Maximizing Attack Speed With Thickets
Basics
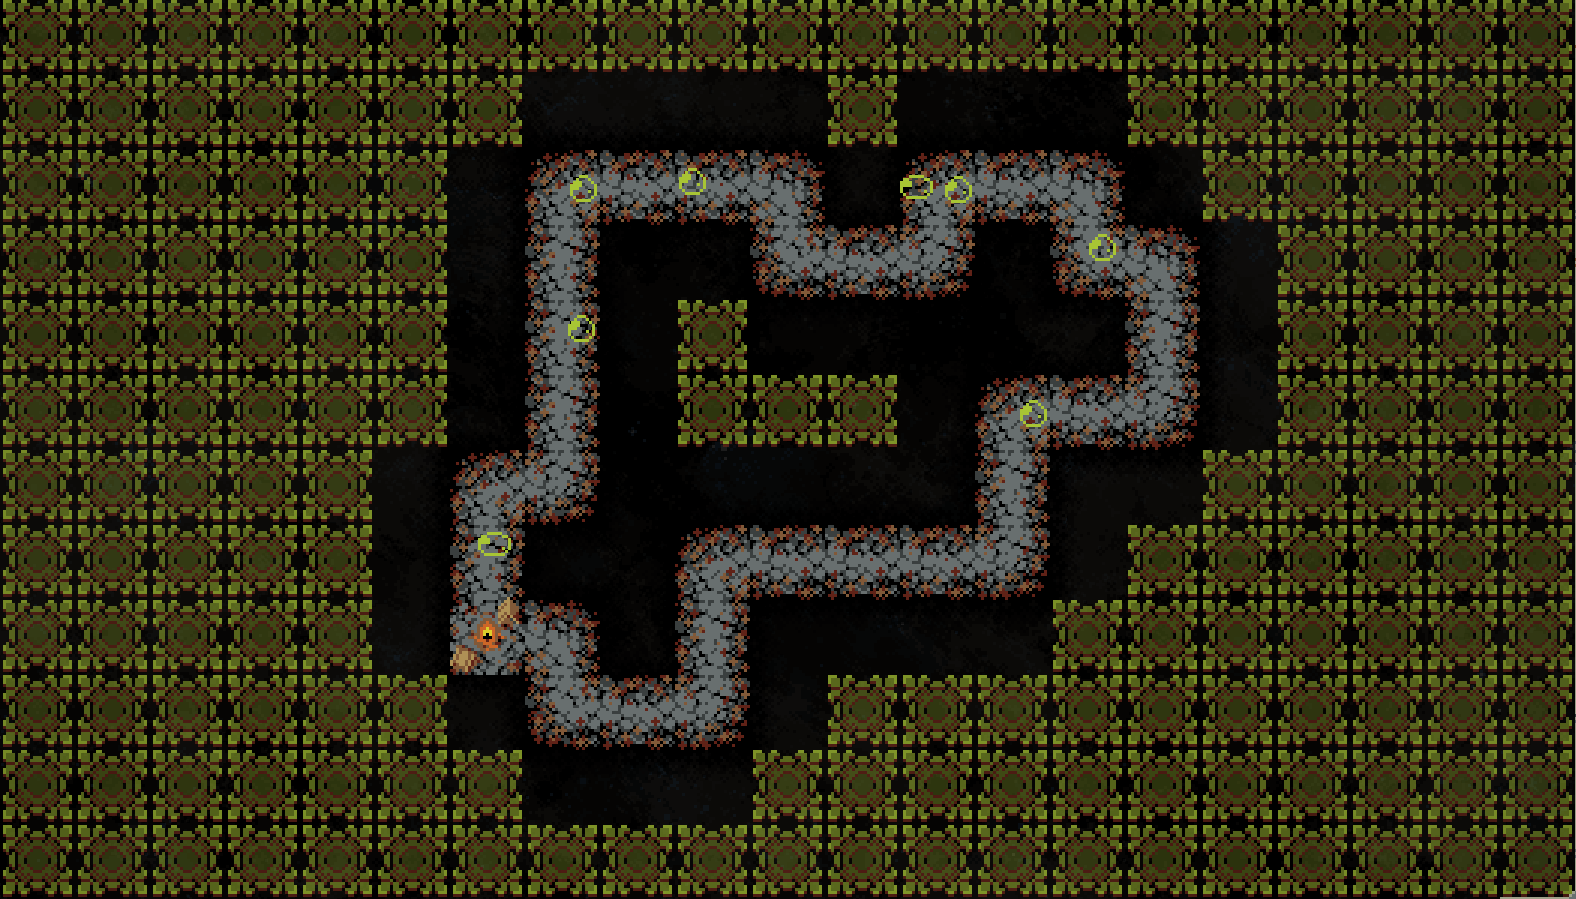
Area
So, let's say you just started a new expedition and your map looks something like this. The important thing to note is the fact that you have 5 tiles of horizontal space on each side of the loop. This is critical if you want to get the most value out of your landscape tiles. The difference between 4x12 setups and 5x12 setups is about 58% attack speed, or 116% if you do the same thing on both sides of the map.
Cards
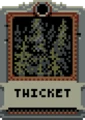
Thicket
Each thicket provides 2% attack speed base. We'll be boosting that up to much higher numbers, by combo'ing them with rivers.

River
Each river doubles the effects of every landscape tile adjacent to it. This effect stacks with multiple rivers, which means generally you want to surround landscape tiles with as many rivers as possible.

Forest
Unless you're trying to spawn the boss as quickly as possible, don't place forests. They simply don't give enough attack speed to be worth taking up a tile that could be a thicket.
Interactions
Thickets are doubled once for every river tile adjacent to them, up to a maximum of 4 times. This means we can get one thicket to be equal to 8 thickets, while only using 5 tiles of space. Naturally, any optimal setup would make use of this as much as possible.
5x12 Optimal Layout
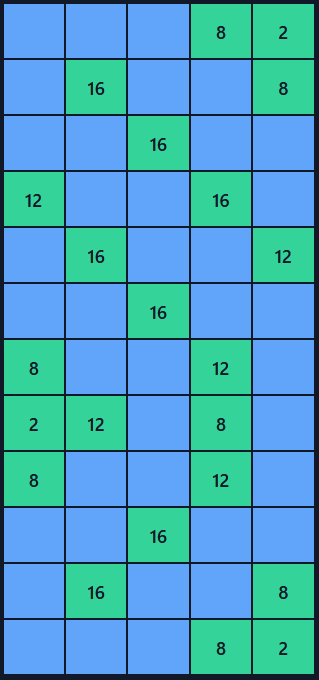
Info
This layout, in total, gives an extra 234% attack speed, using only 22 thickets and 38 rivers. Since rivers can only start on the outermost tiles of the map, you'll need to place the first river tile at the 5th row of the 1st column. This does only cover one side of the map, and could be mirrored if you continued the river.
4x12 Optimal Layout
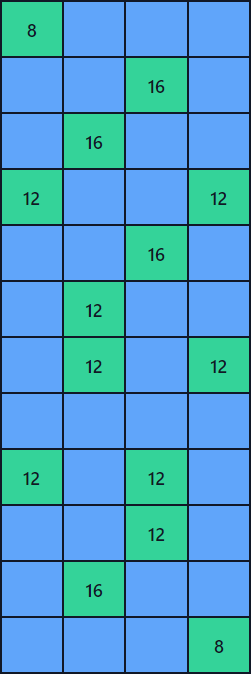
Info
Since you don't always want to reset until you get a 5x12 map space, this layout provides 176% attack speed using 14 thickets and 34 rivers. On this one the river has to start on the third tile down in the first column. You could also swap out the thickets for meadows or something, I suppose. For the sake of keeping things concise though, I'll leave it at that.
Info Sources
All graphics in this guide were made using /u/code_chris' web app for testing layouts, which can be found here.[loopherolayout.xyz]
(ok that website's down now but bro just trust me this guide is kinda old)
This specific layout was posted by /u/claustrophobie in this thread.
None of this stuff is my work, I'm just sharing it on Steam. Thanks to /r/loophero for all the information in this guide.
More Loop Hero guides
- An Unofficial Loop Hero Manual, Mechanics Guide + Sheets!★ 5 (557)57k views1.3k ♥64 minUpdated 31 May, 2023
- Loop Hero - a Community Knowledge Book★ 5 (1k)54k views1.6k ♥8 minUpdated 8 Mar, 2021
- Cards / Tiles combo [Update 1.102]★ 5 (556)37k views1.3k ♥5 minUpdated 9 Jul, 2021
- Warrior Guide for Infinite Loops★ 5 (311)31k views1k ♥9 minUpdated 17 Mar, 2021
- Rogue Guide for Infinite Loops★ 5 (357)30k views1.1k ♥10 minUpdated 17 Mar, 2021
- Loop Hero комбинации карт + секретные боссы★ 5 (440)24k views751 ♥3 minRussianUpdated 16 Mar, 2021




🔥 Popular guides
- Upgrading to PremiumTeam Fortress 2★ 5 (20k)1441k views11k ♥6 minUpdated May 11, 2022
- No More Room in Hell Official ManualNo More Room in Hell★ 5 (2.8k)569k views2.1k ♥29 minUpdated Apr 22, 2019
- NMRiH Community Hosting GuidesNo More Room in Hell★ 5 (526)351k views653 ♥1 minUpdated Aug 10, 2022
- How to 'Git Gud' Soon™MORDHAU★ 5 (2k)318k views3k ♥68 minUpdated Nov 16, 2024
- Лучшие кооперативные игры SteamPAYDAY 2★ 5 (1.5k)315k views2.1k ♥56 minRussianUpdated Apr 27, 2025
- Desert Eagle Heat Treated | Blue GemCounter-Strike 2★ 5 (1.6k)293k views1.5k ♥2 minUpdated Jan 16





This guide was created by its original author on the Steam Community. Are you the author and want it removed? Request removal.