Emperor Guide
Preface
1. This build is an opinion, take it with a grain of salt.
2. Since it is a dessie it will include a dessie guide.
3. PVP only, too tired to add PVE (maybe later)
4.
For those players (you know who you are) tell me in the comments im trash, this build is trash, newb, yadda yadda yadda.
To the rest of us, just learn what you can and enjoy!
No build should be gospel, many things are argued over even by the most veteran of players in the game.
Play what you like, death to meta crap, have fun!
2. Since it is a dessie it will include a dessie guide.
3. PVP only, too tired to add PVE (maybe later)
4.
For those players (you know who you are) tell me in the comments im trash, this build is trash, newb, yadda yadda yadda.
To the rest of us, just learn what you can and enjoy!
No build should be gospel, many things are argued over even by the most veteran of players in the game.
Play what you like, death to meta crap, have fun!
Emperor Build
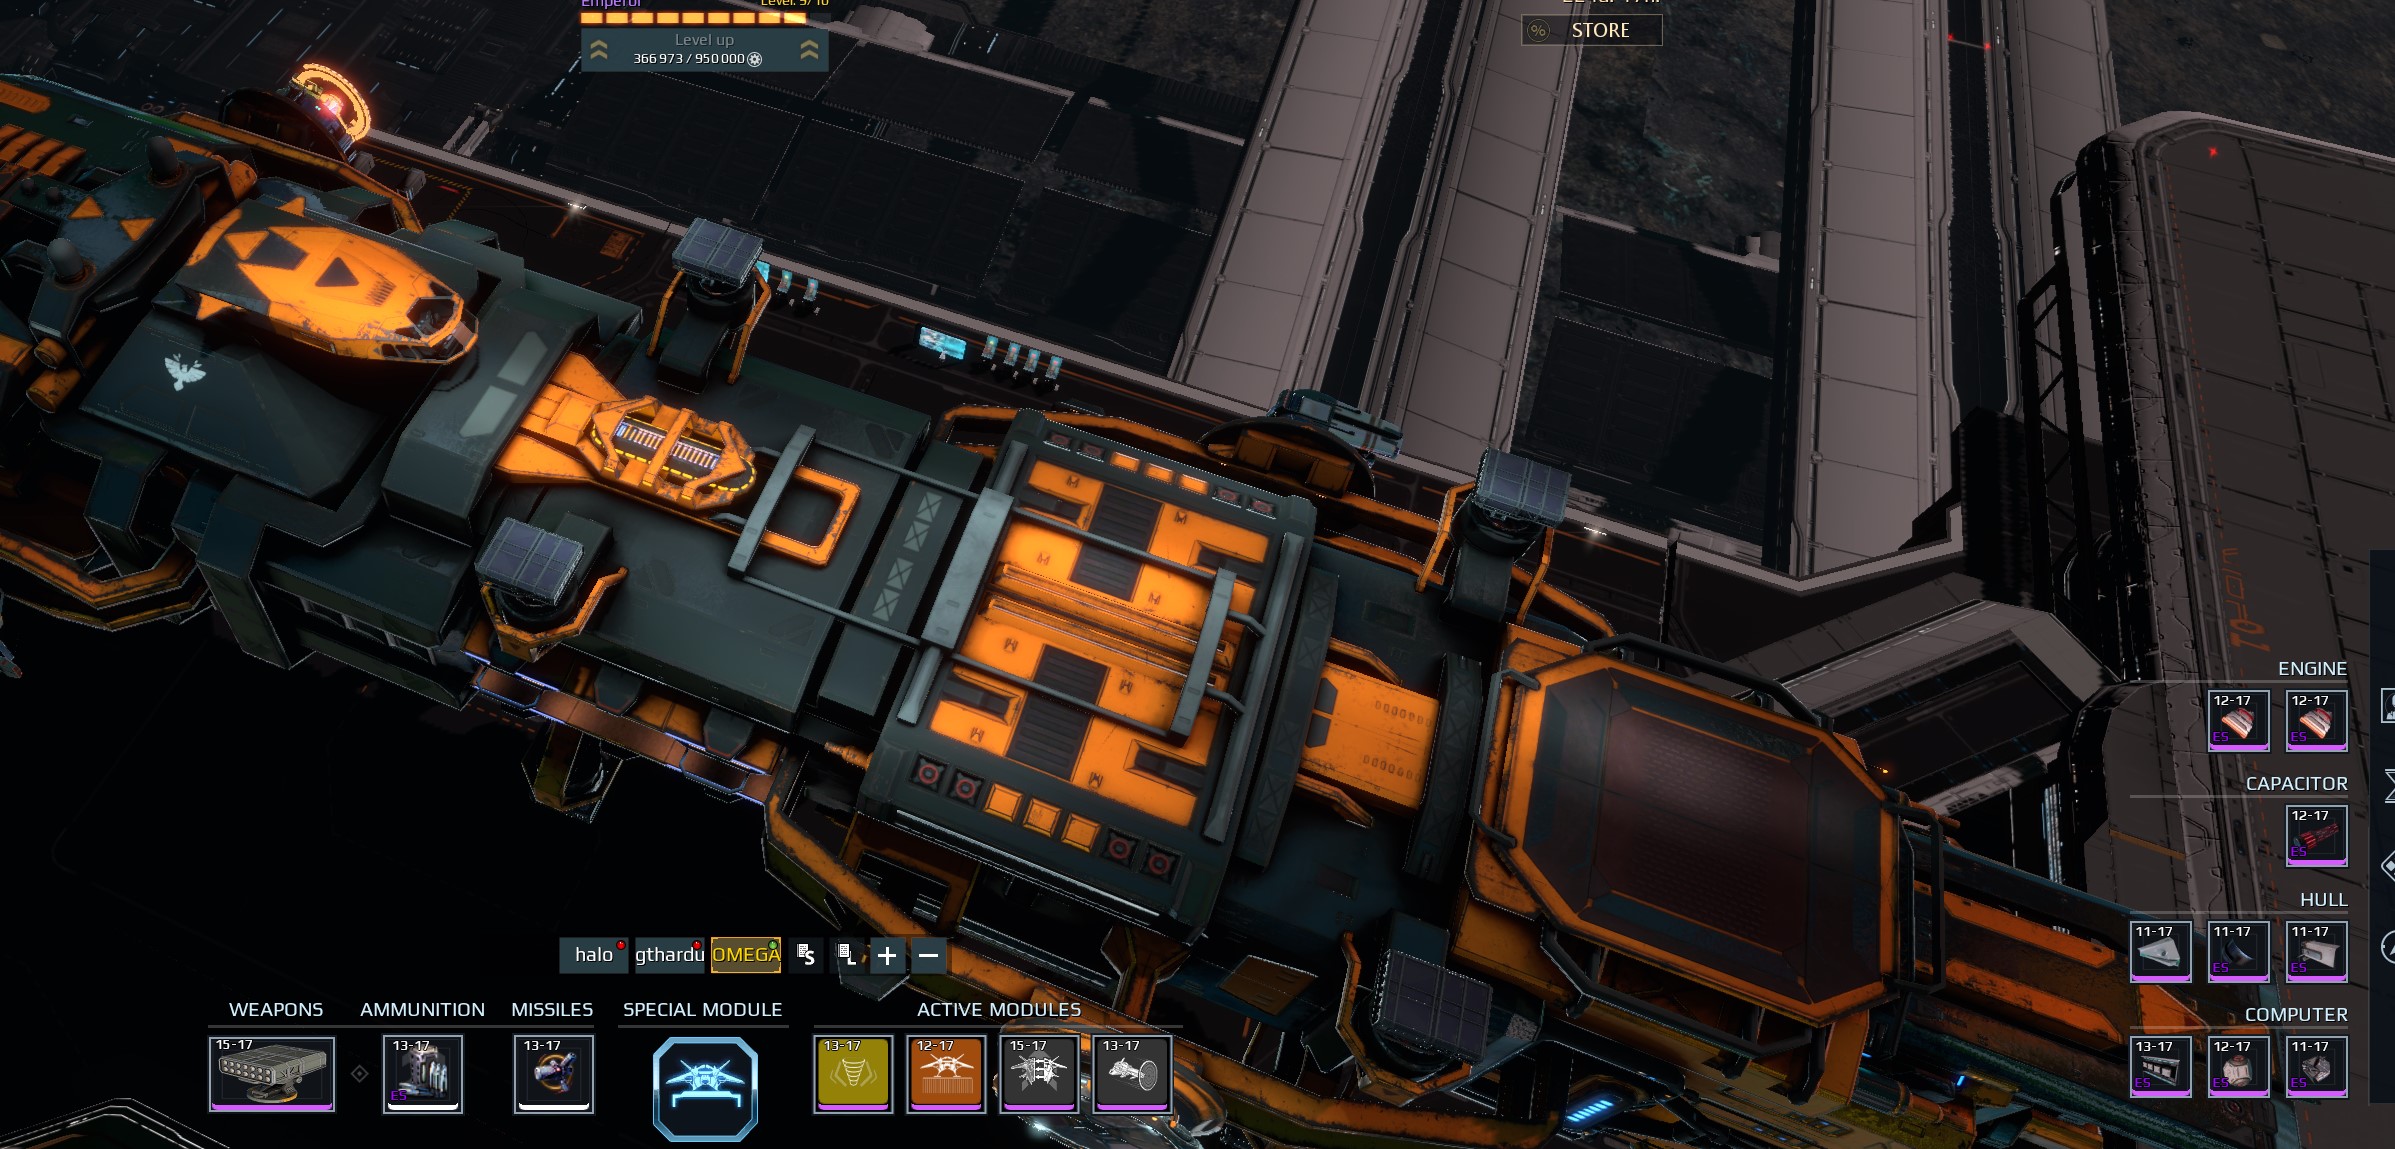
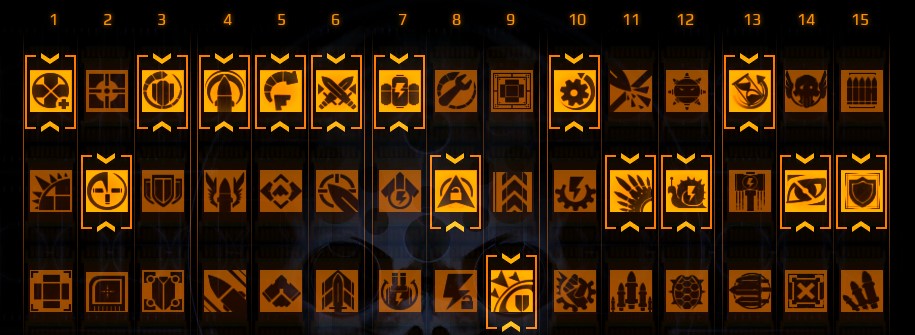
See the pictures.
--
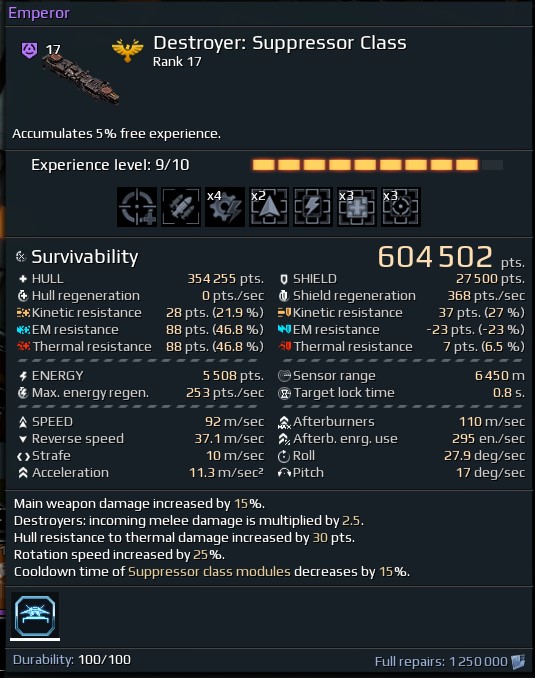
-1 High survivability
-2 Kinda fast with module
-3 Auto-aim ftw*
-4 Fun-ish
This build is for using Omega-B Missile Launcher.
Omega-B
So, you want to create a 'spike' of missiles on the field.
So you need Rate of Fire and less heating rate.
As well as Horizon for range and Overlocked CPU for quick target cycling.
Landing Platform:
As you know, when a player lands on the ship you get a hull regeneration based on 1% per ship of your MAX HP. So this build makes sure you have high health pool.
Gyges Microwave Emitter:Makes you invisible and fast.
Bonuses
The bonuses are for rotation speed (you can swap for hull resists if you want) and module cooldown speed.
Proton Wall is a must for stuns.
Now.
FAQ
"Why no Photon Emitter?"Takes too much energy, and is kinda the only thing that NEEDS energy.
Without it i can roll module cooldown and spam modules (this will make sense with playstyle).
And thats all.
--
Emperor - Rank 17 Empire Destroyer
This ship has the following...-1 High survivability
-2 Kinda fast with module
-3 Auto-aim ftw*
-4 Fun-ish
This build is for using Omega-B Missile Launcher.
Omega-B
So, you want to create a 'spike' of missiles on the field.
So you need Rate of Fire and less heating rate.
As well as Horizon for range and Overlocked CPU for quick target cycling.
Landing Platform:
As you know, when a player lands on the ship you get a hull regeneration based on 1% per ship of your MAX HP. So this build makes sure you have high health pool.
Gyges Microwave Emitter:Makes you invisible and fast.
Bonuses
The bonuses are for rotation speed (you can swap for hull resists if you want) and module cooldown speed.
Proton Wall is a must for stuns.
Now.
FAQ
"Why no Photon Emitter?"Takes too much energy, and is kinda the only thing that NEEDS energy.
Without it i can roll module cooldown and spam modules (this will make sense with playstyle).
And thats all.
Emperor In Field Guide
Destroyer 102 Bootcamp by yours truly...
These are my thoughts, ive played dessies well for a long time and spent a lot of time asking better people to make sure I got some things down pat (thanks Derp!).In order of importance...
1. Positioning
2. Positioning
3. Module Usage
4. Skill (and avoiding stupidity.)
=Positioning=
This thing is big and slow.Always be aware and be careful of being left out by yourself being surrounded.
If you commit poorly, you are stranded. You will die.
If you take damage, then 'take a walk' and heal up. Recognize where you were walking BEFORE you die and go somewhere else.
Watch for lanes, go up or down, and shoot AWAY from the obstacle to curve gun around them.
3. Module Usage Guide
and.. now...BOINK!
BOINK GUIDE FOR FUN
1. Pick target
2. Through wormhole
3. Right before it teleports you automatically..
4. Press gyges and go invisibly.
5. You have now teleported invisibly and can run around!
6. Get into position.
7. REPELLING BEAM THEM INTO THE GROUND
8. MAKE THEM TOUCH GRASS
9. MUAHHAHAHAH
Note. You are more likely to get a kill on them and not just bounce them around if...
1. They dont have shields
2. You are semi-close to them
3. You push their face, in the direction of their face, into the ground.
If it his their back, or maybe their side.. more likely to just bounce around.
Anyways. Spam this. Its fun to just waltz and delete that Zeta from existence.
Other things: Use your modules to defend players and objectives. Think and plan ahead.
Landing Platform: Drone Usage
-Drones do 50% more damage undocked, so make them chase something (remember its like 4500m range).
-Once done, try to call them back BEFORE they die, as when they do they go on cooldown.
-Drones can shoot if you get radar blinded.
4. Skill and Stupidity
Dont be stupid.You cant solo stuff at close range really. Stay at mid to long range.
Omega B has slightly longer range since projectiles have different phases (or for some reason.)
Thaz it.
Fin
I dont have much else to say, add in comments what i missed, i might fix it.
Thanks for reading.
bye.
Thanks for reading.
bye.
More Star Conflict guides
- Star Conflict, for beginners and almost established players.★ 5 (489)26k views331 ♥18 minUpdated Aug 31, 2014
- Руководство для новичков★ 5 (260)9.8k views247 ♥34 minRussianUpdated Oct 18, 2019
- Скрытое Пиратство (Натуральное Пиратство)★ 4 (170)9.3k views161 ♥6 minUpdated Oct 3, 2020
- Бесплатные ГС — Все Способы★ 4 (48)3.8k views43 ♥8 minRussianUpdated Jan 28, 2019
- Фарм Кредитов (Синих, Таинственных Контейнеров) — ОМ маршрут (NEW)★ 4 (42)2.3k views71 ♥5 minRussianUpdated Feb 1, 2020
- a guide to open space for newbies★ 4 (35)1.3k views15 ♥7 minUpdated Nov 30, 2020




This guide was created by its original author on the Steam Community. Are you the author and want it removed? Request removal.