Operations Gene-Seed Locations
Introduction
Hello. This is yet another guide containing various Gene-Seed locations across all missions (at the moment) in the game. This was made for friends but considering the work put into it I might as well make it public as well.
In case Steam fails to load the images or they just stop working at some point, here is an Imgur album compiling all the images as well: https://imgur.com/a/space-marine-2-operations-gene-seed-locations-IOF9zIw
Images are based on ones I am personally familiar with as well as cross referencing other existing guides such as the two below:
Armory data / Gene Seeds Locations: WIP by FLSnowy062
All Gene Seed Locations (Verified) by HardcoreAku
For Purgation in particular, I also must thank the YouTube Channel TurboAchiever for their video on the map as I wasn't able to locate the 2nd spawn myself.
Ironically, a bit before finishing the guide I stumbled upon Kimber Prime's Collectible Maps. If you don't find my own guide helpful, feel free to check his out: https://www.kimberprime.com/
In case Steam fails to load the images or they just stop working at some point, here is an Imgur album compiling all the images as well: https://imgur.com/a/space-marine-2-operations-gene-seed-locations-IOF9zIw
Images are based on ones I am personally familiar with as well as cross referencing other existing guides such as the two below:
Armory data / Gene Seeds Locations: WIP by FLSnowy062
All Gene Seed Locations (Verified) by HardcoreAku
For Purgation in particular, I also must thank the YouTube Channel TurboAchiever for their video on the map as I wasn't able to locate the 2nd spawn myself.
Ironically, a bit before finishing the guide I stumbled upon Kimber Prime's Collectible Maps. If you don't find my own guide helpful, feel free to check his out: https://www.kimberprime.com/
What is a Gene-Seed?
Before we get started, new or inexperienced players might be wondering what a Gene-Seed even is.
This is a collectible item that can be found on every mission and is guaranteed to spawn in one of multiple possible locations on every map regardless of difficulty. If you don't find it in the first location, check the second, or the third, and so on until you find it.
The Gene-Seed takes up your second item slot just like a Guardian Relic, but unlike the Relic the Gene-Seed does not offer an immediate benefit. Instead, having a player successfully carry the Gene-Seed to the end of the mission (and complete it) will award the whole team an additional 20-30% XP (I don't have the exact % for it).
Be warned however as if the player carrying it goes down they will lose it permanently. Preferably have your safest player carry it (and I mean safest in terms of their ability, not their class, a Sniper in the back can still get easily domed by a Tyranid Venom Cannon if he's not paying attention).
Remember, it is lost on incapacitation, not death (though death will also lose it of course), so while you should always make sure to try to spare stimms for your team and not waste them, consider making sure your Gene-Seed carrier is stocked up and healthy.
This is a collectible item that can be found on every mission and is guaranteed to spawn in one of multiple possible locations on every map regardless of difficulty. If you don't find it in the first location, check the second, or the third, and so on until you find it.
The Gene-Seed takes up your second item slot just like a Guardian Relic, but unlike the Relic the Gene-Seed does not offer an immediate benefit. Instead, having a player successfully carry the Gene-Seed to the end of the mission (and complete it) will award the whole team an additional 20-30% XP (I don't have the exact % for it).
Be warned however as if the player carrying it goes down they will lose it permanently. Preferably have your safest player carry it (and I mean safest in terms of their ability, not their class, a Sniper in the back can still get easily domed by a Tyranid Venom Cannon if he's not paying attention).
Remember, it is lost on incapacitation, not death (though death will also lose it of course), so while you should always make sure to try to spare stimms for your team and not waste them, consider making sure your Gene-Seed carrier is stocked up and healthy.
| Mission 01: Inferno
Gene-Seed #1
Location
Objective: Reach the Astra Militarum Camp
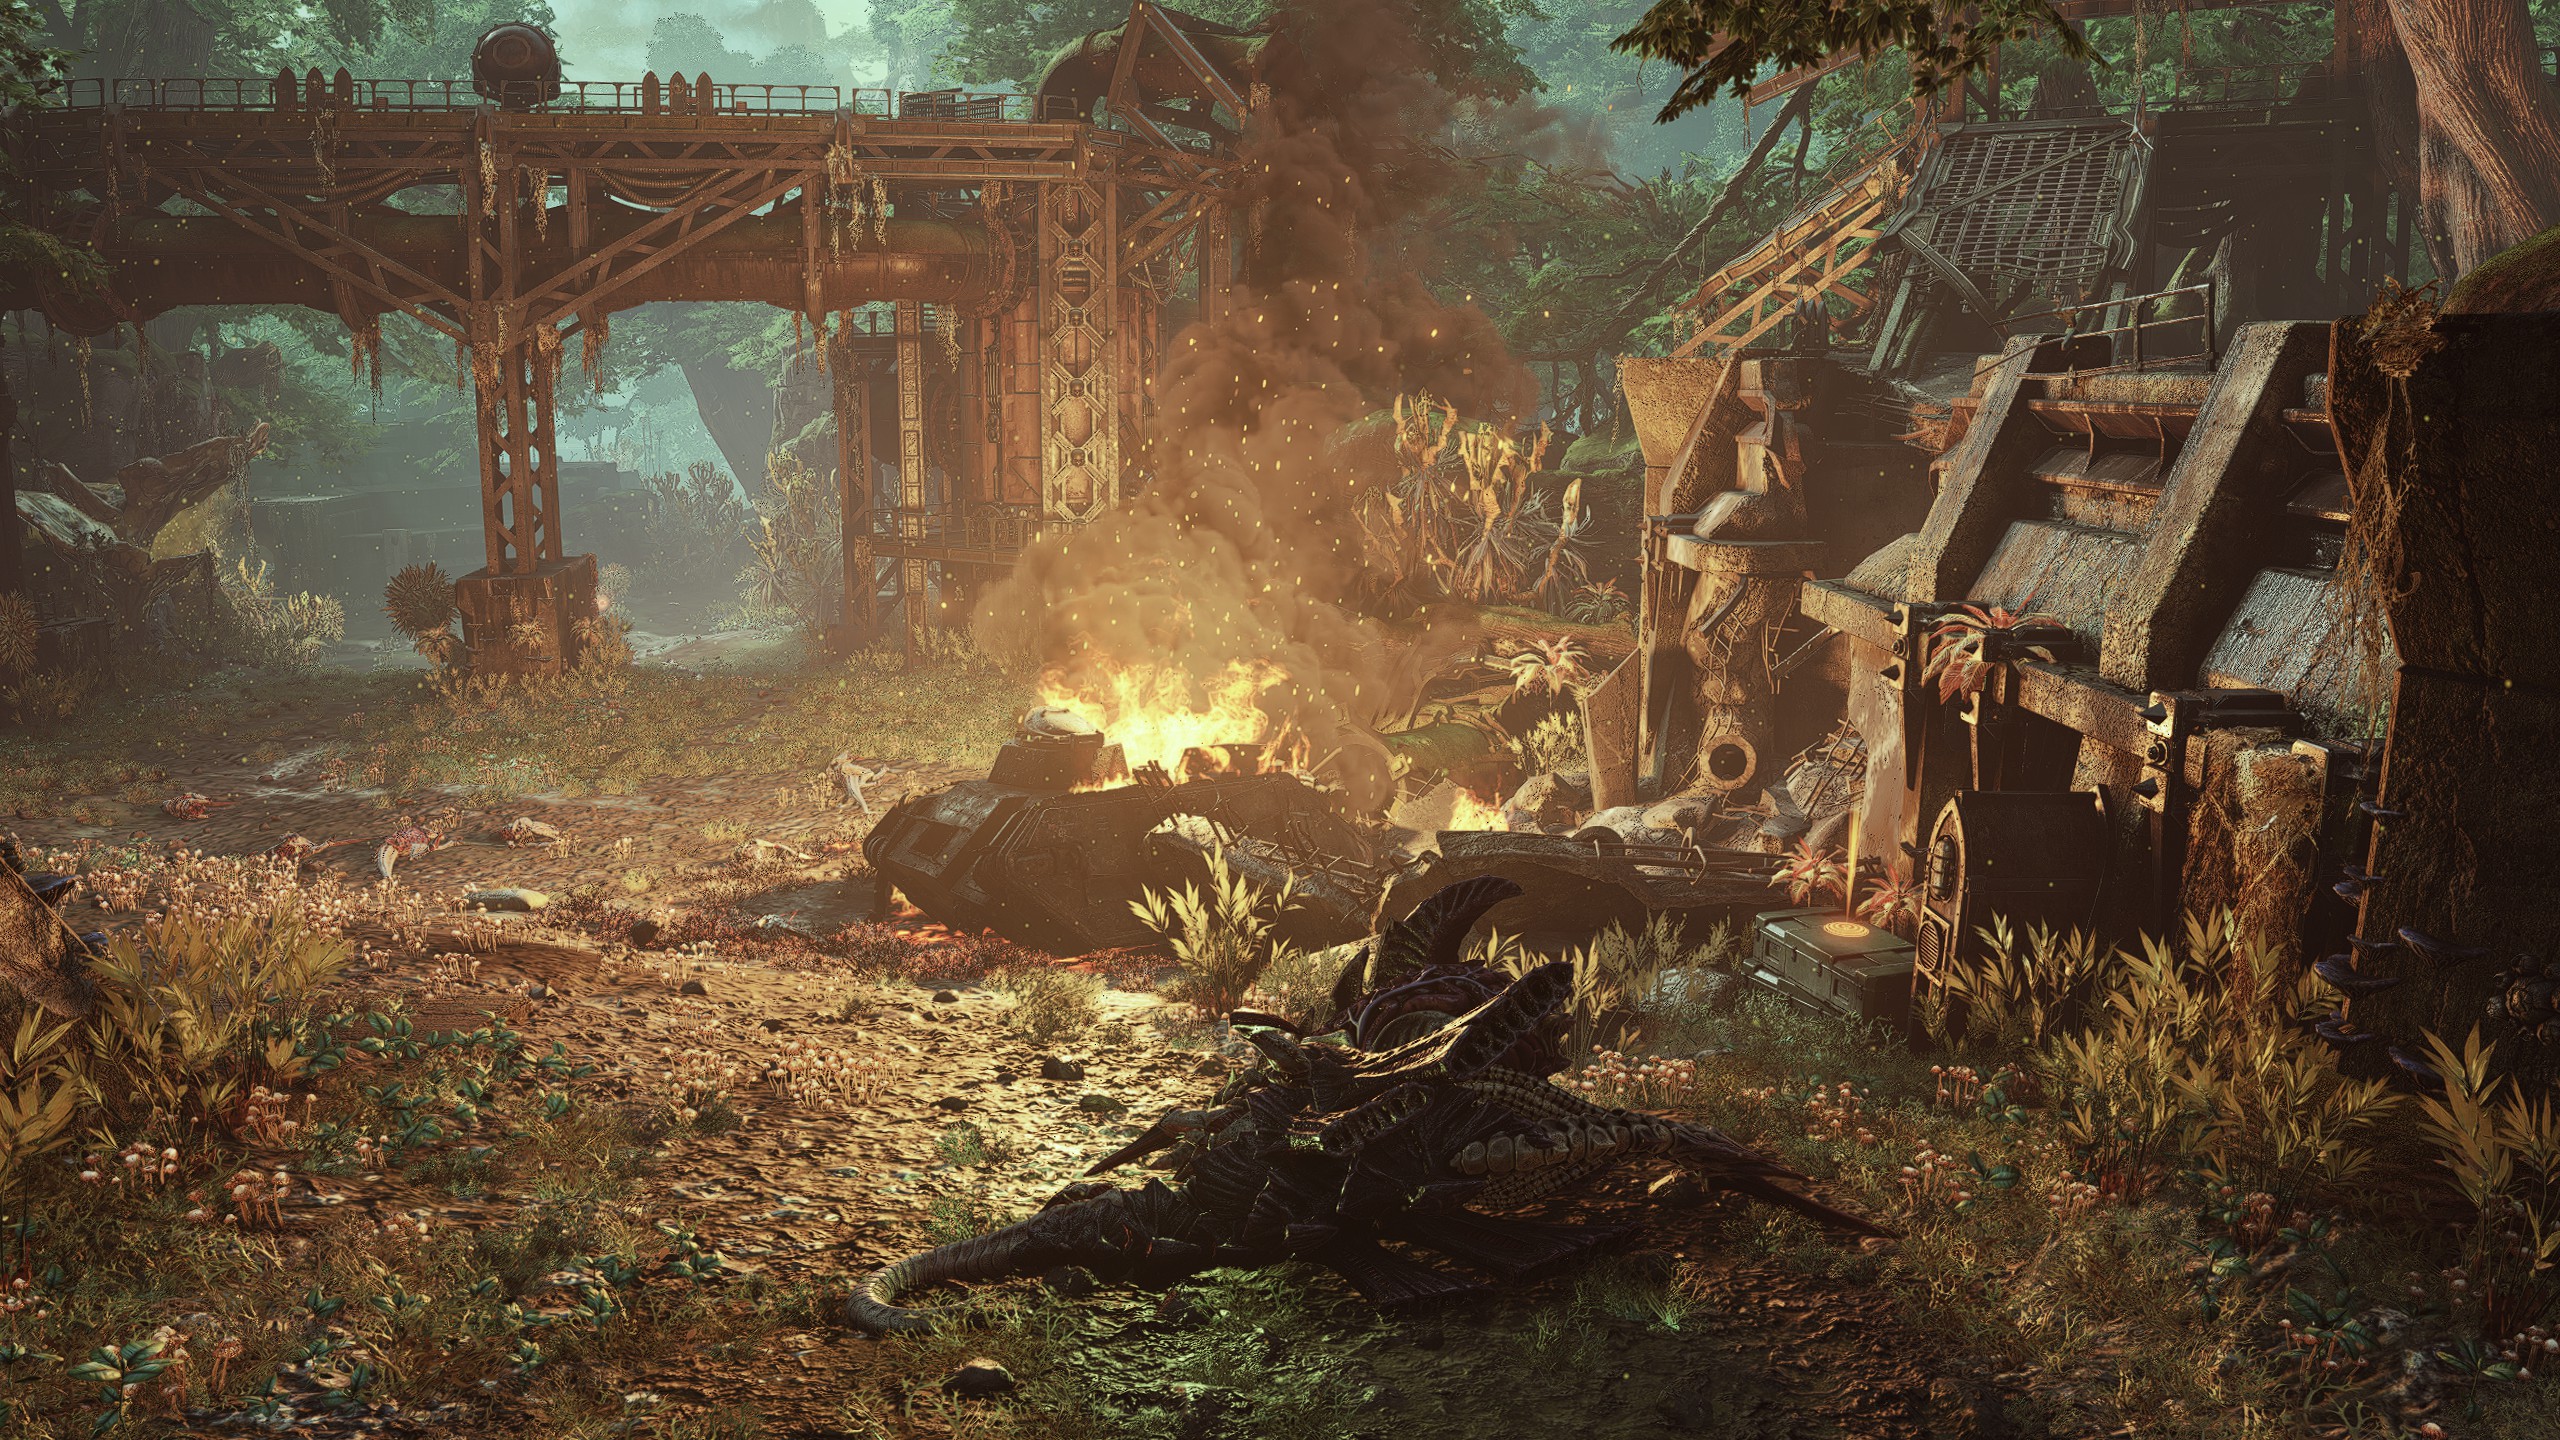
Very early on in the level. Proceed through the jungle as normal until you start to go uphill, pass under the bridge and look to your left at the burning Chimera. The Gene-Seed can spawn on the crates behind it.
Very early on in the level. Proceed through the jungle as normal until you start to go uphill, pass under the bridge and look to your left at the burning Chimera. The Gene-Seed can spawn on the crates behind it.
Gene-Seed #2
Location
Objective: Proceed to the Promethium Refinery
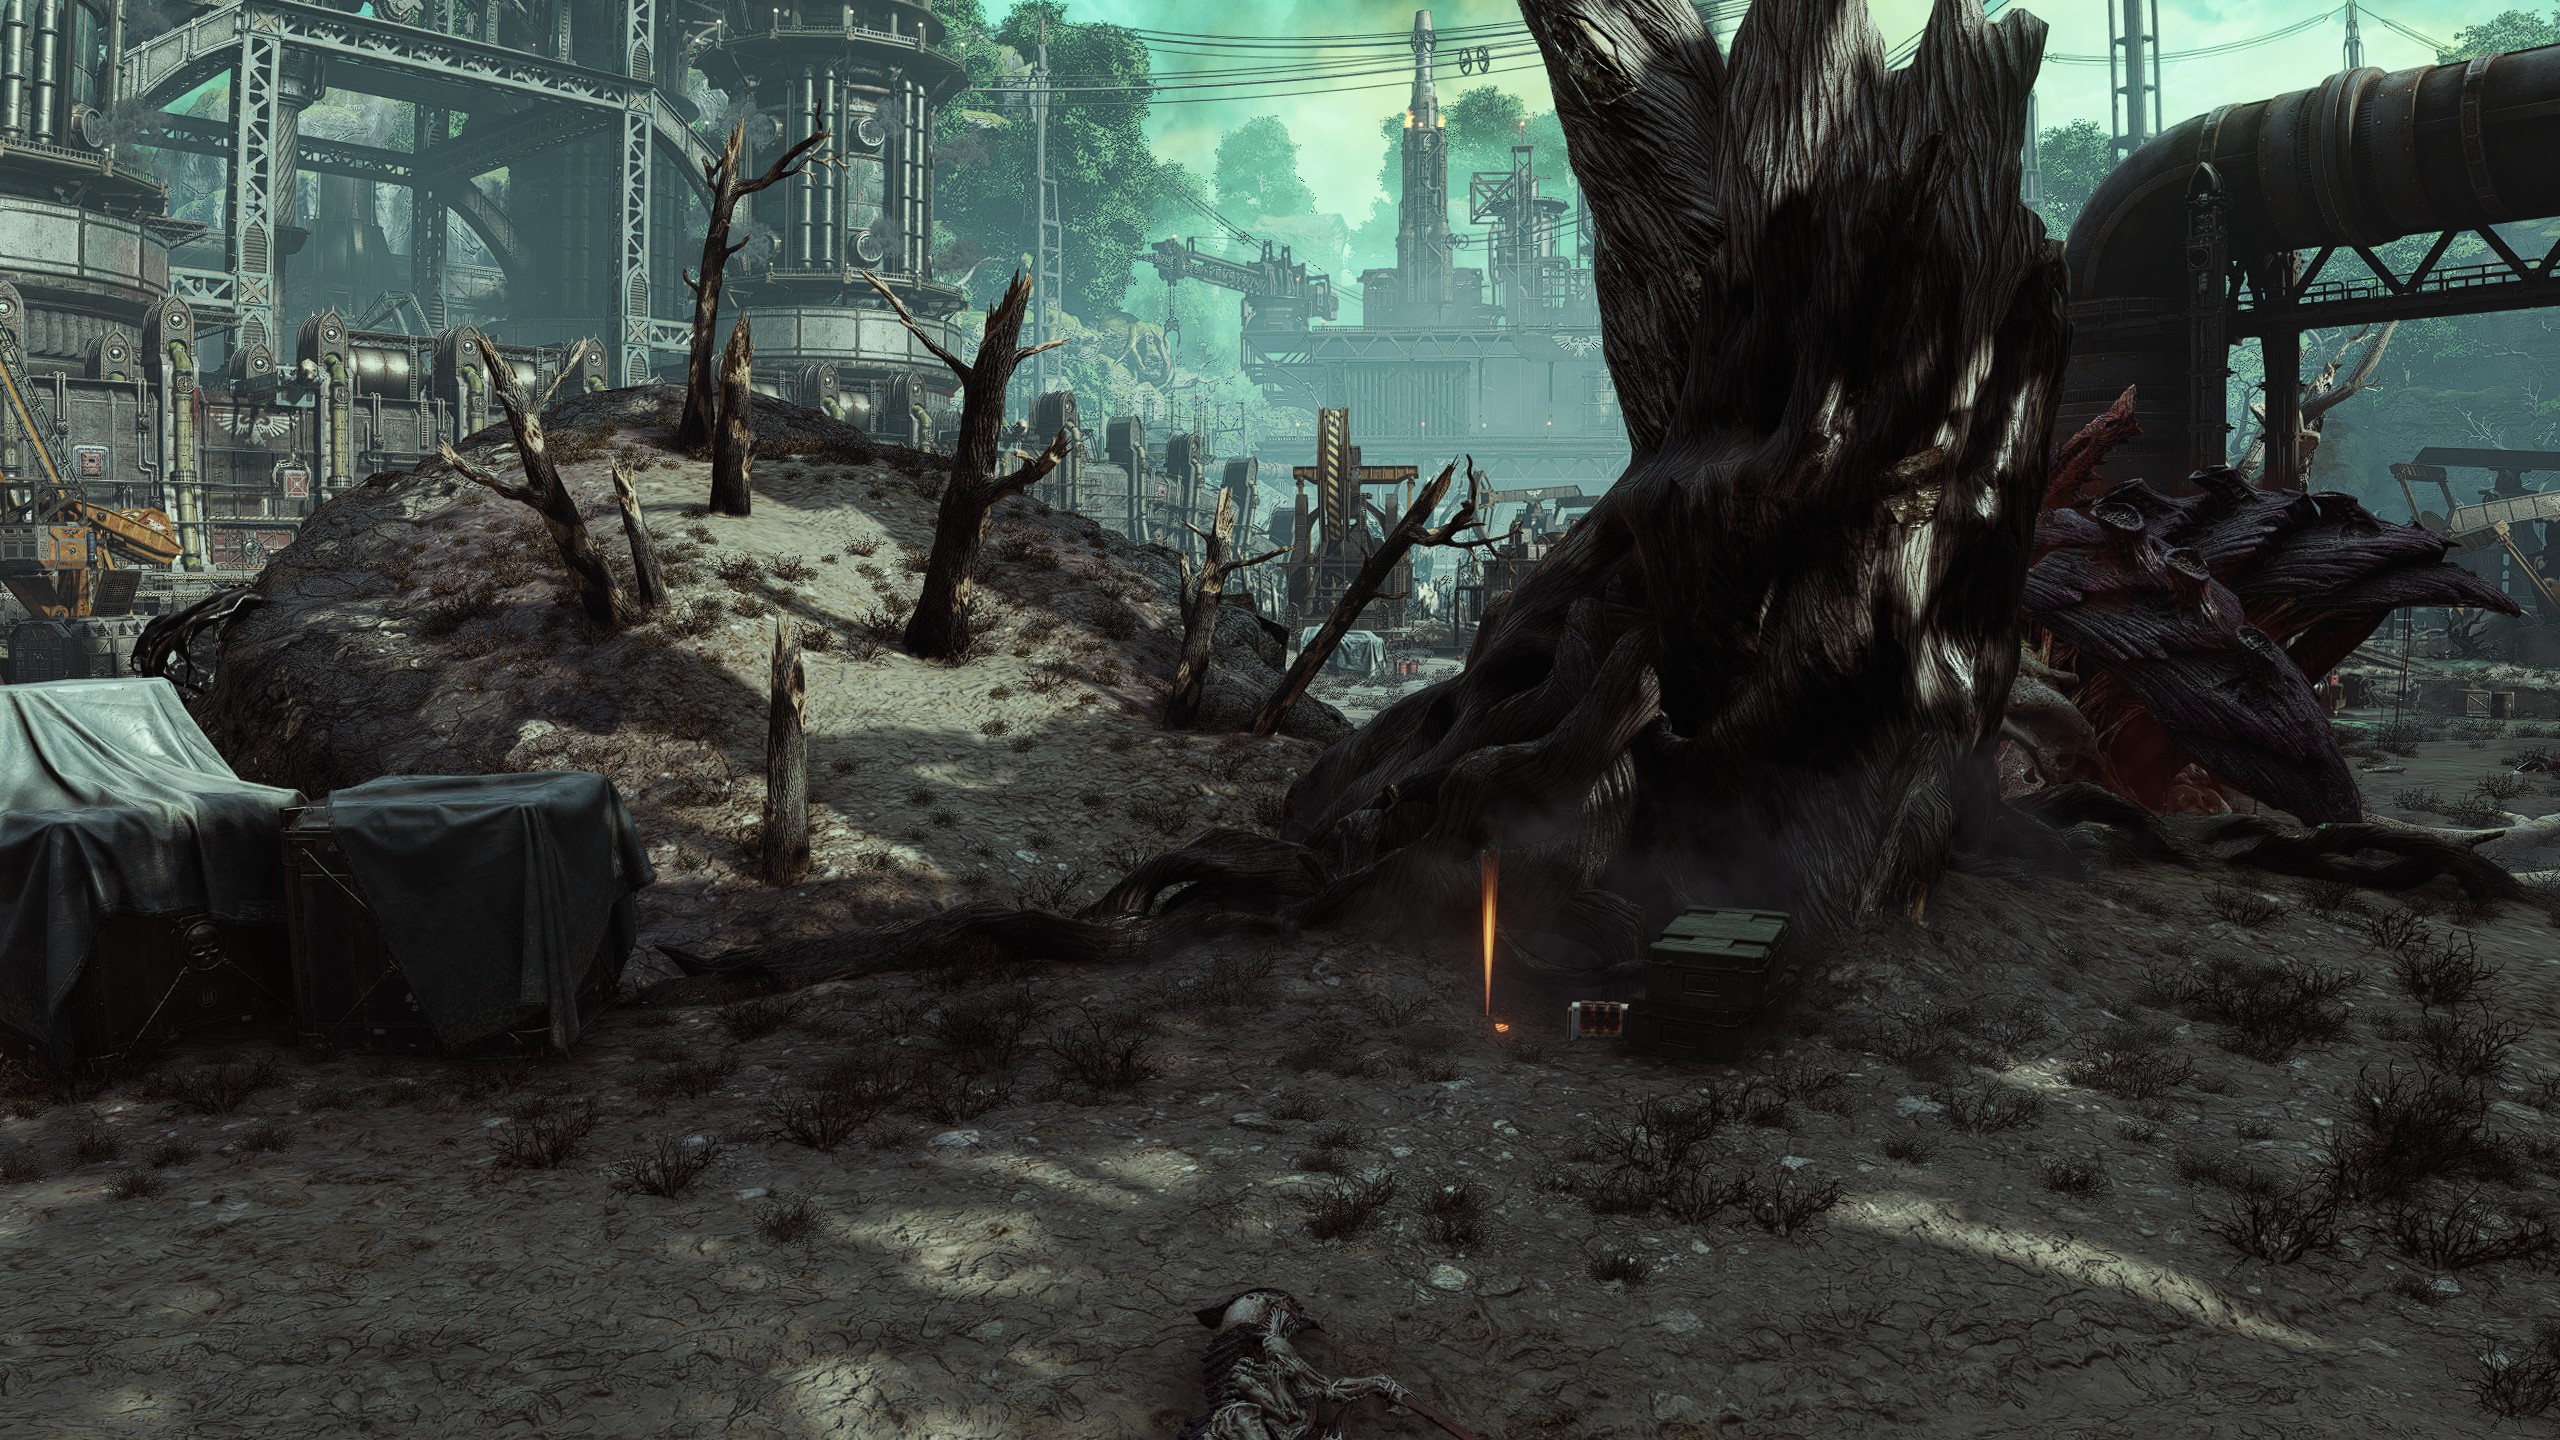
Immediately following the Astra Militarum camp section you will arrive at the Promethium fields. Stick to the left until you come upon a large dead tree just before the land transitions to a constructed walkway and pipeline. Check behind the crates next to the trunk for a hidden Gene-Seed spawn.
Immediately following the Astra Militarum camp section you will arrive at the Promethium fields. Stick to the left until you come upon a large dead tree just before the land transitions to a constructed walkway and pipeline. Check behind the crates next to the trunk for a hidden Gene-Seed spawn.
Gene-Seed #3
Location
Objective: Start Bomb Deployment Protocol / Await Bomb Deployment
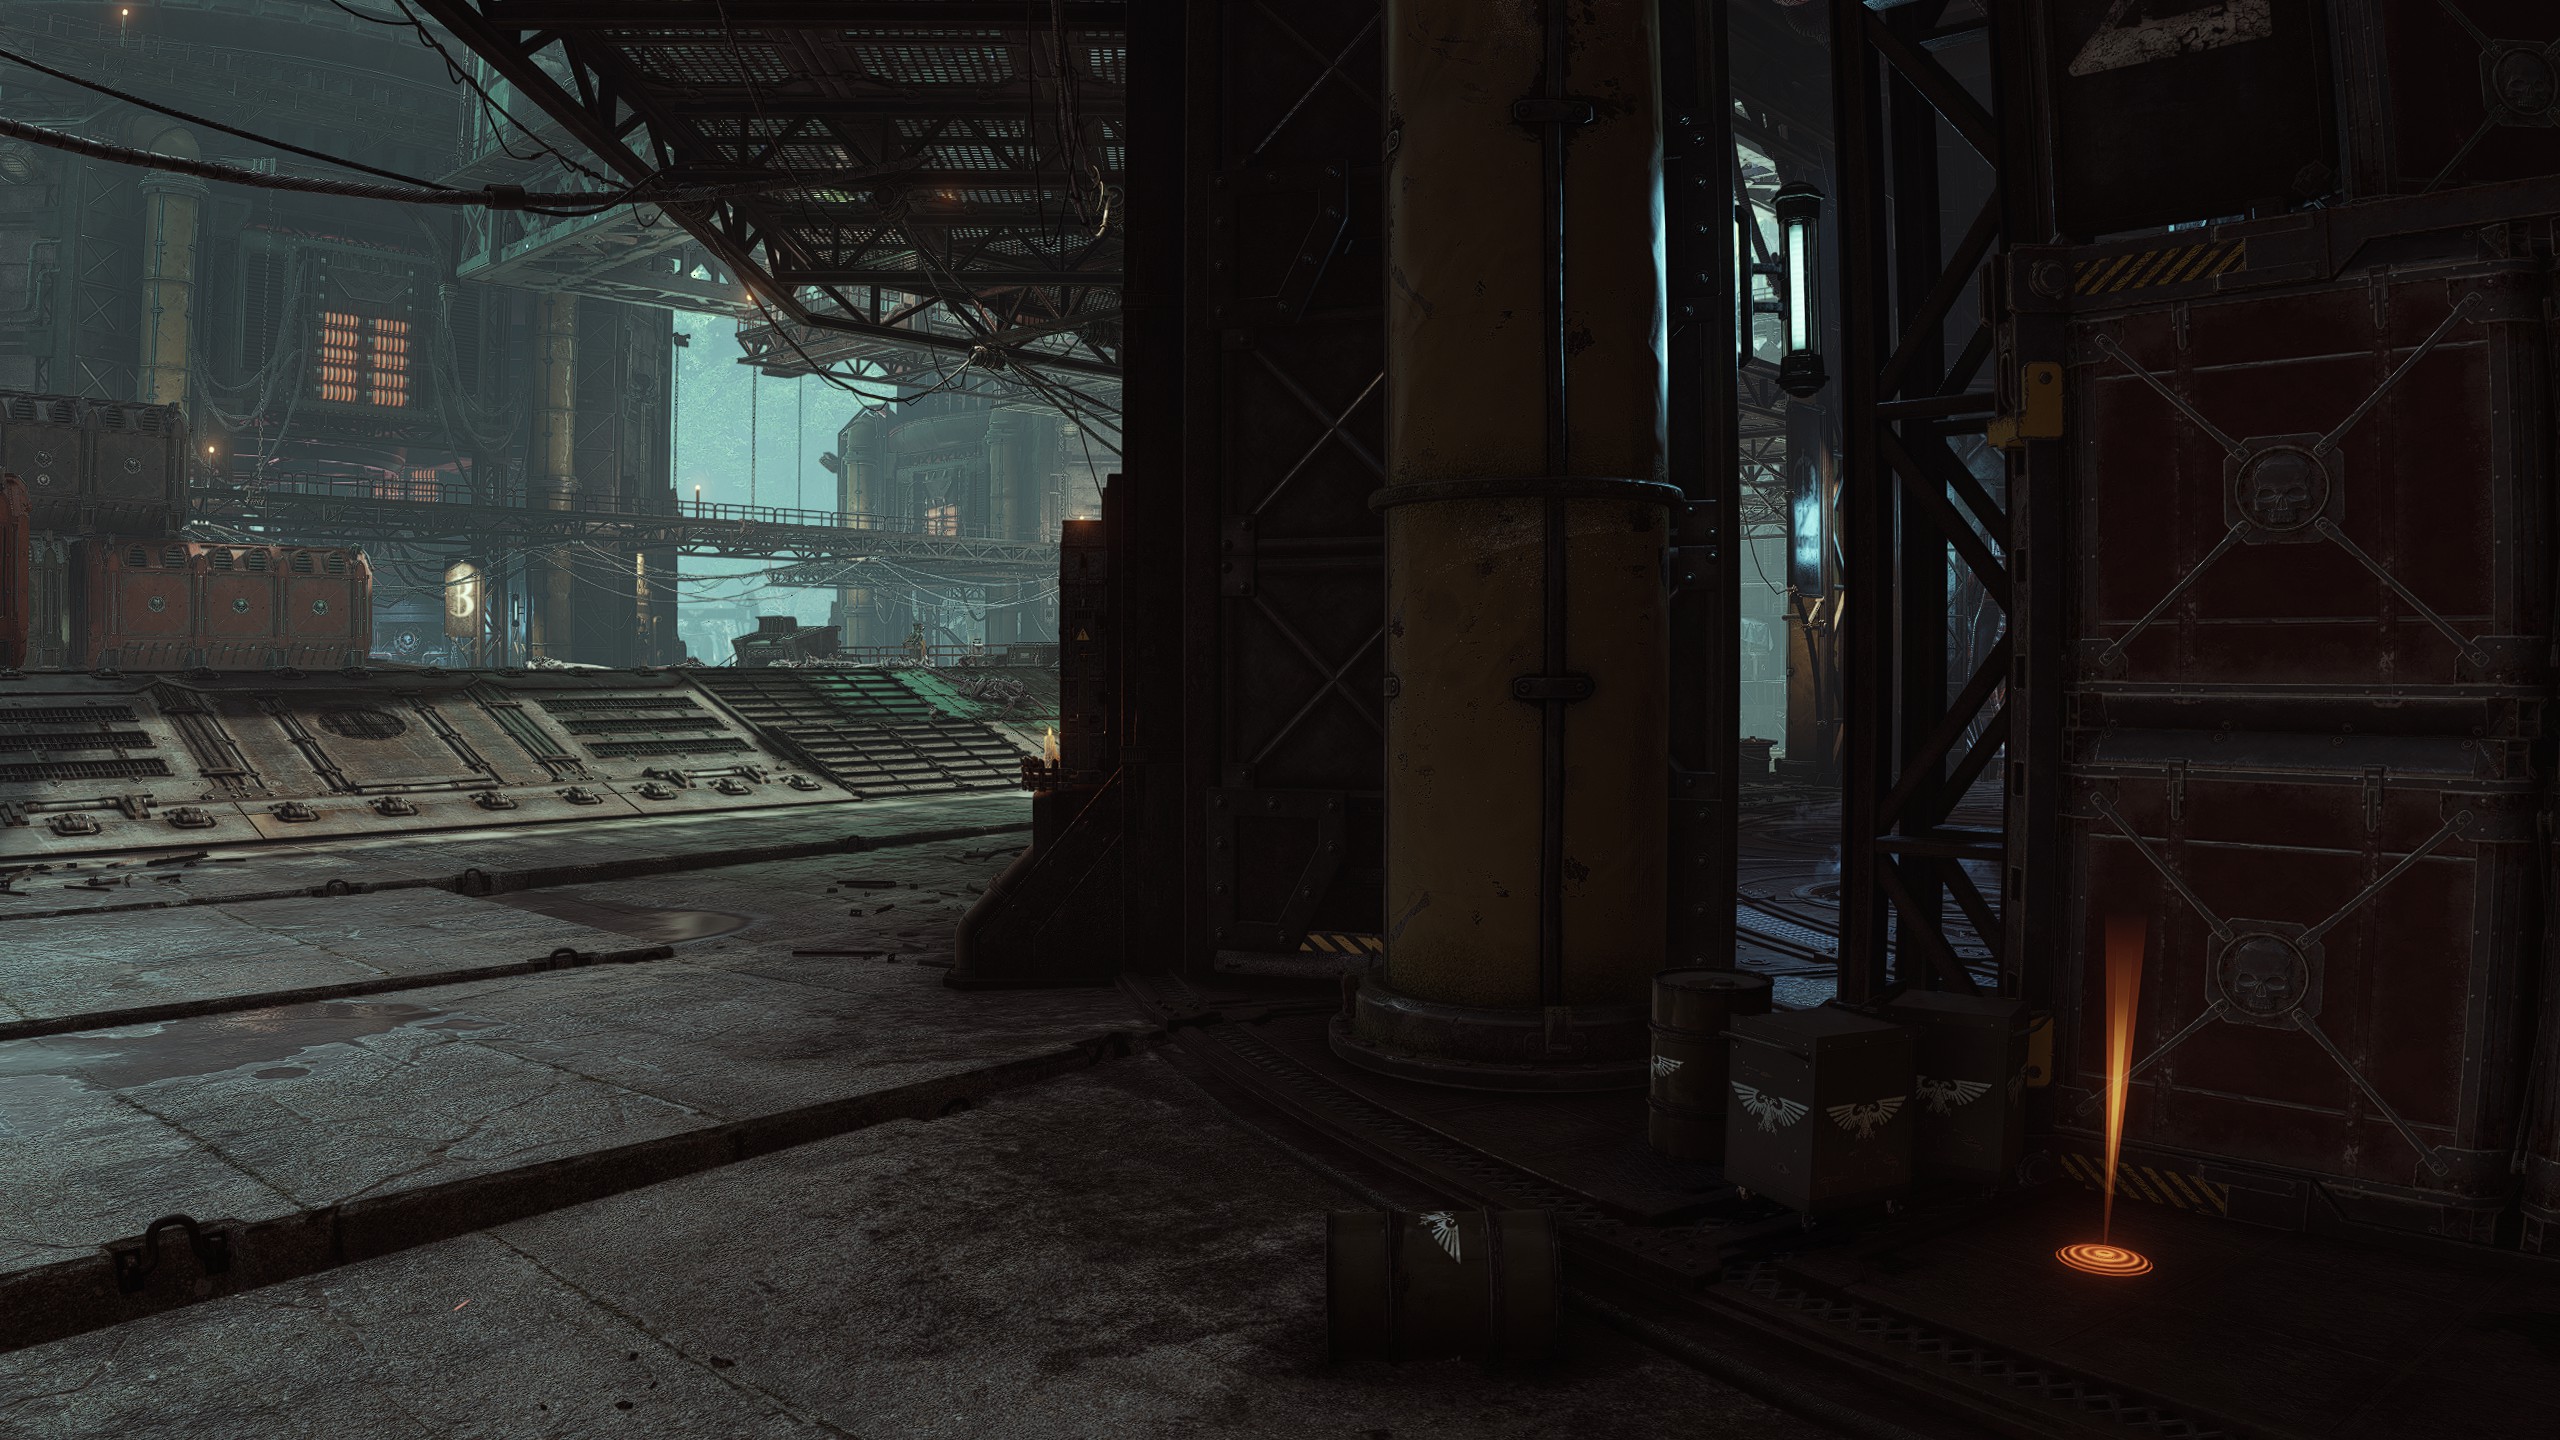
After entering the Promethium Refinery, head up the stairs on the left and check behind Generator 2 where a Gene-Seed can spawn behind the barrels and boxes.
This can be done at any point during or after the objective so long as you don't proceed too far forward.
After entering the Promethium Refinery, head up the stairs on the left and check behind Generator 2 where a Gene-Seed can spawn behind the barrels and boxes.
This can be done at any point during or after the objective so long as you don't proceed too far forward.
Gene-Seed #4
Location
Objective: Advance to the Observation Platform
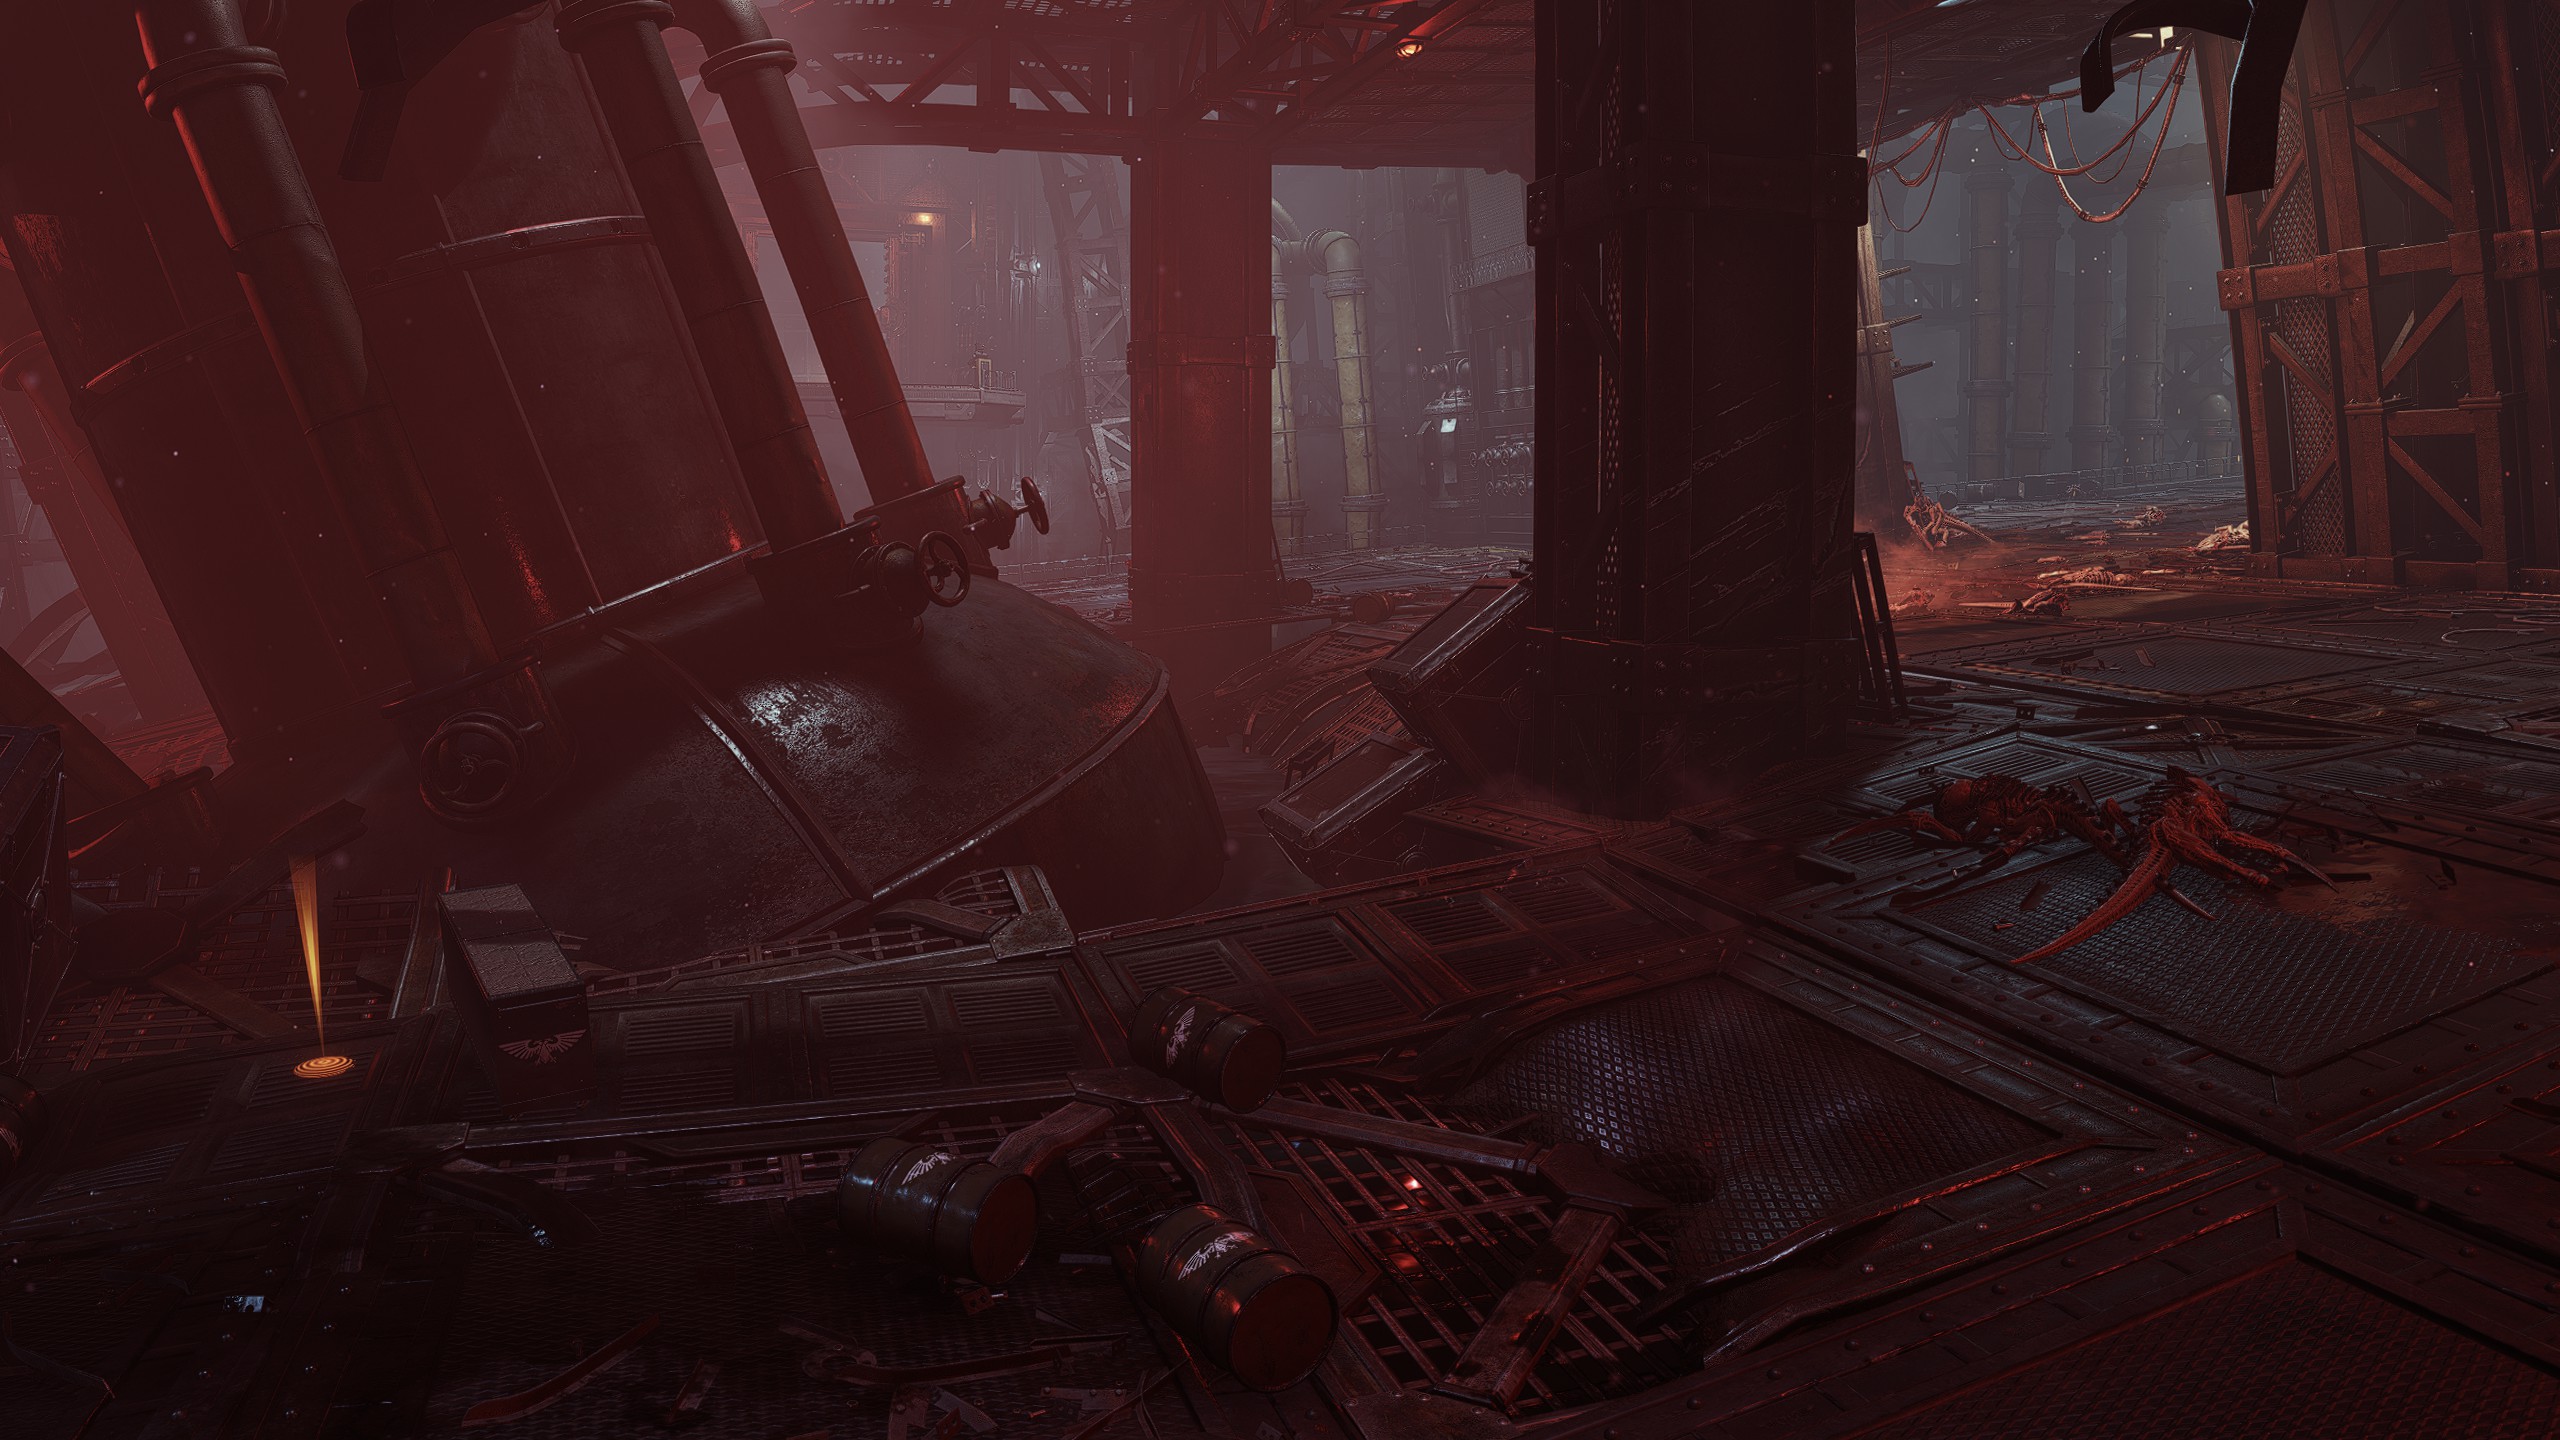
Immediately following the Bomb Deployment section you will assemble and enter the main hangar, a room baked in red lighting. Drop down and head straight from the door, checking to the right behind the large collapsed storage tank where the Gene-Seed can spawn behind a cabinet.
Immediately following the Bomb Deployment section you will assemble and enter the main hangar, a room baked in red lighting. Drop down and head straight from the door, checking to the right behind the large collapsed storage tank where the Gene-Seed can spawn behind a cabinet.
Gene-Seed #5
Location
Objective: Advance to the Observation Platform
Not far from the previous location, proceed forward as normal until you head up some stairs. As soon as you enter the massive room with the elevator on the far side, look to your left from the door and follow the wall to see a knocked down table. The Gene-Seed can spawn behind it.
Not far from the previous location, proceed forward as normal until you head up some stairs. As soon as you enter the massive room with the elevator on the far side, look to your left from the door and follow the wall to see a knocked down table. The Gene-Seed can spawn behind it.
| Mission 02: Decapitation
Gene-Seed #1
Location
Objective: Proceed to the Bridge Tower
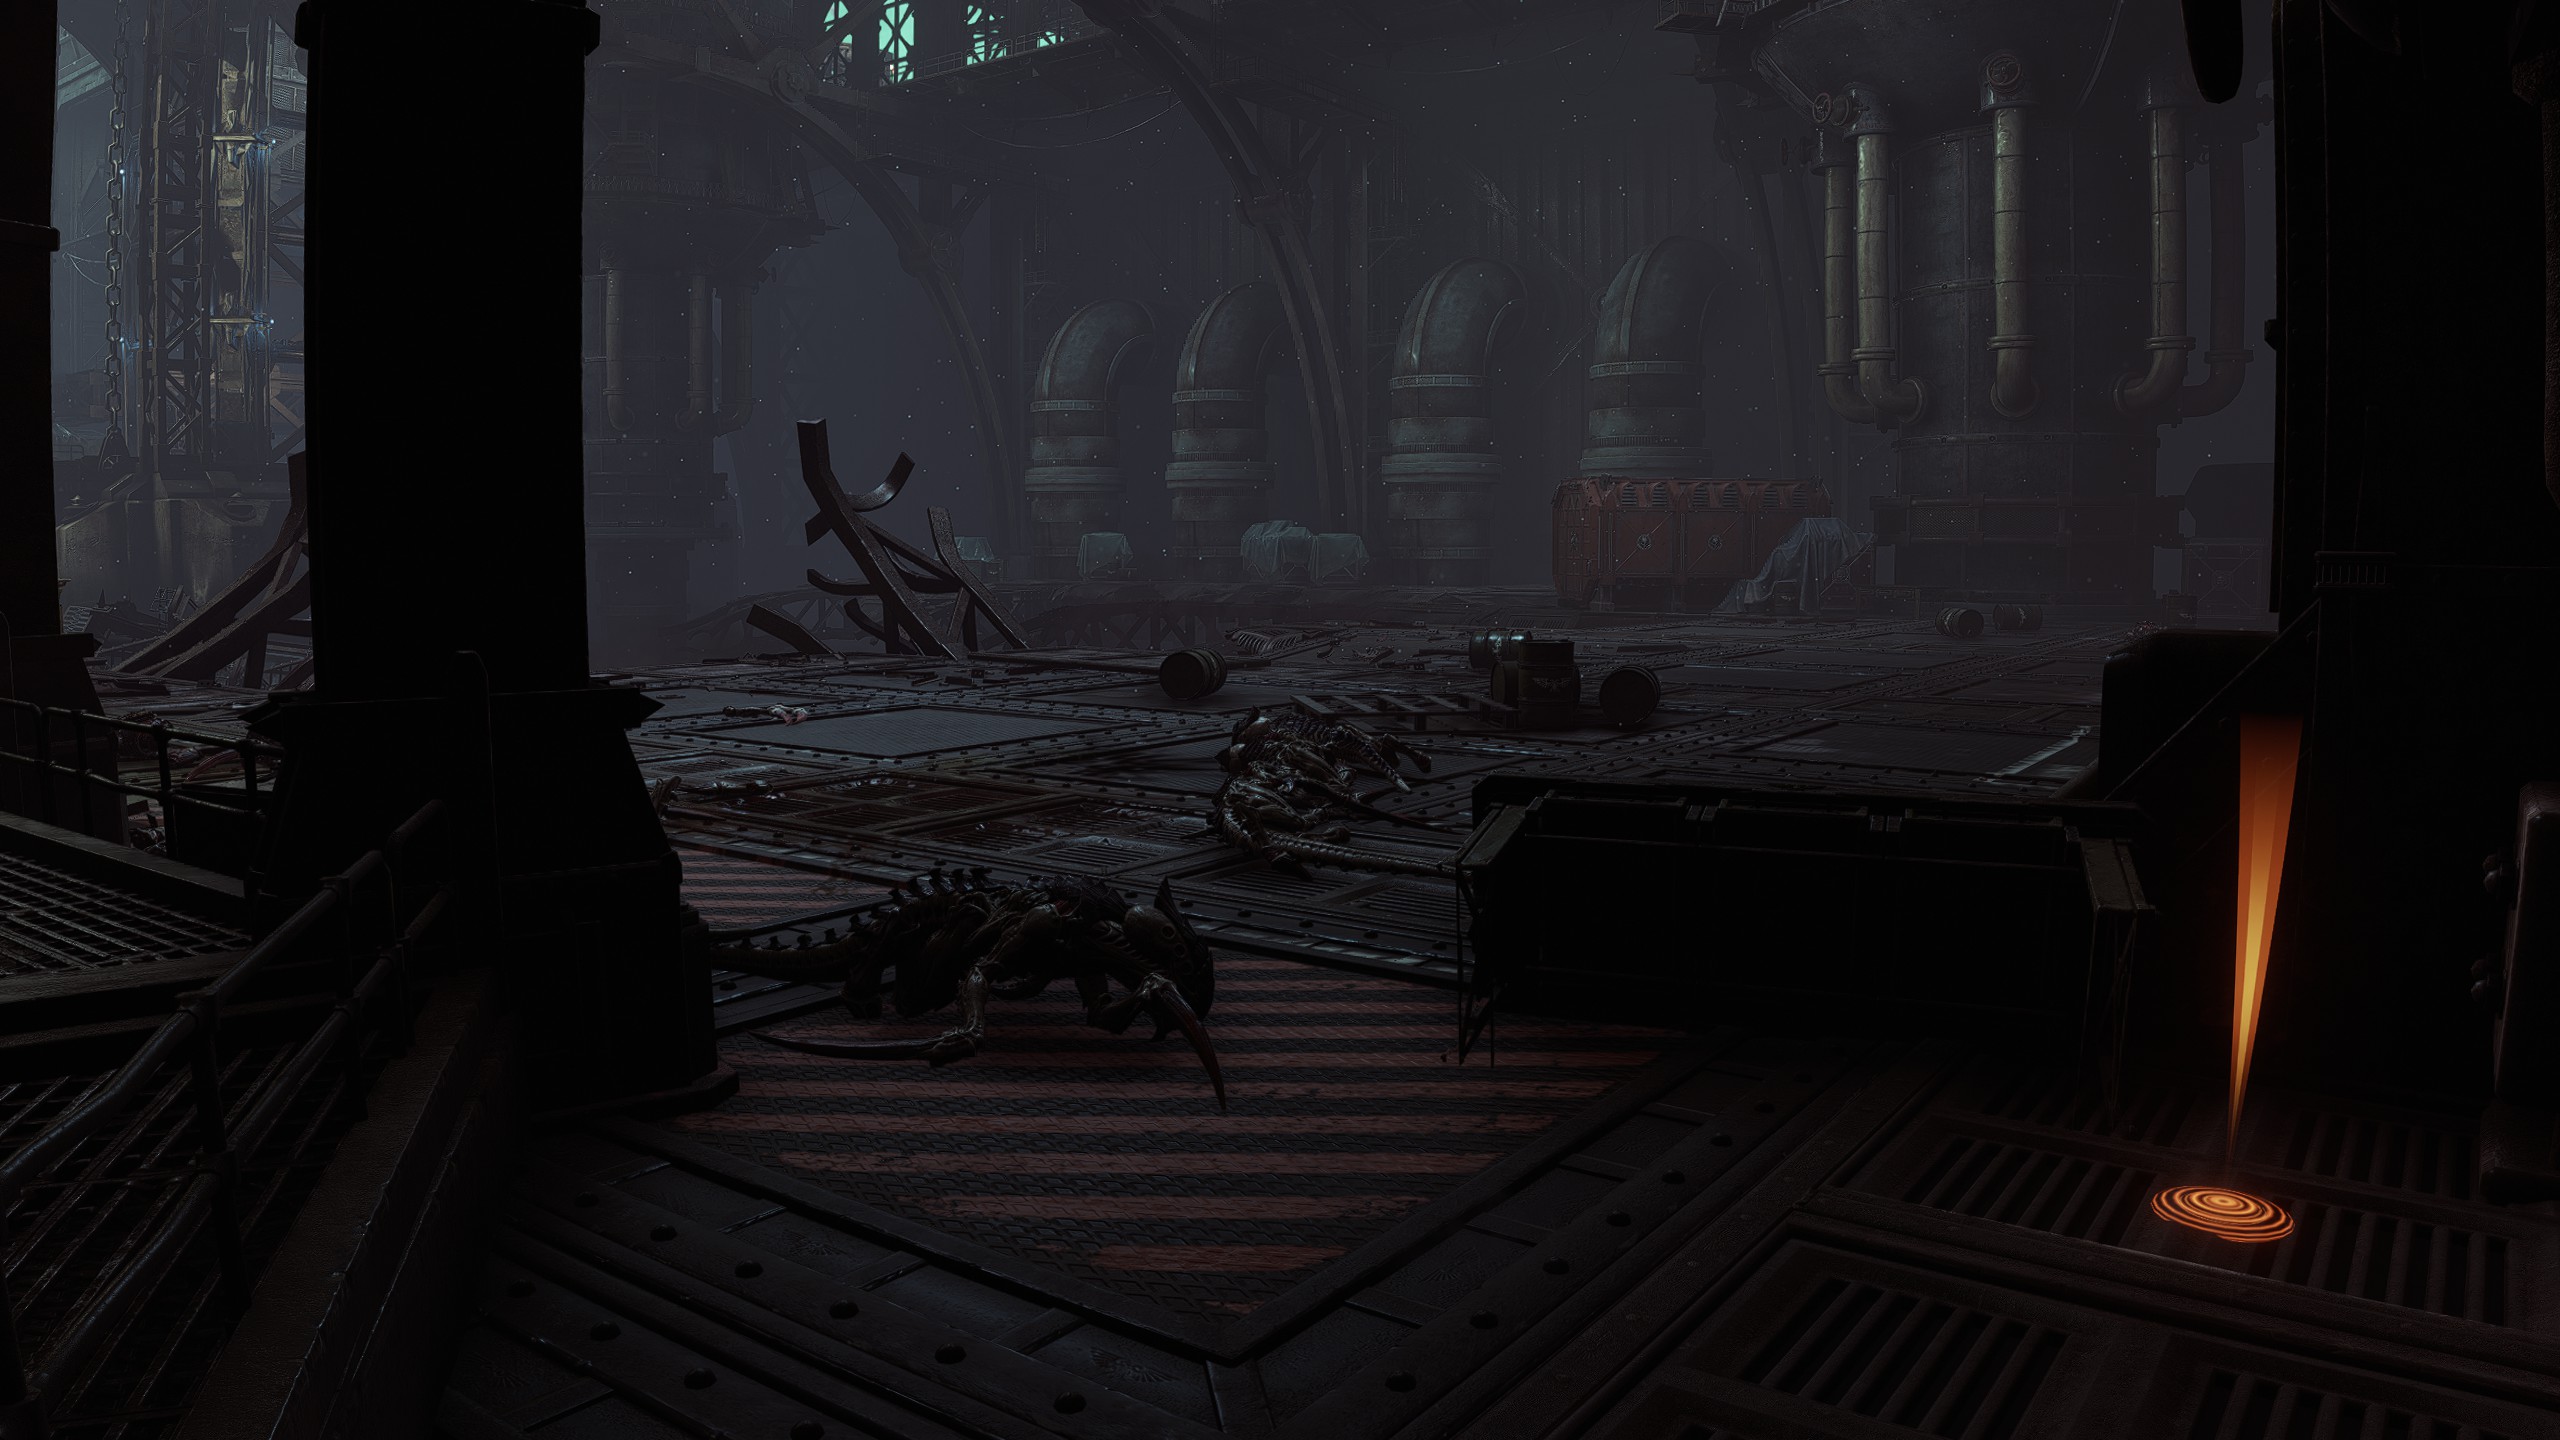
After moving through the collapsed church at the start of the level and dropping down, proceed up some stairs, then down some more. At the bottom of these stairs will be a broken guard rail to your left allowing you to drop down to the lower level. Look behind to your left and check the gap in the wall for a Gene-Seed spawn.
After moving through the collapsed church at the start of the level and dropping down, proceed up some stairs, then down some more. At the bottom of these stairs will be a broken guard rail to your left allowing you to drop down to the lower level. Look behind to your left and check the gap in the wall for a Gene-Seed spawn.
Gene-Seed #2
Location
Objective: Advance to the Bridge
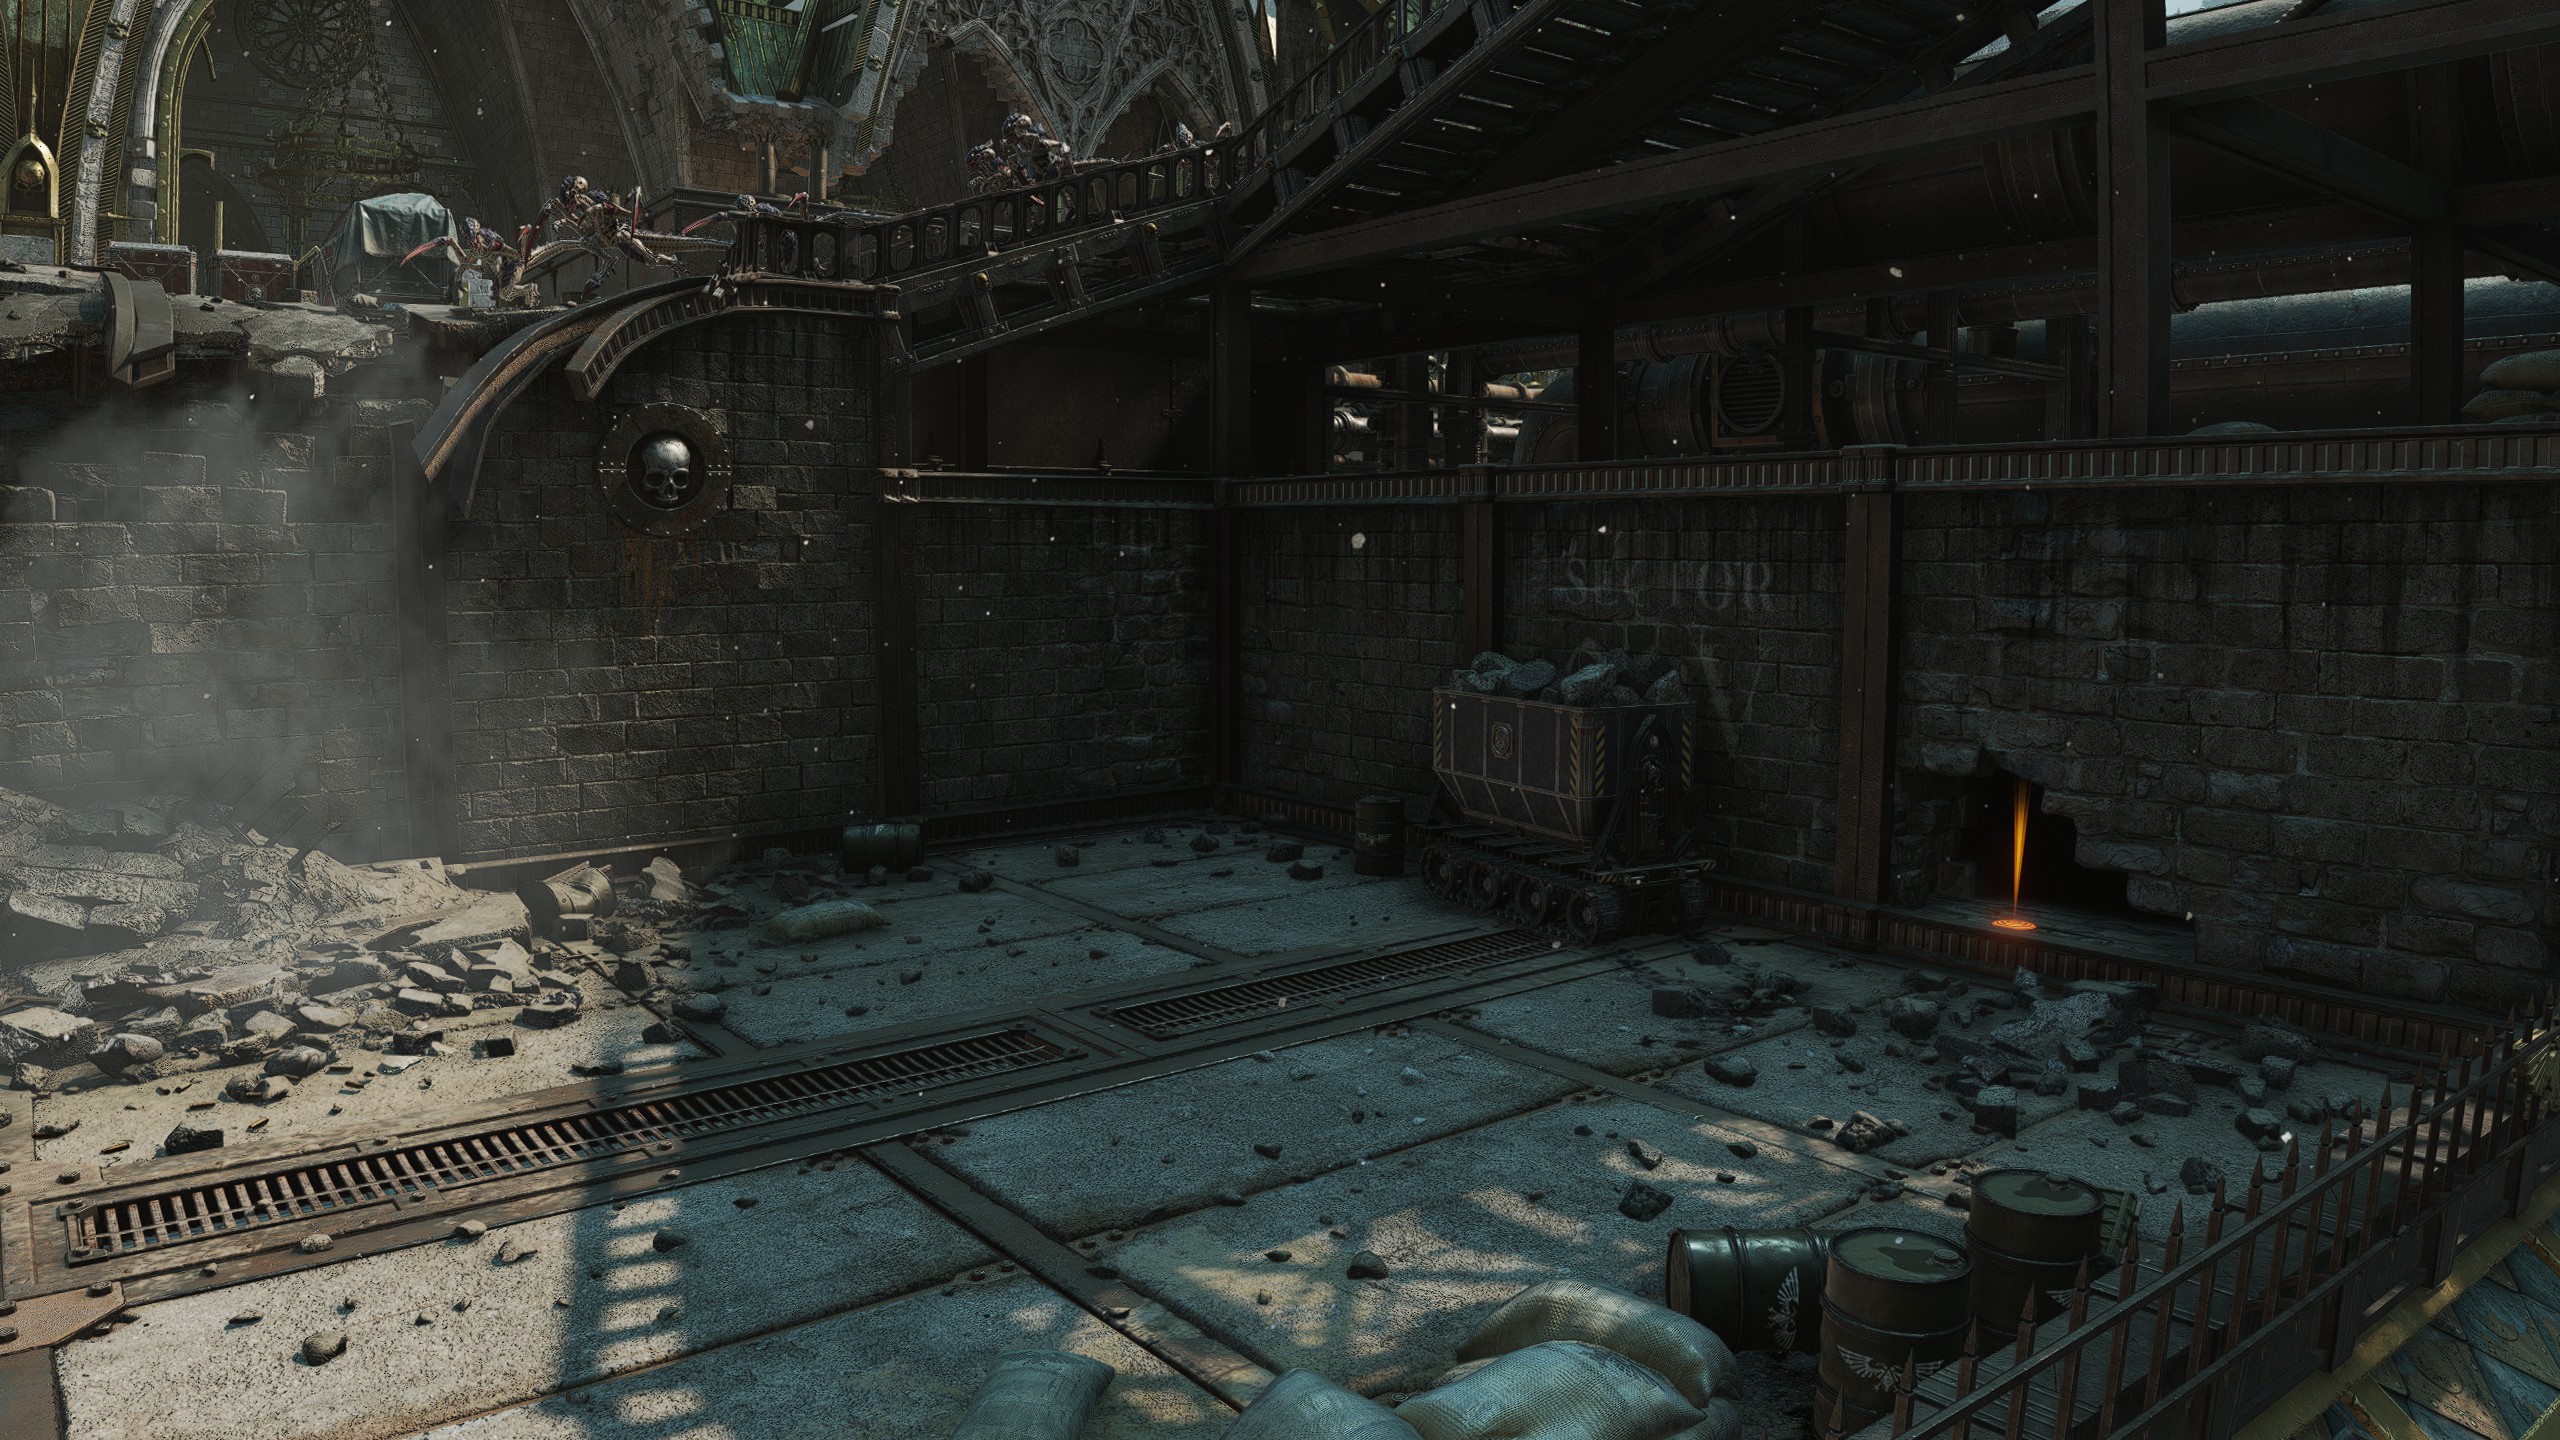
After completing the explosive charges section and proceeding up the elevator you will load into a room with a supply pod in front of you. Instead of going forward towards the main objective, turn around and check the back right corner of the room hidden behind a small wooden barrier (I have no better name for this thing) next to the statue.
After completing the explosive charges section and proceeding up the elevator you will load into a room with a supply pod in front of you. Instead of going forward towards the main objective, turn around and check the back right corner of the room hidden behind a small wooden barrier (I have no better name for this thing) next to the statue.
Gene-Seed #3
Location
Objective: Hold until the Hive Tyrant arrives / Detonate the Charges
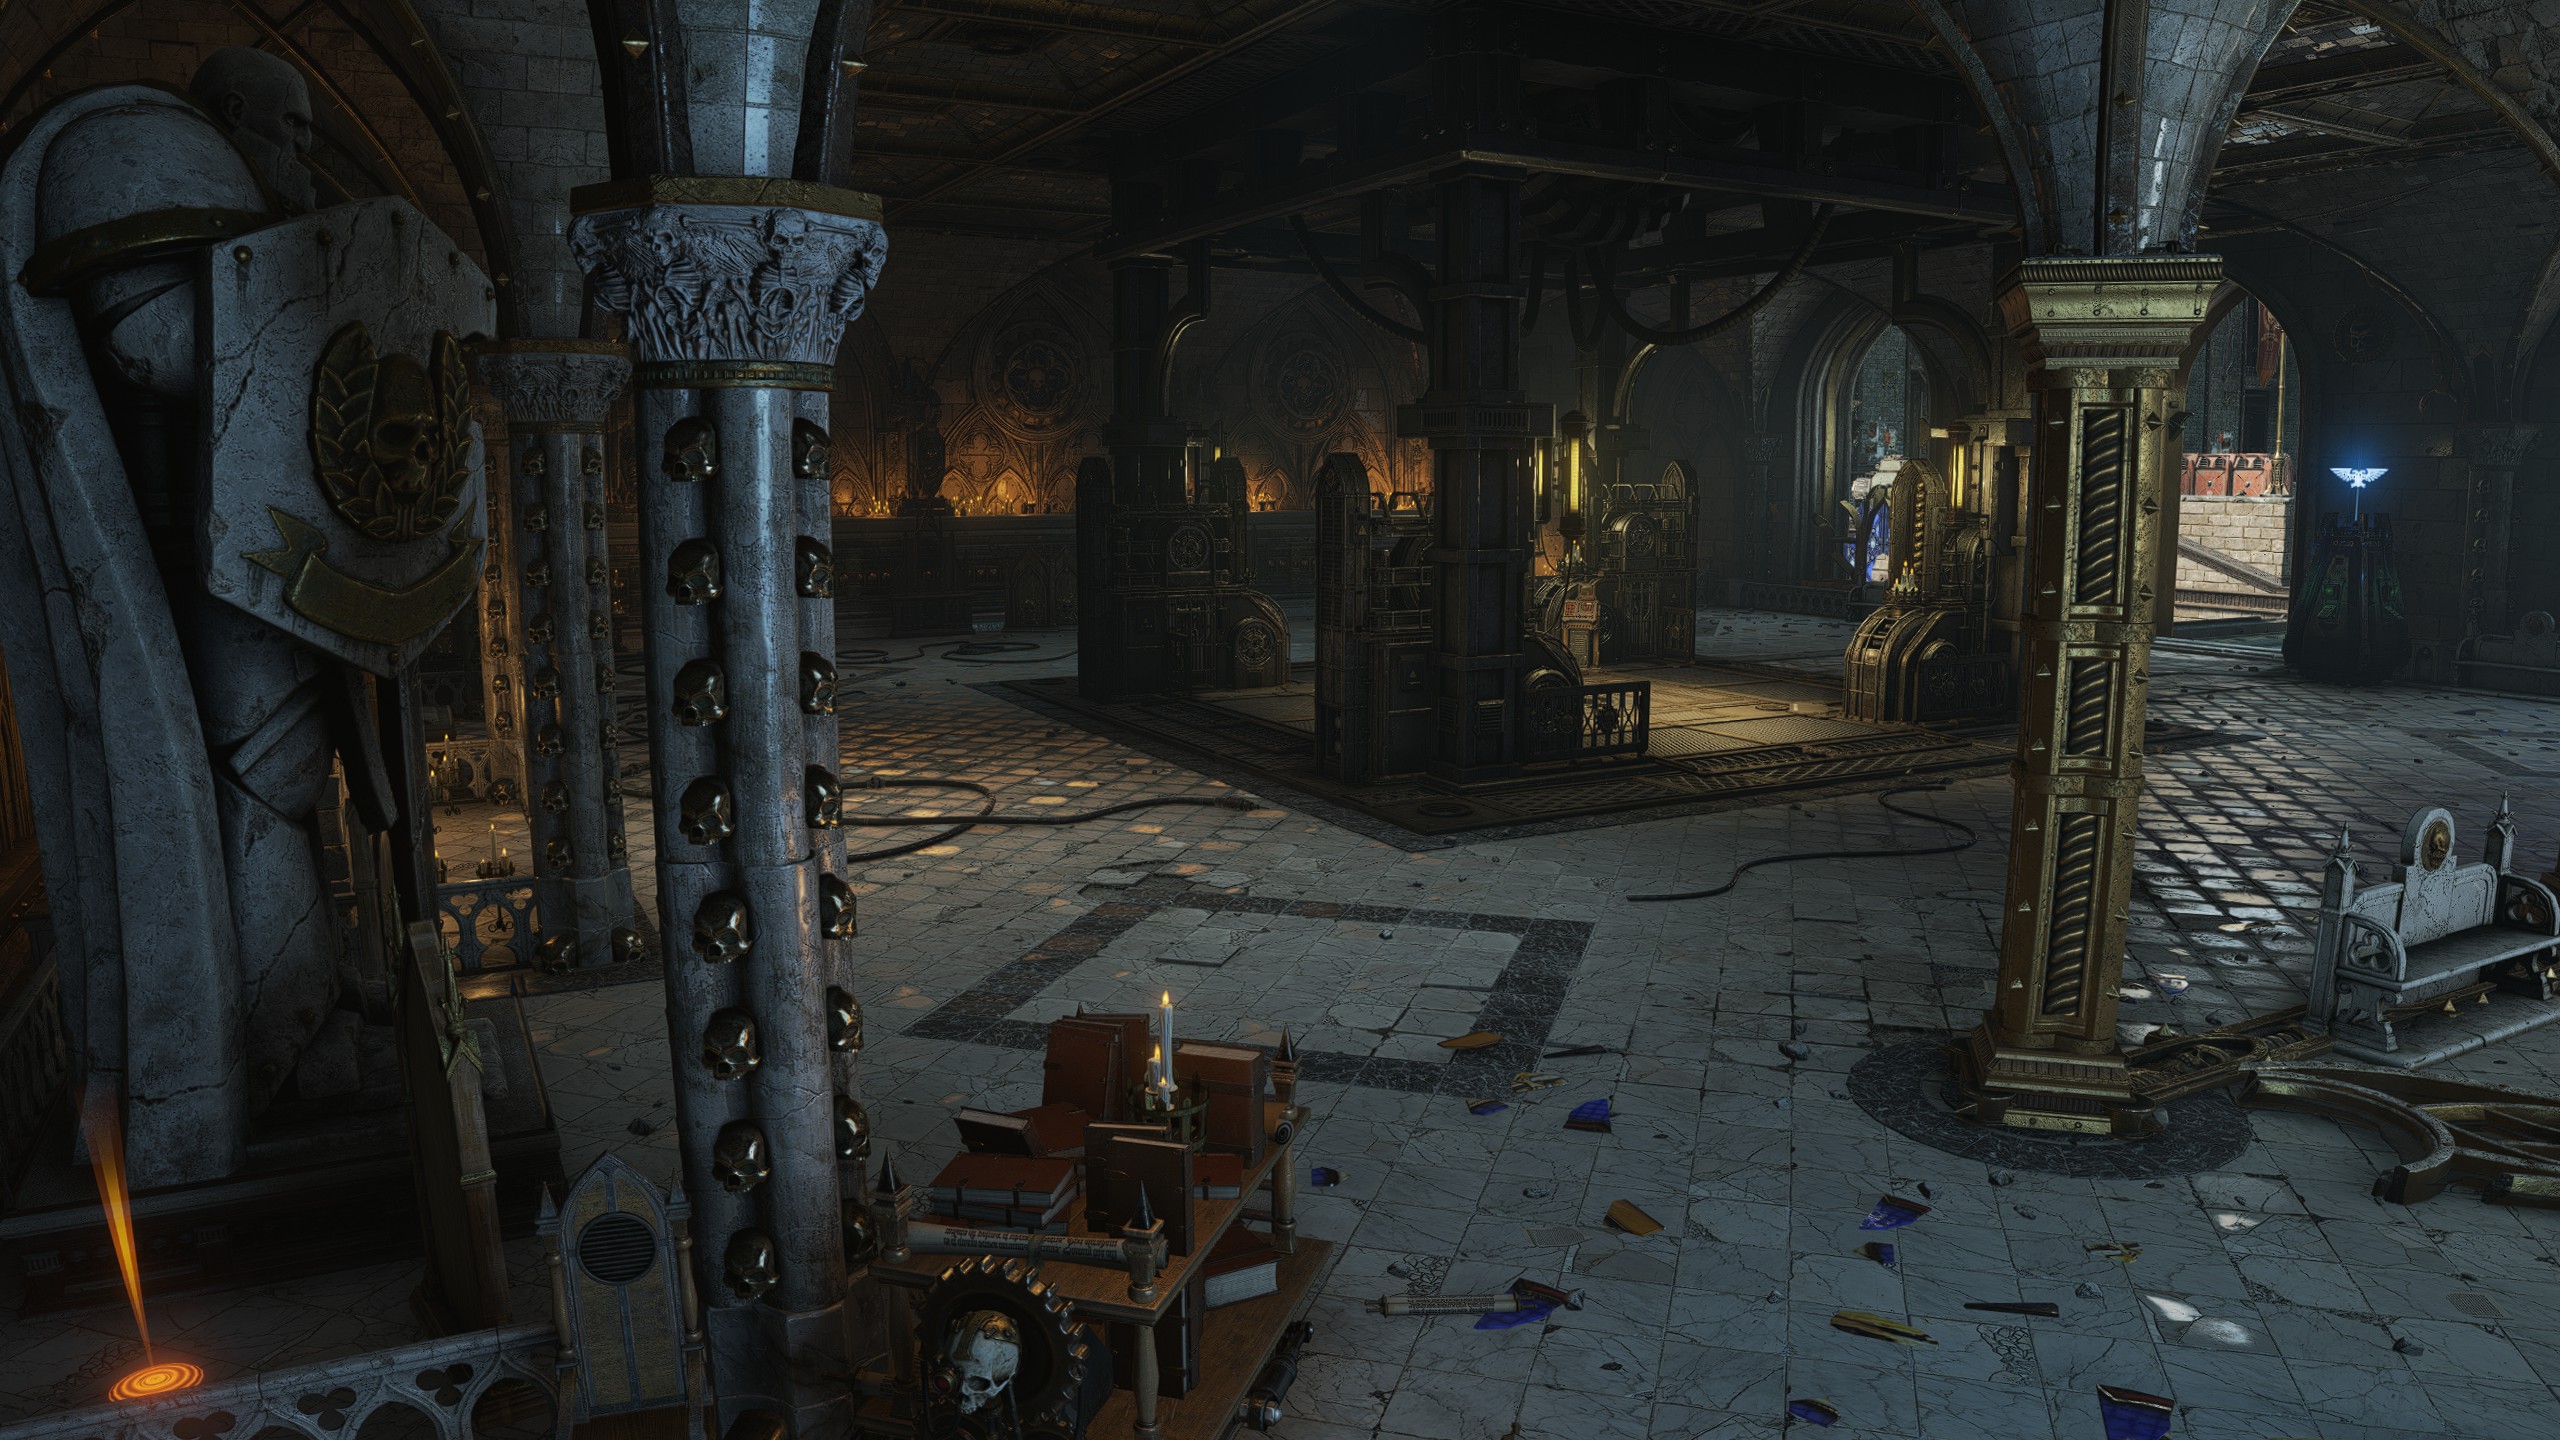
Not far from the second spawn, proceed from the elevator into the holdout section. Go all the way to the back left corner of the battlements and check the corner of "Luggage" area hidden behind some boxes.
Not far from the second spawn, proceed from the elevator into the holdout section. Go all the way to the back left corner of the battlements and check the corner of "Luggage" area hidden behind some boxes.
Gene-Seed #4
Location
Objective: Find the Hive Tyrant
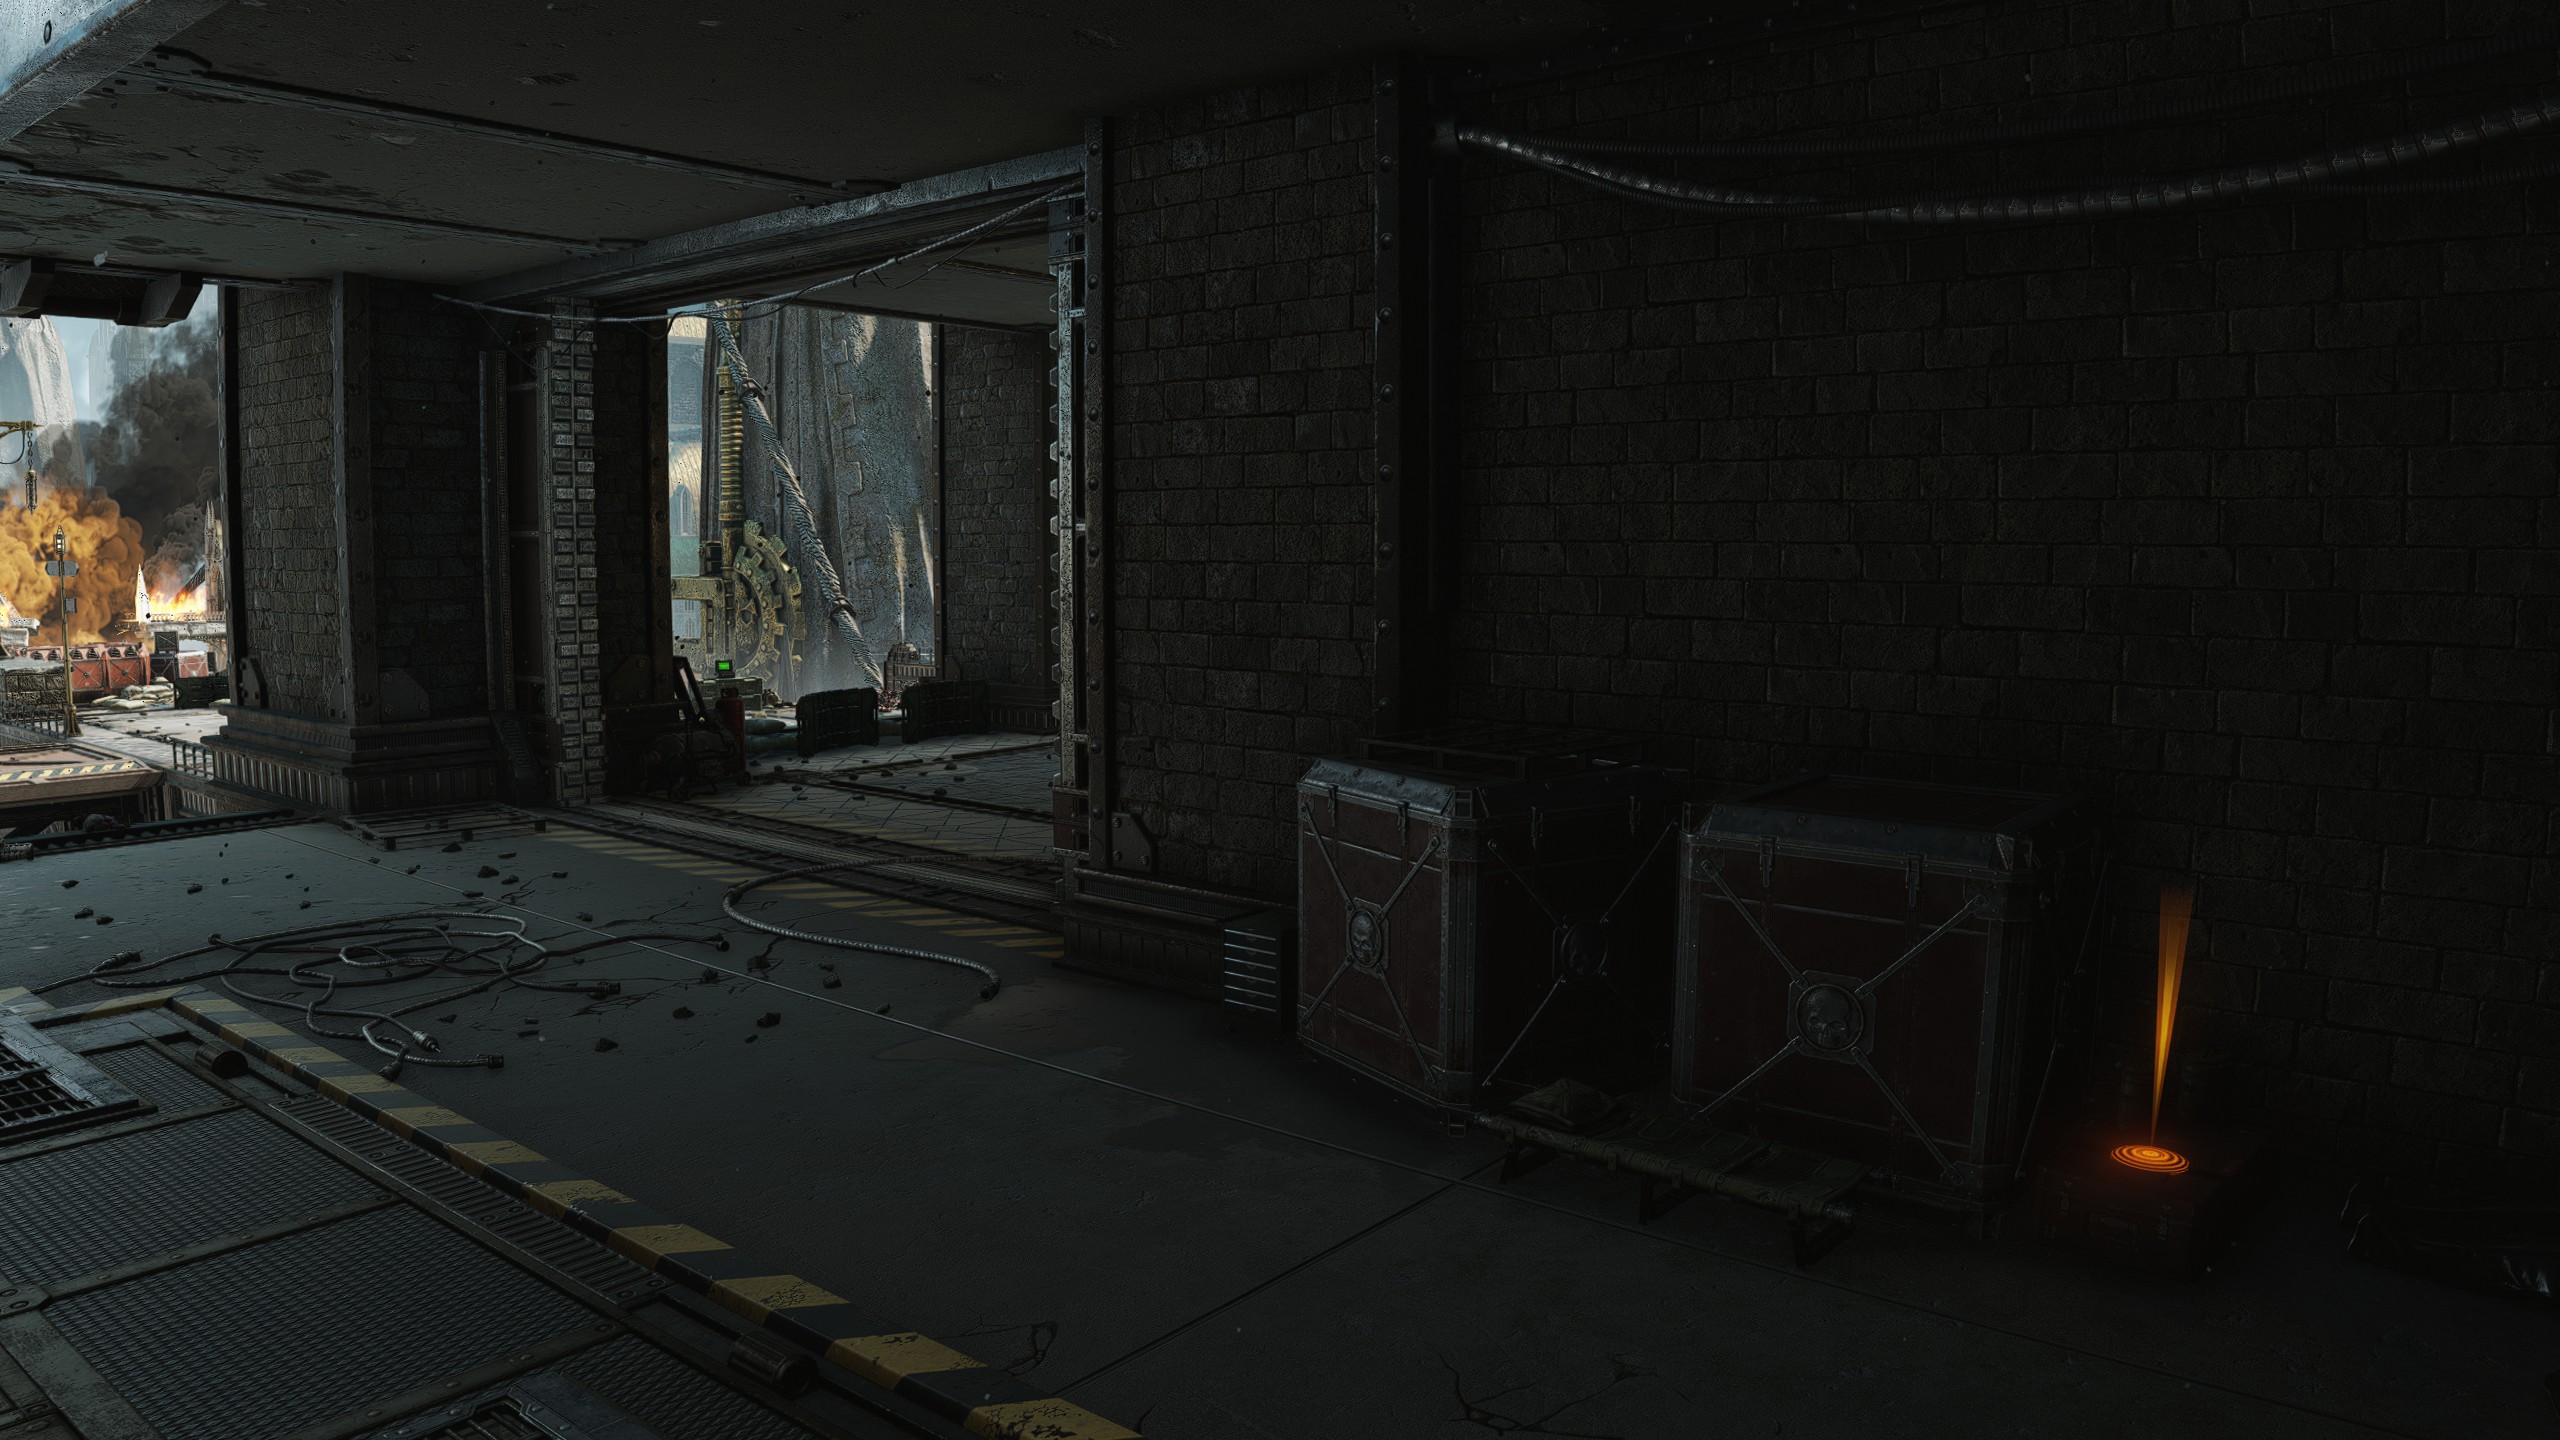
After completing the holdout section and proceeding down the elevator, again turn away from the direction the game wants you to go and look to the back left corner of the room opposite from the door where the Gene-Seed may spawn in a gap in the fencing.
After completing the holdout section and proceeding down the elevator, again turn away from the direction the game wants you to go and look to the back left corner of the room opposite from the door where the Gene-Seed may spawn in a gap in the fencing.
Gene-Seed #5
Location
Objective: Pursue the Hive Tyrant
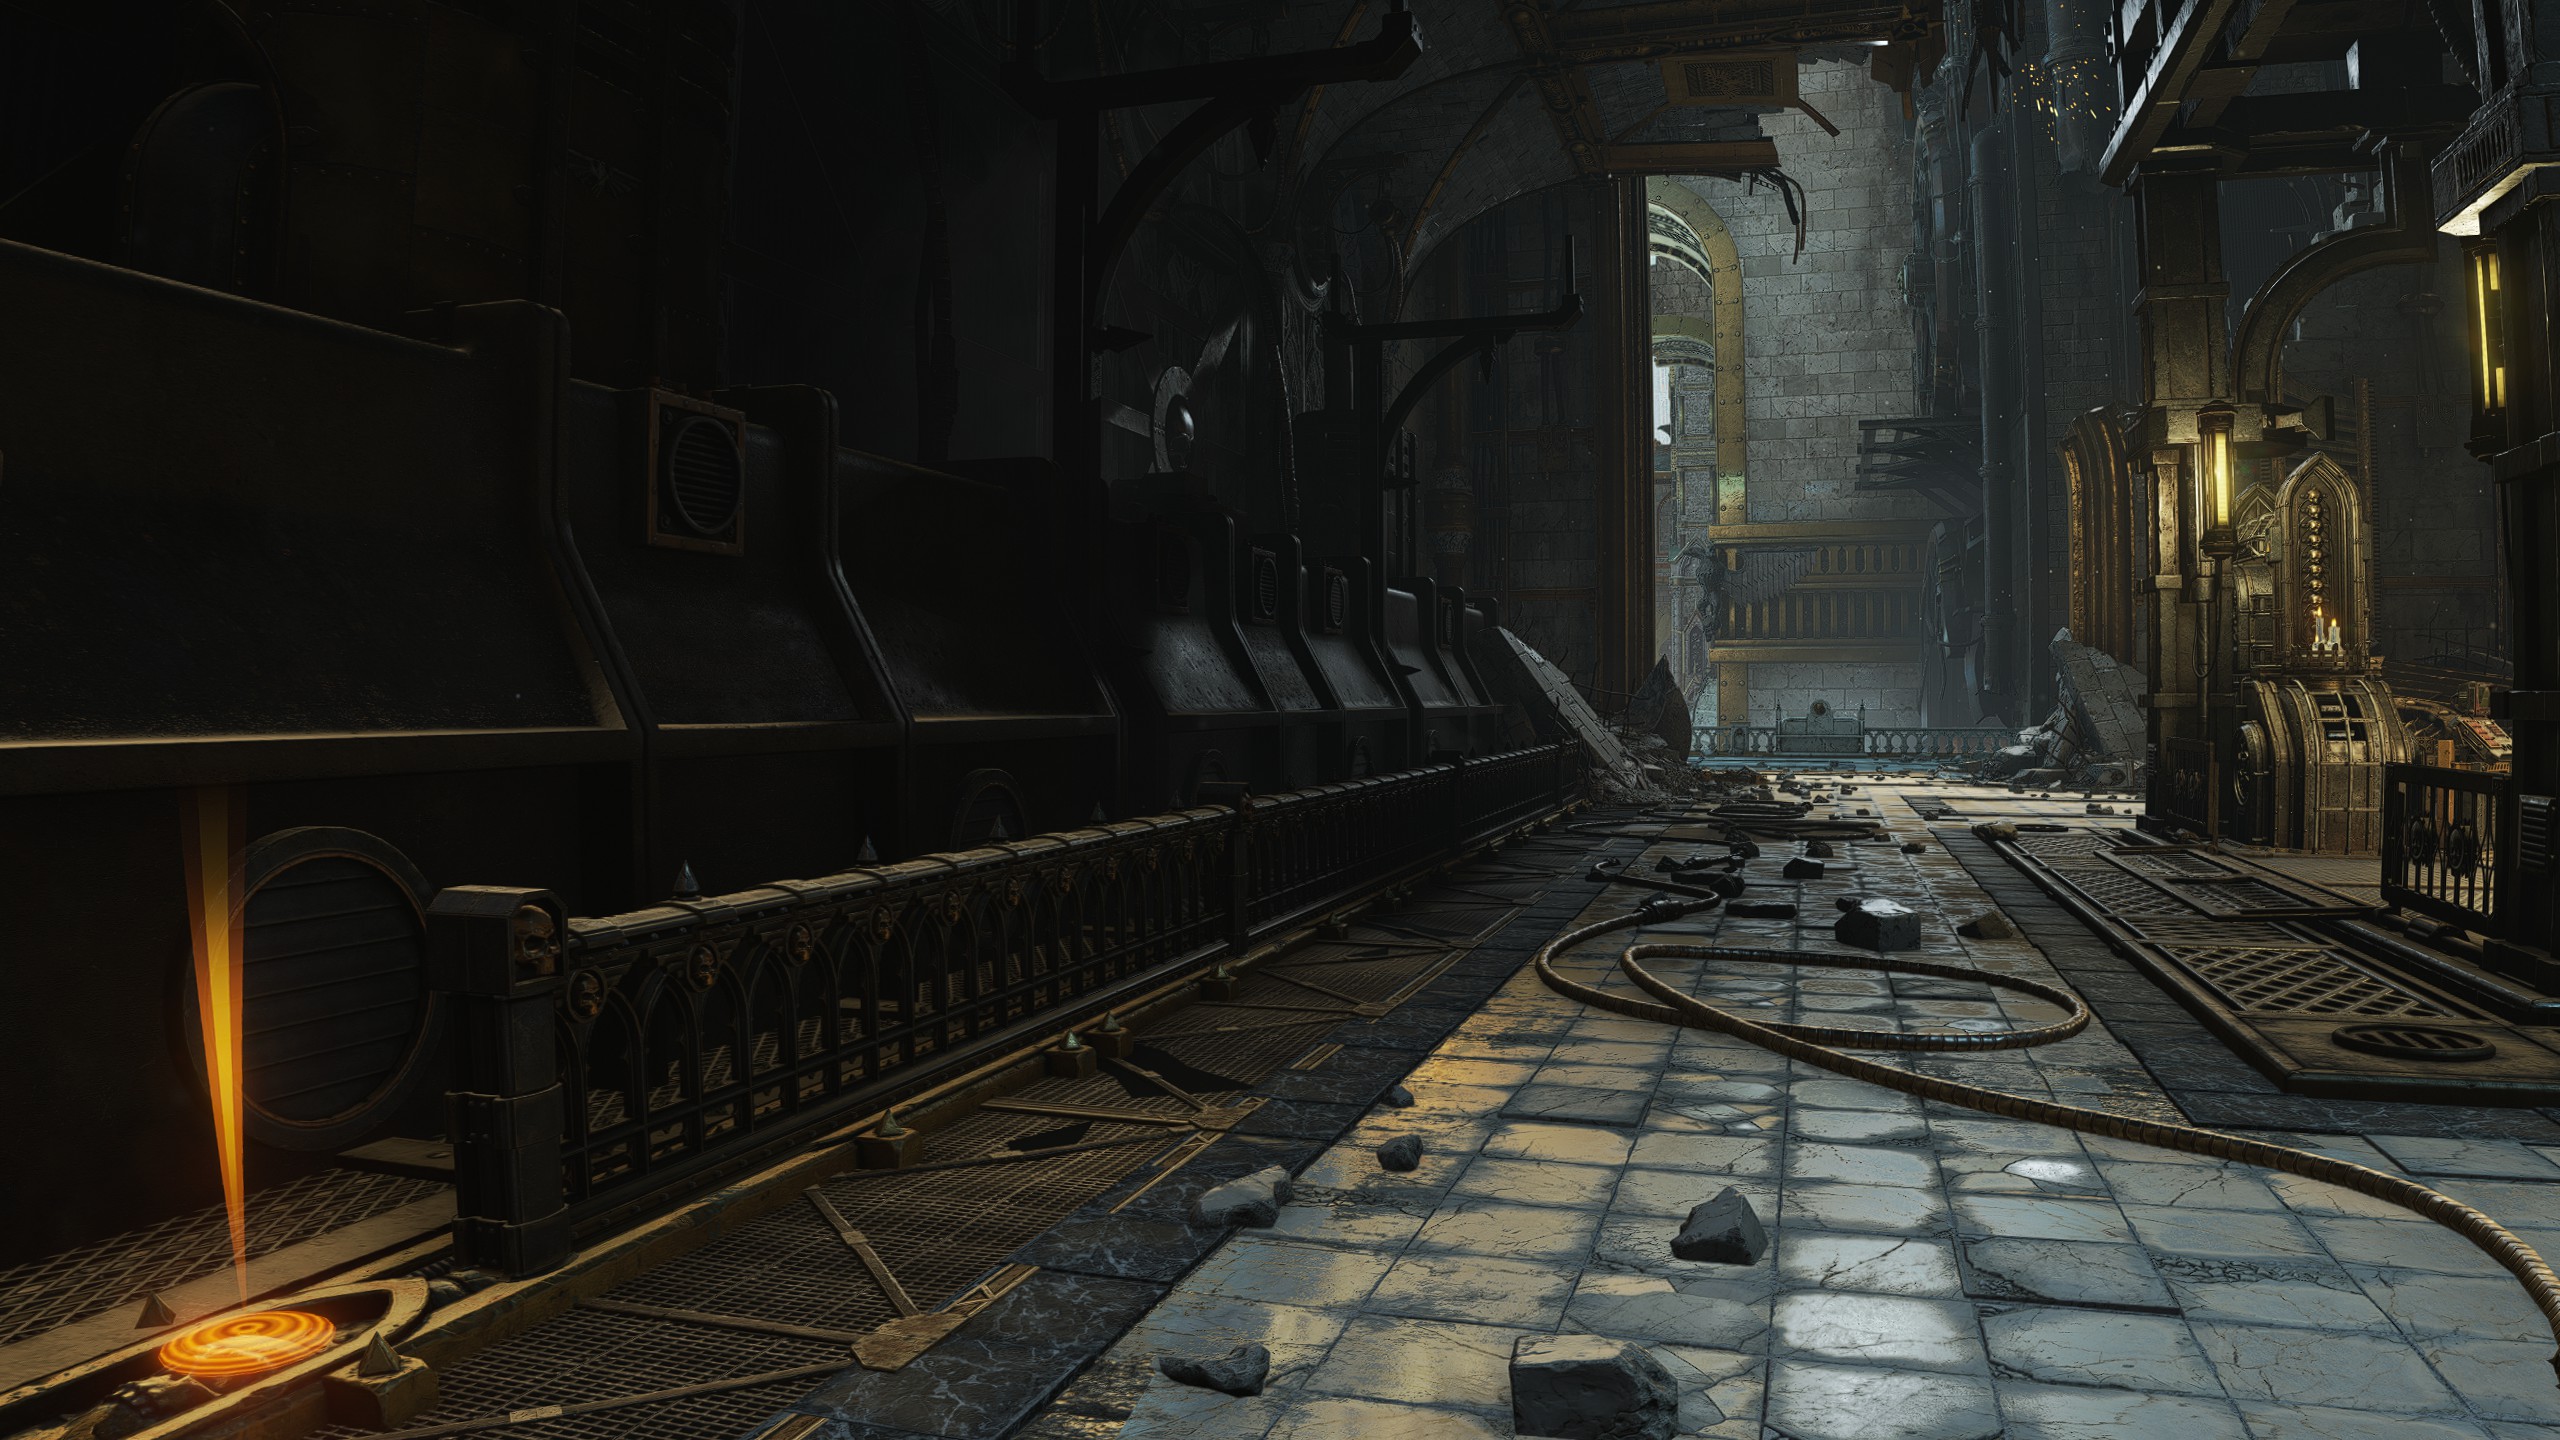
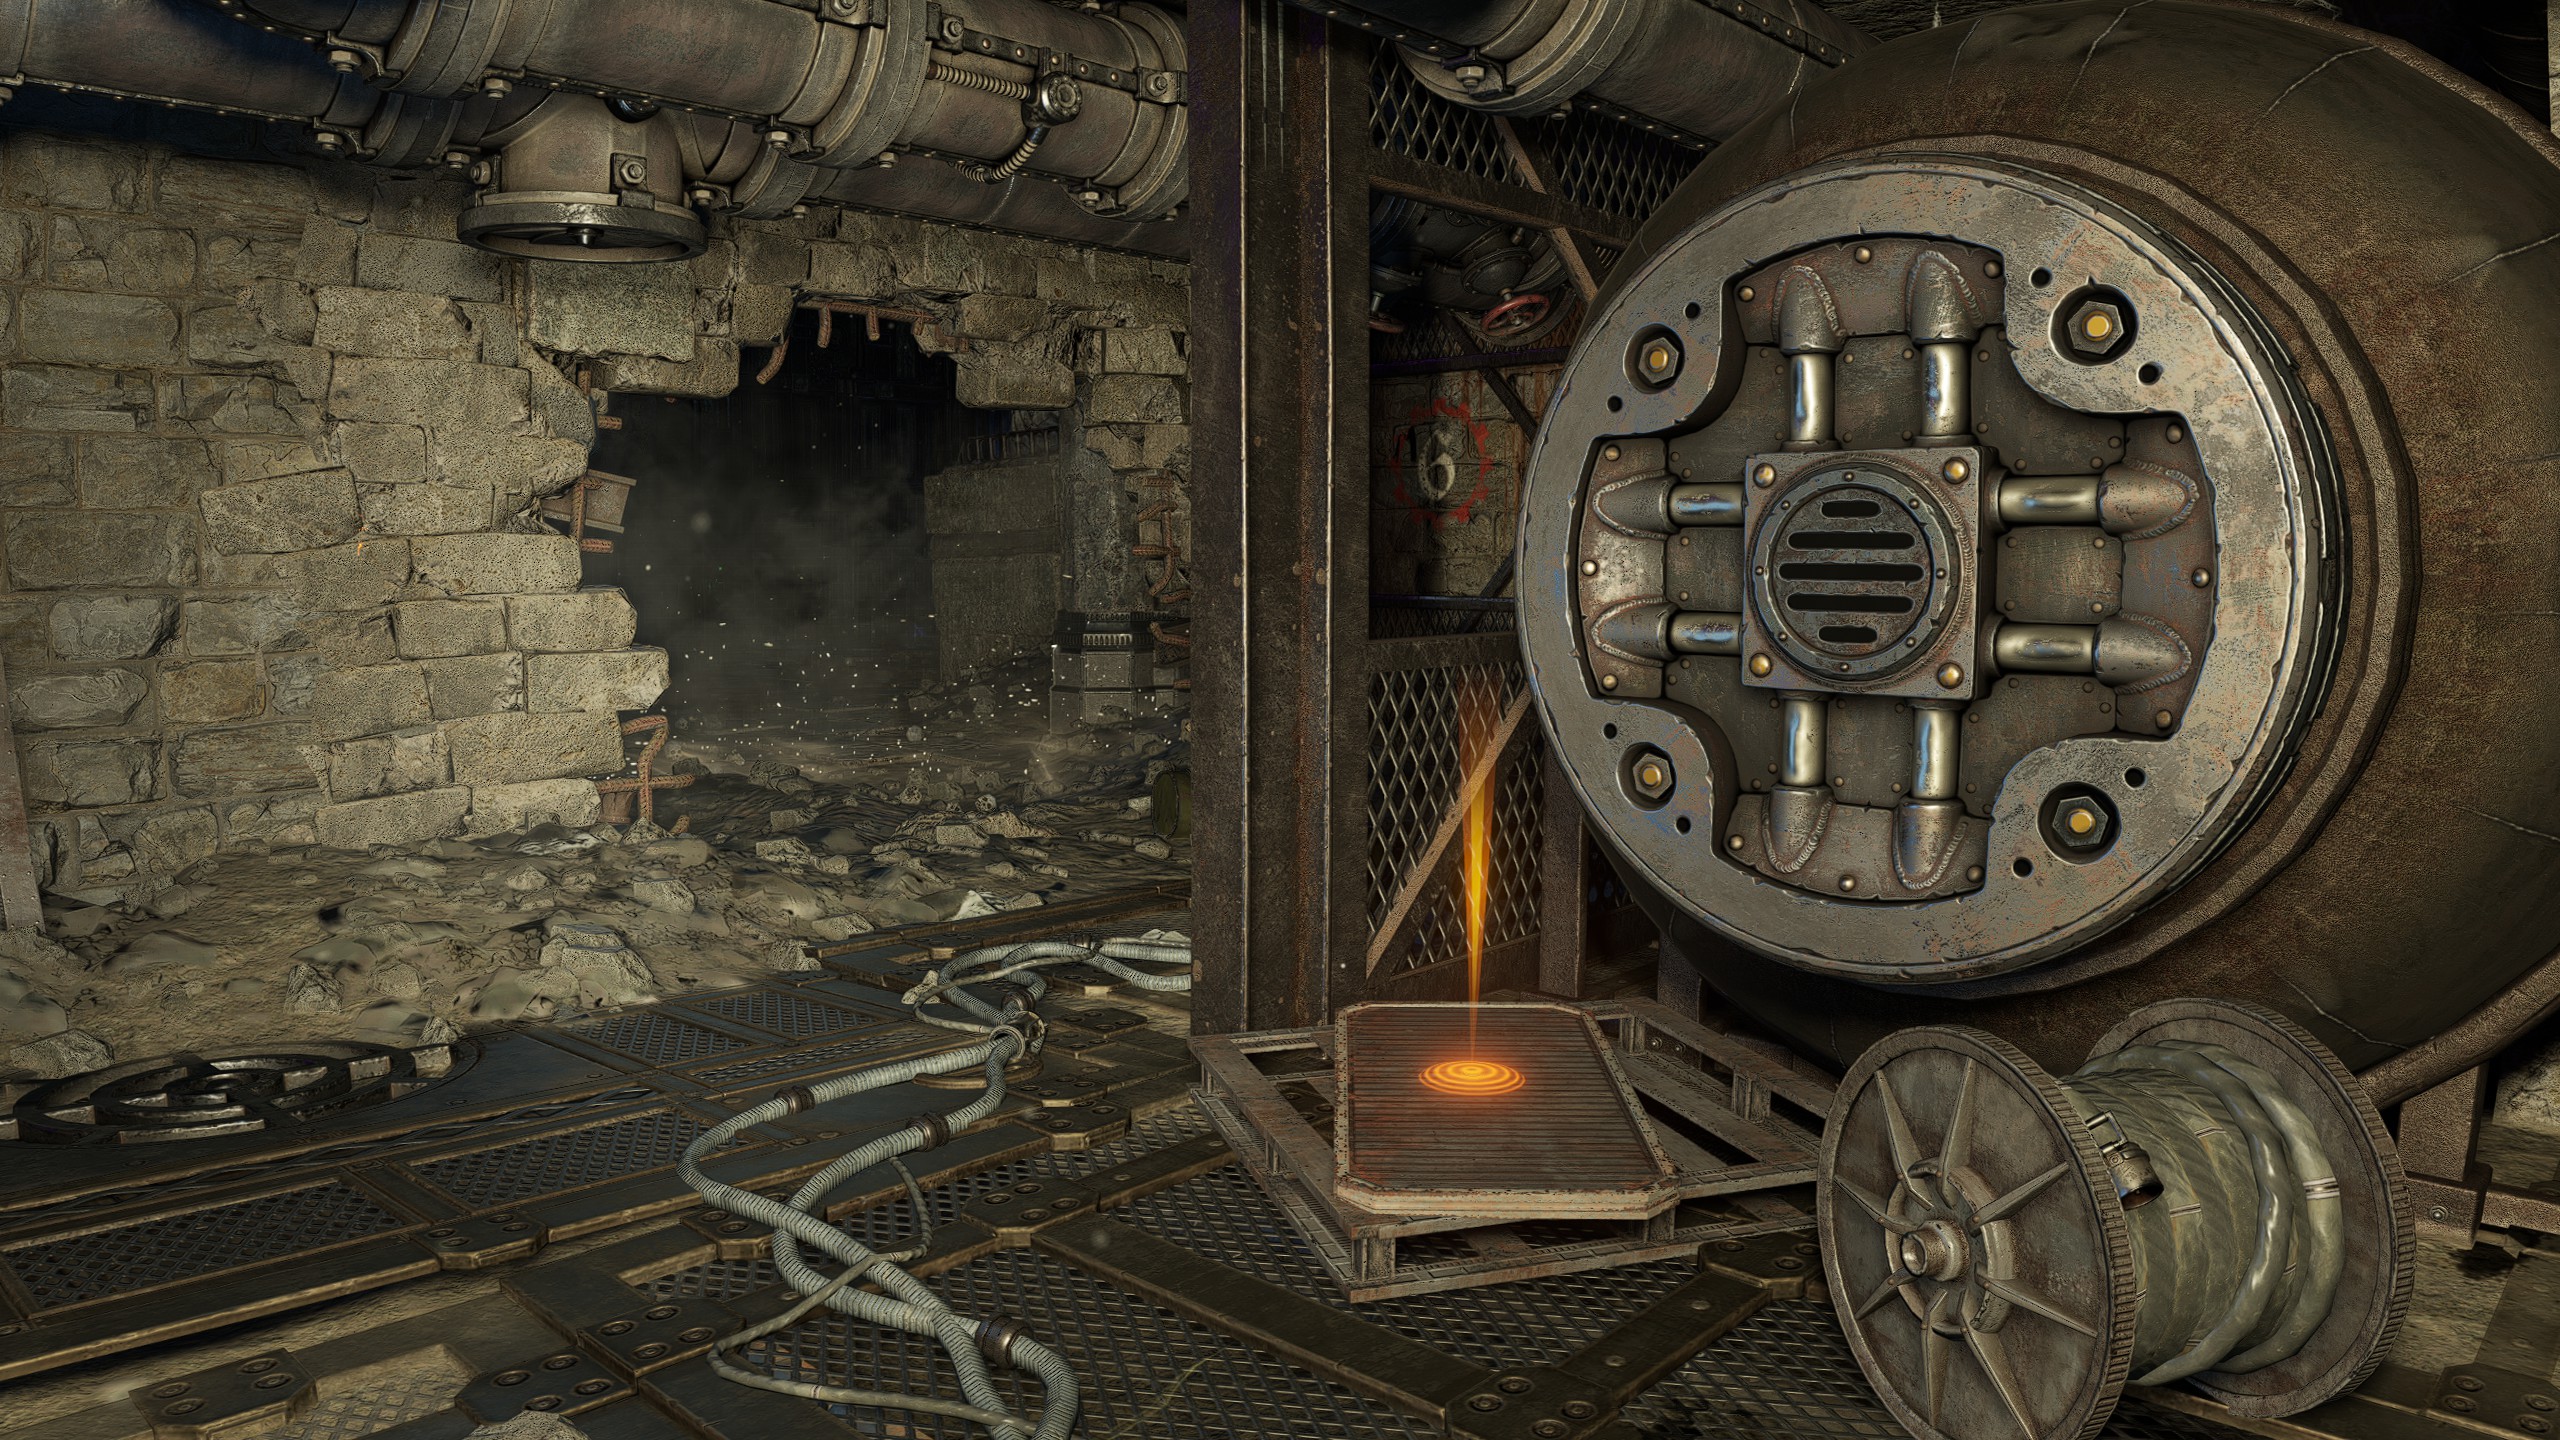
Once you see the Hive Tyrant rise from the rubble pile and the objective update, proceed into the large ventilation tunnels. Keep going until you get to the open area with the elevator and two large fans where the Hive Tyrant moves through. Instead of proceeding forward, turn around and check the back right corner where you can also find Dataslate #2 as the Gene-Seed may be hiding behind the spools.
Once you see the Hive Tyrant rise from the rubble pile and the objective update, proceed into the large ventilation tunnels. Keep going until you get to the open area with the elevator and two large fans where the Hive Tyrant moves through. Instead of proceeding forward, turn around and check the back right corner where you can also find Dataslate #2 as the Gene-Seed may be hiding behind the spools.
| Mission 03: Vox Liberatis
Gene-Seed #1
Location
Objective: Locate the Source of Jamming
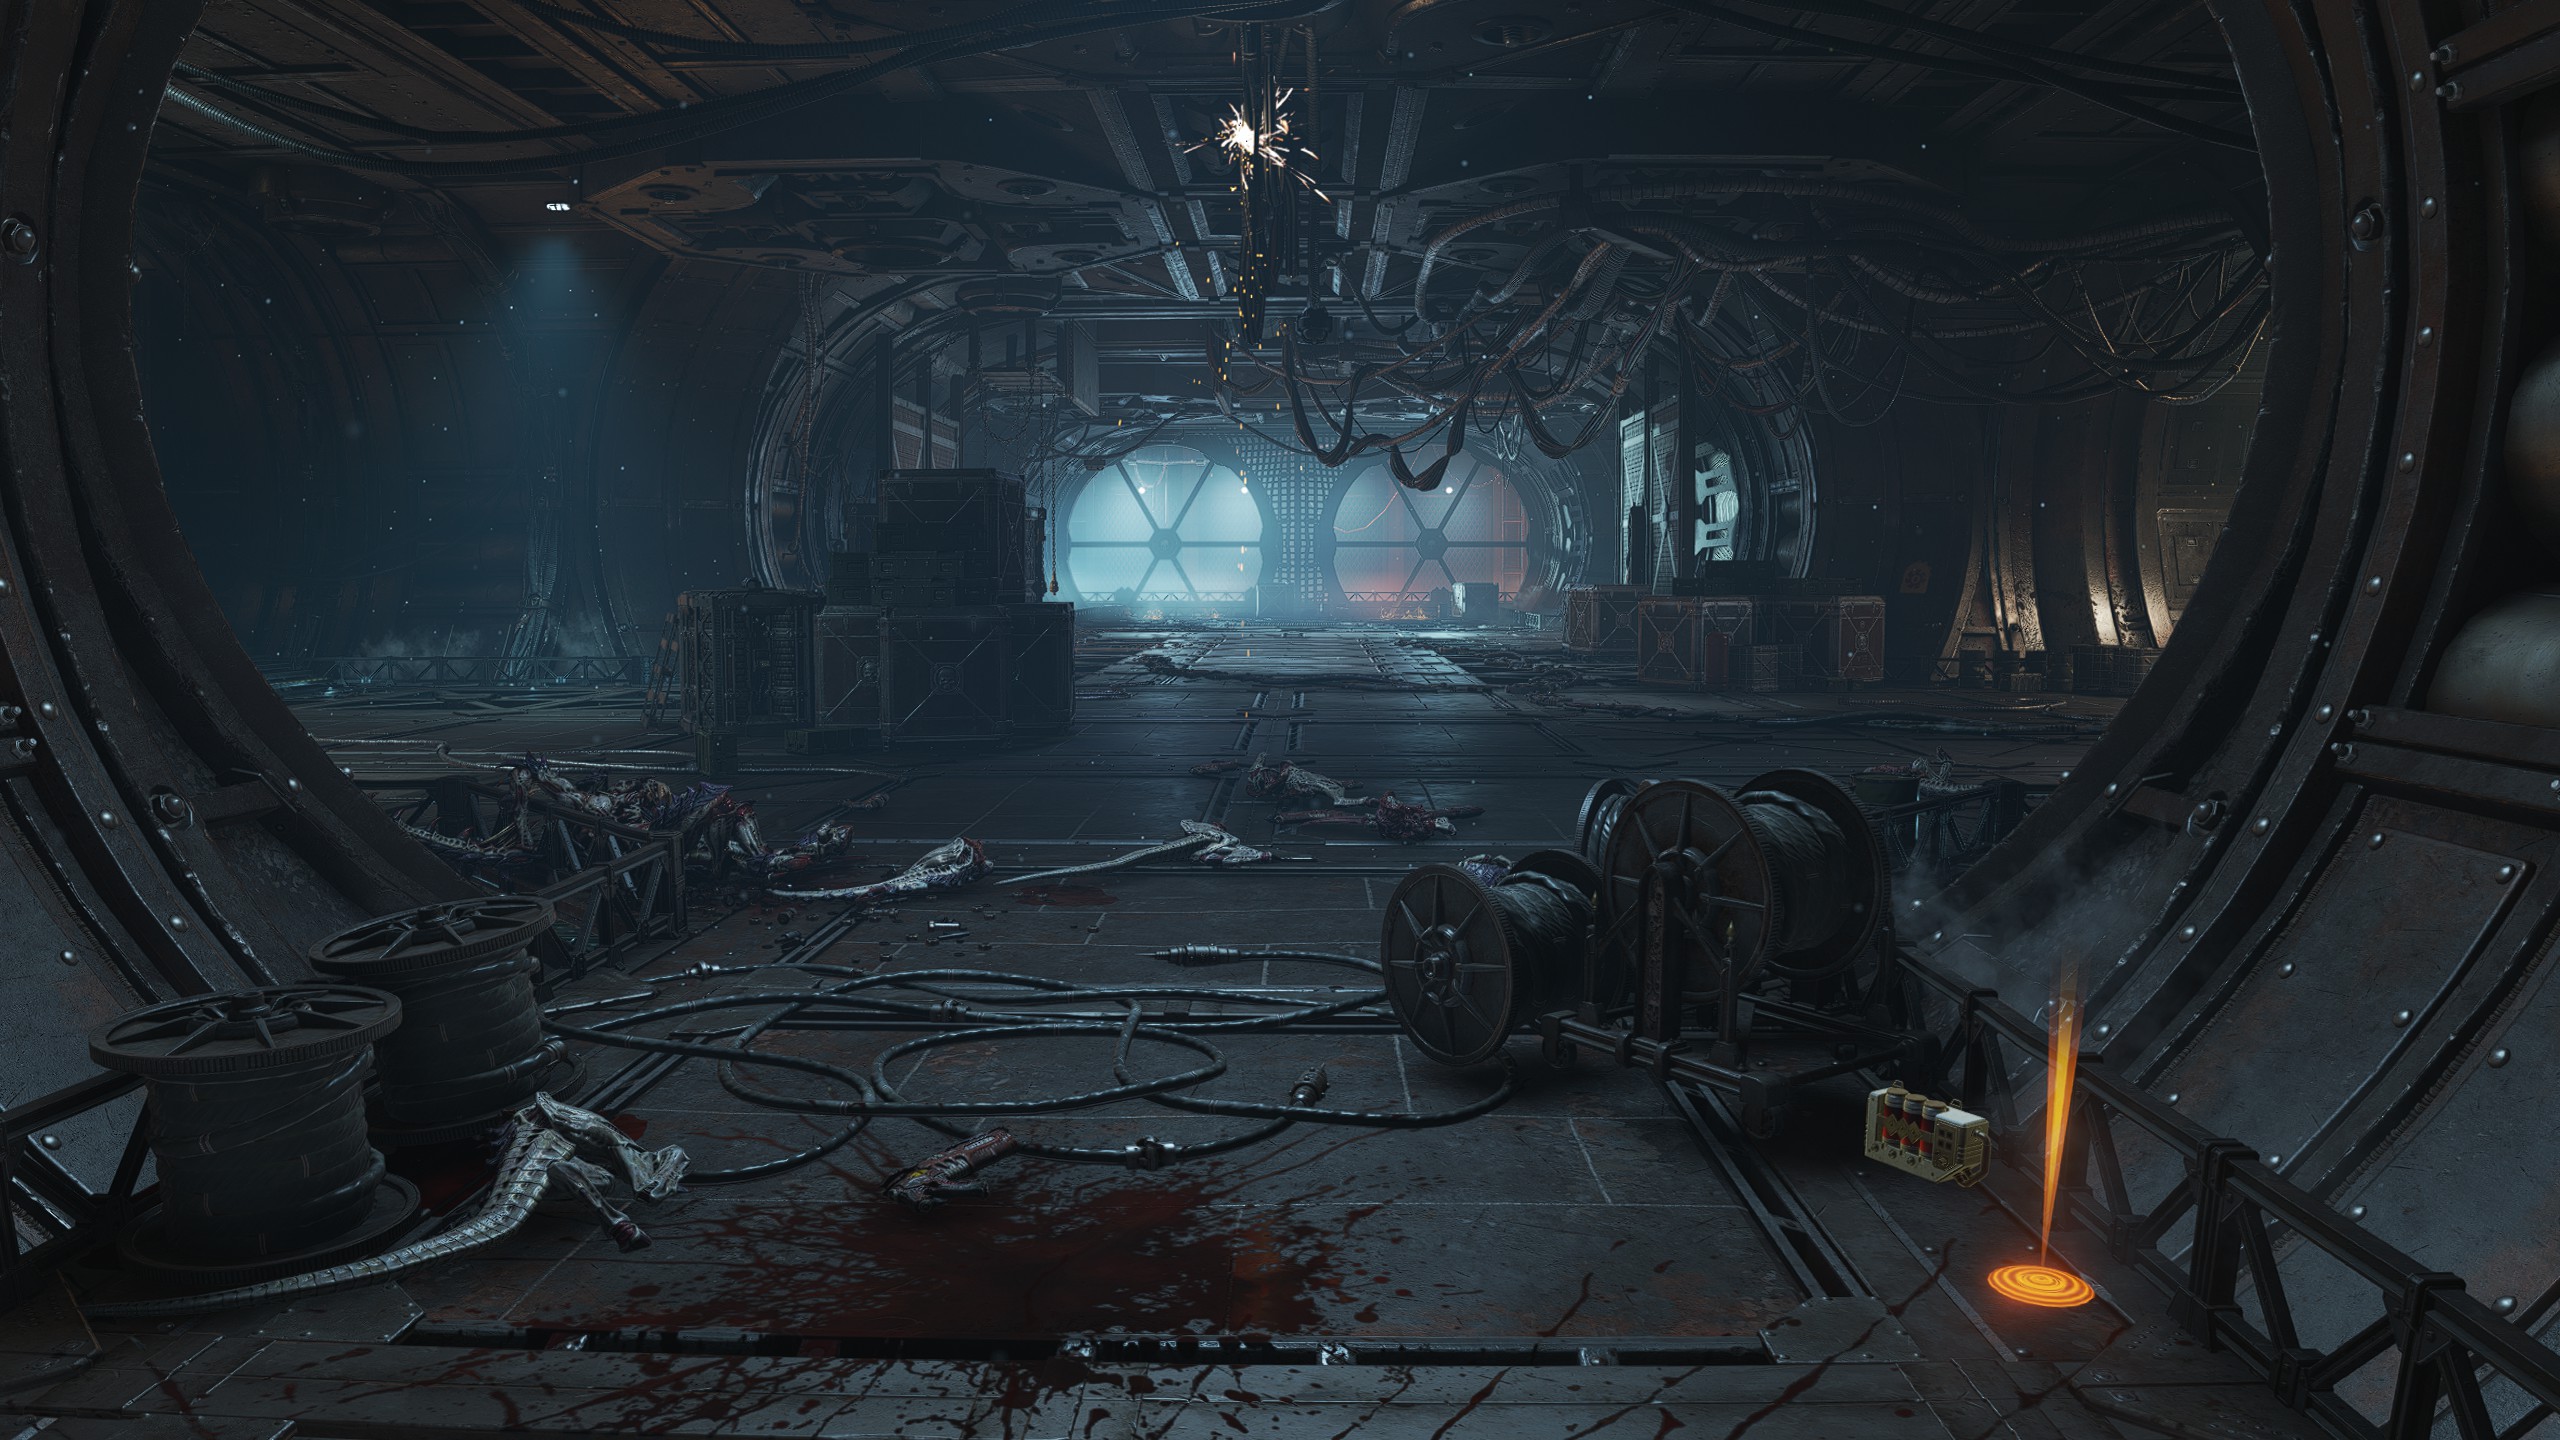
At the very start of the mission. As you advance into the large yard (where sometimes you will find Cadians to assist), instead of going inside stick to the right side and follow it to the edge where there's a crane and multiple containers. The Gene-Seed can spawn behind the containers.
At the very start of the mission. As you advance into the large yard (where sometimes you will find Cadians to assist), instead of going inside stick to the right side and follow it to the edge where there's a crane and multiple containers. The Gene-Seed can spawn behind the containers.
Gene-Seed #2
Location
Objective: Find a way to take down the Warp Shielding
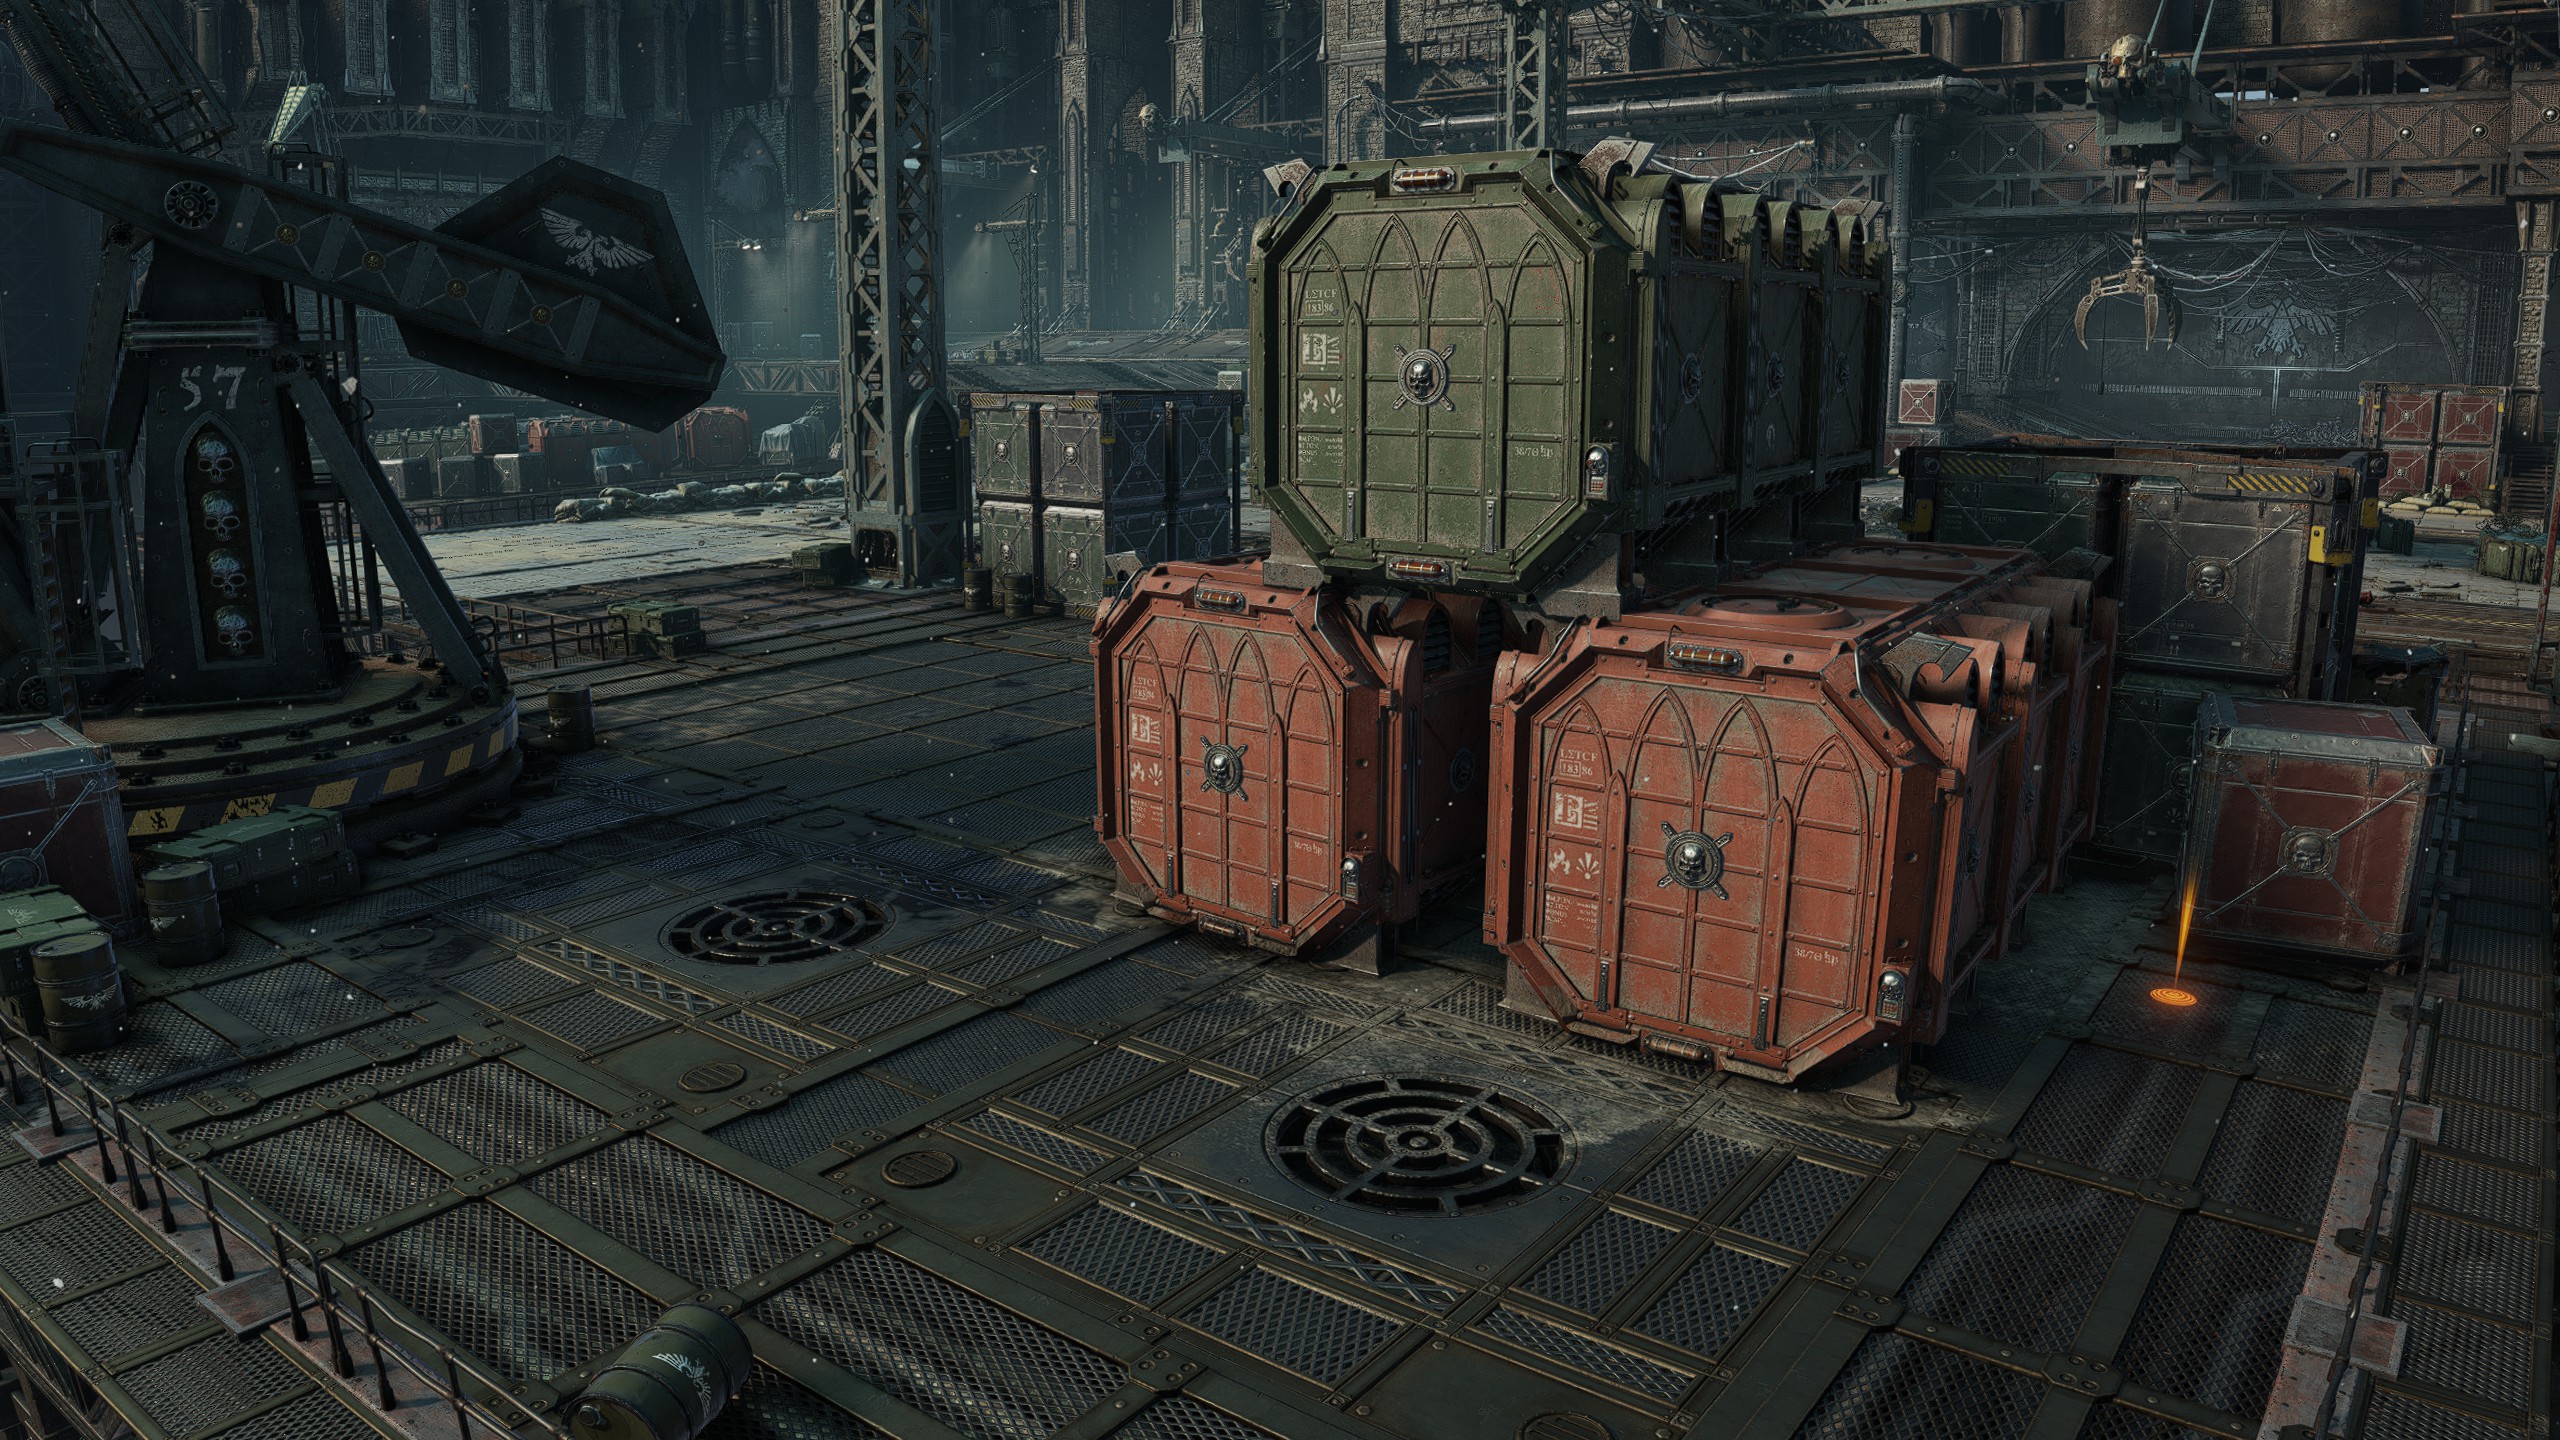
Following the elevator ride up, descend down the rooftops until you come to the balcony that leads inside the church where you encounter the first Chaos enemies. Instead of immediately going inside, proceed all the way to the end of the balcony and check the corner to your left.
Following the elevator ride up, descend down the rooftops until you come to the balcony that leads inside the church where you encounter the first Chaos enemies. Instead of immediately going inside, proceed all the way to the end of the balcony and check the corner to your left.
Gene-Seed #3
Location
Objective: Advance to the Cathedral
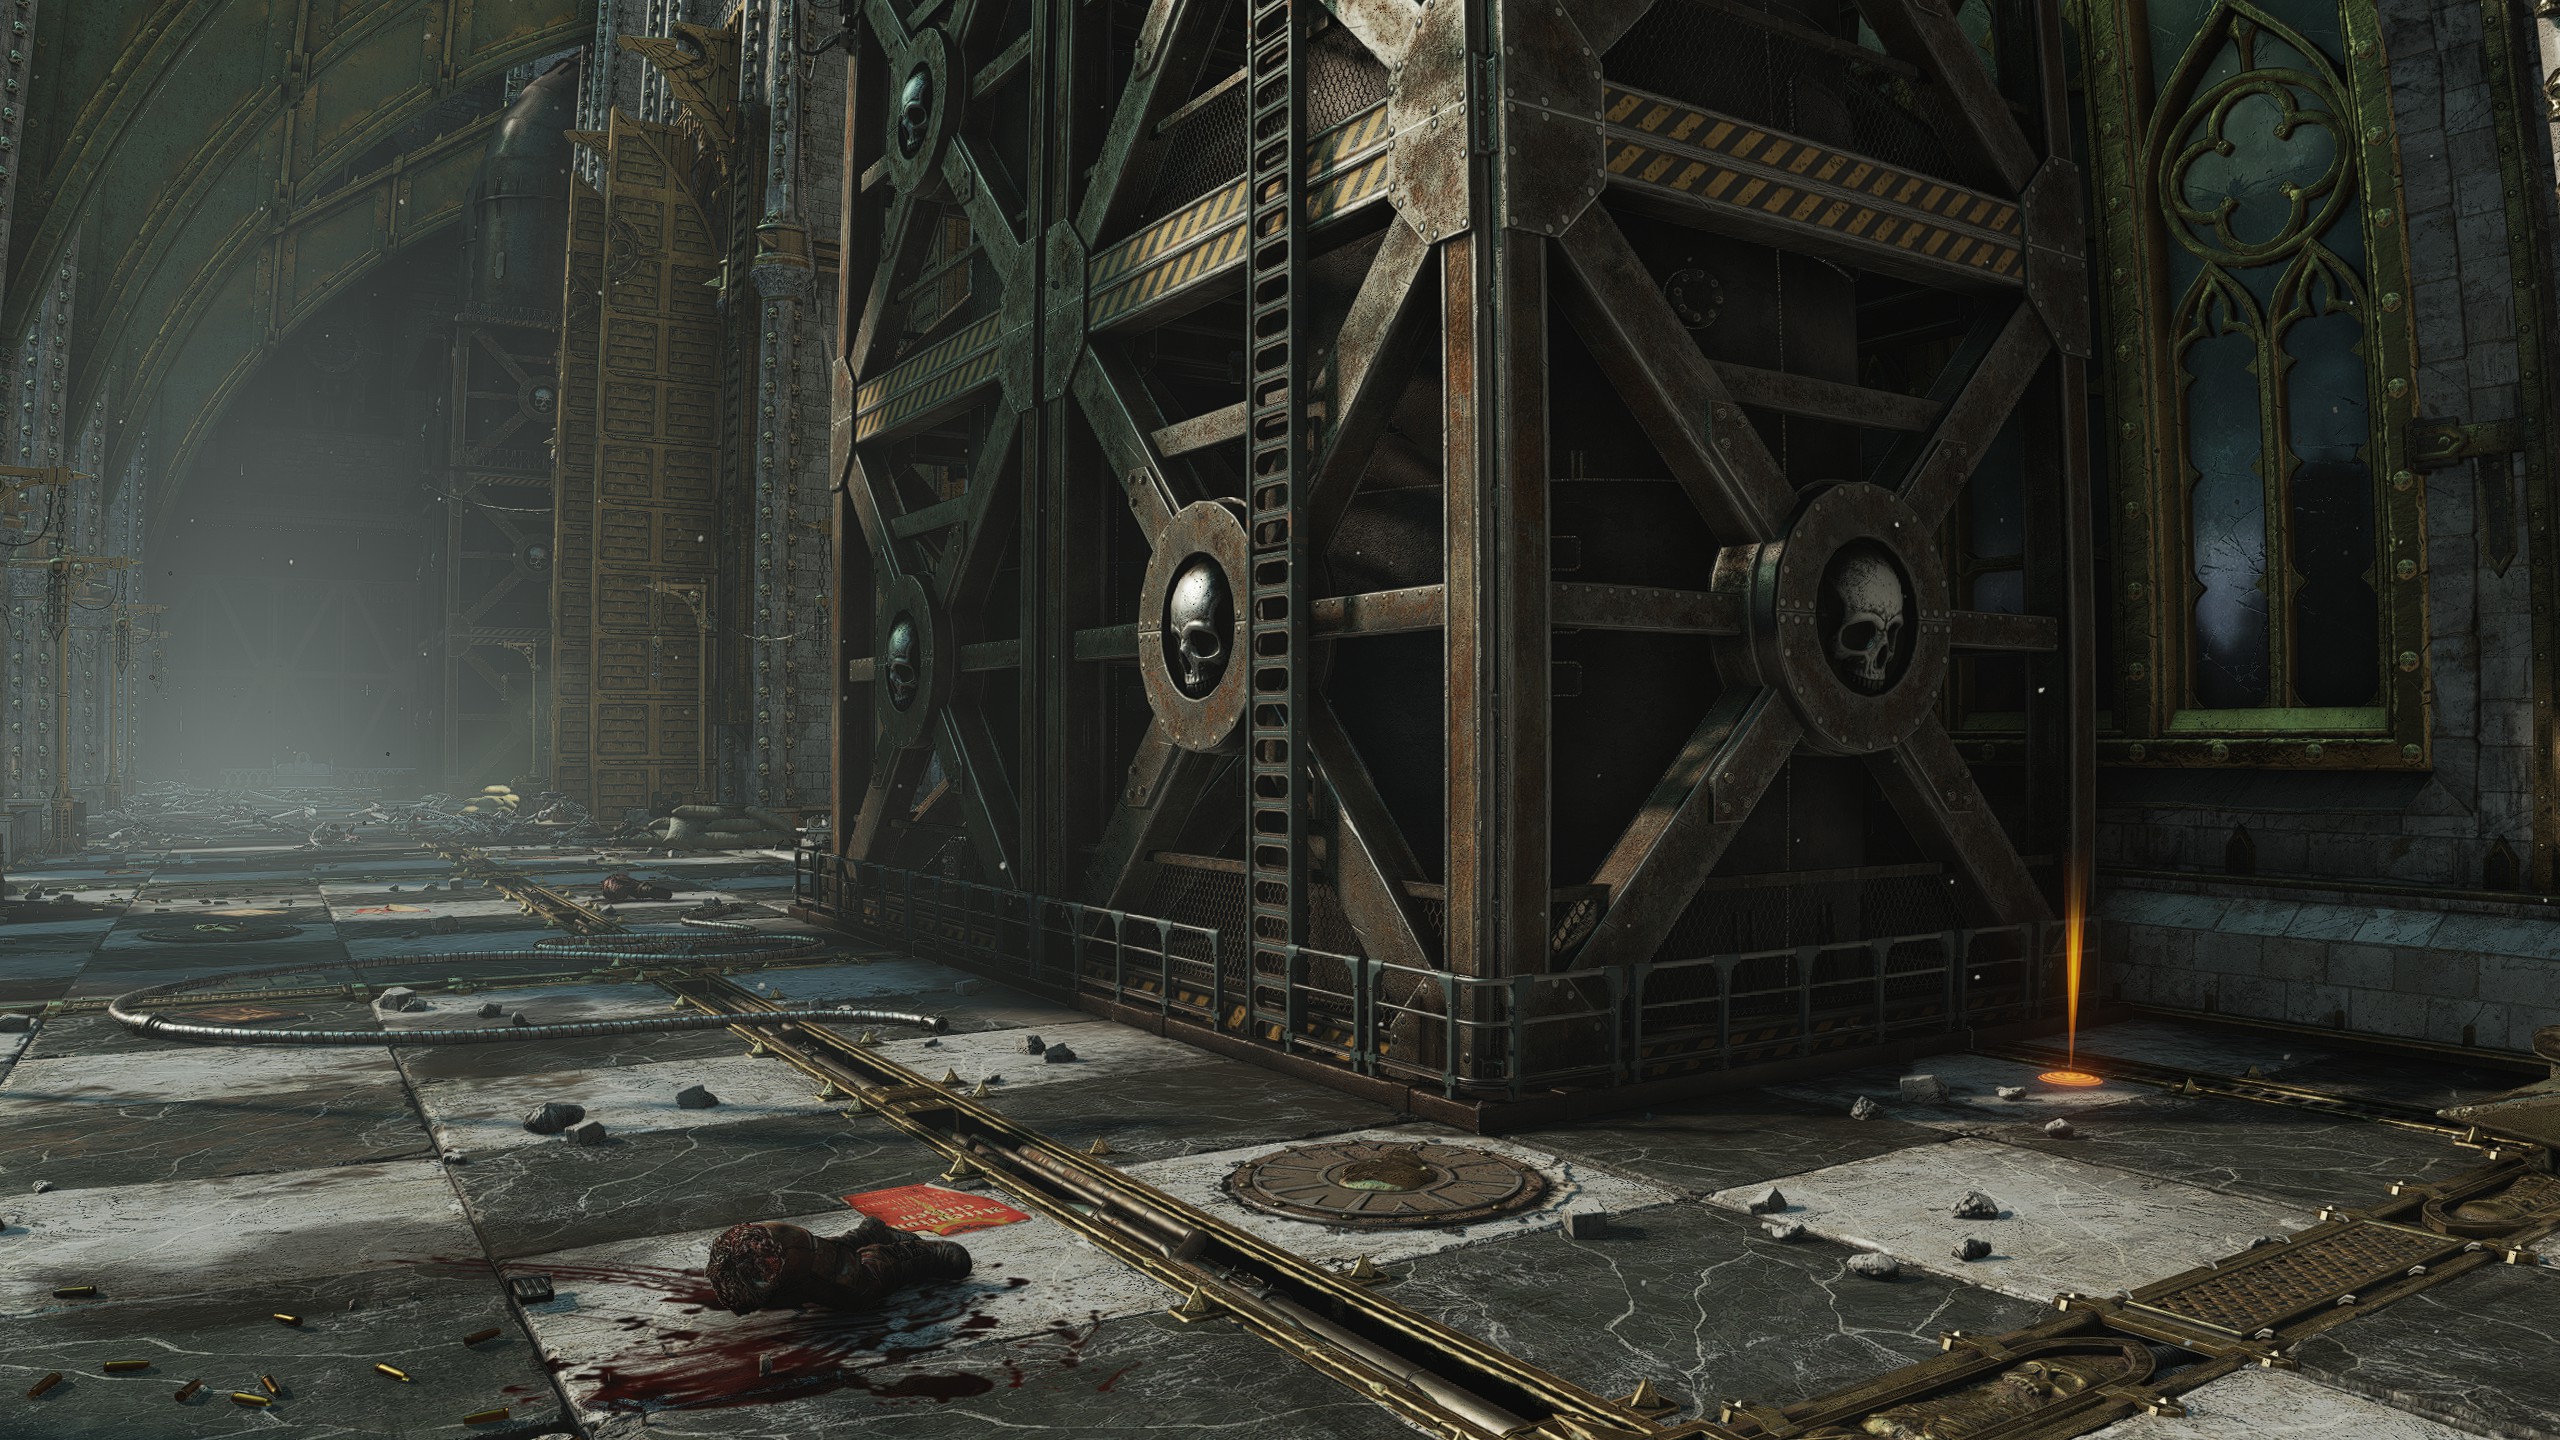
After leaving the church and destroying the second altar, follow the objective down to an elevator that progresses the mission. Before going up, check around the corner near some barrels for a Gene-Seed spawn.
After leaving the church and destroying the second altar, follow the objective down to an elevator that progresses the mission. Before going up, check around the corner near some barrels for a Gene-Seed spawn.
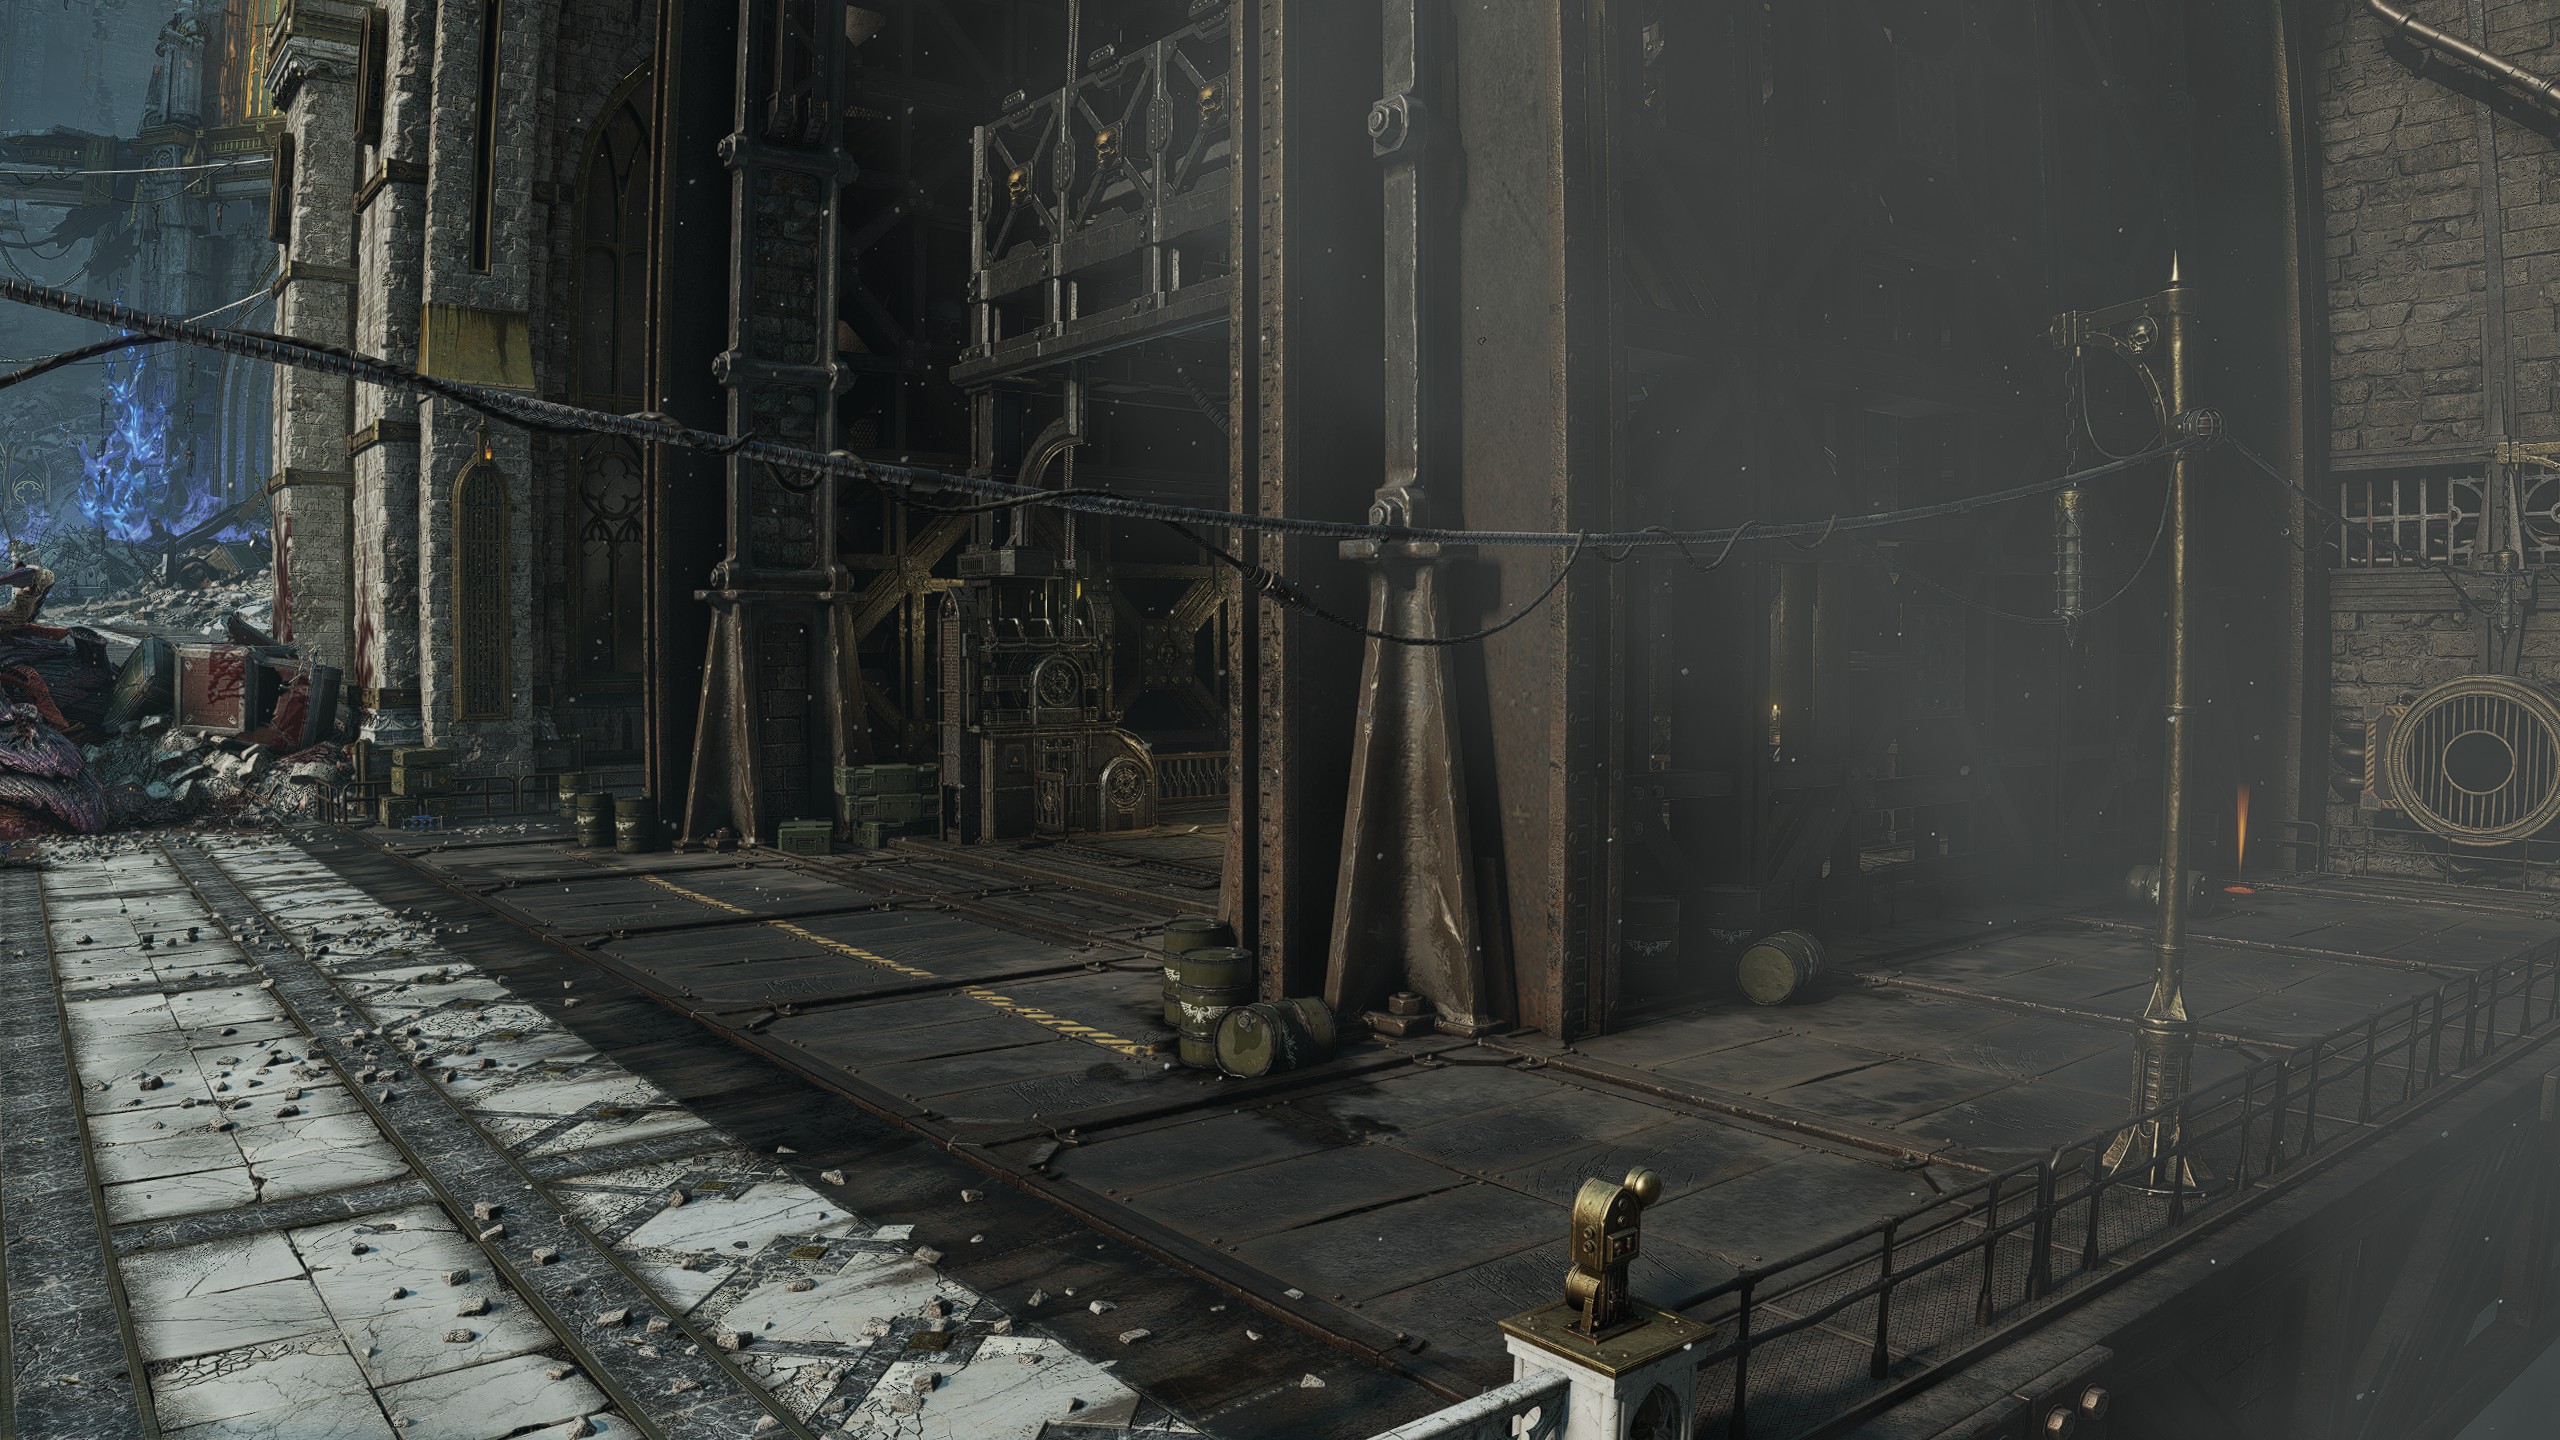
Gene-Seed #4
Location
Objective: Advance to the Cathedral
After riding the elevator up, proceed forward into the massive courtyard area where you find Chaos and Tyranid forces battling it out. Keep following the main path until you get to the door leading into the cathedral, check to the right of the door behind some boxes in a small gap between the last box and the building columns.
After riding the elevator up, proceed forward into the massive courtyard area where you find Chaos and Tyranid forces battling it out. Keep following the main path until you get to the door leading into the cathedral, check to the right of the door behind some boxes in a small gap between the last box and the building columns.
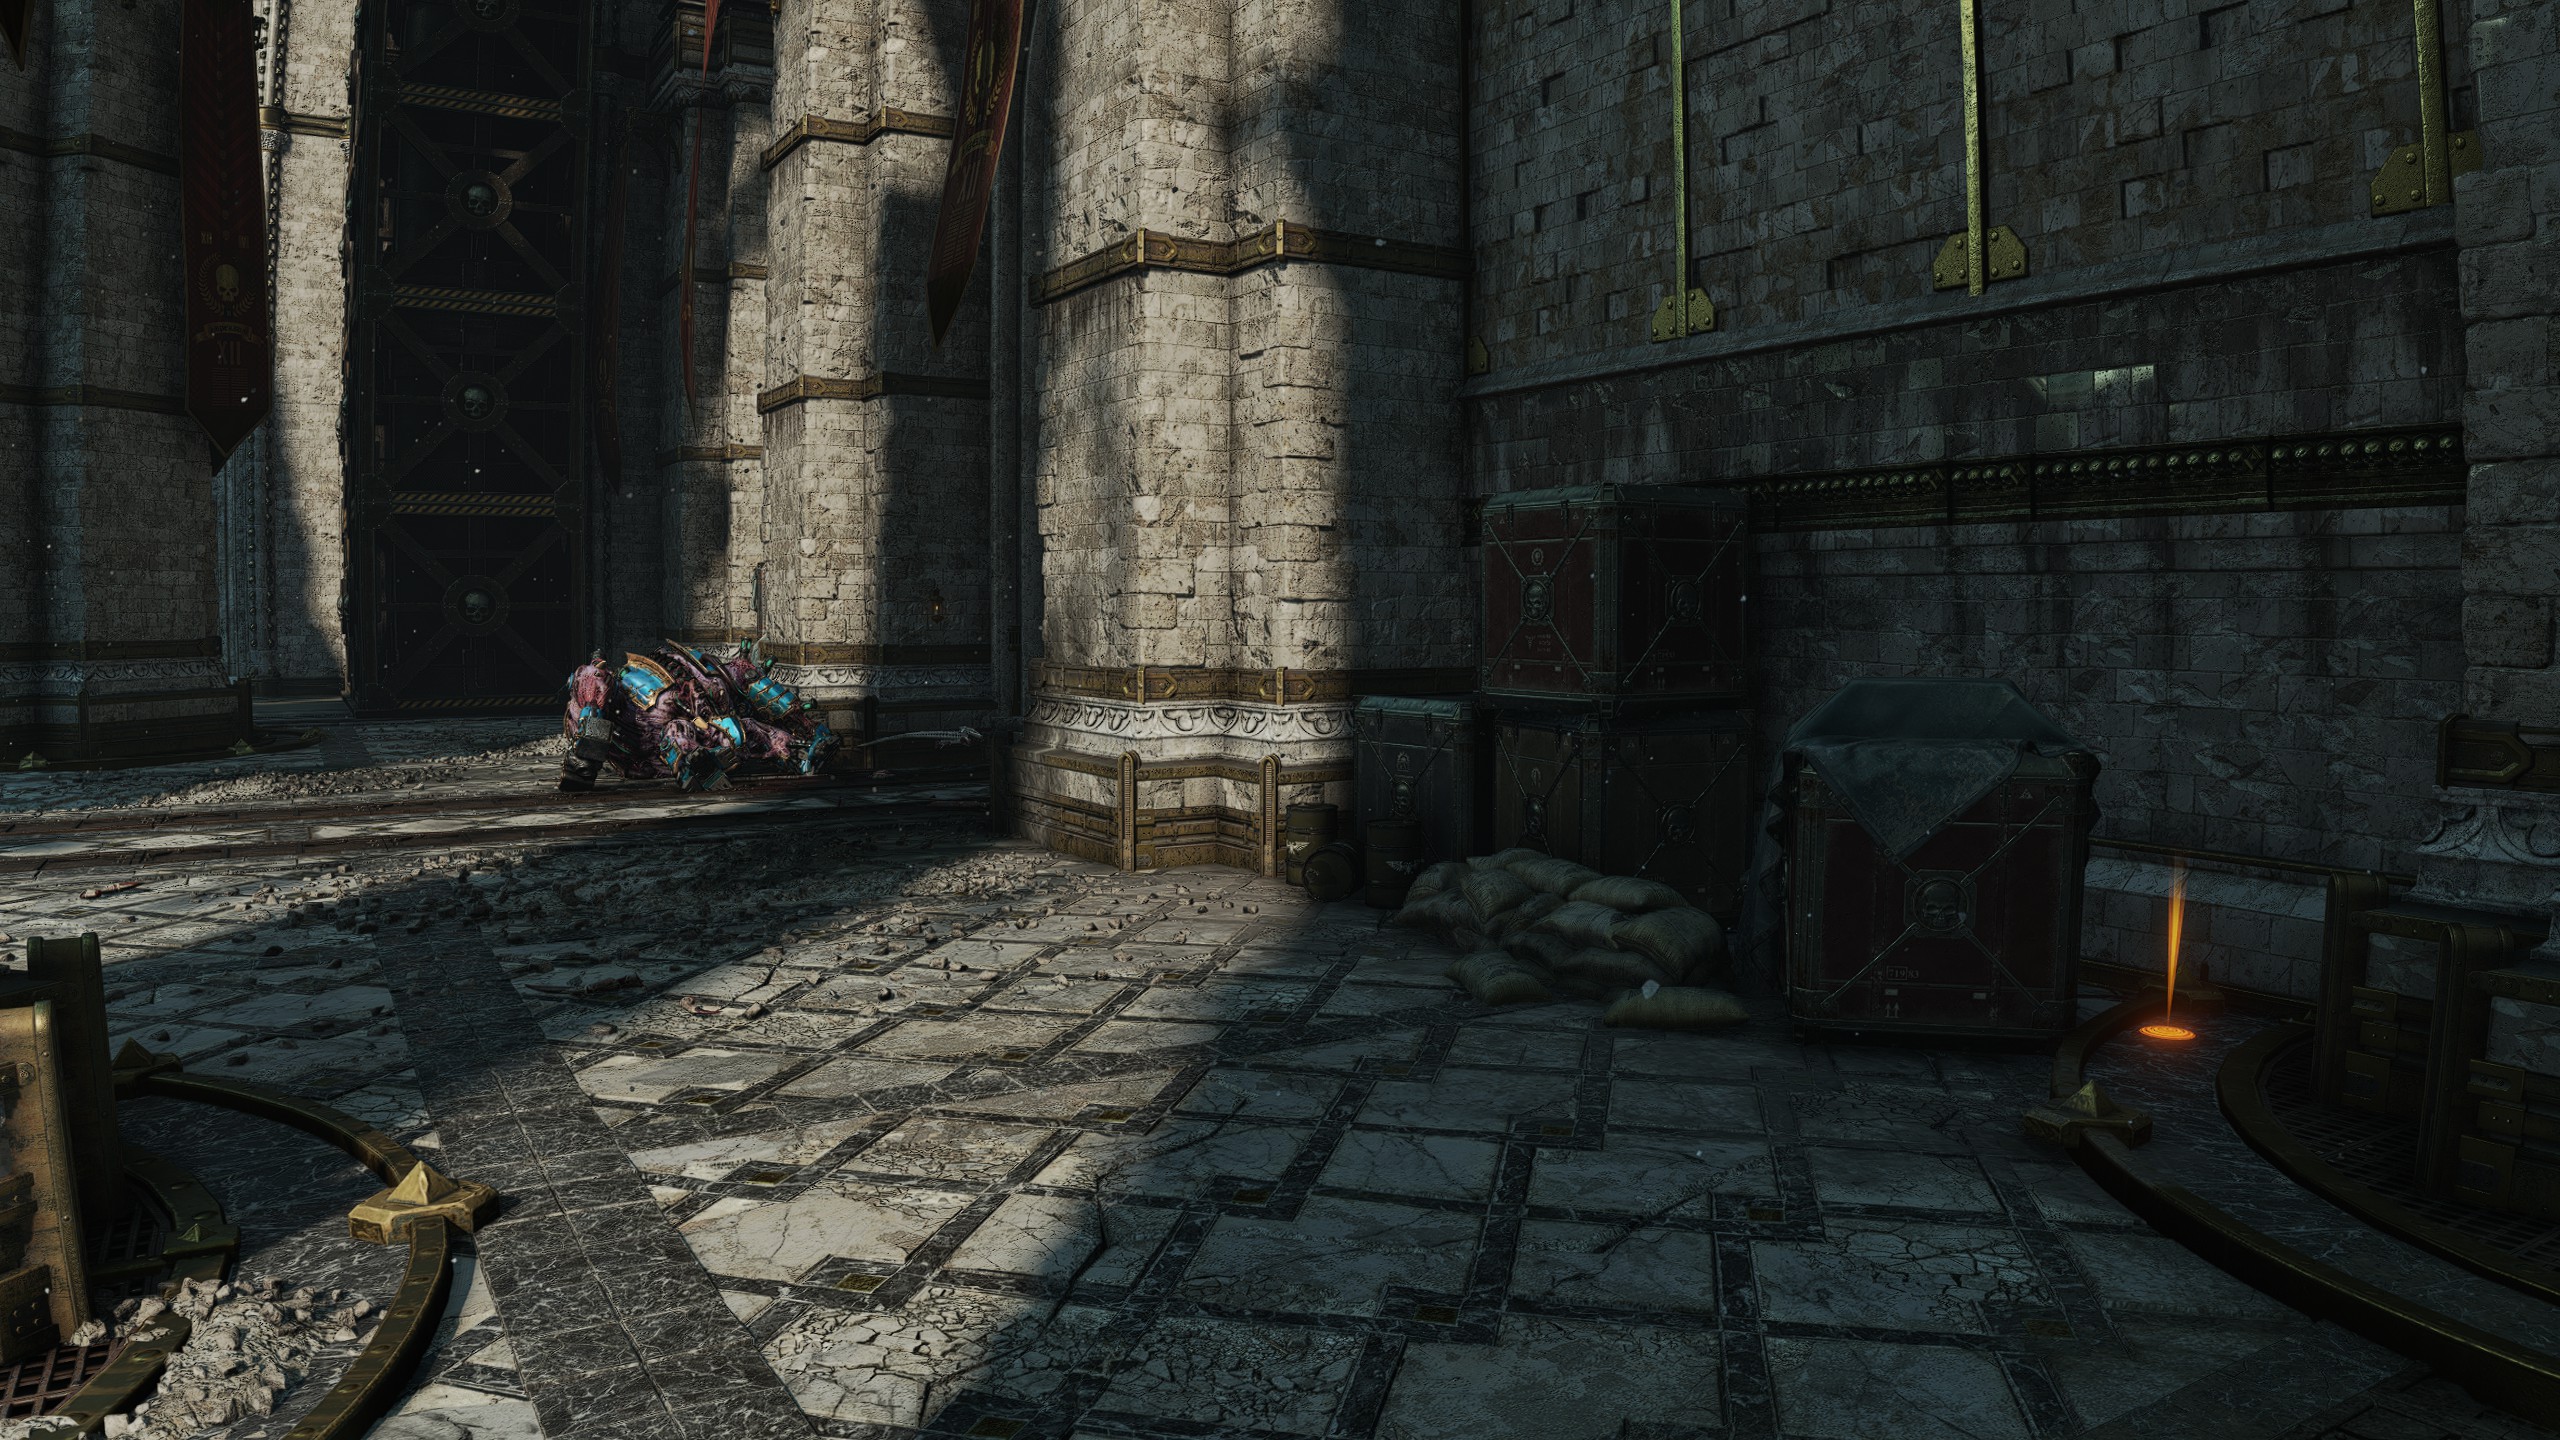
Gene-Seed #5
Location
Objective: Navigate the lower levels of the Cathedral
Not far from the fourth location, enter the cathedral and proceed into the enormous elevator room. Before getting on the elevator, stick to the right side and follow it to the end where some boxes are piled up against a gate. The Gene-Seed can spawn next to the dead Guardsmen.
Not far from the fourth location, enter the cathedral and proceed into the enormous elevator room. Before getting on the elevator, stick to the right side and follow it to the end where some boxes are piled up against a gate. The Gene-Seed can spawn next to the dead Guardsmen.
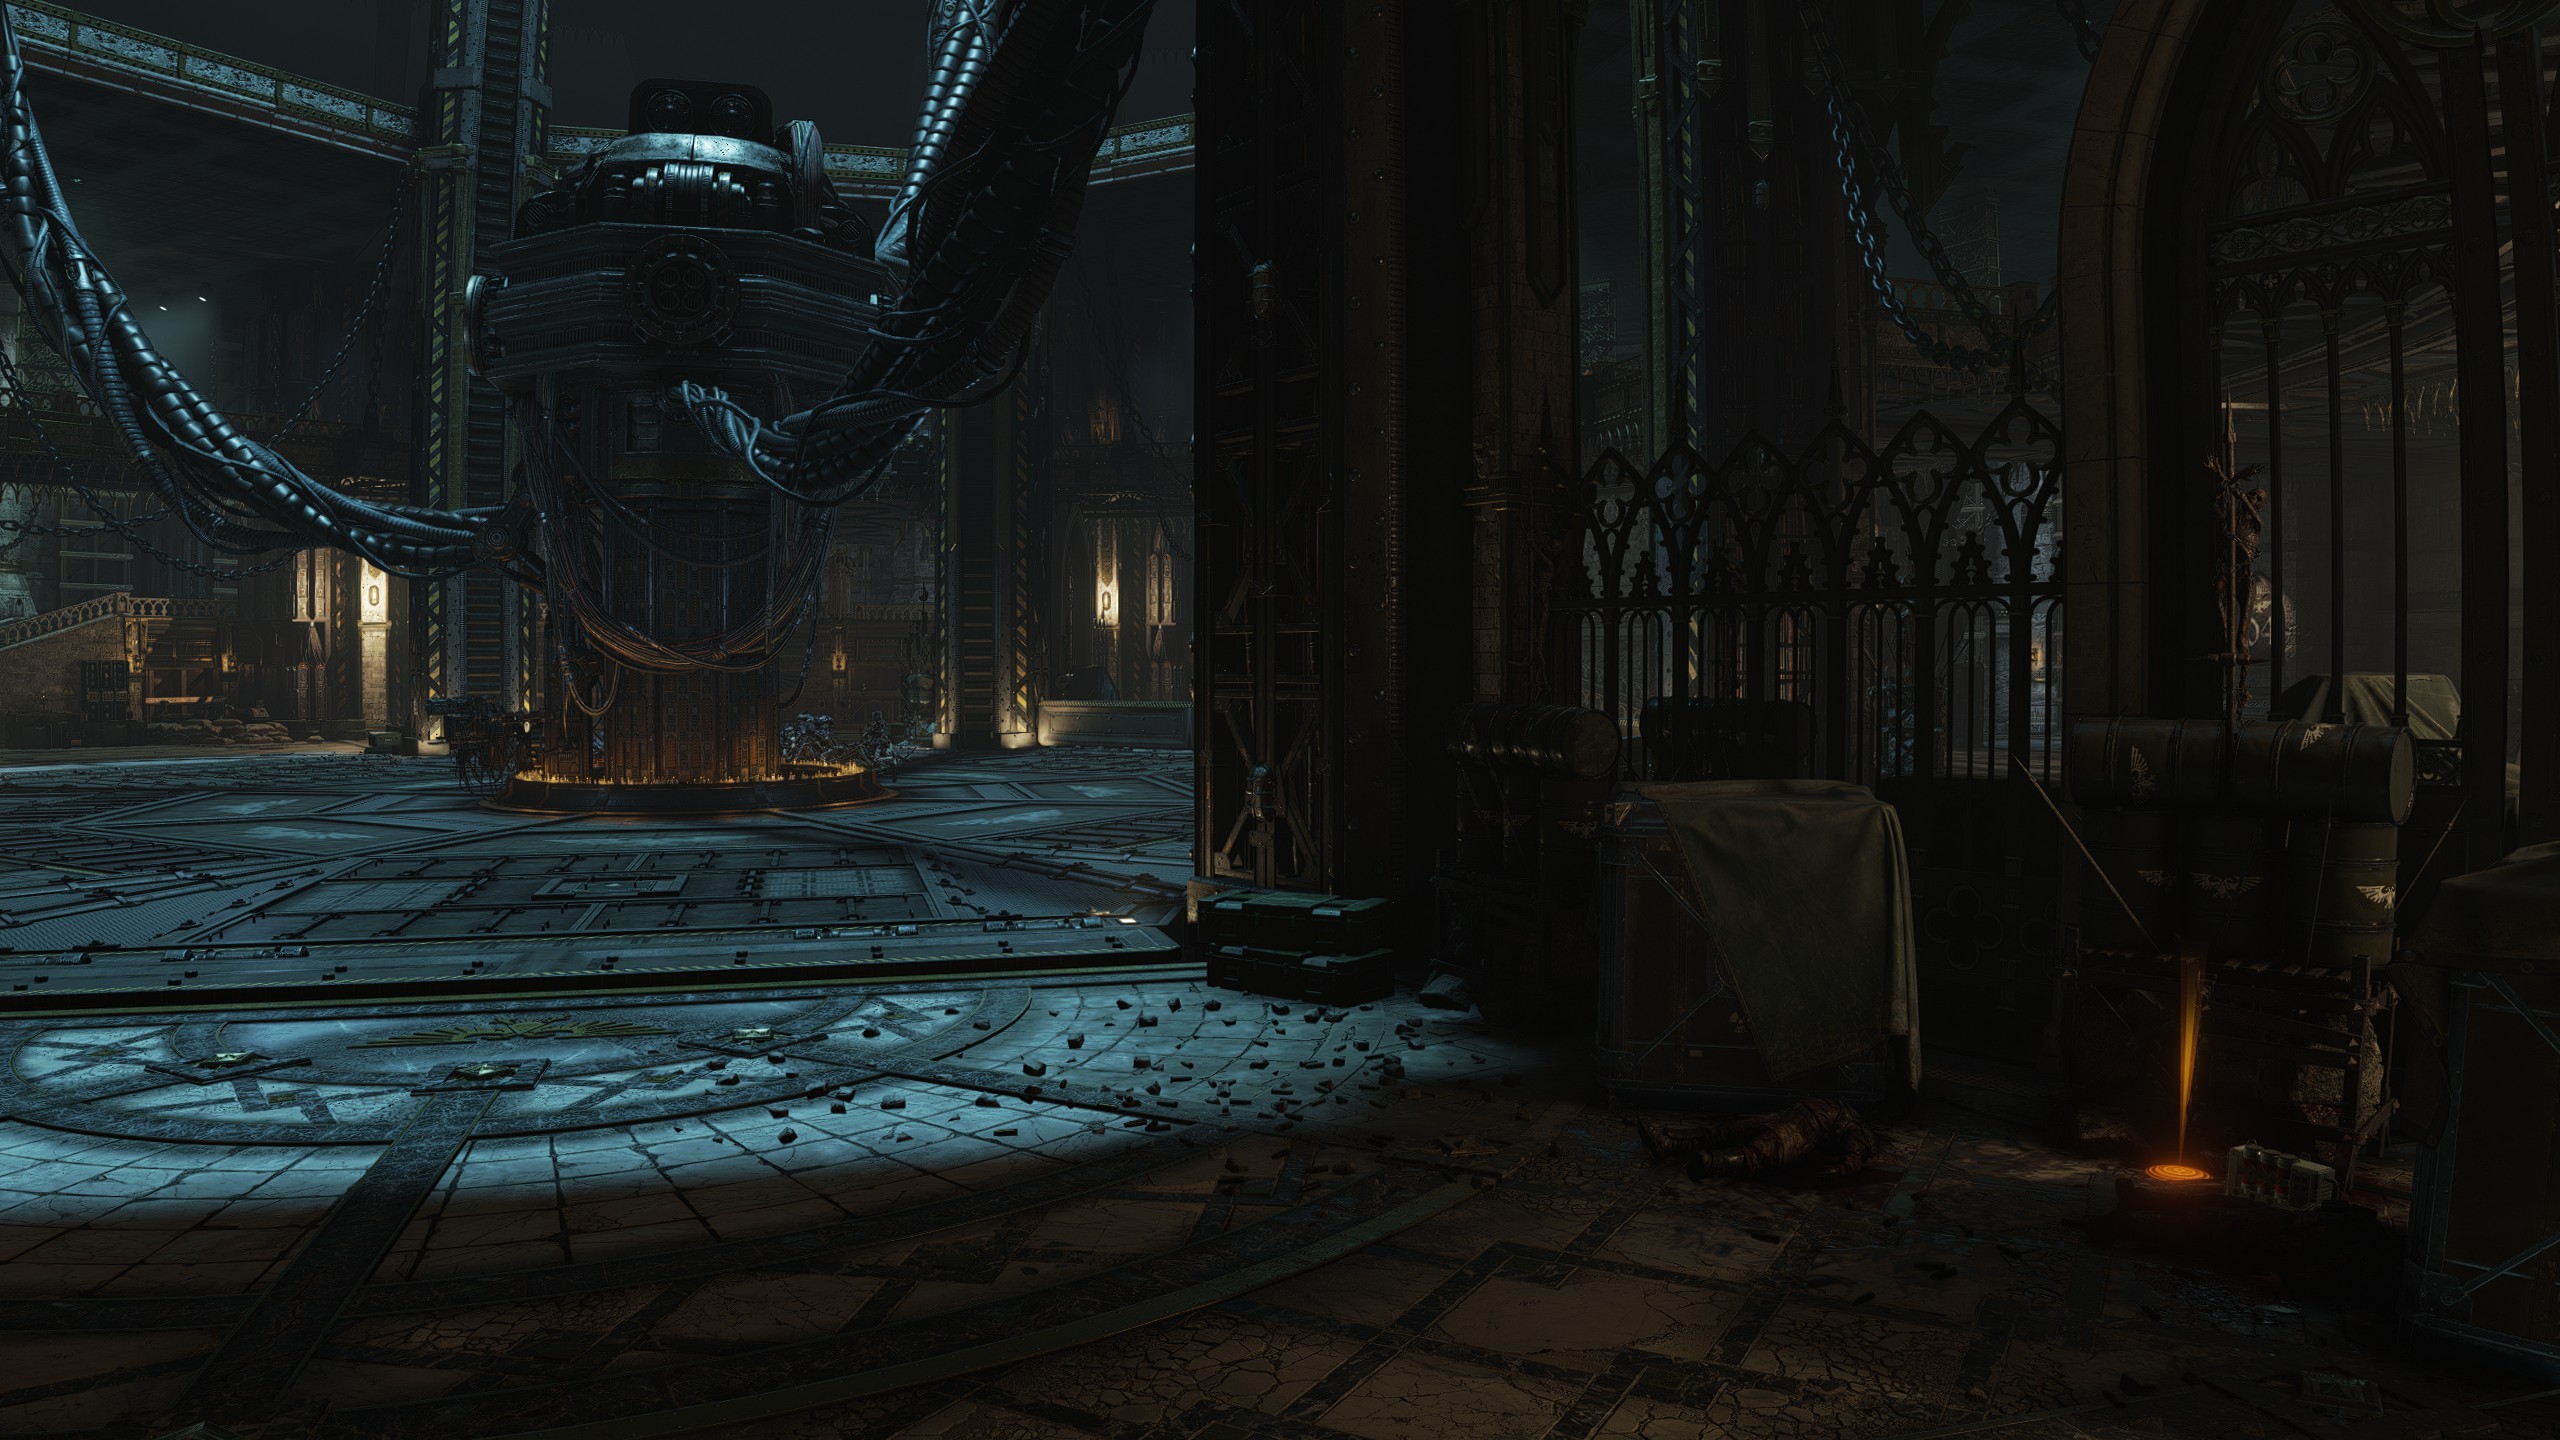
| Mission 04: Reliquary
Gene-Seed #1
Location
Objective: Proceed to the Warp Beacon
Immediately after starting the mission, drop from the initial ledge with the Thunderhawk and hang to the left, going into a small corridor with a white light in it. The Gene-Seed may spawn next to the lower half remains of a Guardsman.
Immediately after starting the mission, drop from the initial ledge with the Thunderhawk and hang to the left, going into a small corridor with a white light in it. The Gene-Seed may spawn next to the lower half remains of a Guardsman.
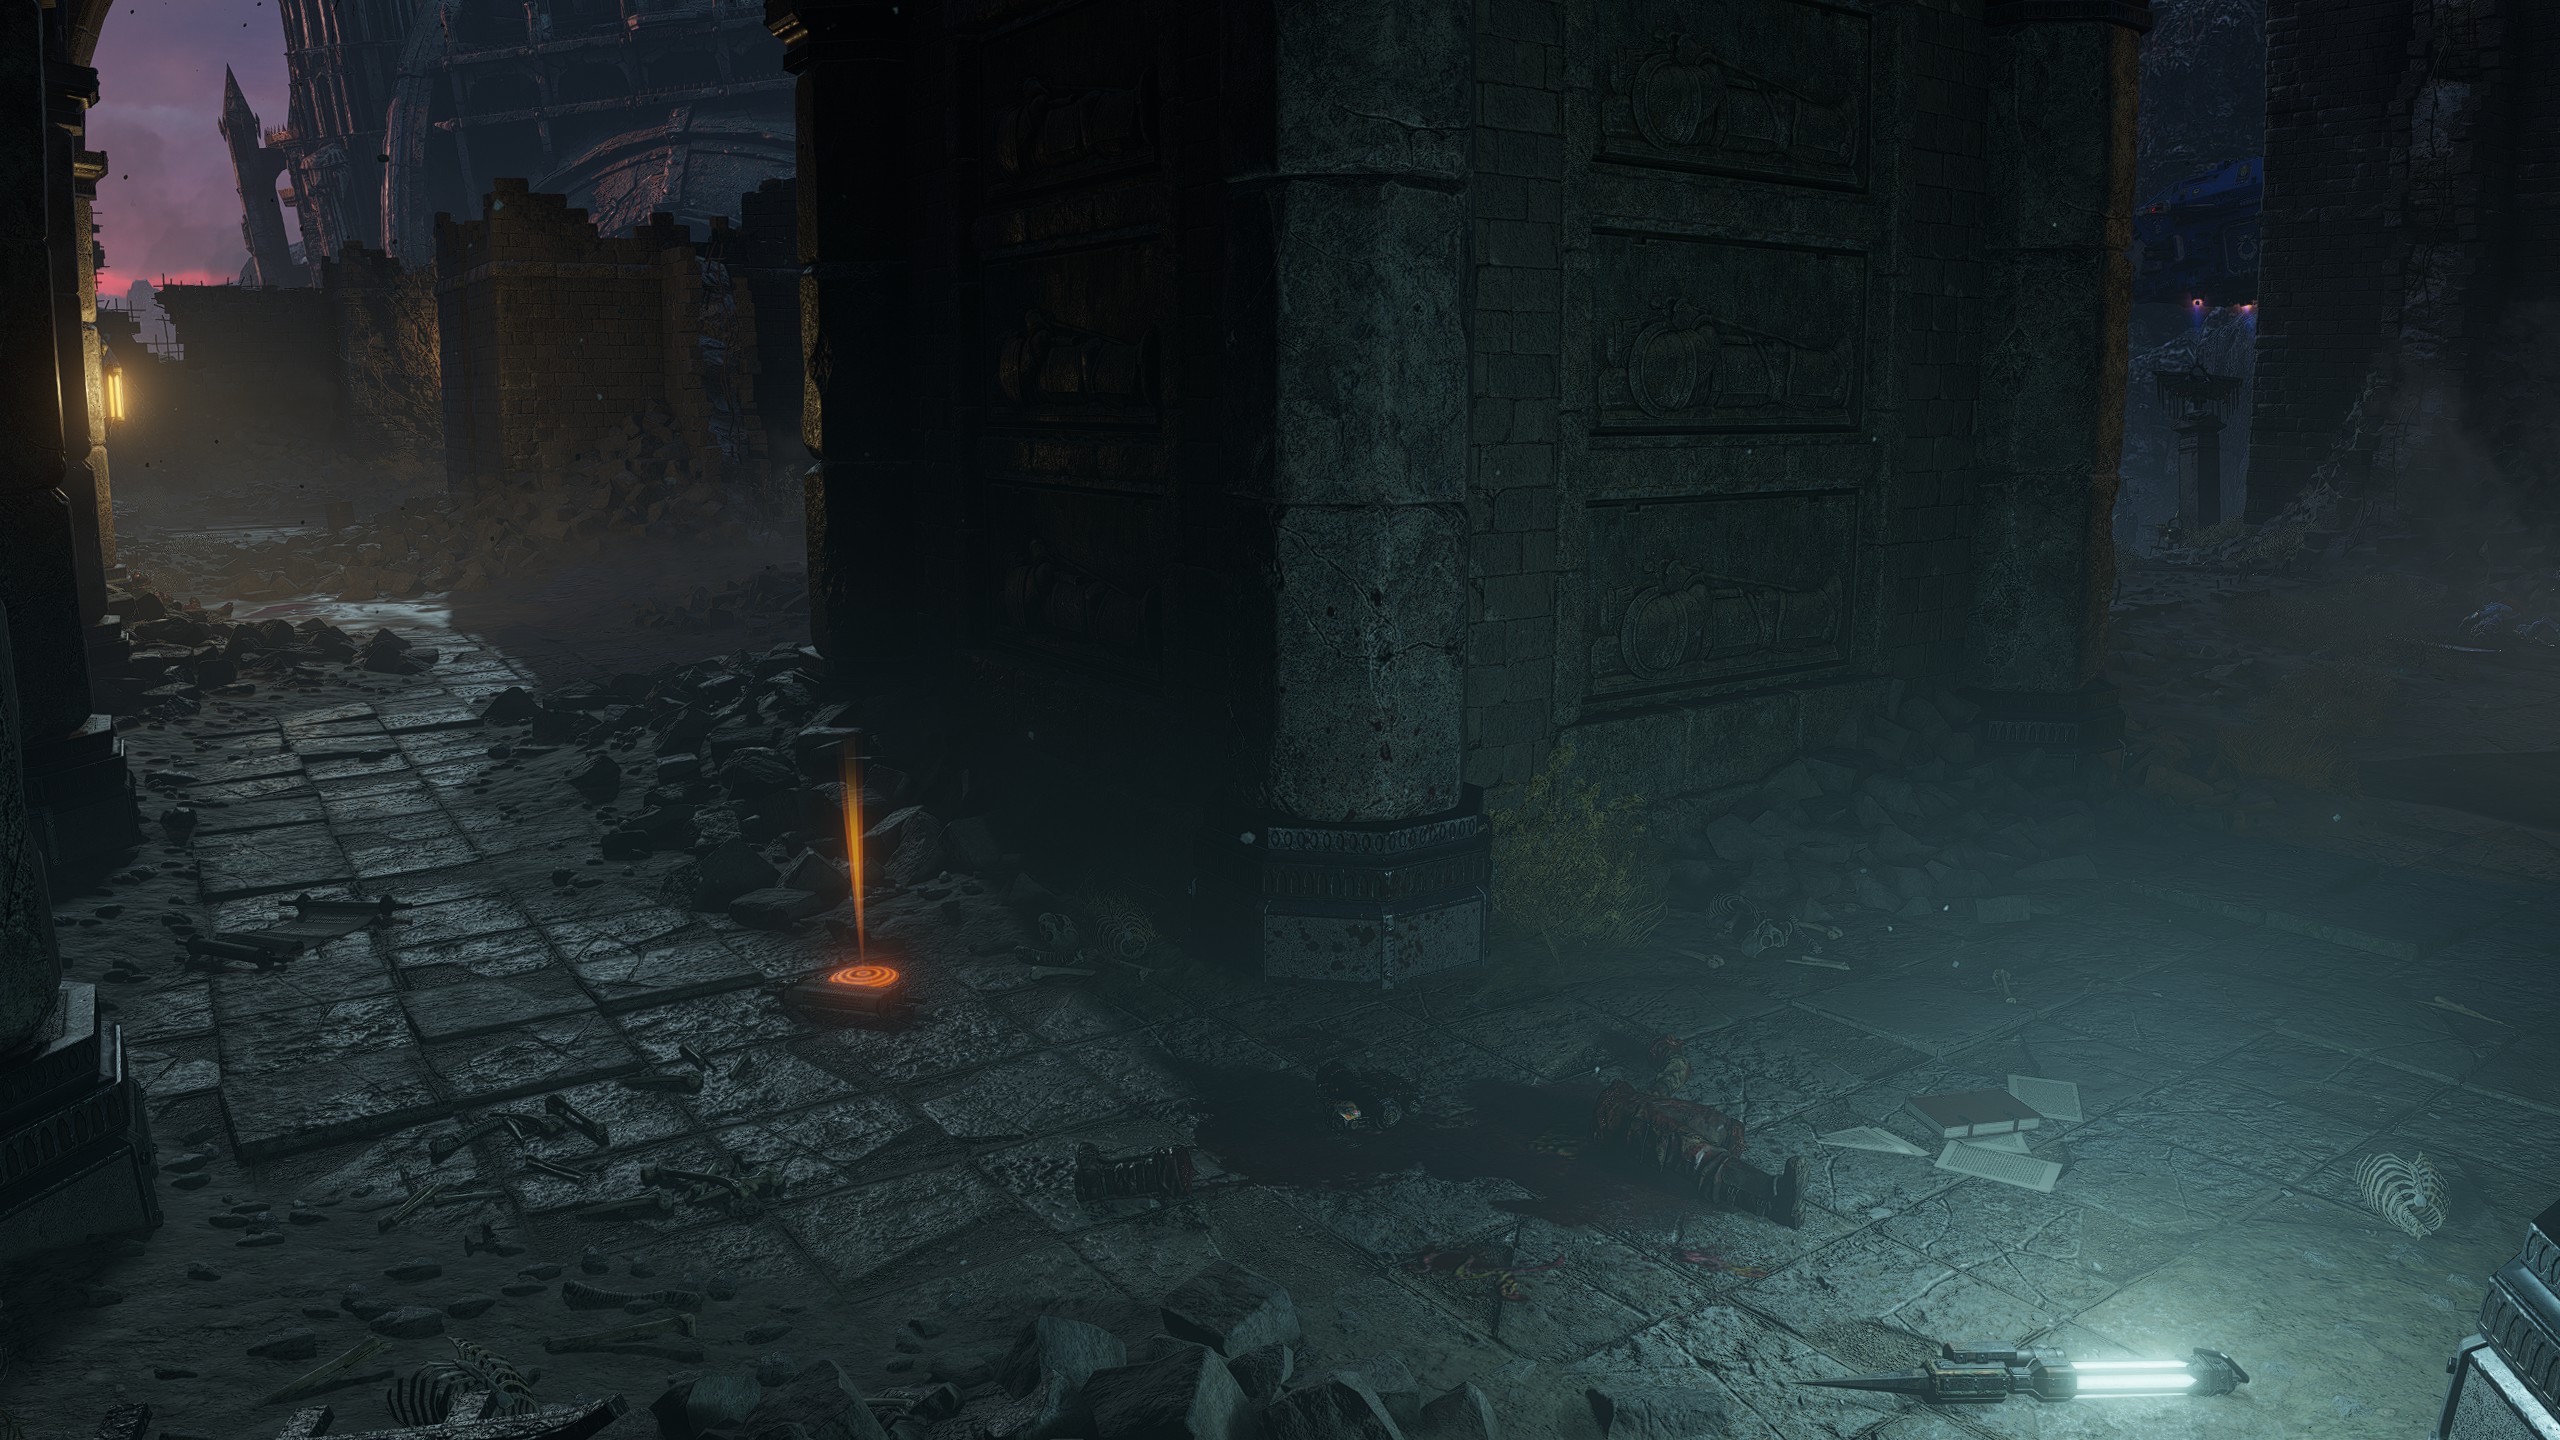
Gene-Seed #2
Location
Objective: Search Servitors' bodies for a Fusion Core (or during any of the objectives in the tomb)
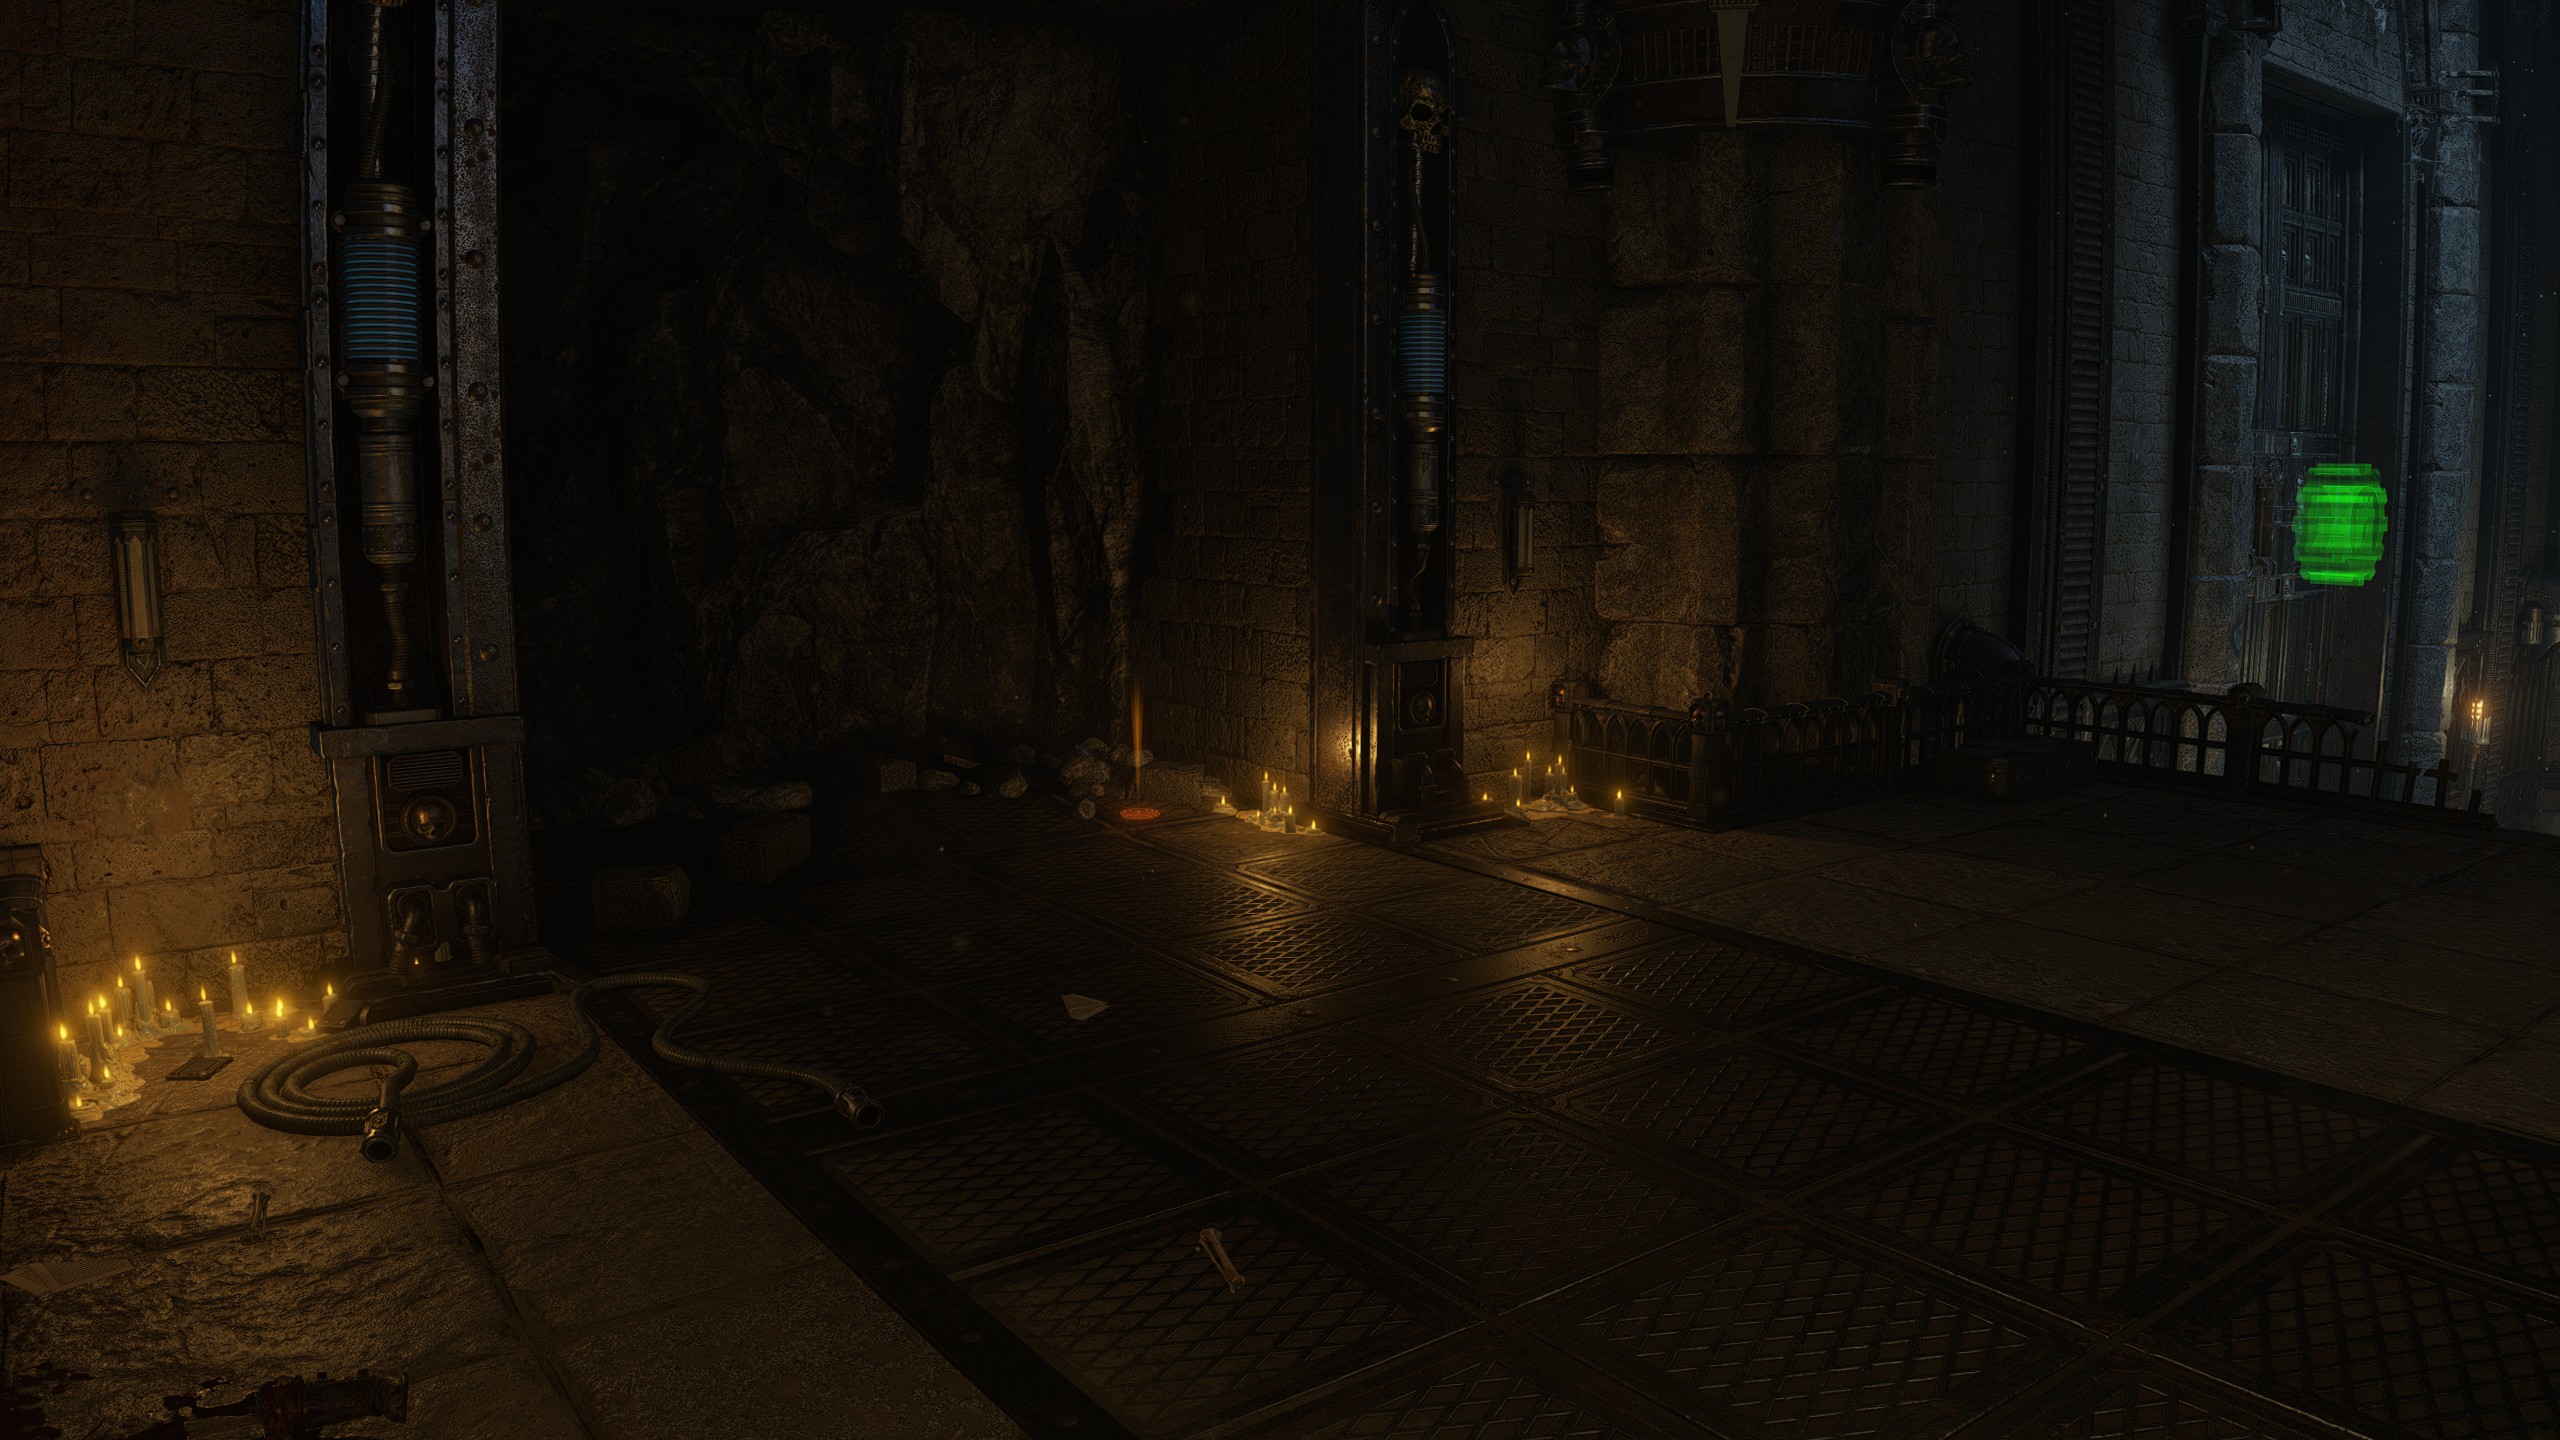
Enter the tomb and drop down from the ledge with the supply pod. Proceed up the stairs to the left where you can find not only Dataslate #1, but also a potential Gene-Seed spawn next to the candles in the caved-in corridor.
Enter the tomb and drop down from the ledge with the supply pod. Proceed up the stairs to the left where you can find not only Dataslate #1, but also a potential Gene-Seed spawn next to the candles in the caved-in corridor.
Gene-Seed #3
Location
Objective: Proceed to the Warp Beacon
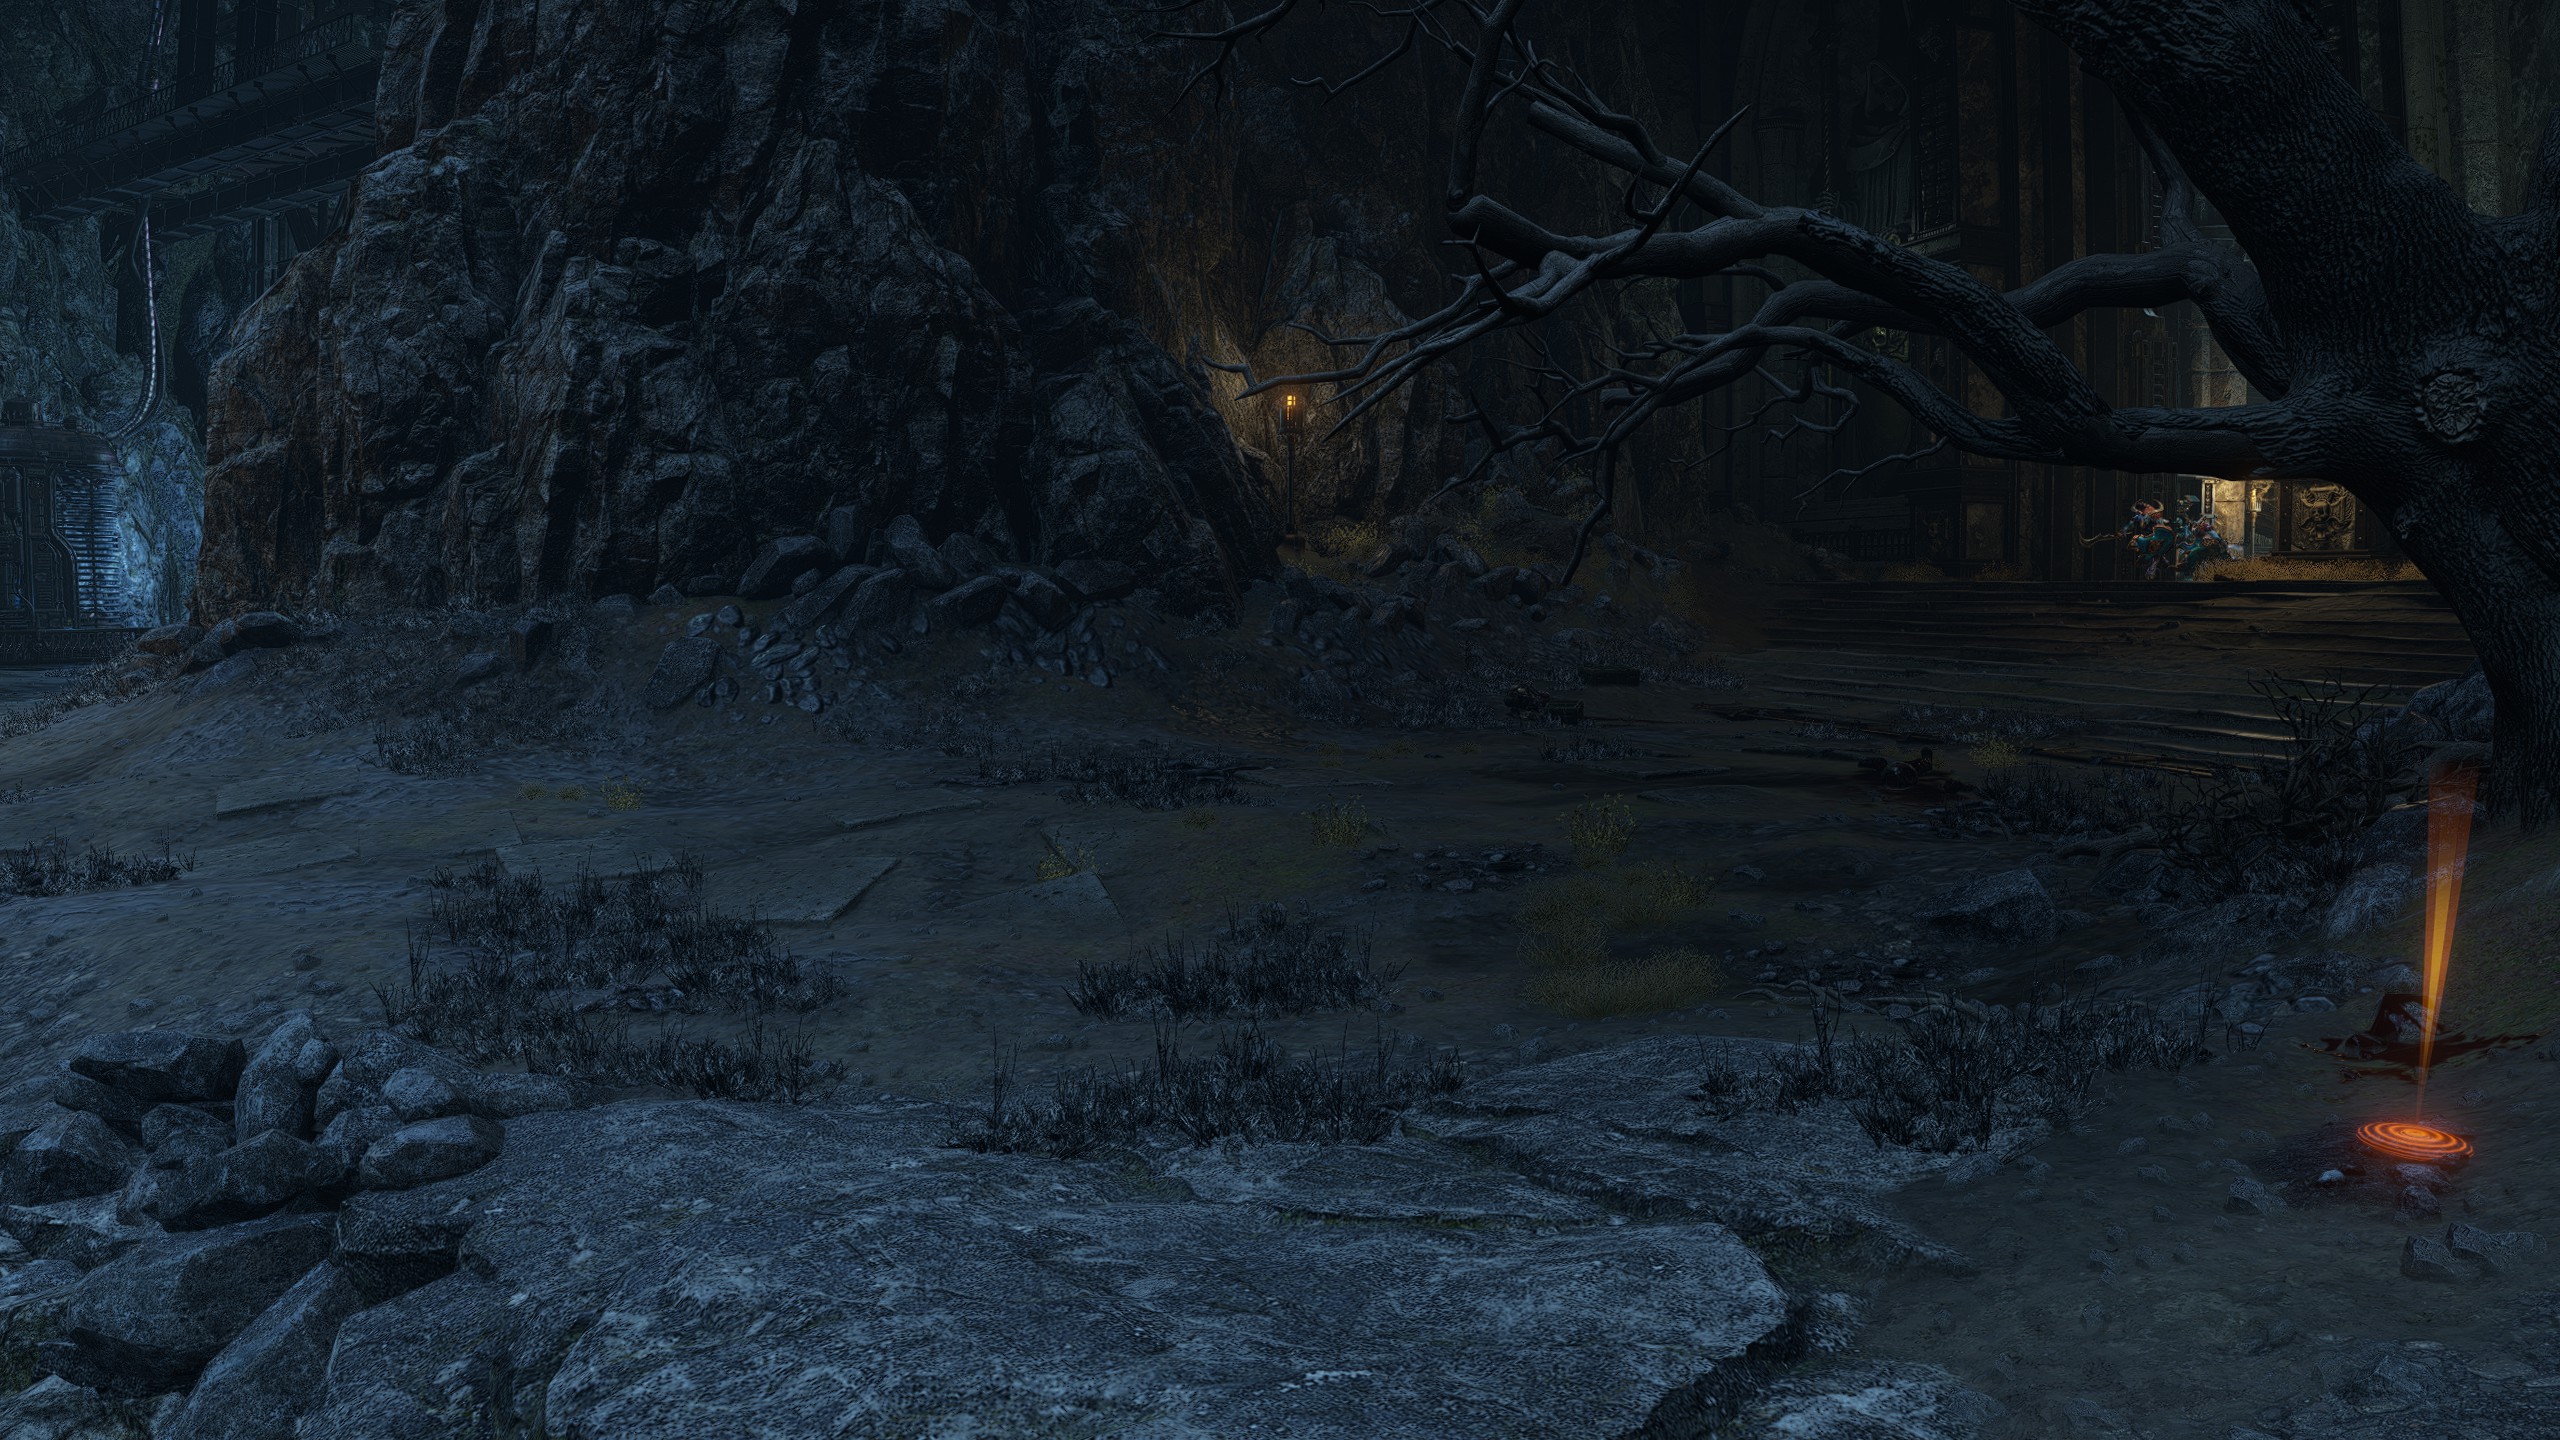
After opening the Consecration Seals and leaving the tomb, instead of going to the right towards the elevator, check behind the tree to your left near the edge of the cliff. This spawn is usually visible from the doorway so you likely don't even have to go towards it to check.
After opening the Consecration Seals and leaving the tomb, instead of going to the right towards the elevator, check behind the tree to your left near the edge of the cliff. This spawn is usually visible from the doorway so you likely don't even have to go towards it to check.
Gene-Seed #4
Location
Objective: Proceed to the Warp Beacon
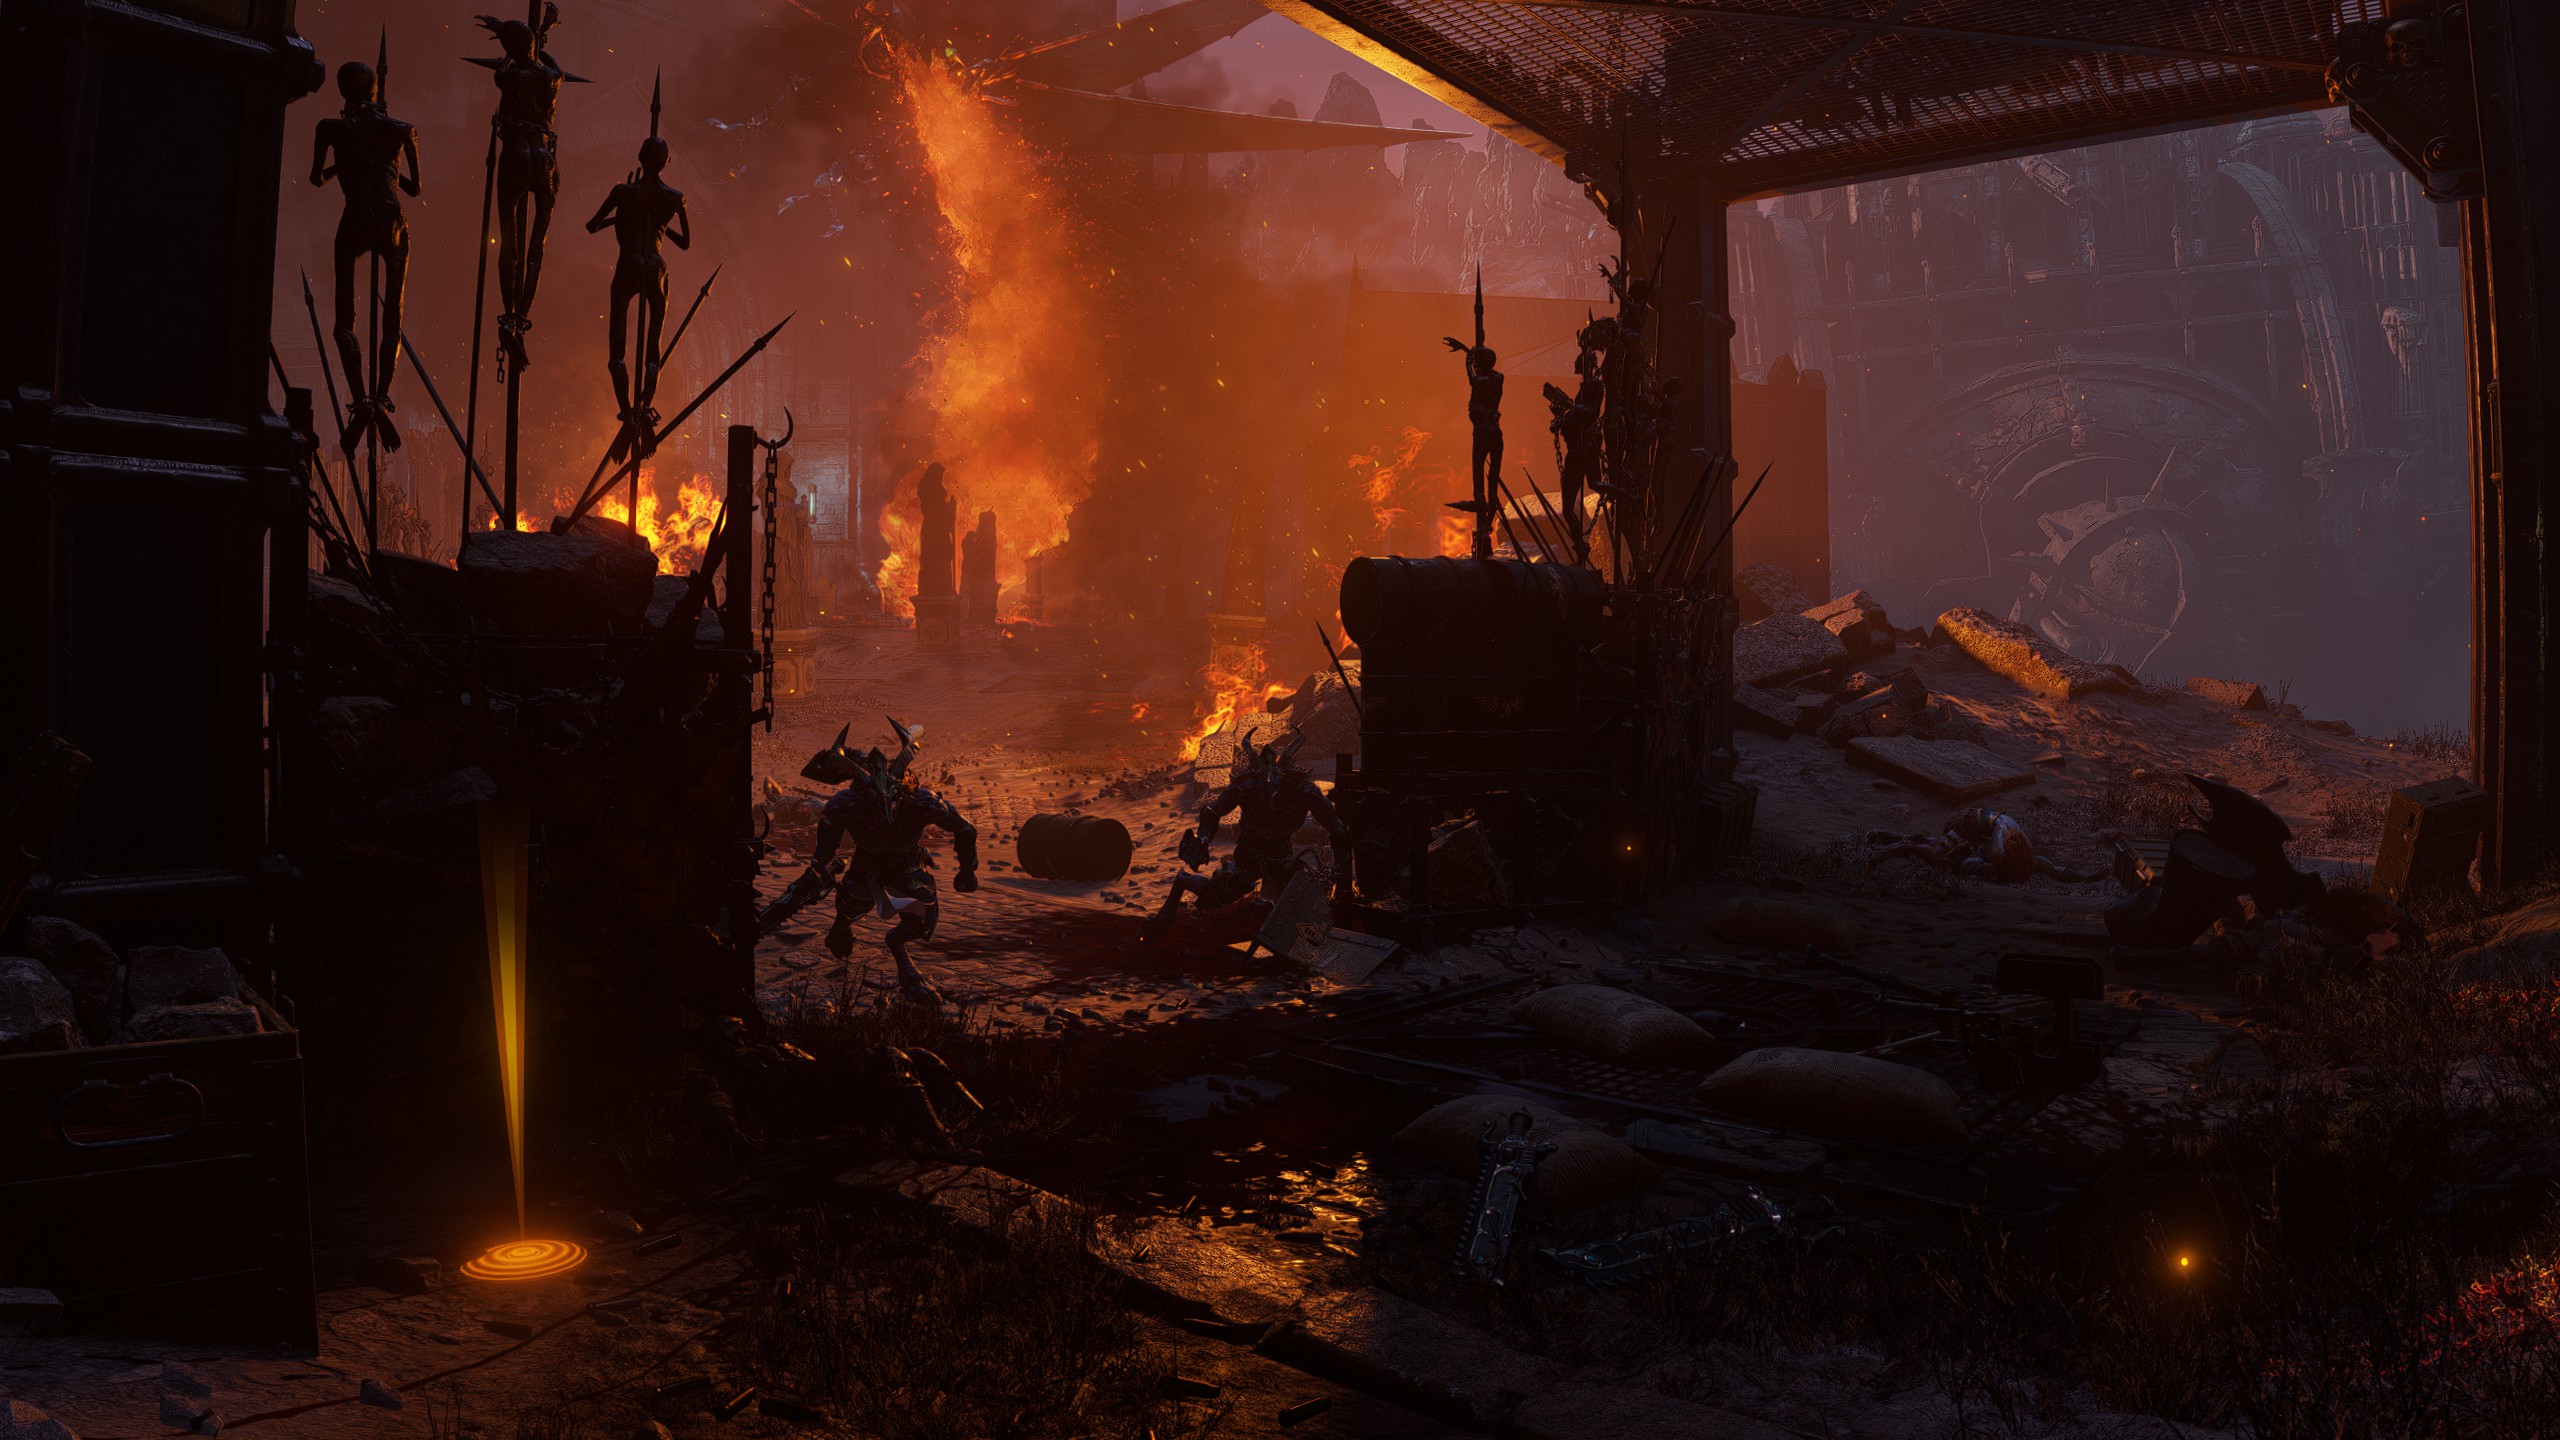
After descending the elevator you will arrive at the Heldrake bridge section. This consists of three separate sections of bridges that the Heldrake will assail you on, split apart by two destroyed towers. Drop down from the second tower (or walk around it) into the last bridge section and check behind the cultists barriers to your right.
Note that you can also check whether it's there before dropping down by looking through the closed gate of the tower.
After descending the elevator you will arrive at the Heldrake bridge section. This consists of three separate sections of bridges that the Heldrake will assail you on, split apart by two destroyed towers. Drop down from the second tower (or walk around it) into the last bridge section and check behind the cultists barriers to your right.
Note that you can also check whether it's there before dropping down by looking through the closed gate of the tower.
Gene-Seed #5
Location
Objective: Proceed to the Warp Beacon (I'm not making this up this is the objective throughout most of the mission)
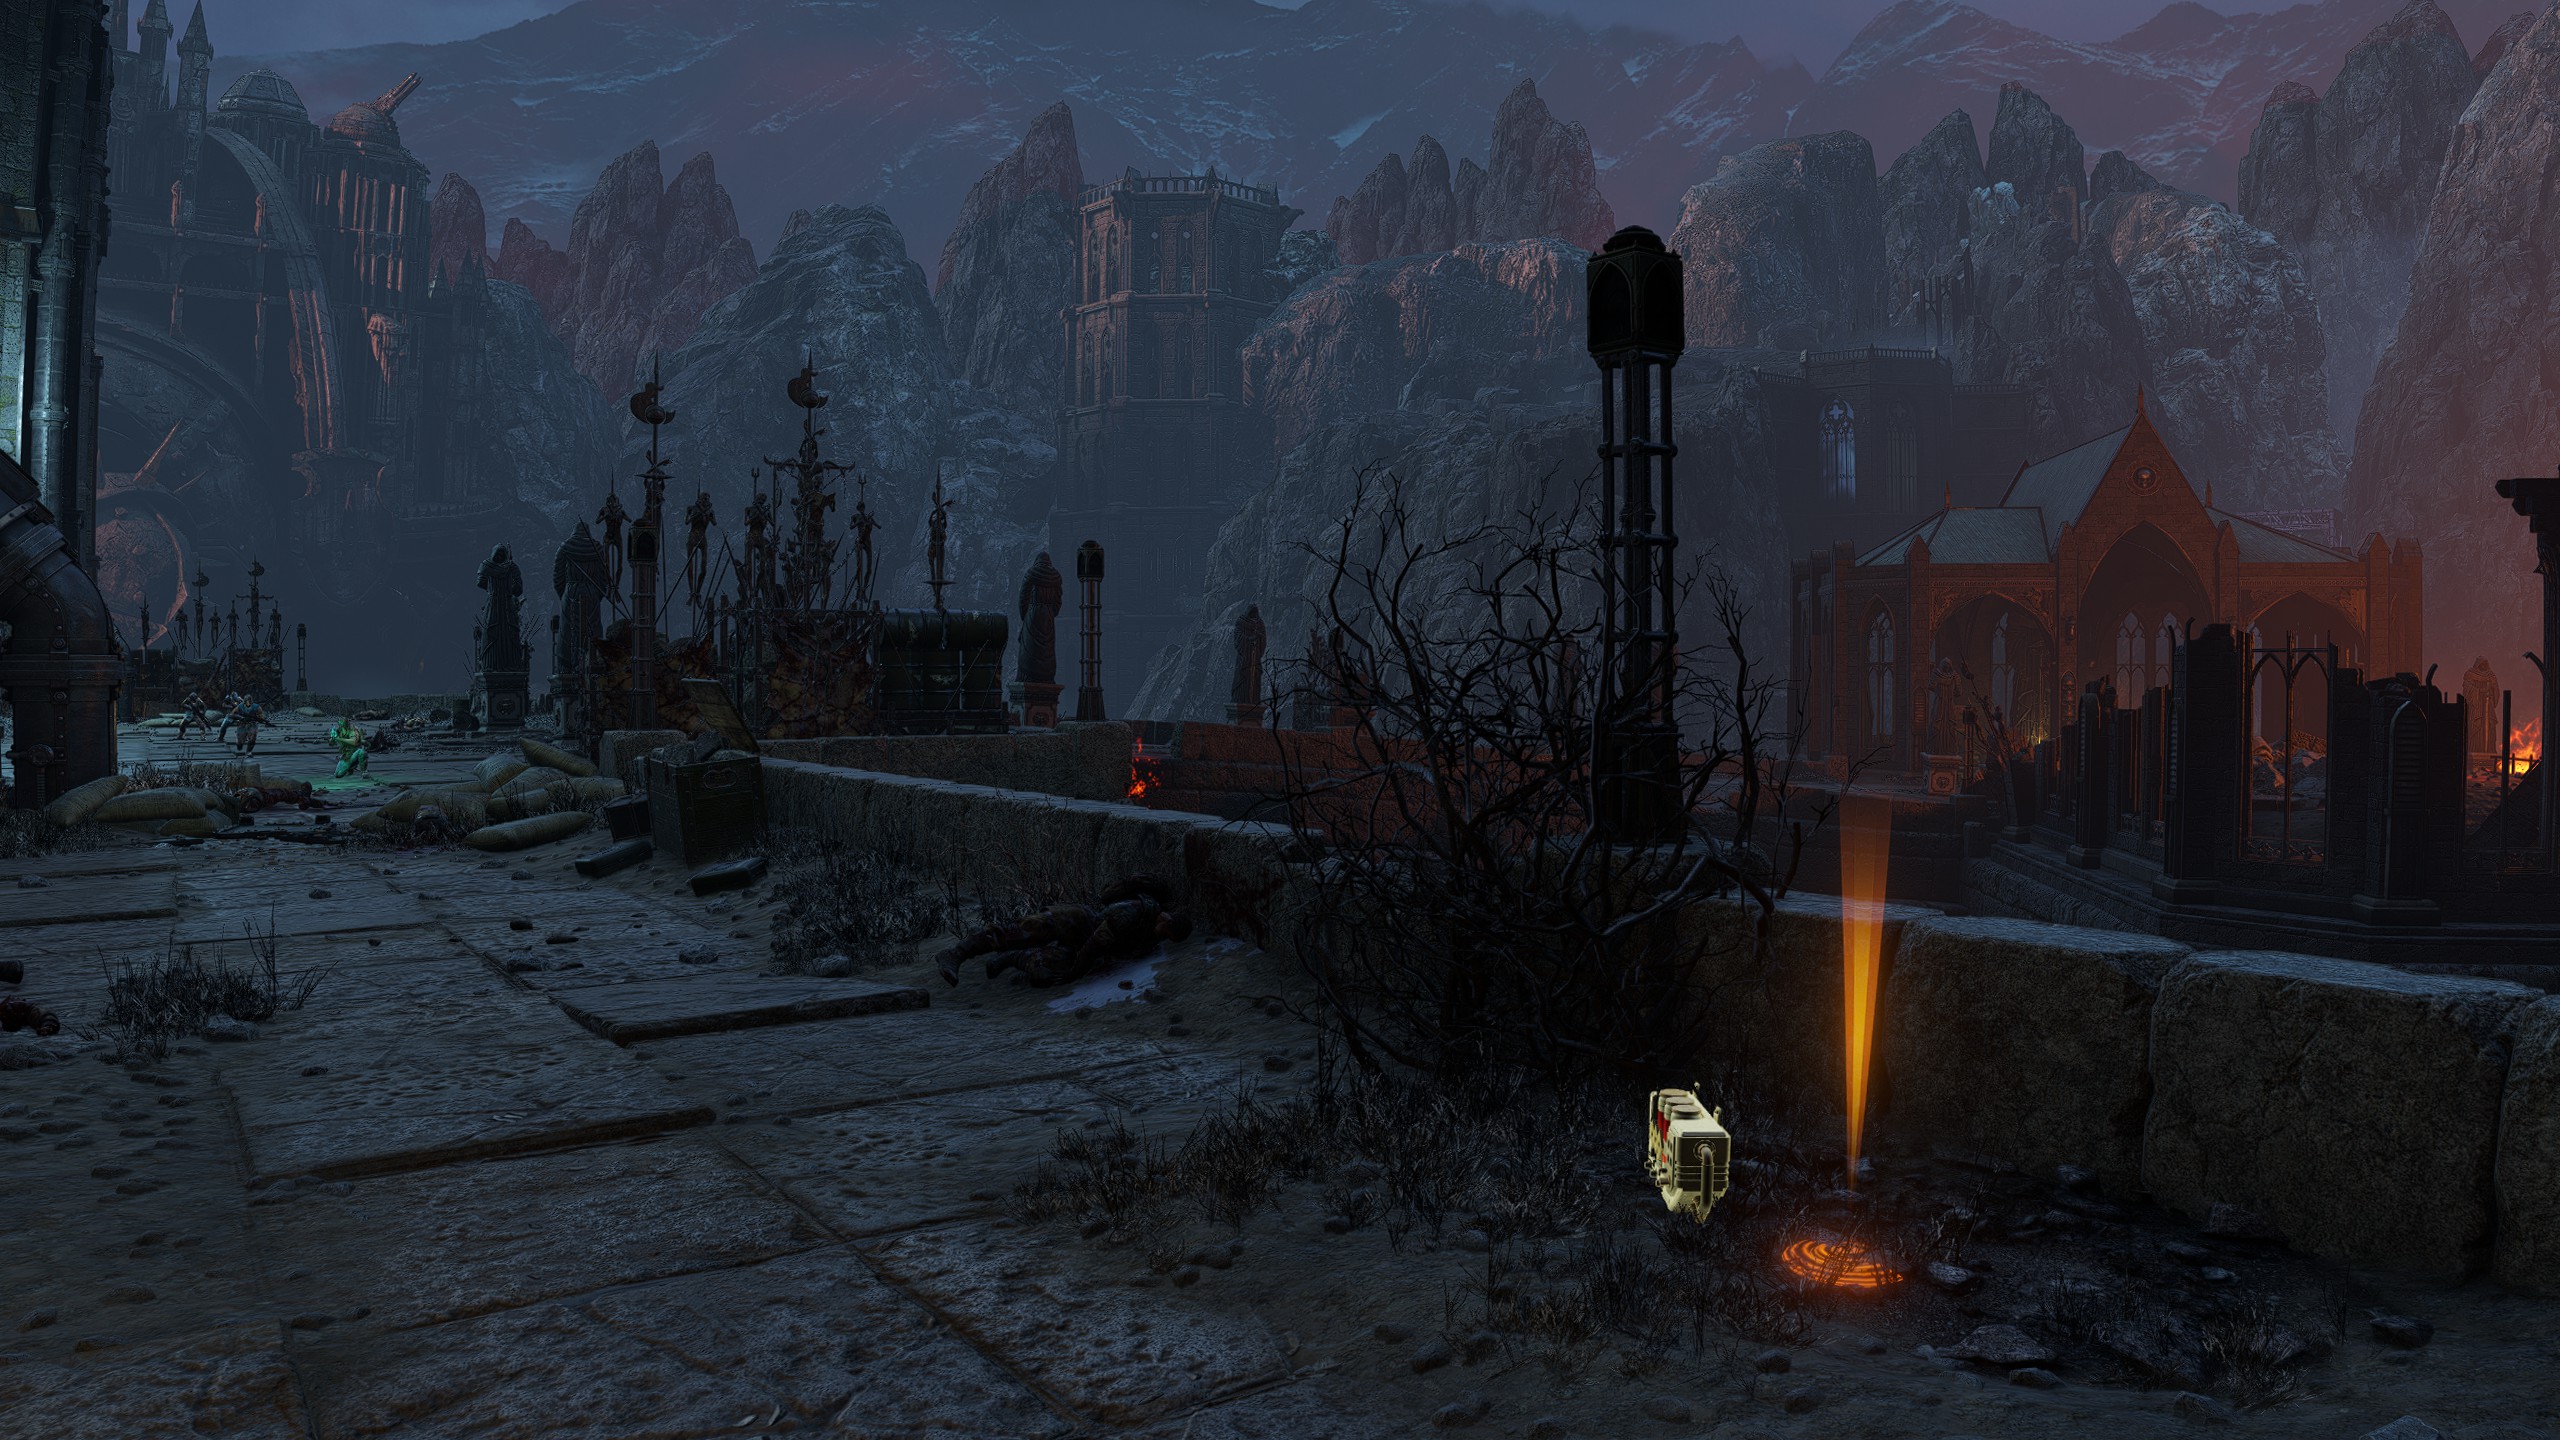
At the very end of the bridge section, before entering the Ecclesiarchy Cathedral turn to the left and follow the path. The Gene-Seed can spawn just behind a small shrubbery next to a post and a yellow light.
At the very end of the bridge section, before entering the Ecclesiarchy Cathedral turn to the left and follow the path. The Gene-Seed can spawn just behind a small shrubbery next to a post and a yellow light.
| Mission 05: Fall of Atreus
Gene-Seed #1
Location
Objective: Proceed to the Mechanicus Compound
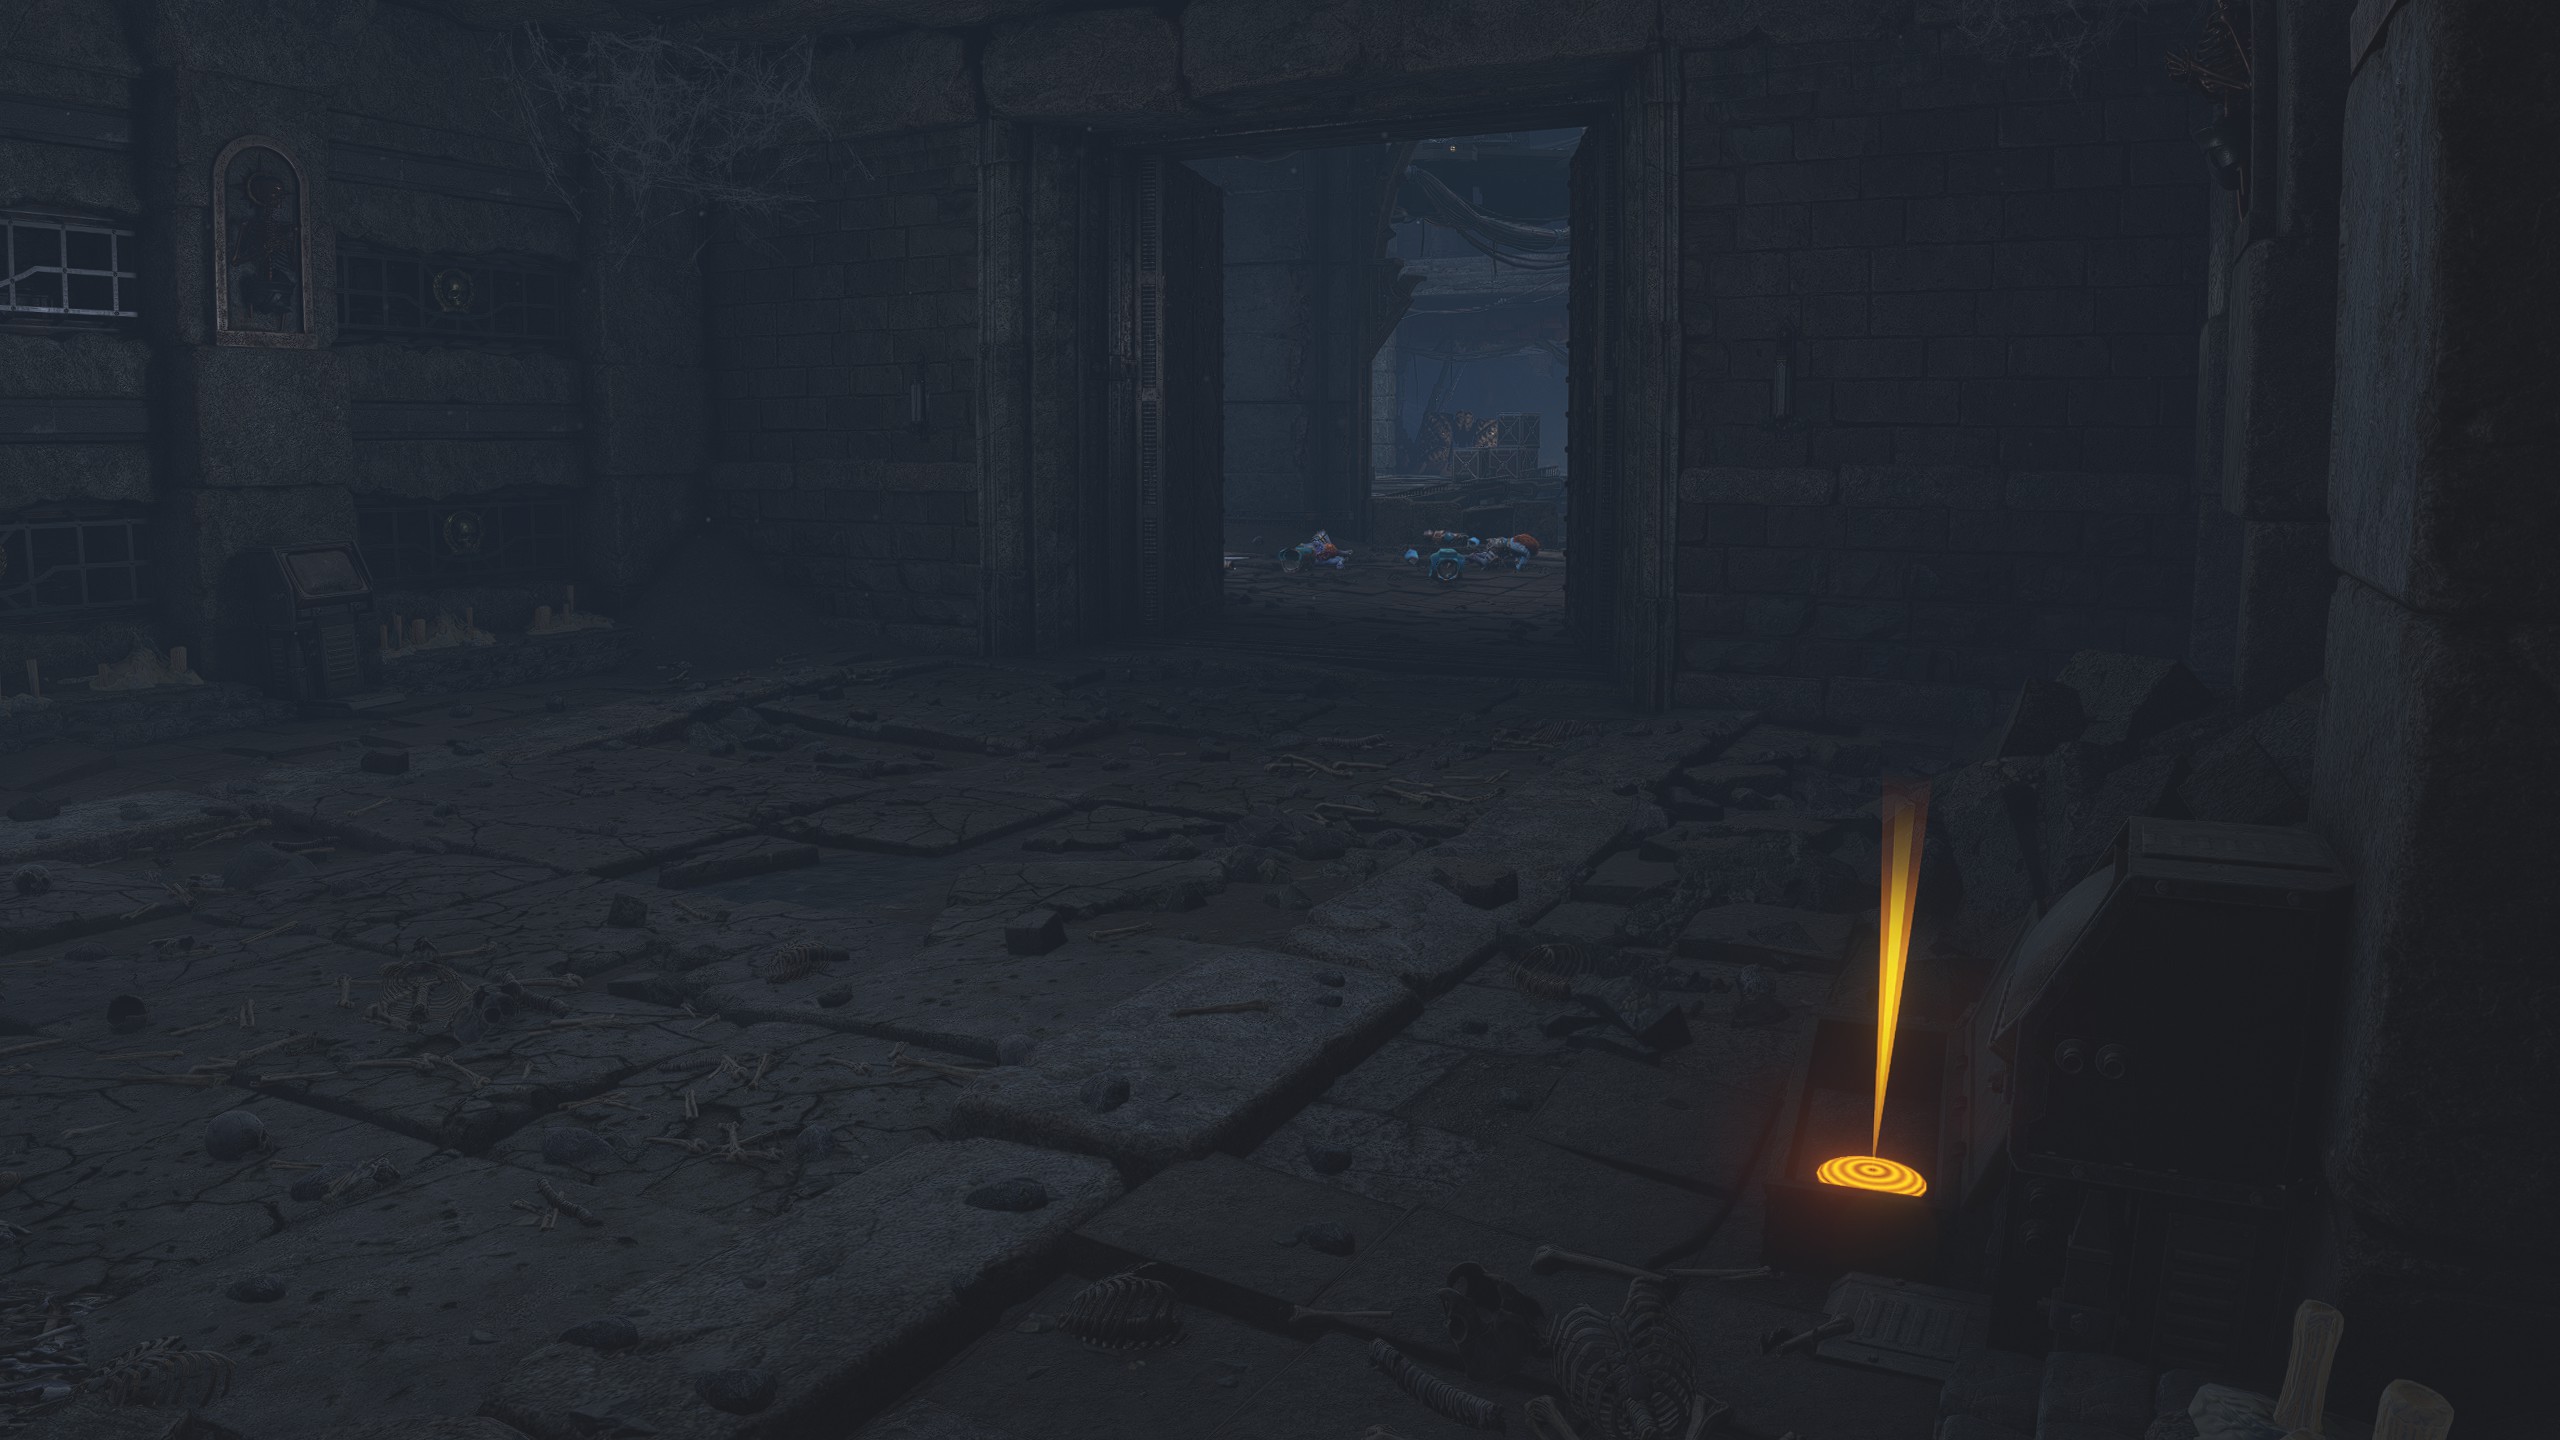
During the first part of the mission, proceed down the spiral room until you get to the second bridge Before crossing the bridge, go passed it and keep going and look inside the room to your right for an open crate where the Gene-Seed can spawn.
During the first part of the mission, proceed down the spiral room until you get to the second bridge Before crossing the bridge, go passed it and keep going and look inside the room to your right for an open crate where the Gene-Seed can spawn.
Gene-Seed #2
Location
Objective: Follow the Dreadnought
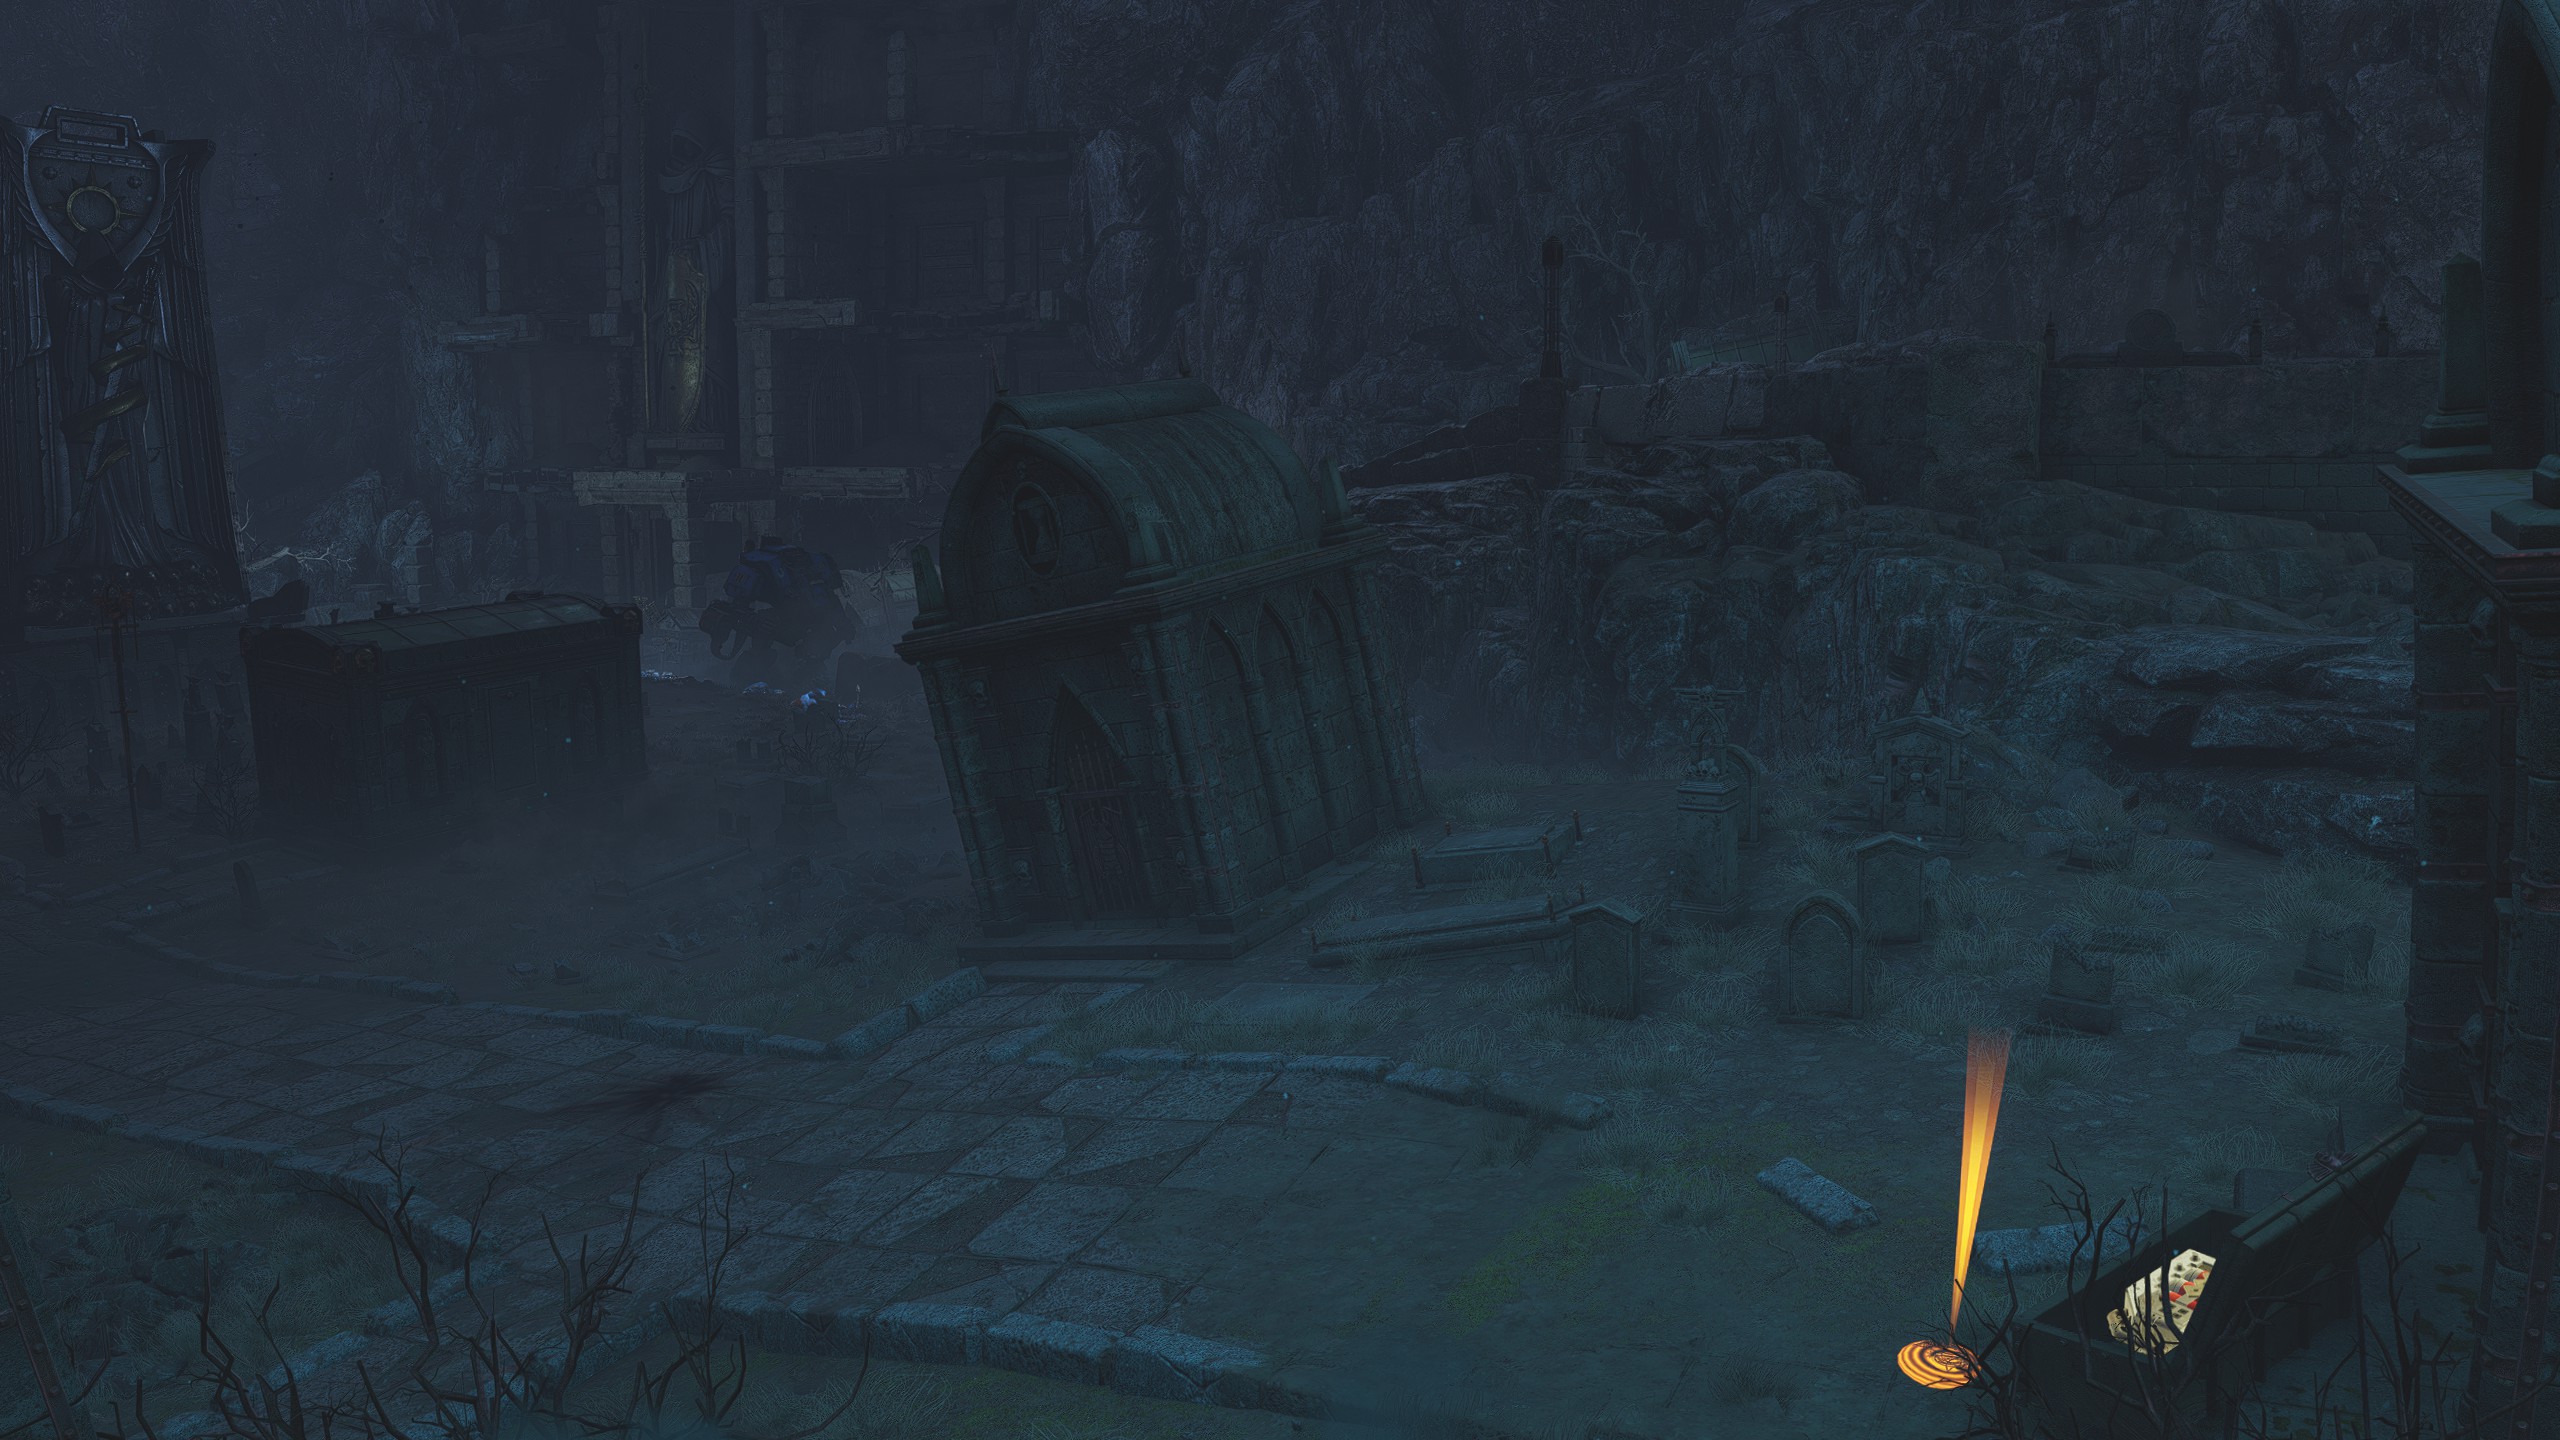
On reaching the Dreadnought section where you first get sight on the Atreus, proceed until you reach the stairs forward. Instead of going up them, go to the right to some mausoleums and to the furthest one in the middle just below a dead tree and check the open crate in front of it.
On reaching the Dreadnought section where you first get sight on the Atreus, proceed until you reach the stairs forward. Instead of going up them, go to the right to some mausoleums and to the furthest one in the middle just below a dead tree and check the open crate in front of it.
Gene-Seed #3
Location
Objective: Proceed to the Mechanicus Compound
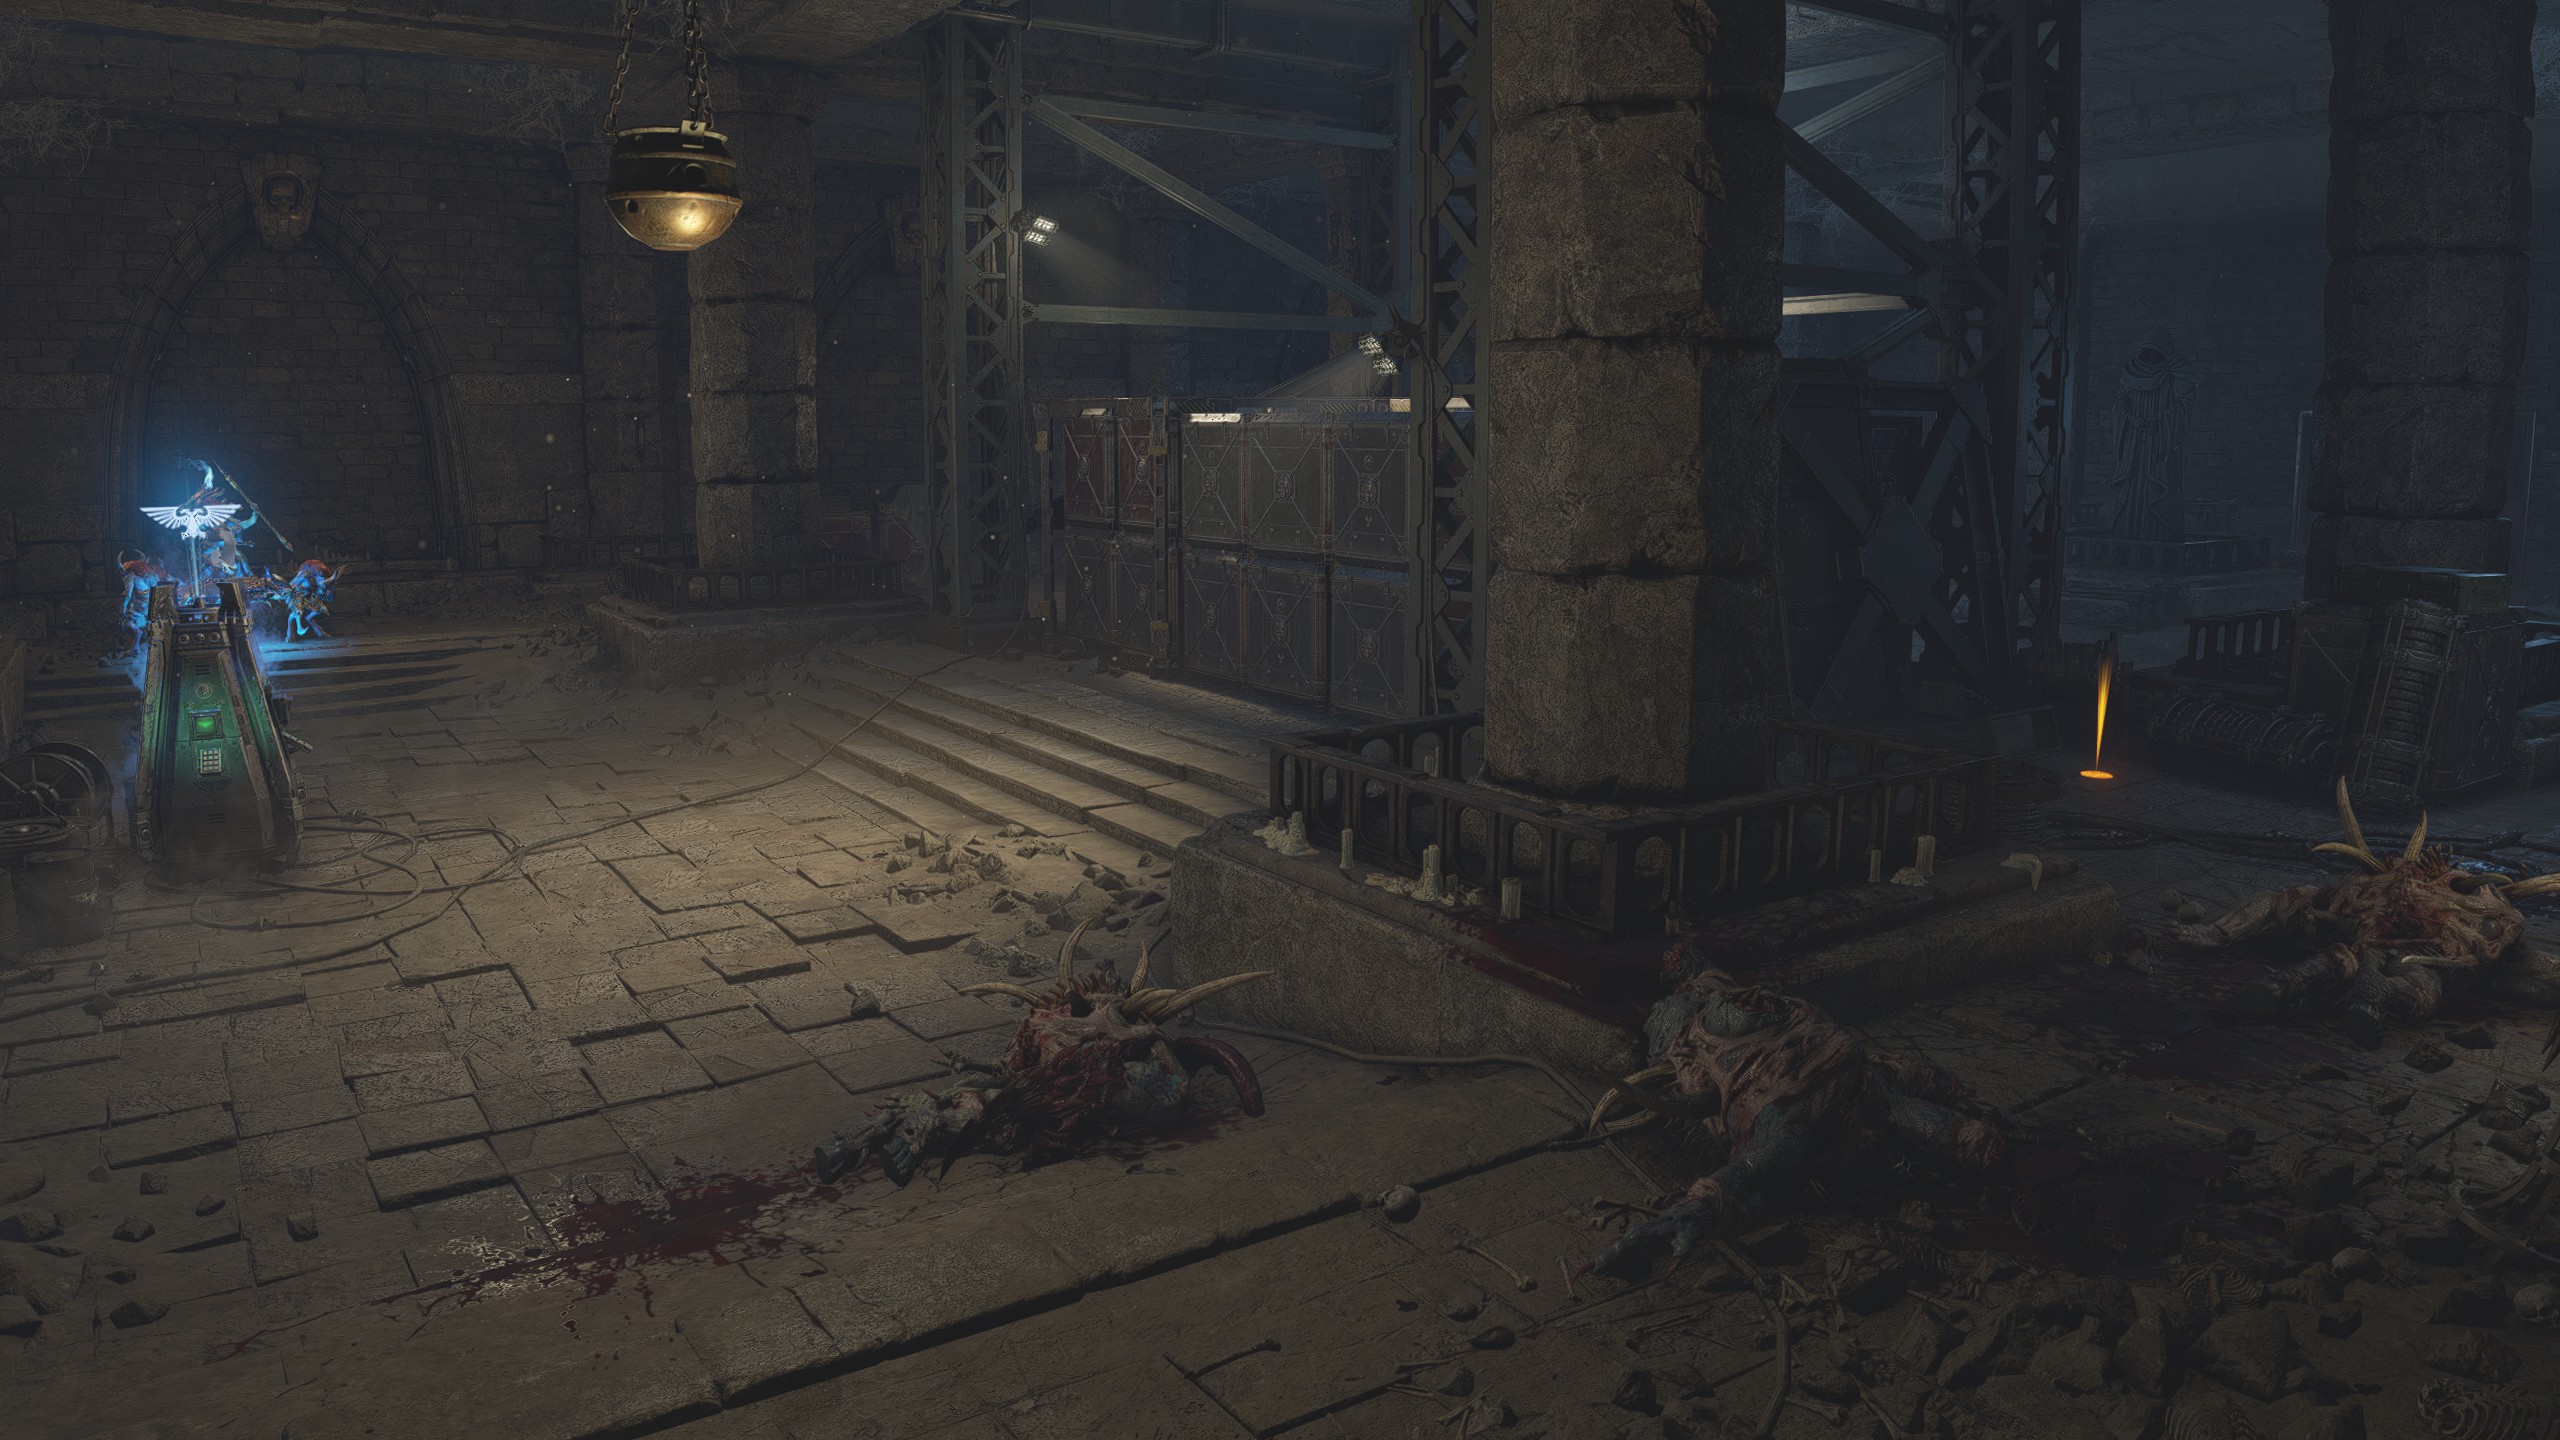
After clearing the passage and dropping into a room with a supply pod, turn to your left and go around the corner and check another open crate between some boxes and spools.
After clearing the passage and dropping into a room with a supply pod, turn to your left and go around the corner and check another open crate between some boxes and spools.
| Mission 06: Ballistic Engine
Gene-Seed #1
Location
Objective: Proceed to the Militarum Depot
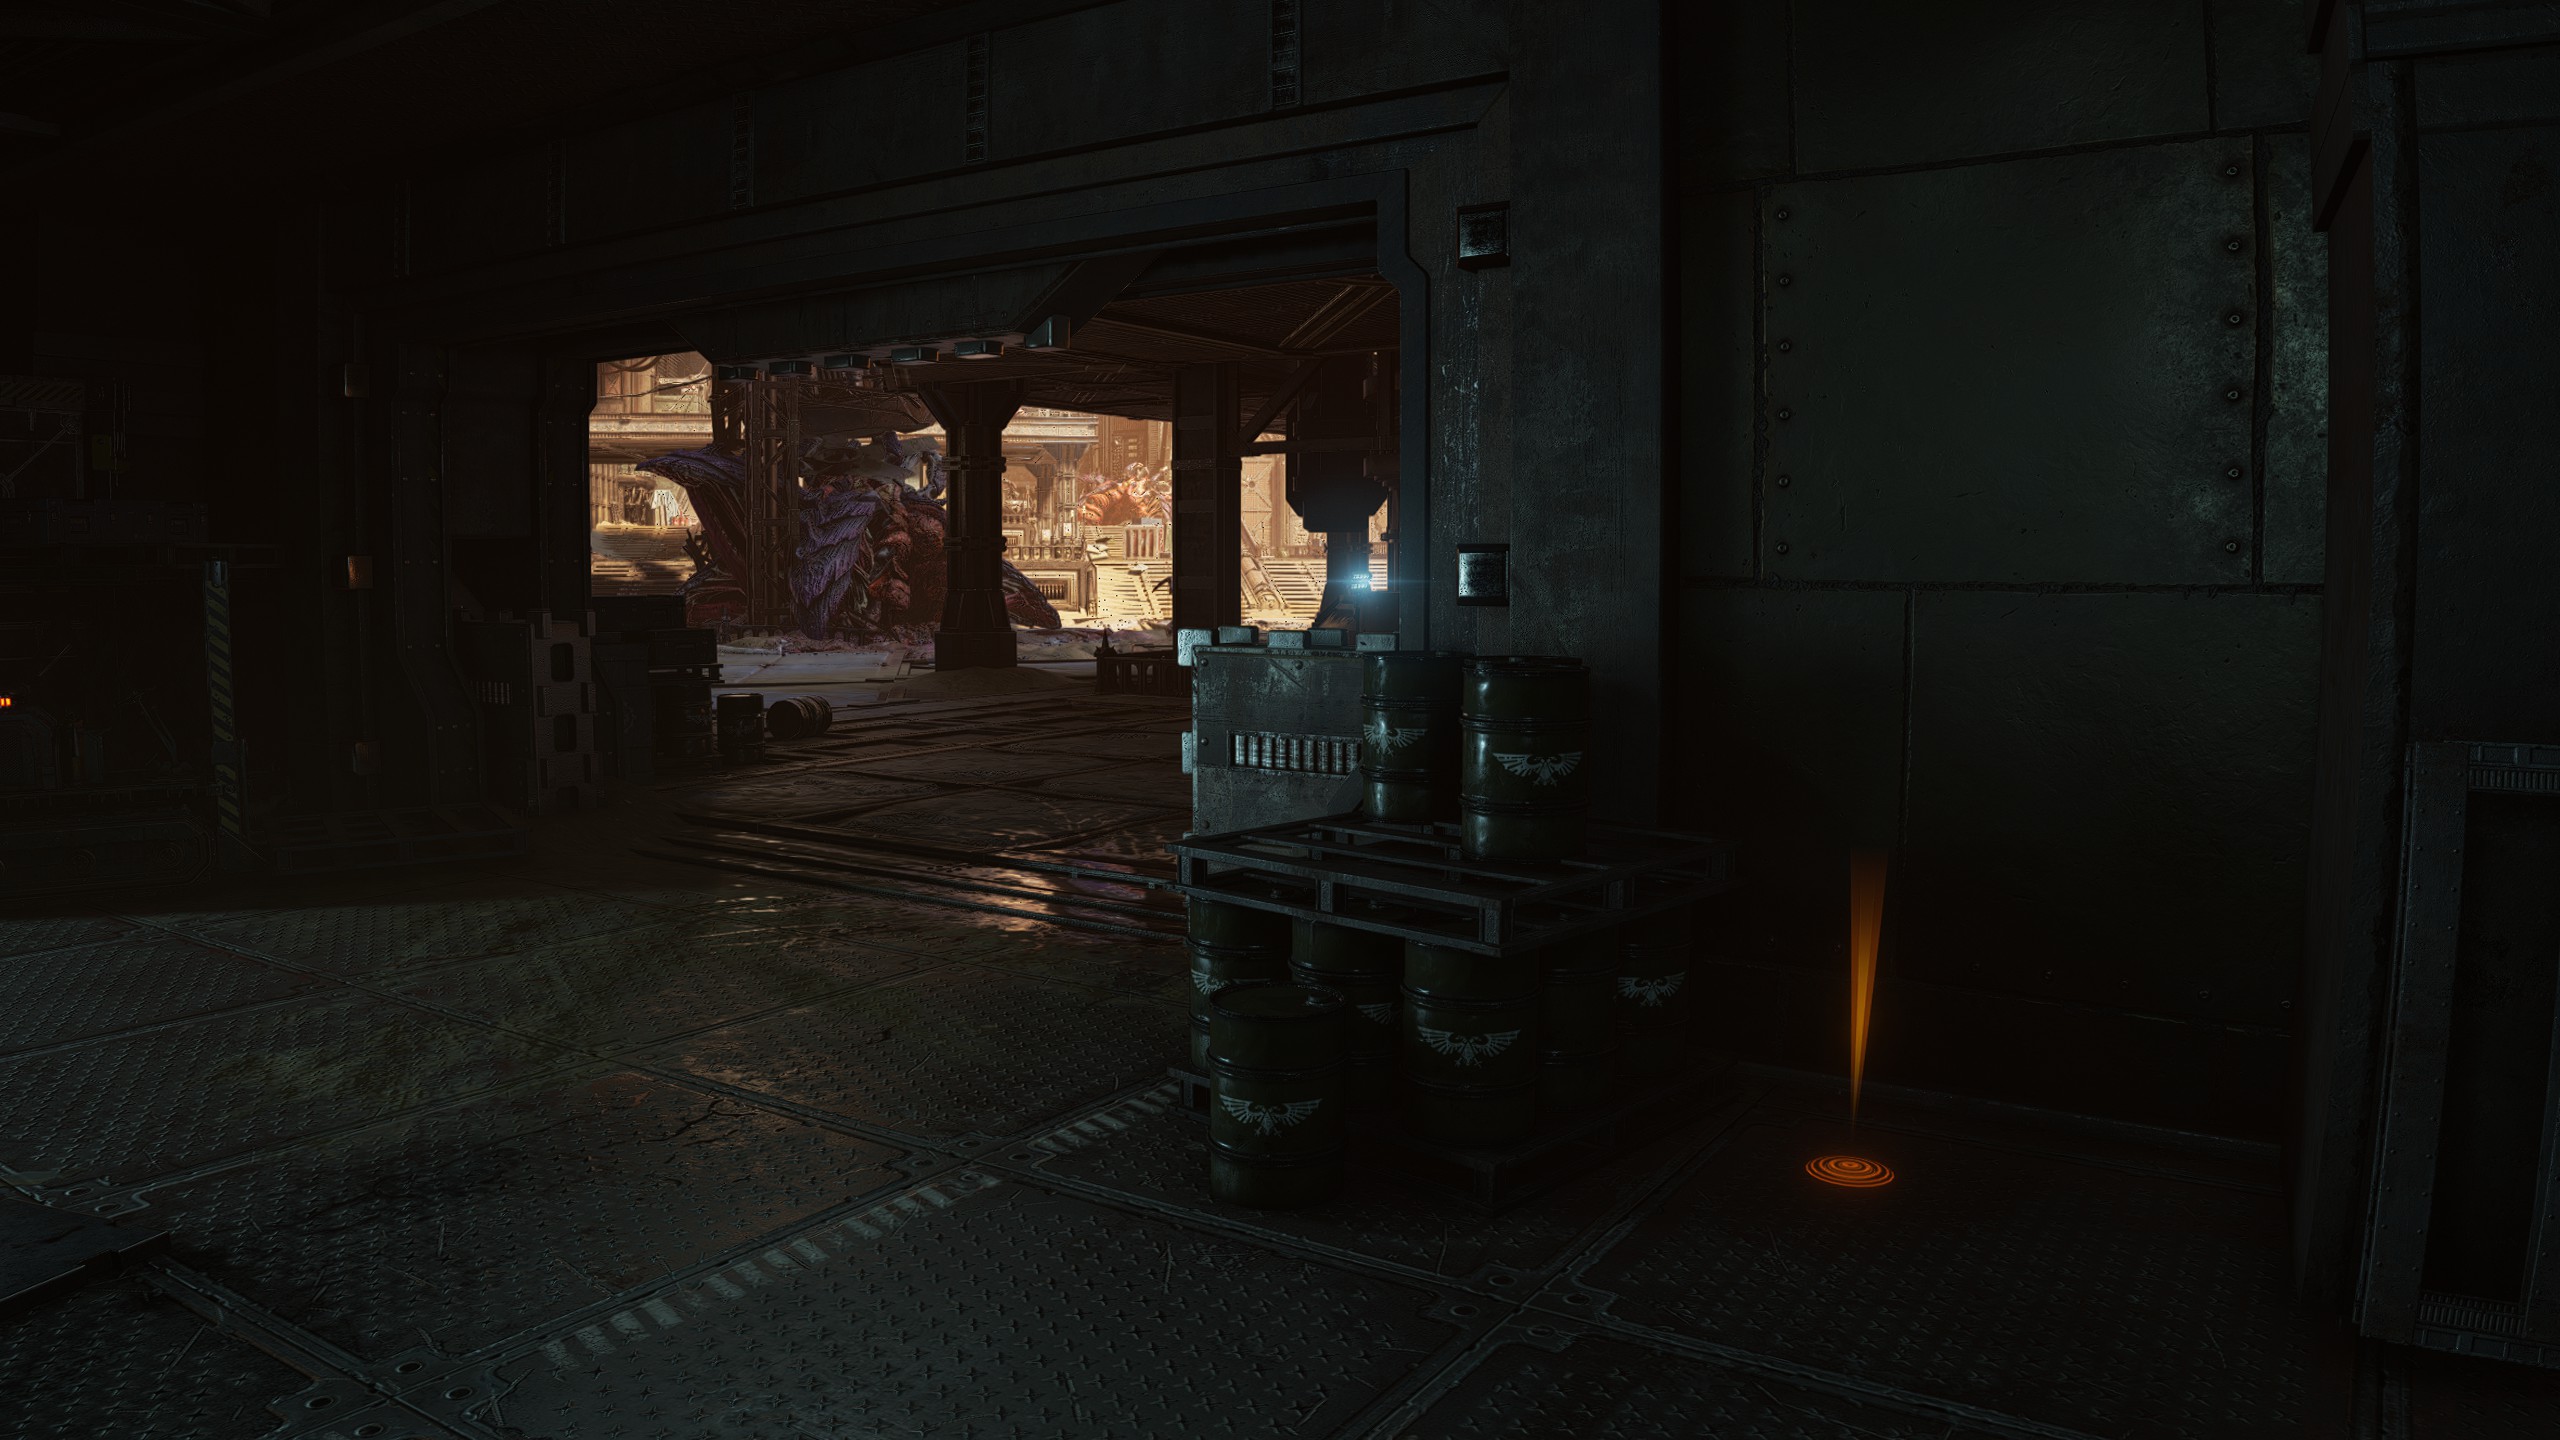
At the start of the mission during the first sandstorm section after descending the initial stairs, keep following the left wall until you reach the first open door below a roof (the second room further ahead is too far). Check to the left inside the room behind a pallet of barrels for a Gene-Seed.
At the start of the mission during the first sandstorm section after descending the initial stairs, keep following the left wall until you reach the first open door below a roof (the second room further ahead is too far). Check to the left inside the room behind a pallet of barrels for a Gene-Seed.
Gene-Seed #2
Location
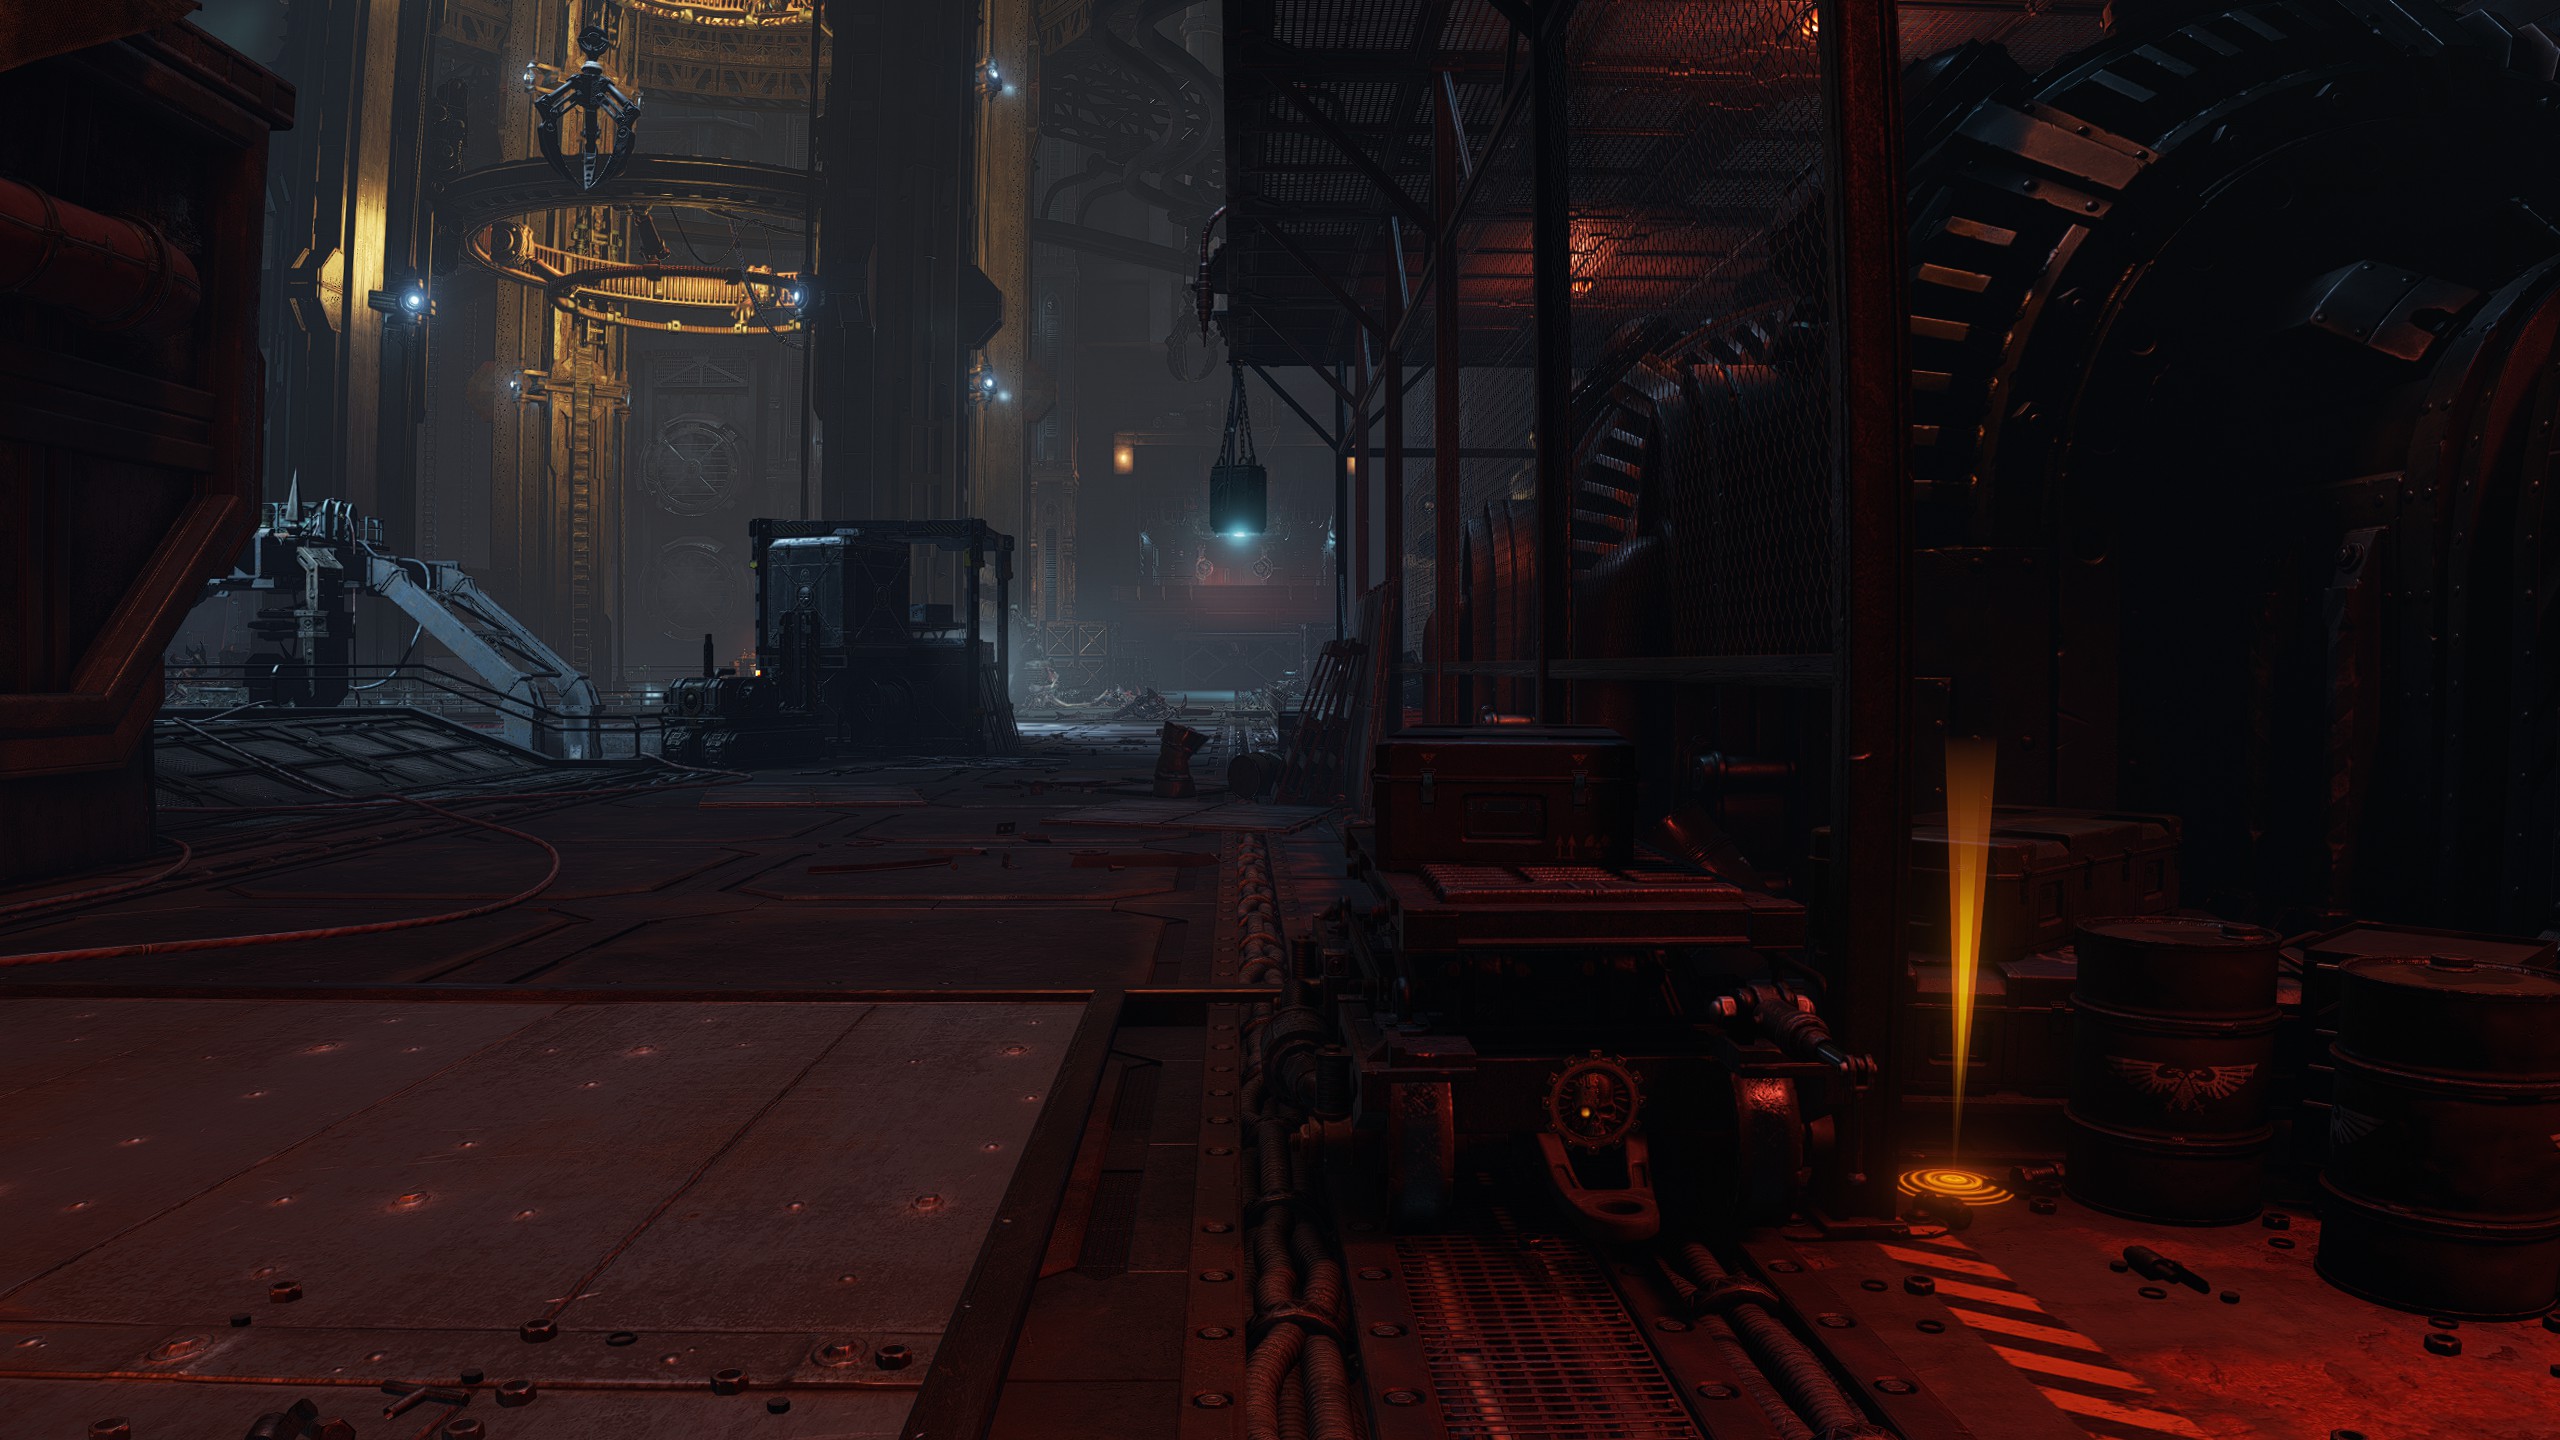
Objective: Awaken the Machine Spirit / Await Completion of Transfer Protocols
Enter the depot and proceed through as normal until you reach the large room where you requisition the warhead. After dropping down, proceed all the way to the far end of the room where one of the terminals for the objective can be (these are randomised so I can't specifically list one) and check to your left behind some barrels (they have been knocked away for convenience in the screenshot).
Enter the depot and proceed through as normal until you reach the large room where you requisition the warhead. After dropping down, proceed all the way to the far end of the room where one of the terminals for the objective can be (these are randomised so I can't specifically list one) and check to your left behind some barrels (they have been knocked away for convenience in the screenshot).
Gene-Seed #3
Location
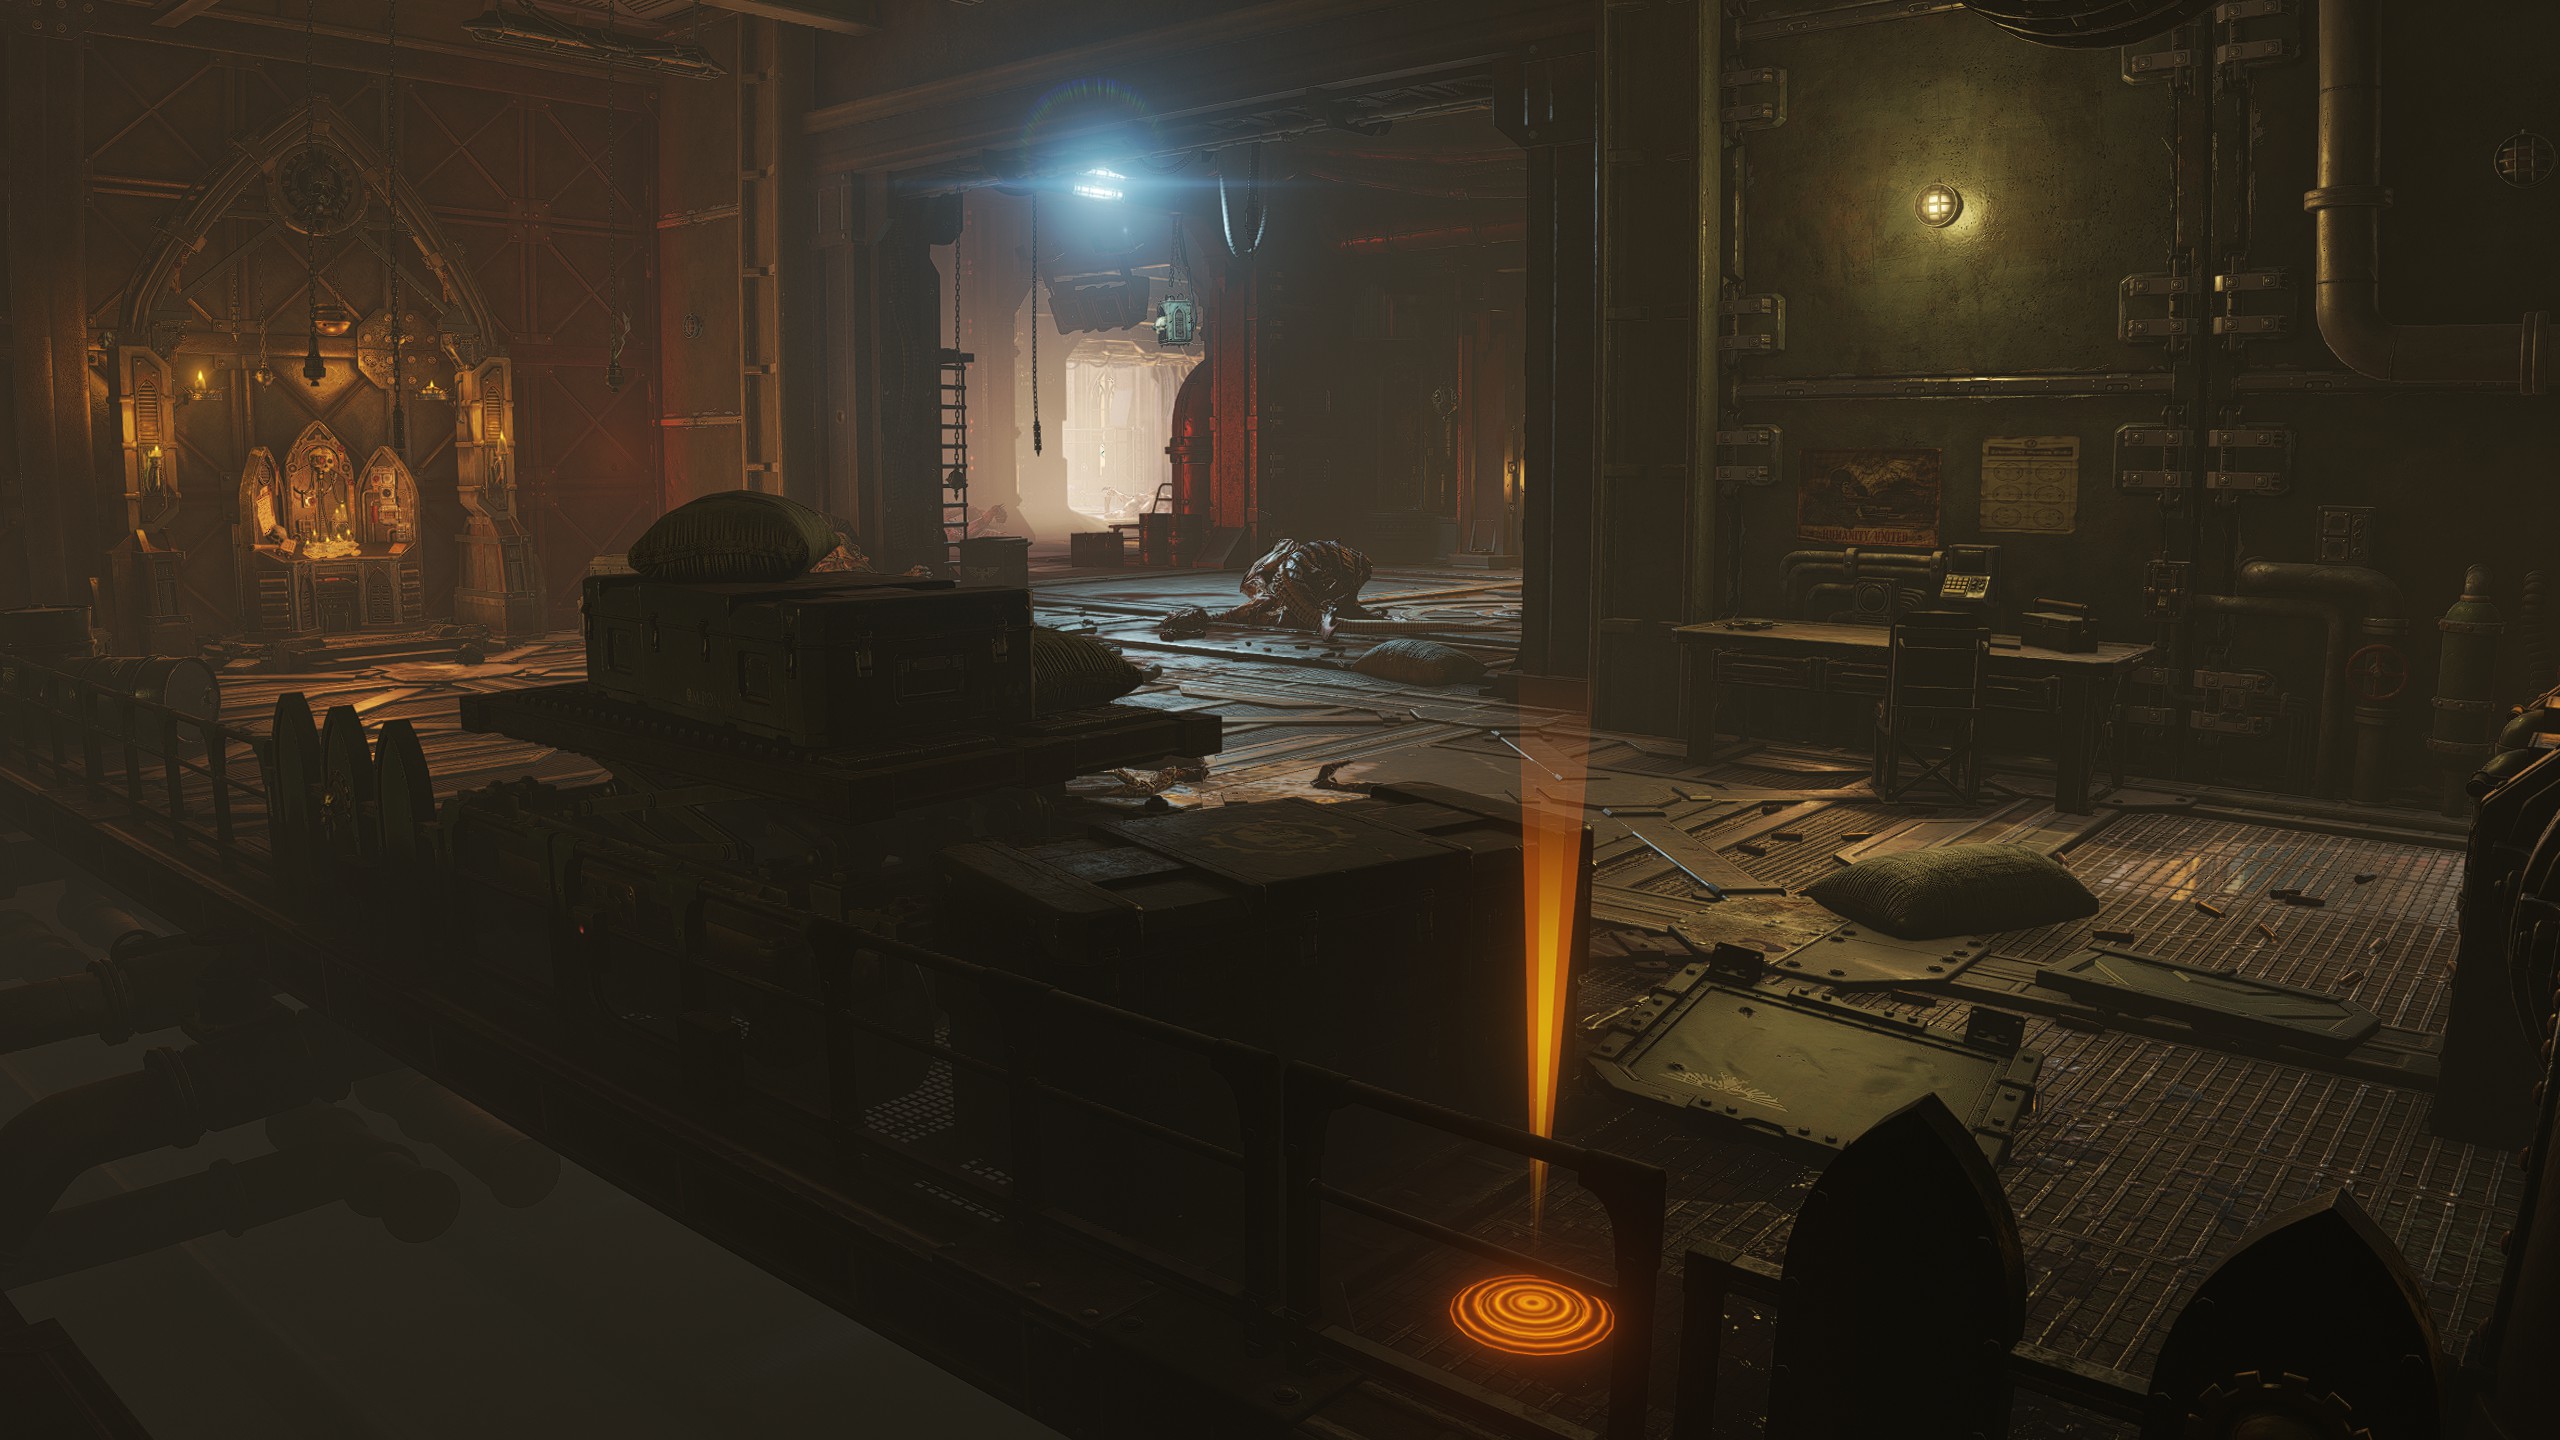
Objective: Advance to the Train
After completing the warhead section and proceeding up the elevator, keep to the left before heading back outside and enter a small room. Turn to the left and check behind some crates under the red pipes.
After completing the warhead section and proceeding up the elevator, keep to the left before heading back outside and enter a small room. Turn to the left and check behind some crates under the red pipes.
Gene-Seed #4
Location
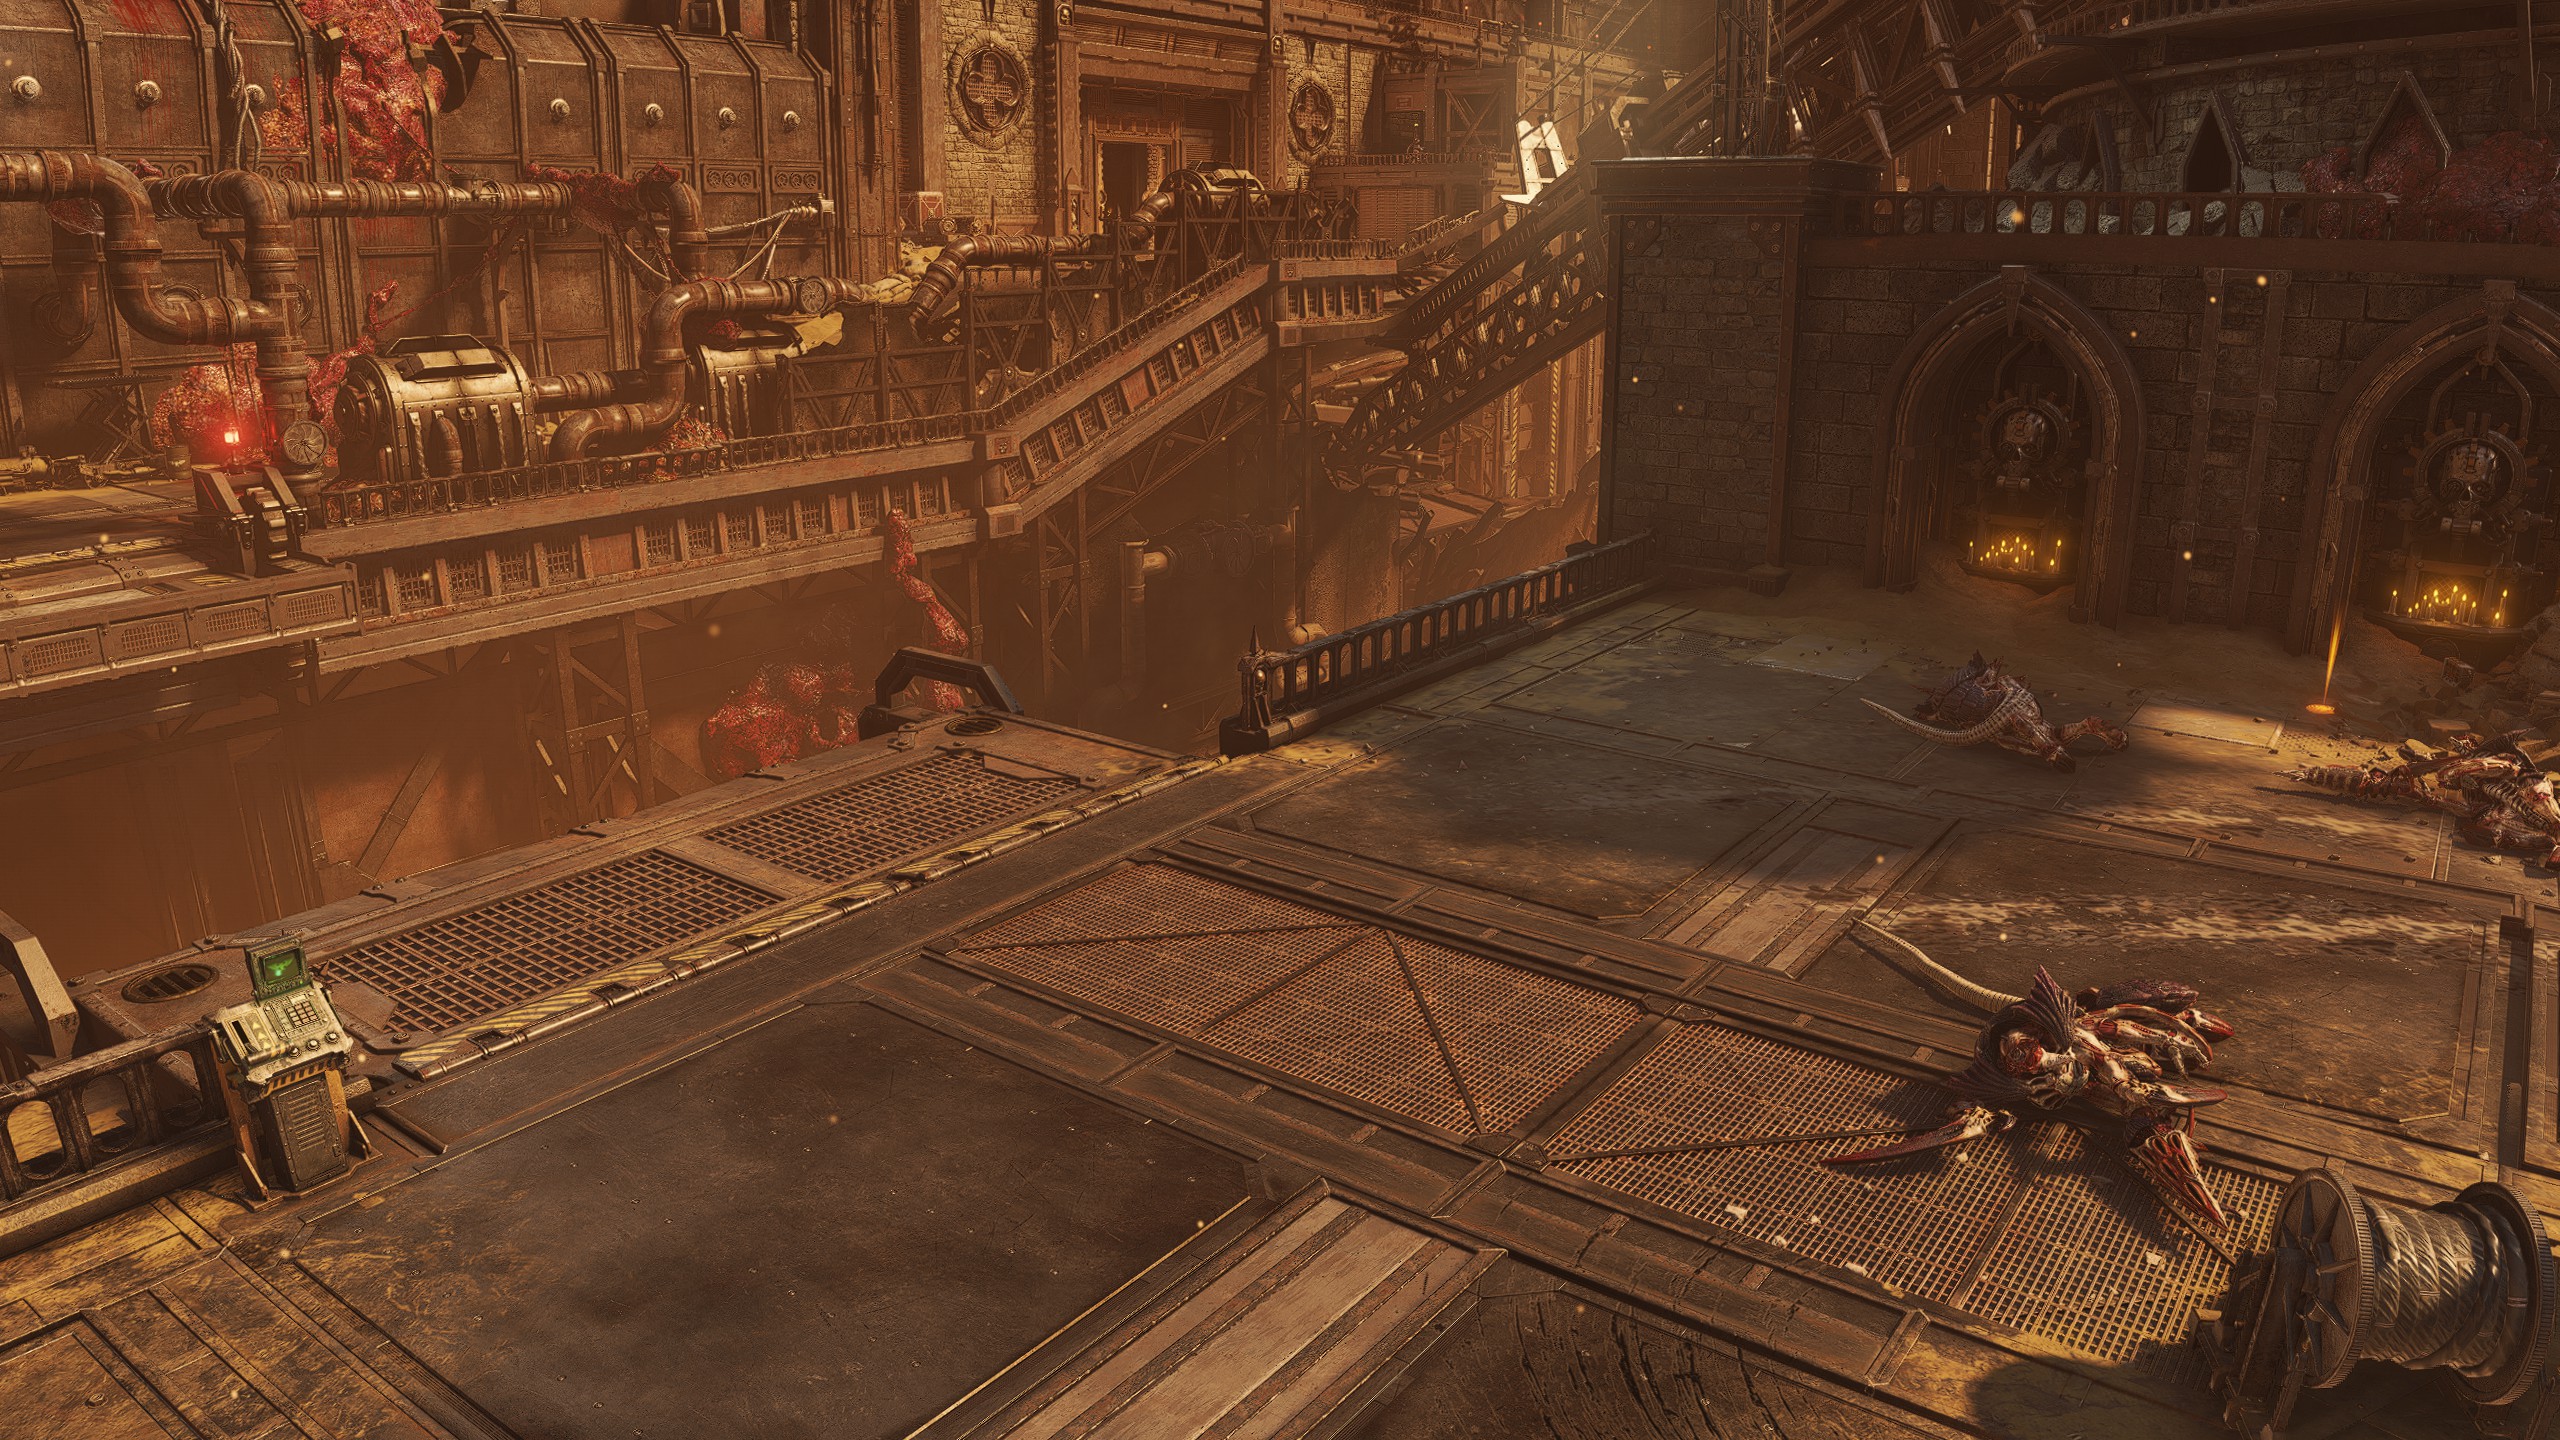
Objective: Advance to the Train
Near the end of the second sandstorm section you will come to a bridge you have to interact with to cross. Look to your right from the bridge where there are some little niches with candles. The Gene-Seed can spawn in the second one immediately next to the pile of rubble.
Near the end of the second sandstorm section you will come to a bridge you have to interact with to cross. Look to your right from the bridge where there are some little niches with candles. The Gene-Seed can spawn in the second one immediately next to the pile of rubble.
Gene-Seed #5
Location
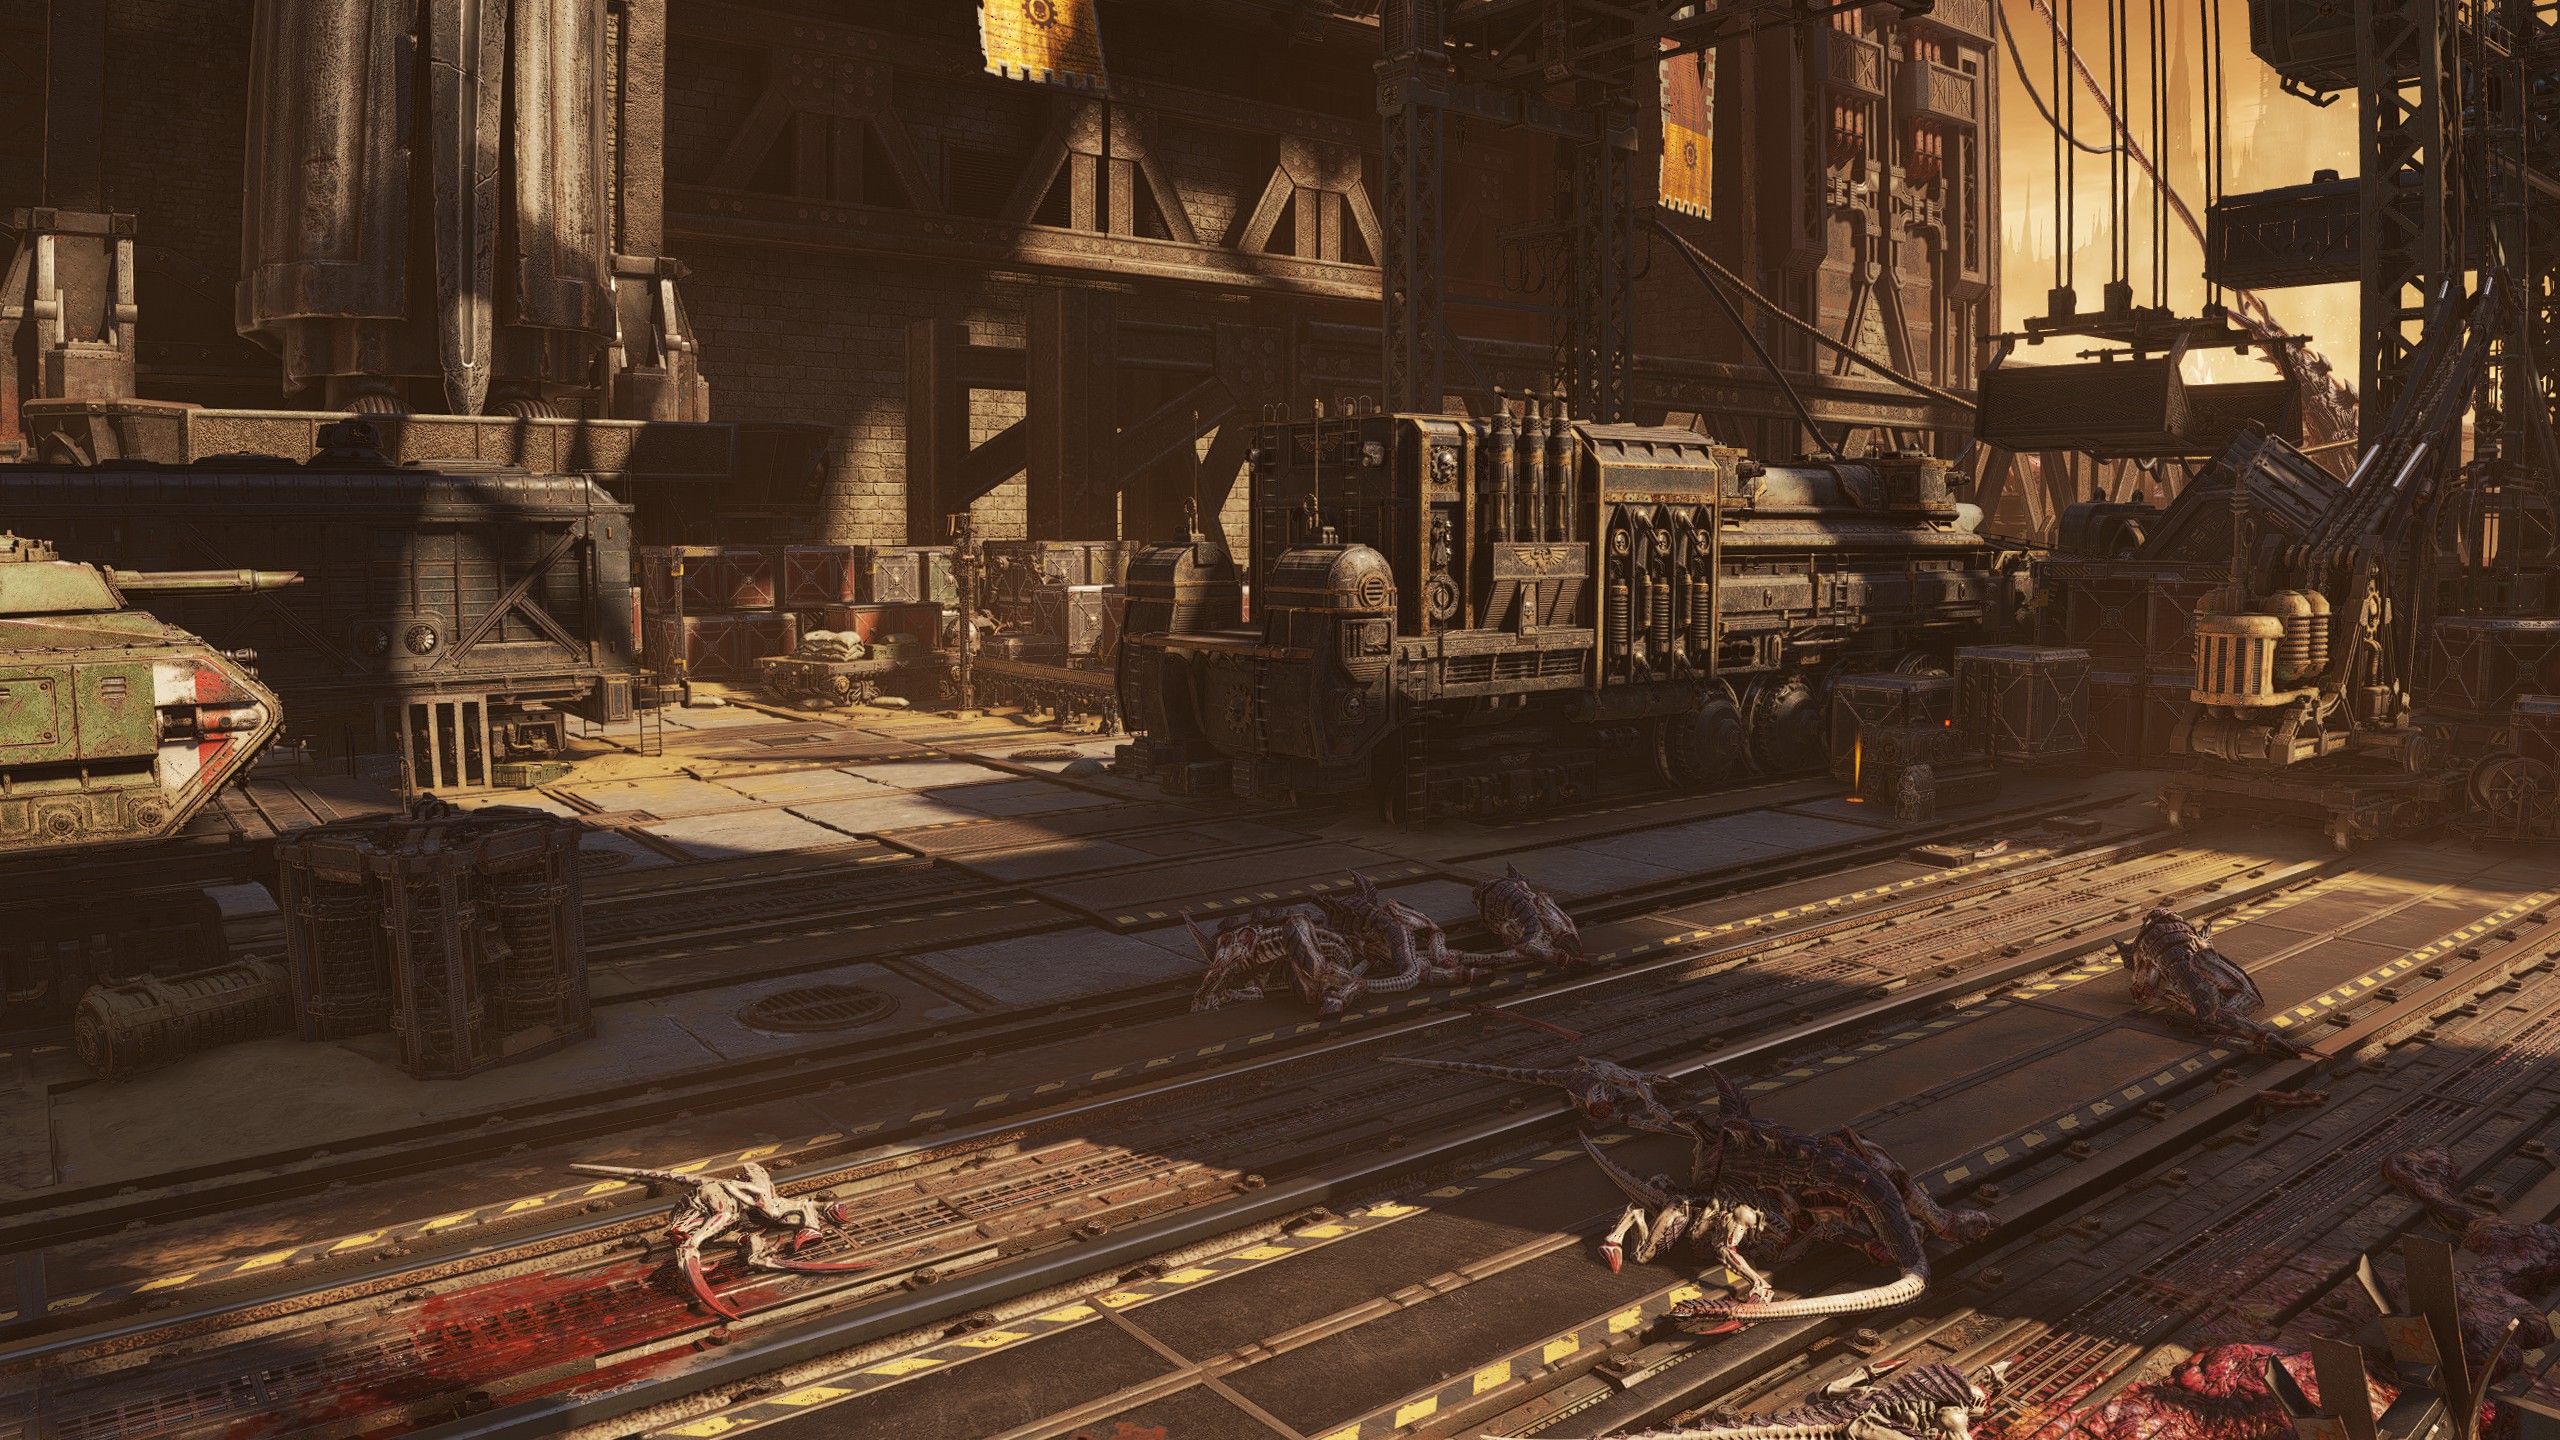
Objective: Advance to the Train
Continue to progress the mission as normal until you reach the trainyard area. Drop down and keep to the right and go just passed the large opening in the ground. The Gene-Seed can spawn in a small gap between the train to your right and a forklift beside it.
Continue to progress the mission as normal until you reach the trainyard area. Drop down and keep to the right and go just passed the large opening in the ground. The Gene-Seed can spawn in a small gap between the train to your right and a forklift beside it.
| Mission 07: Termination
Gene-Seed #1
Location
Objective: Advance to the Fortress
Drop down at the start of the mission and proceed through most of the jungle section until you come to the large open area with trees and Tyranid spikes (just before you start advancing upwards). Keep to the left wall until you come to a small raised alcove where the Gene-Seed can spawn atop a pile of crates.
Drop down at the start of the mission and proceed through most of the jungle section until you come to the large open area with trees and Tyranid spikes (just before you start advancing upwards). Keep to the left wall until you come to a small raised alcove where the Gene-Seed can spawn atop a pile of crates.
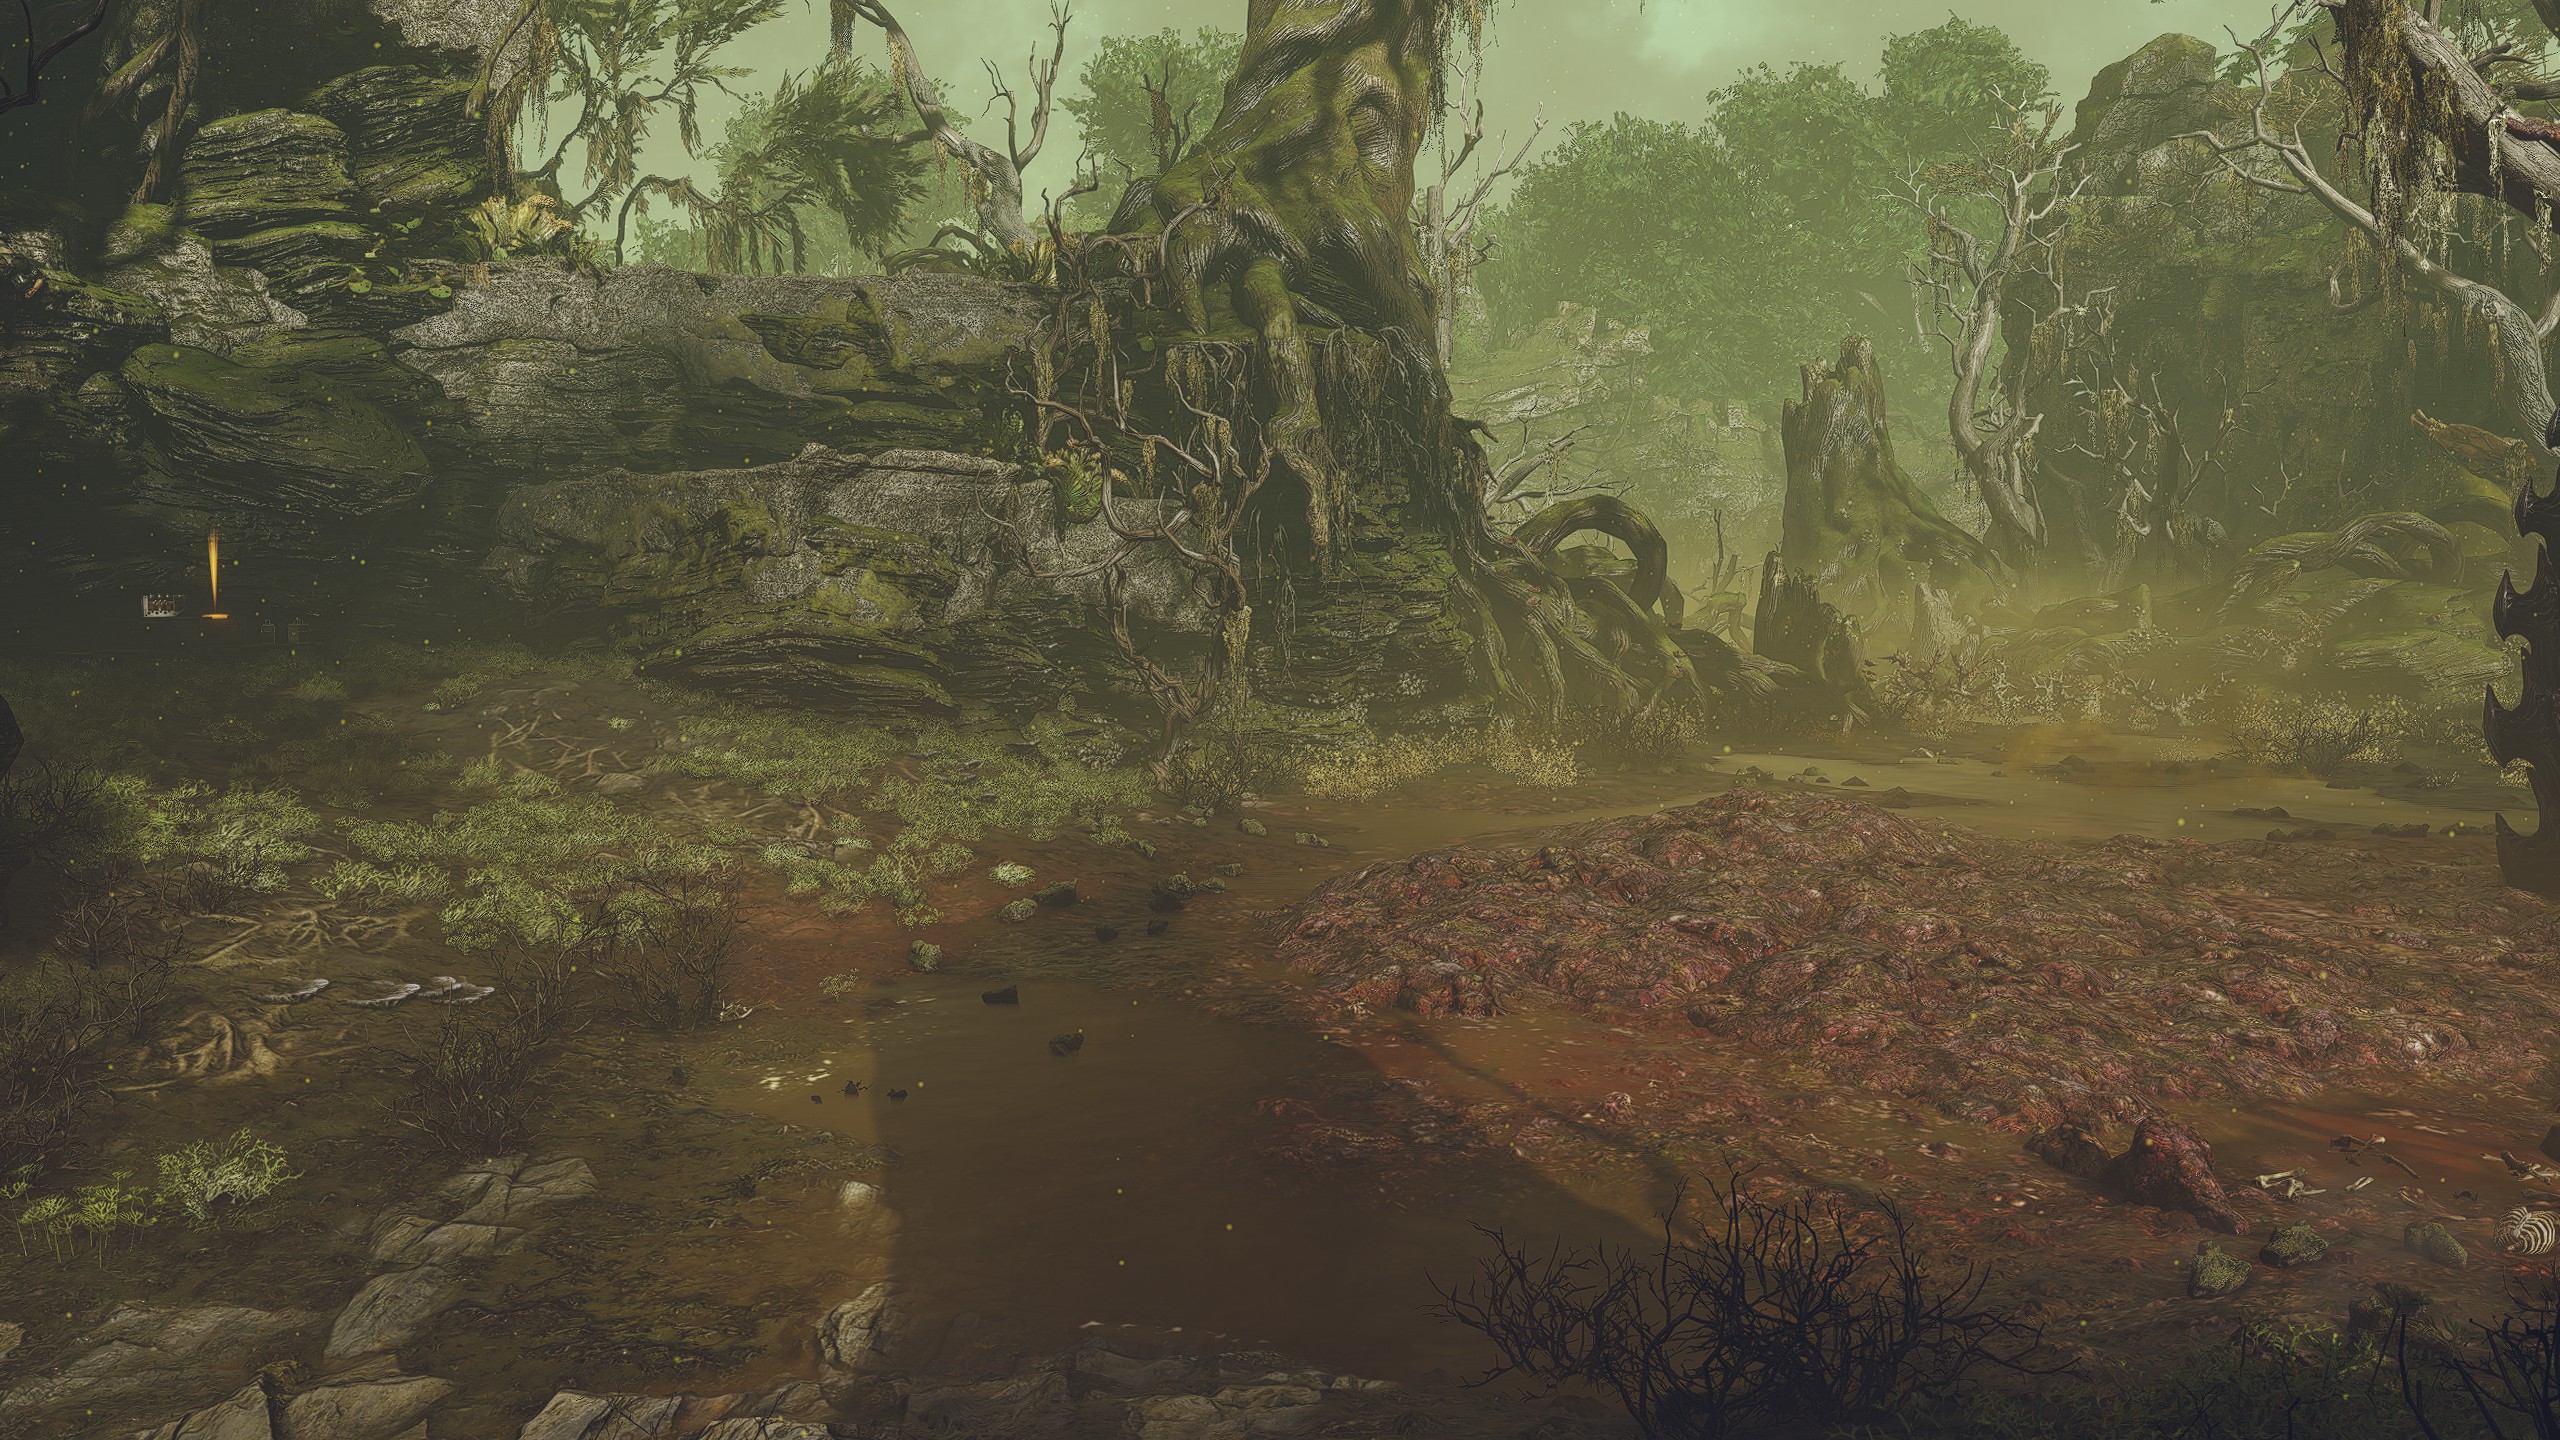
Gene-Seed #2
Location
Objective: Advance to the Fortress
After advancing upwards a bit and pushing aside a rock next to a resupply cache, head immediately to the left and into a cave. The Gene-Seed can spawn in the back where the light is shining in on a crate.
After advancing upwards a bit and pushing aside a rock next to a resupply cache, head immediately to the left and into a cave. The Gene-Seed can spawn in the back where the light is shining in on a crate.
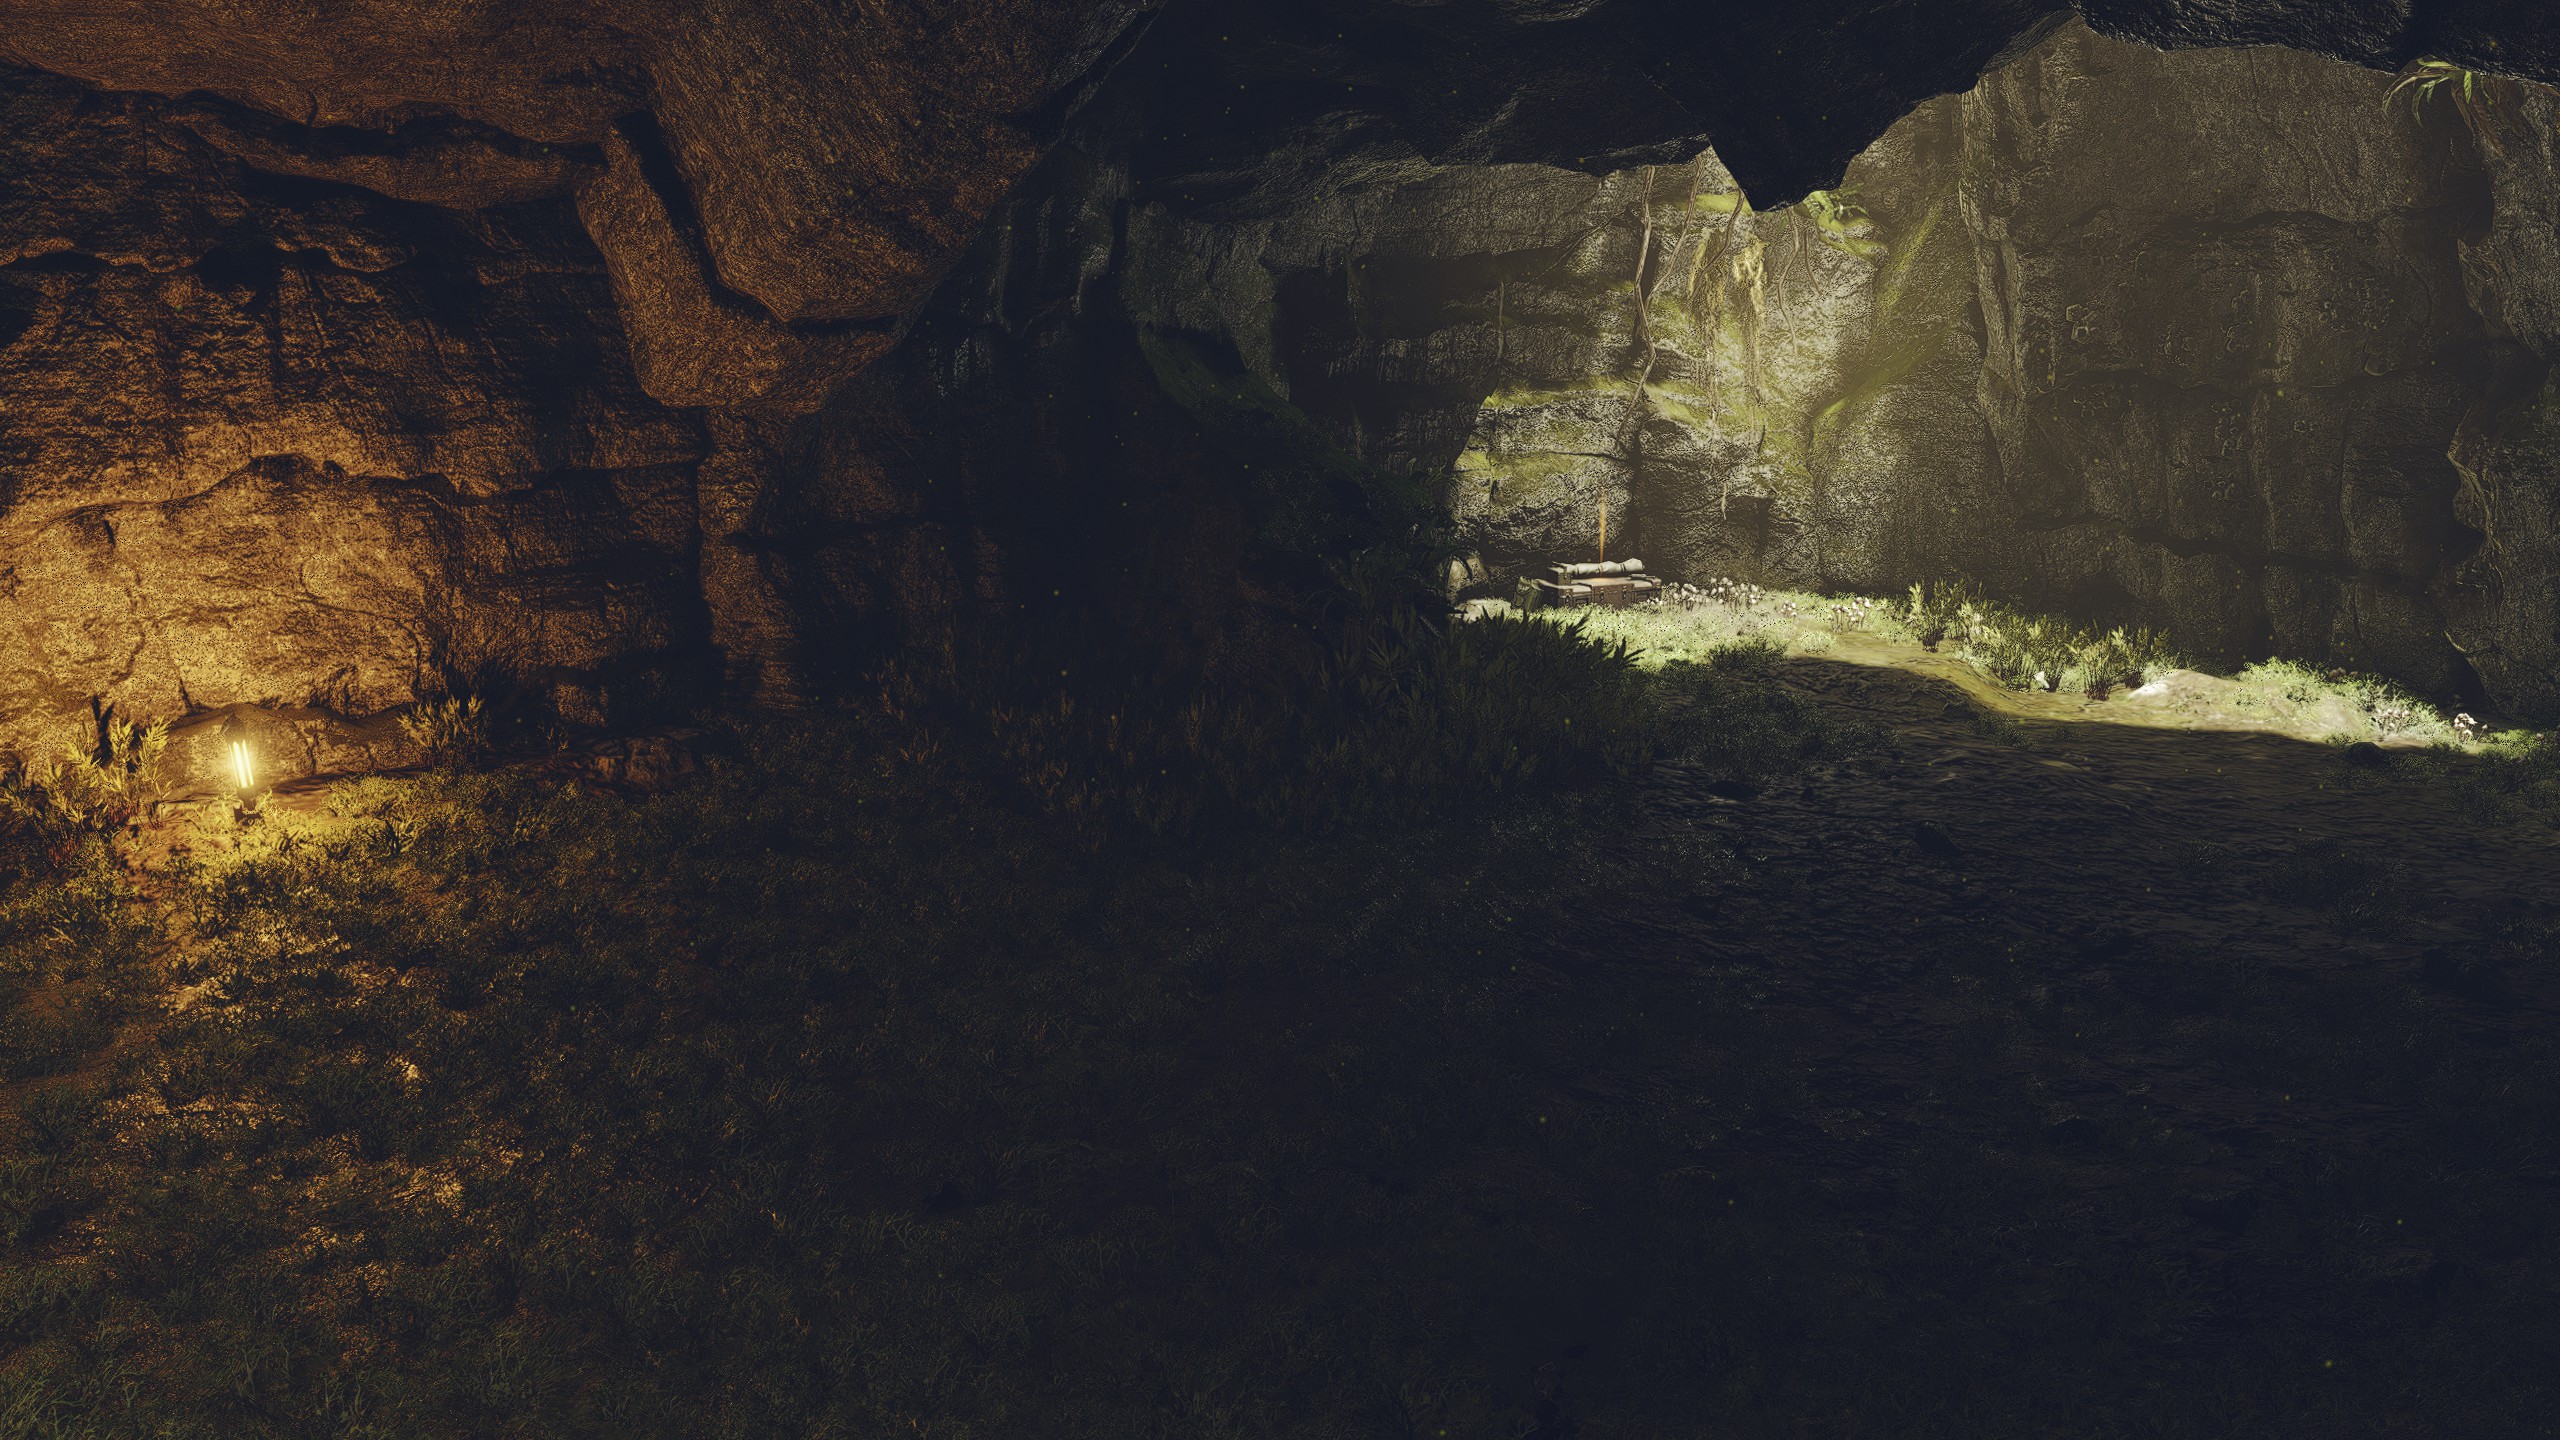
Gene-Seed #3
Location
Objective: Reawaken the Consoles
Enter the Reclamation Center and into the large room where you have to reawaken the consoles to open the door to progress. Head into the room to the right, then keep to the right and go down the first set of stairs. The Gene-Seed can spawn at the end of the overgrown fleshy corridor to your right.
Enter the Reclamation Center and into the large room where you have to reawaken the consoles to open the door to progress. Head into the room to the right, then keep to the right and go down the first set of stairs. The Gene-Seed can spawn at the end of the overgrown fleshy corridor to your right.
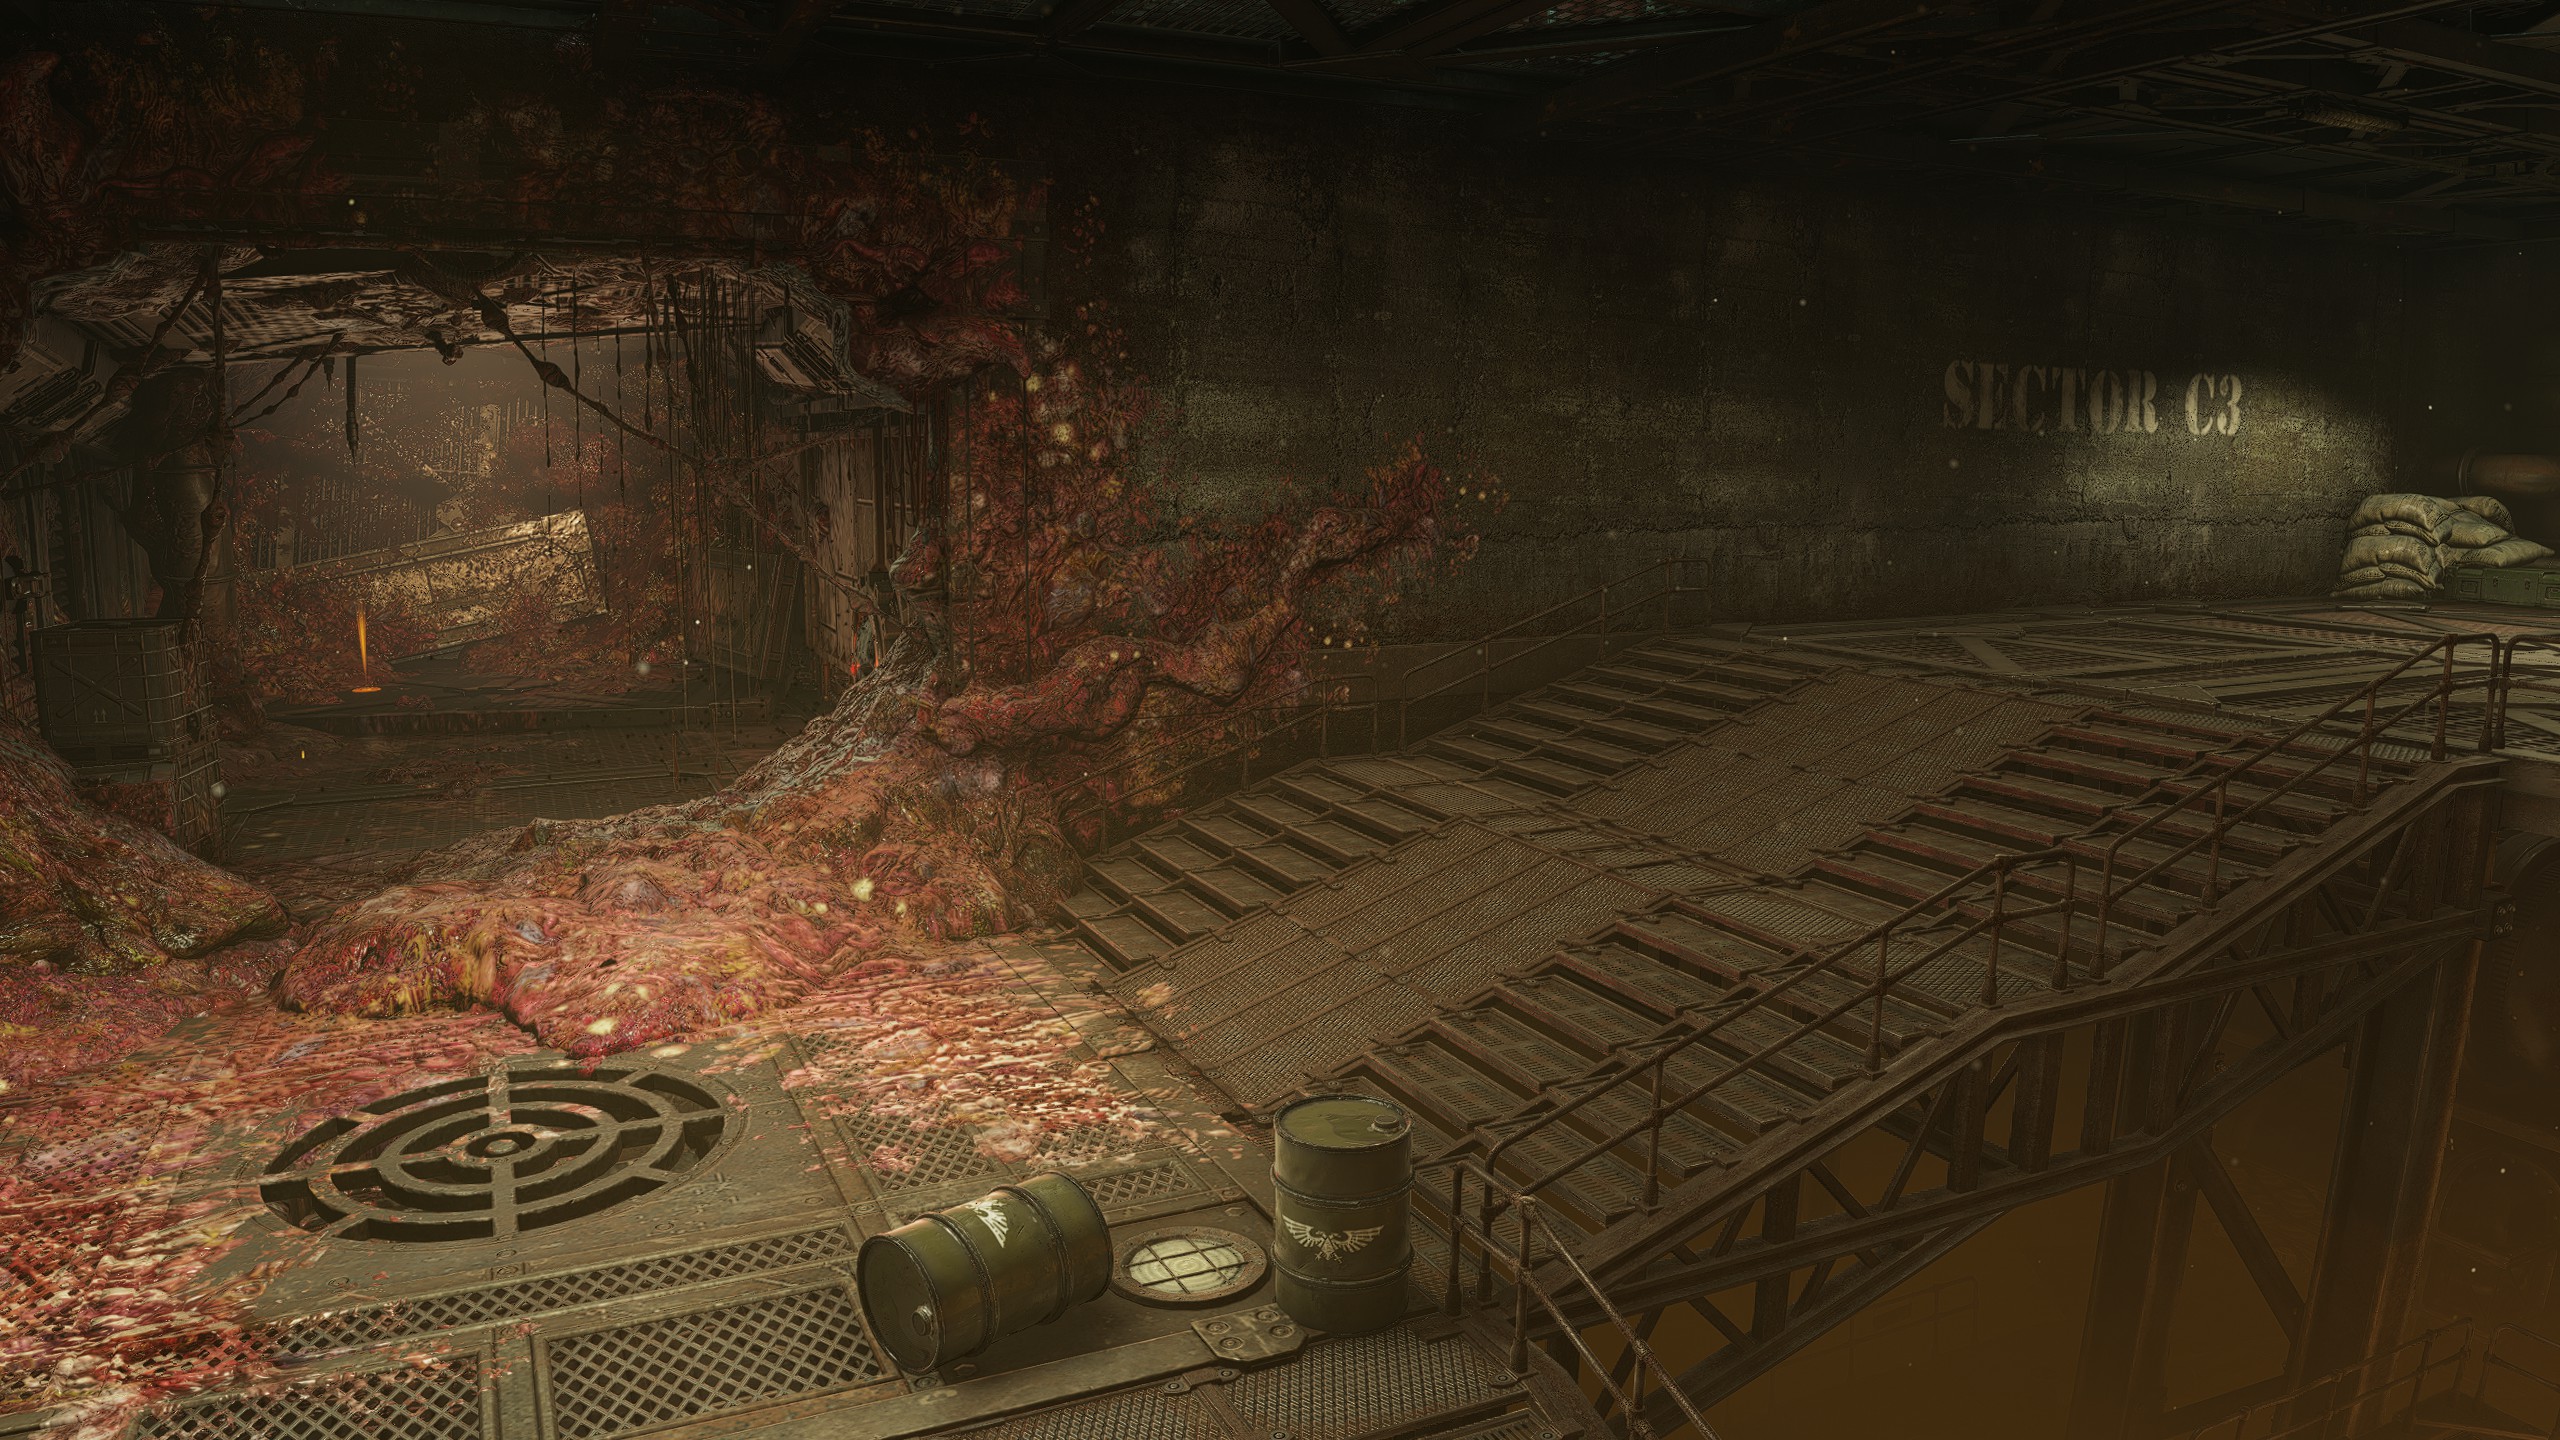
Gene-Seed #4
Location
Objective: Reach the Cannons
After awakening the consoles, proceed forward into the room that opens up. Instead of going to the right or up the stairs to progress the mission, head to the back of the room and look to the left under the walkway and check for a Gene-Seed on top of the crate next to a closed door.
After awakening the consoles, proceed forward into the room that opens up. Instead of going to the right or up the stairs to progress the mission, head to the back of the room and look to the left under the walkway and check for a Gene-Seed on top of the crate next to a closed door.
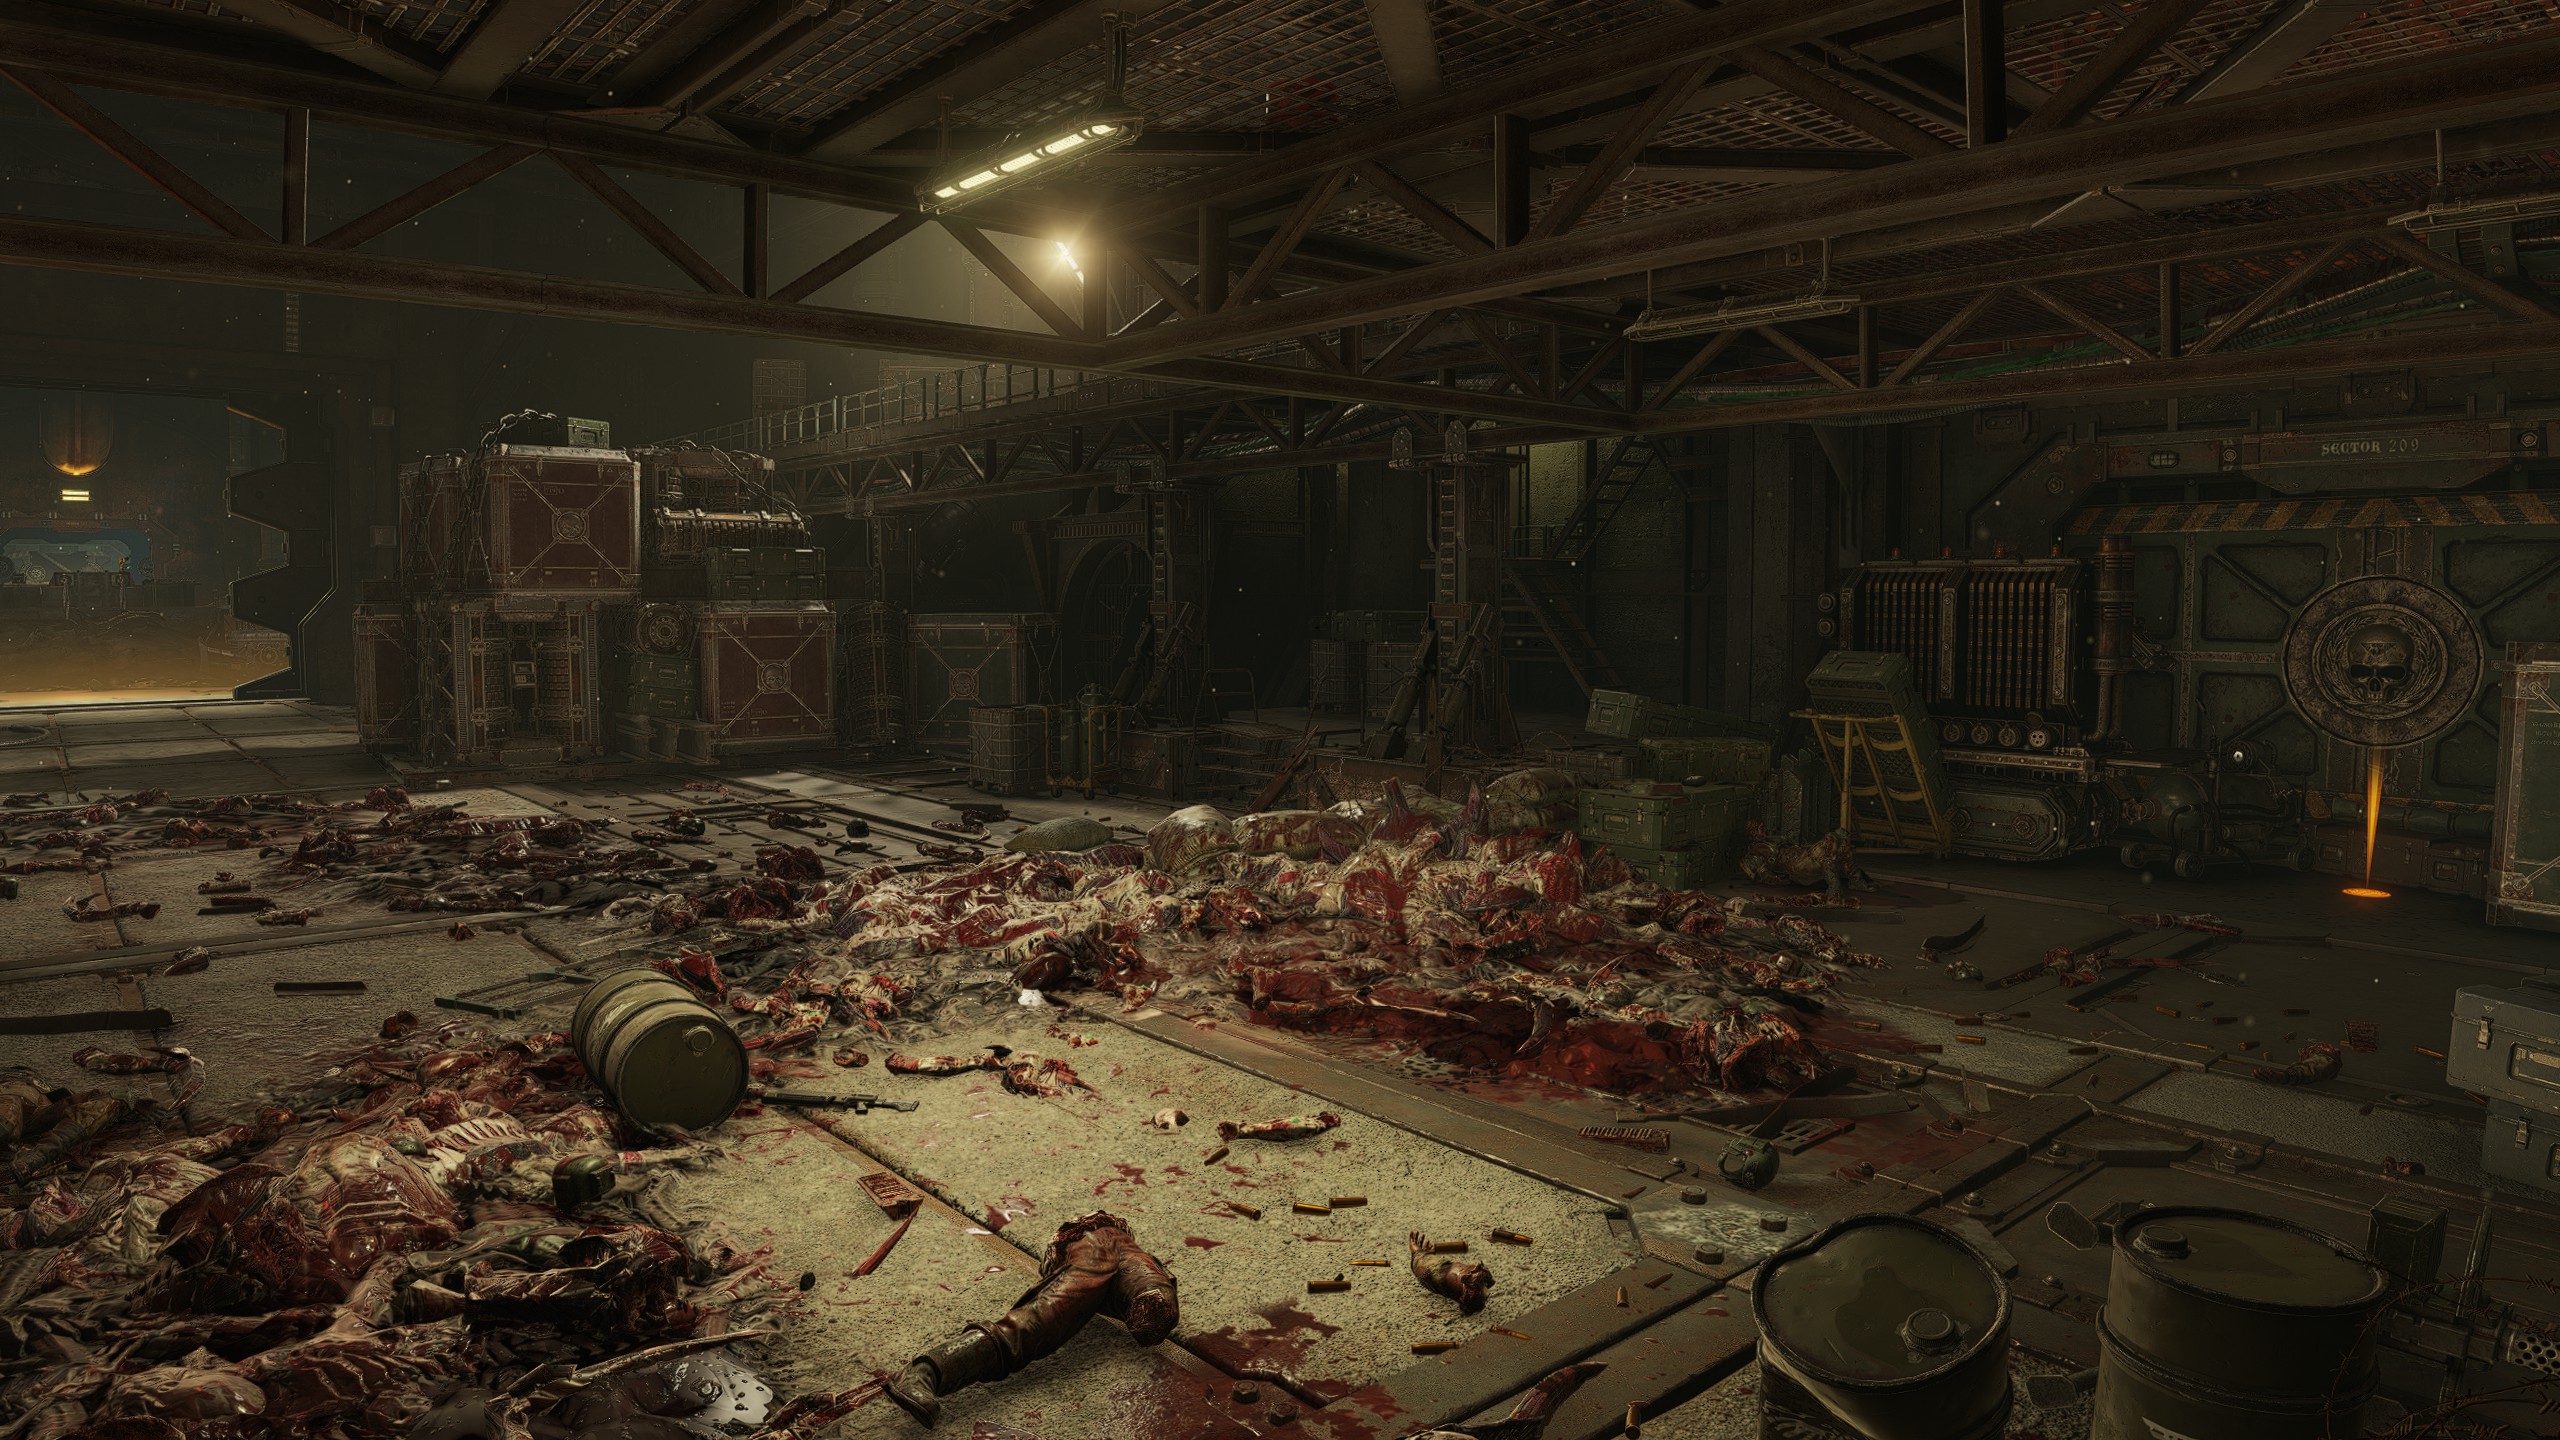
Gene-Seed #5
Location
Objective: Reach the Cannons
Keep progressing the mission until you reach the circular room and proceed up the spiral staircase. Drop down into the supply room with the elevator leading to the battlements, but instead of going forward stick to the left side of the room and check the open area in the back with a red light. The Gene-Seed can spawn on some crates between the container on a train and the support column.
Keep progressing the mission until you reach the circular room and proceed up the spiral staircase. Drop down into the supply room with the elevator leading to the battlements, but instead of going forward stick to the left side of the room and check the open area in the back with a red light. The Gene-Seed can spawn on some crates between the container on a train and the support column.
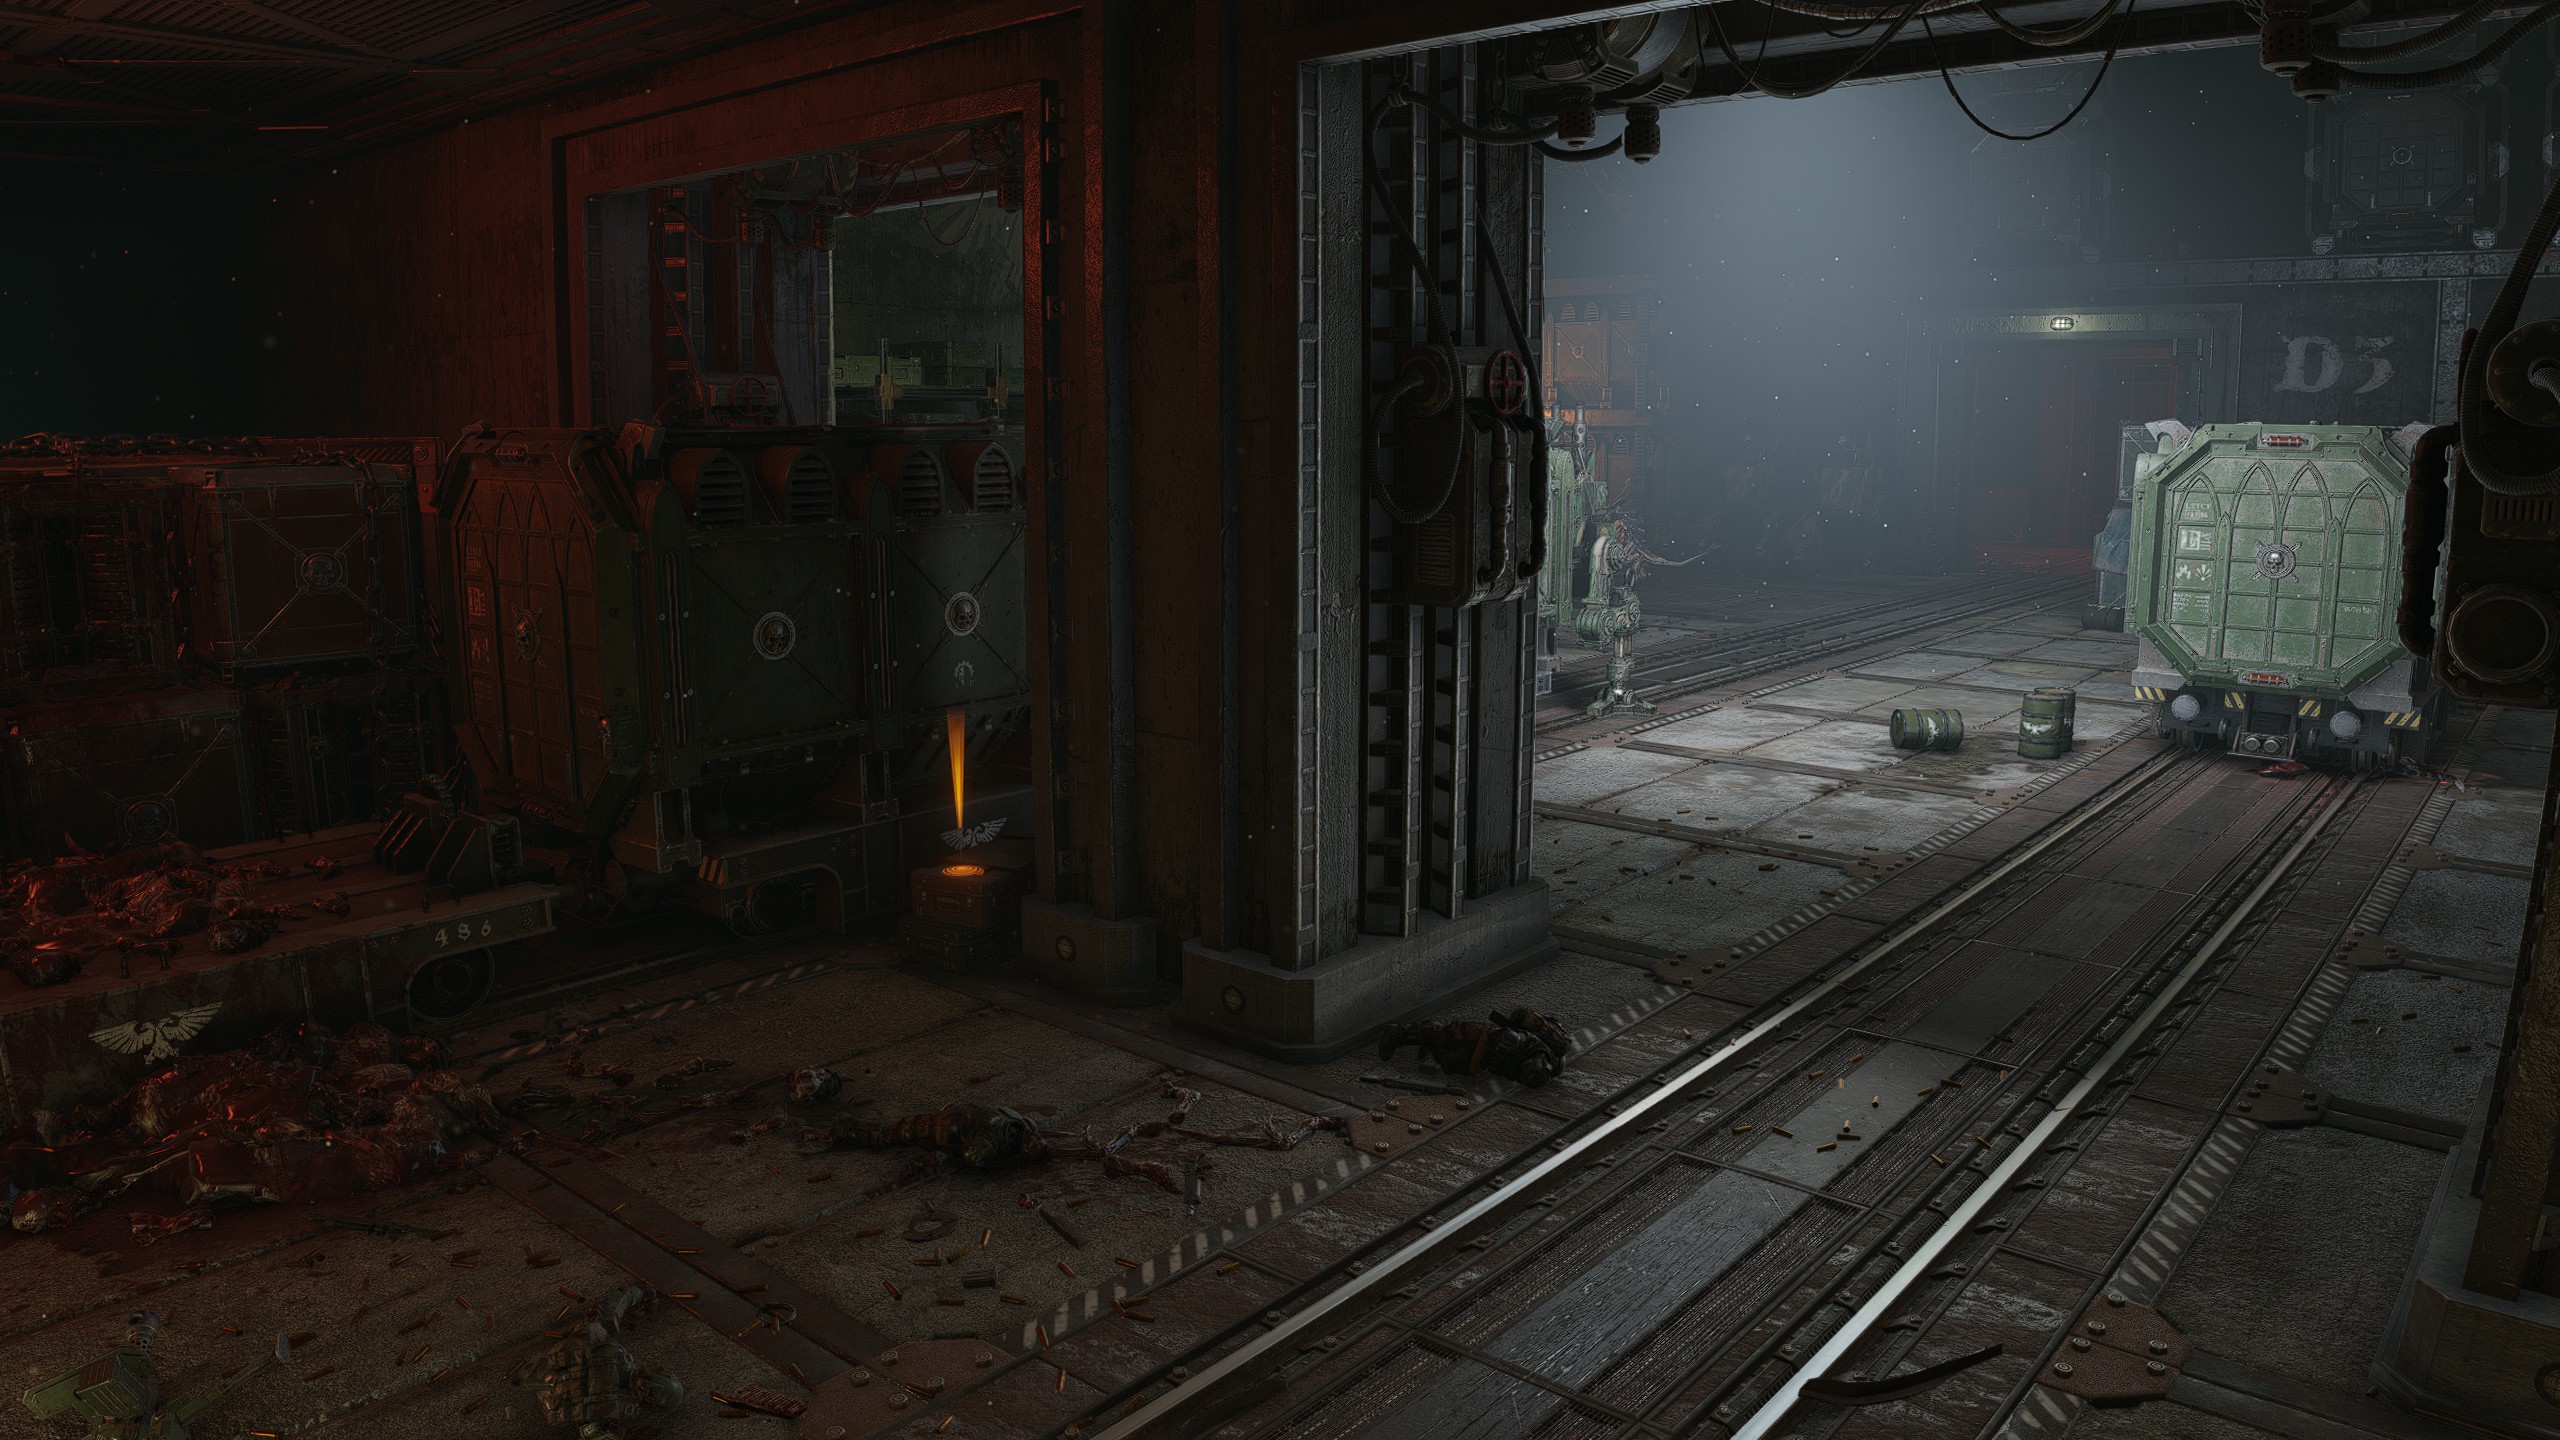
| Mission 08: Obelisk
This mission has a unique variable in that the possible Gene-Seeds later on in the mission are based on what objective you get during the dark section:
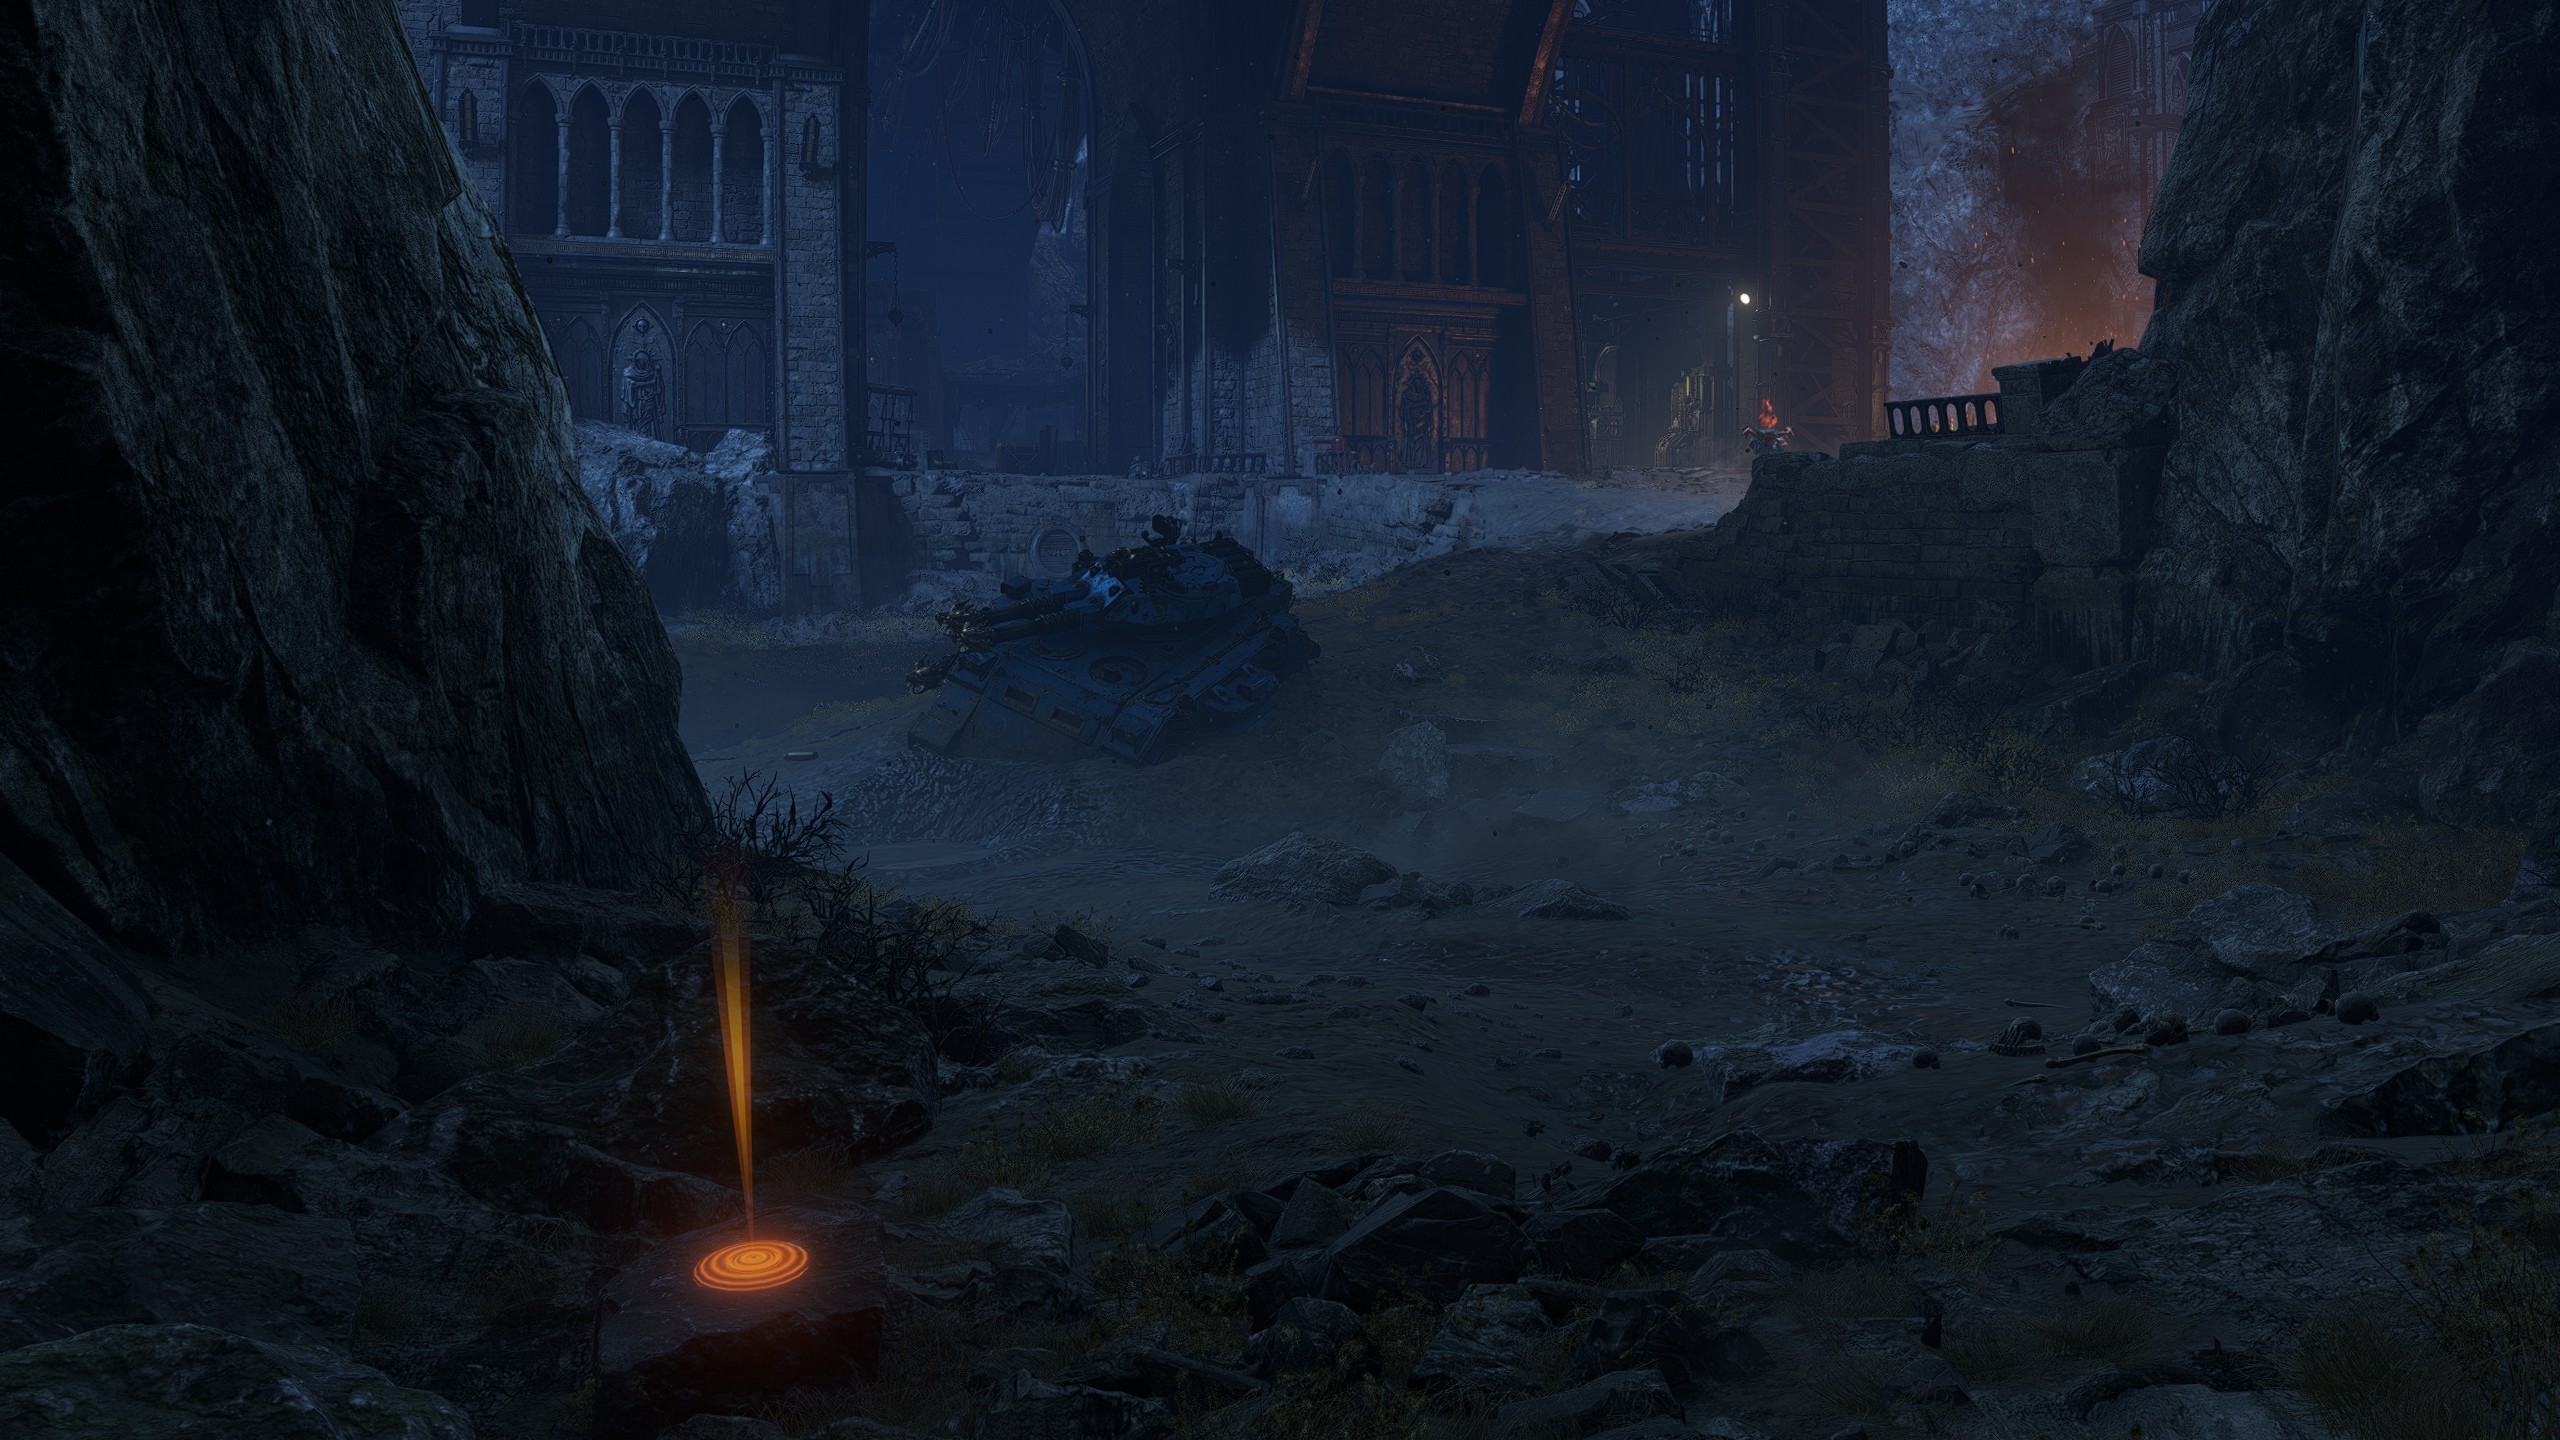
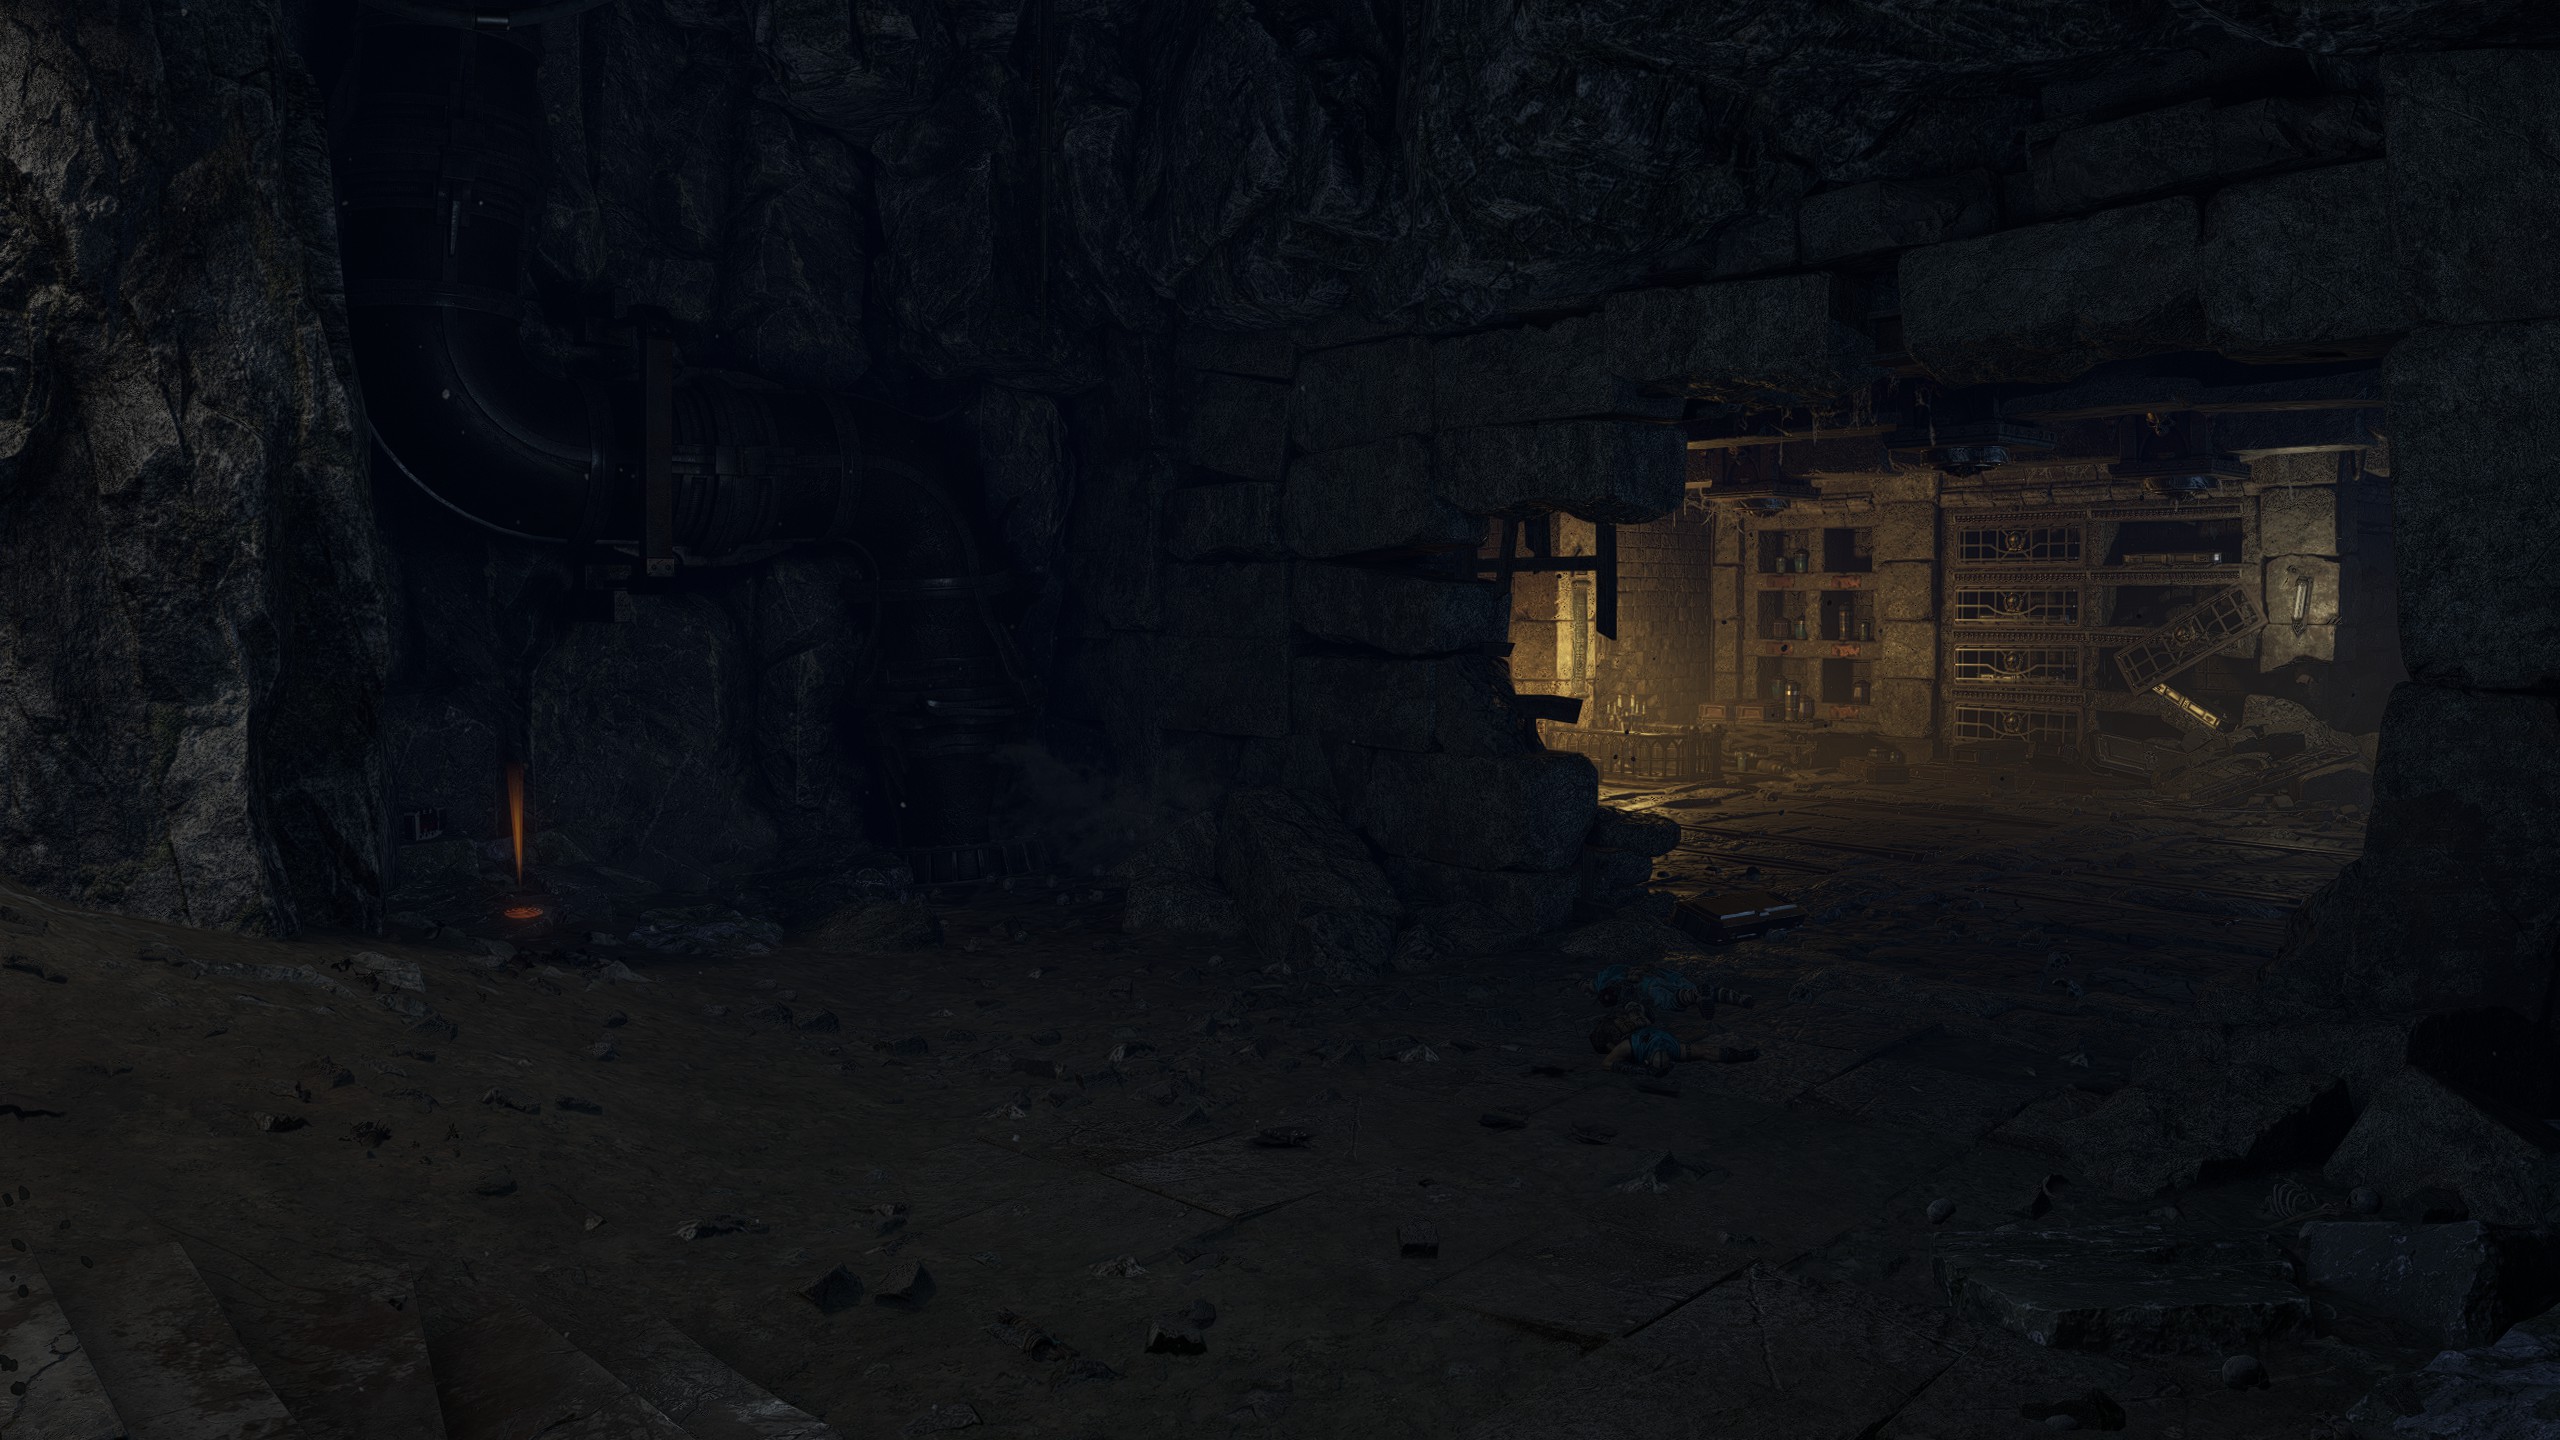
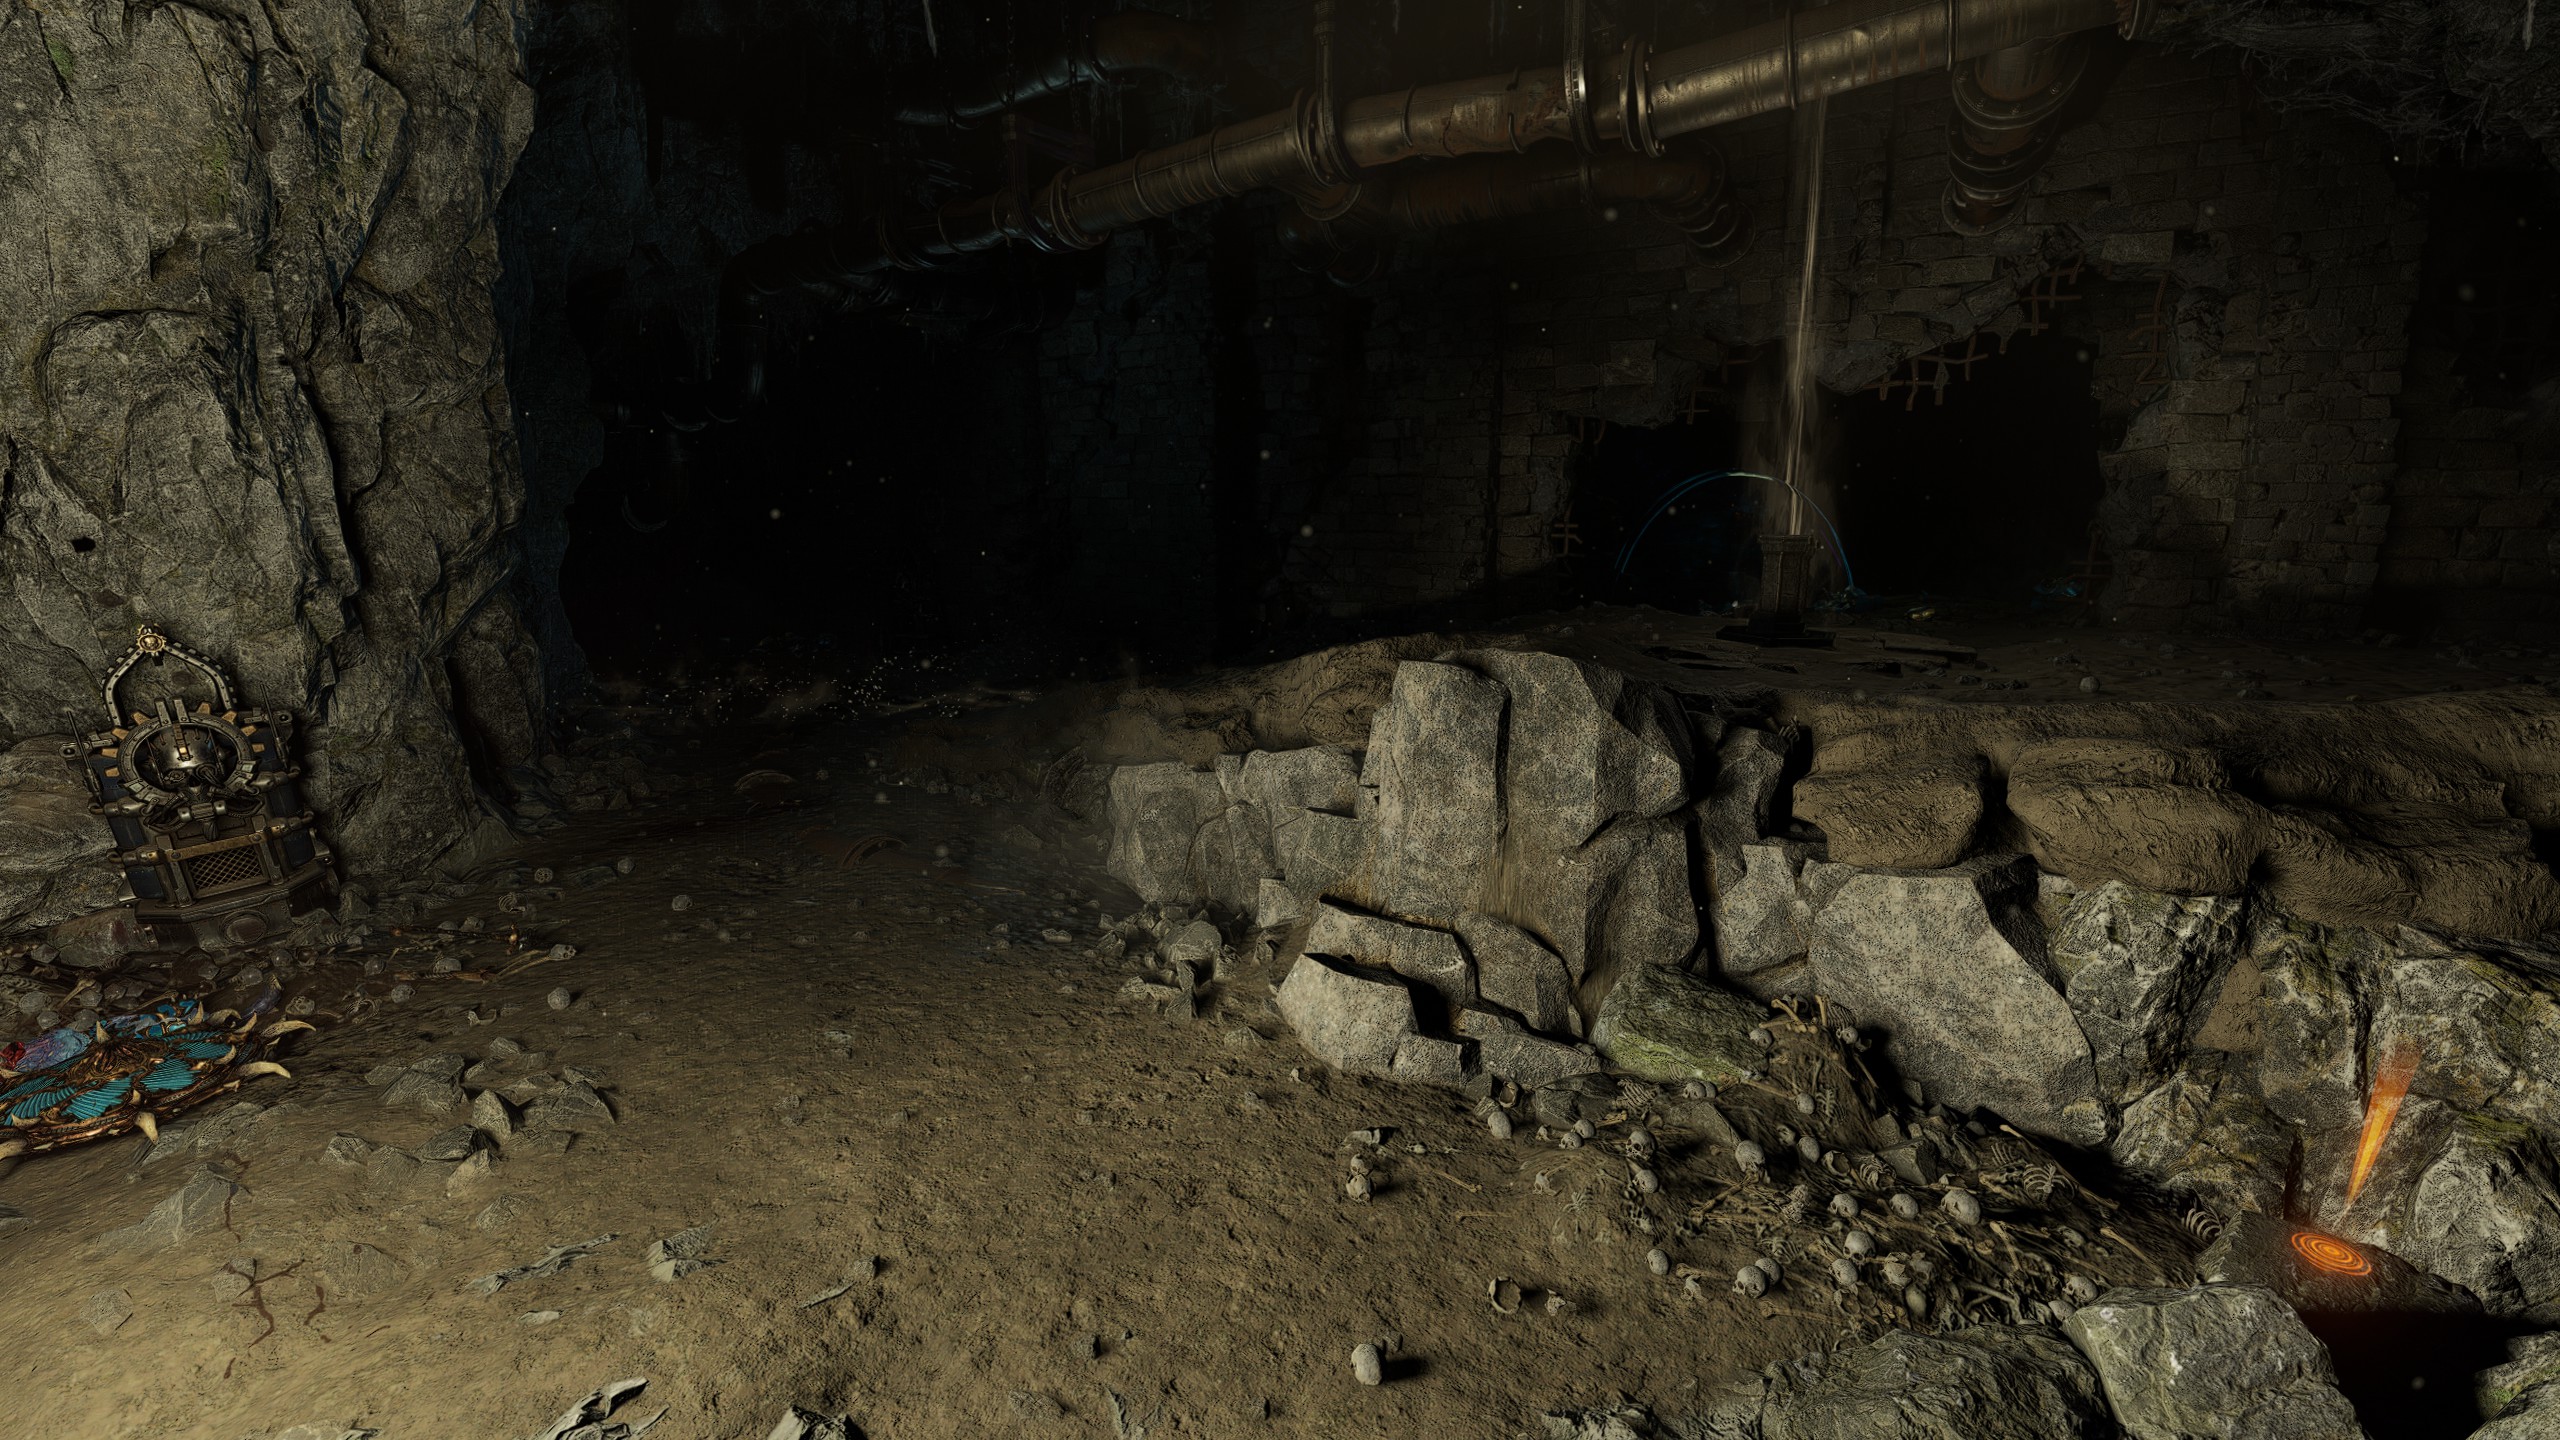
- If the path forward after picking up the Relic for the first time is straight ahead, you will get the Servo-skull path and can find #3 Or #4.
- If the path forward after picking up the Relic instead goes to the right, you will get the Console path and can find #5 Or #6.
Gene-Seed #1
Location
Objective: Advance to the Obelisk Control Console
At the start of the mission, proceed forward while keeping to the right side of the area. Once you reach the destroyed Thousand Sons' Rhino and Predator vehicles, turn to your right and check atop the rocks in the little alcove for a possible Gene-Seed.
At the start of the mission, proceed forward while keeping to the right side of the area. Once you reach the destroyed Thousand Sons' Rhino and Predator vehicles, turn to your right and check atop the rocks in the little alcove for a possible Gene-Seed.
Gene-Seed #2
Location
Objective: Traverse the Tomb
Proceed up the elevator and cross the bridge, dropping down at the end of it. Immediately head to the left and enter into a cave, following it down until you reach the hole in the wall leading into the adjacent room. Before going into the room, turn to your left and check the rocks in the recessed cave wall.
Proceed up the elevator and cross the bridge, dropping down at the end of it. Immediately head to the left and enter into a cave, following it down until you reach the hole in the wall leading into the adjacent room. Before going into the room, turn to your left and check the rocks in the recessed cave wall.
Gene-Seed #3
Location
Objective: Find and Reactivate a Servo-skull
After picking up the relic, head forward. If the center door is open, proceed forward down the Servo-skull path until you reach the room to start the aforementioned objective. Head to the right side of the room and find the altar on that side. The Gene-Seed (and potentially one of the Servo-skull spawns) will be under the ledge below the altar.
After picking up the relic, head forward. If the center door is open, proceed forward down the Servo-skull path until you reach the room to start the aforementioned objective. Head to the right side of the room and find the altar on that side. The Gene-Seed (and potentially one of the Servo-skull spawns) will be under the ledge below the altar.
Gene-Seed #4
Location
Objective: Traverse the Tomb
Complete the Servo-skull objective and proceed into the next room, dropping down the collapsed elevator. Head down the stairs leading to the door, then turn to the left at the bottom and check through the broken wall under the stairs where a Gene-Seed can spawn atop a pallet.
Complete the Servo-skull objective and proceed into the next room, dropping down the collapsed elevator. Head down the stairs leading to the door, then turn to the left at the bottom and check through the broken wall under the stairs where a Gene-Seed can spawn atop a pallet.
Gene-Seed #5
Location
Objective: Traverse the Tomb
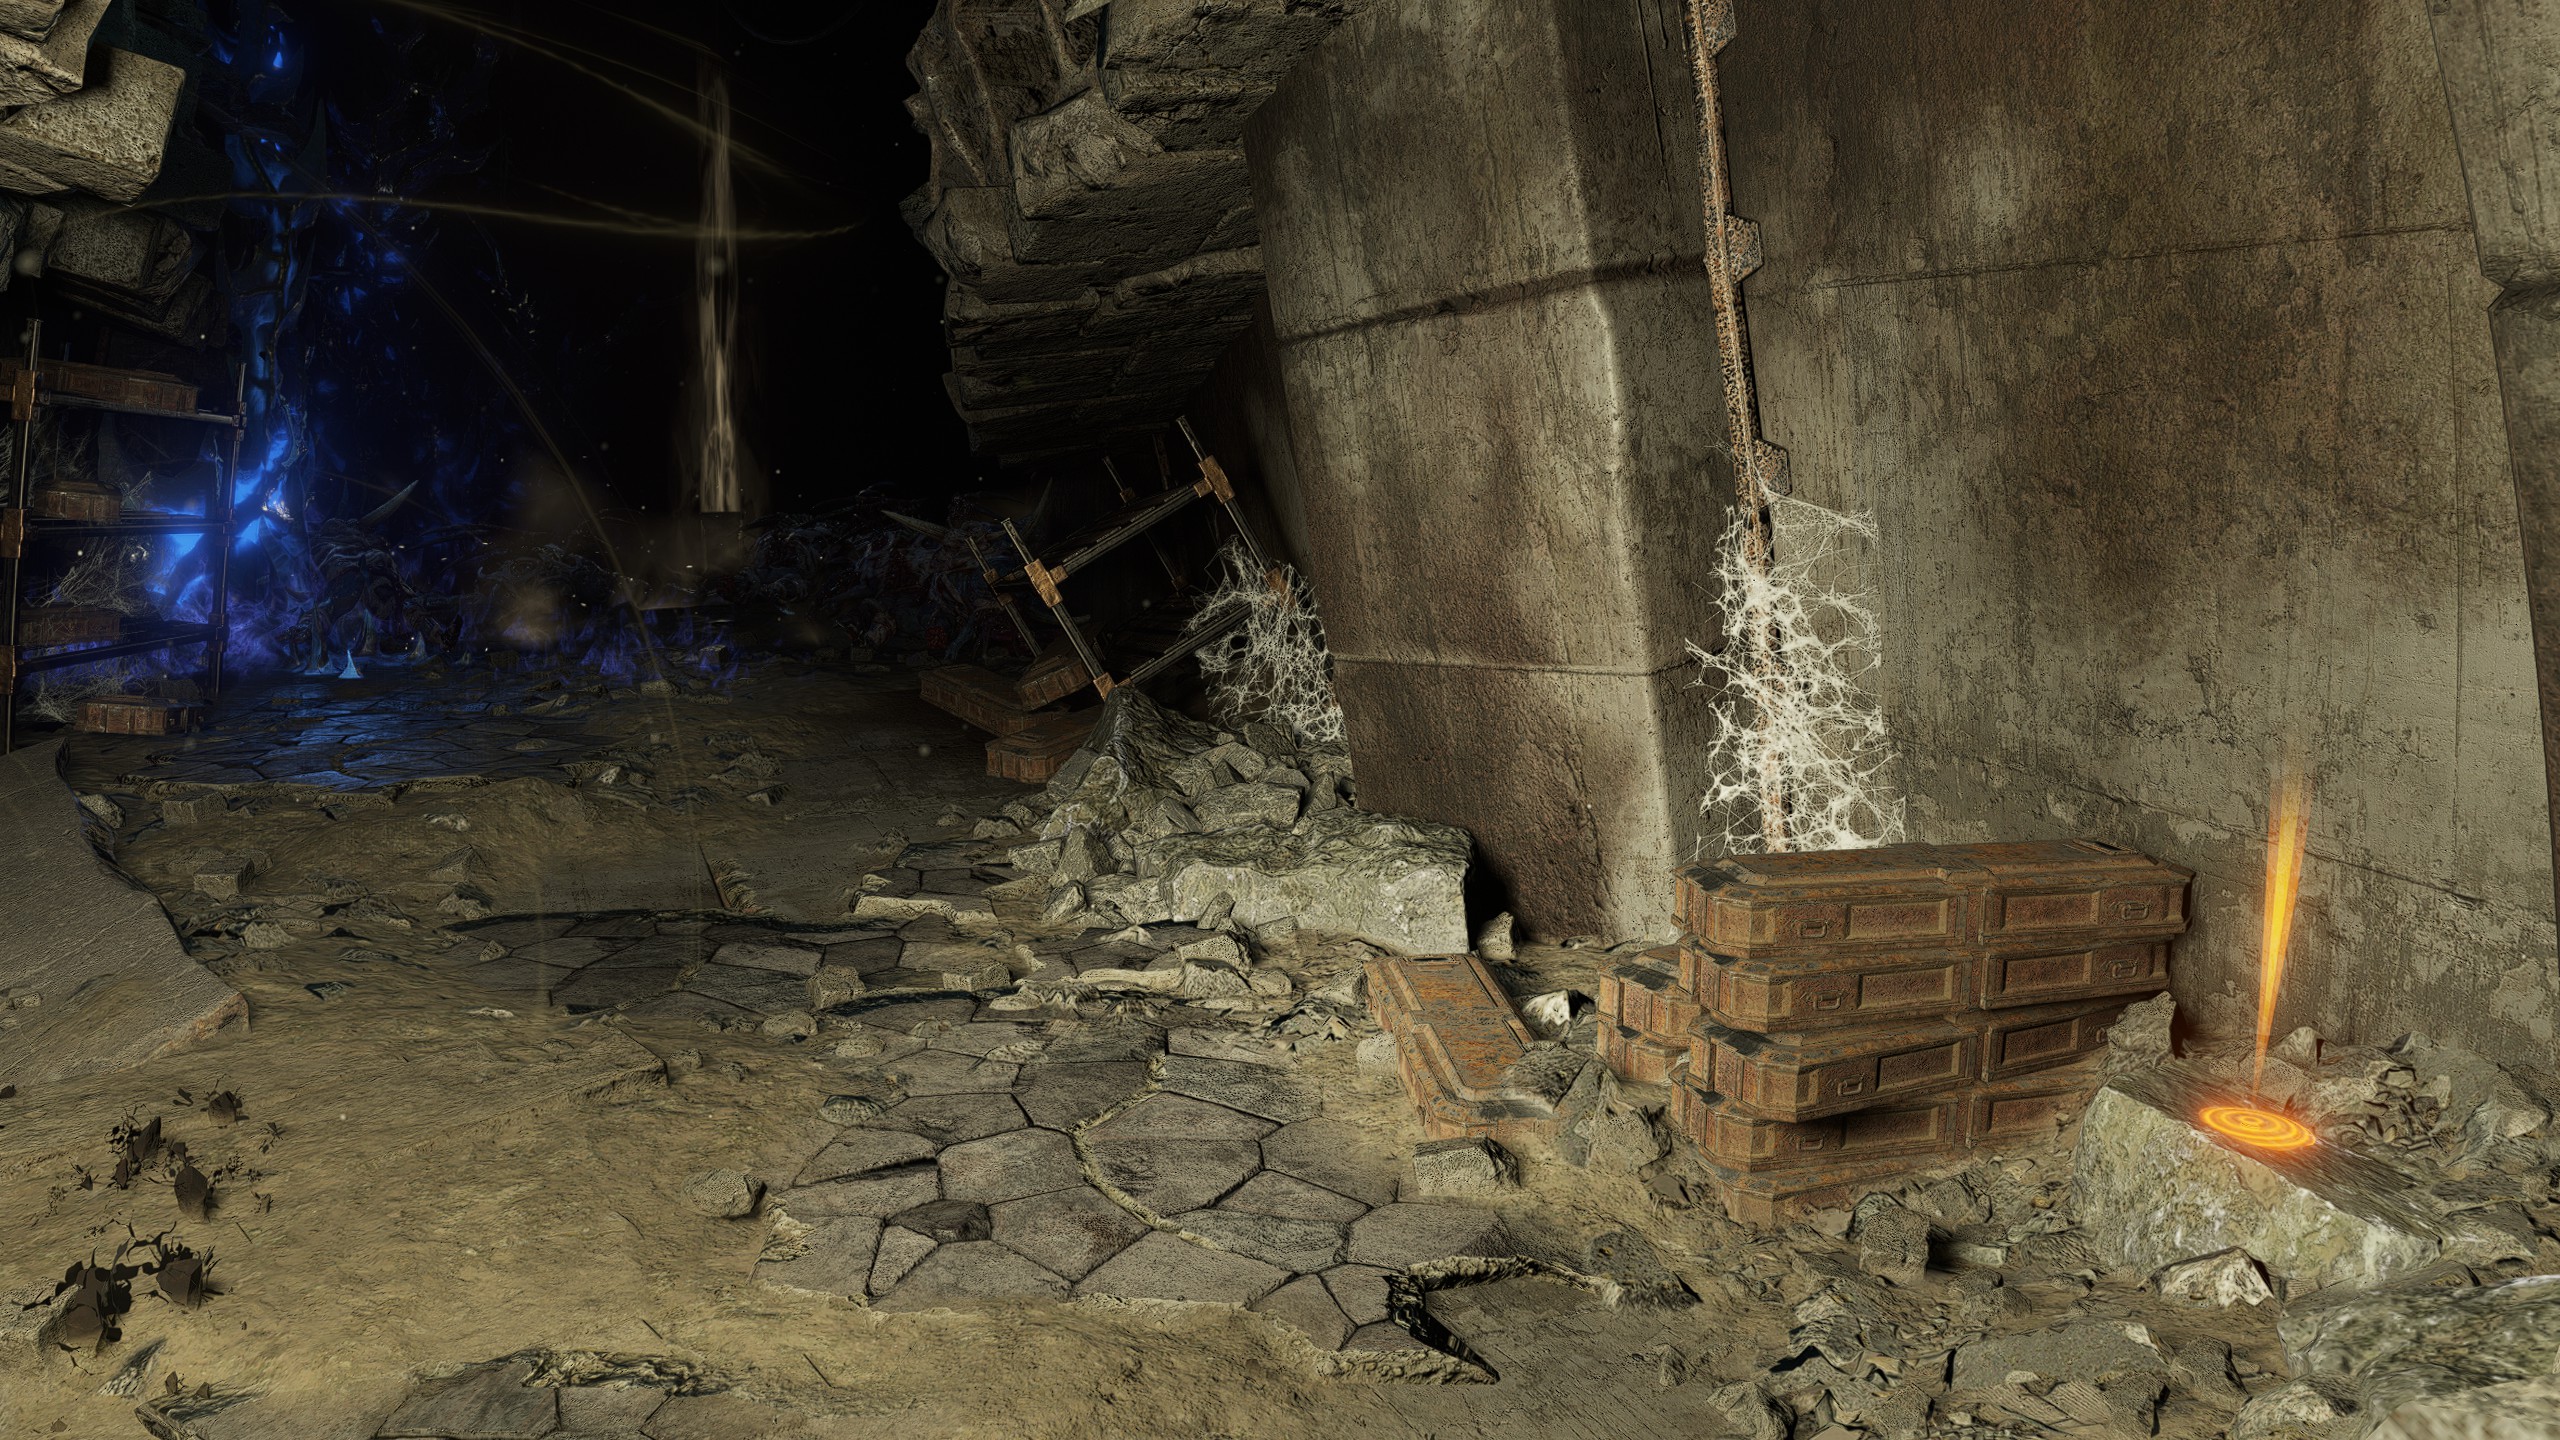
After picking up the relic, head forward. If the right door is open, proceed forward down the Console path and into the maze-like room ahead of you. Immediately turn left and stick to the path until you reach the first altar. To your left will be a small "corridor" in which the Gene-Seed may be hiding in the back behind some caskets.
After picking up the relic, head forward. If the right door is open, proceed forward down the Console path and into the maze-like room ahead of you. Immediately turn left and stick to the path until you reach the first altar. To your left will be a small "corridor" in which the Gene-Seed may be hiding in the back behind some caskets.
Gene-Seed #6
Location
Objective: Traverse the Tomb
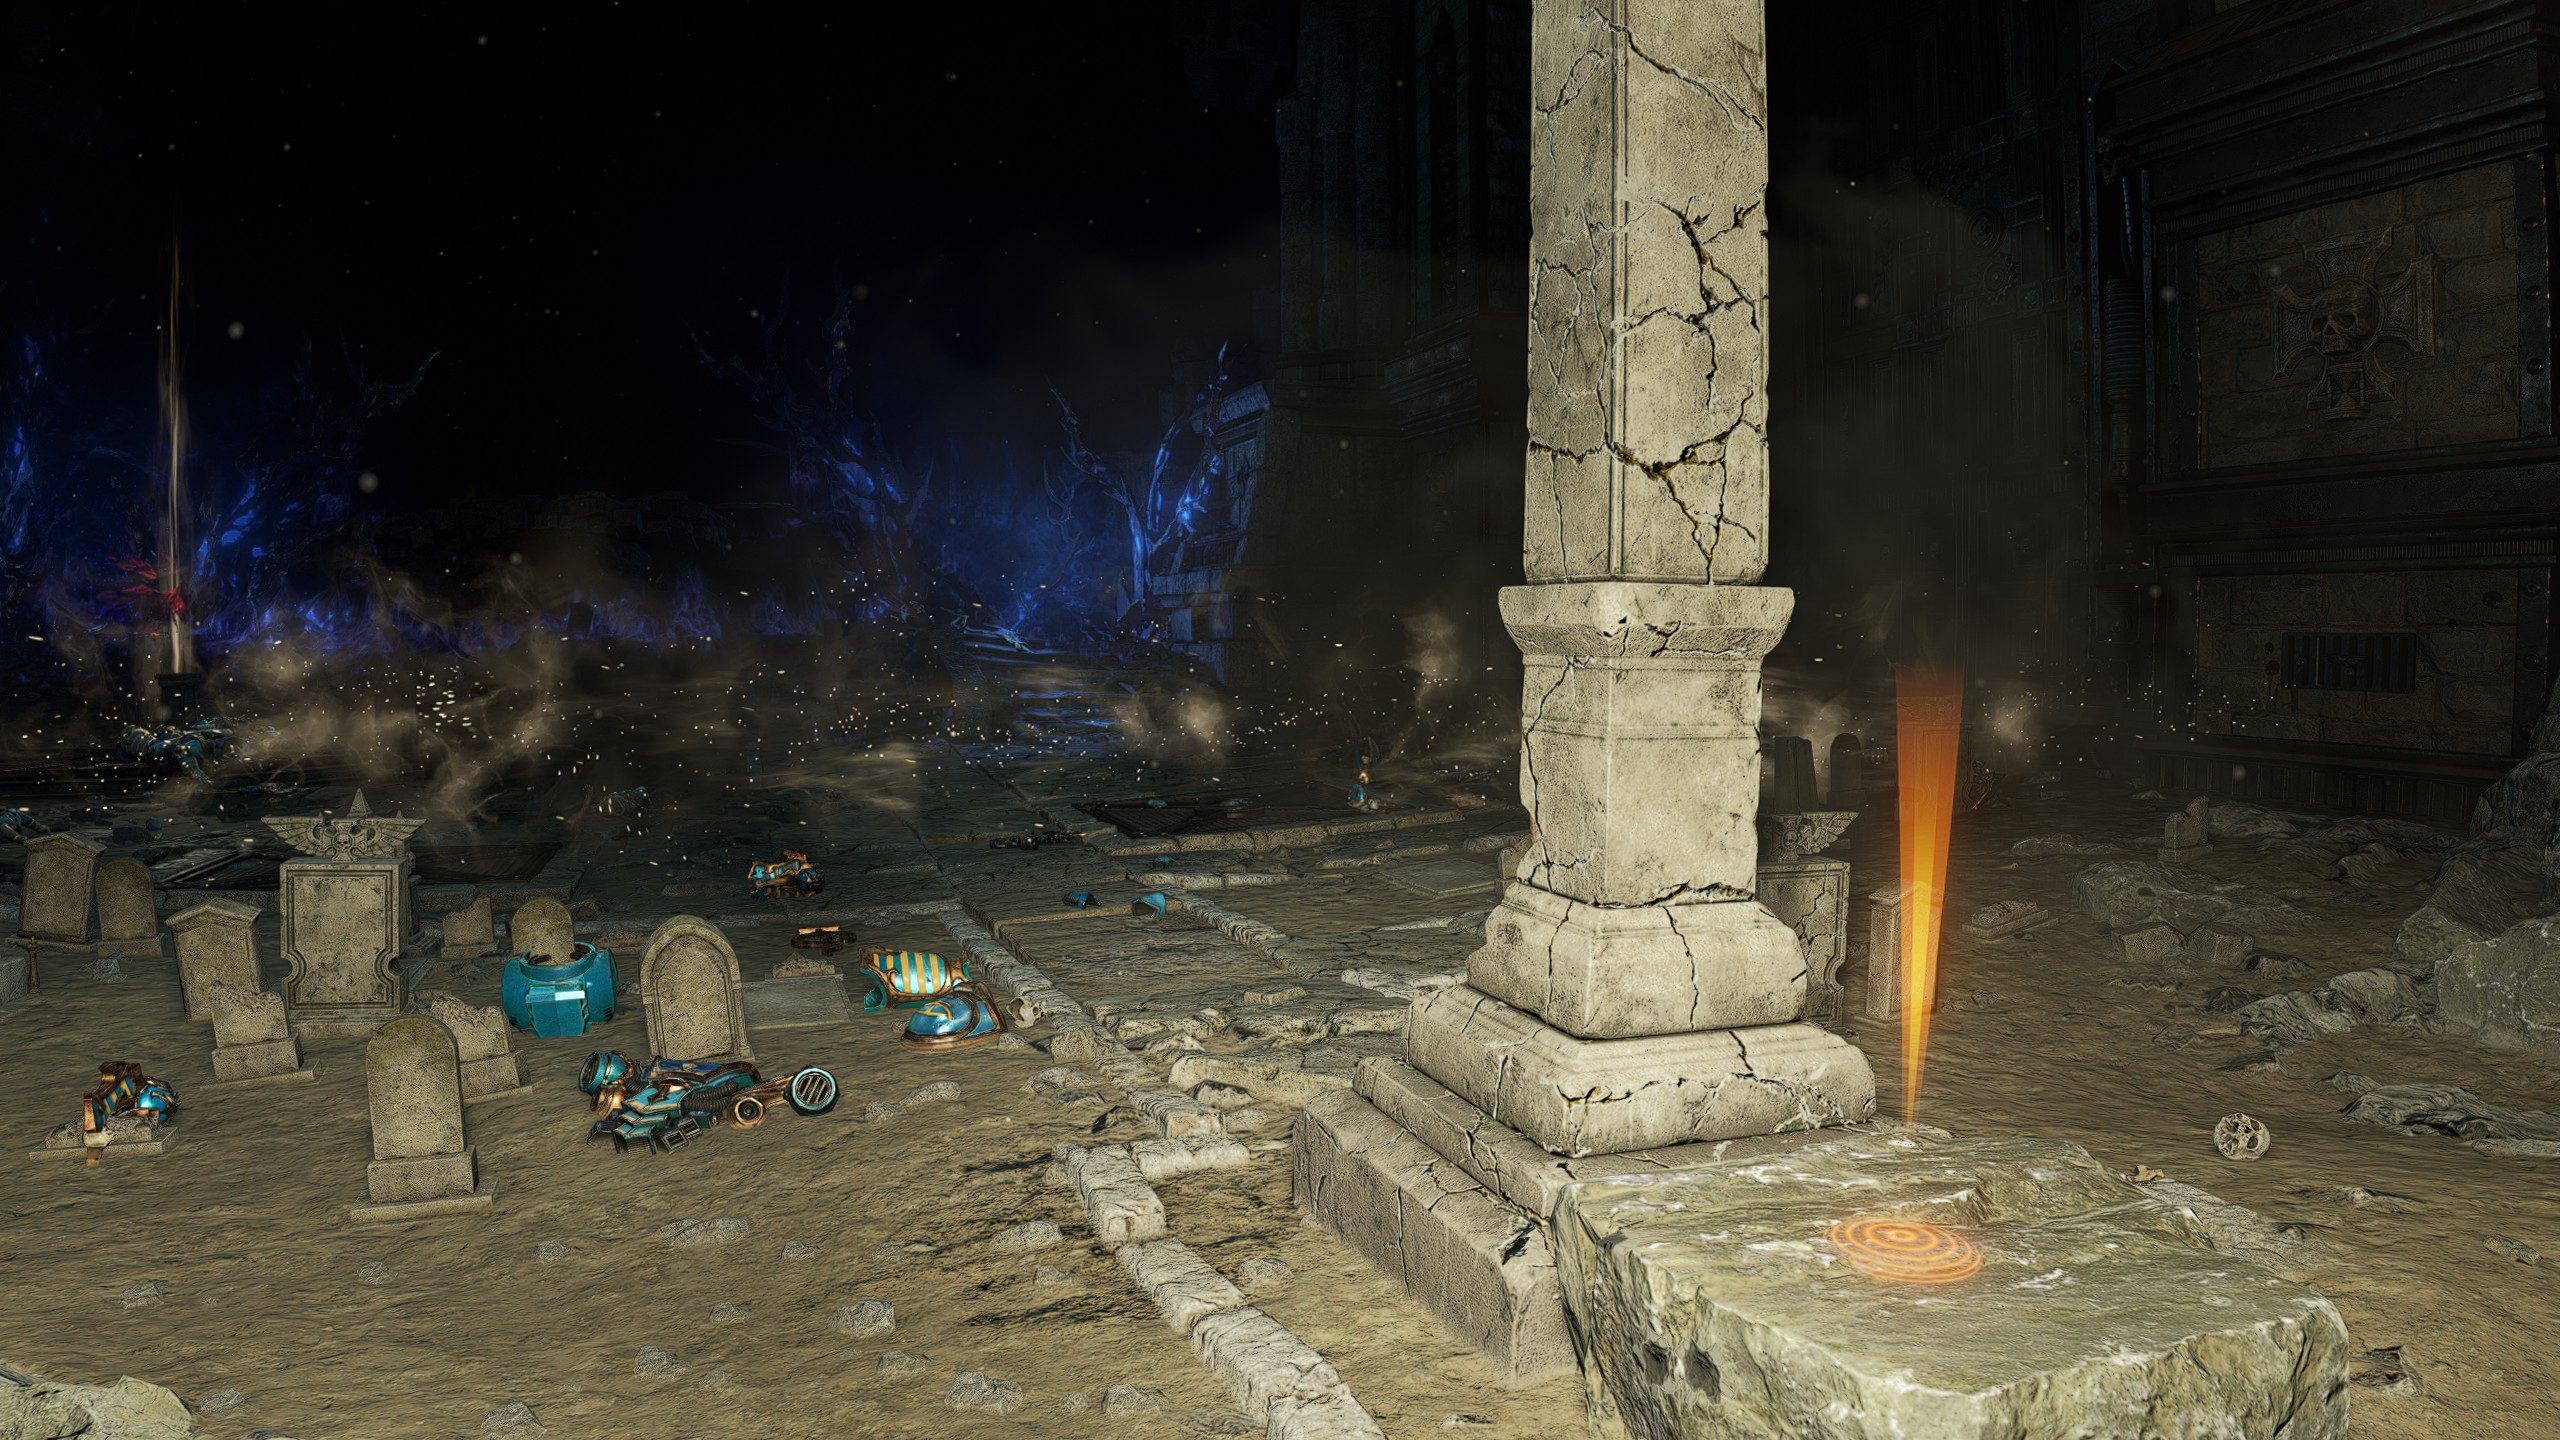
Reactivate the consoles and then open the door into the last part of the tomb. Turn to your left and keep going straight, passing two altars before dropping down to a third one. Straight ahead is a large pillar with which the Gene-Seed can spawn on a rock immediately behind it.
Reactivate the consoles and then open the door into the last part of the tomb. Turn to your left and keep going straight, passing two altars before dropping down to a third one. Straight ahead is a large pillar with which the Gene-Seed can spawn on a rock immediately behind it.
| Mission 09: Exfiltration
Gene-Seed #1
Location
Objective: Reach the Longinus Gamma facility
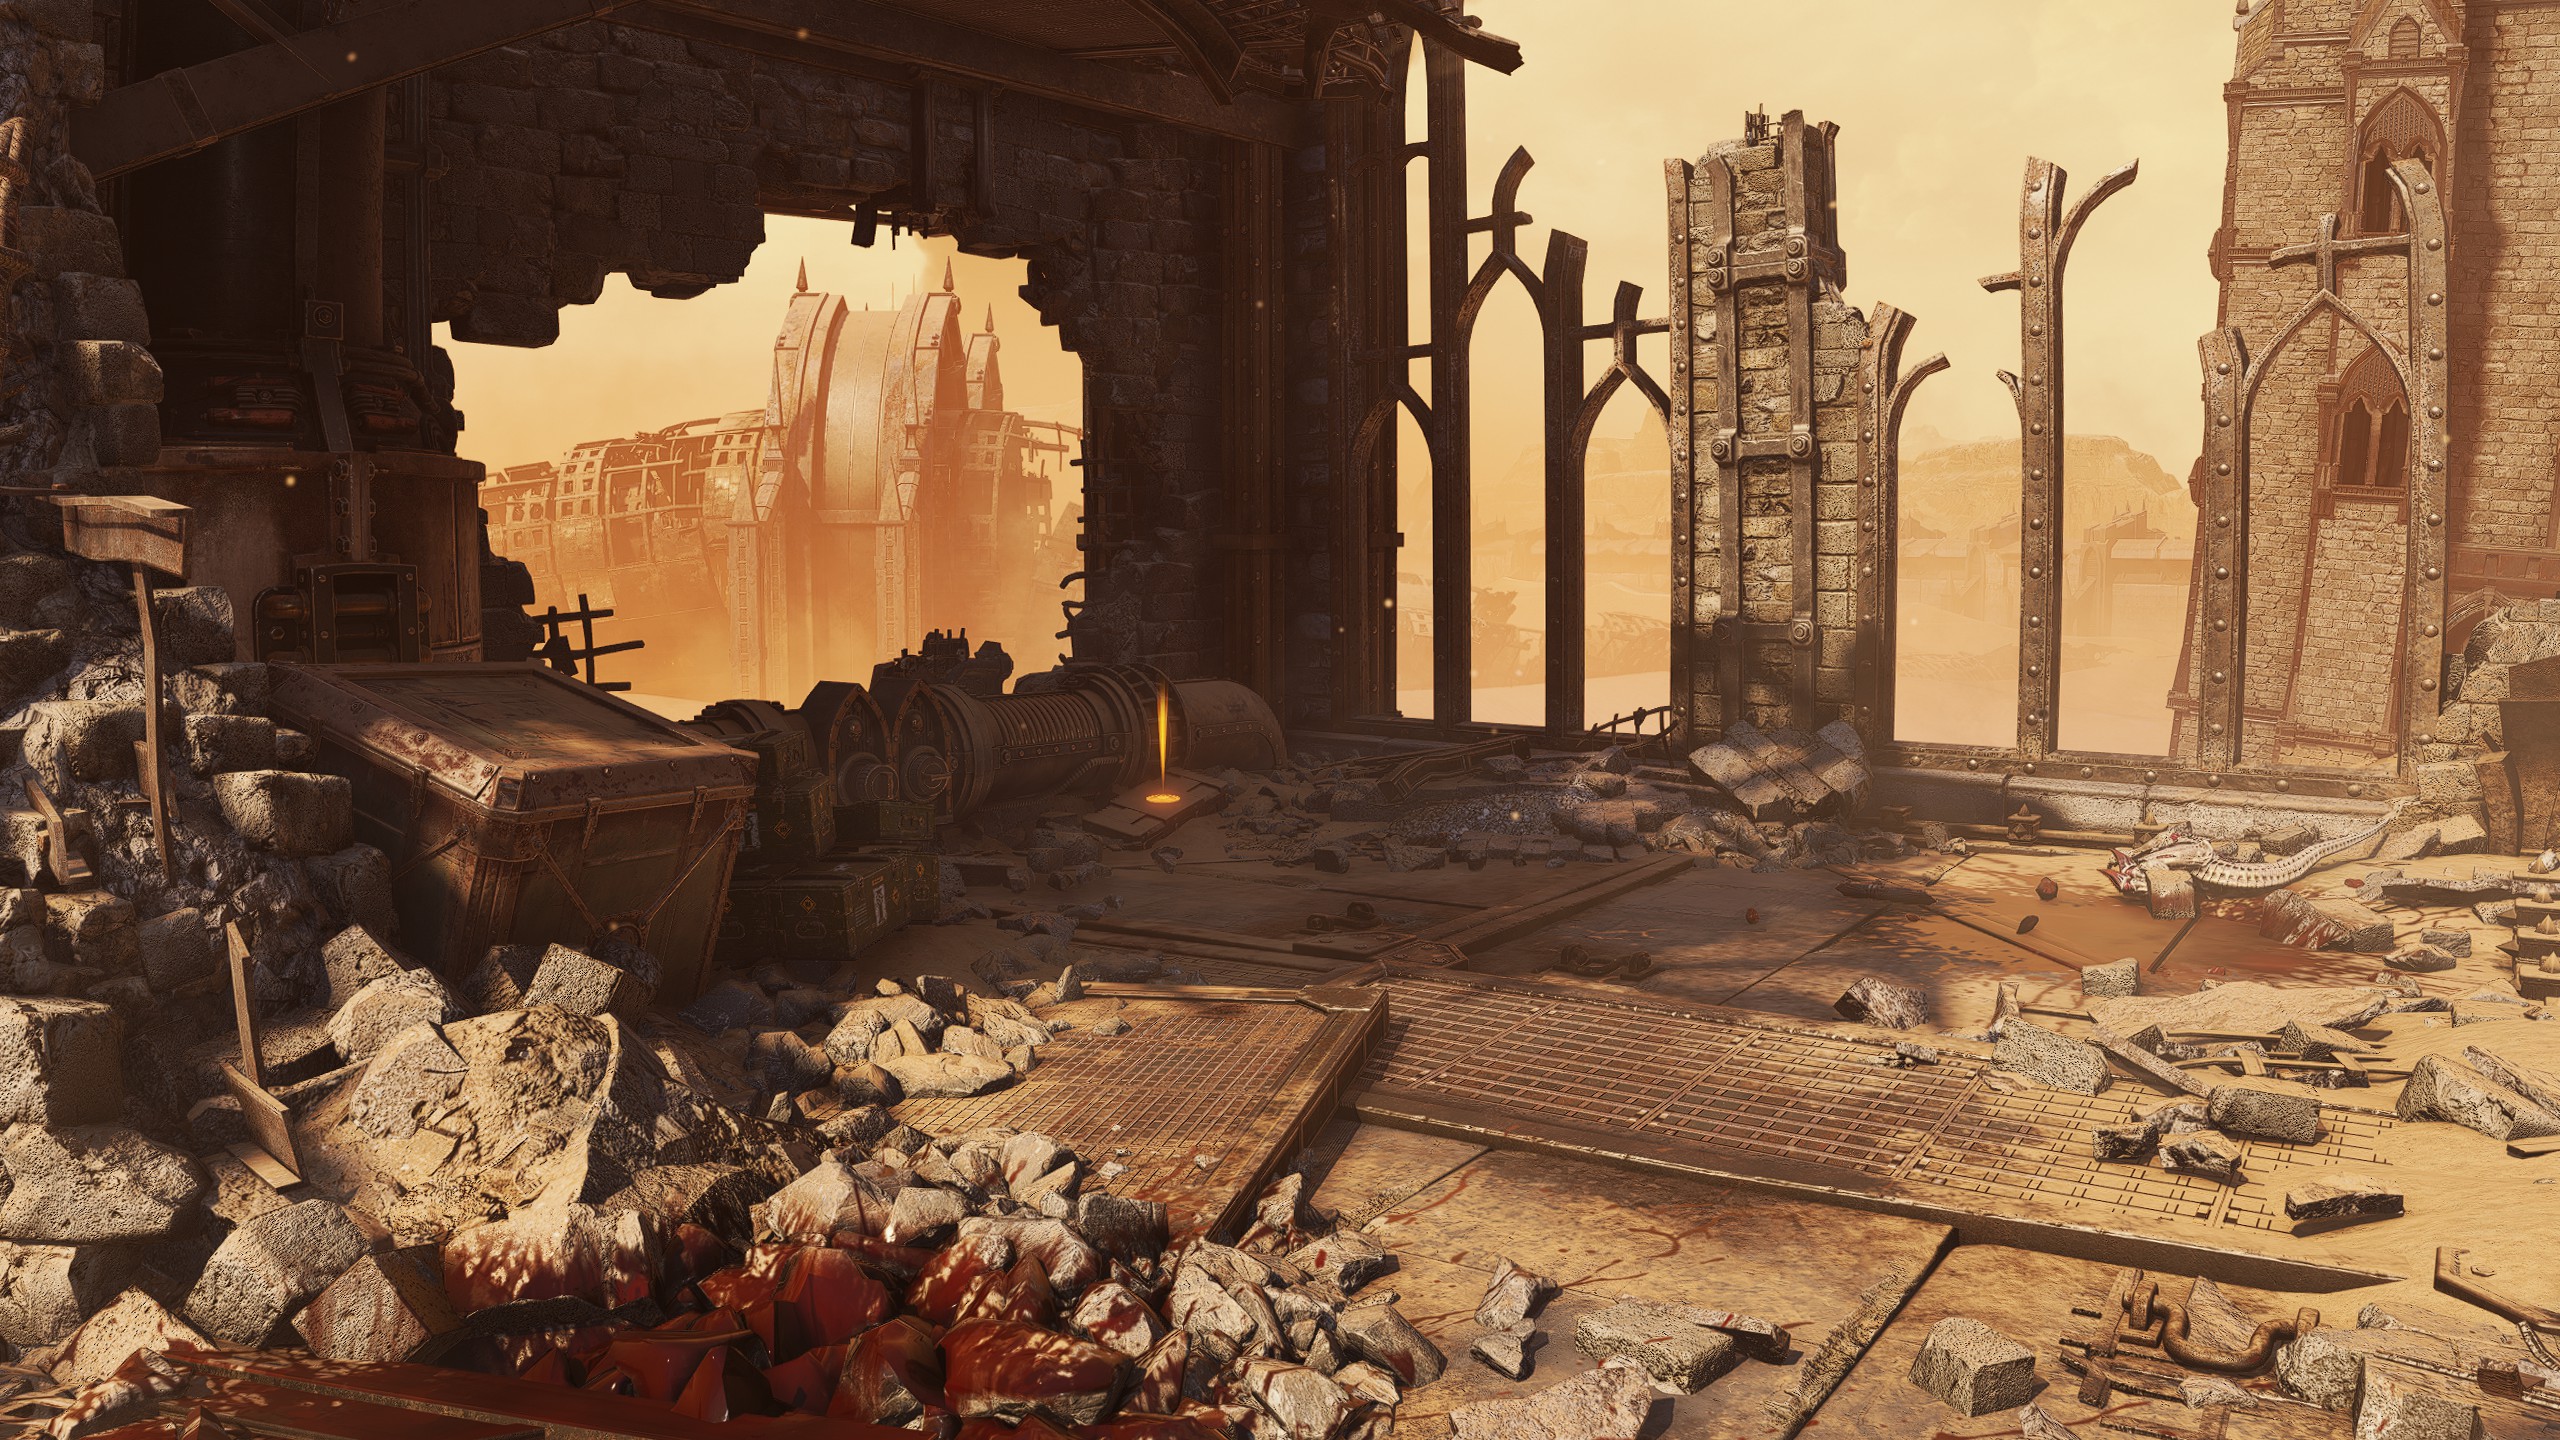
At the start of the mission, proceed forward by any means until you get to the second open area where a large sunken building stands ahead of you. Instead of going towards the large building, head to the small one off to the left at the edge of the area and go up the collapsed walkway. At the top the Gene-Seed may spawn on a crate against the pipe to your left.
At the start of the mission, proceed forward by any means until you get to the second open area where a large sunken building stands ahead of you. Instead of going towards the large building, head to the small one off to the left at the edge of the area and go up the collapsed walkway. At the top the Gene-Seed may spawn on a crate against the pipe to your left.
Gene-Seed #2
Location
Objective: Reach the Longinus Gamma facility
After descending the elevator into the outer wall of the Mechanicus facility, head immediately down to the right and follow it all the way down. The Gene-Seed can spawn inside the tube section hidden on some crates behind the large box.
After descending the elevator into the outer wall of the Mechanicus facility, head immediately down to the right and follow it all the way down. The Gene-Seed can spawn inside the tube section hidden on some crates behind the large box.
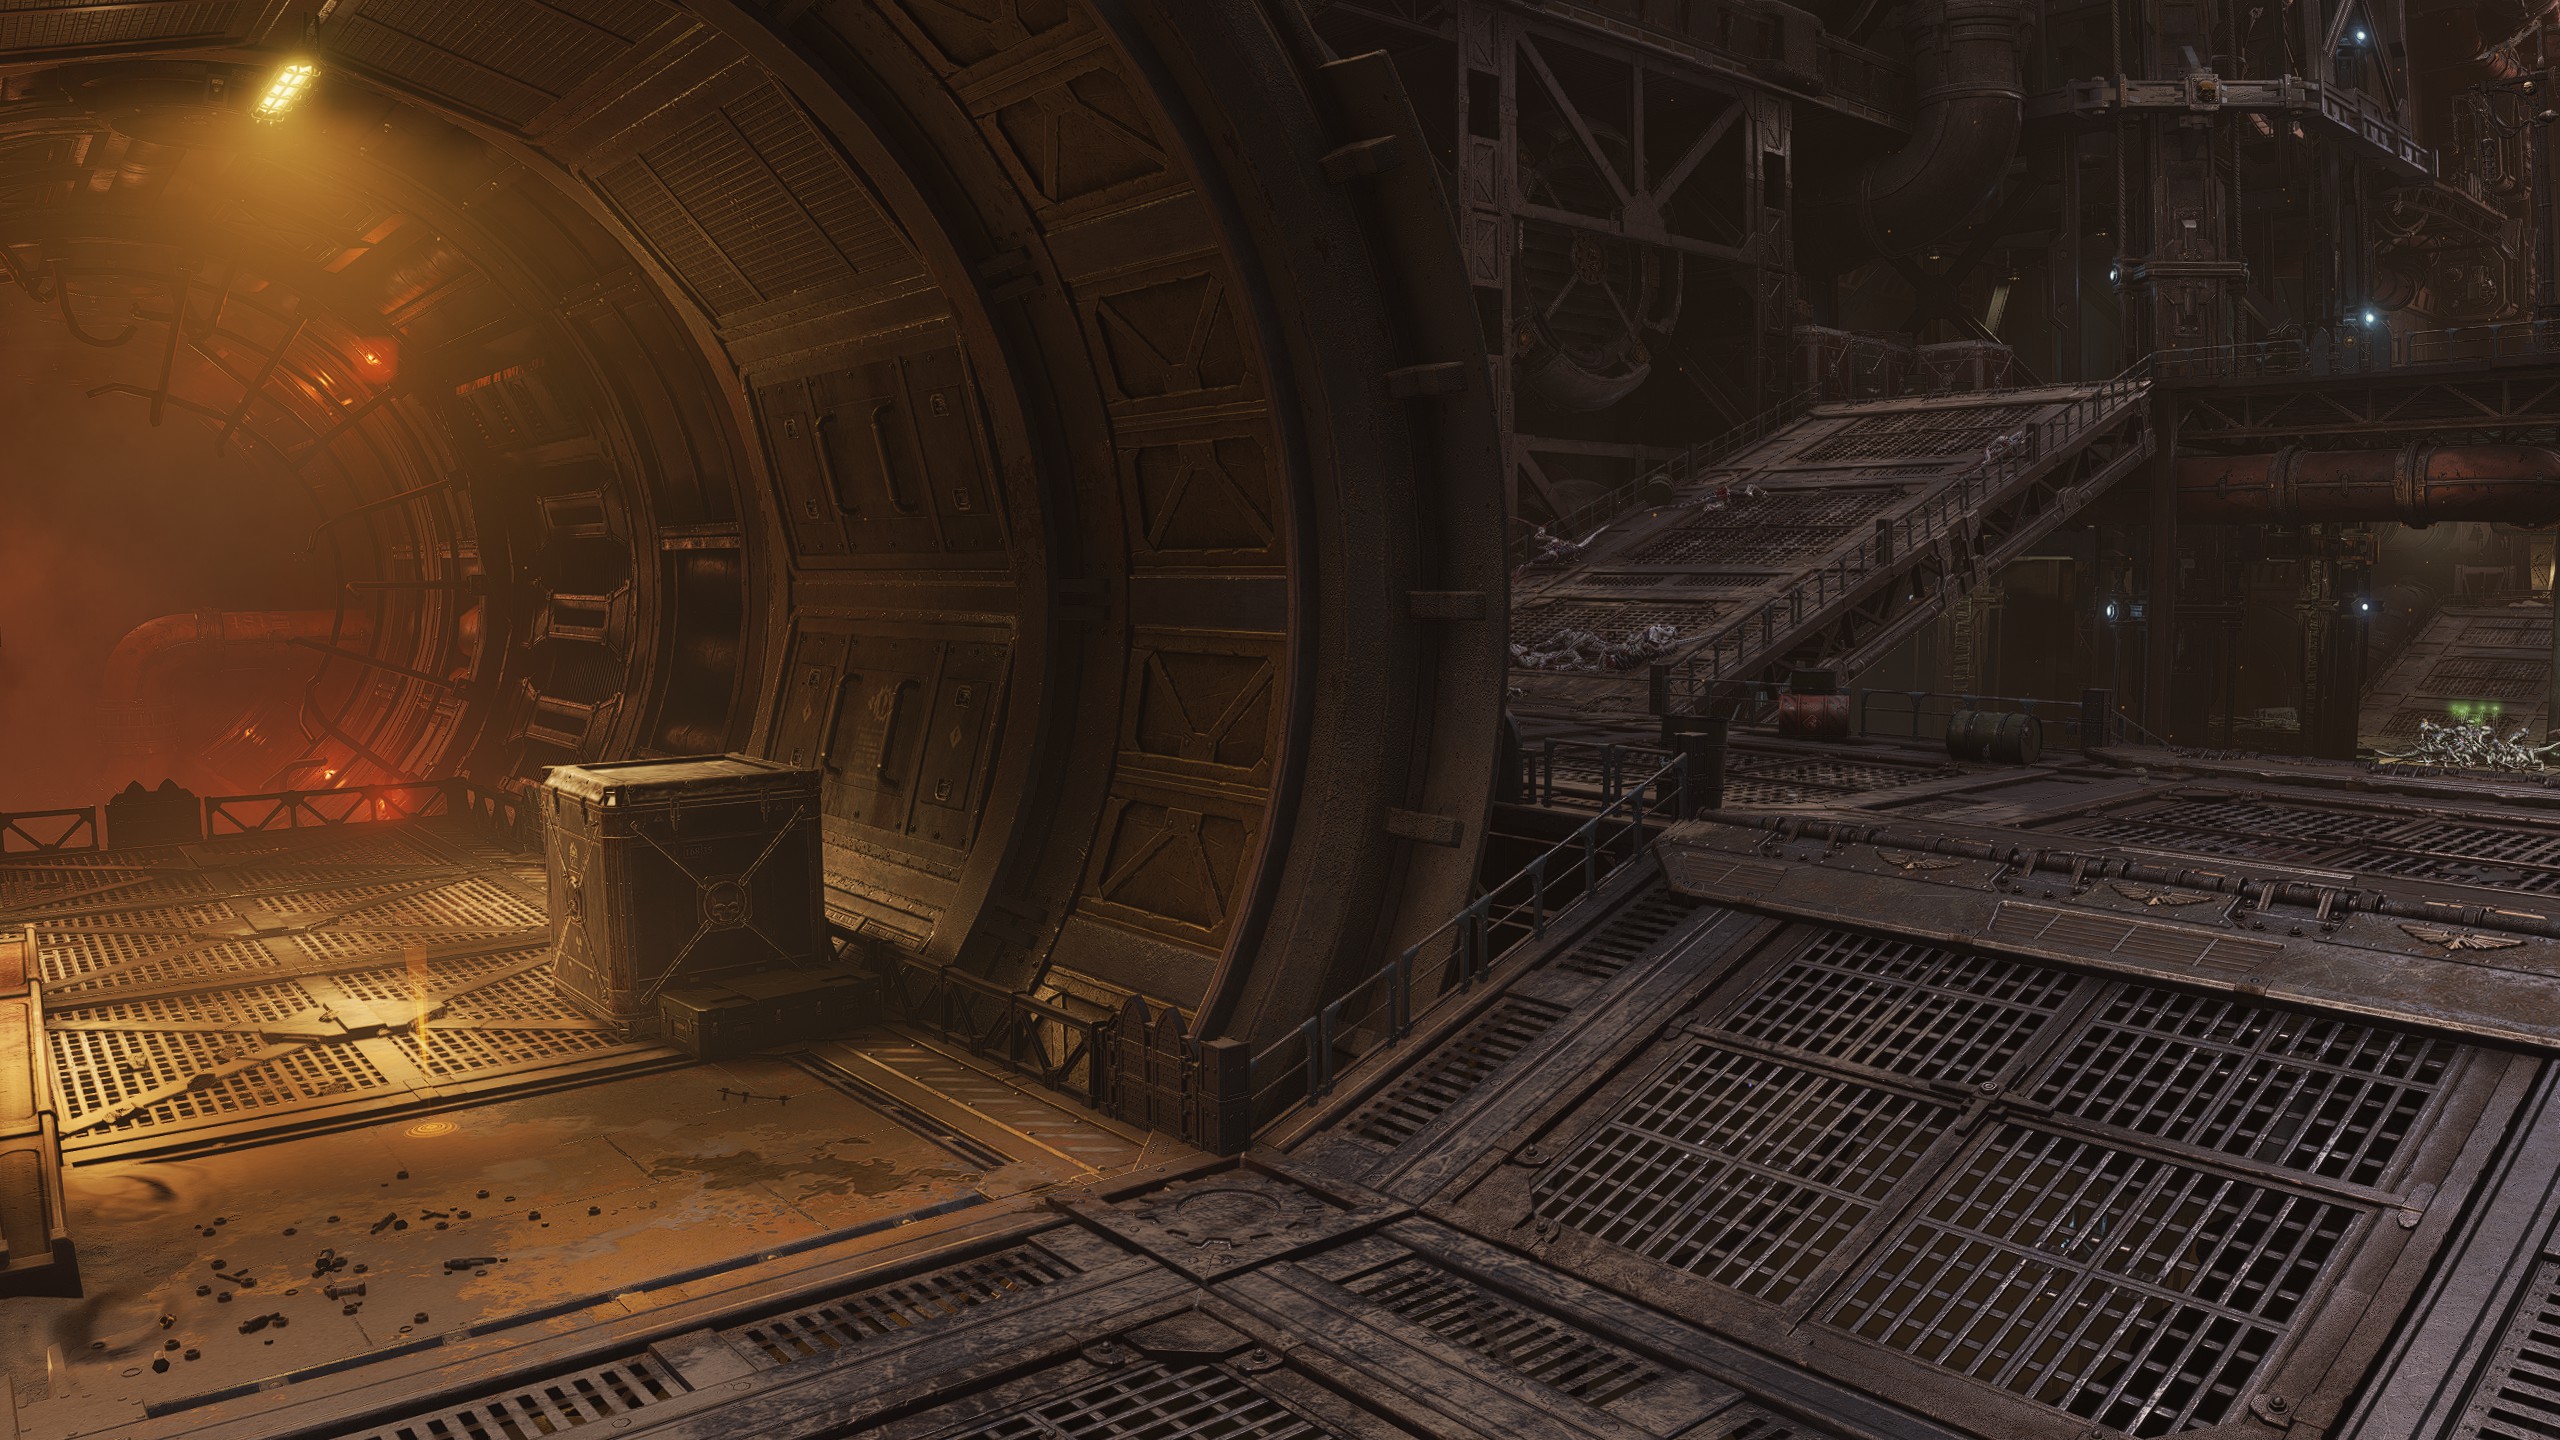
Gene-Seed #3
Location
Objective: Locate the Data Centre
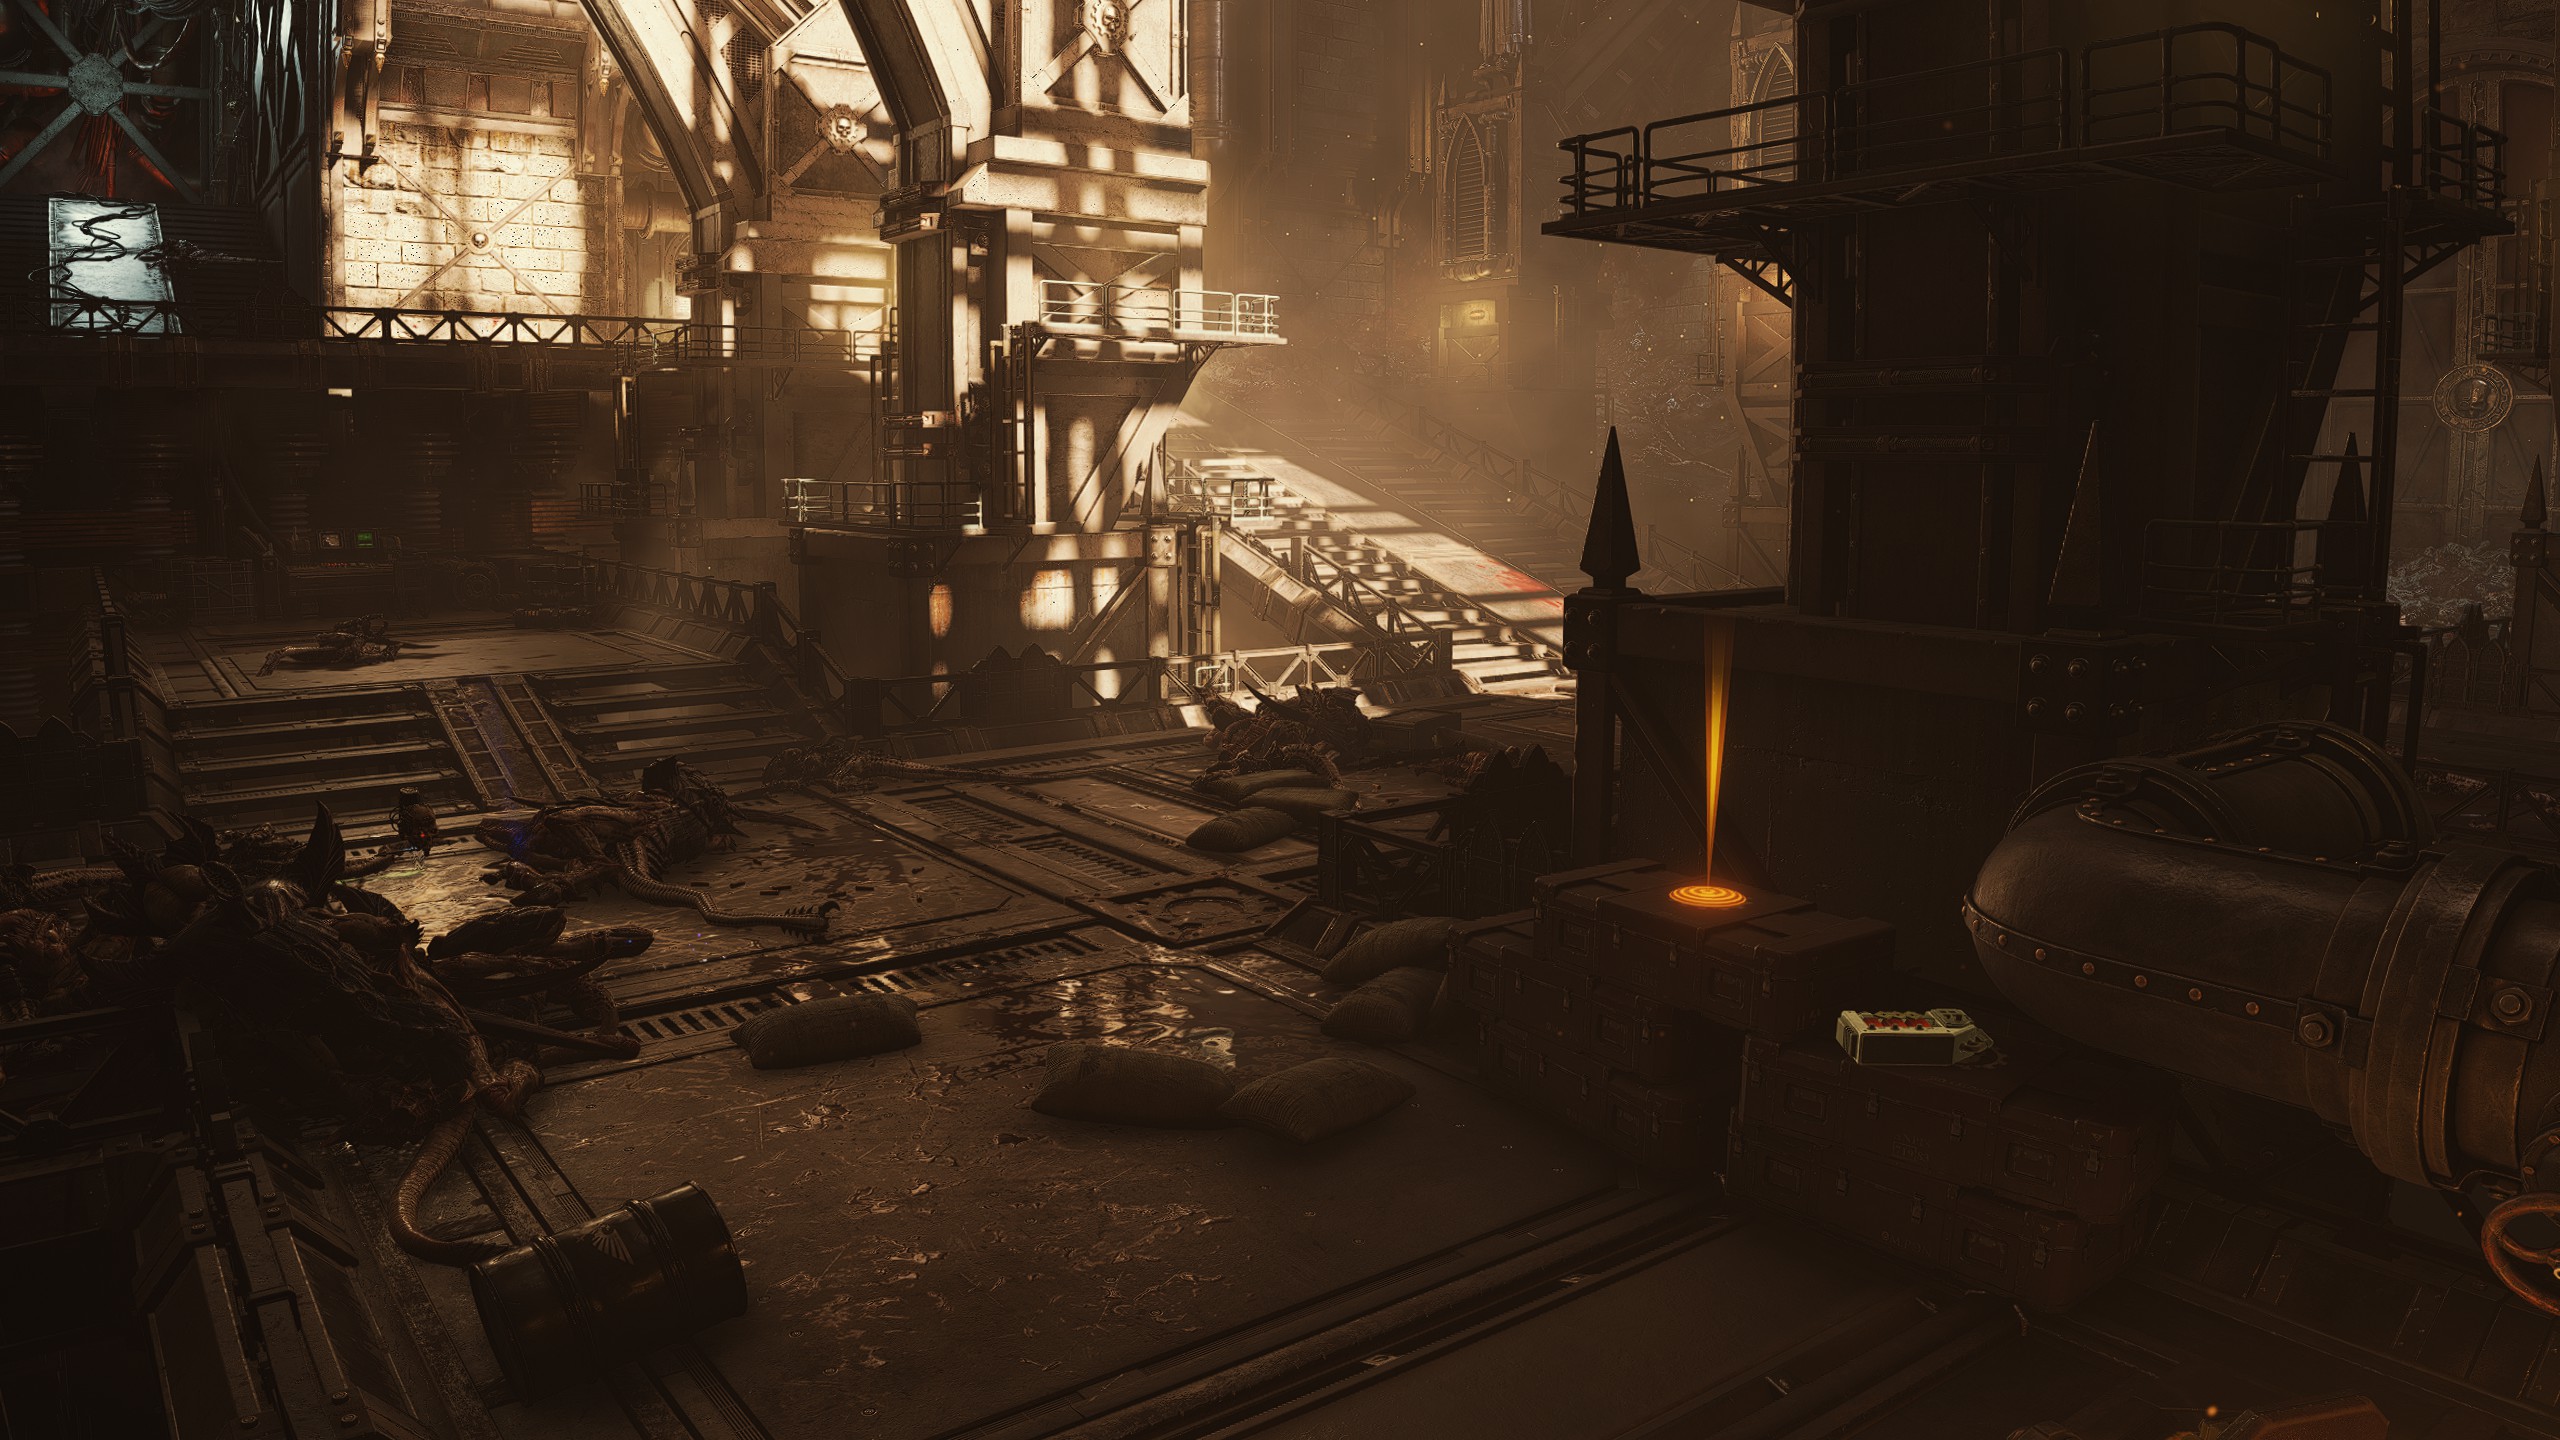
After completing the Melta Bomb section you will actually enter the Longinus Gamma facility proper. In the first room with the large Cog Mechanicum above you head to the left around the support pillars and check on top of a stack of crates.
After completing the Melta Bomb section you will actually enter the Longinus Gamma facility proper. In the first room with the large Cog Mechanicum above you head to the left around the support pillars and check on top of a stack of crates.
| Mission 10: Vortex
Gene-Seed #1
Location
Objective: Advance to the Astropathic Relay
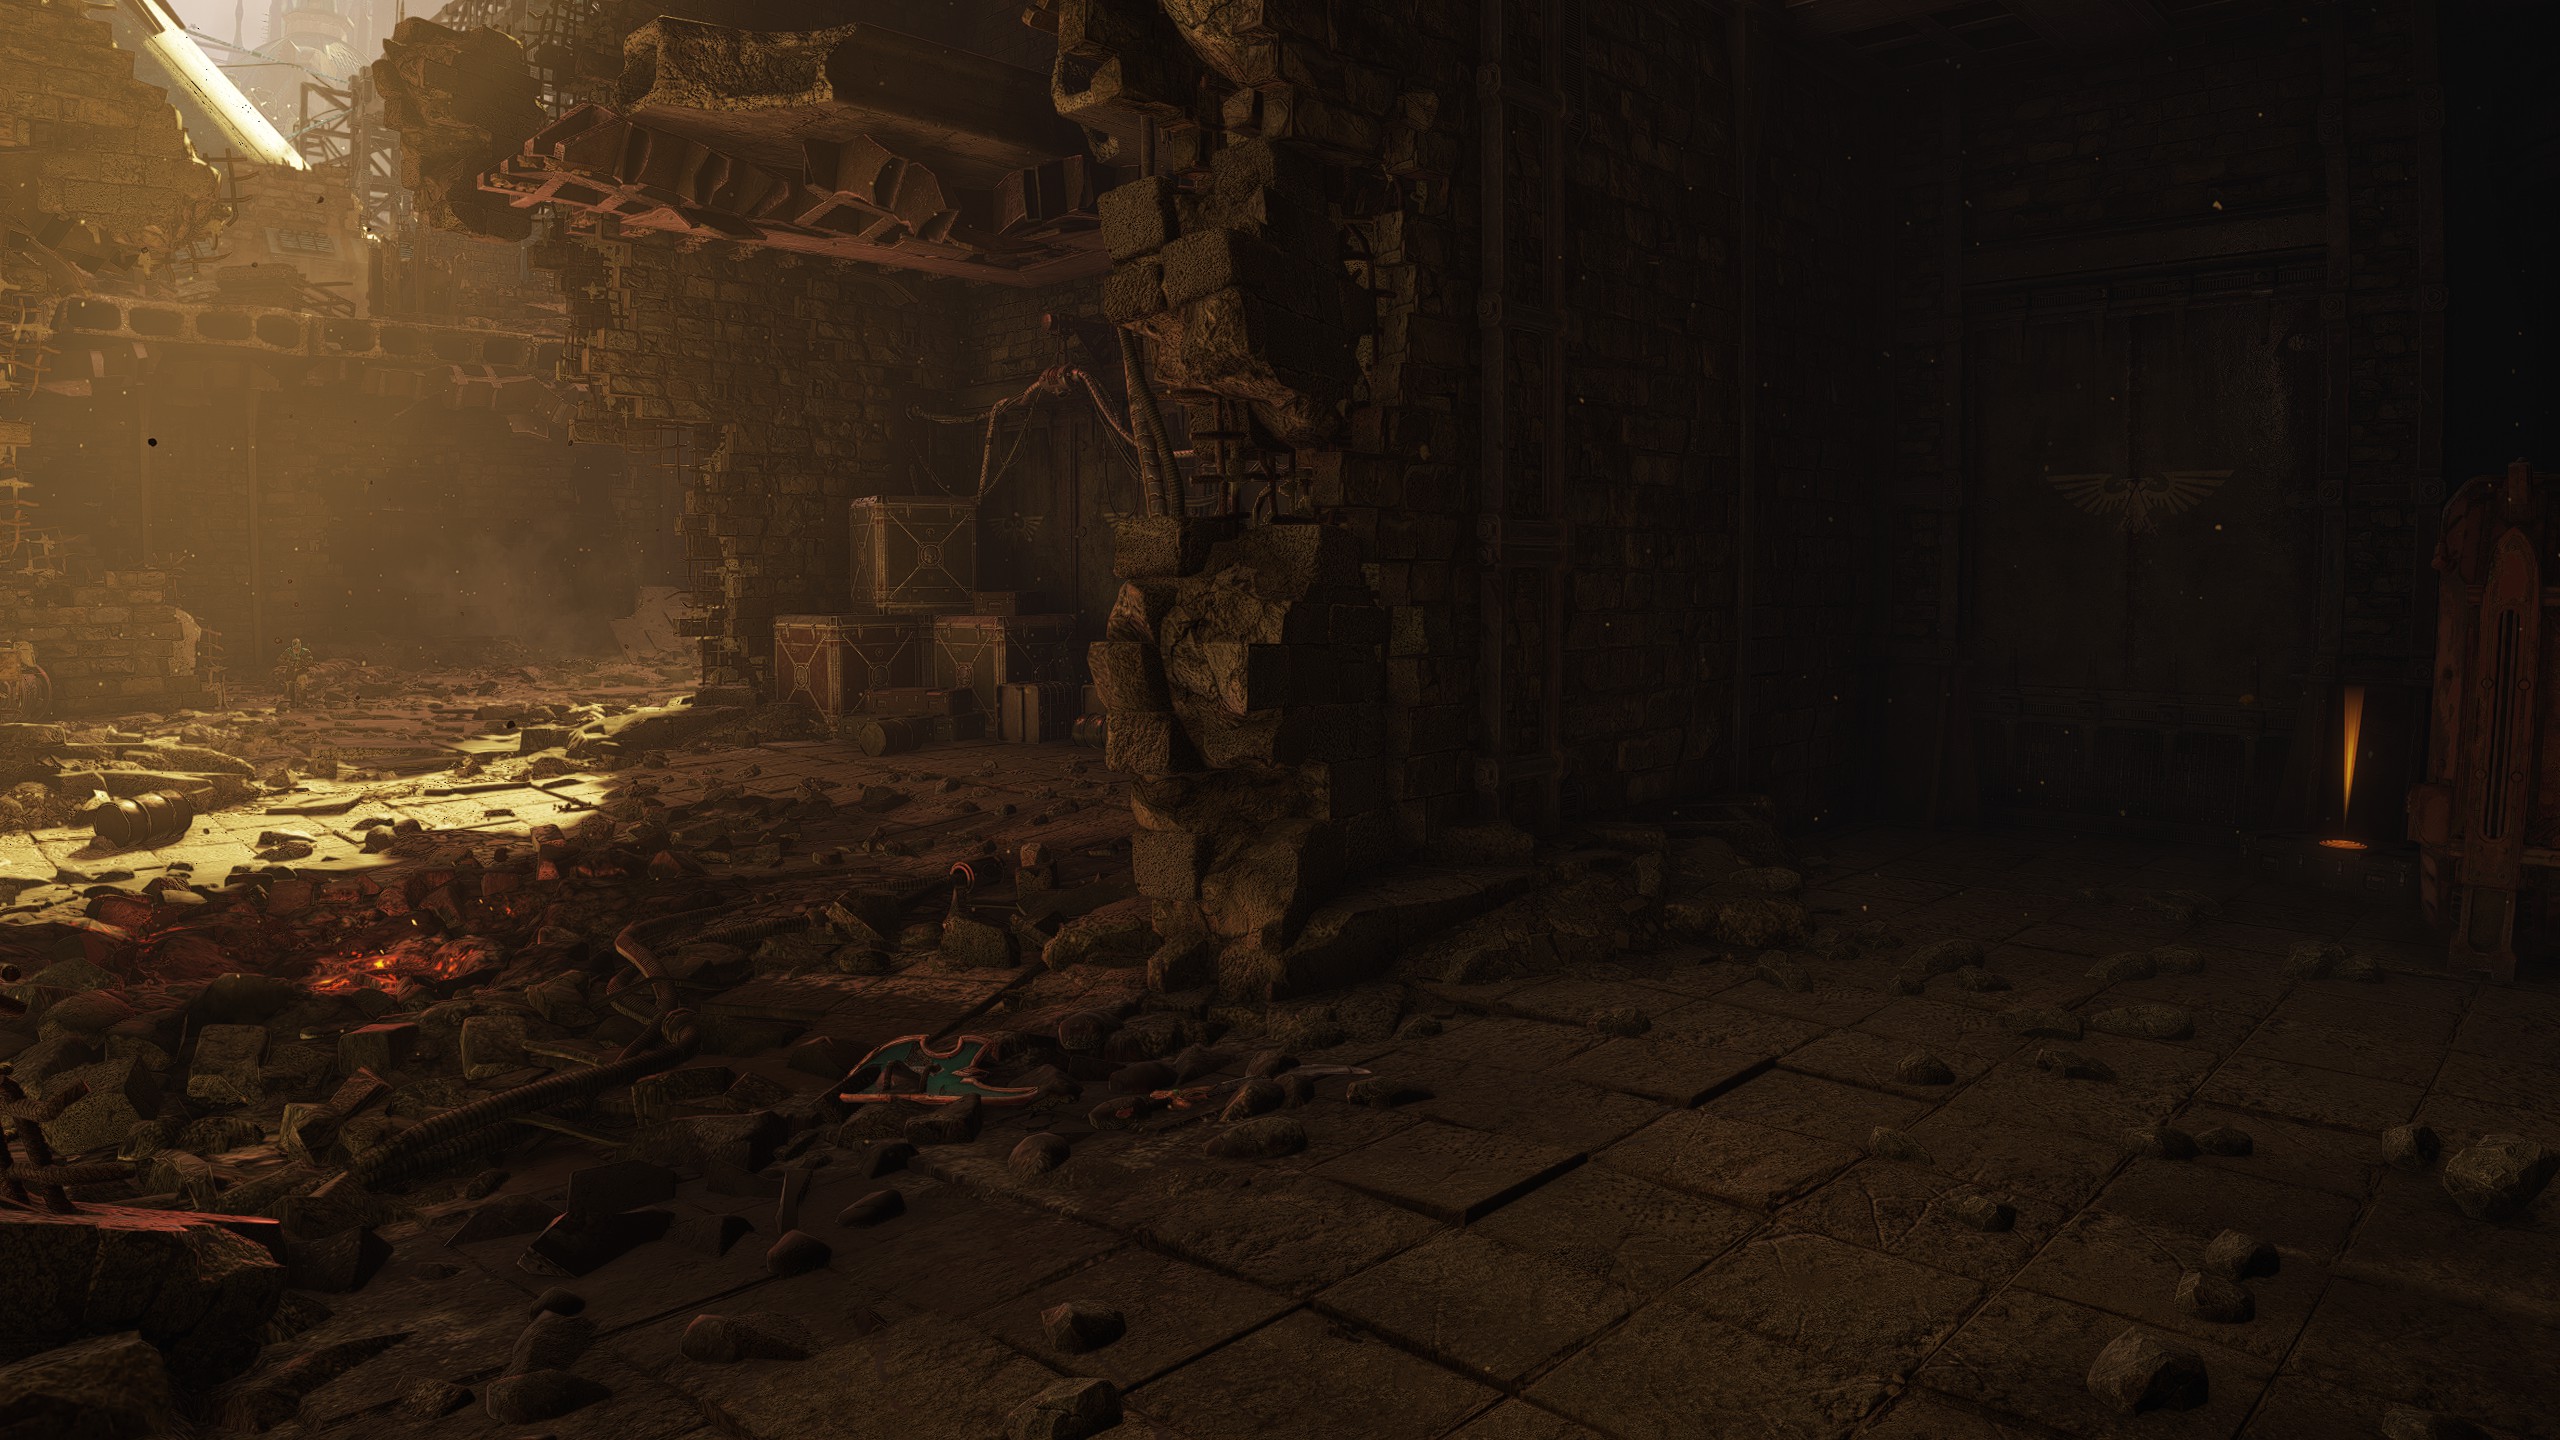
Upon starting the mission proceed as normal until you reach the first drop down. After dropping, head through the destroyed wall to your left, then into the second destroyed wall. The Gene-Seed can spawn to the left on a crate next to the various large red containers.
Upon starting the mission proceed as normal until you reach the first drop down. After dropping, head through the destroyed wall to your left, then into the second destroyed wall. The Gene-Seed can spawn to the left on a crate next to the various large red containers.
Gene-Seed #2
Location
Objective: Advance to the Astropathic Relay
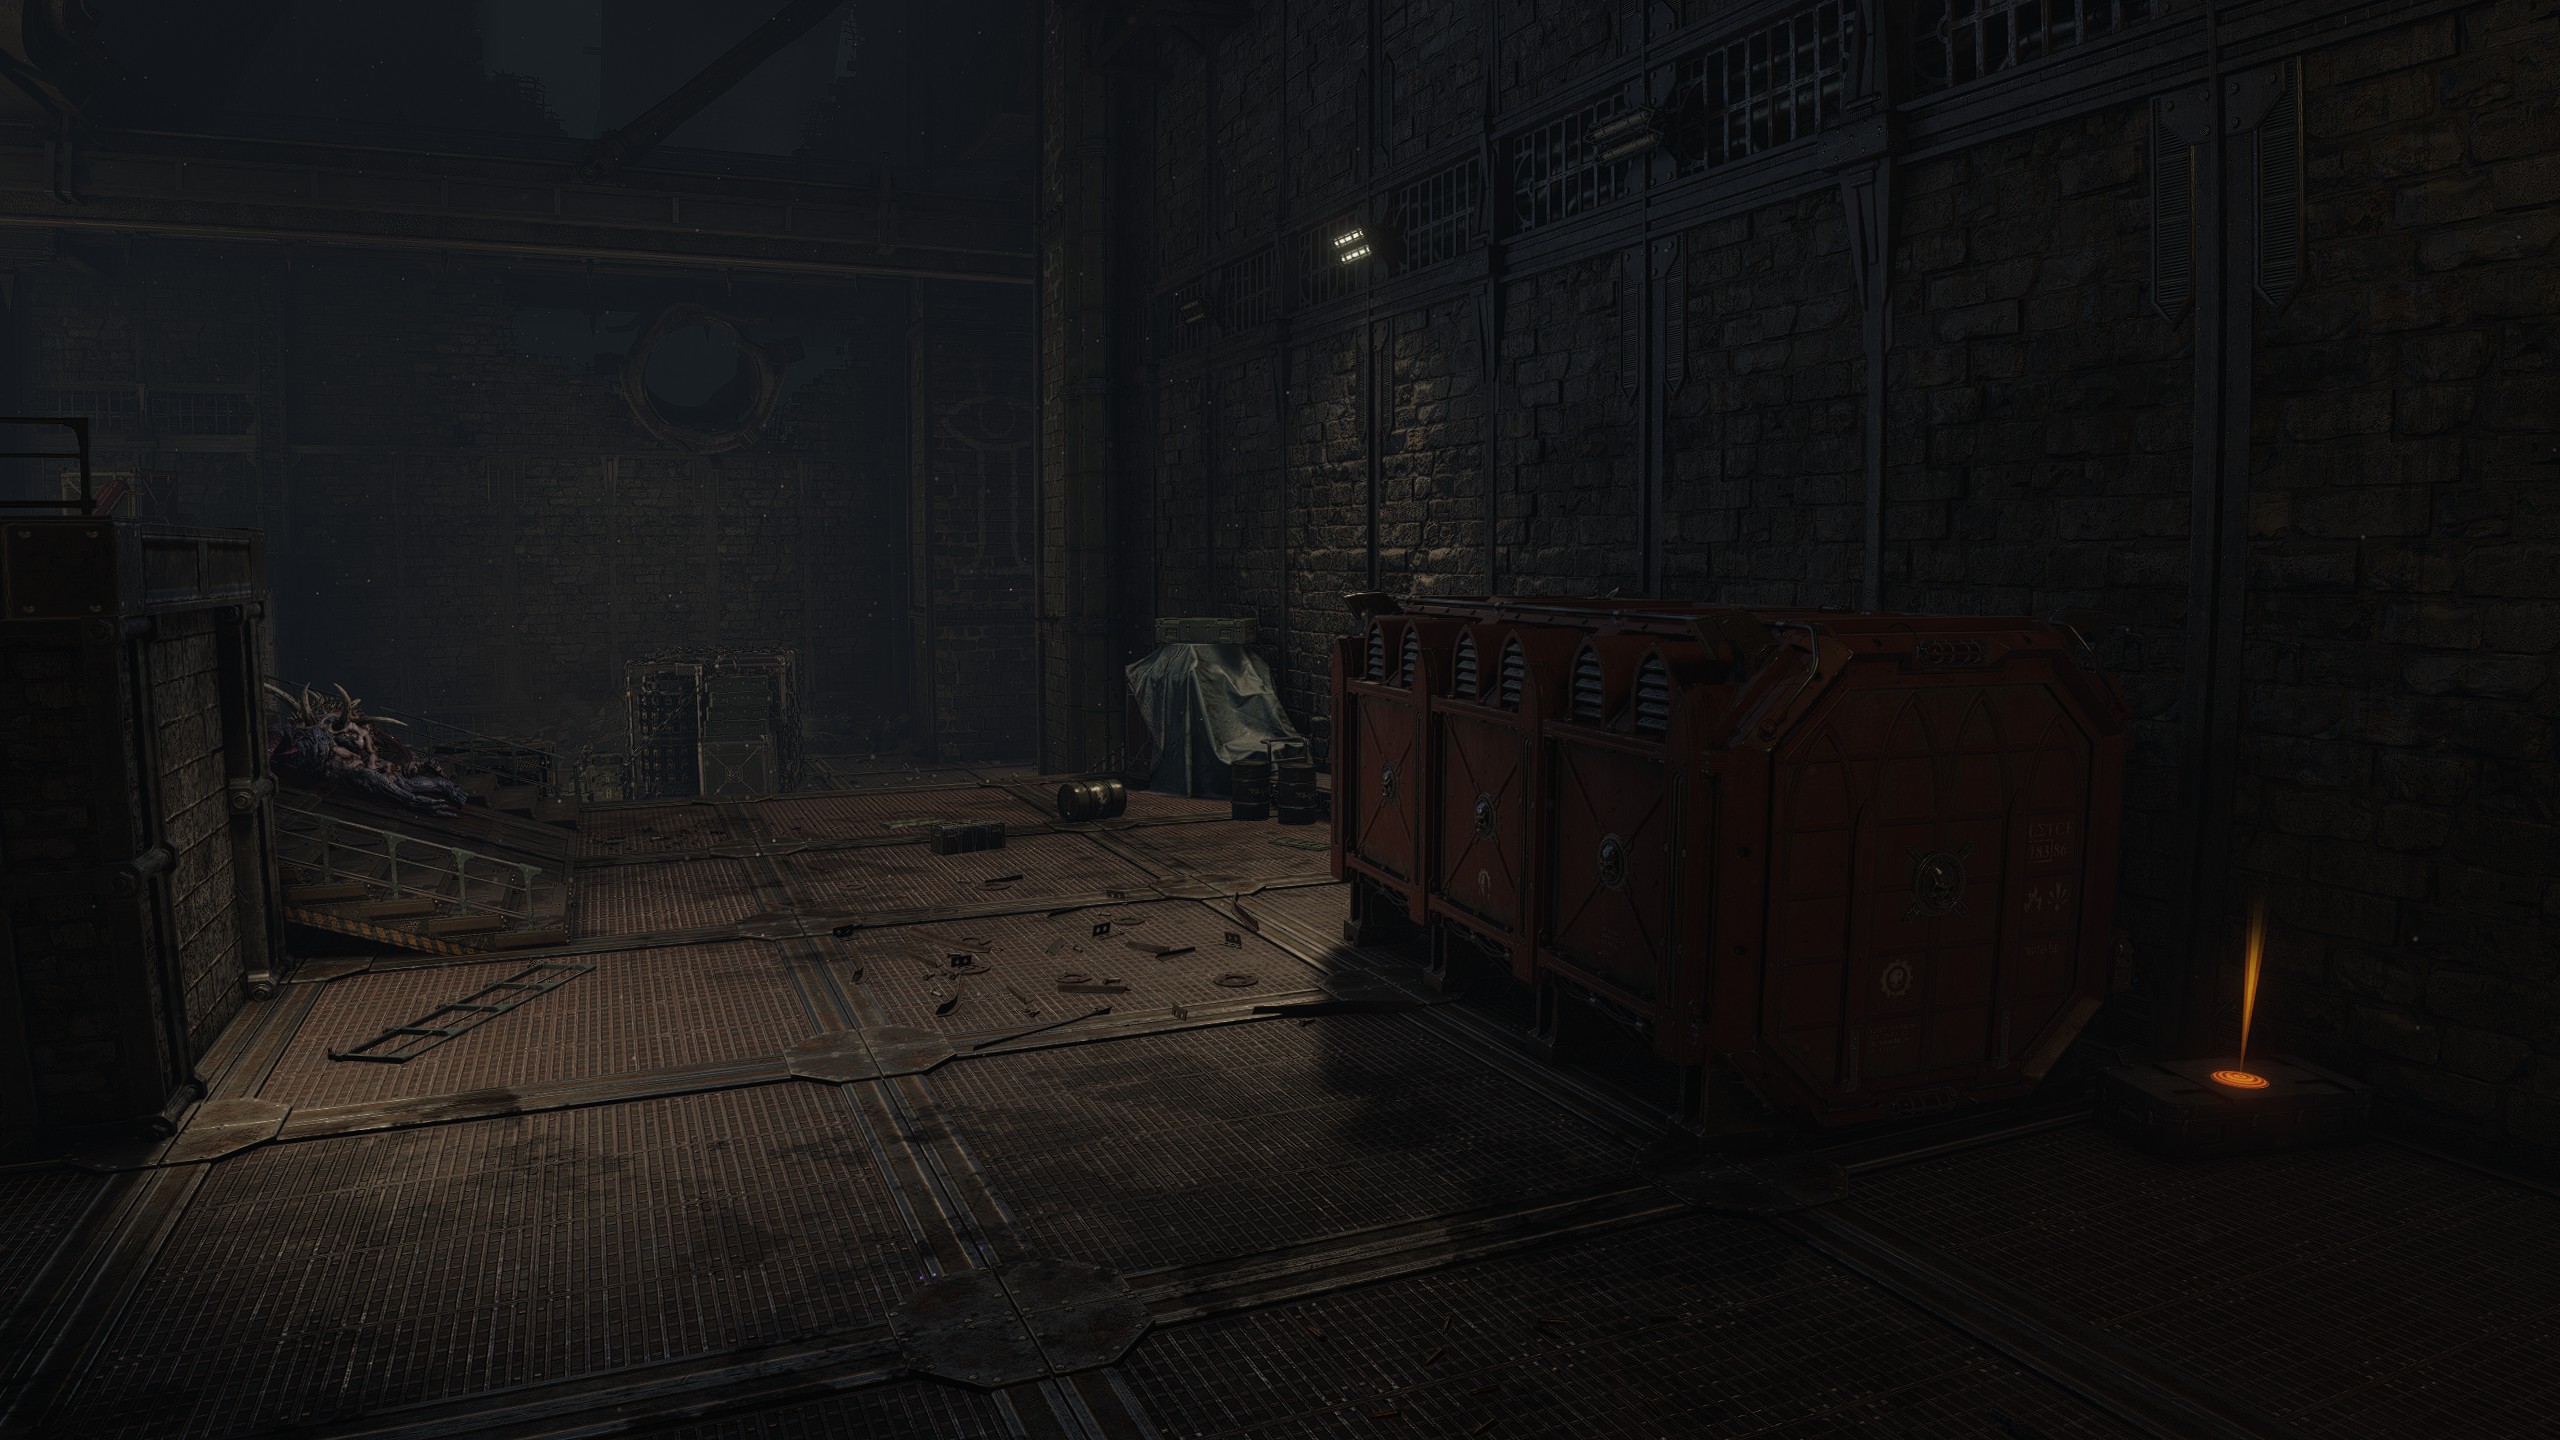
Not far from the first location, keep progressing the mission until reaching the large room just before you drop down and operate a bridge. After heading down the stairs, turn to the right where there is a red container below the door marked "Storage" and check for the Gene-Seed hiding behind the container.
Not far from the first location, keep progressing the mission until reaching the large room just before you drop down and operate a bridge. After heading down the stairs, turn to the right where there is a red container below the door marked "Storage" and check for the Gene-Seed hiding behind the container.
Gene-Seed #3
Location
Objective: Advance to the Astropathic Relay
Immediately from the previous location, drop down to the room with the bridge and cross it. The Gene-Seed can spawn on your right after crossing the bridge, hidden next to the wall column.
Immediately from the previous location, drop down to the room with the bridge and cross it. The Gene-Seed can spawn on your right after crossing the bridge, hidden next to the wall column.
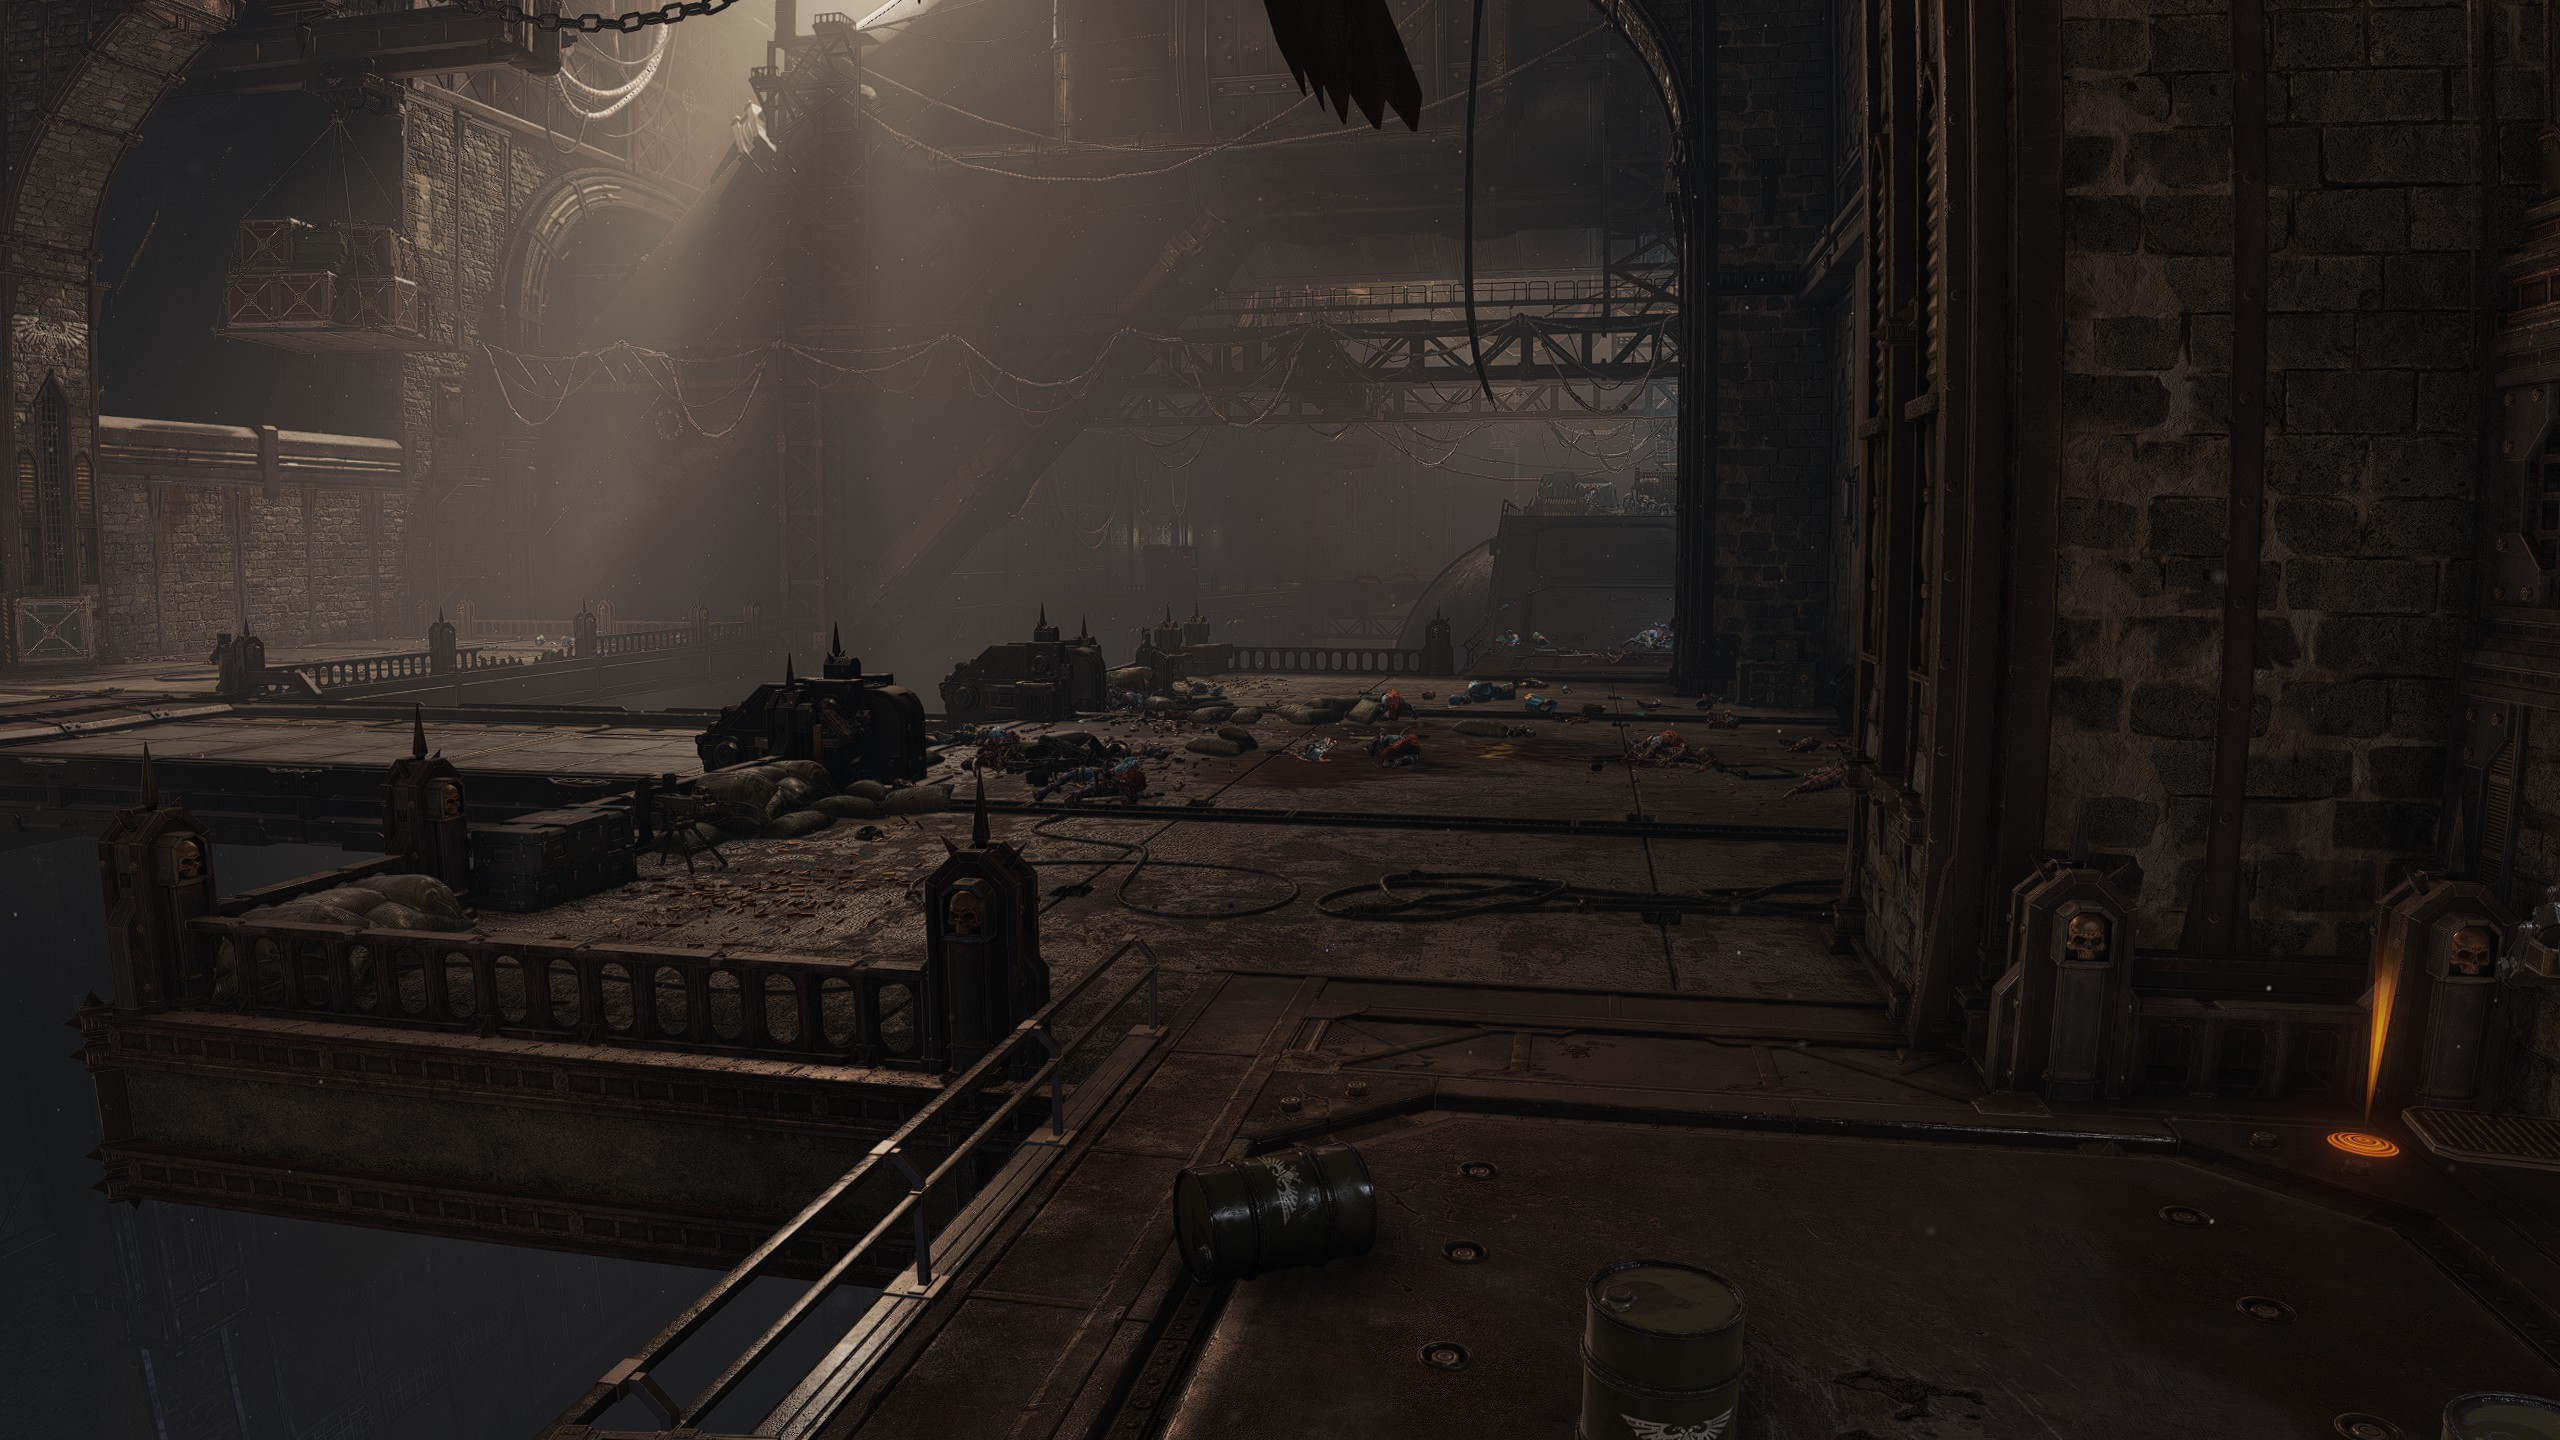
Gene-Seed #4
Location
Objective: Locate the Source of Corruption
After dropping into the lower levels of the facility where the level gets all warped, proceed forward slightly and check under the ramp to your right for the Gene-Seed. This can spawn irrelevant of the randomised path direction.
After dropping into the lower levels of the facility where the level gets all warped, proceed forward slightly and check under the ramp to your right for the Gene-Seed. This can spawn irrelevant of the randomised path direction.
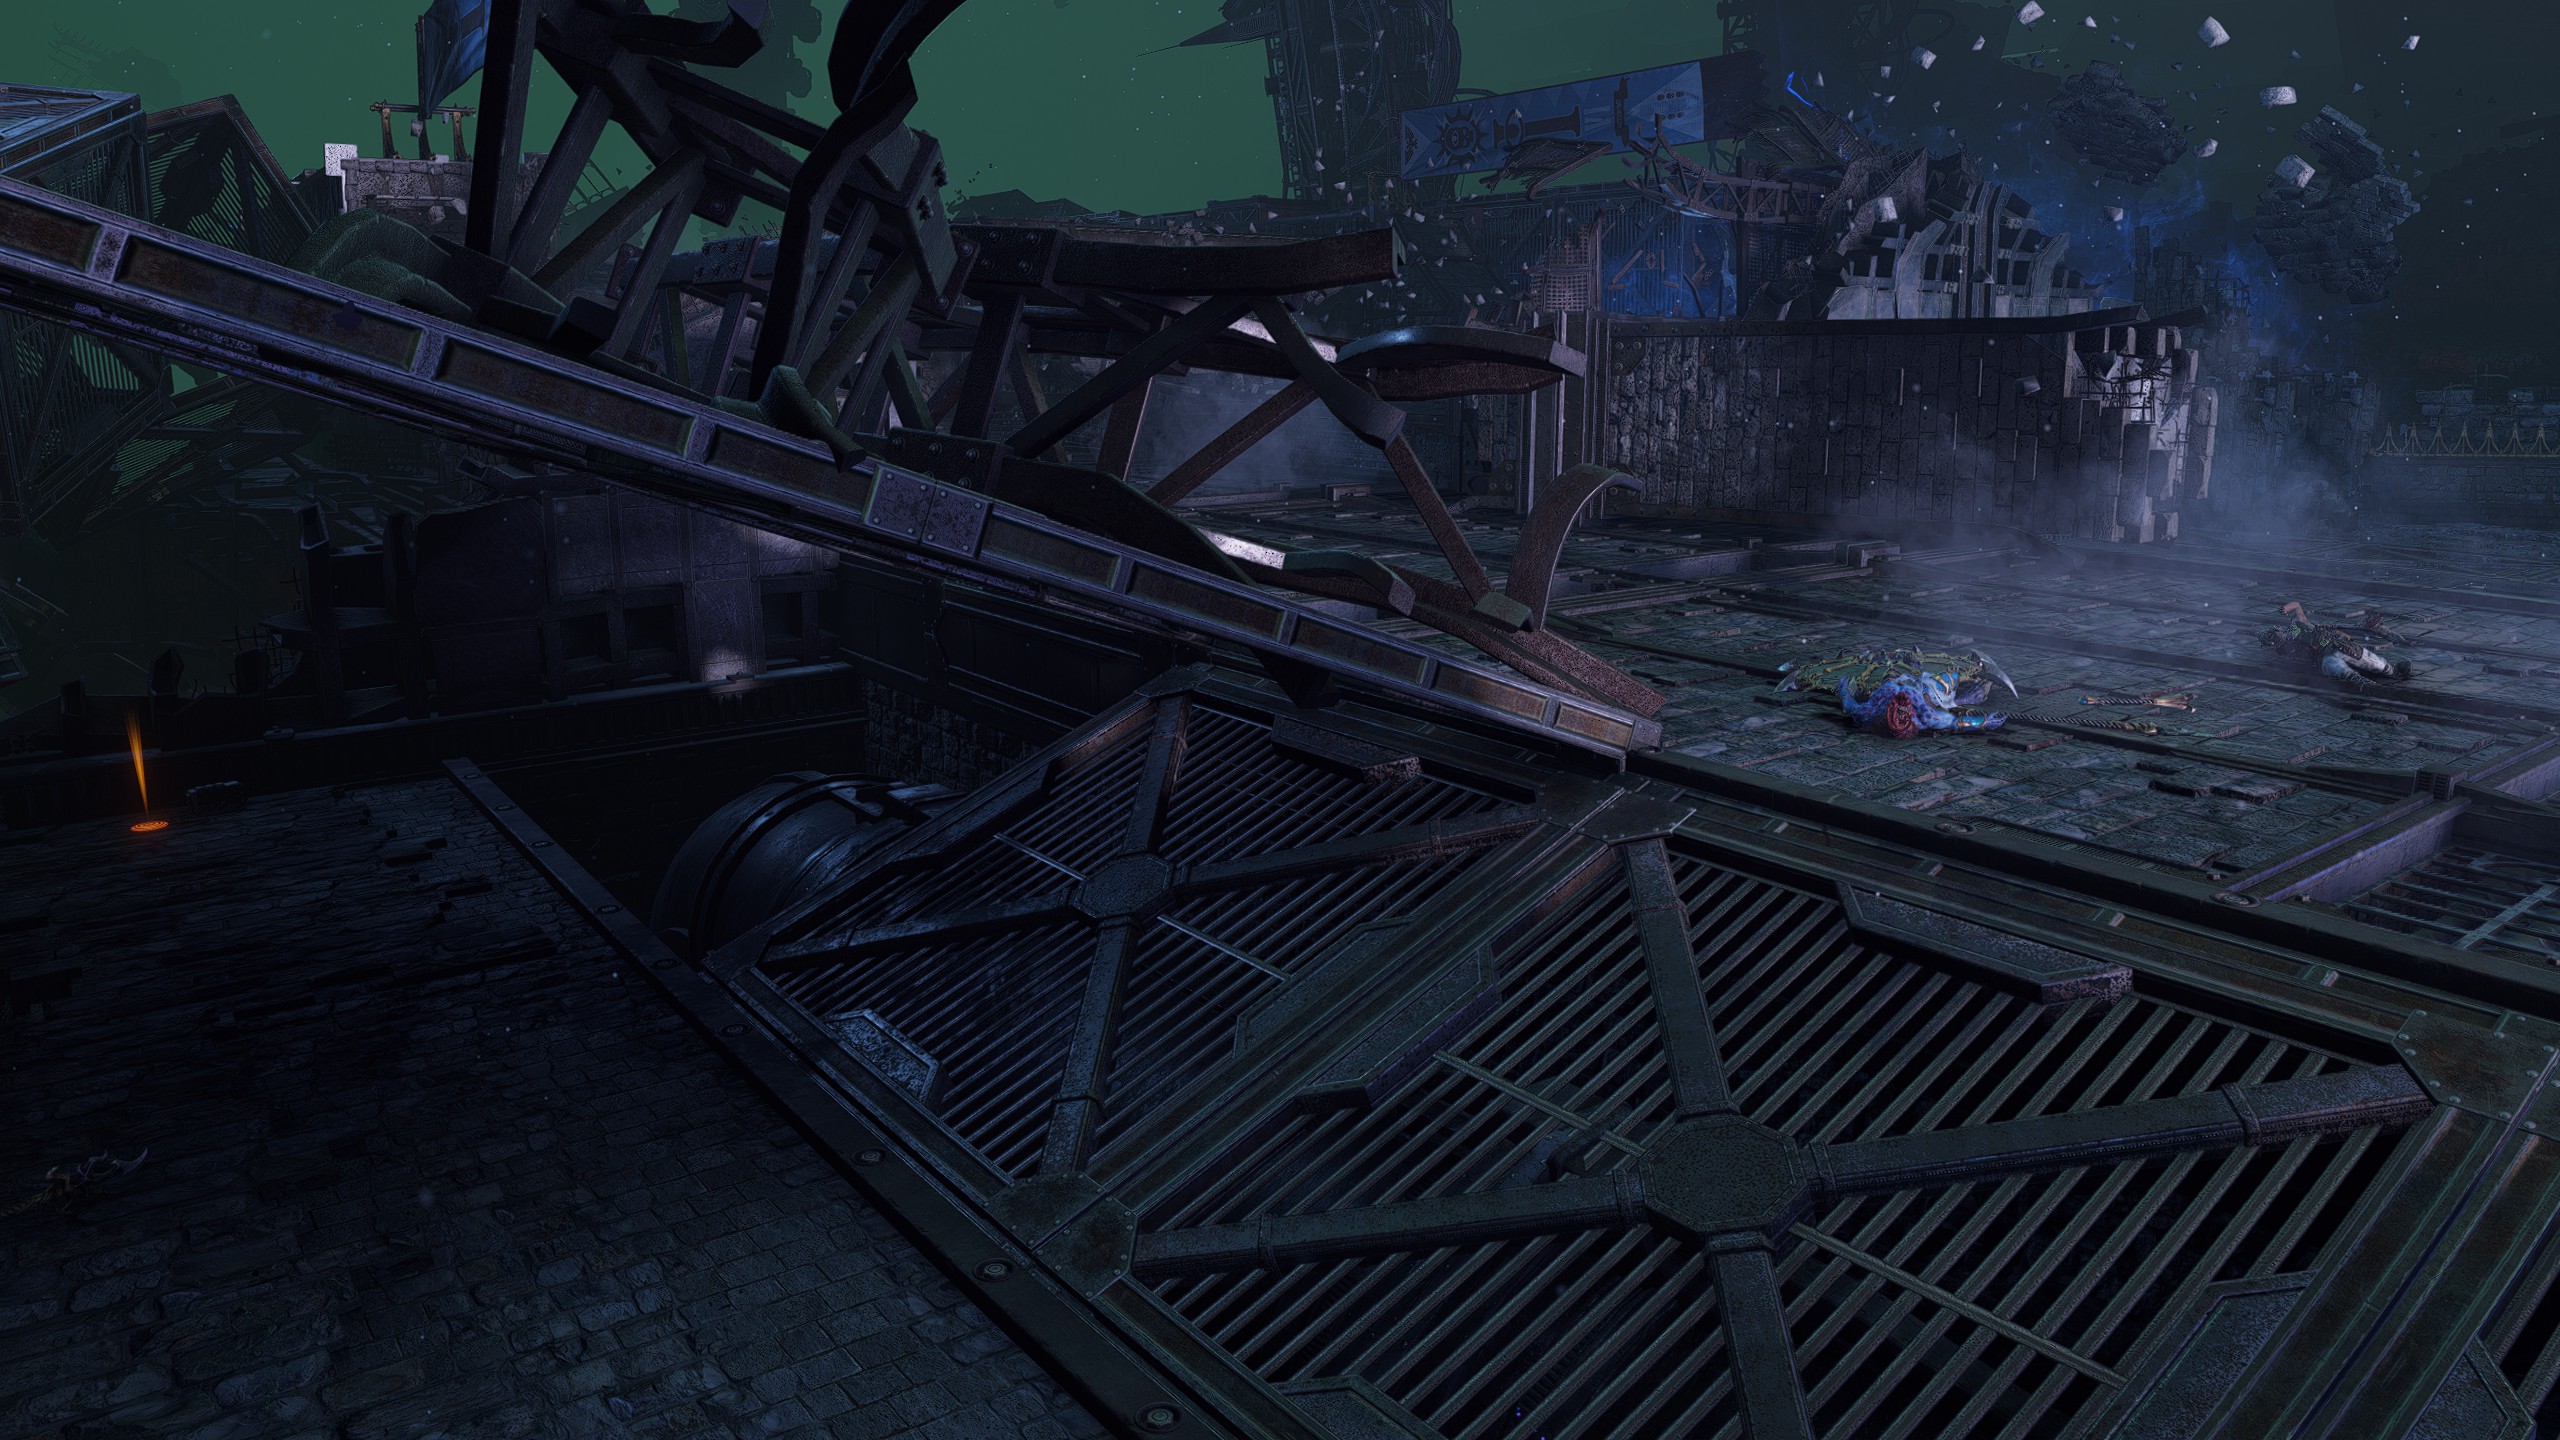
Gene-Seed #5
Location
Objective: Locate the Source of Corruption
After killing the first corrupted Astropath and being dragged further into the relay, proceed forward as normal until you go down the downward slope. Instead of going forward where the path can split based on randomised objective, check a crate hidden behind the back left corner wall.
After killing the first corrupted Astropath and being dragged further into the relay, proceed forward as normal until you go down the downward slope. Instead of going forward where the path can split based on randomised objective, check a crate hidden behind the back left corner wall.
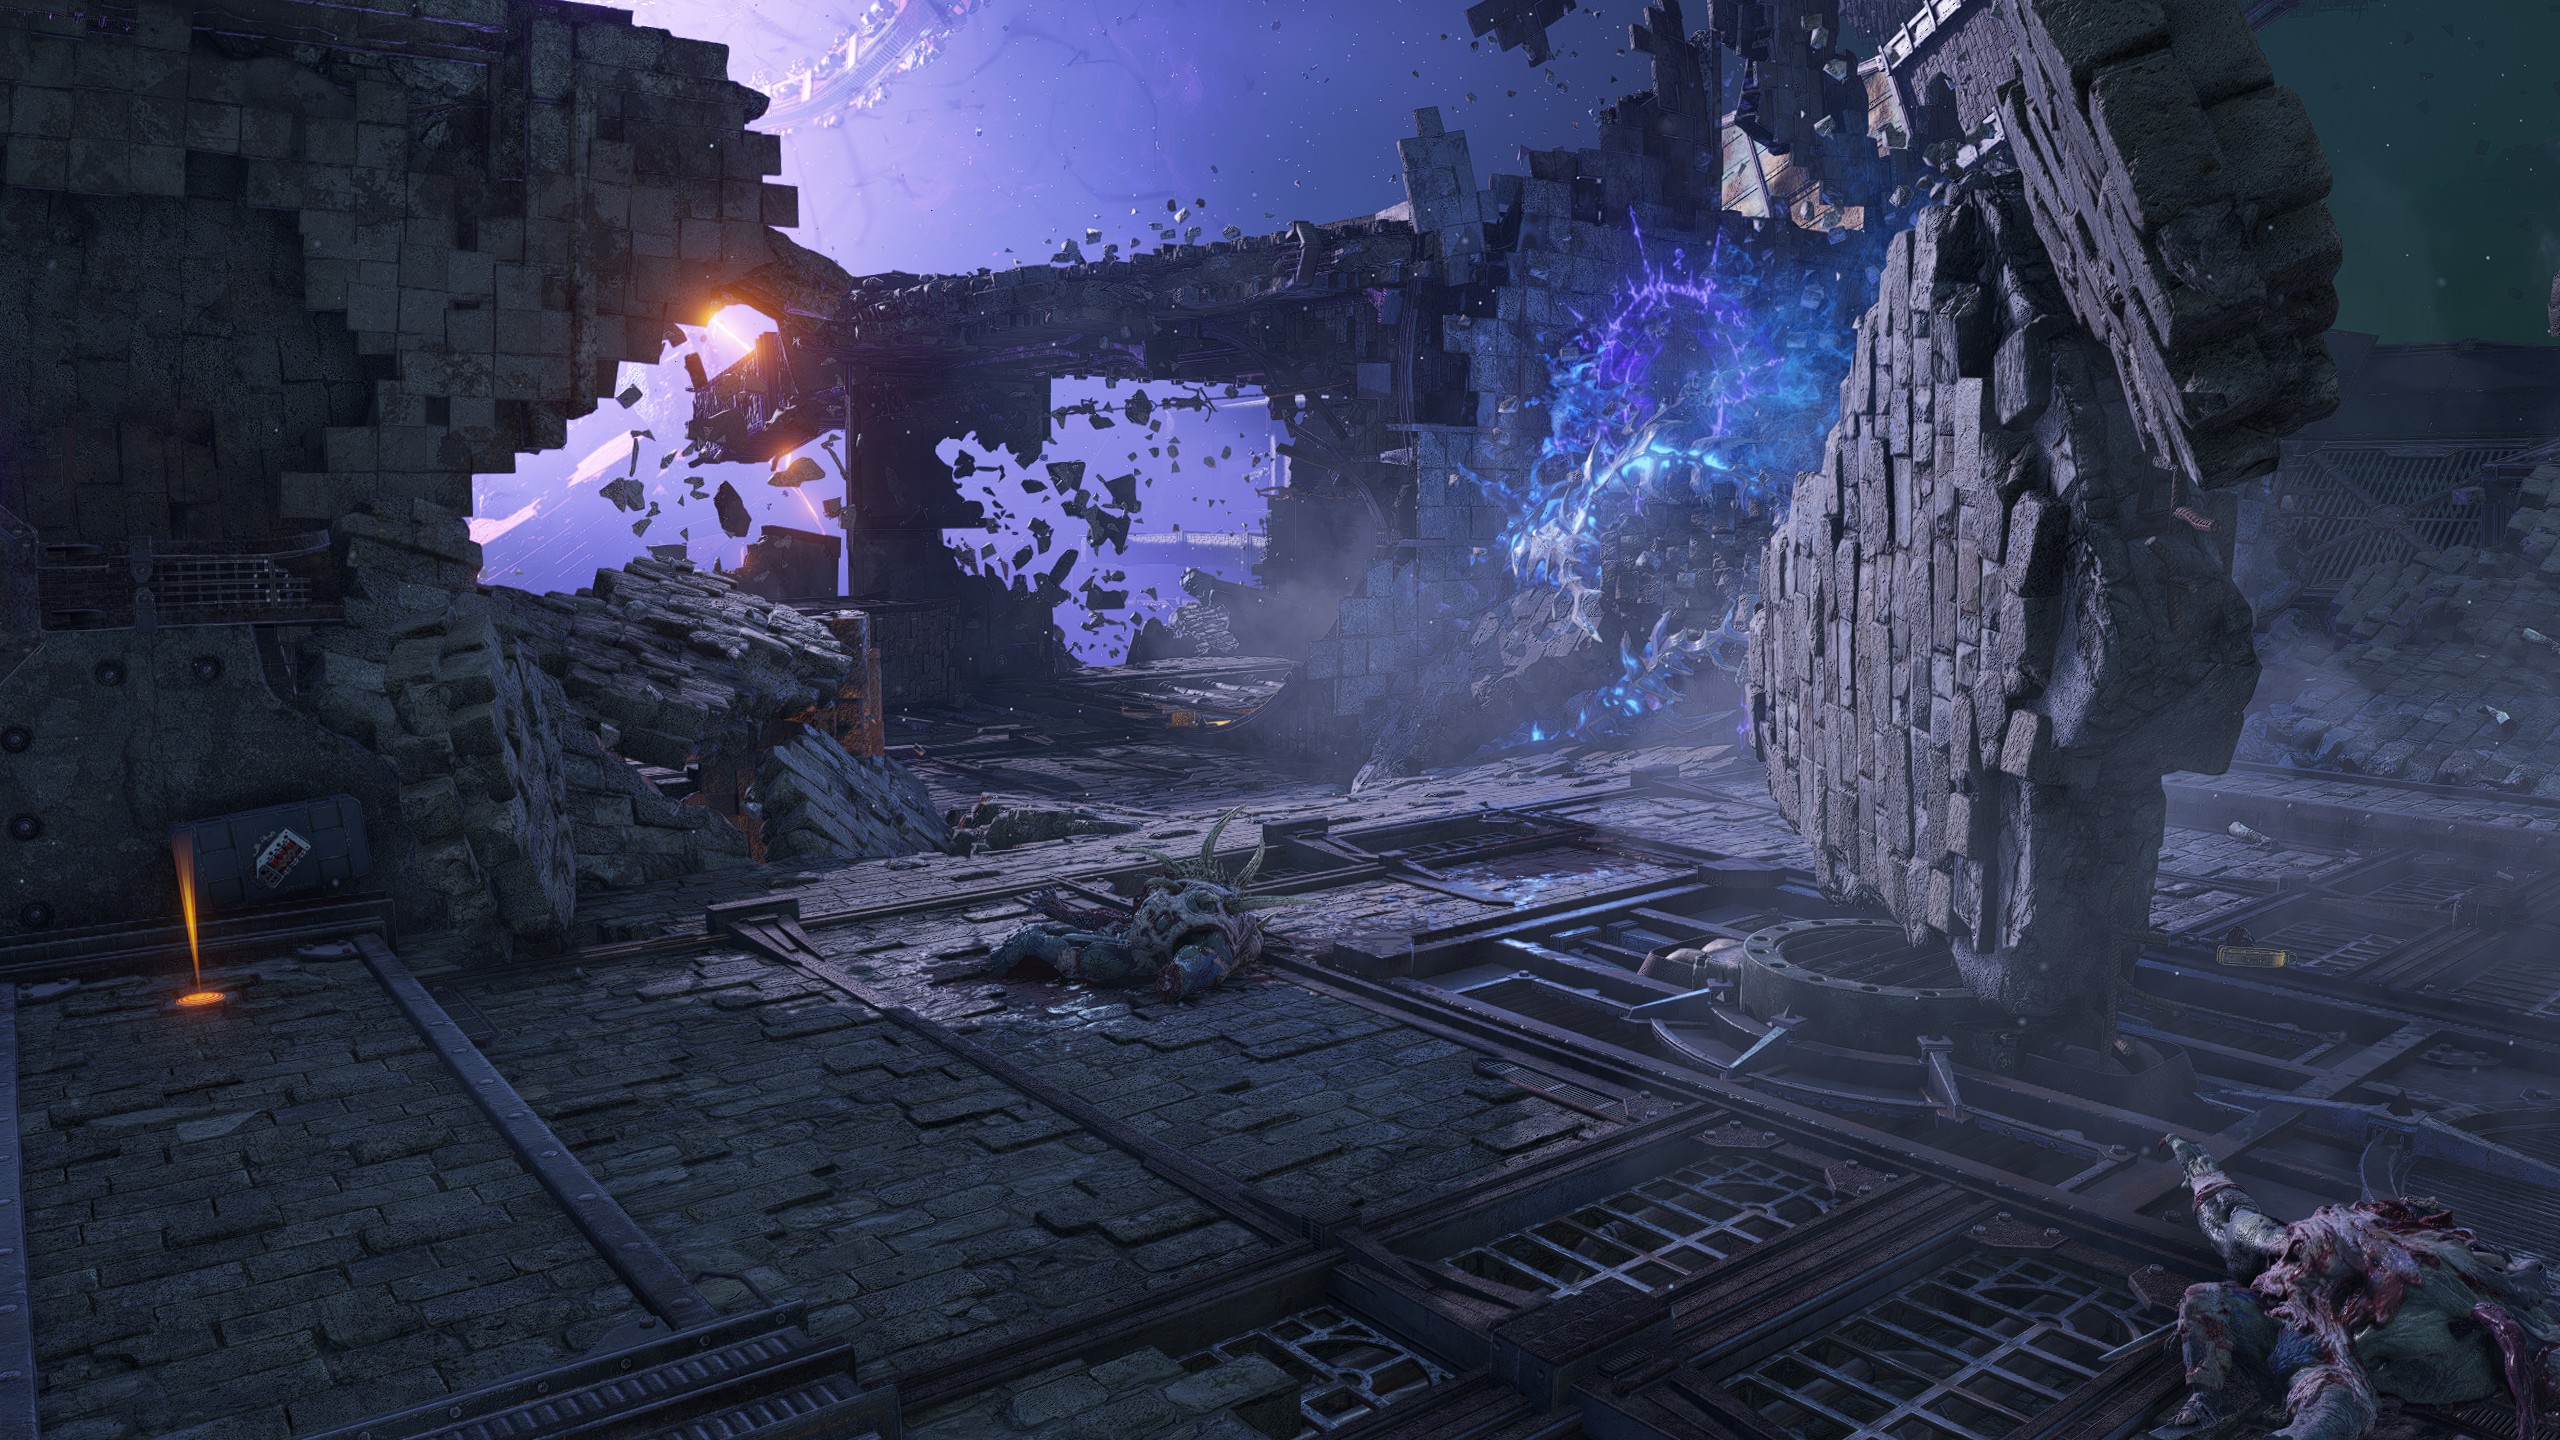
| Mission 11: Reclamation
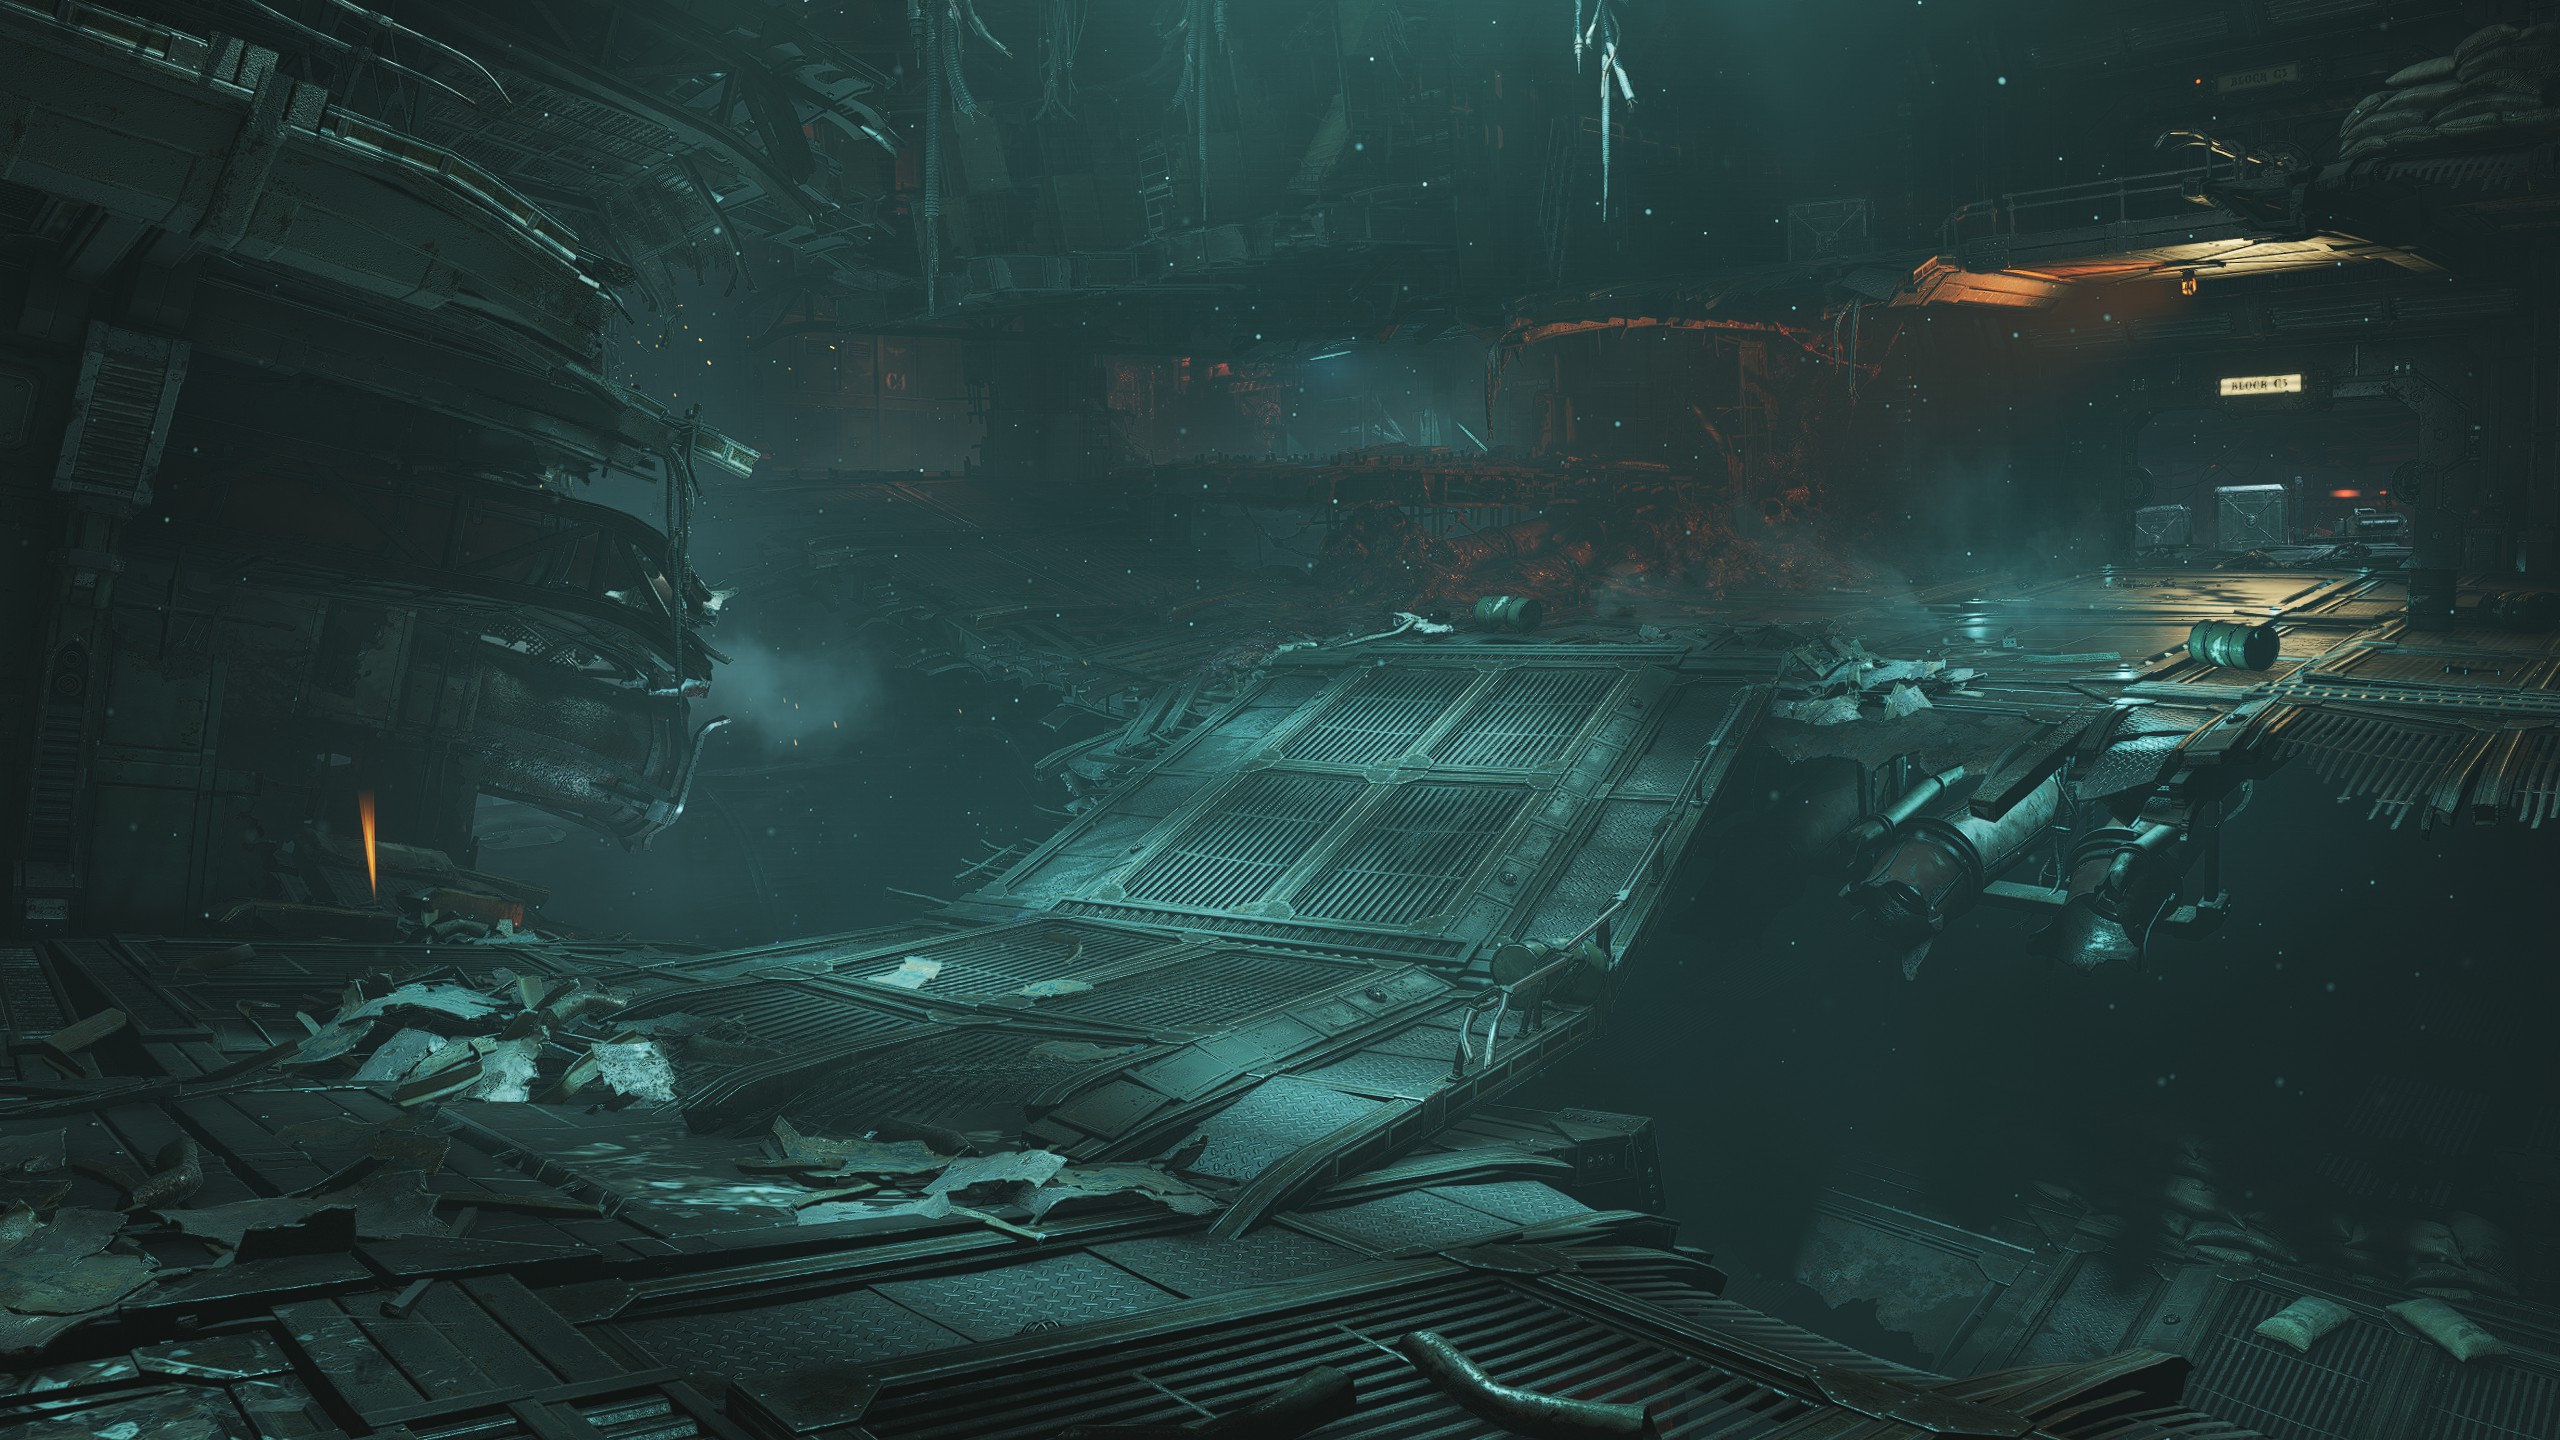
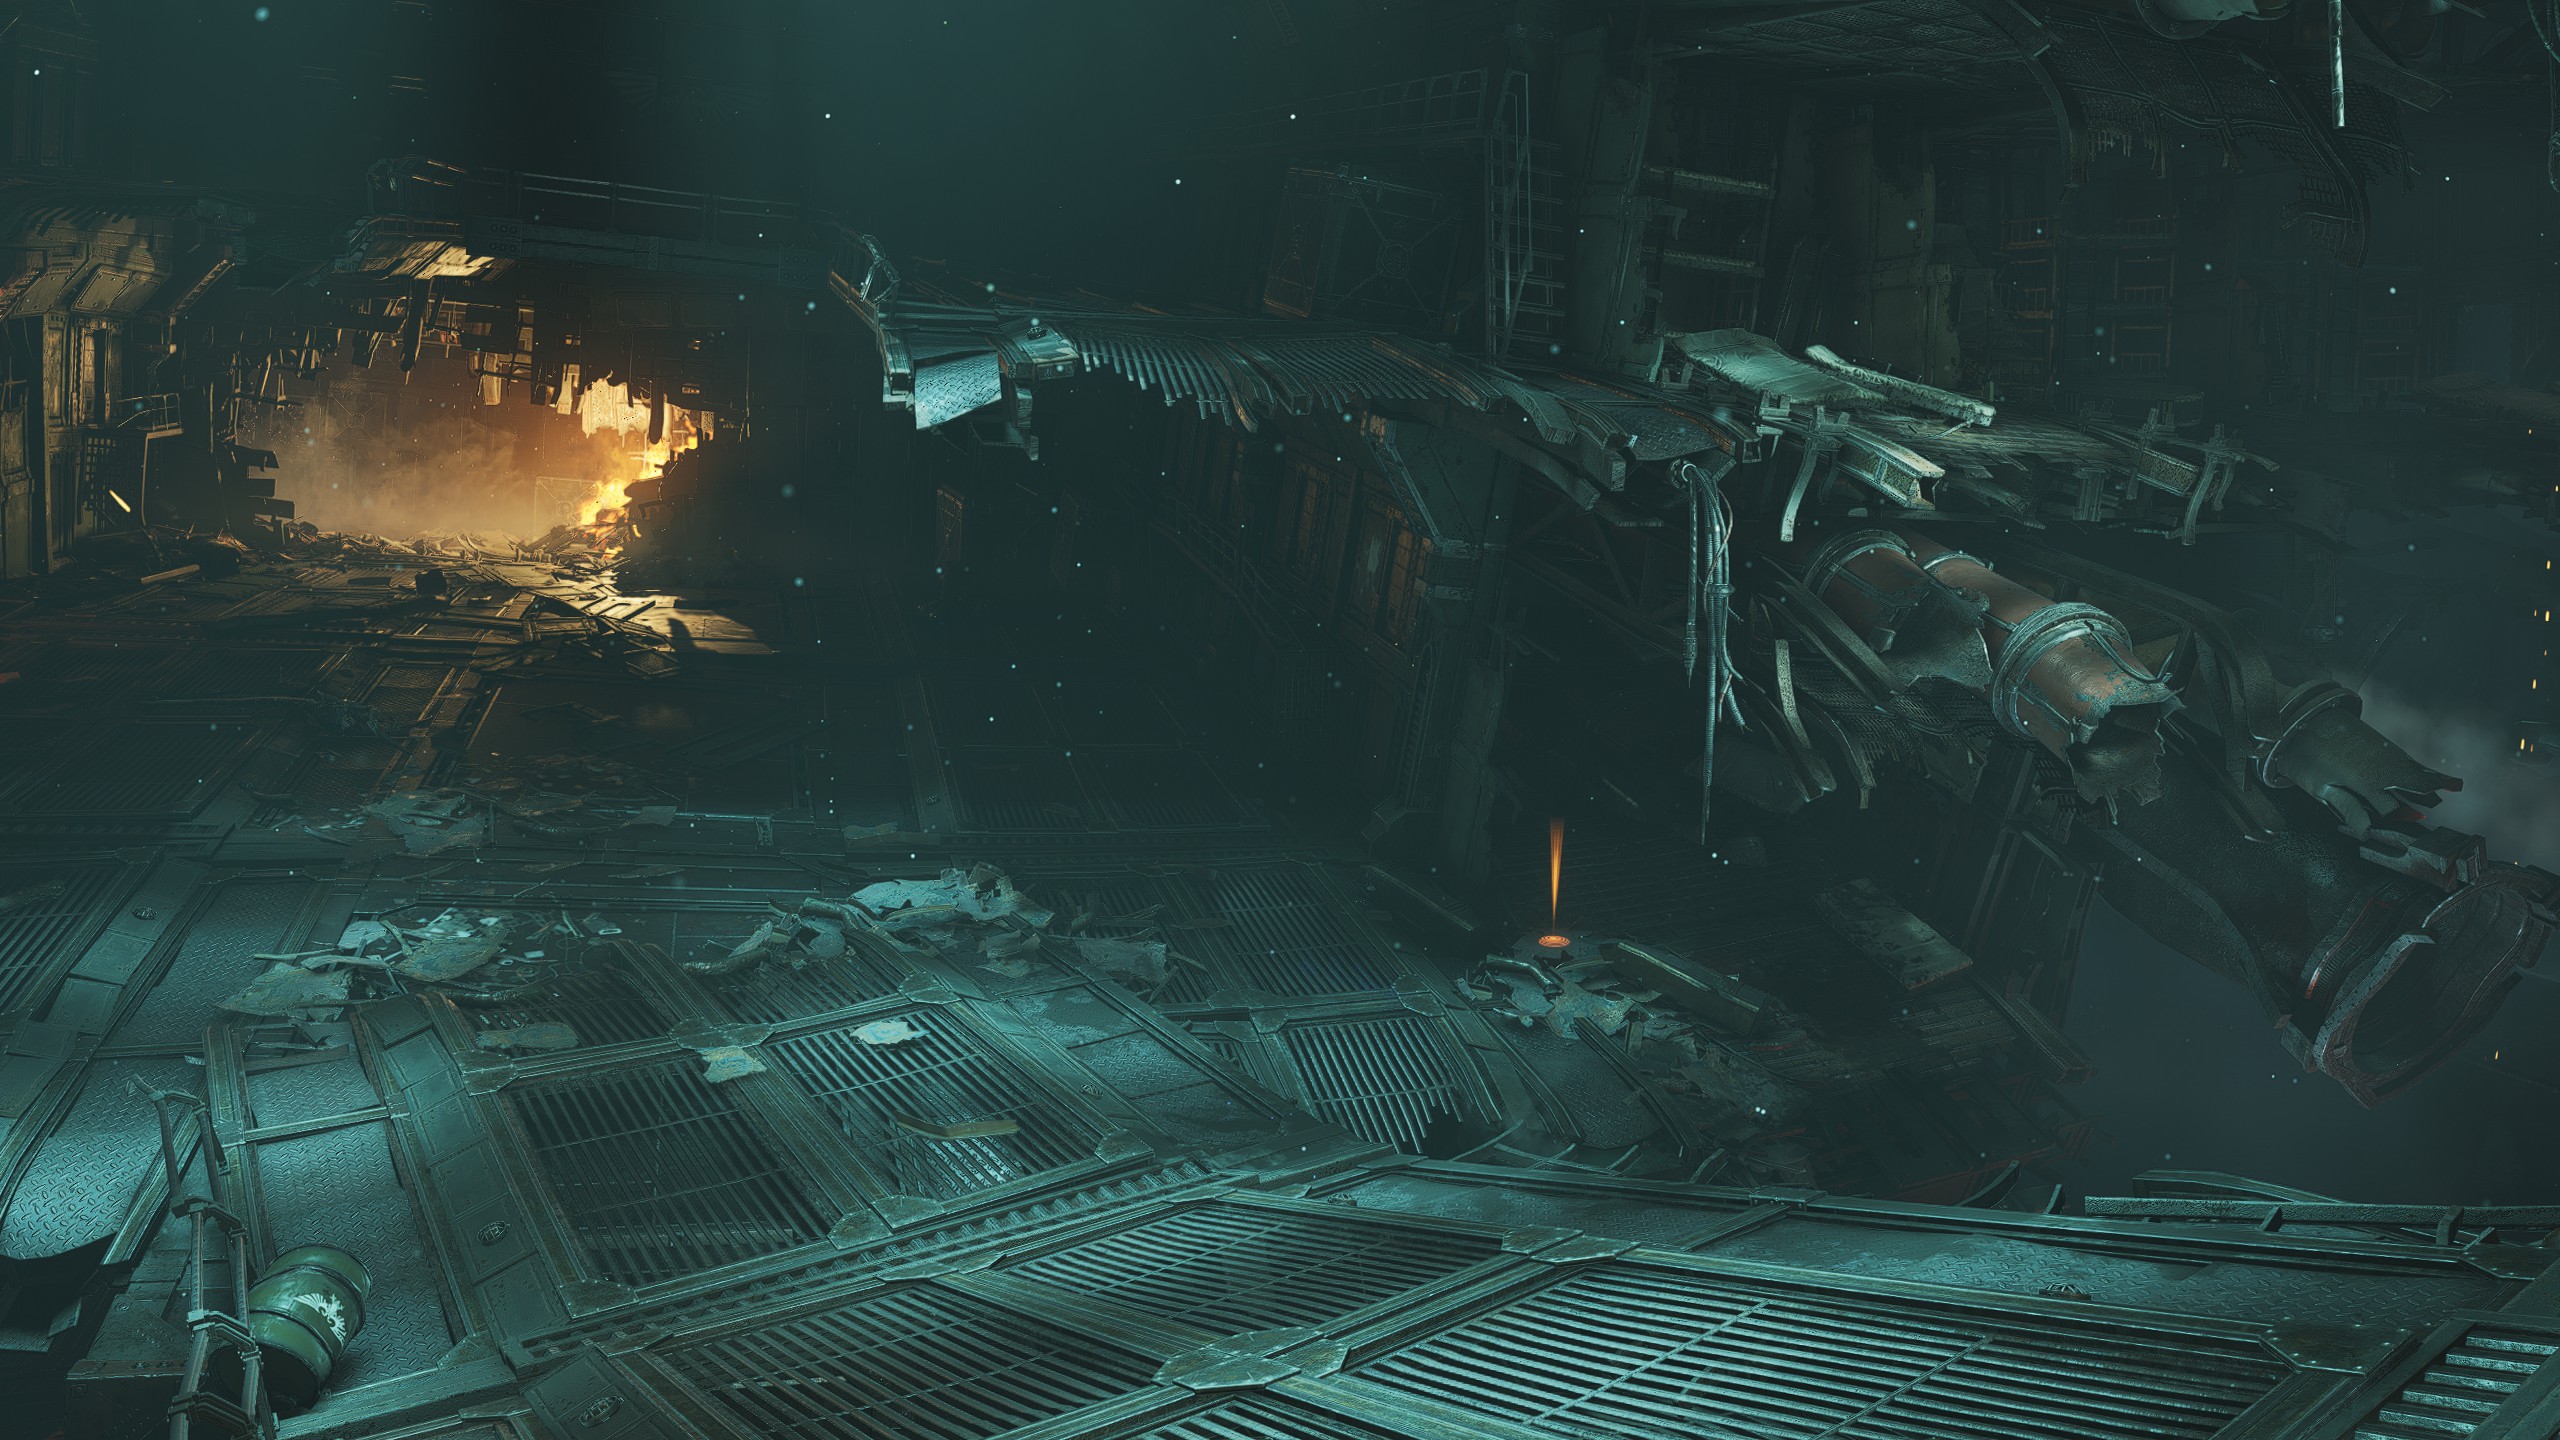
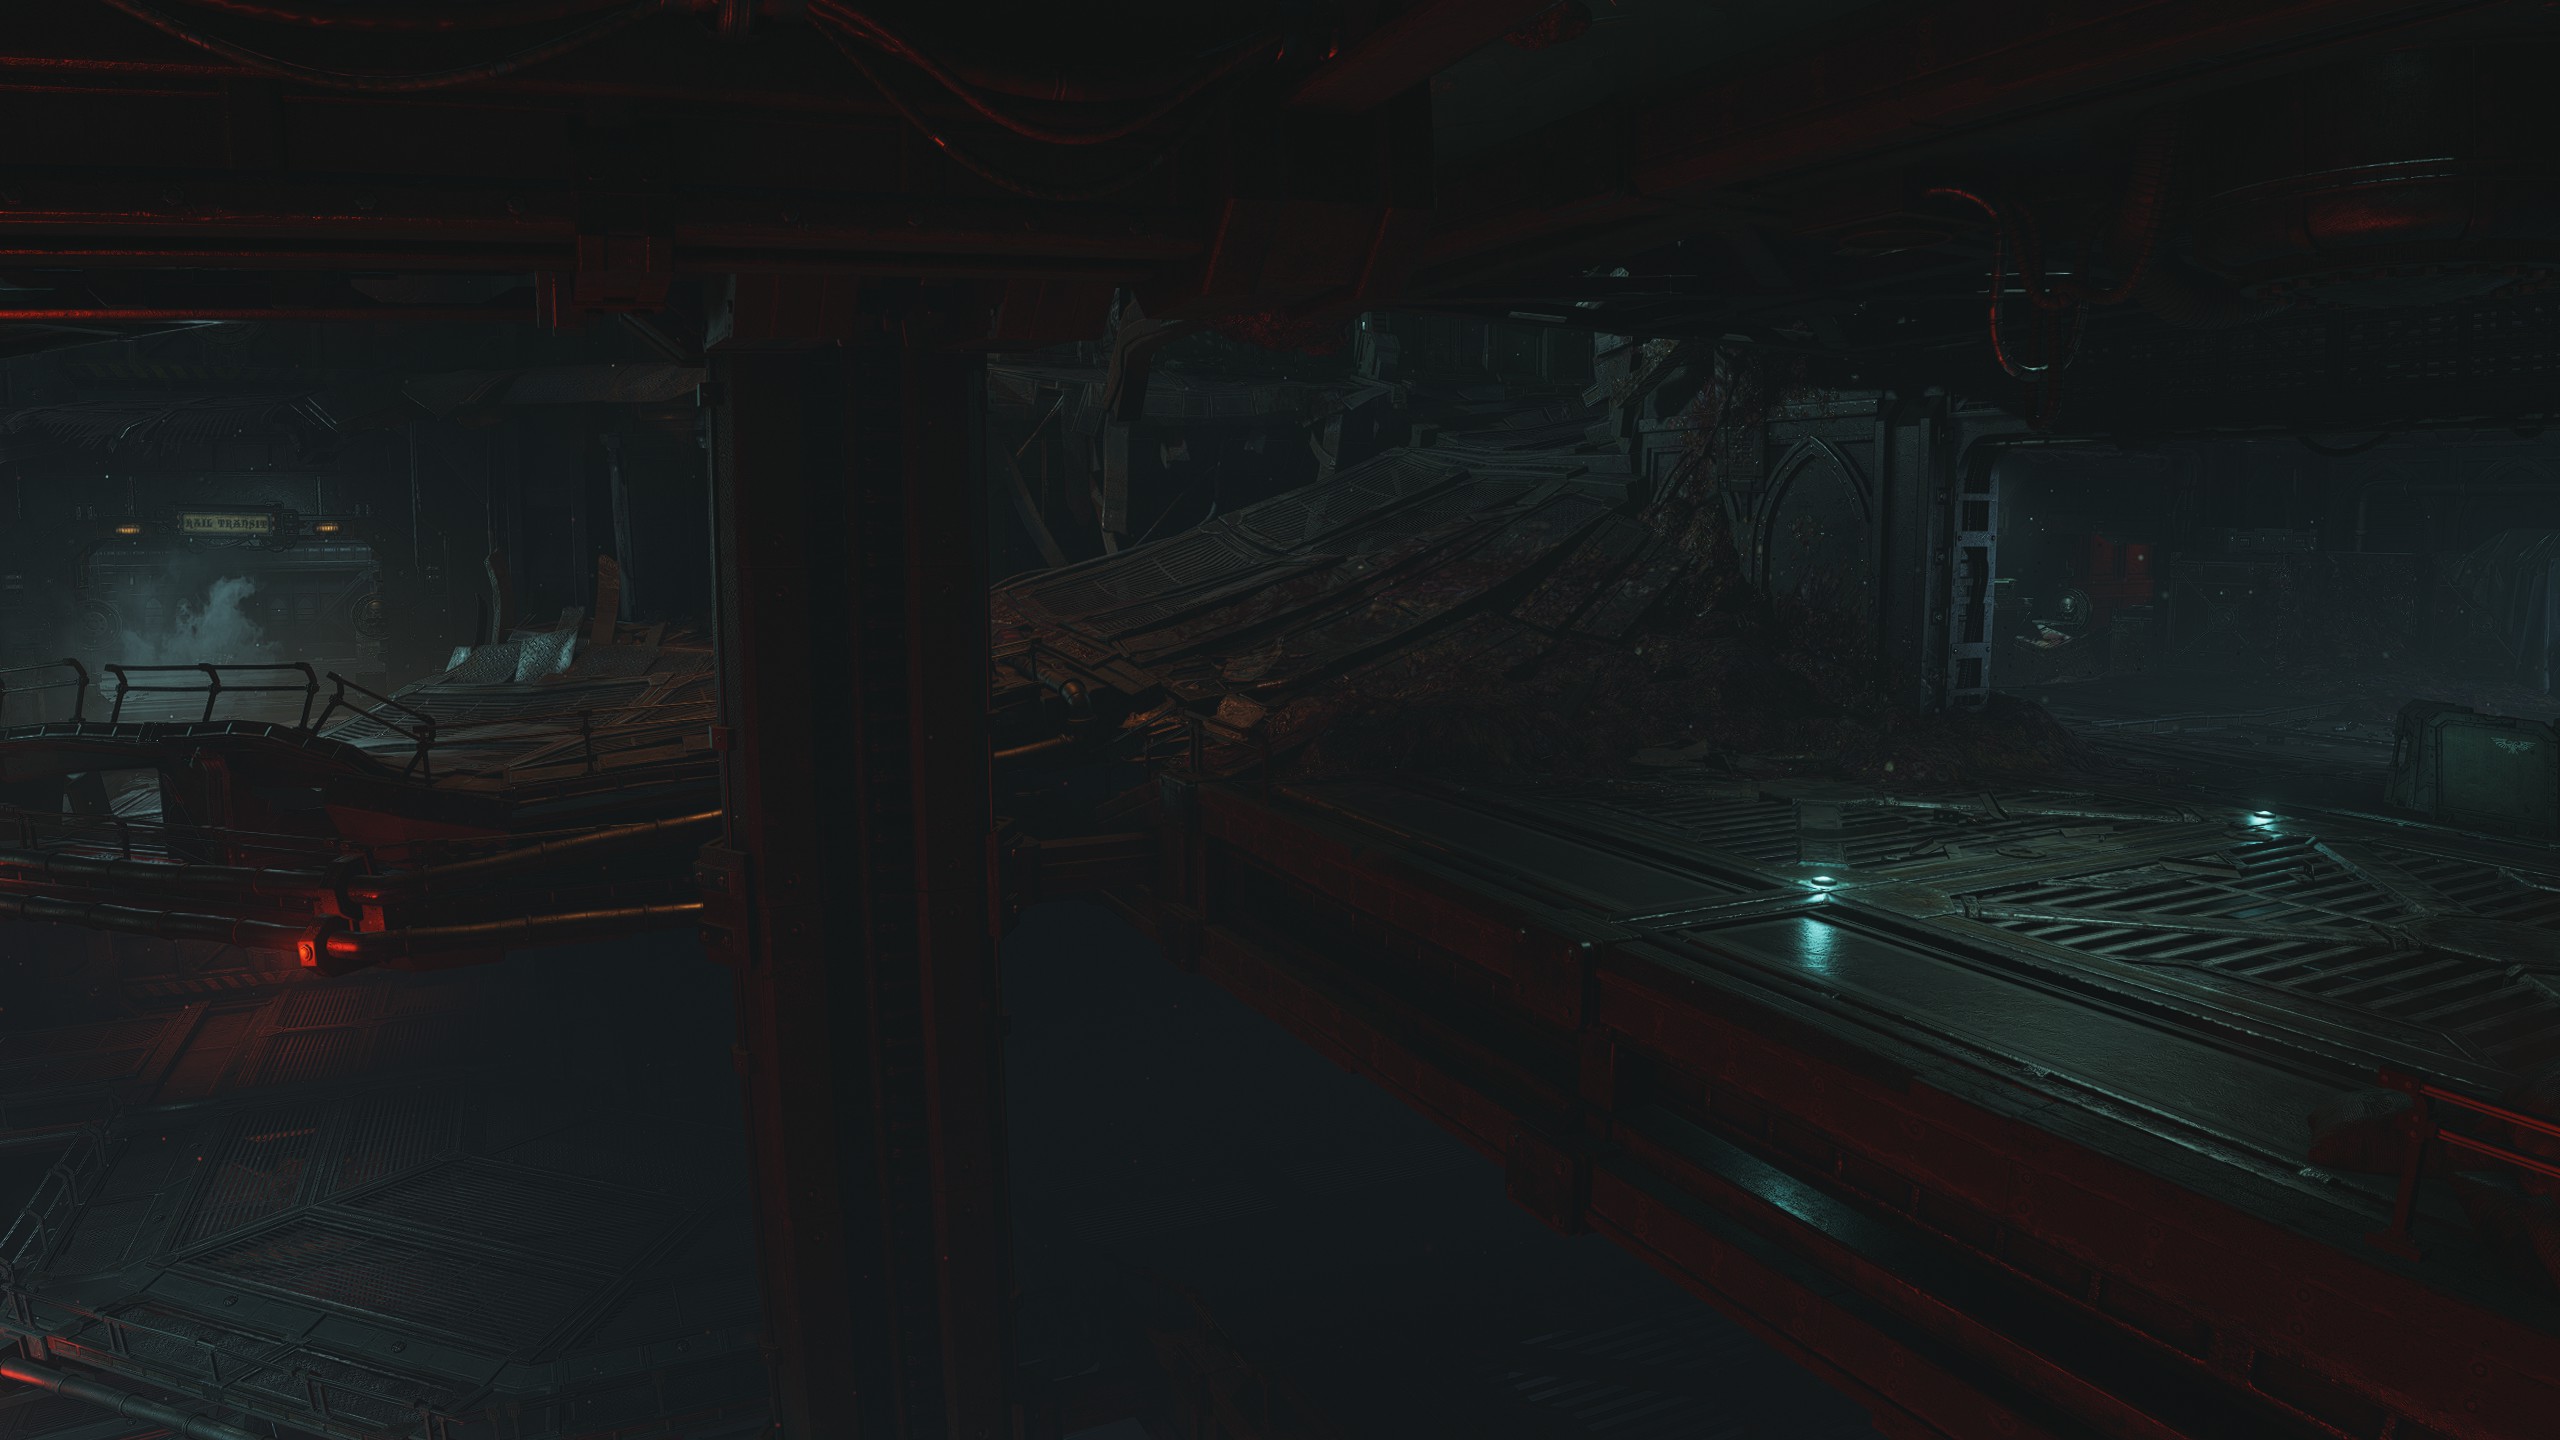
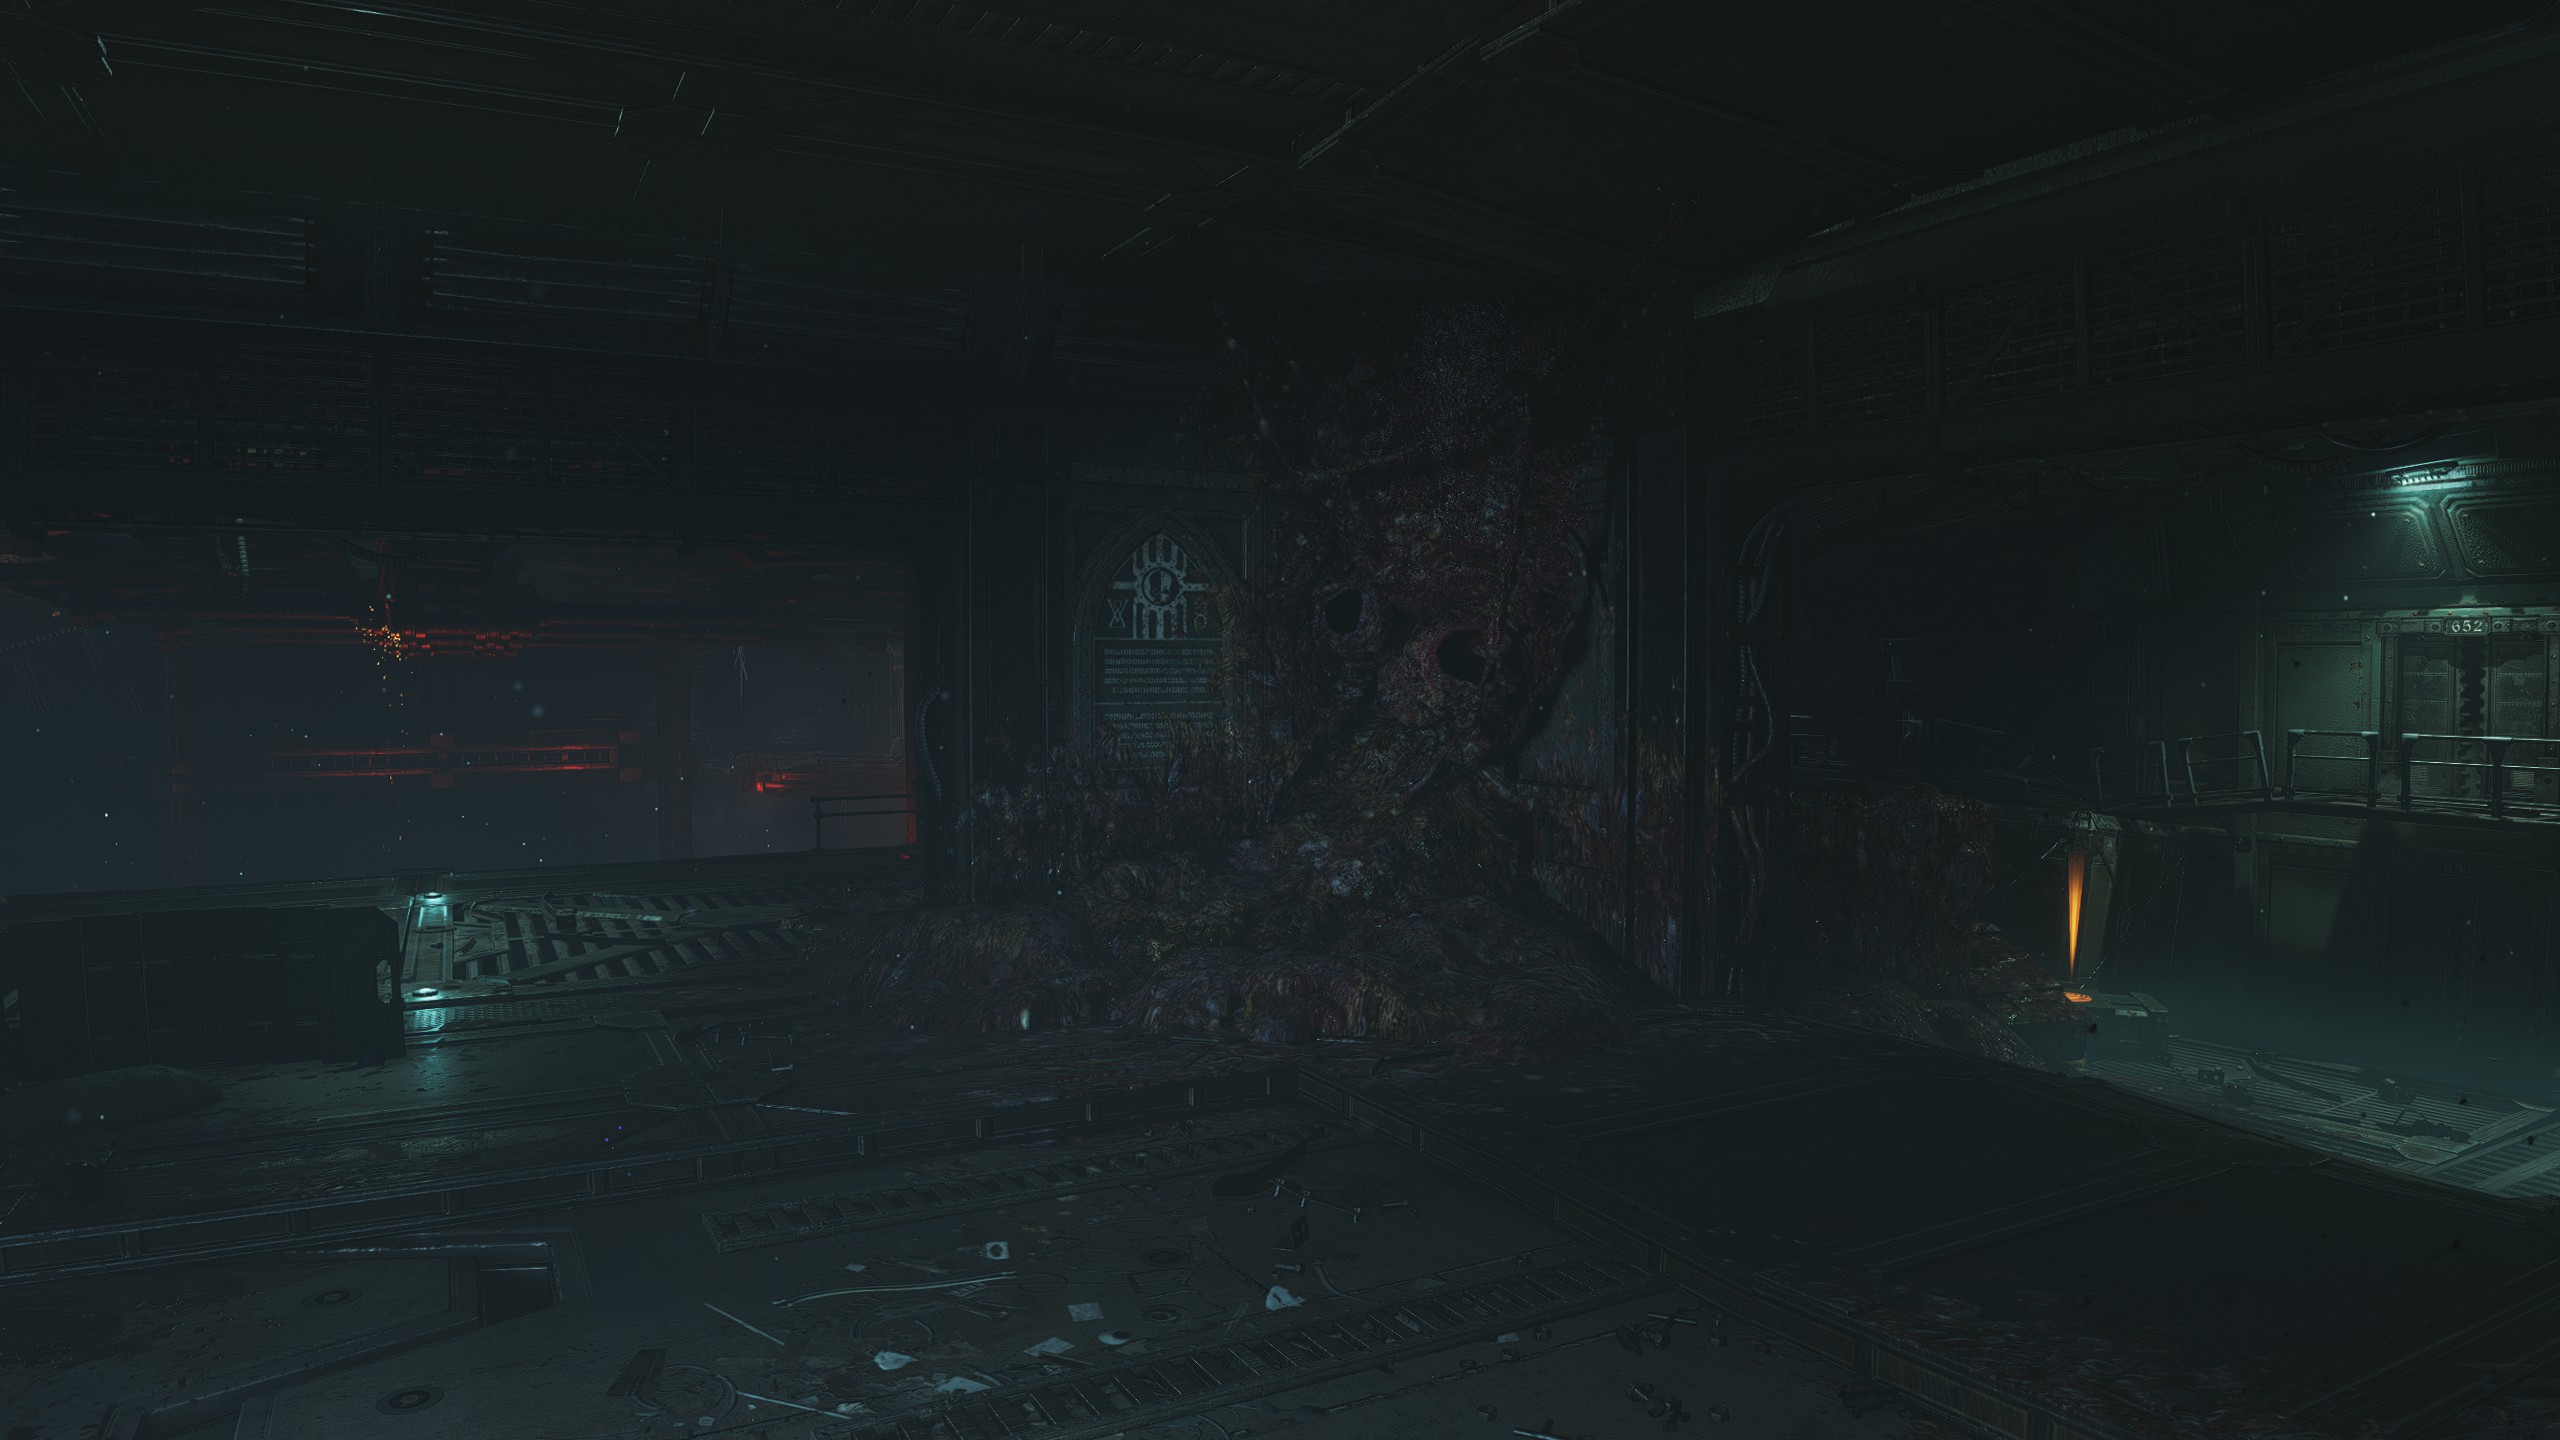
Due to the potentially confusing nature of the Wrath of Espandor, I've doubled up on most images to try to better visualise most locations.
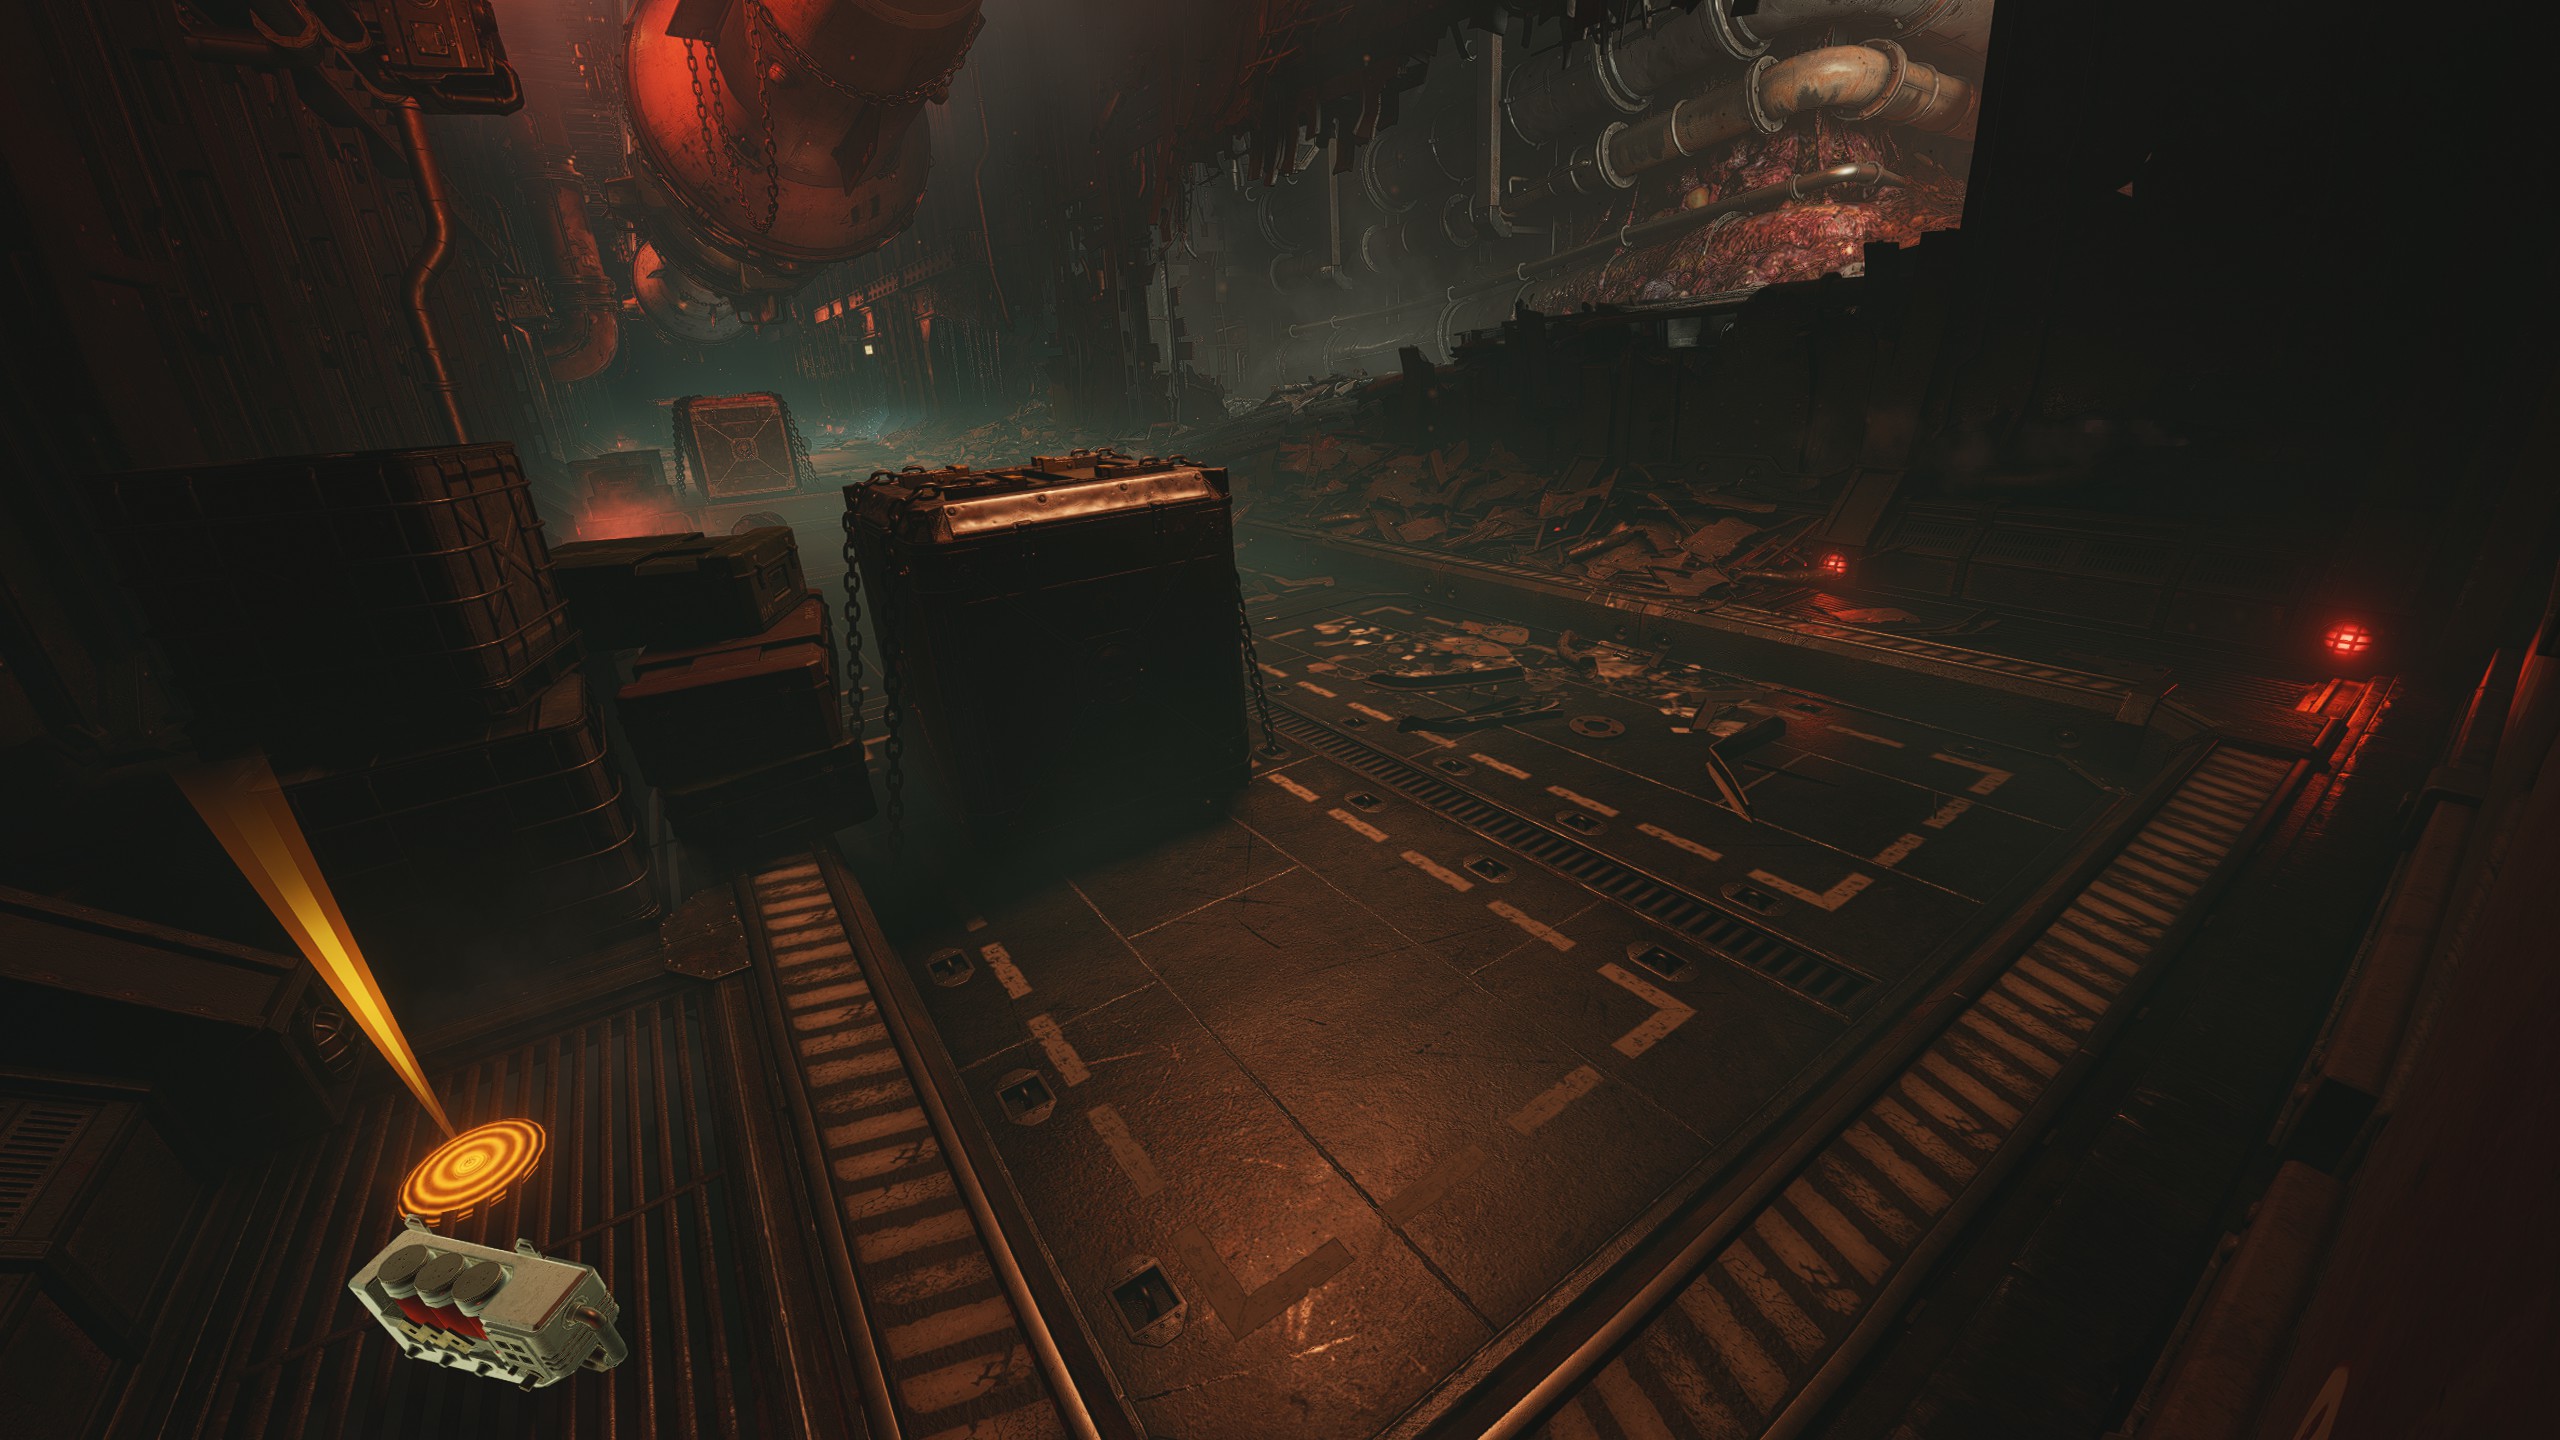
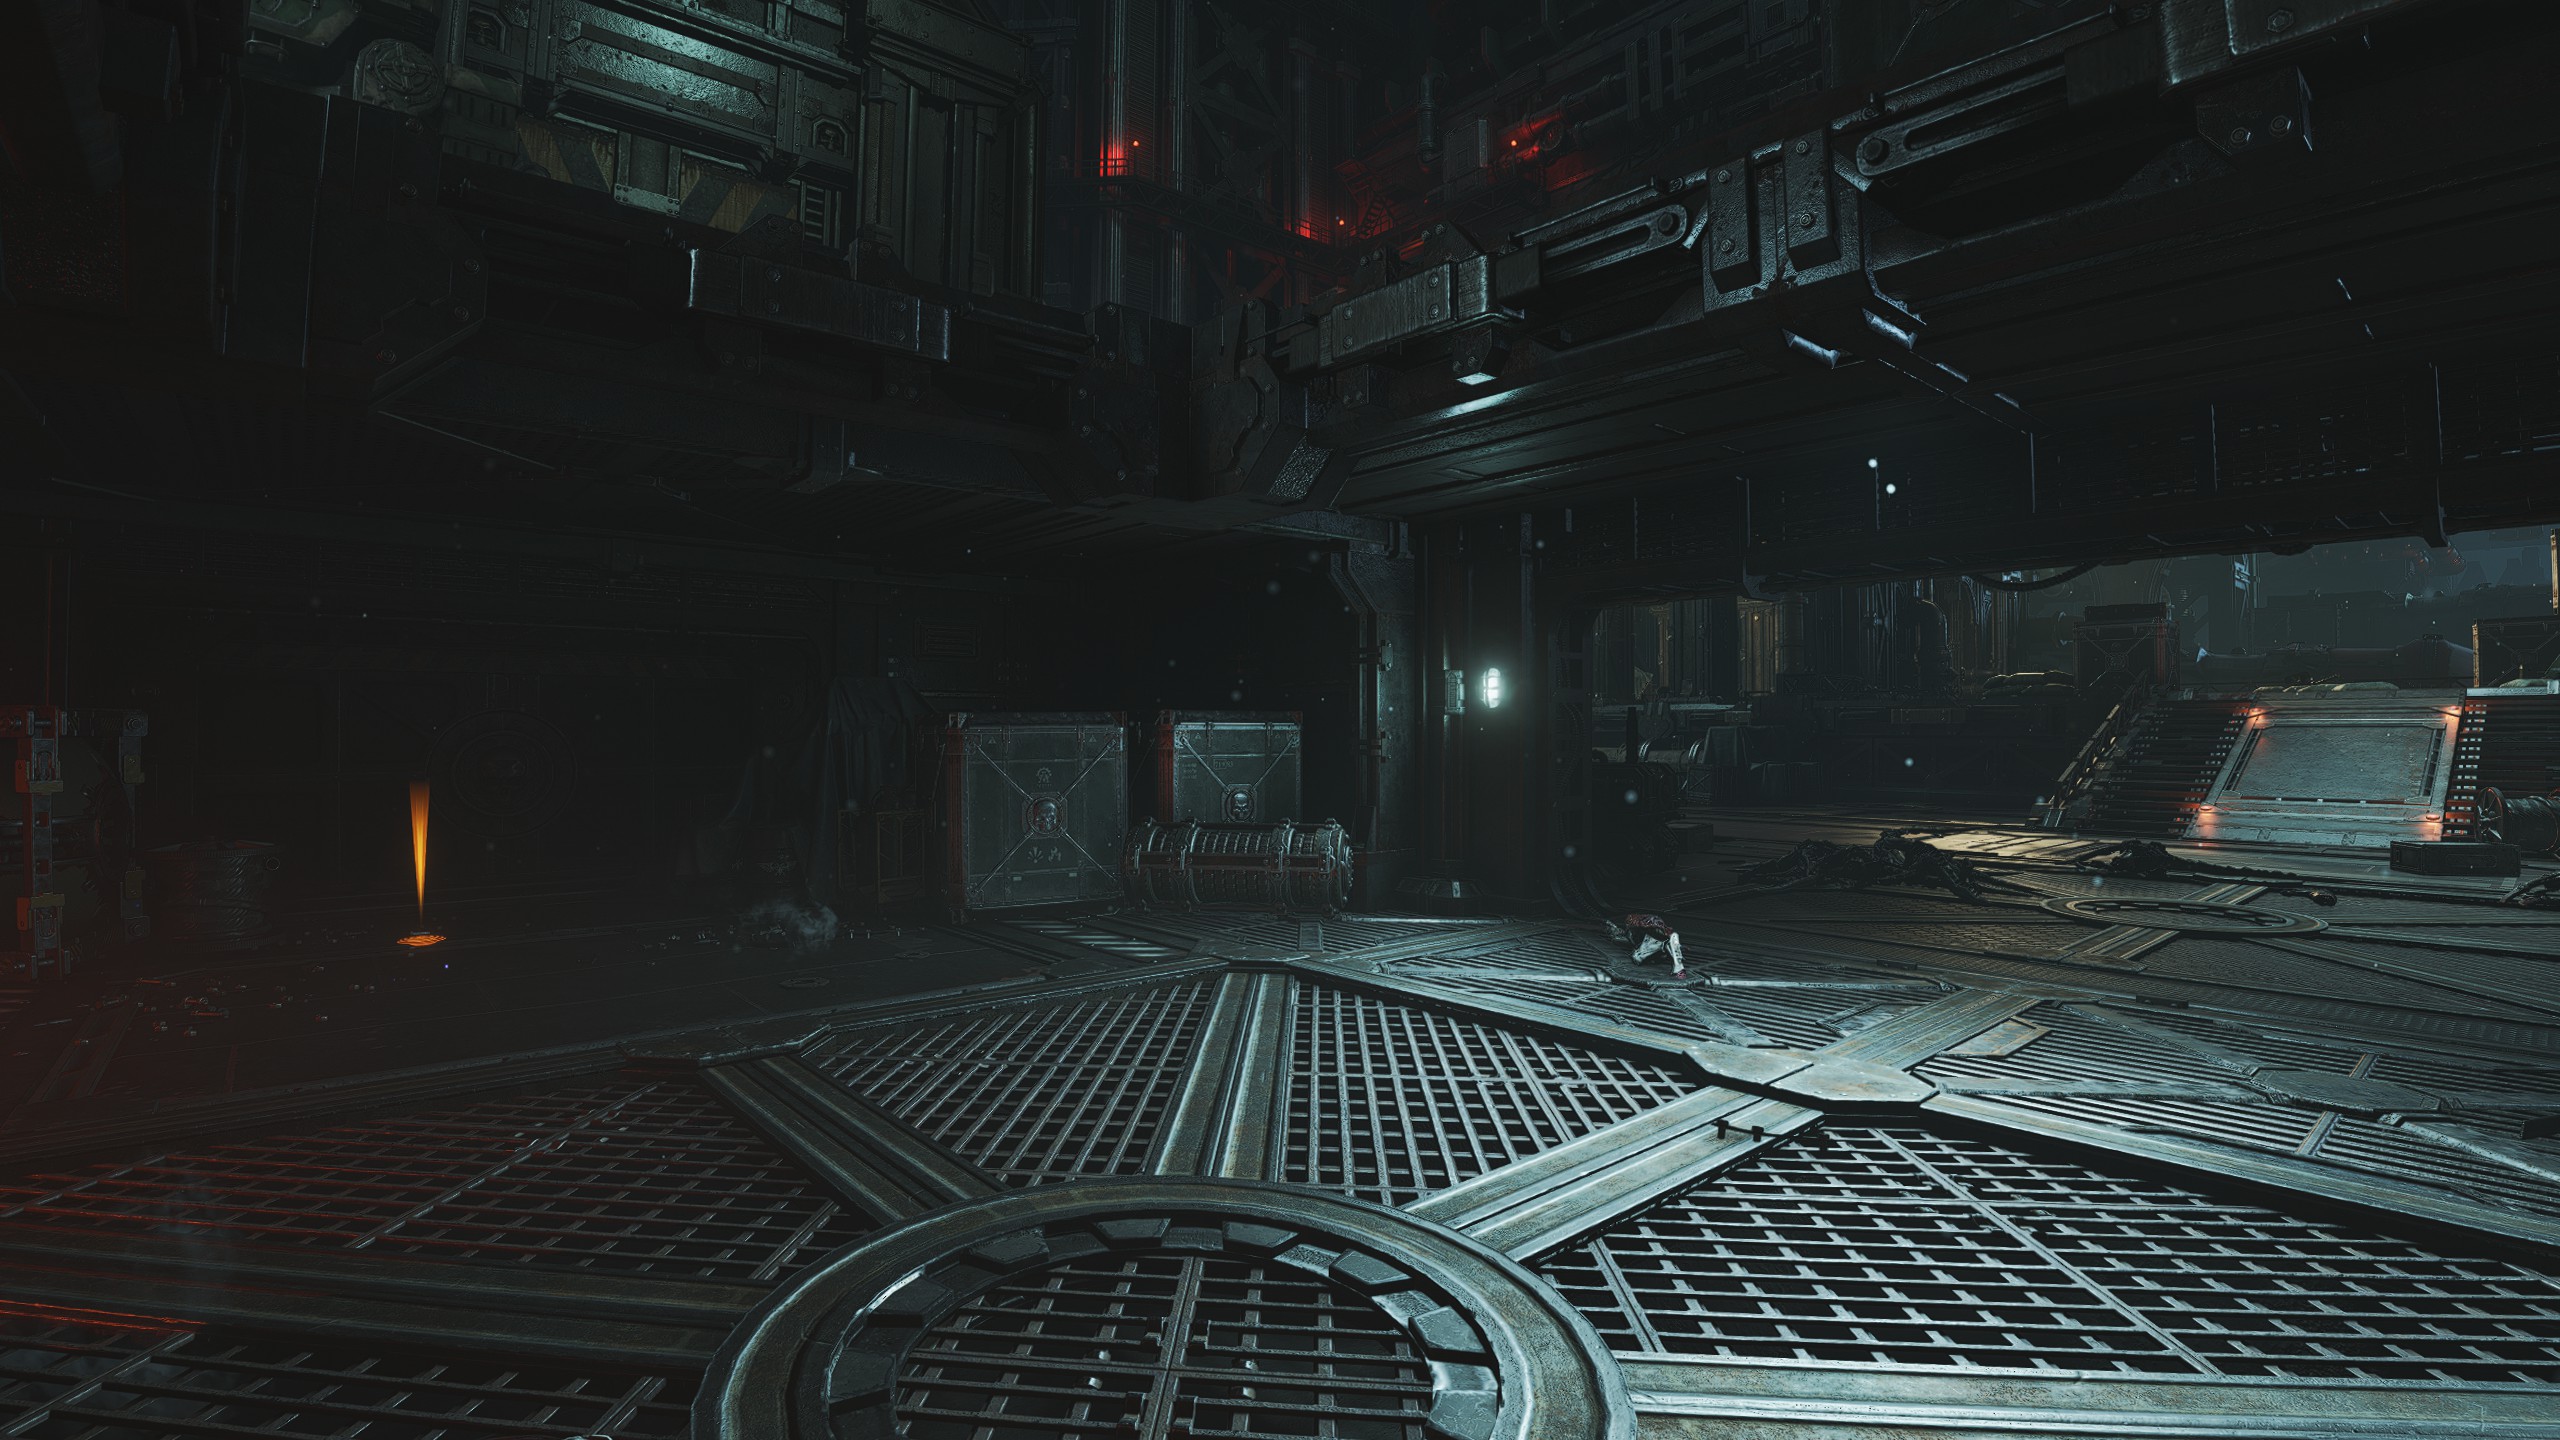
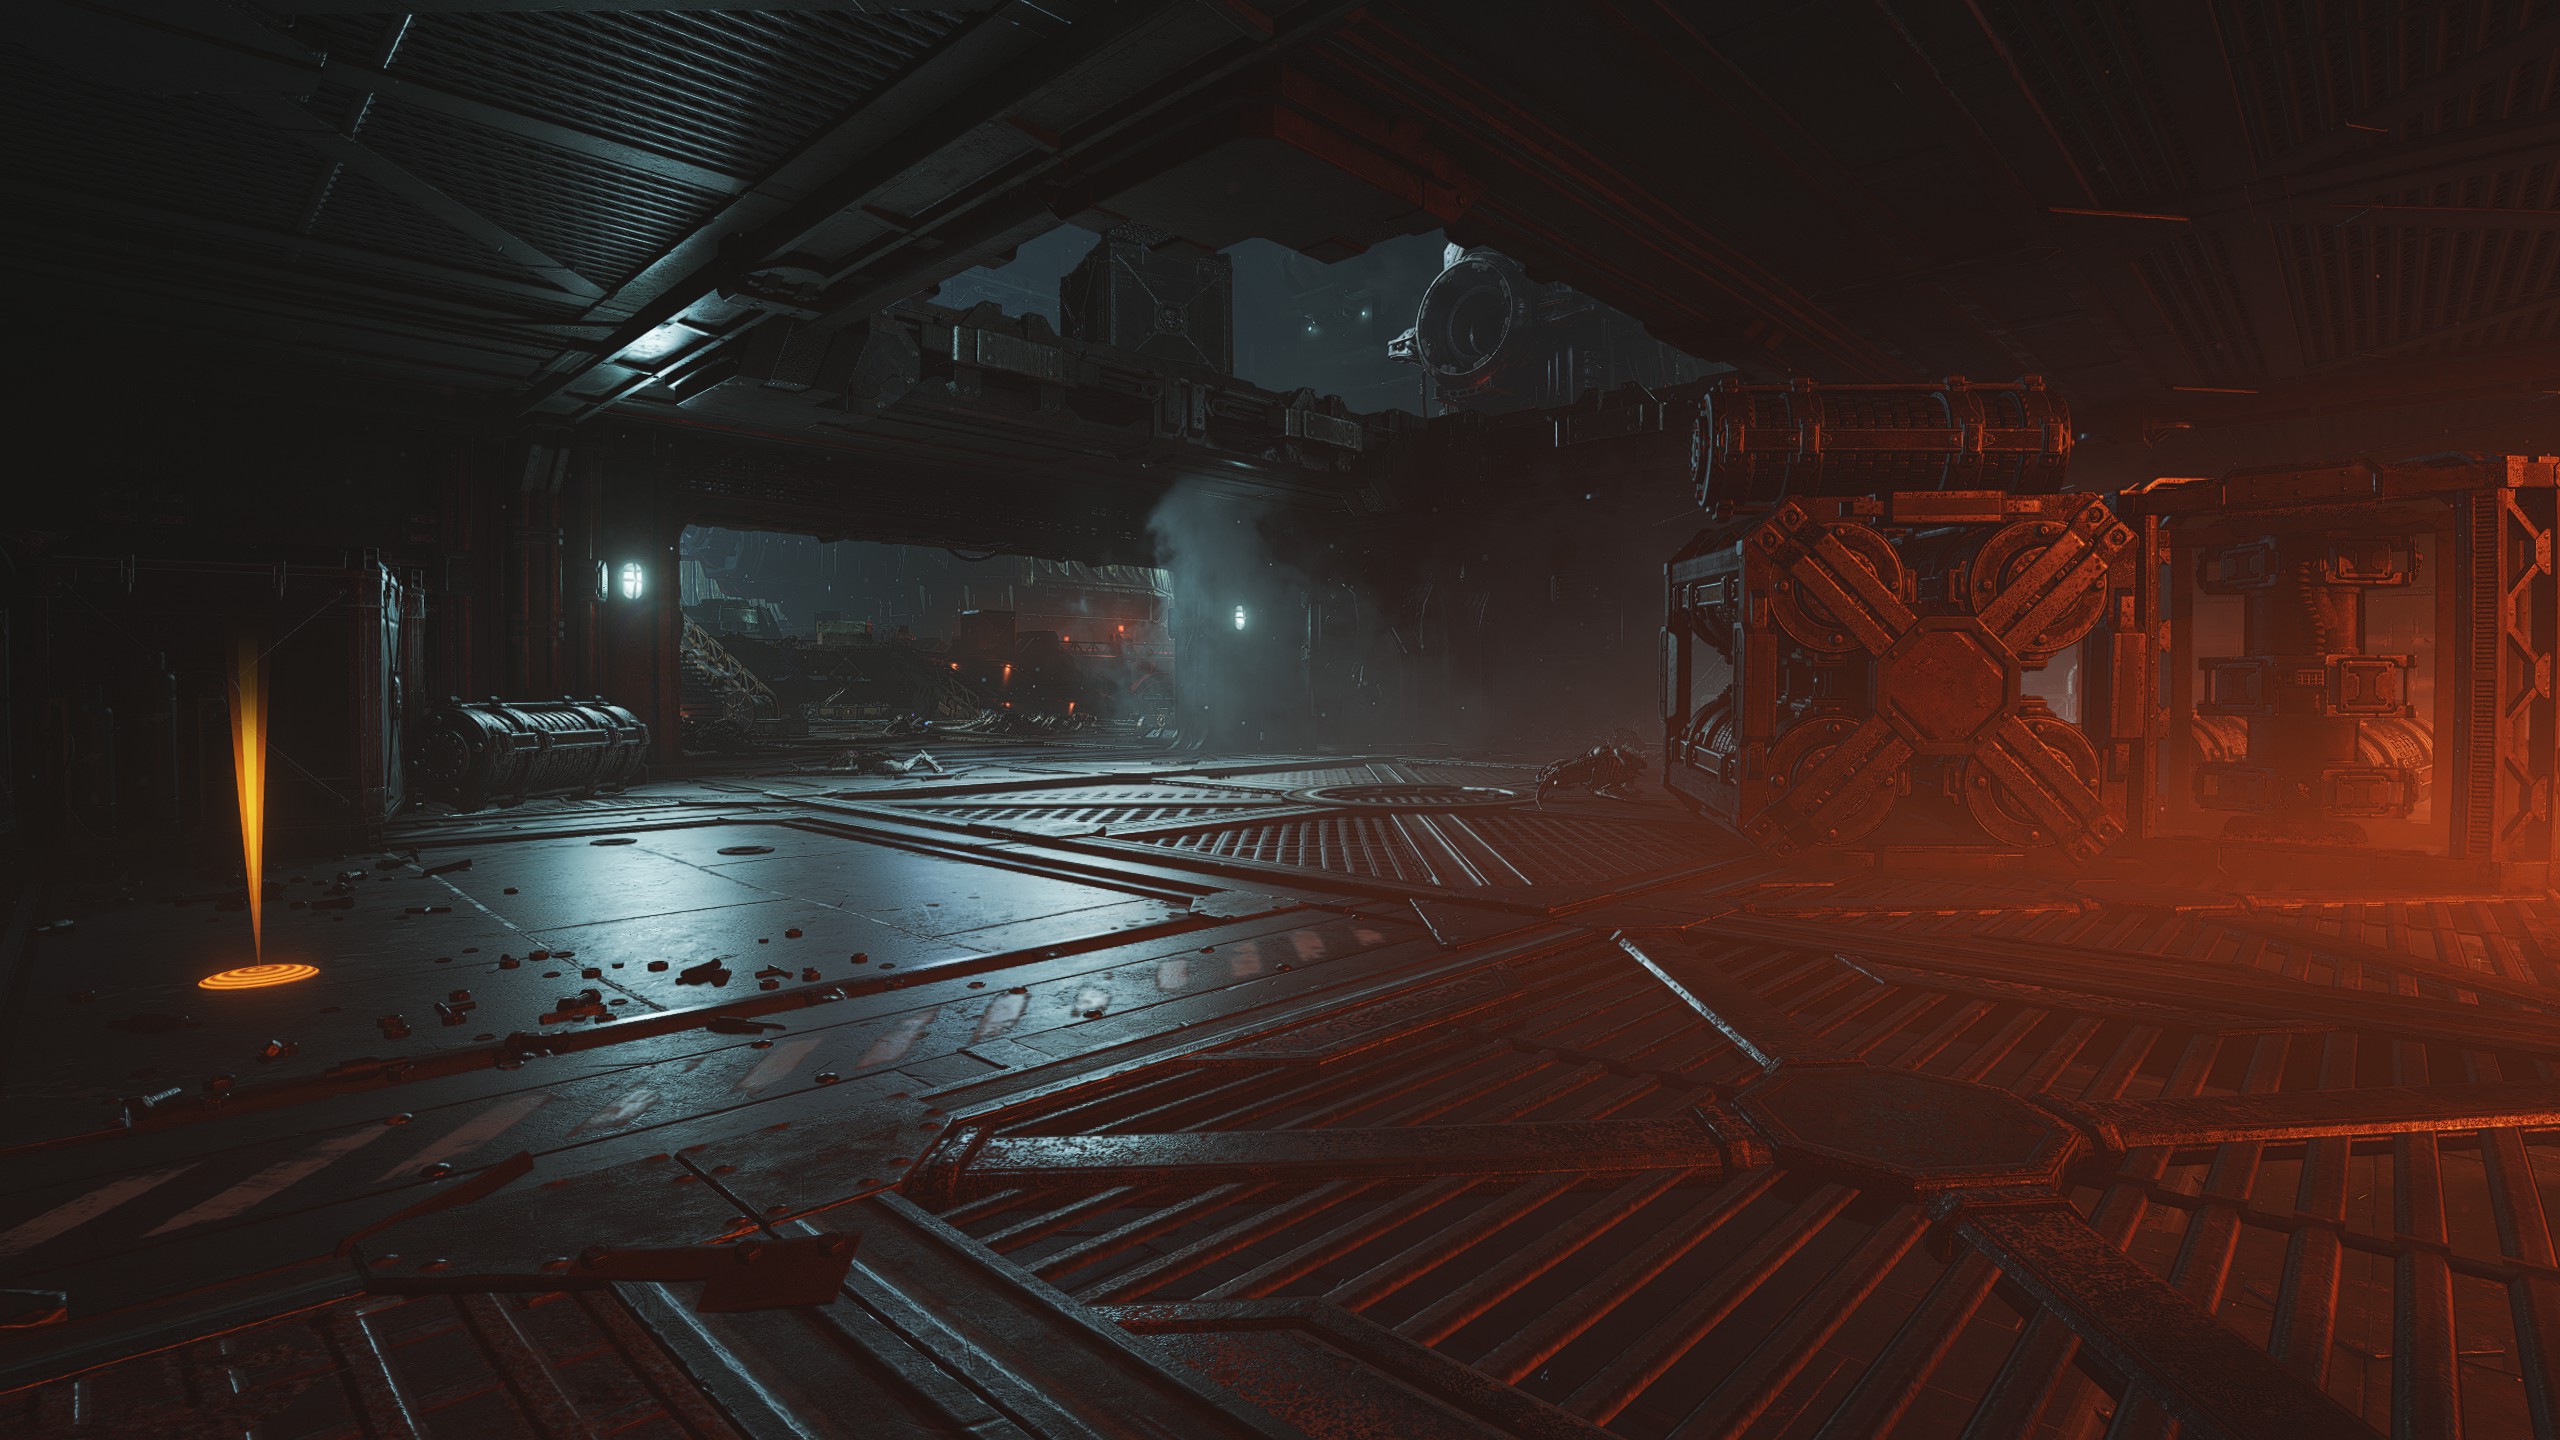
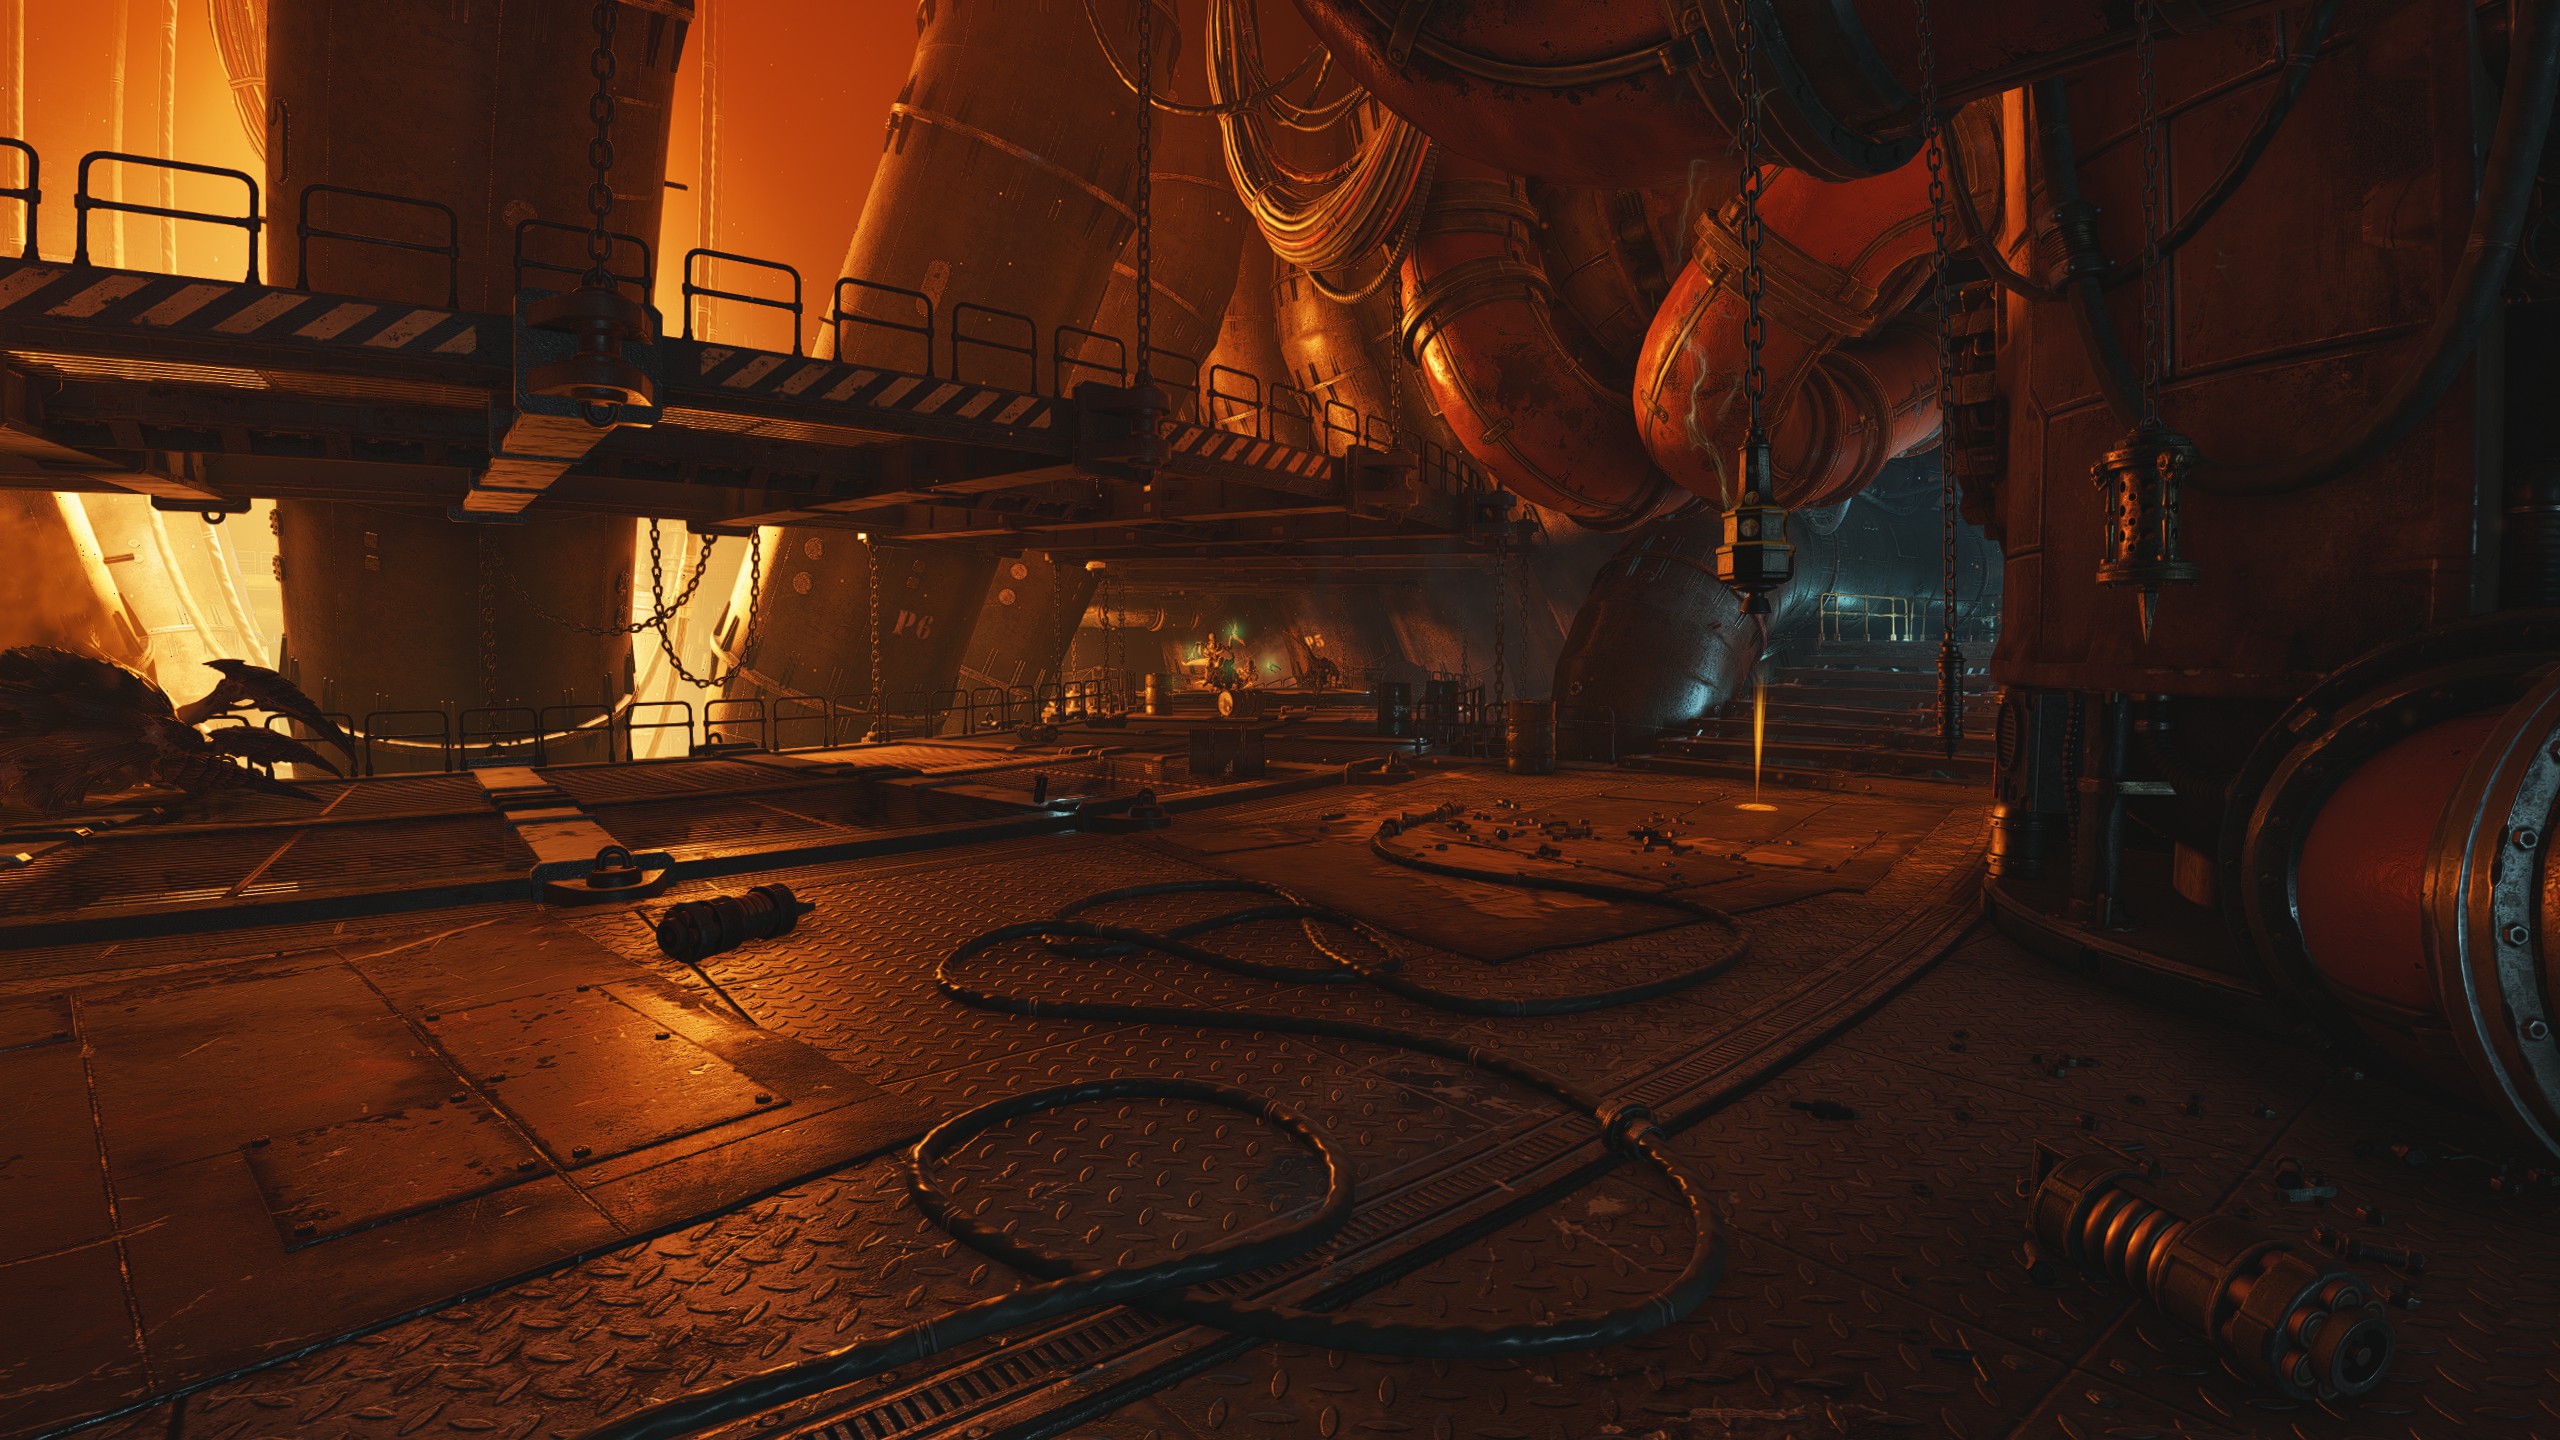
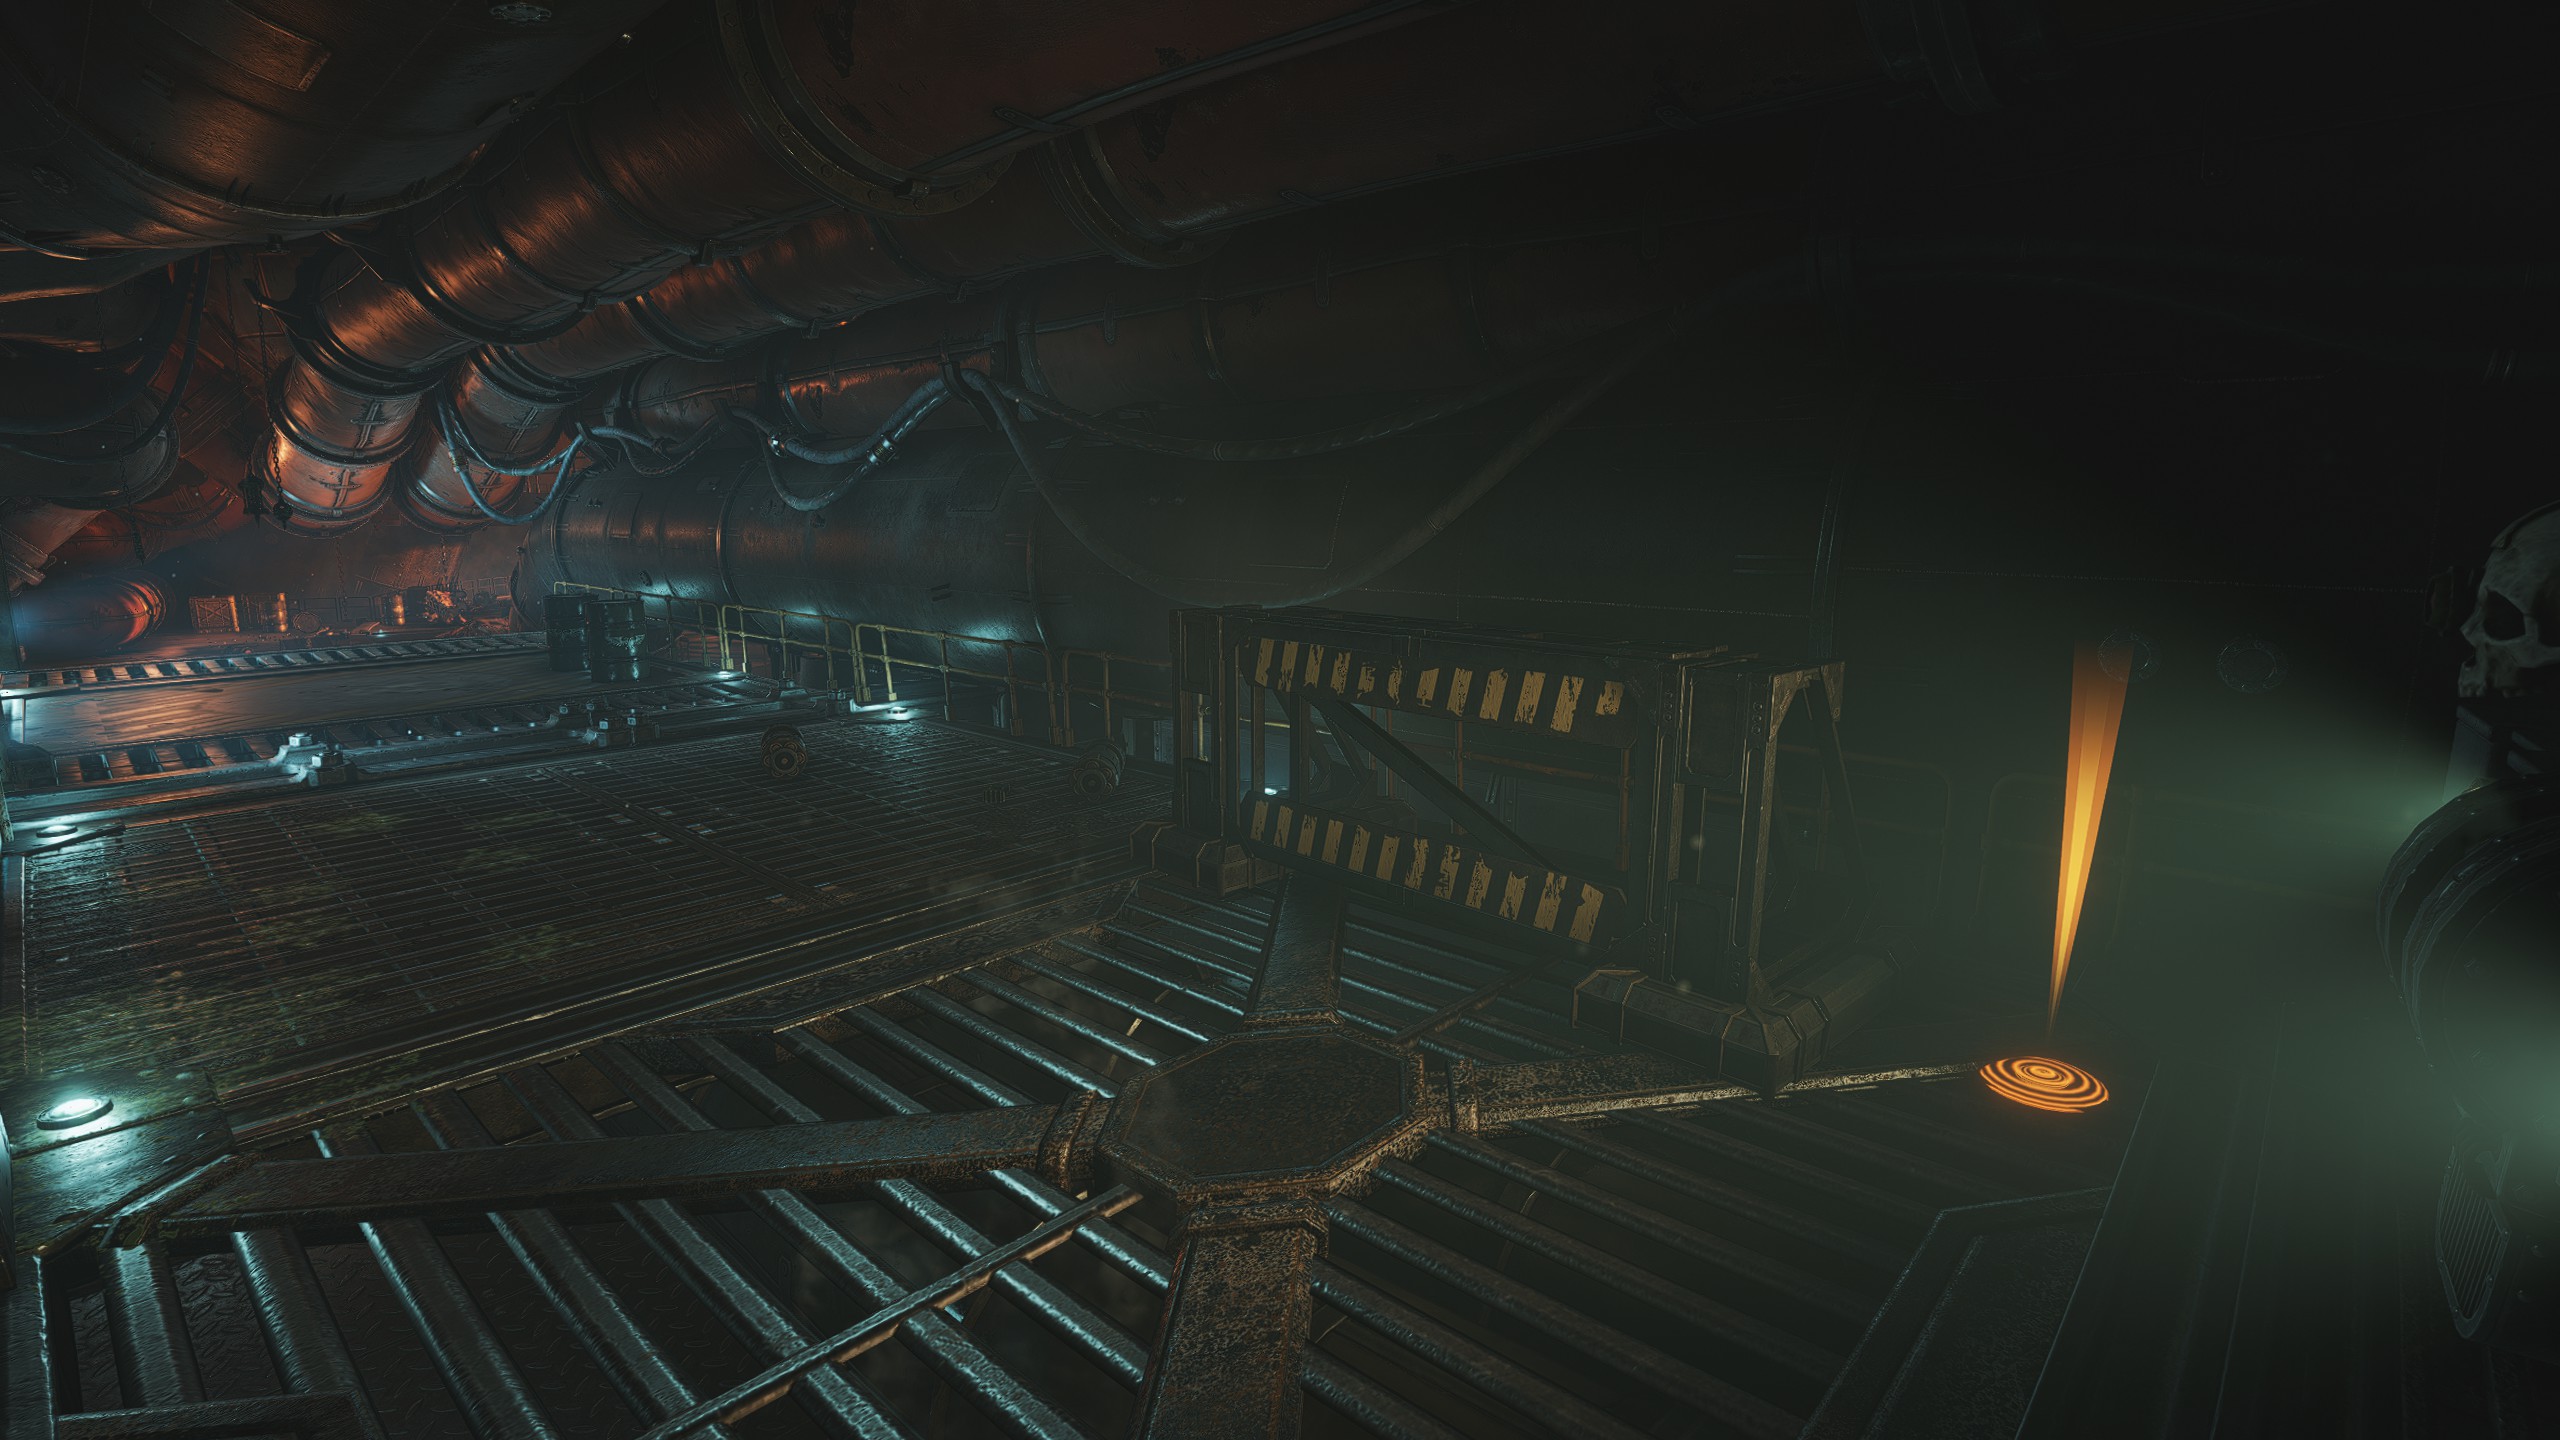
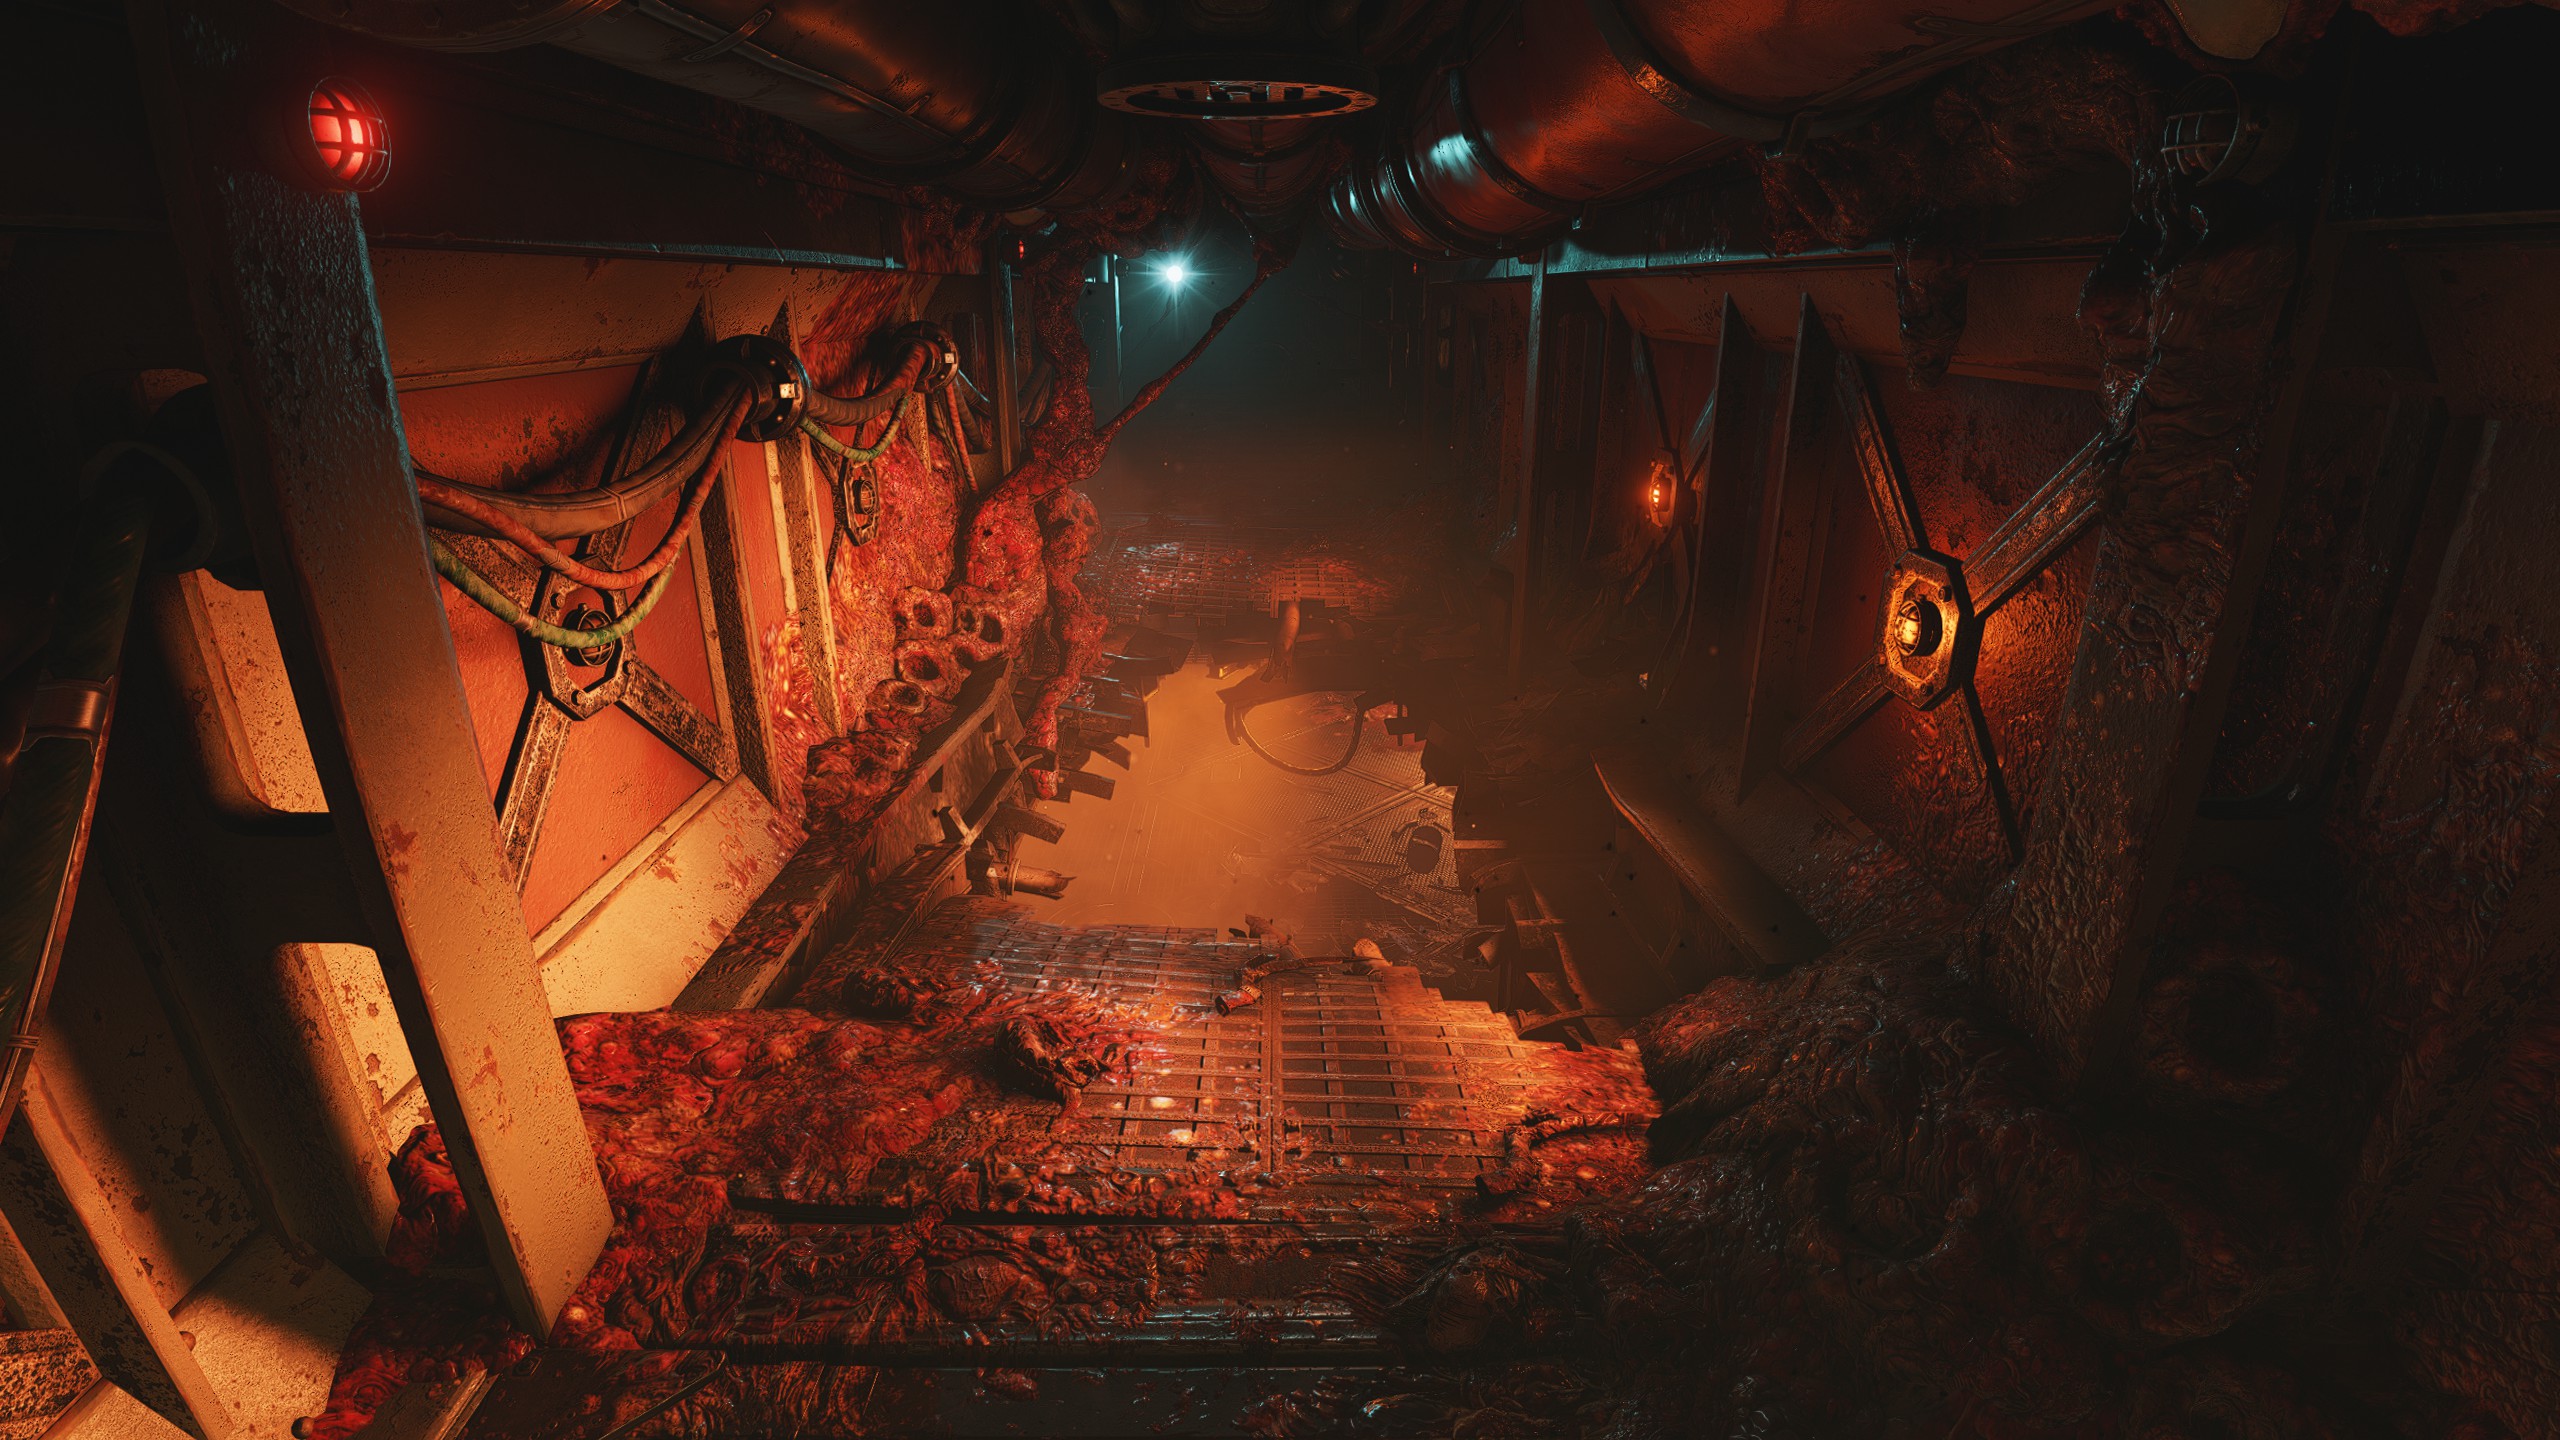
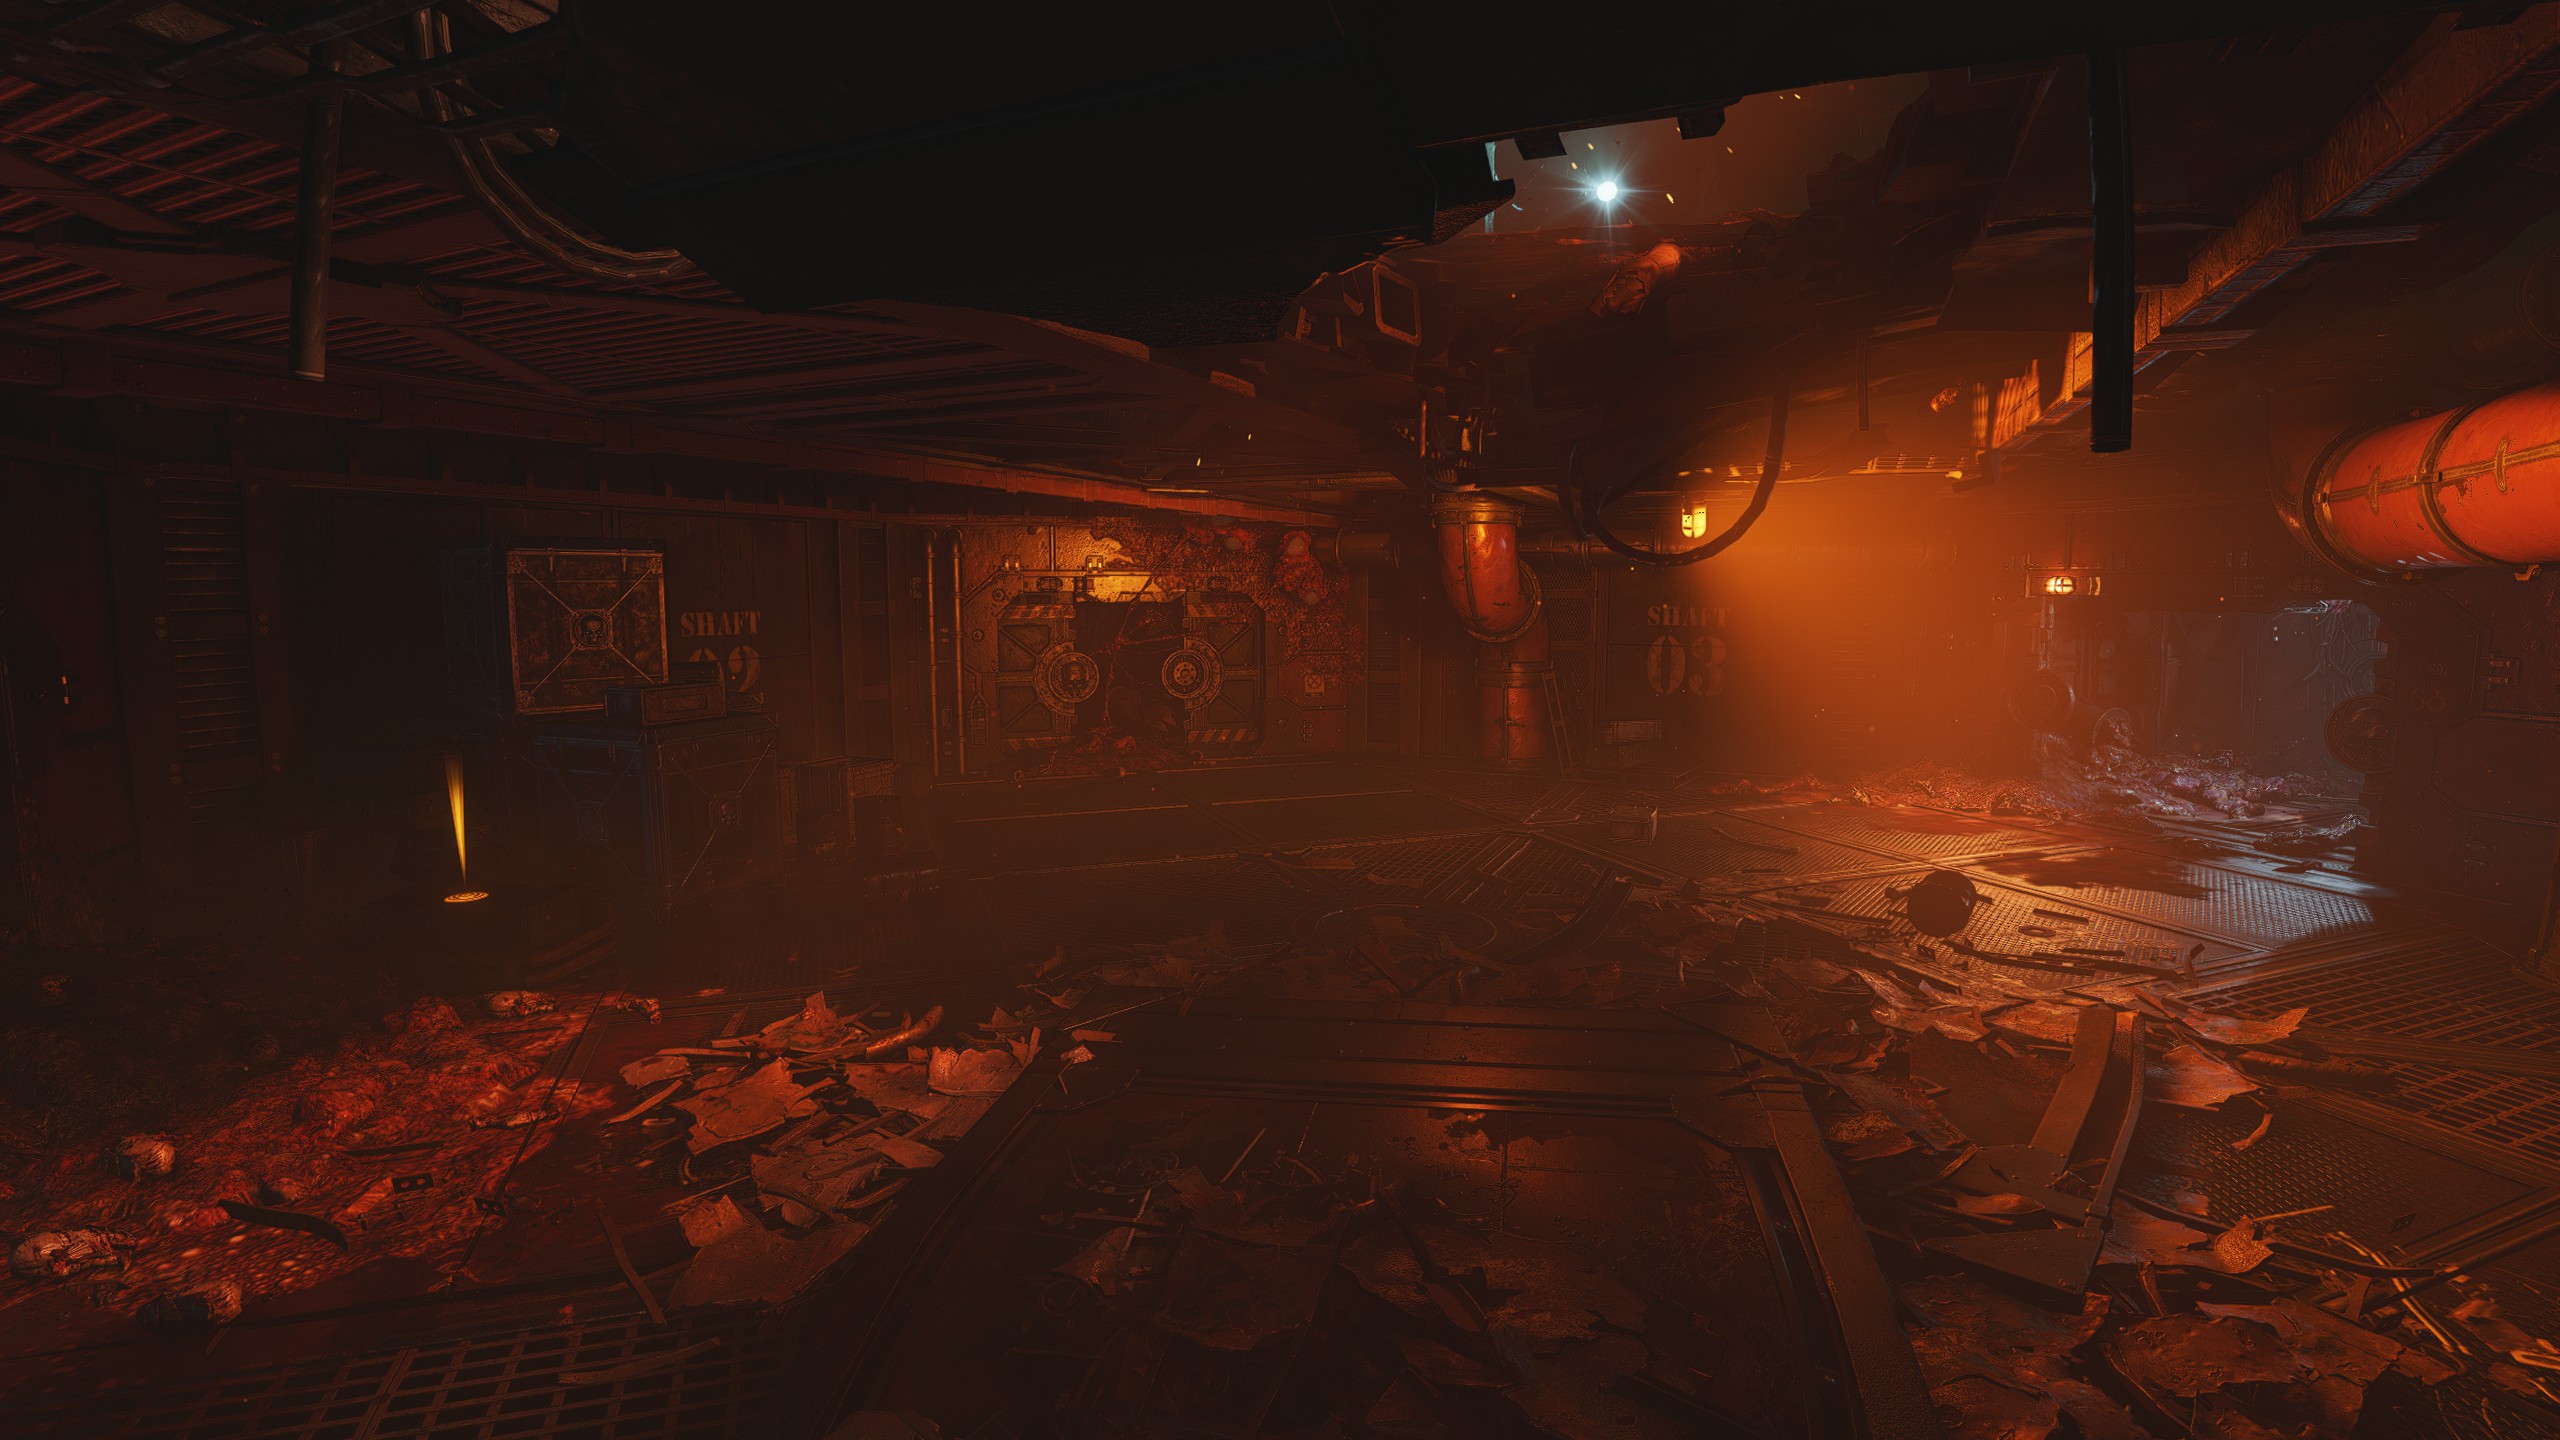
Gene-Seed #1
Location
Objective: Advance to the Ordnance Depot
Enter the ship and proceed through the first two corridors and into the more open room with warheads above your head. Instead of proceeding forward, turn right from the doorway and go all the way to the back of the room and check behind the boxes to your right.
Enter the ship and proceed through the first two corridors and into the more open room with warheads above your head. Instead of proceeding forward, turn right from the doorway and go all the way to the back of the room and check behind the boxes to your right.
Gene-Seed #2
Location
Objective: Advance to the Ordnance Depot
Due to the randomisation this Gene-Seed may be on the path forward or require a bit of sidetracking. It can be found in Block C4, the room with various fires, just to the left of the collapsed walkway that serves as a bridge.
Due to the randomisation this Gene-Seed may be on the path forward or require a bit of sidetracking. It can be found in Block C4, the room with various fires, just to the left of the collapsed walkway that serves as a bridge.
Gene-Seed #3
Location
Objective: Advance to the Ordnance Depot
Just in the other room from location two, this one is in Block C3, the hexagonal room with the massive bottomless shaft. Drop down or walk down the ramp, but before heading into Rail Transit, turn around and go into a small room behind you and check under the ramp.
Just in the other room from location two, this one is in Block C3, the hexagonal room with the massive bottomless shaft. Drop down or walk down the ramp, but before heading into Rail Transit, turn around and go into a small room behind you and check under the ramp.
Gene-Seed #4
Location
Objective: Advance to the Ordnance Depot
Proceed through the mission as normal and head into the Weapons Deck. Go all the way to the end of the section and check the small generator room (this will be to your left if you go down the ramp, or behind you if you drop down, though you can also drop directly into the room). The Gene-Seed spawn is hiding in the back left corner.
Proceed through the mission as normal and head into the Weapons Deck. Go all the way to the end of the section and check the small generator room (this will be to your left if you go down the ramp, or behind you if you drop down, though you can also drop directly into the room). The Gene-Seed spawn is hiding in the back left corner.
Gene-Seed #5
Location
Objective: Reach the Plasma Reactor
Complete the cooling hall objective and proceed down the elevator. Keep heading forward until you reach the room with the orange lighting and the huge pipes, then turn to the right and head down the hallway. The Gene-Seed may spawn at the end behind the caution barrier.
Complete the cooling hall objective and proceed down the elevator. Keep heading forward until you reach the room with the orange lighting and the huge pipes, then turn to the right and head down the hallway. The Gene-Seed may spawn at the end behind the caution barrier.
Gene-Seed #6
Location
Objective: Reach the Plasma Reactor
Continue progressing forward until you reach the generator room from which you will drop down a hole to progress the mission. Immediately after dropping down into the room with the spinning light, look to your left amidst the pile of boxes.
Continue progressing forward until you reach the generator room from which you will drop down a hole to progress the mission. Immediately after dropping down into the room with the spinning light, look to your left amidst the pile of boxes.
| Mission 12: Disruption
Gene-Seed #1
Location
Objective: Reach the Cadian Forces
From the start of the level, drop down the rooftops and proceed through the door in front of you. Keep to the left side of the courtyard and check the back left corner for a potential Gene-Seed spawn.
From the start of the level, drop down the rooftops and proceed through the door in front of you. Keep to the left side of the courtyard and check the back left corner for a potential Gene-Seed spawn.
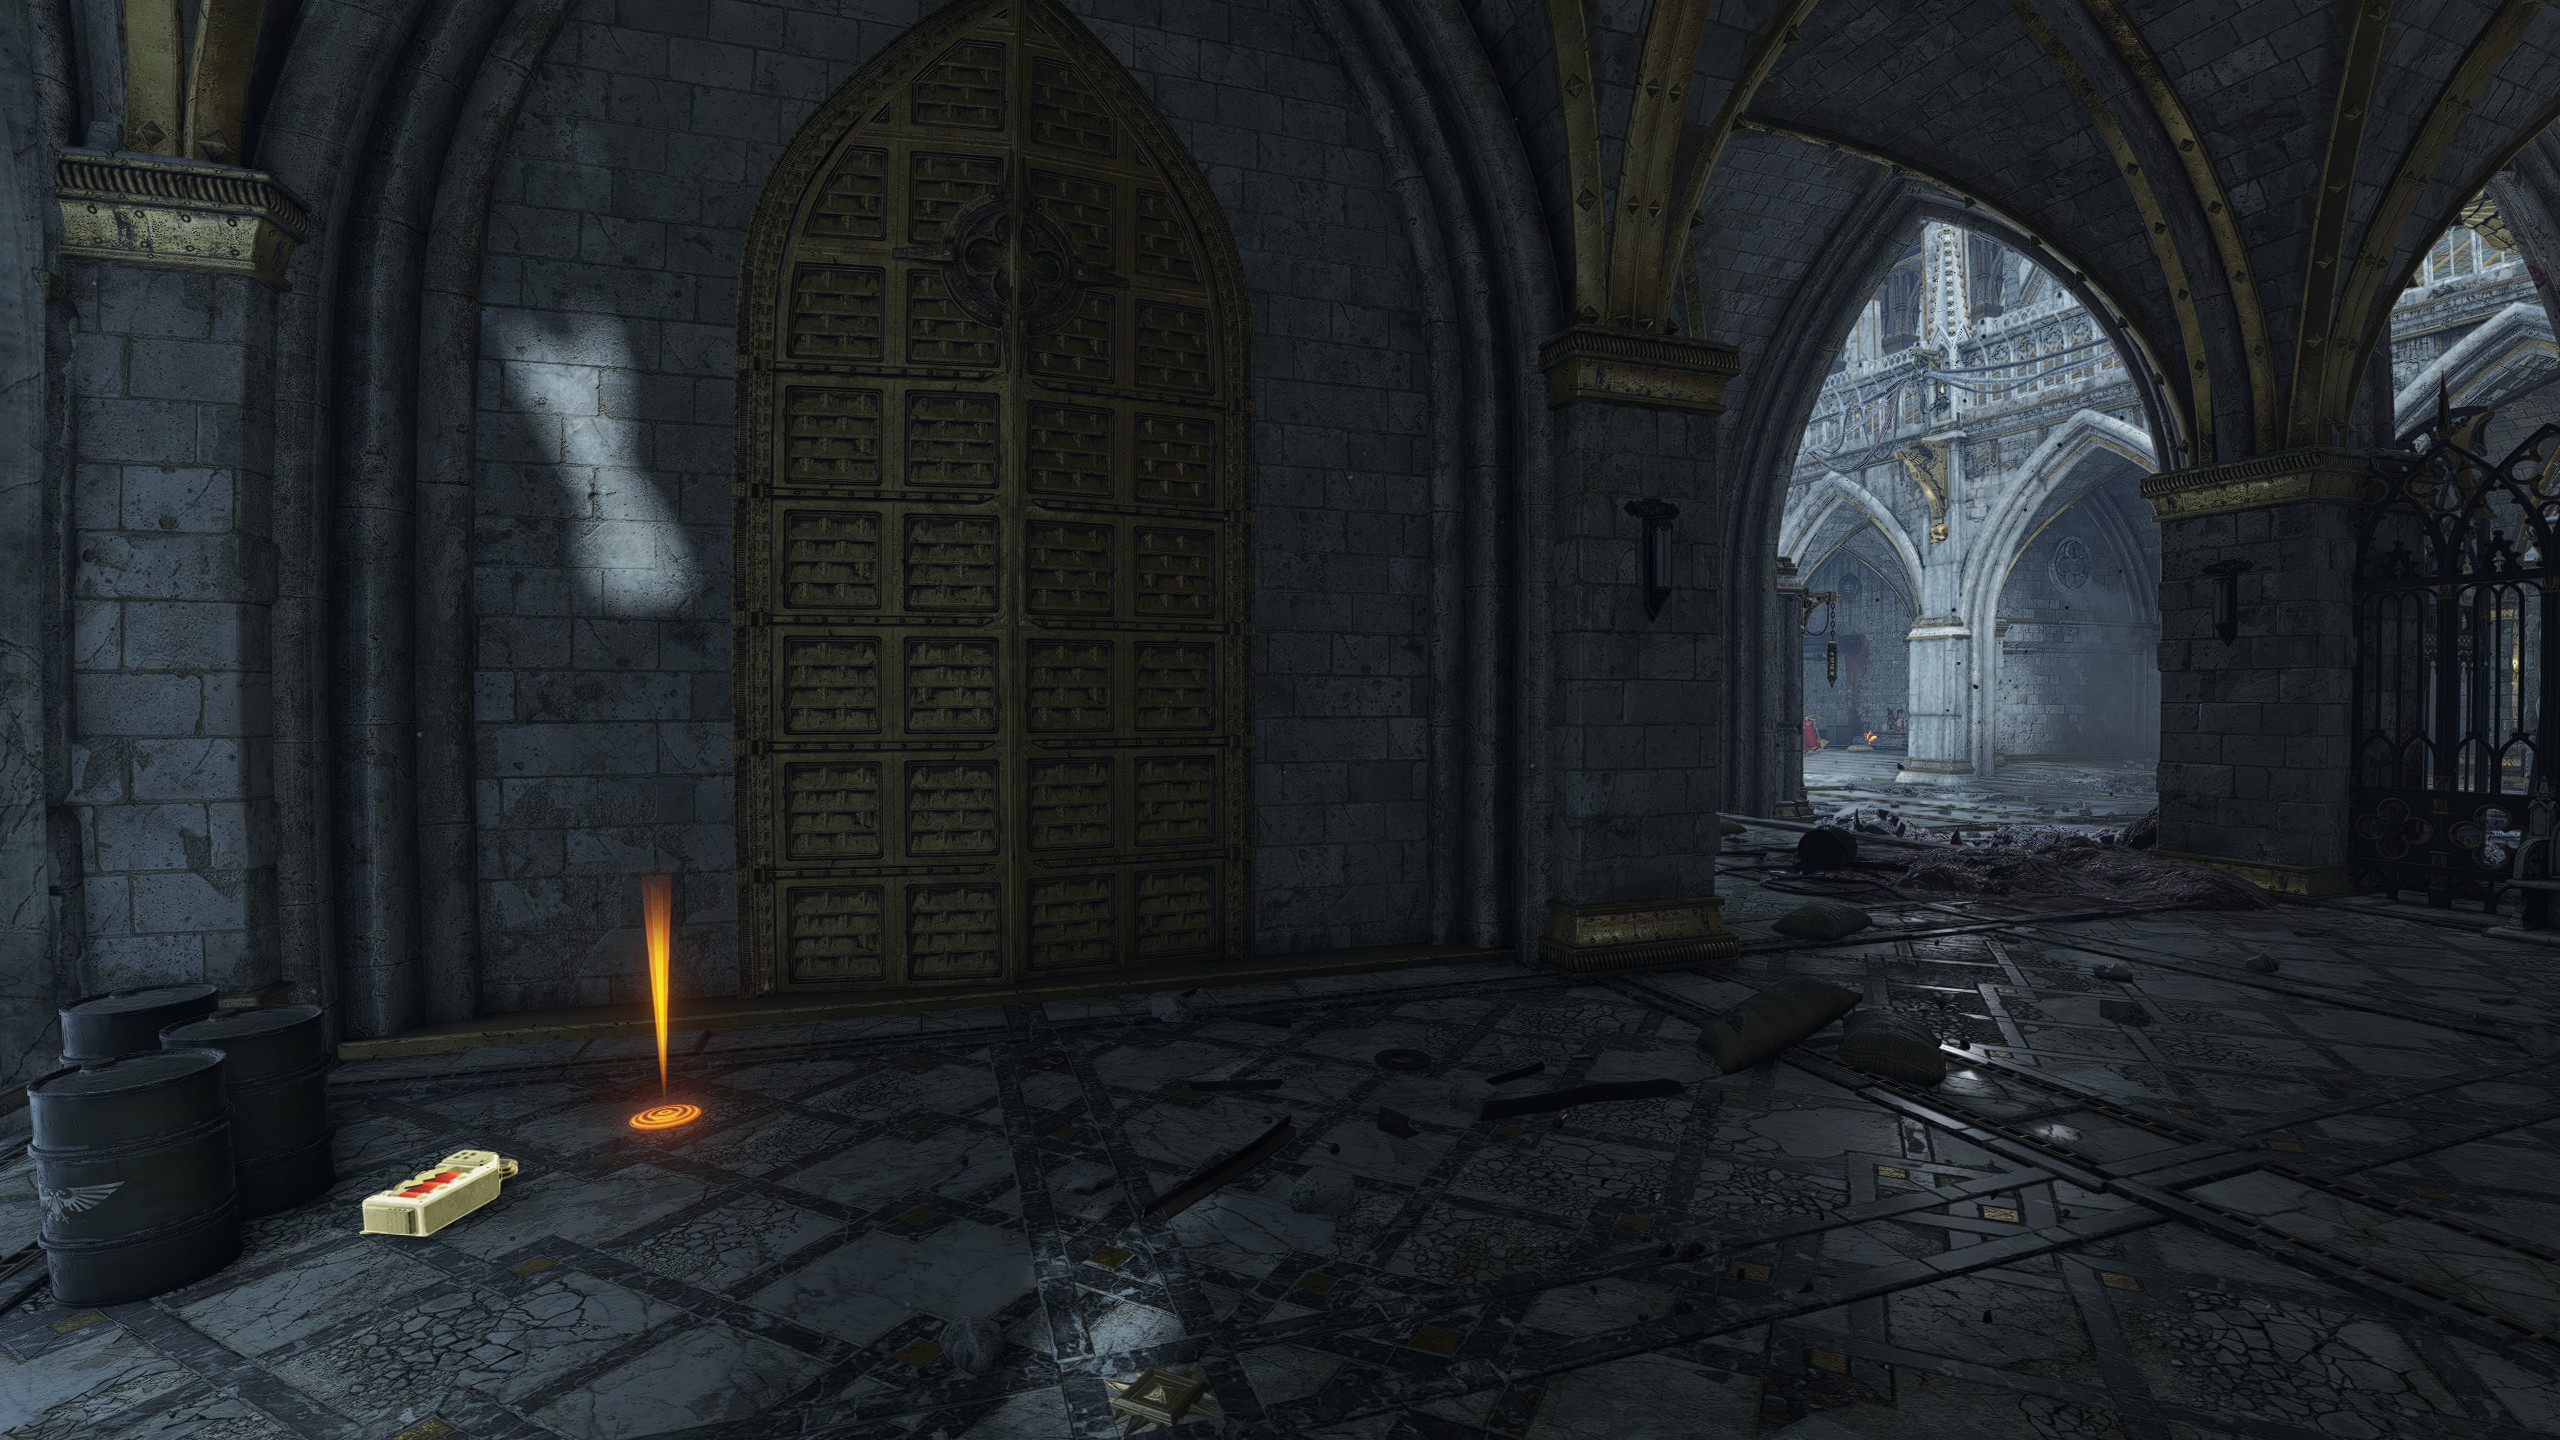
Gene-Seed #2
Location
Objective: Reach the Cadian Forces
Proceed onward from the first location and drop down into the next section with two wrecked Chimeras and usually a bunch of Cadians fighting in front of a closed gate. Continue upwards through the gap in the wall, then drop down into another courtyard with a crashed Valkryie in front of you. Instead of proceeding left as normal, turn to the right and go under the arches to find a possible Gene-Seed next to the first bench.
Proceed onward from the first location and drop down into the next section with two wrecked Chimeras and usually a bunch of Cadians fighting in front of a closed gate. Continue upwards through the gap in the wall, then drop down into another courtyard with a crashed Valkryie in front of you. Instead of proceeding left as normal, turn to the right and go under the arches to find a possible Gene-Seed next to the first bench.
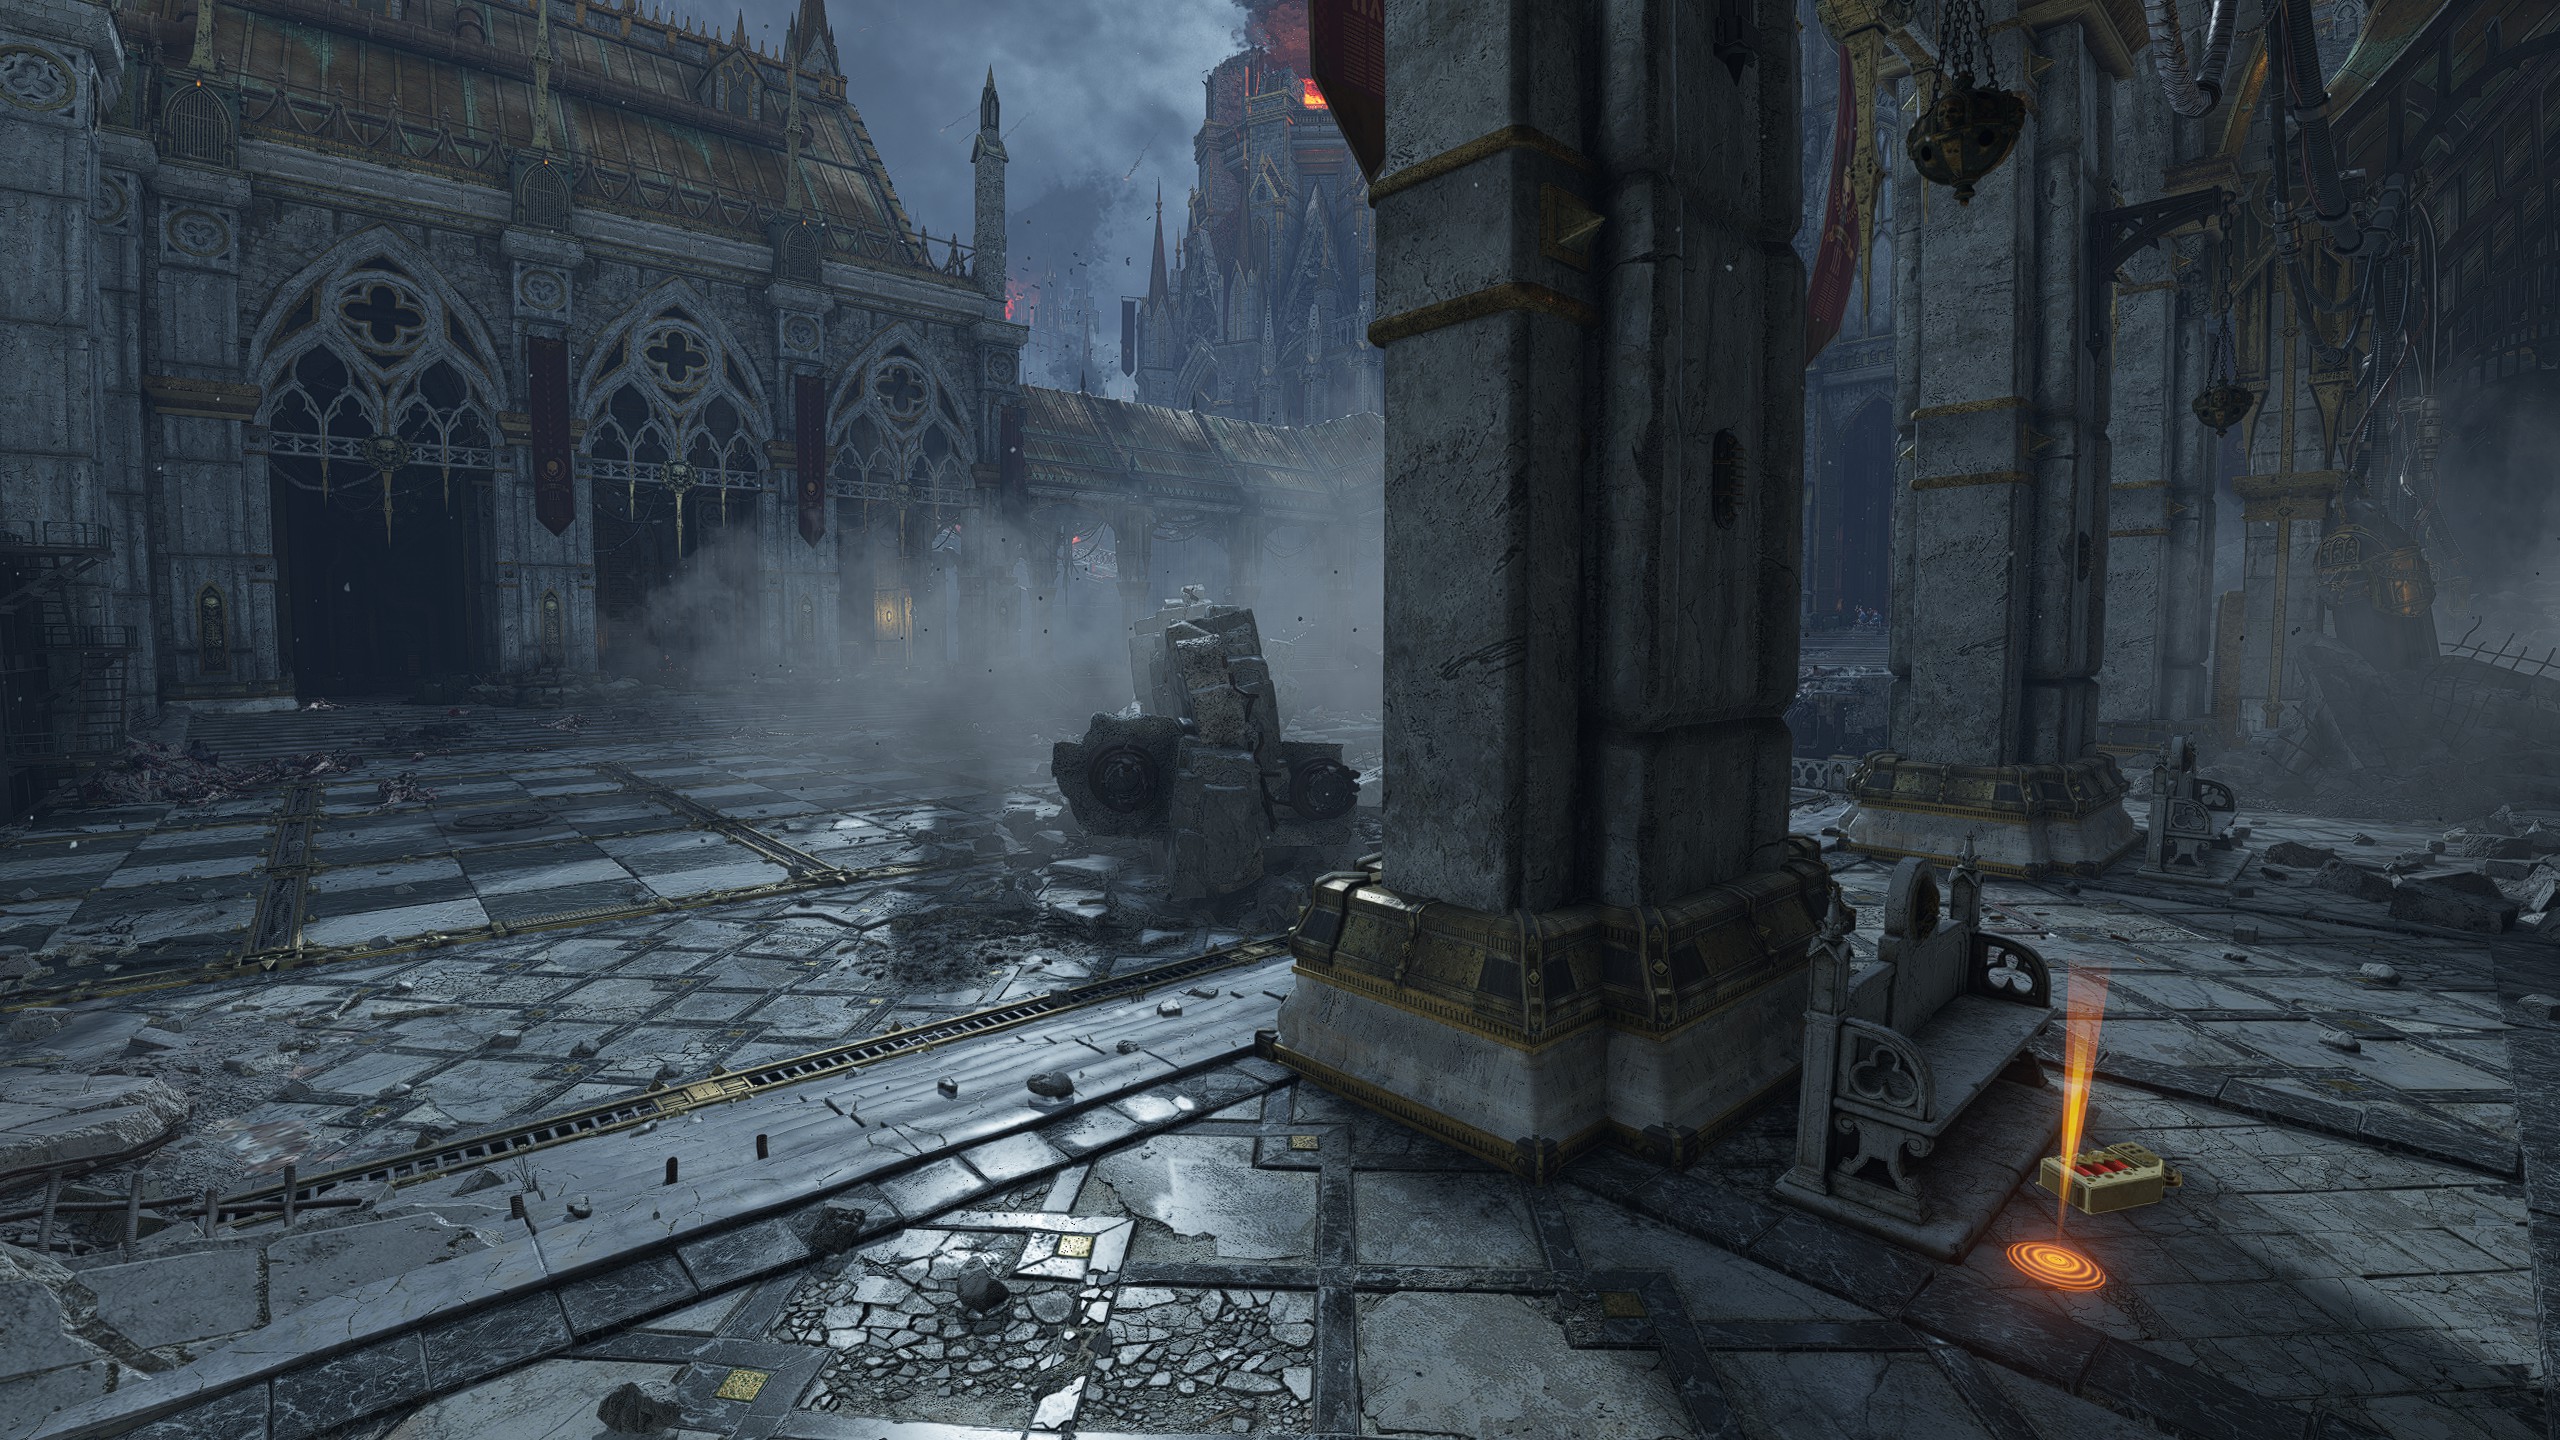
Gene-Seed #3
Location
Objective: Reach the Cadian Forces
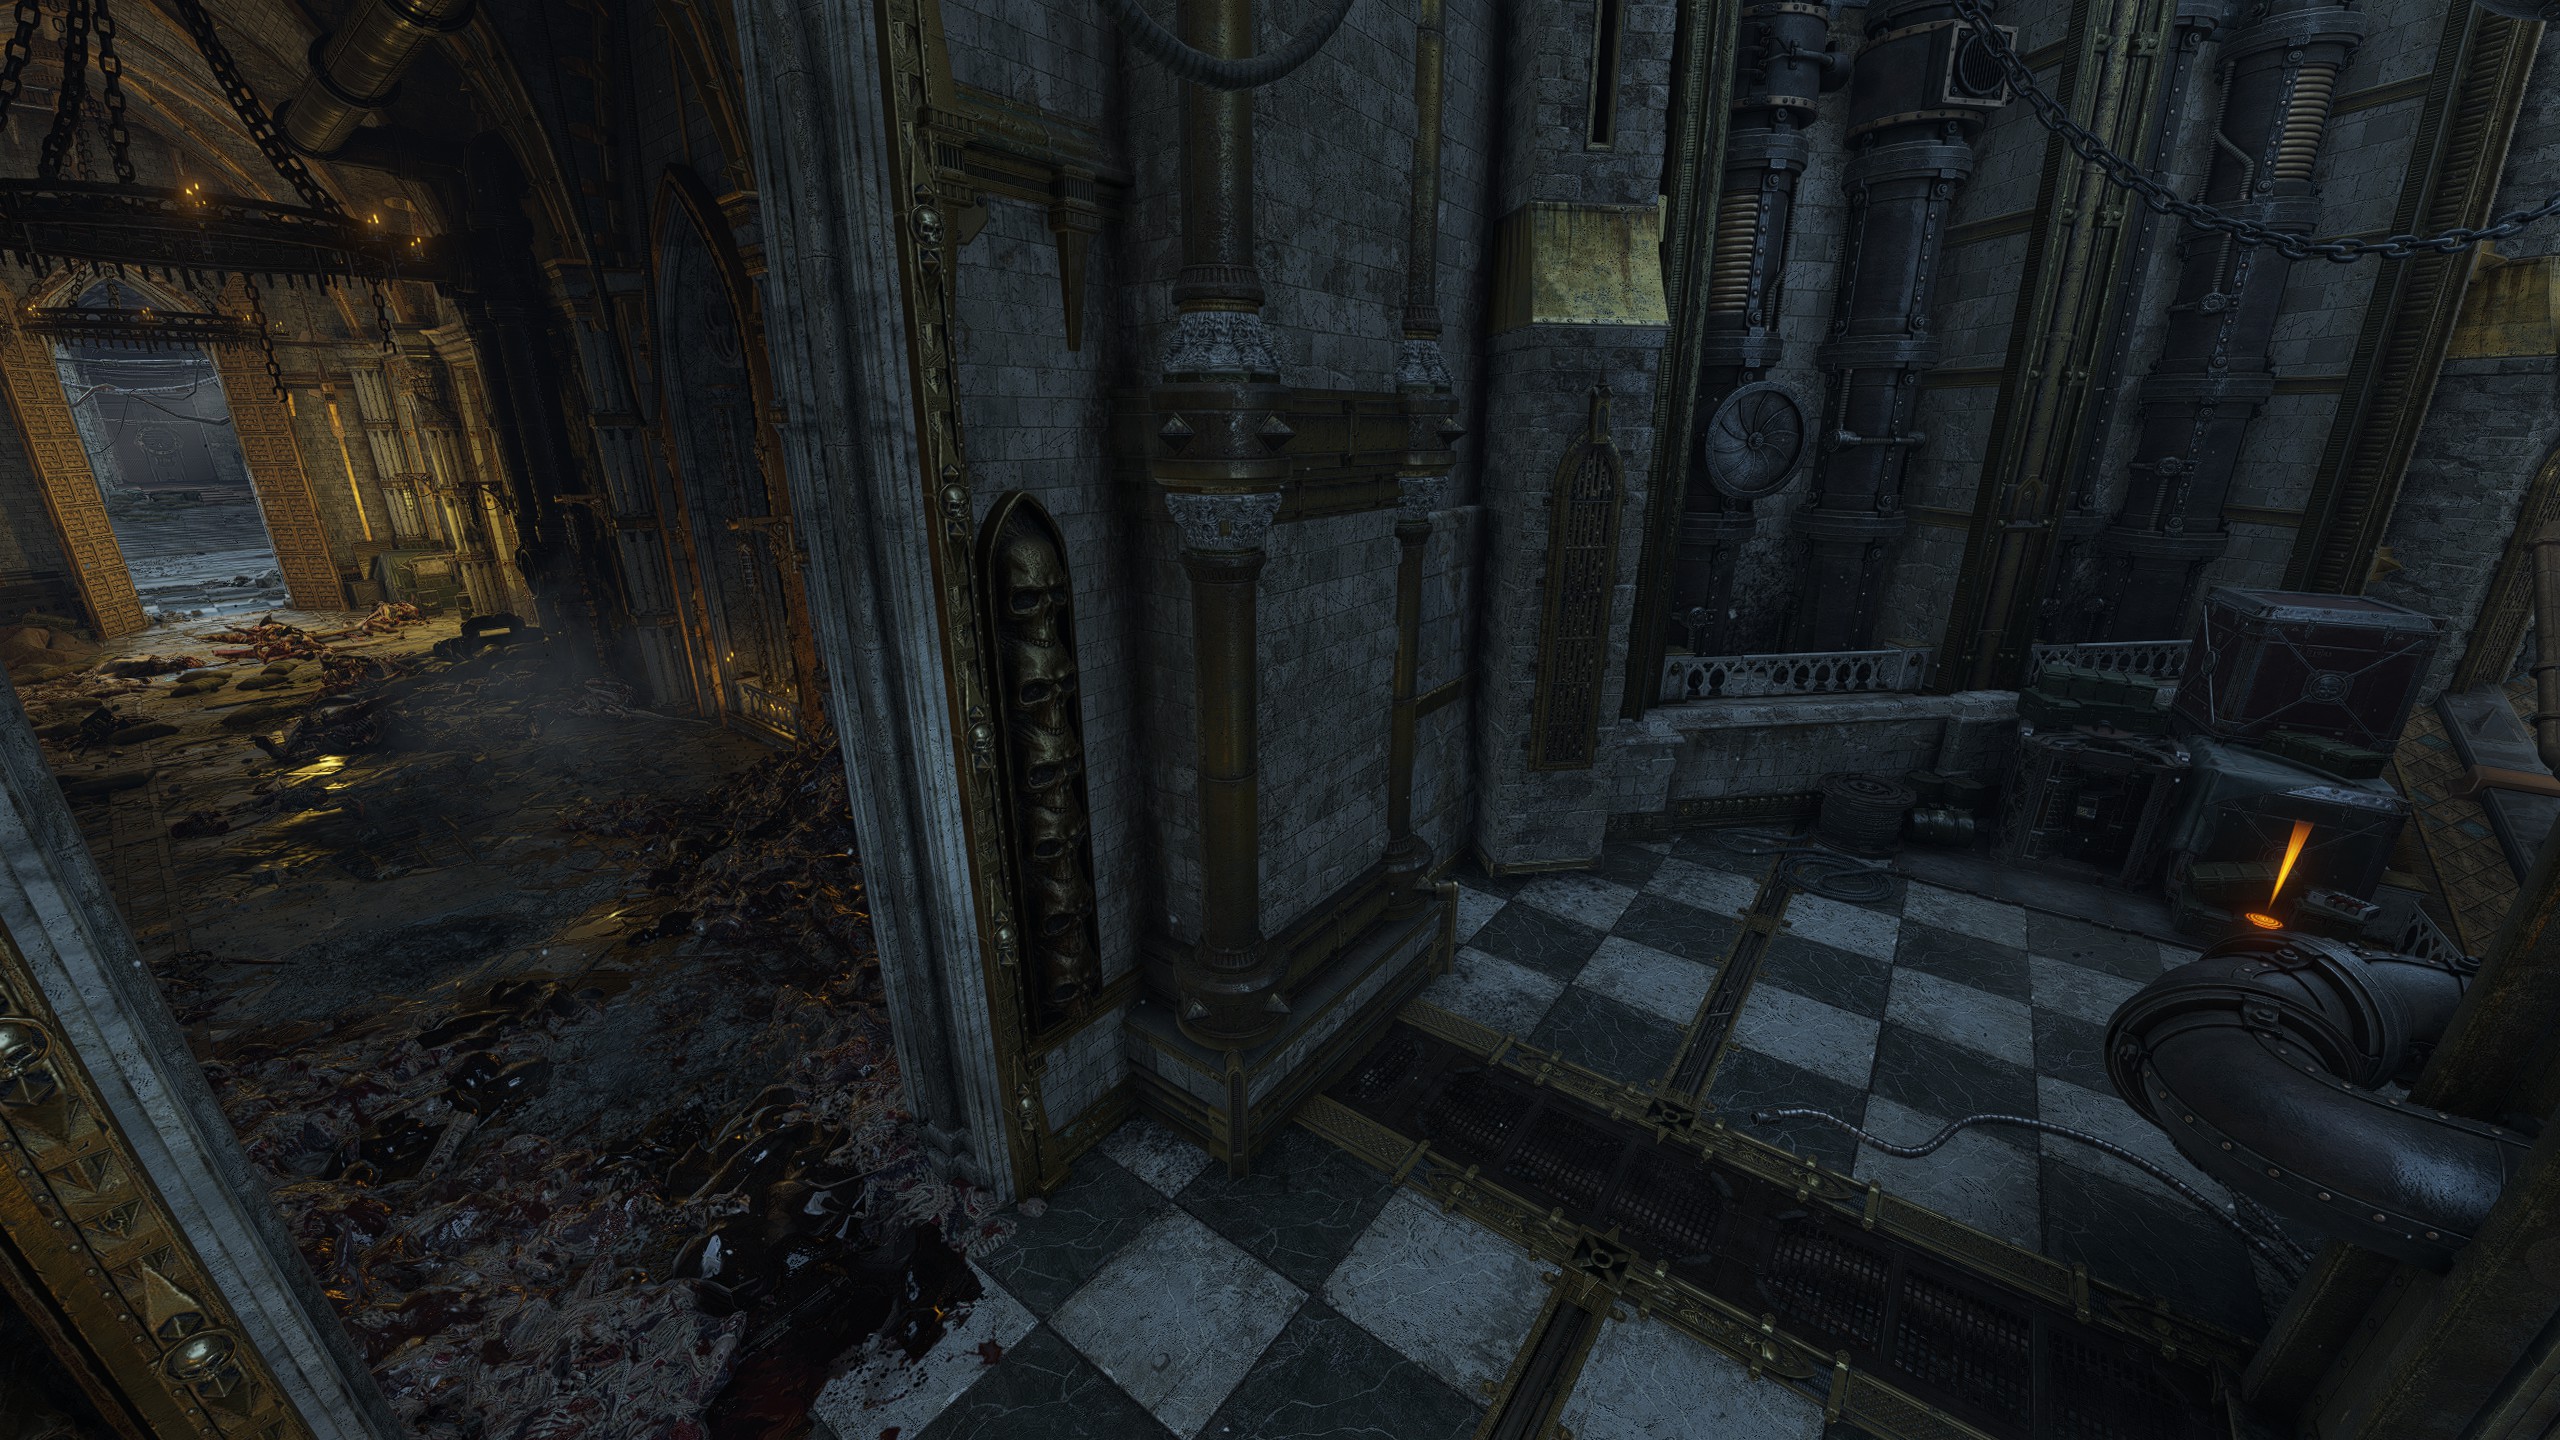
Continue with the mission and progress through the church and up the spiral staircase, leading into a long hallway. Rather than going outside to your right to progress the mission, instead turn left and go all the way down the hallway until you come out to the balcony, then check to your left on some boxes.
Continue with the mission and progress through the church and up the spiral staircase, leading into a long hallway. Rather than going outside to your right to progress the mission, instead turn left and go all the way down the hallway until you come out to the balcony, then check to your left on some boxes.
Gene-Seed #4
Location
Objective: Rendezvous with the Dreadnought
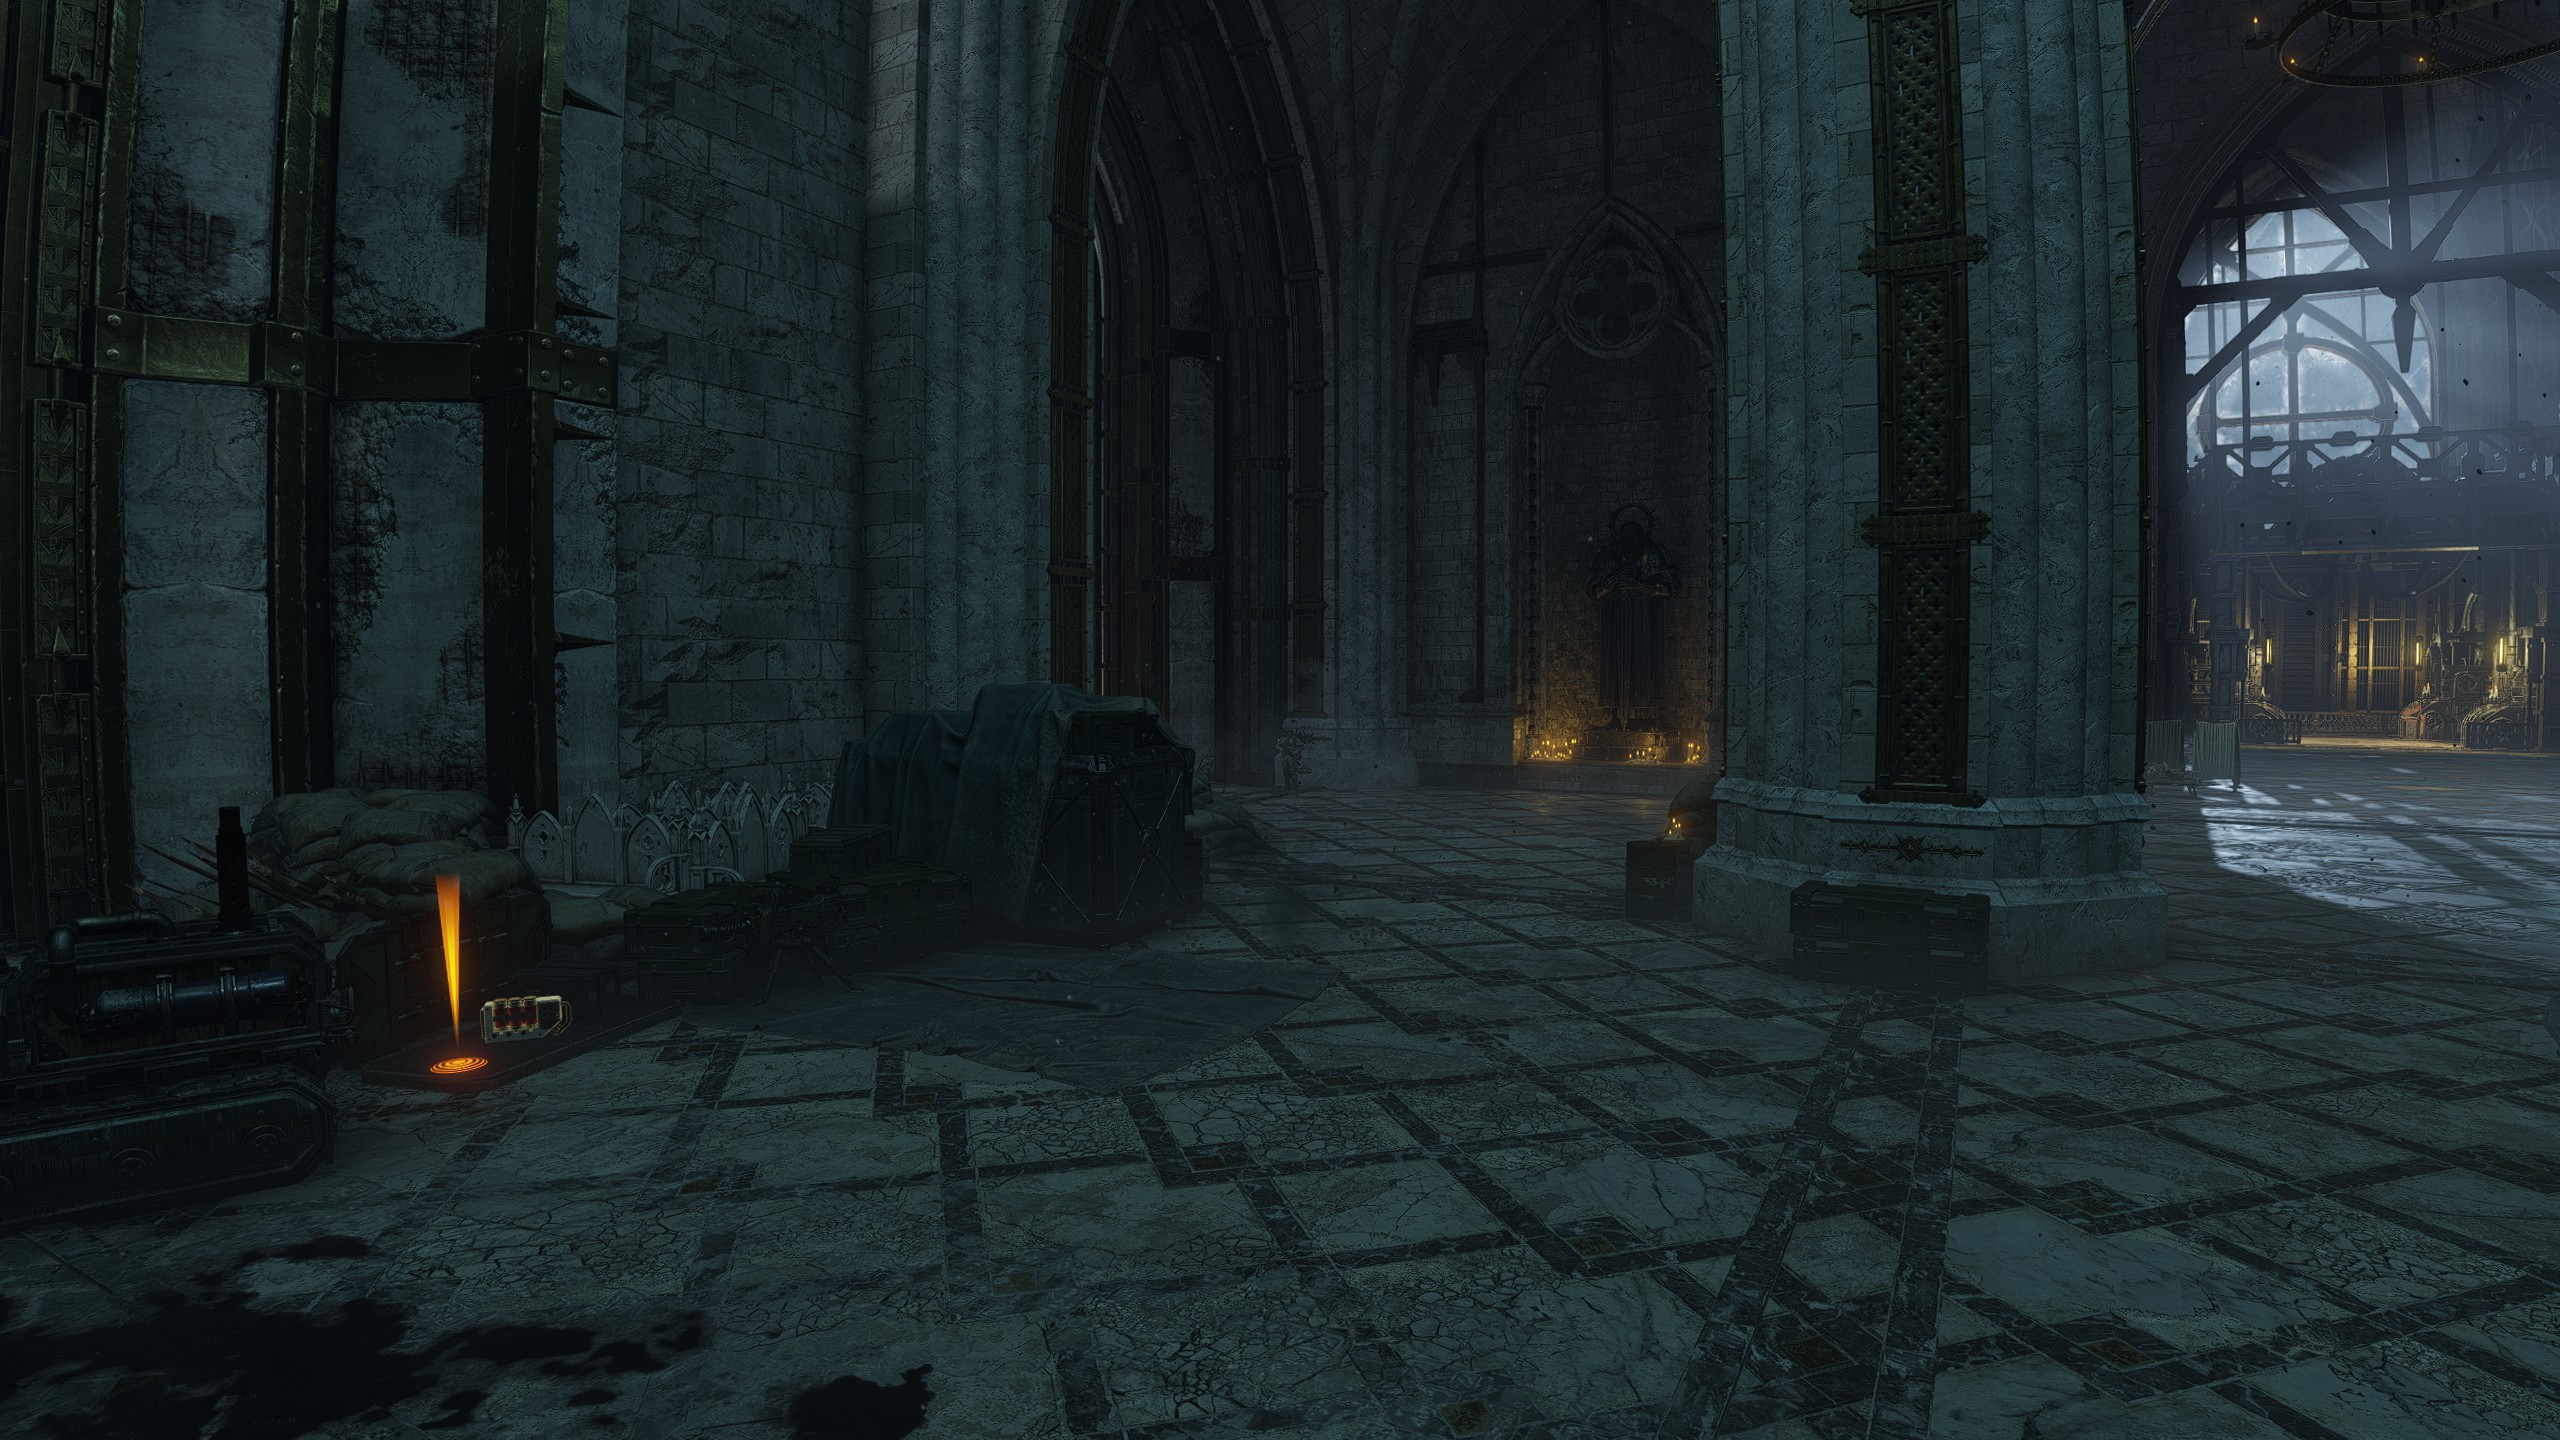
After completing the gate holdout section (Leman Russ tanks my beloved), head through the doors into the Cadian headquarters. Turn immediately to your right and check just behind the forklift near the other door.
After completing the gate holdout section (Leman Russ tanks my beloved), head through the doors into the Cadian headquarters. Turn immediately to your right and check just behind the forklift near the other door.
Gene-Seed #5
Location
Objective: Advance in the Dreadnought's wake
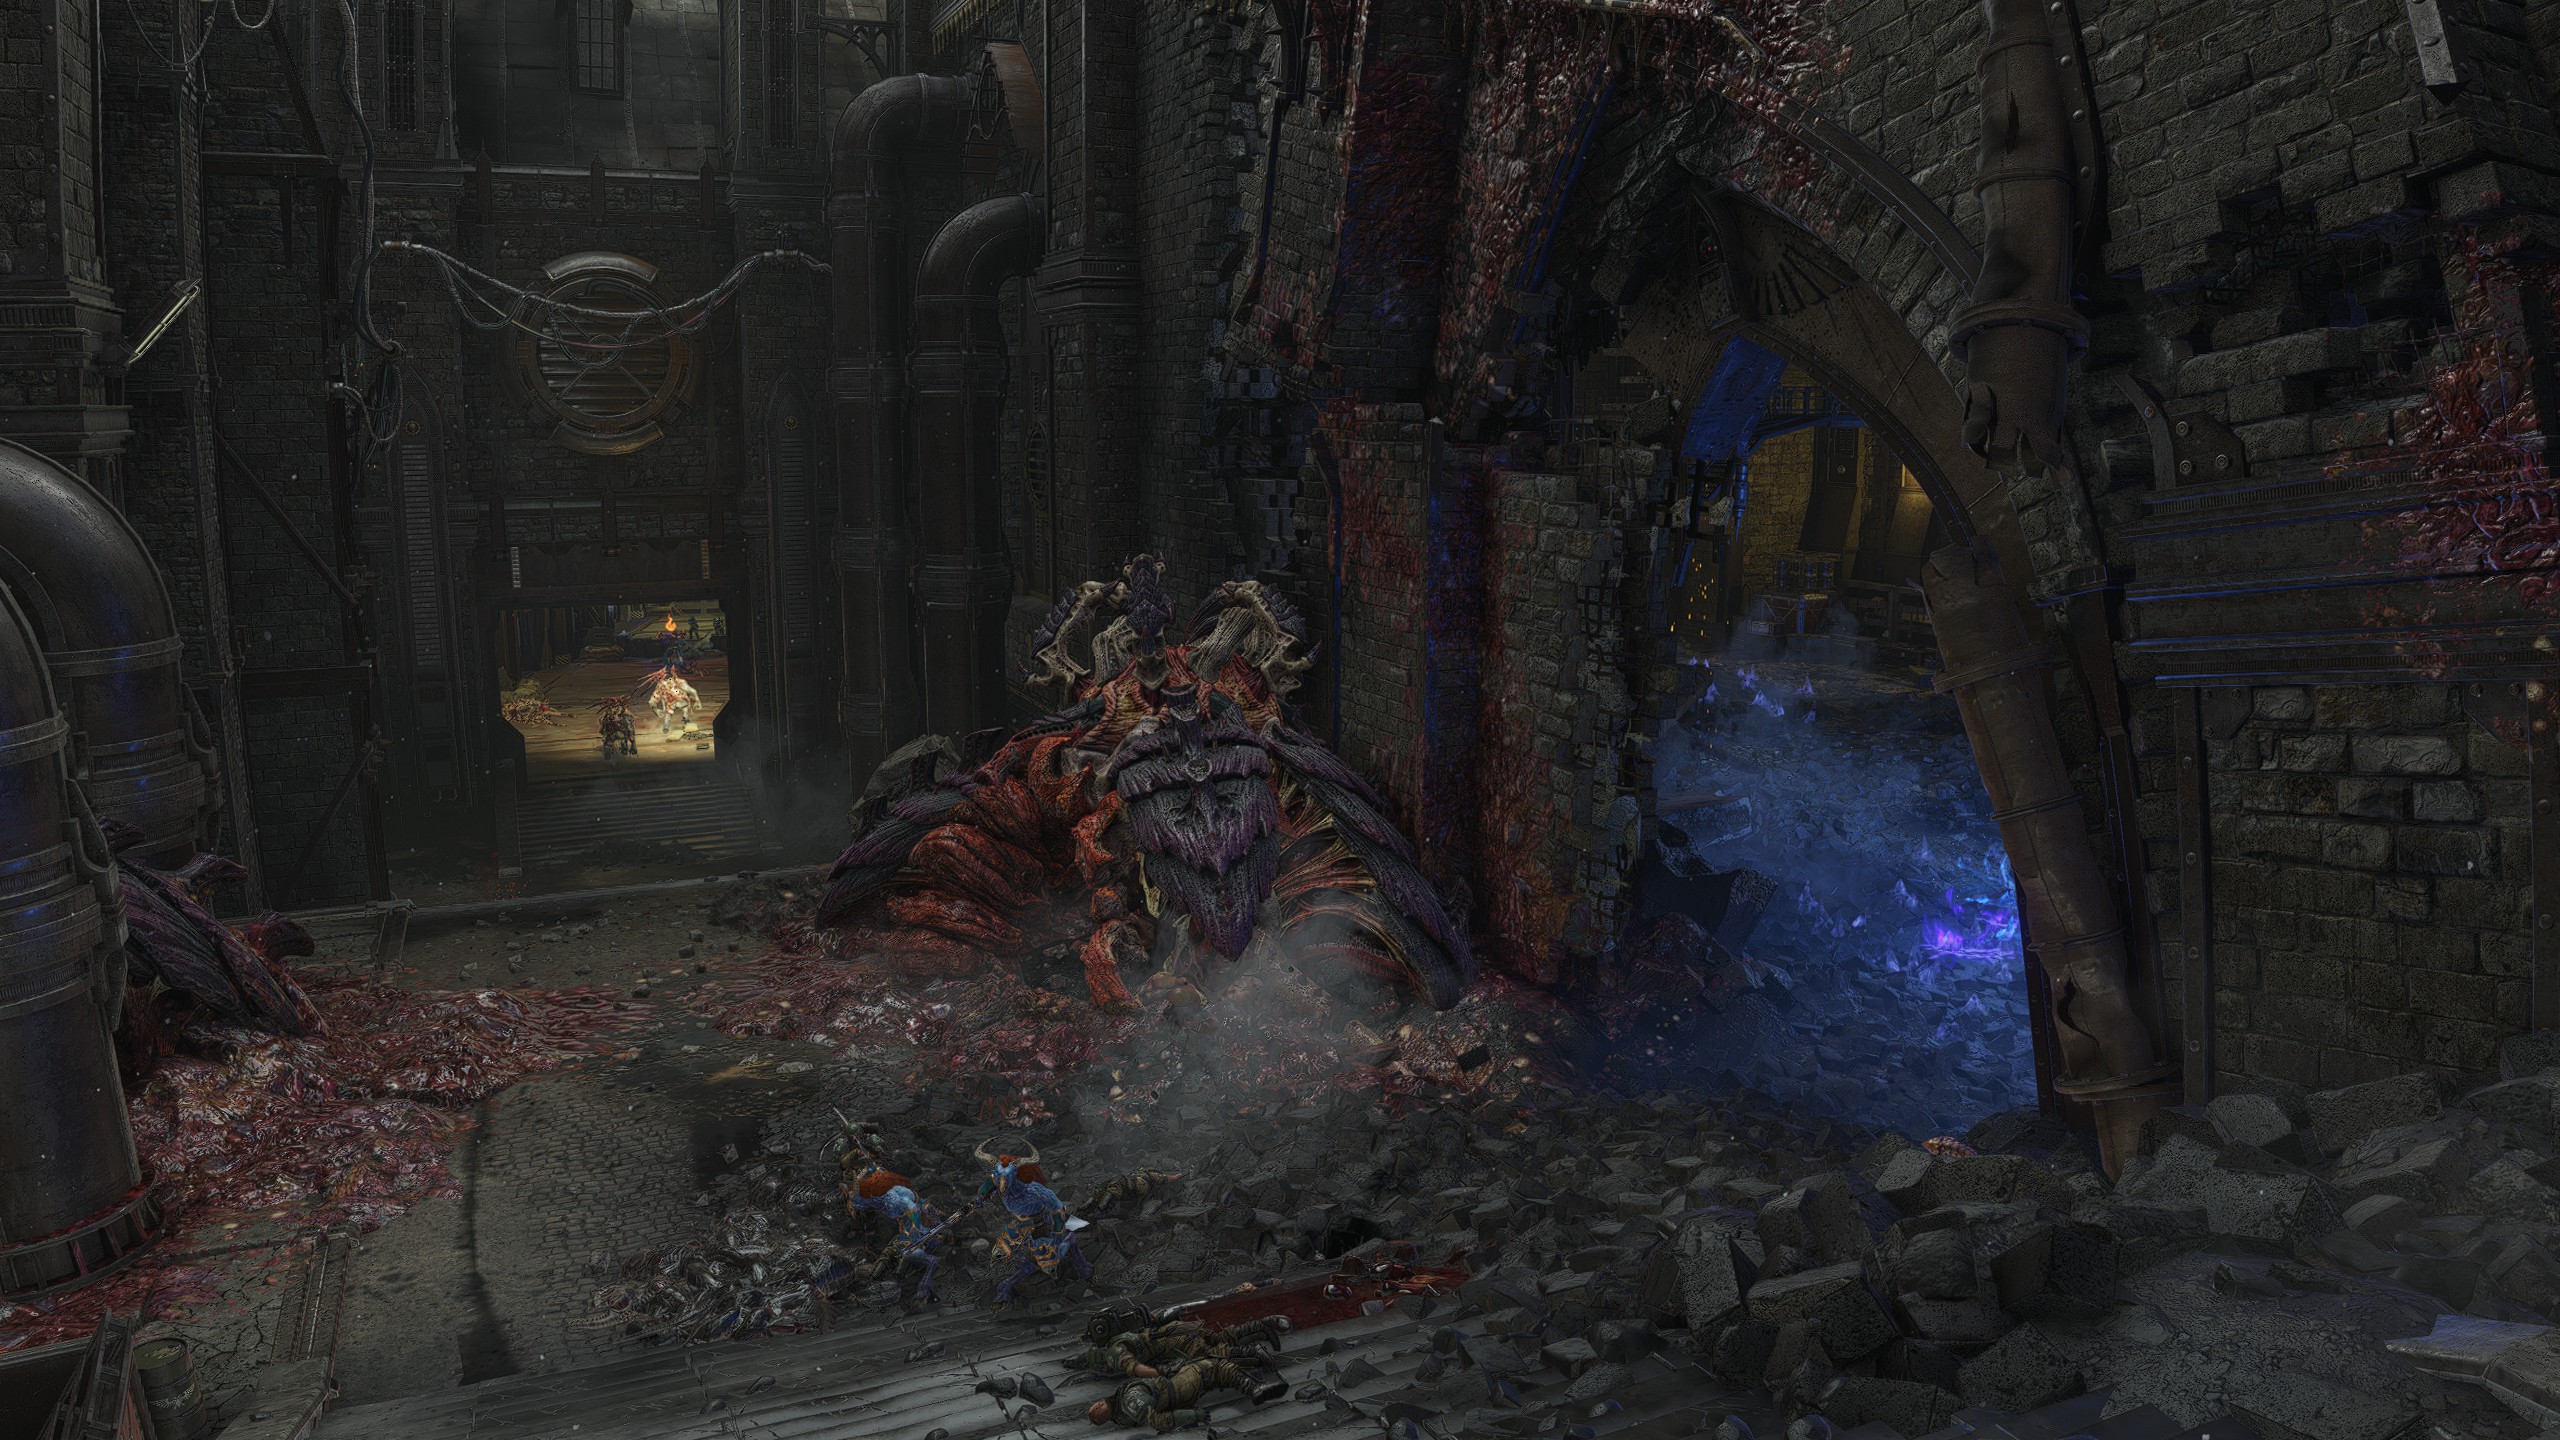
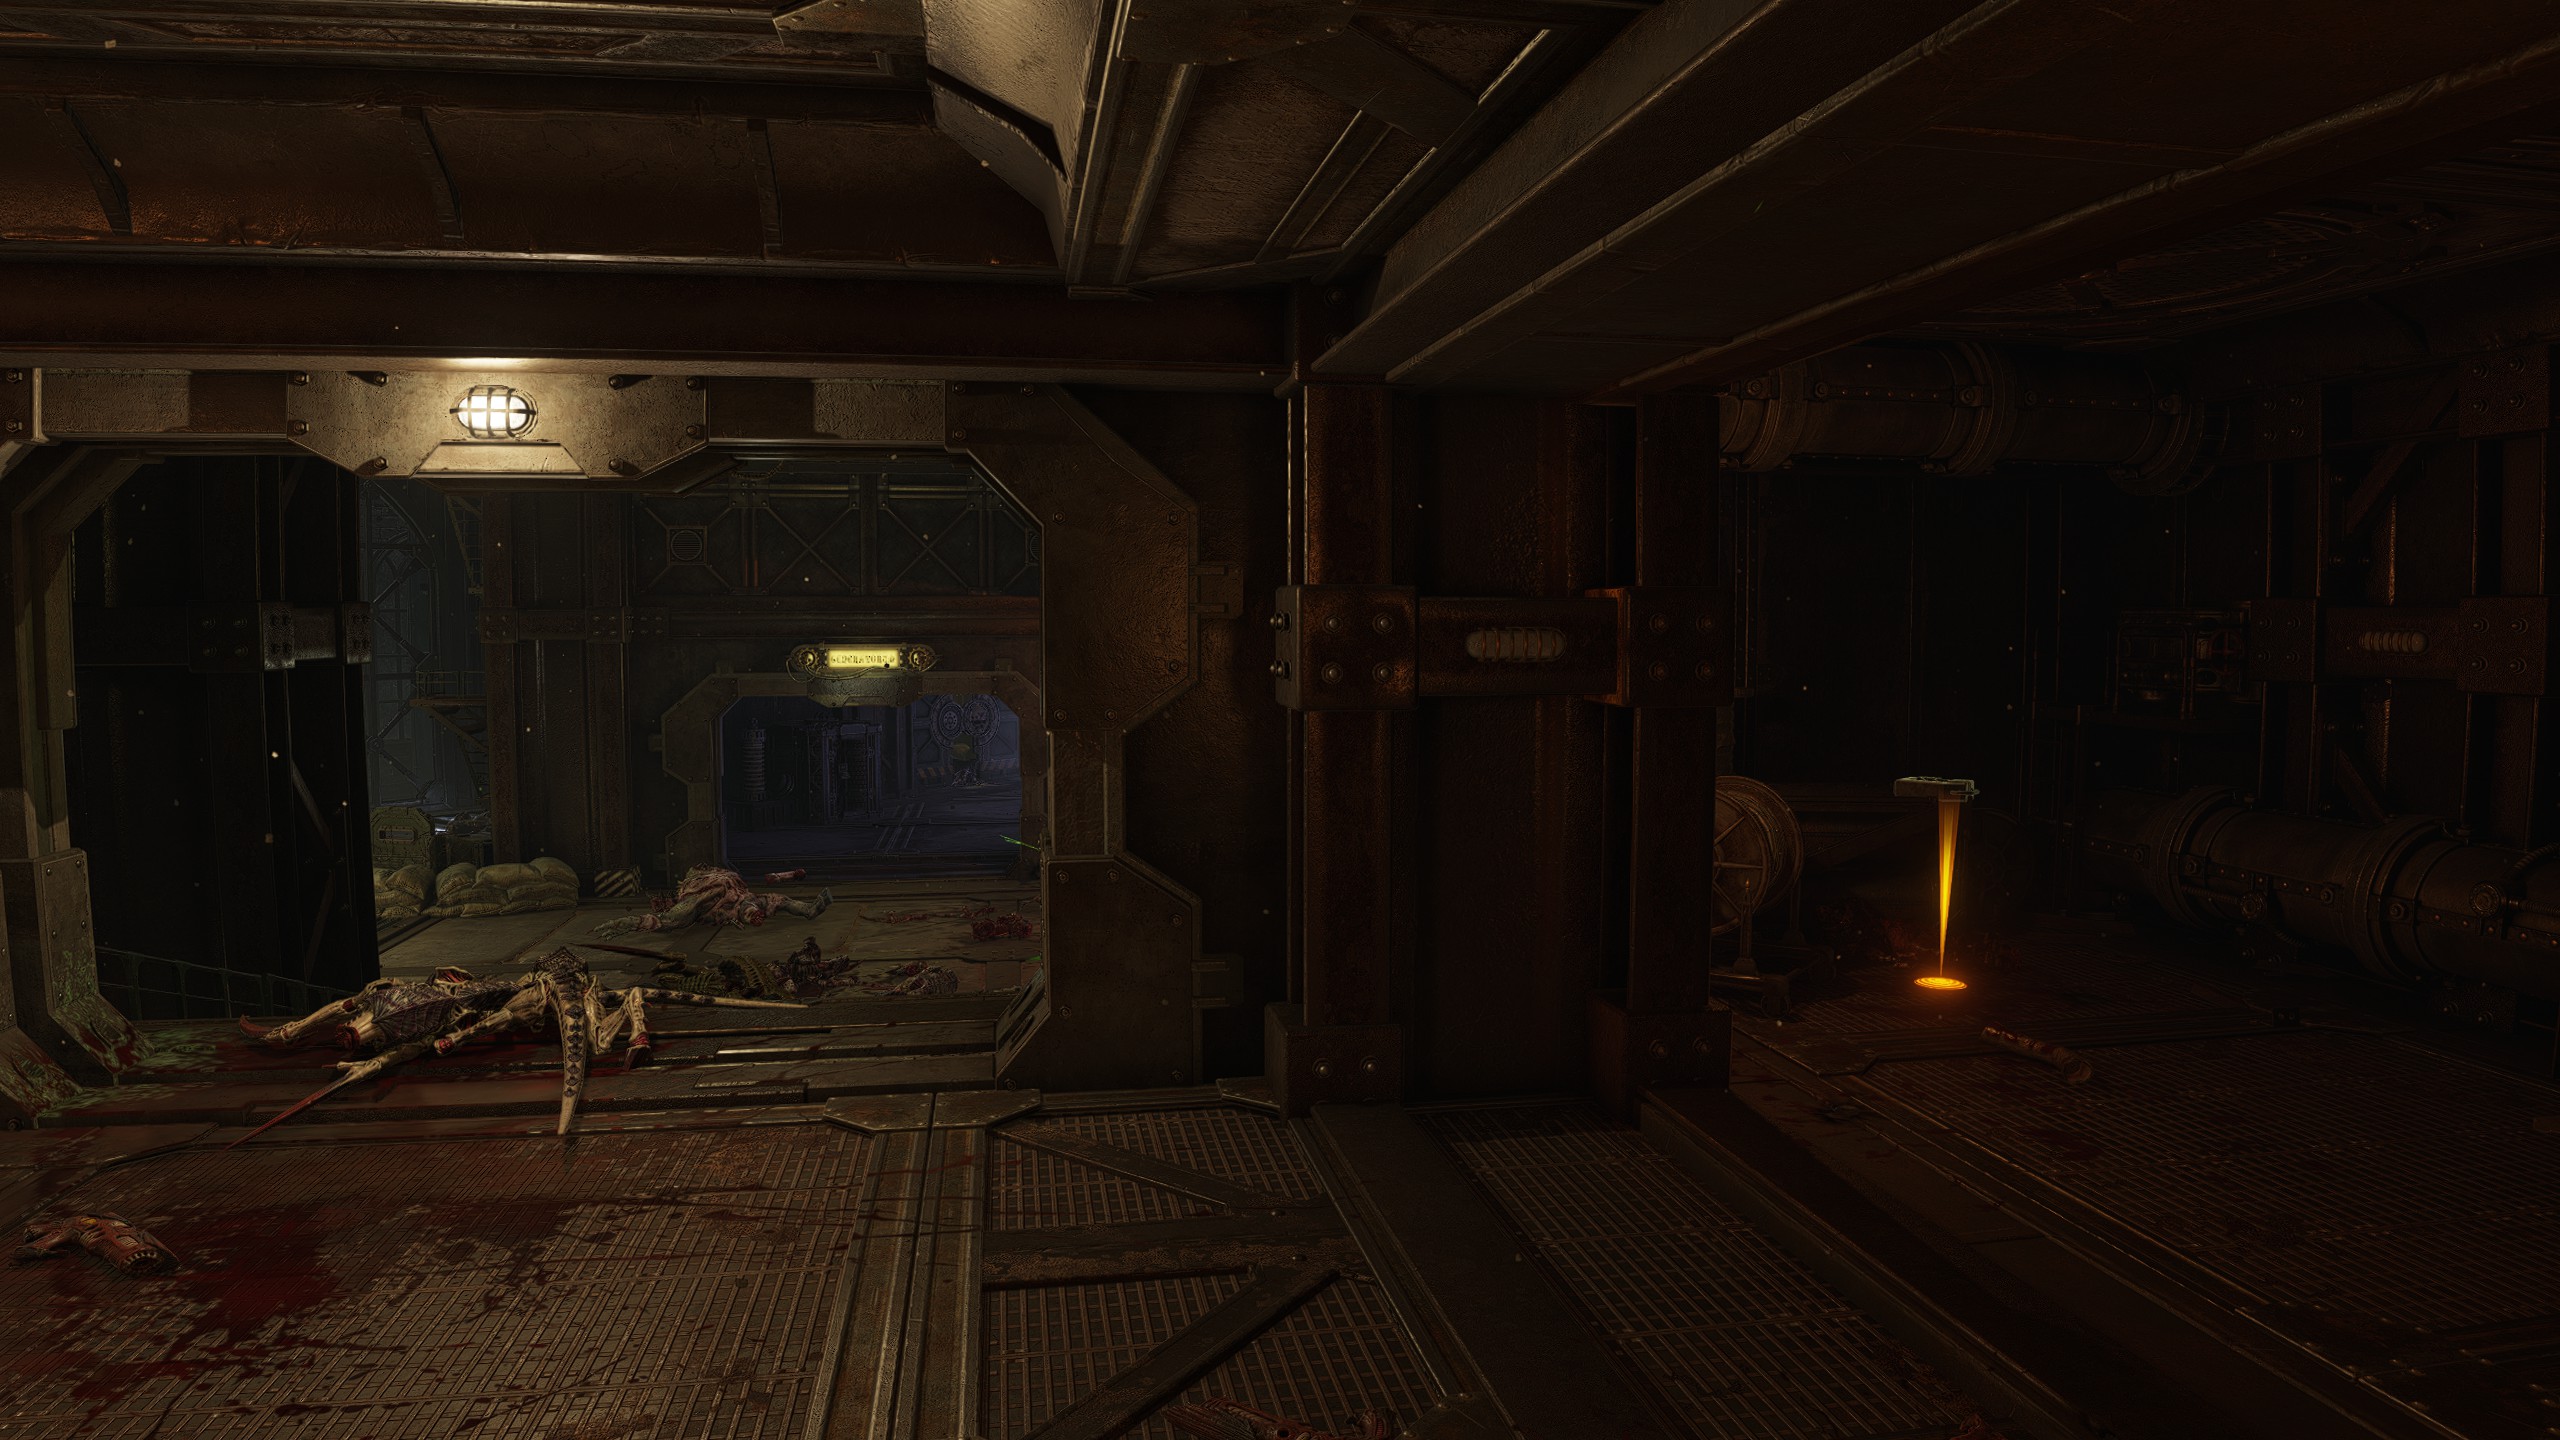
After descending the elevator and linking up with Valtus, proceed forward passed some rubble and into the next alley. There is a gap in the wall next to a Tyrannocyte Spore in front of you which leads all the way to the Gene-Seed. Alternatively, proceed down the stairs into the building and turn to the right after entering and go into the Sector F corridor, the same one that the other path led to. The Gene-Seed can spawn in the back left corner of the small room.
After descending the elevator and linking up with Valtus, proceed forward passed some rubble and into the next alley. There is a gap in the wall next to a Tyrannocyte Spore in front of you which leads all the way to the Gene-Seed. Alternatively, proceed down the stairs into the building and turn to the right after entering and go into the Sector F corridor, the same one that the other path led to. The Gene-Seed can spawn in the back left corner of the small room.
| Mission 13: Purgation
Like Reclamation, I've opted to double-up on the images to better visualise some of the locations.
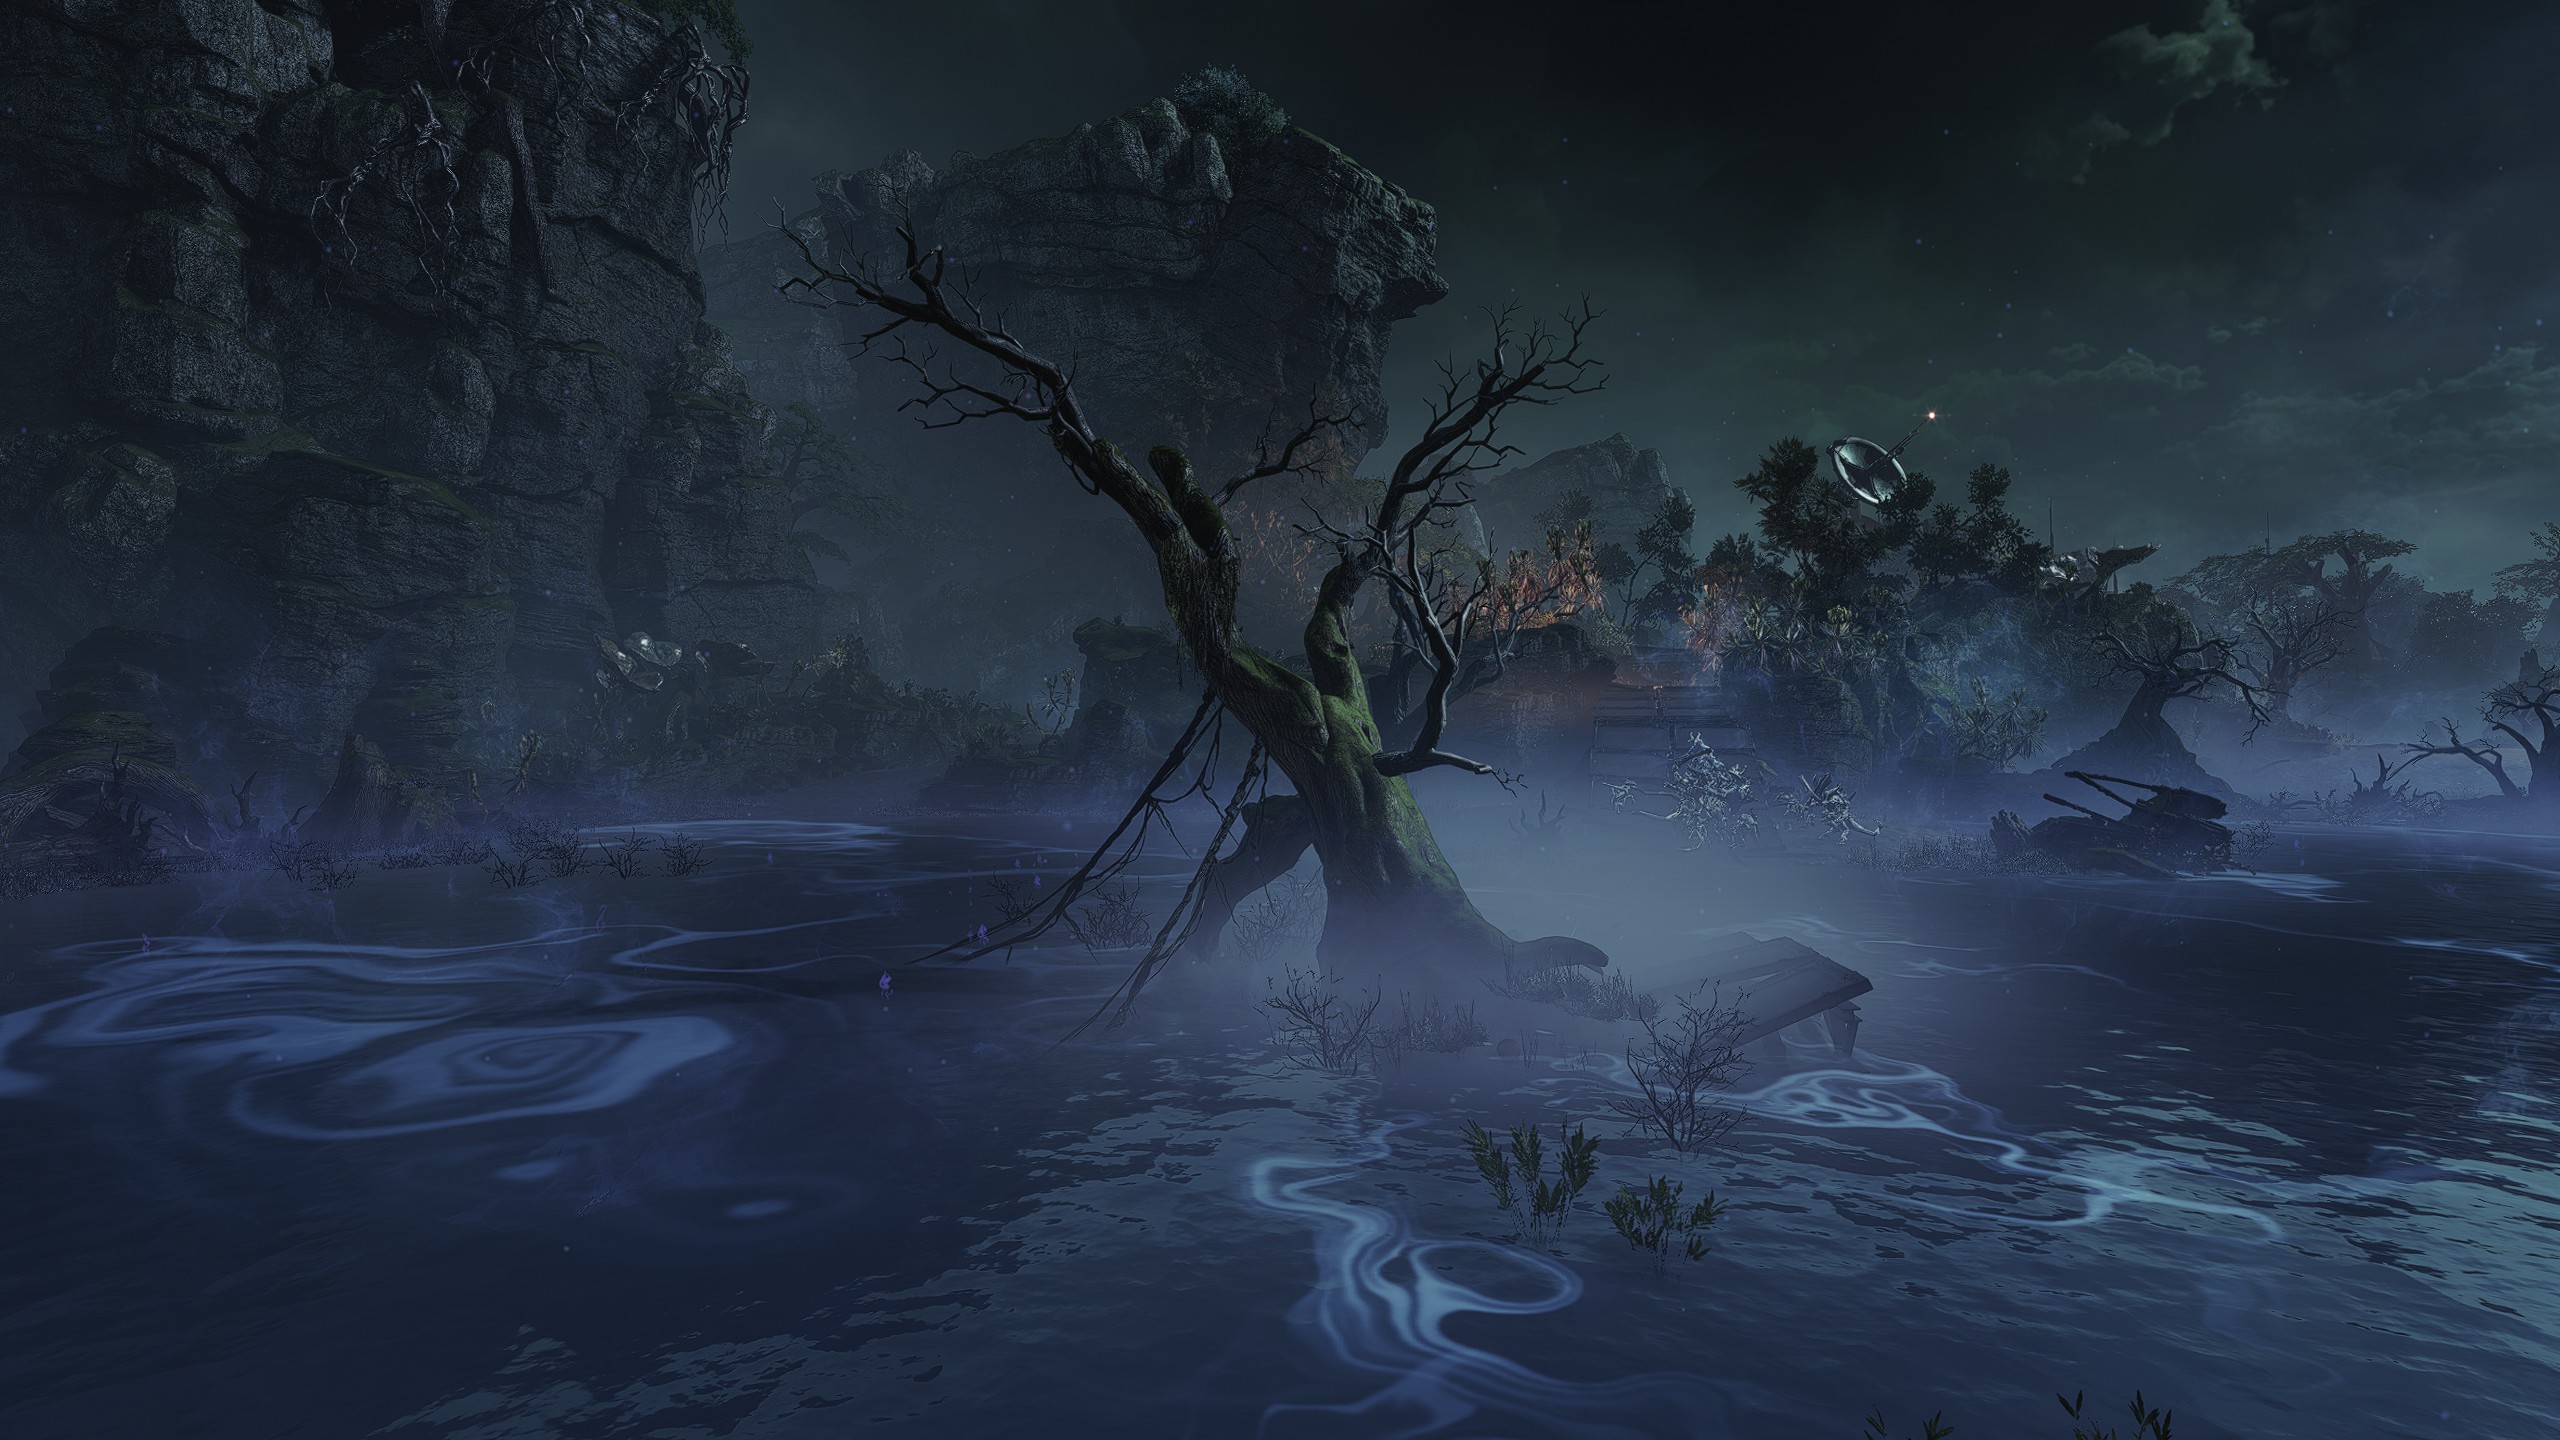
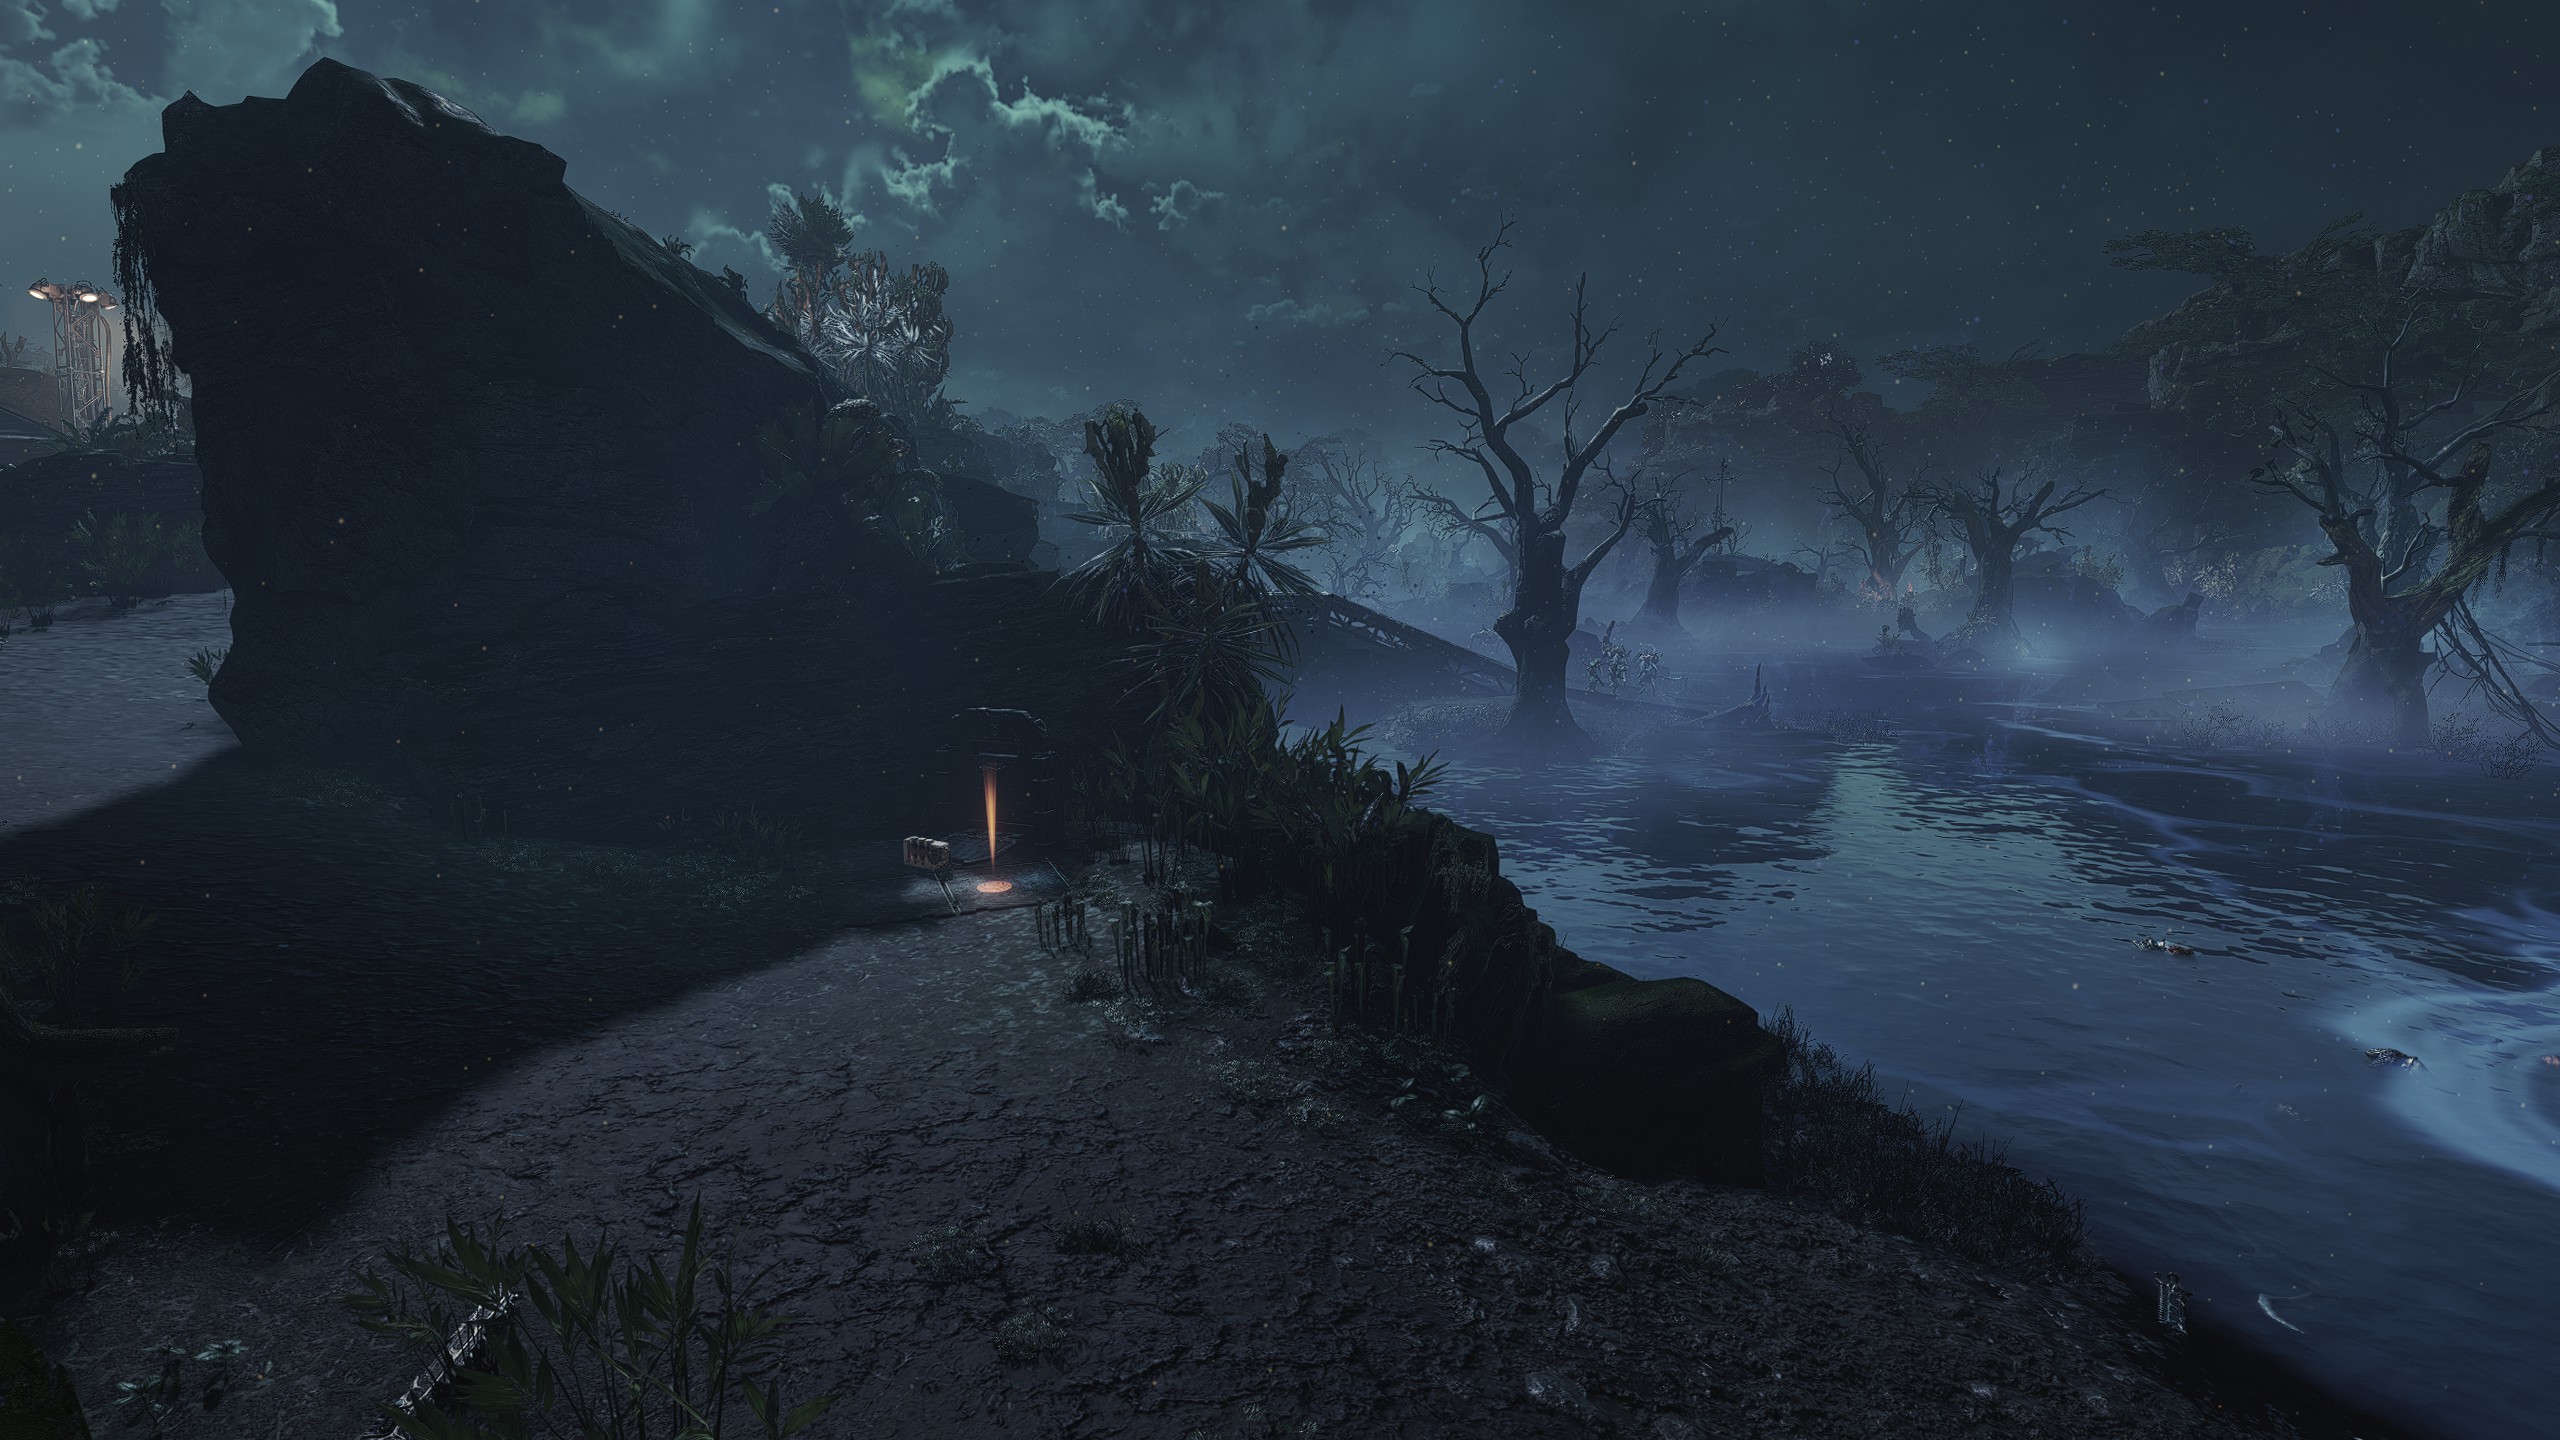
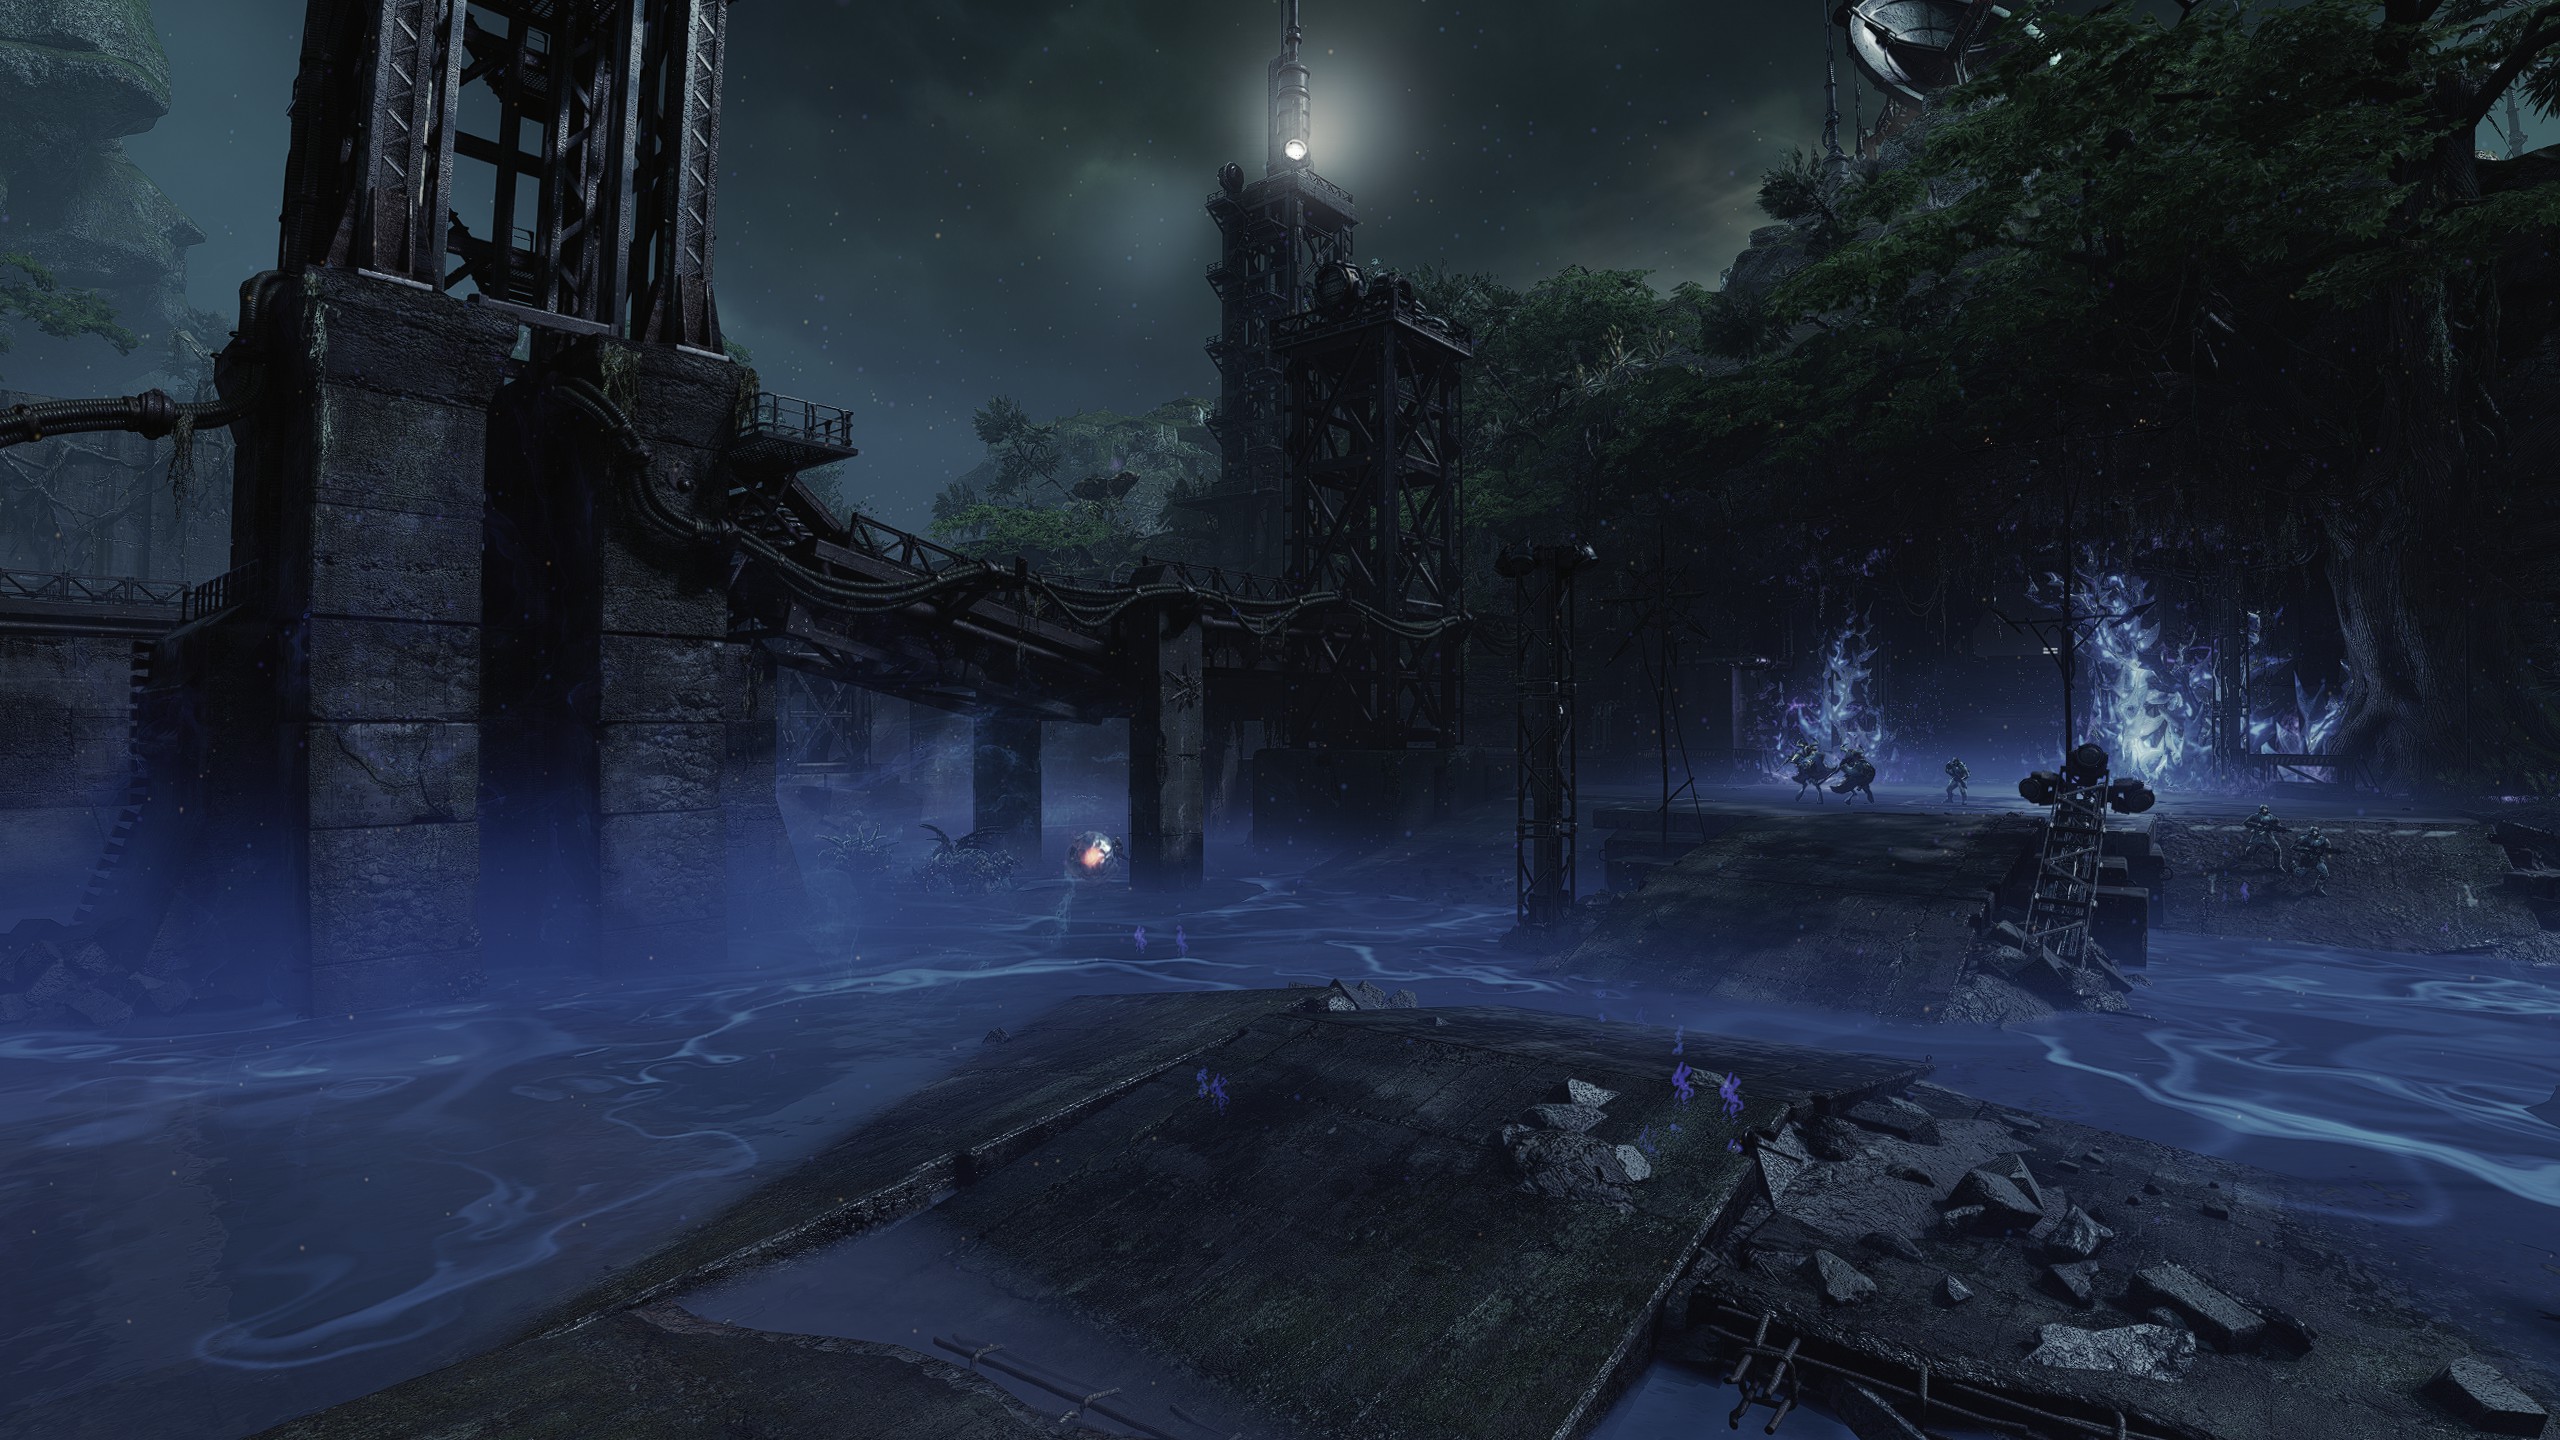
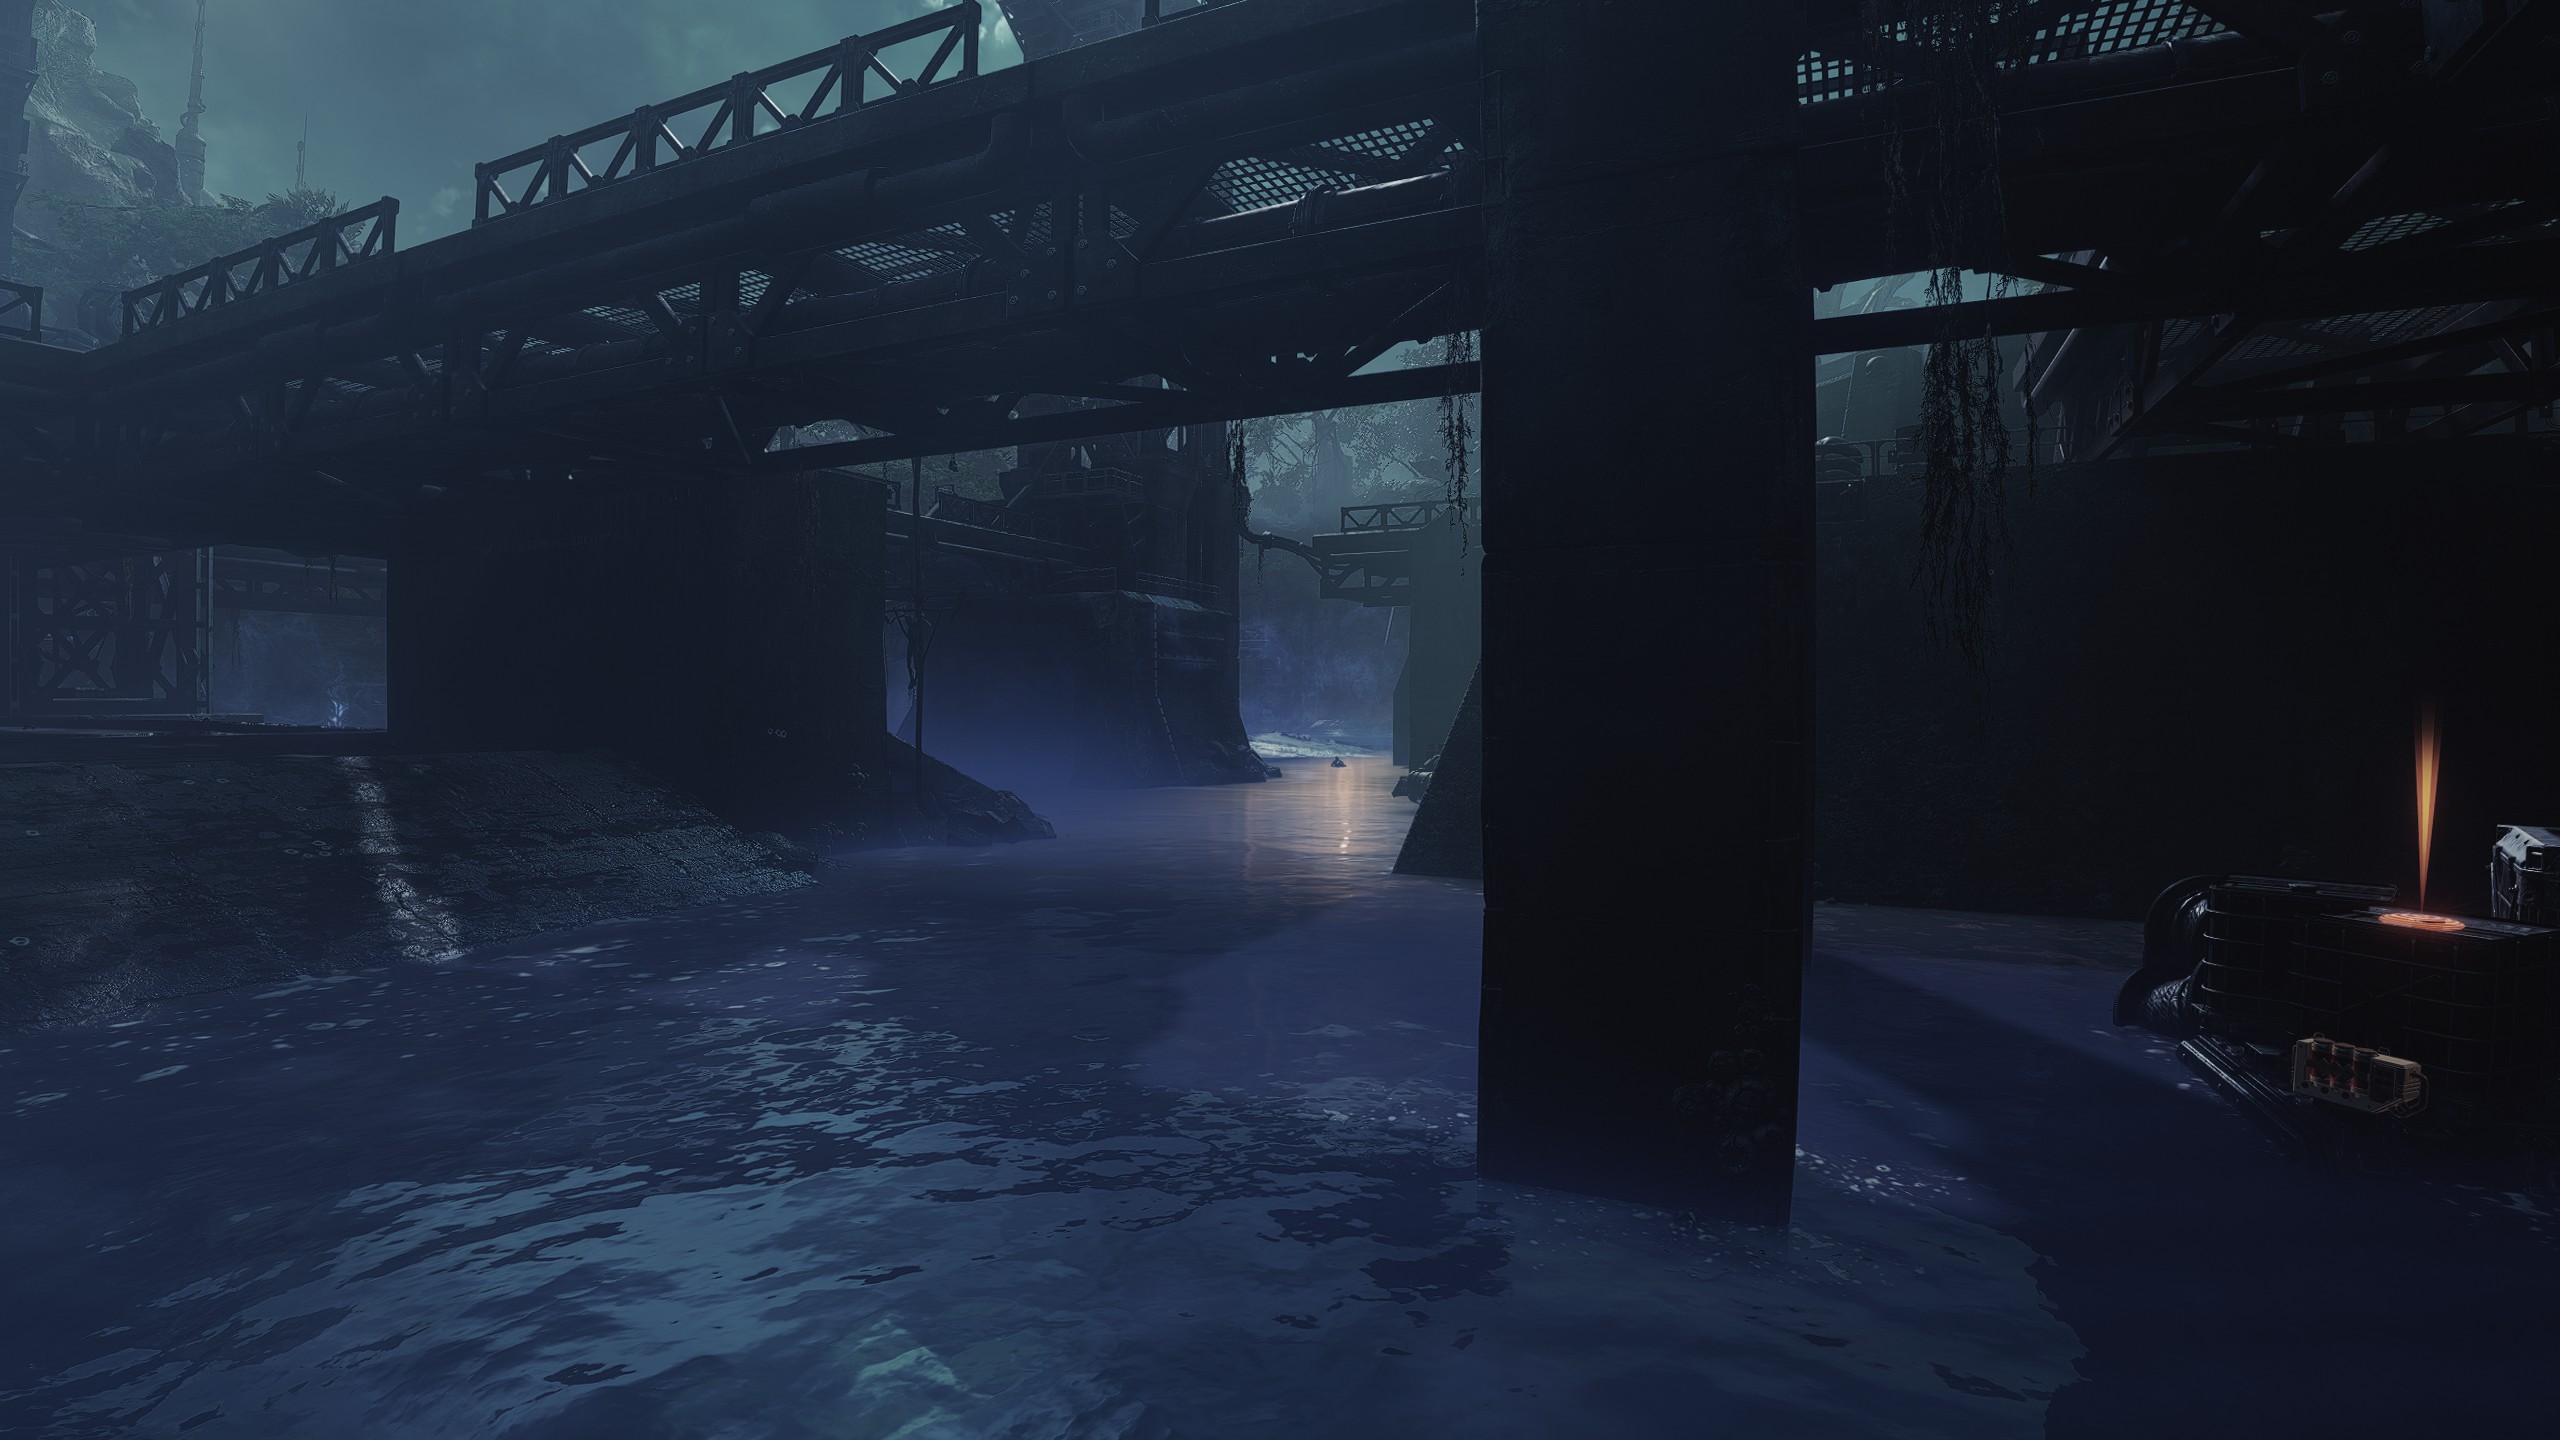
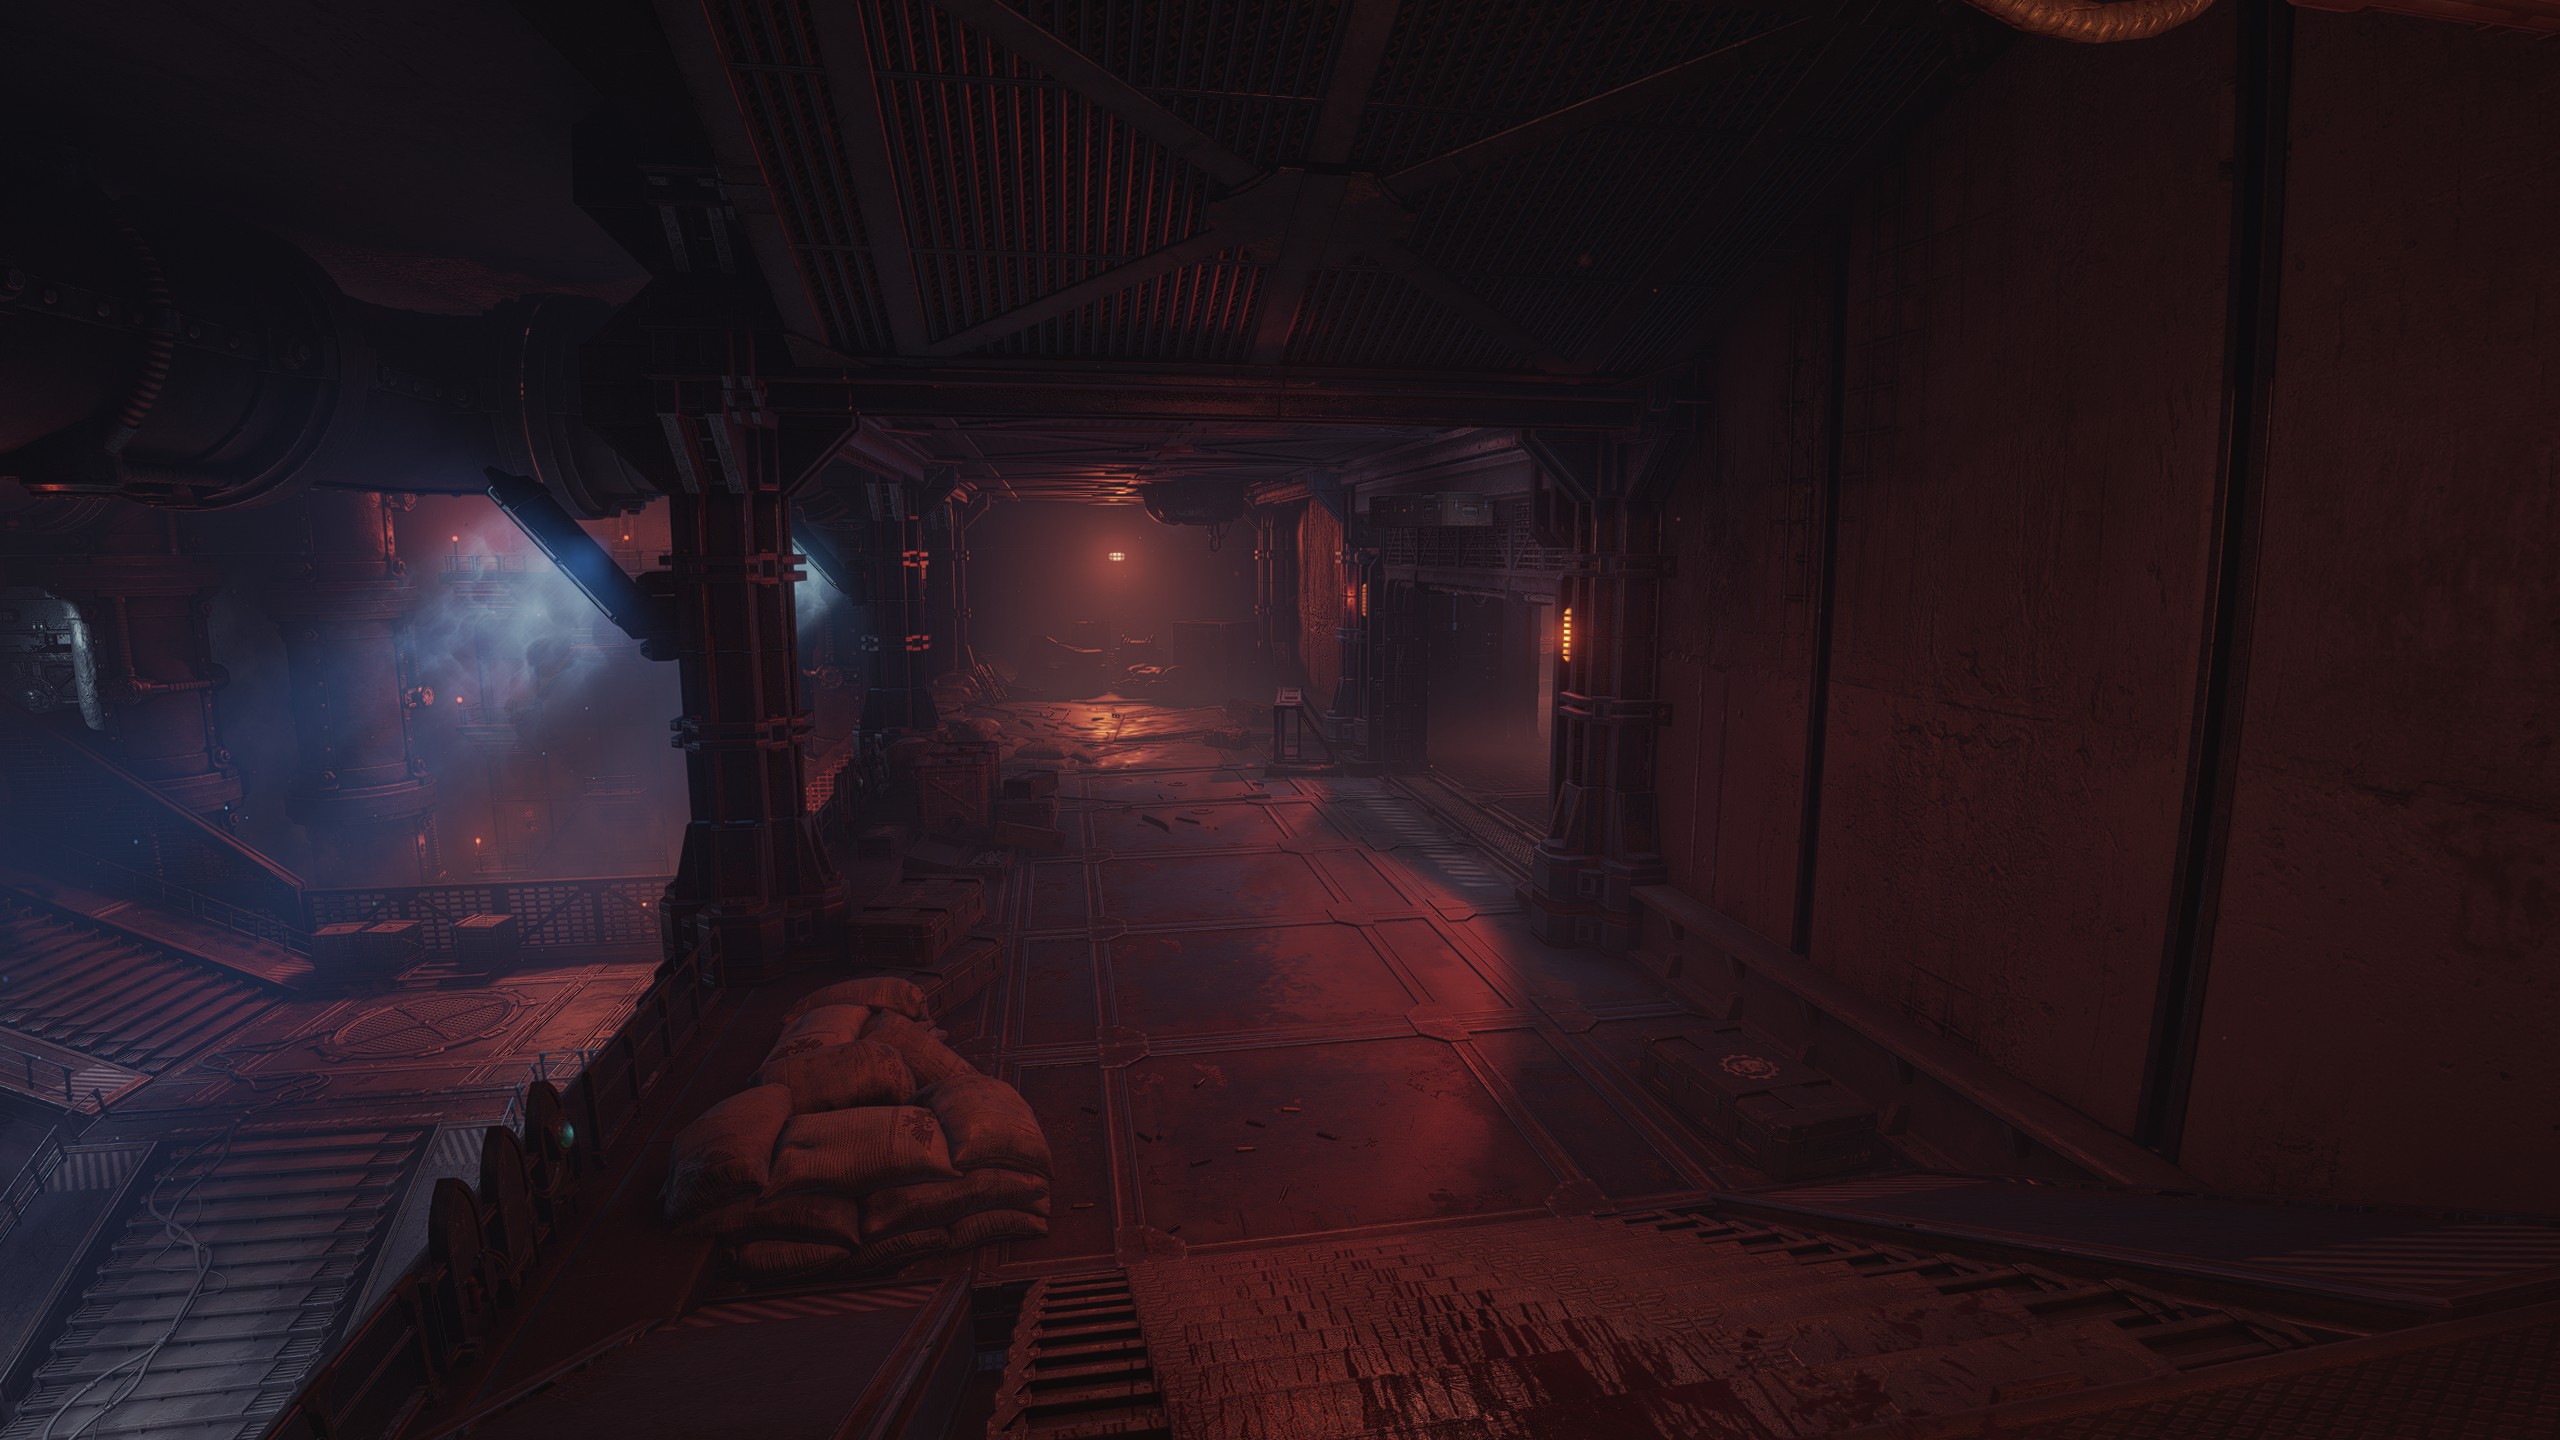
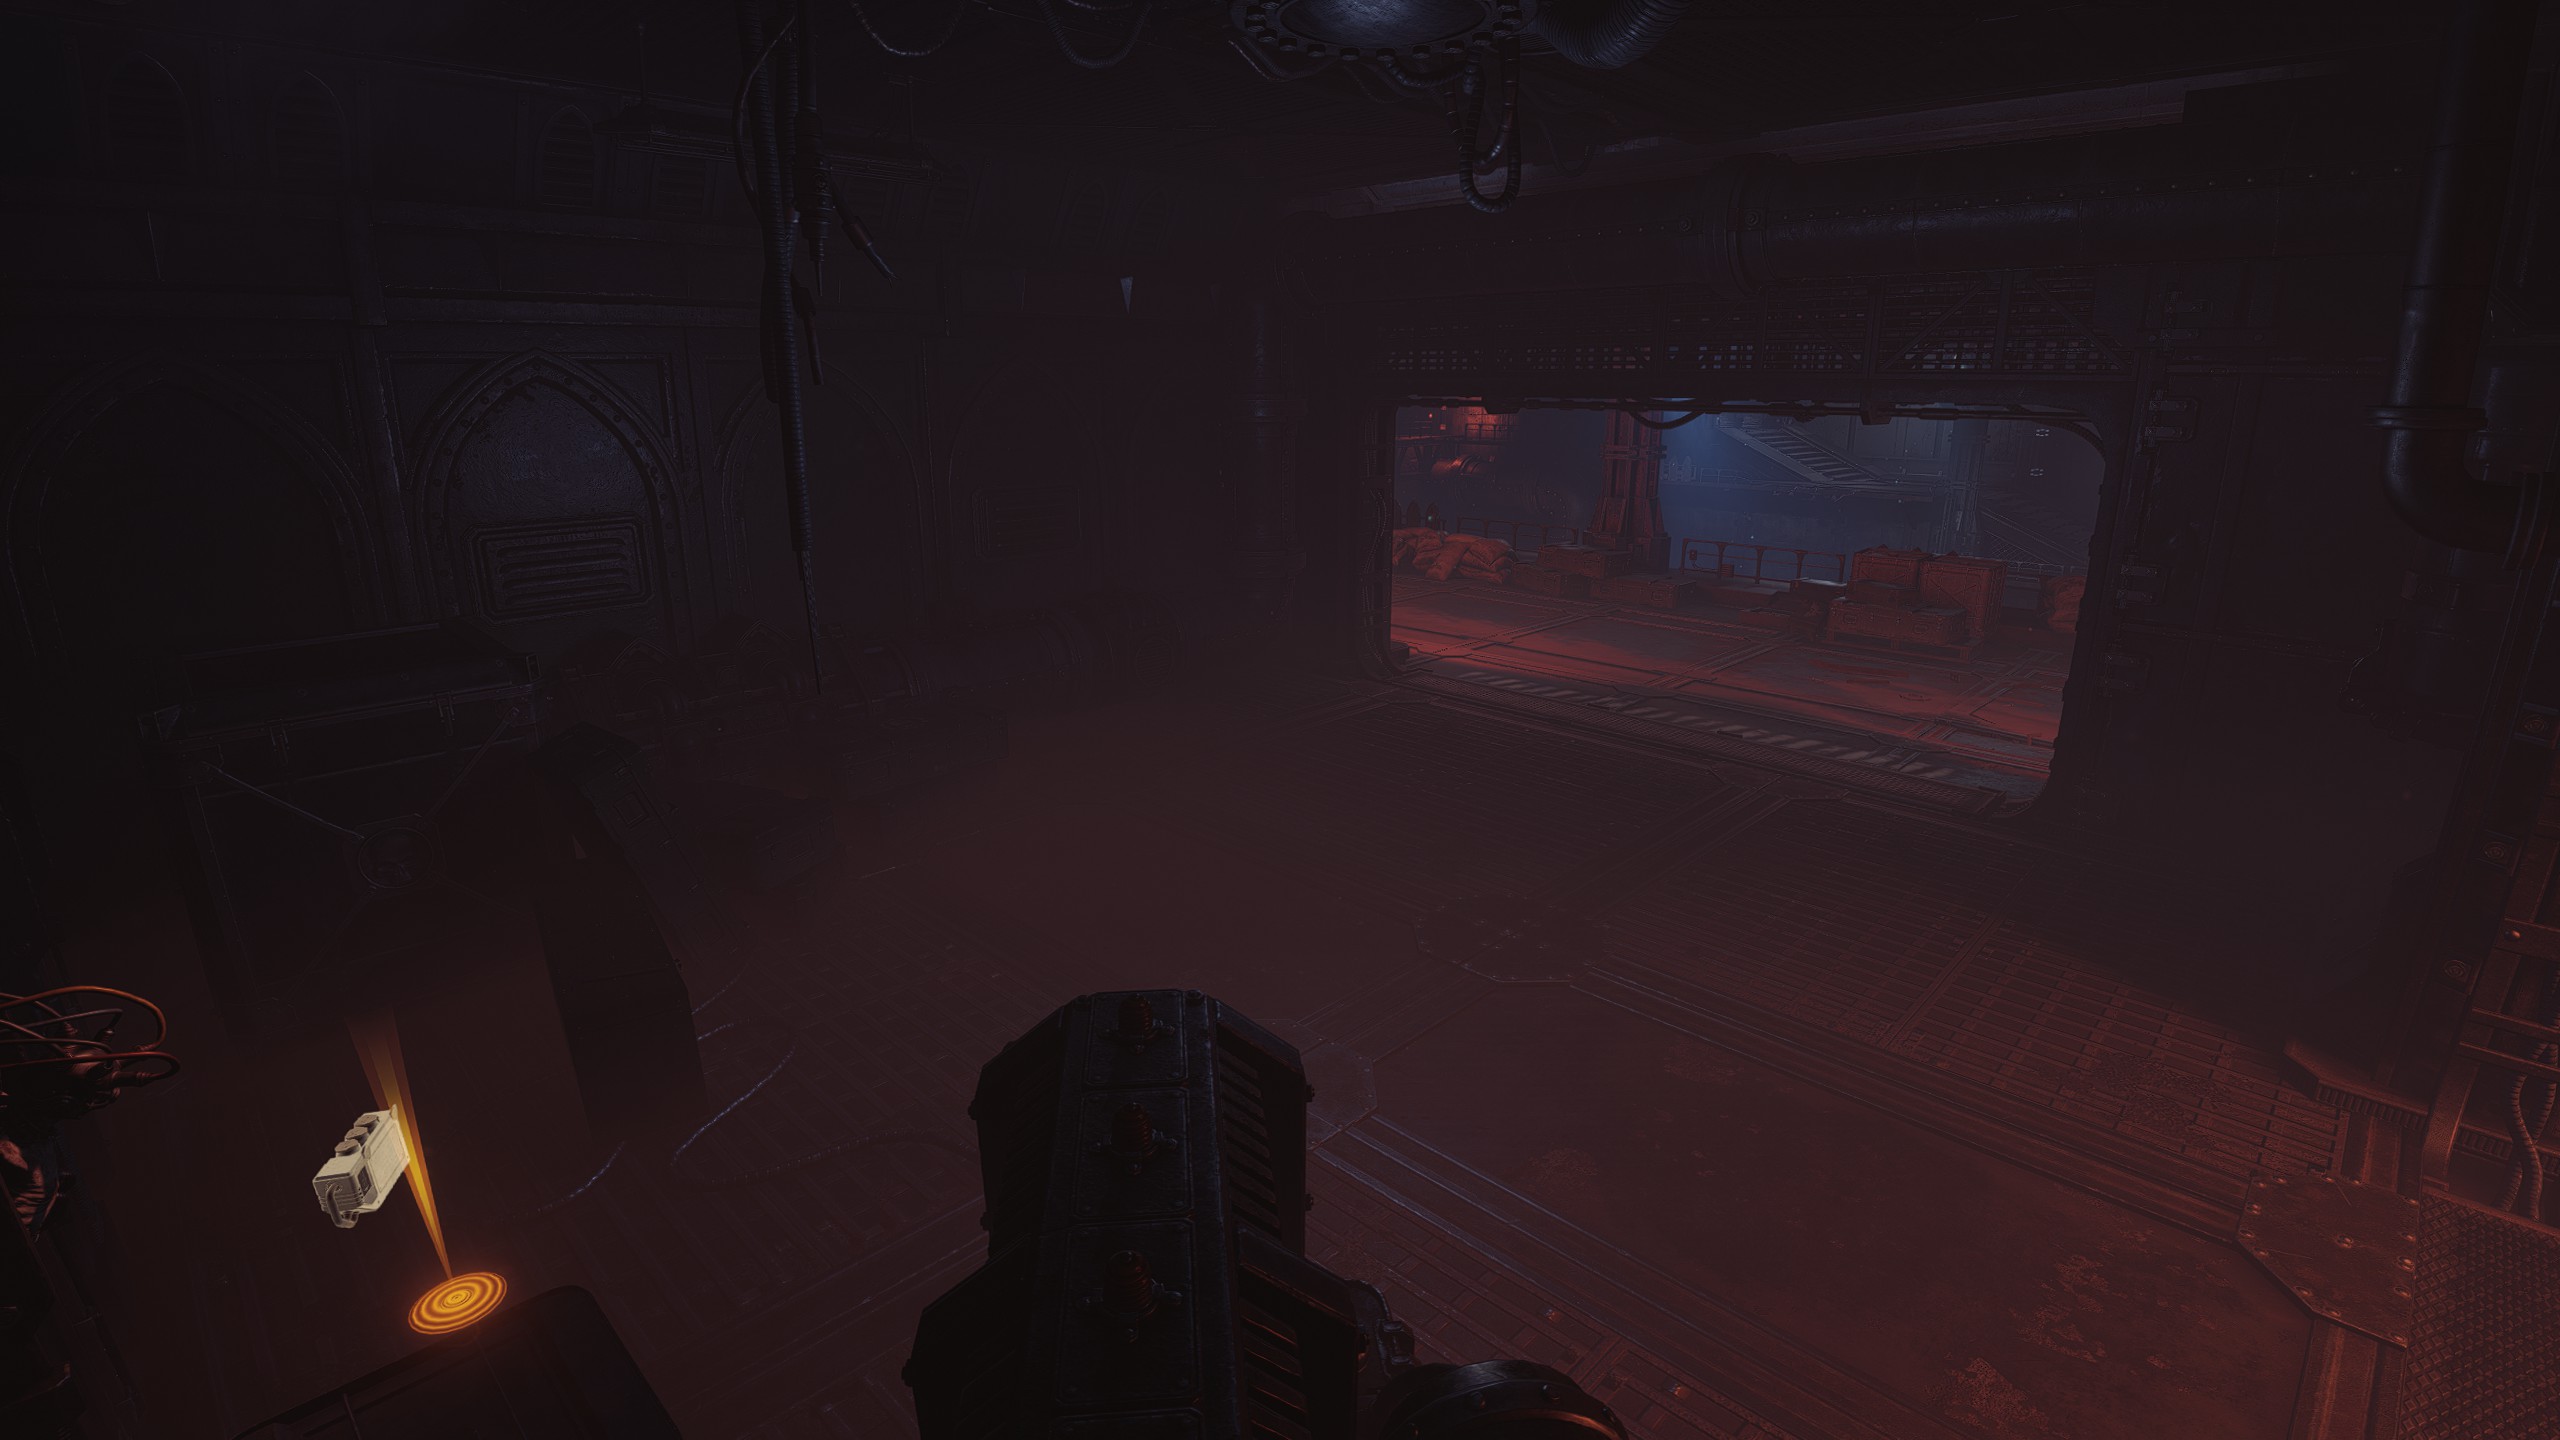
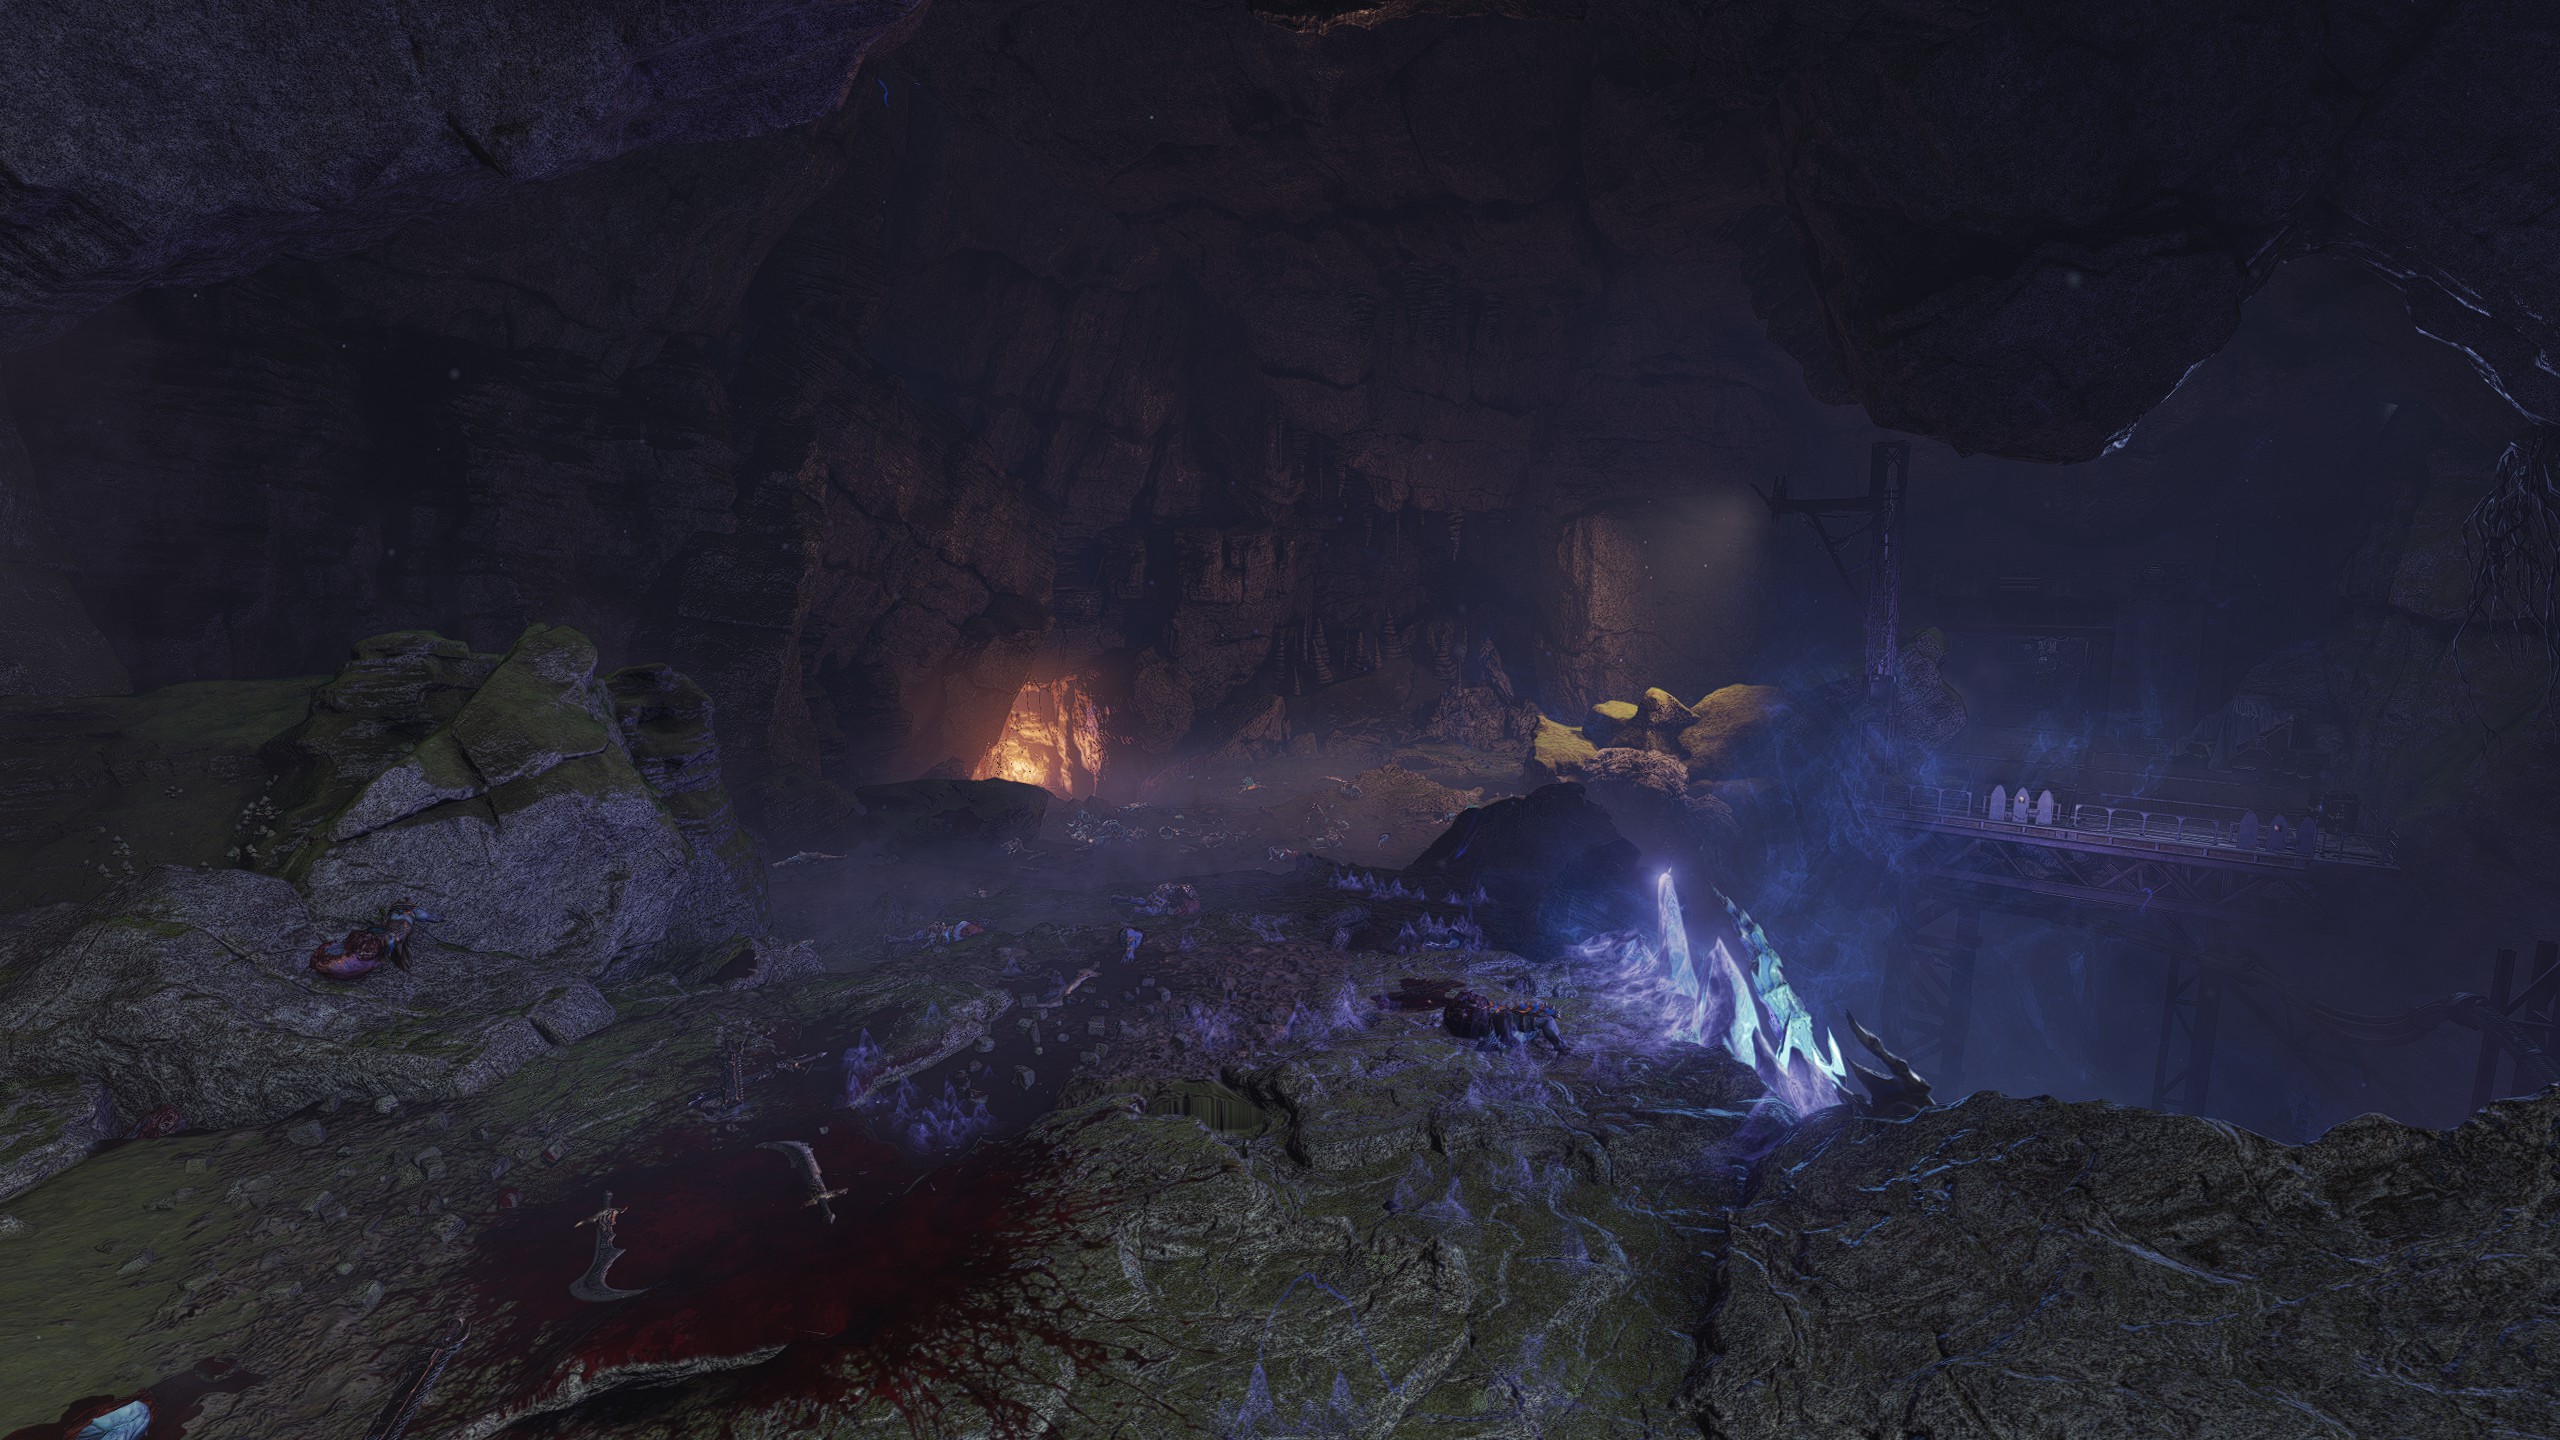
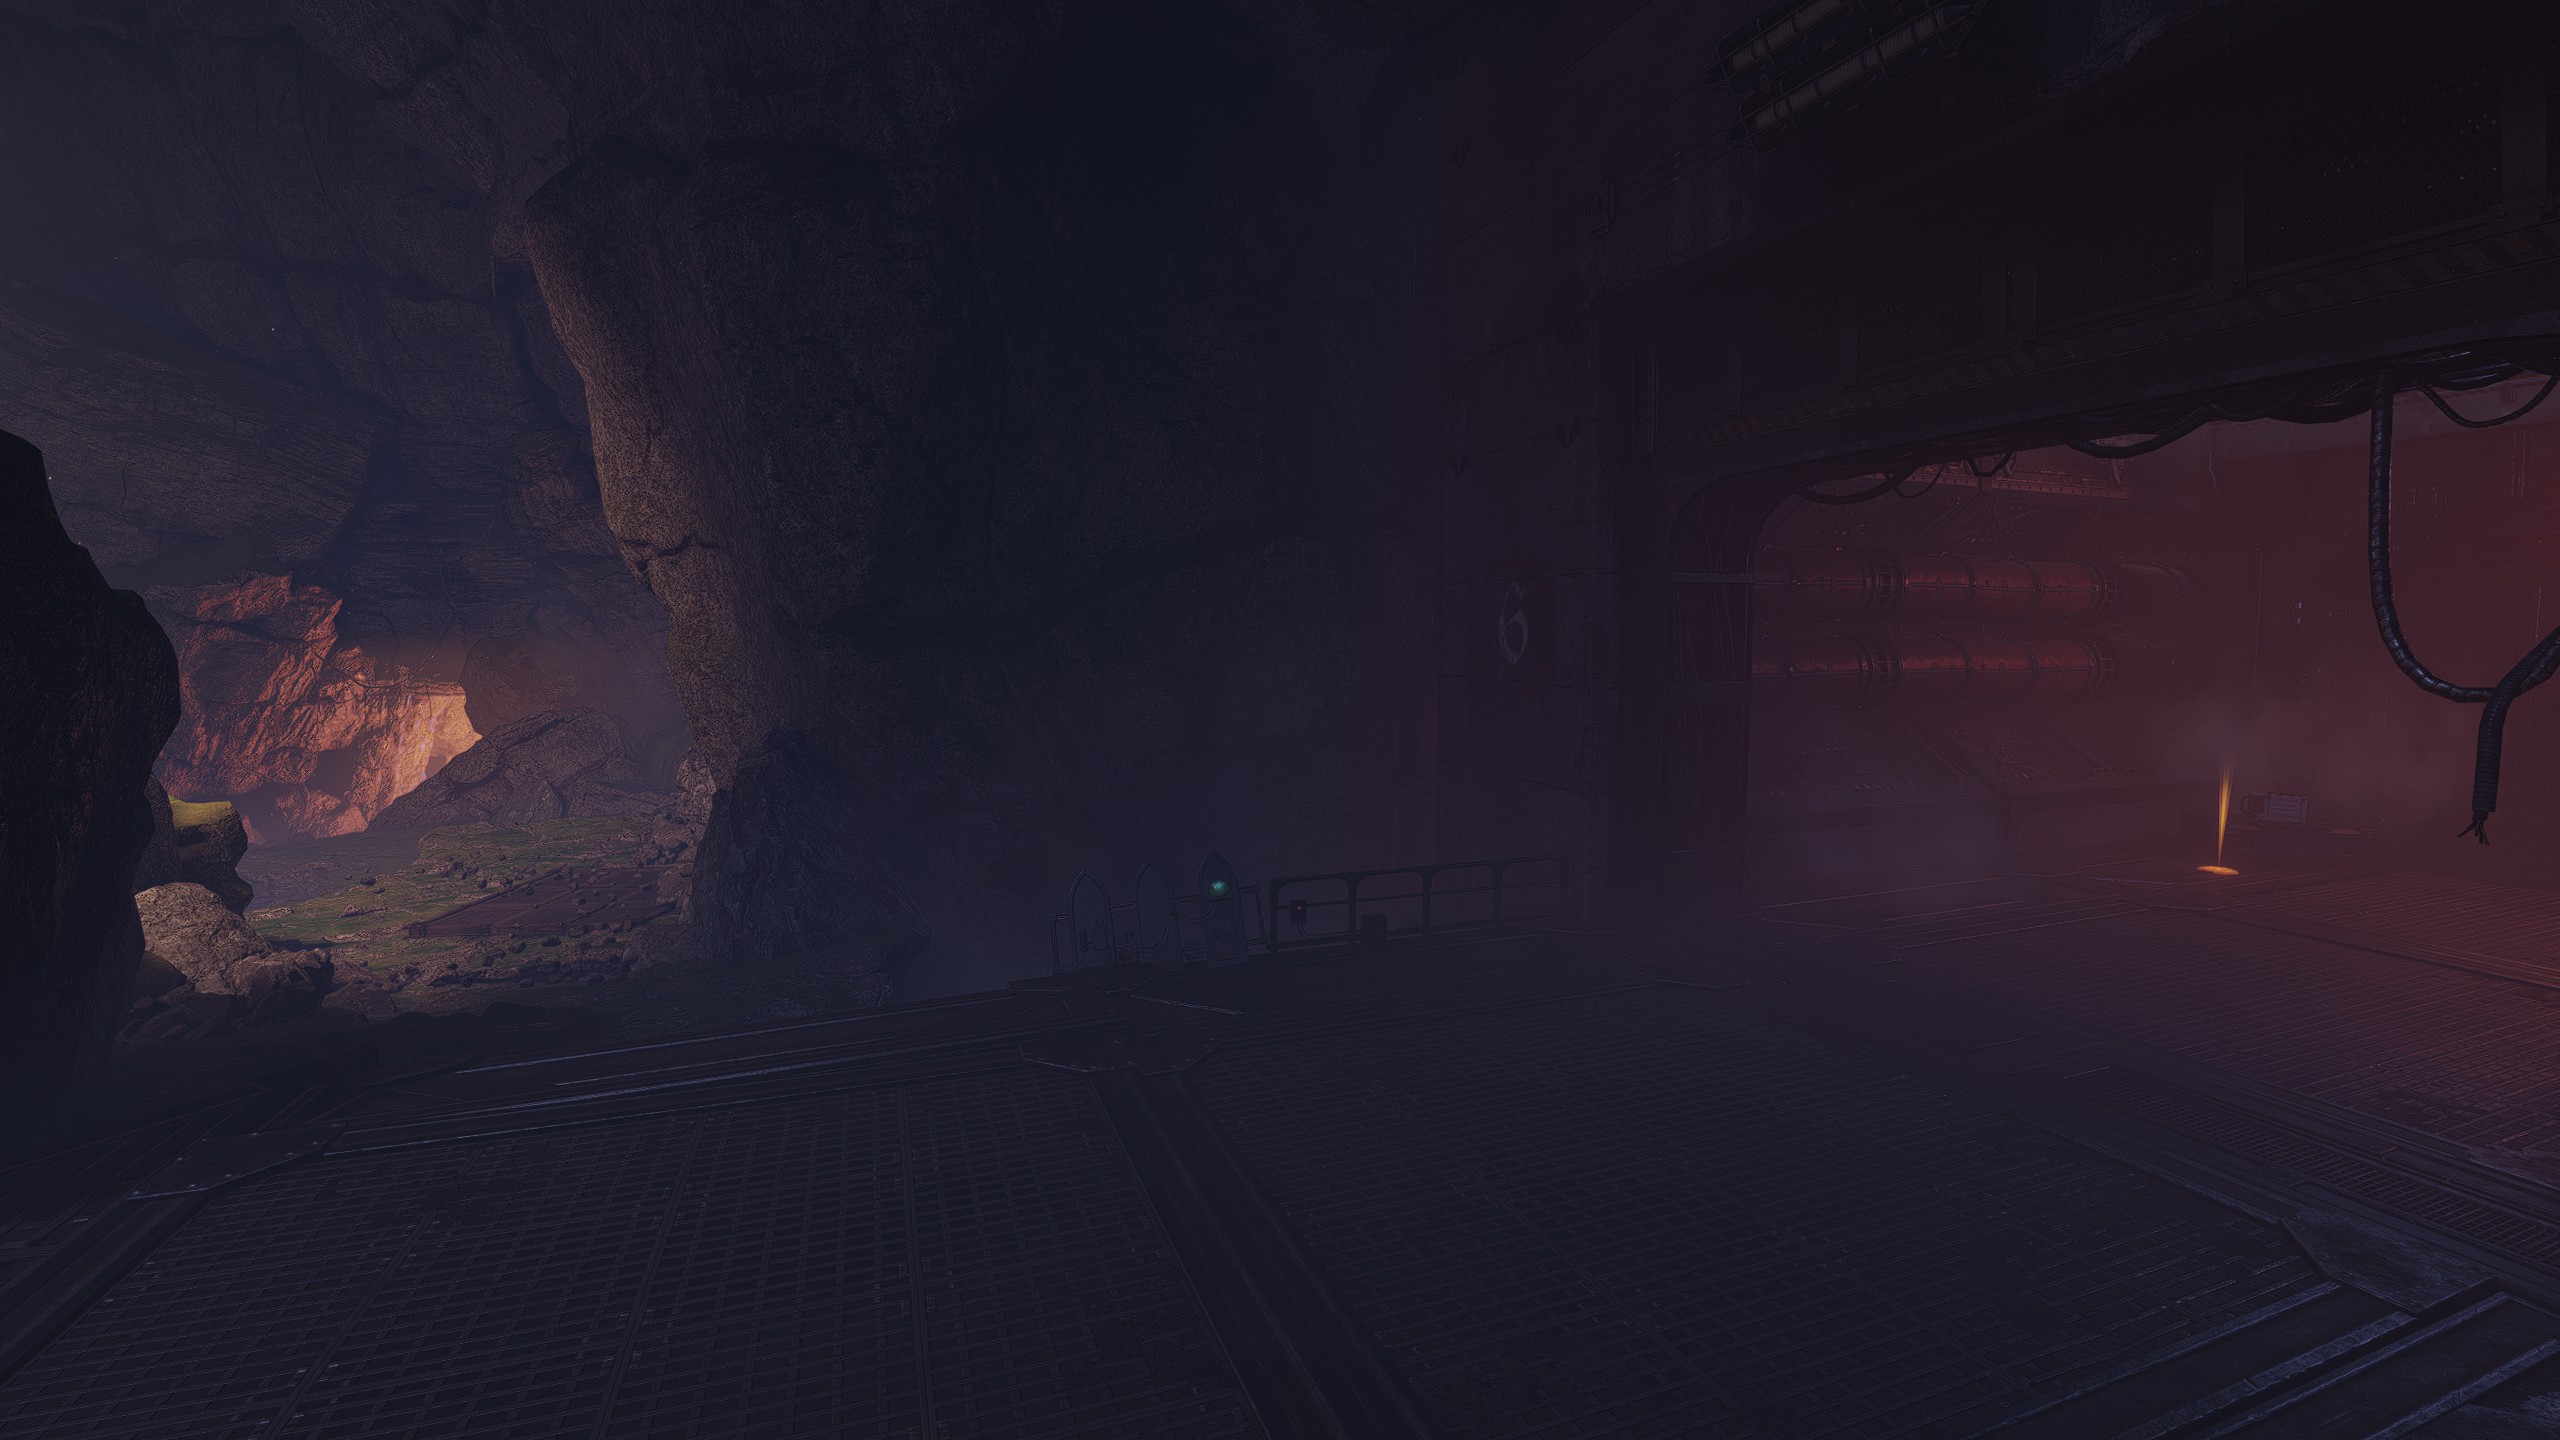
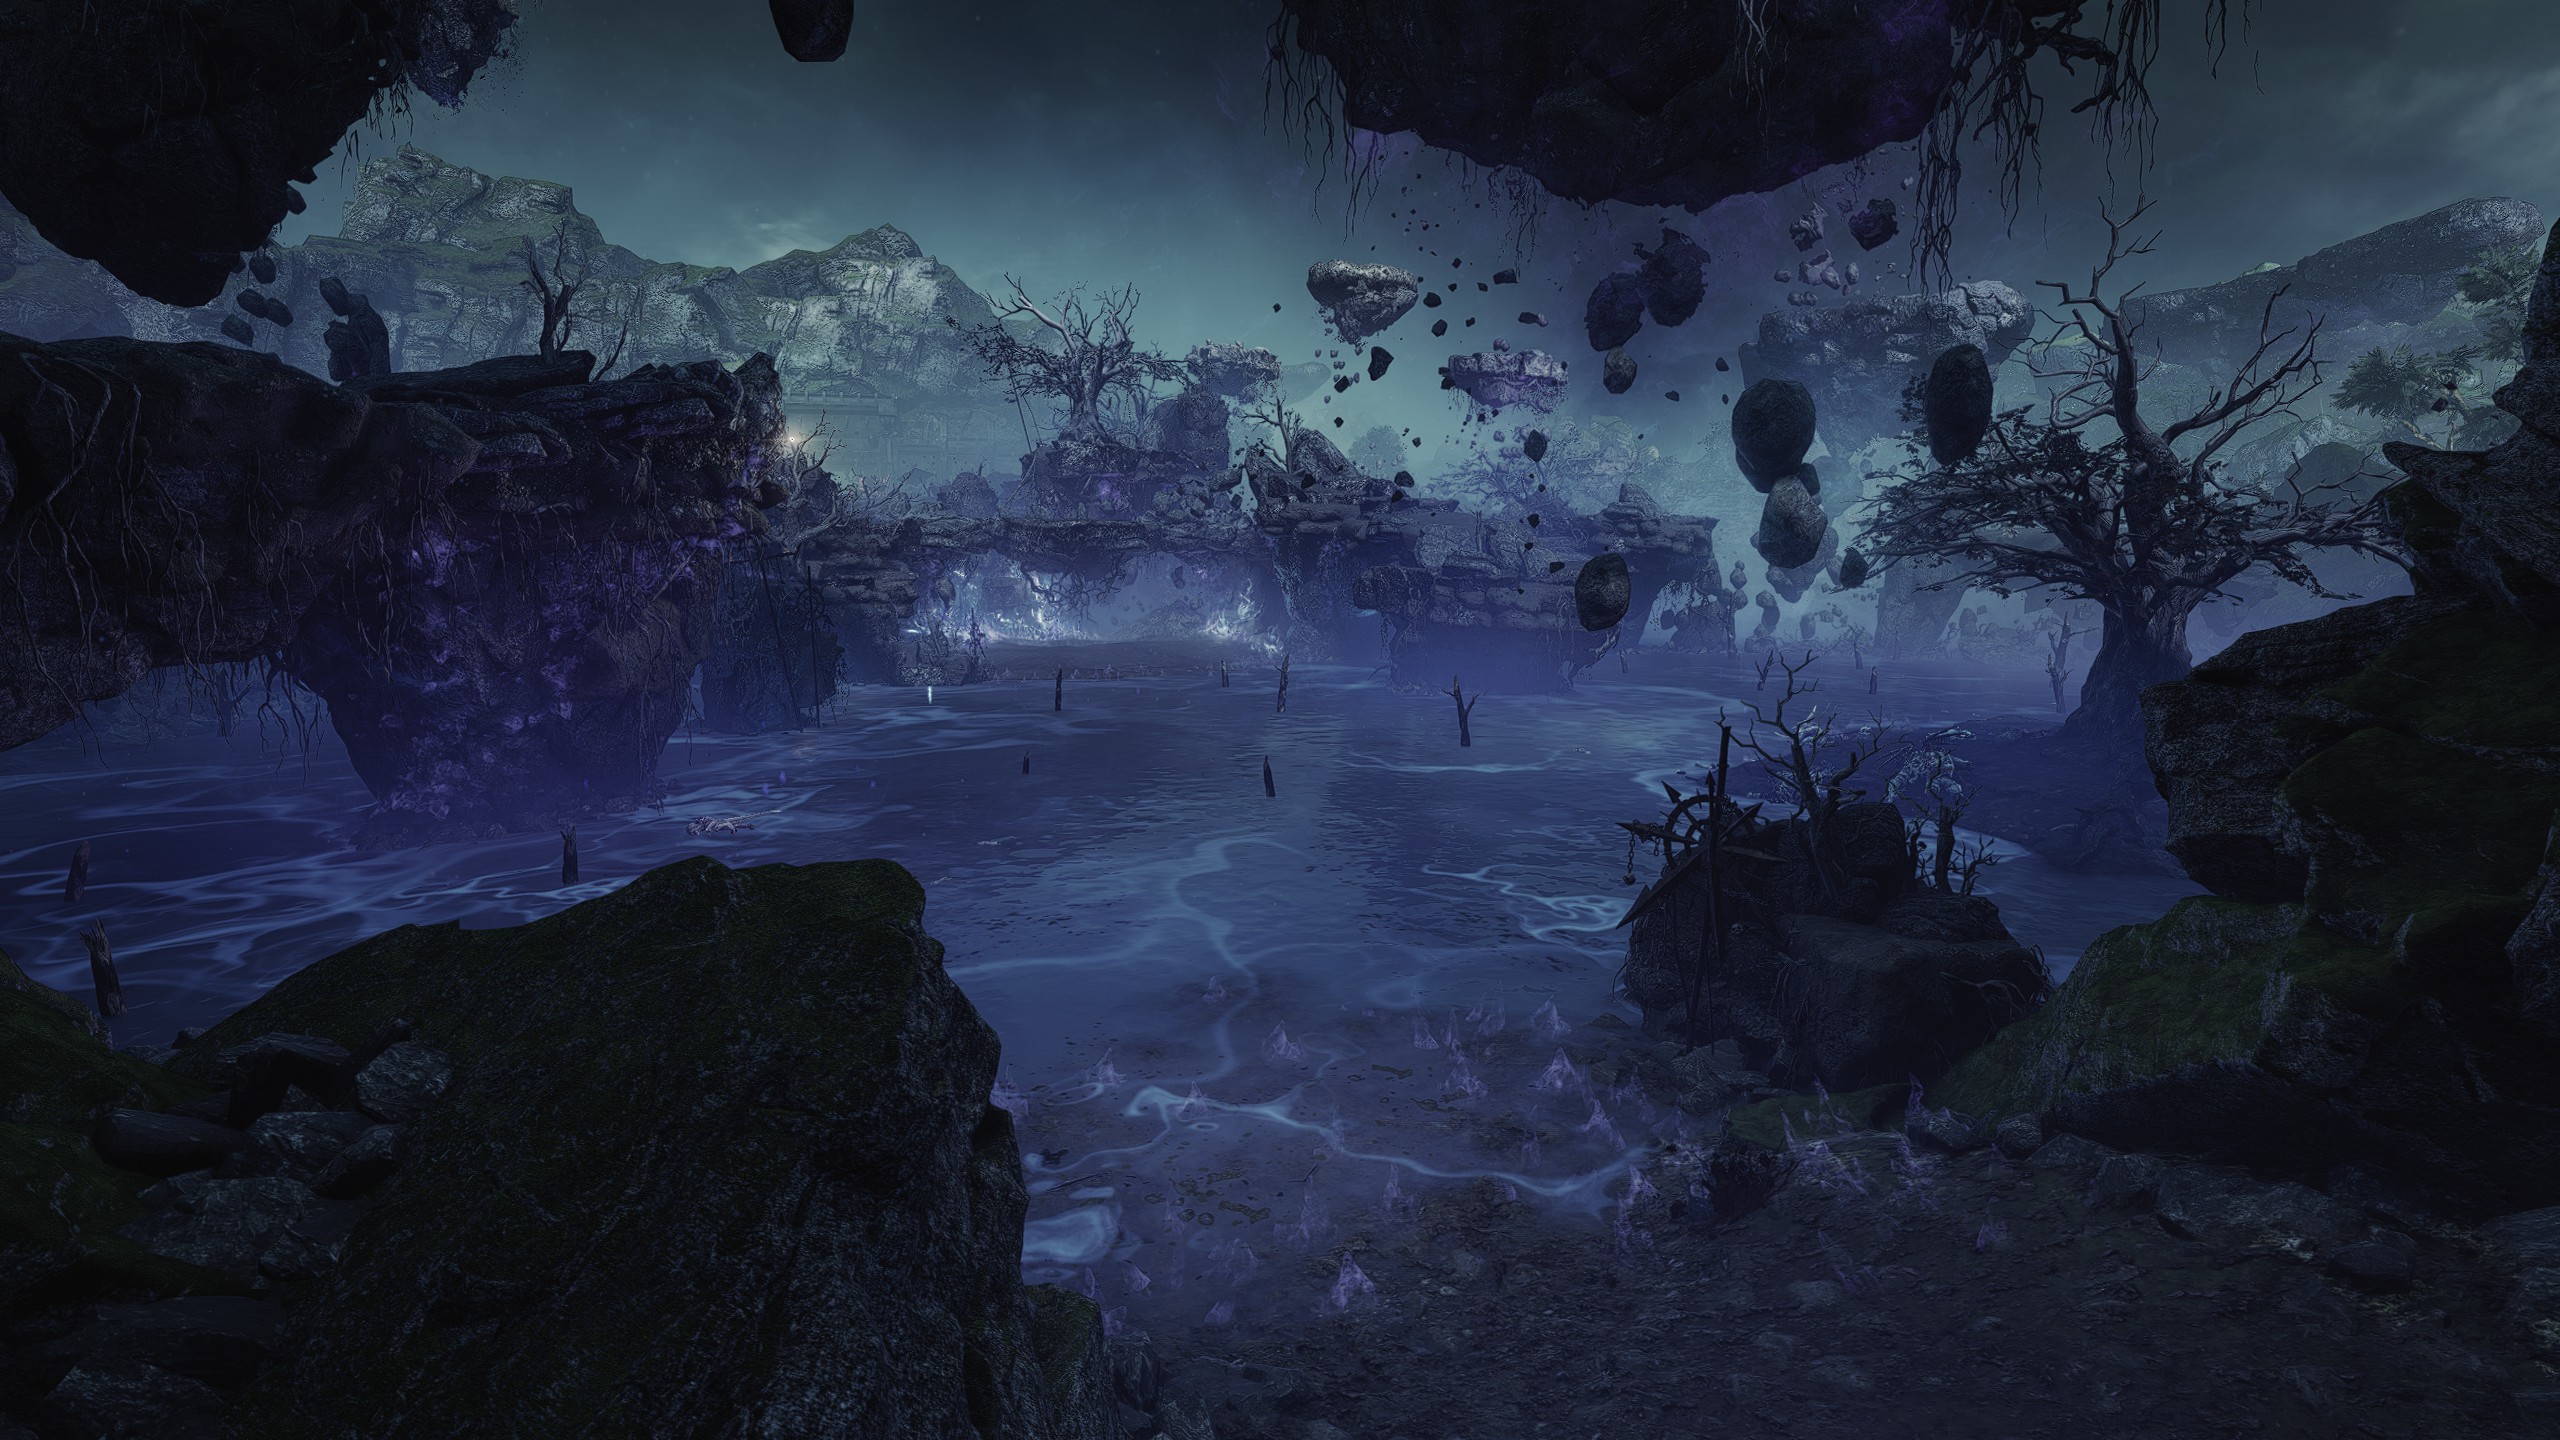
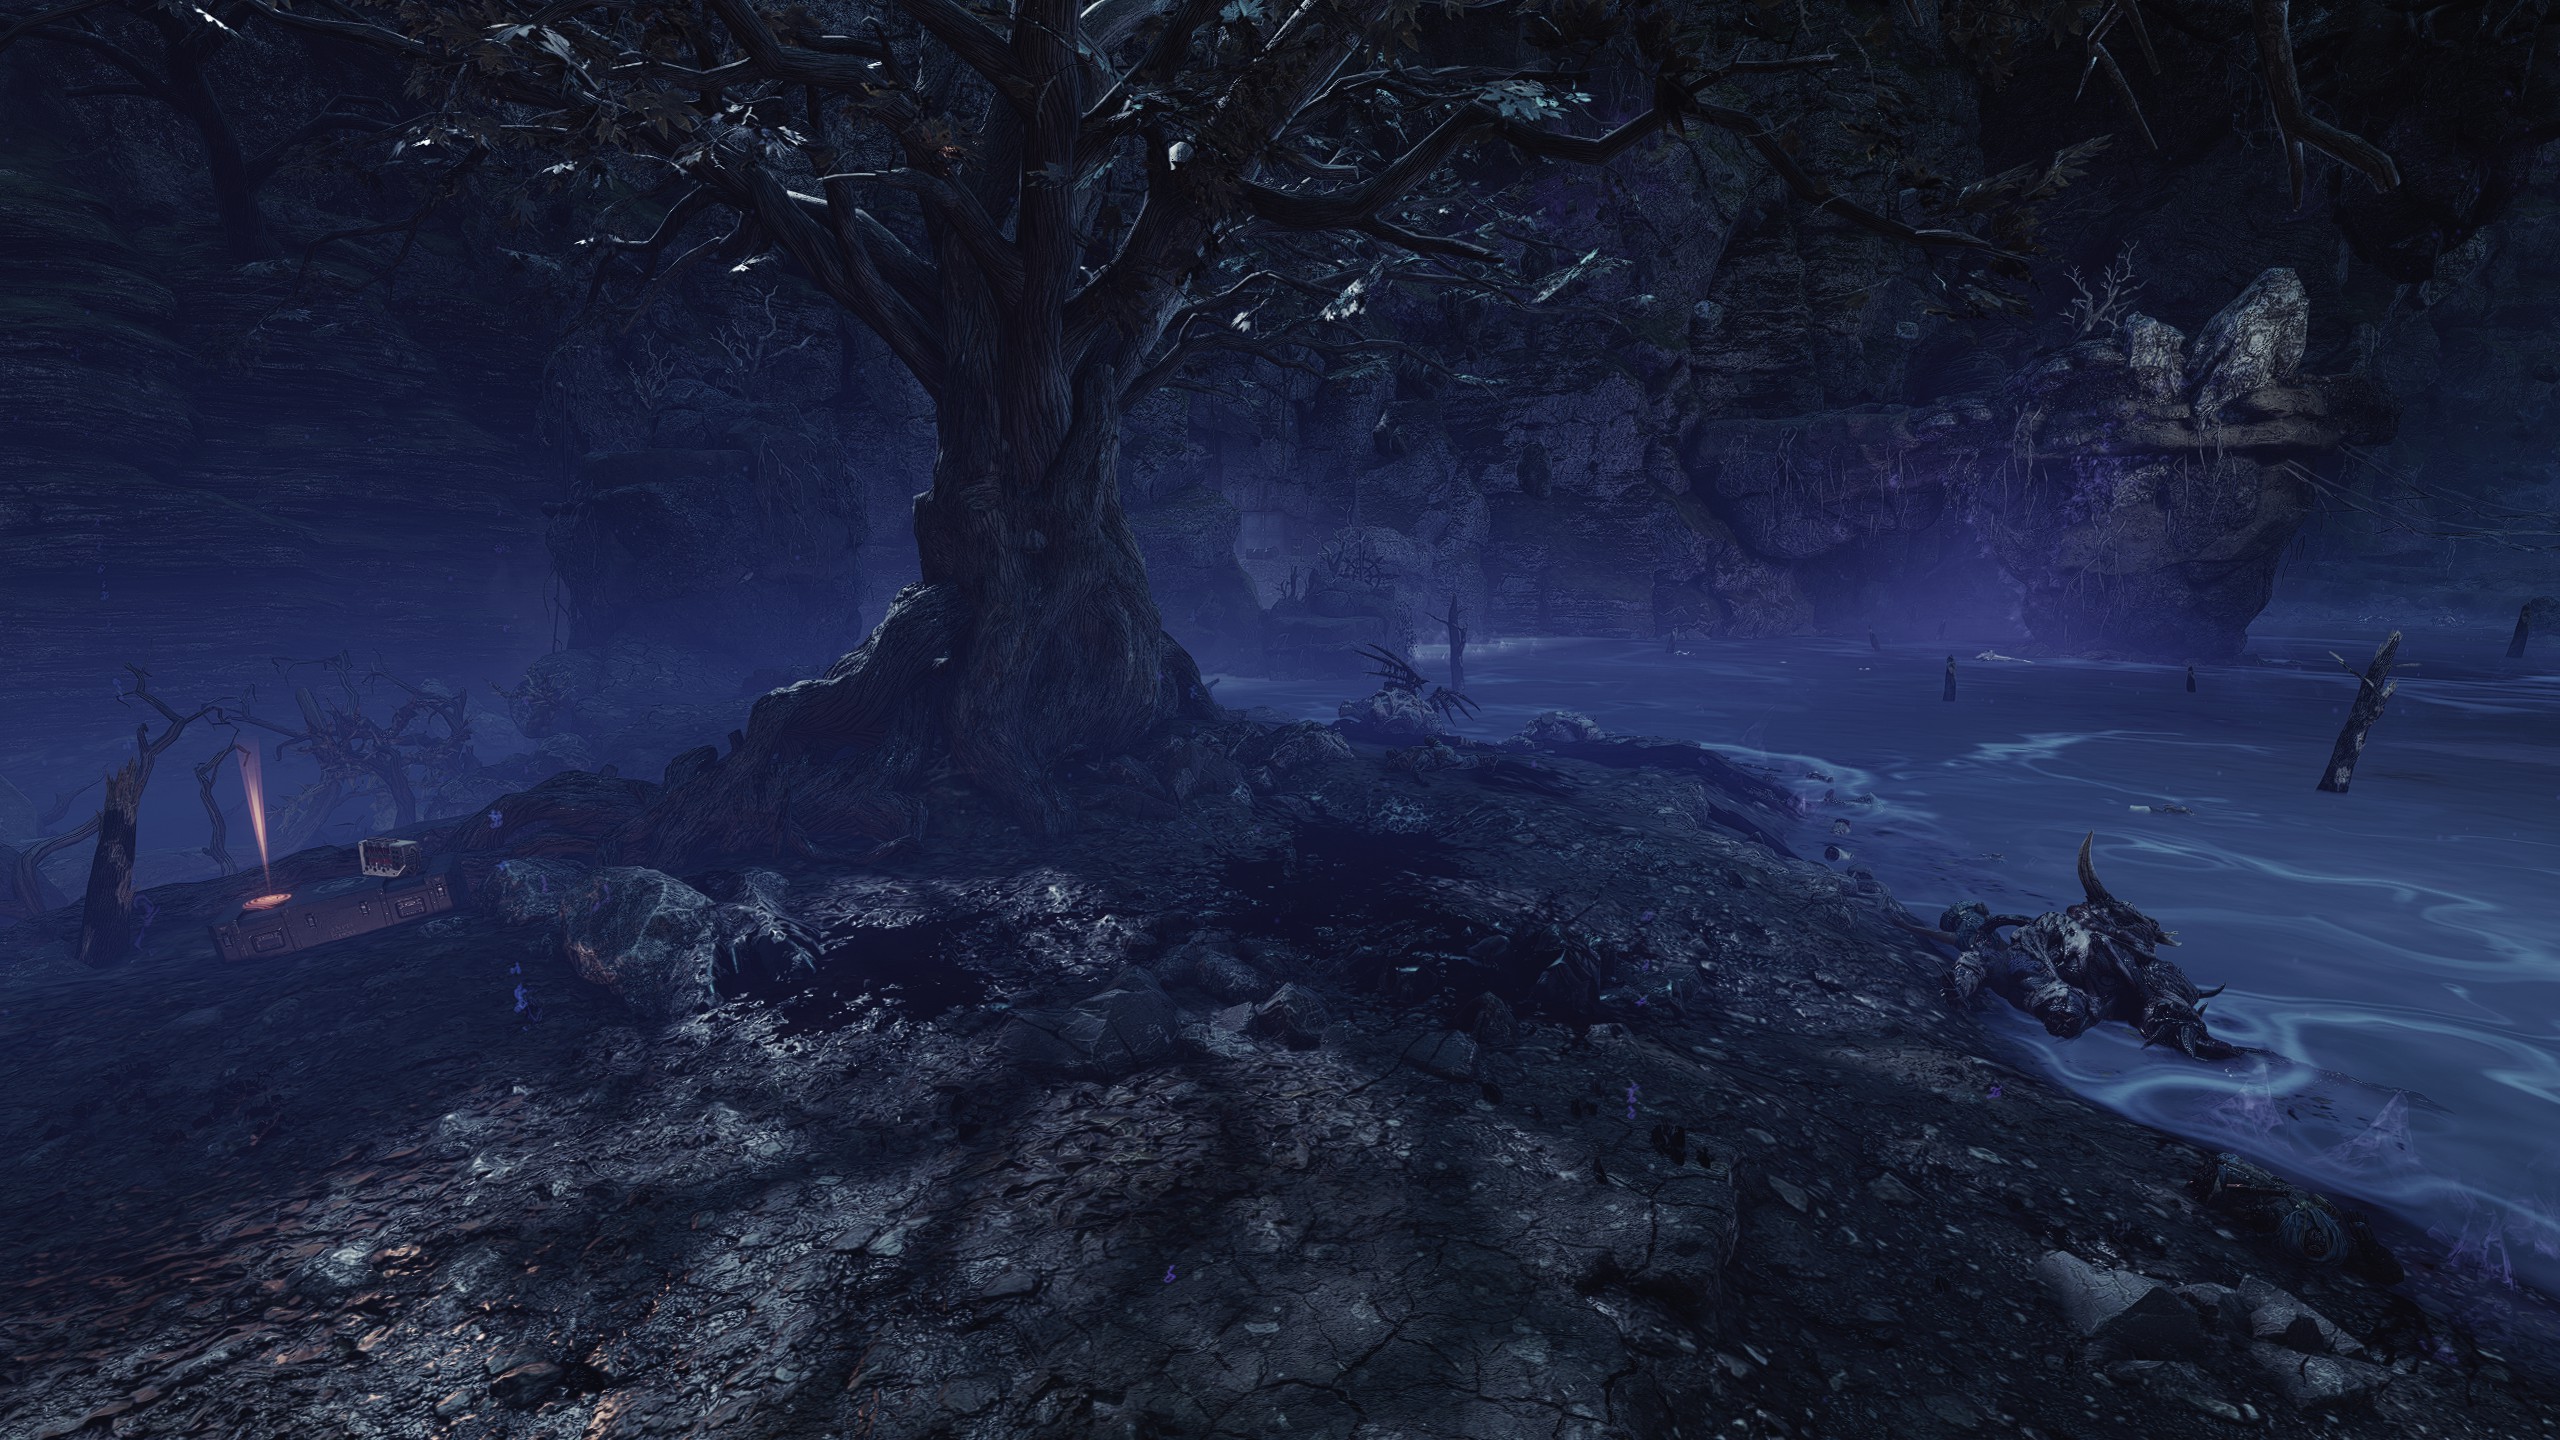
Gene-Seed #1
Location
Objective: Cross the Corrupted Swamp
Proceed from the start of the mission as normal until you reach the first swamp section. Stick to the left side all the way until you reach land. Immediately turn right on the ramp to some metal plating on the floor and a deployable shield for a possible Gene-Seed spawn.
Proceed from the start of the mission as normal until you reach the first swamp section. Stick to the left side all the way until you reach land. Immediately turn right on the ramp to some metal plating on the floor and a deployable shield for a possible Gene-Seed spawn.
Gene-Seed #2
Location
Objective: Reach the Mechanicus Facility
After crossing the corrupted swamp and entering a building, drop down the elevator shaft and open the next door into a small flooded area. Instead of going forward into the caves, head to the back left corner of the area. The Gene-Seed can spawn on some boxes just above the water.
After crossing the corrupted swamp and entering a building, drop down the elevator shaft and open the next door into a small flooded area. Instead of going forward into the caves, head to the back left corner of the area. The Gene-Seed can spawn on some boxes just above the water.
Gene-Seed #3
Location
Objective: Advance to Nozick's Data-Vault
Once you complete the holdout section and enter the facility, proceed forward into the walkways atop the data-vault room. Go down the stairs to your left, then drop down the gap in the guard rails and head into the corridor with red lighting. Before dropping down, check the room to the right and behind a cabinet on the floor.
Don't worry if you dropped down initially. So long as you don't drop down the second drop you can climb back up the other path and make your way back around to the room.
Once you complete the holdout section and enter the facility, proceed forward into the walkways atop the data-vault room. Go down the stairs to your left, then drop down the gap in the guard rails and head into the corridor with red lighting. Before dropping down, check the room to the right and behind a cabinet on the floor.
Don't worry if you dropped down initially. So long as you don't drop down the second drop you can climb back up the other path and make your way back around to the room.
Gene-Seed #4
Location
Objective: Reach Nozick's Laboratory
After completing the data purge, continue forward and drop down into the cave. Follow it down until you get to the rubble you must clear, but instead of going down turn to your right and follow the small path behind the rocks up to a platform with a small room to your left. The Gene-Seed may spawn on the crate in the back.
After completing the data purge, continue forward and drop down into the cave. Follow it down until you get to the rubble you must clear, but instead of going down turn to your right and follow the small path behind the rocks up to a platform with a small room to your left. The Gene-Seed may spawn on the crate in the back.
Gene-Seed #5
Location
Objective: Cross the Corrupted Swamp
Going forward from location four, clear the rubble and push through the water until you reach the exit of the cave. Immediately turn to your right and cross the swamp to a small island with a tree on it where a Gene-Seed can spawn on the crate behind it.
Going forward from location four, clear the rubble and push through the water until you reach the exit of the cave. Immediately turn to your right and cross the swamp to a small island with a tree on it where a Gene-Seed can spawn on the crate behind it.
Closing Words
I know that other guides tend to actually show the Gene-Seed in those locations while mine are more of a "trust me bro" portrayal using pings and descriptions, but I did this mostly to preserve my own sanity. If you feel particular locations aren't described well enough, please let me know.
For similar reasons I have no intention of including Armoury Data or making another guide in the same way. I think the other guides are more than good enough for that, if just because Armoury Data becomes irrelevant a lot faster than Gene-Seeds do IMHO.
That's all, thanks for reading. The Emperor Protects.
For similar reasons I have no intention of including Armoury Data or making another guide in the same way. I think the other guides are more than good enough for that, if just because Armoury Data becomes irrelevant a lot faster than Gene-Seeds do IMHO.
That's all, thanks for reading. The Emperor Protects.
More Warhammer 40,000: Space Marine 2 guides
- Fully Optimized PVE Builds for Every Class★ 5 (1.5k)55k views3.8k ♥36 minUpdated Apr 30, 2025
- Cosmetics Compendium★ 5 (323)43k views487 ♥17 minUpdated May 14, 2025
- [W40k: Space Marine 2] All dataslate locations★ 5 (1.2k)33k views2.4k ♥3 min
- Armory data / Gene Seeds Locations: WIP★ 5 (632)27k views1.6k ♥12 minUpdated Mar 12
- 100% ACHIEVEMENT GUIDE | Warhammer 40,000: Space Marine 2 👑★ 5 (597)24k views1.1k ♥11 minUpdated Aug 28, 2025
- Руководство по всем достижениям | Прохождение игры на 100%★ 5 (596)24k views1.4k ♥6 minRussianUpdated Oct 13, 2024






This guide was created by its original author on the Steam Community. Are you the author and want it removed? Request removal.