Achievements and Trophies Master Guide (2025)
Some useful things to know
Secure loot before leaving
If you have to secure certain loot, you must do so before escaping. Loot bags carried on your back into the escape zone will not count!
Weapon limitations
If you have to use certain weapons, you cannot deal damage with any other weapons, including saws, melee, throwables, and deployables. Opening or breaking something like a deposit box or window will count as damage. AI and Jokers can be used without any problem.
However, if you need to wield certain weapons, the only requirement is starting the heist with them. What you do during the heist doesn't matter in this case.
Akimbo weapons
You can always use the akimbo variant of a weapon if it has any.
Long heists
Heists of multiple days must be completed entirely with the specified equipment or method. You cannot switch your loadout in-between days!
Trophies
You can find your trophies in the Safe House. These are obtained from challenges similar to achievements. Displayed trophies will be visible during any Safe House Raid that you host.
Death Sentence, One Down
On the highest difficulty, there are two basic rules of thumb; use stealth as much as possible, and steadily move from cover to cover once it goes loud. Whichever loadout you bring is a personal choice because everyone will recommend something different - I personally did all loud heists with the Stoic perk deck and shotguns. Try things and see what works best for you.
If you have to secure certain loot, you must do so before escaping. Loot bags carried on your back into the escape zone will not count!
Weapon limitations
If you have to use certain weapons, you cannot deal damage with any other weapons, including saws, melee, throwables, and deployables. Opening or breaking something like a deposit box or window will count as damage. AI and Jokers can be used without any problem.
However, if you need to wield certain weapons, the only requirement is starting the heist with them. What you do during the heist doesn't matter in this case.
Akimbo weapons
You can always use the akimbo variant of a weapon if it has any.
Long heists
Heists of multiple days must be completed entirely with the specified equipment or method. You cannot switch your loadout in-between days!
Trophies
You can find your trophies in the Safe House. These are obtained from challenges similar to achievements. Displayed trophies will be visible during any Safe House Raid that you host.
Death Sentence, One Down
On the highest difficulty, there are two basic rules of thumb; use stealth as much as possible, and steadily move from cover to cover once it goes loud. Whichever loadout you bring is a personal choice because everyone will recommend something different - I personally did all loud heists with the Stoic perk deck and shotguns. Try things and see what works best for you.
Inventory
Illustration
Name and description

A Vote for Change
Equip the Chimano Custom Pistol.
Equip the Chimano Custom Pistol.

Christmas Came Early
Equip the Interceptor 45 Pistol.
Equip the Interceptor 45 Pistol.

Build Me an Army Worthy of Crime
Equip the Golden AK.762 Rifle.
Equip the Golden AK.762 Rifle.

With an Iron Fist
Equip the 350K Brass Knuckles.
Equip the 350K Brass Knuckles.

Heat Around the Corner
Equip the Hockey Heat mask (Community).
Equip the Hockey Heat mask (Community).

Like an Angry Bear
Equip the Mark mask (Community).
Equip the Mark mask (Community).

Merry Christmas!
Equip the Happy Santa mask (Community).
Equip the Happy Santa mask (Community).

Army of One
Equip the GL40 grenade launcher, Locomotive 12G shotgun and Improved Combined Tactical Vest.
You need to ace the Iron Man skill in the Enforcer Tank skill tree.
Equip the GL40 grenade launcher, Locomotive 12G shotgun and Improved Combined Tactical Vest.
You need to ace the Iron Man skill in the Enforcer Tank skill tree.

I'm a Healer-Tank-Damage-Dealer
Spend 10 skill points in each of the five skill trees.
Requires level 42 or higher.
Spend 10 skill points in each of the five skill trees.
Requires level 42 or higher.

Masked Villain
Modify any mask.
Modify any mask.

High Speed, Low Drag
Modify a CAR-4 rifle with
* Competition Foregrip
* CAR Quadstacked Mag
* Competitor's Compensator
Modify a CAR-4 rifle with
* Competition Foregrip
* CAR Quadstacked Mag
* Competitor's Compensator

Mall Ninja
Modify a CAR-4 rifle with
* Gazelle Rail
* Tactical Compensator
* Compact Holosight
* Wide Stock
* Military Laser Module
Modify a CAR-4 rifle with
* Gazelle Rail
* Tactical Compensator
* Compact Holosight
* Wide Stock
* Military Laser Module

Russian Operator
Modify any AK rifle with
* Lightweight Rail
* AK Slavic Dragon Barrel
* AK Quadstacked Mag
* Funnel of Fun Nozzle
Modify any AK rifle with
* Lightweight Rail
* AK Slavic Dragon Barrel
* AK Quadstacked Mag
* Funnel of Fun Nozzle

Point n Shoot
Modify any pistol with
* Pistol Red Dot Sight
* Flash Hider
Modify any pistol with
* Pistol Red Dot Sight
* Flash Hider

So Uncivilised
Equip the Broomstick pistol after modifying it with
* Damper.L 44 Nozzle
* Barrel Sight 44
Equip the Broomstick pistol after modifying it with
* Damper.L 44 Nozzle
* Barrel Sight 44

So Many Choices
Own the Clarion rifle, Gecko 7.62 rifle, Gewehr 3 rifle and GL40 Grenade Launcher.
Own the Clarion rifle, Gecko 7.62 rifle, Gewehr 3 rifle and GL40 Grenade Launcher.

Lock, Stock & Eight Smoking Barrels
Own the Locomotive, Street Sweeper, Reinfeld, Mosconi, Izhma, Raven and M1014 Shotguns.
Own the Locomotive, Street Sweeper, Reinfeld, Mosconi, Izhma, Raven and M1014 Shotguns.

Guns Are Like Shoes
Own 72 weapons.
Own 72 weapons.
Collectibles
Illustration
Name and description
How to achieve

There and Back Again
Earn each of the five Gage package crates at least once.
Earn each of the five Gage package crates at least once.
Collecting packages grants progress towards the package crates. You can easily find these packages on any map by just playing.
View your progress towards the crates in Crime net.
View your progress towards the crates in Crime net.

Only For Us Naughty Heisters
Collect the hidden presents in Border Crossing, San Martín Bank, Breakfast in Tijuana, and Buluc's Mansion.
Collect the hidden presents in Border Crossing, San Martín Bank, Breakfast in Tijuana, and Buluc's Mansion.

For The Mad Hatter
Secure the tea sets in Dragon Heist, Ukrainian Prisoner, Black Cat, and Mountain Master.
Secure the tea sets in Dragon Heist, Ukrainian Prisoner, Black Cat, and Mountain Master.

Conspiracy Theory
Collect the tapes inside safes in Shadow Raid, Border Crossing, Diamond Heist, and Hoxton Breakout. Then listen to them.
You need two hidden keycards for each safe. They stack in your inventory.
Collect the tapes inside safes in Shadow Raid, Border Crossing, Diamond Heist, and Hoxton Breakout. Then listen to them.
You need two hidden keycards for each safe. They stack in your inventory.
Further information on these four achievements can be found in this guide.
Illustration
Name and description

The Only One That Is True
Collect 5 hidden Bullet trophies on any variant of the Bank Heist, the third day of Firestarter, or Jewelry Store.
Unlocks the Bullet trophy.
Collect 5 hidden Bullet trophies on any variant of the Bank Heist, the third day of Firestarter, or Jewelry Store.
Unlocks the Bullet trophy.

The One That Had Many Names
Collect 5 hidden Robot trophies on Shadow Raid or First World Bank.
Unlocks the Robot trophy.
Collect 5 hidden Robot trophies on Shadow Raid or First World Bank.
Unlocks the Robot trophy.

The One Who Declared Himself The Hero
Collect 5 hidden Cultist trophies on Diamond Store or the first day of the Hoxton Breakout heist.
Unlocks the Cultist trophy.
Collect 5 hidden Cultist trophies on Diamond Store or the first day of the Hoxton Breakout heist.
Unlocks the Cultist trophy.

The One That Survived
Collect 5 hidden Marine trophies on GO Bank or Four Stores.
Unlocks the Marine trophy.
Collect 5 hidden Marine trophies on GO Bank or Four Stores.
Unlocks the Marine trophy.
Interaction counters
Illustration
Name and description

It's Alive! It's Alive!
Wear the Frank mask (Event).
Get electrocuted by tasers 25 times.
Wear the Frank mask (Event).
Get electrocuted by tasers 25 times.

Witch Doctor
Wear the Witch mask (Event).
Revive crew members 50 times.
Wear the Witch mask (Event).
Revive crew members 50 times.

I Did Not Have Sexual Relations With That Bulldozer
Wear the 42nd mask (DLC).
Trade hostages 7 times.
Tip: Restart day 2 of the loud Tutorial heist seven times.
Wear the 42nd mask (DLC).
Trade hostages 7 times.
Tip: Restart day 2 of the loud Tutorial heist seven times.

Affordable Healthcare
Wear the 44th mask (DLC).
Place a doctor bag 61 times.
Wear the 44th mask (DLC).
Place a doctor bag 61 times.

From Russia With Love
Wear the Mark mask (Community).
Complete any of Vlad's heists on OVERKILL+ 25 times.
Tip: Replay through Ukrainian Job, which easily takes less than a minute.
Wear the Mark mask (Community).
Complete any of Vlad's heists on OVERKILL+ 25 times.
Tip: Replay through Ukrainian Job, which easily takes less than a minute.

Share the Love
Buy the grenade case asset 100 times.
Buy the grenade case asset 100 times.

Recycling
Pick up 100 arrows (after shooting them).
Pick up 100 arrows (after shooting them).

Denied
Destroy 30 flashbangs before they detonate.
Destroy 30 flashbangs before they detonate.

Golden Grin Anonymous
Spend $1,000,000,000 in the Offshore Payday.
This can be accessed from Crime net.
It's recommended to wait until Infamy level 5.
Spend $1,000,000,000 in the Offshore Payday.
This can be accessed from Crime net.
It's recommended to wait until Infamy level 5.

Lieutenant Colonel
Convert 300 enemies.
Convert 300 enemies.

Plague Doctor
Wear the Scrubs outfit.
Get 200 kills with poison on OVERKILL+.
Can be done in whatever way possible.
Wear the Scrubs outfit.
Get 200 kills with poison on OVERKILL+.
Can be done in whatever way possible.
Guns: Universal kill counters
These kills can be achieved over different weapons.


Illustration
Name and description
The Collector
Get 100 kills with AK or CAR rifles.
Get 100 kills with AK or CAR rifles.
Pump-Action
Wear the Pumpkin mask (Event).
Get 666 kills with shotguns.
Wear the Pumpkin mask (Event).
Get 666 kills with shotguns.
Bang for the Buck
Kill 10 Bulldozers with any shotgun with 000 Buckshot ammo.
Kill 10 Bulldozers with any shotgun with 000 Buckshot ammo.
Knock, Knock
Kill 50 Shields with any shotgun with Slug ammo.
Kill 50 Shields with any shotgun with Slug ammo.
Clay Pigeon Shooting
Kill 10 Snipers with any shotgun with Flechette ammo.
Kill 10 Snipers with any shotgun with Flechette ammo.
Seer of Death
Get 500 headshot kills with sniper rifles.
Get 500 headshot kills with sniper rifles.
Didn't See That Coming Did You?
Get 10 headshot kills with sniper rifles while zip-lining.
Tip: Attempt this on Rats day 1 with the vantage point unlocked.
Get 10 headshot kills with sniper rifles while zip-lining.
Tip: Attempt this on Rats day 1 with the vantage point unlocked.
Drive By
Get 10 kills while in a passenger seat of a vehicle.
Press the crouch button to shoot from a car if not driving.
Get 10 kills while in a passenger seat of a vehicle.
Press the crouch button to shoot from a car if not driving.
Nothing Personal
Kill 30 Snipers with any sniper rifle on OVERKILL+.
Kill 30 Snipers with any sniper rifle on OVERKILL+.
Have Nice Day!
Get 300 kills with the AK17 rifle, Grom sniper rifle or Tatonka submachine gun.
The Rezkoye melee weapon mentioned in the achievement doesn't seem to work.
Get 300 kills with the AK17 rifle, Grom sniper rifle or Tatonka submachine gun.
The Rezkoye melee weapon mentioned in the achievement doesn't seem to work.
Guns: Weapon-specific kill counters
Illustration
Name and description

The Pumpkin King Made Me Do It!
Get 666 kills with the Interceptor 45 pistol.
Get 666 kills with the Interceptor 45 pistol.

License to Kill
Get 378 kills with the Gruber Kurz handgun.
Get 378 kills with the Gruber Kurz handgun.

Above the Law
Get 100 kills with the Signature .40 Pistol.
Get 100 kills with the Signature .40 Pistol.

Hard-Corps
Get 100 kills with the SpecOps submachine gun.
Get 100 kills with the SpecOps submachine gun.

Inception
Get 100 kills with the Eagly Heavy rifle.
Get 100 kills with the Eagly Heavy rifle.

Pump-Action
Wear the Arnold Mask (DLC).
Get 100 kills with the UAR rifle.
Wear the Arnold Mask (DLC).
Get 100 kills with the UAR rifle.

Wanted
Wear the Dolph Mask (DLC).
Get 100 kills with the AK5 rifle.
Wear the Dolph Mask (DLC).
Get 100 kills with the AK5 rifle.

Public Enemies
Wear the Chuck Mask (DLC).
Get 100 kills with the Crosskill pistol.
Wear the Chuck Mask (DLC).
Get 100 kills with the Crosskill pistol.

3000 Miles to the Safe House
Wear the Jean-Claude Mask (DLC).
Get 100 kills with the Kobus 90 submachine gun.
Wear the Jean-Claude Mask (DLC).
Get 100 kills with the Kobus 90 submachine gun.

I'm Not a Crook!
Wear the 37th Mask (DLC).
Kill 69 Snipers with the Commando 553 rifle.
Wear the 37th Mask (DLC).
Kill 69 Snipers with the Commando 553 rifle.

Fool Me Once, Shame on -Shame on You. Fool Me - You Can't Get Fooled Again
Wear the 43rd Mask (DLC).
Kill 95 Shields with the Swedish K submachine gun.
Wear the 43rd Mask (DLC).
Kill 95 Shields with the Swedish K submachine gun.

Far, Far Away
Get 25 kills with the Thanatos .50 Cal sniper rifle from over 40 meters away.
Tip: Use a sight such as the Theia Magnified Scope to see how far away you are aiming.
Get 25 kills with the Thanatos .50 Cal sniper rifle from over 40 meters away.
Tip: Use a sight such as the Theia Magnified Scope to see how far away you are aiming.

Dodge This
Kill 10 Cloakers with headshots with the Thanatos .50 Cal sniper rifle.
Kill 10 Cloakers with headshots with the Thanatos .50 Cal sniper rifle.

Surprise MF
Kill 10 Bulldozers with the Thanatos .50 Cal sniper rifle.
Kill 10 Bulldozers with the Thanatos .50 Cal sniper rifle.

Return to Sender
Kill 25 Snipers with the Rattlesnake sniper rifle.
Kill 25 Snipers with the Rattlesnake sniper rifle.

Double Kill
Get 25 double kills with the Rattlesnake sniper rifle without the Graze skill.
Get 25 double kills with the Rattlesnake sniper rifle without the Graze skill.

Public Enemy No.1
Get 250 kills with the Rattlesnake sniper rifle.
Get 250 kills with the Rattlesnake sniper rifle.

You Can't Hide
Get 25 kills with the R93 sniper rifle through a wall.
Get 25 kills with the R93 sniper rifle through a wall.

Precision Aiming
Kill 25 Bulldozers with the Gewehr 3 Rifle.
Kill 25 Bulldozers with the Gewehr 3 Rifle.

Death From Below
Get 25 kills on rappelling enemies with the Nagant sniper rifle.
Tip: Try this on Hoxton's Breakout day 2.
Get 25 kills on rappelling enemies with the Nagant sniper rifle.
Tip: Try this on Hoxton's Breakout day 2.

Tour de Clarion
Get 200 kills with the Clarion rifle.
Get 200 kills with the Clarion rifle.

Maximum Penetration
Kill 10 Shields through their shield with the R93 sniper rifle.
Kill 10 Shields through their shield with the R93 sniper rifle.

Artillery Barrage
Get 25 kills with the GL40 Grenade Launcher from over 40 meters away.
Get 25 kills with the GL40 Grenade Launcher from over 40 meters away.

Rabbit Hunting
Kill 10 Cloakers using the Gecko 7.62 rifle.
Kill 10 Cloakers using the Gecko 7.62 rifle.

Let Them Fly
Kill 50 Snipers with the Arbiter Grenade Launcher with the standard ammo type.
This weapon is unlocked via the Gage Spec Ops side jobs.
Kill 50 Snipers with the Arbiter Grenade Launcher with the standard ammo type.
This weapon is unlocked via the Gage Spec Ops side jobs.

The Man With The Golden Gun
Kill 6 Skulldozers with the Golden AK.762 rifle.
Tip: In Meltdown on MAYHEM+, there will always be a Skulldozer in a Murkywater container.
Kill 6 Skulldozers with the Golden AK.762 rifle.
Tip: In Meltdown on MAYHEM+, there will always be a Skulldozer in a Murkywater container.

Field Test
Get 500 kills with the Hailstorm Mk5 set in Volley Shot mode.
Get 500 kills with the Hailstorm Mk5 set in Volley Shot mode.

Heister With A Shotgun
Get 1000 kills with the VD-12.
Get 1000 kills with the VD-12.
Guns: Weapon-specific kill counters (cont.)
Hero's Companion
Get 200 kills with the Galant rifle, after getting kills with several other weapons.
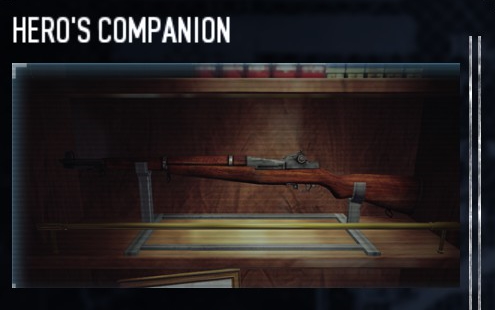
You'll first need to achieve three related trophies;
Friends in Close Quarters, A War Well-Fought, and Speed Talker.
Each trophy unlocks the weapon required for the next trophy, via Aldstone's Heritage side jobs.
These are the requirements in order:
Get 200 kills with the Galant rifle, after getting kills with several other weapons.
You'll first need to achieve three related trophies;
Friends in Close Quarters, A War Well-Fought, and Speed Talker.
Each trophy unlocks the weapon required for the next trophy, via Aldstone's Heritage side jobs.
These are the requirements in order:
- Get 10 kills with the Push Daggers melee weapon.
- Get 50 kills with the Parabellum pistol.
- Get 100 kills with the MP40 submachine gun.
- Get 200 kills with the Galant rifle.
Guns: Universal challenges
Illustration
Name and description

Hedgehog
Have 10 arrows stuck in a Bulldozer.
Tip: Just shoot its corpse.
Have 10 arrows stuck in a Bulldozer.
Tip: Just shoot its corpse.

They Drew First Blood, Not Me
Get 220 kills with a light machine gun in a single day.
Get 220 kills with a light machine gun in a single day.

Killin's As Easy As Breathing
Get 10 kills with a light machine gun without releasing the trigger.
Get 10 kills with a light machine gun without releasing the trigger.

Human Sentry Gun
Get 20 kills in a row with a light machine gun using a bipod, without undeploying the bipod or reloading.
Get 20 kills in a row with a light machine gun using a bipod, without undeploying the bipod or reloading.

Seven Eleven
Get 7 headshot kills with any shotgun within 11 seconds.
Get 7 headshot kills with any shotgun within 11 seconds.

Shotguns 101
Complete any heist with at least 50 shotgun kills and an accuracy of 101%.
Complete any heist with at least 50 shotgun kills and an accuracy of 101%.

Shock and Awe
Hit four enemies at once with an HE round from a shotgun.
Hit four enemies at once with an HE round from a shotgun.

Ducking Awesome
Get 3 headshot kills with a shot from any shotgun modified with Donald's Horizontal Leveller barrel ext.
Get 3 headshot kills with a shot from any shotgun modified with Donald's Horizontal Leveller barrel ext.

In Town You're the Law, Out Here It's Me
Kill a jumping Cloaker using any shotgun.
Kill a jumping Cloaker using any shotgun.

The Reckoning
Get 200 kills with any weapon modified with the Reconnaissance Sight on VERY HARD+ and complete the heist.
Get 200 kills with any weapon modified with the Reconnaissance Sight on VERY HARD+ and complete the heist.

Celsius or Fahrenheit?
Kill 10 enemies in a row, switching between the normal sight and 45 Degree Red Dot Sight after each kill (default hotkey to switch sights is Q). You are allowed to miss shots.
Kill 10 enemies in a row, switching between the normal sight and 45 Degree Red Dot Sight after each kill (default hotkey to switch sights is Q). You are allowed to miss shots.

Triple Kill
Get a triple kill with any sniper rifle without the Graze skill.
Get a triple kill with any sniper rifle without the Graze skill.

Hipster
Complete a day without aiming down-sights.
Complete a day without aiming down-sights.
Dance Party
Get 25 kills within 25 seconds using submachine guns.
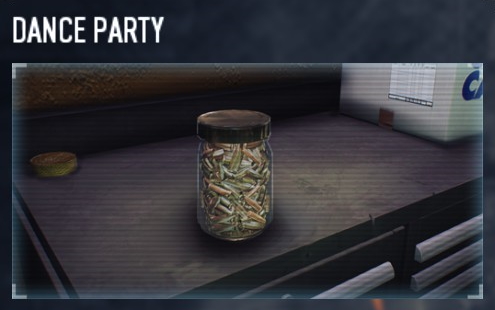
It is recommended to ace the Surefire and Body Expertise skills from the Technician Opressor skill tree.
Guns: Weapon-specific challenges
Illustration
Name and description

Compact Confrontation
Kill a Sniper with the Compact 40mm Grenade Launcher from over 40 meters away.
Kill a Sniper with the Compact 40mm Grenade Launcher from over 40 meters away.

Not Invited
Get 10 kills with the Piglet Grenade Launcher without incendiary rounds, within 10 seconds.
Get 10 kills with the Piglet Grenade Launcher without incendiary rounds, within 10 seconds.

Not Today
Kill a jumping Cloaker with the GL40 Grenade Launcher.
Kill a jumping Cloaker with the GL40 Grenade Launcher.

Big Bada Boom
Kill four enemies with one shot from the GL40 Grenade Launcher.
Kill four enemies with one shot from the GL40 Grenade Launcher.

Names Are for Friends, So I Don't Need One
Get eleven kills with the Lebensaur .308 sniper rifle without reloading.
Get eleven kills with the Lebensaur .308 sniper rifle without reloading.

No Scope
Get 10 kills in a row with the Platypus 70 sniper rifle without missing or aiming down-sights.
Tip: You should equip a laser.
Get 10 kills in a row with the Platypus 70 sniper rifle without missing or aiming down-sights.
Tip: You should equip a laser.

Bullet Hell
Get 10 kills with the Buzzsaw 42 light machine gun within 10 seconds.
Get 10 kills with the Buzzsaw 42 light machine gun within 10 seconds.

Oh, That's How You Do It
Fire for 25 seconds consecutively with the Vulcan Minigun.
* Equip the aced Bulletstorm and basic Fully Loaded skills from the Enforcer Ammo Specialist tree.
* Fully deplete your secondary, and empty your Vulcan Minigun until the point you only have a fully loaded magazine of 750 bullets remaining.
* Interact with your ammo bag and then immediately start shooting. Bulletstorm will now last long enough for this to work.
Fire for 25 seconds consecutively with the Vulcan Minigun.
* Equip the aced Bulletstorm and basic Fully Loaded skills from the Enforcer Ammo Specialist tree.
* Fully deplete your secondary, and empty your Vulcan Minigun until the point you only have a fully loaded magazine of 750 bullets remaining.
* Interact with your ammo bag and then immediately start shooting. Bulletstorm will now last long enough for this to work.

Fastest Gun in the West
Get 6 kills with the Peacemaker .45 Revolver within 6 seconds.
Get 6 kills with the Peacemaker .45 Revolver within 6 seconds.

Swiss Cheese
Get 100 kills with the Kross Vertex submachine gun in a single day.
Get 100 kills with the Kross Vertex submachine gun in a single day.

Spray Control
Get 32 kills with the Tatonka submachine gun without reloading.
Get 32 kills with the Tatonka submachine gun without reloading.
Russian Arsenal
Complete any heist on OVERKILL+ using the AK17 rifle or Grom sniper rifle as primary, the Tatonka submachine gun as secondary, and the Rezkoye as melee weapon.
Complete any heist on OVERKILL+ using the AK17 rifle or Grom sniper rifle as primary, the Tatonka submachine gun as secondary, and the Rezkoye as melee weapon.

Don't Push It
Kill a charging Cloaker using the Deagle pistol.
Kill a charging Cloaker using the Deagle pistol.

Last Action Villain
Get a headshot kill while zip-lining using the R93 sniper rifle.
Get a headshot kill while zip-lining using the R93 sniper rifle.

CAR vs. Car
Destroy a SWAT van turret using only the CAR-4 rifle to damage it.
Destroy a SWAT van turret using only the CAR-4 rifle to damage it.
Melee: Kill counters
Melee builds are very inefficient in this game, and will definitely not work at higher difficulties. However, on Mayhem difficulty or lower, they can be quite fun to use.
I'd recommend at least the following when you're making a melee build;


Big Daddy
Get 5 Bulldozer kills with the Overkill Boxing Gloves
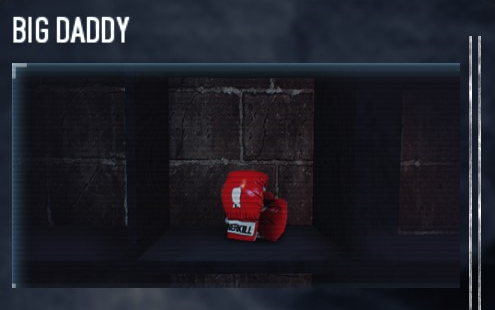
I'd recommend at least the following when you're making a melee build;
- Ace every skill in the Fugitive Brawler skill tree, except for Counterstrike (it isn't very good).
- Ace the Iron Man skill in the Enforcerer Tank skill tree - because you'll need armour.
- Use the Sociopath perk deck if you have it. Otherwise, use the Infiltrator perk deck.
Illustration
Name and description
Hammertime
Get 25 thug kills with the Ding Dong Breaching Tool.
Get 25 thug kills with the Ding Dong Breaching Tool.
I Ain't Got Time To Bleed
Get 15 kills on FBI SWAT with any knife while at 25% or less health at OVERKILL+.
These are the unarmored green or armored brown enemies with "FBI" on them, such as those found on the second day of Rats in loud.
Abilities that give you health for melee kills might not work for this achievement.
Get 15 kills on FBI SWAT with any knife while at 25% or less health at OVERKILL+.
These are the unarmored green or armored brown enemies with "FBI" on them, such as those found on the second day of Rats in loud.
Abilities that give you health for melee kills might not work for this achievement.
For All You Legends
Get 100 kills with the Commically Large Spoon.
Get 100 kills with the Commically Large Spoon.
Buzzbomb
Wear the Cable Guy outfit.
Get 200 kills with the Buzzer or Electrical Brass Knuckles on OVERKILL+.
Wear the Cable Guy outfit.
Get 200 kills with the Buzzer or Electrical Brass Knuckles on OVERKILL+.
Big Daddy
Get 5 Bulldozer kills with the Overkill Boxing Gloves
Melee: Challenges
Illustration
Name and description

Cloak and Dagger
Kill a Cloaker with any knife.
Kill a Cloaker with any knife.

Are You Kidding Me?
Kill a Bulldozer with any knife.
Kill a Bulldozer with any knife.

Police Brutality
Kill a Shield with the Telescopic Baton.
Kill a Shield with the Telescopic Baton.

The Safe Words are Police Brutality and Irony
Kill a Cloaker with the Telescopic Baton.
Kill a Cloaker with the Telescopic Baton.

Wululululu--bzzzt!!!
Kill a charging Cloaker with either the Buzzer or Electrical Brass Knuckles.
Kill a charging Cloaker with either the Buzzer or Electrical Brass Knuckles.

A Tazed of Your Own Medicine
Kill a Taser with either the Buzzer or Electrical Brass Knuckles.
Kill a Taser with either the Buzzer or Electrical Brass Knuckles.

Snipe This!
Kill a Sniper with a melee weapon.
Tip: Attempt this on Hoxton's Breakout day 2.
Kill a Sniper with a melee weapon.
Tip: Attempt this on Hoxton's Breakout day 2.

Swing Dancing
Get 50 melee kills in one day.
You may not use any other weapons that day.
Get 50 melee kills in one day.
You may not use any other weapons that day.

Stick a Fork in Me, I'm Done
Kill a burning enemy with the Motherforker.
Kill a burning enemy with the Motherforker.

Black Knight
Kill a black Bulldozer with the Great Sword.
Kill a black Bulldozer with the Great Sword.

Their Armor Is Thick and Their Shields Broad
Get 10 Shield kills in a single day with either the Buckler Shield, Bearded Axe, Morning Star or Great Sword.
Get 10 Shield kills in a single day with either the Buckler Shield, Bearded Axe, Morning Star or Great Sword.

Draganborn
Upgrade Dragan's Gym located in the basement of the safe house to the next level. Then deal over 500 melee damage to his punching bag.
Upgrade Dragan's Gym located in the basement of the safe house to the next level. Then deal over 500 melee damage to his punching bag.
Throwables
Illustration
Name and description

Skewer
Kill a Cloaker with the Javelin.
Kill a Cloaker with the Javelin.

Fugu Fighter
Poison 3 enemies simultaneously.
Can be done with any poison, though Shurikens are recommended.
Poison 3 enemies simultaneously.
Can be done with any poison, though Shurikens are recommended.

Disco Inferno
Burn 10 enemies simultaneously.
Molotovs are recommended.
Burn 10 enemies simultaneously.
Molotovs are recommended.

Overgrill
Burn a Bulldozer for 10 seconds.
Molotovs are again recommended.
Burn a Bulldozer for 10 seconds.
Molotovs are again recommended.

The Nobel Prize
Get a triple kill with a dynamite.
Get a triple kill with a dynamite.

Fire in the Hole!
Throw grenades 100 times.
Throw grenades 100 times.

Gift Giver
Get 75 kills with non-explosive throwable weapons.
Get 75 kills with non-explosive throwable weapons.

Snake Charmer
Get 100 kills with the Viper Grenade on OVERKILL+
Get 100 kills with the Viper Grenade on OVERKILL+
True Ace
Get 100 kills with the Ace of Spades on OVERKILL+.
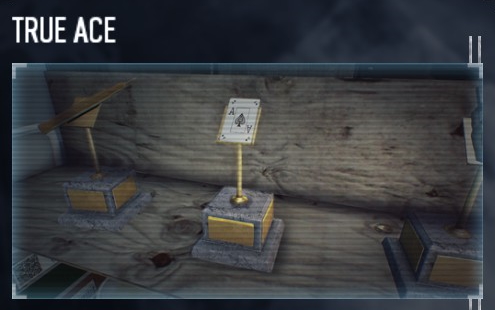
Stealth
Illustration
Name and description

No One Can Hear You Scream
Wear the Venomorph mask (Event).
Get 50 melee kills in stealth.
Wear the Venomorph mask (Event).
Get 50 melee kills in stealth.

Special Operations Execution
Get 25 melee kills in stealth with the Trench Knife.
Get 25 melee kills in stealth with the Trench Knife.

No Heist for Old Men
Complete a day in stealth with the Locomotive 12G shotgun modified with the Silent Killer Suppressor.
Complete a day in stealth with the Locomotive 12G shotgun modified with the Silent Killer Suppressor.

Nothing Out of the Ordinary
Answer four pagers by yourself all within 90 seconds.
Answer four pagers by yourself all within 90 seconds.

Shuriken Shenanigens
Complete a day in stealth with at least 4 kills.
You may only use Shurikens.
Complete a day in stealth with at least 4 kills.
You may only use Shurikens.

Sneaky Beaky Like
Complete any heist in stealth using the AK17 rifle or Grom sniper rifle, in addition to the Tatonka submachine gun and Rezkoye melee weapon.
Complete any heist in stealth using the AK17 rifle or Grom sniper rifle, in addition to the Tatonka submachine gun and Rezkoye melee weapon.
Multiplayer-only
Illustration
Name and description
How to achieve

120 Proof
Requires 4 players.
Have at least 120 kills with your crew, and a crew accuracy of 120%.
Requires 4 players.
Have at least 120 kills with your crew, and a crew accuracy of 120%.
Can be easily done with explosives or the Graze skill.

Bring Your Cop To Work Day
Requires 2-4 players.
Have four converted enemies on your side.
Requires 2-4 players.
Have four converted enemies on your side.
Every player needs the basic Joker skill from the Mastermind Controller skill tree, and optionally the aced Confident skill from the same tree.

Reindeer Games
Requires 4 players.
Complete any heist while everyone wears a different Santa mask; Happy Santa, Furious Santa, Surprised Santa or Tipsy Santa.
Requires 4 players.
Complete any heist while everyone wears a different Santa mask; Happy Santa, Furious Santa, Surprised Santa or Tipsy Santa.
These masks are unlocked via random drops.

Funding Father
Requires 4 players.
Complete any heist while everyone wears a different The Big Bank mask; The 1st, The 16th, The 18th or The First American.
Requires 4 players.
Complete any heist while everyone wears a different The Big Bank mask; The 1st, The 16th, The 18th or The First American.
Masks are unlocked via the achievements;
It Takes a Pig to Kill a Pig, Sweet Sixteen, Backing Bobblehead Bob, It Takes Two To Tango
It Takes a Pig to Kill a Pig, Sweet Sixteen, Backing Bobblehead Bob, It Takes Two To Tango

Ghost Riders
Requires 4 players.
Complete any heist while everyone wears a different difficulty mask.
Requires 4 players.
Complete any heist while everyone wears a different difficulty mask.
You get these masks by completing every single contract on or above a certain difficulty.

Heisters of the Round Table
Requires 4 players.
Complete any heist while everyone wears a Ballistic Vest or heavier. They must also wield a primary weapon, melee weapon, and mask from the Gage Chivalry Pack.
Primaries: Light Crossbow, English Longbow, or Heavy Crossbow
Melee: Buckler Shield, Bearded Axe, Morning Star, or Great Sword
Requires 4 players.
Complete any heist while everyone wears a Ballistic Vest or heavier. They must also wield a primary weapon, melee weapon, and mask from the Gage Chivalry Pack.
Primaries: Light Crossbow, English Longbow, or Heavy Crossbow
Melee: Buckler Shield, Bearded Axe, Morning Star, or Great Sword
Players don't have to wear different masks for this.
Masks are unlocked via the achievements; Skewer, Black Knight, Their Armor Is Thick And Their Shields Broad
Masks are unlocked via the achievements; Skewer, Black Knight, Their Armor Is Thick And Their Shields Broad

Megalo-Mania
Requires 4 players.
Have everyone use the Maniac perk deck. On average between all players, there must be at least 65% or more of the white Maniac bar filled at any point.
Requires 4 players.
Have everyone use the Maniac perk deck. On average between all players, there must be at least 65% or more of the white Maniac bar filled at any point.
Everyone must simply do a lot of damage at the same time.

Megalo-Mania
Requires 3-4 players.
Plant at least 40 trip mines in a single day.
Requires 3-4 players.
Plant at least 40 trip mines in a single day.
Every player needs to ace More Firepower in the Technician Breacher skill tree.
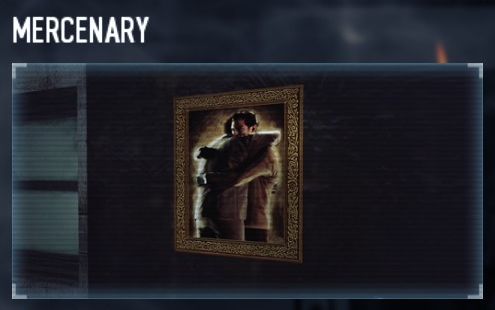
Mercenary
Requires 4 players.
Complete a DEATH WISH+ heist with the Friendly Fire mutator, without hurting another player. Stealth trivialises this challenge.
Miscellaneous
Illustration
Name and description
How to achieve

Virus
Play with a player who has this achievement.
Play with a player who has this achievement.
Join any online lobby. Everyone has it.

Tip the Scales
Interact with the Lady Justice statue.
Interact with the Lady Justice statue.
Fully upgrade John Wick's Shooting Range in the basement of the safe house, and find her there.

I Never Asked for This
Never jump in a heist.
Never jump in a heist.
Just don't jump.

Jump! Jump! Jump!
Jump once every 4 seconds in a heist.
Jump once every 4 seconds in a heist.
Can be done on a short heist with few interactions like Mallcrasher.
Start equipping your mask in the loading screen.
Start equipping your mask in the loading screen.

Bunnyhopping
Jump 100 times within 30 seconds.
Jump 100 times within 30 seconds.
Stand under a doorpost or low ceiling and spam jump.

I Got It, I Got It
Catch a big mid-air.
Catch a big mid-air.
Have a bot with the Quick ability in your crew and throw a bag upwards.
You can equip abilities on bots via the crew management screen.
You can equip abilities on bots via the crew management screen.

One Man Army
Complete any OVERKILL+ job in loud, without other players or bots.
Complete any OVERKILL+ job in loud, without other players or bots.
Converted cops and sniper assets are allowed.
You can stealth a heist until the end, and go loud right before escaping.
You can stealth a heist until the end, and go loud right before escaping.

A Vast Amount of Unlawful Transgressions
Reach rank 250 in Crime Spree.
Reach rank 250 in Crime Spree.
Start this via Crime net.
Your rank is personal and does not affect the rank of others.
Your rank is personal and does not affect the rank of others.

Becoming a King Among Thieves
Reach Infamy rank 100.
Reach Infamy rank 100.
Never try this at all, for your own sake.

One More Down, No More To Go
Complete all heists on DEATH SENTENCE with the One Down mechanic.
Unlocks the Ultimate Heister trophy.
Complete all heists on DEATH SENTENCE with the One Down mechanic.
Unlocks the Ultimate Heister trophy.
You can track your progress via the in-game achievements.
Half of the heists can be stealthed, the other half is a lot more difficult.
Half of the heists can be stealthed, the other half is a lot more difficult.

The End
Find the Payday 2 Secret.
The most comprehensive achievement, but not the most difficult one, as long as you have a reliable team.
Find the Payday 2 Secret.
The most comprehensive achievement, but not the most difficult one, as long as you have a reliable team.
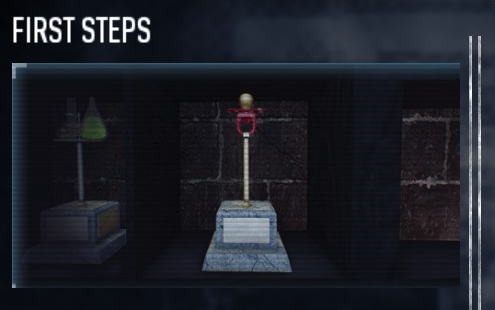
First Steps
Complete the tutorial heists.
Evolution
Complete a heist with an active mutator.
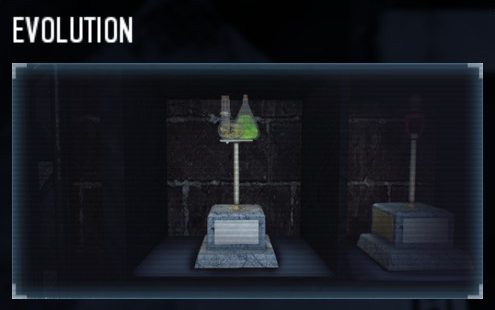
Mutators can be enabled from Crime net and will be activated whenever you host a heist. However, they will prevent achievements and award less cash and experience.
Historiographer
Collect all masks from the Aldstone's Heritage side jobs.
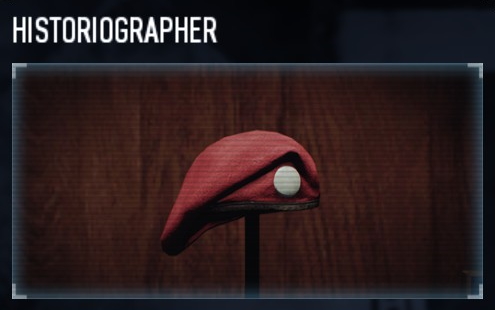
You'll need to do the following things:
- Find the brown briefcase on day 1 of the Firestarter job.
- Get 200 kills in a single day on OVERKILL+ while within the World War 2 exhibition on The Diamond heist.
- Finish day 3 of Framing Frame in stealth after having stolen the wine.
- Discover five war documents that are randomly found in safety deposit boxes on any map, most commonly on the Transport heists.
Holdouts
This is an additional game mode which can be played via Crime net. Your objective is to survive all nine waves while defending a hostage.


- After each wave, the enemies will become stronger and a random modifier might be applied.
- You'll fail if the hostage is freed. If someone goes into custody, the holdout ends after the current wave, though that wave will still count for the achievements.
- You can end the holdout earlier by trading the hostage.
Illustration
Name and description
Wait for a Bigger Boat
Beat wave 9 on the Boat Load holdout.
This is the second day of the Watchdogs heist.
Beat wave 9 on the Boat Load holdout.
This is the second day of the Watchdogs heist.
A Different Level of Scoring
Beat wave 9 on the First World Bank holdout.
Beat wave 9 on the First World Bank holdout.
Cleaning out the House
Beat wave 9 on the Golden Grin Casino holdout.
Beat wave 9 on the Golden Grin Casino holdout.
Money on the Asphalt
Beat wave 9 on the Heat Street holdout.
Beat wave 9 on the Heat Street holdout.
Halfoffius, God of the Mall
Beat wave 9 on the Mallcrasher holdout.
Beat wave 9 on the Mallcrasher holdout.
Federales on the Run
Beat wave 9 on the San Martin Bank holdout.
Beat wave 9 on the San Martin Bank holdout.
Finely Tuned Heister
Beat wave 9 on the Alesso Heist holdout.
Beat wave 9 on the Alesso Heist holdout.
The Bank Manager Must Be Worth Something
Beat wave 9 on the Big Bank holdout.
Beat wave 9 on the Big Bank holdout.
Worthy of Permanent Display
Beat wave 9 on the Diamond holdout.
Beat wave 9 on the Diamond holdout.
Escapes
Escapes have a chance to occur when completing days of certain heists in loud, though there are ways to increase the odds of them appearing. Note that there will never be an escape if an Expert Driver is bought in assets.
Guaranteed way to get the Cafe, Park, or Street escape;
Complete the Ukrainian Job in loud after killing most civilians.
Guaranteed way to get the Garage or Overpass escape;
Complete Rats day 1 after exploding the lab.
However, you can only get six bags that way. For the achievement They See Me Baggin', They Hatin', instead complete Transport: Harbor after killing all civilians there. This has a 35-40% chance to trigger either escape (and hopefully the right one).


Guaranteed way to get the Cafe, Park, or Street escape;
Complete the Ukrainian Job in loud after killing most civilians.
Guaranteed way to get the Garage or Overpass escape;
Complete Rats day 1 after exploding the lab.
However, you can only get six bags that way. For the achievement They See Me Baggin', They Hatin', instead complete Transport: Harbor after killing all civilians there. This has a 35-40% chance to trigger either escape (and hopefully the right one).
Illustration
Name and description
Cappuccino to Go, Please
Cafe escape.
Secure all loot and escape within 30 seconds of the escape van arriving.
Cafe escape.
Secure all loot and escape within 30 seconds of the escape van arriving.
King of the Hill
Park escape.
Have no cops enter the park before the escape van arrives.
Park escape.
Have no cops enter the park before the escape van arrives.
Bullet Dodger
Street escape.
Complete the escape without having any enemy snipers die.
Street escape.
Complete the escape without having any enemy snipers die.
They See Me Baggin', They Hatin'
Garage escape.
Get away with 8 bags.
Garage escape.
Get away with 8 bags.
You Shall Not Pass
Overpass escape.
Have no cops set foot on the bridge before the escape van arrives.
Overpass escape.
Have no cops set foot on the bridge before the escape van arrives.
Aftershock
Loud only.
On higher difficulties, you'll have to haul the safes by hand, because driving the slow van makes you a sitting duck. You may want to restart if the two trucks spawned in unfavourable positions.

On higher difficulties, you'll have to haul the safes by hand, because driving the slow van makes you a sitting duck. You may want to restart if the two trucks spawned in unfavourable positions.
Illustration
Name and description
How to achieve
400 Bucks
Get the sick knife from the homeless man.
Unlocks the Jason trophy.
Get the sick knife from the homeless man.
Unlocks the Jason trophy.
Cable tie or kill the homeless man with the blue hoodie and take his knife.
Alaskan Deal
Loud only.
This is the perfect heist to practice loud on higher difficulties. It's very short, there's plenty of cover, and the part where you have to release the ropes is a great way to test your durability.


This is the perfect heist to practice loud on higher difficulties. It's very short, there's plenty of cover, and the part where you have to release the ropes is a great way to test your durability.
Illustration
Name and description
How to achieve
The Fuel Must Flow
Never let the police cut off the flow of fuel on OVERKILL+.
Never let the police cut off the flow of fuel on OVERKILL+.
You'll need to defend both the tank and the generator.
There Was Room For Two
Shoot the person lying on the raft.
Shoot the person lying on the raft.
You can see the raft when you stand on the ship deck and look over the water.
Headless Snowman
Shoot the four snowmen.
Shoot the four snowmen.
Global Warming
Complete the heist with all players using only Flamethrowers.
Complete the heist with all players using only Flamethrowers.
-
The Alesso Heist
Stealth possible.
Always save two pagers for the guards in the basement if you plan to do this on stealth. Cameras will spot you driving the forklift very easily, so you'll have to loop them or kill the camera guard.


Always save two pagers for the guards in the basement if you plan to do this on stealth. Cameras will spot you driving the forklift very easily, so you'll have to loop them or kill the camera guard.
Illustration
Name and description
How to achieve
Even Steven
Regain your parking fee by placing a C4 on the parking meter in the basement.
Regain your parking fee by placing a C4 on the parking meter in the basement.
-
M.F. Stev
Complete the pyro sequence without failing.
Complete the pyro sequence without failing.
Simply play through the heist in loud or stealth.
Once you get to this point, listen and follow the instructions correctly.
Once you get to this point, listen and follow the instructions correctly.
♥♥♥♥ It, We're Walking
Complete the heist in loud on OVERKILL+ without using the zip-lines or chutes.
Complete the heist in loud on OVERKILL+ without using the zip-lines or chutes.
You can stealth this until the end.
Sound of Silence
Complete the heist without your crew killing anyone.
Complete the heist without your crew killing anyone.
Instead of doing this stealthily, it's a lot more fun to try this on loud at Normal or Hard difficulty.
Art Gallery
Stealth possible.
This is a copy of the first day of Framing Frame, and these achievements may also be earned there.
On its own, this is the best heist to learn how stealth works. Always save one pager for the camera room. Avoid killing the guard behind the desk in the lobby, because by the time his pager is answered, another guard will likely have seen him.


This is a copy of the first day of Framing Frame, and these achievements may also be earned there.
On its own, this is the best heist to learn how stealth works. Always save one pager for the camera room. Avoid killing the guard behind the desk in the lobby, because by the time his pager is answered, another guard will likely have seen him.
Illustration
Name and description
How to achieve
The Wolf Lures You To Your Grave
Stealth kill two guards in the bathroom.
Stealth kill two guards in the bathroom.
You can lure them with the hand dryers.
Van Gogh to Hell
Throw a painting into the toilet.
Be aware, you cannot get it back.
Throw a painting into the toilet.
Be aware, you cannot get it back.
-
Masterpiece
Secure all paintings in stealth without anyone killing guards.
Secure all paintings in stealth without anyone killing guards.
-
The Turtle Always Wins
Complete the heist within 4 minutes with each player wearing the Improved Combined Tactical Vest without an Armor Kit deployable.
Complete the heist within 4 minutes with each player wearing the Improved Combined Tactical Vest without an Armor Kit deployable.
With multiple players, you can use ECM Jammers to run inside and back out again. Simply place them one after another.
Bank Heists
Stealth possible.
Silly enough, there are four variants of this heist that are entirely the same except for the loot found in the vault; Cash, Deposit, Gold, and Random. For each variant, there are also separate achievements for completing it on a certain difficulty.
Furthermore, this is a near-identical copy of the third day of Firestarter. The below achievement Saint Francis may instead be earned there.


Silly enough, there are four variants of this heist that are entirely the same except for the loot found in the vault; Cash, Deposit, Gold, and Random. For each variant, there are also separate achievements for completing it on a certain difficulty.
Furthermore, this is a near-identical copy of the third day of Firestarter. The below achievement Saint Francis may instead be earned there.
Illustration
Name and description
How to achieve
A Good Haul
Complete any Bank Heist with a looted bag value of at least $400.000.
Complete any Bank Heist with a looted bag value of at least $400.000.
Easily done at a high difficulty where money is worth more.
Saint Francis
Complete any Bank Heist after having brought the two punks in the parking lot to the escape van.
Complete any Bank Heist after having brought the two punks in the parking lot to the escape van.
You'll find the two punks near the car containing the drill components. Handcuff them and bring them to the escape van. They are not allowed to escape the map or die.
Beneath the Mountain
Loud only.
The hardest part of this heist comes immediately after entering the building. If it appears, you must deal with the ceiling turret as fast as possible. Everything else is rather straightforward. You cannot use the camera for the vaults if you're being shot at, but there's no penalty to opening the wrong vaults.


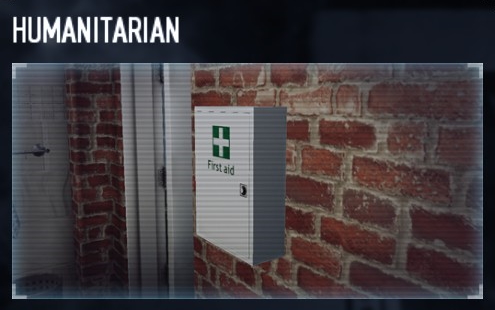
Humanitarian
Complete the heist on MAYHEM+ while you haven't killed any Medics (or Medic Bulldozers). Your crew can still kill them, however.
The hardest part of this heist comes immediately after entering the building. If it appears, you must deal with the ceiling turret as fast as possible. Everything else is rather straightforward. You cannot use the camera for the vaults if you're being shot at, but there's no penalty to opening the wrong vaults.
Illustration
Name and description
How to achieve
Juggernauts
Complete the heist on OVERKILL+ without any player ever going down.
Complete the heist on OVERKILL+ without any player ever going down.
-
Commando Crew
Open the four vaults with loot within 10 minutes on OVERKILL+.
Open the four vaults with loot within 10 minutes on OVERKILL+.
There are six vaults total. Use the camera in the server room to spot the vaults with loot. You don't have to take the loot for this achievement, just open the vault doors after they are unlocked.
Clean House
Secure all the loot on this map.
Secure all the loot on this map.
There are always ten loot bags.
You can find four in the vaults, and six in crates near the escape helicopter.
You can find four in the vaults, and six in crates near the escape helicopter.
Humanitarian
Complete the heist on MAYHEM+ while you haven't killed any Medics (or Medic Bulldozers). Your crew can still kill them, however.
The Big Bank
Stealth possible.
In stealth, always use the Elevator Trick escape plan (unless going for the Entrapment achievement). Try not to kill any civilians before answering the phone call, as this ensures that the caller won't send guards to investigate.
The Bus Stop escape plan is recommended for loud. Enemies will not spawn in the garage.


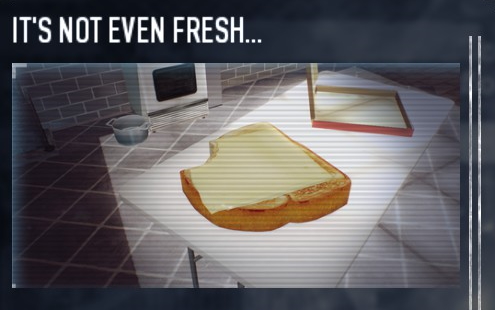
It's Not Even Fresh
In the manager's office where the telephone is located, drill the safe behind the painting on OVERKILL+ and find this sandwich.
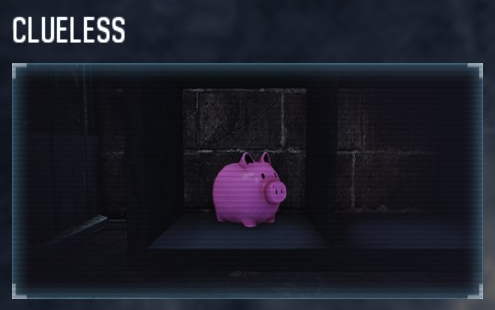
Clueless
Complete the heist on OVERKILL+ without any player using skills.
In stealth, always use the Elevator Trick escape plan (unless going for the Entrapment achievement). Try not to kill any civilians before answering the phone call, as this ensures that the caller won't send guards to investigate.
The Bus Stop escape plan is recommended for loud. Enemies will not spawn in the garage.
Illustration
Name and description
How to achieve
You Owe Me One
Spend all ten favours in preplanning and start the heist.
Spend all ten favours in preplanning and start the heist.
-
It Takes a Pig to Kill a Pig
Crush a law enforcer with the massive pig.
Crush a law enforcer with the massive pig.
Recommended for at least two players.
Have one player lure an enemy under the pig while another one drops it.
Have one player lure an enemy under the pig while another one drops it.
It Takes Two to Tango
Hack the correct computer on the first try.
Hack the correct computer on the first try.
Recommended for at least two players, as this is easily done if another player stays in casing mode.
Use the computer in the manager's office to trigger a sound on the correct computer.
Use the computer in the manager's office to trigger a sound on the correct computer.
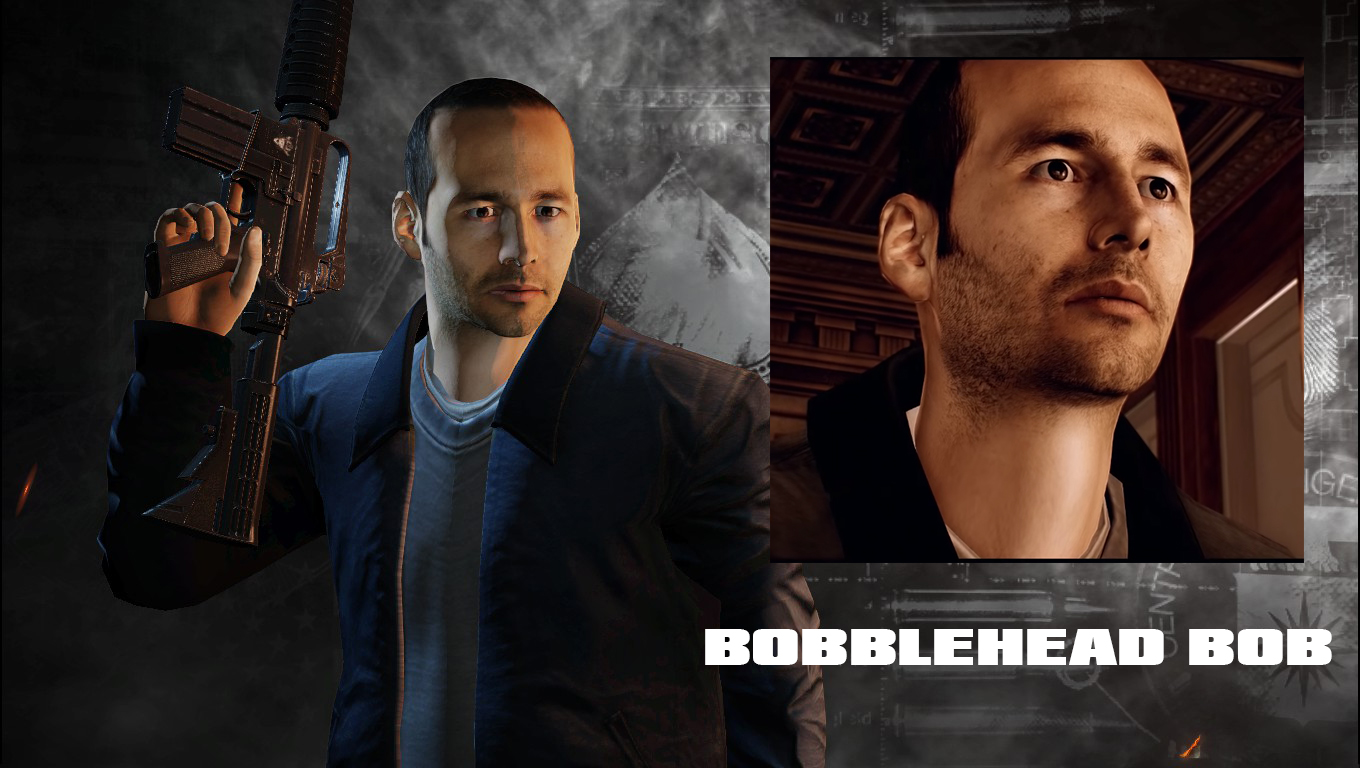
Backing Bobblehead Bob
Get Bob into the vault.
Get Bob into the vault.
He walks into the bank after about a minute. You may wait outside.
Sweet Sixteen
Complete the heist with at least 16 bags.
Complete the heist with at least 16 bags.
-
12 Angry Minutes
Complete the heist on HARD+ within 12 minutes.
Complete the heist on HARD+ within 12 minutes.
-
Entrapment
Complete the heist in stealth via the default escape with 12 bags, without disabling any lasers.
Complete the heist in stealth via the default escape with 12 bags, without disabling any lasers.
Lasers on this map won't be triggered by loot bags, which makes this horrible achievement at least somewhat doable.
Matrix With Lasers
Complete the heist in loud using the Beast drill and C4 Tunneling asset without your crew killing snipers on DEATH WISH+.
Complete the heist in loud using the Beast drill and C4 Tunneling asset without your crew killing snipers on DEATH WISH+.
There are many snipers on this specific escape route. Run from cover to cover and try to stay out of the open. The Stoic perk deck is highly recommended for this.
It's Not Even Fresh
In the manager's office where the telephone is located, drill the safe behind the painting on OVERKILL+ and find this sandwich.
Clueless
Complete the heist on OVERKILL+ without any player using skills.
Big Oil
Stealth possible on day 1.
Stealth only possible on day 2 until the helicopter arrives.
Secure the airplane keys on day 1 to escape faster on day 2. You must secure the keys stealthily, because they will be destroyed if the gangsters are alerted.


Stealth only possible on day 2 until the helicopter arrives.
Secure the airplane keys on day 1 to escape faster on day 2. You must secure the keys stealthily, because they will be destroyed if the gangsters are alerted.
Illustration
Name and description
How to achieve
A Junkyard Full of Junkies
On day 1, kill all bikers within a minute.
On day 1, kill all bikers within a minute.
Use an ECM Jammer to disable the cameras and prevent any alarm. Then rush towards the garage of the house. From there, shoot your way up towards the balcony, and then kill the last few bikers outside until all exclamation marks are gone.
I Knew What I Did Was Wrong
On day 1, open all ATMs in the basement. Saws can be used for this.
On day 1, open all ATMs in the basement. Saws can be used for this.
-
Doctor Fantastic
On day 2, complete the day with the first engine being correct.
On day 2, complete the day with the first engine being correct.
Doctor Miserable
On day 2, complete the day with the last engine being correct on OVERKILL+.
On day 2, complete the day with the last engine being correct on OVERKILL+.
Use the above guide, but save the right engine for last - after first securing all other 11 engines one by one.
This takes roughly an hour, so be aware.
This takes roughly an hour, so be aware.
Damn it, Bile...
On day 2, have Bile trigger the alarm.
On day 2, have Bile trigger the alarm.
You must do the entire day in stealth. Bile will then arrive with the helicopter and trigger the alarm anyway.
Boston Saints
Requires 2-4 players.
Complete the entire heist with every player wearing suits and Akimbo Bernetti 9 pistols on OVERKILL+.
Requires 2-4 players.
Complete the entire heist with every player wearing suits and Akimbo Bernetti 9 pistols on OVERKILL+.
-
The Biker Heist
Both days must be done in loud.
On higher difficulties, the biker's truck will either be next to a SWAT van turret, or out in the open where snipers can easily hit you. The biker will give you three out of six random tasks, and if you are unlucky, he'll also ask for a cola as an additional fourth task.
On the second day, the assault wave never ends. You'll have little to no cover running over the train, and there might be a helicopter turret.


On higher difficulties, the biker's truck will either be next to a SWAT van turret, or out in the open where snipers can easily hit you. The biker will give you three out of six random tasks, and if you are unlucky, he'll also ask for a cola as an additional fourth task.
On the second day, the assault wave never ends. You'll have little to no cover running over the train, and there might be a helicopter turret.
Illustration
Name and description
Let The Man Work
Have the bike mechanic finish the bike without interruptions on day 1 on OVERKILL+
Have the bike mechanic finish the bike without interruptions on day 1 on OVERKILL+
Full Throttle
Complete day 2 on OVERKILL+ within 2 minutes.
Complete day 2 on OVERKILL+ within 2 minutes.
Eye for an Eye
Destroy the helicopter turret on day 2.
It won't always spawn.
Destroy the helicopter turret on day 2.
It won't always spawn.
Birth of Sky
Loud only.
You'll need to find three money pellets, and the heist becomes harder after each pellet you secure. Walking near a pellet means that you have "found" it, and marks it as the next pellet you must extract. For that reason, first head towards the pellets that land in difficult spots, such as in the middle of the street or above the petrol pumps.


You'll need to find three money pellets, and the heist becomes harder after each pellet you secure. Walking near a pellet means that you have "found" it, and marks it as the next pellet you must extract. For that reason, first head towards the pellets that land in difficult spots, such as in the middle of the street or above the petrol pumps.
Illustration
Name and description
How to achieve
No Blood on the Carpet
Release the money without having any player take health damage on OVERKILL+.
Release the money without having any player take health damage on OVERKILL+.
Wear heavy armour.
1... 2... 3... Jump!
Have the entire crew jump out of the airplane within 1 minute 23 seconds on OVERKILL+.
Have the entire crew jump out of the airplane within 1 minute 23 seconds on OVERKILL+.
Rush through the ship and ignore the enemies.
Pinpoint Landing
Land inside the diner.
Land inside the diner.
You'll have to shoot the glass ceiling first.
Expert Landing
Have all players land on a roof, car or any other structure.
Get 200 kills together without any player touching the ground on DEATH WISH+.
Have all players land on a roof, car or any other structure.
Get 200 kills together without any player touching the ground on DEATH WISH+.
Land on the roof of the same building to support each other.
Bring enough ammo bags with you.
Bring enough ammo bags with you.

Black Tie Event
Complete the heist while all players wear suits and only use pistols on OVERKILL+.
Complete the heist while all players wear suits and only use pistols on OVERKILL+.
-
Black Cat
Stealth possible.


Illustration
Name and description
How to achieve
Secret Sea Safecracker
Force Xun Kang to open his safe on OVERKILL+.
You don't have to complete the heist.
Force Xun Kang to open his safe on OVERKILL+.
You don't have to complete the heist.
You can use the computer in the lowest deck to locate his room. It has a safe in a closet. Take Xun Kang hostage and guide him to his room (he'll be marked for you if you complete the first steps of the heist). He'll then open his safe.
One Claw Beam Cutter
Complete the heist in loud on OVERKILL+, while using only one saw at a time to cut the vault.
Complete the heist in loud on OVERKILL+, while using only one saw at a time to cut the vault.
Essentially, this just causes the vault sequence to take four times as long.
Swimming Cat, Silent Burglar
Complete the heist in stealth on OVERKILL+, with all players using only melee weapons.
Complete the heist in stealth on OVERKILL+, with all players using only melee weapons.
-
Master of Floatation
Complete the heist in stealth on MAYHEM+, after at least 8 body bags have been thrown overboard, and without letting any civilian die.
Complete the heist in stealth on MAYHEM+, after at least 8 body bags have been thrown overboard, and without letting any civilian die.
Bring enough body bags with you. Only the regular guards have pagers, so you should focus on killing the other ones. Both Xun Kang and Li Deng don't count as civilians for this achievement, and can be killed.
The Bomb: Dockyard
Stealth possible.
Storywise, this is an alternative to The Bomb: Forest, where the crew successfully steals the loot before it gets a chance to be shipped. But other than that, they have nothing in common.
This is the only heist with two camera operators, one on each side of the dockyard. For that reason, it's usually not worth it to ever disable the cameras in stealth, because it'll cost you two out of four available pagers (and a lot of time).


Storywise, this is an alternative to The Bomb: Forest, where the crew successfully steals the loot before it gets a chance to be shipped. But other than that, they have nothing in common.
This is the only heist with two camera operators, one on each side of the dockyard. For that reason, it's usually not worth it to ever disable the cameras in stealth, because it'll cost you two out of four available pagers (and a lot of time).
Illustration
Name and description
How to achieve
Done in 60 seconds
Open the dock gate within 60 seconds using keycards.
Open the dock gate within 60 seconds using keycards.
You should rush this by placing ECM jammers.
I've Got The Power
Never let the police cut off the power in loud.
Never let the police cut off the power in loud.
Do this on Normal difficulty, as there'll be just two power boxes on the building you need to defend, which makes it very simple. On higher difficulties, there'll be more power boxes.
High Times / Breaking Dead
Cook and secure two bags of meth.
The meth lab is found in one of the cargo containers on the ship.
Cook and secure two bags of meth.
The meth lab is found in one of the cargo containers on the ship.
These are the locations where the ingredients can spawn.
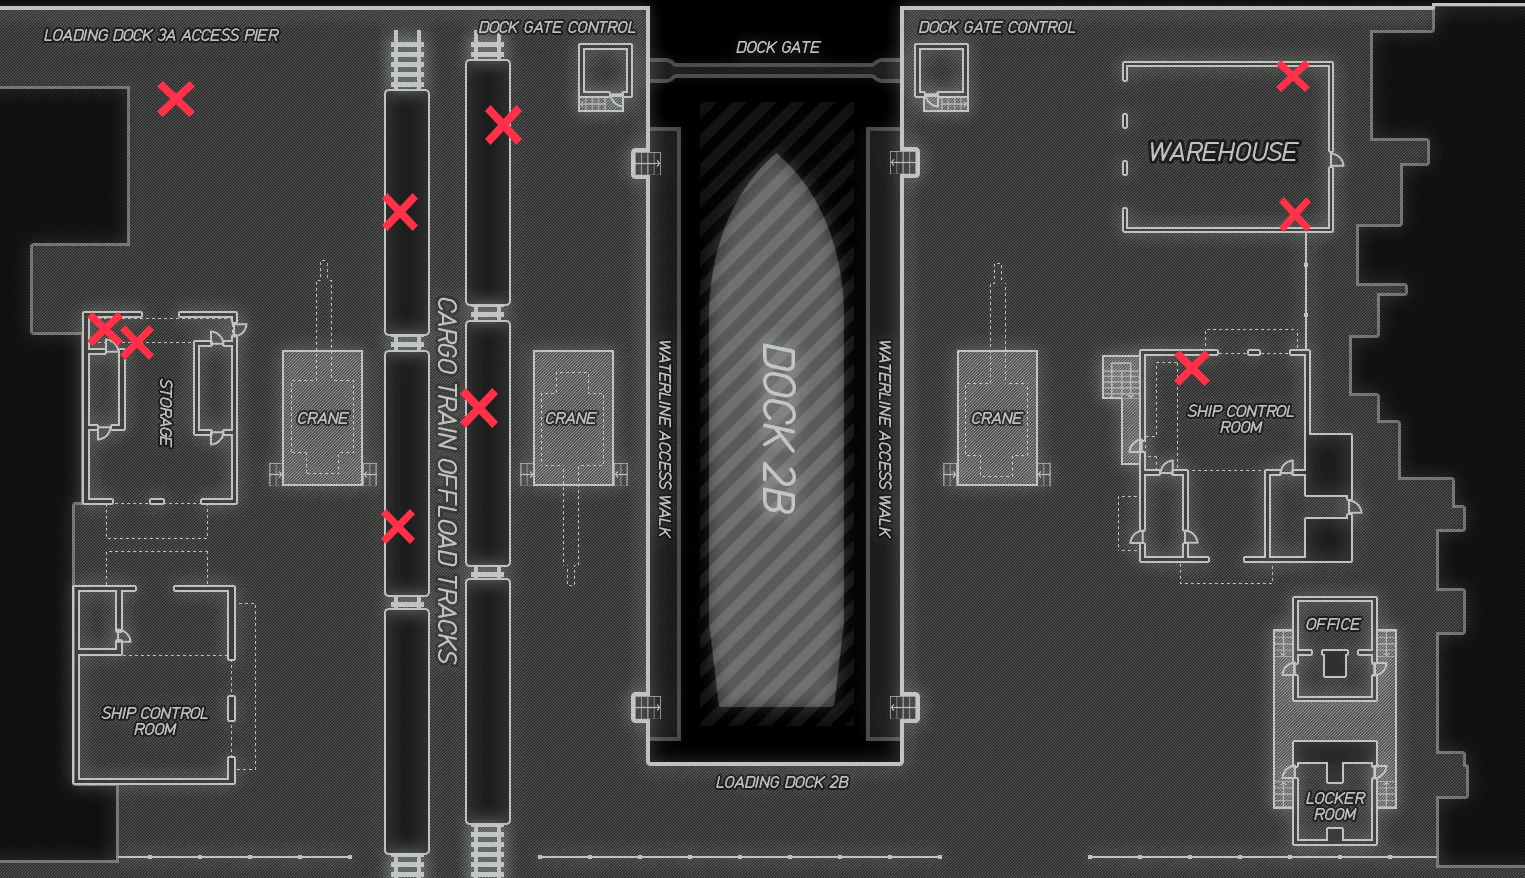
Insert them in this order in the meth lab;
Muriatic Acid > Caustic Soda > Hydrogen Chloride.
Insert them in this order in the meth lab;
Muriatic Acid > Caustic Soda > Hydrogen Chloride.
Sneaking With The Fishes
Complete the heist in stealth on DEATH WISH+.
Complete the heist in stealth on DEATH WISH+.
-
The Bomb: Forest
Loud only.
Usually seen as one of the most difficult heists, due to its sloped terrain and little cover, as well as the quantity of snipers that can spawn. Always go for the Helicopter escape if possible.


Usually seen as one of the most difficult heists, due to its sloped terrain and little cover, as well as the quantity of snipers that can spawn. Always go for the Helicopter escape if possible.
Illustration
Name and description
How to achieve
Pump It Up
Never let the cops disconnect the water hose.
Never let the cops disconnect the water hose.
* In the backup tab in preplanning, purchase Ace Pilot and a Better Pump to speed up the progress.
* You need to use water from the generator, not the helicopter. This means the vault must be on the right side of the map, near the river. You can purchase demolition expert assets to increase the odds of it being there, especially wagons 26-A and 33-M.
* Cops will only target the three water hose connections, never the generator or the vault.
* You need to use water from the generator, not the helicopter. This means the vault must be on the right side of the map, near the river. You can purchase demolition expert assets to increase the odds of it being there, especially wagons 26-A and 33-M.
* Cops will only target the three water hose connections, never the generator or the vault.
Oppressor
Complete the heist with the boat escape without letting any civilian flee or die.
Complete the heist with the boat escape without letting any civilian flee or die.
There are 5 civilians.
Two civilians are standing next to a car at the start, and there are three workers further uphill.
Leave sentry guns behind to guard them as you escape.
Two civilians are standing next to a car at the start, and there are three workers further uphill.
Leave sentry guns behind to guard them as you escape.
Beaver Team
Cut down all five cutable trees within 5 seconds.
This requires the plane escape in preplanning.
Cut down all five cutable trees within 5 seconds.
This requires the plane escape in preplanning.
You require a saw, or alternatively C4. You don't have to complete any objectives for this achievement. These are the locations of the trees;
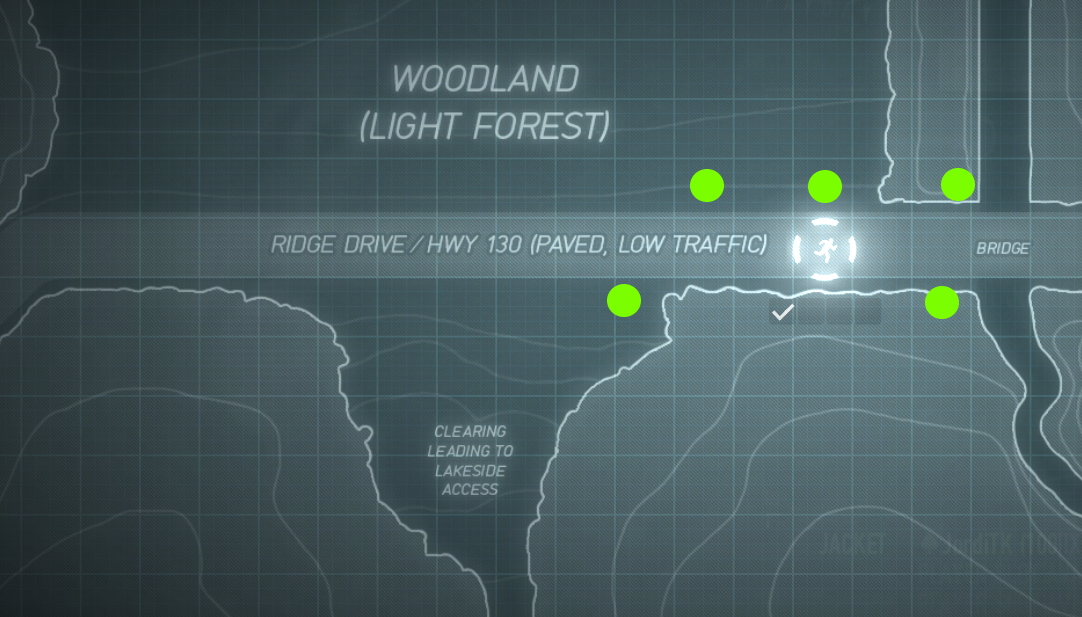
Boiling Point
Loud only.
You may go down in this heist before it has even begun, as you start off parachuting into gunfire. Once you enter the building, the heist will become rather easy, until the point you have to escape again with the server. You'll then have to deal with the many snipers that appear, as the person with the server slowly moves towards the escape.


You may go down in this heist before it has even begun, as you start off parachuting into gunfire. Once you enter the building, the heist will become rather easy, until the point you have to escape again with the server. You'll then have to deal with the many snipers that appear, as the person with the server slowly moves towards the escape.
Illustration
Name and description
UMP for Me, UMP for You
Get 45 kills on special enemies with any submachine gun on OVERKILL+.
Can be done over several heists.
Get 45 kills on special enemies with any submachine gun on OVERKILL+.
Can be done over several heists.
Remember, No Russian
Scan all four bodies without having the mercenaries cut off the power or stop the scanner.
There is always only one power box. If you're lucky, it's near the scanner.
Scan all four bodies without having the mercenaries cut off the power or stop the scanner.
There is always only one power box. If you're lucky, it's near the scanner.
The Ground is Too Cold
Complete the heist without any player going down on OVERKILL+.
Complete the heist without any player going down on OVERKILL+.
Crazy Ivan
Complete the heist with the crew using only melee weapons without electricity or poison on VERY HARD+.
You should use the recommendations in the Melee: Kill counters section for this.
Complete the heist with the crew using only melee weapons without electricity or poison on VERY HARD+.
You should use the recommendations in the Melee: Kill counters section for this.
When in Russia... Do As the Russians Do
Complete the heist having all players wear the Russian Hat mask and Golden AK.762 on OVERKILL+.
Complete the heist having all players wear the Russian Hat mask and Golden AK.762 on OVERKILL+.
Border Crossing
Stealth possible.
One of the longest one-day heists to stealth. It consists of two parts, that may as well have been two separate days.
The camera operators in both parts of the heist don't have pagers. In the second part, the operator can be found in the northern building. There, you'll also find six cages on the main floor, which can be temporarily unlocked via monitors in the offices.


One of the longest one-day heists to stealth. It consists of two parts, that may as well have been two separate days.
The camera operators in both parts of the heist don't have pagers. In the second part, the operator can be found in the northern building. There, you'll also find six cages on the main floor, which can be temporarily unlocked via monitors in the offices.
Illustration
Name and description
How to achieve
Identity Theft
Collect all four Murkywater uniforms.
Collect all four Murkywater uniforms.
Two-Step Verification
Secure all four pieces of Roman armor and finish the heist. The armor must be collected in stealth.
Recommended for at least two players.
Secure all four pieces of Roman armor and finish the heist. The armor must be collected in stealth.
Recommended for at least two players.
* Locate the briefing room in the first part of the heist. Take the keycard from the table and the blueprints from the safe.
* Move to the second part of the heist. There, you can find the other keycard somewhere in the offices. Use both keycards to open the vault in the basement.
* Secure the armor and finish the heist as usual.
* Move to the second part of the heist. There, you can find the other keycard somewhere in the offices. Use both keycards to open the vault in the basement.
* Secure the armor and finish the heist as usual.
Border Crystals
Loud only.
This is set in the same area as the second part of Border Crossing, but the objectives differ, and you cannot earn achievements from that heist here. Instead of securing loot bags, there's a meth lab in the middle of the northern building that you have to use.
You'll only have to secure at least three bags of meth. Outside of the trucks filled with ingredients, there are always three batches of ingredients on the map.

This is set in the same area as the second part of Border Crossing, but the objectives differ, and you cannot earn achievements from that heist here. Instead of securing loot bags, there's a meth lab in the middle of the northern building that you have to use.
You'll only have to secure at least three bags of meth. Outside of the trucks filled with ingredients, there are always three batches of ingredients on the map.
Illustration
Name and description
How to achieve
Heister Cocinero
Complete the heist on OVERKILL+ having secured at least 25 bags of meth.
Complete the heist on OVERKILL+ having secured at least 25 bags of meth.
Similarly to the 25 bags in Cook Off, it's strongly recommended to use the mod Meth Helper to prevent the lab from exploding.
There are enough ingredients for about fifty bags.
There are enough ingredients for about fifty bags.
Breakfast in Tijuana
Stealth possible.


Illustration
Name and description
How to achieve
Stolen Valor
Collect all seven medals.
Collect all seven medals.
There's always one inside a locker in the changing room.
The other six can be randomly found on the second floor in these locations;
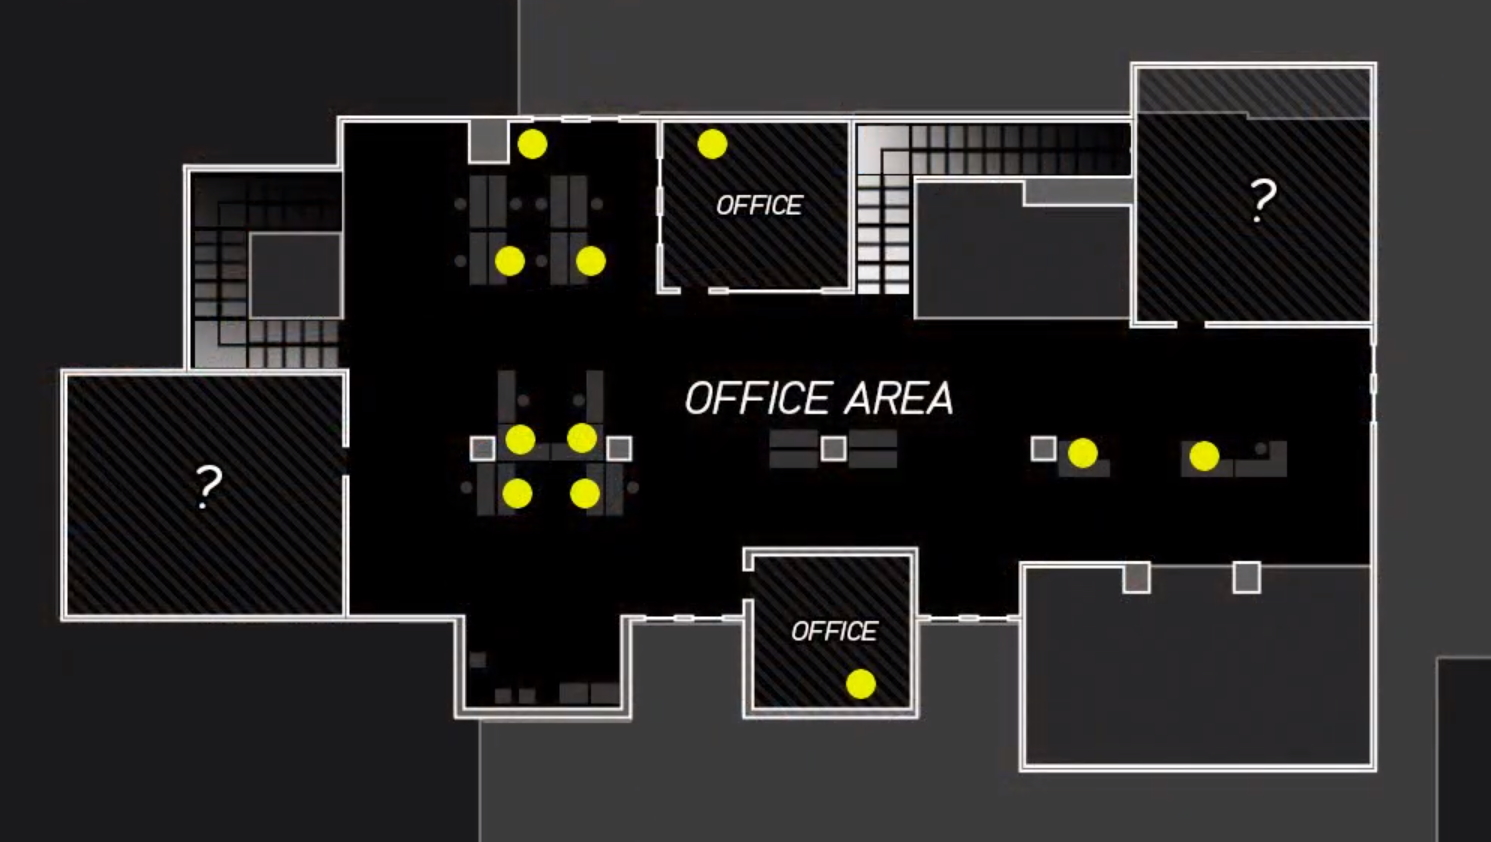
The other six can be randomly found on the second floor in these locations;
Paid in Full
Secure all loot.
Secure all loot.
There are six bags in total;
* Three bags of assault rifles in the armoury on the first floor
* Three bags of coke in the evidence room on the second floor.
* Three bags of assault rifles in the armoury on the first floor
* Three bags of coke in the evidence room on the second floor.
Low Murder Rate
Complete the heist in stealth without your crew killing anyone.
Complete the heist in stealth without your crew killing anyone.
-
Breakin' Feds
Stealth only.
Notorious for the amount of guards in such tight spaces. Spending any pagers before going through the security gates is worthy of a restart. Killing one guard will usually mean you'll have to kill all nearby guards, but will at least grant you freedom of movement in that area.


Notorious for the amount of guards in such tight spaces. Spending any pagers before going through the security gates is worthy of a restart. Killing one guard will usually mean you'll have to kill all nearby guards, but will at least grant you freedom of movement in that area.
Illustration
Name and description
How to achieve
Stalker
Have Garrett marked all the time after he left his office, until the safe is opened.
Have Garrett marked all the time after he left his office, until the safe is opened.
Recommended for at least two players.
Have someone constantly mark Garrett while he is out of his office, while another player tries to open the safe.
Have someone constantly mark Garrett while he is out of his office, while another player tries to open the safe.
A Moment of Silence
Have no one kill or alert any guards until Garrett has used the toilet on OVERKILL+.
Have no one kill or alert any guards until Garrett has used the toilet on OVERKILL+.
Lure him out of his office three times, after which Locke will tell you to spice his food. This causes him to use the bathroom.
You can still kill civilians.
You can still kill civilians.
Staple Relationship
Find the red stapler and bring it to the small office.
Find the red stapler and bring it to the small office.
Bloody Grinch
Complete the heist in stealth on MAYHEM+, while everyone wears Christmas outfits and masks. No one can use pagers.
Complete the heist in stealth on MAYHEM+, while everyone wears Christmas outfits and masks. No one can use pagers.
Can also be completed on the Buluc's Mansion heist.
Brooklyn 10-10
Loud only.


Illustration
Name and description
How to achieve
A Rendezvour with Destiny
Reach Charon within 6 minutes on OVERKILL+.
Reach Charon within 6 minutes on OVERKILL+.
Recommended for at least two players.
Have at least one player cover Charon, while the rest finds a crowbar and places the drill.
Have at least one player cover Charon, while the rest finds a crowbar and places the drill.
Pass the Ammo
Complete the heist after having deployed eight ammo bags in the ammunition storage room on OVERKILL+.
Requires 4 players with the Extra Lead skill from the Enforcer skill tree.
Complete the heist after having deployed eight ammo bags in the ammunition storage room on OVERKILL+.
Requires 4 players with the Extra Lead skill from the Enforcer skill tree.
Find the ammunition room in the second building and drill it open. Everyone must place two ammo bags there.
Apartment Sniper
Complete the heist having all players wield sniper rifles and OVE9000 saws on OVERKILL+.
Complete the heist having all players wield sniper rifles and OVE9000 saws on OVERKILL+.
-
Brooklyn Bank
Loud only.
The equipment from outside the building may best be obtained in-between assault waves.


The equipment from outside the building may best be obtained in-between assault waves.
Illustration
Name and description
All the Gold in Brooklyn
Complete the heist on VERY HARD+, having secured at least 12 bags of gold.
Complete the heist on VERY HARD+, having secured at least 12 bags of gold.
Obsessive Opening
Open at least 30 deposit boxes and all 3 ATMs on OVERKILL+. Best done with saws.
Open at least 30 deposit boxes and all 3 ATMs on OVERKILL+. Best done with saws.
Animal Kingdom
Requires 4 players.
Complete the heist on OVERKILL+ while everyone wears a different Brooklyn Bank mask (Alces, Canis Lupus, Felis Lynx, or Ursus Martifimus).
These masks are unlocked by the two other achievements.
Requires 4 players.
Complete the heist on OVERKILL+ while everyone wears a different Brooklyn Bank mask (Alces, Canis Lupus, Felis Lynx, or Ursus Martifimus).
These masks are unlocked by the two other achievements.
Buluc's Mansion
Stealth possible.
Always use the Boat entry for stealth, as it'll be easier to get inside and haul loot later.


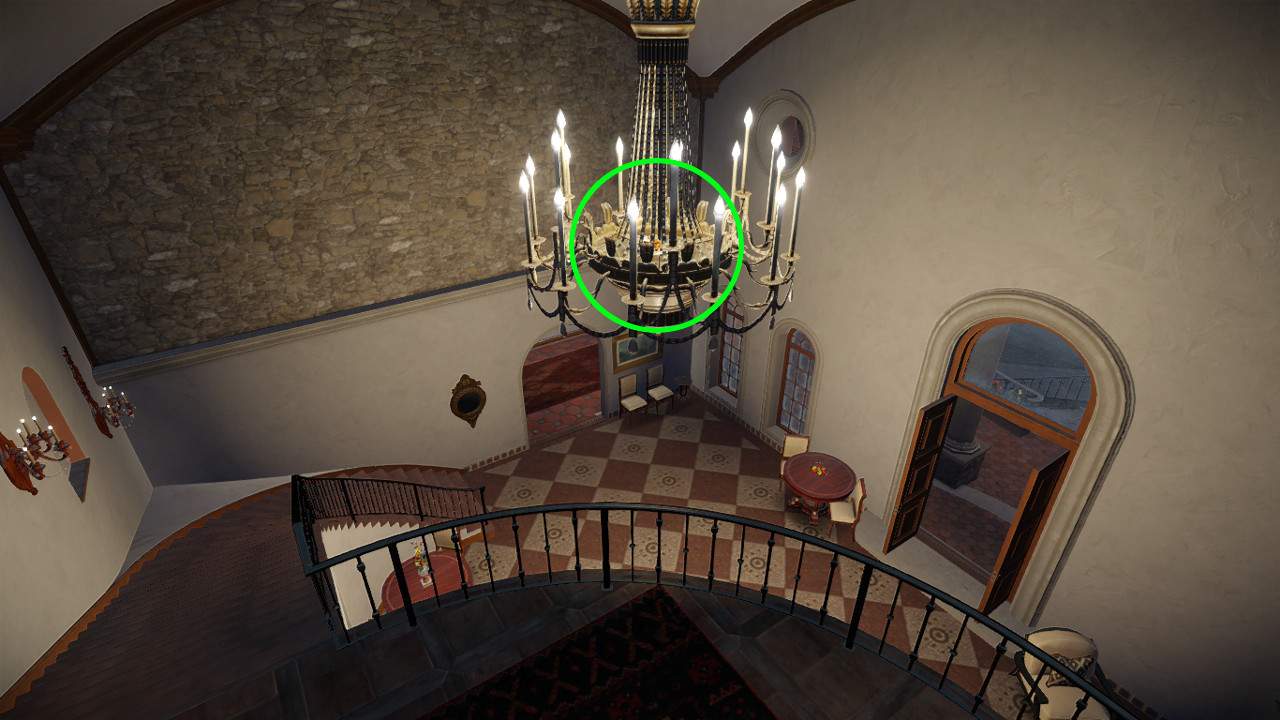

Always use the Boat entry for stealth, as it'll be easier to get inside and haul loot later.
Illustration
Name and description
How to achieve
We Expect You To Die, Mr. Buluc
Unleash the shark and proceed with the heist.
Unleash the shark and proceed with the heist.
You'll find the shark in the hidden lounge.
Press the button before confronting Buluc.
Press the button before confronting Buluc.
Sugar, Lard and Scorpions
Collect the hidden churro.
Collect the hidden churro.
Everything but the Patio Furniture
Secure all the loot on this map in stealth.
Secure all the loot on this map in stealth.
There are 21 loot bags;
* Twelve in the wine cellar.
* Five in the inner sanctum.
* One on the second floor near Buluc's office.
* The last three are located here;
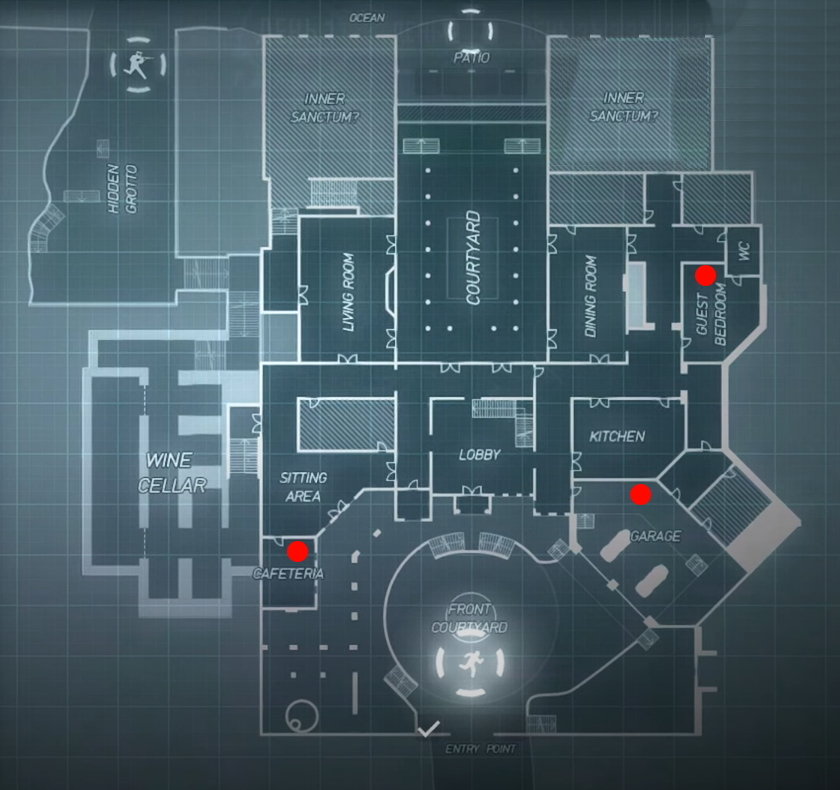
* Twelve in the wine cellar.
* Five in the inner sanctum.
* One on the second floor near Buluc's office.
* The last three are located here;
Bloody Grinch
Complete the heist in stealth on MAYHEM+, while everyone wears Christmas outfits and masks. No one can use pagers.
Complete the heist in stealth on MAYHEM+, while everyone wears Christmas outfits and masks. No one can use pagers.
Can also be completed on the Breakin' Feds heist.
Car Shop
Stealth only.
Once the C4 explodes, a "point of no return" timer will commence. You'll then have four minutes to finish the heist on Normal, down to two minutes on higher difficulties.


I Got This
Complete the heist with a detection risk of 70+ without using ECM jammers.
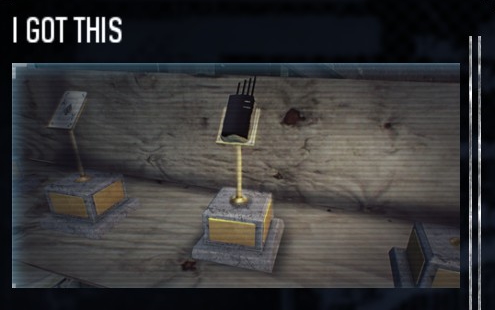
Once the C4 explodes, a "point of no return" timer will commence. You'll then have four minutes to finish the heist on Normal, down to two minutes on higher difficulties.
Illustration
Name and description
How to achieve
Gone in 240 seconds.
Complete the heist within 4 minutes.
Complete the heist within 4 minutes.
While you can stealth this, it's easier in loud on Normal. You could even do this at the same time as you earn the I Got This trophy.
Tag, You're It!
Requires 4 players.
Be the first player to reach the docks.
Requires 4 players.
Be the first player to reach the docks.
If you are driving in a car with another player, only one of you will receive this achievement. So if you want to make sure it's you, you have to drive alone.
I Got This
Complete the heist with a detection risk of 70+ without using ECM jammers.
Cook Off
Loud only.
This is the same as the first day of Rats, except here you will constantly receive new supplies and can go on indefinitely. Both F in Chemistry and Full Measure may also be earned on Rats.


This is the same as the first day of Rats, except here you will constantly receive new supplies and can go on indefinitely. Both F in Chemistry and Full Measure may also be earned on Rats.
Illustration
Name and description
How to achieve
F In Chemistry
Blow up the lab.
Blow up the lab.
Listen to Bain.
Full Measure
Secure 7 bags of meth without blowing up the lab on OVERKILL+.
Secure 7 bags of meth without blowing up the lab on OVERKILL+.
Maybe don't listen to Bain.
Kiss The Chef
Complete the heist having secured 25 bags of meth on OVERKILL+
Unlocks the Meth trophy.
Complete the heist having secured 25 bags of meth on OVERKILL+
Unlocks the Meth trophy.
Never listen to Bain at all.
This achievement will take a very long time. Without the mod Meth Helper, it will also give you a headache.
This achievement will take a very long time. Without the mod Meth Helper, it will also give you a headache.
Counterfeit
Loud only.
After Cursed Kill Room, this might be the easiest loud-only heist. You'll spend most time indoors where you can hold chokepoints, and you can do a large potion of the heist in stealth.
Once masked, never set foot outside of the premises. Follow the man to the basement and start the hack. Two cops will eventually appear to investigate the situation. Subdue whomever comes down to the basement. Afterwards, a phone will ring, which can be answered to delay the inevitable police assault just a little longer.


After Cursed Kill Room, this might be the easiest loud-only heist. You'll spend most time indoors where you can hold chokepoints, and you can do a large potion of the heist in stealth.
Once masked, never set foot outside of the premises. Follow the man to the basement and start the hack. Two cops will eventually appear to investigate the situation. Subdue whomever comes down to the basement. Afterwards, a phone will ring, which can be answered to delay the inevitable police assault just a little longer.
Illustration
Name and description
How to achieve
Why?
Place a body bag on the grill.
Place a body bag on the grill.
-
Crowd Control
Have all civilians as hostages until the safe is opened.
Have all civilians as hostages until the safe is opened.
There are 7-9 civilians. One is always inside the house, while the others are next to the pool.
Basement Dwellers
Don't let the cops enter the printing room until the safe is opened on OVERKILL+.
Don't let the cops enter the printing room until the safe is opened on OVERKILL+.
-
Cutting the Red Wire
Disarm the C4 on OVERKILL+.
Disarm the C4 on OVERKILL+.
Bain will mention the explosives when you open the printing room. However, they don't always spawn, so restart if they don't.
Dr. Evil
Secure a million worth of counterfeit money.
Secure a million worth of counterfeit money.
Money is worth more on higher difficulties.
This should take about 35-45 minutes on Mayhem with four players.
This should take about 35-45 minutes on Mayhem with four players.
Crude Awakening
Stealth possible.


Illustration
Name and description
How to achieve
Human Torch
Kill the boss on loud on OVERKILL+ using three oil pits at most.
Kill the boss on loud on OVERKILL+ using three oil pits at most.
You can only damage the boss while he's on fire from having stood in a burning oil pit. Although there is no bonus damage from headshots on this boss, it shouldn't take long to bring him down.
The Right Stuff
Take the correct oil sample from the oil tanks on the first try.
Take the correct oil sample from the oil tanks on the first try.
There are two visual clues as to which one is the purest oil sample;
* On a whiteboard with test results in the lab, you'll find the codename of the right oil (OZ07, IM22, or NT02).
* In a nearby room on the same floor, there's a graph that shows three coloured lines. The colour with the highest peak is the right colour.
* On a whiteboard with test results in the lab, you'll find the codename of the right oil (OZ07, IM22, or NT02).
* In a nearby room on the same floor, there's a graph that shows three coloured lines. The colour with the highest peak is the right colour.
Cash Liquidation
Throw all six money bags into the ocean and pick them up with the boat during the escape.
You have to buy the extra cash asset in preplanning.
Throw all six money bags into the ocean and pick them up with the boat during the escape.
You have to buy the extra cash asset in preplanning.
After killing Gabriel, head to his room where you can find four money bags and a notepad with a number code.
You'll need this code during the escape. It will open the private office next to the briefing room in an earlier part of the map that you'll go through again. It contains the other two money bags.
You'll need this code during the escape. It will open the private office next to the briefing room in an earlier part of the map that you'll go through again. It contains the other two money bags.
Seagulls Aren't Real
Shoot the ten seagulls in stealth. They appear in random locations.
Shoot the ten seagulls in stealth. They appear in random locations.
There are eight or nine seagulls before the boss arena. You have to shoot them before entering the arena. You'll find the remaining seagulls in the arena.
There'll always be enough seagulls regardless of which bridge you take halfway through the heist.
https://steamcommunity.com/sharedfiles/filedetails/?id=2996331951
There'll always be enough seagulls regardless of which bridge you take halfway through the heist.
https://steamcommunity.com/sharedfiles/filedetails/?id=2996331951
Texas Treasure, Part 4
Solve a hidden puzzle and collect the final item of Texas Treasures.
Solve a hidden puzzle and collect the final item of Texas Treasures.
This requires having the Texas Treasure, Part 3 achievement from the Hostile Takeover heist.
https://steamcommunity.com/sharedfiles/filedetails/?id=2992024536
https://steamcommunity.com/sharedfiles/filedetails/?id=2992024536
Cursed Kill Room
Loud only.
There isn't any loud heist easier than this one.
In this heist, the goal is to open several safes before the timer runs out. However, should you wish to do this on Death Sentence for the achievement, simply start the timer and never leave the initial room at all. Once the timer has run out, press the red button that appears to complete the heist.


There isn't any loud heist easier than this one.
In this heist, the goal is to open several safes before the timer runs out. However, should you wish to do this on Death Sentence for the achievement, simply start the timer and never leave the initial room at all. Once the timer has run out, press the red button that appears to complete the heist.
Illustration
Name and description
How to achieve
Say Hello To My Halloween Friend!
Collect all 7 Deadly Sins masks
Collect all 7 Deadly Sins masks
You'll need to do the heist seven times.
Choose a mask you don't have yet each time you have opened four safes.
Choose a mask you don't have yet each time you have opened four safes.
Faster! Faster! I can do it faster!
Open 6 safes in a single run.
Open 6 safes in a single run.
-
The Diamond
Stealth possible.
Straightforward heist that's very enjoyable on both loud and stealth. In either case, you'll have to traverse a tile puzzle to reach the diamond. Failing it will trigger the alarm and fill the room with gas.
You'll only have 30 seconds for this puzzle on the highest difficulty. In stealth, it's best to reset the puzzle until you get an easy path. In loud, simply step on a tile to active the gas trap, and wait for the gas to disappear.


Straightforward heist that's very enjoyable on both loud and stealth. In either case, you'll have to traverse a tile puzzle to reach the diamond. Failing it will trigger the alarm and fill the room with gas.
You'll only have 30 seconds for this puzzle on the highest difficulty. In stealth, it's best to reset the puzzle until you get an easy path. In loud, simply step on a tile to active the gas trap, and wait for the gas to disappear.
Illustration
Name and description
Cat Burglar
Complete the heist in stealth.
Complete the heist in stealth.
Diamonds in the Rough
Complete the heist in loud.
You need to go loud before entering the vault.
Complete the heist in loud.
You need to go loud before entering the vault.
Culture Vultures
Secure 10 additional bags.
Secure 10 additional bags.
Smoke and Mirrors
Complete the heist within 10 minutes.
Complete the heist within 10 minutes.
Honor Among Thieves
Requires 4 players.
Complete the heist while every player wears different Diamond Heist masks (The Cursed One, Anubis, Medusa, or Pazuza), which are unlocked by the other achievements.
Requires 4 players.
Complete the heist while every player wears different Diamond Heist masks (The Cursed One, Anubis, Medusa, or Pazuza), which are unlocked by the other achievements.
Diamond Heist
Stealth possible.


Illustration
Name and description
How to achieve
Dead Change
Take the cash from the man killed by Bain in loud.
Take the cash from the man killed by Bain in loud.
His money lands on the fountain.
Blood Diamond
Secure the elusive red diamond.
Secure the elusive red diamond.
This diamond only has a 20% chance of spawning on MAYHEM+.
When entering the vault, you will see an additional vault door straight ahead of you if the red diamond has spawned.
Similarly to the Murphy's Law achievement, you can always use the WolfHud mod to see what loot there is as soon as you start the heist.
When entering the vault, you will see an additional vault door straight ahead of you if the red diamond has spawned.
Similarly to the Murphy's Law achievement, you can always use the WolfHud mod to see what loot there is as soon as you start the heist.
The Hunt for the Blue Sapphires
Collect every sapphire outside of the vault on OVERKILL+.
Must be done in stealth.
Collect every sapphire outside of the vault on OVERKILL+.
Must be done in stealth.
There are 12 sapphires, always on the same locations. You don't have to do any objectives.
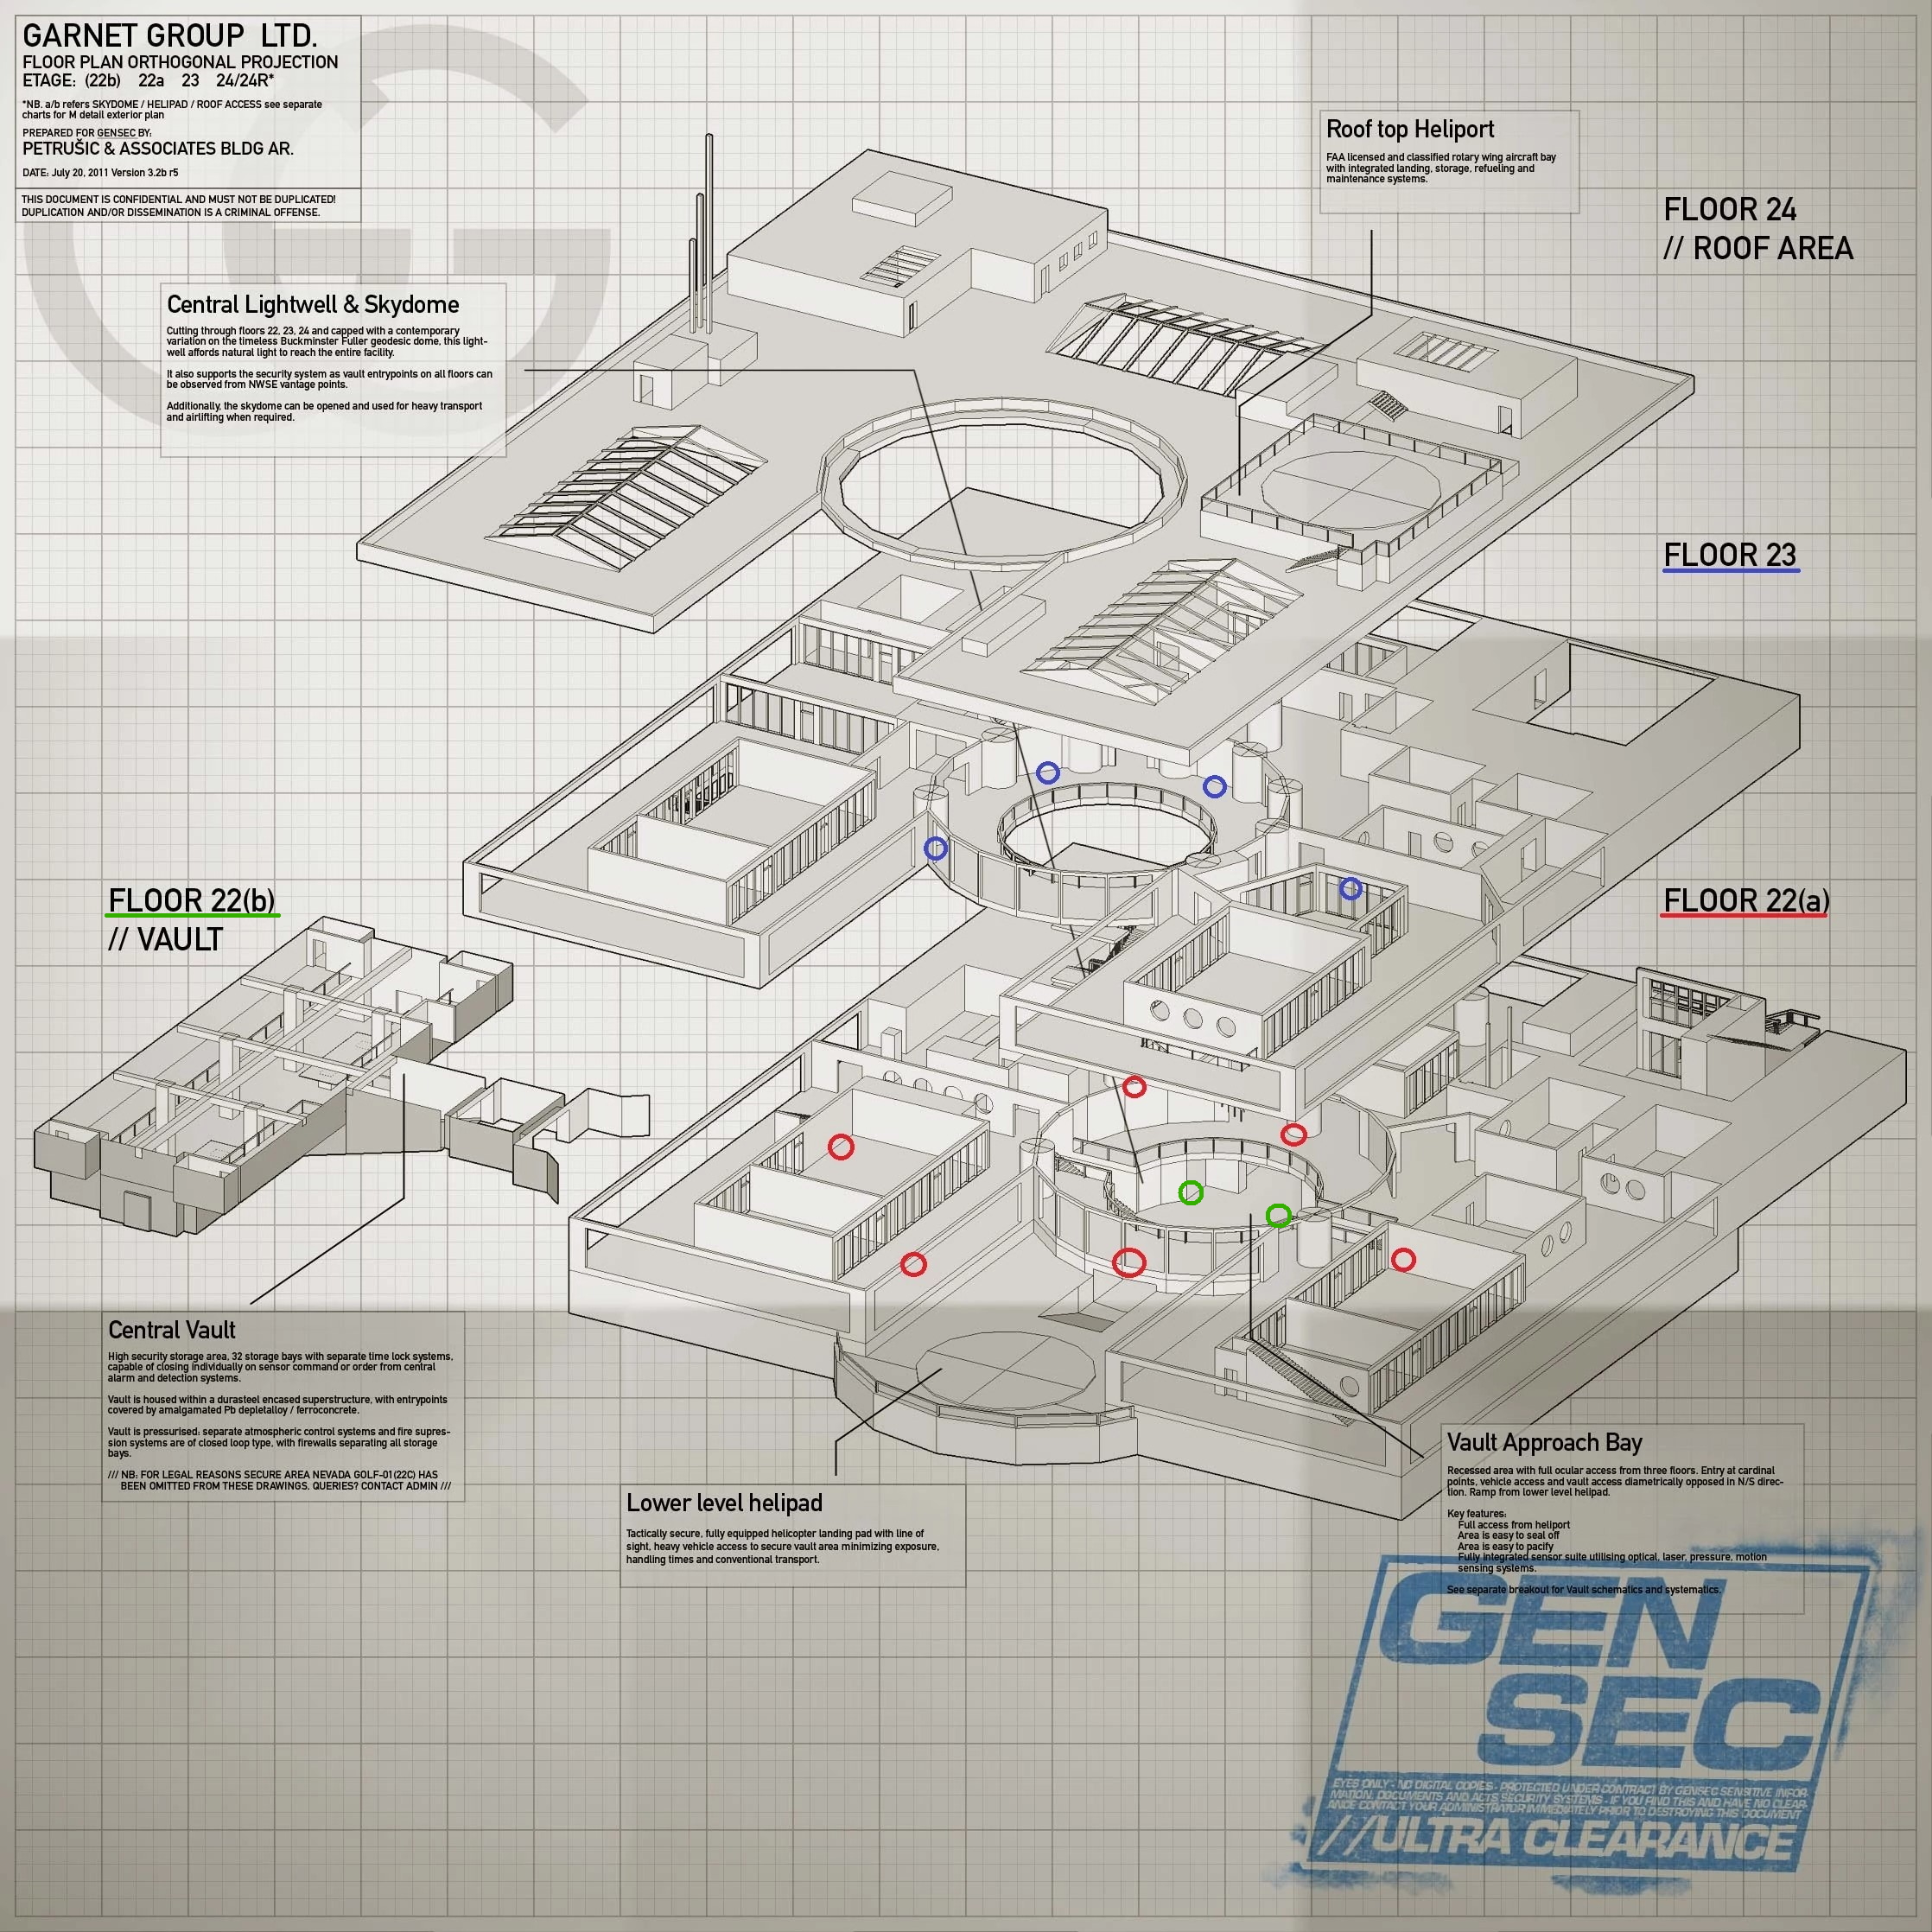
Diamond Store
Stealth possible.

Diamonds
Complete the heist on OVERKILL+ after securing all jewelry and destroying the SWAT Turret.
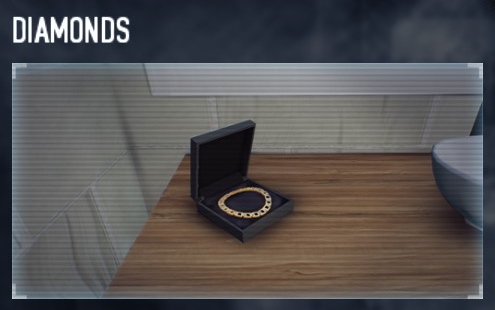
Illustration
Name and description
How to achieve
Hostage Situation
Secure all bags of jewelry on OVERKILL+ without having any civilian escape, die or leave the Diamond store.
It's a headache that's recommended for 3-4 players.
Secure all bags of jewelry on OVERKILL+ without having any civilian escape, die or leave the Diamond store.
It's a headache that's recommended for 3-4 players.
* There are a total of four guards on this map. Get rid of the camera guy first, and then the rest, so you can freely focus on the civilians.
* You'll fail the achievement as soon as any civilian who was ever inside of the area walks outside. The area that counts as "the Diamond store" is the ground floor and the staircase, not the offices.
* This makes the manager a problem. If she walks outside, you failed. If she walks upstairs, you failed (even before you enter the store). If she was already in her office you can leave her there.
* Civilians outside do not need to be brought into the Diamond store. However, they are not allowed to leave the map, so they must be controlled as well.
* You will only know if you have succeeded once you complete the heist. Enjoy.
* You'll fail the achievement as soon as any civilian who was ever inside of the area walks outside. The area that counts as "the Diamond store" is the ground floor and the staircase, not the offices.
* This makes the manager a problem. If she walks outside, you failed. If she walks upstairs, you failed (even before you enter the store). If she was already in her office you can leave her there.
* Civilians outside do not need to be brought into the Diamond store. However, they are not allowed to leave the map, so they must be controlled as well.
* You will only know if you have succeeded once you complete the heist. Enjoy.
Diamonds
Complete the heist on OVERKILL+ after securing all jewelry and destroying the SWAT Turret.
Dragon Heist
Stealth possible.


Illustration
Name and description
How to achieve
All The Gold in Chinatown
Complete the heist in stealth on OVERKILL+ after securing all loot.
Complete the heist in stealth on OVERKILL+ after securing all loot.
There are 15 bags in total.
* Two inside the china store.
* Three in the basement in crates.
* Four in the small auction room, including two paintings.
* One inside the safe in the auctioneer's room.
* Five inside the vault, including the required item for the heist.
* Two inside the china store.
* Three in the basement in crates.
* Four in the small auction room, including two paintings.
* One inside the safe in the auctioneer's room.
* Five inside the vault, including the required item for the heist.
Keep Breathing That Fresh Air
Never let the cops use gas in loud.
Never let the cops use gas in loud.
You'll have to go loud from the start of the heist.
There is a single vent in an alley outside the warehouse through which the cops will attempt to pump gas. They will try this as soon as the drill has been started.
There is a single vent in an alley outside the warehouse through which the cops will attempt to pump gas. They will try this as soon as the drill has been started.
Speed Lizard
Complete the heist in stealth within 6 minutes on OVERKILL+.
Complete the heist in stealth within 6 minutes on OVERKILL+.
Although the achievement allows it, doing this on loud is practically impossible.
Election Day
Stealth possible on day 1.
Stealth only possible on day 2 if the right truck was tagged on the first day.


Computer
Complete day 1 in loud, after finishing both intel downloads on the computer.
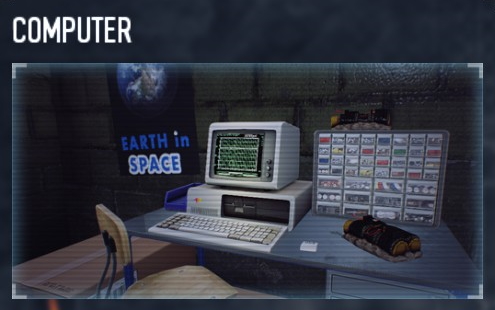
Stealth only possible on day 2 if the right truck was tagged on the first day.
Illustration
Name and description
How to achieve
Master Detective
Tag the right truck on day 1 in stealth.
Tag the right truck on day 1 in stealth.
Either find the opened container with voting cards and tag the truck with the same colours, or use the computer and tag the truck of which the company isn't listed.
Murphy's Law
Tag the wrong truck on day 1, then find nothing in the vault on day 2.
Tag the wrong truck on day 1, then find nothing in the vault on day 2.
There's always a chance that there's loot in the vault, voiding the achievement. It may take several restarts until you have found absolutely nothing in the vault.
It's highly recommended to use the WolfHud mod to see what loot there is on the map, so you can immediately restart after the loading screen instead of wasting time.
It's highly recommended to use the WolfHud mod to see what loot there is on the map, so you can immediately restart after the loading screen instead of wasting time.
Hot Lava 2.0
Interact with the computer on day 1 in stealth without anyone touching the ground.
Concrete elevations, like the one you start on, don't count as ground.
Interact with the computer on day 1 in stealth without anyone touching the ground.
Concrete elevations, like the one you start on, don't count as ground.
You'll want the Security Access asset for this. Head for the top floor of the left building (from your starting point of view). If the computer isn't there, restart.
Speedlock Holmes
Tag the right truck on day 1 within a minute.
Tag the right truck on day 1 within a minute.
Rush with ECM Jammers, and tag the truck of one of the two companies with only a single truck. That way there is a 50% chance that you will be correct.
Storage Hunter
After tagging the right truck on day 1, secure all extra loot from the storage bins on day 2 and then complete the heist.
After tagging the right truck on day 1, secure all extra loot from the storage bins on day 2 and then complete the heist.
There are six storage bins in total. They must be opened with a drill or a keycard. Storage bins without loot can be left unopened.
Death Wish Swinger
Complete the heist in stealth on DEATH WISH+.
Complete the heist in stealth on DEATH WISH+.
Both days must be stealthed. Remember that you will always get an additional stealth reward at the escape point.
Reputation Beyond Reproach
Requires 4 players.
After tagging the wrong truck on the first day, complete day 2 without letting anyone get downed or cuffed on DEATH WISH+.
Requires 4 players.
After tagging the wrong truck on the first day, complete day 2 without letting anyone get downed or cuffed on DEATH WISH+.
You'll have to do the second day on loud after tagging the wrong truck, so good luck.
Computer
Complete day 1 in loud, after finishing both intel downloads on the computer.
Firestarter
Stealth possible on all three days, though unusually difficult on day 1, as described below.
If you never alert the gangsters on the first day, it's possible to secure the weapons in stealth (not destroying them). However, the fact that this day was clearly not made for stealth is what makes it difficult. Cameras cannot be permanently disabled on higher difficulties, and if any gangster is alerted, even if killed right after, the day will turn loud.
To stealth this day, bring as many body bags as possible. First, eliminate the gangsters behind the hangars in the alleys, while hiding their bodies. Some gangsters will roam around the map. You can just wait a while for each of these to walk into the alleys to kill them.
Then, you'll need to deal with the stationary guards. Those standing still outside of the closed hangars can usually be left alone, though you'll need to kill those inside the open hangars containing loot. These guards are almost constantly in view of each other, so it requires precise timing and quick shooting, and preferably other players - though it's possible alone.
The second day of this heist is a lot simpler to stealth, and the third day even more so. The third day is also mostly the same as any of the Bank heists.


I Just Had To
Complete day 2 in stealth.
If you never alert the gangsters on the first day, it's possible to secure the weapons in stealth (not destroying them). However, the fact that this day was clearly not made for stealth is what makes it difficult. Cameras cannot be permanently disabled on higher difficulties, and if any gangster is alerted, even if killed right after, the day will turn loud.
To stealth this day, bring as many body bags as possible. First, eliminate the gangsters behind the hangars in the alleys, while hiding their bodies. Some gangsters will roam around the map. You can just wait a while for each of these to walk into the alleys to kill them.
Then, you'll need to deal with the stationary guards. Those standing still outside of the closed hangars can usually be left alone, though you'll need to kill those inside the open hangars containing loot. These guards are almost constantly in view of each other, so it requires precise timing and quick shooting, and preferably other players - though it's possible alone.
The second day of this heist is a lot simpler to stealth, and the third day even more so. The third day is also mostly the same as any of the Bank heists.
Illustration
Name and description
How to achieve
Lord of War
Secure all weapons on day 1.
Secure all weapons on day 1.
There are 11 or 12 bags of weapons.
Saws are useful for the trucks.
Saws are useful for the trucks.
Wasteful
Complete day 1 after having burned all weapons on DEATH WISH+.
Complete day 1 after having burned all weapons on DEATH WISH+.
You'll need to find the fuel tank and shoot it, then throw all weapons into the fire.
Be aware that the weapons will explode after burning for a few seconds.
Be aware that the weapons will explode after burning for a few seconds.
Guessing Game
Complete the day 2 in stealth without hacking the computer.
Complete the day 2 in stealth without hacking the computer.
Disable the correct two power boxes, and then finish the heist in stealth.
There are four or five boxes, meaning you only have a 17% or 10% chance to succeed. There is no way to increase these odds.
Luckily, it's one of the first tasks of that day, so you can restart quite quickly.
There are four or five boxes, meaning you only have a 17% or 10% chance to succeed. There is no way to increase these odds.
Luckily, it's one of the first tasks of that day, so you can restart quite quickly.
You Can Run, But Not Hide
Secure the goat on day 2.
Secure the goat on day 2.
In a room on the ground floor you'll find a goat in a cage. You can use a saw or C4 to quickly open it.
It's Getting Hot In Here
On day 3, have everyone stay in the vault on DEATH WISH+ as the money burns out.
On day 3, have everyone stay in the vault on DEATH WISH+ as the money burns out.
This is easily done in stealth, after taking care of all NPCs.
The First Line
Find the hockey poster on day 3.
Unlocks the First Line trophy.
Find the hockey poster on day 3.
Unlocks the First Line trophy.
It's randomly found in a deposit box. These can be quickly opened with saws.
Here Comes The Pain Train
Requires 4 players.
Complete all days in loud on OVERKILL+ having everyone wield unmodified AK rifles and unmodified Para submachine guns.
Requires 4 players.
Complete all days in loud on OVERKILL+ having everyone wield unmodified AK rifles and unmodified Para submachine guns.
-
For Daisy
Finish the heist on OVERKILL+ with every player using only pistols.
Finish the heist on OVERKILL+ with every player using only pistols.
-
I Just Had To
Complete day 2 in stealth.
First World Bank
Stealth possible.


Illustration
Name and description
How to achieve
Au Ticket
Drill the small safe in the office and take what is inside.
Drill the small safe in the office and take what is inside.
This safe is in the crowded office that you'll go through as you head towards the escape.
Down Payment
Kill the bank manager with the Money Bundle (melee weapon).
Kill the bank manager with the Money Bundle (melee weapon).
-
Federal Assurance
Kill all Bulldozers inside the vault within 30 seconds after jumping in.
Kill all Bulldozers inside the vault within 30 seconds after jumping in.
They only spawn there on OVERKILL+.
There are up to four bulldozers. Rocket launchers trivialise this challenge.
There are up to four bulldozers. Rocket launchers trivialise this challenge.
1337
Complete the heist within 13 minutes 37 seconds.
Complete the heist within 13 minutes 37 seconds.
-
Original Heisters
Requires 4 players.
Complete the heist on OVERKILL+ with the original Payday crew, each wielding a Reinfield shotgun and Bernetti 9 pistol.
Requires 4 players.
Complete the heist on OVERKILL+ with the original Payday crew, each wielding a Reinfield shotgun and Bernetti 9 pistol.
That means each player needs to select either Dallas, Hoxton, Wolf, or Chains.
Cloaker Fear
Secure all additional loot bags on OVERKILL+ without using the vent shortcut for the additional bags.
Secure all additional loot bags on OVERKILL+ without using the vent shortcut for the additional bags.
You are still allowed to use the vent for the required amount of bags, just not the extra ones.
Hidden Hostages
Complete the heist with 6 or more hostages hidden behind the wall in the main lobby.
Complete the heist with 6 or more hostages hidden behind the wall in the main lobby.
Either do this in stealth, or have someone defend the hostages until the escape is available.
OVERDRILL
Requires 4 players.
Solve the secret of this heist on DEATH WISH+ and enter the secret vault.
Requires 4 players.
Solve the secret of this heist on DEATH WISH+ and enter the secret vault.
https://steamcommunity.com/sharedfiles/filedetails/?id=538995264 It'll take about 45-50 minutes in total to enter the vault, then 20 more minutes to move all the gold to the exit (which is optional but extremely rewarding).
Four Stores
Stealth possible.
Because of the randomness of this heist, you first should walk around in casing mode to spot where the safes are, then plan accordingly. Unless, of course, you're going loud and simply loot everything.

Because of the randomness of this heist, you first should walk around in casing mode to spot where the safes are, then plan accordingly. Unless, of course, you're going loud and simply loot everything.
Illustration
Name and description
How to achieve
Yeah He's A Gold Digger
Find a rare gold bar in a safe.
Find a rare gold bar in a safe.
Use C4 to quickly blow up the safes, and restart if it isn't there.
Framing Frame
Stealth possible on all three days.
The first day is identical to Art Gallery, and achievements earned there may also be earned here. If that day is completed in stealth, or within 50 seconds after the alarm went off, the trade on the second day will almost always go without any issues (restart if it doesn't). Else, there's a high chance you will be ambushed.


The Elephant in the Room
Complete the entire heist on OVERKILL+ with each day ending in stealth.
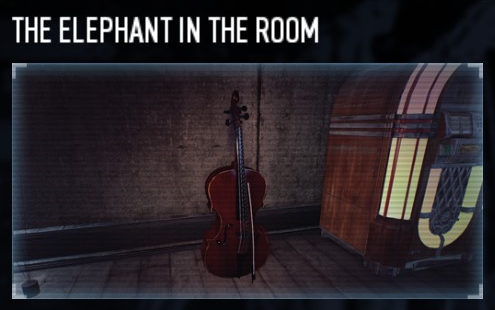
The first day is identical to Art Gallery, and achievements earned there may also be earned here. If that day is completed in stealth, or within 50 seconds after the alarm went off, the trade on the second day will almost always go without any issues (restart if it doesn't). Else, there's a high chance you will be ambushed.
Illustration
Name and description
How to achieve
Painting Yourself Into a Corner
Secure all nine paintings in stealth on day 1.
Secure all nine paintings in stealth on day 1.
-
Big Deal
Steal all nine paintings on day 1, then trade them all on day 2.
Steal all nine paintings on day 1, then trade them all on day 2.
-
I Wasn't Even There
Secure all eight gold bags from the vault in stealth on day 3.
Secure all eight gold bags from the vault in stealth on day 3.
There are three possible spawn locations for the vault, always behind a bookshelf. Be aware that guards can spot moved bookshelves.
Afraid of the Dark
When going loud on day 3, don't let the cops turn off the power.
Recommended for at least two players, so there's at least one player per power box.
When going loud on day 3, don't let the cops turn off the power.
Recommended for at least two players, so there's at least one player per power box.
On Overkill difficulty or lower there will be two power boxes.
The upload takes 6 minutes and 40 seconds.
The upload takes 6 minutes and 40 seconds.
We Do It Live!
Complete the entire heist on OVERKILL+ without any player using skills, while wearing suits and wielding the Platypus 70 sniper rifle and Judge shotgun.
Complete the entire heist on OVERKILL+ without any player using skills, while wearing suits and wielding the Platypus 70 sniper rifle and Judge shotgun.
-
The Elephant in the Room
Complete the entire heist on OVERKILL+ with each day ending in stealth.
GO Bank
Stealth possible.


Illustration
Name and description
How to achieve
Upside Down
Shoot the letter T of "Roberts" on the bank logo on the roof.
Shoot the letter T of "Roberts" on the bank logo on the roof.
-
Dead Presents
Place 4 body bags under the Christmas tree.
Place 4 body bags under the Christmas tree.
-
All Eggs in One Basket
Have the plane pick up all bags of cash with the skyhook in loud.
Have the plane pick up all bags of cash with the skyhook in loud.
Loot the entire vault, and then make sure every bag is in the basket when the plane takes it.
Eco Round
Complete the heist without using your primary weapon.
Complete the heist without using your primary weapon.
-
Sewer Rats
Requires 3-4 players.
Secure all bags of cash via the sewers on OVERKILL+.
Requires 3-4 players.
Secure all bags of cash via the sewers on OVERKILL+.
Have the cage be picked up without any bags in it. This will unlock the sewers.
Once you open the sewers you'll have 3 minutes to escape (on Overkill difficulty).
Due to the length and randomness of the sewers this might require several restarts.
Once you open the sewers you'll have 3 minutes to escape (on Overkill difficulty).
Due to the length and randomness of the sewers this might require several restarts.
We Are Professionals
Complete the heist in stealth, without your crew killing any civilians on OVERKILL+.
Recommended for at least three players with the Forced Friendship skill in the Mastermind skill tree.
Complete the heist in stealth, without your crew killing any civilians on OVERKILL+.
Recommended for at least three players with the Forced Friendship skill in the Mastermind skill tree.
Civilians are constantly spawning just outside of the map, where you can't reach them. They will be alarmed if you make any noise, so you must keep quiet for the entire heist.
Goat Simulator
Both days must be done in loud.
Considered the hardest heist by almost everyone. Save this "jewel" for last if you're trying for the Death Sentence One Down mask.
On that difficulty, you'll have to secure fifteen goats on the first day throughout an unusually large area that has barely any cover. Get the goats from the plaza as fast as possible, as this area will be the most difficult to enter once the assault has started. Driving the Longfellow will be necessary to move around most of the town at all. It can store up to four goats, and must be driven into the escape van when escaping.
Some may find the second day easier, some may find it harder. You will require someone with C4 for the last part of this day. Defending from inside the barn is rather simple, but going outside to fill the crates will again put you in a difficult position with little cover - especially if the cage is near the bridge with the SWAT van turret.
Once the goats have been secured, you'll drive towards a closed bridge with a control tower. You'll need to place the C4 on the door while being shot at (still a better alternative to a drill), then press the button and survive behind the building (inside is no cover) for two more minutes.


Goat
Extract 25 goats on day 2.
Must be done over several heists, because there aren't enough goats to do this in one heist.
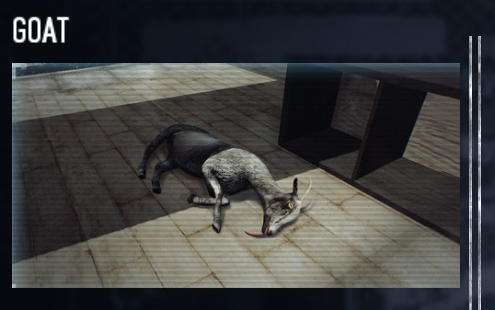
Considered the hardest heist by almost everyone. Save this "jewel" for last if you're trying for the Death Sentence One Down mask.
On that difficulty, you'll have to secure fifteen goats on the first day throughout an unusually large area that has barely any cover. Get the goats from the plaza as fast as possible, as this area will be the most difficult to enter once the assault has started. Driving the Longfellow will be necessary to move around most of the town at all. It can store up to four goats, and must be driven into the escape van when escaping.
Some may find the second day easier, some may find it harder. You will require someone with C4 for the last part of this day. Defending from inside the barn is rather simple, but going outside to fill the crates will again put you in a difficult position with little cover - especially if the cage is near the bridge with the SWAT van turret.
Once the goats have been secured, you'll drive towards a closed bridge with a control tower. You'll need to place the C4 on the door while being shot at (still a better alternative to a drill), then press the button and survive behind the building (inside is no cover) for two more minutes.
Illustration
Name and description
How to achieve
Baaaa... *Bang* aaaah
Throw a goat in the air, kill an enemy, and catch the goat before it lands.
Throw a goat in the air, kill an enemy, and catch the goat before it lands.
Do this alone with a bot in your crew that has the Quick ability.
Goat in 60 Seconds
Secure six goats in the escape van within a minute of it arriving on day 1.
Secure six goats in the escape van within a minute of it arriving on day 1.
The location of the escape van is randomised.
Collect four goats in the Longfellow, so you can quickly secure them once the van arrives, and then find two more.
Collect four goats in the Longfellow, so you can quickly secure them once the van arrives, and then find two more.
Hazzard County
When the escape car is available on day 2, complete the heist within 4 minutes.
When the escape car is available on day 2, complete the heist within 4 minutes.
Have someone bring C4 or a saw so they can quickly open the door of the bridge control room.
Farmer Miserable
Send all goats in separate cages on OVERKILL+ on day 2.
Send all goats in separate cages on OVERKILL+ on day 2.
Do not collect any additional goats on day 1.
On day 2, you'll have to wait several minutes whenever a cage has been picked up. There'll be 13 goats on the Overkill difficulty.
This takes about 45 minutes in total.
On day 2, you'll have to wait several minutes whenever a cage has been picked up. There'll be 13 goats on the Overkill difficulty.
This takes about 45 minutes in total.
Goat
Extract 25 goats on day 2.
Must be done over several heists, because there aren't enough goats to do this in one heist.
Golden Grin Casino
Stealth possible.
In multiplayer, it's possible for a player to not take their kit from the guitar case, and instead remain as spotter for the other players throughout the heist. This is especially useful considering the amount of tasks that involve sneaking around NPCs.
You'd want the Van escape and Heartbreaker Annie asset for stealth. For loud, just purchase any BFD upgrade and attachment that you see fit.


Golden Grin
Complete the heist on DEATH WISH+ while you are wielding silenced pistols as both primary and secondary weapons. Obviously, this is best done in stealth.
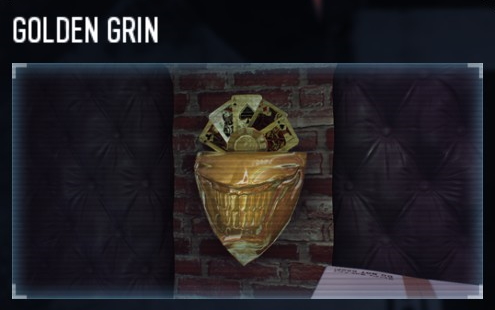
In multiplayer, it's possible for a player to not take their kit from the guitar case, and instead remain as spotter for the other players throughout the heist. This is especially useful considering the amount of tasks that involve sneaking around NPCs.
You'd want the Van escape and Heartbreaker Annie asset for stealth. For loud, just purchase any BFD upgrade and attachment that you see fit.
Illustration
Name and description
How to achieve
Hail to the King, Baby
Complete the heist in stealth, having killed the Elvis Presley look-alike.
Complete the heist in stealth, having killed the Elvis Presley look-alike.
He can be all over the map, so just hang around the main floor and he'll eventually walk past you.
City of Sin and Well-Oiled Gears
Complete the heist in loud, without the BFD ever breaking.
Recommended for two or more players.
Complete the heist in loud, without the BFD ever breaking.
Recommended for two or more players.
Defend the power boxes and the drill itself, and keep filling the tanks.
Make sure to start with all BFD upgrade assets.
Make sure to start with all BFD upgrade assets.
High Roller
Complete the heist within 14 minutes.
Complete the heist within 14 minutes.
Can be done in stealth or loud.
Golden Grin
Complete the heist on DEATH WISH+ while you are wielding silenced pistols as both primary and secondary weapons. Obviously, this is best done in stealth.
Green Bridge
Loud only.


Tied Up
Collect the four pairs of handcuffs.
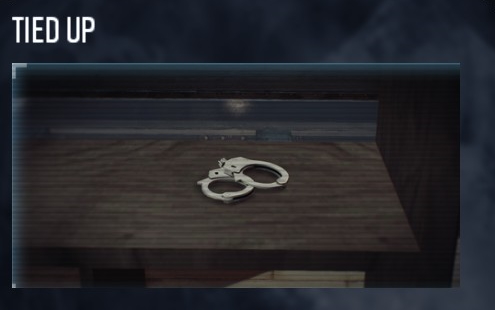
Illustration
Name and description
How to achieve
I Felt Bad For Him
Place a medic bag next to the dead man.
Place a medic bag next to the dead man.
You'll find his corpse on the left side (facing the explosion) of the bridge, near where it blew up.
Back to Prison
Free and zip-tie the additional six prisoners.
Free and zip-tie the additional six prisoners.
You do not have to defend these hostages.
Caution! Wet Floors
Escort the prisoner to the bottom of the scaffolding without any player touching the ground on OVERKILL+.
Everyone has to stay off the ground from the moment the prisoner is freed.
Recommended for 3-4 players, so each player can cover a different part of the bridge and there will be less jumps required.
You will unlock something called "an irrational hatred for this achievement".
Escort the prisoner to the bottom of the scaffolding without any player touching the ground on OVERKILL+.
Everyone has to stay off the ground from the moment the prisoner is freed.
Recommended for 3-4 players, so each player can cover a different part of the bridge and there will be less jumps required.
You will unlock something called "an irrational hatred for this achievement".
* You might want to practice this on Normal difficulty first, so you can learn the jumps without caring about the cops.
* Make sure to wear suits, and spend your skill points on movement skills.
* The player that opens the van doors should stand on top of the van. They can open it from up there. Restart if the prisoner is in the fourth van, all the way at the end of the bridge.
* Stay near the prisoner so you can keep shouting at him, and make sure enemies never get close. Otherwise, he may hunker down in an unreachable spot.
* If done right, you'll get this achievement the moment he reaches the scaffolding (the extraction building).
* Make sure to wear suits, and spend your skill points on movement skills.
* The player that opens the van doors should stand on top of the van. They can open it from up there. Restart if the prisoner is in the fourth van, all the way at the end of the bridge.
* Stay near the prisoner so you can keep shouting at him, and make sure enemies never get close. Otherwise, he may hunker down in an unreachable spot.
* If done right, you'll get this achievement the moment he reaches the scaffolding (the extraction building).
Attacked Helicopter
Destroy the helicopter turret before the prisoner is picked up by the helicopter.
Destroy the helicopter turret before the prisoner is picked up by the helicopter.
-
Tied Up
Collect the four pairs of handcuffs.
Heat Street
Loud only.


Not So Fast
Collect the hidden turtoise.
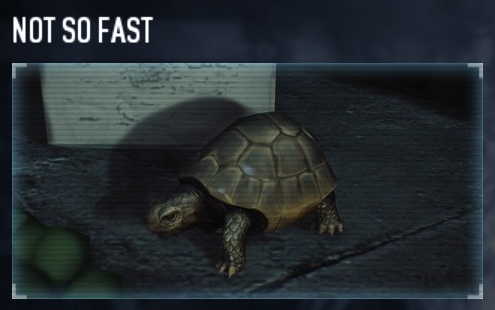
Illustration
Name and description
How to achieve
It's Nice To Be Nice
Complete the heist on HARD+ without having any civilian die.
Complete the heist on HARD+ without having any civilian die.
Make sure not to use explosives or the Graze skill.
AI and Jokers will never kill civilians.
AI and Jokers will never kill civilians.
Zookeeper
Collect the eight animal posts.
Collect the eight animal posts.
Patience is Key
Complete the heist without using any gas cans.
You'll have to wait 30 minutes for the man to eventually climb out of his van.
Complete the heist without using any gas cans.
You'll have to wait 30 minutes for the man to eventually climb out of his van.
This is best done alone with AI on Normal difficulty.
Reach the van and interact with it. Then find a safe spot, leave your computer, and take a walk or do some household chores for 30 minutes. Return and finish the heist.
Reach the van and interact with it. Then find a safe spot, leave your computer, and take a walk or do some household chores for 30 minutes. Return and finish the heist.
Not So Fast
Collect the hidden turtoise.
Hell's Island
Loud only.


Illustration
Name and description
How to achieve
Prison Rules
Get 13 kills with the Nova Shank on OVERKILL+. Can be done over several heists.
Get 13 kills with the Nova Shank on OVERKILL+. Can be done over several heists.
See the Melee: Kill counters section for tips.
Another Way Out
Free all other prisoners before freeing Bain on OVERKILL+.
Free all other prisoners before freeing Bain on OVERKILL+.
There are 3 or 4 other prisoners.
Use the cameras to spot them.
Use the cameras to spot them.
Beacon of... Nope
Shoot out the moving light of the lighthouse in the last section.
Shoot out the moving light of the lighthouse in the last section.
Fire at this light, preferably with a sniper rifle.
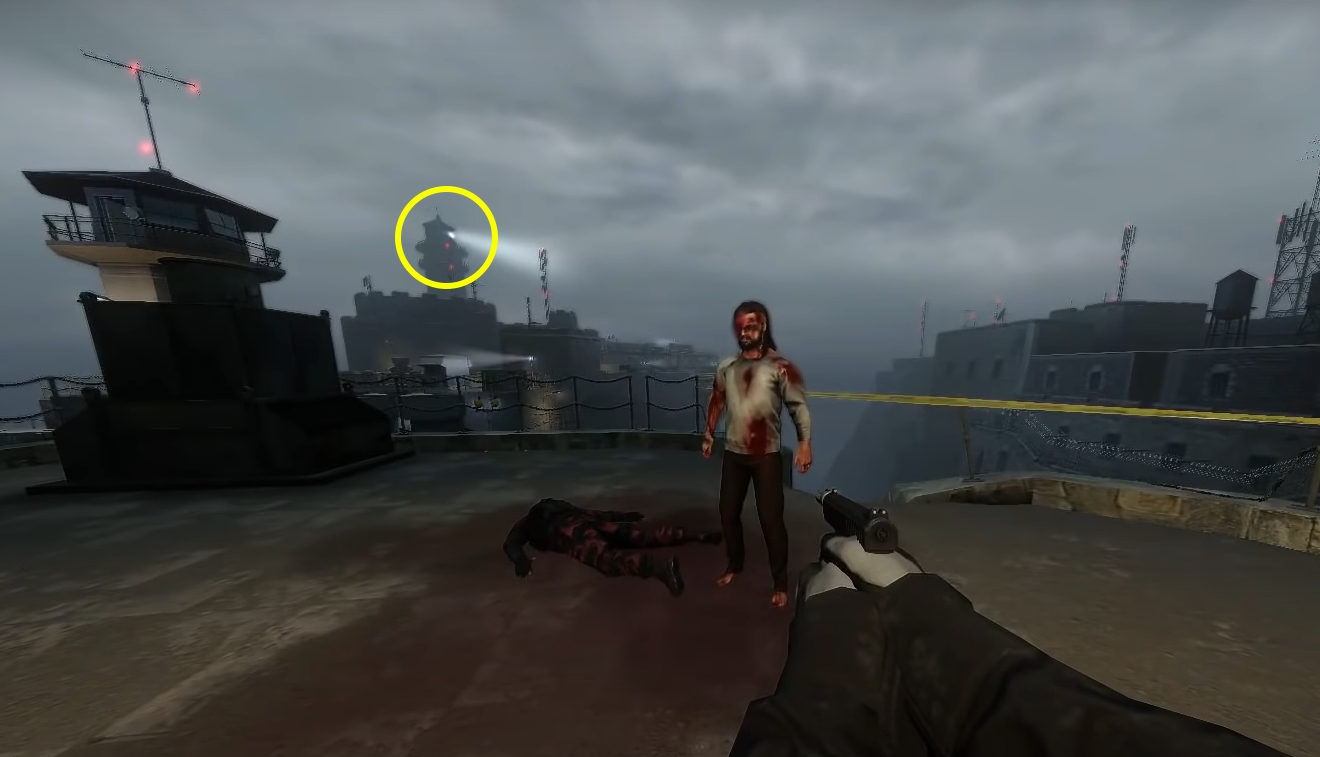
Henry's Rock
Loud only.
Rather difficult due to the amount of large rooms you'll be fighting in. Especially the last area will be tricky, as it guarded by two SWAT turrets.


Rather difficult due to the amount of large rooms you'll be fighting in. Especially the last area will be tricky, as it guarded by two SWAT turrets.
Illustration
Name and description
How to achieve
The Red Button
Complete the heist after pressing the red button on OVERKILL+.
Complete the heist after pressing the red button on OVERKILL+.
Next to the terminal is a red button that says "DO NOT PRESS".
Press it before starting the first terminal hack to make the heist more challenging. Then, complete the heist.
Press it before starting the first terminal hack to make the heist more challenging. Then, complete the heist.
Boom, Headshot!
Headshot all five mannequins in the weapon room with pistols within 3 seconds.
Headshot all five mannequins in the weapon room with pistols within 3 seconds.
You won't always get that room, so you can restart if it isn't the first room you open.
You can do this with multiple players. The short timer starts when the first mannequin shot.
You can do this with multiple players. The short timer starts when the first mannequin shot.
Hack This!
Destroy the security turrets next to the helicopter pad instead of shutting them down on OVERKILL+.
Destroy the security turrets next to the helicopter pad instead of shutting them down on OVERKILL+.
-
Hidden Secrets
Solve an additional puzzle in the Archaeology lab.
Solve an additional puzzle in the Archaeology lab.
Open the crate and bag the box. Then simply press the three buttons on the outside of the crate in the correct order;
Pyramid (front) > Circle (right) > Rhombus (left)
Pyramid (front) > Circle (right) > Rhombus (left)
Hostile Takeover
Stealth possible.


Illustration
Name and description
How to achieve
Just Passing Through
Complete the heist in stealth on OVERKILL+ without your crew killing any civilians.
You must also complete the heist within 7 minutes alone, or within 4 minutes in multiplayer.
Complete the heist in stealth on OVERKILL+ without your crew killing any civilians.
You must also complete the heist within 7 minutes alone, or within 4 minutes in multiplayer.
Stealing the research documents should be your final objective, after destroying the lab, unlike what the game tells you. Otherwise, you will have to face a security team (which takes precious time).
Alternatively, you could also try to rush this with ECM Jammers with four players.
Alternatively, you could also try to rush this with ECM Jammers with four players.
Payday Kart 64
Smash with golf carts through all pick up signs in numerical order, within 60 seconds from the first one.
Smash with golf carts through all pick up signs in numerical order, within 60 seconds from the first one.
There are 16 signs in total.
You can do this alone, or with multiple players as if it's a relay race.
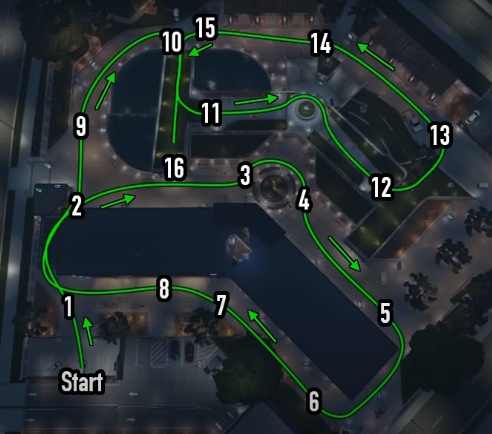
You can do this alone, or with multiple players as if it's a relay race.
Texas Treasures, Part 3
Find the hidden safe and collect what is inside. This has more steps than Part 2.
Find the hidden safe and collect what is inside. This has more steps than Part 2.
This requires having the Texas Treasure, Part 2 achievement from the Lost in Transit heist.
https://steamcommunity.com/sharedfiles/filedetails/?id=2936238546
https://steamcommunity.com/sharedfiles/filedetails/?id=2936238546
System Shocked
Lure at least 50 enemies to their death in electrified water on OVERKILL+, without leaving the flooded rooms.
Lure at least 50 enemies to their death in electrified water on OVERKILL+, without leaving the flooded rooms.
Instead of breaking the lab equipment, use C4 to blow up the windows, causing electrified water to flood the room. You can find C4 in the second floor bathroom.
Every player must be inside of the rooms with electrified water to start the counter. If any player leaves this area, the counter is reset.
Every player must be inside of the rooms with electrified water to start the counter. If any player leaves this area, the counter is reset.
Hotline Miami
Both days must be done in loud.


Illustration
Name and description
How to achieve
Do You Like Hurting Other People?
Get 30 kills on thugs with a baseball bat. Can be done over several heists.
Get 30 kills on thugs with a baseball bat. Can be done over several heists.
See the Melee: Kill counters section for tips.
Overdose
Secure 6 bags of meth on day 1.
Secure 6 bags of meth on day 1.
There are 1-3 sets of ingredients in the meth lab, and 3-4 in the basement crates. Restart if there are not three sets in the meth lab.
Ingredients always spawn in the same boxes in the meth lab and adjacent room. Strangely enough, there is a higher chance to find more ingredients on lower difficulties, with the best odds on Normal.
Insert the ingredients in this order;
Muriatic Acid > Caustic Soda > Hydrogen Chloride.
Ingredients always spawn in the same boxes in the meth lab and adjacent room. Strangely enough, there is a higher chance to find more ingredients on lower difficulties, with the best odds on Normal.
Insert the ingredients in this order;
Muriatic Acid > Caustic Soda > Hydrogen Chloride.
Walk Faster
On day 2, enter the Commissar's apartment room within 3 minutes 30 seconds from the start on OVERKILL+.
On day 2, enter the Commissar's apartment room within 3 minutes 30 seconds from the start on OVERKILL+.
Easily done if you use saws to get past the gates.
Phew!
Rescue the captive on day 2.
Rescue the captive on day 2.
You can find a man with a pig mask bound to a chair somewhere on your way towards the Commissar. The chair is rigged with explosives that must be disarmed.
Sound of Animals Fighting
Requires 4 players.
Complete the heist on HARD+ while everyone wears a different mask from this heist.
Requires 4 players.
Complete the heist on HARD+ while everyone wears a different mask from this heist.
Everyone must wear either Dennis, Graham, Rasmus or Aubrey.
Unlock these masks with the above achievements.
Unlock these masks with the above achievements.
Hoxton Breakout
Both days must be done in loud.


Illustration
Name and description
How to achieve
Situation Normal
Complete the heist without using any keycards on day 2 on OVERKILL+.
Complete the heist without using any keycards on day 2 on OVERKILL+.
You can equip C4 or ECM Jammers to unlock most doors without keycards. Though, this is not necessary to complete the heist.
Watch the Power Switch!
Never let the cops turn off the power on day 2 while Hoxton is in the server room.
Never let the cops turn off the power on day 2 while Hoxton is in the server room.
There is only one power switch. Have someone watch it at all times.
Wind of Change
Requires 4 players.
Complete the heist on OVERKILL+ while everyone wears either the British Bulldog, Old Blood And Guts, The Constable or The Red Bear mask (all DLC).
Requires 4 players.
Complete the heist on OVERKILL+ while everyone wears either the British Bulldog, Old Blood And Guts, The Constable or The Red Bear mask (all DLC).
Everyone needs to wear a different mask.
You can unlock them via the achievements; So Uncivilised, Bullet Hell, Death From Below and Special Operations Execution.
You can unlock them via the achievements; So Uncivilised, Bullet Hell, Death From Below and Special Operations Execution.
Tabula Rosa
Complete the heist on OVERKILL+ without any player using skills, while wearing suits and wielding the Golden AK.762 rifle and Chicago Typewriter submachine gun.
Complete the heist on OVERKILL+ without any player using skills, while wearing suits and wielding the Golden AK.762 rifle and Chicago Typewriter submachine gun.
-
Hoxton Revenge
Stealth possible.
Note that the vault timelock will pause while there's an ECM jammer active. Going loud will cause the target to don heavy armour and use firearms.

Note that the vault timelock will pause while there's an ECM jammer active. Going loud will cause the target to don heavy armour and use firearms.
Illustration
Name and description
Silent But Deadly
Complete the heist in stealth.
Complete the heist in stealth.
Jewelry Store
Stealth possible.
Very similar to the Ukrainian Job, only lacking the tiara. It's the most basic heist there is, actually intended for new players. There are never more than four guards, thus they can all be killed.

Very similar to the Ukrainian Job, only lacking the tiara. It's the most basic heist there is, actually intended for new players. There are never more than four guards, thus they can all be killed.
Illustration
Name and description
Private Party
On OVERKILL+, go loud, so the van drives away.
Don't let the cops enter the Jewelry Store before the van returns.
On OVERKILL+, go loud, so the van drives away.
Don't let the cops enter the Jewelry Store before the van returns.
Lab Rats
Loud only.
One of the hardest loud heists, as it involves a lot of vertical movement. You're perfectly safe on top of the giant containers, but going up and down will make you a massive target - especially while using the ziplines. If you are downed, it'll be difficult for your crew to reach you in time.
The mod Meth Helper can be used for this map, so you won't accidentically nuke it.


One of the hardest loud heists, as it involves a lot of vertical movement. You're perfectly safe on top of the giant containers, but going up and down will make you a massive target - especially while using the ziplines. If you are downed, it'll be difficult for your crew to reach you in time.
The mod Meth Helper can be used for this map, so you won't accidentically nuke it.
Illustration
Name and description
How to achieve
Skill Shot
Secure a bag in the secret area.
Secure a bag in the secret area.
Trick or Treat!
Survive the Cloaker event on OVERKILL+.
Survive the Cloaker event on OVERKILL+.
This event will randomly occur once you have created the first batch of meth.
Lost in Transit
Stealth possible.


Illustration
Name and description
How to achieve
Victimless Crime
Complete the heist in stealth without your crew killing anyone.
Complete the heist in stealth without your crew killing anyone.
-
Texas Treasures, Part 2
Find the hidden safe and collect what is inside.
Find the hidden safe and collect what is inside.
This requires having the Texas Treasures achievement from the Midland Ranch heist.
https://steamcommunity.com/sharedfiles/filedetails/?id=2877548422
https://steamcommunity.com/sharedfiles/filedetails/?id=2877548422
Tabula Railroad
Complete the heist in loud on OVERKILL+ without any player using skills, while wearing suits and wielding the Mosconi 12G Shotgun and Castigo .44 Revolver.
Complete the heist in loud on OVERKILL+ without any player using skills, while wearing suits and wielding the Mosconi 12G Shotgun and Castigo .44 Revolver.
Stay together. There is no cover atop of the trains, and bots will likely not get to you in time.
Billy The Kid
Get five headshot kills with any revolver within 10 seconds.
Get five headshot kills with any revolver within 10 seconds.
-
Mallcrasher
Stealth possible.
It's a really short heist, that's very doable in loud on a high difficulty.
Funnily enough, it can also be stealthed. There aren't many guards, and you can even burn down the gym if there's no one near. Especially smashing the wine bottles (it'll barely make a sound) will quickly rack up damage.


It's a really short heist, that's very doable in loud on a high difficulty.
Funnily enough, it can also be stealthed. There aren't many guards, and you can even burn down the gym if there's no one near. Especially smashing the wine bottles (it'll barely make a sound) will quickly rack up damage.
Illustration
Name and description
Shoot the Glass
Destroy all windows.
Destroy all windows.
Self Checkout
Complete the heist within 3 minutes.
Complete the heist within 3 minutes.
$1.8M Speedrun
Loot $1.800.000 in loose cash within 50 seconds on OVERKILL (not on a higher difficulty).
Simply ignore the shops and instead use saws or ECM Jammers for the ATMs.
Loot $1.800.000 in loose cash within 50 seconds on OVERKILL (not on a higher difficulty).
Simply ignore the shops and instead use saws or ECM Jammers for the ATMs.
Meltdown
Loud only.
My personal favourite loud heist. Getting the parts out is difficult with the amount of snipers around in the first area, but afterwards you'll get to drive around like a maniac. Some players may find this hard, but it just involves learning the driving mechanics of this game.
Enemies die when hit by a moving object, even if it's a forklift going just five km/h. On higher difficulties, you should only drive the Longfellow, as the forklifts are just too impractical when you have to dodge bullets. It can hold four bags, so you must drive twice as you have to secure eight. You'll need to watch out for the turrets on the way, but the escape zone itself is almost clear of enemies.


Long Fellow
Requires 3-4 players.
Complete the heist on OVERKILL+ within 7 minutes.
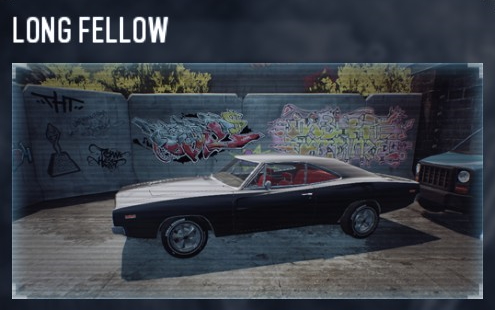
For this trophy there's simply not enough time to drive twice with the Longfellow, so the other players must drive on forklifts.
My personal favourite loud heist. Getting the parts out is difficult with the amount of snipers around in the first area, but afterwards you'll get to drive around like a maniac. Some players may find this hard, but it just involves learning the driving mechanics of this game.
Enemies die when hit by a moving object, even if it's a forklift going just five km/h. On higher difficulties, you should only drive the Longfellow, as the forklifts are just too impractical when you have to dodge bullets. It can hold four bags, so you must drive twice as you have to secure eight. You'll need to watch out for the turrets on the way, but the escape zone itself is almost clear of enemies.
Illustration
Name and description
How to achieve
They Don't Pay Us Enough
Secure all additional loot.
Secure all additional loot.
There are eight additional loot bags, for a total of 16 bags with the warheads included;
* You can find seven loot bags in crates inside the warehouse.
* The eighth loot bag is inside a random Murkywater container with a Bulldozer.
* You can find seven loot bags in crates inside the warehouse.
* The eighth loot bag is inside a random Murkywater container with a Bulldozer.
There Was A Car?!
Complete the heist without using the Longfellow car.
Recommended for 3-4 players.
Complete the heist without using the Longfellow car.
Recommended for 3-4 players.
Take the least possible loot. Each forklift can hold three bags and you will need to secure eight warheads.
Long Fellow
Requires 3-4 players.
Complete the heist on OVERKILL+ within 7 minutes.
For this trophy there's simply not enough time to drive twice with the Longfellow, so the other players must drive on forklifts.
Midland Ranch
Stealth possible.
Always take the Crossbar asset, which then appears at spawn. Mark Weapon Part Crates can be useful to avoid time on empty crates, and Extra Weapon Parts will be needed if you're trying to maximise the profit.
Past the starting area, the map of this heist is divided in two parts. You can enter either one first by going left or right from the spawn point. Both parts take about as long to complete, but the loot is found on the left side, so it's advisable to complete that part first.


Always take the Crossbar asset, which then appears at spawn. Mark Weapon Part Crates can be useful to avoid time on empty crates, and Extra Weapon Parts will be needed if you're trying to maximise the profit.
Past the starting area, the map of this heist is divided in two parts. You can enter either one first by going left or right from the spawn point. Both parts take about as long to complete, but the loot is found on the left side, so it's advisable to complete that part first.
Illustration
Name and description
How to achieve
Caddyshacked
Get 100 kills with a golf cart on OVERKILL+. Can be done over several heists.
Get 100 kills with a golf cart on OVERKILL+. Can be done over several heists.
There are two golf carts on the west side of the map.
Lucky Streak
Find all five horseshoes.
These can spawn in 16 different locations.
Find all five horseshoes.
These can spawn in 16 different locations.
Marshal Law
Get four Marshal Sharpshooter (those with a yellow laser) kills with the turret on OVERKILL+. Can be done over several heists.
Get four Marshal Sharpshooter (those with a yellow laser) kills with the turret on OVERKILL+. Can be done over several heists.
The turret is in the west side of the map, on top of a pick-up truck. It's recommended to not bring any AI or Jokers with you for this achievement.
Texas Treasures
Craft a "sheriff star" on OVERKILL+ by combining several items.
Craft a "sheriff star" on OVERKILL+ by combining several items.
Mountain Master
Stealth possible.
This is a long heist to stealth, with a considerable amount of guards. You may particularly be caught "off-guard" by the guards near and on the balcony after cutting the window. Waste as little pagers as possible before entering this area, because you'll stay here for a while. Once you pull the fire alarm, the doors to the rooftop will open. Be aware that all guards behind those doors will then enter the level.
Similarly to Framing Frame, you'll need to move bookshelves to find the objective, but guards will notice moved bookshelves.
Never throw any bodies off the building, as it will raise the alarm. And try not to sound the gong.


This is a long heist to stealth, with a considerable amount of guards. You may particularly be caught "off-guard" by the guards near and on the balcony after cutting the window. Waste as little pagers as possible before entering this area, because you'll stay here for a while. Once you pull the fire alarm, the doors to the rooftop will open. Be aware that all guards behind those doors will then enter the level.
Similarly to Framing Frame, you'll need to move bookshelves to find the objective, but guards will notice moved bookshelves.
Never throw any bodies off the building, as it will raise the alarm. And try not to sound the gong.
Illustration
Name and description
How to achieve
No Gnome Left Behind
Secure the hidden gnome on VERY HARD+. He must be secured in the helicopter.
Secure the hidden gnome on VERY HARD+. He must be secured in the helicopter.
You will find the gnome in the garage, in the trunk of an SUV with a growing red light. Opening the trunk will trigger the car alarm, causing the heist to go loud.
Crouching Bomber, Hidden Flamer
Complete the heist in loud on OVERKILL+.
Every player must wear a dragon bomber suit, and Yufu Wang must be killed having taken damage only from flamethrowers. His mask must also be collected.
Complete the heist in loud on OVERKILL+.
Every player must wear a dragon bomber suit, and Yufu Wang must be killed having taken damage only from flamethrowers. His mask must also be collected.
You should do this without AI, because they cannot equip flamethrowers and thus cannot damage him in any way. If you bring them in anyway, they don't have to wear the suit.
You have to go loud before heading towards the roof. You'll know the achievement works if he drops a mask on death.
Collect this mask and finish the heist.
You have to go loud before heading towards the roof. You'll know the achievement works if he drops a mask on death.
Collect this mask and finish the heist.
Did You Inhale Some Demon Speed?
Press the three buttons on the roof within two minutes of activating the timer, while in stealth on OVERKILL+. You do not need to complete the heist.
Press the three buttons on the roof within two minutes of activating the timer, while in stealth on OVERKILL+. You do not need to complete the heist.
You'll find the timer on a wall just before going up the staircase. Activate it, then press the three buttons on the following locations; 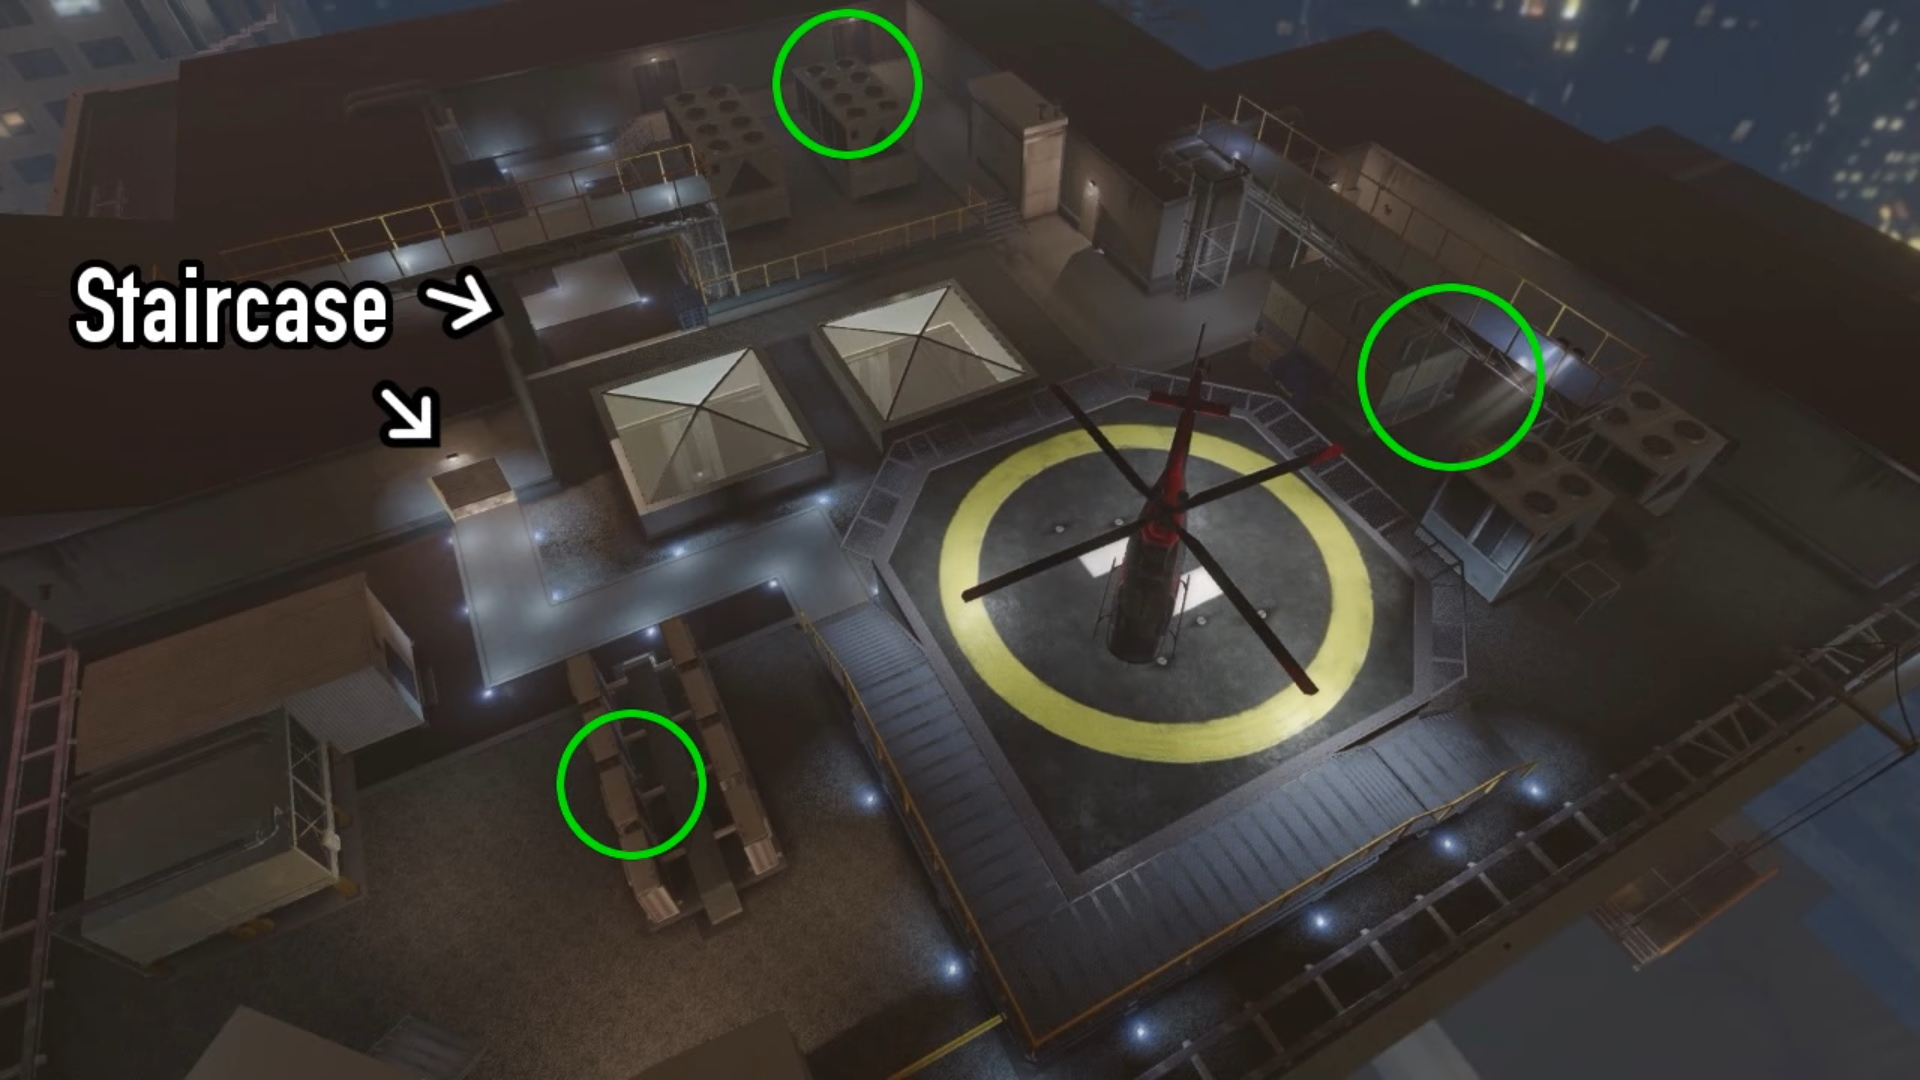
Murky Station
Stealth only.


Illustration
Name and description
How to achieve
Crouched and Hidden, Flying Dagger
Get eight guard kills with any throwing weapon while crouching. Can be done over several heists.
Get eight guard kills with any throwing weapon while crouching. Can be done over several heists.
For this achievement, kills only count if the heist is completed.
Ghost Run
Complete the heist within seven minutes.
Complete the heist within seven minutes.
-
Janitor
Complete the heist after placing a body bag in each of the four dumpsters.
Complete the heist after placing a body bag in each of the four dumpsters.
These are the locations of the dumpsters;
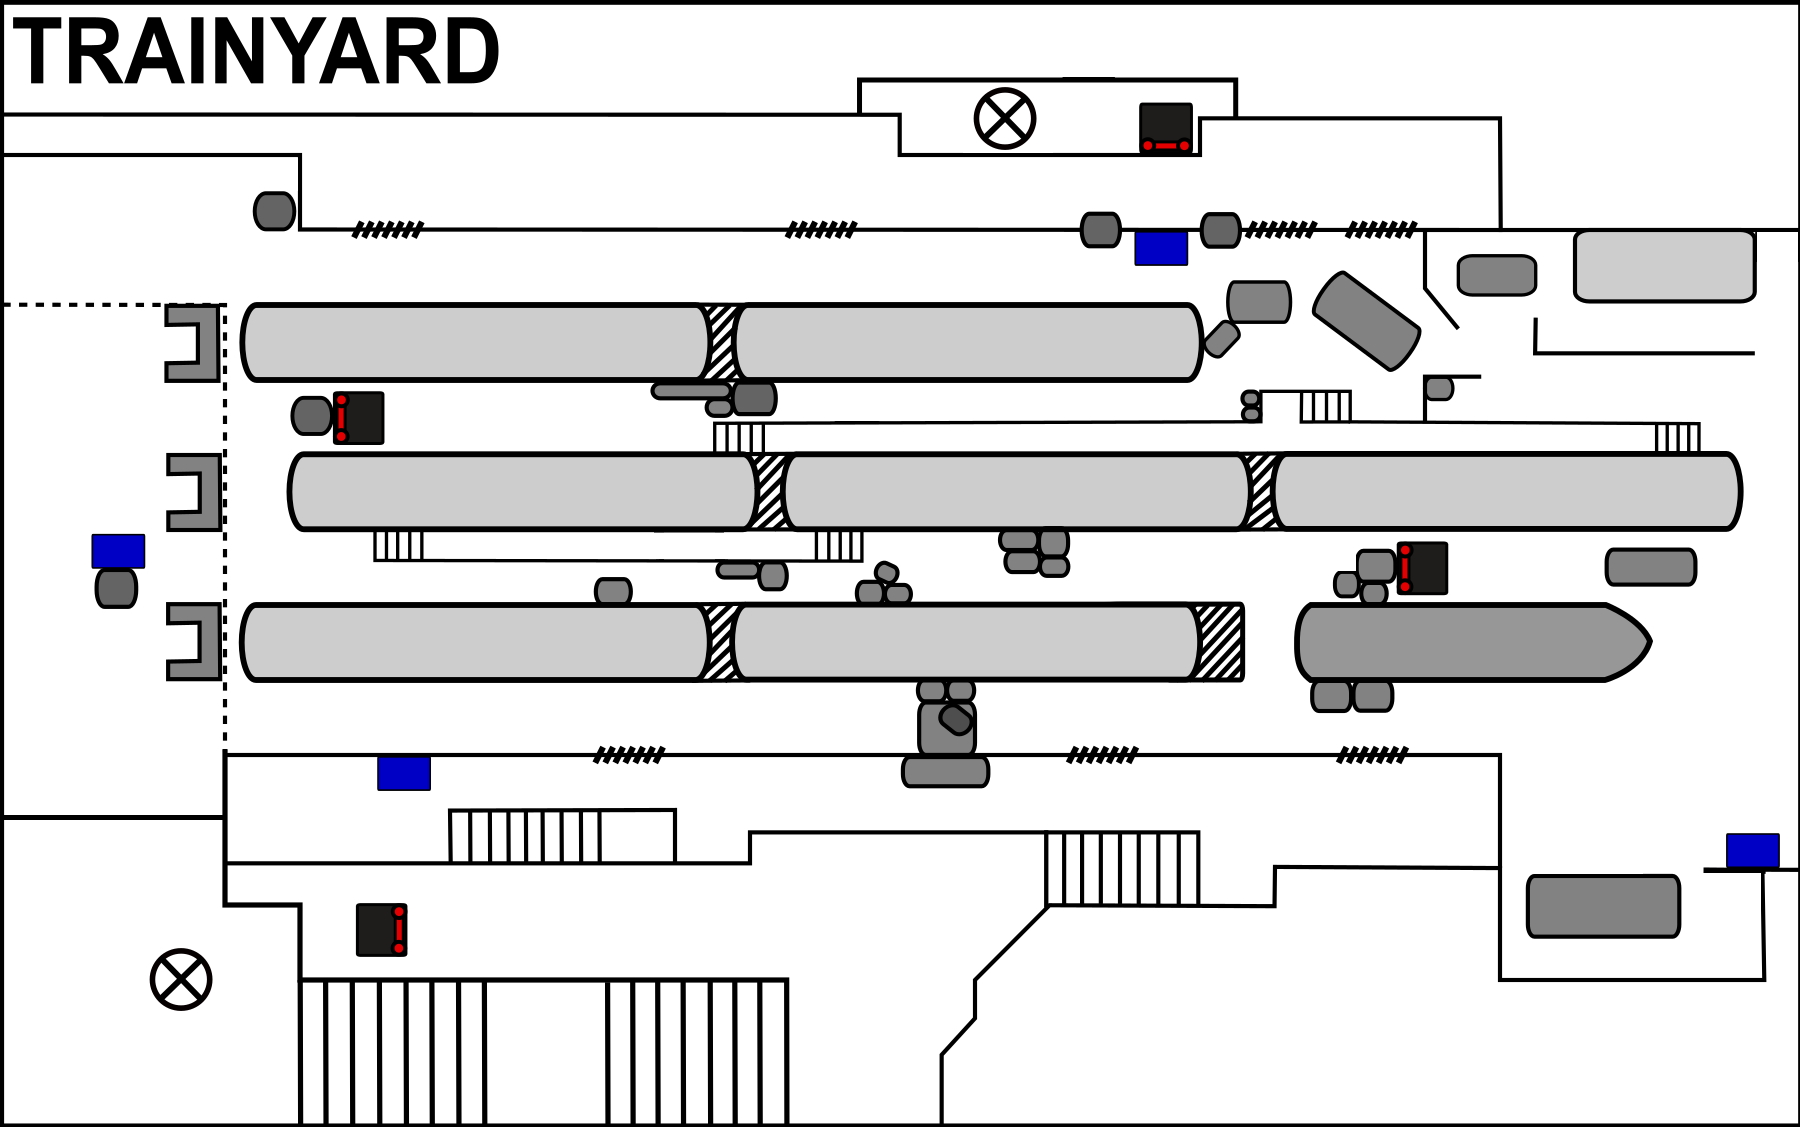
No Witnesses
Complete the heist after killing all ten guards without using ECM Jammers on OVERKILL+.
Recommended for 3-4 players, as the point of no return timer when going loud is very short.
Complete the heist after killing all ten guards without using ECM Jammers on OVERKILL+.
Recommended for 3-4 players, as the point of no return timer when going loud is very short.
* There are three guards in the basement and seven on the surface. Start the heist by killing those in the basement. Then progress through the heist as usual.
* If needed, you'll still have one pager left for a guard on the surface.
* Once escaping has become available, get in position to kill all remaining guards in rapid succession and get out.
* If needed, you'll still have one pager left for a guard on the surface.
* Once escaping has become available, get in position to kill all remaining guards in rapid succession and get out.
Pacifist
Complete the heist without your crew killing anyone.
Complete the heist without your crew killing anyone.
-
Looting in the Dark
Complete the heist after securing all loot without your crew killing anyone on OVERKILL+.
Complete the heist after securing all loot without your crew killing anyone on OVERKILL+.
There are 16 bags of loot in total;
* Two bags in the basement.
* The two required EMP bomb parts.
* Twelve bags in the other trains.
* Two bags in the basement.
* The two required EMP bomb parts.
* Twelve bags in the other trains.
Nightclub
Stealth possible.
Very basic heist. In stealth, stand next to the bouncer and he'll let you in after a short while. It's all extremely simple, but boring, as you'll eventually just have to wait until the safe with loot is drilled.
Alternatively, with multiple players you can rush in and out with ECM Jammers. Purchase the Loot Drop Truck asset, place the jammers, blow up the safe with C4, and be done within a few minutes.


Staying Alive
Complete the heist using only tripmines to kill enemies.
You need to kill at least one enemy this way, but just one is enough.
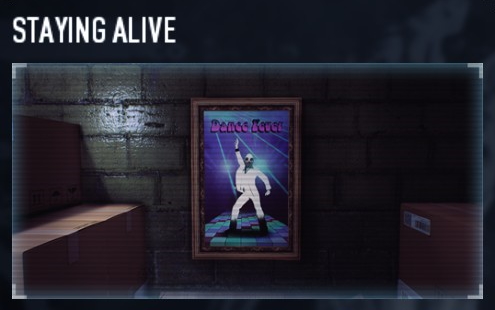
Disco Night
Complete the heist in stealth on DEATH WISH+.
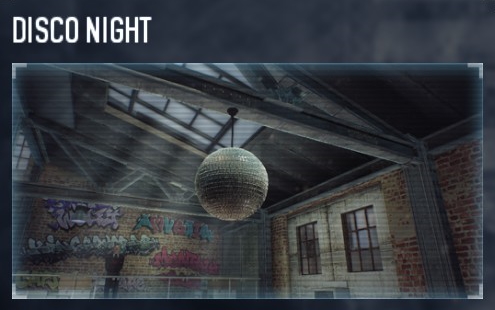
Very basic heist. In stealth, stand next to the bouncer and he'll let you in after a short while. It's all extremely simple, but boring, as you'll eventually just have to wait until the safe with loot is drilled.
Alternatively, with multiple players you can rush in and out with ECM Jammers. Purchase the Loot Drop Truck asset, place the jammers, blow up the safe with C4, and be done within a few minutes.
Illustration
Name and description
How to achieve
I'm Going All-In!
Place a cash bag on the poker table in the backroom.
Place a cash bag on the poker table in the backroom.
-
Everyday I'm Shovelin
Get 25 kills on law enforcers with the shovel.
Can be done over several heists.
Get 25 kills on law enforcers with the shovel.
Can be done over several heists.
See the Melee: Kill counters section for tips.
The Eight and Final Rule
Get 50 kills on law enforcers with fists.
Can also be done over several heists.
Get 50 kills on law enforcers with fists.
Can also be done over several heists.
See the Melee: Kill counters section for tips.
Keep the Party Going
Zip-tie the DJ and bring him to the escape zone.
Zip-tie the DJ and bring him to the escape zone.
-
Hey Mr. DJ
Have at least 12 hostages on the dance floor when you escape.
Have at least 12 hostages on the dance floor when you escape.
You can use sentry guns to guard the hostages as you escape.
Do not purchase the Bad Music asset, as there'll be less civilians to take hostage.
Do not purchase the Bad Music asset, as there'll be less civilians to take hostage.
Ove Saw 72000
Complete the heist having each player wield the OVE 9000 saw as primary and secondary weapon.
Complete the heist having each player wield the OVE 9000 saw as primary and secondary weapon.
Each player must have the Portal Saw skill in the Enforcer skill tree.
Staying Alive
Complete the heist using only tripmines to kill enemies.
You need to kill at least one enemy this way, but just one is enough.
Disco Night
Complete the heist in stealth on DEATH WISH+.
No Mercy
Stealth possible until cutting a wire.
Follow the below achievements Keep the Cool and ...Or Was It the Blue One for the part that can be stealthed. After that, you'll only need to test a blood sample (perhaps more than once) and wait on the elevator. The hardest part will be keeping the power on. Note that going down will break any blood samples you're carrying.


Follow the below achievements Keep the Cool and ...Or Was It the Blue One for the part that can be stealthed. After that, you'll only need to test a blood sample (perhaps more than once) and wait on the elevator. The hardest part will be keeping the power on. Note that going down will break any blood samples you're carrying.
Illustration
Name and description
How to achieve
Nyctophobia
Get the power back on within five seconds of it being shut down on HARD+ and complete the heist.
Recommended for 3-4 players.
Get the power back on within five seconds of it being shut down on HARD+ and complete the heist.
Recommended for 3-4 players.
As you are waiting on the elevator, you'll have to defend these seven power switches;
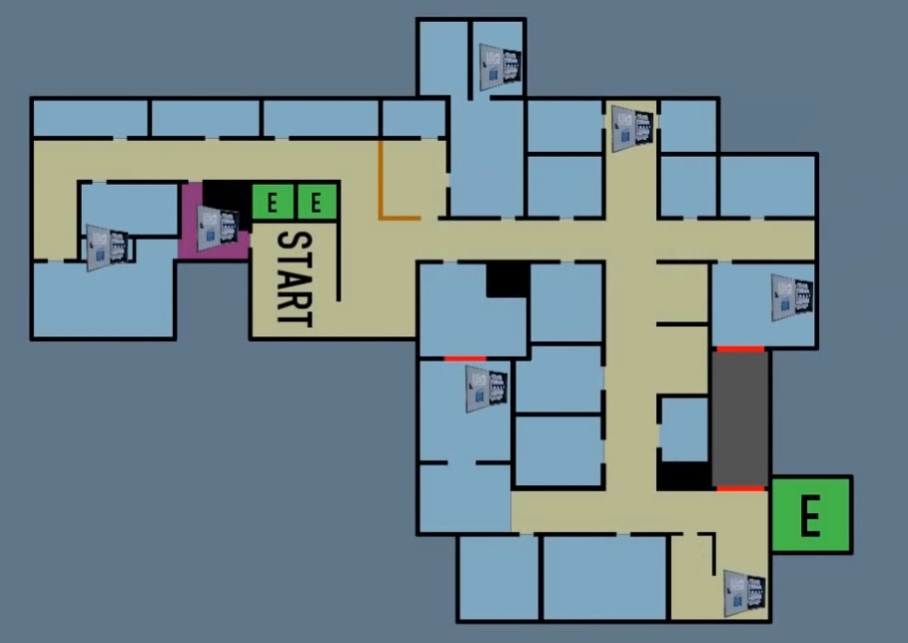
Anytime a switch is turned off, it must be turned back on again within five seconds.
One power switch at random will always be turned off. Cops will also try to turn them off.
Anytime a switch is turned off, it must be turned back on again within five seconds.
One power switch at random will always be turned off. Cops will also try to turn them off.
Keeping the Cool
Get to the ICU in stealth on HARD+.
Get to the ICU in stealth on HARD+.
* There are 3-9 cameras, depending on the amount of players. You'll have seven seconds to disable all cameras after putting on the mask.
* Subdue the civilians until the fake sentries are set up.
* Occasionally, Bain will announce that a guard or civilian has entered the building. They must be taken care off.
* Subdue the civilians until the fake sentries are set up.
* Occasionally, Bain will announce that a guard or civilian has entered the building. They must be taken care off.
...Or Was It The Blue One
Cut the correct wire in stealth.
Cut the correct wire in stealth.
After dressing up as a doctor, cut the wire connected to the room with the infected patient. Listen to what the doctor has to say to discover which one's the right patient.
Cutting a wire will automatically set off the alarm, meaning the heist cannot be completed in stealth.
Cutting a wire will automatically set off the alarm, meaning the heist cannot be completed in stealth.
Panic Room
Loud only.
Secure as much loot as you can before killing the gangster boss, as the police will not arrive before then.
Most of the heist isn't so hard, but defending the rooftop for the helicopter will be a disaster on higher difficulties. There are enemies coming in from all sides, so there's hardly any cover. You'll be confined to the staircase from inside the building, where enemies may also come up from behind you.


Secure as much loot as you can before killing the gangster boss, as the police will not arrive before then.
Most of the heist isn't so hard, but defending the rooftop for the helicopter will be a disaster on higher difficulties. There are enemies coming in from all sides, so there's hardly any cover. You'll be confined to the staircase from inside the building, where enemies may also come up from behind you.
Illustration
Name and description
How to achieve
Quick Draw
After putting on your mask, kill all gangsters within 60 seconds on OVERKILL+.
Recommended for at least two players.
After putting on your mask, kill all gangsters within 60 seconds on OVERKILL+.
Recommended for at least two players.
Have one player rush towards the top floor, kill the boss, get his keys, and then open the vault door to kill all gangsters there. Meanwhile, the other players can efficiently clear out the remaining rooms.
You'll get the achievement as soon as all gangsters are dead.
You'll get the achievement as soon as all gangsters are dead.
The Dentist Delight
Secure the large red toothbrush.
Unlocks the But It's The Tooth trophy.
Secure the large red toothbrush.
Unlocks the But It's The Tooth trophy.
Don't You Dare Miss
Get a crew accuracy above 200%.
Recommended for just one player, because the accuracy of certain weapons isn't registered well in multiplayer.
Get a crew accuracy above 200%.
Recommended for just one player, because the accuracy of certain weapons isn't registered well in multiplayer.
Use grenade launchers and rocket launchers for this.
AIs can take out the snipers for you without wasting crew accuracy, because their accuracy is disregarded.
AIs can take out the snipers for you without wasting crew accuracy, because their accuracy is disregarded.
Cardio Training
Have all players on the roof when the escape triggers, then open the basement door within 20 seconds.
Recommended for at least two players.
Have all players on the roof when the escape triggers, then open the basement door within 20 seconds.
Recommended for at least two players.
Have at least two players use Inspire to shout at eachother as they jump off the building, so they'll survive the fall.
Prison Nightmare
Loud only.
This heist involves starting "wheels of misfortune" that may trigger a random event. Each wheel eventually awards a keycard, which can be used to obtain additional loot or end the heist. If going for the loot, this process can be repeated indefinitely.


Spooky Pumpkin
Shoot the hidden pumpkin.
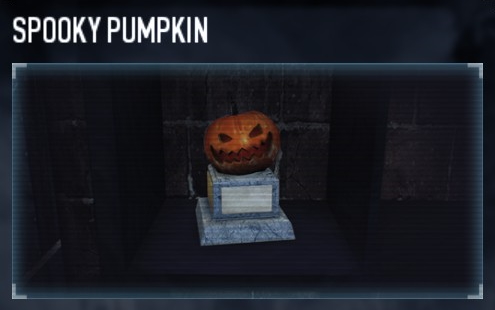
This heist involves starting "wheels of misfortune" that may trigger a random event. Each wheel eventually awards a keycard, which can be used to obtain additional loot or end the heist. If going for the loot, this process can be repeated indefinitely.
Illustration
Name and description
How to achieve
A Long Night of Horrors
Obtain at least 15 keycards on MAYHEM+, and complete the heist without any player going into custody.
Obtain at least 15 keycards on MAYHEM+, and complete the heist without any player going into custody.
-
Salem Asylum
Get on the train within 4 minutes 44 seconds on MAYHEM+.
Recommended for two players, but not more.
Get on the train within 4 minutes 44 seconds on MAYHEM+.
Recommended for two players, but not more.
This timing is really tight, and it's counted individually per player. Because there are just two ziplines at the end, only two players will be able to get this achievement in time.
Wear suits and use movement skills. Restart if the wheel ever gets stopped.
Wear suits and use movement skills. Restart if the wheel ever gets stopped.
He's Got Experience
Complete the heist on HARD+, with one player as Hoxton and everyone wielding the Nova Shank melee weapon. Enemies may only be killed with the Nova Shank.
Complete the heist on HARD+, with one player as Hoxton and everyone wielding the Nova Shank melee weapon. Enemies may only be killed with the Nova Shank.
See the Melee: Kill counters section for tips. You can still use converted cops to kill, but not AI teammates.
Cloaker Charmer
Complete the heist on VERY HARD+ while wearing the PNV BriteNite mask (found under Normal), having killed at least one Cloaker.
Complete the heist on VERY HARD+ while wearing the PNV BriteNite mask (found under Normal), having killed at least one Cloaker.
-
Spooky Pumpkin
Shoot the hidden pumpkin.
Rats
Loud only on day 1 and day 3.
Day 2 might be completable without combat.
The first day is the same as Rats, with the exception that there'll be no additional ingredients beyond the first seven batches. The achievements F in Chemistry and Full Measure may also be earned here.
Cooking additional bags on day 1 increases the chance of the deal on day 2 going without any issue, though it's never guaranteed. Simultaneously, not having enough bags doesn't mean that the deal will go awry. In either case, you can also sneak or storm into the building to obtain the information.
The last day is a straightforward hit-and-run.


Day 2 might be completable without combat.
The first day is the same as Rats, with the exception that there'll be no additional ingredients beyond the first seven batches. The achievements F in Chemistry and Full Measure may also be earned here.
Cooking additional bags on day 1 increases the chance of the deal on day 2 going without any issue, though it's never guaranteed. Simultaneously, not having enough bags doesn't mean that the deal will go awry. In either case, you can also sneak or storm into the building to obtain the information.
The last day is a straightforward hit-and-run.
Illustration
Name and description
How to achieve
I Am The One Who Knocks
Cook three bags of meth without letting any law enforcer enter the house on day 1. This does not include the basement.
This achievement cannot be earned on Cook Off.
Cook three bags of meth without letting any law enforcer enter the house on day 1. This does not include the basement.
This achievement cannot be earned on Cook Off.
Cops can enter from anywhere on the ground floor. They can also rarely enter the second floor via the windows in the small room, so use planks to block those windows.
Furthermore, once per heist two cops will rappel from a helicopter onto the balcony. Be prepared for this when the helicopter arrives.
You will get the achievement as soon as the third batch is finished, if you succeeded.
Furthermore, once per heist two cops will rappel from a helicopter onto the balcony. Be prepared for this when the helicopter arrives.
You will get the achievement as soon as the third batch is finished, if you succeeded.
Caribbean Pirate
Cook at least an additional bag of meth on day 1, then steal your payment on day 2.
Cook at least an additional bag of meth on day 1, then steal your payment on day 2.
Give the bags of meth to the thugs, shoot them, and steal the bags back as well as the payment.
Short Fuse
Secure seven bags of money without defusing the bombs on day 3.
Recommended for at least two players.
Secure seven bags of money without defusing the bombs on day 3.
Recommended for at least two players.
Open all the suitcases. As soon as you take money out of a suitcase, the bombs will activate. Have everyone take as much money as possible out of the suitcases before they explode.
Cooking With Style
Requires 4 players.
Complete all days on OVERKILL+ while everyone wears a Combined Tactical Vest and General Overkill (DLC) mask, wielding a Vulcan Minigun and HRL-7 rocket launcher.
Requires 4 players.
Complete all days on OVERKILL+ while everyone wears a Combined Tactical Vest and General Overkill (DLC) mask, wielding a Vulcan Minigun and HRL-7 rocket launcher.
-
Four Monkeys
Requires 4 players.
Complete all days on OVERKILL+ while everyone wears either the Clint, John, Rutger or Steven mask (DLC).
Requires 4 players.
Complete all days on OVERKILL+ while everyone wears either the Clint, John, Rutger or Steven mask (DLC).
Everyone needs to wear a different mask.
You can unlock them via the achievements; Clay Pigeon Shooting, Seven Eleven, No Heist For Old Men and Bang For The Buck.
You can unlock them via the achievements; Clay Pigeon Shooting, Seven Eleven, No Heist For Old Men and Bang For The Buck.
Reservoir Dogs
Both days must be done in loud.
Like the outstanding movie it's based on, the story is told in reverse. You'll first see the result of the heist that went wrong, then the heist itself. Defending the hideout is simple enough, and you can use breaks in between waves to run over the street. The day of the robbery will be harder.
The storefront has little cover, being made of glass, and the elevators behind the desk may spawn more enemies. You'll have more room to defend yourself as soon as the gate opens. On high difficulties, there'll also be a SWAT van turret right in front of the store (and a second one on Death Sentence). These vans contain some money bags, if you dare.
You can use the zipline on the second floor to move loot bags to the car, but this should only be done if another player is currently near the car. Otherwise, the cops may take these bags somewhere else. With enough bags secured, it'll still be difficult to escape - especially if there are still any active turrets. The route towards the escape zone is filled with additional enemies.


Like the outstanding movie it's based on, the story is told in reverse. You'll first see the result of the heist that went wrong, then the heist itself. Defending the hideout is simple enough, and you can use breaks in between waves to run over the street. The day of the robbery will be harder.
The storefront has little cover, being made of glass, and the elevators behind the desk may spawn more enemies. You'll have more room to defend yourself as soon as the gate opens. On high difficulties, there'll also be a SWAT van turret right in front of the store (and a second one on Death Sentence). These vans contain some money bags, if you dare.
You can use the zipline on the second floor to move loot bags to the car, but this should only be done if another player is currently near the car. Otherwise, the cops may take these bags somewhere else. With enough bags secured, it'll still be difficult to escape - especially if there are still any active turrets. The route towards the escape zone is filled with additional enemies.
Illustration
Name and description
How to achieve
Get Off My Property
Don't let any law enforcer enter the warehouse until Twitch arrives with the escape van on day 2.
Recommended for at least two players.
Don't let any law enforcer enter the warehouse until Twitch arrives with the escape van on day 2.
Recommended for at least two players.
You'll have enough time at the start to set up planks and sentry guns. One player should do the objectives while the rest stays inside.
Ignore the entrance in the back of the warehouse, because cops will not spawn there unless this challenge is failed.
Ignore the entrance in the back of the warehouse, because cops will not spawn there unless this challenge is failed.
Pinky Swear
Escort Mr. Pink back to the warehouse within 60 seconds after getting him out of the car on DEATH WISH+ on day 2.
Escort Mr. Pink back to the warehouse within 60 seconds after getting him out of the car on DEATH WISH+ on day 2.
Run outside immediately when Mr. Pink arrives. Keep shouting at him and keep the cops away.
Just Shut Up And Take My Money
Hit the cashier on day 1 with the Money Bundle.
Hit the cashier on day 1 with the Money Bundle.
-
Silver Tongue
Convert the cashier on day 1.
Convert the cashier on day 1.
Requires the Joker skill from the Mastermind skill tree. Hitting her once with the Money Bundle should be enough.
Waste Not, Want Not
Secure (almost) all of the loot in the store on day 1 on OVERKILL+ in Mr. Blonde's car.
Secure (almost) all of the loot in the store on day 1 on OVERKILL+ in Mr. Blonde's car.
You must secure these 19 loot bags;
- Five in the store display area.
- One on the trolley after the security gate.
- Three in the offices on the second floor.
- Ten in the vault.
Loot bags from the office safes or the Gensec truck don't count towards this achievement.
- Five in the store display area.
- One on the trolley after the security gate.
- Three in the offices on the second floor.
- Ten in the vault.
Loot bags from the office safes or the Gensec truck don't count towards this achievement.
Close Shave
Get 92 special enemy kills with the Alabama Razor on OVERKILL+. Can be done over several heists.
Get 92 special enemy kills with the Alabama Razor on OVERKILL+. Can be done over several heists.
See the Melee: Kill counters section for tips.
United We Heist
Complete the heist on OVERKILL+ using only the Union 5.56 rifle.
Complete the heist on OVERKILL+ using only the Union 5.56 rifle.
-
Safe House Nightmare
Loud only.
This heist is unusually hard, even on lower difficulties. You'll face endless waves of Cloakers (not on Normal) and headless Bulldozers. You'll also receive random negative effects every now and then.
This is the perfect heist to earn achievements that require killing a Cloaker or Bulldozer.

This heist is unusually hard, even on lower difficulties. You'll face endless waves of Cloakers (not on Normal) and headless Bulldozers. You'll also receive random negative effects every now and then.
This is the perfect heist to earn achievements that require killing a Cloaker or Bulldozer.
Illustration
Name and description
How to achieve
Water Works
Collect the correct baby mask on OVERKILL.
There is a similar achievement for NORMAL, HARD and VERY HARD.
Collect the correct baby mask on OVERKILL.
There is a similar achievement for NORMAL, HARD and VERY HARD.
You'll have to play the heist on each seperate difficulty until the end, then find the correct mask after going up the staircase - before waking up.
Picking up a fake mask may down the player that interacted with it. It's impossible to tell fake masks apart from right ones.
There are no masks on Mayhem and higher.
Picking up a fake mask may down the player that interacted with it. It's impossible to tell fake masks apart from right ones.
There are no masks on Mayhem and higher.
Safe House Raid
Loud only.
You can show off your earned trophies here. The Long Fellow trophy even provides some decent cover. Safe house rooms you have upgraded will also retain their upgrades when you host this heist. In particular, fully upgrading the Common Rooms will spawn a doctor's bag in your safe house. Other rooms have little effect on the gameplay.
It can be hosted by accepting the notification that you have to defend your safe house. If the message was declined, you'll have to wait twelve hours for it to reappear, or join an online game that hosts this heist. Completing this heist prevents the host from hosting it again for three days.

You can show off your earned trophies here. The Long Fellow trophy even provides some decent cover. Safe house rooms you have upgraded will also retain their upgrades when you host this heist. In particular, fully upgrading the Common Rooms will spawn a doctor's bag in your safe house. Other rooms have little effect on the gameplay.
It can be hosted by accepting the notification that you have to defend your safe house. If the message was declined, you'll have to wait twelve hours for it to reappear, or join an online game that hosts this heist. Completing this heist prevents the host from hosting it again for three days.
Illustration
Name and description
The Raid Gang
Complete the heist on DEATH WISH+ without letting the cops take any bags off the map.
Complete the heist on DEATH WISH+ without letting the cops take any bags off the map.
San Martín Bank
Stealth possible.


Vlad's Tape
Collect Vlad's Tape from the bank vault.
You can always find it inside one of the deposit boxes.
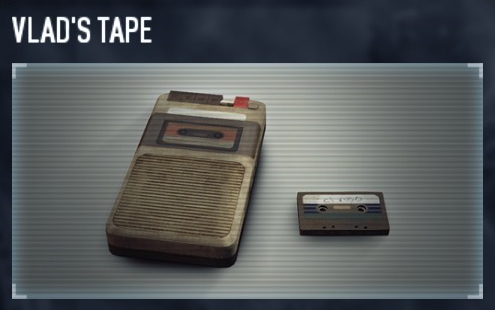
Illustration
Name and description
How to achieve
Now Hit Me With The Music
Kill one of the band members outside the bank with the El Ritmo melee weapon.
Kill one of the band members outside the bank with the El Ritmo melee weapon.
-
Gunpowder Glory
Have the heist go loud on OVERKILL+ before anyone enters the bank, and then keep all enemies away from the fountain plaza until the heist is completed.
Recommended for 2-4 players.
Have the heist go loud on OVERKILL+ before anyone enters the bank, and then keep all enemies away from the fountain plaza until the heist is completed.
Recommended for 2-4 players.
Deploy some sentry guns around the plaza and have only one player do the objectives.
Swat turrets can spawn and will destroy the sentry guns if you aren't careful.
Swat turrets can spawn and will destroy the sentry guns if you aren't careful.
Silencioso y Codicioso
Secure all 11 loot bags from the vault and open up all 240 deposit boxes in stealth on OVERKILL+.
Secure all 11 loot bags from the vault and open up all 240 deposit boxes in stealth on OVERKILL+.
Silent saws will still alert everyone within 10 meters, even through walls. If you use them, be aware that you might need to rush towards the escape zone.
Once more, there are 240 deposit boxes. Lockpicking is quiet, but will take a very long time.
Once more, there are 240 deposit boxes. Lockpicking is quiet, but will take a very long time.
Vlad's Tape
Collect Vlad's Tape from the bank vault.
You can always find it inside one of the deposit boxes.
Santa's Workshop
Loud only.


Illustration
Name and description
How to achieve
Pumped Up And Jolly
Complete the heist while all players only use shotguns.
Complete the heist while all players only use shotguns.
-
Only Santa Brings Gifts
Secure ten bags of loot without using player equipment or assets.
Secure ten bags of loot without using player equipment or assets.
-
Santa Slays Slackers
Keep the elves alive for 30 minutes after the first assault wave has started on OVERKILL+.
Keep the elves alive for 30 minutes after the first assault wave has started on OVERKILL+.
When cops are interacting with an elf, a shield icon will appear above the elf. You'll have a short time to defend the elf before he's gone from the map.
Euro Bag Simulator
Secure 100 bags on OVERKILL+ and complete the heist.
Recommended for 2-4 players.
Secure 100 bags on OVERKILL+ and complete the heist.
Recommended for 2-4 players.
This can take about an hour in multiplayer, and likely even longer if you are attempting this alone.
Be sure to have some snacks with you before starting.
Be sure to have some snacks with you before starting.
Scarface Mansion
Stealth possible.


The World Is Yours
Secure 24 Yayo bags. Must be done over several heists.
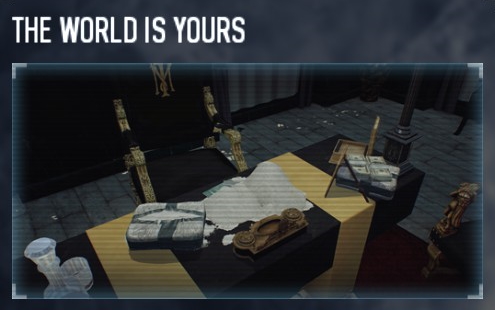
Pelican Killer
Shoot 20 pelicans. Must be done over several heists.
Use the above guide from Look At These Pelicans Fall.
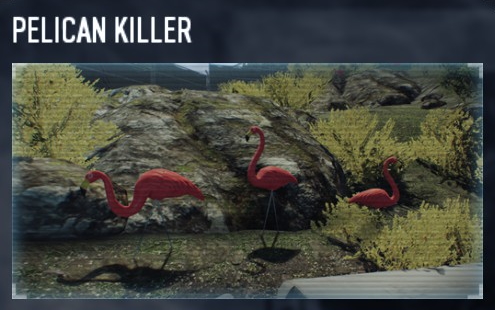
Scrap Metal
Requires 4 players.
Escape after going loud on MAYHEM+, while everyone uses the Maniac perk deck without any skills.
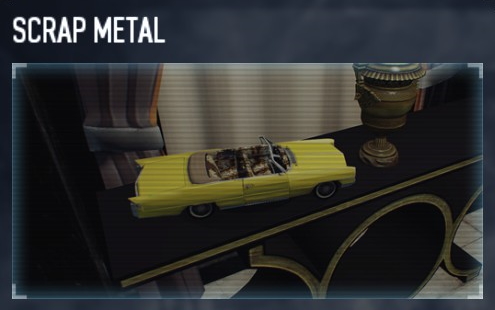
Illustration
Name and description
How to achieve
Look At These Pelicans Fall
Shoot the two pink flamingos.
Their locations are random.
Shoot the two pink flamingos.
Their locations are random.
Settling a Scar
Complete the heist on OVERKILL+ in loud within 15 minutes.
Complete the heist on OVERKILL+ in loud within 15 minutes.
-
What? You Want Me To Dance?
Complete the heist on MAYHEM+ in stealth within 13 minutes.
Recommended for 2-4 players.
Complete the heist on MAYHEM+ in stealth within 13 minutes.
Recommended for 2-4 players.
* Guards outside the mansion have no pagers. Start the heist by placing ECM Jammers while killing everyone outside, then hide them out of view from the cameras and the guards on the roof.
* One or two players should then start doing the objectives, while the others haul the bodies to make sure they'll also be out of view from the windows when the open.
* Enter the house, and proceed with the objectives there. Shoot the boss immediately when the doors to his room are opened. You can then safely secure the loot and leave.
* One or two players should then start doing the objectives, while the others haul the bodies to make sure they'll also be out of view from the windows when the open.
* Enter the house, and proceed with the objectives there. Shoot the boss immediately when the doors to his room are opened. You can then safely secure the loot and leave.
The World Is Yours
Secure 24 Yayo bags. Must be done over several heists.
Pelican Killer
Shoot 20 pelicans. Must be done over several heists.
Use the above guide from Look At These Pelicans Fall.
Scrap Metal
Requires 4 players.
Escape after going loud on MAYHEM+, while everyone uses the Maniac perk deck without any skills.
Shacklethorne Auction
Stealth possible.
You must have the Ladder asset for stealth, and the Glass Cutter asset if you want to quietly secure more loot. While you'll only need the tablet, you can find up to 40 loot bags in this heist.


You must have the Ladder asset for stealth, and the Glass Cutter asset if you want to quietly secure more loot. While you'll only need the tablet, you can find up to 40 loot bags in this heist.
Illustration
Name and description
Press [F] to Pay Respects
Interact with the corpse found in one of the exhibitions on the top floor.
This can only be achieved by one player per heist.
Interact with the corpse found in one of the exhibitions on the top floor.
This can only be achieved by one player per heist.
The Auction Cry
Complete the heist in stealth on OVERKILL+ within 5 minutes.
Recommended for at least two players.
Complete the heist in stealth on OVERKILL+ within 5 minutes.
Recommended for at least two players.
Heavy Metal
Must be done in stealth.
In the dusty room where the vault is located, you'll find a maintenance man in blue uniform. Zip-tie him and lead him through the metal detectors at the entrance, setting off the alarm.
Must be done in stealth.
In the dusty room where the vault is located, you'll find a maintenance man in blue uniform. Zip-tie him and lead him through the metal detectors at the entrance, setting off the alarm.
Shadow Raid
Stealth only.
My personal favourite heist to stealth. It's always an entertaining challenge to try securing all the loot there is on this map, and then getting away with the samurai armour. It's randomised enough that it never becomes repetitive.
You'll want to make use of pre-planning. I'd recommended Thermite Paste (Sidewalk Outside Compound), the Bag Zip-Line (River Tug), and an additional Loot Drop Off Point (Warehouse Doors Garbage).
With these assets, collect the thermite paste right at the start of the heist. Either enter the sewers from inside the building (near the vault), or head towards the waterfront (where you have unlocked the bag zip-line). Use the paste to burn through the set of bars next to water to open up easy access between the sewers and the waterfront. There's always one guard near the zip-line, who might be stationary. Kill him if he's moving around.
You can use the extra loot drop off point in case the alarm is raised, or to quickly secure the samurai armour. You'll need two keycards to unlock the vault with the armour. Both must be inserted within ten seconds, or the alarm will be triggered. Guards can spot an open vault door. Both the guard in the security room and the worker with the yellow hat inside the building will have a keycard.


Bushido
Secure all four pieces of Samurai Armor before even picking up any other loot on OVERKILL+.
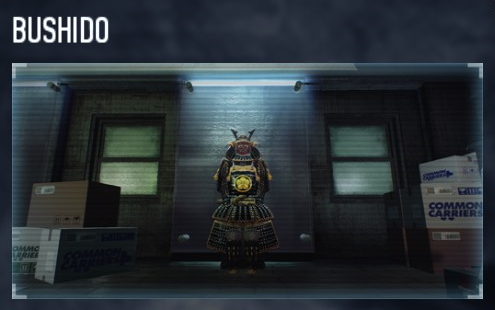
My personal favourite heist to stealth. It's always an entertaining challenge to try securing all the loot there is on this map, and then getting away with the samurai armour. It's randomised enough that it never becomes repetitive.
You'll want to make use of pre-planning. I'd recommended Thermite Paste (Sidewalk Outside Compound), the Bag Zip-Line (River Tug), and an additional Loot Drop Off Point (Warehouse Doors Garbage).
With these assets, collect the thermite paste right at the start of the heist. Either enter the sewers from inside the building (near the vault), or head towards the waterfront (where you have unlocked the bag zip-line). Use the paste to burn through the set of bars next to water to open up easy access between the sewers and the waterfront. There's always one guard near the zip-line, who might be stationary. Kill him if he's moving around.
You can use the extra loot drop off point in case the alarm is raised, or to quickly secure the samurai armour. You'll need two keycards to unlock the vault with the armour. Both must be inserted within ten seconds, or the alarm will be triggered. Guards can spot an open vault door. Both the guard in the security room and the worker with the yellow hat inside the building will have a keycard.
Illustration
Name and description
I Will Pass Through Walls
Complete the heist with at least six bags and without your crew killing anyone.
Complete the heist with at least six bags and without your crew killing anyone.
I Am Ninja
Secure 16 bags of loot, including all four pieces of Samurai Armor found inside the vault.
Secure 16 bags of loot, including all four pieces of Samurai Armor found inside the vault.
I Will Take With Impunity
Secure at least one loot bag of the following;
Money, Gold, Cocaine, Artifact, Painting, Assault Rifles, and Server.
Secure at least one loot bag of the following;
Money, Gold, Cocaine, Artifact, Painting, Assault Rifles, and Server.
I Will Succeed With Dignity
Complete the heist on OVERKILL+ without using any preplanning favours.
Complete the heist on OVERKILL+ without using any preplanning favours.
I Have No Idea What I Am Doing
Complete the heist in stealth while wielding the Vulcan Minigun and HRL-7 rocket launcher.
Complete the heist in stealth while wielding the Vulcan Minigun and HRL-7 rocket launcher.
Bushido
Secure all four pieces of Samurai Armor before even picking up any other loot on OVERKILL+.
Slaughterhouse
Loud only.


Illustration
Name and description
How to achieve
But How?
Have the armored truck drop head-first without shooting the cables.
Have the armored truck drop head-first without shooting the cables.
* Wait near the start until you have a good view of the truck driving into the alleyway.
* Shoot at the window of the truck, causing it to drop into the slaughterhouse head-first instead of the other way around.
* Make your way towards it, and then wait five minutes for it to drop.
* Shoot at the window of the truck, causing it to drop into the slaughterhouse head-first instead of the other way around.
* Make your way towards it, and then wait five minutes for it to drop.
Pyromaniacs
Collect both gasoline tanks within 30 seconds of entering the slaughterhouse.
Recommended for at least two players.
Collect both gasoline tanks within 30 seconds of entering the slaughterhouse.
Recommended for at least two players.
Pork Royale
Secure the pig marked with an X and complete the heist on OVERKILL+.
Secure the pig marked with an X and complete the heist on OVERKILL+.
It will always be one of the pigs at random.
You will see an interact option when you get close to it.
You will see an interact option when you get close to it.
Making A Statement
Complete the heist on OVERKILL+ without your crew killing any Snipers.
Do not use AI for this, as they might kill them.
Complete the heist on OVERKILL+ without your crew killing any Snipers.
Do not use AI for this, as they might kill them.
-
Not Hard Enough
Complete the heist on OVERKILL+ while Captain Winters is still present on the level.
You must play in online mode. He will not appear in offline mode.
Complete the heist on OVERKILL+ while Captain Winters is still present on the level.
You must play in online mode. He will not appear in offline mode.
He will eventually spawn if you wait long enough, so you can already proceed to the escape zone.
However, he will not spawn if a SWAT Turret has appeared (20% chance). Restart if that happened.
However, he will not spawn if a SWAT Turret has appeared (20% chance). Restart if that happened.
Stealing Xmas
Loud only.


Illustration
Name and description
How to achieve
Imitations
Collect both hidden Payday masks.
Collect both hidden Payday masks.
Christmas Party
Complete the heist with ten zip-tied civilians within the four pillars around the christmas tree.
Recommended for 2-4 players.
Complete the heist with ten zip-tied civilians within the four pillars around the christmas tree.
Recommended for 2-4 players.
It's best to zip-tie the civilians at the start of the heist, and have someone watch them.
The Grinch
Secure all additional loot on this map on OVERKILL+.
Secure all additional loot on this map on OVERKILL+.
There are nine additional loot bags;
- Six on display in the jewelry store.
- Two in the back room of the tech store.
- One in the back room of the shoe store.
- Six on display in the jewelry store.
- Two in the back room of the tech store.
- One in the back room of the shoe store.
Transport heists
Loud only.
There are five variants of the Transport heist; Crossroad, Dowtown, Harbor, Park, and Underpass.
Each of them is played on a distinct map, unlike the Bank heists, but the objectives are the same in all variants - break into the transports vans, secure the loot, and escape. Again, for each variant there are separate achievements for completion.
Note that unlike the name, Transport: Train is not a variant of these Transport heists, but instead a completely different heist. It is however locked behind the below achievement But Wait - There's More!.


There are five variants of the Transport heist; Crossroad, Dowtown, Harbor, Park, and Underpass.
Each of them is played on a distinct map, unlike the Bank heists, but the objectives are the same in all variants - break into the transports vans, secure the loot, and escape. Again, for each variant there are separate achievements for completion.
Note that unlike the name, Transport: Train is not a variant of these Transport heists, but instead a completely different heist. It is however locked behind the below achievement But Wait - There's More!.
Illustration
Name and description
How to achieve
I Do What I Do Best, I Take Scores
Wear the Hockey Heat mask (Community).
Complete Transport heists on OVERKILL+ 15 times.
Wear the Hockey Heat mask (Community).
Complete Transport heists on OVERKILL+ 15 times.
If you want to grind this, this is best done while attempting to earn the next achievement If You Liked It [...]. Otherwise, playing the Downtown variant is recommended, because you'll know where the escape point is the moment you start bagging loot.
If You Liked It You Should Have Put a Ring on It
Complete any Transport heist after having secured at least nine bags of gold.
Complete any Transport heist after having secured at least nine bags of gold.
The type of loot and the amount of bags is always randomised. Do the Transport: Underpass heist on Overkill difficulty or higher for the best odds for this achievement.
But Wait - There's More!
Collect the confidential folder randomly found in a deposit box on any Transport heist.
Unlocks the Transport: Train heist.
Collect the confidential folder randomly found in a deposit box on any Transport heist.
Unlocks the Transport: Train heist.
Use saws to open the safeboxes quickly. Other than that, it's just pure luck, with an equal chance for every single box.
It will unlock for each player in the lobby once found.
It will unlock for each player in the lobby once found.
Transport: Train
Stealth possible.
On the highest difficulty, there are always eleven guards and four civilians on the map. It'll take quite a while to haul all required loot bags while avoiding detection.


On the highest difficulty, there are always eleven guards and four civilians on the map. It'll take quite a while to haul all required loot bags while avoiding detection.
Illustration
Name and description
How to achieve
Let Them Watch
Complete the heist without your crew killing any Snipers.
Complete the heist without your crew killing any Snipers.
You can easily do this in stealth
We’re Gonna Need a Bigger Boat
Secure all 20 ammunition bags.
Unlocks the Turret trophy if done on OVERKILL+.
Secure all 20 ammunition bags.
Unlocks the Turret trophy if done on OVERKILL+.
Best done on Mayhem or higher, because then you'll require collecting all loot bags anyway.
Ukrainian Job
Stealth possible.
Due to its insanely short length and little resistance, this is without doubt the easiest heist in this game. It's very similar to the Jewelry Store, but you just have to collect one certain item.


So Pretty
Complete the heist in stealth on DEATH WISH+ without anyone equipping ECM Jammers.
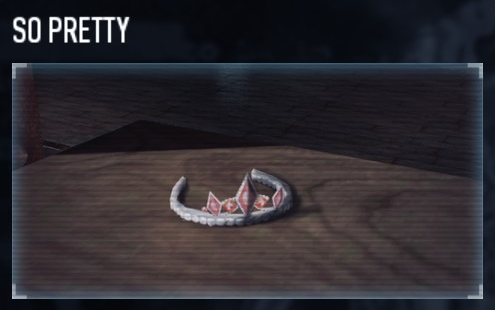
Due to its insanely short length and little resistance, this is without doubt the easiest heist in this game. It's very similar to the Jewelry Store, but you just have to collect one certain item.
Illustration
Name and description
How to achieve
Let's Do Th...
Complete the heist within 35 seconds.
Complete the heist within 35 seconds.
Simply use an ECM Jammer, get the tiara from one of the two safes, and run back to the van. Do this on Normal difficulty to ensure both safes can be lockpicked.
I'm Sure No One Heard That
Complete the heist in stealth after triggering the alarm from the metal detectors.
Complete the heist in stealth after triggering the alarm from the metal detectors.
These metal detectors have a 70% of appearing at the entrance on Very Hard difficulty or higher. Restart if they are not there.
You can first subdue all NPCs, or rush with ECM Jammers.
You can first subdue all NPCs, or rush with ECM Jammers.
So Pretty
Complete the heist in stealth on DEATH WISH+ without anyone equipping ECM Jammers.
The Ukrainian Prisoner
Stealth possible.
After completing the first area, you can choose to either go left or right. Both ways will lead to the same area. After that, you can again choose which way to follow towards the escape area.
Assuming you're playing in stealth, it's advisable to go right on both choices. Although the routes on the right contain drones, there are more NPCs on the left side. Furthermore, most drones can be disabled with the Less Drones asset.


After completing the first area, you can choose to either go left or right. Both ways will lead to the same area. After that, you can again choose which way to follow towards the escape area.
Assuming you're playing in stealth, it's advisable to go right on both choices. Although the routes on the right contain drones, there are more NPCs on the left side. Furthermore, most drones can be disabled with the Less Drones asset.
Illustration
Name and description
How to achieve
Thinking Ahead
Secure the ten bags of hidden loot and complete the heist.
You must press three hidden buttons on random locations throughout the heist to access this loot.
Secure the ten bags of hidden loot and complete the heist.
You must press three hidden buttons on random locations throughout the heist to access this loot.
Just to Cheese Them Off
Destroy all eight vases on the map. There are 40 possible spawn locations for these vases.
Destroy all eight vases on the map. There are 40 possible spawn locations for these vases.
This Calls for a Round of Sputniks!
Complete the heist on OVERKILL+ with at least 100% accuracy, after you've killed at least 100 enemies with a sniper rifle.
Complete the heist on OVERKILL+ with at least 100% accuracy, after you've killed at least 100 enemies with a sniper rifle.
Use the aced Graze skill in the Mastermind Sharpshooter skill tree.
Undercover
Loud only.


Failed Assassination
Complete the heist on OVERKILL+ with all players wearing suits, having no skills, and using only sniper rifles.
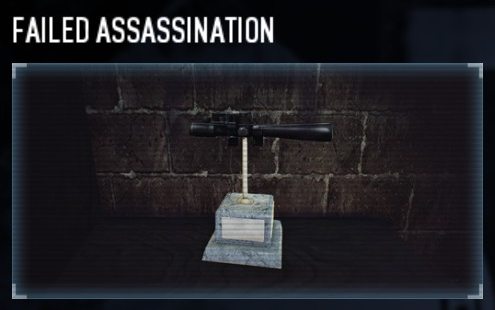
Illustration
Name and description
The Saviour
Place at least ten planks in one heist.
Planks may appear at several random locations, as shown in this old guide that's still accurate.
Place at least ten planks in one heist.
Planks may appear at several random locations, as shown in this old guide that's still accurate.
Blow-Out
Complete the heist on OVERKILL+ with all players using only grenade launchers and rocket launchers.
Complete the heist on OVERKILL+ with all players using only grenade launchers and rocket launchers.
I Feel Like Robin Hood
Complete the heist on OVERKILL+ with all players using only bows without modifcations.
Complete the heist on OVERKILL+ with all players using only bows without modifcations.
Keep Clear of the Windows
Complete the heist without your crew killing any Snipers.
Do not use AI for this, as they might kill them.
Complete the heist without your crew killing any Snipers.
Do not use AI for this, as they might kill them.
Not Even Once
Complete the heist on OVERKILL+ without any player getting downed or cuffed.
Complete the heist on OVERKILL+ without any player getting downed or cuffed.
Failed Assassination
Complete the heist on OVERKILL+ with all players wearing suits, having no skills, and using only sniper rifles.
Watchdogs
Both days must be completed in loud.


Snipe It
Complete the heist using only sniper rifles with an accuracy of at least 100%.
You should use the aced Graze skill from the Mastermind skill tree.
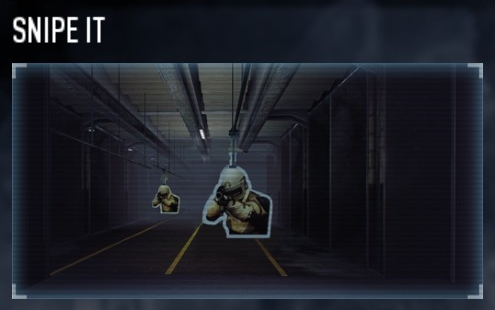
Illustration
Name and description
How to achieve
Coming In Hot
Complete day 1 without letting the cops destroy your escape van.
Complete day 1 without letting the cops destroy your escape van.
Purchase the Armored Escape asset in preplanning and quickly escape when the van arrives.
Fish A.I.
Throw a loot bag into the sea on day 2.
Throw a loot bag into the sea on day 2.
-
Out Of Bounds
Secure 12 bags on day 2 without letting any law enforcer enter the warehouse on OVERKILL+.
Secure 12 bags on day 2 without letting any law enforcer enter the warehouse on OVERKILL+.
On Mayhem and higher, the warehouse is locked, so...
We Are Rockstars On This Job
Complete the heist on OVERKILL+ with all players using no skills and wielding the AMCAR rifle and Chimano 88 pistol.
Complete the heist on OVERKILL+ with all players using no skills and wielding the AMCAR rifle and Chimano 88 pistol.
-
Unusual Suspects
Requires 4 players.
Complete the heist on OVERKILL+ while everyone wears a different Assault Pack mask; Black Death, Crow Goblin, Professor Wrath or Volt.
Requires 4 players.
Complete the heist on OVERKILL+ while everyone wears a different Assault Pack mask; Black Death, Crow Goblin, Professor Wrath or Volt.
Masks are unlocked via the achievements; Precision Aiming, Big Bada Boom, Tour de Clarion and Rabbit Hunting.
Snipe It
Complete the heist using only sniper rifles with an accuracy of at least 100%.
You should use the aced Graze skill from the Mastermind skill tree.
The White House
Stealth possible.
In stealth, killing any guard in the final area will cause a new one to appear - though this will only occur once. Something odd to note is that guards in that area aren't alerted by the hack, and not even the opened vault.


In stealth, killing any guard in the final area will cause a new one to appear - though this will only occur once. Something odd to note is that guards in that area aren't alerted by the hack, and not even the opened vault.
Illustration
Name and description
How to achieve
A Heist To Remember
Collect the sandwich at the end of the heist.
Collect the sandwich at the end of the heist.
It is found in the final area, on the table in the room with a golden-framed painting.
Big Brother
Complete the heist in stealth on OVERKILL+ without anyone destroying a camera.
Complete the heist in stealth on OVERKILL+ without anyone destroying a camera.
Simply subdue the guard in the security room.
This room is found near the oval office.
This room is found near the oval office.
President For A Day
Complete the heist while you wear a presidential mask.
Complete the heist while you wear a presidential mask.
Several masks can be worn for this achievement, especially the numbered masks (e.g. The 16th).
White Xmas
Loud only.
Only the first assault wave will end, as the second wave is supposed to endless, preventing any hostage trades from that point on. However, due to an oversight, if Captain Winters appears on the second wave and is defeated, the wave will end, and normal assault waves will follow.


Only the first assault wave will end, as the second wave is supposed to endless, preventing any hostage trades from that point on. However, due to an oversight, if Captain Winters appears on the second wave and is defeated, the wave will end, and normal assault waves will follow.
Illustration
Name and description
Impossible, It Can't Be. Is It?
Secure the randomly found Almir's Toast.
It has a low chance of spawning in a present.
Secure the randomly found Almir's Toast.
It has a low chance of spawning in a present.
What's In The Box?
Complete the heist on OVERKILL+ after opening at least 40 packages.
Complete the heist on OVERKILL+ after opening at least 40 packages.
Riders on the Snowstorm
Requires 4 players.
Complete the heist on DEATH WISH+ while every player wears a different White Xmas mask;
Mrs. Claus, Strinch, Krampus or Mechanical Santa.
These are all unlocked by completing this heist once on Overkill difficulty or higher.
Requires 4 players.
Complete the heist on DEATH WISH+ while every player wears a different White Xmas mask;
Mrs. Claus, Strinch, Krampus or Mechanical Santa.
These are all unlocked by completing this heist once on Overkill difficulty or higher.
The Yacht Heist
Stealth only.


Gone Fishing
Complete the heist with each player at maximum (75) detection risk.
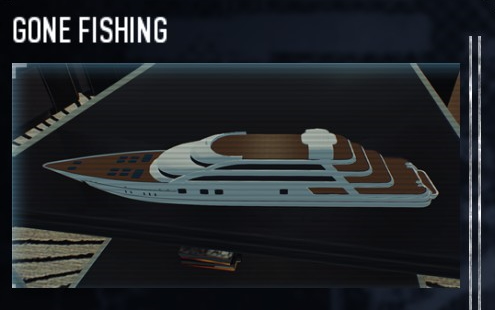
Illustration
Name and description
How to achieve
Pacifish
Complete the heist without your crew killing anyone.
Complete the heist without your crew killing anyone.
-
Blood in the Water
Complete the heist after killing every guard.
Complete the heist after killing every guard.
There are eight guards on the Normal or Hard difficulty, and more on higher difficulties.
Progress through the heist as usual, using pagers if needed. Once escaping has become available, use ECM Jammers and kill the remaining guards.
Progress through the heist as usual, using pagers if needed. Once escaping has become available, use ECM Jammers and kill the remaining guards.
Thalassophobia
Complete the heist within 6 minutes.
Recommended for 2-4 players.
Complete the heist within 6 minutes.
Recommended for 2-4 players.
Each player should cover a different part of the ship.
Do this on Normal or Hard, and save two pagers for the two guards in the server room.
Do this on Normal or Hard, and save two pagers for the two guards in the server room.
Gone Fishing
Complete the heist with each player at maximum (75) detection risk.
Footnotes
That concludes all 1,328 achievements and 66 trophies in this game.
I wouldn't actually recommend getting them all, especially not the grindy ones. Still, you'll find that there are many achievements and trophies that'll make the game more enjoyable.
Additional credits to everyone whose guide is linked here, and particularly Unknown Knight for the screenshots I have taken from his videos.
Keep on heisting.
~ JordiTK
I wouldn't actually recommend getting them all, especially not the grindy ones. Still, you'll find that there are many achievements and trophies that'll make the game more enjoyable.
Additional credits to everyone whose guide is linked here, and particularly Unknown Knight for the screenshots I have taken from his videos.
Keep on heisting.
~ JordiTK
🏆
Beat PAYDAY 2's achievements?
Flex it — let your friends know you pulled it off.
More PAYDAY 2 guides
- Лучшие кооперативные игры Steam★ 5 (1.5k)315k views2.1k ♥56 minRussianUpdated Apr 27, 2025
- The Long Guide★ 5 (8.6k)153k views14k ♥474 minUpdated Jun 16, 2018
- Gage Spec Ops DLC Case/Key Locations (Arbiter)★ 5 (2.8k)105k views3.3k ♥4 minUpdated Nov 18, 2025
- A Complete Walkthrough of the Payday 2 Secret★ 5 (1.9k)89k views3.7k ♥8 minUpdated Jul 7, 2019
- DSOD Loud Build List★ 5 (3.3k)77k views9.4k ♥42 minUpdated Dec 17, 2023
- The Lost Tapes Guide (Find all Lost Safes)★ 5 (557)57k views879 ♥13 minUpdated Dec 16, 2025





This guide was created by its original author on the Steam Community. Are you the author and want it removed? Request removal.