Getting overpowered in Early-Game
・Barrels Glitch: Easy Gold + High-Tier Equipment
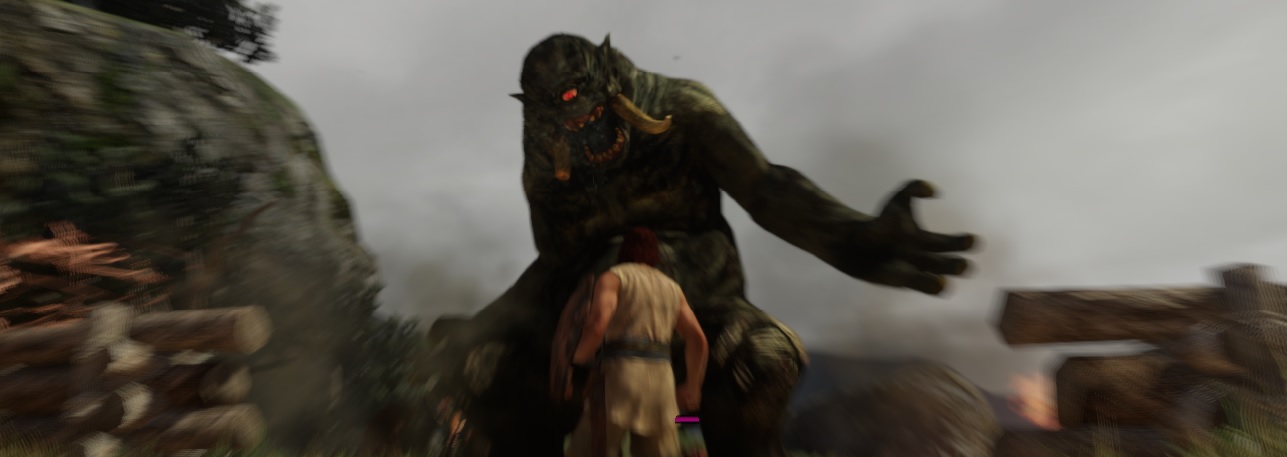
You can do this at the very start of the game, after fighting the Cyclops and creating your main Pawn.
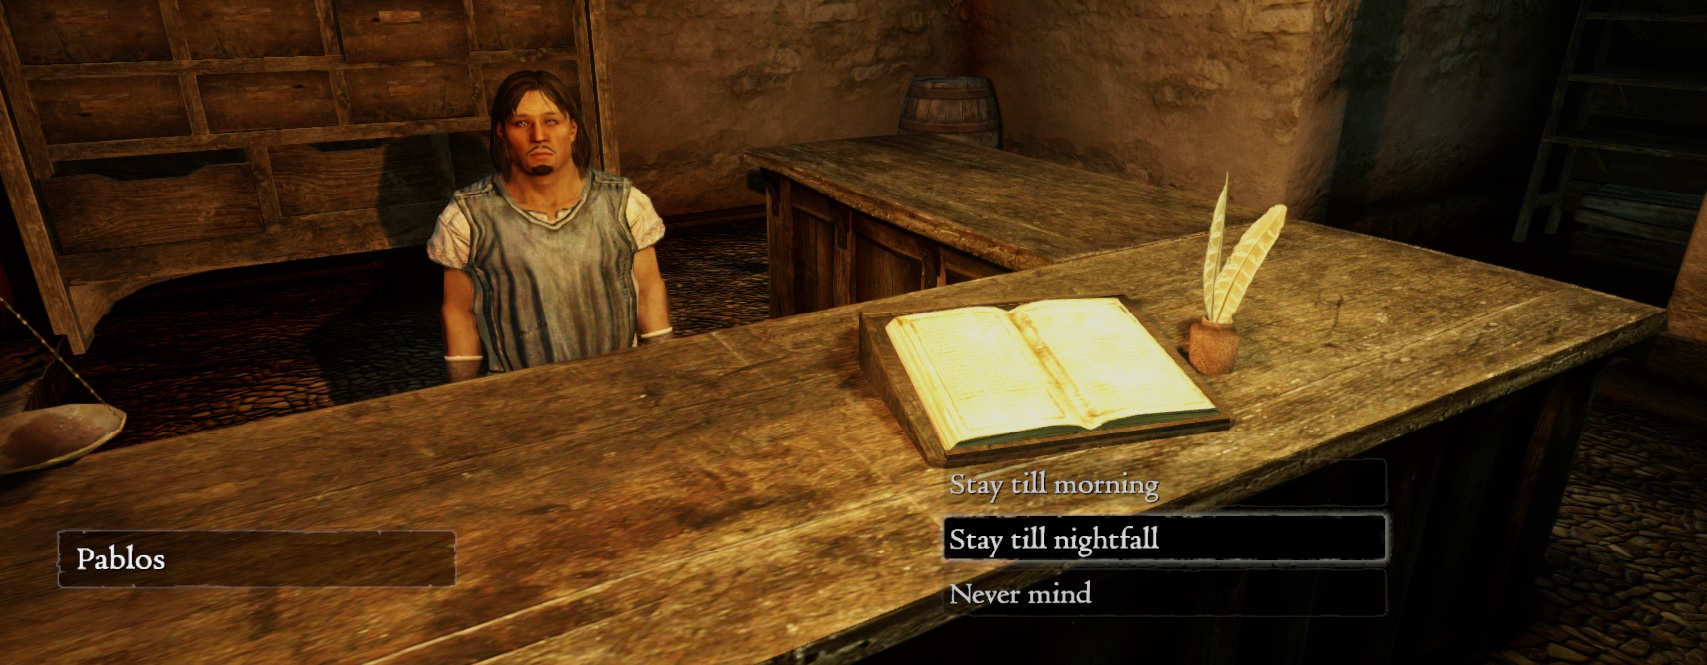
Go back to Cassardis, sleep in Pablos' Inn until nightime and go right to Bitterblack Isle (The purple quest icon).
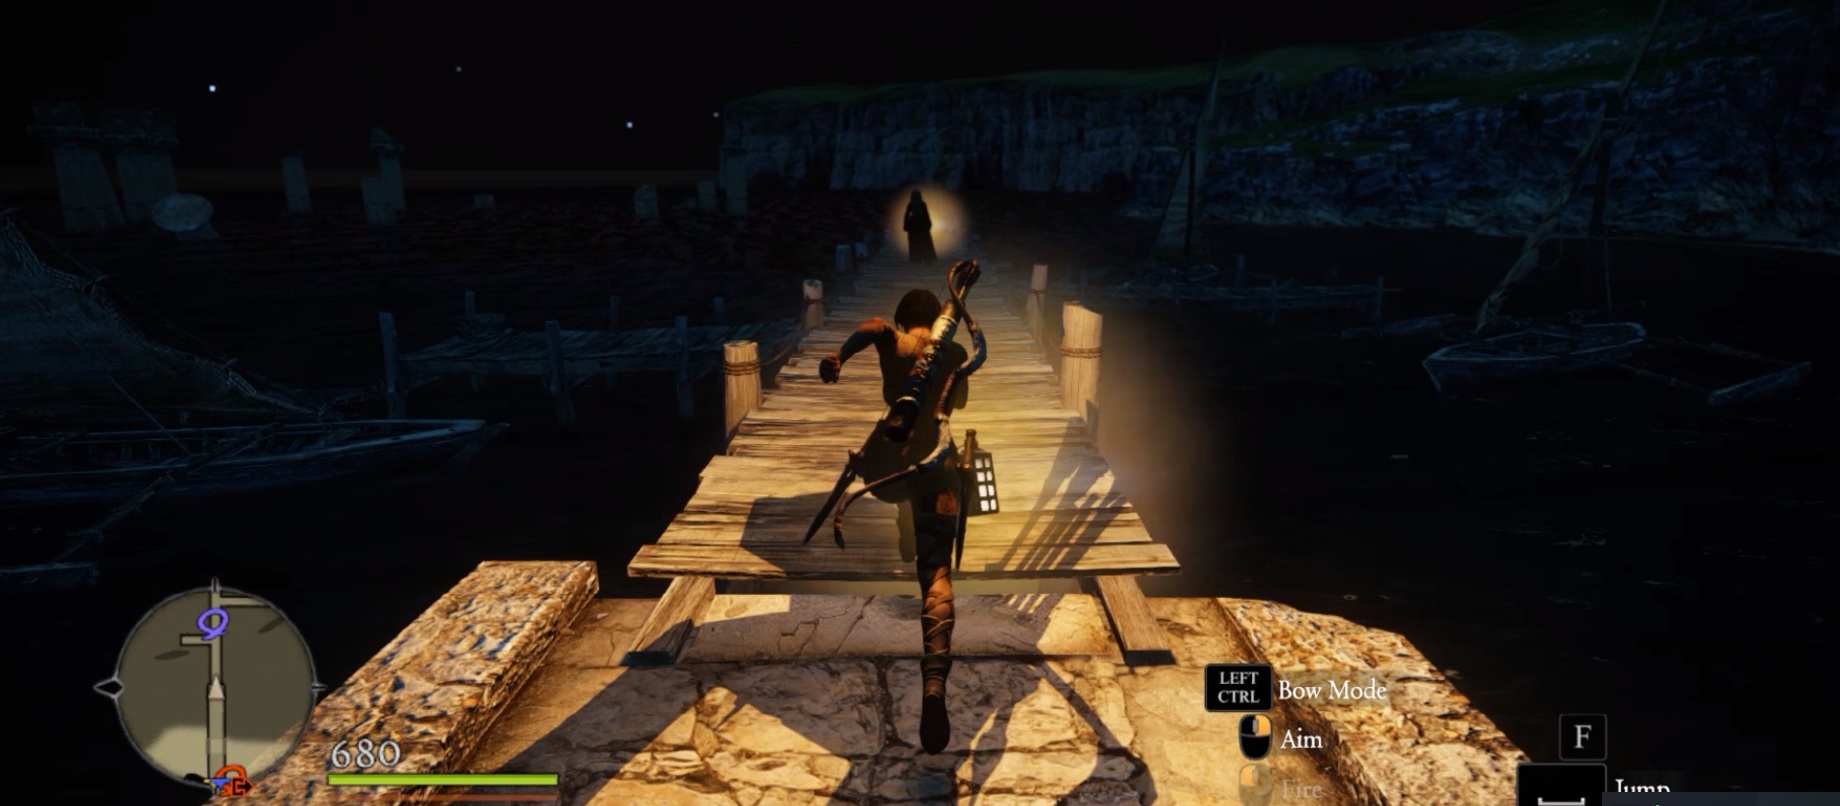
You can skip the cutscenes if you wish, but they're beautiful.
Throw all your pawns to the lake. We do this because they tend to break the barrels, and each pawn you have active will consume XP, there's a more in-depth explanation about this on this guide.
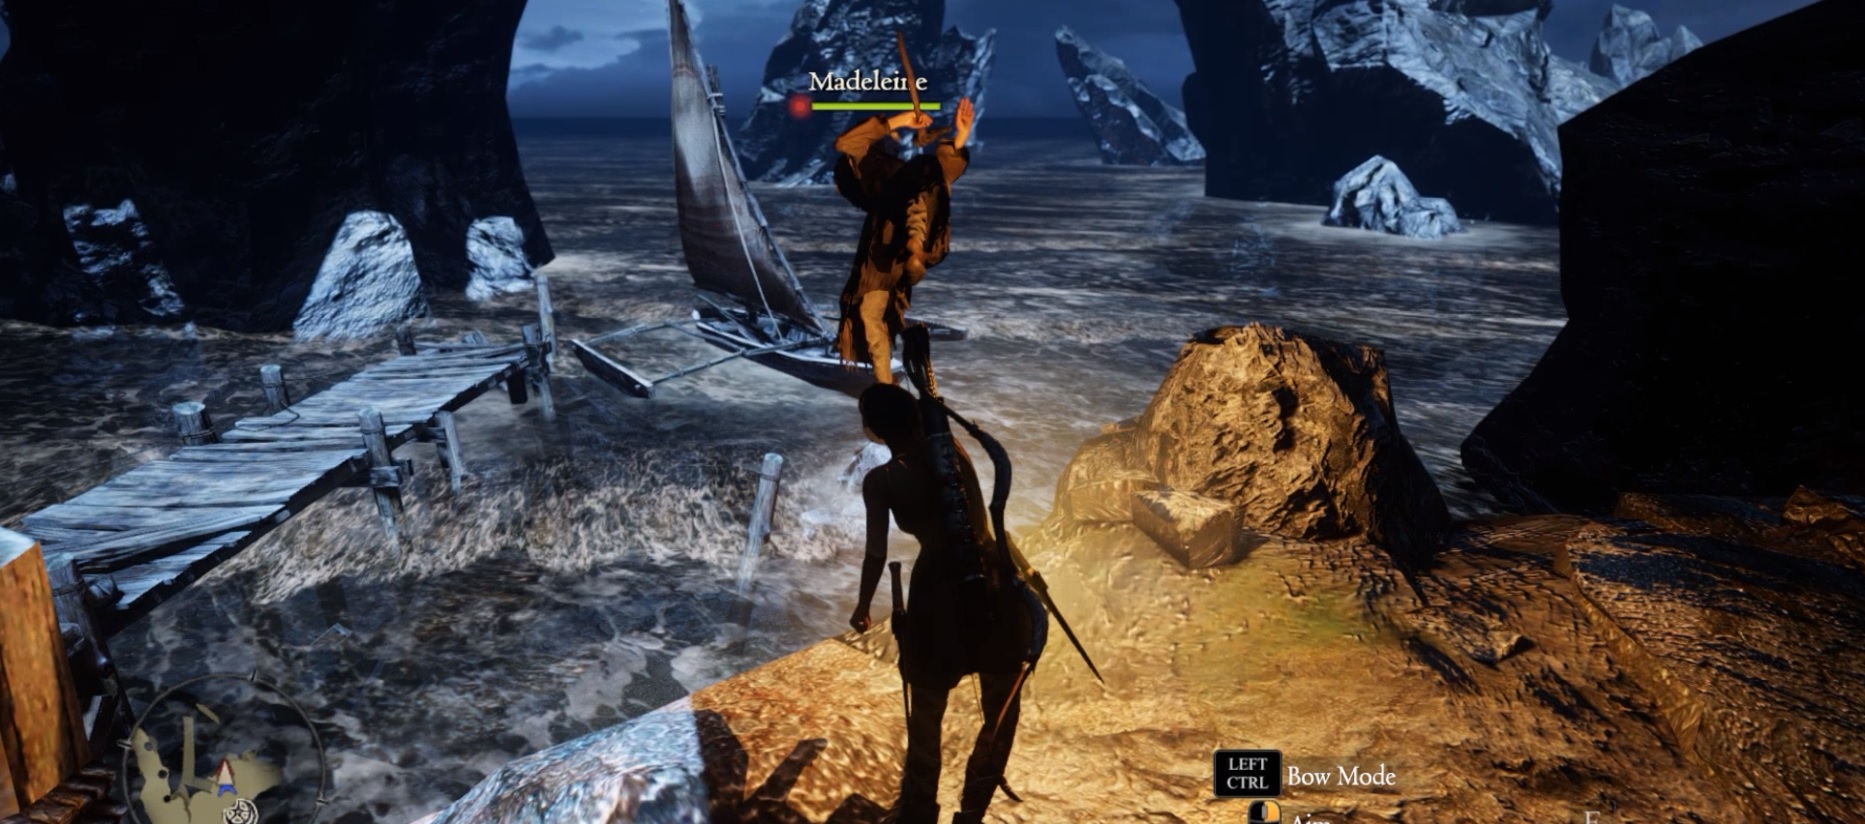
Take every quest from here and open that chest from behind.
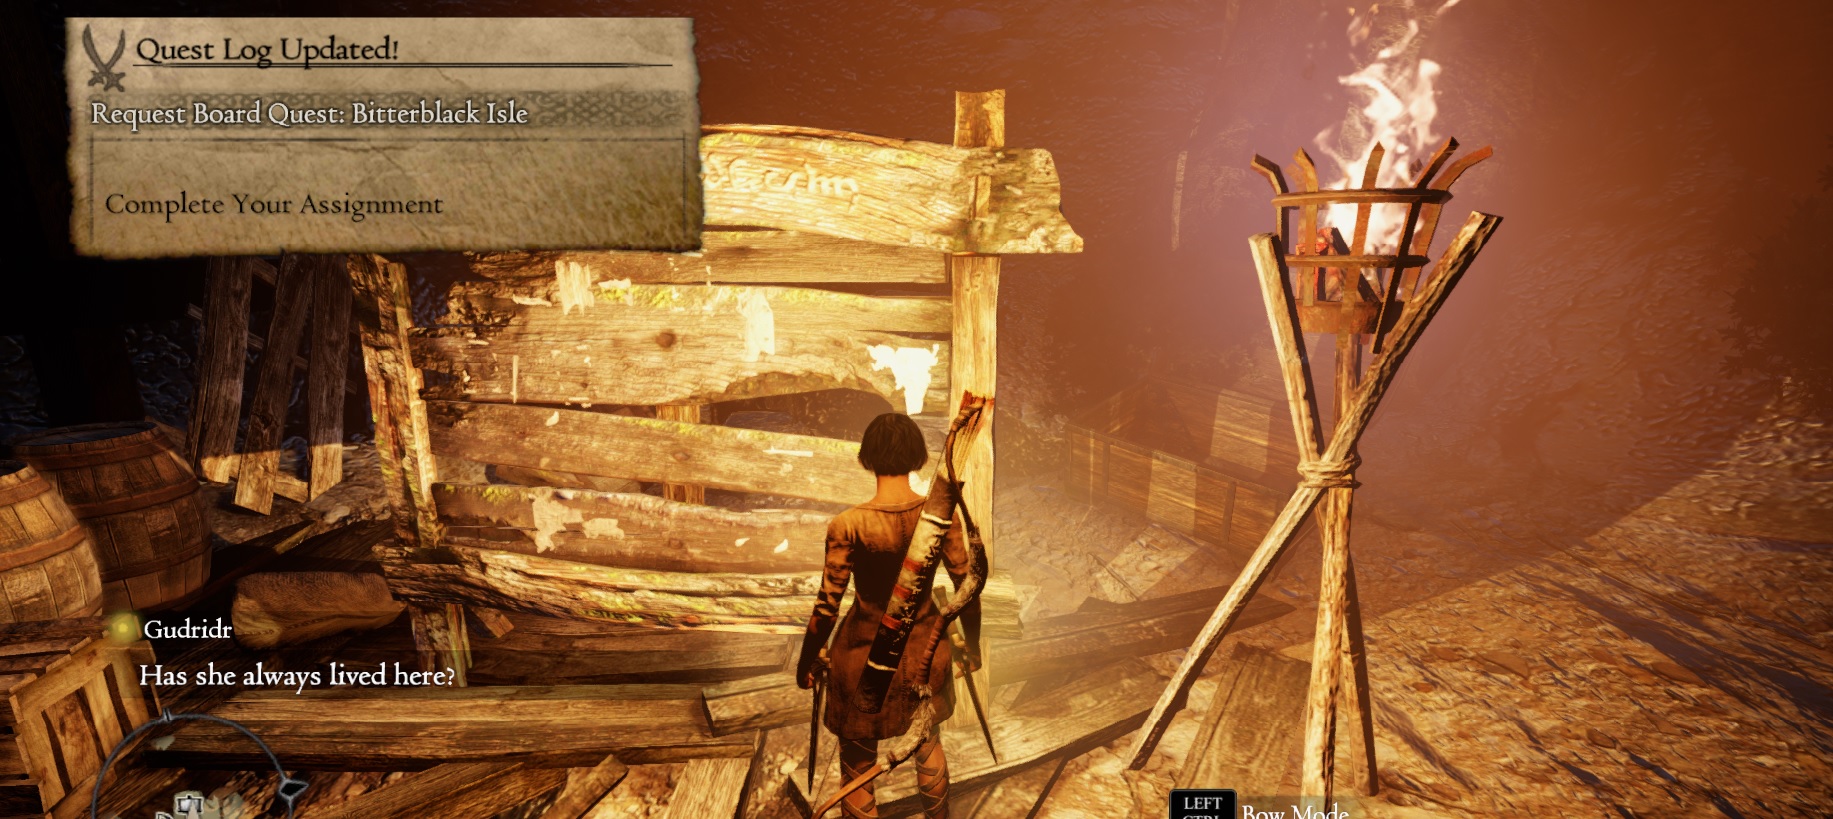
In this video I'll show you the path to 'Duskmoon Tower: Third Floor' and visual references on how to perform the famous Barrel Glitch, so it's important that you watch it.
https://youtu.be/YHCYCSe39pY
Talk to this NPC to get a lot of gold and XP.
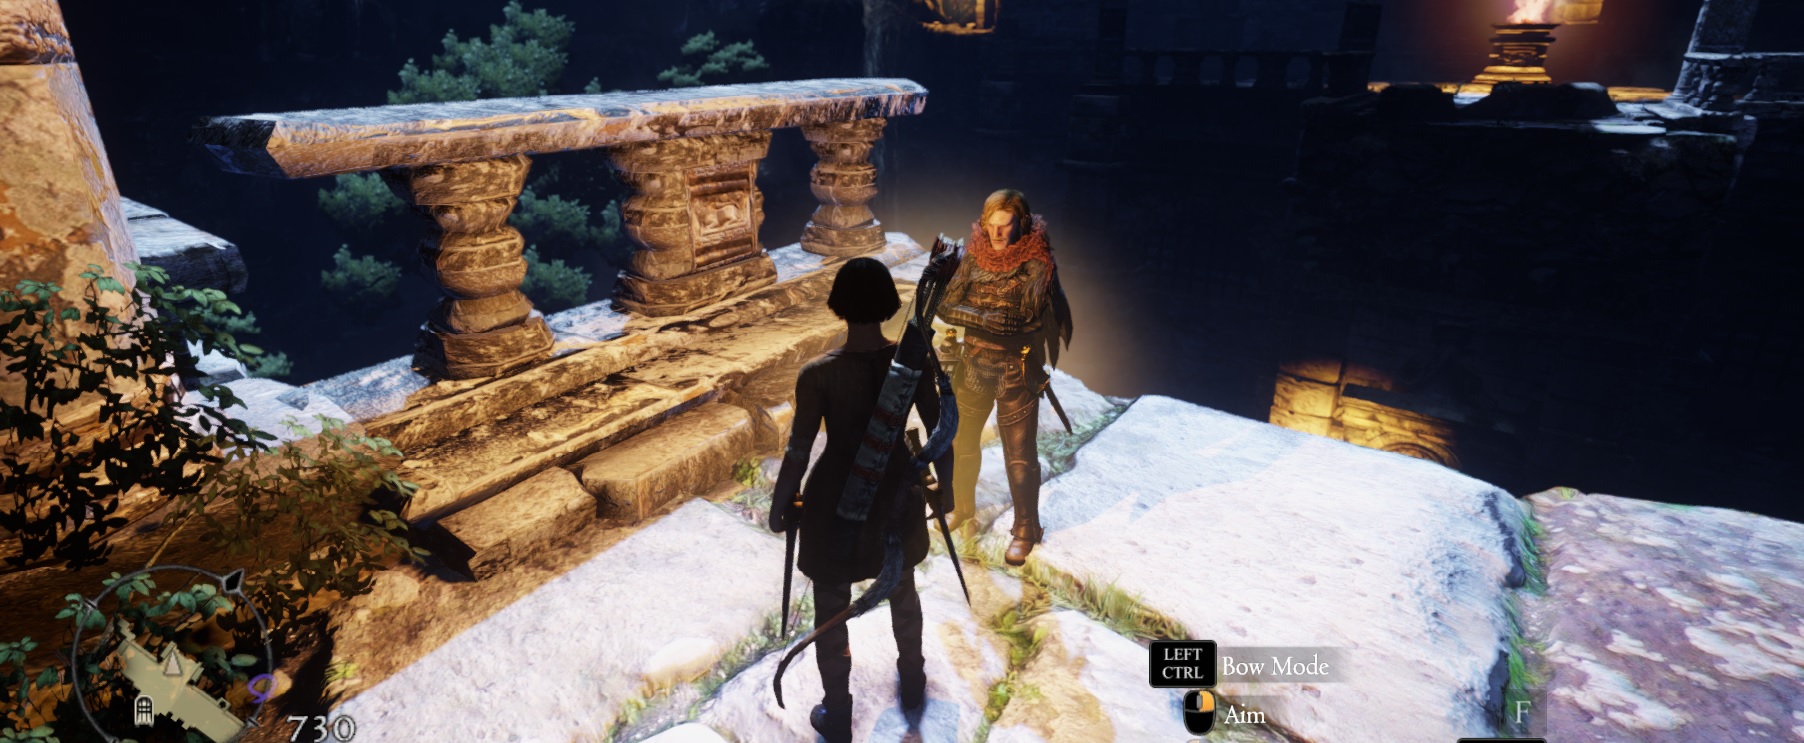
That video will take you to this room with two doors inside. To open those doors you'd need Moonbeam Gems, and we're not even remotely prepared to get those yet, so we'll perform the Barrels Glitch.
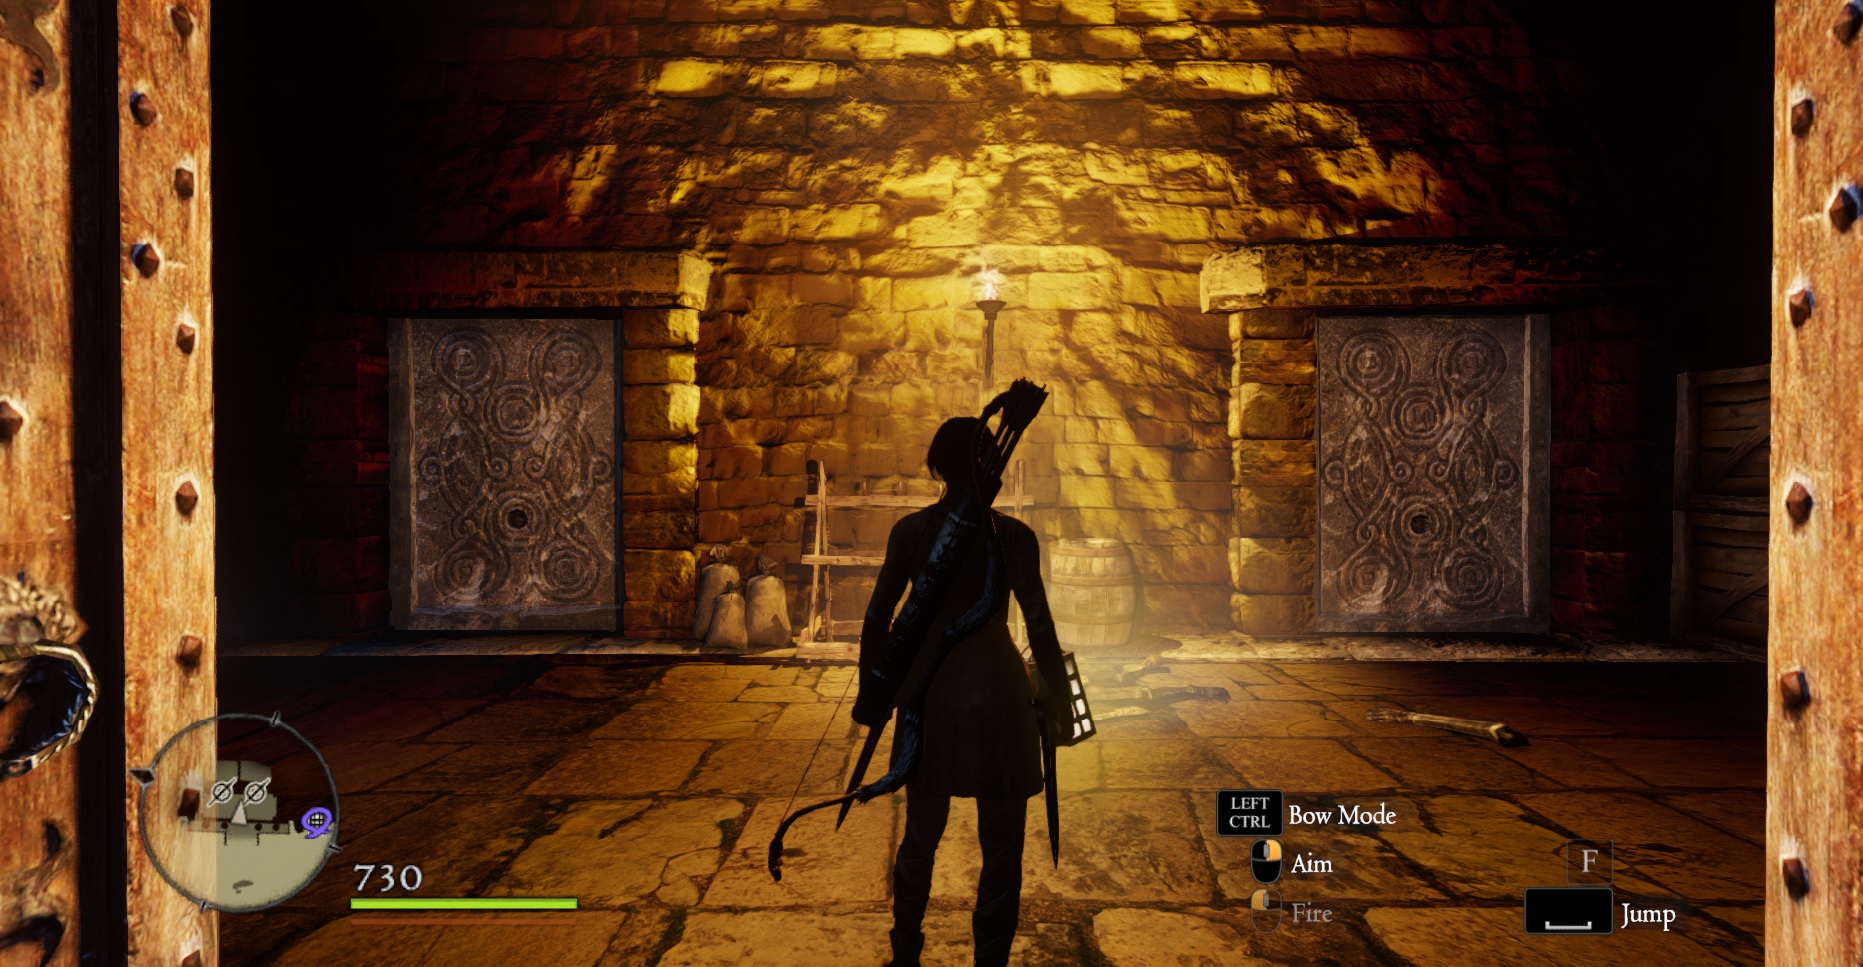
Take one barrel and put it at a corner in front of one of those doors, just like in this picture:
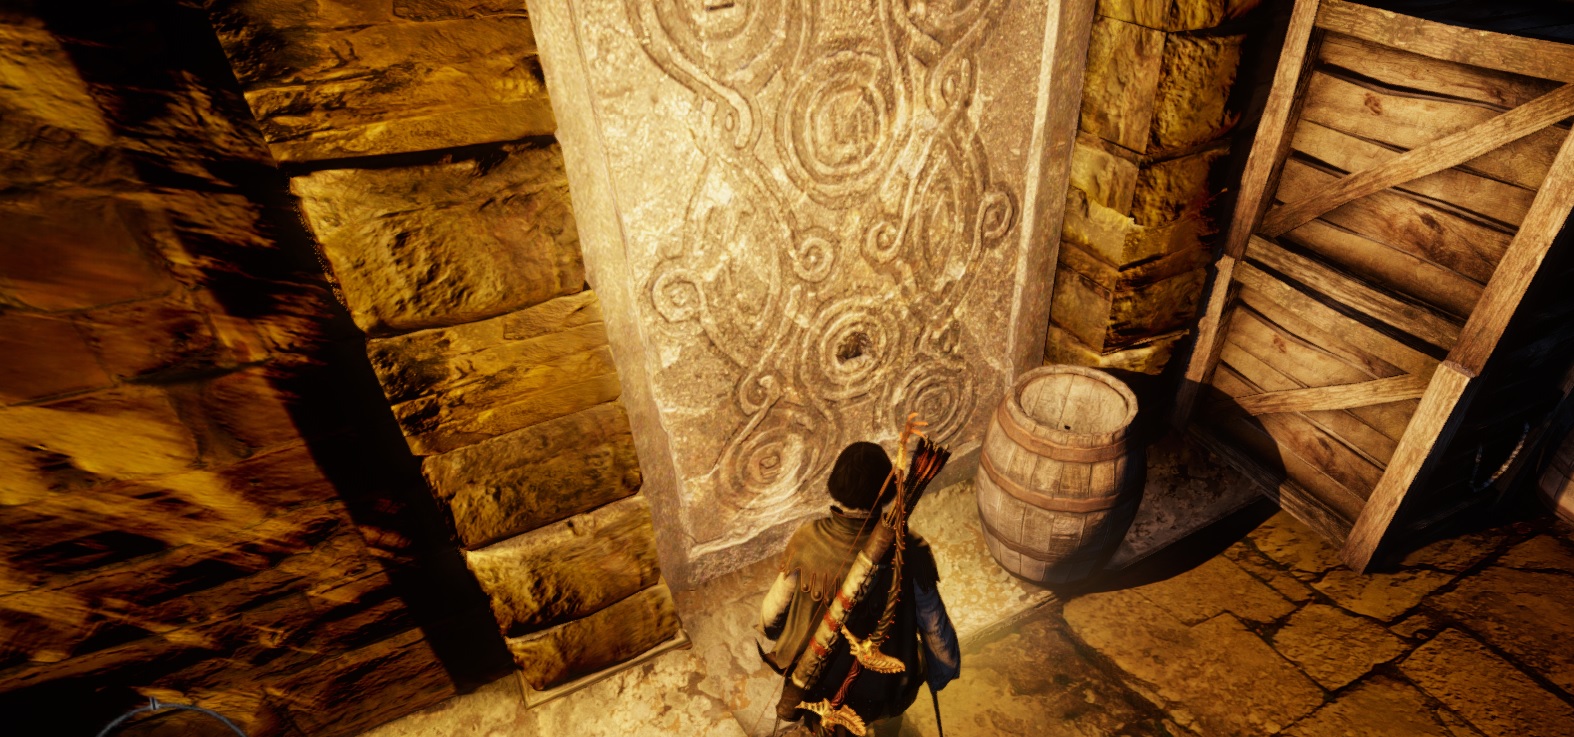
Take something else like another barrel or a pot and walk towards the barrel. You may pass through it, and if you don't, take the barrel and place it there once again.
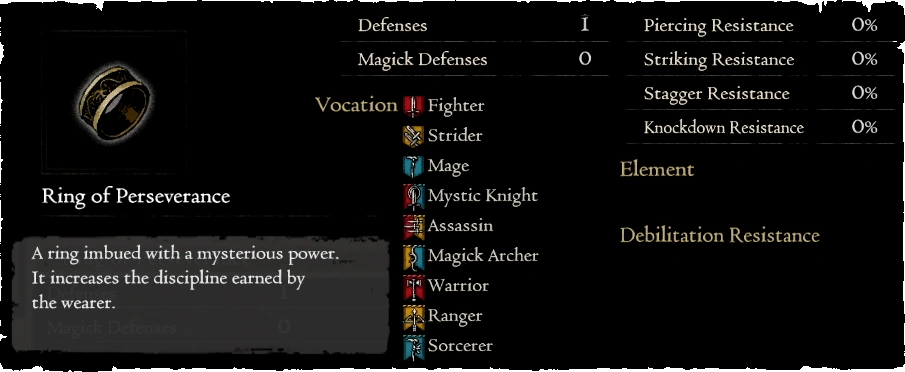
The idea is to jump between the barrel and the gate while holding something else. Eventually the barrel will disable its noclip state and push you through the gate inside the room, where you can obtain high-tier equipment and the Ring of Perseverance which provides you with a 50% boost on Discipline Points gain.
One funny thing about this is that you can put a barrel close to a door and then grab a Pawn (instead of an object/prop) to glitch yourself, hahah.
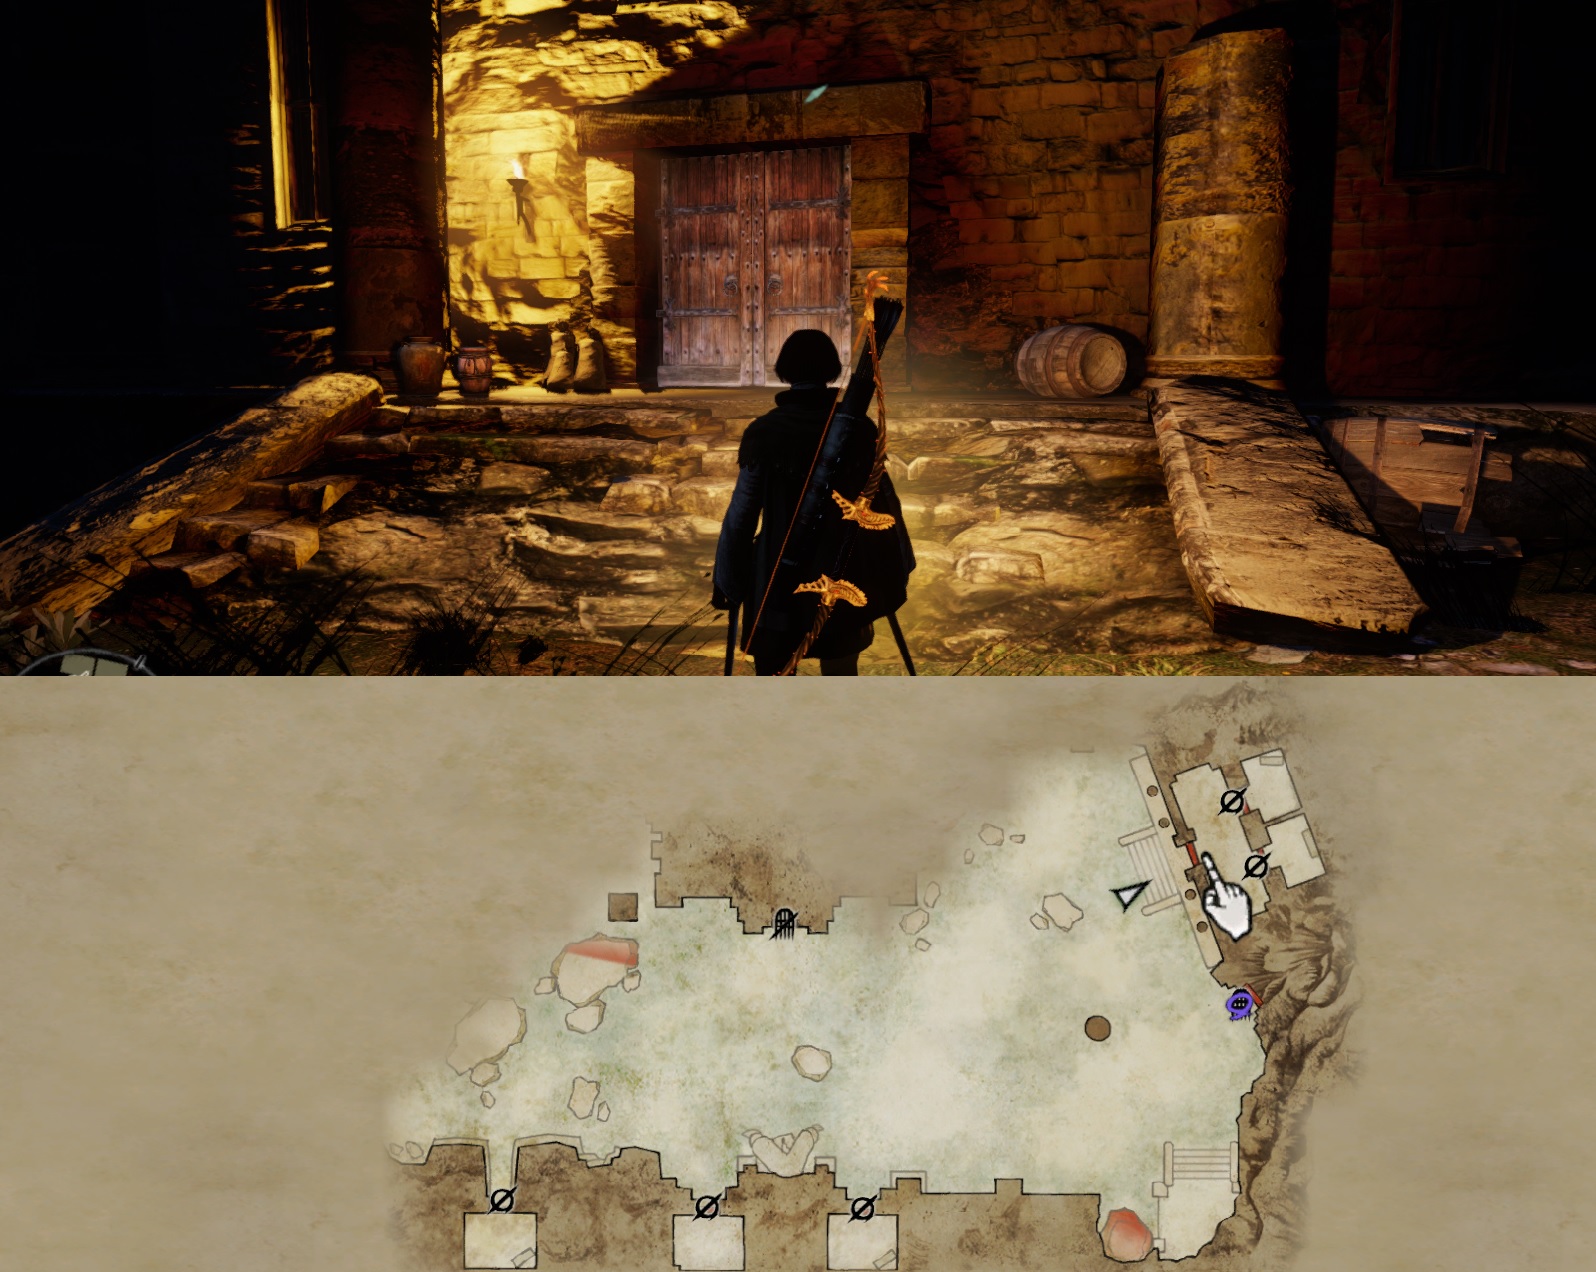
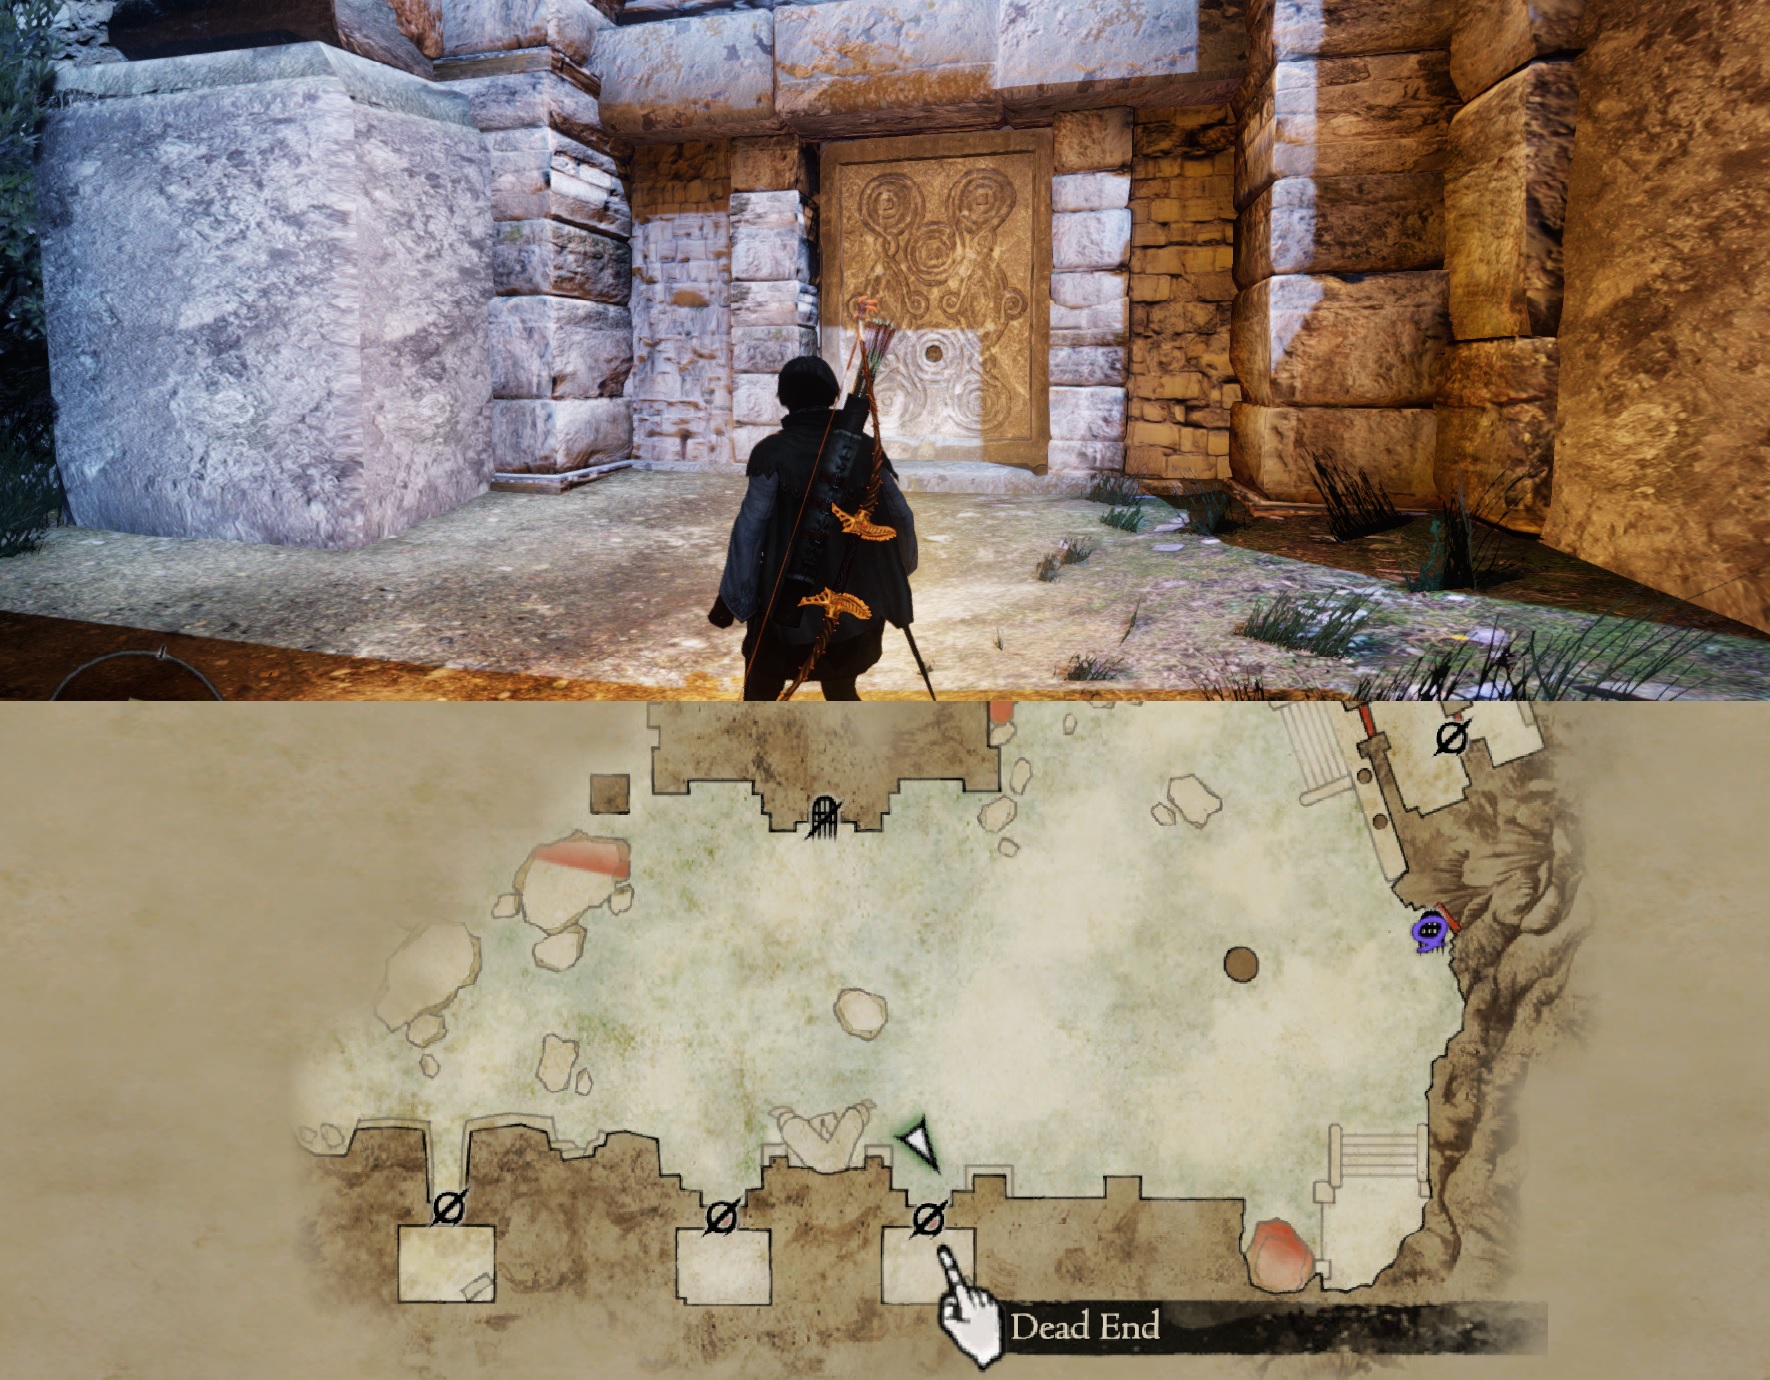
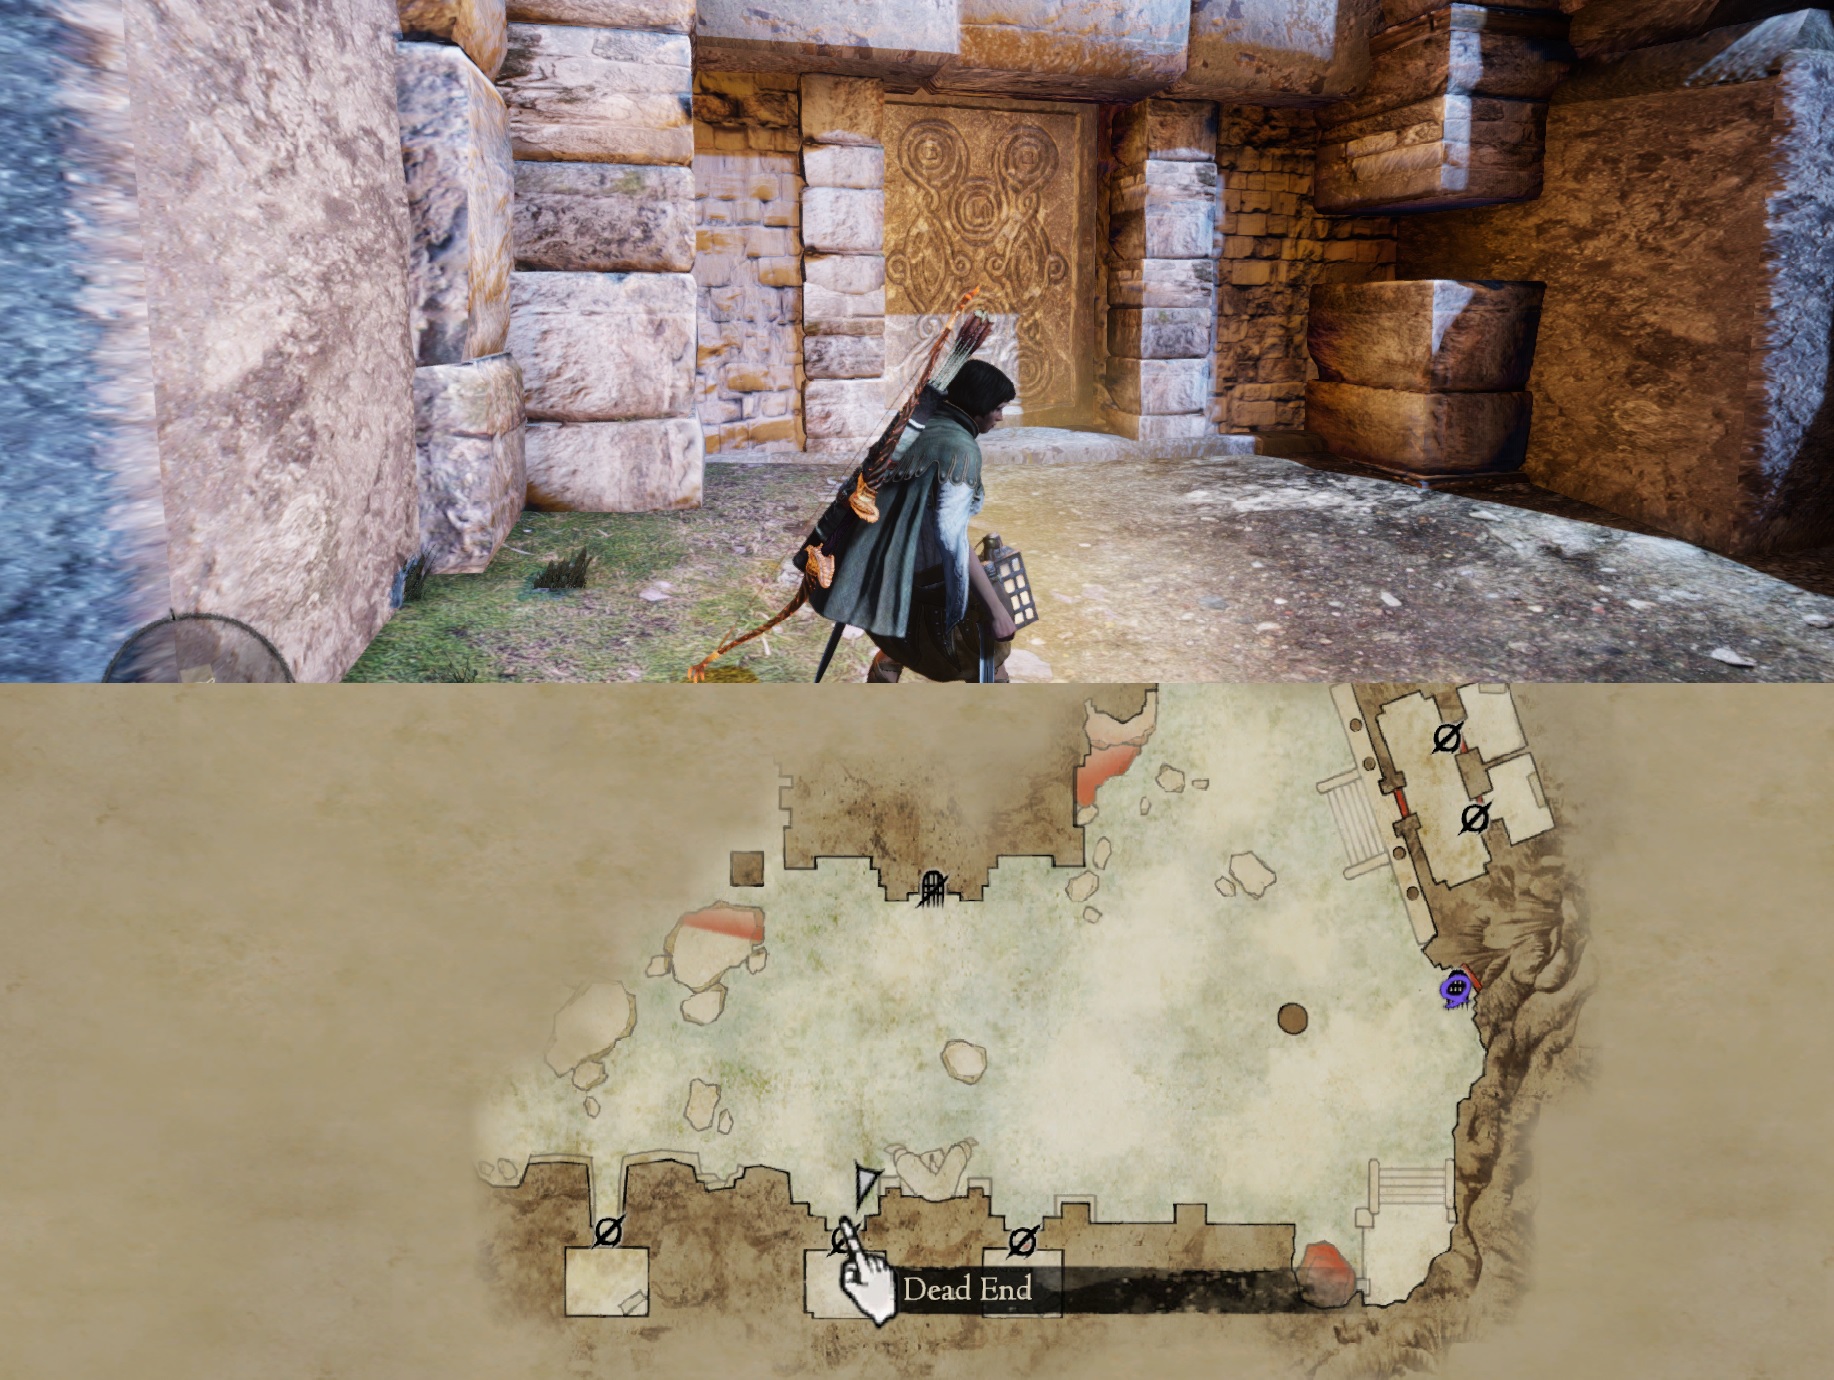
There's five doors here where you'll be able to perform this glitch, in the previously linked video I'm getting into all of them.
These are the five doors:
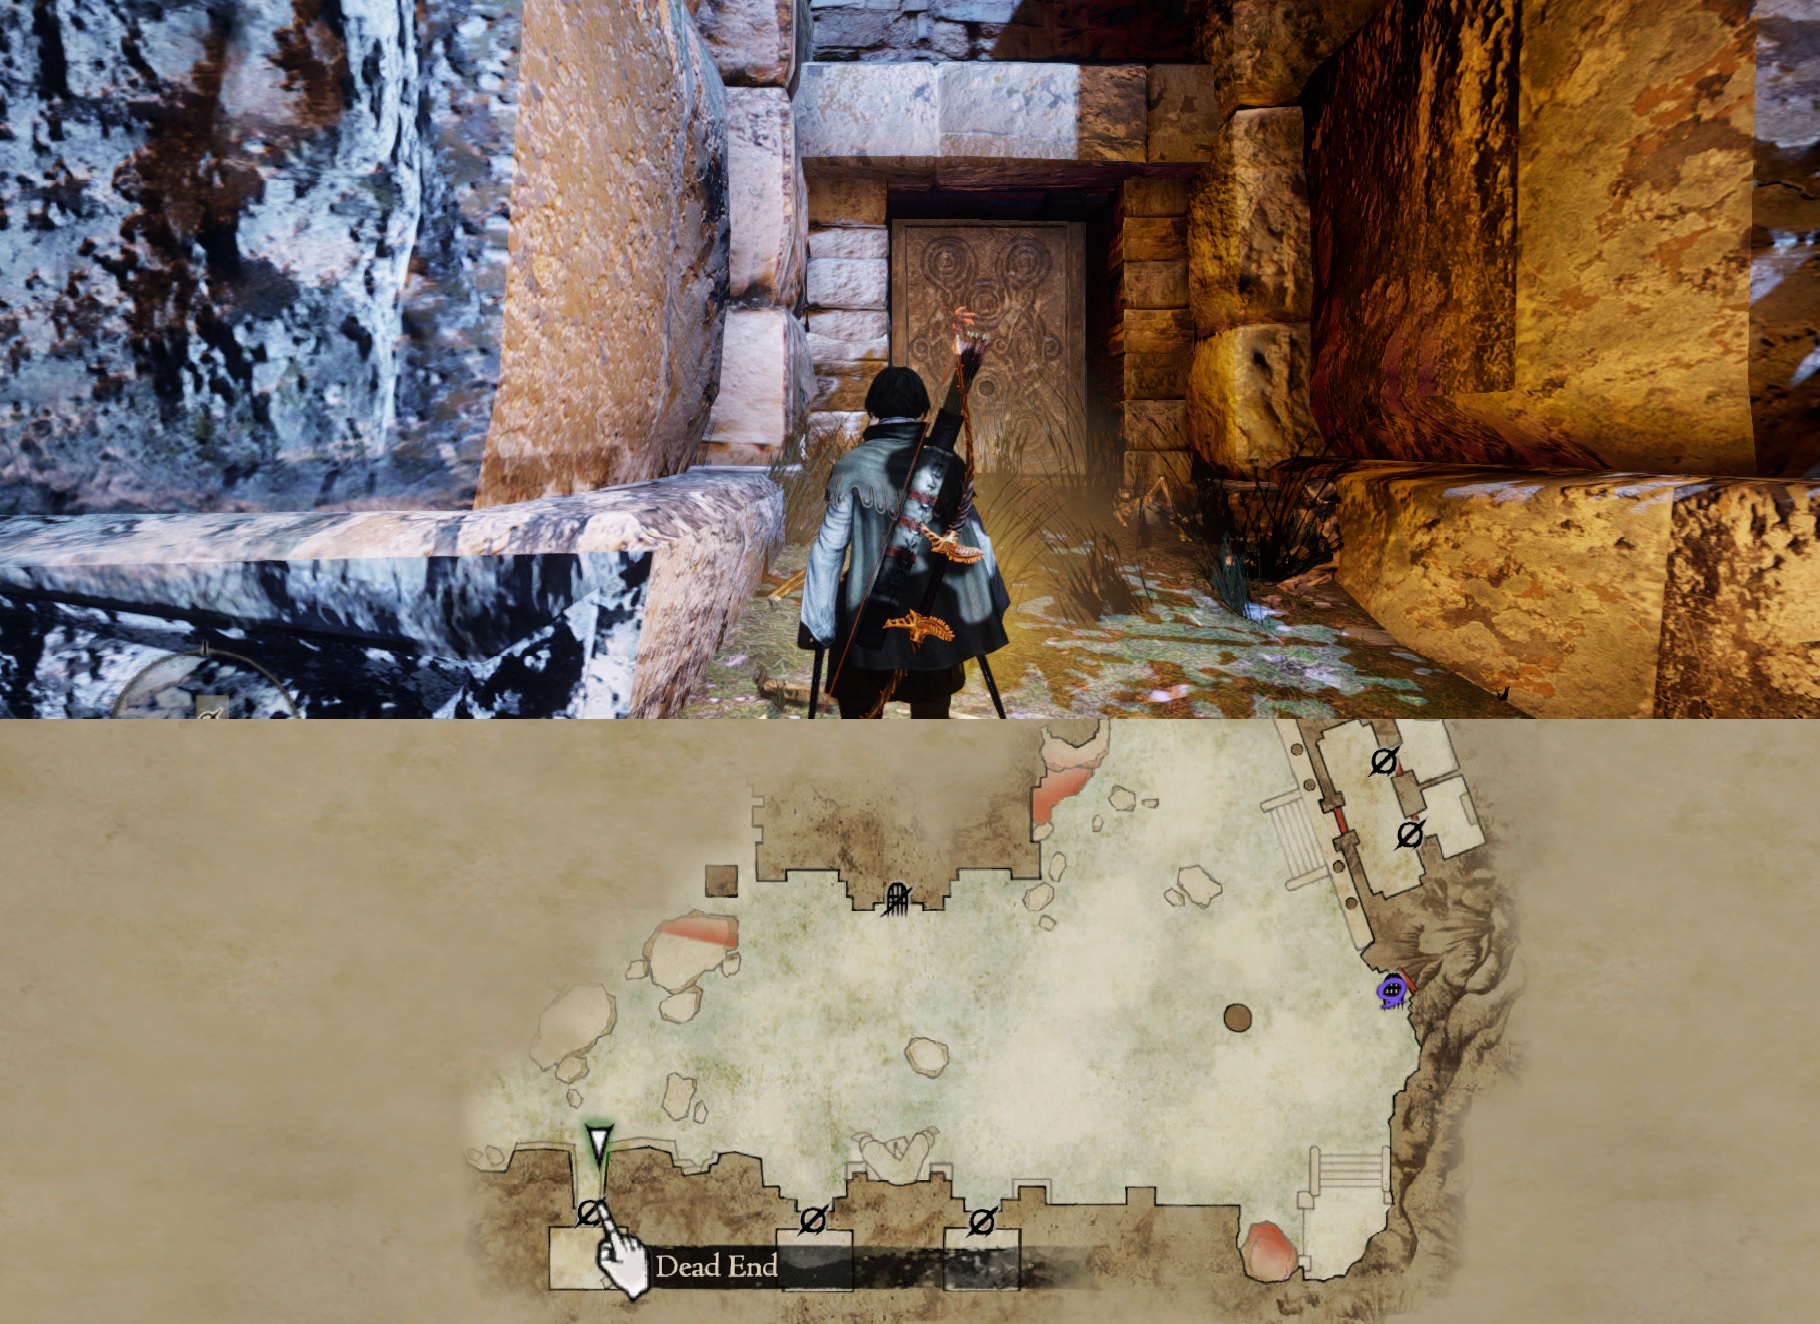
https://youtu.be/YHCYCSe39pY
If you're playing as a Dagger Vocation such as Strider, Ranger, Assassin and Magick Archer, you can Dodge, which allows you to perform an alternative way of glitching with barrels.
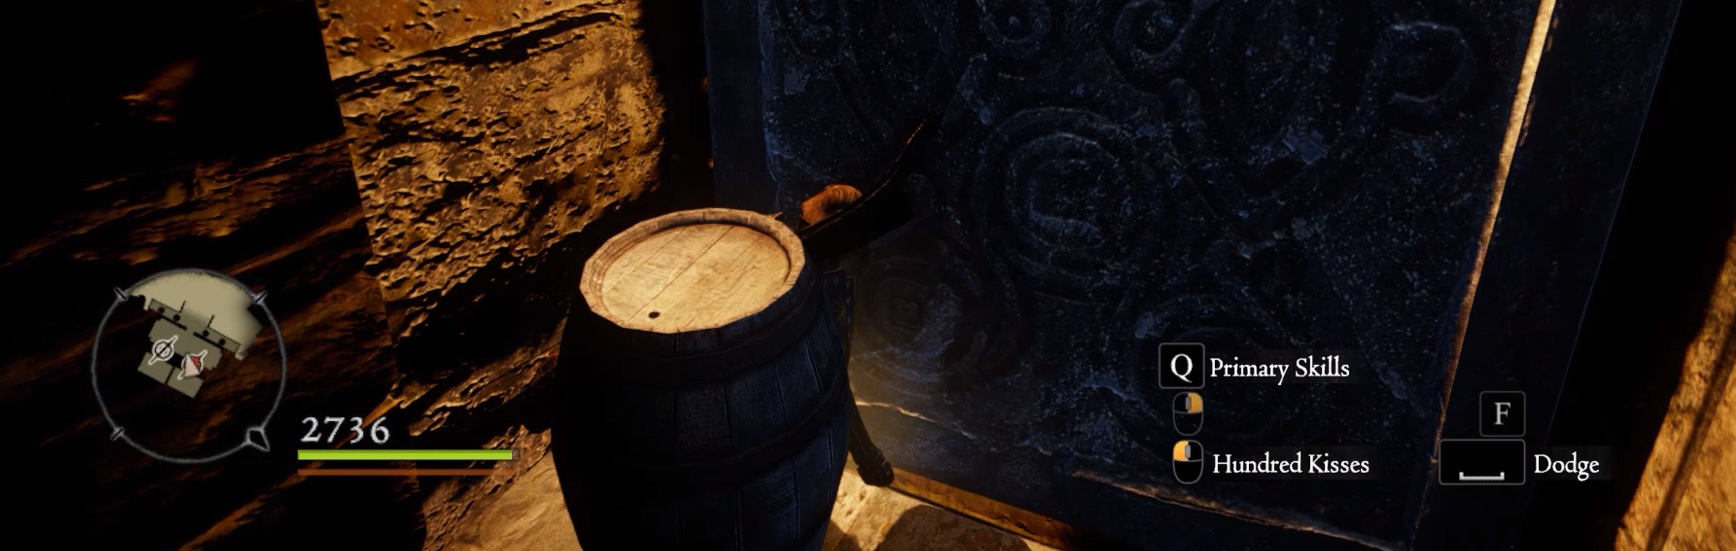
All you have to do is put the barrel at a corner of a door and noclip on it just like a before, but instead of taking another prop, just spam Dodge to the door's direction until you pass through it. If it didn't work in 5 to 8 Dodges, move the barrel a bit further from the door and keep trying.
If for some reason you broke all your barrels, you can go to 'Save and Continue' and then 'Exit Without Saving' and reload, they'll be there again. If you want it to be faster, you can Godsbane yourself (if you've gotten it) or use a Liftstone.
One last thing: While reading the Dragon's Dogma Wiki page on the Barrels Glitch, I found this:
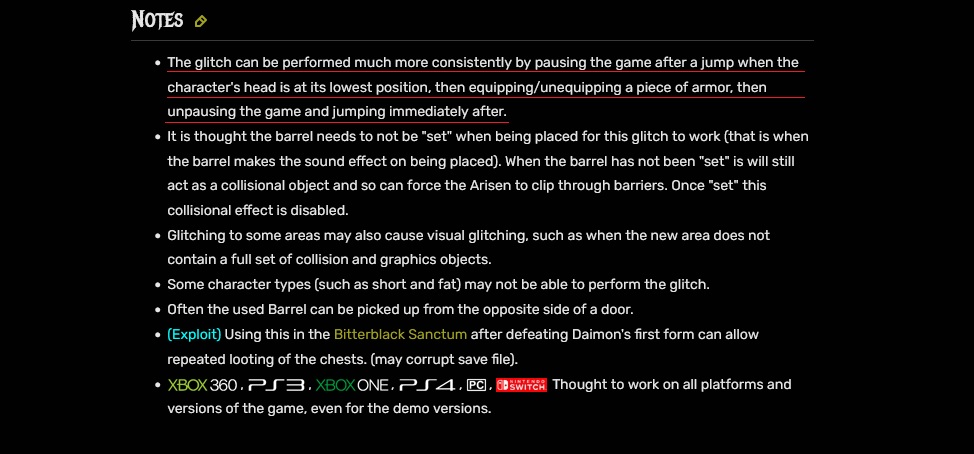
All you have to do is jump while being at the corner of a wall and inside a barrel, then wait for your character to fall, then pause your game when your character's head is pretty low (Just before being able to jump once again), go to Equipment and equip then unequip something. Unpause your game and Voulá! It won't work 100% of the times, but it does help a lot.
This is also explained and shown in the previously provided video.
EXTRA STUPID LITTLE THING: Have you noticed that the left door from the room with two doors in Duskmoon Tower: Third Floor isn't properly aligned to its respective gap in the floor?
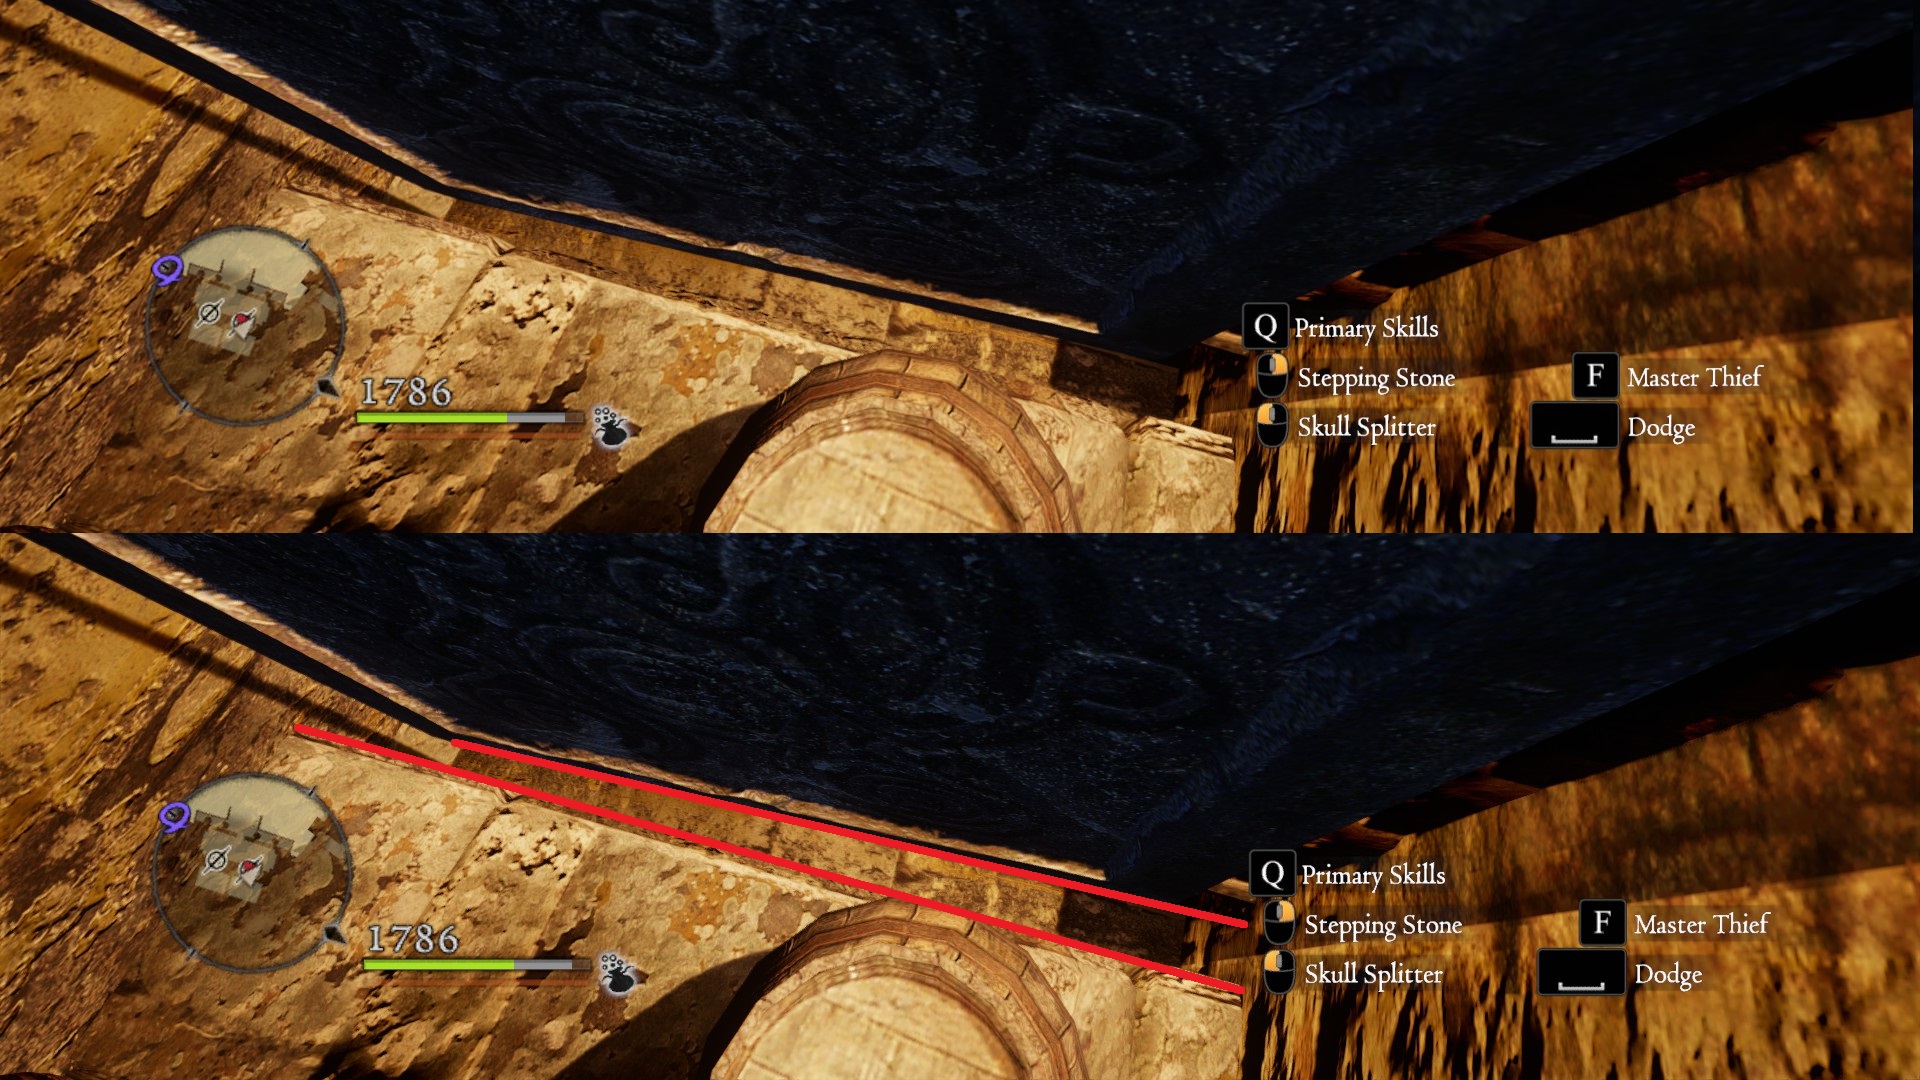
I'm talking about the door that contains the Dragon's Ire. Go there and you'll see. I think various others of these doors have the same issue.
Go back to Cassardis, sleep in Pablos' Inn until nightime and go right to Bitterblack Isle (The purple quest icon).
You can skip the cutscenes if you wish, but they're beautiful.
Throw all your pawns to the lake. We do this because they tend to break the barrels, and each pawn you have active will consume XP, there's a more in-depth explanation about this on this guide.
Take every quest from here and open that chest from behind.
In this video I'll show you the path to 'Duskmoon Tower: Third Floor' and visual references on how to perform the famous Barrel Glitch, so it's important that you watch it.
https://youtu.be/YHCYCSe39pY
Talk to this NPC to get a lot of gold and XP.
That video will take you to this room with two doors inside. To open those doors you'd need Moonbeam Gems, and we're not even remotely prepared to get those yet, so we'll perform the Barrels Glitch.
Take one barrel and put it at a corner in front of one of those doors, just like in this picture:
Take something else like another barrel or a pot and walk towards the barrel. You may pass through it, and if you don't, take the barrel and place it there once again.
The idea is to jump between the barrel and the gate while holding something else. Eventually the barrel will disable its noclip state and push you through the gate inside the room, where you can obtain high-tier equipment and the Ring of Perseverance which provides you with a 50% boost on Discipline Points gain.
One funny thing about this is that you can put a barrel close to a door and then grab a Pawn (instead of an object/prop) to glitch yourself, hahah.
There's five doors here where you'll be able to perform this glitch, in the previously linked video I'm getting into all of them.
These are the five doors:
Doors 1 and 2:
Door 3:
Door 4:
Door 5:
https://youtu.be/YHCYCSe39pY
If you're playing as a Dagger Vocation such as Strider, Ranger, Assassin and Magick Archer, you can Dodge, which allows you to perform an alternative way of glitching with barrels.
All you have to do is put the barrel at a corner of a door and noclip on it just like a before, but instead of taking another prop, just spam Dodge to the door's direction until you pass through it. If it didn't work in 5 to 8 Dodges, move the barrel a bit further from the door and keep trying.
If for some reason you broke all your barrels, you can go to 'Save and Continue' and then 'Exit Without Saving' and reload, they'll be there again. If you want it to be faster, you can Godsbane yourself (if you've gotten it) or use a Liftstone.
One last thing: While reading the Dragon's Dogma Wiki page on the Barrels Glitch, I found this:
The glitch can be performed much more consistently by pausing the game after a jump when the character's head is at its lowest position, then equipping/unequipping a piece of armor, then unpausing the game and jumping immediately after.
All you have to do is jump while being at the corner of a wall and inside a barrel, then wait for your character to fall, then pause your game when your character's head is pretty low (Just before being able to jump once again), go to Equipment and equip then unequip something. Unpause your game and Voulá! It won't work 100% of the times, but it does help a lot.
This is also explained and shown in the previously provided video.
EXTRA STUPID LITTLE THING: Have you noticed that the left door from the room with two doors in Duskmoon Tower: Third Floor isn't properly aligned to its respective gap in the floor?
I'm talking about the door that contains the Dragon's Ire. Go there and you'll see. I think various others of these doors have the same issue.
・Throwblasts: An overpowered weapon in early-game
Throwblasts are surprisingly powerful items that can be bought infinitely from Aestella's shop in Cassardis.
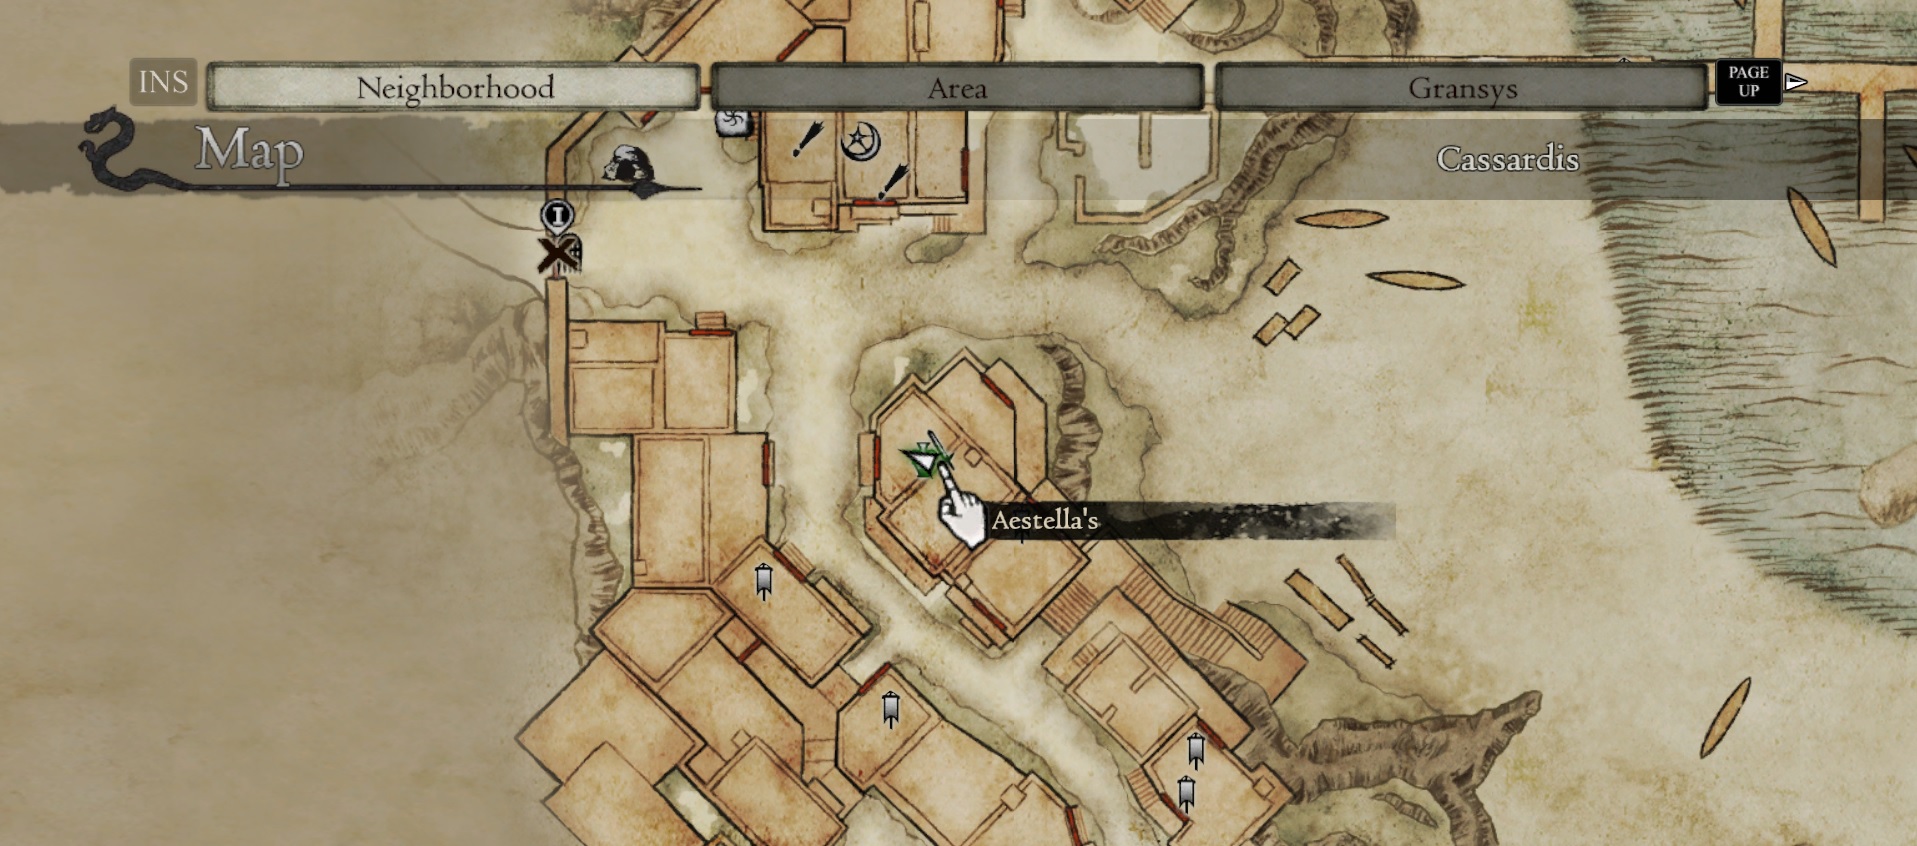
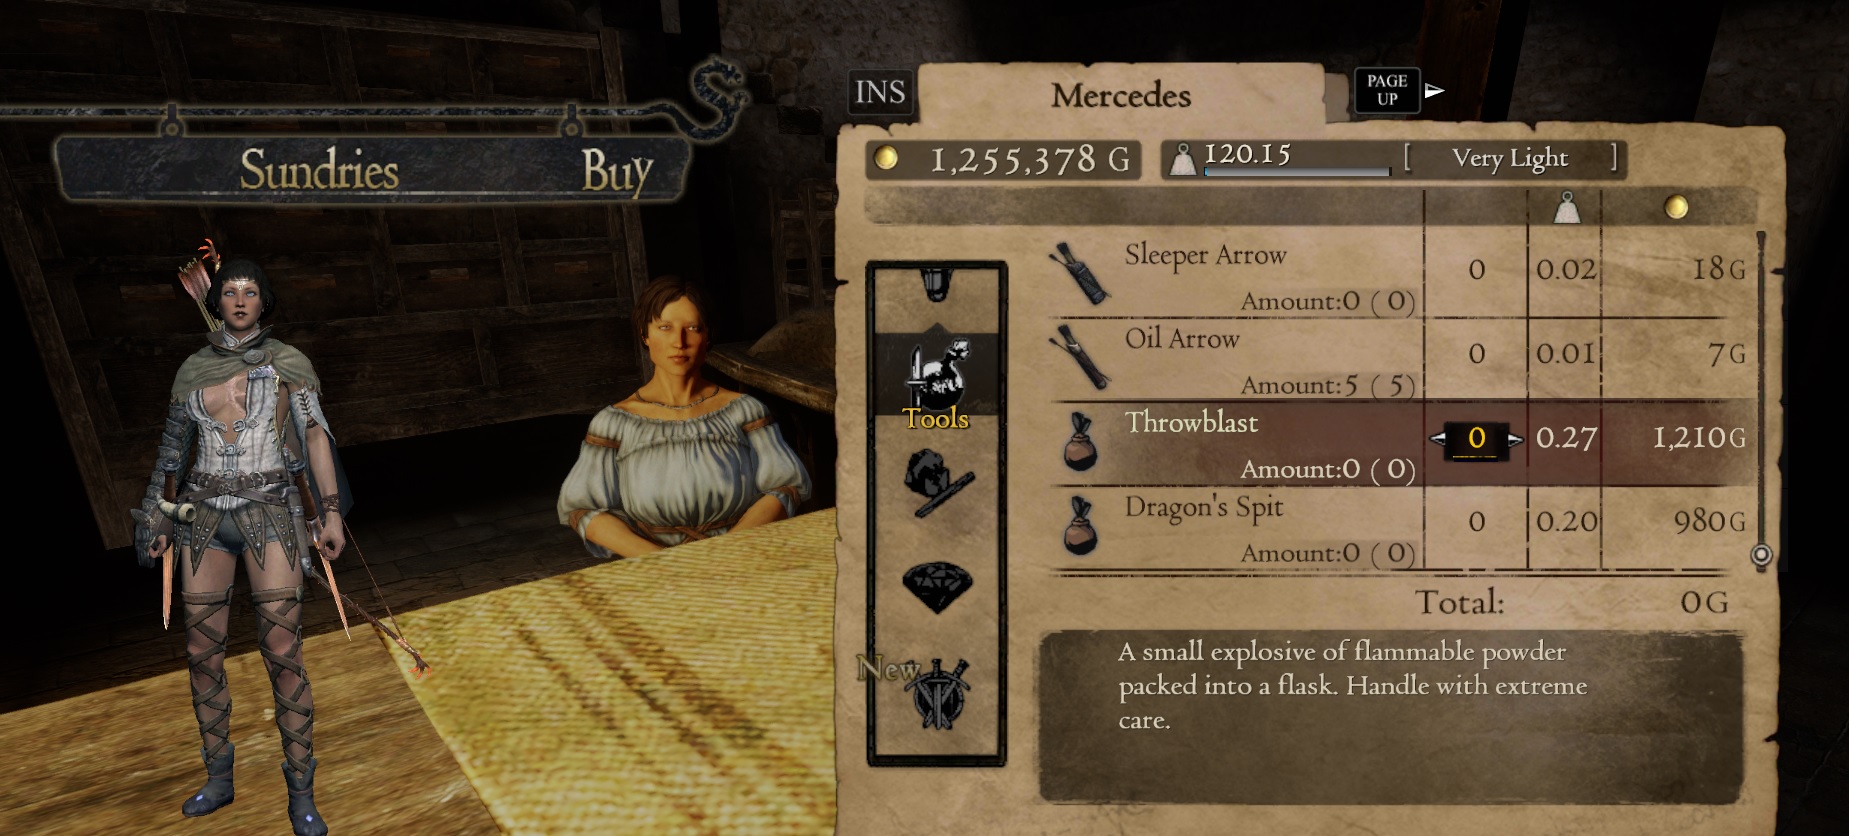
To use them, open your inventory, go to 'Tools' and select them with the option 'Hold'.
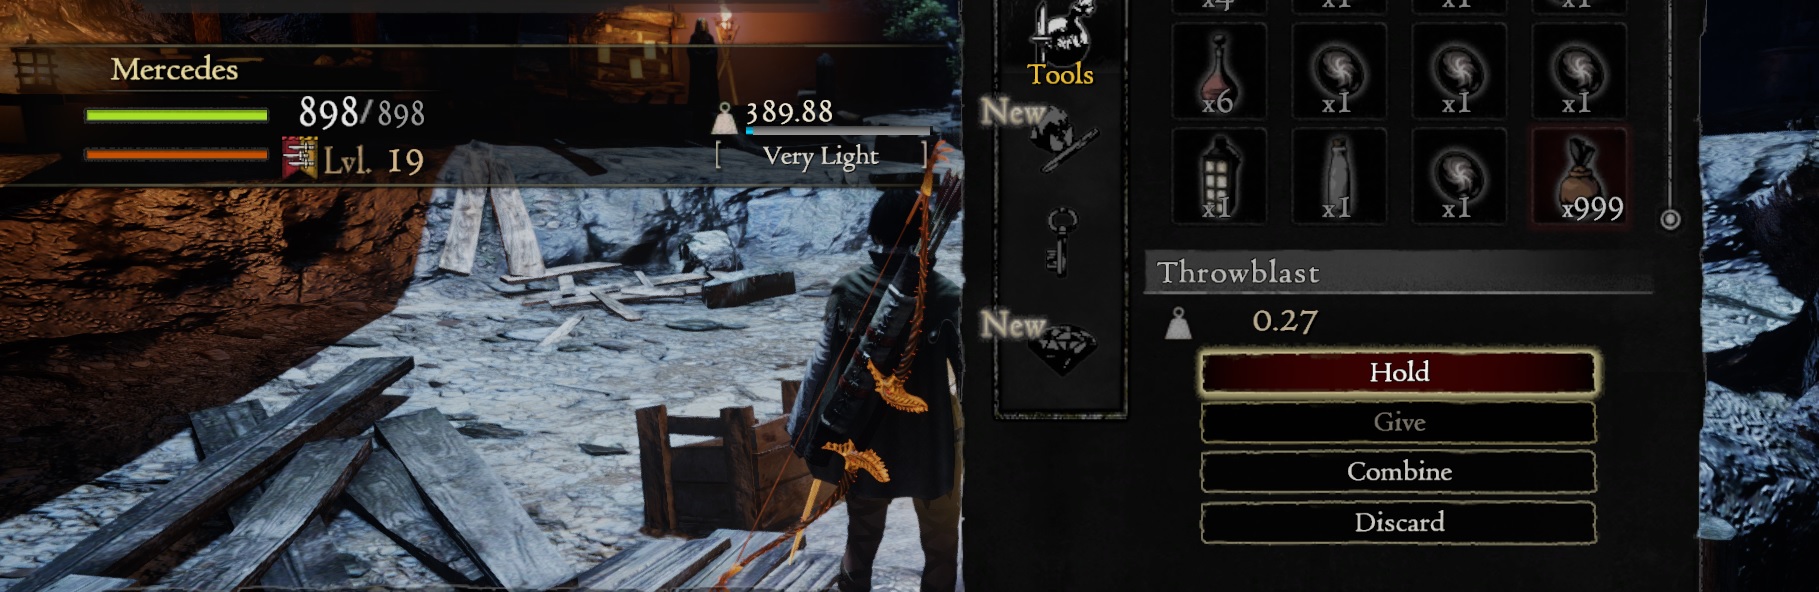
These things are ridiculously broken, you can beat various bosses on Bitterblack Isle with low-level characters by just spamming the sh1t out of it. It does high damage and throws enemies away, sometimes stunning them for various seconds.
And if you possess the Vandal's Ring, you'd gain double damage with the ThrowBlasts.
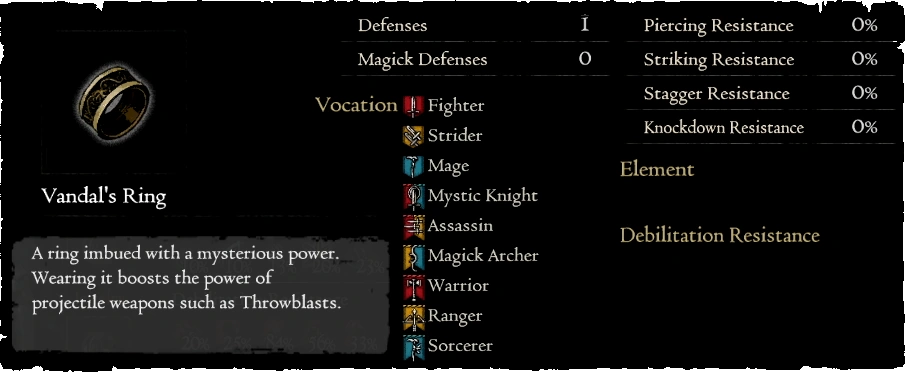
The Vandal's Ring can be obtained as a reward for the post-Grigori quest titled 'An Unseen Rival II' or in Bitterblack Isle by purifying a 'Bitterblack Gear Lv.3', and its effect stacks if you get two of them.
When using Throwblasts, you'd want to aim to weak spots like Cyclops' feets to weak them or make them fall down and then aim for their heads. Do not worry too much about it, throwing them like an idiot will eventually hit a weak spot, but it's good to keep this in mind. Throwblast are especially useful against Chimeras due to its impact area being able to damage both its lion head and goat head in one explosion, and it can also cut the serpent head very easily.
Here's video proof of how broken these items are:
https://www.youtube.com/watch?v=eVJJLKMiFjM
To use them, open your inventory, go to 'Tools' and select them with the option 'Hold'.
These things are ridiculously broken, you can beat various bosses on Bitterblack Isle with low-level characters by just spamming the sh1t out of it. It does high damage and throws enemies away, sometimes stunning them for various seconds.
And if you possess the Vandal's Ring, you'd gain double damage with the ThrowBlasts.
The Vandal's Ring can be obtained as a reward for the post-Grigori quest titled 'An Unseen Rival II' or in Bitterblack Isle by purifying a 'Bitterblack Gear Lv.3', and its effect stacks if you get two of them.
When using Throwblasts, you'd want to aim to weak spots like Cyclops' feets to weak them or make them fall down and then aim for their heads. Do not worry too much about it, throwing them like an idiot will eventually hit a weak spot, but it's good to keep this in mind. Throwblast are especially useful against Chimeras due to its impact area being able to damage both its lion head and goat head in one explosion, and it can also cut the serpent head very easily.
Here's video proof of how broken these items are:
https://www.youtube.com/watch?v=eVJJLKMiFjM
・Incredibly useful Augments
The best strategy for an early Hard Mode character is to get the Bastion, Fortitude and Awareness Augments as fast as possible.
You can change your Vocation and still keep any Augment from other Vocations equipped and stacked.
If you stack these three Augments in Normal Mode, you'd obtain a total of 130 Damage Reduction; but in Hard Mode, if you stack them, you'd get a total of 585 Damage Reduction (without counting the Damage Reduction you'd obtain from the rest of your build). This means that these three Augments can make Hard Mode's Early-Game easier than Normal Mode's Early-Game.
After you reach Gran Soren for the first time, you can go to the Pawns Guild and get them really fast.
Here's a more in-depth explanation:
The 'Bastion' Augment provides you with Damage Reduction.
This is added to the total of Damage Reduction that your build already has.
This is incredibly useful during Early-Game if you're playing on Hard Mode, where a hit that would cause 225 (or less) damage points will only cause 1 to none damage.
If you're not a Warrior, change your vocation to it and select the 'Bastion' Augment for a total of 900 Discipline Points.
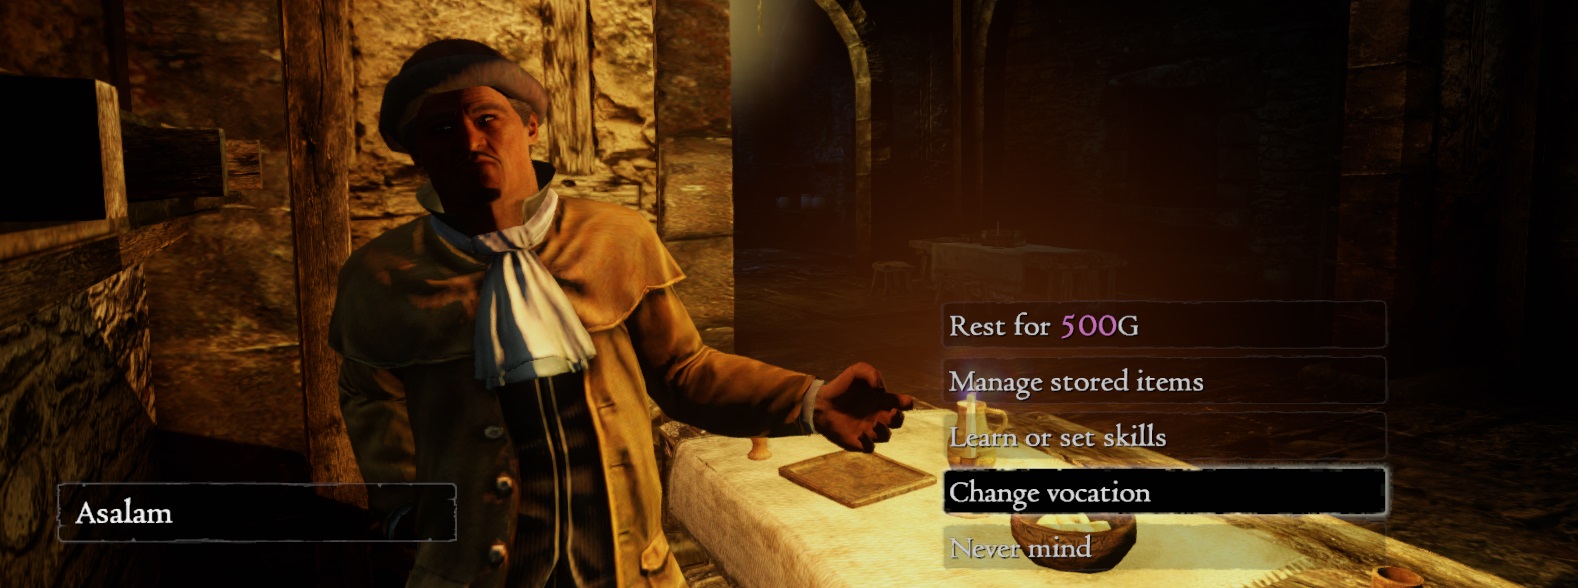
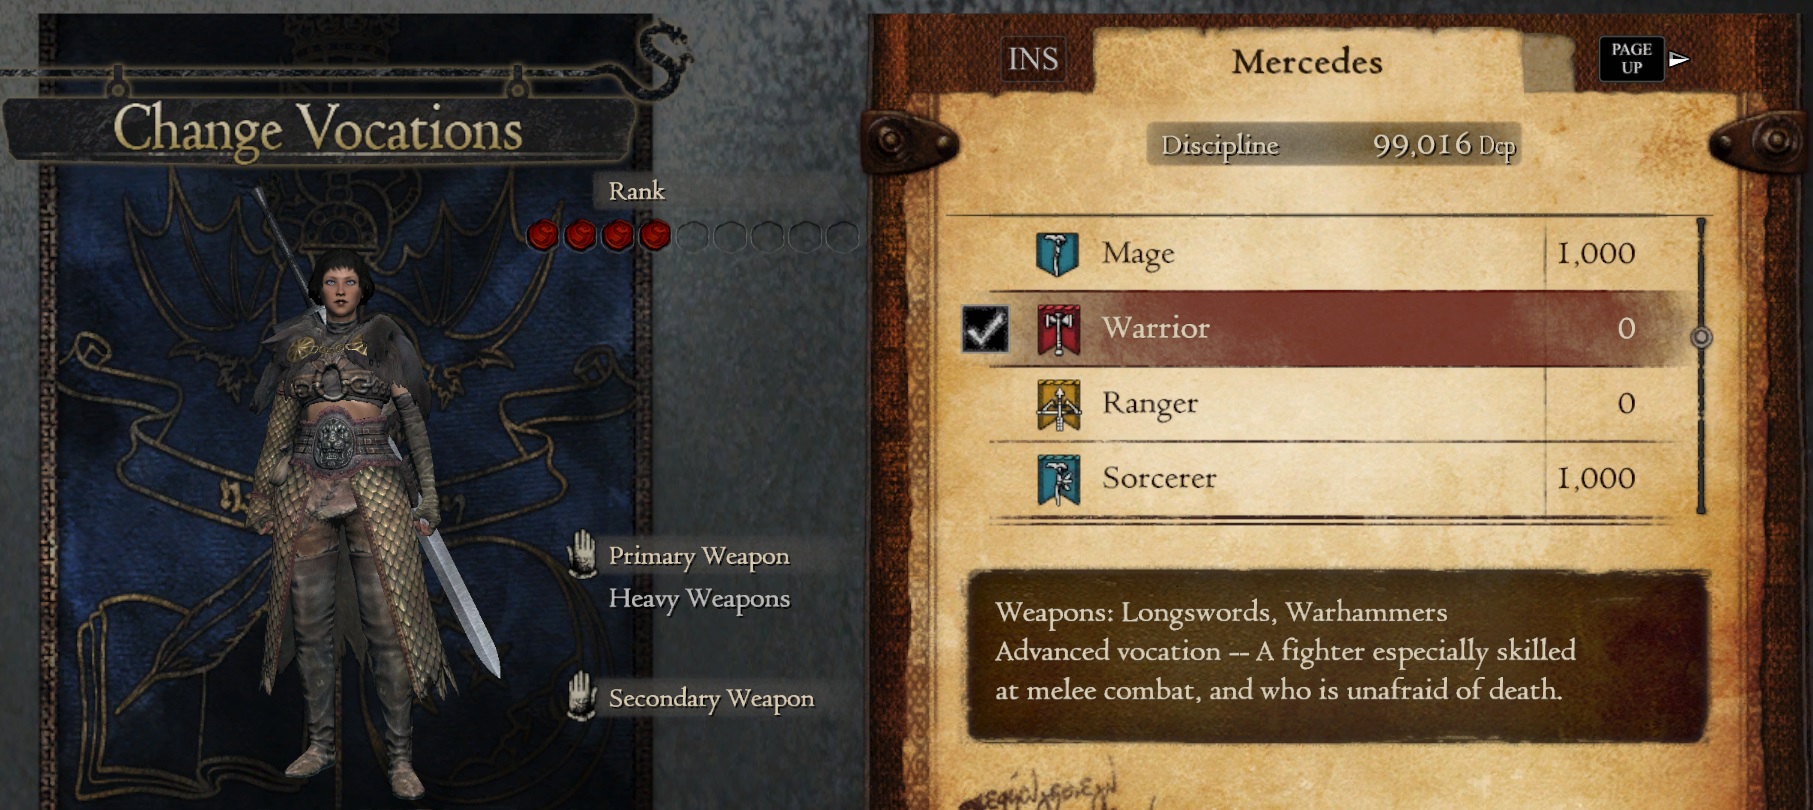
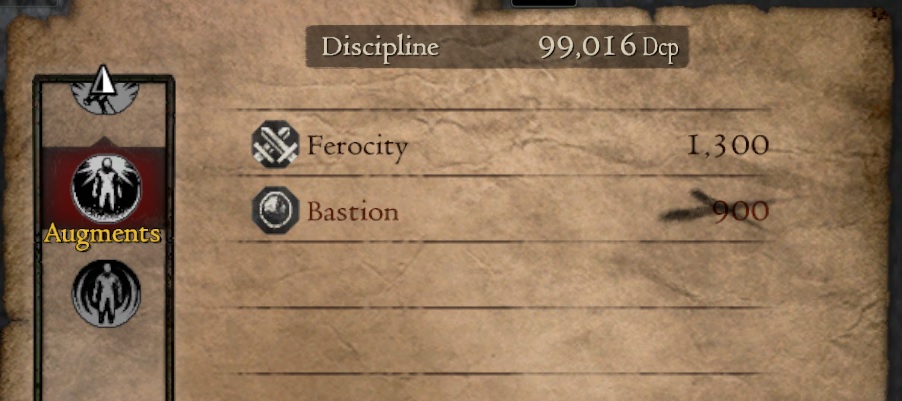
Now go to 'Set skills' and add Bastion to your equipped Augments. If you don't want to keep playing as a Warrior, don't worry; you can change your vocation and still keep this Augment equipped.
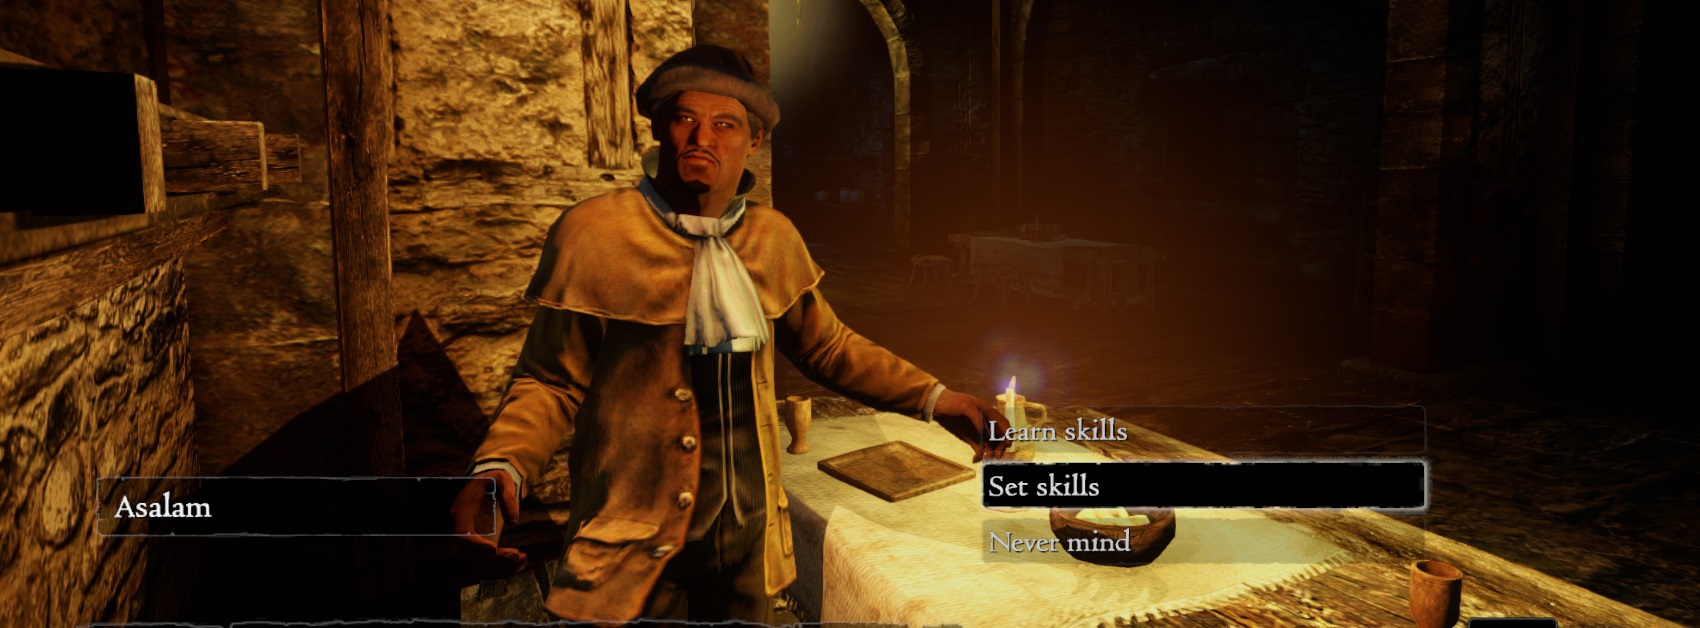
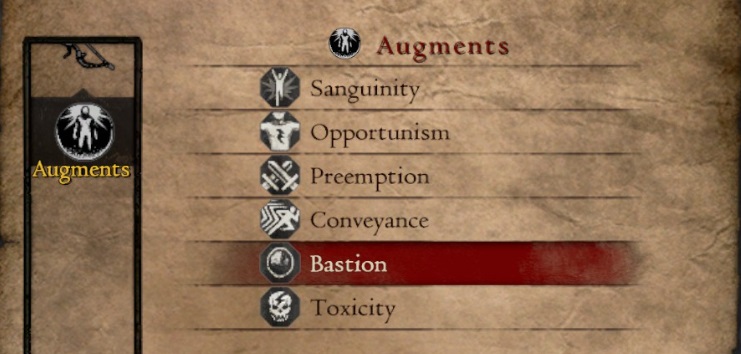
'Bastion' will become useless on Mid to Late-game, but for an Early-game character it's a game changer.
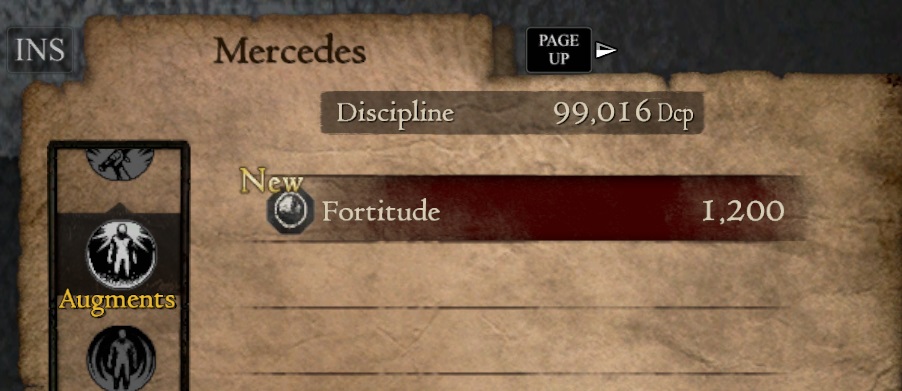
Similar to the 'Bastion' Augment, Fortitude provides you with Damage Reduction that can be stacked with the rest of your build, including any other Augment like 'Bastion'.
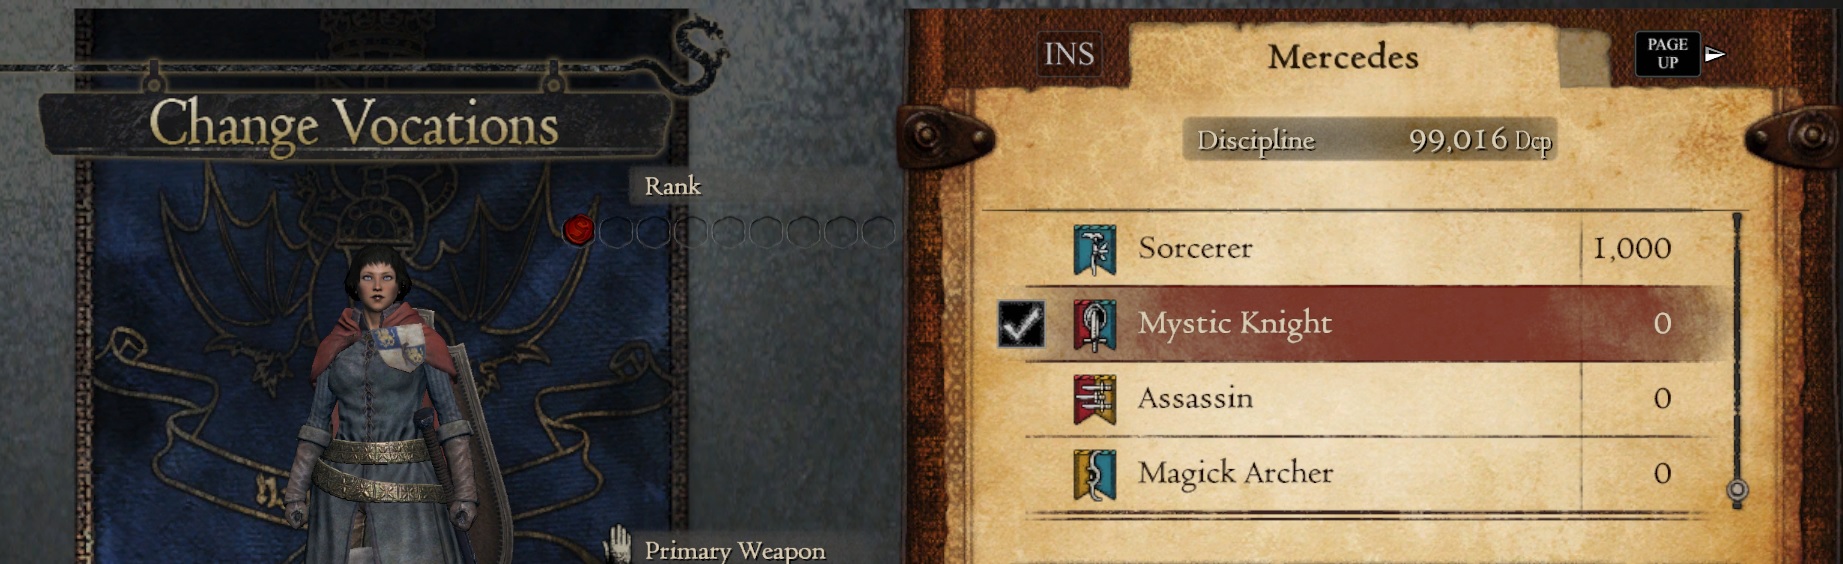
To obtain 'Fortitude', change to a Mystic Knight look for it on the 'Augments' list in the 'Learn skill' menu.
Similar to the 'Bastion' and 'Fortitude', 'Awareness' provides you with Damage Reduction.
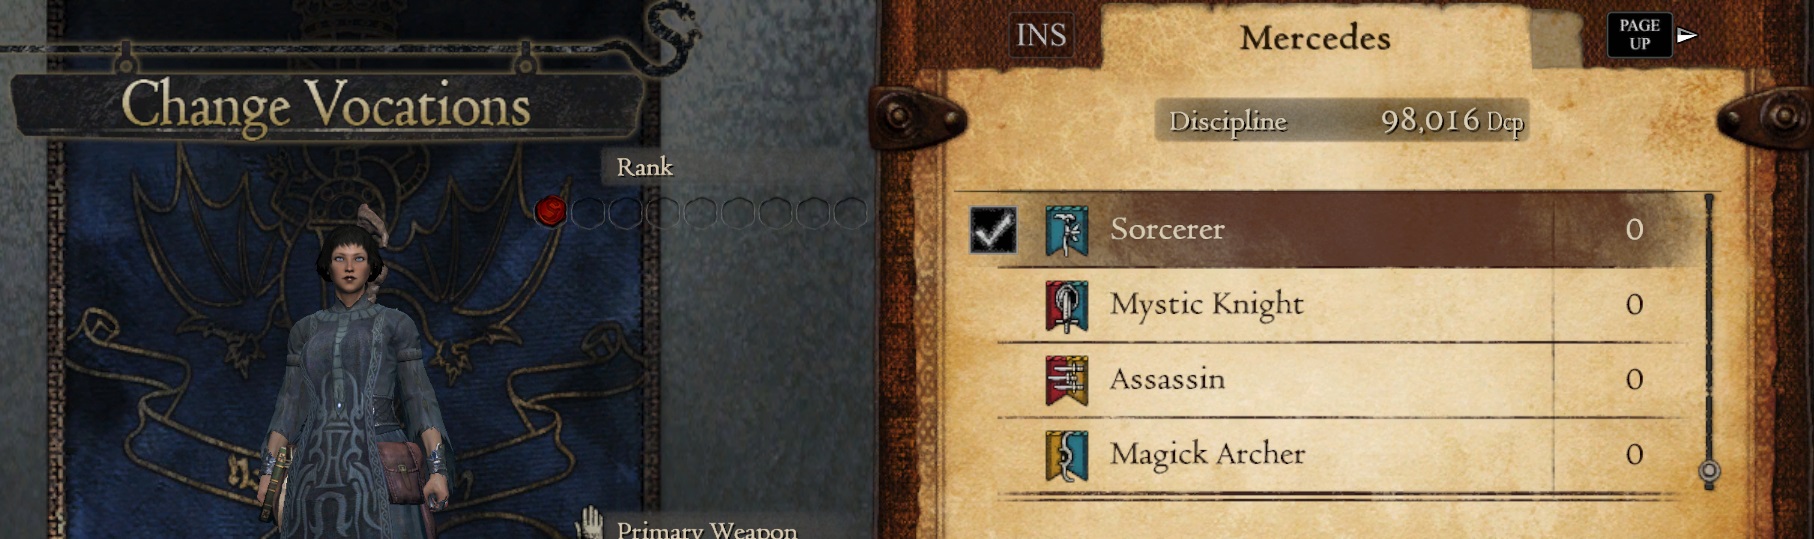
To obtain 'Awareness', change to a Sorcerer and look for it on the 'Augments' list in the 'Learn skill' menu.
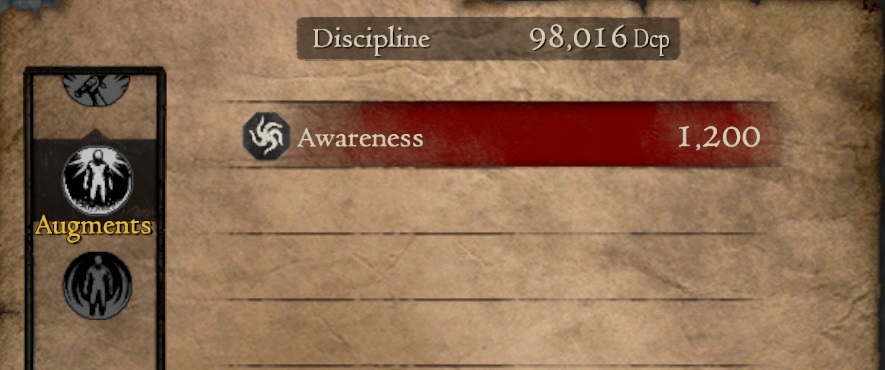
If you level up Mage, you can eventually learn the 'Apotropaism' Augment which provides you with the same effects than 'Fortitude'.
You can obtain the 'Mettle' Secret Augment through purificating a Bitterblack Novelty Level 3, which provides you with an increase in White Health (you know, the white part in your health bar that's left to be recovered).
As a Strider you can learn the 'Endurance' Augment which provides you with an increase in Stamina for a total of 100 points.
- 'Bastion' can be learnt if you unlock the Warrior Vocation.
- 'Fortitude' can be learnt if you unlock the Mystic Knight Vocation.
- 'Awareness' can be learnt if you unlock and level up the Sorcerer Vocation.
You can change your Vocation and still keep any Augment from other Vocations equipped and stacked.
If you stack these three Augments in Normal Mode, you'd obtain a total of 130 Damage Reduction; but in Hard Mode, if you stack them, you'd get a total of 585 Damage Reduction (without counting the Damage Reduction you'd obtain from the rest of your build). This means that these three Augments can make Hard Mode's Early-Game easier than Normal Mode's Early-Game.
After you reach Gran Soren for the first time, you can go to the Pawns Guild and get them really fast.
Here's a more in-depth explanation:
The 'Bastion' Augment
The 'Bastion' Augment provides you with Damage Reduction.
- In Normal Mode, you gain 50 points of Damage Reduction.
- In Hard Mode, you get 225 points of Damage Reduction
This is added to the total of Damage Reduction that your build already has.
This is incredibly useful during Early-Game if you're playing on Hard Mode, where a hit that would cause 225 (or less) damage points will only cause 1 to none damage.
If you're not a Warrior, change your vocation to it and select the 'Bastion' Augment for a total of 900 Discipline Points.
Now go to 'Set skills' and add Bastion to your equipped Augments. If you don't want to keep playing as a Warrior, don't worry; you can change your vocation and still keep this Augment equipped.
'Bastion' will become useless on Mid to Late-game, but for an Early-game character it's a game changer.
The 'Fortitude' Augment
Similar to the 'Bastion' Augment, Fortitude provides you with Damage Reduction that can be stacked with the rest of your build, including any other Augment like 'Bastion'.
- In Normal Mode, you gain 30 points of Damage Reduction.
- In Hard Mode, you get 135 points of Damage Reduction
To obtain 'Fortitude', change to a Mystic Knight look for it on the 'Augments' list in the 'Learn skill' menu.
The 'Awareness' Augment
Similar to the 'Bastion' and 'Fortitude', 'Awareness' provides you with Damage Reduction.
- In Normal Mode, you gain 50 points of Damage Reduction.
- In Hard Mode, you get 225 points of Damage Reduction
To obtain 'Awareness', change to a Sorcerer and look for it on the 'Augments' list in the 'Learn skill' menu.
More resistance-related Augments
If you level up Mage, you can eventually learn the 'Apotropaism' Augment which provides you with the same effects than 'Fortitude'.
You can obtain the 'Mettle' Secret Augment through purificating a Bitterblack Novelty Level 3, which provides you with an increase in White Health (you know, the white part in your health bar that's left to be recovered).
As a Strider you can learn the 'Endurance' Augment which provides you with an increase in Stamina for a total of 100 points.
・The Tomb of the Unknown Traveler
If you're starting a character with Swords or Daggers, here's a quick way to get some cool weapons in early game.
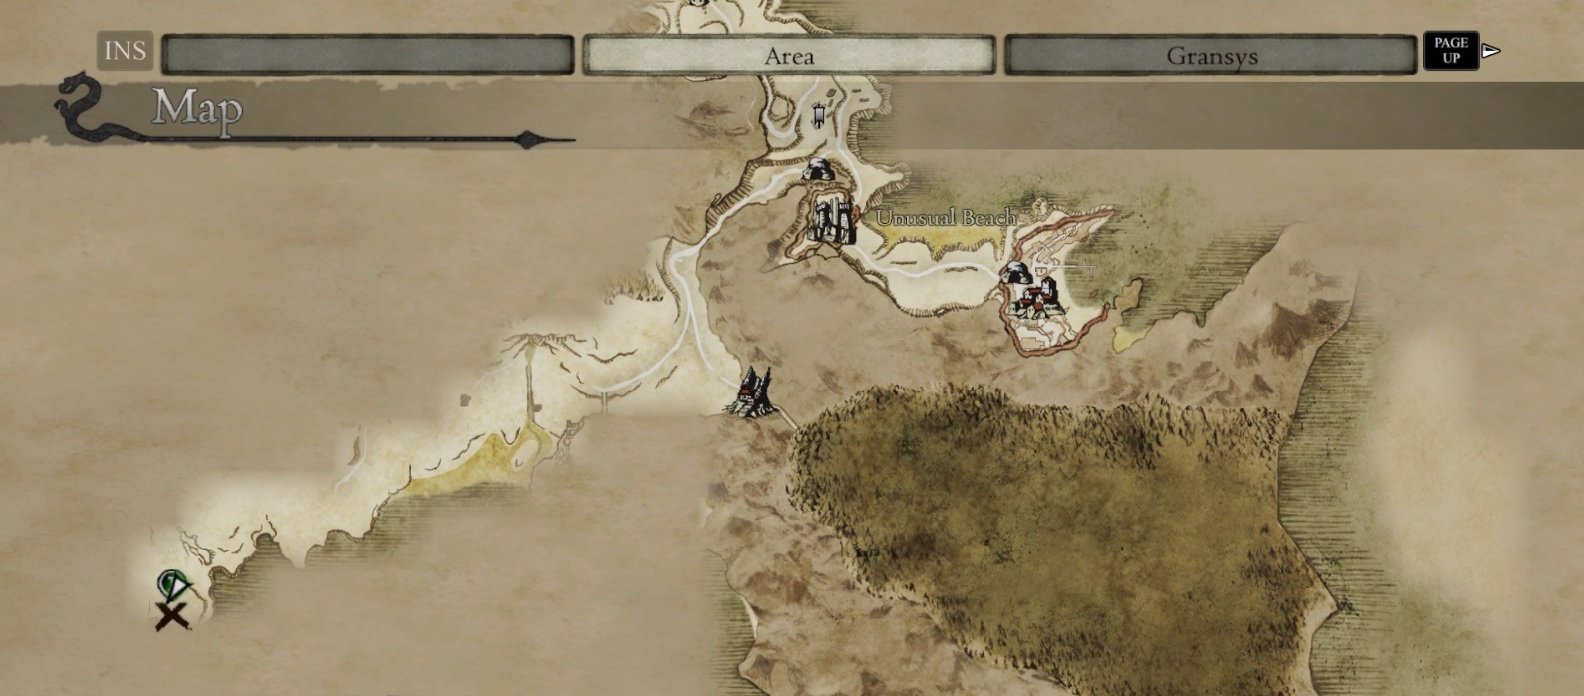
The Tomb of the Unknown Traveler is located in Verda Woodlands, as shown in the picture below:
It's easier to get there if you ignore all enemies, some might be tough in early game. Be careful with the Golem especially.
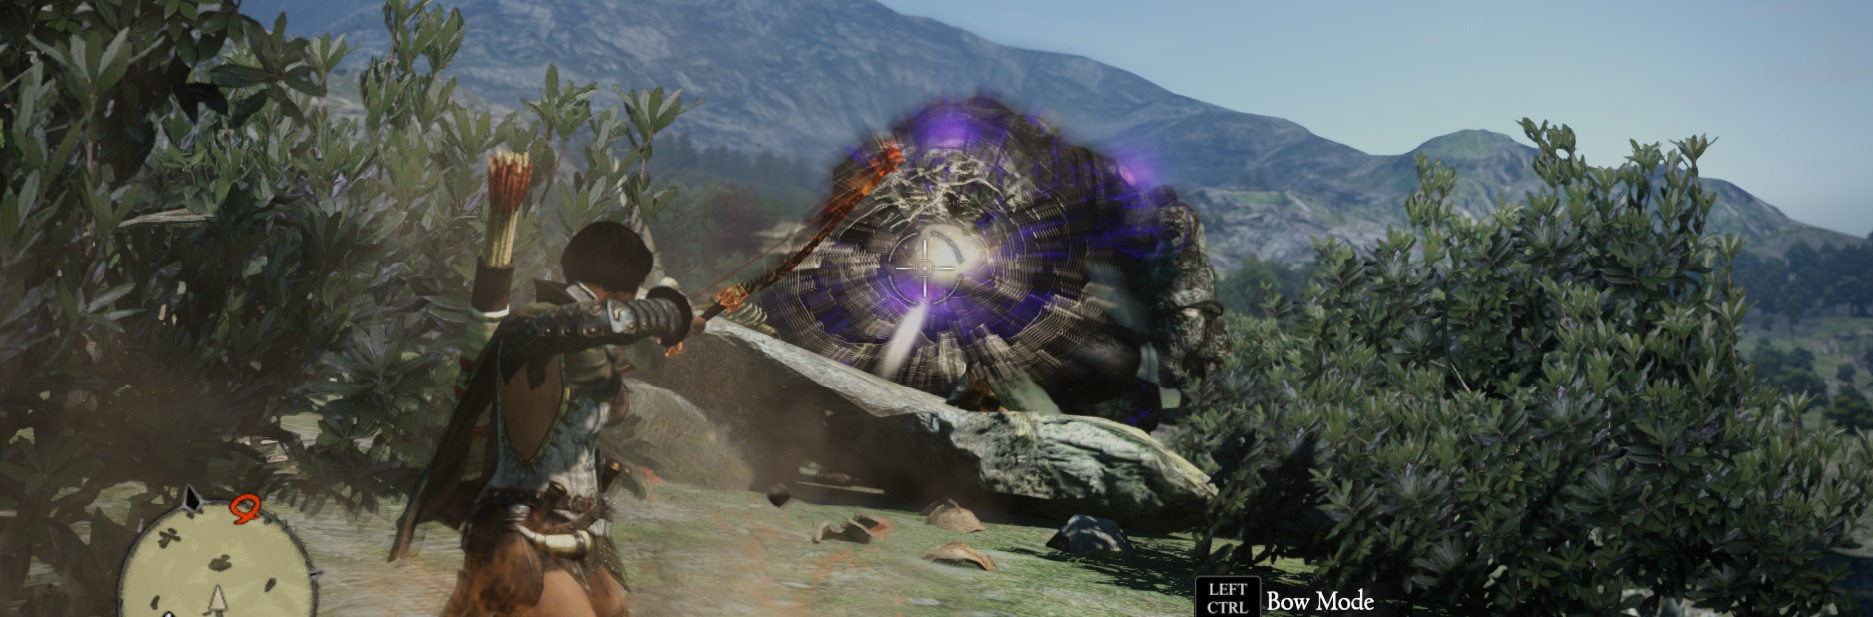
Here you'll see this stone referencing King Arthur's Sword in the Stone story.
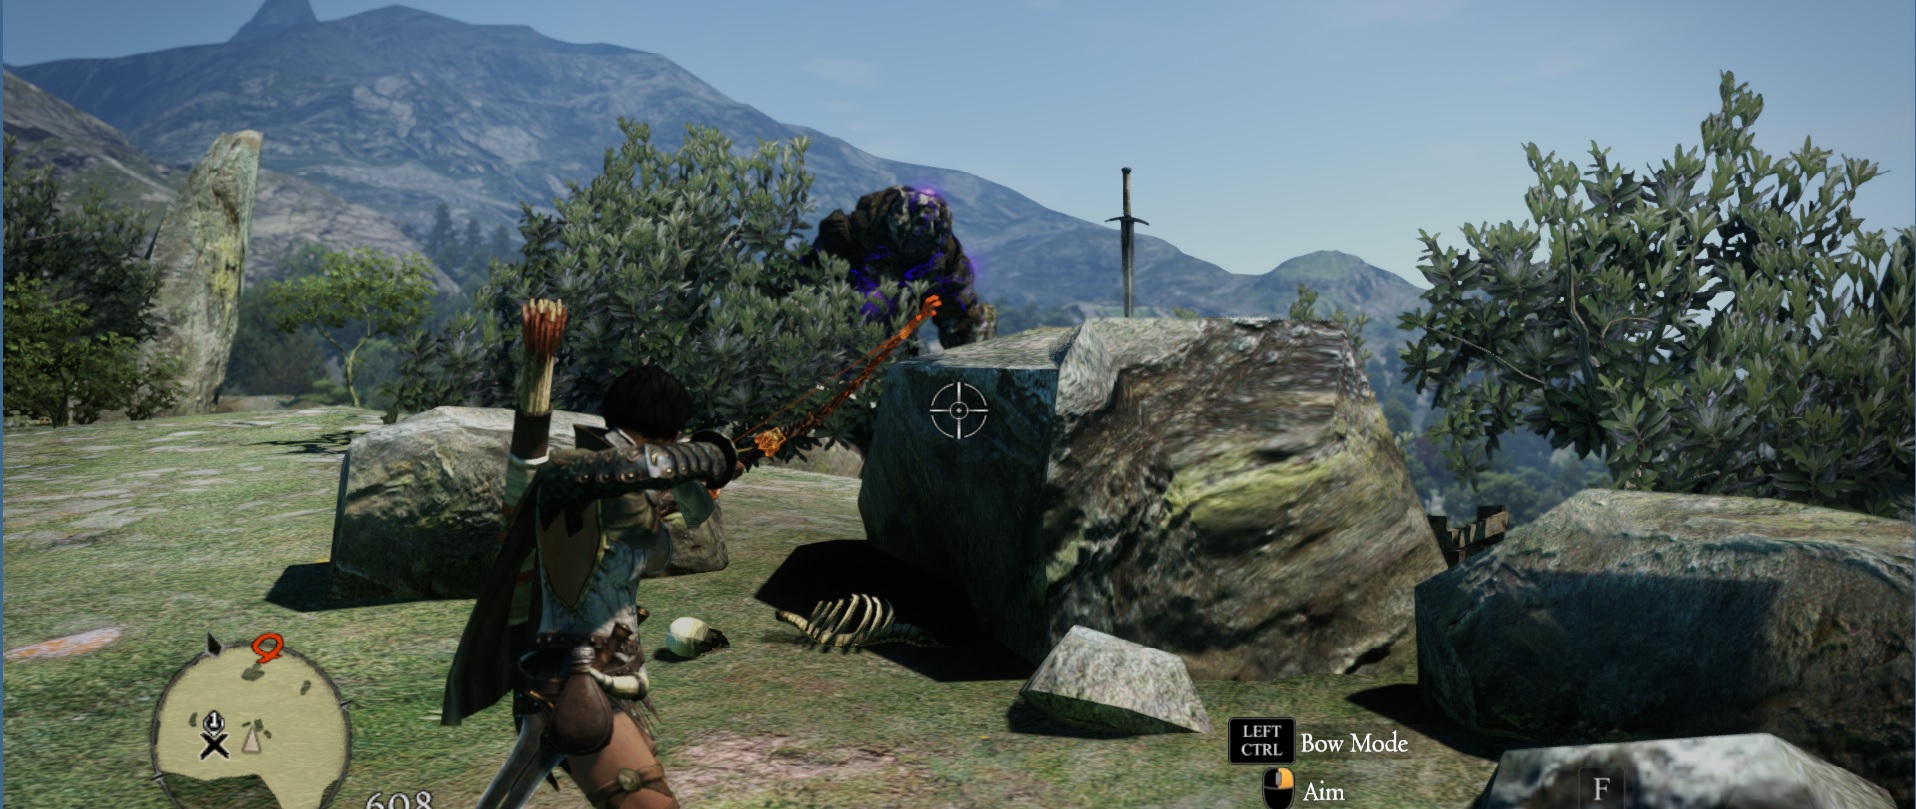
Save the game before interacting with it.
It will give you one of these three great items:
If you didn't get the item you were looking for (which would be Eden's Warden or Scalding Razors), just exit the game without saving and re-load it. If you saved before interacting with the sword in the stone, you may get another weapon from the 3-weapons rotation.
To its north you'll see this rock with two explosive barrels, behind it there's this 'rusted' version of a sword.
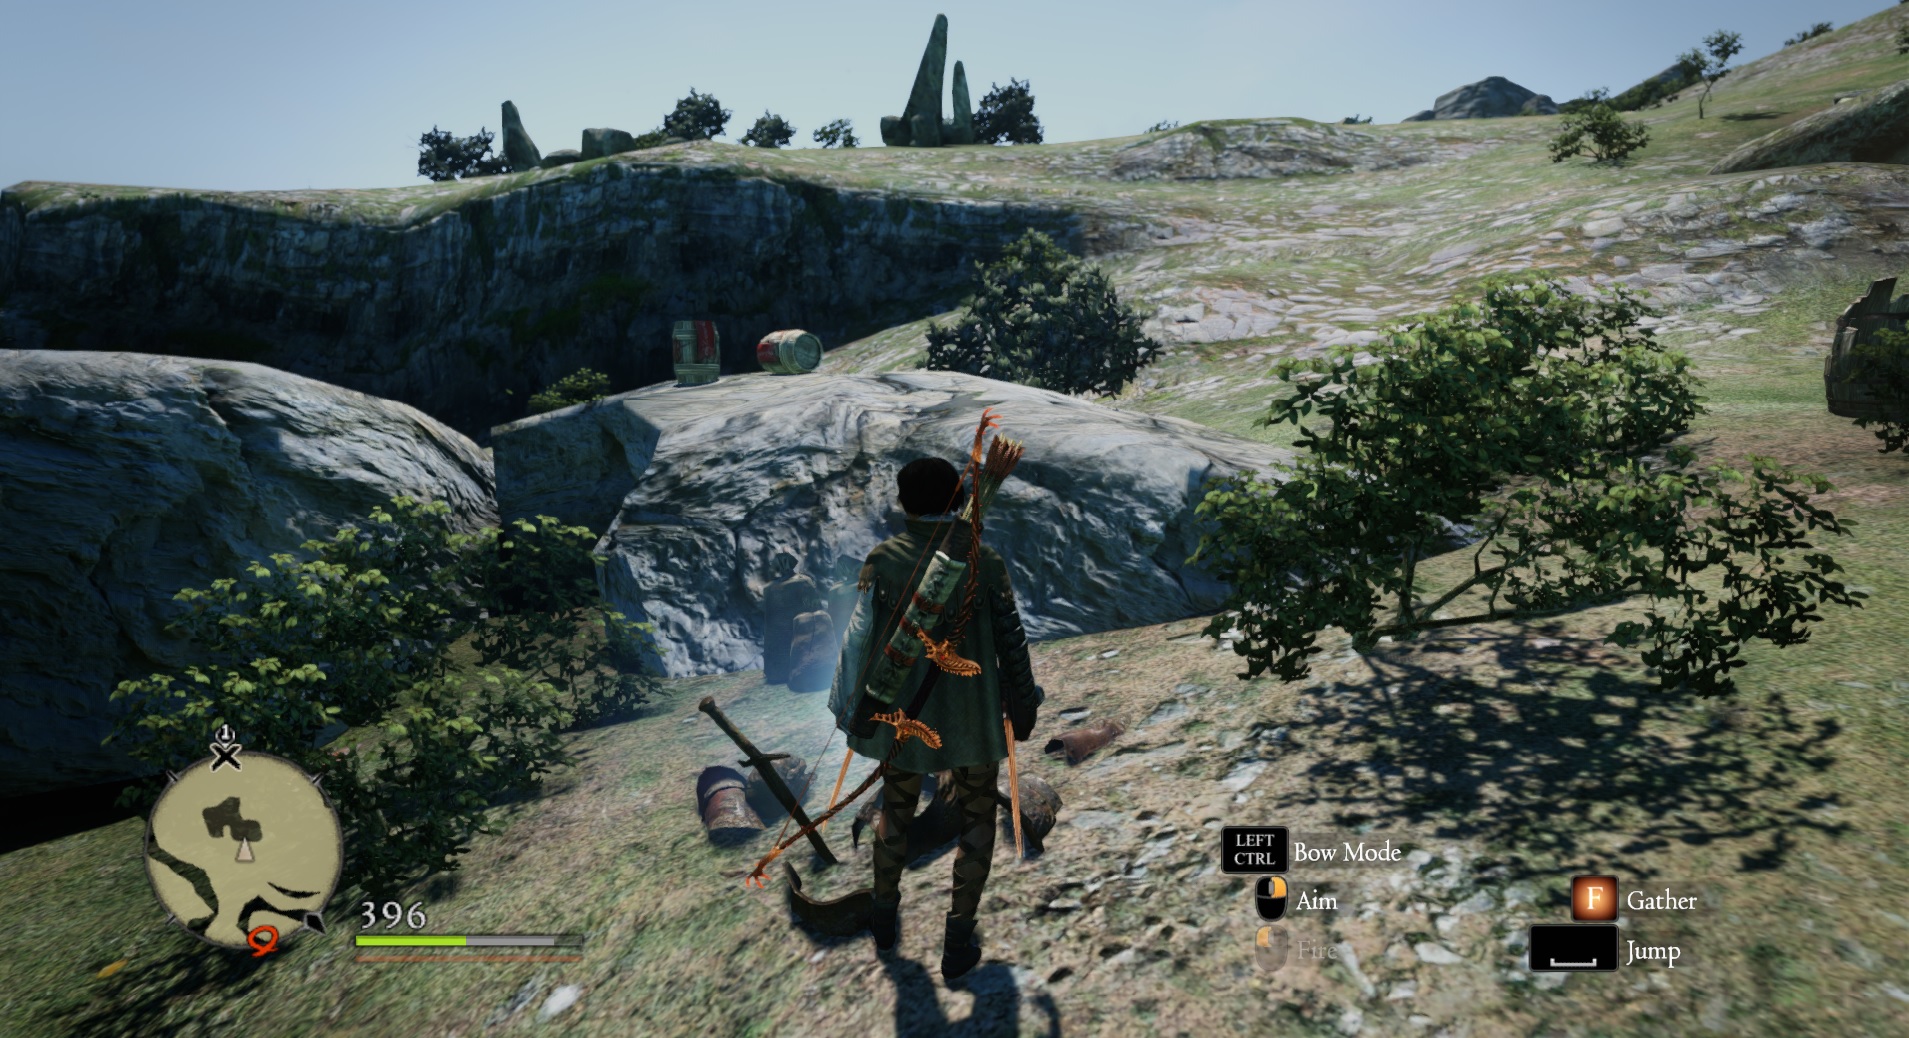
This won't give you much better equipment, but it contains a decent mage weapon called Thunderclap on its rotation.
The Tomb of the Unknown Traveler is located in Verda Woodlands, as shown in the picture below:
It's easier to get there if you ignore all enemies, some might be tough in early game. Be careful with the Golem especially.
Here you'll see this stone referencing King Arthur's Sword in the Stone story.
Save the game before interacting with it.
It will give you one of these three great items:
- Steel Greatsword: A decent Longsword.
- Eden's Warden: A Sword with Fire Enchantment.
- Scalding Razors: Daggers with Fire Enchantment.
If you didn't get the item you were looking for (which would be Eden's Warden or Scalding Razors), just exit the game without saving and re-load it. If you saved before interacting with the sword in the stone, you may get another weapon from the 3-weapons rotation.
To its north you'll see this rock with two explosive barrels, behind it there's this 'rusted' version of a sword.
This won't give you much better equipment, but it contains a decent mage weapon called Thunderclap on its rotation.
・A few extra tips!
Here's a few useful tips that some players might not know about.
As an Strider you can steal items with the skills 'Pilfer' and its improved iteration, 'Master Thief', and you can use them on the Prisoner Gorecyclops that appear over Bitterblack Isle to obtain pretty good loot without having to fight them.
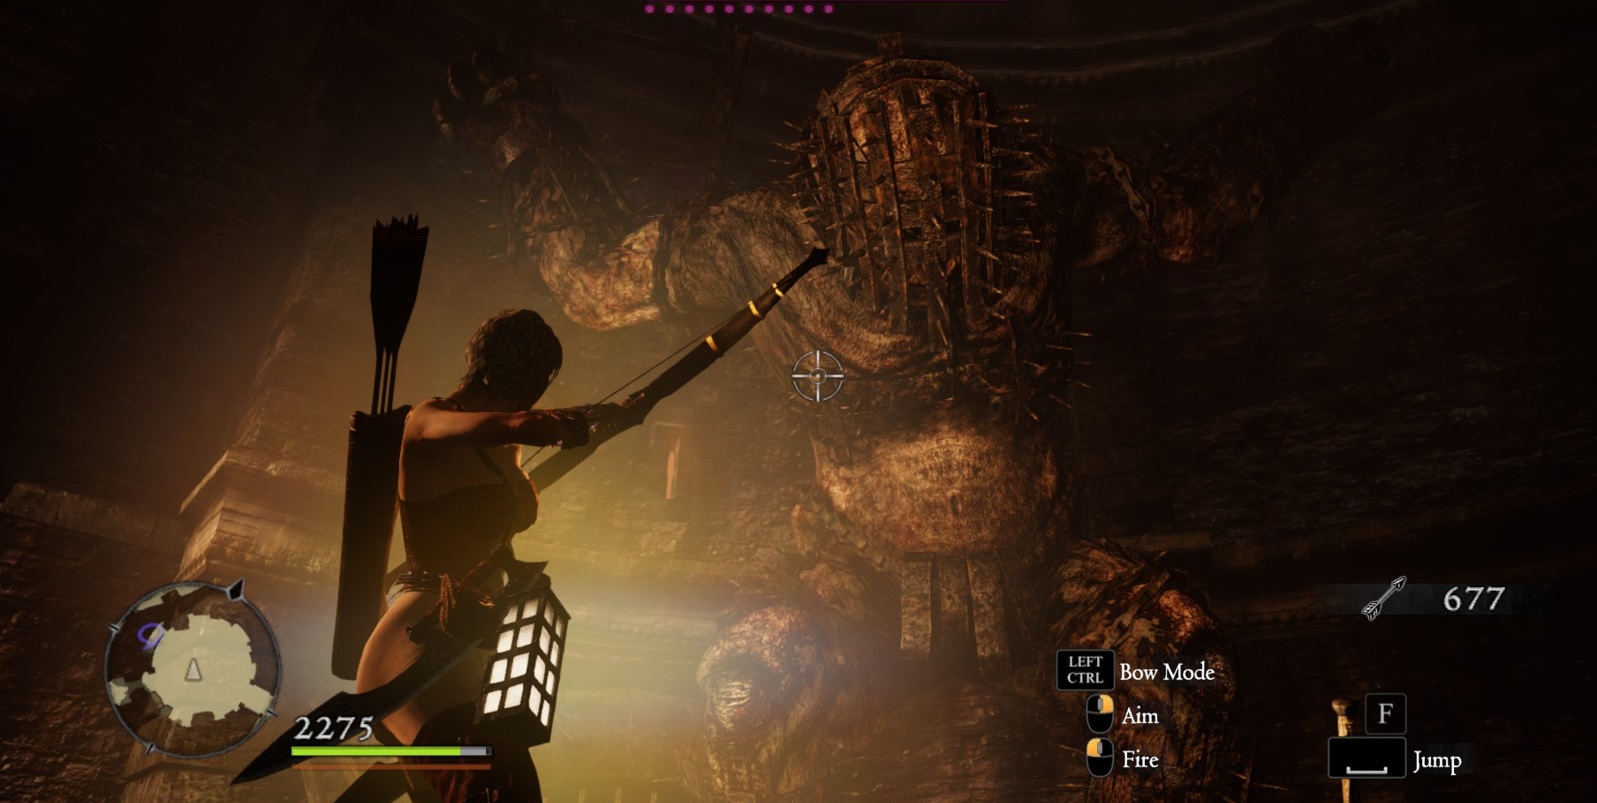
This applies to the room with two Prisoner Gorecyclops too.
You might not like him, but he's an important NPC gameplay-wise. He's the only NPC that will sell you infinite Conqueror's Periapt and Pilgrim's Charm, so try to get him out of jail.
You can obtain 5 Portcrystals per playthrough, but you can get more by doing resets (like switching to Hard Mode) or NG+. However the max quantity of Portcrystals that can function if placed is 10.
At the end of this video I showcase a few things that can be useful.
https://www.youtube.com/watch?v=6M9ZUbAPkK8
Those things are:
'Off With Its Head' might be Dragon's Dogma most unsufferable quest, especially for NG+; but did you know you can make the Ox go faster? All you have to do is interact with it, you'll see it allows you to kick that motherf*cker, that way he'll go a bit faster.
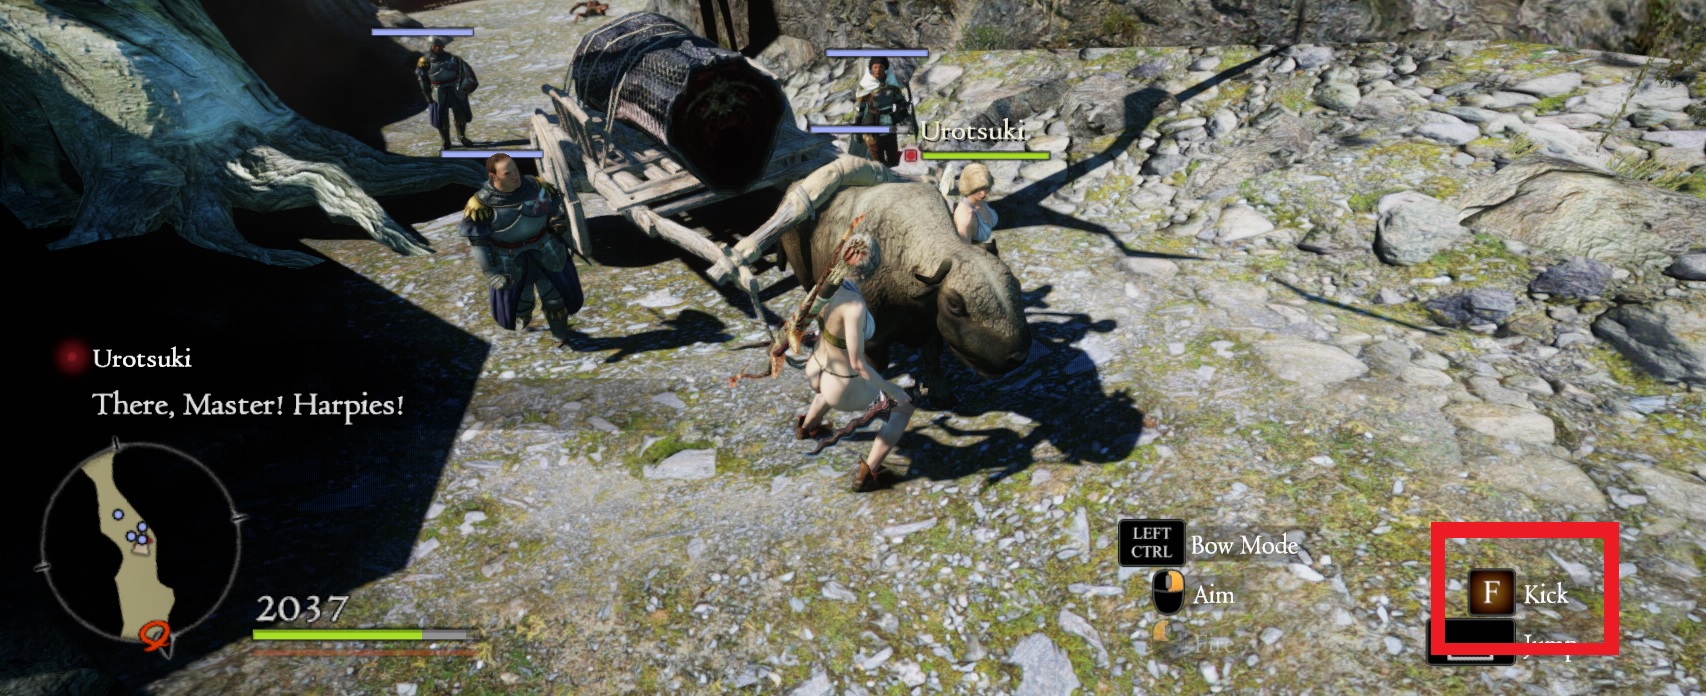
Just repeat this process and this quest can get a bit quicker. But beware, you do him some damage by kicking his 4ss; thankfully you and/or your Pawn can heal it as a Mage.
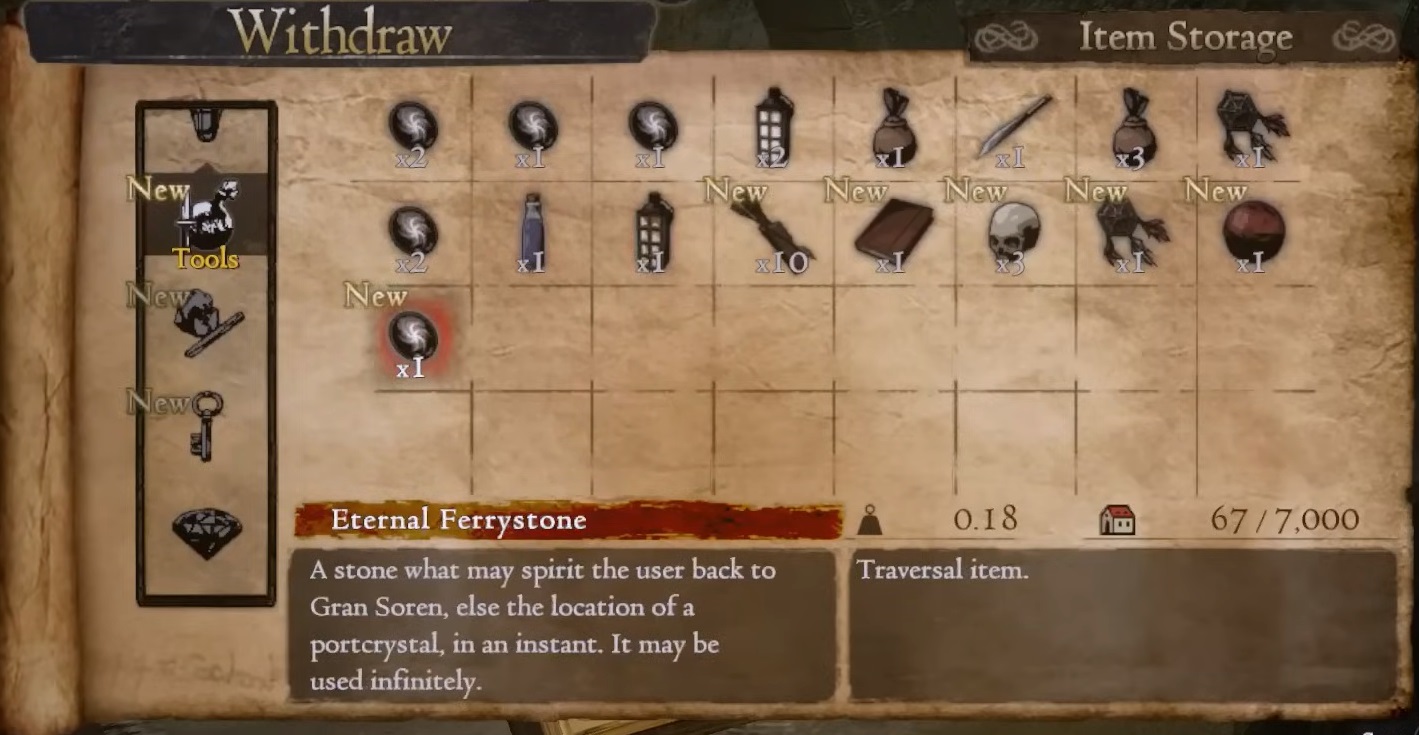
This PC version comes with the DLC titled 'Dark Arisen' already installed, which means you can get the DLC Bonus Items from the very start. Those items are kept in your Item Storage (not your Inventory), just go to any Inn (like Pablos' Inn in Cassardis), select 'Manage stored items', then 'Withdraw' and take those items.
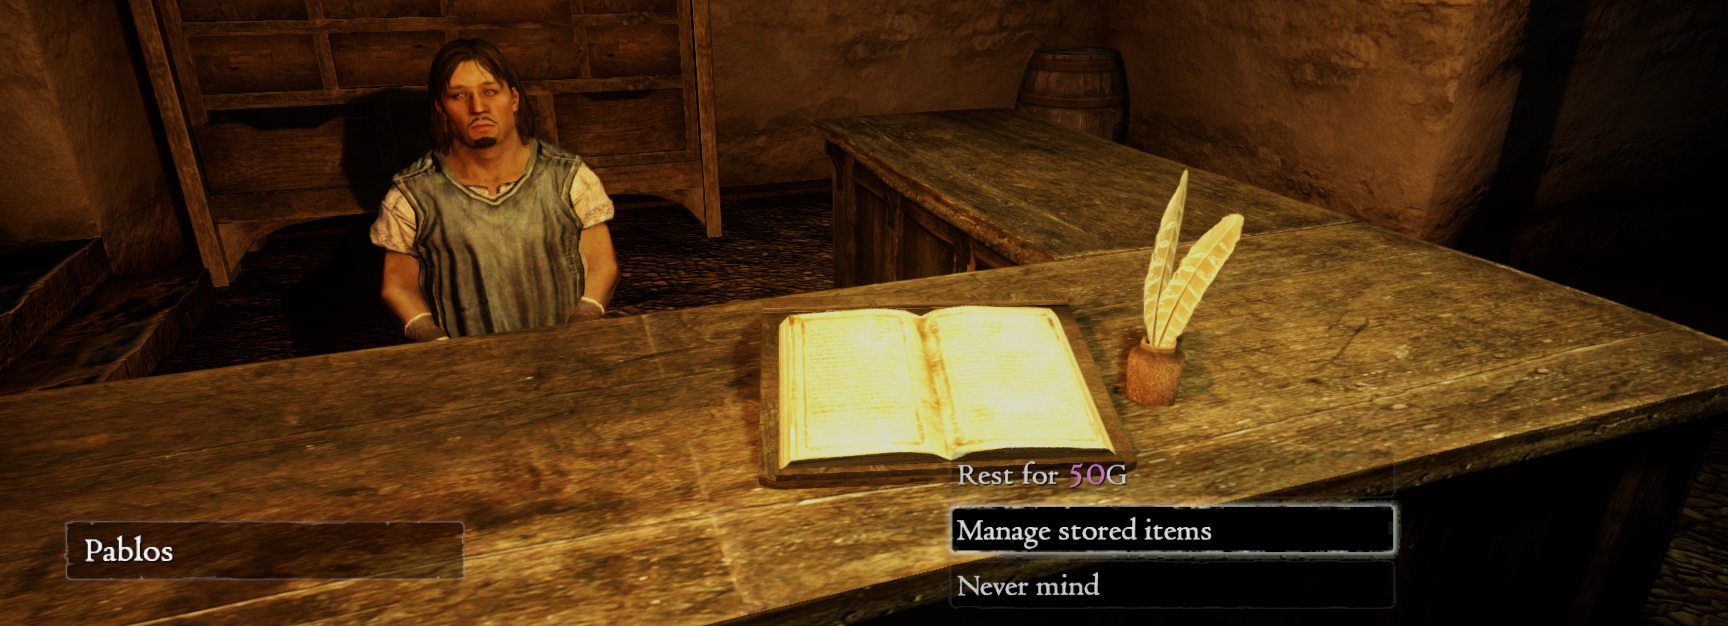
One of those items is the 'Eternal Ferrystone' which will allow you to teleport to Cassardis, Gran Soren or any Portcrystal without getting consumed like regular Ferrystones.
If you're on desperate need for any kind of healing items, you can buy the Potent Greenwarish for a moderate price of 300G at Gran Soren. Having 999 of them saved my life various times.
You can create fake iterations of different items at The Black Cat by using the Forgery option, however there's a list of items it cant duplicate due to him not having resources like Magick. Therefore, duplicated items with Magick properties will lack their Magick.
In the Prologue titled 'The End at the Beginning', while playing as Savan, you don't need to necessarily kill the Chimera. You can simply let it kill you, this way you can rush to the Chimera's room and just die to pass through the Prologue faster.
You can skip the Lure of the Abyss main quest from the Pawns Guild. It's as simple as having a Wakestone, jumping from the top to the bottom to die from fall damage, then reviving and using a Ferrystone (or the 'Eternal Ferrystone') to warp back to Gran Soren.
You can withdraw the Eternal Ferrystone at any Inn at that point or simply grab the one that's in middle of the warp in Gran Soren. To obtain three Wakestone Shards (to complete a Wakestone) you can buy one from The Black Cat, another from Fournival and another one from Jayce in Devilfire Grove, or you can take a quick visit to Bitterblack Isle if you're brave enough. If you're on NG+ you're probably full of Wakestones anyways.
Here's a quick video doing this:
https://youtu.be/1Jz_8vQMSXY?si=LpOYTClXNNxxZCUg
The Everfall might be the only interior where you can use a Ferrystone, and I suppose it is because it stops counting as an interior during Post-Game.
If you're interested in opening those curious closed doors at Smuggler's Pass or the cells inside the dungeon underneath Duke's castle, you'll have to use Skeleton Keys.
They're easy to craft, just combine Shackles with Iron Scrap, Hunk of Ore, Unremarkable Ore or a Hammer. You can find them at various chests through Gransys and Bitterblack Isle, or buy them at The Black Cat.
In this game, you can use some disguises to infiltrate in some places. One of the quests about Salvation has an alternative route where you can simply disguise as one of them, and in the quest Duchess In Distress you're required to disguise as a Royal Guard on duty to rescue Aelinore.
This is a pretty interesting mechanic that's commonly overlooked, it reminds me of Fallout: New Vegas.
If you enter the Duke's Demesne at night, you'll be taken to a cell. But if you use a Royal Guard set (such as the one you're given during Duchess In Distress), you can get inside at night and sneak to the Duchess' Bedchambers to obtain the Silk Lingerie, which can only be looted at her bed during nightime.
Here's a video obtaining it:
https://www.youtube.com/watch?v=2MWO5LOLSmE
https://steamcommunity.com/sharedfiles/filedetails/?id=3197064130
Stealing Bitterblack items
As an Strider you can steal items with the skills 'Pilfer' and its improved iteration, 'Master Thief', and you can use them on the Prisoner Gorecyclops that appear over Bitterblack Isle to obtain pretty good loot without having to fight them.
This applies to the room with two Prisoner Gorecyclops too.
Fournival is important.
You might not like him, but he's an important NPC gameplay-wise. He's the only NPC that will sell you infinite Conqueror's Periapt and Pilgrim's Charm, so try to get him out of jail.
Portcrystals are capped at 10
You can obtain 5 Portcrystals per playthrough, but you can get more by doing resets (like switching to Hard Mode) or NG+. However the max quantity of Portcrystals that can function if placed is 10.
Two BBI tips: Impale Gazer and Gravity-Kill
At the end of this video I showcase a few things that can be useful.
https://www.youtube.com/watch?v=6M9ZUbAPkK8
Those things are:
- You can lure enemies into gravity-killing themselves (Video provides example). If you don't have a Magick Damage resource to kill Living Armors, you can simply gravity-kill them.
- You can make the Gazer impale himself by standing right below him when he summons that lava-looking.
Make the Ox go faster
'Off With Its Head' might be Dragon's Dogma most unsufferable quest, especially for NG+; but did you know you can make the Ox go faster? All you have to do is interact with it, you'll see it allows you to kick that motherf*cker, that way he'll go a bit faster.
Just repeat this process and this quest can get a bit quicker. But beware, you do him some damage by kicking his 4ss; thankfully you and/or your Pawn can heal it as a Mage.
Eternal Ferrystone
This PC version comes with the DLC titled 'Dark Arisen' already installed, which means you can get the DLC Bonus Items from the very start. Those items are kept in your Item Storage (not your Inventory), just go to any Inn (like Pablos' Inn in Cassardis), select 'Manage stored items', then 'Withdraw' and take those items.
One of those items is the 'Eternal Ferrystone' which will allow you to teleport to Cassardis, Gran Soren or any Portcrystal without getting consumed like regular Ferrystones.
Potent Greenwarish
If you're on desperate need for any kind of healing items, you can buy the Potent Greenwarish for a moderate price of 300G at Gran Soren. Having 999 of them saved my life various times.
'The Black Cat' can't duplicate Magick
You can create fake iterations of different items at The Black Cat by using the Forgery option, however there's a list of items it cant duplicate due to him not having resources like Magick. Therefore, duplicated items with Magick properties will lack their Magick.
- For example: A duplicated Wyrmking Ring won't have the same spell-casting time reduction as the original item.
You don't need to kill the Chimera at the Prologue
In the Prologue titled 'The End at the Beginning', while playing as Savan, you don't need to necessarily kill the Chimera. You can simply let it kill you, this way you can rush to the Chimera's room and just die to pass through the Prologue faster.
Skip the Lure of the Abyss quest
You can skip the Lure of the Abyss main quest from the Pawns Guild. It's as simple as having a Wakestone, jumping from the top to the bottom to die from fall damage, then reviving and using a Ferrystone (or the 'Eternal Ferrystone') to warp back to Gran Soren.
You can withdraw the Eternal Ferrystone at any Inn at that point or simply grab the one that's in middle of the warp in Gran Soren. To obtain three Wakestone Shards (to complete a Wakestone) you can buy one from The Black Cat, another from Fournival and another one from Jayce in Devilfire Grove, or you can take a quick visit to Bitterblack Isle if you're brave enough. If you're on NG+ you're probably full of Wakestones anyways.
Here's a quick video doing this:
https://youtu.be/1Jz_8vQMSXY?si=LpOYTClXNNxxZCUg
The Everfall might be the only interior where you can use a Ferrystone, and I suppose it is because it stops counting as an interior during Post-Game.
Skeleton Keys
If you're interested in opening those curious closed doors at Smuggler's Pass or the cells inside the dungeon underneath Duke's castle, you'll have to use Skeleton Keys.
They're easy to craft, just combine Shackles with Iron Scrap, Hunk of Ore, Unremarkable Ore or a Hammer. You can find them at various chests through Gransys and Bitterblack Isle, or buy them at The Black Cat.
Infiltration and disguises
In this game, you can use some disguises to infiltrate in some places. One of the quests about Salvation has an alternative route where you can simply disguise as one of them, and in the quest Duchess In Distress you're required to disguise as a Royal Guard on duty to rescue Aelinore.
This is a pretty interesting mechanic that's commonly overlooked, it reminds me of Fallout: New Vegas.
If you enter the Duke's Demesne at night, you'll be taken to a cell. But if you use a Royal Guard set (such as the one you're given during Duchess In Distress), you can get inside at night and sneak to the Duchess' Bedchambers to obtain the Silk Lingerie, which can only be looted at her bed during nightime.
Here's a video obtaining it:
https://www.youtube.com/watch?v=2MWO5LOLSmE
Check this other guide I made :)
https://steamcommunity.com/sharedfiles/filedetails/?id=3197064130
More Dragon's Dogma: Dark Arisen guides
- Hero Achievement and Missable Quests Guide★ 5 (3.5k)58k views7.1k ♥30 minUpdated Aug 2, 2016
- Dragon's Dogma: Dark Arisen. Getting started 101 and "did you know's?"★ 5 (918)53k views1.1k ♥17 minUpdated Jan 20, 2016
- The Arisen's Handbook: A Guide to Adventuring in Gransys★ 5 (1.7k)42k views3.4k ♥91 minUpdated Oct 8, 2023
- The Guide to Vocations and Skills★ 5 (806)42k views1.9k ♥86 minUpdated Jan 1, 2020
- Chronological Quest Guide for dd:da★ 5 (779)33k views2k ♥54 minUpdated Jul 5, 2023
- Vocations, Strengths and Weaknesses, all Part of a Whole - Writings of an Aged Arisen★ 5 (575)32k views873 ♥33 minUpdated Jan 3, 2021



This guide was created by its original author on the Steam Community. Are you the author and want it removed? Request removal.