Bannerlord Multiplayer: Siege Mode Guide.
Disclaimer/Foreword
This guide is a collection of my opinions and assumes in many of its suggestions that you want to play with your team competitively in Siege to win. Of course, you don't always have to be competitive, and it's very fun not to be. However, there are also truly enjoyable matches to be had when both teams are trying earnestly to win.
This guide is intended for new players who may not be aware of some basic tactics and essential concepts. This guide does not go deeply into dueling mechanics as I'm not good at it.
I've never made a guide before, so please forgive my grammar and feel free to correct, expand, or disagree with me in the comments.
I am not very good at this game, but you don't have to be to play well in a team.
This guide is intended for new players who may not be aware of some basic tactics and essential concepts. This guide does not go deeply into dueling mechanics as I'm not good at it.
I've never made a guide before, so please forgive my grammar and feel free to correct, expand, or disagree with me in the comments.
I am not very good at this game, but you don't have to be to play well in a team.
Siege: The Mode Itself.
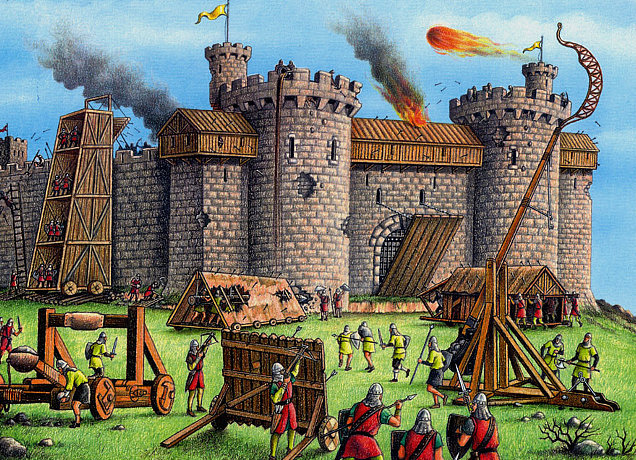 Like most multiplayer games, Siege is a mode revolving around Teamwork, Communication, Awareness, Foresight, and Caution.
Hold Left ALT often so you can be aware of Flags and where your teammates are. Communication between teammates or lack thereof wins and loses games. Hold Tab to see the scoreboard. Pay attention to this screen. There's valuable information here, such as the troop types people are playing, the number of players on both Teams, and dangerous players to watch out for.
Always remember Flags are king. They are the only objective, and no matter what playstyle you favor or the unit you play as, they should be the first priority along with staying alive. As the Attackers, your team must group and make melee assaults on Flags. The Defenders must also group and defend or retake Flags with their own Infantry. There is no getting around that fact. This is why in Siege, the most effective units are usually Heavy Infantry, and a large majority of the team will ideally pick them most of the time.
This is not to say that other unit types are useless. A couple of good Archers alone can stop a vertical assault cold while supporting melee teammates very effectively from vantage points. And while they're most effective on defense, having another couple of good Archers in a Flag assault can win flags and games by sniping ballistae users or enemy Archers while again supporting melee. I'm no good at Archer myself, but if you put in the practice, it's possible to be a very deadly asset as one and make a significant difference at all levels of Siege. However, you must always be aware of your surroundings and be prepared to fight in melee when necessary. If an enemy is closing in on you, don't risk your life for one extra arrow shot. Use that time instead to draw your melee equipment.
Cavalry in Siege has less utility than other modes but can still be hugely valuable in certain situations. When choosing Cavalry, you must consider the map you're on and the current situation. A Horseman or two can make a massive difference if a flag is on open flat ground and combat is happening there. As Cavalry, you must play sneakily and cautiously. When choosing to attack, it's always best to take the enemy unaware, such as when they're engaged in melee with your teammates, which is especially important as Cavalry. Know that rarely someone who appears to be unaware of you may only be pretending to lure you in. If you think your target has seen you already before, be extra careful about it. Watch out for spears but don't fear them. Unaware Spearmen are also easy prey, but be very cautious when engaging them from the front. You should probably leave them alone until you can catch them engaging your teammates, but when you see no other option, consider how long the enemy spear or pike is compared to your own. If it's longer, do whatever you can to stay away because if they know how to use it, you're at a dangerous disadvantage. If yours is longer, you still have to be careful in keeping yourself and your horse out of range while using your range advantage to hit.
Whatever type of unit you use, always keep in mind that you should very rarely go it alone. Every unit supports each other, and the game is won through group action. Stragglers are easy pickings whatever side you're on, and mobbing them prevents them from participating in infantry engagements where they would be much more effective. This leads into:
Flag Defense and Chokepoints.
 Both teams will inevitably have to defend whatever Flags are under their control. When defending a Flag, use map awareness and team communication to determine where the enemy is attacking from.
When the enemy assaults your position, the environment itself will define the combat. Chokepoints are paths the enemy is forced to use when attacking your Flags, and enough Infantry must be concentrated at these points to defend effectively. Chokepoints are best when they also limit or deprive the enemy Infantry of support from Archers and Cavalry. E.g., The gatehouses on many maps, the destructible wall when defending Skala, the stairs to G on Ayzar, or just the narrowest point in whatever footpath the enemy is using. Chokepoints are essential for both Teams though their availability usually favors the Defenders.
Take care not to prioritize Chokepoints over Flags. Chokepoints are only helpful as long as they keep the enemy from advancing to the Flag. When Chokepoints fail, players must regroup on the threatened Flag as soon as possible and prepare to repel the enemy. Reclaim Chokepoints only when the Flag is safe again.
When holding tight Chokepoints where only 1 or 2 people can stand, such as a doorway, hold your shield up and push against any enemies trying to get in. This is surprisingly effective, be sure to keep moving around to avoid getting kicked.
The concept of Overextension is a crucial aspect that decides games very often. Always remember that whether you're on attacking or defending, Flags under your control must be protected. Overrunning your Chokepoints and abandoning the Flag, even to chase after the repelled enemy is the fastest way to become a Straggler. Stragglers are lone, unsupported Players and are picked off easily only to the benefit of the enemy team, don't be one. This is the biggest mistake I see people make in almost every game of Siege, and it actively loses games.
Like most things, the earlier point is not absolute. There are situations where extending past your defenses is beneficial, such as using calm moments between assaults to destroy enemy siege weapons to great effect. E.g., When defending flag A on Ayzar: The multiple Attacker ballistae with vantage on the Flag are not too far away to make an effort to destroy them when not actively repelling the enemy. Just be sure you return when you finish or if overwhelming resistance is met, as that's probably the next assault wave headed for the Flag. This applies doubly to catapults that threaten destructible walls. Special effort should be taken as Defenders at the beginning of the game to destroy them quickly, as losing a wall on some maps can be devastating and force your team to spread troops more thinly.
Infantry Engagements
 When Infantry from both teams clashes. Your number one priority, above perhaps even the Flag, is to stay alive. When you are killed the enemy team gains gold, which will then be used to purchase Heavy Infantry.
Heavy Infantry is the true powerhouse unit of the team. Their high armor, strong shields, and weapon skills are designed to conquer Flags and win Infantry Engagements. When the enemy team cannot supply enough of them to perform melee assaults effectively, the advantage begins to shift heavily in your team's favor. The highest priority enemies to take care of first are Straggler Heavy Infantry, but only when it's safe to do so. When Infantry engagements begin always remember to fight as a team. Ideally, Heavy Infantry should be in line with each other holding their shields up while fighting. Refrain from dueling one on one unless necessary. When an enemy is outnumbered and it's safe to do so, make an effort to support each other and surround them, rather than attempting quick risky attacks.
Always keep an eye out and listen for enemy Cavalry. If you can't hear well then look behind yourself often. Sometimes by standing still without moving, you can fool the enemy Cavalry into thinking you're unaware. Punish them if they fall for it. Always strike the horse first unless you're hitting the rider from behind where they can't block.
Don't let the enemy Infantry dictate the flow of battle or draw you into a disadvantageous position (see Overextension). Take advantage wherever you can get it, from your team as well as the environment. If an enemy Infantryman breaks away from his teammates during an engagement, focus your attacks on the straggler while protecting your teammates. This leads to a small but important tactic you may need to use against a particular type of player.
"Star" players. If you keep an eye on the scoreboard and the combat taking place, you will quickly identify certain enemies that are particularly hard to kill. These are players that the enemy team tends to form around, and they can usually be seen near the front of assaults and defenses. Pay attention to the names of the enemy Infantry. Take care when engaging these players. They've probably played this game longer than you and already know how to take advantage of the combat system. To beat these players when you're unskilled like me, you have to remove their support and minimize their abilities in the equation. Refrain from dueling them one on one as that's exactly what they practice for. Separate them from their teammates using your shields and then gang up on them with multiple players. Maneuver and force them into corners whenever possible and then execute them carefully. They will be watching closely for any opportunity to strike back, don't give it to them with a risky action.
When playing always remember to use your shield. It's a vital tool for many things such as holding chokepoints, protecting from arrows, safeguarding teammates, and of course, blocking in melee. It helps keep you alive, which is the most important objective aside from Flags, so try to always carry one, especially if you aren't fully comfortable with manual blocking.
Depending on the type of enemy units being used, it can be worthwhile to lug a spear or pike around with your other equipment. Spears are shorter and have a good balance of Anti-Cavalry and Infantry support. Pikes are the premier of Anti-Cavalry, and Horsemen will fear you. Both can be braced with X though pikes are better at it. Press CAPS LOCK to walk while bracing your weapon.
Dueling. Dueling is one on one melee combat. While you should always stay with teammates and fight together, inevitably, you'll find yourself alone with an enemy. Don't panic, even if it's a "star" player you're up against. They have all the same limitations you do and have only learned to more effectively use the capabilities that you possess. Look at their weapon and shield, compare them to your own, then fight in a way that emphasizes your equipment and minimizes theirs. The most important factors in dueling (and this is likely my unqualified opinion here) are attack speed, length of the weapons involved, and efficient utilization of movement. You must judge these factors quickly and accurately and then act on them. I'm too bad at dueling to discuss the finer points, so ask someone else. The best advice I can give is that if it's not necessary to duel someone, then don't. The only time to be dueling is when you're the last one on the Flag with an Enemy or when intercepting a Backcapper. If you see yourself becoming outnumbered at any point, consider retreating. If necessary for your survival, drop your equipment to run faster. Once out of danger, rejoin your teammates and counterattack. Holding Flags is very important, but dying pointlessly after a lost Infantry engagement against overwhelming numbers is a waste of manpower for your team and free gold for the enemy.
Backcapping. A Valid Strategy.
Backcapping in Siege is generally understood as when a lone player, or small group, slips behind the Defender's established positions and claims a Flag farther inside the castle that is usually not threatened or defended heavily.
Some players find the practice unsavory or dishonorable. Perhaps, and if both teams agree not to do it, then whatever. But those players might remind themselves Siege is a violent competition, where both teams strive to complete objectives at the cost of the enemy team. In a serious game with both teams playing with the goal being a victory, it seems to me it would be disrespectful not to use every tool to your advantage. <im aware this is a lame nerd thing to say
Defending includes communication about all Flags, not just those where combat is happening. If you see an enemy running through your castle, let your team know where they are, or engage them yourself if possible.
Backcapping as Attackers can be risky but very valuable. It may be best done with a small team of Heavy Infantry. Defenders don't usually expect backcapped Flags to be held by more than a Peasant, and the initial counterattack will probably be light. This loses the Defenders valuable time on whatever Flag you've taken and also draws enemy Infantry away from the front. If the response is not light and overwhelming enemy numbers are on their way, then return to the front and play as normal.
Do your best not to die while Backcapping. Retreat if you aren't confident you can hold the Flag. Don't give the enemy free gold for anything.
Backcapping is also valuable for destroying enemy defenses in advance. Ballistae, Gates, and such do wonders for Defenders on some Flags, and removing them increases your team's chance of victory in a very real way.
Backcapping fails when you are killed without drawing Defenders from the front or taking sufficient Flag defense time from the enemy.
Defenders must always keep an eye out for enemies being where they aren't supposed to be. Communicate with your team and act decisively to handle Backcapping quickly and efficiently.
Some players find the practice unsavory or dishonorable. Perhaps, and if both teams agree not to do it, then whatever. But those players might remind themselves Siege is a violent competition, where both teams strive to complete objectives at the cost of the enemy team. In a serious game with both teams playing with the goal being a victory, it seems to me it would be disrespectful not to use every tool to your advantage. <im aware this is a lame nerd thing to say
Defending includes communication about all Flags, not just those where combat is happening. If you see an enemy running through your castle, let your team know where they are, or engage them yourself if possible.
Backcapping as Attackers can be risky but very valuable. It may be best done with a small team of Heavy Infantry. Defenders don't usually expect backcapped Flags to be held by more than a Peasant, and the initial counterattack will probably be light. This loses the Defenders valuable time on whatever Flag you've taken and also draws enemy Infantry away from the front. If the response is not light and overwhelming enemy numbers are on their way, then return to the front and play as normal.
Do your best not to die while Backcapping. Retreat if you aren't confident you can hold the Flag. Don't give the enemy free gold for anything.
Backcapping is also valuable for destroying enemy defenses in advance. Ballistae, Gates, and such do wonders for Defenders on some Flags, and removing them increases your team's chance of victory in a very real way.
Backcapping fails when you are killed without drawing Defenders from the front or taking sufficient Flag defense time from the enemy.
Defenders must always keep an eye out for enemies being where they aren't supposed to be. Communicate with your team and act decisively to handle Backcapping quickly and efficiently.
The end of the game.
 There's a point in many games of Siege where the only Flag left to hold is G. This is the ultimate objective. Communication is just as if not even more critical at this stage.
Defenders must completely gather at and around the Flag. Infantry must be directly on the Flag and at whatever Chokepoints are still possible and helpful. Archers must be at the best vantage points possible within view and bow range of the Flag. Cavalry must quickly support melee engagements and intercept reinforcements when possible. At the end of these defenses, you must stay alive directly on top of the Flag and prevent the Attackers from claiming it. Communicate to your team where and how many Attackers are on their way. It is of absolute importance not to overextend. There is nothing left to fight for but G, and leaving means losing the game for your team. If enemy Heavy Infantry fully occupies the Flag, consider switching off Archers and Cavalry. The Flag is king.
________________________________________________________________________________
Attackers are maybe simpler than the above. Choose Heavy Infantry, gather the entire team together, then assault and occupy the Flag with full force. Destroy ballistae whenever possible. Stay on the Flag with your shield up while making unpredictable movements to defend yourself from Archers.
That's all.
Thank you for reading.
To any prospective new players or people on the fence: Multiplayer is not dead yet, and there's loads of fun to have in it still. Ask people in the servers when the most popular times are for your timezone, and they will know.
To any prospective new players or people on the fence: Multiplayer is not dead yet, and there's loads of fun to have in it still. Ask people in the servers when the most popular times are for your timezone, and they will know.
More Mount & Blade II: Bannerlord guides
- The Silk Road: Trading, Workshop, and Goods★ 5 (1.6k)84k views3.7k ♥24 minUpdated Jul 8, 2020
- Money / Bannelord Guide★ 5 (893)74k views1.9k ♥20 minUpdated Apr 16, 2022
- Companions,Wanderers, and Wives. Oh my! [UPDATED 2024]★ 5 (1.3k)66k views3.3k ♥28 minUpdated Jan 13, 2025
- Сборник внутриигровых чит-кодов. Читы. Коды.★ 4 (123)54k views471 ♥4 minRussianUpdated 19 Mar, 2024
- Ultimate Bannerlord Beginner's Guide★ 5 (513)50k views943 ♥19 minUpdated Dec 21, 2022
- Perks, Perk Trees / Anti-Cowardice Guide (War Sails Update)★ 5 (539)31k views1.8k ♥132 minUpdated 27 Apr



🔥 Popular guides
- Upgrading to PremiumTeam Fortress 2★ 5 (20k)1441k views11k ♥6 minUpdated May 11, 2022
- No More Room in Hell Official ManualNo More Room in Hell★ 5 (2.8k)569k views2.1k ♥29 minUpdated Apr 22, 2019
- NMRiH Community Hosting GuidesNo More Room in Hell★ 5 (526)351k views653 ♥1 minUpdated Aug 10, 2022
- Лучшие кооперативные игры SteamPAYDAY 2★ 5 (1.5k)315k views2.1k ♥56 minRussianUpdated Apr 27, 2025
- Desert Eagle Heat Treated | Blue GemCounter-Strike 2★ 5 (1.6k)292k views1.5k ♥2 minUpdated Jan 16
- Treasure Hunt Puzzle SolutionsTotal War: WARHAMMER II★ 5 (6.9k)281k views15k ♥3 minUpdated Aug 19, 2021






This guide was created by its original author on the Steam Community. Are you the author and want it removed? Request removal.