GAME TUTORIAL
Introduction
First off, welcome to Gear Up if you never played it!
If you just opened the Community Hub you won't know me, otherwise there is a chance that you do, and to briefly introduce myself I am the world 1st at this game (DM leaderboards), I also wrote the bug list and the rebalance list (helped by ShyShade, adixox12, Nobody 497 and Fastlex) for versions 1.0.14 and upcoming 1.0.15 (now 1.0.20 is out). So yeah, I can claim I have seen pretty much all of this game and I feel like I should write a guide for it, as many many users asked me to do so.
And now, what is Gear Up about? Hey, I don't want to be boring, there are videos everywhere below and the official trailer on the Steam page, go look at them! Why read about how a game is when you can watch a video of it and judge yourself? :P
Note: there will be both embedded videos and links, because Steam has been freezing for many people upon clicking the embedded ones. If this happens, please use the direct links. (Thanks Valve!)
If you just opened the Community Hub you won't know me, otherwise there is a chance that you do, and to briefly introduce myself I am the world 1st at this game (DM leaderboards), I also wrote the bug list and the rebalance list (helped by ShyShade, adixox12, Nobody 497 and Fastlex) for versions 1.0.14 and upcoming 1.0.15 (now 1.0.20 is out). So yeah, I can claim I have seen pretty much all of this game and I feel like I should write a guide for it, as many many users asked me to do so.
And now, what is Gear Up about? Hey, I don't want to be boring, there are videos everywhere below and the official trailer on the Steam page, go look at them! Why read about how a game is when you can watch a video of it and judge yourself? :P
Note: there will be both embedded videos and links, because Steam has been freezing for many people upon clicking the embedded ones. If this happens, please use the direct links. (Thanks Valve!)
--------------------------------------------------
---------------> GENERAL <---------------
[BEGINNER] Basic controls
I will just list some of them, you can check the others in the menus, but these are the most important. I didn't type the extremely obvious ones (such as left click).
- W, A, S, D: These are the obvious ones, I don't feel like I need to explain them.
- Q, E: These are the most important controls if you are using Hovers, Spiders, Slime ball and they are used to strafe sideways.
- P: Few people know this, but if you hold down P for 5 seconds, you will self-destroy. This is useful if you get completely stuck somewhere!
- R: Uses provocation, if your decoration allows it (Bull's Horns, Police Sirens, Disco Ball and Vuvuzela, whereas the Flare fires a single harmless light rocket in the sky).
- Right click: This fires BOTH supports you have mounted, there is currently no way to fire one at a time.
- Shift: If you hold it down, you can zoom in, but it works ONLY with Sniper weapons (Sniper and Desecrator).
- Space: If you have 4 supports you can switch between each pair with this button.
- Mouse wheel: If you have more than one primary weapon you can switch between them with this button.
[BEGINNER] Pick-ups!
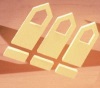
Refills all of your ammunition.

Restores 25 hp.

Gives you a temporary (20s) damage boost (150%).
Example: a basic sniper that does 50 dmg, will do 75.
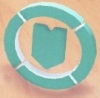
Gives you a temporary (20s) defense boost (200%).
Example: a basic sniper would deal 50 dmg to you, but if you are on shield, it will only do 25.
NOTES:
- Pick-ups respawn every 50 seconds.
- Pick-ups like damage booster and shield last 20 seconds each.
- You can stack shield and damage booster! (And it's op!)
- You cannot stack the same power up twice (picking 2 damage boosters/shields in a row will not stack), but it will extend your power up time back to the initial 20 seconds.
[BEGINNER] How to play!
Always be aware of how your enemies play and where they are. You will notice the tanks that just sit there will be quickly taken out. You will also notice players who are constantly moving in random ways are much harder to hit - it is important to always be moving in non-linear paths. Zig Zag is basic but very effective against the majority of players you will run across!
How to effectively tackle your enemies? You have to be able to judge their build, compare it to yours, and exploit their weaknesses - example: if you have a desecrator (sniper rifle, 69dmg, long reload) and you see an heavily armored tank (300+ hp) coming straight towards you, you better retreat or you will get shredded, as you may hit him once, but you will only do 69 damage out of his 300 hp, then you will be harmless for a long long time (reload) and he will have plenty of time to rip you apart.
NEWCOMERS TUTORIAL Direct YT link
Features:
How to effectively tackle your enemies? You have to be able to judge their build, compare it to yours, and exploit their weaknesses - example: if you have a desecrator (sniper rifle, 69dmg, long reload) and you see an heavily armored tank (300+ hp) coming straight towards you, you better retreat or you will get shredded, as you may hit him once, but you will only do 69 damage out of his 300 hp, then you will be harmless for a long long time (reload) and he will have plenty of time to rip you apart.
NEWCOMERS TUTORIAL Direct YT link
Features:
- How to move generally;
- How to counter snipers;
- How to counter heavy tanks;
- How to counter machine guns;
- Funny situations;
- Funny reactions;
- How to use power ups properly;
- Learn to analyze enemy builds and exploit their weaknesses;
- English commentary;
- My ugly face :P
[BEGINNER] Results and G
G are the in-game currency, and they allow you to buy more parts in the shop (unless you have premium and unlocked all of them).
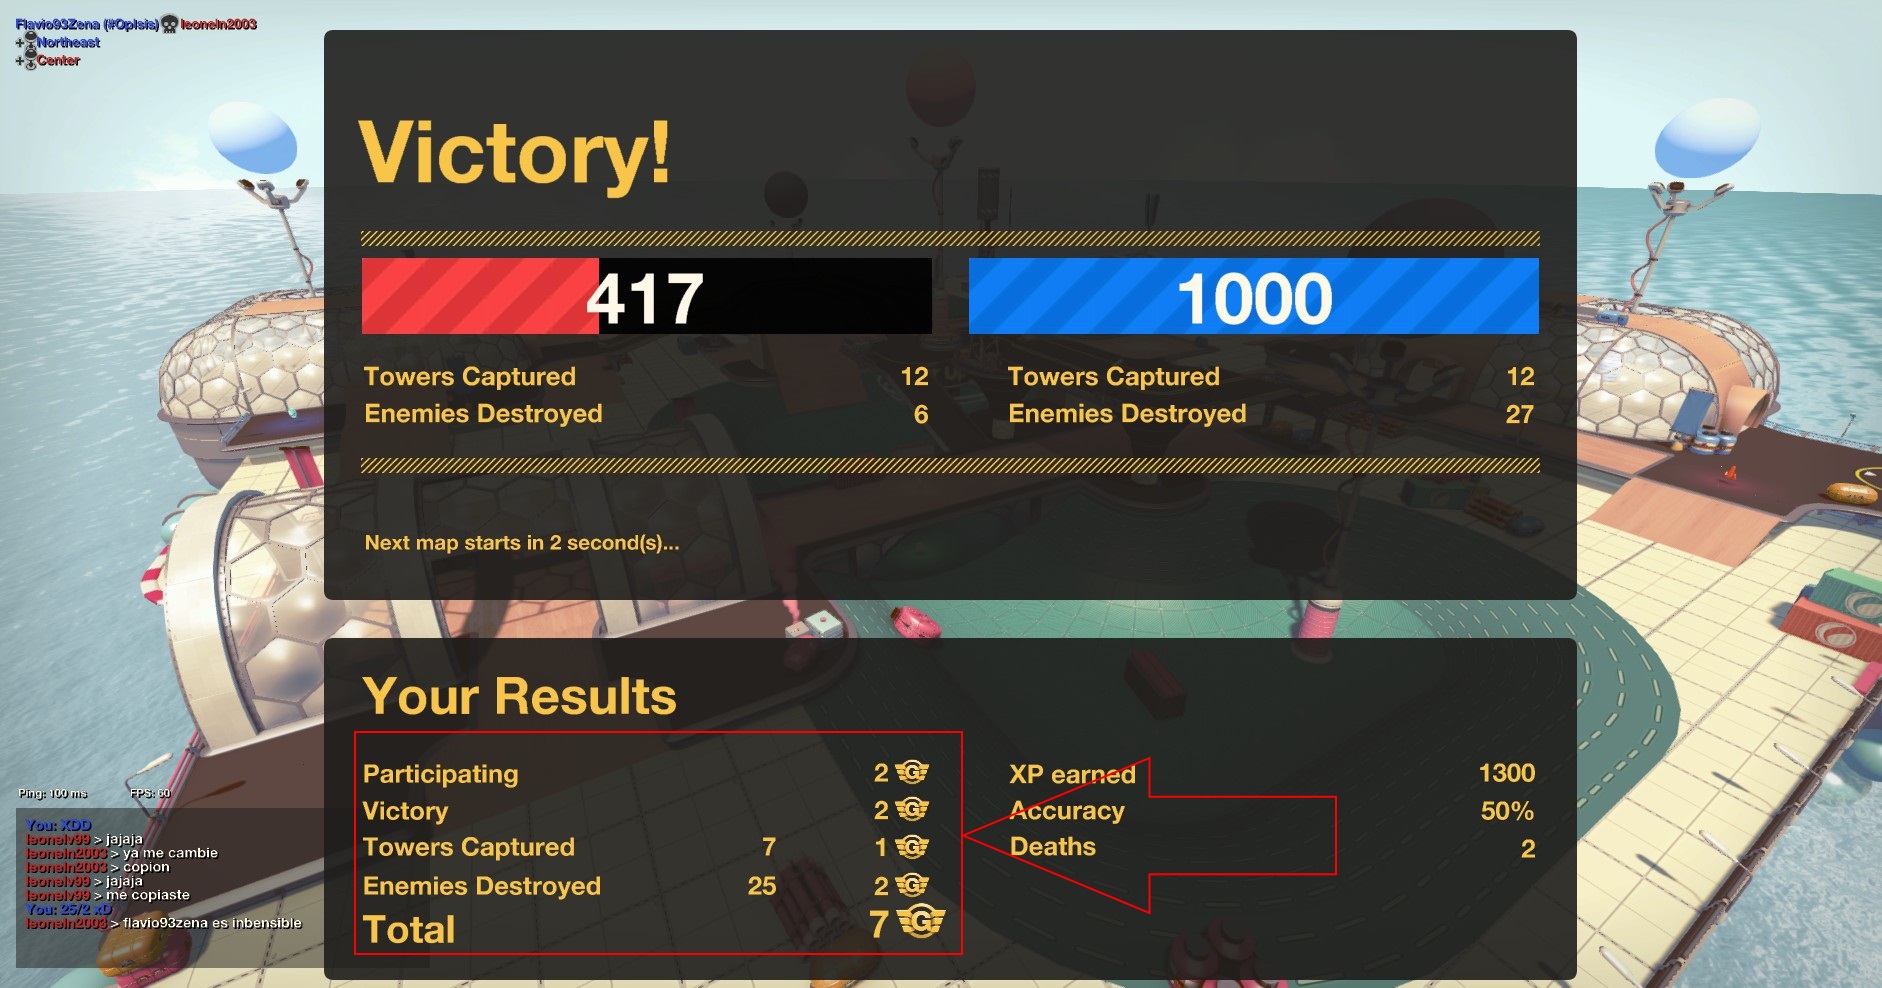
How to earn G?
- 1 G for Participating (2 if you have basic/premium)
- 1 G per 10 Kills
- 1 G per 5 Captures (in Conquest game mode)
- 2 G for Winning
Where do I see my earnings?
[INTERMEDIATE] Map awareness and power ups
So you are in a heated fight with another tank. You shoot at him and he shoots back. Now you are both only 1 shot away from taking the other one out! Oops he picked up an health pack and restored 25 health. Boom you're dead. The moral of this story is "pick up the power ups!" even if it's just to prevent the enemy to take them. The only time I don't pick up a power up is when I have a teammate behind me and he needs it more than I do.
--> Short examples videos here <--
Map awareness + out of ammo. Direct YT link
Here I get 2 people shooting me in the back, and I quickly take the damage booster to reverse my turret and face them, first, I take out the lighter one as it's a one shot for me and it's less damage being taken, then I keep retreating and take out the other guy while he is chasing me and coming through the smoke.
I turn around but I run out of ammo trying to kill another tank, the nearest pickup is the one on top, but there is a sniper already so a quick calculation for a plan B takes me directly to the shield and then to where I was before, hoping ammo has respawned (nope), so again moving forward into the top-right corner of the map, where I finally find my ammo.
This, but reacting instantly and doing it in 35 seconds requires quite a lot of experience.
Be aware of the damage you can deal and power up awareness. Direct YT link
Don't die to take a power up. Direct YT link
Many people make this mistake, including top players (and rarely, even myself). Calculate how much it can cost to take a power up, if it costs you 100% of your hp, it doesn't worth it.
--> Short examples videos here <--
Map awareness + out of ammo. Direct YT link
Here I get 2 people shooting me in the back, and I quickly take the damage booster to reverse my turret and face them, first, I take out the lighter one as it's a one shot for me and it's less damage being taken, then I keep retreating and take out the other guy while he is chasing me and coming through the smoke.
I turn around but I run out of ammo trying to kill another tank, the nearest pickup is the one on top, but there is a sniper already so a quick calculation for a plan B takes me directly to the shield and then to where I was before, hoping ammo has respawned (nope), so again moving forward into the top-right corner of the map, where I finally find my ammo.
This, but reacting instantly and doing it in 35 seconds requires quite a lot of experience.
Be aware of the damage you can deal and power up awareness. Direct YT link
Don't die to take a power up. Direct YT link
Many people make this mistake, including top players (and rarely, even myself). Calculate how much it can cost to take a power up, if it costs you 100% of your hp, it doesn't worth it.
[ADVANCED] Maneuvers/Tactics
--> Short examples videos here <--
Turn your turret before the enemy is dead. Direct YT link
Killing a fast flamethrower. Direct YT link
Spawn points may be laggy. Direct YT link
Turn your turret before the enemy is dead. Direct YT link
Killing a fast flamethrower. Direct YT link
Spawn points may be laggy. Direct YT link
[ADVANCED] Elegant escape maneuvers
--> Short examples videos here <--
A guy with double power up appears right in front of you? Direct YT link
Forced to retreat? Always shoot back, you may be lucky! Direct YT link
Outnumbered, bad tactical situation, escape. Direct YT link
A guy with double power up appears right in front of you? Direct YT link
Forced to retreat? Always shoot back, you may be lucky! Direct YT link
Outnumbered, bad tactical situation, escape. Direct YT link
--------------------------------------------------
---------------> BUILDING <---------------
How to build?
Please refer to the section after this one to see the values I will be talking about in this part, thanks!
So, how do you do it? Here, click BOTH these little boxes, next to the support you want: http://steamcommunity.com/sharedfiles/filedetails/?id=730972797
Spider: try to stick to the optimal load mass as well.
Beetle: you can slap anything you want on these, although you will be slow. It's best for camping snipers.
Buggy: these are pretty average, but try to stick to the optimal load mass as much as you can, otherwise if you need to carry more weight, use fenders.
Fenders: you can slap a lot of weight on these, but you will go slower than buggy wheels.
Terms you need to understand:
Where is the build menu?
It's either in the game main menu or even if you press ESC while in a game, you will have it among the other options! It is pretty self-explanatory, so I will just say something that is not very easy to understand in the next question.How do I install 2 supports?!
One common misconception is that people think you need to pay twice for the support to be able to mount it. NO! You can mount as many as you like provided you have space (I say this because in some configurations you can have 4 support slots instead of 2).So, how do you do it? Here, click BOTH these little boxes, next to the support you want: http://steamcommunity.com/sharedfiles/filedetails/?id=730972797
Hovers
Try to stick to the optimal load mass for vintage jets and fans (especially fans), while with hover discs and turbines you can get to the maximum load as well (although they will slow down).Spiders
Flea legs: you must stick to the optimal load mass, otherwise they will be terrible by design.Spider: try to stick to the optimal load mass as well.
Beetle: you can slap anything you want on these, although you will be slow. It's best for camping snipers.
Tracks
Tracks are meant to be powerful, and as you will be able to see in the statistics tables they have very good high load throttle in general, because you can effectively slap very high mass values onto them and still be able to move. You may want to experiment a bit between a model and another.Wheels
Go-kart: you must stick to the optimal load mass, otherwise they will be terrible by design.Buggy: these are pretty average, but try to stick to the optimal load mass as much as you can, otherwise if you need to carry more weight, use fenders.
Fenders: you can slap a lot of weight on these, but you will go slower than buggy wheels.
Terms you need to understand:
- Optimal Load Mass: the ideal mass a propulsion can carry, and uses the Low Load Throttle.
- Maximum Load Mass: if you carry this amount of mass, your propulsion will be using the High Load Throttle.
- Low Load Throttle: this value directly controls the acceleration when you are carrying the Optimal Load Mass.
- High Load Throttle: this value directly controls the acceleration when you are carrying the Maximum Load Mass.
- Top speed: this value expresses the top speed you can get with a propulsion. Careful, if you are on High Load Mass, you may not be able to reach it!
Propulsion values you need to know
Please refer to the previous section to understand how to use and understand these values.
As of version 1.0.19
These are tables representing the current in-game values for propulsions, and can definitely help you to build better builds if you follow the guidelines in the section above. This took a LOT of time because the code to create these tables is absolutely massive, hope you appreciate this.
As for how do I have access to this kind of data... It's because I help a lot with the game balance and I'm also a Beta Tester.
As of version 1.0.19
These are tables representing the current in-game values for propulsions, and can definitely help you to build better builds if you follow the guidelines in the section above. This took a LOT of time because the code to create these tables is absolutely massive, hope you appreciate this.
As for how do I have access to this kind of data... It's because I help a lot with the game balance and I'm also a Beta Tester.
Hovers
Name
Hp
Mass
Top speed
Optimal mass load
Maximum mass load
Low load throttle
High load throttle
Engine force
Lift force coefficient
Buy price
Vintage jets
35
7
35
12
21
1.1
0.35
600
190
5
Fans
40
6.2
30
11
14
1.9
0.4
430
140
5
Hover Discs
55
8.4
26
13
20
1.3
0.7
525
150
5
Turbines
85
10
21
17
26
1.2
0.9
700
180
10
Spiders
Name
Hp
Mass
Top speed
Optimal mass load
Maximum mass load
Low load throttle
High load throttle
Buy price
Flea
25
6
32
7
15
1
0.3
5
Spider
45
7.4
27
13
24
1
0.6
10
Beetle
80
9.8
17
18
30
1
0.9
15
Tracks
Name
Hp
Mass
Top speed
Optimal mass load
Maximum mass load
Low load throttle
High load throttle
Engine force
Lift force coefficient
Side friction
Buy price
Vintage tracks
30
8
32
11
20
1.5
0.5
10
270
14
5
Scout tracks
40
8
35
11
15
1.6
0.3
9
240
16
0
Basic tracks
55
8.5
35
13
17
1.6
0.4
10
240
18
5
Six Wheels
63
8.8
32
13
18
1.7
0.4
11
270
18
5
Miner
70
9.4
30
15
21
1.6
0.7
12
280
18
5
Jack Knife Tracks
80
10
26
17
27
1.45
1
13.5
240
19
10
Power tracks
90
10.5
20
18
30
1.3
0.95
14
270
15
10
Wheels
Name
Hp
Mass
Top speed
Optimal mass load
Maximum mass load
Low load throttle
High load throttle
Buy price
Go-Kart
30
6.2
55
11
14
1.1
0.3
10
Buggy
45
7.8
45
13
18
1.2
0.5
5
Fenders
50
9
40
14
25
1
0.8
7
Slime ball
Name
Hp
Mass
Top speed
Engine force
Lift force coefficient
Damping force coefficient
Turn torque
Turn damping
Buy price
Slime ball
45
7
30
480
2000
10
1600
300
5
Building examples!
Worst possible tank example:
http://steamcommunity.com/sharedfiles/filedetails/?id=689747641
This is terrible because it has 24 mass when go-kart propulsion can only carry 14 at max, and 11 is the optimal value.
Tiny? Low hp? Yes, but also 81 acceleration:
http://steamcommunity.com/sharedfiles/filedetails/?id=689749057
This is great (although it may not be efficient against all kind of tanks), because it has only 6 mass with the anti-gravity supports and the optimal mass for go-karts is again 11, so it will be incredibly fast (81 acceleration). The trick is to ambush unwary prays and cyrcle around them with unpredictable moves - careful not to wheelie!
Low mass flea spider:
http://steamcommunity.com/sharedfiles/filedetails/?id=689801582
With only 5 mass this build can be really annoying, this is also the lightest tank you can build in Gear Up.
Jack Knife tracks with lasers:
http://steamcommunity.com/sharedfiles/filedetails/?id=689801608
You may say that Jack Knife tracks have 17 as Low Load mass, so you may address this as really bad because of 24 mass. However, if you check the high load throttle, it's pretty high for tracks, because they are supposed to consider weight, but not be horribly hindered due to overloading. This means the build will not be bad as the difference between Low Load Throttle and High Load Throttle is small.
Power tracks ultra heavy:
http://steamcommunity.com/sharedfiles/filedetails/?id=689801908
Same as above, this tank is heavier than Low Load, but again Low Load Throttle is pretty high so they can carry this thing anyway. You can switch to the repair gun + thrusters to move to a safe position and heal yourself by shooting a wall and then switch back when close to an enemy and spam him with the revolver.
Lightning fast flamethrower:
http://steamcommunity.com/sharedfiles/filedetails/?id=689802216
This thing has the highest acceleration value you can obtain in Gear Up, so the trick is to dodge everything and burn the hell out of your opponents!
Grayhound killer:
http://steamcommunity.com/sharedfiles/filedetails/?id=689802776
With its heavy armor this thing can get closer to enemies and spam them for a LOT of damage in close range with the Grayhound (that has an extremely high dps).
Horrible fans build:
http://steamcommunity.com/sharedfiles/filedetails/?id=689803199
With that weight and fans propulsion, this thing will not go anywhere because fans max load is 14 and with 0.4 High Load Throttle. (Yes, fans are extremely sensible to weight).
http://steamcommunity.com/sharedfiles/filedetails/?id=689747641
This is terrible because it has 24 mass when go-kart propulsion can only carry 14 at max, and 11 is the optimal value.
Tiny? Low hp? Yes, but also 81 acceleration:
http://steamcommunity.com/sharedfiles/filedetails/?id=689749057
This is great (although it may not be efficient against all kind of tanks), because it has only 6 mass with the anti-gravity supports and the optimal mass for go-karts is again 11, so it will be incredibly fast (81 acceleration). The trick is to ambush unwary prays and cyrcle around them with unpredictable moves - careful not to wheelie!
Low mass flea spider:
http://steamcommunity.com/sharedfiles/filedetails/?id=689801582
With only 5 mass this build can be really annoying, this is also the lightest tank you can build in Gear Up.
Jack Knife tracks with lasers:
http://steamcommunity.com/sharedfiles/filedetails/?id=689801608
You may say that Jack Knife tracks have 17 as Low Load mass, so you may address this as really bad because of 24 mass. However, if you check the high load throttle, it's pretty high for tracks, because they are supposed to consider weight, but not be horribly hindered due to overloading. This means the build will not be bad as the difference between Low Load Throttle and High Load Throttle is small.
Power tracks ultra heavy:
http://steamcommunity.com/sharedfiles/filedetails/?id=689801908
Same as above, this tank is heavier than Low Load, but again Low Load Throttle is pretty high so they can carry this thing anyway. You can switch to the repair gun + thrusters to move to a safe position and heal yourself by shooting a wall and then switch back when close to an enemy and spam him with the revolver.
Lightning fast flamethrower:
http://steamcommunity.com/sharedfiles/filedetails/?id=689802216
This thing has the highest acceleration value you can obtain in Gear Up, so the trick is to dodge everything and burn the hell out of your opponents!
Grayhound killer:
http://steamcommunity.com/sharedfiles/filedetails/?id=689802776
With its heavy armor this thing can get closer to enemies and spam them for a LOT of damage in close range with the Grayhound (that has an extremely high dps).
Horrible fans build:
http://steamcommunity.com/sharedfiles/filedetails/?id=689803199
With that weight and fans propulsion, this thing will not go anywhere because fans max load is 14 and with 0.4 High Load Throttle. (Yes, fans are extremely sensible to weight).
--------------------------------------------------
---------------> WEAPONS <---------------
Weapons and how to use them (part 1)
★ = 1 score
✰ = 0.5 score
Usage: this is a very hard weapon to use, despite it can be very good at close range because of 42 dps, try to stick to medium distance and pick enemies off.
Best used on: any build.
Usage: this weapon fires ground-level shots, and you need to have wheels to shoot decently, otherwise it will bounce off to nowhere.
Best used on: strictly wheeled tanks, especially if 140+ hp.
Usage: this is a nightmare to aim, but one of the best weapons if you become a pro with it (if you don't have 200 hours in game don't even bother trying, seriously, don't). Aim a lot higher than where you want to hit. Direct damage is extremely op, because it's 60, but splash damage is only 15, so it can be both a very good and very bad weapon.
Best used on: floating tanks, jumping tanks, tanks that can gain height. Remember, height is op with this weapon.
Usage: this is a very powerful cannon, it shoots more horizontally than heavy cannon, so it is way easier to aim with, and has very high dps. However, it has reduced impact radius and less damage. Spam your enemies in their faces with this in close range!
Best used on: any build, just not really slow ones.
Usage: Please, do not spam shots with this weapon, unless you are in very short range (it can be deadly in those cases), instead try to aim each shot. Want to know why I nerfed its rate of fire a few versions ago? Because it was op? No, to force people to aim with it, the nerf didn't actually change its effectiveness.
Best used on: fast builds.
Usage: you might want to use this on a fast build, and pick enemies off from medium range. Remember, direct shot is nice, splash damage isn't.
Best used on: fast builds.
Usage: the bullet is a bit slow, remember it. It shoots perfectly horizontally, exactly where you aim, for great damage and decent fire rate, but it requires some thinking to hit people, you will not hit anything if you don't pre-fire at them.
Best used on: any build, particularly nice on medium tanks.
✰ = 0.5 score
Default cannon
Type
Damage
Fire rate
Impact radius
Ammo
Exit velocity
Recoil Input
Easy to use
Short range
Medium range
Long range
Very long range
Fast horizontal cannon shot
35
1.25
5
20
200
50
★★
★★★
★★★✰
★✰
★
Best used on: any build.
Bronze cannon
Type
Damage
Fire rate
Impact radius
Ammo
Exit velocity
Recoil Input
Easy to use
Short range
Medium range
Long range
Very long range
Ground-level cannon shot
50
0.95
5
18
140
120
★★✰
★★★★✰
★★★✰
★★✰
✰
Best used on: strictly wheeled tanks, especially if 140+ hp.
Heavy cannon
Type
Damage
Fire rate
Impact radius
Ammo
Exit velocity
Recoil Input
Easy to use
Short range
Medium range
Long range
Very long range
Cannon arc
60
0.67
12
15
190
140
★
★★★★
★★★★★
★★✰
✰
Best used on: floating tanks, jumping tanks, tanks that can gain height. Remember, height is op with this weapon.
Dragon cannon
Type
Damage
Fire rate
Impact radius
Ammo
Exit velocity
Recoil Input
Easy to use
Short range
Medium range
Long range
Very long range
Cannon arc (lower than heavy cannon)
40
1.1
7
18
180
100
★★★★
★★★★✰
★★★★✰
★★
✰
Best used on: any build, just not really slow ones.
Revolver
Type
Damage
Fire rate
Impact radius
Ammo
Exit velocity
Recoil Input
Easy to use
Short range
Medium range
Long range
Very long range
Fast horizontal cannon shot
23
2.2
4.5
45
250
90
★★★✰
★★★★✰
★★★★✰
★★✰
★✰
Best used on: fast builds.
Bamboomer
Type
Damage
Fire rate
Impact radius
Ammo
Exit velocity
Recoil Input
Easy to use
Short range
Medium range
Long range
Very long range
Fast cannon arc
30
1.65
9.5
35
250
75
★★★✰
★★★
★★★★★
★★
✰
Best used on: fast builds.
ANTI Cannon
Type
Damage
Fire rate
Impact radius
Ammo
Exit velocity
Recoil Input
Easy to use
Short range
Medium range
Long range
Very long range
Horizontal cannon shot
50
1
6
30
115
75
★★✰
★★★★★
★★★✰
★
✰
Best used on: any build, particularly nice on medium tanks.
Weapons and how to use them (part 2)
Automatic missiles
Type
Damage
Fire rate
Impact radius
Ammo
Exit velocity
Recoil Input
Easy to use
Short range
Medium range
Long range
Very long range
Fast horizontal cannon shot
55
0.75
9
15
80*
135
★★★★
★★★★✰
★★★★
★★
★
Best used on: any build, especially ultra-lights.
* The bullet has acceleration.
Winged missile
Type
Damage
Fire rate
Impact radius
Ammo
Exit velocity
Recoil Input
Easy to use
Short range
Medium range
Long range
Very long range
Horizontal cannon shot
75
0.45
15
8
50*
250
★★✰
★★★★★
★★★✰
★✰
✰
Best used on: agile builds.
* The bullet has acceleration.
Tesla generator
Type
Damage
Fire rate
Impact radius
Ammo
Exit velocity
Recoil Input
Easy to use
Short range
Medium range
Long range
Very long range
Horizontal cannon shot
27
2
5
20
170
60
★★★
★★★★✰
★★★★
★★
★
Best used on: any build.
Tesla bouncer
Type
Damage
Fire rate
Impact radius
Ammo
Exit velocity
Recoil Input
Easy to use
Short range
Medium range
Long range
Very long range
Ground-level cannon shot
40
2
5
15
140
120
★✰
★★★★★
★★★
✰
✰
Best used on: medium tanks, try not to use a tall tank, I suggest wheels to avoid huge bullets bounces.
Sniper
Type
Damage
Fire rate
Impact radius
Ammo
Exit velocity
Recoil Input
Easy to use
Short range
Medium range
Long range
Very long range
Sniper shot
50
0.3
0
8
∞
335
★★
★★
★★★✰
★★★★★
★★★★★
Best used on: heavily armored spiders or fast and agile builds.
Sniper "Desecrator"
Type
Damage
Fire rate
Impact radius
Ammo
Exit velocity
Recoil Input
Easy to use
Short range
Medium range
Long range
Very long range
Sniper shot
69
0.145
0
6
∞
400
★★
★
★★
★★★★★+
★★★★★+
Best used on: heavily armored spiders or fast and agile builds.
Plasma blaster
Type
Damage
Fire rate
Impact radius
Ammo
Exit velocity
Recoil Input
Easy to use
Short range
Medium range
Long range
Very long range
Machine gun
12
4
5
70
230
40
★★✰
★★★★
★★★✰
★
✰
Best used on: medium/heavy tanks.
Weapons and how to use them (part 3)
Laser Auto Cannon
Type
Damage
Fire rate
Impact radius
Ammo
Exit velocity
Recoil Input
Easy to use
Short range
Medium range
Long range
Very long range
Machine gun
7.6
5
5
120
300
35
★★★★★
★★★✰
★★★★✰
★★
✰
Best used on: any build, but not really indicated on light tanks.
Vintage laser
Type
Damage
Fire rate
Impact radius
Ammo
Exit velocity
Recoil Input
Easy to use
Short range
Medium range
Long range
Very long range
Fast low damage sniper shots
28
1.4
5
40
350
100
★★✰
★★★
★★★★★
★★★
★
Best used on: agile tanks, lights/medium, just agile ones.
Harpoon
Type
Damage
Fire rate
Impact radius
Ammo
Exit velocity
Recoil Input
Easy to use
Short range
Medium range
Long range
Very long range
Harpoon-like
40
1.1
3
20
160
85
★★
★★★★
★★★★✰
★★
✰
Best used on: fast light/medium floating tanks (but in some cases also heavies).
Minigun basic
Type
Damage
Fire rate
Impact radius
Ammo
Exit velocity
Recoil Input
Easy to use
Short range
Medium range
Long range
Very long range
Machine gun
7
7
2
130
335
40
★★★★★
★★★★✰
★★★
✰
✰
Best used on: medium/heavy tanks.
Machinegun
Type
Damage
Fire rate
Impact radius
Ammo
Exit velocity
Recoil Input
Easy to use
Short range
Medium range
Long range
Very long range
Machine gun
5.5
8.25
2
170
380
35
★★★★★
★★★★
★★★✰
★
✰
Best used on: medium/heavy tanks.
Gatling gun
Type
Damage
Fire rate
Impact radius
Ammo
Exit velocity
Recoil Input
Easy to use
Short range
Medium range
Long range
Very long range
Machine gun
4.25
9.9
2
225
400
30
★★★★★
★★★✰
★★★★✰
★✰
✰
Best used on: medium/heavy tanks.
Weapons and how to use them (part 4)
Flamethrower
Type
Damage
Fire rate
RANGE
Ammo
Exit Velocity
Recoil Input
Easy to use
Short range
Medium range
Long range
Very long range
Flamethrower
0.95
60
18
200
∞
N/D
★★
★★★★★+
✰
✰
✰
Best used on: medium/light but fast builds.
Scavenger
Type
Damage
Fire rate
RANGE
Ammo
Exit Velocity
Recoil Input
Easy to use
Short range
Medium range
Long range
Very long range
Flamethrower
0.65
50
35
145
∞
N/D
★★
★★★★★+
★★★
✰
✰
Best used on: medium but fast builds.
Shotgun
Type
Damage
Fire rate
RANGE
Ammo
Exit Velocity
Recoil Input
Easy to use
Short range
Medium range
Long range
Very long range
Shotgun
60
0.45
30
20
∞
250
★★★
★★★★★+
★✰
✰
✰
Best used on: fast tanks.
Grayhound
Type
Damage
Fire rate
Impact radius
Ammo
Exit Velocity
Recoil Input
Easy to use
Short range
Medium range
Long range
Very long range
Ground-level cannon shot
30
2
3
45
85*(Accel=20)
75
★★✰
★★★★★
★★★✰
✰
✰
Best used on: wheeled tanks, try not to use a tall tank.
Proximity mine
Type
Damage
Fire rate
TRIGGER radius
Ammo
Exit Velocity
Age
Easy to use
Short range
Medium range
Long range
Very long range
Mine launcher
45
0.5
8
20
85
7s
★✰
★★★★
★★★
✰
✰
Best used on: agile tanks.
Repair cannon
Type
Damage
Fire rate
Impact radius
Ammo
Exit Velocity
Recoil Input
Easy to use
Short range
Medium range
Long range
Very long range
Horizontal cannon shot
-23
2.1
5
45
250
50
★★
★★★★
★★★★
✰
✰
Best used on: any build.
Good weapon combo... Or not?
All weapons shoot differently, and this is fairly obvious, but how to pair weapons to a good support?
The things you need to consider are 5 basically:
Yeah yeah I will, don't worry :) I'll just put some images below, mentioning just what they are (please ignore the actual tank and only consider weapons+supports, I was just taking screenshots). Now, try to guess if a combo is good or not, then scroll down and there will be a list (in spoiler tags, so you won't see it by accident and will have to think about it) telling you whether you nailed it or not, including the reason.
The things you need to consider are 5 basically:
- Weapon kind vs support kind.
Will elaborate this later, but basically if you slap missiles and machine guns together they don't work very well, because you have to aim differently to hit anything. - Bullet speeds.
If your weapon has a much faster/slower bullet, then your combo is likely a bad one. - Max ammo.
If your weapon runs out of ammo a lot before supports, you may not notice it and get an huge disadvantage because your main weapon will not be able to shoot or viceversa. - Fire rate:
If your weapon shoots much faster than your supports or viceversa, it will be very hard to aim because it's terribly confusing. - Special weapons.
Some weapons like flamethrower or shotgun don't get along with anything else very well, so you may consider adapting your build for such usage, will provide an example below.
Now that the above is clear, put some examples you theory-freak!
Yeah yeah I will, don't worry :) I'll just put some images below, mentioning just what they are (please ignore the actual tank and only consider weapons+supports, I was just taking screenshots). Now, try to guess if a combo is good or not, then scroll down and there will be a list (in spoiler tags, so you won't see it by accident and will have to think about it) telling you whether you nailed it or not, including the reason.
- Missiles + bumblebee: http://steamcommunity.com/sharedfiles/filedetails/?id=689724797
- Harpoon + spears: http://steamcommunity.com/sharedfiles/filedetails/?id=689724774
- Shotgun + thrusters: http://steamcommunity.com/sharedfiles/filedetails/?id=689724739
- Machinegun + autocannon: http://steamcommunity.com/sharedfiles/filedetails/?id=689724707
- Sniper rifle + lasers: http://steamcommunity.com/sharedfiles/filedetails/?id=689724627
- Heavy cannon + mortars: http://steamcommunity.com/sharedfiles/filedetails/?id=689724666
- Winged missile + wasp missiles: http://steamcommunity.com/sharedfiles/filedetails/?id=689726911
- Vintage laser + machine guns: http://steamcommunity.com/sharedfiles/filedetails/?id=689726929
- Winged missile + mines: http://steamcommunity.com/sharedfiles/filedetails/?id=689726956
-->Hover this black box to show the list!<--
------------------------------------------------- Missiles + bumblebee: YES, they have similar bullet speed, similar kind of shooting and generally you have to aim more or less in the same place to hit an opponent. Best against: medium/heavy tanks, you may have to use splash damage to kill light tanks.
- Harpoon + spears: YES, they are exactly the same (thanks to me tweaking their values!), but it's not easy to use these. Best against: any tank.
- Shotgun + thrusters: YES, these get along very well, because you can slap thrusters onto a medium/heavy tank (or extremely light), and just ambush unwary enemies. Annoying combo, but effective. Best against: light or medium tanks.
- Machinegun + autocannon: YES, they do basically the same thing - spam the crap out of your opponent. Best against: any non-super-fast tank.
- Sniper rifle + lasers: YES, veterans use a sniper build in 1vs1 fights, although it's obviously extremely hard to use properly. Best against: light/medium tanks.
- Heavy cannon + mortars: NO, this is a terrible combo. With the heavy cannon you have to shoot above your enemy, while with mortars you have to shoot in front of them, so you will either hit with the cannon or with mortars.
- Winged missile + wasp missiles: NO, this is a terrible combo. With the winged missile you have to figure out where the enemy is going to be by the time your rocket hits him, but instead with the wasp missiles you have to shoot in front of him, aiming at the ground, so you will either hit with the winged missile or with wasp missiles. They have very different fire rates, too, which will make it confusing as well.
- Vintage laser + machine guns: NO, ha, I got you on this one, you thought this was good didn't you? It's not! Vintage laser shoots in a very different way from machine guns, despite it shoots straight the bullet speed is just way too different (laser has a single bullet, that has to hit, otherwise you will be missing 28 damage) and also the bloom (machine guns bloom a lot, while vintage laser is really accurate).
- Winged missile + mines: NO, this is a terrible combo. It just doesn't make sense to have a missile and proximity mines together... Just no, I think this one was the most obviously broken build.
--------------------------------------------------
---------------> GAME-MODES <---------------
Deathmatch
Deathmatch is by far my favourite mode, I really know everything about it, so open your mind and read carefully ;)
You can be either:
Q/A
DEATHMATCH GAMEPLAY (NEWCOMERS TUTORIAL) Direct YT link
You can be either:
- Aggressive: an aggressive player doesn't care much about his k/d ratio, and focuses exclusively onto getting the highest number of kills.
This strategy works if you are actually good enough to get many kills before you die, otherwise you are just being foolish and dying repeteadly is just going to make your enemies happy. - Defensive: a defensive player cares a lot about his life, and tries very hard not to give it away. He may be a bit slower at killing the enemy, but he can definitely be as deadly as an aggressive player, or more. If you play defensively, you really have to run away if you face a situation where you are disadvantaged, and try to fight always when you areat least 90% sure of the outcome (you will kill the opponent).
Q/A
- Q: hey, you are world 1st, so which style do you use?
A: Mostly defensive, but I can be aggressive in 1vs1 at extremely high levels. - Q: do you play defensive because it's better or because you like it?
A: it's much harder to play defensively, so it can be better (but not always! I found myself rapidly switching style in some games, in order to win them!), and I also like it. - Q: are there any high levels playing aggressively?
A: yes, there are. Just pick what suits you best until you can determine how you can be more effective at both. - Q: so are you saying I should learn both styles?
A: yes, definitely, but mastering them and being able to switch back and forth is something that requires quite a bit of time to learn. - Q: ok, can I see how you play?
A: I think that I can link the tutorial video here, as I played DM, but I may add more videos of me playing my real build. Feedback is appreciated about this.
DEATHMATCH GAMEPLAY (NEWCOMERS TUTORIAL) Direct YT link
Team Deathmatch
Team Deathmatch is different from Deathmatch, first of all, you have (obviously) a team, but you can also choose where to respawn.
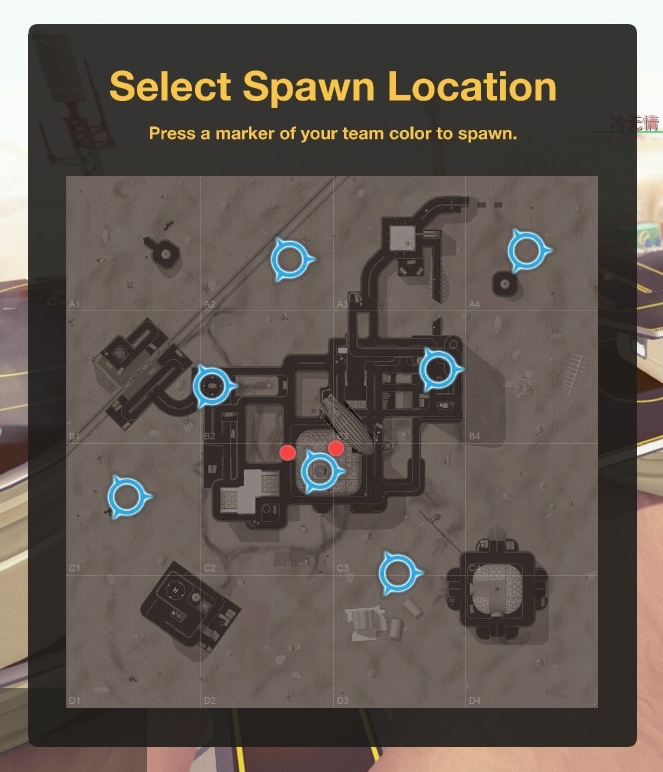
As you can see there are several blue icons and that's where you want to click, to choose your respawn point! :)
Be careful and choose a spot that is not surrounded by the enemy team, otherwise you may get insta-rekt!
As always, a good tutorial video (on the default tank yet again) that will show and explain you more insights/tips on how to play TDM properly:
Team Deathmatch Tutorial Direct YT link
As you can see there are several blue icons and that's where you want to click, to choose your respawn point! :)
Be careful and choose a spot that is not surrounded by the enemy team, otherwise you may get insta-rekt!
As always, a good tutorial video (on the default tank yet again) that will show and explain you more insights/tips on how to play TDM properly:
Team Deathmatch Tutorial Direct YT link
Conquest (by zooxanthellaeh2o)
This part of the guide was written by one of the best Conquest players in the world, zooxanthellaeh2o, I just revised and formatted it.
Note: there are snipers out there who cap towers and snipe simultaneously, they do not fall into this category.
zooxanthellaeh2o's Conquest Guide Direct YT link
Generally what to do:
Conquest games are more about team stratagy and less about personal skill levels. While you do need to be able to kill your enemies to be effective, you will also have to be smart at making decisions. The most important thing to remember is that towers win matches. I can't stress that enough. So many players will chase the kill instead of the tower. That leaves even the most combat hardened players scrambling to earn points for their team.Case scenario 1:
Here is an example. The match starts. Your team captures the first flag and so does the enemy team. Both teams rush the other teams flag. A battle will ensue in the middle somewhere, almost everyone will be destroyed. Usualy one guy will be left alive who then starts to cap a third tower. Meanwhile everyone is respawning and rushing the 3rd flag again. In this scenario Both teams are generating 1 point per second. Lets look at how this might play out differently...Case scenario 2:
The match starts. Your team captures the first flag and so does the enemy team. Both teams rush the other teams flag and a battle will ensue in the middle somewhere. This time you decide to go around the battle and head straight for the enemy flag. If you just take 1 ring off the tower and head into the middle for the skirmish, no matter what the outcome is in the middle...your team will be generating 1 point per second and the enemy team will not. Note: This is much harder to accomplish with a slow heavy tank.Snipers:
An highly skilled sniper can be an asset to a conquest team while an average skilled sniper can be a hinderence. Before you start getting upset let me explain. While in deathmatch or team deathmatch there are 2 things you have to do: kill your opponents and do not let them kill you - Conquest is a little different: like I said before towers win matches. If you have a member of your team not capturing towers, he is not helping with the most crucial aspect of earning points. In fact, because the amount of people on your team versus the amount of people on the enemy team will determine how fast you can capture a tower, he is actually making it easier for the enemy team to capture towers faster. Let me say that again. The amount of people on your team versus the amout of people on the enemy team will determine how fast your team can capture a tower. Another thing to note is that you can double up on a tower to capture it twice as fast. Three people sitting at a tower will capture it three times faster then if you were there by yourself.Case scenario 3 (Snipers):
Here is a scenario that has happened to me more than a few times. The match starts and its evenly matched 2 vs 2. You head out to the first tower and both your enemies head out to their first tower. In this scenario you have a sniper on your team and instead of helping you cap the first tower, he heads up on a roof to try and stop the enemy from capturing their tower. Now a really good sniper will take out both enemy tanks while you capture the first tower. If he doesn't, because his gun is pointing the wrong way looking at something shiny, then they are going to cap the first tower twice as fast as you and be half way done with a second tower by the time you capture your first, and it just gets worse from there! The bottom line is that snipers only do half the job as everyone else unless they are killing twice as much as everyone else. I do not play as a sniper and routinely get 10-20 kills per match. If you are a sniper and you're not getting 20-40 kills per conquest match, you are indeed hurting your team's score.Note: there are snipers out there who cap towers and snipe simultaneously, they do not fall into this category.
Runners:
Runners in conquest are very helpful to a team's success. A fast and agile tank that can run to the other side of the map and deactivate the enemy towers can be the difference between success and failure. While it's best to stay in a pack to outgun the enemy team and capture towers faster, an evenly matched game can be thrown off balance by a single tank running behind the action and deactivating enemy towers. The enemy team often becomes confused and breaks up scrambling to recapture them. This makes it easier for your team's main group to gun down any opposition. A good runner can keep the enemy towers deactivated almost the whole game, but more than one runner can hurt a team as well! If your main assault force is constantly defeated because there are not enough people helping, then running is counter-productive. If you are a runner and you see someone else on your team doing the same, then it might be better to throw on some more armor and help the main group.zooxanthellaeh2o's Conquest Guide Direct YT link
Tag
Tag is the most recent mode that has been added to the game, and it's a very unique and niche thingy.
How does this work then?
Sorry this section is still work in progress and it doesn't feature a video as of now.
How does this work then?
- You start alone, just like a regular Deathmatch, and your goal is to kill red tanks.
- As soon as you kill someone you will "assimilate" him into your team and he will become blue.
- Kill all red tanks until everyone will be blue on your screen.
- Be careful! Your "teammates" may see each other as red, so you have to be fast at killing all the red tanks!
- This mode requires a minimum of 4 (3 from the next patch and onwards) active players to start (already seeing the map, but not yet spawned - the game will hold you there).
Sorry this section is still work in progress and it doesn't feature a video as of now.
--------------------------------------------------
---------------> BONUS <---------------
Good shots showcase!
- Flavio93Zena
Montage! Direct YT link
Planned sniper kill at high levels Direct YT link
-------------------------------------------------- - Fastlex
Fastlex using Desecrator. Direct YT link
360 mlg shot :P
https://gfycat.com/DentalTornArcherfish - adixox12
adixox rolling good shot Direct YT link
Bloopers!
No physics, just no. Lol. Direct YT link
Erh... Halp?
http://steamcommunity.com/sharedfiles/filedetails/?id=690232084
http://steamcommunity.com/sharedfiles/filedetails/?id=690232107
Sniper fail. Direct YT link
Erh... Halp?
http://steamcommunity.com/sharedfiles/filedetails/?id=690232084
http://steamcommunity.com/sharedfiles/filedetails/?id=690232107
Sniper fail. Direct YT link
CREDITS
This guide took me an extremely long time to type, I started it in December, 2015 and worked on it, then stopped, then had some hardware and software problems, then real life things caught me up too much etc etc...
However, I'd still love to thank especially zooxanthellaeh2o for the help (as he wrote the Conquest section). Nonetheless, I wrote most of it, if you enjoy it and would like to donate for all the time I spent on it (I also hold the bug list and the rebalance list), you may do so -->here<--[www.paypal.me].
Thanks in advance to anyone who decides to donate! You are super awesome! :D
Even if you decide not to do so, thank you for reading this anyway! I hope it will help you to improve your skills and your gameplay. If it does, please leave a thumbs up!
Happy tanking!
However, I'd still love to thank especially zooxanthellaeh2o for the help (as he wrote the Conquest section). Nonetheless, I wrote most of it, if you enjoy it and would like to donate for all the time I spent on it (I also hold the bug list and the rebalance list), you may do so -->here<--[www.paypal.me].
Thanks in advance to anyone who decides to donate! You are super awesome! :D
Even if you decide not to do so, thank you for reading this anyway! I hope it will help you to improve your skills and your gameplay. If it does, please leave a thumbs up!
Happy tanking!
More Gear Up guides
- How to gather system information★ 4 (52)104k views80 ♥1 min
- Top Vehicles (OUTDATED)★ 5 (244)13k views279 ♥8 minUpdated Dec 31, 2019
- THE MOST ULTIMATE TANKS 0.1.1.8 [Updated]★ 4 (96)9.9k views130 ♥4 minUpdated Dec 3, 2018
- Gear Up: Guide to all achievements [RU]★ 4 (73)2.8k views42 ♥6 minRussianUpdated Aug 1, 2020
- Weapon Summary [WIP]1.4k views12 ♥2 minUpdated Sep 24, 2015
- How to create "The Exonerator"1.3k views15 ♥3 min






This guide was created by its original author on the Steam Community. Are you the author and want it removed? Request removal.