Using your own Logos on GeForceNOW
Using own Logos in GeForceNOW
This Guide is for all those who play X4: Foundations on GeForceNOW.
GFN Instances runs on closed systems. Its impossible at the moment to place your own logos in the user folder of the game when using GFN.
BUT, this guide will show you how simple you can use your own logos in GFN with a easy walkaround!
Great! But how we do this?
No. At least you keep the Workshop Item on "Private". This prevent flooding the Workshop and you can still use the Workshop Items in your own game without spamming the public workshop.
Sounds great! How do I start?
The whole progress is simple!
You don't need special knowledge or coding skills. You can simple Copy&Paste the whole Guide to your mod. With this guide, even a potato can create own logos for X4!
Checklist
- Your Logo as .tga file
- (But, my Logo is .jpeg/.jpg/.png/other format)
- No Problem! Check out the next chapter of this Guide "Create .tga file"
- X Tools
- You can get X Tools directly from steam! If you own X4 then go to your Library and
Check the "Tools" box to view all tools you own. You find the X Tools App there.
Its free and you can access it when you own the game. Just download to your system.
- Text Editor (I highly recommend Notepad++, which is free and open source, you can also use
windows editor but I gave no guarantee that this will work)
You have everything ? Then go to "Create the Mod"
Create .tga file
If you already have a .tga file of your Logo, then you can skip this step!
At first you have to choose a Logo that you like.
The resolution should be 1:1 - This means hight and width should be exactly the same!
In this Guide we will work with 256x256 as resolution.
Now you have to convert your image file (.jpeg/.png/.jpg/other) to a .tga file!
You can do this on multiple ways:
- Using GIMP (free, open source) or PhotoShop (paid software from Adobe)
- Using a Online Image Converter Tool (I will not provide any links to those, use at your own risk)
- Using a converter Software on your Computer you maybe own
If you don't know how to create or export a image file to a .tga file, feel free to use google.
In a perfect world, you now have a .tga file of your Logo. Then go to the next step.
Create the Mod
Create a Folder anywhere on your computer. I recommend your Desktop.
Name the new folder to anything you like. But it should be individual, this can prevent conflicts with other mods, that are named the same.
In this Example we create a Folder named "logoguide"
The result should now look like this
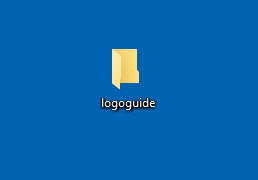
Now we have to create some subfolders.
To do this, I open the "logoguide" folder I just created.
Inside the folder we create a new folder that MUST be named "assets"
now you create some more folders, that we have the following path as result:
"..\logoguide\assets\fx\gui\textures\player_logos\"
The result should look like this now:
Now we go back inside the "logoguide" folder. And create a second folder there called "libraries"
The result should look like this now:
Everything matches? Great, go to the next step!
Now we go inside the "player_logos" folder you created under the path:
"..\logoguide\assets\fx\gui\textures\player_logos\" In this folder you drag your .tga file(s) that it looks like this:

(You can ignore the Icon of the .tga file, it depends on which software you used last with that file, this can be different to every user)
Step 3: Multiple .tga files (Only do this step if you want to create a mod with multiple Logos)
Repeat Step 2 but keep in mind to name the follwing .tga files like this:
logoguide01 (The File we just created)
logoguide02
logoguide03
and so on...
(You can replace >logoguide< with any other name but all .tga files should be named the same and
numbered like 01,02,03...)
Open your Text Editing Tool.
I will use Notepad++ in this Guide.
Create a new file.
Here you can copy&paste the following code piece:
In Notepad++ click in the Top Bar on "Code" and select XML
The Syntax and the Code should now be colored.
REPLACE EVERY "logoguide" in this Code with the name of your Folders and .tga files!
And at "<icon name="logo_logoguide_01" ONLY change the "logoguide" to your .tga file name without the number that it looks excactly like this:
"<icon name="logo_FILENAME_01"
The result should now look exactly like this: Now save the file as icons.xml in the path: "..\logoguide\libraries\icons.xml"
It should look like this now:

Congrats! Now move to the next step!
Step 4: Using the Catalog Tool
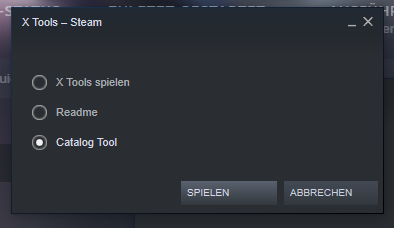
Now go to your Steam Library and start X Tool.You get a Pop-Up Window and there choose Catalog Tool, like shown below:
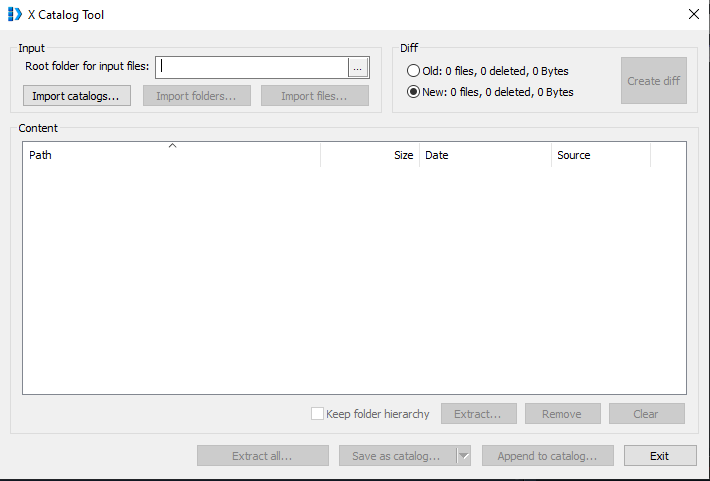
 Now you have this Window:
 Now click on this Button (marked with red circle):
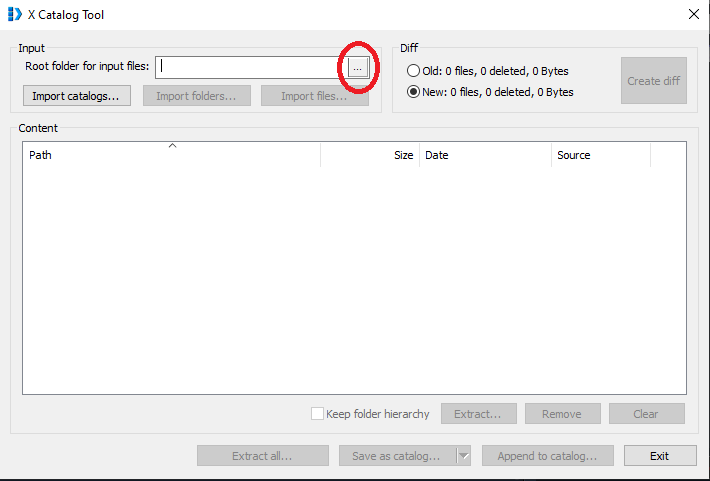 Now select the logoguide folder we created and confirm. The Result now should look like this:
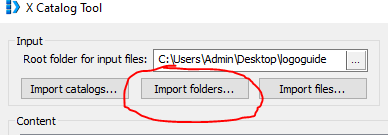
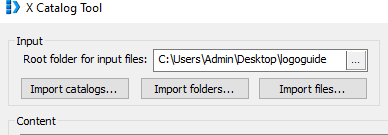 Now click on "Import Folders ..." like shown below in the red circle:
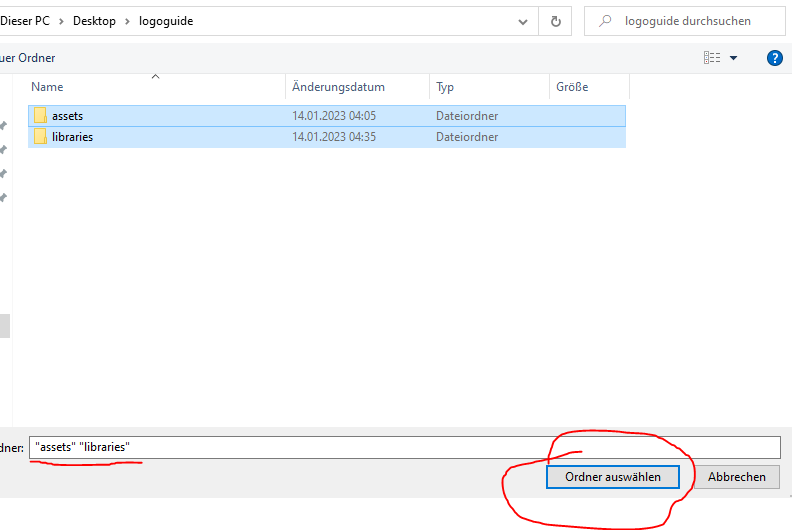
 Select the assets and the libraries folders. Like this:
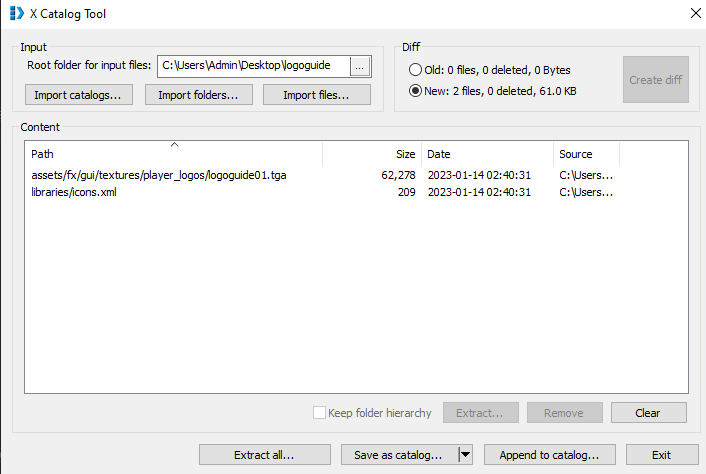
 Now after you imported the folders your X Catalog Tool should look like this:
 Now you click on the Arrow Down on "Save as Catalog" like below in red boxes:
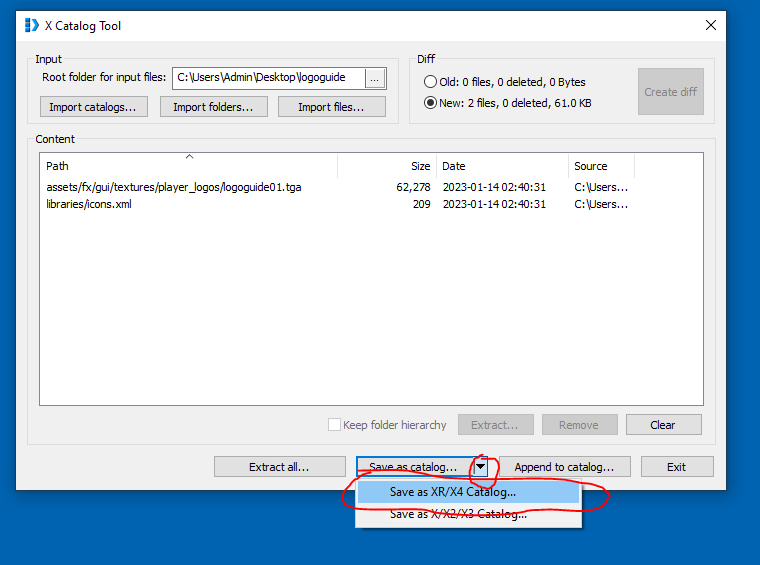 And save it as XR/X4 Catalog.
I recommend, saving them on your Desktop in your logoguide folder.
Name it logoguide! (Replace logoguide again with a name u choose for your files)
Then it should look like this:
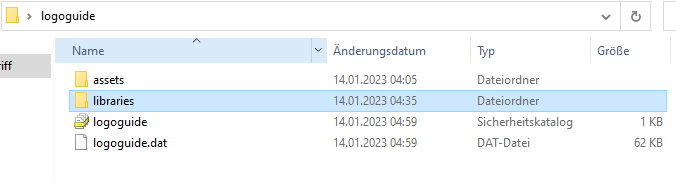 Now you drag the "assets" and "libraries" folders out of the logoguide folder. To any Place like your Desktop. That The Folder now should look like this: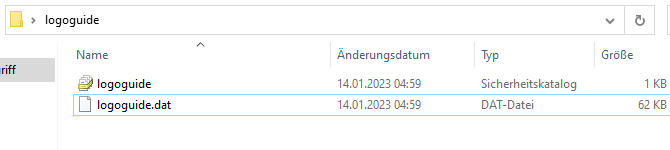
Step 5: Creating the content.xml
You got it until here? Great! Its almost done. A few Steps and we are done!
Now open Notepad++ again, and create a new file and set it to XML Code.
Again you can just copy and paste this code.
You only have to edit "Choose a Name" and "Choose a Description" to anything your choice.
You can edit them later in the Workshop.
The Result have to look like this:
 You dont have to edit any of the other parameters here. Leave them as they are.
Now Save the content.xml to the logoguide folder, that it looks like this:
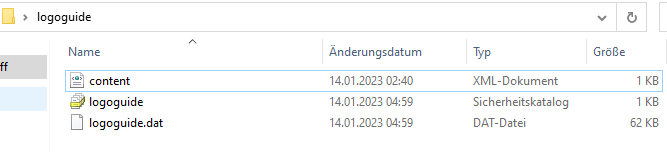
Now we have everything to upload our mod to the Workshop.
Close the X Catalog Tool.
Upload to the Workshop
But to do this right and make it usable afterwards we have to start X Tool again, but now we choose "Play X-Tools" like this:
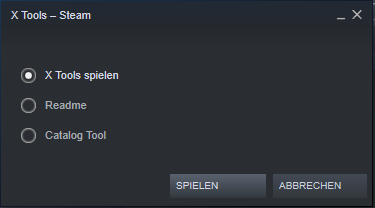
Now the cmd (Console) opens on your screen.
To Upload the Mod just type the following command (Check for Upper and Lower Case and include all Symbols I use)
You must be logged into Steam while the X Tool is running.
This COULD look like this:
Steam accepts also jpeg/png and jpg images.
You can choose any image you want. But remember Steam Guidelines and Rules.
If you want to publish your Logo Mod to the Public Steam Workshop, then you should use a good Image. If you want to keep the Mod Private and use it only for yourself, then choose what u want.
After you entered the Command, press ENTER
Now you will be asked in the Console if you want to Upload. Then press "y".
Now your Workshop Mod will be uploaded and is available in your Steam Workshop.
Remember, new Workshop Items are automatically set to Private.
If you want to publish it to the public workshop you have to set it to public.
But please don't spam the Workshop with useless Things only you would use.
Keep them better in Private.
DONT FORGET TO SUBSCRIBE TO YOUR OWN MOD TO USE IT IN GFN!
Congrats!
You did it! You created your own Logo Mod in the Workshop. And you can now play with your logo(s) in GeForceNOW.
Please leave a Like and a Comment if this Guide helped you.
If you have questions, feel free to ask in comments.
For troubleshooting with Errors you can send me a Message on Discord: Norxic#8438
If I have time, I will help.
If you want to create a Mod with more than one Image. The icons.xml must be extended like this:

- X4 Full Map [Timelines][7.0]★ 5 (579)46k views1.2k ♥1 minUpdated 22 Jun, 2024
- A Guide to Game Starts★ 5 (209)28k views437 ♥27 minUpdated 7 Jan
- X4 Beginner Guide 5.1★ 5 (393)27k views1.2k ♥22 minUpdated 7 Mar, 2023
- All Ownerless Ships in X4: Foundations (9.00 Base Game + All DLCs)★ 5 (453)27k views1.1k ♥10 minUpdated 10 Jun
- X4 Ultimate Weapons Guide. [NOW ON THE WIKI]★ 5 (343)23k views768 ♥104 minUpdated 8 Jul, 2024
- X4 sector map★ 4 (146)22k views207 ♥1 minUpdated 6 Dec, 2018


- Upgrading to PremiumTeam Fortress 2★ 5 (20k)1441k views11k ♥6 minUpdated May 11, 2022
- No More Room in Hell Official ManualNo More Room in Hell★ 5 (2.8k)569k views2.1k ♥29 minUpdated Apr 22, 2019
- NMRiH Community Hosting GuidesNo More Room in Hell★ 5 (526)351k views653 ♥1 minUpdated Aug 10, 2022
- ULTIMATE GUIDE FOR GAME DEV TYCOONGame Dev Tycoon★ 5 (5.8k)326k views10k ♥4 minUpdated 23 Jan, 2014
- How to 'Git Gud' Soon™MORDHAU★ 5 (2k)318k views3k ♥68 minUpdated Nov 16, 2024
- Лучшие кооперативные игры SteamPAYDAY 2★ 5 (1.5k)315k views2.1k ♥56 minRussianUpdated Apr 27, 2025






This guide was created by its original author on the Steam Community. Are you the author and want it removed? Request removal.