Feast of Grimnir: Side Trolls Guide
Order of Completion and Notes (Redux)
so this is here to help people in getting the trolls. where to find them and how to do them all at once if you wish.
Its important to know that as soon as you kill a bonus troll you get credit for it even if you fail. Playing with randoms can be difficult to get all 3 in one match so just doing one at a time is frequently a better choice.
I decided to change this up. You can start with any room and finish the maps in any order and still get all 3 side trolls.
The only requirement is you absolutely have to have 3 barrels going into this or its not feasible to get all 3 side trolls in one mission run.
The barrel order for all maps will ALWAYS be the same to do all 3 trolls in one run regardless of which order you run it. The first room will require you to bring 2 barrels, the 2nd room 1 barrel, the last room will have 2 barrels in it. If you did the cog room first this will require you to grab the dwarf keys.
Dwarf keys are located in the cog room on the dead dwarf.
So I will post each map and what you can or need to do in each map and suggest the order you do them in for a random vs non-random run.
For a random run I suggest you do Water->Wheel->Cog.
The reason being is the Wheel and Cog sections without water allow enemies to swarm across the dry zones attacking you everywhere from every direction. By turning on water and flooding those dry zones you can funnel enemies into kill boxes making it easier to do with randoms that can sometimes struggle with a chaotic battle on a map they may not know.
For a non-random run with a group you trust can handle their roles well I would suggest
Cog->Wheel->Water. The reason being is that its easier to move the 2 barrels in the cog room, since you can control the spawns by not pulling the cog release lever, and since you can pre-clear the room of enemies allowing you to mostly safely move the barrels across unmolested. Without water in the Wheel room you can cut across the map to the farthest barrel while fighting off large hordes in the process but it is faster assuming nobody goes down, hence also more dangerous. Not a problem with a good group.
You will also need to grab the dead dwarf keys doing Cog first to complete the trolls in the other maps.
No-Barrel Random Run
I am finding this the best way to do no barrel random runs. The wipe rate has dropped significantly.
COG -> Wheel -> Water The reason we do cog first is this is frequently a death trap for randoms. If they cannot handle the one section of the map with limited spawns, it does not bode well for the rest of the mission. They also should have health going in so the chances are higher they will make it through this. It is important to pick up the dwarf keys here. Then we move on to Wheel. Wheel is what utterly destroys random teams as often as not. While they are grinding away at the mob, the specials tear them apart usually because nobody is bothering to target them down. On the Wheel map on F, since we have not turned on the water the lake bed is dry and we have the dwarf keys. Below F on the dry lake bed is another door. That door ties in to the one at F. Take it, move up, when the entire living team assembles at the door it will open from the inside. Then just exit and hop out of the area. No bridge fuss, no mobs just in, out, and done. The water map is the easiest for randoms generally.
Stage 1
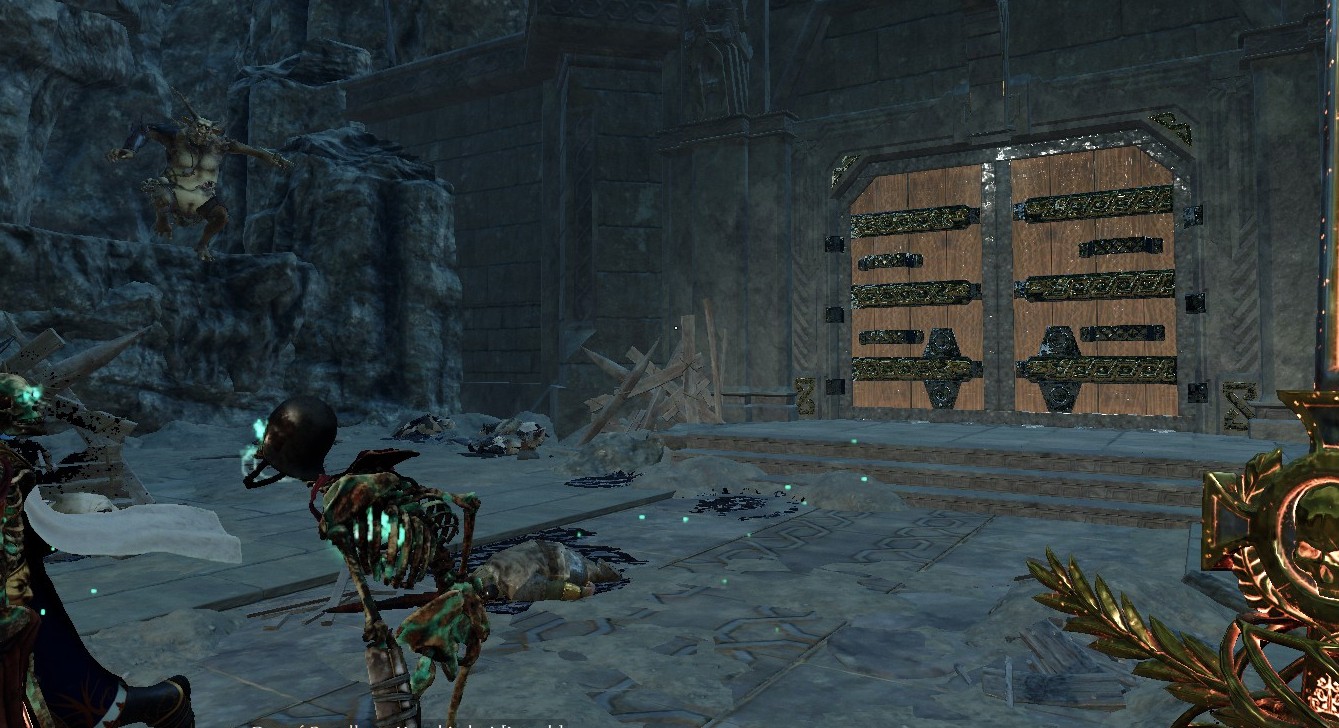
So the first thing we need to do is gather the 3 barrels. After defeating the first troll, beyond these doors will be our barrels.
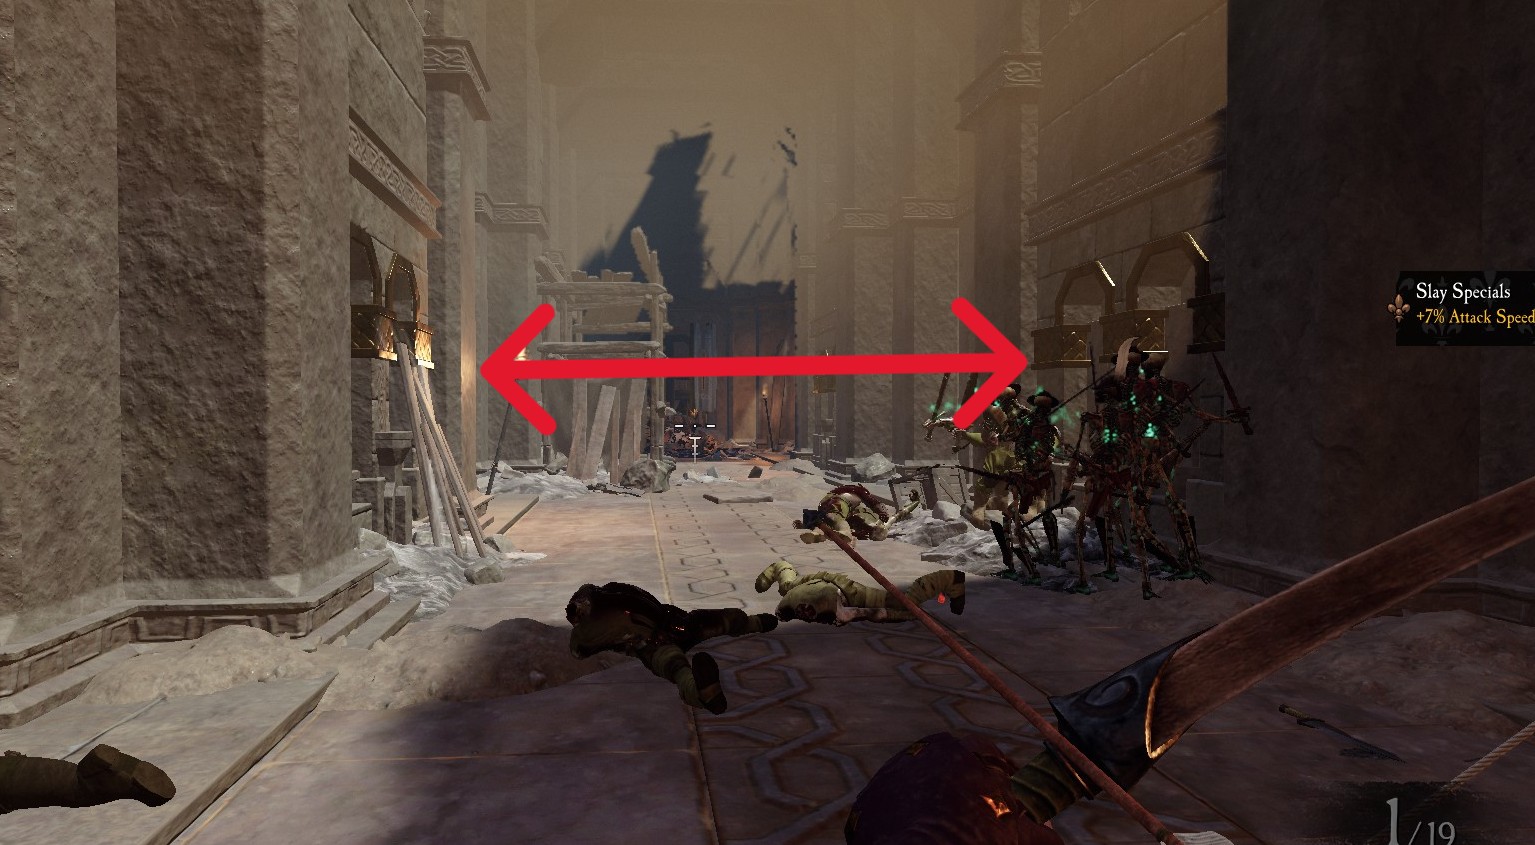 When you come to this hall check these side halls. If you do not find your third barrel in there proceed to the next room where you will fight the two trolls. Your third barrel will be in there.
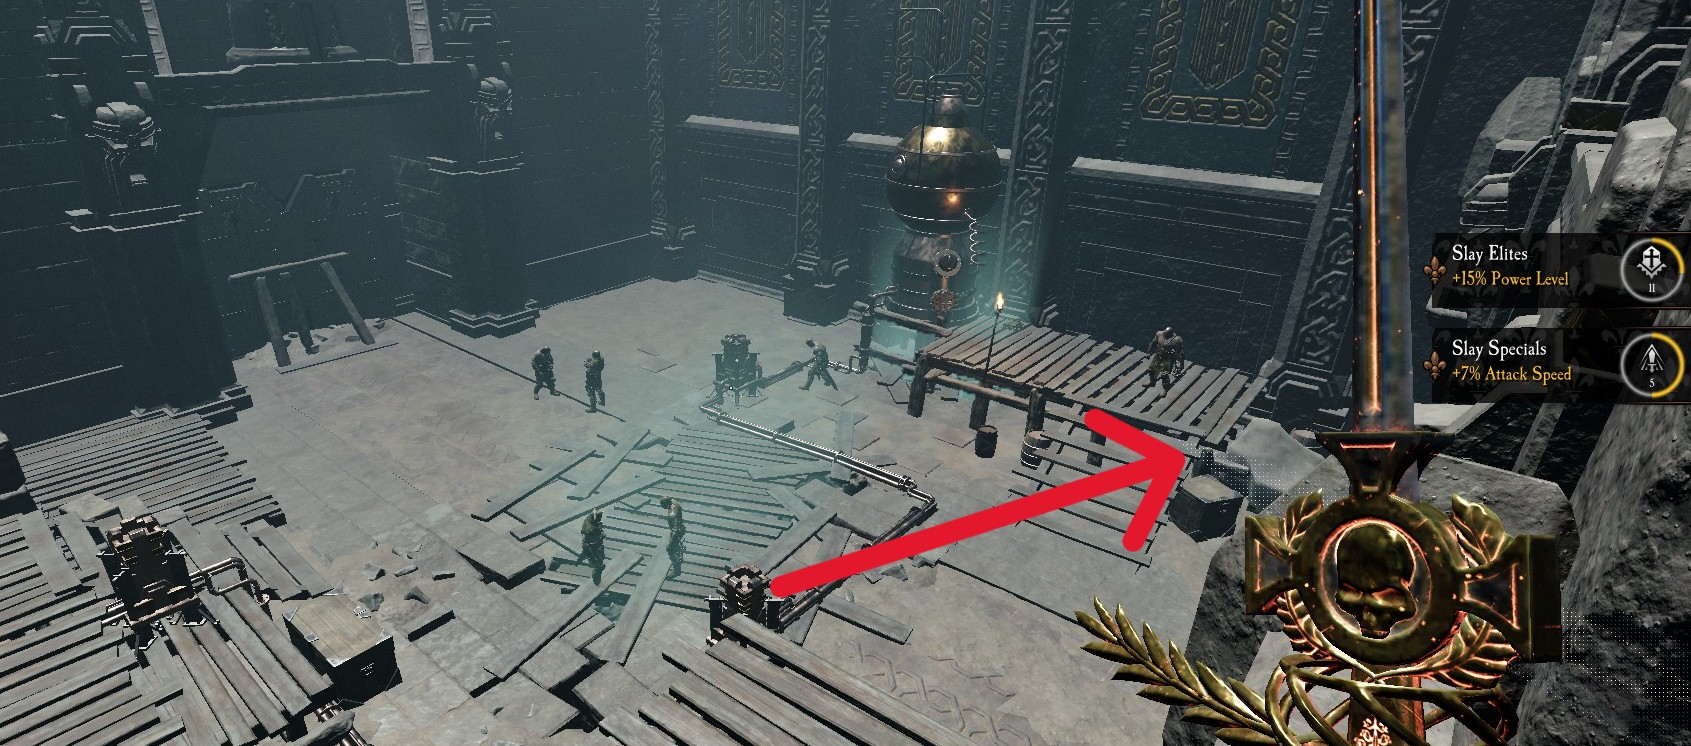
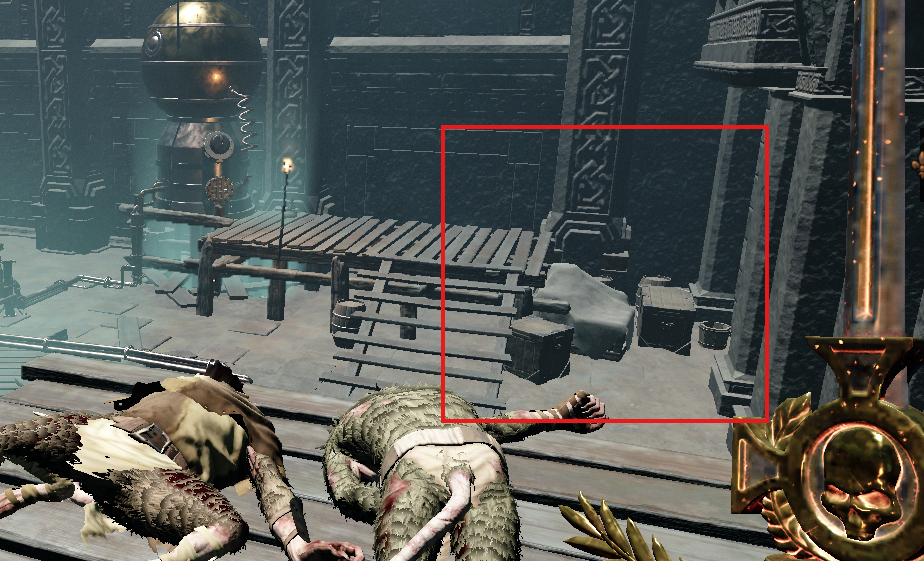 Once in this room where you fight your two trolls clear out the mobs and stuff your 3 barrels in this corner. This will generally keep them safe during the troll fight and out of the way from enemy spawn points.
After the fight be mindful of the spawns that appear as the ladder comes down then move your barrels to the main hall.
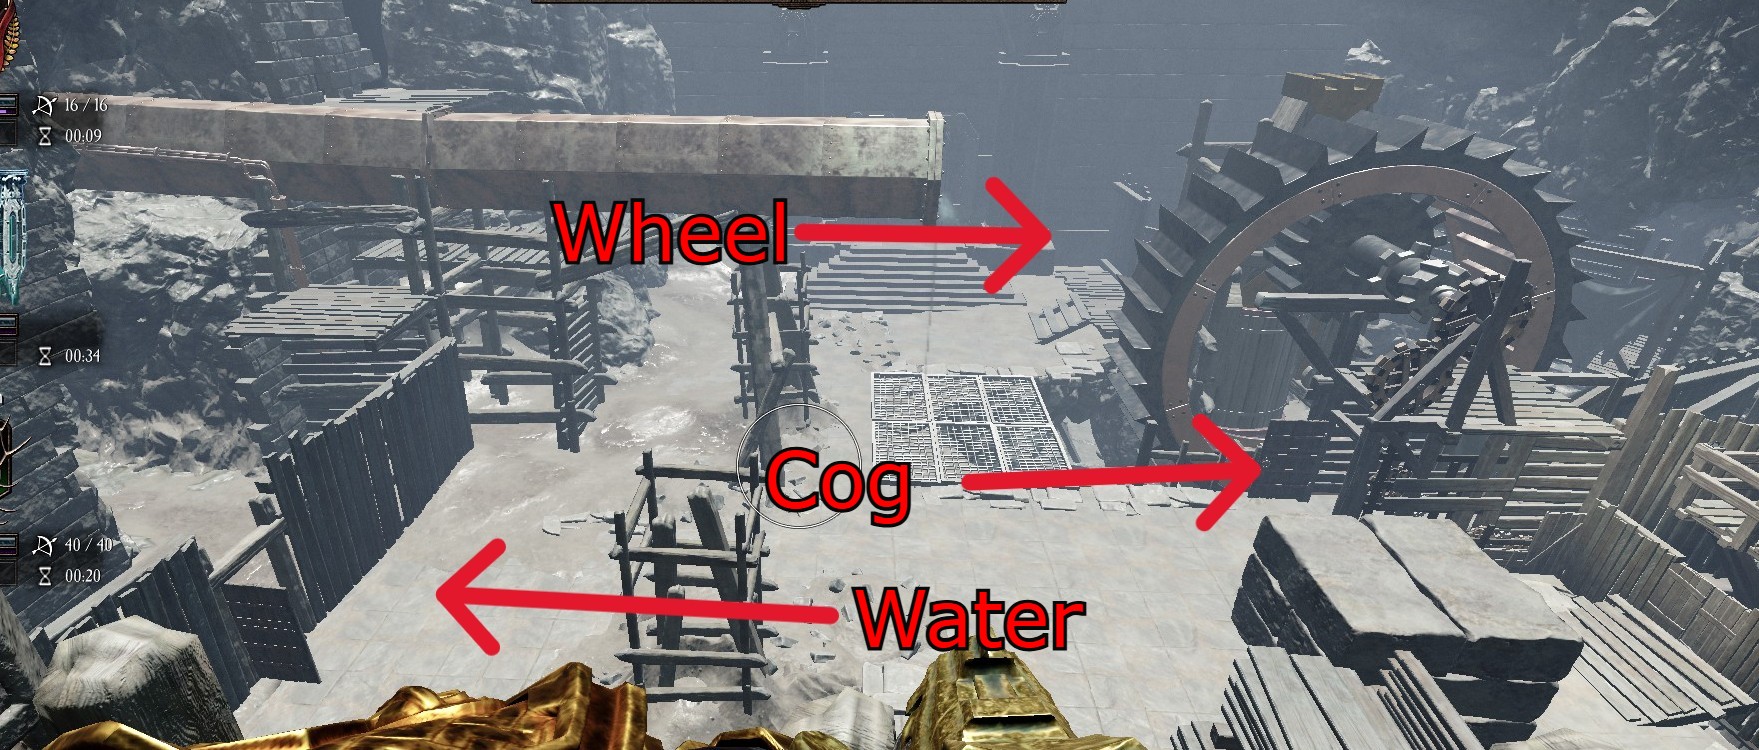 Here is where we choose what sections to do in which order. Even if you are skipping the barrels with random players I still suggest you do water first.
 Water Map
This map has 2 barrels in it, one can be unlocked with dwarf keys, the other by doing Wheel room before Water. If you do this map first then you will need to bring 2 barrels to unlock the troll.
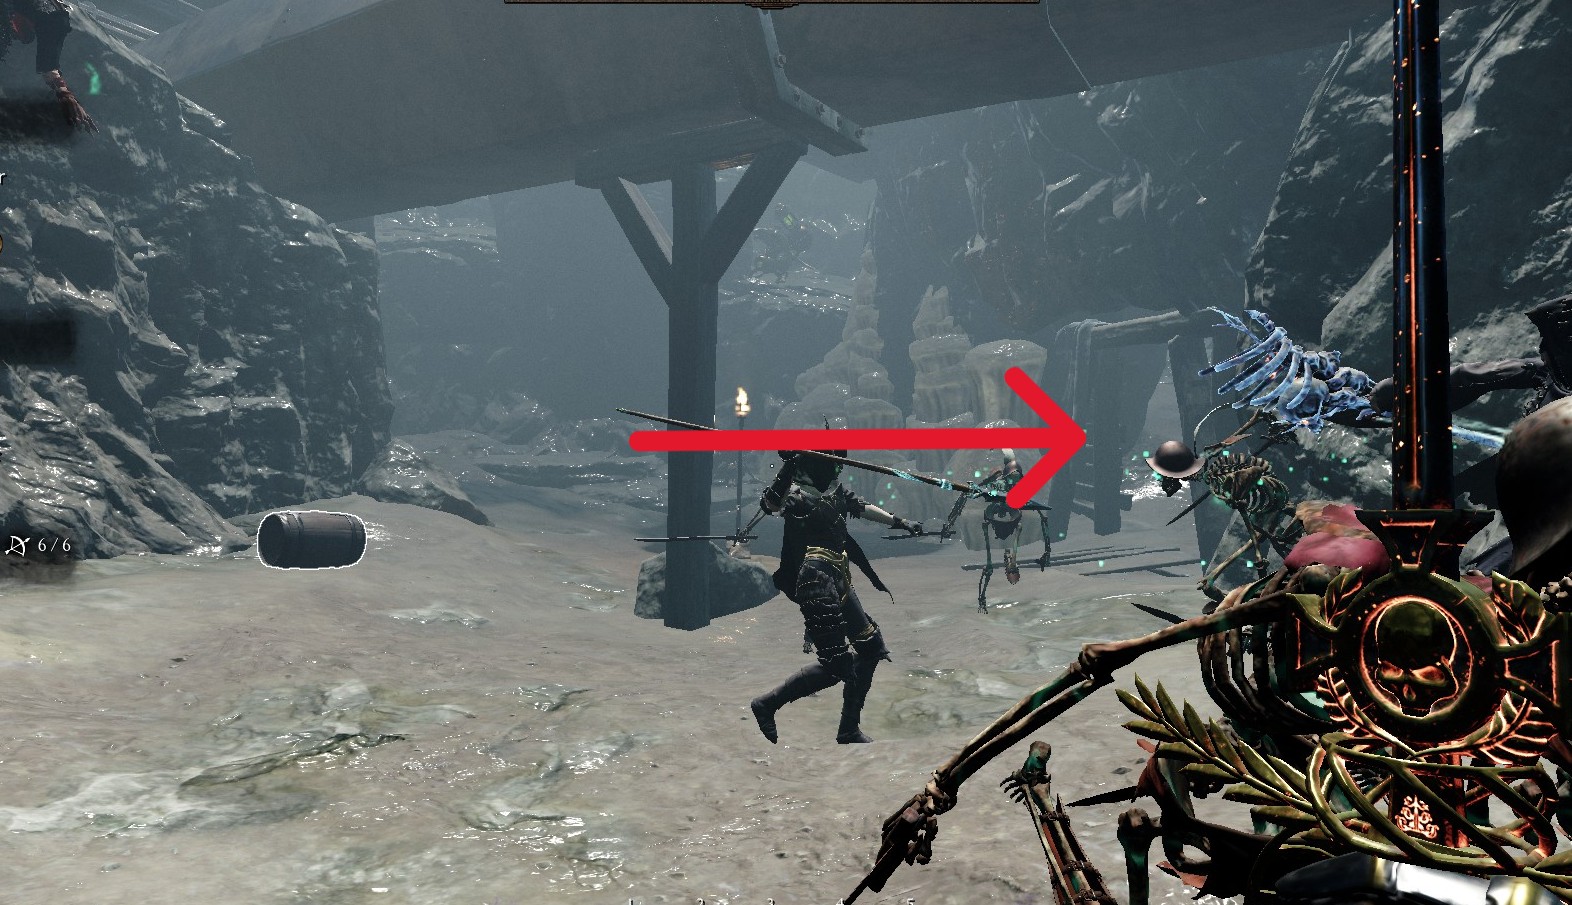 If you did Wheel BEFORE this one, then shortly after entering the map you will see a entrance to the right that had been previously blocked. Take this entrance and follow the path up.
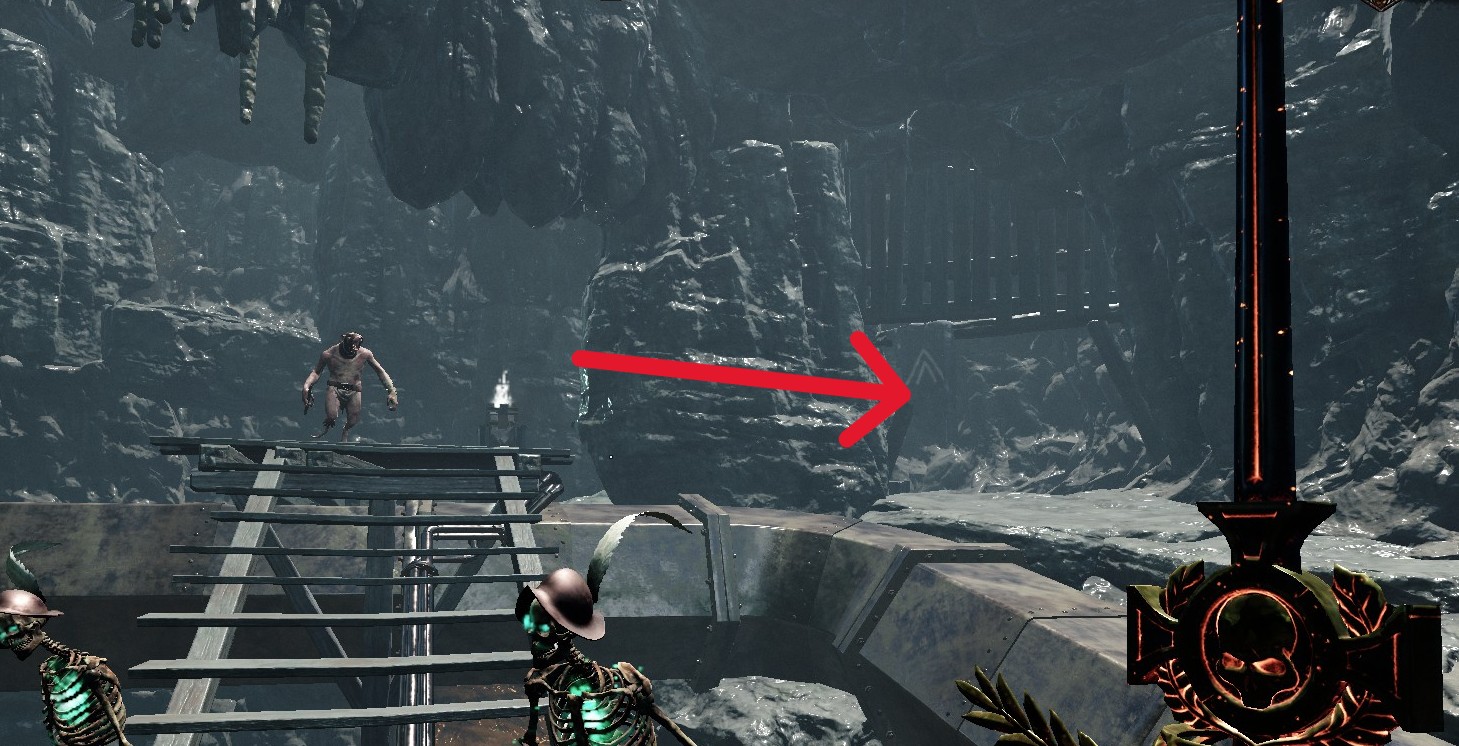 Eventually the path will lead you to another section that had been previously blocked by planks containing a barrel. Grab it.
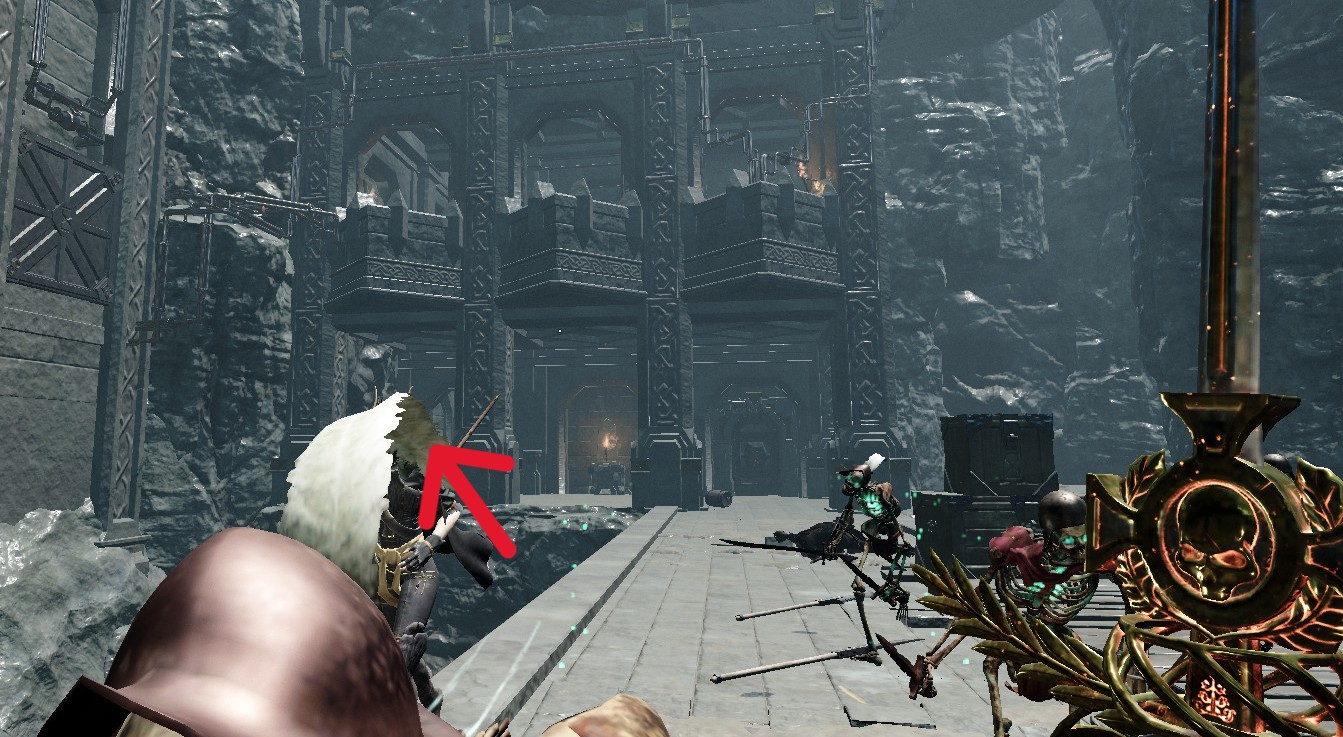 once you enter here, toss your barrels somewhere safe, clear out the mobs and move up the 1st level of steps, to the left is the Water Room Troll
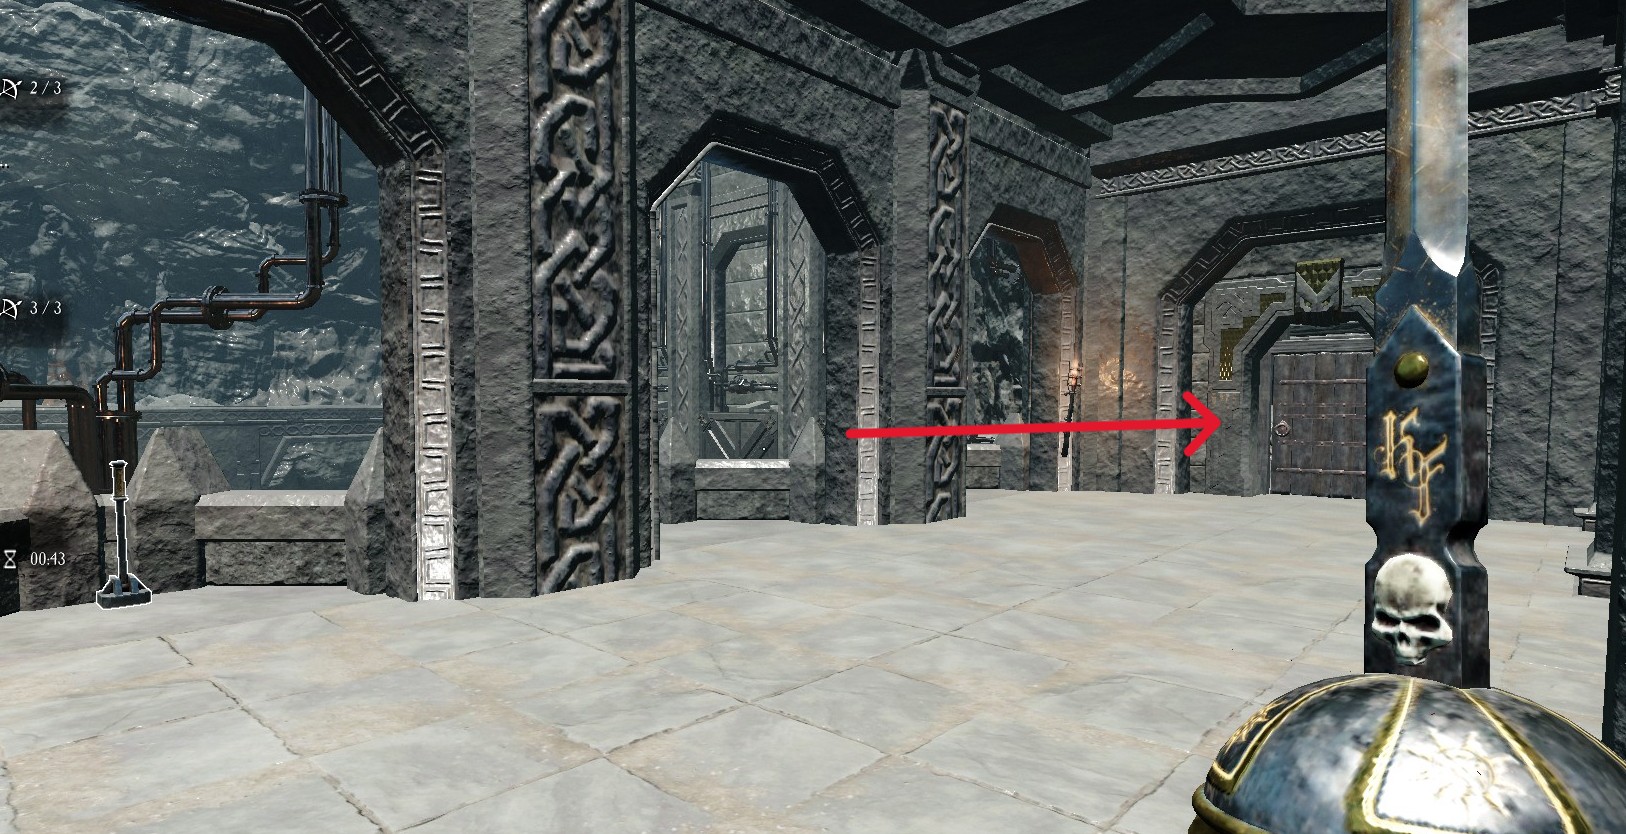 If you did the COG room BEFORE this one AND grabbed the dwarf keys, then to the right of the lever you pull to start the water is a door containing another barrel.
 Wheel Map
This room has 2 barrels in it but only 1 can be accessed with dwarf keys or 1 by doing a previous room.
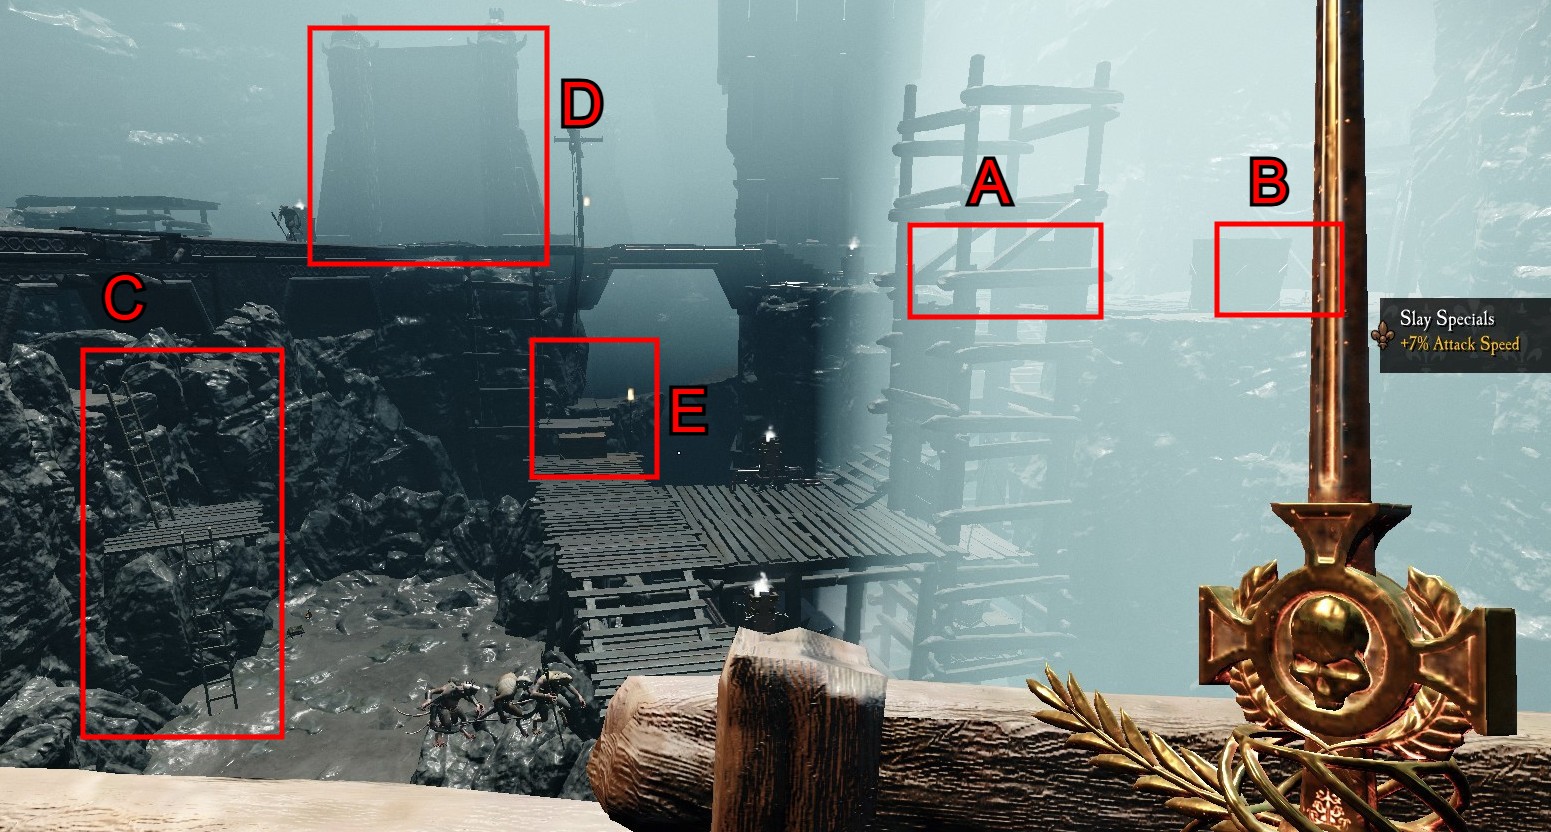
A - If you did the Water Room BEFORE coming here, you can activate a lever here to raise a barrel.
B - If you did the COG room BEFORE coming here AND grabbed the keys off the dwarf, you can open a door with supplies but no barrel in here.
C - If you did this map before the water room and this is dry you can take these ladders to quickly access the barrel at the end of the bridge. You will be mass swarmed by enemies so this is not suggested to be done with randoms. If you are skipping the barrels entirely this can be a faster way out of the map.
D - This is where the Wheel Troll is. First we have to drop the draw bridge to get to him.
E - To drop the drawbridge you have to get here and hop across.
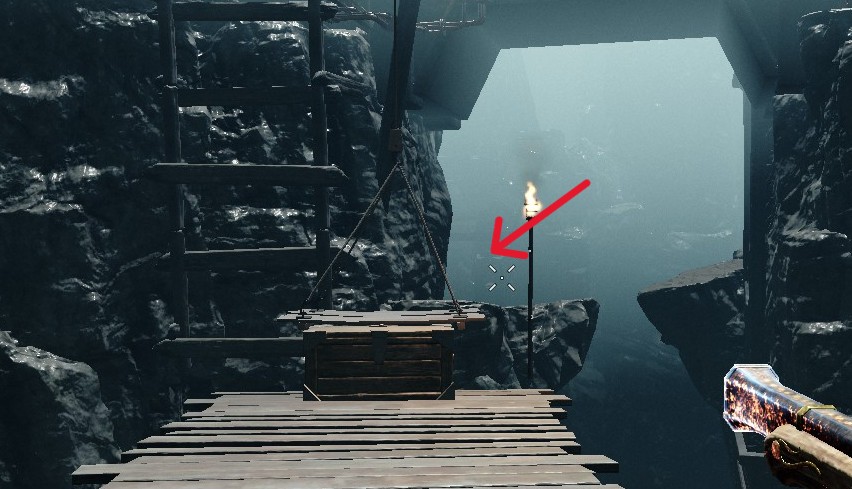
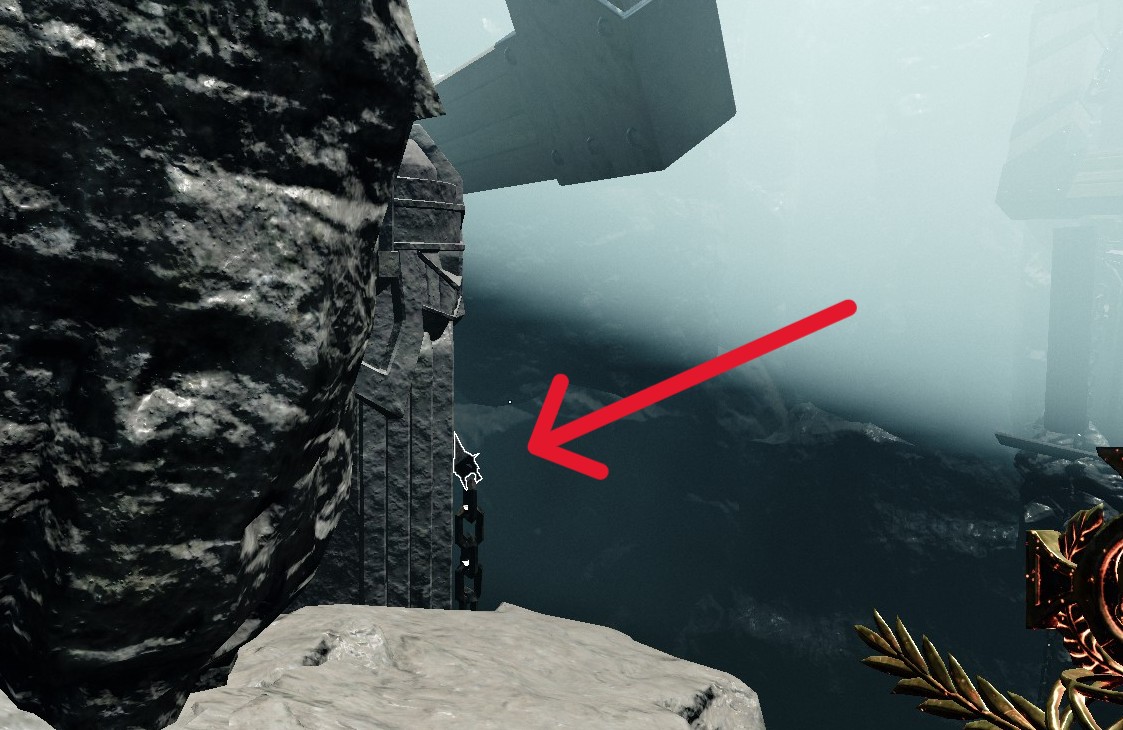
Once here, break this piece of wood to drop the first half of the drawbridge. Then take a barrel to the edge of the drawbridge.
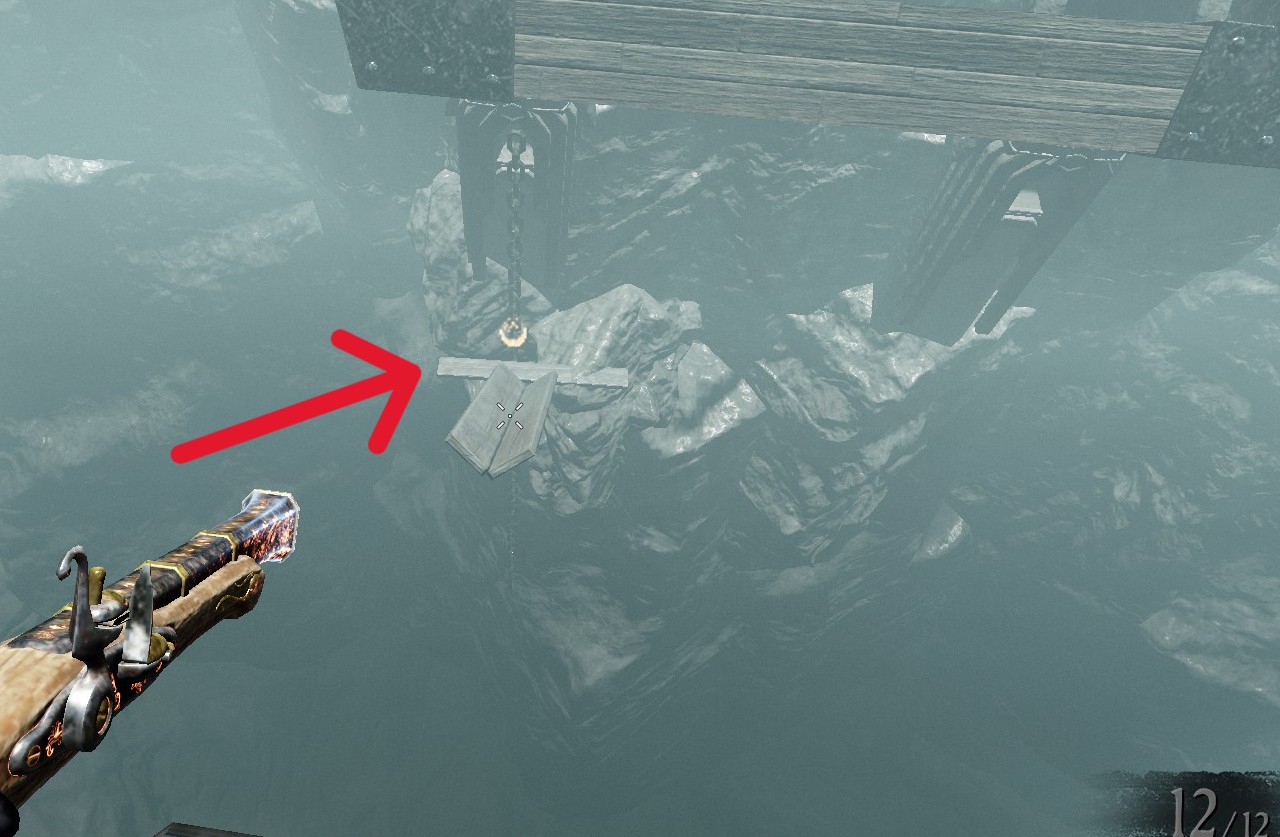 Drop a barrel here. You have to toss it but the opening is pretty large so its hard to miss. This will drop the other half of the drawbridge. Take your other barrel across to access the troll.
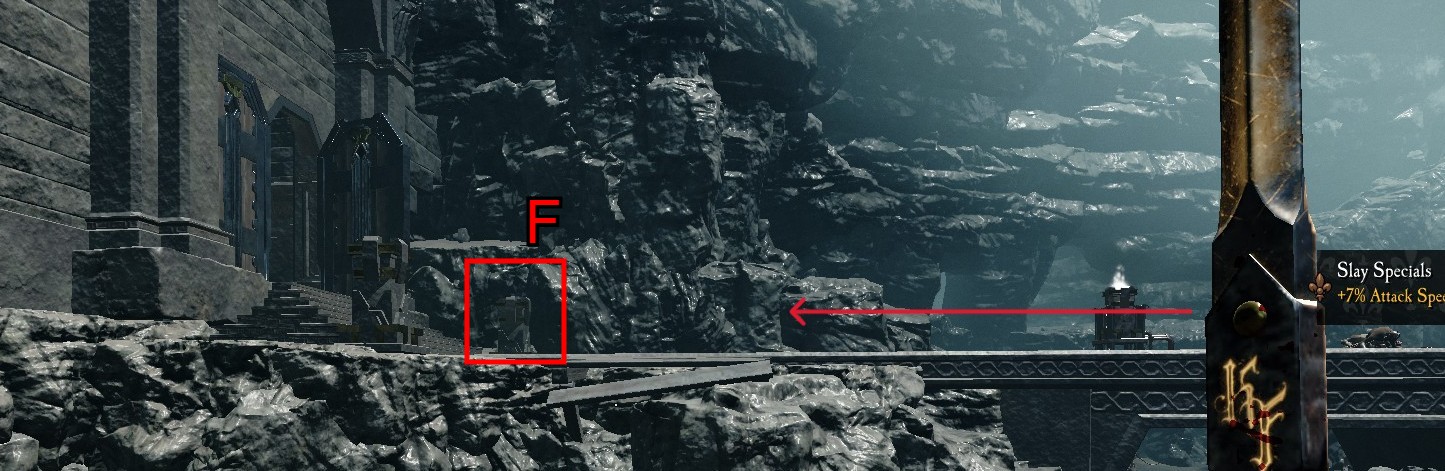
F - If you did the COG room BEFORE this AND grabbed the keys off the dead dwarf, there is a door here with another barrel.
Cog Map
This room has 2 barrels in it that require the other 2 rooms to be done first to open their respective barrel locations. Water will open one, Wheel will open the other.
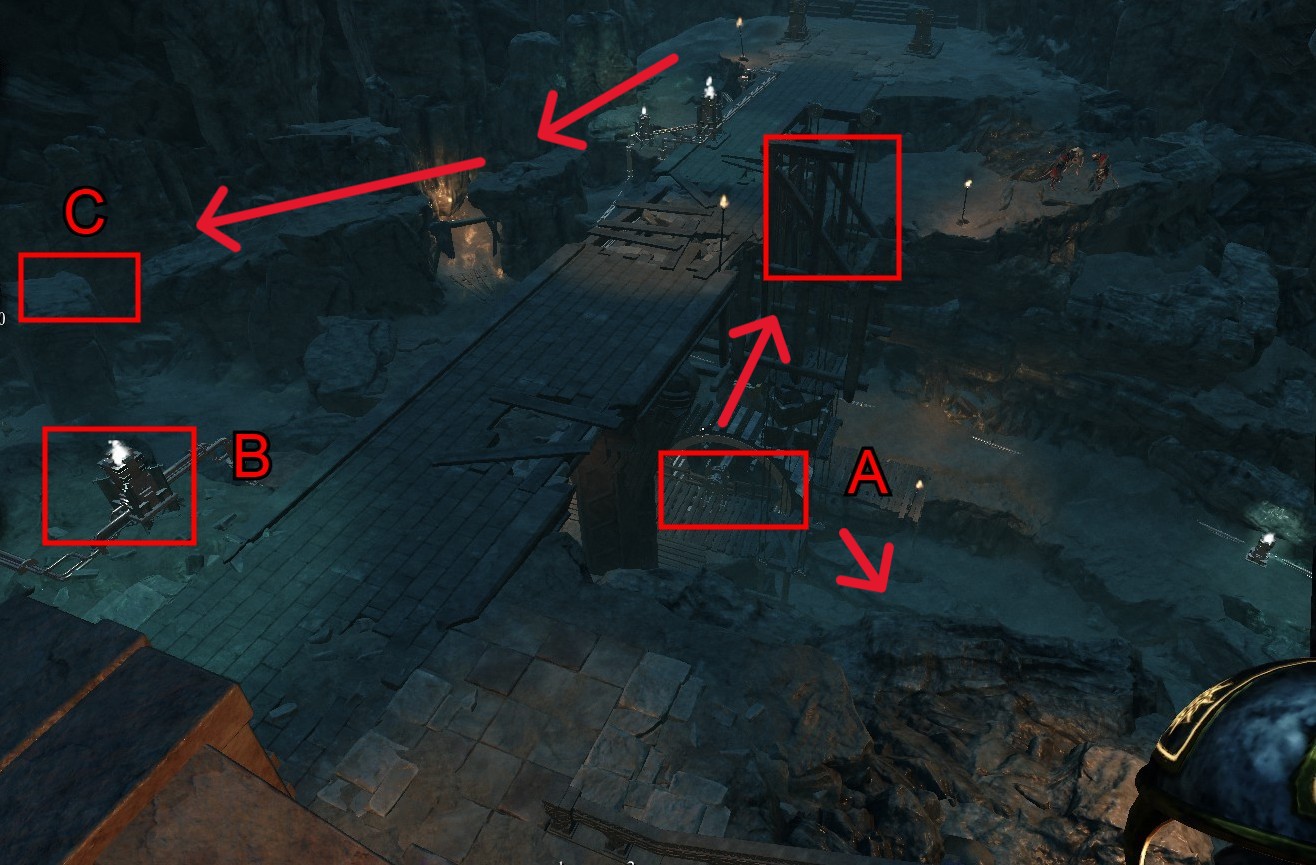
A - If you did the Water room before the Cog Room, with the water on you can activate the lever here which will raise a barrel to the top of the bridge.
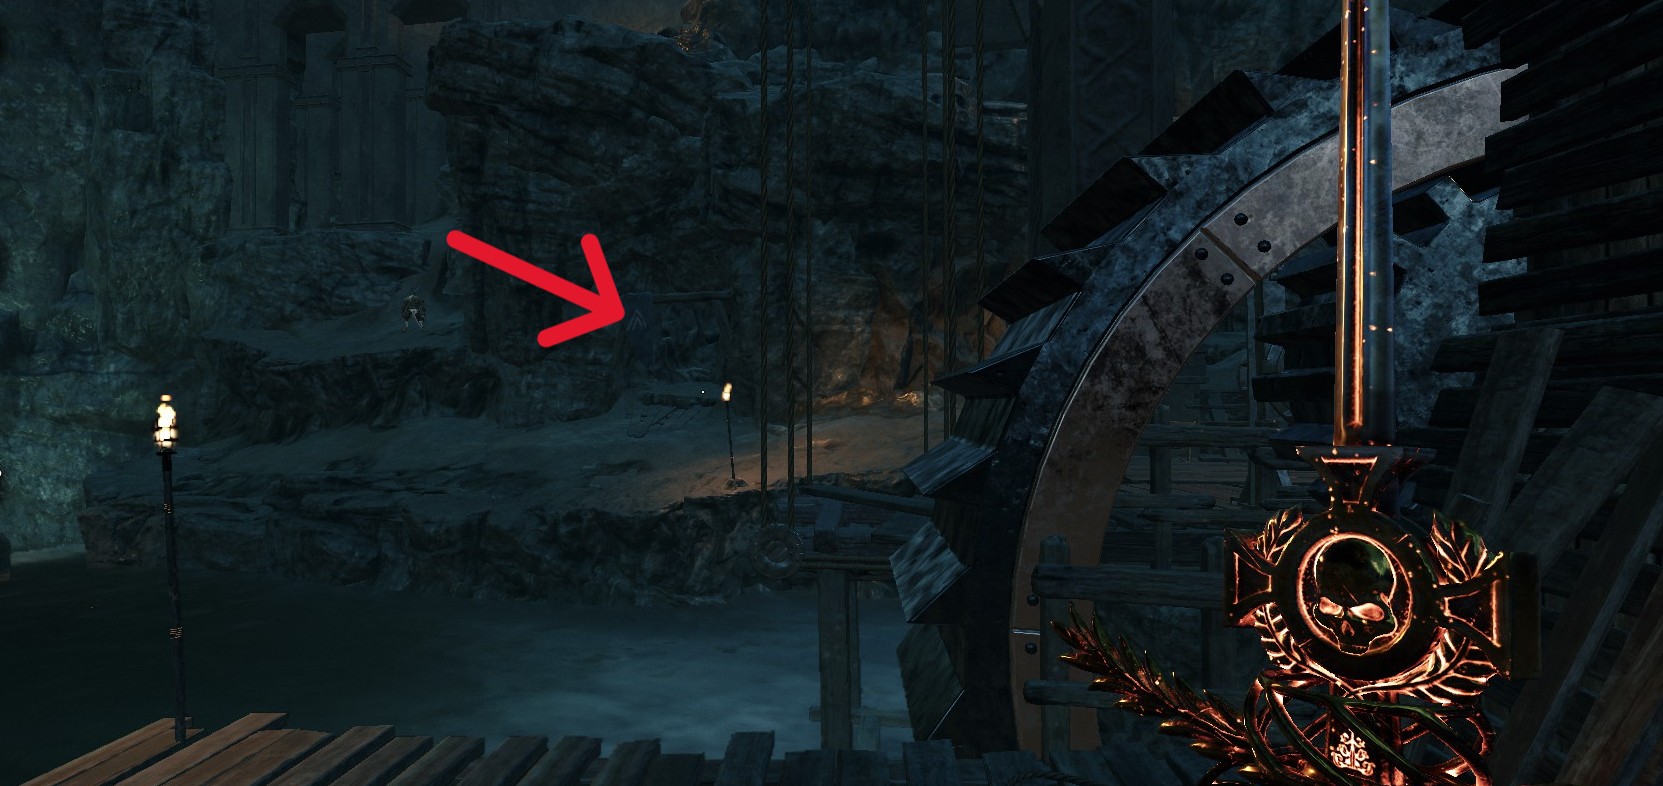 Opposite the lever, against the wall, if you did Wheel room before Cog room. The planks blocking a cave holding another barrel here will be removed.
B - A dead dwarf holding keys will be here upstream of the Water Wheel.
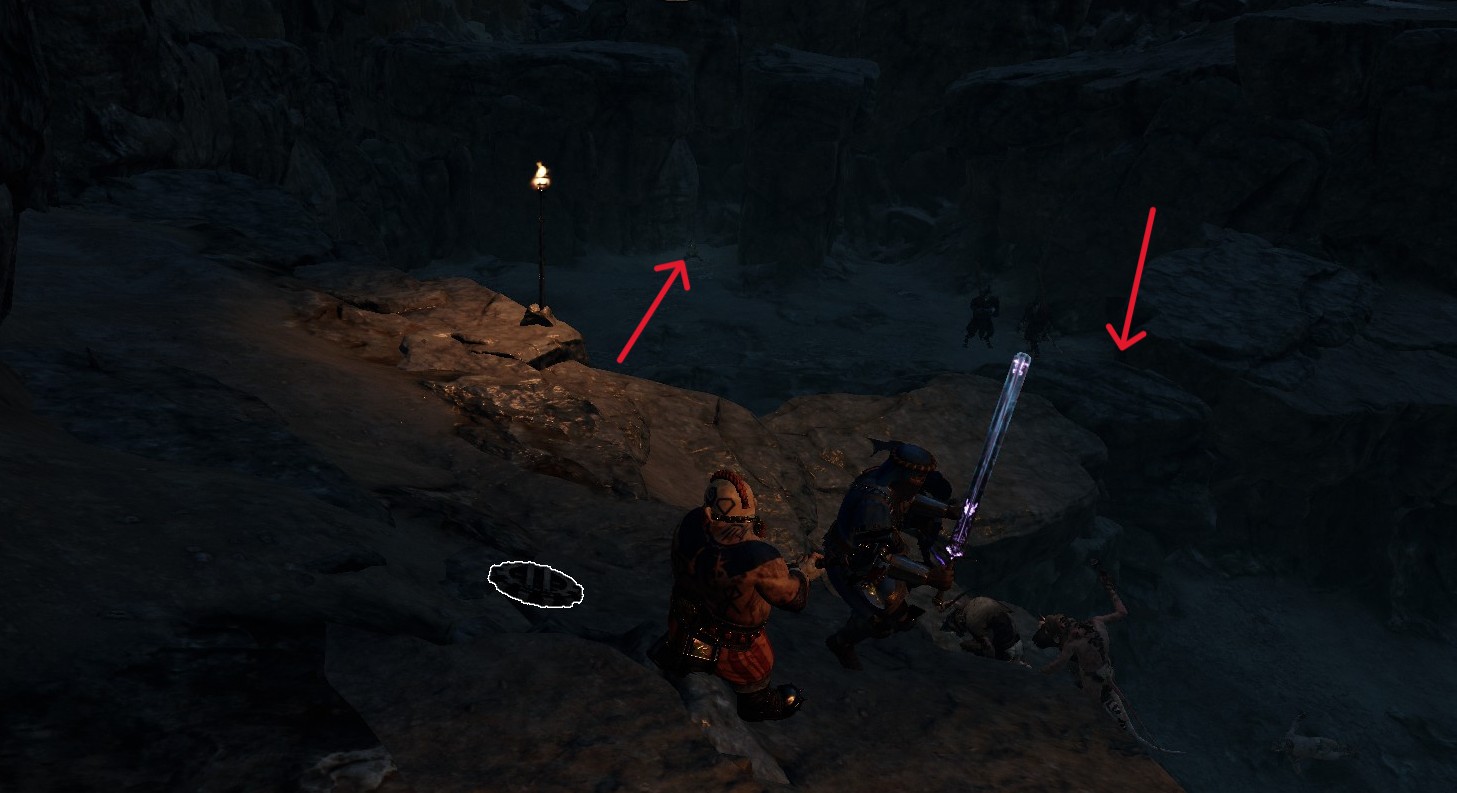 If the water is on the keys will be in the middle of these rocks. If the water is off the keys will be in a tiny cave to the rear under the pathway leading to the cog room troll.
C - Follow this pathway with 2 barrels to open up the Cog Room Troll.
- 【Updated to Patch 6.10】【All Careers】Legend Builds Collection★ 5 (2.6k)99k views7.6k ♥87 minUpdated Mar 10
- 【Updated to Patch 6.10】【Cataclysm Builds】Kruber all careers★ 5 (1.8k)60k views5.7k ♥33 minUpdated Mar 10
- 【Updated to Patch 6.11】Optimal Melee Weapon Combo★ 5 (1.9k)58k views5.2k ♥26 minUpdated Jun 11
- 【Updated to Patch 6.10】【Cataclysm Builds】Saltzpyre all careers★ 5 (1.7k)57k views5.6k ♥36 minUpdated Mar 10
- 【Updated to Patch 6.10】【Cataclysm Builds】Bardin all careers★ 5 (1.8k)57k views5.6k ♥33 minUpdated May 12
- 【Updated to Patch 6.10】【Cataclysm Builds】Sienna all careers★ 5 (1.7k)57k views5.4k ♥37 minUpdated Mar 10



- Upgrading to PremiumTeam Fortress 2★ 5 (20k)1441k views11k ♥6 minUpdated May 11, 2022
- No More Room in Hell Official ManualNo More Room in Hell★ 5 (2.8k)569k views2.1k ♥29 minUpdated Apr 22, 2019
- NMRiH Community Hosting GuidesNo More Room in Hell★ 5 (526)351k views653 ♥1 minUpdated Aug 10, 2022
- ULTIMATE GUIDE FOR GAME DEV TYCOONGame Dev Tycoon★ 5 (5.8k)326k views10k ♥4 minUpdated 23 Jan, 2014
- How to 'Git Gud' Soon™MORDHAU★ 5 (2k)318k views3k ♥68 minUpdated Nov 16, 2024
- Лучшие кооперативные игры SteamPAYDAY 2★ 5 (1.5k)315k views2.1k ♥56 minRussianUpdated Apr 27, 2025






This guide was created by its original author on the Steam Community. Are you the author and want it removed? Request removal.