General Info and Tips for Final Fantasy VII
General Information about this Guide
General Combat
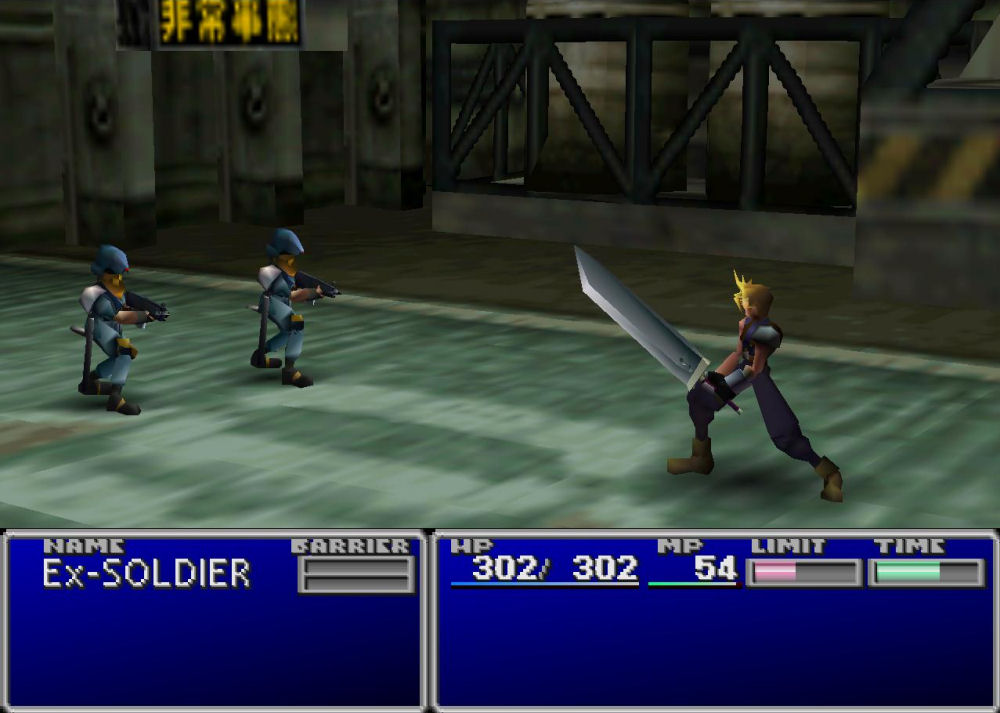 Combat is not too hard to master. Once you've learned how to use materia, you've learned the hardest part. I won't go into too much detail, since combat in Final Fantasy VII is pretty straightforward, but here are some tips:
Use [Page Up] + [Page Down] (whatever buttons you set these to) to start fleeing from combat.
If you need to change row, hit left on you command window when it pops up, and select Change.
Make sure to set the ATB to what you would like in the Config menu. Wait is strongly suggested for new players, so they can take their time to select commands. Active should only be used when you feel completely comfortable with the game's mechanics, and have played on Recommended first.
If you need to defend, you can right on you command window, and Defend should come up (make sure to go to the right of all of your commands).
Stealing or mugging is never a bad idea. It can net you items you normally would not be able to gain through combat alone. For example, Deenglows in the Train Graveyard, the first place you go after you gain the first Steal materia, have Ethers. Considering you cannot buy ethers until later on in the game, it may not be a bad idea to steal quite a few of them. It's not just items you can steal either. You can gain several good pieces of gear before you would normally be able to buy them. You can steal Carbon Bangles from Moth Slashers in the Shinra Building, an item you normally wouldn't be able to buy until a little later in the game. Be sure to steal from every enemy you can, as you might be surprised as to what you can find!
Using Sense can give you a better idea of the enemy(s) HP, MP, and any weaknesses, so that you can act accordingly.
Using Manipulate can help you access to various Enemy Skills you would not be normally be able to learn.
Learn as many Enemy Skills as you can, as they can provide abilities that normal magic materia cannot.
Using items should be reserved for when your healing needs are low, you are silenced, or are out of MP. Restore type magic and healing enemy skills can provide a lot of your healing needs.
Regen is a great way to restore HP without consuming too much MP. Cast it once on a character and watch his or her HP increase quickly!
Wall is sometimes unneccessary for some enemies. Watch the enemy's tactics, as Barrier or MBarrier could be a lot more cost effective for your defensive needs.
Summoning in random battles is mostly unnecessary, as the cost for casting is higher than most spells around the time at which you acquired it.
Most random battles can be solved with just using the Attack command. There is no need to resolve all fights with an overwhelming show of magical might. That just wastes MP, which you will need for healing and spells against bosses.
The spells of the Exit materia are incredibly costly for their intended effect. You are better off just using the escape button. However, in a situation where you are close to town and in dire straights, this could be helpful. Exercise appropriate judgment with these spells.
In case it does need to be said, escaping generates no EXP and no AP.
You can choose to save your Limit Breaks by not using the Limit command, choosing a different command, defending, or not acting at all.
Getting killed makes you lose all of your limit gauge.
If you are killed while learning an enemy skill, you will still learn it, unless your party is defeated and one of your party members was ejected from battle, thus placing you back in the field screen without the skill learned.
Hypers increase your limit gauge quicker, but you take an accuracy penalty. Tranquilizers have the opposite effect.
Tranquilizers can be a cheap alternative to Barrier magic (though not as potent), since it lasts until you rest or use a Hyper.
If you need to boost your damage resistance abilities, try casting Barrier/MBarrier/Wall and using a Tranquilizer. This will help reduce the damage you take by quite a bit. If you want to negate damage (with the exception of non-elemental spells), cast Shield, as it will make you effectively immune to damage. Resist/Vaccines will help you become immune to status effects temporarily.
There are a variety of battle items that emulate spells, though their power is less than magic counterparts. That said, they can still be quite useful.
The Resist spell can be a large boon if you cast it before an enemy that uses a lot of status effect spells gets a chance to cast. It will make you immune to all status effects, including instant death. However, the spell has a high MP cost, costing 120 MP, so this is a spell to save for tricky boss fights. Otherwise, try to use items to get rid of status effects.
That said, many accessories can prevent status effects as well, and this can save you a lot of grief and items. As well as this, if you attach the Added Effect materia to your armor with a paired materia that causes status effects, such as Mystify or Transform, you will prevent those effects from affecting you.
The only status effects that last after combat are Fury, Sadness, and Death.
Materia
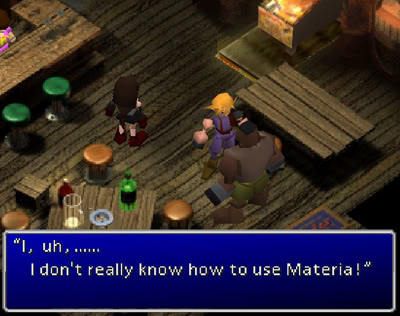 Materia is the core mechanic of the game. Being able to change up your abilities, commands, and stats on a whim is part of the FFVII experience. However, making the right choice of materia combinations and which materia is necessary to equip is important. Too much of one certain kind of materia can burden you quite a bit. Materia is a significant investment on your part. It is sometimes very costly to acquire new materia, sometimes even costing more than weapons and armor! However, you will want to save money for new materia, as they can help to change your combat tactics. For example, the Revive materia reduces the amount of Phoenix Downs you will need to buy over the course of your adventure.
Many basic materia can be purchased, but other more rare materia must be found. Keep in mind that you can also sell materia, though the price you will receive is dependent upon how much AP has been invested into the materia. Mastered materia fetches a high price. A mastered All materia will net you 1.4 million gil.
As I mentioned earlier, some materia must be found. Some of the best materia are ones you find. Make sure to search every nook and cranny for materia. Materia on the field screen will glimmer like items do, so pick them up! Make sure to outfit your team with a reasonable materia loadout. All three of your characters don't need to be healers, though you can do this if you feel you need to. One or two characters with Restore materia in the party should suffice.


An important note
When equipping materia, make sure to note the growth rate on your weapon or armor. If the center of the slot is black, this signifies that there will be no materia growth. This trait can found on the ultimate weapons of each party member.
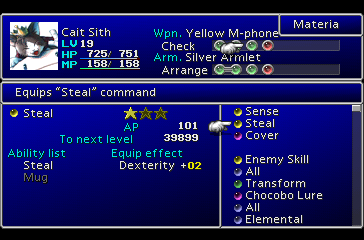
Materia List: Magic (Green Materia)
Here is a list of magic materia and their basic information:
Learned abilities: Bolt2 (2000 AP), Bolt3 (18000 AP)
Mastered at: 35000 AP
Positive: Magic +1, Max MP +2%
Negative: Strength -1, Max HP -2%
Basic attack magic materia that Cloud will start off with. It can be bought in many locations in the world for 600 gil.
Learned abilities: Ice2 (2000 AP), Ice3 (18000 AP)
Mastered at: 35000 AP
Positive: Magic +1, Max MP +2%
Basic attack magic materia that Cloud will start off with. It can be bought in many locations in the world for 600 gil.
Learned abilities: Fire2 (2000 AP), Fire3 (18000 AP)
Mastered at: 35000 AP
Positive: Magic +1, Max MP +2%
Negative: Strength -1, Max HP -2%
Basic attack magic materia that Red XIII will start off with. It can be bought in many locations in the world for 600 gil.
Learned abilities: Cure2 (2500 AP), Regen (17000 AP), Cure3 (25000 AP)
Mastered at: 40000 AP
Positive: Magic +1, Max MP +2%
Negative: Strength -1, Max HP -2%
Healing materia that can be found in the Shinra No. 1 reactor and bought for 750 gil at various locations around the world.
Learned abilities: Bio2 (5000 AP), Bio3 (20000 AP)
Mastered at: 38000 AP
Positive: Magic +1, Max MP +2%
Negative: Strength -1, Max HP -2%
Poison elemental materia that can be found in the Shinra Headquarters (67f) and bought for 1500 gil at various locations around the world. Does not work on poison-elemental creatures.
Learned abilities: Quake2 (6000 AP), Quake3 (22000 AP)
Mastered at: 60000 AP
Positive: Magic +1, Max MP +2%
Negative: Strength -1, Max HP -2%
Earth elemental materia that can be bought for 1500 gil at various locations around the world. Does not work against flying enemies.
Learned abilities: Esuna (12000 AP), Resist (52000 AP)
Mastered at: 60000 AP
Positive: Magic +1, Max MP +2%
Negative: Strength -1, Max HP -2%
Status removal and prevention materia that can be bought for 1500 gil at various locations around the world.
Learned abilities: Life2 (45000 AP)
Mastered at: 55000 AP
Positive: Magic +2, Magic Defense +1, Max MP +5%
Negative: Strength -2, Vitality -1, Max HP -5%
Revival materia that brings characters back to life that can be bought for 3000 gil at select shops around the world.
Learned abilities: Silence (10000 AP)
Mastered at: 20000 AP
Positive: Magic +1, Max MP +2%
Negative: Strength -1, Max HP -2%
Status effect materia that causes sleep or prevents spellcasting. Can be bought at select shops for 3000 gil.
Learned abilities: Toad (12000 AP)
Mastered at: 24000 AP
Positive: Magic +1, Max MP +2%
Negative: Strength -1, Max HP -2%
Status effect materia that Cait Sith starts off with that causes Frog or Mini. Can be bought for 5000 gil at various locations around the world.
Learned abilities: Berserk (12000 AP)
Mastered at: 25000 AP
Positive: Magic +1, Max MP +2%
Negative: Strength -1, Max HP -2%
Status effect materia that causes confusion or berserk. Can be bought for 6000 gil at select shops around the world.
Learned abilities: Slow (12000 AP), Stop (52000 AP)
Mastered at: 60000 AP
Positive: Magic +2, Magic Defense +1, Max MP +5%
Negative: Strength -2, Vitality -1, Max HP -5%
Temporal magic that increases, slows, or stops the flow of time for the intended target. Can be bought for 6000 gil in select shops.
Learned abilities: Demi2 (20000 AP), Demi3 (30000 AP)
Mastered at: 40000 AP
Positive: Magic +1, Max MP +2%
Negative: Strength -1, Max HP -2%
Magic that reduces an enemy's HP by a certain percentage. Can be found in Cosmo Canyon or purchased in late game areas for 8000 gil.
Learned abilities: DeSpell (6000 AP), Death (10000 AP)
Mastered at: 45000 AP
Positive: Magic +2, Magic Defense +1, Max MP +5%
Negative: Strength -2, Vitality -1, Max HP -5%
Magic that removes positive magic or kills enemies. Can be found in Shinra Mansion or bought in late game areas for 9000 gil.
Learned abilities: MBarrier (5000 AP), Reflect (15000 AP), Wall (30000 AP)
Mastered at: 45000 AP
Positive: Magic +2, Magic Defense +1, Max MP +5%
Negative: Strength -2, Vitality -1, Max HP -5%
Protective materia that reduces damage from physical or magic attacks, both, or reflects spells back to their caster (up to 4x reflection on caster). Can be bought for 10000 gil in Rocket Town.
Learned abilities: Remove (8000 AP)
Mastered at: 24000 AP
Positive: Magic +1, Max MP +2%
Negative: Strength -1, Max HP -2%
Magic that removes you or your enemies from combat. No EXP or AP is gained in this manner. Can be bought for 10000 gil in Rocket Town.
Learned abilities: Comet2 (12000 AP)
Mastered at: 60000 AP
Positive: Magic +2, Magic Defense +1, Max MP +5%
Negative: Strength -2, Vitality -1, Max HP -5%
Non-elemental magic that hits either a single target or random mulitple targets. Can only be found in the Forgotten City.
Learned abilities: Full Cure (3000 AP)
Mastered at: 100000 AP
Positive: Magic +4, Magic Defense +2, Max MP +10%
Negative: Strength -4, Vitality -2, Max HP -10%
Healing magic that restores all HP. Can only be found late game in Cosmo Canyon.
Learned abilities: Shield (10000 AP)
Mastered at: 100000 AP
Positive: Magic +4, Magic Defense +2, Max MP +10%
Negative: Strength -4, Vitality -2, Max HP -10%
Defensive magic that makes the target immune to physical and elemental magic for a short period. Can only be found in the Northern Crater.
Learned abilities: Break (3000 AP), Tornado (17000 AP), Flare (25000 AP)
Mastered at: 40000 AP
Positive: Magic +4, Magic Defense +2, Max MP +10%
Negative: Strength -4, Vitality -2, Max HP -10%
Materia housing powerful elemental attack spells. Can only be found in Mideel when interacting with a certain NPC.
Learned abilities: Ultima (5000 AP)
Mastered at: 100000 AP
Positive: Magic +4, Magic Defense +2, Max MP +10%
Negative: Strength -4, Vitality -2, Max HP -10%
A materia containing a powerful non-elemental attack spell that hits all targets. Can only be found in North Corel following a certain event.
Mastered at: 0 AP
Positive: None
Negative: None
Materia containing all magic abilities. Can only be gained by having a mastered copy of each materia and interacting with the green Huge Materia or by undergoing a certain side quest late game.
Materia List: Command (Yellow Materia)
Here is a list of all the Command materia and their basic information:
Learned abilities: Mug (40000 AP)
Mastered at: 50000 AP
Positive: Dexterity +2
Materia that allows you to steal items from enemies. Mug allows you to steal and attack at the same time, but the attack is halved. You can find this materia in the Midgar sewers after fighting Aps and it can be bought later Kalm for 1200 gil.
Learned abilities: None
Mastered at: 40000 AP
Materia that allows you to see the HP, MP, and weaknesses of any enmey. Some late game foes and bosses are immune to this ability. Red XIII starts off equipeed with this materia, and you can find it in the Sector 6 playground, after your second visit to Sector 7. You can later buy it in Kalm or Junon for 1000 gil.
Learned abilities: Special, learned through enemies attacking you.
Mastered at: 0 AP
This is a special materia that you can fill with spells learned from enemies. They range in abilities, but many are worthwhile to get. I will explain these in a different section. You can find these at Shinra Headquarters in Midgar, the Respectable Inn in Junon, the Forgotten City, and the Chocobo Sage's House.
Learned abilities: None
Mastered at: 40000 AP
Positive: Luck +1
This materia allows you to have a chance for a guaranteed critical hit. However, there is a chance that attack will outright miss too. This can be found at Gongaga or purchased for 10000 gil at Rocket Town and Fort Condor (Disc 2+).
Learned abilities: Coin (45000 AP)
Mastered at: 60000 AP
Positive: Vitality +1
This materia allows you to throw weapons, and later gil, at the enemy. Not all weapons can be thrown, however, Tifa's and Red XIII's weapons are unable to be thrown, as well as the Gatling Gun and the Buster Sword. Coin allows you to determine how much money you want to throw, and the more money you throw, the more damage you will do. Yuffie starts off with this materia, and you can later purchase it at Fort Condor and Rocket Town (Disc 2+).
Learned abilities: None
Mastered at: 40000 AP
This ability allows you to control an enemy temporarily, or until it is damage. Manipulate is the only way to learn some enemy skills, like White Wind or Angel Whisper. Cait Sith starts off equipped with this materia, and it can be later purchased for 10000 gil at Rocket Town and Fort Condor (Disc 2+).
Learned abilities: None
Mastered at: 40000 AP
Morph is a very unique materia. It allows you to turn enemies into items. However, this effect only works with enemies with extremely low HP (read: critical). This item is necessary to get the Underwater materia. It can only be found in the Temple of the Ancients, so if you miss it when you go there, you will never have a chance to get it again.
Learned abilities: 4x-Cut (100000 AP)
Mastered at: 150000 AP
Positive: Dexterity +2
This materia, when equipped, replaces the Attack command with 2x-Cut or 4x-Cut, which allows you to attack two or four times respectively. This can only be found in the Sunken Gelnika Airship.
Learned abilities: None
Mastered at: 250000 AP
This materia, when equipped, replaces Magic with W-Magic, which allows you to cast two spells in one turn. This can only be found in the Northern Crater.
Learned abilities: None
Mastered at: 250000 AP
This materia, when equipped, replaces Summon with W-Summon, which allows you to cast two summon spells in one turn. Regular limitations from summoning still apply. This can only be purchased in the Battle Square for 65000 BP.
Learned abilities: None
Mastered at: 250000 AP
This materia, when equipped, replaces Item with W-Item, which allows you to use two items in one turn. This can only be found on the Midgar Train Tracks (Disc 2). If you miss getting it then, you will never have a chance to get it again.
Learned abilities: Flash (100000 AP)
Mastered at: 150000 AP
This materia allows to hit all enemies at once, regardless of row, for normal damage. Flash can outright slay most enemies instantly (though enemies with Instant Death immunites will not be affected). This can only be found in the Ancient Forest. Keep in mind that Flash will replace Slash-All when it levels up.
Learned abilities: None
Mastered at: 100000 AP
This materia allows you to repeat the previous action by the ally that last acted. This ability will fail if the ability is a Limit Break. The charcter miming expends no MP when miming spells or summons. This is found in the Materia Cave near Wutai. You need at least a green chocobo to access it.
Learned abilities: None
Mastered at: 0 AP
This materia, when equipped, gives you all of the command materia skills, with the exception of Enemy Skills, since they cannot be mastered.
Materia List: Summon (Red Materia)
Here is a list of summon materia and their basic information
Learned abilities: x2 (2000 AP), x3 (14000 AP), x4 (25000 AP), x5 (35000 AP)
Mastered at: 35000 AP
Positive: Magic +1, Max MP +2%
Negative: Max HP -2%
This materia has two effects: it will either summon a moogle riding a chocobo (93.75% chance), which will slam into all enemies for wind damage, or a fat chocobo (6.25% chance), which will fall onto all enemies, causing wind damage and possibly causing Stop. It is one of the easier summon materias to miss, as you must talk to the chocobos on the Chocobo Farm before you get the Highwind, otherwise, you'll never get a chance to get it.
Learned abilities: x2 (4000 AP), x3 (15000 AP), x4 (30000 AP), x5 (50000 AP)
Mastered at: 50000 AP
Positive: Magic +1, Max MP +2%
Negative: Max HP -2%
This is a materia that causes ice damage to all enemies. This is the easiest materia to get, as it is given to you in Junon Harbor, as part of the game's plot progression.
Learned abilities: x2 (5000 AP), x3 (20000 AP), x4 (35000 AP), x5 (60000 AP)
Mastered at: 60000 AP
Positive: Magic +1, Max MP +2%
Negative: Max HP -2%
This materia allows you to deal fire damage to all enemies. You can find this materia on the Cargo Ship (you can't really miss it).
Learned abilities: x2 (10000 AP), x3 (25000 AP), x4 (50000 AP), x5 (70000 AP)
Mastered at: 70000 AP
Positive: Magic +1, Max MP +2%
Negative: Max HP -2%
This materia summons Ramuh, who causes lightning damage to all enemies. You only get one chance for this materia, and it is in the Racer's Lounge in the Golden Saucer. You only go here once as part of the plot progression.
Learned abilities: x2 (15000 AP), x3 (30000 AP), x4 (60000 AP), x5 (80000 AP)
Mastered at: 80000 AP
Positive: Magic +1, Max MP +2%
Negative: Max HP -2%
Titan deals earth damage to all enemies, except those that can fly. You can find this materia in the reactor in Gongaga.
Learned abilities: x2 (16000 AP), x3 (32000 AP), x4 (65000 AP), x5 (80000 AP)
Mastered at: 80000 AP
Positive: Magic +1, Magic Defense +1 Max MP +5%
Negative: Max HP -5%
Odin, like Choco/Mog, has two different effects. However, it is not as random as Choco/Mog. Steel Bladed Sword will be used against enemies that can be affected by Instant Death, otherwise, he will use Gunge Lance, which causes non-elemental damage to one foe. You can find this in the safe in Shinra mansion.
Learned abilities: x2 (18000 AP), x3 (38000 AP), x4 (70000 AP), x5 (100000 AP)
Mastered at: 100000 AP
Positive: Magic +1, Magic Defense +1 Max MP +5%
Negative: Max HP -5%
Leviathan deals water damage to all enemies. This is the only water attack, other than Aqualung, that you get in the game, and the only materia with the water type that you can link with Elemental. It is gained for finishing Yuffie's sidequest in the Pagoda.
Learned abilities: x2 (5000 AP), x3 (20000 AP), x4 (50000 AP), x5 (120000 AP)
Mastered at: 120000 AP
Positive: Magic +1, Magic Defense +1 Max MP +5%
Negative: Max HP -5%
Bahamut deals a modest amount of non-elemental damage against all foes and ignores Magic Defense. It can only be found in the Temple of the Ancients.
Learned abilities: x2 (22000 AP), x3 (60000 AP), x4 (90000 AP), x5 (140000 AP)
Mastered at: 140000 AP
Positive: Magic +1, Magic Defense +1 Max MP +5%
Negative: Max HP -5%
Kjata is an attack that deals lightning, fire, and ice damage. This seems promising, but beware, if the enemy absorbs any part of the damage, they'll absorb the entire attack, so use caution in using this ability. It can be found as a floating light in the Sleeping Forest. Grab it to acquire the materia.
Learned abilities: x2 (25000 AP), x3 (65000 AP), x4 (100000 AP), x5 (150000 AP)
Mastered at: 150000 AP
Positive: Magic +1, Magic Defense +1 Max MP +5%
Negative: Max HP -5%
Alexander will deal holy damage to all enemies. As it is the only holy type materia, you may want to link it with Elemental materia for extra damage against foes with this weakness. It can be found in the Great Glacier in the cave, after fighting Snow, who will fight you if you touched the hot springs.
Learned abilities: x2 (30000 AP), x3 (80000 AP), x4 (140000 AP), x5 (200000 AP)
Mastered at: 200000 AP
Positive: Magic +2, Magic Defense +2 Max MP +10%
Negative: Max HP -10%
Neo Bahamut deals a large amount of non-elemental damage to all foes and ignores Magic Defense. It can only be found in the Whirlwind Maze. You only visit this place, so pick it up (it's not hard to spot).
Learned abilities: x2 (28000 AP), x3 (70000 AP), x4 (120000 AP), x5 (180000 AP)
Mastered at: 180000 AP
Positive: Magic +2, Magic Defense +2 Max MP +10%
Negative: Max HP -10%
Phoenix deals a lot of fire damage to all enemies. In additon to that, it also revives all fallen allies, so this makes an excellent link materia for Final Attack. This can be found one of two places. You can find it at Fort Condor, when defending the reactor there for the final time (note that you can fail, but almost have to actively failing). If you fail, then you can find it in the Bone Village mini-game.
Learned abilities: x2 (35000 AP), x3 (120000 AP), x4 (150000 AP), x5 (250000 AP)
Mastered at: 250000 AP
Positive: Magic +4, Magic Defense +4 Max MP +15%
Negative: Max HP -10%
Hades has two effects. It will cause non-elemental damage to all targets, and it will cause Poison, Confuse, Sleep, Silence, Mini, Frog, Slow, and Paralysis to all enemies not immune to these statuses. It is found in the sunken Gelnika.
Learned abilities: x2 (35000 AP), x3 (120000 AP), x4 (150000 AP), x5 (250000 AP)
Mastered at: 250000 AP
Positive: Magic +4, Magic Defense +4 Max MP +15%
Negative: Max HP -10%
Typhoon's Disintegration attack will cause lightning, fire, ice, and earth elemental damage that ignores Magic Defense. However, like Kjata, if one element is absorbed, the whole attack is absorbed. It can be found in the Ancient Forest, once that area is made accessible.
Learned abilities: x2 (35000 AP), x3 (120000 AP), x4 (150000 AP), x5 (250000 AP)
Mastered at: 250000 AP
Positive: Magic +4, Magic Defense +4 Max MP +15%
Negative: Max HP -10%
Bahamut ZERO deals an high amount of non-elemental damage that ignores Magic Defense. You MUST have Bahamut and Neo Bahamut in your inventory to acquire this Materia. This materia can be acquired in two ways. You can interact with the blue Huge Materia, or if you didn't acquire that, you may find it in the Bone Village mini-game.
Learned abilities: x2 (50000 AP), x3 (200000 AP), x4 (300000 AP), x5 (500000 AP)
Mastered at: 250000 AP
Positive: Magic +8, Magic Defense +8 Max MP +20%
Negative: Max HP -10%
This deals non-elemental damage to all enemies 13 times. You can only find this on Round Island, which requires a gold chocobo.
Materia List: Support (Blue Materia)
Support materia add unique effects to the paired materia, and as such do not anything on their own. Below is a list of support materia and their basic information:
Learned abilities: x2 (2000 AP), x3 (10000 AP), x4 (25000 AP), x5 (40000 AP)
Mastered at: 40000 AP
Materia supported: Restore, Mystify, Heal, Time, Seal, Ice, Poison, Fire, Gravity, Lightning, Barrier, Earth, Destruction, Revive, Transform, Master Magic
This is one of the most basic of support materia. It only works with magic materia and grants the All ability to all the spells within the linked materia that can be supported. However, you can only use the All ability so many times per spell per battle, so keep an eye on the magic info window in your magic menu in combat. This materia is intially equipped by Red XIII, and can be found in the Sector 7 slums, the Shinra Cargo Ship, Mt. Nibel, and the Great Glacier. It can be purchased at Fort Condor as well (Disc 2+). This is the only materia you can purchase. Keep in mind that it sells for 1.4 million gil, too, so if you are strapped for cash and don't really need a mastered All materia anymore, you can sell it for a nice bit of gil.
Learned abilities: Null* (10000 AP), Absorb* (40000 AP)
Mastered at: 80000 AP
*When equipped on armor
**When equipped on weapon
Materia supported: Ice, Poison, Fire, Gravity, Lightning, Earth, Choco/Mog, Shiva, Ifrit, Ramuh, Titan, Leviathan, Alexander, Phoenix, Typoon
This materia, when linked with an elemental attack magic or summon materia will add that attack's element to the weapon or armor. The protection from elemental attacks grows with level from halving damage to negation to absorbing the attack. This materia can only be found in the Midgar Shinra Headquarters, Mt. Nibel, and Tifa's piano in Nibelheim.
Learned abilities: None
Mastered at: 100000 AP
Materia supported: Poison, Seal, Mystify, Transform, Time, Destruct, Contain, Choco/Mog, Odin, Hades
This materia allows you to either add status effects to your weapon, or prevent them from affecting you. Keep in mind that if you're immune to Slow and Stop, you'll be immune to Haste, too.
Learned abilities: None
Mastered at: 100000 AP
Materia supported: Restore, Revive, Ice, Poison, Fire, Gravity, Lightning, Earth, Comet, Contain, Full Cure, Ultima, Master Magic, Throw, Morph, Steal, Deathblow, Mime, Master Command, All Summon
This materia allows you to absorb MP from an enemy, when you attack with the paired materia. You can only gain this materia by undergoing a sidequest with Yuffie, so if you never recruit Yuffie, you'll never be able to get this materia.
Learned abilities: None
Mastered at: 100000 AP
Materia supported: Restore, Revive, Ice, Poison, Fire, Gravity, Lightning, Earth, Comet, Contain, Full Cure, Ultima, Master Magic, Throw, Morph, Steal, Deathblow, Mime, Master Command, All Summon
This materia allows you to absorb HP from an enemy, when you attack with the paired materia. You can only find this materia in Wutai and the Northern Crater.
Learned abilities: None
Mastered at: 200000 AP
Materia supported: All Magic, Steal, Sense, Deathblow, Manipulate, Morph, Throw, Mime, Master Command, All Summon
This materia allows you to make a standard attack and use the linked materia in the same turn. However, watch what you link it with, as you may not all combos are helpful. This can only be found in the Great Glacier.
Learned abilities: +20% (1500 AP),+30% (6000 AP), +40% (18000 AP), +50% (35000 AP)
Mastered at: 35000 AP
Materia supported: All magic materia, all summon materia
This materia boosts the power of the linked materia. It also raises the MP as well, so watch what you're attaching it to. There is no need to link this to a materia if your numerical value is already 9999 with a particular materia, and there is little point linking this to status effect materia, Gravity, or Revive materia, as their abilities go off a certain formula and are not enhanced by this ability. You only gain one chance to gain this materia in the game, as it is located in the Whirlwind Maze.
Learned abilities: None
Mastered at: 200000 AP
Materia supported: All Magic, Steal, Sense, Deathblow, Manipulate, Morph, Throw, Mime, All Summon
This materia allows you to steal items when you use the linked materia. Again, like Added Cut, watch what you link this with. This materia can be found in the Da-Chao Mountains.
Learned abilities: +40% (40000 AP), +60% (80000 AP), +80% (160000 AP), +100% (300000 AP)
Mastered at: 300000 AP
Materia supported: All magic and summon materia, with the exception of their Master counterparts.
This materia allows you to use the paired materia when you are attacked. However, the activation rate is low when you first gain the materia, but the rate of activation increases as the materia levels, until eventually it will automatically activate when you are hit. You can only gain this materia by completing a Chocobo Race at rank A or S or by finding it in the Northern Crater.
Learned abilities: x2 (20000 AP), x3 (40000 AP), x4 (80000 AP), x5 (120000 AP)
Mastered at: 120000 AP
Materia supported: All magic, summon, and command materia, with the exception of Slash All, Double Cut, W-Item, W-Magic, W-Summon, and Master Command
This materia allows you to make one final attack when your HP reaches 0. This is handy for setting up automatic revives, such as with Revive materia or the Phoenix summon materia. Keep in mind that this activation is like All, in that it can only be used up to 5 times. You can win this materia from a Special Battle at Gold Saucer's Battle Square.
Learned abilities: x2 (20000 AP), x3 (80000 AP), x4 (120000 AP), x5 (200000 AP)
Mastered at: 200000 AP
Materia supported: All magic and summon materia, except for Knights of the Round
This materia allows you to cast a magic or summon spell up to four times in one round. This can be handy in exploting weaknesses in an enemy. However, this can only be used up to 5 times per battle. You must explore a cave near the Chocobo farm with a blue Chocobo to find this materia.
Learned abilities: 35% (20000 AP), 50% (60000 AP), 65% (100000 AP), 80% (150000 AP)
Mastered at: 150000 AP
Materia supported: All magic materia, Steal, Sense, Deathblow, Manipulate, Morph, Throw, Mime, and all summon materia
This materia allows you to have a chance at using the linked materia at the start of battle before any character or enemy can act. The rate increases as the materia levels up. You can win this materia in Chocobo Racing rank A or S.
Learned abilities: +40% (40000 AP), +60% (80000 AP), +80% (120000 AP), +100% (200000 AP)
Mastered at: 200000 AP
Materia supported: Steal, Sense, Deathblow, Manipulate, Morph, Throw, Mime
This materia allows you to counter with command materia when you are hit. Like Magic Counter, the activation of this ability goes up as the materia levels up. This materia can only be found in the Northern Crater.
Materia List: Independent (Purple Materia)
Here is a list of Independent Materia and their basic information:
Learned abilities: +40% (2000 AP), +60% (10000 AP), +80% (25000 AP), +100% (40000 AP)
Mastered at: 40000 AP
Positive: Vitality +1
This materia, found near Aeris's house, allows you to take damage in place of an ally. Its activation rate increases by level.
Learned abilities: 1.5x chance (3000 AP), 2x chance (10000 AP), 3x chance (30000 AP)
Mastered at: 30000 AP
Positive: Luck +1
Self-explanatory. Sold to you by Chocobo Billy in the Chocobo Farm for 2000 gil.
Learned abilities: None
Mastered at: 80000 AP
Self-explanatory. Can be found in the Mythril Mines.
Learned abilities: +40% (10000 AP), +60% (20000 AP), +80% (50000 AP), +100% (100000 AP)
Mastered at: 100000 AP
This materia allows to make a physical attack if you are attacked. You can find this after you defeat the Materia Keeper in Mt. Nibel, and you can win it in Chocobo Races in ranks A and S.
Learned abilities: +87.5% (8000 AP)
Mastered at: 20000 AP
Negative: Luck -1
As the name implies, you gain a better chance of encountering enemies. You can only win this materia as a prize in the Battle Square. It is exceptionally costly before you gain the Tiny Bronco (TB) at 5120 BP, but drops to 800 after you gain the Bronco, and to 250 when you gain the Highwind (HW).
Learned abilities: +20% (15000 AP), +30% (30000 AP), +40% (60000 AP), +50% (100000 AP)
Mastered at: 100000 AP
This materia increases your dexterity by a set percentage each level. This is another Battle Square Prize: 20480 BP before TB, 12800 BP after TB, 4000 BP after HW.
Learned abilities: +20% (10000 AP), +30% (20000 AP), +40% (30000 AP), +50% (50000 AP)
Mastered at: 50000 AP
This materia increases your HP by a set percentage each level. You can earn this as a prize from the Rufus mini-game at 60-90 points. You can also buy it at Cosmo Canyon or Mideel for 8000 gil.
Learned abilities: +20% (10000 AP), +30% (20000 AP), +40% (30000 AP), +50% (50000 AP)
Mastered at: 50000 AP
This materia increases your MP by a set percentage each level. You can buy it at Cosmo Canyon or Mideel for 8000 gil.
Learned abilities: +20% (15000 AP), +30% (30000 AP), +40% (60000 AP), +50% (100000 AP)
Mastered at: 100000 AP
This materia increases your luck by a set percentage each level. This is found only in the Temple of the Ancients, so be sure to grab it!
Learned abilities: +20% (10000 AP), +30% (20000 AP), +40% (30000 AP), +50% (50000 AP)
Mastered at: 50000 AP
This materia increases your Magic by a set percentage each level. You can find this at the Forgotten Capital.
Learned abilities: x2 (80000 AP)
Mastered at: 150000 AP
Positive: Luck +1
This materia doubles the amount of gil you earn in combat. This materia is glitched, and you'll always get twice the amount. This can be bought for 1000 GP in Wonder Square.
Learned abilities: x2 (60000 AP)
Mastered at: 150000 AP
Positive: Luck +1
This materia increases the amount of EXP you receive after combat, depending on the level of the materia. This can be bought in Wonder Square for 2000 GP.
Learned abilities: +9% (8000 AP), +11% (20000 AP), +13% (40000 AP), +19%, stackable (80000 AP)
Mastered at: 80000 AP
Positive: Dexterity +2
This materia can make it so that you have the first attack in combat. It has a low activation rate, but at the last level, you can stack the effect with other Pre-Emptive Materia. This is a Battle Square prize: 10240 BP before TB, 6400 BP after TB, and 1000 BP after HW.
Learned abilities: -87.5% (8000 AP)
Mastered at: 20000 AP
Positive: Luck +1
This materia decreases your chance of encountering enemies by a set percentage. This is a prize in Chocobo Racing ranks B, A, or S.
Learned abilities: x2 (20000 AP), x3 (50000 AP), x4 (80000 AP), x5 (160000 AP)
Mastered at: 160000 AP
This materia applies the All effect to all magic spells that can be affected by All, physical attacks (selected with Attack), Steal, Mug, Sense, Morph, Manipulate, and D. Blow. This materia is found in the Northern Crater. There is a discrepancy with the AP listed above, and it is listed to the best of my knowledge as many different guides give different AP values for each level, so this is meant to serve as an estimate of AP, though 160000 AP is the master value.
Learned abilities: None
Mastered at: 80000 AP
This materia switches your HP and MP values. This can give you over 999 MP, but your Max HP will be capped at 999, so use caution when equipping this materia. This materia is found in the materia cave near Corel. You will need at least a black chocobo.
Learned abilities: None
Mastered at: 0 AP
This materia does nothing but the above. This is gained by trading the Earth Guide to the Kalm Traveler, which can only be morphed from a Ghost Ship in the tunnel to the Junon Reactor.
Suggestions for Materia Combinations
 As mentioned earlier, linking materia is incredibly important. There are a variety of combos that work. Here are some examples and suggestions:
All + Restore: restore the HP to all allies at once
All + Fire: deal fire damage to all enemies at once
Elemental + Alexander (on weapon): add the holy element to your weapon
Elemental + Leviathan (on weapon): add the water element to your weapon
Elemental + Fire (on armor): halve, negate, or absorb all fire damage taken (this depends on what level the Elemental materia is)
Added Effect + Seal (on weapon): add a chance to confuse your enemy or put it to sleep
Added Effect + Seal (on armor): prevent confusion or sleep from affecting you
Final Attack + Phoenix: when killed, summon Phoenix to deal fire damage to all enemies and revive all allies
Steal + HP or MP Absorb: Steal or mug and drain HP or MP from a single target (not recommended against undead foes)
MP Turbo + Restore: heal an ally with greater potency, but at the cost of an increased MP cost
Magic Counter + Lightning: Counter an enemy's attack with a Bolt series spell
Counter + Deathblow: Counter an enemy's attack with a devestating attack... or a miss.
Quadra Magic + any magic attack materia: use a spell up to four times, which is useful for dispatching a foe with an elemental weakness quickly.
Enemy Skills
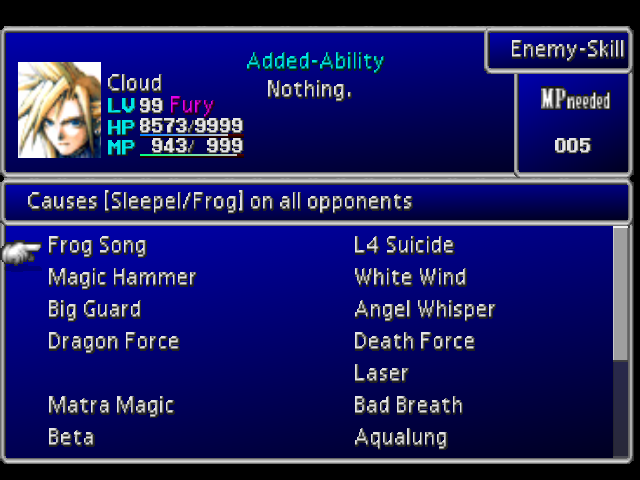 Enemy skills are magic abilities that you can learn from enemies in combat. Many skills are incredibly valuable, and some are almost worthless. I will go through each one and explain its use and what the positives and negatives are for each one. I will also score each out of 10.
Score: 10/10
This is an incredibly helpful skill. It dishes out damage equivalent to a standard attack (but is based upon your magic skill, rather than strength). The damage is multiplied by 8 if you and the target are the same level. It is completely free to cast, and can be used in place of Attack, in case it has been replaced by Limit, just in case you want to save your Limit Breaks for an upcoming boss.
Score: 10/10
This is one of the best abilities in the game, since it saves you a lot of money and ethers. This ability steals up to 100 MP per casting from an enemy (if it has MP), for a net of 97 MP for you (3 MP casting cost). I definitely recommend getting this skill as early as you can, since you can use it to recharge your MP and deny your enemies that same MP for their own abilities.
Score: 9/10
This is an incredibly useful skill to learn, since it emulates Esuna, Full Cure, and Life2 in one spell for a modest 50 MP. It completely restores the HP of one ally, alive or dead, and removes a number of status effects. The only problem I have with this skill is that it is found so late in the game.
Score: 8/10
This skill allows you to potentially heal a lot of damage and it gets rid of many status effects. However, the spell will restore HP equal to the amount of the caster's current HP. If you are at low HP, I would recommend casting a Cure spell.
Score: 8/10
Trine is a nice spell for a good portion of the game. It's like having Bolt2 for 2 less MP. However, its potency is lost when Bolt3 is learned.
Score: 8/10
Aqualung is a very potent water skill that hits all enemies, and one of the few you can gain, other than Leviathan. You can learn this around the middle of Disc 1, making it a fairly indespensible skill throughout most of the disc, and through a good portion of Disc 2.
Score: 8/10
Beta is a powerful fire ability that you can potentially learn very early (with the right set up) from the Midgar Zolom. Throughout most of the first disc, this skill can one shot many enemies, excluding bosses of course. It has a potency level between Fire2 and Fire3, so it is fairly useful for characters who have neither ability. After the start of the second disc, it begins to lose potency, especially if you have Fire3.
Score: 7/10
This spell casts Barrier, MBarrier, and Haste on the entire. This is very nice, because you can find this skill before find their respective materia. The biggest drawback is with Haste. Haste is normally nice, but it accelerates the decrease of the Barrier and MBarrier gauge, so if you need protection, you may be better off casting Wall, since it provides Barrier and MBarrier for 2 MP more than Big Guard and doesn't have Haste. However, the skill is still handy to have.
Score: 7/10
Shadow Flare deals a lot of non-elemental damage to one target. It is useful, but it can only be learned from a small number of late game enemies (almost all of which are bosses), and 'd rather use Comet2 for 10 more MP and hit multiple targets (or the same target multiple times).
Score: 7/10
This spell hits all enemies for non-elemental damage that ignores defense. Very useful, but the biggest problem is that the one enemy that you can learn it from will only use it once per save file.
Score: 5/10
This skill is very much a crapshoot. It is a very potent skill you learn early on in Disc 2, but since it does multiple elemental types of damage, it can be negated by the target having one immunity or made even worse if the target can absorb the damage.
Score: 5/10
???? is actually the name of the skill. It deals damage equal to the caster's max HP minus his/her current HP. This can be risky, since the damage is based upon your current HP. Use with caution.
Score: 4/10
Bad Breath inflicts Sleep, Poison, Confuse, Silence, Frog, and Small/Mini on all enemies. This can be useful, but keep in mind that many late game enemies have various status immunities, so this spell can lose effectiveness rather quickly.
Score: 3/10
This spell inflicts fire damage to a single target. It is slightly more potent than Fire, but it lacks any long-lasting power, even early on in the game.
Score: 3/10
This spell is exactly like Demi2, except for around half the cost. Anything immune to Gravity based magic will be immune to this too.
Score: 3/10
This spell will hit all enemies for non-elemental damage. It is a great skill very early on, especially since it is one of the first Enemy Skills you can learn. However, its potency greatly diminishes after around the 2/3 section of the first disc, where other spells will hit harder.
Score: 2/10
The purpose of this skill is to make you immune to death. However, very few enemies use instant death attacks. This ability does not protect against Death Joker from Cait Sith's Limit Break.
Score: 2/10
Frog Song casts both Frog and Sleep on a single target. This skill is incredibly limited in usefulness. Many enemies can resist this skill, and many late game enemies have many status immunities, so you're just wasting MP.
Score: 1/10
This ability is pretty weak, since the damage dealt is equal to the number of times you've escaped from battle. That said, it can turn into a cheap pocket nuke if you escape enough times.
Score: 1/10
Speaking of crapshoots, this skill takes the cake in that department. This skill will randomly target one character, enemy or ally, and even the caster, and kill that character. Luck does play a factor in this, but this skill is not really something you should use often.
Score: 1/10
This spell will place a 60 second (30 if hasted) counter on an enemy. When the timer reaches zero, the target will be killed if it can be affected by instant death. This is often a waste of MP, since you can kill most enemies that can be affected by instant death much faster than 60 seconds.
Score: 1/10
This spell, when cast on a group of enemies, will kill enemies with a level divisible by 5. This is even more worthless than the two aforementioned skills, since it is completely dependent upon the target's level.
Score: 1/10
L4 Suicide hit all enemies, and if their level is divisible by 4, they will be shrunk and be put at a critical HP. Seemingly useful, if it were not for the level modifier. This skill is required to learn Chocobuckle.
Score: 1/10
This skill is buggy, due to FFVII's magic defense bug. This will raise your spirit, but not magic defense, as the skill suggests. You are better off using MBarrier or a Tranquilizer to reduce magic damage. It's a waste of MP.
A Guide to Negative Status Effects
There are a variety of nasty status effects that can plague you throughout the game. Almost all of these effects disappear after battle, with the exception of Fury, Sadness, and Death. Aeris's status healing Limit Breaks will heal all ailments, except Death, without fail. Angel Whisper will cure all negative status effects, except for Death-sentence and Imprisoned. White Wind will cure everything except Death, Death-sentence, and Imprisoned. Esuna will cure all negative status effects, except Death, Death-sentence, Imprisoned, and Stop. It will also remove Fury and Sadness. Remedies have the same effect as Esuna. Holy Torches, while normally can get rid of negative status effects, can also remove Slow, Stop, and Mini. Here is a list of what they are, what they do, and their cures:
Cure: Antidote item, Remedy item, Poisona, Esuna, Angel Whisper, White Wind
Cure: Eye Drops item, Remedy item, Esuna, Angel Whisper, White Wind
Cure: Phoenix Down item, Life, Life2, Phoenix Summon, Angel Whisper
Cure: None
Cure: Hit the object with a physical attack (yellow) or magic attack (blue)
Cure: Echo Screen item, Remedy item, Esuna, Angel Whisper, White Wind
Cure: Physical damage, Remedy item, Esuna, Angel Whisper, White Wind
Cure: Physical damage, Remedy item, Esuna, Angel Whisper, White Wind
Cure: Soft item, Remedy item, Esuna, Angel Whisper, White Wind
Cure: Soft item, Remedy item, Esuna, Angel Whisper, White Wind
Cure: Cornucopia item, Remedy item, Holy Torch item, Mini, Esuna, Angel Whisper, White Wind
Cure: Maiden's Kiss item, Remedy item, Frog, Esuna, Angel Whisper, White Wind
Cure: Holy Torch item, Haste, Angel Whisper, White Wind
Cure: Holy Torch item, DeSpell, Angel Whisper, White Wind
Cure: Remedy item, Esuna, Angel Whisper, White Wind
Cure: Remedy item, Esuna, Angel Whisper, White Wind
A Guide to Positive Status Effects
Not all status effects are bad, however. Some are almost indispensible in combat. DeBarrier will remove all barriers, Reflect, and Shield. DeSpell removes all barriers, plus Haste, Slow, Stop, Regen, Death Force, Reflect, Shield, and Resist. Holy Torches remove all positive status effects, except for Fury, Sadness, and Death Force. Peerless, All Lucky 7's!, and Lucky Girl cannot be removed once they are activated.Here is a list of positive status effects and their effects:
Cure: DeBarrier, DeSpell, Holy Torch item
Cure: DeBarrier, DeSpell, Holy Torch item
Cure: DeBarrier, DeSpell, Holy Torch item
Cure: DeBarrier, DeSpell, Holy Torch item
Cure: DeSpell, Slow, Holy Torch item
Cure: DeSpell, Holy Torch item
Cure: DeBarrier, DeSpell, Holy Torch item
Cure: DeBarrier, DeSpell
Cure: Tranquilizer, White Wind
Cure: Hyper, White Wind
Cure: DeSpell, White Wind
Cure: None
Cure: None
Cure: None
Items
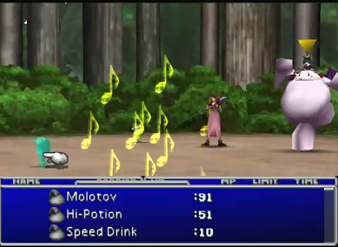 Items can help you deal with a lot of problems in and out of combat, so here are some general tips about items:
As a rule, you should keep at least a small stock of at least 10 status recovery items of each type, more so for HP recovery items and Phoenix Downs. It may not be a bad idea to keep a large stock of Echo Screens, as well, since Silence will prevent you from casting Esuna on yourself.
Status recovery items are generally better to have on hand, rather than casting Esuna all the time, especially if you're only under the effect of one status. If you are under multiple statuses, Esuna is probably the better way to go.
Remedies will cure any ailment that the spell Esuna can heal, however Remedies are much more rare, so you may want to conserve them for when you are in dire straights, such as when Bad Breath has been cast on you.
Phoenix Downs can be used to fell undead foes, though your success is not always guaranteed.
Any item with the word "source" (such as Speed Source) in it will permanently raise one ability by one point.
Elixirs and Megalixirs are incredibly rare. Try not to use them (especially the megalixirs) randomly, as you cannot buy them at all, though you can win them from the Wonder Catcher in Wonder Square, though the odds of getting either one are very low (around 1%). Only a small number of enemies will drop Elixirs, and the majority of them are boss enemies. Elixirs, however, can be found in a variety of locations around the world. You can also win Megalixirs from Master Tonberries. Megalixirs can also be stolen from certain enemies in the Northern Crater: Master Tonberry, Iron Giant, Gighee. Megalixirs can be found, but not at the same rate as Elixirs.
Vaccines have the same effect as Resist, in that they will make you immune to status effects, though these are incredibly rare and cannot be bought.
Hero Drinks give you a 30% boost to your Attack, Magic, Defense, and Spirit. This effect can be stacked up to four time for a total of a 100% increase.
Light Curtains will cast Barrier on the entire party. Lunar Curtains will cast MBarrier on the entire party. Mirrors will cast Reflect on the entire party. None of the items can be bought.
Speed Drinks will cause Haste on one ally. Cannot be bought.
Holy Torches are a mixed bag. They remove the following conditions from all targets: Haste, Slow, Stop, Mini, Regen, Barrier, MBarrier, Reflect, and Shield, much like the DeSpell. These can be good for resetting the statuses of all enemies if they have put up too many defensive abilities. Note that you can only win these from Unknown 3, but you can morph Vampire Bats, Stilvas, and Evil Heads into Holy Torches.
Smoke Bombs will allow you to flee random battles without fail, however they are very costly at 1000 gil apiece.
Keep in mind that you can always use items, no matter what materia you equip. You cannot use items when you are under the effect of Stop, Paralyze, Petrify, Death, or under the effect of the special Item Seal handicap in the Battle Square.
Items can be a nice way to top off HP between battles without having to use up valuable MP you will need in combat.
Tents: Buy and use them often. They recover all HP/MP at any save point and anywhere on the overworld map. These are quite the life saver. They are like having an inn wherever you are!
Some items do not have a purpose at all, other than taking up space. 1/35 Soldiers are an example of this.
Limit manuals can only be used if you have all six Limit Breaks of levels 1-3 learned for that character. Cait Sith does not have a manual.
As mentioned in the General Combat section, there are items that emulate certain spells. They lack the punch of their magical counterparts, but are nice to have if you are running low on MP. I will also note again that Tranquilizers are a cheap alternative to Barrier (and the two effects do stack!), since you'll take less damage (though your limit gauge will slowly build). Many are not quite as important to carry, but some are well worth it. The attack items can be found fairly often, so I won't talk about them, but the most useful status effect and damage items are what I will mention here. This is handy to remember in the battle against Rapps.
Ghost Hands will drain MP from a target. Make sure not to use them against undead targets, however, or it will have the inverse effect. These can be won/stolen from Ghosts early on in the game at the Train Graveyard, and can be morphed from Gi Spectors and Sneaky Steps.
Cauldrons inflict several status effects at once: Poison, Sleep, Mini, Frog, Confuse, and Silence. This is like casting Bad Breath on a single target. Like many of the items I will mention here, these cannot be bought. They can won/stolen from Dragon Zombies or can be found in the Submarine Game in Wonder Square.
Spider Webs will inflict Slow on all enemies, which is quite useful. Cannot be bought. They can be won/morphed/stolen from Grashtrikes, and stolen from Kimara Bugs
Hourglasses will inflict Stop on all enemies, but the effect is not always guaranteed (80% accuracy). Cannot be bought. These can only be won from Edgeheads or morphed from Kimara Bugs.
Stardusts have the same effect as Comet2. They can only be purchased from the Battle Square for 8000 BP.
The word, "Recovery," when it floats above a charcter instead of numbers, signifies that you have recovered full HP and MP.
Limit Breaks
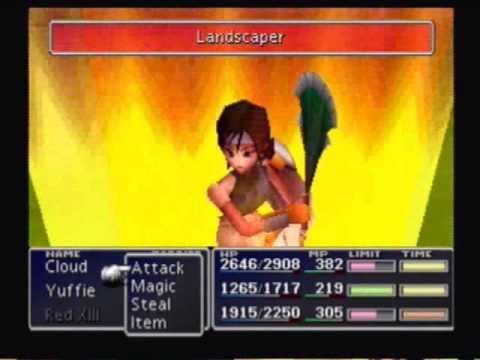 Limit Breaks are powerful abilities that each party member can use when their limit gauge reaches its max. They range from powerful attacks to healing to party buffs. These abilities are incredibly nice to use in combat and can easily dispatch most foes. Things to note about Limit Breaks:
Hypers are a good way to build your Limit gauge quicker, but this comes at the cost of some accuracy.
Limit Breaks always interrupt the order of turns. Limit Breaks will always be the next action, no matter how many actions are normally slated to go before you. In the case of multiple Limit Breaks, they will go in the order they were selected in.
Tifa's Limit break has 3 items on the reel. Hit will deal standard damage, Yeah! will deal critical damage, and Miss... well, that's obvious. Beat Rush will never have Miss on the reel, the other limit breaks in her line will.
None of Aeris's Limits are damage dealing. Aeris's limit breaks are all recovery, support, or status inducing abilities. Using these can reduce the need for some magic materia. In fact, early on in the game, it may be wise to use Aeris's Healing Wind ability to restore HP in lieu of Cure spells, though the power of this ability will start to be lacking by the time you leave Midgar.
Cait Sith only learns two Limit Break abilities, period. Dice and Slots. There is no Limit manual for Cait Sith.
Cait Sith's Dice ability multiplies the number of dice times 100, except in the case in which all the numbers are the same, then they are multiplied by 200.
Cait Sith's slots ability is somewhat risky. Most of the time, you will deal damage to all enemies, but you can also fully recover the party, lose two of your party members and make a giant Cait Sith, kill all enemies (and I do mean ALL enemies) on one side of the screen (provided that they're not immune to magic damage), or kill the party (the only true bad thing to happen).
Yuffie's Level 2 Limit Break, Landscaper, does not affect flying enemies.
You lose control of Vincent for the rest of the battle when he uses his Limit Break.
You can a second ability in a Limit Break level by utilizing them so many times. Usually, this is around eight times. To learn a new Limit level, you must dispatch so many enemies, so don't be afraid to fight every enemy!
The higher your Limit Break level, the slower it will take to fill the Limit gauge.
Hypers help you increase your Limit gauge faster, but at the cost of more damage to you and decreased accuracy, whereas Tranquilizers can decrease the amount of damage you take, while causing your Limit gauge to build more slowly.
All Level 4 Limit Breaks can only be learned through a special Limit manual, which you will have to find around the world. Some are easy to get. Others are very hard to get. You'll just have to look around!
- Graphical Overhaul★ 5 (1k)90k views1.6k ♥3 minUpdated 27 May, 2014
- Final Fantasy 7 Full Guide★ 5 (2.7k)51k views7k ♥137 minUpdated 10 Jul, 2018
- XBox 360 Controller Fix★ 5 (775)48k views1.2k ♥7 minUpdated 17 Feb, 2023
- Final Fantasy VII General and Technical FAQ★ 5 (362)42k views333 ♥6 minUpdated 19 Jun, 2015
- Permanent Missable Content related to Achievements★ 5 (1.3k)39k views3.3k ♥15 minUpdated 3 Mar, 2019
- Remaster your FF7 - Essential Modding Guide★ 5 (623)38k views1.7k ♥23 minUpdated 24 Feb




- Upgrading to PremiumTeam Fortress 2★ 5 (20k)1441k views11k ♥6 minUpdated May 11, 2022
- No More Room in Hell Official ManualNo More Room in Hell★ 5 (2.8k)569k views2.1k ♥29 minUpdated Apr 22, 2019
- NMRiH Community Hosting GuidesNo More Room in Hell★ 5 (526)351k views653 ♥1 minUpdated Aug 10, 2022
- ULTIMATE GUIDE FOR GAME DEV TYCOONGame Dev Tycoon★ 5 (5.8k)326k views10k ♥4 minUpdated 23 Jan, 2014
- How to 'Git Gud' Soon™MORDHAU★ 5 (2k)318k views3k ♥68 minUpdated Nov 16, 2024
- Лучшие кооперативные игры SteamPAYDAY 2★ 5 (1.5k)315k views2.1k ♥56 minRussianUpdated Apr 27, 2025






This guide was created by its original author on the Steam Community. Are you the author and want it removed? Request removal.