How to create and use settings presets
How it works
As many players know, the game has a console that allows to change all the settings in the game by entering commands. It is also possible to make a list of commands in a file, creating a "preset". Then, an "exec" command can be used to load the preset file and execute all the commands from the file at once. This makes for an easy way to store multiple settings presets and quickly change between them. It's much easier than changing all the setting manually each time. It's also much more convenient than having copies of config files, as all presets can be stored in a single file instead of 3 config files located in different places, and the presets can be changed on the go, without restarting the game.
The basic idea is simple: make a new text file, add all the necessary commands, save it, then apply settings by running "exec". For example, a file named "preset1.cfg", located in the game's home directory (Documents\American Truck Simulator on Windows, ~/.local/share/American Truck Simulator on Linux or $HOME/Library/Application Support/American Truck Simulator on MacOS), can be executed by typing in the console:You can make presets of any settings, including graphical settings, regional and language settings, UI settings, gameplay settings, physics settings, audio settings, device settings. However, it is not possible to make presets of keys, buttons and axes binds this way.
If you are a master of game console already, this should be enough for you. If not, the next sections will have a real example of possible usage of this feature.
A real world example
Preliminary work

Uncheck the "Use Steam Cloud" checkbox. There will be a warning, click "OK" :
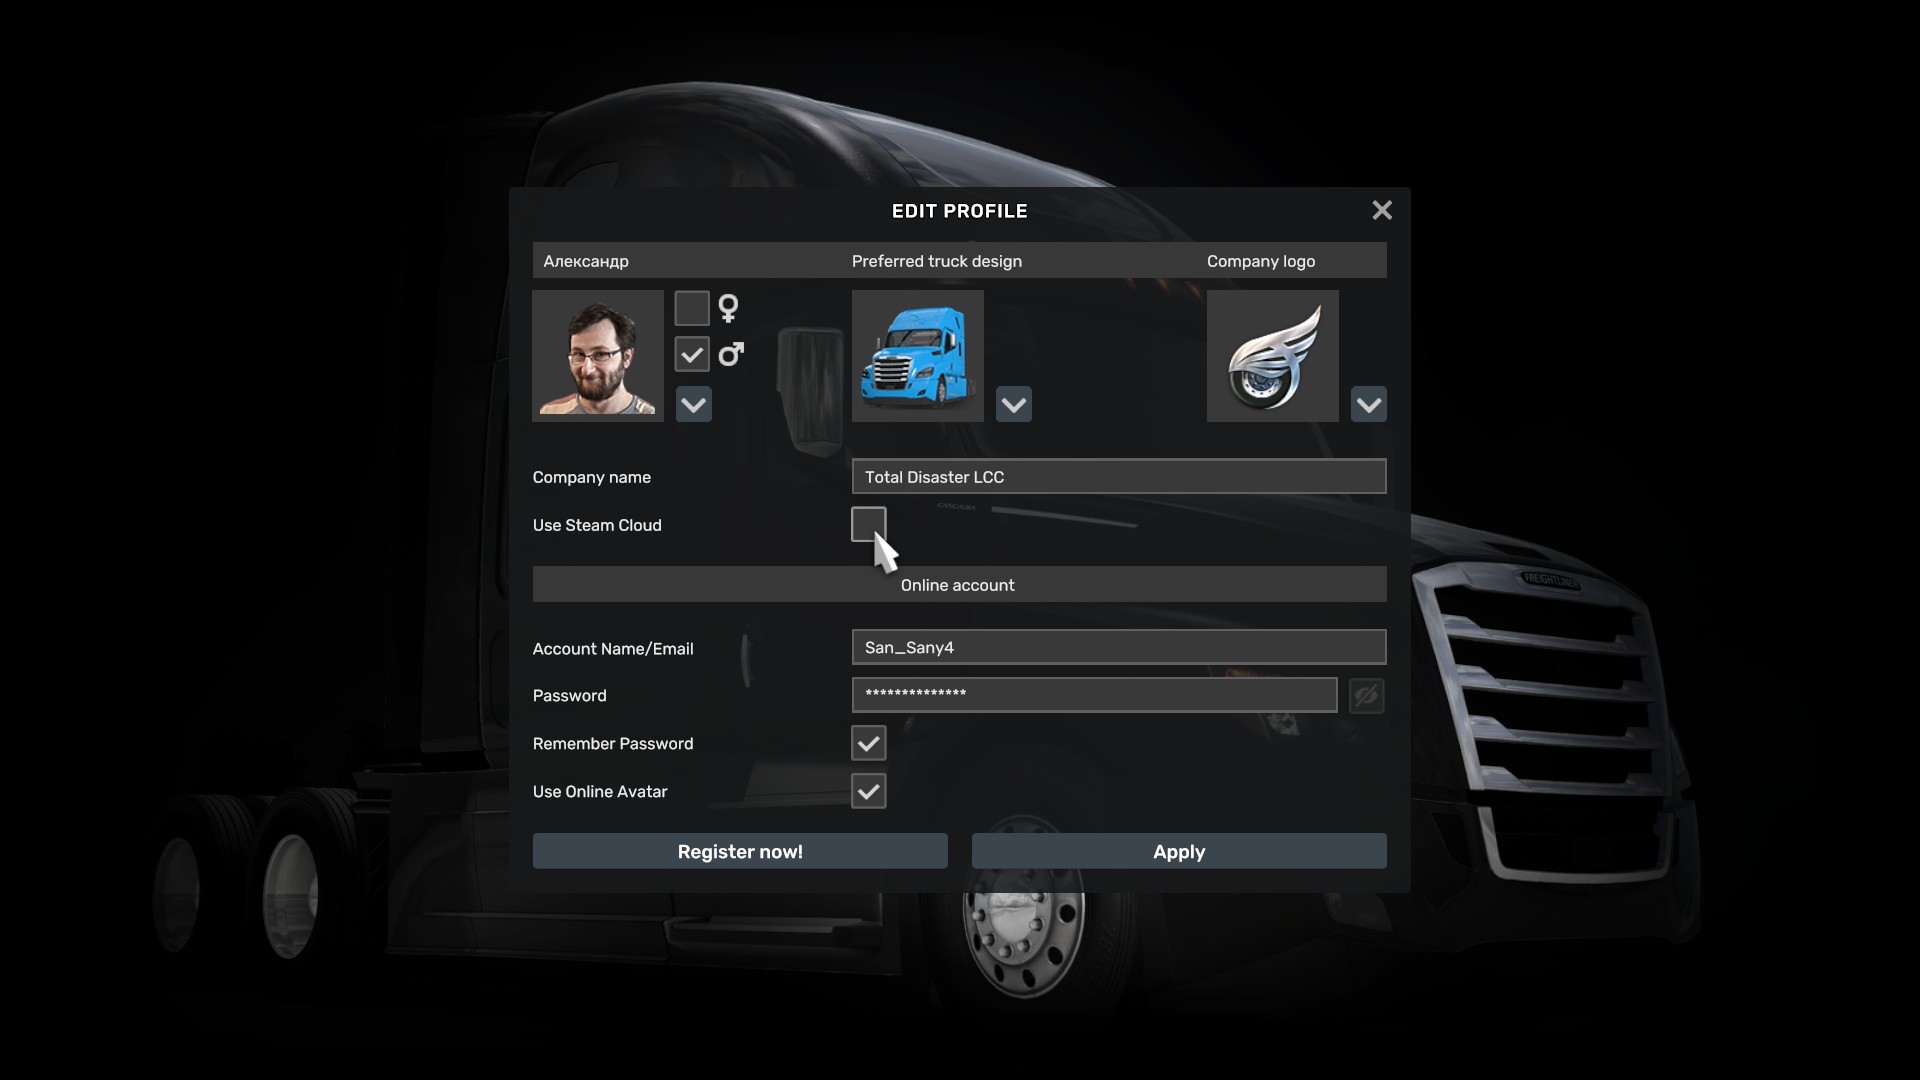
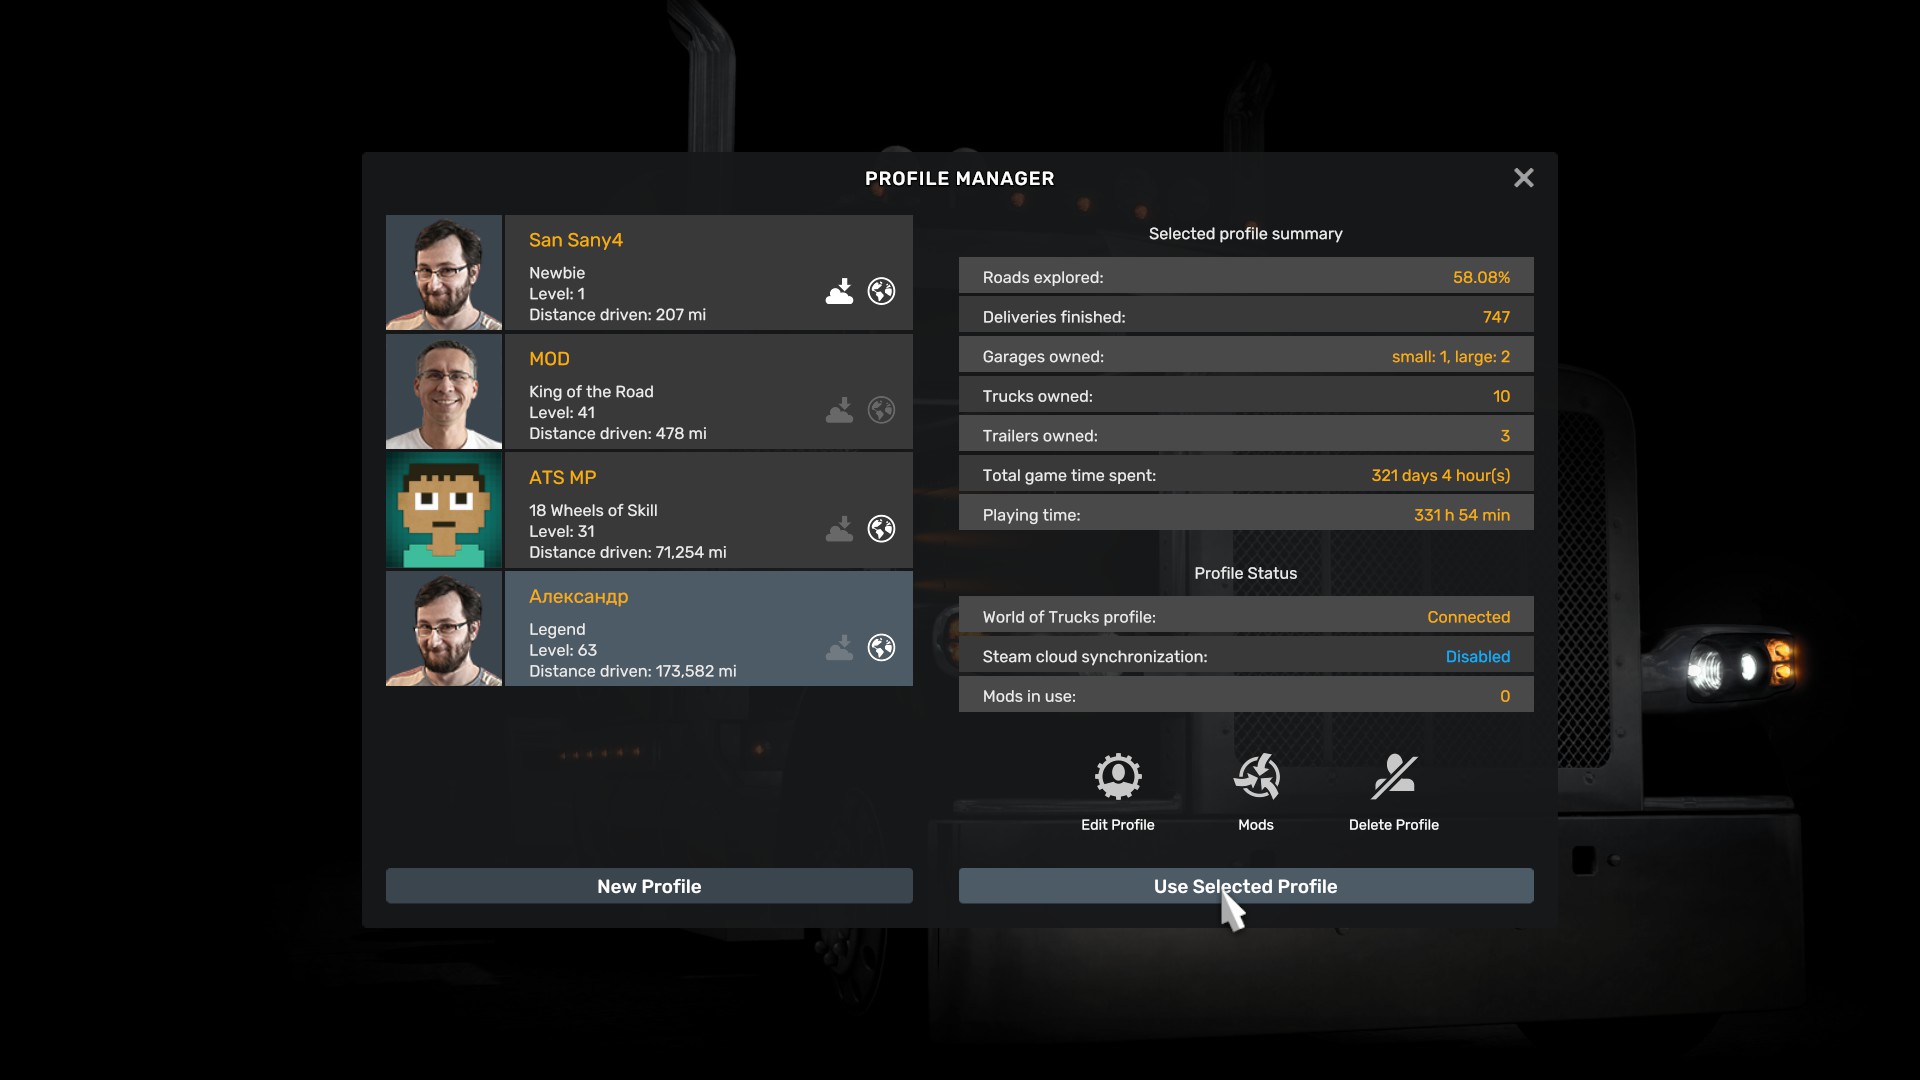
Click "Apply" button. Check that the "Steam cloud synchronization" says "Disabled", then load the profile.
Setting up the first truck
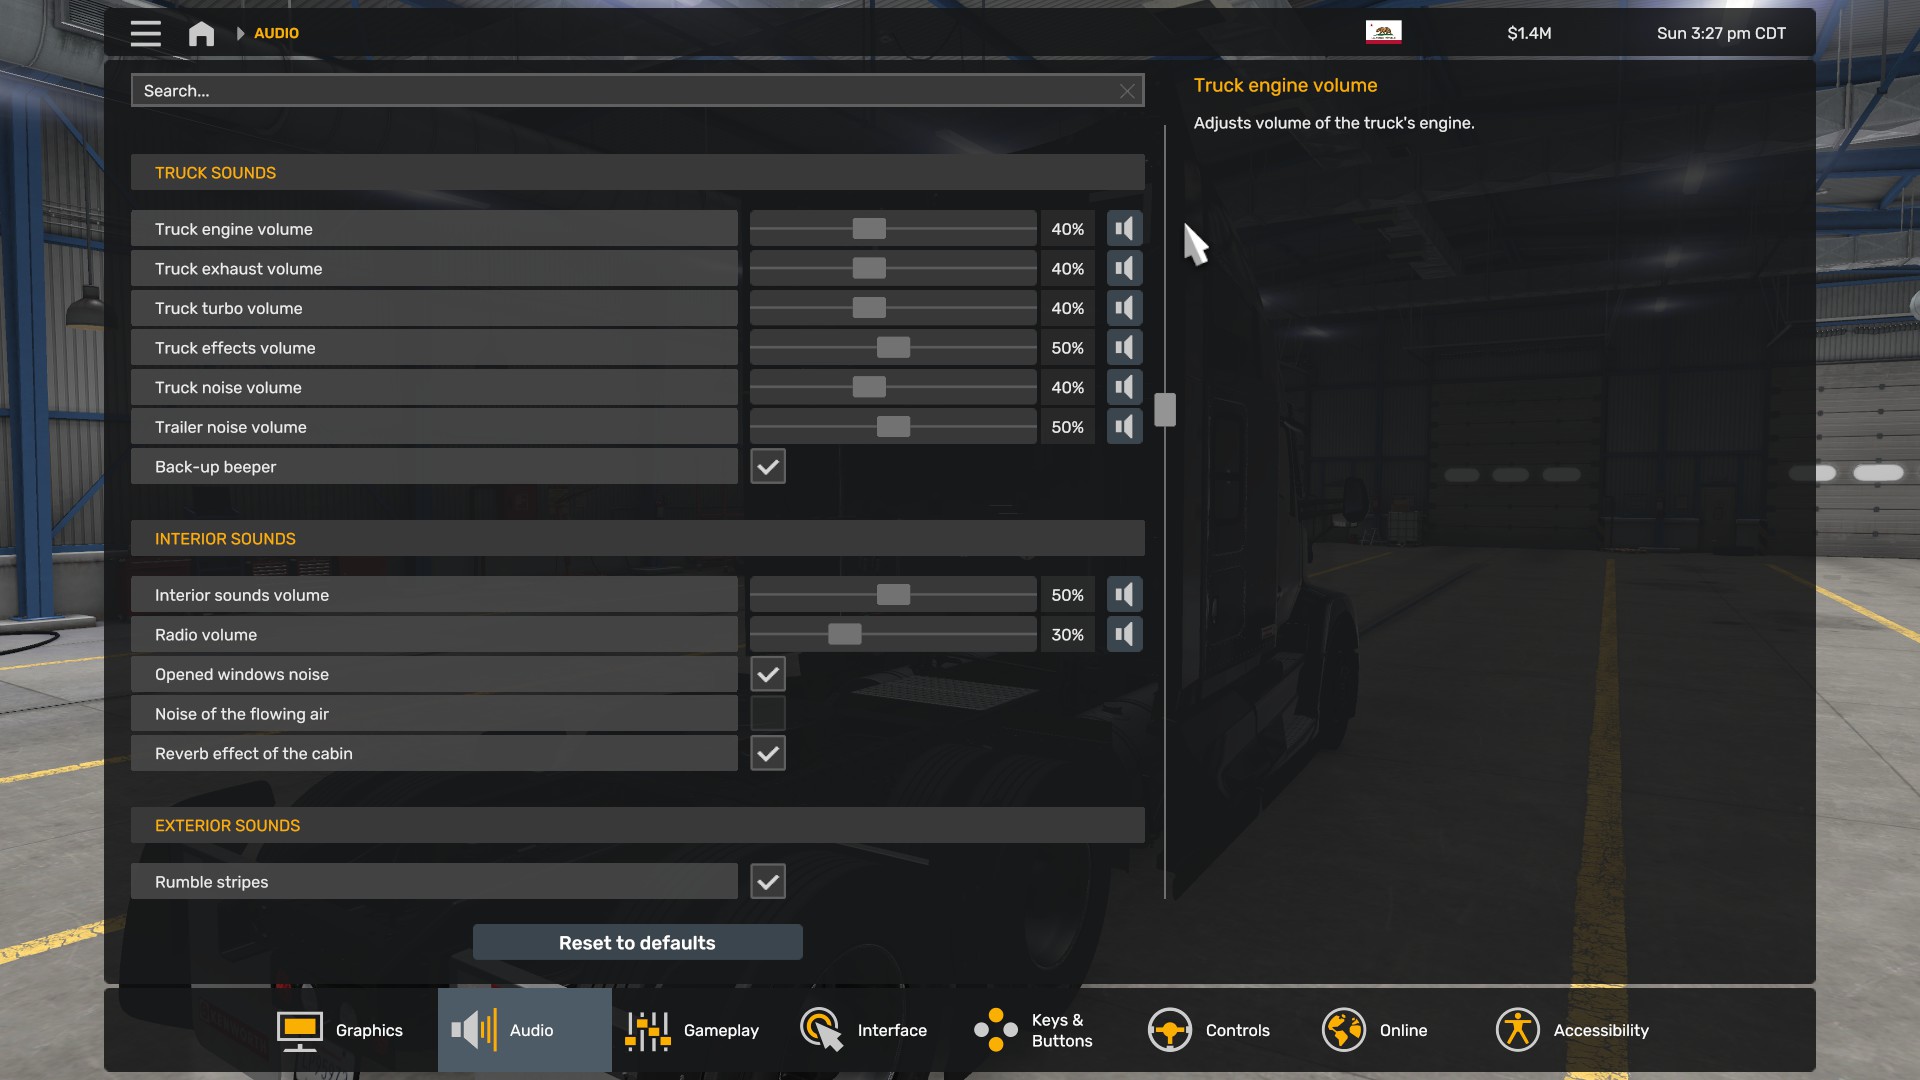
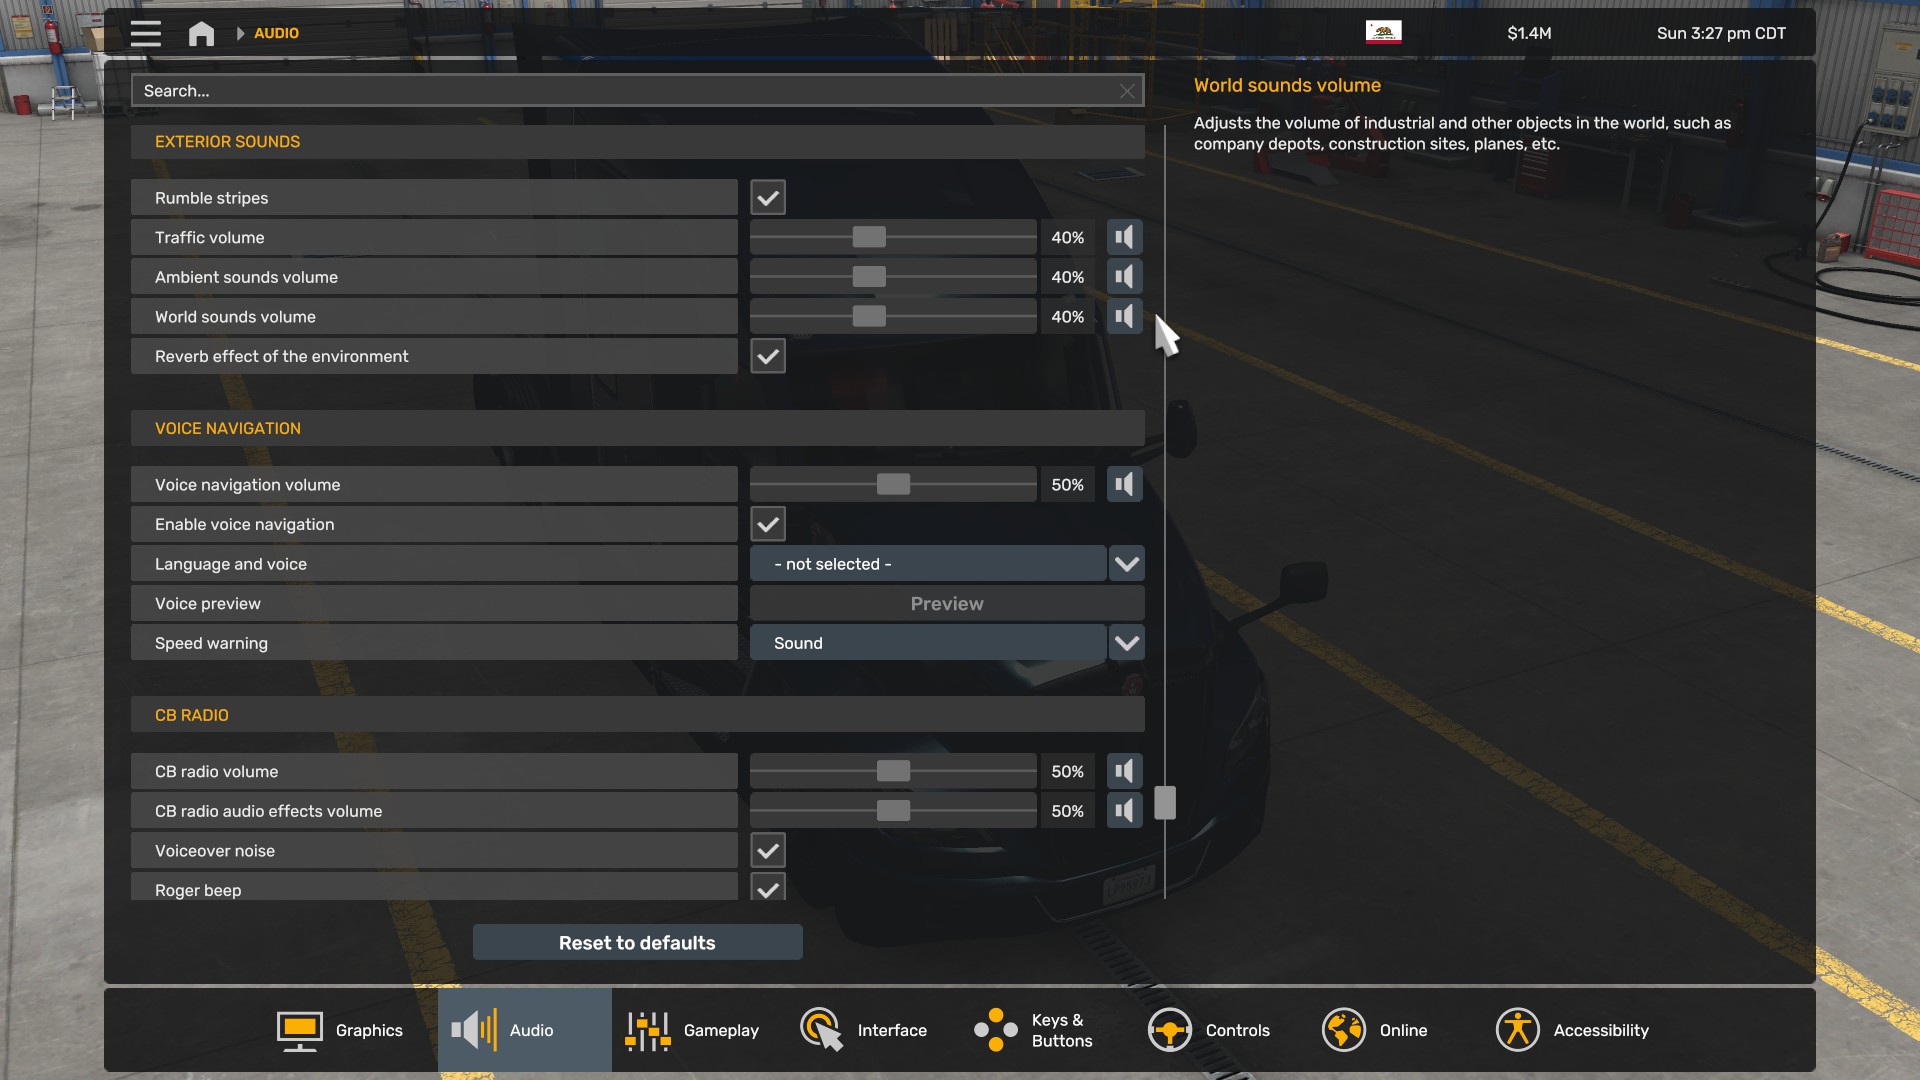
Then, Gameplay settings tab. I set the gearbox to Automatic, because that's what installed on the truck. I make the suspension and frame stiffer, cab suspension softer for comfort, and brakes more efficient.
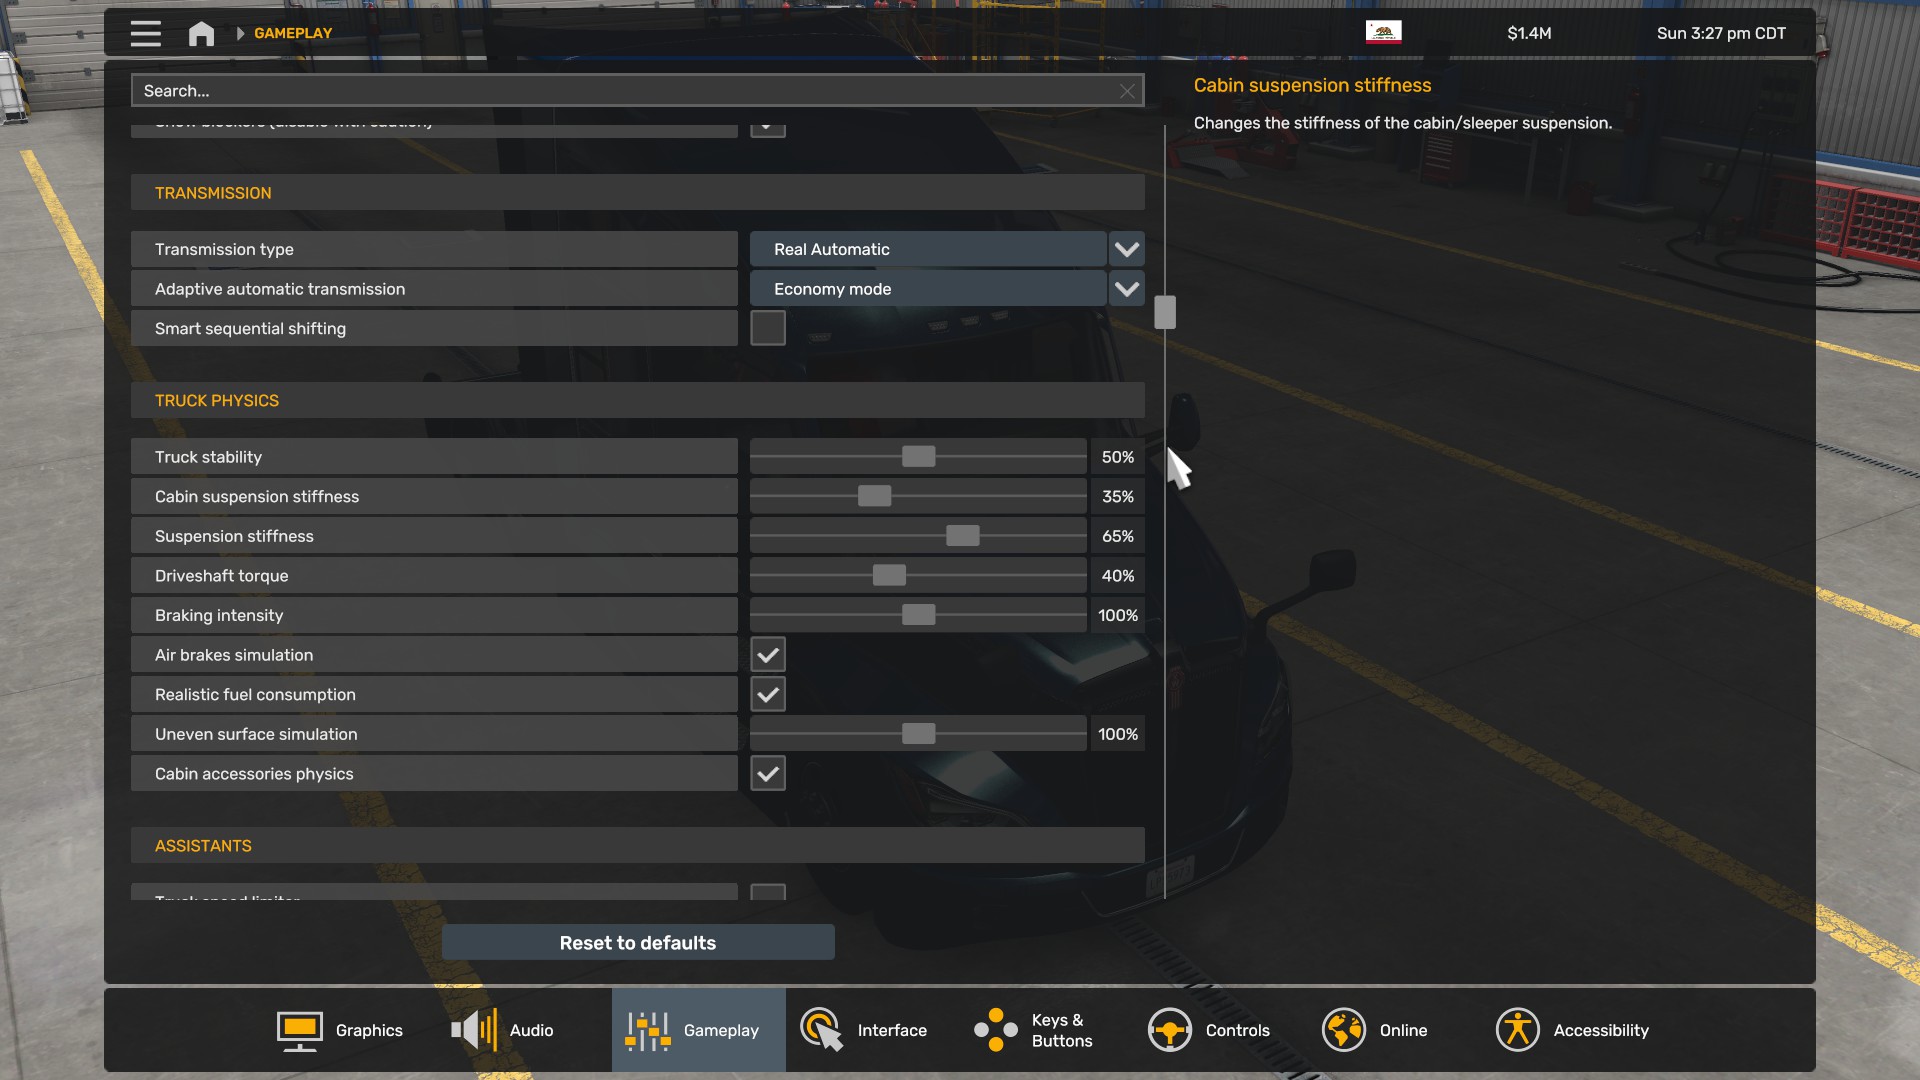
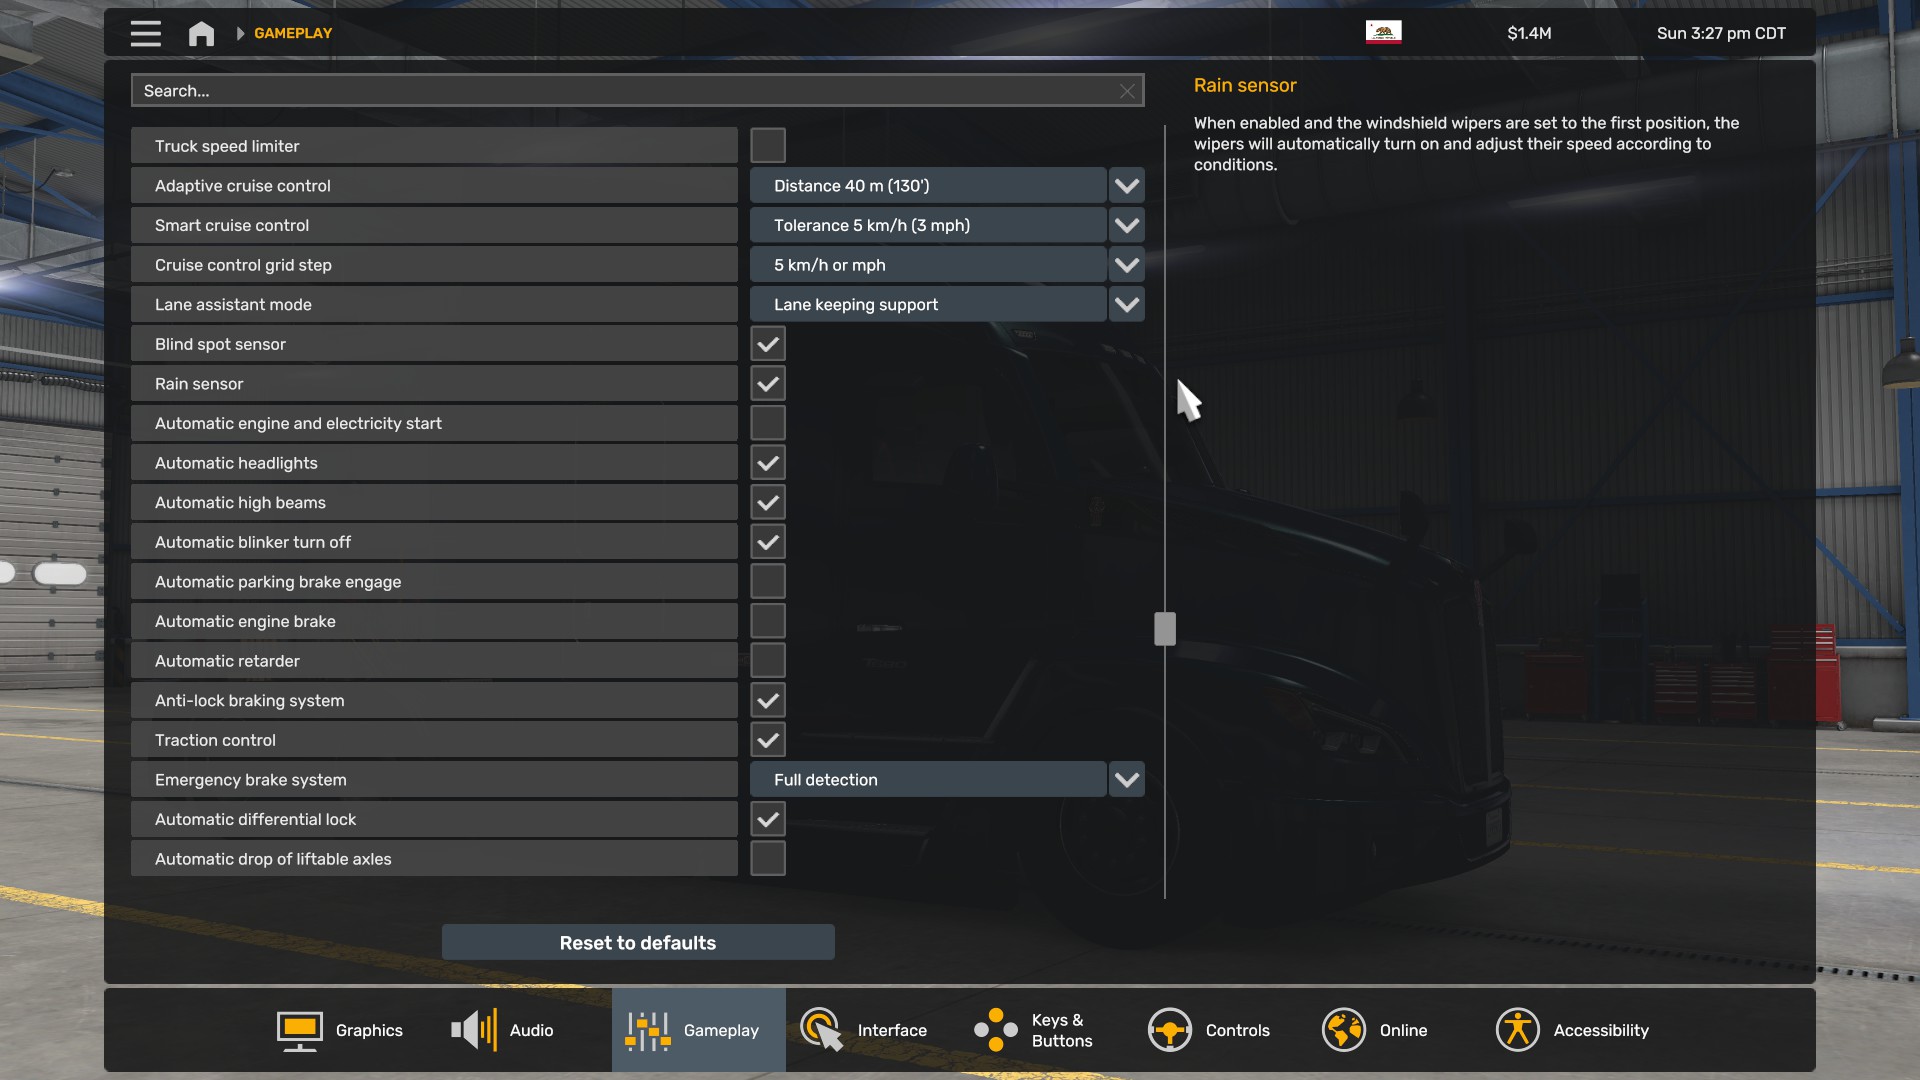
Then, I enable all the modern truck features, including all the sensors and some automation:
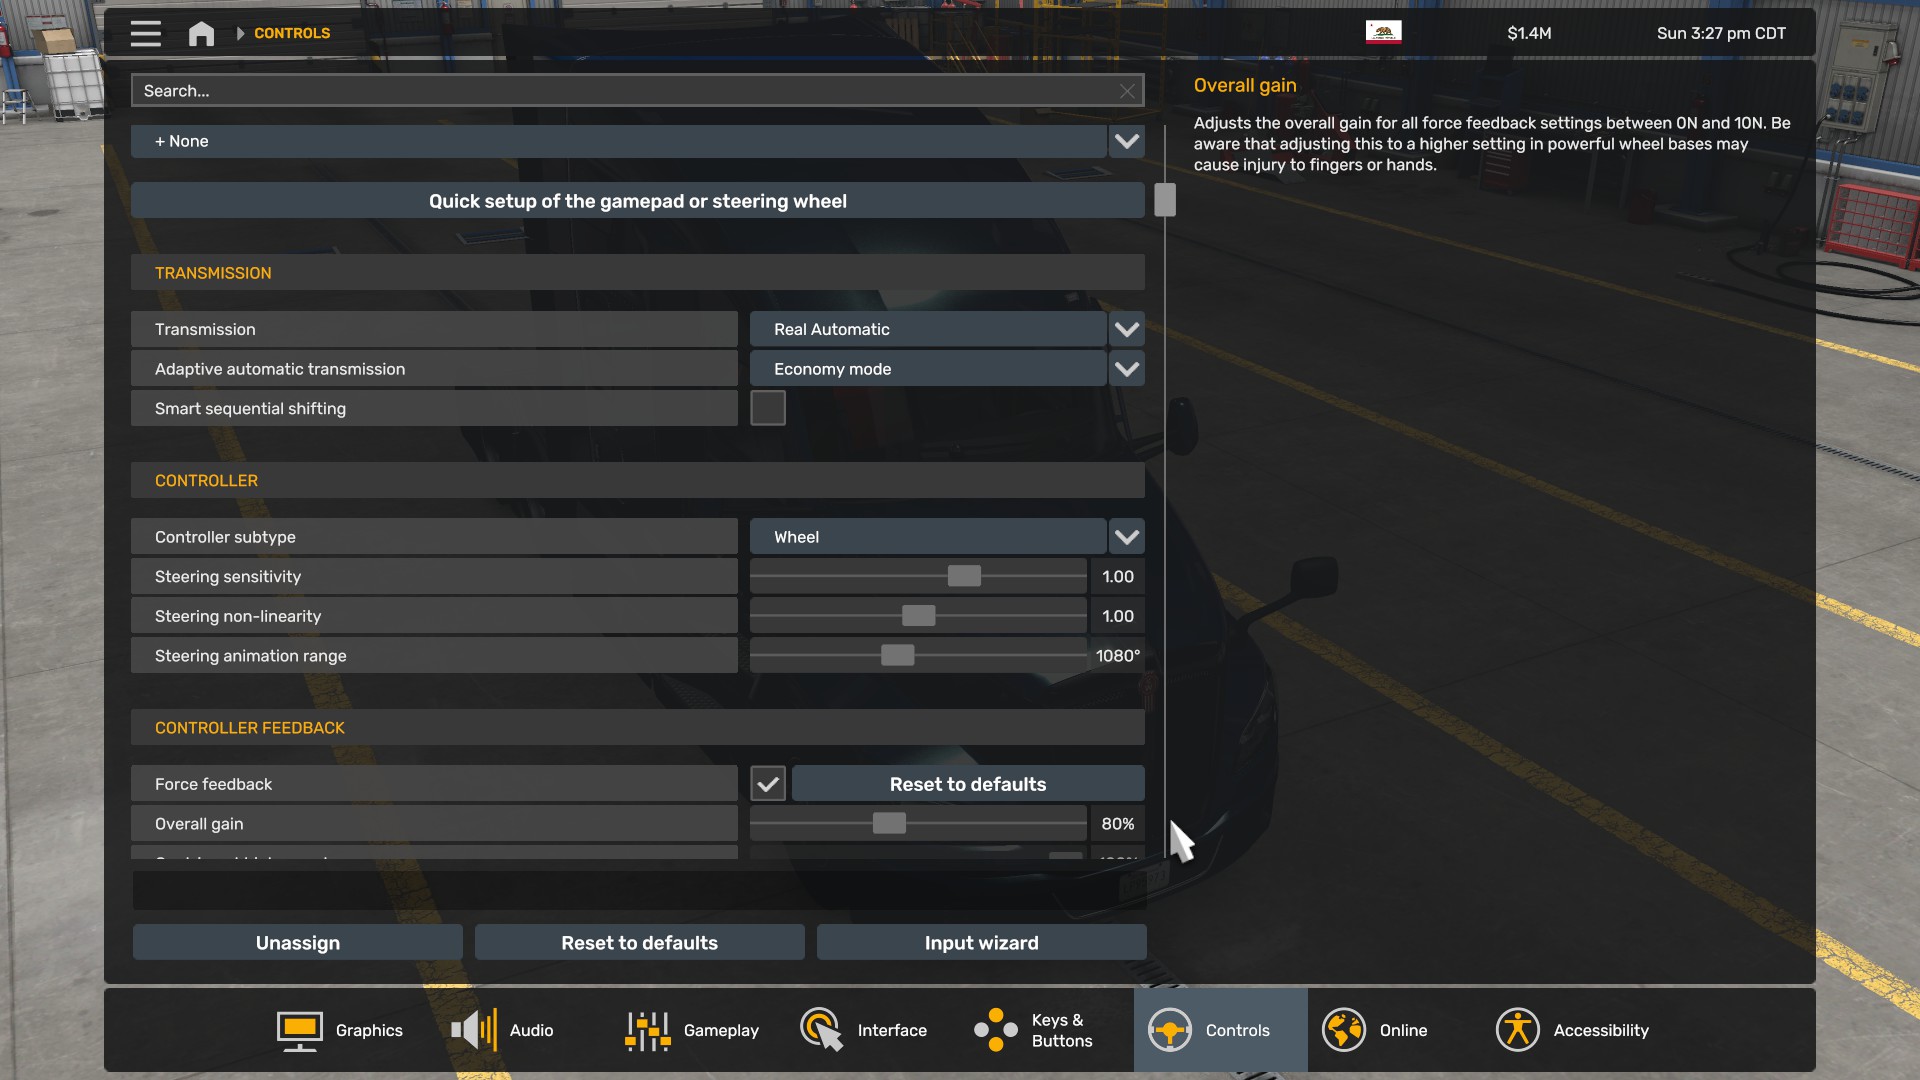
Finally, on Controls page, I set the steering wheel animation to 1080° and decrease the force feedback gain to simulate more powerful power steering:
Saving the first truck settings
You don't have to set all the settings like I did, this is just an example. You can set yours however you like. Exit the Settings menu, this is important, because the settings are saved when you close the menu. Minimize the game, you don't have to stop it, and go to game's home folder. Make a copy of "config.cfg" file. For easier identification later, you can rename the copy, for example, as "configT680.cfg".
Then, go to "profiles" folder, then open the folder of the profile you're making a preset for. If there's only a single subfolder in "profiles", congrats, that's the one you need. If you have more, you have to find the correct one. The folder names are your profile names in UTF-8 encoding, written in hexadecimal. You can search for any "UTF-8 to HEX" online converter and type your profile name into it, then compare with the folder name.
After locating the correct profile folder, go inside it. Make a copy of both "config.cfg" and "config_local.cfg" files. You can also rename them, for example, "configT680profile.cfg" and "config_localT680.cfg".
If you have changed any Force Feedback settings, or other steering wheel or pedals settings like steering sensitivity or deadzones, you also need a file "controls.sii". Make a copy and call it, for example, "controlsT680.sii".
Setting up the second truck
Now you can return to the game, and set the desired settings for the second truck, in my case 389.
Starting with sound again, I increase volume of the truck and surround sounds: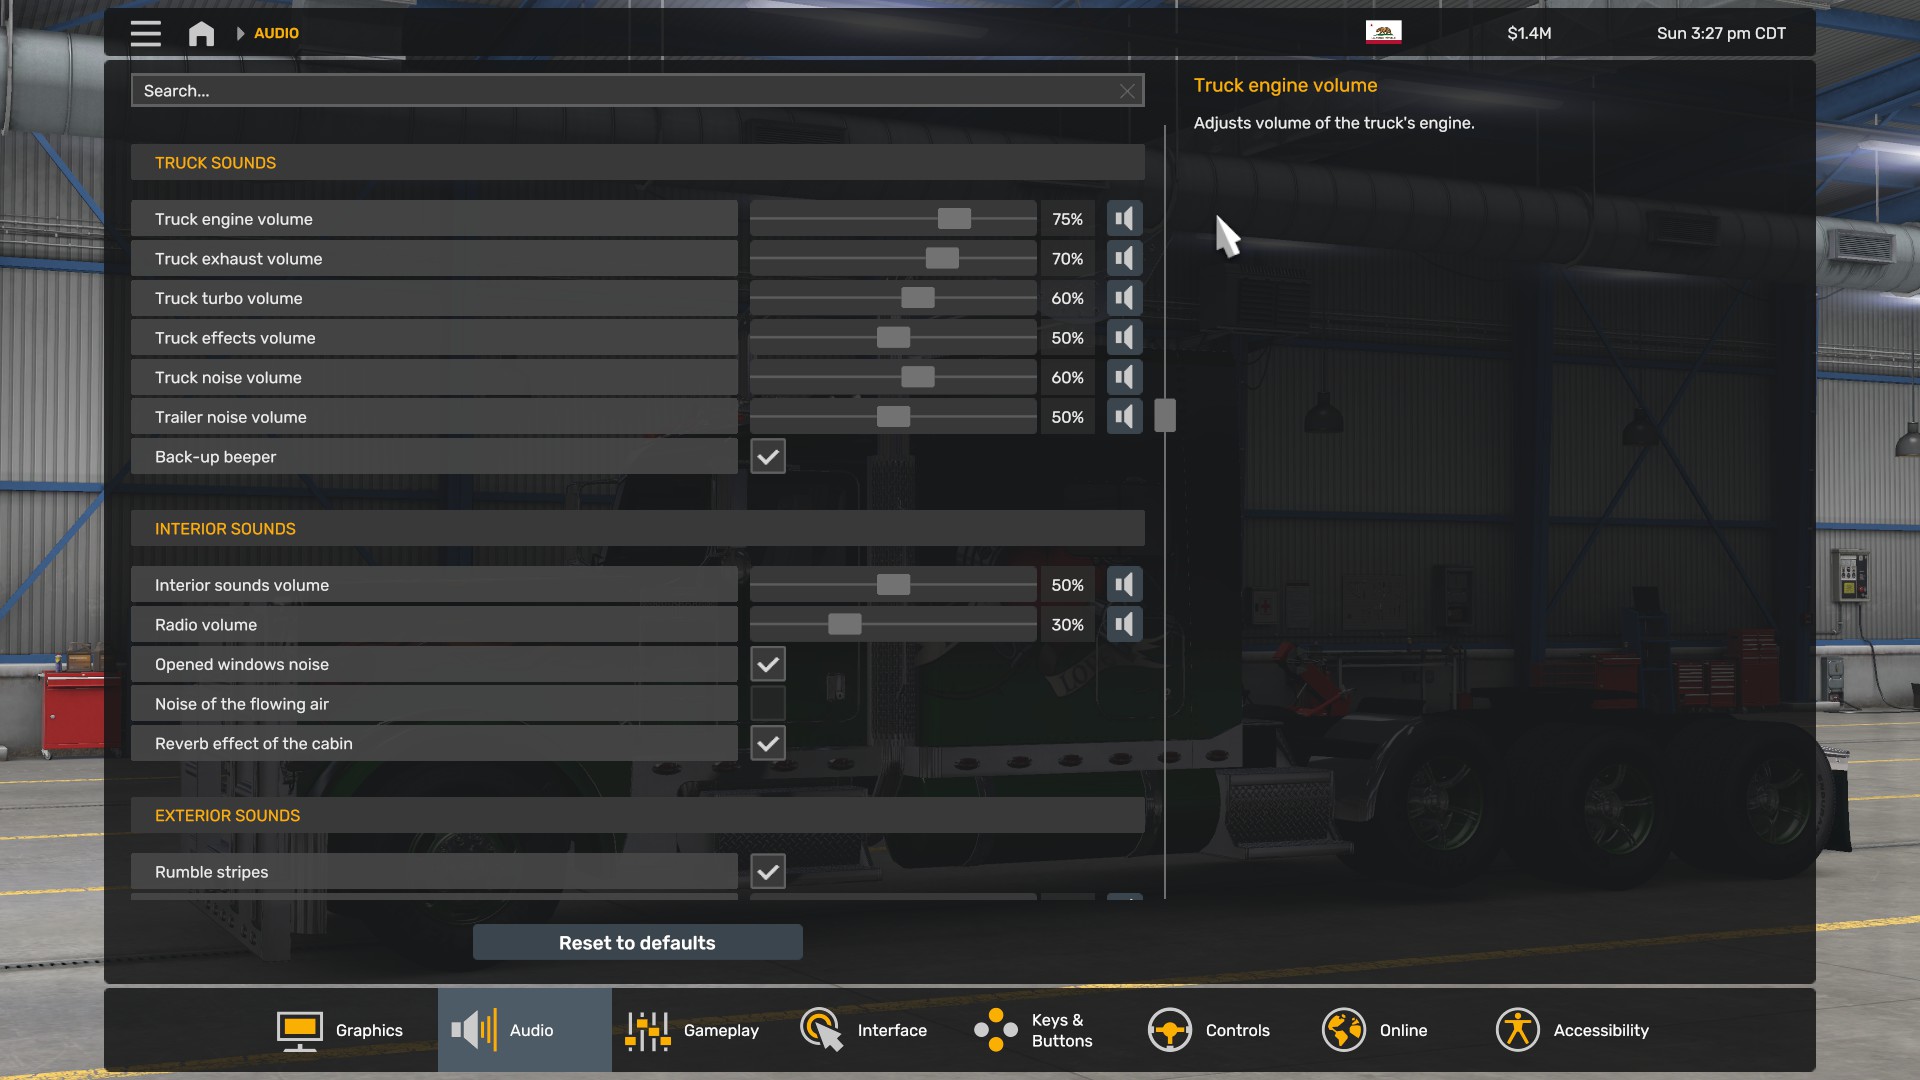
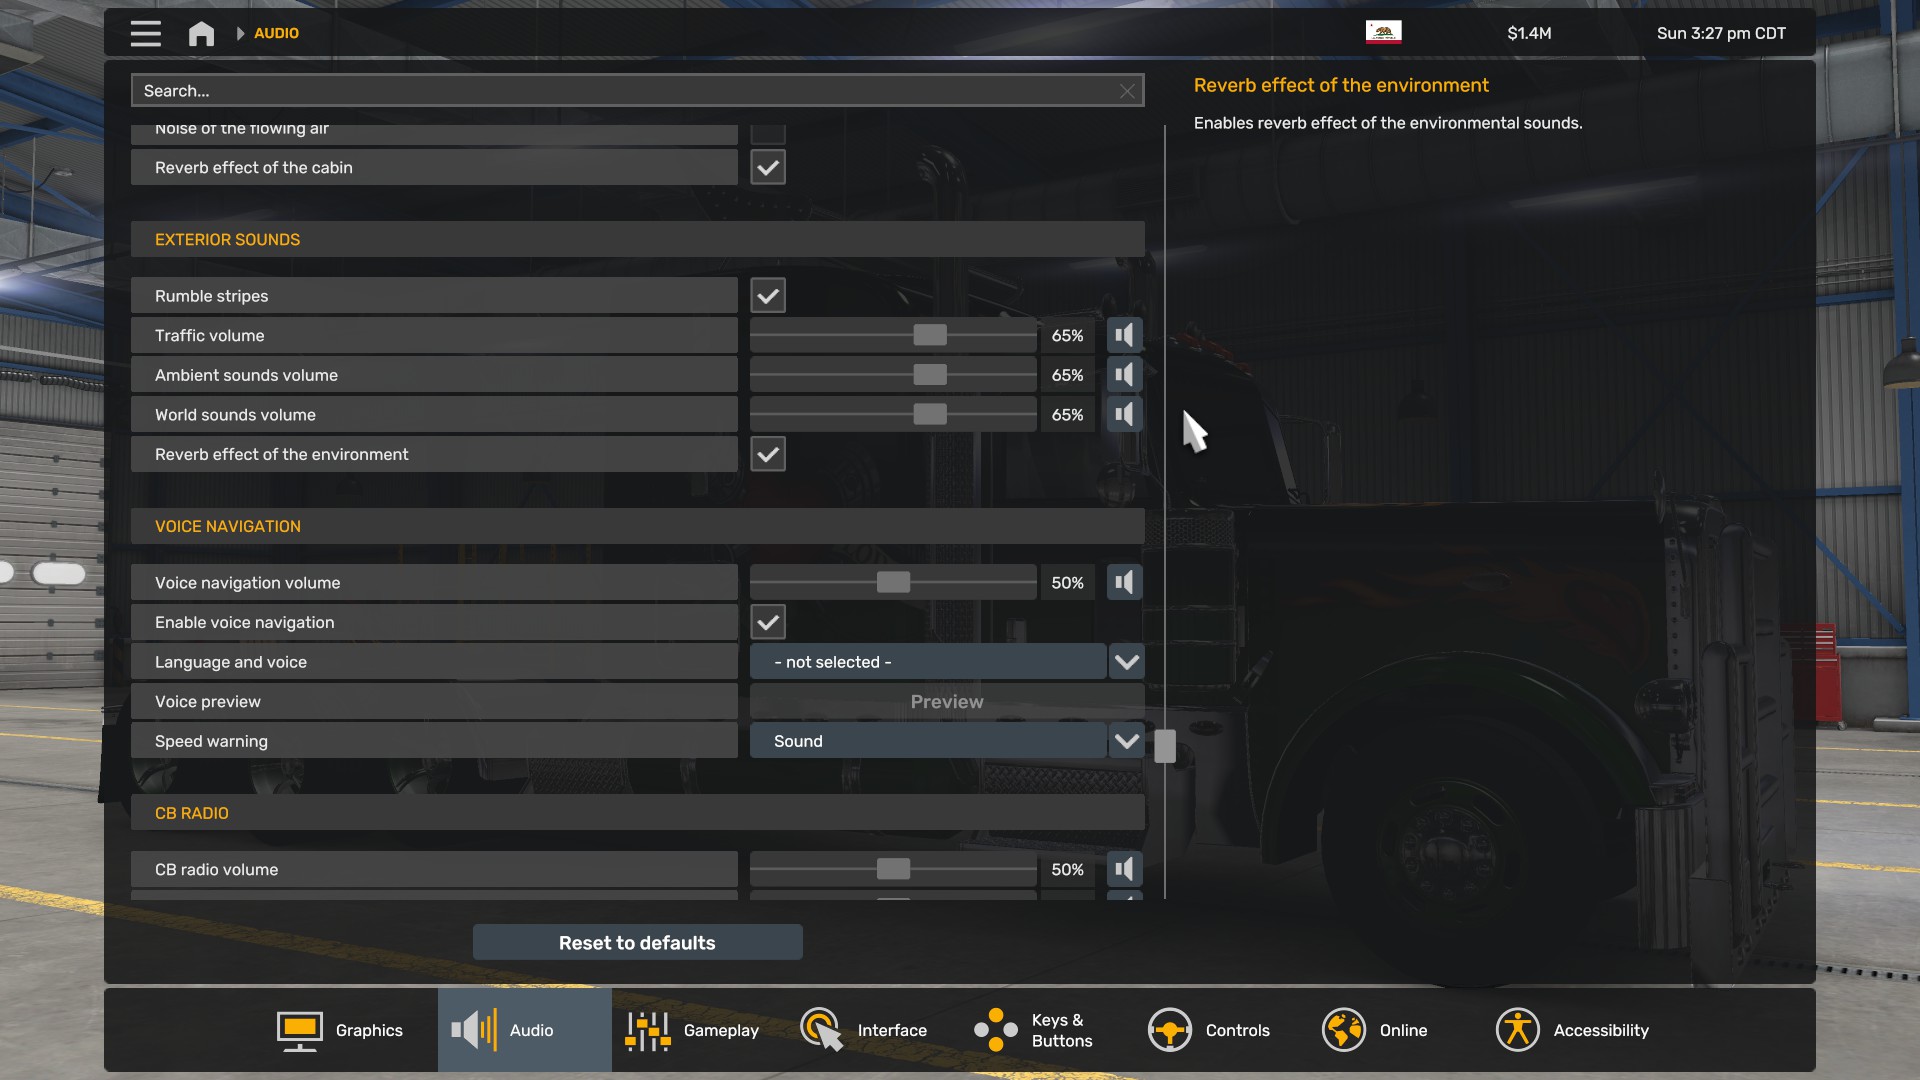
Then, I change the transmission to manual (H-shifter). As this is an older truck, I make the suspension and frame less stiff, the cab stiffer, and the brakes weaker.
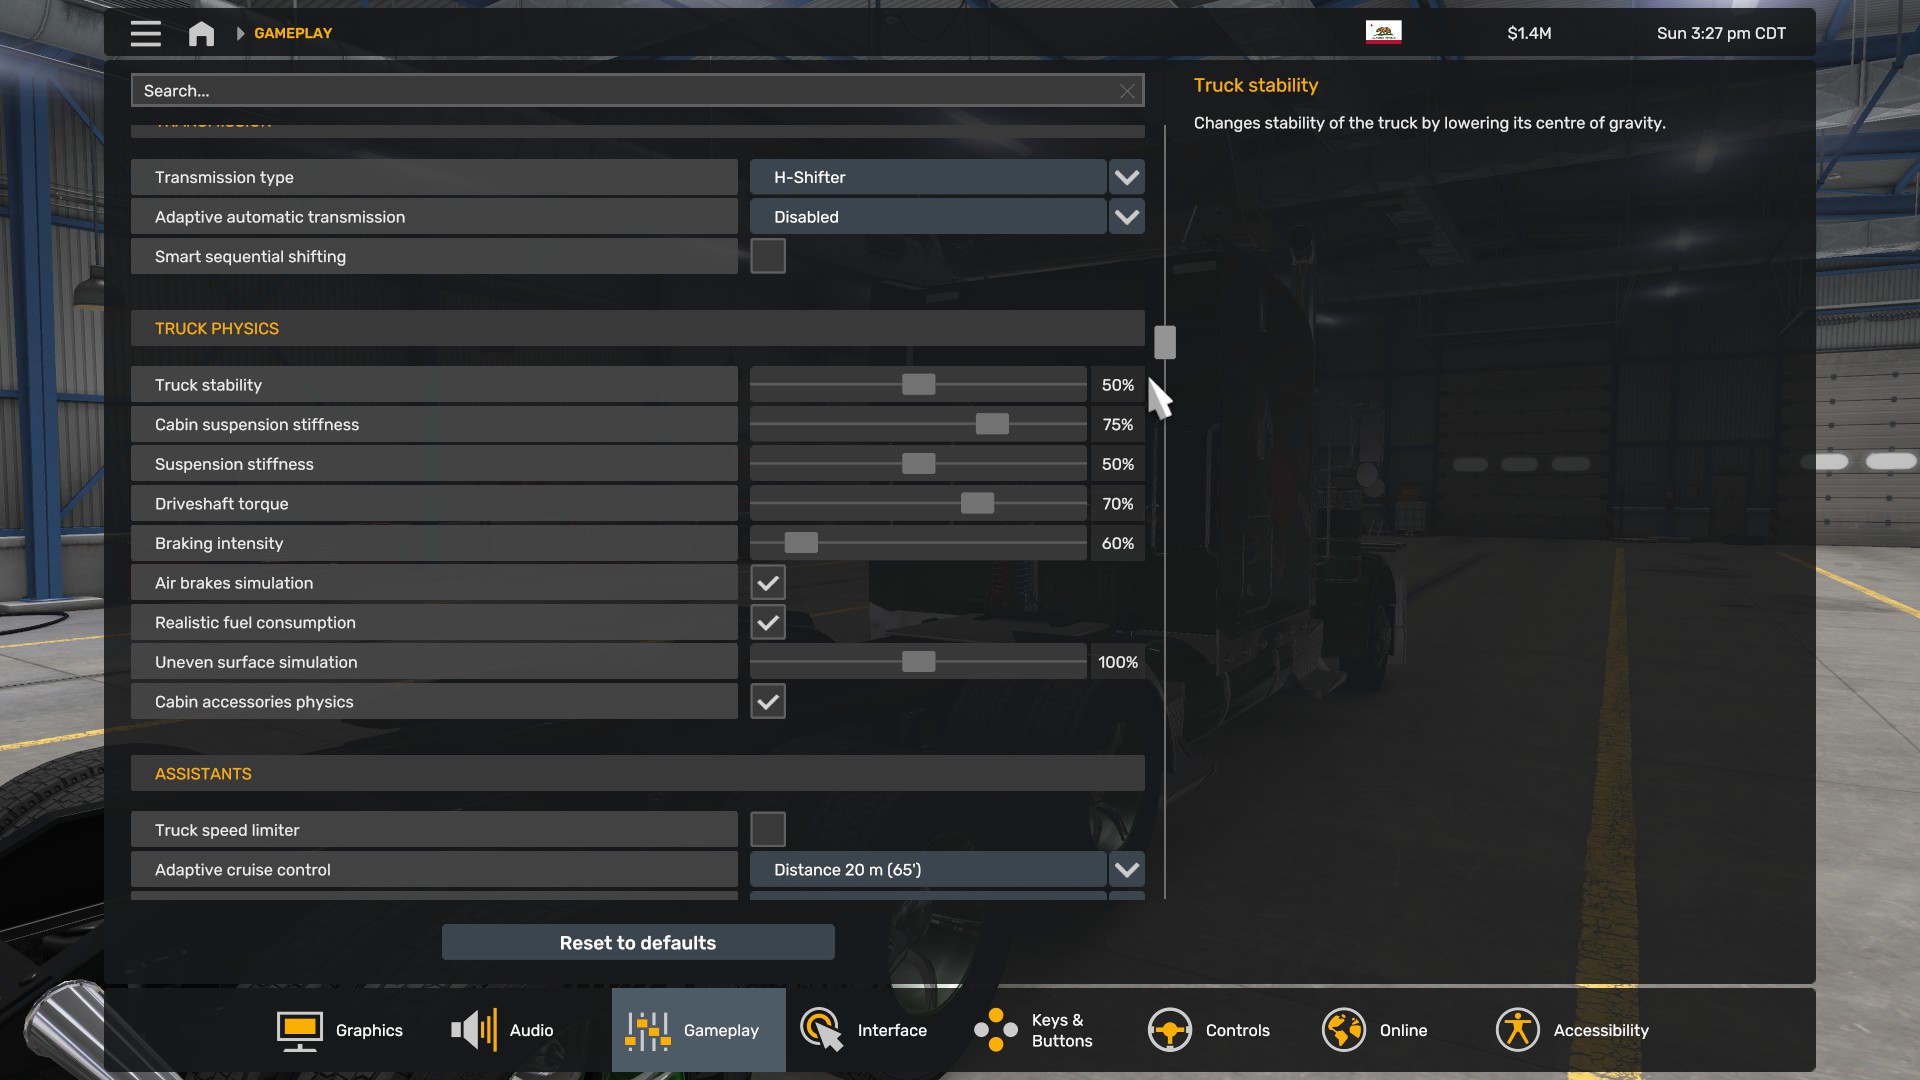
I turn off all the fancy modern features, except ABS:
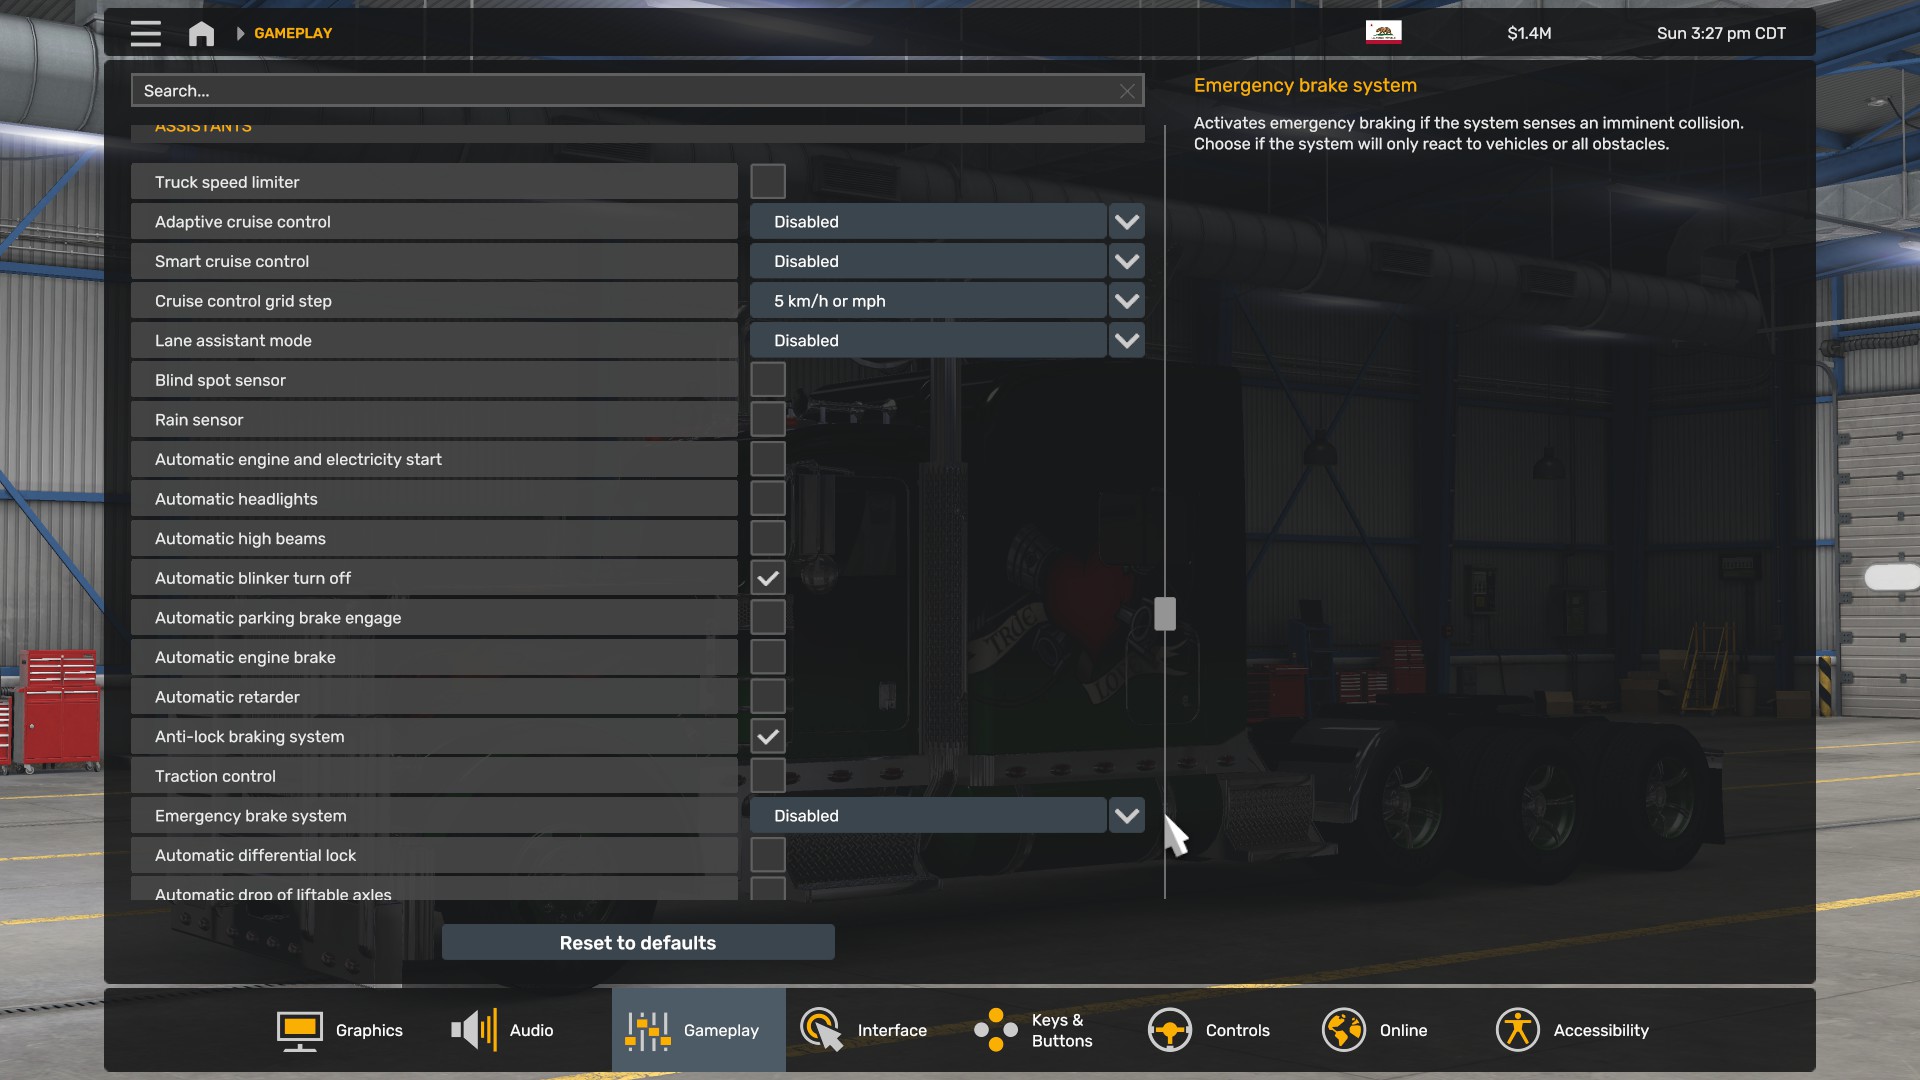
Finally, I set the steering wheel animation to 1800° and the force feedback stronger:
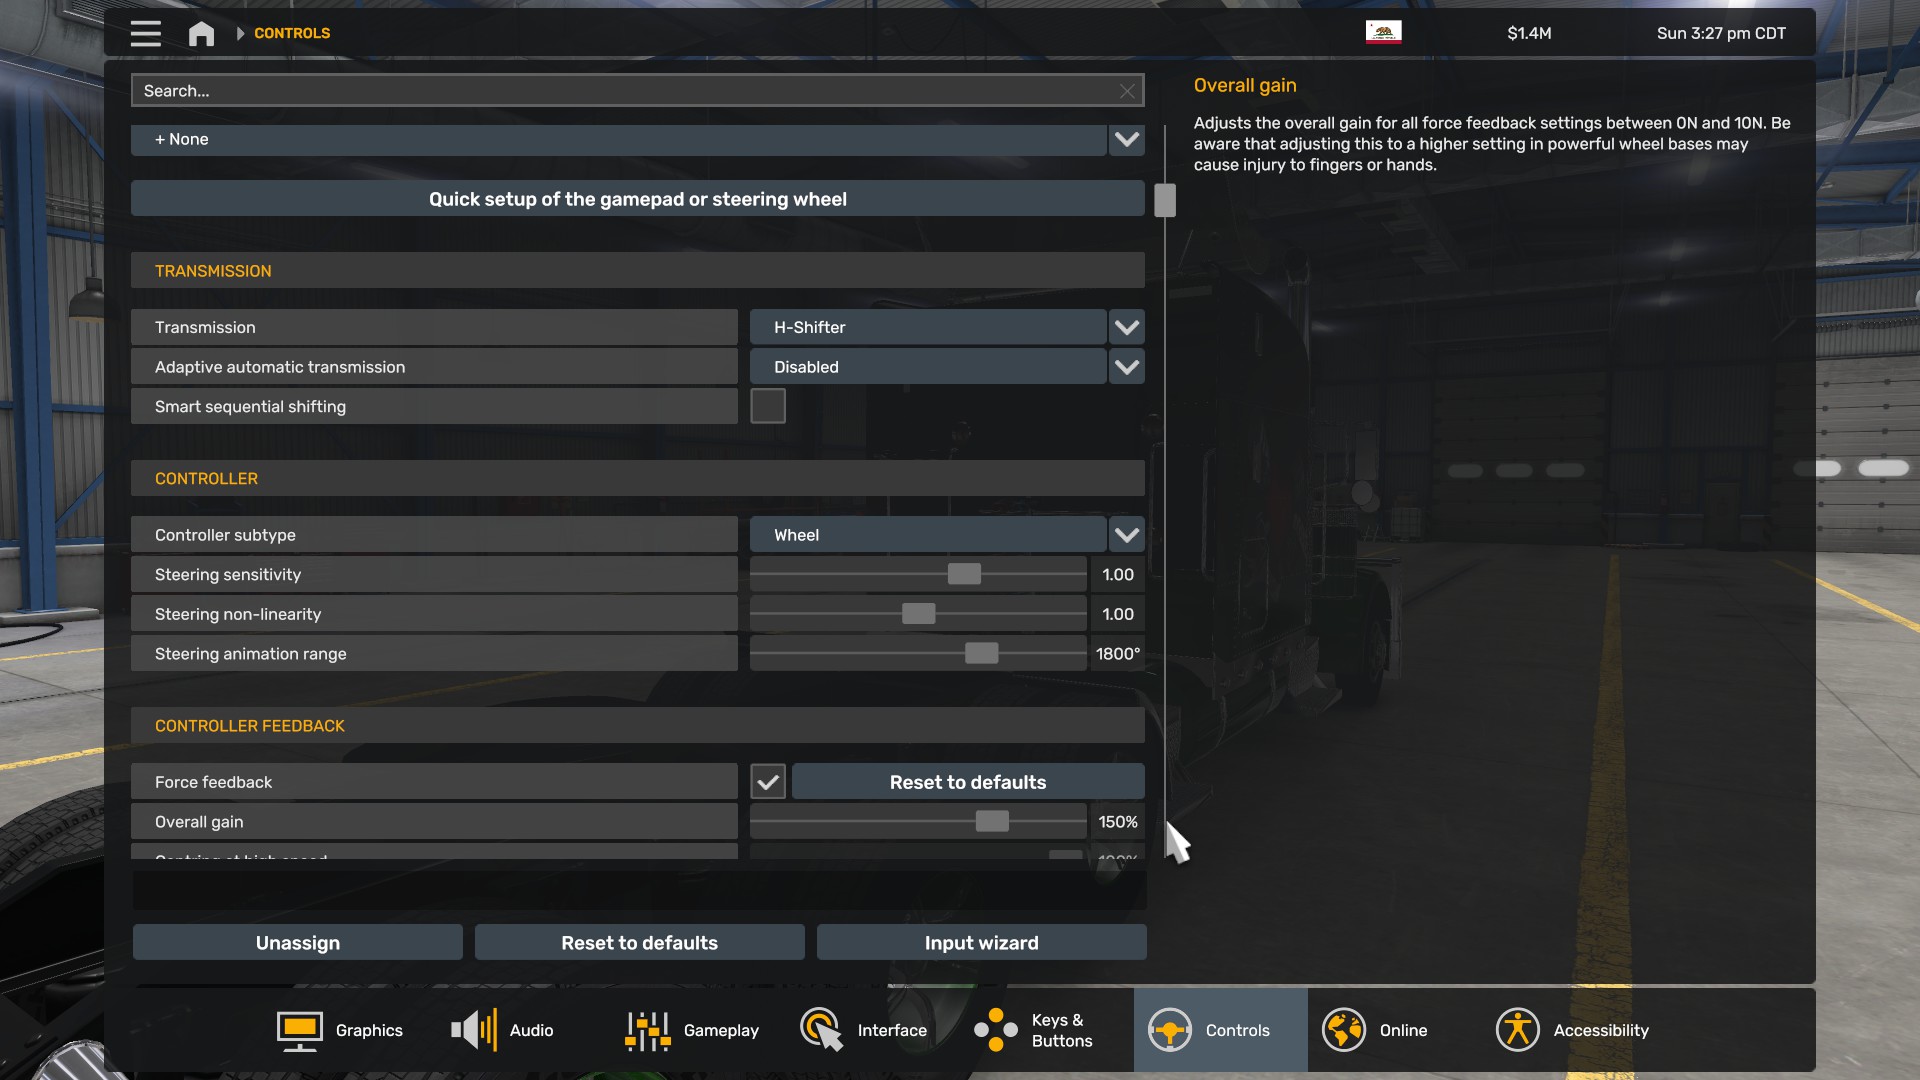
Making the presets
Now it's time to actually make the preset files. Create two new empty text files in the game's home directory. Rename them into something simple yet meaningful. I decided to call them "t680.cfg" and "389.cfg", but you can choose your own names. You don't have to change their file extension to ".cfg", you can keep them as ".txt" files or even leave them without extensions, it does not matter.
It's possible to dump all the settings from all three config files into each preset file and call it a day. But there's more efficient and elegant solution. You need to open both old and new config files and compare them, and select only the settings that were changed. You can do this using just your own eyes, of course, but there are free tools that make it so much easier. You can use a plugin for your text editor for comparing files, or you can use third-party software like Meld, or, the simplest solution, use any free comparison tool online. I recommend DiffCheck.io, but there are other websites as well with that functionality.
Go to the game's home folder, and open both the current "config.cfg" file and the copy you made before, in this example it's "configT680.cfg", in comparison mode. It will look something like this: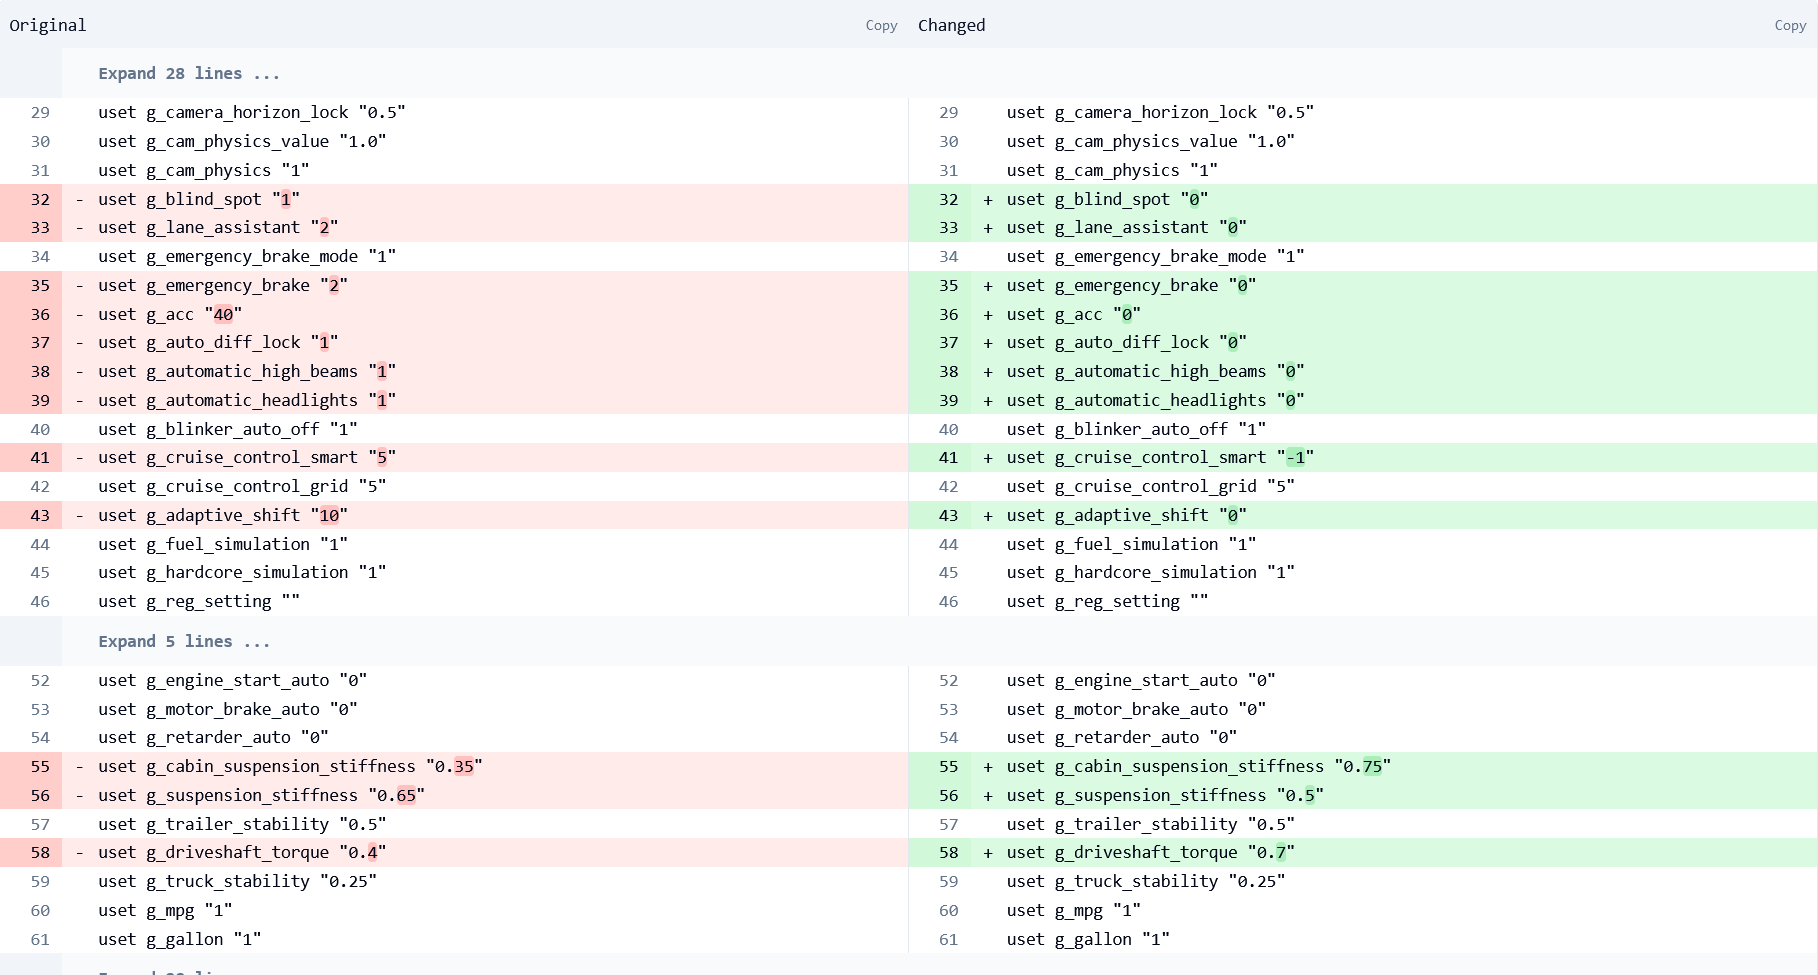
All the lines with difference will be highlighted. Now, copy all the highlighted settings from one file to one of the preset files, and from the other file to the other preset. In this example, from "config.cfg" to "389.cfg", and from "configT680.cfg" to "t680.cfg". That's why I recommended renaming the copy, it's harder to mistake what goes where. You don't have to copy the "uset " part, just copy the setting name and value, like this:
The ability to have all the desired settings in the same preset file, not spread across four config files, is why presets are superior than just keeping several copies of all the config files. Once made, presets are also easier to use when Steam Cloud sync is enabled, as it makes the game store one of the configs in a very different location within Steam folder.
You can add comments by making a new line starting with the hash or pound sign:Finally, make sure that the preset files end with an extra empty line at the end of the file. Otherwise, the game will not be able to do the last command in the file.
Preset file examples
Here's my t680.cfg:
And here's my 389.cfg:
Note the empty lines at the end of each file, they are important. Also note that the settings are not ordered the same way they are shown in the settings UI in the game, and the values not always correspond with numbers shown near the sliders, it's normal.
Using the preset files
Now, all is left to do is to try the presets in action. Switch back to the game, open console by pressing the key to the left of "1", it's usually marked as "`" or "~".
My current settings are still for 389. I switch to T680: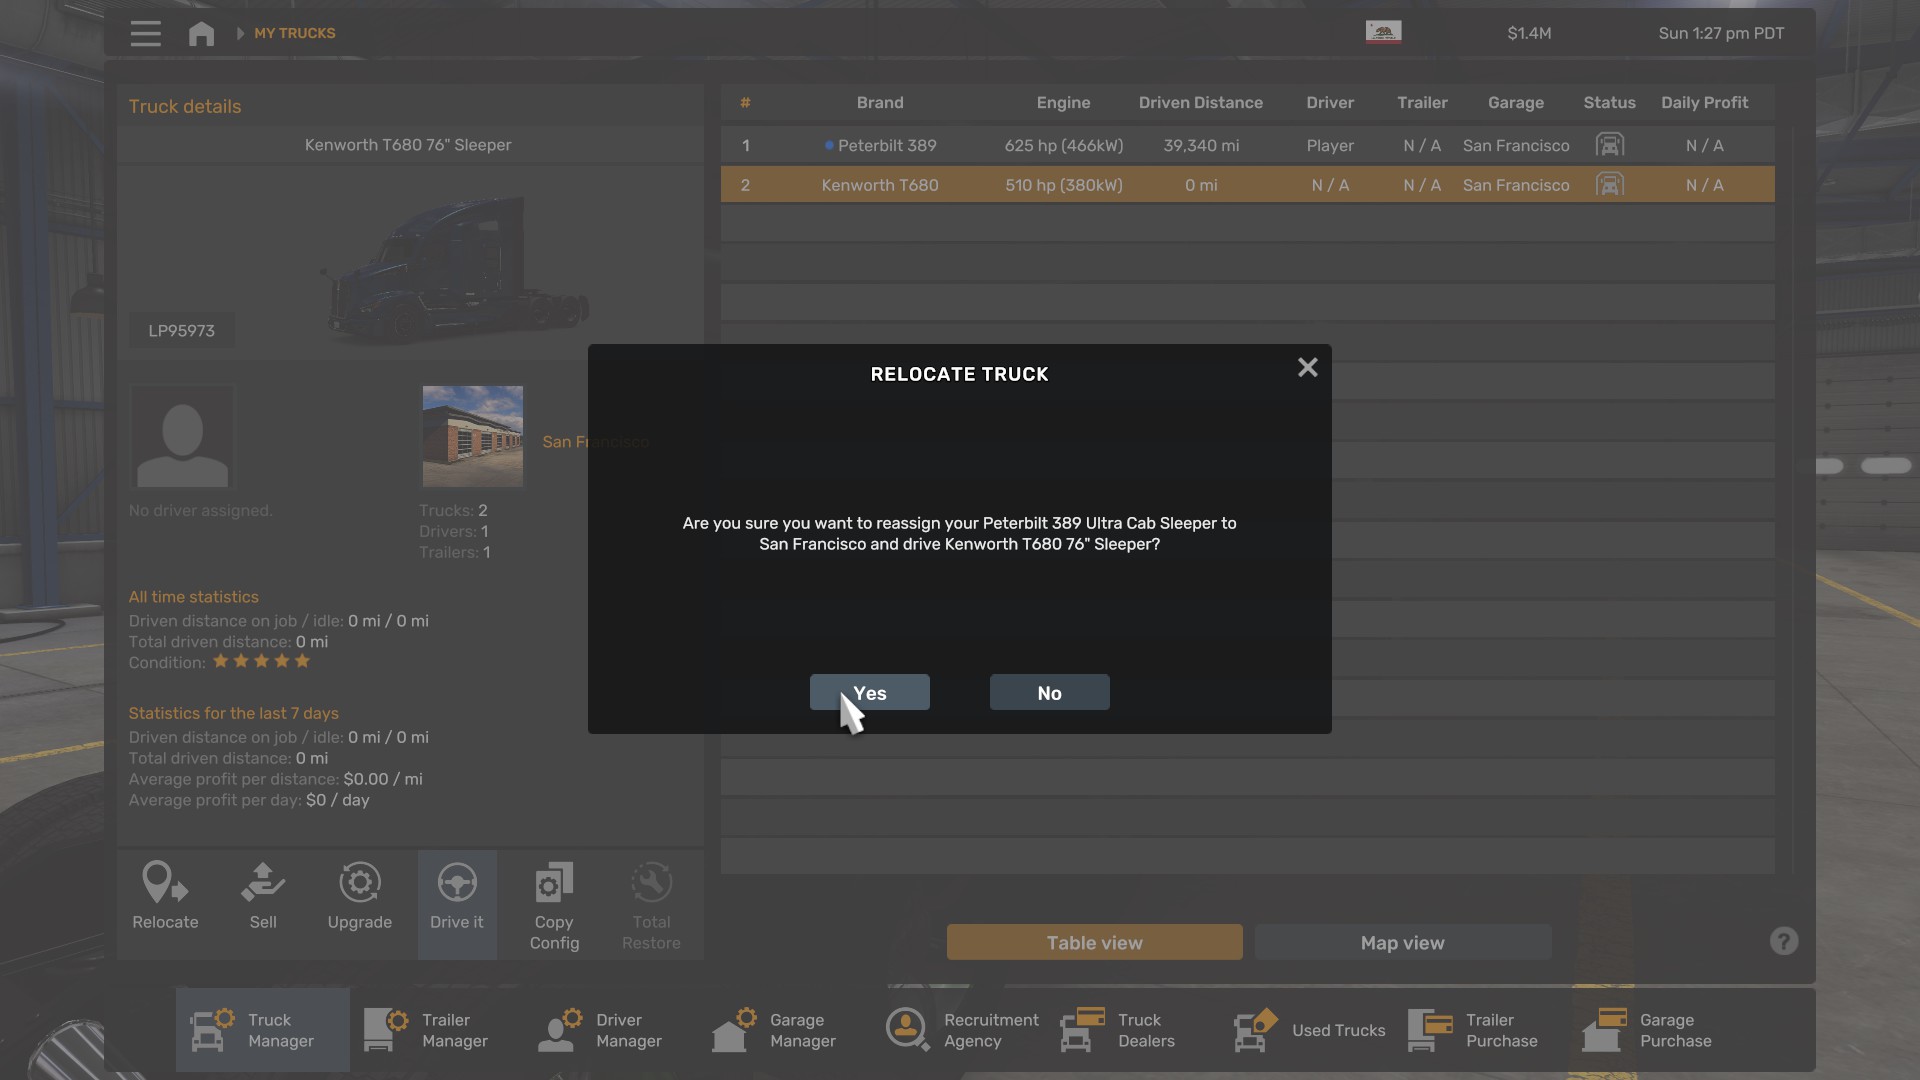
Then I type into the console
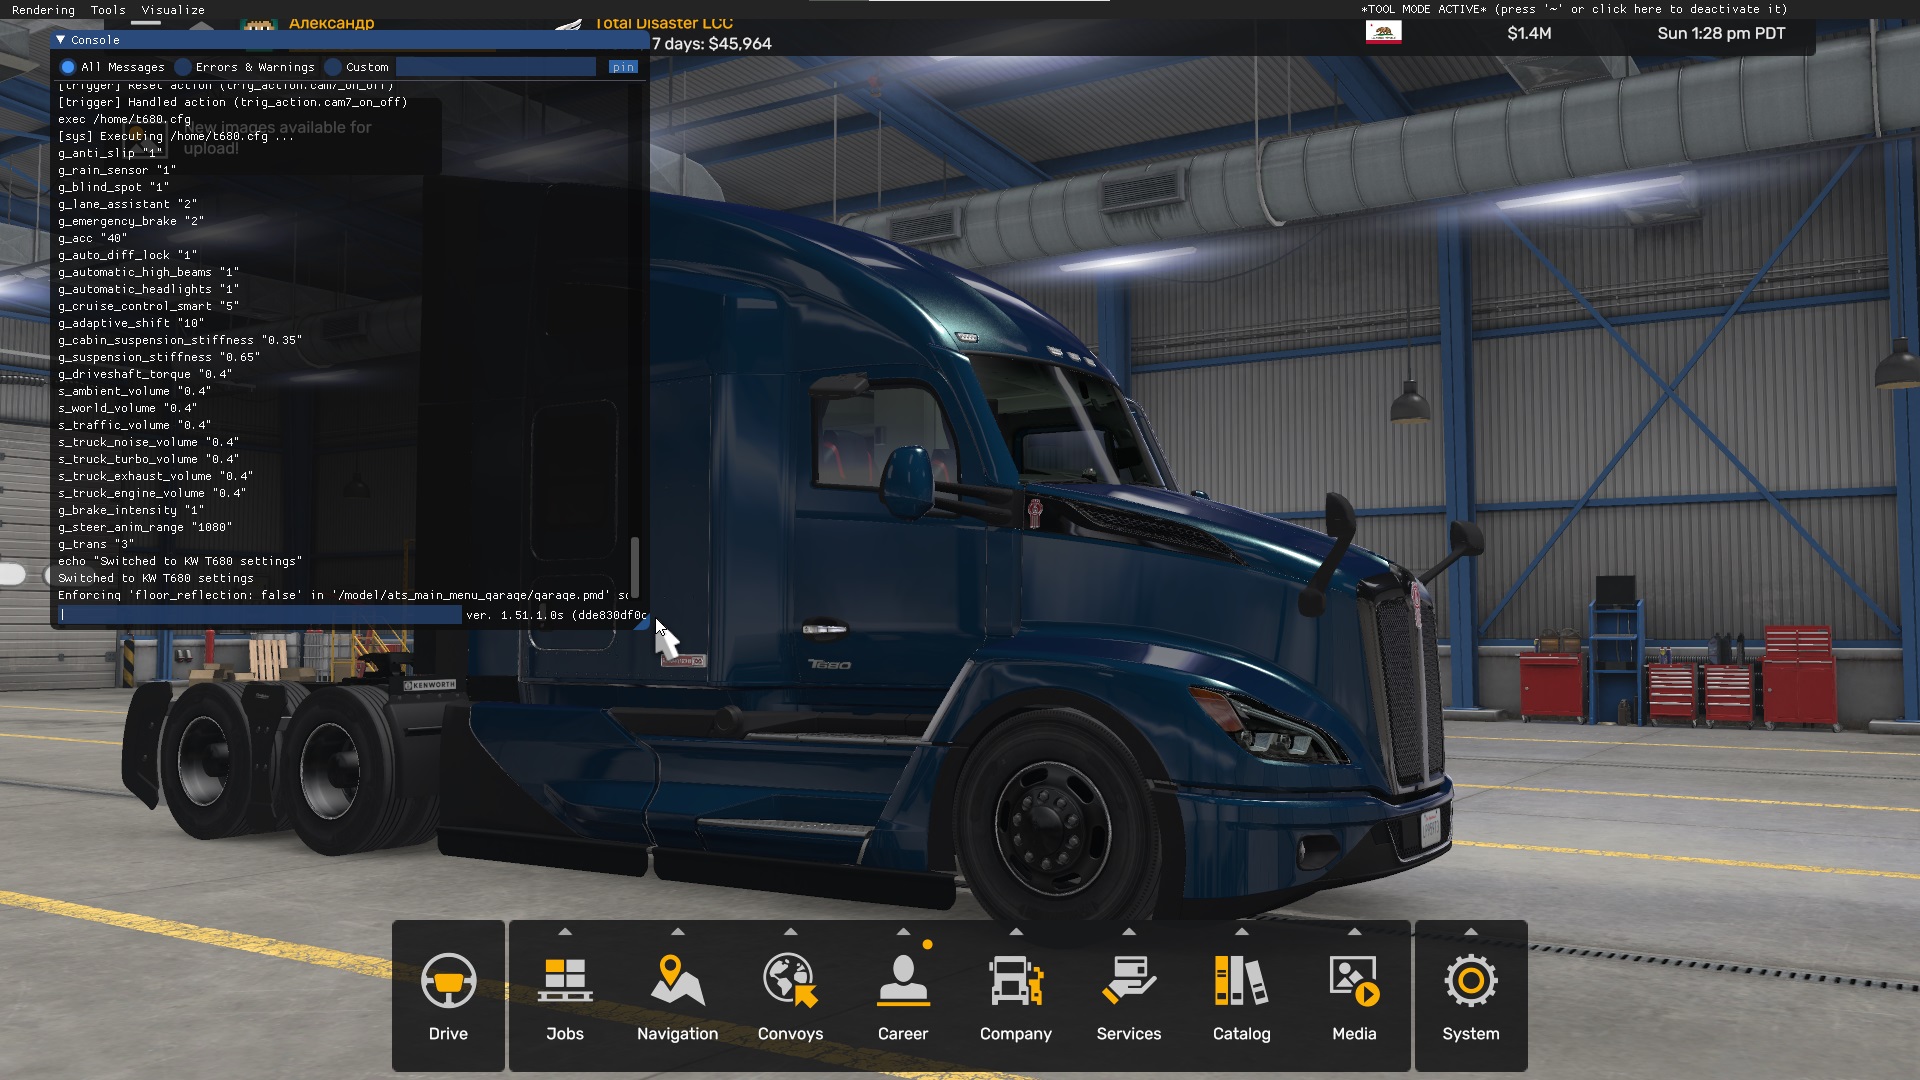
And it's done. But I go to settings just to check, and I see that the settings are corresponding to the modern truck:
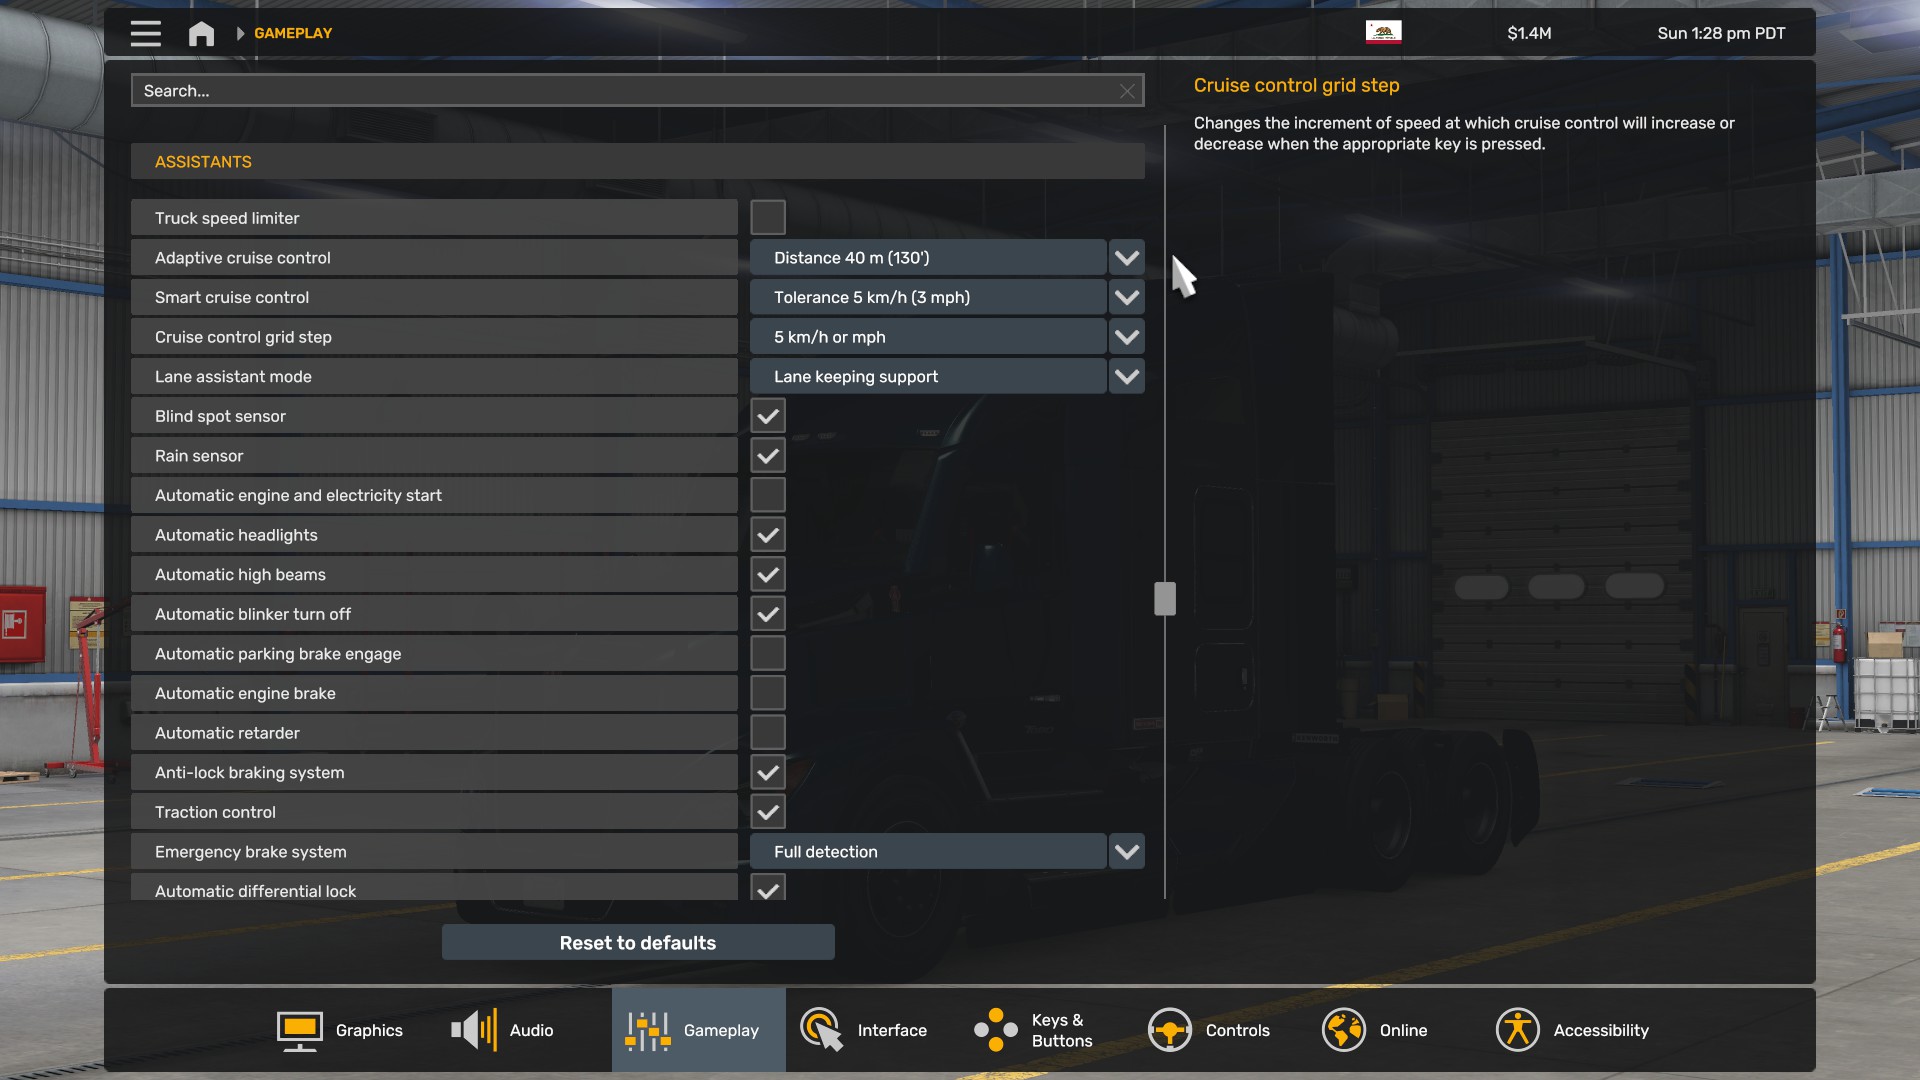
And to change back to 389's settings, I can type in the console:
As I said, the presets are not limited to sounds or truck settings. You can make presets of any settings, including graphical settings, regional and language settings, UI settings, gameplay settings, device settings, and so on.
And one last thing: now you can enable Steam Cloud synchronization for the profile back.
- Hidden and unmarked roads - USA - WEST - updated 2026/02/20★ 5 (1.3k)38k views1.9k ♥73 minUpdated Feb 19
- The American Truckers Guide to everything!★ 5 (960)34k views1.5k ♥53 minUpdated Aug 16, 2020
- American Truck Simulator 100% Achievement-Guide [ENG]★ 5 (704)15k views1.3k ♥8 minUpdated May 16
- Все достижения American Truck Simulator + все DLC [100% Achievement-Guide] [upd: 15.05.26]★ 5 (1.2k)14k views1.7k ♥42 minRussianUpdated Jul 12
- Texas 100% Achievement-Guide [ENG]★ 5 (443)12k views595 ♥7 minUpdated May 16
- Washington - 100% Achievement-Guide [ENG]★ 5 (503)12k views532 ♥2 minUpdated Mar 24, 2023




- Upgrading to PremiumTeam Fortress 2★ 5 (20k)1441k views11k ♥6 minUpdated May 11, 2022
- No More Room in Hell Official ManualNo More Room in Hell★ 5 (2.8k)569k views2.1k ♥29 minUpdated Apr 22, 2019
- NMRiH Community Hosting GuidesNo More Room in Hell★ 5 (526)351k views653 ♥1 minUpdated Aug 10, 2022
- ULTIMATE GUIDE FOR GAME DEV TYCOONGame Dev Tycoon★ 5 (5.8k)326k views10k ♥4 minUpdated 23 Jan, 2014
- How to 'Git Gud' Soon™MORDHAU★ 5 (2k)318k views3k ♥68 minUpdated Nov 16, 2024
- Лучшие кооперативные игры SteamPAYDAY 2★ 5 (1.5k)315k views2.1k ♥56 minRussianUpdated Apr 27, 2025






This guide was created by its original author on the Steam Community. Are you the author and want it removed? Request removal.