How to Crop a Texture Atlas into Individual Sprites (Atlas Cropper)
Step 1: Prepare the Files
To start, you will need to extract the texture atlas itself. You can find detailed instructions on how to do this in this guide.
https://steamcommunity.com/sharedfiles/filedetails/?id=2208764780
Personally, I use an old-school but proven method using NinjaRipper and Noesis Model Viewer.
Once everything is set up, find the texture atlas you need (for example, an icon atlas) using Noesis. Don't forget to export the atlas from .dds to .png format and give the file any name you like (e.g., atlas_123).
Next, you need to download the corresponding VT Lua atlas file:As a result, you should have two essential files: the atlas itself (in .png format) and its configuration file (in .lua format).
Step 2: Set Up the Google Colab
https://colab.research.google.com/drive/1f-5ycnvLnwCQTkbMSnAxUSH4gXAbo8r6?usp=sharing
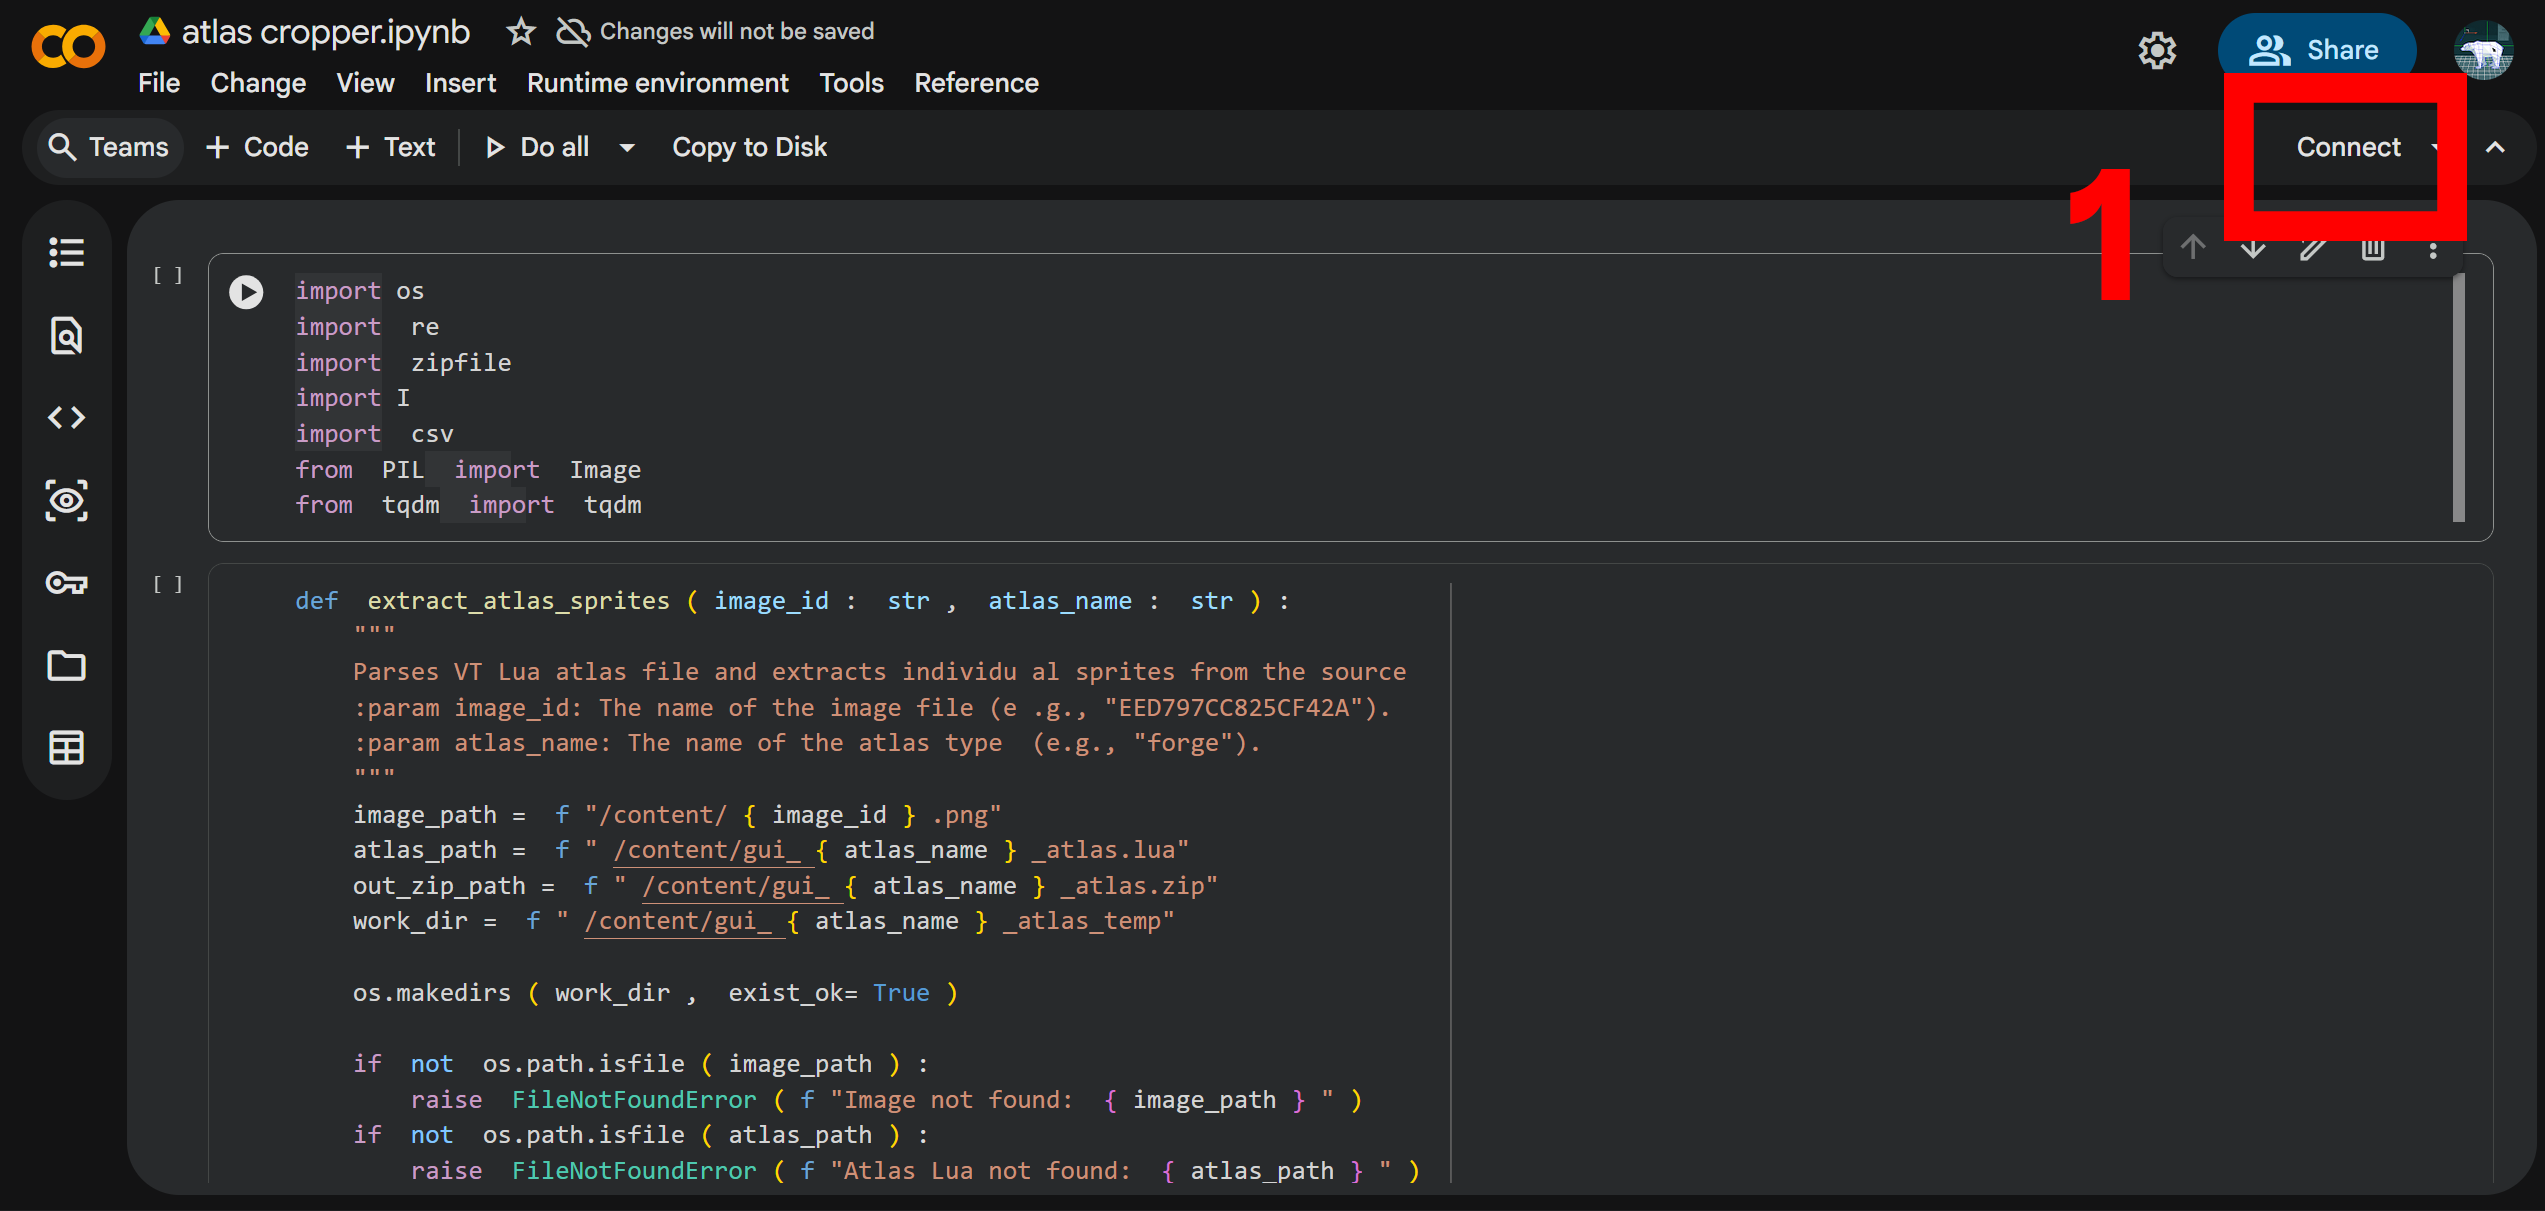
- Make sure to log into your Google account and click the Connect button in the top right corner.
- Wait a moment for a green checkmark to appear, indicating a successful connection.
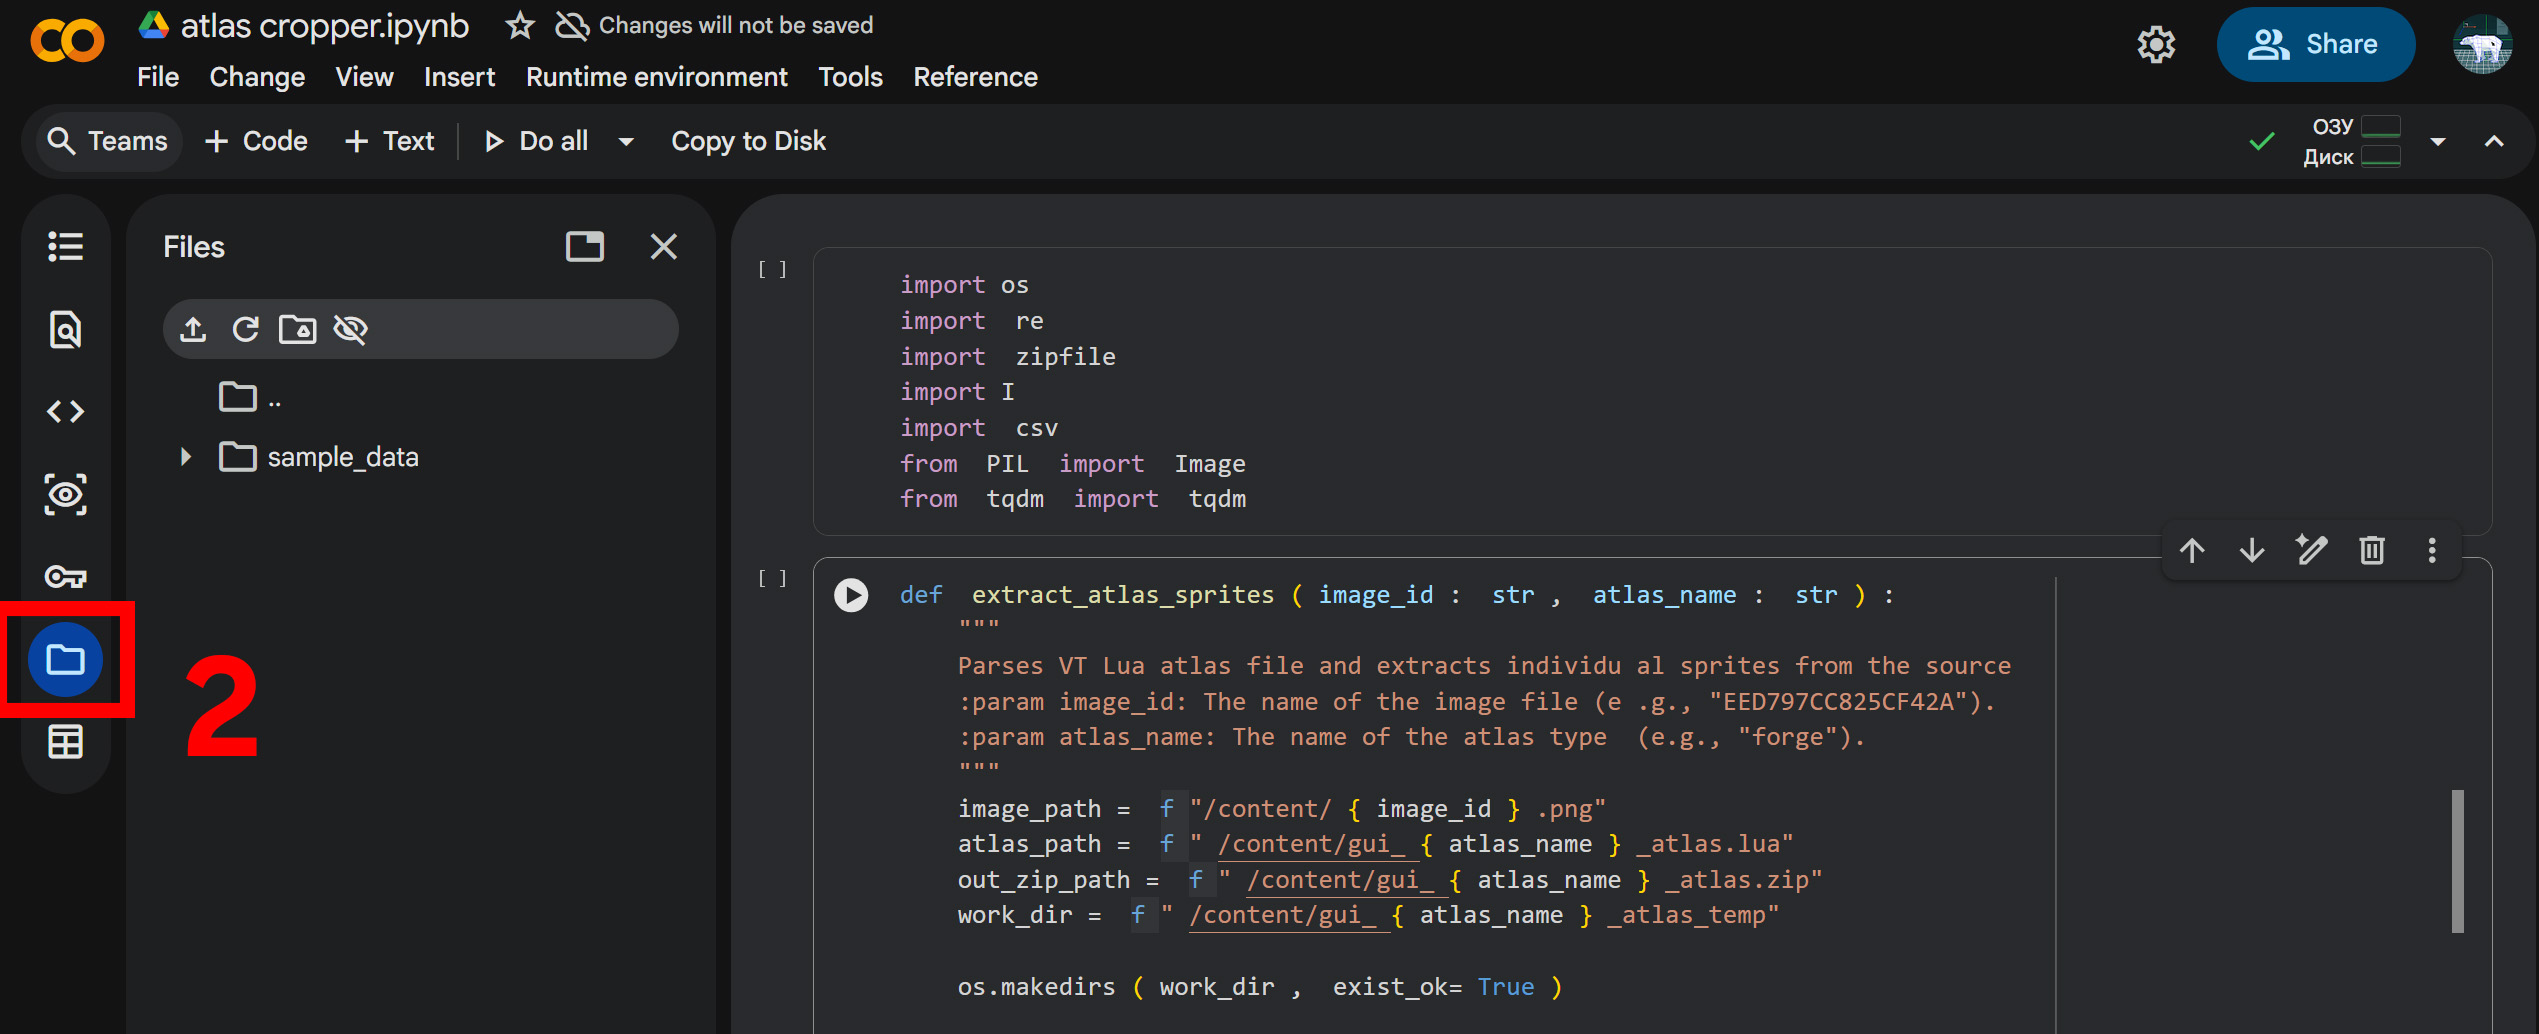
- Go to the Files tab (the content folder) on the left sidebar.
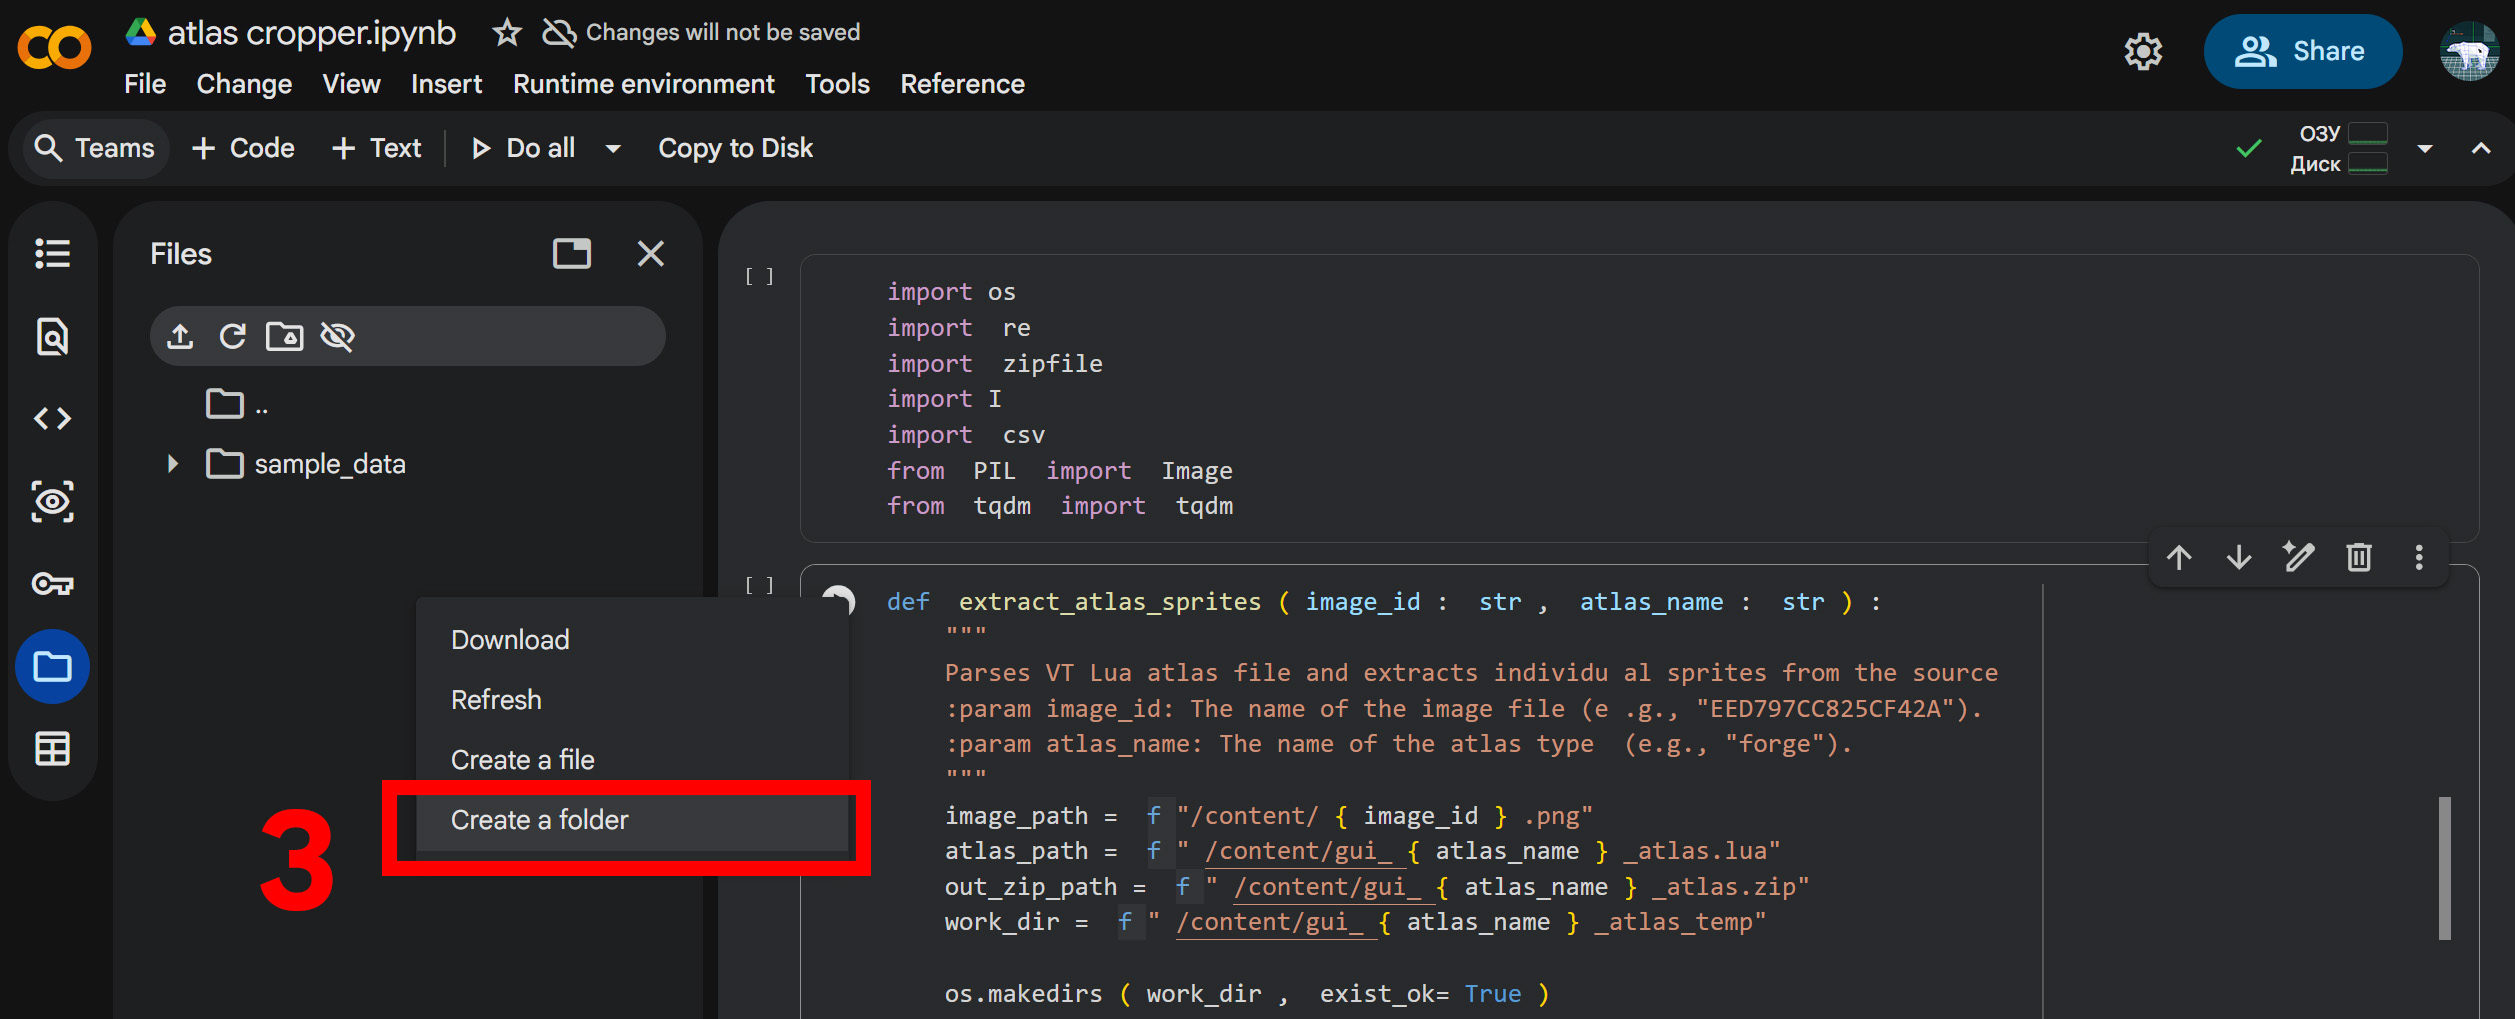
- Create a new folder there and name it gui_{atlas_name}_atlas_temp. Replace {atlas_name} with the actual type of the atlas, based on the name of the downloaded .lua file. In my case, it will be gui_icons_atlas_temp.
- Drag and drop the atlas (.png) and its config file (.lua) directly into the root content folder.
Step 3: Edit and Run the Script
- For {image_id}, enter your image file name (in my case, atlas_123).
- For {atlas_name}, enter the atlas type (in my case, icons).
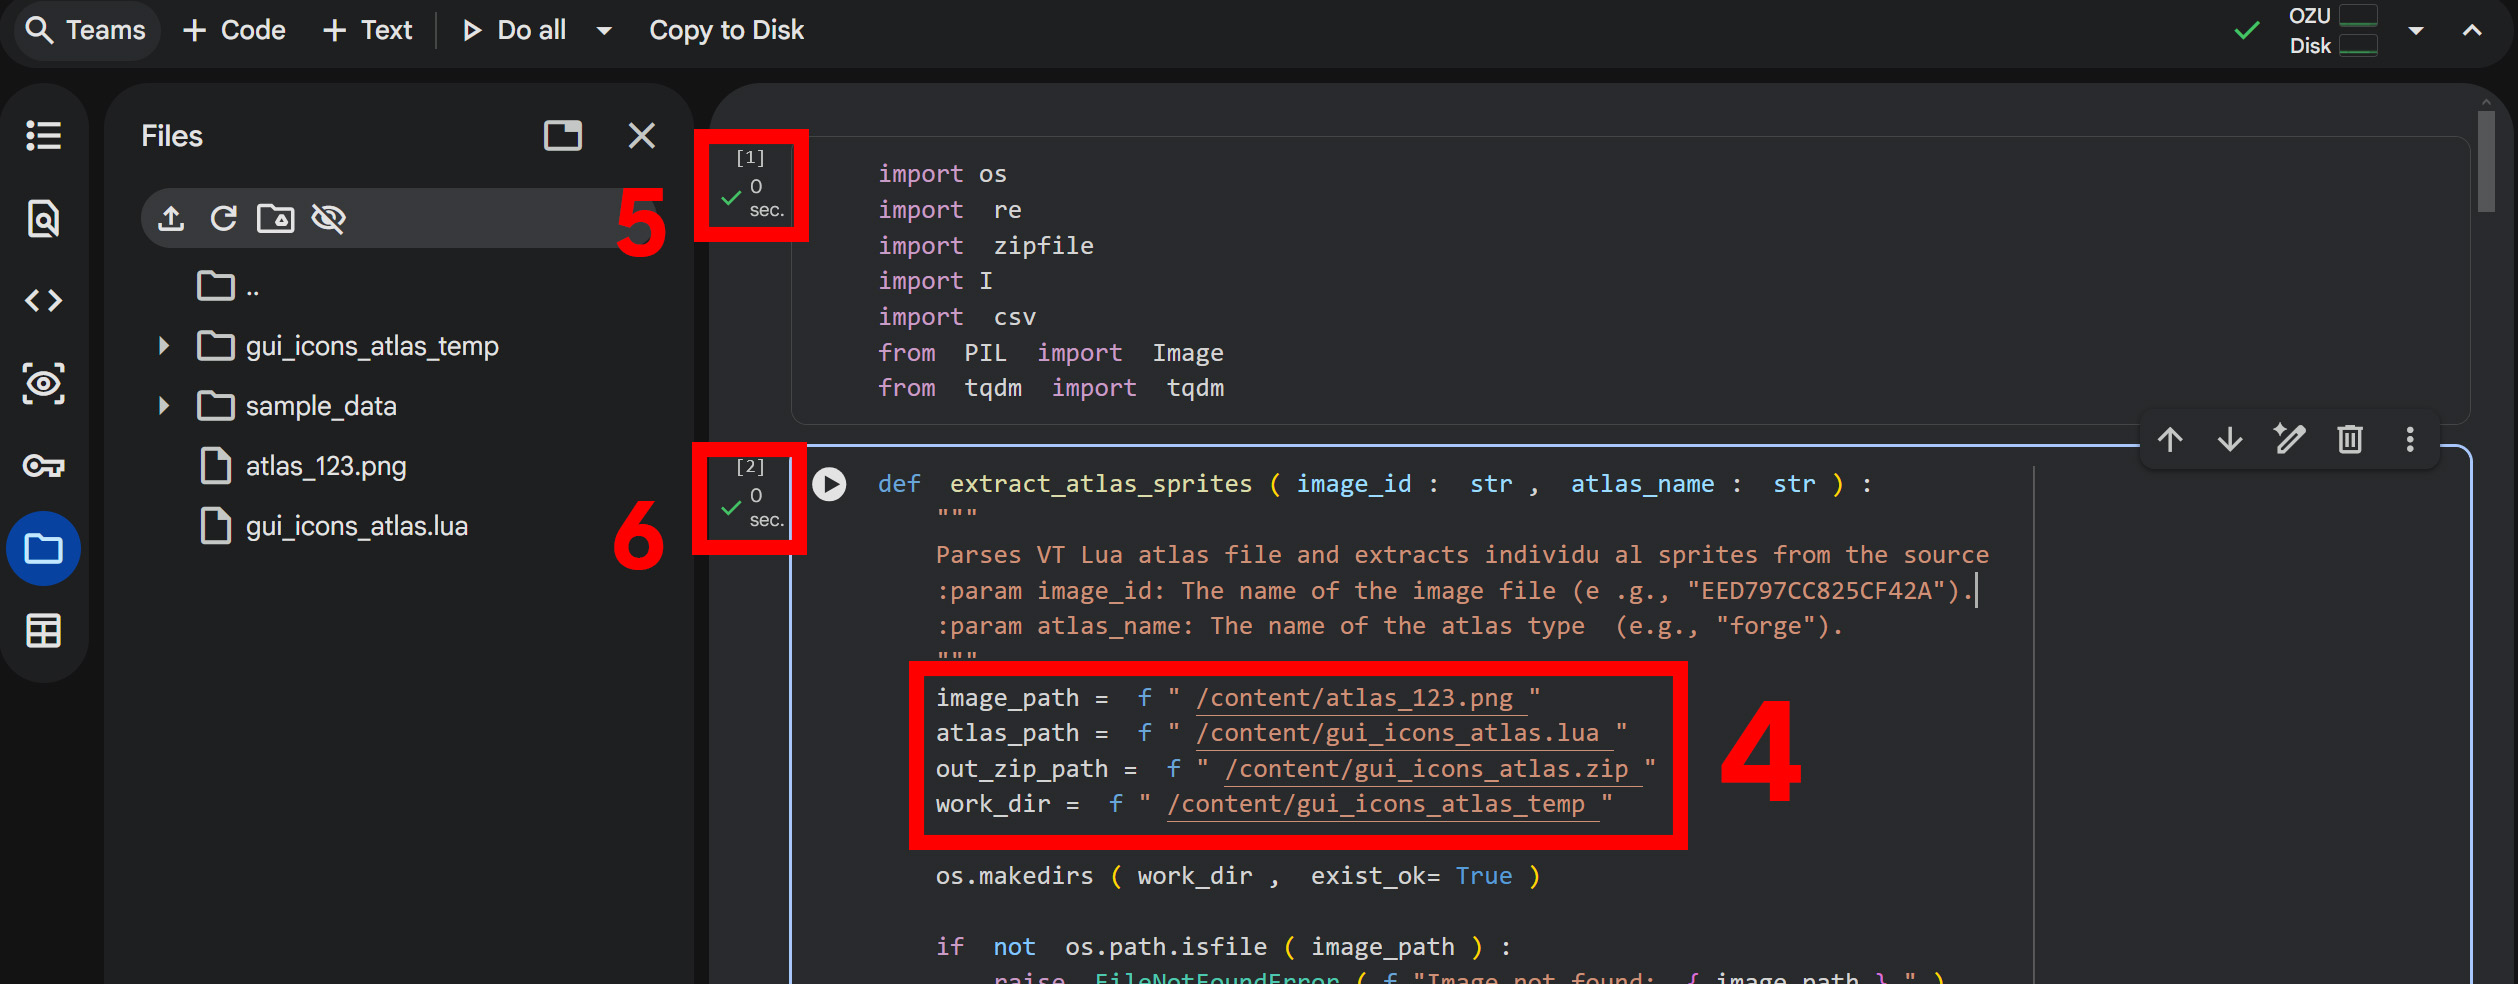
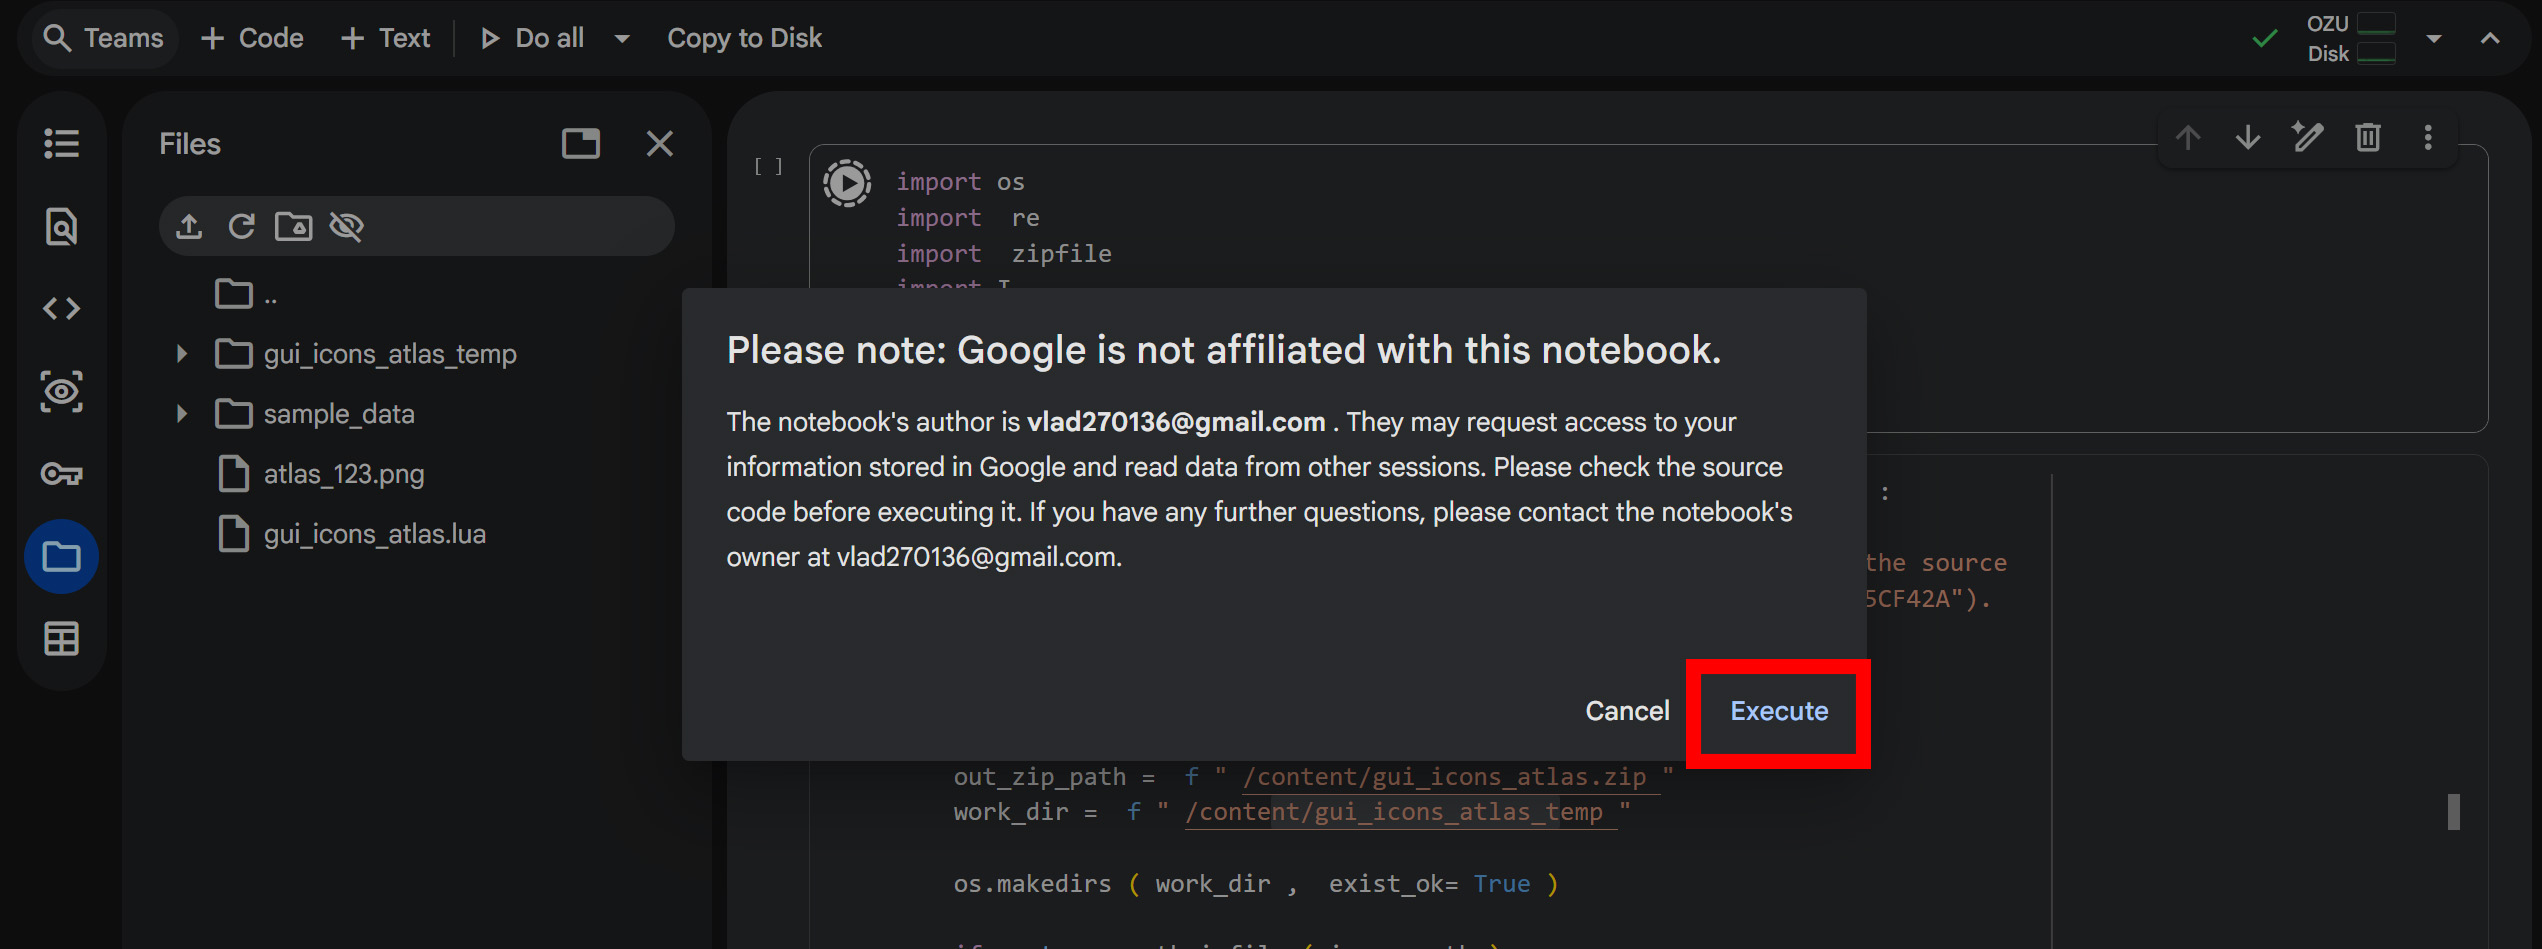
- Run the very first code cell. If a warning from Google pops up, simply click Execute.
- Run the second cell.
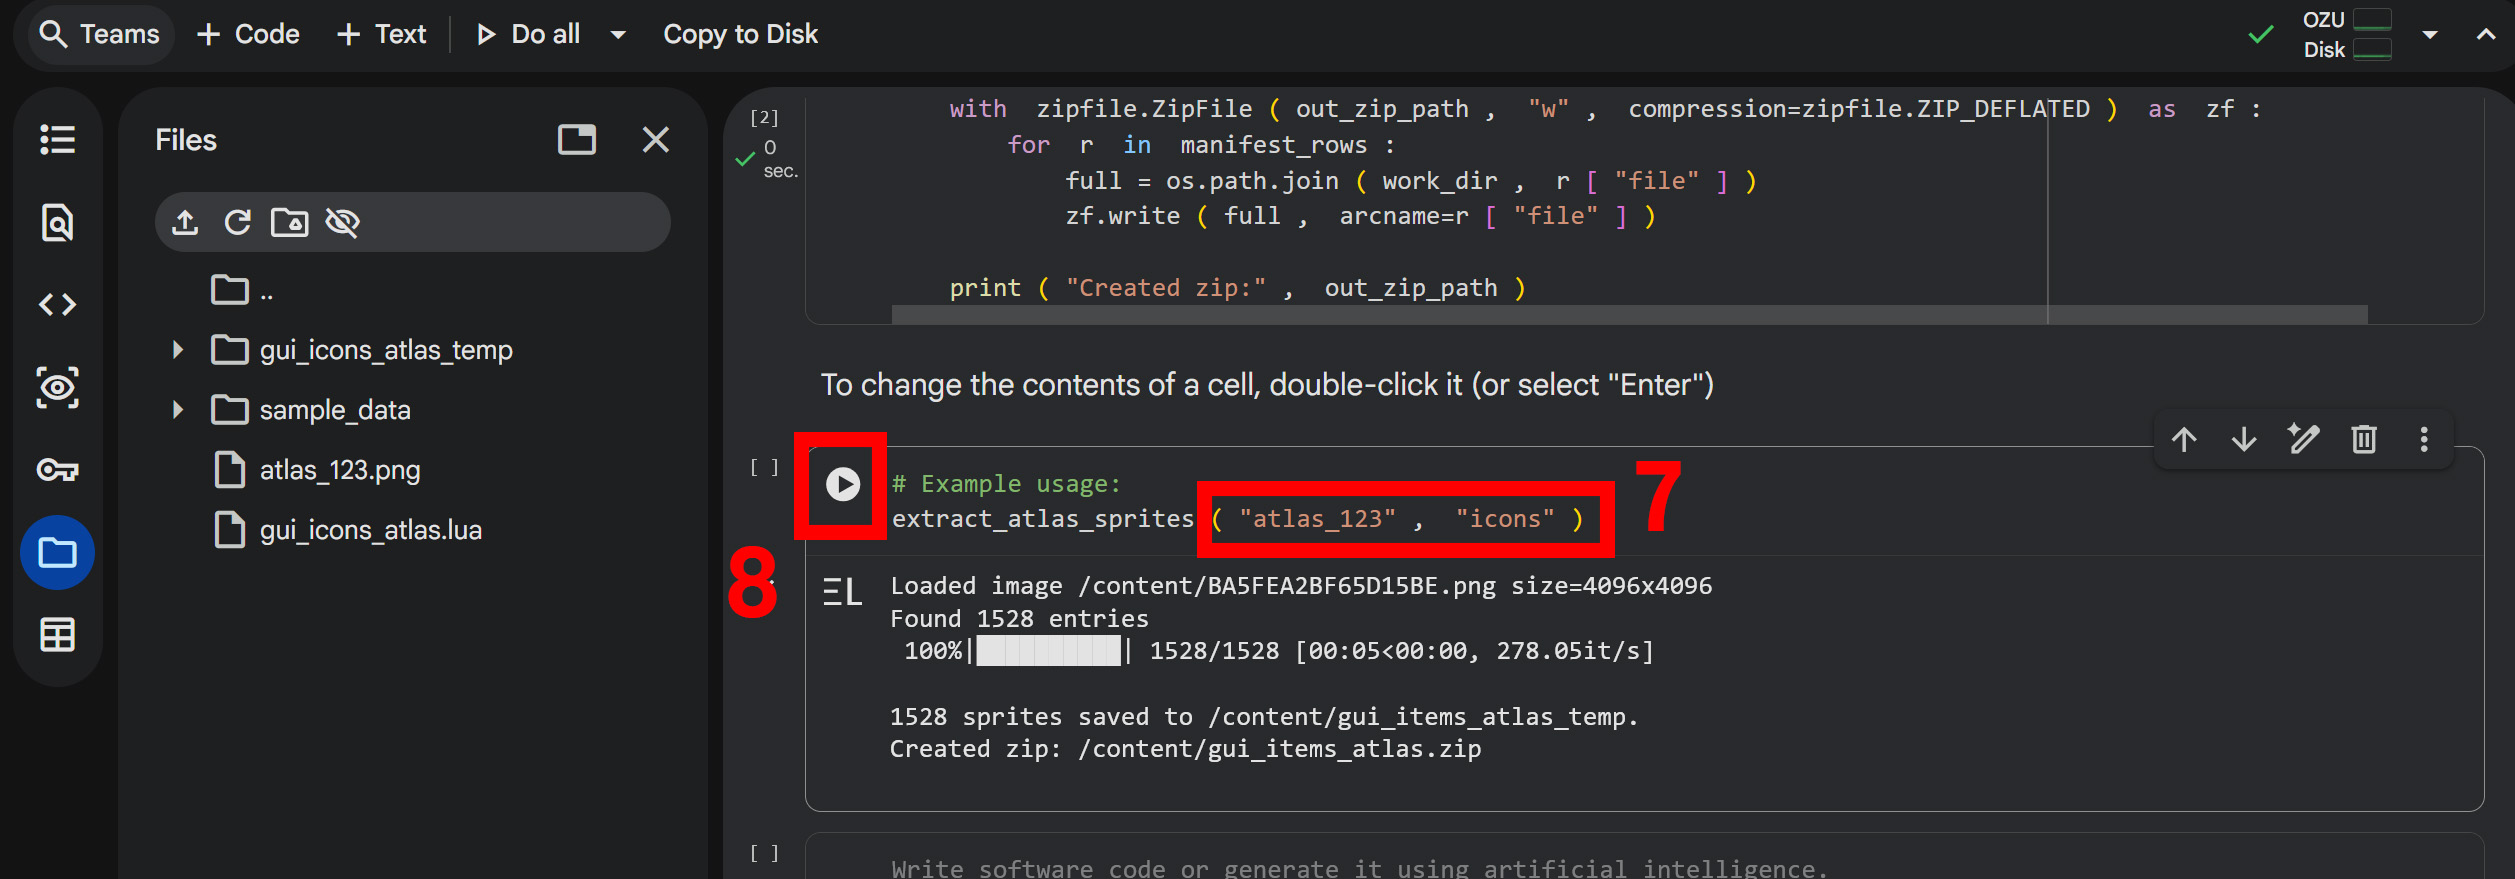
- Don't rush to run the third cell! First, you need to change the image name and atlas type inside it. In my example, the final function call looks like this: extract_atlas_sprites("atlas_123", "icons").
- Now you can run the third cell. The sprite extraction process will begin.
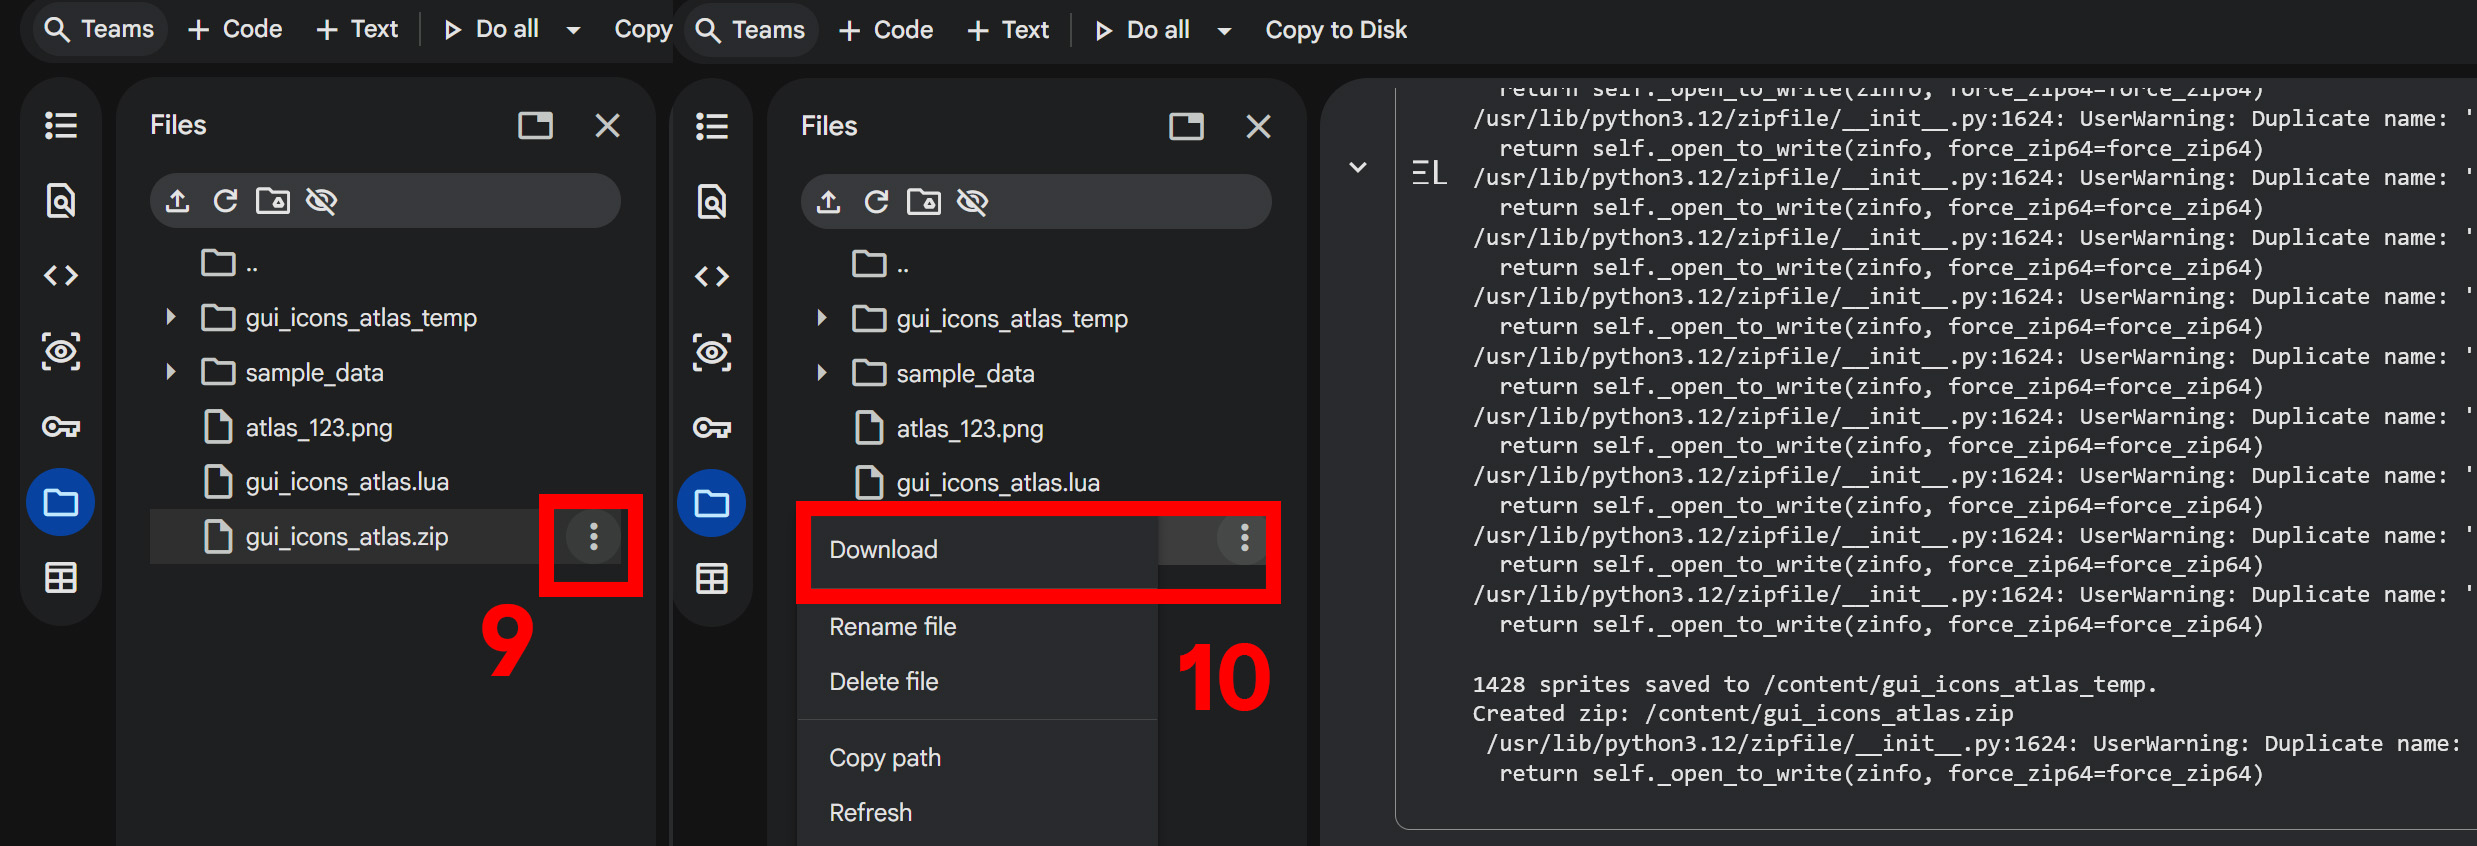
Step 4: Download the Results
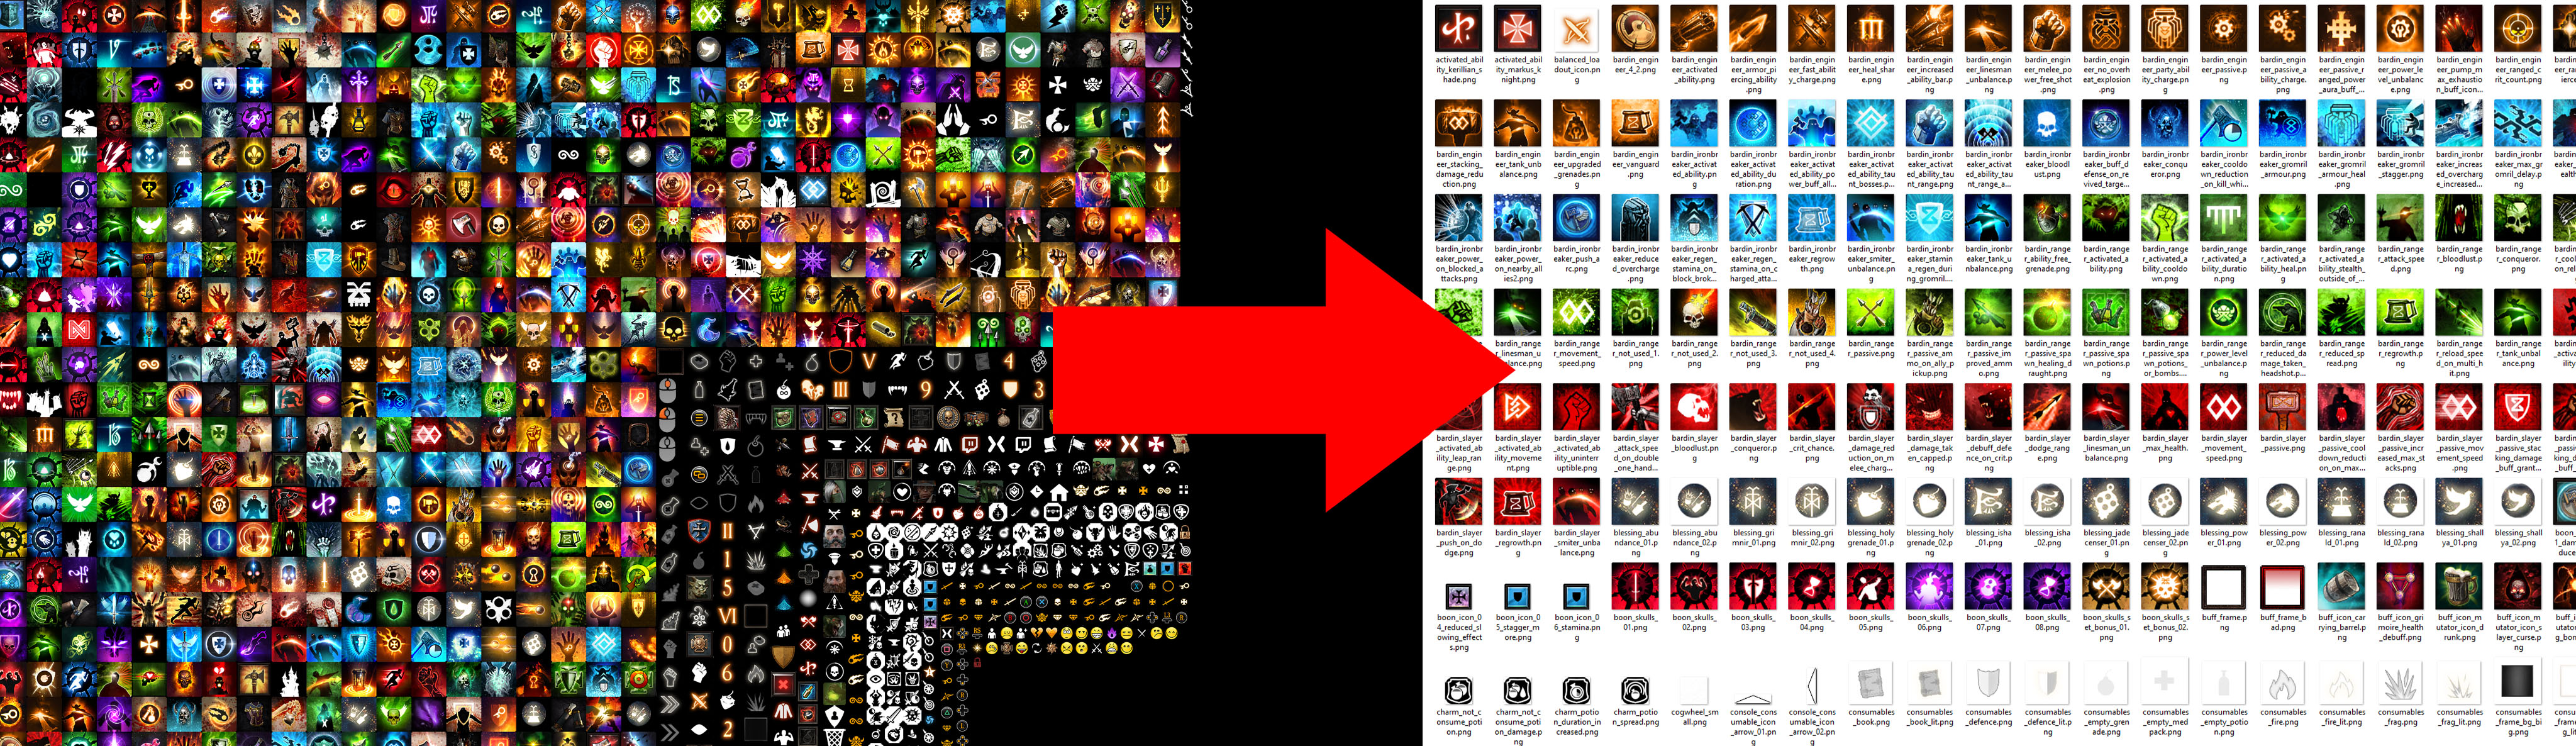
And you're done! All that's left is to unpack the archive on your computer to easily browse the images.
Bonus Information
On top of that, we have created a GitHub repository containing all the sprites extracted from the VT1 and VT2 atlases:
https://github.com/Vladm0z/Vermintide-2-Atlases
We will try to update it periodically so that you can view which images have been added or deleted.
If you have any questions left, feel free to ask them in the comments below!
- 【Updated to Patch 6.10】【All Careers】Legend Builds Collection★ 5 (2.6k)99k views7.6k ♥87 minUpdated Mar 10
- 【Updated to Patch 6.10】【Cataclysm Builds】Kruber all careers★ 5 (1.8k)60k views5.7k ♥33 minUpdated Mar 10
- 【Updated to Patch 6.11】Optimal Melee Weapon Combo★ 5 (1.9k)58k views5.2k ♥26 minUpdated Jun 11
- 【Updated to Patch 6.10】【Cataclysm Builds】Saltzpyre all careers★ 5 (1.7k)57k views5.6k ♥36 minUpdated Mar 10
- 【Updated to Patch 6.10】【Cataclysm Builds】Bardin all careers★ 5 (1.8k)57k views5.6k ♥33 minUpdated May 12
- 【Updated to Patch 6.10】【Cataclysm Builds】Sienna all careers★ 5 (1.7k)57k views5.4k ♥37 minUpdated Mar 10



- Upgrading to PremiumTeam Fortress 2★ 5 (20k)1441k views11k ♥6 minUpdated May 11, 2022
- No More Room in Hell Official ManualNo More Room in Hell★ 5 (2.8k)569k views2.1k ♥29 minUpdated Apr 22, 2019
- NMRiH Community Hosting GuidesNo More Room in Hell★ 5 (526)351k views653 ♥1 minUpdated Aug 10, 2022
- ULTIMATE GUIDE FOR GAME DEV TYCOONGame Dev Tycoon★ 5 (5.8k)326k views10k ♥4 minUpdated 23 Jan, 2014
- How to 'Git Gud' Soon™MORDHAU★ 5 (2k)318k views3k ♥68 minUpdated Nov 16, 2024
- Лучшие кооперативные игры SteamPAYDAY 2★ 5 (1.5k)315k views2.1k ♥56 minRussianUpdated Apr 27, 2025






This guide was created by its original author on the Steam Community. Are you the author and want it removed? Request removal.