Versus Map Items
Screaming Bell
Total Items
Round 1
Healing: 6 Draughts: 2
Kits: 4 Bombs: 12
 Explosive: 7
Fire: 5 Potions: 11
 Ammo: 8
 Pouches: 5
Crates: 3 Barrels: 6
 Explosive: 3
Fire: 3
Round 2
Healing: 5Draughts: 1Kits: 4 Bombs: 6
Explosive: 4Fire: 2 Potions: 8
Ammo: 14Pouches: 12Crates: 2 Barrels: 6
Explosive: 4Fire: 2
Round 1
Section 0: Spawn Room
Bombs: 3 (Explosive: 2 / Fire: 1)Potions: 4
Ammo: 1 (Crate)
Section 1: Spawn → Hold Event
• Bombs: 1 (Explosive)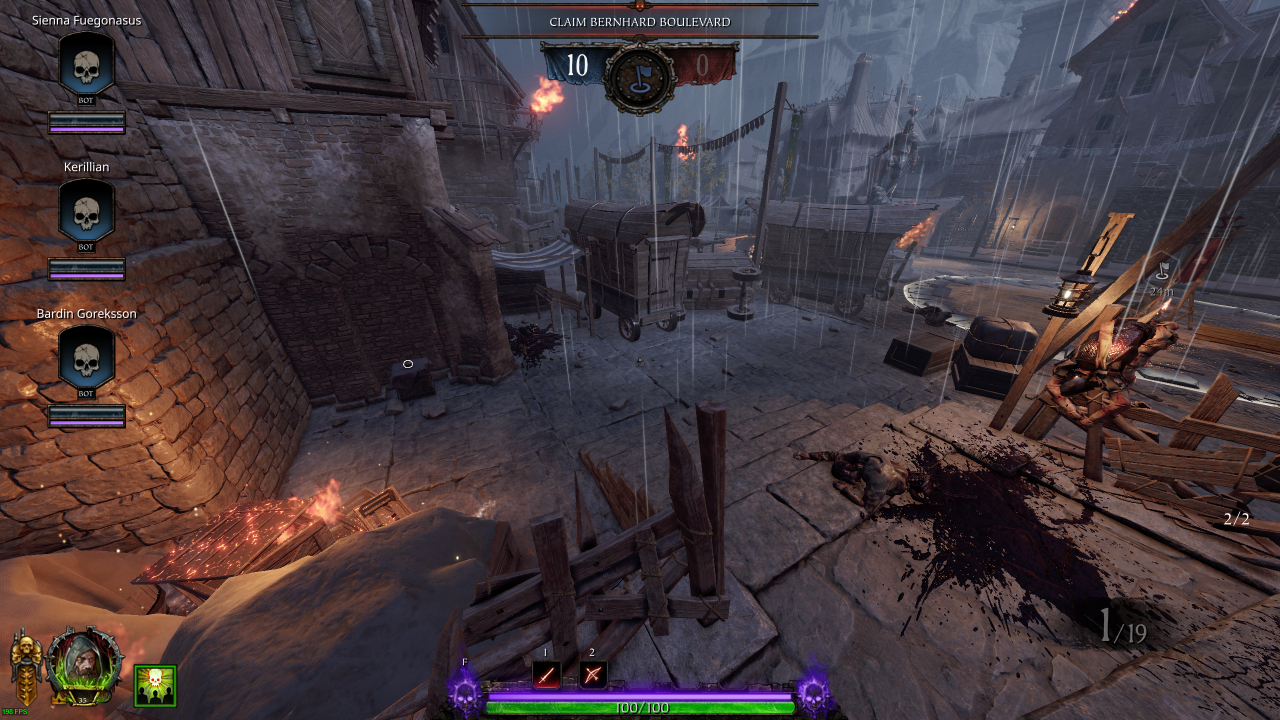
Section 2: Drop Down → Lever
• Healing: 1 (Kit)• Bombs: 1 (Explosive)
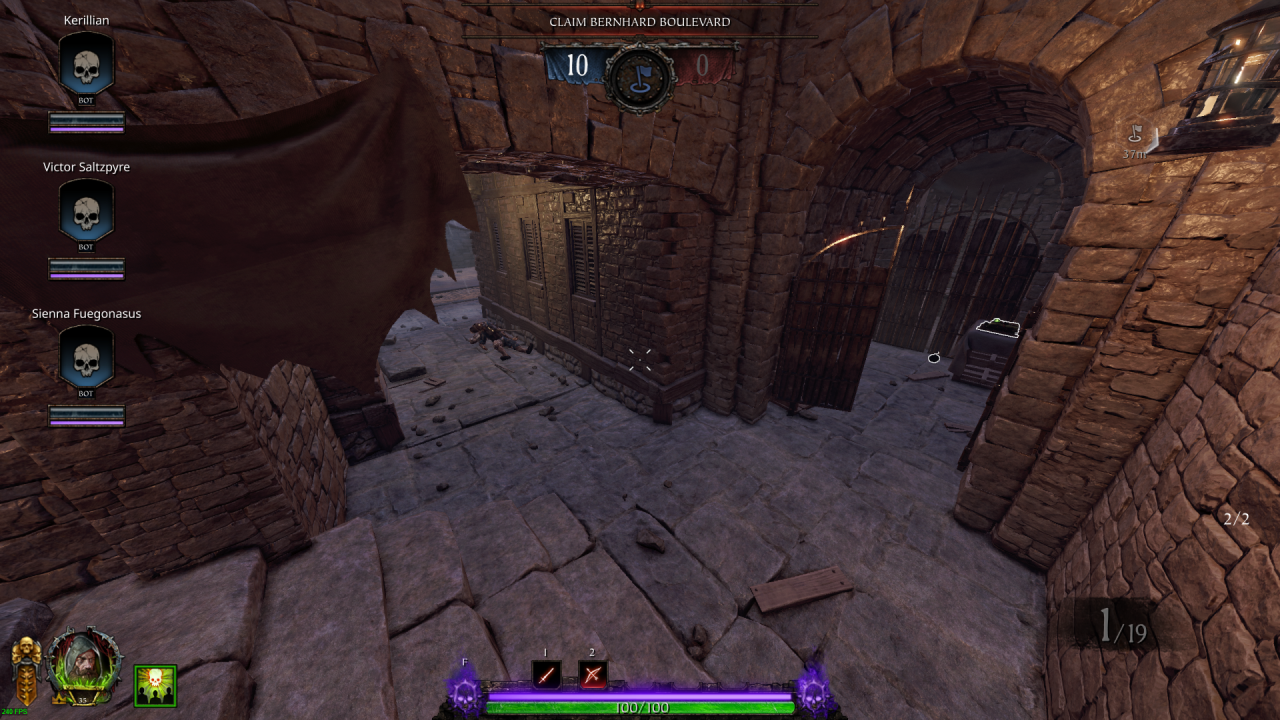
• Healing: 2 (Draught: 1 / Kit: 1)
• Bombs: 2 (Explosive: 1 / Fire: 1)
• Potions: 2
• Ammo: 1 (Crate)
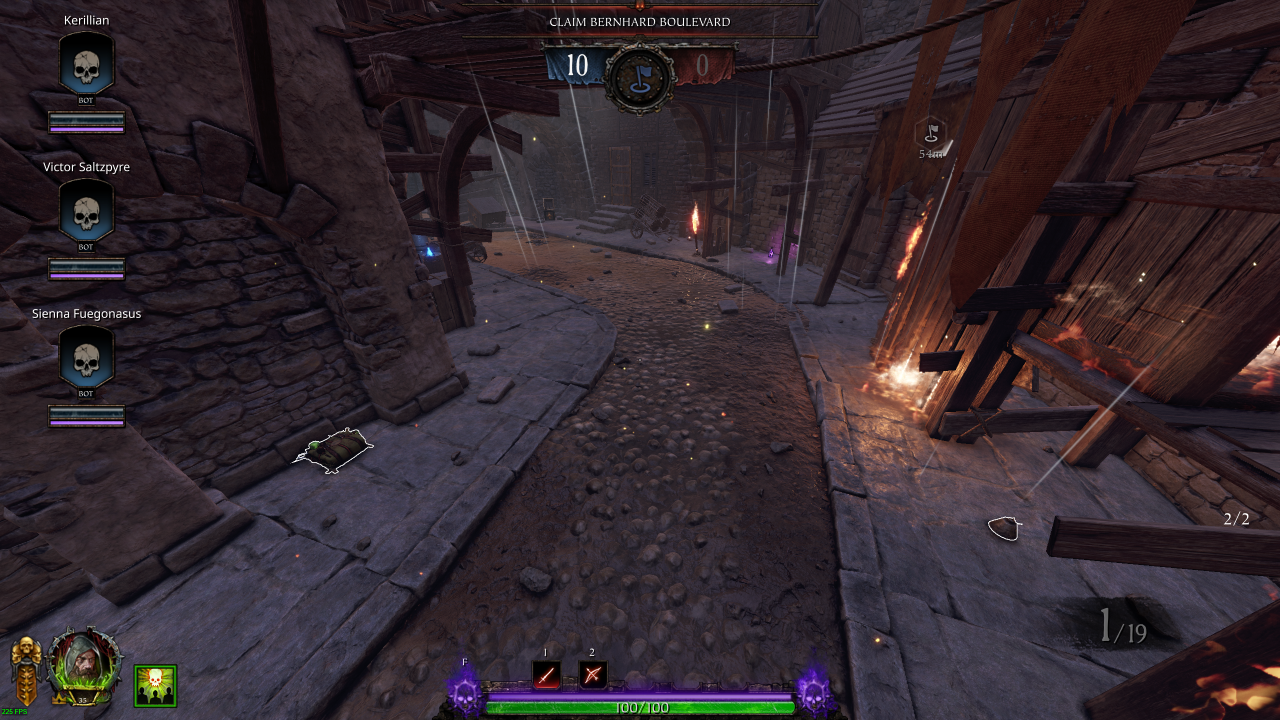
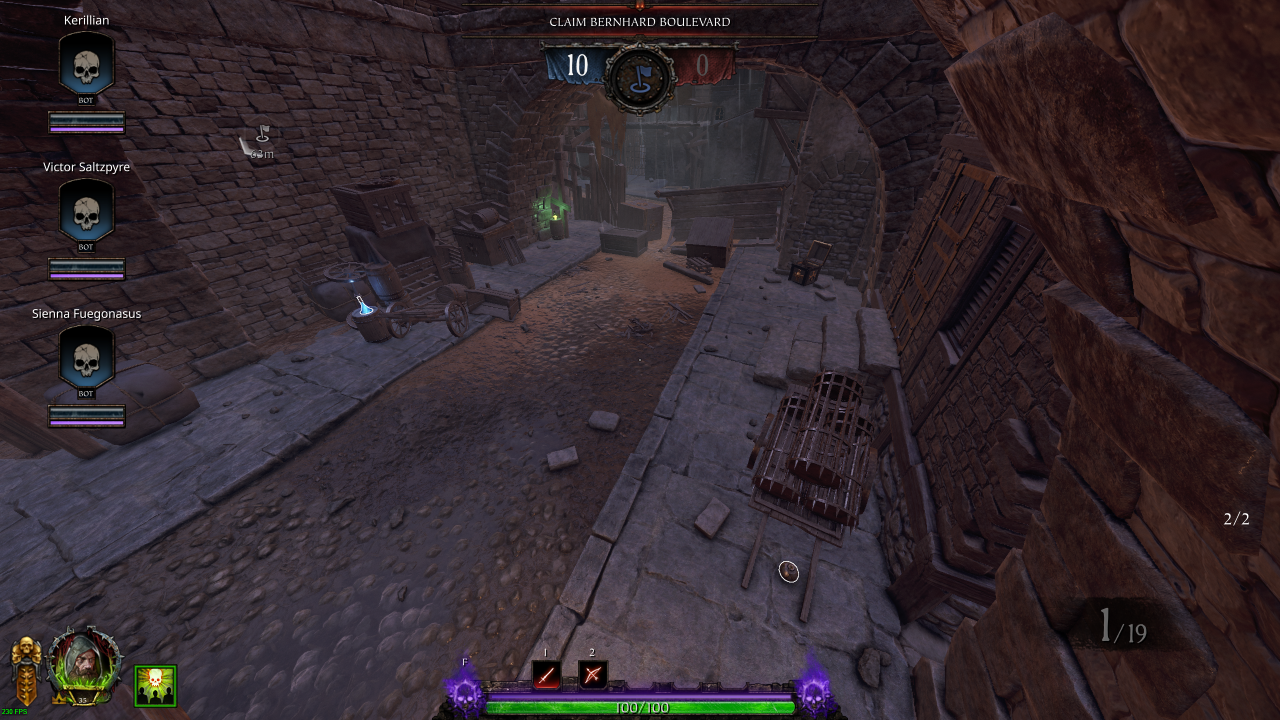
• Bombs: 1 (Fire)
• Potions: 1
• Ammo: 1 (Pouch)
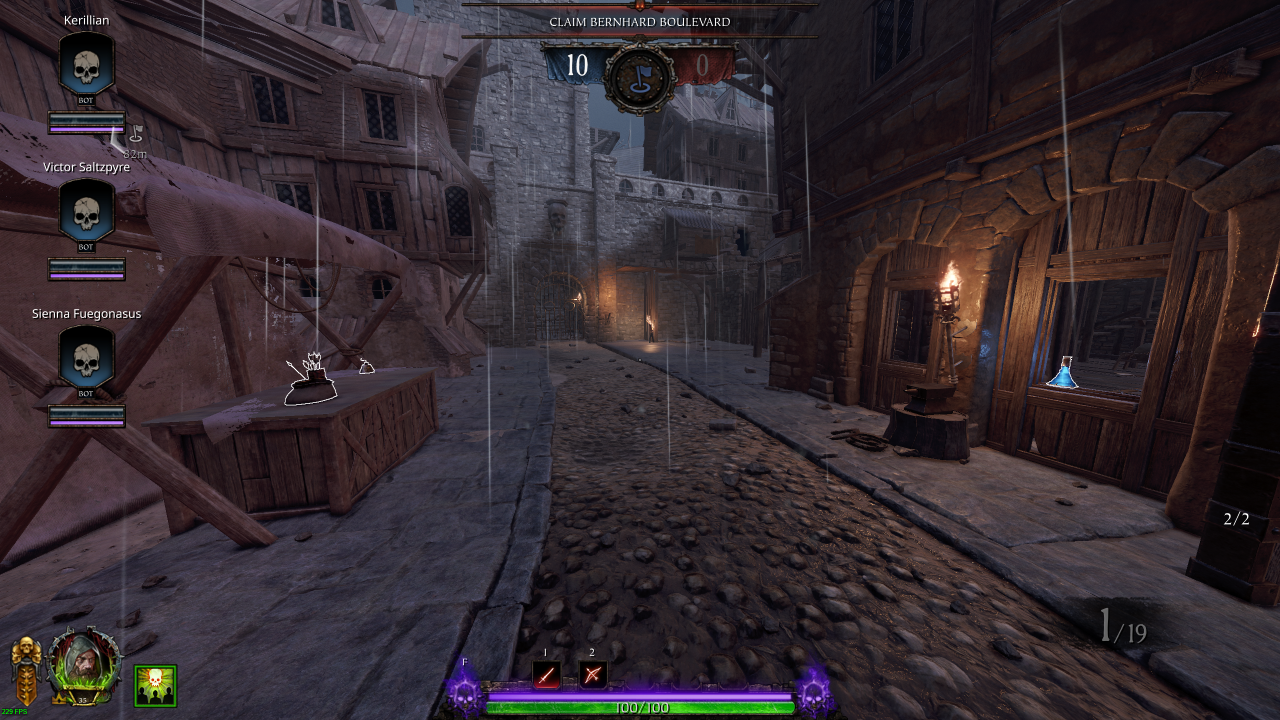
Section 2.5: Staircase Area
• Ammo: 1 (Pouch)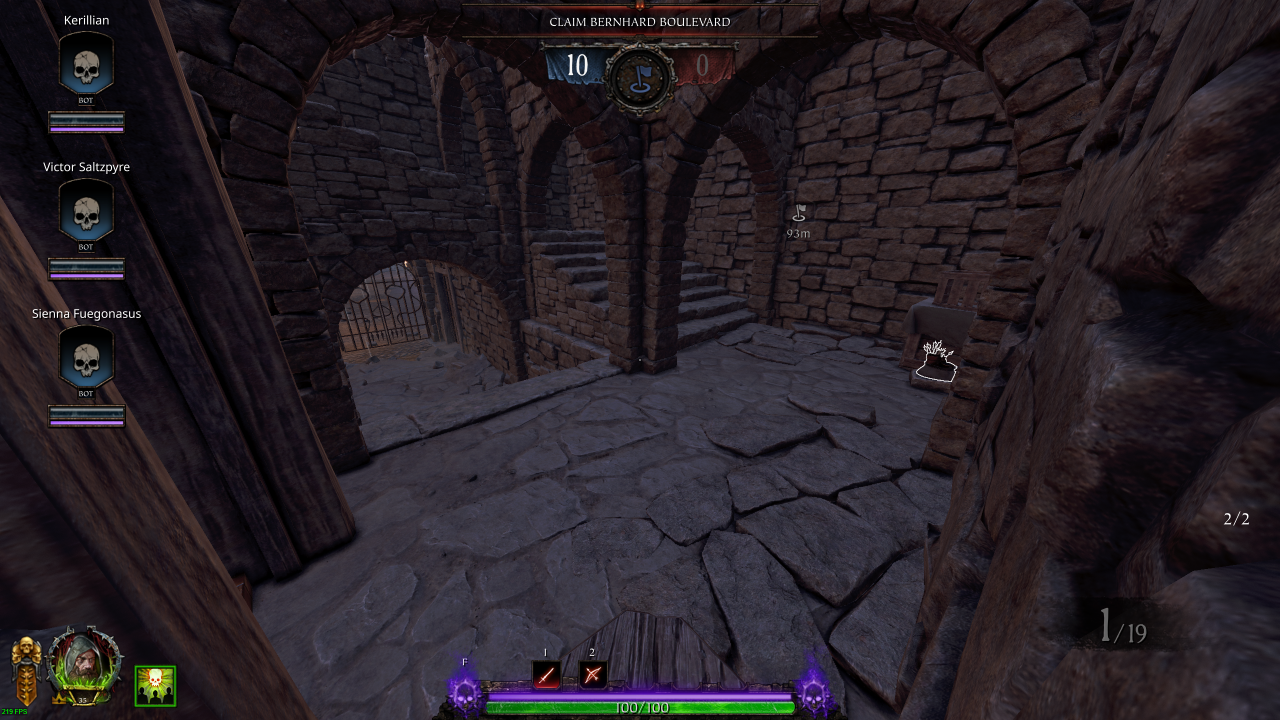
• Bombs: 1 (Explosive)
• Ammo: 1 (Pouch)
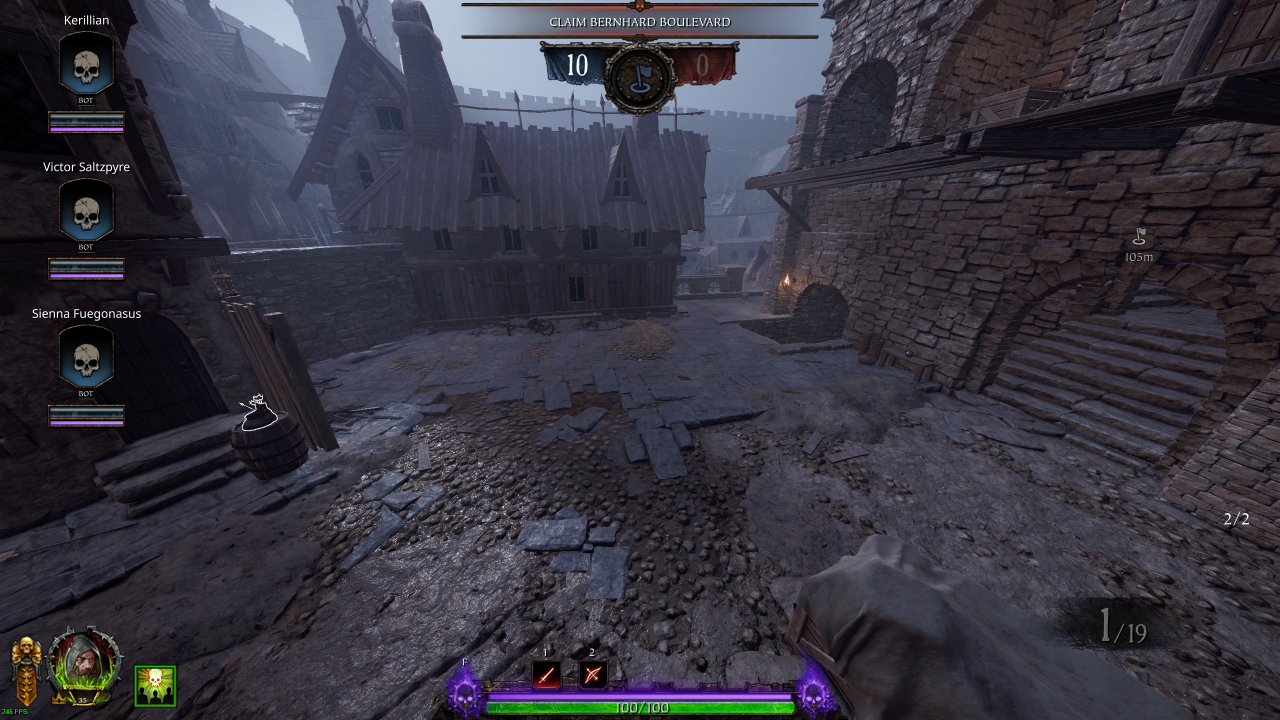
Section 3: Barrel Event
Loot on top
• Healing: 2 (Draught: 1 / Kit: 1)• Bombs: 2 (Explosive: 1 / Fire: 1)
• Potions: 1
• Ammo: 1 (Pouch)
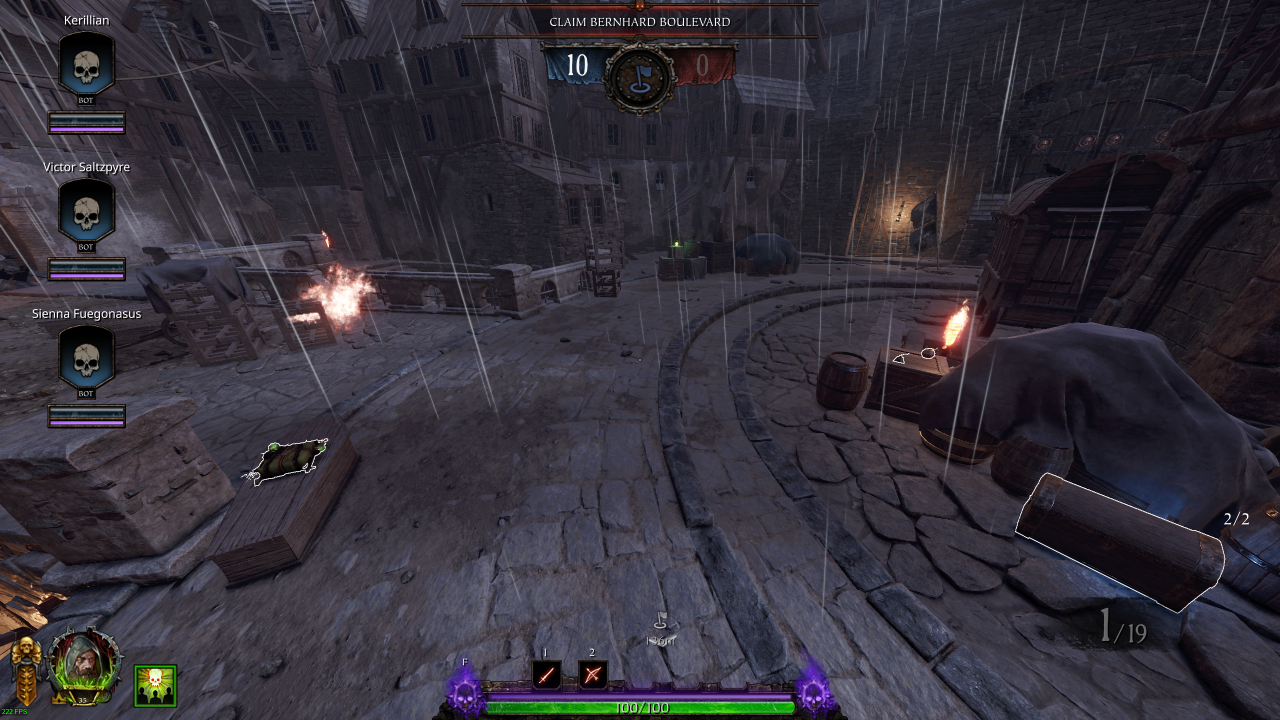
Loot below
• Healing: 1 (Kit)• Bombs: 1 (Fire)
• Potions: 3
• Ammo: 1 (Pouch)
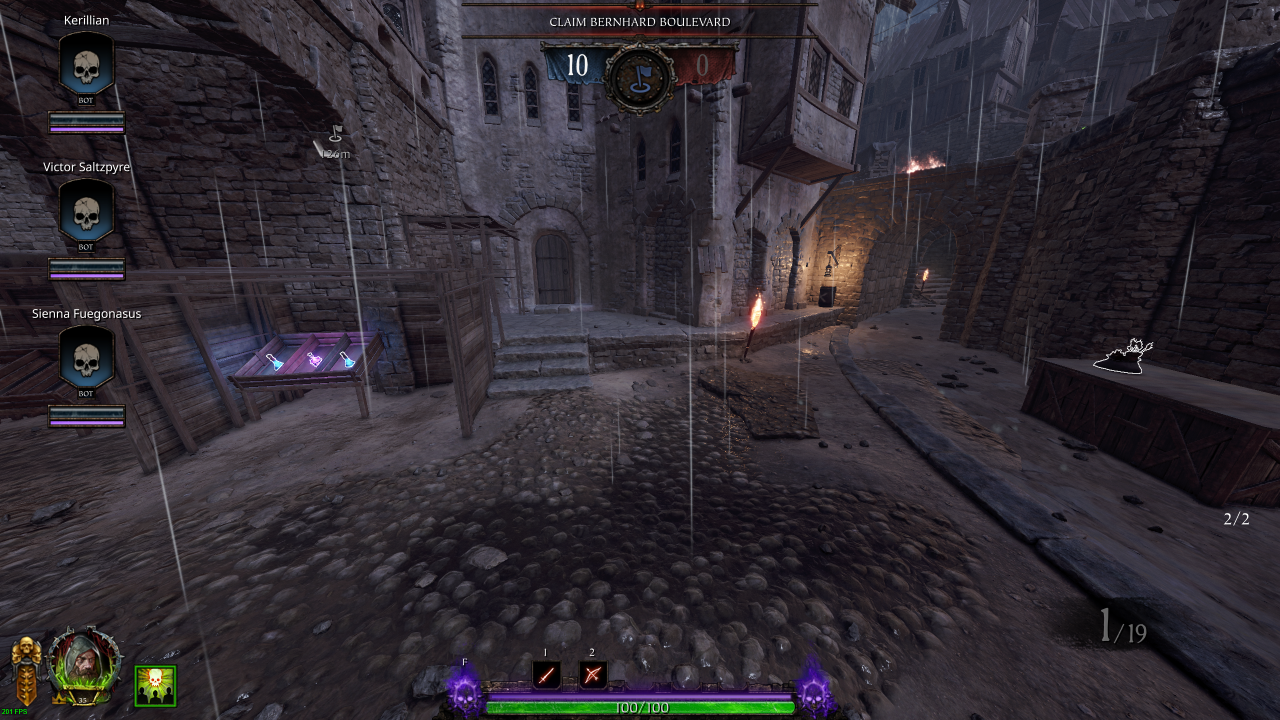
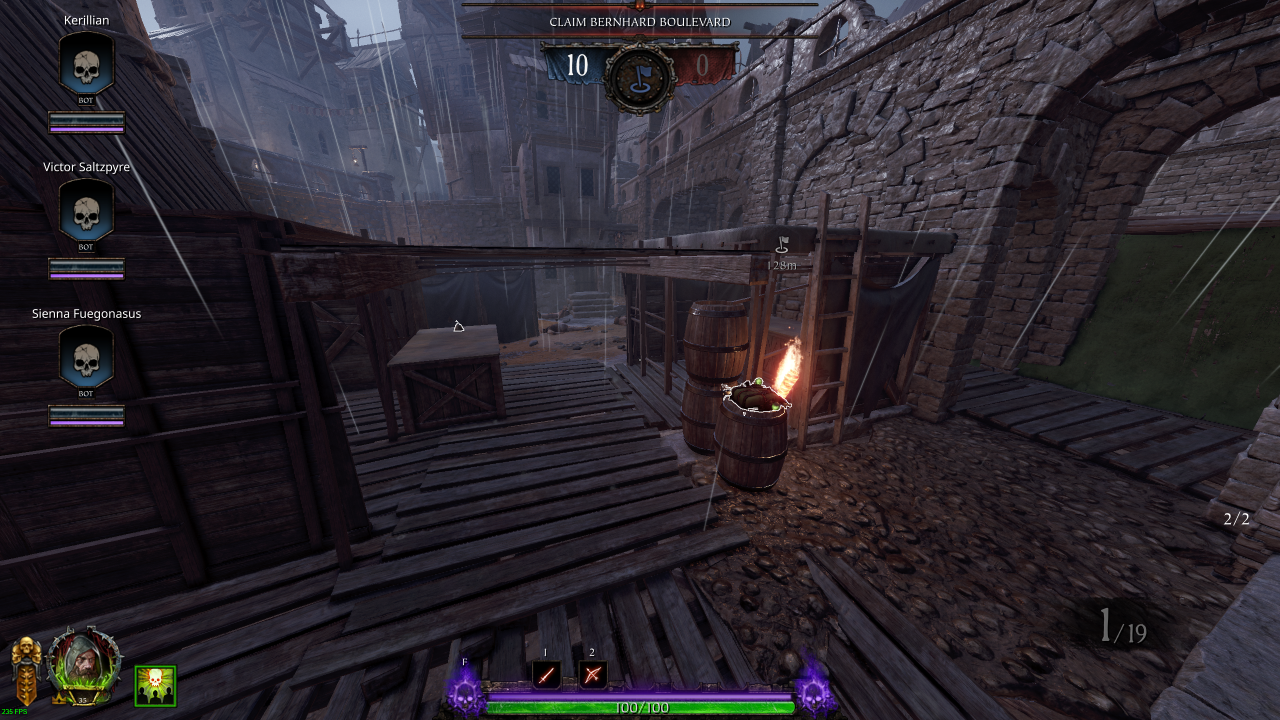
Grim Room
• Ammo: 1 (Crate)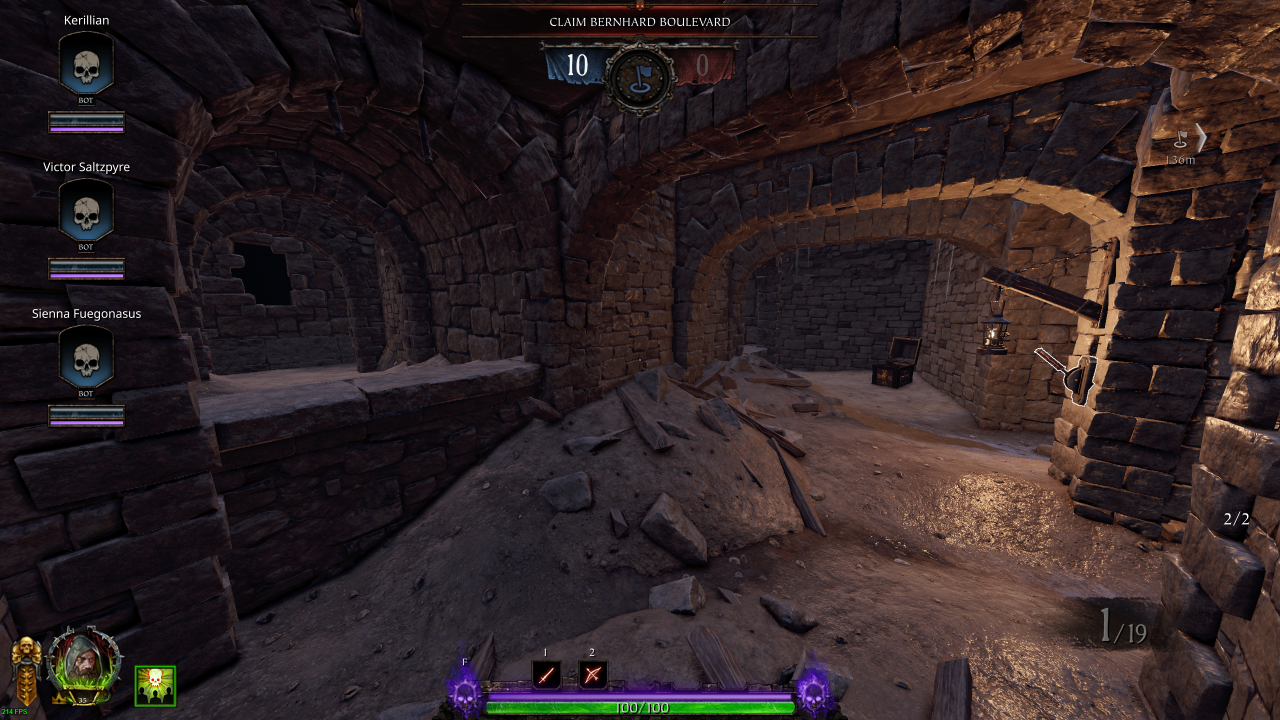
Section 4: Barrel Event → Safe Room
There is no more loot past the destroyed barrier after the Barrel Event
Round 2
Section 0: Spawn Room
Bombs: 3 (Explosive: 2 / Fire: 1)Potions: 3
Ammo: 2 (Pouch: 1 / Crate: 1)
Section 1: Spawn → Bomb Cart
• Ammo: 1 (Pouch)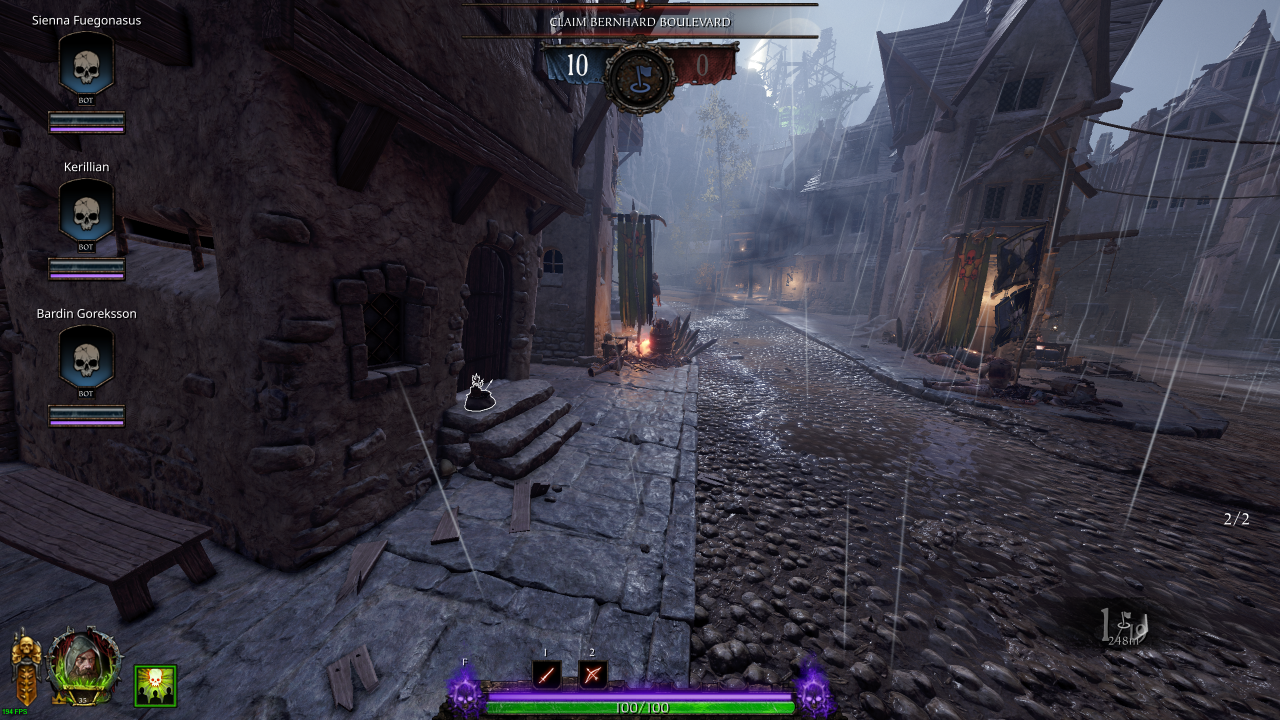
• Potions: 1
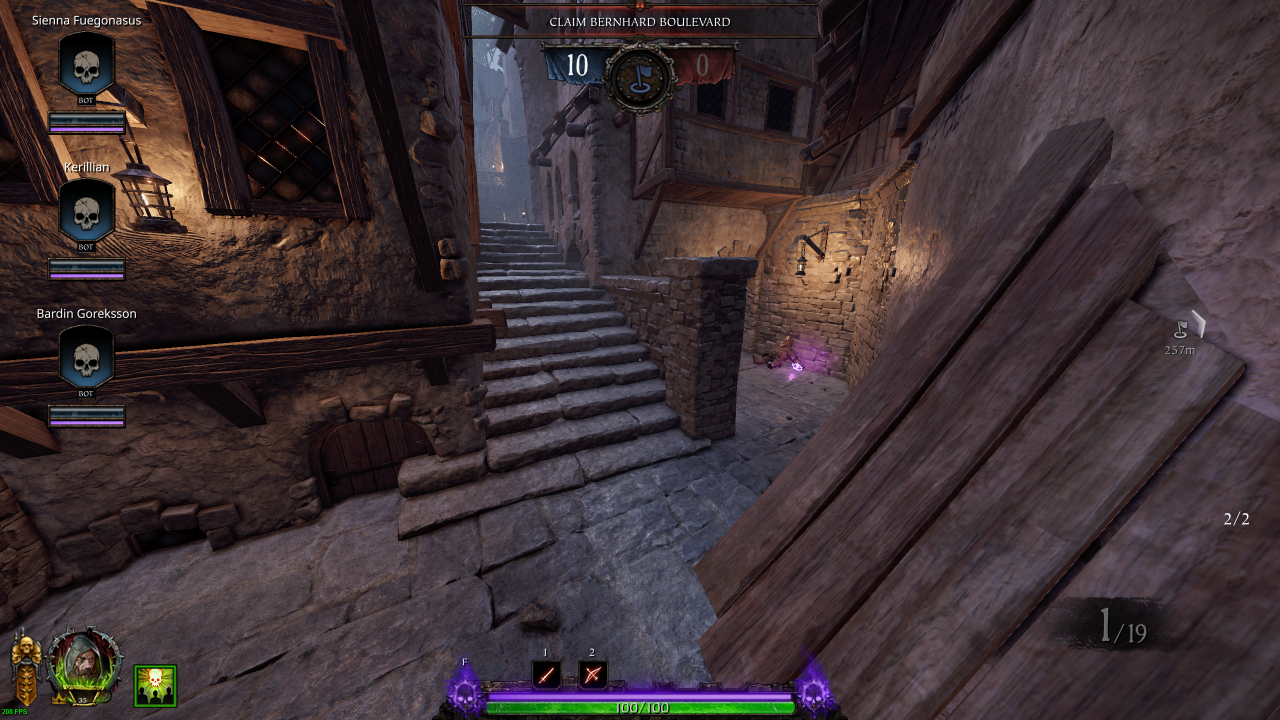
• Healing: 1 (Draught)
• Ammo: 1 (Pouch)
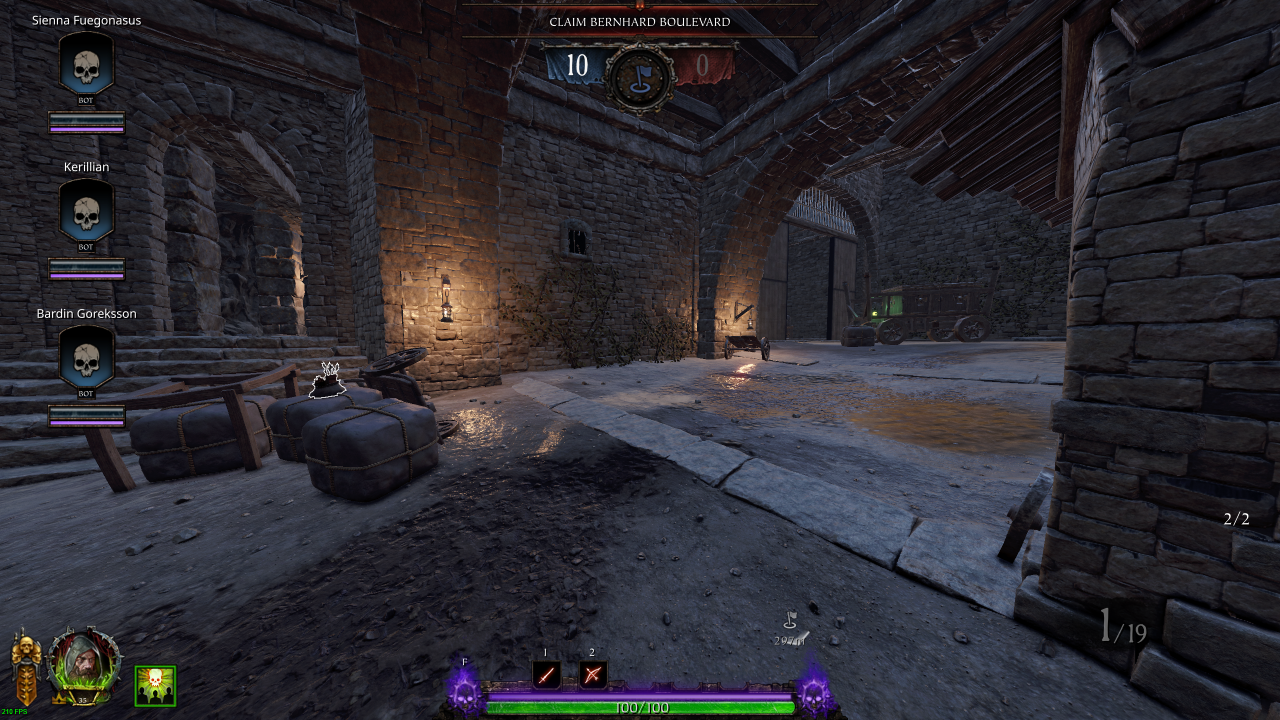
• Healing: 1 (Kit)
• Bombs: 1 (Fire)
• Potions: 1
• Ammo: 1 (Pouch)
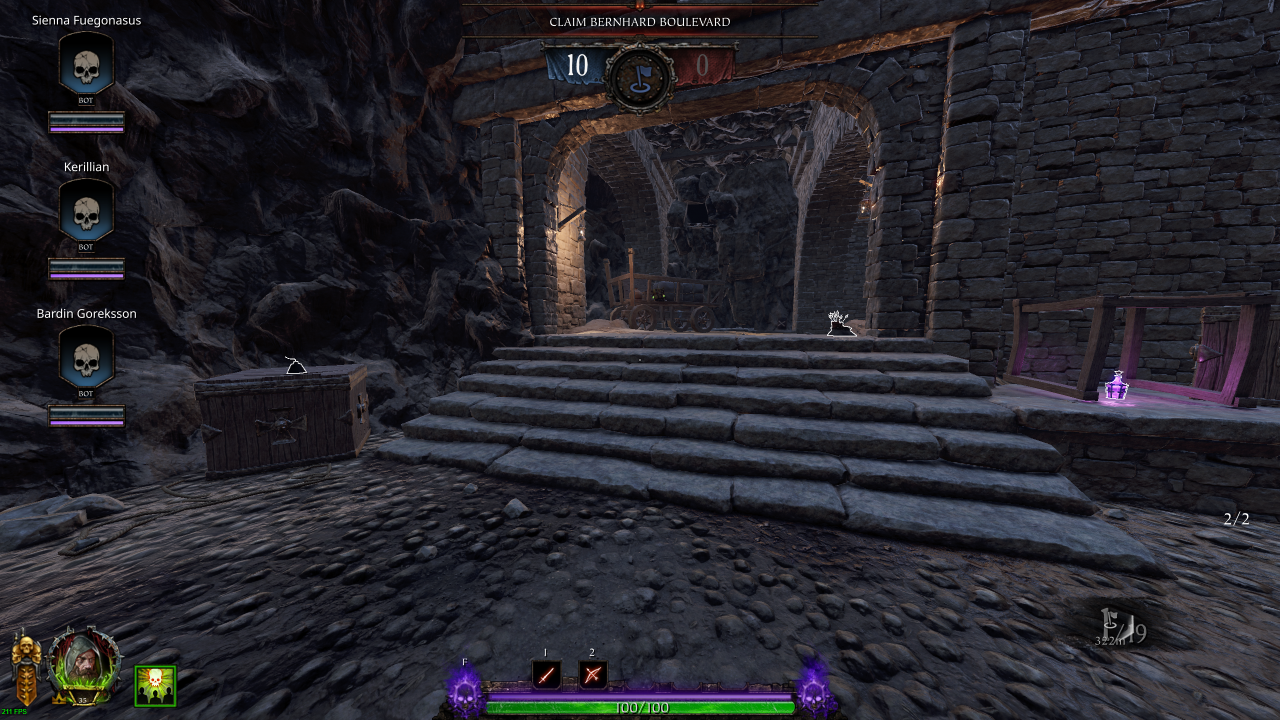
• Ammo: 1 (Pouch)
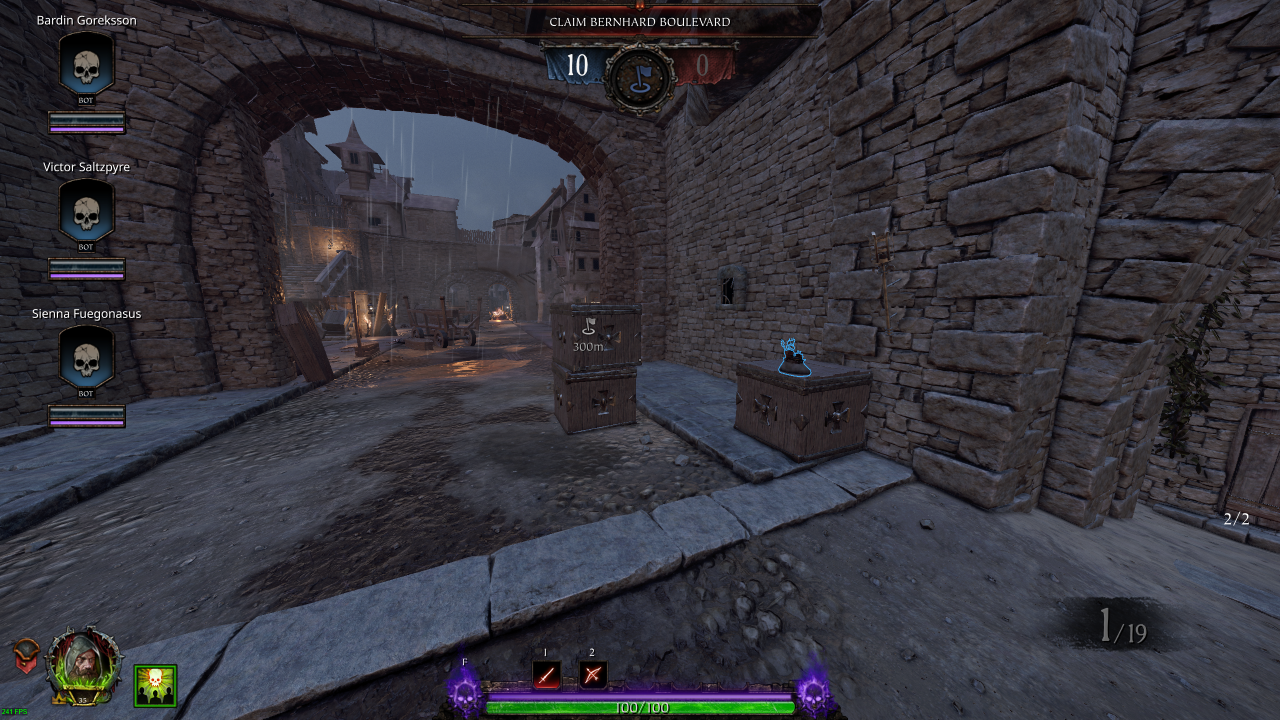
• Ammo: 1 (Pouch)
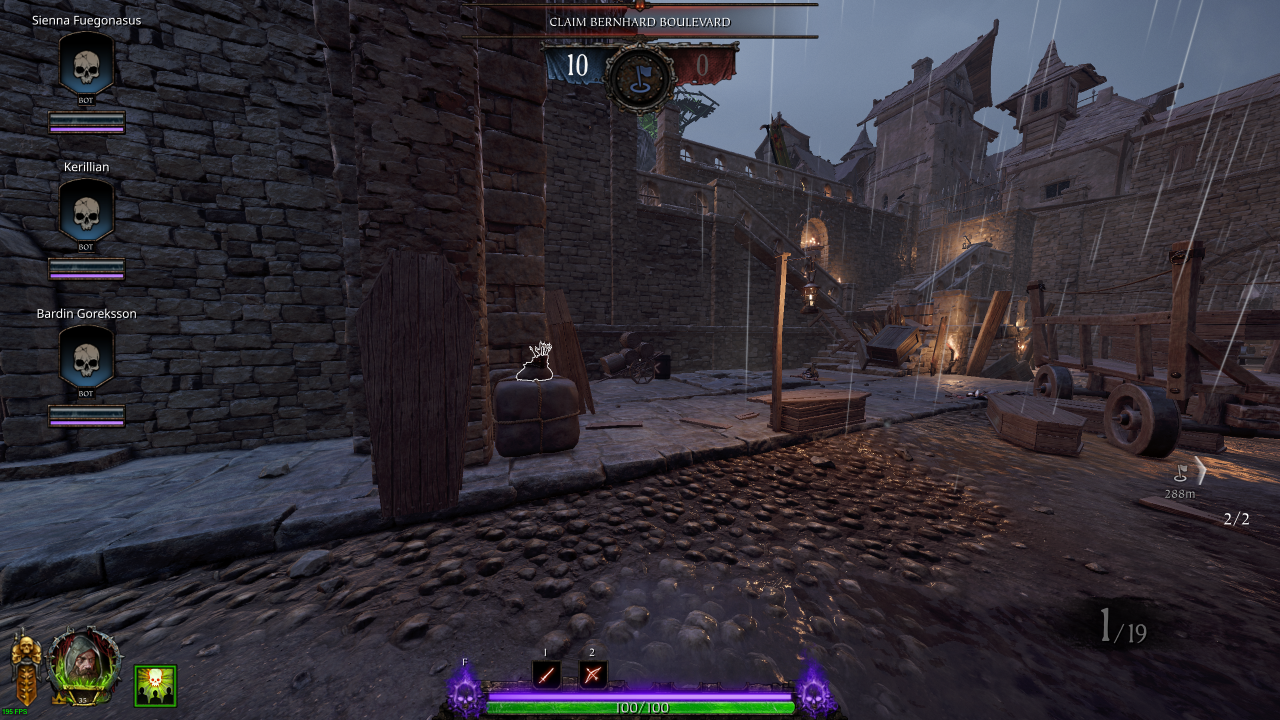
Section 2: Barricade → Wall
• Bombs: 2 (Explosive: 1 / Fire: 1)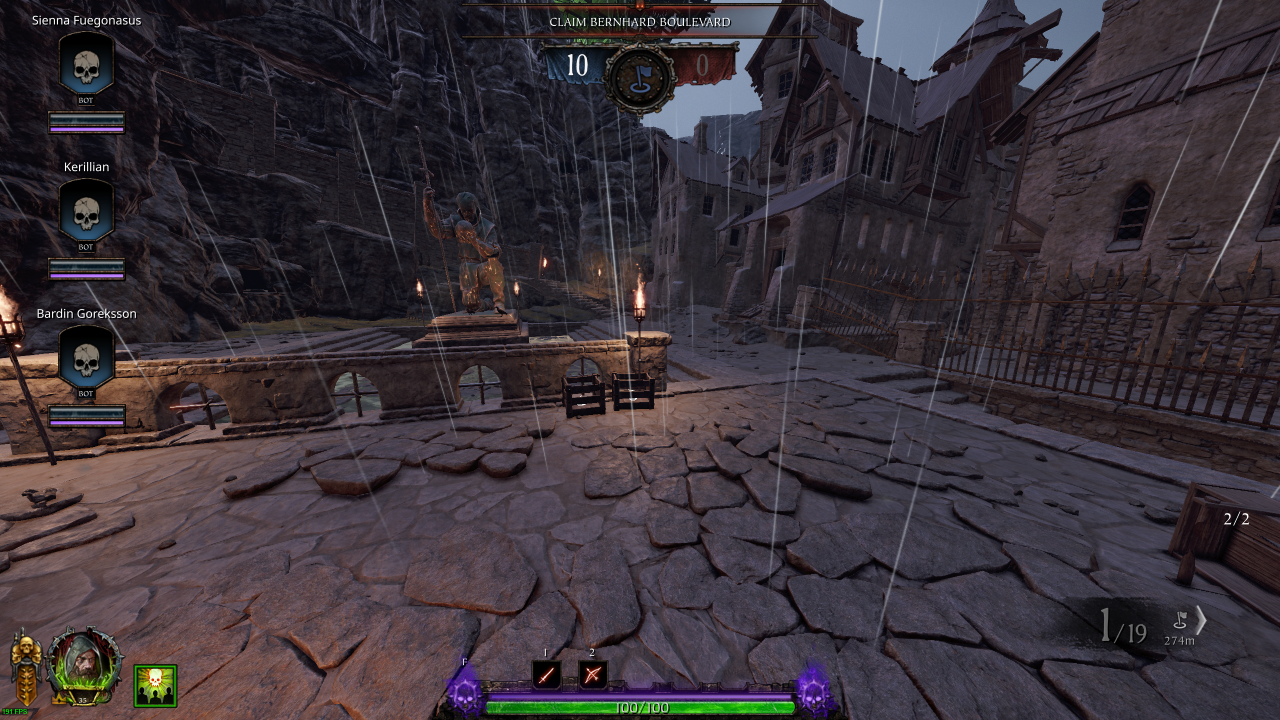
• Ammo: 1 (Pouch)
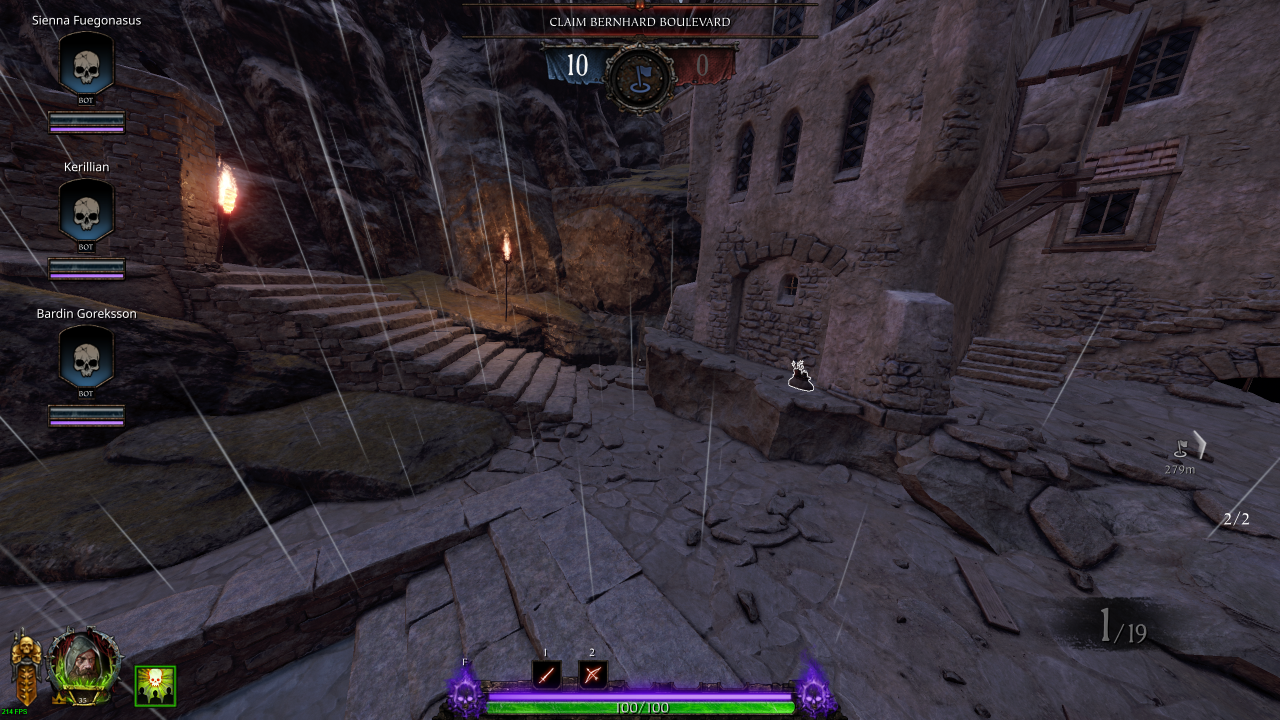
• Ammo: 1 (Pouch)
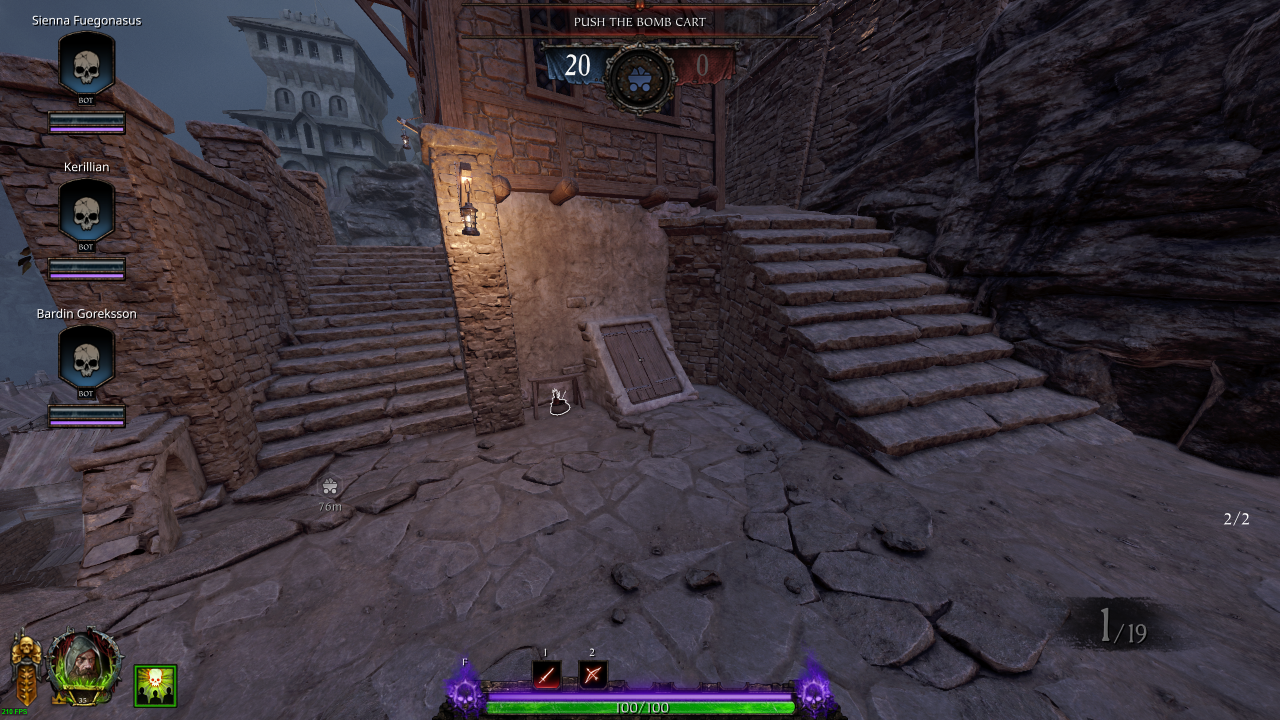
• Healing: 1 (Kit)
• Bombs: 1 (Fire)
• Potions: 1
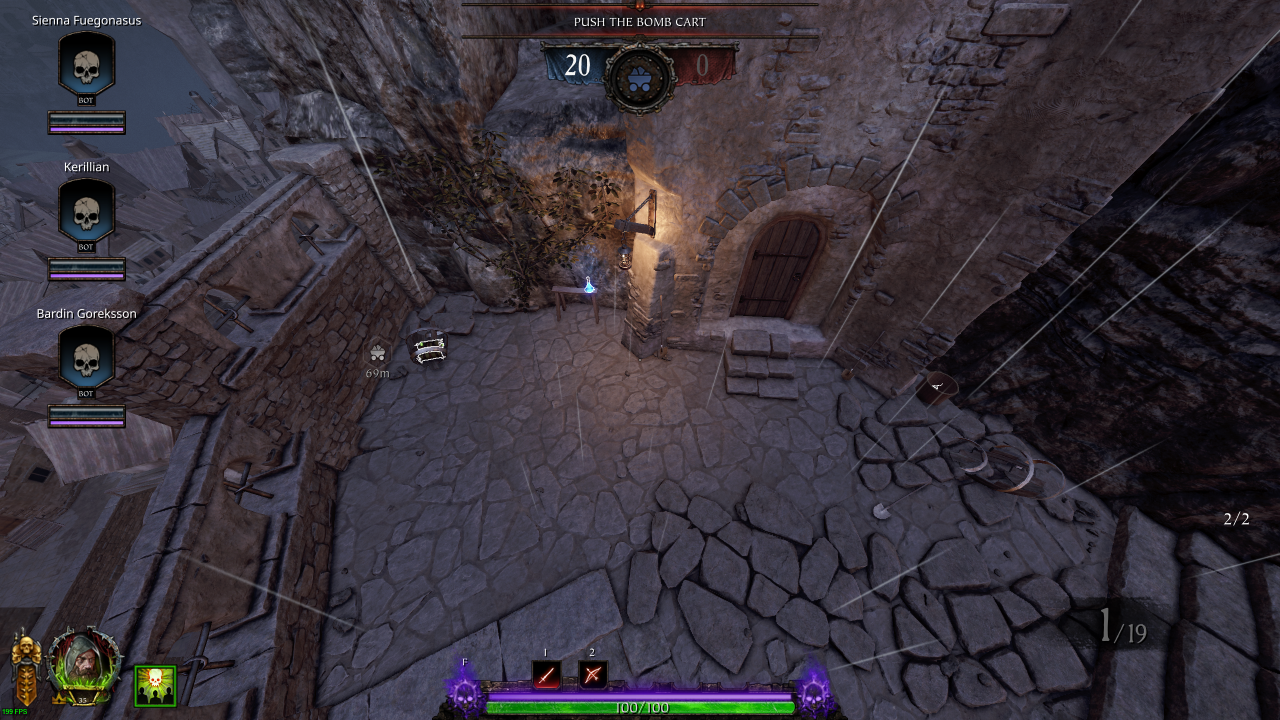
• Ammo: 1 (Crate)
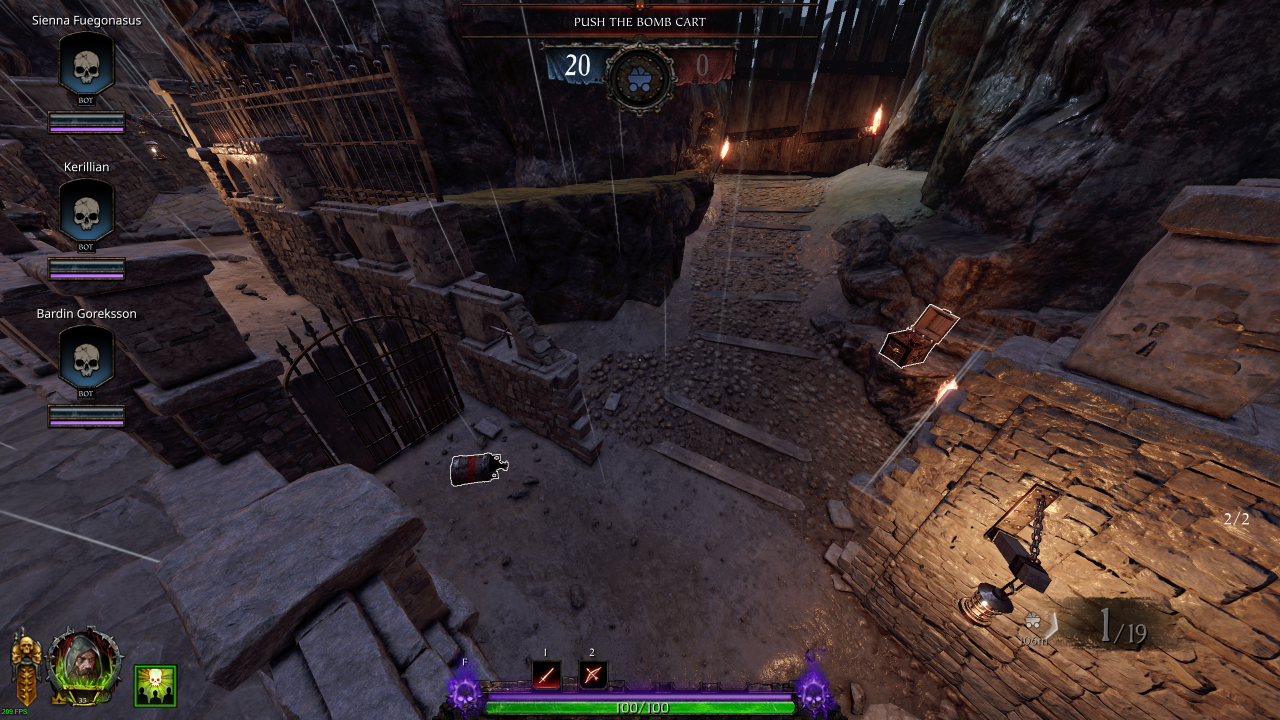
Section 3: Chain Event
• Healing: 1 (Kit)• Bombs: 1 (Explosive)
• Potions: 1
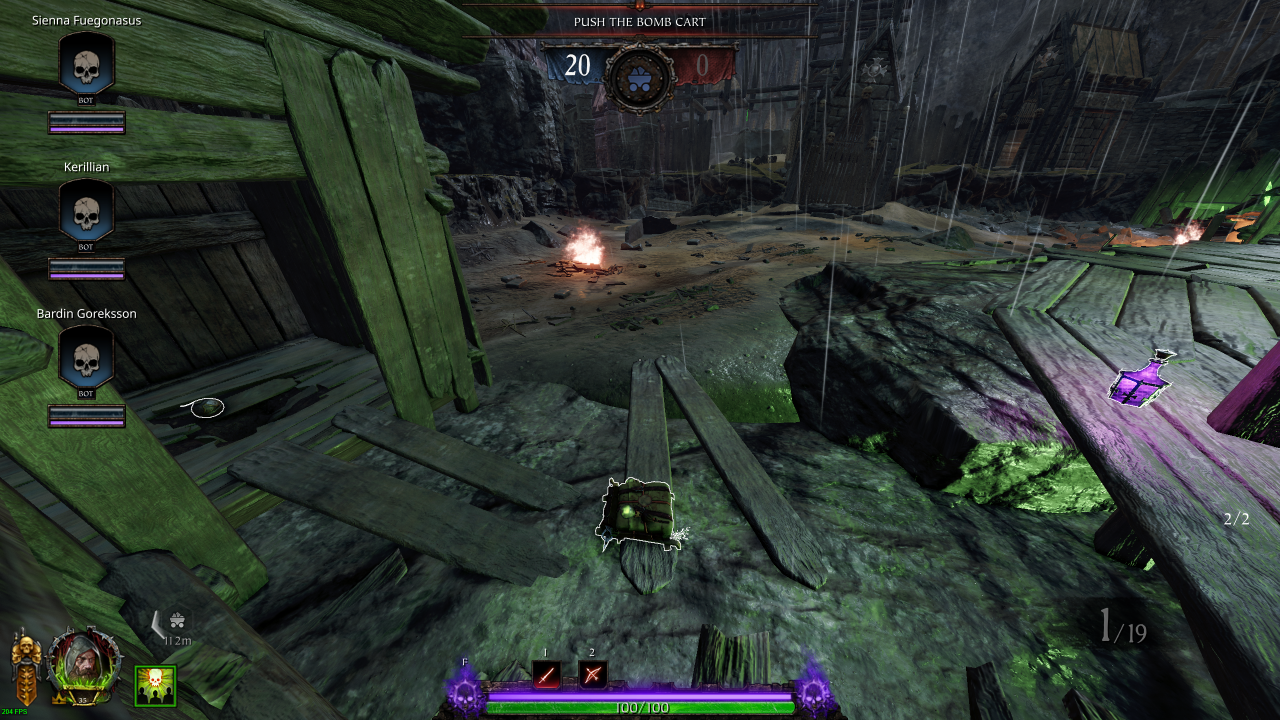
• Healing: 1 (Kit)
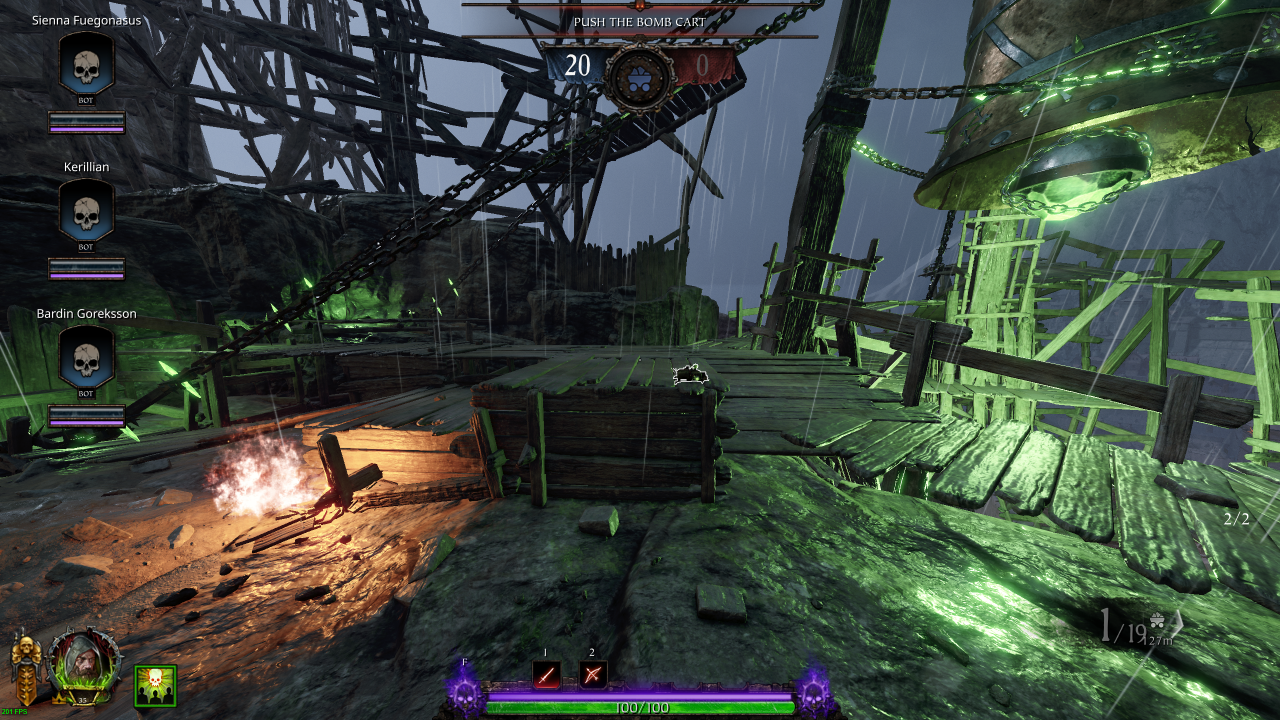
• Ammo: 1 (Pouch)
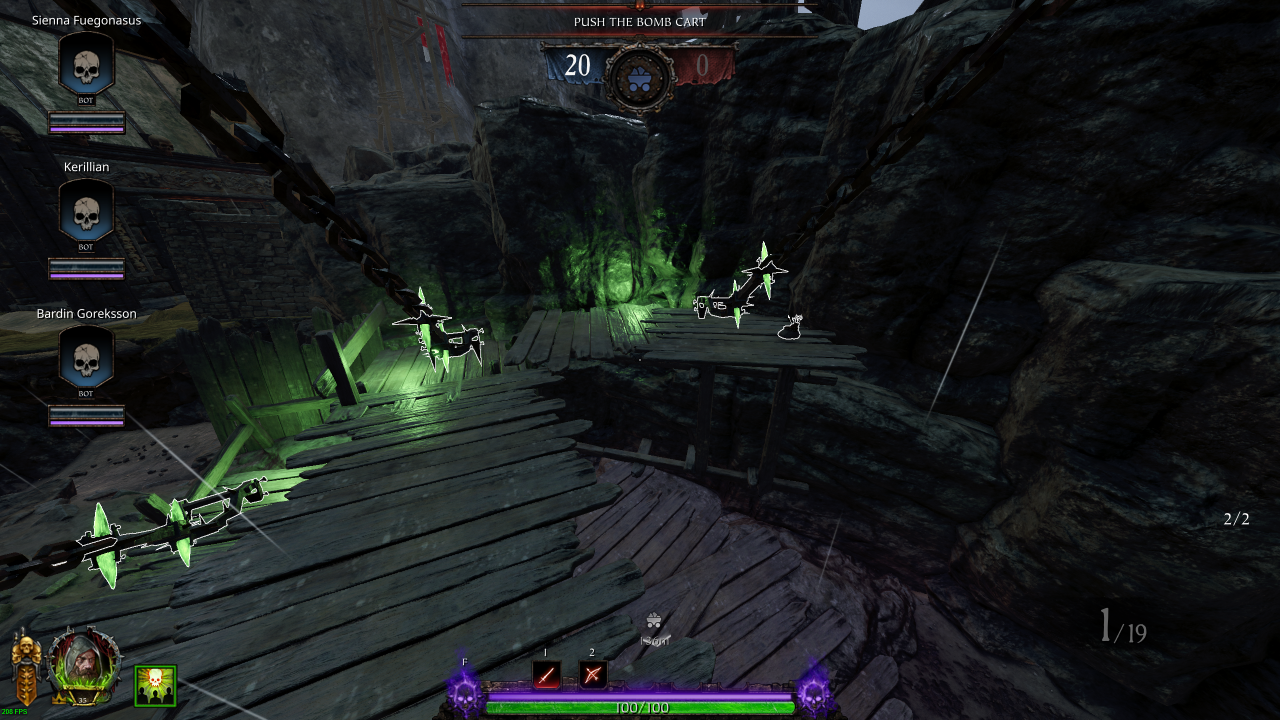
• Ammo: 2 (Pouch)
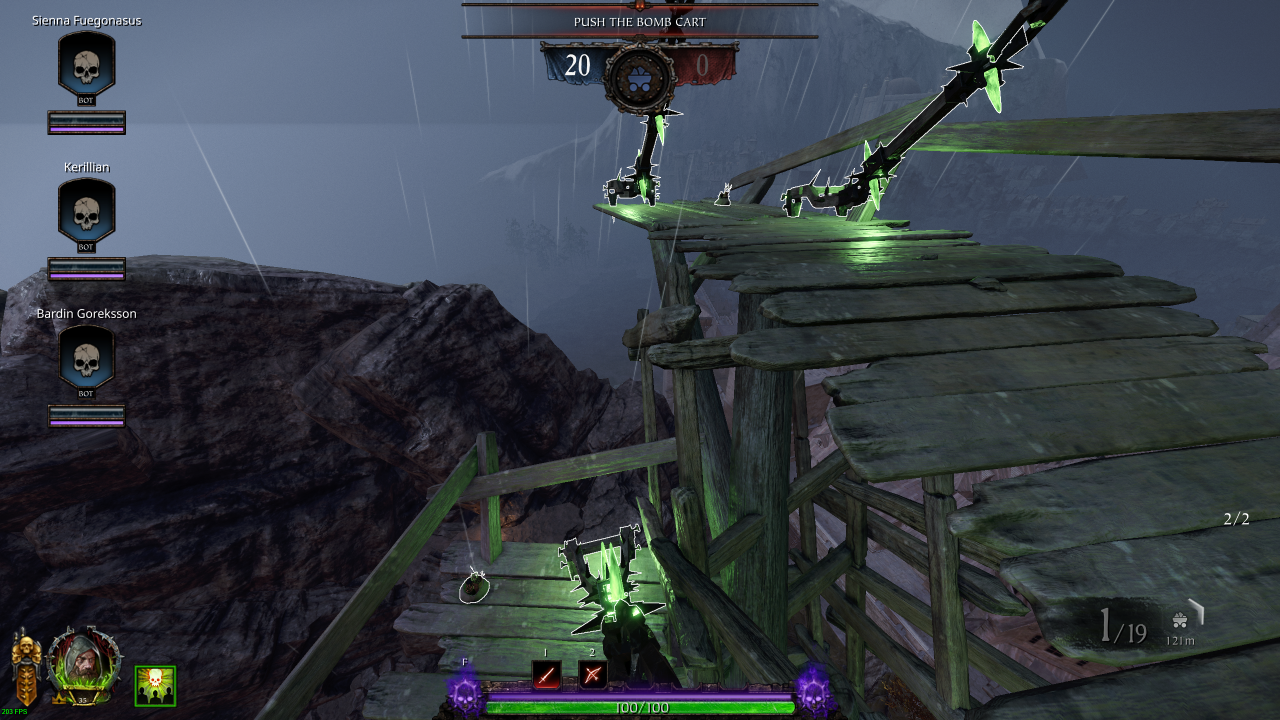
• Potions: 1
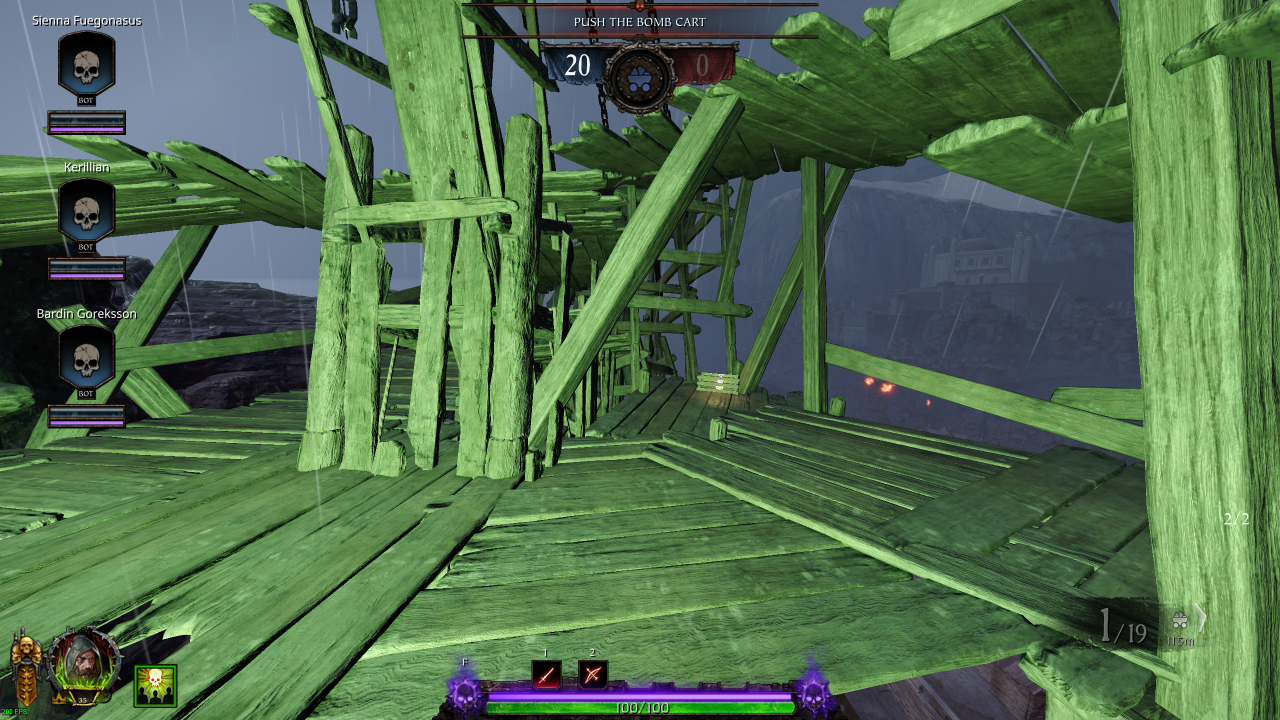
• Ammo: 1 (Pouch)
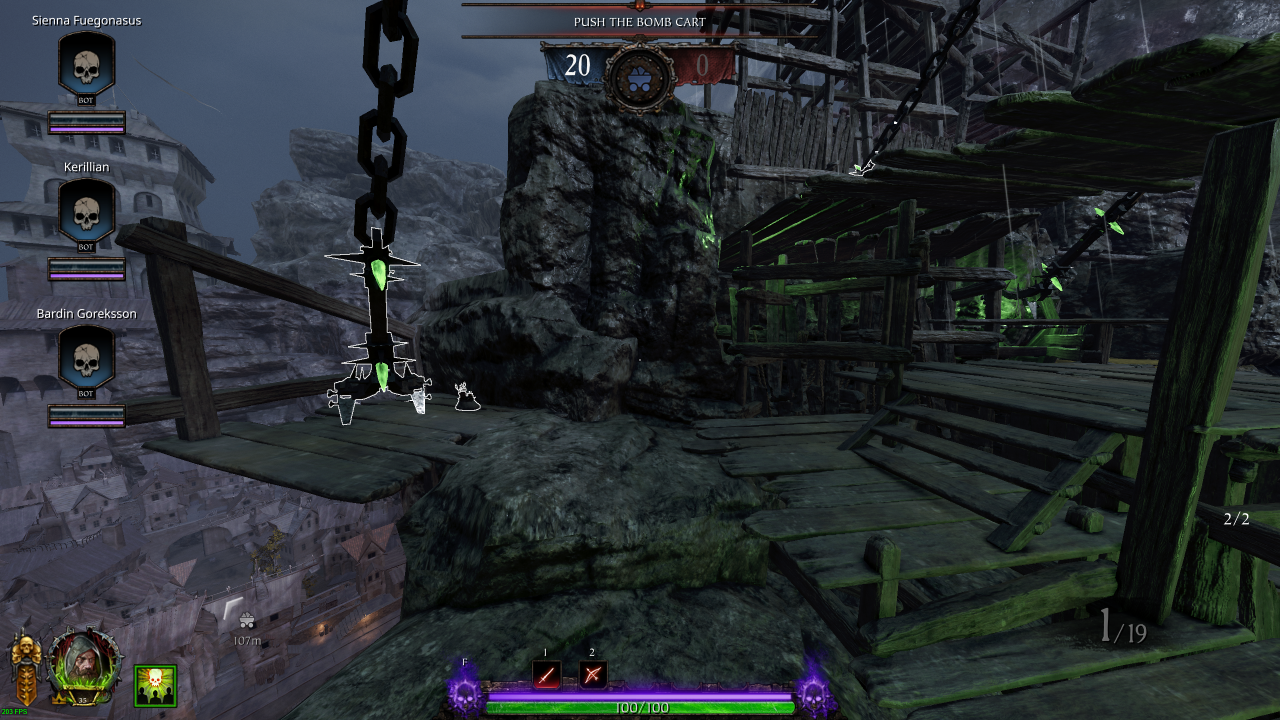
Section 4: Drop Down → Bridge of Shadows
Once you drop from the Chain Event, there is no more loot
Righteous Stand
Total Items
Round 1
Healing: 4Draughts: 2Kits: 2 Bombs: 7
Explosive: 5Fire: 2 Potions: 10
Ammo: 11Pouches: 9Crates: 2 Barrels: 13
Explosive: 6Fire: 7
Round 2
Healing: 6Draughts: 2Kits: 4 Bombs: 8
Explosive: 3Fire: 5 Potions: 7
Ammo: 6Pouches: 4Crates: 2 Barrels: 4
Explosive: 2Fire: 2
Round 3
Healing: 6Draughts: 3Kits: 3 Bombs: 15
Explosive: 8Fire: 7 Potions: 7
Ammo: 13Pouches: 10Crates: 3 Barrels: 12 (+3 unreachable)
Explosive: 5 (+2 unreachable)Fire: 7 (+1 unreachable)
Round 1
Section 0: Spawn Room
Bombs: 4 (Explosive: 3 / Fire: 1)Potions: 4
Ammo: 1 (Crate)
Section 1: Spawn → Barrel Event
• Bombs: 1 (Explosive)• Potions: 1
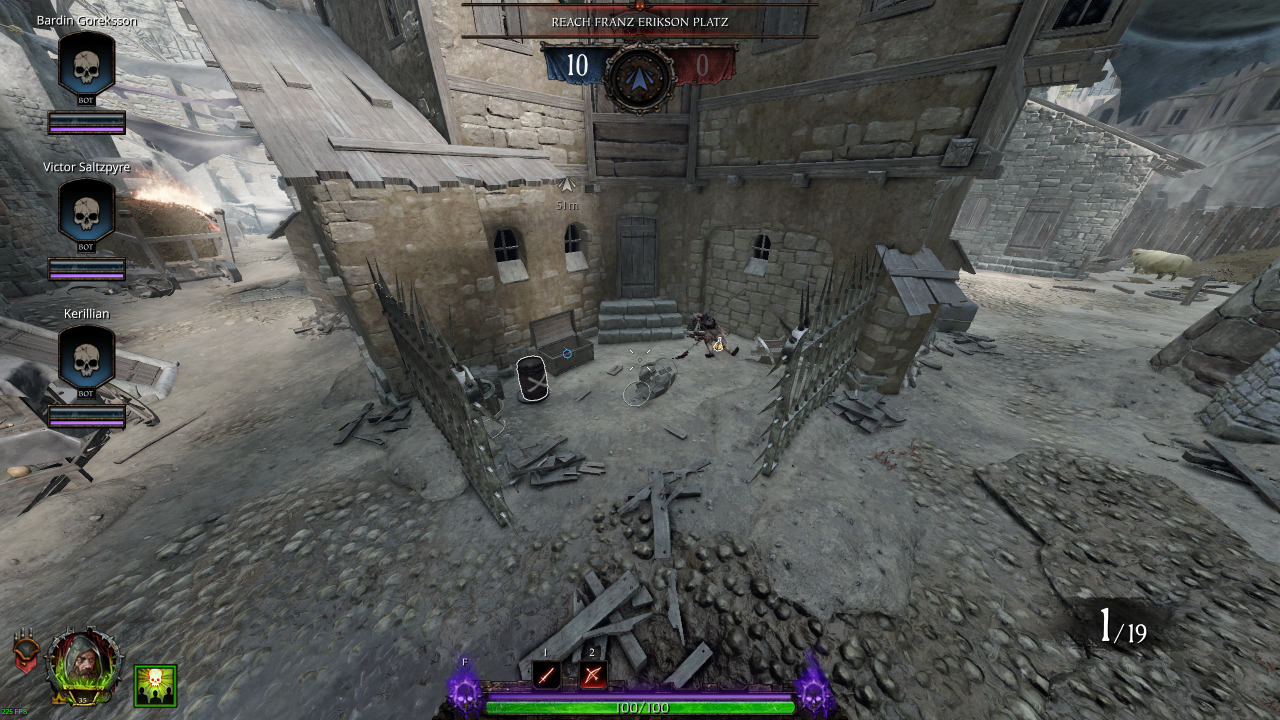
• Bombs: 1 (Explosive)
• Potions: 1
• Ammo: 1 (Pouch)
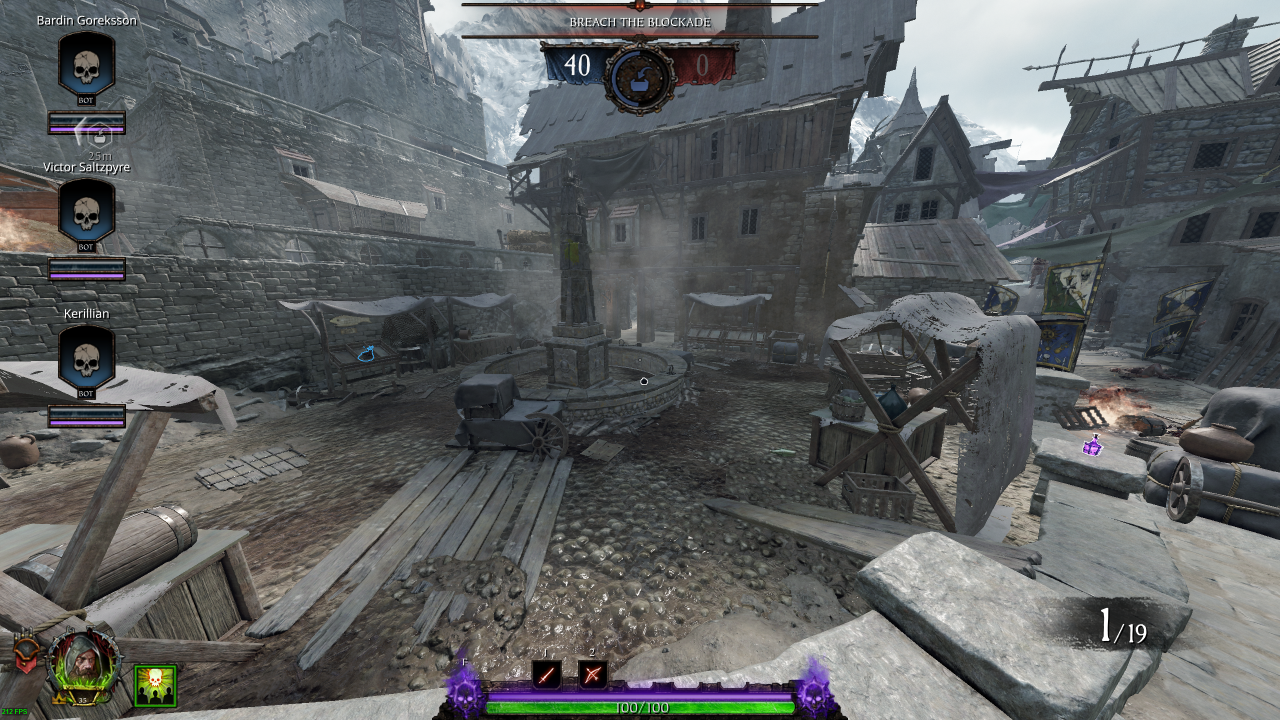
Section 1.5: Barrel Event→ Arena
• Healing: 1 (Draught)• Ammo: 1 (Pouch)
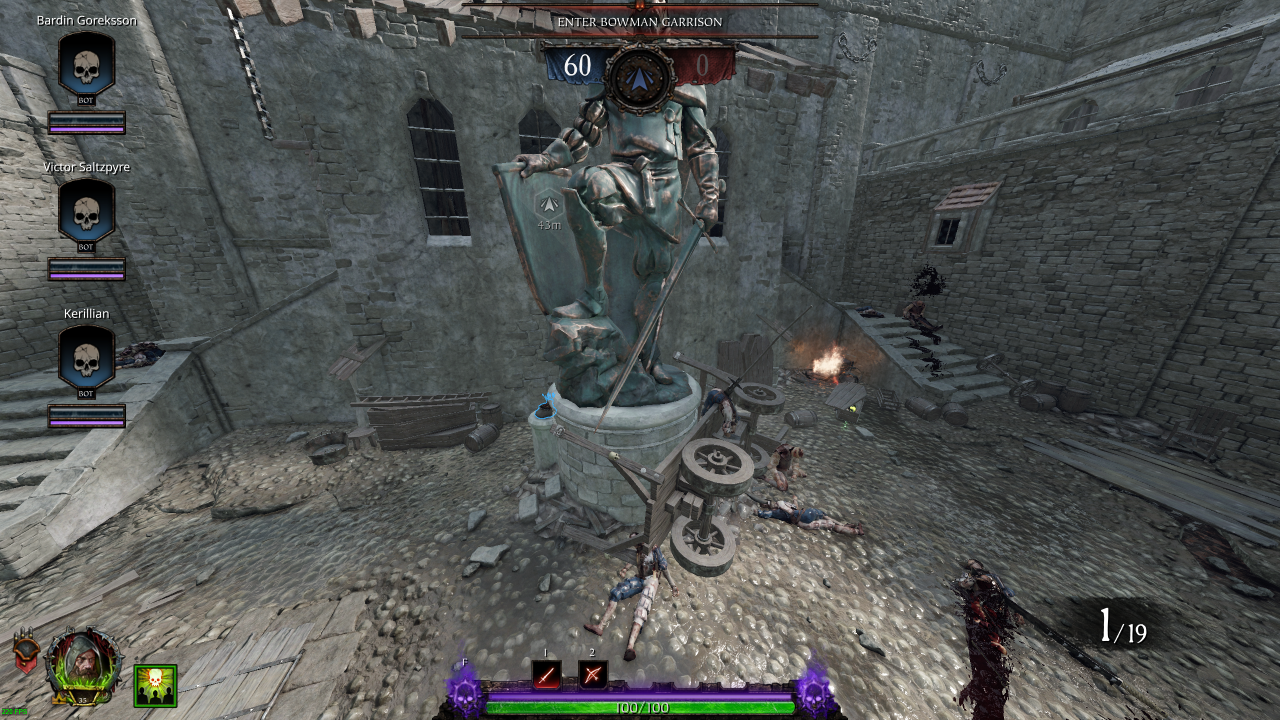
• Healing: 1 (Kit)
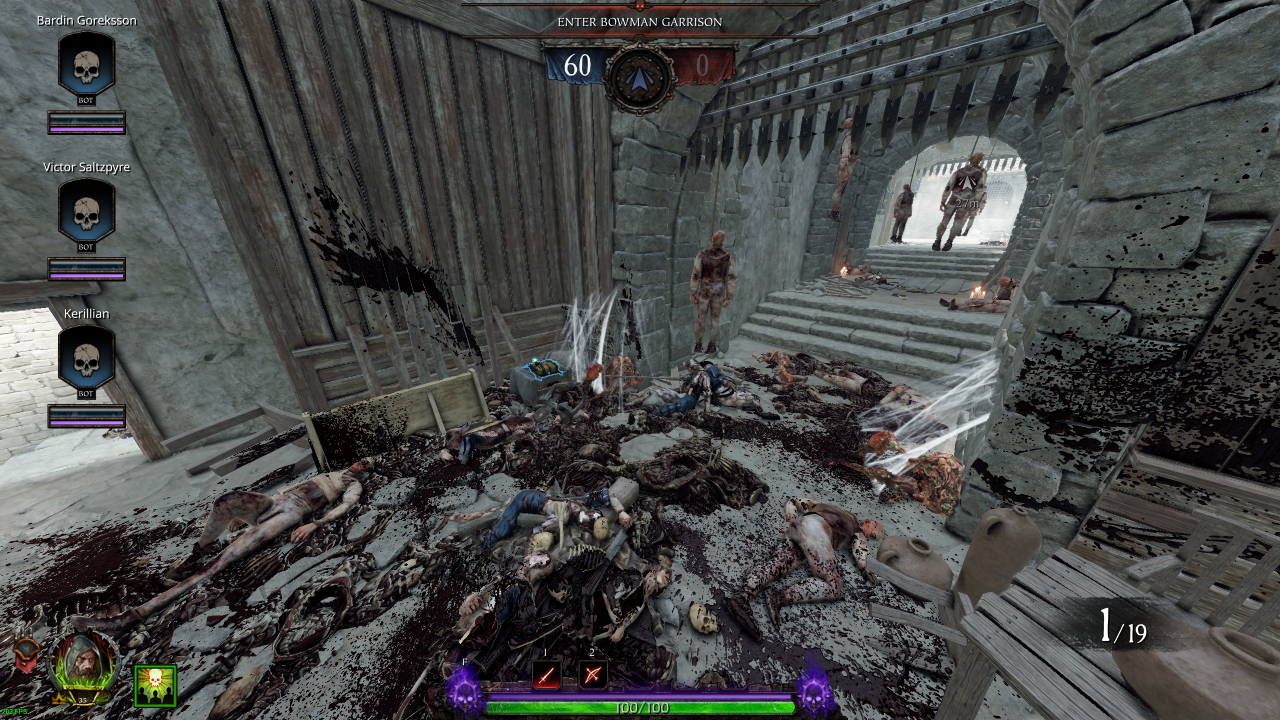
Section 2: Arena
• Healing: 2 (Draught / Kit)• Ammo: 1 (Pouch)
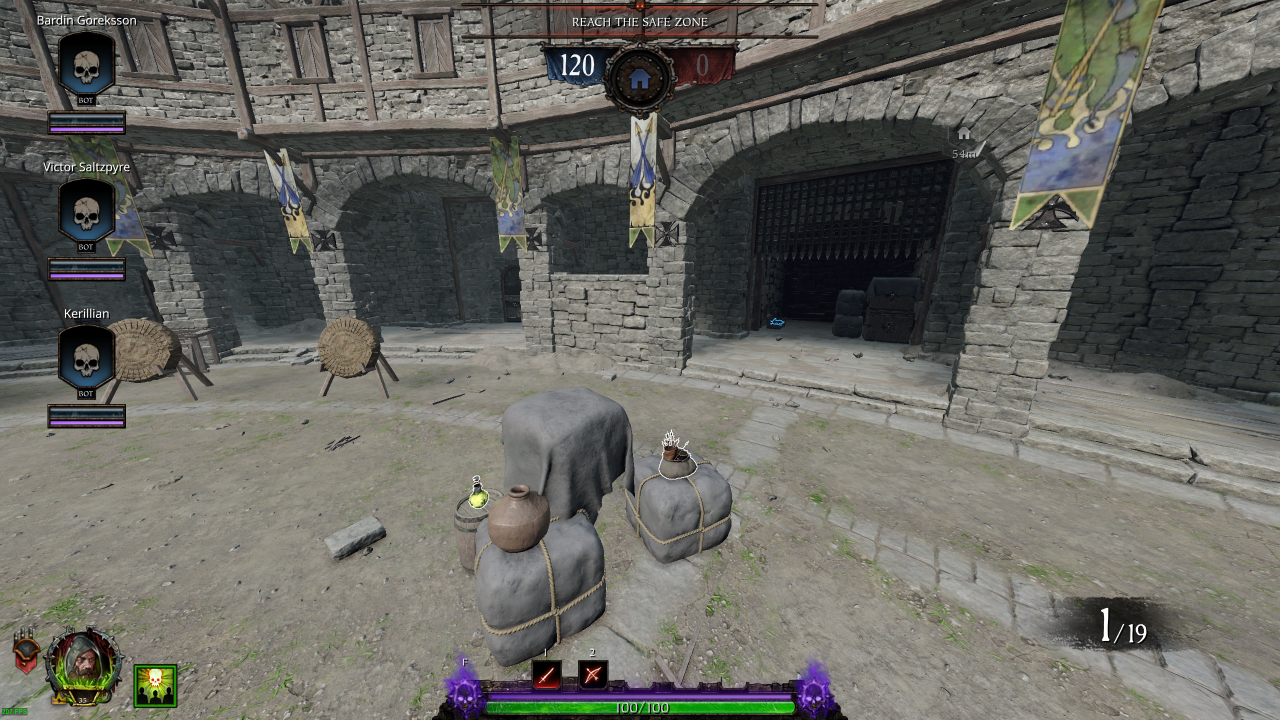
• Potions: 2
• Ammo: 1 (Pouch)
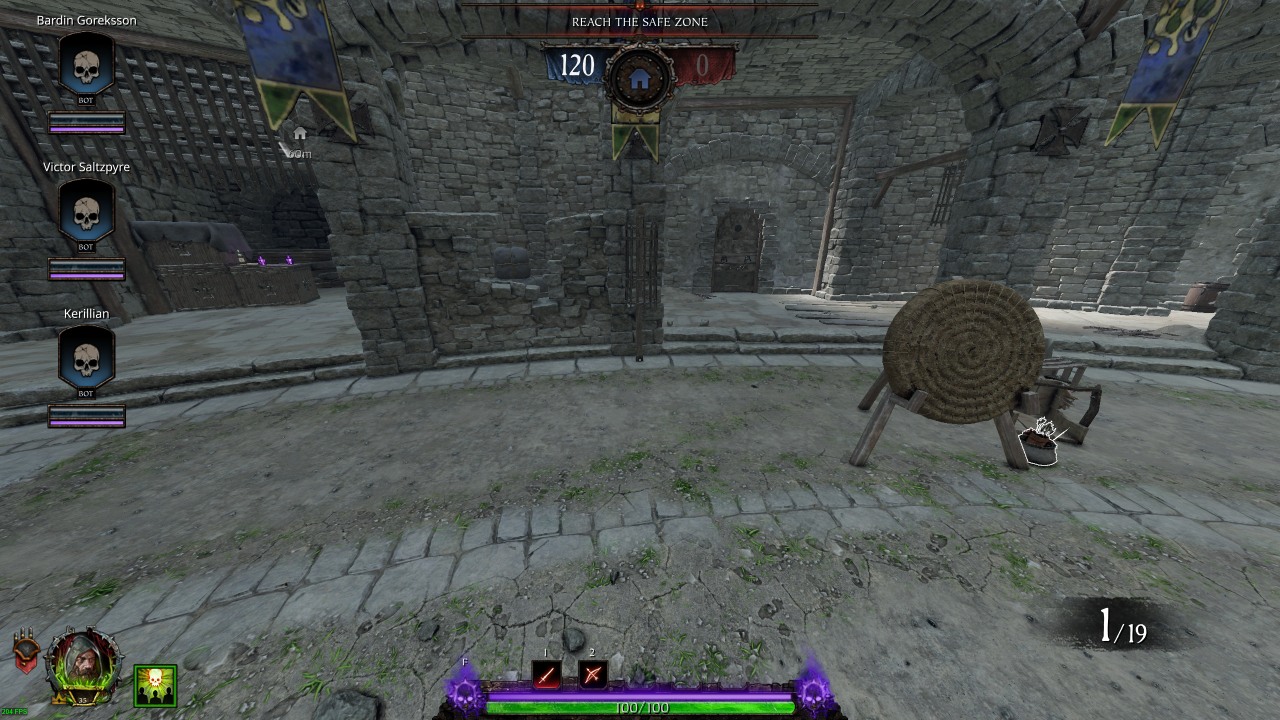
• Ammo: 1 (Crate)
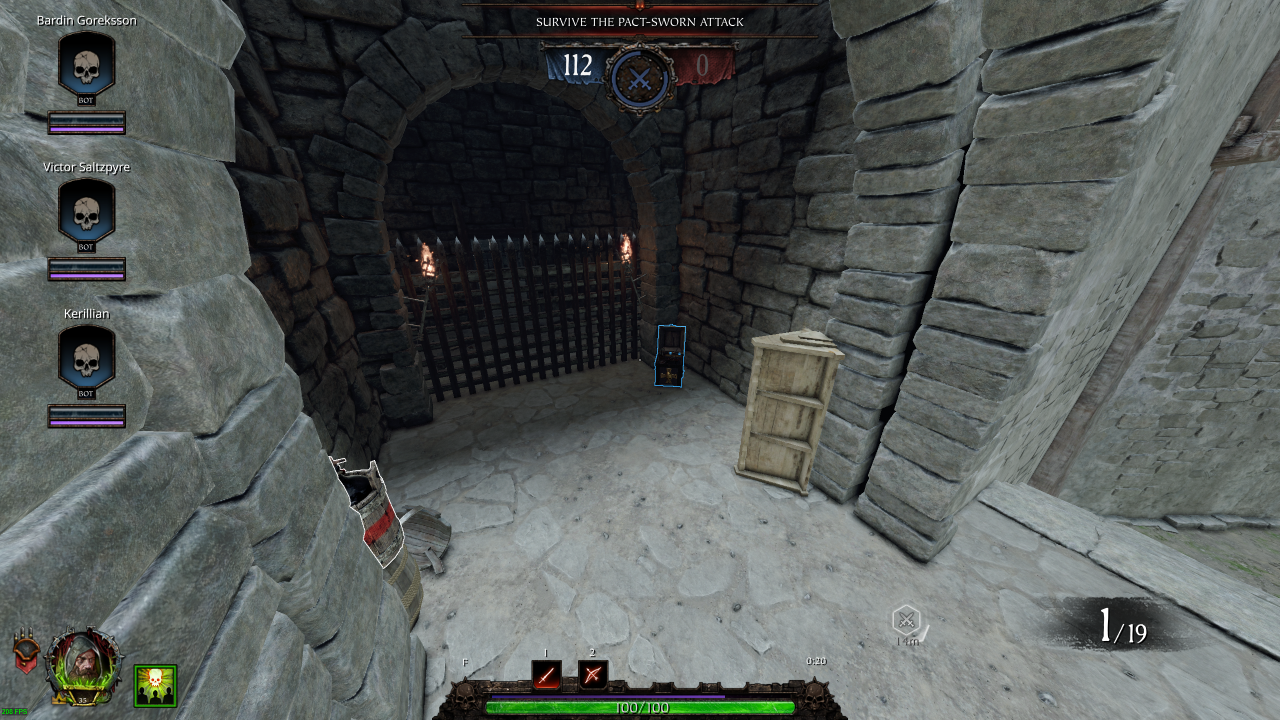
Section 3: Arena → Safe Zone
• Potions: 1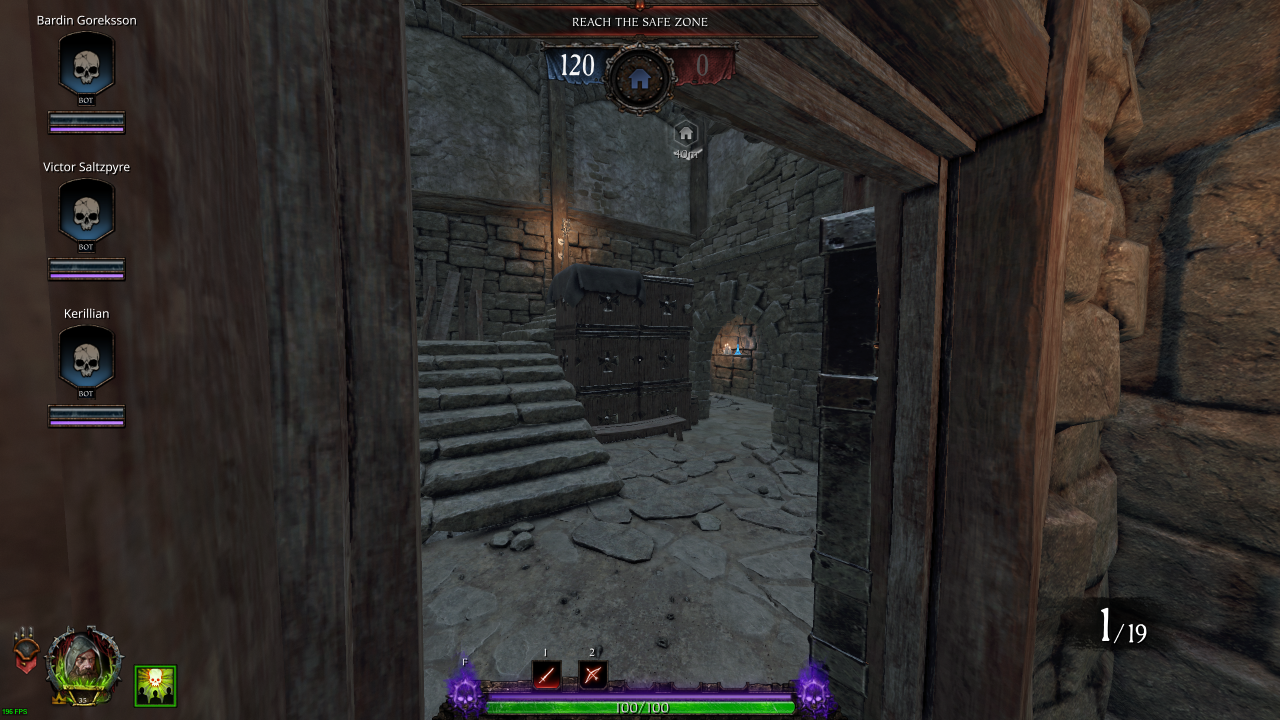
• Potions: 1
• Ammo: 1 (Pouch)
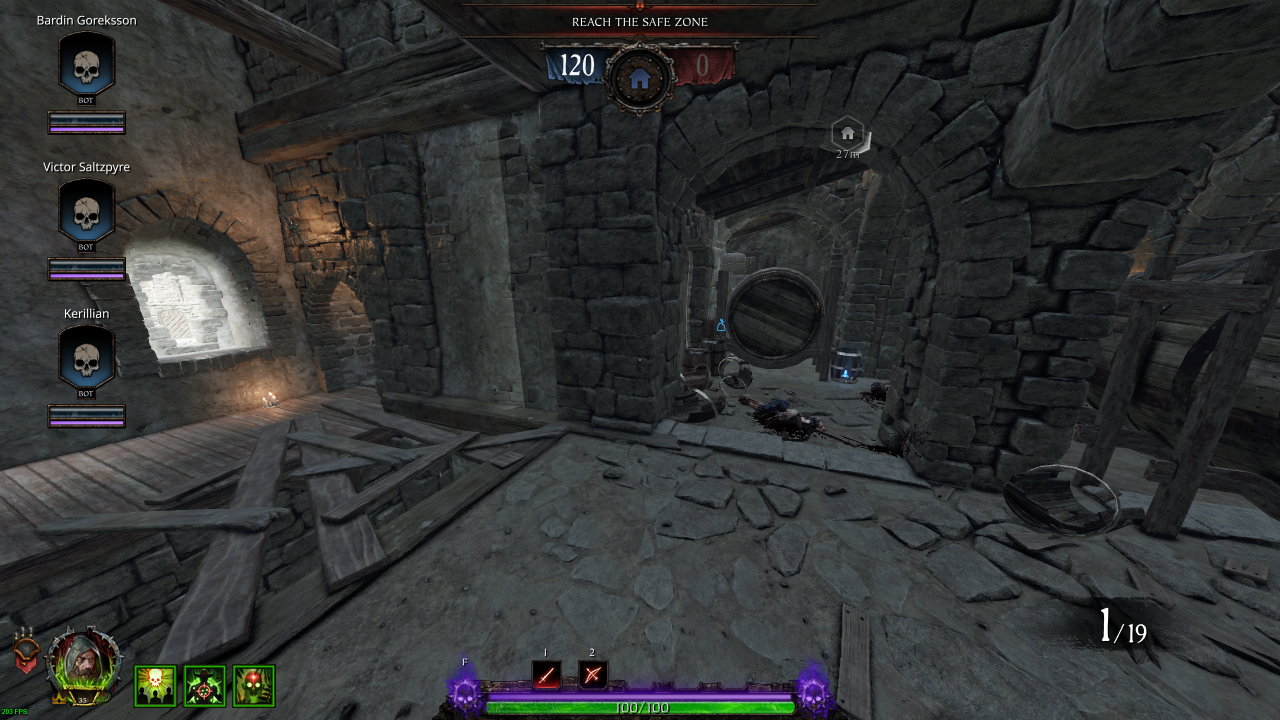
• Ammo: 2 (Pouch)
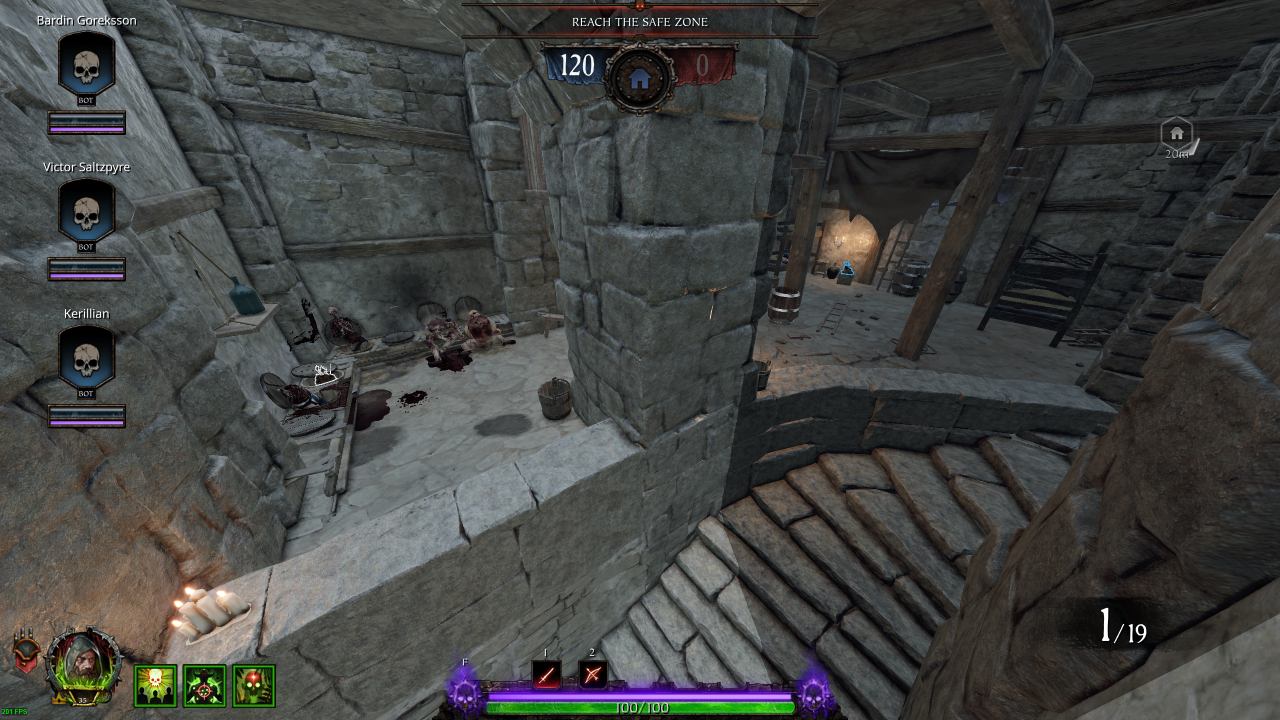
• Ammo: 1 (Pouch)
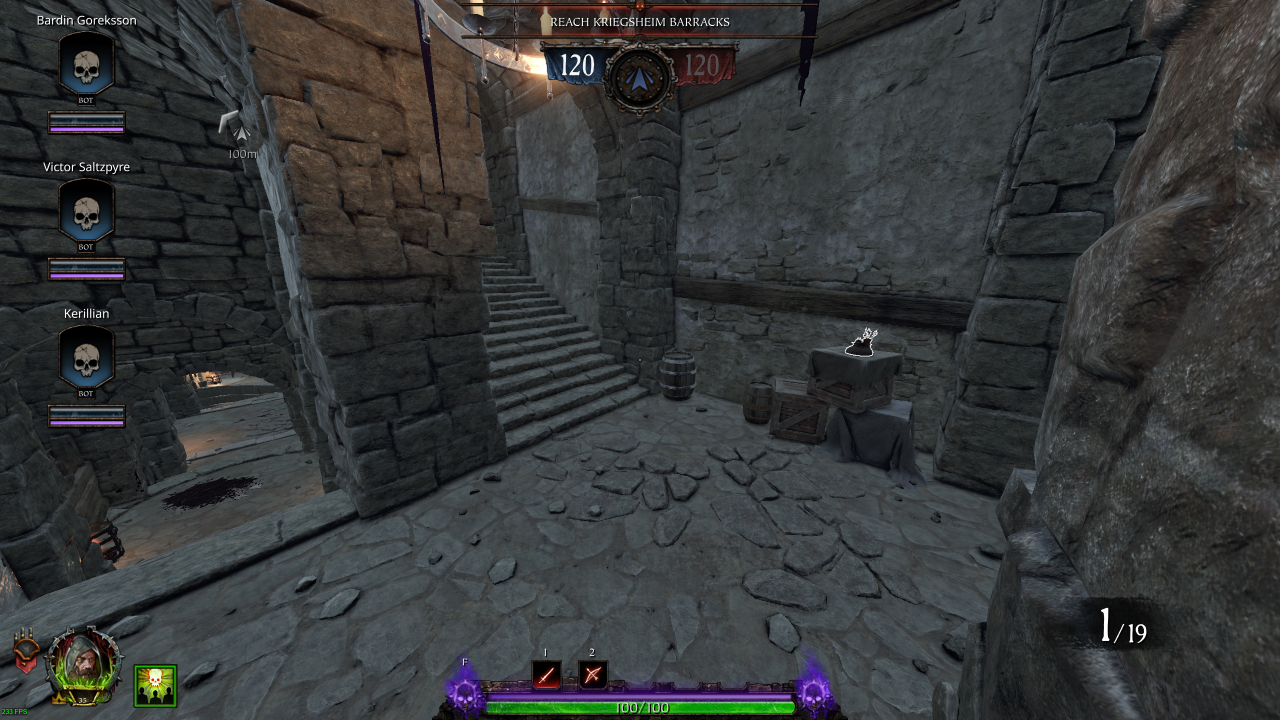
• Ammo: 1 (Pouch)
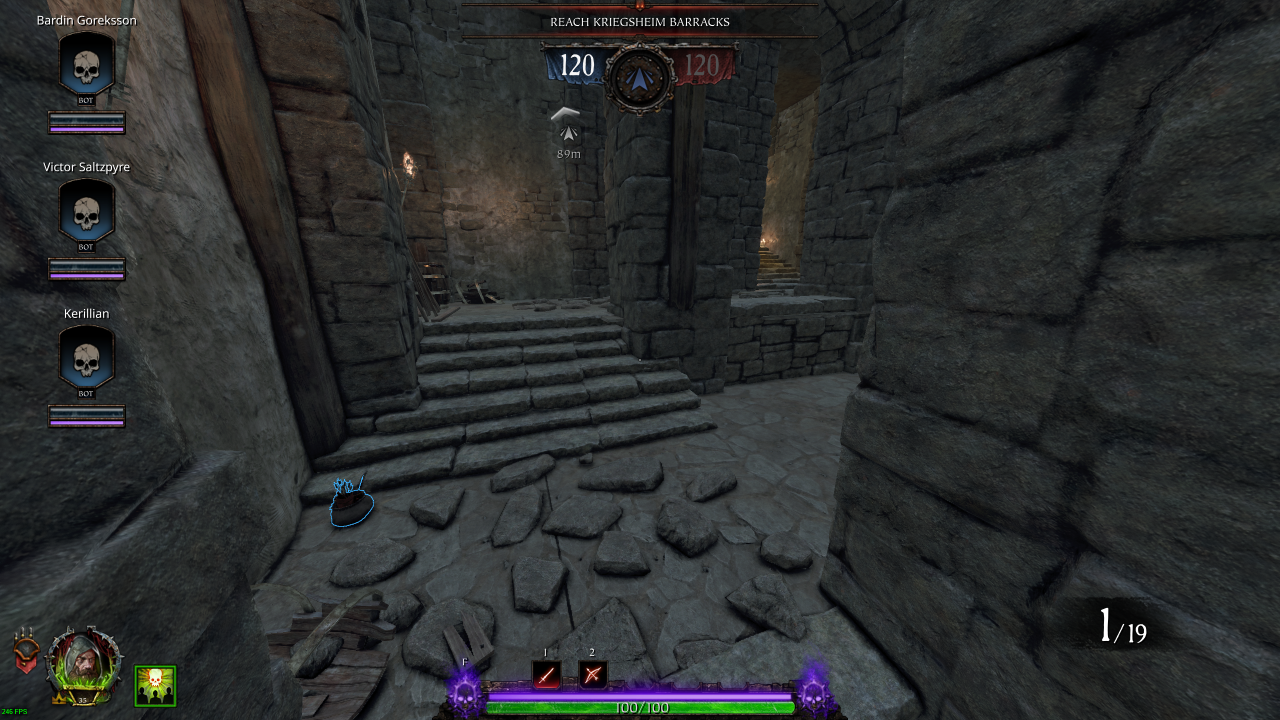
• Bombs: 1 (Fire)
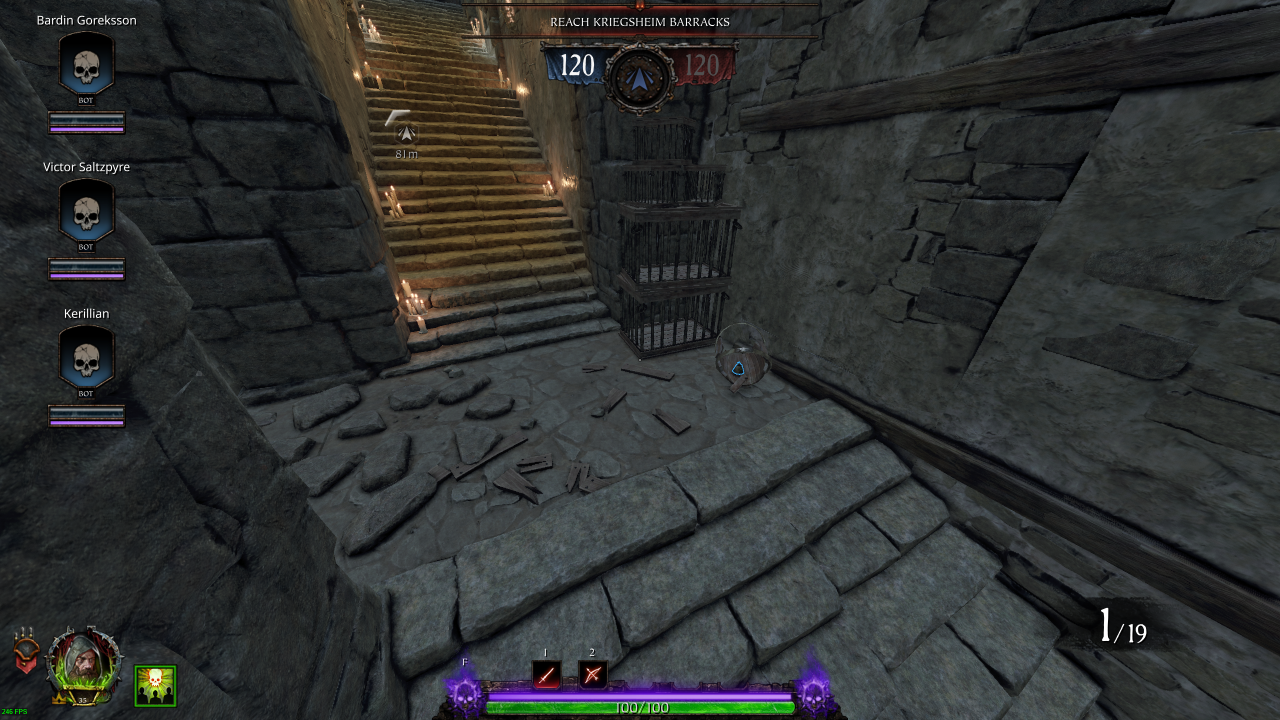
Round 2
Section 0: Spawn Room
Bombs: 2 (Explosive: 1 / Fire: 1)Potions: 4
Ammo: 1 (Crate)
Section 1: Spawn → Battlements
• Bombs: 1 (Fire)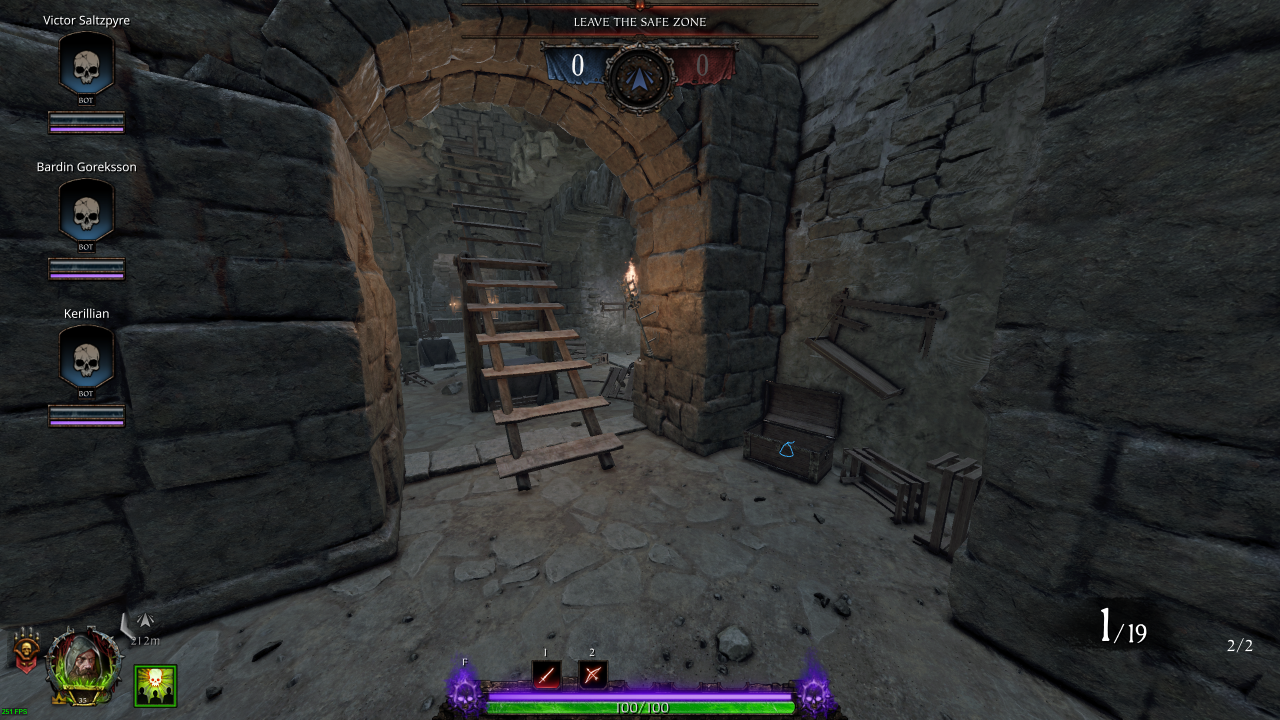
• Healing: 1 (Kit)
• Bombs: 2 (Explosive: 1 / Fire: 1)
• Ammo: 2 (Pouch)
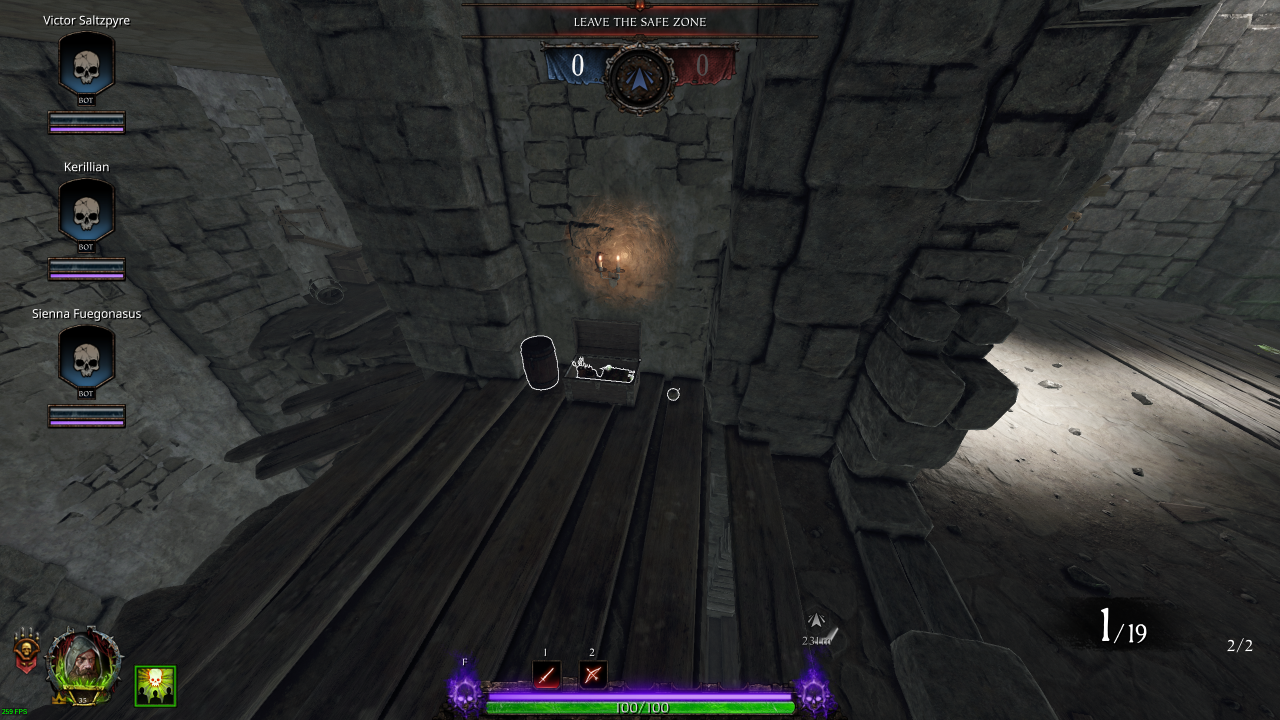
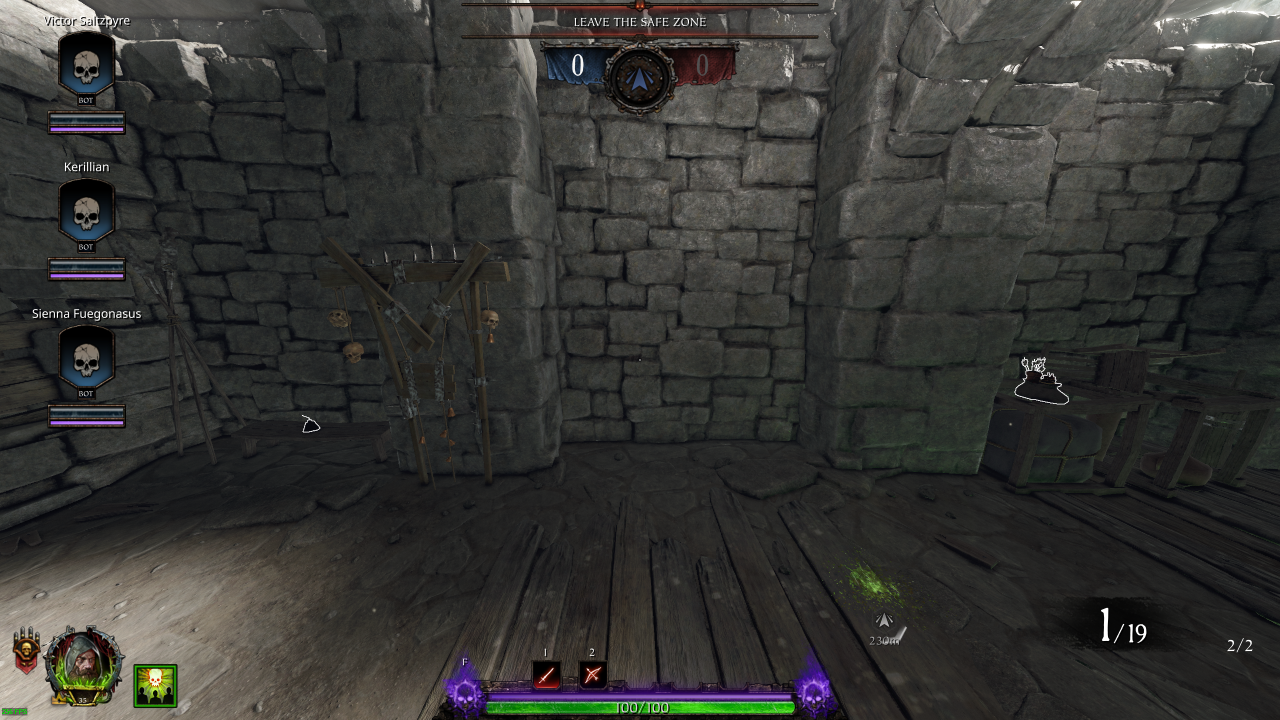
• Healing: 1 (Kit)
• Potions: 1
• Ammo: 1 (Pouch)
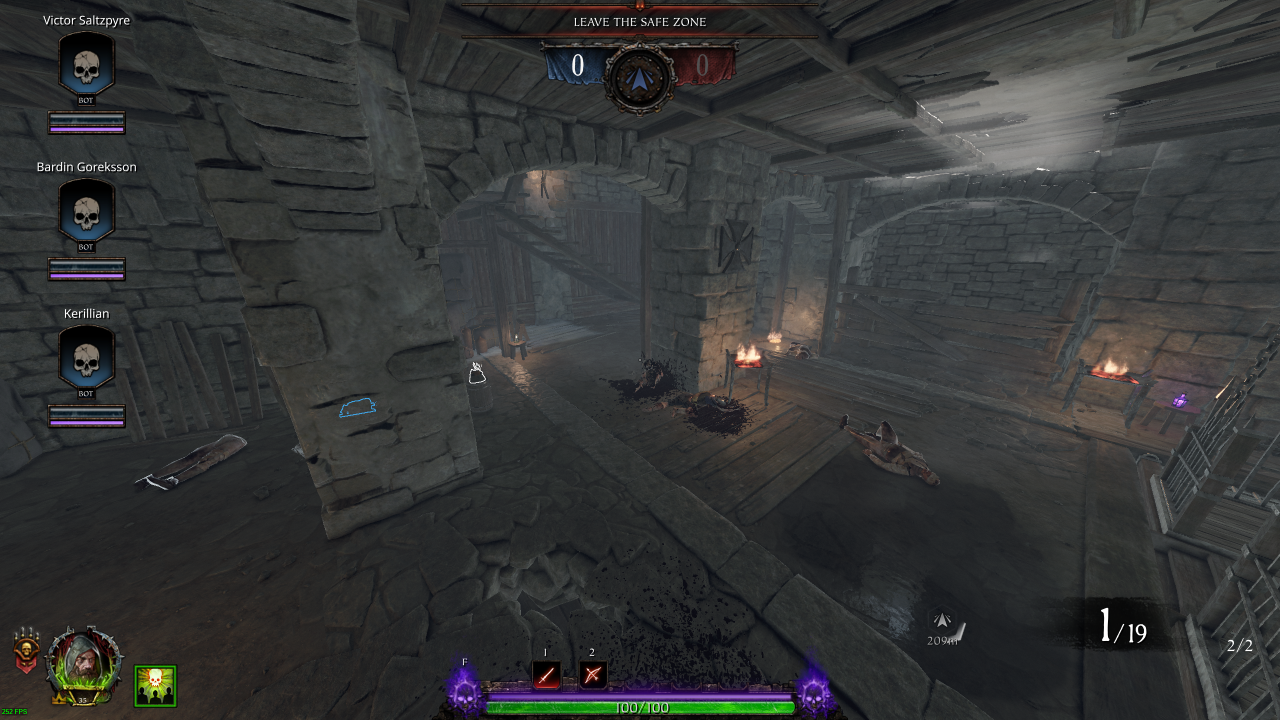
• Healing: 1 (Draught)
• Bombs: 2 (Explosive: 1 / Fire: 1)
• Ammo: 1 (Crate)
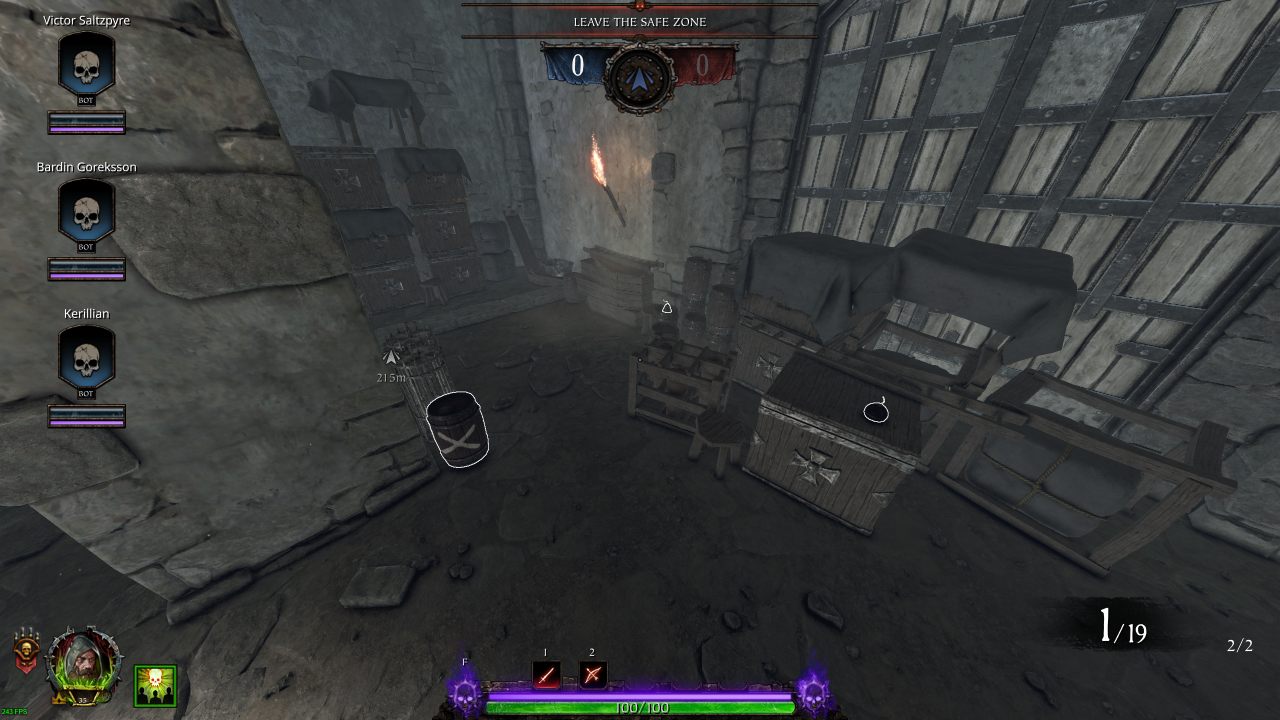
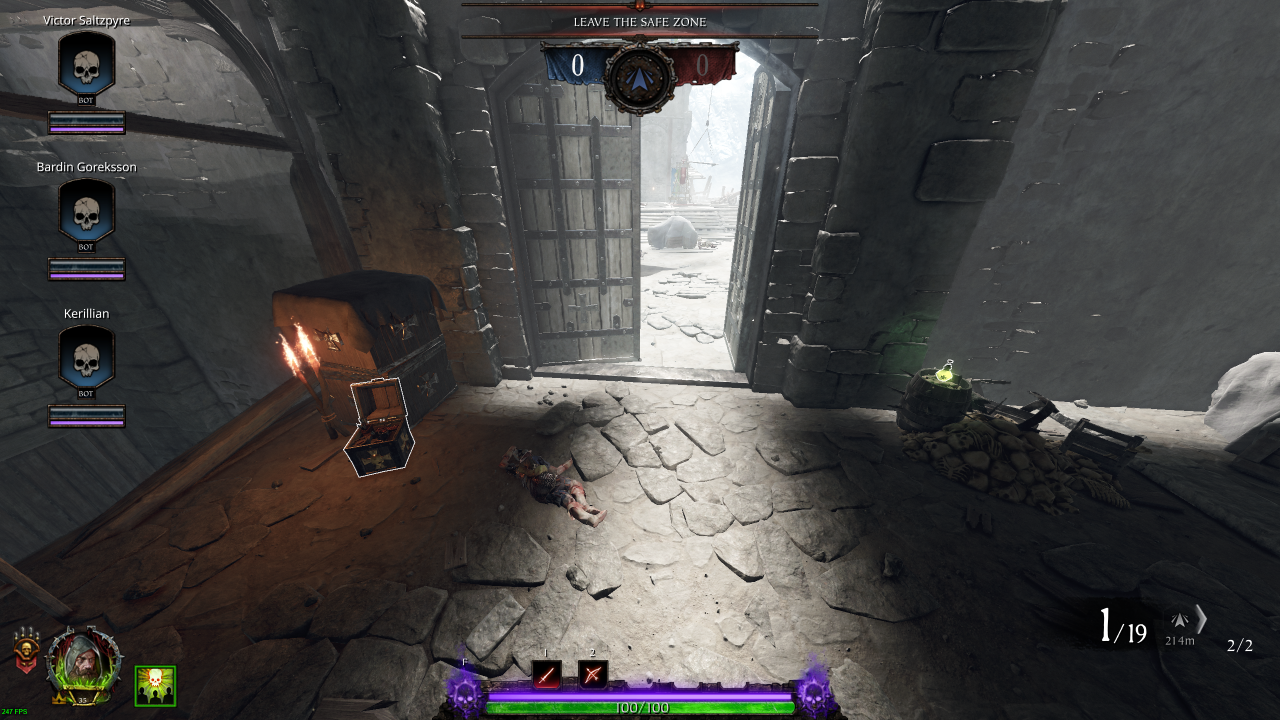
Section 2: Hold Event → Drop Down
• Healing: 1 (Kit)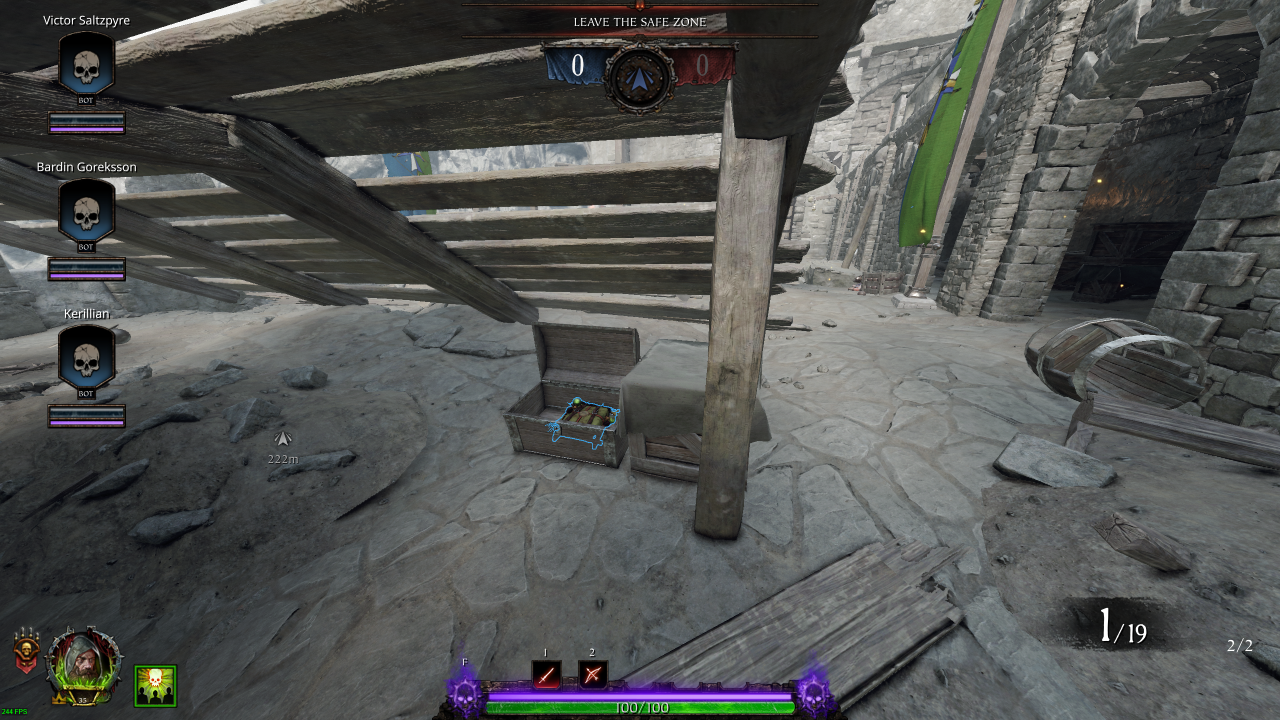
• Healing: 1 (Draught)
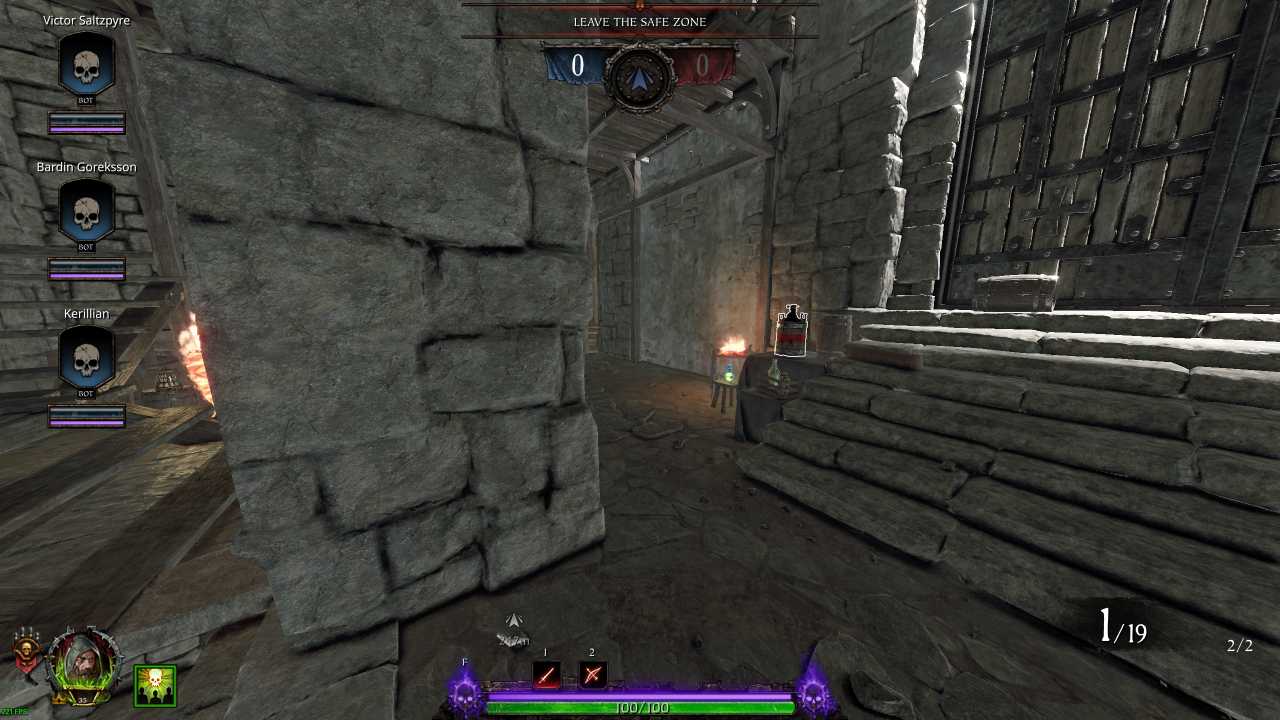
• Healing: 1 (Kit)
• Potions: 1
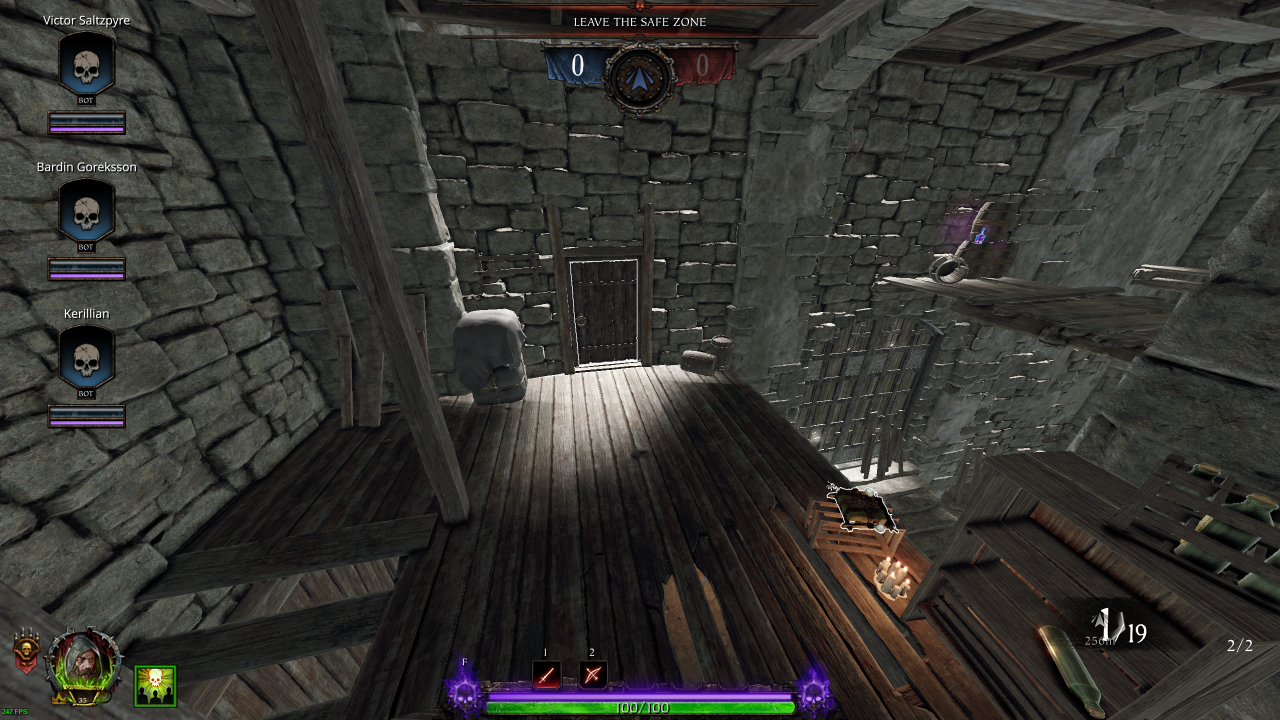
Section 3: Cannon Event → Safe Zone
• Ammo: 1 (Pouch)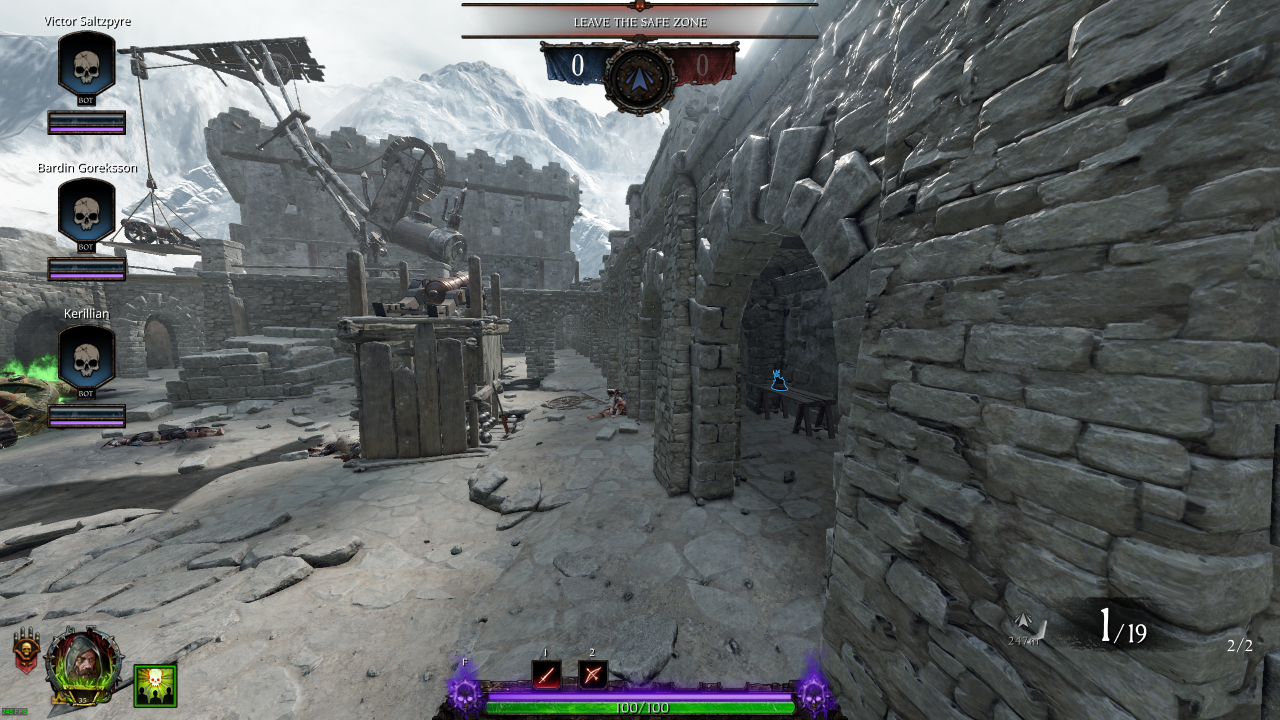
• Bombs: 1 (Fire)
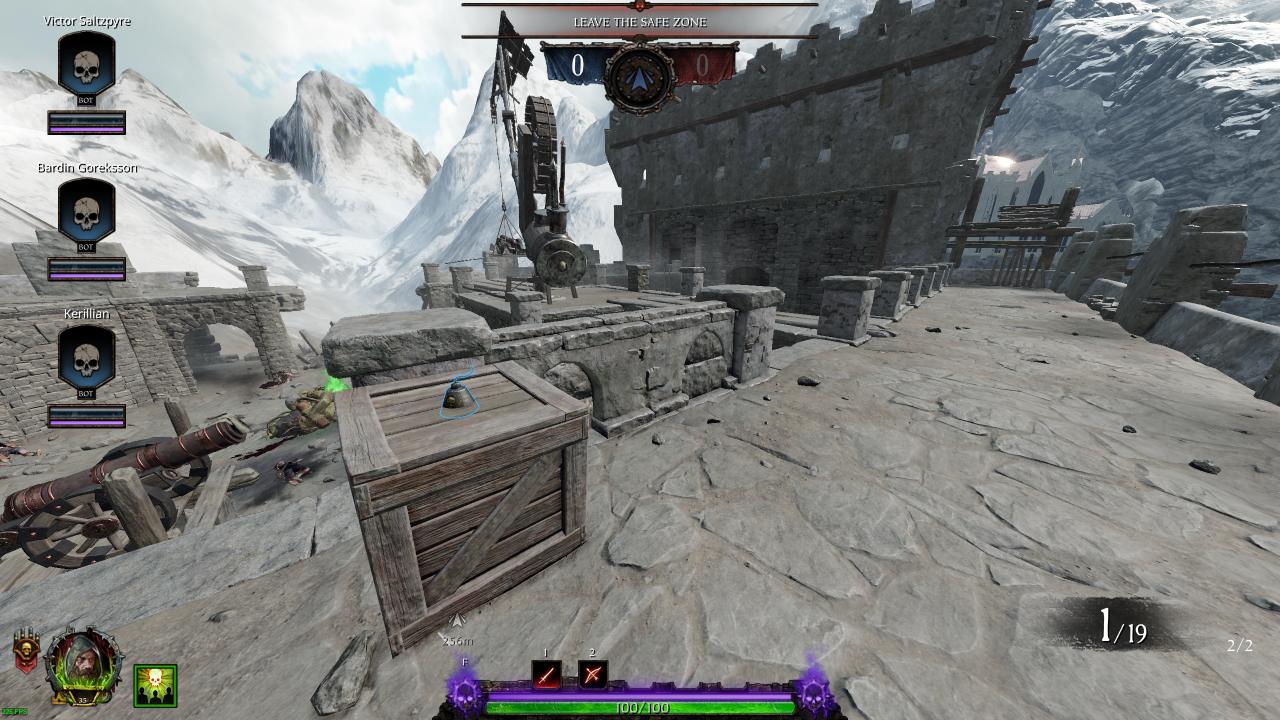
• Potions: 1
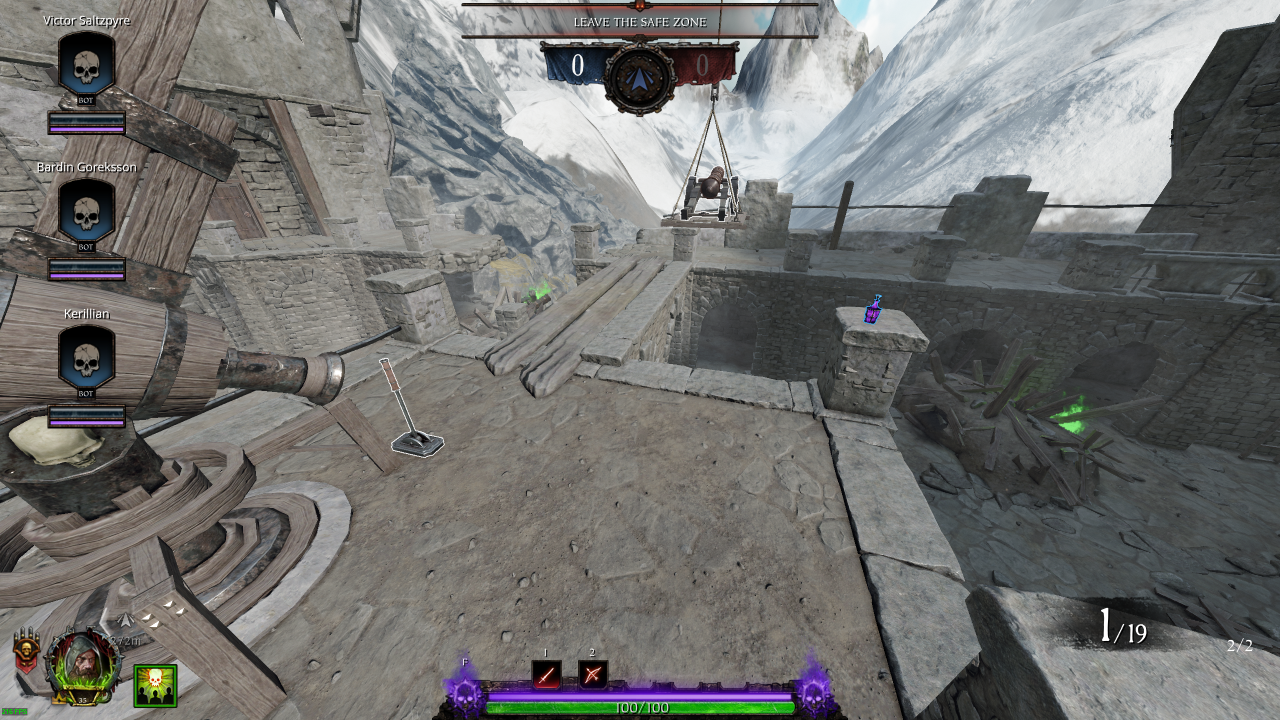
Round 3
Section 0: Spawn Room
Bombs: 4 (Explosive: 2 / Fire: 2)Potions: 4
Ammo: 1 (Crate)
Section 1: Spawn → Hold Event
• Bombs: 2 (Explosive: 1 / Fire: 1)• Potions: 1
• Ammo: 1 (Crate)
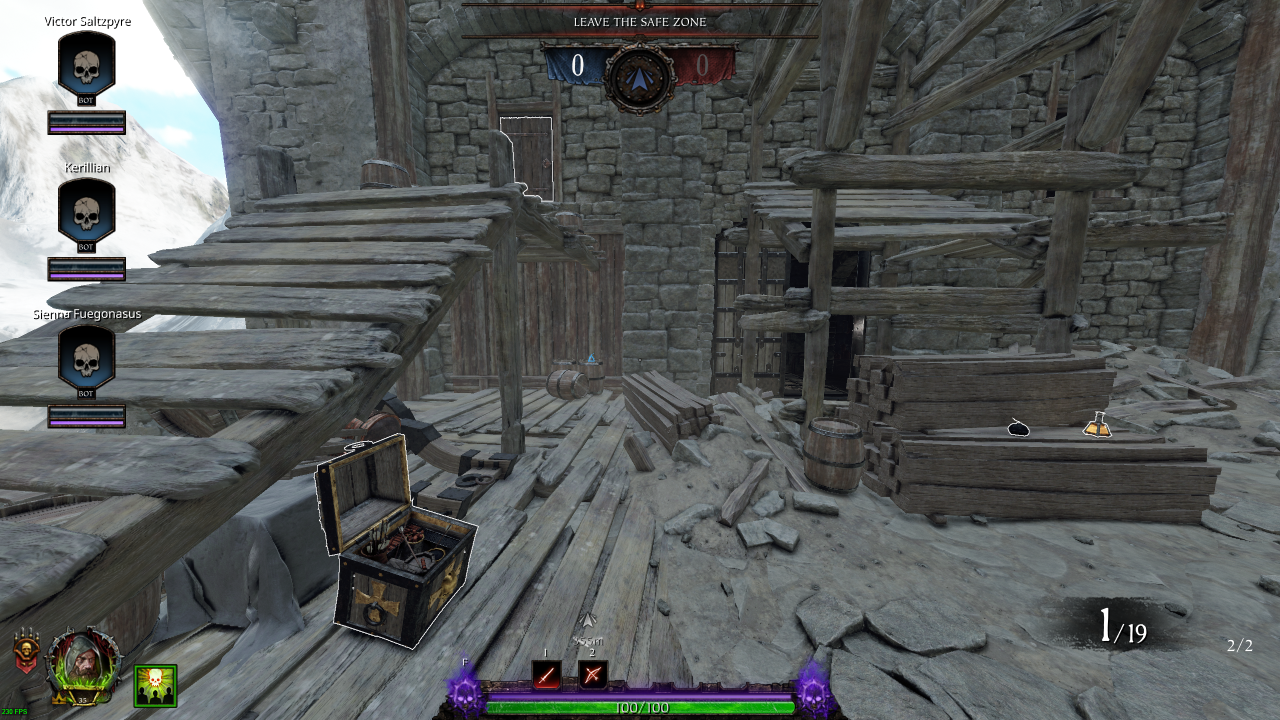
• Ammo: 3 (Pouch)
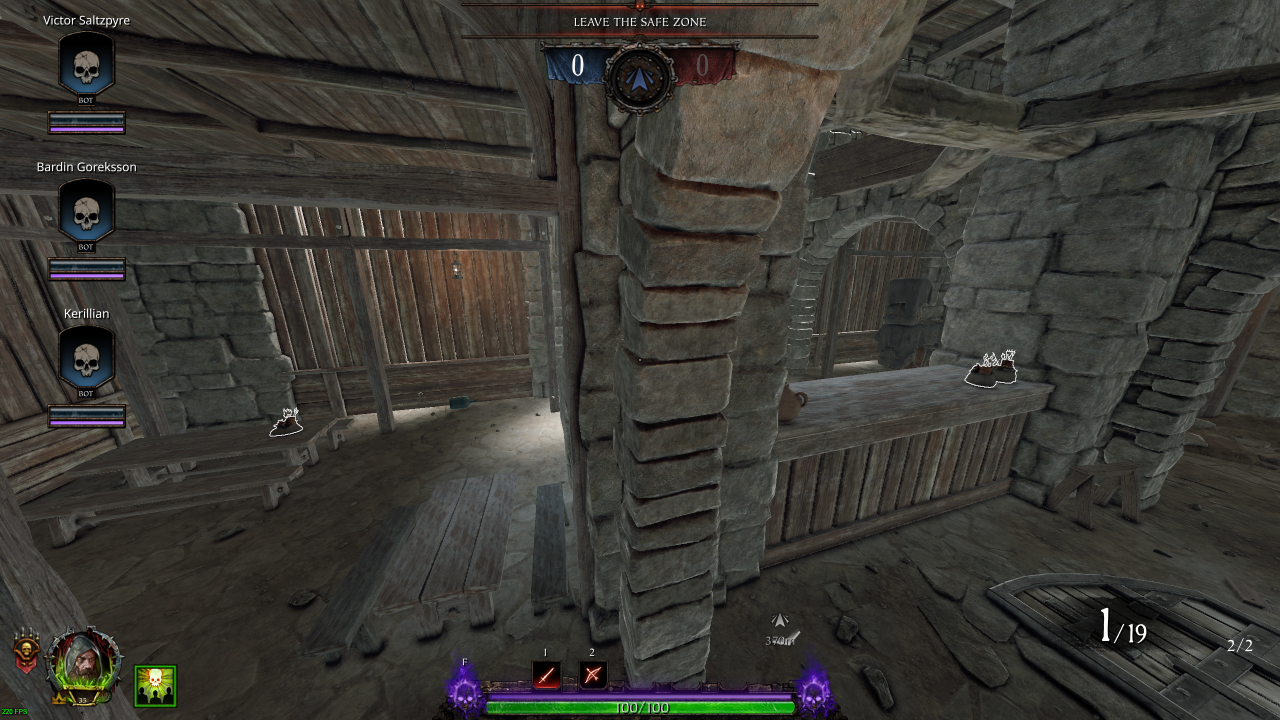
• Bombs: 1 (Explosive)
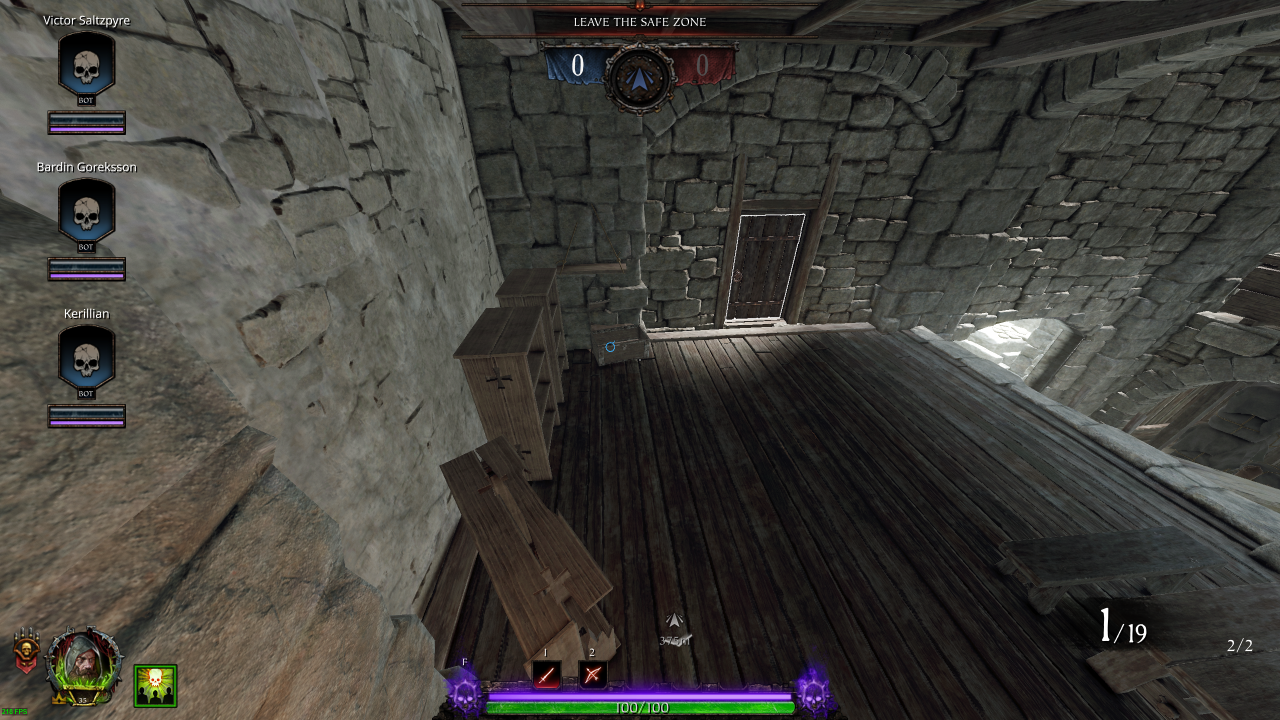
• Ammo: 1 (Pouch)
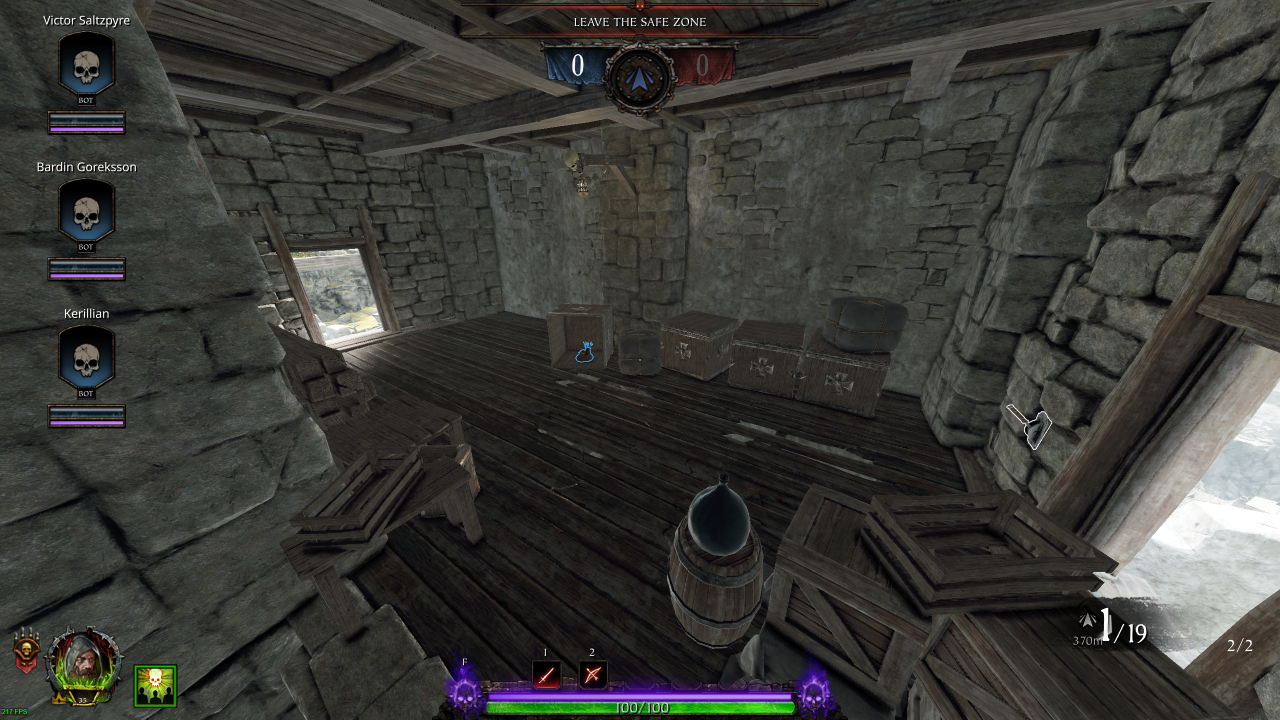
• Ammo: 2 (Pouch)
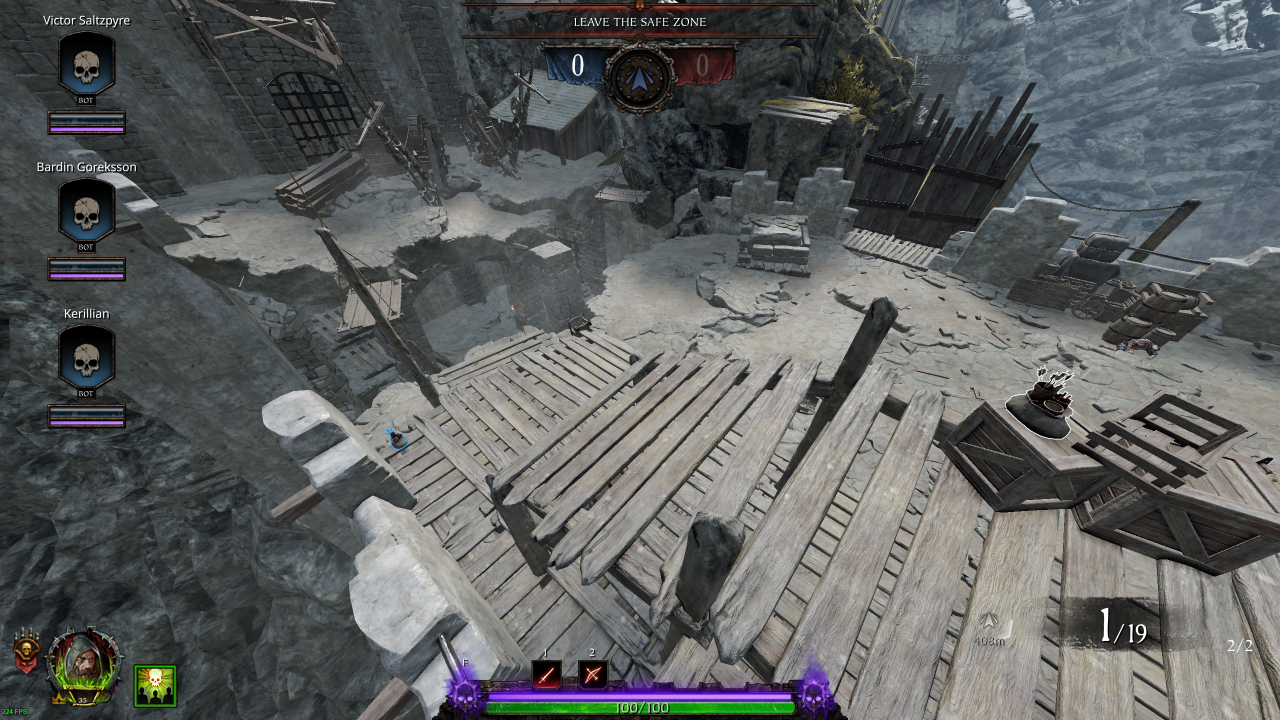
Section 2: Drop Down → Temple of Sigmar
• Potions: 1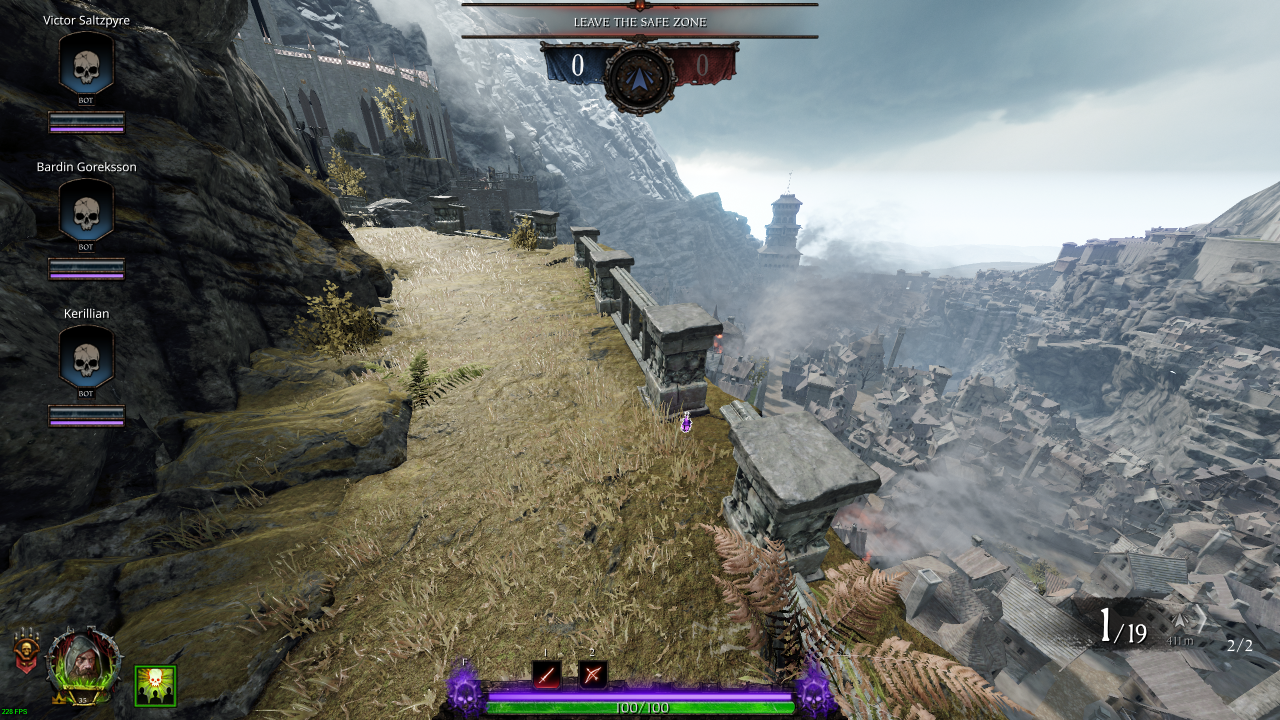
• Ammo: 3 (Pouch)
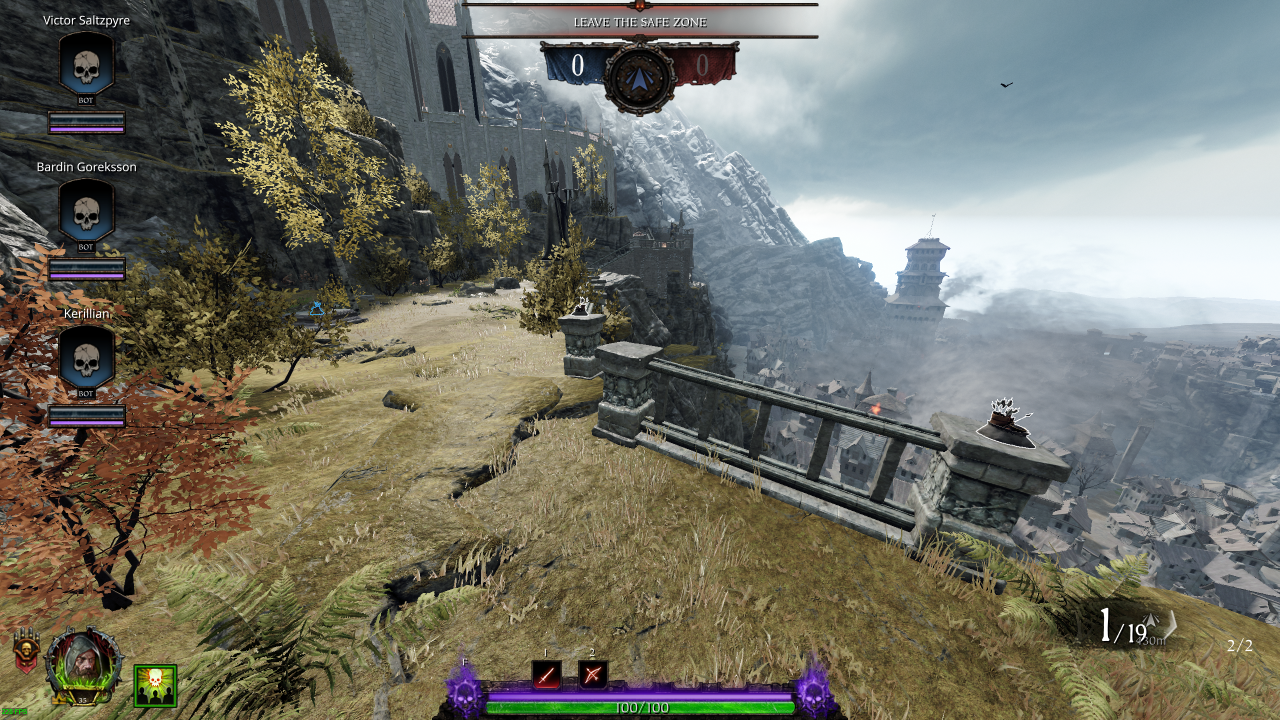
• Healing: 1 (Kit)
• Bombs: 1 (Explosive)
• Ammo: 1 (Pouch)
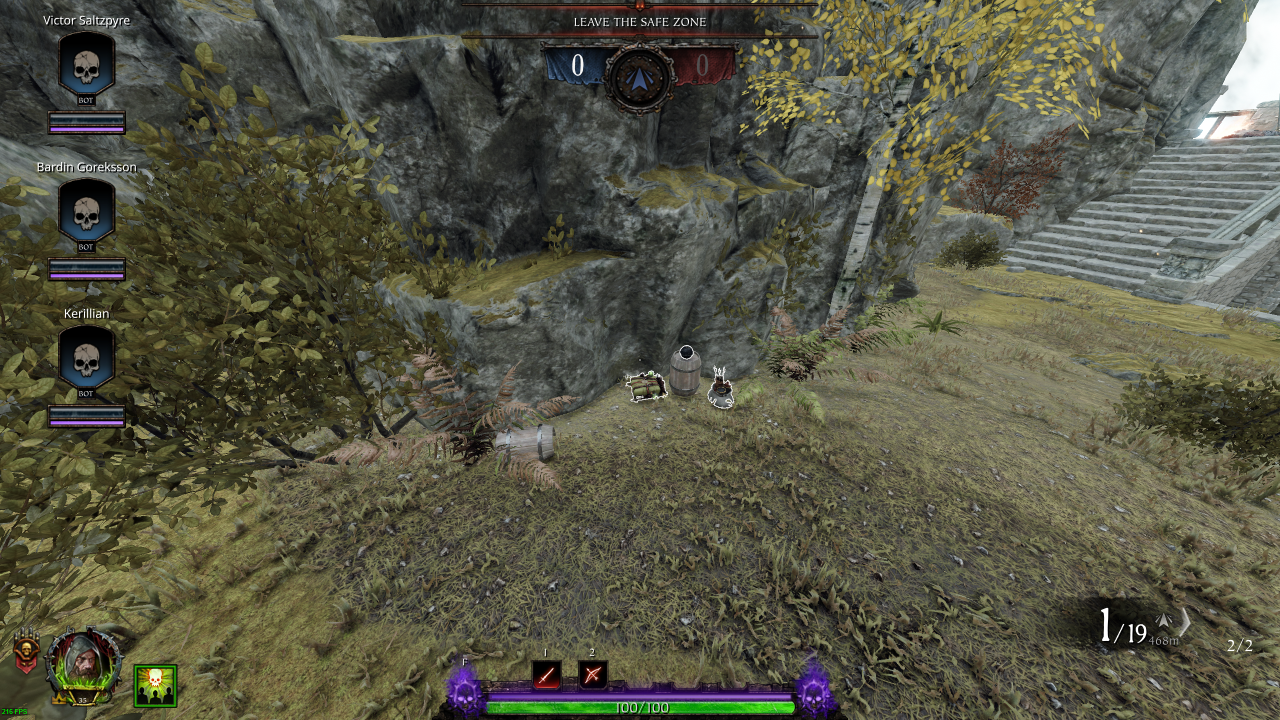
• Bombs: 1 (Fire)
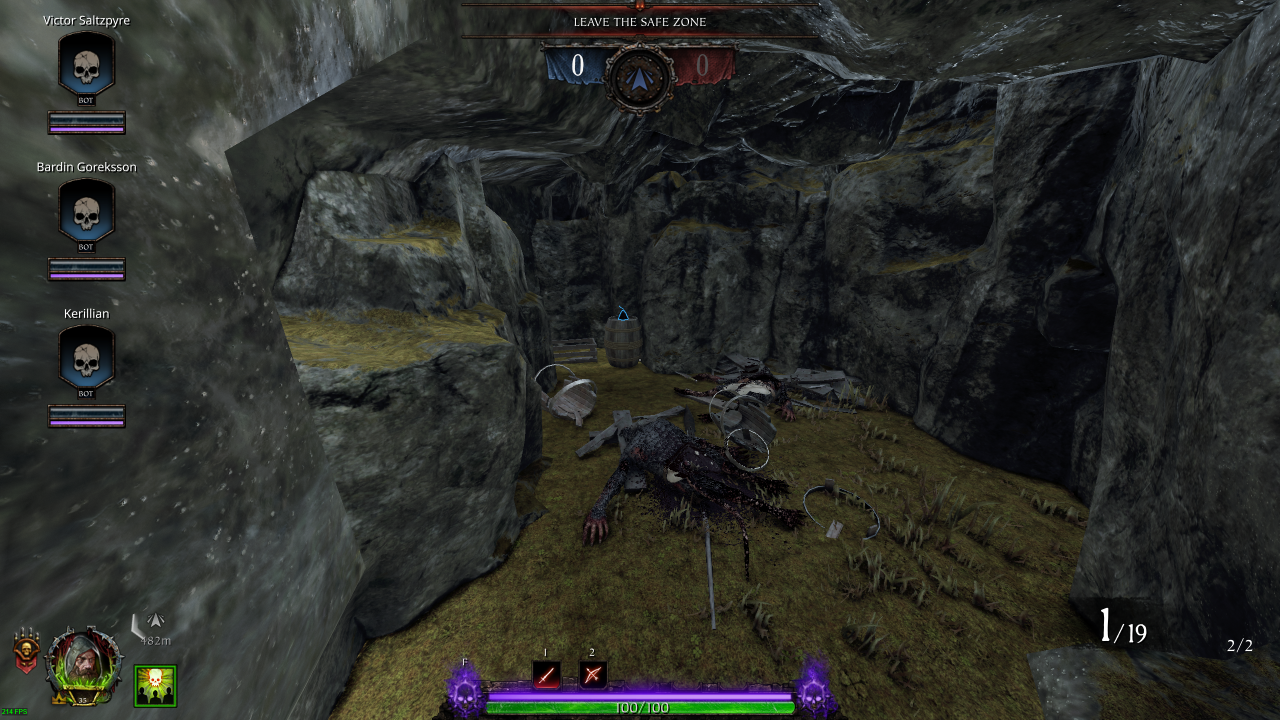
• Bombs: 2 (Explosive: 1 / Fire: 1)
• Potions: 3
• Ammo: 1 (Crate)
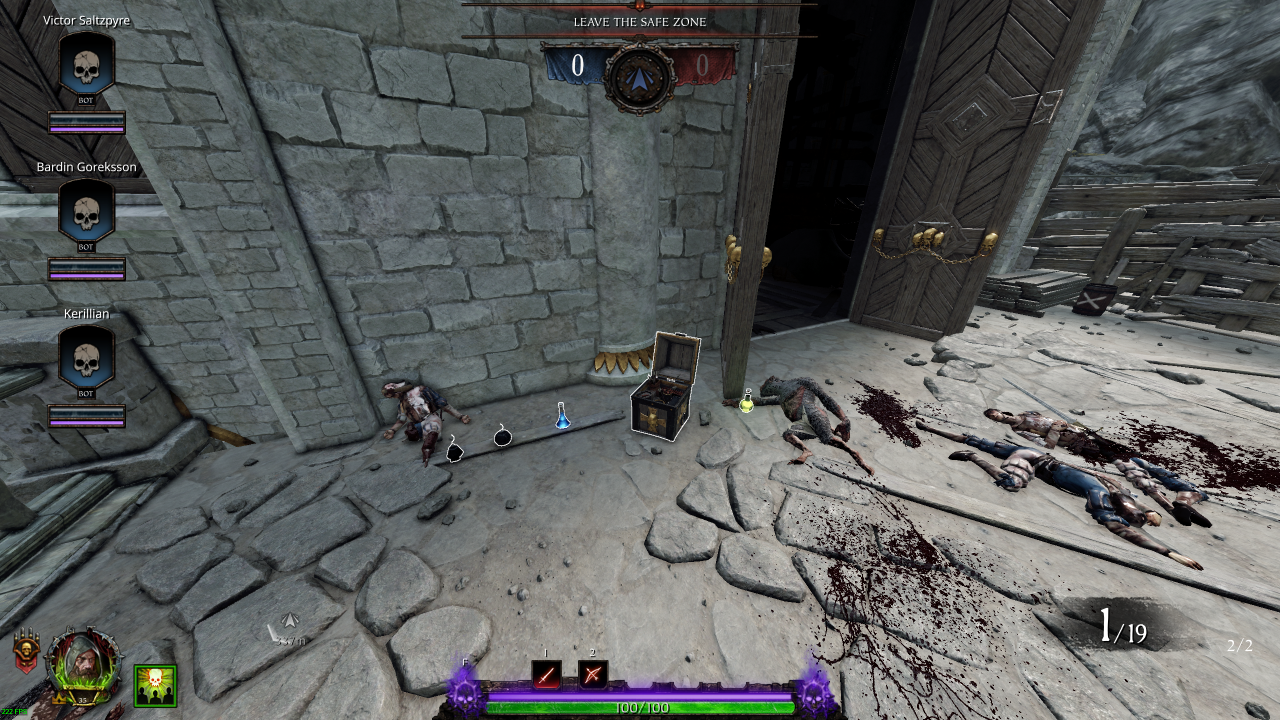
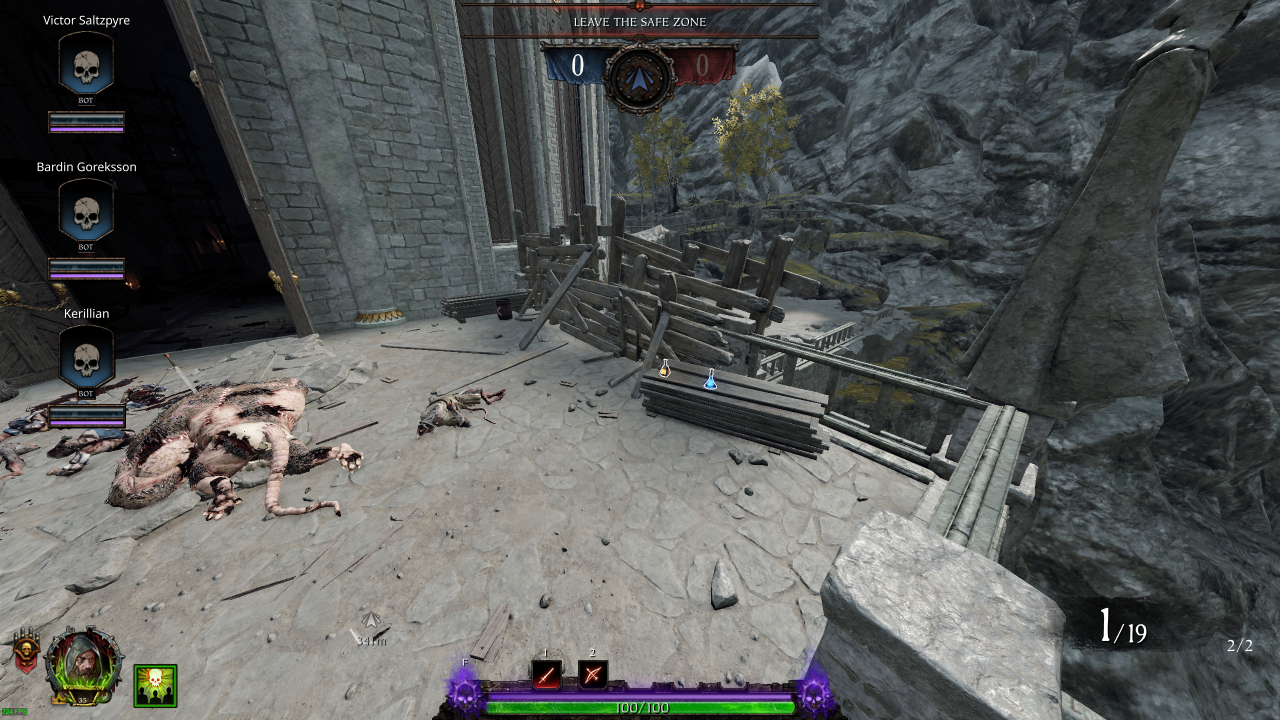
Section 3: Temple of Sigmar
• Healing: 1 (Draught)• Bombs: 1 (Explosive)
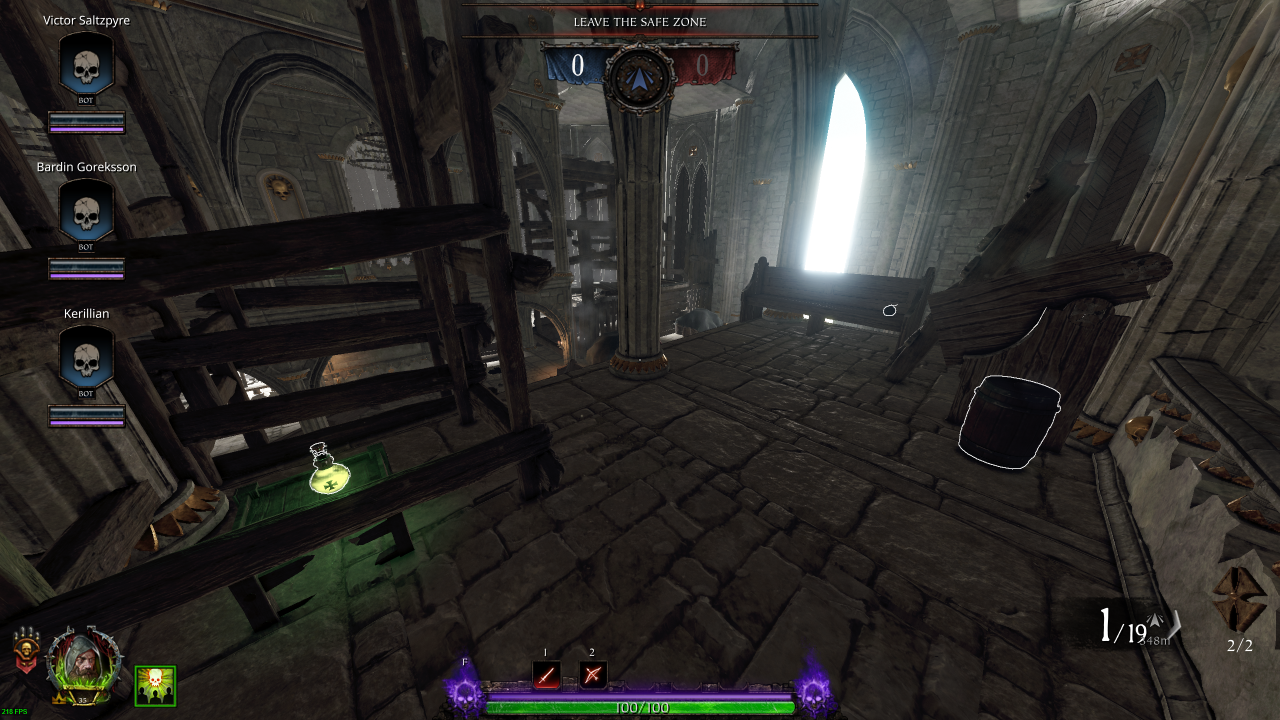
• Healing: 1 (Draught)
• Bombs: 1 (Explosive)
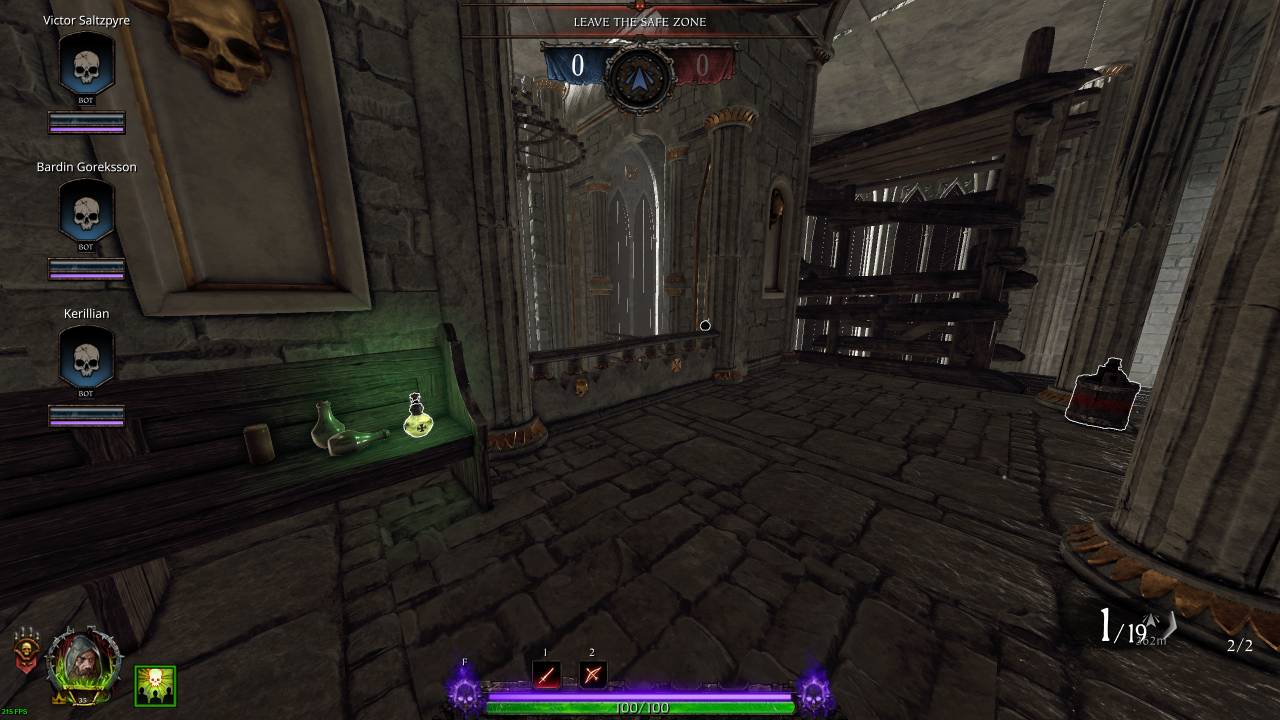
• Bombs: 1 (Fire)
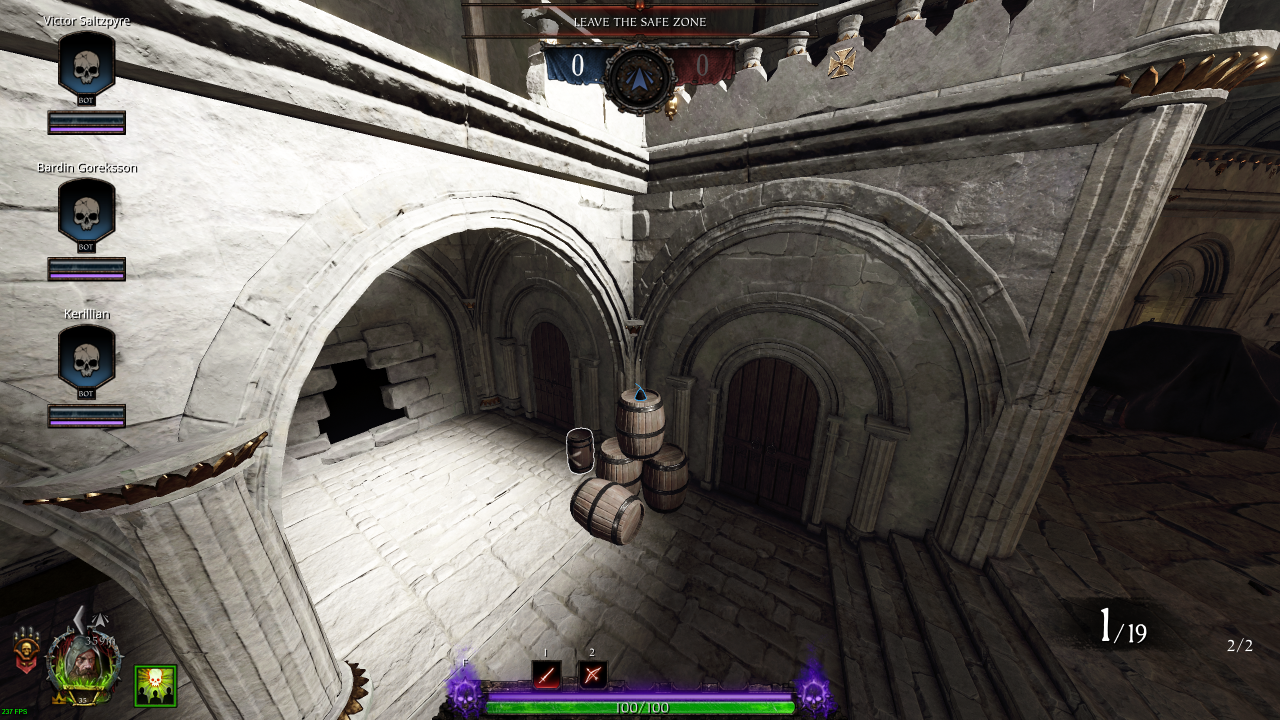
• Potions: 2
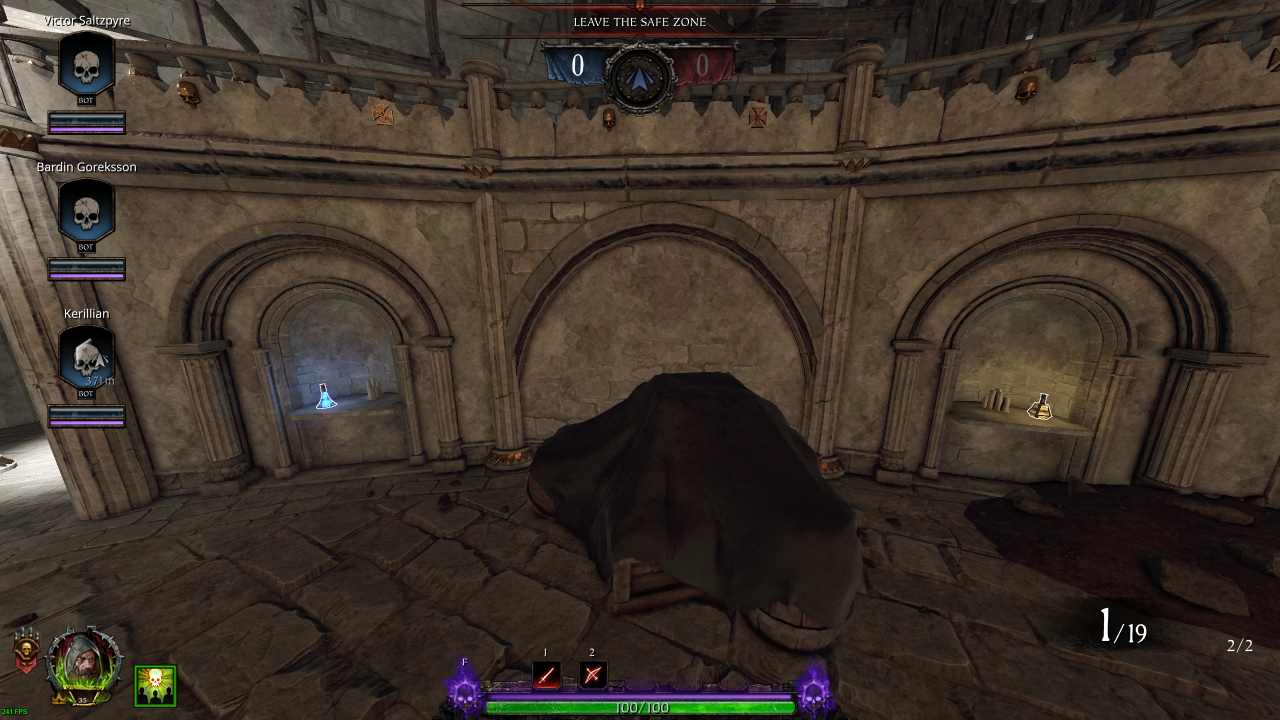
• Healing: 2 (Draught)
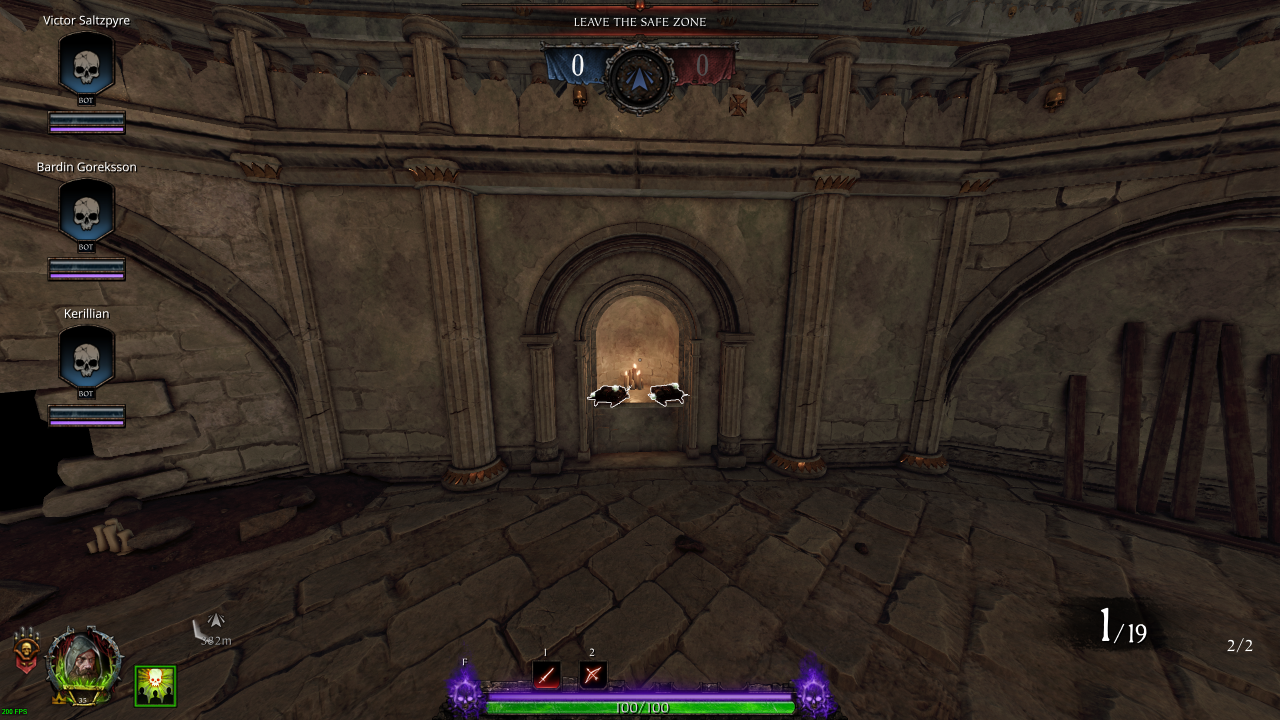
• Bombs: 1 (Fire)
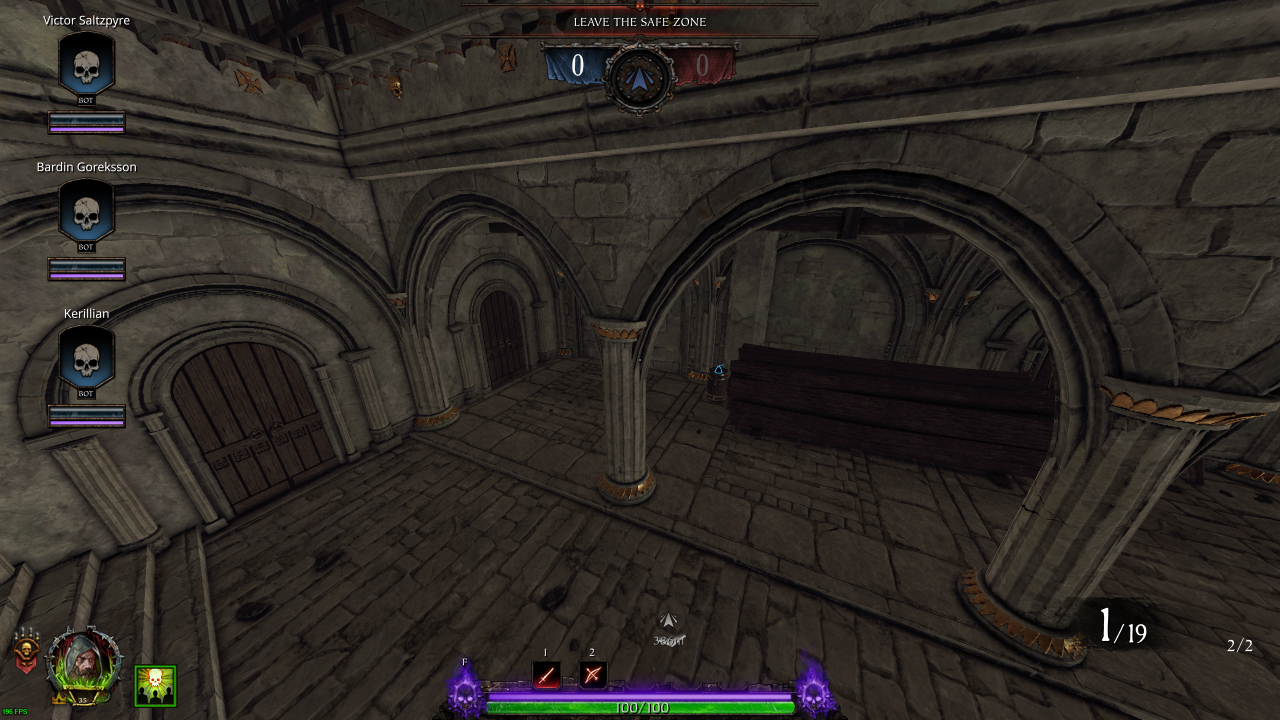
Against the Grain
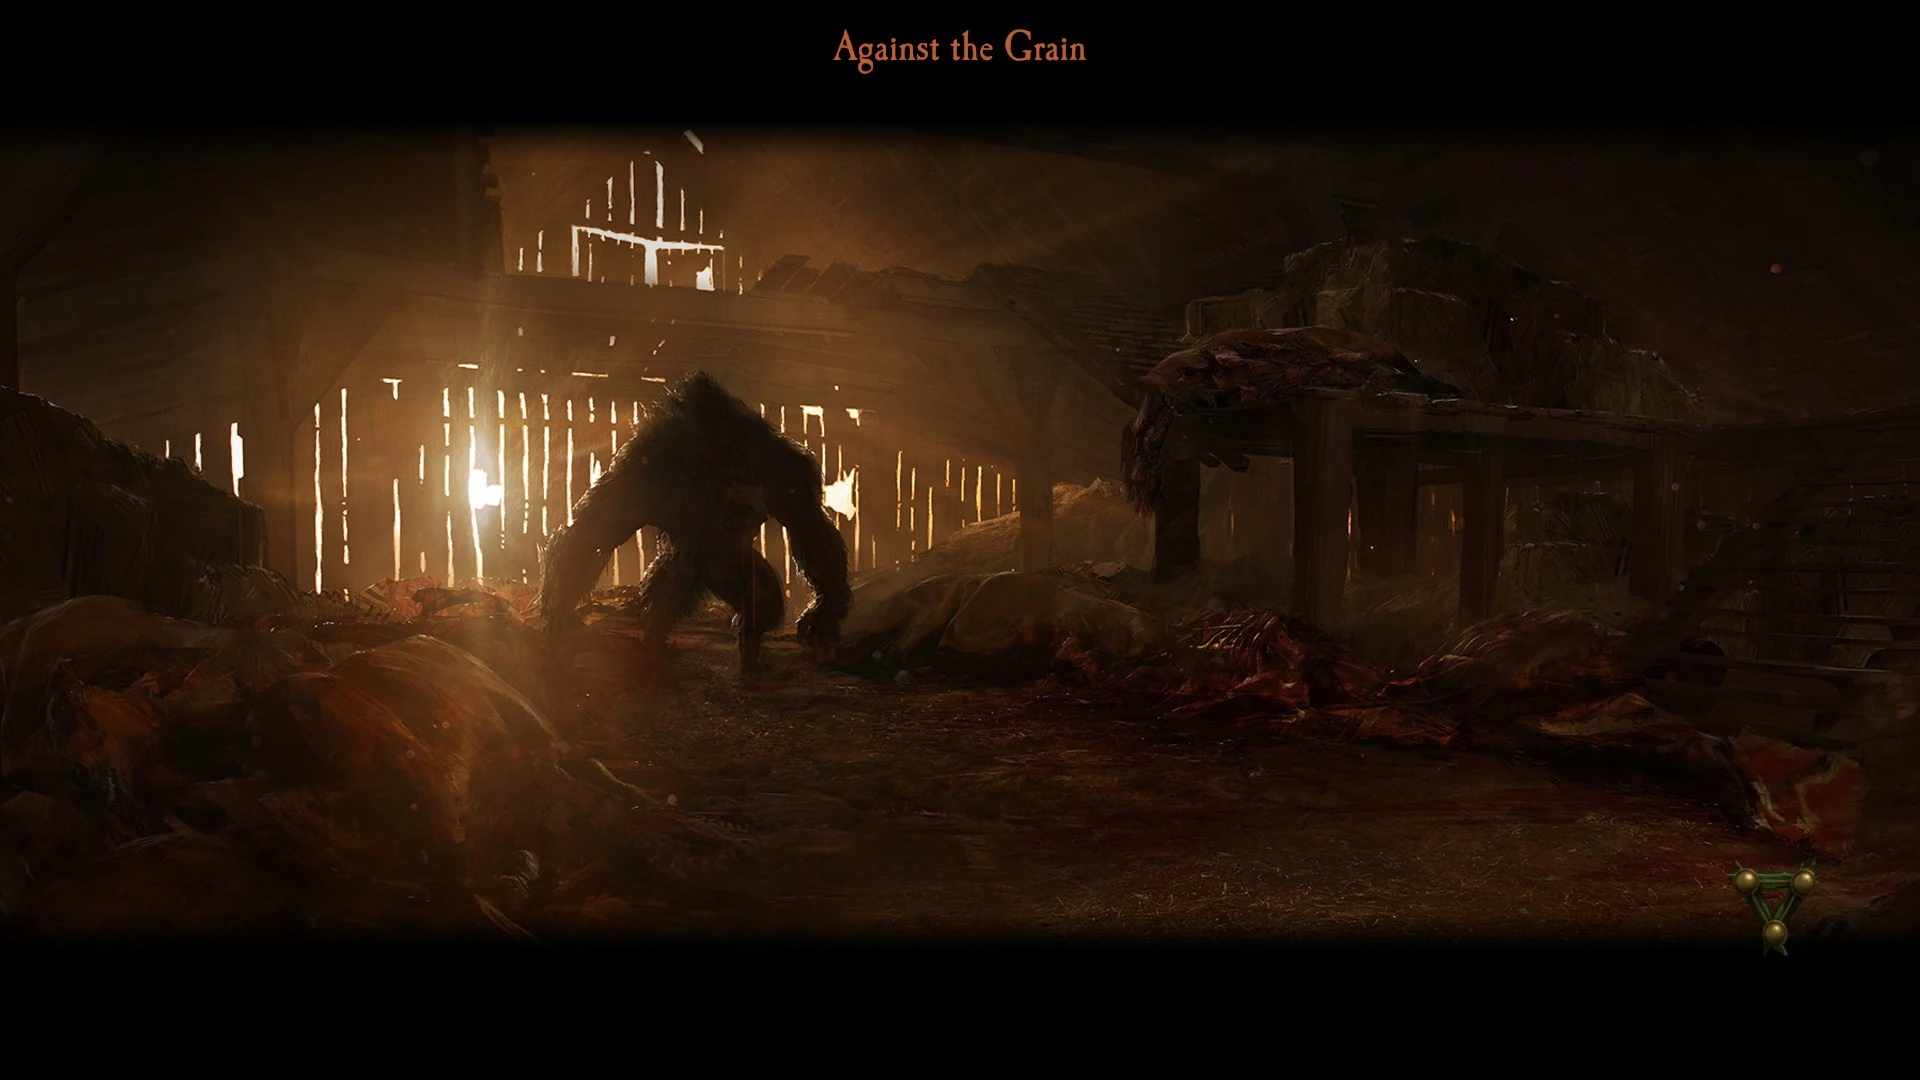
Total Items
Round 1
Healing: 7 {8}Draughts: 5Kits: 2
RNG: 1 Draughts Bombs: 11 {16}
Explosive: 7Fire: 4
RNG: 5 Potions: 8 {9}
Set: 8RNG: 1 Ammo: 14 {19}
Pouches: 12Crates: 2
RNG: 5 pouches Barrels: 9
Explosive: 6Fire: 3
Round 2
Healing: 7 {11}Draughts: 4Kits: 3
RNG: 4 Draughts Bombs: 10 {12}
Explosive: 6Fire: 4
RNG: 2 Potions: 5 {9}
Set: 5RNG: 4 Ammo: 17 {20}
Pouches: 15Crates: 2
RNG: 3 pouches Barrels: 12
Explosive: 7Fire: 5
Round 1
Section 0: Spawn Room
Bombs: 4 (Explosive: 2 / Fire: 2)Potions: 4
Ammo: 1 (Crate)
Section 1: Grain Field → Drop Down
� RNG: Inside BoxHealing (Draught) / Potion
• Healing: 0 {1} (Draught)
• Potions: 0 {1}
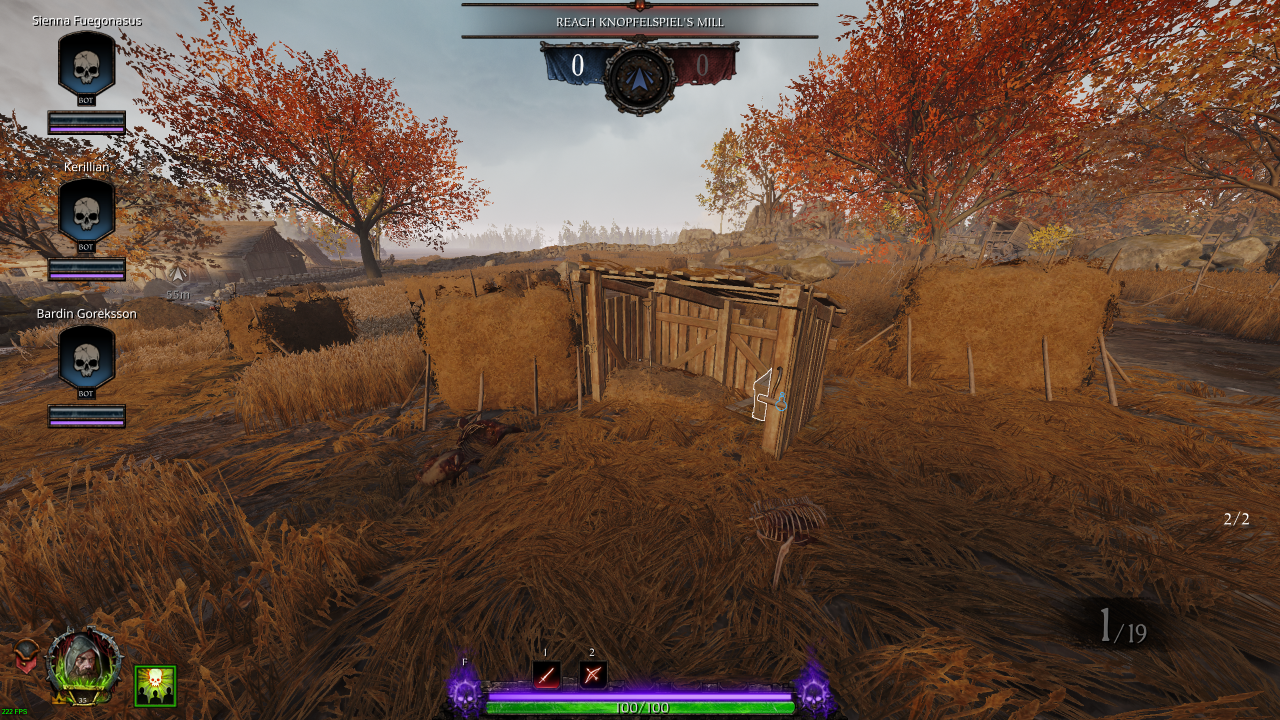
• Bombs: 1 (Fire)
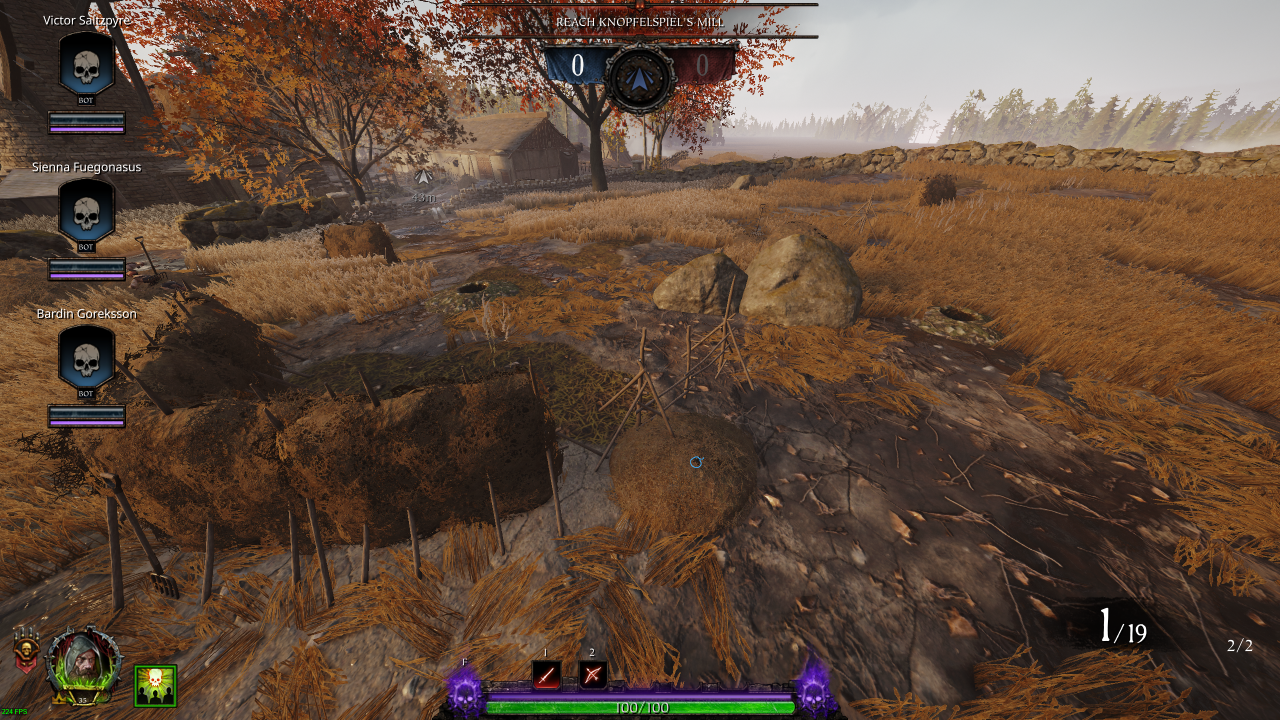
• Potions: 1
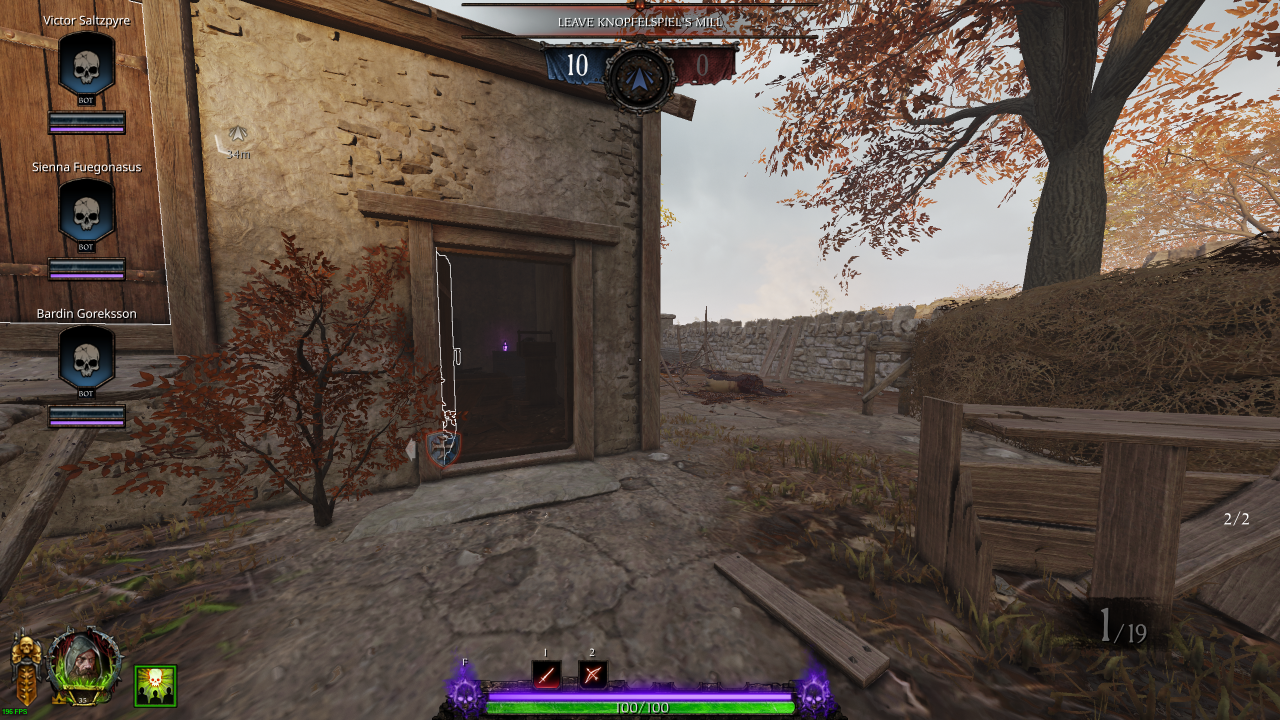
• Potions: 1
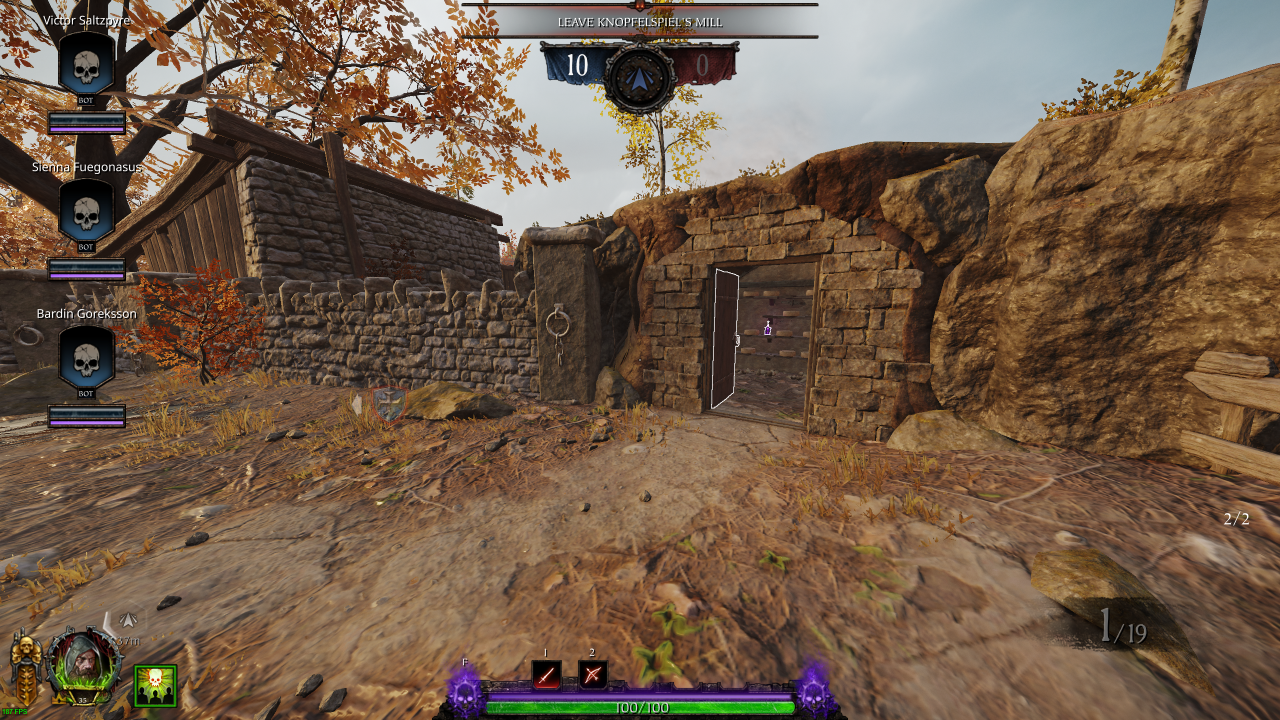
• Healing: 1 (Draught)
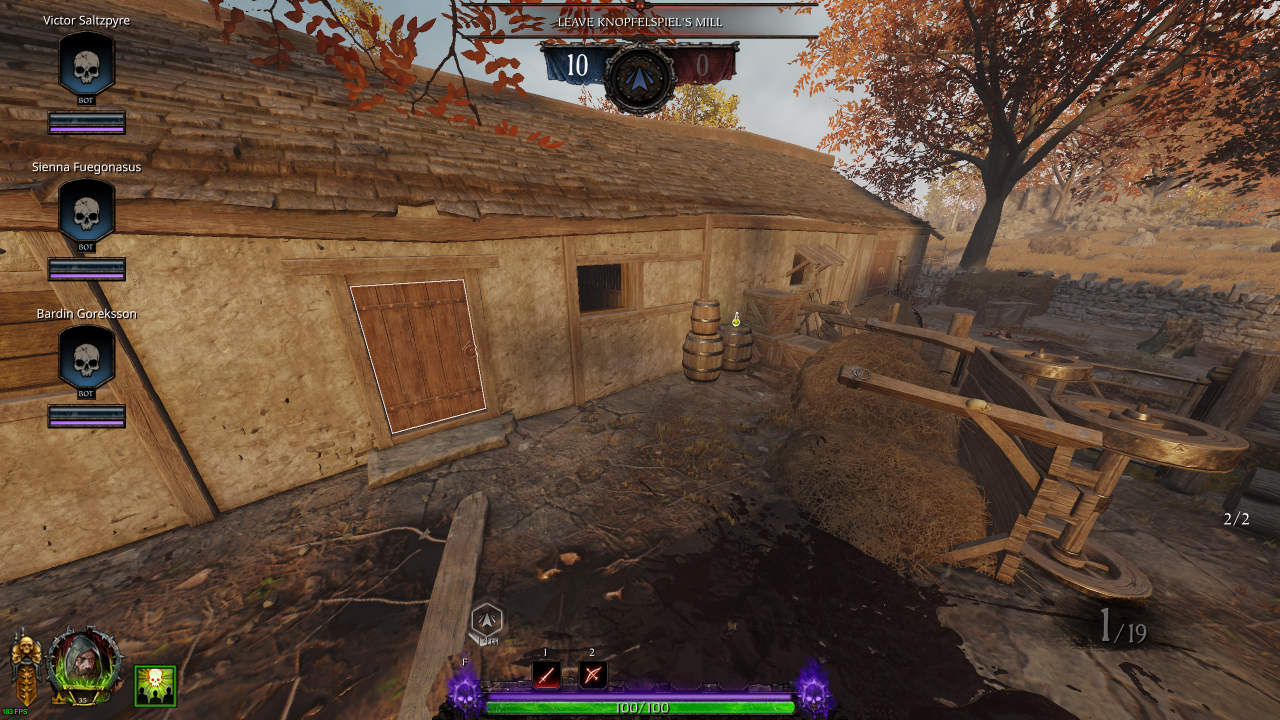
• Bombs: 1 (Explosive)
• Ammo: 1 (Pouch)
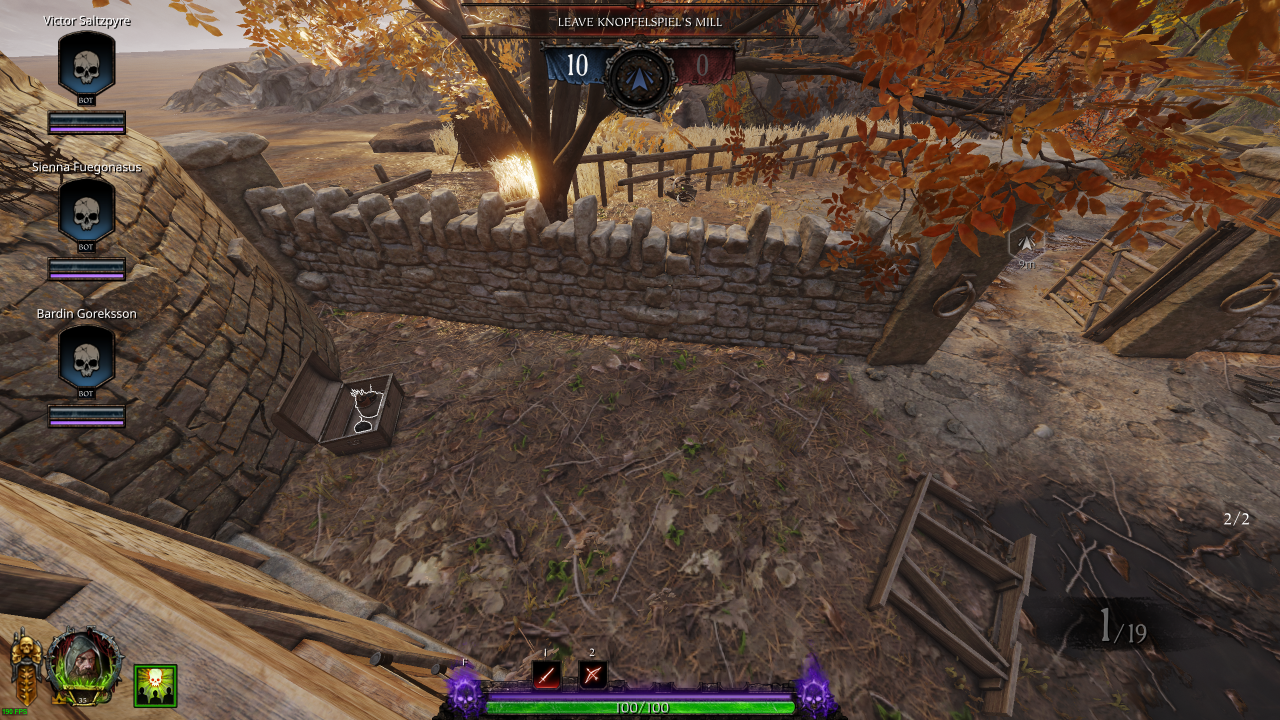
• Healing: 1 (Kit)
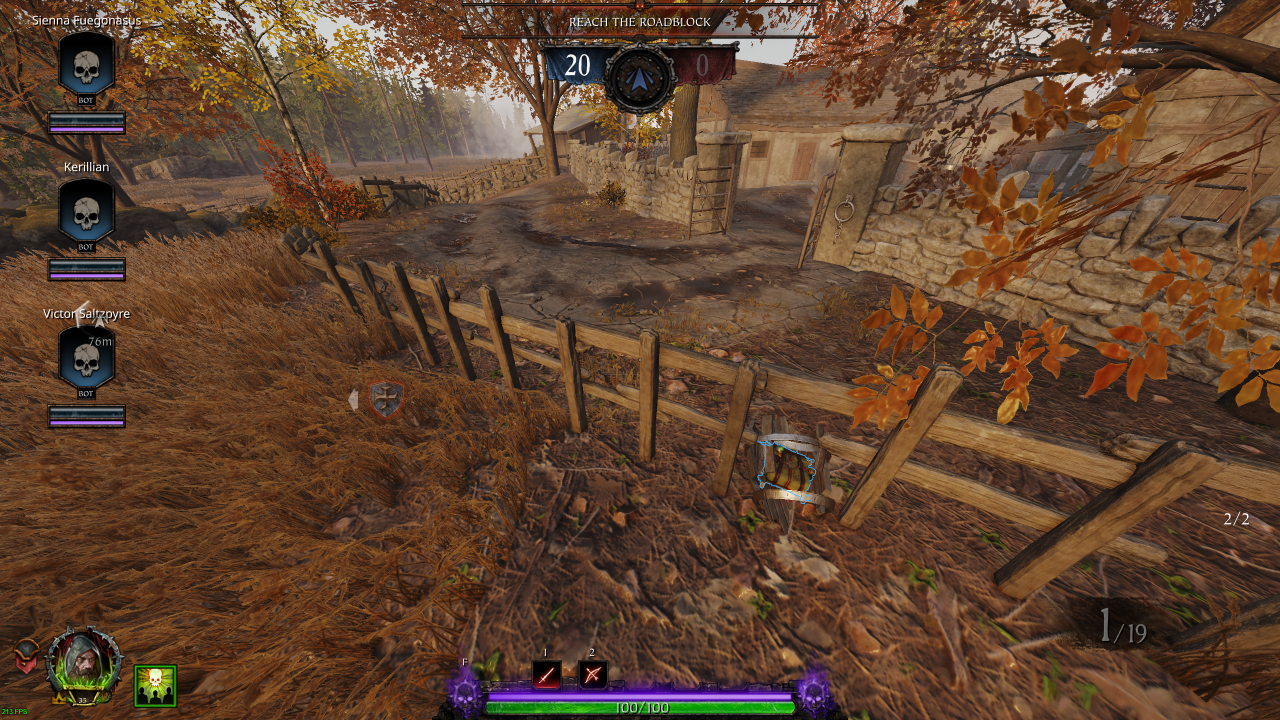
Section 2: Open Field
• Healing: 1 (Draught)• Bombs: 1 (Explosive)
• Ammo: 3 (Pouch)
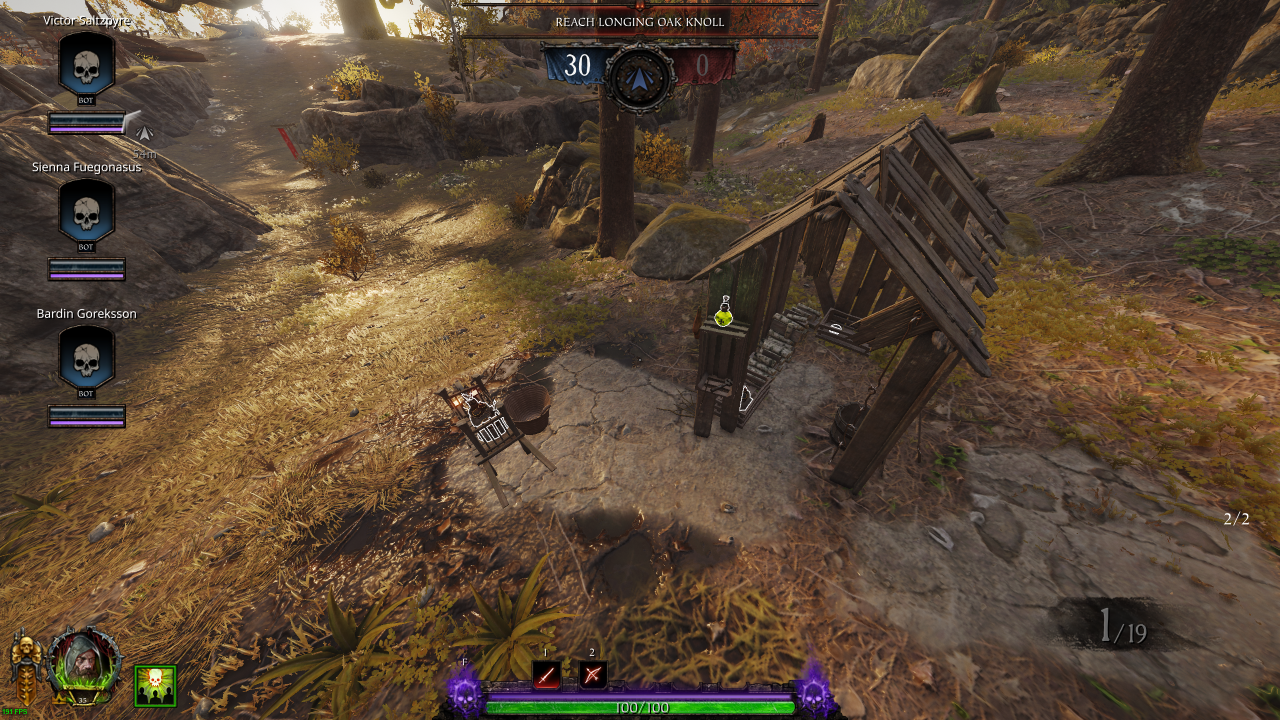
• Healing: 1 (Draught)
• Ammo: 1 (Pouch)
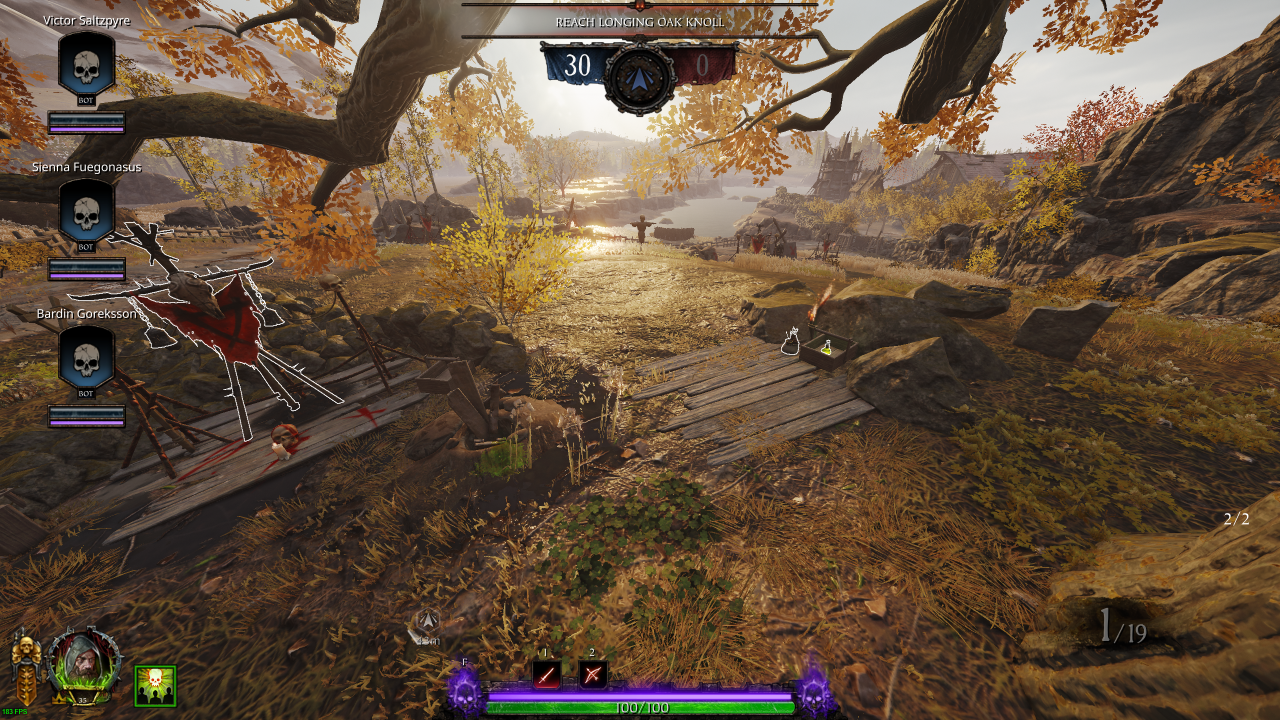
� RNG: Inside Cart: Right Item
Bomb (Explosive / Fire) / Ammo Pouch
• Bombs: 0 {1} (Explosive / Fire)
• Potions: 1
• Ammo: 2 {3} (Pouch)
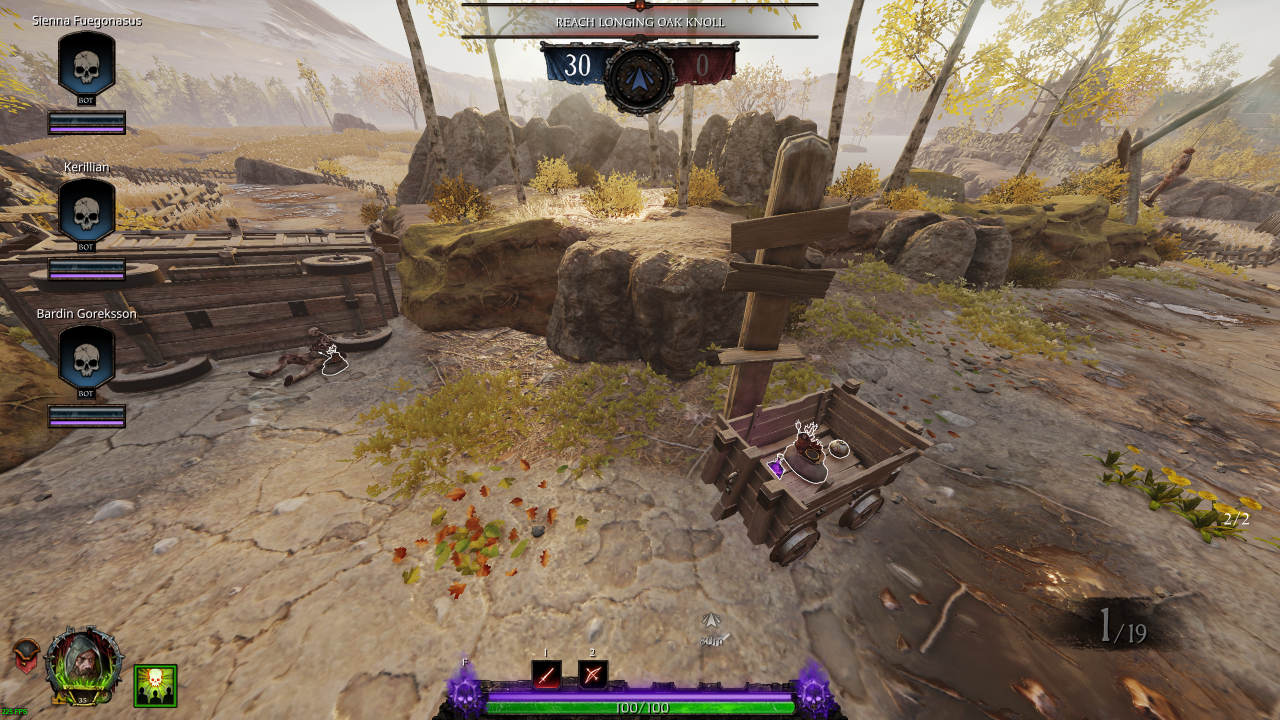
Section 3: Wall → Inside Barn
• Healing: 1 (Kit)• Ammo: 1 (Crate)
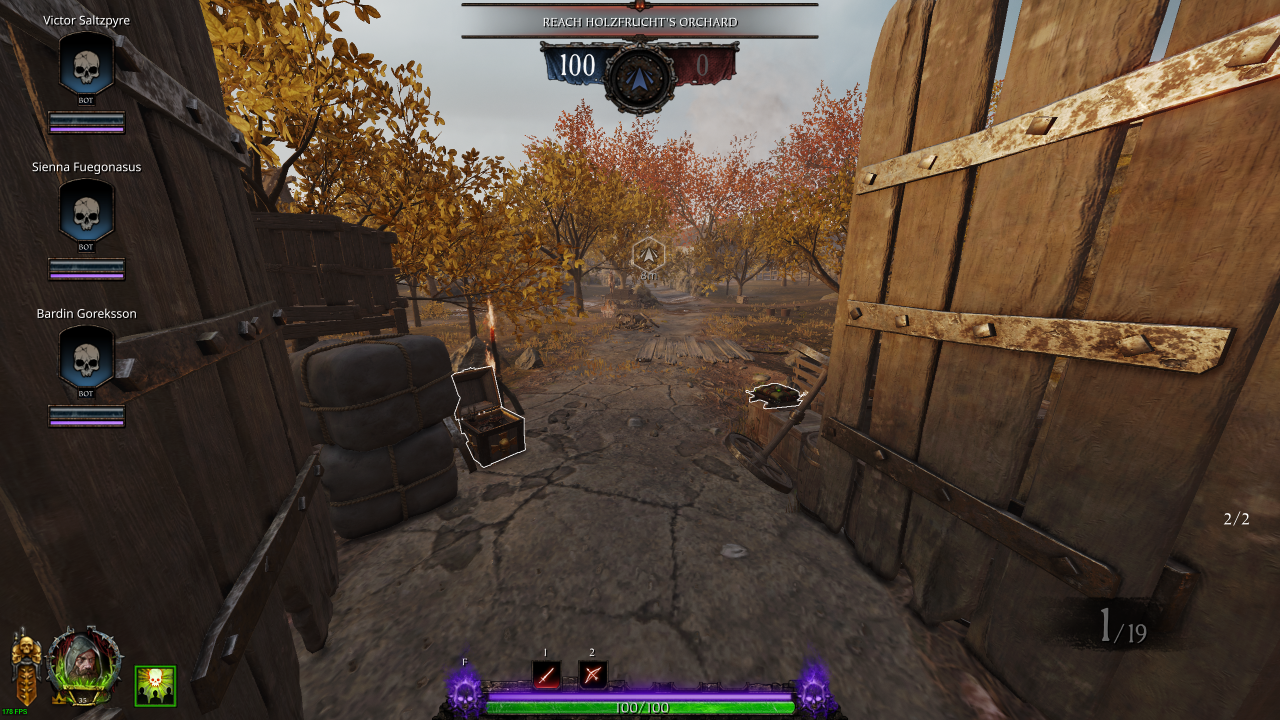
• Bombs: 1 (Explosive)
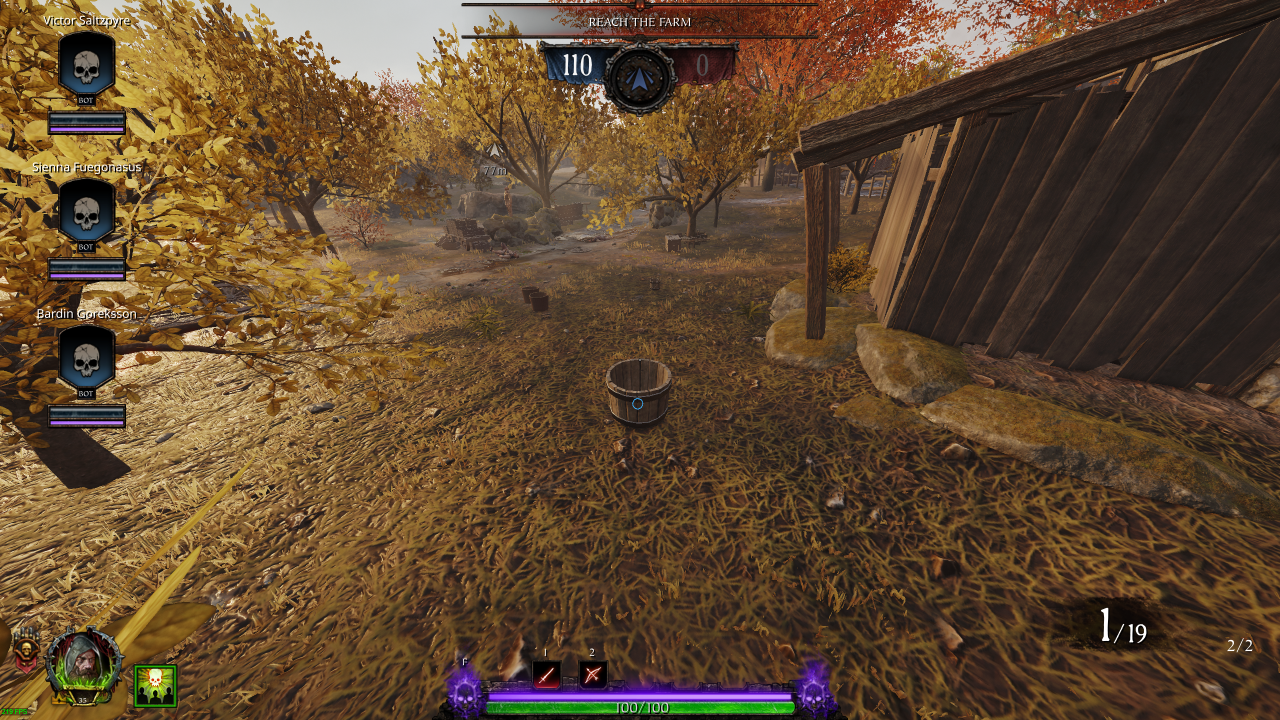
• Bombs: 1 (Fire)
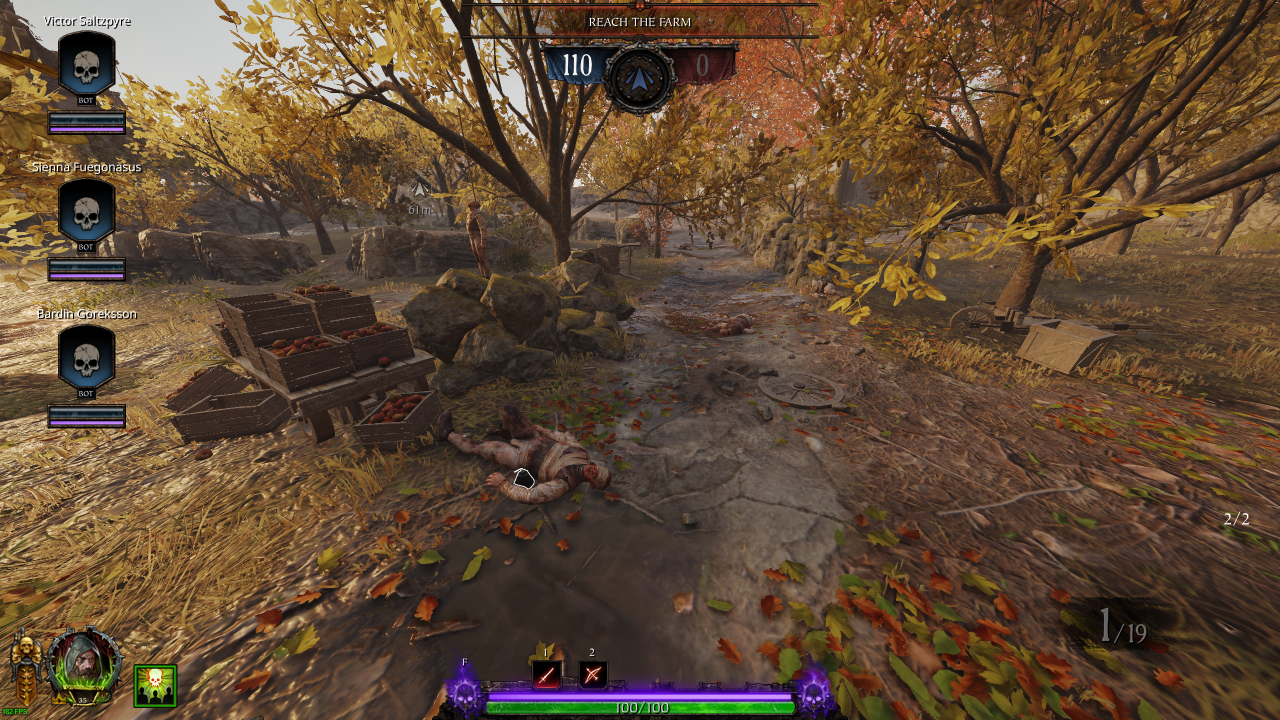
� RNG:
Left: Bomb (Explosive / Fire) / Ammo Pouch
Right: Bomb (Explosive / Fire) / Ammo Pouch
• Bombs: 0 {2} (Explosive / Fire)
• Ammo: 0 {2} (Pouch)
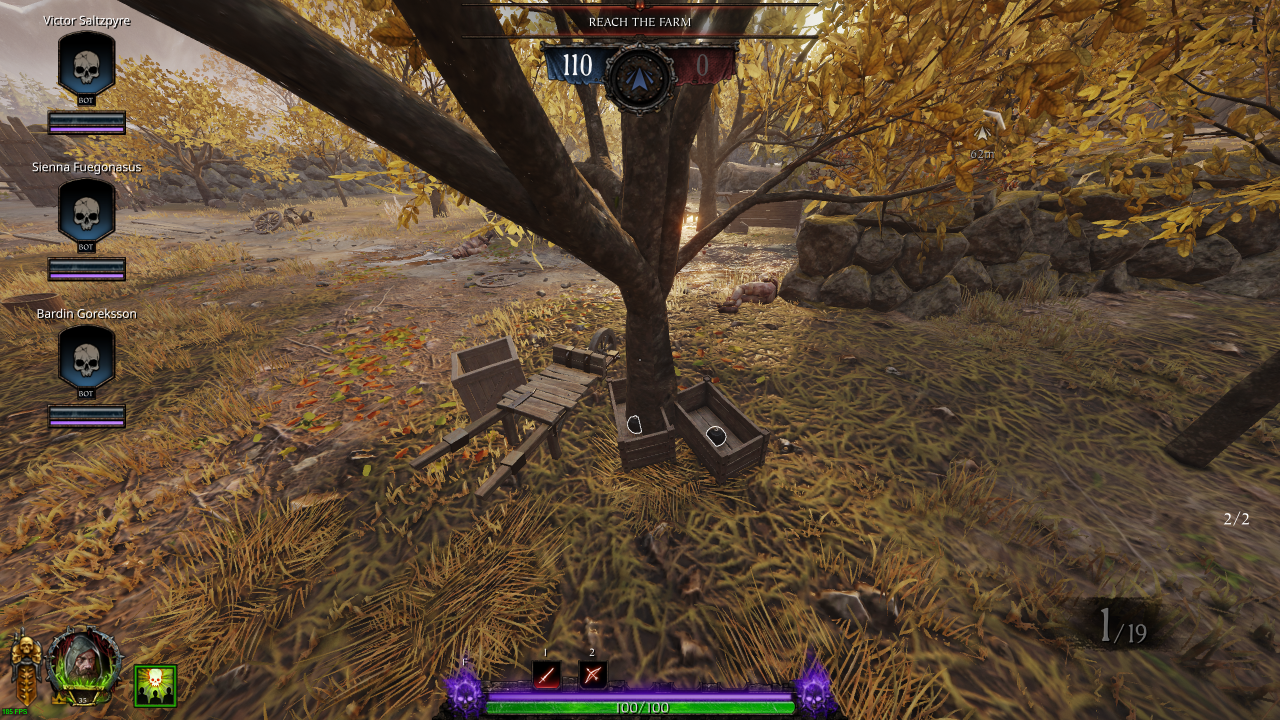
� RNG: Right Item
Bomb (Explosive / Fire) / Ammo (Pouch)
• Healing: 1 (Draught)
• Bombs: 0 {1} (Explosive / Fire)
• Ammo: 0 {1} (Pouch)
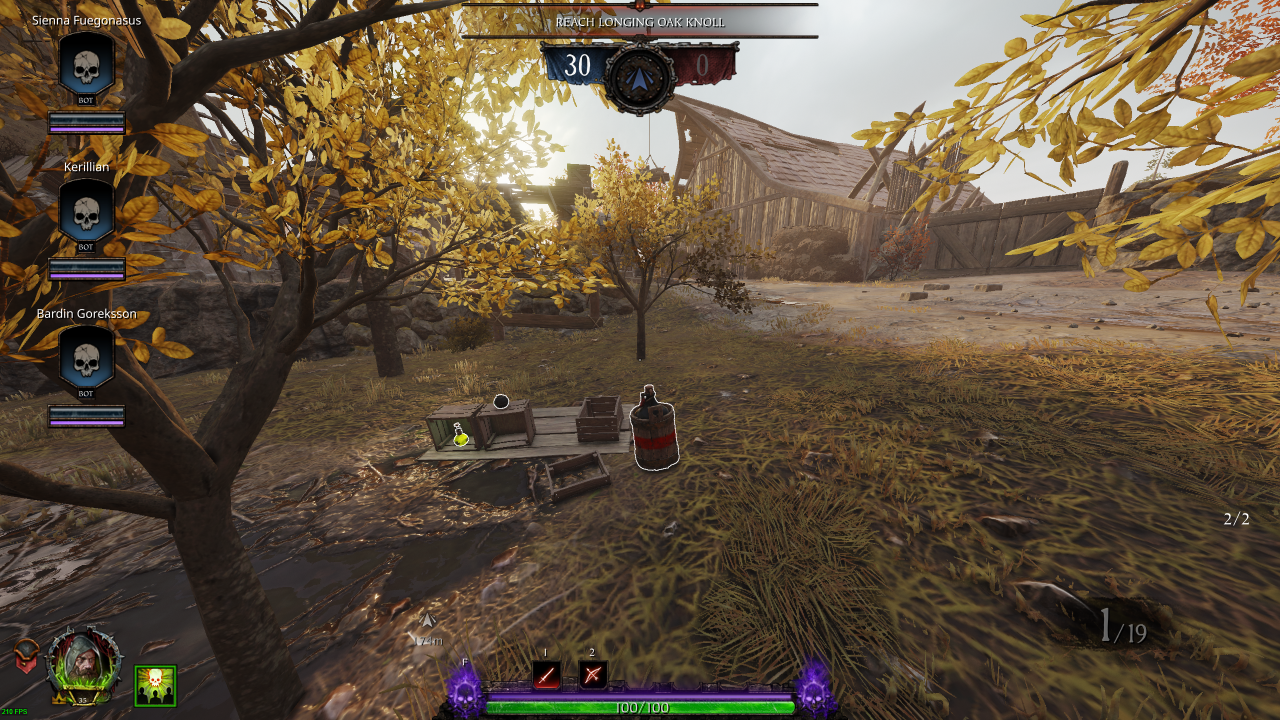
• Healing: 1 (Draught / Kit)
• Bombs: 1 (Explosive)
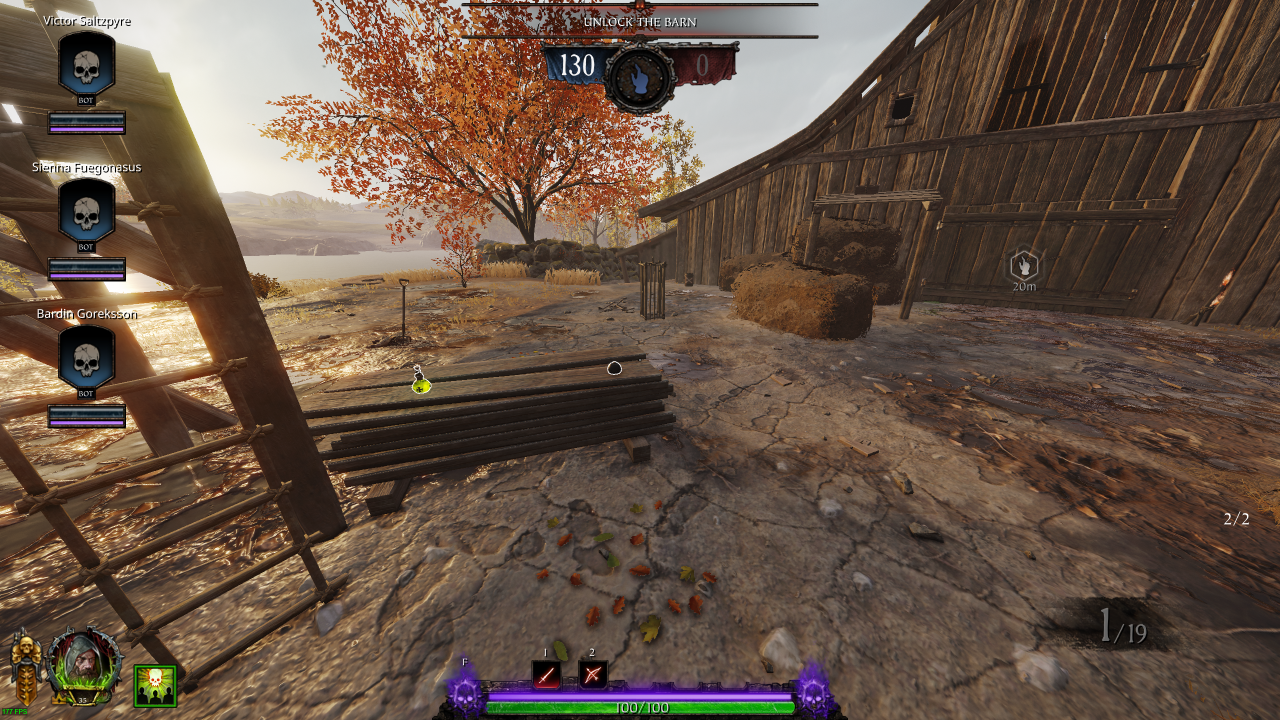
• Ammo: 2 (Pouch)
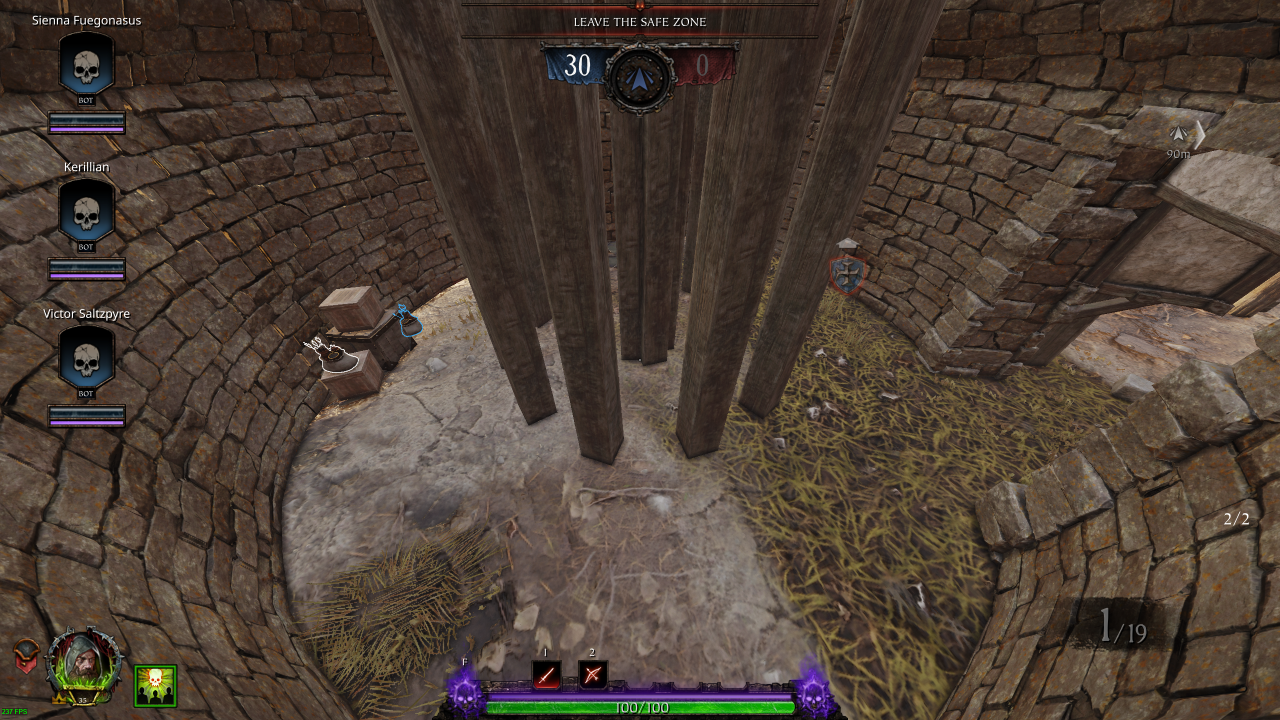
• Potions: 1
• Ammo: 1 (Pouch)
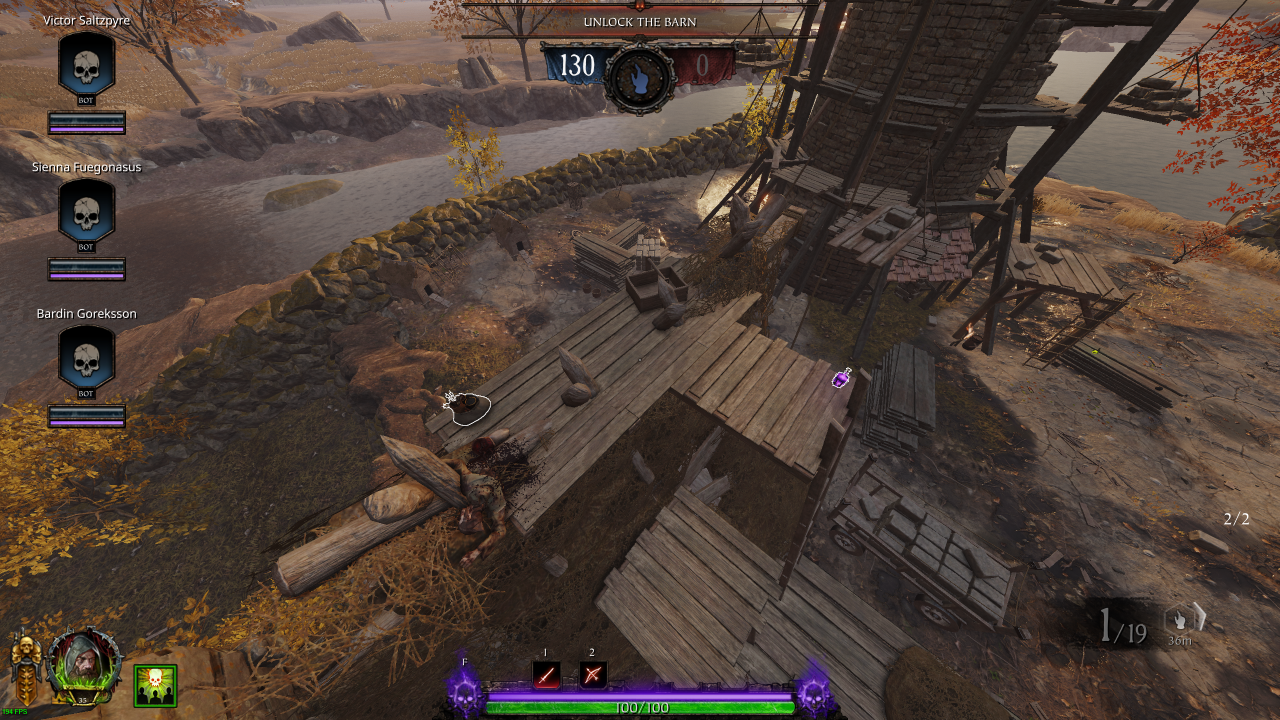
• Bombs: 1 (Explosive)
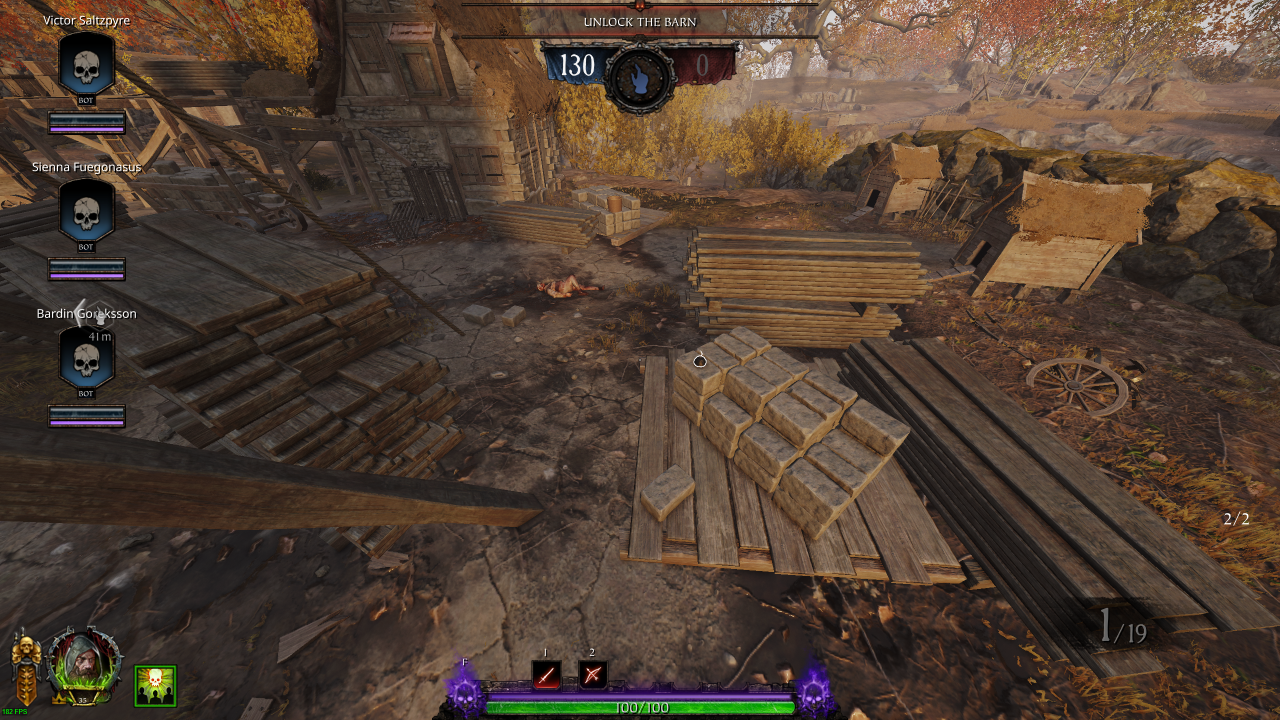
� RNG:
Bomb (Explosive / Fire) / Ammo Pouch
• Bombs: 0 {1} (Explosive / Fire)
• Ammo: 0 {1} (Pouch)
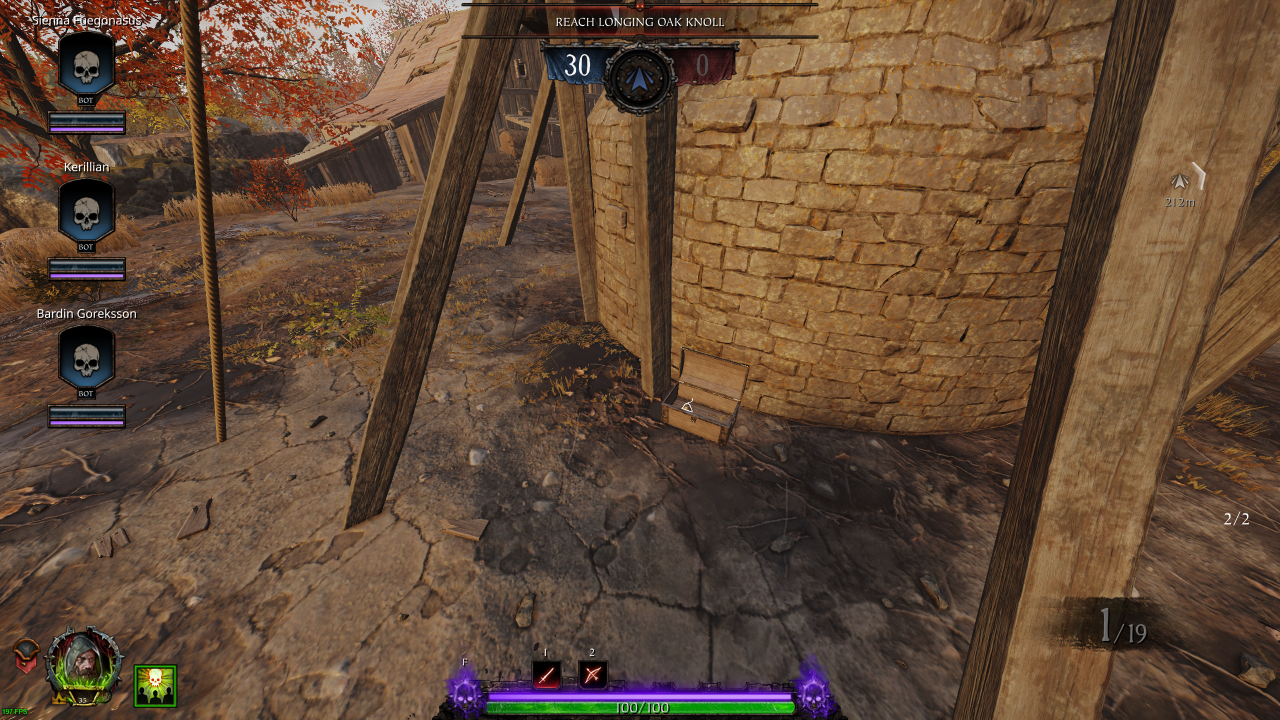
• Ammo: 1 (Pouch)
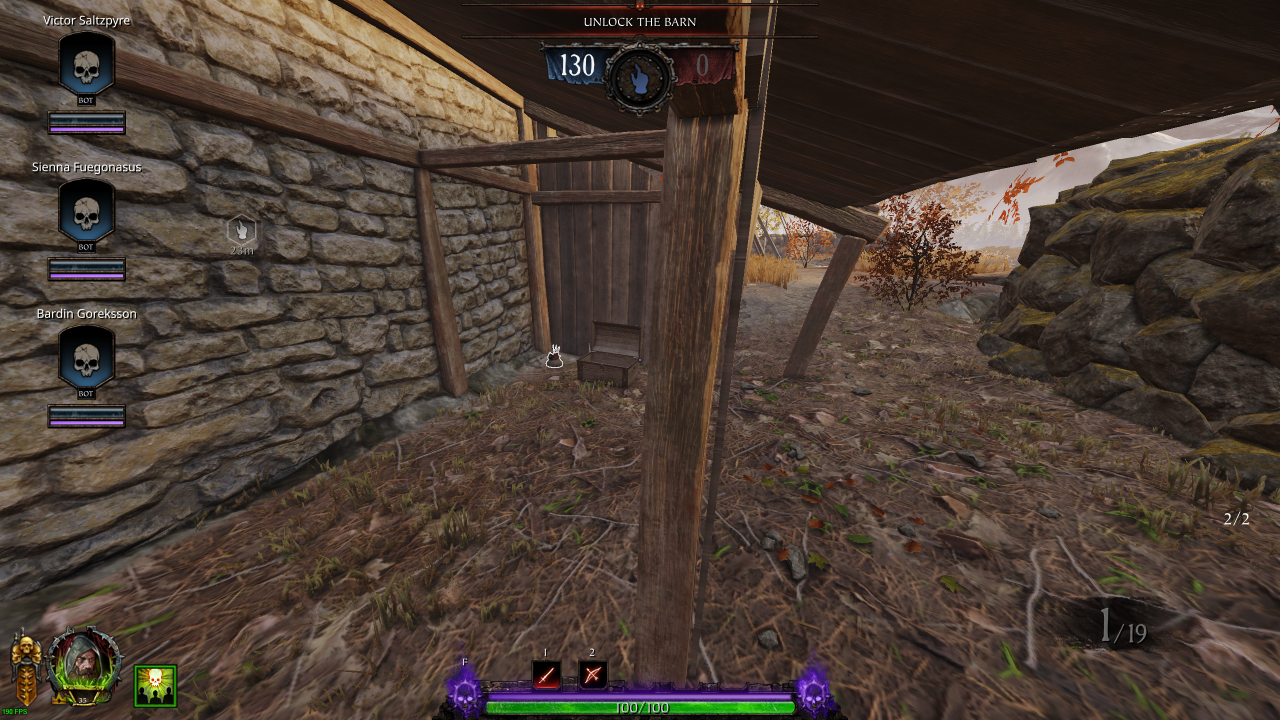
• Ammo: 1 (Pouch)
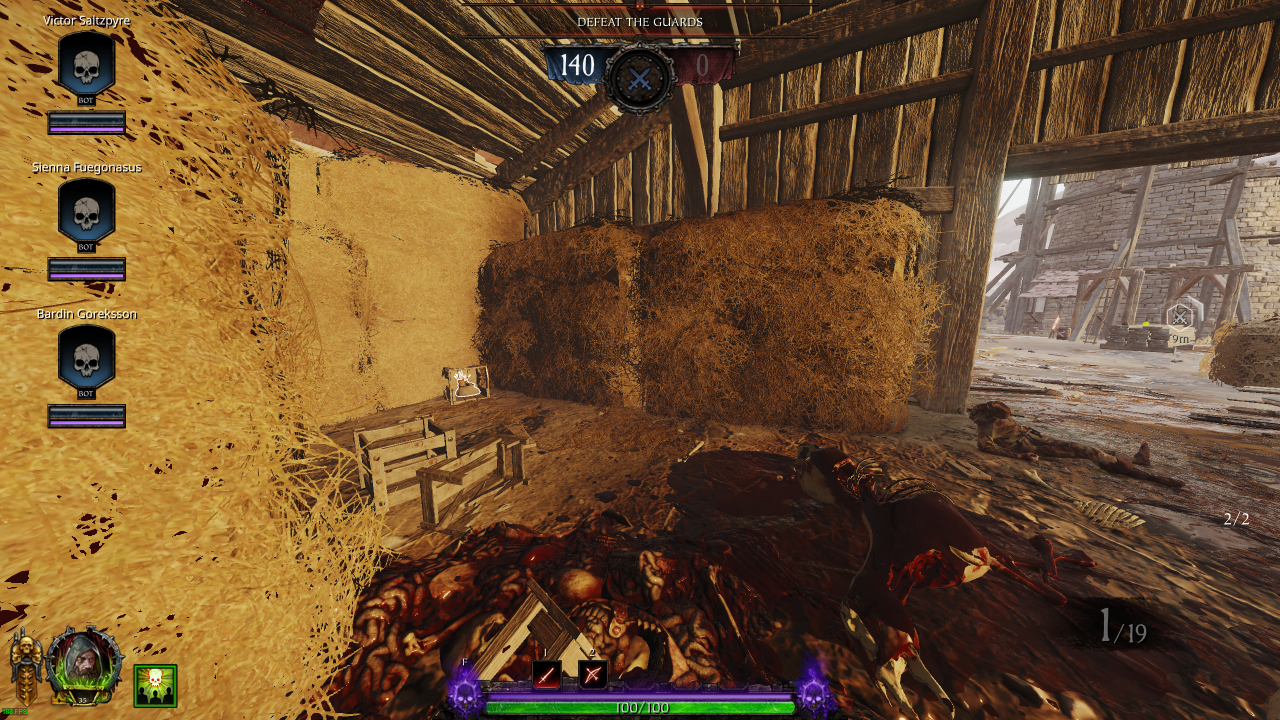
Section 4: Barn Wall → Safe Zone
There is no more loot past the destroyed Wall after Kill Event
Round 2
Section 0: Spawn Room
Bombs: 3 (Explosive: 2 / Fire: 1)Potions: 4
Ammo: 1 (Crate)
Section 1: Hold Objective → Closed Doors
• Ammo: 1 (Pouch)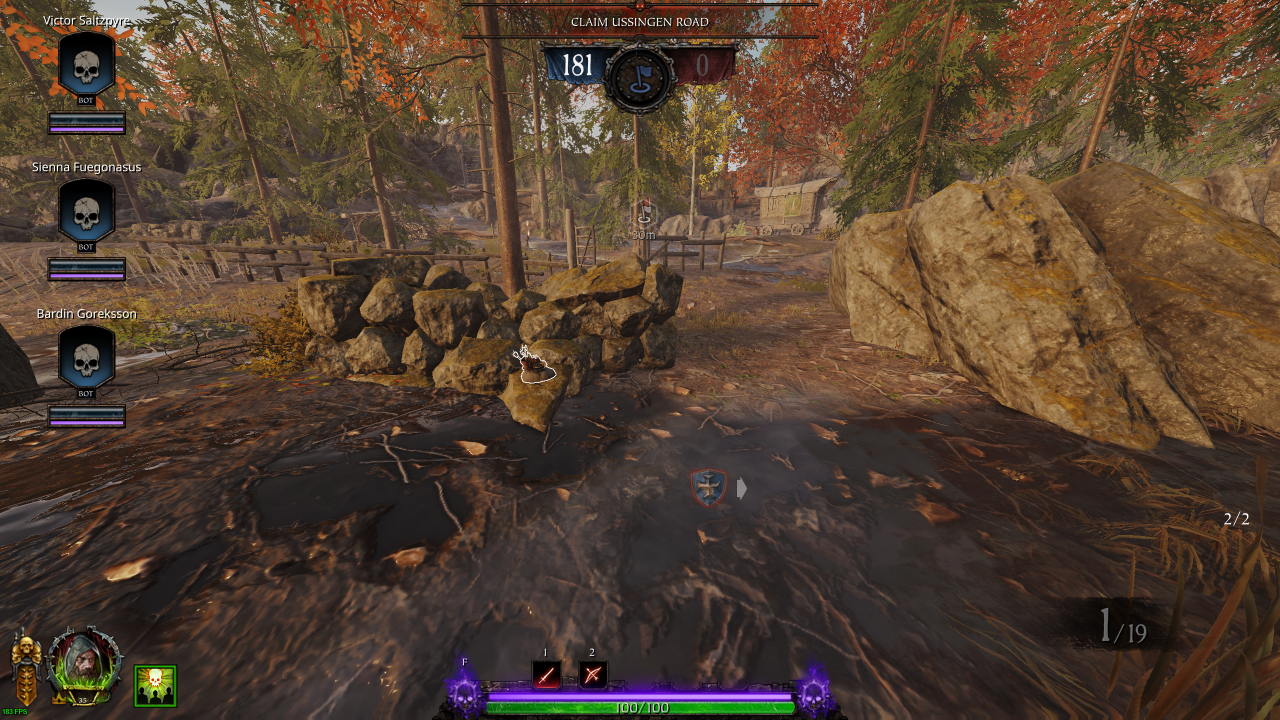
� RNG:
Bomb (Explosive / Fire) / Ammo Pouch
• Bombs: 0 {1} (Explosive / Fire)
• Ammo: 0 {1} (Pouch)
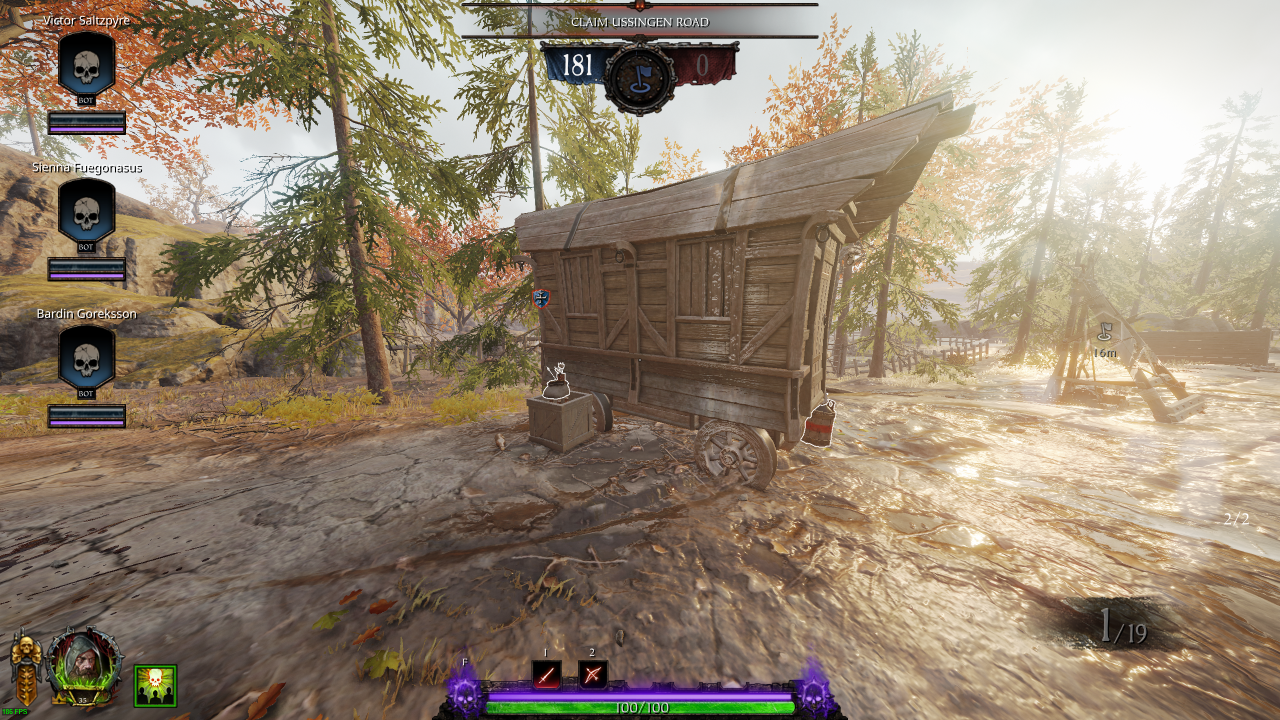
• Healing: 1 (Draught)
• Ammo: 2 (Pouch)
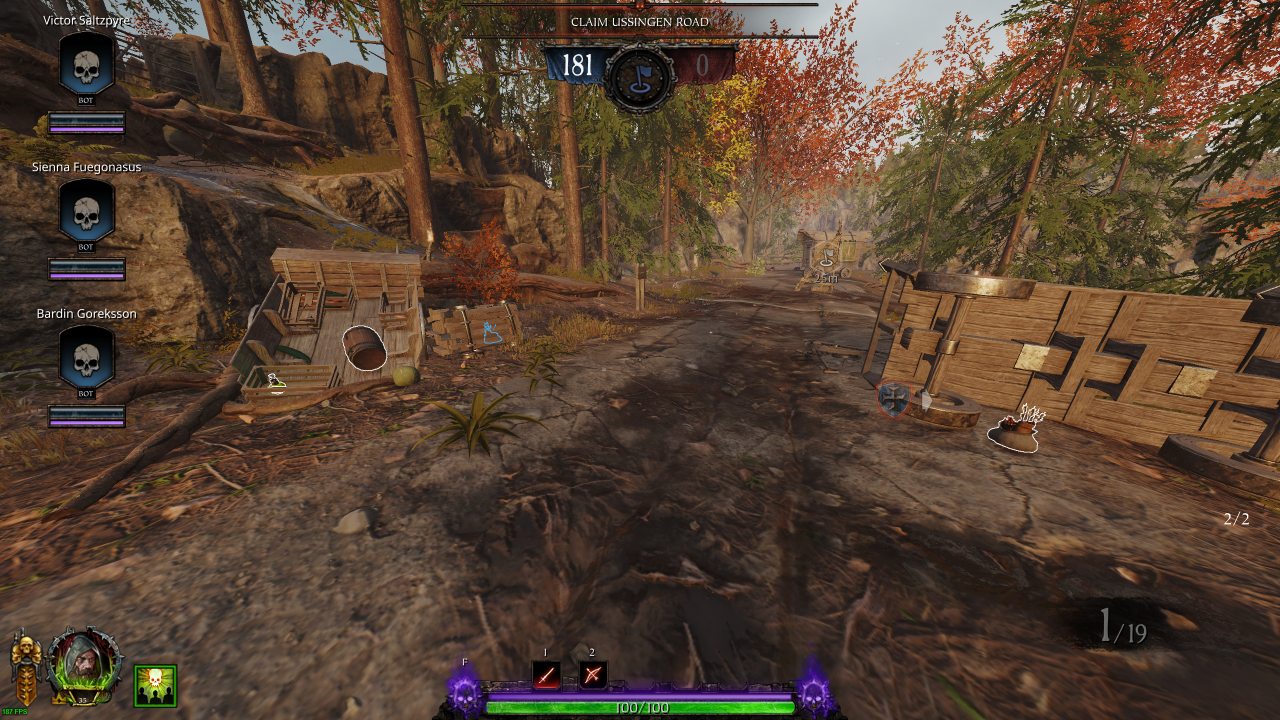
• Ammo: 1 (Pouch)
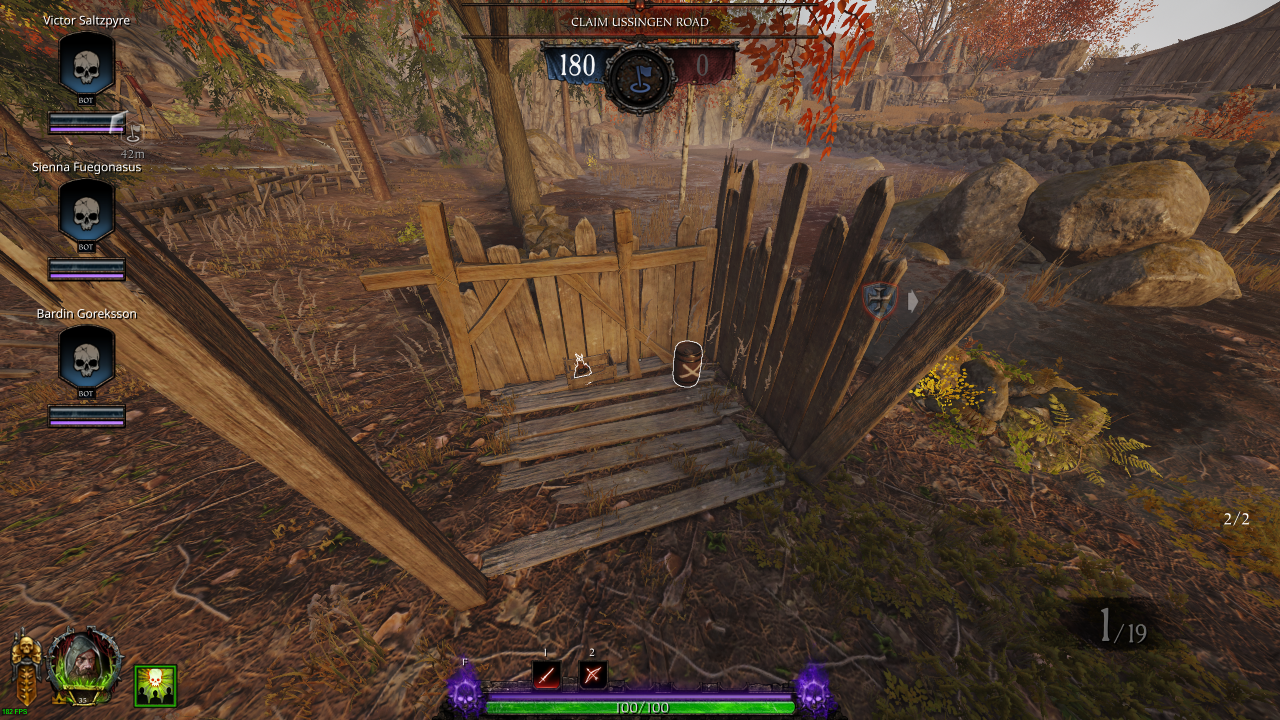
� RNG:
Left: Healing (Draught) / Potion
• Healing: 0 {1} (Draught)
• Bombs: 1 (Fire)
• Potions: 0 {1}
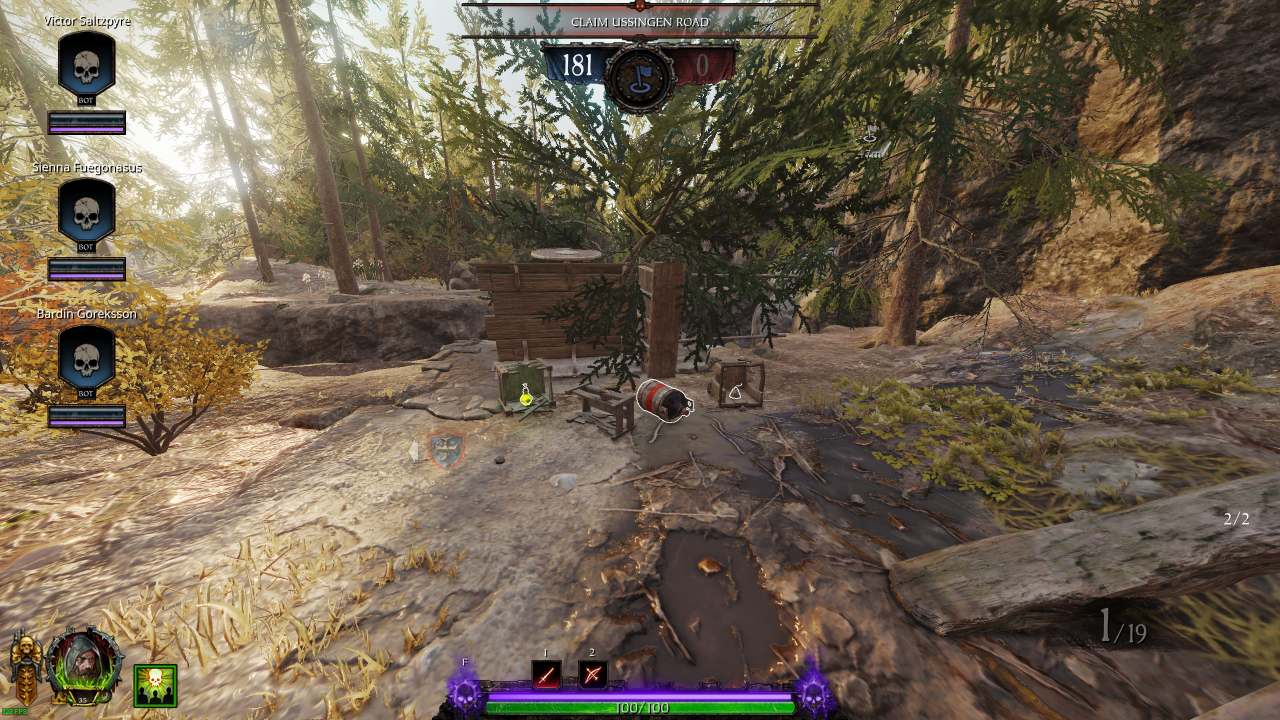
• Bombs: 2 (Explosive: 1 / Fire: 1)
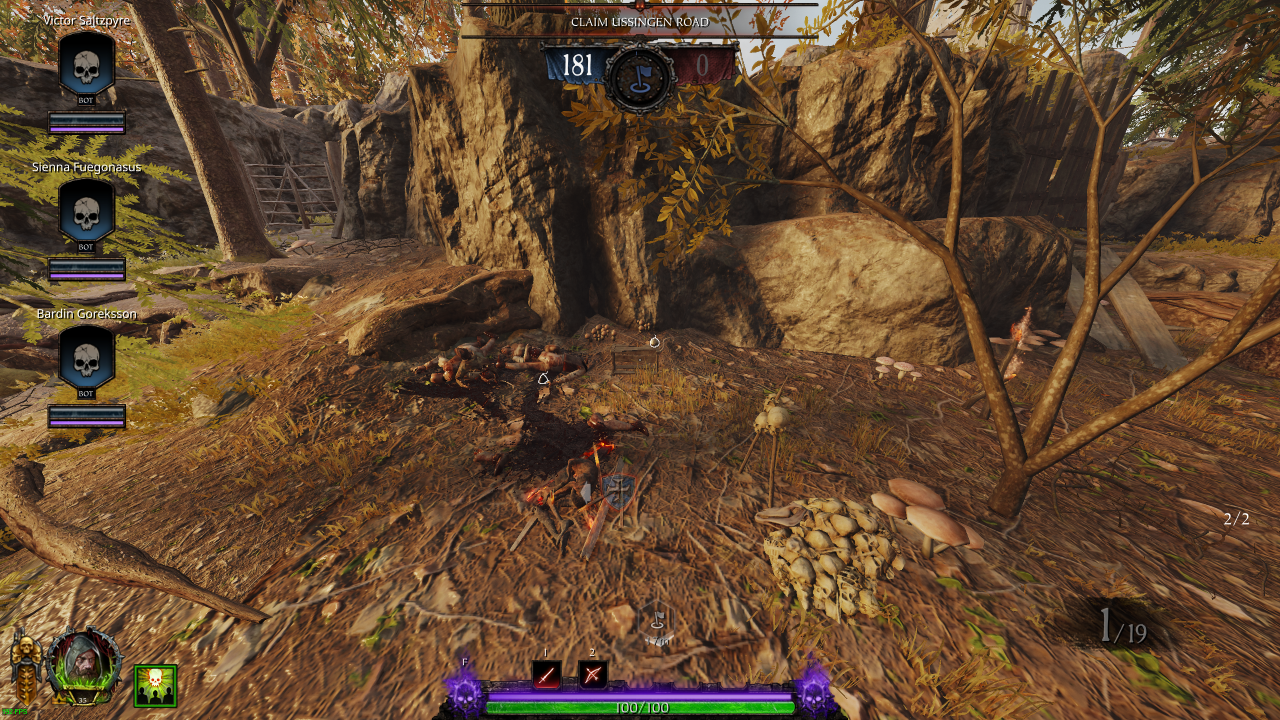
• Ammo: 1 (Pouch)
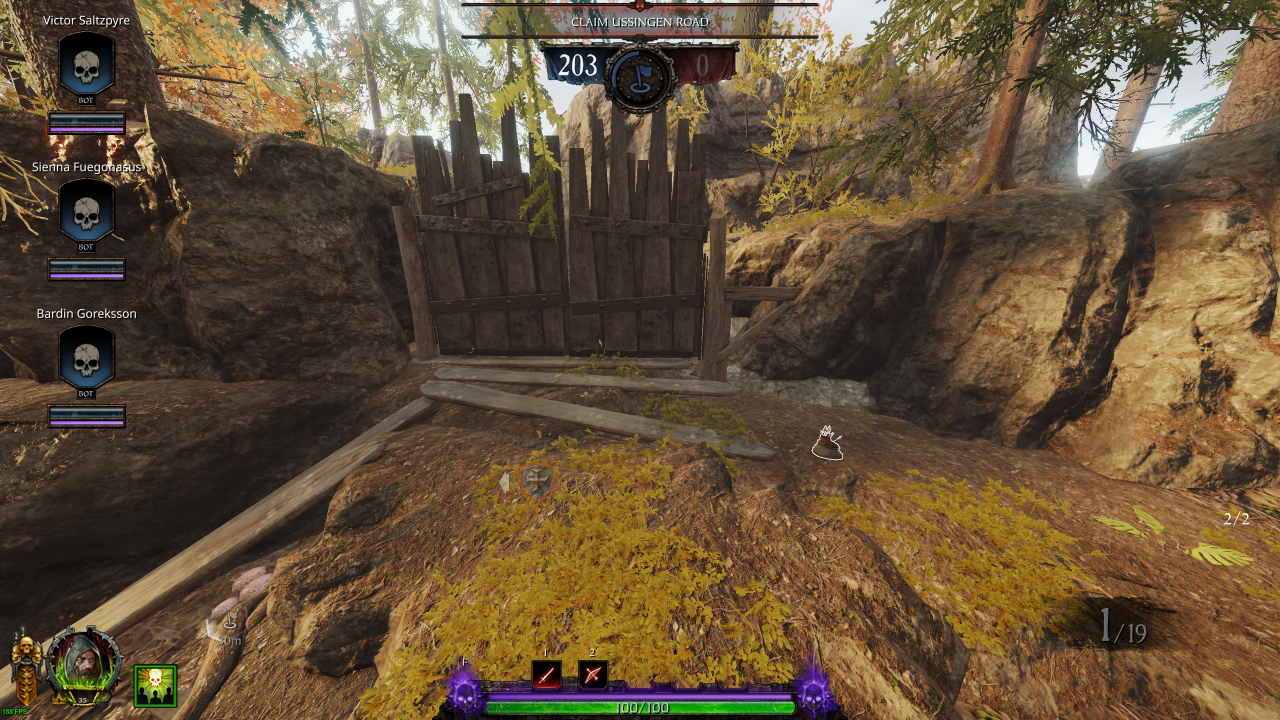
Section 2: Opened Doors → Bridge
• Healing: 1 (Draught)• Ammo: 1 (Pouch)
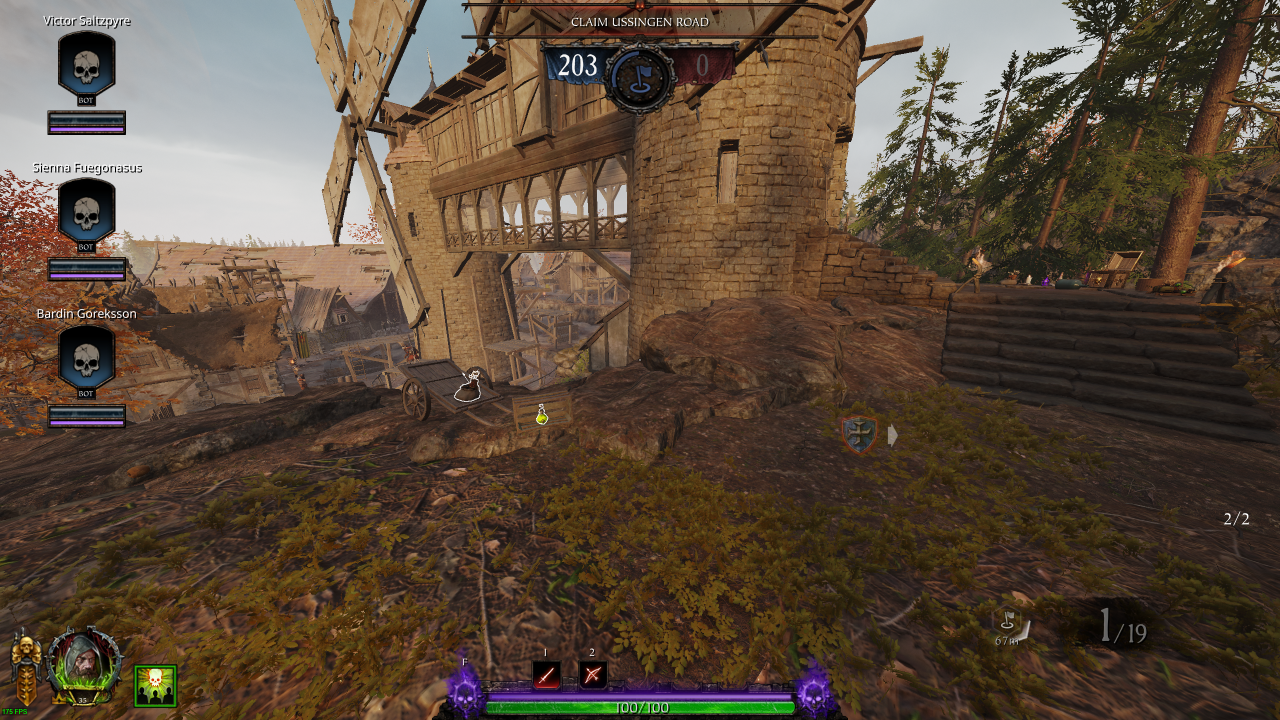
� RNG:
Second Left: Healing (Draught) / Potion
• Healing: 1 {2} (Draught / Kit: 1)
• Potions: 0 {1}
• Ammo: 2 (Pouch: 1 / Crate: 1)
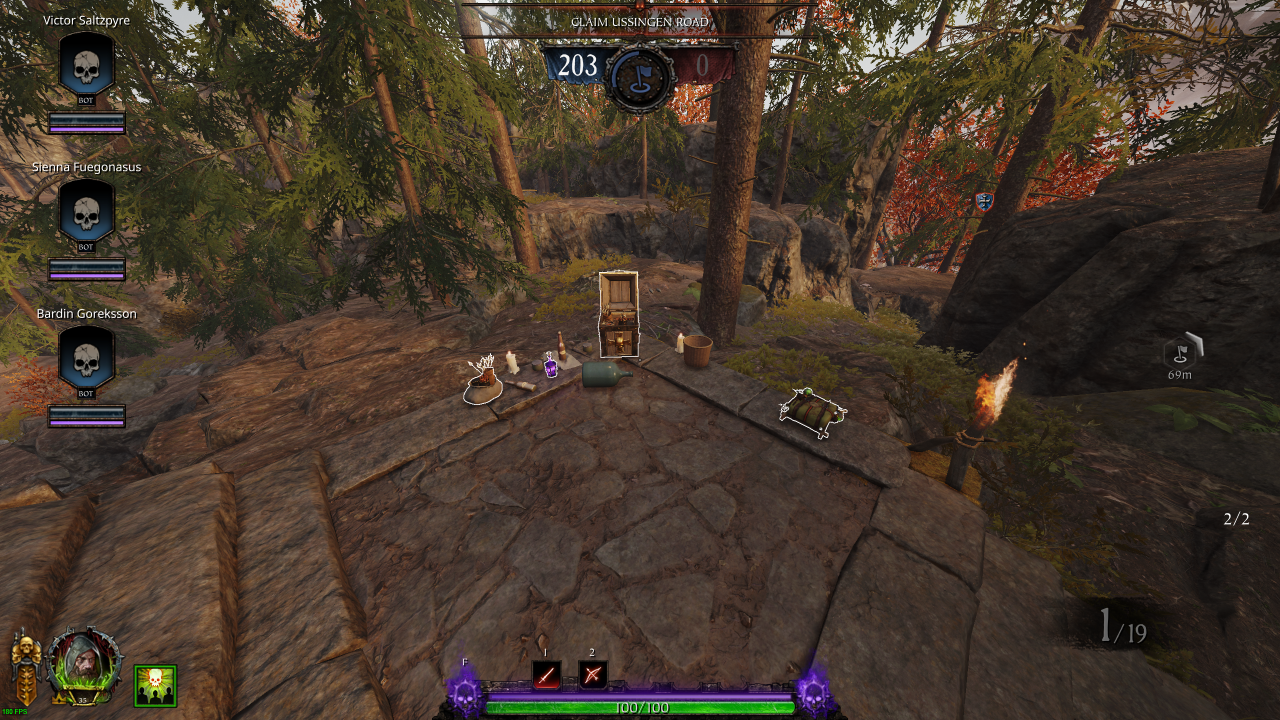
Section 3.1: Drop Down → Barn Entrance
• Healing: 1 (Kit)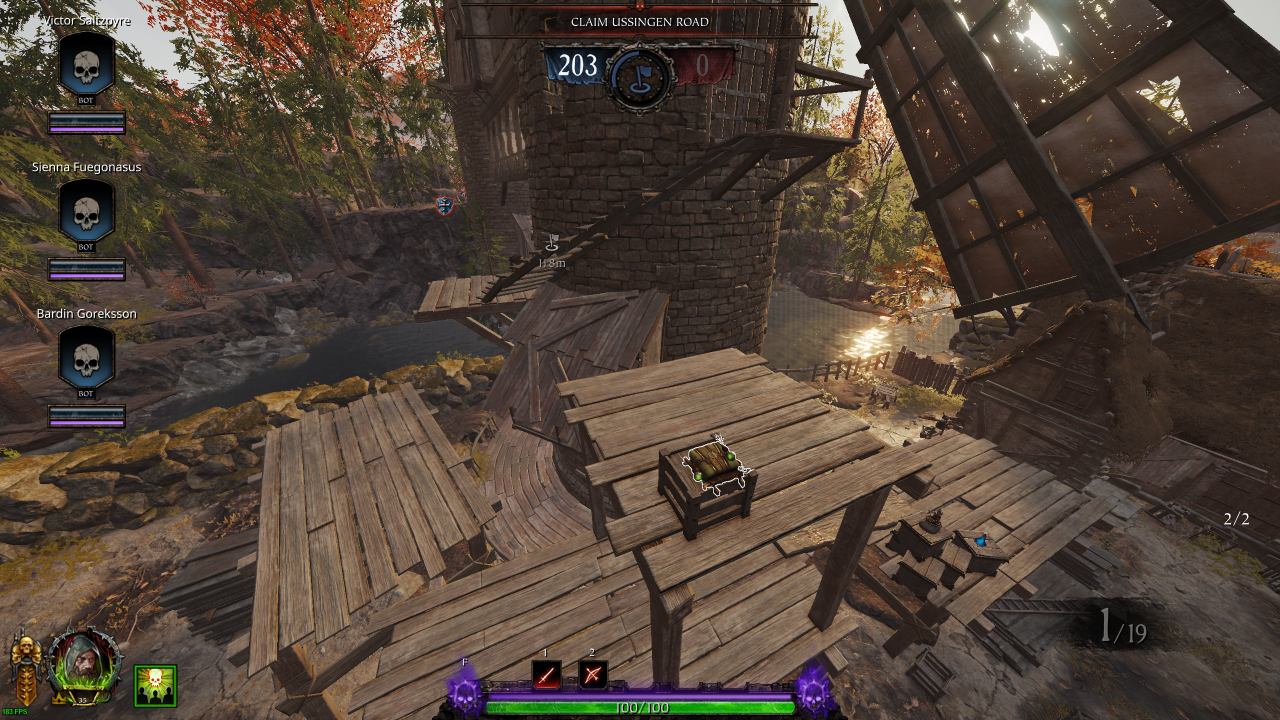
• Potions: 1
• Ammo: 1 (Pouch)
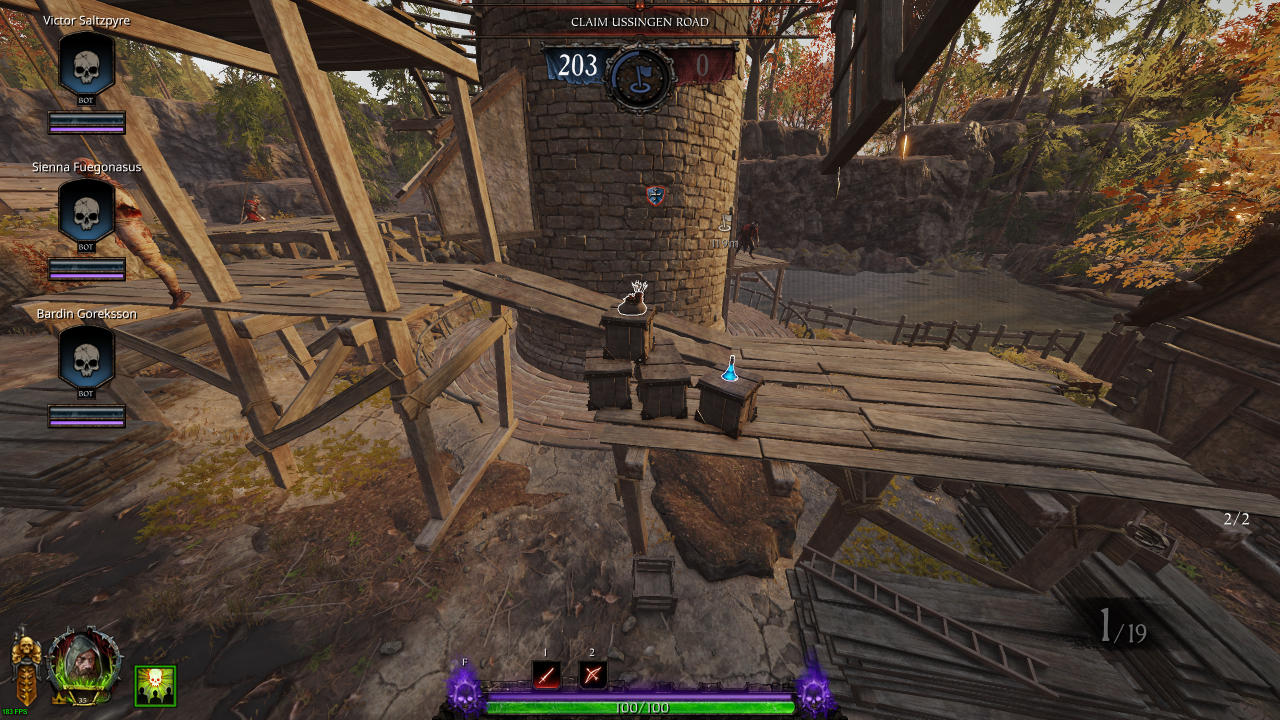
• Bombs: 2 (Explosive: 1 / Fire: 1)
• Ammo: 1 (Pouch)
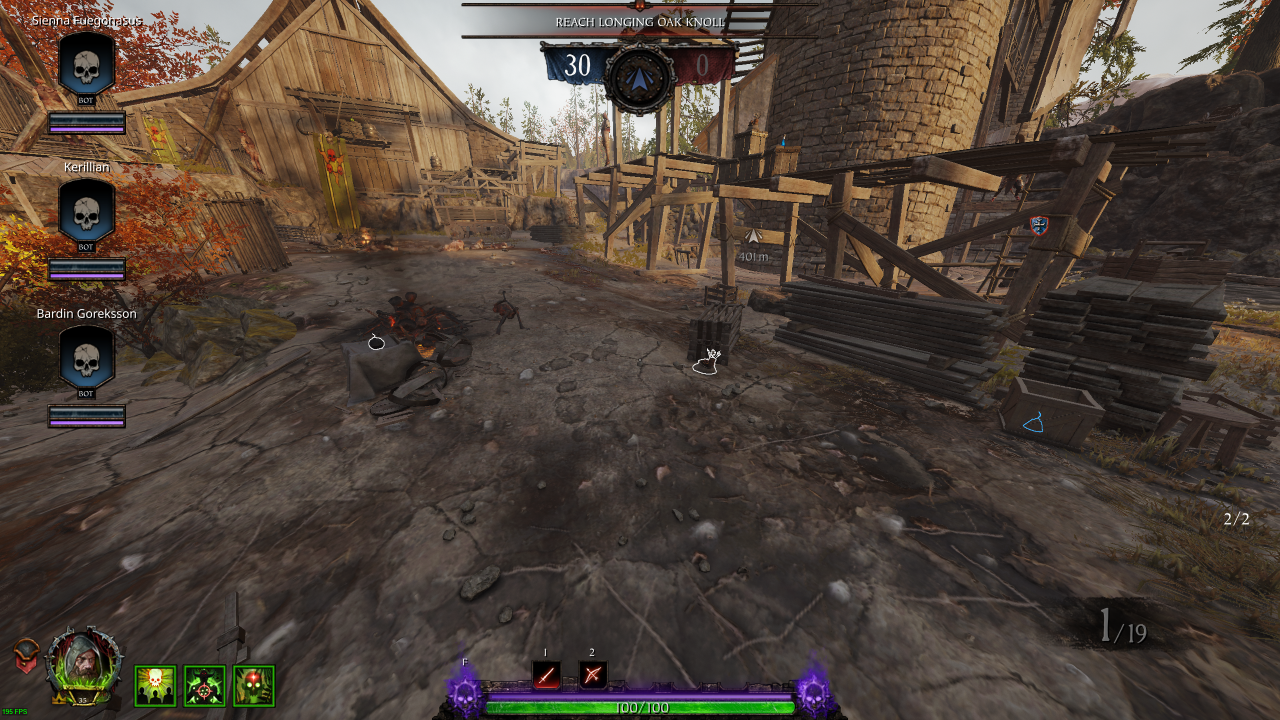
• Ammo: 1 (Pouch)
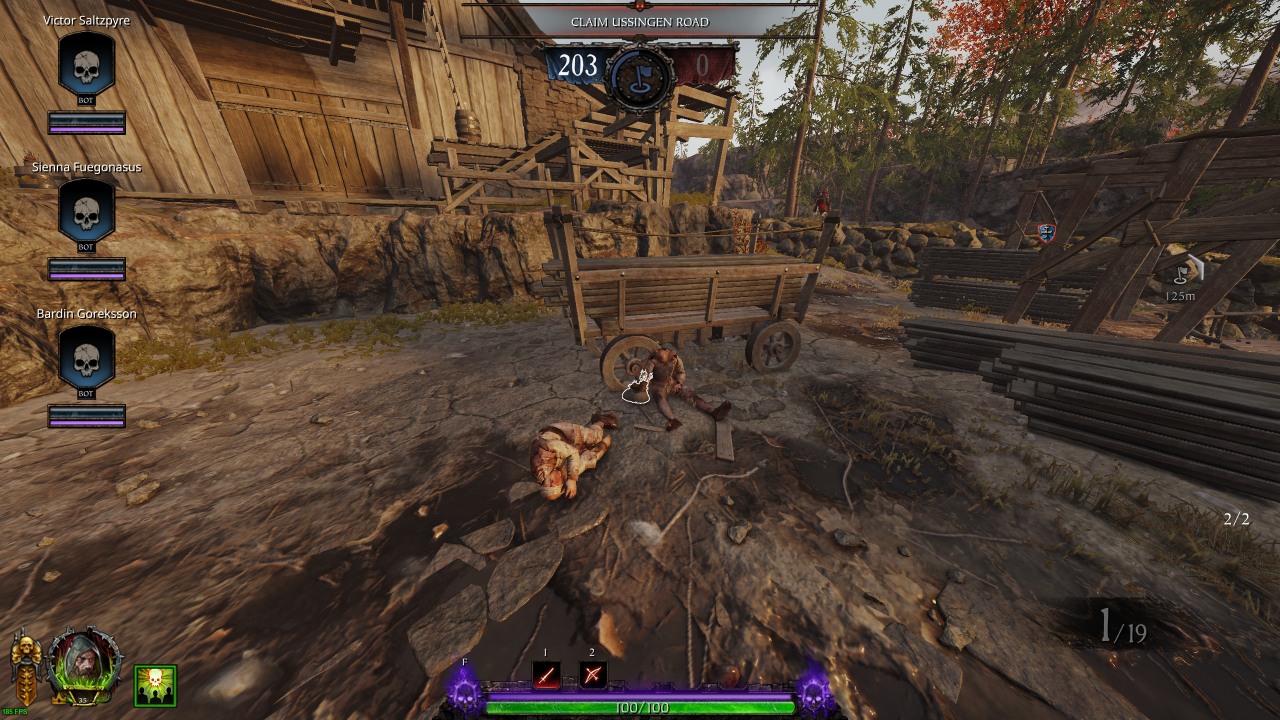
• Healing: 1 (Draught)
• Ammo: 1 (Pouch)
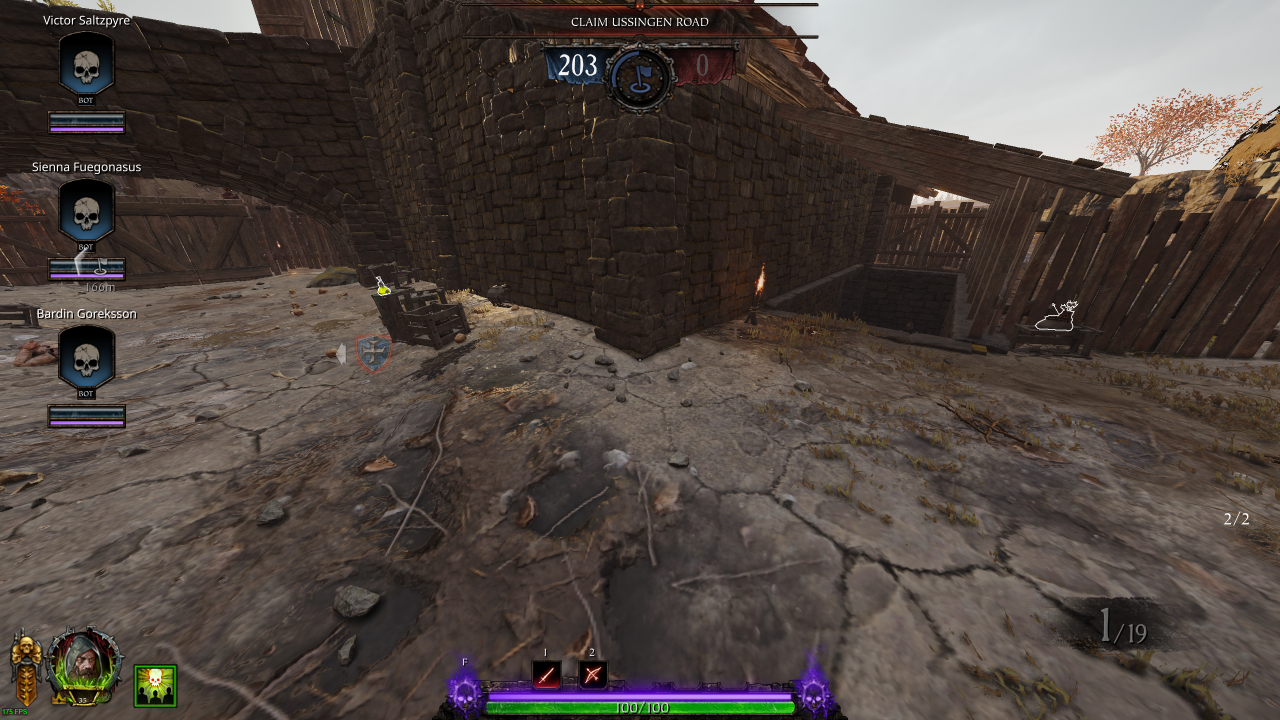
Section 3.2: Barn
� RNG:Healing (Draught) / Potion
• Healing: 0 {1} (Draught)
• Potions: 0 {1}
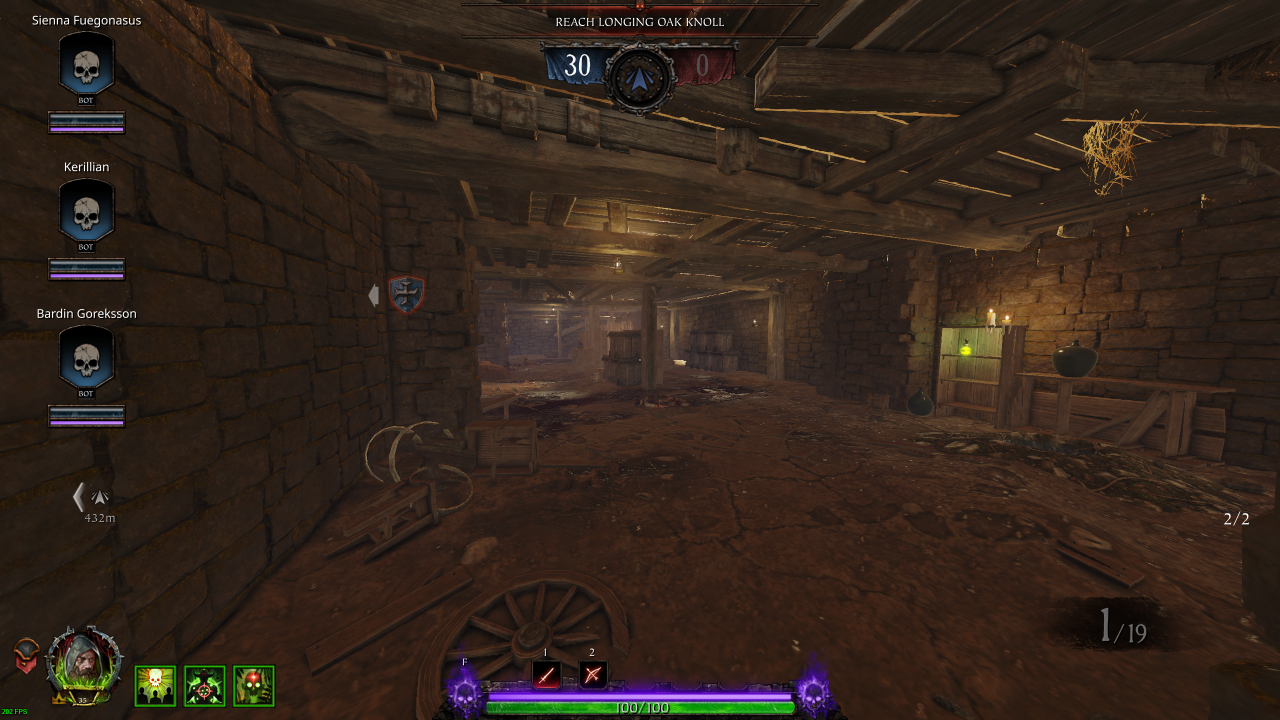
• Bombs: 1 (Explosive)
• Ammo: 1 (Pouch)
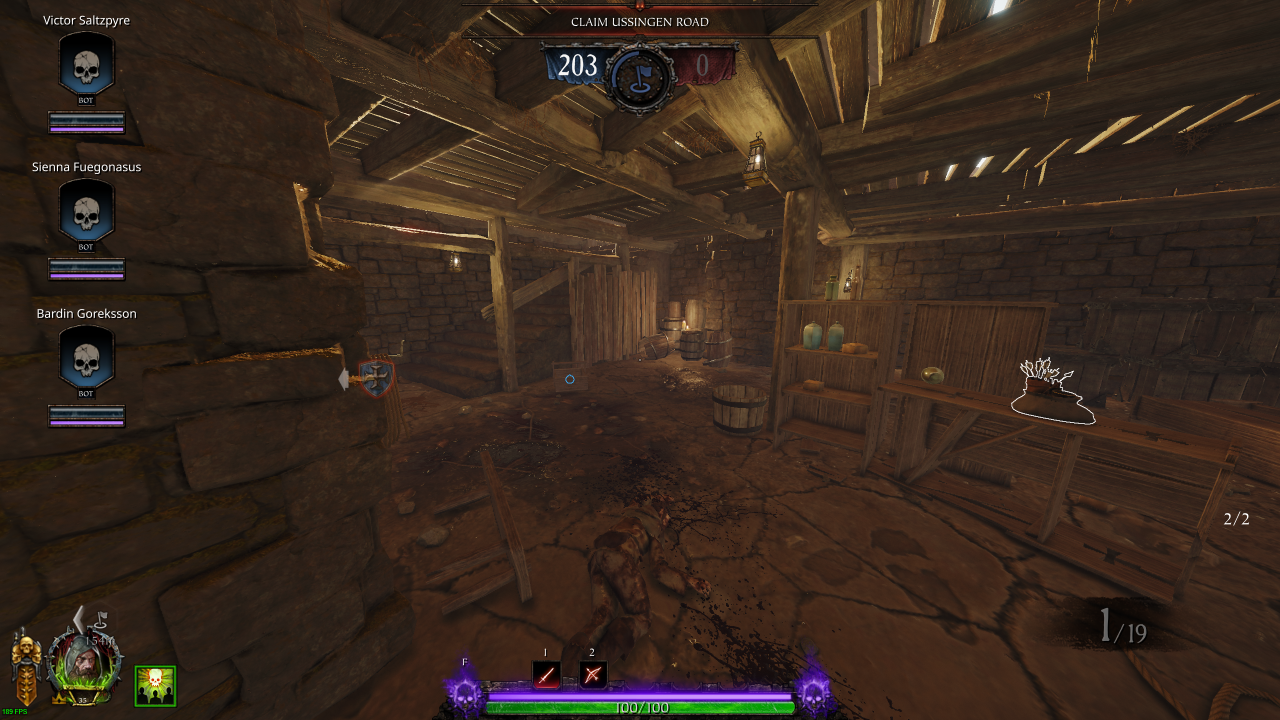
• Healing: 1 (Kit)
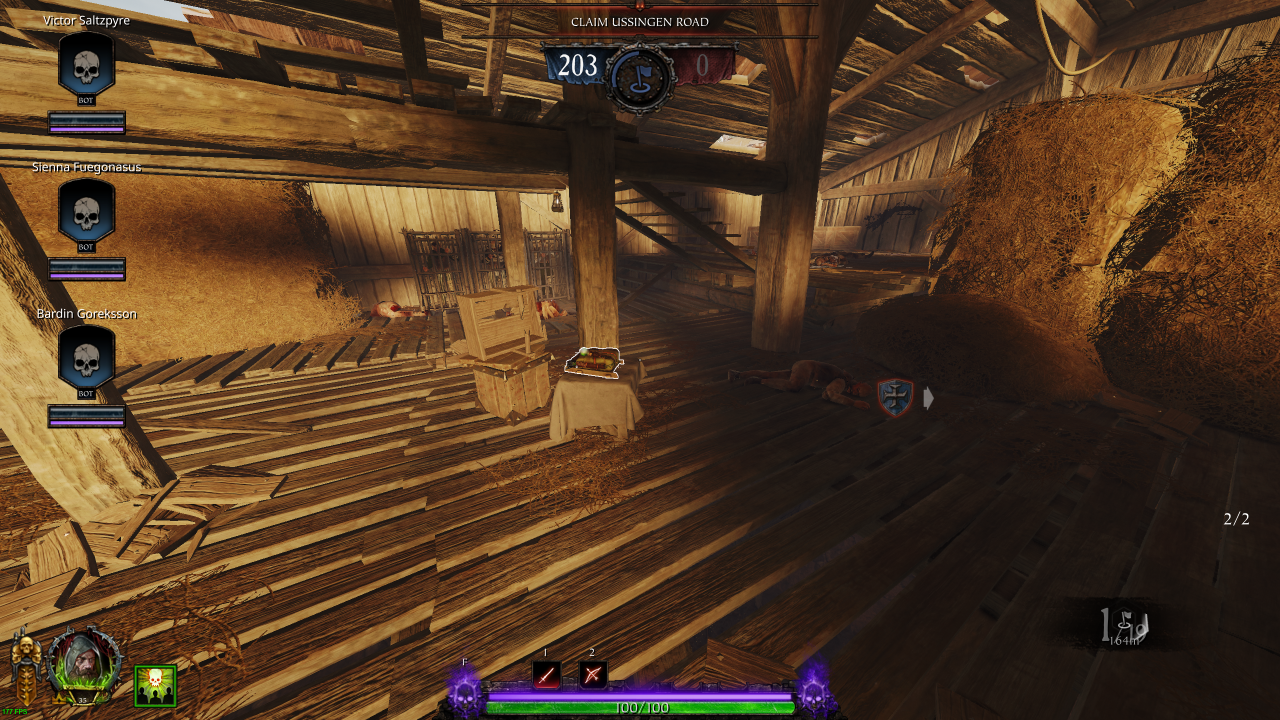
� RNG:
Mid: Bomb (Explosive / Fire) / Ammo Pouch
Right: Healing (Draught) / Potion
• Healing: 0 {1} (Draught)
• Bombs: 0 {1} (Explosive / Fire)
• Potions: 0 {1}
• Ammo: 1 {2} (Pouch)
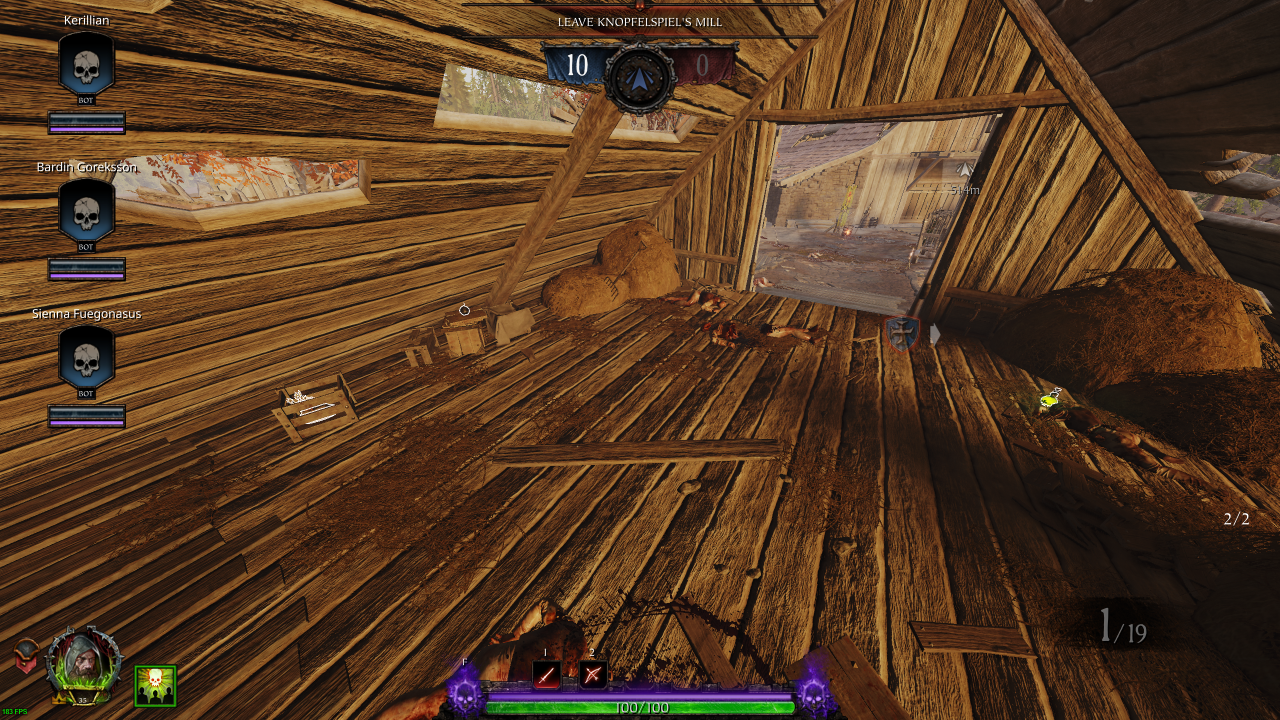
Section 3.3: Event Crest
• Ammo: 1 (Pouch)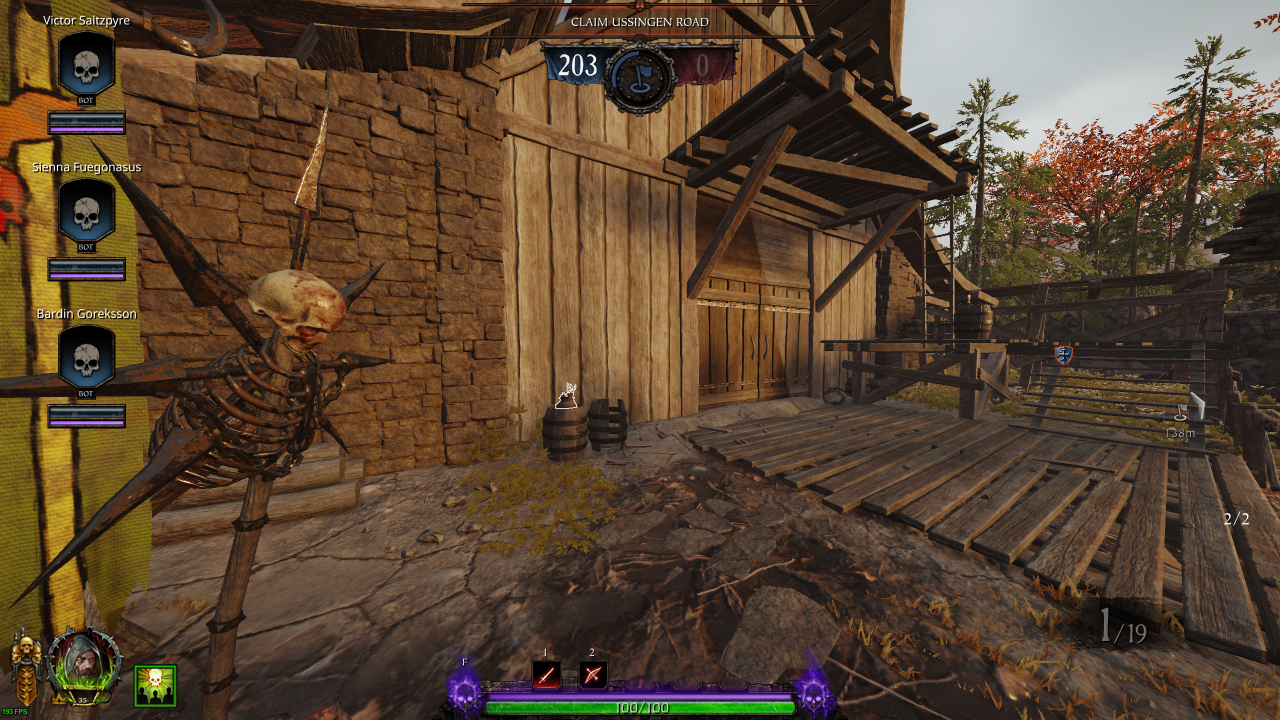 � RNG:
Bomb (Explosive / Fire) / Ammo Pouch
• Bombs: 0 {1} (Explosive / Fire)
• Ammo: 0 {1} (Pouch)
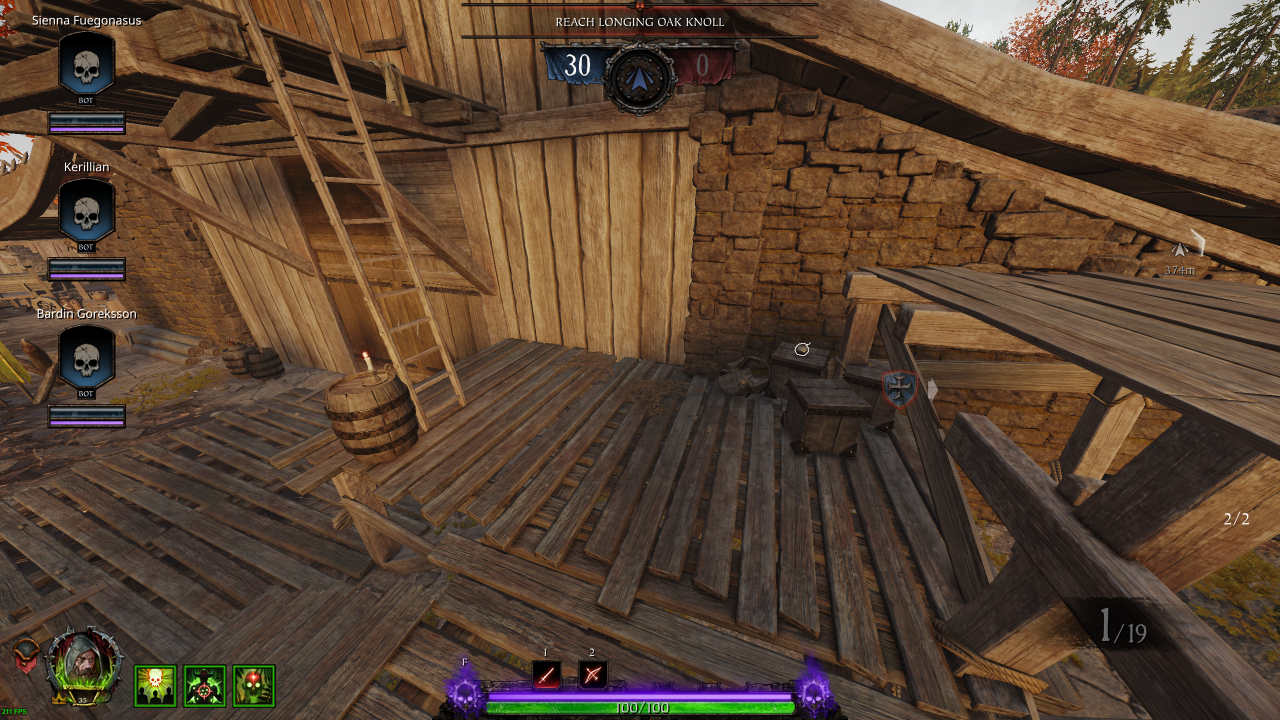
• Healing: 1 (Draught)
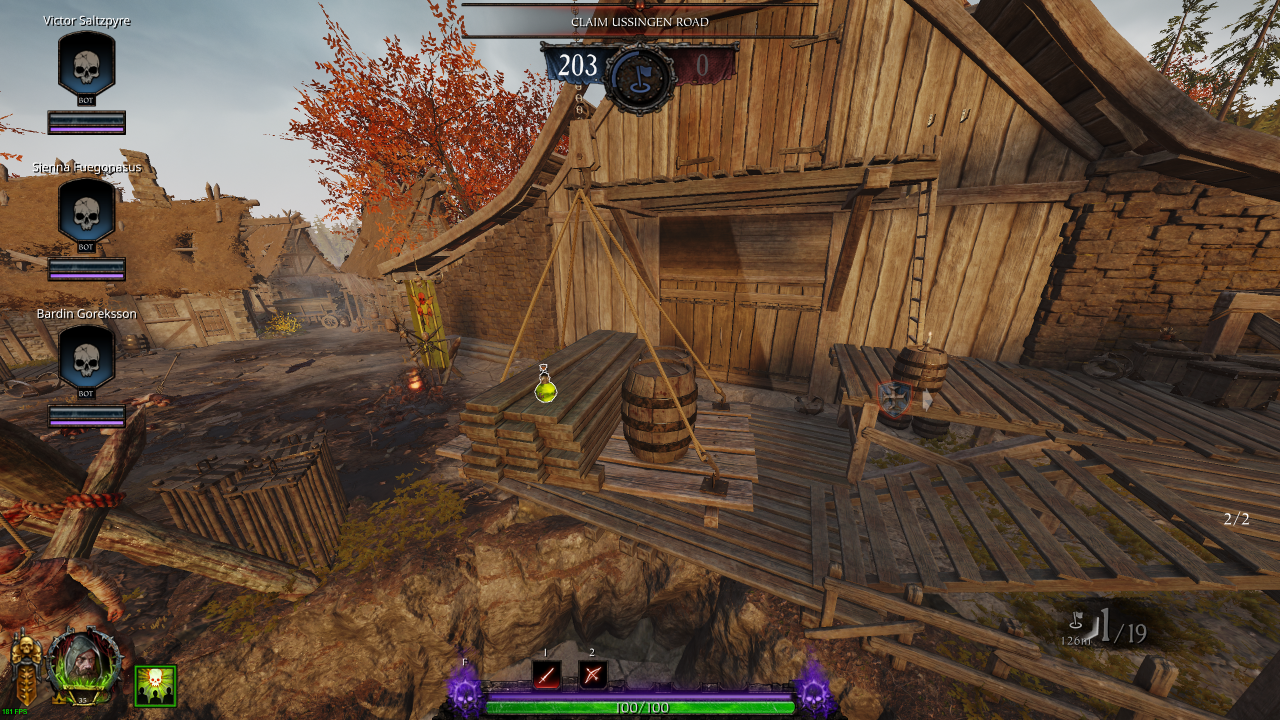
Section 4: Sawmill
• Bombs: 1 (Explosive)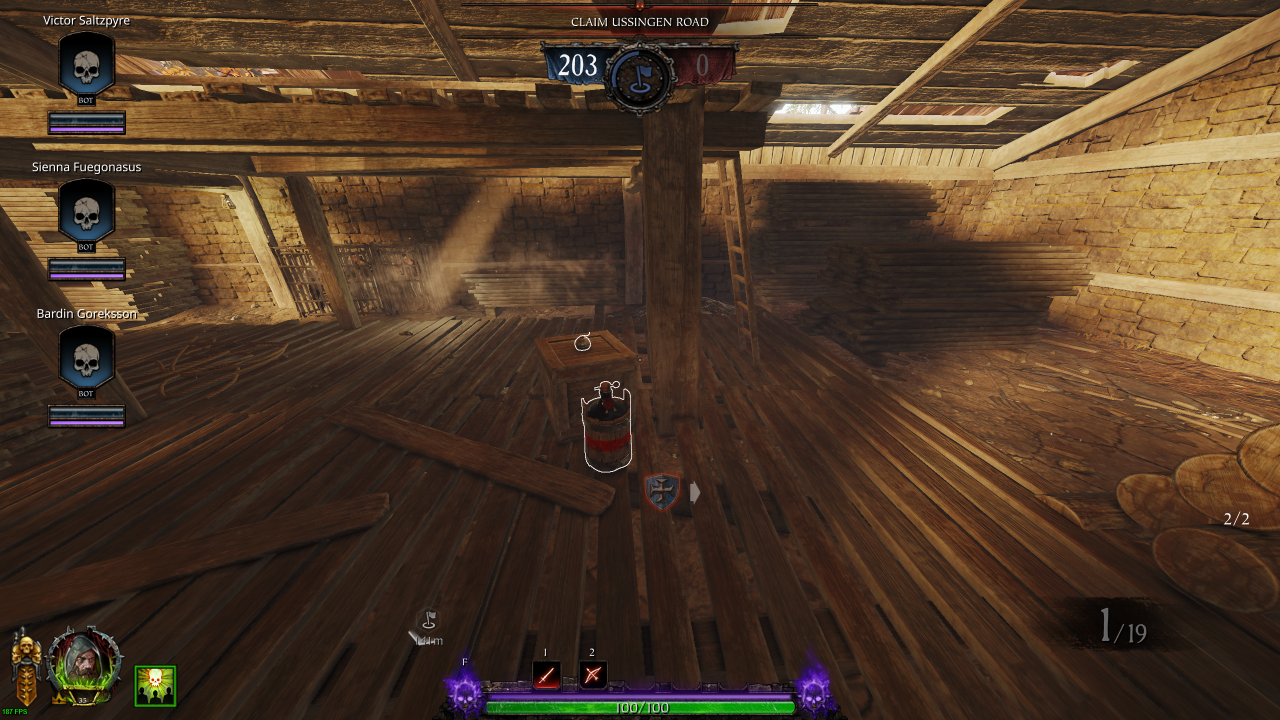
• Ammo: 1 (Pouch)
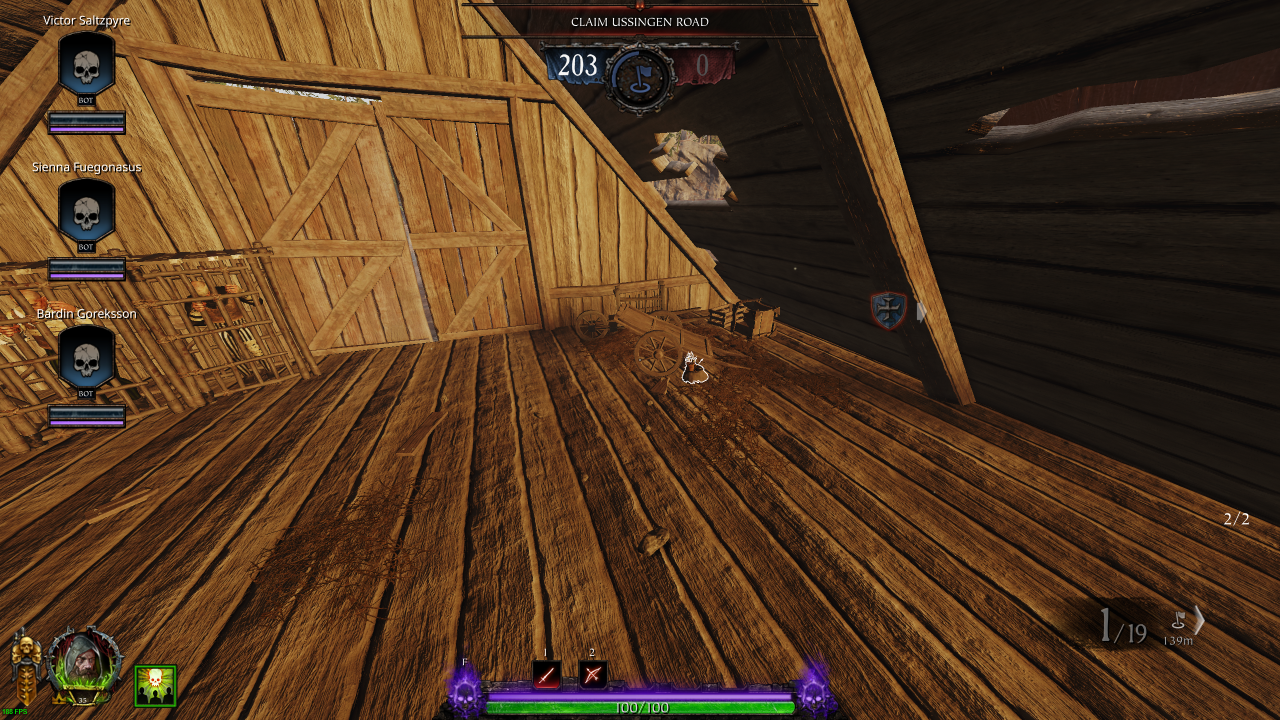
Section 5: Sawmill → Safe Zone
There is no loot past the Sawmill
Fort Brachsenbrücke
Total Items
Round 1
Healing: 4Draughts: 2Kits: 2 Bombs: 6
Explosive: 3Fire: 3 Potions: 6
Ammo: 4Pouches: 3Crates: 1 Barrels: 5
Explosive: 4Fire: 1
Round 2
Healing: 5Draughts: 2Kits: 3 Bombs: 8
Explosive: 5Fire: 3 Potions: 12
Ammo: 13Pouches: 9Crates: 4 Barrels: 0
Explosive: 0Fire: 0
Round 3
Healing: 7Draughts: 4Kits: 3 Bombs: 9
Explosive: 5Fire: 4 Potions: 7
Ammo: 5Pouches: 3Crates: 2 Barrels: 6
Explosive: 4Fire: 2
Round 1
Section 0: Spawn Room
Bombs: 4 (Explosive: 2 / Fire: 2)Potions: 4
Ammo: 1 (Crate)
Section 1: Spawn Room → After Hold Event
• Healing: 1 (Draught)• Bombs: 1 (Fire)
• Ammo: 1 (Pouch)
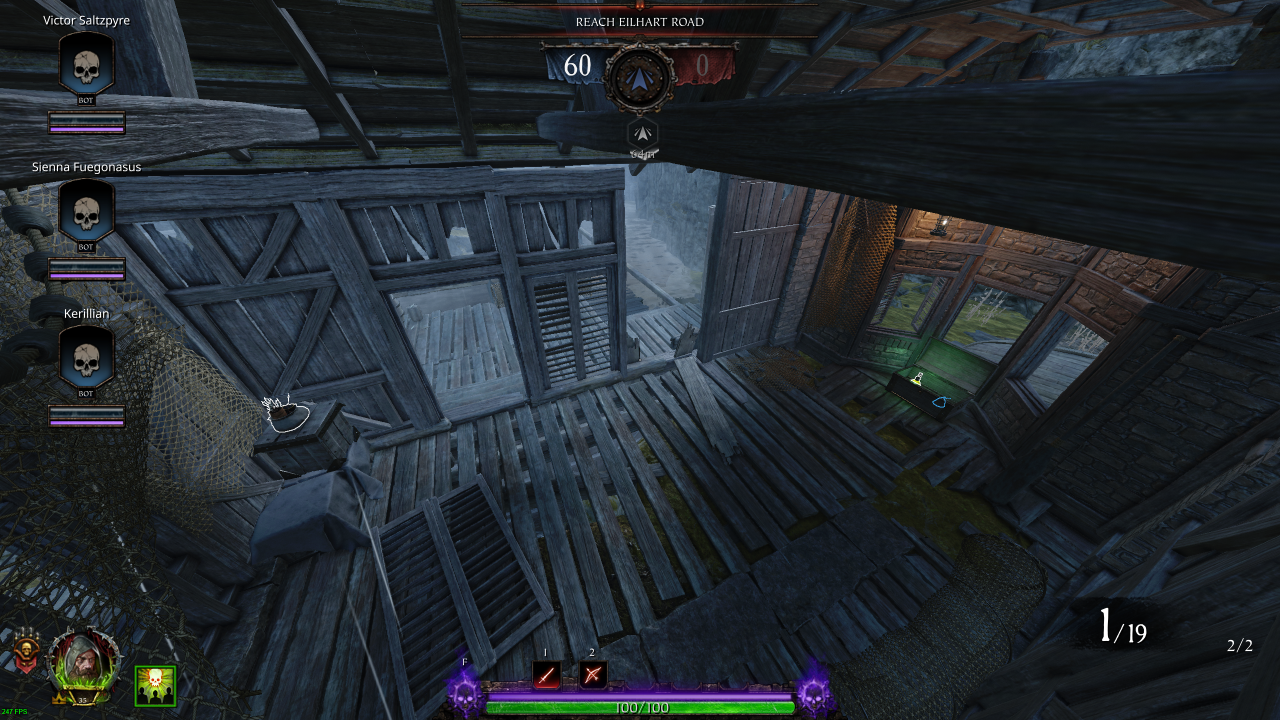
• Ammo: 1 (Pouch)
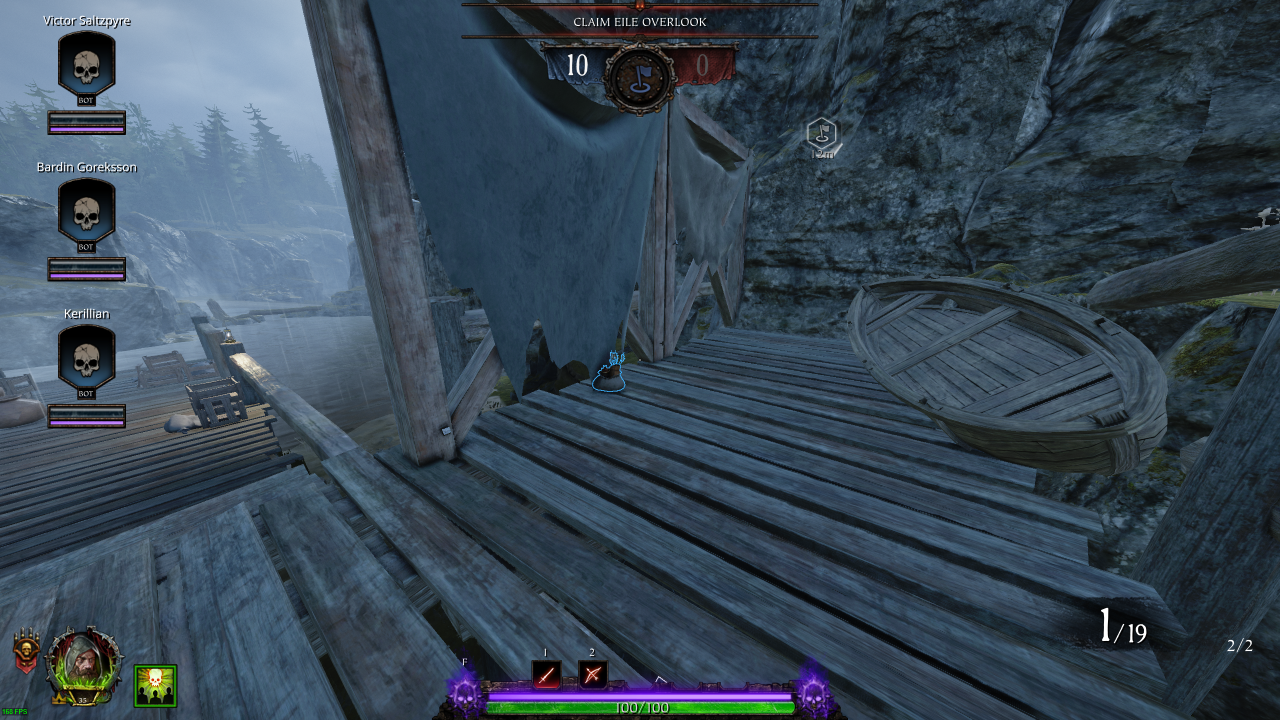
• Healing: 1 (Kit)
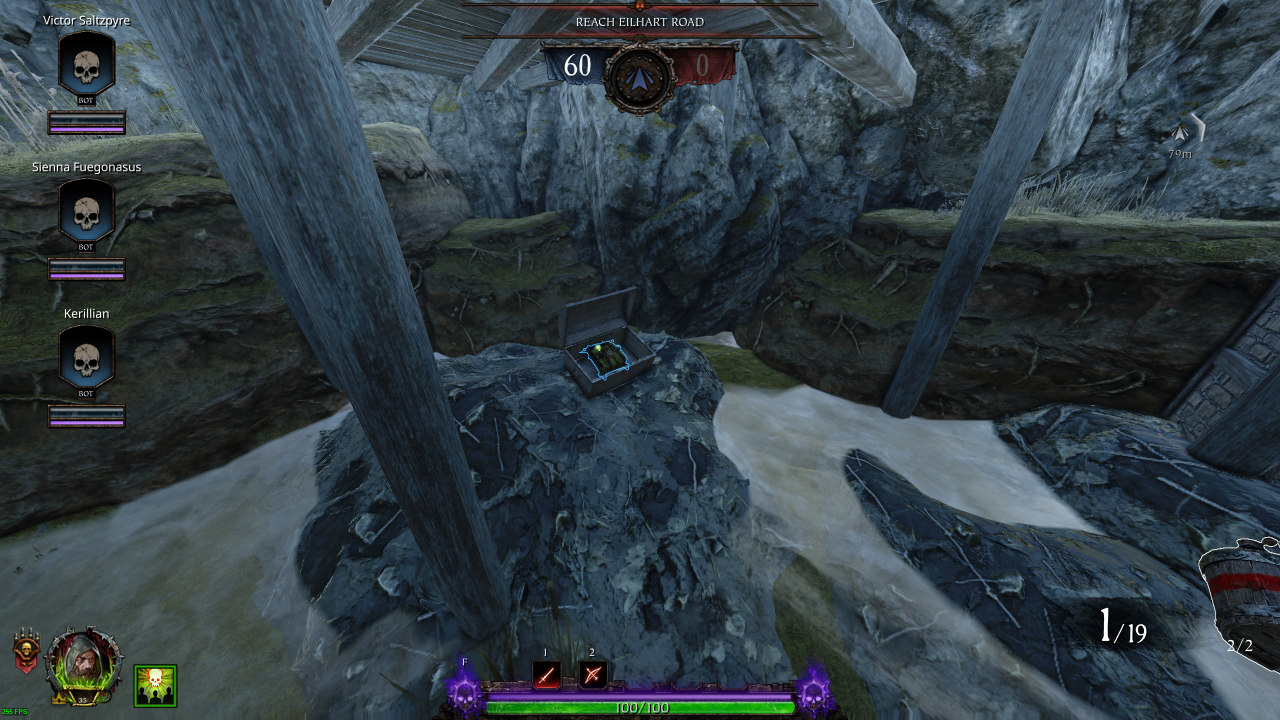
Section 2: Drop Down → Catapult
• Potions: 1• Ammo: 1 (Pouch)
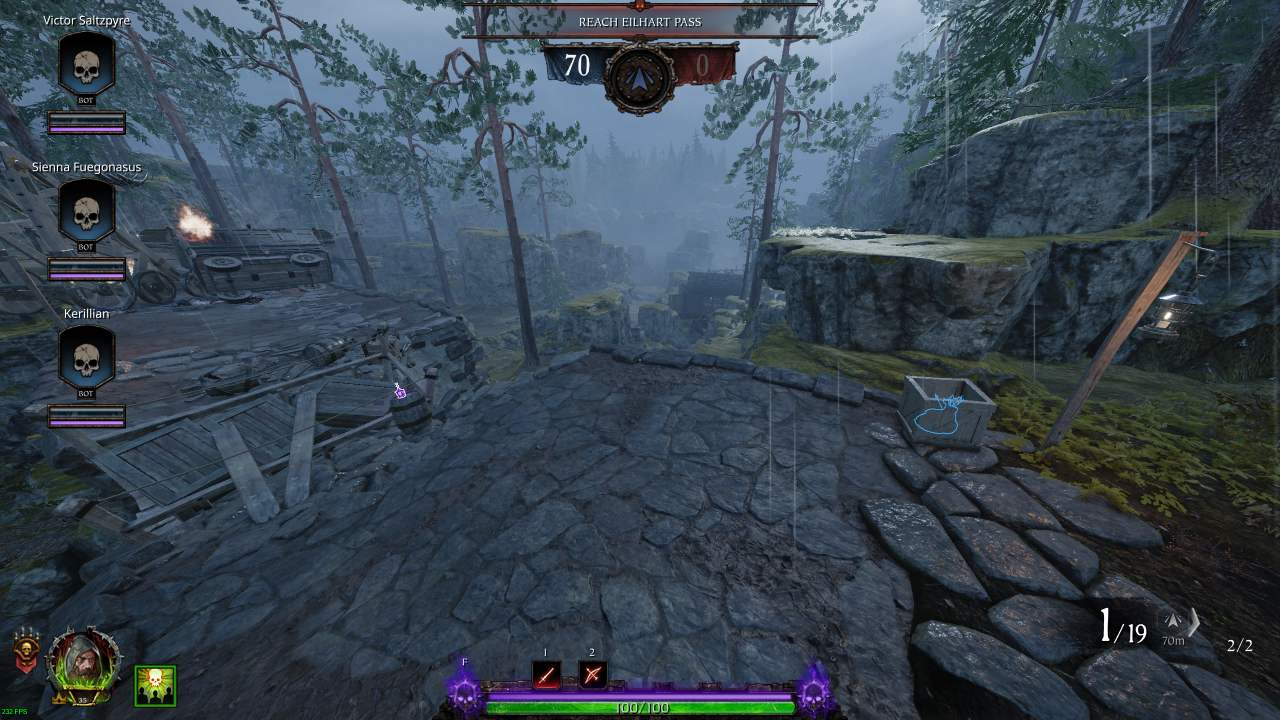
• Healing: 1 (Draught)
• Ammo: 1 (Pouch)
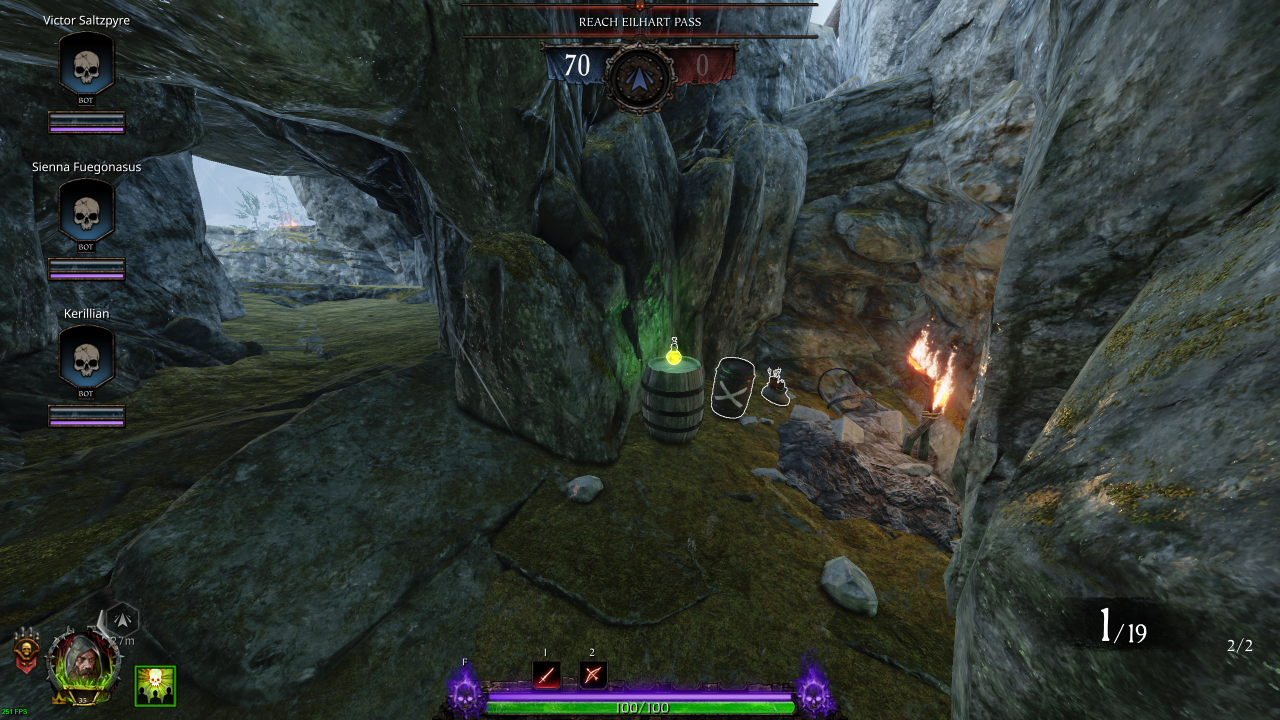
Section 3: Catapult Area → Wall
• Healing: 1 (Kit)• Bombs: 1 (Explosive)
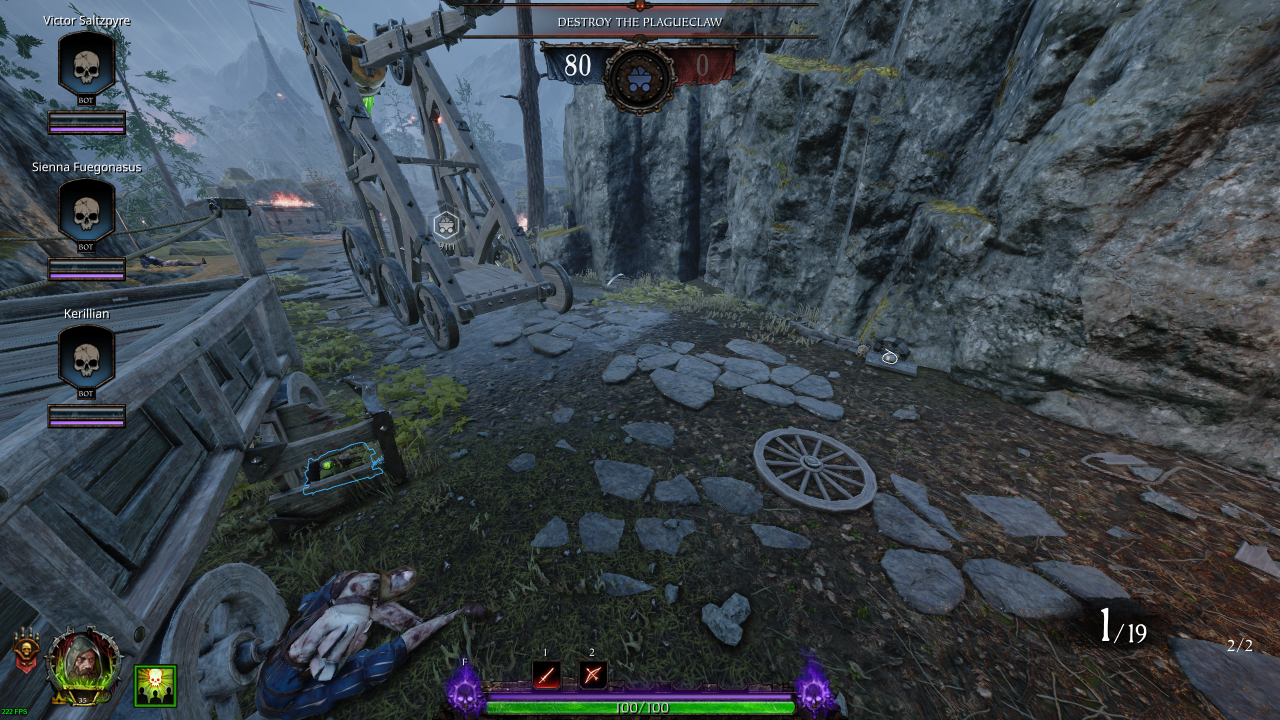
• Potions: 1
• Ammo: 1 (Pouch)
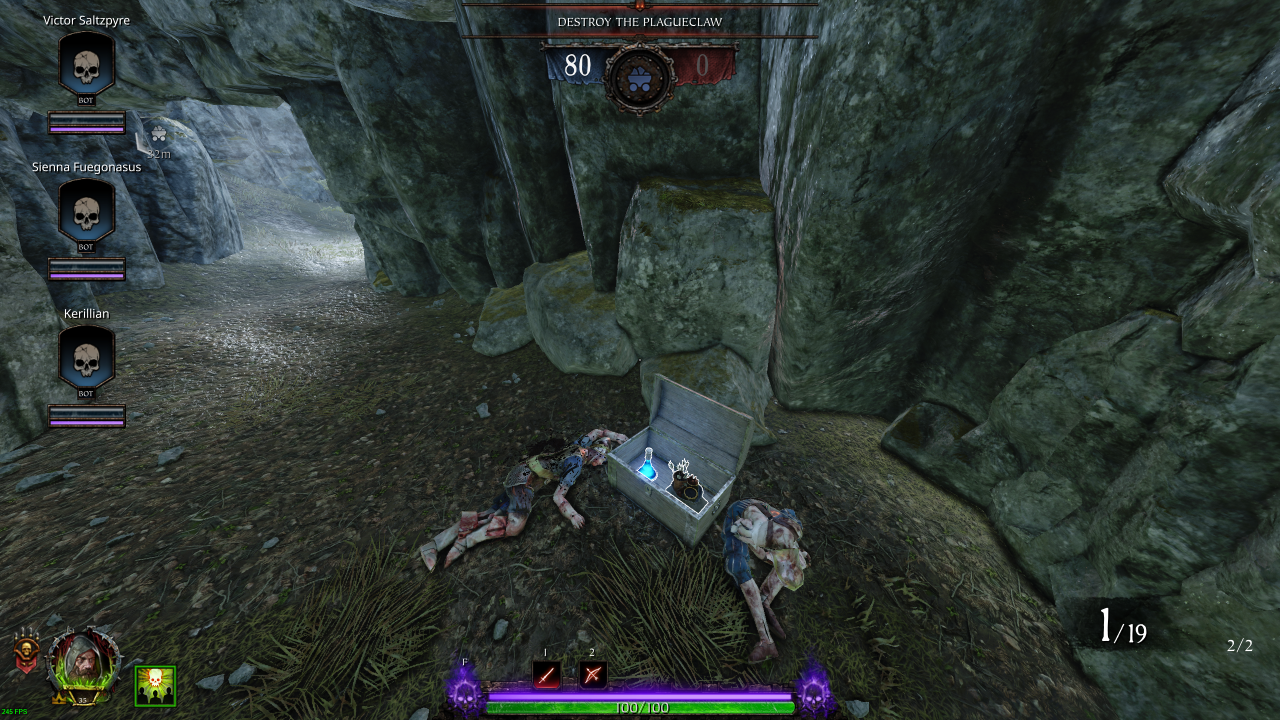
Section 3: Wall → Safe Zone
Once past the Wall, there is no more loot
Round 2
Section 0: Spawn Room
Bombs: 4 (Explosive: 3 / Fire: 1)Potions: 4
Ammo: 3 (Crate)
Section 1: Spawn Room → Bridge
• Healing: 1 (Kit)• Potions: 1
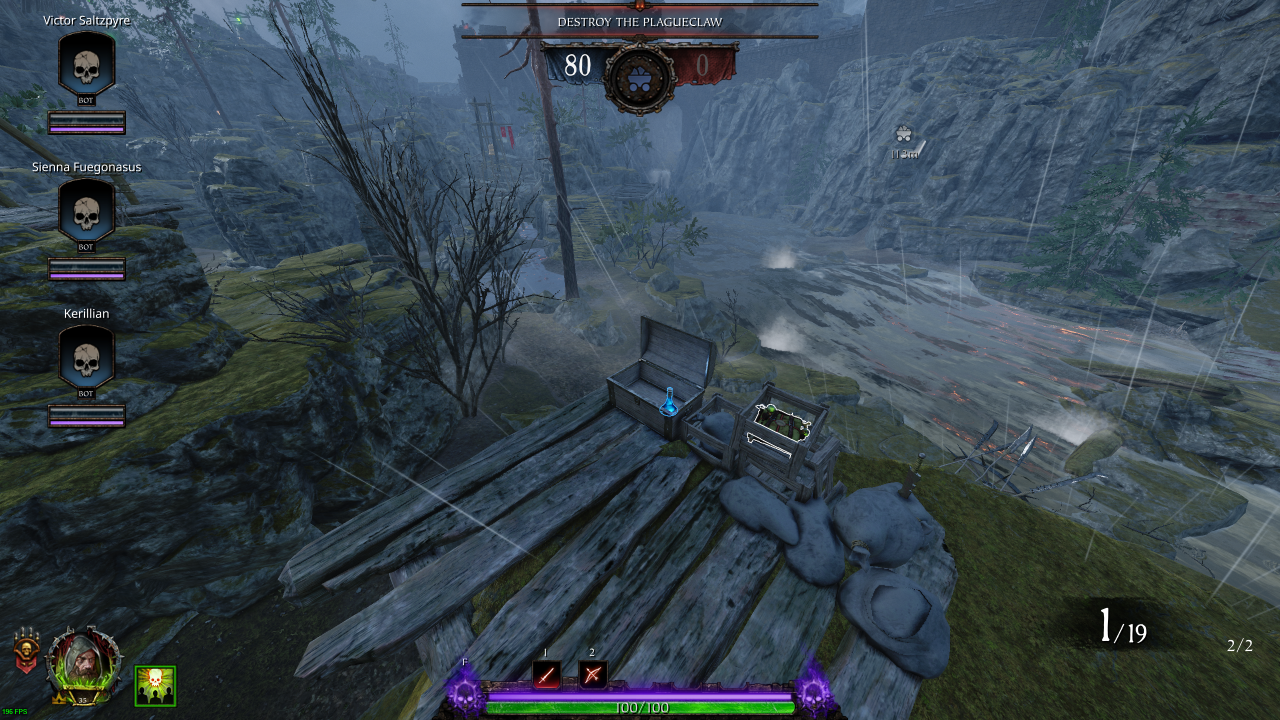
• Potions: 1
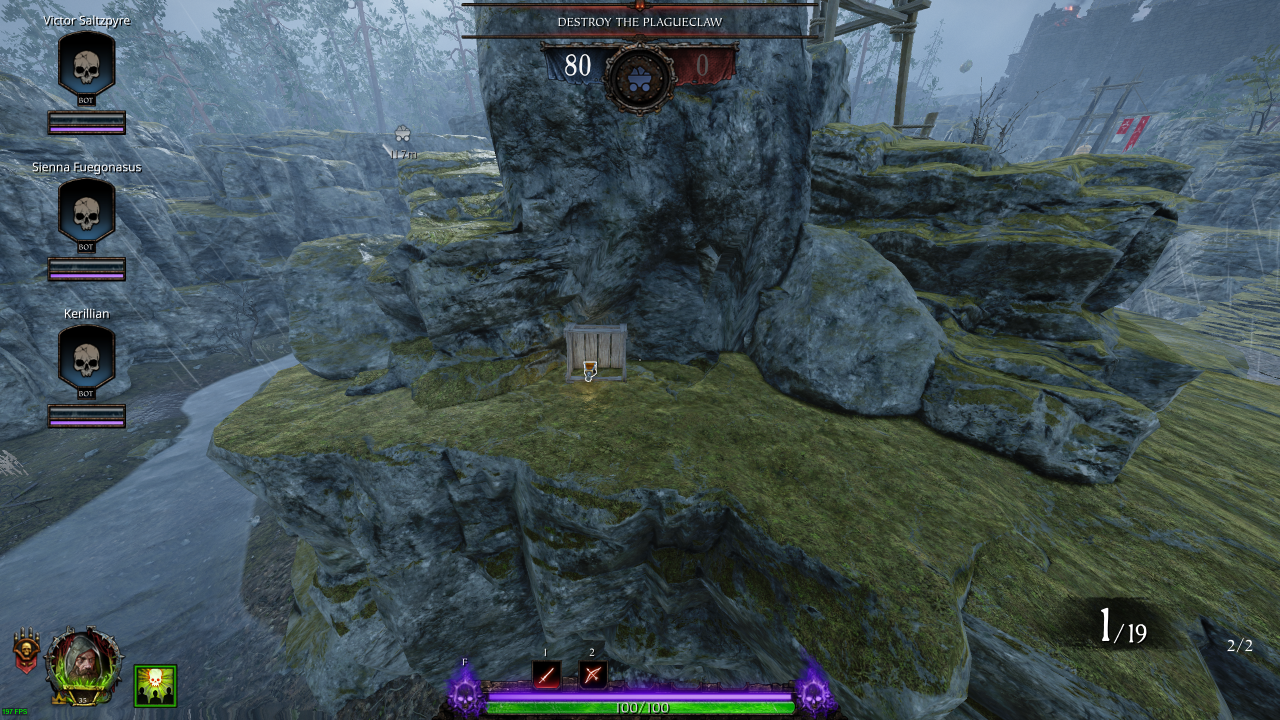
• Healing: 1 (Draught)
• Bombs: 1 (Explosive)
• Potions: 1
• Ammo: 3 (Pouch)
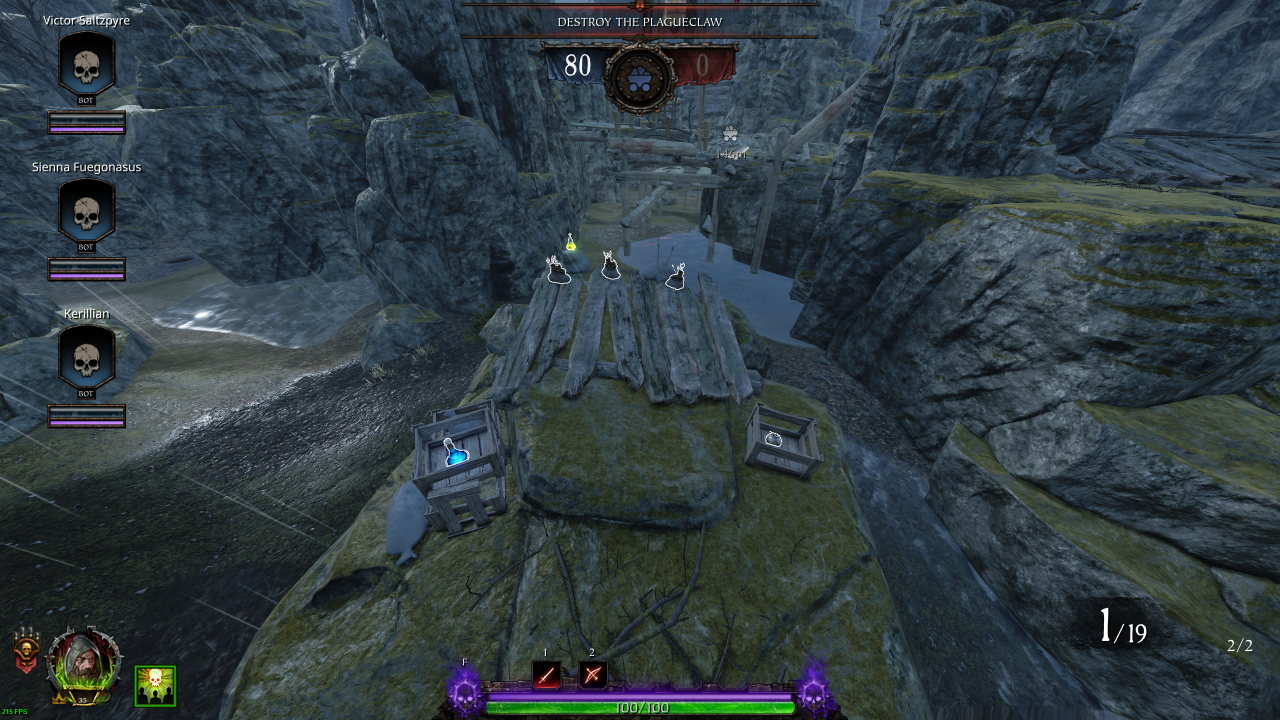
• Ammo: 2 (Pouch)
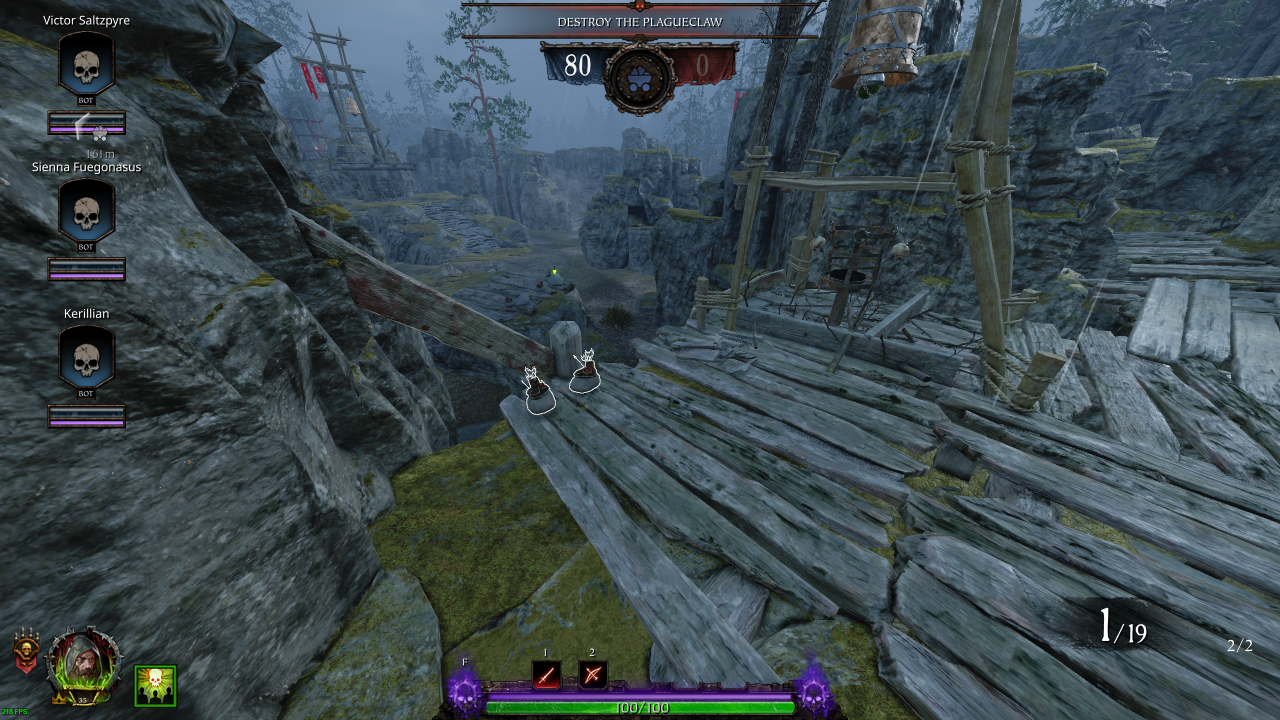
• Bombs: 1 (Fire)
• Potions: 1
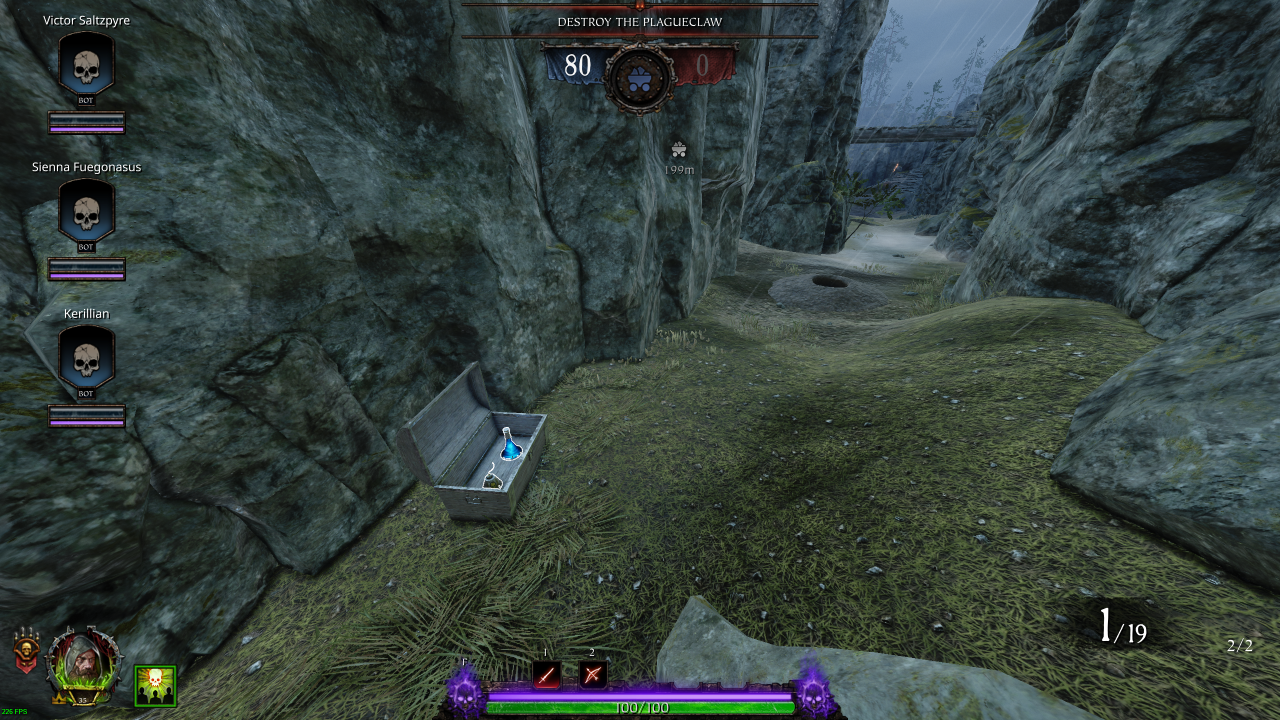
• Healing: 1 (Kit)
• Ammo: 2 (Pouch)
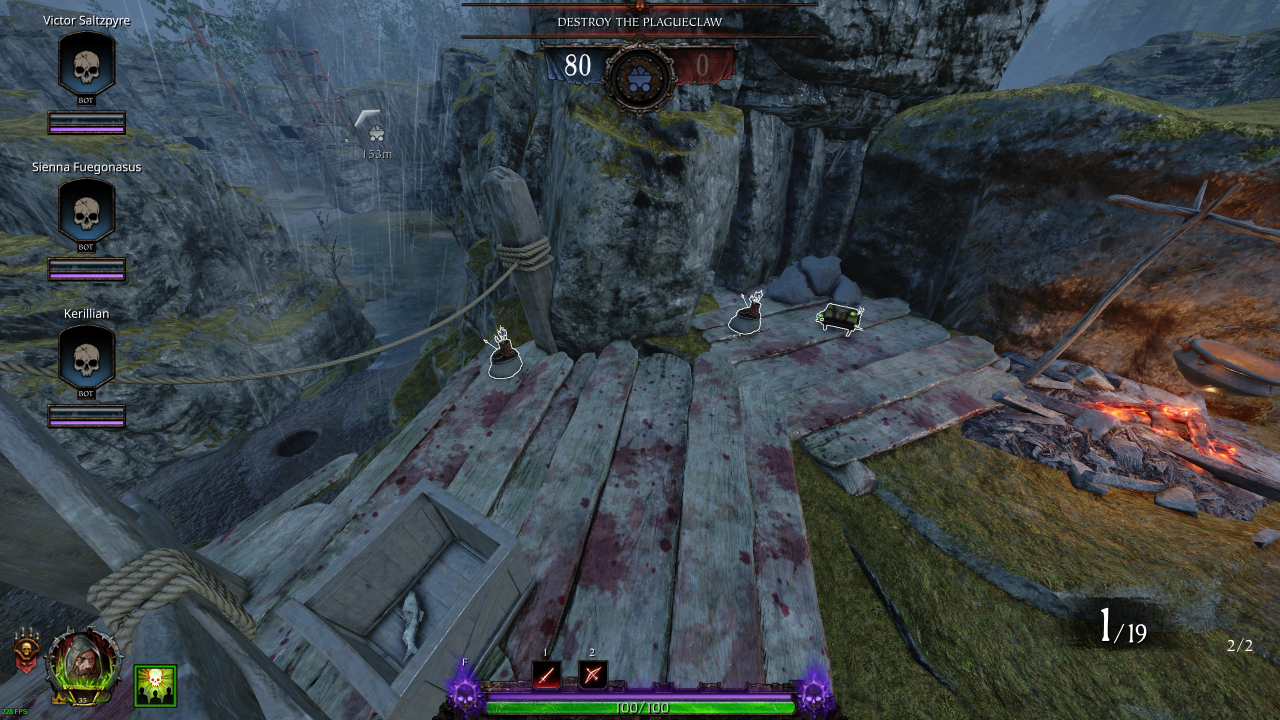
Section 2: Bridge → Gate
• Healing: 1 (Draught)• Potions: 1
• Ammo: 2 (Pouch)
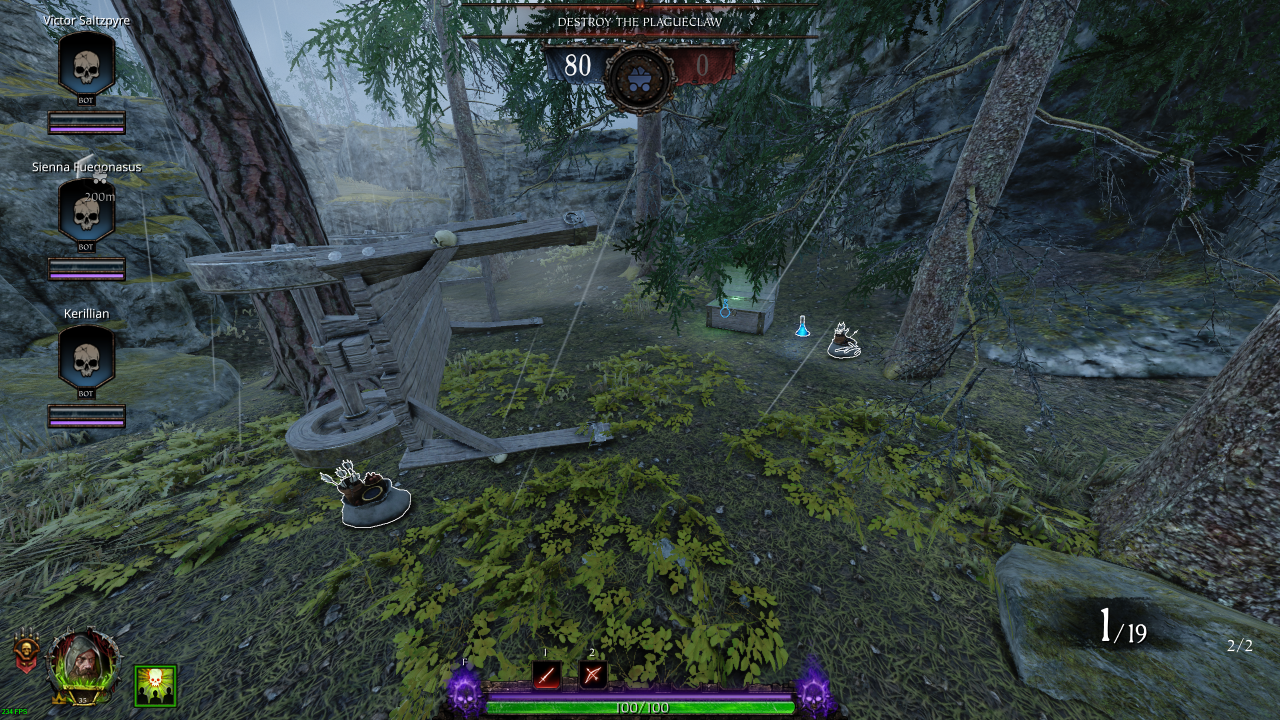
• Potions: 1
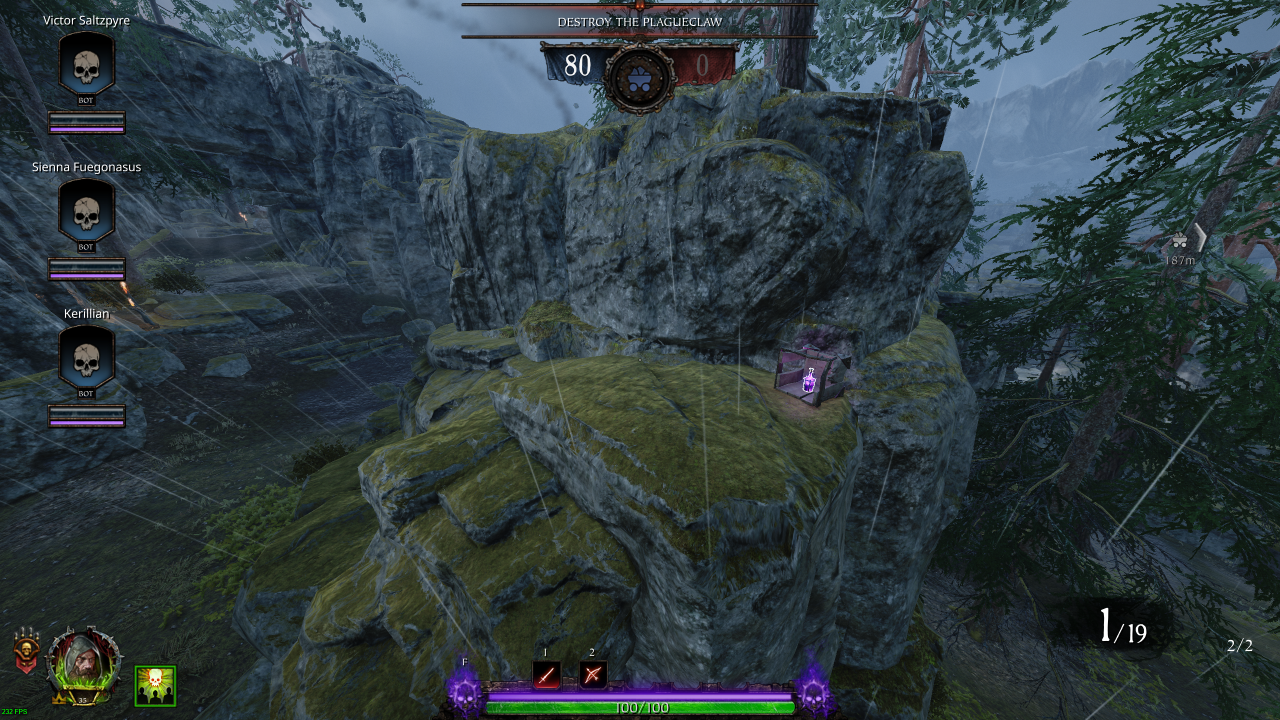
• Bombs: 3 (Explosive: 2 / Fire: 1)
• Potions: 2
• Ammo: 1 (Crate)
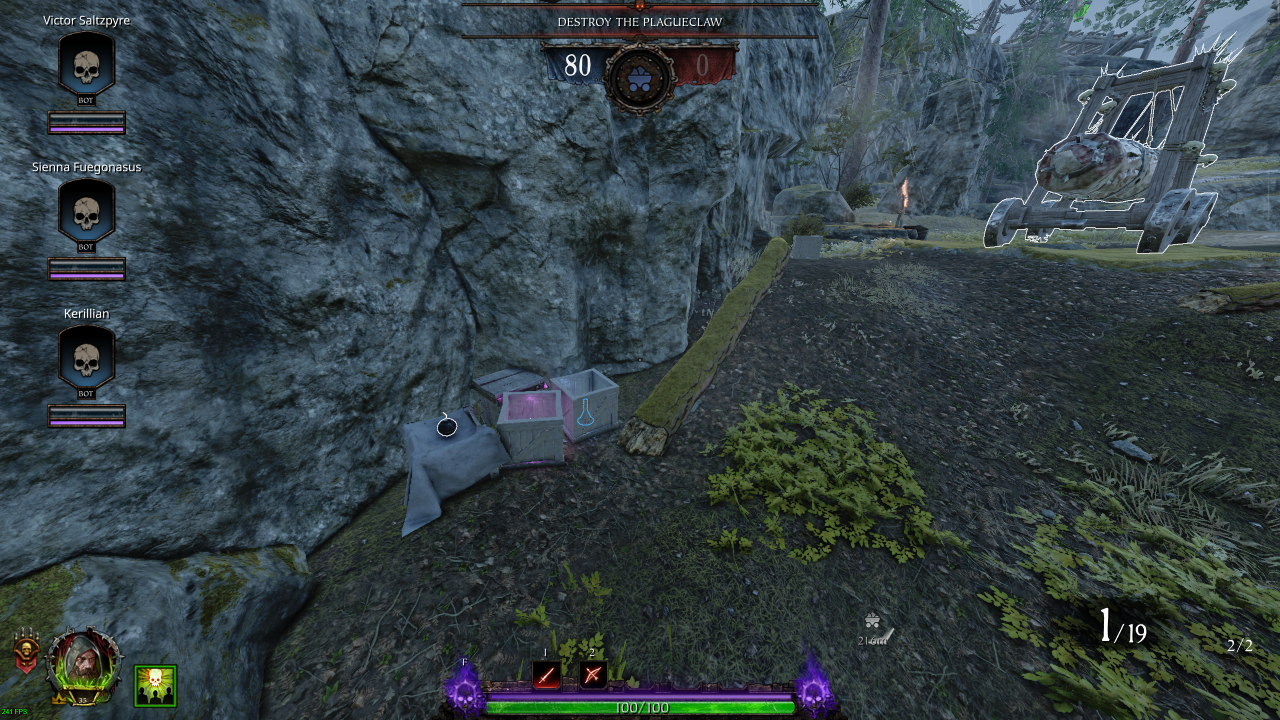
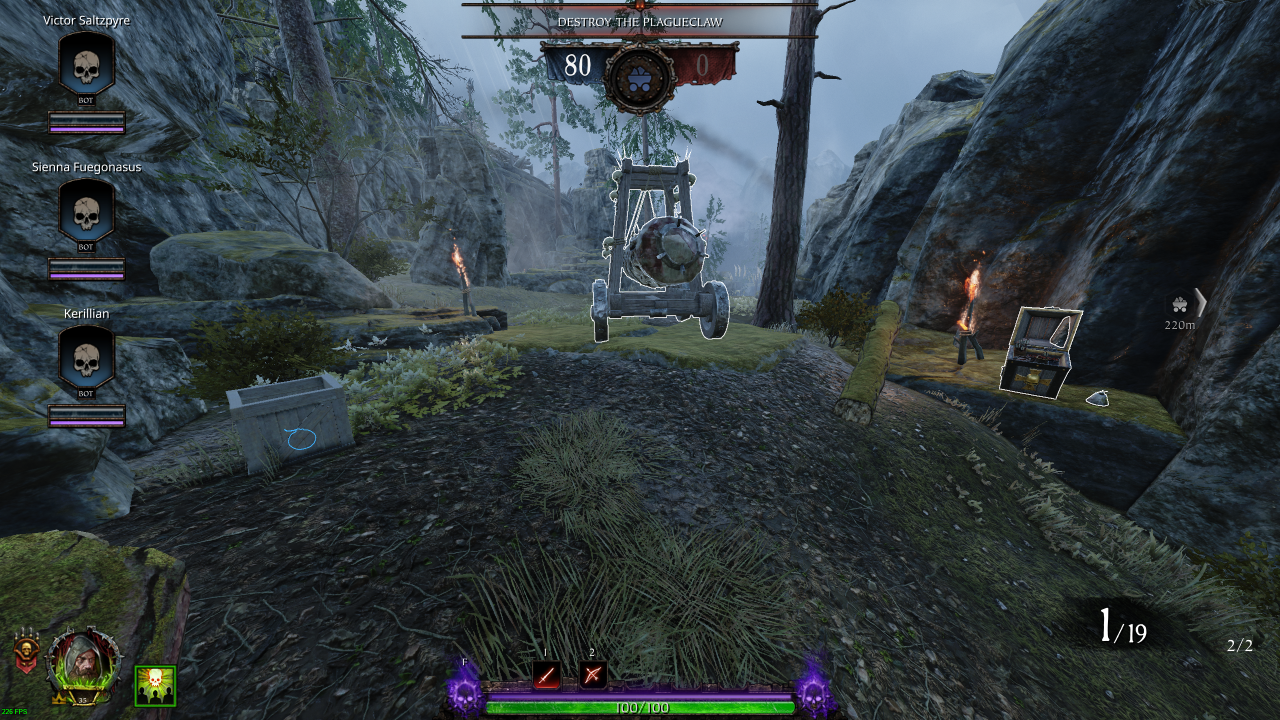
• Healing: 1 (Kit)
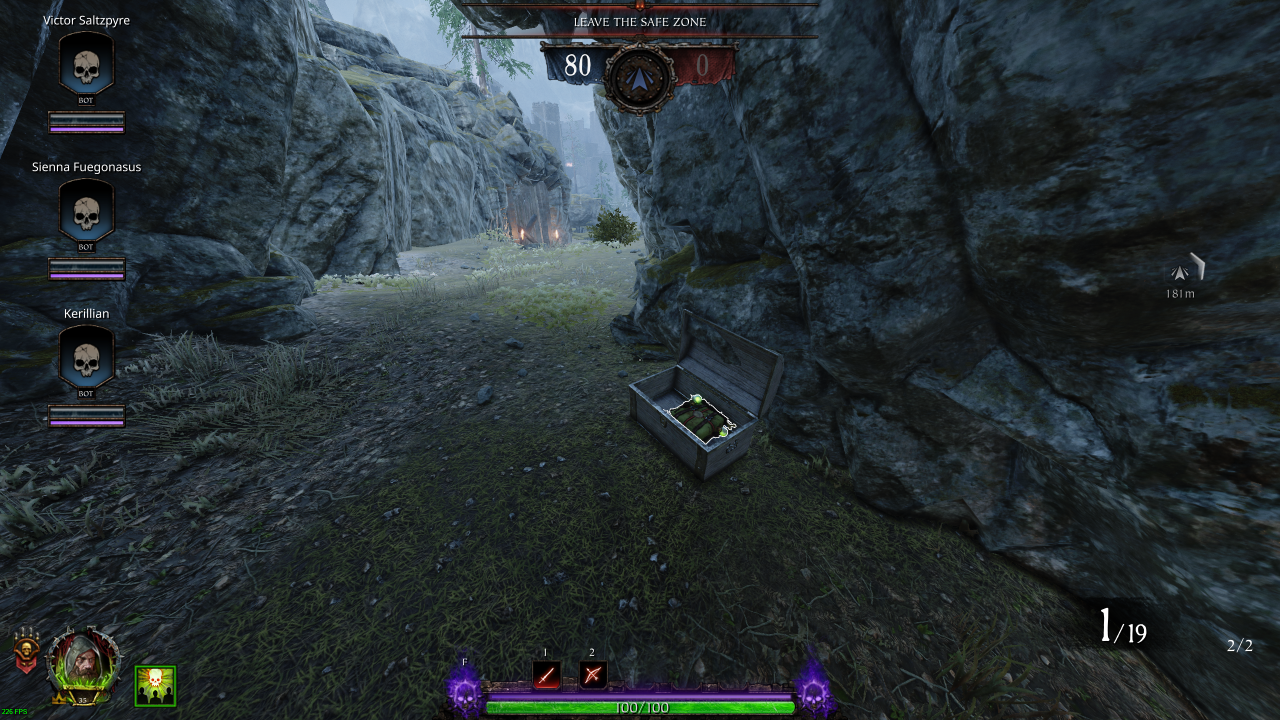
Section 3: Gate → Spawn Room
Once the Wall is broken, there is no more items
Round 3
Section 0: Spawn Room
Bombs: 2 (Explosive: 2)Potions: 4
Section 1: Spawn Room → Old Armoury
• Bombs: 1 (Fire)• Ammo: 1 (Crate)
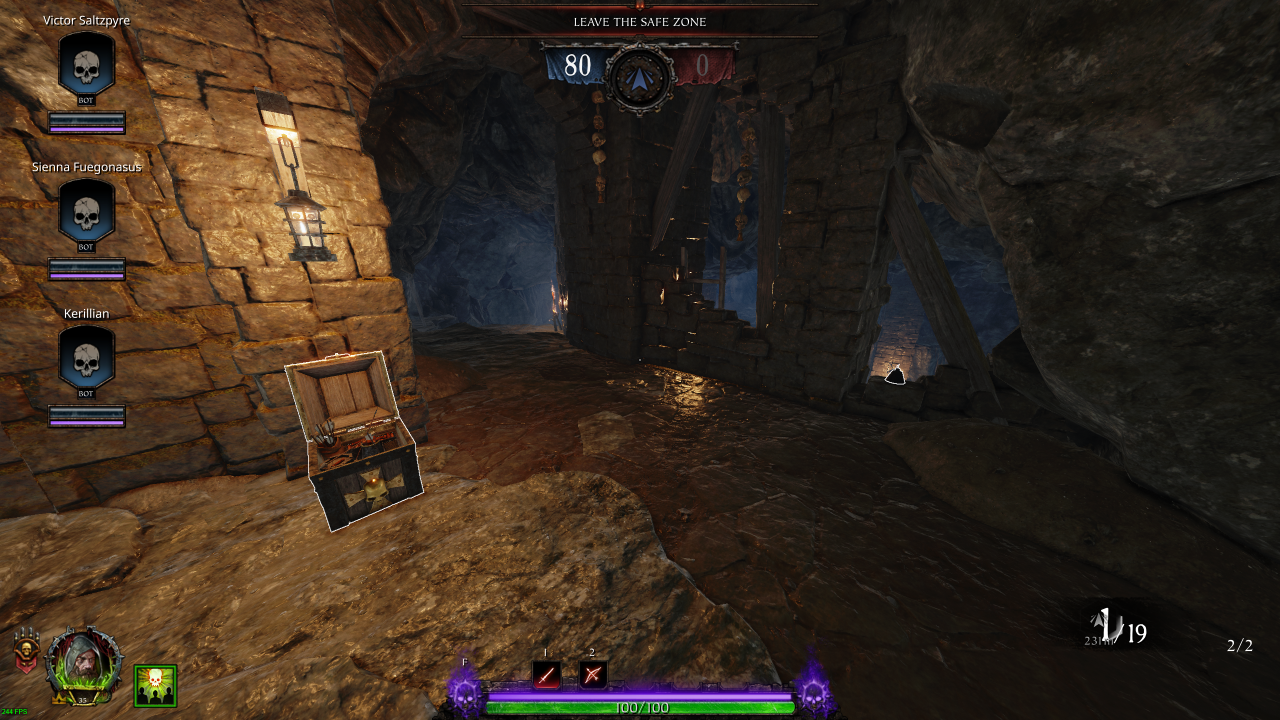
• Ammo: 1 (Pouch)
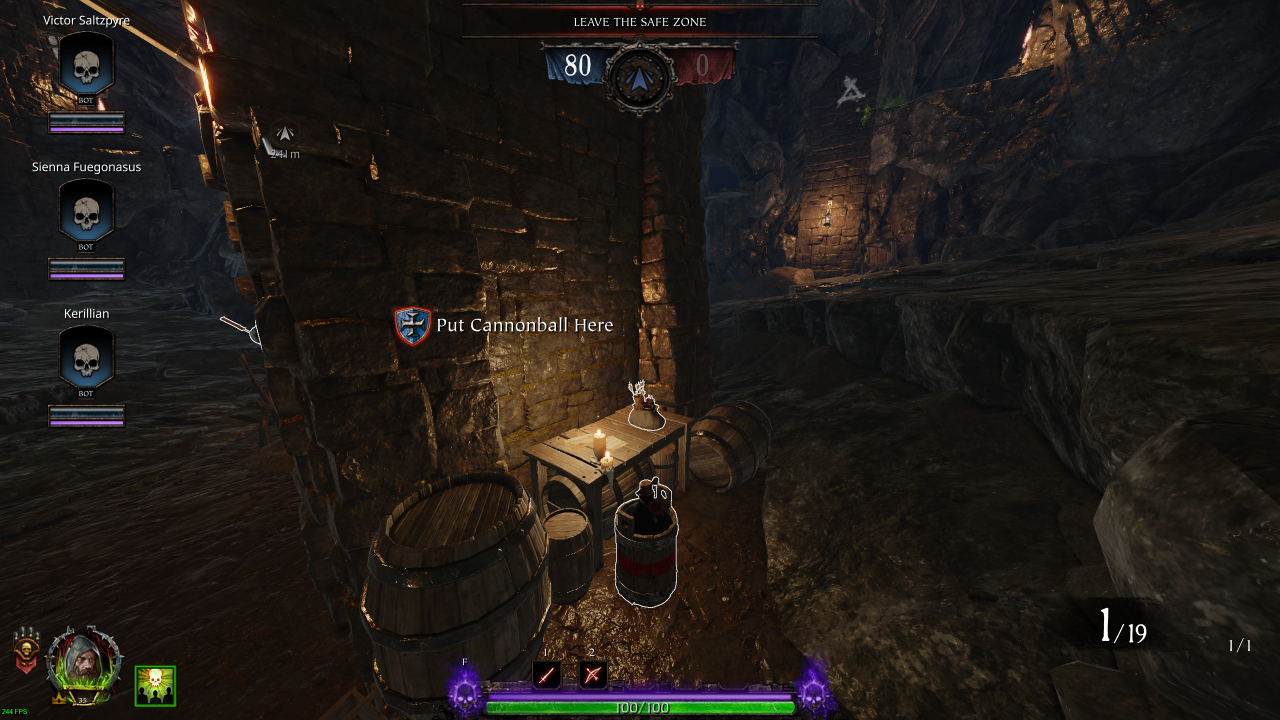
• Bombs: 2 (Explosive: 1 / Fire: 1)
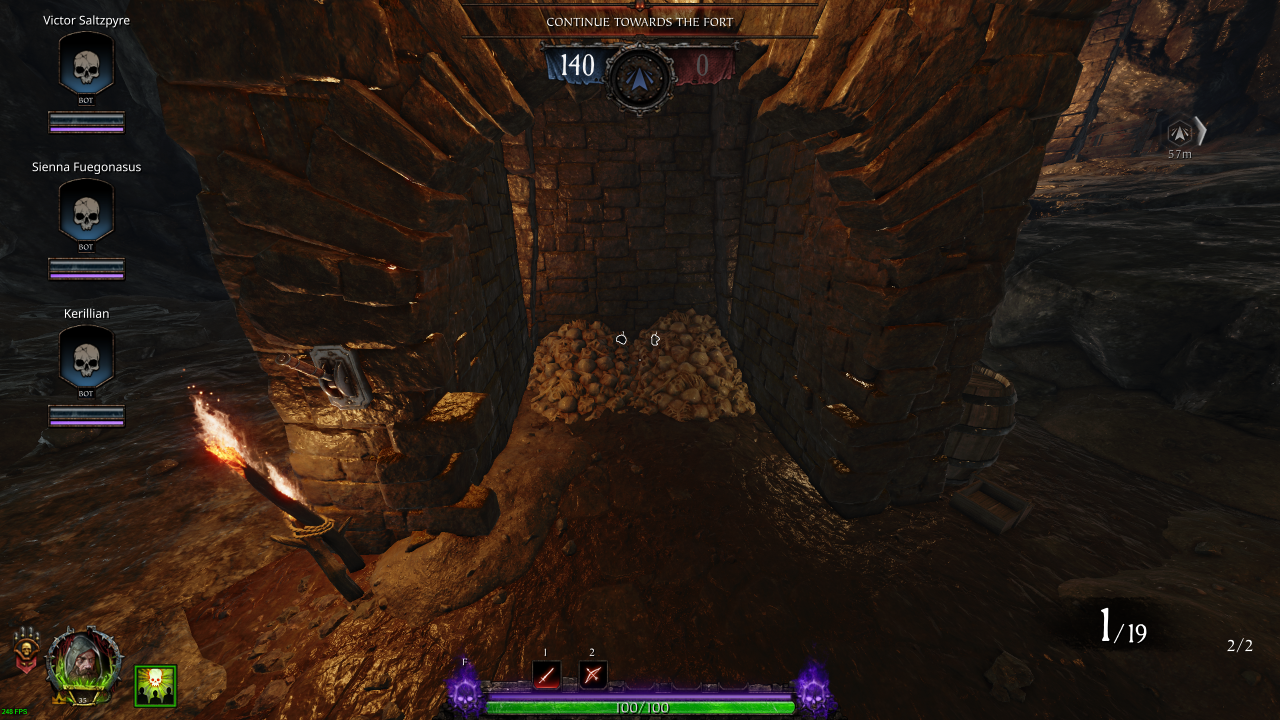
Section 2: Old Armoury Doors → Outer Courtyard
• Potions: 1• Ammo: 1 (Pouch)
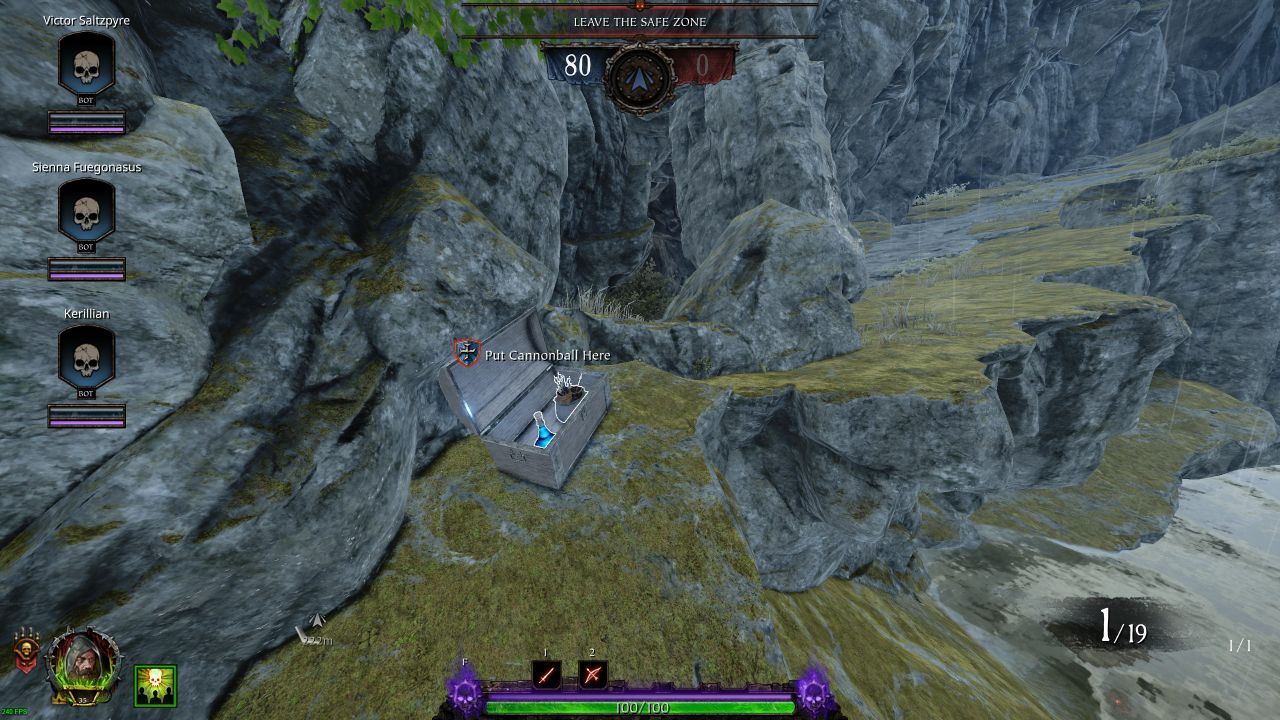
• Healing: 1 (Kit)
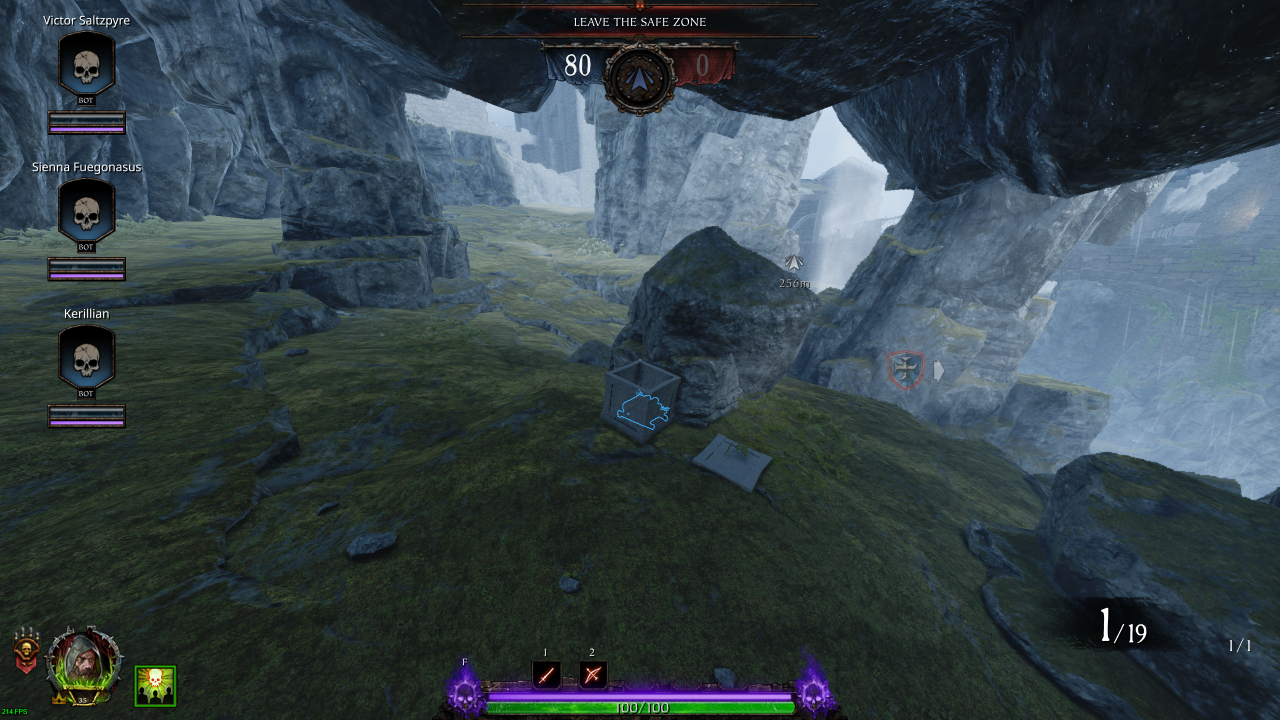
• Bombs: 2 (Fire)
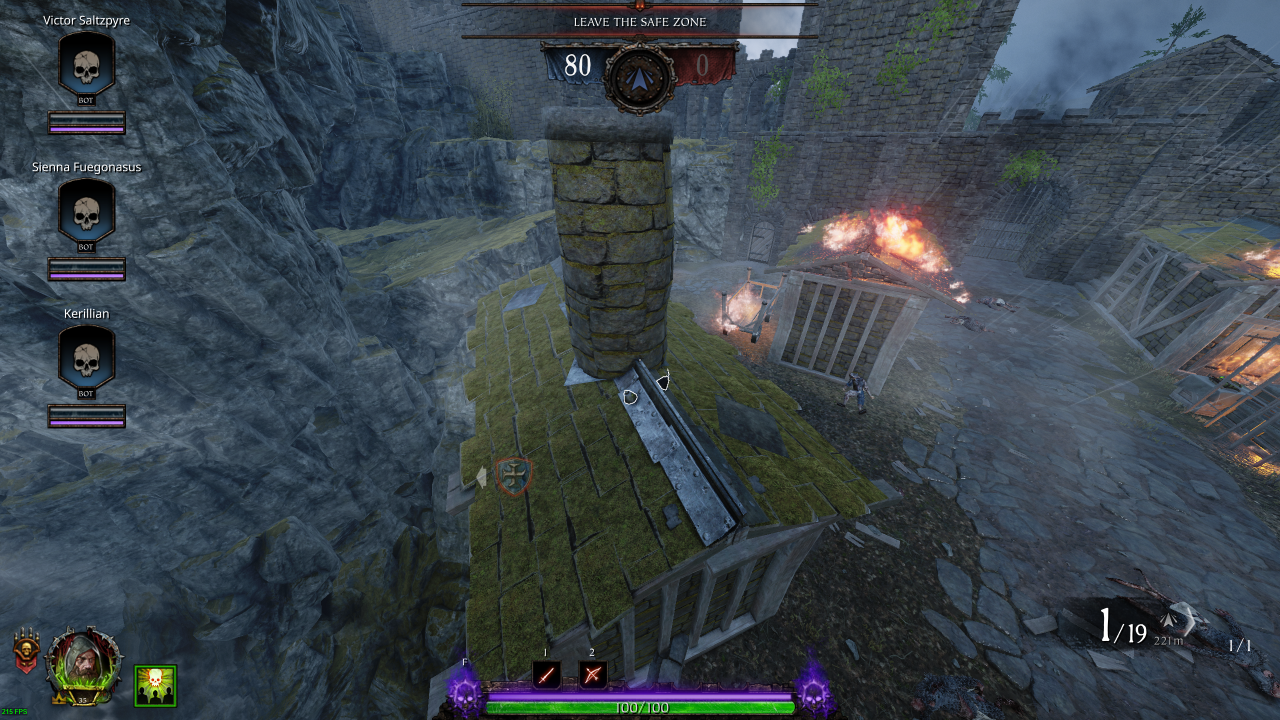
• Healing: 1 (Kit)
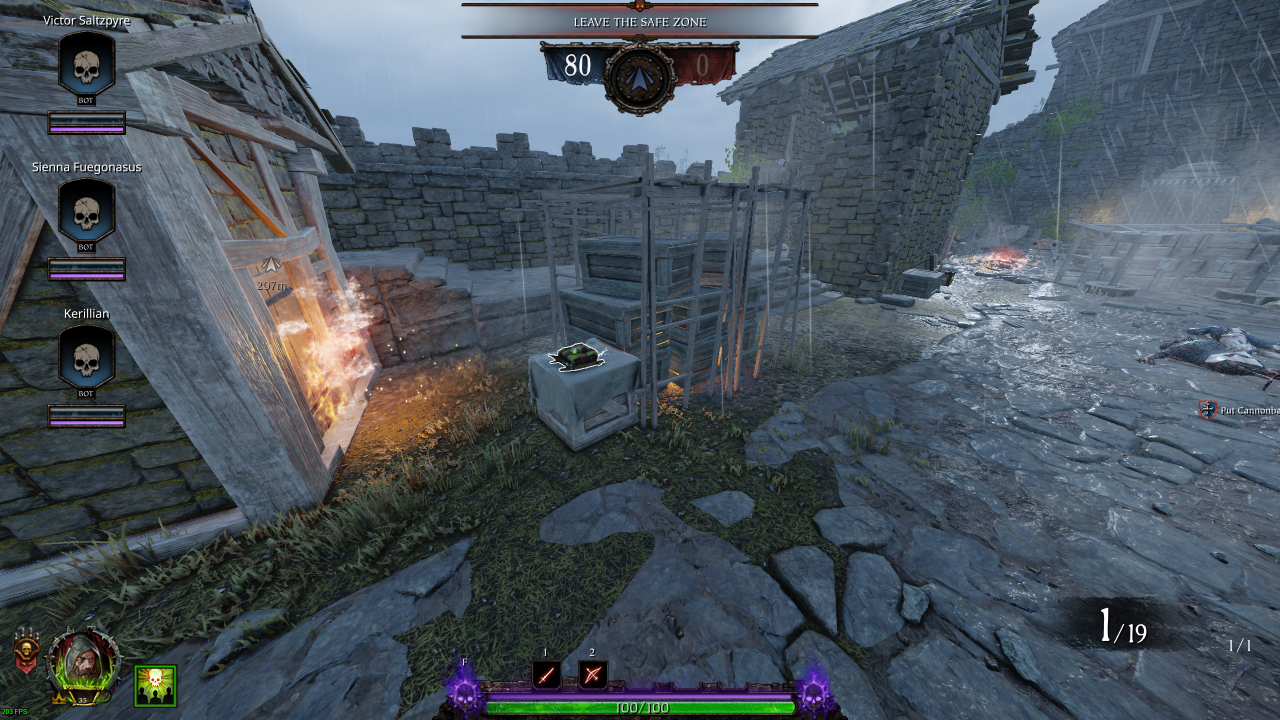
• Potions: 1
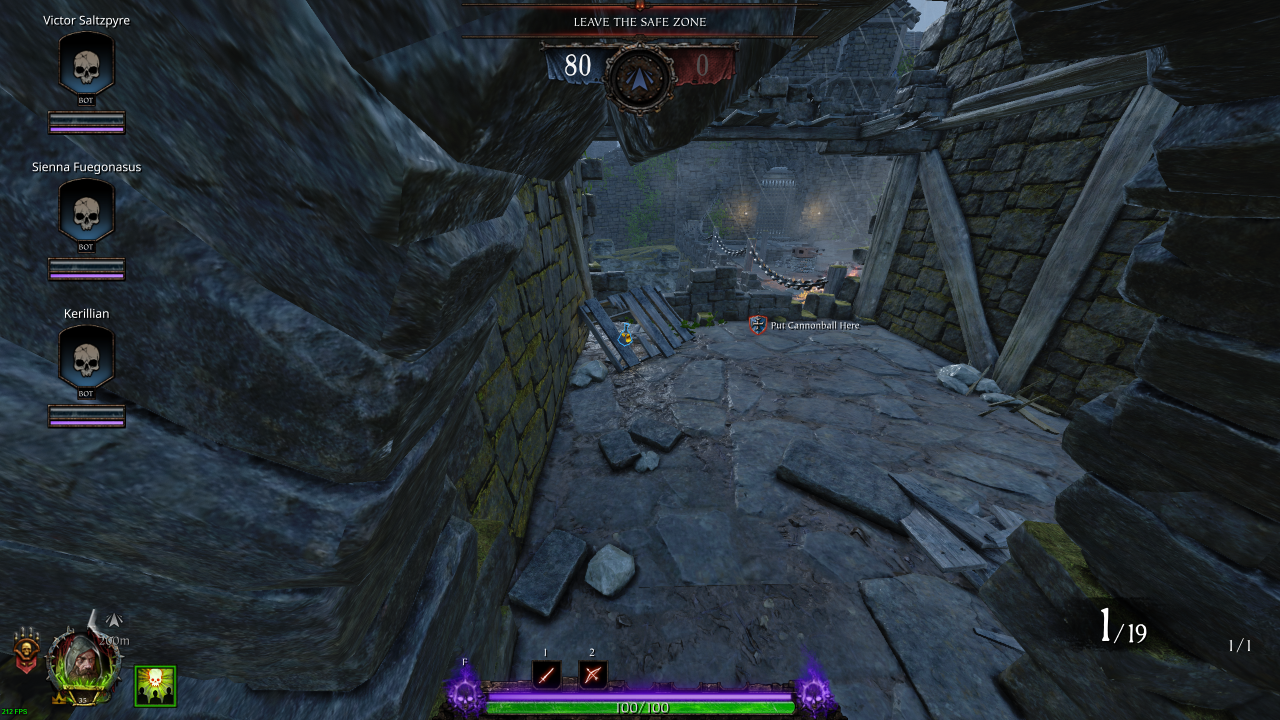
• Ammo: 1 (Crate)
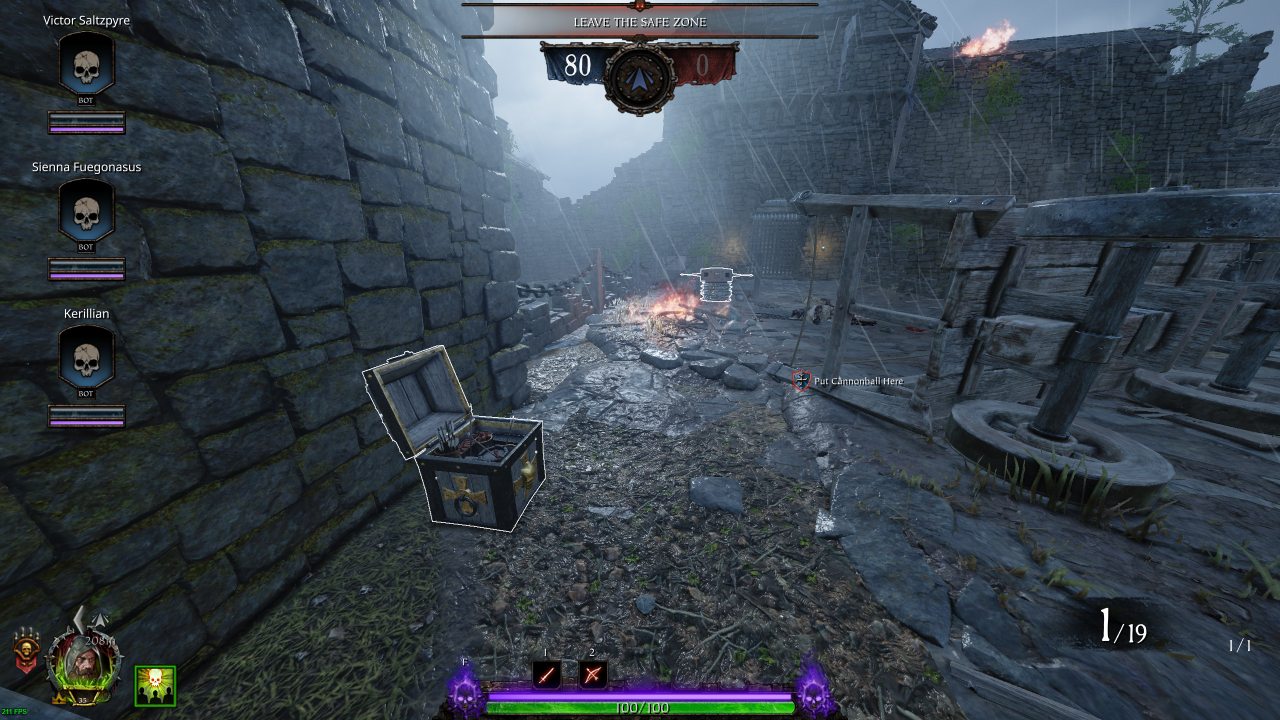
• Bombs: 1 (Explosive)
• Ammo: 1 (Pouch)
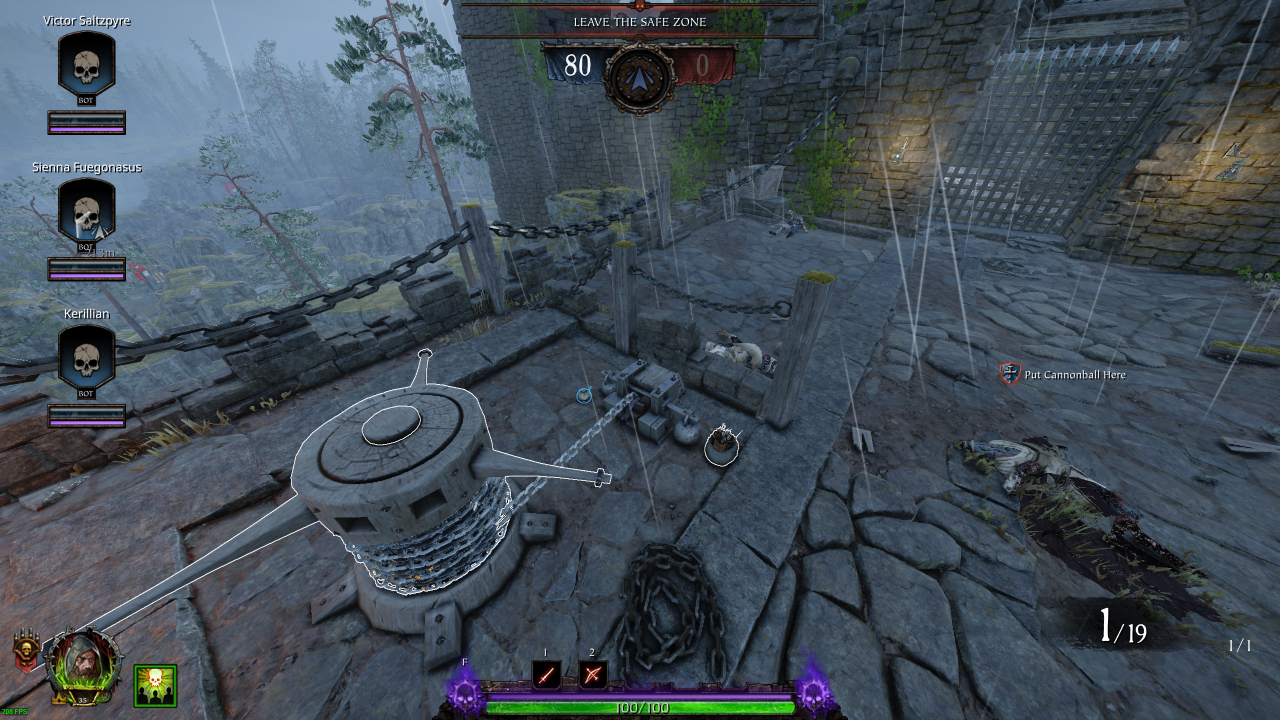
Section 3: Inner Courtyard
• Potions: 1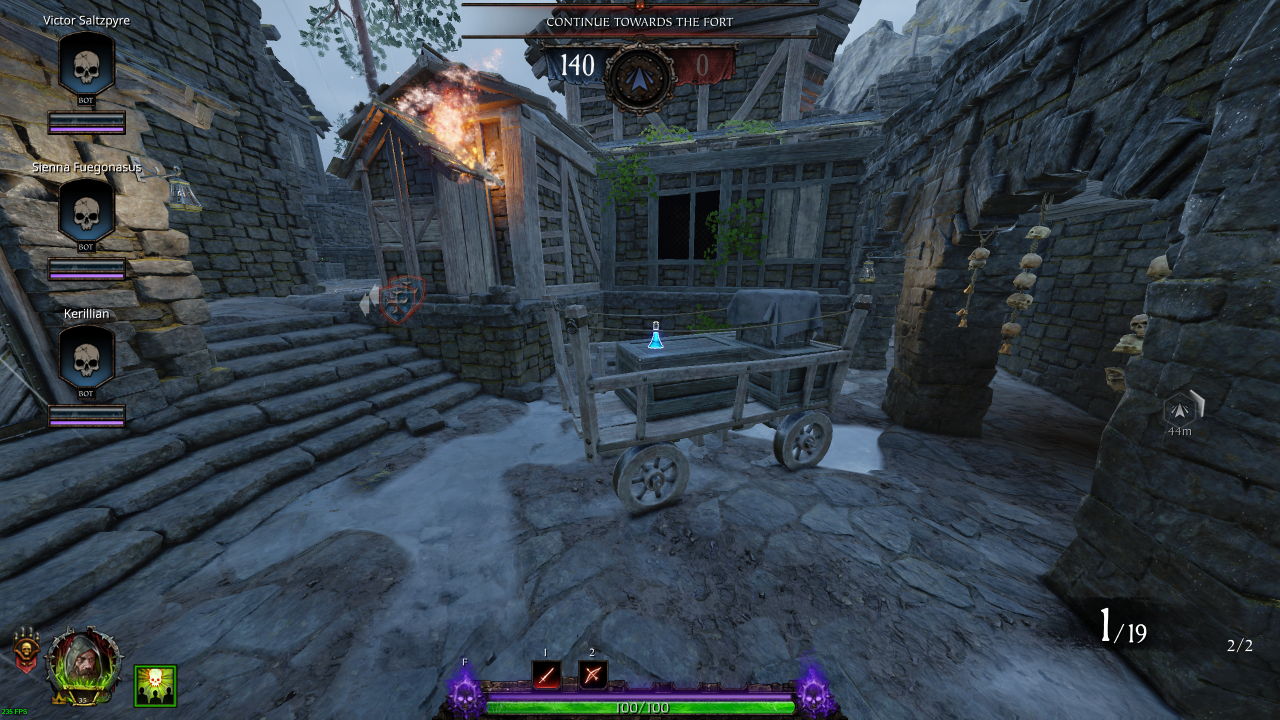
• Healing: 1 (Kit)
• Ammo: 1 (Pouch)
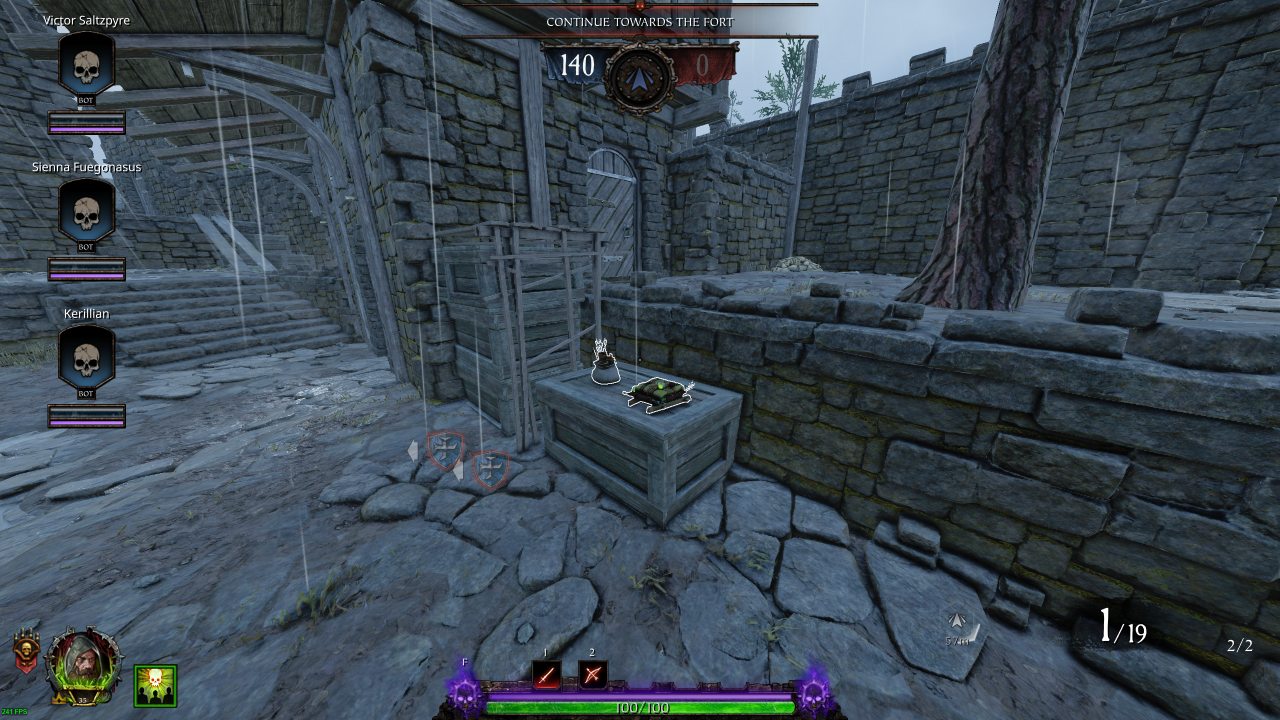
• Healing: 1 (Draught)
• Bombs: 1 (Fire)
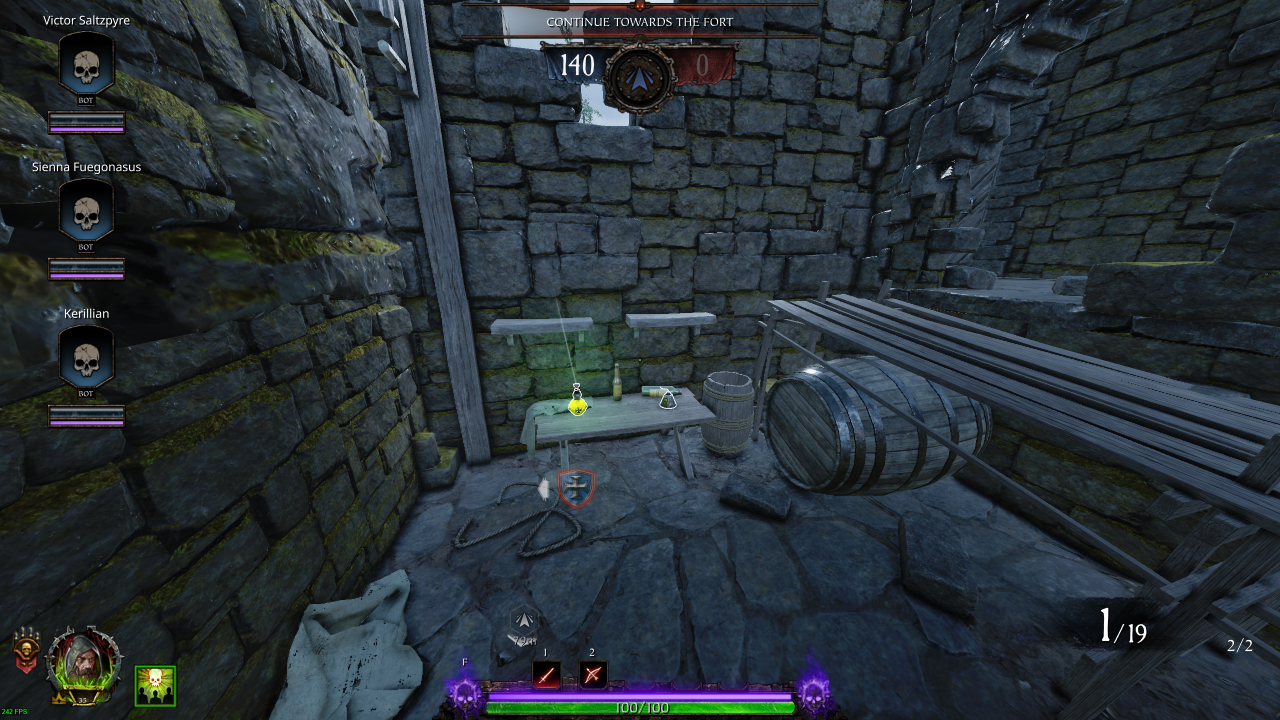
• Healing: 1 (Draught)
• Ammo: 2 (Pouch)
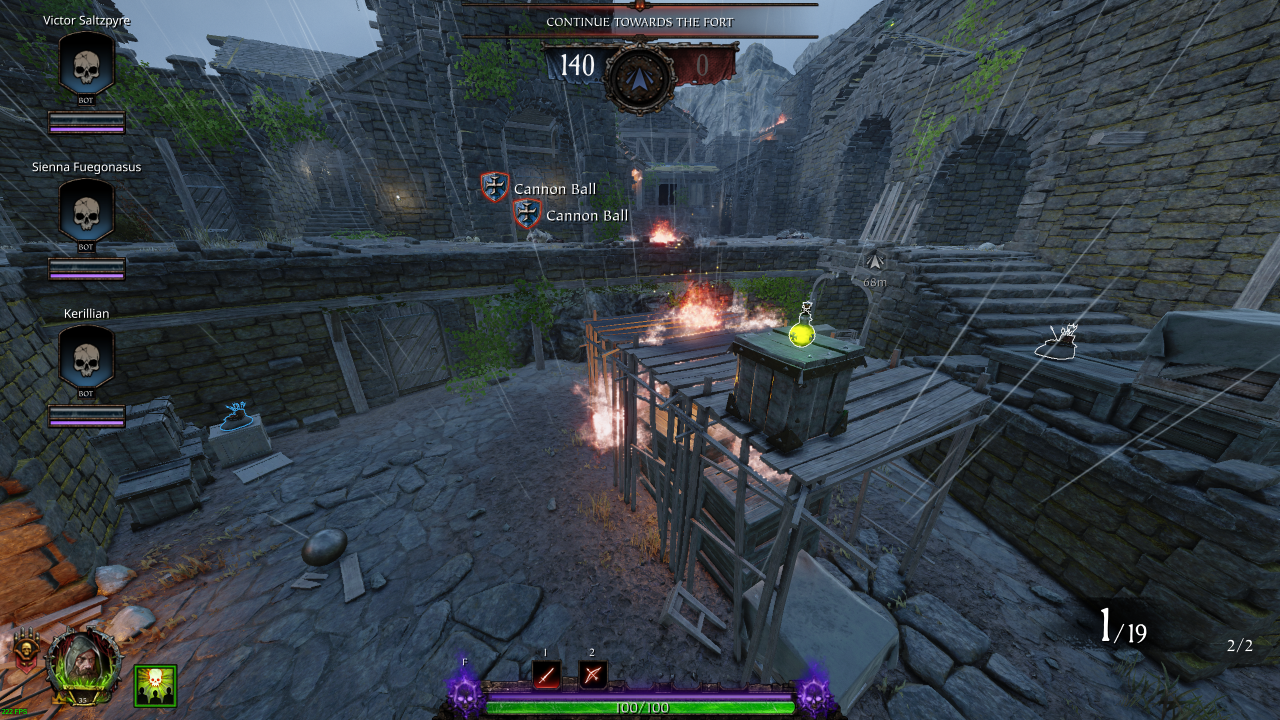
• Healing: 1 (Draught)
• Potions: 1
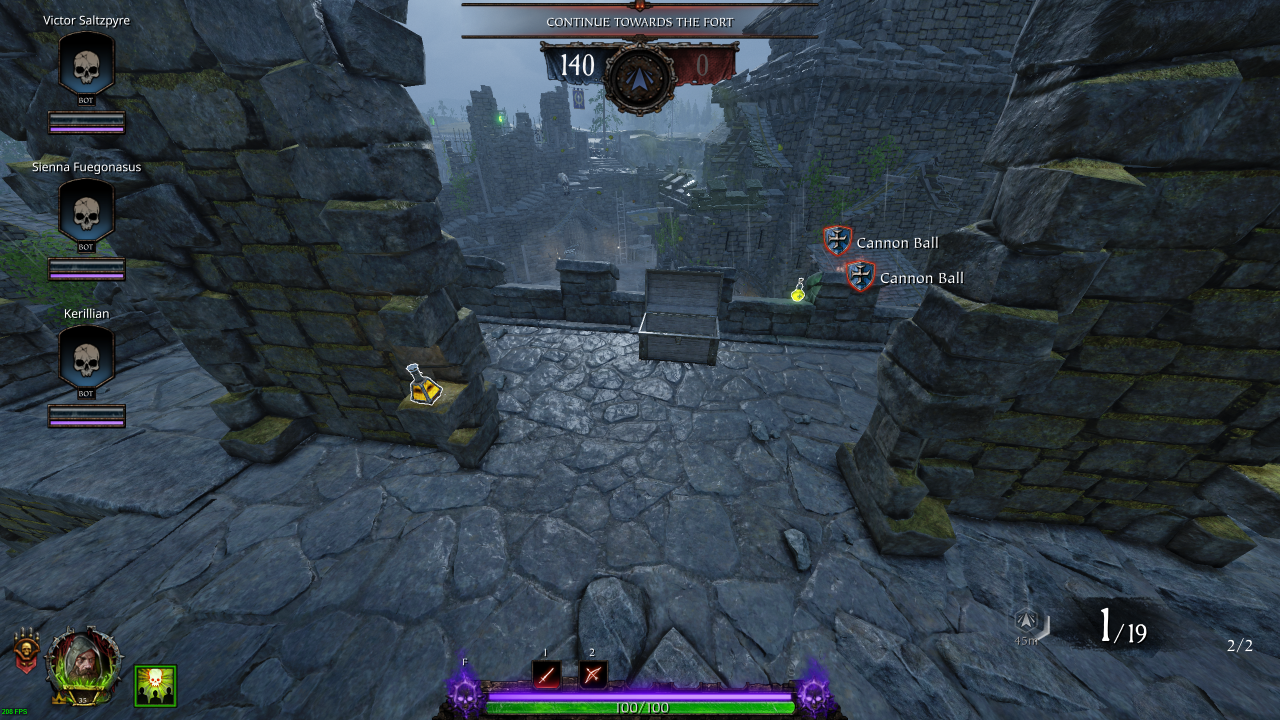
Loot Room
Room Opens After Firing 2 Cannons• Healing: 1 (Draught)
• Bombs: 2 (Explosive / Fire)
• Potions: 1
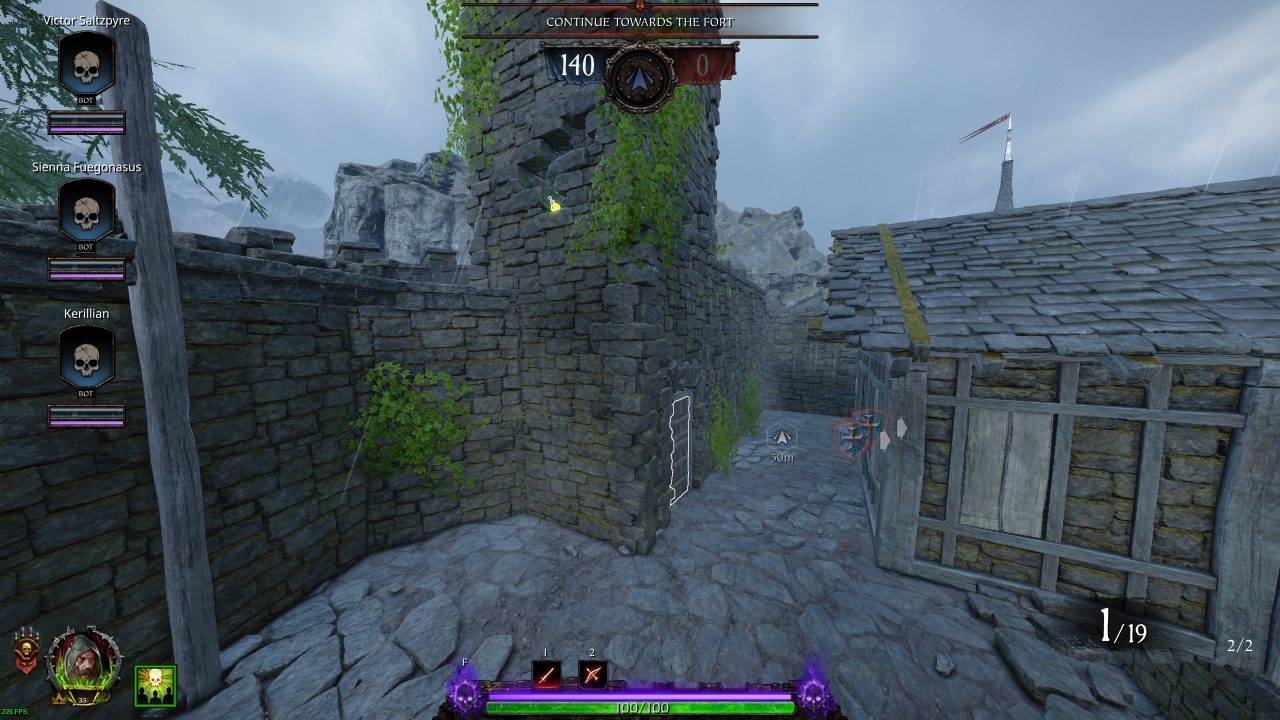
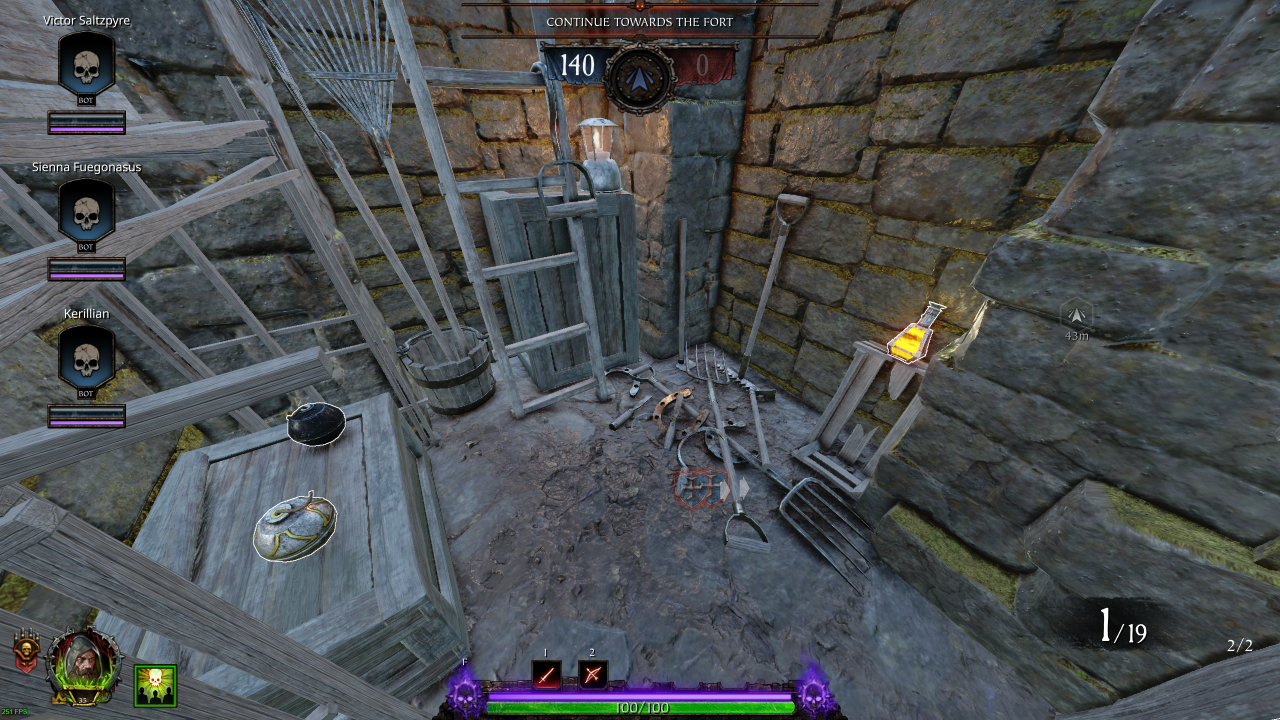
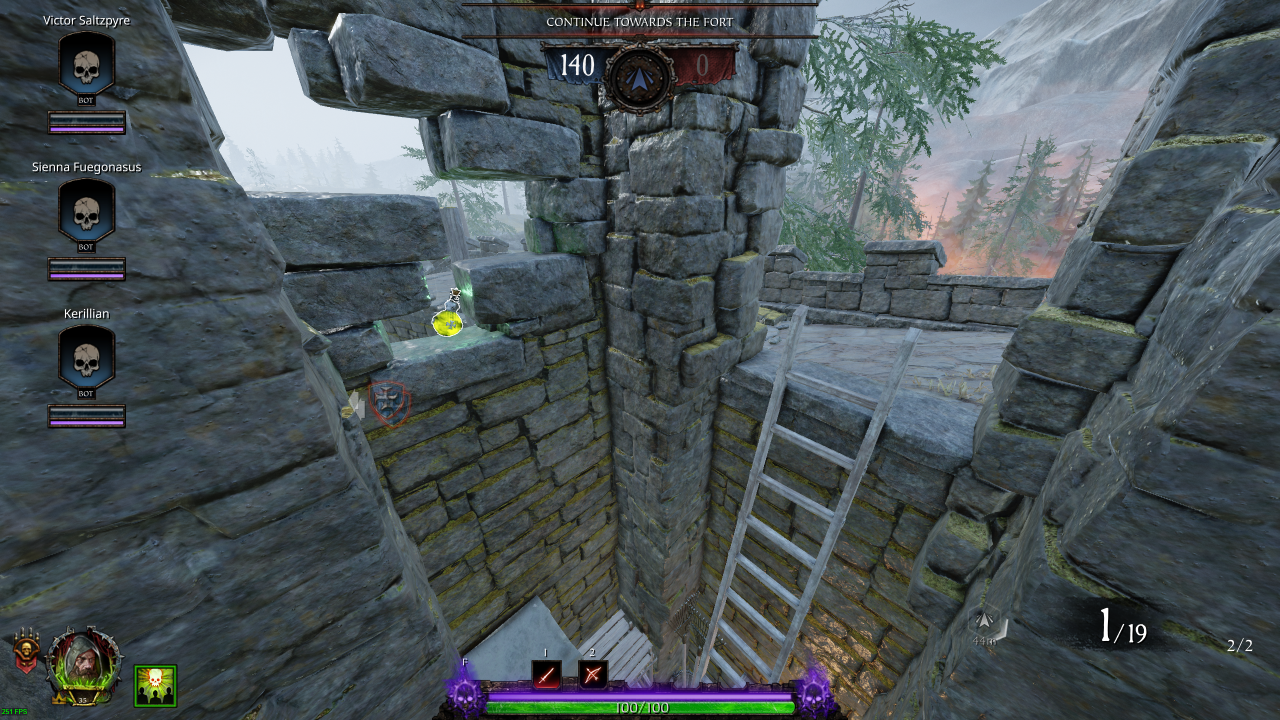
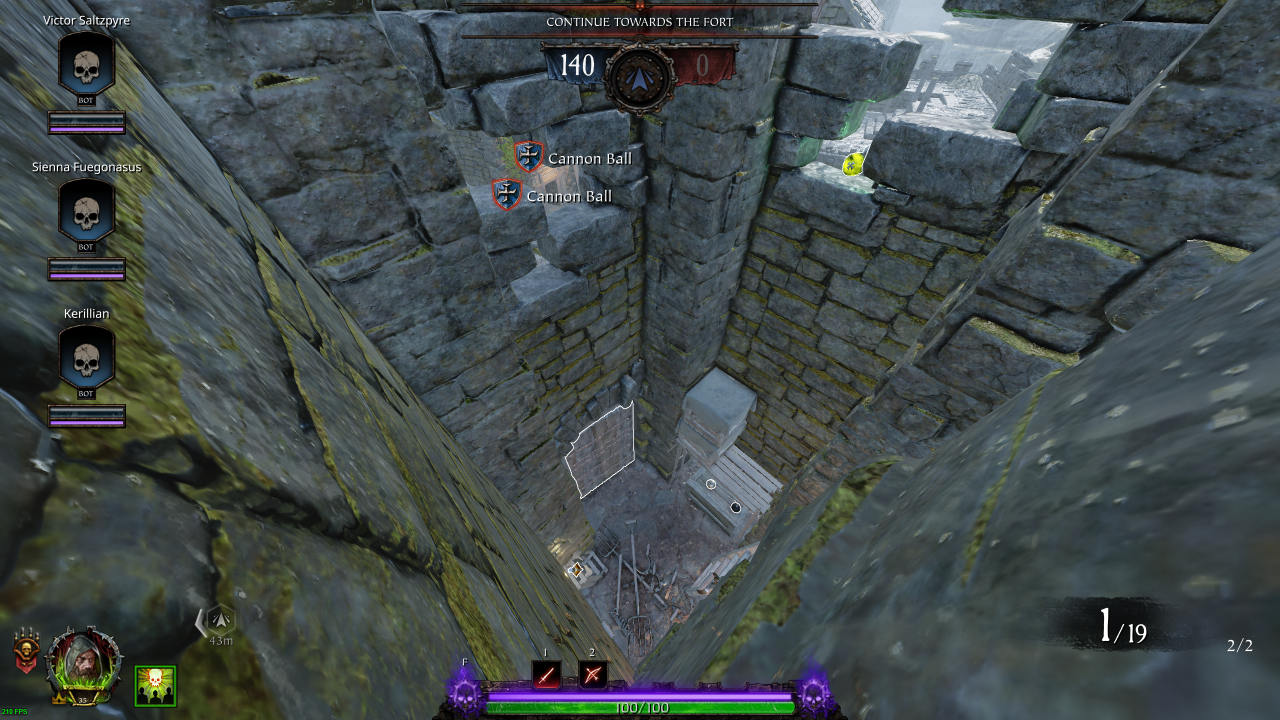
Section 4: Inner Courtyard → Bridge of Shadows
No more loot after leaving the Inner Courtyard
Engines of War
Total Items
Round 1
Healing: 7Draughts: 2Kits: 5 Bombs: 5
Explosive: 3Fire: 2 Potions: 9
Ammo: 10Pouches: 8Crates: 2 Barrels: 9
Explosive: 6Fire: 3
Round 2
Healing: 9Draughts: 5Kits: 4 Bombs: 6
Explosive: 4Fire: 2 Potions: 12
Ammo: 16Pouches: 15Crates: 1 Barrels: 7
Explosive: 2Fire: 5
Round 3
Healing: 5Draughts: 2Kits: 3 Bombs: 4
Explosive: 2Fire: 2 Potions: 5
Ammo: 7Pouches: 6Crates: 1 Barrels: 2
Explosive: 0Fire: 2
Round 1
Section 0: Spawn Room
Bombs: 2 (Explosive: 2)Potions: 4
Barrels: 2 (Fire)
Section 1: Spawn Room → End of 1st Objective
• Ammo: 1 (Crate)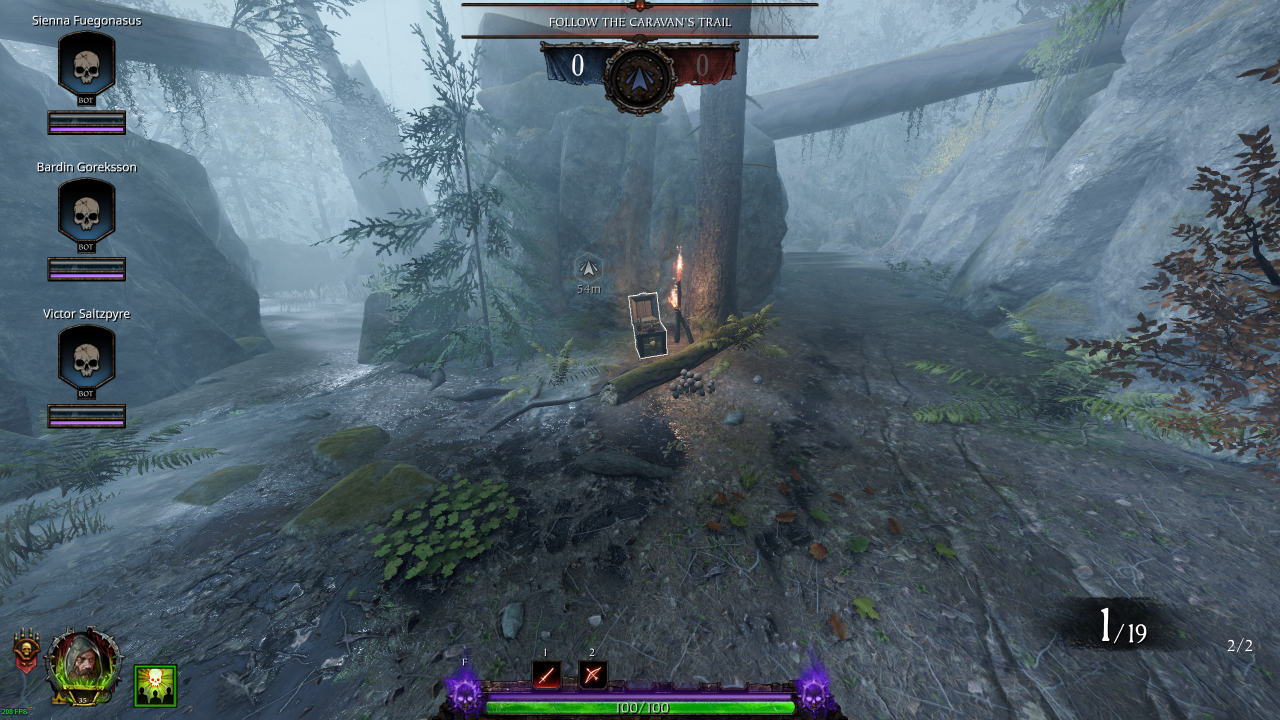
• Potions: 1
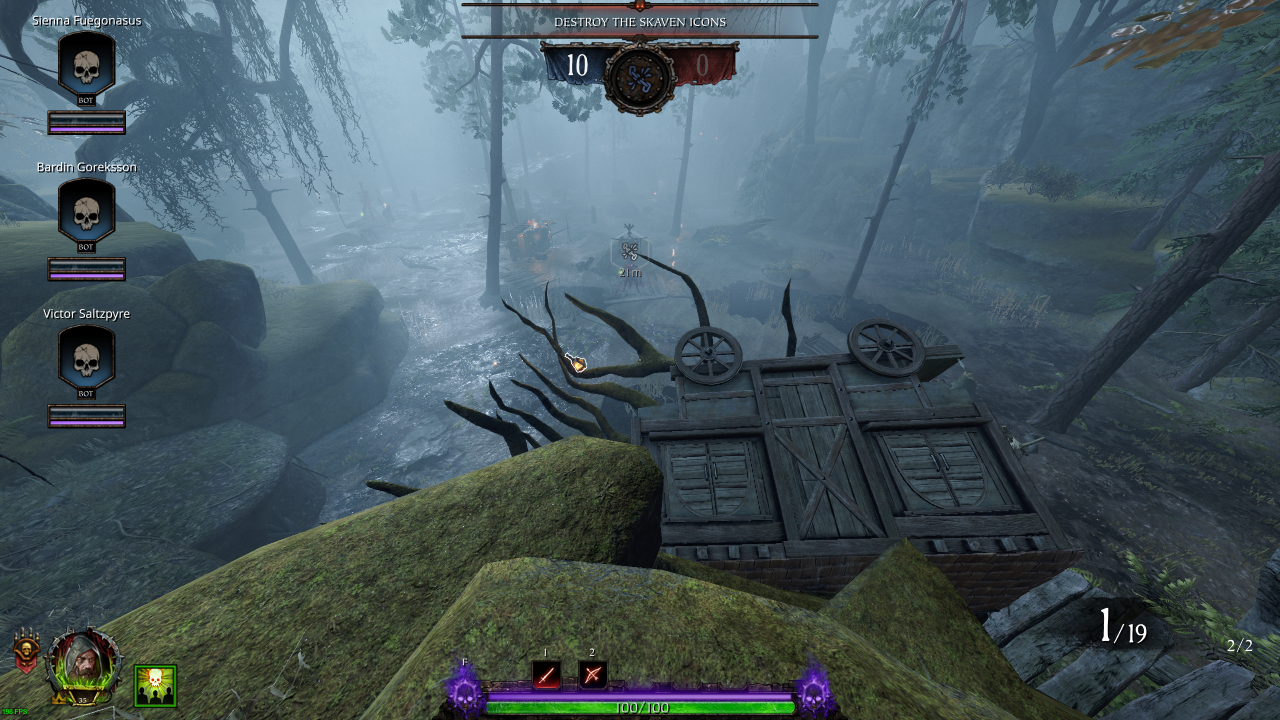
• Ammo: 1 (Pouch)
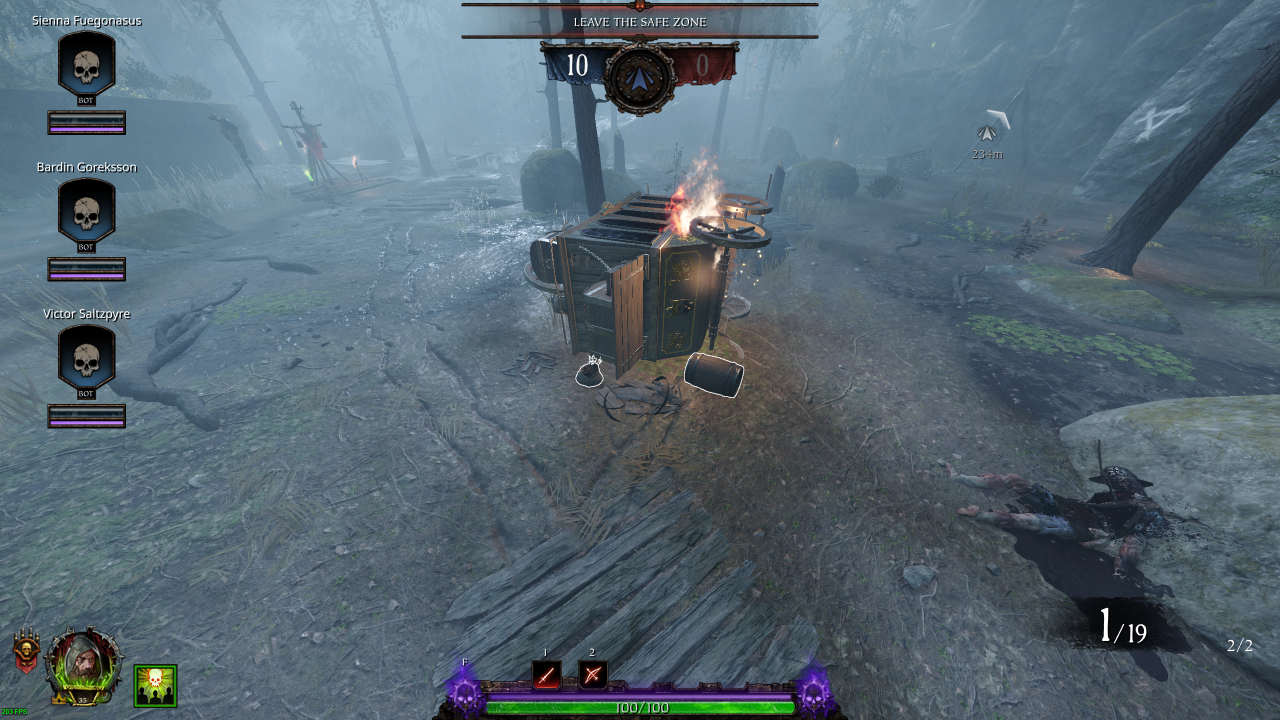
• Ammo: 1 (Pouch)
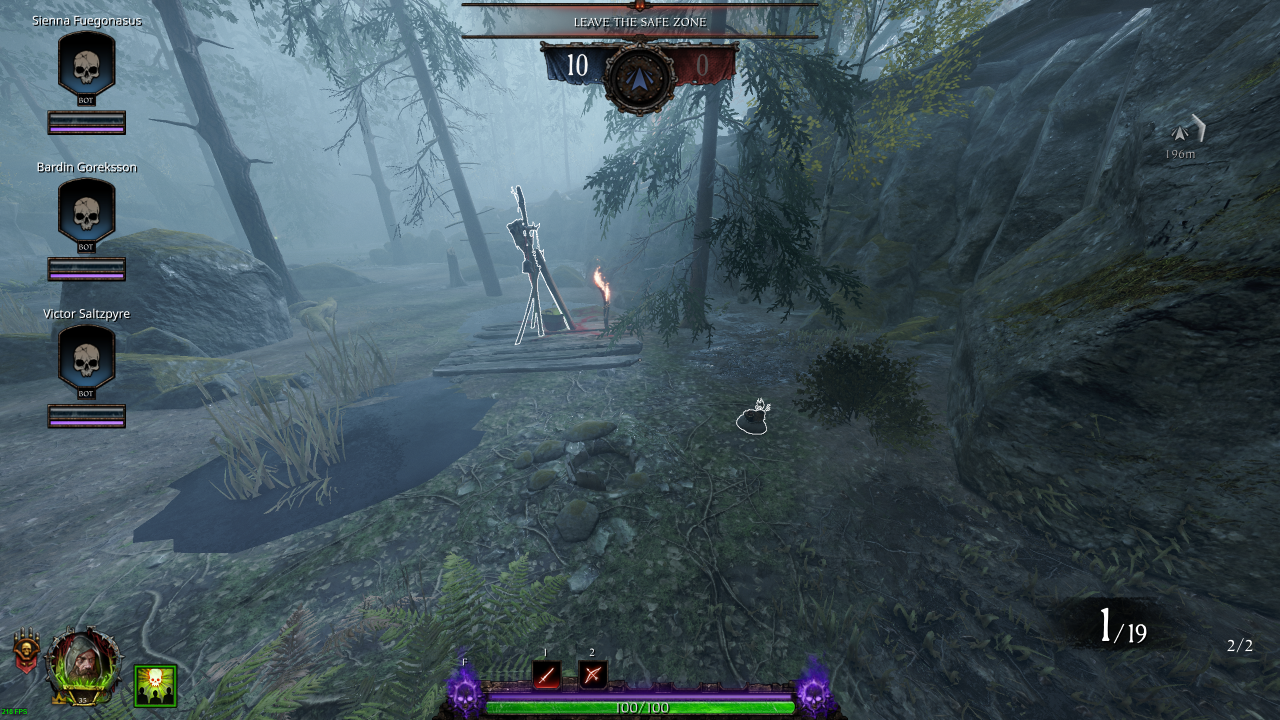
• Healing: 1 (Kit)
• Ammo: 1 (Pouch)
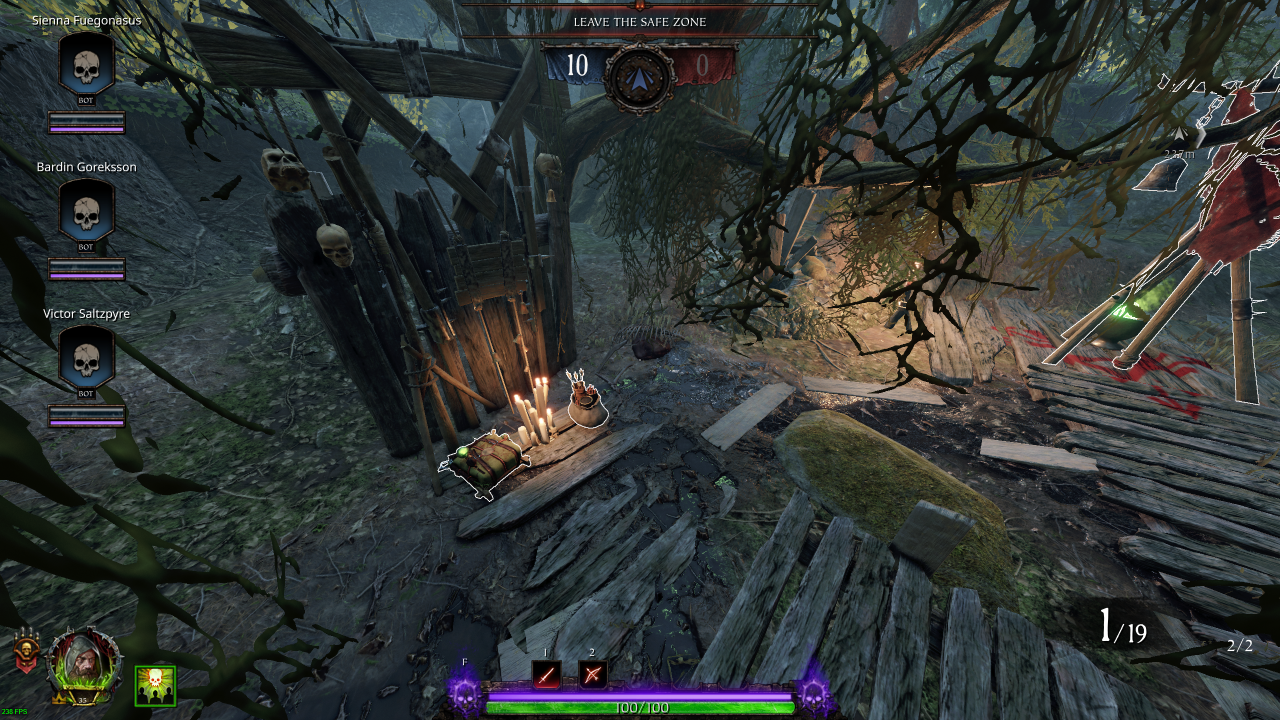
• Healing: 1 (Kit)
• Potions: 1
• Ammo: 1 (Pouch)
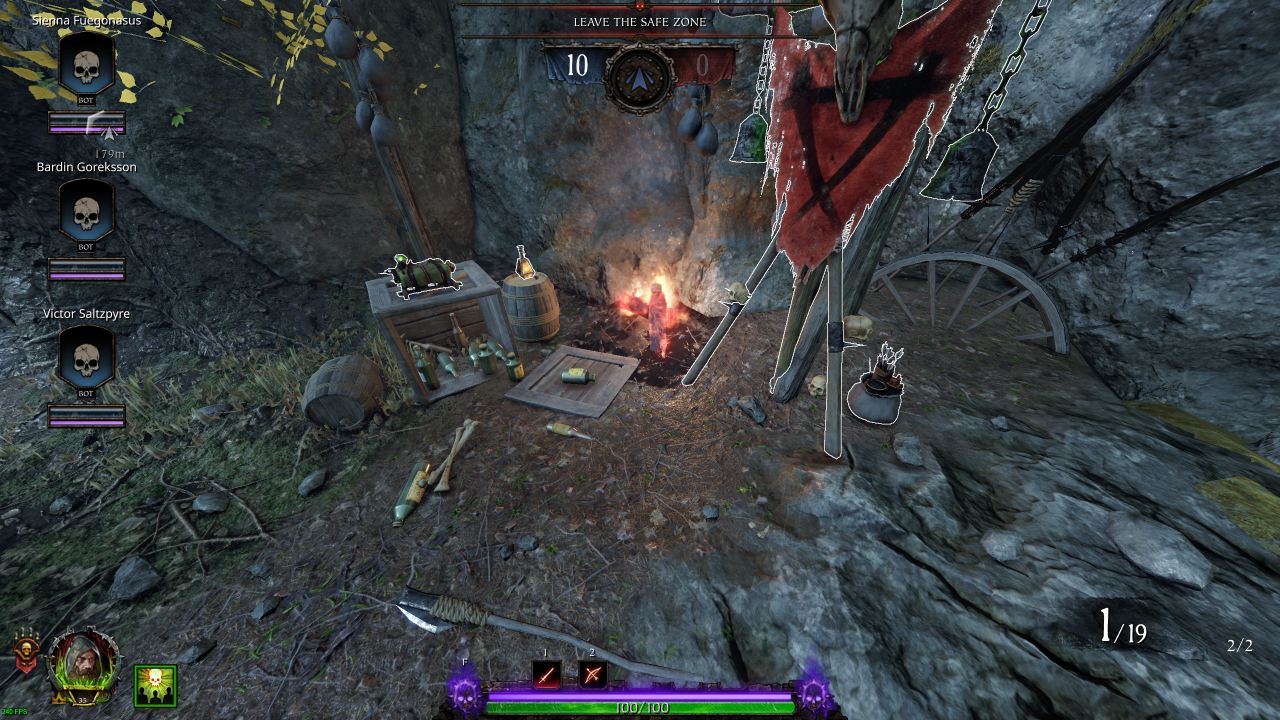
Section 2: Bridge Area
• Bombs: 1 (Explosive)• Potions: 1
• Ammo: 1 (Pouch)
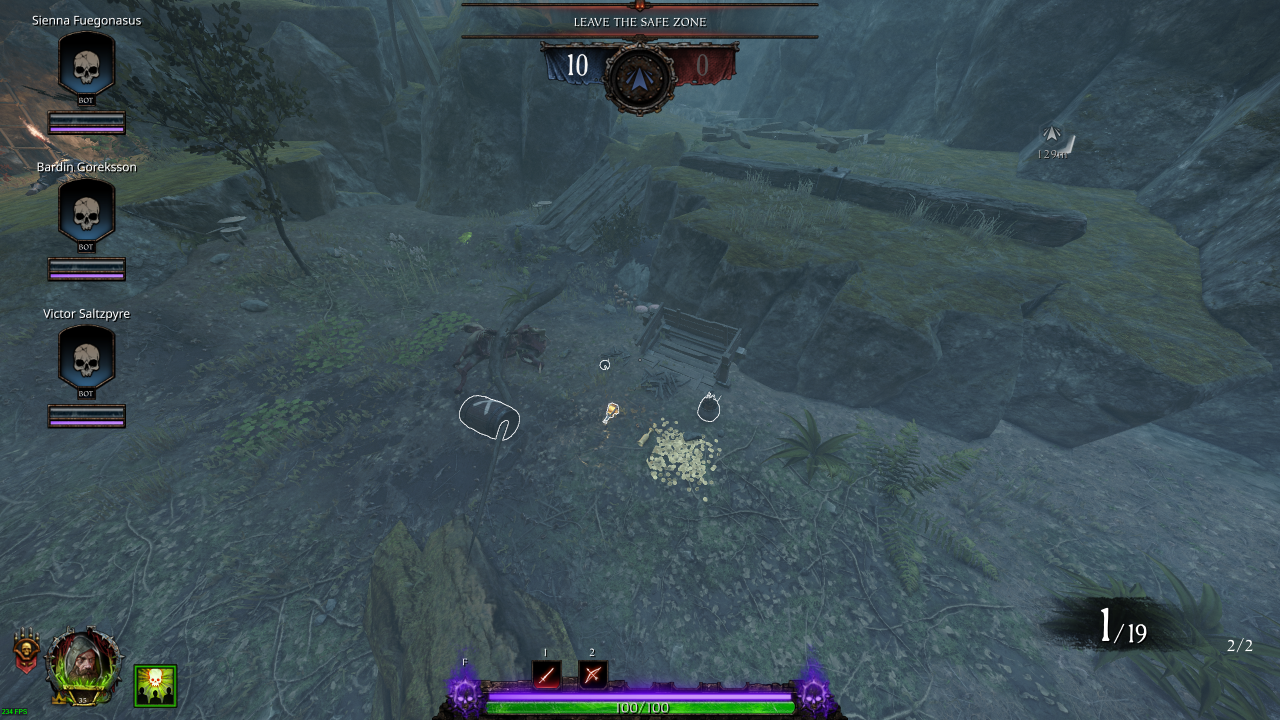
• Healing: 1 (Draught)
• Ammo: 1 (Pouch)
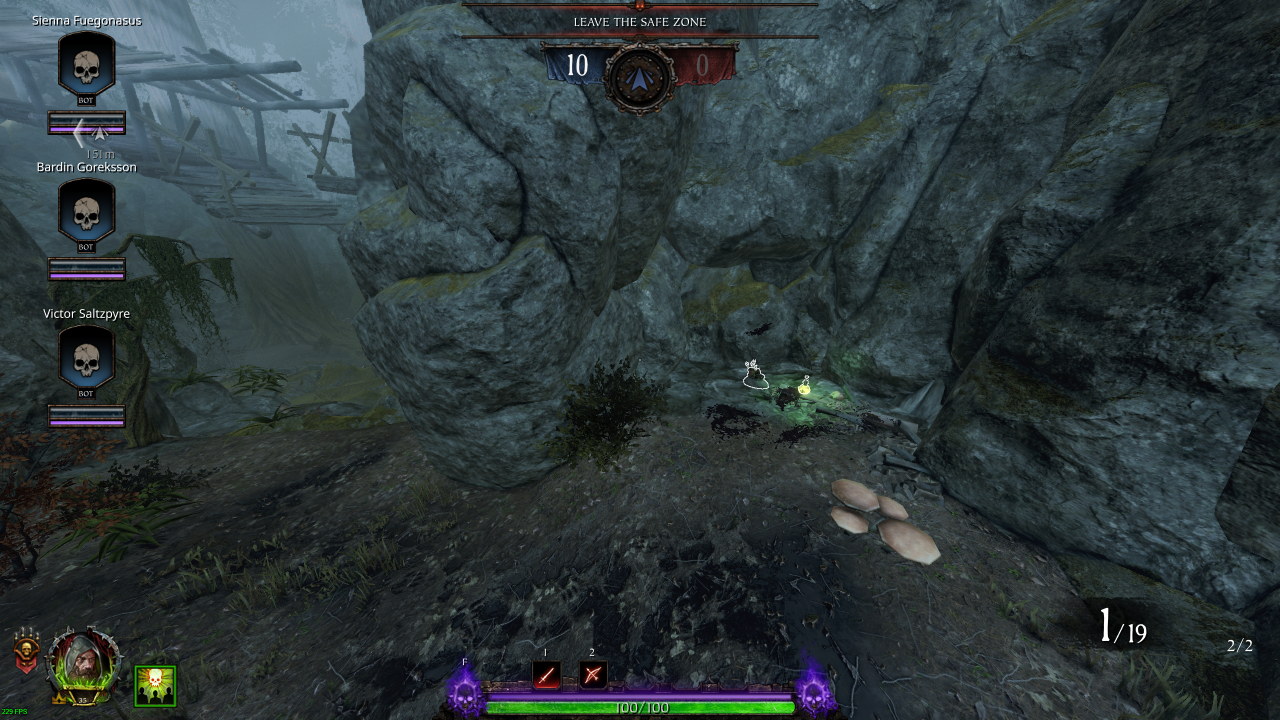
Section 3: After Bridge
• Healing: 1 (Draught)• Ammo: 1 (Crate)
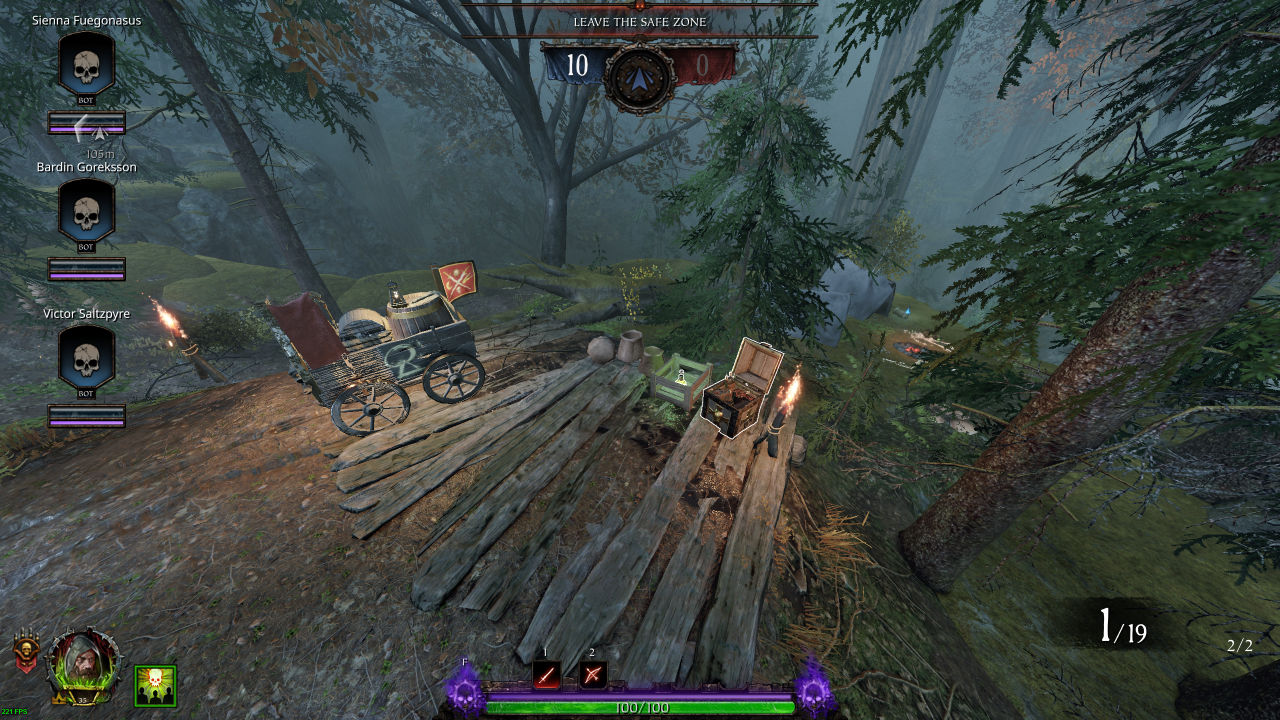
• Healing: 1 (Kit)
• Potions: 1
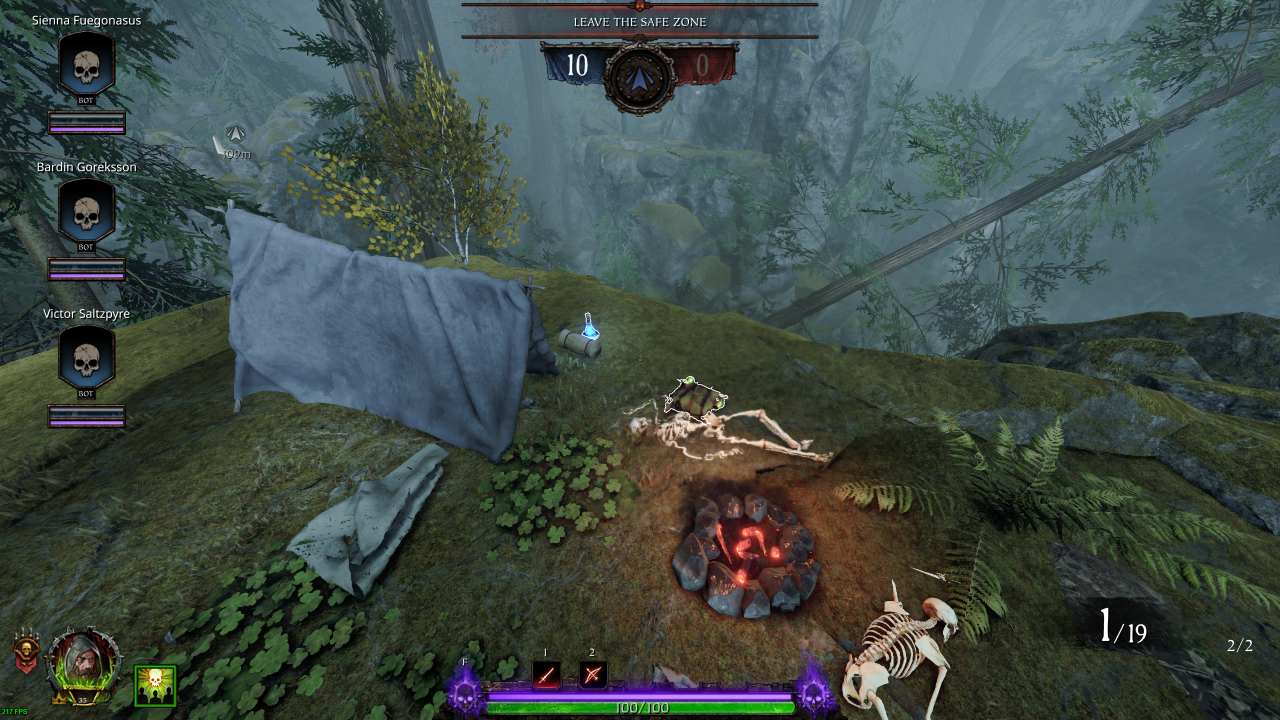
• Healing: 1 (Kit)
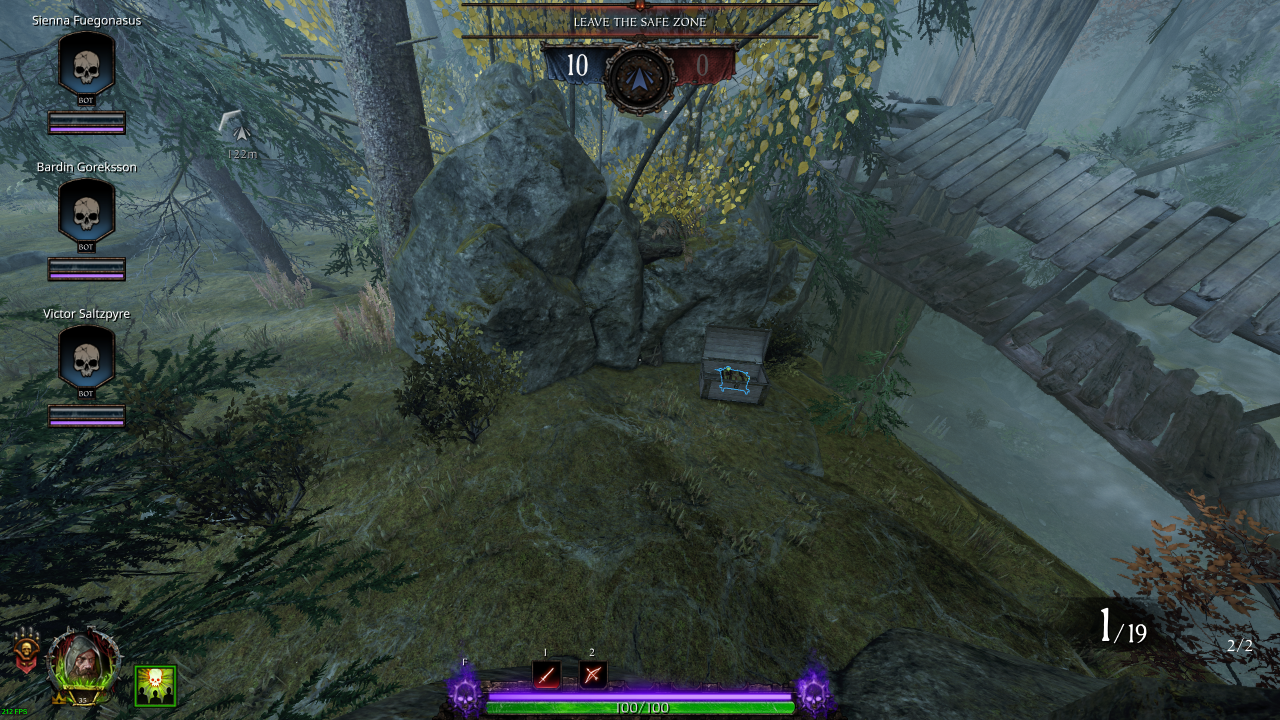
• Healing: 1 (Kit)
• Bombs: 1 (Explosive / Fire)
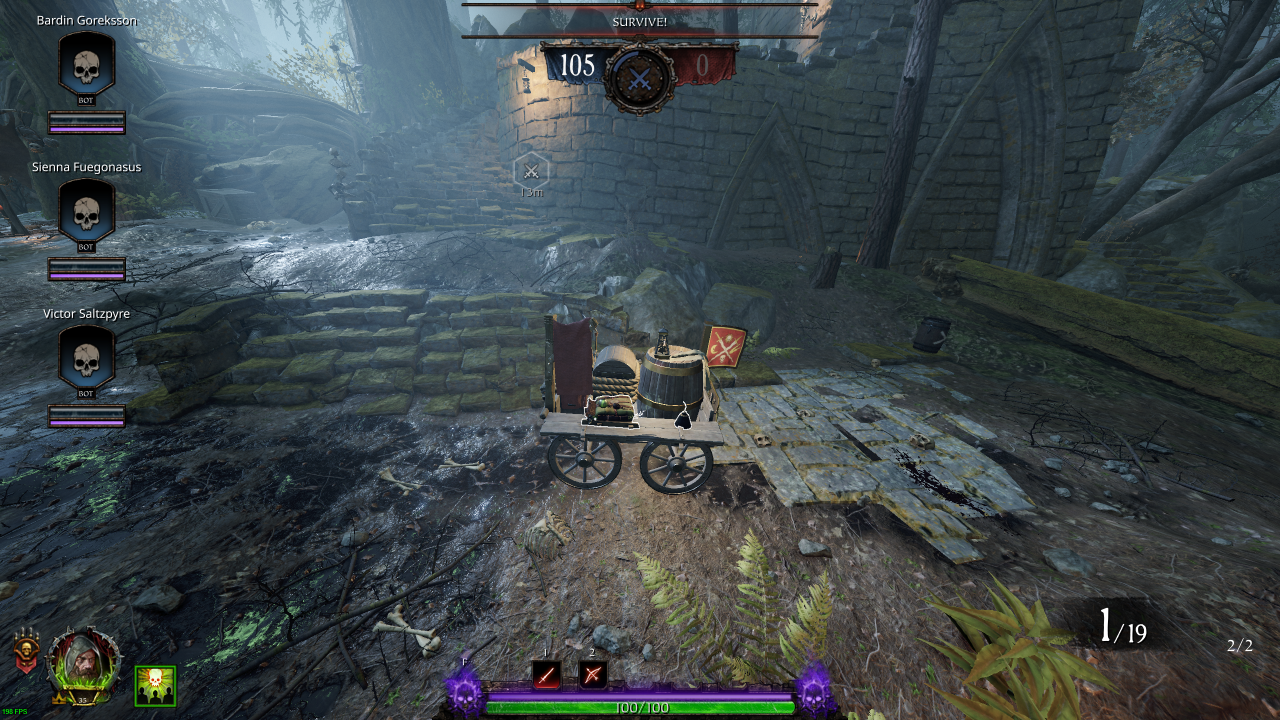
• Bombs: 1 (Fire)
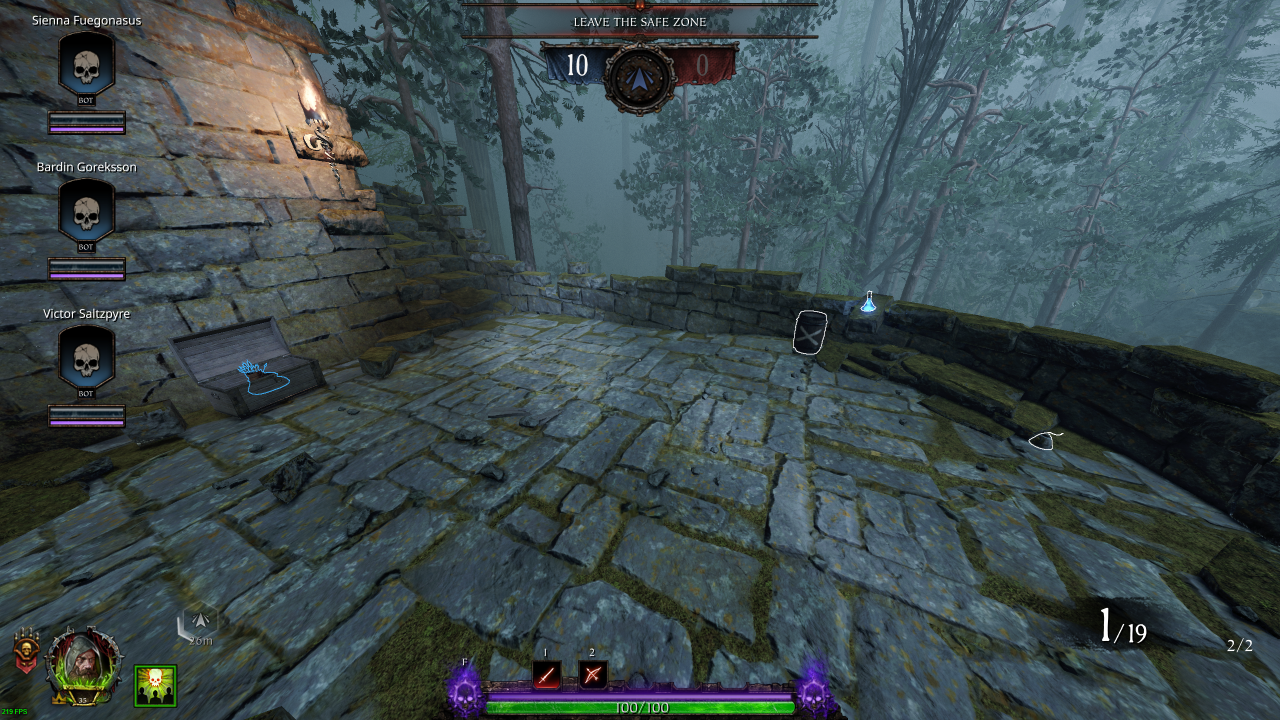
• Potions: 1
• Ammo: 1 (Pouch)
Round 2
Section 0: Spawn Room
Bombs: 4 (Explosive: 2 / Fire: 2)Potions: 4
Ammo: 1 (Crate)
Section 1: Spawn Room → Doomwheel Event
• Ammo: 1 (Crate)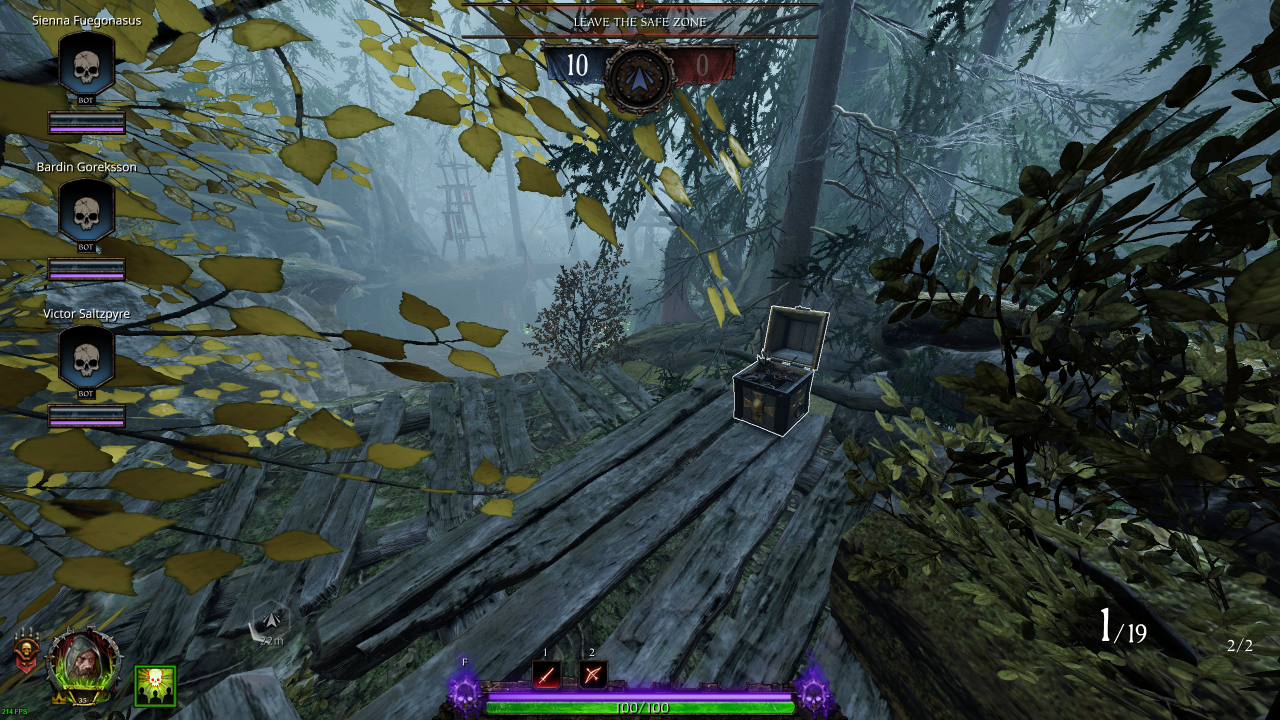
• Healing: 1 (Draught)
• Ammo: 1 (Pouch)
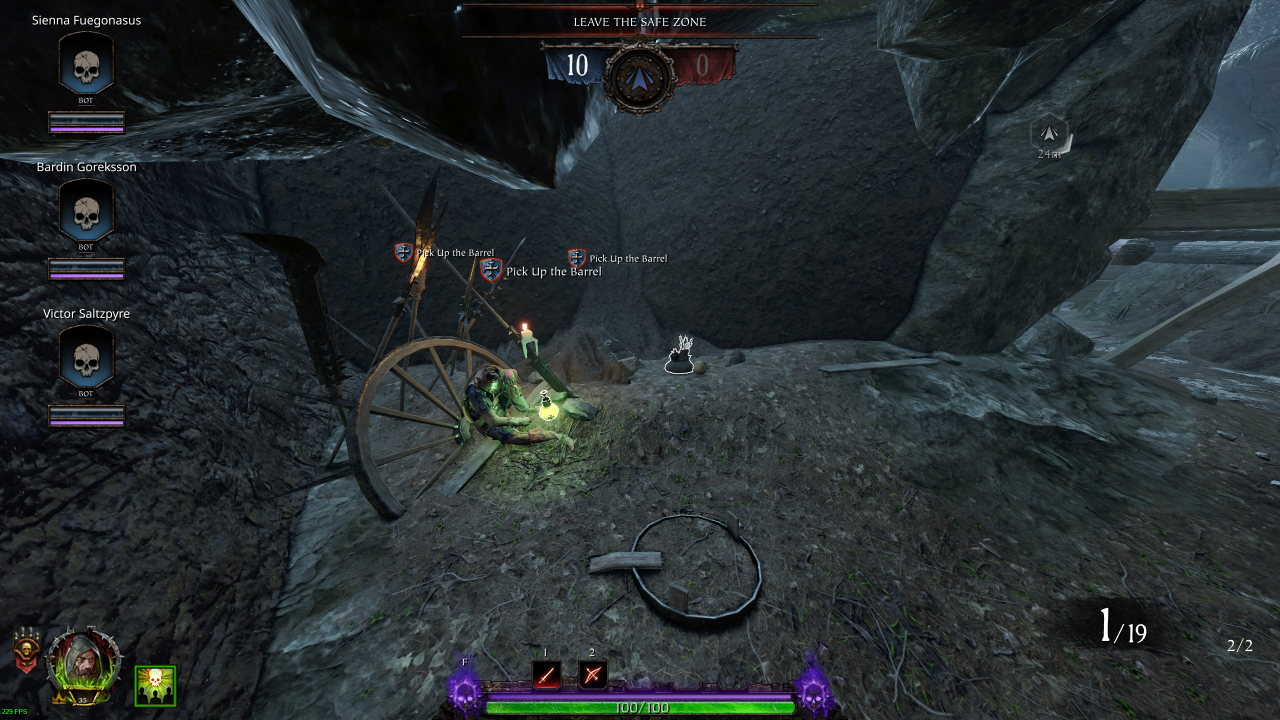
• Potions: 1
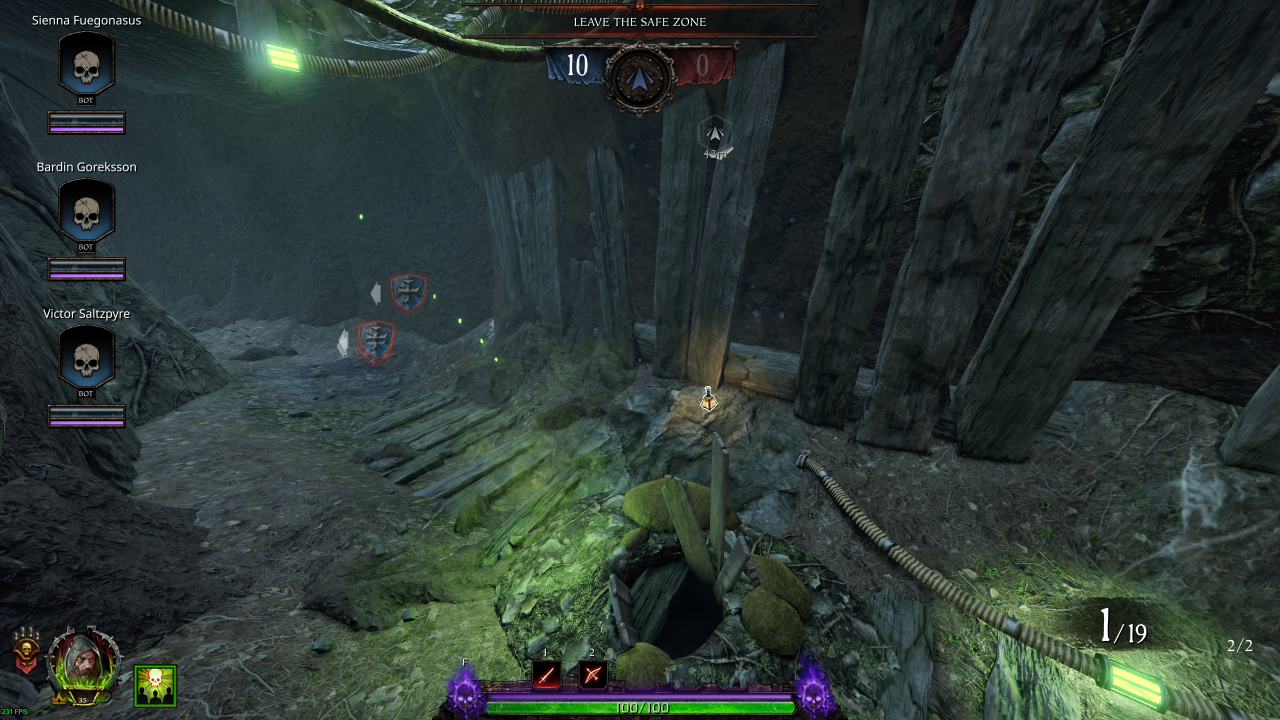
• Ammo: 2 (Pouch)
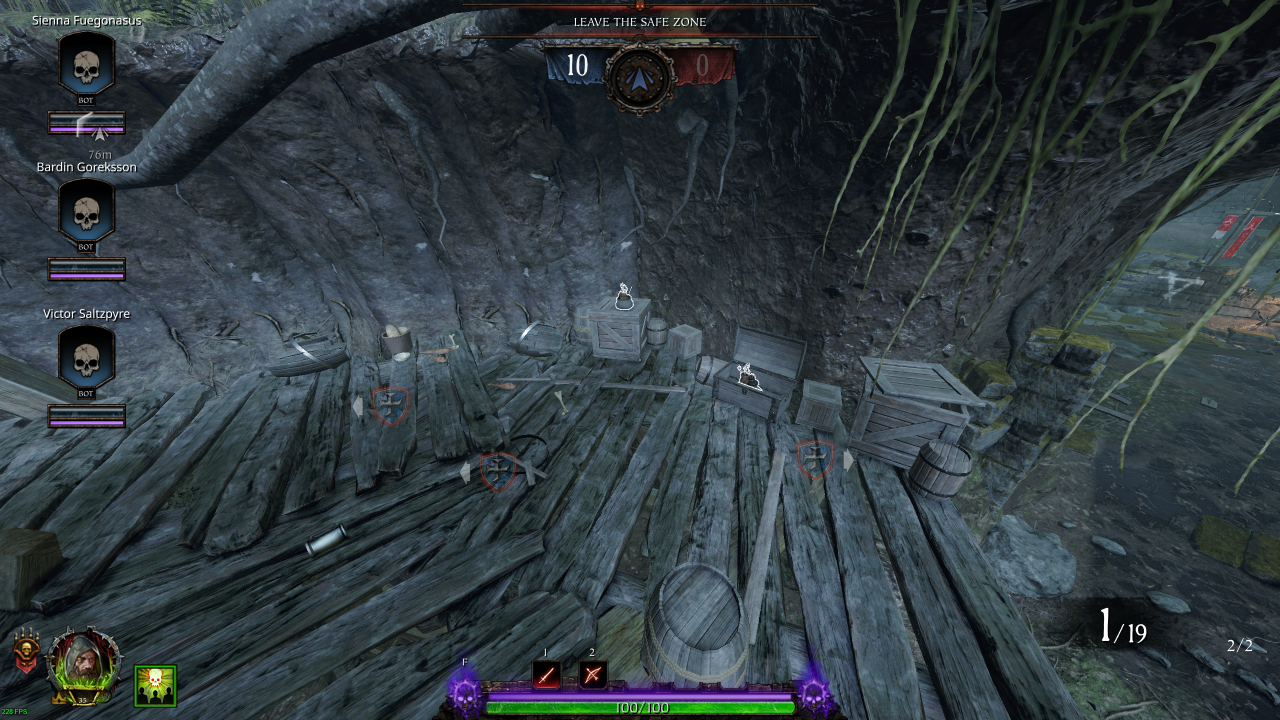
• Ammo: 1 (Pouch)
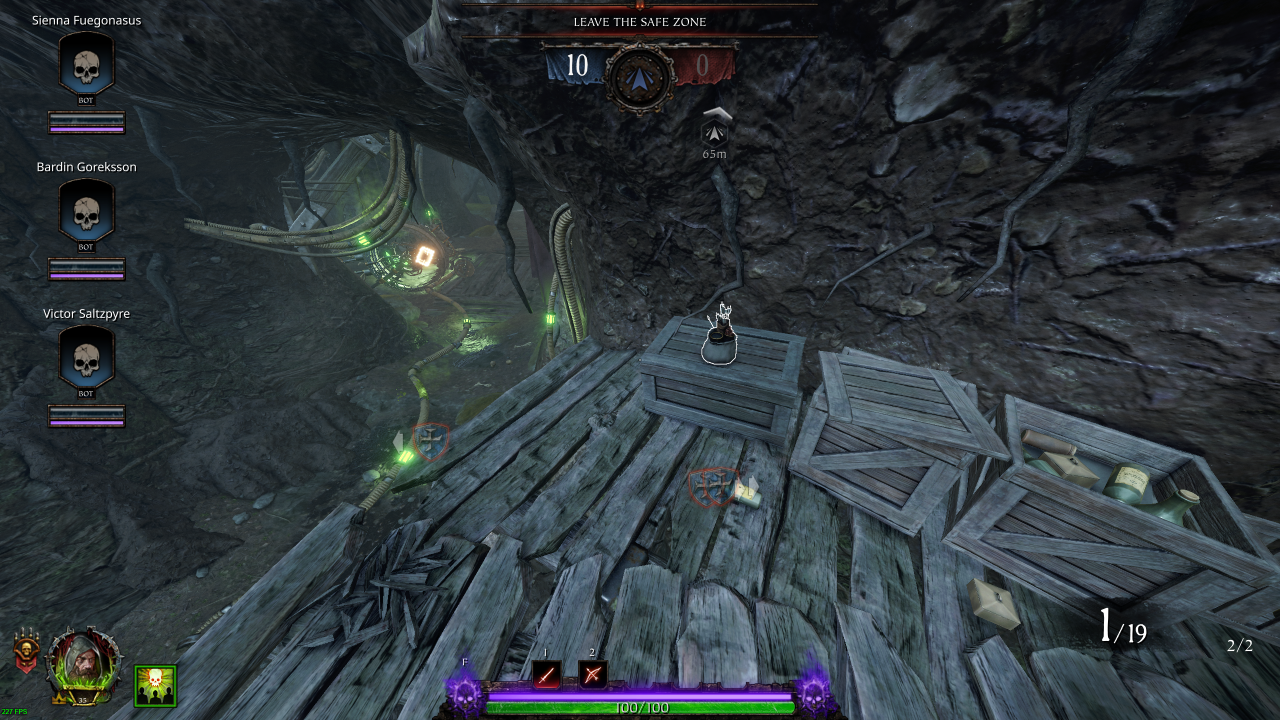
• Ammo: 2 (Pouch)
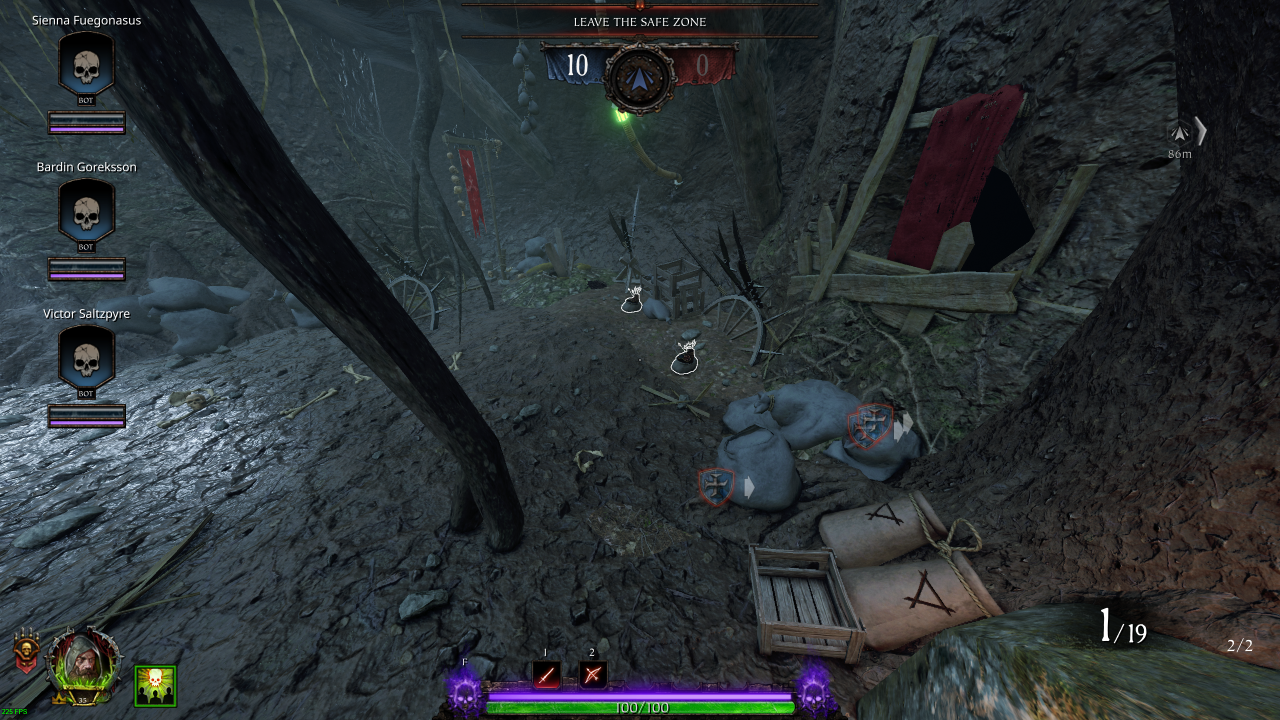
• Healing: 1 (Draught)
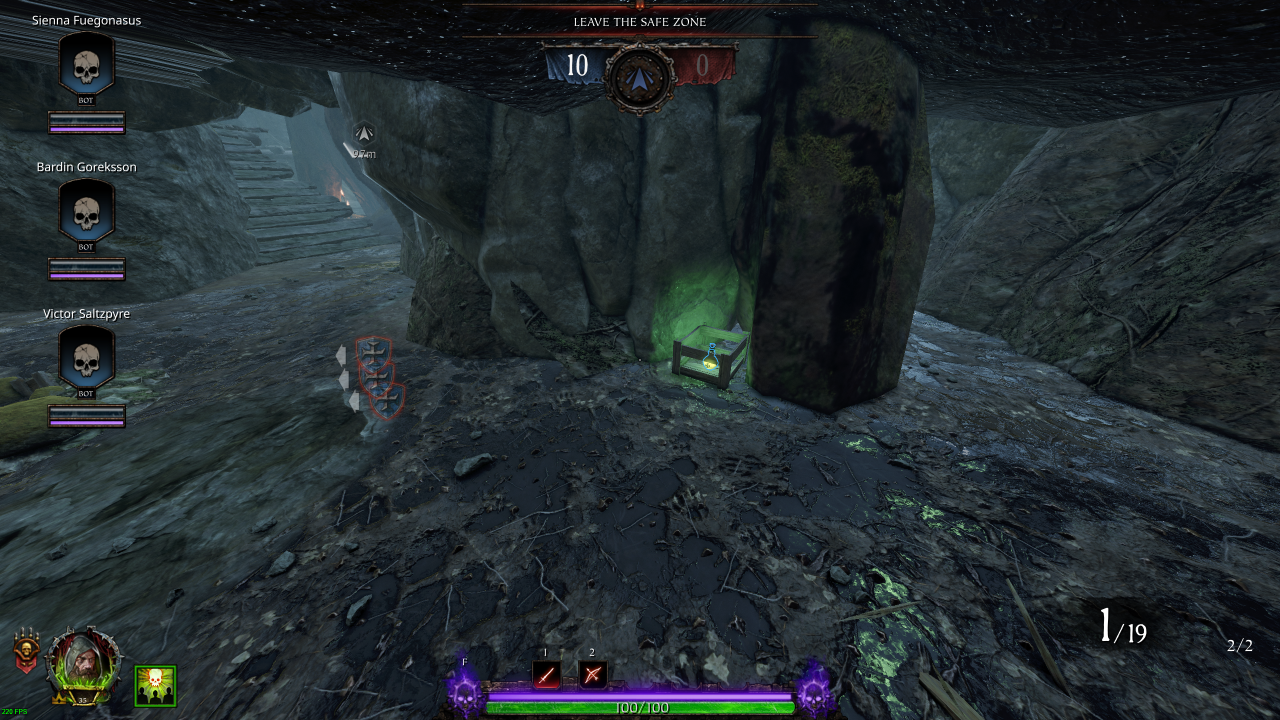
• Ammo: 2 (Pouch)
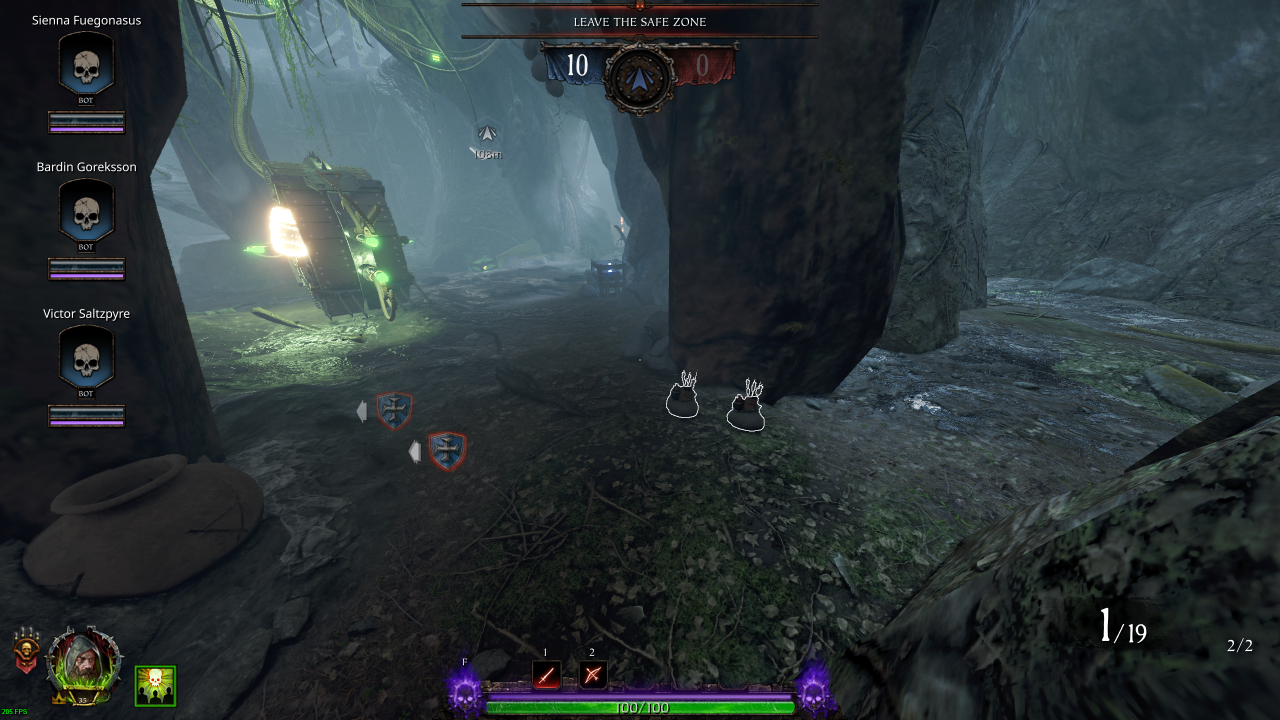
• Healing: 1 (Draught)
• Potions: 1
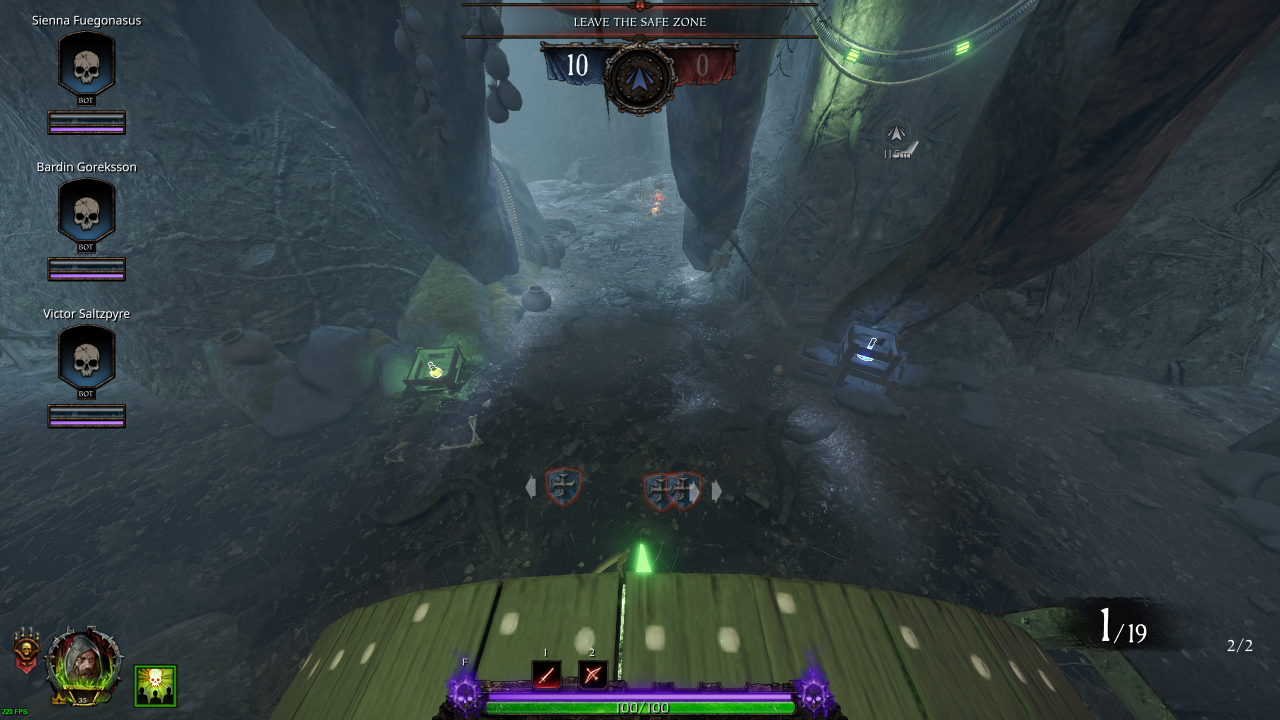
• Ammo: 1 (Pouch)
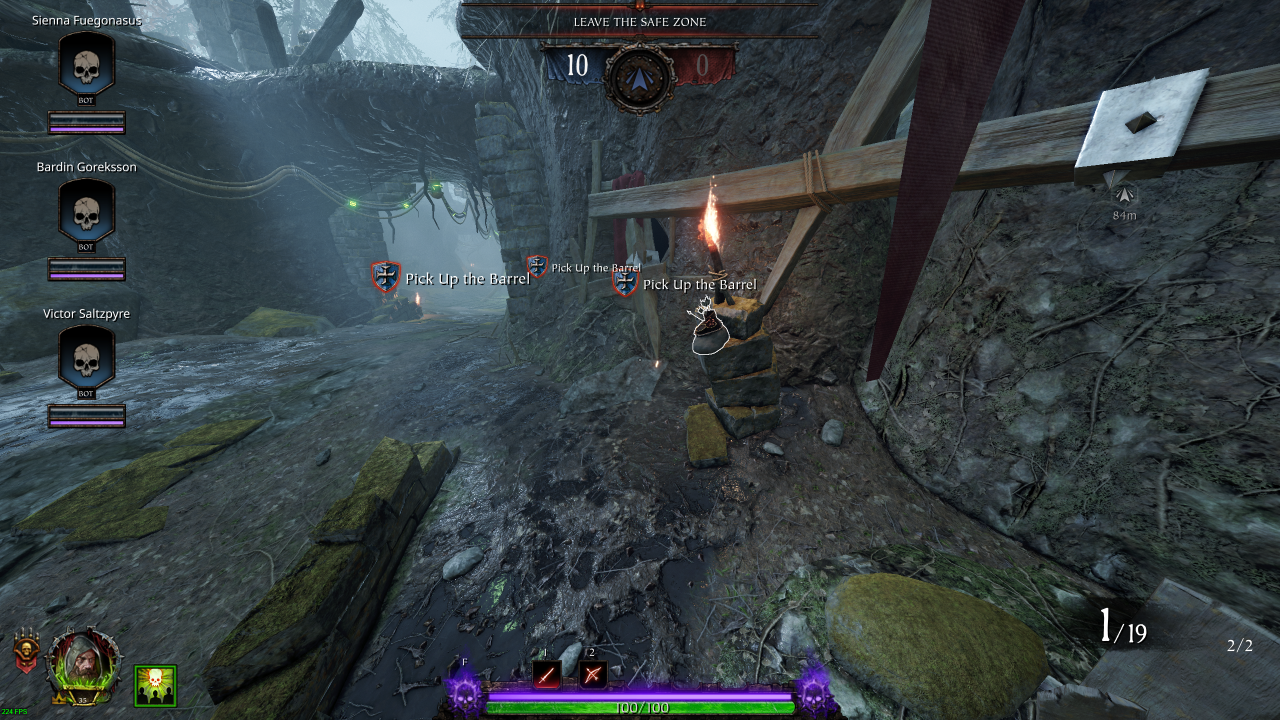
• Healing: 1 (Kit)
• Potions: 1
• Ammo: 1 (Pouch)
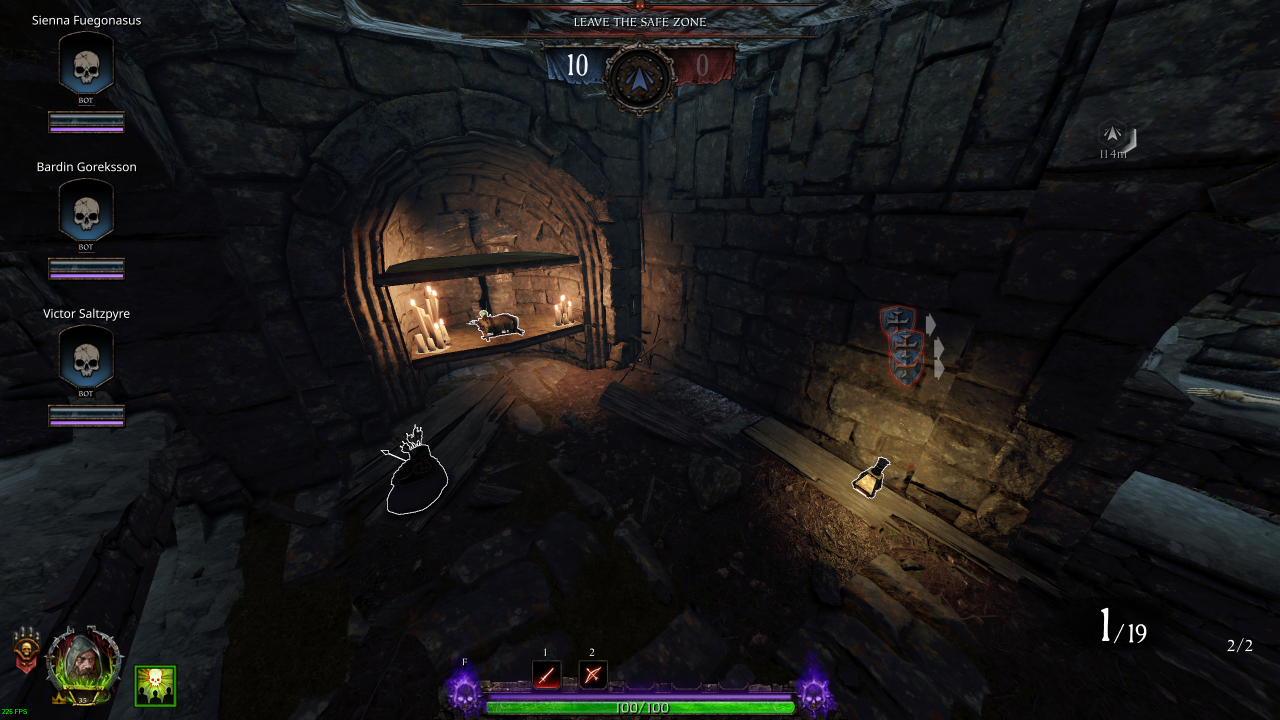
Section 2: After Doomwheels → Gargoyle Heads
• Healing: 1 (Draught / Kit)• Ammo: 2 (Pouch)
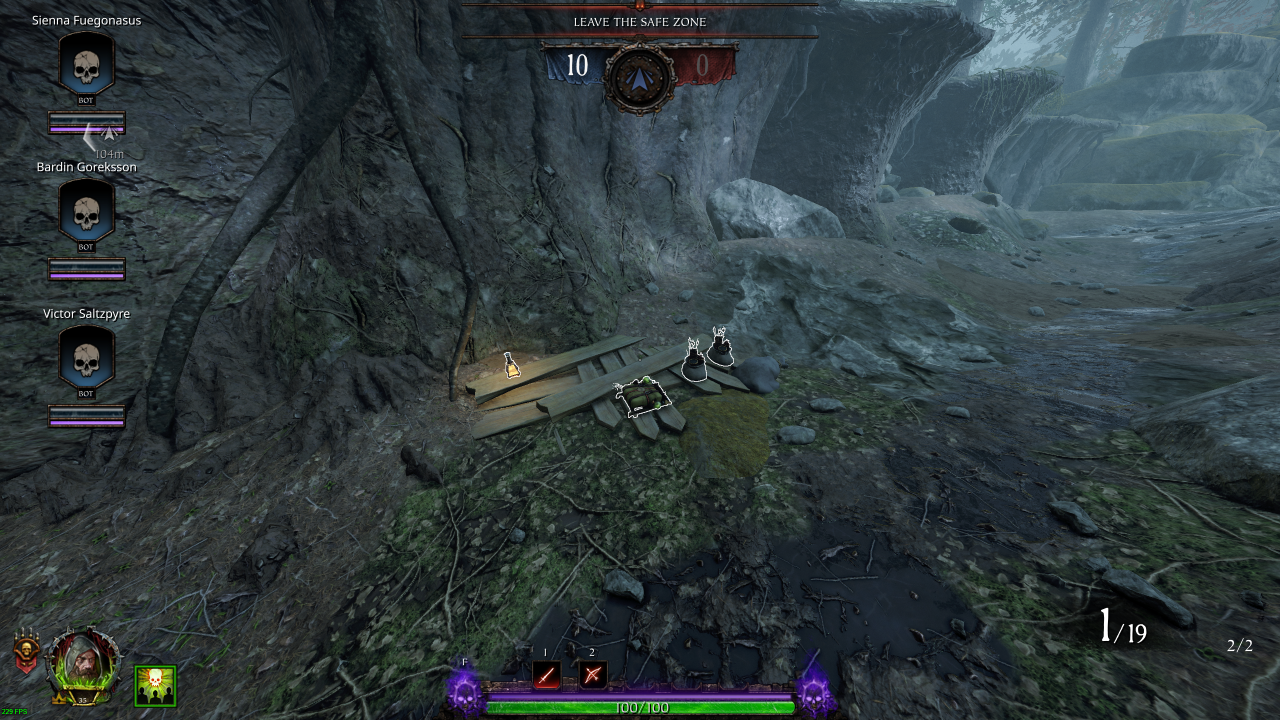
• Healing: 1 (Draught)
• Ammo: 1 (Pouch)
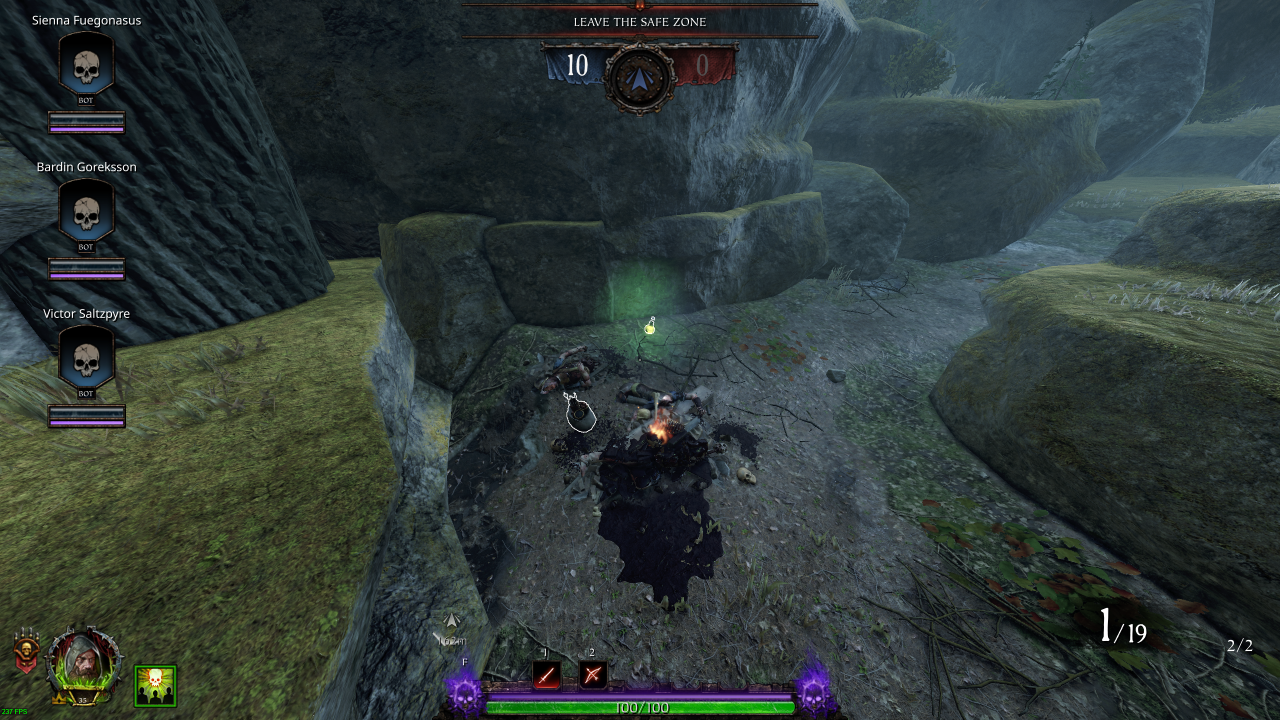
• Potions: 1
• Ammo: 1 (Pouch)
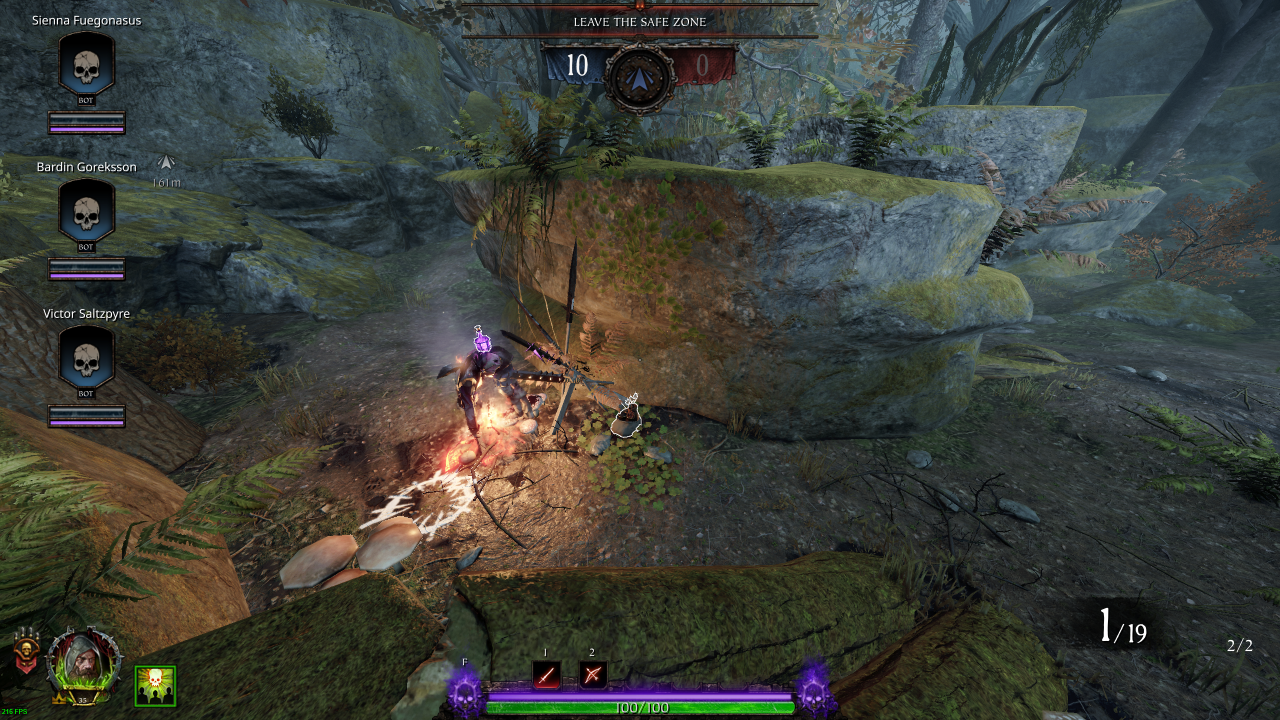
• Healing: 1 (Kit)
• Bombs: 1 (Explosive)
• Ammo: 1 (Pouch)
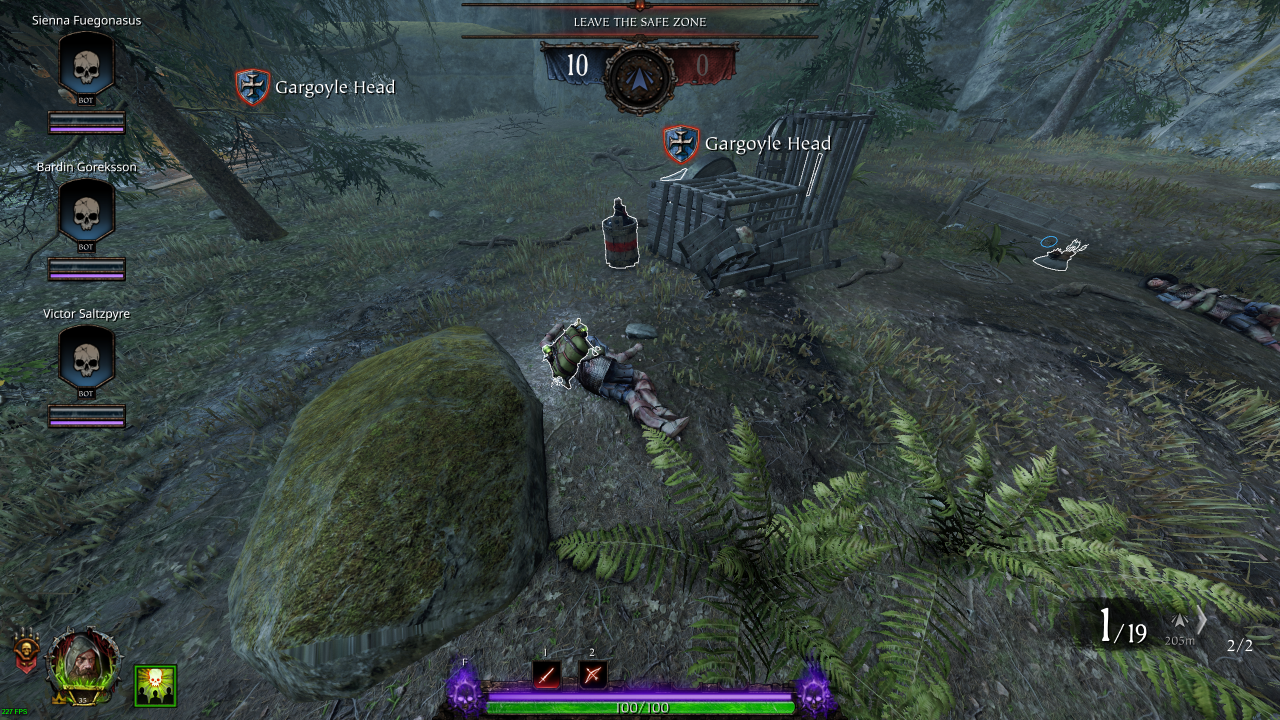
Section 3: Free Prisoner Event
• Potions: 1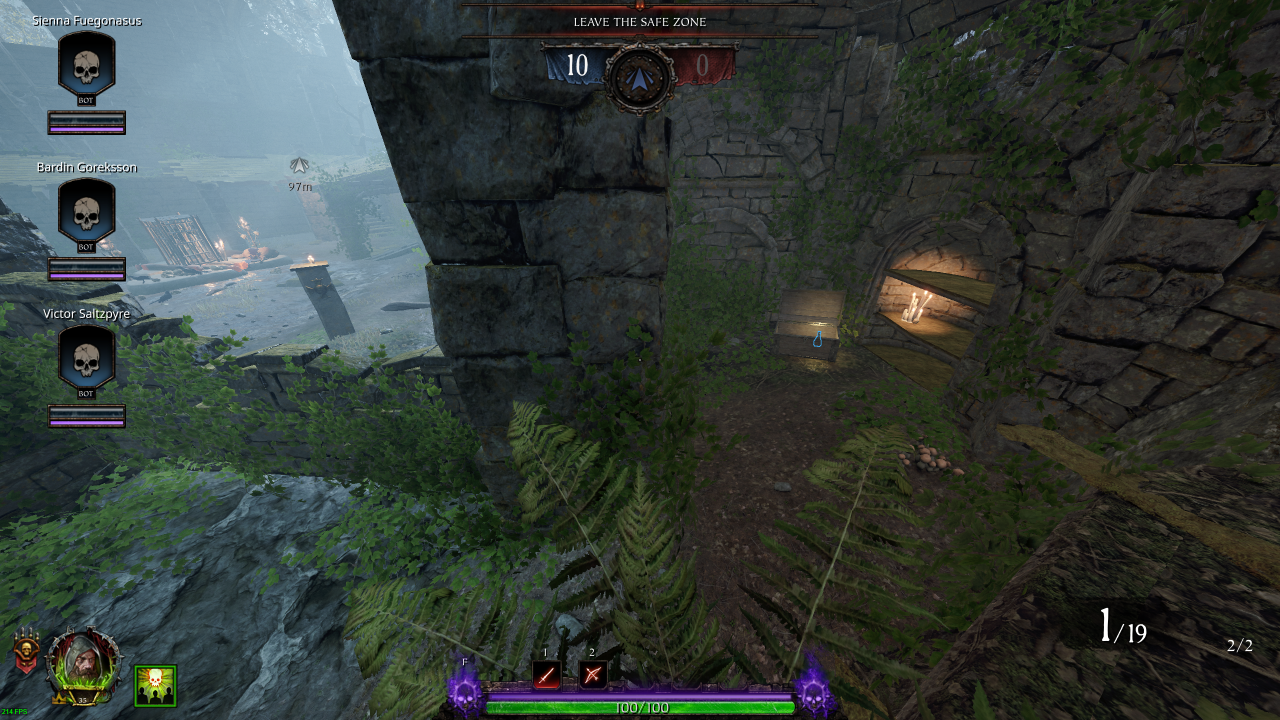
• Healing: 1 (Kit)
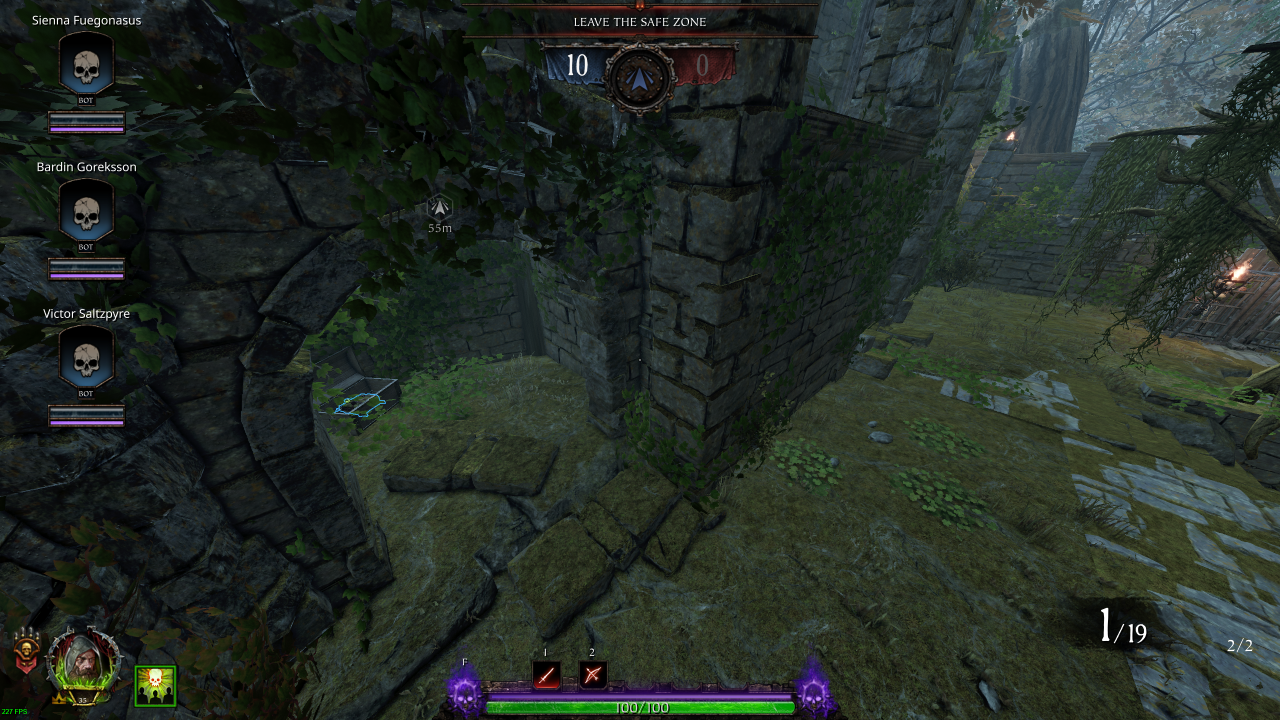
• Potions: 1
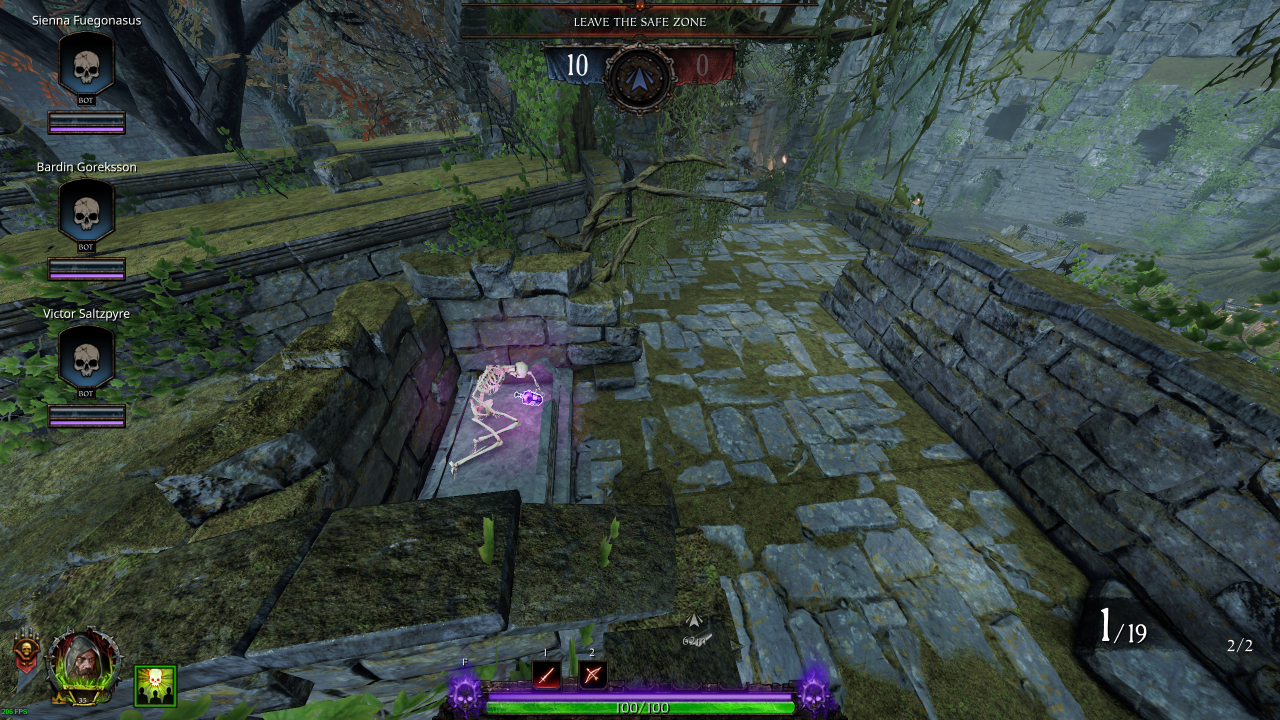
• Bombs: 1 (Explosive)
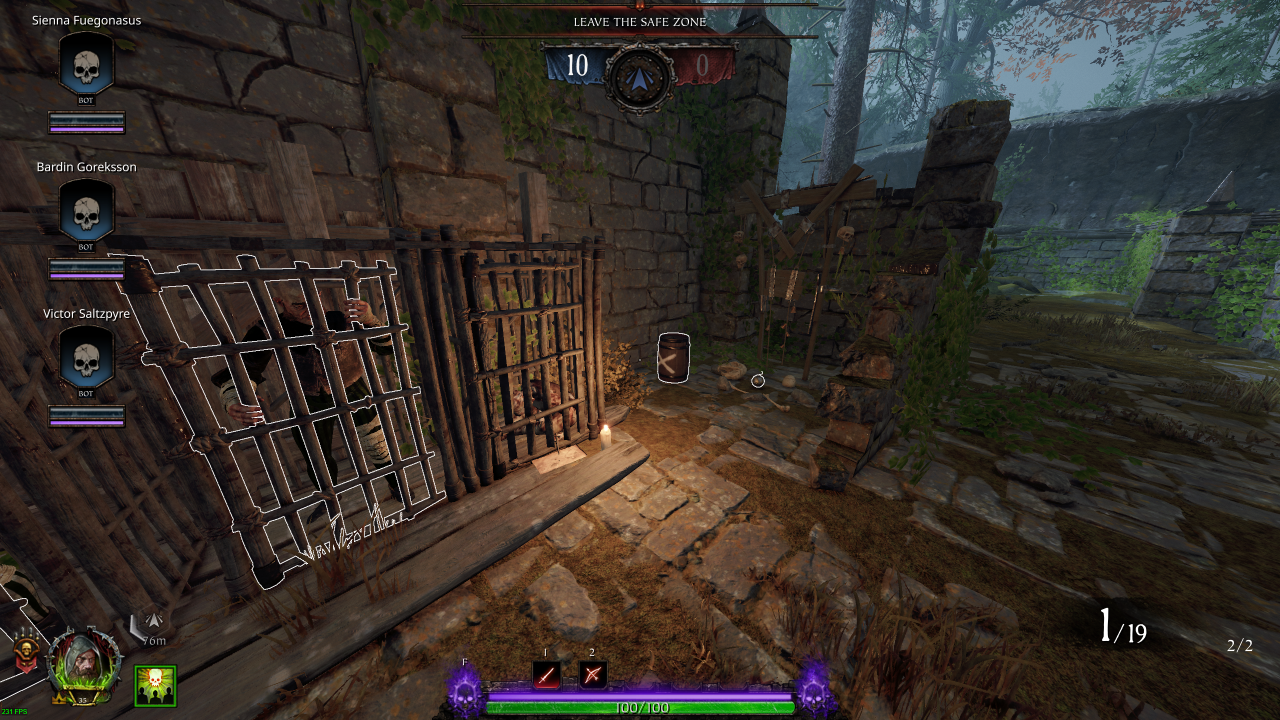
• Healing: 1 (Draught)
• Potions: 1
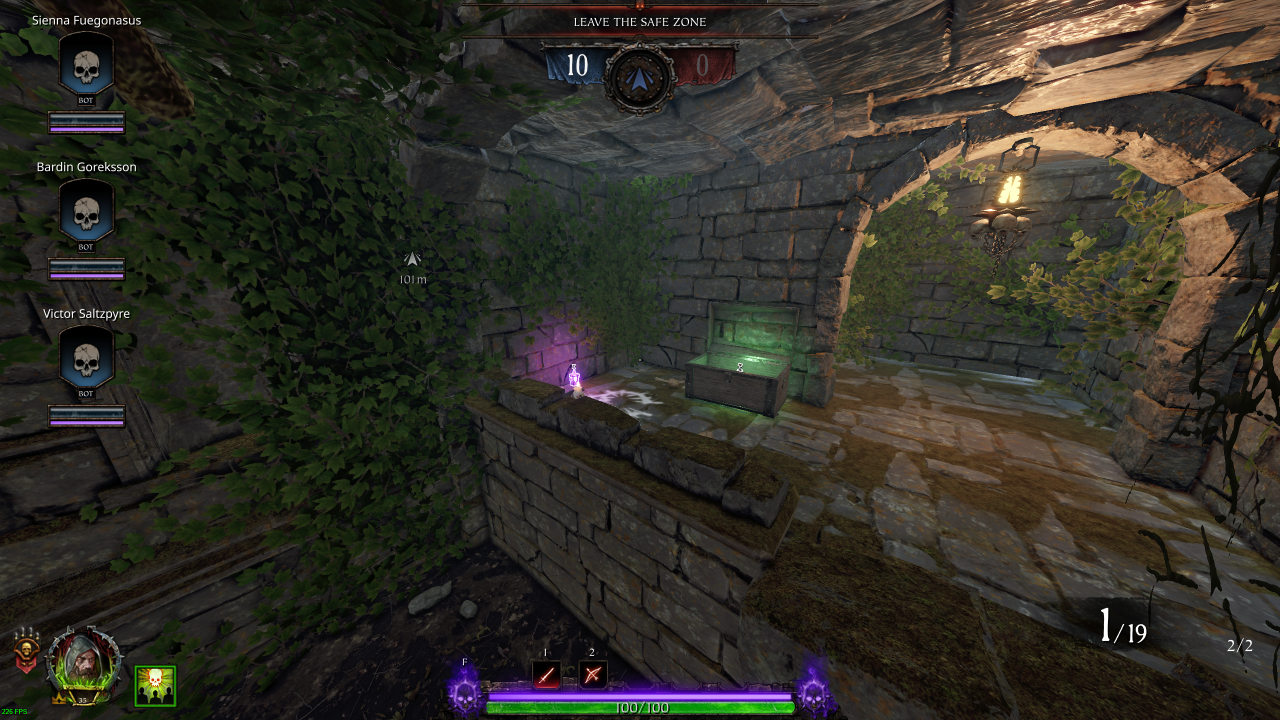
Round 3
Section 0: Spawn Room
Bombs: 1 (Explosive: 1)Potions: 4
Ammo: 1 (Crate)
Barrels: 1 (Fire)
Section 1: Spawn Room → After Hold Event
• Healing: 1 (Kit)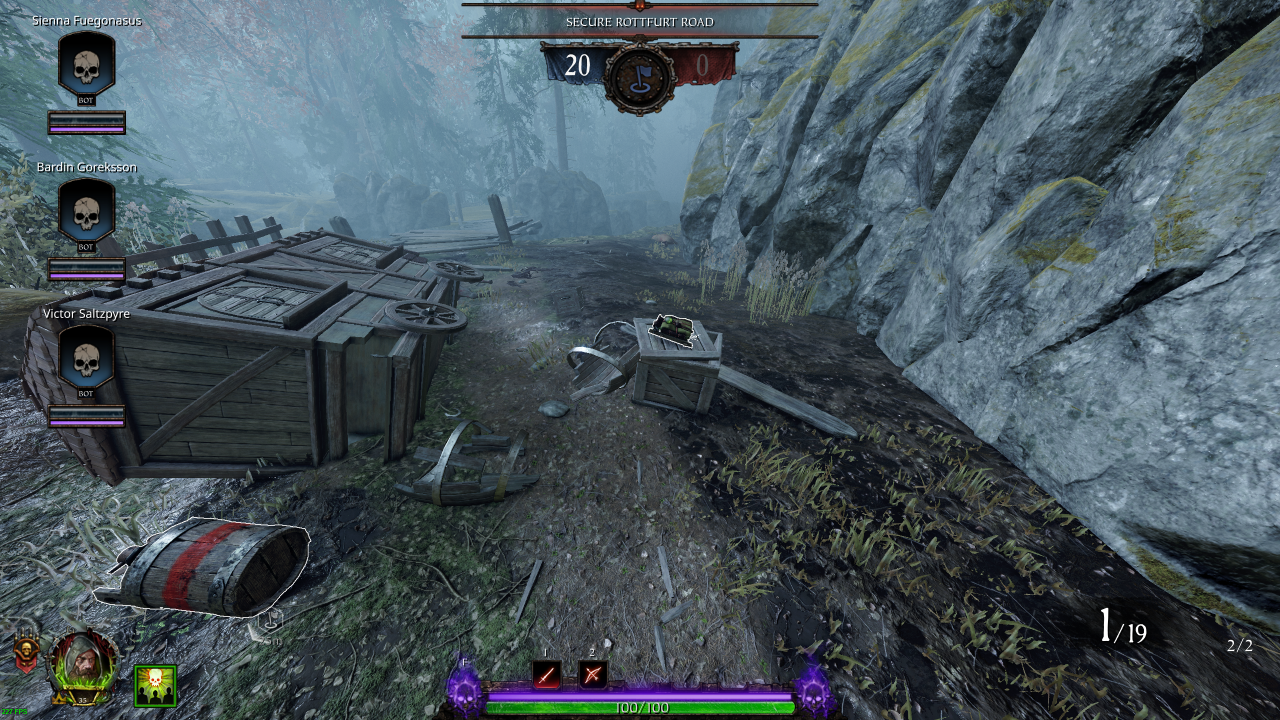
• Potions: 1
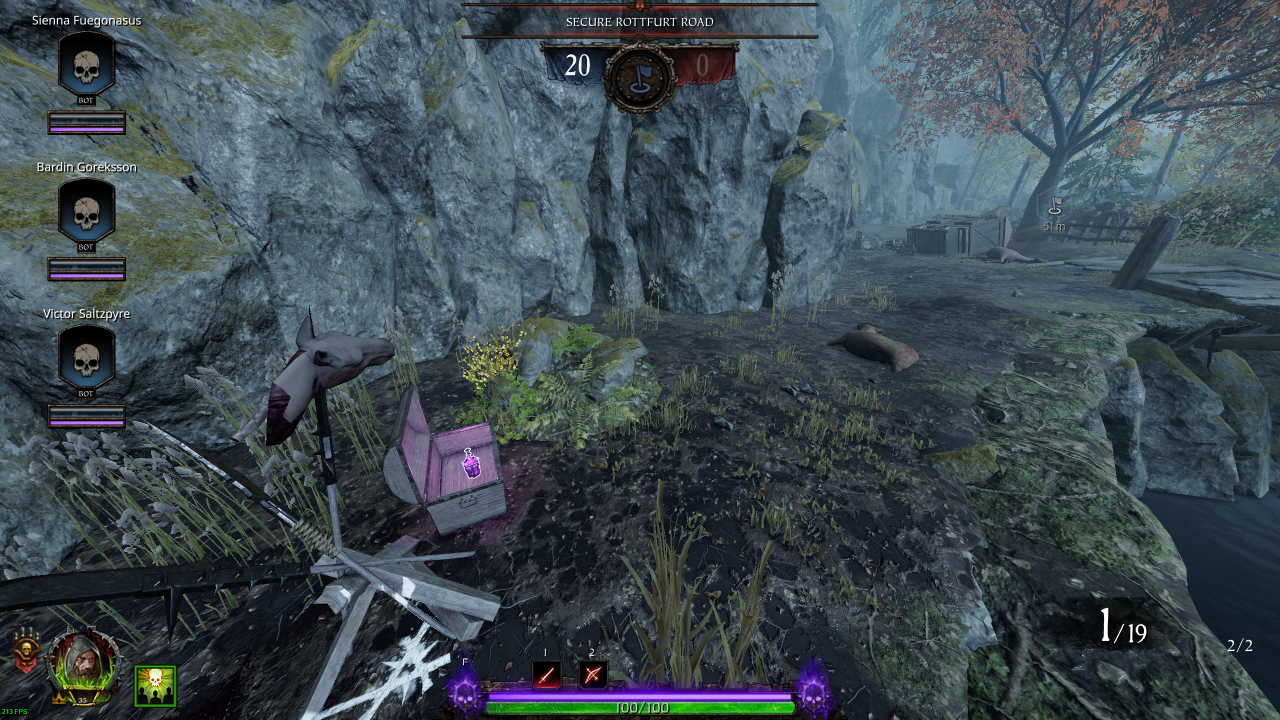
• Healing: 1 (Draught)
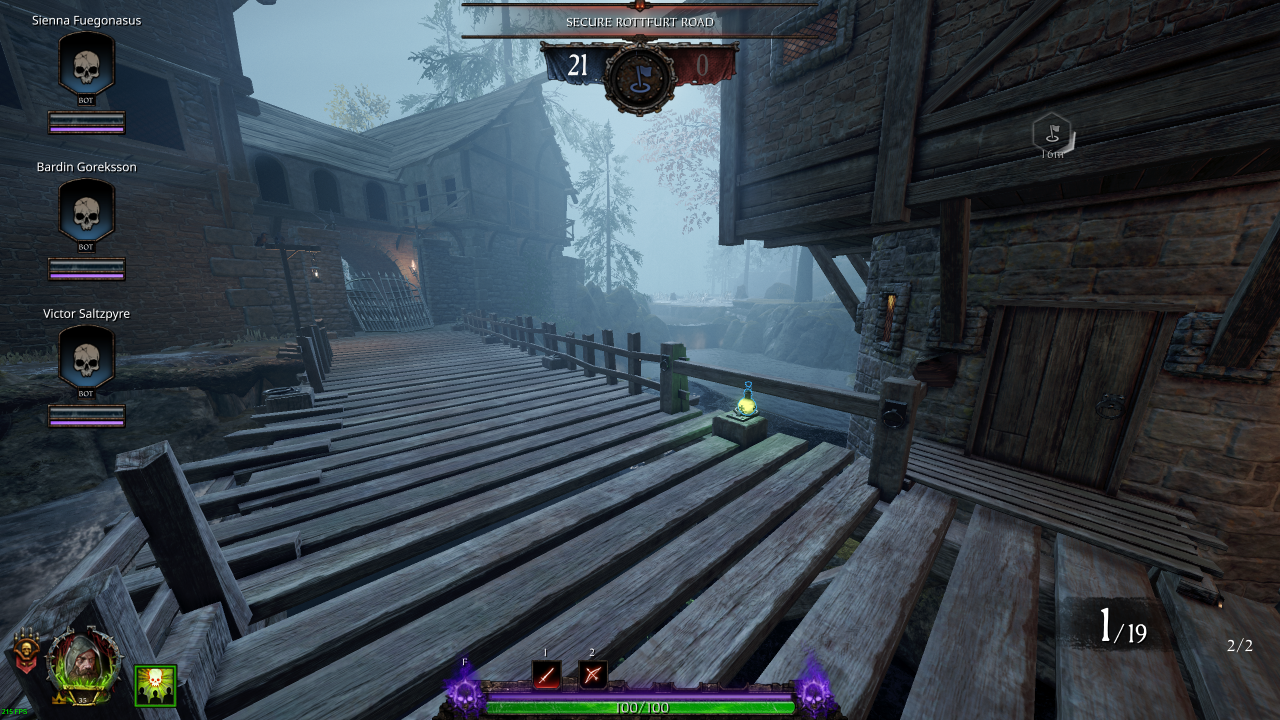
Section 2: Survive Event
• Ammo: 1 (Pouch)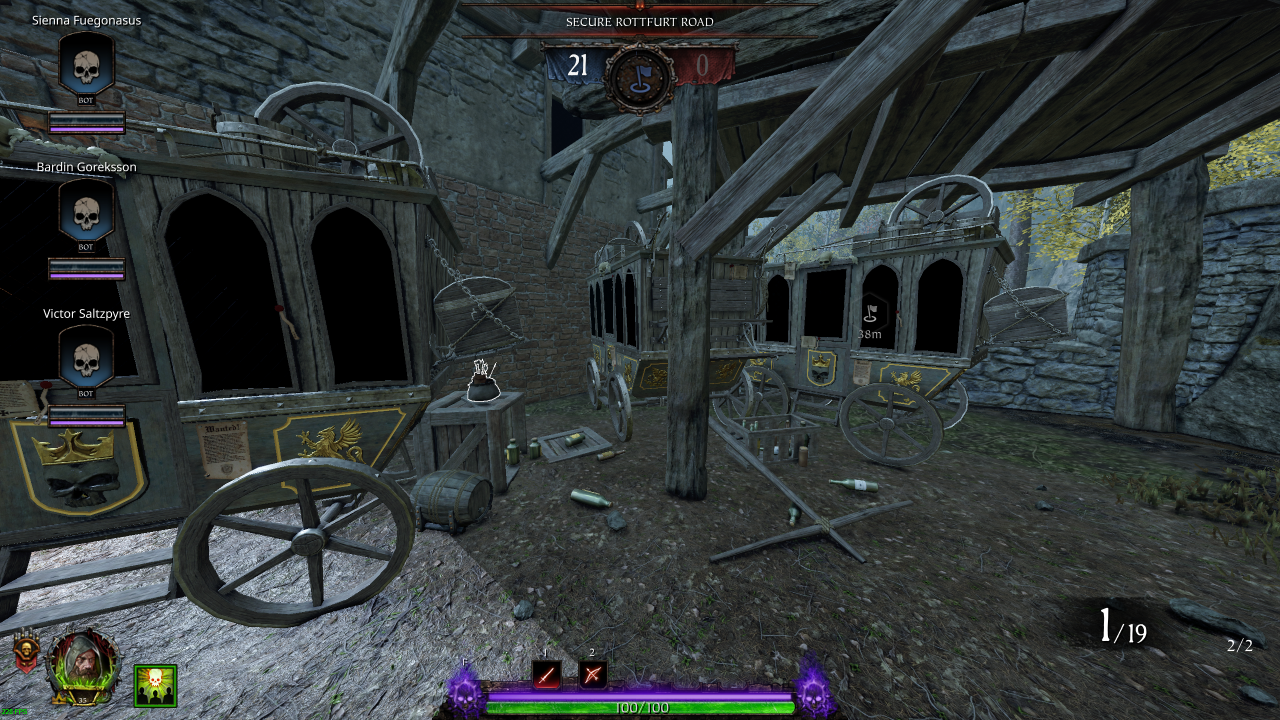
• Ammo: 1 (Pouch)
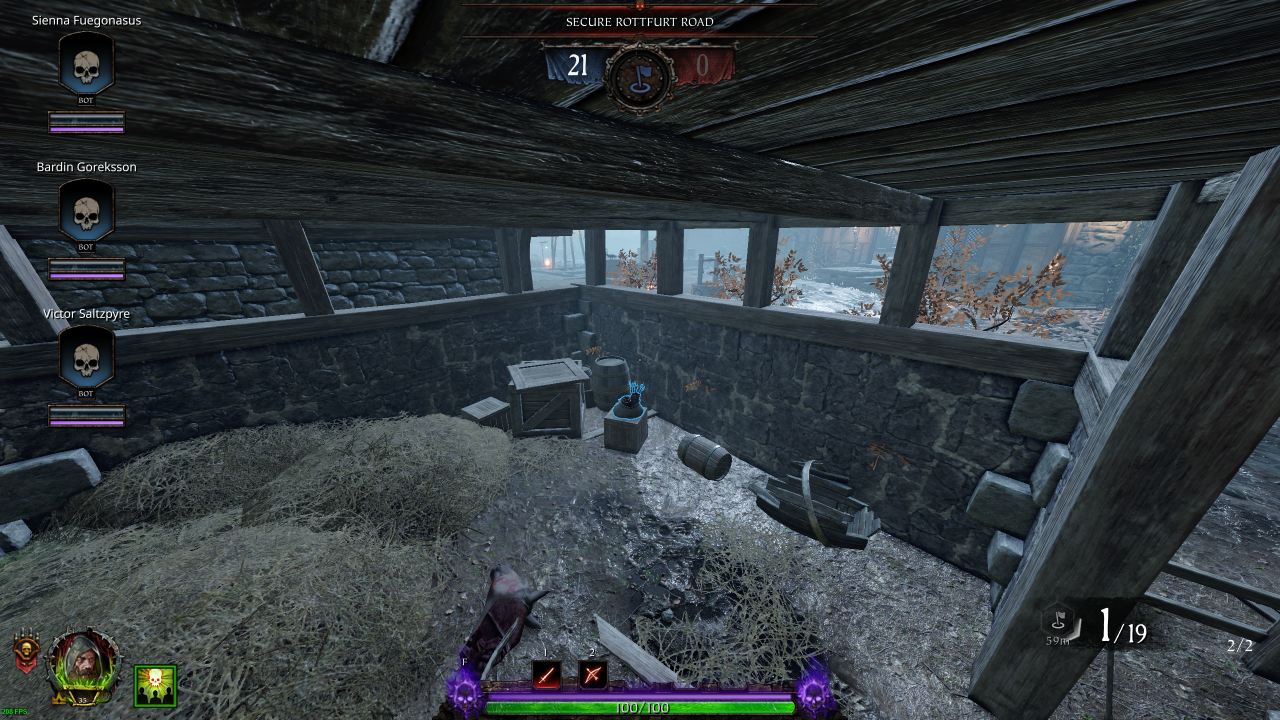
• Healing: 2 (Draught: 1 / Kit: 1)
• Ammo: 1 (Pouch)
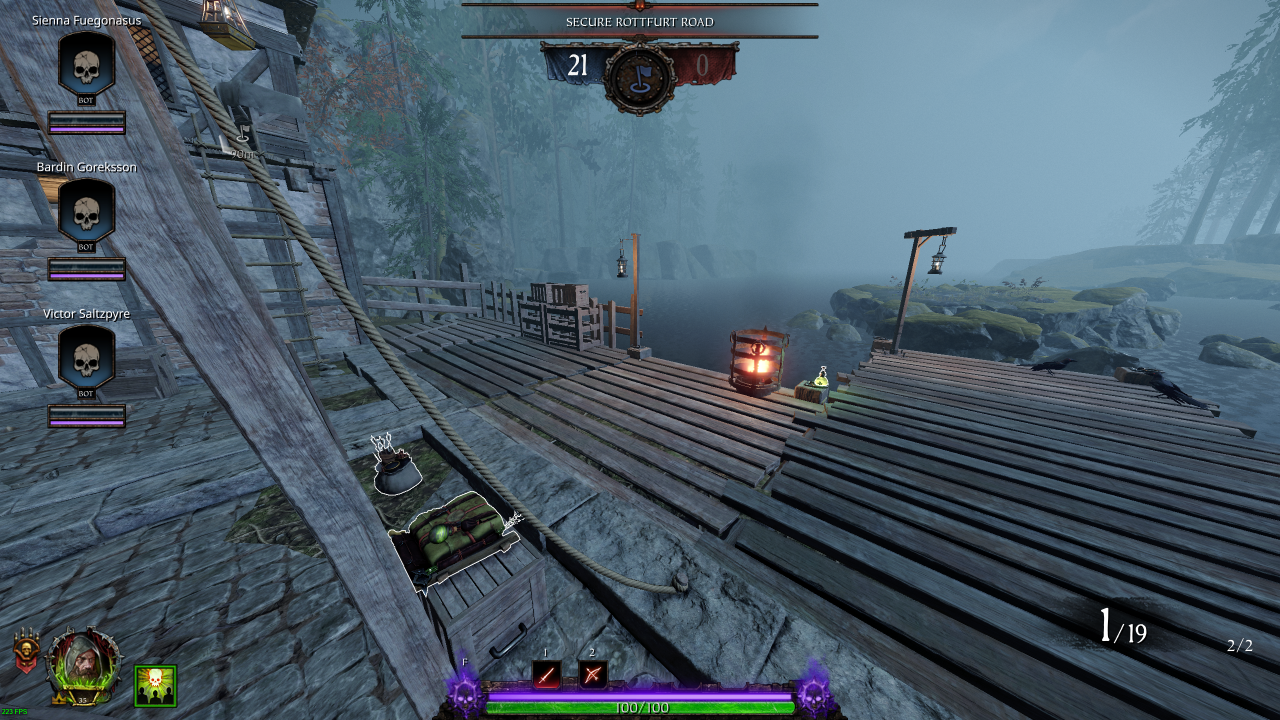
• Ammo: 1 (Pouch)
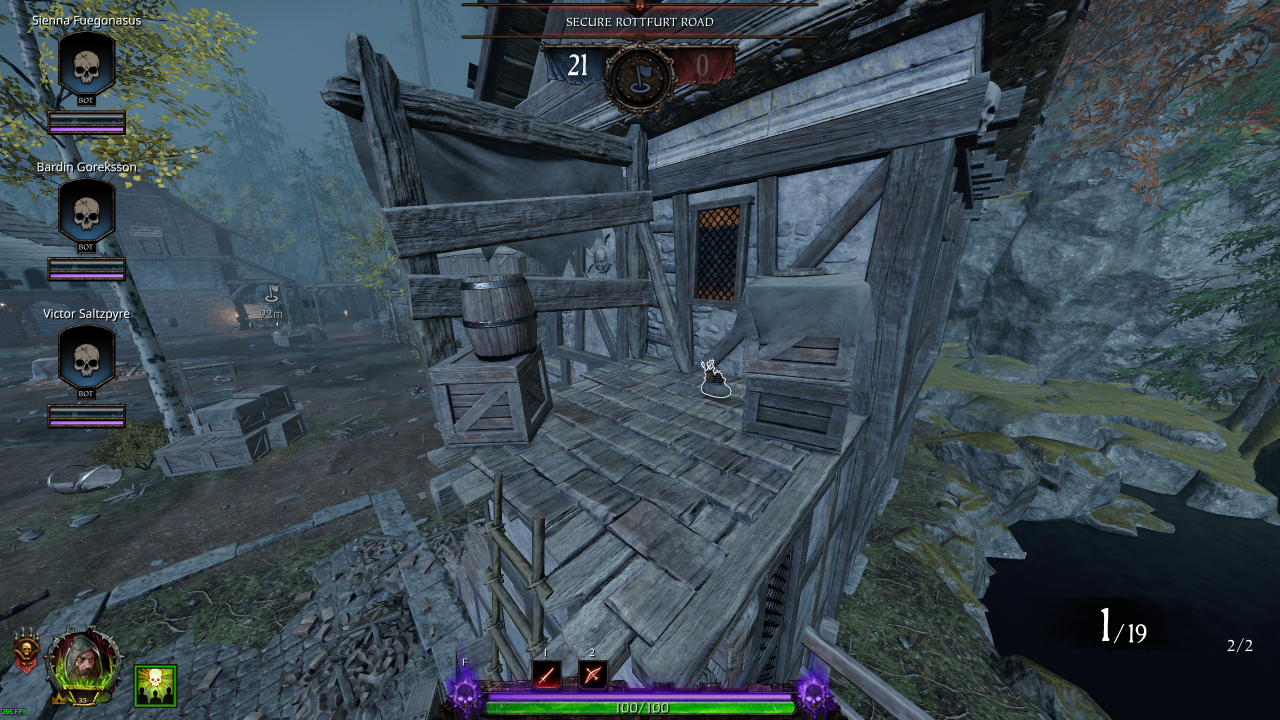
• Healing: 1 (Kit)
• Bombs: 2 (Fire)
• Ammo: 3 (Pouch)
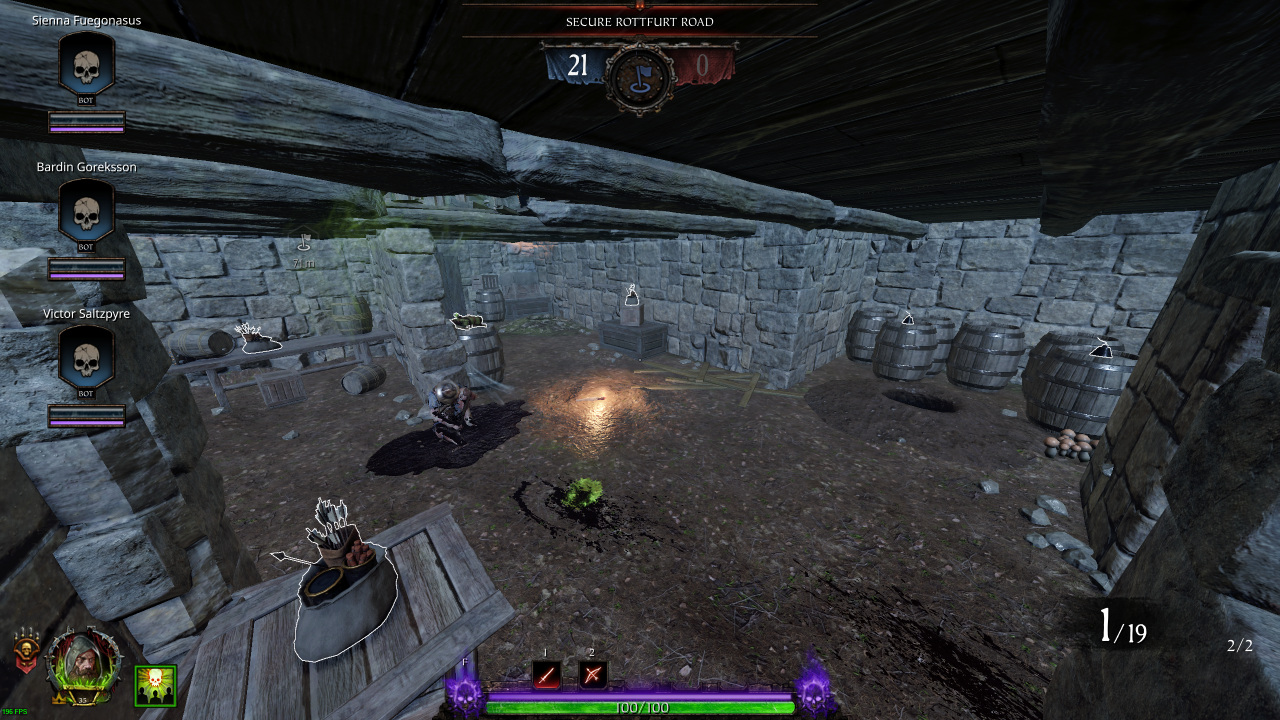
• Healing: 1 (Draught)
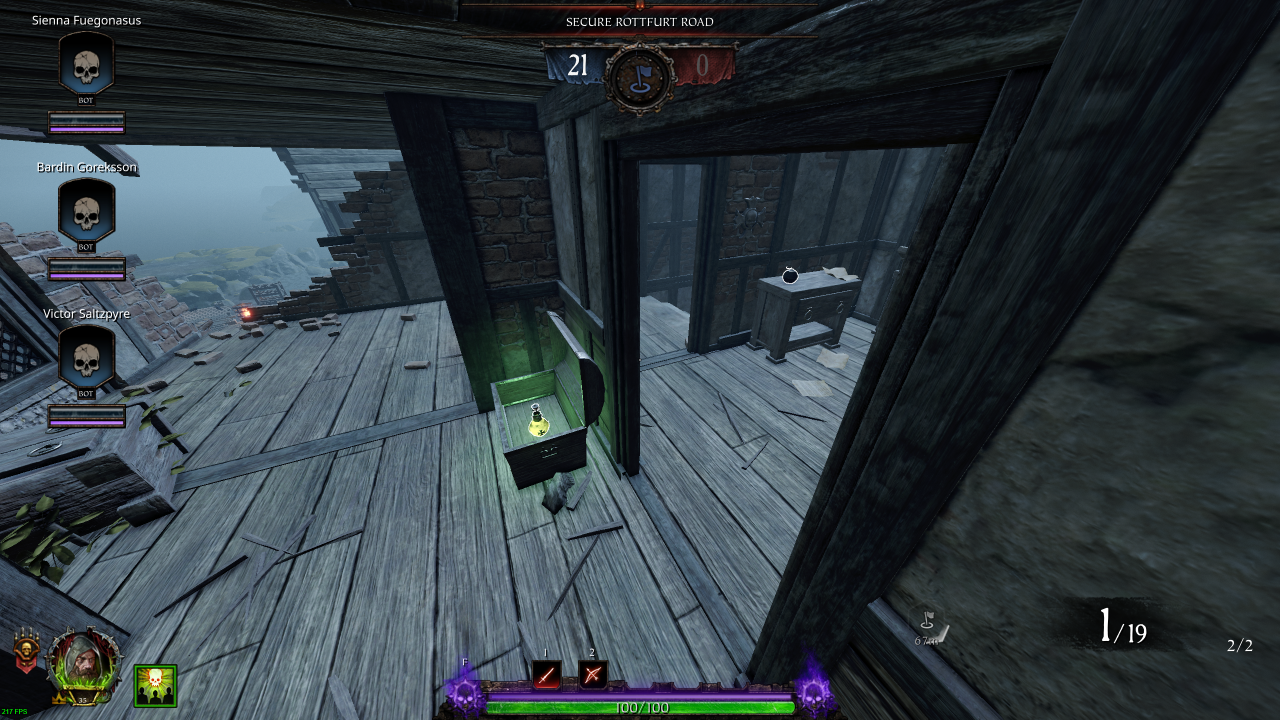
• Bombs: 1 (Explosive)
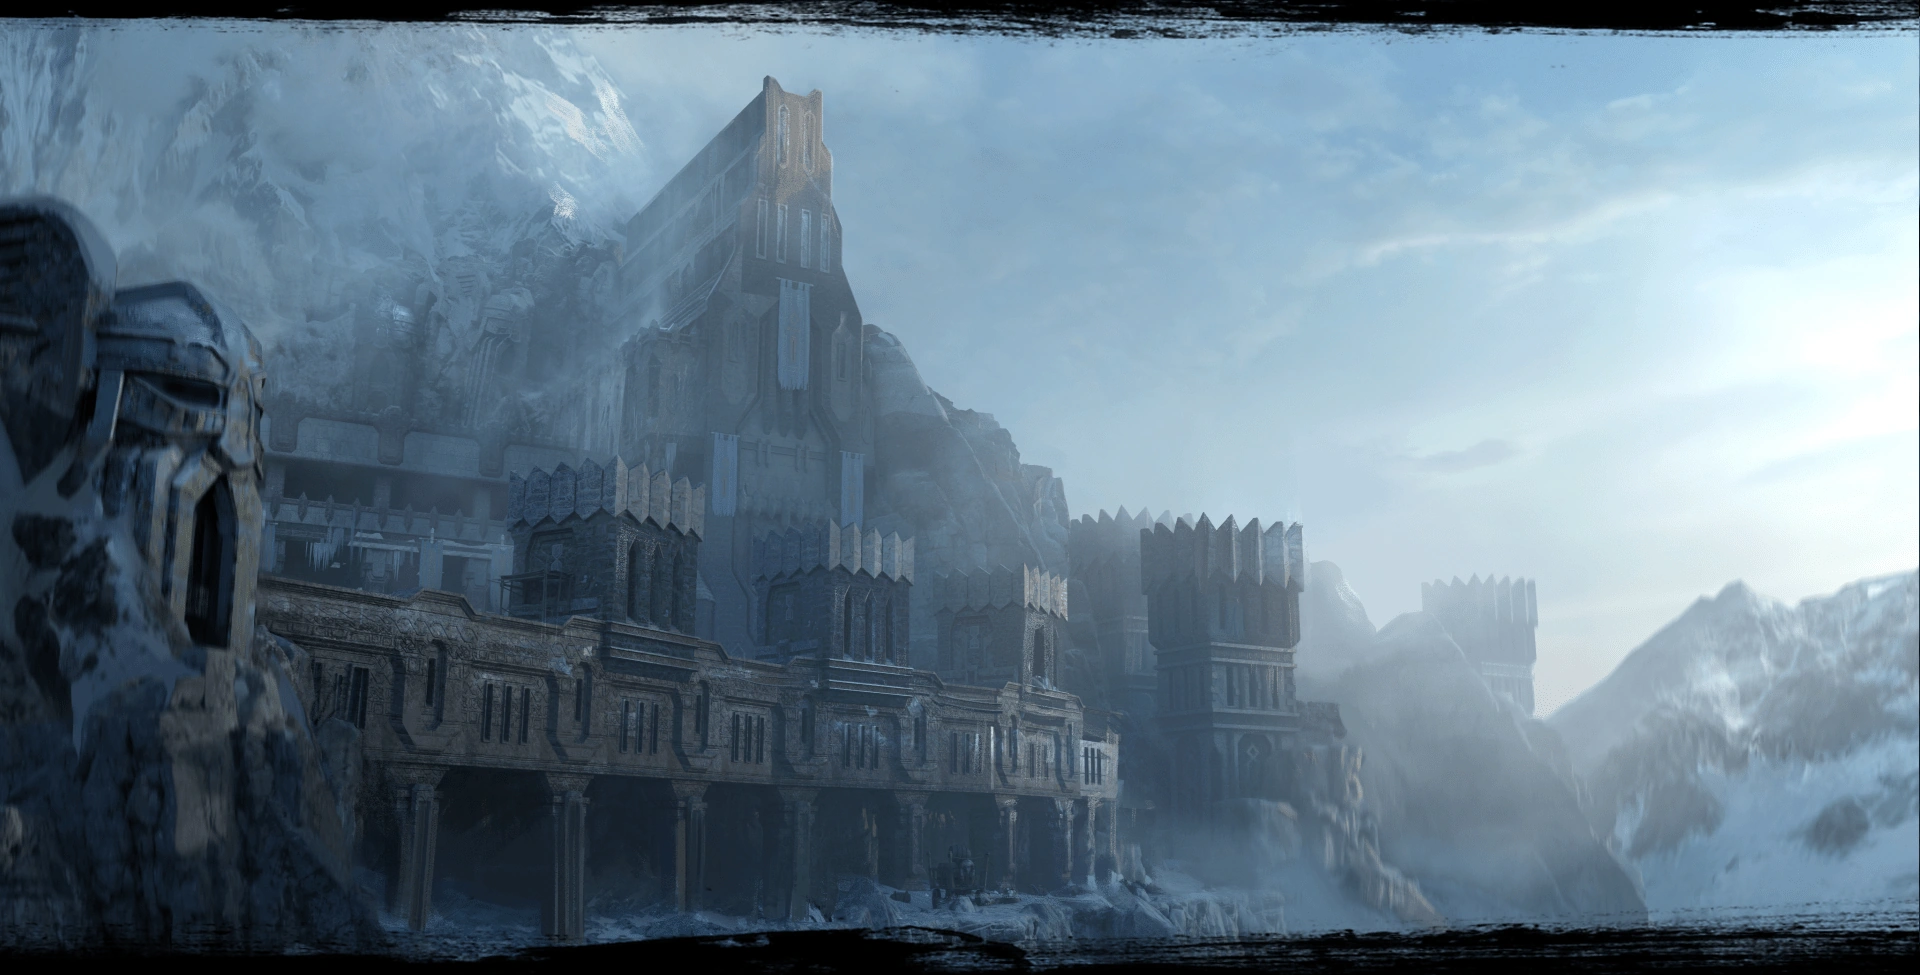
A Grudge Served Cold
Total Items
Round 1
Healing: 8Draughts: 4Kits: 4 Bombs: 10
Potions: 10
Ammo: 12Pouches: 11Crates: 1 Barrels: 17
Explosive: 10Fire: 7
Round 2
Healing: 7Draughts: 4Kits: 3 Bombs: 8
Potions: 9
Ammo: 10Pouches: 8Crates: 2 Barrels: 7
Explosive: 3Fire: 4
Round 3
Healing: 12Draughts: 7Kits: 5 Bombs: 11
Potions: 13
Ammo: 13Pouches: 10Crates: 3 Barrels: 14
Explosive: 7Fire: 7
Round 1
Section 0: Spawn Room
Bombs: 4Potions: 4
Ammo: 1 (Crate)
Section 1: Spawn Room → Drop Down
• Ammo: 1 (Pouch)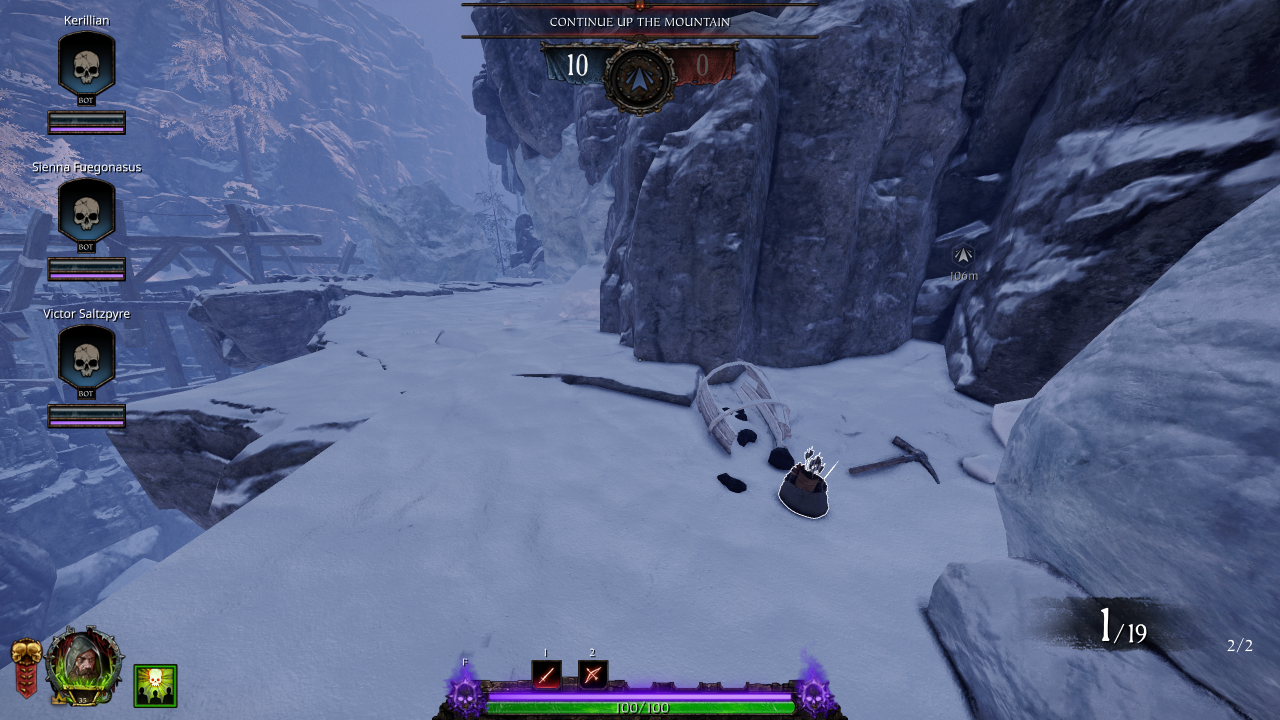
• Ammo: 2 (Pouch)
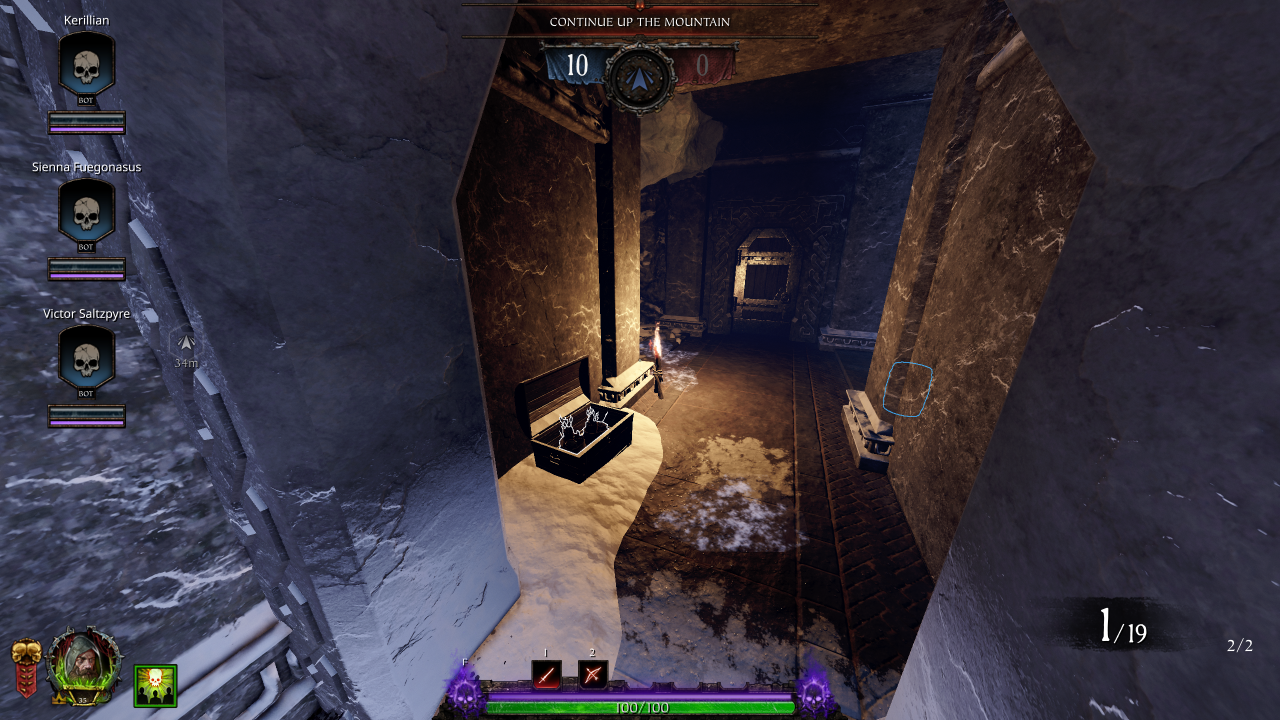
• Healing: 1 (Kit)
• Potions: 1
• Ammo: 1 (Pouch)
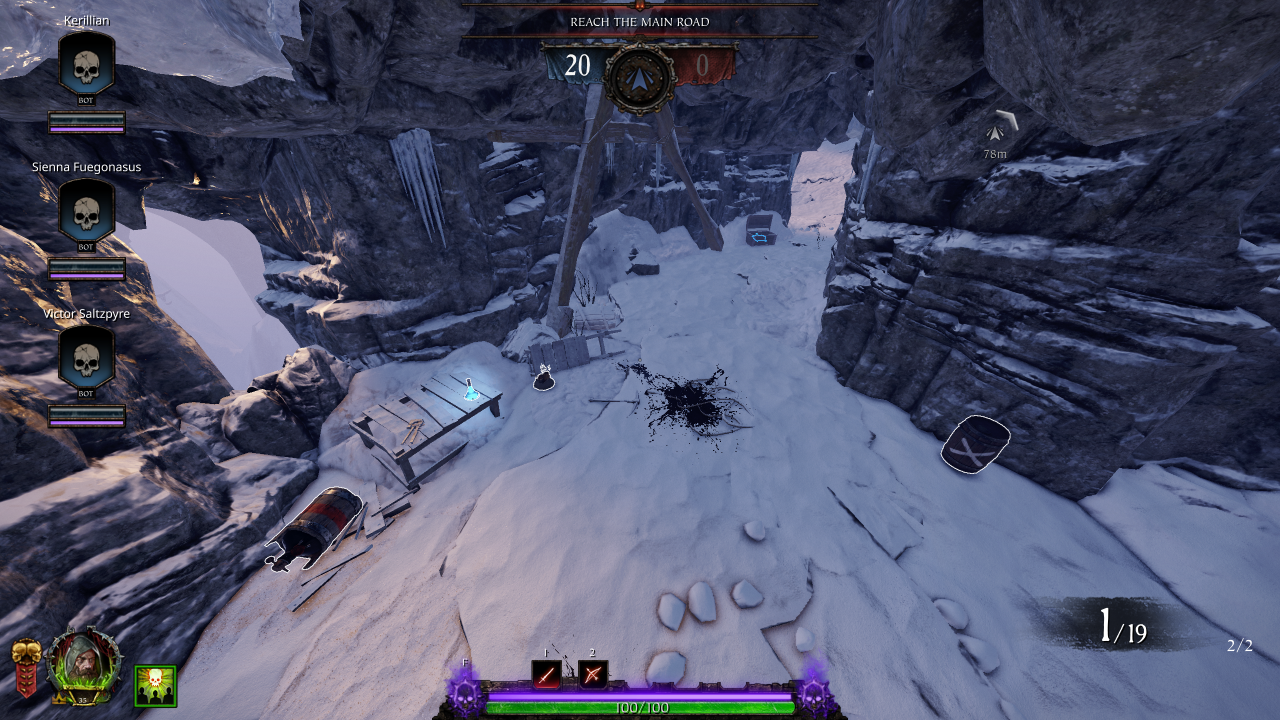
• Healing: 1 (Draught)
• Potions: 1
• Ammo: 1 (Pouch)
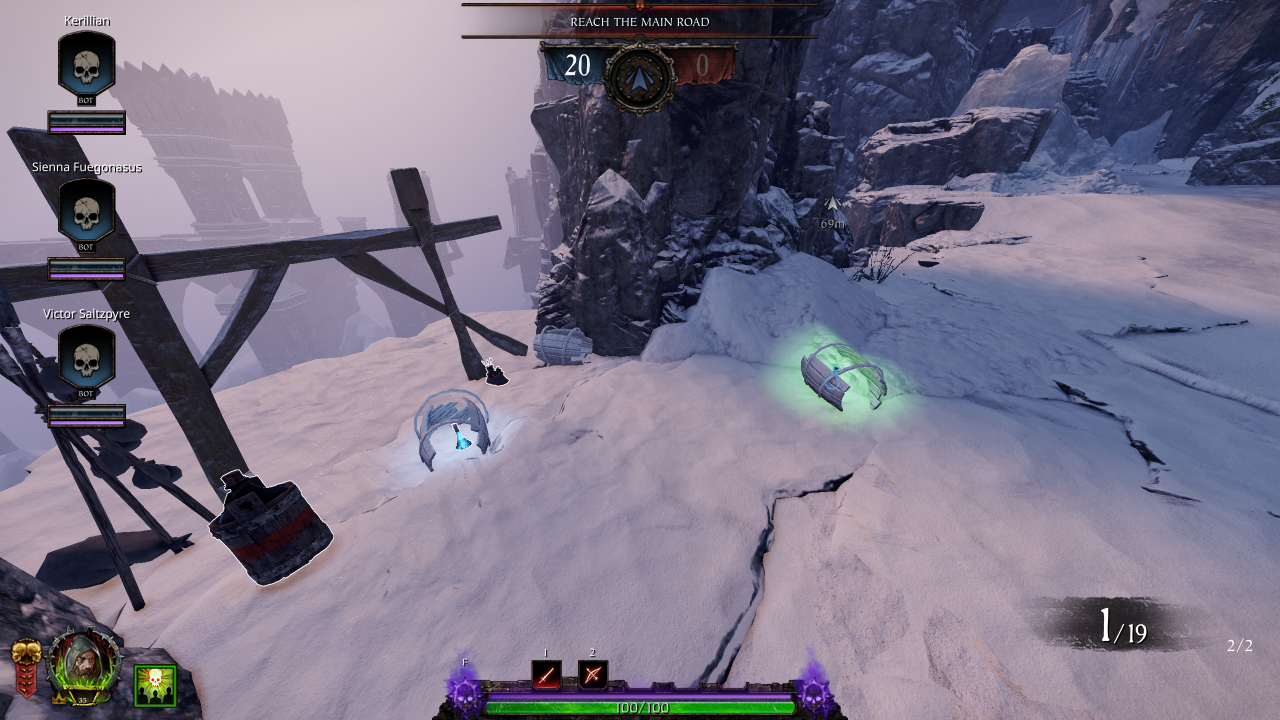
Section 2: Main Road → Event Arena
• Bombs: 1 (Explosive / Fire)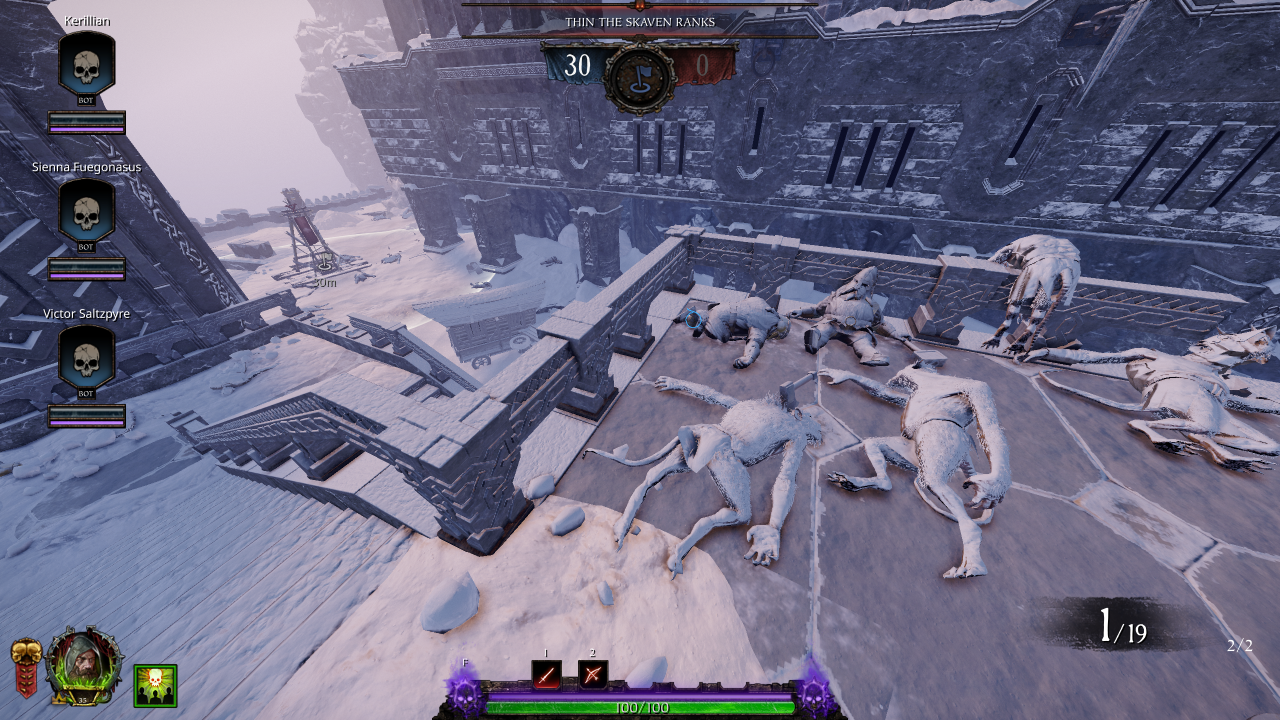
• Healing: 1 (Kit)
• Potions: 1
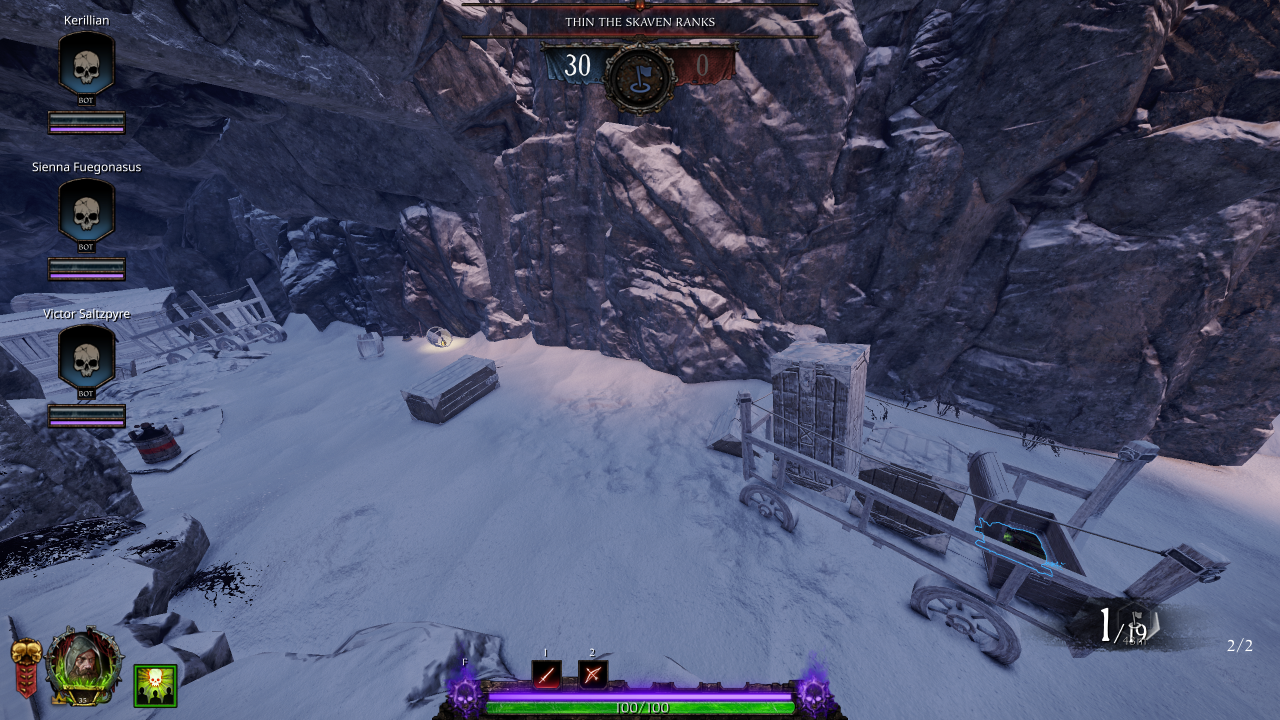
• Bombs: 1 (Explosive / Fire)
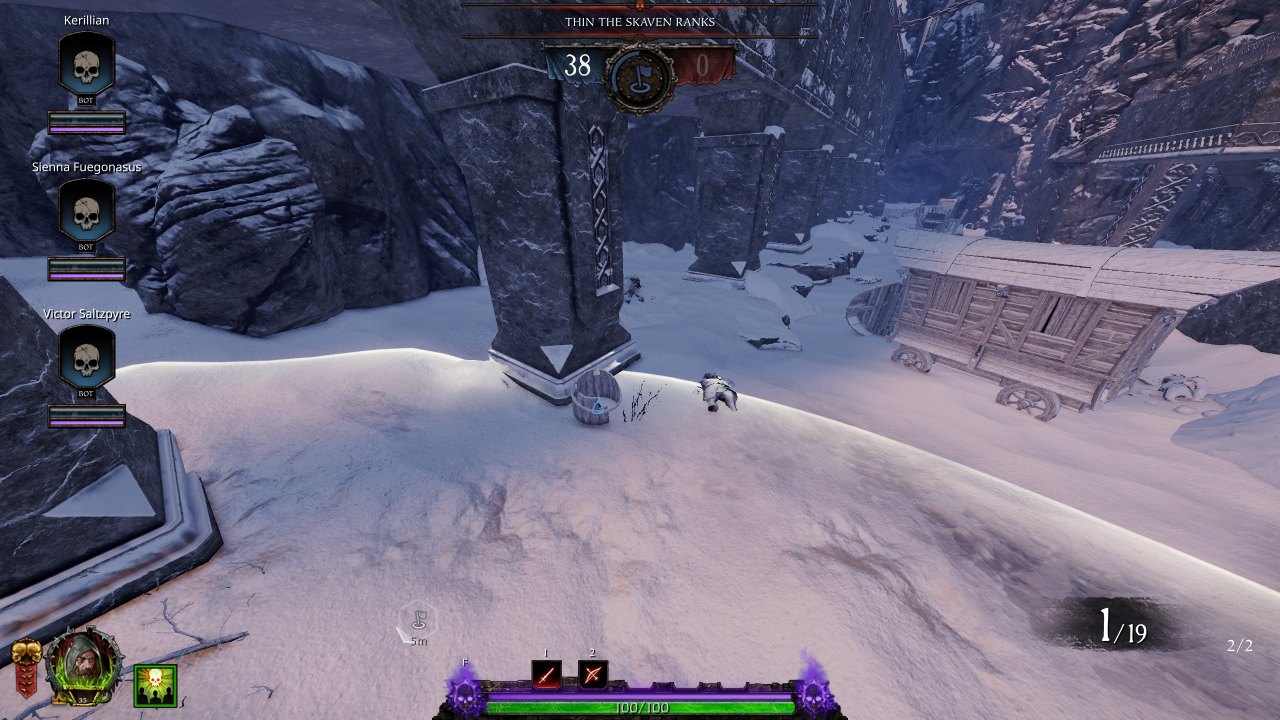
• Healing: 1 (Draught)
• Bombs: 2 (Explosive / Fire)
• Ammo: 1 (Pouch)
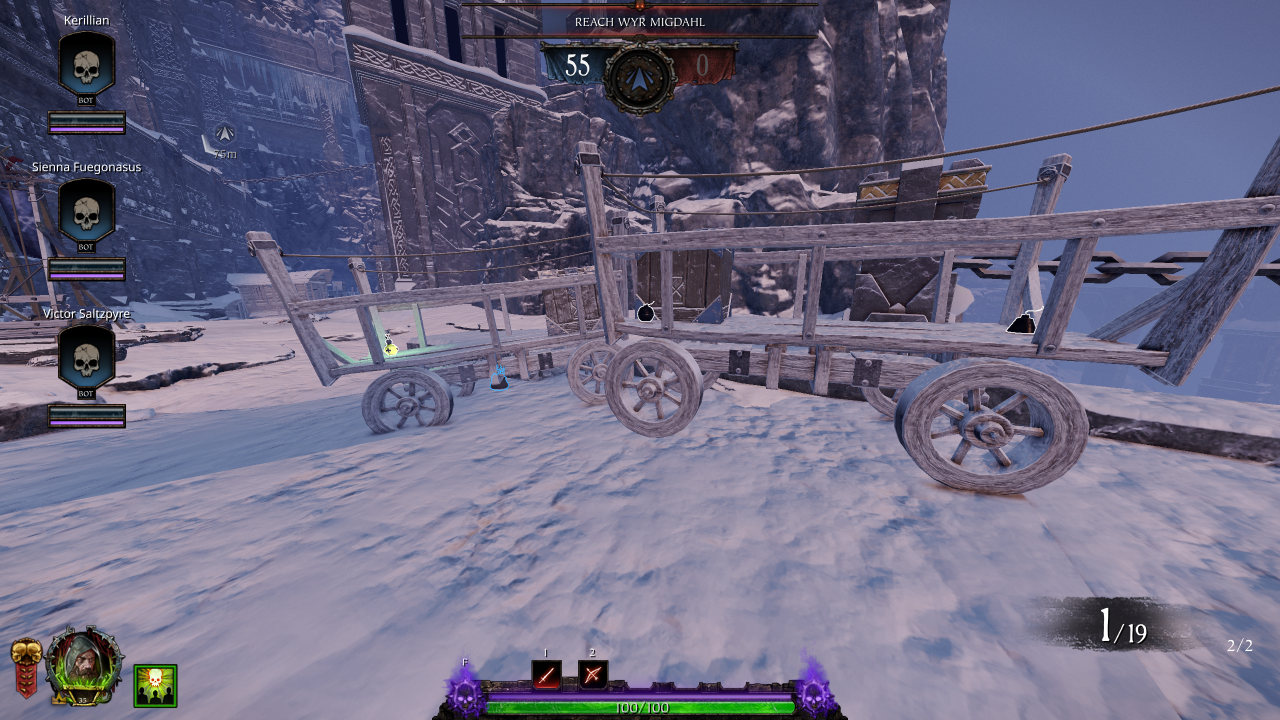
• Healing: 1 (Kit)
• Potions: 1
• Ammo: 1 (Pouch)
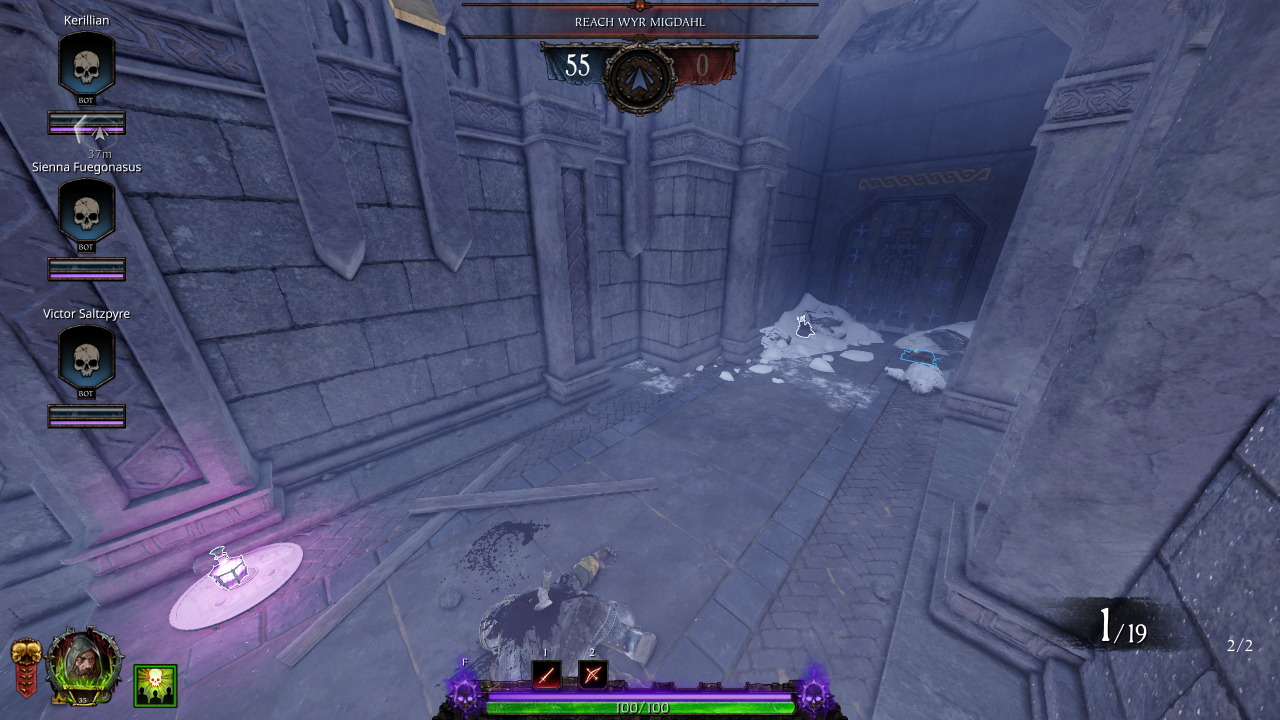
• Potions: 1
• Ammo: 1 (Pouch)
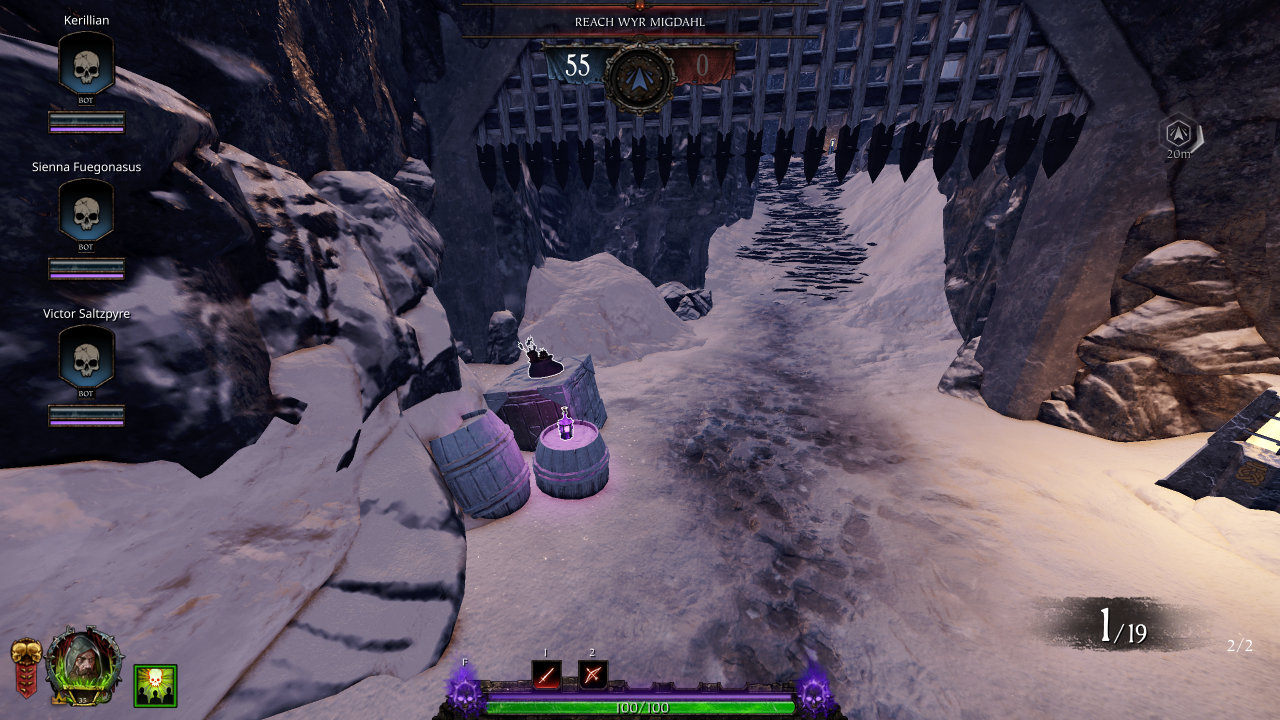
• Bombs: 1 (Explosive / Fire)
• Ammo: 1 (Crate)
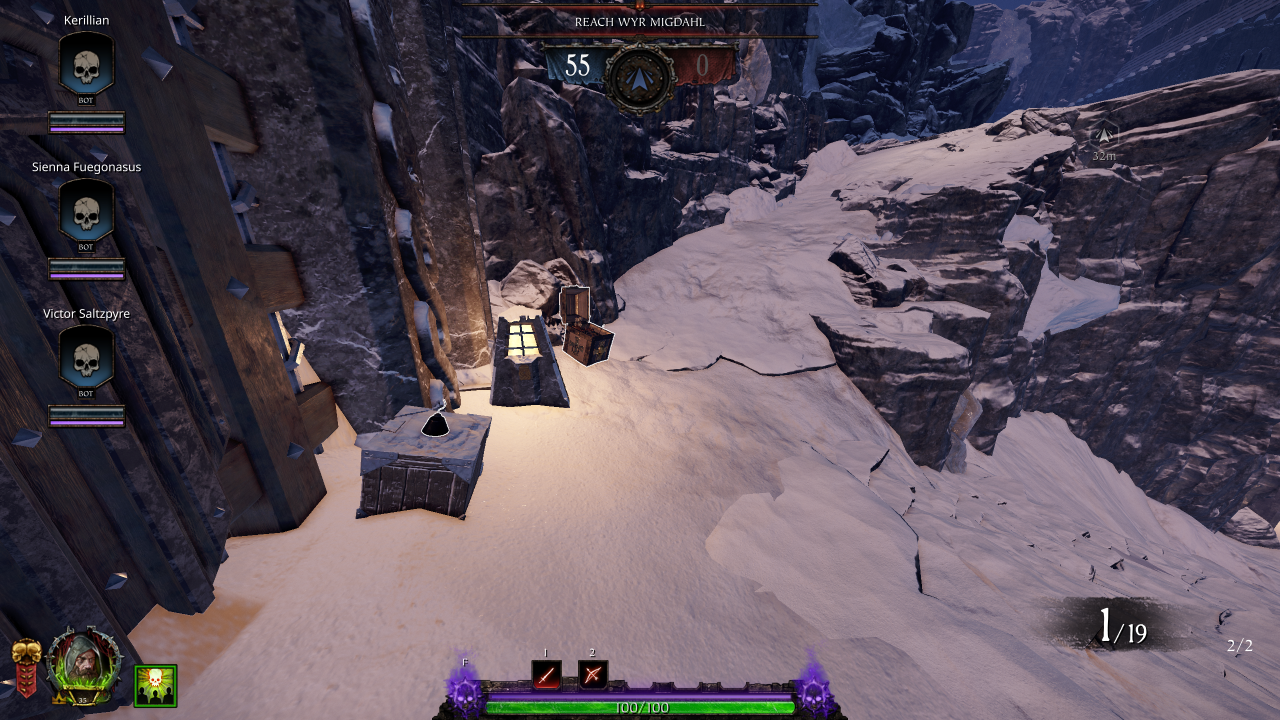
Section 3: Event Arena → Safe Zone
• Healing: 1 (Kit)• Potions: 1
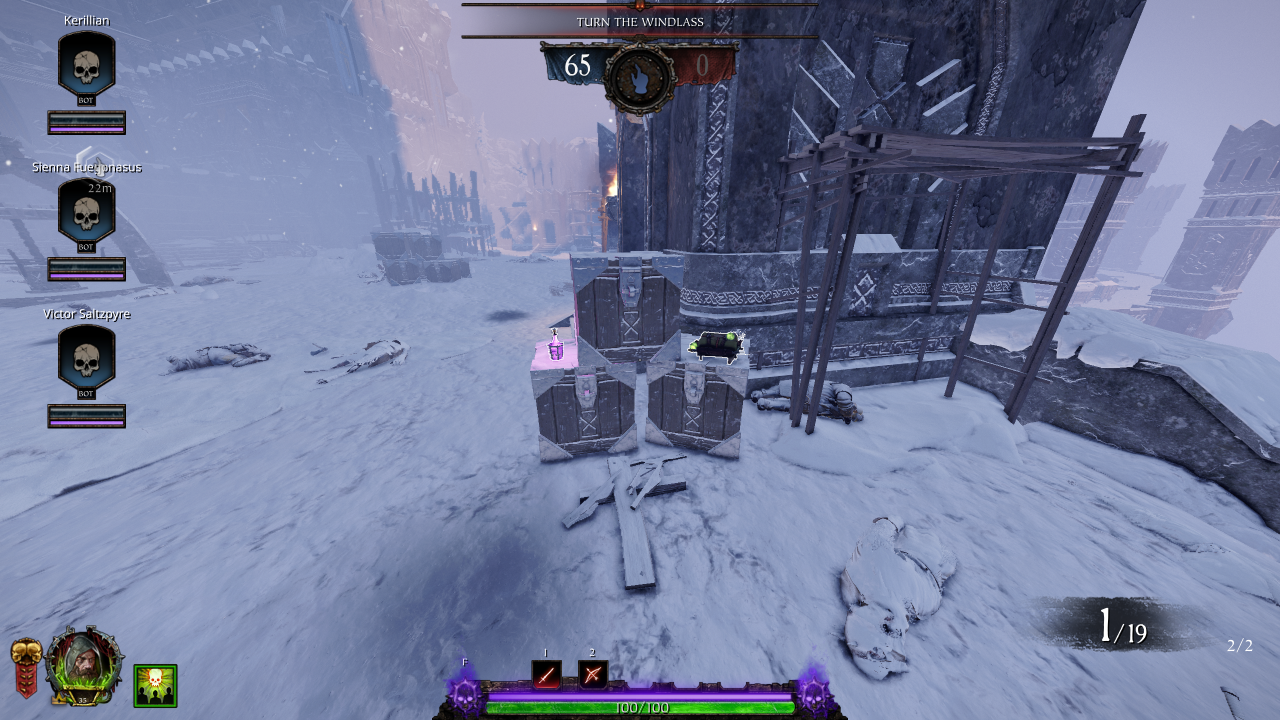
• Ammo: 1 (Pouch)
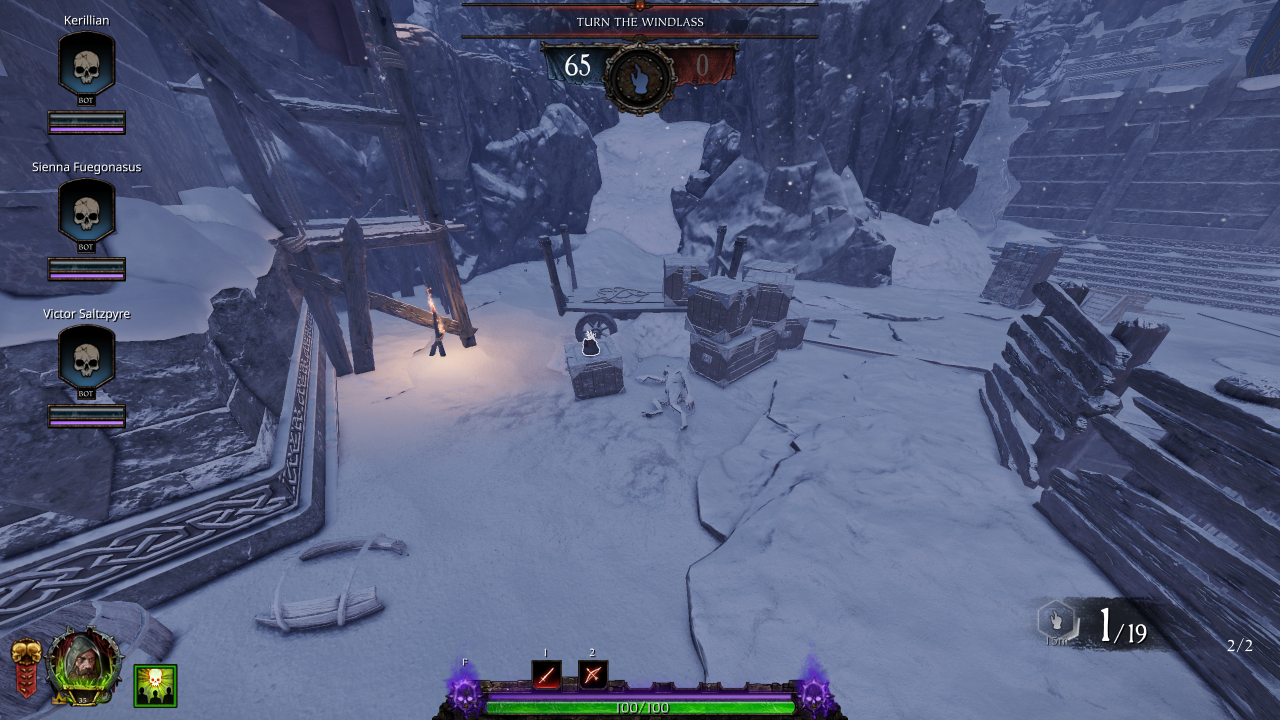
• Ammo: 1 (Pouch)
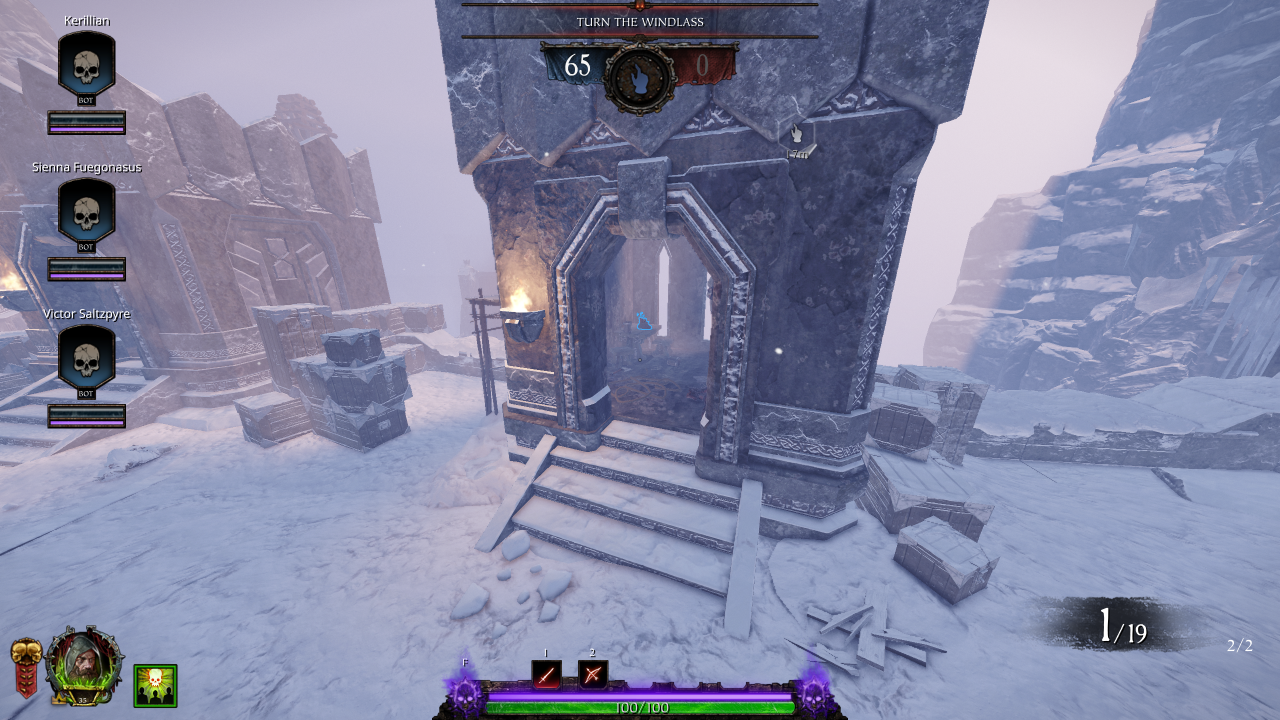
• Healing: 1 (Draught)
• Bombs: 1 (Explosive / Fire)
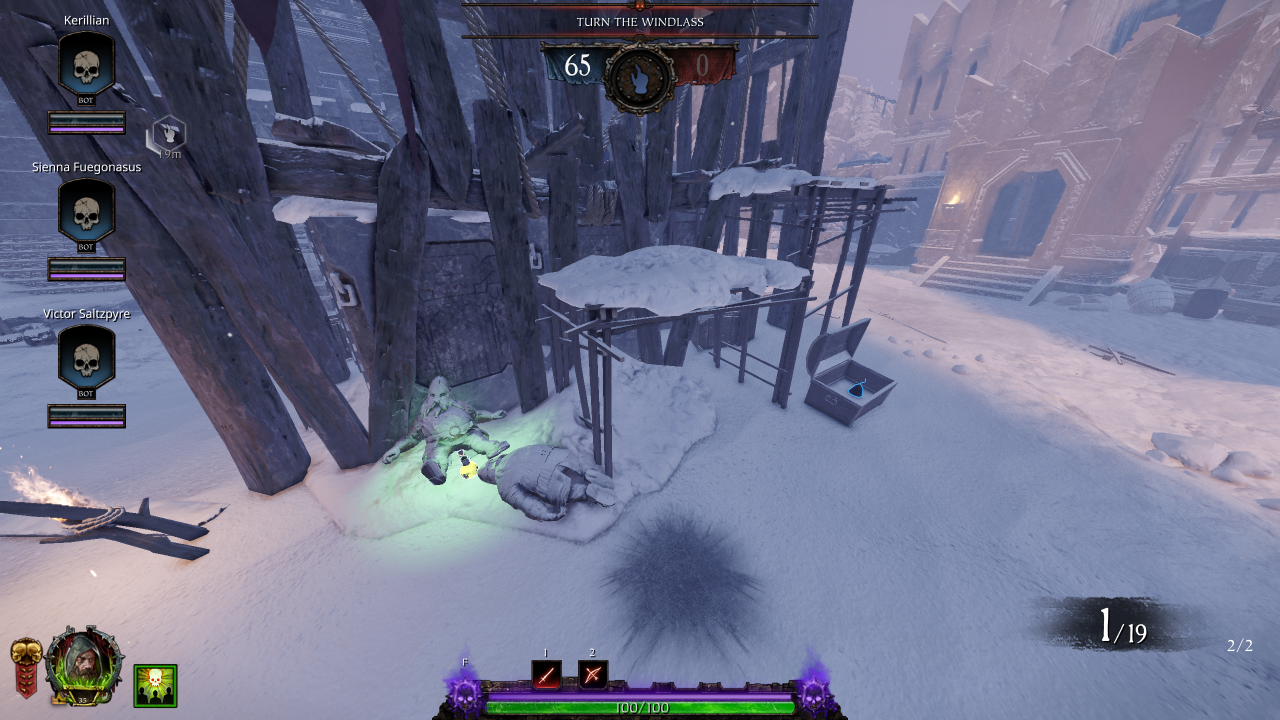
• Ammo: 1 (Pouch)
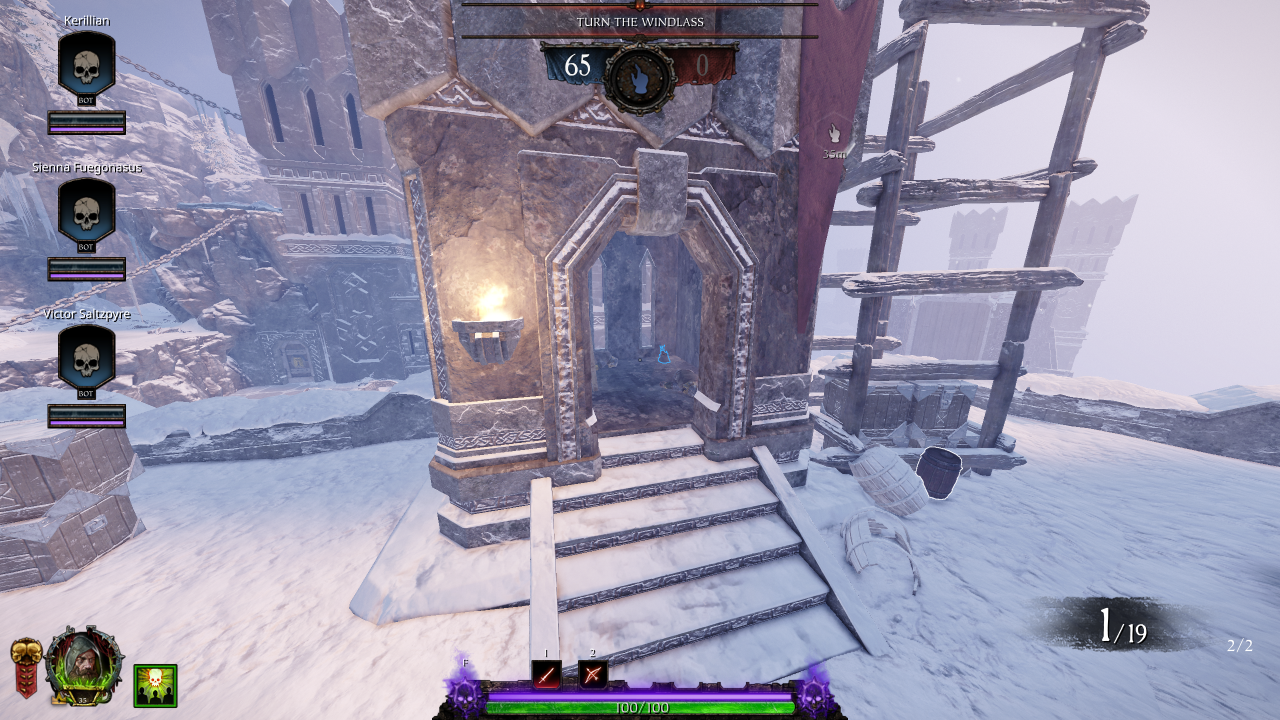
• Healing: 1
• Potions: 1
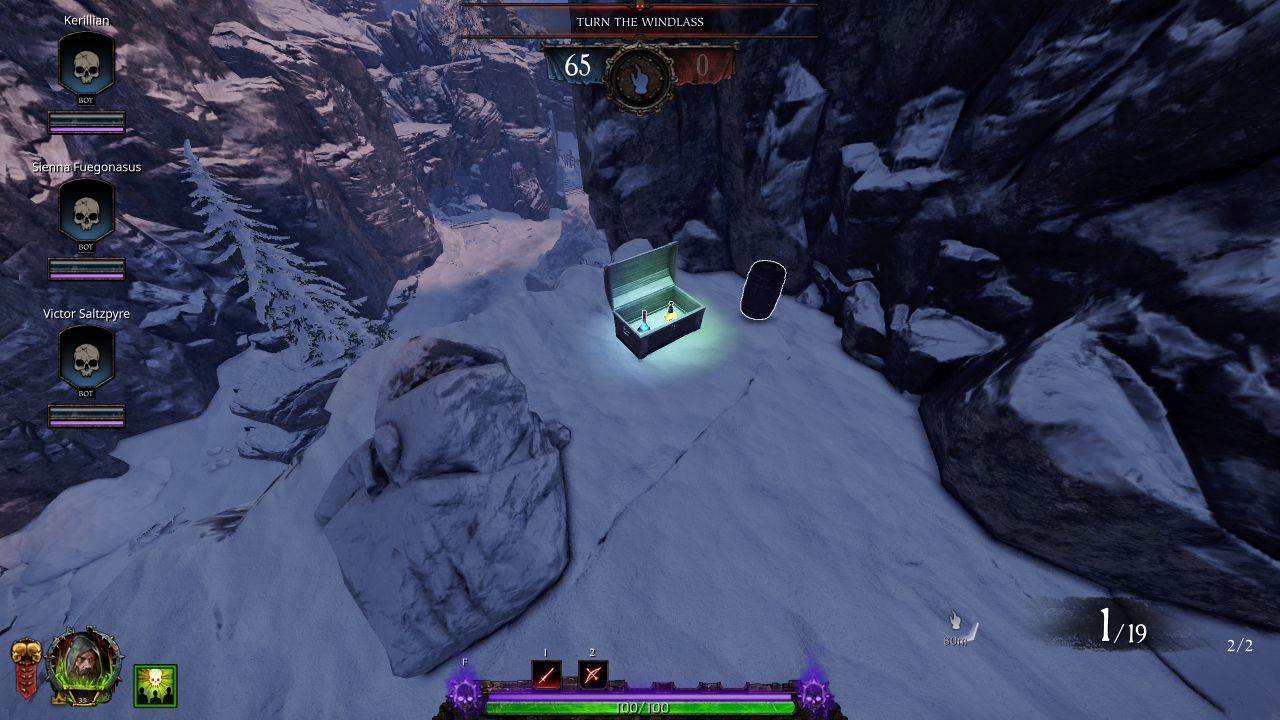
Round 2
Section 0: Spawn Room
Bombs: 4Potions: 4
Section 1: Spawn Room → Drop Down
• Bombs: 1 (Explosive / Fire)• Ammo: 1 (Pouch)
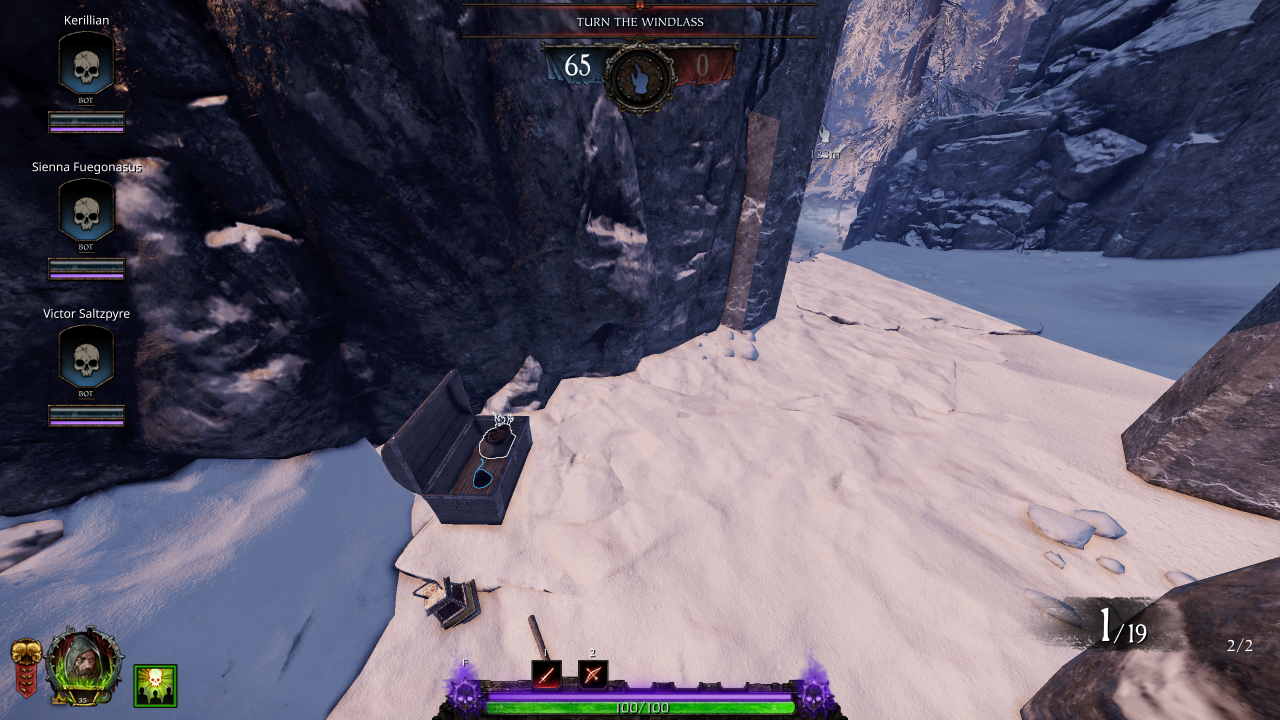
Section 2: Frozen Lake → Drop Down
• Bombs: 1 (Explosive / Fire)• Ammo: 2 (Pouch)
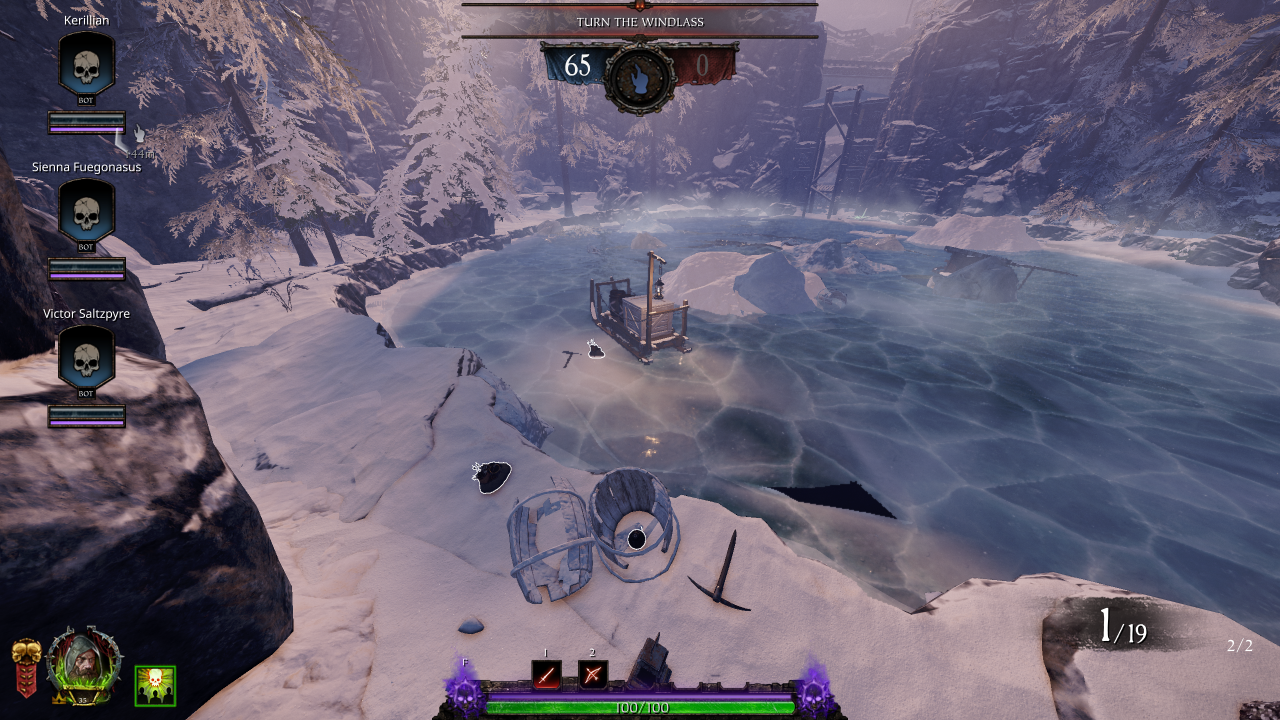
• Healing: 1 (Draught)
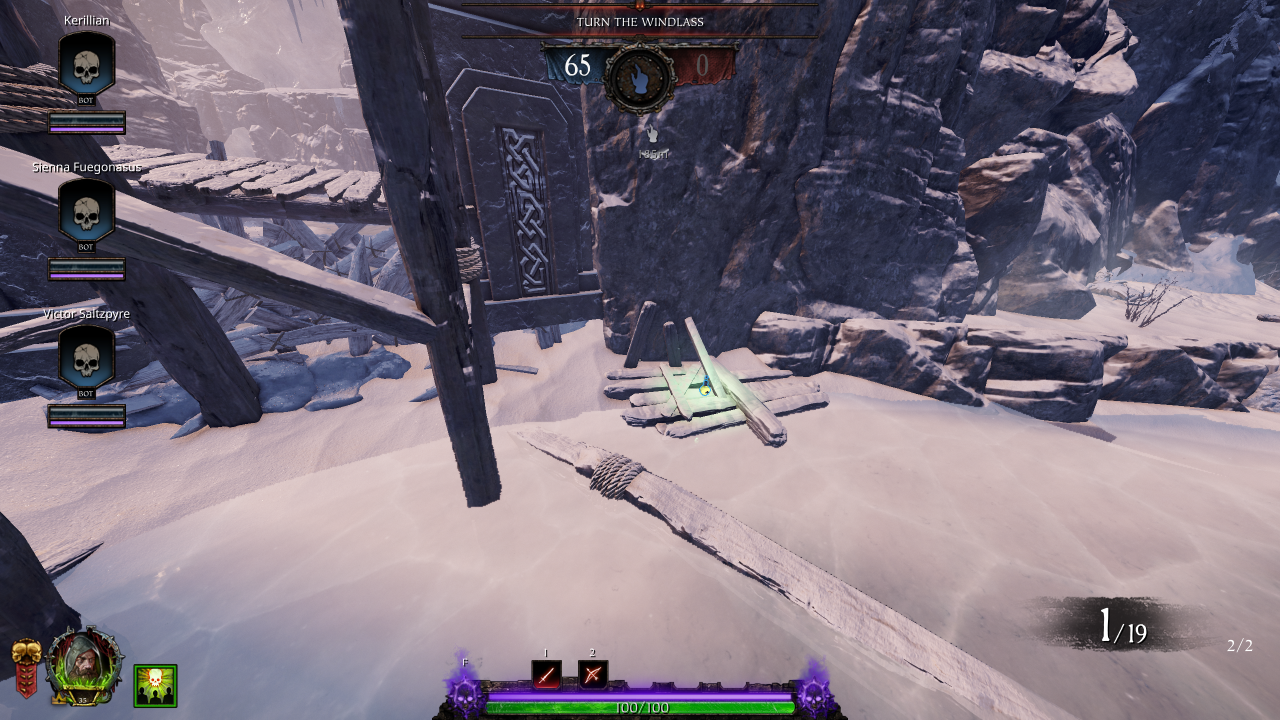
• Healing: 1 (Kit)
• Ammo: 2 (Pouch)
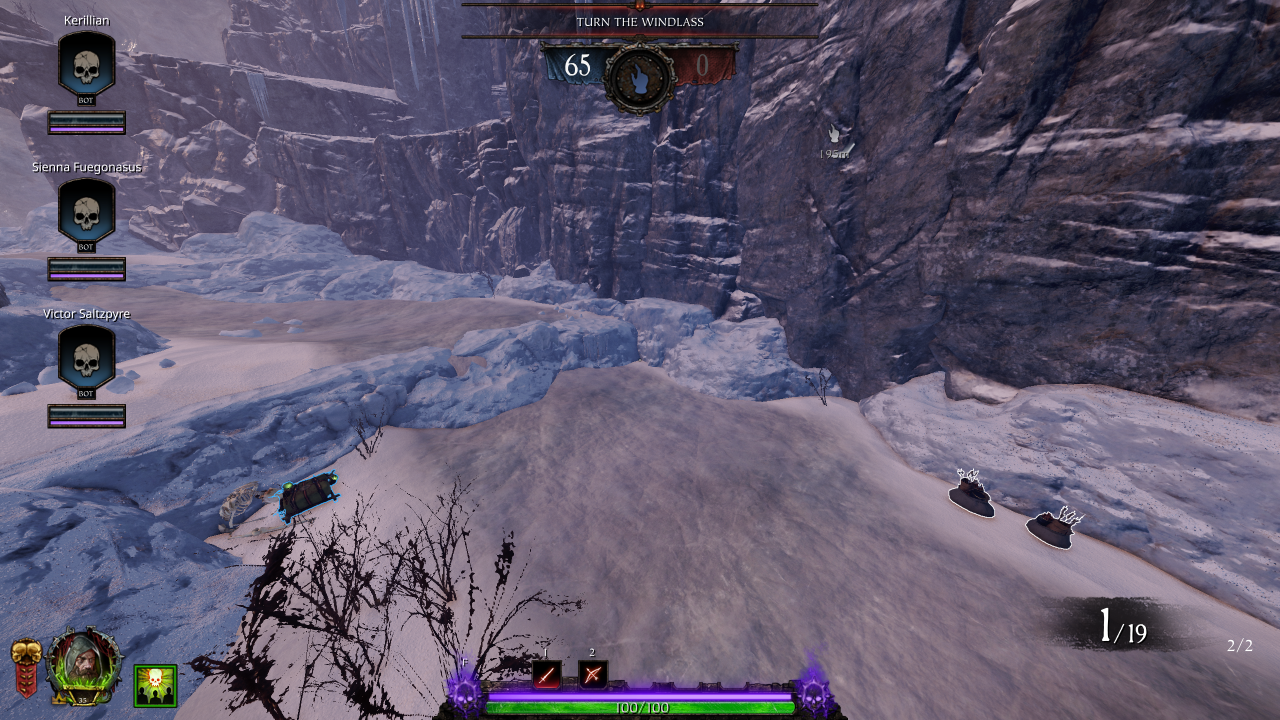
Section 3: Mad Dog Mine
• Bombs: 1 (Explosive / Fire)• Potions: 1
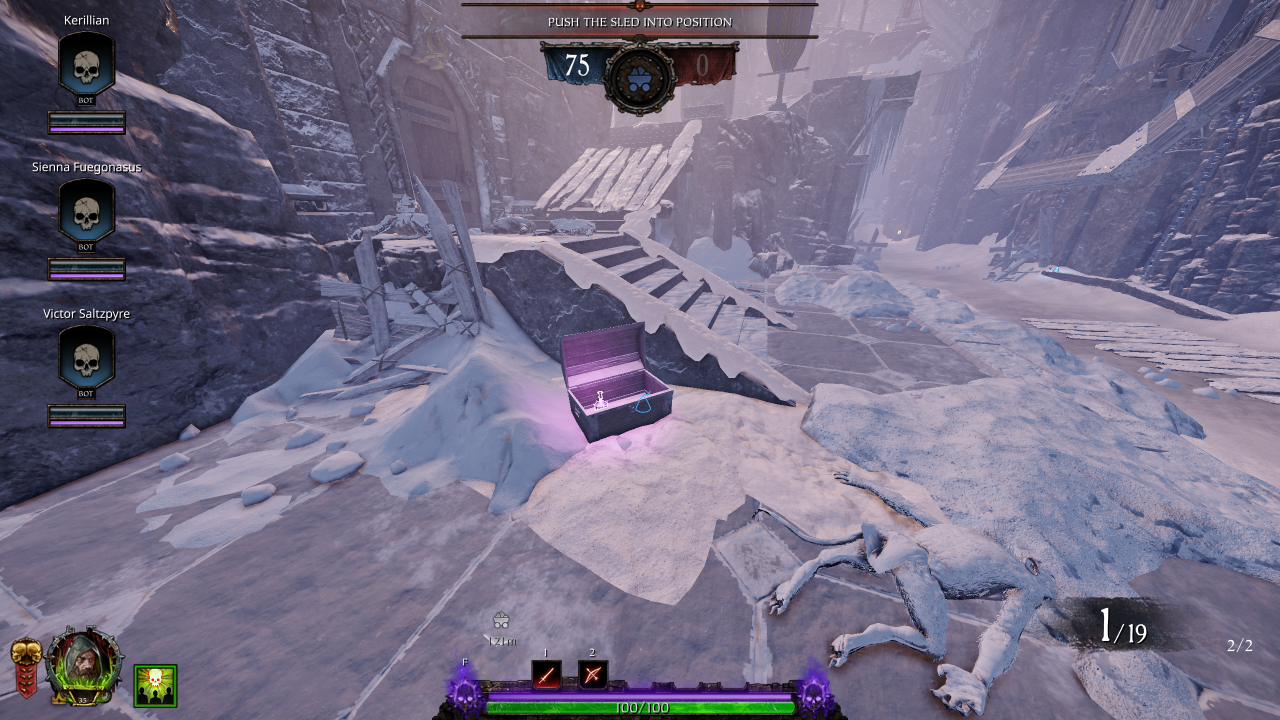
• Potions: 1
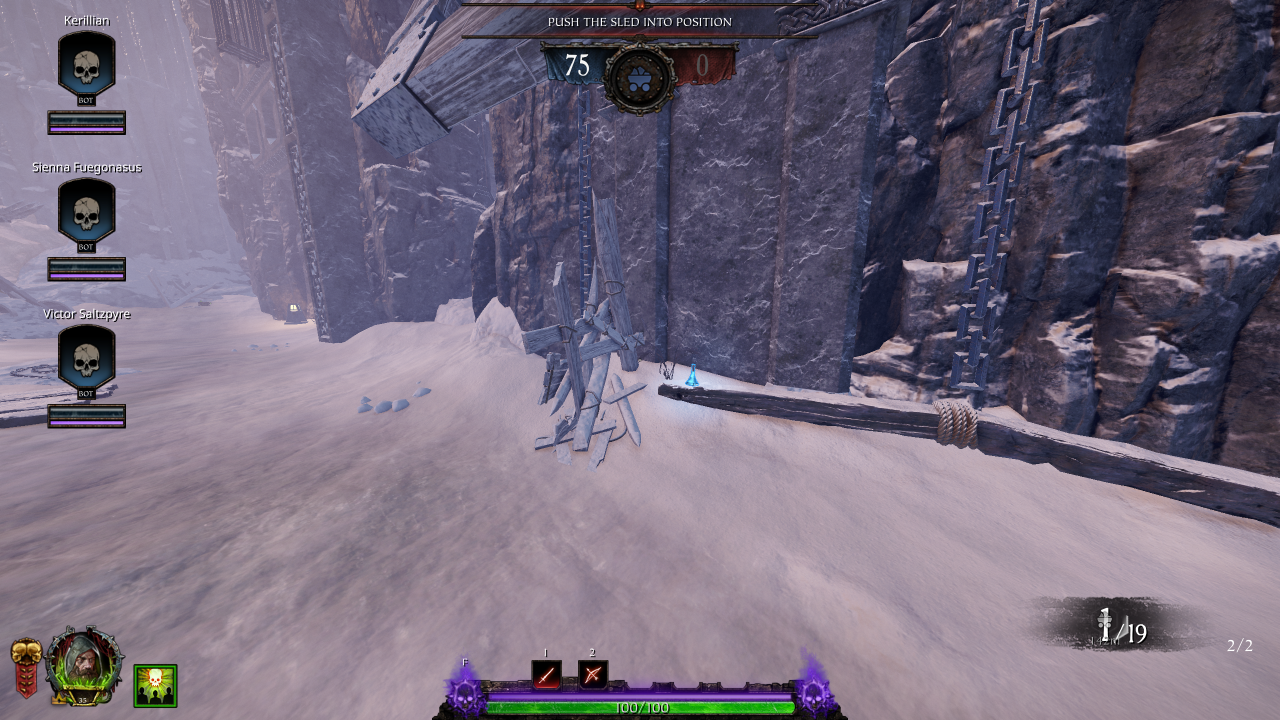
• Ammo: 1 (Pouch)
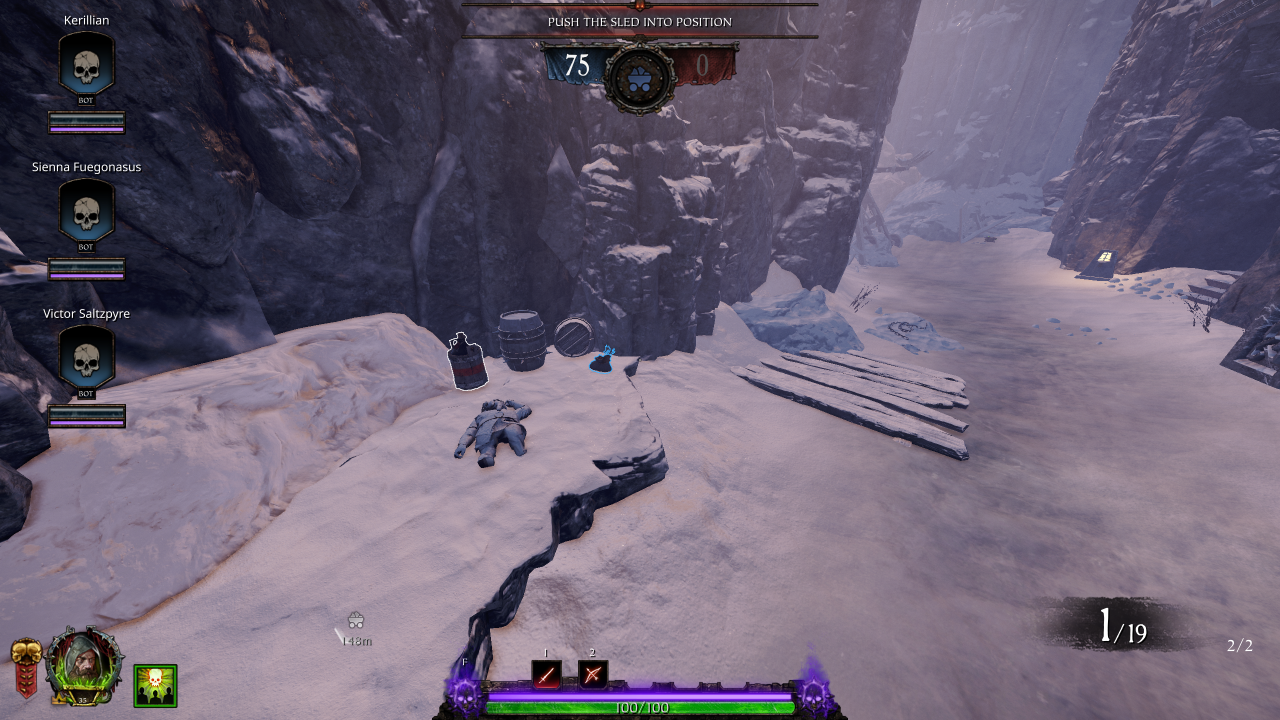
• Healing: 1 (Kit)
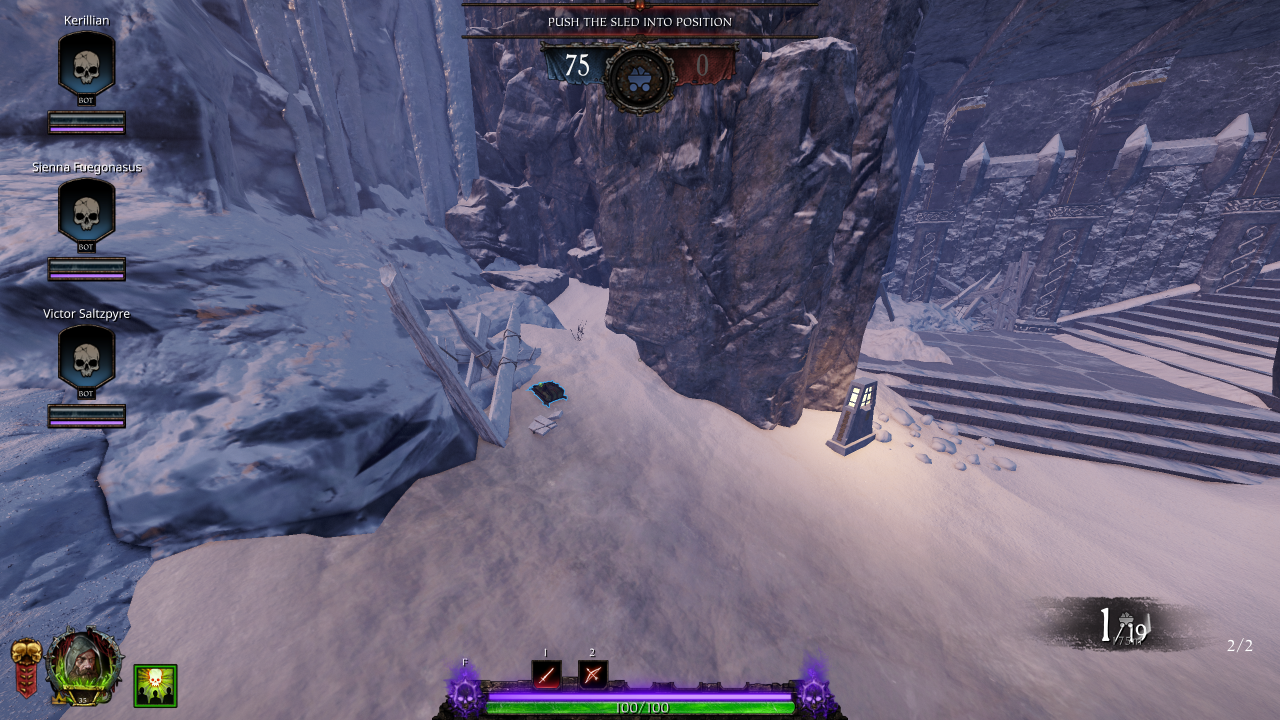
• Healing: 1 (Draught)
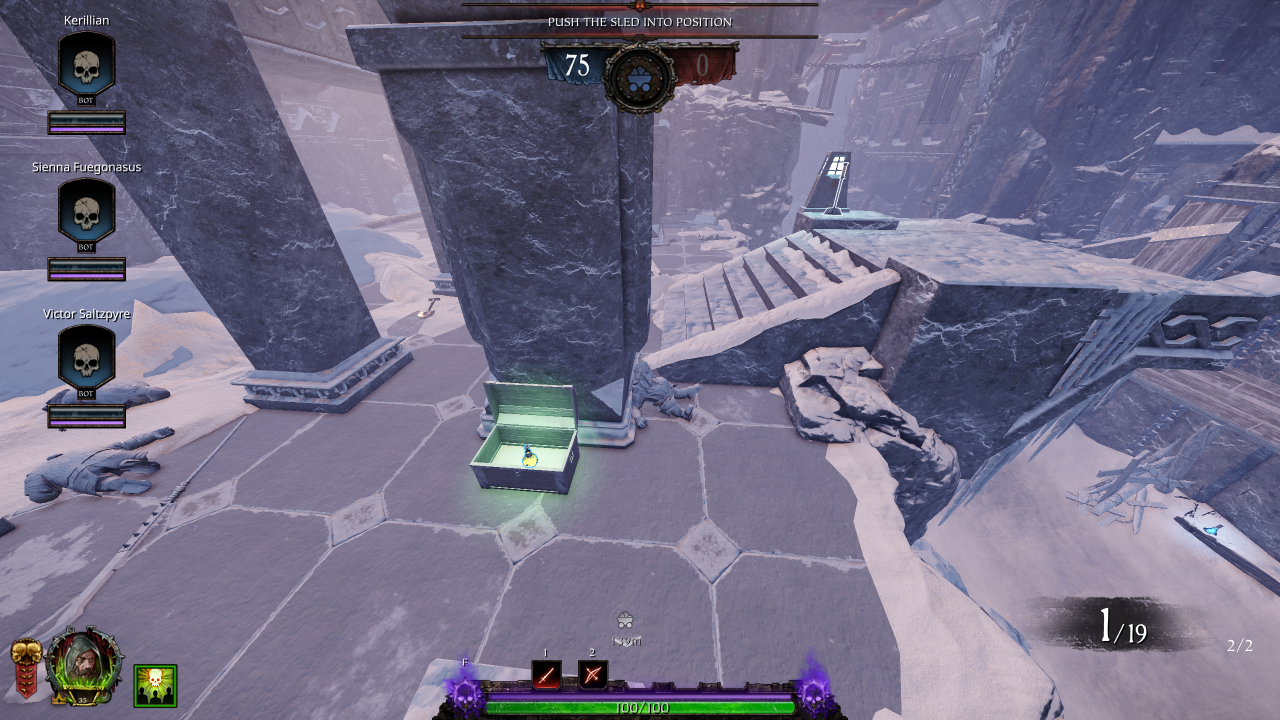
• Ammo: 1 (Pouch)
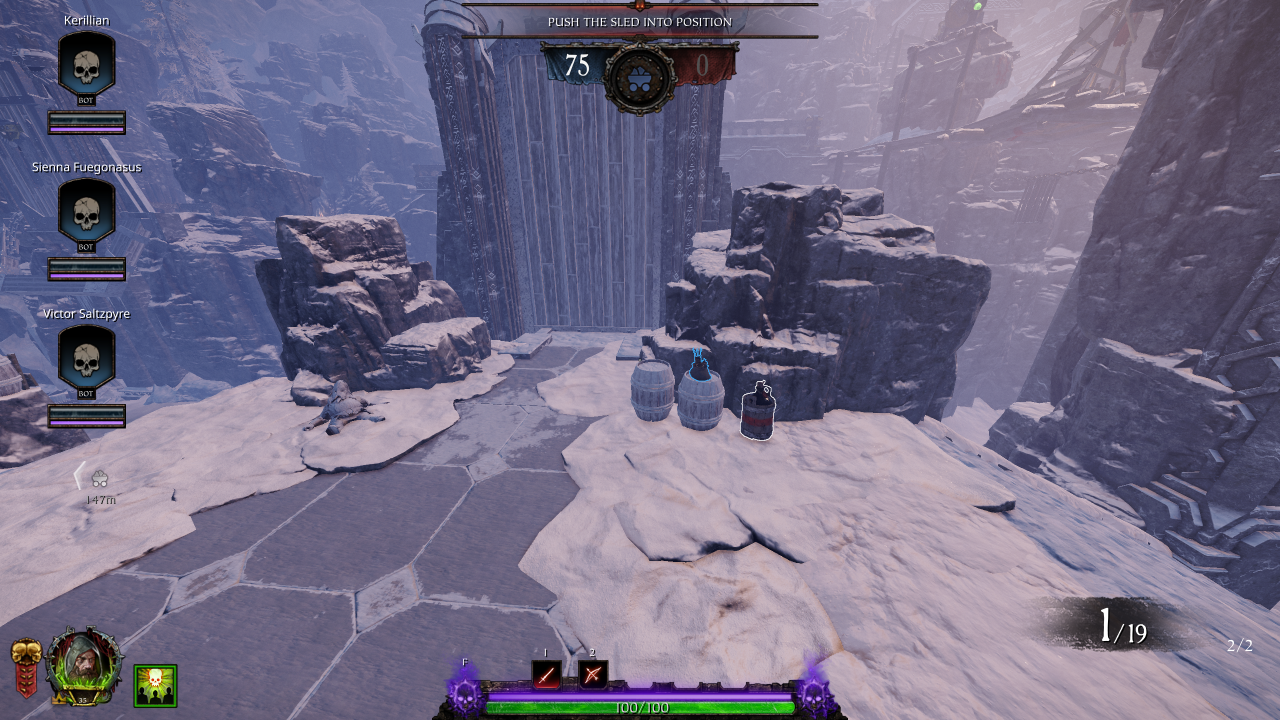
• Potions: 1
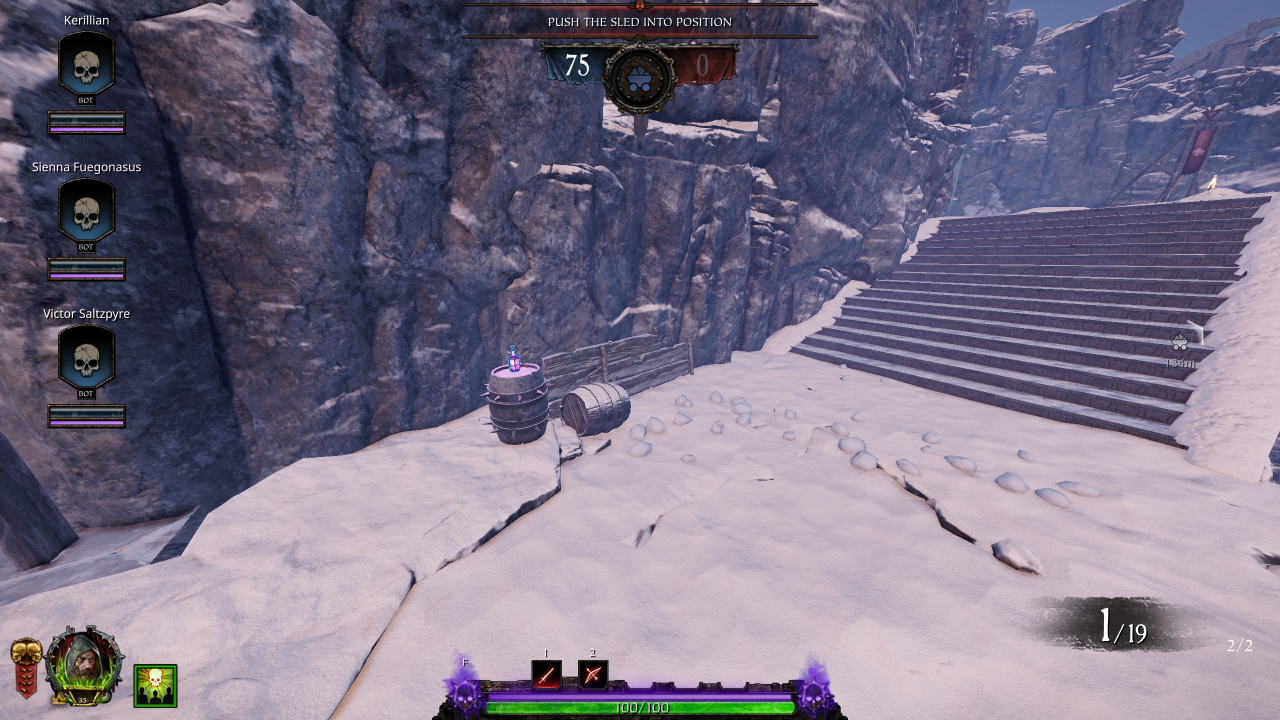
• Healing: 1 (Draught)
• Potions: 1
• Ammo: 1 (Pouch)
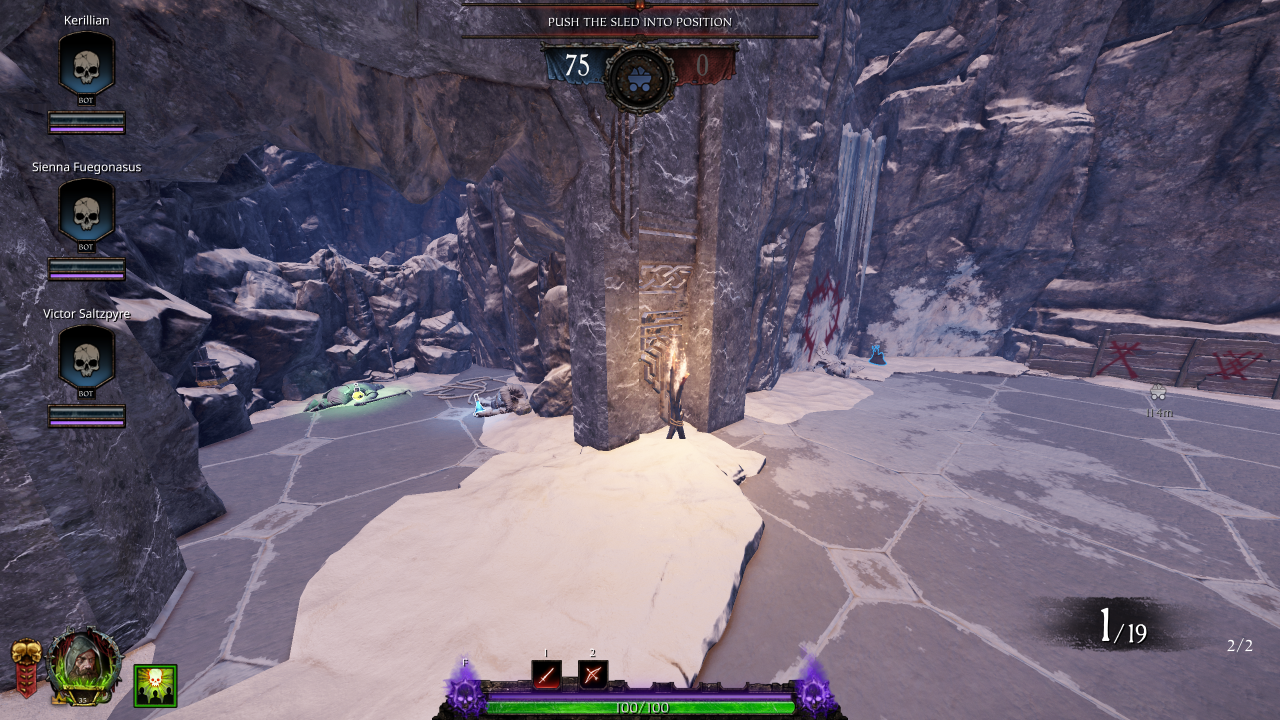
• Healing: 1 (Kit)
• Potions: 1
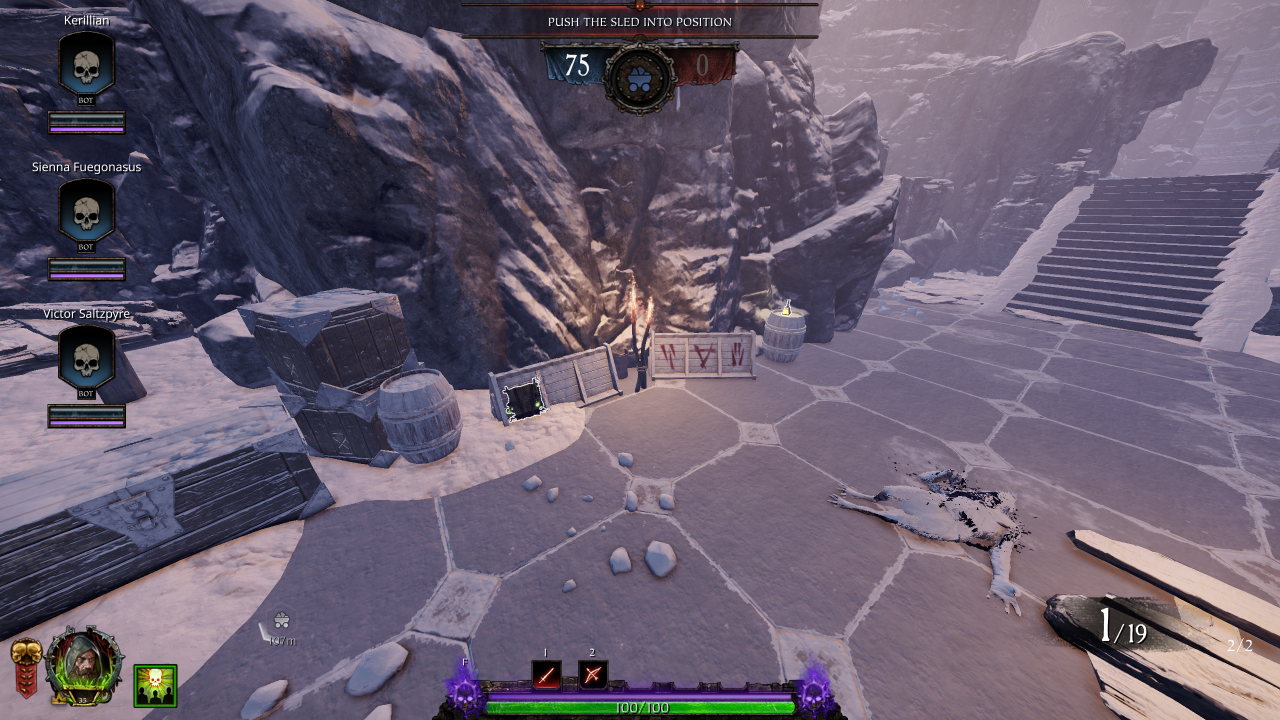
• Ammo: 2 (Pouch)
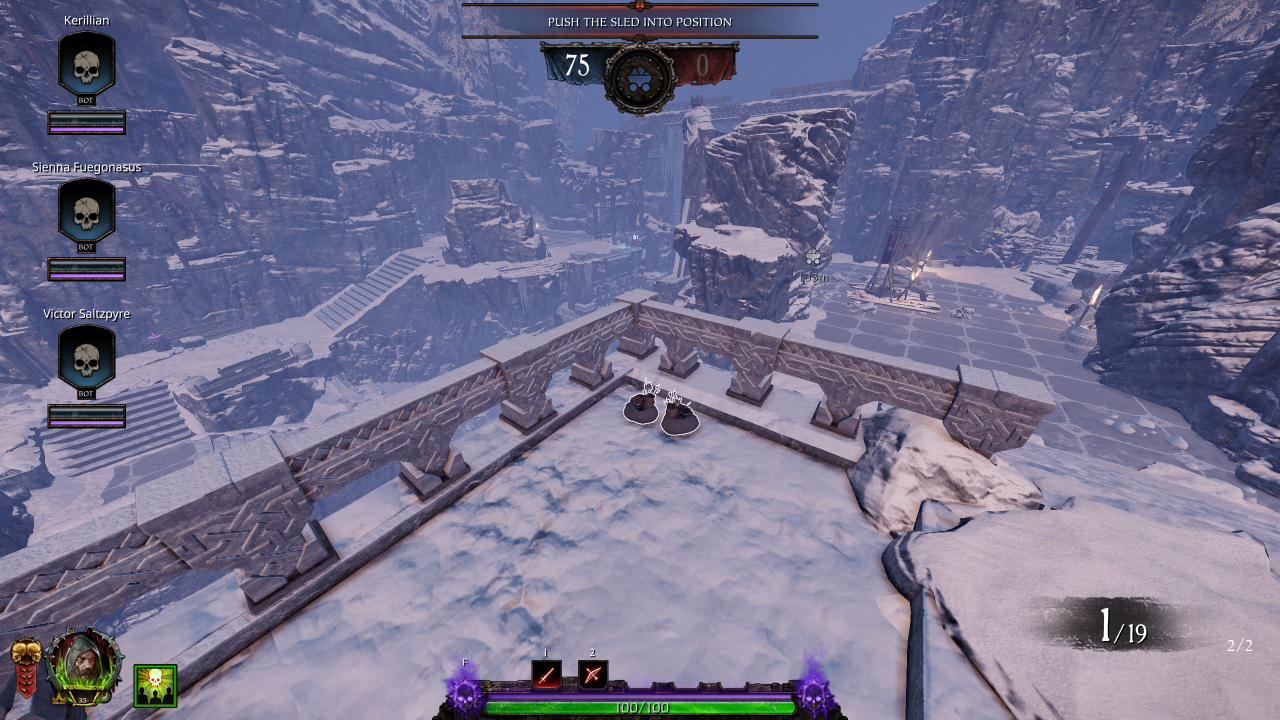
• Ammo: 2 (Pouch)
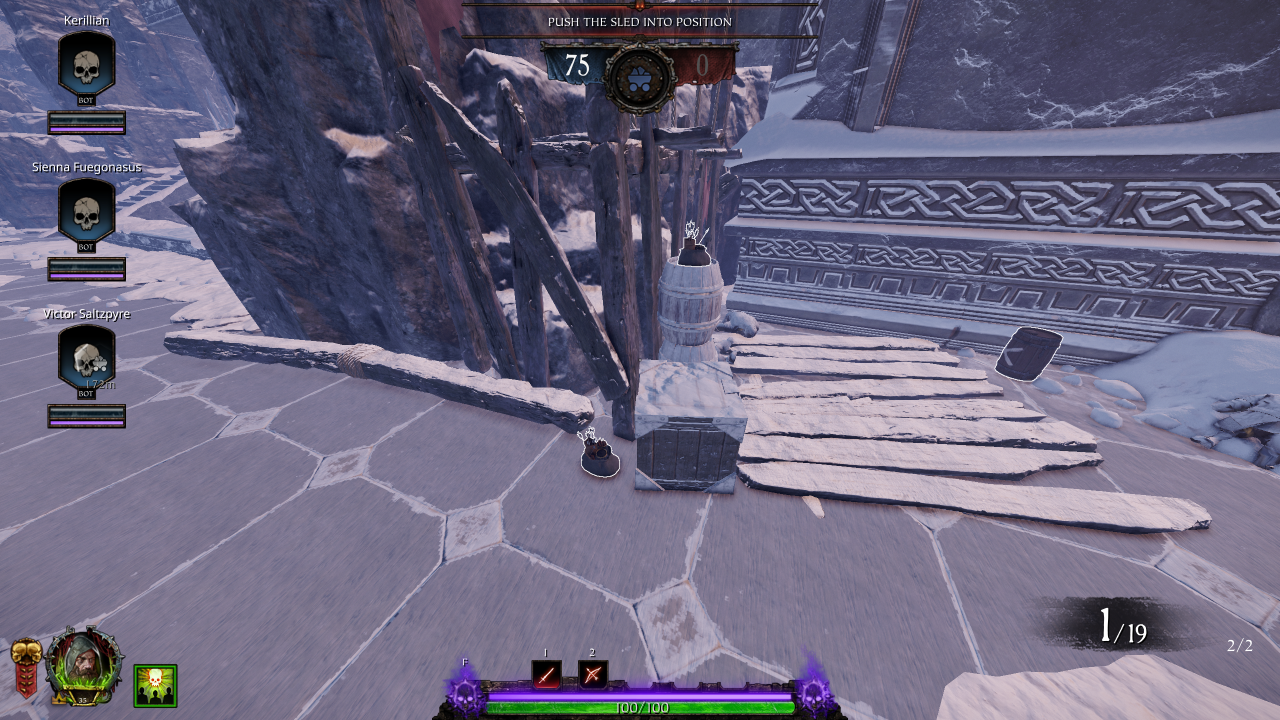
• Bombs: 1 (Explosive / Fire)
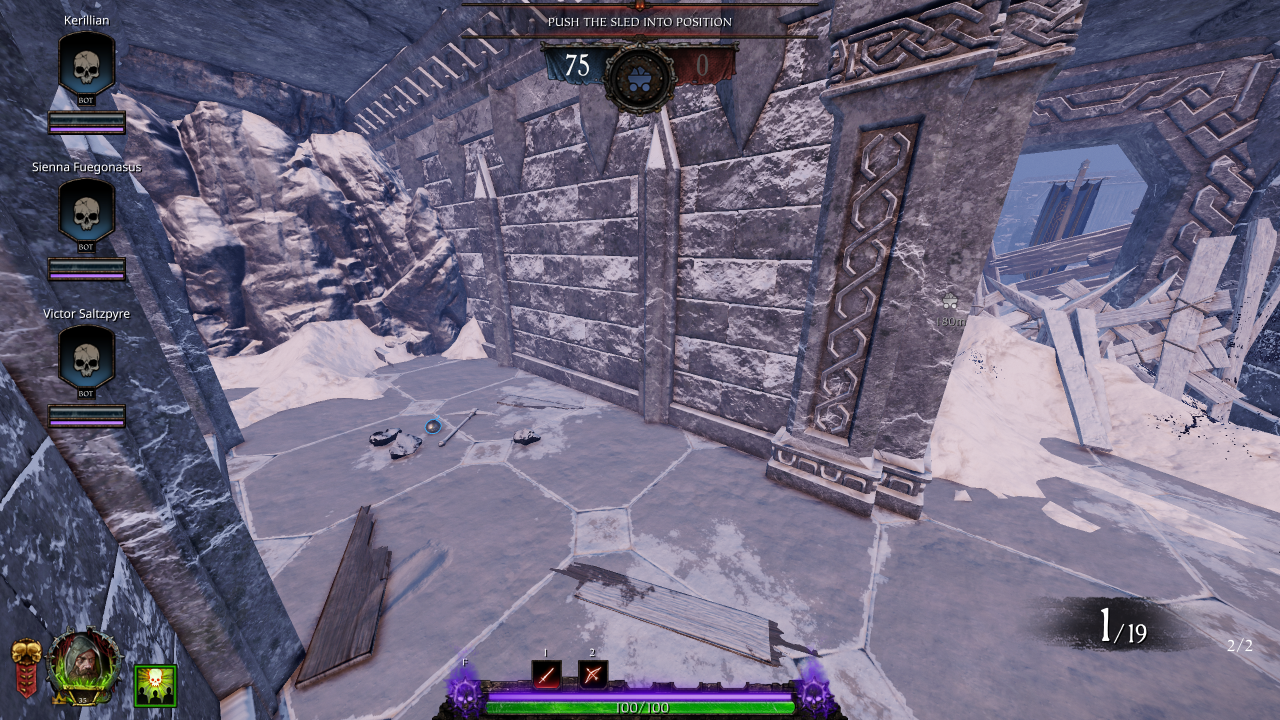
• Healing: 1 (Draught)
• Potions: 1
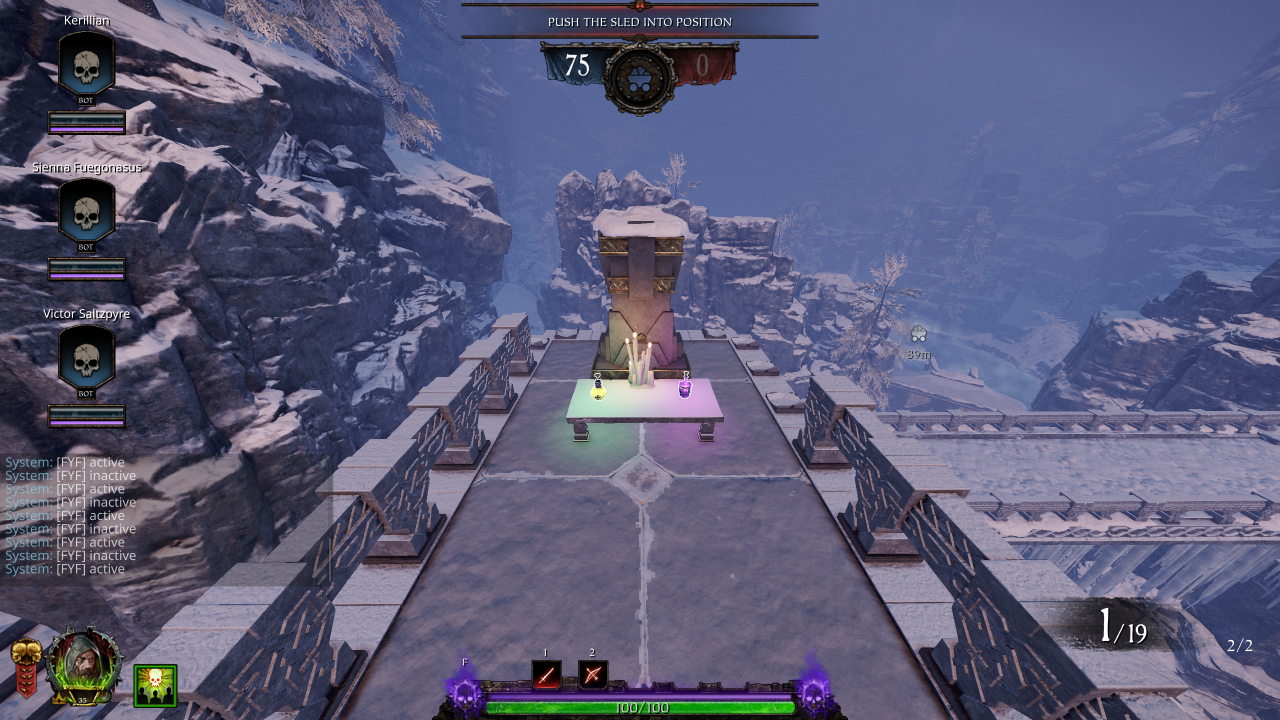
• Bombs: 1 (Explosive / Fire)
• Ammo: 1 (Crate)
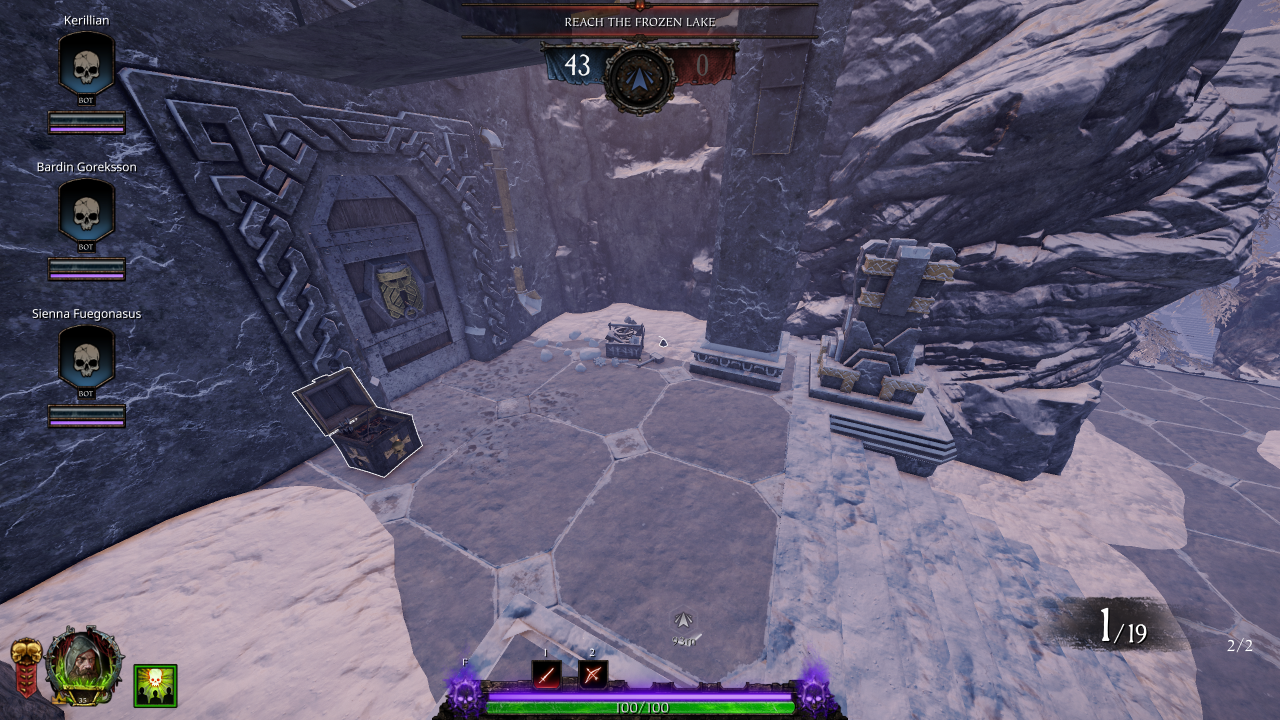
Round 3
Section 0: Spawn Room
Bombs: 4Potions: 4
Section 1.1: Spawn Room → Mad Dog Mine
All Loot from Round 2; Section 3
Section 1.2: Railyard → Drop Downs
• Bombs: 1 (Explosive / Fire)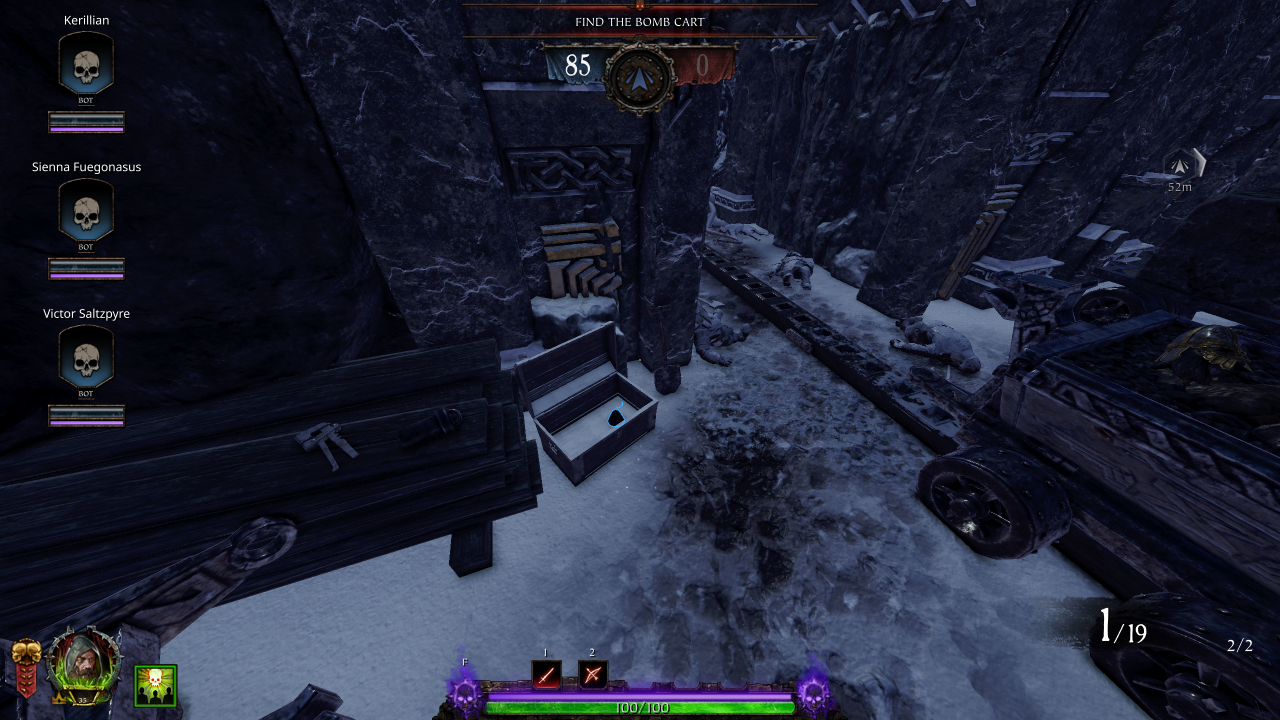
• Ammo: 1 (Pouch)
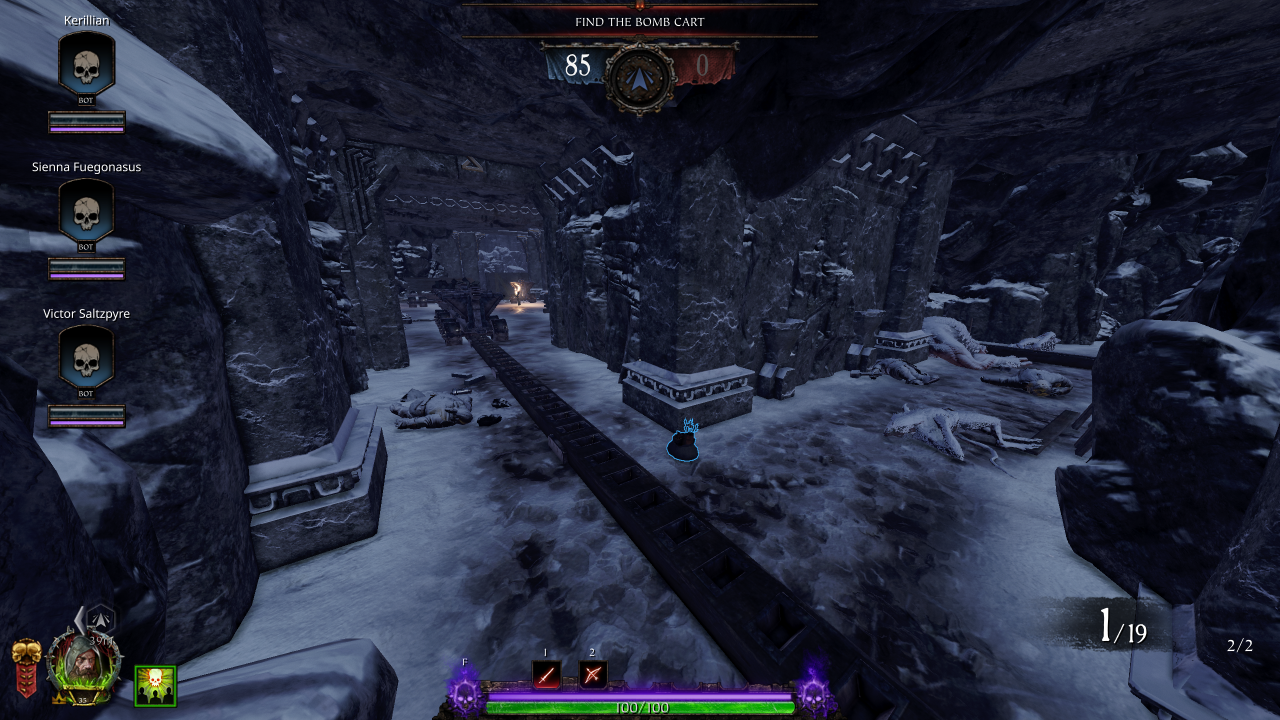
• Healing: 1 (Draught)
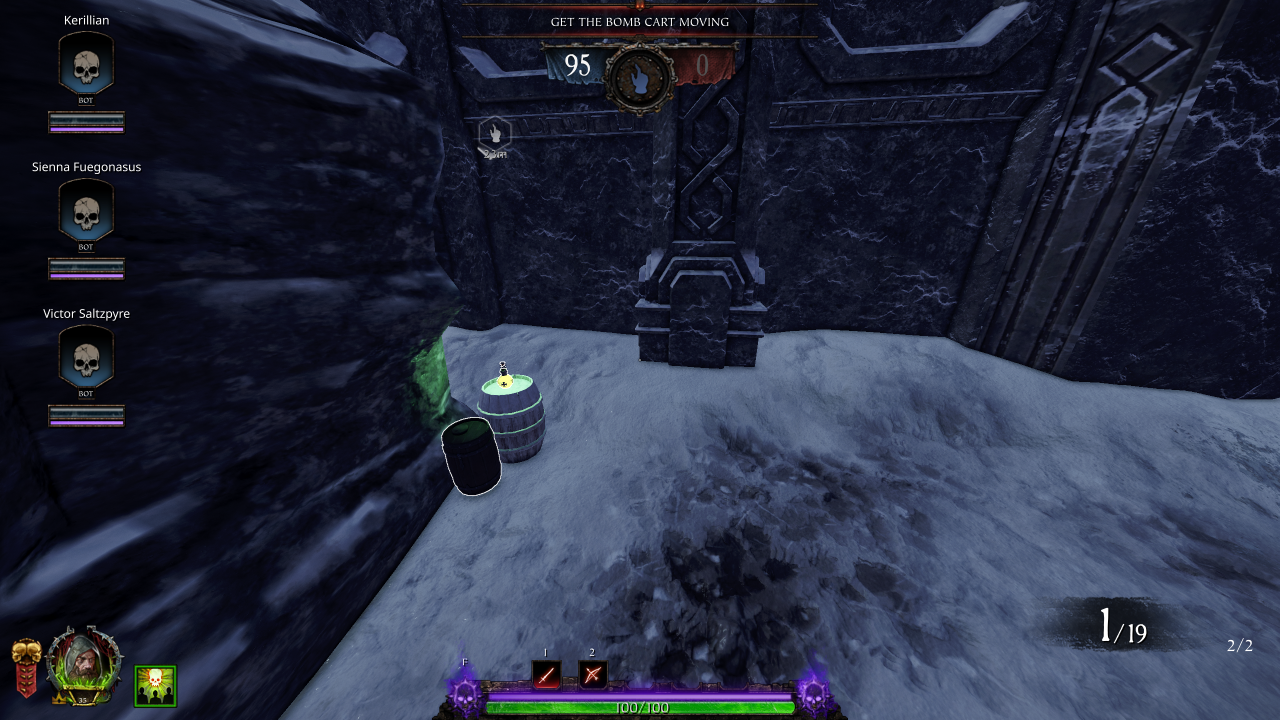
• Potions: 1
• Ammo: 1 (Pouch)
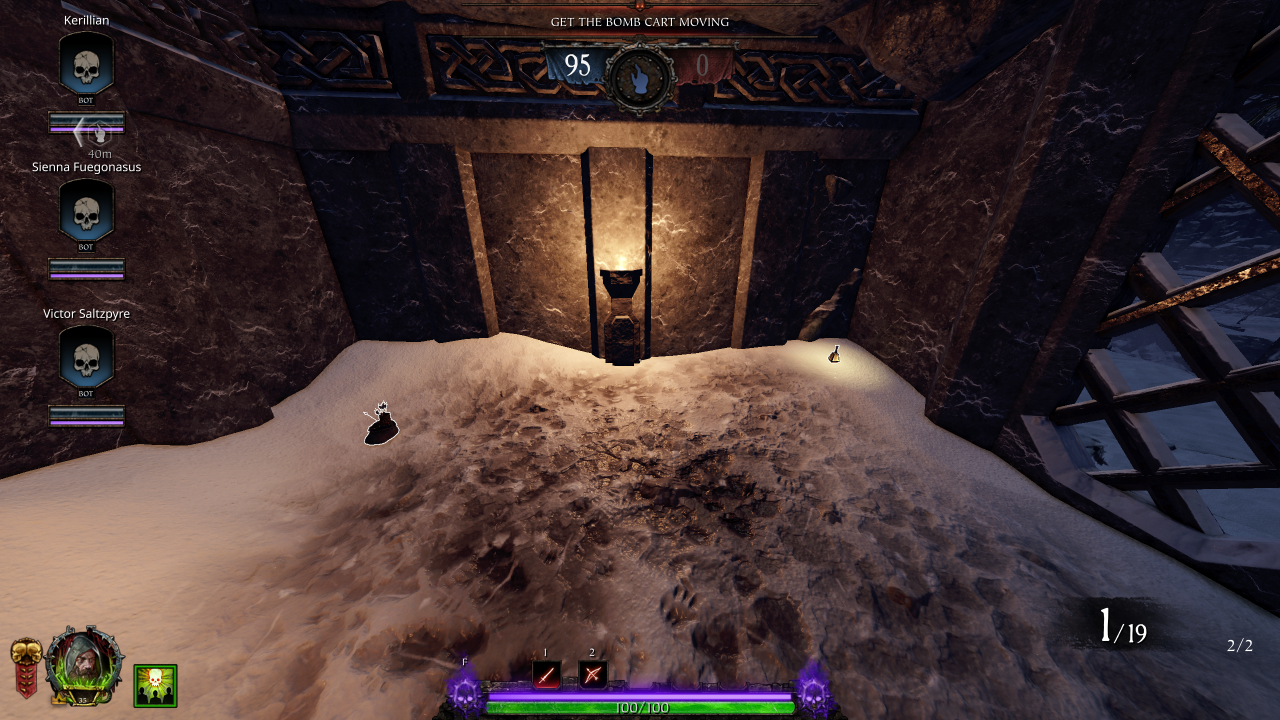
• Ammo: 1 (Pouch)
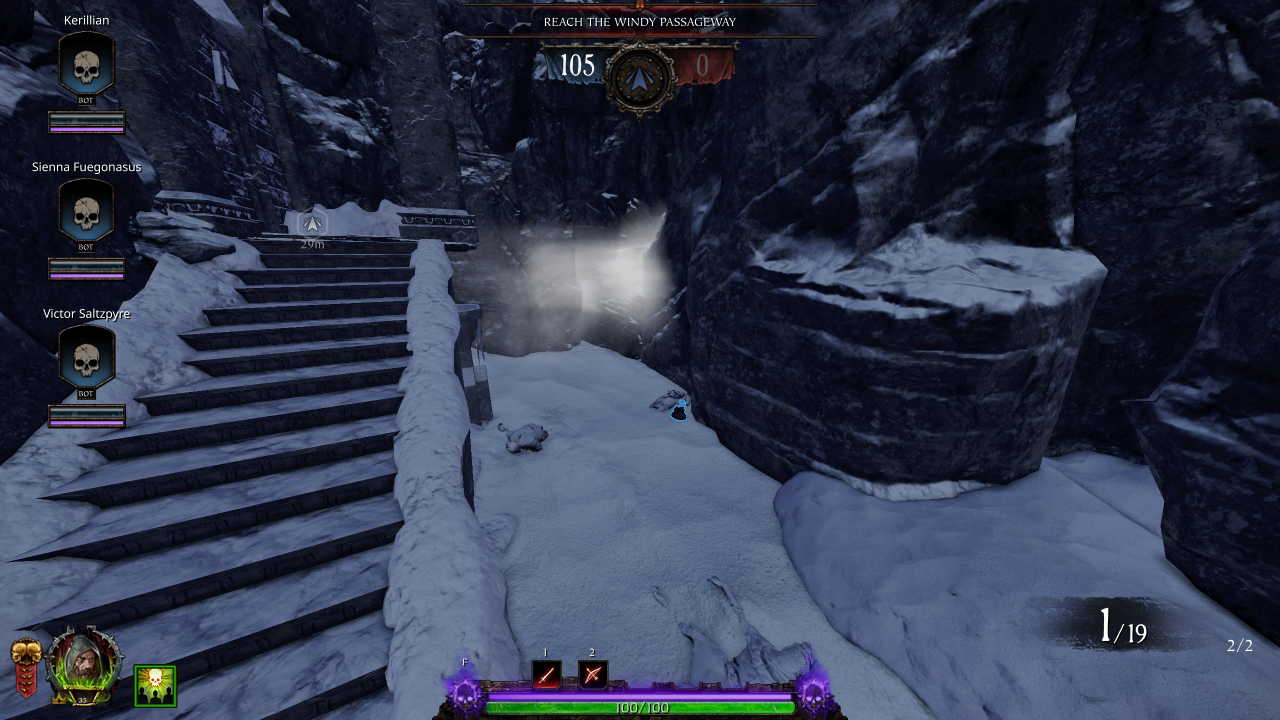
• Healing: 1 (Draught)
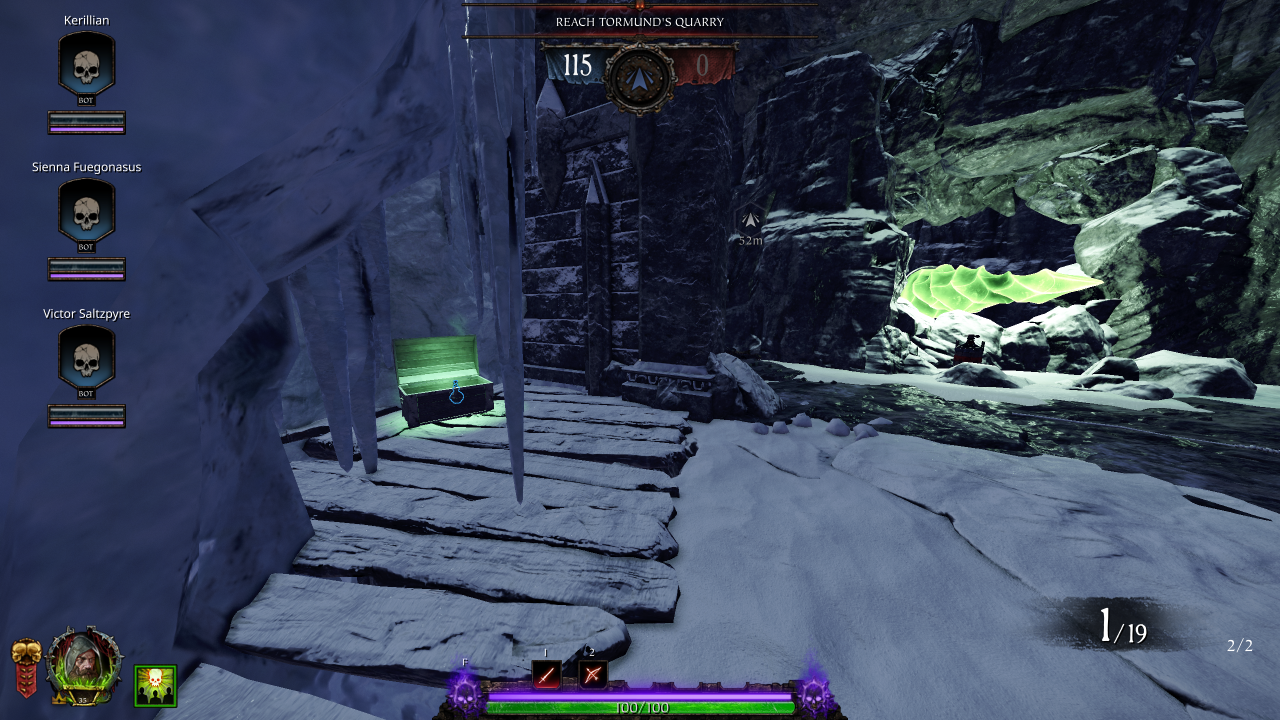
• Healing: 1 (Kit)
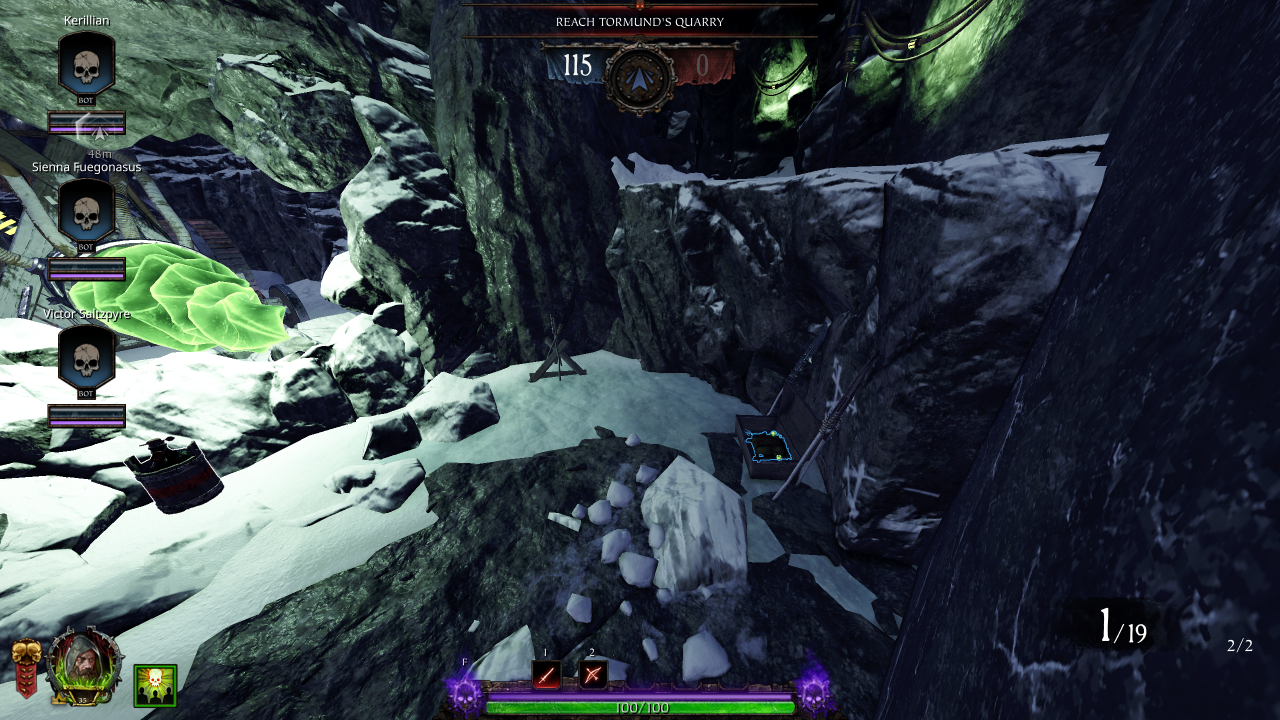
• Ammo: 1 (Crate)
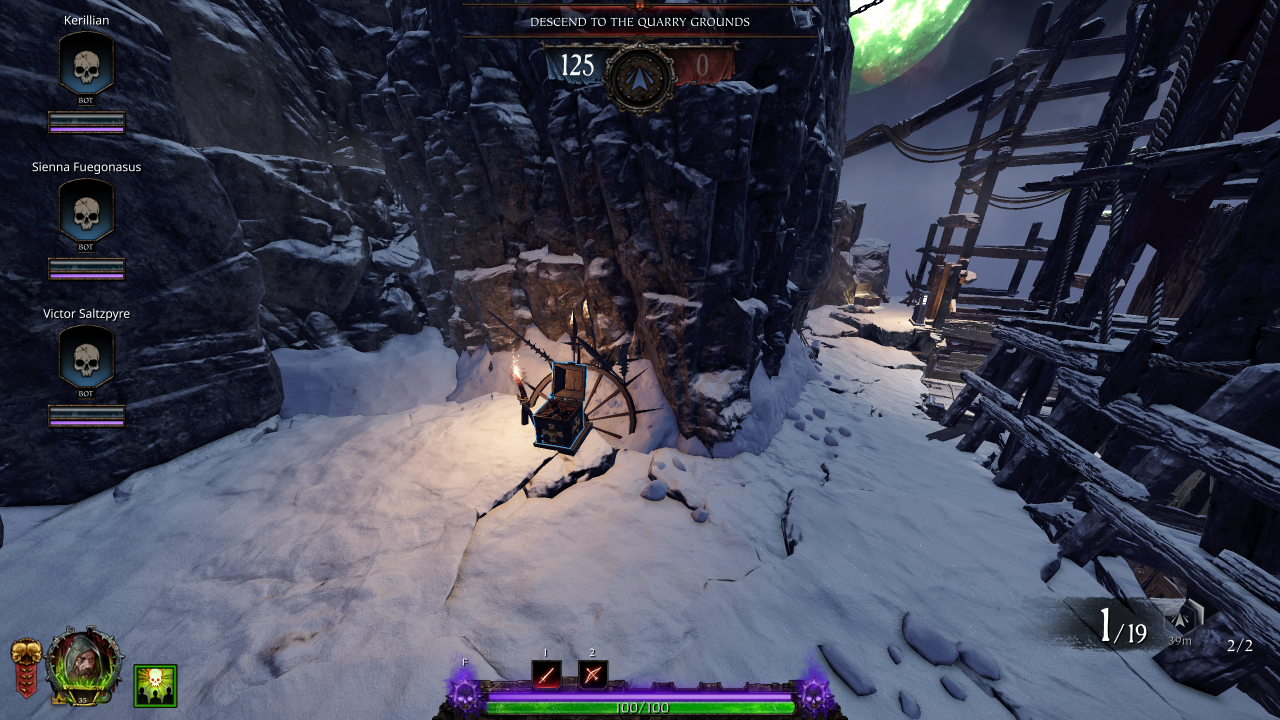
• Healing: 1 (Kit)
• Potions: 1
• Ammo: 1 (Pouch)
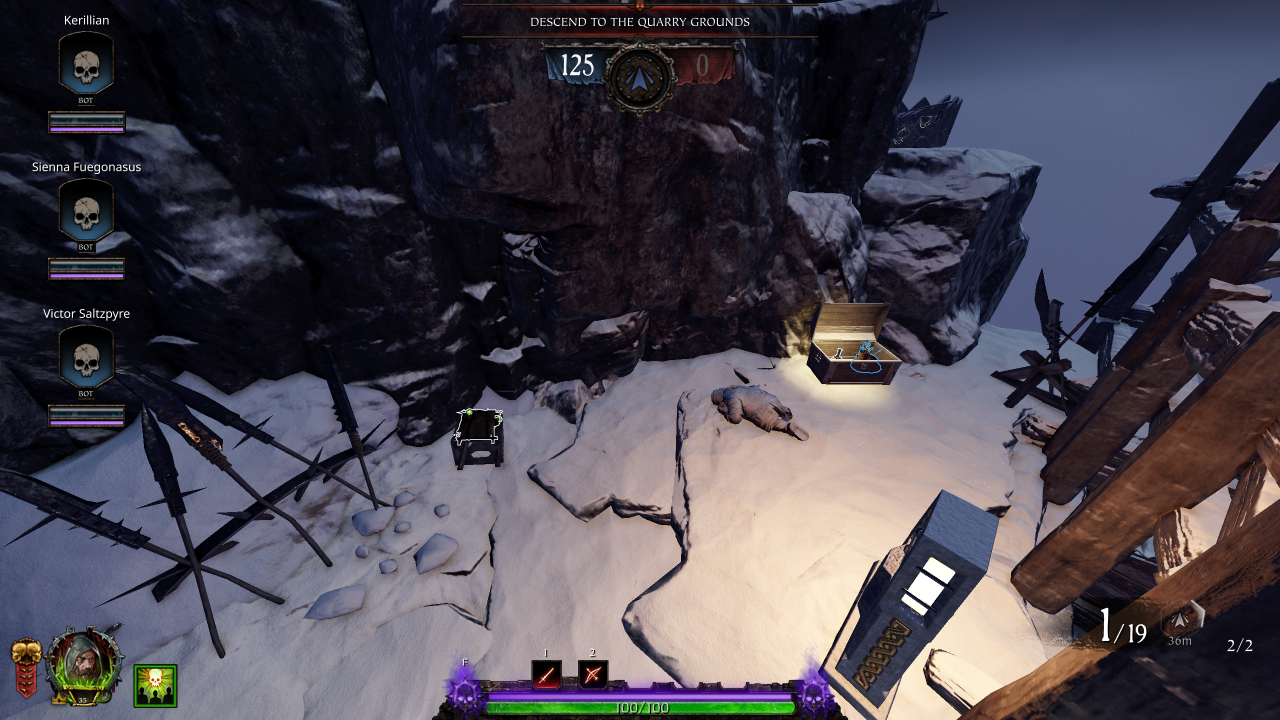
Section 2: Event Room
• Healing: 1 (Draught)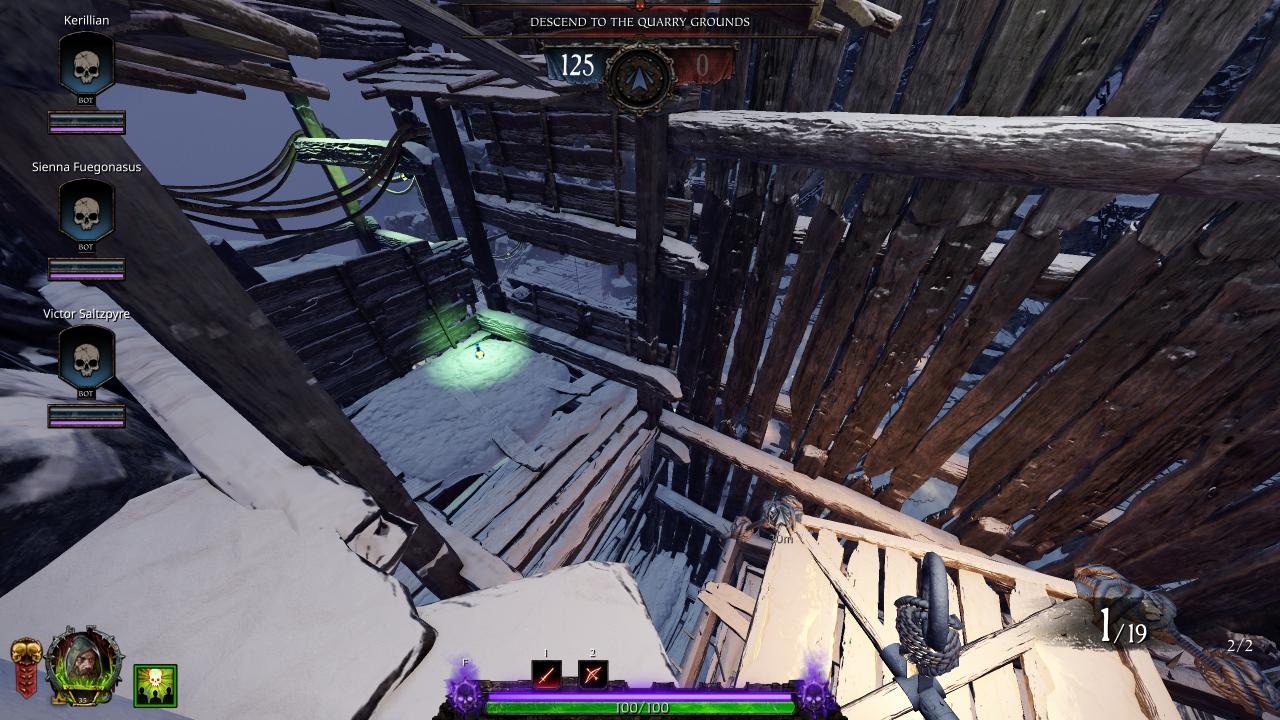
• Bombs: 1 (Explosive / Fire)
• Potions: 1
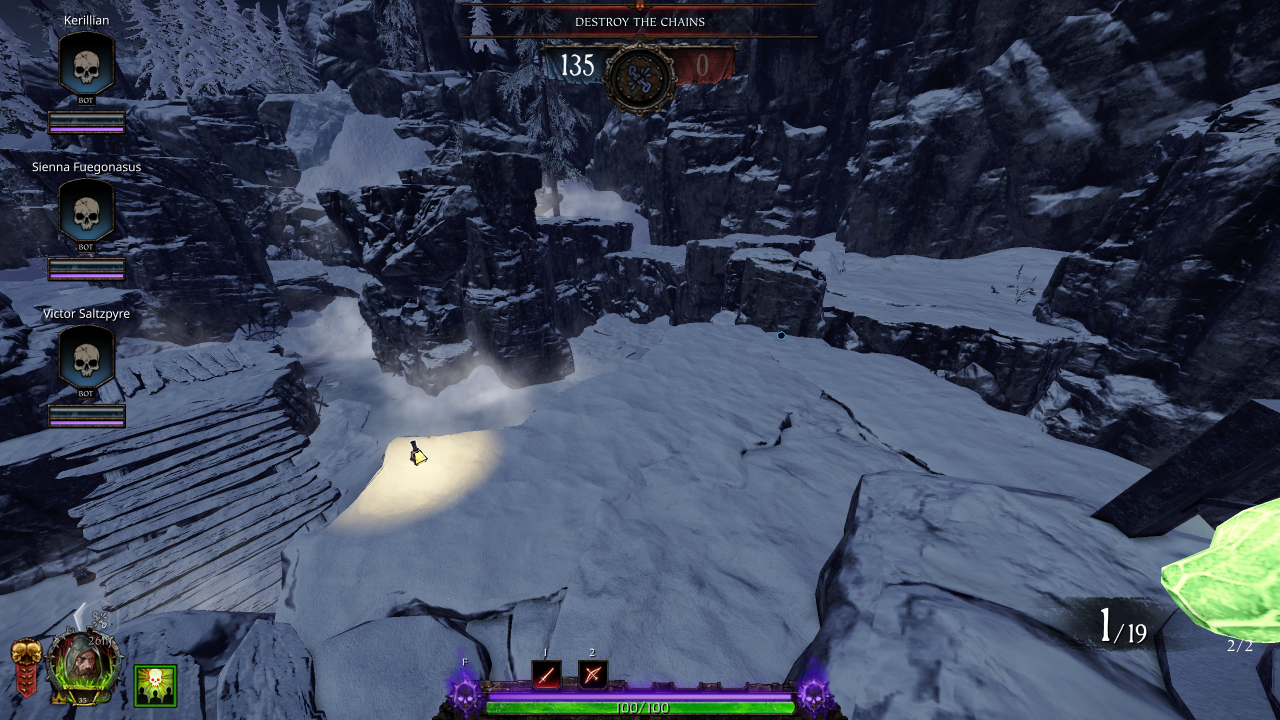
• Bombs: 1 (Explosive)
• Potions: 1
• Ammo: 1 (Pouch)
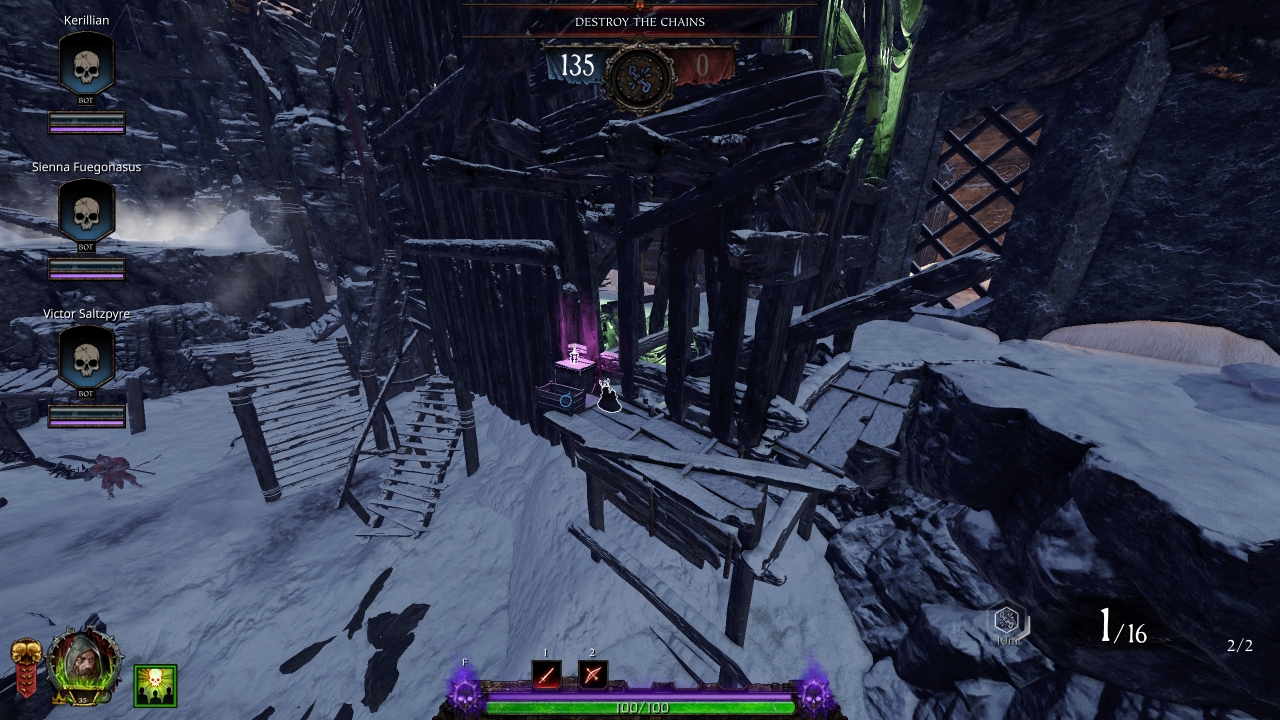
• Bombs: 1 (Explosive / Fire)
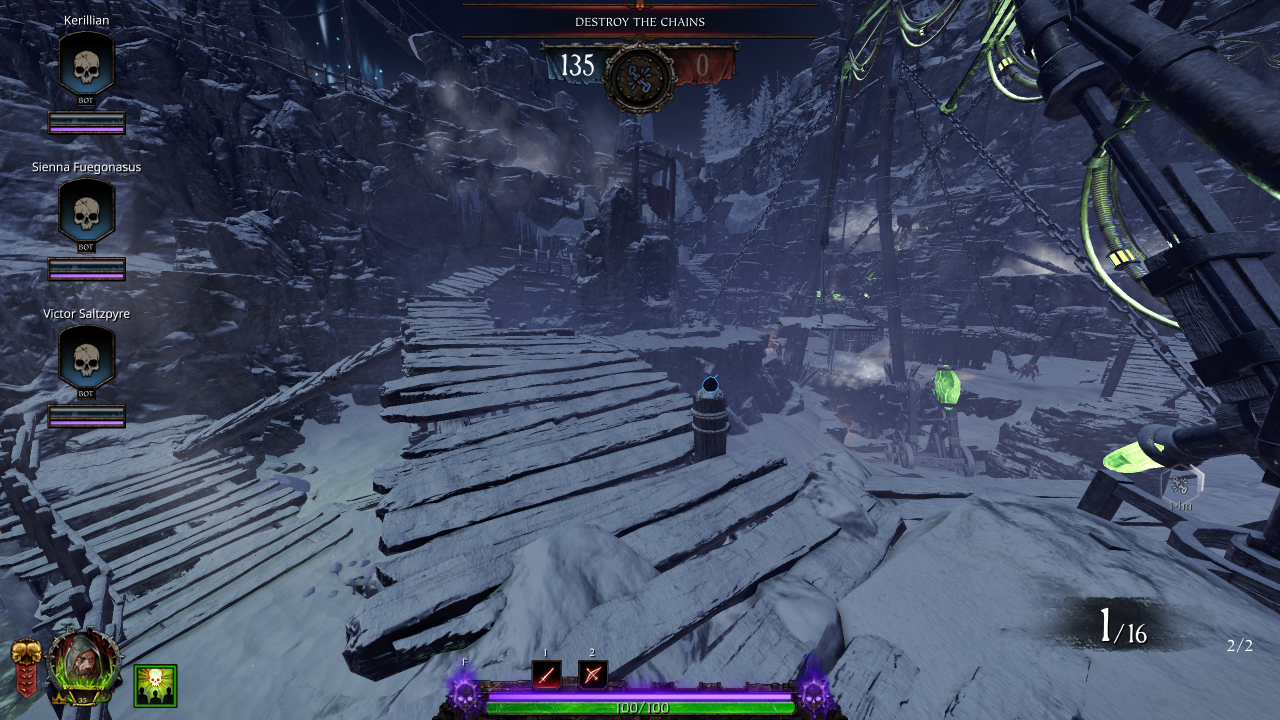
• Healing: 2 (Draught: 1 / Kit: 1)
• Bombs: 1 (Explosive)
• Ammo: 1 (Pouch)
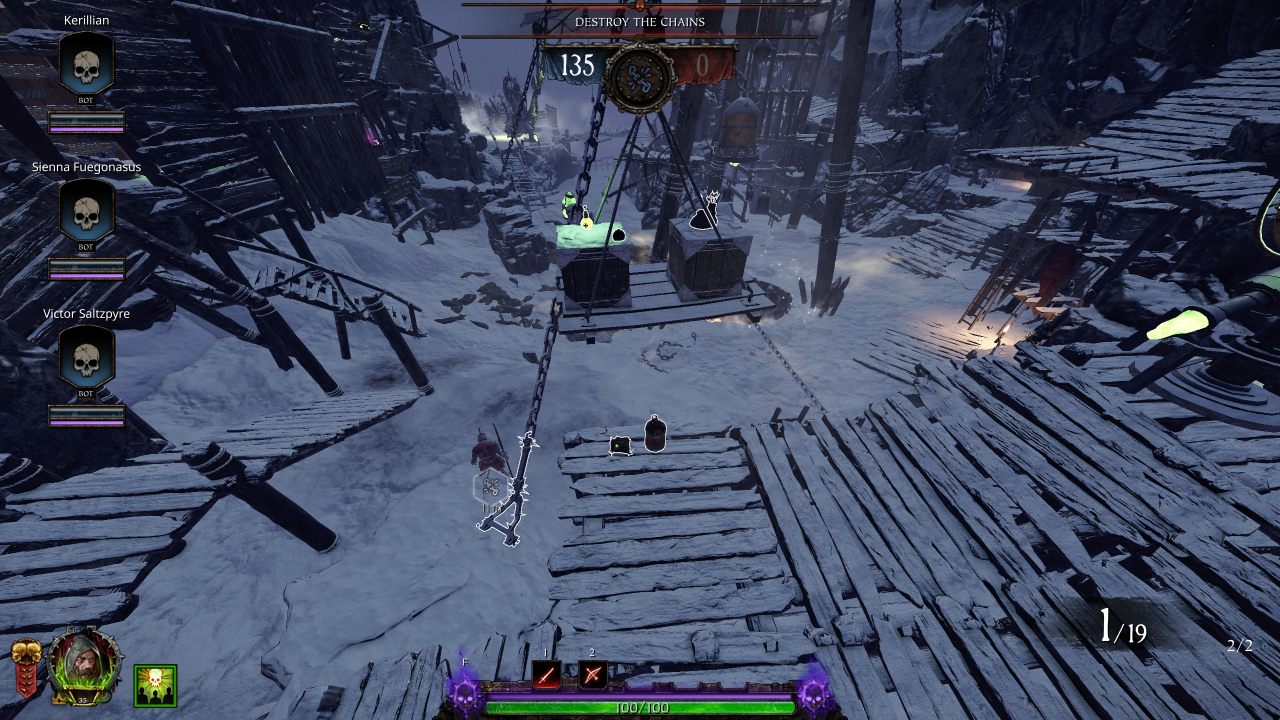
• Potions: 1
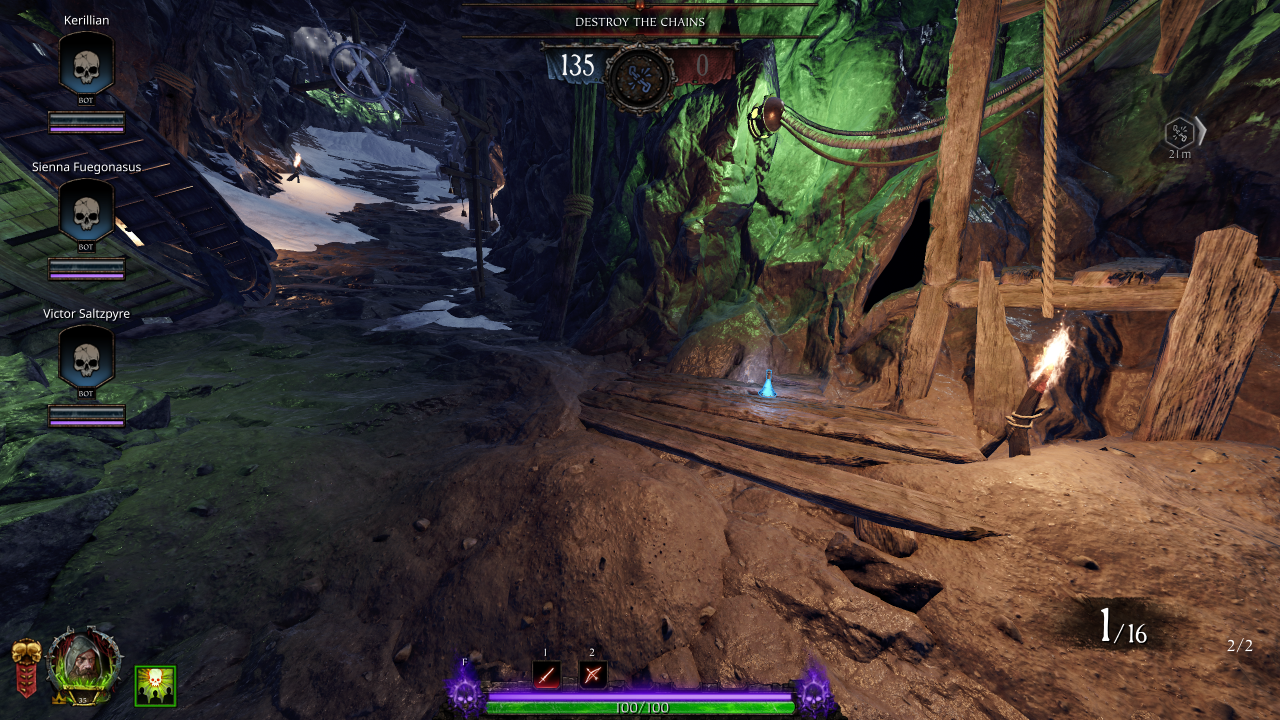
Section 3: Event Room → Bridge Of Shadows
Once you leave the Event Room, there is no more lootMore Warhammer: Vermintide 2 guides
- 【Updated to Patch 6.10】【All Careers】Legend Builds Collection★ 5 (2.6k)99k views7.6k ♥87 minUpdated Mar 10
- 【Updated to Patch 6.10】【Cataclysm Builds】Kruber all careers★ 5 (1.8k)60k views5.7k ♥33 minUpdated Mar 10
- 【Updated to Patch 6.11】Optimal Melee Weapon Combo★ 5 (1.9k)58k views5.2k ♥26 minUpdated Jun 11
- 【Updated to Patch 6.10】【Cataclysm Builds】Saltzpyre all careers★ 5 (1.7k)57k views5.6k ♥36 minUpdated Mar 10
- 【Updated to Patch 6.10】【Cataclysm Builds】Bardin all careers★ 5 (1.8k)57k views5.6k ♥33 minUpdated May 12
- 【Updated to Patch 6.10】【Cataclysm Builds】Sienna all careers★ 5 (1.7k)57k views5.4k ♥37 minUpdated Mar 10




🔥 Popular guides
- Upgrading to PremiumTeam Fortress 2★ 5 (20k)1441k views11k ♥6 minUpdated May 11, 2022
- No More Room in Hell Official ManualNo More Room in Hell★ 5 (2.8k)569k views2.1k ♥29 minUpdated Apr 22, 2019
- NMRiH Community Hosting GuidesNo More Room in Hell★ 5 (526)351k views653 ♥1 minUpdated Aug 10, 2022
- ULTIMATE GUIDE FOR GAME DEV TYCOONGame Dev Tycoon★ 5 (5.8k)326k views10k ♥4 minUpdated 23 Jan, 2014
- How to 'Git Gud' Soon™MORDHAU★ 5 (2k)318k views3k ♥68 minUpdated Nov 16, 2024
- Лучшие кооперативные игры SteamPAYDAY 2★ 5 (1.5k)315k views2.1k ♥56 minRussianUpdated Apr 27, 2025






This guide was created by its original author on the Steam Community. Are you the author and want it removed? Request removal.