Early Game Gravelord Sword Build
Cool Sword Facts
- It takes Demon Titanite. (Even at base level this thing packs a punch.)
- I HIGHLY recommend two-handing this weapon. Not only is it quite heavy without serious END, its play style is just not suited for using a shield at all.
- R1 is a slashing attack with a lot of range.
- R2 is a thrust attack (great for doorways).
- Jump attack is a downwards chop.
- Post-roll attack is a wide arc that has a slight delay (helps with crowd control).
- Technically the sword does 300 poison proc but unless you're fighting an enemy with a lot of HP, they're usually dead before it does anything. The poison is more obvious with bosses like the Stray Demon and Ornstein, and even then the actual HP numbers cut doesn't show up on the enemy health bar.
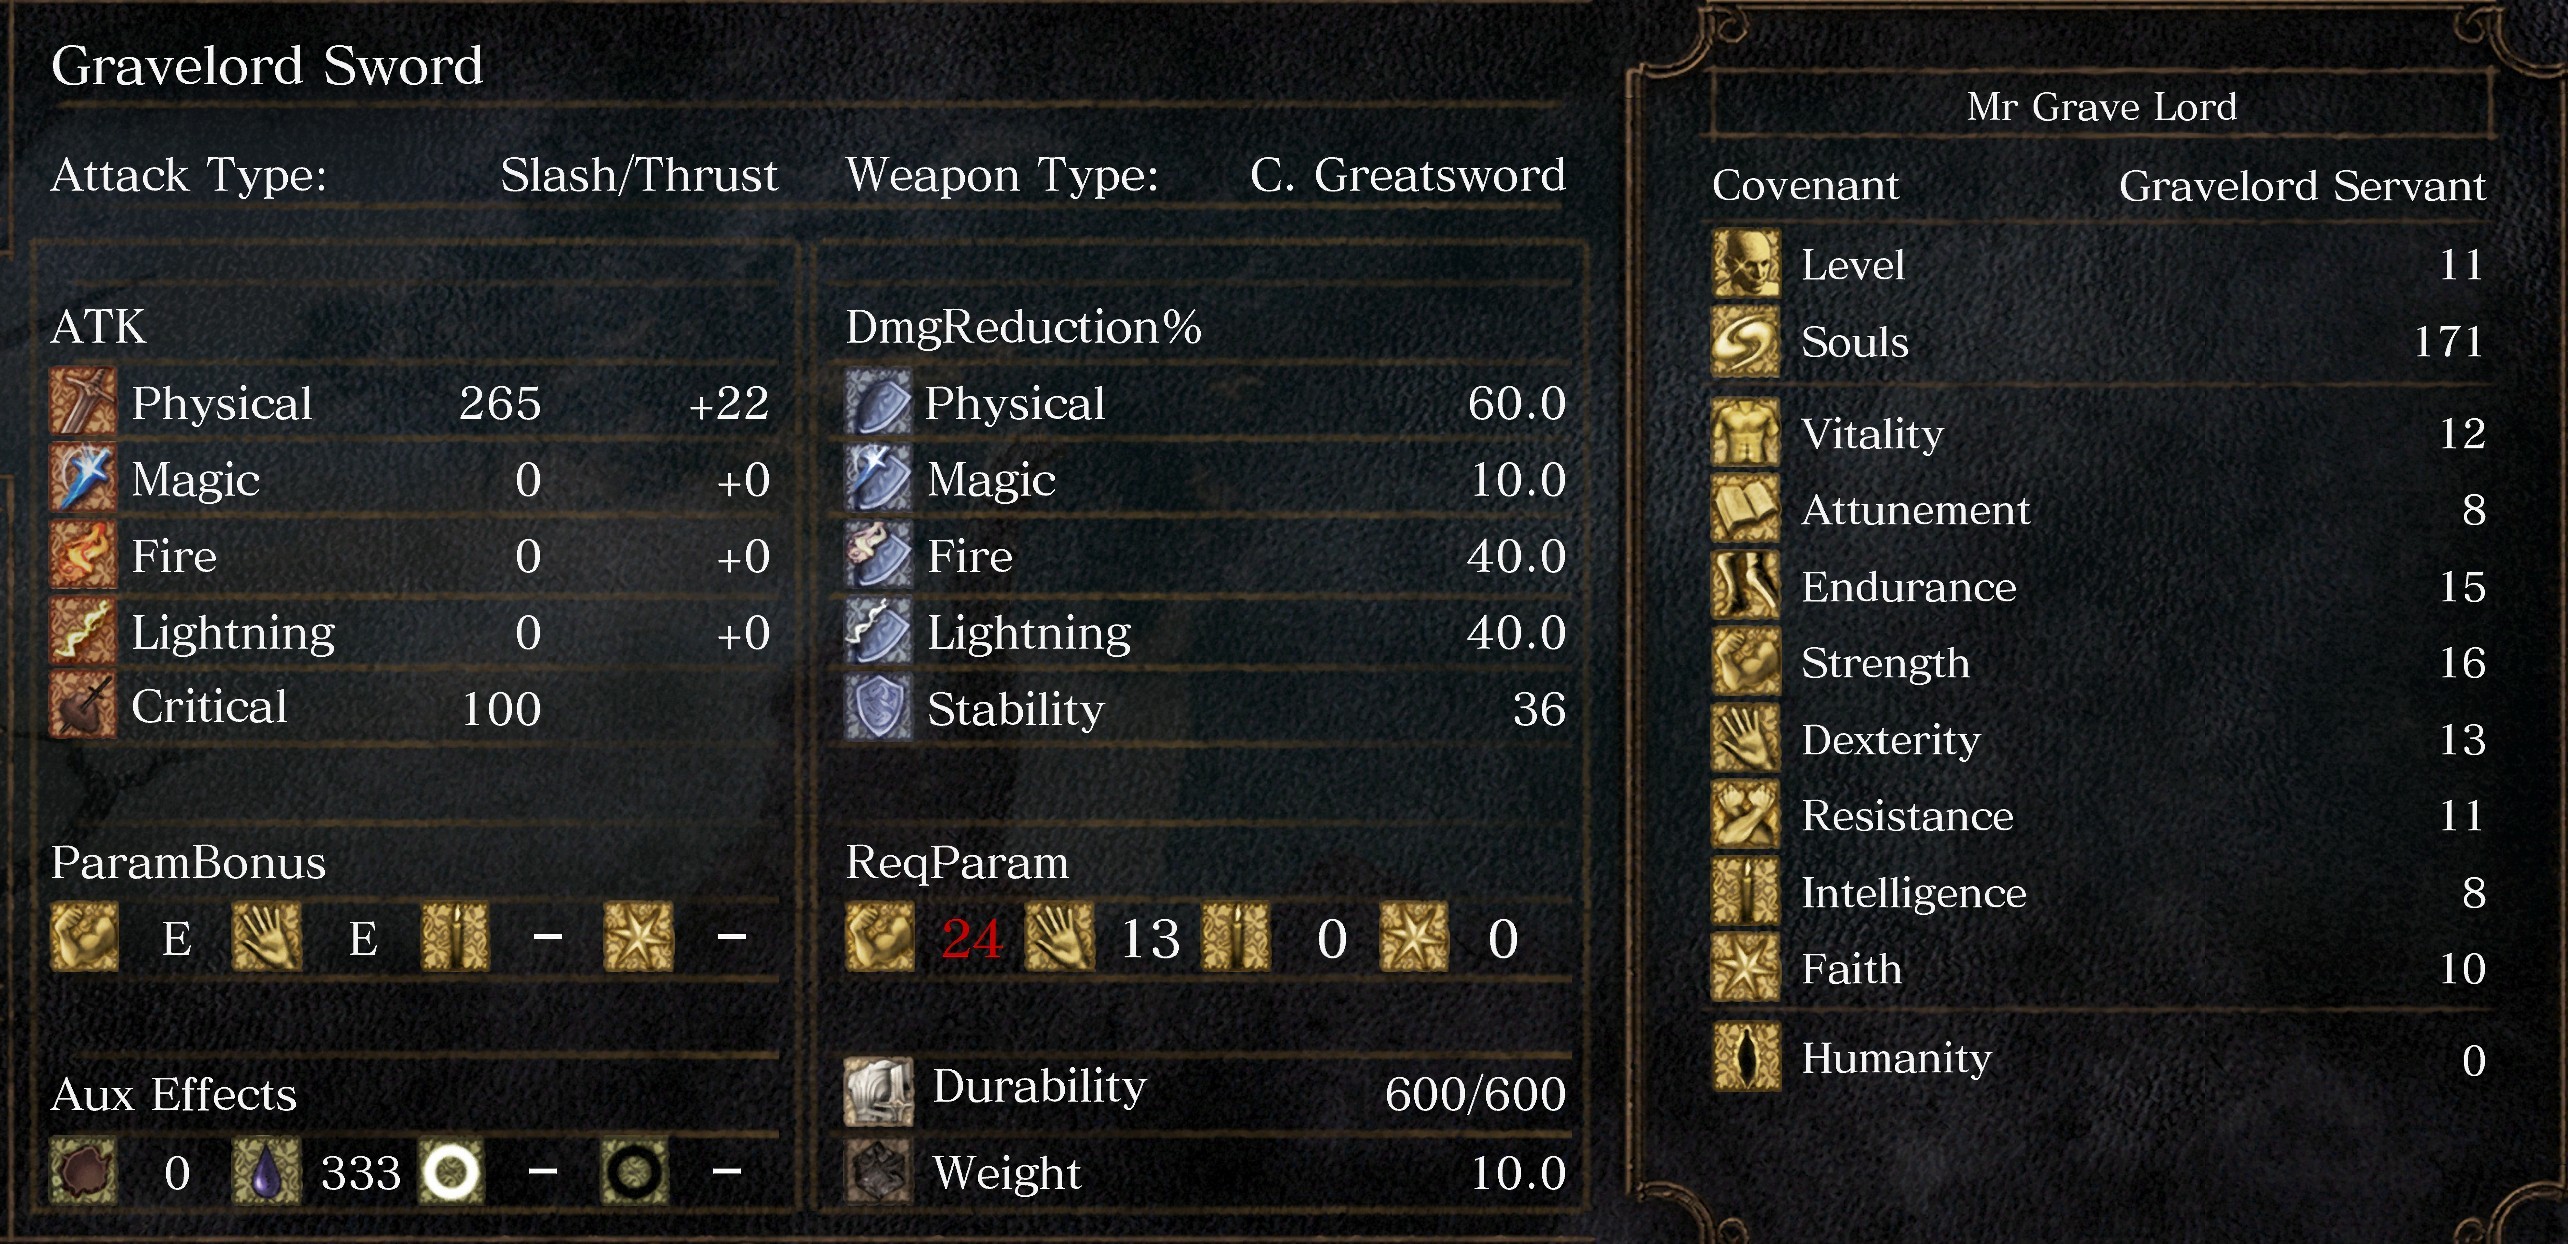
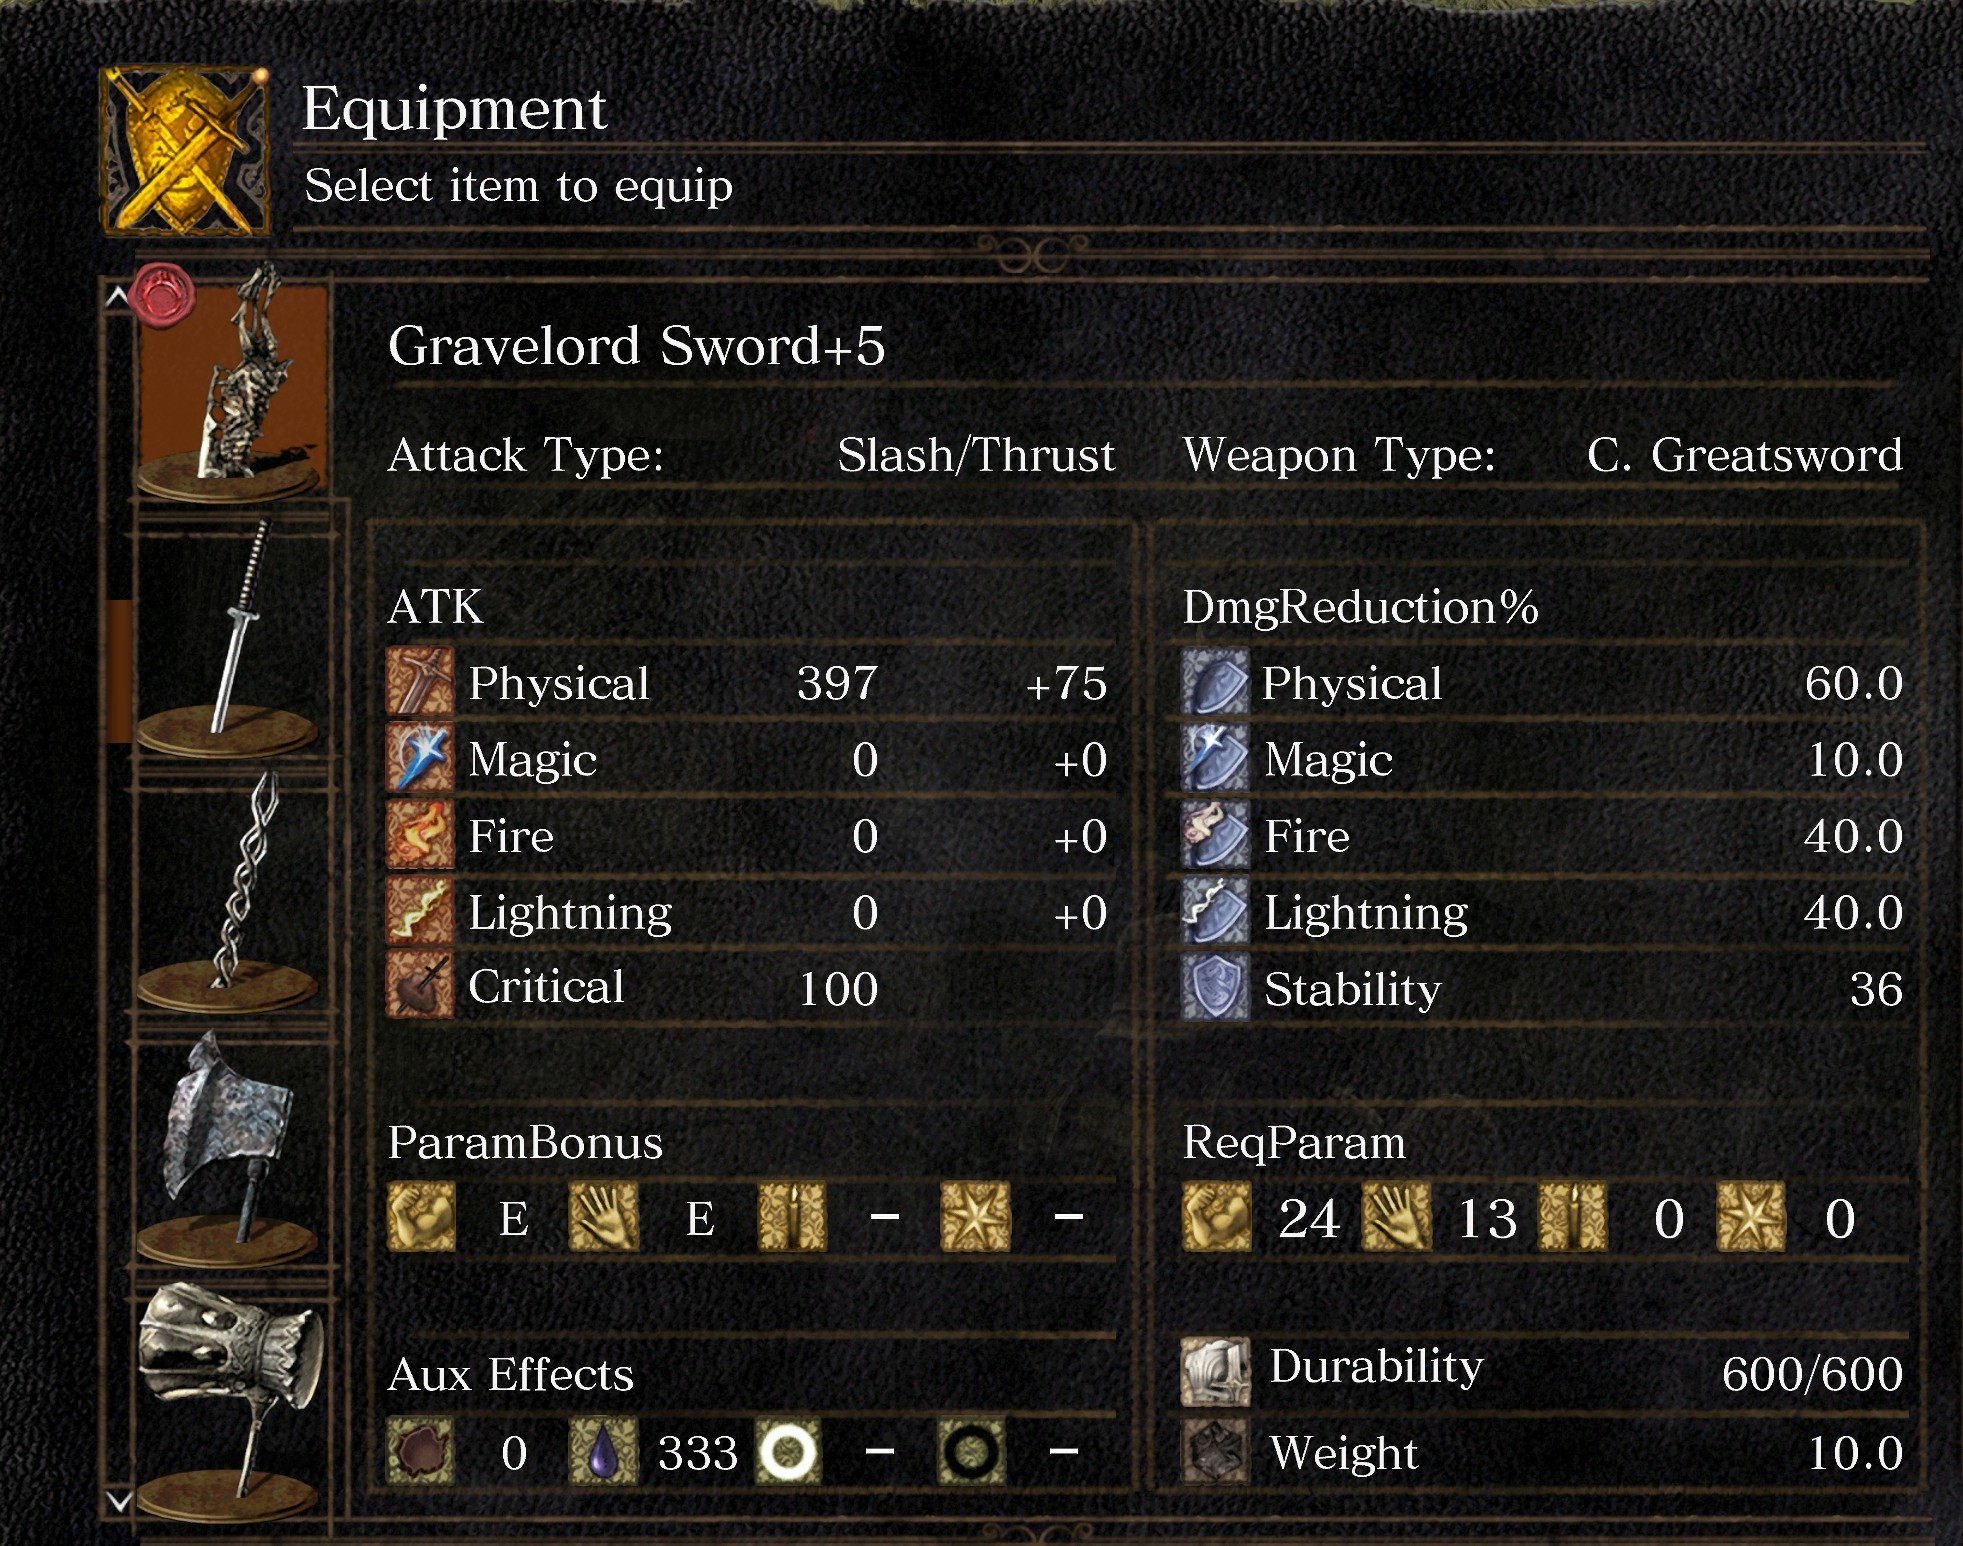
Choosing a Class
To begin, make sure that your character can or WILL have the ability to equip the Gravelord Sword by the time that you get it, or you'll be in for a world of embarrassment.
"No, no guys! I swear I have this super epic trick to get my hands on one of the most powerful weapons in the game! I dodged 500 skeletons to get here!"
My friend, you have 10 STR. You cannot wield the sword with two hands, let alone one.
You will need at minimum:- STR 16
- DEX 13
- END ~10-15
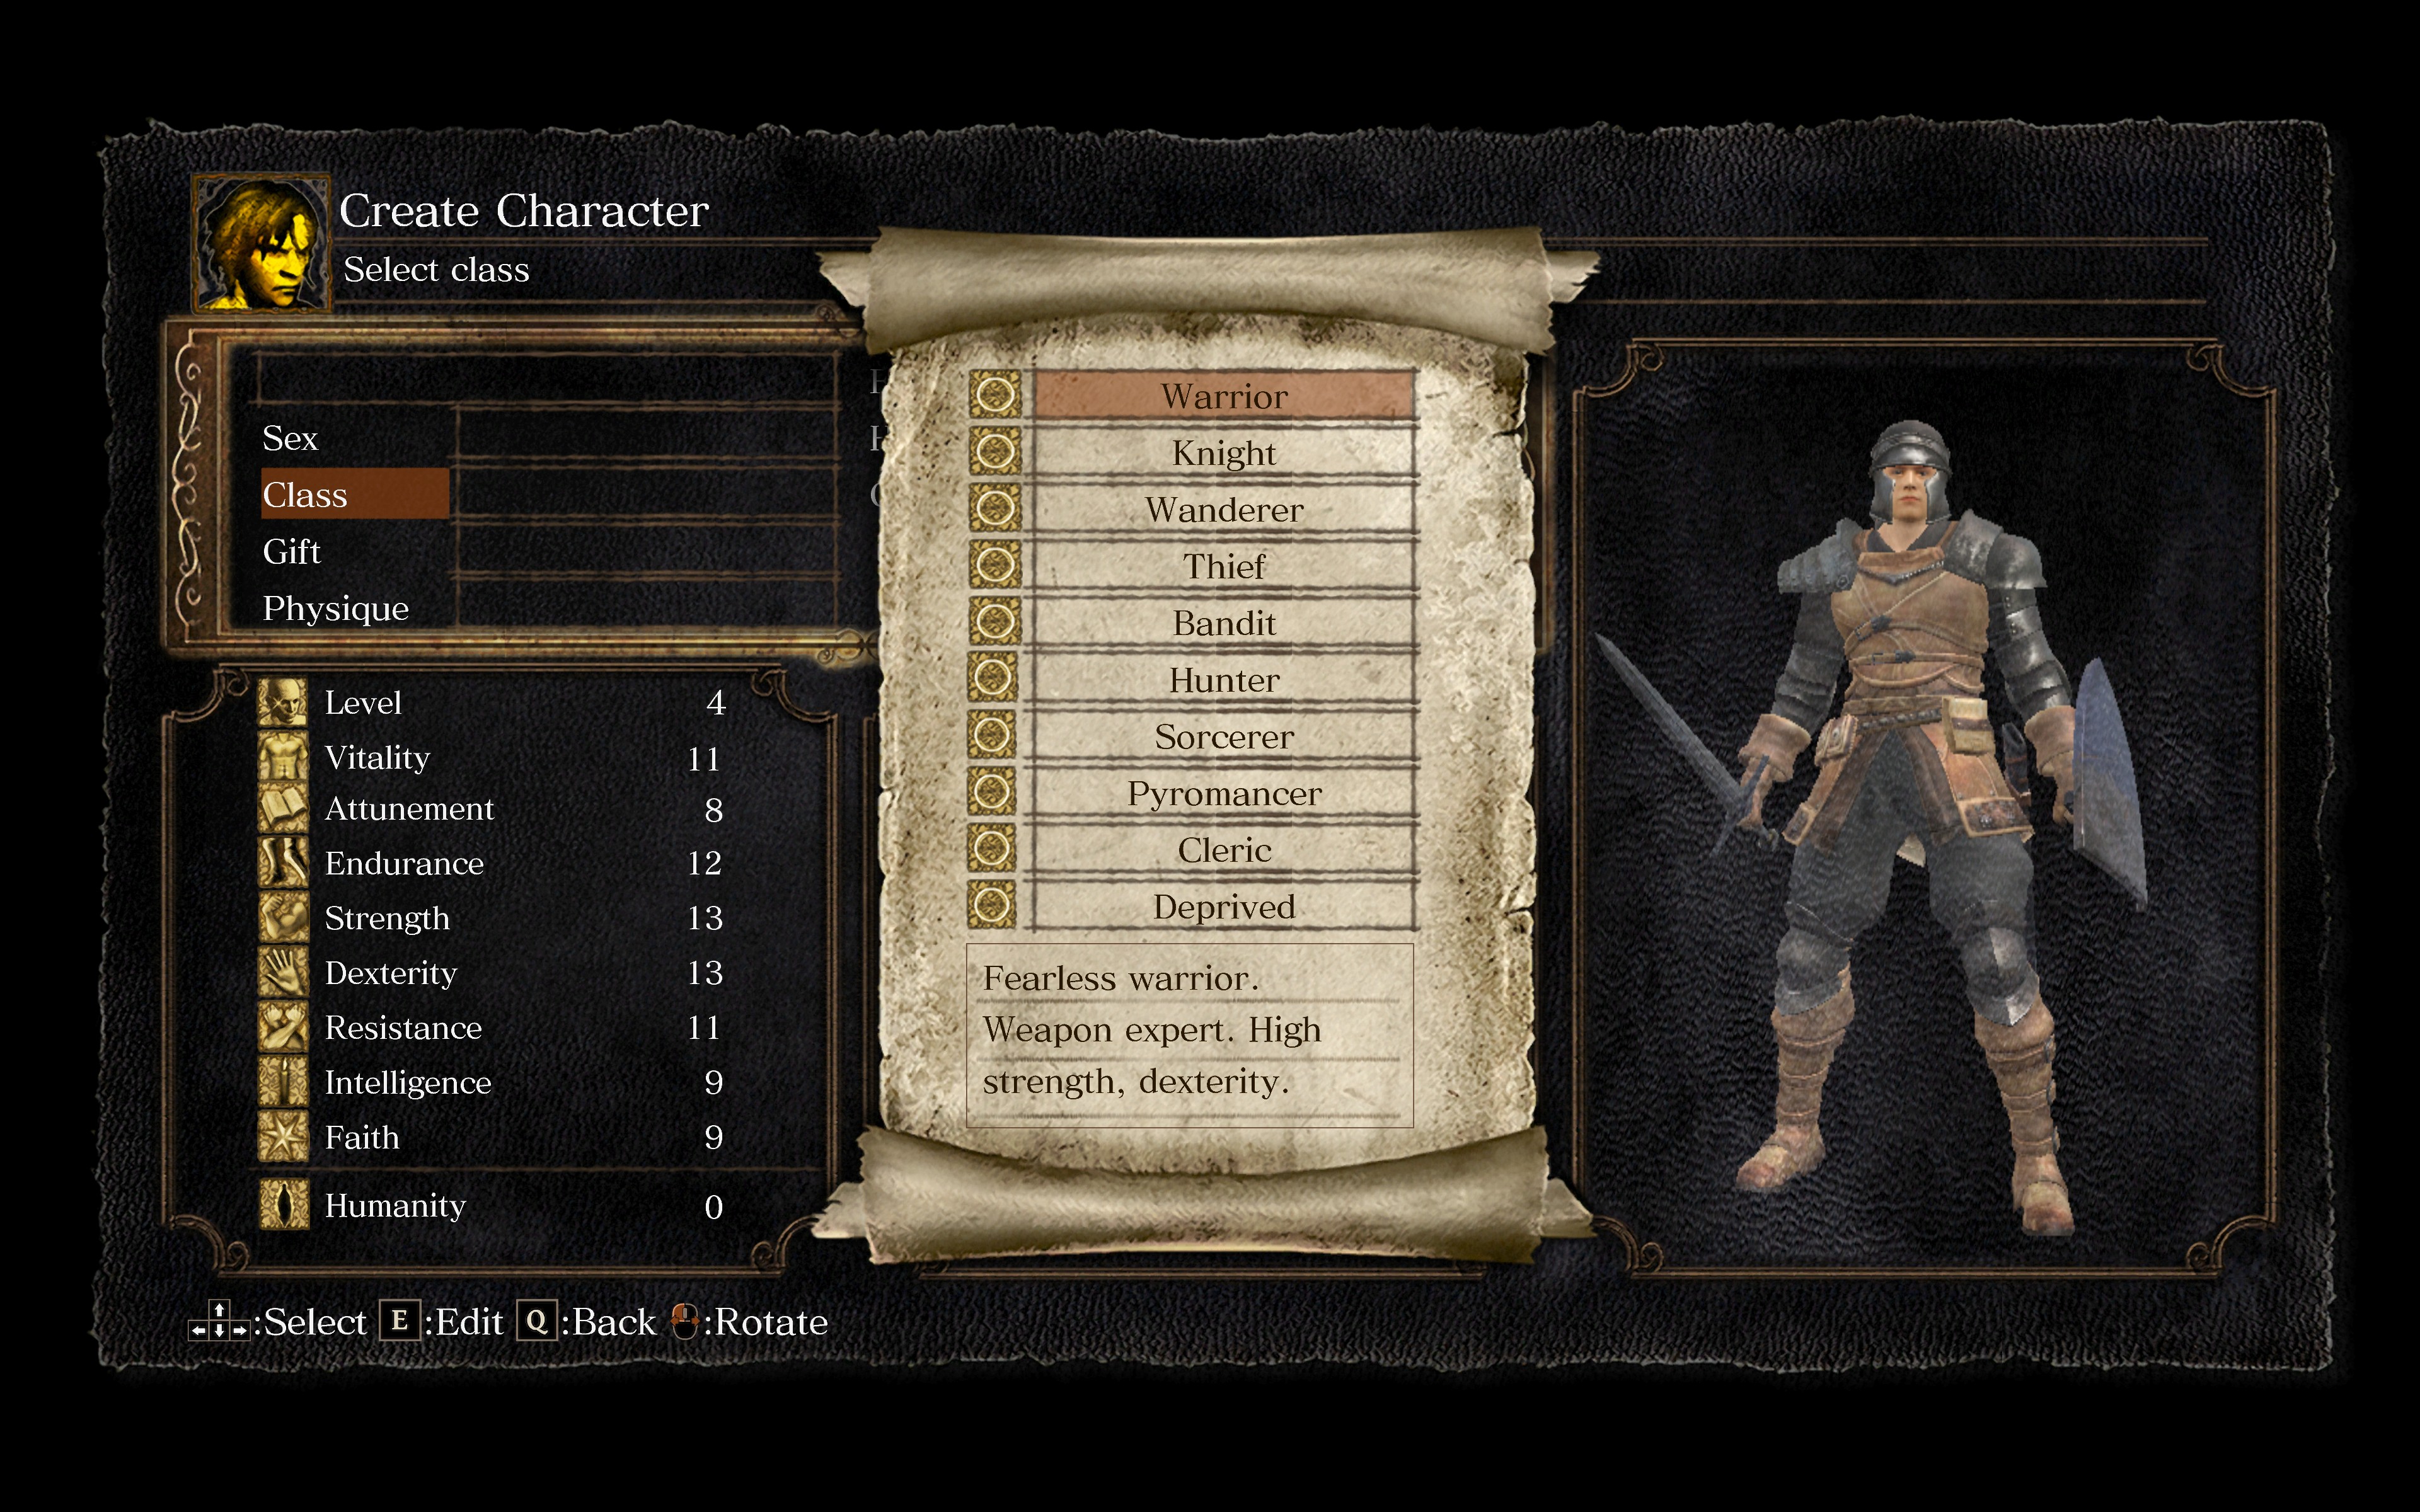 The Hunter (Need +4 STR)
 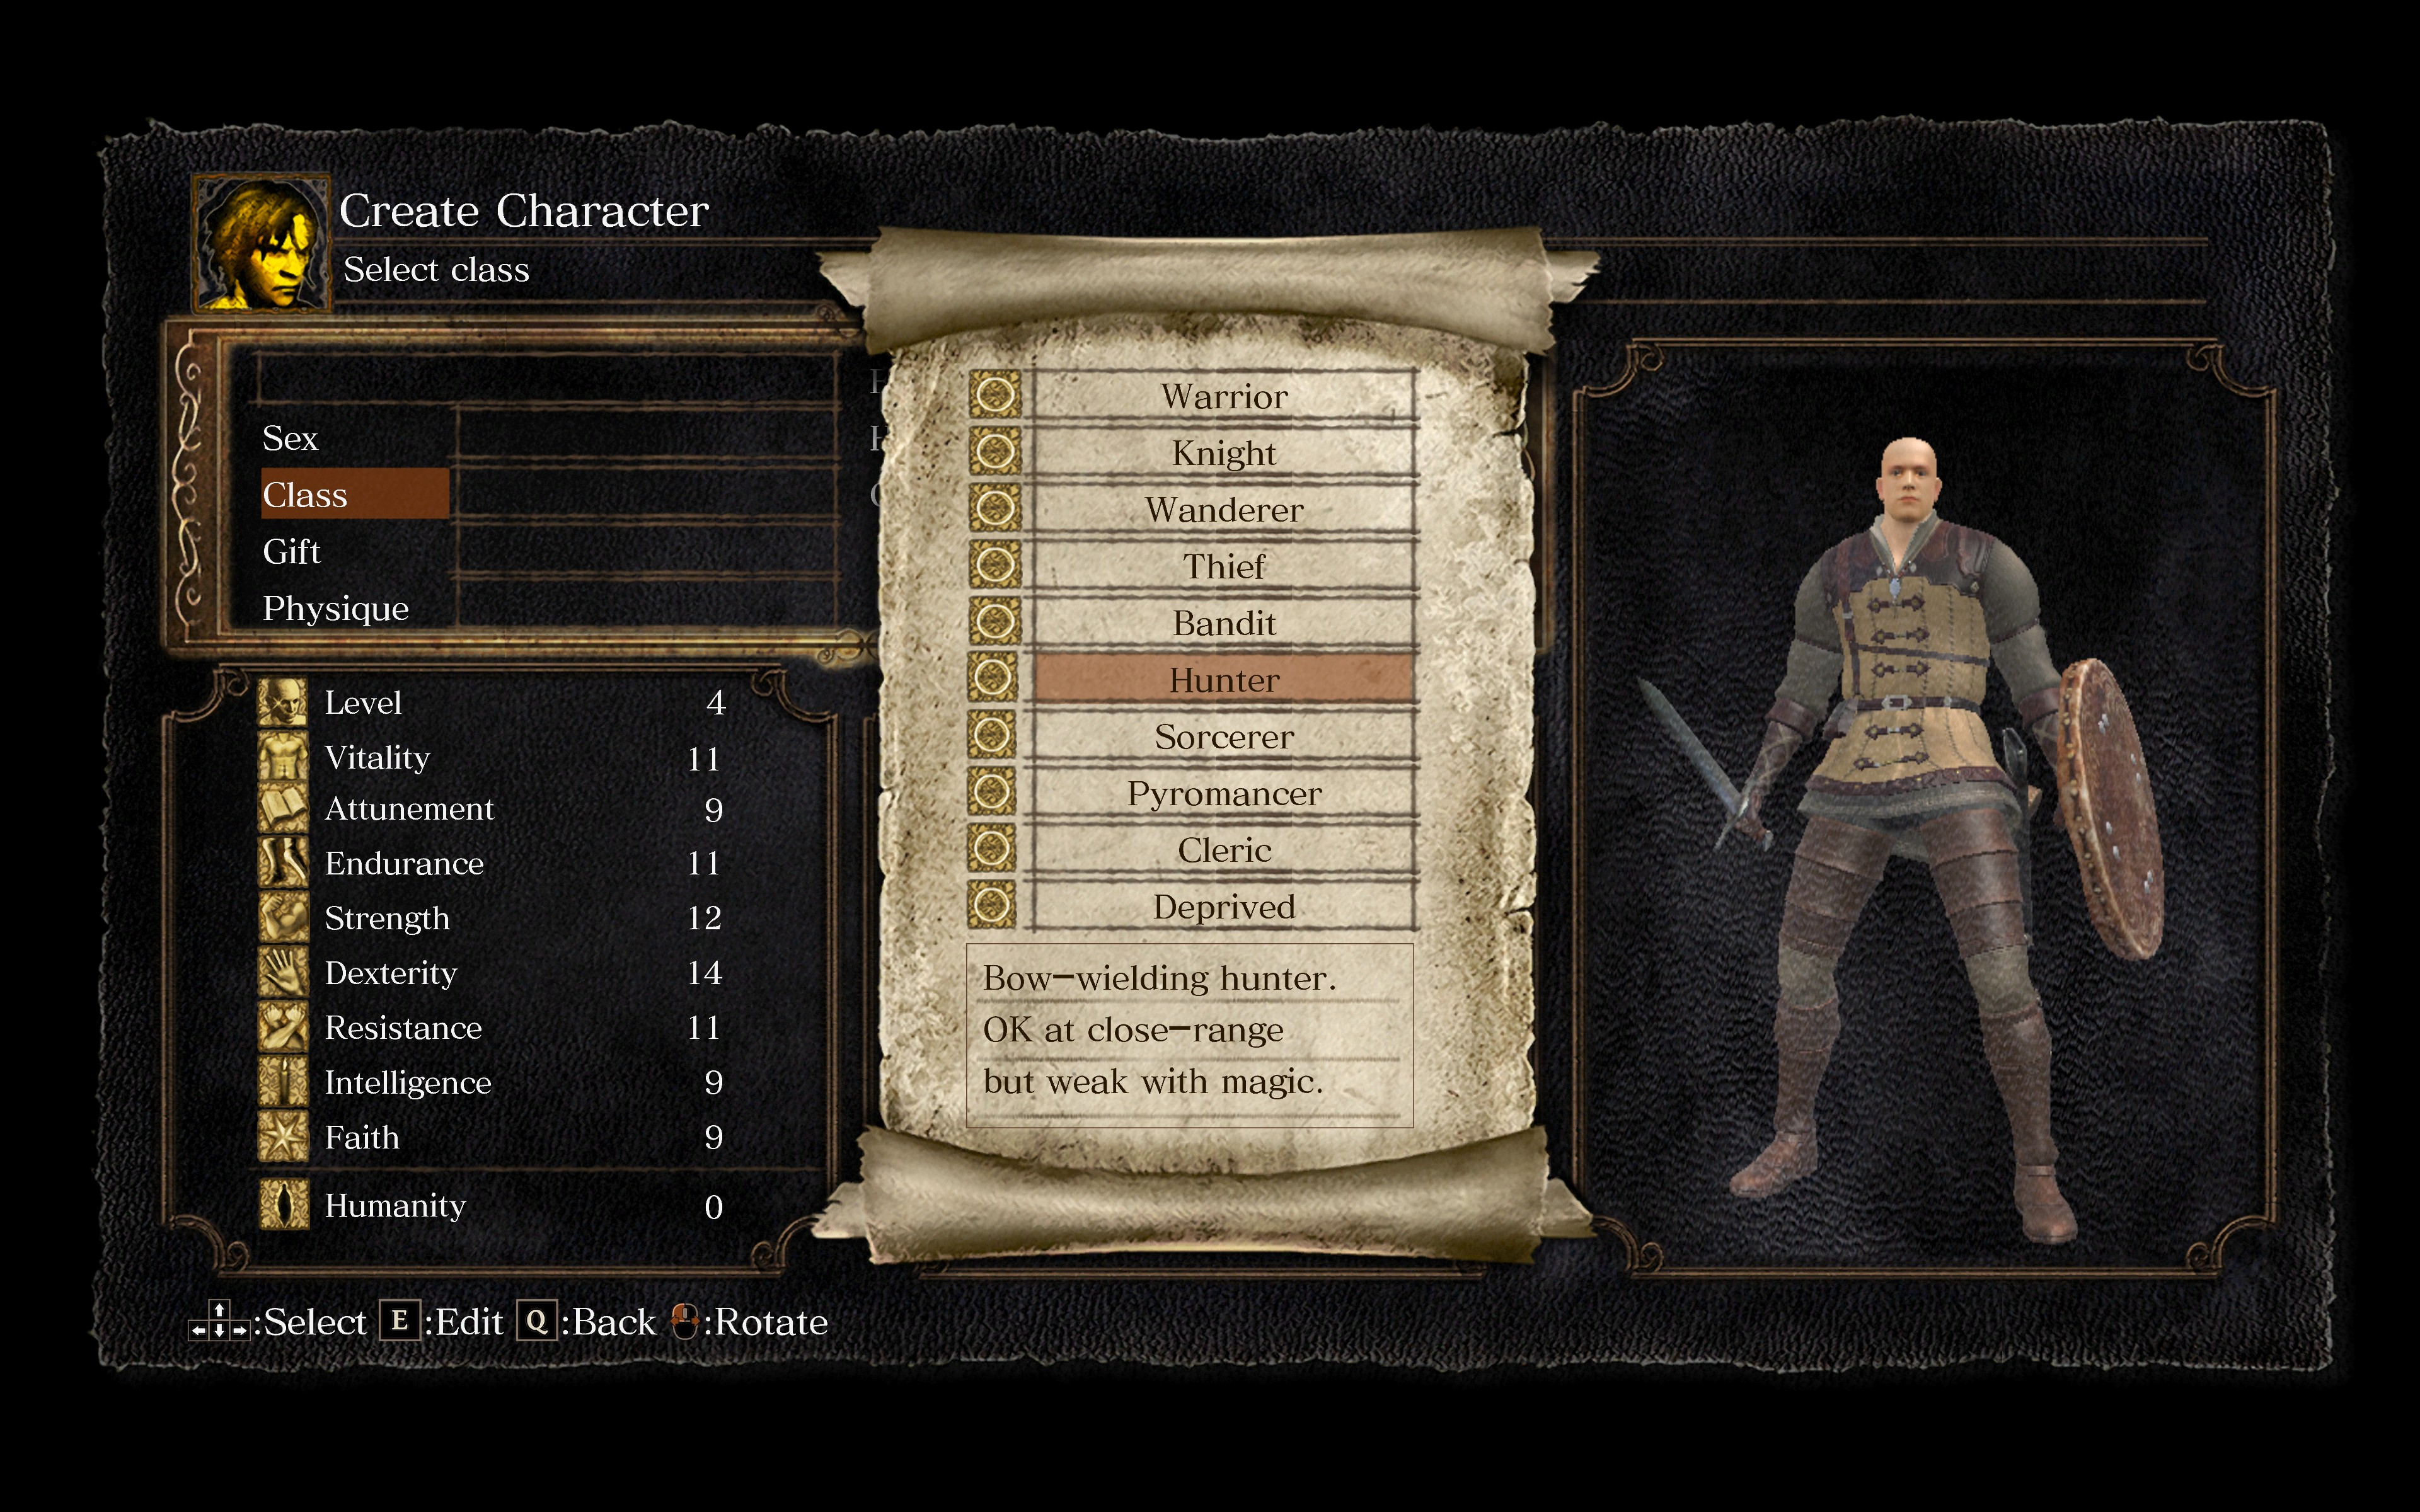 The Wanderer (Need +6 STR)
 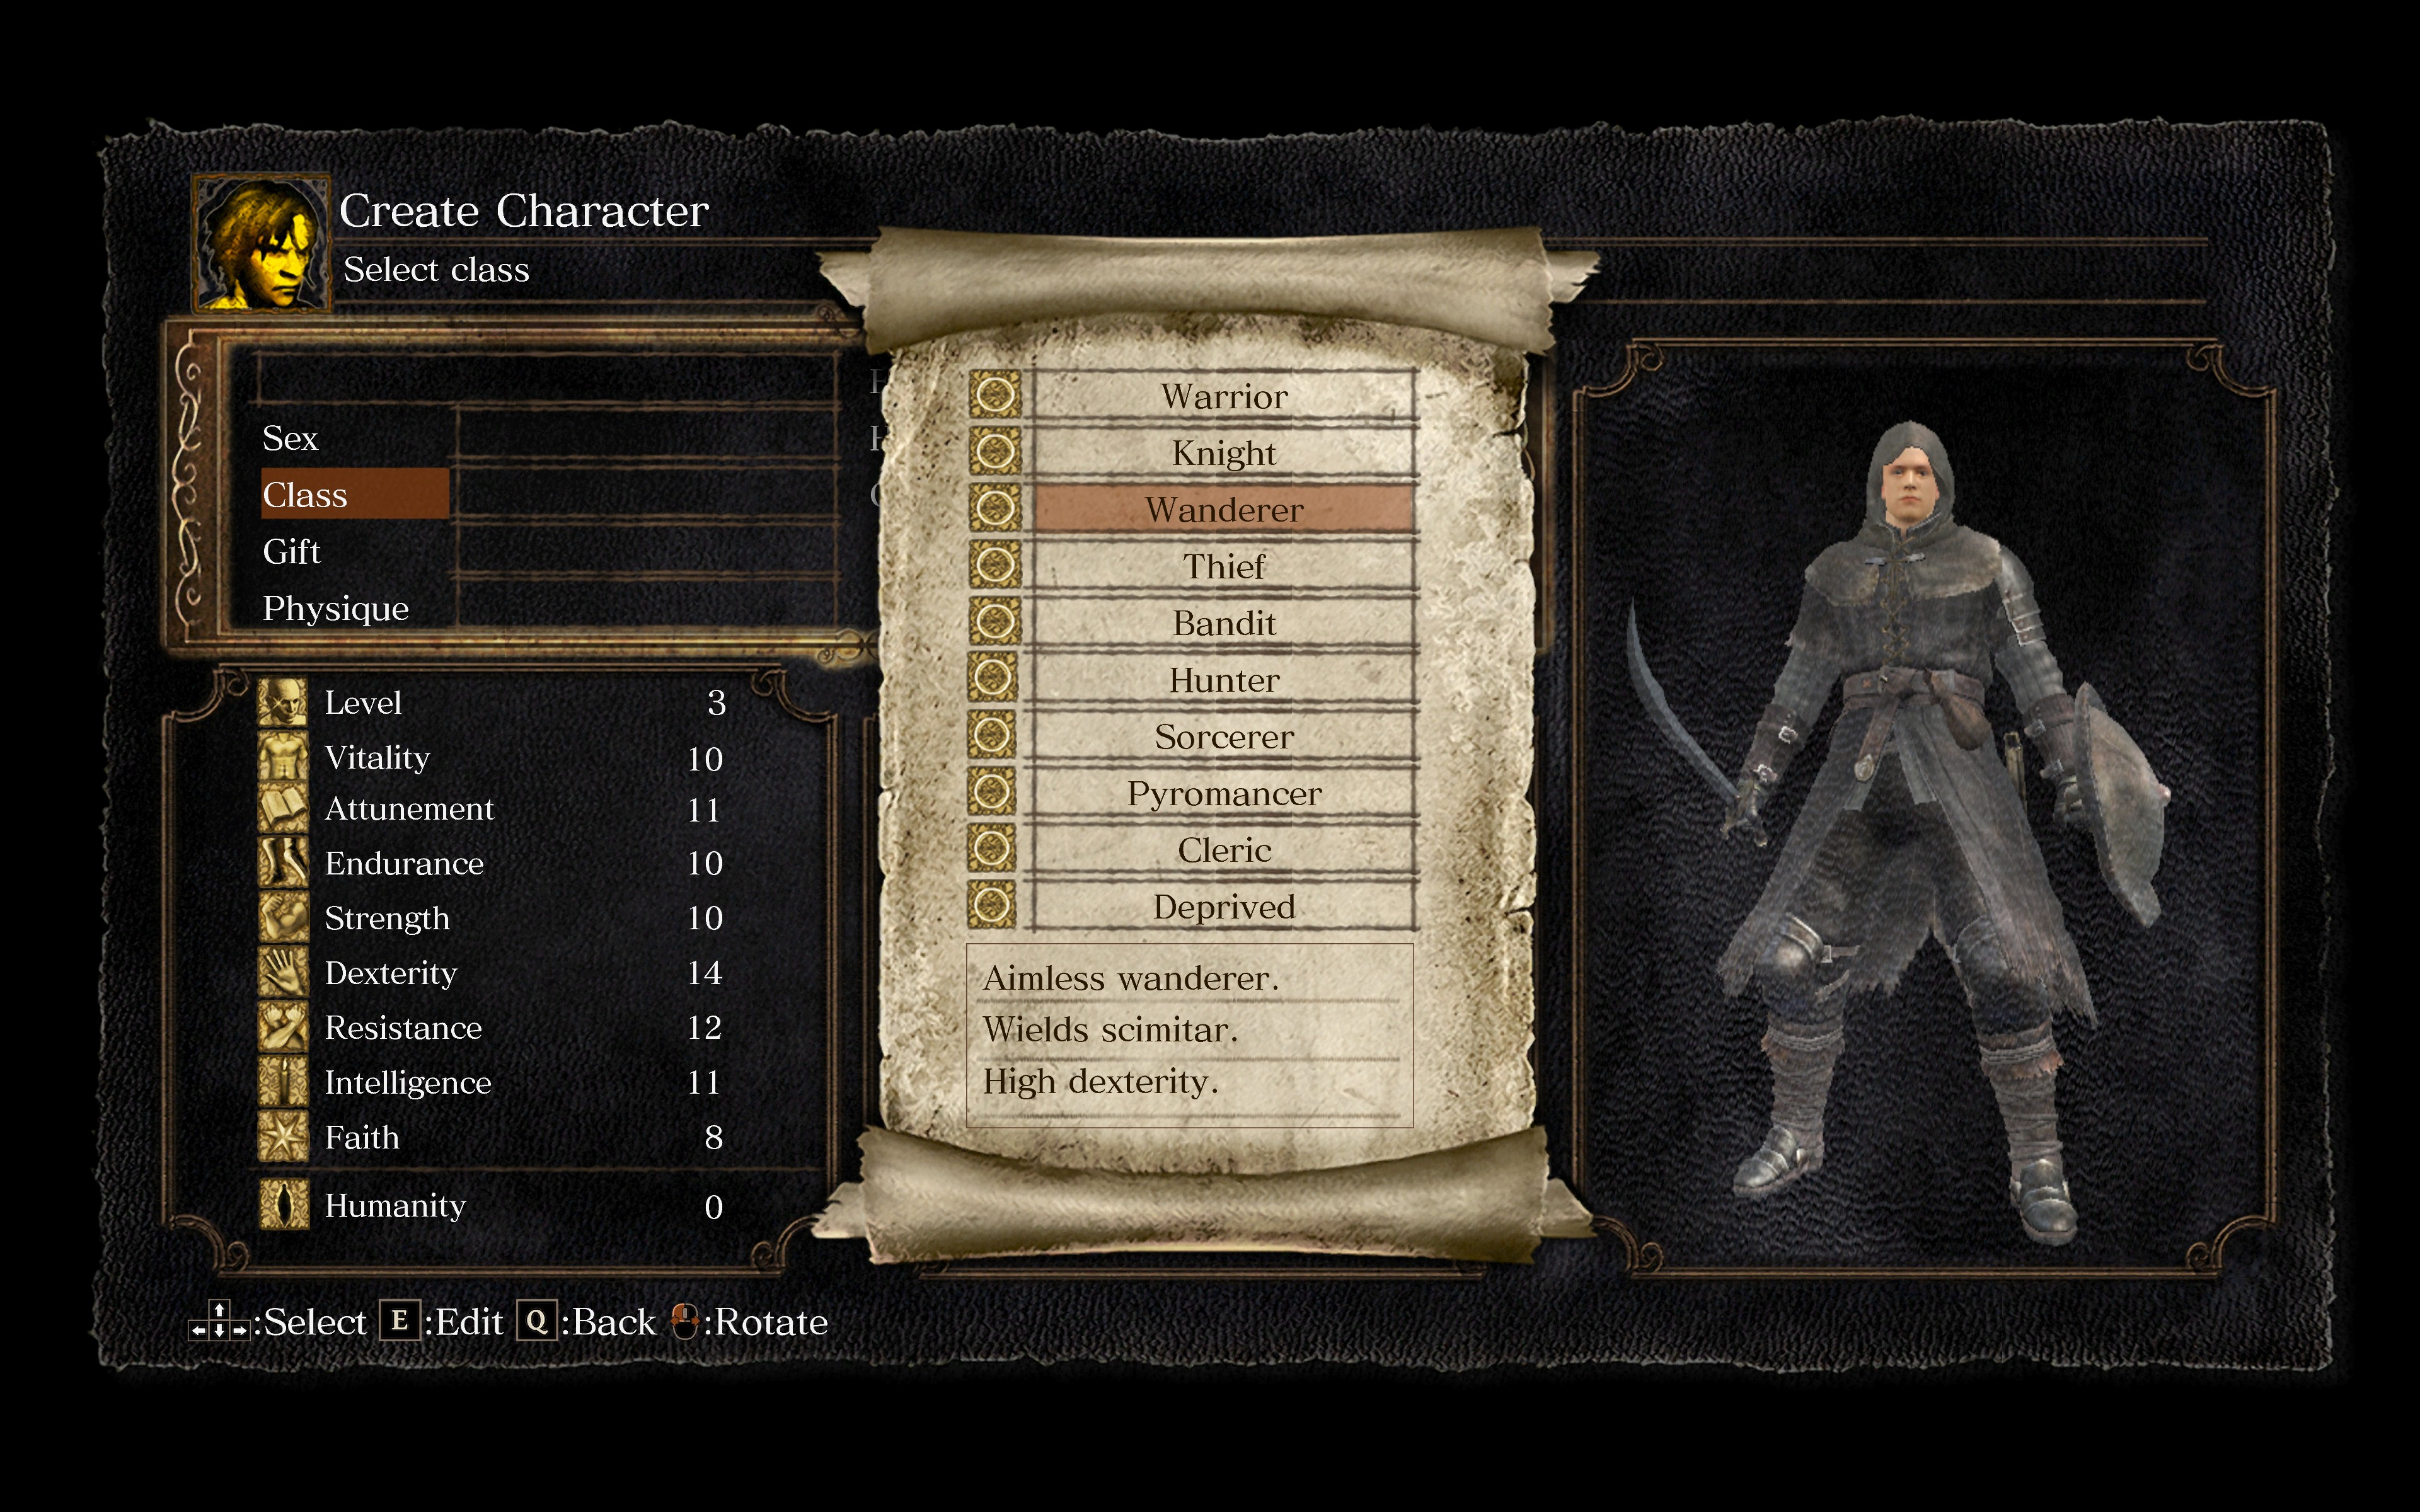 The Bandit (Need +2 STR, +4 DEX)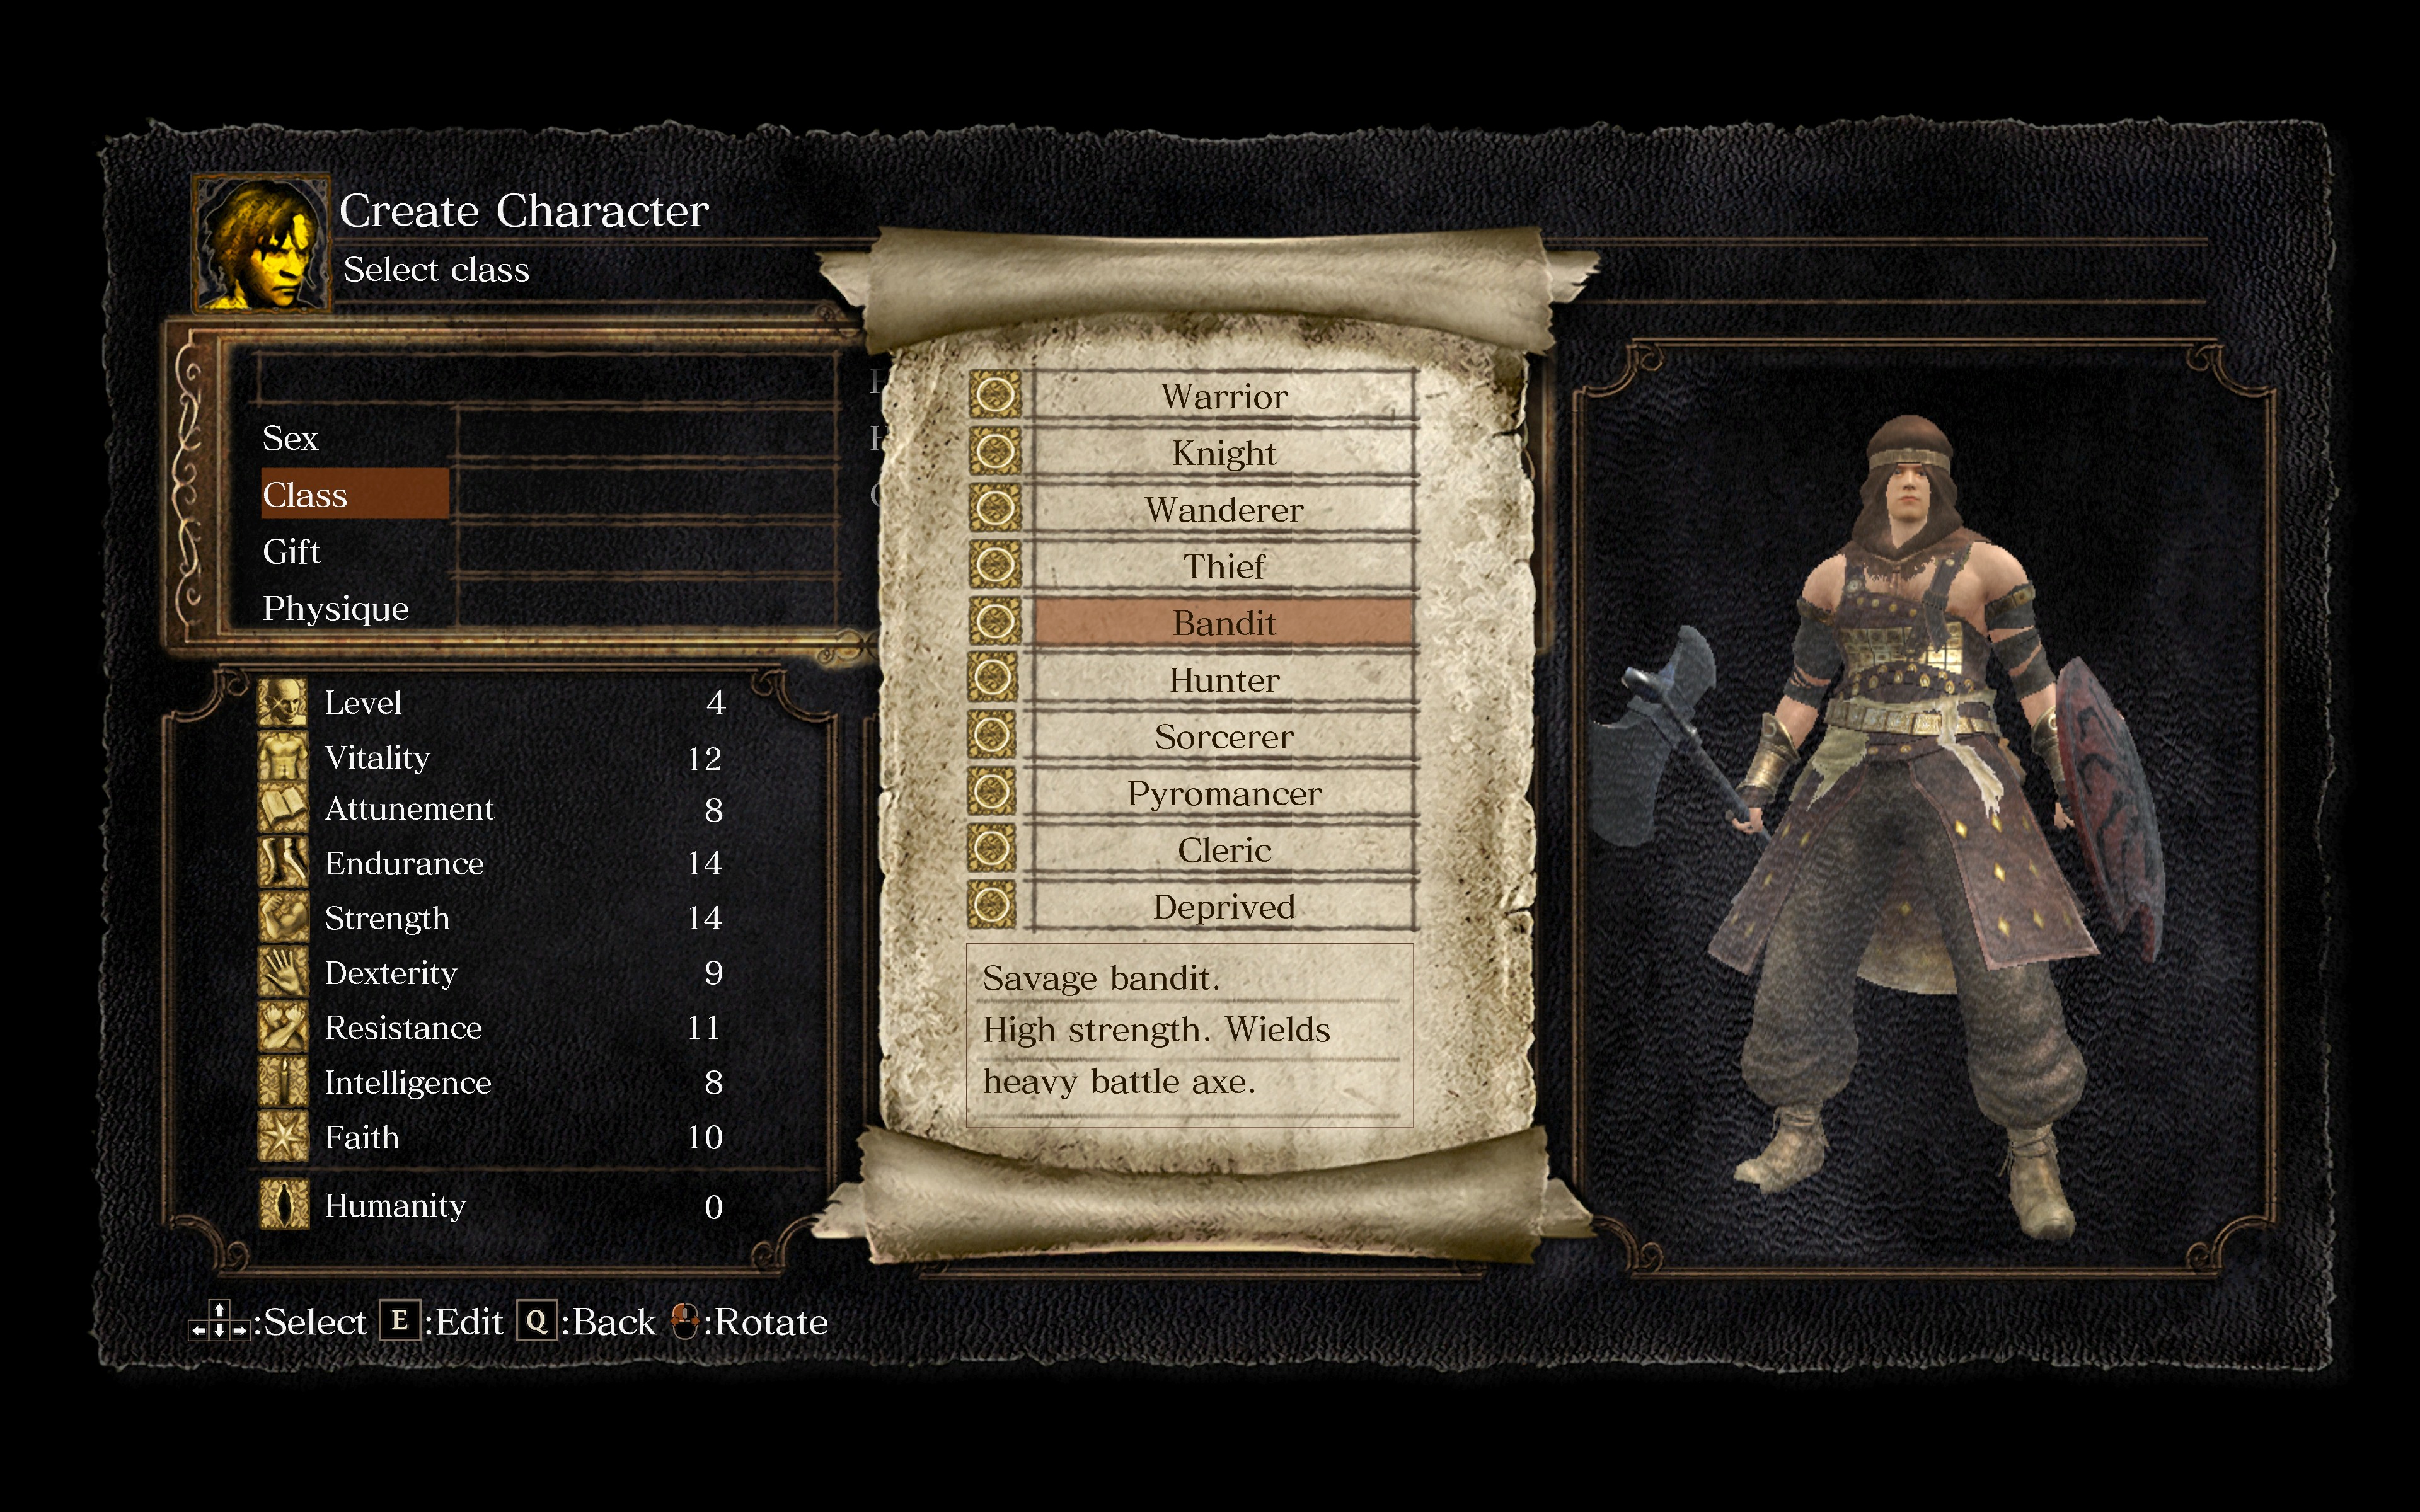
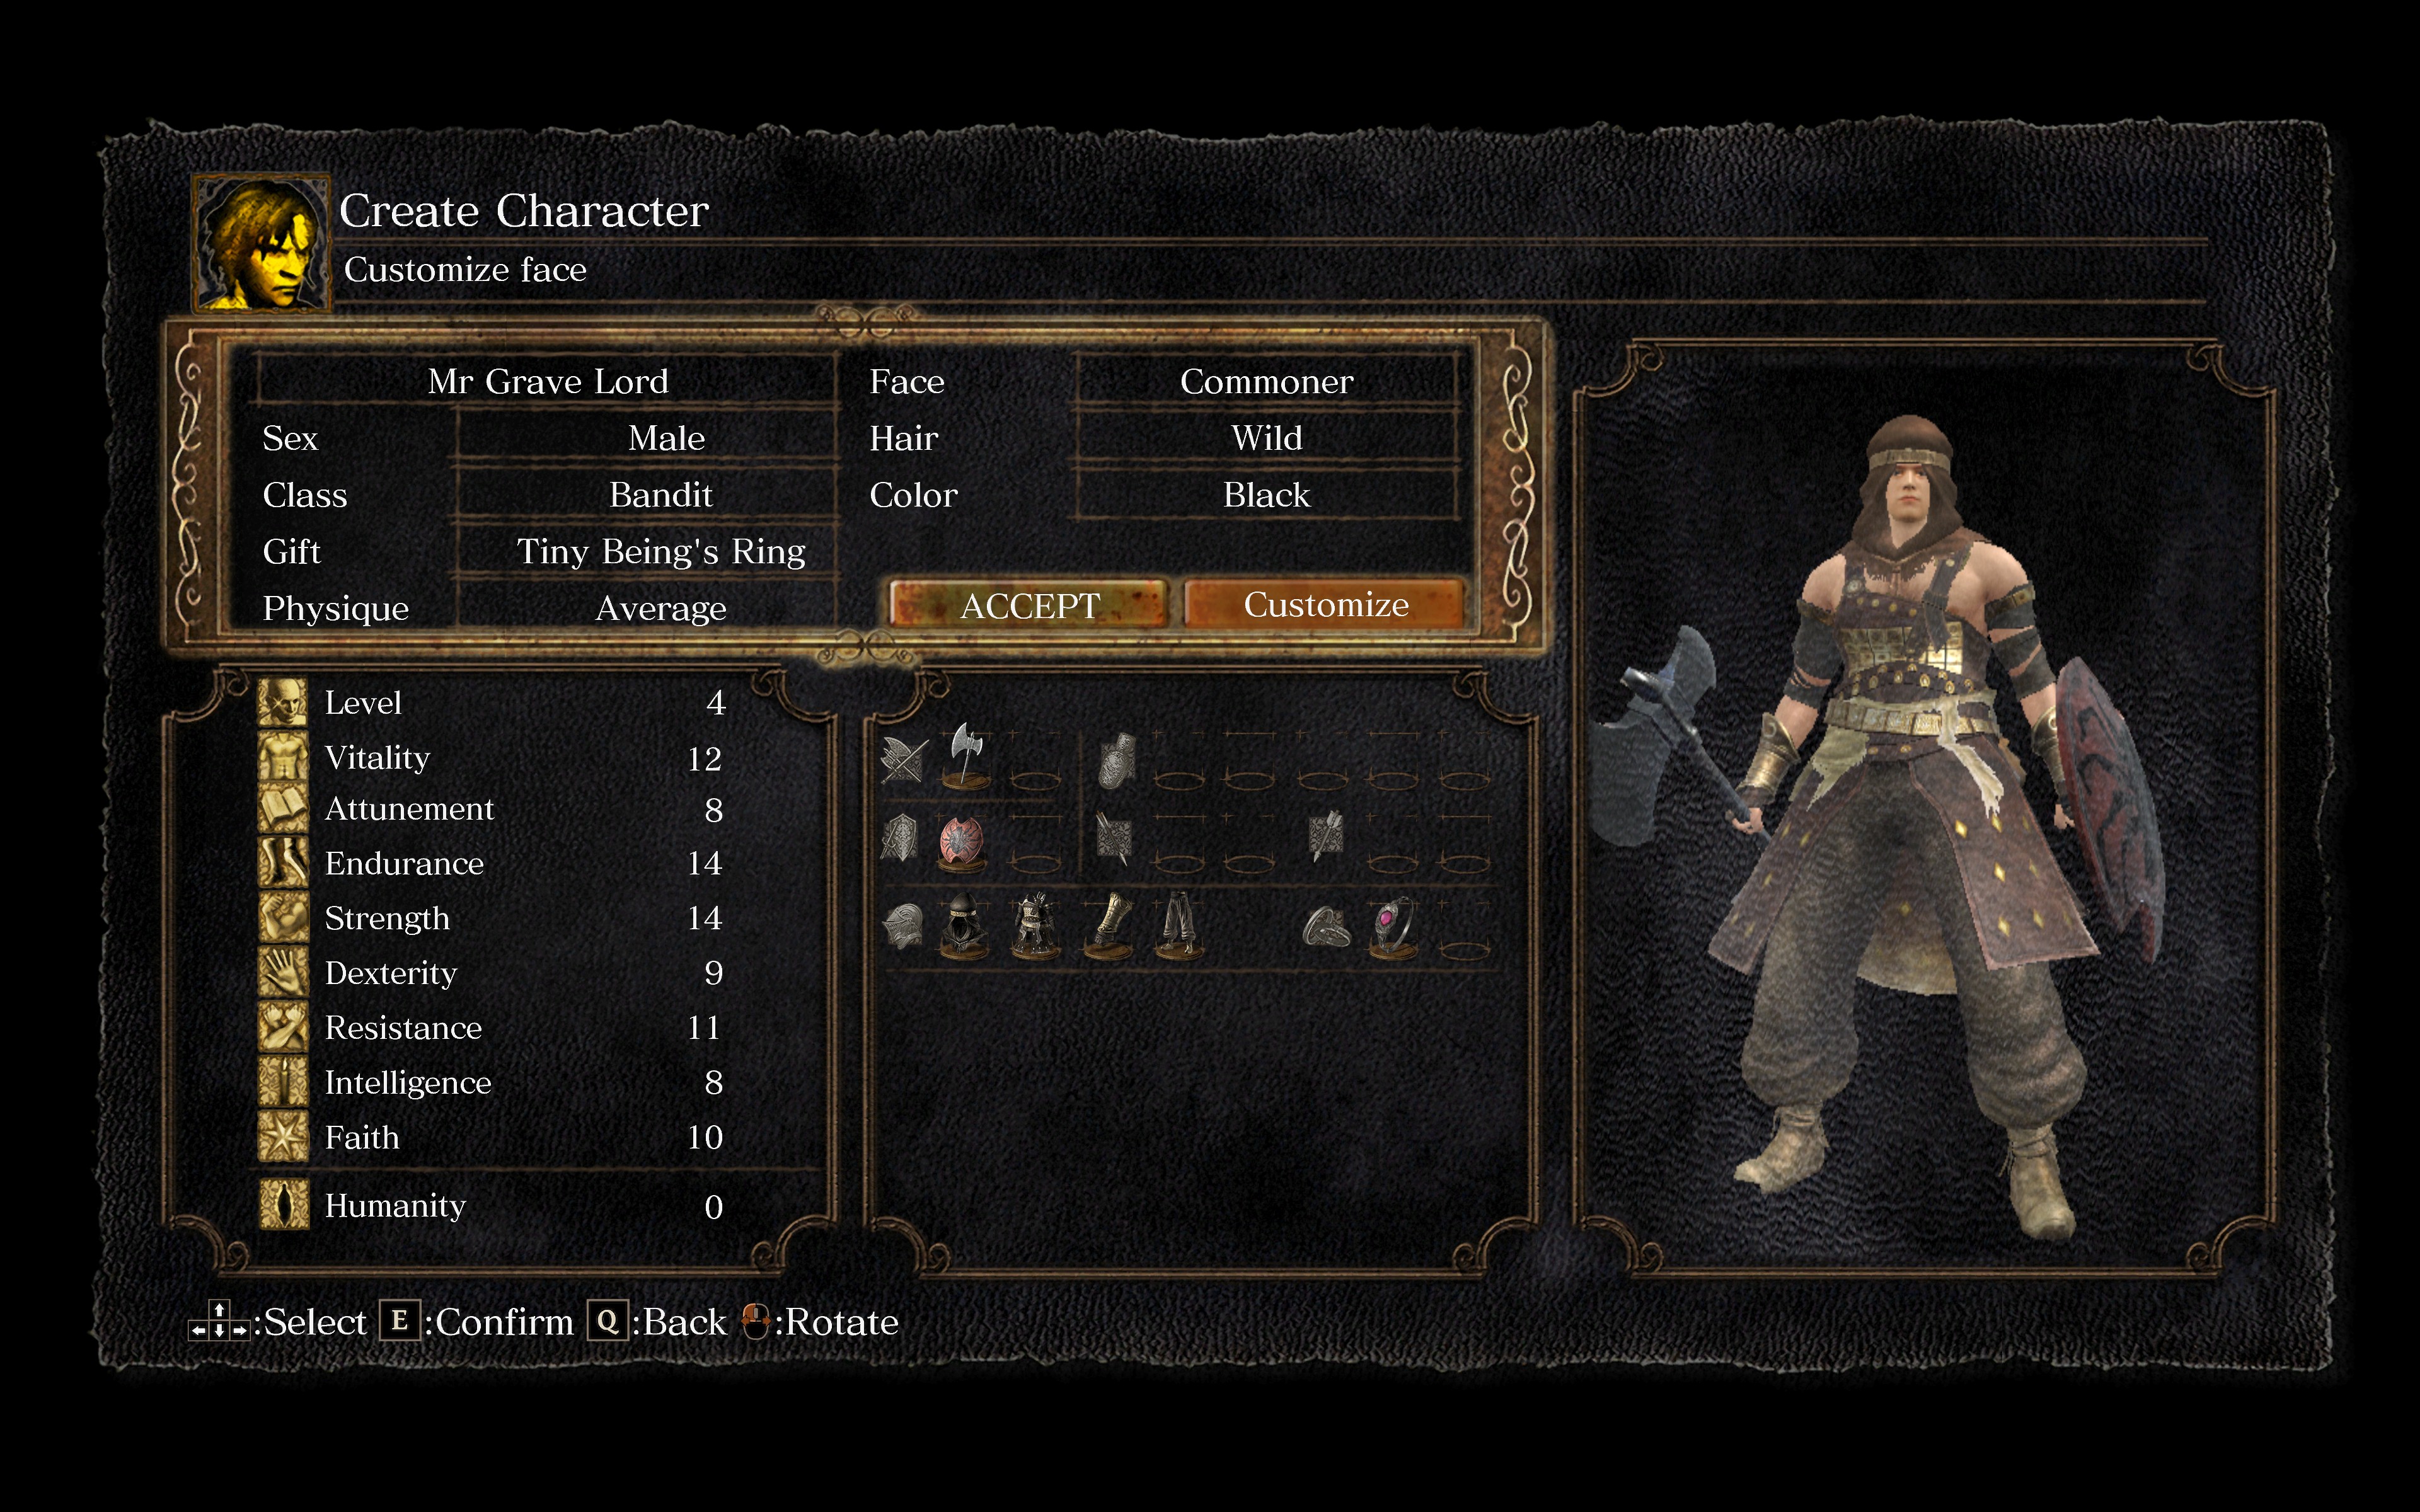
If you are going for any class that ISN'T The Bandit, my advice is to level END (once you have the stats for the sword ready to go, of course). That way you can actually roll past all those skeletons and make your way to the coffin.
I barely managed to do it at END 15 and that took me about half an hour (there and back). I'm operating under the assumption that you are significantly better at the game than I am.
That's it for the pre game section. The true Dark Souls starts here or something like that.
Getting Those Extra Levels
Now you might be thinking: "Graphite, I thought this build was supposed to save me time and effort, not add another hour of level grinding to my playthrough."
Oh my sweet summer child. You're absolutely correct. In fact, this build WILL save you mountains of time and effort, especially if you're good at dodging skeletons. I even made a walkthrough so you, too, can get souls while putting in 20% of the effort required in a normal playthrough.
- Kill every undead you come across on your way to the Asylum Demon. You also get 2000 souls from the Asylum Demon (3 levels if you're level 4).
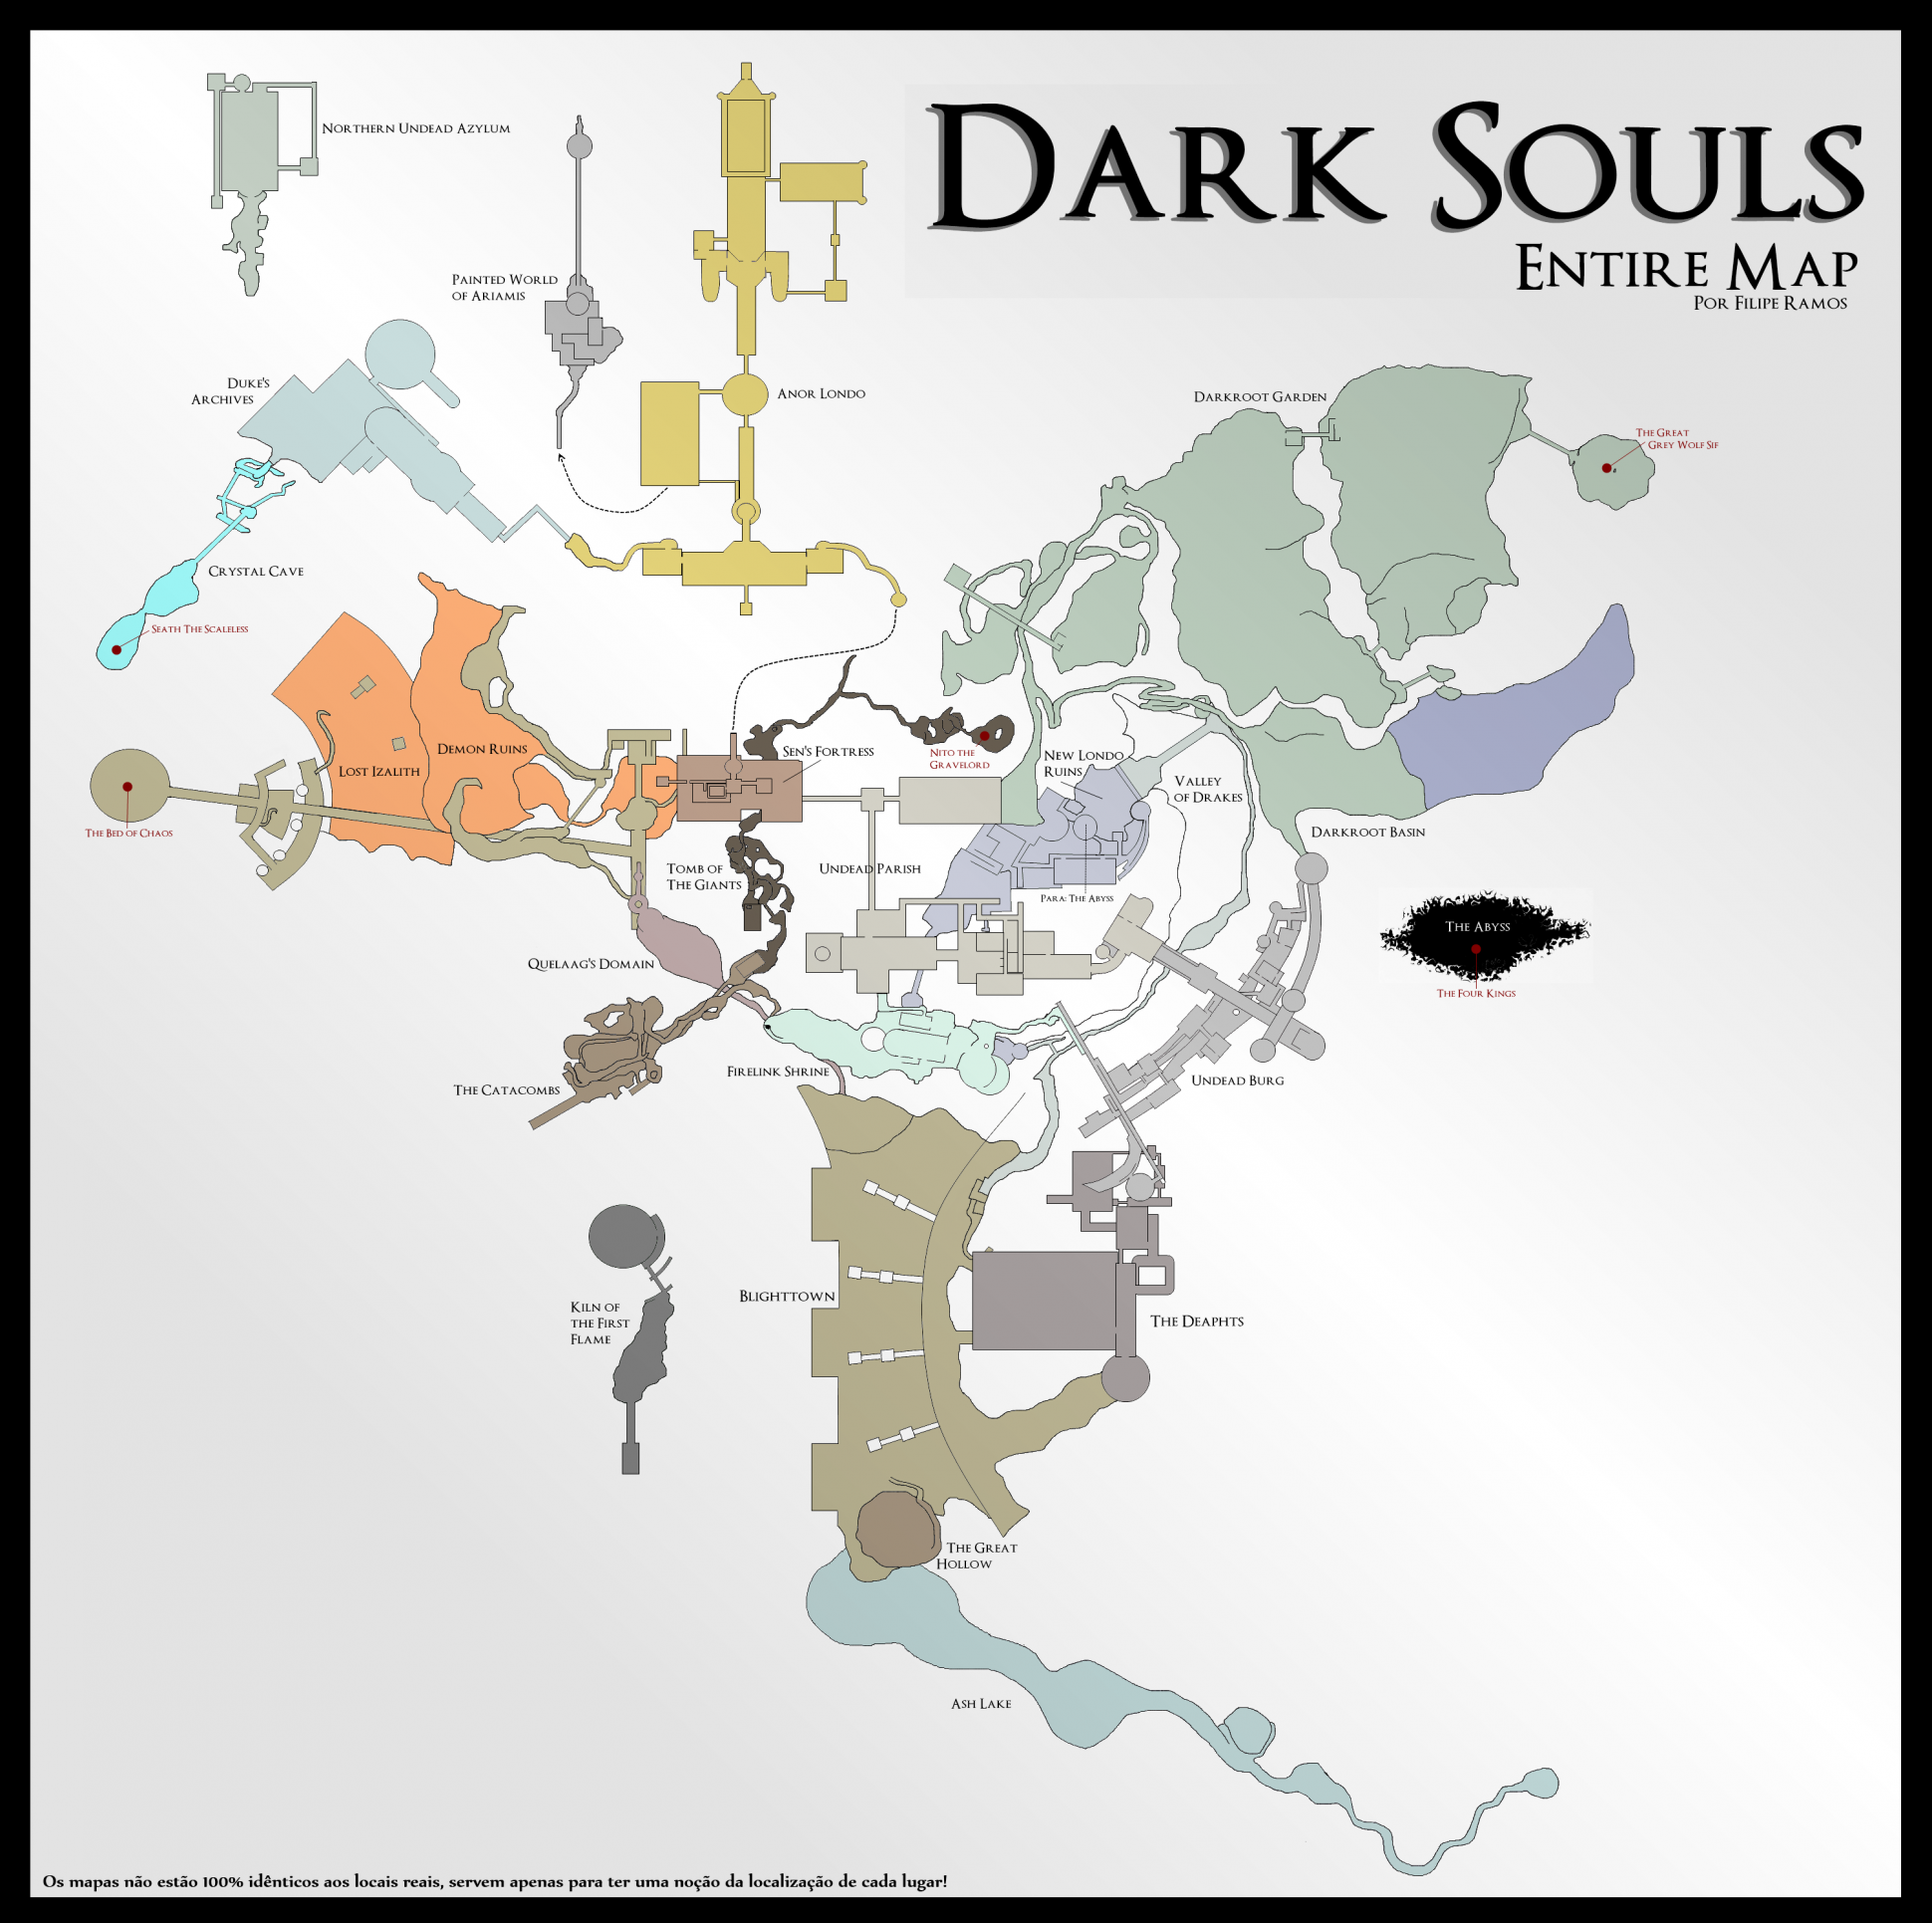
- Collect the Soul of a Lost Undead from the left side of the Asylum exterior. I have attached a poorly drawn map if that helps.
- In the Catacombs, once you've activated the lever behind the waterfall, keep going straight to find a Soul of A Proud Knight. This is NOT on the side Patches appears on. Have another poorly drawn map.
This item is very obvious but you will be surrounded by skeletons, so it is risky. Pay attention to the exploding skulls and the spike traps on the side. This map does not include the spike traps...yet. I want to test all of the statues and find the exact ones so I can provide an accurate guide.
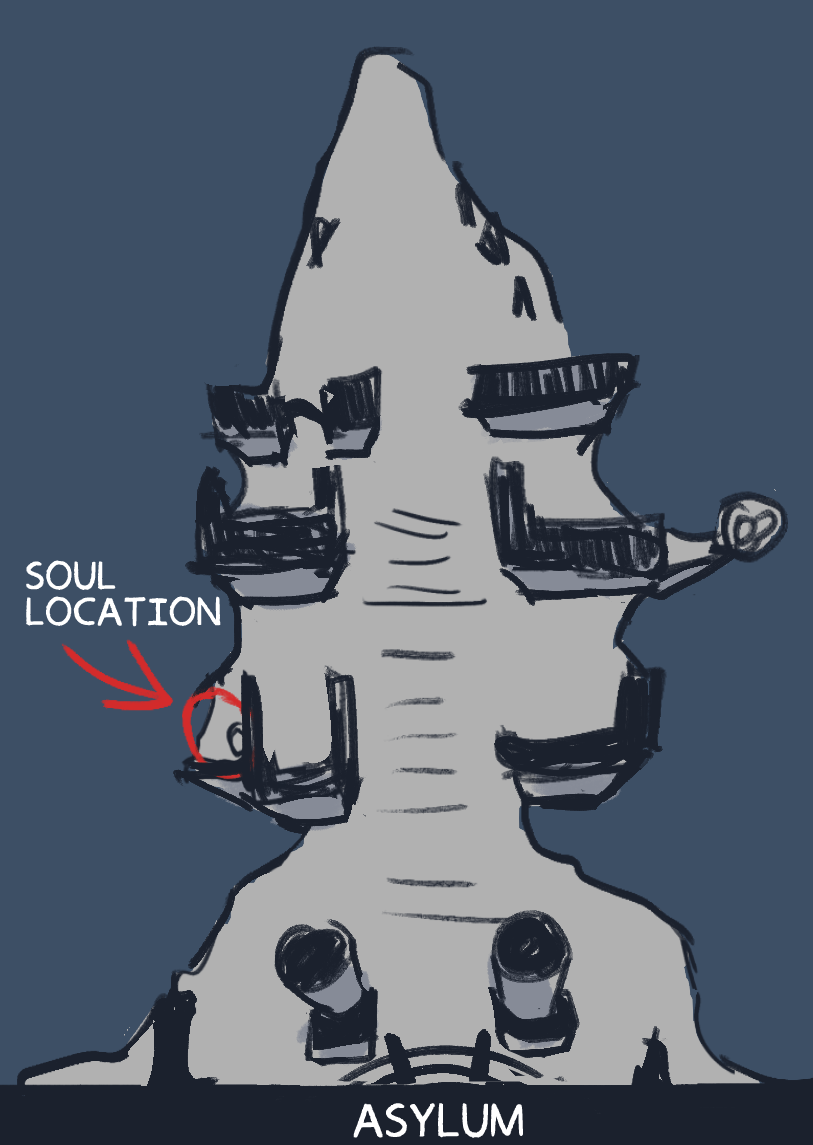
These combined will give you around 4200 souls, which is more than enough to get you to the STR/DEX requirements.
Firelink to Catacombs
The road is long but not impossible. Make sure you save your stamina for necessary dodging and sprinting. Walk if you can!
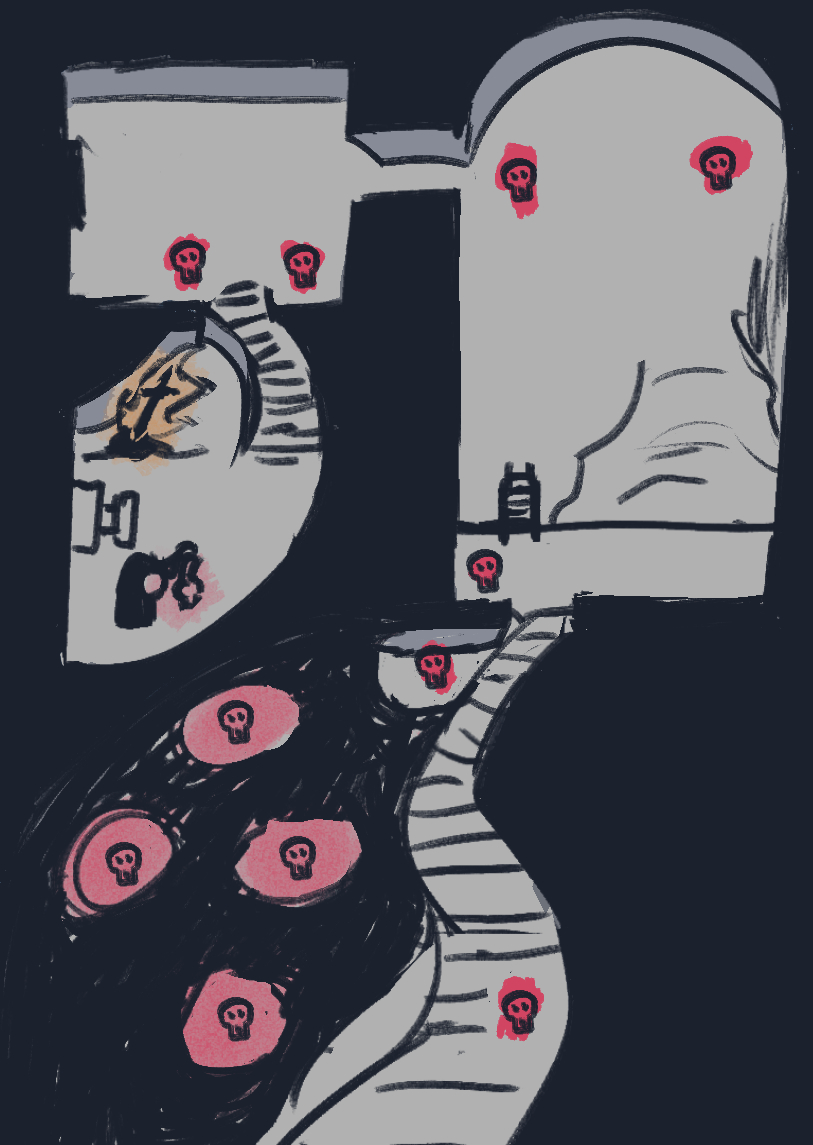
Here is another poorly drawn map, in case you want to plan a route past the enemies. Unfortunately, you do have to kill the Necromancer to actually be able to light this bonfire.
For beginners, feel free to follow steps below:- Go through the graveyard, down the stairs and into the Catacombs. Watch out for the exploding skulls. Just keep running and don't stop.
- Go down the ladder and to the left side of the room. Turn left to go through the doorway and down the hall. Don't try to kill the skeletons.
- Immediately to your left is a hole in the wall. Through here is the Necromancer. Save up your stamina.
Pro Tip: you can lure the skeletons so their pathing gets confused and they bump into the wall outside the room, rather than you.
This part of the process only killed me once, somehow! The hardest part is definitely the second leg of the journey.
Illusory Wall Waterfall Bonfire
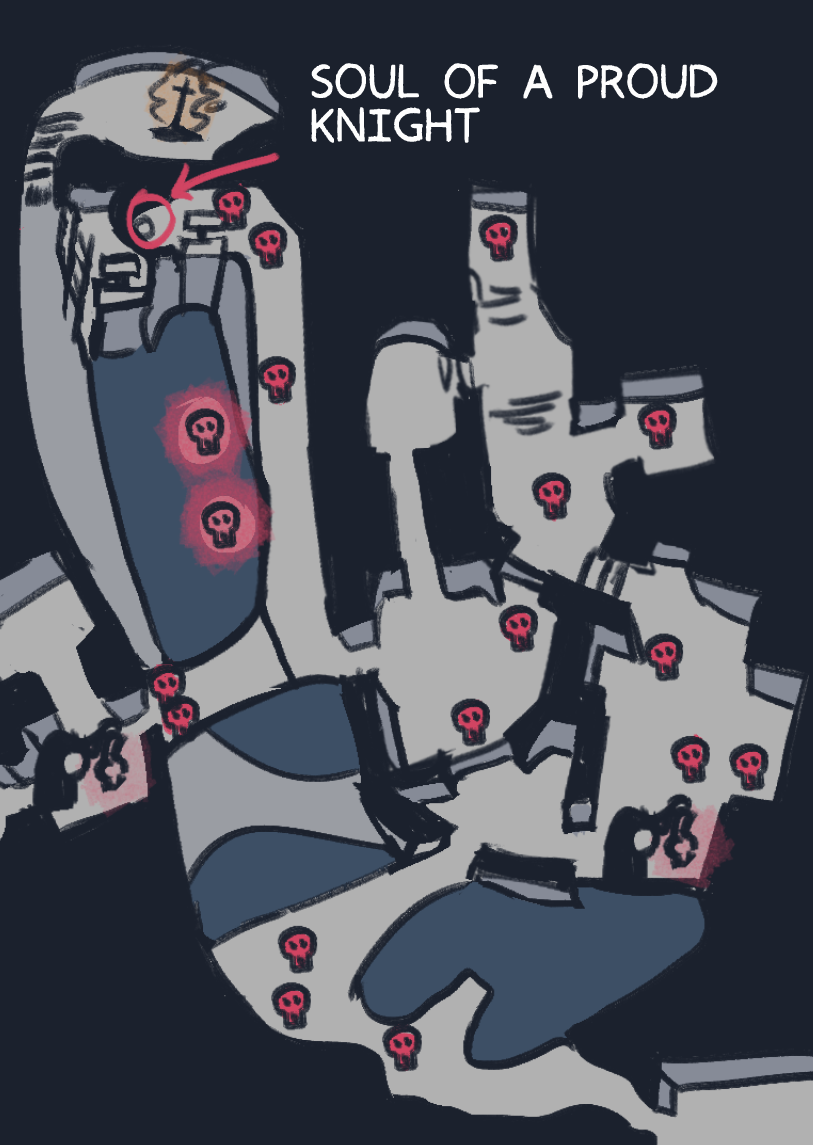
This map does not include the spike traps...yet. I want to test all of the statues and find the exact ones so I can provide an accurate guide. Beginner or Souls Veteran, you should check the steps below just to save yourself some time:
- Activate the lever in the bonfire room. Go left through the new hole in the wall.
- Run along the cliff and cross the bridge on your right. You can guide the skeletons to attack in opposite directions, which gives you a greater chance of slipping past them.
- Through the doorway, watch out for the archer skeleton on your left. Turn right and then left to dash through the larger room, following the left wall. Do not enter the alcove on your left.
- A Necromancer will make a run for it, do not try to kill him. (There are too many skeletons).
- Turn left at the end of the room to enter a corridor. Watch out for the skeleton jumping from a ledge on your left. Go straight.
- There is a fork in the road here. Go through the left doorway, do NOT go down the right hallway. Go left again. Watch out for the archer skeleton.
- Turn right at the first opening. You will see a spiky bridge. Turn right again and follow the cliff.
- Don't get too close to the statues on your right! Some of them are spiky. Also, watch out for exploding skulls on your left. Activate the lever at the end of the path.
- Turn around and cross the bridge you activated. Turn right and drop down to a cliff path.
- Run towards the wall and reveal the illusion by rolling into it. There is a statue that will spike you, so roll carefully. Enter the bonfire chamber.
- Die. The skeletons from the bridge have most definitely followed you. Do not despair! With the bonfire found you can now go an alternate route.
- Repeat steps 1 and 2. On this first bridge, jump down to the now safe bridge with a white fog gate on one end. You now have a straight shot to the bonfire room from there, and Patches will not turn the lever on you because you're going away from the fog wall, not towards it.
This took me 5 deaths. Hopefully it only takes you 1! Memorizing skeleton attack patterns helps a lot, as well as having a clear path to follow before you start.
Pro Tip: Activate the illusory wall before you reset to the bonfire, otherwise that lower bridge will not be safe.
Getting to The Coffin
Have another poorly drawn map and a more expertly drawn Titanite Demon. As you can see, my illustration skills are 90% men, 10% schematics. Sorry.
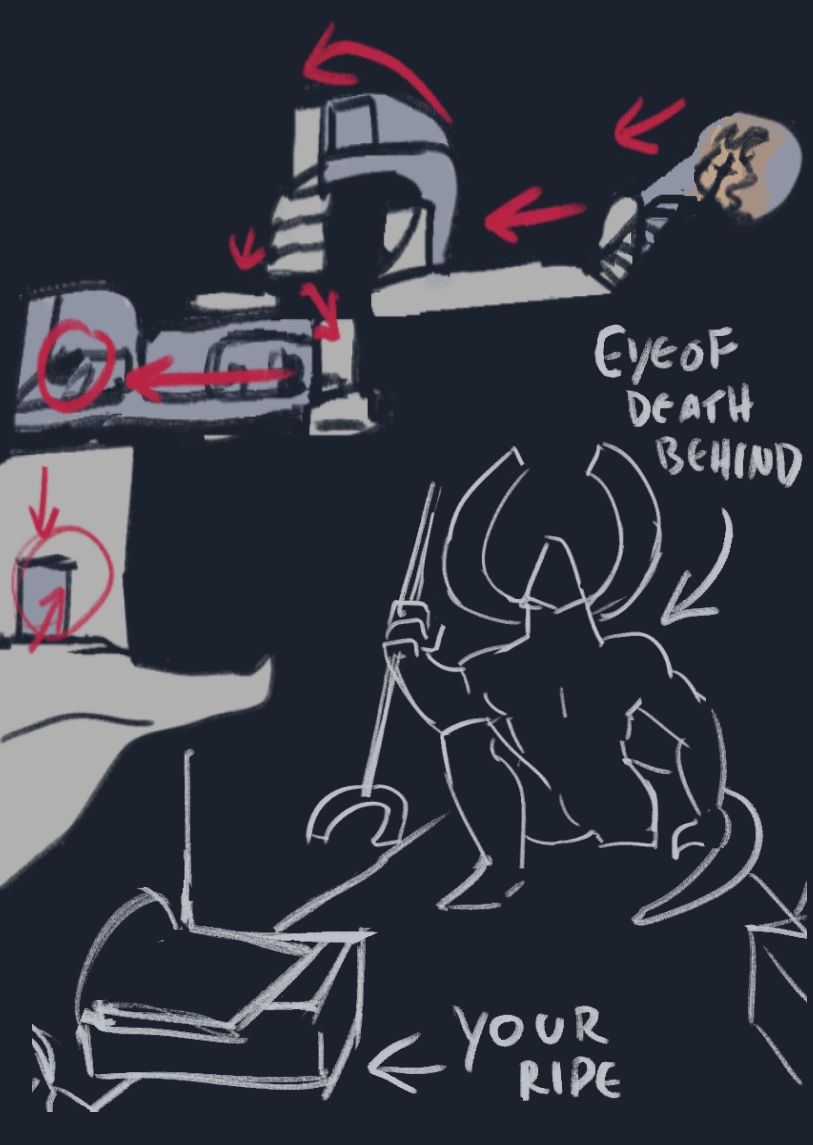 This one is both more and less complicated than you would expect:
 - From the waterfall bonfire, go straight until there is a doorway to your right.
- Enter the doorway and follow the path until you reach an open ledge.
- Turn right and line yourself up with the platform below. Drop down.
- Turn around. You will see another doorway on your left. Drop to the ledge where this doorway is and go inside.
- Turn left in the tunnel. Do NOT drop down to the necromancer. Instead, go through the side tunnel and enter a chamber with some suspicious floor texture on it.
- The floor texture on the upper left side will give way, dropping you right in front of the most intact corridor of the catacombs. Walk down this hallway.
- The only enemy is a Titanite Demon that aggros if you try to pass it. Unfortunately, you will have to try to pass it. Roll to the right and watch out for its roll catches. Make sure to get the Eye of Death behind the Titanite Demon, or the next part will not work.
- IF you manage to survive the Titanite Demon (you don't have to kill it), you will now be facing the way you came. Go to the end of the first coffin on your right. The prompt "Nestle in coffin" will appear.
IF the Titanite Demon killed you, this coffin would be the last coffin on your left before the Titanite Demon. It will not attack you if you are in the area of the coffin, only if you try to walk past it. The prompt shows up if you stand at the very end of the coffin.
- Nestle in coffin. Wait. A cutscene will play (but only after you've questioned if you did the ritual correctly a dozen times). You don't need a humanity or anything to get the cutscene, as long as you have the Eyes of Death you're all set.
- Post cutscene. You are now in the domain of Mr. Gravelord Nito himself. He is hanging out in his own, much larger and more prestigious coffin. Pledge allegiance to him and he will give you an incredible sword, FOR FREE. (You cannot kill him in this state, by the way). You can also leave the covenant after this.
- If you don't have a homeward bone, use the Darksign. As long as you weren't carrying any souls with you, you're all set.
This took me 1 death because of a creature whose name rhymes with Bitinite Heman.
Congratulations! You now have one of the best swords in the game, AND (if you followed the leveling tips) the stats to use it!
Now for the hard part. Getting back to Firelink Shrine in one piece.
Going Home
With your newfound power, hopefully the trip back isn't nearly as hard as the trip there. Unfortunately, going up is a little harder than going down. You'll have to go the long way.
- From the Waterfall Bonfire, go down the path, back through that door on the right.
- Same steps as last time. Follow the path. Drop down to the platform. Turn around and drop down to the doorway. Enter.
- Instead of going left, this time you DO want to kill the Necromancer. Drop into the room and push the lever. (This opens a shortcut in case you die here).
- The Gravelord Sword oneshots skeletons but you will easily be overwhelmed, especially with the low poise a player has in the early game. If you can, try to make a run for it.
- Go up the curved staircase on your left. You're now at another bridge. Cross it and turn right.
- Argh! It's that archer skeleton again. Run past it and drop down to cross your final bridge.
- From here, follow the cliffside path down to that hole in the wall on your right, and sit at the bonfire ASAP.
- Exit the bonfire room and turn right. Turn right again and head up the ladder. I promise the skeletons are not worth it.
- Roll past the skeletons on the stairs. The first skeleton on your right is easy to dodge. The second one will stand right in your path, but there is a little ledge to your right that you can CAREFULLY roll towards before the exploding skulls take you all out.
- Run through the graveyard to Firelink Shrine.
- Climb the stairs of the shrine under the blackbird. Run around the upper level a bit to lose the skeletons following you. Jump down and run to the bonfire when you think you're far away enough.
Now go forth, my friend, with this insane, game breaking weapon.
Also, I died 6 times on my way back, and this entire run (from start of game to end of getting the sword) took me about 40 minutes total. It'll hopefully take you even less time :> Good luck!!!
- DARK SOULS: REMASTERED 100% Achievement Guide★ 5 (2k)53k views4.5k ♥95 minUpdated 12 Dec, 2020
- 100% Achievement Guide: Dark Souls - Remastered★ 5 (2k)53k views5.5k ♥183 minUpdated 8 May
- Прохождение Dark Souls★ 5 (1k)40k views2.6k ♥66 minRussianUpdated 16 Jan, 2022
- Dark Souls NPC Questlines in Order★ 5 (864)31k views2.2k ♥11 minUpdated 18 Sep, 2023
- Пошаговое получение 100% достижений в DARK SOULS™: REMASTERED★ 5 (1.3k)26k views3k ♥19 minRussianUpdated 26 Nov, 2023
- DARK SOULS™: maps★ 5 (206)25k views541 ♥1 min


- Upgrading to PremiumTeam Fortress 2★ 5 (20k)1441k views11k ♥6 minUpdated May 11, 2022
- No More Room in Hell Official ManualNo More Room in Hell★ 5 (2.8k)569k views2.1k ♥29 minUpdated Apr 22, 2019
- NMRiH Community Hosting GuidesNo More Room in Hell★ 5 (526)351k views653 ♥1 minUpdated Aug 10, 2022
- ULTIMATE GUIDE FOR GAME DEV TYCOONGame Dev Tycoon★ 5 (5.8k)326k views10k ♥4 minUpdated 23 Jan, 2014
- How to 'Git Gud' Soon™MORDHAU★ 5 (2k)318k views3k ♥68 minUpdated Nov 16, 2024
- Лучшие кооперативные игры SteamPAYDAY 2★ 5 (1.5k)315k views2.1k ♥56 minRussianUpdated Apr 27, 2025






This guide was created by its original author on the Steam Community. Are you the author and want it removed? Request removal.