Making Bad Items Useful
Introduction
The Binding of Isaac is a game about adaptation - in order to be victorious you will need to turn everything the game throws at you to your advantage. Often this is pretty easy - a damage up or a new tear effect is a pretty straightforward upgrade, but not every item can be The Pentagram or Spirit of the Night.
Some items aren't just useless, they can be actively detrimental to your run or worse - lethal in their own right. But that doesn't have to be the case - in the right hands at the right time, nearly every item in the game has a use, and some of the worst ones can be your best friends if you know how to use them.
Feel free to comment with questions, suggestions or corrections. I'm sure I haven't covered every trick in the book here.
This guide doesn't cover trinkets because they're mostly either beneficial or useless with little in between, but if you want information on them, check out Color Printer's excellent Trinket Guide: Trinket Guide
He provided a lot of interesting information about how the game works that I referred to when making this guide.
Cursed Treasures (Part 1)
Not all of these items are harmful, but they're often risky.
Tactics: Self Damage items in The Binding of Isaac are difficult to use with any effectiveness because you'll typically want to save your health for your enemies. With that in mind, there's a few scnarios you'll want to always use them.
If you can manage it, try to activate a self-damage item immediately after being hit, while Isaac is still in his invincibility frames. You can try using it beforehand if you're about to be hit by something that does a full heart of damage, but it's more reliable to do so afterwards because you aren't taking any damage you don't need, so if you guess wrong and end up dodging you haven't wasted health. This has the fairly straightforward effect of damaging everything in the room for free, because you won't take extra damage while invincible.
Similarly, you can combine them with The Polaroid, Celtic Cross or The Chariot's invincibility effect to use their abilities for free. They also don't count as damage for the purpose of no-hit achievements.
Note that some self-damage items have specific tactics which will be mentioned in more detail later on in the guide.
Tactics: While usually not worth the annoyance, Chocolate Milk can be beneficial when combined with Mom's Knife, due to the fact you have to charge it up regardless. By combining the two you can deal much more damage than usual. You can do the same with Brimstone, but your damage will be proportionate to time spent charging (not charged) in the current room. So if you charged in the previous room you'll do no damage.
Tactics: The Dead Cat is one of the best items in the game provided you're on the first four floors* and have a way to kill yourself eight times. Should you use it wisely, you can gain up to eight extra boss room items.
*Unless you're having a really powerful run already you don't want to have to build your health back up starting on the depths and the trick is also much harder to pull off.
This requires some skill and a bit of luck. First, you need to acquire some method of portable self-harm, usually bombs, but a self damage like those mentioned above, or the IV Bag will also work. You'll want to clear out the floor, leaving any spirit hearts, eternal hearts or health upgrade items untouched (at least for now). If you aren't very confident in your dodging you might want to take one spirit heart to start with, but you'll find yourself with several red heart drops anyway, so it's not too important.
The method is simple: You need to beat the boss and then kill yourself in the boss room. Repeatedly.
Every time you die in a room, the enemies are reset and you appear outside, having used one of your respawns. This doesn't reset item drops, rocks destroyed or pickups on the ground, but each time you kill the boss, a new item will spawn. It won't override the old one, you just get a new item. This can make you extraordinarily powerful early on, provided you can keep killing the boss then committing suicide without dying too often in the process.
Feel free to take anything that isn't a health upgrade to make subsequent fights easier.
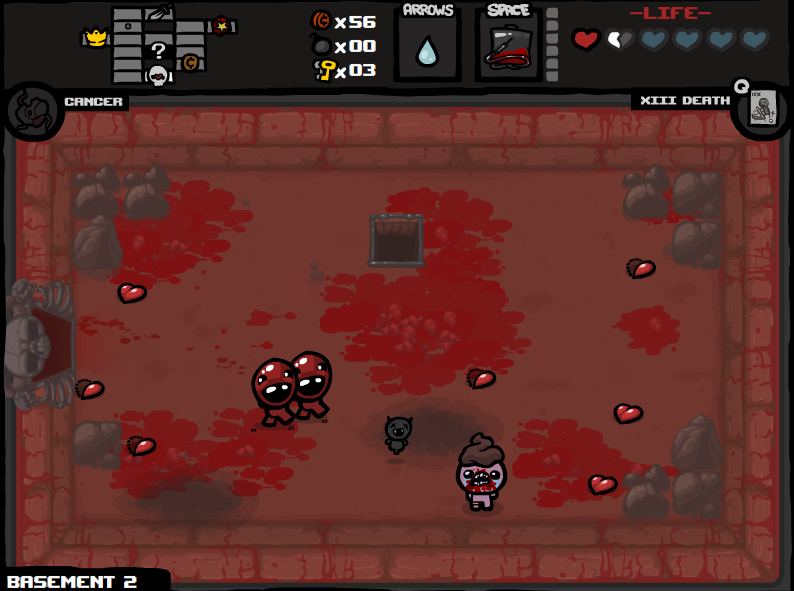
This includes cubes of meat. In fact, you can gain up to two level 4 meat boys using this strategy.
Also if you're playing as Judas there's no reason not to get the dead cat prior to getting HP upgrades because your base health is low enough that you don't lose anything.
Finally, getting three Guppy items (excluding Guppy's Hairball) will activate Cat Mode which is an excellent powerup.
Cursed Treasures (Part 2)
This section was getting a bit long so I've split it up
Tactics: While not strictly a bad item, the Forget Me Now can be a tough sell due to the fact it replace your spacebar item. What might sway your decision however is if you find it on an XL floor. When used under the effects of Curse of the Labyrinth, the Forget Me Now will separate the two floors, putting you on the first one, allowing you to get double the items. So if you use the
Forget Me Now on the Caves XL you'll be taken back to the Caves 1.
Tactics: This is a high risk high reward item depending on how good you are at avoiding damage and how many heart containers you choose to sacrifice. A single container is rarely worth it, so I advise sacrificing all of them, or at most leaving one. This is because there are several benefits to having a low number of heart containers and a high number of spirit hearts.
First, you get free access to Boss Arenas and the treasures within. Second, when you only have spirit hearts, the Polaroid Trinket works every time you get hit (watch out: The Cursed Skull does as well!). Third, ♥♥♥♥♥ of Babylon can be maintained permanently. Fourth, Spirit Heart damage doesn't count towards angel/devil room appearances. Meaning you'll always have an increased chance of seeing them if you have no red heart containers
Note that if you decide on having one container instead of none, you'll be able to use blood banks prior to the Womb without sacrificing spirit hearts, but that's really the only benefit. You'll also want to use Guppy's Paw as a one off item most of the time, as it has few practical uses in a fight (namely, invoking it when you're about to die for some added survivability). This works best if you have either a large number of heart containers to start with or The Nail/The Relic/The Book of Revelations to replenish your spirit hearts regularly.
Note that you can use the Strength card/Liberty Cap trinket to get a temporary extra heart container which can be sacrificed. You can use this to put yourself on -1 heart containers instead of zero. There's no difference but a health up will just bring you back to zero instead of one.
Tactics: Ipecac is a classic double edged sword, offering extreme damage and infinite explosives at the high risk of self damage. But there are a few things you can do to cut down the risks.
First and foremost, never EVER take My Reflection or Three Dollar Bill while using Ipecac. You will die. Second, keep your range down - Ipecac won't damage what it arcs over, and if you're being chased by Globins, high range is going to make them almost impossible to fight. You want a medium range - far enough you're unlikely to blow yourself up carelessly, but near enough you can still hit things. Third, back up before firing - there's a small window after you fire where the shots are low enough to hit nearby rocks or enemies before they land. Ipecac requires a lot of coordination to avoid this, and in some rooms, avoiding self damage will be impossible, so you need to choose your shots carefully.
Tactics: Whenever you use the IV Bag, always activate it twice in a row. It will become reusable before your invincibility frames wear off so there is never a reason not to get two uses out of it.
Anyway, standard self damage advice applies - use it to get paid to take damage, but where the IV Bag differs from Blood Rights, is it can be useful out of combat as well. Specifically, when giving health to Demon Beggars or Blood Donation Machines, you can activate the IV bag (twice) to get some extra cash. If you have the Bloody Penny you should be able to sustain your donating habits nigh-indefinitely by doing so. Note that you can achieve the same effect by placing a second Donation Machine or Demon Beggar right next to the first so you donate to both simultaneously.
The IV bag is also a great d20 enabler.
Tactics: Mitcheeta posted a useful tip explaining that you can completely mitigate the damage from Kamikazie by pressing up against a wall before using it. Simply standing next to the wall isn't enough, you have to be stationary, but holding the appropriate movenent key down for it to work. You will also still take damage if you blow open a secret room and start moving into it. This is pretty useful for grabbing tinted rocks and damaging enemies close to walls.
As with the IV bag, the standard self damage advice applies, but note that a full heart of damage that doesn't ignore spirit hearts is rarely preferable to regular half-heart damage, and even then it's unlikely to be useful unless it's against a melee enemy such as a globin.
Misfortune Telling
Tarot cards are usually great, there's a few that are more useful than they seem at first glance.
Tactics: While you usually want to clear out an early floor before confronting the boss to maximize your chance of room drops or spacebar item charges, once you get to the full heart damage floors (The Womb onwards) the Emperor is extremely valuable. Use it to avoid unnecessary damage and grinding, especially if you end up with the Curse of Darkness or Curse of the Lost. Those floors are generally too risky to hang around in for long unless you're really powerful and there are usually no item rooms that make them worth exploring.
Tactics: If you're wondering why you get stomped on, try activating the card in a room with enemies. If the enemy you chose is Mom, you will still be stomped on.
Tactics: This naturally applies to the Anarchist's Cookbook as well, but you can activate the card, then use the d20 to create several pickups.
Alternative (uses for) Medicine
In each run, the colours and effects of your pills will be random, and unless you're playing as Cain or have an item to prevent them, you'll have about as much chance of getting a bad pill as a good one. But not every bad pill is as awful as it seems.
Before we go any further, please note that stat down pills are 20% less effective than their respective stat up pills (where applicable). So a Speed Down will not quite cancel out a Speed Up.
Tactics: The Bad Trip pill is a classic example of a secret benefit to an otherwise bad pill. Wait until you get to one heart or less, then pop it for a full heal. It's pretty simple, just be sure to only use it if you don't have any spirit hearts left - it'll take them first.
Tactics: Much like Bad Trip, if you have one red heart or less and want more, you can get a free heart container from a health down pill. Or, if you just have to see what's in a Boss Arena and you're on two hearts, you can sacrifice a heart container for what is often a health upgrade anyway.
True Effect: Increases the frequency of room drops by 10%, even beyond the usual maximum.
Tactics: There are three luck stats in the Binding of Isaac*, and the one pills affect governs the frequency of room drops. You can have either neutral luck, positive luck or negative luck, but negative luck is broken. What happens is that negative luck is subtracted from the drop chance, meaning it actually increases it. In fact any change in luck will increase room drop chance. However, while positive luck only counts once before resigning itself to just increasing the frequency of Tough Love teeth, negative luck can increase the room drop rate as high as you have pills.
So taking 10 Luck Up pills will result in slightly more drops and permanent teeth (if you have Tough Love), but 10 Luck Down pills will almost guarantee a drop at the end of every room.
Note: If you're taking luck down pills, avoid the PHD and the Luck Foot because any subsequent Luck Downs will be converted to Luck Up and become useless to you.
*That's not important, what is important is that luck pills only affect room drop rates and don't do anything else. However, other luck items will stack with them to increase drop rates.
And The Rest
Some bad items are still bad enough that you still want to get rid of them pretty quick, but they can help you out in a few situations. So here's some stuff that won't ever really be awesome, but can still help you out of a tight spot.
If the book in question is in a library this is extra important because subsequent libraries will spawn different, possibly better books and second, because you remove them from the library item pool. Try to use Isaac's D6 (nun's habit preferred) as much as possible to re-roll the library because once you go through all the books, it will start pulling from the item room pool. That means a library becomes a 2x Item room that can spawn even past the depths. Needless to say, this can be really useful in the late game!
Tactics: You can easily escape from an Arena or a boss fight using this item, even on the Chest. This can be really handy if you don't want to risk death to get a Boss Arena item.
Tactics: This can be pretty useful against a few kinds of enemies - specifically the ones that charge you down or jump on you. When you see bosses like Pin, Peep, Monstro or Mom about to land on you, activate Lemon Mishap so they land on the puddle, taking a decent amount of damage. The key is to activate it when you know exactly where an enemy will be, rather than leaving it to chance. Using it to block off a thin alleyway can also get you some free kills. Simply put - when used reactively rather than proactively, (or proactively while under the effects of an invincibility item) you should be able to do some damage with it.
As with any spacebar item, Lemon Mishap can become considerably more useful in combination with the Nun's Habit, provided you don't mind taking a few extra hits.
Tactics: You can use it to break tinted rocks without spending a bomb.
Tactics: This can either be useful or pretty bad depending on what tear effects you have. The Lump of Coal is a great way to ensure the former because the longer the tear is in the air, even if it isn't moving further away, the more damage it will do. You can also use it to kill Doples without being hit by firing then moving the Dople into its path. In conjunction with Cupid's Arrow or Polyphemus you can utilize the piercnig effect to get in a few extra hits.
Tactics: The Poop can be used as an impromptu shield either for blocking shots or charging foes. It's useful in situations where you have no mobility, but it's not going to win you a fight. The coins it yields can also be useful from time to time, particularly if you have one of the Penny trinkets, but should not be relied upon as a source of cash.
Tactics: When in the Top Secret Room that looks like a Cathedral room and contains a single Eternal Heart, any red hearts it drops will be eternal hearts. If you get the chance, feel free to spend all your money on it in these rooms - you can end up with a lot of heart containers.
In addition, here's a cool slot machine trick originally posted by Macbeth:
The Portable Slot Machine can also be exploited for extra boss room items much like the Dead Cat. Simply use it in a boss room until it spawns a fly, then leave and re-enter the room to make the boss respawn. As usual, each boss kill nets you a new item so repeat the process as long as you have money. This works with the Wheel of Fortune card as well, but I suggest only using that if the boss in question doesn't shoot bombs, lest you find your slot machine destroyed before you can get more than one use out of it.
- Achievement Guide for The Binding of Isaac★ 5 (1k)39k views1.5k ♥9 minUpdated Sep 29, 2018
- The Bindening™: A Comprehensive Guide to Everything Isaac★ 5 (2.1k)32k views2.8k ♥155 minUpdated Jul 4, 2015
- Unlocking Broken Achievements [Windows/Mac]★ 5 (565)31k views506 ♥6 minUpdated Mar 12, 2021
- Comprehensive Guide To The Binding Of Isaac★ 5 (980)29k views1.3k ♥75 minUpdated Aug 19, 2015
- «The Binding of Isaac»: руководство по достижениям★ 5 (1.2k)25k views1.4k ♥11 minRussianUpdated Sep 26, 2014
- How to use an XBOX controller in The Binding of Isaac★ 5 (232)21k views224 ♥1 minUpdated Jul 20, 2014


- Upgrading to PremiumTeam Fortress 2★ 5 (20k)1441k views11k ♥6 minUpdated May 11, 2022
- No More Room in Hell Official ManualNo More Room in Hell★ 5 (2.8k)569k views2.1k ♥29 minUpdated Apr 22, 2019
- NMRiH Community Hosting GuidesNo More Room in Hell★ 5 (526)351k views653 ♥1 minUpdated Aug 10, 2022
- ULTIMATE GUIDE FOR GAME DEV TYCOONGame Dev Tycoon★ 5 (5.8k)326k views10k ♥4 minUpdated 23 Jan, 2014
- How to 'Git Gud' Soon™MORDHAU★ 5 (2k)318k views3k ♥68 minUpdated Nov 16, 2024
- Лучшие кооперативные игры SteamPAYDAY 2★ 5 (1.5k)315k views2.1k ♥56 minRussianUpdated Apr 27, 2025






This guide was created by its original author on the Steam Community. Are you the author and want it removed? Request removal.