MGSV PvP 101 Handbook
INTRODUCTION
I’ve got this game in October 2020, started FOBs on December 2020, so basically I am a 2021 generation MGSV player. My first PvP was at the end of last year and I got my ass kicked by top players. Since then, I realized that my offline experience with the game was far away from a competent one in online multiplayer, so I decided to plan a strategy to be a strong player as fast as I could without sacrificing my personal life.
I just got 600 hours in this game (when I started to write this guide of course), far less than still noob players (at least in lethal PvP, I’m not talking about pro ghosters) that have like 1.500 hours and can’t have a bronze nameplate yet. I’m not getting fun of them by saying this, I’m just telling you that I played less and achieved things faster by playing less but in a smarter way. I don’t consider myself a skilled player but a strategic and a tactical one.
I’m doing this because I got this knowledge as the months went by, some by myself, some by tips given from some friends. I want to help new players (and not so new) to be better in order to reactivate this community, to have more competent players in PvP, and to prevent noobs to use cheats because they think top players are cheating or because they don’t know how to enhance their performance. I want to prevent more “Jarl Valdi” kind of players to exist LOL.
I apologize beforehand if some ideas are not clear enough, my native language is Spanish.
Let’s get started...
UPDATE: The guide has been updated after 1100+ hours playing, with new secrets and tactics I've been discovered over time.
MINDSET Part 1
“With intelligence, investment and study you can achieve practically everything”
What we want to achieve with this guide is to be a strong player as fast as we could, to be able to do that, we first have to plan a clear strategy. The term “strategy” is derived indirectly from the Classic and Byzantine (330 A.D.) Greek “strategos,” which means “general”, so we must think first as a general and then act as the “One Man Army” Big Boss and drug and arm prosthetic enhanced Venom Snake. That’s the difference between strategy and tactic.
Before planning, we must acquire a strategy mindset following the next principles:
1.- Think ahead about your long-term goals.- We want to be a strong player, for that we need the right equipment, and knowing that most of the best items and weapons are only available as online development items, they require a lot of time and resources to get them. Later in this guide I’ll tell you how to get the needed items and weapons faster.
2.- Choose which battles to fight and which to avoid.
- If you´re just getting started, you may not have the experience and the items/weapons needed to be able to defeat a top player, so you can’t be that stupid to keep attacking their bases and opening wormholes to your base, you will lose all your resources and staff in a blink of an eye. Be smart in that situation and don’t retaliate against top players yet.
3.- Keep your emotions under control.
- All human beings are emotional first and rational second. Accept this and you will be able to keep your cool under tense situations. It’s just a game, you can win, or you can lose but you should try to always have fun and learn by your mistakes. "Because Tony learn from his mistakes"
4.- See things as they are, not how your emotions color them.
Here I have an opinion about playstyles (I will talk about this at the end of the guide), for me, there are two main playstyles:
- Old-style [OG Style/Old Fashioned Style] (not using Energy Wall nor Autowormhole, nor Quiet);
- Modern-style (Post 2017-2018 updates style, having E-RB WH GEN.[★10~12] + Energy Wall + Quiet) and
- 5.- Judge people for their actions.
- Self-explanatory, don’t believe everything someone is telling you, some cheaters are very discrete but they get caught very easily one day or another.
- Don’t be frustrated because you still don’t have the items/weapons needed for the playstyle you want. It’s a process you have to walkthrough if you want to do it in a legit way. Adapt your tactics to get resources and staff, that’s your priority when starting on FOBs.
- When starting on FOBs, YOU MUST save the most resources and staff as possible, so don’t be stupid by retaliating lethally other players only because they stole stuff and staff from you. Be smart and choose your battles with intelligence and ghost their bases instead.
- Challenge yourself and don’t use cheats because of your fears. Period.
“Your interest in war is not the violence, the brutality, the waste of lives and resources, but the rationality and pragmatism it forces on us and the ideal of winning without bloodshed.”
“As a warrior in life, you welcome combat and conflict as ways to prove yourself, to better your skills, to gain courage, confidence, and experience. Instead of repressing your doubts and fears, you must face them down, do battle with them. You want more challenges, and you invite more war. You are forging the warrior’s spirit, and only constant practice will lead you there.”
MINDSET Part 2
Probably, when you get started in this game and you don’t know anyone who plays (that happened to me at the beginning) you won’t get the chance to have any PvP, and when you start to get a higher espionage rank, you start to find some players that could defeat you easily. Or worse, you get your first nuke, and some top player came to steal it from you. In that situation you may think: “OMG that player is cheating, I shooted him/her many times and he/she never died” or “WTF was that teleportation thing?? Or “What was that blue bubble that protects him/her??” “WHAT?? I got disconnected?? I have a perfect internet connection… Impossible”. All those things can make you think that they are cheating, but that’s not always truth.
Well, my friend, here are some explanations for those things that can confuse you as a noob and eventually, can motivate you to cheat, but before doing that, keep this in mind:
*.- There are some items you can unlock once you get enough points in the “Event FOB mission tab”. Some of them are:
Wormhole Generator- Grade [★9] (Red ones) you can teleport manually to where you placed this item. It’s destructible and can be stolen by the other player.
- Grade [★10~12] (Blue ones) you can teleport manually to where you placed this item and, in case you die, got stunned or tranquilized, you will teleport automatically to where you placed this item. It’s indestructible and can’t be stolen by the other player.
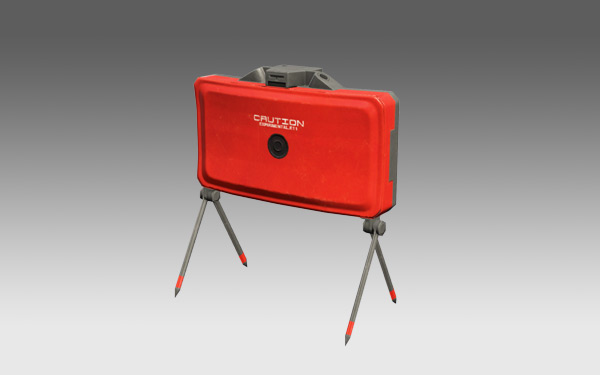
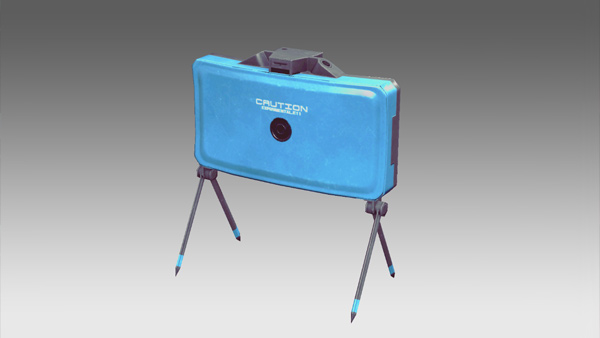
Energy Wall
- It’s the blue bubble that can protect you from any damage except fulton launcher. You can use it to fall from heights, to pass through sleep gas, stun grenades, bullets and explosions.
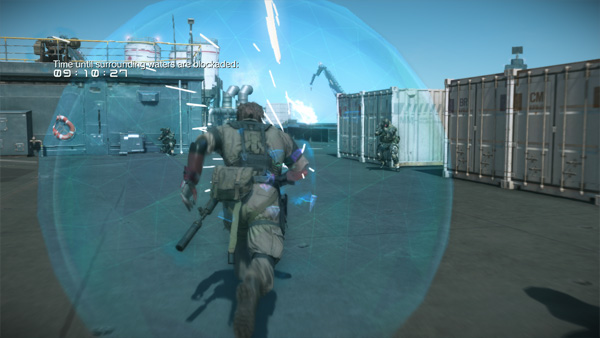
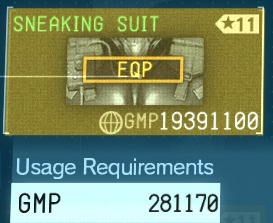
*.- And here’s the explanation of why those players are really tough to kill: Grade [★11] Sneaking Suits (all 3 versions)
- Provide a very high level of defense and shows no heat signature when the other player is using NVGs (the weapons are still warm up tho)
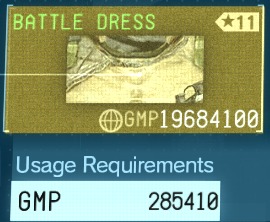
 Grade [★11] Battle Dress
- Provide the highest level of defense but your silhouette is bigger and shows heat signature when the other player is using NVGs.
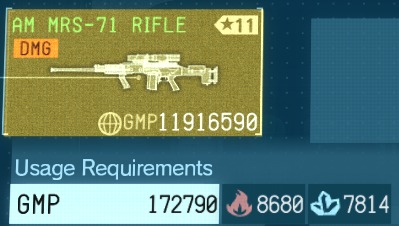
 Grade [★11] AM-MRS-71 RIFLE
- The most conventional sniper rifle used in PvPs. With this you need only 3 shots to kill a Snake using Grade [★11] Sneaking suit (if you aren’t shooting in the head, of course)
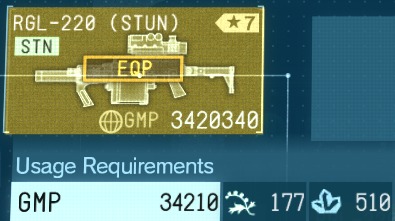
 Grade [★7] RGL-220 (STUN)
- The most conventional hip primary weapon for PvPs. With this you can easily stun your enemy. If you don’t shoot directly to the other player, you need two to stun a Snake and one to stun a Quiet.
And about the internet connection problems, usually have to do with the connection of the host, who is always the invader. I don’t know about it that much in this moment, so I will update this guide in the future in the matter. I’ll appreciate if you contact me to help me with info about it.
STRATEGY - PHASE 1 (Part 1)
- All Command Platforms first
- All Base Development Platforms second.
- All R&D Platforms third.
- The rest.
Is very important that you develop one platform completely at a time and not every platform at once. You delay the build a little, but you’ll be less vulnerable to invaders. (Keep this in mind if you try to have a life outside the game, but if you’re fully committed to the game, this tip may be trivial as you may be playing more and stealing more resources from your enemy)
MB coins
Yes, most people don’t like in-game purchases, but if you value your time more than your money, you should give it a try to speed up FOBs build process. DON’T USE THEM TO SPEED UP EQUIPMENT DEVELOPMENT (before getting all FOBs done) NOR DEPLOYMENT DISPATCH IF YOU DON’T HAVE ENOUGH VEHICLES.- I invested in the higher pack of mb coins available, 3 times in total, once a month. I feel like I purchased the game like 4 times in total, but totally worth it as is the only game I play I the present.
Here are the resources you can get if you enter to the core of a certain platform:
- Command Platform – Biological Material
- Combat Platform – Common Metal
- R&D Platform – Precious Metal (Most required at high grade equipment)
- Base Development Platform – Minor Metal
- Support Platform – Fuel Resources (Most required at the beginning)
- Intel Platform – Golden Crescent
- Medical Platform – Digitalis (Purpurea)
- You can fulton containers from your enemy’s Base Development Platform too!, specially the red ones.
As time and resources are limited, you should develop your equipment in a smart order, here’s my approach:
- To level up your FOB to the max (lv. 78) you need to protect your lethal staff, so prioritize this uniform first.
- Besides, it helps if you’re a noob as it has a higher defense level than a Sneaking Suit, so you can practice longer in the battlefield before being killed by NPCs
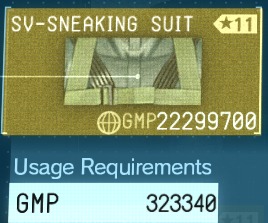 Here you have 3 options:
- SV-Sneaking Suit: Needs less days to develop, but Grade [★11] is more expensive to equip.
- Sneaking Suit: Needs a lot of days to develop, but Grade [★11] is cheaper to equip. Furthermore, it’s the uniform used by your non-lethal staff.
- Sneaking Suit (NS): Same as SV-Sneaking Suit.
- Don’t develop all of them at the same time please, but one at a time: Battle Dress and then one of the 3 Sneaking Suits.
a.- PRIMARY WEAPONS (HIP)
Grade [★11] AM MRS-4R
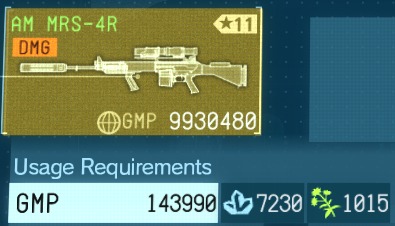
- Necessary mostly for your mid and long-range lethal staff, to increase your base lv.
- Mandatory weapon for PvPs, huge impact space against enemies and can mark them. Nightmare for Autowormhole and Quiet users.
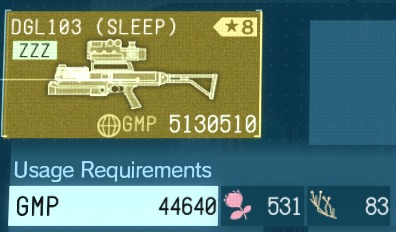
- Important to attach to your lethal sniper rifle.
b.- PRIMARY WEAPONS (BACK)
Grade [★11] AM-MRS-71 RIFLE
- Simply the best for fast and accurate playstyle. You should attach a grenade launcher, a sleep one is recommended.
- I equipped the Grade [★7] until I got the Grade [★11], to save some resources.
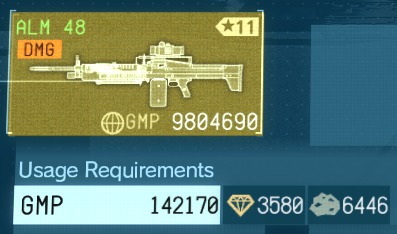
- Great for PvPs, useful for great distance shots too and high damage. The only problem is that it can’t attach a grenade launcher.
- Mandatory to increase your mid-range base lv. Specially if you pretend to protect your nukes in a better way (Yes, I recommend lethal mid-range in Command Platform).
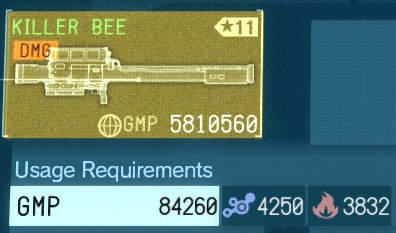
- Only to increase your mid-range base lv.
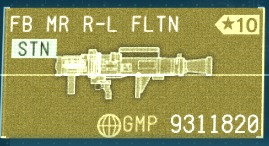
- Useful against cheaters and modern-style players, as it can’t be avoided with Energy Wall for example. It’s considered a dirty move tho, keep that in mind, specially if you shoot it cowardly from the first deck. If you use it as an invader, it’s fairer in my opinion.
c.- SECONDARY WEAPONS
Grade [★4~7] ZORN-KP
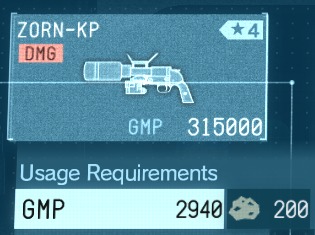
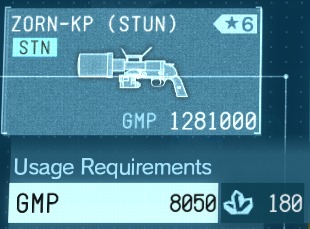
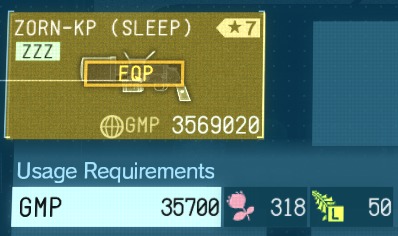
- Depending on your preferences, you should be using the lethal, sleep or stun option.
Grade [★7] TORNADO-6
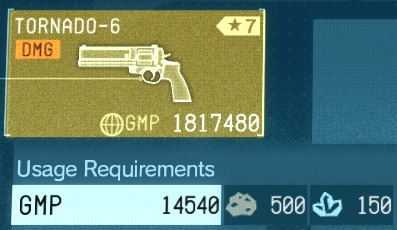
- I recommend it if you play as a defender, it helps you to mark your enemy as the bullets bounce to them. Useful if you don't want to reveal your position by shooting with a Grenade Launcher.
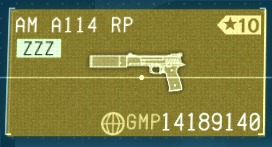
- Useful if you want to troll your enemy using Hand of Jehuty and cqc moves.
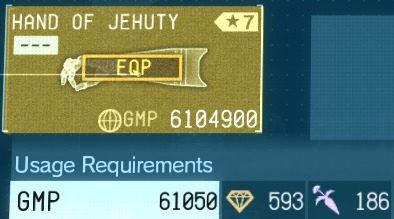
- Mandatory for PvPs as you can teleport your enemies to you and control them so you can do whatever you want with them.
STRATEGY - PHASE 1 (Part 2)
d.- SUPPORT WEAPONS
(1) Throwable Weapons
Grade [★10] E-STUN DECOY
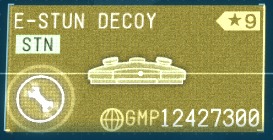
- I don’t use it much, but I’ve seen players that place them as traps combined with mines to knock out their enemy.
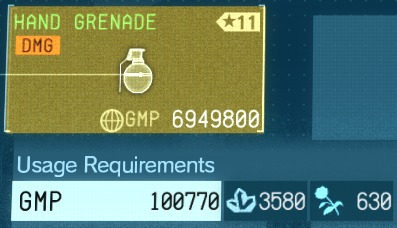
- To upgrade lethal setups. And to toss them over enemies specially if you knocked them out and you can’t shoot them from where you’re standing.
- To upgrade non-lethal setups. Useful to mark and knock enemies where you can’t reach by a Grenade Launcher shoot.
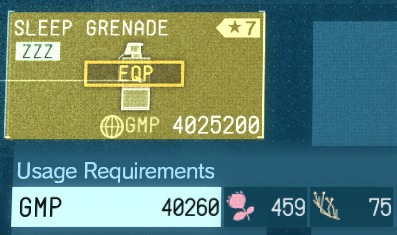
- Mandatory in PvPs. Useful to tranquilize your enemies if you think they are getting close to you; to prevent them to cross the bridge if they are coming close to you, etc. Really one of the most important weapons in the game.
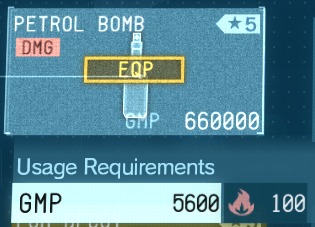
- Useful to quickly kill enemies that have been knocked out and to make vulnerable an enemy that’s being teleported to the placed wormhole.
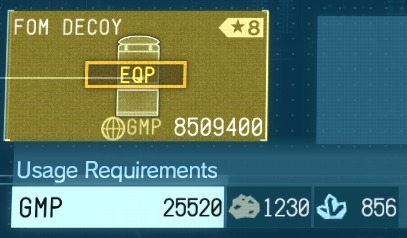
- Mandatory in PvPs. “The art of war is based on deception” – The Art of War, Sun Tzu.
- It create a dummy field of your location on your enemy’s iDroid map. The uses for this are infinite as your creativity can be.
(2) Placeable Weapons
Grade [★8] M21 D-MINE
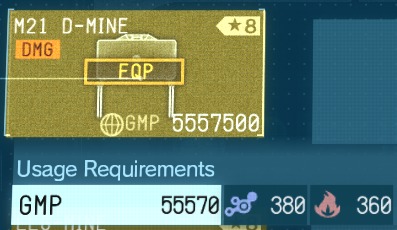
- To upgrade your lethal setup. Useful to trap your enemies with another weapon to knock them out.
- If your enemy trigger a mine you placed in a PvP (not the custom ones placed by the owner of the base), the enemy will be marked. So, on the contrary, if you trigger a placed mine by your enemy in a PvP, you should unmark yourself immediately.
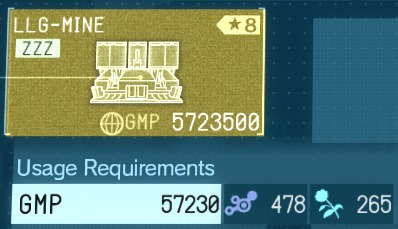
- To upgrade your non-lethal setup. Useful to tranquilize your enemies in most situations. Is important that is fully upgrades because the space for trigger it gets bigger.
- I don’t use it, but some players place it in front of a M21 D-MINE to knock out their enemies.
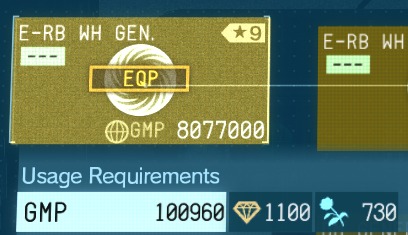
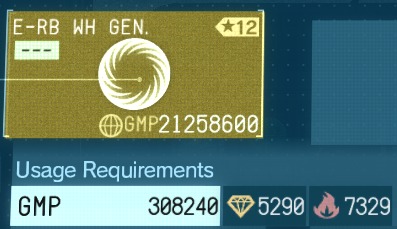
- Grade [★9] (Red ones) you can teleport manually to where you placed this item. It’s destructible and can be stolen by the other player.
- Grade [★10~12] (Blue ones) you can teleport manually to where you placed this item and, in case you die, got stunned or tranquilized, you will teleport automatically to where you placed this item. It’s indestructible and can’t be stolen by the other player.
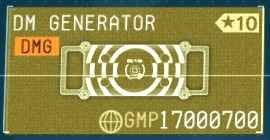
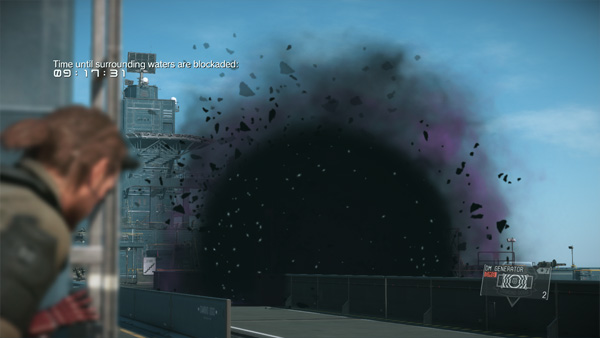
- As this creates a ball of dark matter, it passes through walls, so it’s useful to destroy cameras, mines, Grade [★9] E-RB WH GEN, etc.
- If you’re a defender using it, and the invader is an Old-style player, this weapon is useful to destroy their Grade [★9] E-RB WH GEN and prevent some surprises.
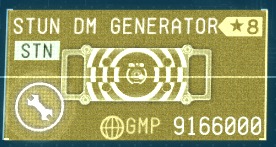
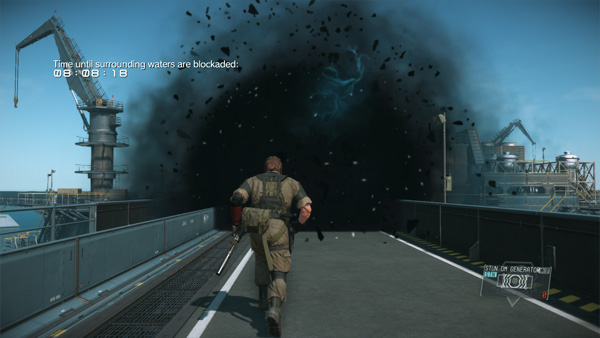
- Never used it, probably useful to knock out massive number of NPCs if they are close together. I don’t know if it’s useful against players.
d.- ITEMS
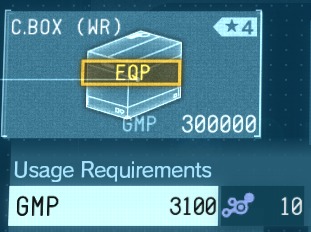
- Cardboard Boxes: The uses of it will be covered in the next section of this guide. I have equipped a minimum of 3 boxes in my items wheel.
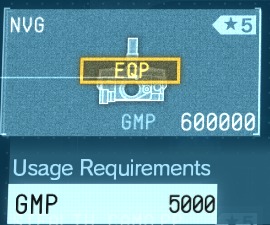
- Grade [★5] NVGs: No commentary.
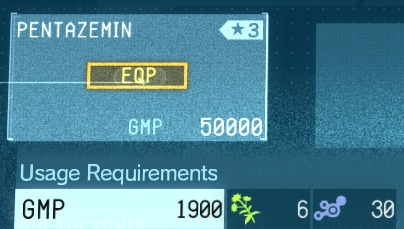
- Grade [★3] PENTAZEMIN: Keeps your hand steady while aiming.
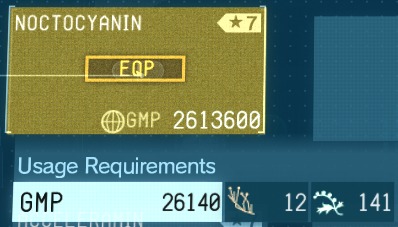
- Grade [★7] NOCTOCYANIN: Let you see enemies through walls, even if they’re unmarked.
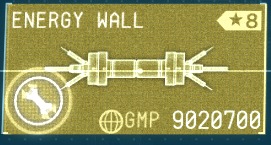
- Grade [★9] Energy Wall: Shield that temporarily nullifies shots, stun effects, sleep, and markings. Only for modern-style players.
STRATEGY - PHASE 2
- Unmark yourself from your enemy by getting in and jumping out of it.
- Protect yourself a little against Stun damage (and bullets too).
- Pentazemin: keep your hands steady while aiming.
- Noctocyanin: makes you able to see sense NPCs through walls.
- Creative uses of FOM decoy and “play dead” stealth mode.
- If you’re running, it stops you immediately without inertia.
- If you’re selecting an item/weapon, it gets activated immediately (and you close the wheel selection faster to keep your vision clear).
- If you’re on the ground, it helps standing up in a controlled way.
- It’s the reason Dolphin Dive exists.
Item/weapon selection
- You MUST practice a lot to master the item/weapon wheel selection. It was my nightmare as a noob, and I needed a lot of time to get used to it.
- Just practice selecting our desired item/weapon faster, while moving. Once you make it, you’ll do it by muscular memory.
Intermediate Cardboard box usage
- Using the knack above to equip it faster and if you use it to unmark yourself from the enemy, when you jump out of it, you can stand up faster by aiming while you press the standing key/button.
- In case you equip it by mistake, or if you need to unequip it asap, you can press the attack button.
Aiming tips
- Don’t use auto aim option. If you use it, you risk aiming something closer than your enemy and get hurt. It happen a lot if a cardboard box or a decoy is in front of you and your enemy is in front too but further away.
- To aim better, don’t look at the center of the screen while you do it, is a classic mistake most noobs do on any shooter game. Instead, look at what you want to shoot and move the mouse to that location. It may be weird at the beginning, but you’ll get use to it.
- In my personal taste, for a fast-paced game, I recommend using a scope that have only 2 options: x2.0 and x6.0.
- Recommended mouse settings for better aiming + easier management of equipment wheel: 800dpi + mouse sensibility set to 0. But it's a personal taste this one.
- This move can save you from a dangerous situation if you react fast to it.
- It helps you to be harder to hit.
The exploited move that can break the game mechanics as it were meant to be, for your own benefit:
- It can keep you safe from the damage of Stun Grenades that exploded near you, however, it can do nothing against a direct attack from these.
- The way it works is that while your character is on the air, you can’t get the damage. That’s all I know.
- It’s much less effective against sleep gas but works too.
- To be able to do this, you have to: dive, aim, crouch, repeat. It will be hard to get the momentum of it right, but you’ll get it by practicing a lot.
- The video on the right has 3 clips, the first one is a wrong way to do this movement, because it's just jumping and running; the second is the correct order of movements you have to do to practice this; and the third one is an example of Dolphin Diving correctly done.
Combining item selection Combining drugs at the same time
- Useful when you want to identify where the NPCs are and shoot them with precision. Especially useful when starting an invasion as you get up the stairs.
- You can select the box, unmark yourself by jumping out of it, equip NVGs and stand up faster while aiming and finally, toss a FOM decoy to the box. Useful to play a fast-paced game.
Advanced CQC
It is important that you be in crouch position if you’re going to CQC, because:- It covers more space to be able to CQC your enemy.
- If you “Haidaraa!” a player, you’ll be able to CQC him earlier than if you were standing.
- It’s useful if you’re grabbing a player that is using Energy Walls in order to keep grabbing him as the animation is over.
STRATEGY - PHASE 3
- I don’t recommend it if you want to train lethal PvP with a Sneaking Suit, because is not possible to dispatch to eliminate enemy reinforcements.
- Is a safe place to don’t lose resources for deployment and neither you or your opponent won’t lose any espionage points.
- The defender must always play old-style.
- The defender won’t kill the invader until there is no more time, or never.
- The defender will let the invader steal his RGL STUN rounds with CQC disarm technique.
- The defender can destroy the energy generator so electronic stuff won’t interfere. The same with mortars. (Optional to rest or add difficulty).
- The invader has to play seriously.
- Some players don’t like the idea of the invader gets to the core in this kind of training (Probably because of points and 10 soldiers stolen). But I don’t care. Do you?? That’s up to you!
You can dispatch so you’ll train as if it were a real PvP situation. Because of that, both you and the other player risks espionage points.
- Set the option to use lethal weapons in Mother Base. And set the option to be able to select weapons before entering Mother Base. (I don’t remember how, you can investigate it by your own)
- And start practicing :D
- It’s a safe place to practice your aiming (shooting the lights and stuff, never your staff), dolphin diving, and all the knacks mentioned in the previous section.
- It has the benefit that you can get the FOB emergency mission alarm while practicing this way and not having any time limit.
- But you can’t practice with another player. This is for personal training only.
PLAYSTYLES
"You cannot expect the other player, by default, to play by your rules."That being said, here is the proposal of what us Old-style players think is the best and more entertaining way of playing the game. Here are the unwritten rules that now are being written. Excuses from now on are not allowed MUAHAHAHAHAHAHAHAHAHA.
Playstyles
- No use of Energy Wall.
- No use of E-RB WH GEN Grade [★10~12] (Blue ones).
- No use of Quiet.
- You can use E-RB WH GEN Grade [★9] (Red ones).
- Use Energy Wall.
- Use E-RB WH GEN Grade [★10~12] (Blue ones).
- Use of Quiet.
This particular style requires grounding to be understood. The idea of playing like this stems from the need to improve and evolve your game skills to the next level. As is well known, in real life, if you handicap yourself in anything but you still manage to achive the goal, then you are greater than the person who can't do the same with handicap. Players who handicaps themselves show to be pretty confident on their skills. Wouldn't you like to be a great player too?? if that's the case then try to play in a Fair Play fashion, if not, then you will not be more than an average player.
- No use of Energy Wall.
- No use of Quiet.
- No use of Fulton Launcher.
- Not use of STN/ZZZ-Grab&Drop-CQC Glitch to steal the weapon of the enemy.
- DEFENDER: must no use any E-RB WH GEN Grade [★9~12] at all.
- INVADER: same rules as Old-style + No getting further than 3rd deck (The second one from your POV, INVADER starts in 4th, keep that in mind) while DEFENDER arrives.
INVADER:
- Can play with any of the 3 previous styles.
- Can or can not enter to the core, that's between the two of you. You better keep that rule clear before starting the PvP to not have misunderstandings.
DEFENDER:
- Can play Old-Style or Fair play.
- Has to disable mortars and energy generator. (OPTIONAL)
- He let the INVADER steal his weapon so he can reload ammo. Then let himself be killed so INVADER can keep moving.
Those are mere propositions, there are some other rules to make the game even more challenging as:
- DEFENDER only allowed to place a wormhole in the 1st deck.
- INVADER only allowed to place a wormhole in 3rd or 4th deck.
- DEFENDER not allowed to run down the bridge (this is a bit extreme, I don't care about this particular one)
- Not usage of any stun damage
- Not NVG (using smoke grenades here is madness hahaha)
- Invading with minimal dispatch, eliminating reinforcements at most
- Etc.
Be creative and if playing with friends, both should be aware of the rules both are imposing, so there will not be misunderstandings.
Play as you wish. But I insist in that the best and fastest way to become a better player is to handicap yourself to Old-Style. Although facing Modern-Style players is a hell of a challenge, look forward to it as a challenge and nothing more.
CHEATERS - How to deal with them in PvP
As Konami don't care at all about this game, cheaters are literally the most players you can find in FOBs, at least on PC. Here are some strategies you can use to defeat them.
Usually this cheat make both players invencible against damage, and the safer way to surpass this is with a headshot. I suggest to you that you do a headshot when you suspect you are defending against a cheater, because they will be stuck but alive, so you can shoot their heads to get a lot of points (points limit in a defense is 300.000 points).
You can throw the player to the sea if it's possible, but the character will be down below and you will have to wait until the time is over.
Faster movement cheats
Well, as the name indicates, this makes the character faster to move and shoot faster. I don't think there is a particular way to defeat this kind of cheater, if he doesn't use another cheat, then defeat them as you would do against a legit player
"Ghost" cheat
This cheat makes the character practically intangible, except for CQC, but that's all you can do about it. The only way to surpass this cheat is by throwing the cheater to the sea, task that is pretty difficult to achieve.
Unlimited timer cheat
Be careful with this one, because if this happen to you, is not necessarily a cheat. Once I defended against Arcado and the timer ended to 0, the PvP was still going, so I thought it may be a cheat. But then he showed me the PvP from his POV proving that he had the timer right. And as we all now, the host is the invader so the correct timer is the invader's. Keep in mind that this may be because of the distance of the players, in the case I mentioned, Arcado is from China and I am from Chile, so practically, in the other side of the world. To surpass this problem, you should kill/fulton the invader, there is not other way.
I DON'T REMEMBER MORE AT THE MOMENT, I'LL APPRECIATE IF SOMEBODY CAN HELP ME TO COMPLETE THIS SECTION PLEASE :D
How to deal with Hand of Jehuty Stun-lock
Have you ever been in a situation where, when infiltrating or defending a base, your rival knocks you out, pull you to them with the hand of jehuty (HOJ) only to continuously knocks you out with no end in sight? Play enough FOB and you will.
So the typical scenario is when someone is knocked out and then drawn to someone using the HOJ, the player to move and have to wait until the "dizzy" animation plays out. During this time, the person pulling you may use cqc, a tranq, or whatever means of knocking you out again, and then repeating the process indefinitely until they decide to kill you.
There are several things a person being stun locked can do in an attempt to get out of the lock. One common way is to wake up as fast as you can then to immediately aim and begin rolling away from the person using the HOJ. The purpose is to here is to maximize the distance between you and the “wisp” being sent towards you to pull you back to your enemy. Doing so successfully prevents the wisp from pulling you back and gives you a chance to incapacitate your enemy.
Another method is to use the e-wall when you’re about to be knocked out again after being pulled by the HOJ. While you are in the dizzy animation, you can select and utilize certain items. One of which is the E-wall. So another counter for someone who is just hellbent on doing this to you is to wait for them to cqc you, and as you hit the floor you activate the e-wall, preventing you from being knocked unconscious and giving you an opportunity to counter attack.
What I will usually do is use my e-wall just as I get knocked to the ground by CQC, then use my sleep pistol to knock out the person doing this. This typically works, especially if it’s the first instance of someone doing the stun-lock to you.
However, the person using the stun lock can counter this counter by continuously using cqc and making you use up your e-wall charges until you're eventually knocked out. Then, it becomes a game of using the e-wall just as you land on the ground and then attempting to dive or roll out of the way.
Here is an example of the player Blaster
One of these other perpetual stun lock methods can occur when your enemy successfully knocks you out, however you are still standing and are in the “staggered” animation and waiting to fall. During this time while you are still standing or just as you are falling down, the opposing player can initiate the animation to pick you up, only to then place you down and use cqc to disarm you and have you instantly become knocked out again with literally zero opportunity to utilize an item like the e-wall or to even have a chance to dive out of it. During this scenario, the best way to attempt to get out this loop is to NOT attempt to wake up during this entire exchange until after you're knocked out after the disarm, and then attempting to get out the traditional way through aim and roll, e-wall. However, if they are picking you up and walking off with you, you may attempt to wake up of the stun if prompted and successfully escape. But this is not usually the case.
The big issue with countering this stun lock is that with the balloon being shot and you being dropped from it, you are not given the chance to utilize items so you won't be able to utilize the e-wall to counter it initially. So once again, there is no 100% guarantee out of this method.
When someone is knocked out but far away from you, you can use the HOJ to pull them to you, knock them out/disarm them to replenish your ammo and then knock them out for a tactical take down bonus and then kill them.
In addition, if there is a cheater in your base, you can potentially use the stun lock to drag them to an edge and pull them into the sea and have them either quit or wait until the timer runs out
However, if you and the person you're going up against establish that doing this is fair game, then enjoy yourself. It can be fun to see how others manage to escape and allows you to refine your techniques in escaping it yourself.
Thanks to Kunsel for helping me figure out and refine a lot of this stuff.
◆ How to be a fast paced player
Although I made that quick video guide almost a year ago, here are some tips that not many players know. What you are witnessing here is the descifred code to maximize your entire movement in the game. Trust me, your entire gameplay experience will feel very different, and you are gonna love it.
"When I play with controller, I feel like I am a dancer moving through the scenery. With Keyboard is a pain in the ass to move"
With controller you can move very smooth around the world, hiding through containers, dodging headshots, etc. It has even the benefit of having an aesthetic smooth movement when you watch your recording after. You just move your thumb where you want to move which feels pretty natural, with K&M you have to be continuosly pressing the keys if you want to do diagonal movements... that's simply ugly.
With K&M I feel that the dolphin dive exploit is more manageable, because you can move the mouse while moving anywhere you want easier than with controller, as you will be using your right thumb pressing the buttons for dolphin diving so you can only control your movement but your situational awearness can be in a little trouble.
I suggest to try both ways, because you feel that the experience is entirely different. You can learn the best from both worlds and you can even anticipate how other players will react based only on which kind of device is using.
First of all, to stop wasting brain power on item selection when you can use all of it properly by thinking on the tactics you are going to execute in the middle of the battlefield, you need to master the equipment wheels usage.
Here are some tips for both Controller and K&M users:
Controller:
This is the best way to master the equipment wheels just because the game was designed to be played with a controller from the beginning, especially having in mind the PlayStation controllers layout, due to the position of the D-Pad and the left analog stick, allowing you to use your left index finger to press the equipment wheels buttons, freeing your left thumb to keep moving your character with the left analog stick. This is so obvious when you grab a controller, that I was surprised that some players didn't manage to use it properly, holding tight the hand and not using the left index finger as I just said.
Keyboard & Mouse:
This is the most difficult way to master the equipment wheels, is not natural to use a wheel selection interface with a mouse (They should have adapted the system as classic Mass Effect games did flawlessly, console and PC had different equipment interface), besides, the movement is directly influenced by the dpi and sensitivity of your mouse, as some of you know, I used to play with 12400dpi and mouse sens option set to 0, (yes, 12400 dpi), resulting in equipment selection a complete nightmare. You may ask how in hell I managed to select times with such a high dpi, and the answer to that mistery is...
"El Supra truco" or The Supra's trick in English
I came out with an alternative to solve that inconvenient, which consists in... dramatic drum sounds please... using the the directional keys to select the equipment. Try it now if you are already in the game, hold the item/weapon wheel button, then, instead of moving your mouse, do what I said.
Yes, is simply as that, the principle is easy, but... how do you excecute it in a practical way??
The answer is also simple: the magic of PC is that you can buy any custom gaming K&M. For this, you only need something that allow you to have minimum 4 buttons on the side (Keyboard or mouse, doesn't matter) which you can asign every individual directional key, and there you go.
I don't suggest the usage of macros because you will mess it up with the minimum movement of the mouse, unless... you are smart enough to find a way that prevent this. I know how, but I won't tell :P, besides macros ruins the experience, I tried to use macros for dolphin dive and equipment selection wheels in the past and doesn't work properly, because the game relies too much on your fps count and it messes up the input latency, meaning, is an useless quest at the end, and if you manage to pull it off, it will ruin the experience overall by loosing control of your character, which is not a good idea. Remember, everything about PvPs is about having always the control of the situation.
The other alternative if you don't have nor want to invest in a gaming device, you can asign the directional buttons to keys like UHJK or IJKL, and getting used to it. I tried and it worked, but I wasn't willing to move that much my left hand.
Nowadays I would only suggest you to switch to 800pi + mouse sens 0, which is my current settings since a couple days before my match against Apo in the tournament.
You will find the best way that suits you, you just have to tweak things by yourself for your own needs. I invested my entire first 6 months in PvPs trying to figure it out and mastering it, now you only have to invest time in the mastery of equipment selection.
There are some settings you may had overlooked, but were available for you from day 0. The secret to be the fastest player as possible, doesn't depend that much on how fast you press the keys/buttons, only depends on the correct settings and perfect momentum. You'll be mad that you didn't know this from the beginning, but you will be excited as I was when I was told this. This secret settings will allow you to even make more effective dolphin dives, having as a result a more reliable and secure mechanism to protect yourself from knock out damage + standing up faster when you are dolphin diving.
So, are you ready to discover the secret code of greatness in FOB PvPs??
Send me your (or your parents) credit car numbers and information, front and back side... no, just kidding hahahahah
Now breath and read carefully
Go to Options, CAMERA SETTINGS, and put all camera speed up to their maximum, in reality, is only the camera change speed the one that needs to be at it maximium, but if you put all of them up to 10 you get the full fast experience
That's it, now you will have to get used to it for a little while, but it worth it completely. You'll notice the whole experience is different, you'll feel faster and ready to conquer the world.
But please, PLEASE, turn off camera shake. Just do it. It's distracting and on PvPs you don't want cinematographic action, you want effective action.
◆ How to facilitate playing with your friends ("Fix" Konami broken servers).
How to play with your friends easily
You have two main ways to do this
- First: You both support each other and you visit your friend's base destroying or stealing something, that will open a wormhole to your base for him/her.
- Second: You don't support each other, I mean, no support at all from both sides. Then, you put yourself in Security Challenge and HOLD YOUR BASE, this means that you have to go to your allies tab and "enter your base" so anyone who tries to enter sees the warning that someone is already in, the purpose of it is so your friend have safe time to look up your base. So, when your friend finally finds you in Security Challenge, he tell you that and you RELEASE YOUR BASE, thus he can enter right away to invade you.
What to do if your friend is in your base and he already triggers the alarm but you don't get a notification? (or anybody is in your base going full alarm and you don't get any notification)
- You have to open your iDroid, go to Customization Menu/Avatar. Then you simply press "Ok" and get back to the chopper. What this does is to "reset" your connection to the servers, and you will be able to get the notifications again. Be aware tho, this "tweak" doesn't fix the problem 100% of the times. Once I was being invaded by a friend and I didn't get the notification even doing this trick. Still, it works 99% of the time, and if not, the next fix would solve it.
What to do if you get stuck in any FOB Mission's tab?
- I asume you play connected to the internet through Ethernet cable (I haven't tried this with Wi-Fi connection but you can give it a try)
- Sometimes the tabs get stucks and your iDroid menus don't work when you enter to any server related menues, and it doesn't allow you to play. To fix this, you have to directly disconnect the Ethernet Cable and connect it again, you'll get a notification saying you that you are not longer connected and if you enter your Steam overlay you will be disconnected. You wait to your Steam overlay screen shows up that you are connected again and then you connect to the server within pause menu. Now, you will be able to navegate through the iDroid menus without any problem.
◆ How to improve your PvP IQ 1
"How to think like a soldier? I can't teach you that. A soldier needs to be strong in spirit, body, and technique - and the only thing you can learn from someone else is techinique. In fact, technique doesn't even matter. What's most important is spirit. Spirit and body are like two sides of a single coin. They're the same thing. I can't teach you how to think. You'll just have to figure it out for yourself."
"It is easy to teach one to be skillful, but it is difficult to teach him his own attitude."
Although I agree with both quotes, I think is possible to teach some key principles that will allow you to develop your own criteria while elaborating your unique style of playing.
That being said, the skills you have to develop, besides all the techniques I've already talked about, is to take the right decisions: deceitful movement, deception tactics, fast reactions, be able to discriminate what is the best thing you can do in a determined situation to not waste time and make every second count. Every instant in the game is a decision you have to make.
An FOB PvP invasion has the following phases:- Phase 0 Pre-PvP or simply PvE.
- Phase 1 PvP start and taking positions.
- Phase 2 Looking for the first kill/extraction
- Phase 3 Kill/Extraction + respawn time
- Phase 4 Endgame and core.
To be an Elite player, the only thing you should do is dispatch to eliminate reinforcements only. If you want to practice a little bit easier, then dispatch to eliminate armour so the base get to Grade 6 or higher, dispatching below Grade 6 is despicable. And if you want to just to chill out or make things easier, then dispath to eliminate guards too. But the challenging you let the base be, the better in the long term, the bigger your confort zone will become and the better you will become.
You can use your wormholes in here no problem, when defender arrives the wormholes will be refilled. I haven't tested what else is refilled, you can make your own tests and let me know to update this info. I'm pretty sure bullets don't get refilled so don't waste them.
Depending on the Base layout, you will be able to destroy the mortars and energy generators... or not. You should be able to know if that's possible when choosing the base to invade and previous study of the layout itself.
For a more challenging and satisfactory win against the defender, you should let deck 2nd and 1st NPCs alive, because, the more empty the base when PvP, the easier, ergo, the boring the match will be. You want to be an elite player, don't you?? challenge yourself every day a litle bit.
If you STN or ZZZ any NPC, they will show up as you left them when the defender arrives. But if you just had them hold on the floor, they will show up as if nothing happened to him.
If the defender doesn't arrive yet, then you better start to mark all them as possible, including cameras and UAVs.
If there are 4 minutes left and defender is yet to arrive and is not a friend that you are expecting to enter, then you can open your way directly to the core or suicide yourself to invade another base, that's up to you.
FOBs structures are built for the sake of Hide&Seek kind of play, meaning that there will be almost always a way to hide, whenever you are and in almost any situation you are involved.
As you already know, any Stun Grenade damage done by a weapon, by the exception of the stun hand grenade, will mark your character, so, to determine what a "safe spot" is, you need to see where the defender actually is to try to guess where he/she can delive some stun damage. This is a thing of experience, and actually you need to play a lot or watch a lot of videos to figure where you should be to be able to avoid being marked by stun damage. If you are not in a safe position, or you are but somehow you got a stun damage and your enemy is far a way, then you have two options, you get in the box and unmark yourself, or you fall back (running or dolphin diving depending on your needs) and then unmark yourself with the box. But you will always have to move! because that spot is already compromised. You can get back to that position afterwards of course.
The box is an important asset for this matter. My advice (something I just started doing recently) is to use the box more often to stay safe. Although you can be marked, you will not be damaged. You can simply get to a safe spot, equip the box and while being inside of it, consult the iDroid map. Make it a habit...
Reminder: Sleep Damage is not stopped by a box, and dolphin diving can save you from it if you are already far away from it only.
Another tactic that's pretty useful to prevent being marked from aiming or binoculars, is using smoke grenades. Have you ever noticed that when you attack with Sleep damage to NPCs and then you wanted to analyze them with the binoculars you couldn't do it unless the smoke was disipated?? That's how I discovered smoke from any source don't allow you to mark what's on the other side by pure aiming. Use it at bridges, corners, or whenever you think it may fulfill its purpose. Another Elite secret related to this, is that when using NVGs you can't tell what kind of Smoke it is, so you can use it as a deception tactic too!
If you encounter yourself in a sniper duel, I suggest you to start in a crouch position (as you always should be doing for long-range targets), then you move in zig zag to dodge the bullets, when you feel that your enemy got the right height and is more likely to make a headshot, you stand up and keep moving in a zig zag motion. I can't believe NOBODY has used this trick yet, and is pretty useful. I have been killed a lot of times trying to figure out how to do it in proper way, here you have. Summarizing: Start crouch, move in zig zag until you feel in danger, and then you stand up, repeating the process.
◆ How to improve your PvP IQ 2
What if you get marked with Stun damage and your enemy is close to you??
This is one of the last things I've learned in the game, actually while in the tournament period. Please, don't, DON'T YOU DARE, to use the box in order to unmark yourself. DON'T, simply just don't do it. The reason is pretty simple, and I am mad that I get to realize this very late: is a psychological thing, if you get marked by your enemy, the first thing he is going to do is to shoot another stun round, and you may not be fast enough to finish the "entering the box" animation, so you will be exposed to get knocked out. What you should do instead?? Fallback! How?? depends! on where you are, where you think your enemy is, and how safe do you feel to retreat. If your enemy is very close and you even hear him getting close, then the best option is to teleport with a wormhole, if you don't want to use a wormhole and think you can make a nice comeback, then you better start dolphin diving until you are aware of the situation and position of the enemy. If you are close to the bridge where you came from and think the enemy will not have a clear shot to knock you out easily, then runaway! and retreat to an already cleaned deck. Never ever use the box to unmark yourself immediately while being cornered by your enemy, don't be afraid on having a mark over your head, it may dissapear suddenly, and it is confusing for your enemy too! because he will see that you are moving, but as the character can run fast, your foe needs to think twice to look up the distance where you are, so he will not be fully aware on if you are getting closer to him or the opposite for about 2 seconds, and here, every second counts!
Another fast and kind of safe way to retreat, is using the box. If you are inside the box in a stand position, you press the jump button and you will slide directly where your character is facing. And you can cancel the slide pressing the attack button.
About hiding in containers, is a risky idea unless you have a way to retreat safely behind them. The best way to attack a player who is hiding in containers is using Sleep damage.
It's important to be a flexible player, so nobody can predict your next movement, you should be a rushy player, and then a conservative and defensive one, then you can choose to gamble on sniper duels, and then you can be a sneaky bastard... the idea is to be unpredictable, so you can surprise your enemy easily anytime you want. This is something you will learn only by trying and error, gathering experience through time. But here are some quick ideas to make this: the FOM decoy you can throw it anywhere you want, you can toss it in your current position and then move quickly somewhere else, or you can toss it to the bridge to make the enemy believe you are retreating or willing to do a sniper duel, you can toss it in the opposite side of your current position in the same deck, you can send it directly to the ocean, letting the tidal waves move it where it pleases, be aware tho, you can't control were it goes and you can't know, so the best option here is to toss it pretty close to the structure of the platform. You can also fake your movement by throwing and FOM to X position and then throw another one a litte bit further, to Y position, all that while holding your current position. Without the need of FOM, the best way to surprise your enemy is by holding a position, and moving while you see your enemy is moving, because he is not consulting his map at that moment so he will think you are still holding the position the map indicated him moments before.
About pushing forward, as a psychological thing, if you mark your enemy, the first thing he would like to do is to retreat to a safe position, so if you keep pushing by shooting more stun grenades while you are running directly to him, is more likely you will have the advantage. This particular move is very hard to pull off, because you will have to be self assure that you can react fast or predict where your enemy is going.
One thing you can do to react and retreat fast if you push forward and you fail, it's to have selected the wormhole before hand, making sure you have the wormhole equiped and then select the weapon you want to use. You may see it as nothing, but this move can save you when you need it the most, because you are less likely to fail selecting the wormhole when you feel in danger.
If you have knocked out your enemy and you don't have a clear shot, you better don't waste time and kill or destroy everything else you can, or you can change position if you think that he was aware of your position, anyway, don't waste time trying to get a shot. Remember, every second counts!
If you hace knocked out your enemy and you have a clear shot, but not to his head, you will need 3 shots if he is close and 4 if he is far away (if you have mainstream equipment, this will be the case if your rifle and your enemy's sneaking suit have the same grade)
◆ How to improve your PvP IQ 3
Here you have plenty of options, you can push forward, hold your position but focusing on killing and destroying everything you have in front of you, etc. That's up to you.
The thing is, that this particular fase is repeated as much times as you kill or extract the defender. Use this time gap wisely. Or I will insane.
There are many tactics you can use to be able to win, one of those is focusing more on trying to extract the defender rather than kill him, use sleep grenades to get the remain NPCs to sleep (works only against Lethal bases) and then retreat with a wormhole. Or simply playing hide&seek for real, doing stealth prone where you can be safe hidden or whatever, complementing with a FOM decoy far away from you. Here you can use all your creativity to be able to win. I am not such a core expert myself, so I can't help you out more in this matter. If I learn new things, I may add that info in here.
◆ CONCLUSION
It was a pleasure to be in this community, but now I will retire from the game. I have important things to do in my own life and this guide is just like a short book were I share all the knowledge I gathered while being an active part of this community. Feel free to ask whatever question you have, or chill with me on private chats. I will be happy to help if you approach me in good faith. Keep up the good work and keep the game alive until it dies forever.
Good bye.
“Practice doesn’t make perfect, practice make permanent. Only perfect practice makes perfect.”
- The Water Pistol: A serious guide about a "joke" weapon★ 5 (919)78k views802 ♥6 minUpdated Nov 4, 2019
- Mods I use to make this game good★ 5 (506)47k views1.3k ♥1 minUpdated Oct 31, 2023
- Advanced Game Mechanics★ 5 (1.5k)45k views2.1k ♥12 minUpdated Oct 1, 2021
- Guide to S Ranking Missions★ 5 (1.3k)35k views2.7k ♥43 minUpdated May 10, 2016
- Recommended Mods for Custom Missions, Side Ops and Beyond★ 5 (866)32k views1.8k ♥10 minUpdated Sep 1, 2022
- Metal Gear: Хронология и запуск всех частей на ПК★ 5 (734)30k views1.9k ♥7 minRussianUpdated Mar 6, 2022




- Upgrading to PremiumTeam Fortress 2★ 5 (20k)1441k views11k ♥6 minUpdated May 11, 2022
- No More Room in Hell Official ManualNo More Room in Hell★ 5 (2.8k)569k views2.1k ♥29 minUpdated Apr 22, 2019
- NMRiH Community Hosting GuidesNo More Room in Hell★ 5 (526)351k views653 ♥1 minUpdated Aug 10, 2022
- ULTIMATE GUIDE FOR GAME DEV TYCOONGame Dev Tycoon★ 5 (5.8k)326k views10k ♥4 minUpdated 23 Jan, 2014
- How to 'Git Gud' Soon™MORDHAU★ 5 (2k)318k views3k ♥68 minUpdated Nov 16, 2024
- Лучшие кооперативные игры SteamPAYDAY 2★ 5 (1.5k)315k views2.1k ♥56 minRussianUpdated Apr 27, 2025






This guide was created by its original author on the Steam Community. Are you the author and want it removed? Request removal.