Praise the Victories (RNG Minimization Guide)
Rationale and Assumptions
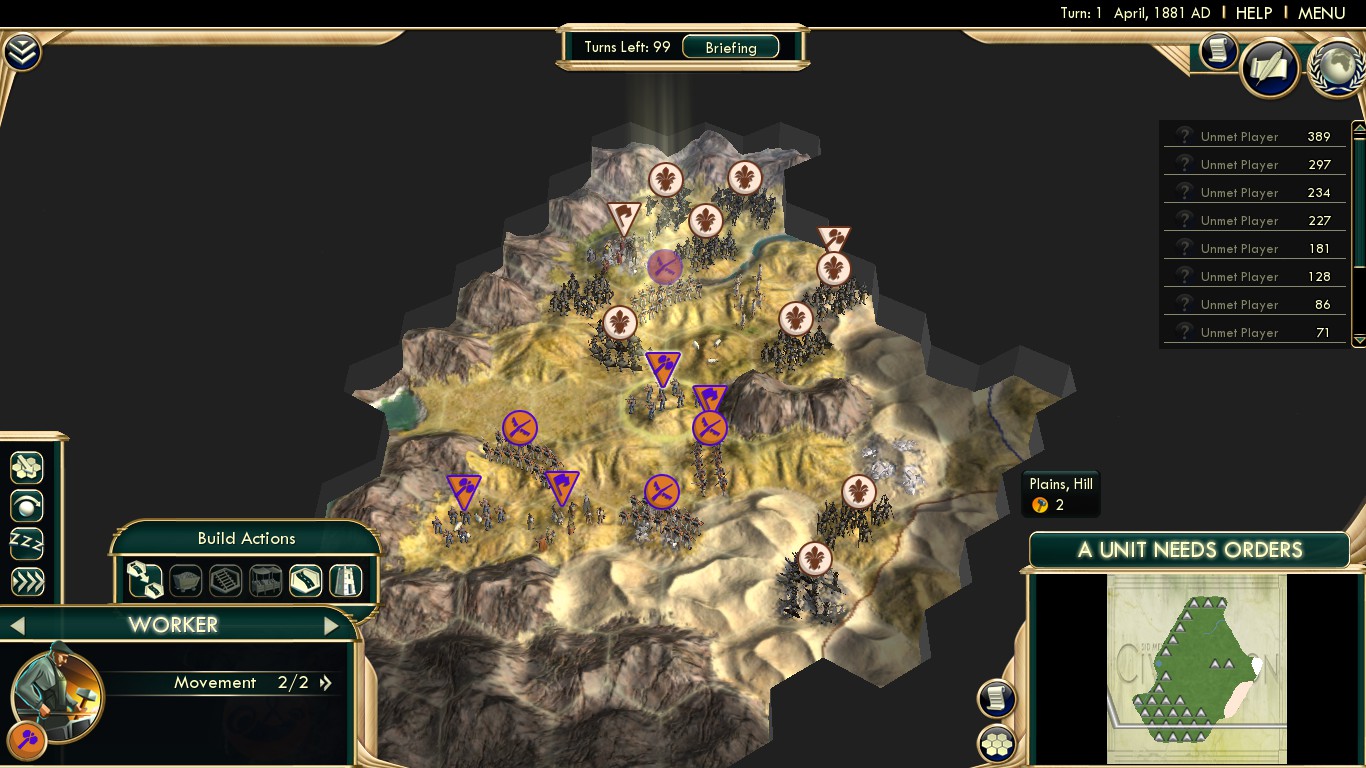
This scenario varies so wildly that a good map is necessary for victory to even be possible[0] (and even then it took me three full attempts[1] before I finally won). Having unlocked all but two achievements[2], I must say that this is the most RNG-heavy scenario I’ve ever seen. Thus, I wholeheartedly endorse using the map this saint posted[forums.civfanatics.com] years ago. The following is based around said map, and even with the wonderful mountain range to shield you on three sides, it is still quite challenging, and there is always a non-zero chance that you will lose through no fault of your own.
“It is possible to commit no mistakes and still lose. That is not a weakness.
That is life.” — Jean-Luc Picard, Star Trek: The Next Generation
Example: When two European powers declare war on you together, reload the quick save you made at the end of your turn (because you don’t want to go back and redo everything). Ask Ethiopia or Egypt—your only friendly allies—to pay you to declare war on the lesser, farther evil. Then go about your next turn completely unaffected by the imminent danger on your doorstep with a little extra coin and/or happiness.
Proper City Placement and Micro-Management
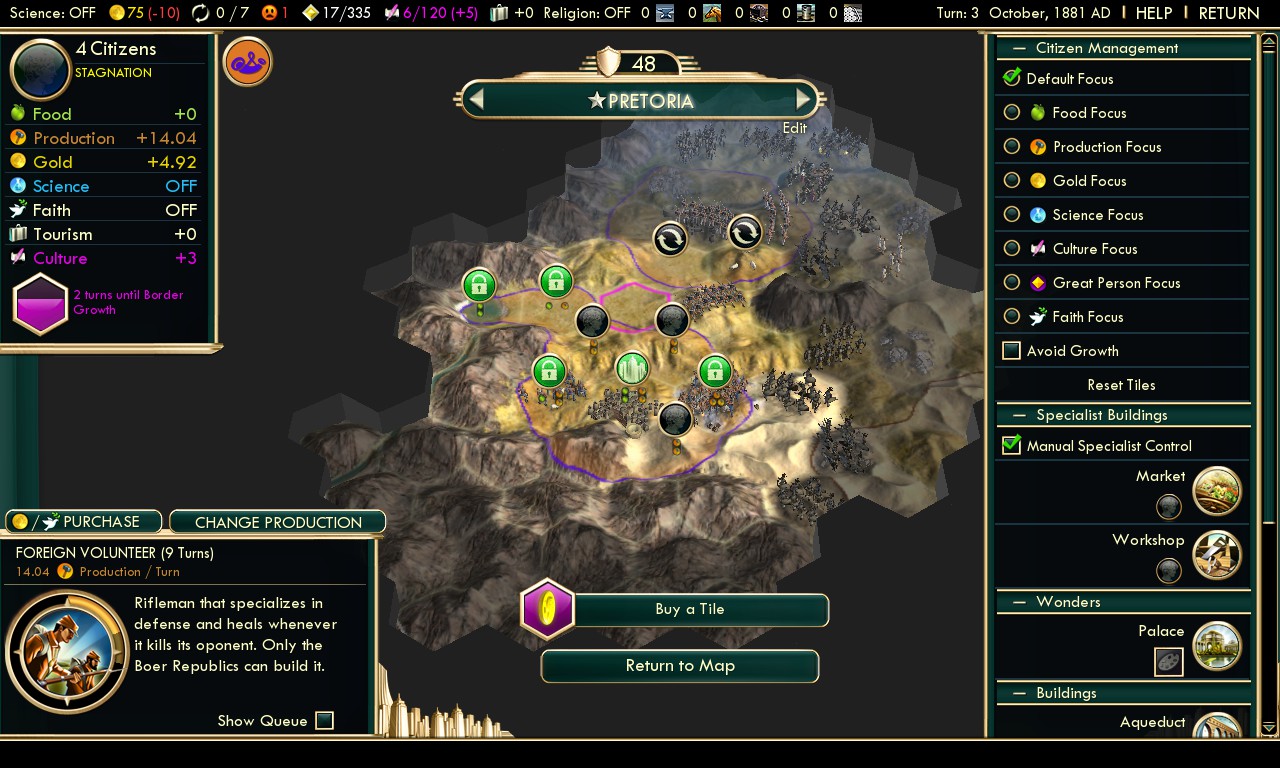
Proper city placement is key. In this map, both cities will be founded between sheep and iron. You will need to purchase tiles and manually assign citizens in your capital immediately so that they don’t accidentally starve themselves. Unfortunately, starvation is unavoidable in your second city and the population will hover at 3 until improvements are made.
You start the game with four units. And you will need a bare minimum of four units to lockdown your valley. Seriously, no visitors—ever! Maintain that line of defense at all costs, and gradually push it out and you’ll do fine[3]. Unfortunately, one of the four units must immediately get voted off the island (and will likely never return).
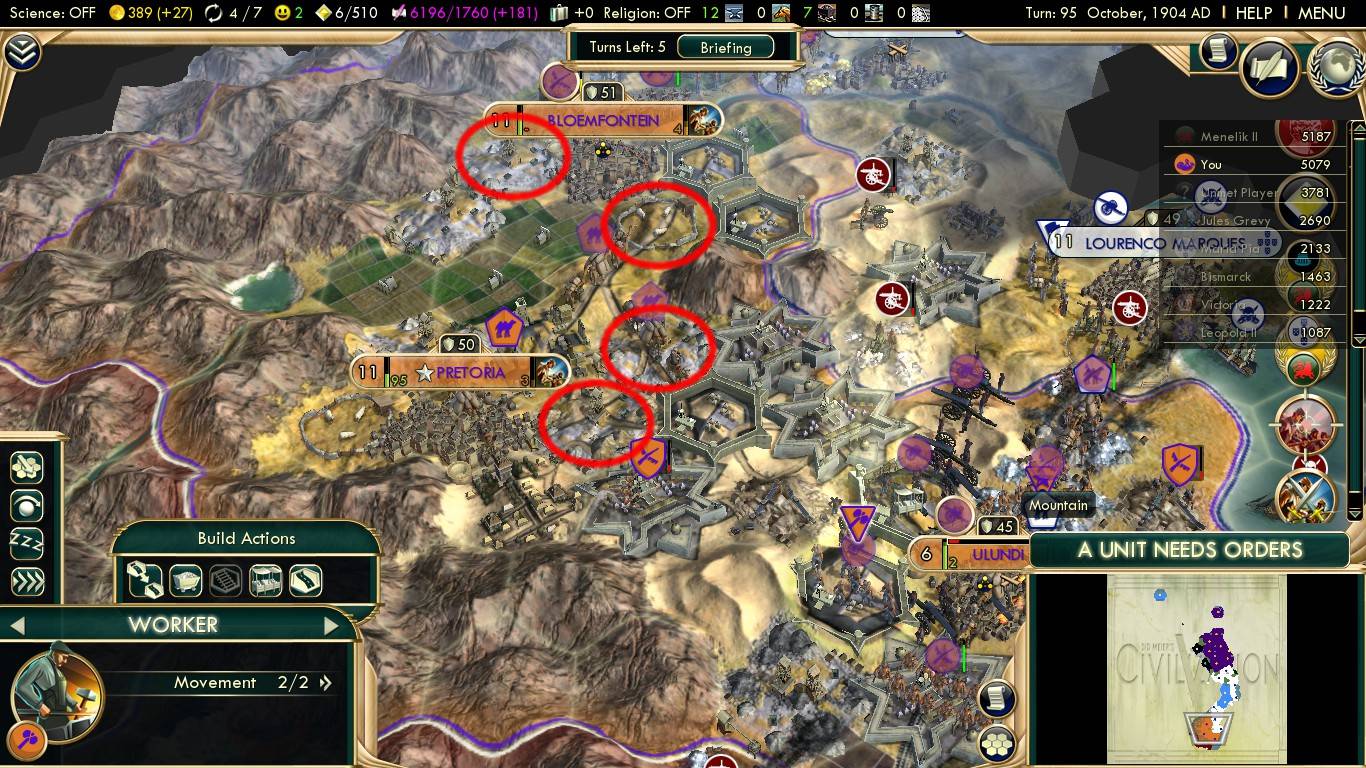
So have your exile follow the Zulu migration northward, threading the needle between where they settle and Portugal (get an embassy and open borders with her upon meeting her if the Zulus block your path). There are four wonders to visit on your pilgrimage: Mt. Kilimanjaro, Lake Victoria, King Solomon’s Mines, and the Source of the Nile.
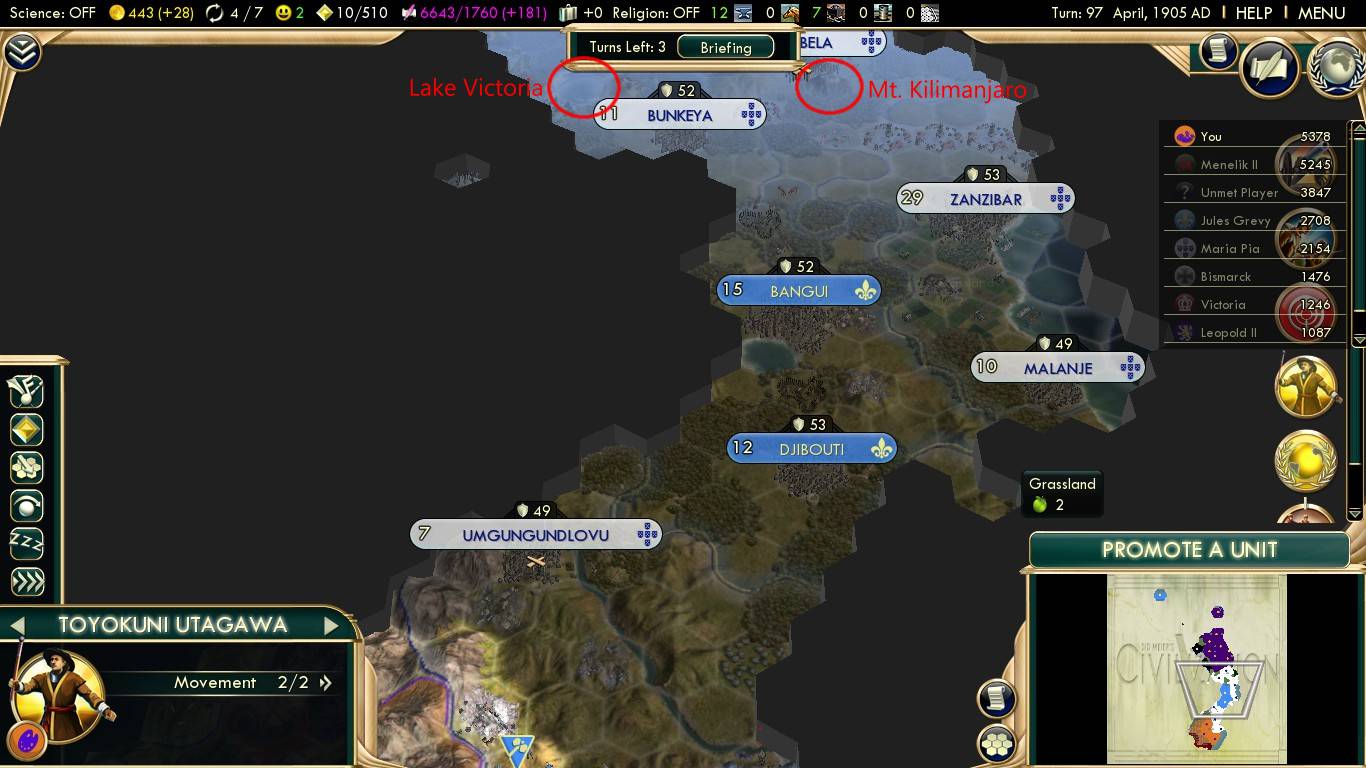
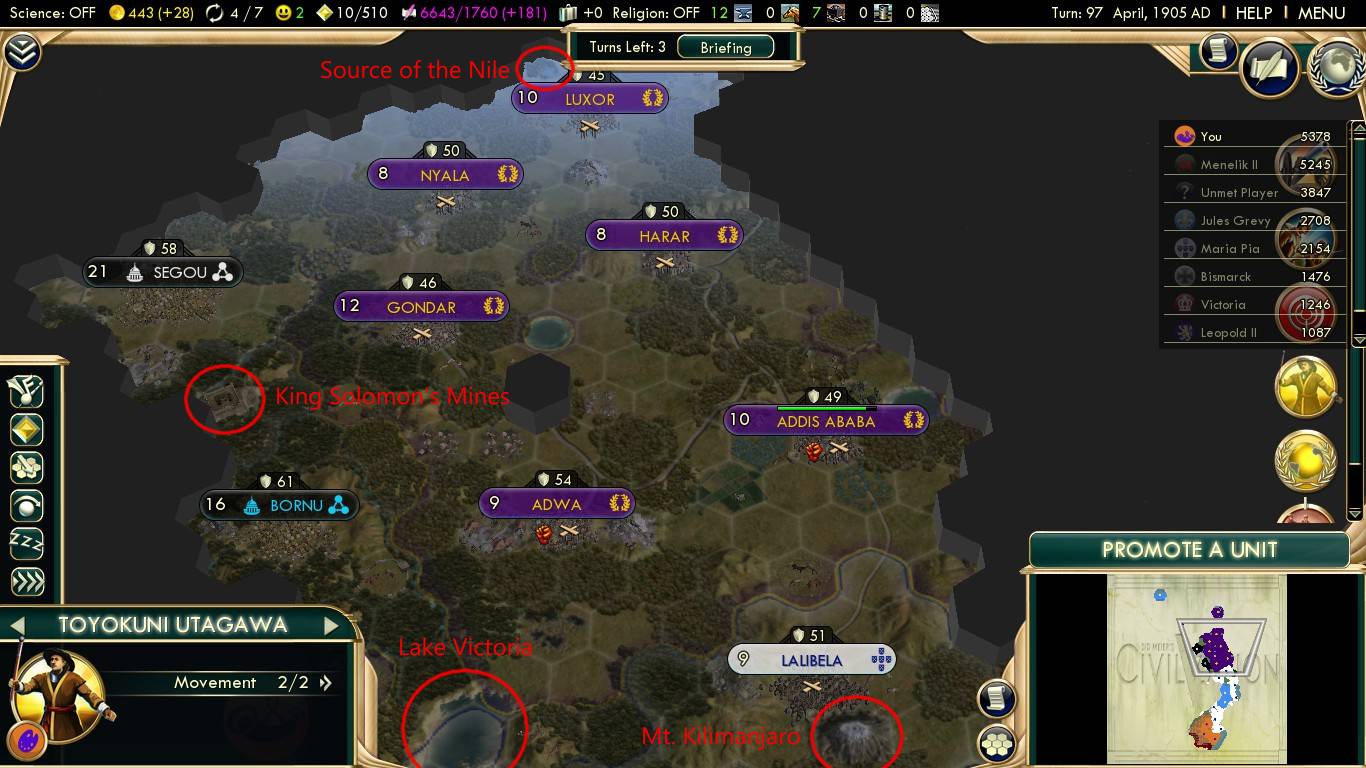
Note: Pretend Ethiopia and Egypt hold all that territory, the best screenshots I had were late game[4].
Because this map is luckier than the original poster may have ever known, all four wonders are close by on the same side of the map. I recommend Mt. Kilimanjaro first because it gives the unit double movement speed on hills (and every bit helps). Past that, it doesn’t really matter. You could swing around by the Mines on your return journey, or put the roads Ethiopia hopefully paved to good use.
Like real world governments, there are no consequences for poor fiscal policy </sarcasm>. So don’t worry too much about it. I never had units disband. But I did build the occasional finance building when brief opportunities presented themselves.
Additionally, Egypt and Ethiopia will be your only friends, trading partners if you ever accrue luxury resources (or a surplus of starting iron… 😏) to trade for exotic goods to boost happiness, GDP.
Forward, Onward to Victory
I experimented with both production[6] and food caravans, and the food ones were inherently superior. Not only do they provide more citizens to work improvements (with only two cities, a large population is good for this strategy), but there will also be more specialists to assign to guilds. Also, ensure that once the capital won’t starve itself, set it to auto and ensure that manually assigning specialists is not checked—otherwise, unemployed citizens won’t be doing anything!
In addition to three slots, the Hermitage doubles culture in a city (go for the capital for synergy with the extra palace bonus slot). Unfortunately, this requires an amphitheater and an opera house in all cities—which is a tall order when supporting the war machine, combatting unhappiness and bankruptcy. Also, build the Staatsmuseums, the Boer-specific building replacing the museum that comes with a great work preinstalled!
Building a garden in the second city (since it is by a river) will increase great person generation by 25%. Building the National Epic in the Capital will do the same—in addition to coming with another great slot (just like the Heroic Epic, which also makes all units built in that city +15% more effective[7]).
Because I promoted my cannons on rough terrain, two of them got the double attack and extra range promotion by the end to wreak havoc on the high seas. Unfortunately, I did not have a flat land promoted one, which made clearing the beach harder than necessary (so learn from my mistake). Also, treat all melee units like the orc with the fuse in Lord of the Rings. Canons and ships will ensure that the city has zero health, but as long as a melee unit is not permitted to pass—or land—the city cannot fall [again].
At this point, the game ended for me, and I won. I hope you do too, and that this guide helped in some small way. Please let me know if you found it helpful, or have additional insights to help fellow players.
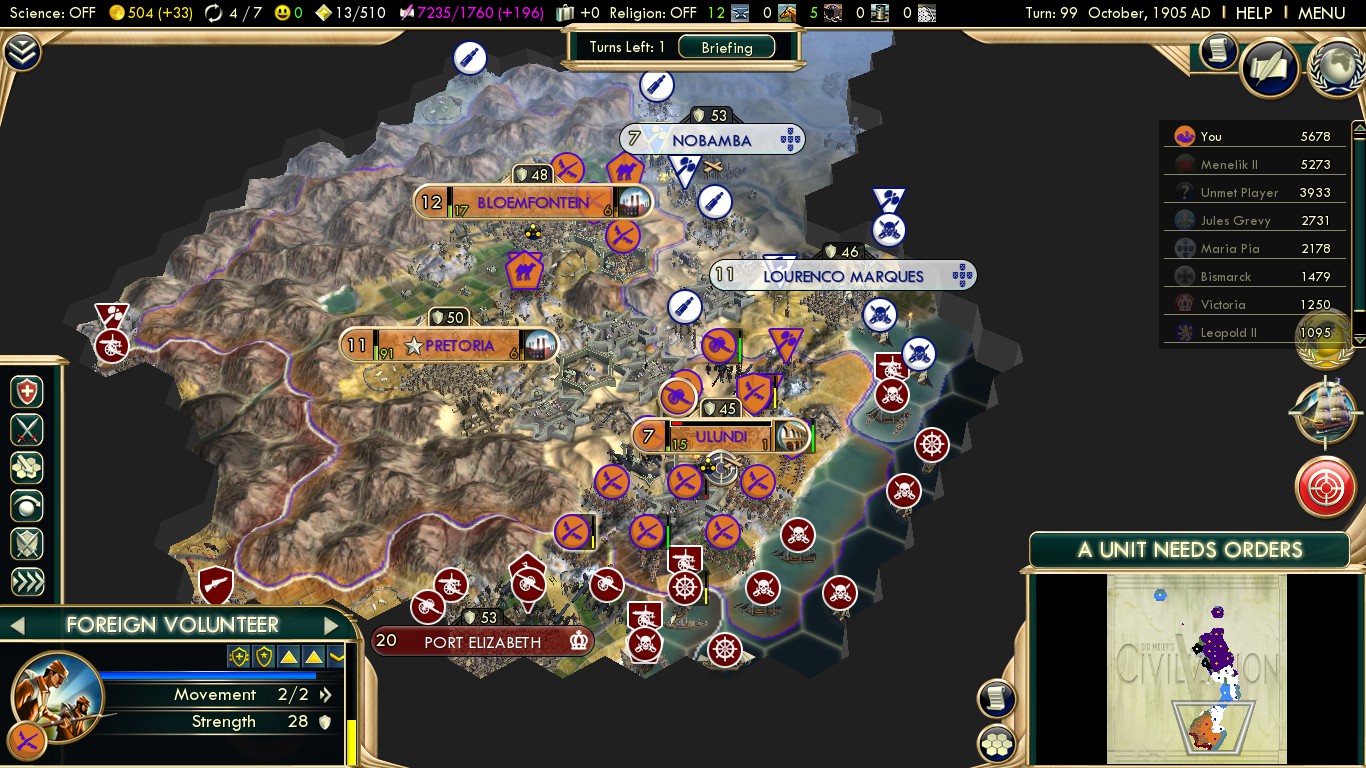
Note: My cities were cranking out units during the final stretch upon capturing Ulundi (I just switched to factory production for vanity upon acquiring English coal).
Footnotes
[1] Ethiopia had too much momentum for me to catch up in the first two (we were neck and neck in the second match). And in the final game where I won, Italy decided to conquer every single Ethiopian city—save for one—by the end of the last turn (thus plateauing Ethiopia’s score, and allowing me to pull ahead in the final 5 turns).
[2] Ottoman Carpentry and Pax Romana Aeternum still await me.
[3] And likely better than me, because as you can see, I allowed myself to get bogged down on the southern front. So as long as you're lucky enough for Ethiopia not to be destined to win, there is a considerable enough margin for the minimum number of points needed to win (as you can see between the discrepancies with my high score and the ones everyone else posts online).
[4] And of all the times I played, Ethiopia only refused to offer open borders once. So if that happens don't lose heart! Rather, assume that attitude will get him crushed by Italy like he did in my game.
[5] Not sure how that works logistically, perhaps the caravans are actually hunter gatherers who scrounge up supplies on their trek and deliver them to cities in need like soldiers living off the land in war.
[6] Building forges and the Ironworks worked out better when paired with food caravans.
[7] This stacks quite nicely with the other +15% bonus from the friendly territory policy, unit adjacency policy, and great general proximity—which are invaluable for withstanding future bombardments.
- Real Populations★ 5 (1.2k)79k views1.2k ♥2 minBulgarianUpdated Aug 31, 2017
- Civ-specific tricks, secrets and clarifications (BNW)★ 5 (1k)53k views2.2k ♥96 minUpdated Jun 30, 2019
- Zigzagzigal's Civ Summaries (BNW)★ 5 (1.5k)49k views3.9k ♥134 minUpdated Jun 30, 2019
- Who to Trust and Who to Avoid in Civ V★ 5 (570)41k views802 ♥12 minUpdated Jul 8, 2016
- How to win the Korea Scenario as Korea on Deity in 16 turns★ 5 (532)41k views828 ♥15 minUpdated Apr 1, 2016
- Civilization V Achievement guide★ 5 (2.4k)39k views4.2k ♥134 minUpdated Jun 13, 2014




- Upgrading to PremiumTeam Fortress 2★ 5 (20k)1441k views11k ♥6 minUpdated May 11, 2022
- No More Room in Hell Official ManualNo More Room in Hell★ 5 (2.8k)569k views2.1k ♥29 minUpdated Apr 22, 2019
- NMRiH Community Hosting GuidesNo More Room in Hell★ 5 (526)351k views653 ♥1 minUpdated Aug 10, 2022
- Лучшие кооперативные игры SteamPAYDAY 2★ 5 (1.5k)315k views2.1k ♥56 minRussianUpdated Apr 27, 2025
- Desert Eagle Heat Treated | Blue GemCounter-Strike 2★ 5 (1.6k)292k views1.5k ♥2 minUpdated Jan 16
- Treasure Hunt Puzzle SolutionsTotal War: WARHAMMER II★ 5 (6.9k)281k views15k ♥3 minUpdated Aug 19, 2021






This guide was created by its original author on the Steam Community. Are you the author and want it removed? Request removal.