B42.19.0 Deticated server setup for friends
Step 1 - SteamCMD download
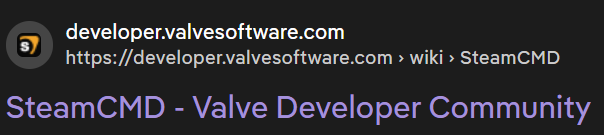
.
2. This will open up a site with a large menu, but we are here for the '1.1 Windows' version: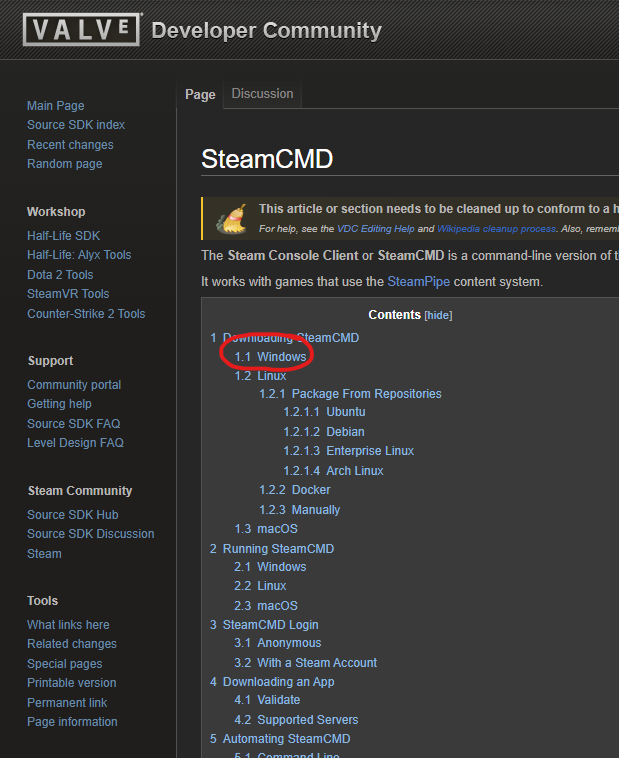
.
3. Then click on the blue https link which will download the latest version of SteamCMD for you: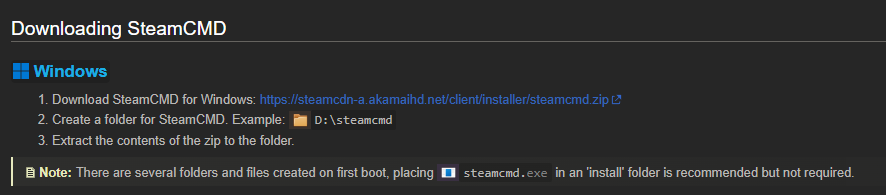
Step 2 - SteamCMD Setup
- Once SteamCMD is downloaded you'll get a zip file you need to extract.
I highly recommend extracting this file in your C:\ drive at the very root below such files as,
'Program Files x86', 'Users', 'Windows'
This should open up a command prompt, here you will type the following: login anonymous.
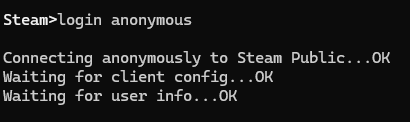 3. Now for one of the most important parts type the following exactly as written: app_update 380870 -beta unstable validate
- You should see the console printing a few messages which could take a while for it to have done its thing.
However when the console is done go to the following newly created files for the next step:
C:\SteamCMD\steamapps\common\Project Zomboid Dedicated Server
if you didnt save it in your C drive just look for SteamCMD>steamapps>common
Just leave this folder open you'll need it later
Step 3 - Port Forwarding
This is probably the part where most will have a difficult time because examples would show private data of mine and everyone elses internet provider uses a different interface (you'll soon see what i'm talking about).
1. Open any browser and type your local ip adress.Dont know what that is? press the 'Windows' key on your keyboard and type 'cmd'.
This should open up a console similar to what you've seen in the previous steps.
In this console you'd want to type 'ipconfig'
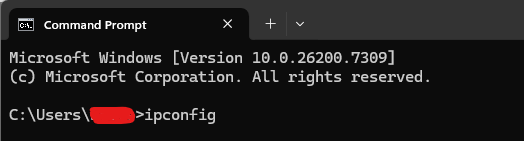 Ignore all the difficult text except for 2 important lines: 'IPv4 Address' and 'Default Gateway'
For the step you are on we are after the 'Default Gateway' which should look something like 192.168.xxx.1
(make sure to write down your 'IPv4 Address' somewhere you'll need this later)
Anyway now that you have your 'Default Gateway' type that number in your browser:

- Login to your modem/router, dont know the password? physically look around your house for the modem.
At the bottom of every modem there should be a white paper with the 'modem password' (not wifi password).
Thats the password you're after to login into your router via your browser
But now that you see your modem setting look for the securety tab.
This security tab should have a 'Port-Forwarding' section.
I hope my example shoud bring you in the right direction, but you want to port-forward 16261 and 16262 both UDP.
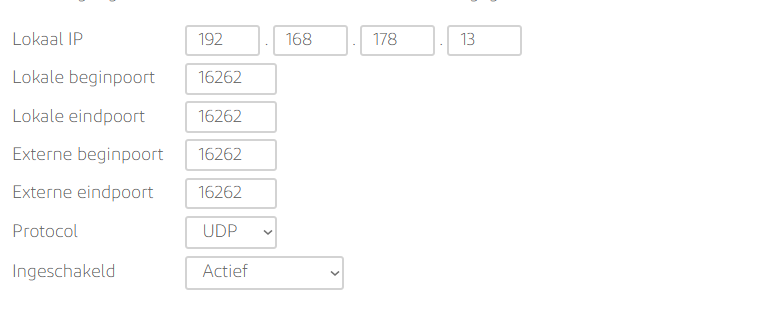 (your local(lokaal) ip should be the IPv4 Address you've written down)
Step 4 - Booting the server
You've made it past the hardest parts, however this is also the part that gets the most unresolved bugs. If you've done the past few steps correctly you should be perfectly fine.
- Go back to your SteamCMD\steamapps\common\Project Zomboid Dedicated Server
- Open the StartServer64.bat file
- This should open up a console that will start going wild with text, this is your server booting up.
(if this part doesn't work you must delete the 'Project Zomboid Dedicated' file in SteamCMD\steamapps\common\Project Zomboid Dedicated and make sure you've done Step 1 correctly)
'SERVER STARTED' and 'Steam is enabled':

- You should now close the server and continue to the next step 'Step 5'
Step 5 - Customising your server
- After opening the StartServer64.bat file in SteamCMD\steamapps\common\Project Zomboid Dedicated Server, there should be a newly create file in C:\Users\windowsusername\Zomboid.
This file location is the same for everyone else so try to find it.
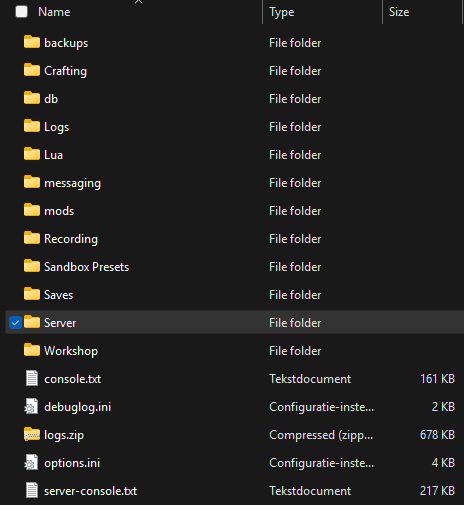
- Open up the 'Server' folder. this will have a few auto generated .ini and .lua files inside of them
- Change your server properties (in my case servertest.ini)
These files can be opened/edited using notepad.
Look for items such as 'PublicName=' to change server name or Public=false to Public=true so your server show up in the public serverpage (NOT recommended)
within this file you can also add mods for your server using 'Mods=\modname1;\modname2;' and 'WorkshopItems=modnumber1;modnumber2;' - Change your sandbox settings (in my case servertest_SandboxVars.lua)
Here you can change things like Zombie speed or Item spawn rate
Step 6 - Joining the deticated server
- In your steam library rightclick zomboid, go to propperties, then beta's, then select the unstable - unstable version.
- Open up zomboid and navigate to the multiplayer tab
- For you as host to join, add a new server within the multiplayer tab.
server name = the servername you've put inside the .ini file
server ip = your local IPv4 Address
server password = the password you've put inside the .ini file (can be empty)
server port = 16261 - For your friend to join.
server name = the servername you've put inside the .ini file
server ip = your global ip (as host open your browser and type 'whats my ip, IPv4')
server password = the password you've put inside the .ini file (can be empty)
server port = 16261
Reported bugs / Fixes
src\tier0\threadtools.cpp (3623) : Assertion Failed: Illegal termination of worker thread 'Thread(0x00007FF8F62B3390/0x000'
Answer:
If you get this error make sure to fully delete the following folders
C:\Users\windowsusername\Zomboid
and
C:\SteamCMD\steamapps\common\Project Zomboid Dedicated Server
Then redo step 2 in the guide, double check for any spelling mistakes, deleting these files first is necessary for the fix to work
Answer:
As host its true, you can join using your IPv4 address using CMD>ipconfig>IPv4
However for your friends to join they need your global IPv4 address.
As host you can find your global ip by opening a browser tab and type in the seach bar 'whats my ip'
This website will show your global IPv4 adress
Big thank you
I'm grateful you've manage to find this guide and hopefully it will have helped you out <3
If anyone is experiencing a type of bug not listed in this guide please commend away, the more people we can help the more we can enjoy the buggy zomboid multiplayer experience
Also i might have a few spelling mistakes here and there, i'm sorry i wouldn't mind if you'd point them out to me
Enjoy!!!
- Modding Policy★ 5 (397)133k views208 ♥9 minUpdated Nov 8, 2022
- 80 tips and tricks for Project Zomboid (If you have over 100 hours in this game some of these will probably be new to you too)★ 5 (1.6k)82k views3.1k ♥28 minUpdated Aug 29, 2021
- Топ 100 лучших модов на "project zomboid"★ 5 (415)68k views1.1k ♥10 minRussianUpdated Jul 28, 2024
- [B41] Лучшие места для базы★ 5 (477)61k views1.3k ♥6 minRussianUpdated Nov 30, 2025
- Первая помощь ❤★ 5 (628)49k views1.4k ♥5 minRussianUpdated Jan 20, 2025
- The Basics of Base Building★ 5 (704)48k views1.5k ♥17 minUpdated Dec 24, 2021





- Upgrading to PremiumTeam Fortress 2★ 5 (20k)1441k views11k ♥6 minUpdated May 11, 2022
- No More Room in Hell Official ManualNo More Room in Hell★ 5 (2.8k)569k views2.1k ♥29 minUpdated Apr 22, 2019
- NMRiH Community Hosting GuidesNo More Room in Hell★ 5 (526)351k views653 ♥1 minUpdated Aug 10, 2022
- ULTIMATE GUIDE FOR GAME DEV TYCOONGame Dev Tycoon★ 5 (5.8k)326k views10k ♥4 minUpdated 23 Jan, 2014
- How to 'Git Gud' Soon™MORDHAU★ 5 (2k)318k views3k ♥68 minUpdated Nov 16, 2024
- Лучшие кооперативные игры SteamPAYDAY 2★ 5 (1.5k)315k views2.1k ♥56 minRussianUpdated Apr 27, 2025






This guide was created by its original author on the Steam Community. Are you the author and want it removed? Request removal.