Project Zomboid B42 Animals: From “Found Them” to “Fed the Base” (2025 UPDATED)
What you’re building
Build 42 animals are real, they have needs, and they get weird if you treat them like furniture. Living animals were added in Build 42.
Step 1: Get the animals home without chaos
There are three real ways I move animals in B42, and one of them is only for small ones.
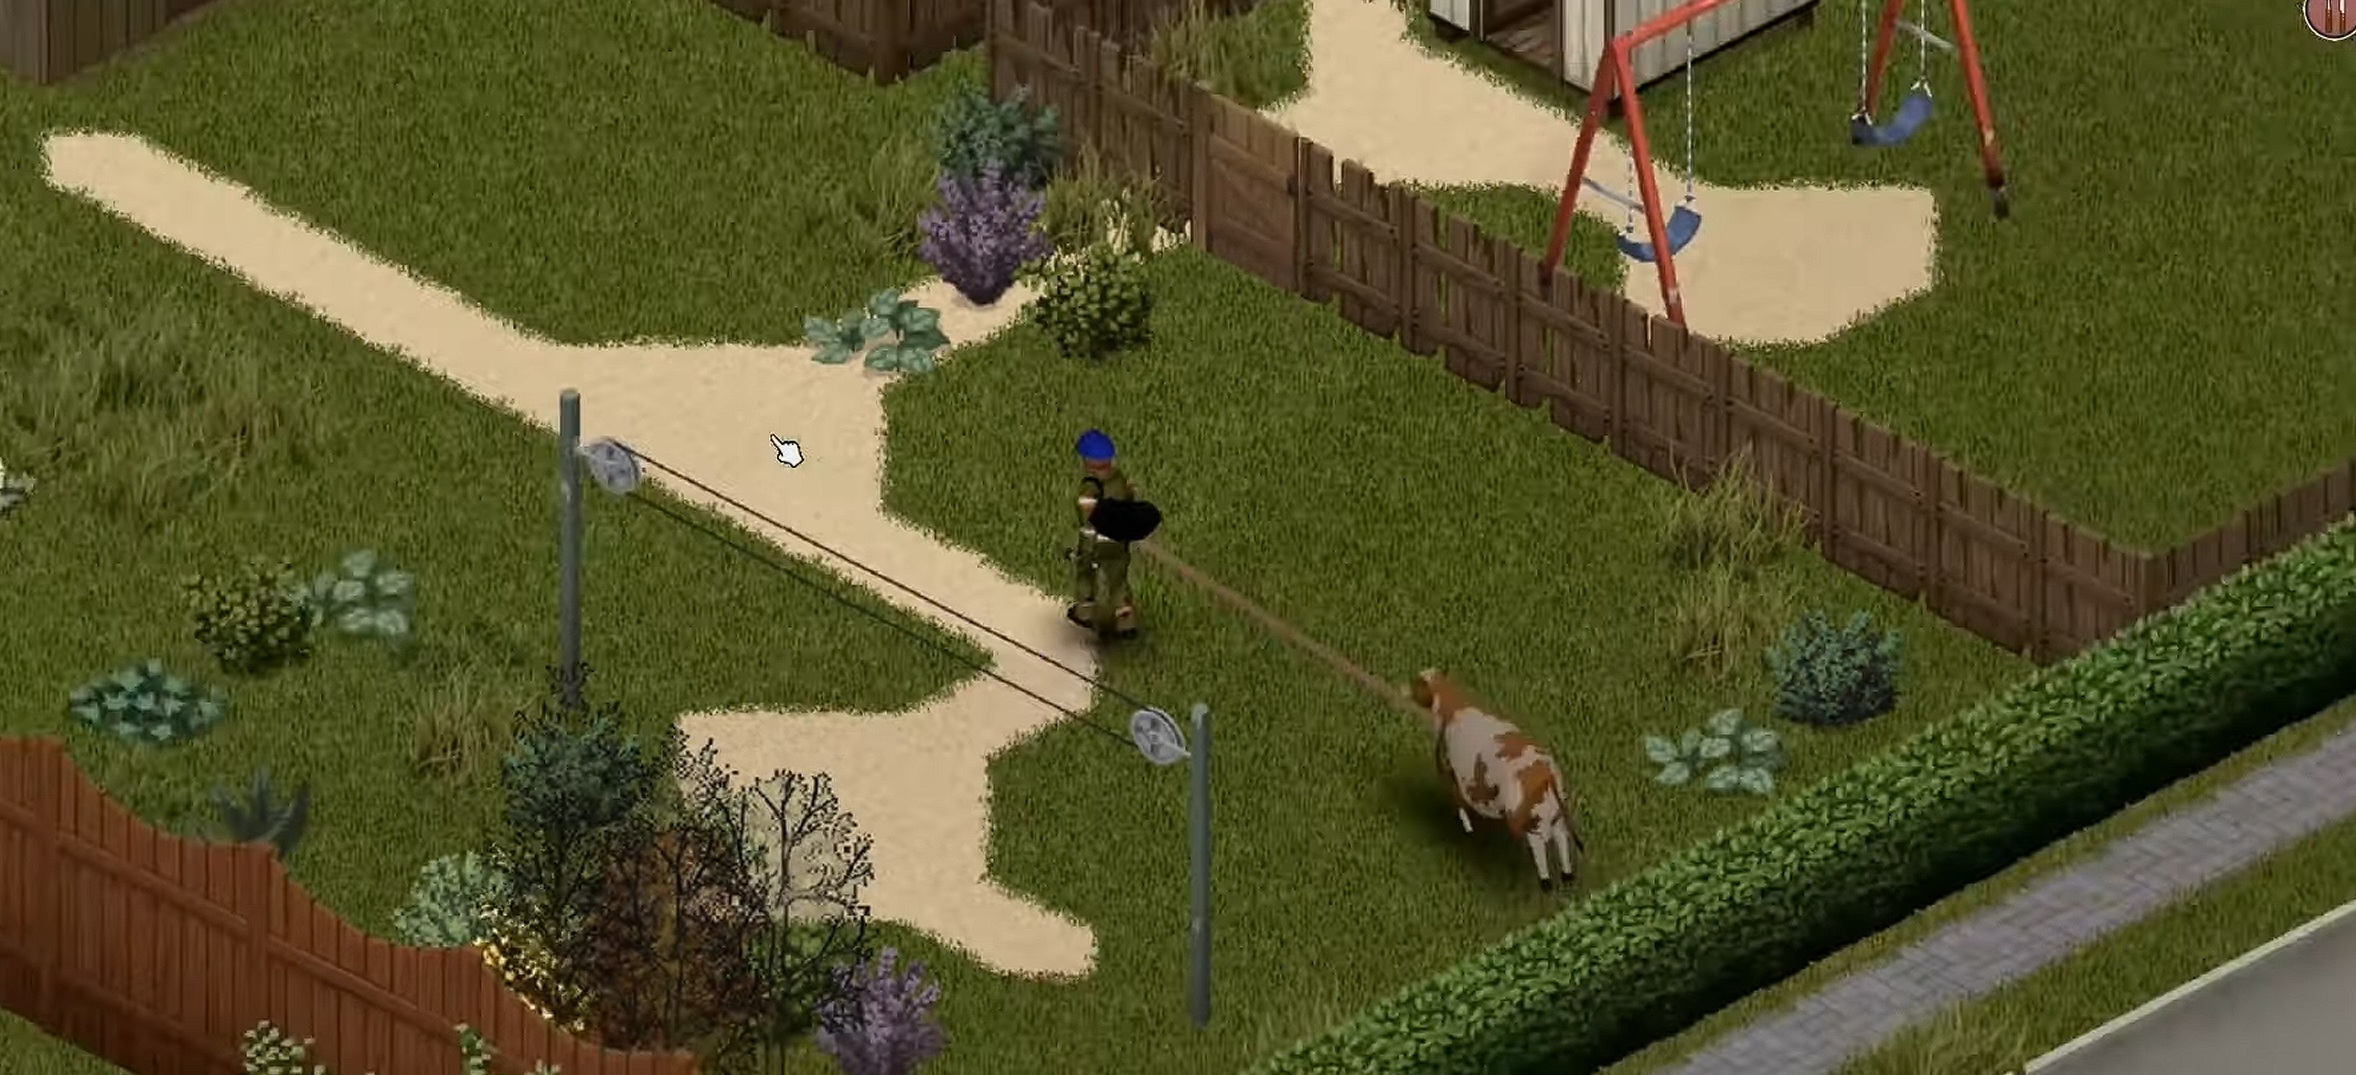
For bigger animals like cows, do this:
Right click the animal, hover its name, pick “Attach animal to rope”, then walk it back to your base. It’ll follow you while attached.
Big warning. Don’t sprint around them. Don’t drag them past a pack of zombies “just real quick”. Stress matters. Cows (and other livestock) get scared by zombies, loud noise, and you running near them.
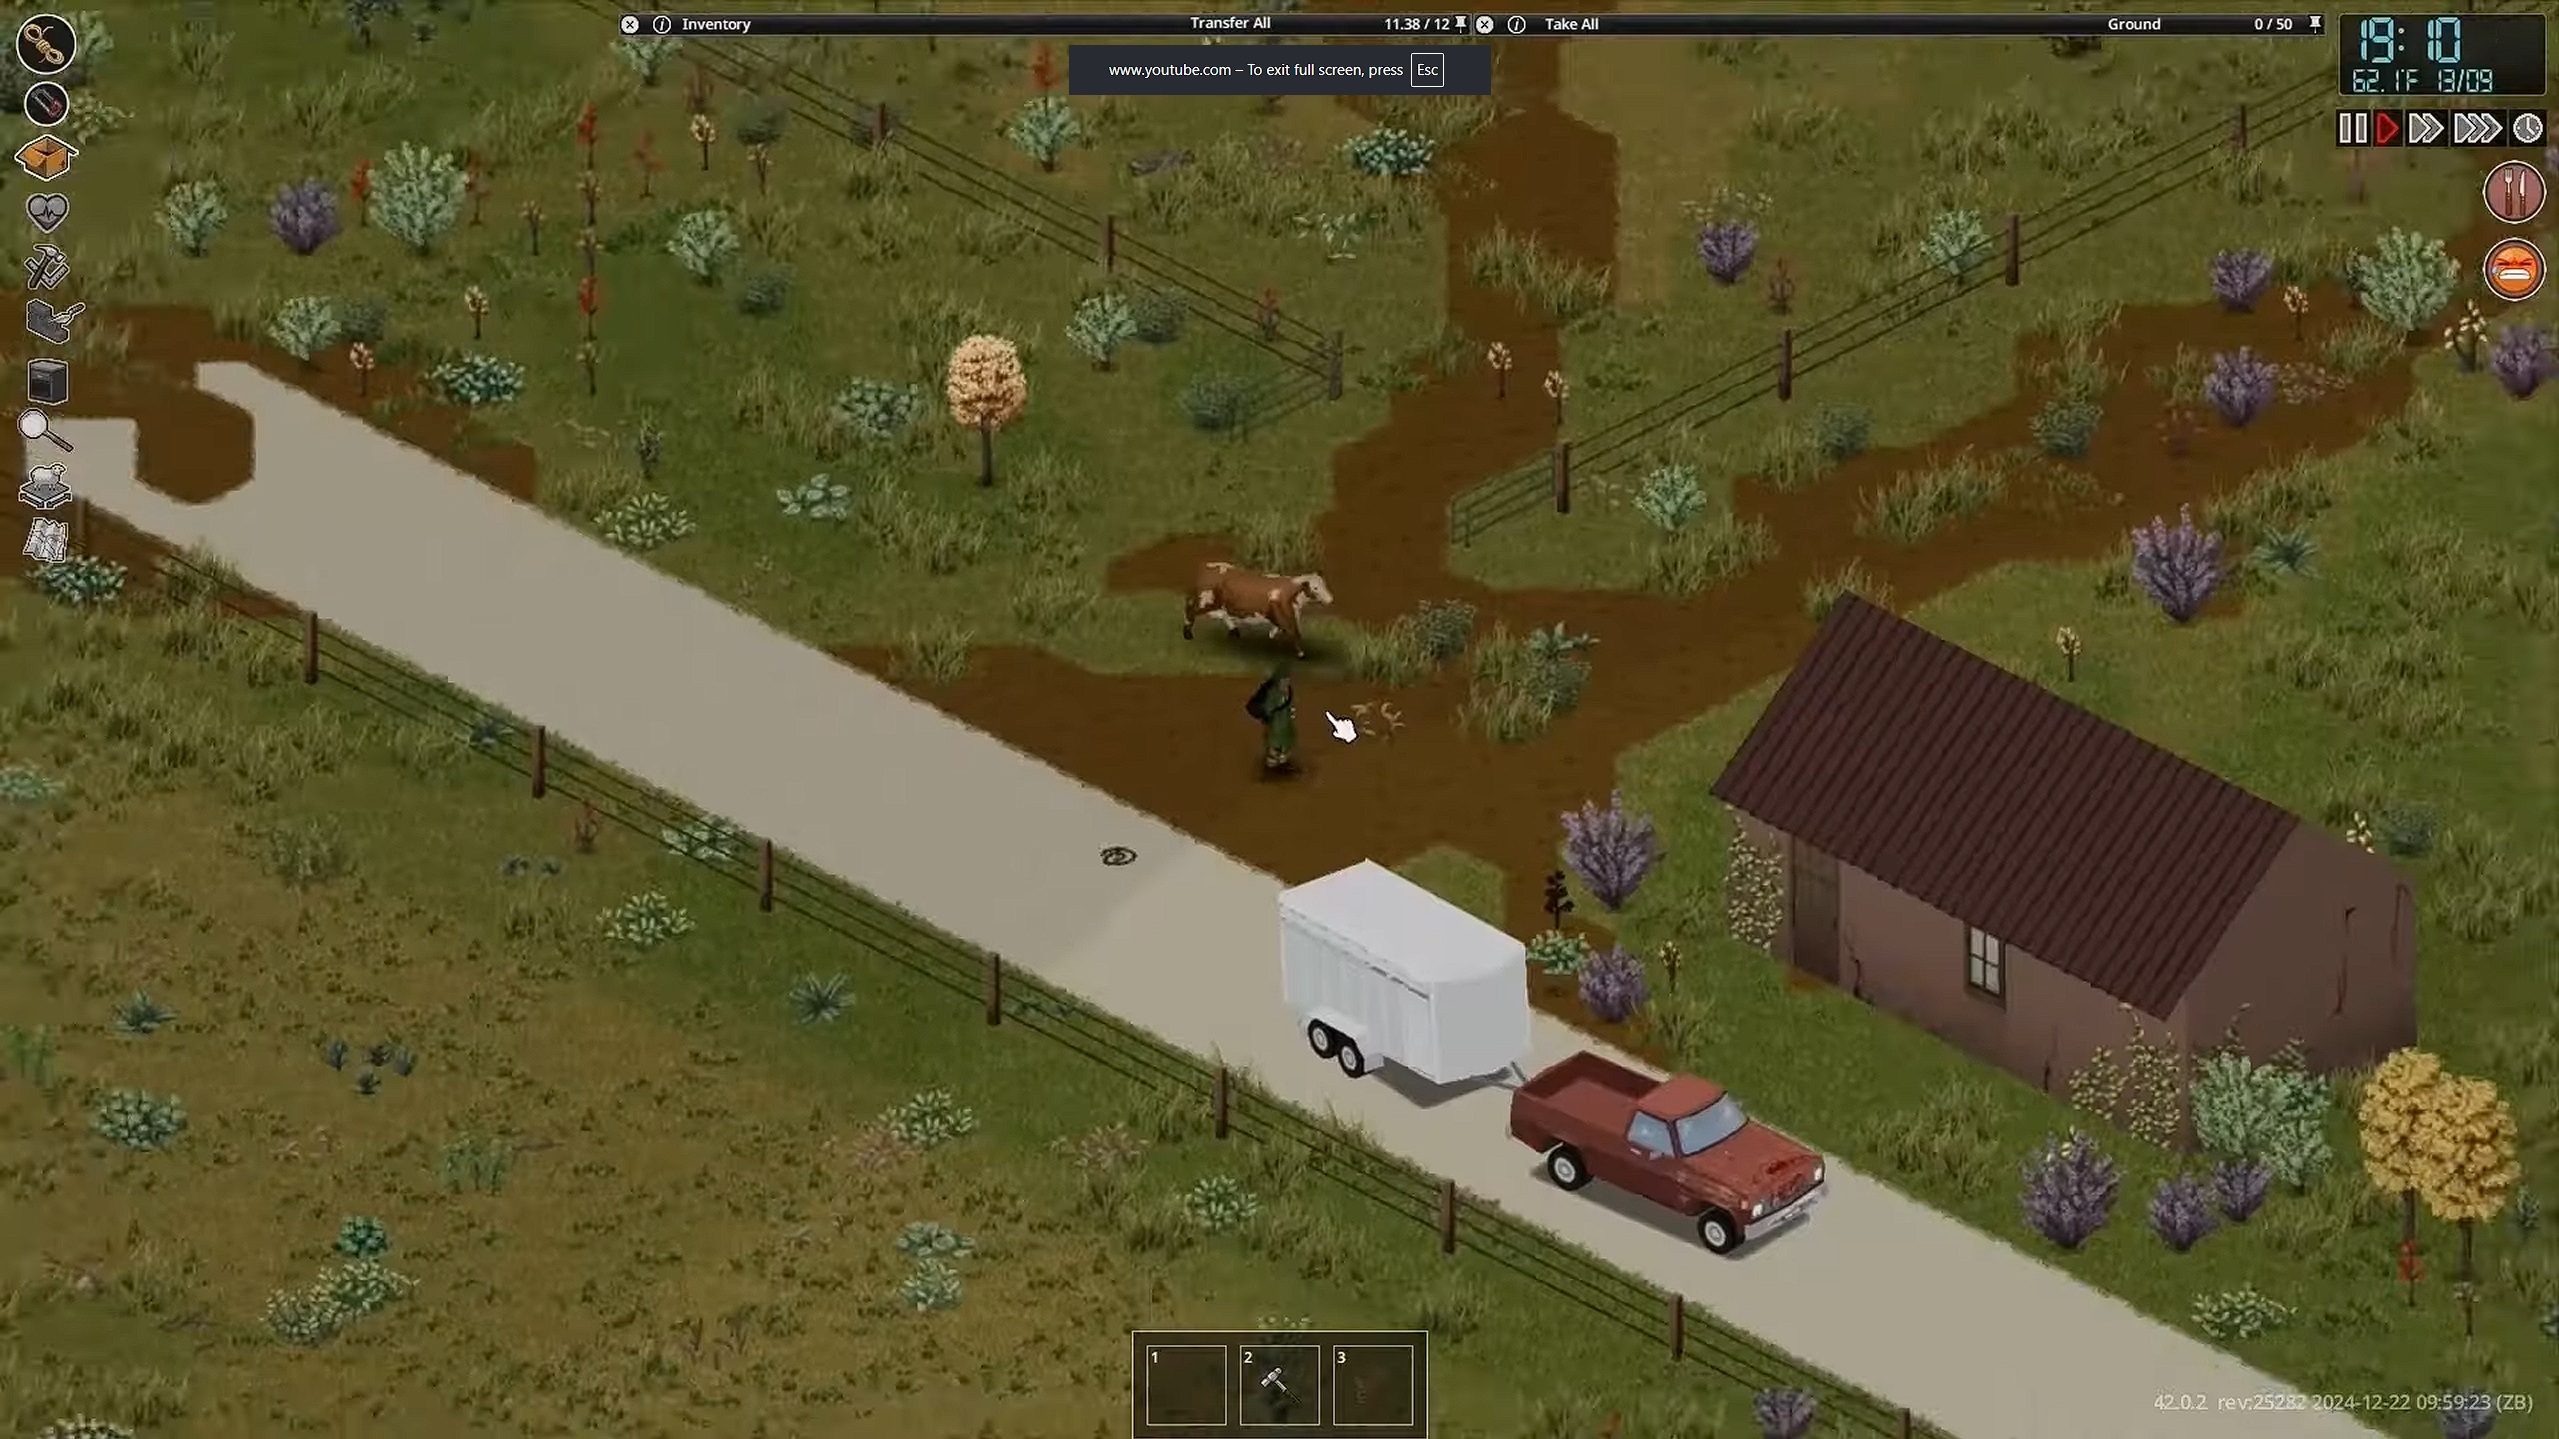
If you find a Livestock Trailer, tow it behind a working vehicle. Animal trailers are unpowered, and extra weight will slow your vehicle down.
Fun detail that actually matters: towing is governed by horsepower, not torque, so sport class cars are weirdly good at pulling these.
How it works for cows: rope them, lead them into the trailer, right click the livestock trailer to place the animal inside. Then unload by roping again and walking them into the zone.
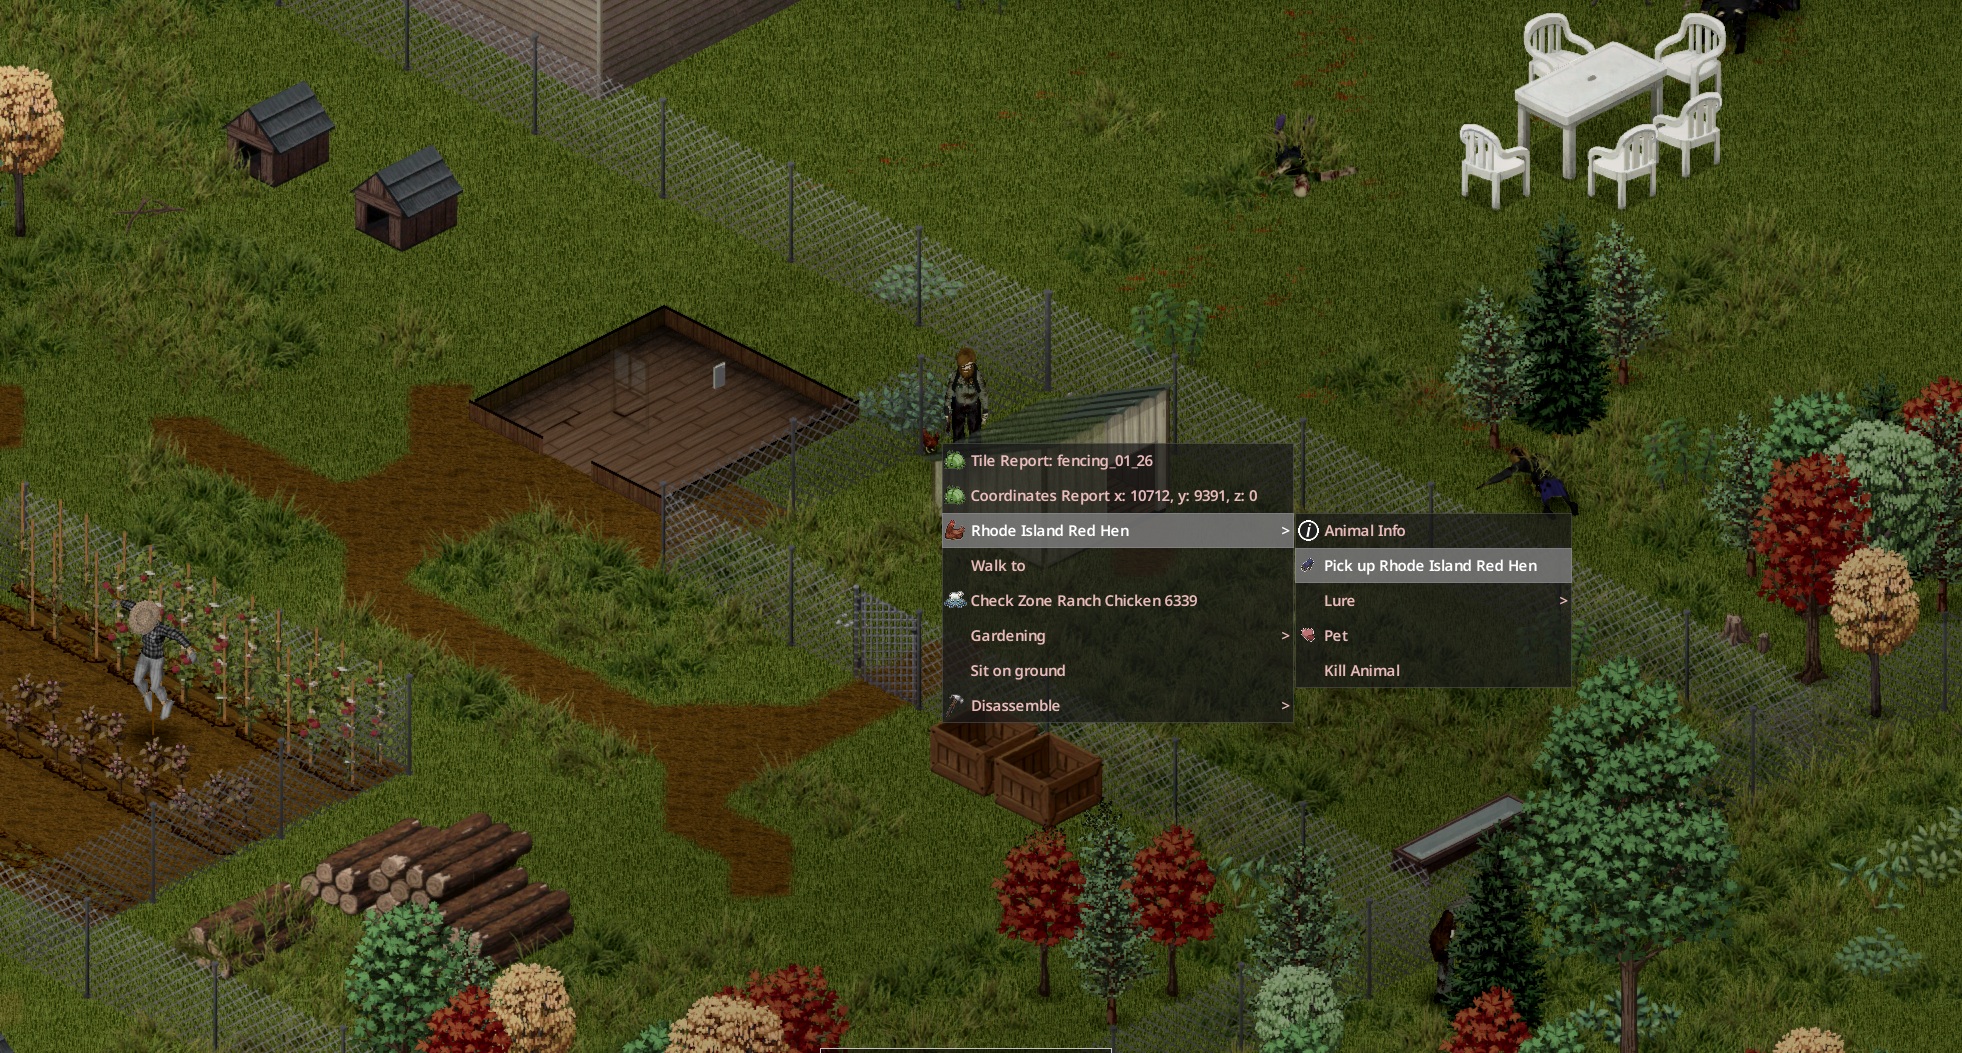
Some animals can be picked up only when they’re babies, like lambs for sheep.
Don’t plan your whole farm around that. It’s a nice bonus, not the backbone.
Step 2: Make a Livestock Zone the right way
This is the part most people rush, then wonder why animals wander off or stop producing.
Open the Zoning icon on the left HUD and make a Livestock Zone.
That zone needs three things in it: food, water, shelter. If you don’t give shelter, you’ll see stress climb and things get unpredictable.
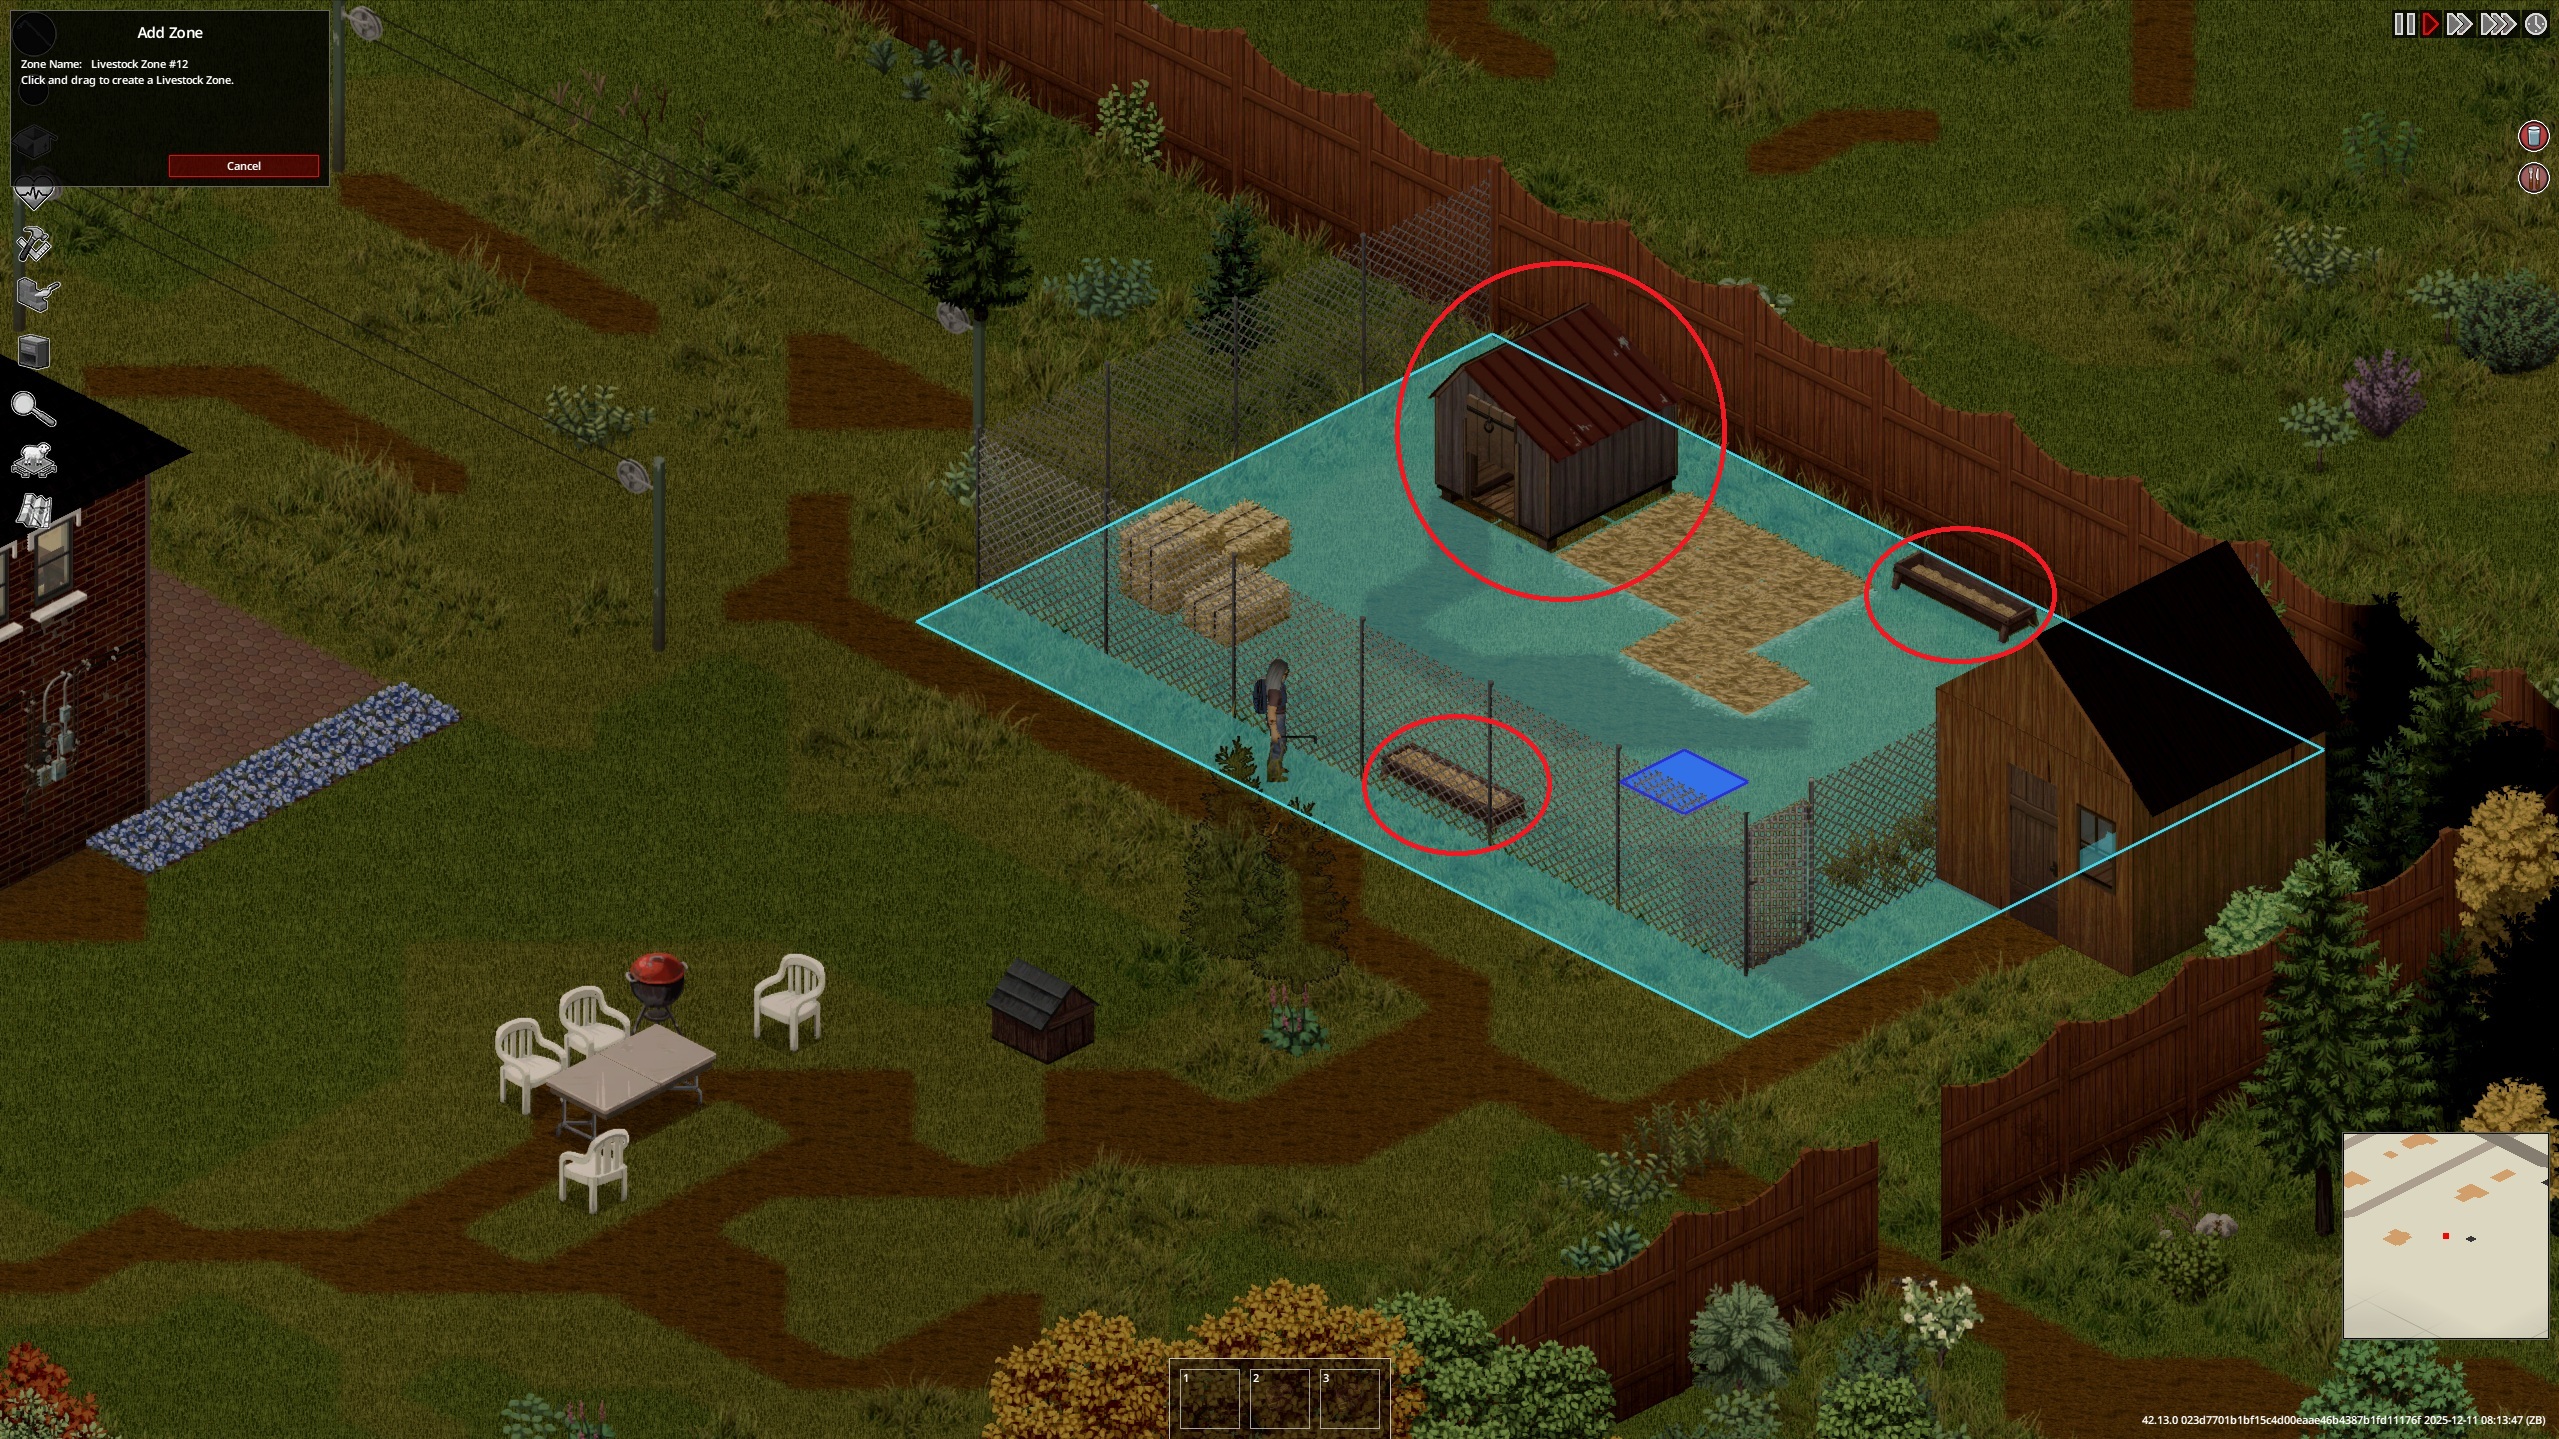 Two big mechanics to know:
- They don’t actually need fencing to stay in the zone, which sounds nice, until they get stressed and run out anyway.
- Use the zone menu to check totals (food, water, shelter) and hit Animal Info for an individual animal to see stuff like hunger, thirst, stress, plus name, breed, gender, age.
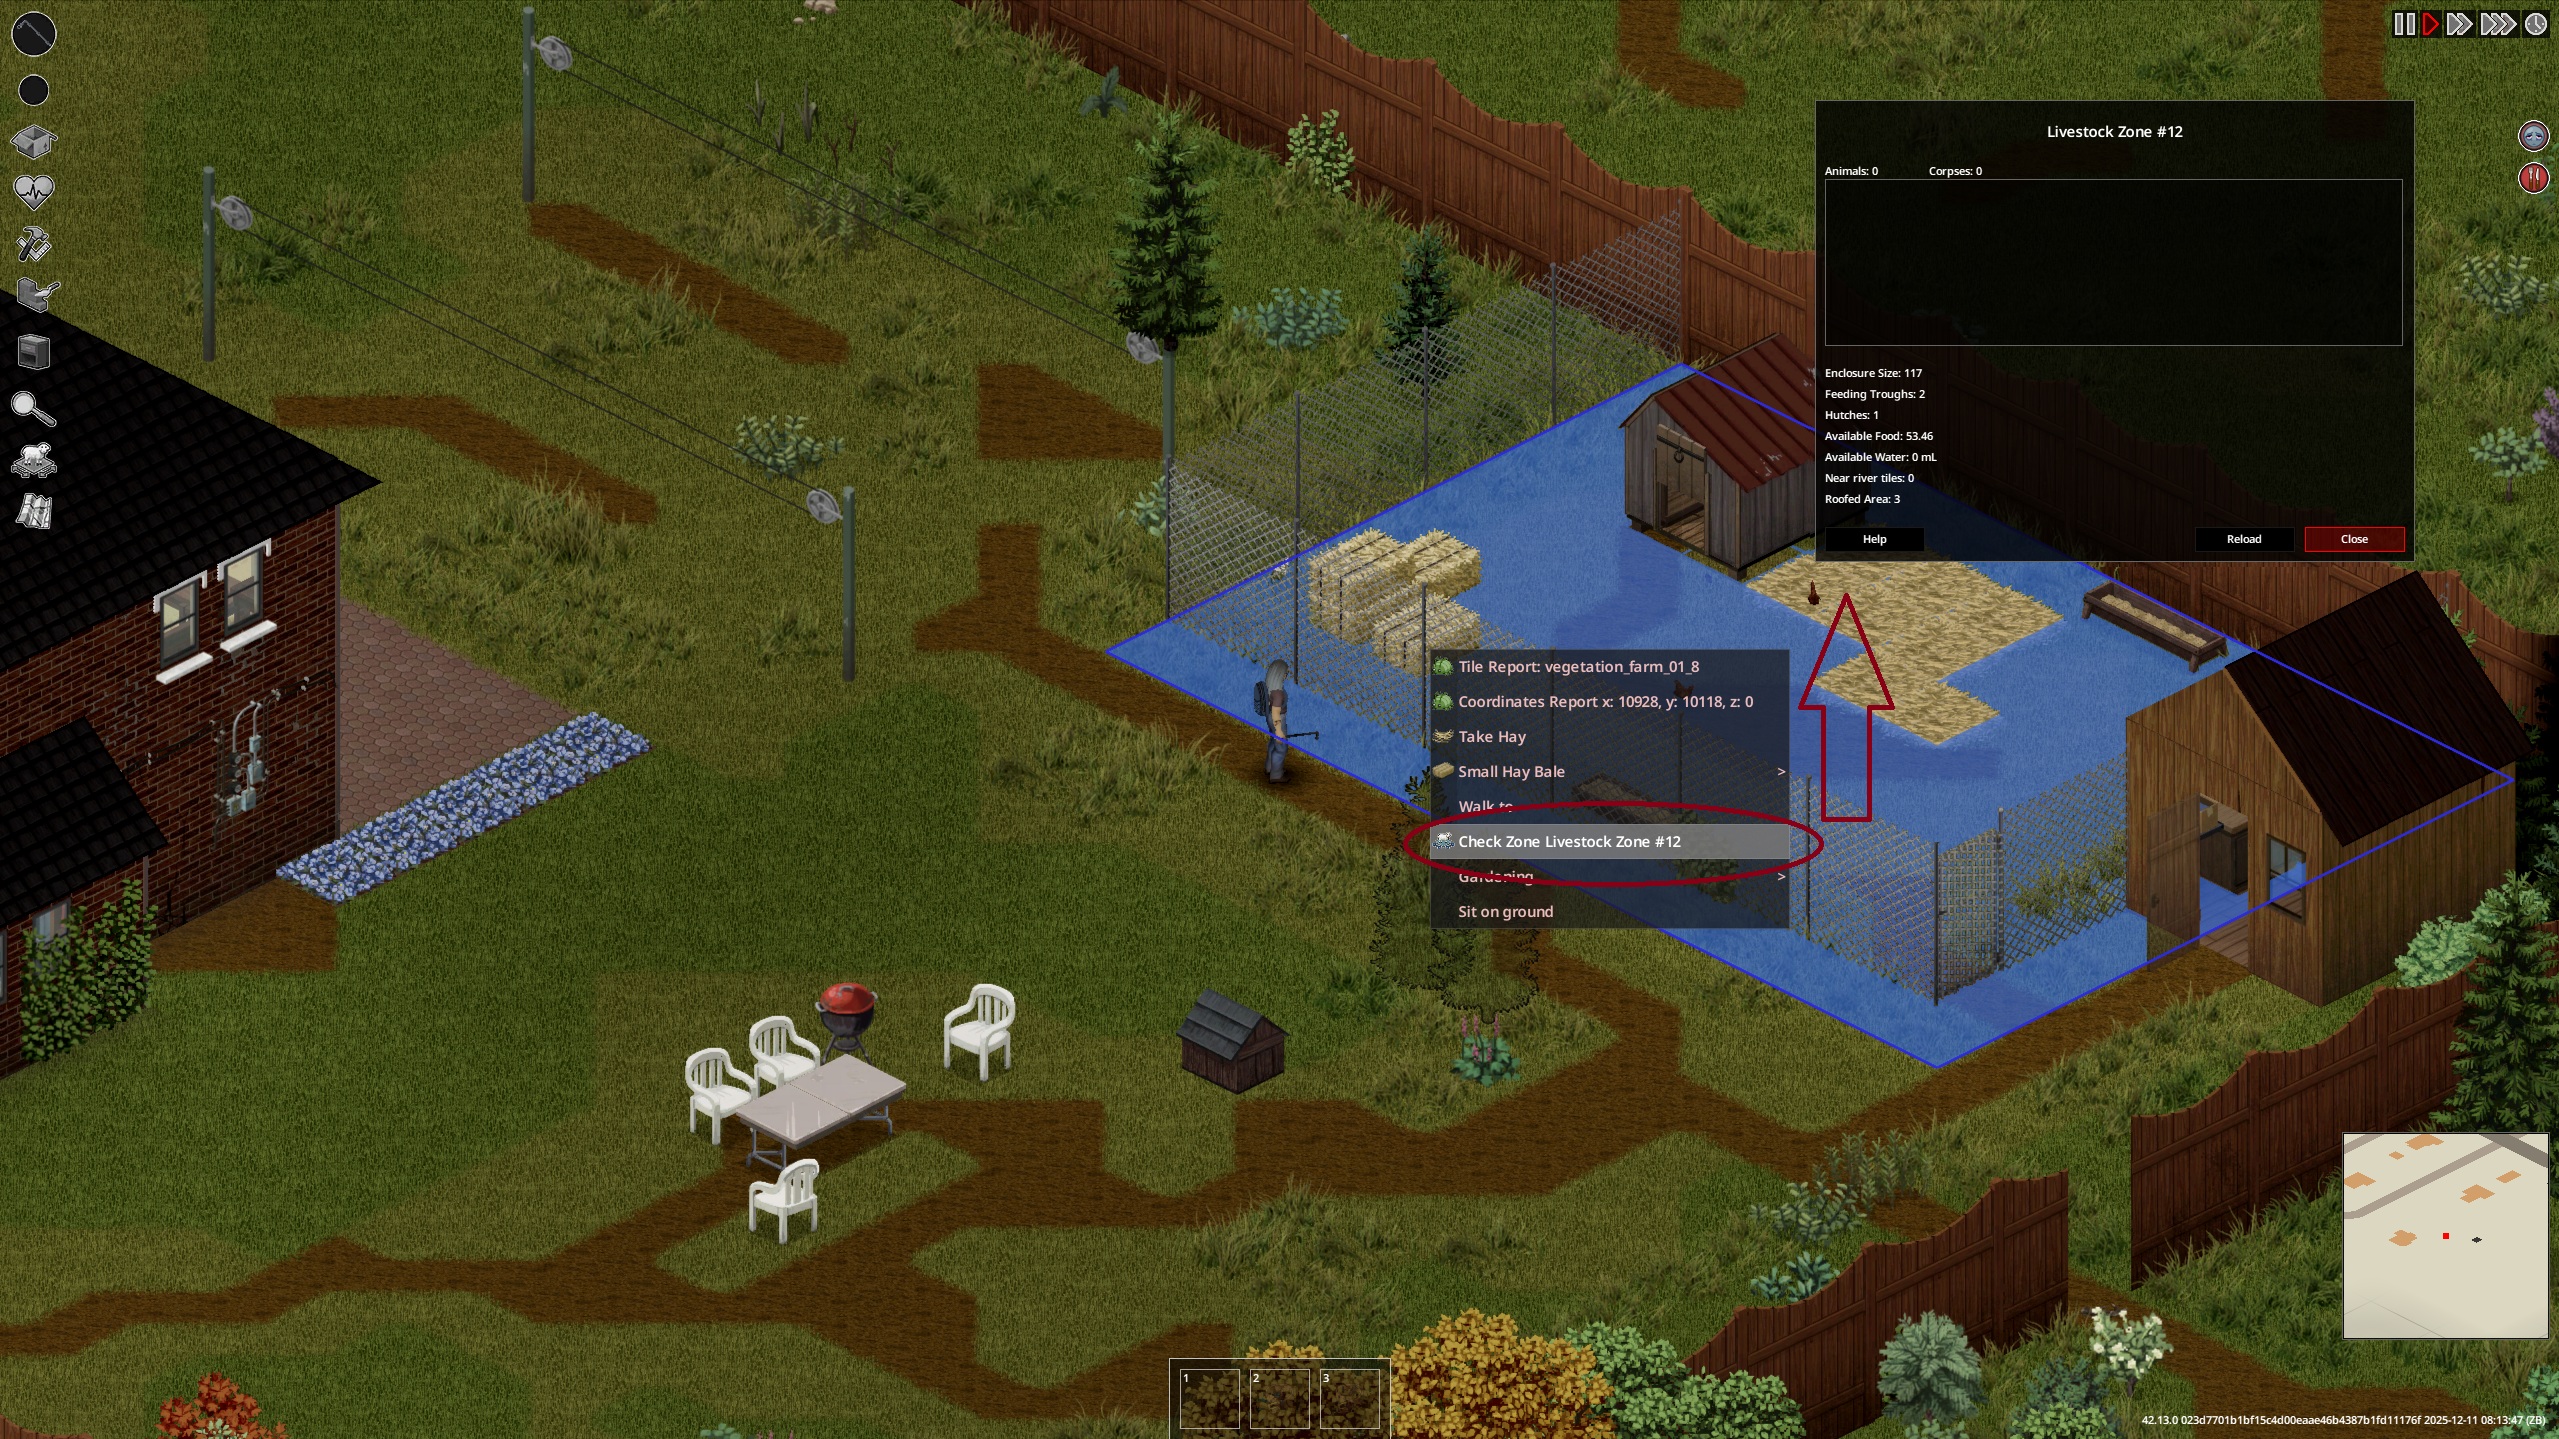
That Animal Info panel is your truth source. Check it when anything feels off.
Step 3: Feeding and water, the trough rules people miss
You’re going to be living off troughs. Get used to it.
Troughs accept animal food like grass cuttings which fill “animal feed value”.
Capacity matters if you’re supporting a herd. The Animal Trough on the wiki lists a total capacity of 140.
- Food goes in via the inventory HUD
- Water goes in via right click menu
That’s handy. It can also mess you up if you meant that trough for feed and it’s now full of water.
- Animal Feed Bag is the cleanest option when you’re stocked. It can be placed in an animal trough, small metal trough, or huge metal trough for animals to eat from.
- Cows can eat hay, grass, vegetables, fruits, and animal feed.
- Chickens are special: if they’re kept in an area with enough grass tiles, they won’t need to be fed. If not, they can eat wheat seeds and insects you place in the zone.
Water for chickens still matters. They need a water source provided in a trough or a bucket.
Step 4: The daily routine, what I do every morning
- Open the livestock zone menu, check totals, then click Animal Info on anything that looks stressed.
- Top up water troughs. If you’re swapping trough roles, empty first.
- Walk, don’t sprint, and don’t drag zombies near them. Stress spikes are real.
- Quick interaction for XP and “acceptance” building. Pet them if you have time, it counts toward Animal Care XP anyway.
- Collect products if available.
Step 5: Product workflow, from animal to storage
This is where the farm starts feeding the base for real.
If the cow isn’t milked and the calf doesn’t feed, the cow can stop producing after a few days.
So don’t ignore it once it starts.
Calves need to be in the same livestock zone as their mother to drink milk.
Sheep also have Milk as an option, plus Shear, and they’re a renewable source of milk or wool.
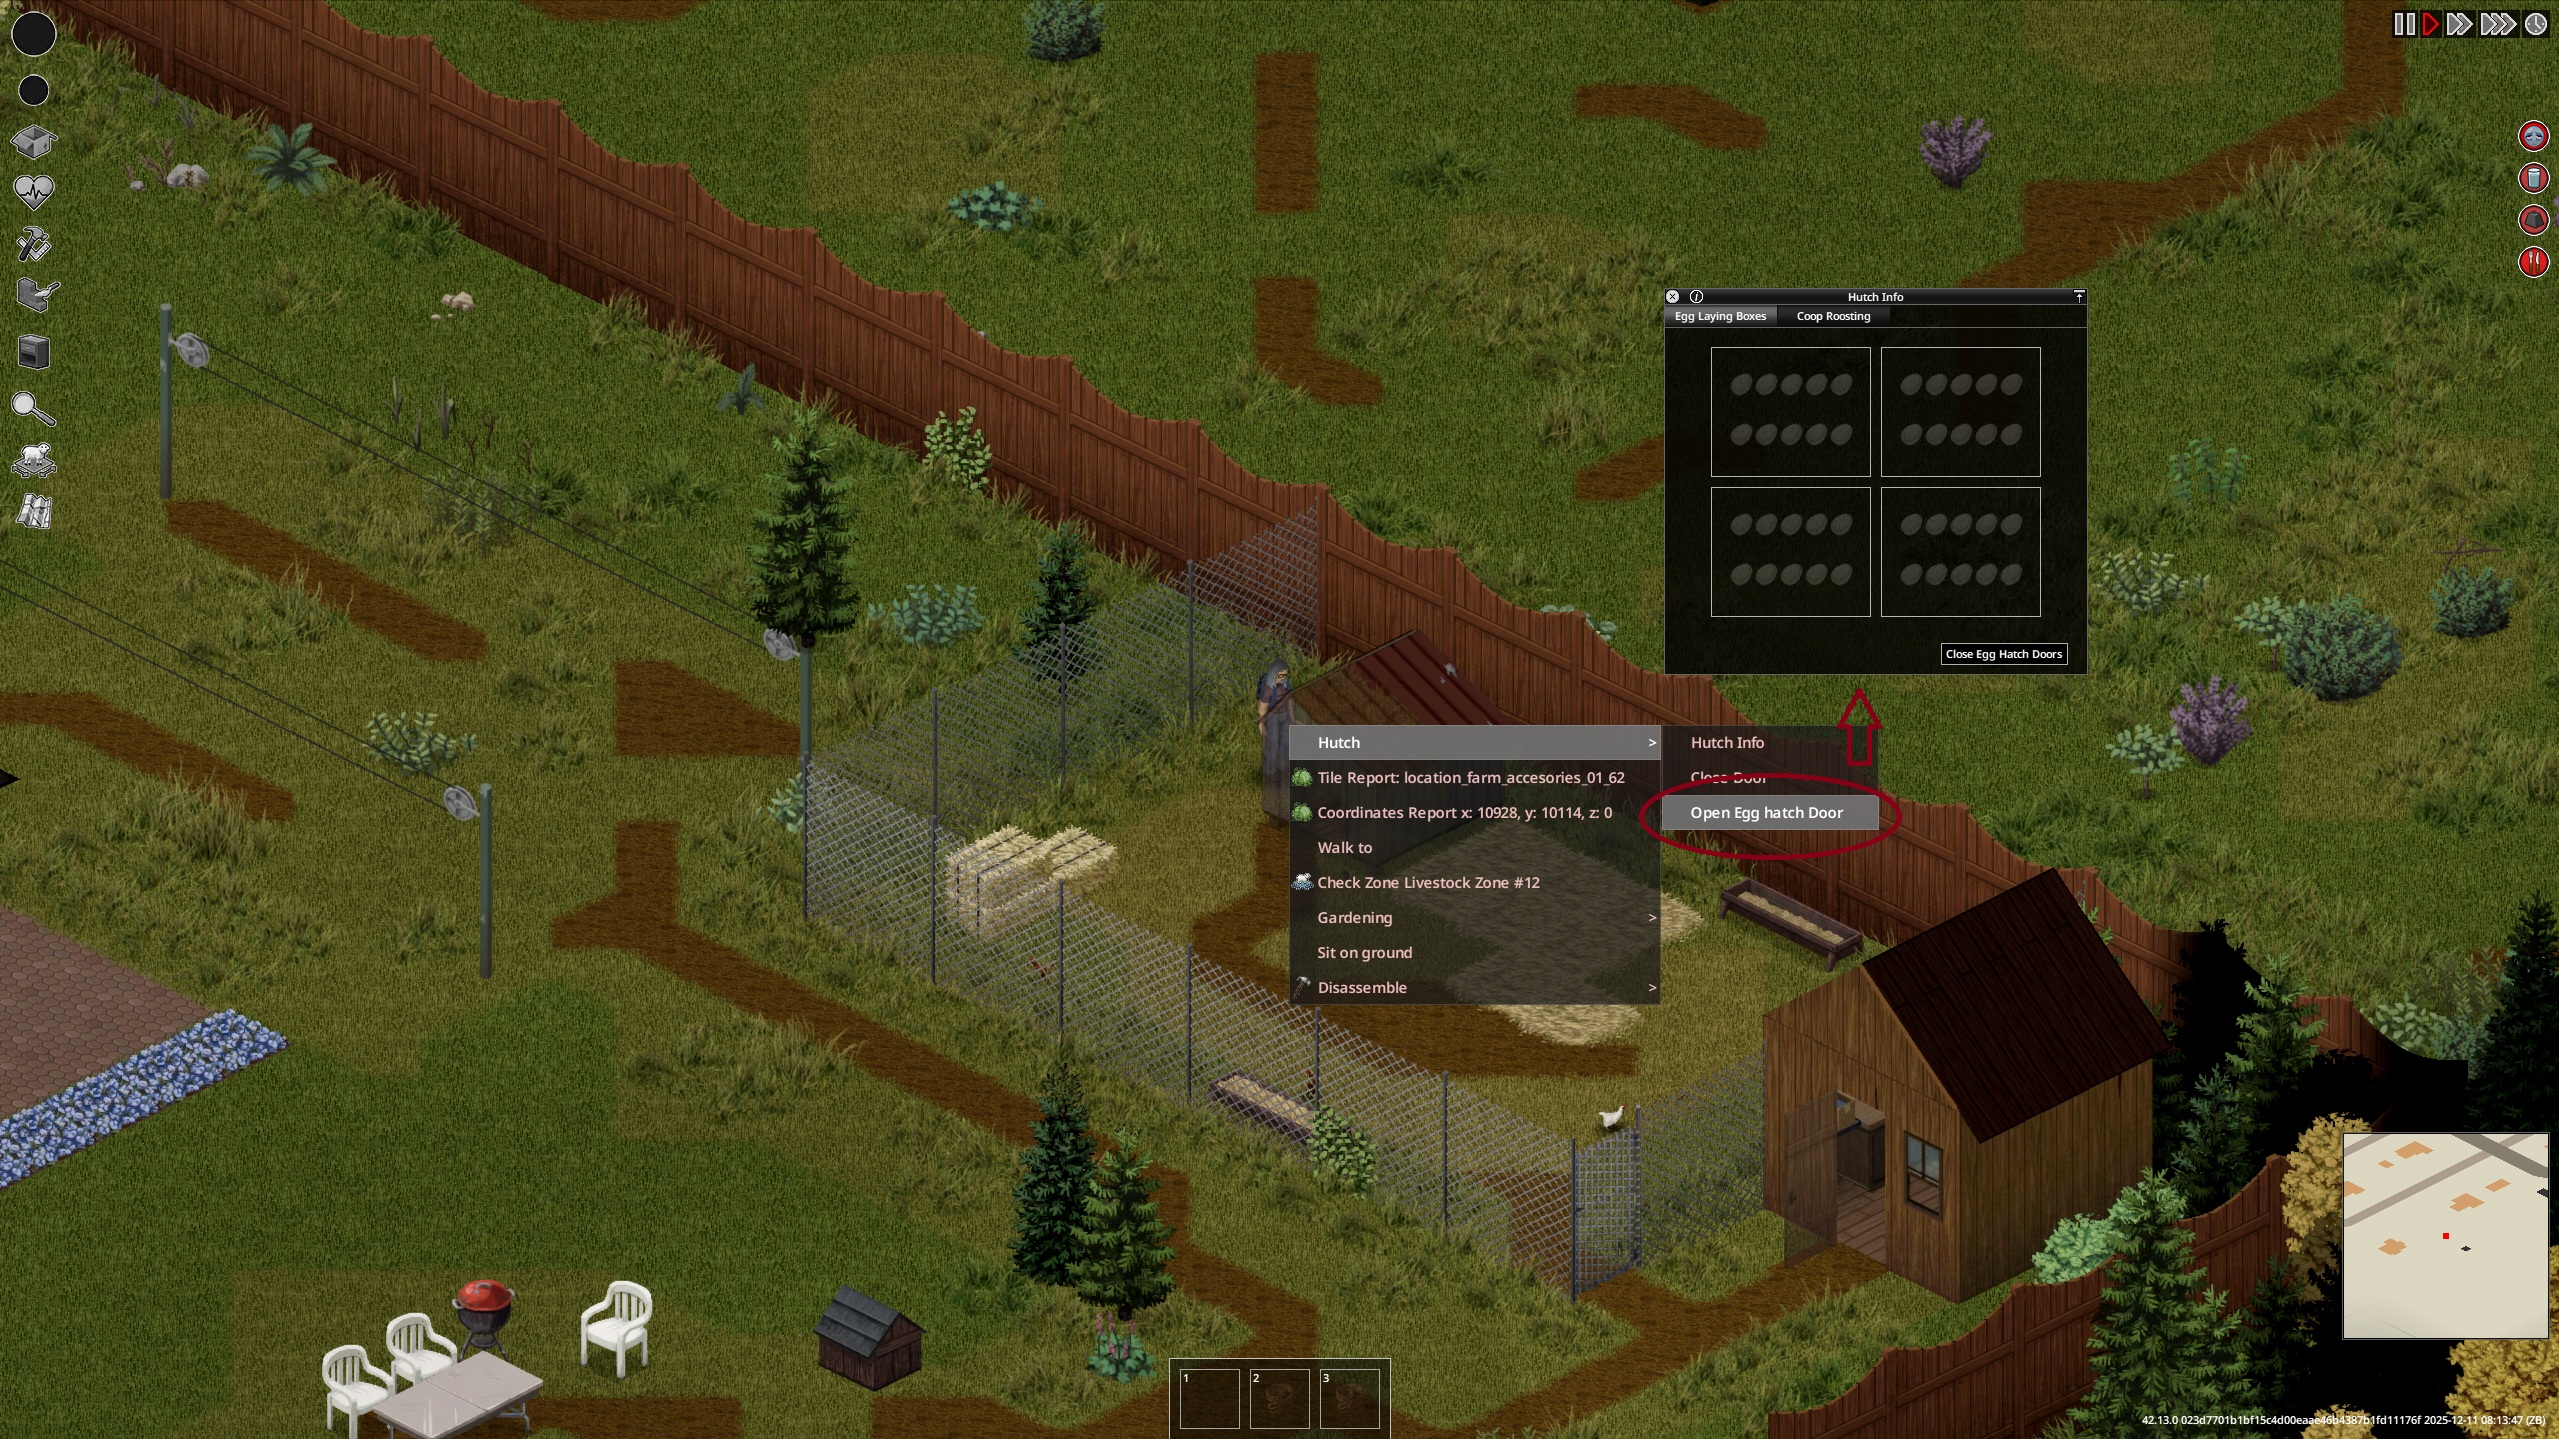
If your chickens are always stressed or wandering, you’re going to hate your life. Fix the zone first.
And yeah, keep the tool on you when you go out there. It’s annoying to walk back because you forgot it.
This is quietly huge, because it supports your crops while the animals support your calories.
Step 6: Butchering day, when you need a meat surge
Sometimes you don’t want renewable. You want a pile of meat right now.
The Butchering skill affects meat cut quality, and higher levels mean better quality harvested.If you butcher on a Butcher Hook, you can get unprocessed animal leather and more meat from the animal.
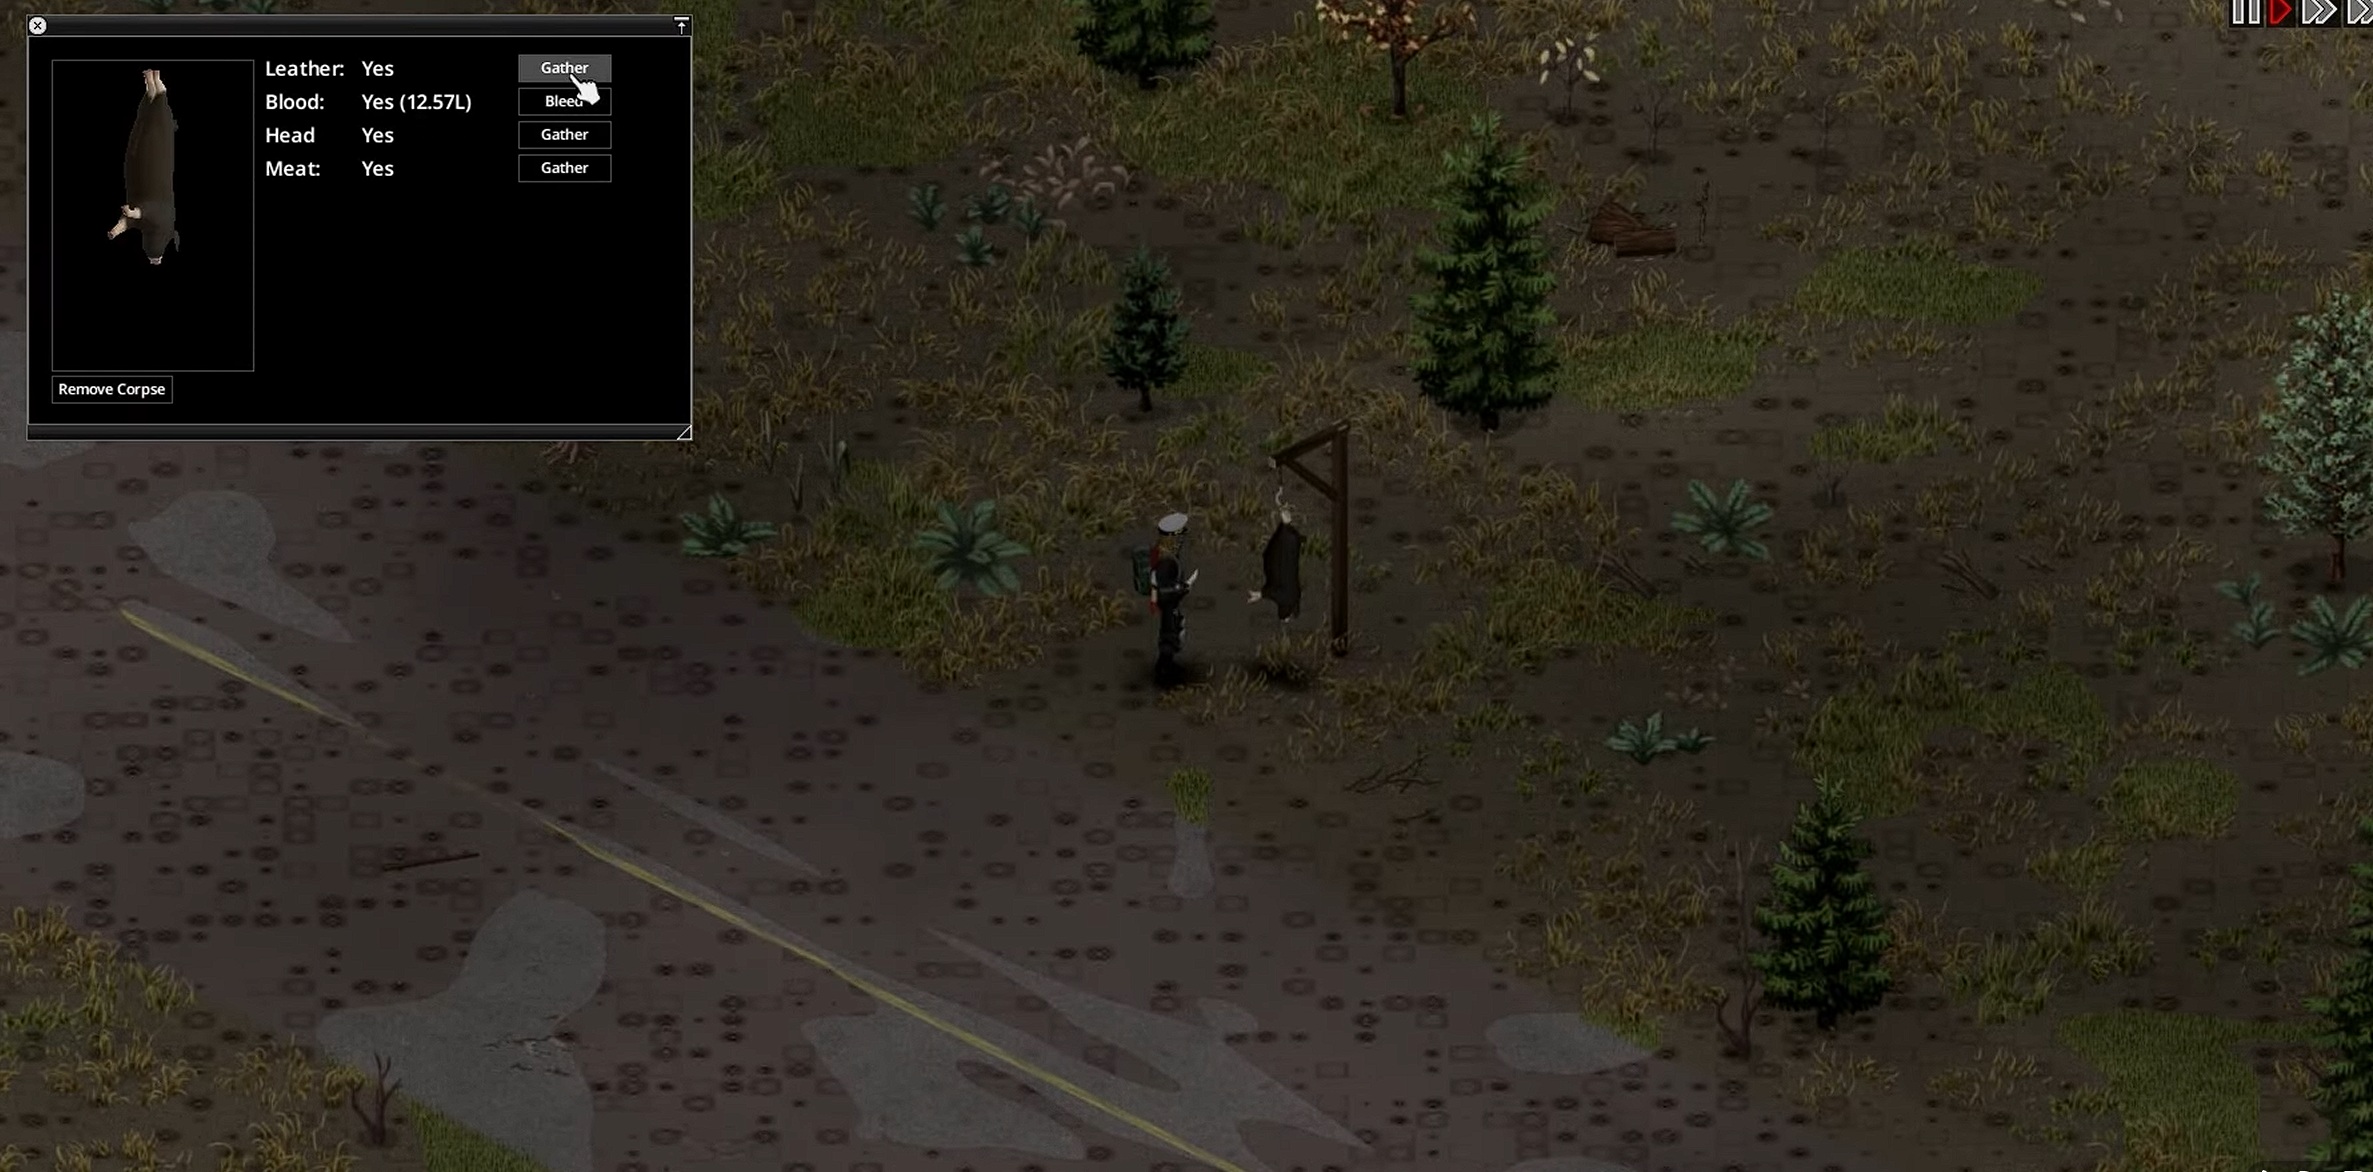 I treat butchering like a planned event:
- have knives ready
- have a freezer or at least a powered fridge setup
- have containers for sorting
- don’t do it at 9 PM when you’re tired and panicking
Step 7: Animal Care skill, the quiet multiplier
If you’re serious about animals, Animal Care is a real skill, not fluff.
Animal Care lets you view more info, increases the amount of resources harvested, and reduces the chance that stressed animals will break during milking or shearing as your level goes up.
You gain Animal Care XP by doing animal actions like milking, shearing, giving water, petting, collecting eggs.
One specific book example: Animal Care II: "Animal Welfare Basics" gives a 5x XP multiplier for Animal Care levels 3 to 4 while you’re in that range.
Common mistakes that ruin farms
- You made the livestock zone, but the trough is technically outside it. They won’t eat from it if it’s not inside their zone.
- You filled a trough with water, then tried to add feed without emptying it first. Doesn’t work.
- You keep sprinting through your pen area and wondering why stress stays high. That’s literally called out as a stress trigger.
- You’re trying to do cows before you can handle water logistics. Start with chickens if you live near grass tiles, they can be low maintenance on feed.
Available Translation
Optional Trainer Helpers (Use Responsibly)
More Project Zomboid Guides

- Modding Policy★ 5 (397)133k views208 ♥9 minUpdated Nov 8, 2022
- 80 tips and tricks for Project Zomboid (If you have over 100 hours in this game some of these will probably be new to you too)★ 5 (1.6k)82k views3.1k ♥28 minUpdated Aug 29, 2021
- Топ 100 лучших модов на "project zomboid"★ 5 (415)68k views1.1k ♥10 minRussianUpdated Jul 28, 2024
- [B41] Лучшие места для базы★ 5 (477)61k views1.3k ♥6 minRussianUpdated Nov 30, 2025
- Первая помощь ❤★ 5 (628)49k views1.4k ♥5 minRussianUpdated Jan 20, 2025
- The Basics of Base Building★ 5 (704)48k views1.5k ♥17 minUpdated Dec 24, 2021





- Upgrading to PremiumTeam Fortress 2★ 5 (20k)1441k views11k ♥6 minUpdated May 11, 2022
- No More Room in Hell Official ManualNo More Room in Hell★ 5 (2.8k)569k views2.1k ♥29 minUpdated Apr 22, 2019
- NMRiH Community Hosting GuidesNo More Room in Hell★ 5 (526)351k views653 ♥1 minUpdated Aug 10, 2022
- ULTIMATE GUIDE FOR GAME DEV TYCOONGame Dev Tycoon★ 5 (5.8k)326k views10k ♥4 minUpdated 23 Jan, 2014
- How to 'Git Gud' Soon™MORDHAU★ 5 (2k)318k views3k ♥68 minUpdated Nov 16, 2024
- Лучшие кооперативные игры SteamPAYDAY 2★ 5 (1.5k)315k views2.1k ♥56 minRussianUpdated Apr 27, 2025






This guide was created by its original author on the Steam Community. Are you the author and want it removed? Request removal.