Settlement Guide
TL;DR: or, Top 10 Settlement Facts
- New settlements always start in a terrible state. If you visit a couple of times a day and make the right choices, it will take a week or so to get out of debt and start producing goods, a month or two to upgrade the whole settlement to S-Class, and about 6 months for enough settlers to arrive to fill your buildings.
- Goods produced by settlements vary hugely in value, and the high-value ones are different for each alien faction. Korvax make the highest unit-value goods, but with several settlements a mix is best.
- Goods can be collected at any Teleportation terminal, not just at your settlement.
- Collecting goods wipes out production in progress, so best done just after a batch is complete.
- You can click out of Settlement management decisions without deciding, and if you ignore them for long enough or make a decision at another Settlement they will be replaced with a different decision.
- Nothing bad happens to your settlement if you ignore a message saying it is under attack. The attack will still be just starting whenever you next return, and it won't damage the settlement anyway.
- There is no "Settlement reserve", so any payment made puts the settlement in debt, losing any uncollected tribute goods and any progress towards the next batch.
- "Donate to Settlement reserves" actually moves the production clock forward by around 1 to 11 hours, depending on the amount.
- A few buildings can only be upgraded to S-Class with materials from Purple star systems, only reachable when all the main story missions are done. But none of them open up new kinds of goods output.
- Growing and upgrading a settlement perversely increases the time it takes to produce a batch of tribute goods. So C-Class settlements tend to produce goods fastest.
So you decided to take on a settlement...
or maybe you took over one by mistake because the story led you there, or you just stumbled over it in your travels.
Seriously consider retiring as Overseer as soon as possible - see Checking Status and Retiring. Settlements nag you with reminder messages and can take up a lot of game time. They're not a great way to get rich, and are not needed to get to the end game. Why let yourself be tied down to one location in an exploration game?
There are a few reasons for sticking with it:- One of the more interesting minor missions is only triggered if you take over and build up a settlement. No more spoilers about that here.
- Settlements can provide a steady supply of valuable goods for no effort, once set up. They don't compete with purpose-built unit farms, but they are at least as good as a large frigate fleet.
- Settlements regularly pop up a variety of amusing interactions with your NPC citizens.
- You can suppress most of the nagging by changing your active mission.
- Settlements can act as a base/trade outpost/space station, with teleport terminal, landing pads, trade terminal, and a few facilities found nowhere else, such as a reusable Anomaly Detector.
- By setting up a base that overlaps the settlement you can get the best of both: your base gets an NPC population and the various settlement facilities, while the freedom of base building allows you enlarge and decorate the town or use the settlement buildings as cores for your own creations.
This guide tries to explain how settlements work, to help plan strategy - it's not a walk-through (the mission is endless). Because the guide is so long, most sections are written to be fairly self-contained, so you don't have to read the whole thing.
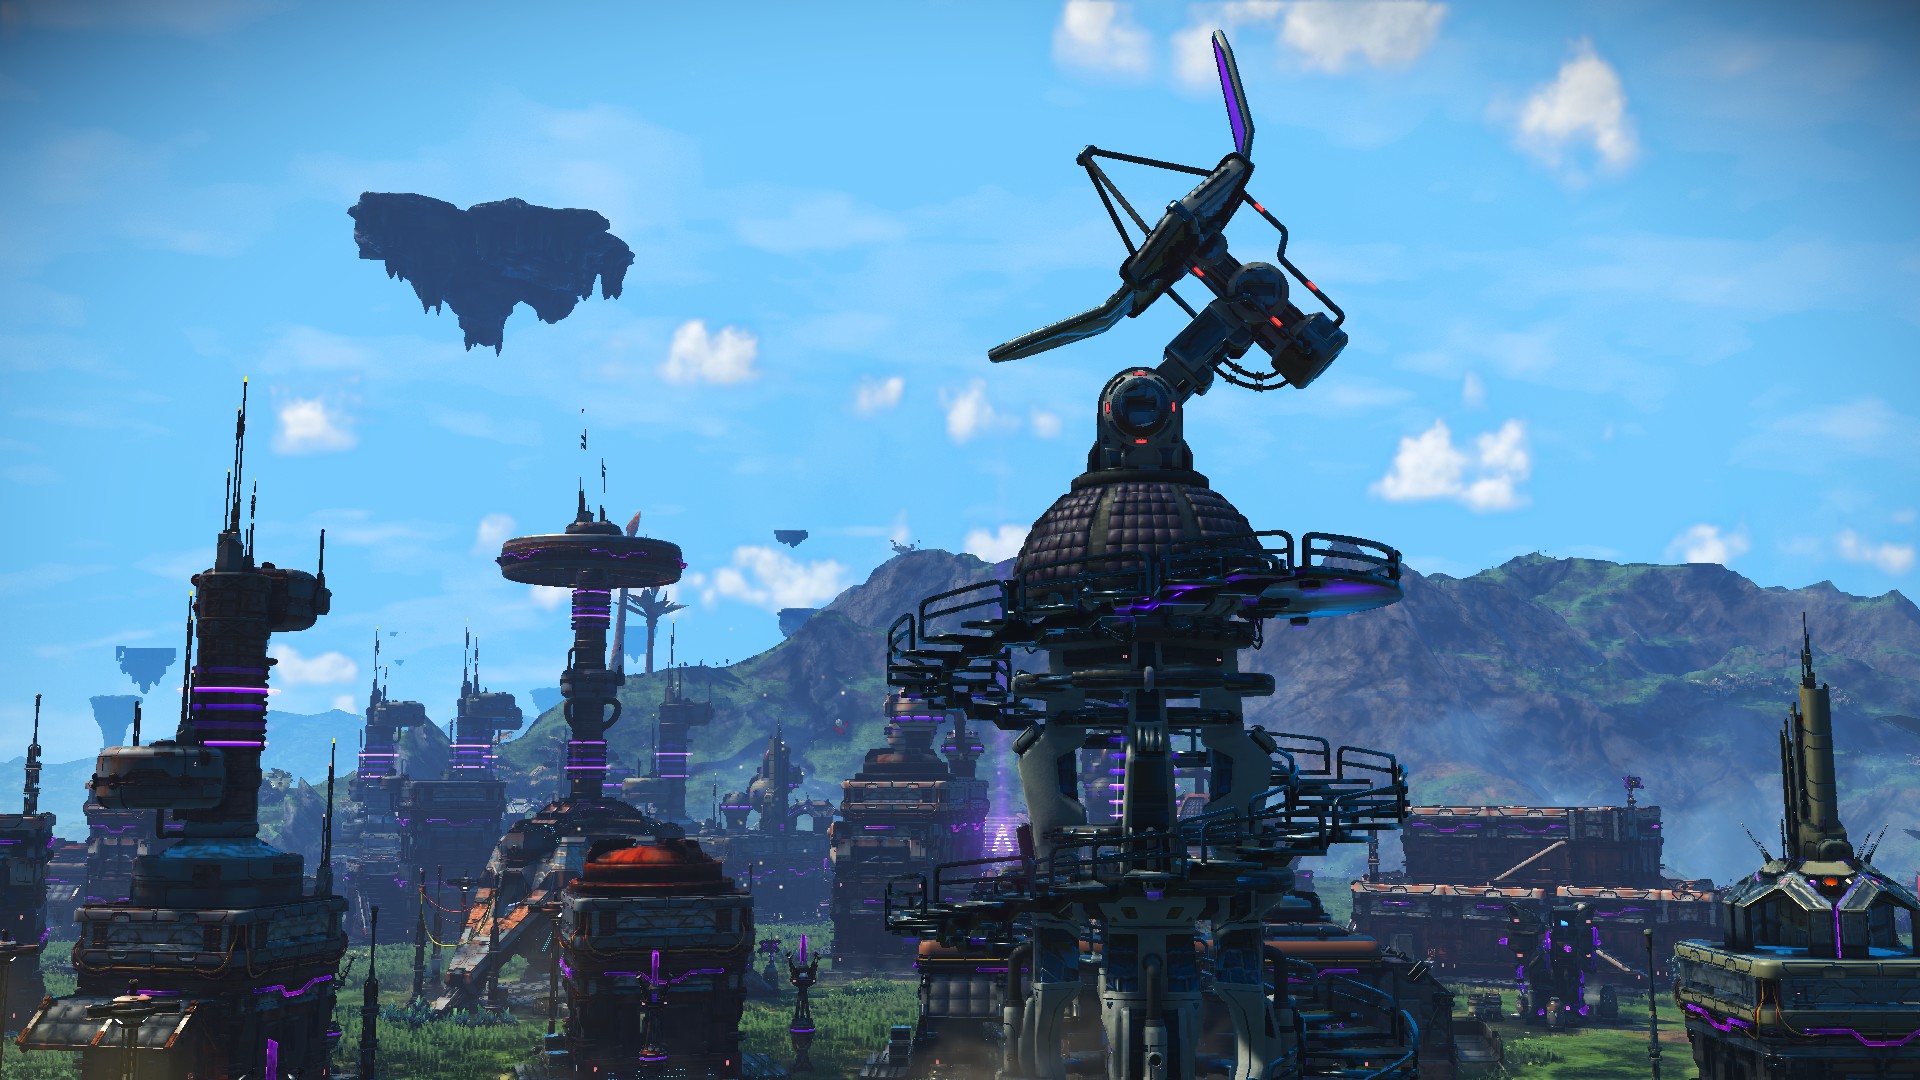
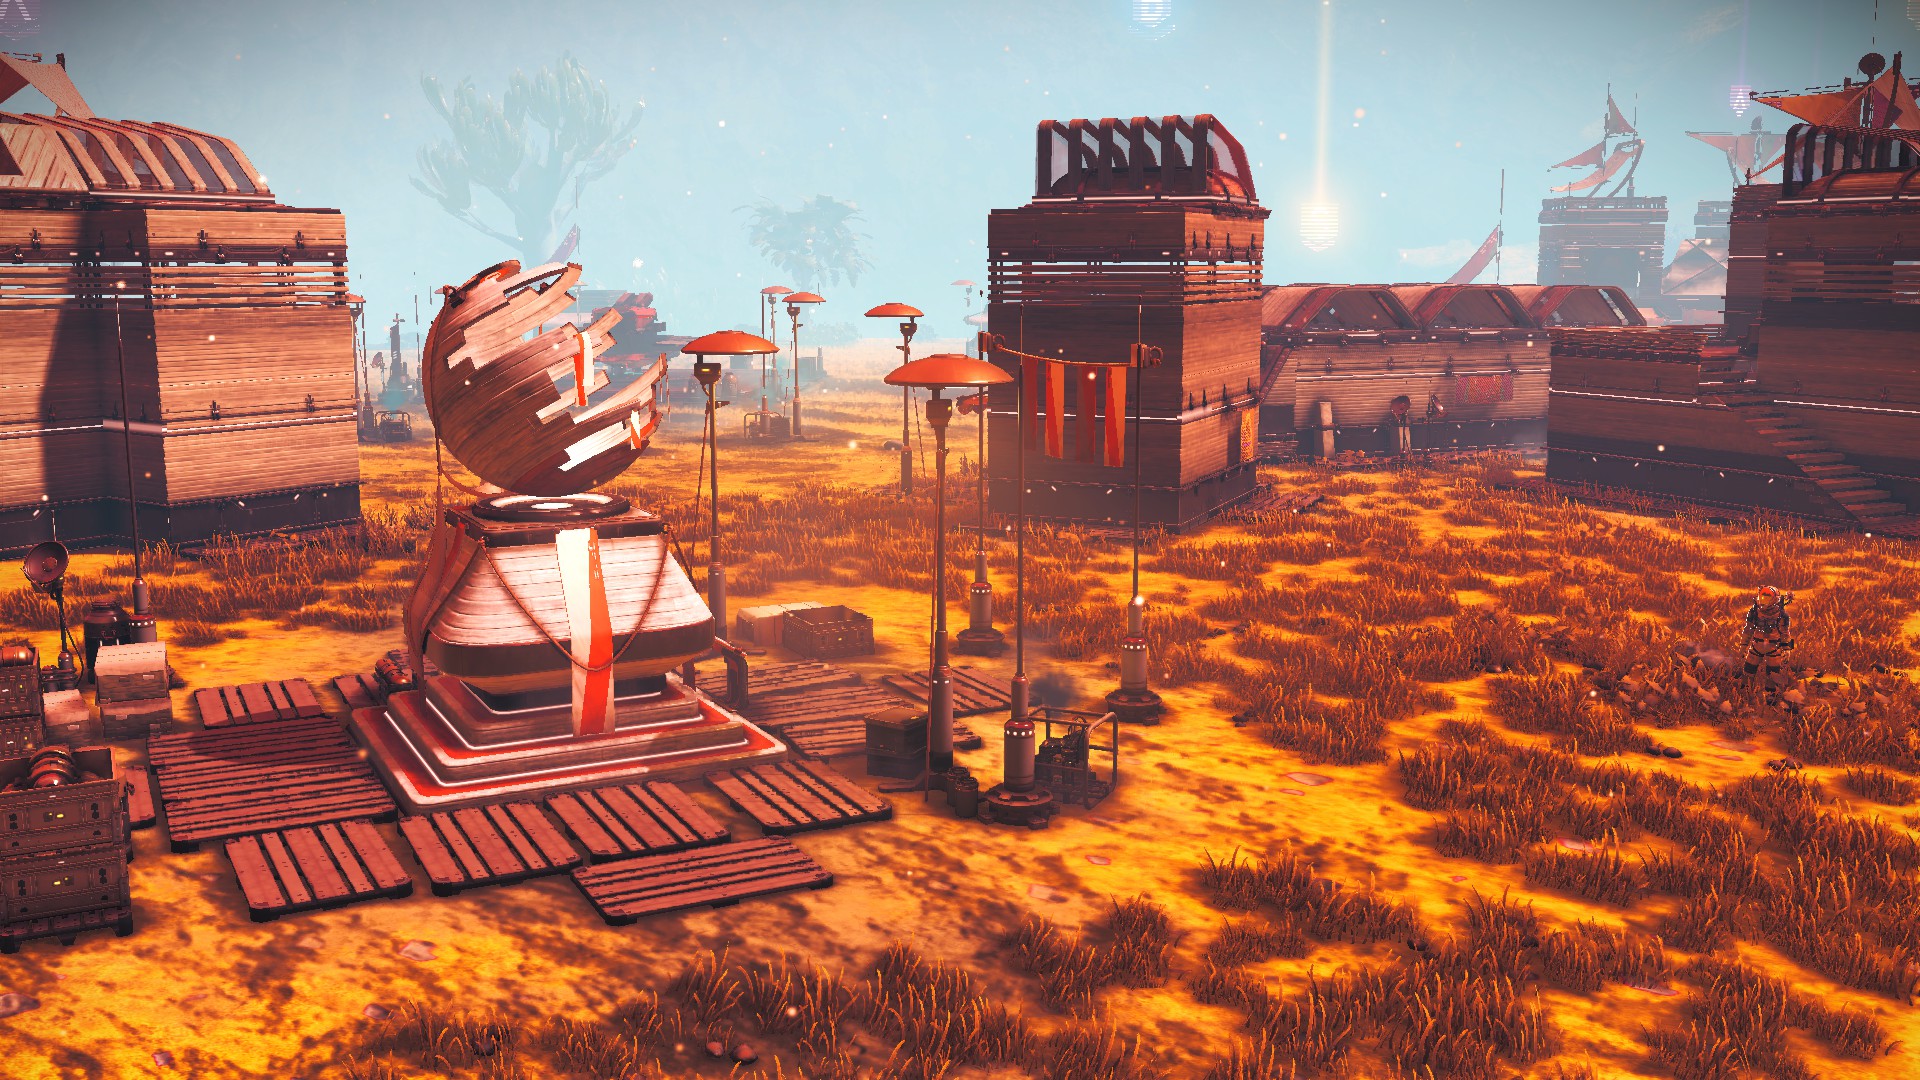
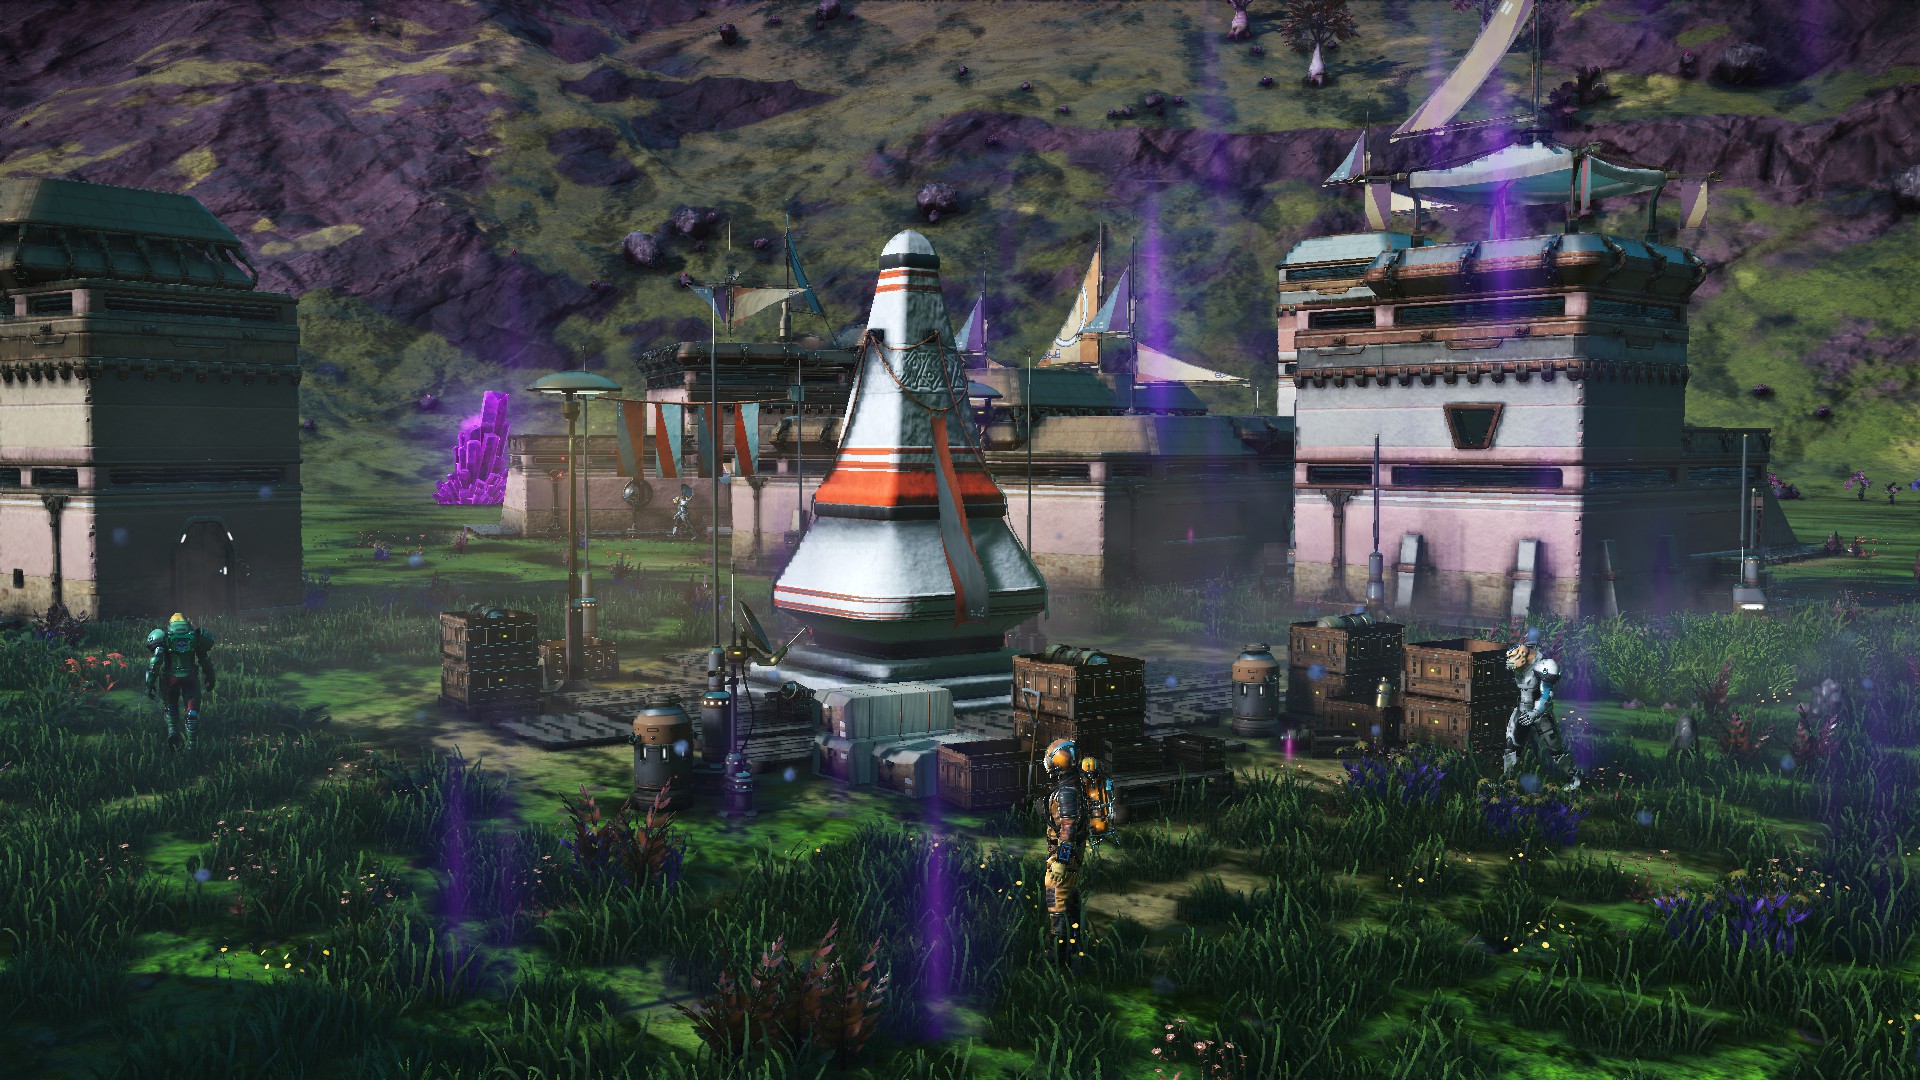
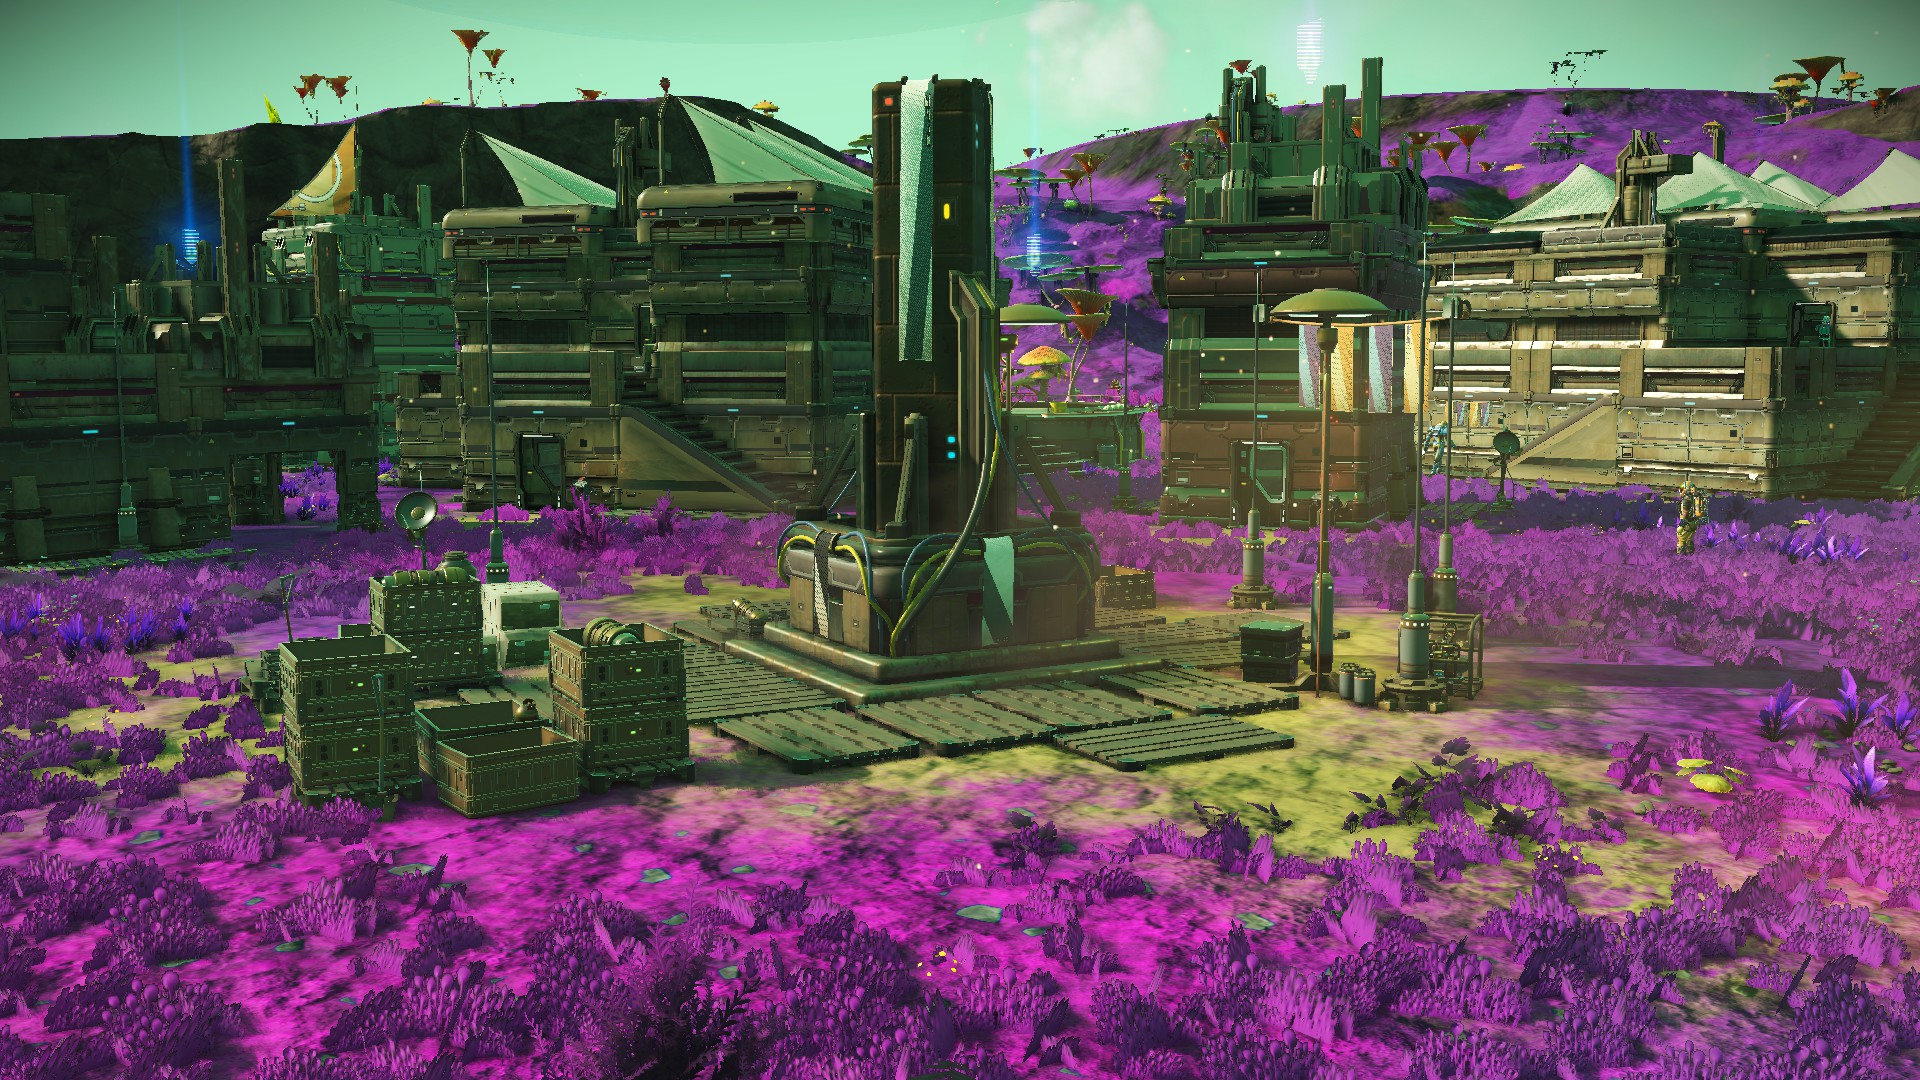
This guide is a work in progress. To write it I've run ten settlements, got feedback on drafts from Steam discussions, and checked out as many settlement issues reported on Steam as I could. There can still be places where I'm mistaking coincidences for general rules, so please comment if anything here contradicts your experience or you think I've missed anything worth mentioning. I will revise it now and again.
Thanks to all players who have commented on settlements in 2025: posts by Lindy Bomber, BDS and Mr Bufferlow have been particularly useful.
Settlements seem designed to be played as a side game: you typically spend a few minutes there at the start & end of a session while doing something unrelated in between - early in the game you may need to search for obscure building materials, but experienced players will be able to source these quickly even if they don't have a supply already. Action is spaced out by long timers, so there is usually no point in hanging around. If you stay more than about 10 minutes, the settlement will likely be attacked by pirates. Nagging messages from Settlements can be ignored indefinitely, even the ones that say the Settlement is under attack.
You have almost no agency: nearly all your actions are prompted by requests for decisions from the settlement terminal. Wandering around the settlement and talking to settlers changes nothing. The one thing you can choose to do that affects progress is to upgrade the class of existing buildings.
But there's a catch: growing and upgrading a settlement unexpectedly slows down the rate tribute is made. If you want to maximise that, you need to hold down all the statistics or even reduce them, so you never get the "S-Class" badge.
Once it's out of debt, you can ignore your settlement and just use it as a steady source of free loot that can be picked up from any teleport terminal. Or you can role-play for ever dealing with settler issues and using the settlement as a base with a wide range of facilities, described in Kinds of Buildings.
Choosing a Settlement
There are no Settlements in Abandoned or Uncharted systems, nor on Airless, Strange or Infested planets. They are found in Pirate systems and on dissonant planets.
Like other PoIs, settlements are built on flat ground, often cut into surrounding terrain so there may be cliffs on one side. The flat area should be at least 130 u in radius from the central monument. Sometimes this fails and landscape features cut into the flat area: don't accept a settlement like that, as buildings could get buried in the terrain - in the worst case, a build terminal is inaccessibly buried, in which case you can neither progress the settlement nor retire as Overseer, so you are stuck with a part-built settlement.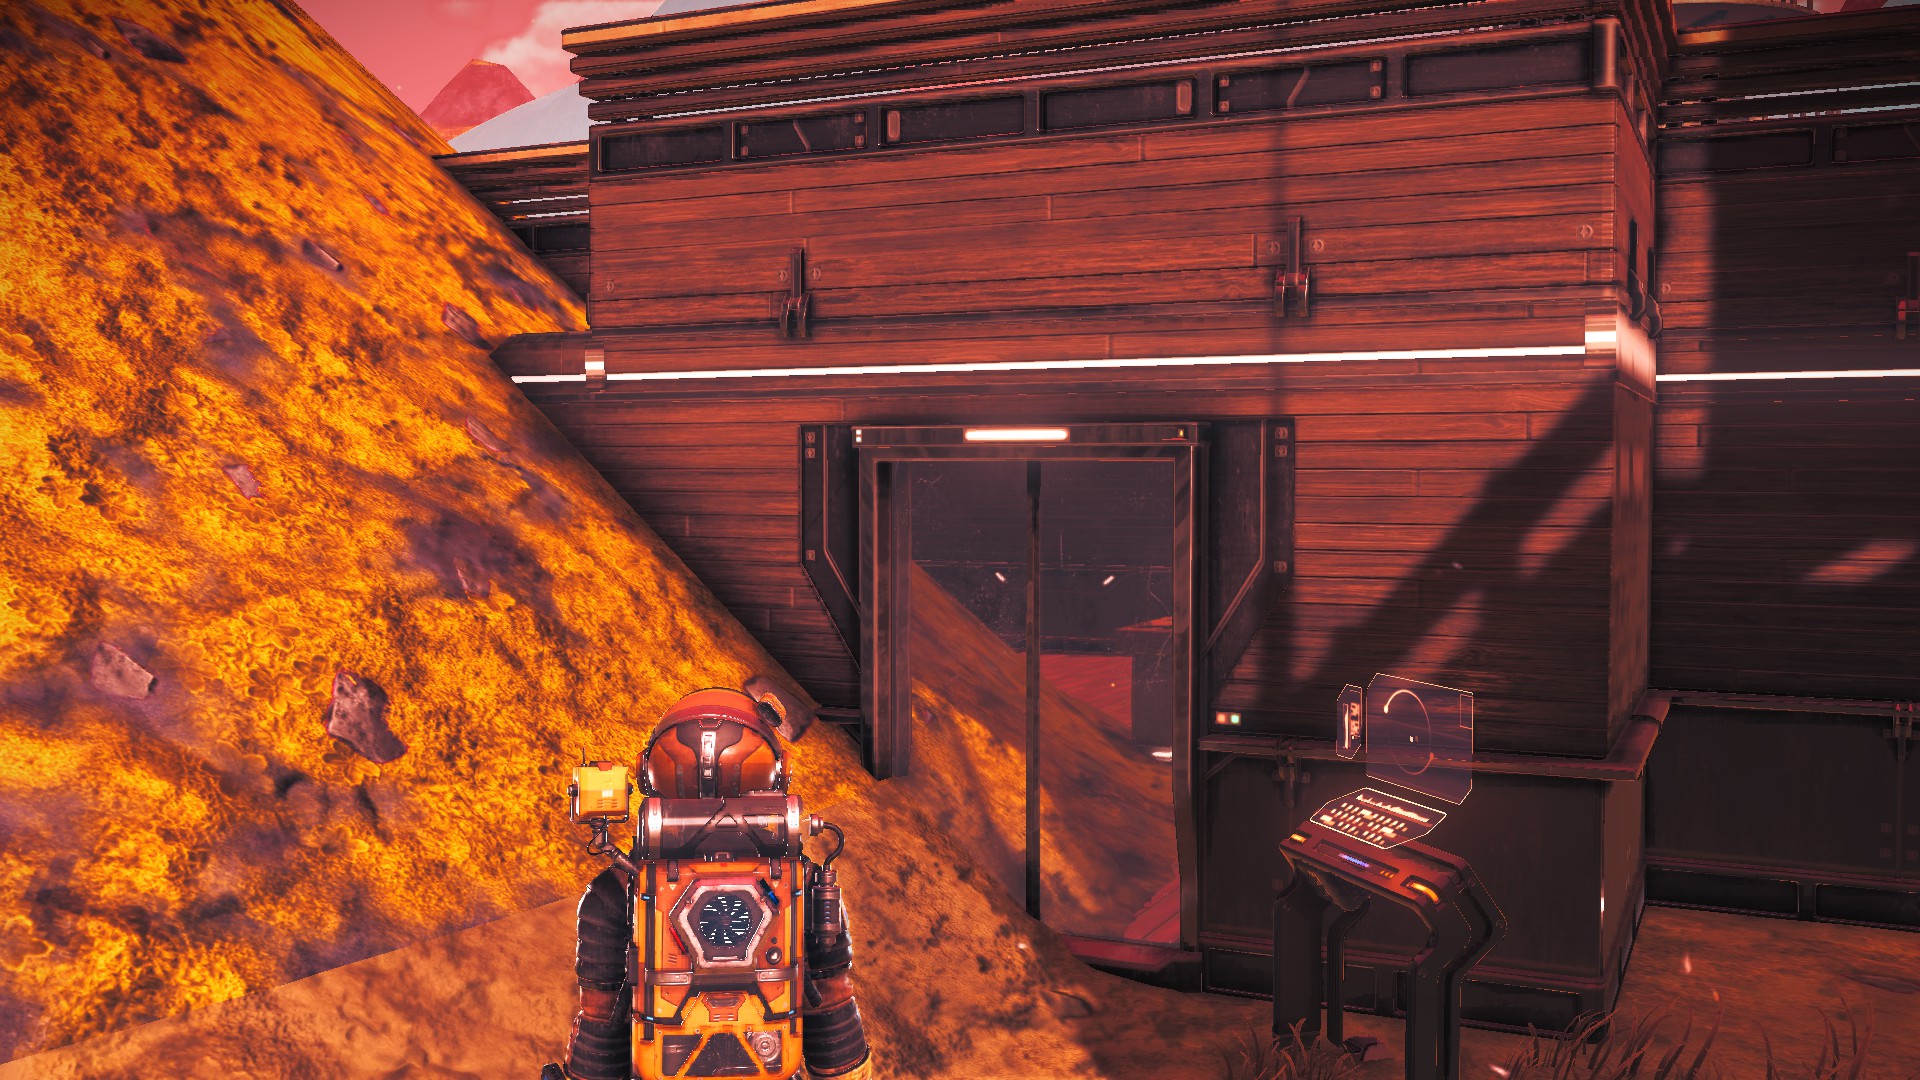
[Not ideal: the build terminal just escaped being buried.]
Don't worry if the settlement area is covered in resources like boulders, plants, crystals, etc. These magically disappear in the area around each building that's started. But giant unscannable plants or minerals, or another PoI like a Colossal Archive, are NOT cleared, and if present you run the risk that build terminals, or even the main office terminal, may spawn inside one and be unreachable.
Avoid settlements on planets with aggressive sentinels or predators: even if you have enough upgrades that they don't pose a threat, fending off constant attacks is a waste of time. Extremely stormy planets make it hard to see your settlement and find your way around, even if your hazard protection can cope.
Every settlement sometimes has the odd NPC rendered at the wrong height, but avoid bugged settlements, e.g., where they're all sunk into the ground (or all the buildings are floating in the air). Such issues are rare and even when they happen they are intermittent, so may be missed on the first visit, You can live with them if you don't care about the RPG aspect, or resign and start again somewhere else.
If you want to exploit your settlement for production of loot, choosing the right alien faction is crucial: it's the same as the faction dominating the star system, unless you go for an Autophage settlement. Check out the section on Producing Goods for details.
A highly-developed settlement can increase the level of the local economy by one step, e.g. from Tier 2 (Comfortable, Medium Supply etc) to Tier 3 (Wealthy, Opulent etc), or from Tier 1 (Destitute, Low Supply etc) to Tier 2. If you want to exploit this, don't start in a Tier 3 economy!
Checking Status and Retiring
The Status page of your Settlement shows the key settlement numbers and, if not in debt, the tribute goods hoppers from which you can collect any goods already produced, with a button to change the goods for each hopper. There is also a button to view the Settlement History page, which gives almost entirely wrong information about the Settlement, and contains the button to retire as Overseer.
The Status page can be viewed in four different ways:- Settlement Hub Interface at the central Monument in the settlement. This is where you take over as Overseer. (It's labelled Heart of Atlantid in Autophage settlements.)
- Settlement Administration Terminal in the Overseer's Office. You have to be here to make management decision (option 1). Option 2 shows the status page for the settlement you're in. Option 3 allows you to select the status page for any of your settlements.
- At any Teleportation Terminal: select the settlement you want, and choose "View Settlement Status" to get the status page.
- Settlement Register on the Quick Menu. Unlike other views of the status page, selection and collection of tribute goods is greyed out.
You can retire as Overseer from any of these views. If you retire while in the settlement, nothing obviously changes until you leave, but it will vanish from your teleporter list and the Settlement Register. If you find your way back, e.g. because you left a Save Beacon there, the Settlement will have reverted to the state it was in when you found it. In one case where I had no assets on the planet, the entire planet was erased from my discovery list, even though I had uploaded all the fauna.
You can't retire if a construction or upgrade is going on. If you reached your settlement via the main story, you need to to build the Overseer's Office and at least one other building, and make a few management decisions before the game lets you retire.
Buildings: Overview
There are 14 kinds of settlement building, although each kind goes by many names (see below). With a few exceptions, buildings are made and decorated with components that can also be used for player bases, including items from the Quicksilver dealer.
Each building has a Build terminal outside one entrance. The HUD marker for a building is placed here. Interact with the build terminal to view the building properties, start construction stages, and open buildings.
Each alien faction builds in a different material: wood for Gek, stone for Vy'keen, alloy for Korvax, and salvaged metal for Autophage. Buildings of different factions are otherwise essentially identical, except that Autophage settlements may contain "Autonomous Cranes", which are not found in the other factions.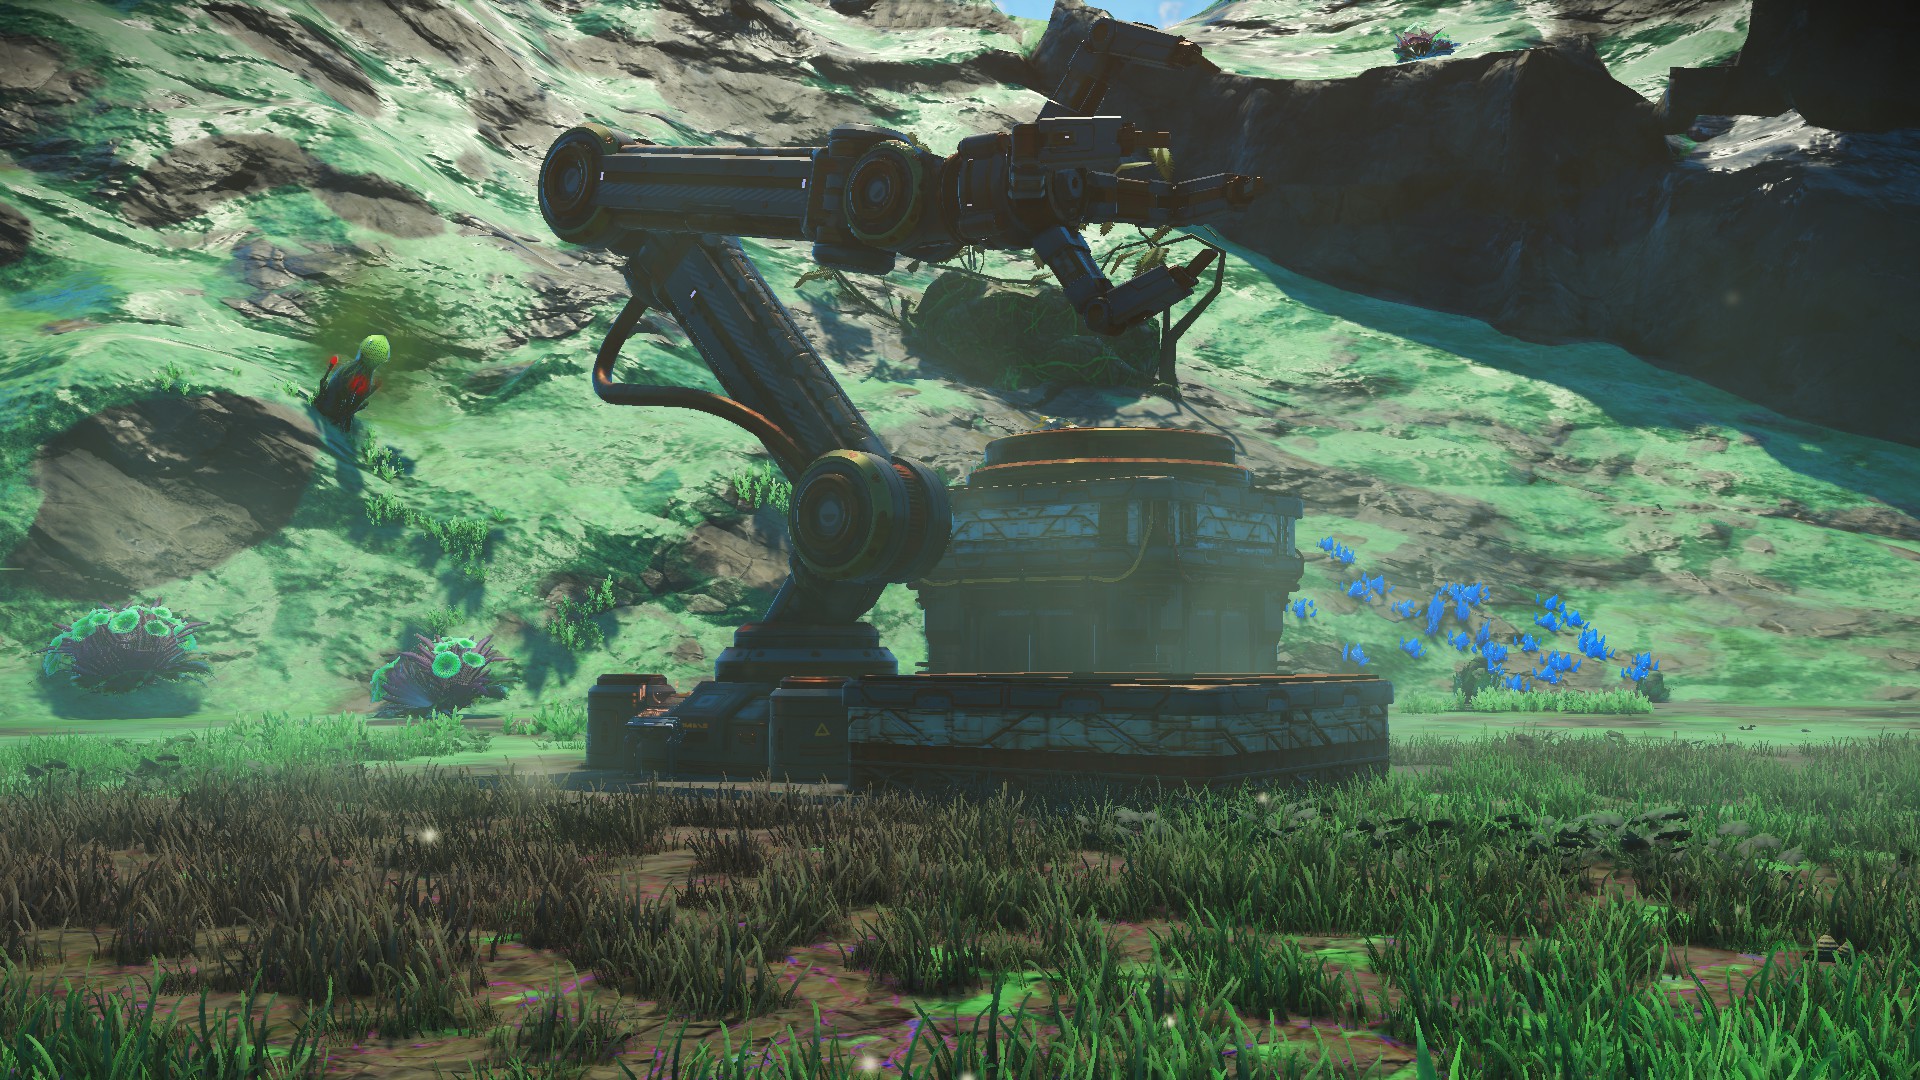
[Autonomous Crane, aka Crane Entity (etc). The rarest settlement building - now more commonly found in Waste Processing Plants. Not made from base parts.] Individual buildings are randomly procedurally-generated. For the one-room Utility Modules this may be as simple as randomly selecting roof style and whether walls have windows, but in the
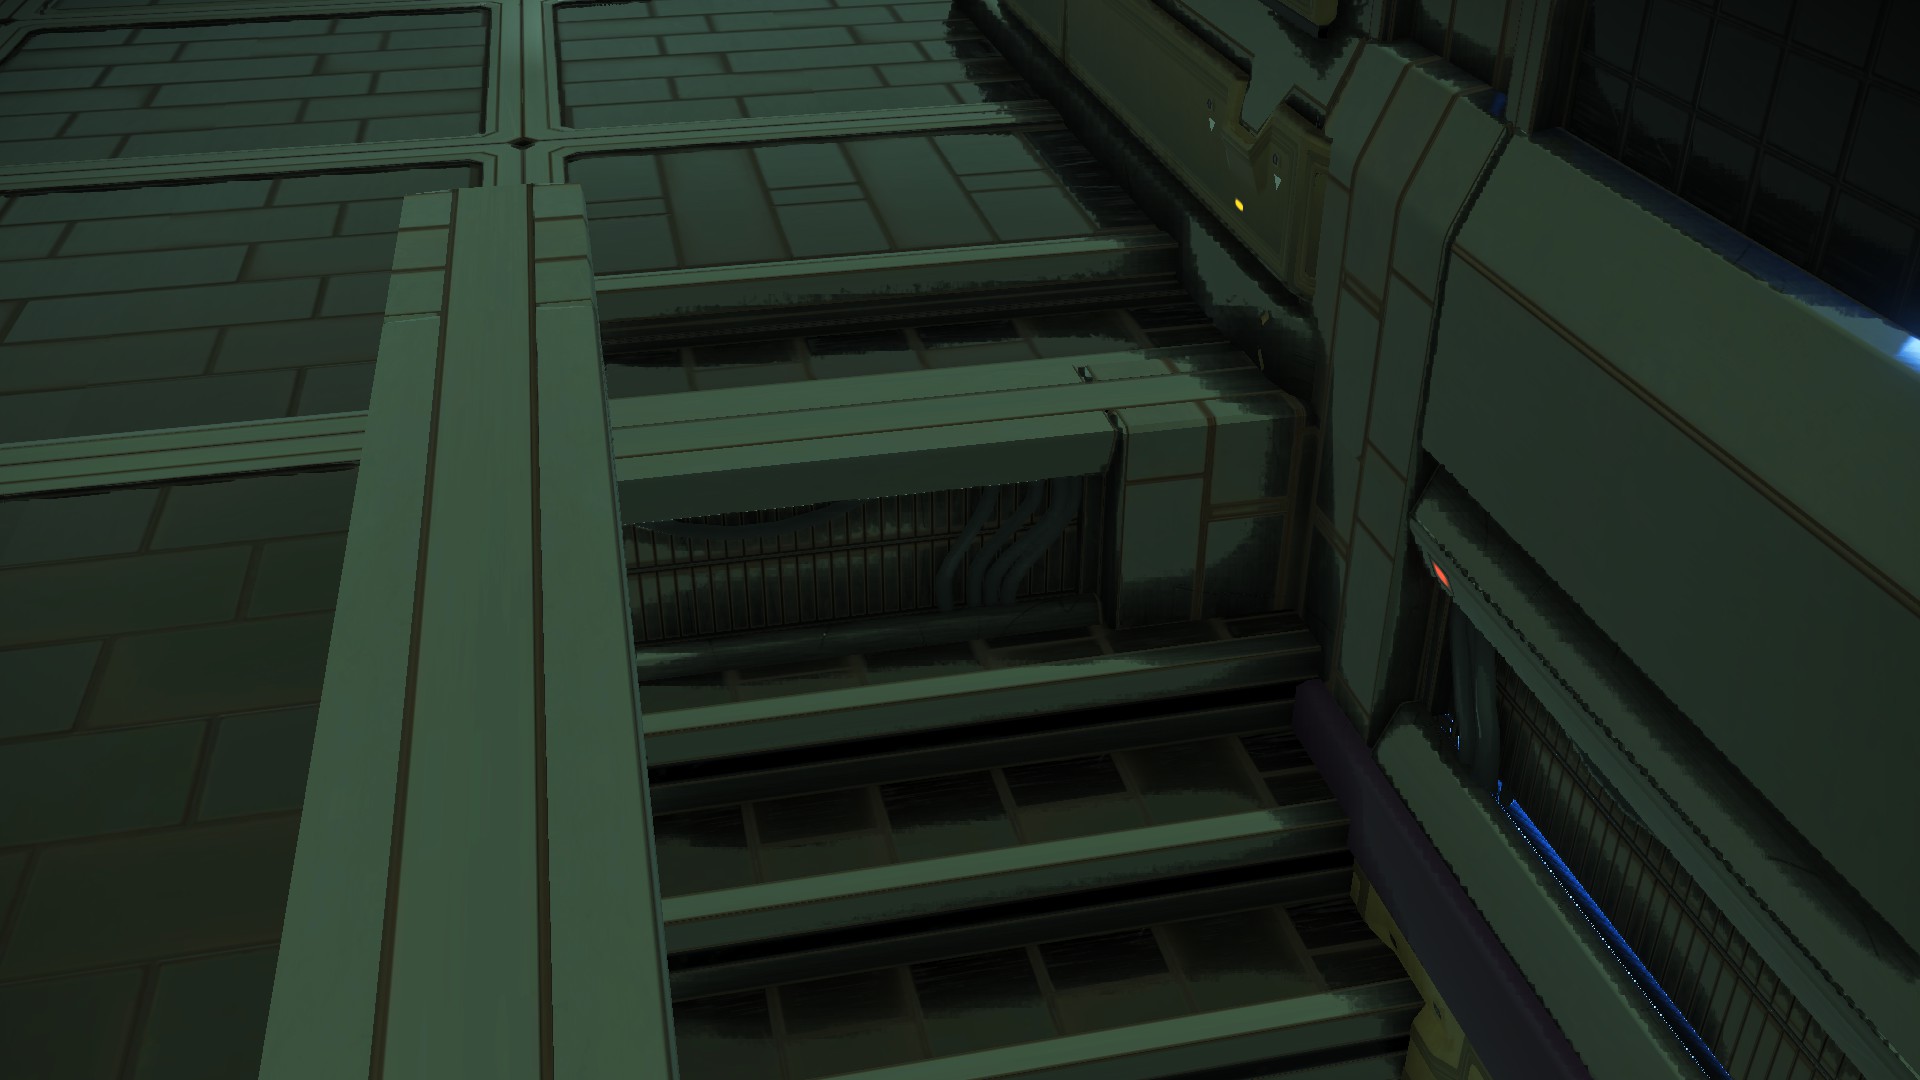
largest buildings it can be quite elaborate, with variable number of stories, external and internal staircases positions etc. This does not always work perfectly: internal stairs may need jumping to climb and external doorways may be blocked by internal stairs. Sometimes rooms in upper stories are inaccessible.
Utility Modules are always empty, despite allegedly containing power generators, wireless hubs, etc., but other buildings are internally decorated - although there are no beds in residential buildings, and no plants in farm buildings; they contain hydroponic trays but nothing grows or can be planted there (but see Customising with an overlapping base)
Towers and Fishing Ponds are unique to Settlements. Neither have interior rooms, and their designs are the same for all alien factions, except that Autophage have distinctive Towers.
Each building has its own statistics: number of inhabitants, maximum number of inhabitants, Productivity, Happiness buff, and Upkeep. These contribute to the overall statistics of the settlement (building Upkeep goes to settlement Maintenance), which are also affected by settlement-wide buffs. Buildings of the same kind and Class have small pseudo-random differences in their statistics, similar to the pattern with spaceships.
When the settlement terminal offers a construction opportunity, it advertises the Productivity but not the Upkeep, so it can come as a nasty surprise that every building is initially a loss-making C-class, with Upkeep more than Productivity, and usually a negative Happiness buff. Upkeep never changes, but by upgrading through B, A, to S-class you increase the maximum number of inhabitants, Happiness buff, and sometimes Productivity. The actual number of inhabitants may go up or down as the settlement develops: the population spreads across the settlement buildings to give about the same number in each building (until the smaller ones fill up) - so new buildings are populated by settlers moving from existing ones, at least until new settlers arrive.
The display page for each building has an item "Special Features". Usually this says "None", but otherwise lists the sort of Feature also found on the settlement Status page (see Settlement Features and other Buffs). The Special Features for individual buildings seem to be random and non-functional: they are not from the Status Page list and don't seem to confer any buffs.
If a settlement is abandoned and restarted, the buildings are the same as before: the seed for the procedural generation is fixed by the location.
Non-productive buildings add significant Happiness points when fully upgraded. Except for the Fishing Pond which always has a single "employee", upgrading increases Maximum Population, especially for the larger residential buildings.
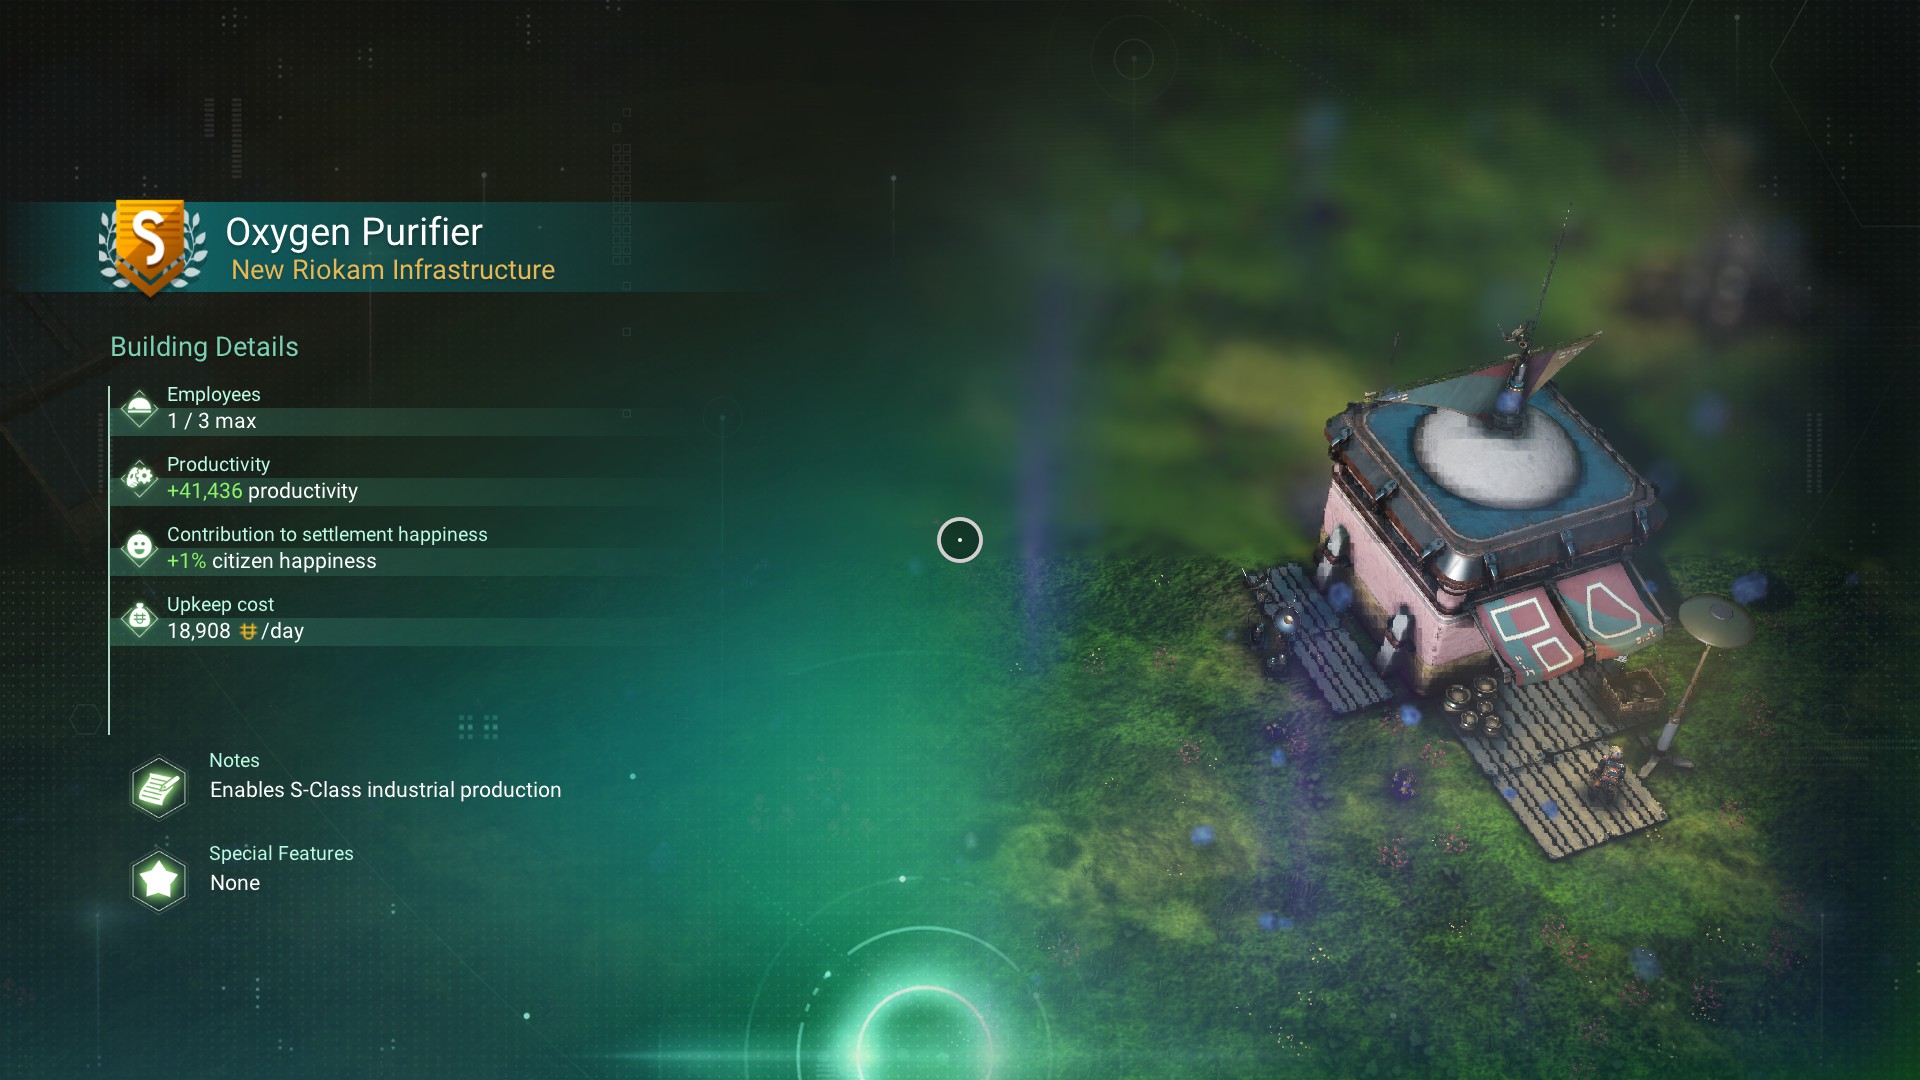
[Generic name: Utility Module; Subtitle "Infrastructure"; Specific name: "Oxygen Purifier"; Tribute requirement type: Industrial building,]
In the stats display page for most C-Class buildings, the "Note" field says "Can be upgraded to <B-class name>". Industrial and agricultural buildings have notes reading "Enables C-Class industrial [or agricultural] production", but these are still re-named on upgrade. For these buildings, only the class is changed in the Note after upgrade; for the rest, the Note is replaced by a comment such as "Said to be haunted" or "Contains a hidden trap door" - these don't describe actual game features, and are applied randomly to any type of building.
A frequent glitch is that the new name of B-class buildings is not displayed immediately, but only after re-loading; but the Note message is immediately over-written, which makes it hard to keep track. I prefer to use the Upkeep to identify buildings, as that never changes and has a very small chance of being identical for two buildings in one settlement.
There don't seem to be any repeatable differences between differently-named buildings of the same type and class.
Constructing and Upgrading Buildings
Each building requires two to four construction stages prior to opening as C-Class, with three further upgrades required to reach S-Class. On completion of construction and after each upgrade, buildings must be opened before they contribute to the Settlement economy - the final appearance is revealed at this point.
No building upgrades can be started while a construction or upgrade is in progress at the same settlement, but two or more settlements can have construction at the same time. Also, if a construction opportunity is on offer, you can start an upgrade at the same settlement and then start the construction, and the two will run concurrently.
Each construction stage or upgrade needs a specific quantity of a particular resource. These depend on the kind of building and are independent of the alien faction. They are usually common materials for construction and early upgrades, e.g. Silicate Powder, Ferrite Dust, etc. The most exotic are 3 Aronium to complete a Starship Dock and 3 Living Glass to complete a Warehouse. In the early game Aronium most likely obtained by raiding Planetary Depots; Living Glass can only be crafted so you will need the recipe, and also the recipe for Lubricant.
Upgrades to A- and S-Class require more exotic materials, such as Trade Goods (e.g., 3 Superconducting Fibre) or items high up in the crafting tree (e.g. 3 Hot Ice). Trade goods can only be purchased in systems with the appropriate Economy Types (e.g., Tier 3 [wealthy] Advanced Materials for SC Fibre), so it helps to understand the trade system for such upgrades. Trade Centres need a Mind Control Device to upgrade to A-Class; this is from the freighter tech tree.
Large Dwellings, Warehouses, Towers, and Factories need material from Purple star systems to upgrade to S-Class, so these upgrades cannot be made until players have completed all the story missions. Contrary to rumour, this does not lock any kind of production, since "Industrial" buildings include not only Warehouses and Factories but also the small Utility Modules, which can be upgraded to S-Class with Chlorine. Dwellings and Towers are not needed for any tribute options.
Each kind of building has a particular time for building stages and upgrades to complete (the same for all stages). The shortest is for the Administrative Building (90 sec), and otherwise range from 20 min to 2 hours, depending on building size. Larger buildings provide more accommodation (especially for residences), and more productivity: see the table below.
At C-Class, Upkeep exceeds Productivity for all buildings. Productive buildings are roughly break-even at B-Class, make a modest profit at A-class, and a large one at S-class. Farms and Factories are the most productive. The Office Productivity only increases on upgrade from B to A class, and then roughly gives break-even.
C Class buildings are normally made with aged/weathered components. Upgrading to B Class transforms them to polished/new style. I have not noticed any visible changes on upgrades to A and S Class. (In one of my settlements, C-class buildings were in new style: may be a bug or just deliberate randomness.)
Kinds of Building
This table gives typical statistics for each kind of building, after upgrade to S-Class. Productivity and upkeep can vary by up to 30%. Maximum population can be up to 10% or so less than quoted, and happiness buffs can be 1% less than quoted (including 0% for some S-Class productive buildings). Happiness is a floating-point number (e.g. 0.5%) rounded to whole numbers for display, since changes of nominally 1% may not change the display, but do affect goods production time.
Build stages are for construction to C Class. There are then 3 upgrade stages to S Class. "Time" is the time to complete one construction or upgrade stage.
Tower: on upgrade to B-Class, sprouts a spiral staircase leading to a terminal at the top. Each upgrade adds new capabilities:
B-Class Scan for Planetary Buildings; A-Class Formulate navigation data, Scan for Distress Signal Coordinates; S-Class Scan for Space Anomalies (you have to go to space and trigger the pulse drive to complete the search). Each of these works once a RT day, with different PoIs randomly found each time (sometimes off-planet).
Starport: on upgrade to B-Class, adds a Spaceship upgrade terminal like the one at the back of Space Stations. At S-Class, adds a Spaceship Fabrication terminal. If your starship is not sitting on the landing pad, NPC ships will visit as at a trading post, and you can trade or buy their ships.
Trade Centre: contains a Trade terminal, a merchant with wares like the ones in Minor Settlements, and an envoy from the local Guild (not in Pirate systems). Frequently, one or both of the last two are away from their desks. Autophage merchants are bugged and don't sell anything. Neither the merchant nor the Envoy count as settlers, or as "employees" of the Trade Centre.
Fishing Pond: makes catching rare fish easier as they are upgraded: at S-Class there is around a 30% chance of catching legendary fish even without using bait.
Factory: contains a multi-tool sale terminal that holds a different tool each day. AFAIK upgrading the factory does not improve the multitool. Factories are relatively rare, only offered as construction opportunities in about half of all settlements.
Saloon: If you want to see your NPCs dance, go here - you get to choose the ByteBeat track.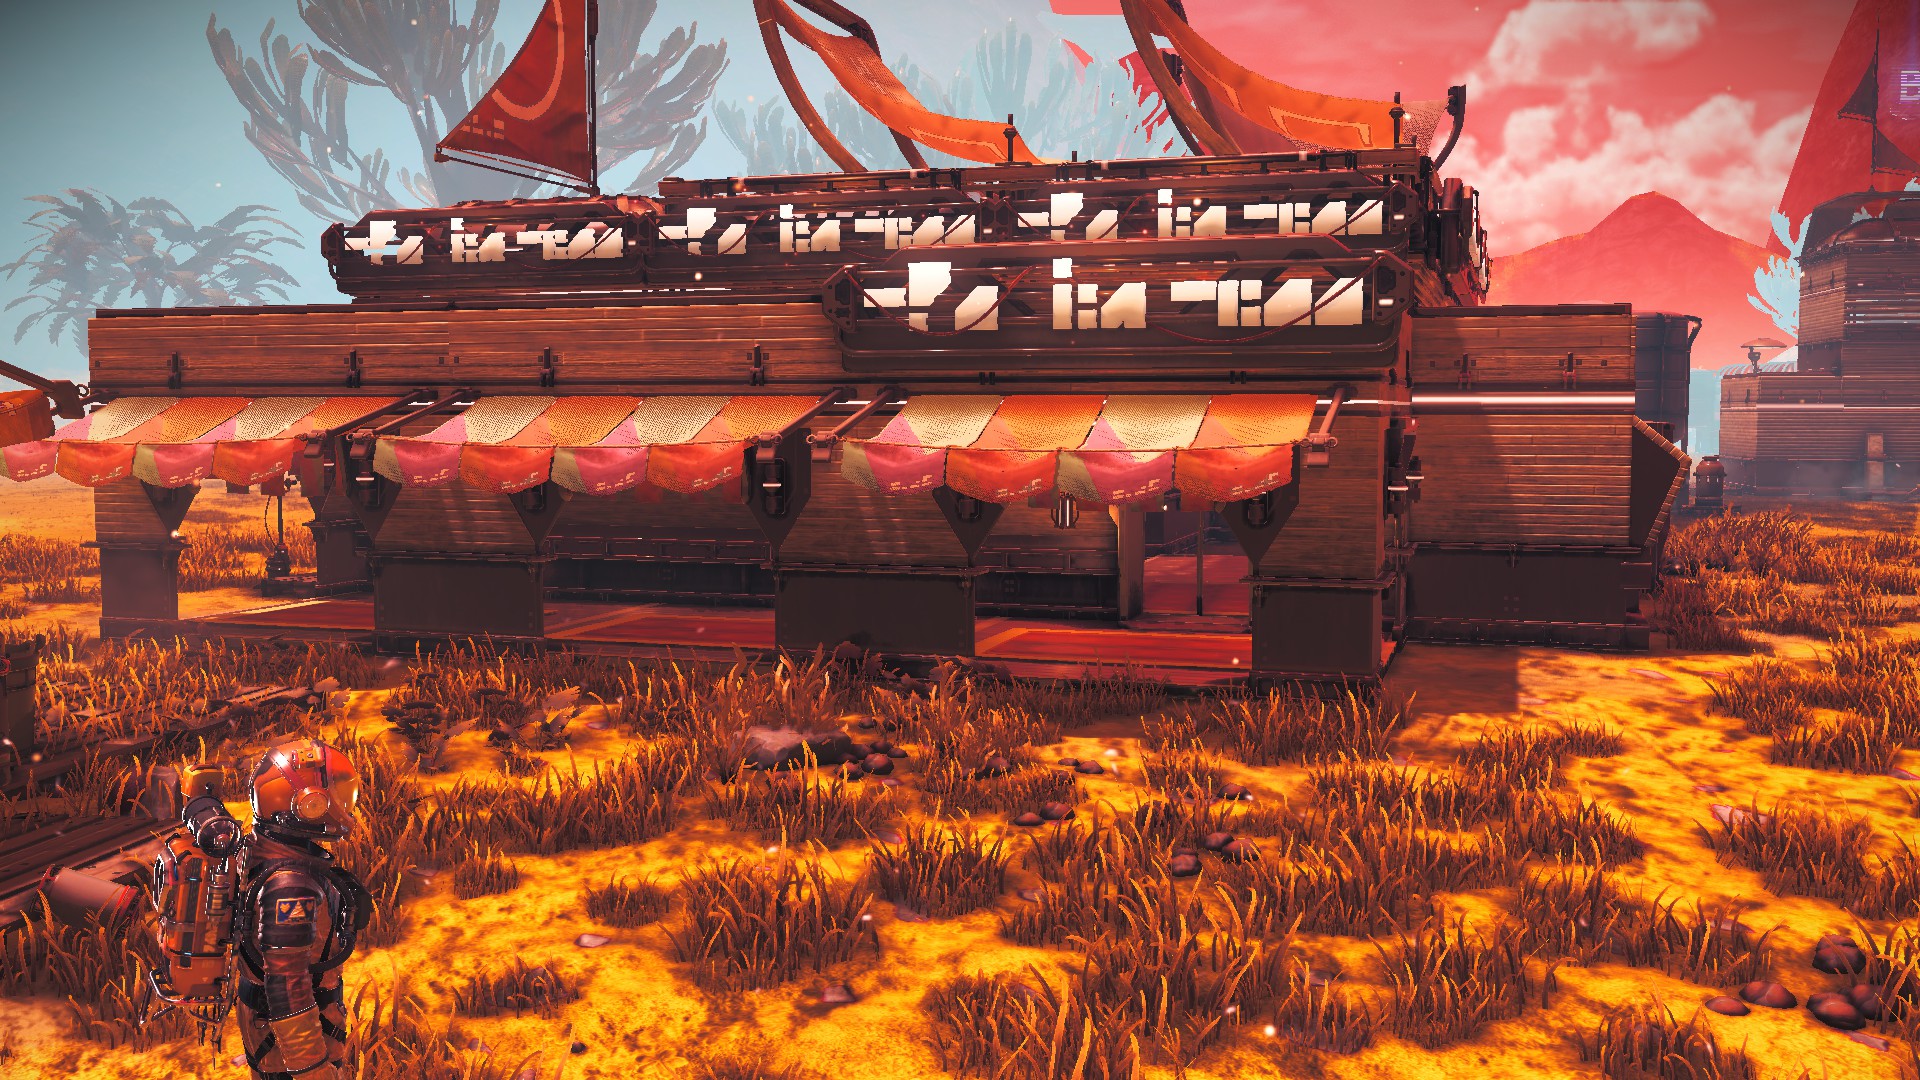
Settlement Map
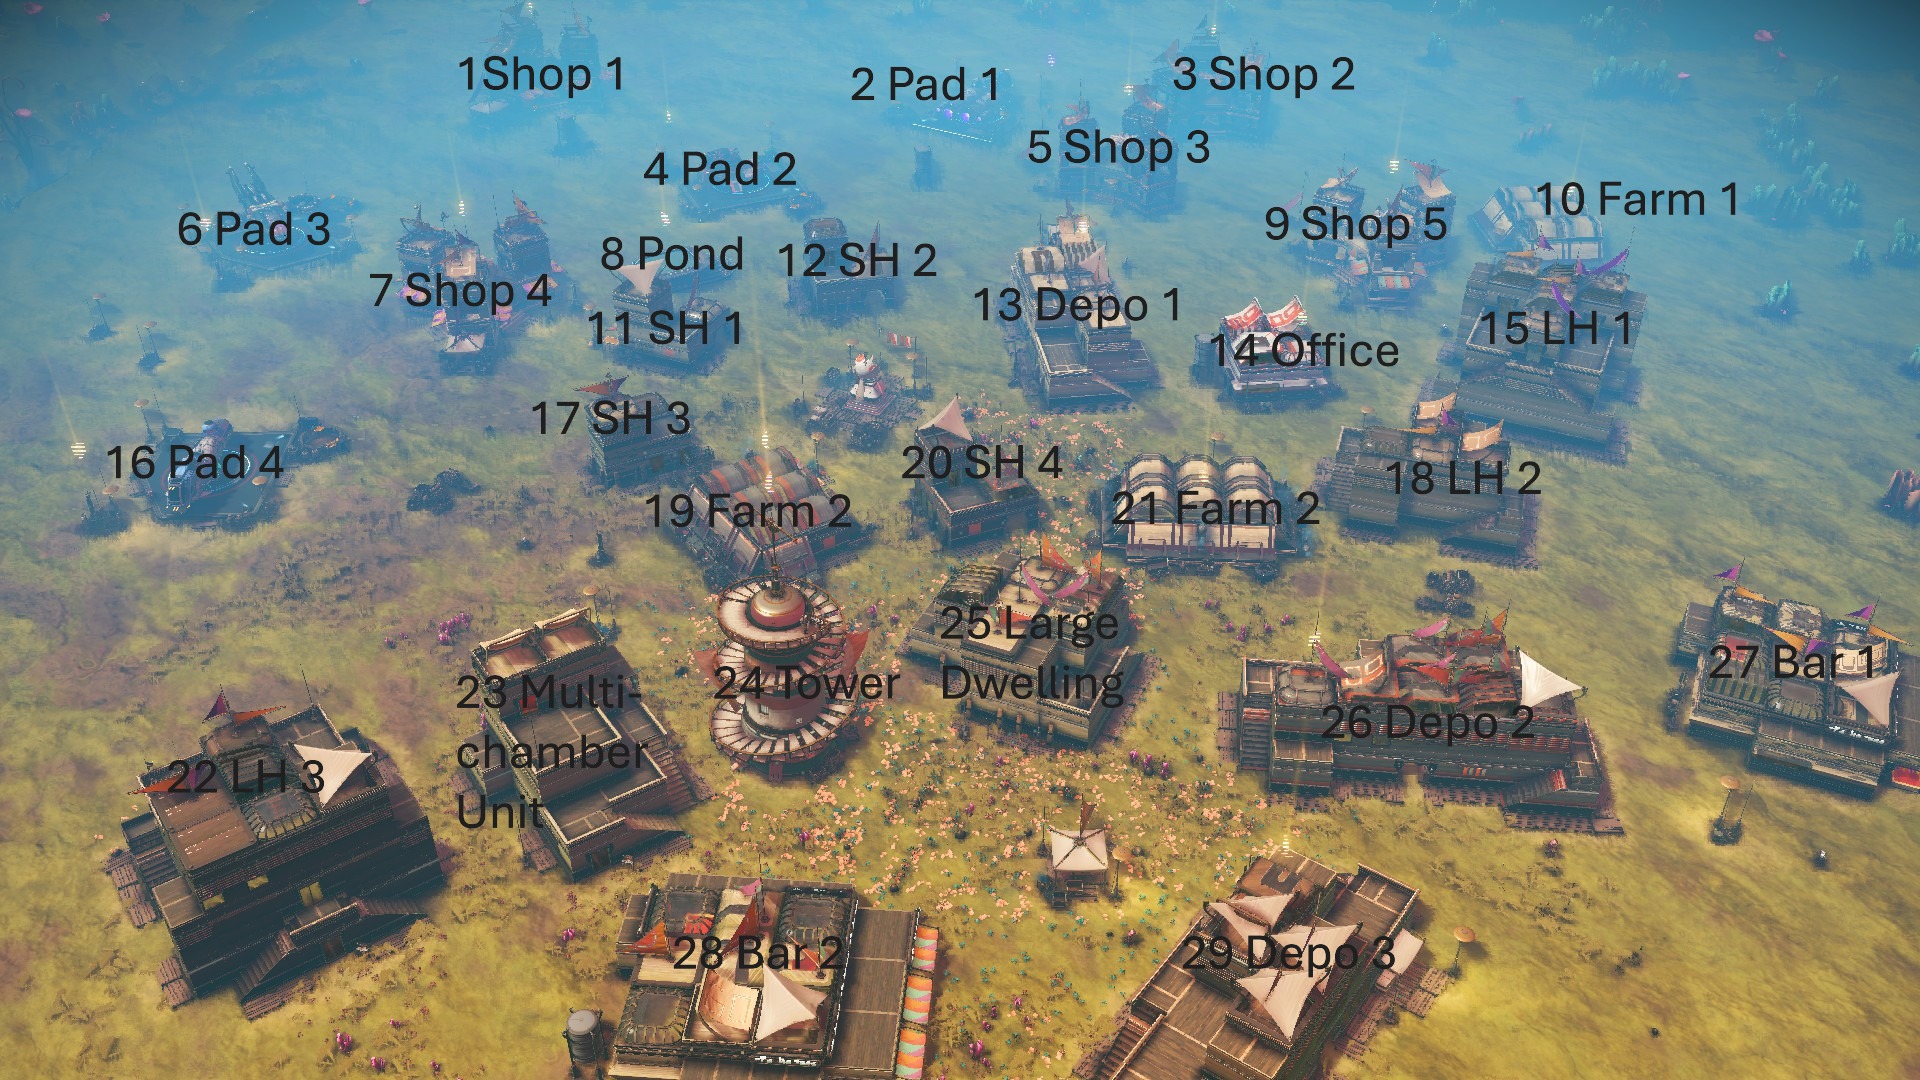 [Photo used to check I counted all 29 buildings]
Paying off Debt
When you take over a settlement, Maintenance exceeds Productivity and the settlement is accumulating debt. If you get Productivity above Maintenance, the debt is gradually paid down, and when it's paid off the settlement starts making goods that you can take away as tribute.
A semi-competent dev could code this in their sleep, but the workings of NMS settlements are much more devious than expected. Hello Games is addicted to putting small random variations in the core parameters of the game (for instance, ship stats), and settlements are no different.
When in debt, the settlement terminal shows a timer ticking down until the debt is paid off. This runs in approximately real time (including while logged out). When debt is increasing, the timer shows infinity, but the debt increases at approximately the real-time rate expected (Maintenance Costs minus Productivity).
Here's a settlement where Productivity has just gone past Maintenance for the first time: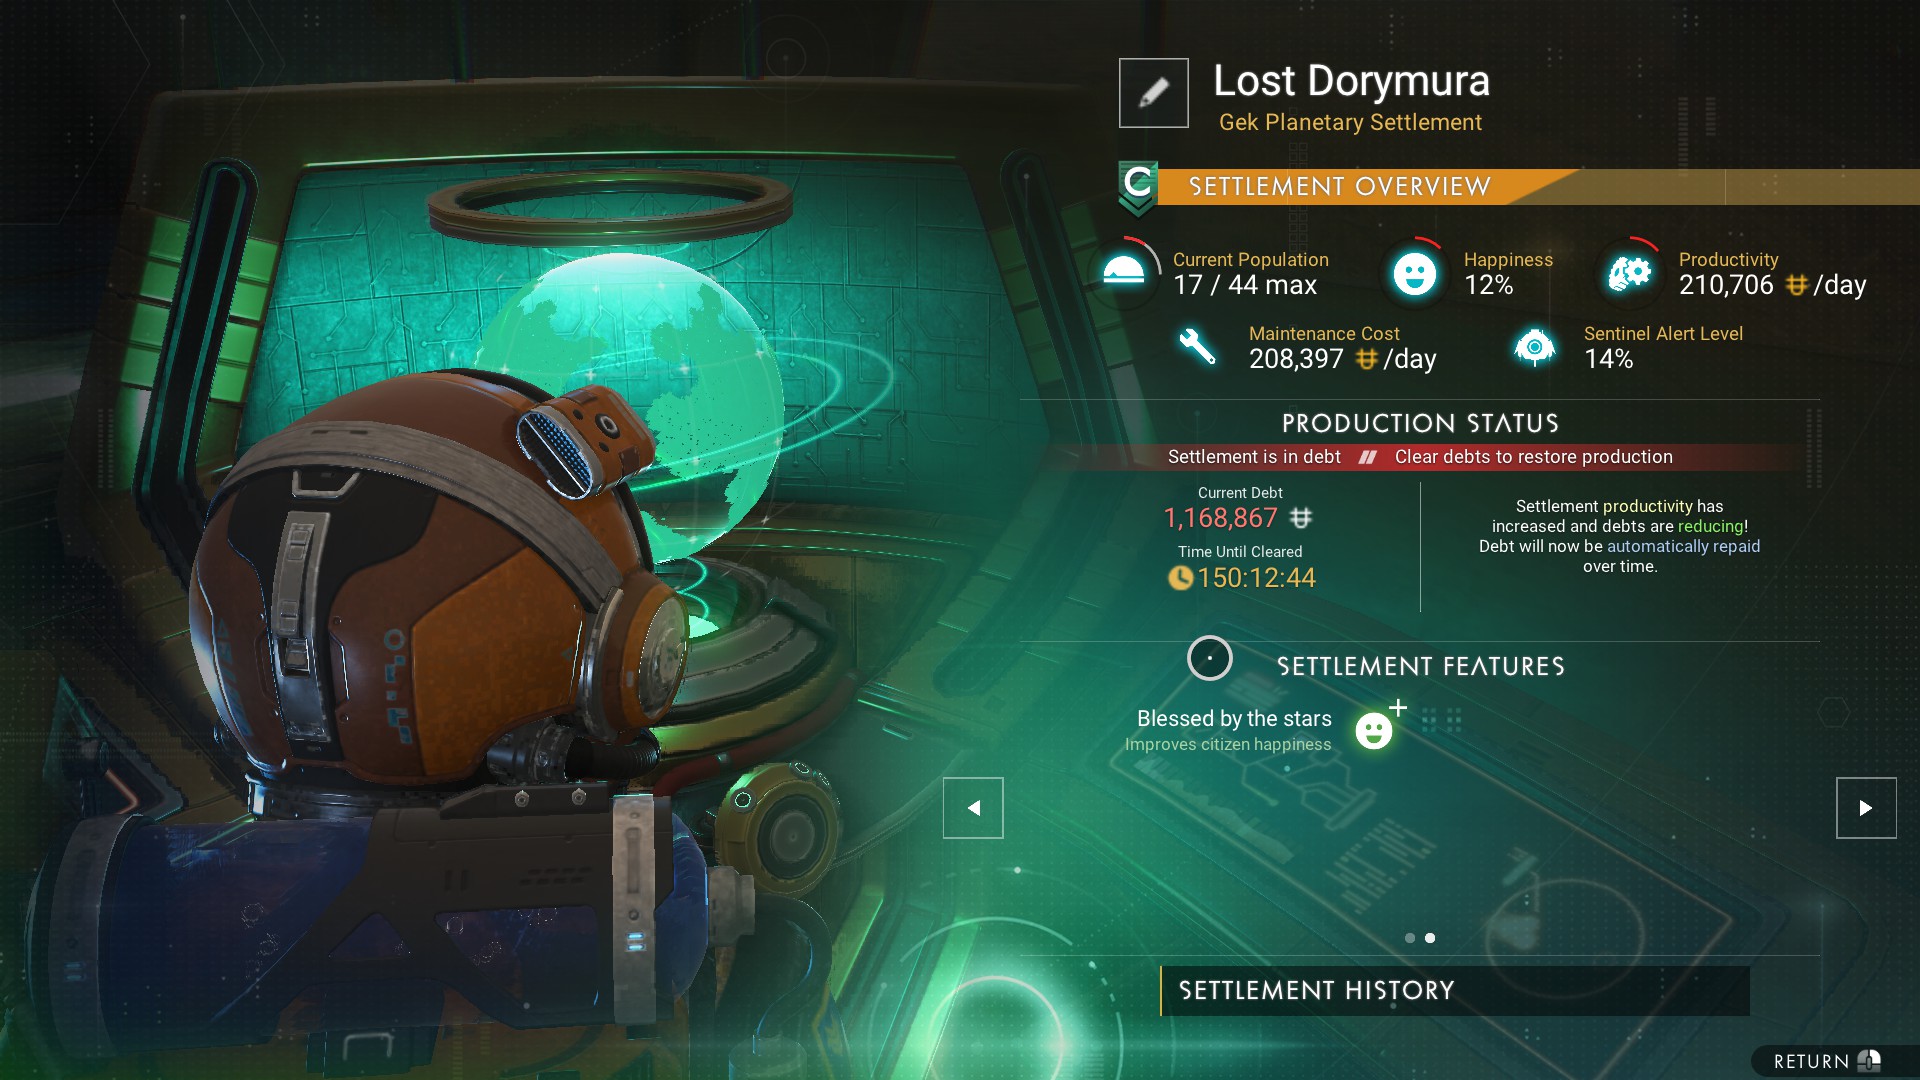
As the terminal shows, the debt of just over a million units (Mu) will be paid off in 150 hours and change, equivalent to 6.259 days. That gives a repayment rate of 186,754 u/day. which is 88.6% of Productivity (210,706 u/day) - vastly more than the net profit (Productivity minus Maintenance costs = 2,309 u/day). In fact, maintenance costs have no effect on the payoff rate once they are less than Productivity. This makes no sense in an economy simulator, but does in a game, as it gets the player through the boring repayment section a lot faster.
As you improve your settlement, Productivity goes up, and as expected, repayment goes faster. Early in the process the repayment rate can exceed Productivity (clearly, there is no interest on these debts). Generally, repayment also goes faster as Happiness increases, but every time you make a settlement decision the repayment rate seems to change randomly by a small amount as well.
If Productivity falls below Maintenance during the initial pay-off phase then as expected debt starts increasing again. But if this happens after the initial debt is cleared, the settlement does not immediately go back into debt, even after exit and re-load. But if the gap becomes bigger than about 50,000 units/day, the settlement does go into increasing debt until balance is restored.
Although increasing Productivity increases the repayment rate, in the long term repayment does not go up as fast. The initial debt will be paid off before that becomes important, but settlements go into debt any time a payment is made. As the settlement is improved (increased Productivity and Happiness, reduced Maintenance costs) the ratio of repayment rate to Productivity gradually fall.
Repayment seems to be capped at (5/3) Mu/day, even when Productivity is around 3 Mu/day.
Donations to Settlement Reserves
If the settlement is not in debt the units are said to go to "Settlement Reserves", but there is no such fund: any payment from the settlement results in instant debt. But donating to reserves is not pointless: it actually takes time off the production clock. The conversion rate from units to time is generally much lower than the settlement Productivity - in other words, it "costs" much less to get an hour's worth of output by donation than by the usual settlement production methods. If you are producing maximum-value goods, you often get far more benefit from donating to reserves than you would by choosing the alternate option and taking the gift (but some gifts are S-class treasures worth up to around 2 Mu, so be careful).
Settlement Features and other Buffs
The settlement Status page displays up to 18 Features, such as "Automated recycler", "Localised quicksand" or "Resident Diplomat" that confer some buff (positive or negative). Except for personnel, these are just words - they are not in the 3D model. New settlements have about 5 features, mostly negative. Features can be added by several kinds of management decisions: initially they are just added to the list. Later on they may replace existing features, starting with the negative ones. Some management decisions give direct buffs that don't correspond to any features. In the long run features and buffs are more important than buildings for determining the overall settlement statistics.
Features can adjust up or down all the settlement stats: population, max population, happiness, productivity, Maintenance costs, and sentinel attention. The numerical change seems to be random and are usually not quoted when the decision is offered, so can only be worked out by checking the settlement statistics before and after the feature is accepted. For productivity and maintenance the values range from 20,000 to 100,000 u/day (the latter equivalent to an S-Class farm). Changes to happiness and Sentinel attention are from 1% to a few percent, and changes to (max) population are between 1 and 4.
Often when you are offered a new Feature it is not obvious what effect it will have. Names seem to be randomly procedurally generated, but there are a few rules:- Max Population is increased by features with fairly obvious names such as "Efficient nests", "Snug habitats", "Well-packed berths" etc. They are the rarest features offered.
- Citizen Happiness is improved by Blessings (from "Mysterious Warnings", see next section), any kind of drinks machine, by de-toxifiers, and any kind of "Personal", "Public" or "Hallucinogenic" features. Resident (aka Specialist, Veteran, or Professional) Settlers with arts-related skills (Musician, Storyteller, Milliner etc.), and also Diplomats improve Happiness.
- Productivity is increased by features including the words: energy; desalination; quantum; station; lab; chamber; core; welder; (not a complete list). This means that features with names like Maintenance core or Medical station improve Productivity, despite appearances.
- Maintenance costs are decreased by food production features ("Ever-burning Jam cannery", "Pilgrim's Tonic farm"...), power plants, mutual or cooperative drones, recyclers, biospheres, biodomes, anomaly shielding...
- Sentinel attention is decreased by features mentioning Sentinel/Aerons, anti-drone equipment, and also by Resident specialists with aggressive skills, e.g. Bounty Hunters or Assassins, and Divinators(!), These features not only reduce the current Sentinel alert level, but also slow down the rate of attacks long-term.
Negative features are either present at the start or are random consequences of unkind management decisions, where the outcome is listed as "???"; so there is no point in listing their names here. Negative buffs that claim to cause "Occasional population loss" give a one-off reduction in the Max population below the total over individual buildings; these are restored when the buff is replaced with a positive one.
Once the feature list is full, or sometimes before that, management decisions that normally offer new features may replace an existing feature or just give the buff without changing the feature list. When a feature is replaced, its buff is lost. This mechanism can sometimes free up a slot in the Feature list, if the new feature is identical to an existing one (most often Public Artwork): features are only listed once although you do get the double buff.
Decisions, Decisions
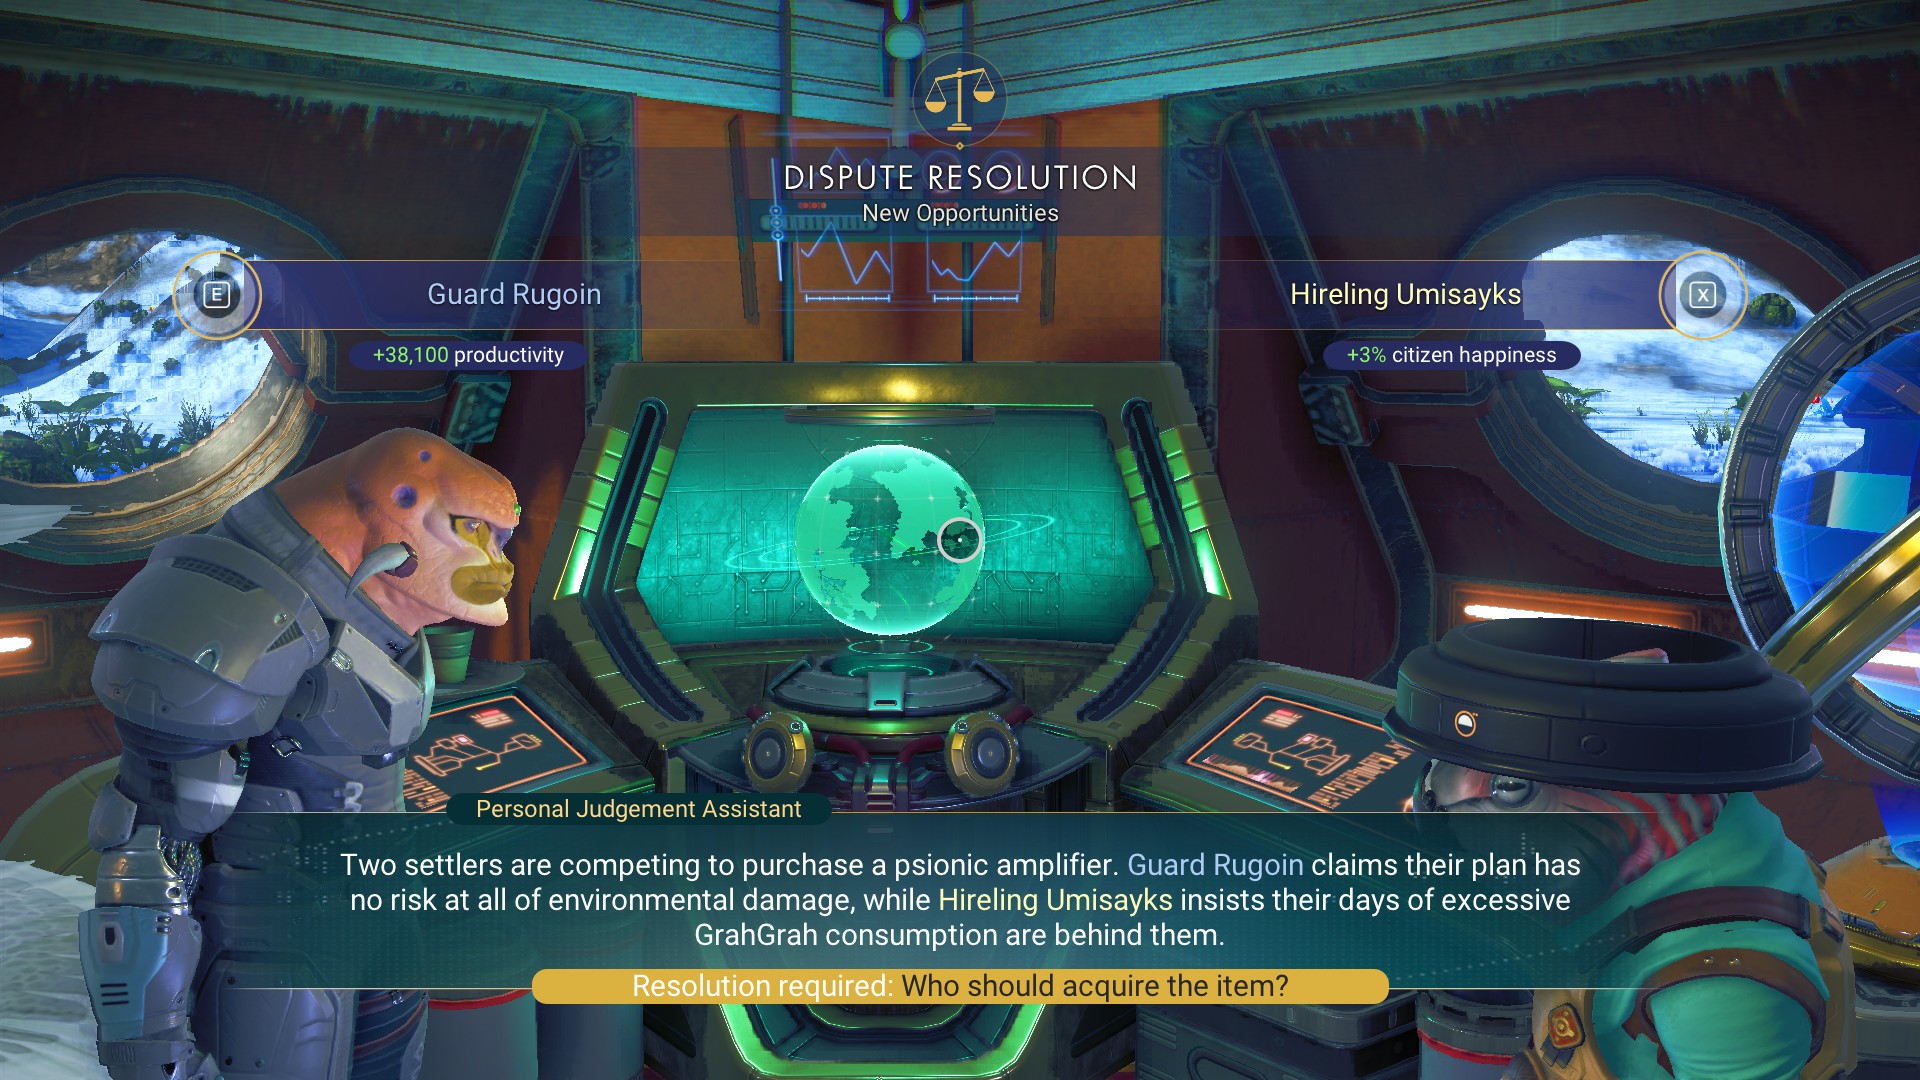
Context for the decision is given in a text box labelled "Personal Judgement Assistant". Some decisions have more than two outcome options.
If you delay responding to one decision, including by being logged out, the next one may come more quickly, presumably on the original schedule.
Any decision that results in a payment by the settlement puts it in instant debt, losing current tribute production progress including uncollected tribute.
You do not have to respond immediately to an offered decision: right mouse click takes you out of the interaction. For instance, you may want to check settlement status and collect tribute before making a payment. If neither option is helpful, you can ignore the decision and it will be replaced by another, normally on the usual schedule. If it persists, change to a non-Settlement expedition for a while. If you have more than one settlement, a decision at one resets pending decisions at the others - including decisions advertised by nags ("A stranger has been sighted nearby... etc") but not actually come up yet.
There are five kinds of decision:
Once your settlement is fully built, with 27 to 29 buildings, these offers stop. There is no way to tell that the last building has been done except that after a while you notice that construction opportunities are no longer coming up.
Other visitors need help. Giving or not increases or decreases your status with the settlement main faction (not the faction of the visitor, if different).
Some visitors bring a Mysterious Warning in their alien language, which if you can translate is usually some blood-curdling statement: "The Red Accuser will consume you" etc.; they ask for a few coins in recompense. If paid, these confer a blessing on the settlement and if not, usually a curse giving a substantial negative buff that can affect any settlement statistic.
Some visitors ask to stay, giving their qualifications for various unlikely professions ("Art Critic", "Robotimancer"...). Accepting them adds to maintenance costs but does not incur instant debt. They add to the population, and become a settlement Feature, or at least an equivalent buff if the feature list is full. In some cases a later visitor will claim these are wanted criminals and demand custody, in return for a Quicksilver reward. If you hand them over, their Feature and corresponding buff is lost but neither maintenance nor population decreases.
A Glorious Expedition: If accepted, starts an expedition mini-mission that happens entirely off-screen. It incurs a small debt, but on successful return you are offered either a gift or a chance to donate to reserves: the amount is typically enough to jump the tribute production clock forwards by 10-11 hours. This is worthwhile near the start of a long production run but not if you have already run up 9+ hours of production. Since the Beacon update, these expeditions are always successful, possibly a bug. (Prior to Beacon, they nearly always ended in disaster, with loss of settlers and no profit).
The Next Generation: choose a name for a new-born: either choice adds 1 to population.
A Personal tribute: Specialist settlers offer you a gift vaguely relevant to their profession, or alternatively a donation to reserves, worth an hour or two of production.
An Immortal Legacy A settler fancies themselves as an epic poet/sculptor/dramatist etc and offers to create a work of art - for a price. Accepting adds debt and the Feature "Public Artwork" which gives a Happiness buff. Rejecting gives a small negative Happiness buff. Strangely, even if you have Professional artists in your settlement, the artworks are product by some random Toilgek/Drill Warrior/Geologist Entity (etc) instead. You can add Public Artworks multiple times and get the buffs, but there is only ever one in the Feature List.
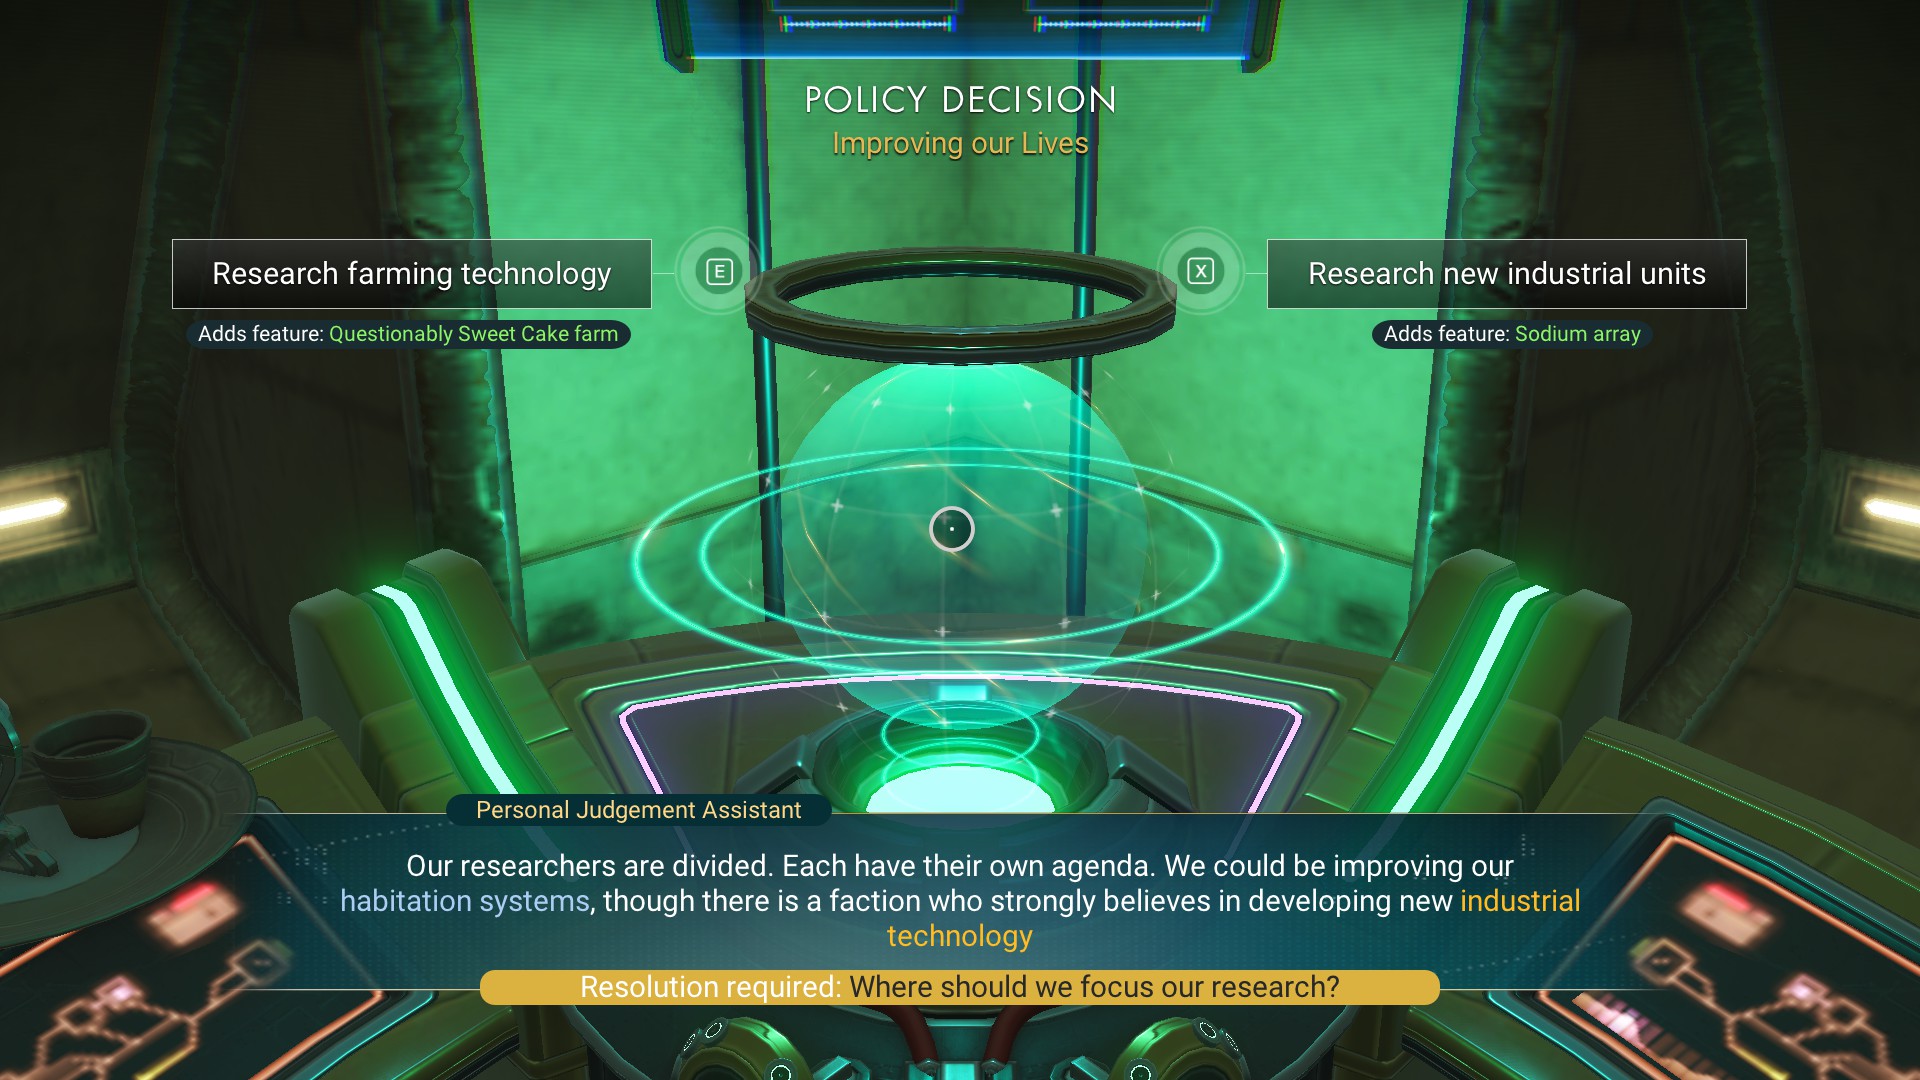
In this case "Farming technology" actually reduces maintenance, rather than increasing max population as expected for an improvement to habitation systems.
In other disputes you allocate contested resources between settlers, each conferring a different settlement buff.
The Settlers
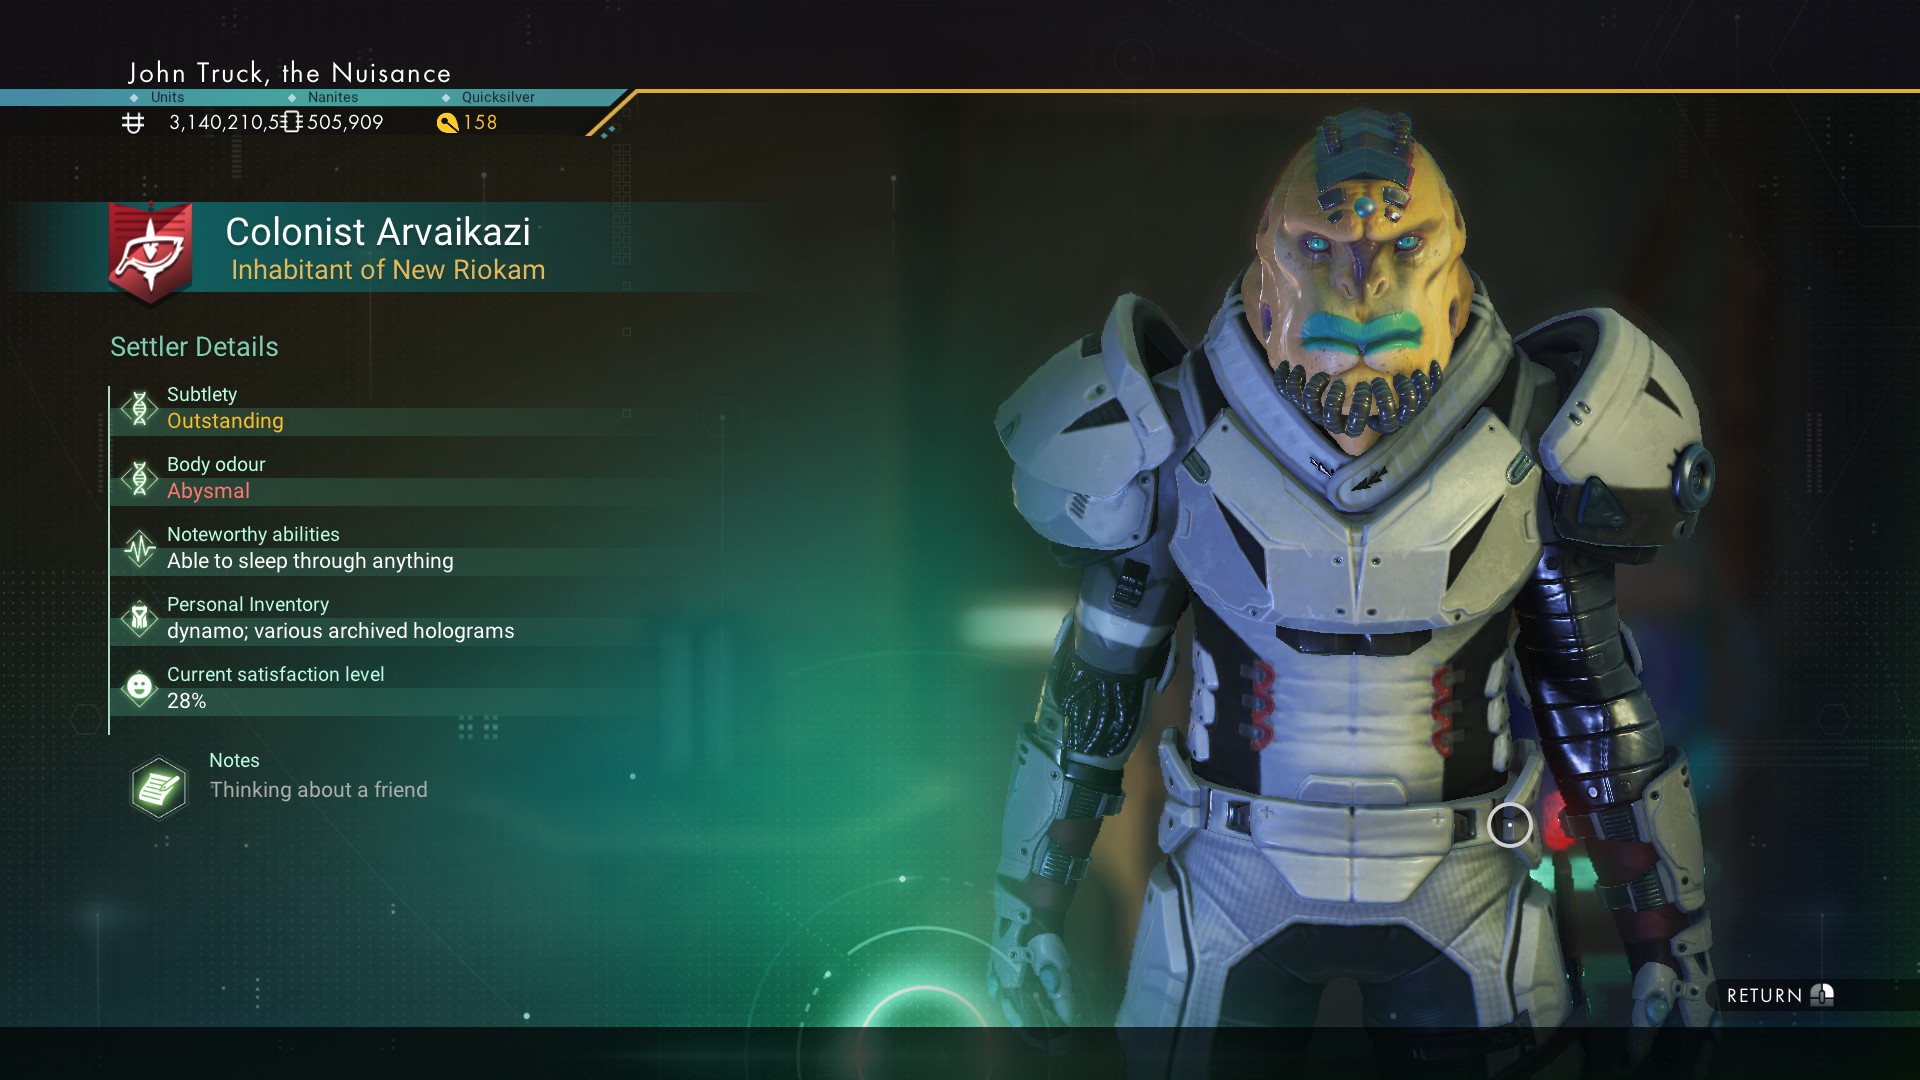
If resident specialists were allowed to stay via management decisions, settlers with the same title (e.g. Professional Divinator) and appearance can be found in the settlement, and their attributes mention their specific buff, but their personal names vary from meeting to meeting. They may appear in later management decisions. Settlers who appear in dispute resolution decisions seem to be randomly generated and are not part of the actual population.
As with freighter crew, settler thoughts are visible. Settlers always suck up to you as Overseer when you interact with them, but their thoughts are more negative at the start: they become more positive as the happiness level of the settlement goes up. (Each settler has a Satisfaction level randomly different from the settlement Happiness by some small amount.)
You can also find your Squadron pilots in the settlement - while there, they have settler-type thought-bubbles with typical settler thoughts, but interacting with them yields their statistics as pilots rather than settlers.
NPCs in a settlement mostly belong to the dominant faction in the star system but, just as in Space Stations and Freighters, some members of other factions (excluding autophage) are present. Autophage settlements seem to be exclusively autophage, apart from your squadron pilots.
Some settlers arrive via management decisions, either naming a new-born or by allowing a visitor to stay. Others are there from the start: the initial population is usually roughly 20 although it can go as low as zero. But most settlers arrive unannounced - you just find that the population has increased by one or two since your last visit. The rate of arrival tends to increase over time, presumably as the result of improved statistics like happiness or productivity. Even so, the rate is very slow, at most 1 or 2 per day. Long after you have maxed out all other statistics, which can be done in one or two months, you will still be recruiting settlers.
If settler happiness gets too low, they start leaving. In one case, a series of tyrannical decision took happiness down to 17%, and the population then dropped by 4 between visits.
Normally, the settlement population listed on the terminal equals the total number of settlers in all the buildings: this means the employees in productive buildings and the patrons in the bars are different people from the inhabitants of residential buildings (you can imagine they work shifts and cycle between workplace and residence, but the numbers don't match up). In some settlements the count on the terminal is off by one or two: this may be due to initial Features that affect population. Things get more complicated when settlement population approaches the maximum. Due to habitation buffs, the max. population of a settlement will become significantly larger than the total in all the buildings. The last buildings to fill up are the large residential ones, and in the one case I got to this stage, the last 3 free spaces were never filled. Instead, some buildings took in more workers or residents than their nominal capacity:
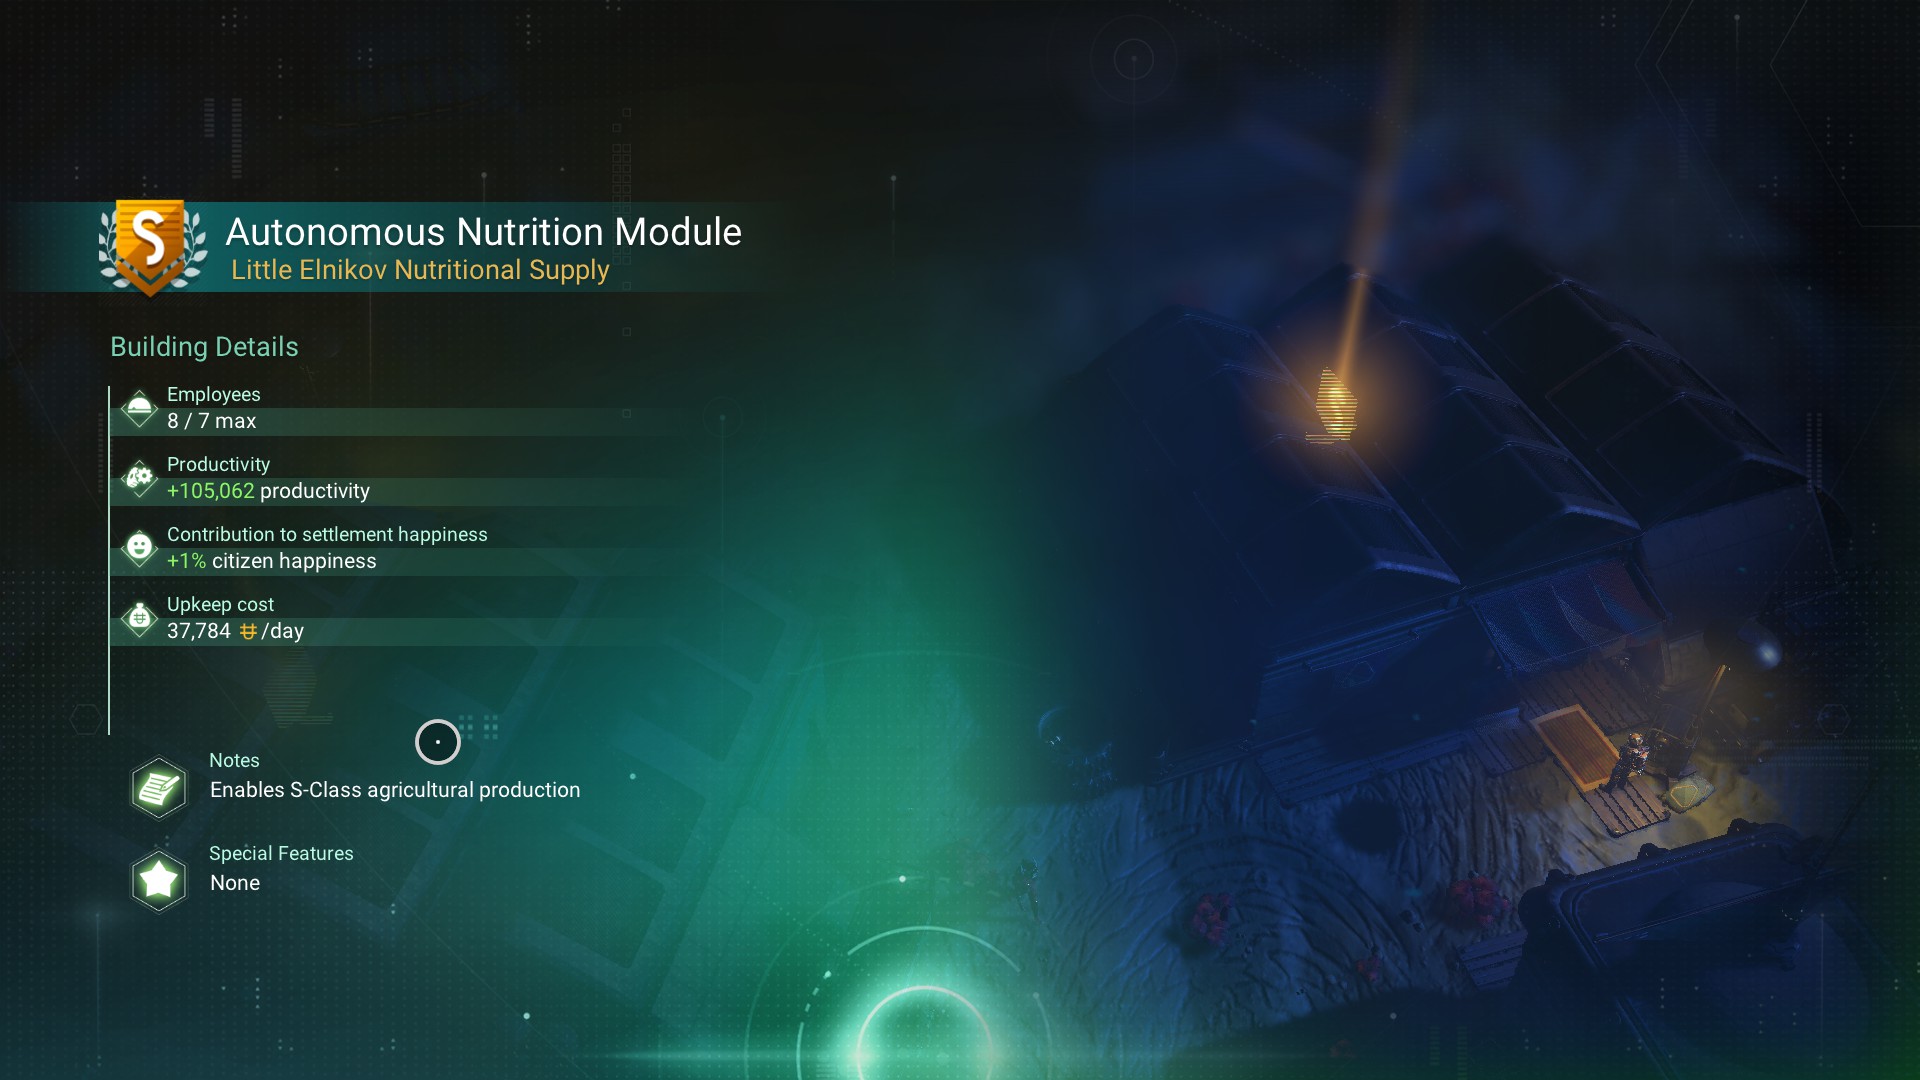
But even so, the total population was larger than the total over individual buildings - presumably the rest are homeless vagrants.
Producing Goods
When you get your settlement out of debt, it starts producing goods (aka loot, aka tribute) that you as Overseer can take away. This is not the same as the Productivity of the settlement, measured in units/day, which is not accessible by the Overseer.
This is not the best way to get rich in NMS, but once the settlement is up and running it produces goods with no effort: you don't even have to visit as you can collect at any Teleportation terminal. With the right choices, settlements can produce wealth faster than even a maxed-out set of five frigate fleets.
Output options depend only on the alien species: they are the same for all planet biomes, system economies, region guilds, and galaxies. They are also independent of the settlement class.
Goods are produced in batches, for instance 2 Glass or 165 Radon. No goods are available until the entire batch is complete. For Vy'keen, Korvax and Autophage settlements, the batch time is the same for all types of goods: between 20 and 40 hours depending on settlement progress (see How Batch time Varies).
Gek batch times are different for different goods. The are all multiples of a basic unit which I call the Gek Production time (GPT). For instance, a batch of Glass takes 2 GPT while a batch of Faecium takes 4 GPT. The GPT itself varies between 1 and 2 hours, This variable production time tends to even out the value produced per day between different options, but large variations remain.
For the common goods produced by all factions, Gek also have different batch sizes from the rest. Even when their batches are smaller, the net production rate is faster because batches are produced in a few hours, as opposed to more than a day.
At the slowest batch times, the highest-value choices give for the two output hoppers combined a value of 5, 5.3, 0.3, 1.5 Mu/day for Vy'keen, Korvax, Gek, Autophage respectively. For Vy'keen and Korvax this is well over the maximum Productivity of around 3 Mu/day.
The timer is re-set when goods are collected, without producing any output, so this should only be done early in the production cycle, otherwise many hours of production can be wasted.
If the settlement goes into debt, that is, whenever a payment is made by the settlement. goods in the hoppers are lost and there is no production until the debt is paid off, when the timer starts from scratch again. This is not a bug but part of the settlement game mechanic: almost every overseer decision has pros and cons, and the player must also decide whether to put off or ignore the decision to allow a production cycle to complete. The much shorter batch time for most Gek goods makes it less of a problem to accept settlement debts, and so allows Gek settlements to develop fast without losing too much loot.
When you log out and later back in, the real time while logged out is credited to all settlement output timers, even if the settlement is not visited during a session.
BUT, there is a catch (or perhaps a bug): in many cases the timer re-sets to the beginning of a cycle when you log back in, effectively losing progress on the latest production cycle. This never happens when the output hopper is empty, so you can safely produce items with long production times. It usually but not always happens when there is output in the hopper - I have not found any rhyme or reason for this. The re-set occurs when the game is re-started, whether or not the settlement is visited.
Vy'keen and Korvax Tribute Goods
(I had to split the table of tribute goods in two to fit on the page):
Autophage and Gek Tribute Goods
For basic, agricultural and starport items, Vy'keen and Korvax products and batch sizes are identical. Gek produce the same goods but with different batch sizes; some Autophage products are different but have the same value as Vy'keen and Korvax, except that Autophage produce Warp Hypercores instead of Warp Cells.
For leisure, industrial and commercial items each race makes different goods. The commercial products from Vy'keen, Korvax & Gek are trade goods: each race makes one each from six of the seven economy types. Autophage commercial goods are craftable items, mostly useful for repairing broken tech.
Best Buys
While for most goods Gek production is fastest, they are slowest for the most valuable goods. The fastest way to produce unit value from a single settlement is with the Korvax: set both outputs to Quantum Processors. The equivalent Gek item (Cryogenic chamber) takes 300 GPT, i.e. 2-3 real-time weeks to produce, as opposed to less than 40 hours for the Korvax. (Even so, this is still the fastest way to produce unit value from a Gek settlement).
With two settlements, the best option is to add a Vy'keen settlement producing Portable Reactors: together with the Quantum Processors this only requires 2 Geodesite to craft 2 Fusion Igniters, net value 31,200,000 units. Geodesite is often returned by frigate fleets, so no additional grind is needed.
Even though not optimal in terms of unit value, many players prefer to produce Frigate fuel from Gek settlements, as they can give enough to supply a small or highly optimised frigate fleet, eliminating grinding for the hydrogen and tritium needed to craft the fuel.
The most useful items from Autophage are probably Inverted Mirrors, which help with farming crashed interceptors by avoiding fights with Corrupt Sentinels. Radiant shards are useful as fuel for interceptors but it's much faster to harvest them on a Dissonant planet, especially with an exocraft mining laser.
How Batch Time Varies
Notoriously, the batch time generally increases as you "improve" your settlement. This is likely a bug, but has not been fixed months after it was first reported. Specifically Increasing happiness, max population, and productivity slow down production.
The batch time maxes out when the dials for Max Population, Happiness and Productivity are all complete at 175, 100% and 1.5 Mu/day respectively. For Gek, the maximum GPT is 2 hours (so, 4 hours for Metal Plating, 10 hours for Frigate Fuel and 600 hours for a Cryogenic Chamber). For non-Gek, max batch time is 1 day 16 hours (40 hrs). The time increases steadily with each of these three quantities until they hit the limit. The time does not change when Maintenance or (actual) Population change.
Most* of the times I have recorded are pretty accurately predicted by the formula:
Batch time = Maximum time x (0.476 + 0.310 x Max Pop/175 + 0.095 x Productivity/1.5 Mu/day + 0.119 x Happiness/100%)
where in the formula, Max Pop, Productivity and Happiness are replaced by 175, 1.5 Mu/day, and 100% respectively if they go over these values. From this, the most important factor is the Max Population and the least is Productivity: it's not easy to separate the factors as they usually increase together, but some building upgrades and all buffs affect only one factor at a time, allowing my regression analysis to separate them.
Extrapolating to zero on all statistics gives a notional minimum time of about 19 hours (non-Gek)
or 57 min (GPT), but it's not possible to reduce Max. Population to zero.
(* Some outliers are likely due to my typos. There are also small rounding errors, as Happiness is only shown to the nearest 1%).
Attacks
Settlements are regularly attacked. The settlement terminal includes a "Sentinel alert level", and attacks are triggered when this reaches 100%. This generates an urgent warning, whatever mission you are currently doing.
The attackers will kindly wait for you to arrive and dispose of them: there will be no damage to settlement buildings or NPCs if you don't return immediately or even for years. Once the fight starts, the NPCs will run and hide, but in fact they and the buildings will stay safe, even if shot accidentally by the player - only the player can take damage.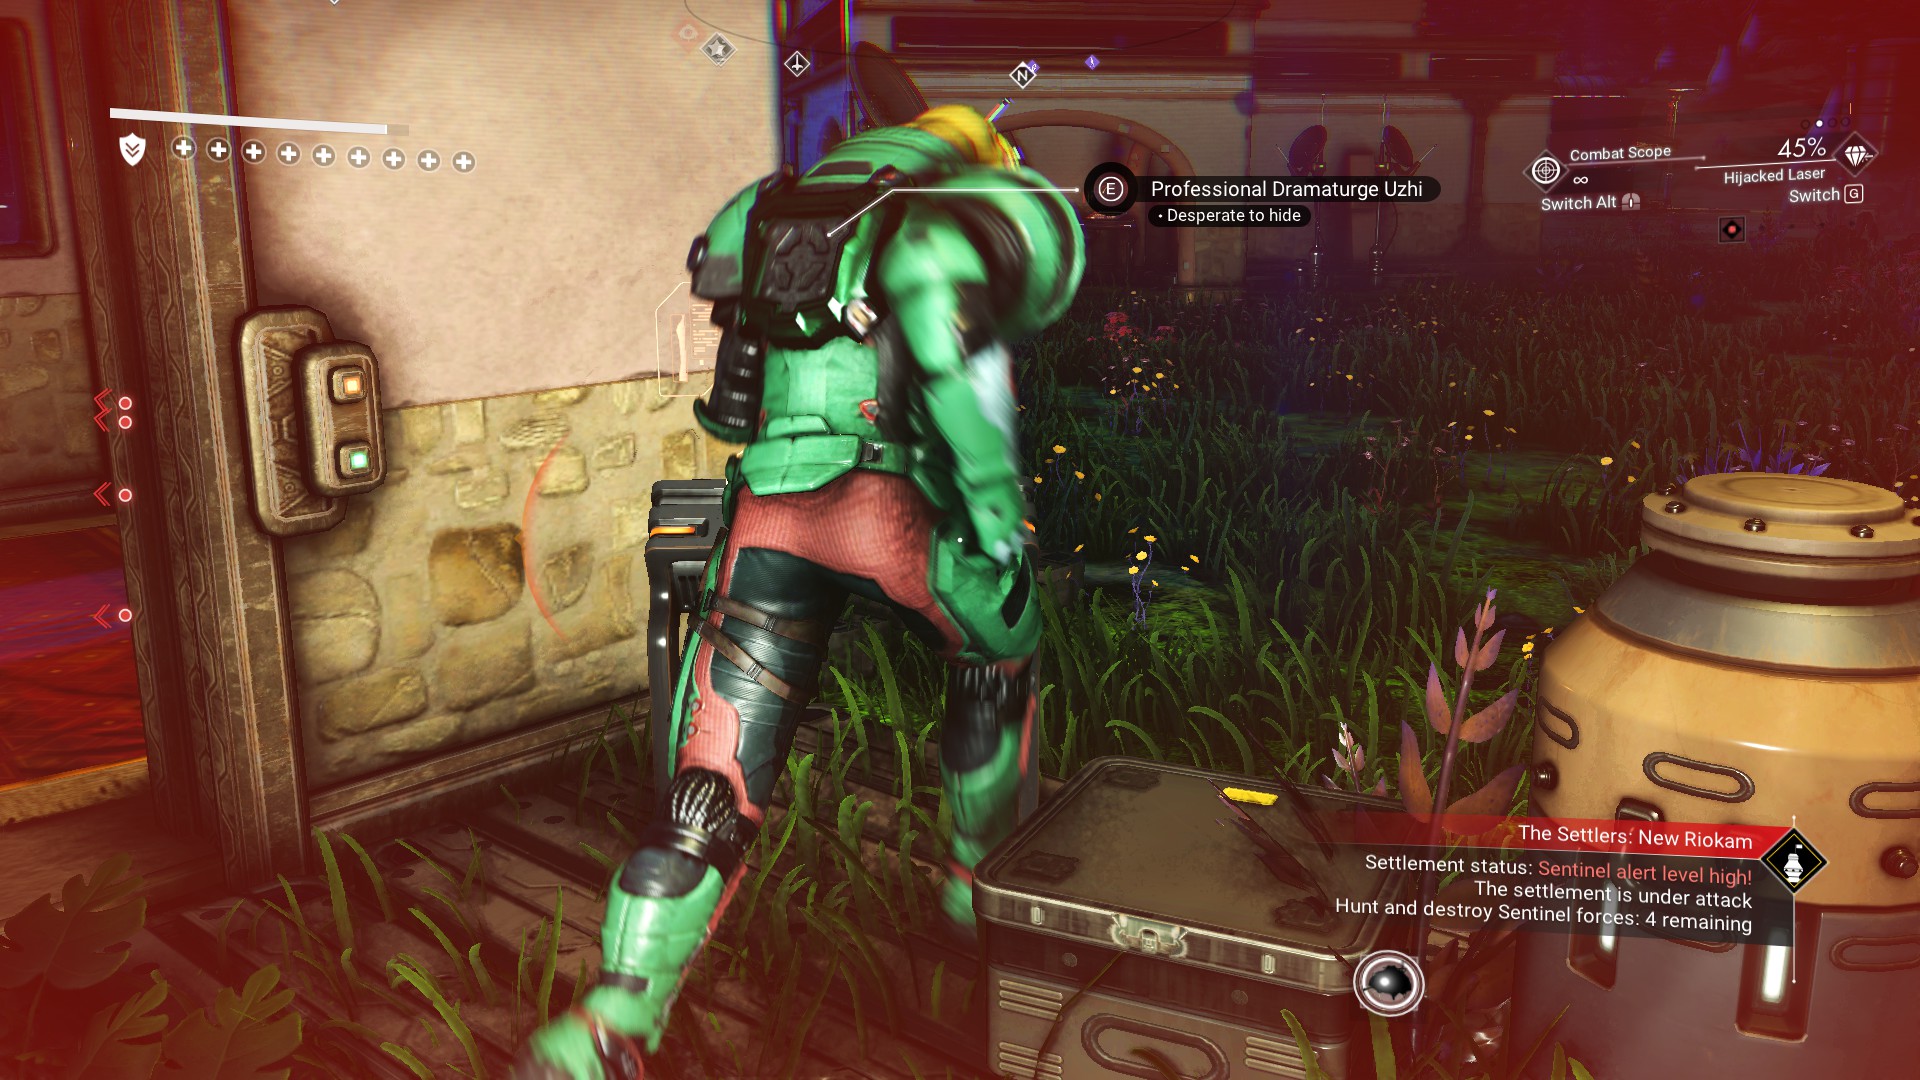
[Despite their lore, Vy'keen run from Sentinels and don't fight back]
The regular Sentinel attackers vary randomly between settlements but are fixed for a particular settlement. They may resemble first- or second-wave Sentinel attacks, but once defeated don't trigger a higher-wave follow on. Currently, sentinel quads (dogs), if present, don't actually attack. Some settlements get attacked by corrupted sentinels, either the usual drones or the spiders (spiders also don't attack). These are not necessarily on dissonant planets.
Between sentinel attacks, on a less regular timescale are "Biological Infestations": either the green horrors spawning out of the ground, as when whispering eggs are collected, or brood mothers and their spawn, as when vile grubs are crushed (irrespective of whether the planet is infested by the Vile Spawn). Again, a given settlement gets only one kind of infestation.
Settlements may also be attacked by pirates: this seems to be triggered if the player stays in the settlement for more than about 10 minutes (may depend on the star system conflict level - haven't checked). If you have a Squadron they will appear and distract the pirates while you run for your spaceship. As always, buildings and NPCs take no damage from pirate attacks.
Settlement Progress
Settlement progress is marked by the three dials on the Status page showing Population/ Maximum population, Happiness and Productivity, and also by Maintenance Cost.
The dials complete at 175 population, 100% happiness and 1.5 Mu/day productivity, but all of these statistics can be increased past those points. Eventually, further buffs for happiness and productivity give smaller increase than claimed, and then no increase. The limit varies between settlements: I have had happiness saturate at between 146% and 181%; productivity tops out at around 3 Mu/day. It may by relevant that the maximum happiness was reached in the settlement with the largest population.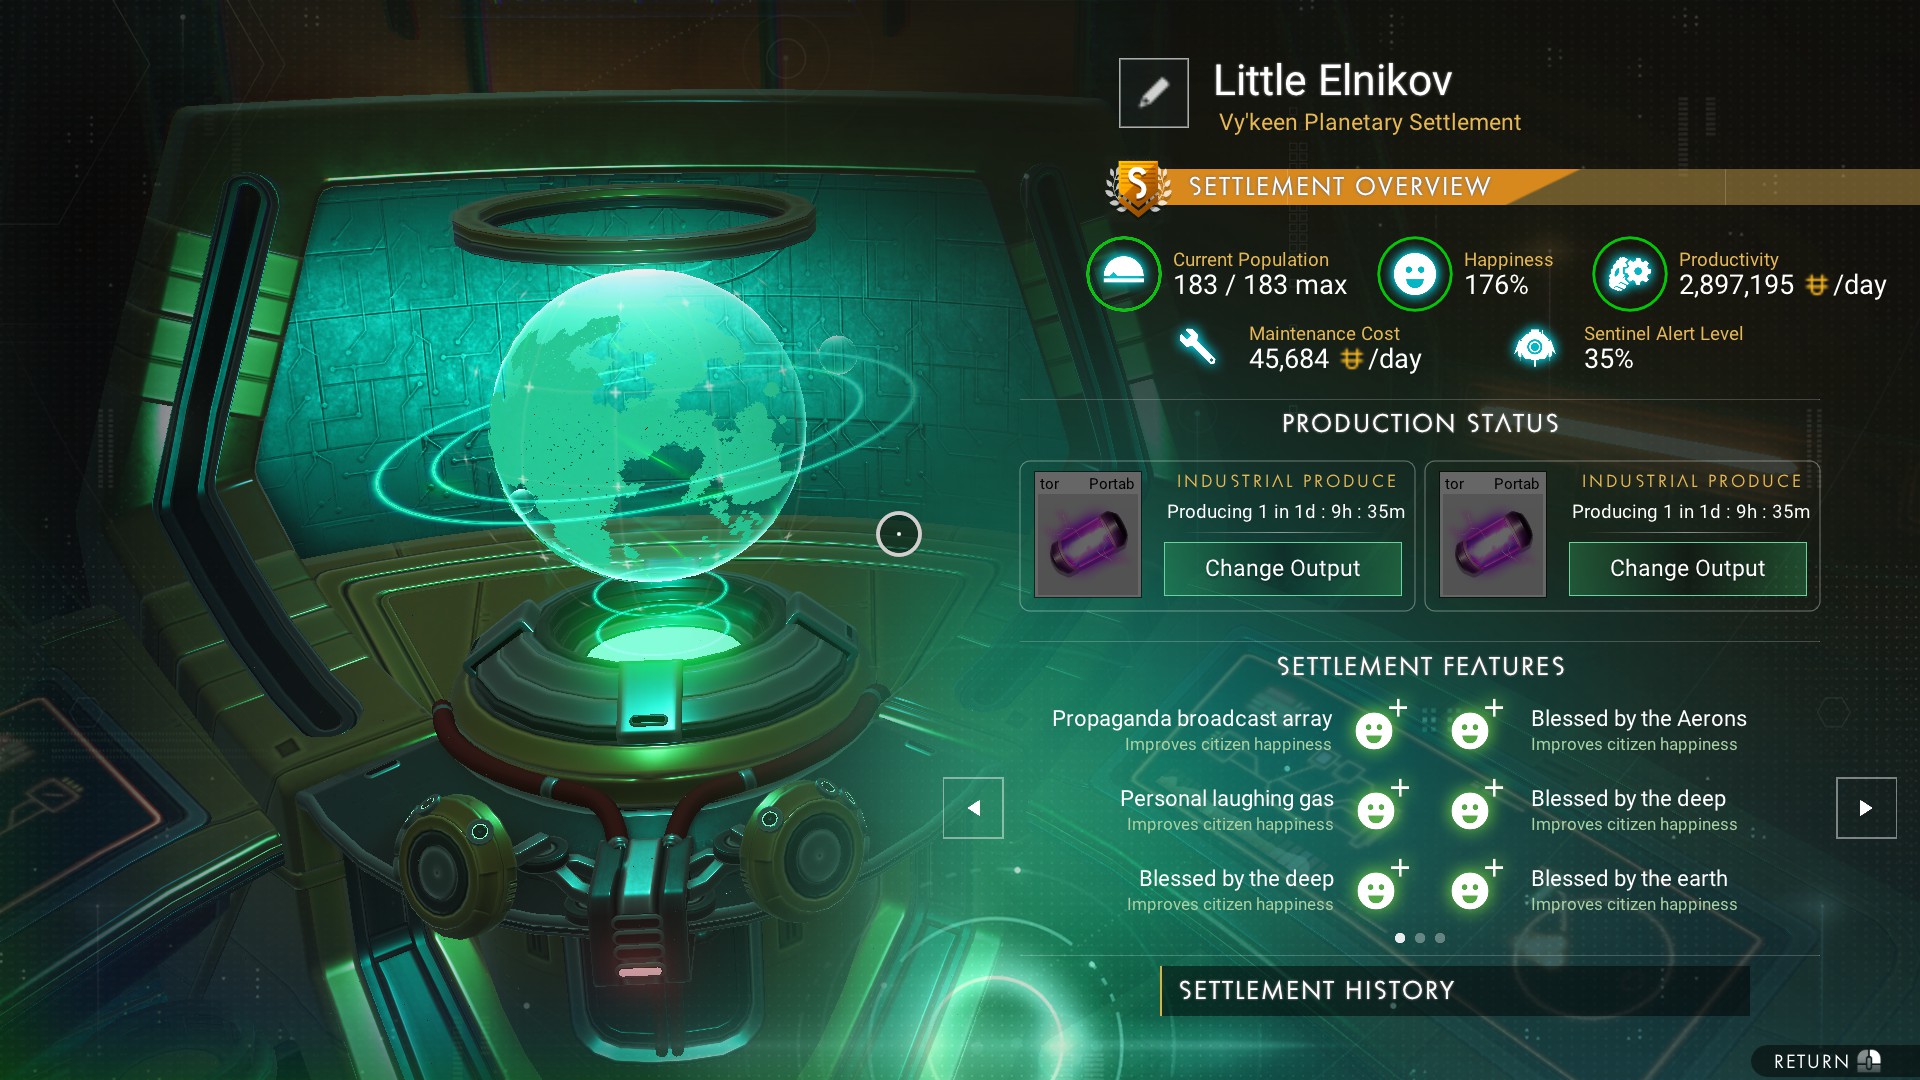
Population is by far the slowest statistic to increase, and I have not reached saturation on it in any settlement: Population can reach the nominal maxiumum, but the maximum can then be increased by further buffs to habitation systems. Population can go well over 200.
New settlements start with 10-12 C-class buildings consisting of assorted residences and 2 to 4 Farm modules and/or Warehouses. All these buildings start with negative happiness buffs, and there will usually be negative happiness Features as well, but the initial settlement Happiness is positive although small, so there is a positive starting buff.
The fastest way to get out of debt is to upgrade farms and warehouses one at a time to S-class, starting with the farms. This blocks construction opportunities until the upgrading is complete, but as far as I can tell delaying building work doesn't reduce the number of buildings you eventually get.
To minimise production time you should keep Max Population, Happiness and Productivity as low as possible, so if this is your aim, only upgrade enough to get productivity higher than Maintenance costs, and don't construct new buildings - of course, it will then take longer to get out of debt.
Settlement Class is upgraded when Productivity and Happiness reach certain levels, although there seems to be a random element in the exact threshold, and you can offset low values on one by high values on the other. Roughly, B Class is reached when the Happiness and/or Productivity dials go past the quarter mark, i.e. 25% and 375,000 units/day respectively. A class seems to need over 70% happiness and 700,000 u/day, and S-class needs well over 115% happiness and/or around 1 Mu/day. S-Class can be reached before the building cycle is complete. Class is apparently independent of population, Max population, and Maintenance cost.
If Productivity and Happiness are reduced by accumulating negative buffs, settlement class can go down again.
The economy level of the star system is increased by 1 "star" when settlements reach some high level slightly above the point where they get to S class. (They can still be red on the population indicator, and it doesn't need all buildings to be fully upgraded). This does not change the buy/sell percentages for Trade goods markup, but it does increase the range of trade goods available.
Trying to minimise tribute production time is the only reason to reduce Maintenance, since doing so lets you keep pushing Productivity down. Maintenance can get to zero with enough buffs. Although the display then sticks at zero, internally the value goes negative, since later penalties that increase Maintenance can still leave the display showing zero.
Customising with an overlapping base
Your settlement is not your base: in some ways it behaves like a base belonging to another player. You can't edit the terrain within 300 u of the central monument, although you can mine plants, boulders etc. You can't edit any settlement buildings with the Build menu, and you can't put down a Base computer within the 300 u radius, although you can place portable tech like Save Beacons.
The 300 u radius is more than twice the size of the flattened region on which the Settlement is built; it's the same size as the default Base region.
But of course you can put down a Base computer just outside the protected radius. I have not tried this myself: the following is based on suggestions by other users in Steam forums.
The simplest method is to select the base computer in the build menu and walk away from the settlement monument until the build hologram turns green. If you place your computer here, its build circle will reach the Monument, allowing you to add buildings or decorations to the near side of the Settlement.
You can do more, since you can extend the base radius in the usual way to up to 1000 u, at which point the entire settlement is accessible for building. You still won't be able to move components of the settlement buildings, but you can free-place your own building components on or next to them, and continue your own building with snap-placement as usual.
Once your base is created, you can pick up the Base computer and drop it wherever you like, including into the Overseer's office. Your base boundary will stay centred on the original computer position.
Very nearby bases (up to about 1000 u) do not show up on the Settlement Teleport terminal, so if your base is centred just outside the 300 u radius, you will have to walk, ride, or use a chain of short-range teleporters.
It's not a good idea to to build within the settlement until after the settlement build phase is definitely over, or you will run the risk of your buildings phasing into settlement ones. Settler NPCs can already get stuck by walking into walls of settlement buildings, so I guess that extra building projects inside settlements could cause NPC pile-ups. But you can safely add decorations to existing buildings and put your own just outside the outer ring of settlement buildings. For instance, you can glitch-build plants in the hydroponic trays inside farm buildings for added realism.
Settlements vs. the Lore
- Korvax and Autophage are supposed to be electronic beings, but their settlements contain Farm buildings described as "Settlement Nutrition Supply".
- In the lore, Gek reproduce by spawning by the hundred in spawning pools. In settlements they produce single offspring like all other races and there is no sign of a spawning pool (hopefully they are not using the fishing pond).
- In the lore, each Autophage painstakingly assembles themself over thousands of years. They refer to the traveller as a "Pre-built entity". Yet in settlements they produce offspring like the other races.
- In the rest of the game, Autophage go to great lengths to hide from the other races, but their settlements are lit up like purple Christmas trees, although the settlers themselves are invisible until suitably scanned.
- Vy'keen are supposed to spend all their time fighting the sentinels, but run away from them just like all the other aliens when Sentinels attack settlements.
- In Dispute resolution decisions, members of different races are sometimes presented as lovers, siblings, or parent and child.
Gotchas and Bugs
- There is no "Settlement reserve", so any payment made as a management decision puts the settlement in debt, losing any uncollected tribute and whatever progress has been made towards the next batch of tribute.
- Collecting tribute wipes out progress on the next batch for that hopper, so is best done near the start of a cycle.
- To see the HUD marker for buildings under construction, warning icons for attacking sentinels or monstrosities, and get the related messages, your current mission must be set to "The Settlers" (and for the right settlement if you have more than one). The right mission is usually selected automatically if you teleport between settlements, but not if you have a settler expedition in progress (that's a separate mission), and also not if you have unrelated missions like the Exploration Guide selected.
- You can access build terminals from inside a building, but if you are inside when you start an upgrade, you may get trapped there by the hoarding. You can always escape when the upgrade is complete.
- You can't retire as overseer when a build project is underway. Unfortunately, the most common reason for wanting to retire is that a build project has got irretrievably stuck, e.g., with the build terminal missing or apparently underground. These are very rare problems but a cautious player will save the game just before taking over a settlement (which triggers building the office), and before any other build.
- Taking over a new settlement should immediately trigger the mission to build the Overseer's Office, but often doesn't. It may help to talk to settlers before you start. If not, exit and re-load will fix it.
- The merchant and/or the Guild envoy are often missing from their desks at Trade Centres. This is intermittent so fixable with an exit & reload, although probably not worth the hassle.
- On upgrade from C to B-Class, the building hoardings are often still present after the building is opened, blocking the entrance; also the name is never changed to the high-class version (Advanced Sleep Pod etc.), and the HUD icon may still give the old name and class. Fixed on re-loading.
- Teleporting to a settlement sometimes drops you on top of the central monument instead of into the Office as expected. You may also (rarely) land on the Office roof - some settlements have these glitches more often than others.
- Saving (using a Save Point or Save Beacon) inside the Office can get you stuck in the wall on re-load. I usually place a Save Beacon just outside the Office, which also allows me to find the Settlement if for some reason the HUD marker is not showing.
- Some settlements are intermittently rendered at the wrong height, so that buildings all float a fixed level above the ground.
- NPCs are sometimes rendered at the wrong height: either buried in the ground with only head and shoulders showing, or walking or standing high in the air. This affects individual NPCs and is not synchronised with the building issue.
- NPCs often phase through the walls of buildings.
- NPC occasionally get stuck in clusters where several of them are in the same spot, superimposed. The same issue can affect herd fauna.
- Tribute production time should go down as productivity increases, not the opposite. You would also expect it to go down with increasing population, rather than up with increasing room for settlers. It also seems perverse that improved happiness increases production time.
- Very rarely, the build terminal at a construction site is not visible and the HUD marker suggests it is below ground, making it impossible to access, since you cannot excavate in settlements. This makes it impossible to complete the building. This can be persistent and if so locks a settlement, since no further buildings can be started while one is under construction, nor can the Overseer retire (This has never happened to me but been convincingly reported by other players).
- On mountainous planets, the flat area of the settlement may be cut into by surrounding terrain features, and new buildings may clip into the terrain. In the worst case this can bury the building terminal so construction cannot be started, locking the settlement as above. Building terminals and even the Office terminal can also be blocked by giant plants or other landscape features that cannot be destroyed - these do not stay in exactly the same place on repeat visits.
- Management decisions that the Judgement Assistant describes as offering a choice between two kinds of buff (e.g. Productivity vs improved Habitation systems) often give a different kind of buff than promised, especially for improved Habitation Systems. Sometimes both buffs turn out to affect the same statistic.
- The production time for tribute goods sometimes re-sets at the start of a new session, wiping out hours or more of production. This also seems to happen sometimes when "donating to reserves" when the donation is enough to complete production of one or more batches, since the output timer immediately afterwards is often at the start of a cycle.
- When Sentinel attacks include a quad (dog), it just stands still without attacking. The same applies to the mini versions of corrupted quads (spiders): the larger spider quad that arrives at the same time is aggressive.
- After the initial debt is cleared, settlements do not return to accumulating debt if Maintenance costs rise above Productivity, until the gap is about 50,000 u/day.
- Upgrading buildings always pops up a red frowny face with the message "Happiness reduced by 0", even though the building happiness buff is usually increased.
- Happiness buffs from upgrading buildings usually give about half the expected increase to the settlement total. For instance, C- to B-Class usually increases the building happiness buff from -1% to +1%, but overall settlement happiness is never increased by 2%, and often not increased at all (may be related to the previous bug).
- Negative buffs that allegedly cause Population loss should reduce the number of settlers, not the Maximum number of settlers.
- The pop-up for the terminal at the top of Towers claims that "Scan for Distress Signal Coordinates" is available at B-Class, but in fact it is only available at A-Class.
- Settler expeditions are always successful. The blurb for the Beacon update said that success was more likely (prior to Beacon they nearly always ended in disaster), but also made it clear that they should still be risky, so this is a bug.
- The merchant at Autophage Trade Centres never offers their bill of wares: instead, they natter endlessly in Autophage, with no transcription text box.
- Per the Beacon announcement, there should be an Autophage terminal at the central monument in Autophage settlements, but currently it is not present.
- Starship inventory is not accessible to the trade terminal at Trade Centres, even when the ship is parked on a Settlement landing pad and in teleporter range. This bug also affects trade terminals in player bases.
- Population does not decrease when wanted settlers are handed over to the authorities.
- Nearly all the numbers on the Settlement History page that I can check are wrong, even the actual number of buildings in the settlement.
- The end of Settler expeditions are flagged by an audible "Inventory full" message, rather than a more appropriate one.
- Doorways into residential buildings are sometimes blocked by internal stairs. Some internal stairs cannot be climbed without jumping.
- Autophage Towers have two building terminals, both marked by HUD icons. One is inaccessible under the spiral stairs after upgrade to B-class. (Thanks to Fytayn for pointing this out).
- No Man's Sky Access Codes★ 5 (880)43k views2.1k ♥1 minUpdated 14 Apr
- Refining – The Magic Of Alchemy★ 5 (1.2k)41k views3.6k ♥5 minUpdated 24 Mar, 2022
- How to get RICH in NMS SUPER FAST★ 5 (501)32k views1k ♥2 minUpdated 7 Sep, 2022
- Multi-Tools: Types, Statistics, Weapons, Layouts★ 5 (550)27k views1.3k ♥7 minBulgarianUpdated 3 Jul, 2025
- Starship Guide: Types, Statistics & Roles★ 5 (461)25k views924 ♥8 minBulgarianUpdated 30 May
- Звездолеты СТРАЖЕЙ★ 5 (220)24k views519 ♥7 minRussianUpdated 9 Feb, 2025




- Upgrading to PremiumTeam Fortress 2★ 5 (20k)1441k views11k ♥6 minUpdated May 11, 2022
- No More Room in Hell Official ManualNo More Room in Hell★ 5 (2.8k)569k views2.1k ♥29 minUpdated Apr 22, 2019
- NMRiH Community Hosting GuidesNo More Room in Hell★ 5 (526)351k views653 ♥1 minUpdated Aug 10, 2022
- ULTIMATE GUIDE FOR GAME DEV TYCOONGame Dev Tycoon★ 5 (5.8k)326k views10k ♥4 minUpdated 23 Jan, 2014
- How to 'Git Gud' Soon™MORDHAU★ 5 (2k)318k views3k ♥68 minUpdated Nov 16, 2024
- Лучшие кооперативные игры SteamPAYDAY 2★ 5 (1.5k)315k views2.1k ♥56 minRussianUpdated Apr 27, 2025






This guide was created by its original author on the Steam Community. Are you the author and want it removed? Request removal.