Simplified Outrider Build Guide
Introduction
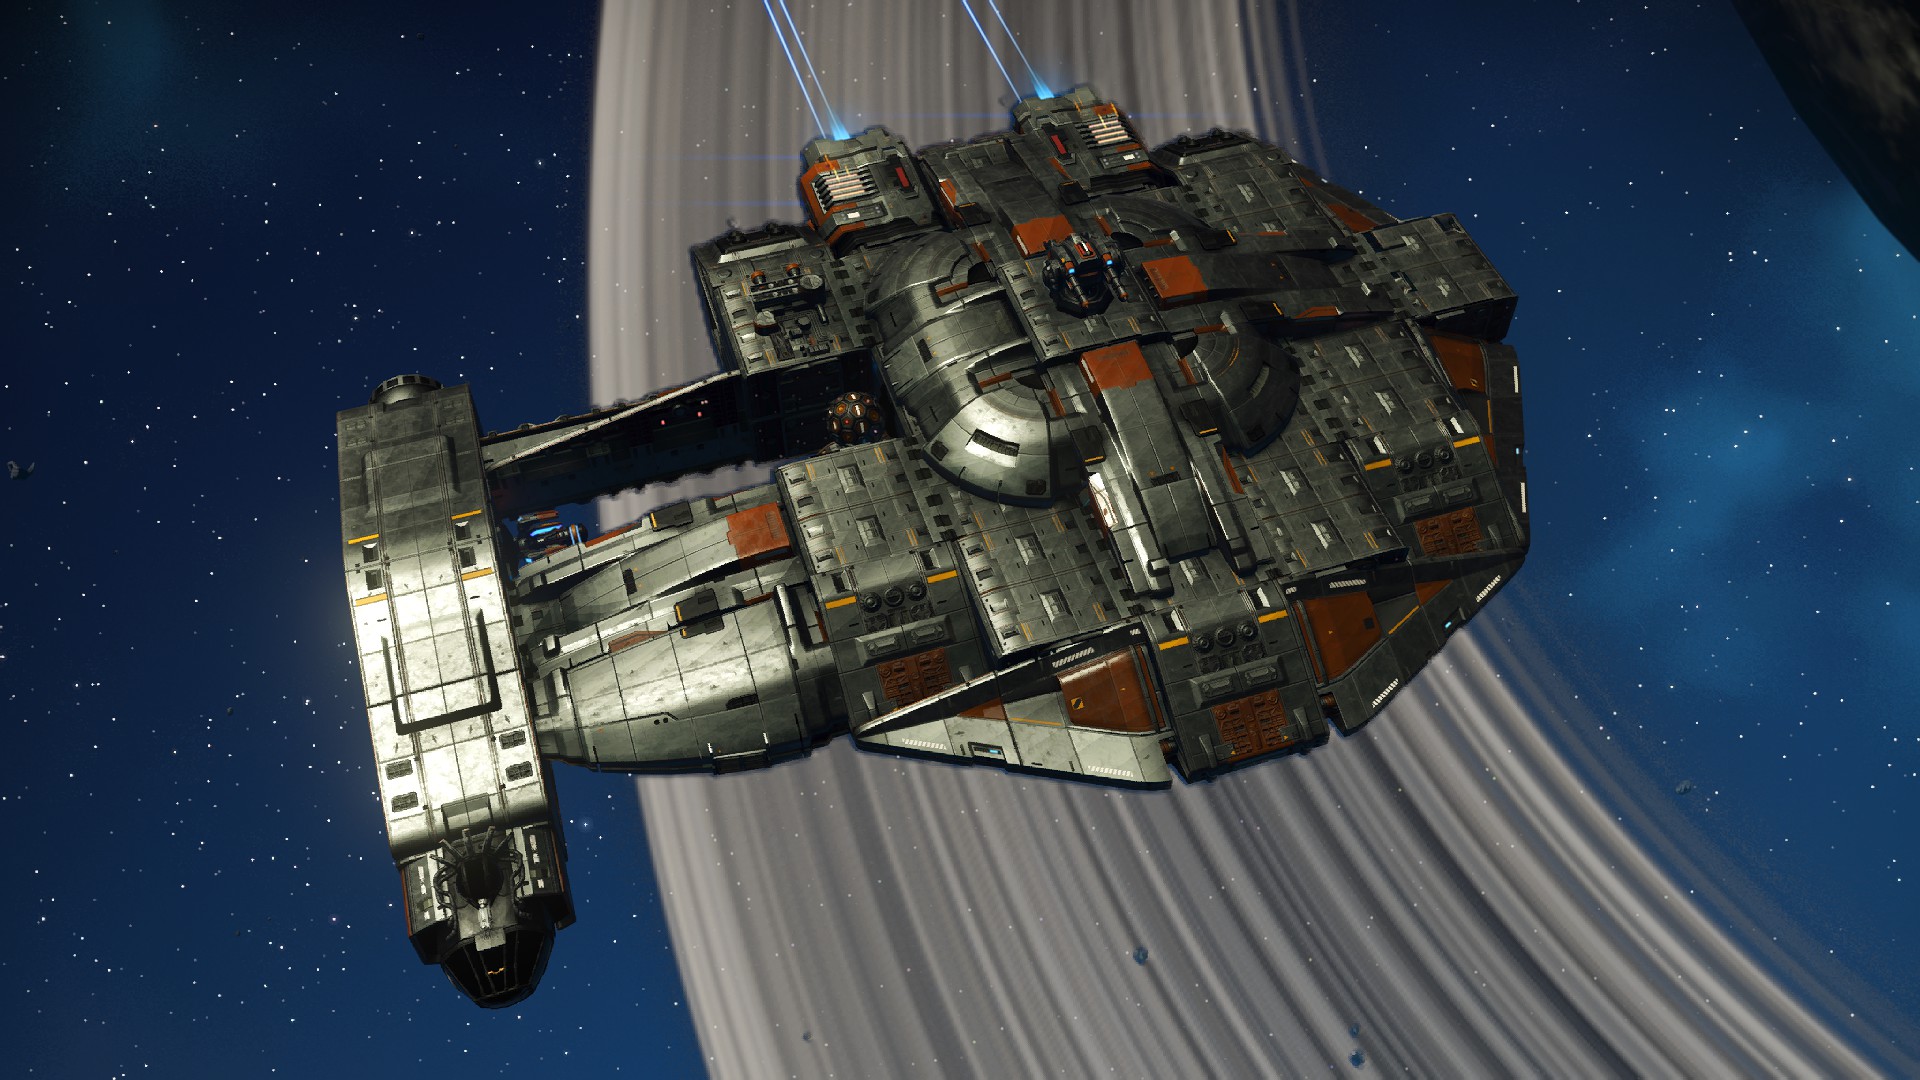 This is my first ship building guide for No Man's Sky. Here, I will teach you (yes, you) how to build a simplified version of Dash Rendar's Outrider, the YT-2400. (Thank the redditor who asked if I could make this guide.) Don't worry, this guide doesn't use any offsets, free placement rotations, or glitches.
I took pictures of nearly every step to make it as easy as possible to follow along. It isn't an overly complex build, but it is a large ship and it will use most of the complexity limit.
There are a couple spots on the sides where you can add windows on your own ship, but I won't be adding them in this guide. And, I recommend choosing the color for your ship when you start to make the painting easier on yourself.
Required parts (for the basic build only):
13 x Habitations
17 x Walkways
1 x Landing Thruster
1 x Titan Cockpit
1 x Titan Landing Bay
4 x Titan Sub-light Thrusters
1 x Speedbird Cowling
1 x Speedbird Diffuser
8 x Speedbird Dome Sections
7 x Speedbird Fairings
2 x Speedbird Nacelle
1 x Supercruise Aerofoil
3 x Supercruise Cowlings
1 x Longshore Cowling
6 x Argonaut Cowlings
3 x Argonaut Fuel Covers
1 x Albatross Cargo Tank
2 x Domed Casings
2 x Radiator Casings
8 x Turbine Aerofoils
2 x Phase Beams
1 x Azimuth Reactor
1 x Medusa Reactor
1 x Zenith Reactor
up to 4 x Cargo Links
2 x Air Purifiers
For a more accurate version of the YT-2400, check my other guide here.
(If you're interested in another asymmetrical ship design, check out the Tetsudon build guide.)
First Level
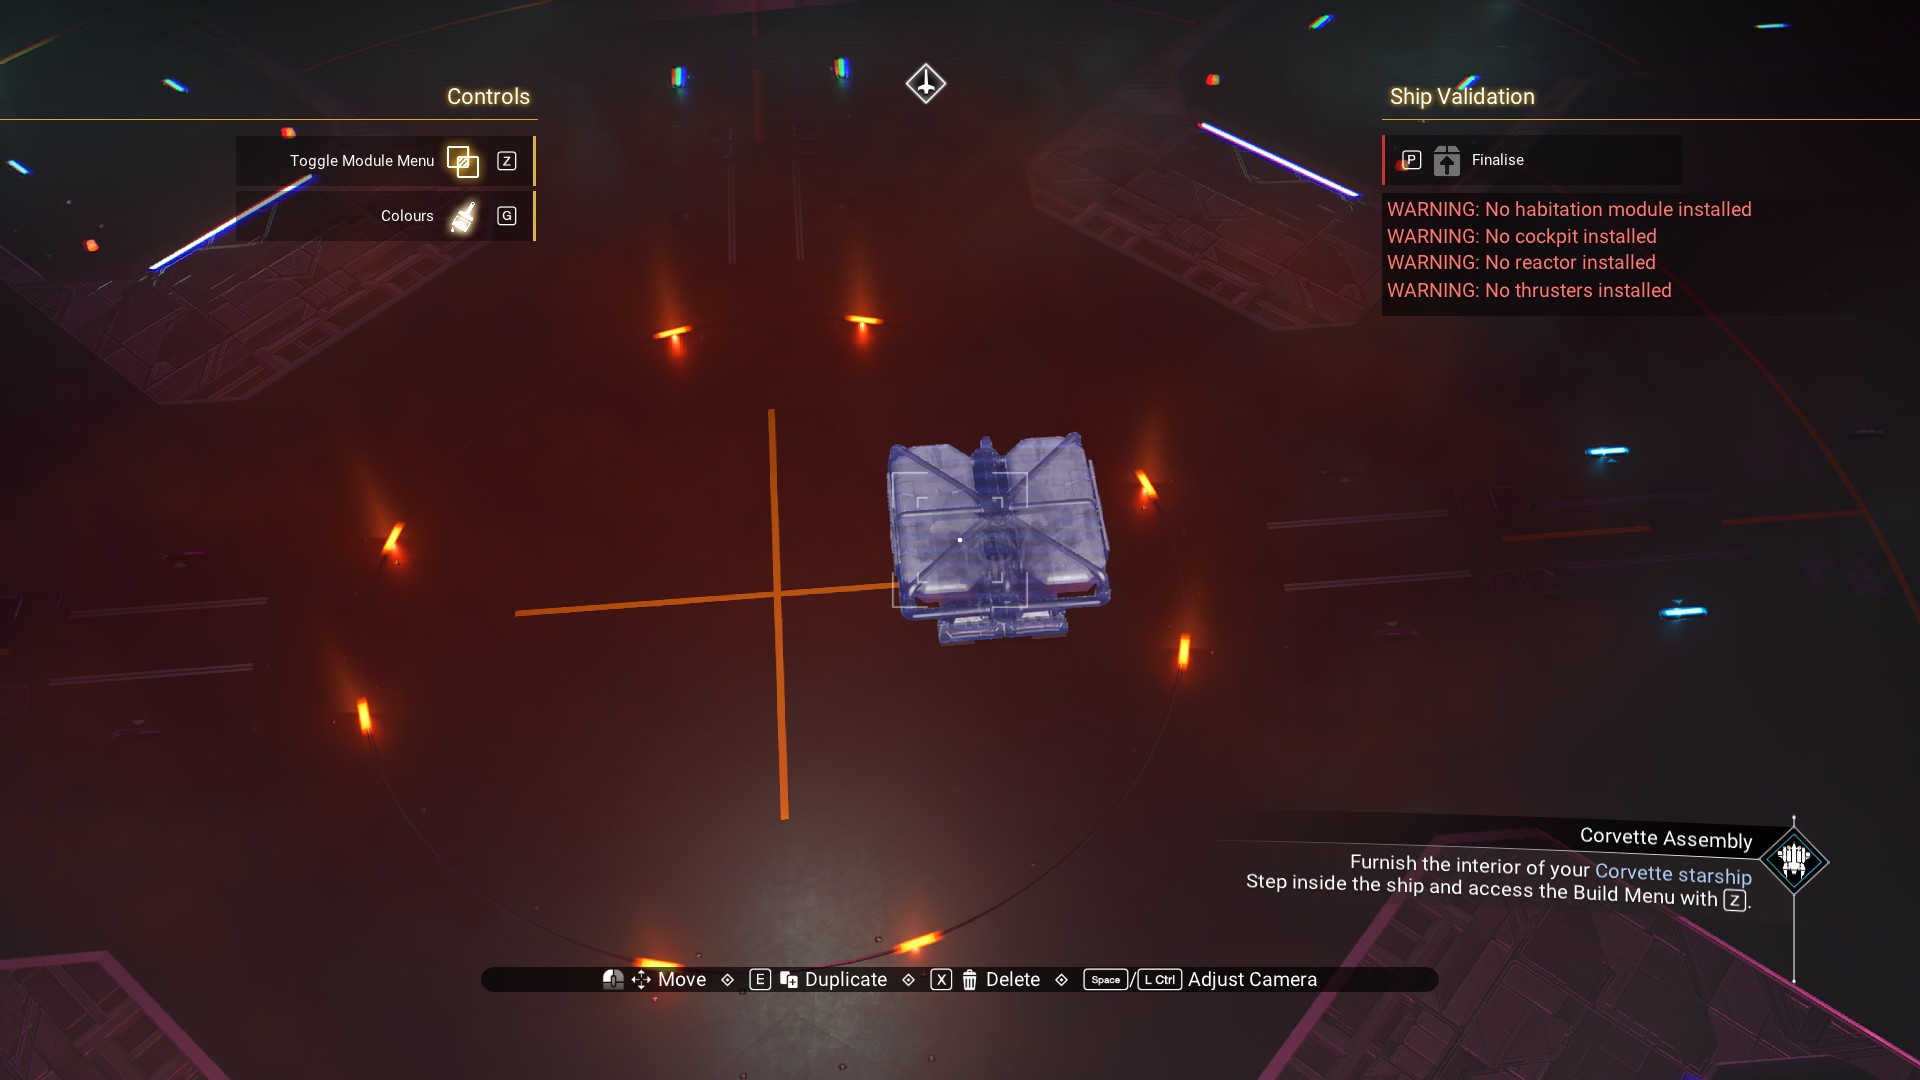 Place a walkway on top of the landing gear.
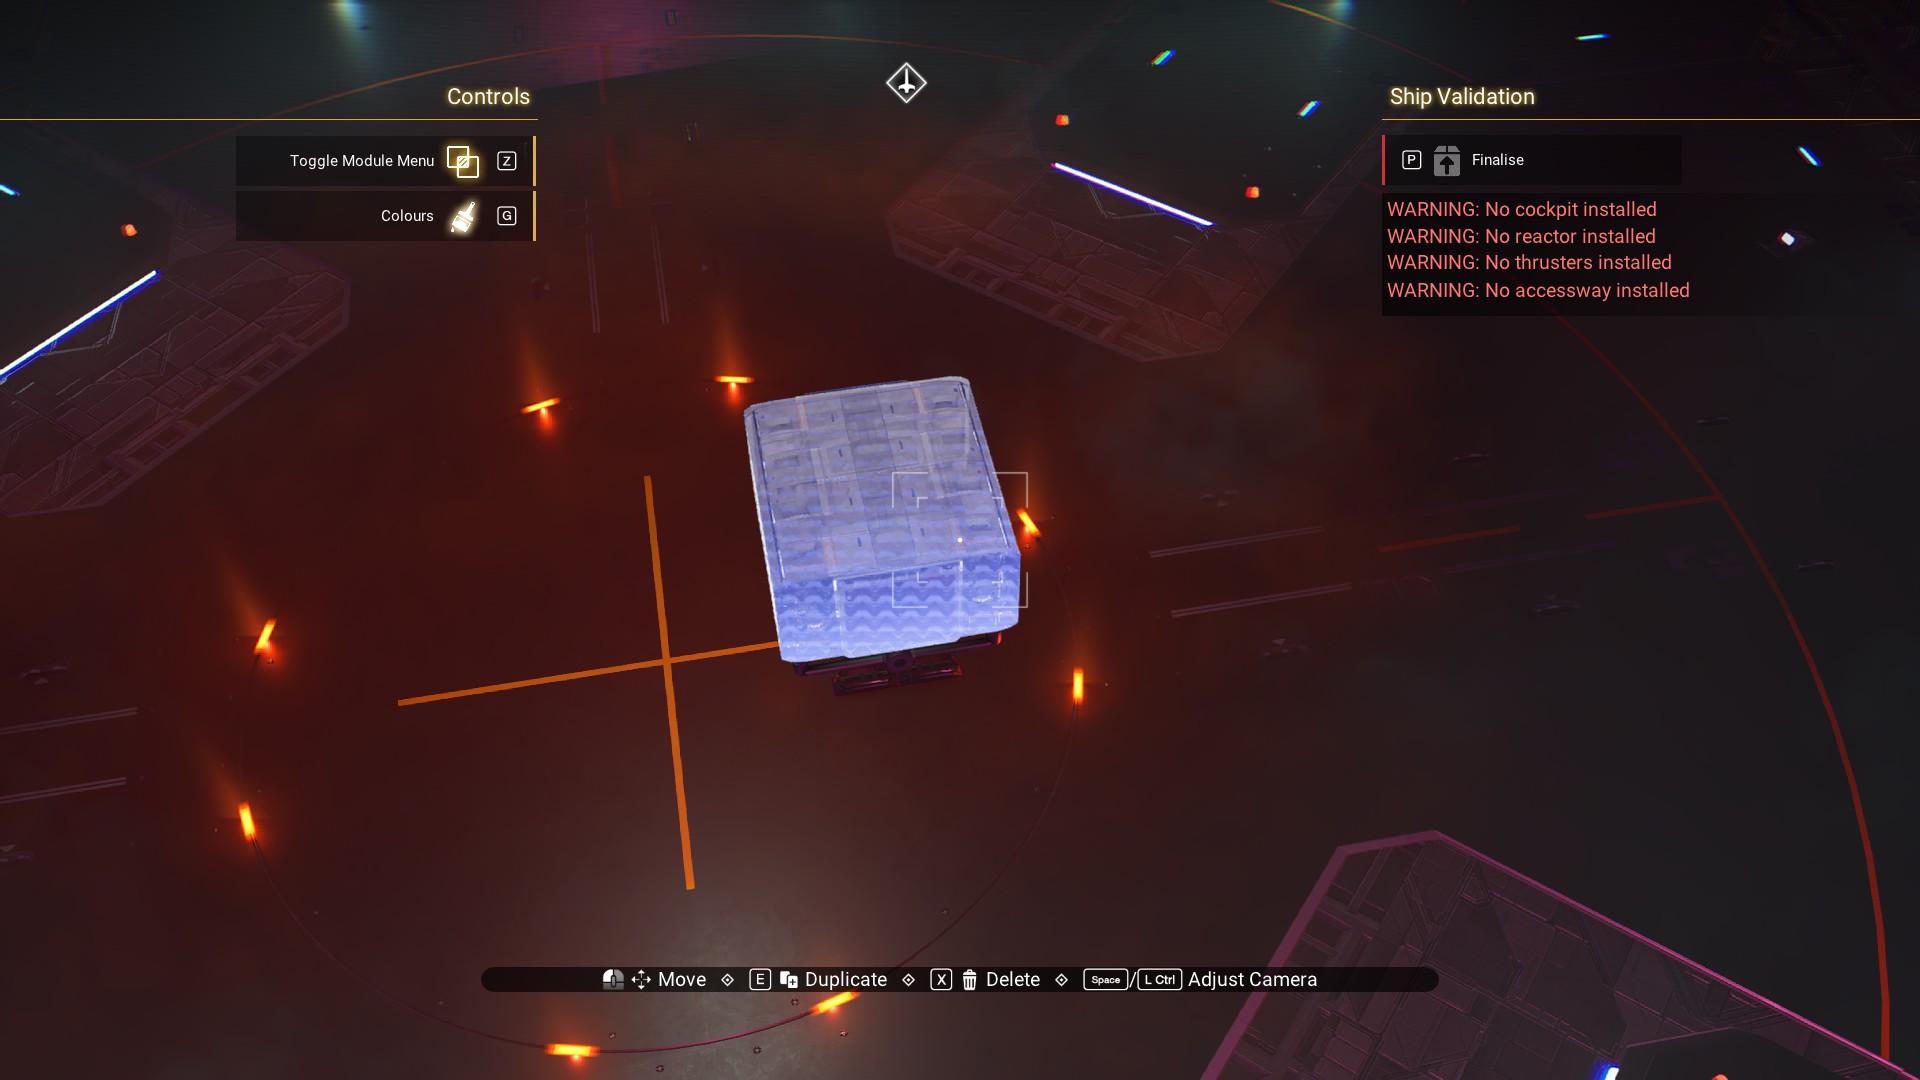 Delete the landing gear and place a Phase Beam on the underside of the walkway.
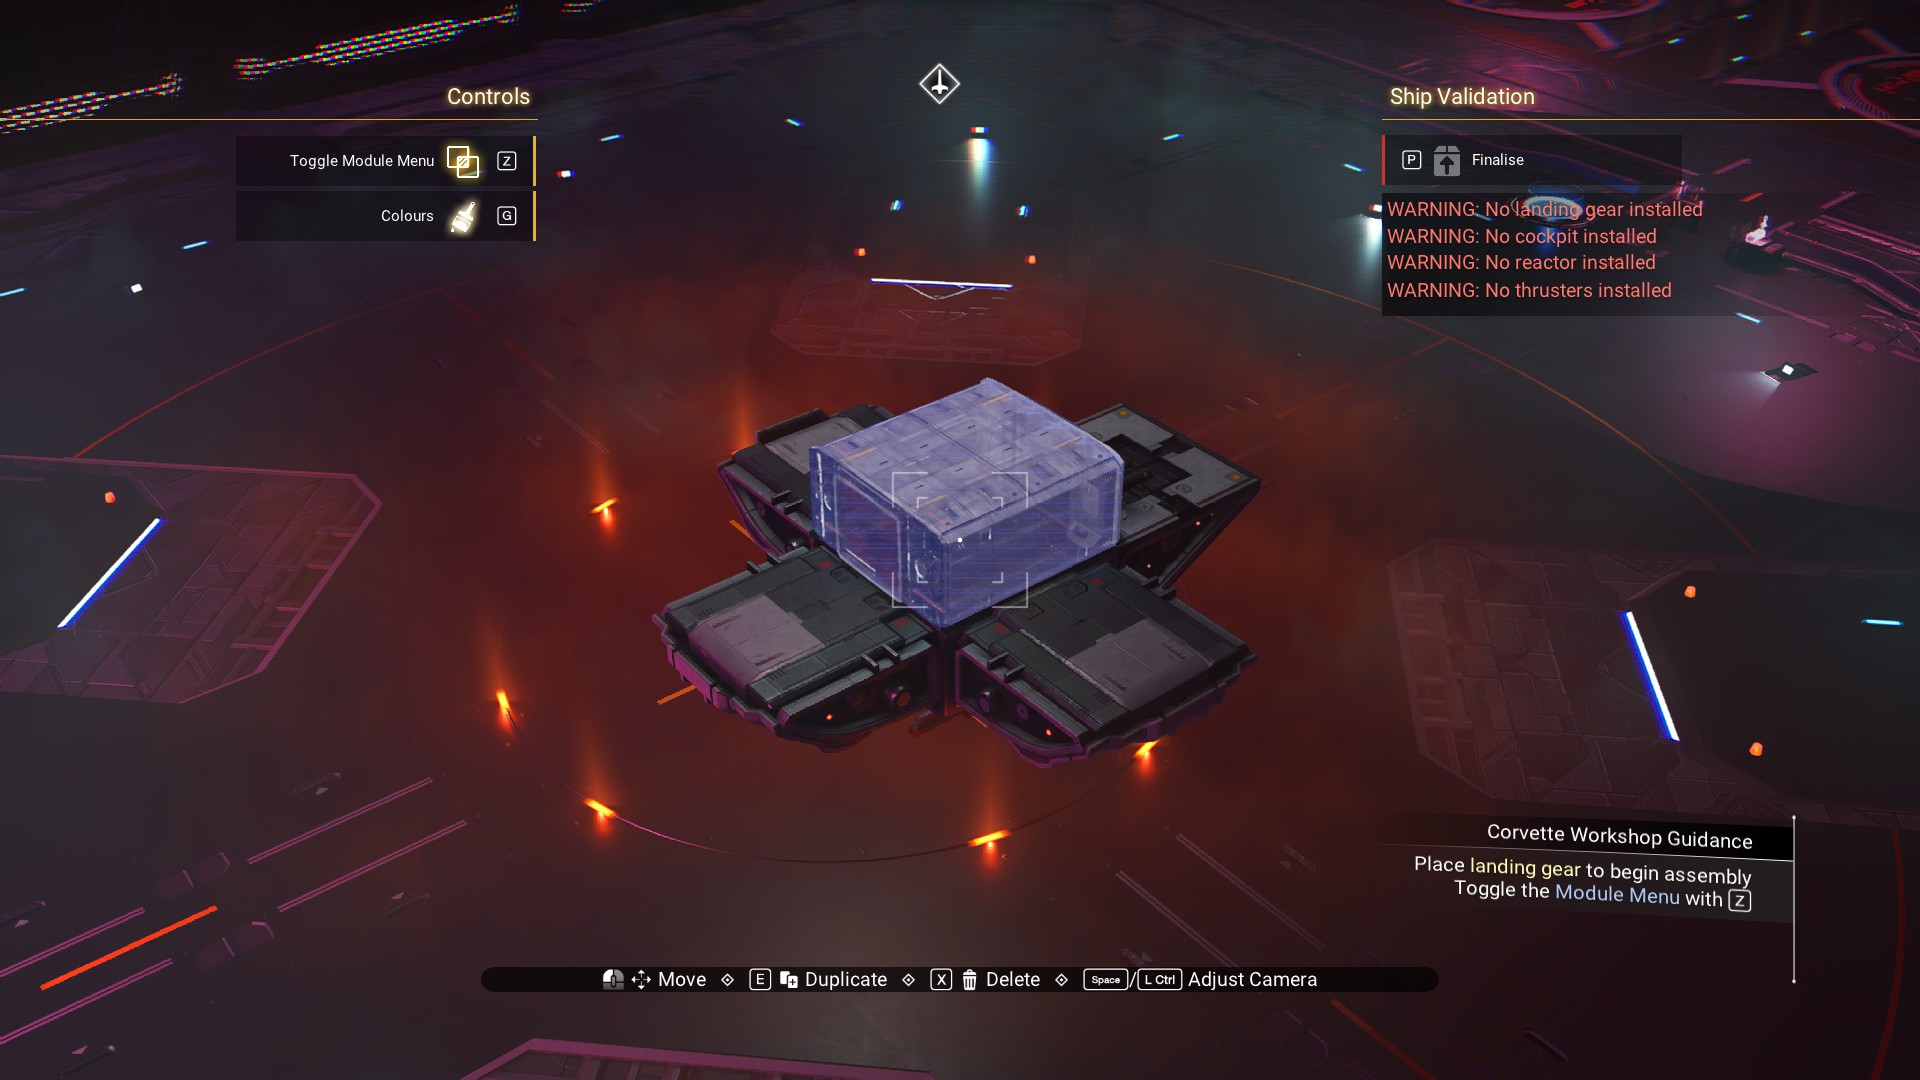
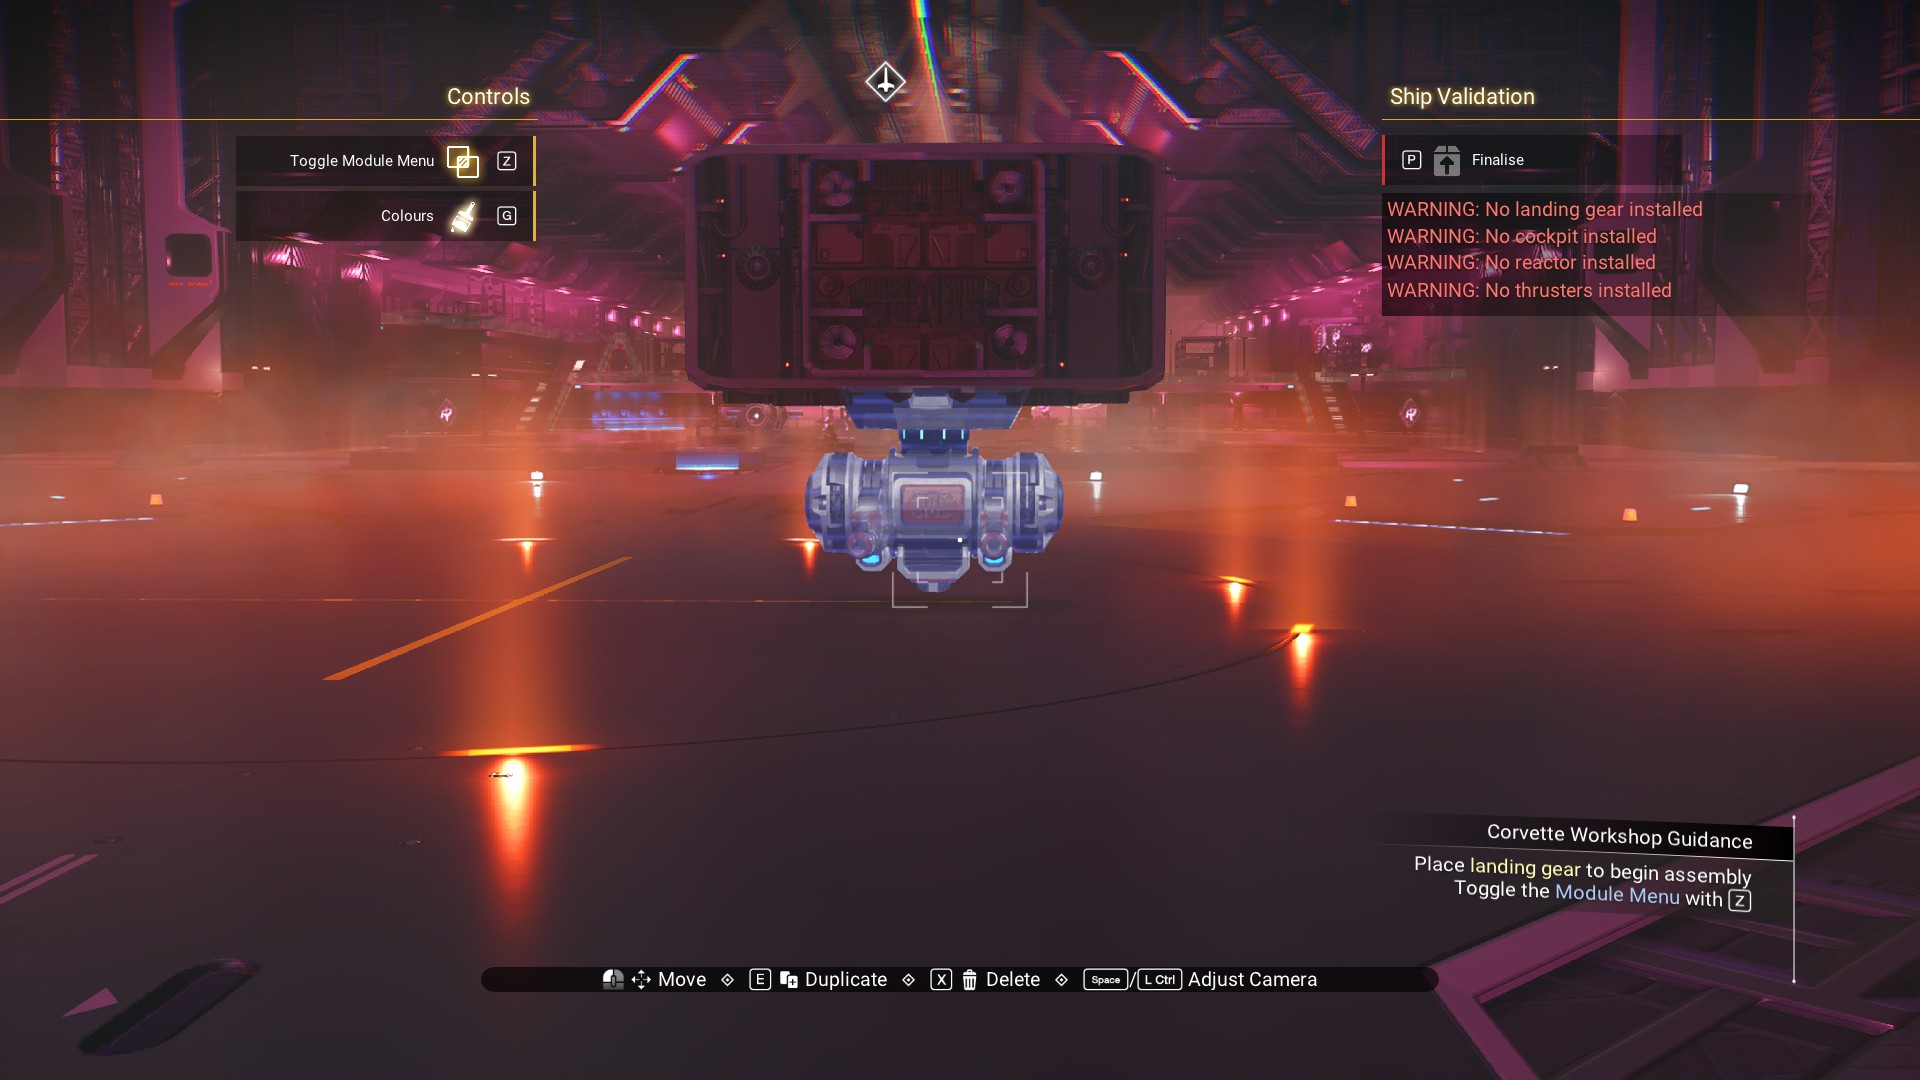 Select the Speedbird Fairing and place it upside down on the front and either side of the walkway.
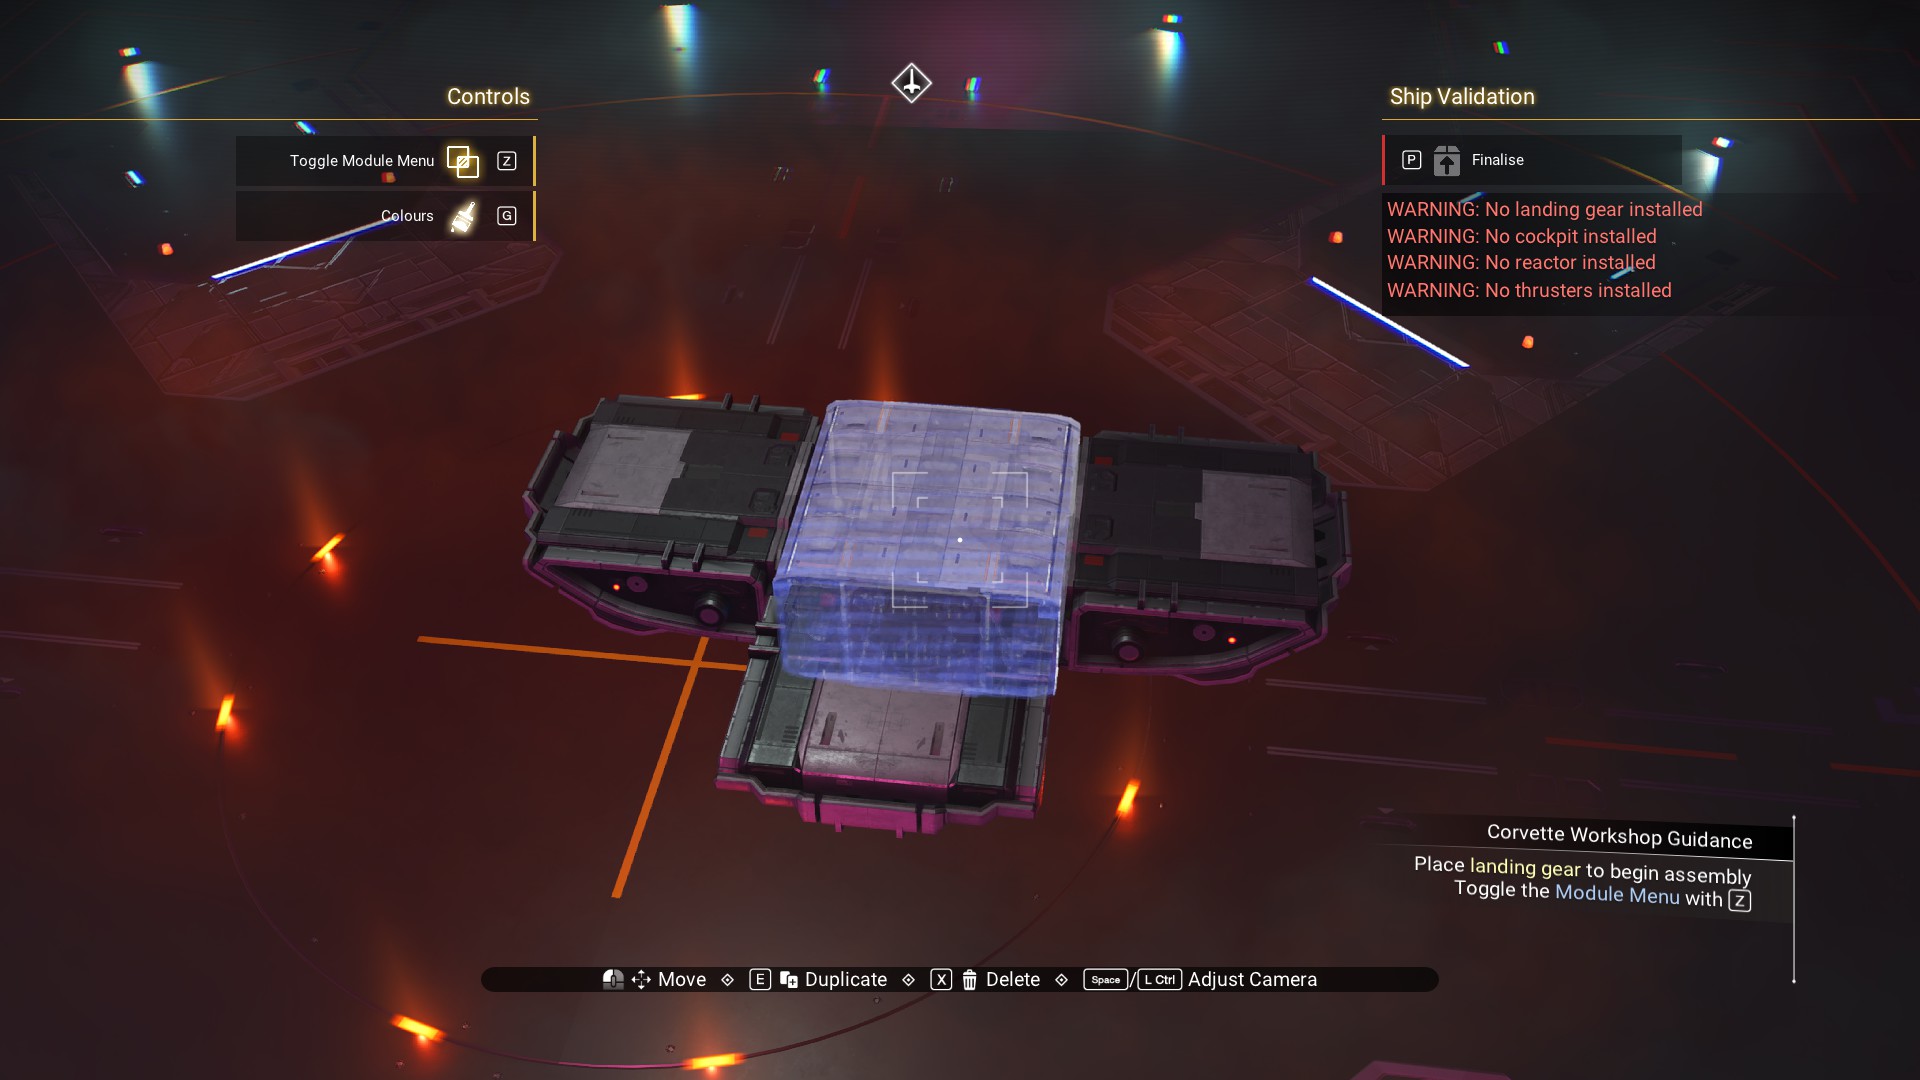 Place a Titan Landing Bay on the rear of the walkway.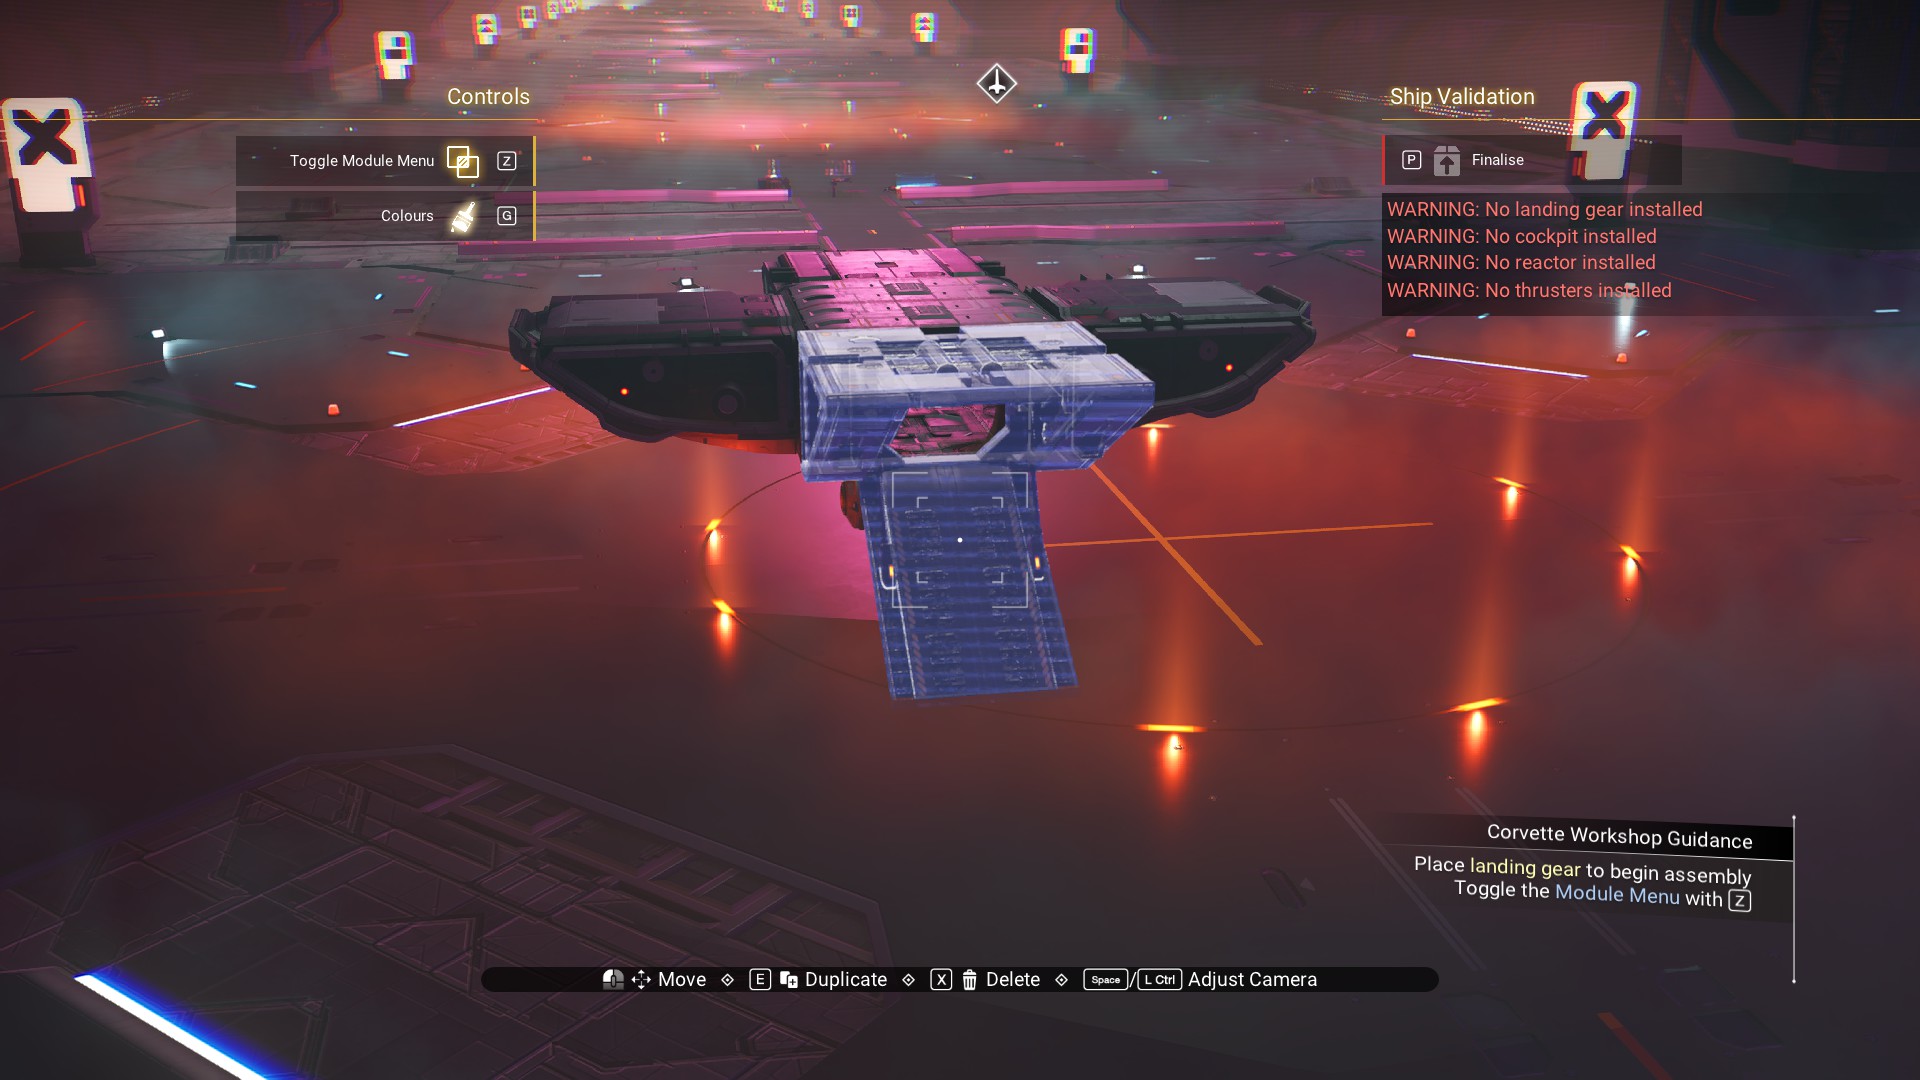
The last thing to do on this first level is to place the Speedbird Dome Section between each fairing, and the landing bay. I forgot to do this until the very end of the build though so I'll go over it again later (when we get to the part where I finally remembered).
Second Level
 Fill in the second level with Habitations and Walkways as shown, leaving a gap beside the walkway you just placed.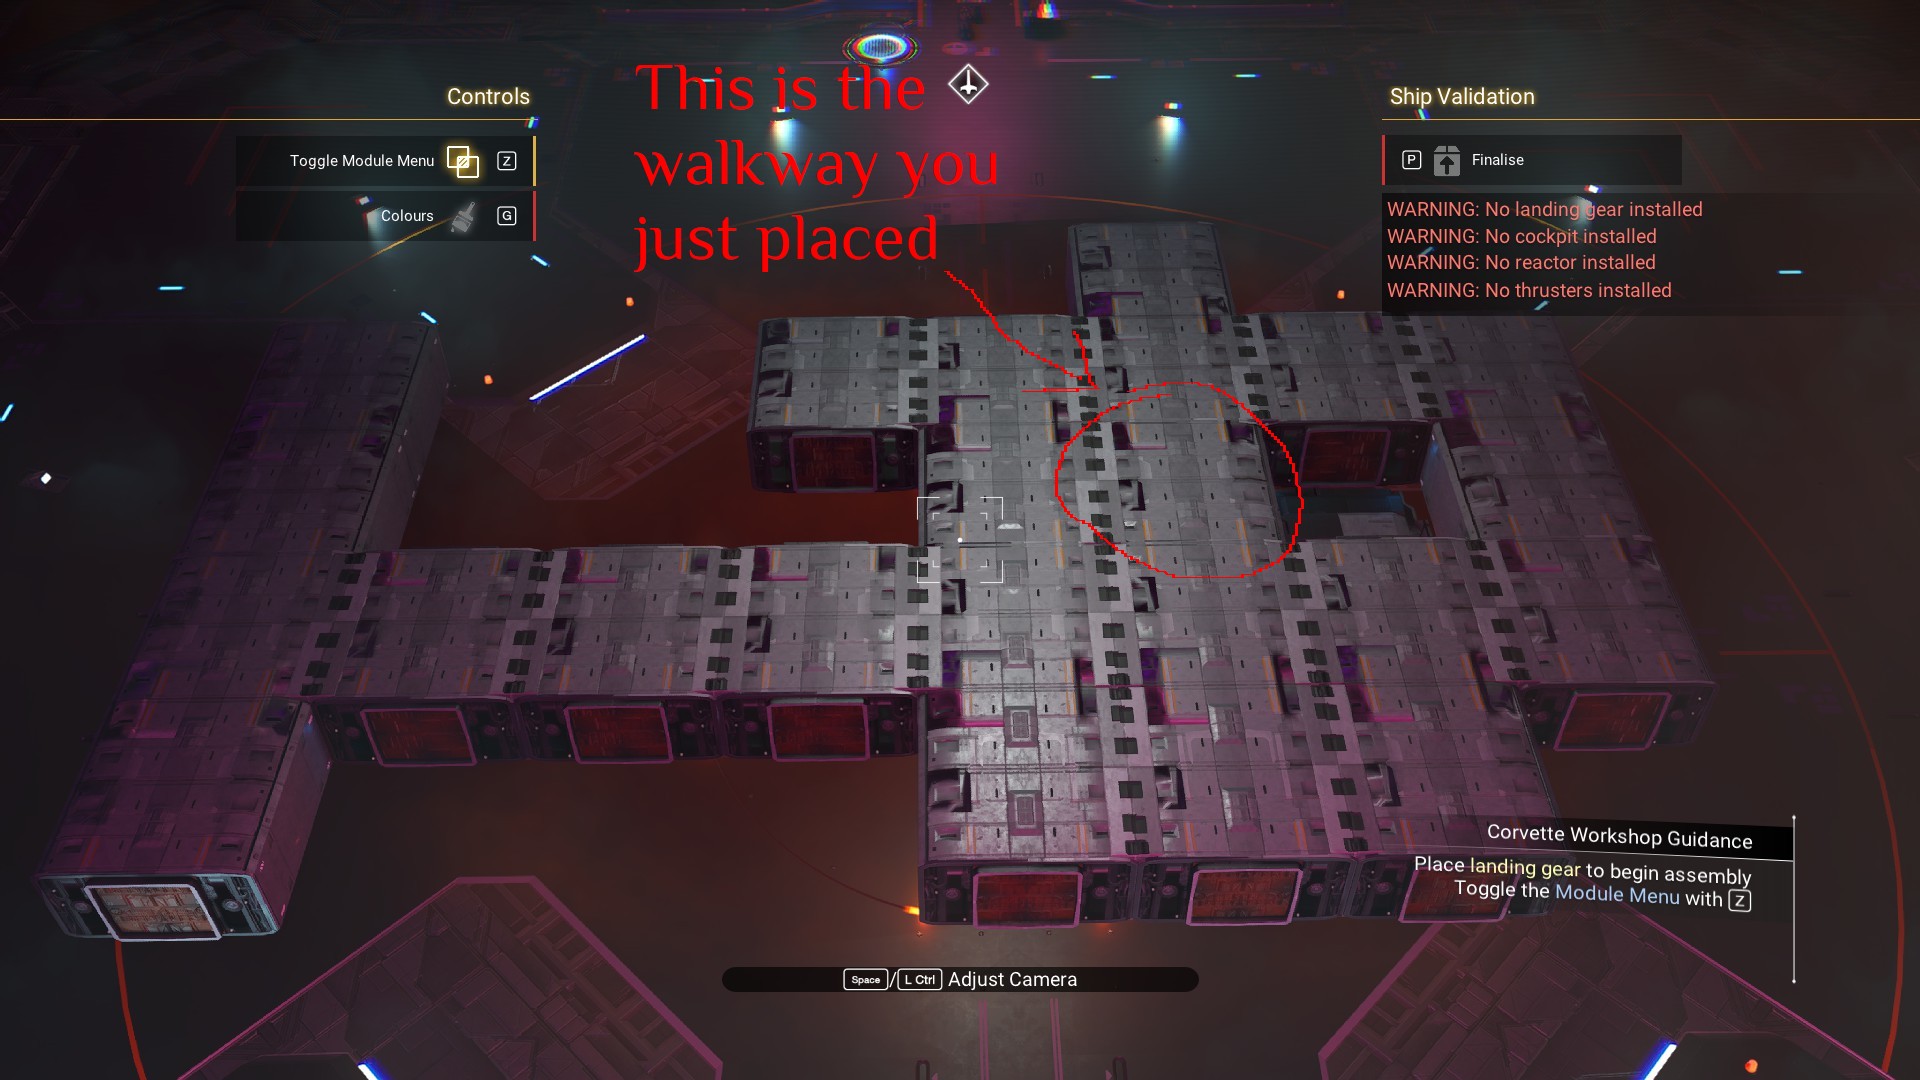
Habitations.
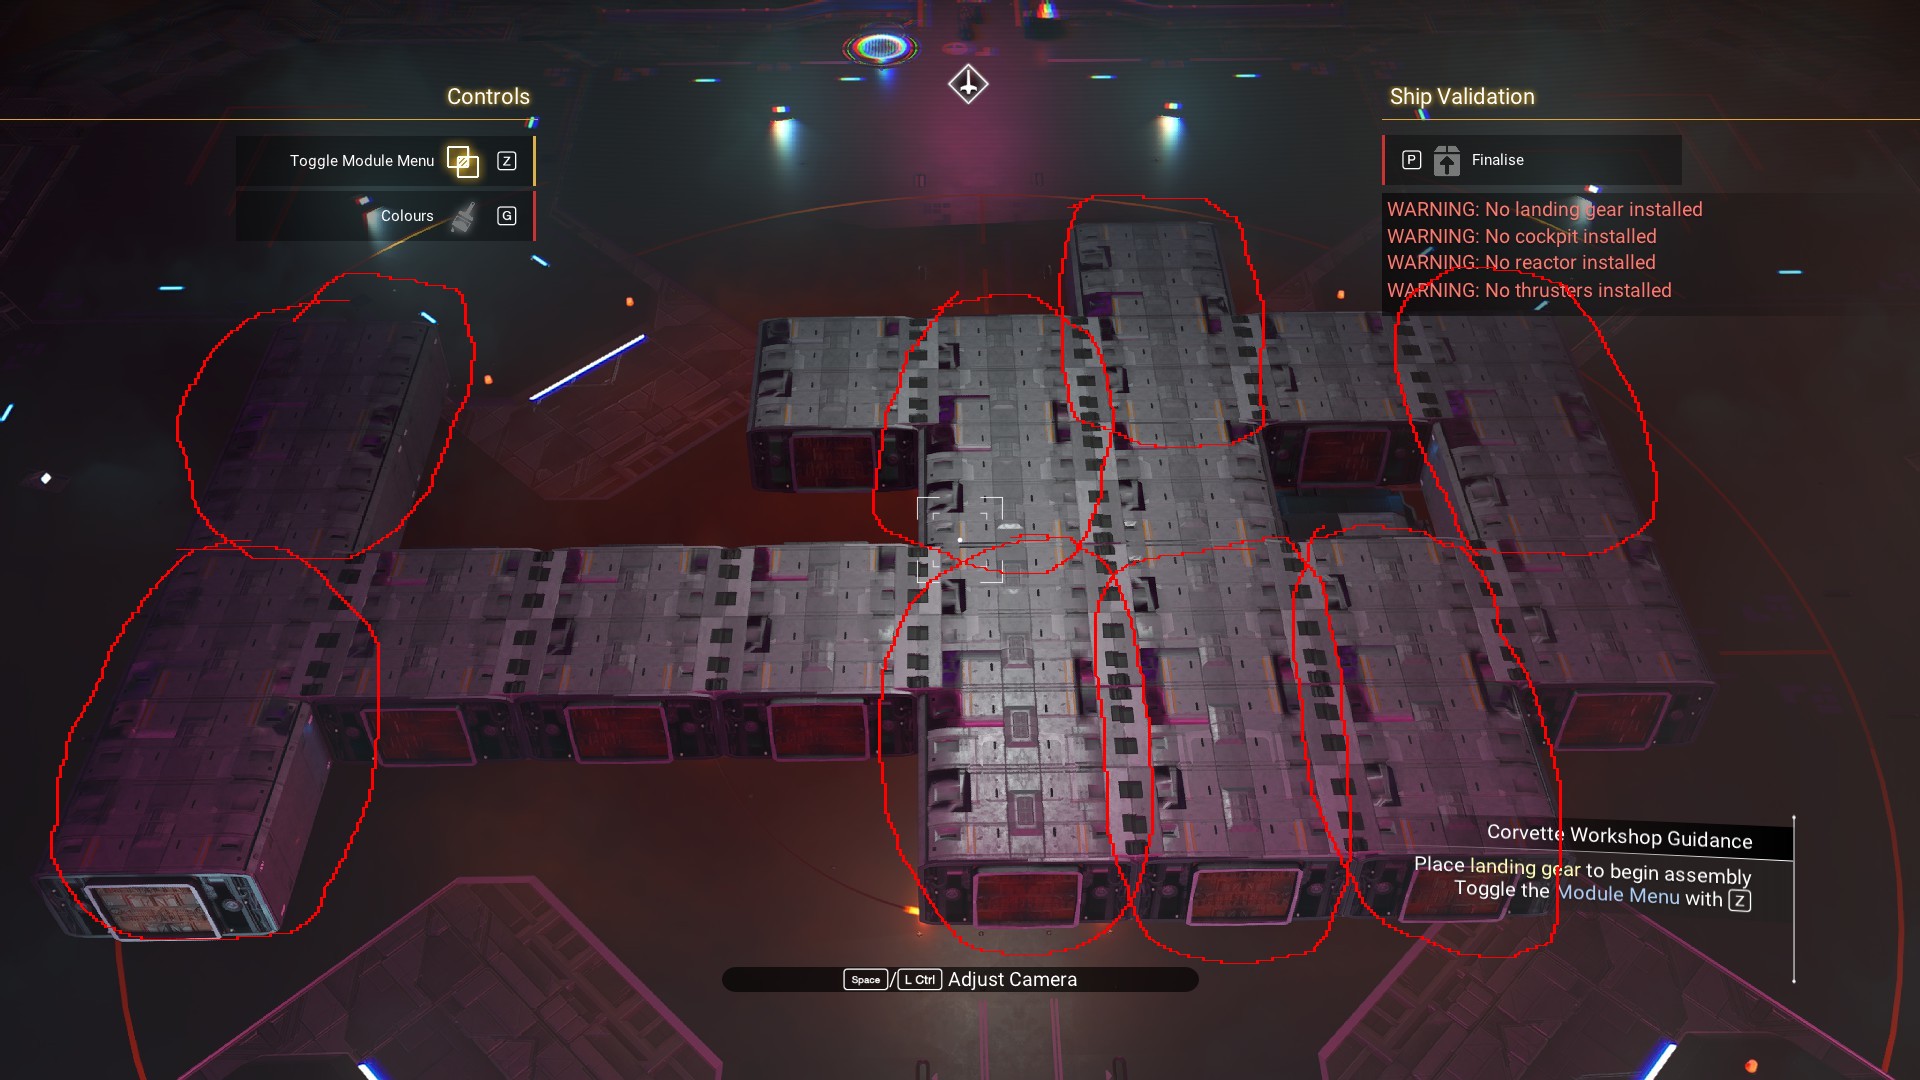
Walkways.
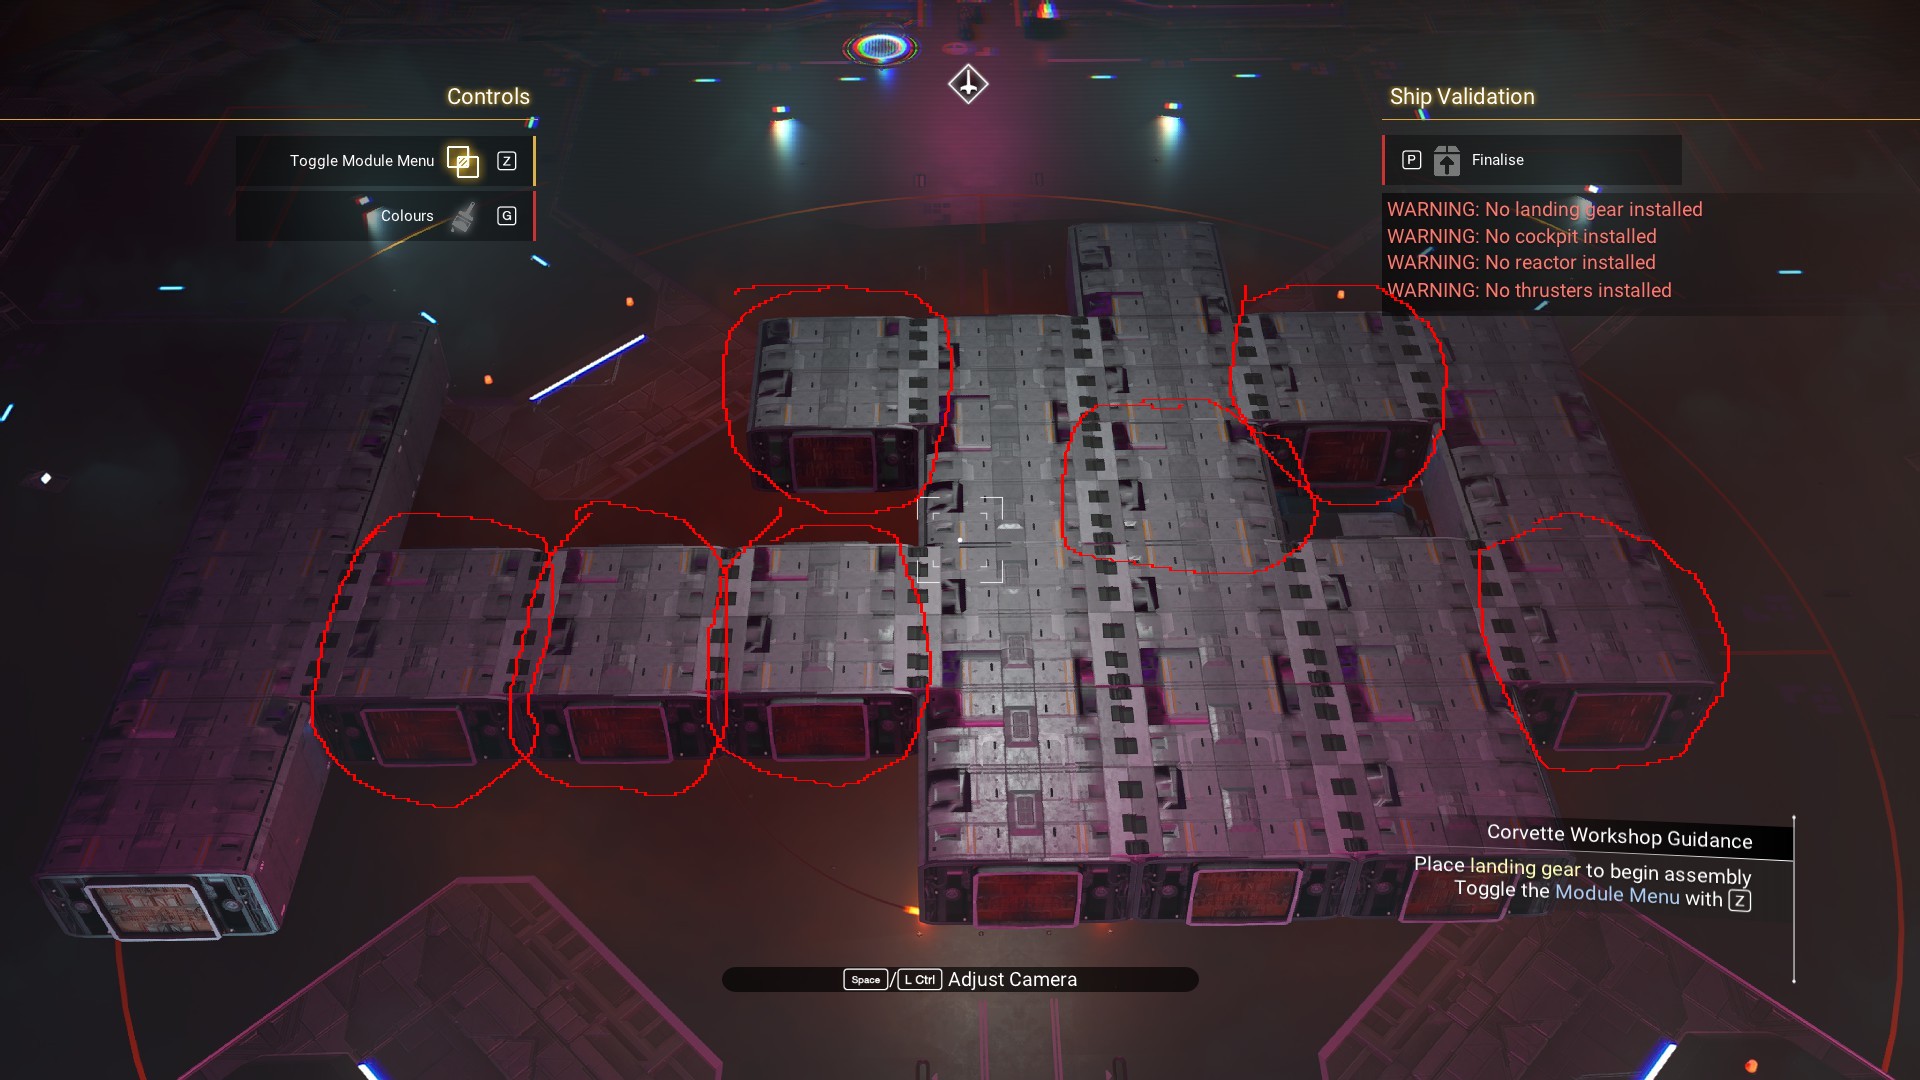 Two Titan Sub-Light Thrusters on the rear.
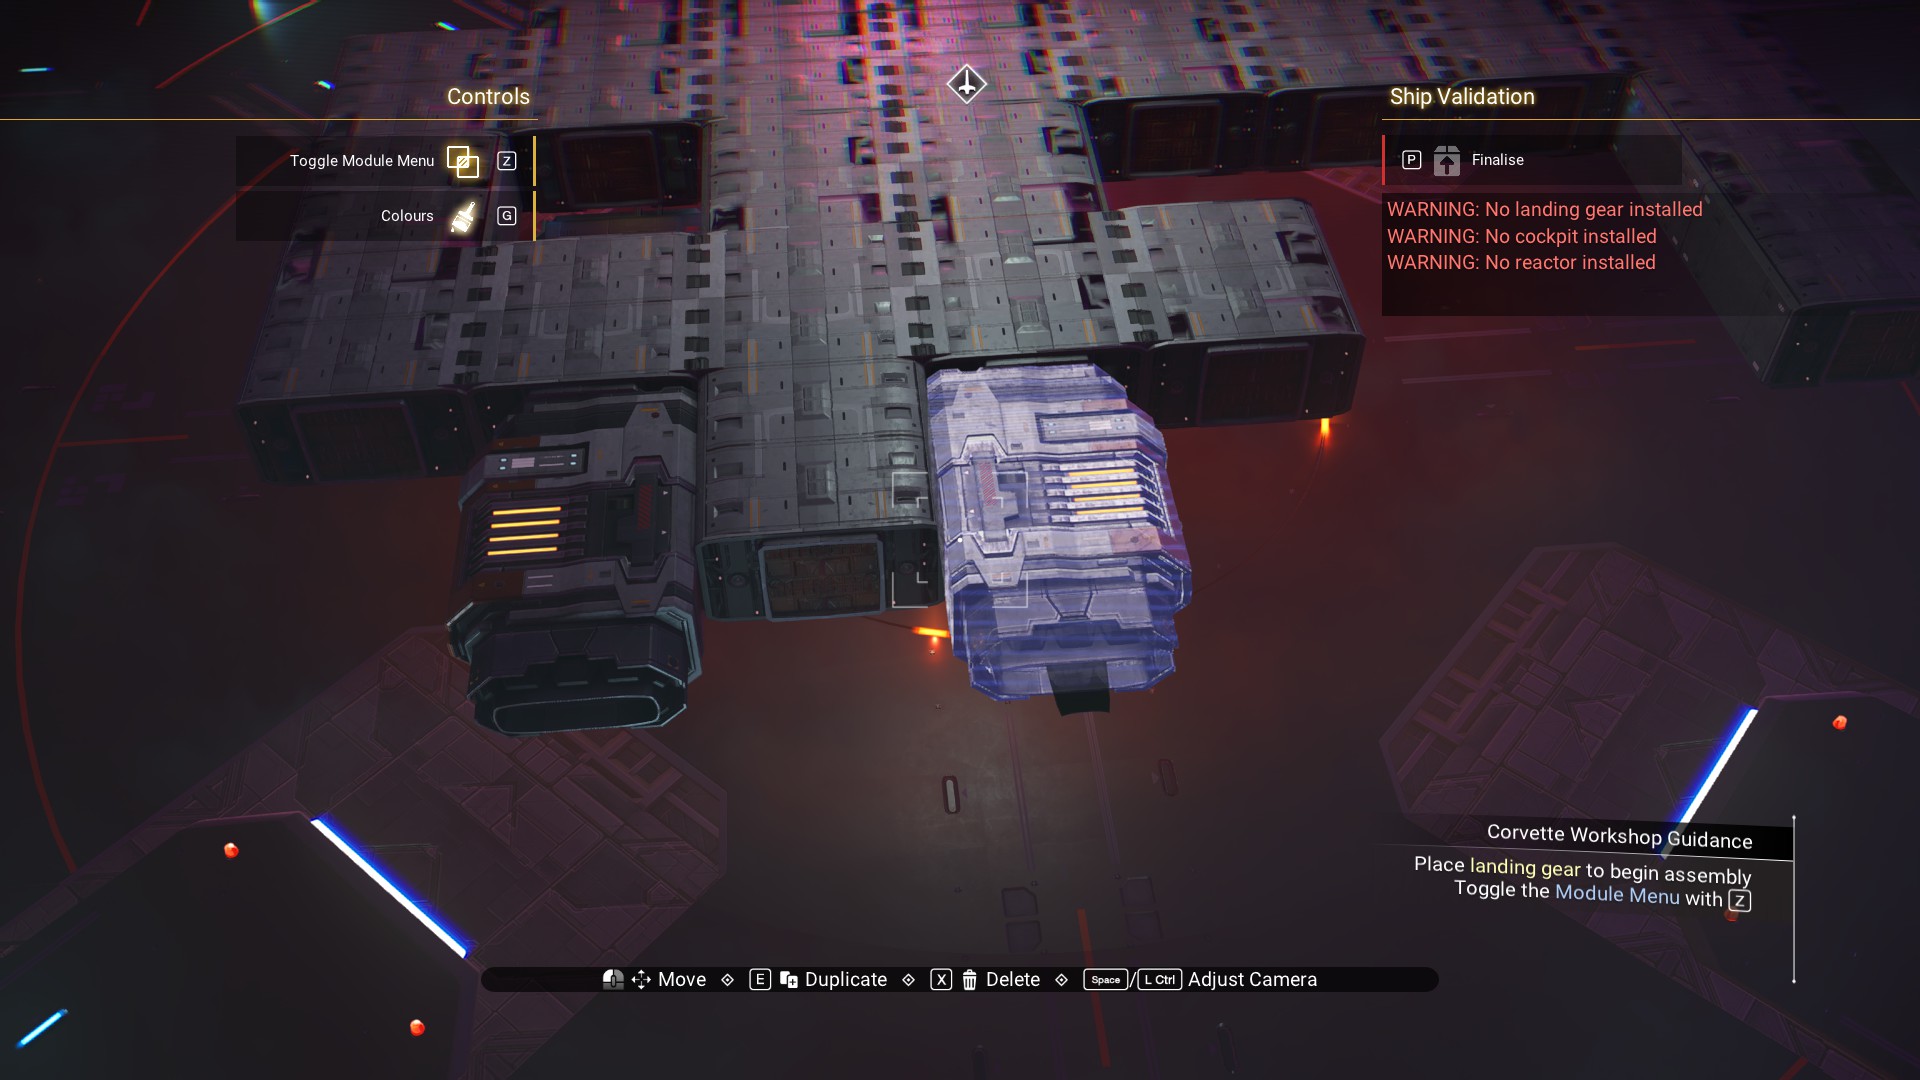 Flip a Radiator Casing and place it between the thrusters.
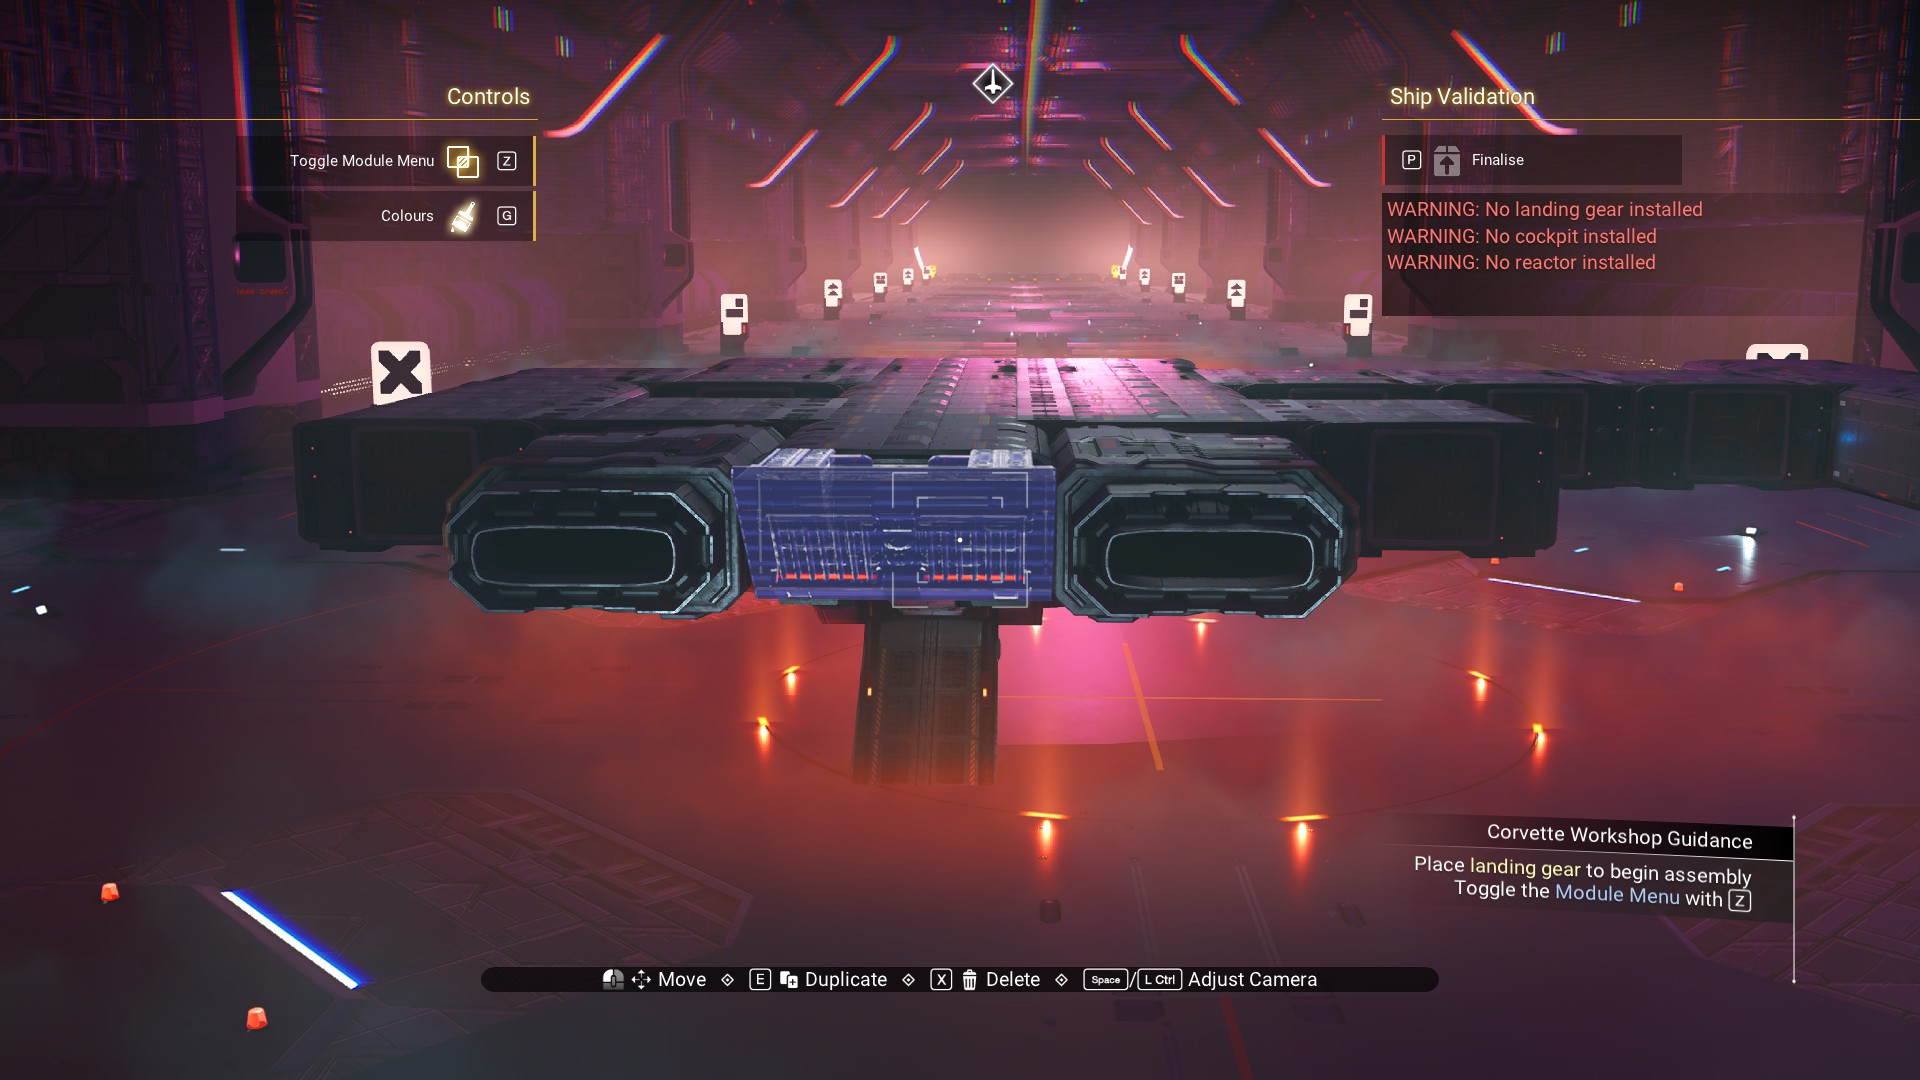 Two Domed Casings create a strut to the rear of the cockpit. Flip them over vertically and make sure the angle is toward the rear of the ship.
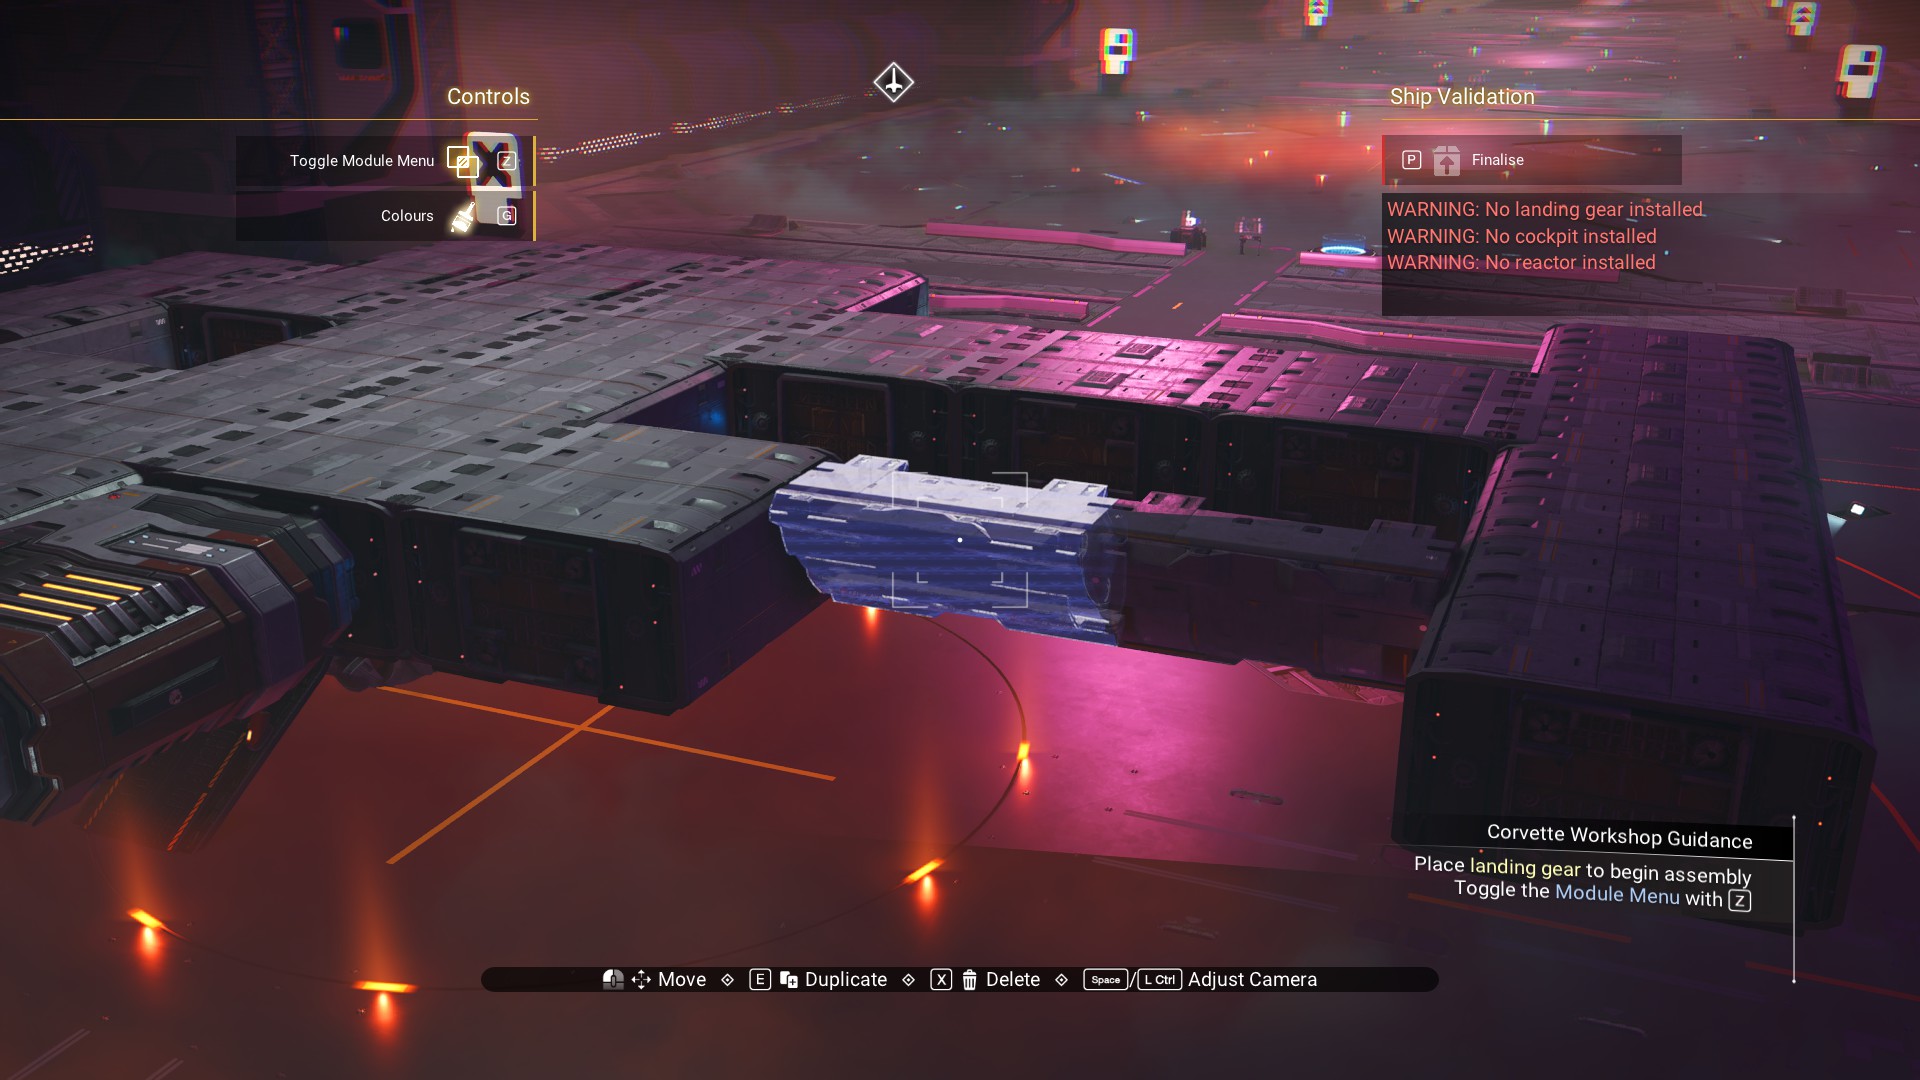 Now, to put the cockpit on the cockpit.
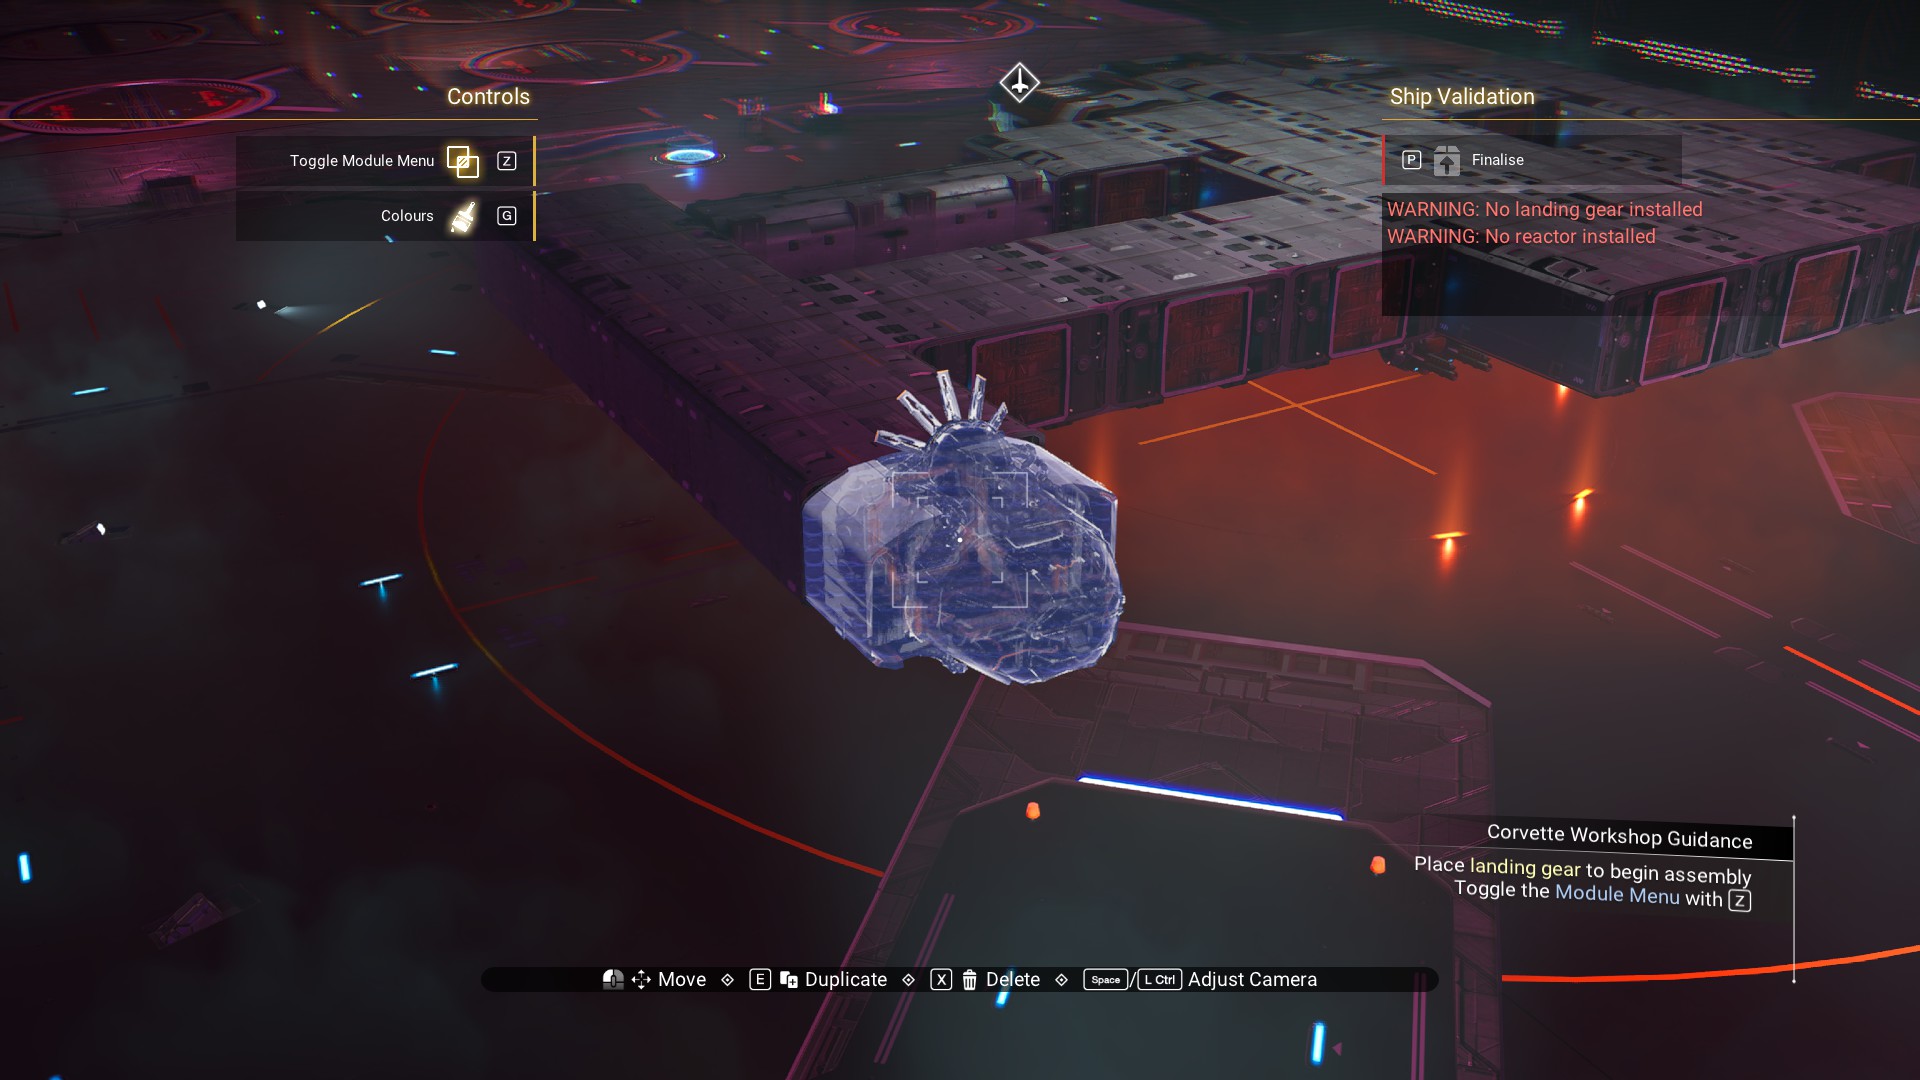 Supercruise Cowling underneath the front of the cockpit.
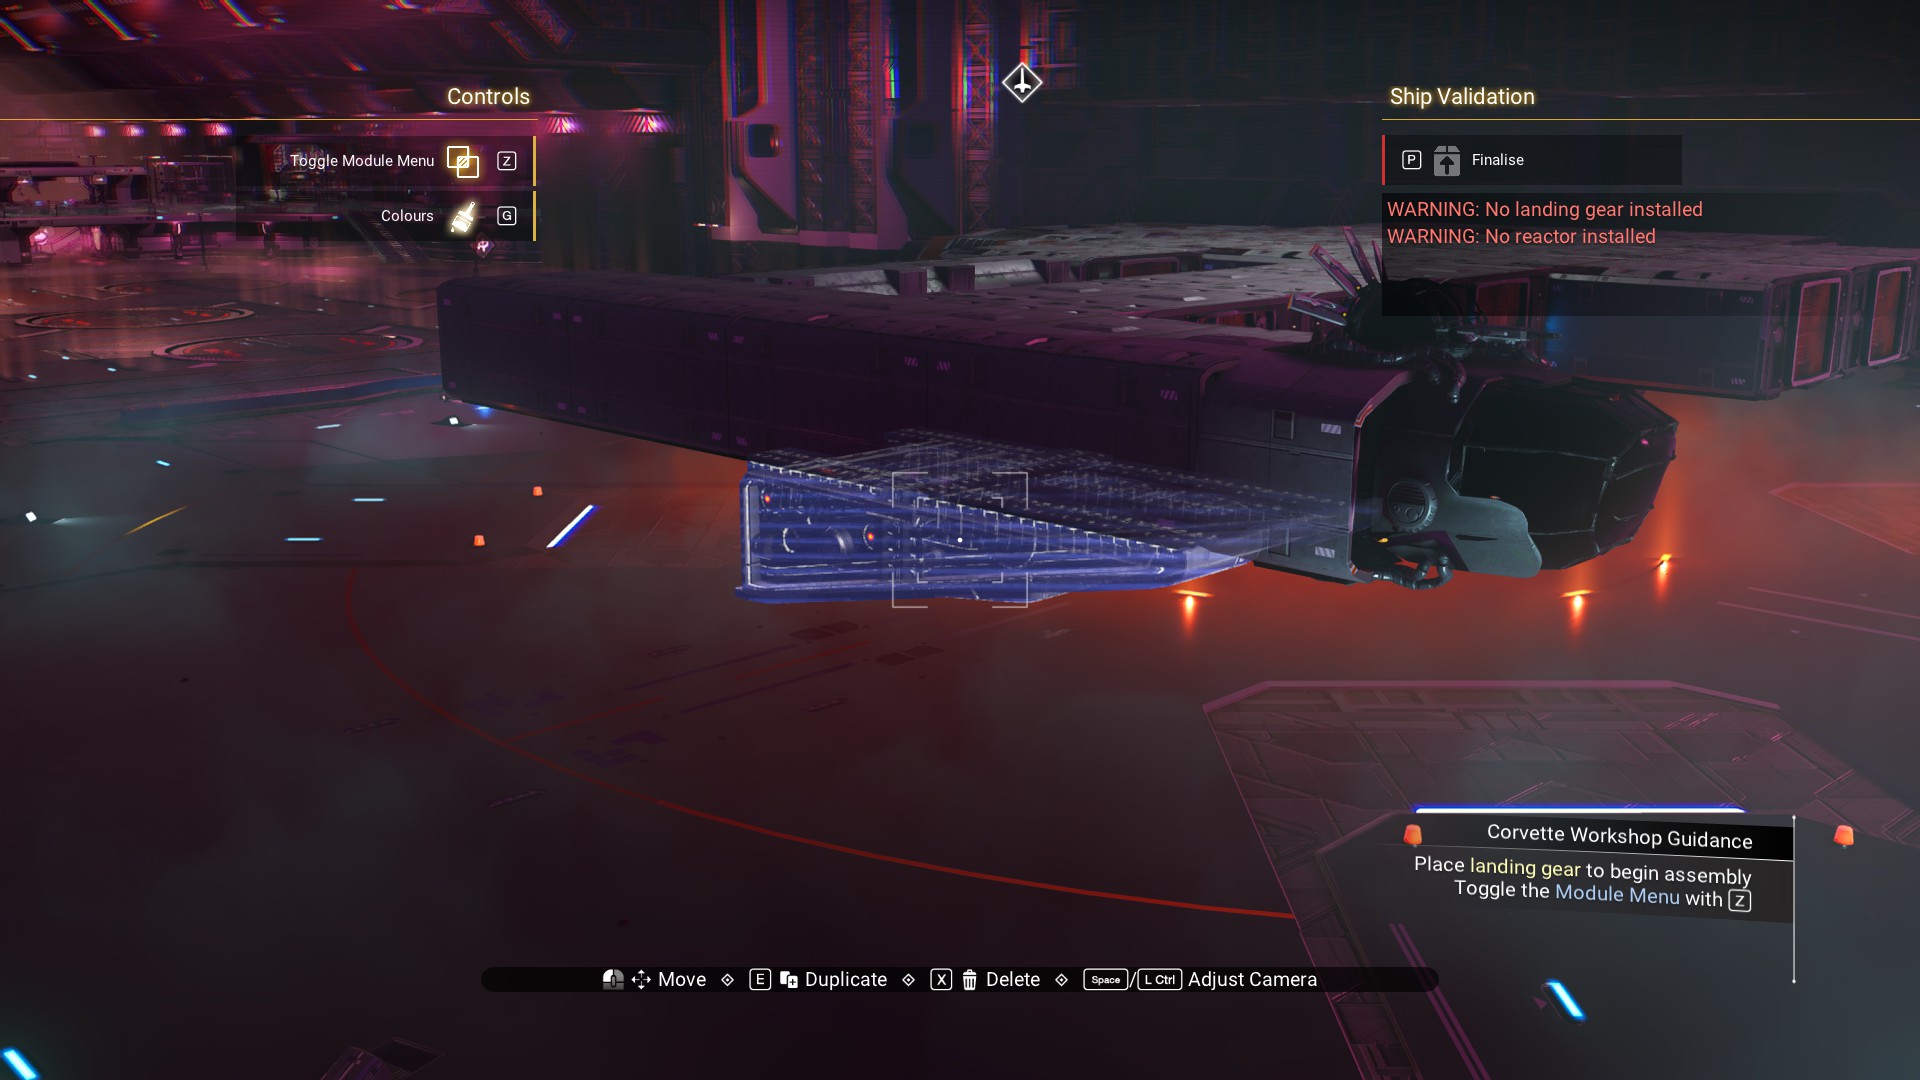 And, Longshore Cowling underneath the rear of the cockpit.
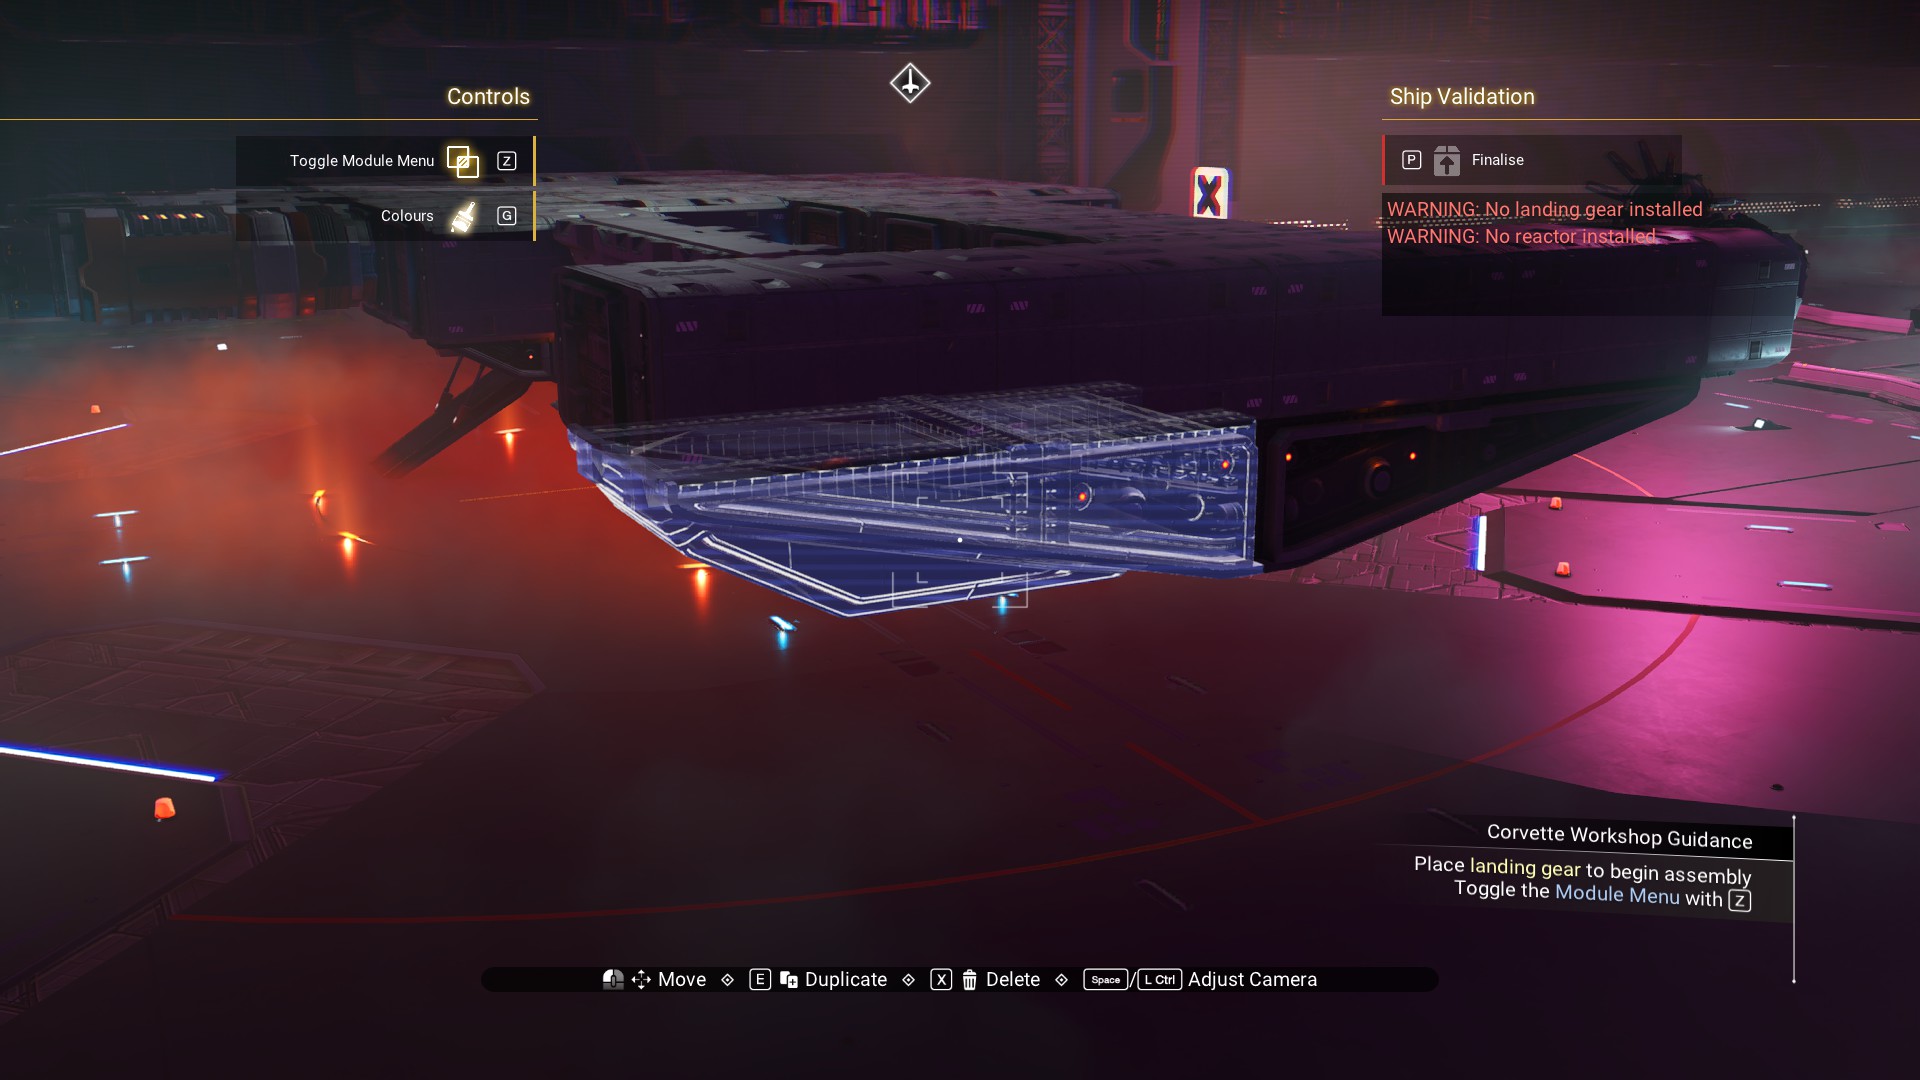 Landing thrusters will fit toward the front end of the Longshore Cowling. This is how we get away with the phase beam under the main part of the ship.
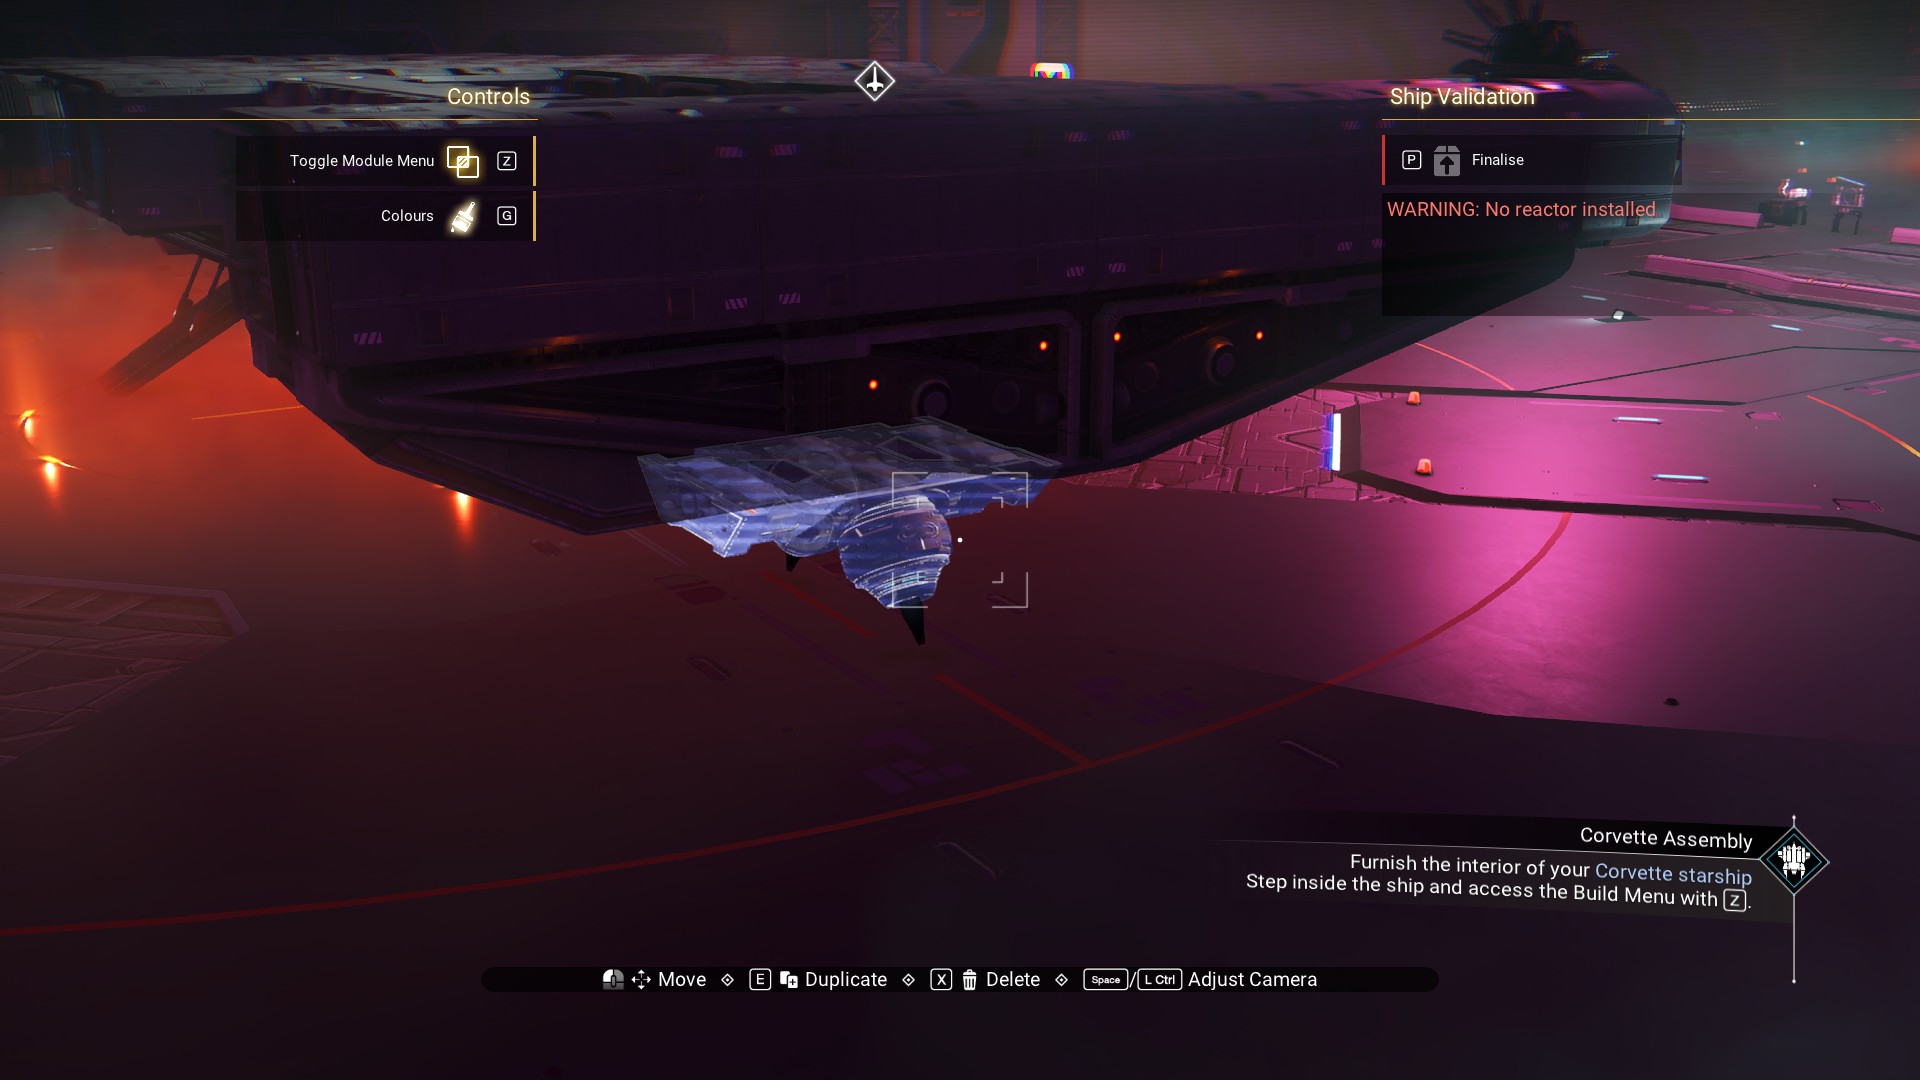 Throw a Cargo Link on the back end to make it look fancy.
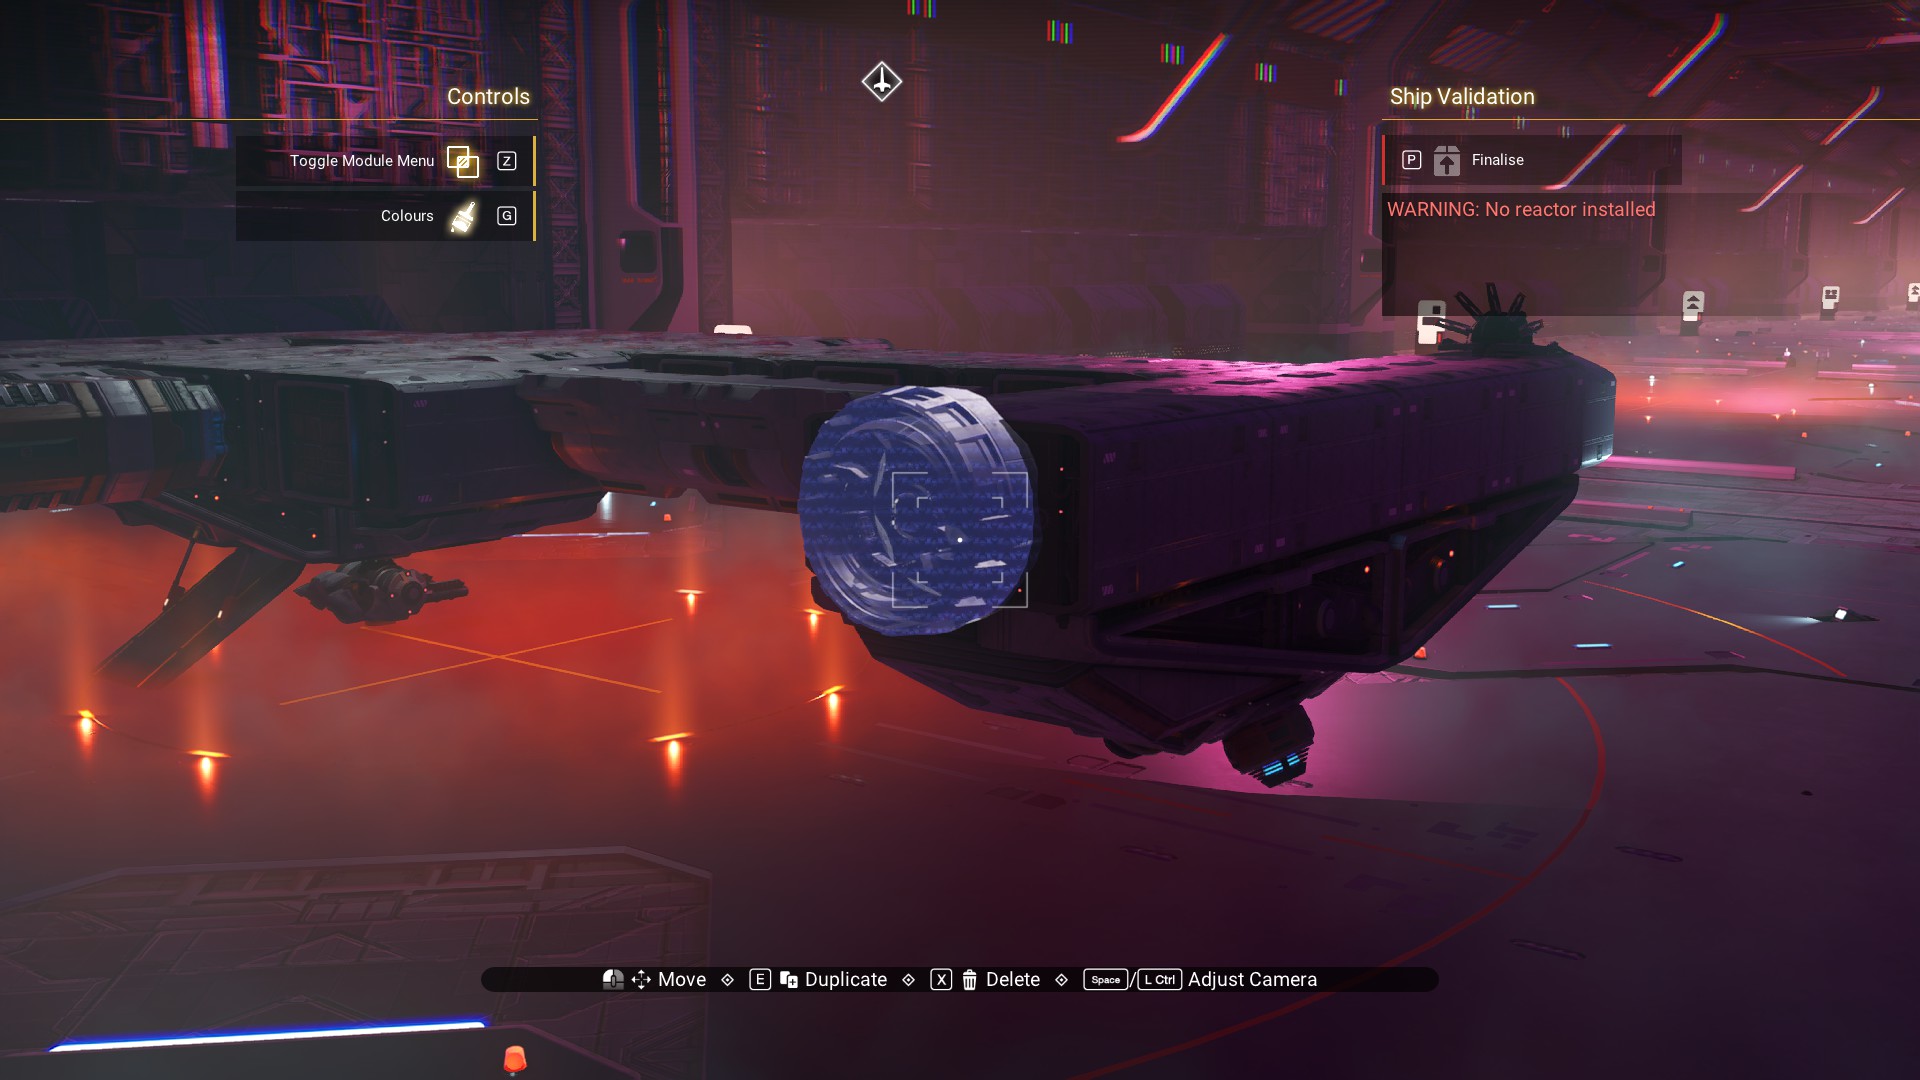 Argonaut Cowling on the front arm leading from the body toward the cockpit, flipped vertically.
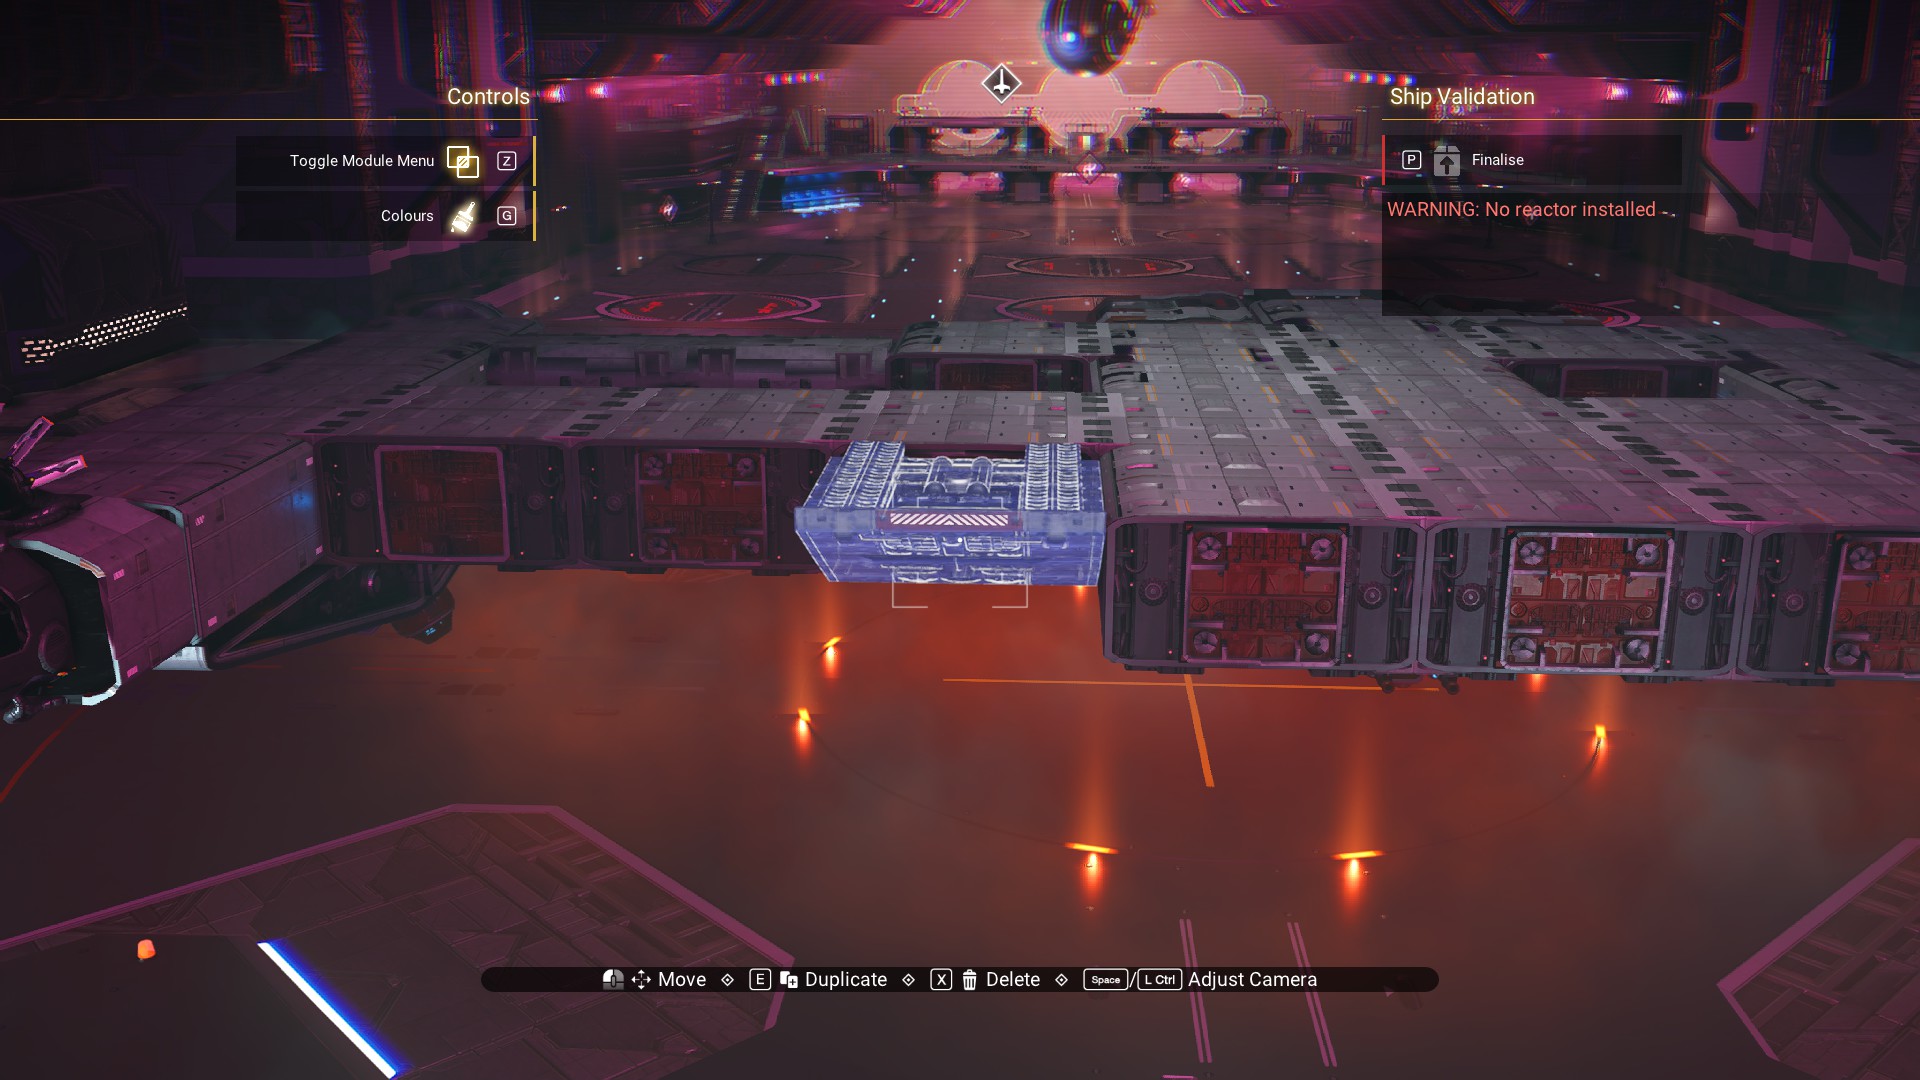 And, a Speedbird Diffuser on the far end of the same arm, next to the cockpit. Also, flipped vertically.
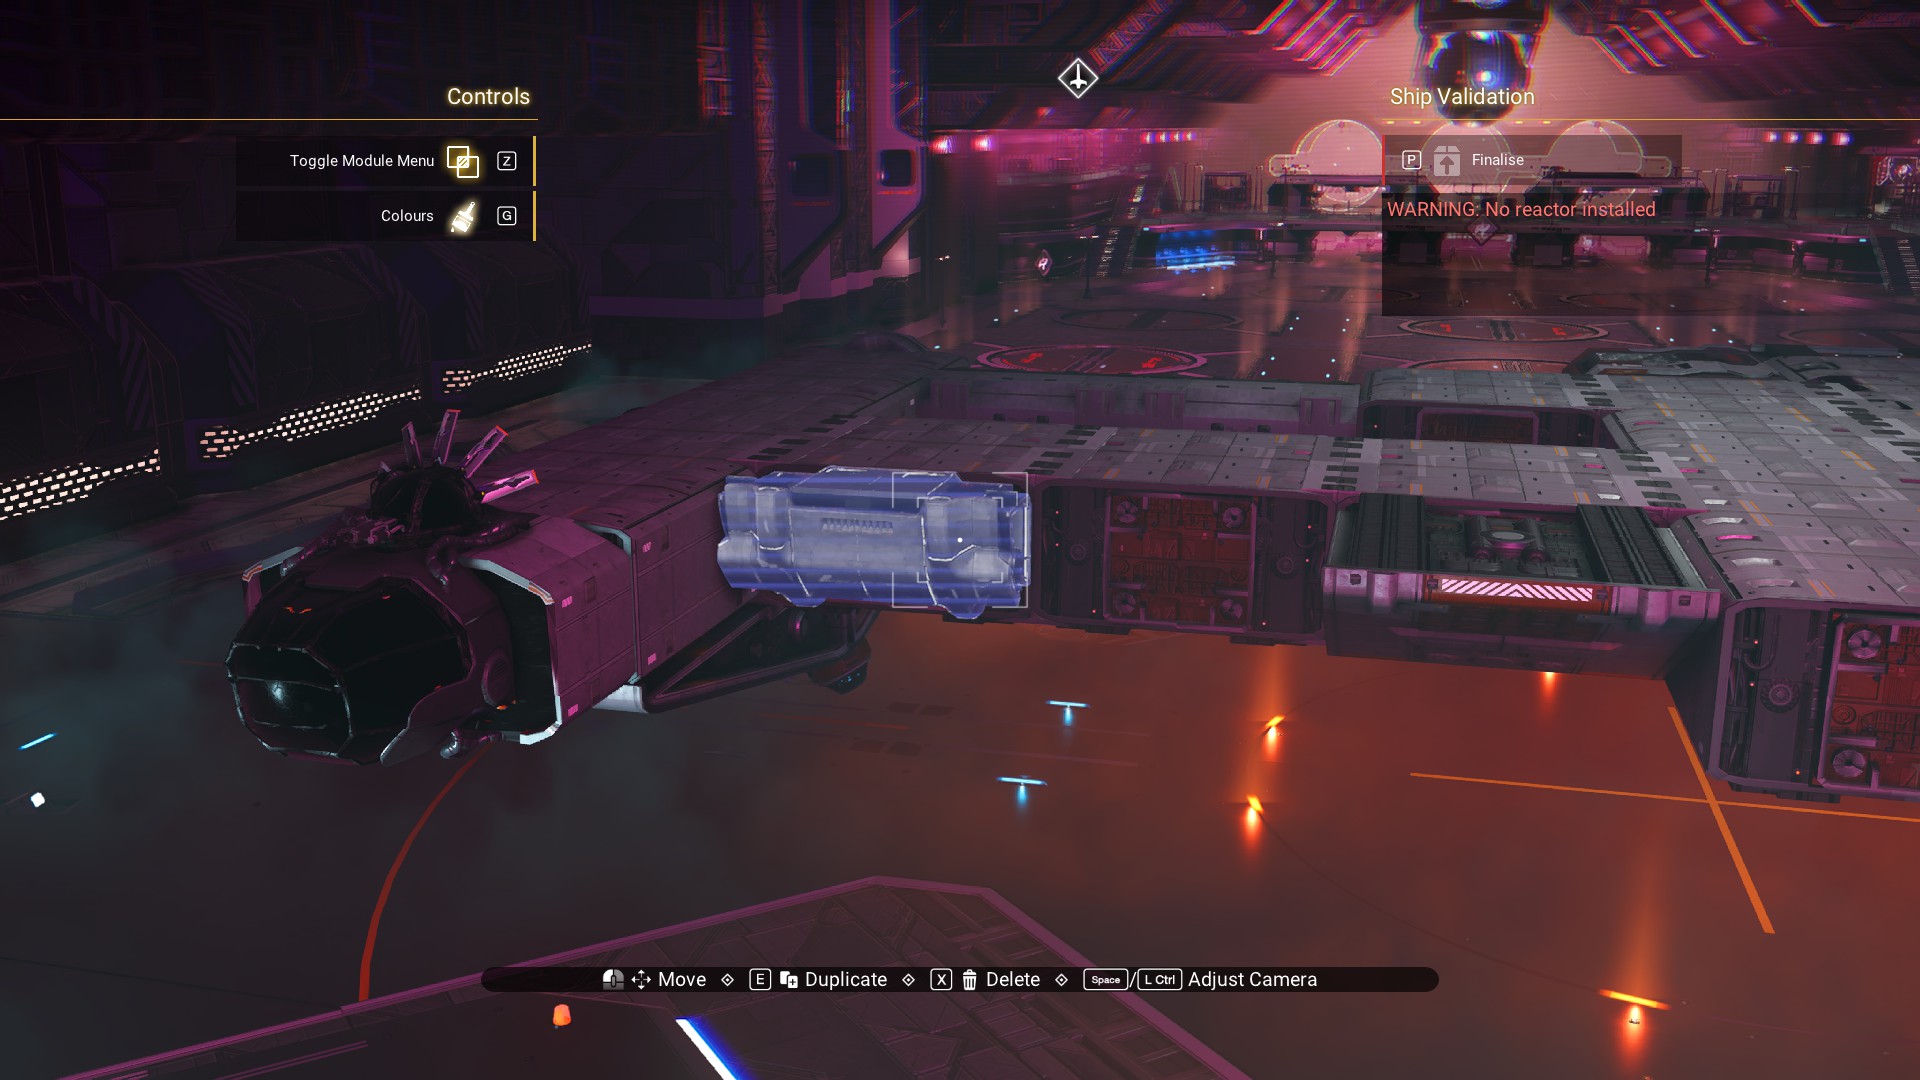 Attach a Speedbird Nacelle to the Argonaut cowling so it covers the Speedbird Diffuser. Also, upside down. Every angle and curve on this level is upside down.
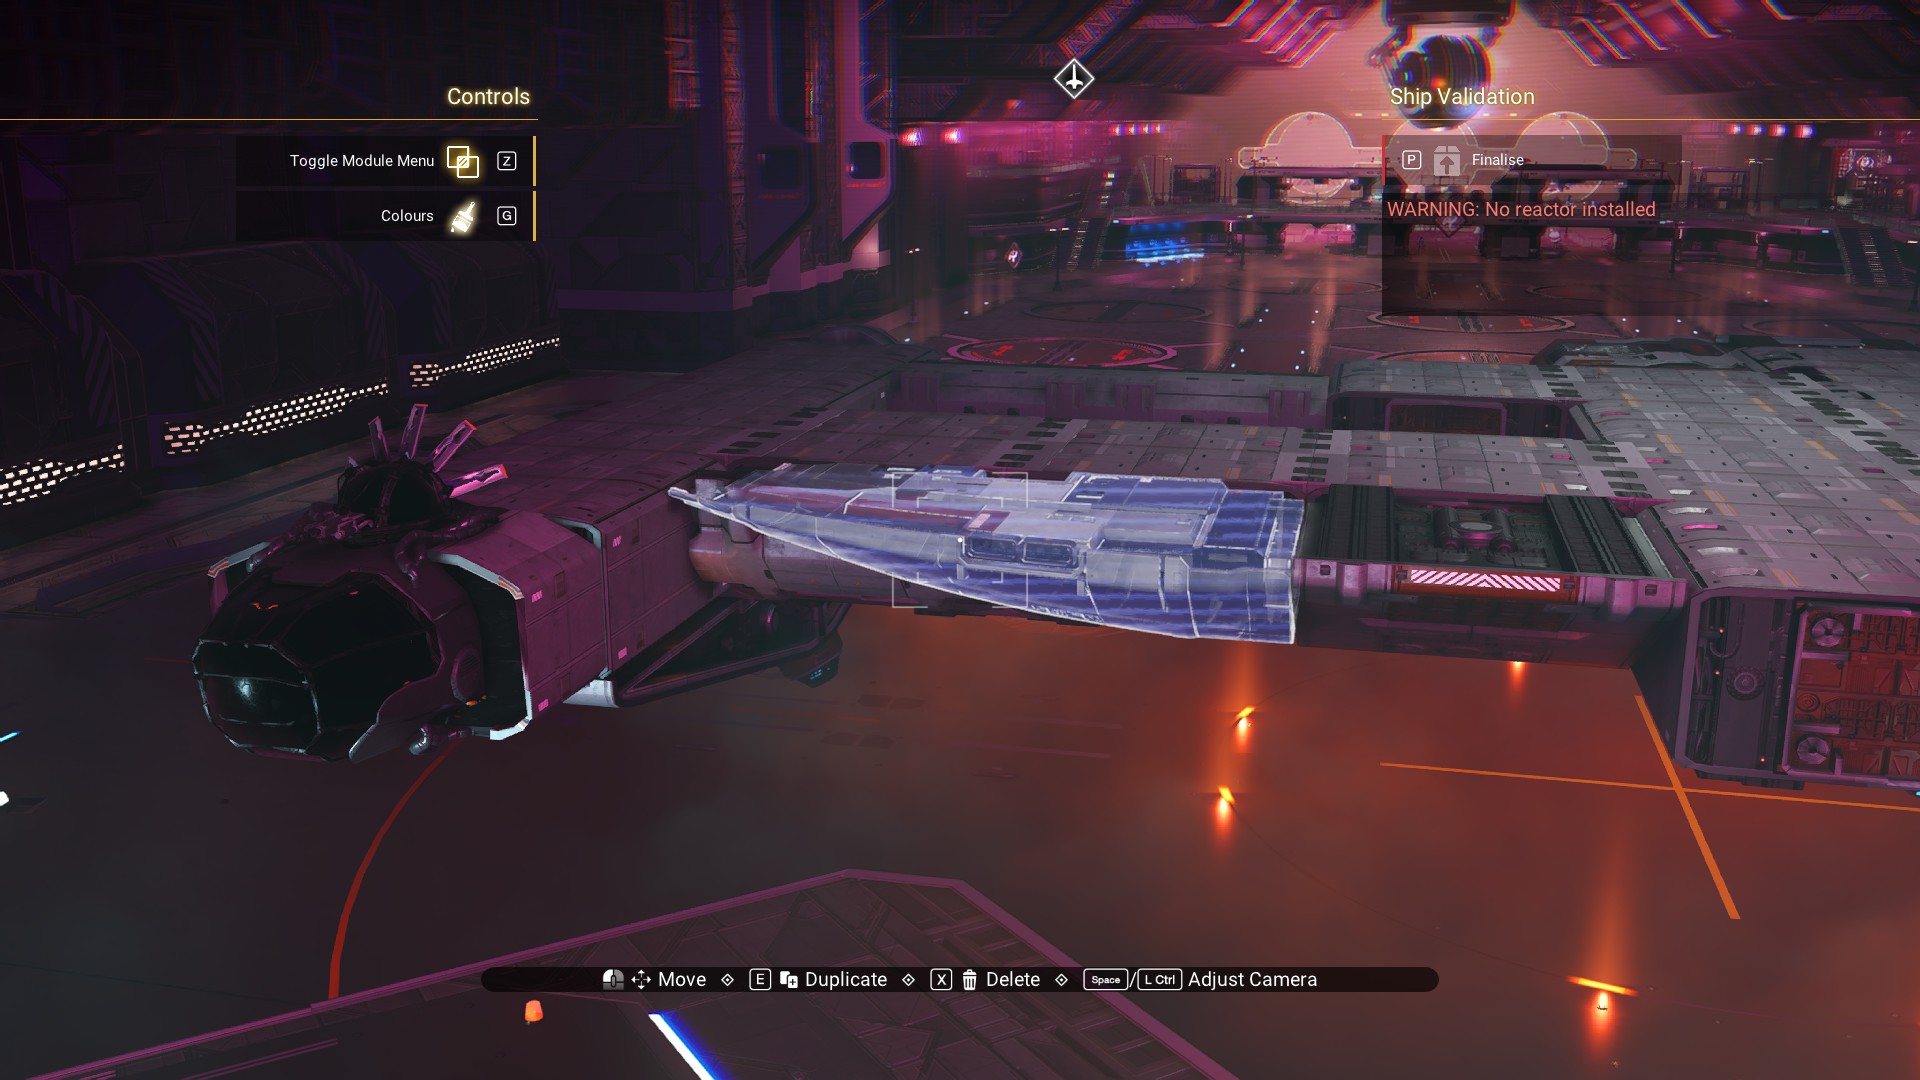 Argonaut Cowling on the front.
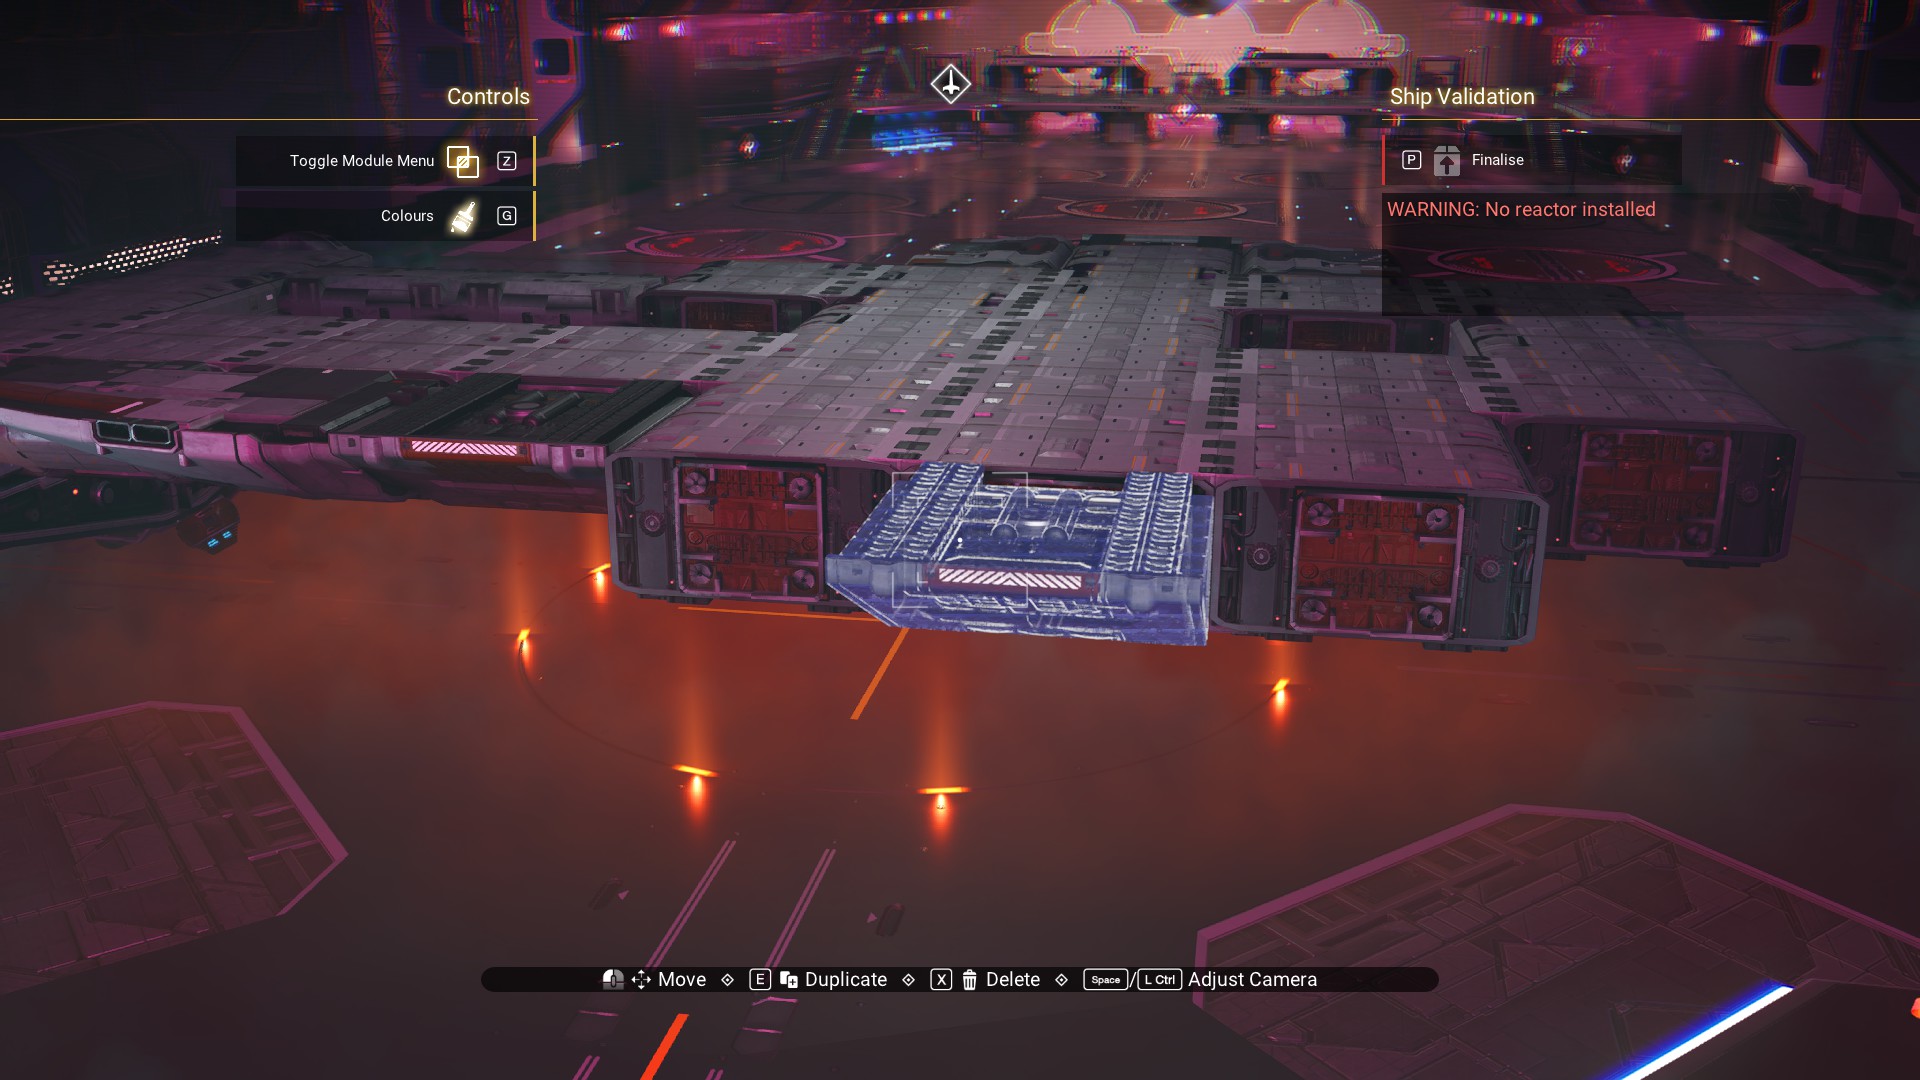 And, another on the shoulder.
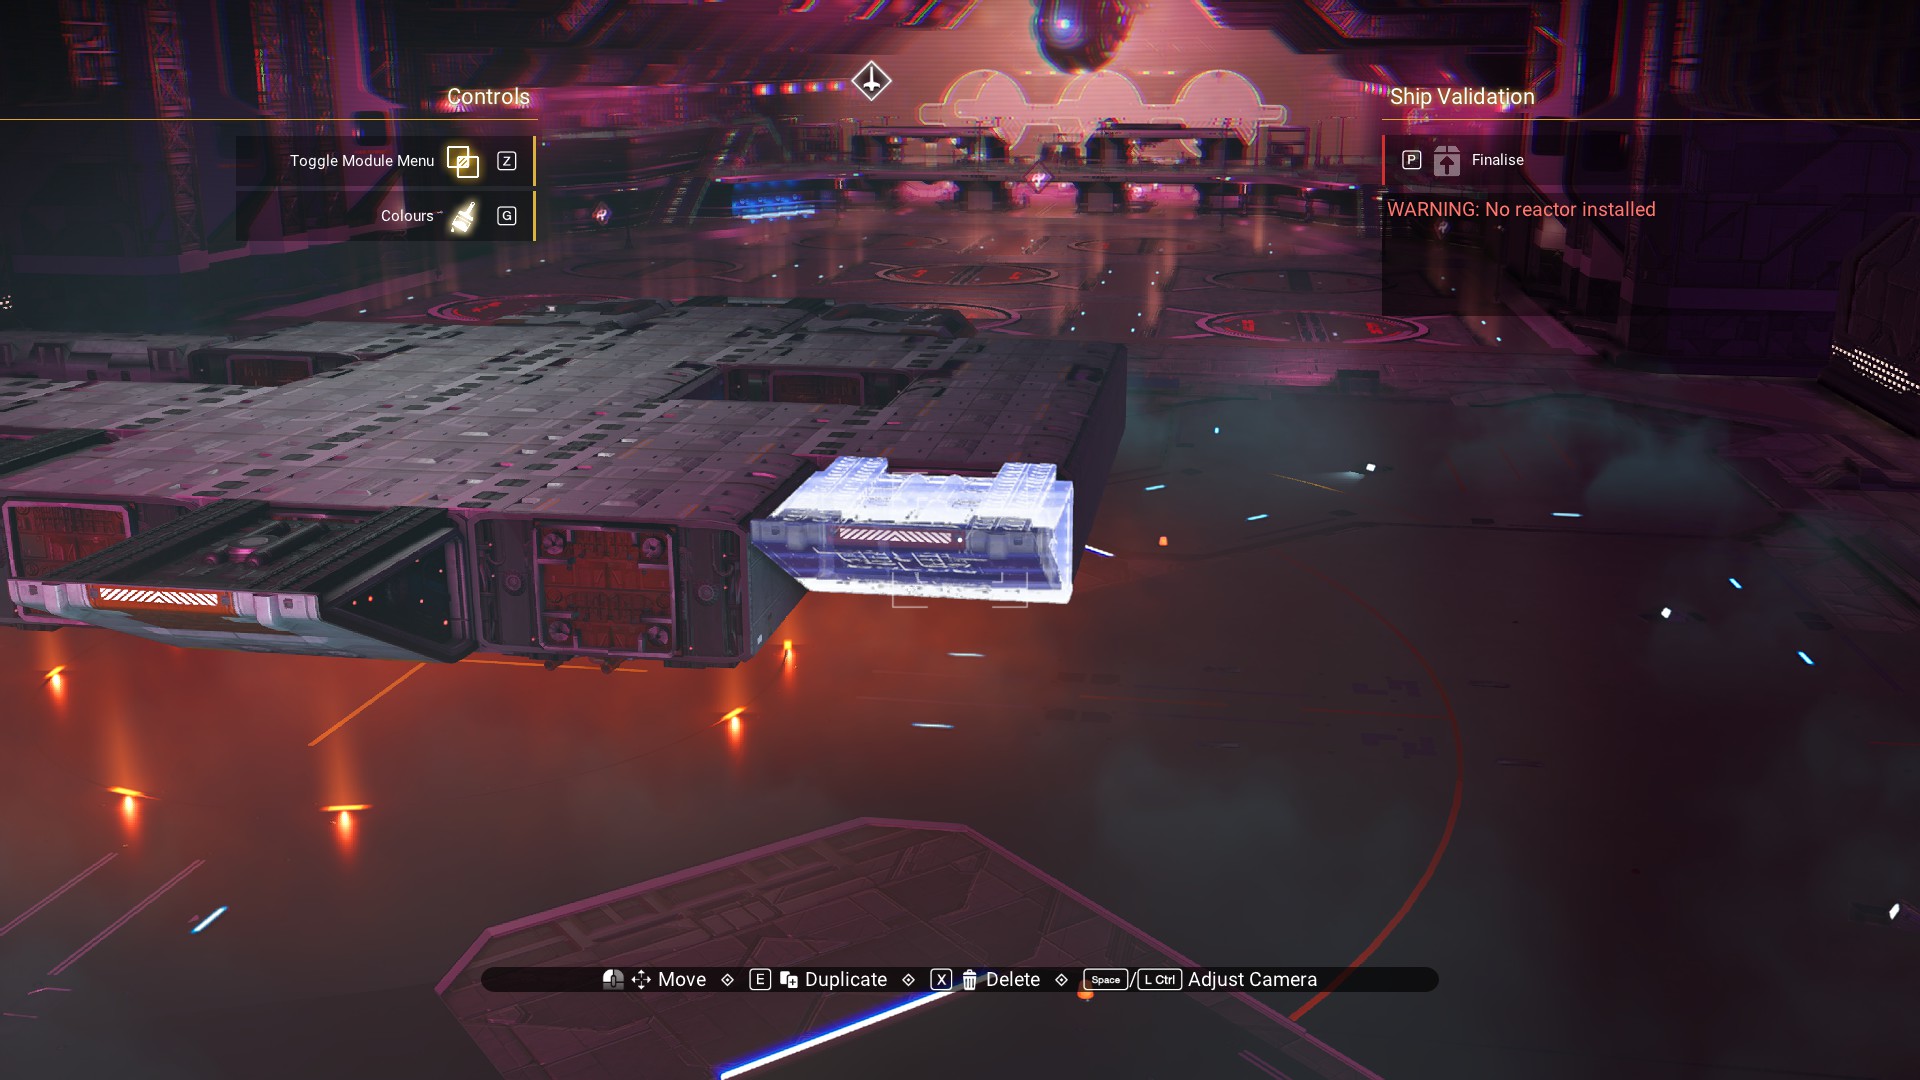 Add another walkway to the side of the body.
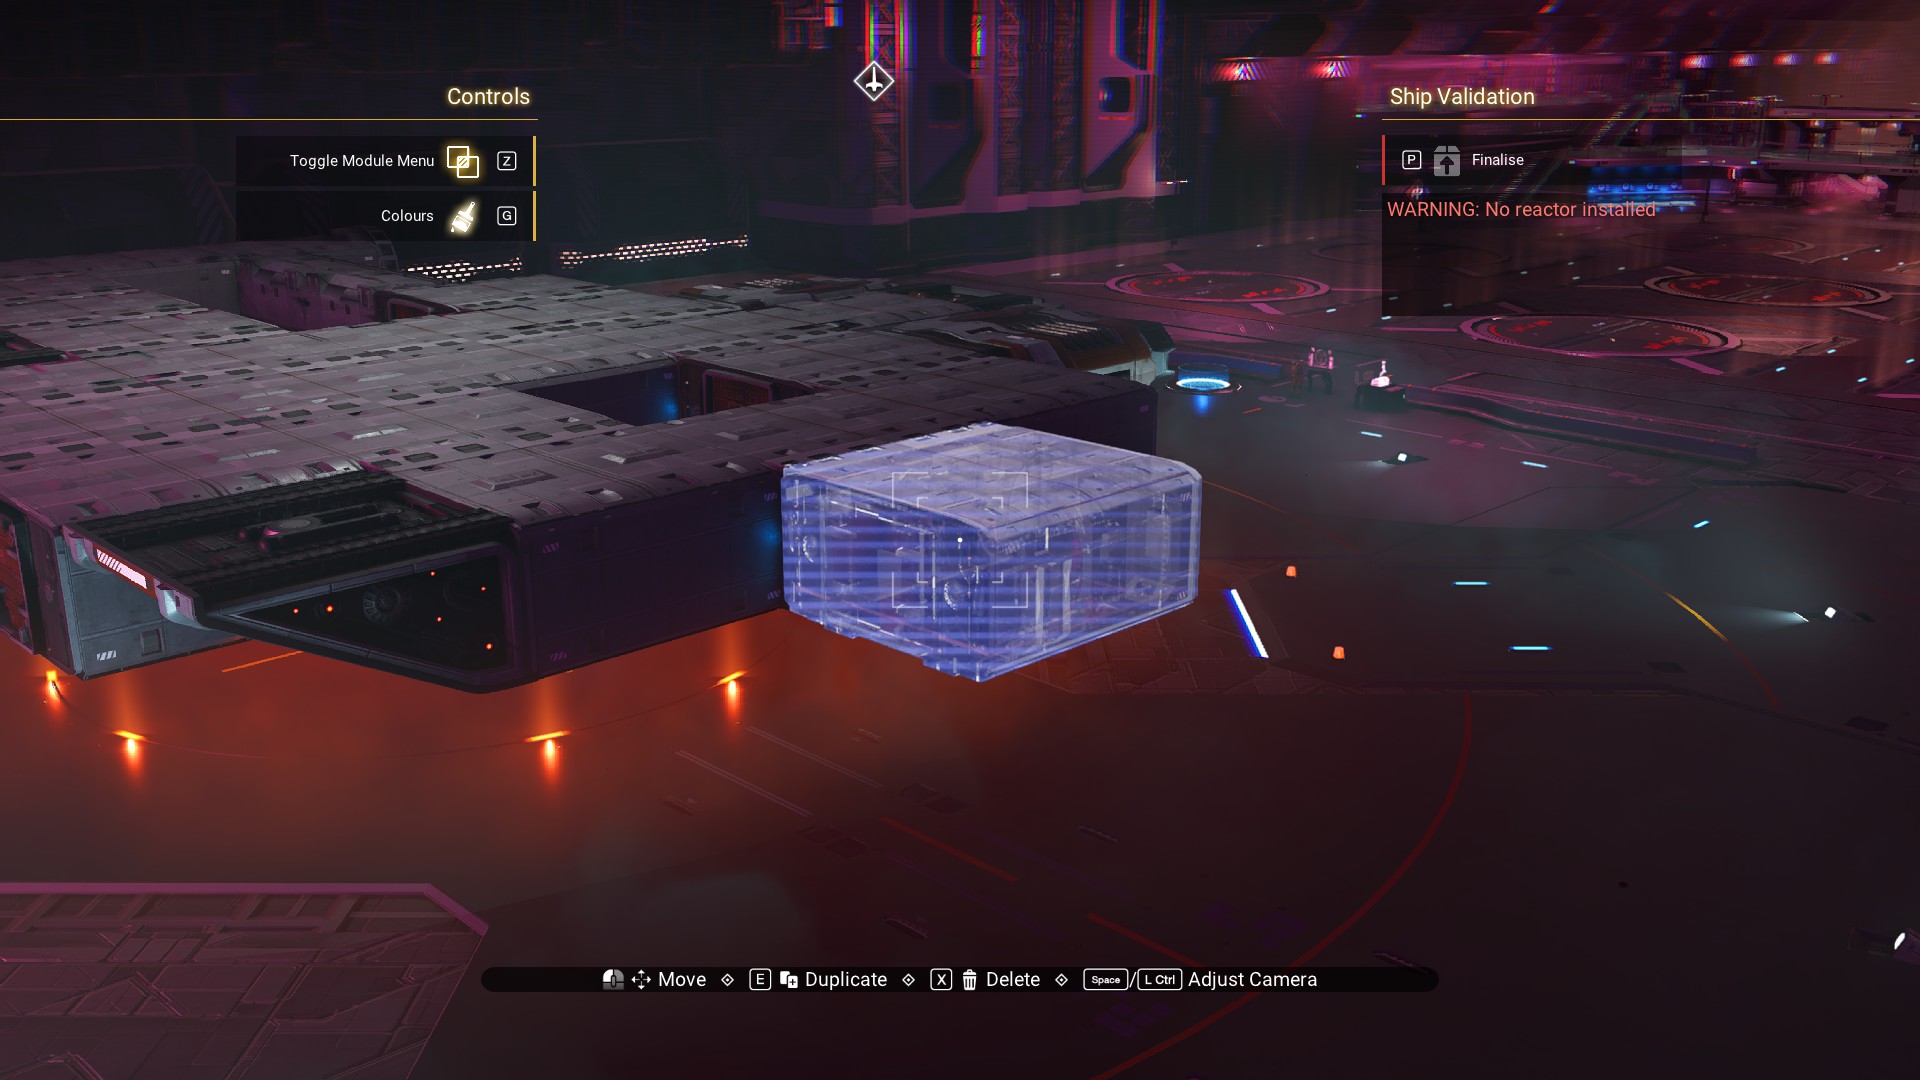 An Argonaut Fuel Cover on the rear, to the left of the engines.
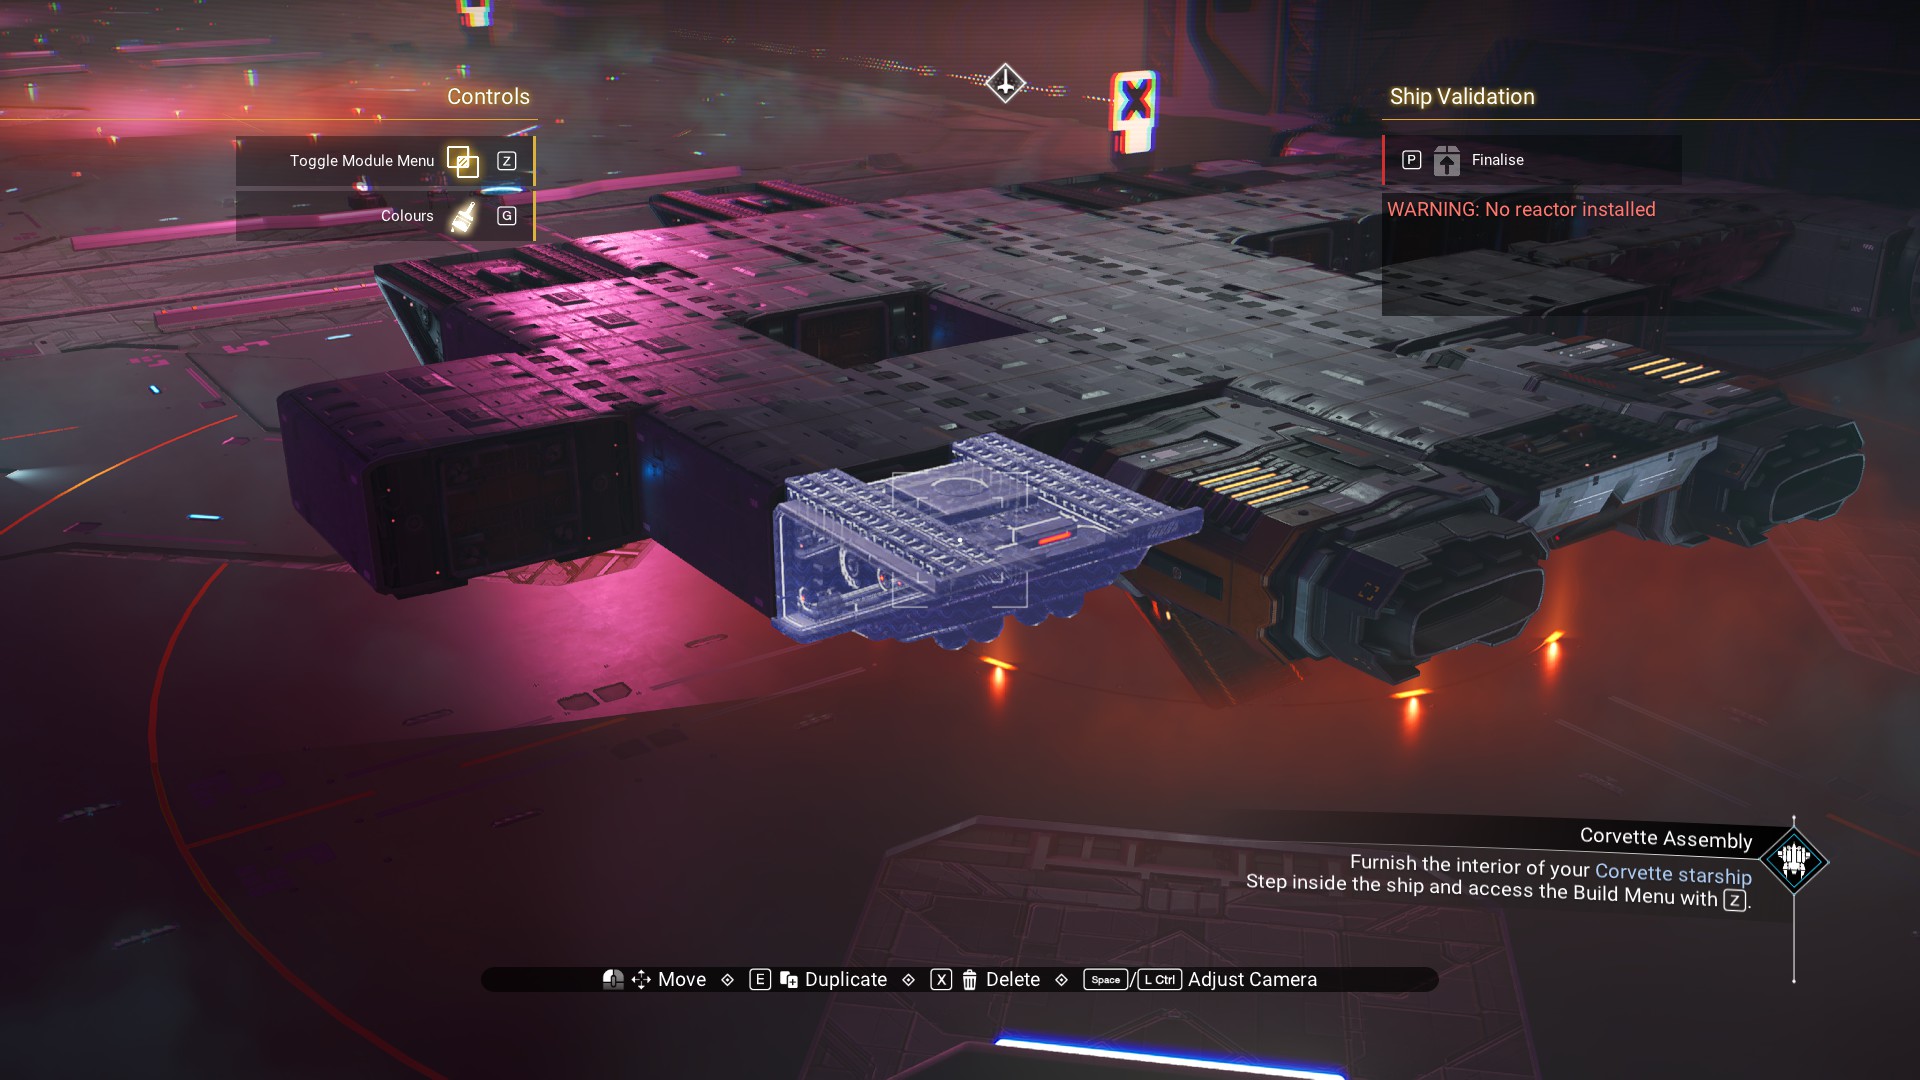 And, an Albatross Cargo Tank on the rear, to the right of the engines.
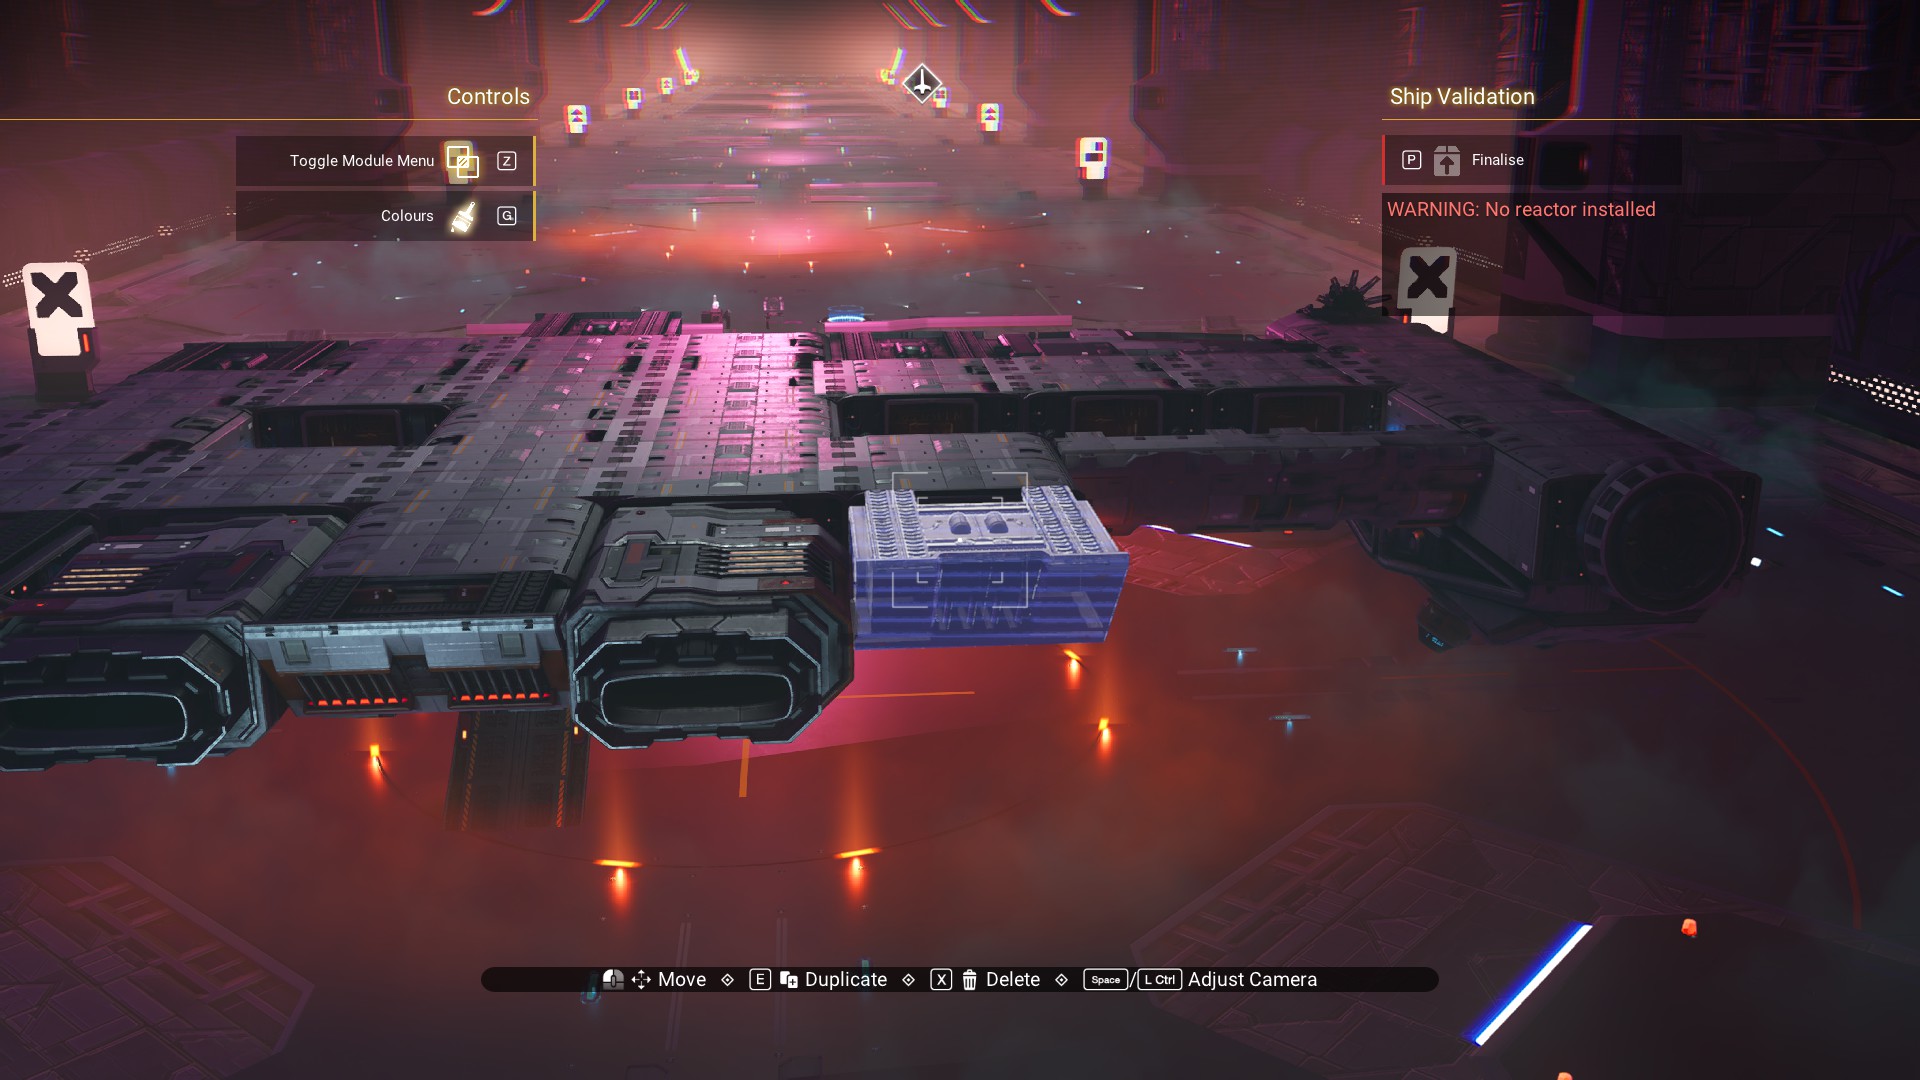 Turbine Aerofoils on the front, to either side of the Argonaut Cowling.
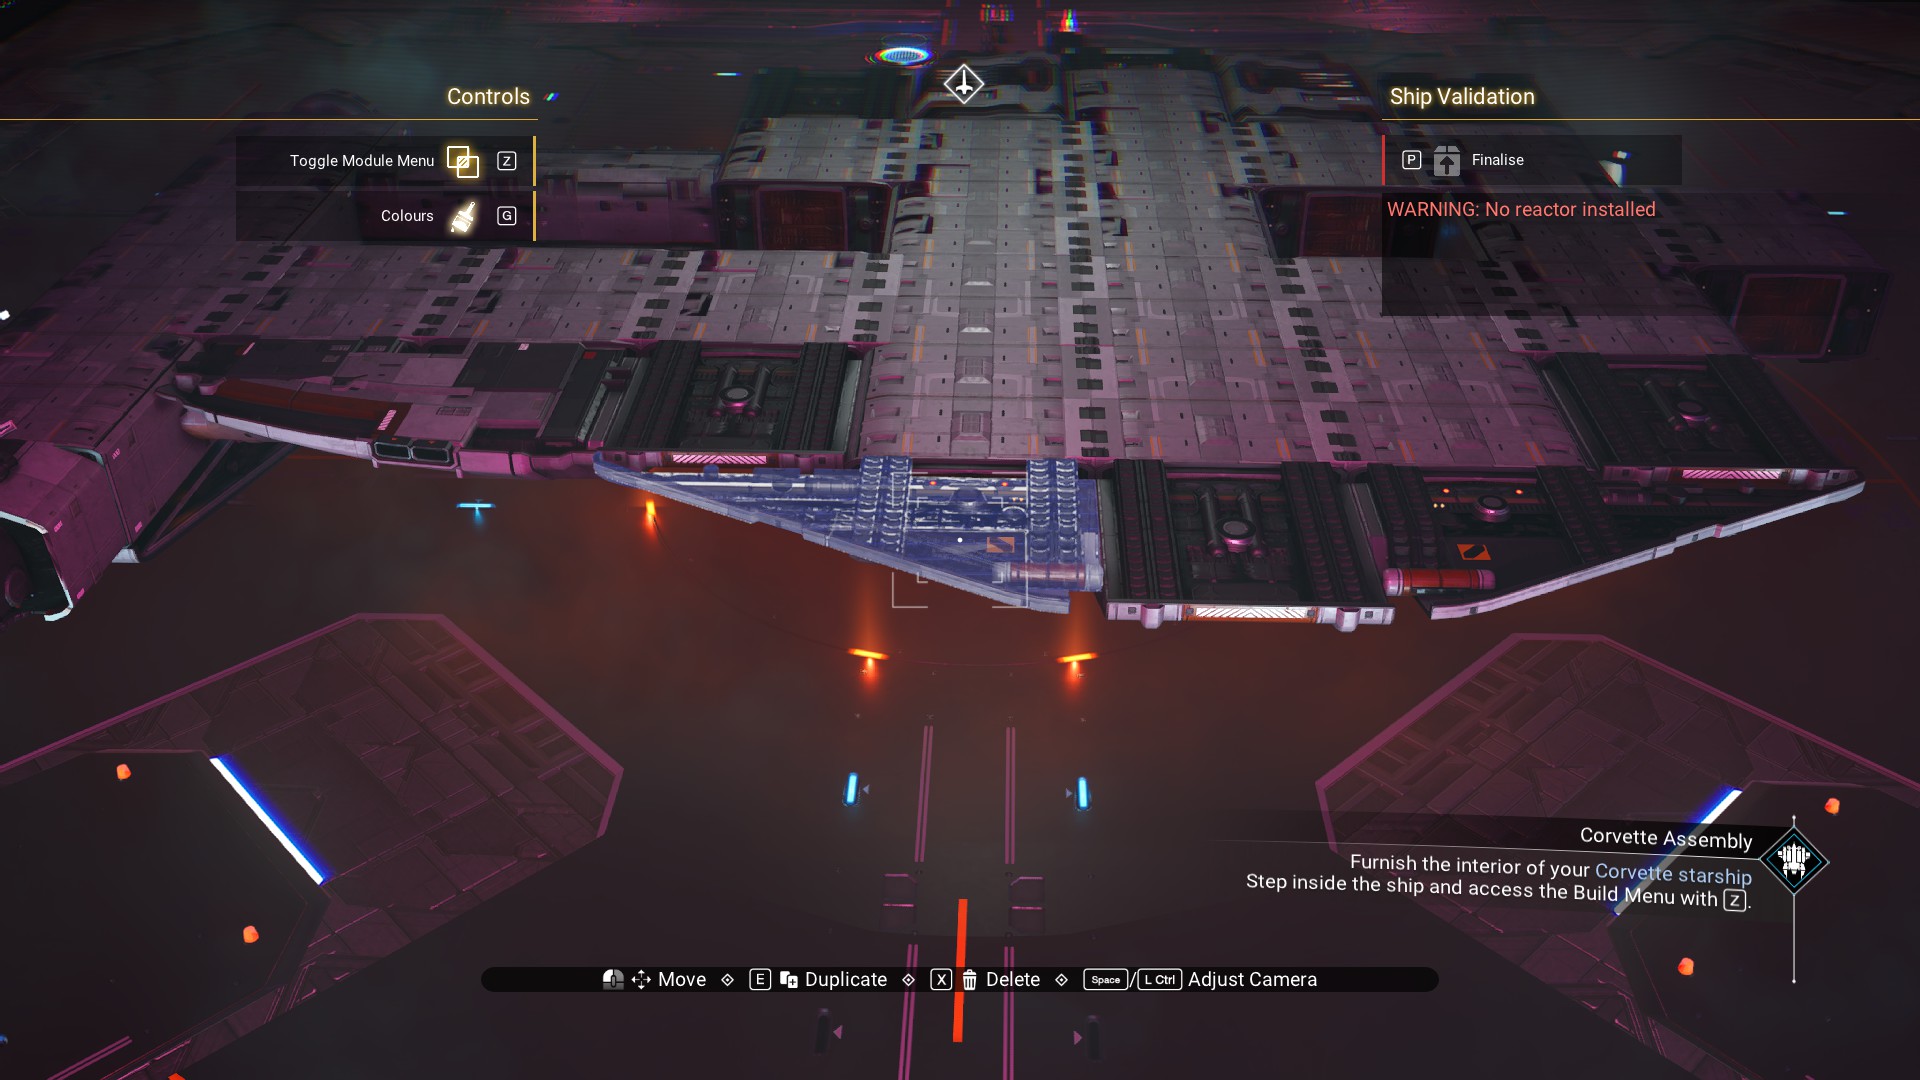 And, Turbine Aerofoils on the side, to either side of the walkway.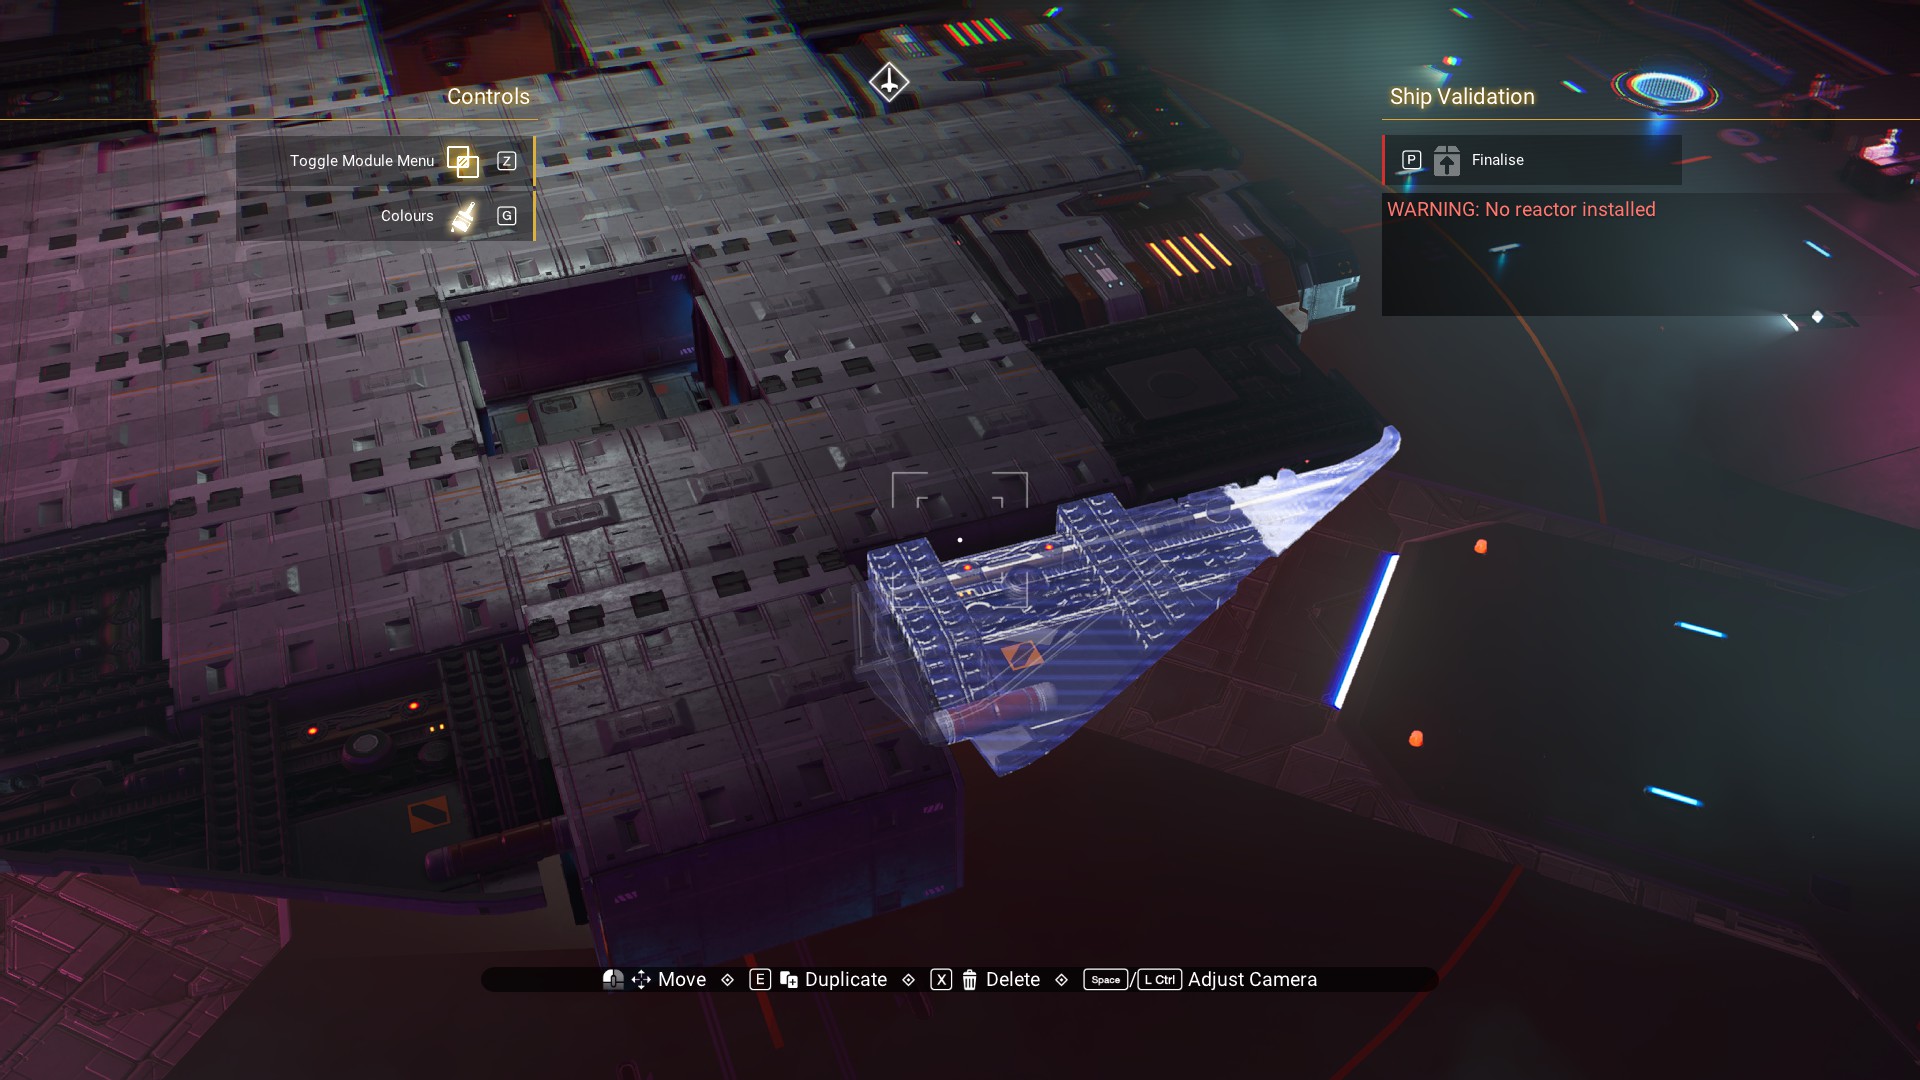
Third Level
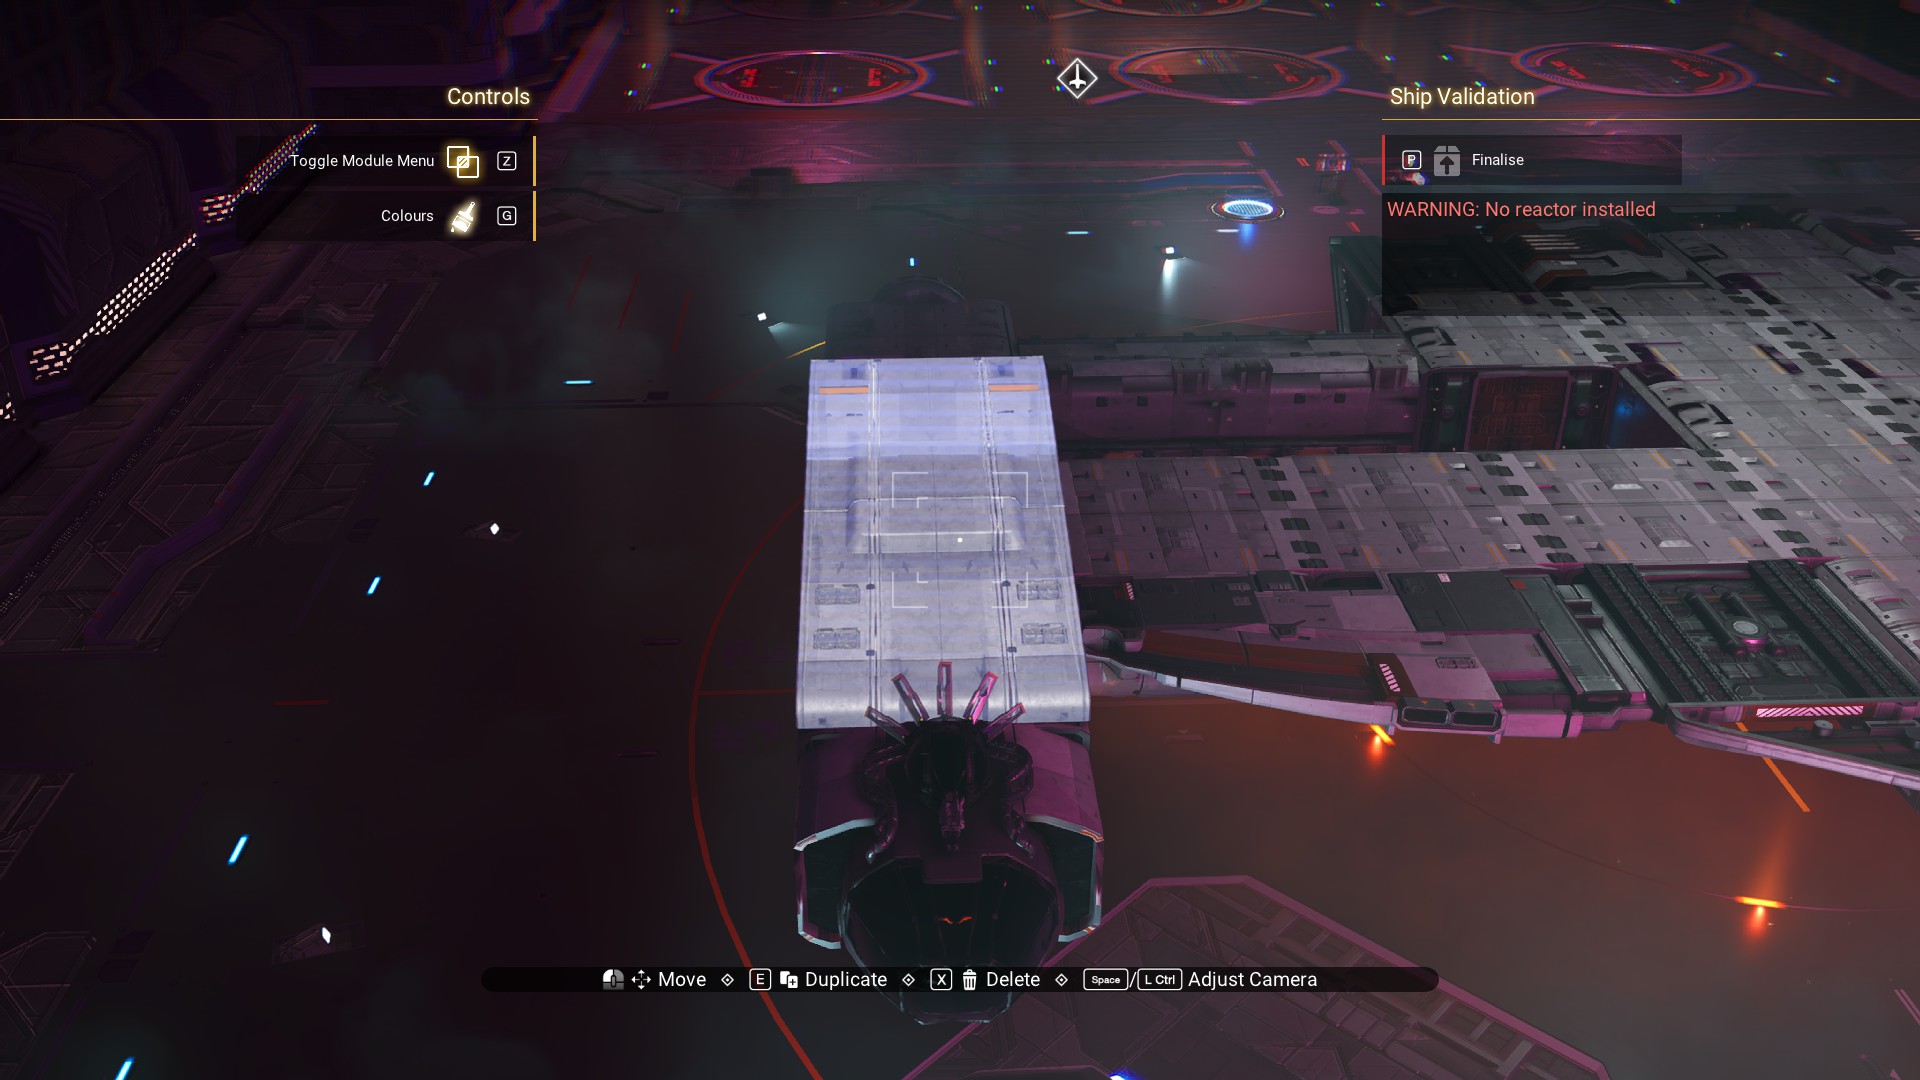 And, another on the back of the cockpit.
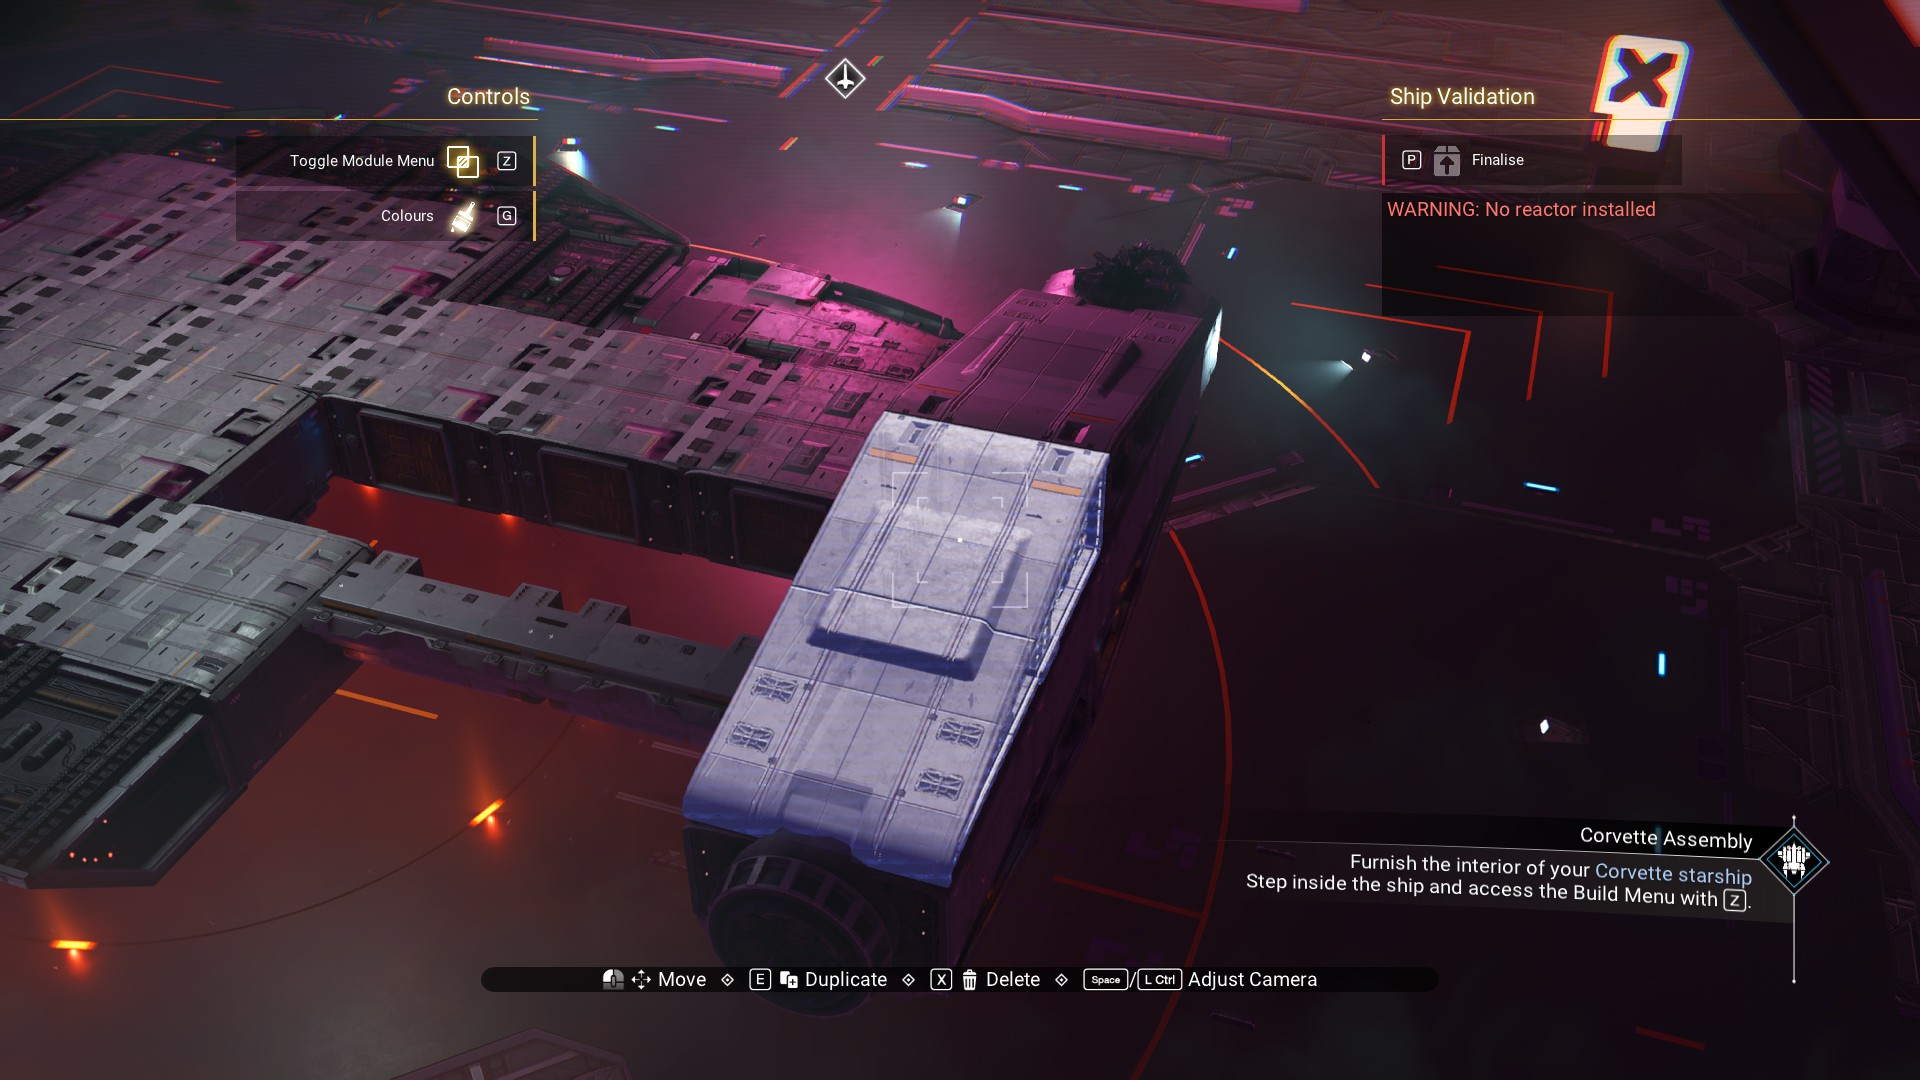 Place a Supercruise Aerofoil on the rear strut leading to the cockpit, angle toward the rear.
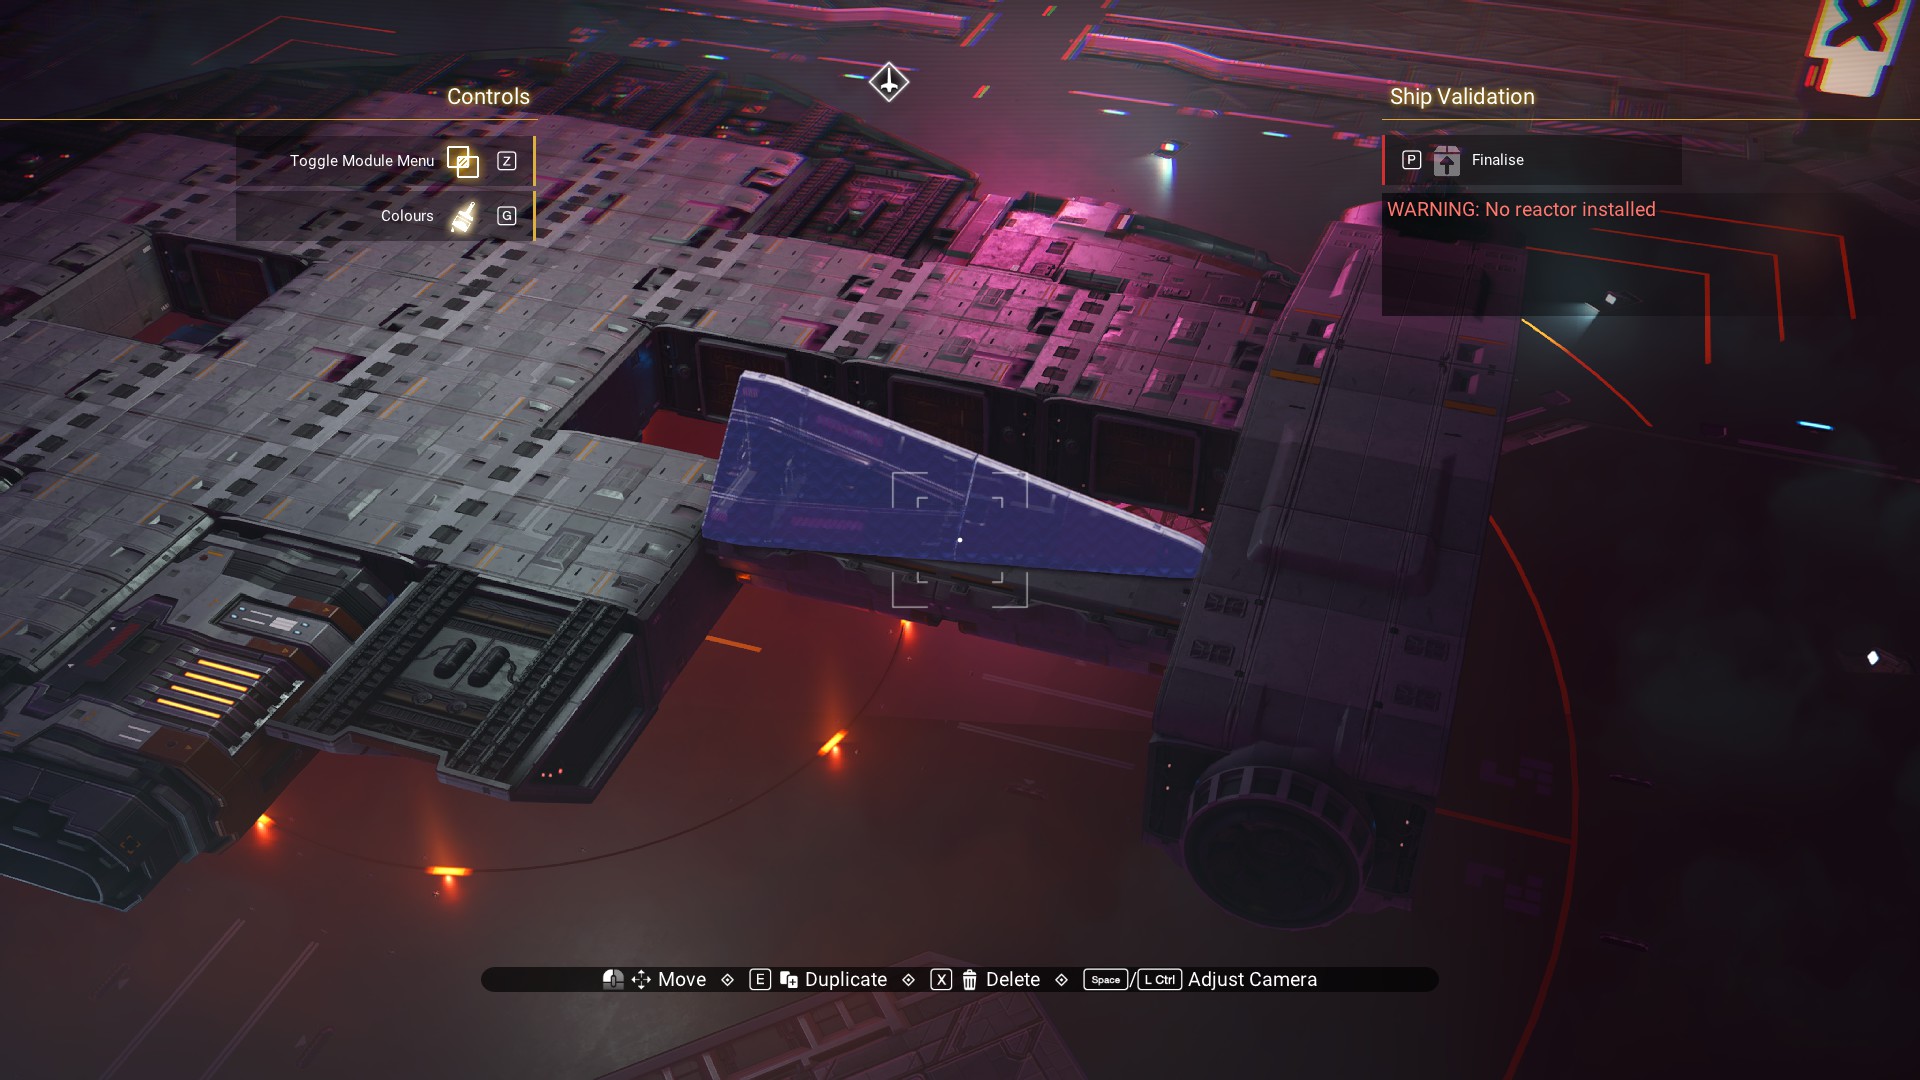 Speedbird Cowling over the walkways of the front arm leading to the cockpit.
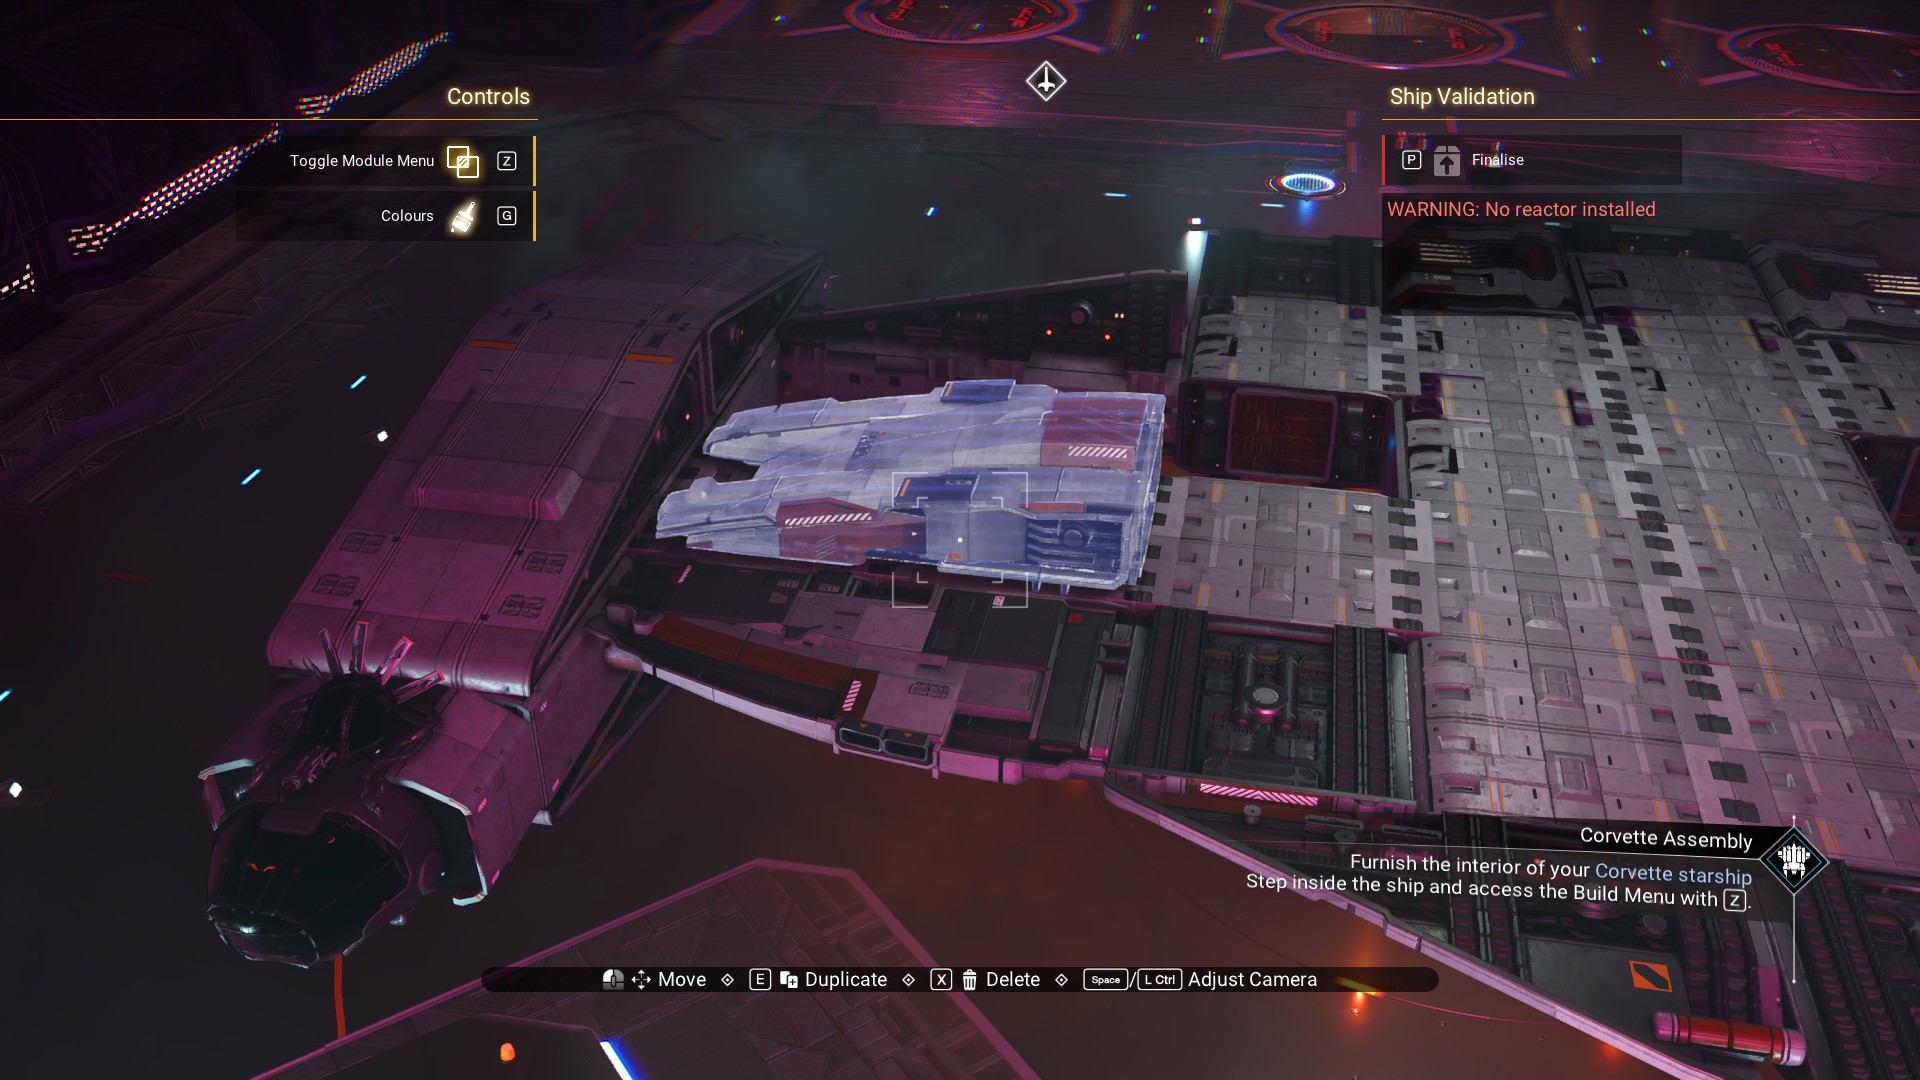 Fill in Walkways for the body.
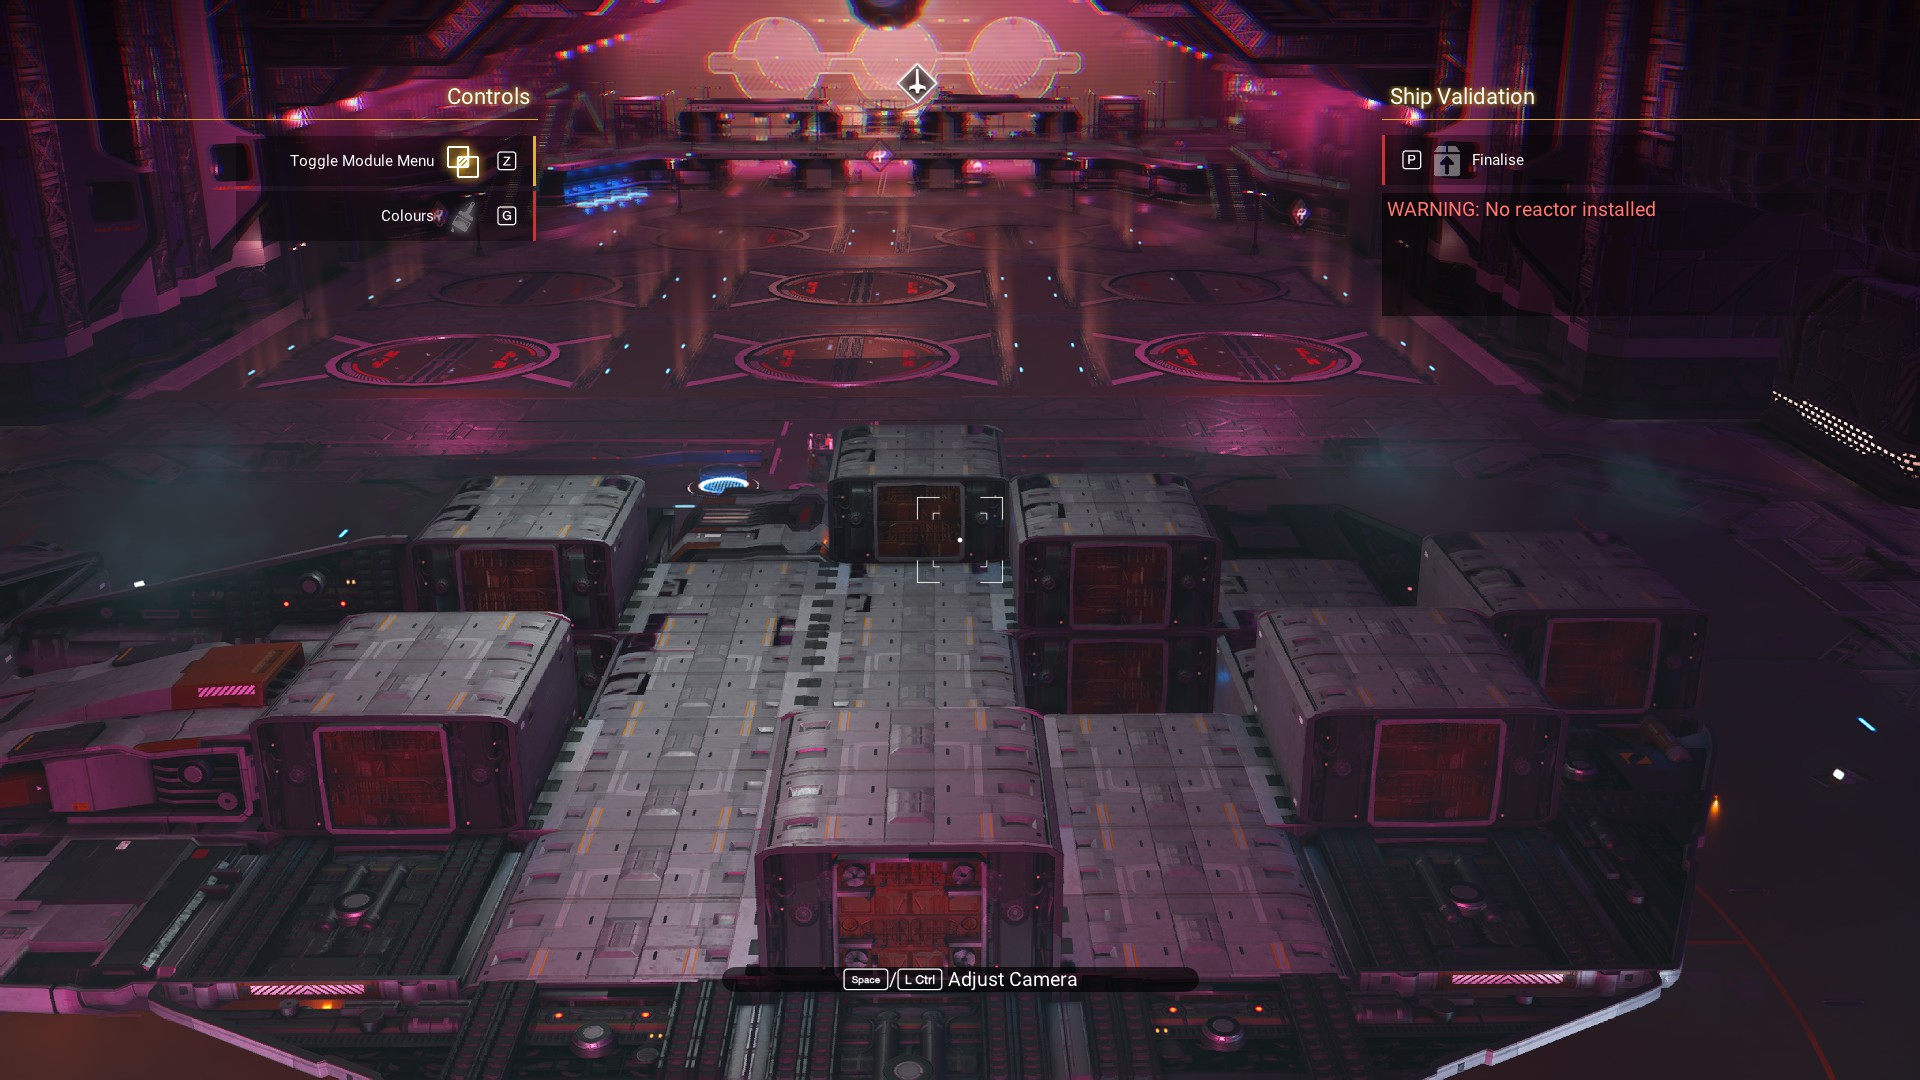 And, fill in Habitation modules for the body, leaving the two gaps (as shown).
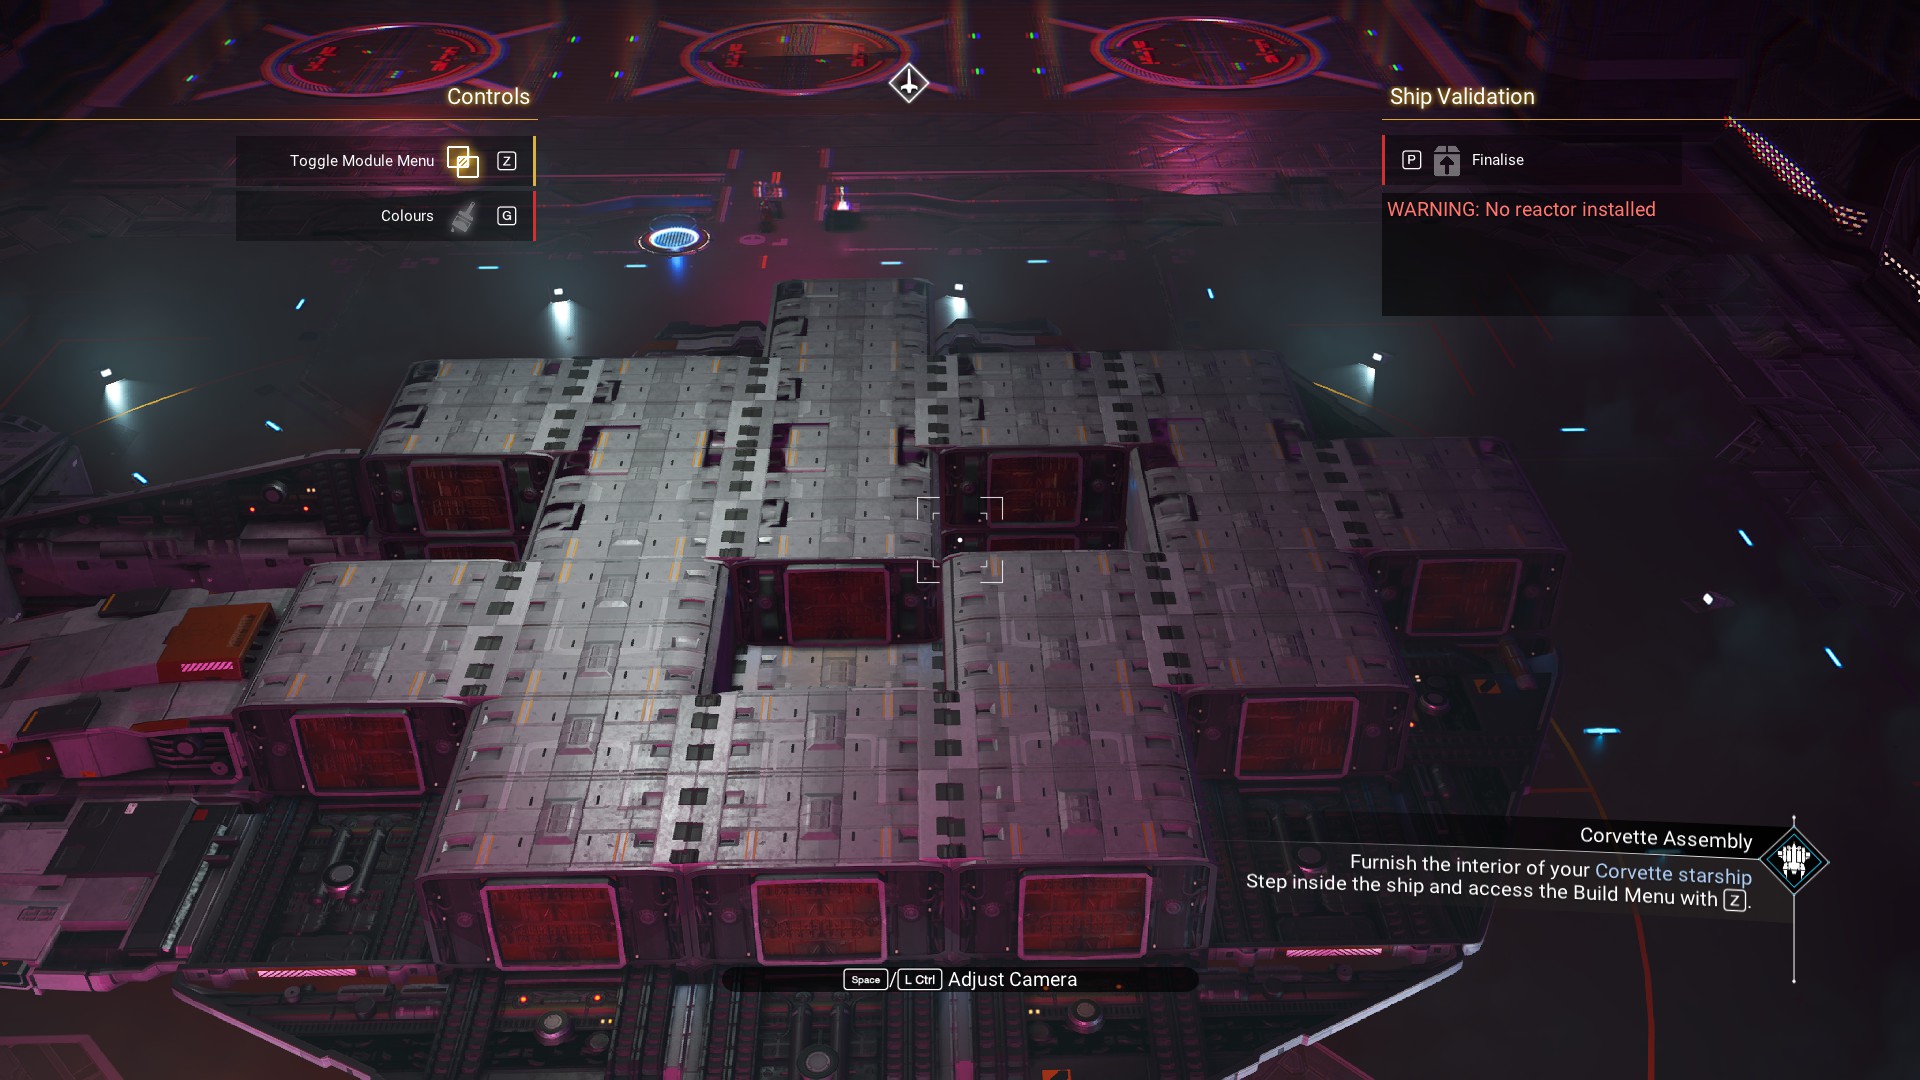 Argonaut Cowling and Speedbird Nacelle for the arm.
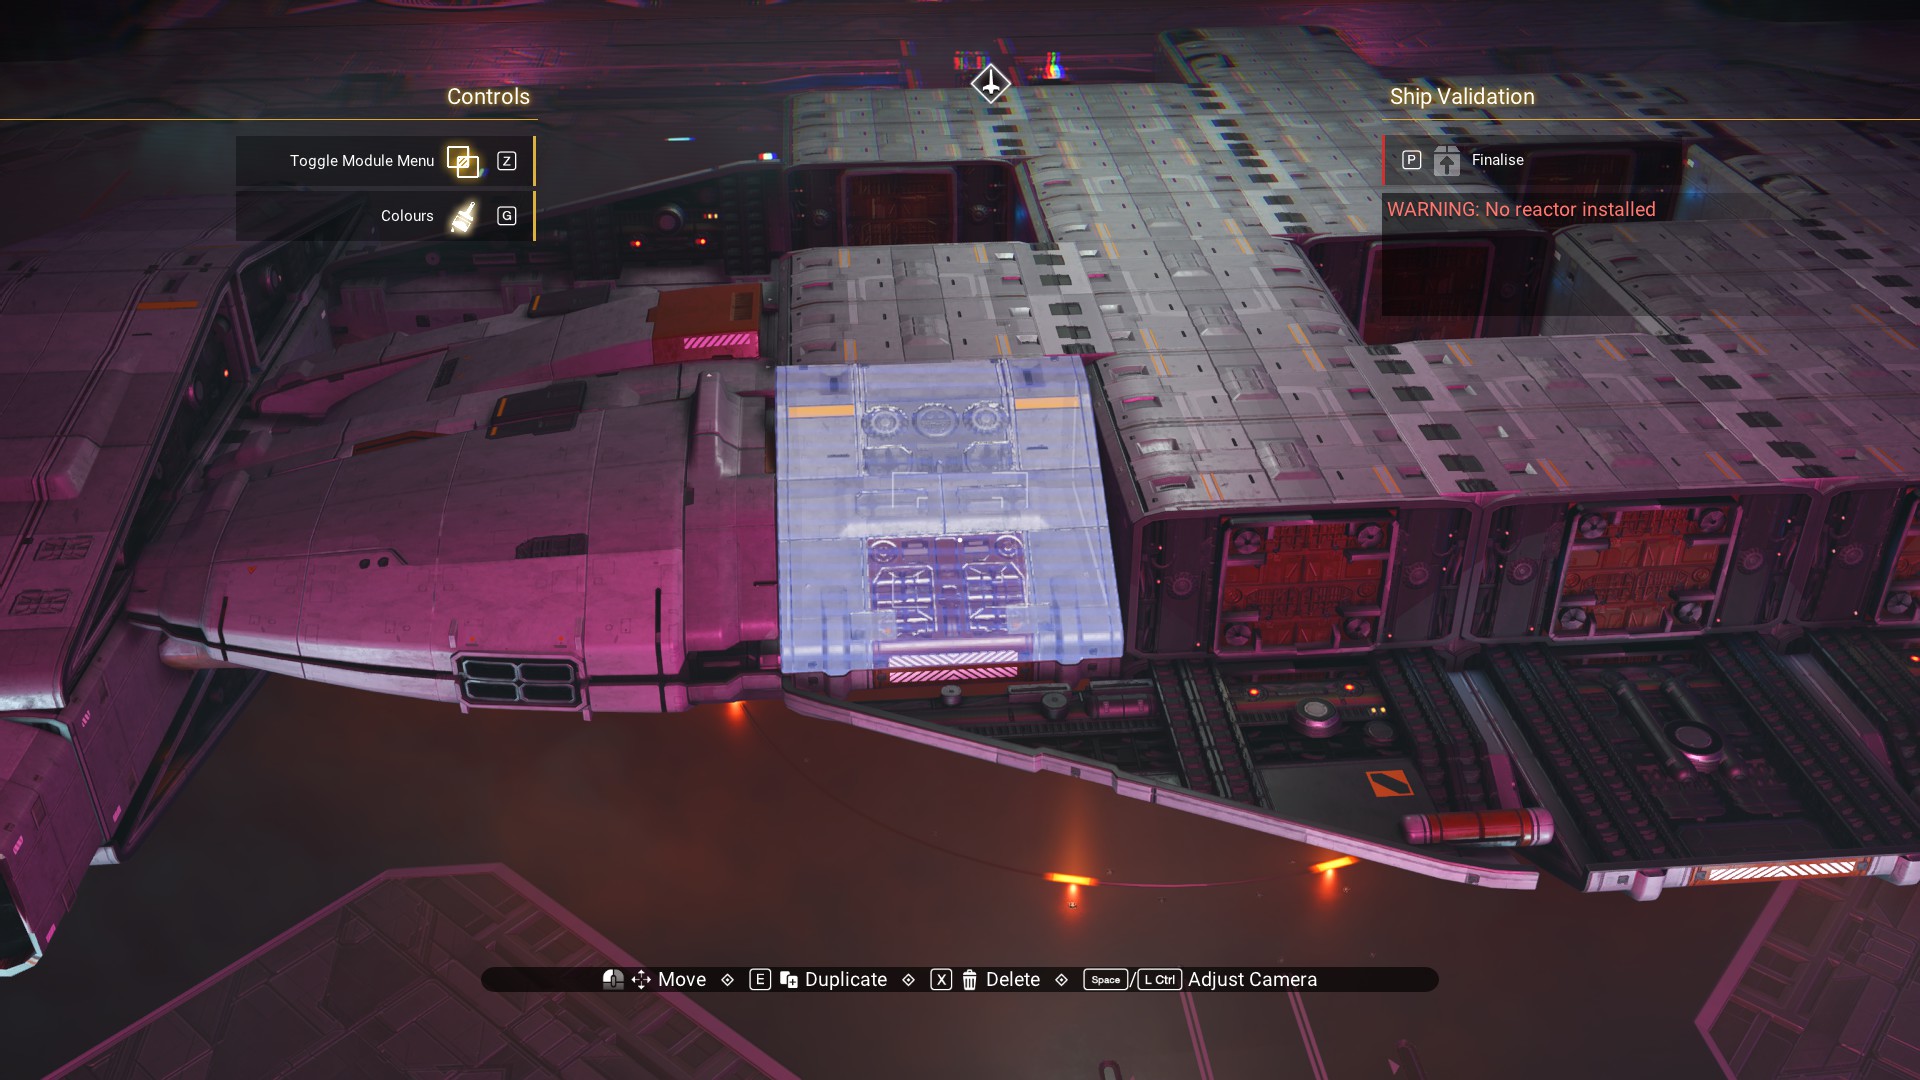 Argonaut Cowling and Turbine Nacelle for the front.
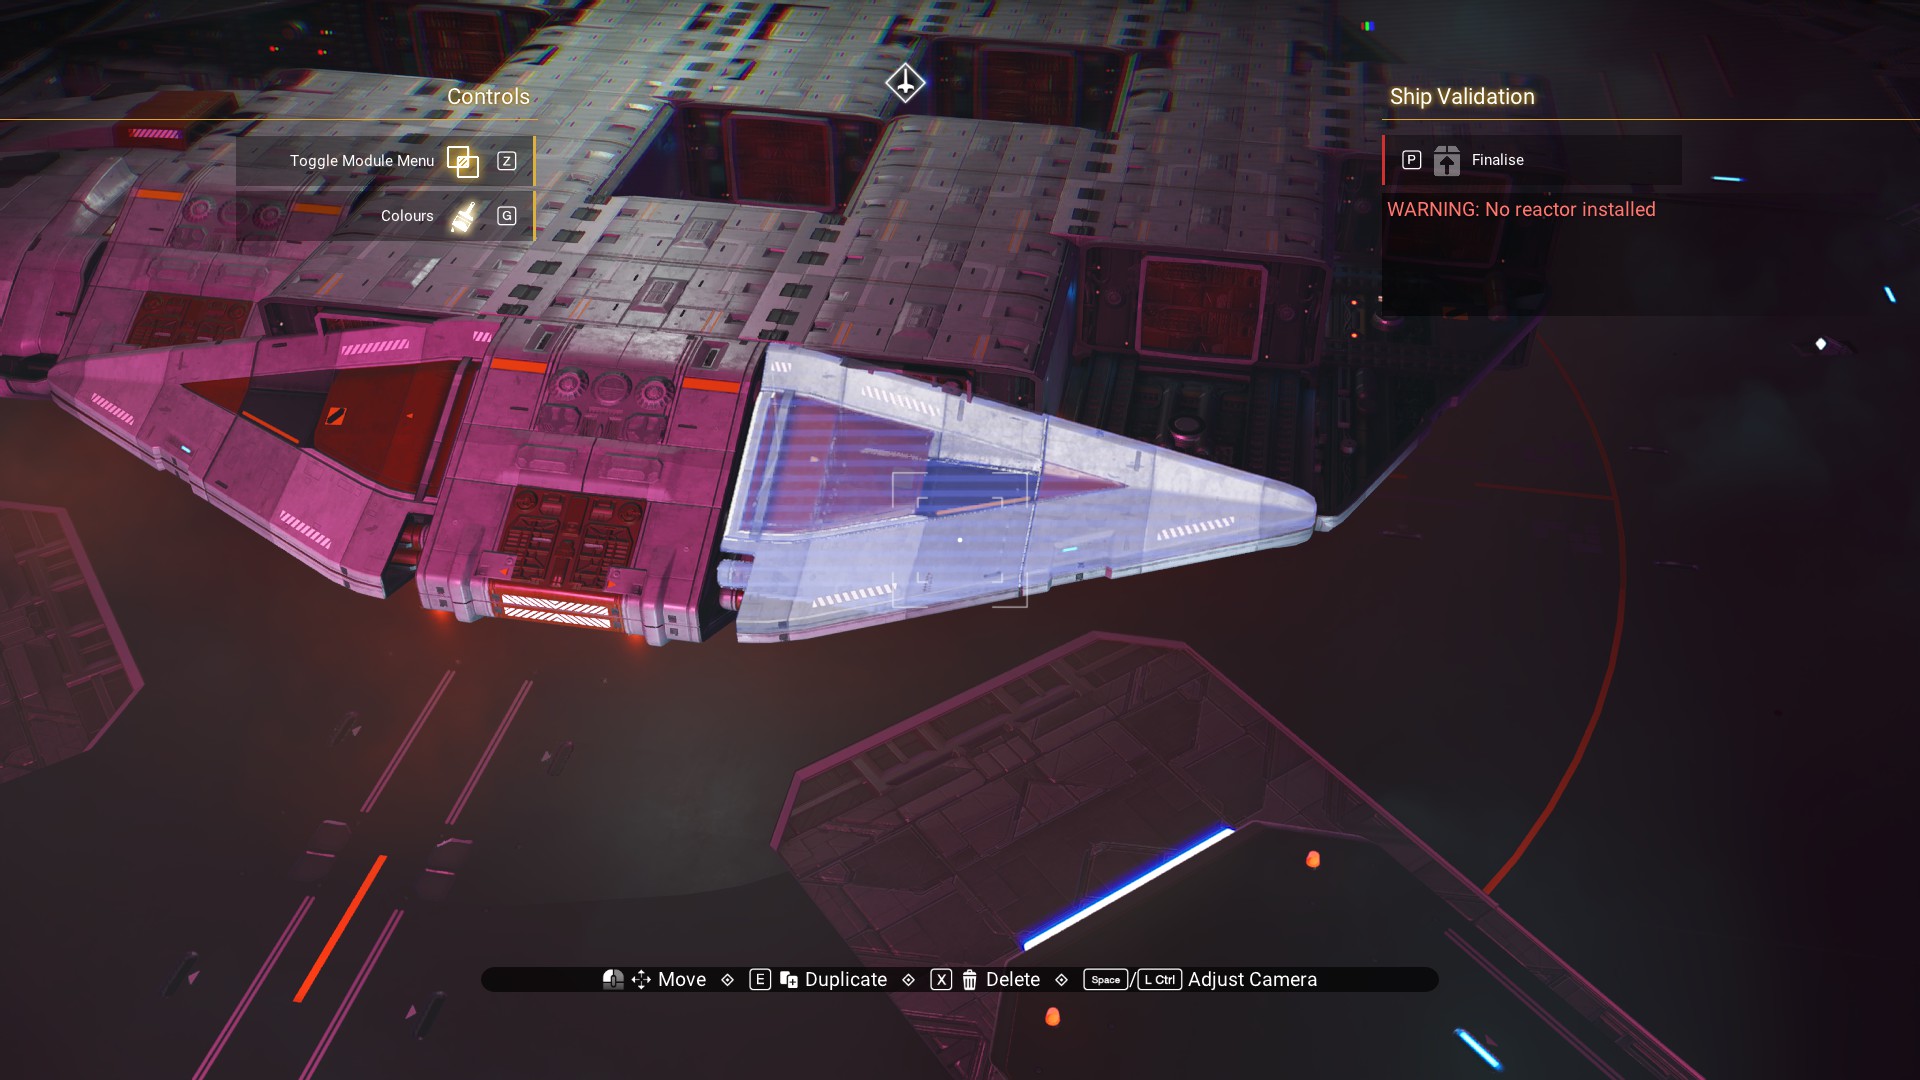 Argonaut Cowling on the shoulder.
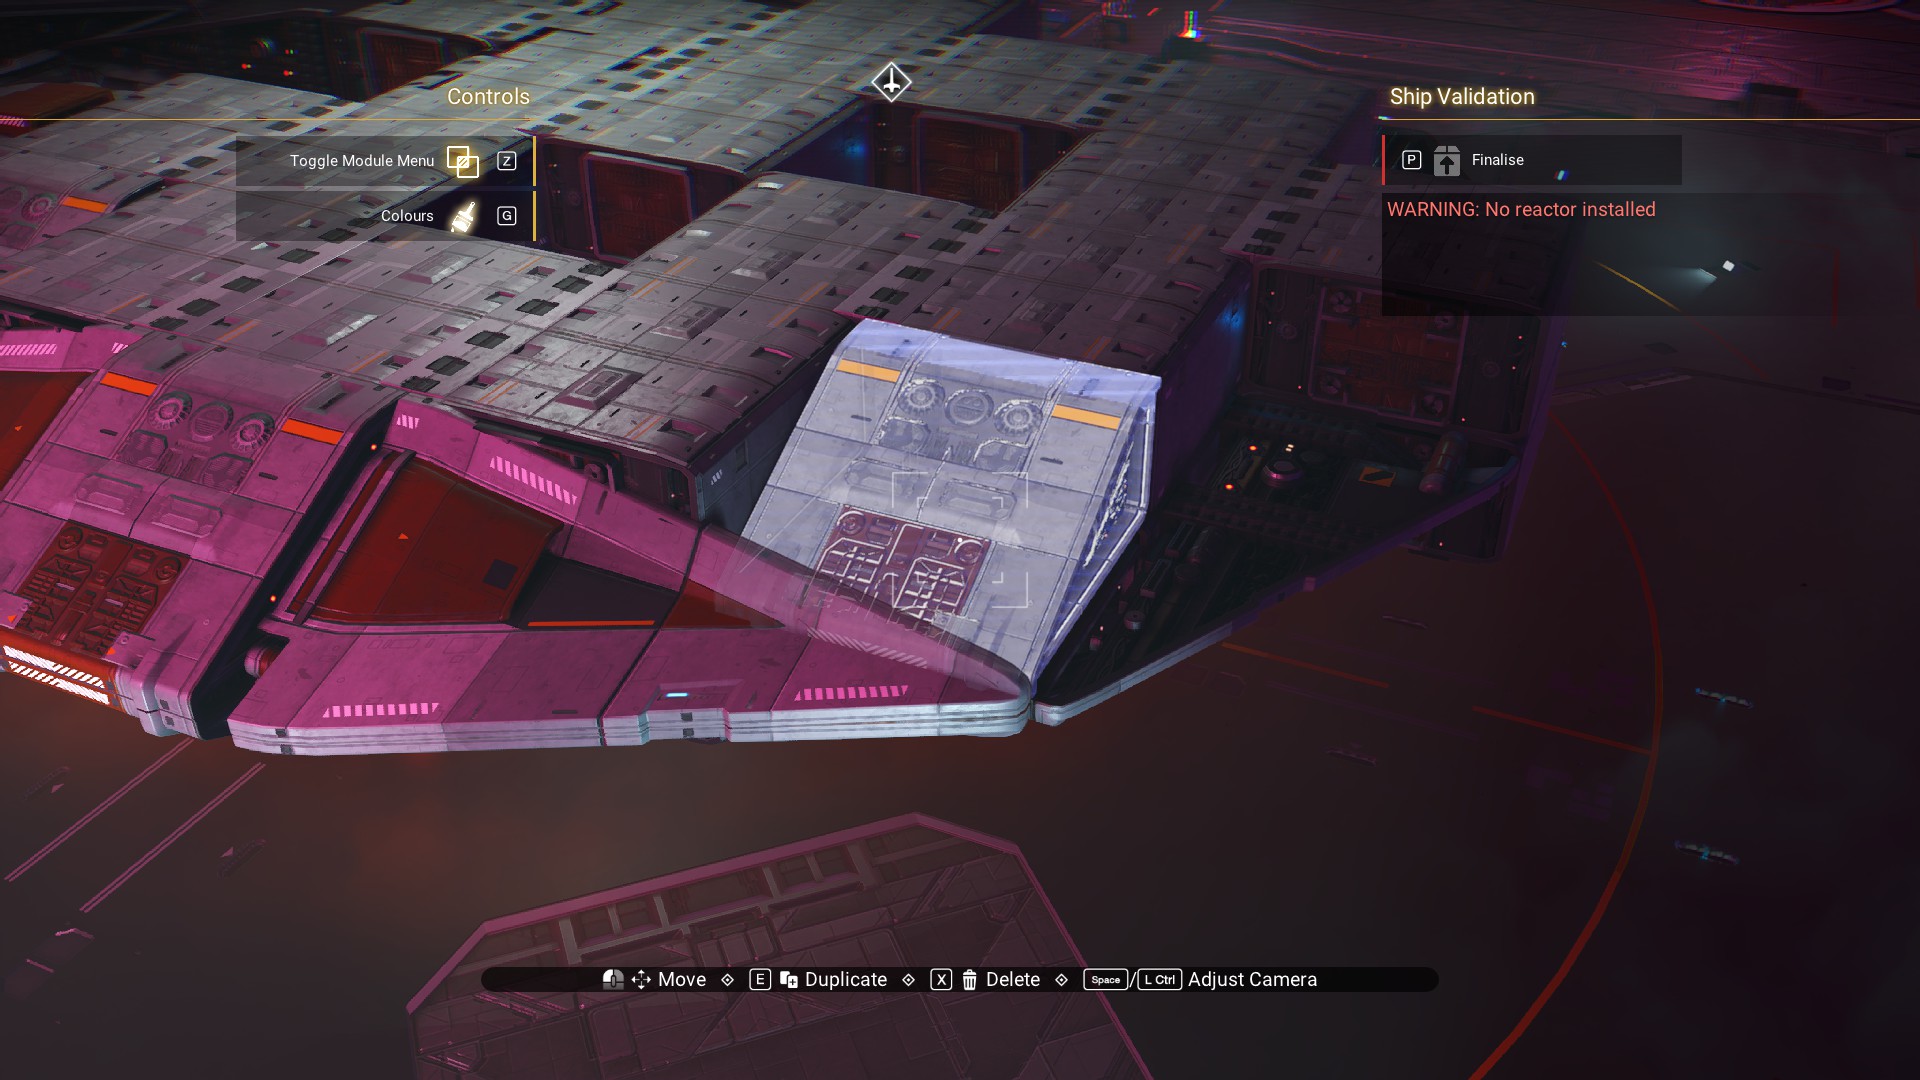 Turbine Nacelle on the side, to either side of the walkway.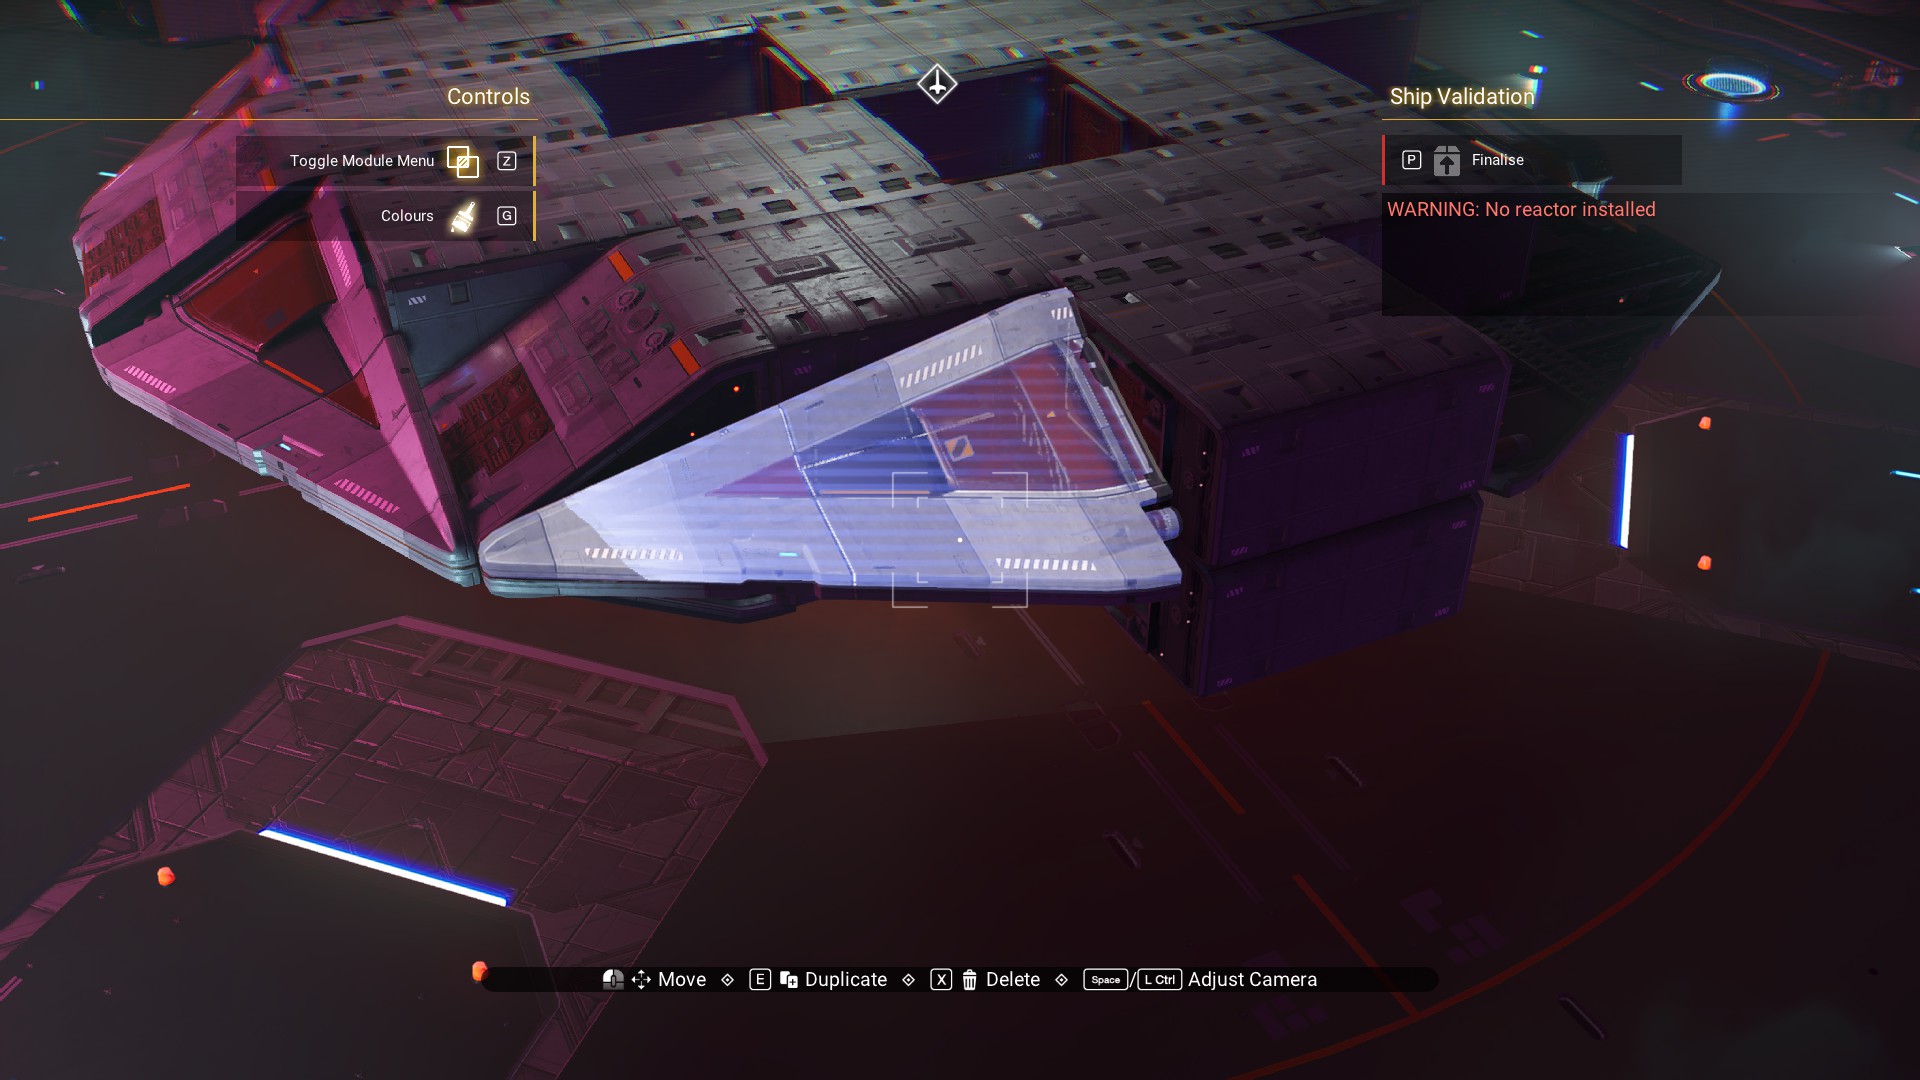
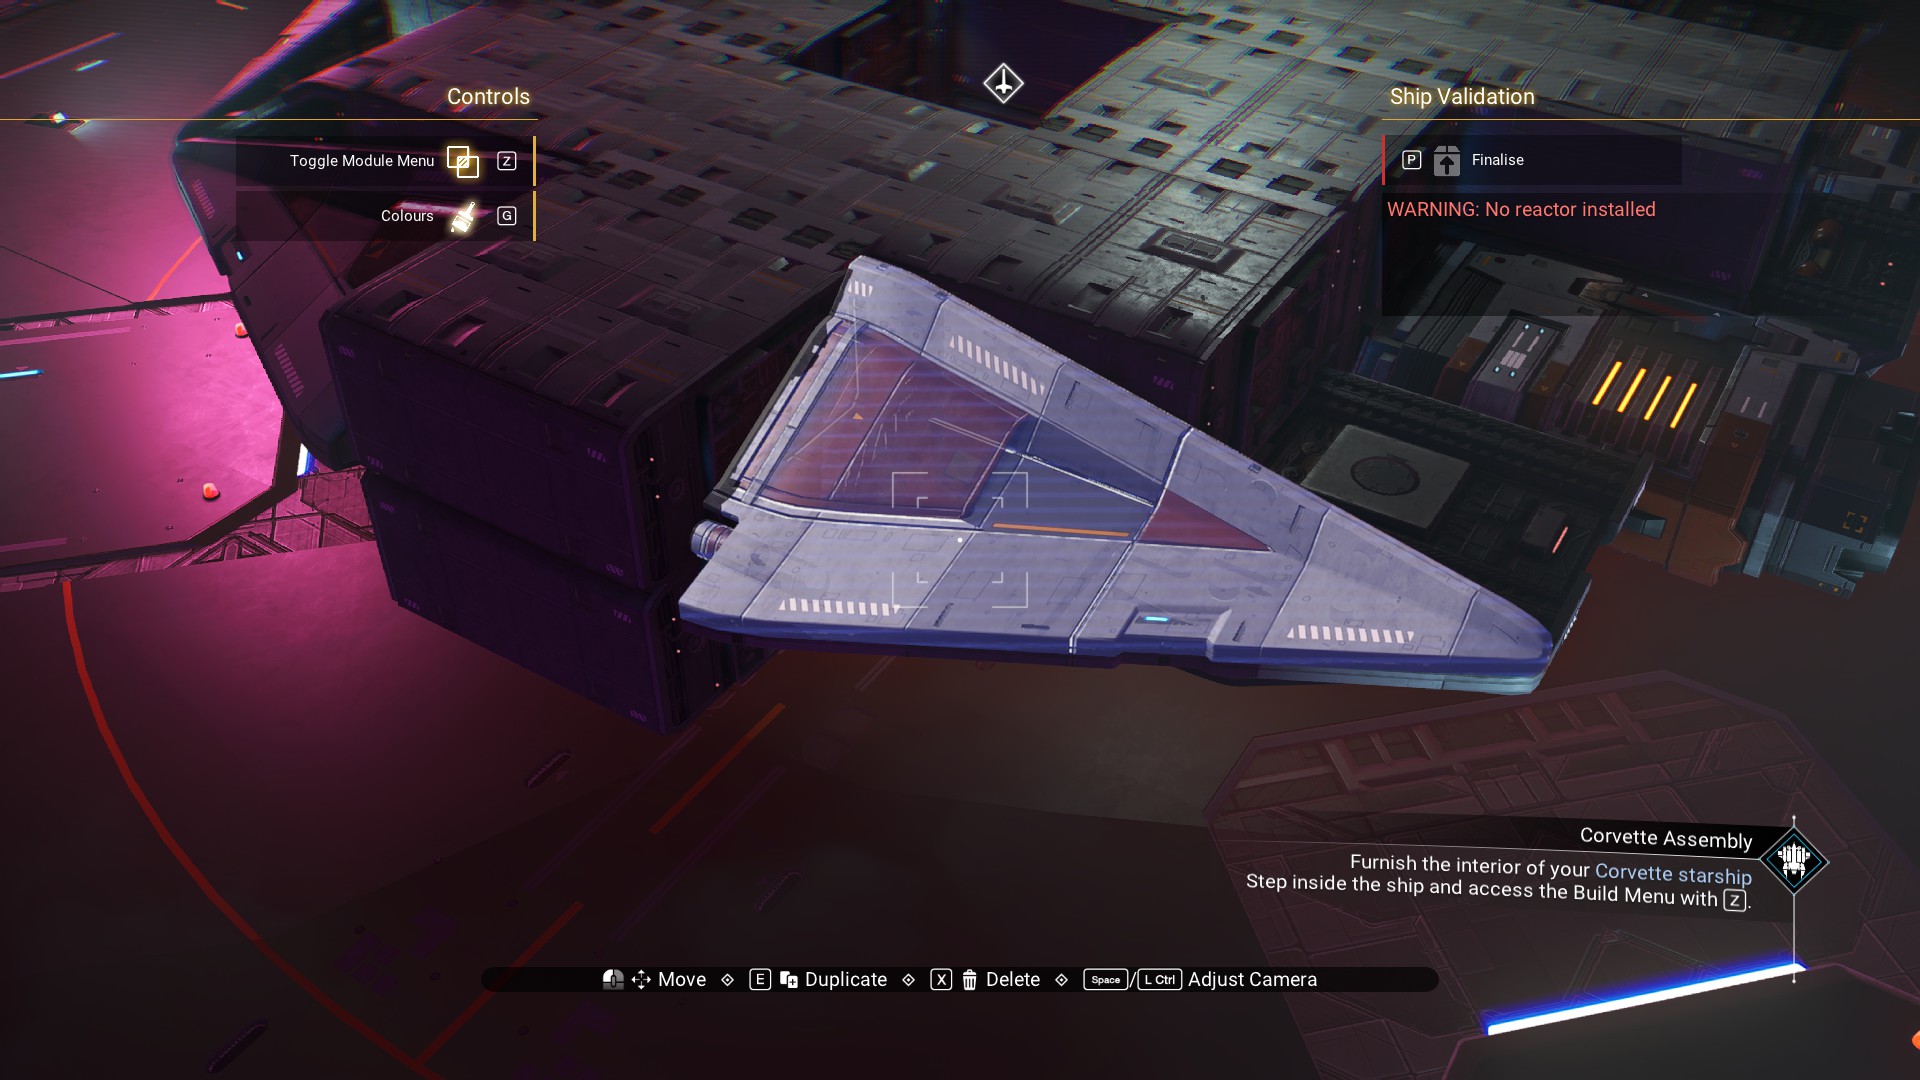
Argonaut Fuel Covers to the left and right of the engines.
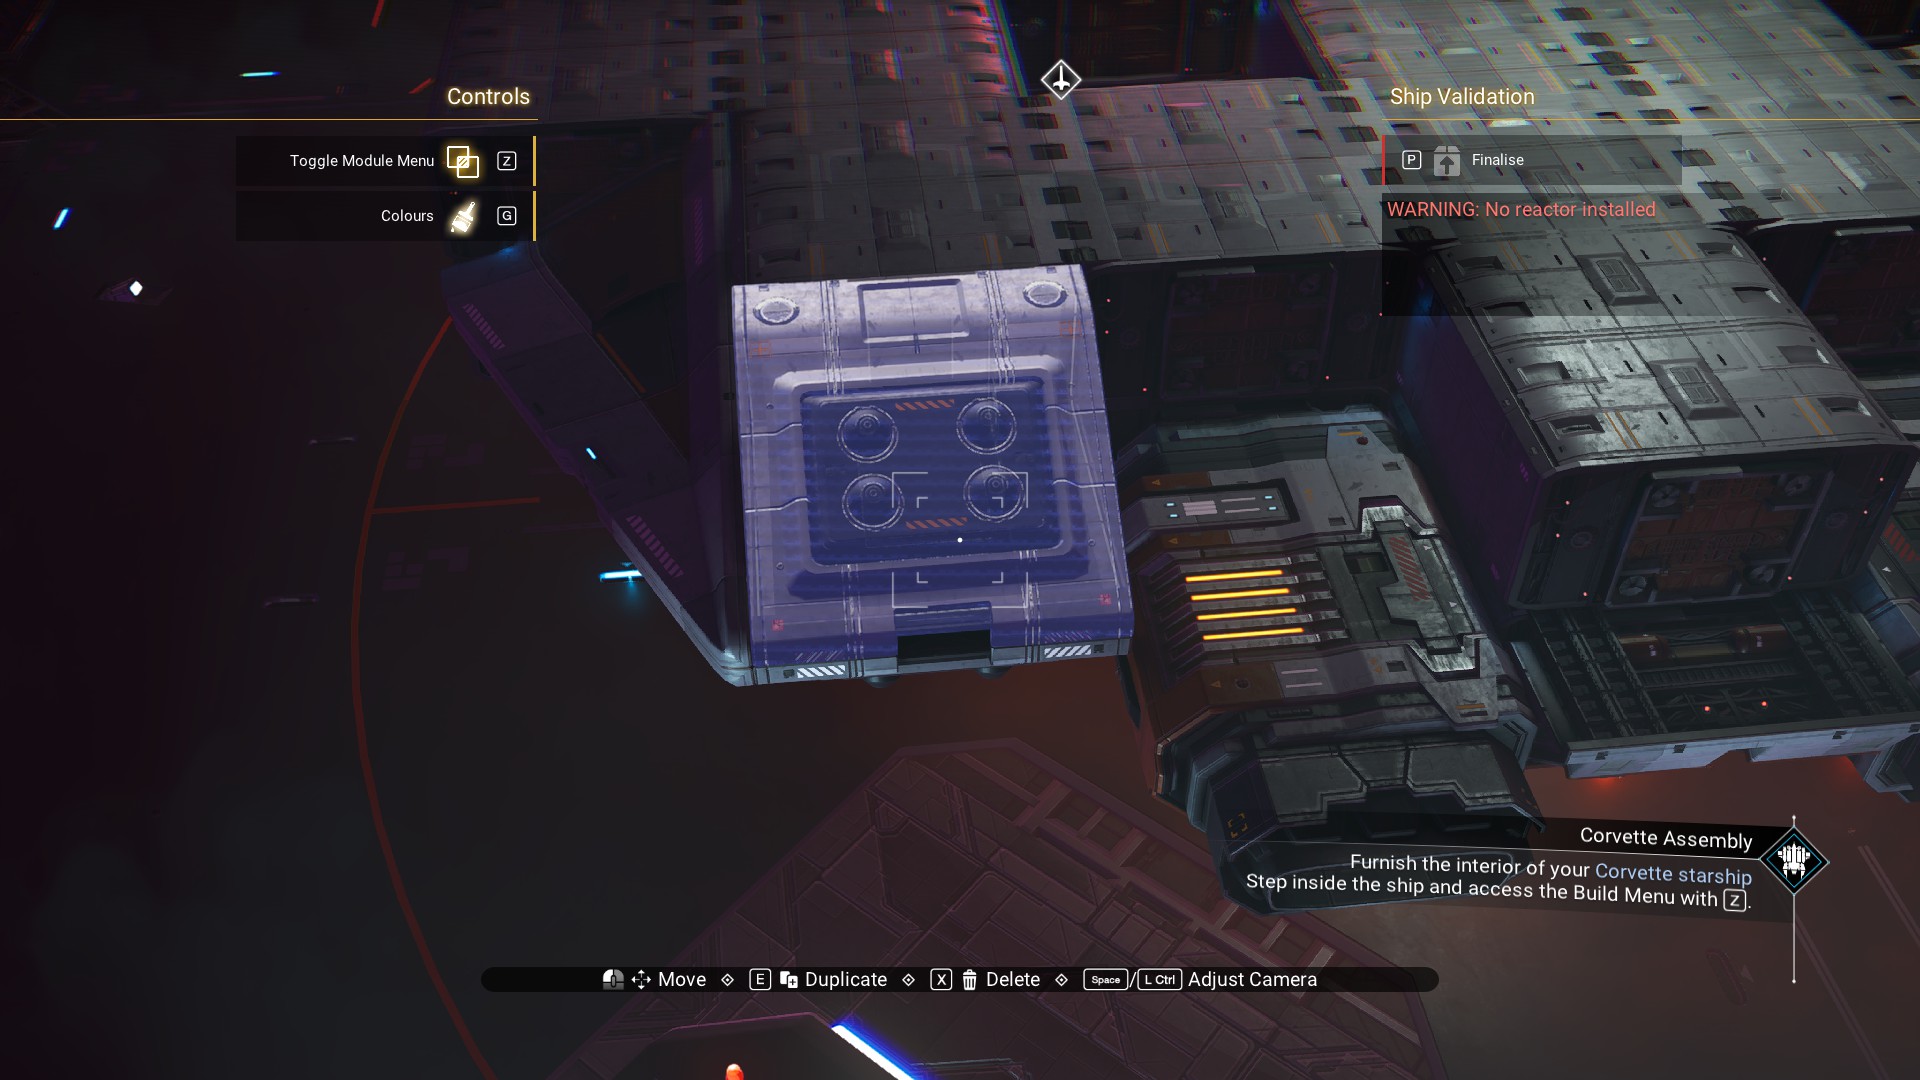
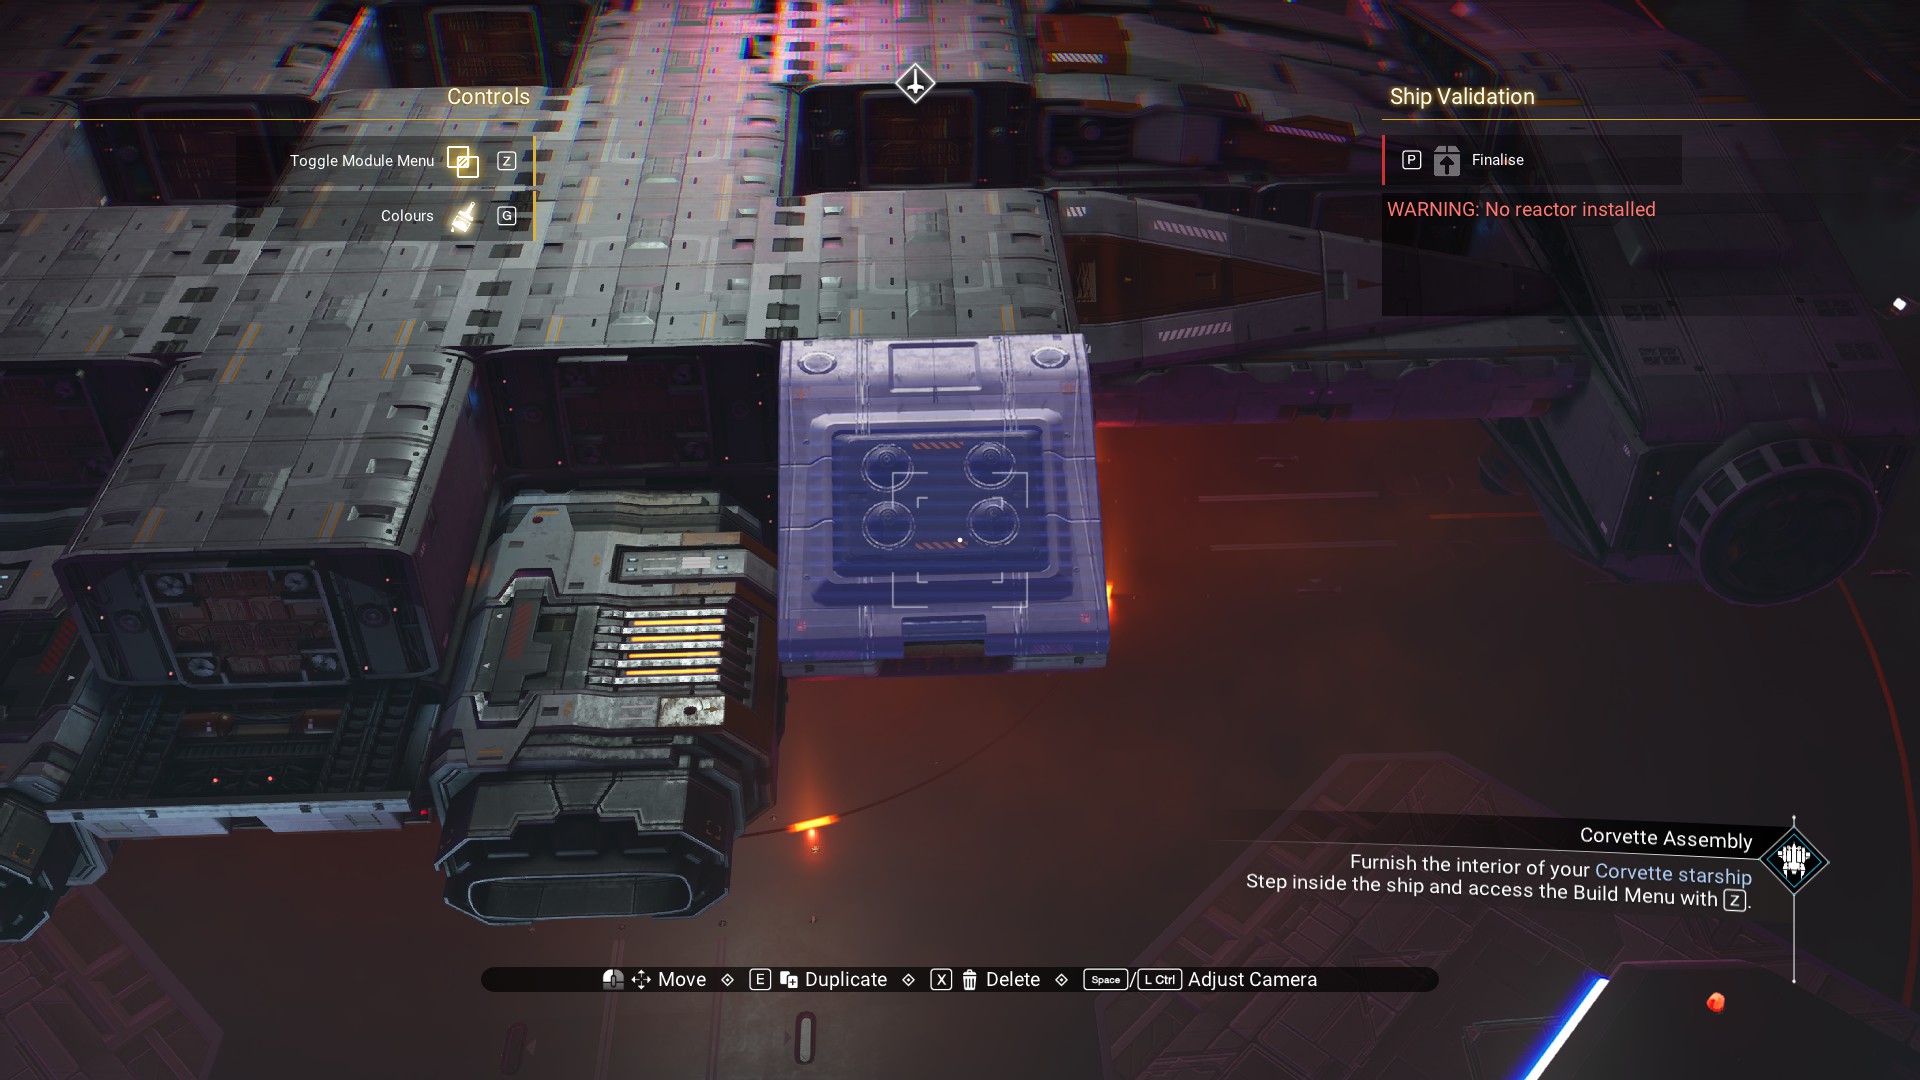
Then, a second set of Engines on top of the first set, and a Radiator Casing between them.
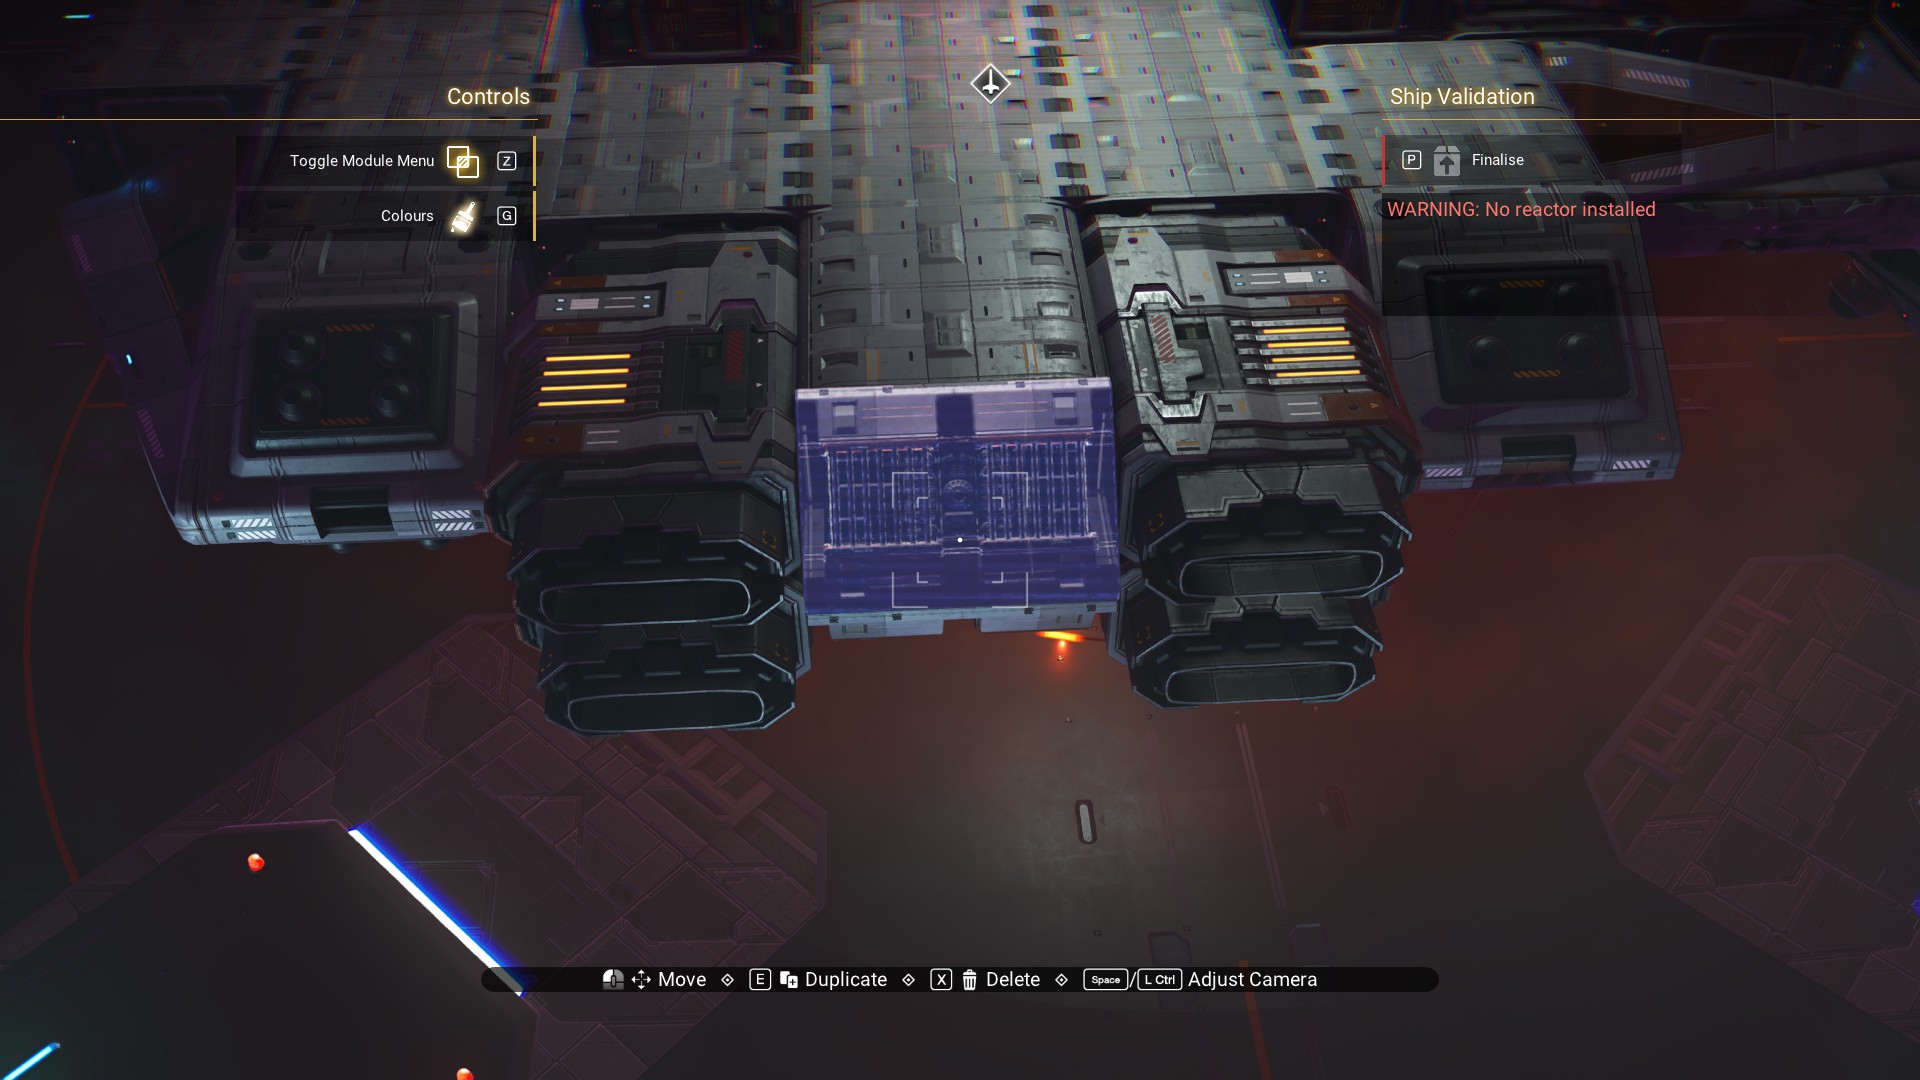 Medusa-Class Reactor in the gap toward the front of the ship.
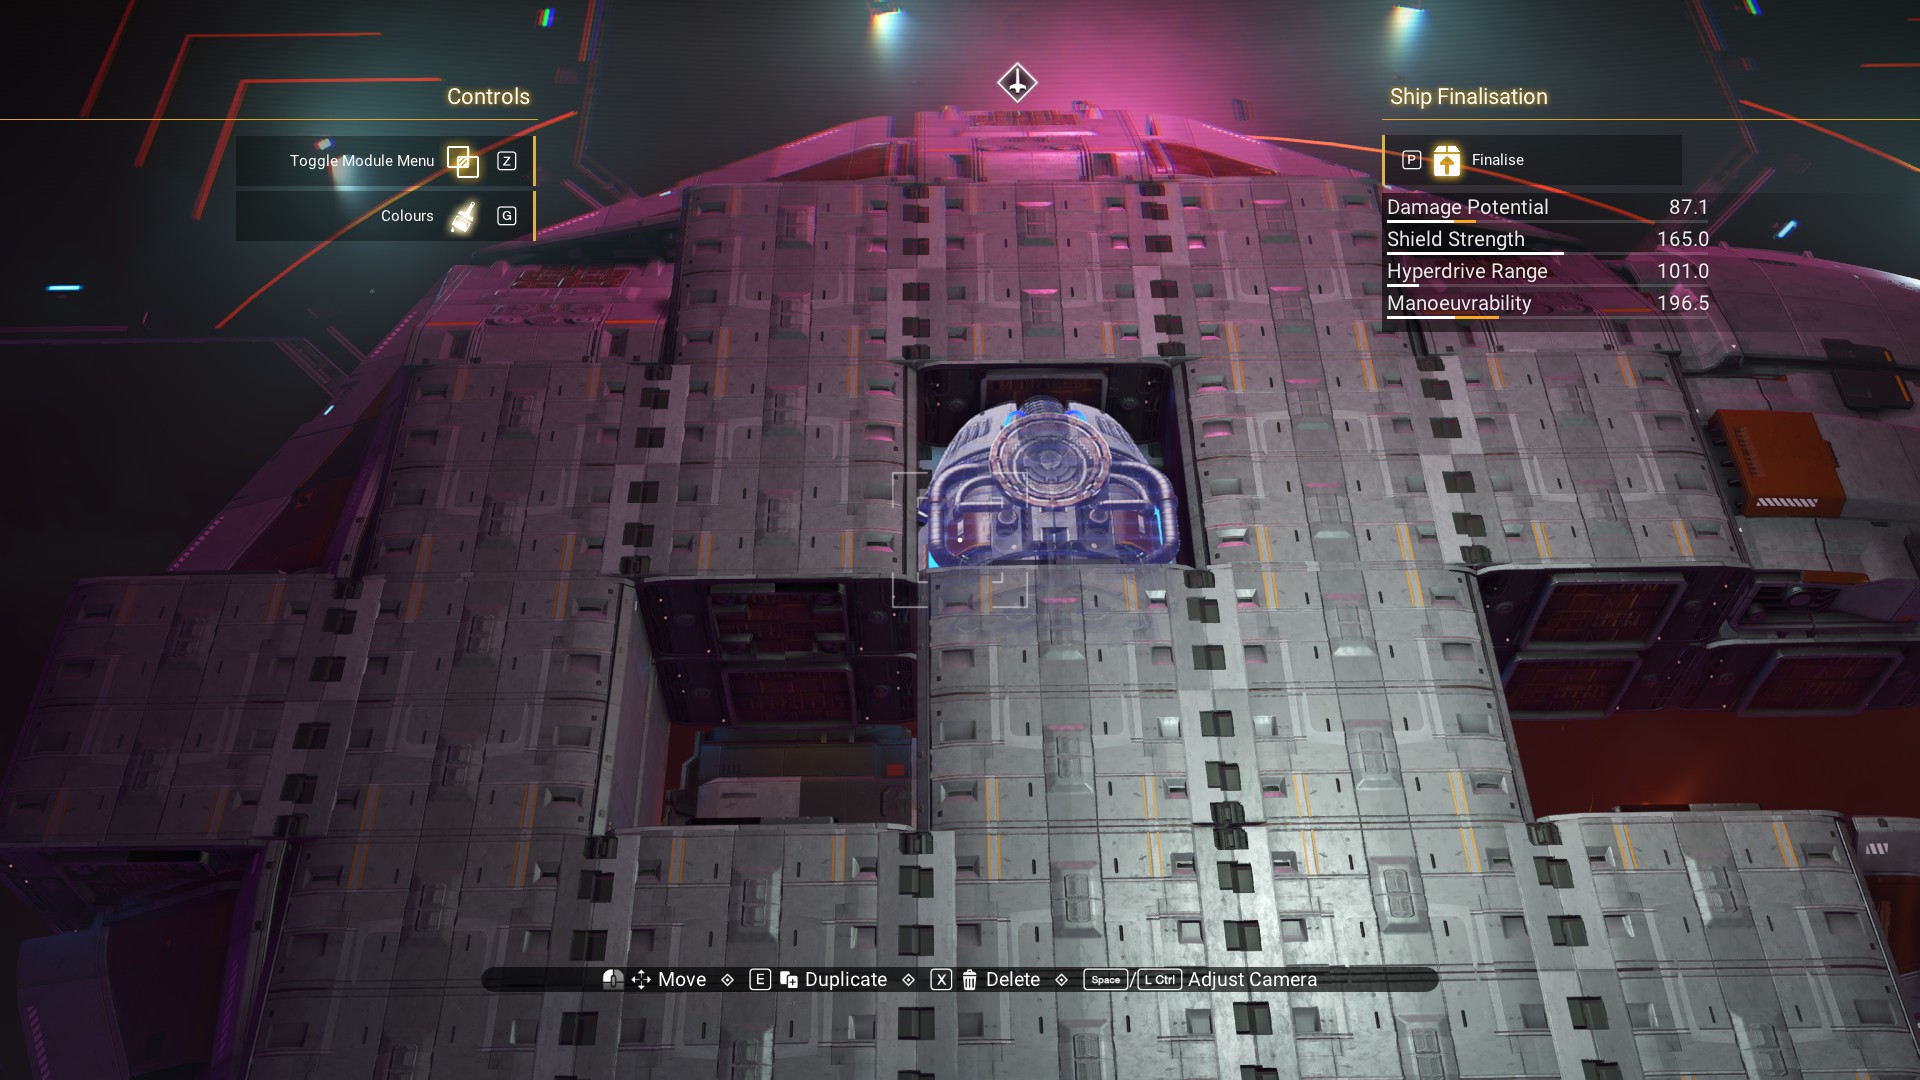 Zenith-Class Reactor at the bottom of the gap to the side.
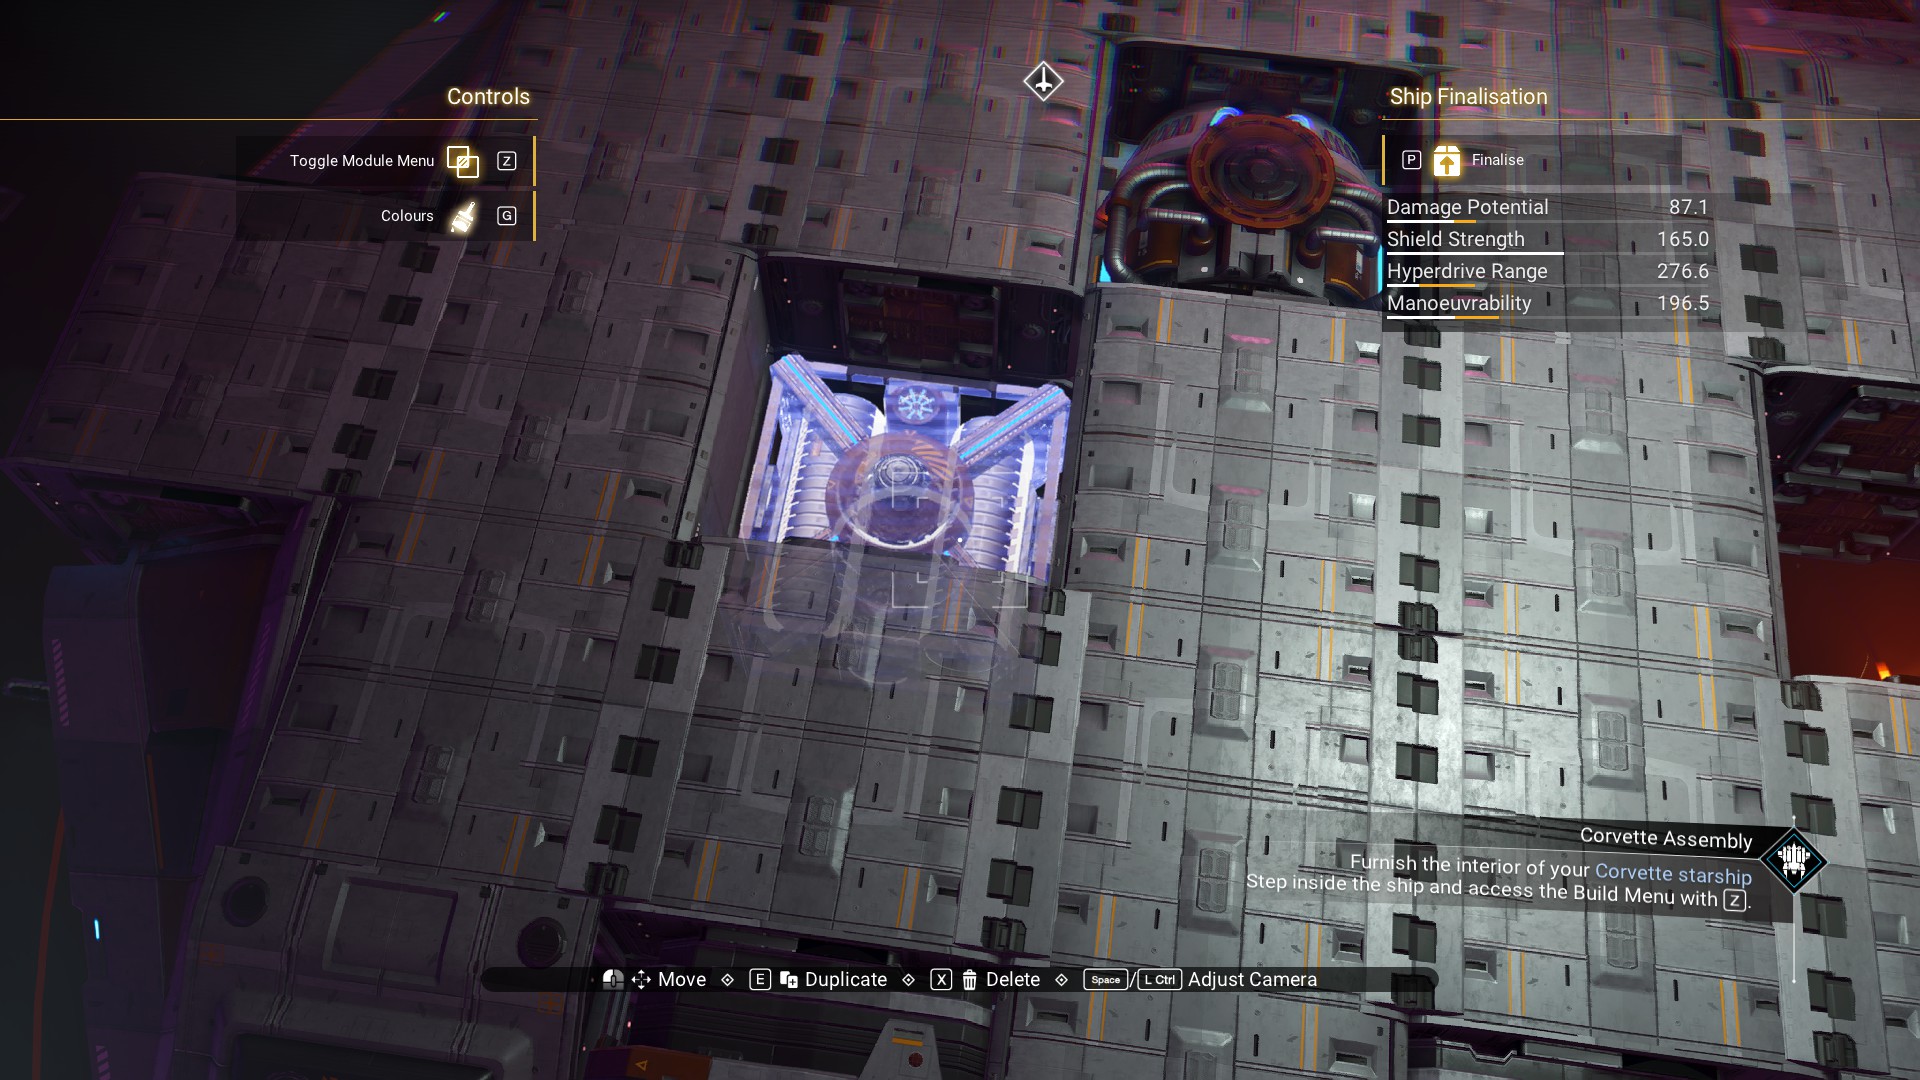 And, Azimuth-Class Reactor on top of the Zenith Reactor. (Careful, as of writing this there is still a bug which prevents you from interacting with the Azimuth Reactor once it's been placed.)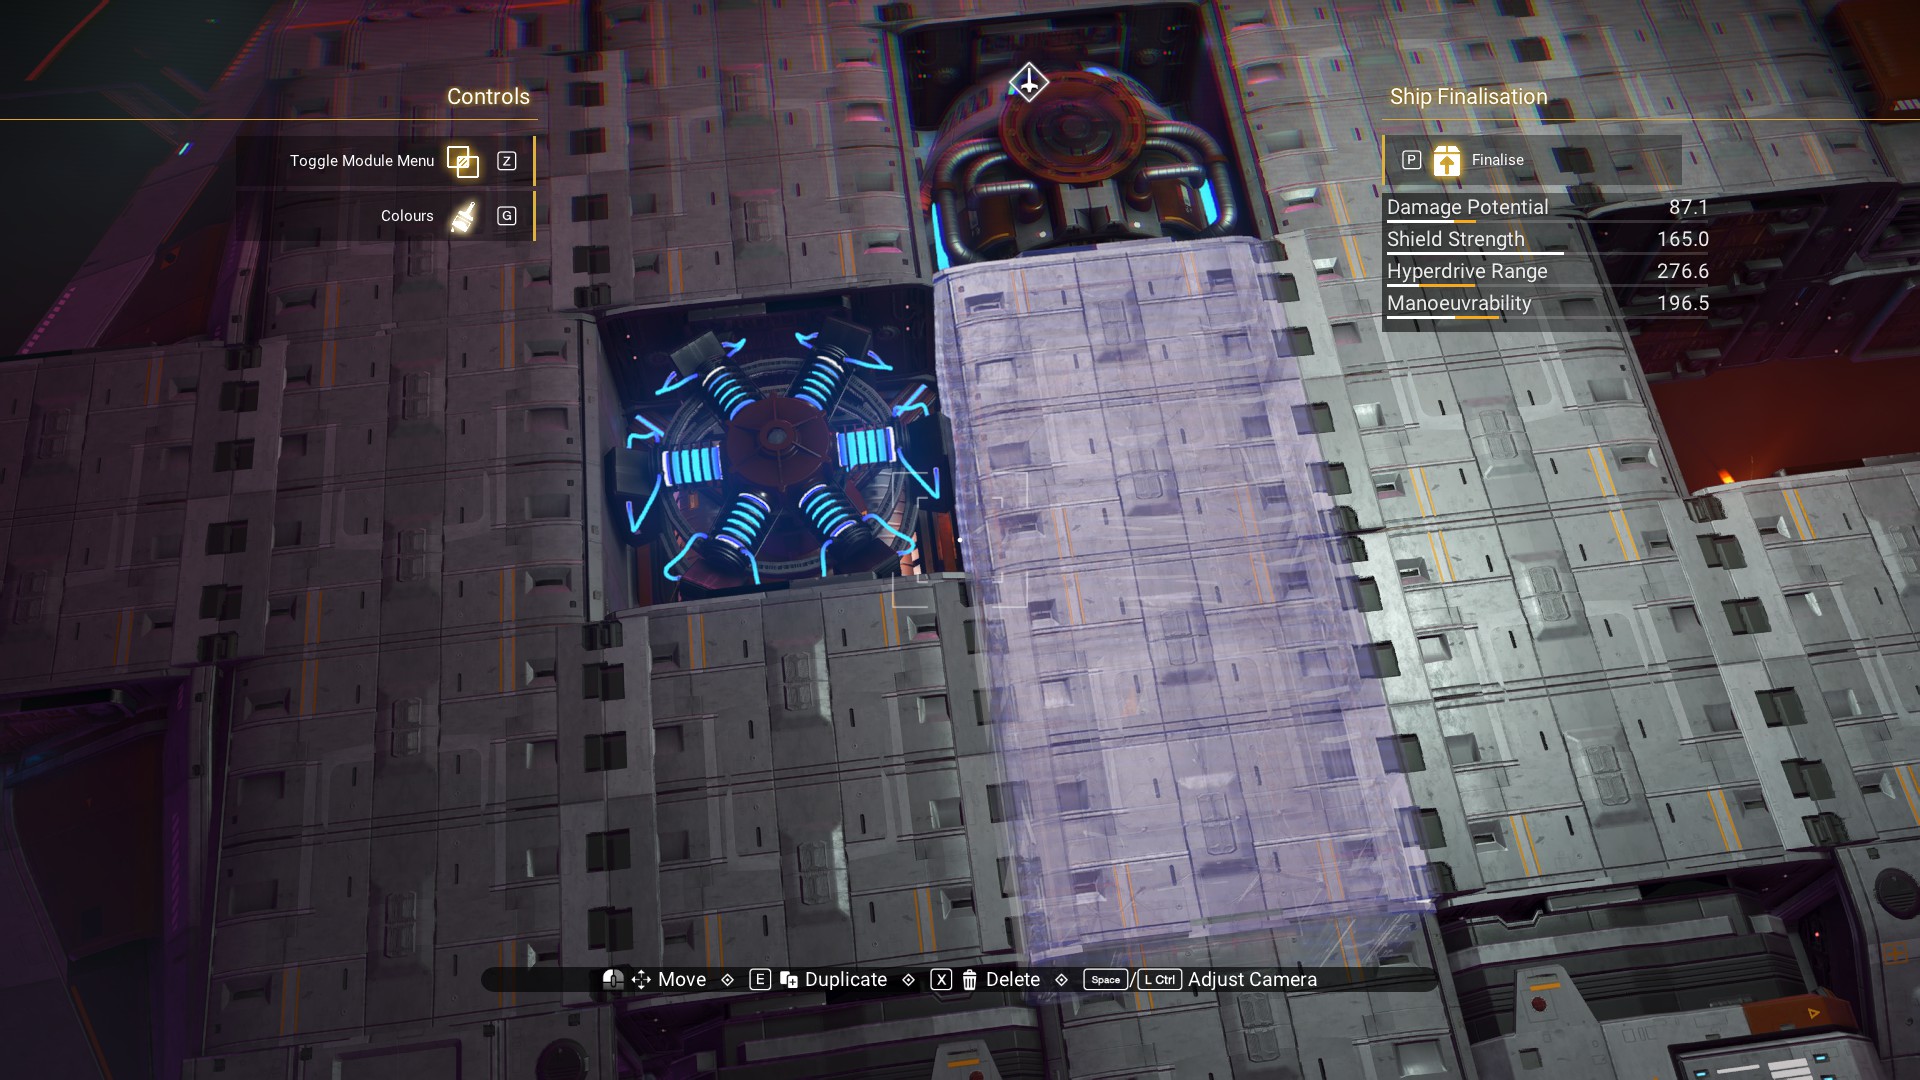
The gaps we've placed the reactors into will allow them to be hidden from view once we build the dome on top.
Fourth Level and Finishing Touches
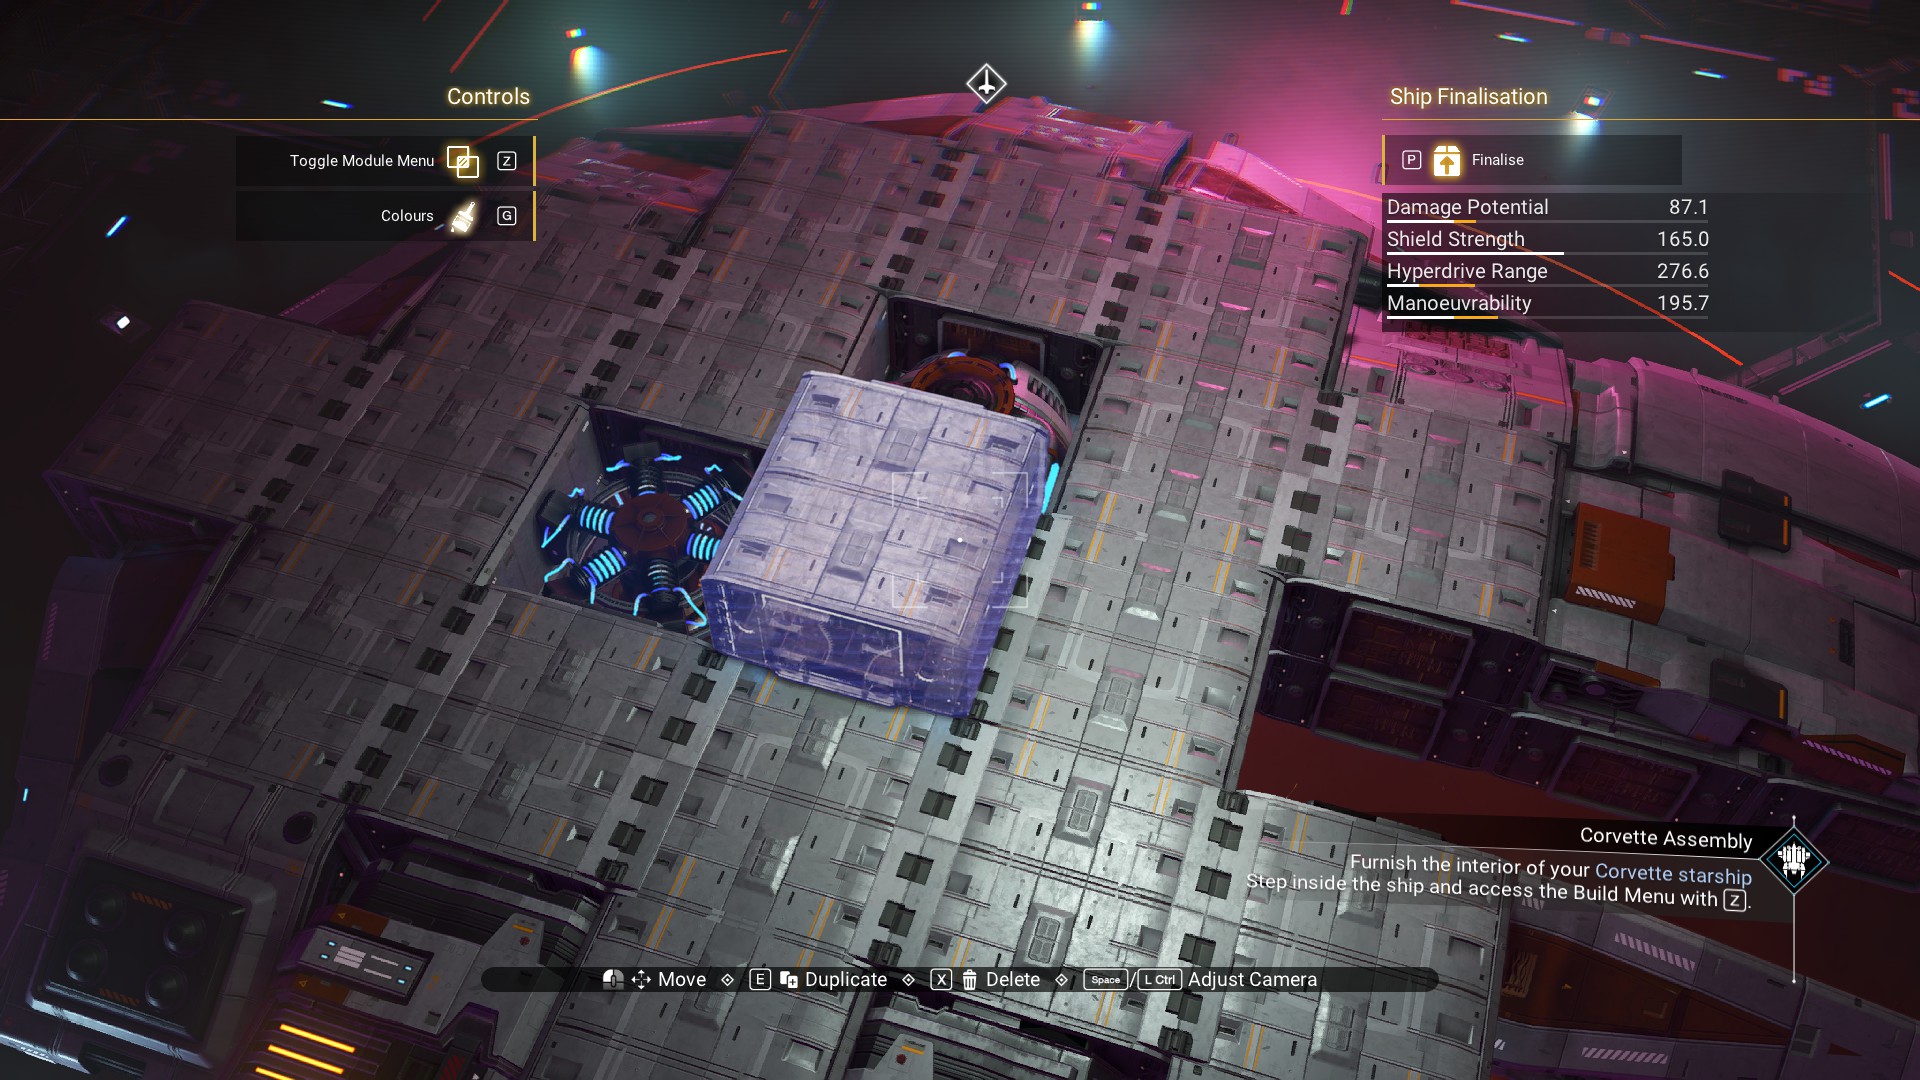 Speedbird Fairing on each of the four sides of the walkway.
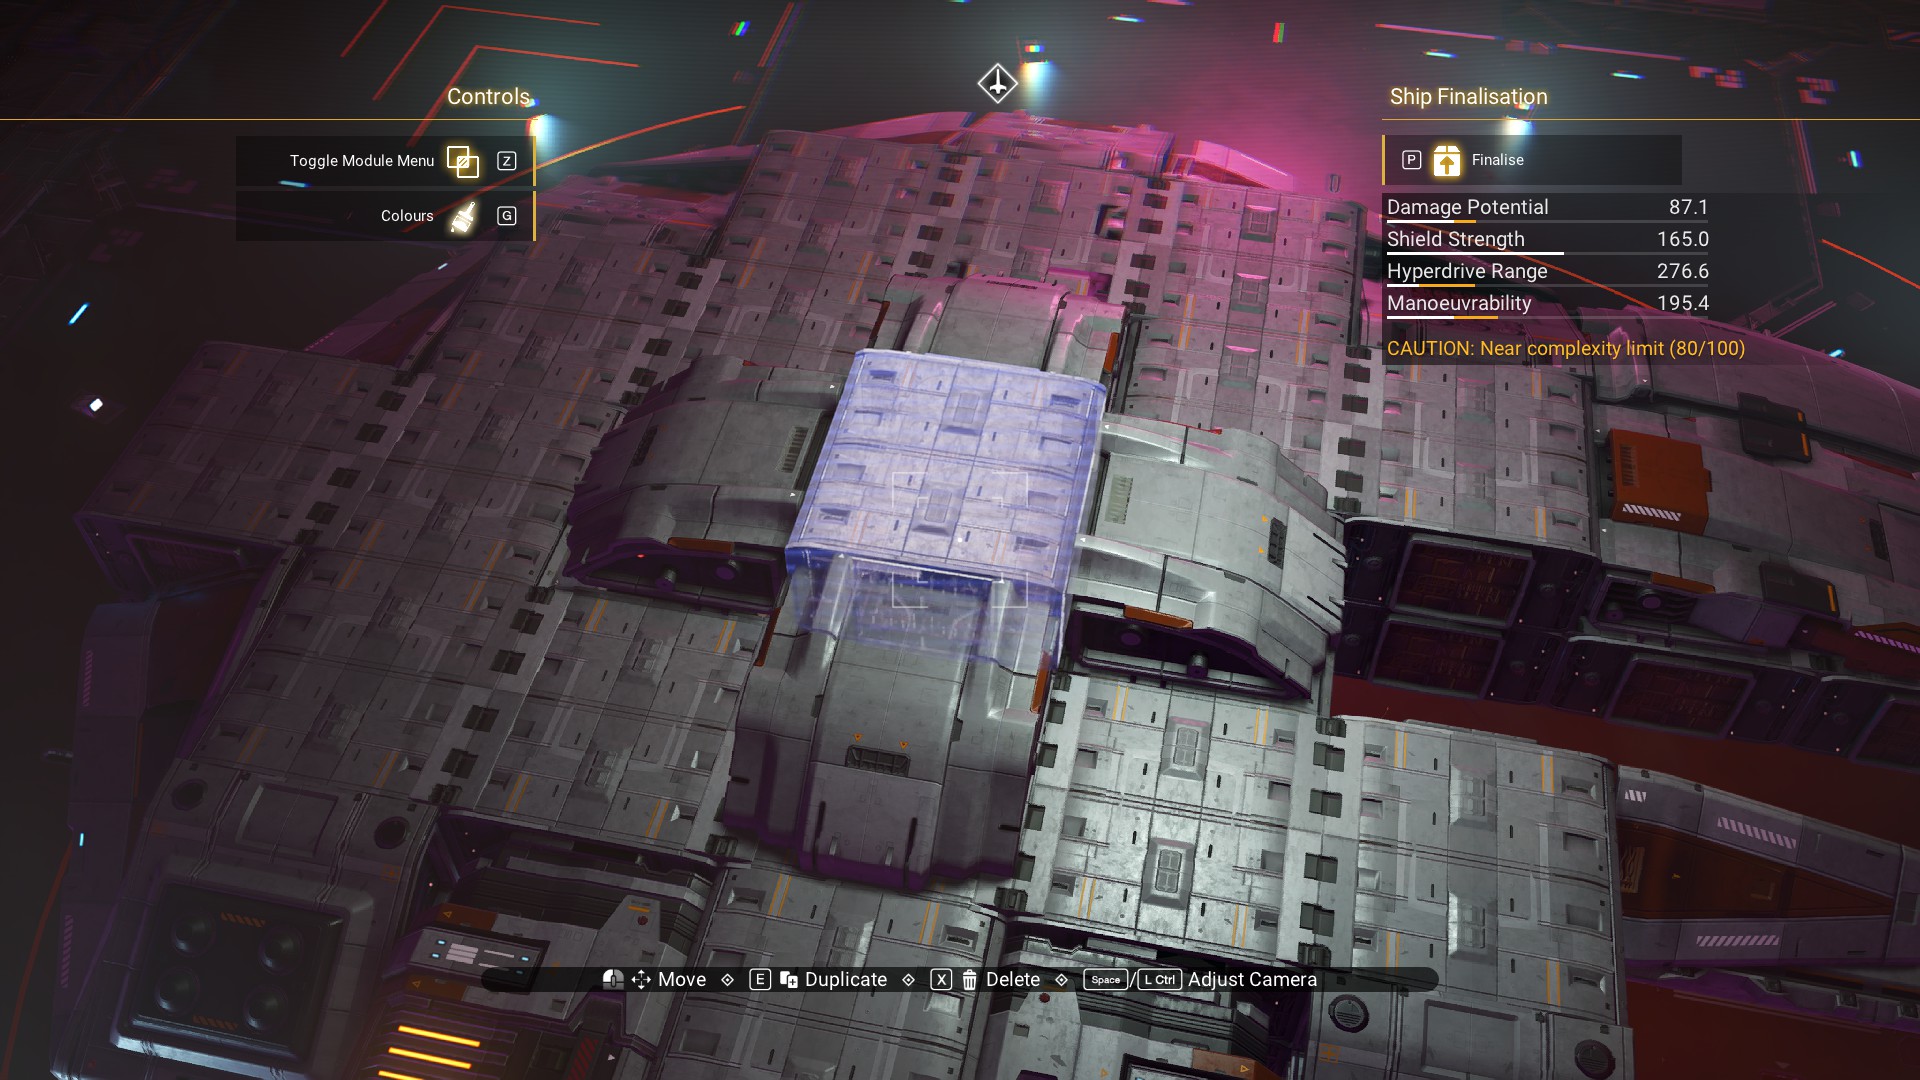 Speedbird Dome Sections between the four fairings. (Which I forgot to do on the bottom level.)
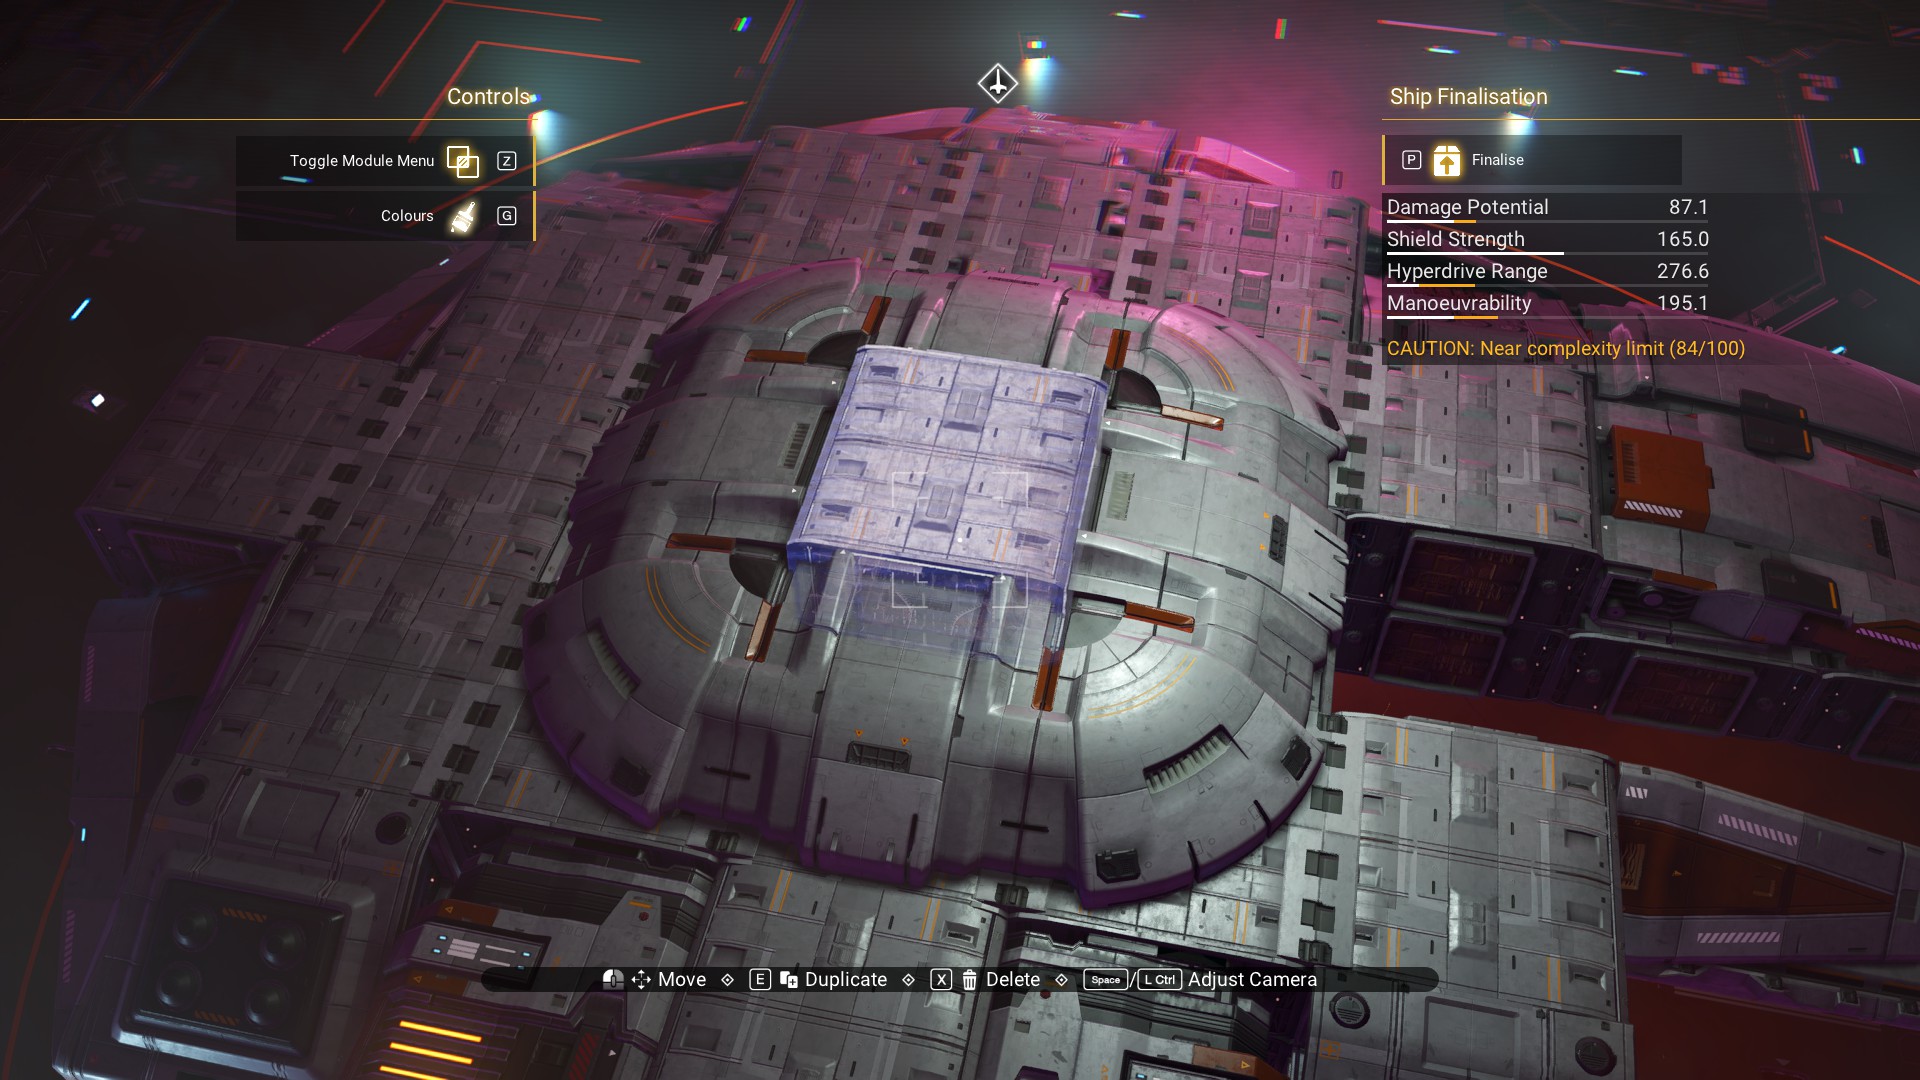 But, we can add the Dome Sections to the bottom now.
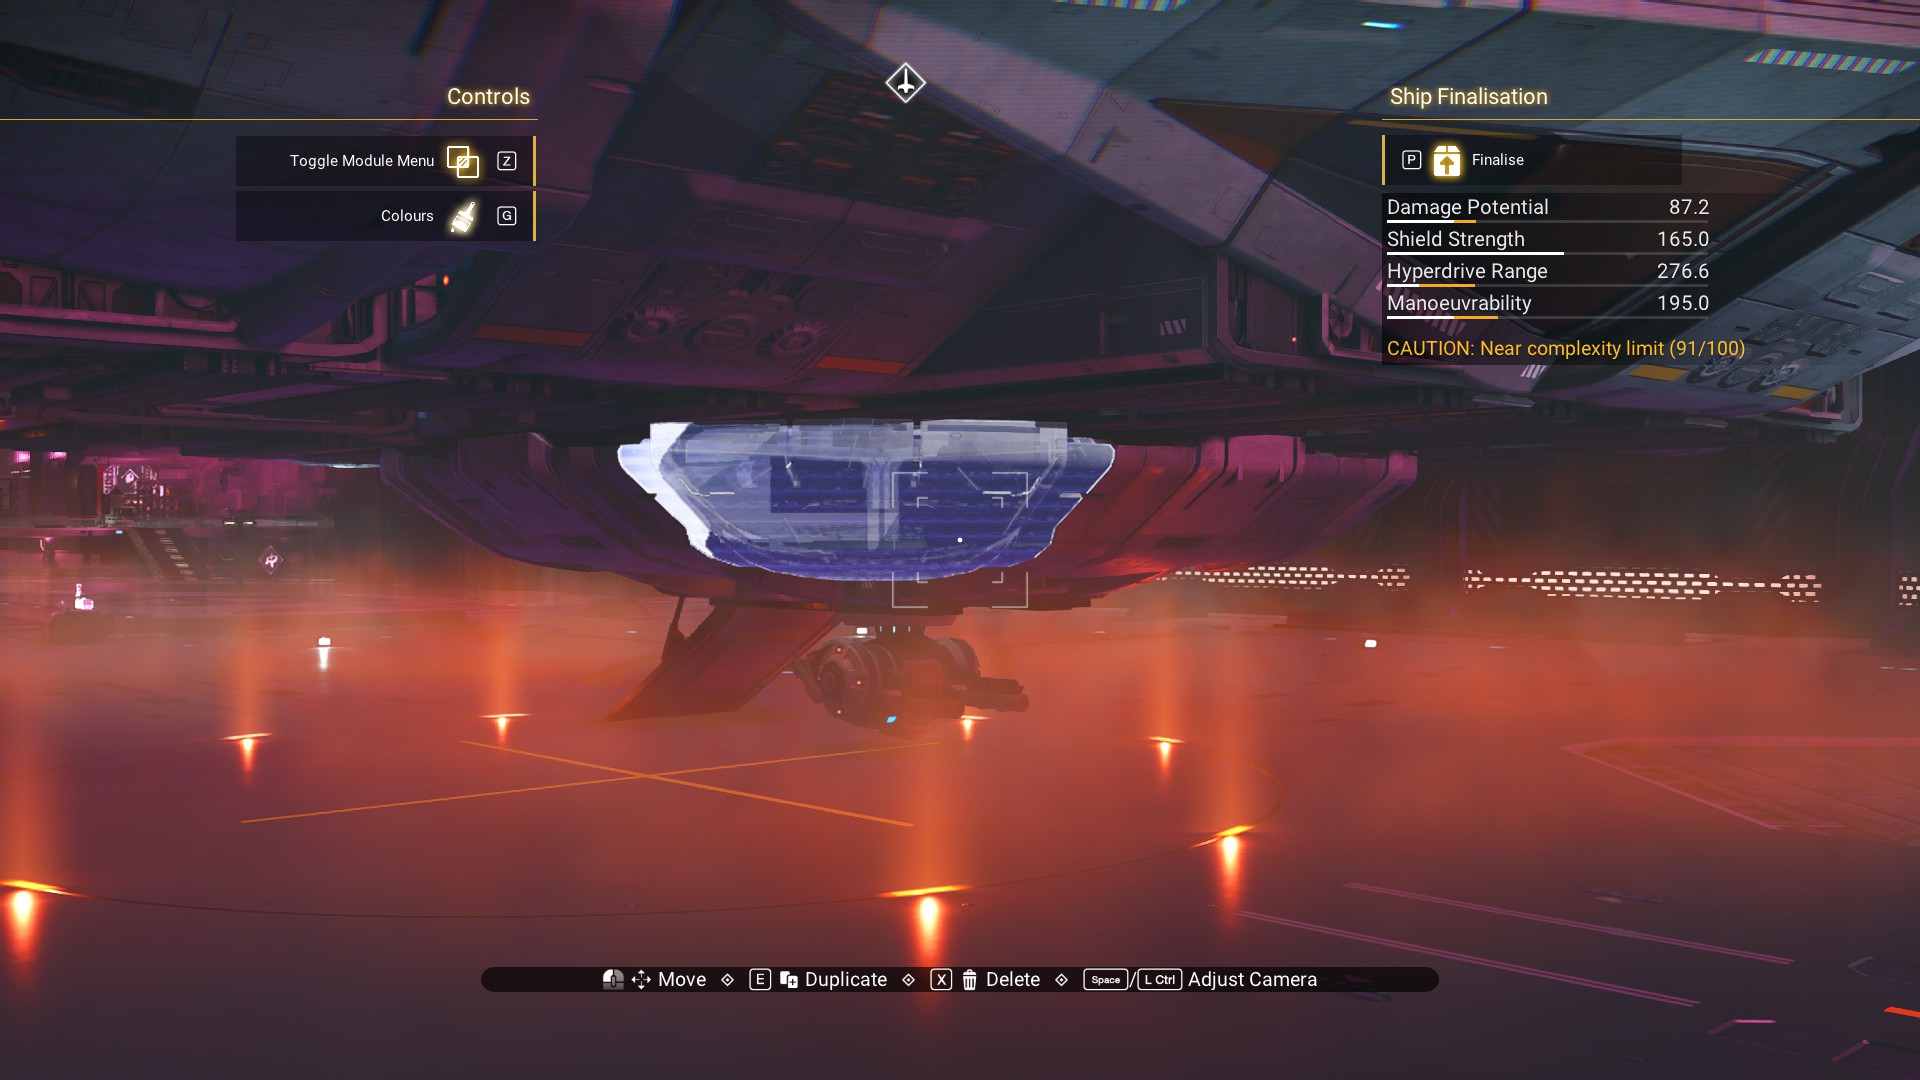 Phase Beam on top.
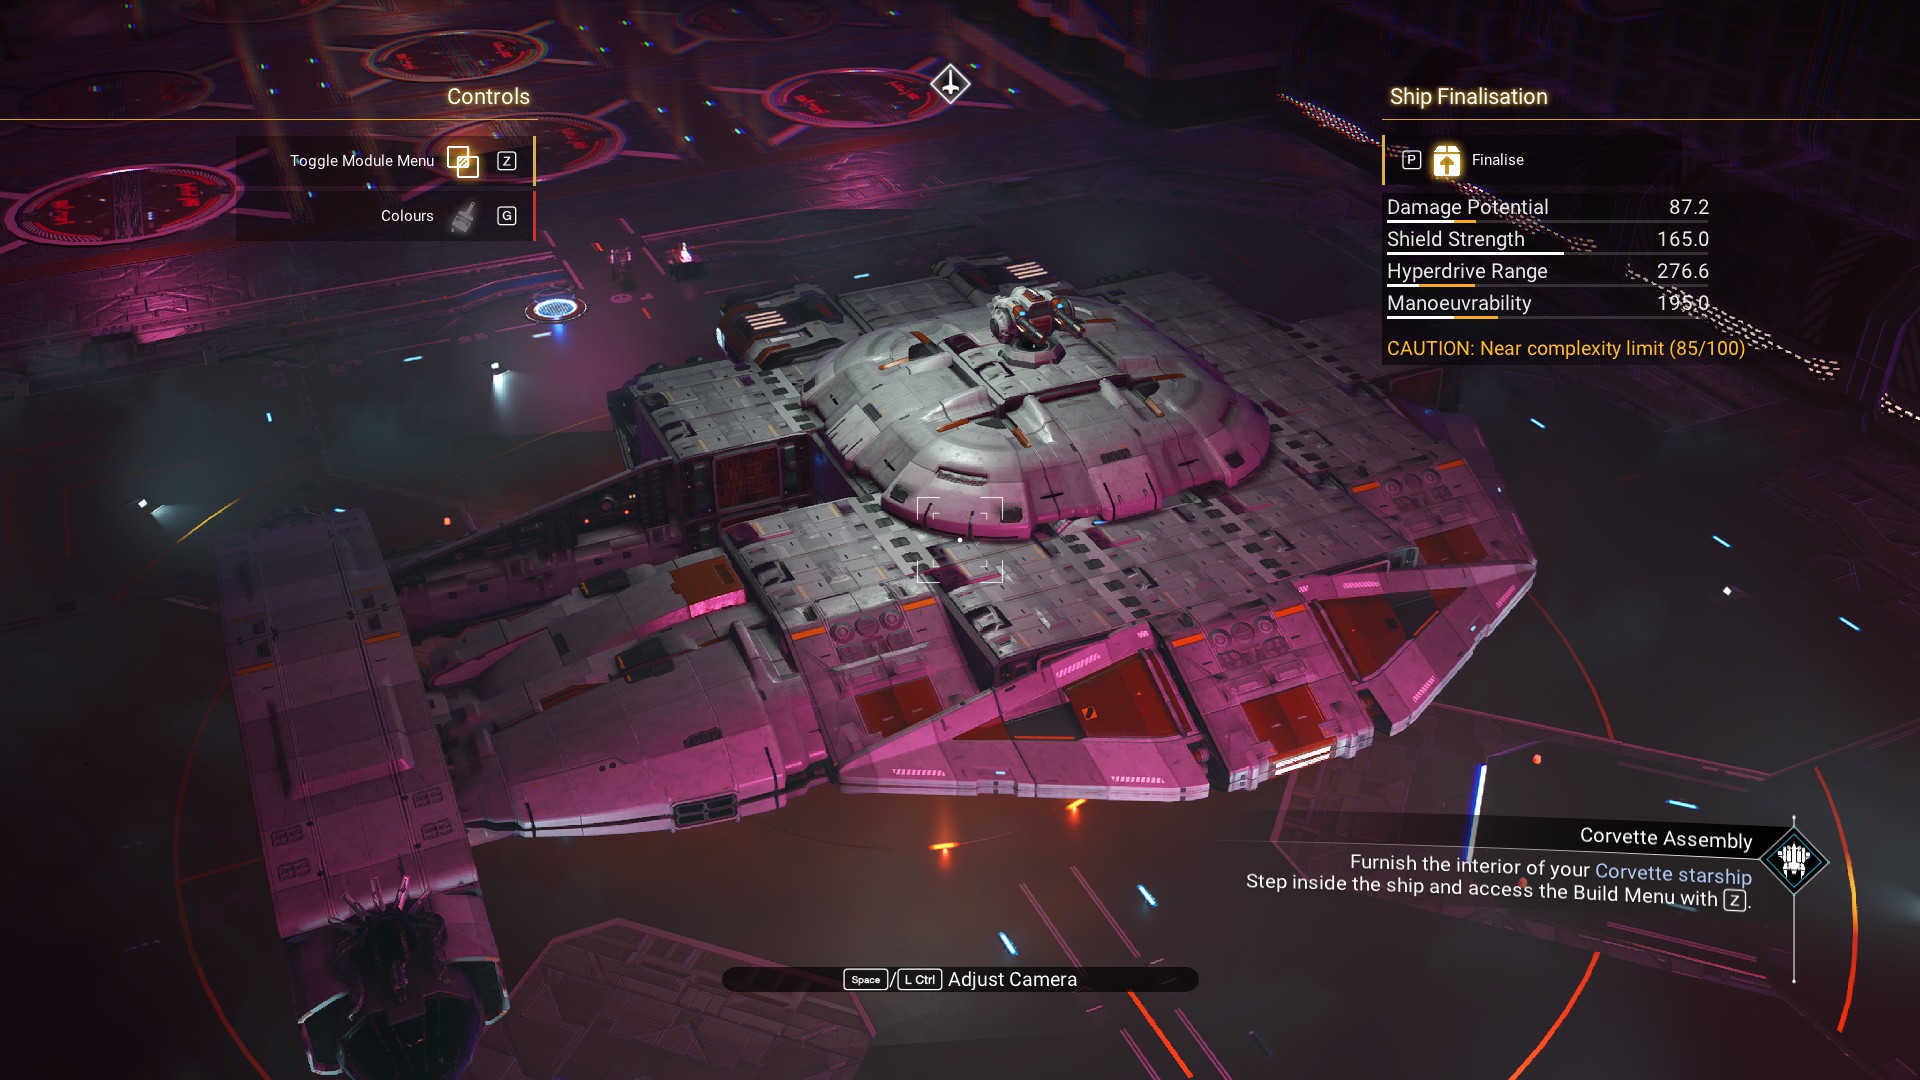
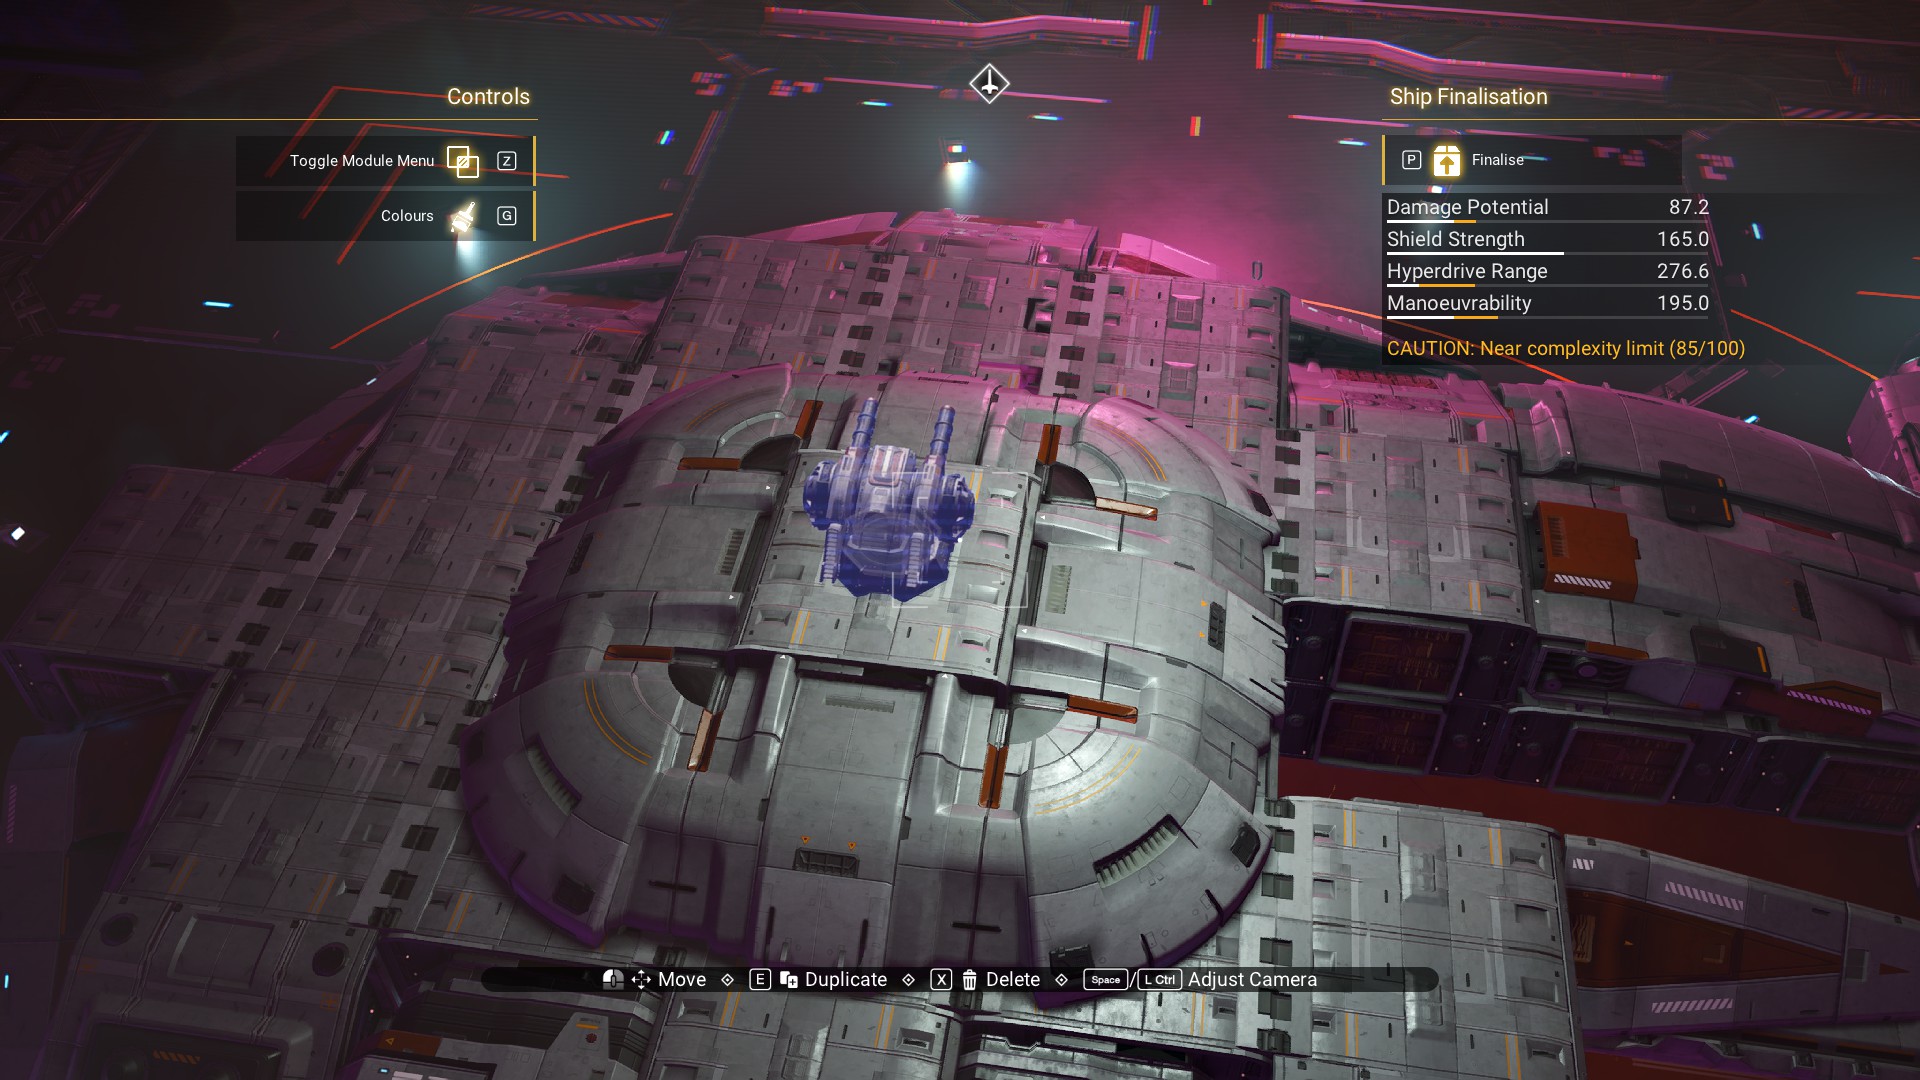 From here, we're basically finished. We just need a few added details to make it stand out a little more.
 The Outrider design usually has round service hatches on the rear of the ship. We can also add some if we want, using the Cargo Links. They go well between and to either side of the engines.
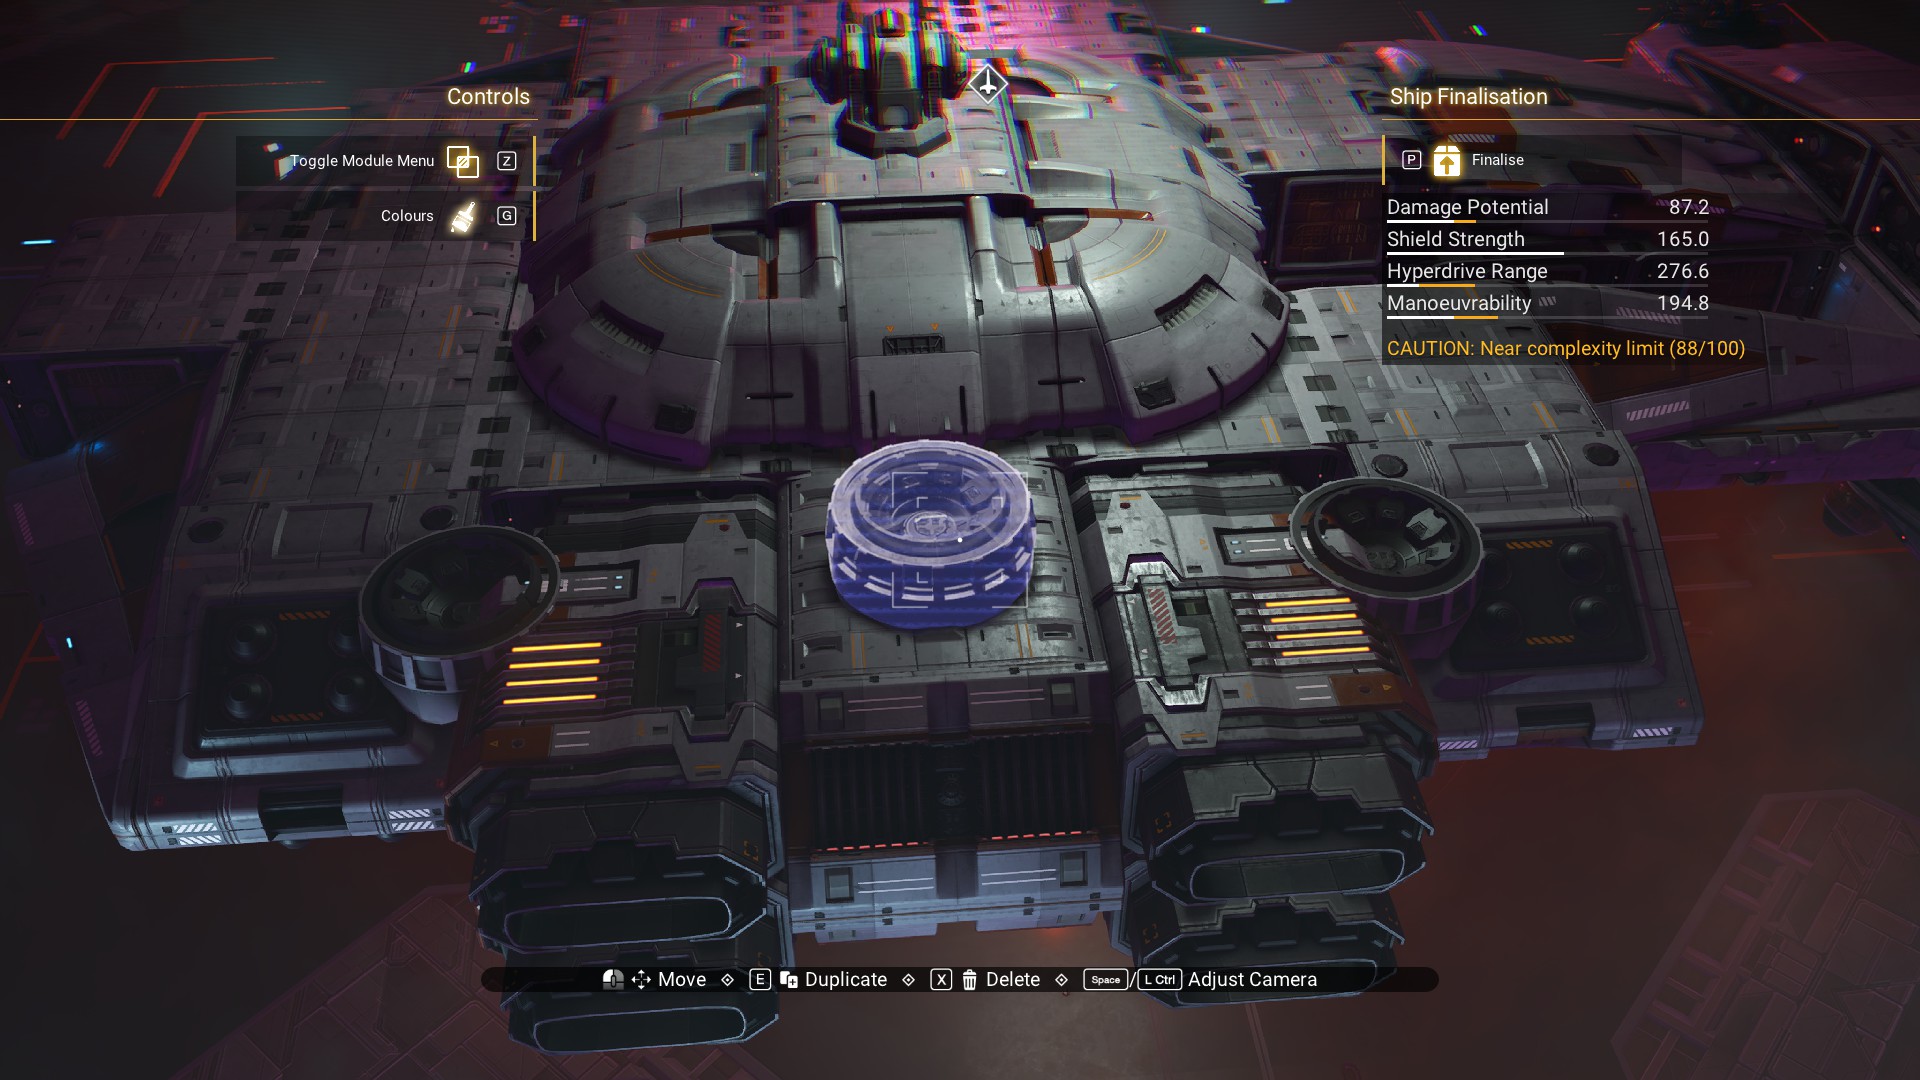 We can also add Air Purifiers for texture. I like these more than the Cargo Links.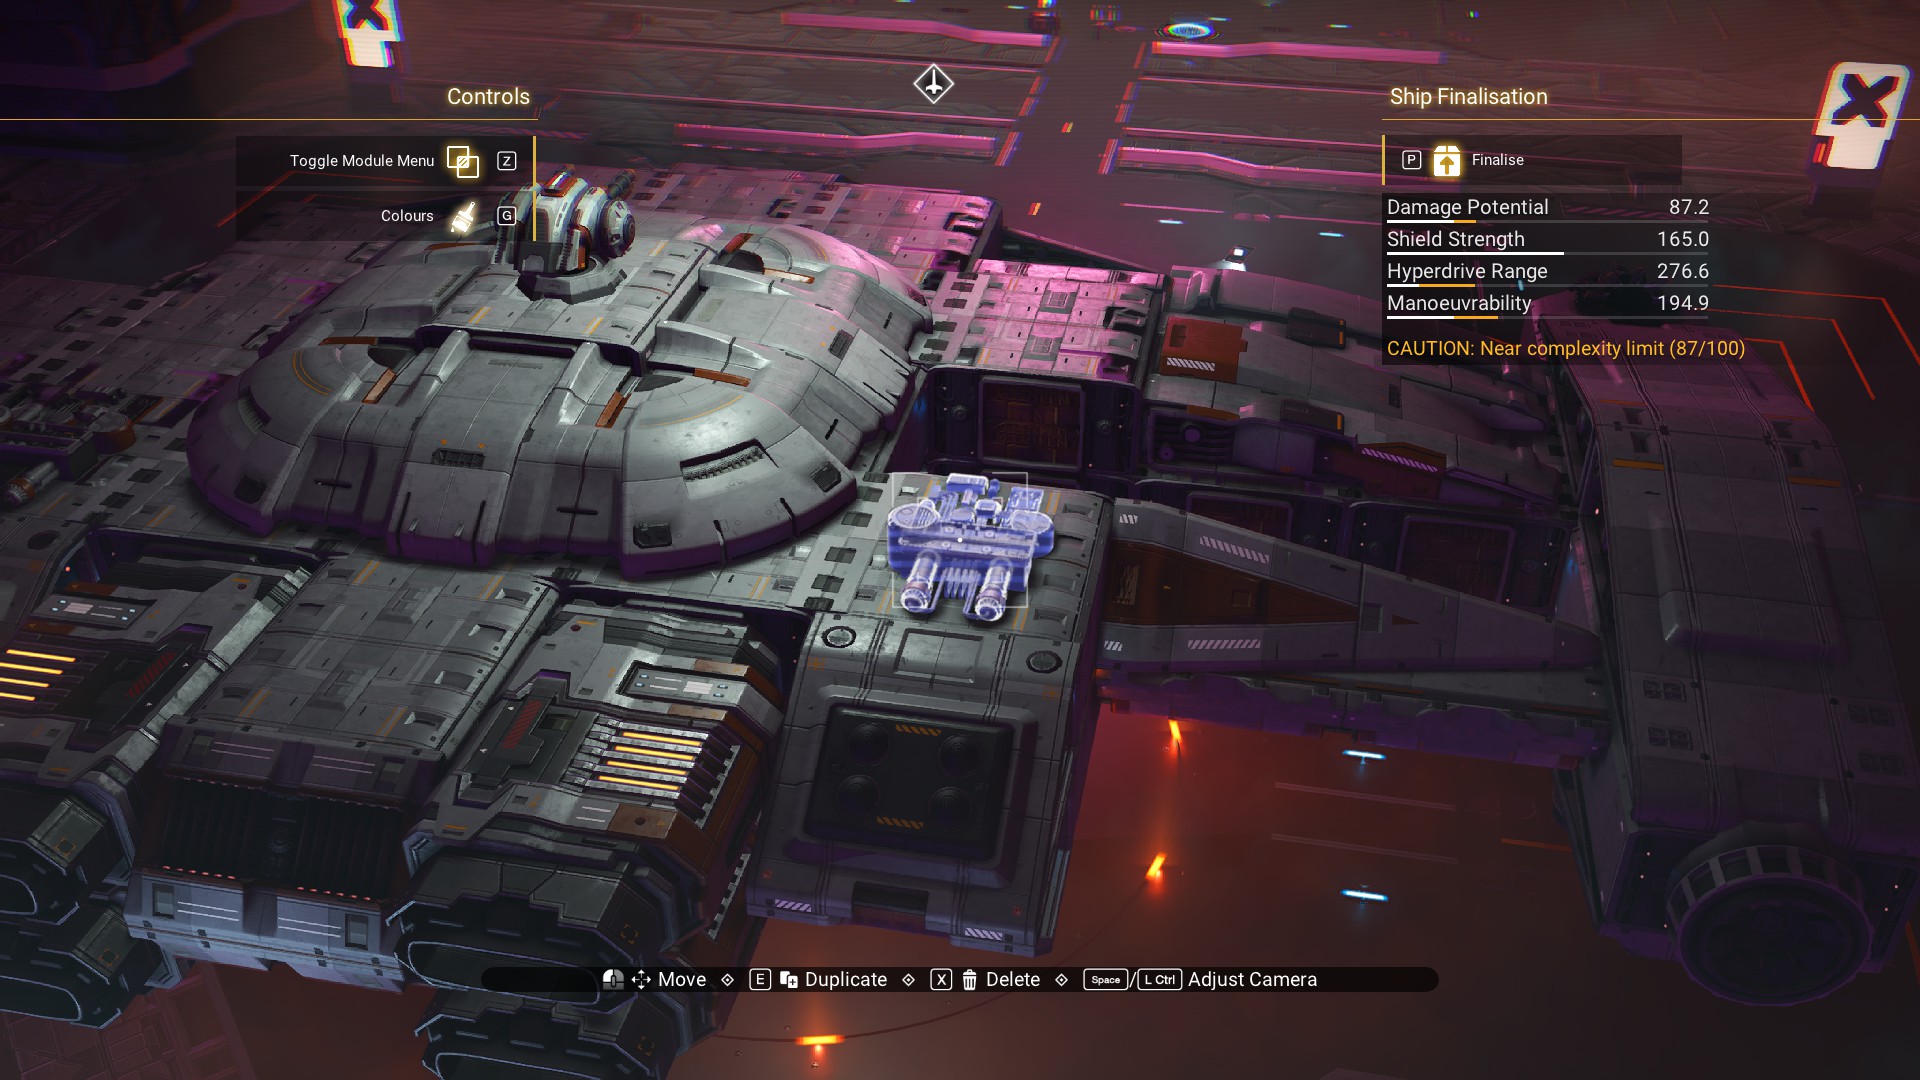
Congratulations! You have now built a YT-2400 Light Freighter. I'm going to add some personal touches to mine though, just because I can.
Personal Touches
The Outrider is probably my favorite ship to come out of Star Wars lore. But, it can be difficult to do the rough textures you see along the outsides of many Star Wars ship designs. (I did see someone had managed to do it with a Millenium Falcon build, and it looks amazing.)
So, all I did was exchange the Speedbird Fairings around the top and bottom domes with Speedbird Cowlings. Notably, on the front, port side, and rear of the domes (except where the landing bay is).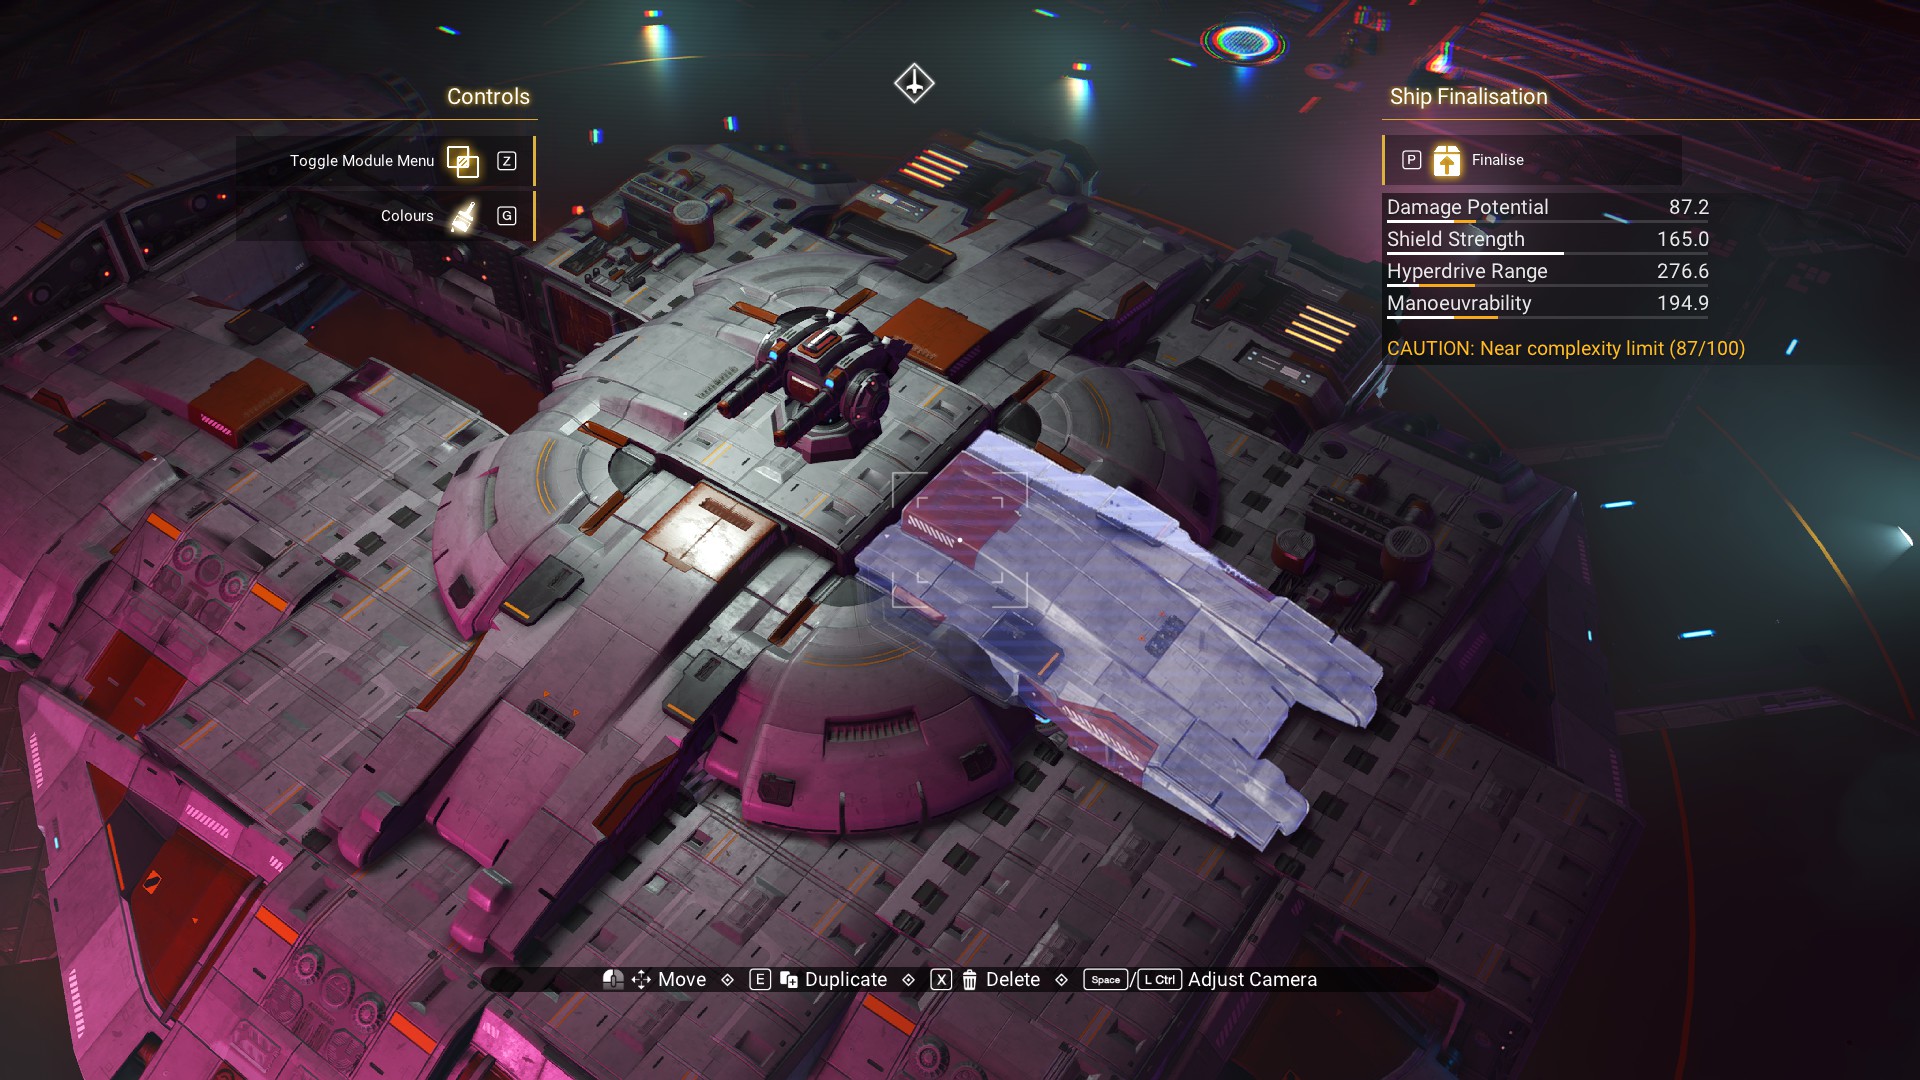
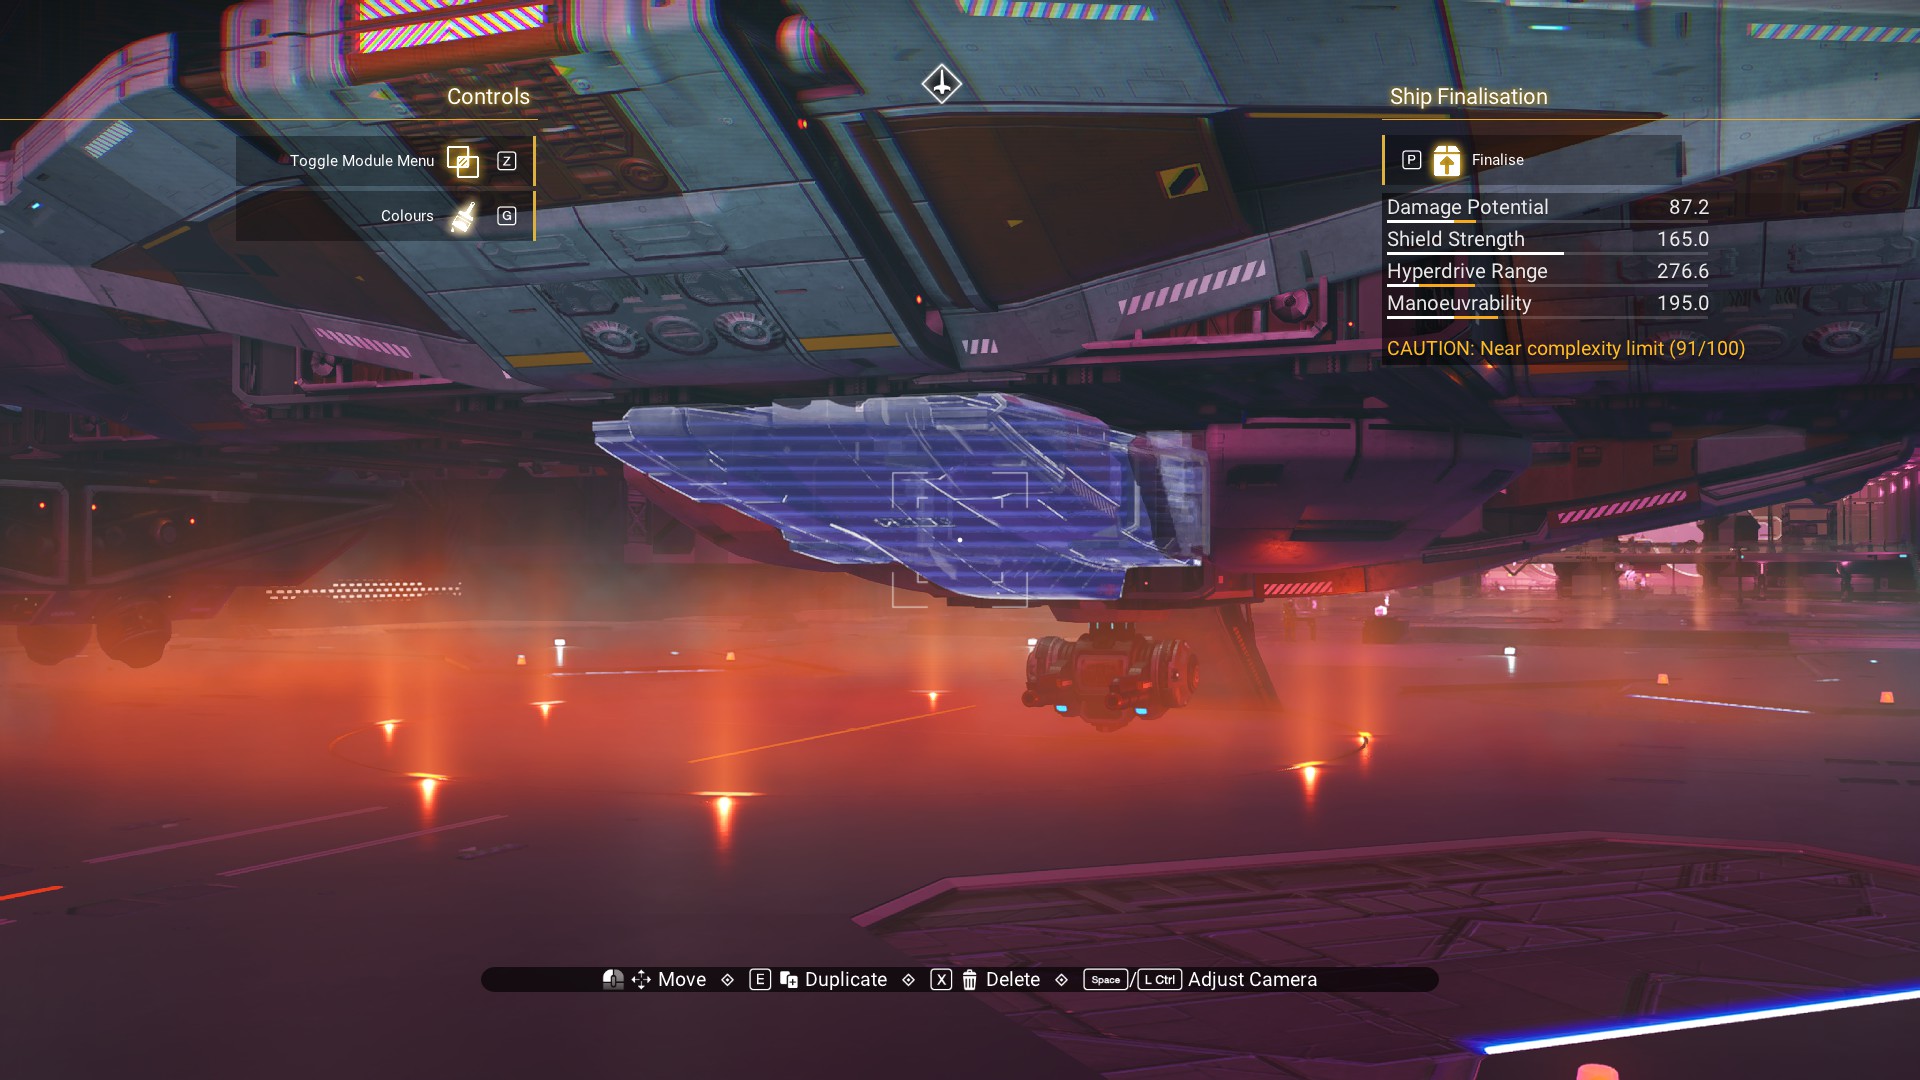
 I like the contour this small change adds.
Don't forget to paint your ship, if you haven't done so already.
I like the contour this small change adds.
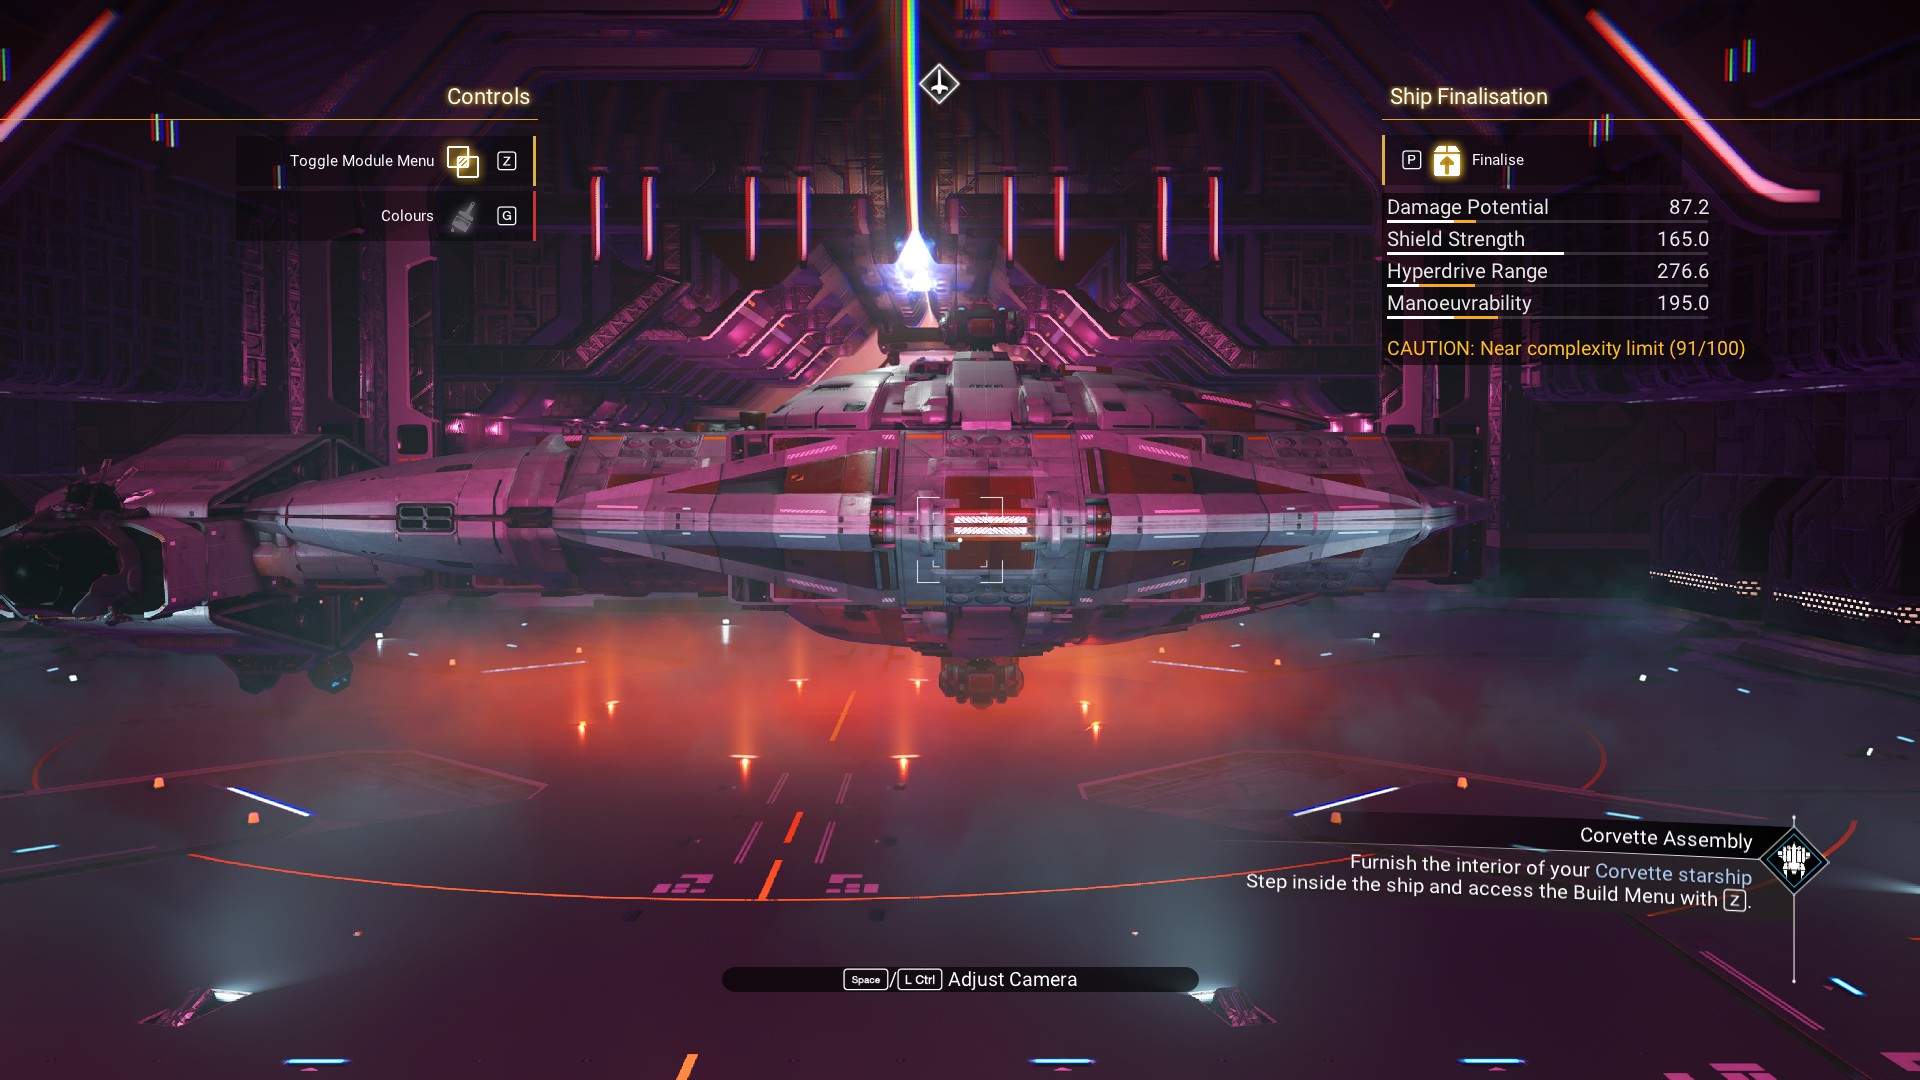
Don't forget to paint your ship, if you haven't done so already.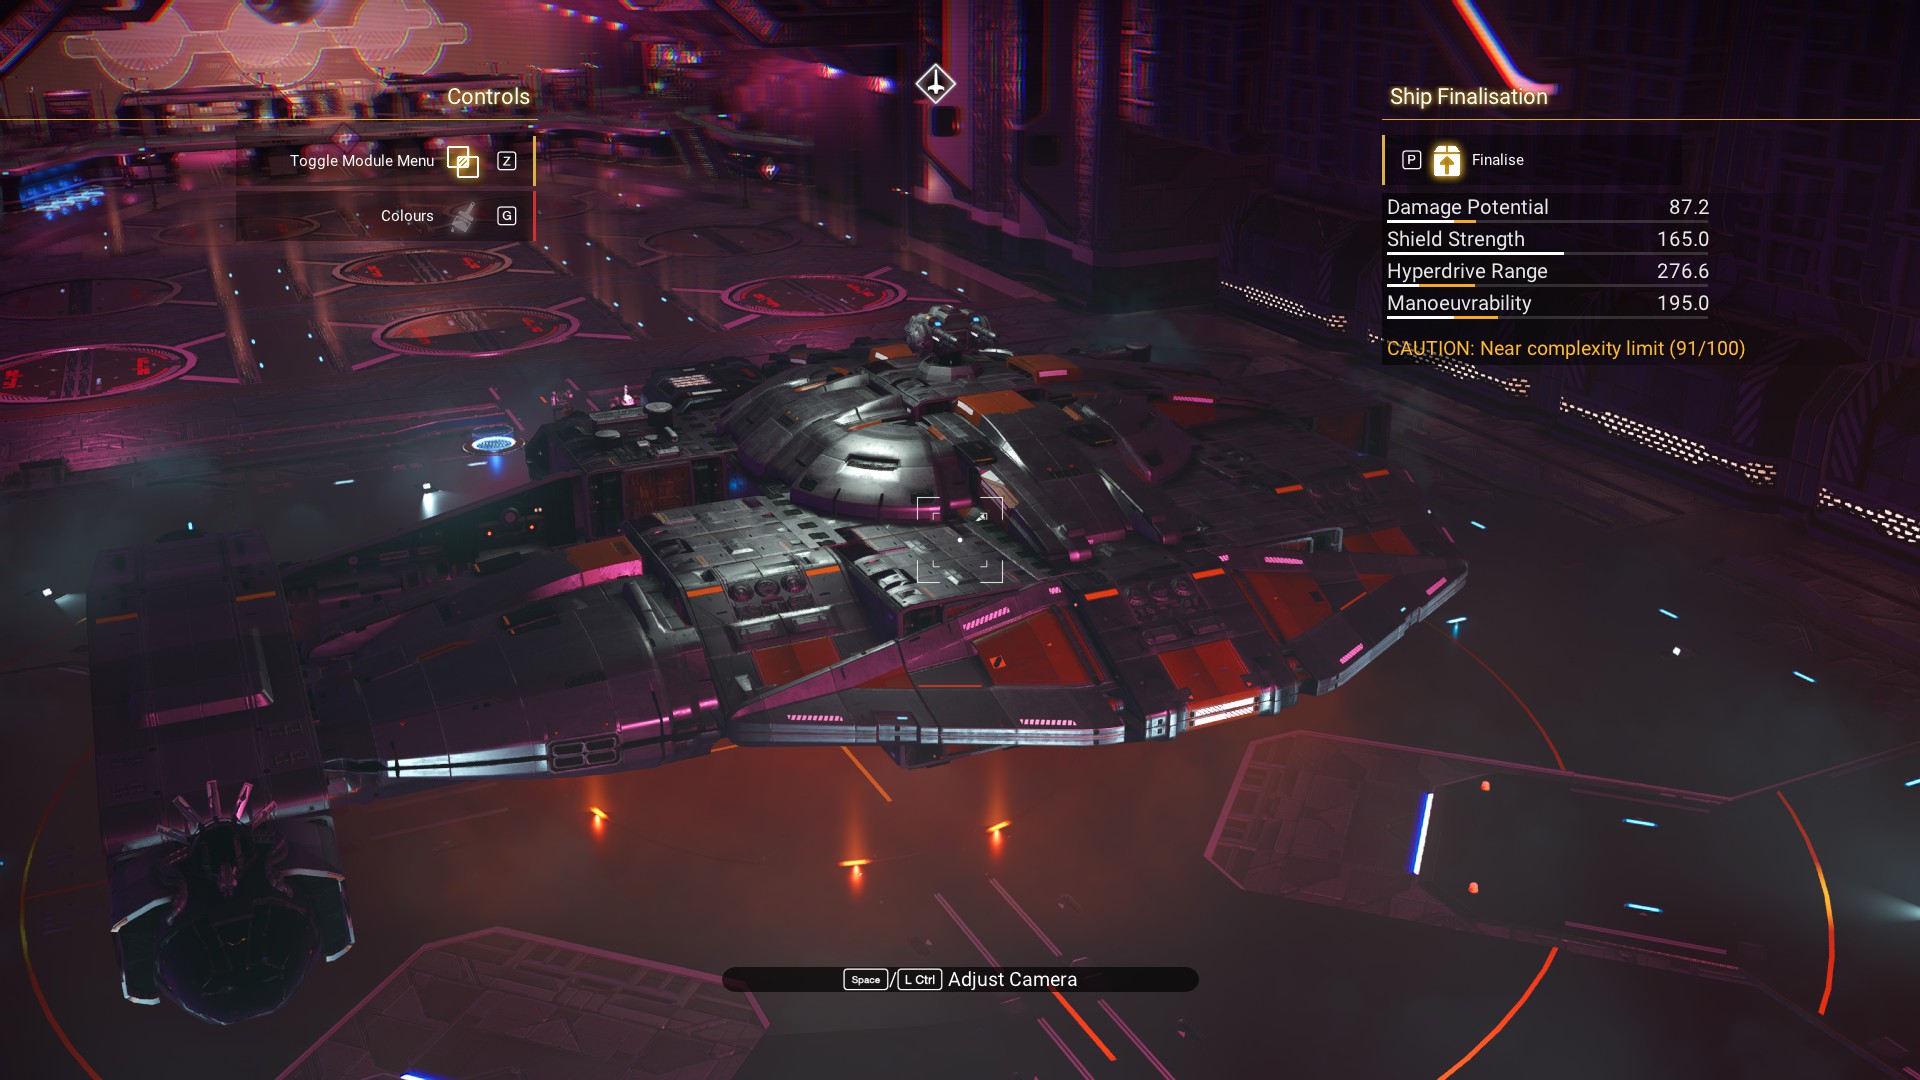 And, use the space between the body of the ship and the cockpit to house some shielding units.
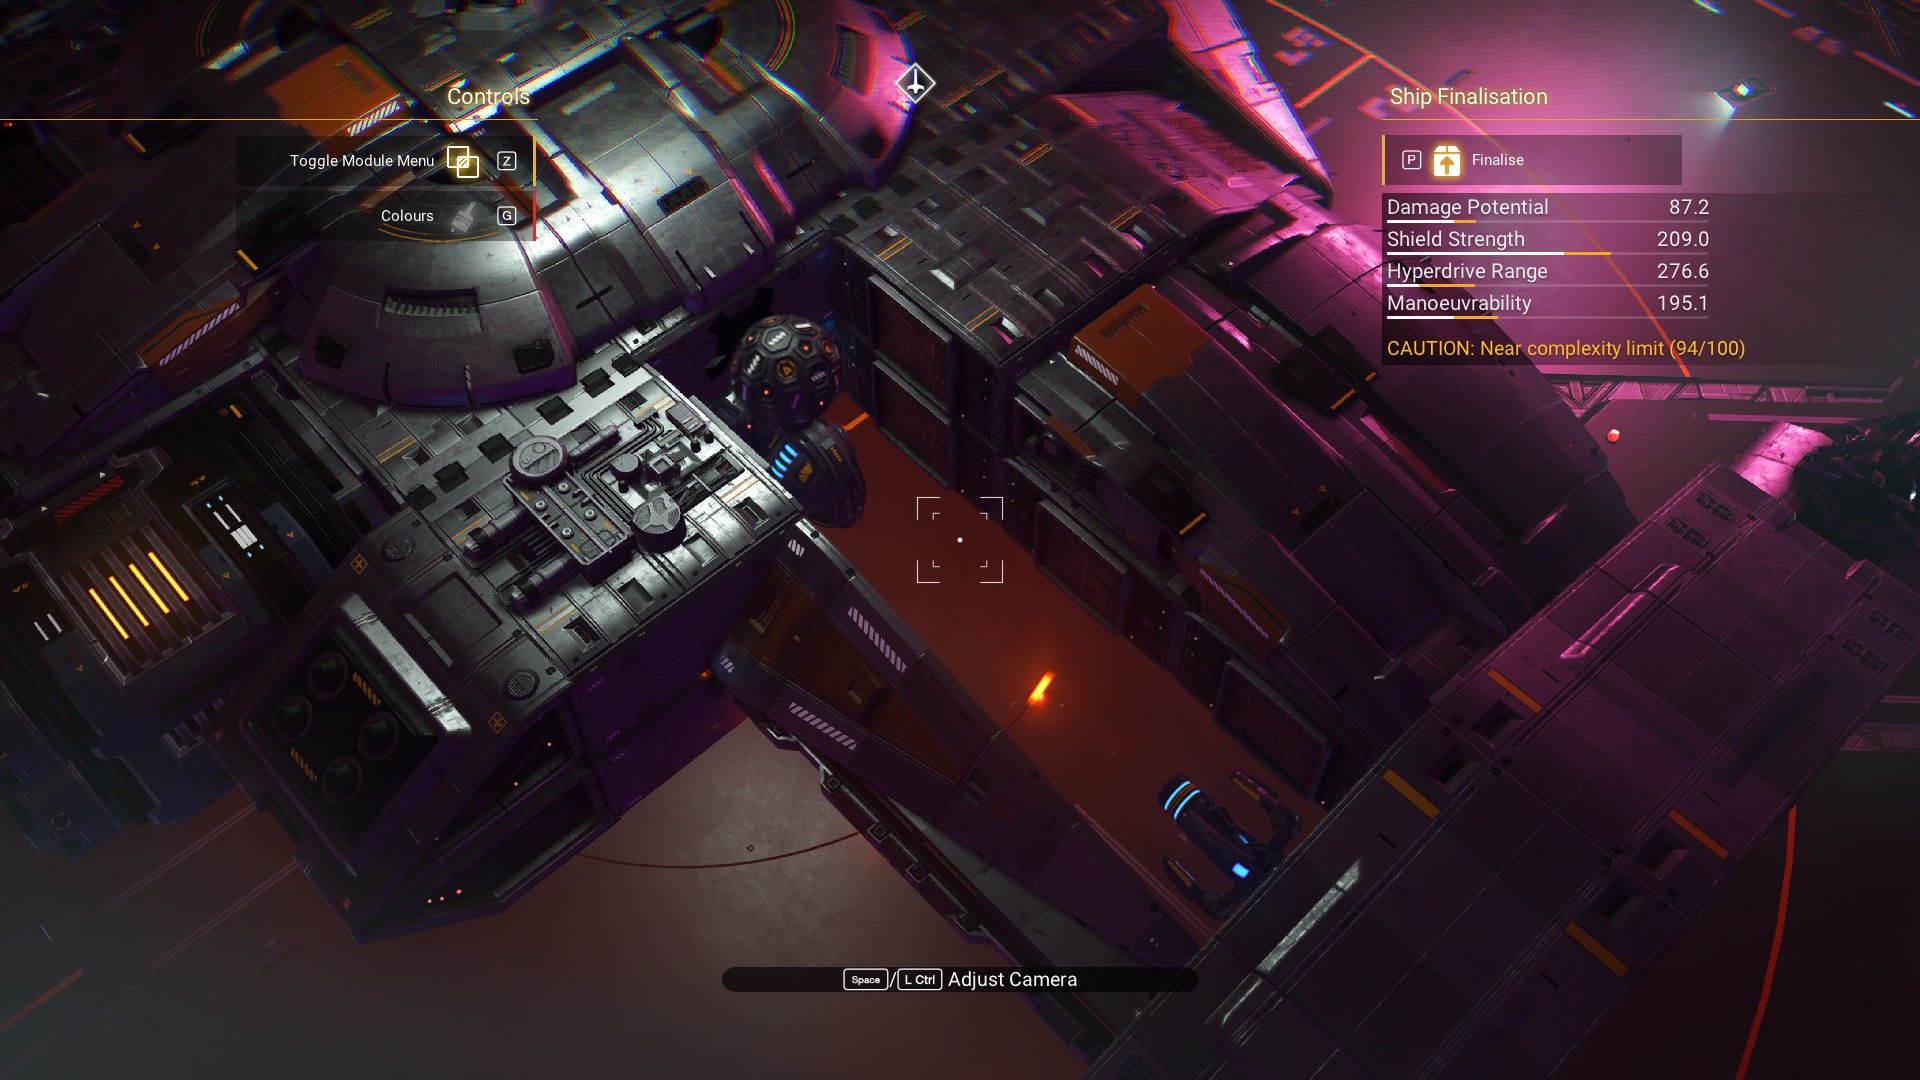 With that, your ship is done! Your very own Outrider, No Man's Sky edition.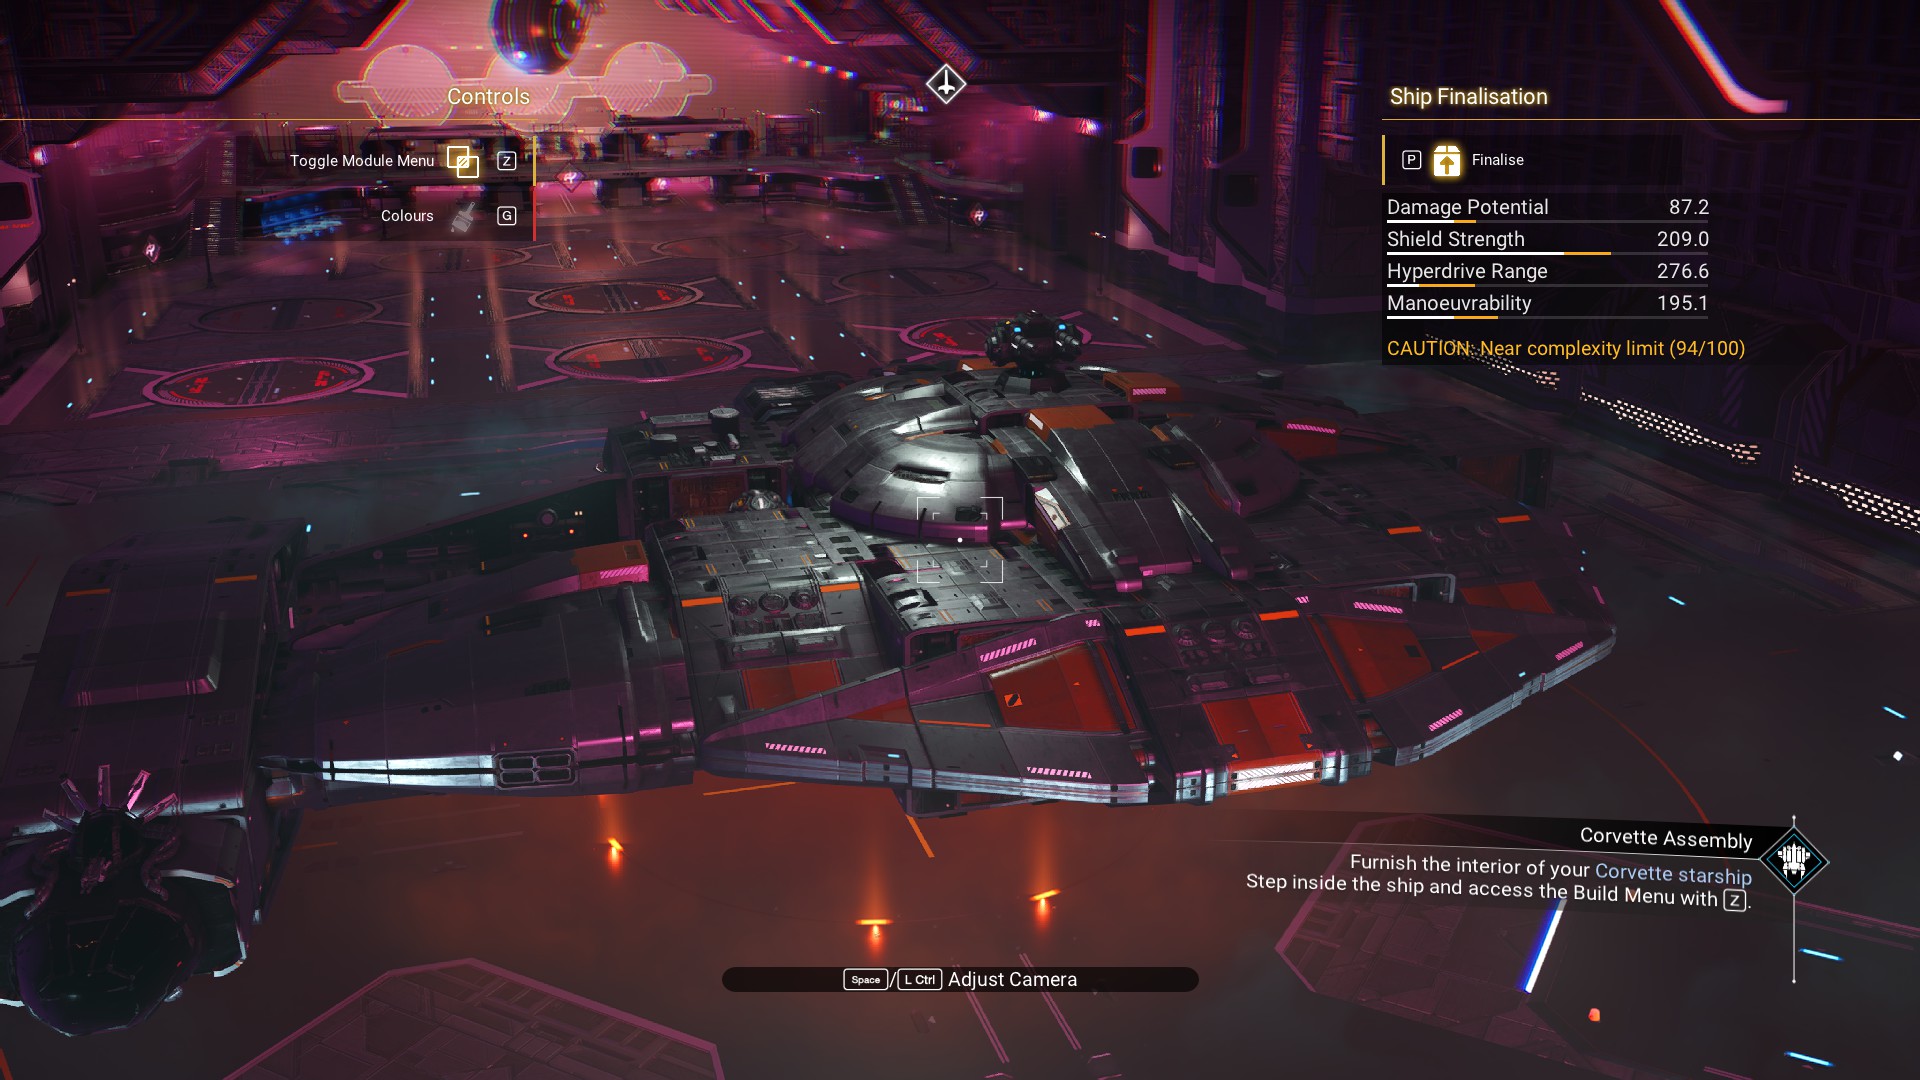
I hope you found this guide helpful, whether you build your own Outrider or take some of the ideas and apply them to your own designs.
Changelog
5/17/26 Changed the title and introduction to reflect a new guide I'm making on a more precise Outrider. Added a hyperlink to the Tetsudon build guide.
5/27/26 Added a hyperlink to another build guide.
- No Man's Sky Access Codes★ 5 (880)43k views2.1k ♥1 minUpdated 14 Apr
- Refining – The Magic Of Alchemy★ 5 (1.2k)41k views3.6k ♥5 minUpdated 24 Mar, 2022
- How to get RICH in NMS SUPER FAST★ 5 (501)32k views1k ♥2 minUpdated 7 Sep, 2022
- Multi-Tools: Types, Statistics, Weapons, Layouts★ 5 (550)27k views1.3k ♥7 minBulgarianUpdated 3 Jul, 2025
- Starship Guide: Types, Statistics & Roles★ 5 (461)25k views924 ♥8 minBulgarianUpdated 30 May
- Звездолеты СТРАЖЕЙ★ 5 (220)24k views519 ♥7 minRussianUpdated 9 Feb, 2025



- Upgrading to PremiumTeam Fortress 2★ 5 (20k)1441k views11k ♥6 minUpdated May 11, 2022
- No More Room in Hell Official ManualNo More Room in Hell★ 5 (2.8k)569k views2.1k ♥29 minUpdated Apr 22, 2019
- NMRiH Community Hosting GuidesNo More Room in Hell★ 5 (526)351k views653 ♥1 minUpdated Aug 10, 2022
- ULTIMATE GUIDE FOR GAME DEV TYCOONGame Dev Tycoon★ 5 (5.8k)326k views10k ♥4 minUpdated 23 Jan, 2014
- How to 'Git Gud' Soon™MORDHAU★ 5 (2k)318k views3k ♥68 minUpdated Nov 16, 2024
- Лучшие кооперативные игры SteamPAYDAY 2★ 5 (1.5k)315k views2.1k ♥56 minRussianUpdated Apr 27, 2025






This guide was created by its original author on the Steam Community. Are you the author and want it removed? Request removal.