YT-2400 Outrider Build Guide
Introduction
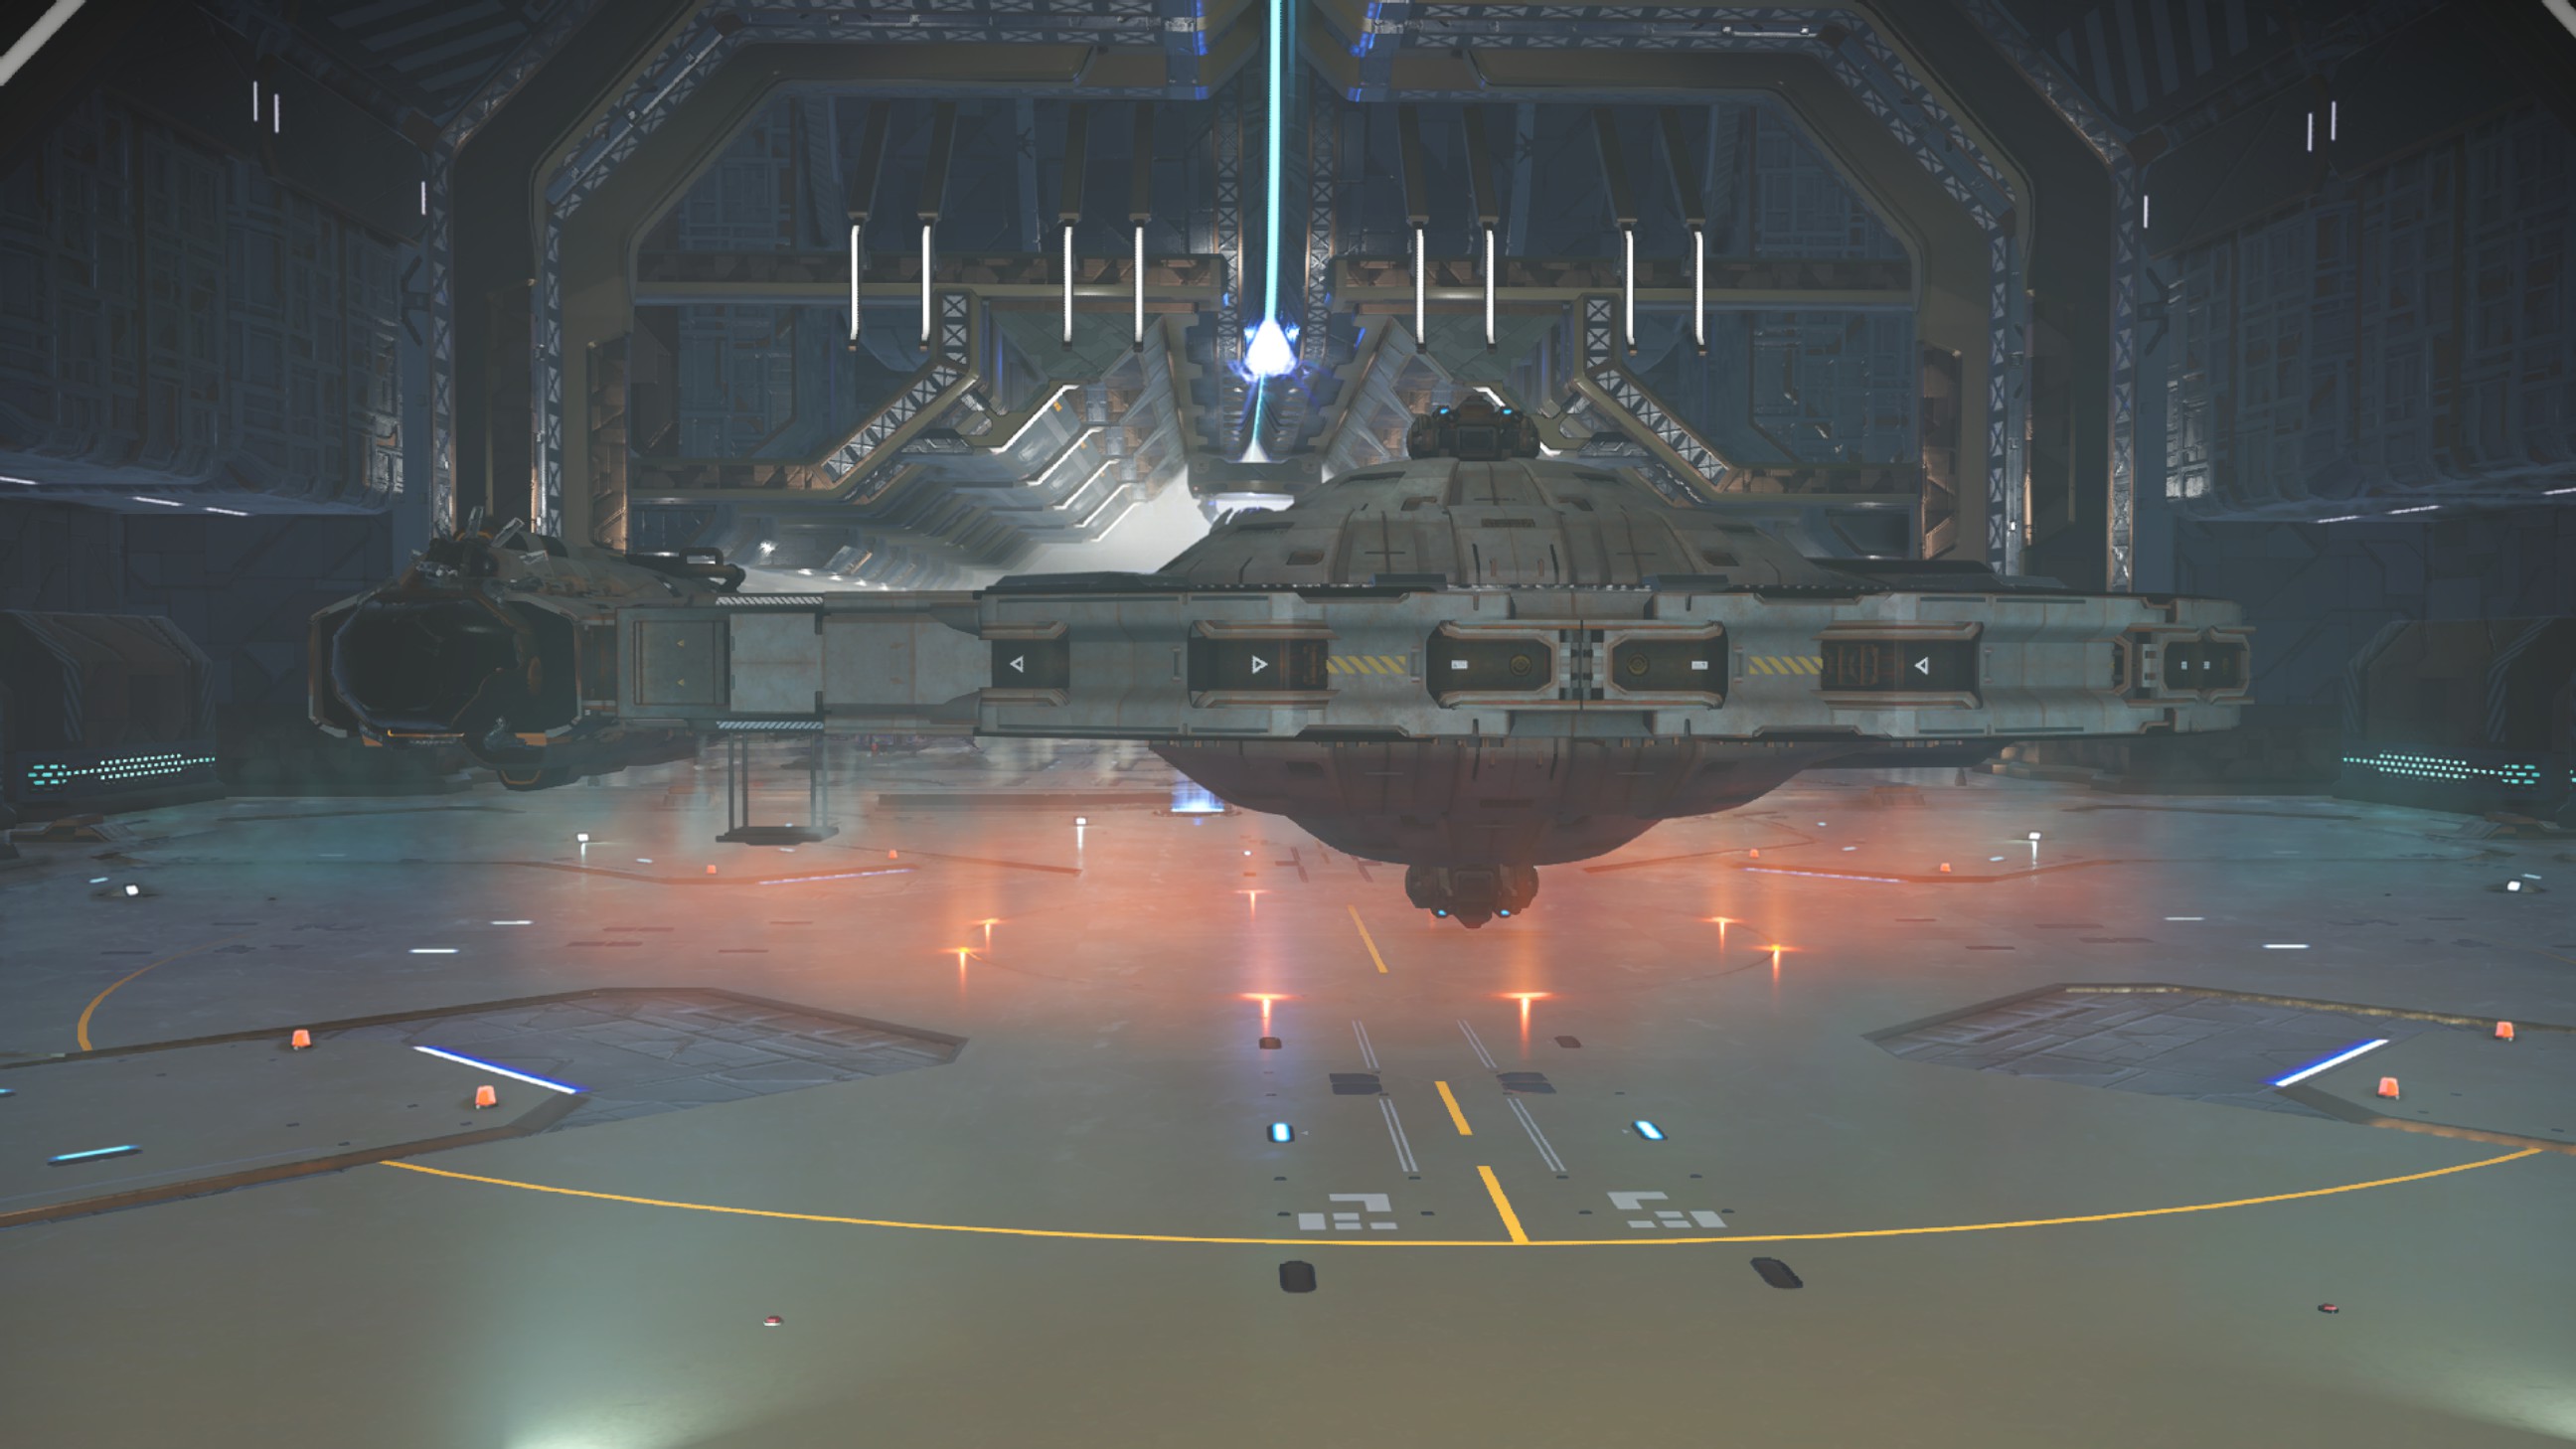 Hello and welcome! The YT-2400 Outrider is a light freighter with a saucer-like body and the cockpit extended away from the hull to keep the pilot safe should the rest of the ship be destroyed.
I've greatly improved on my original design for the Outrider (seen here), and gotten it, probably, as close as I possibly can in NMS.
This version of the YT-2400 uses offsets, 45 degree rotations, 180 degree stacked habs, and a free placement rotation. If any of these techniques are new to you, don't worry! This guide will give you a detailed explanation on how to do all of it, with plenty of pictures to help you along. The whole ship can be built without ever leaving the space station (as long as you have all the parts).
This guide has over 400 images to help you along, and is the longest guide I've made yet. It's seriously made me consider doing recordings for any future builds I might do, but I already took all the pictures for this one so I might as well put them to good use.
Check out my custom asymmetrical ship design, the Tetsudon, here.
Parts List
I used Thunderbird-class habs and walkways, so those are what are listed, but you can use whichever you prefer.
Listed, in alphabetical order:
Cargo Link: 5
Ducting Outlet: 4 (1 is used for offsets)
Engine Cover: 8
Fuel Pod Cover: 4
Hardframe Diffuser Rim: 1
Landing Gear or Thruster: 1
Longshore Cowling: 2
Longshore Thruster: 3
Medusa-class Reactor: 1 (optional)
Phase Beam Array: 2
Rockhopper Propeller Module: 2 (used for offsets)
Speedbird Dome Rim: 1
Speedbird Dome Section: 16
Speedbird Fairing: 6
Speedbird Nacelle Rim: 9
Thunderbird-class Hab: 4
Thunderbird-class Landing Bay: 1
Thunderbird-class Walkway: 32 (10 of these aren't in the final product)
Titan-class Cockpit: 1
Titan-class Landing Bay: 2 (neither of these are in the final product)
Vesper Cowling: 4
Vesper Diffuser Rim: 2
Zenith-class Reactor: 10 (9 of these aren't in the final product)
Extra materials needed for building:
Ferrite Dust: 100
Glass: 3
Silver: 90
Central Structure
Place any landing gear in the center.
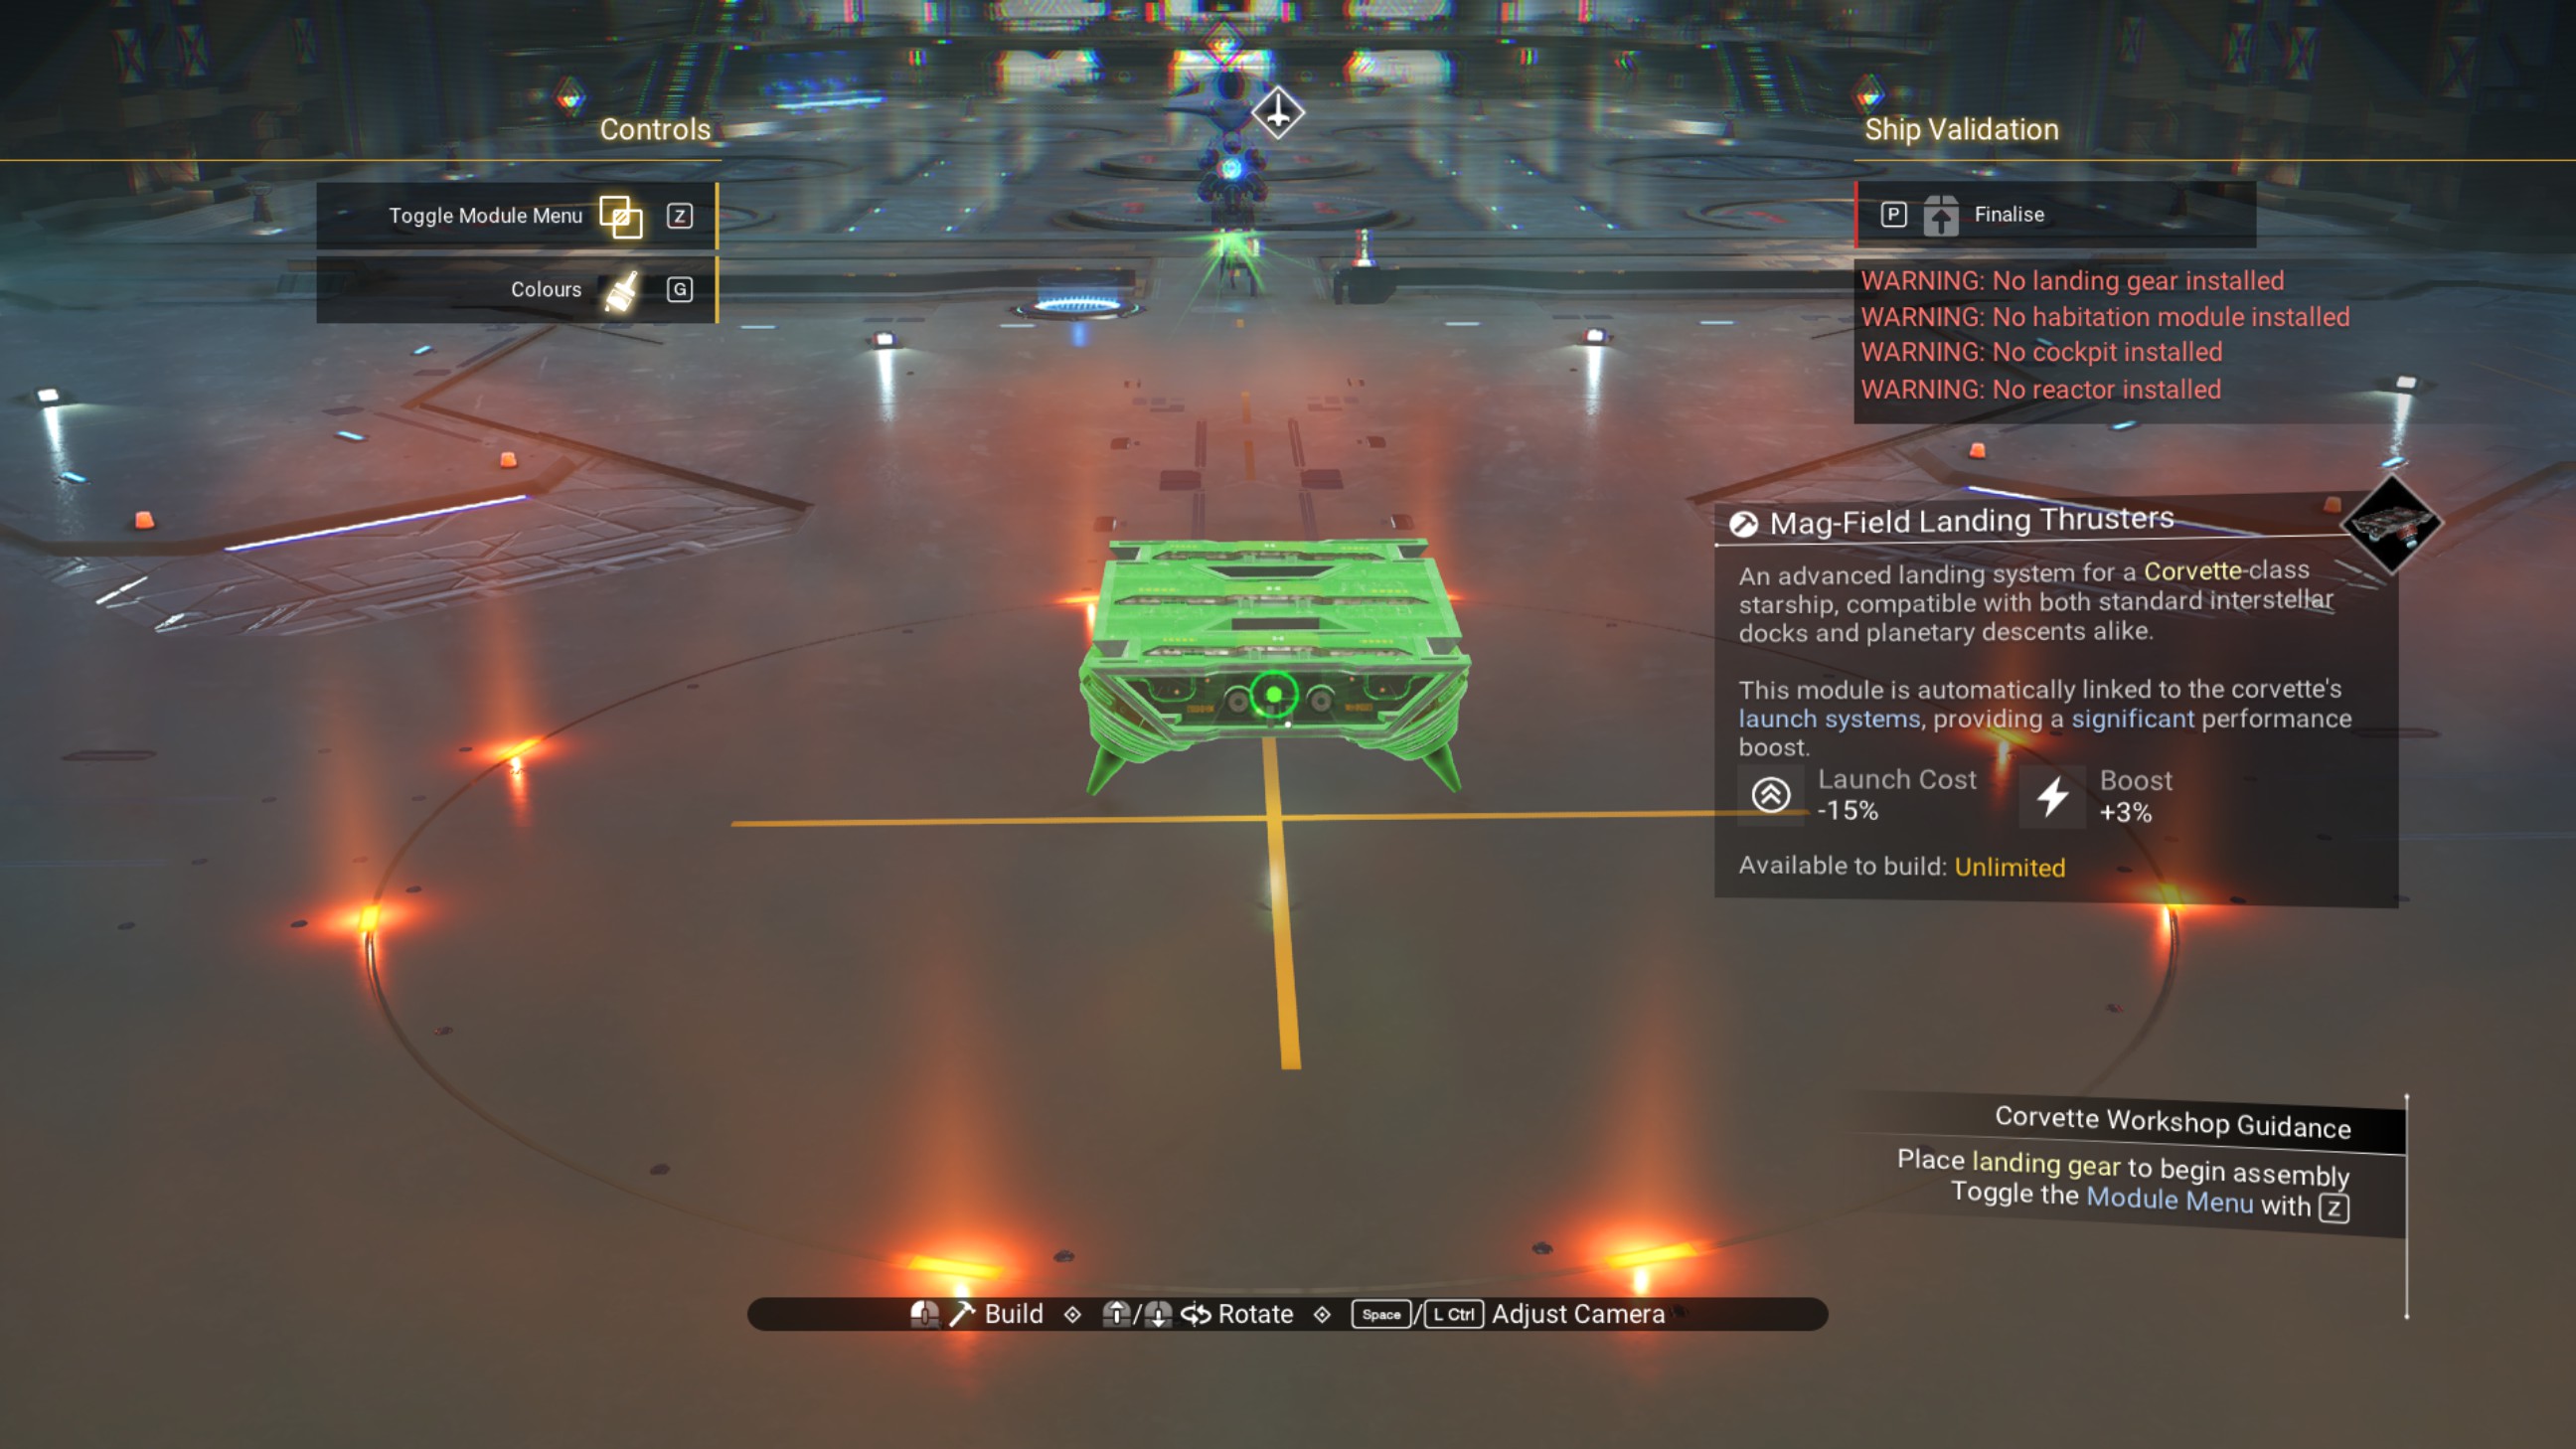
Place a walkway on top.
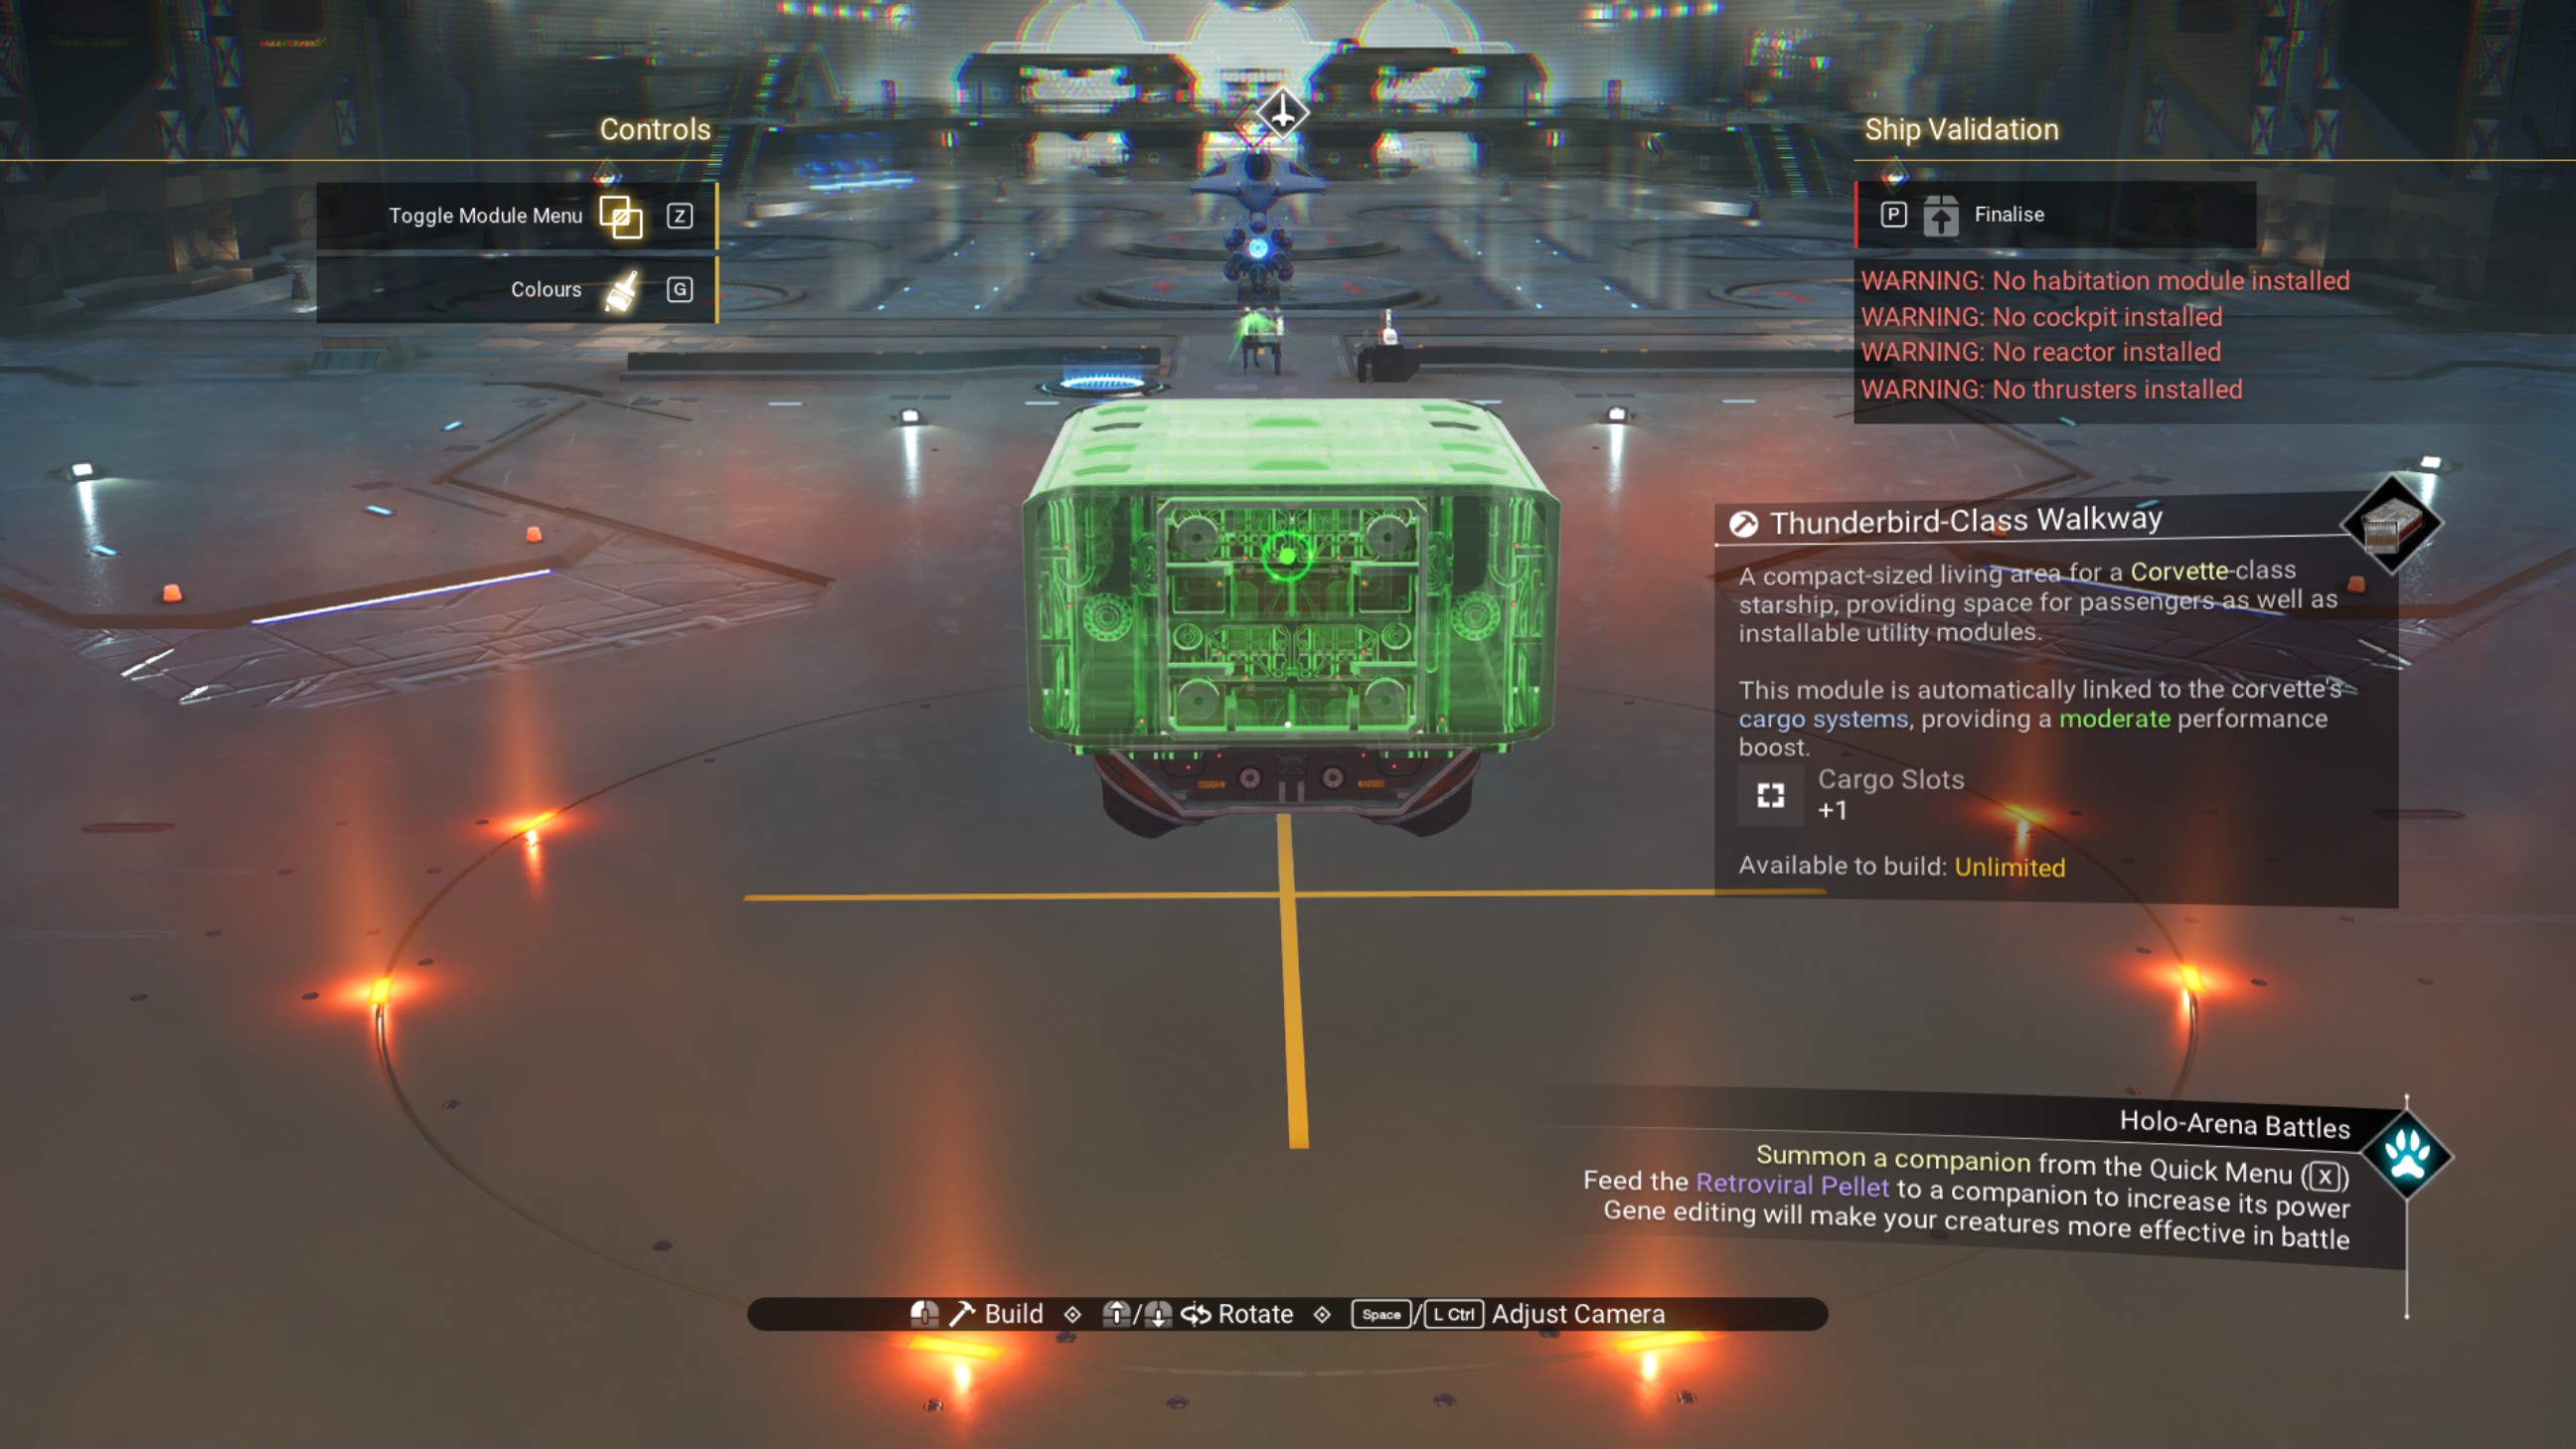
Place a ducting outlet on the front of the walkway.
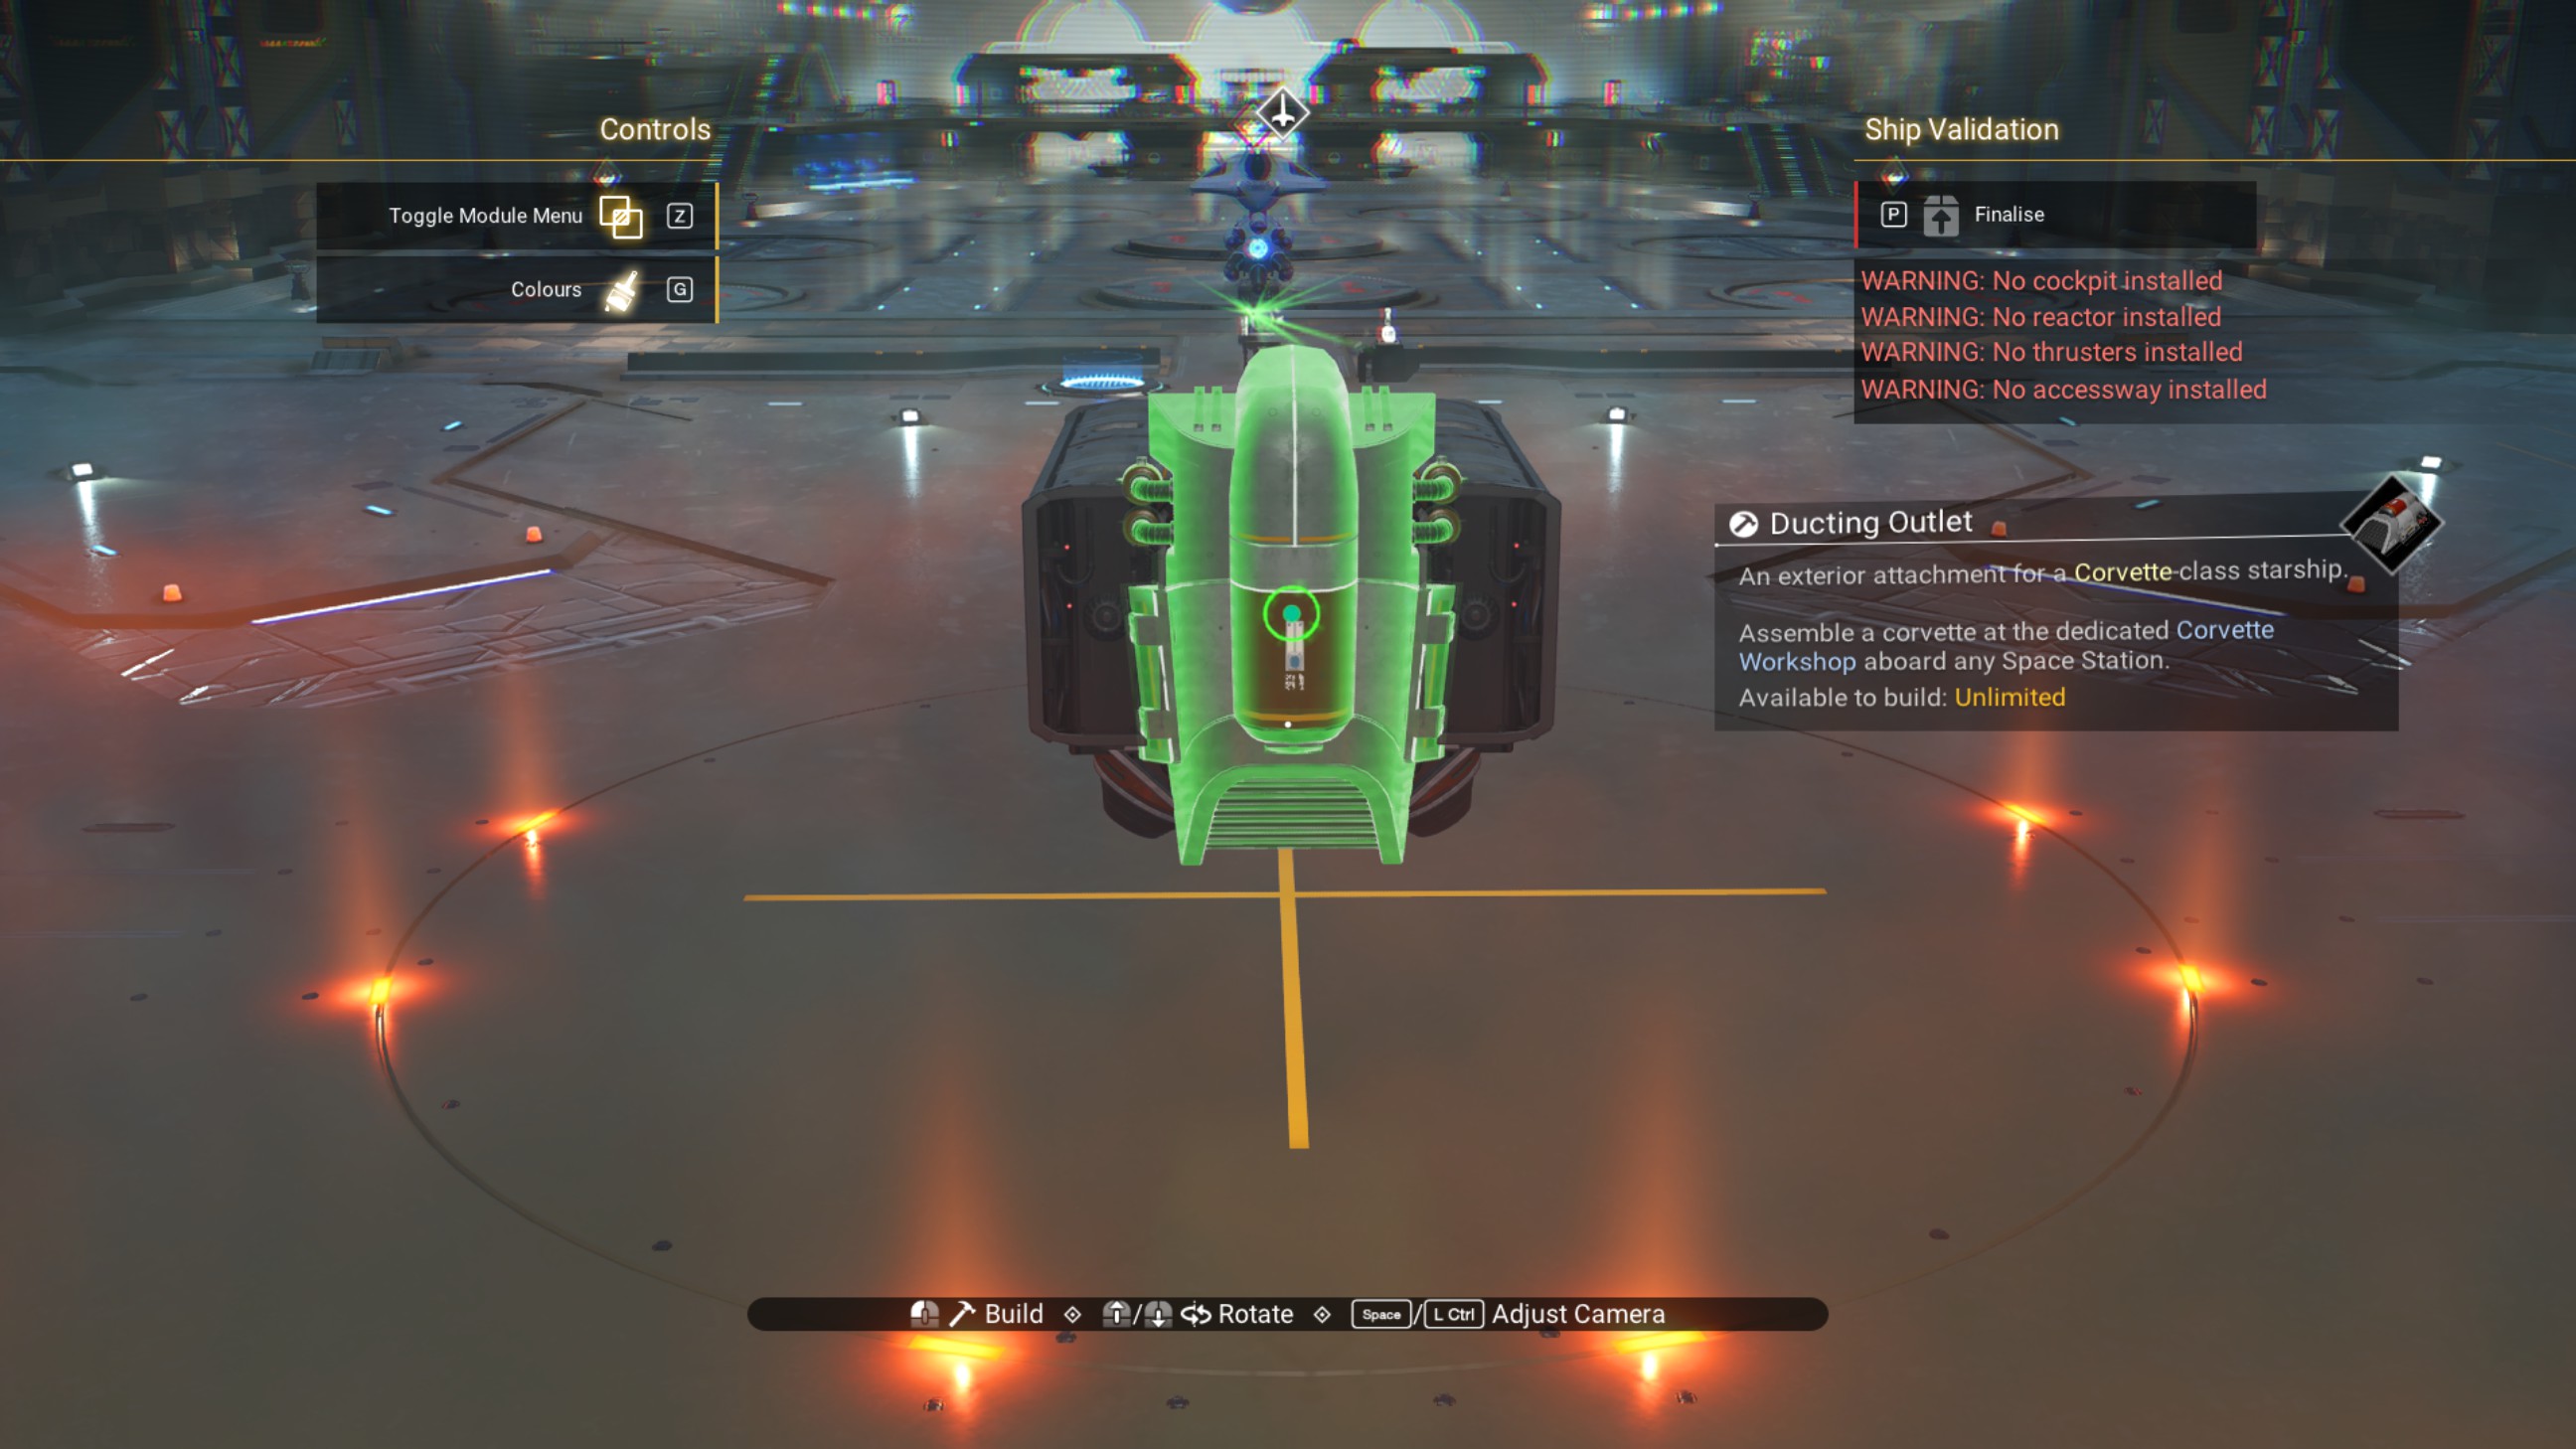
Move the walkway so the ducting outlet is on the starboard side (the right side of the ship; on your left if facing the front of the ship, as shown).
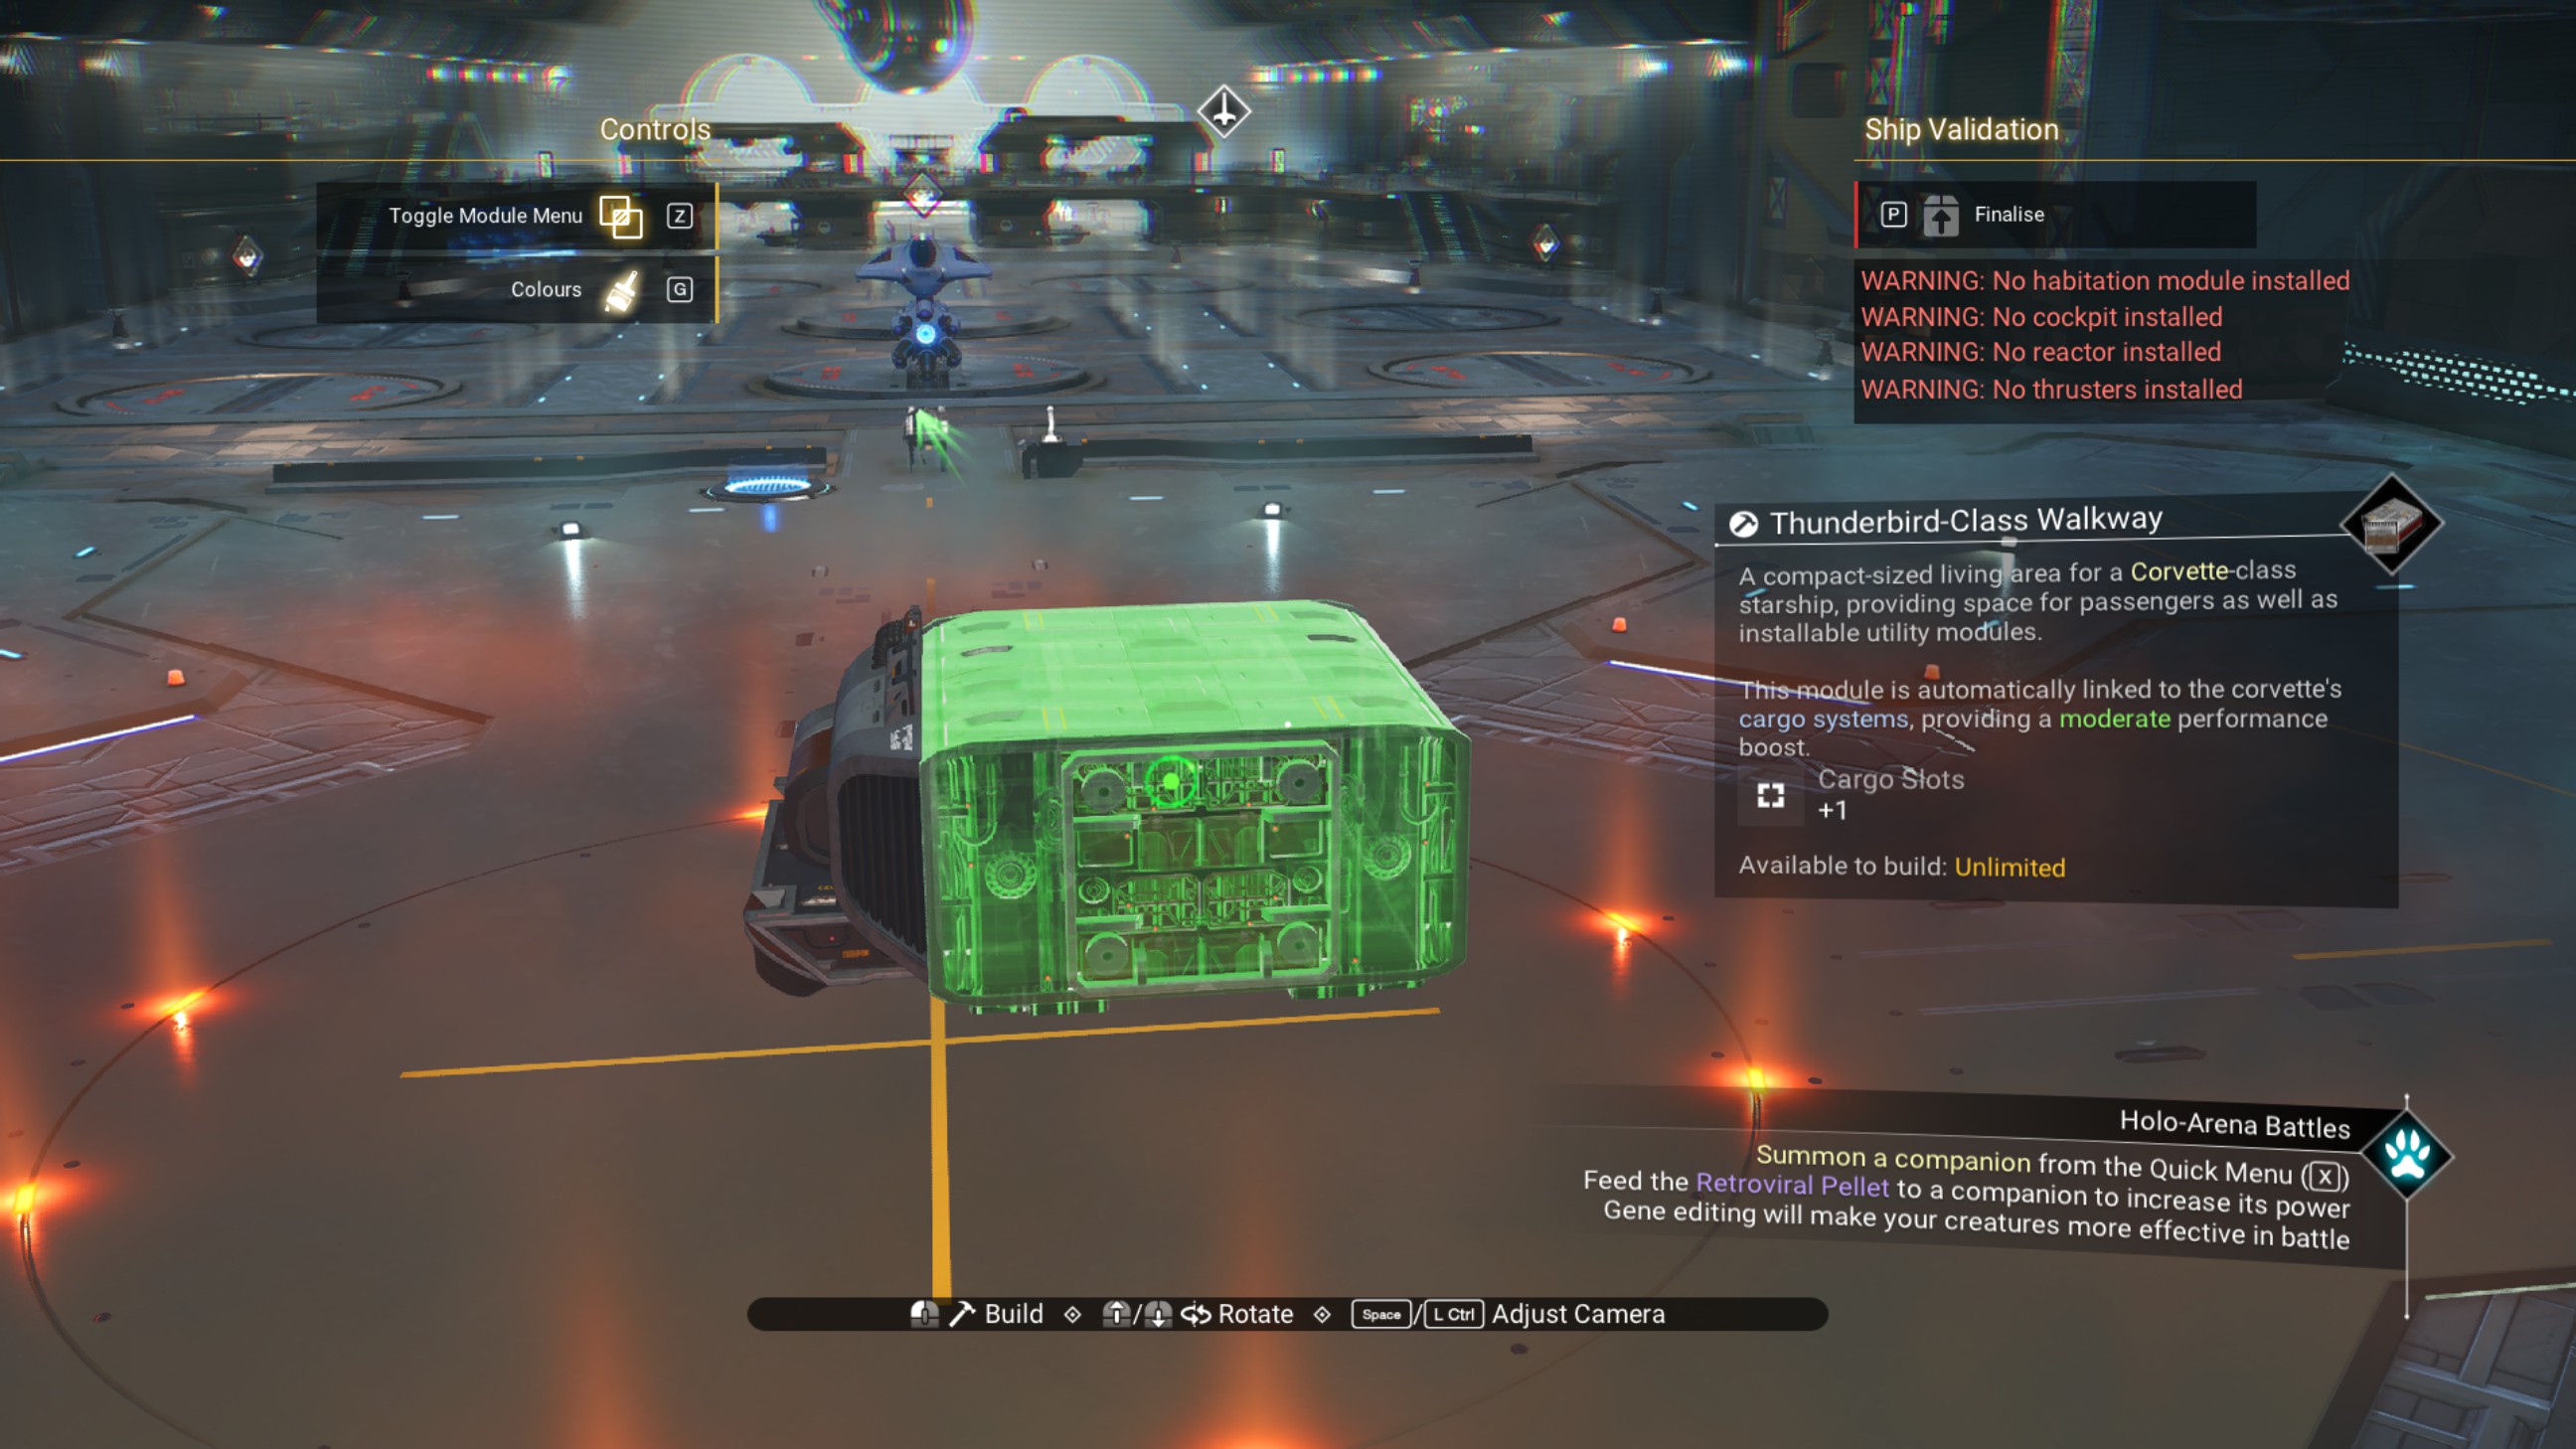
Delete the landing gear and the ducting outlet.
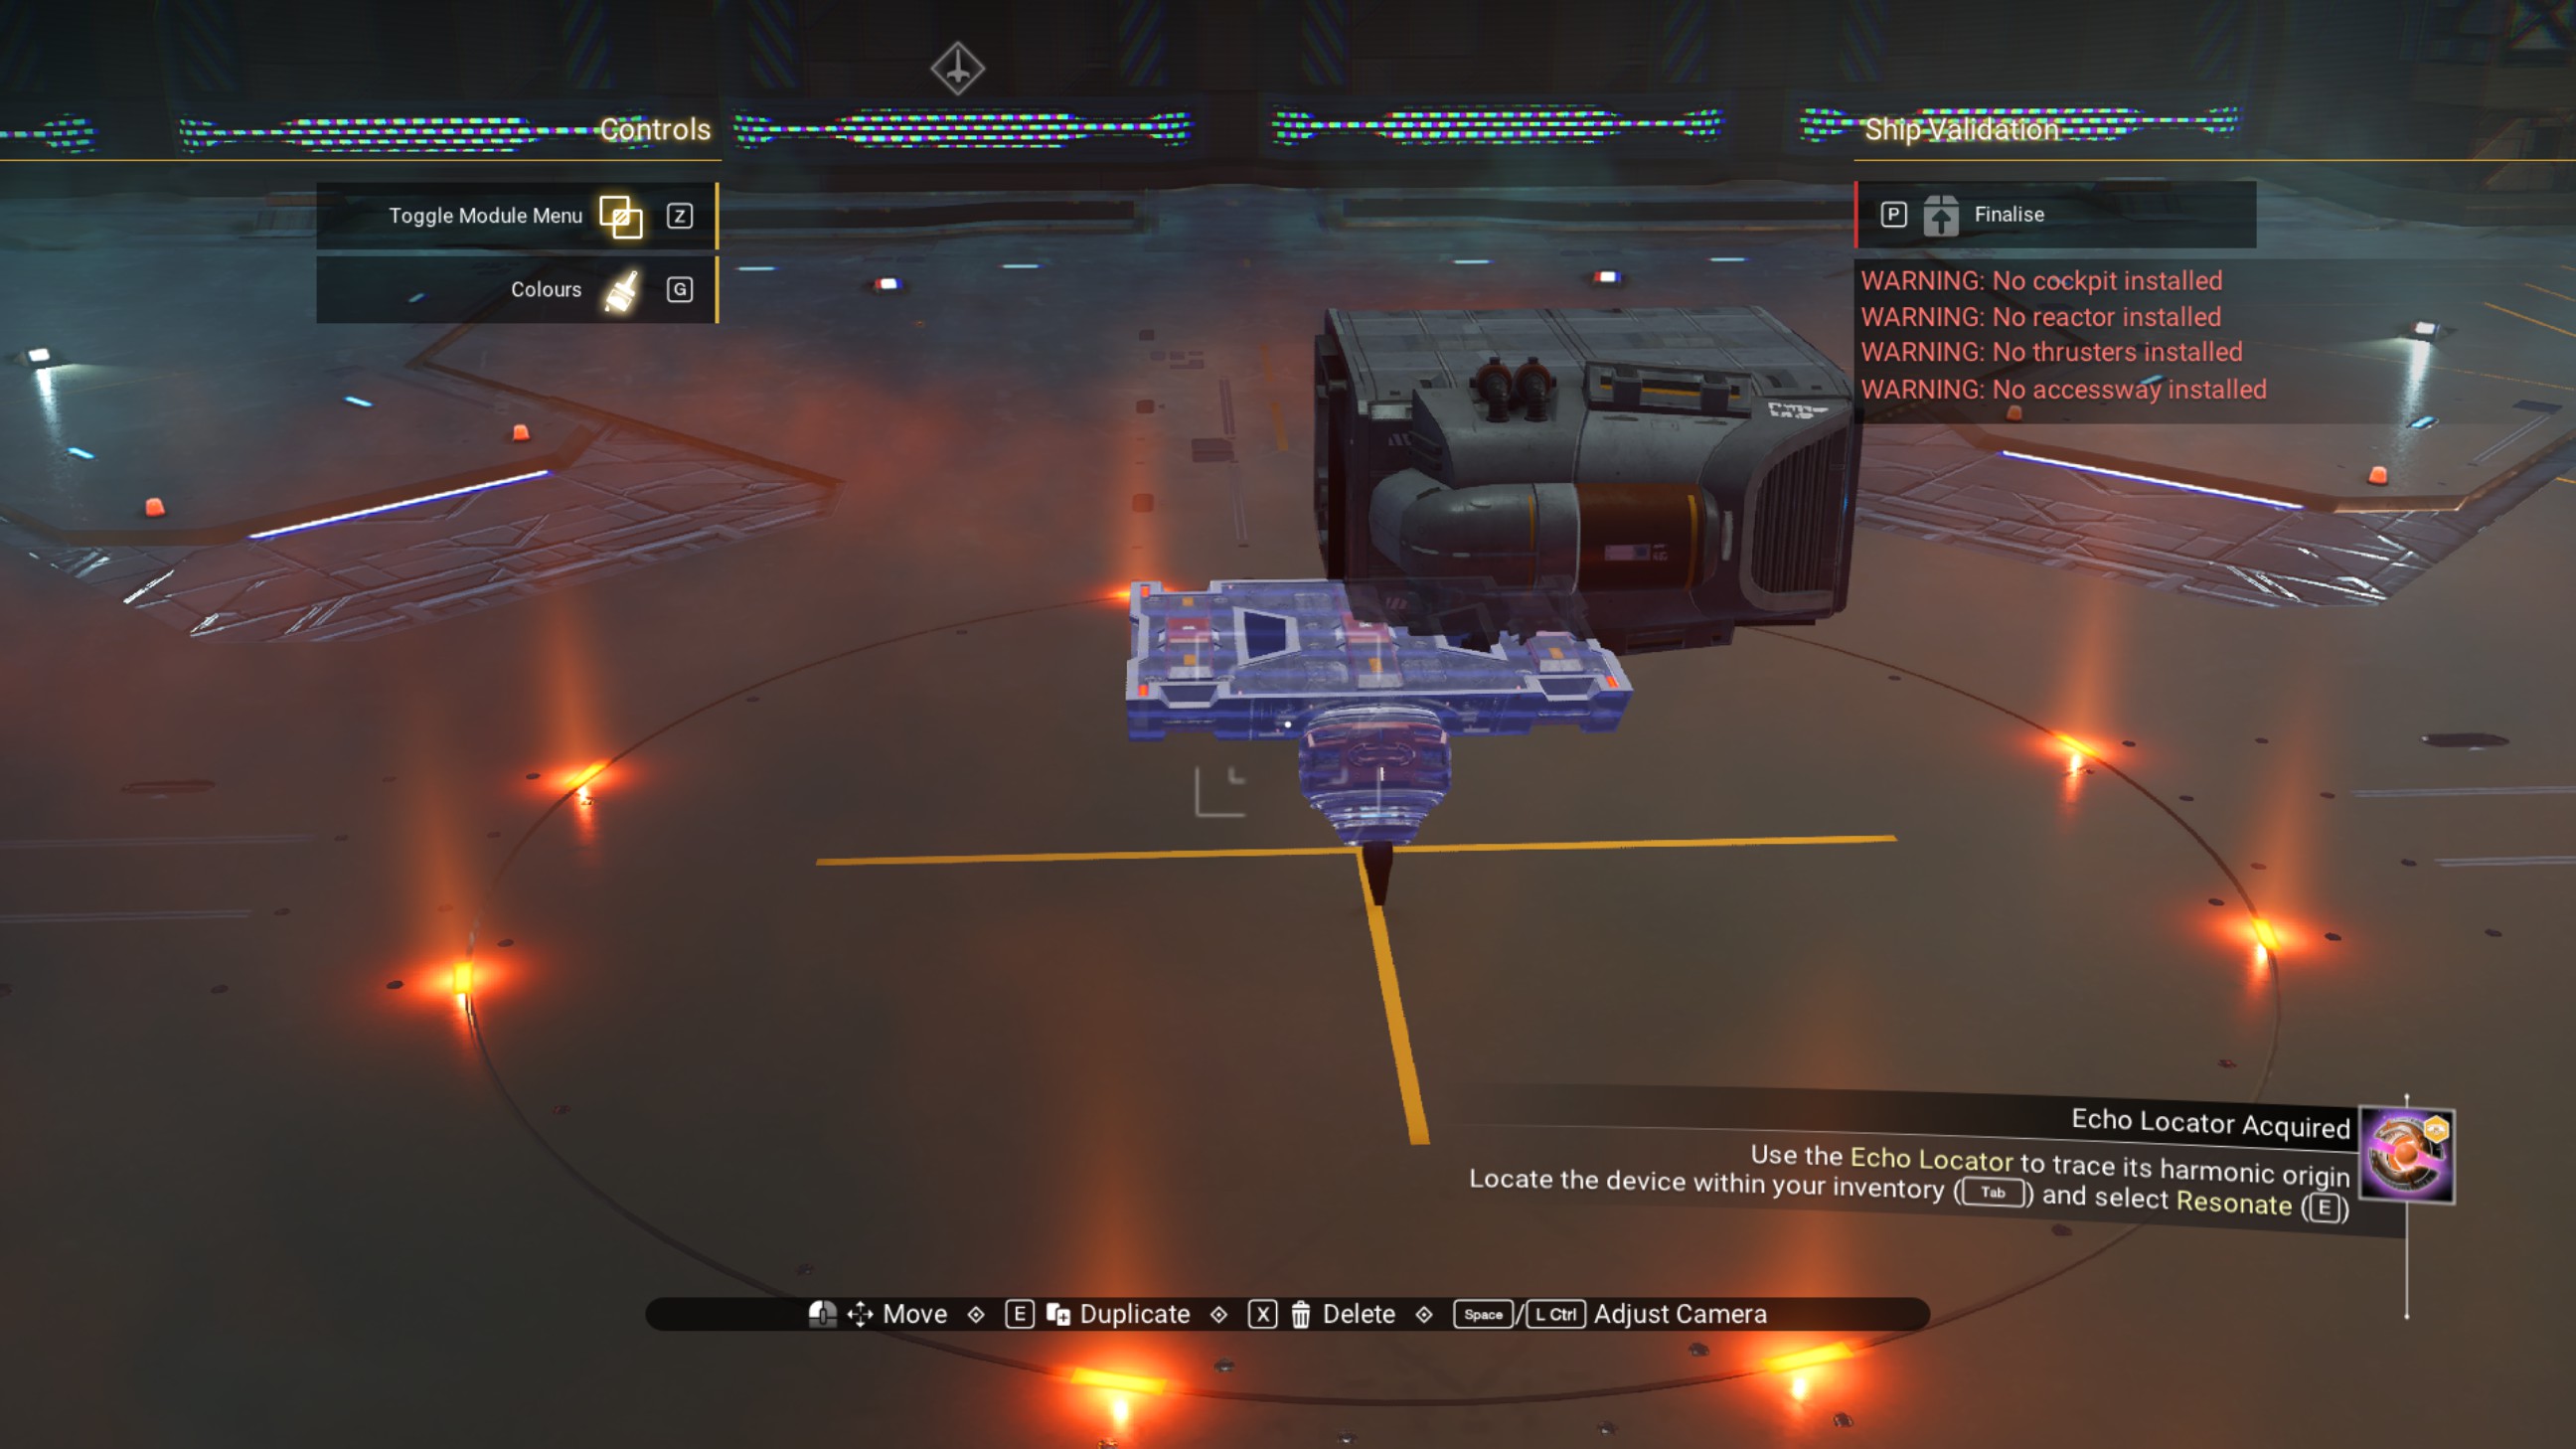
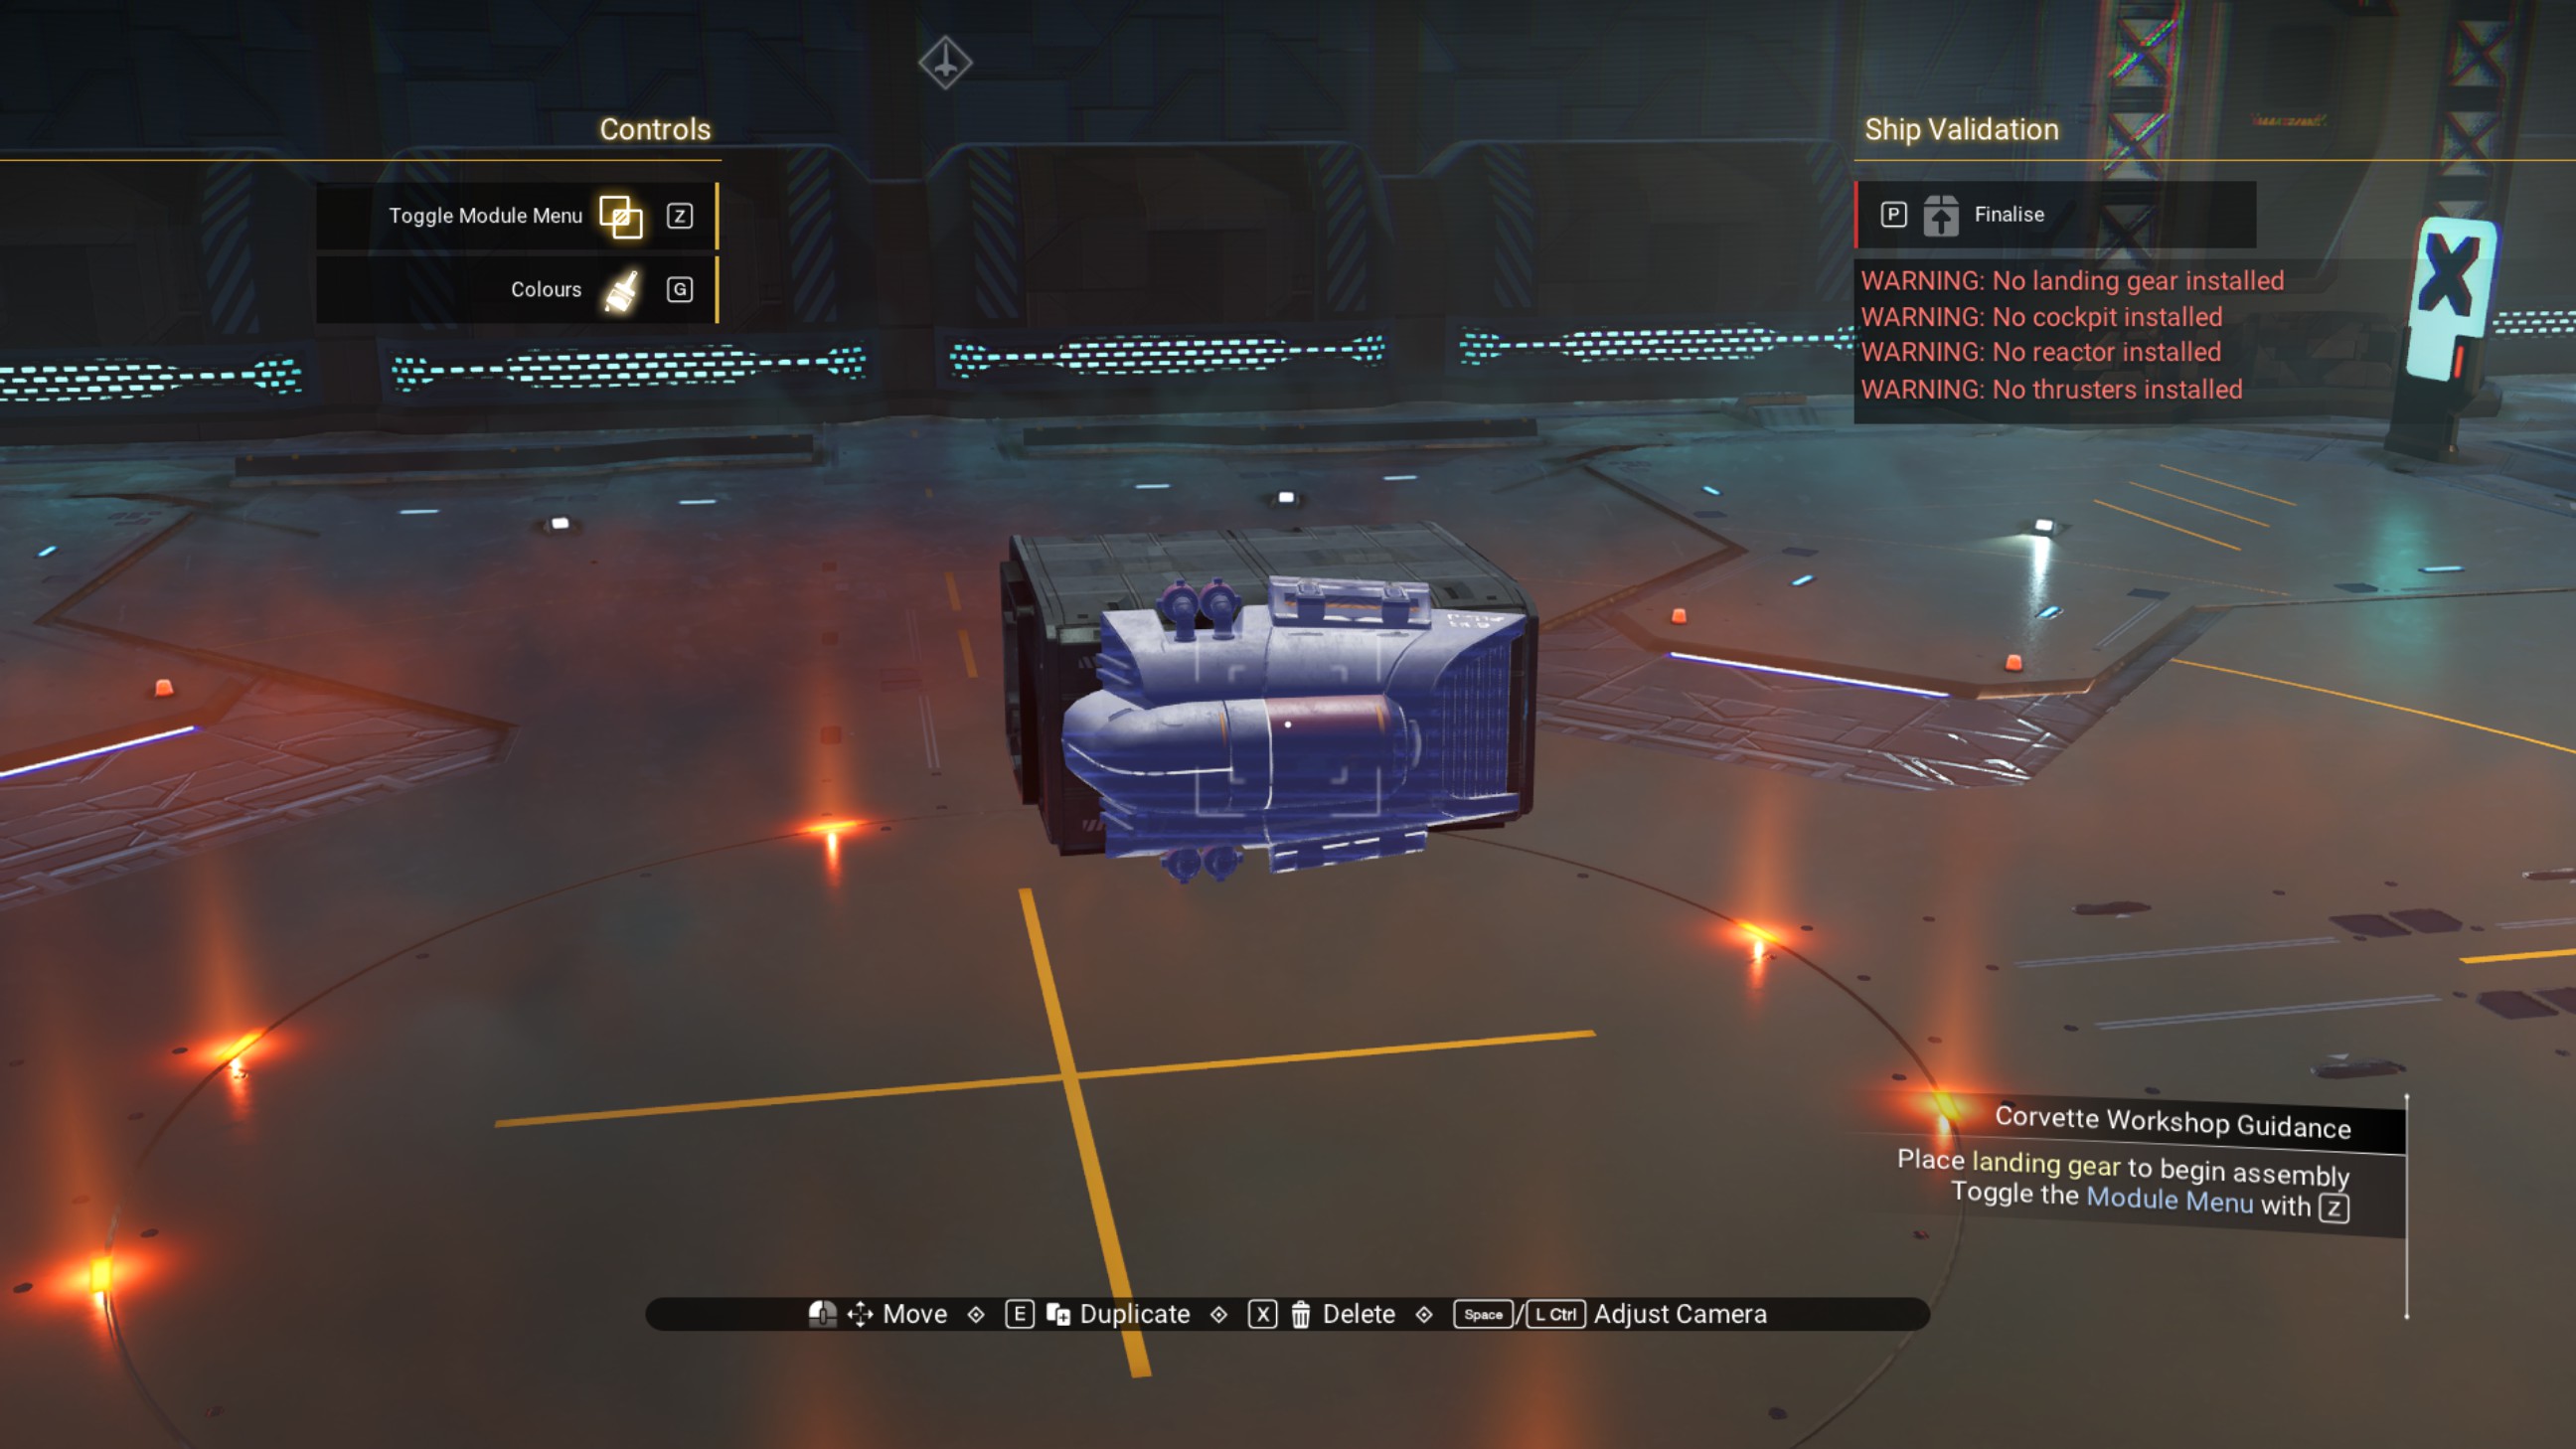
Rotate a propeller module and place it alongside the walkway. We're going to use it to adjust the walkway half a block to the rear.
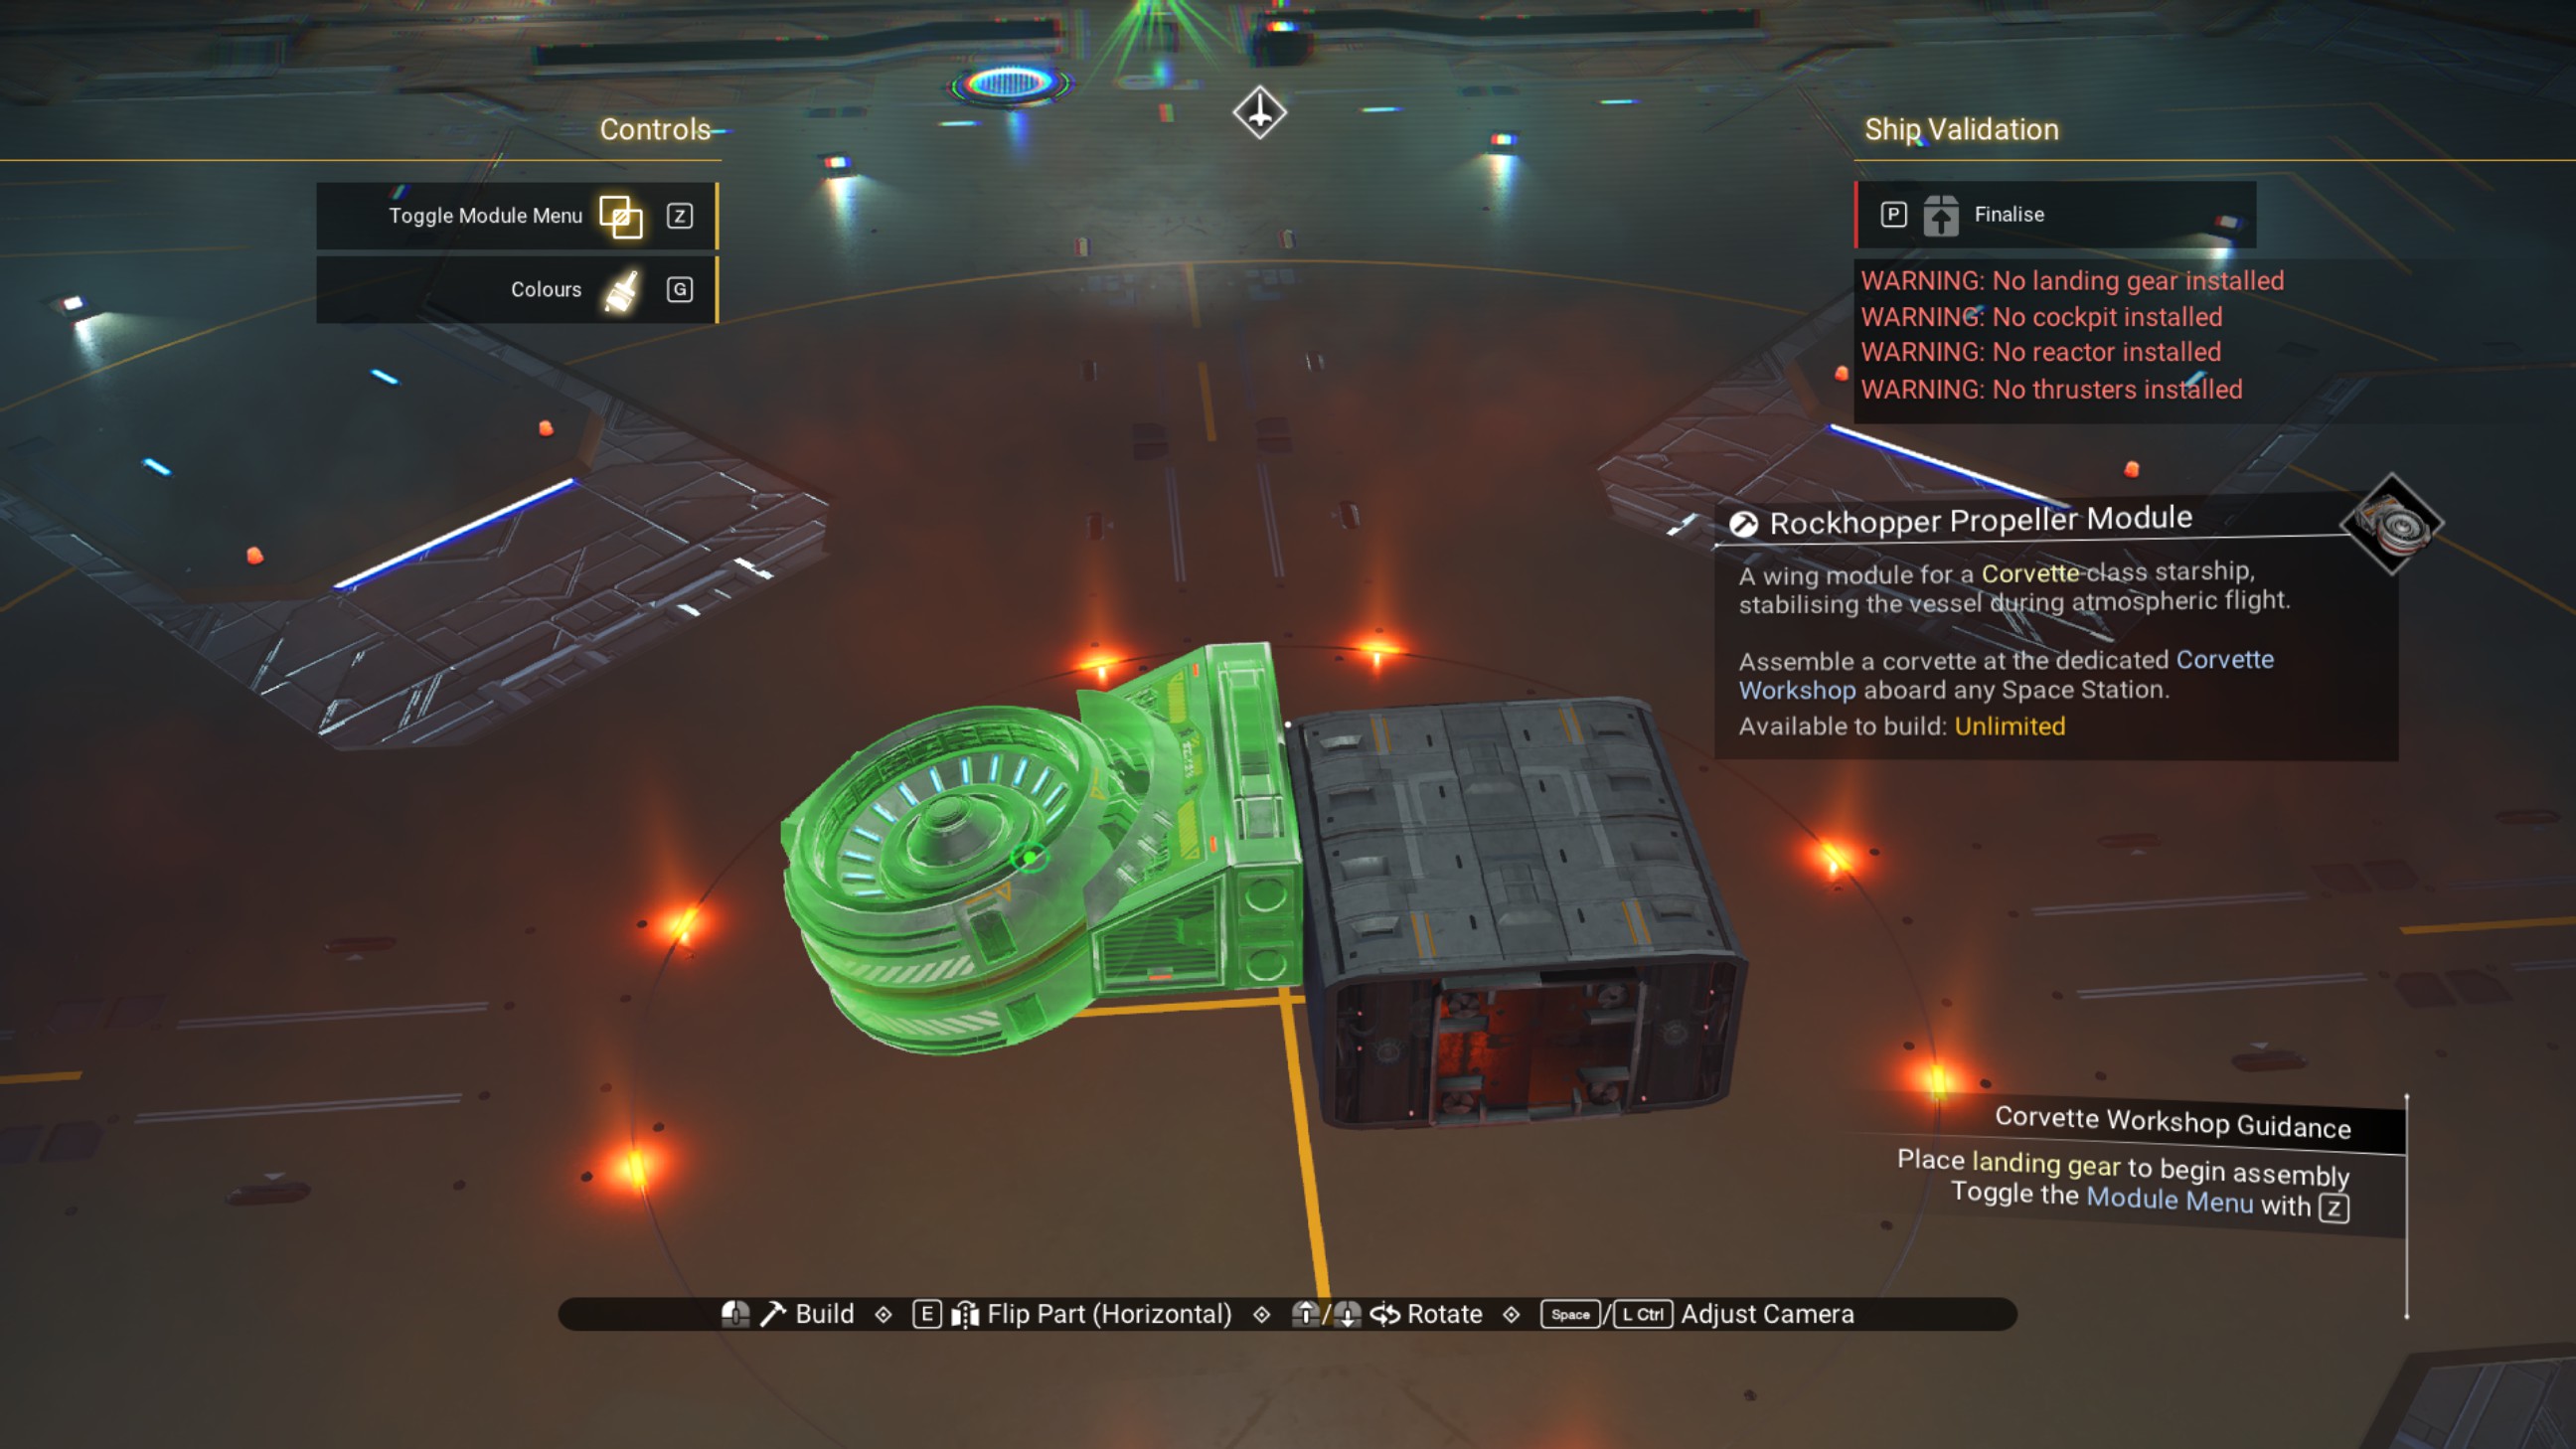
Shift the walkway back half a step using the propeller module.
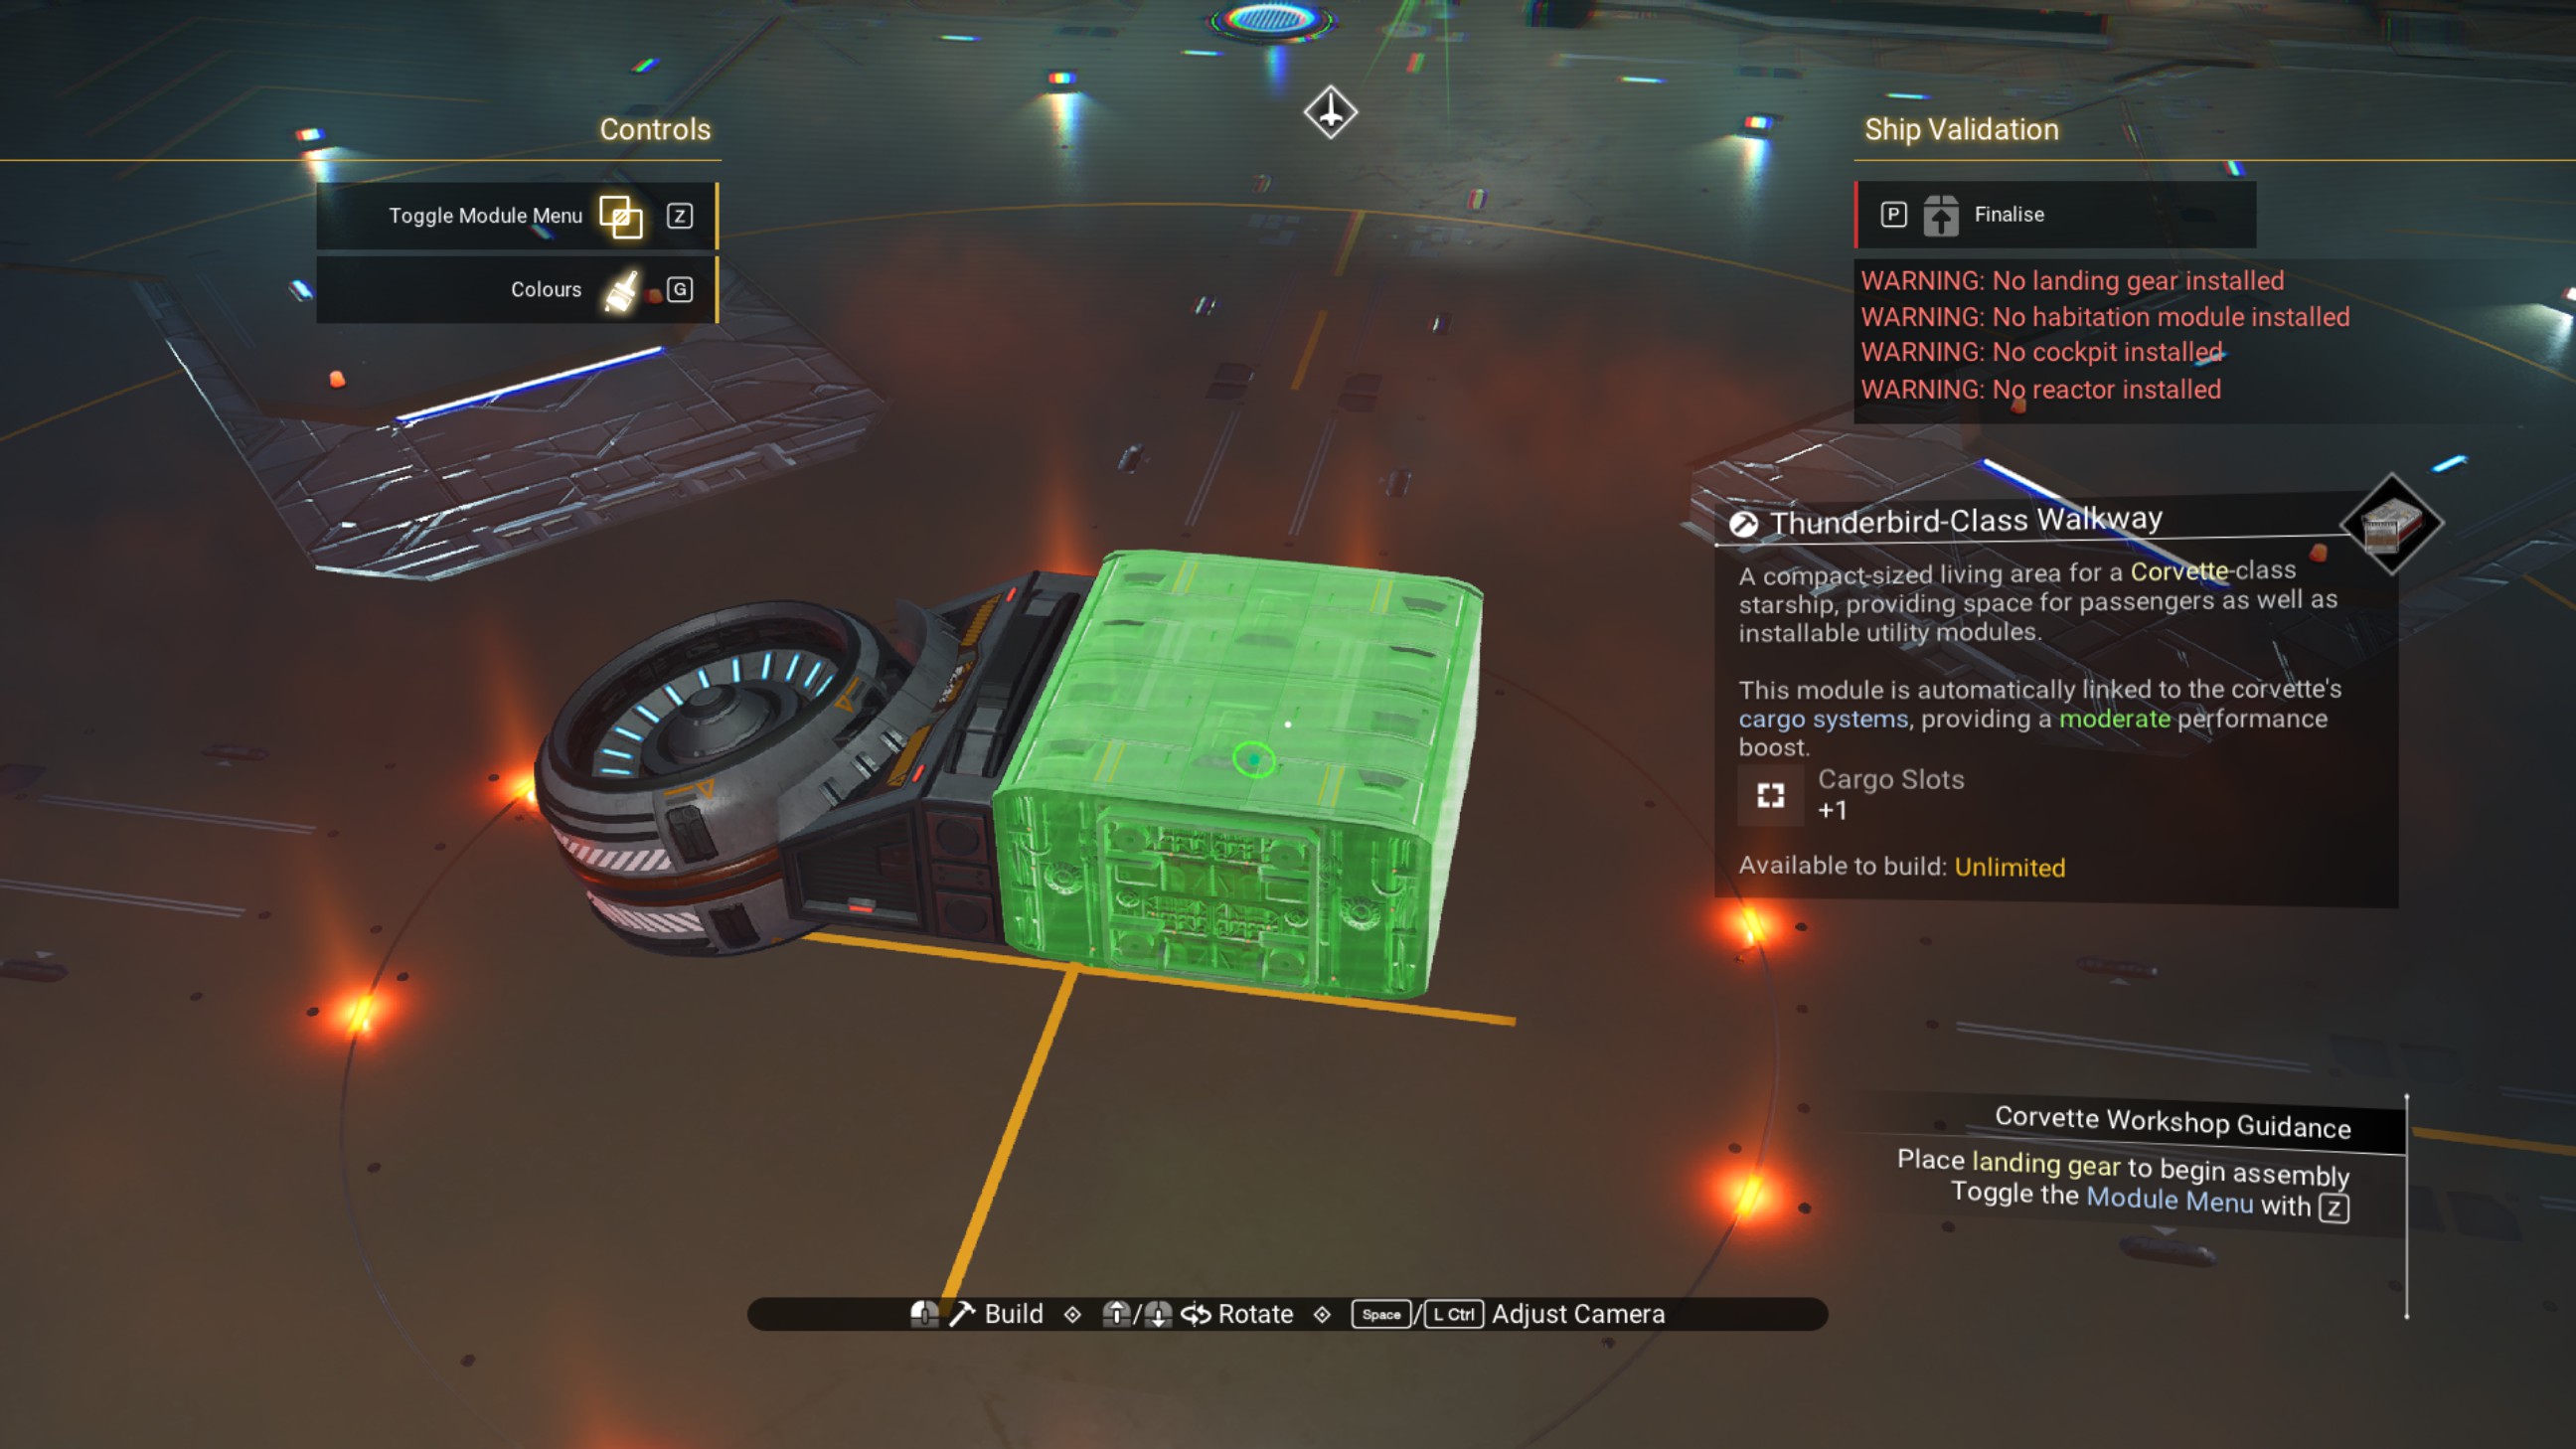
Delete the propeller module.
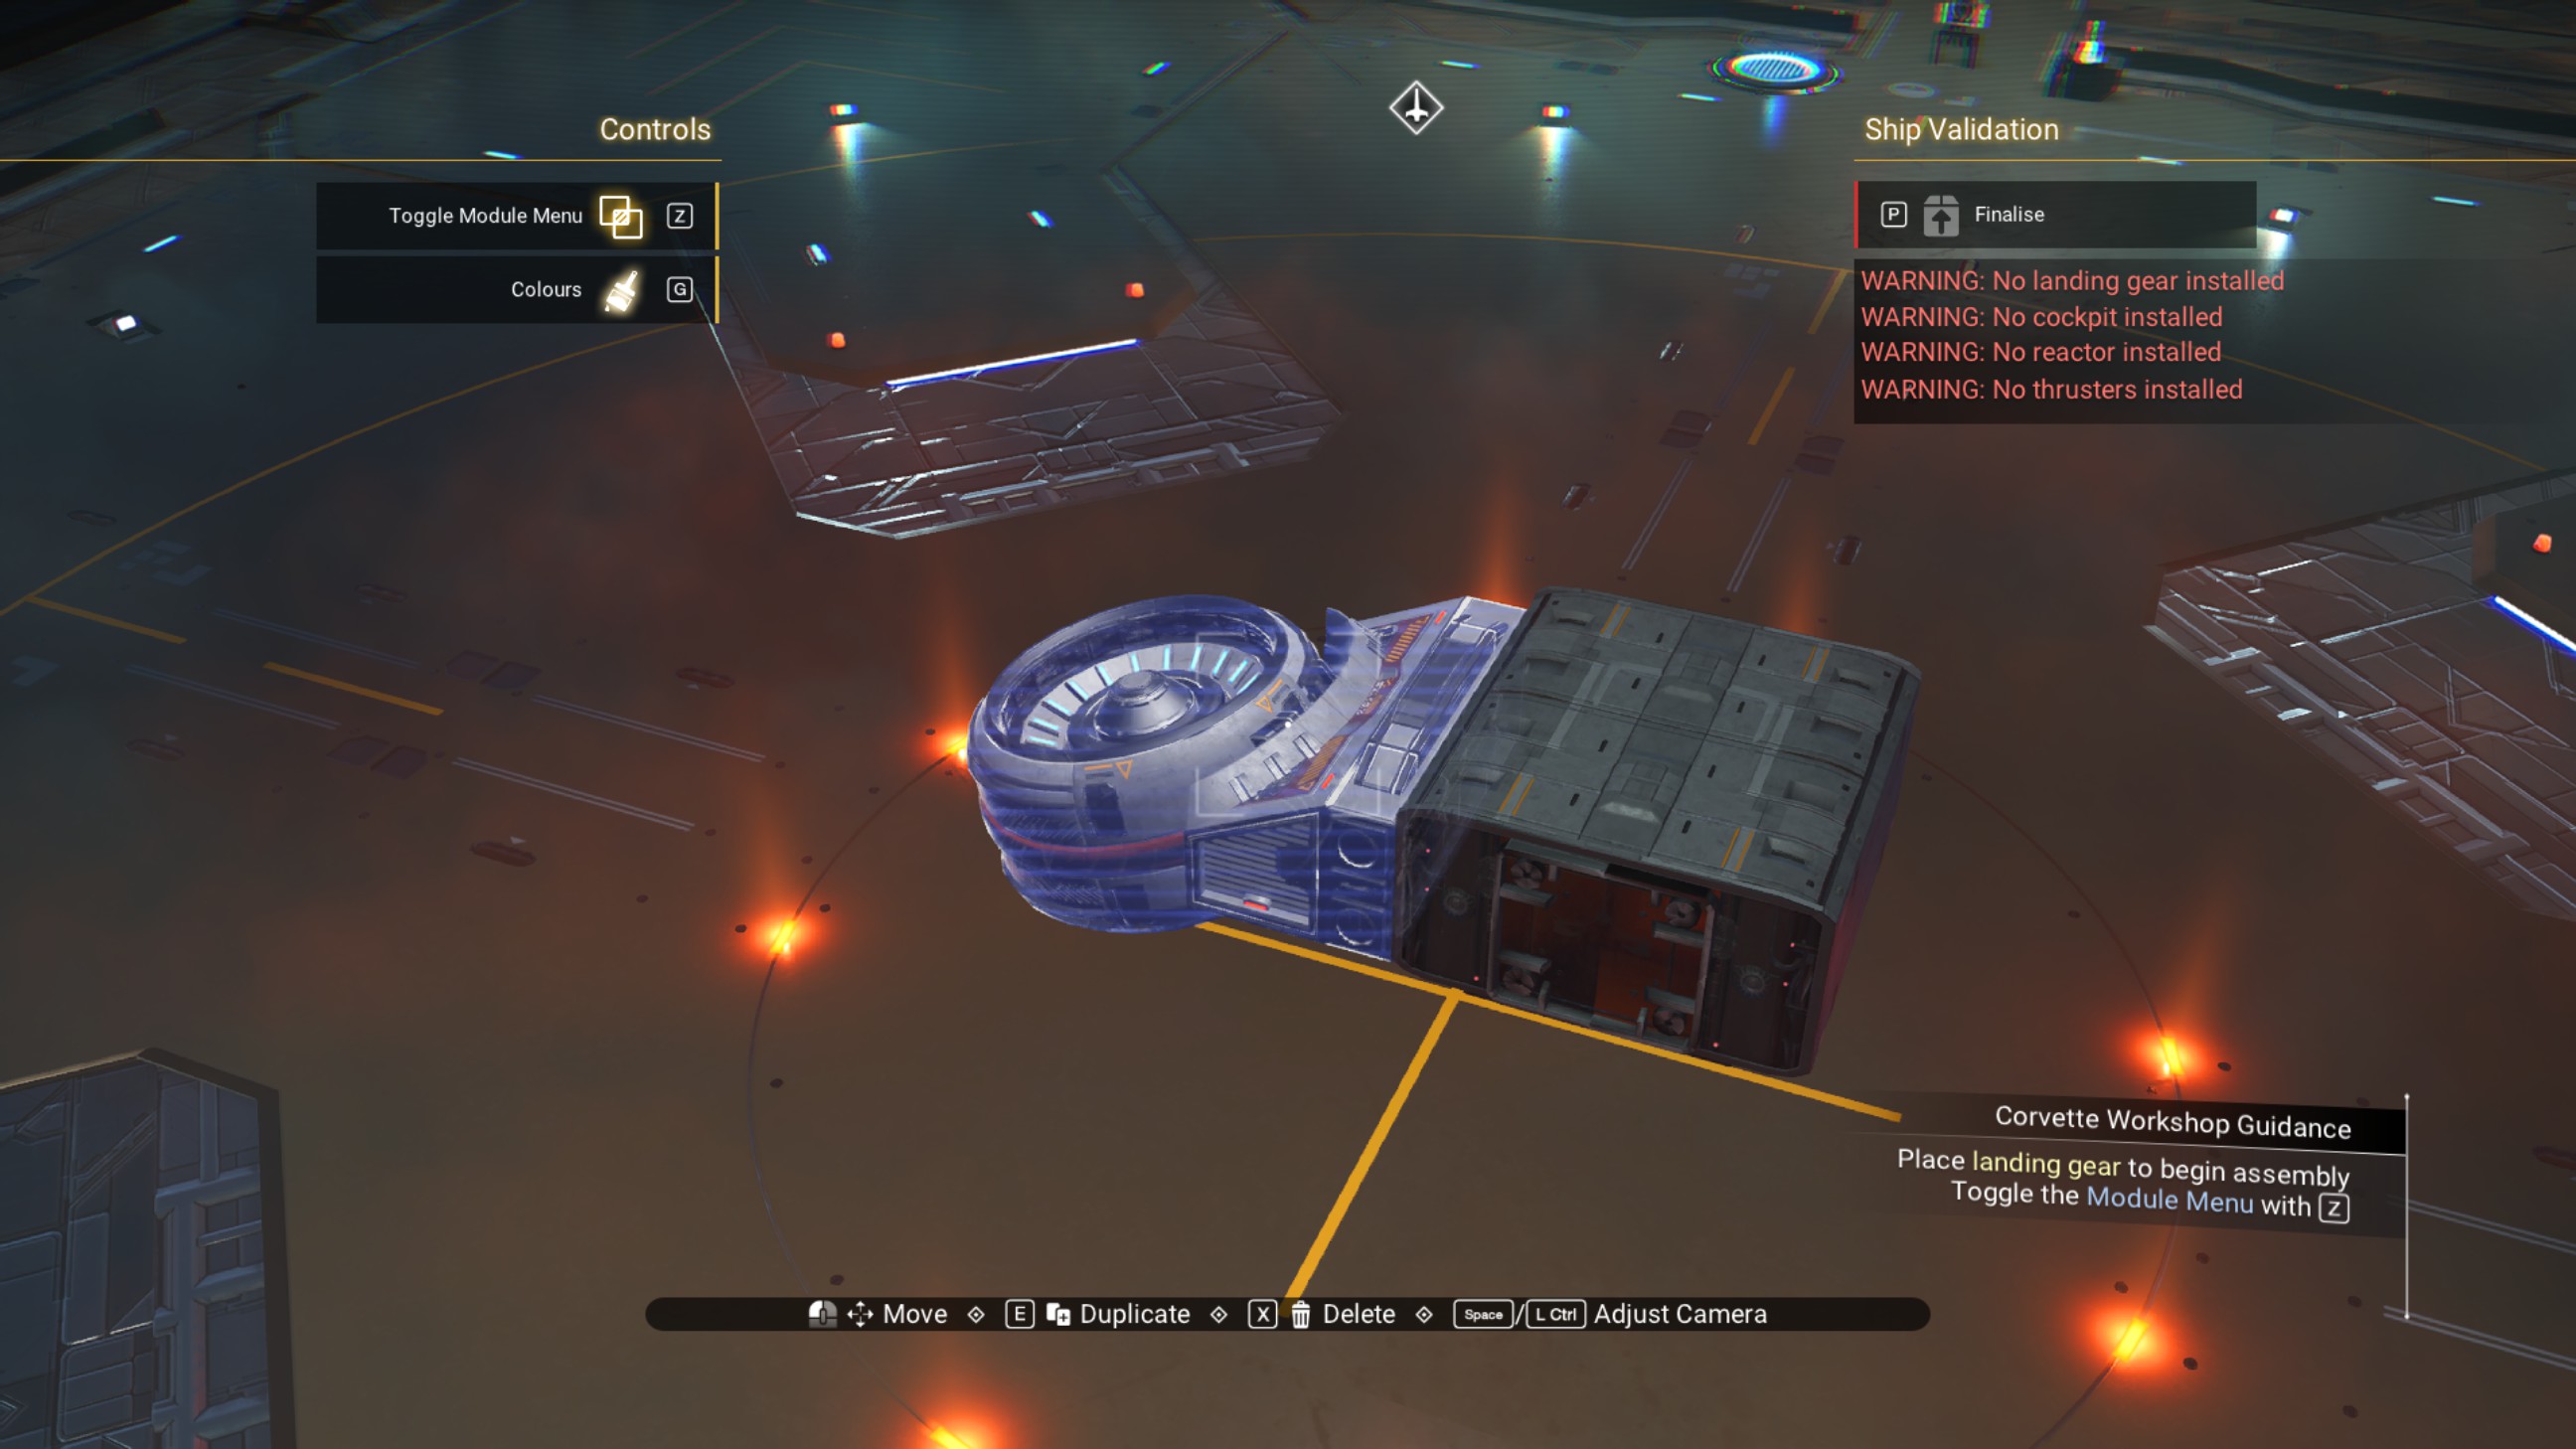
Place a phase beam on the underside of the walkway.
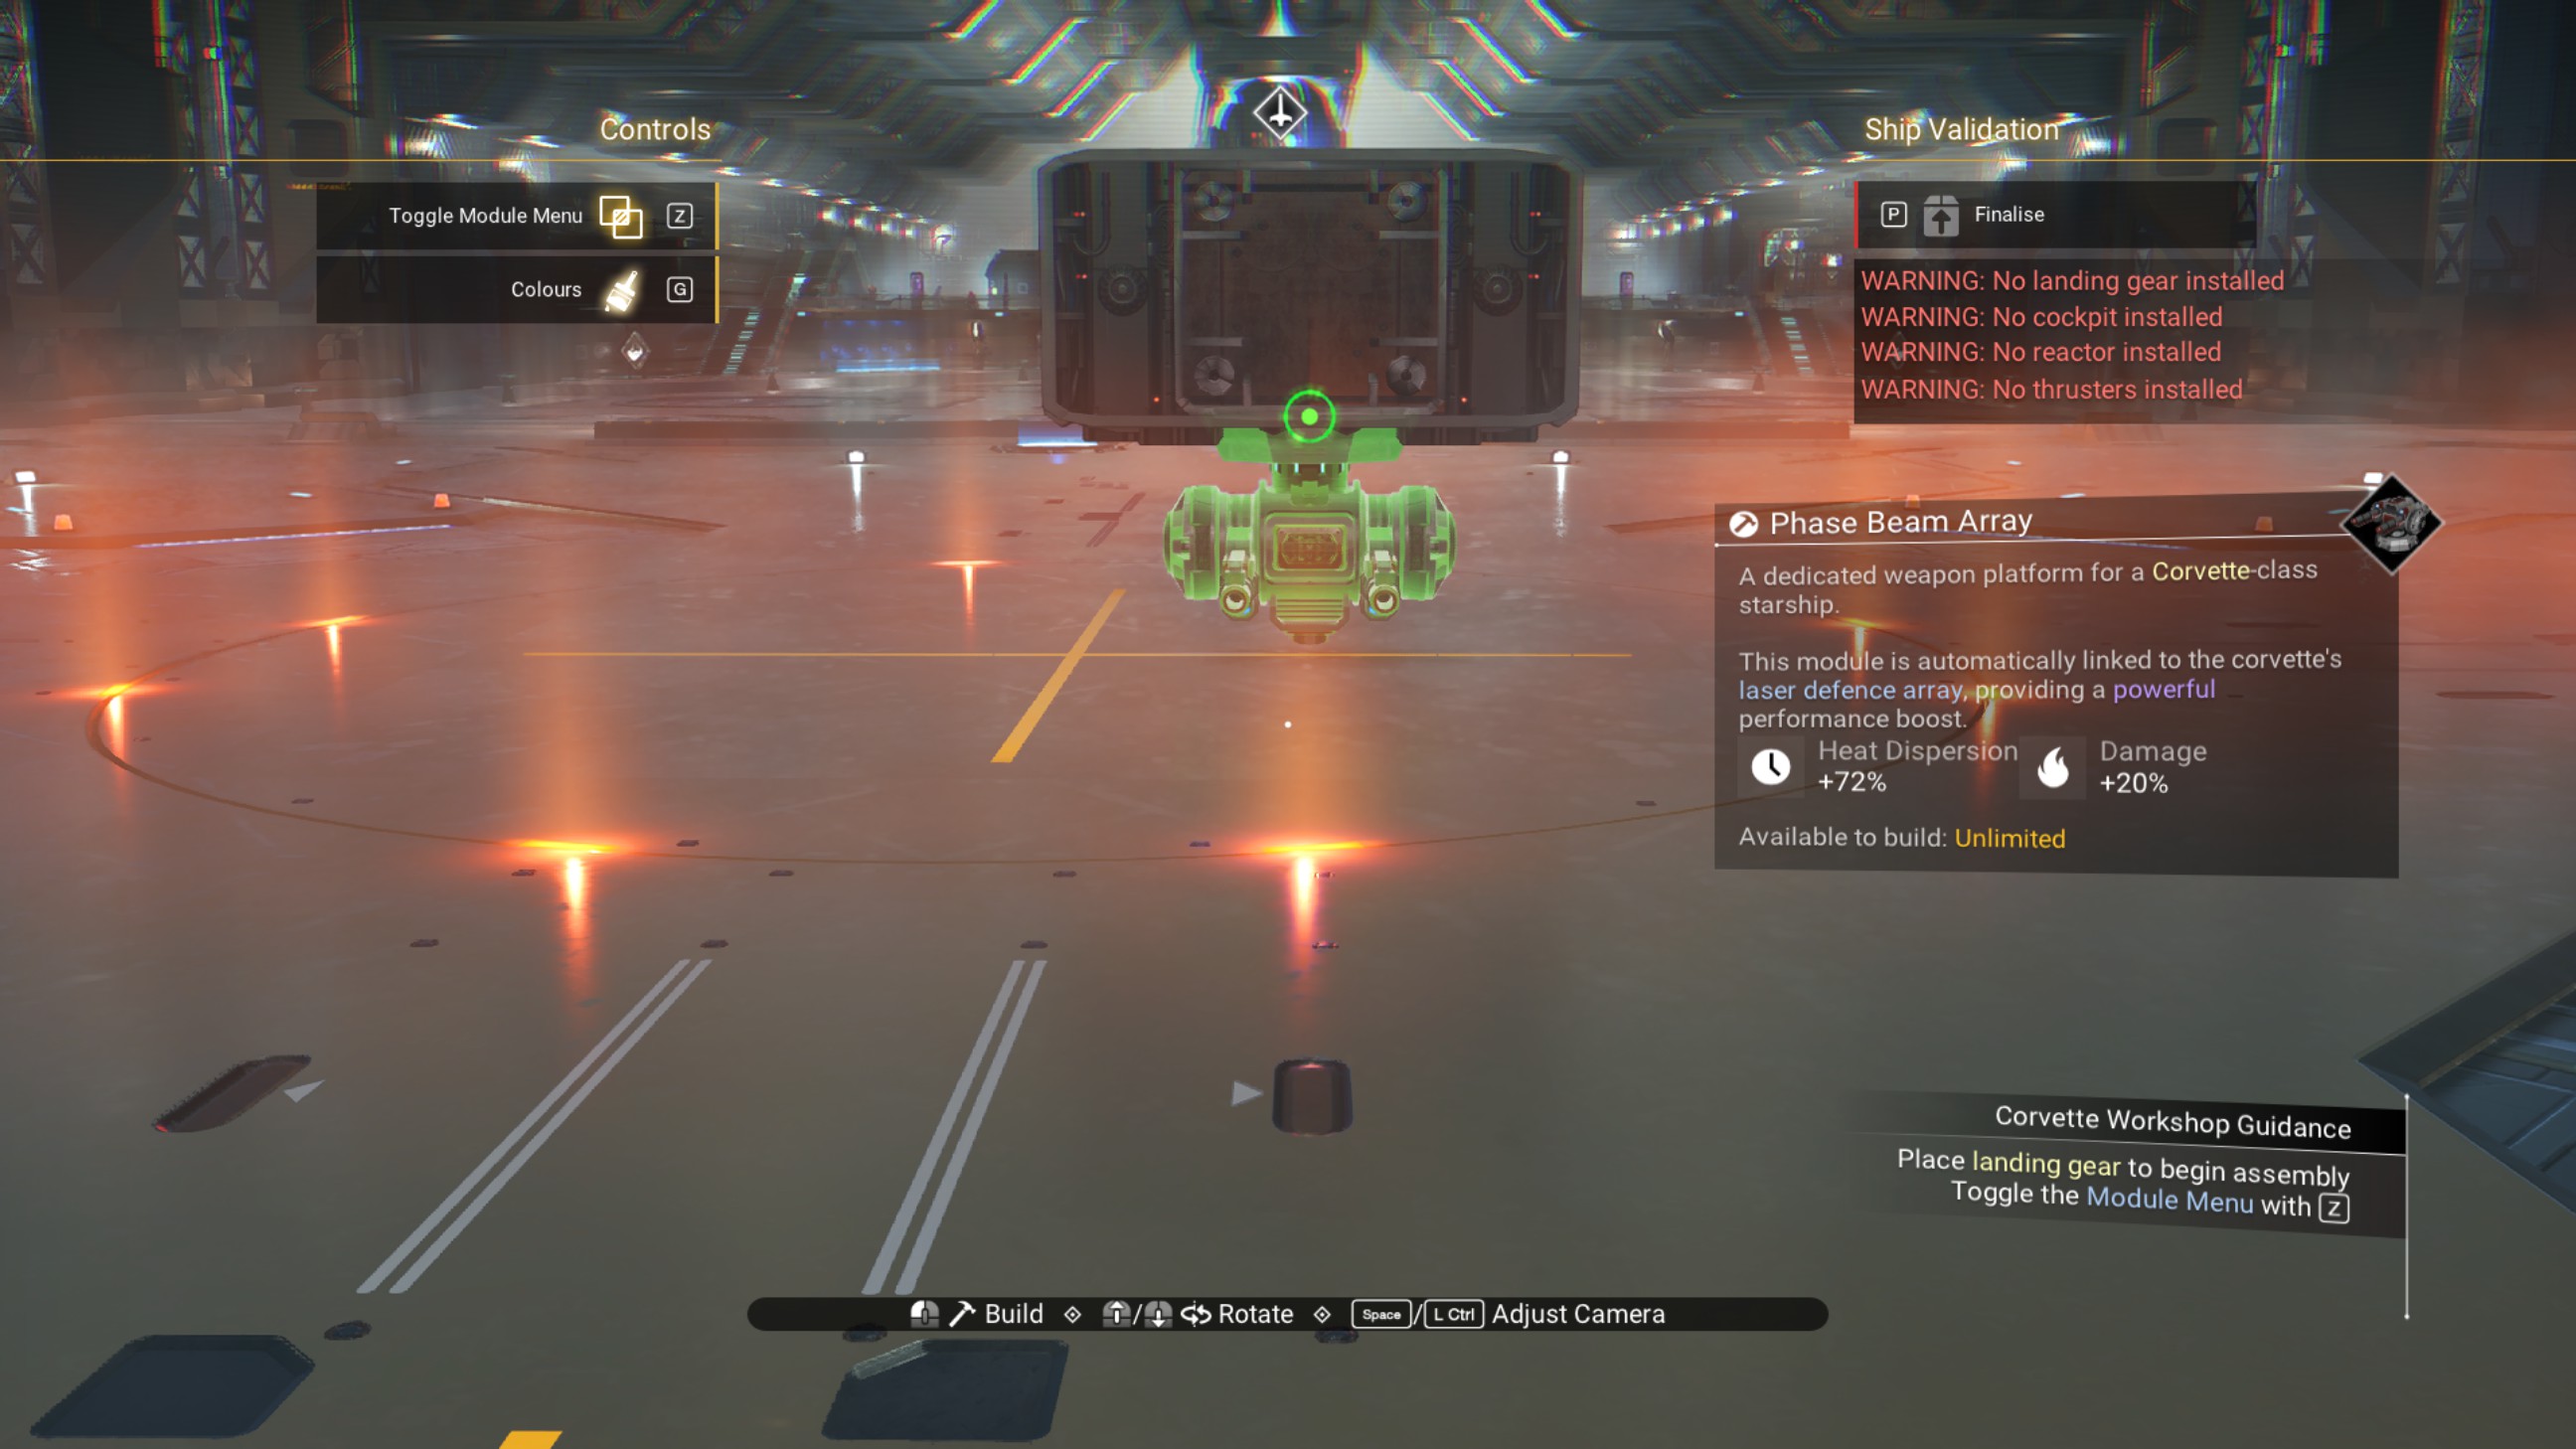
Place two more walkways on top of the first one. (To save yourself a headache later, make this top walkway a zenith reactor instead.)
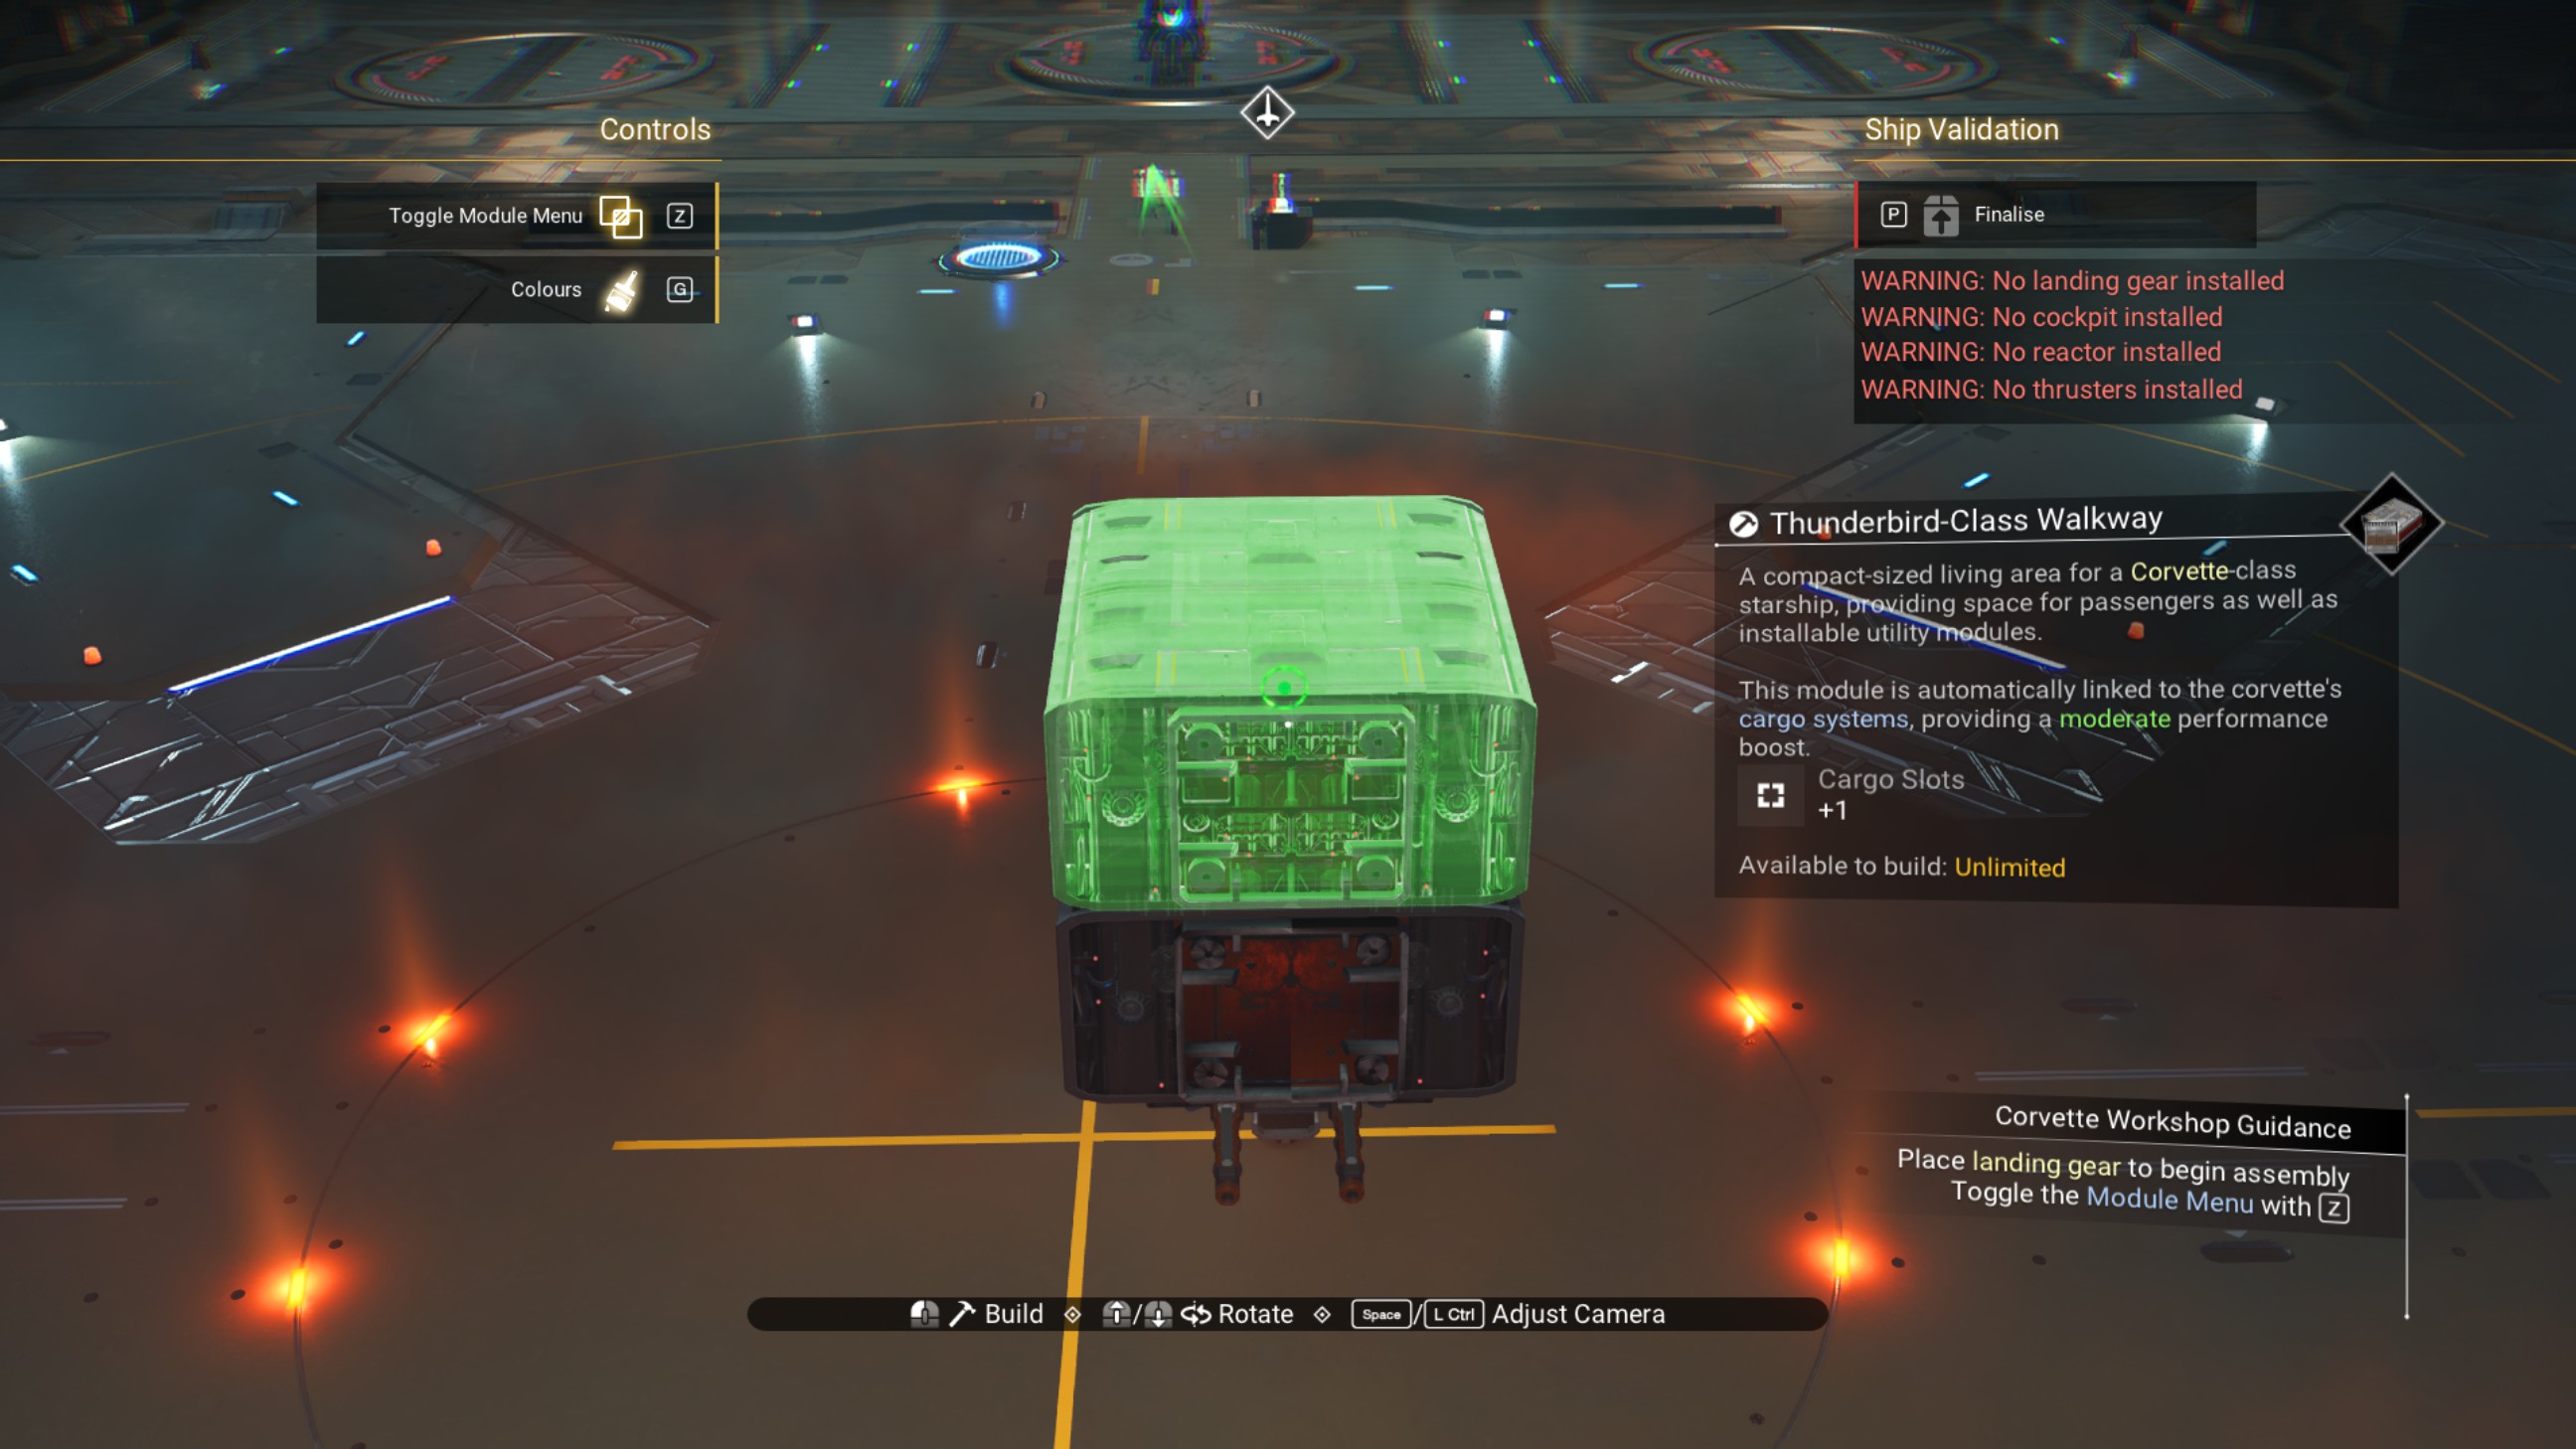
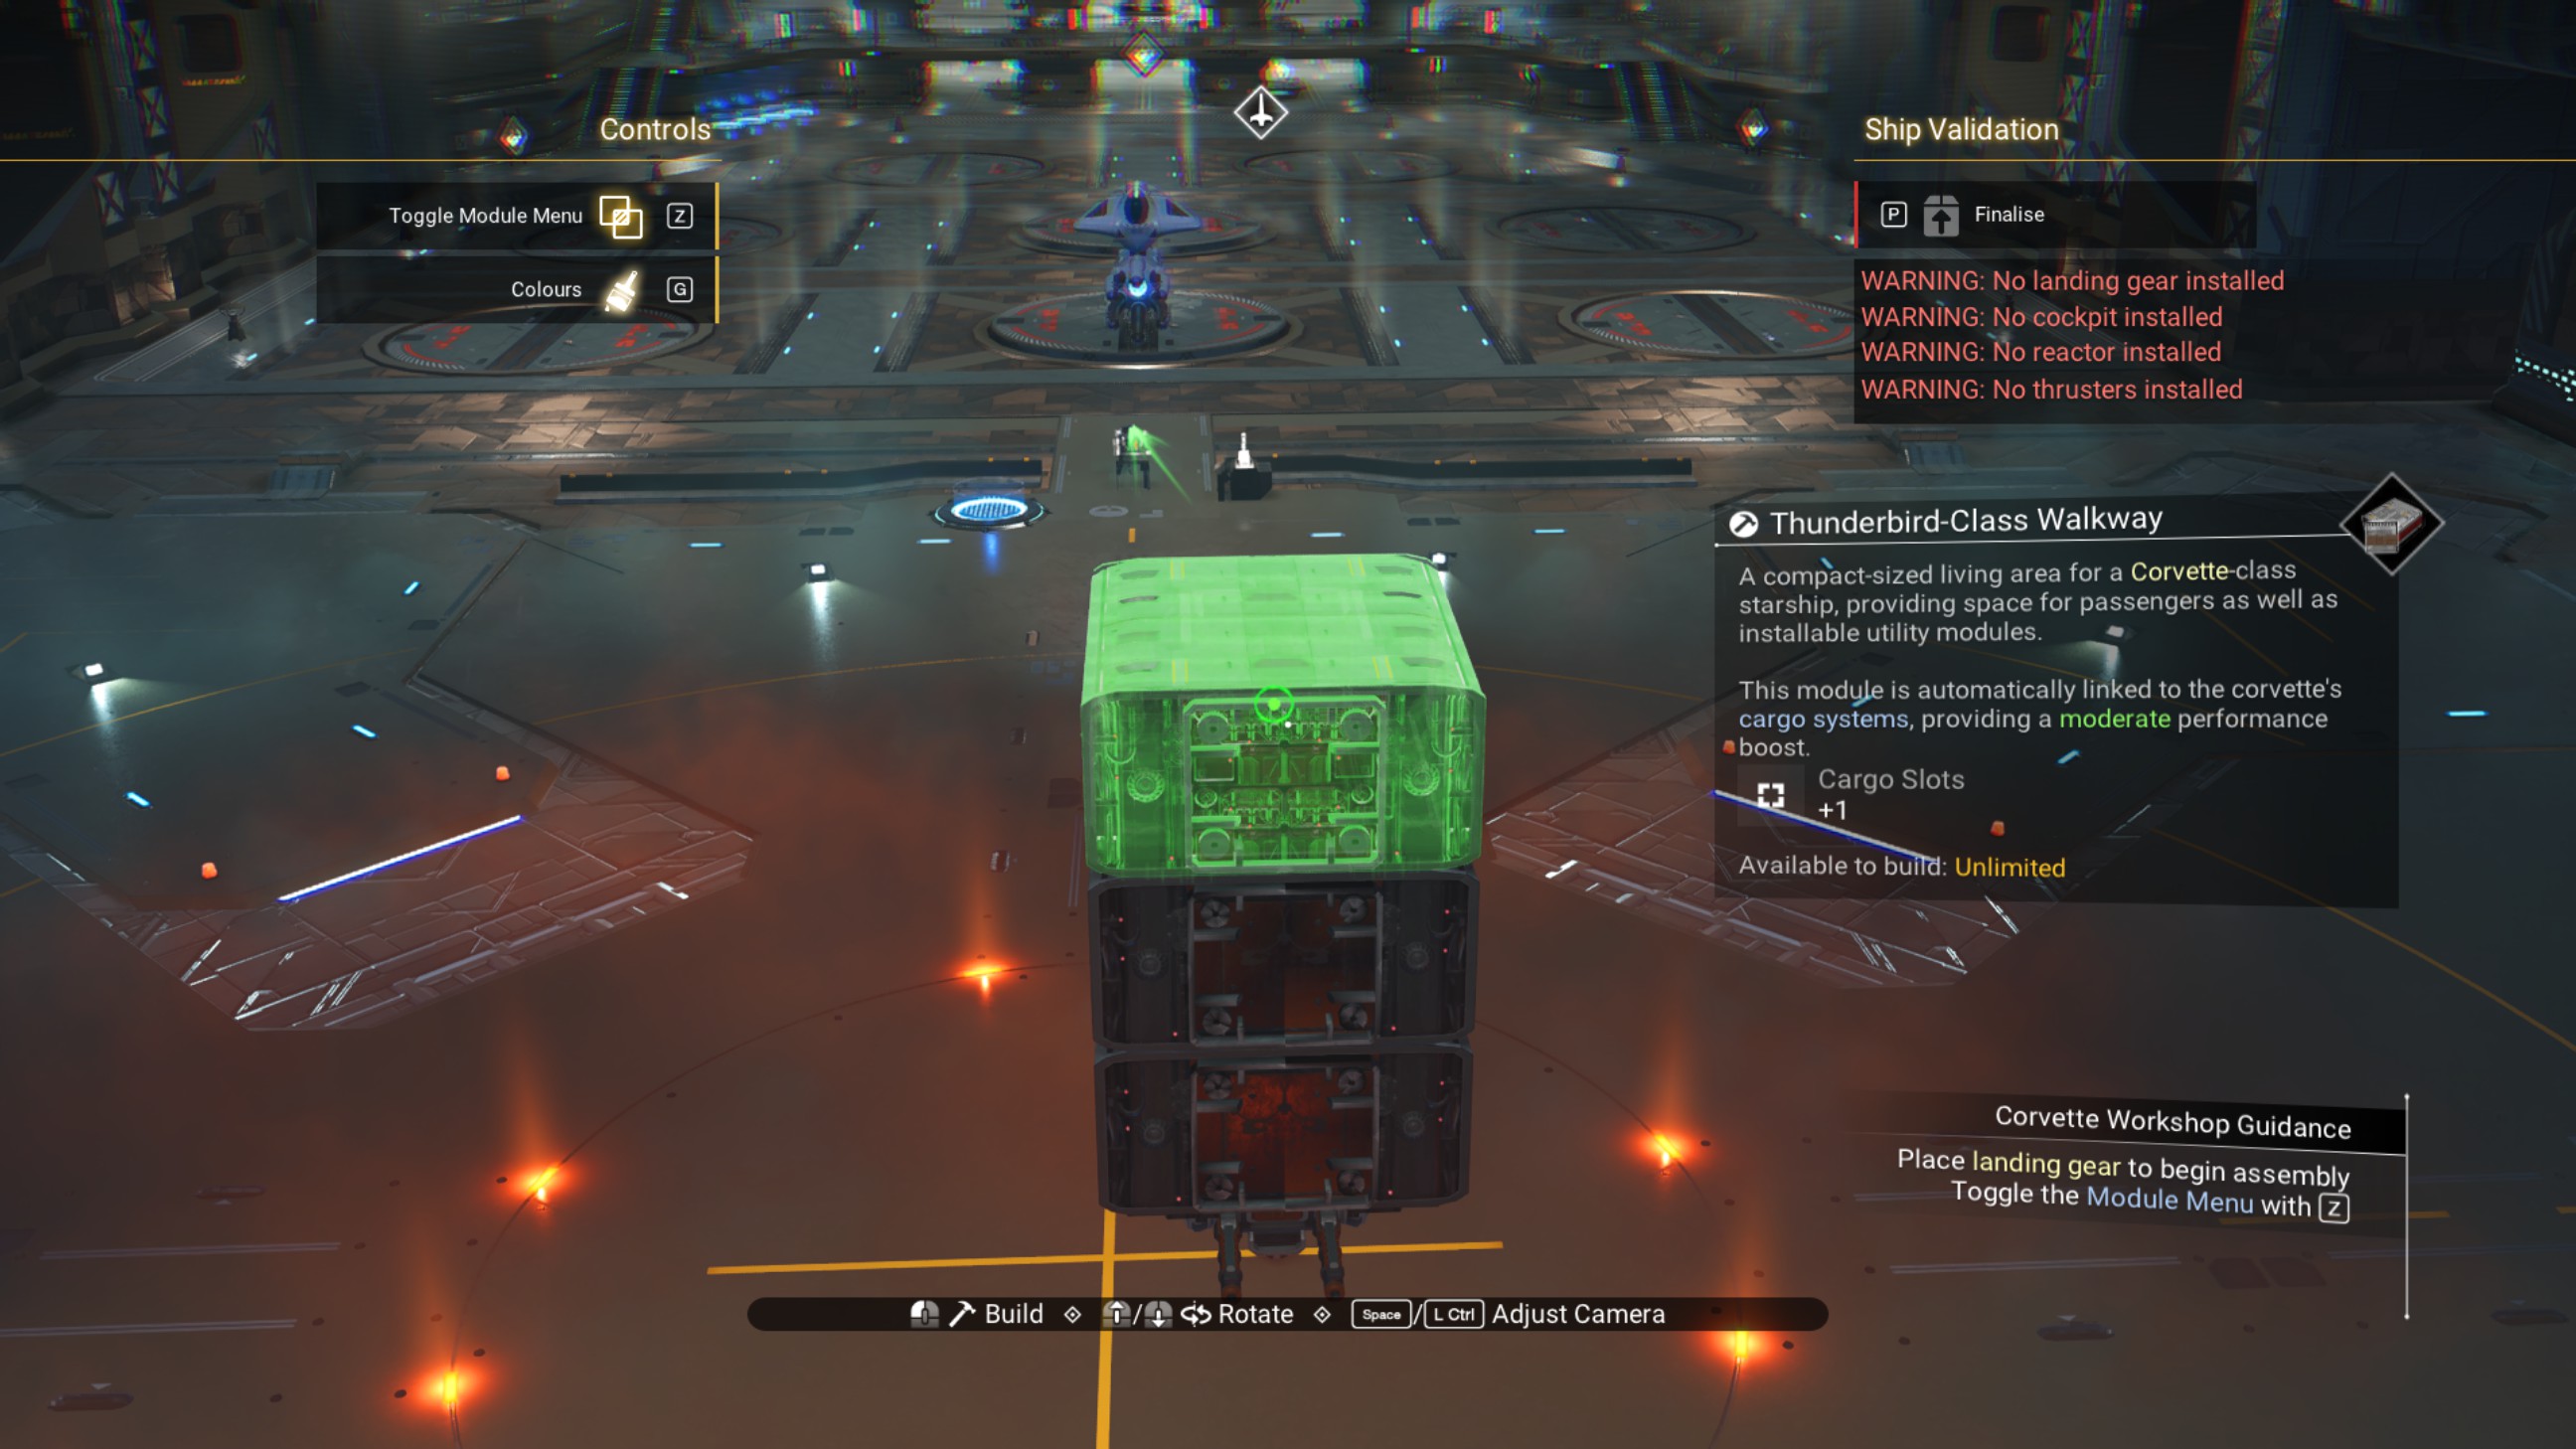
Then, another phase beam on top of those.
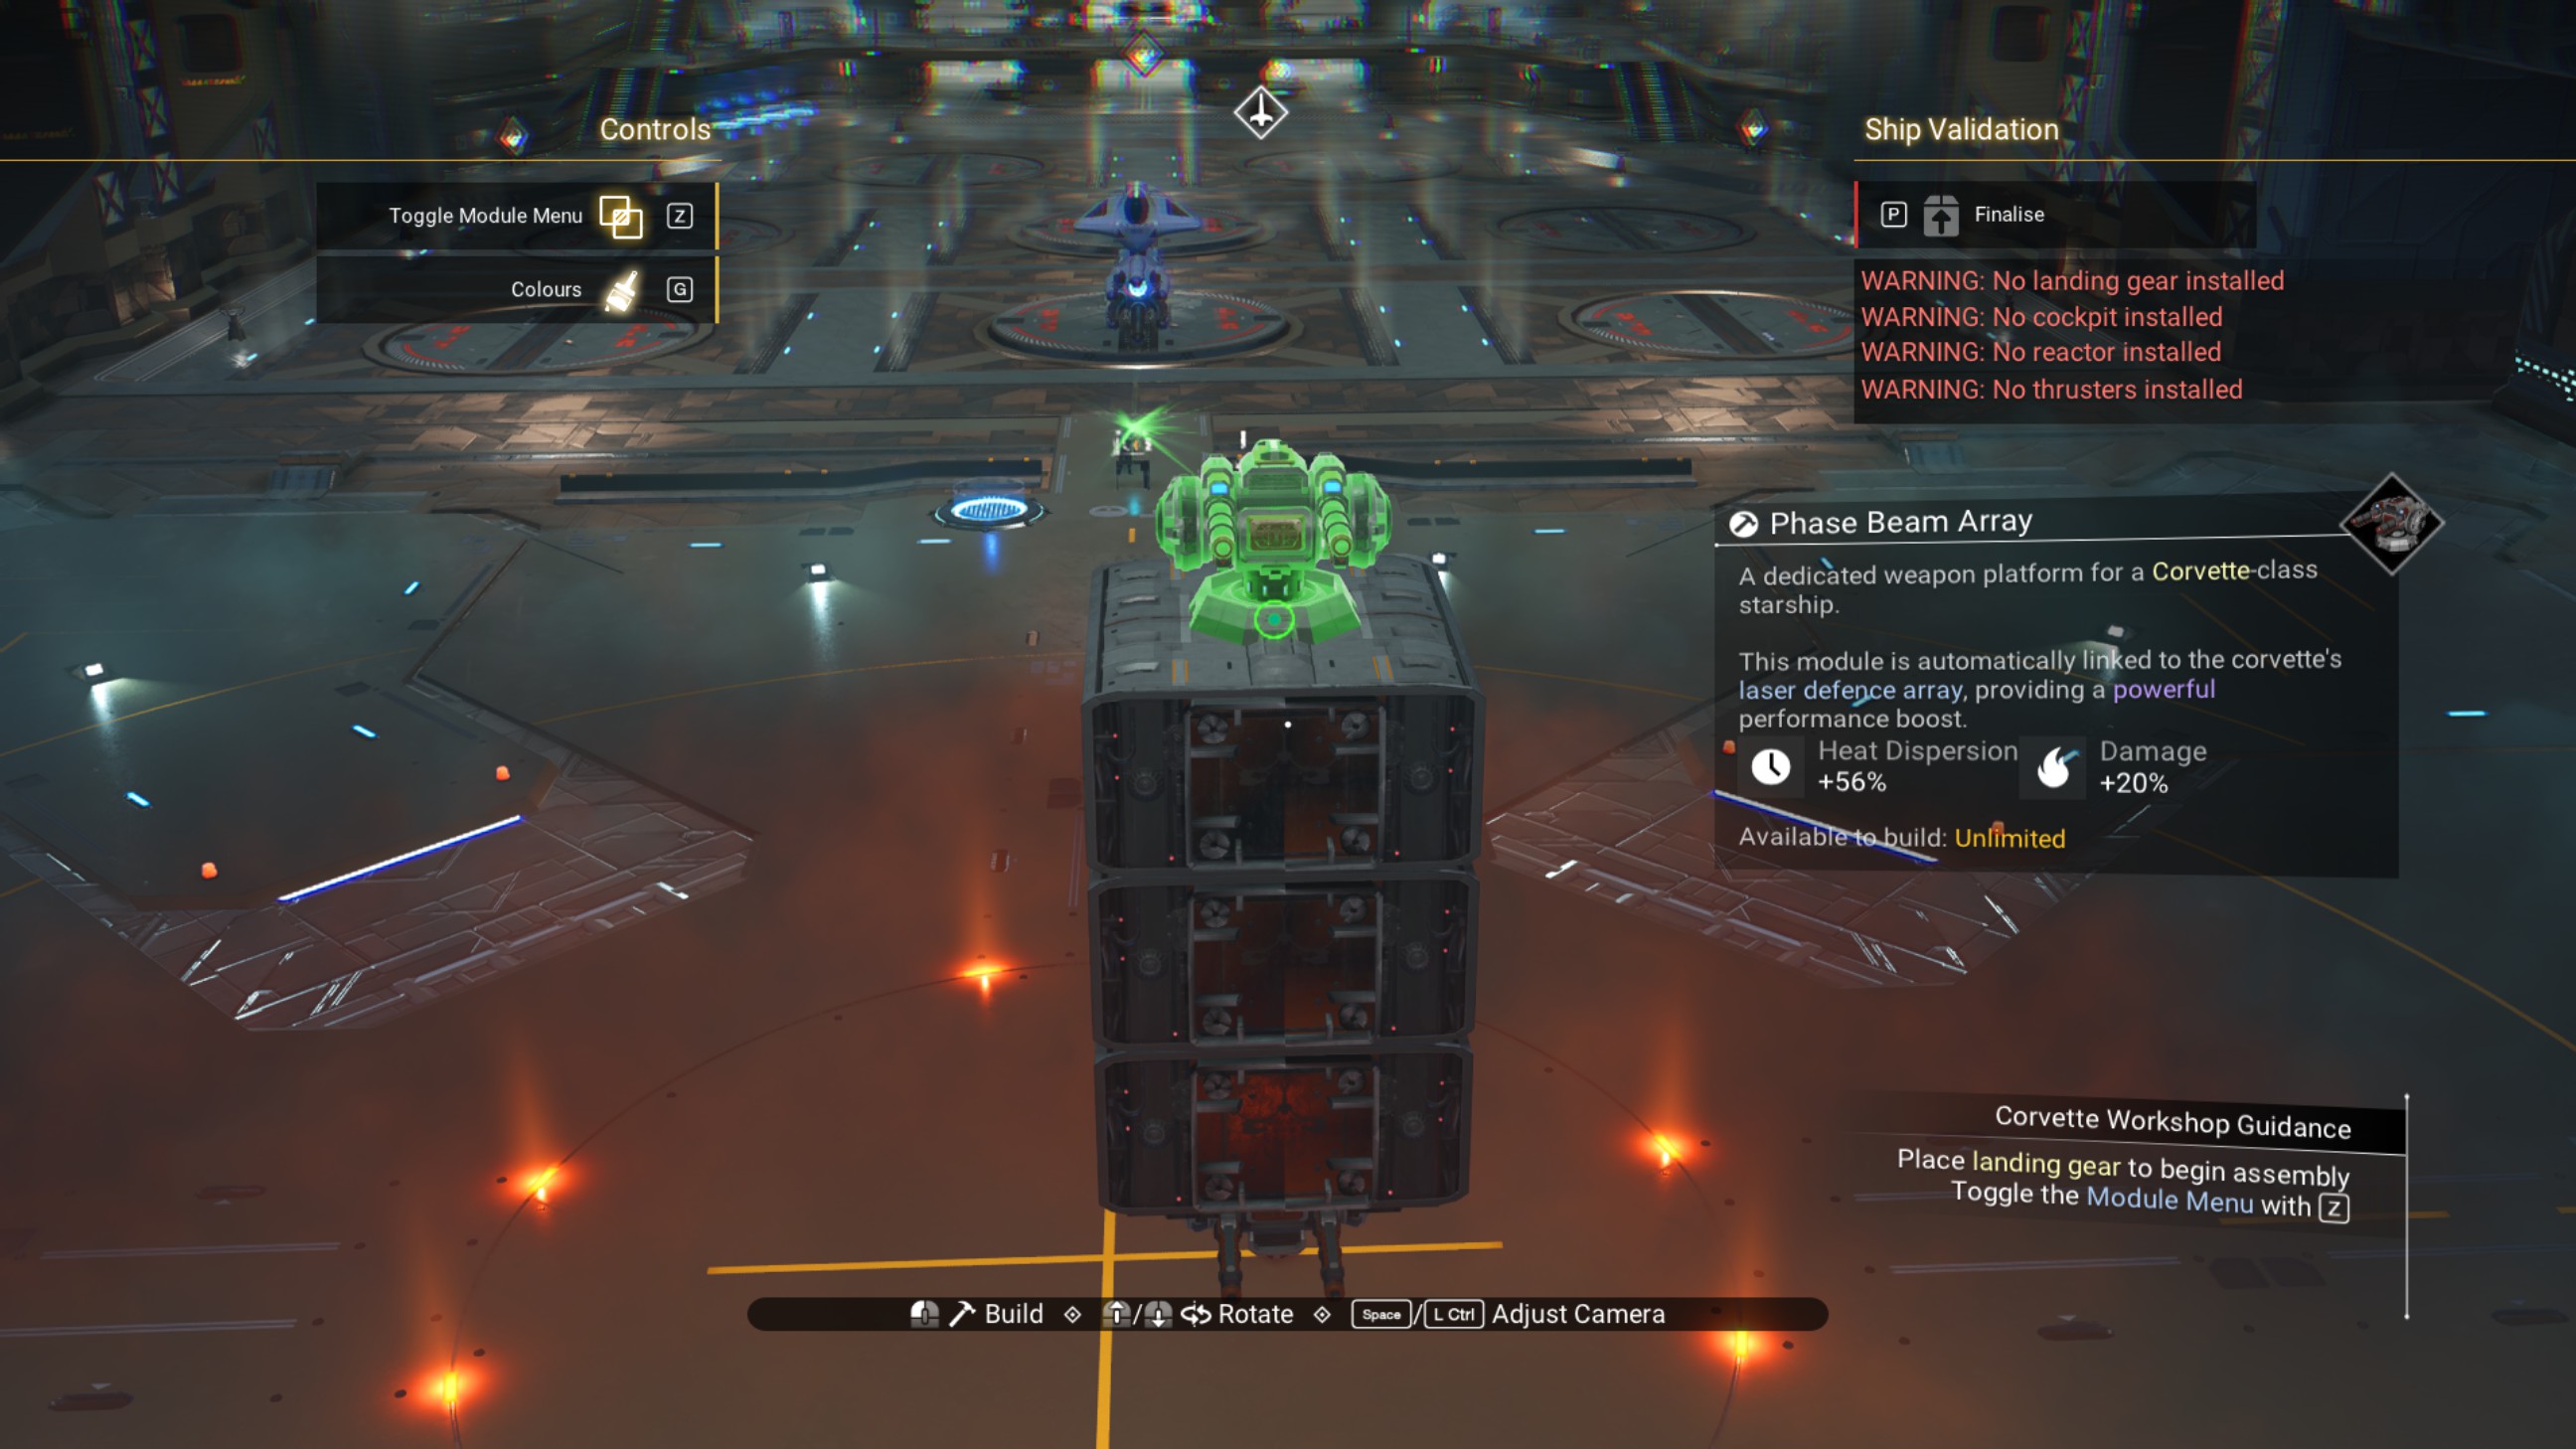
Add another walkway on the front. We're going to move this one around a bit.
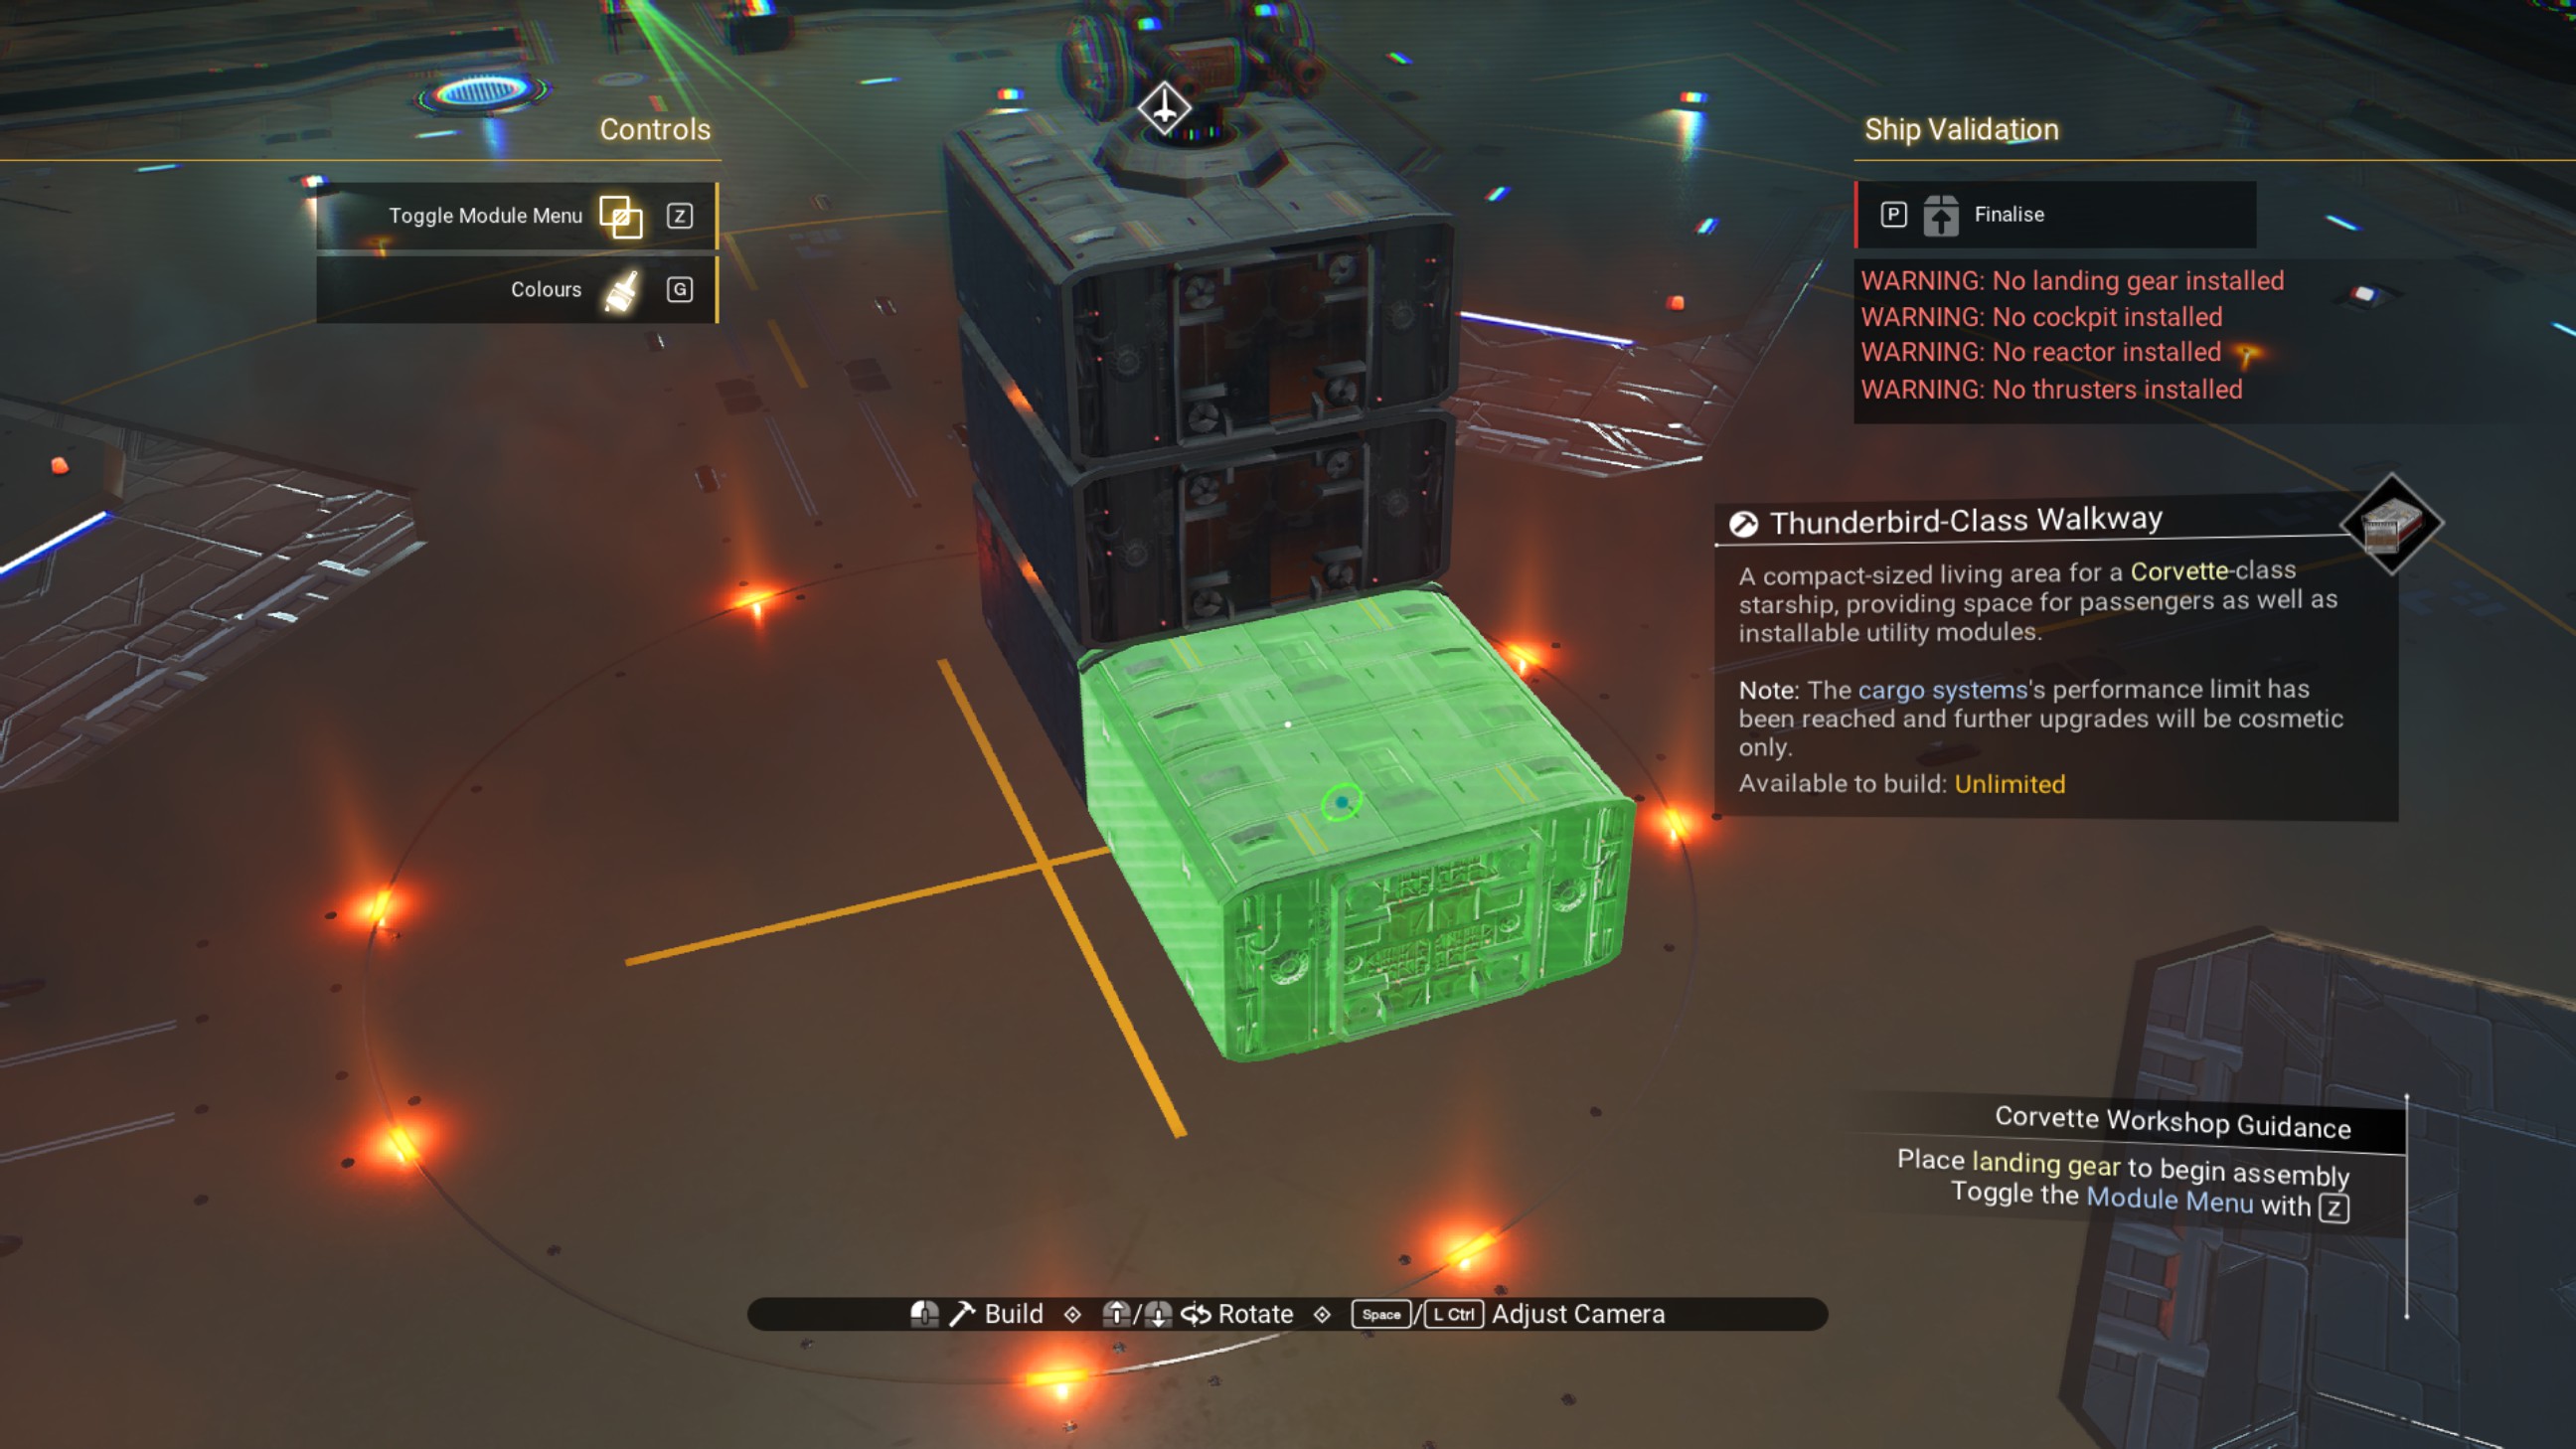
Put a ducting outlet on front of that walkway.
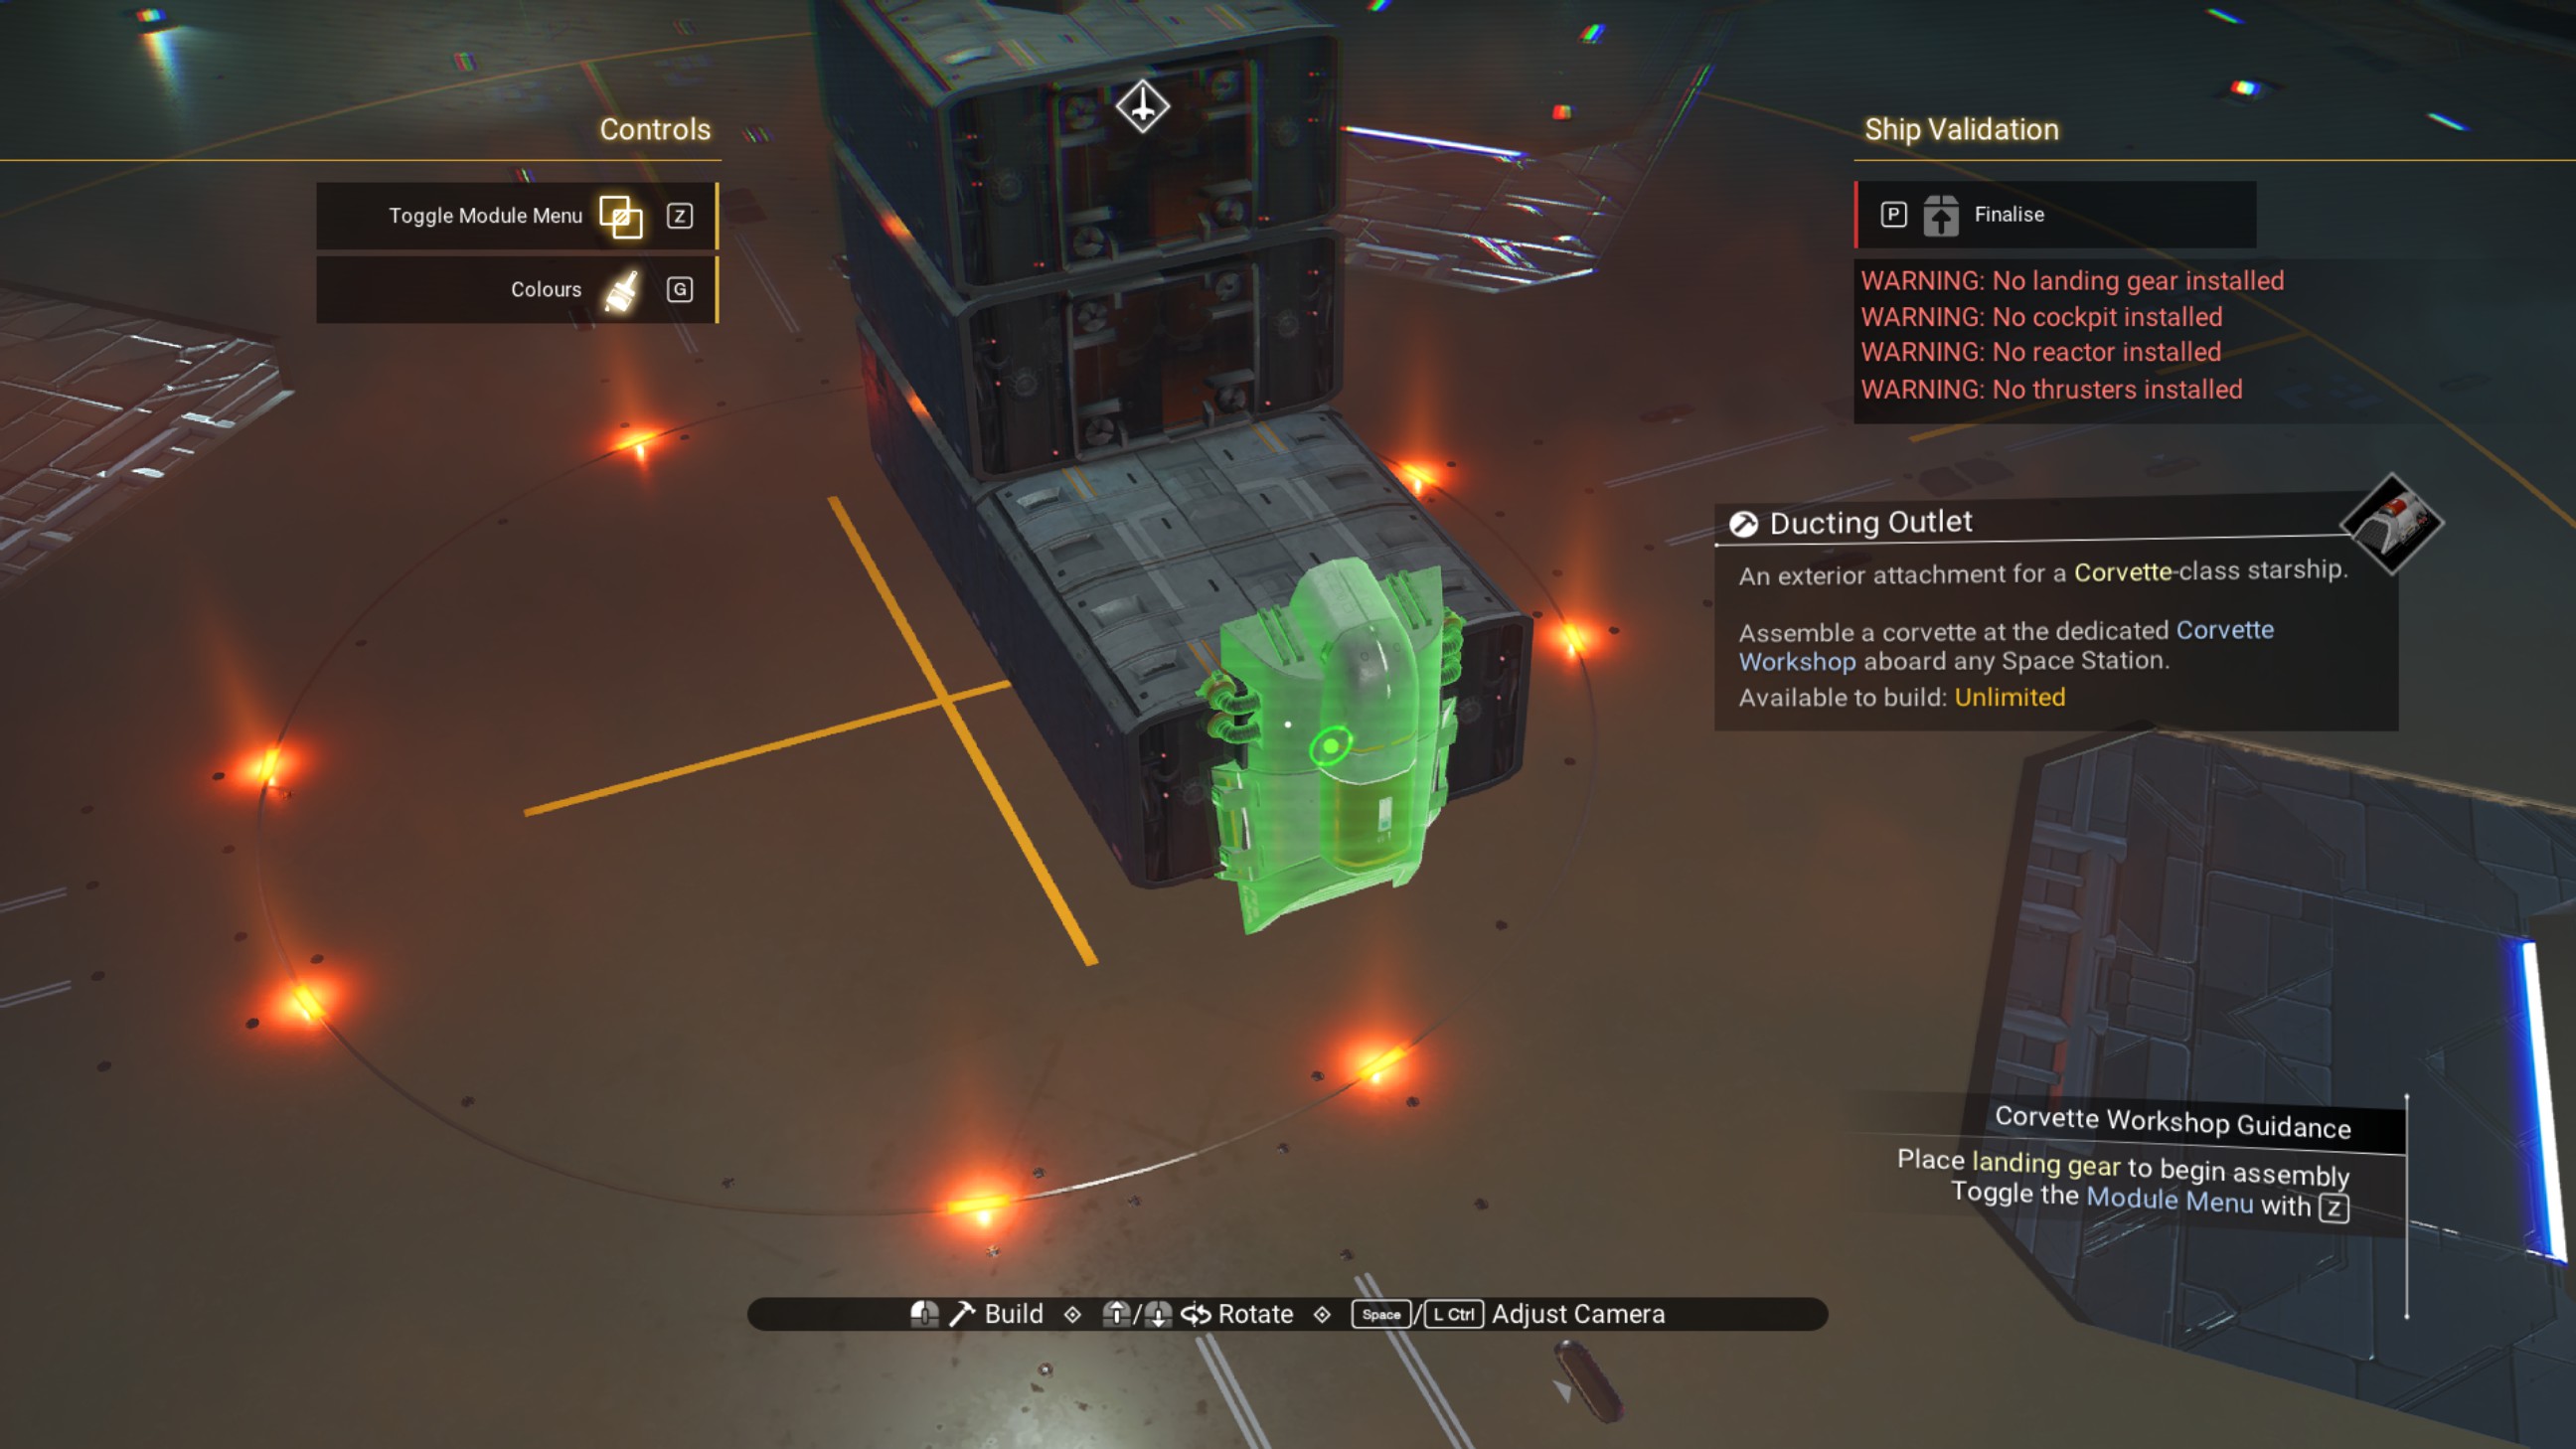
Shift the walkway so the ducting outlet is now on the bottom of it.
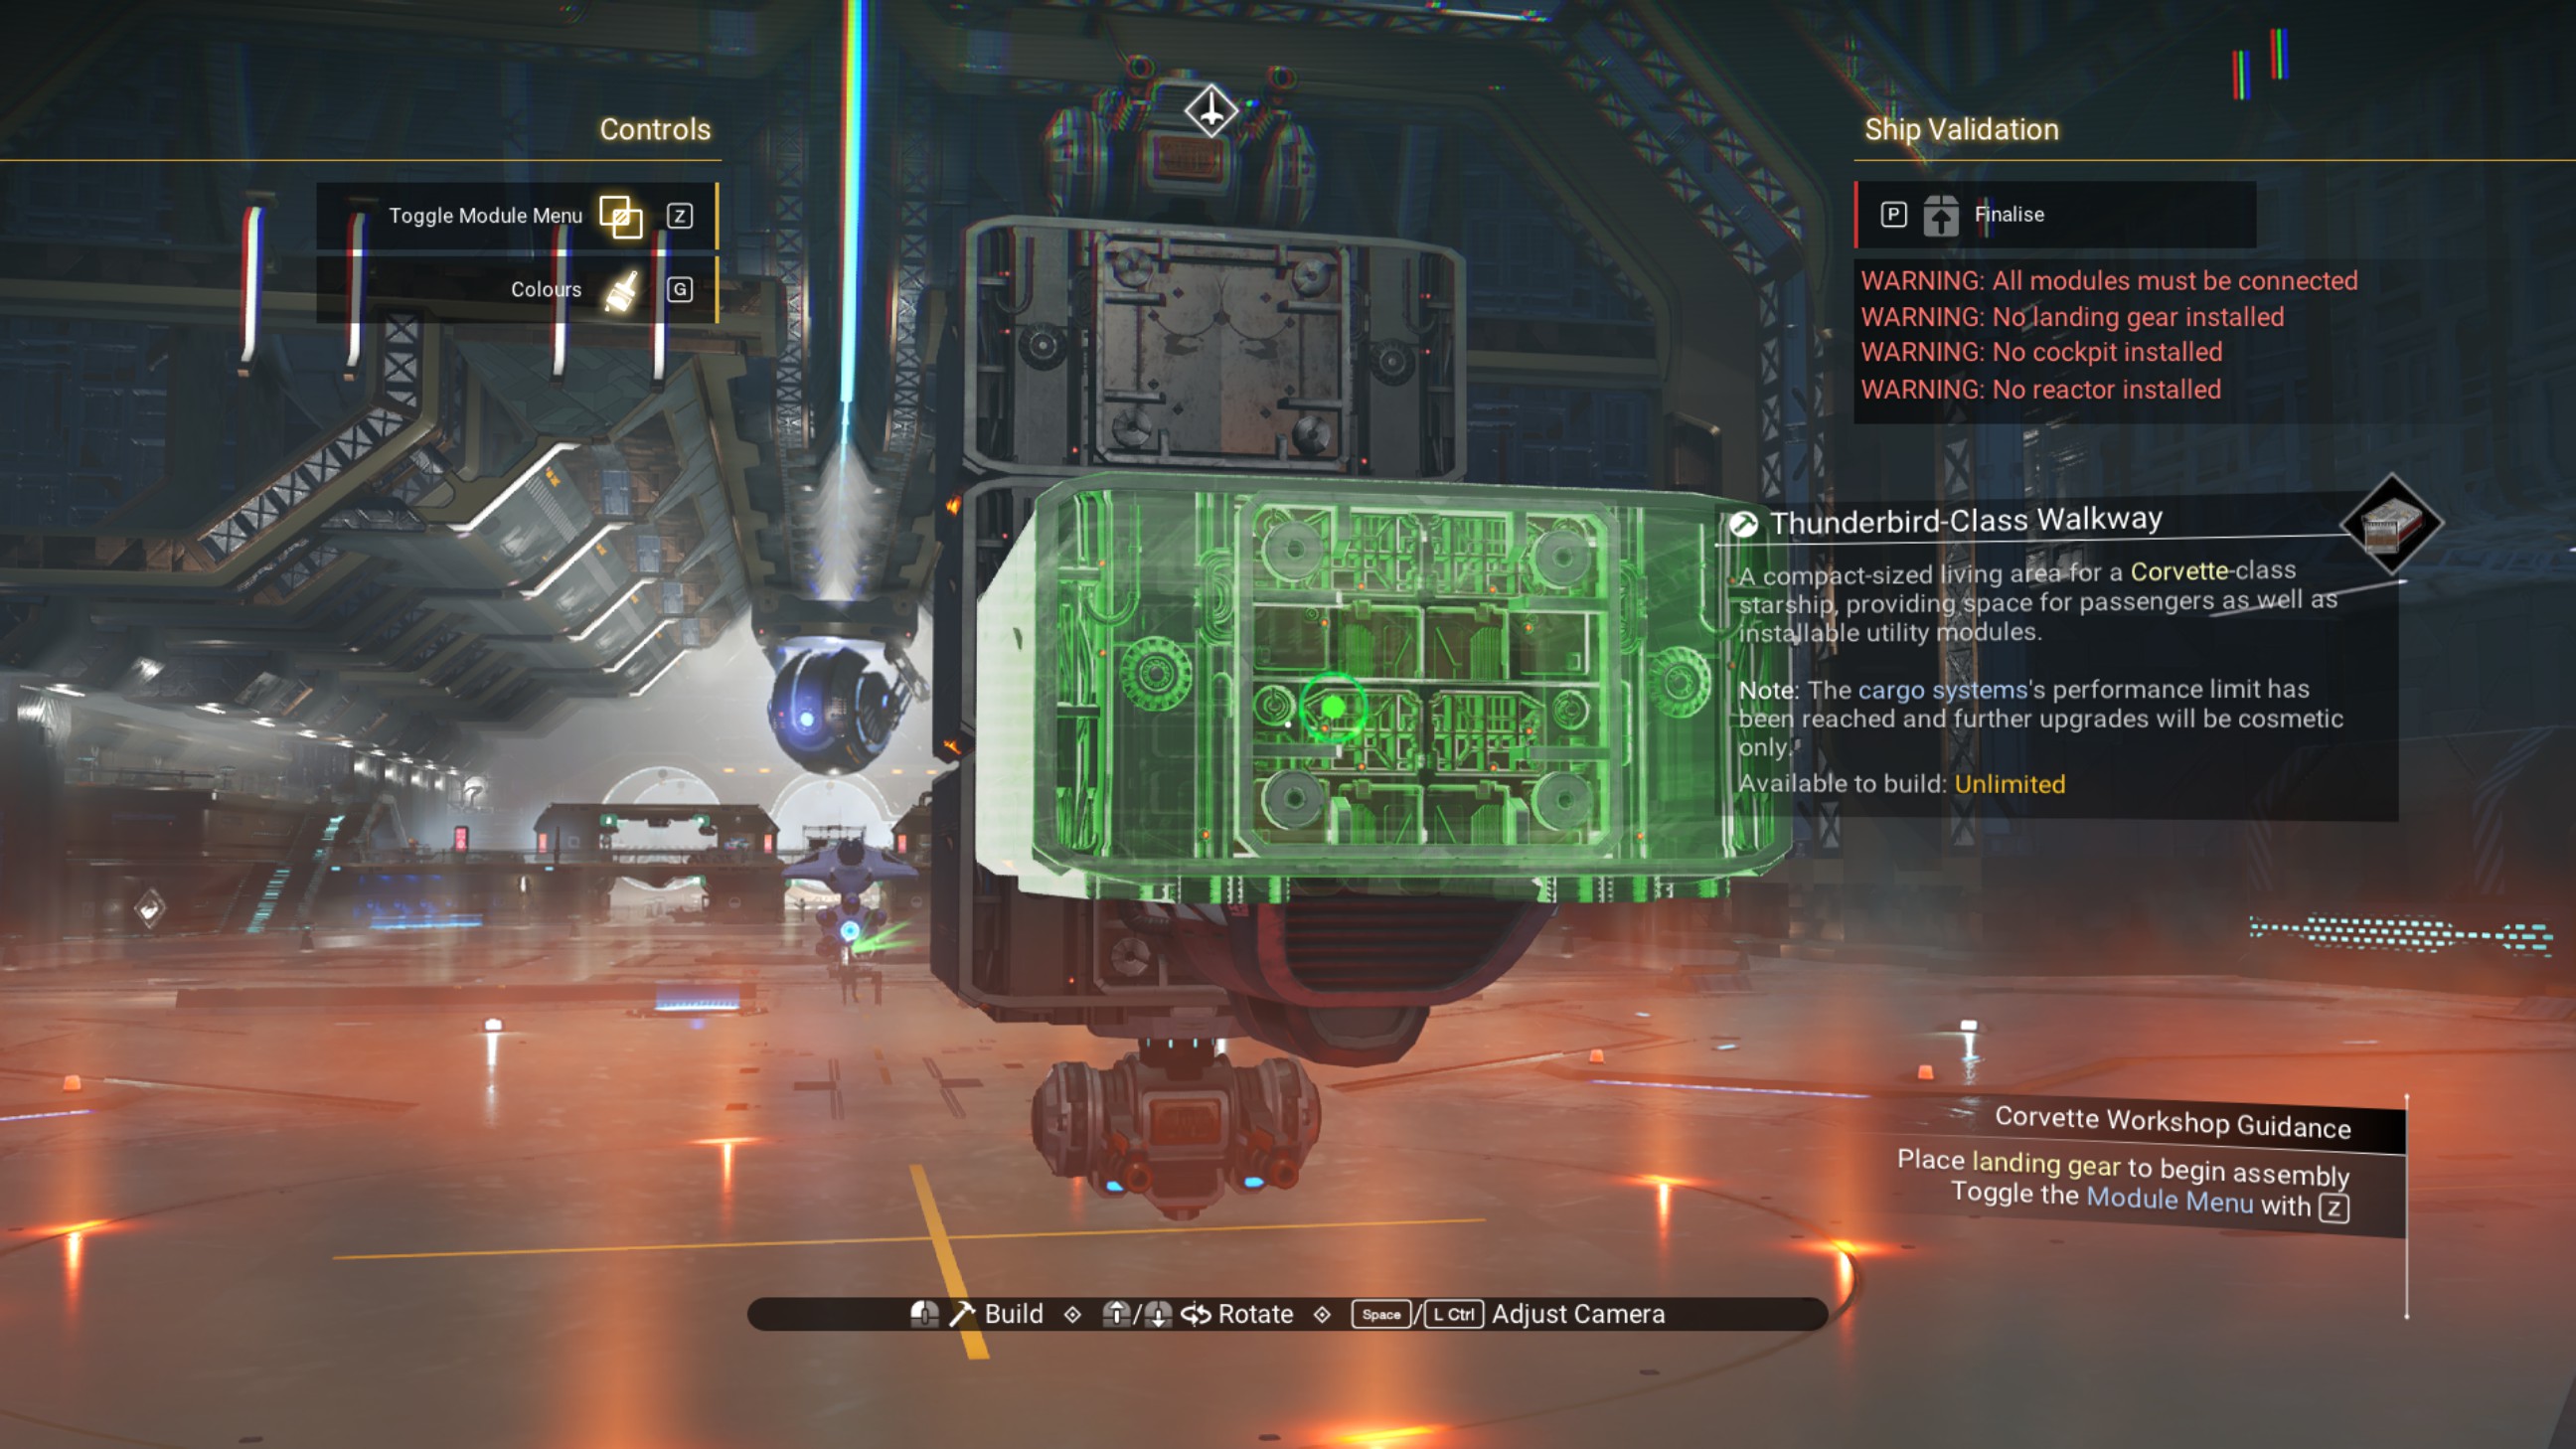
Move the ducting outlet on front of the walkway again.
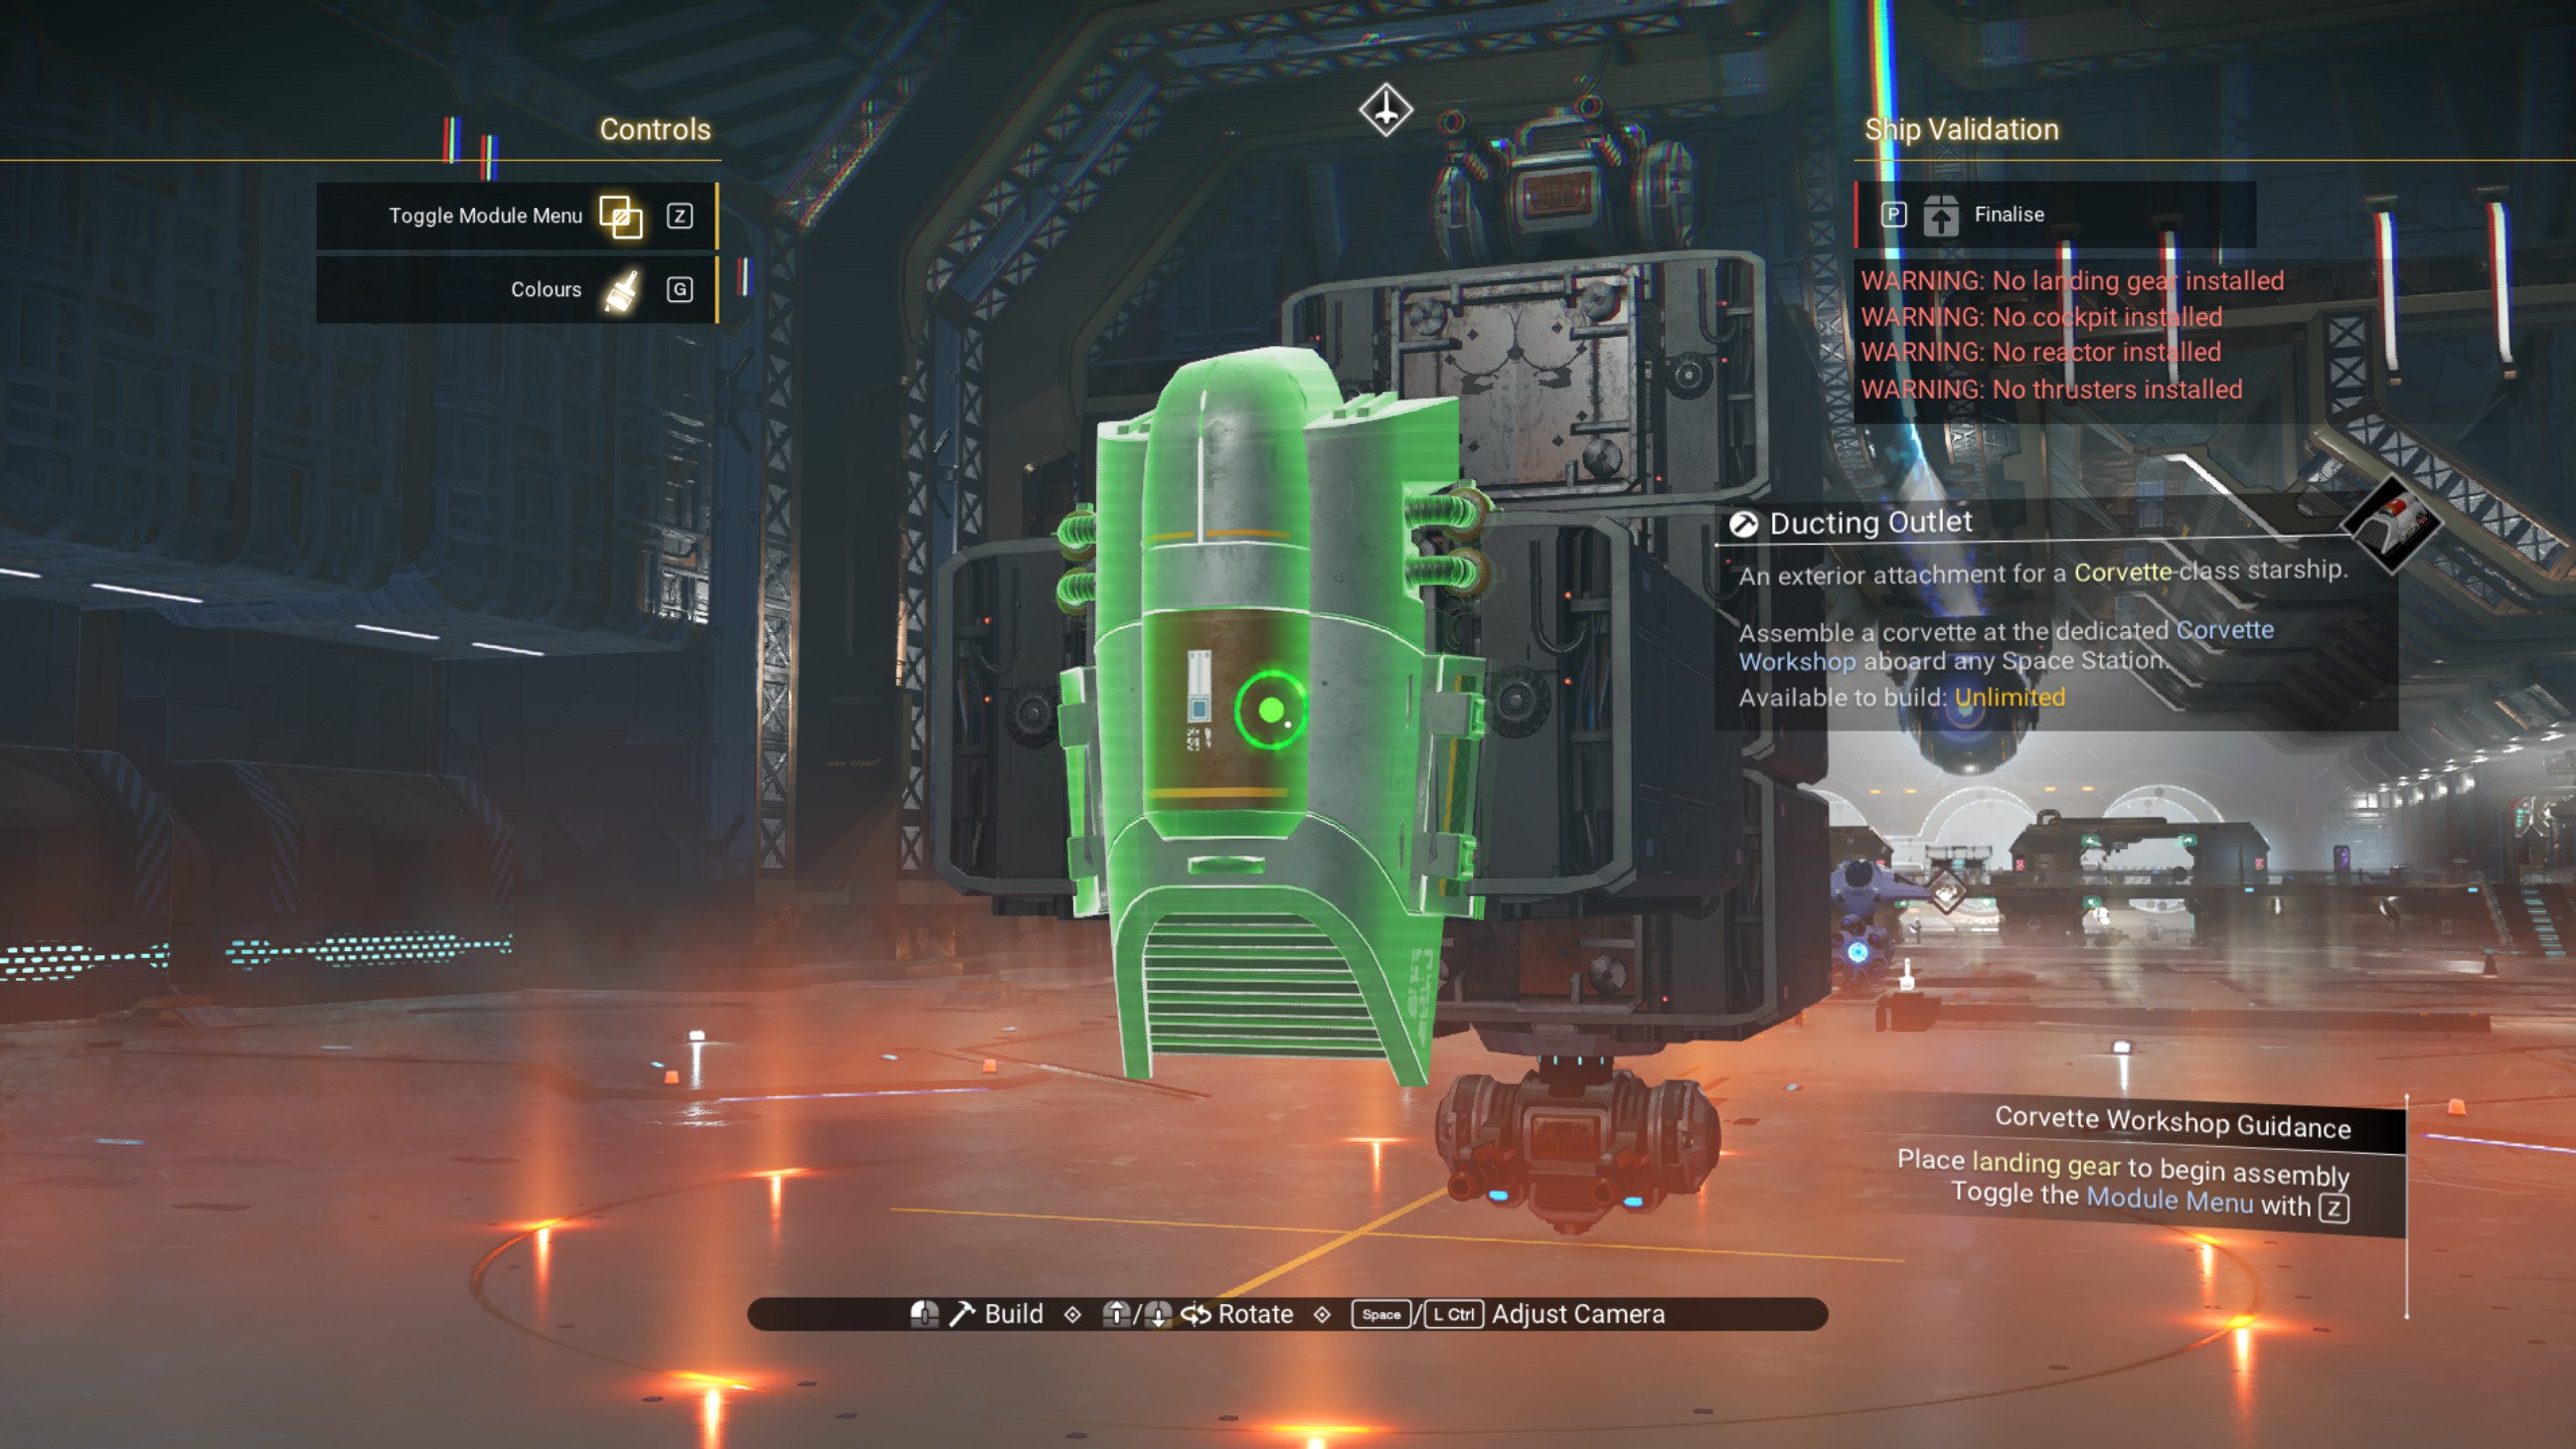
Then, shift the walkway again, this time so the ducting outlet is on the starboard side.
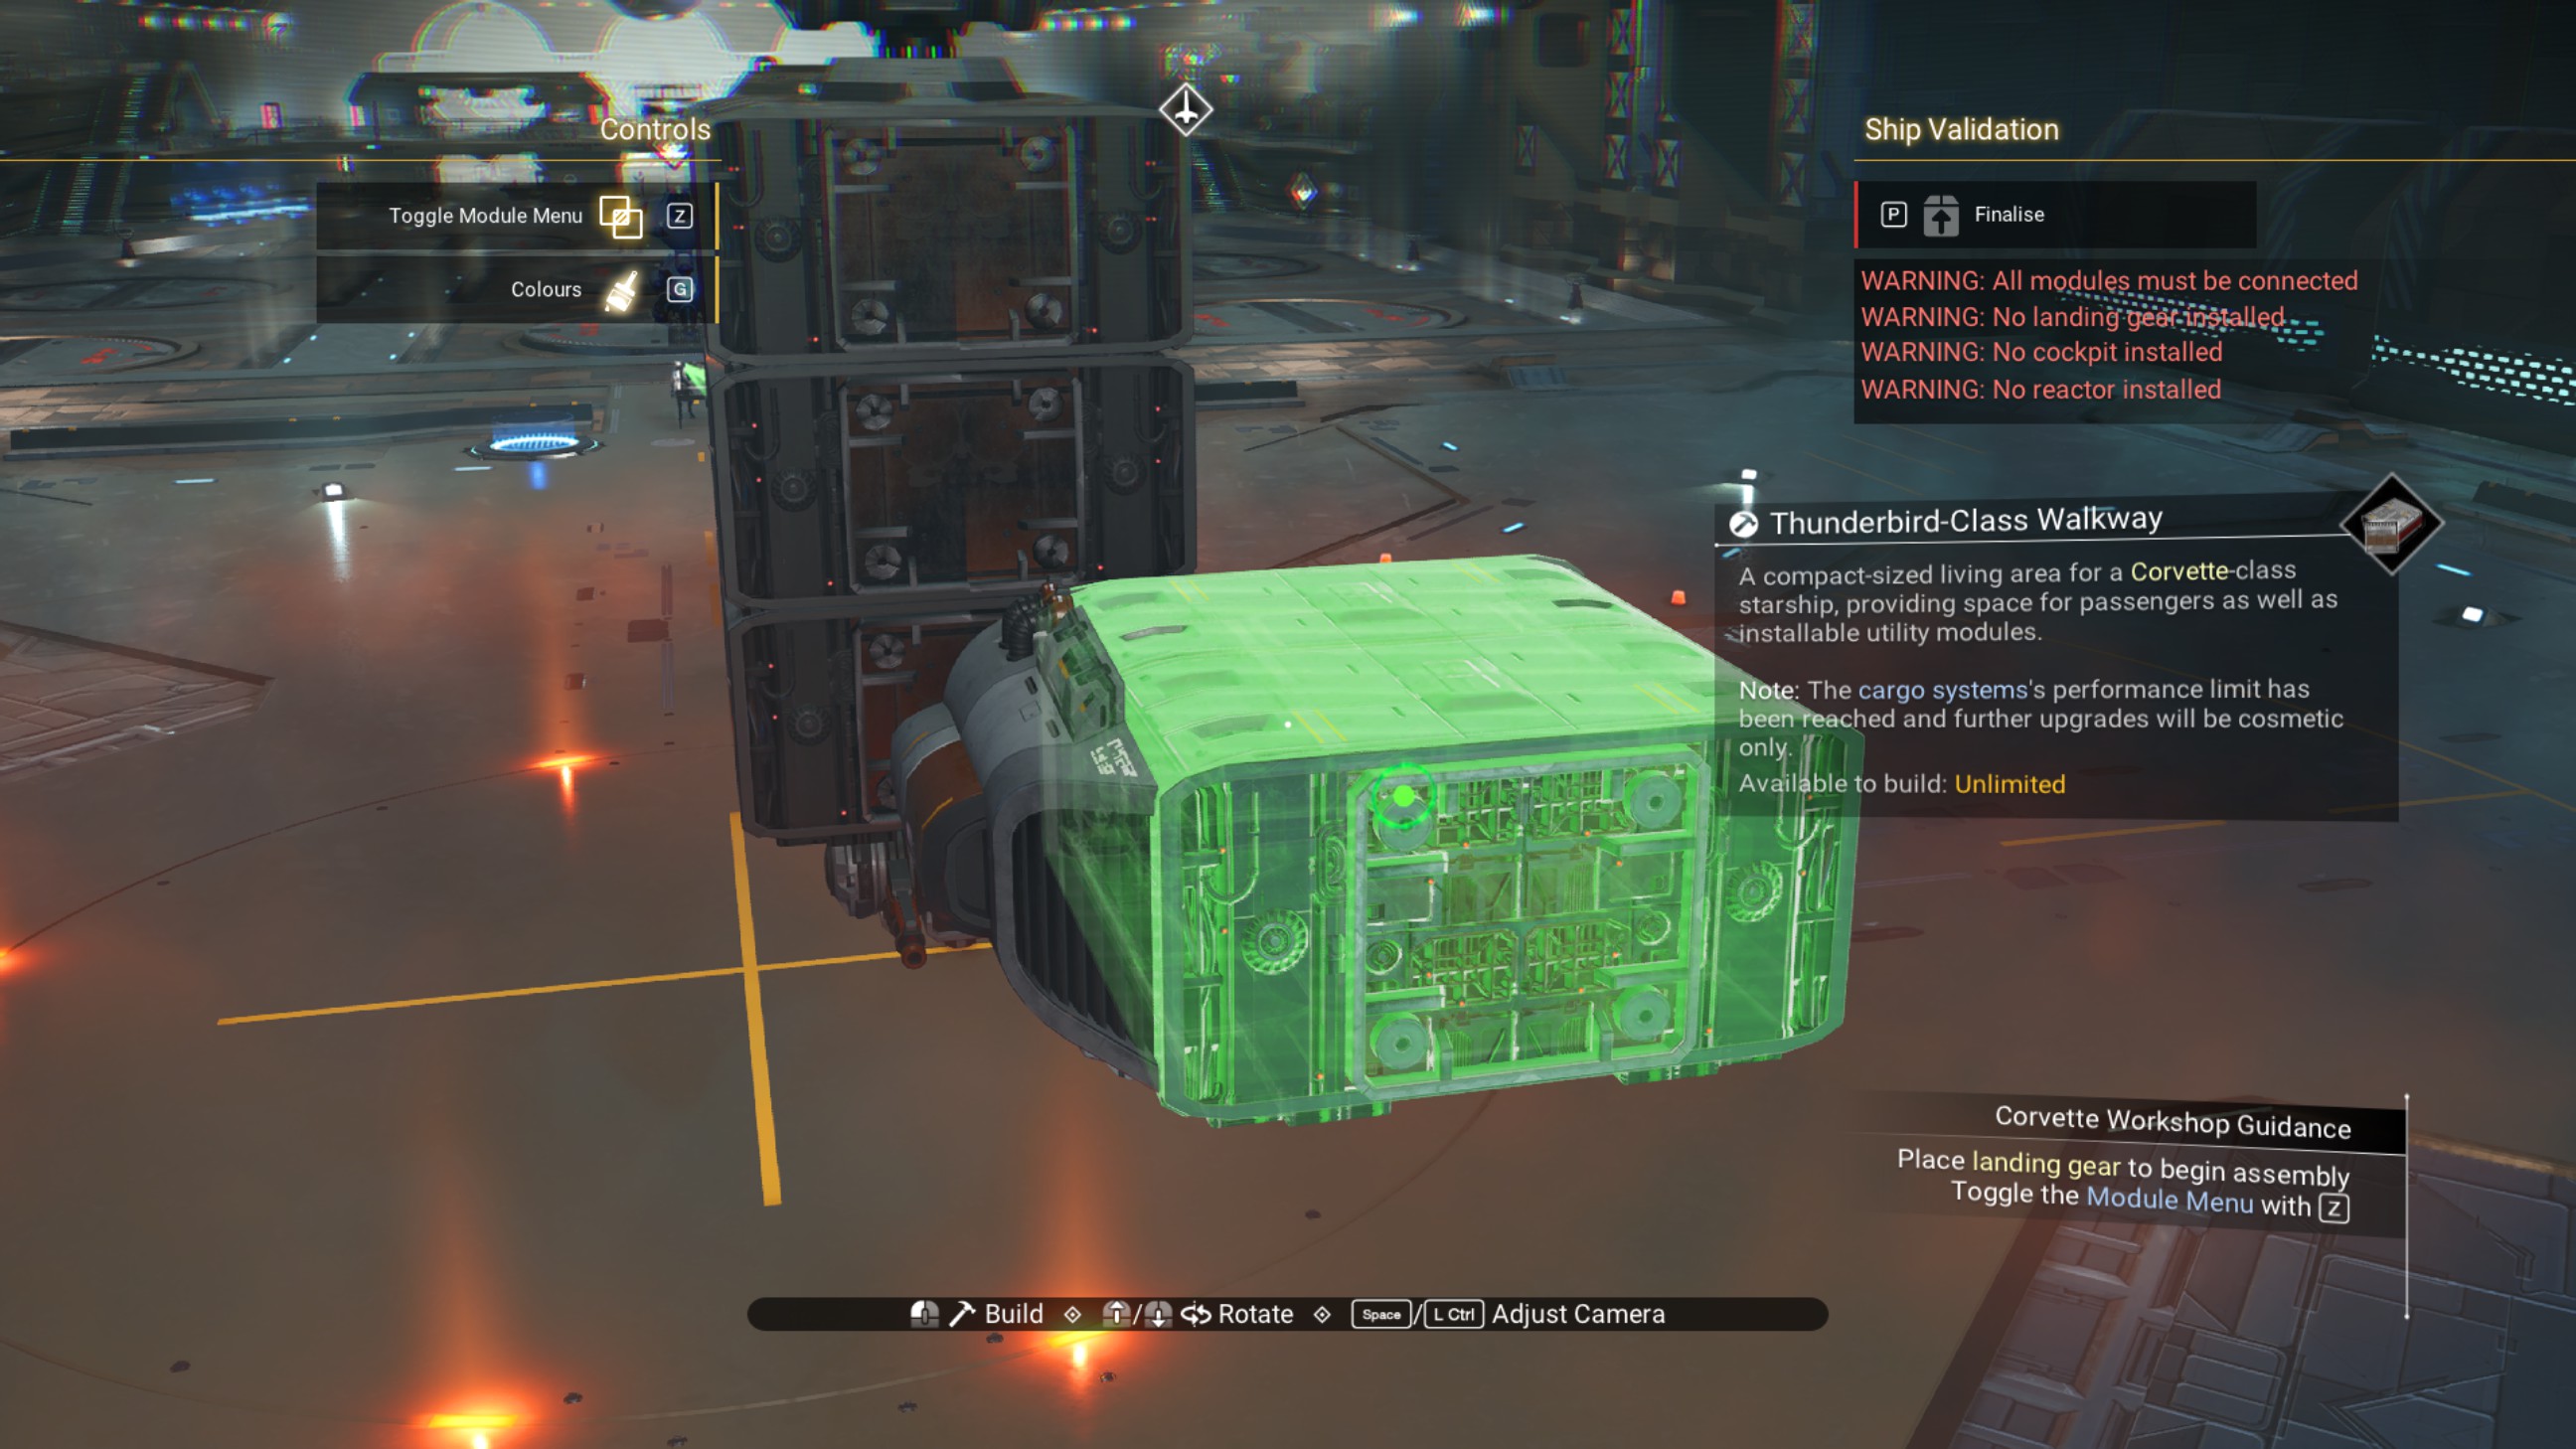
Delete the ducting outlet and place a rotated propeller module on the side of the walkway as shown.
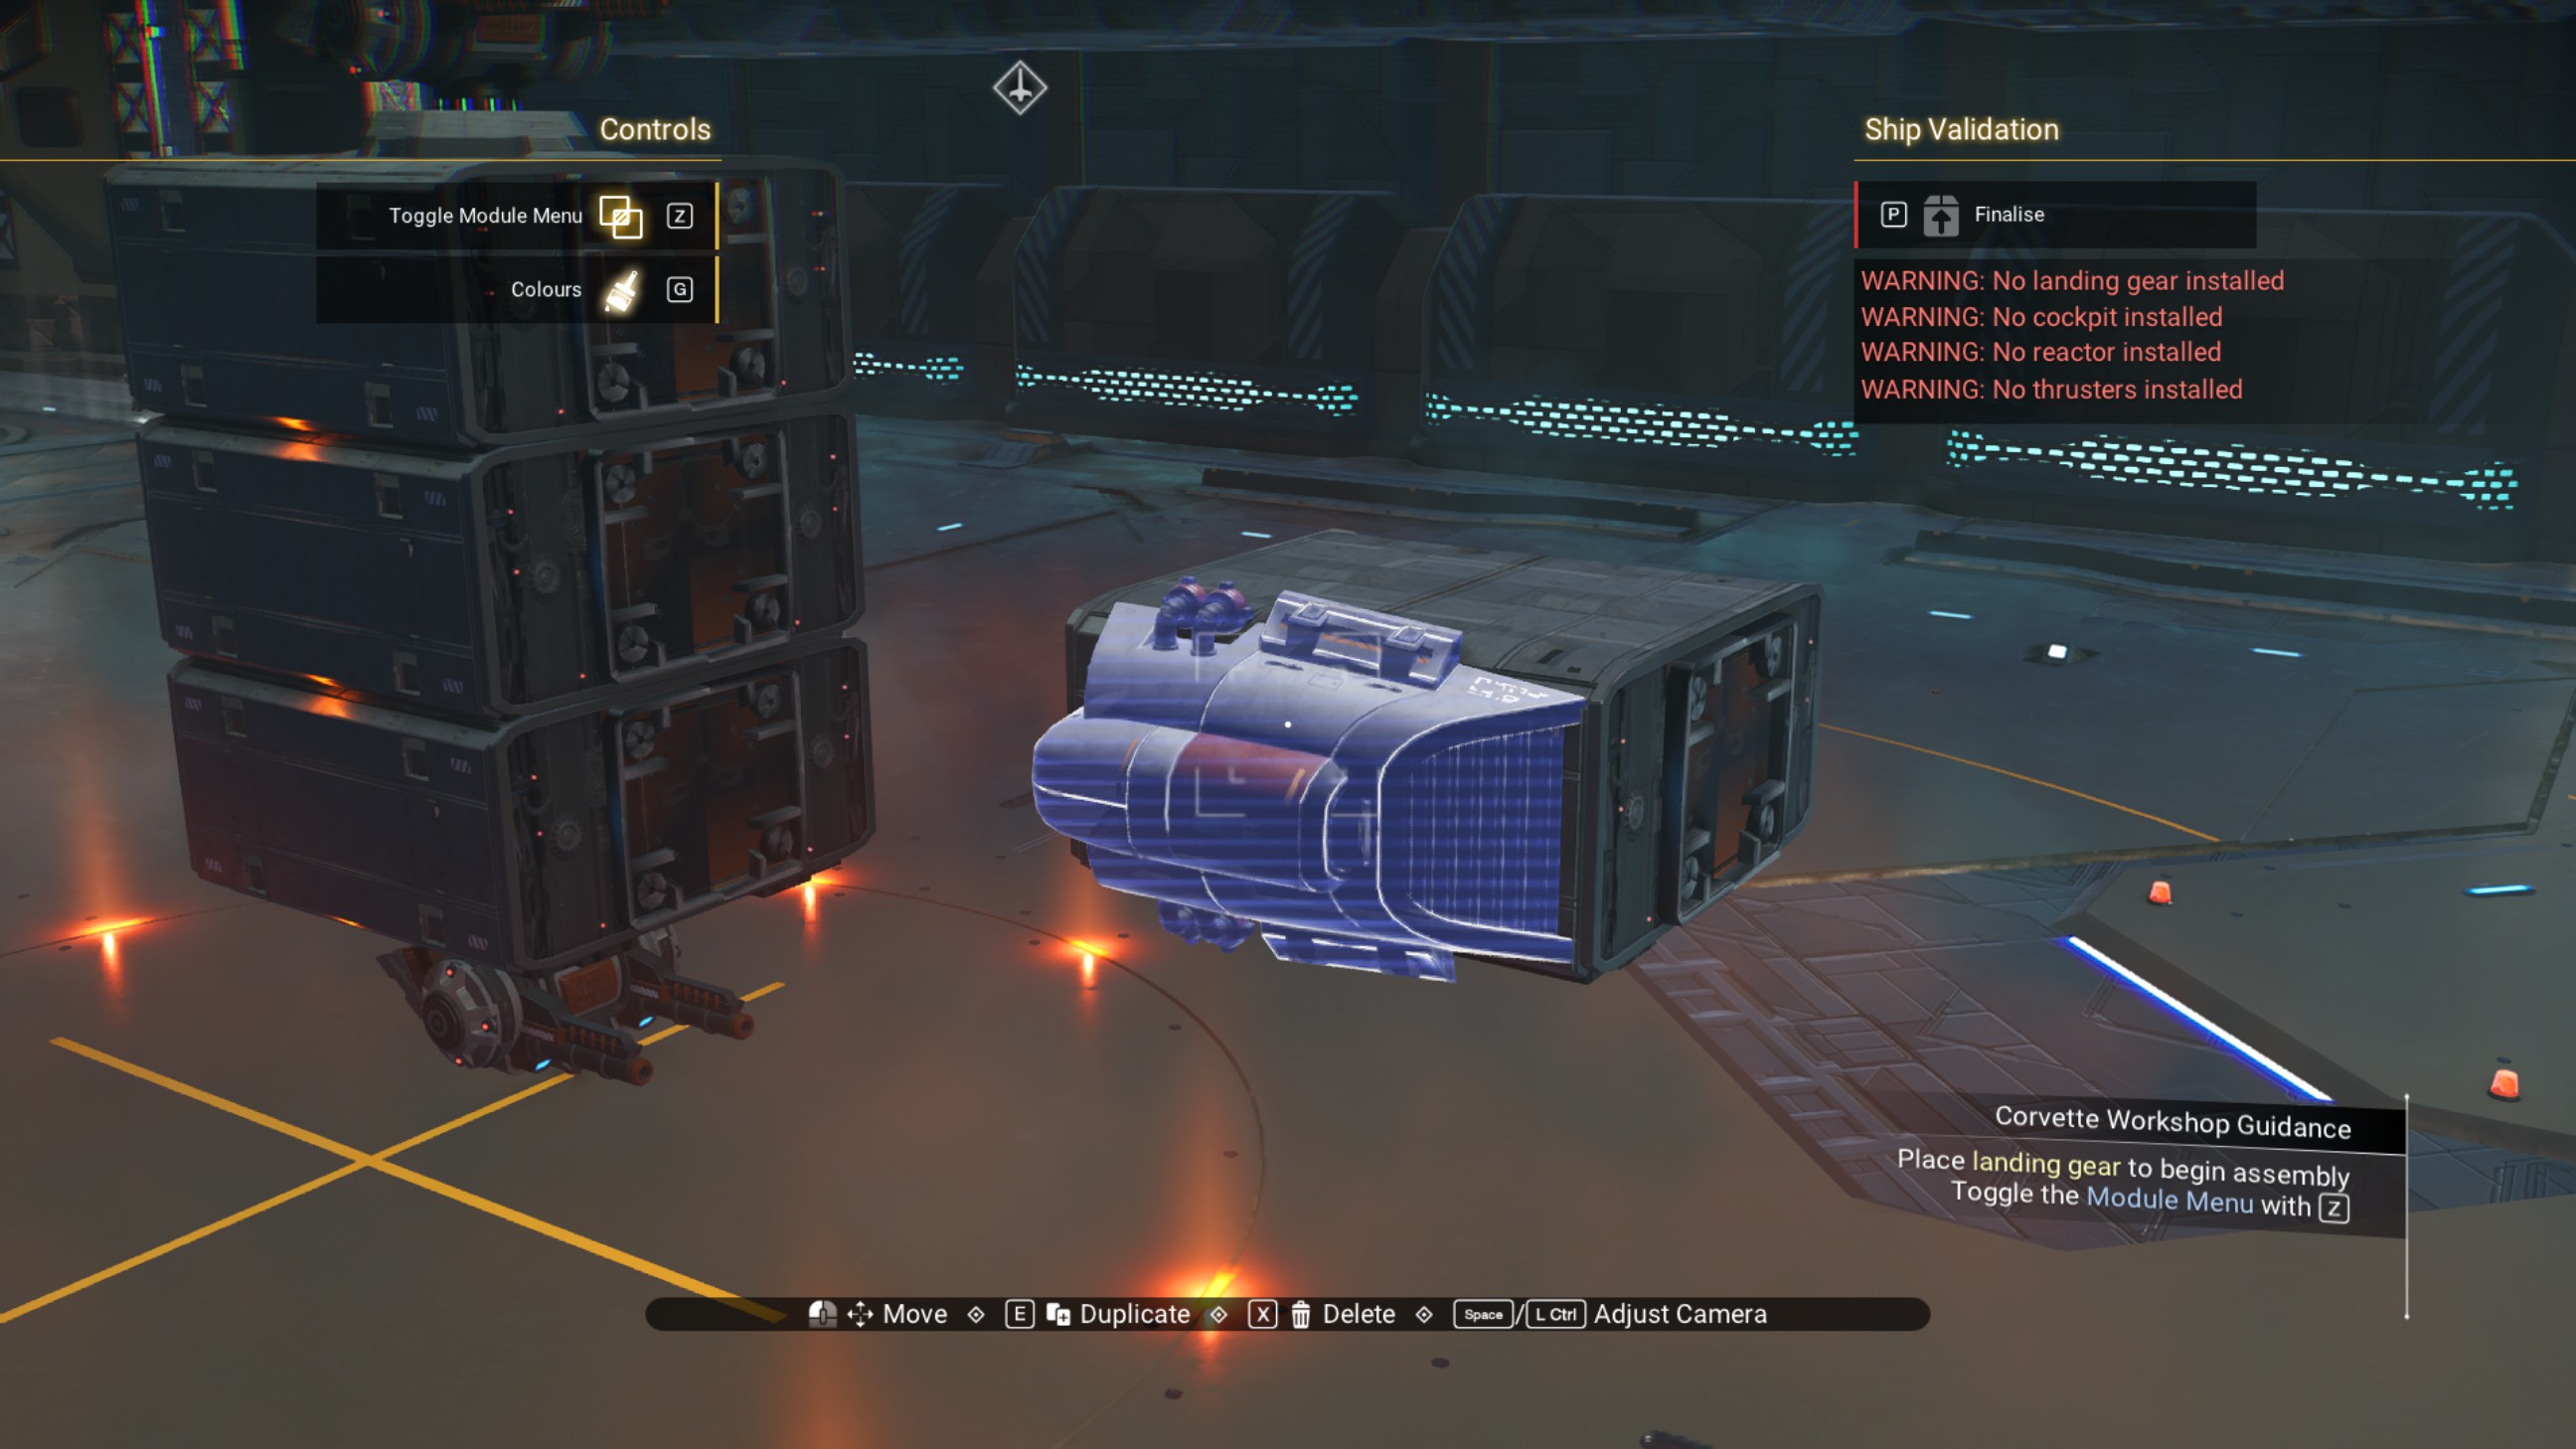
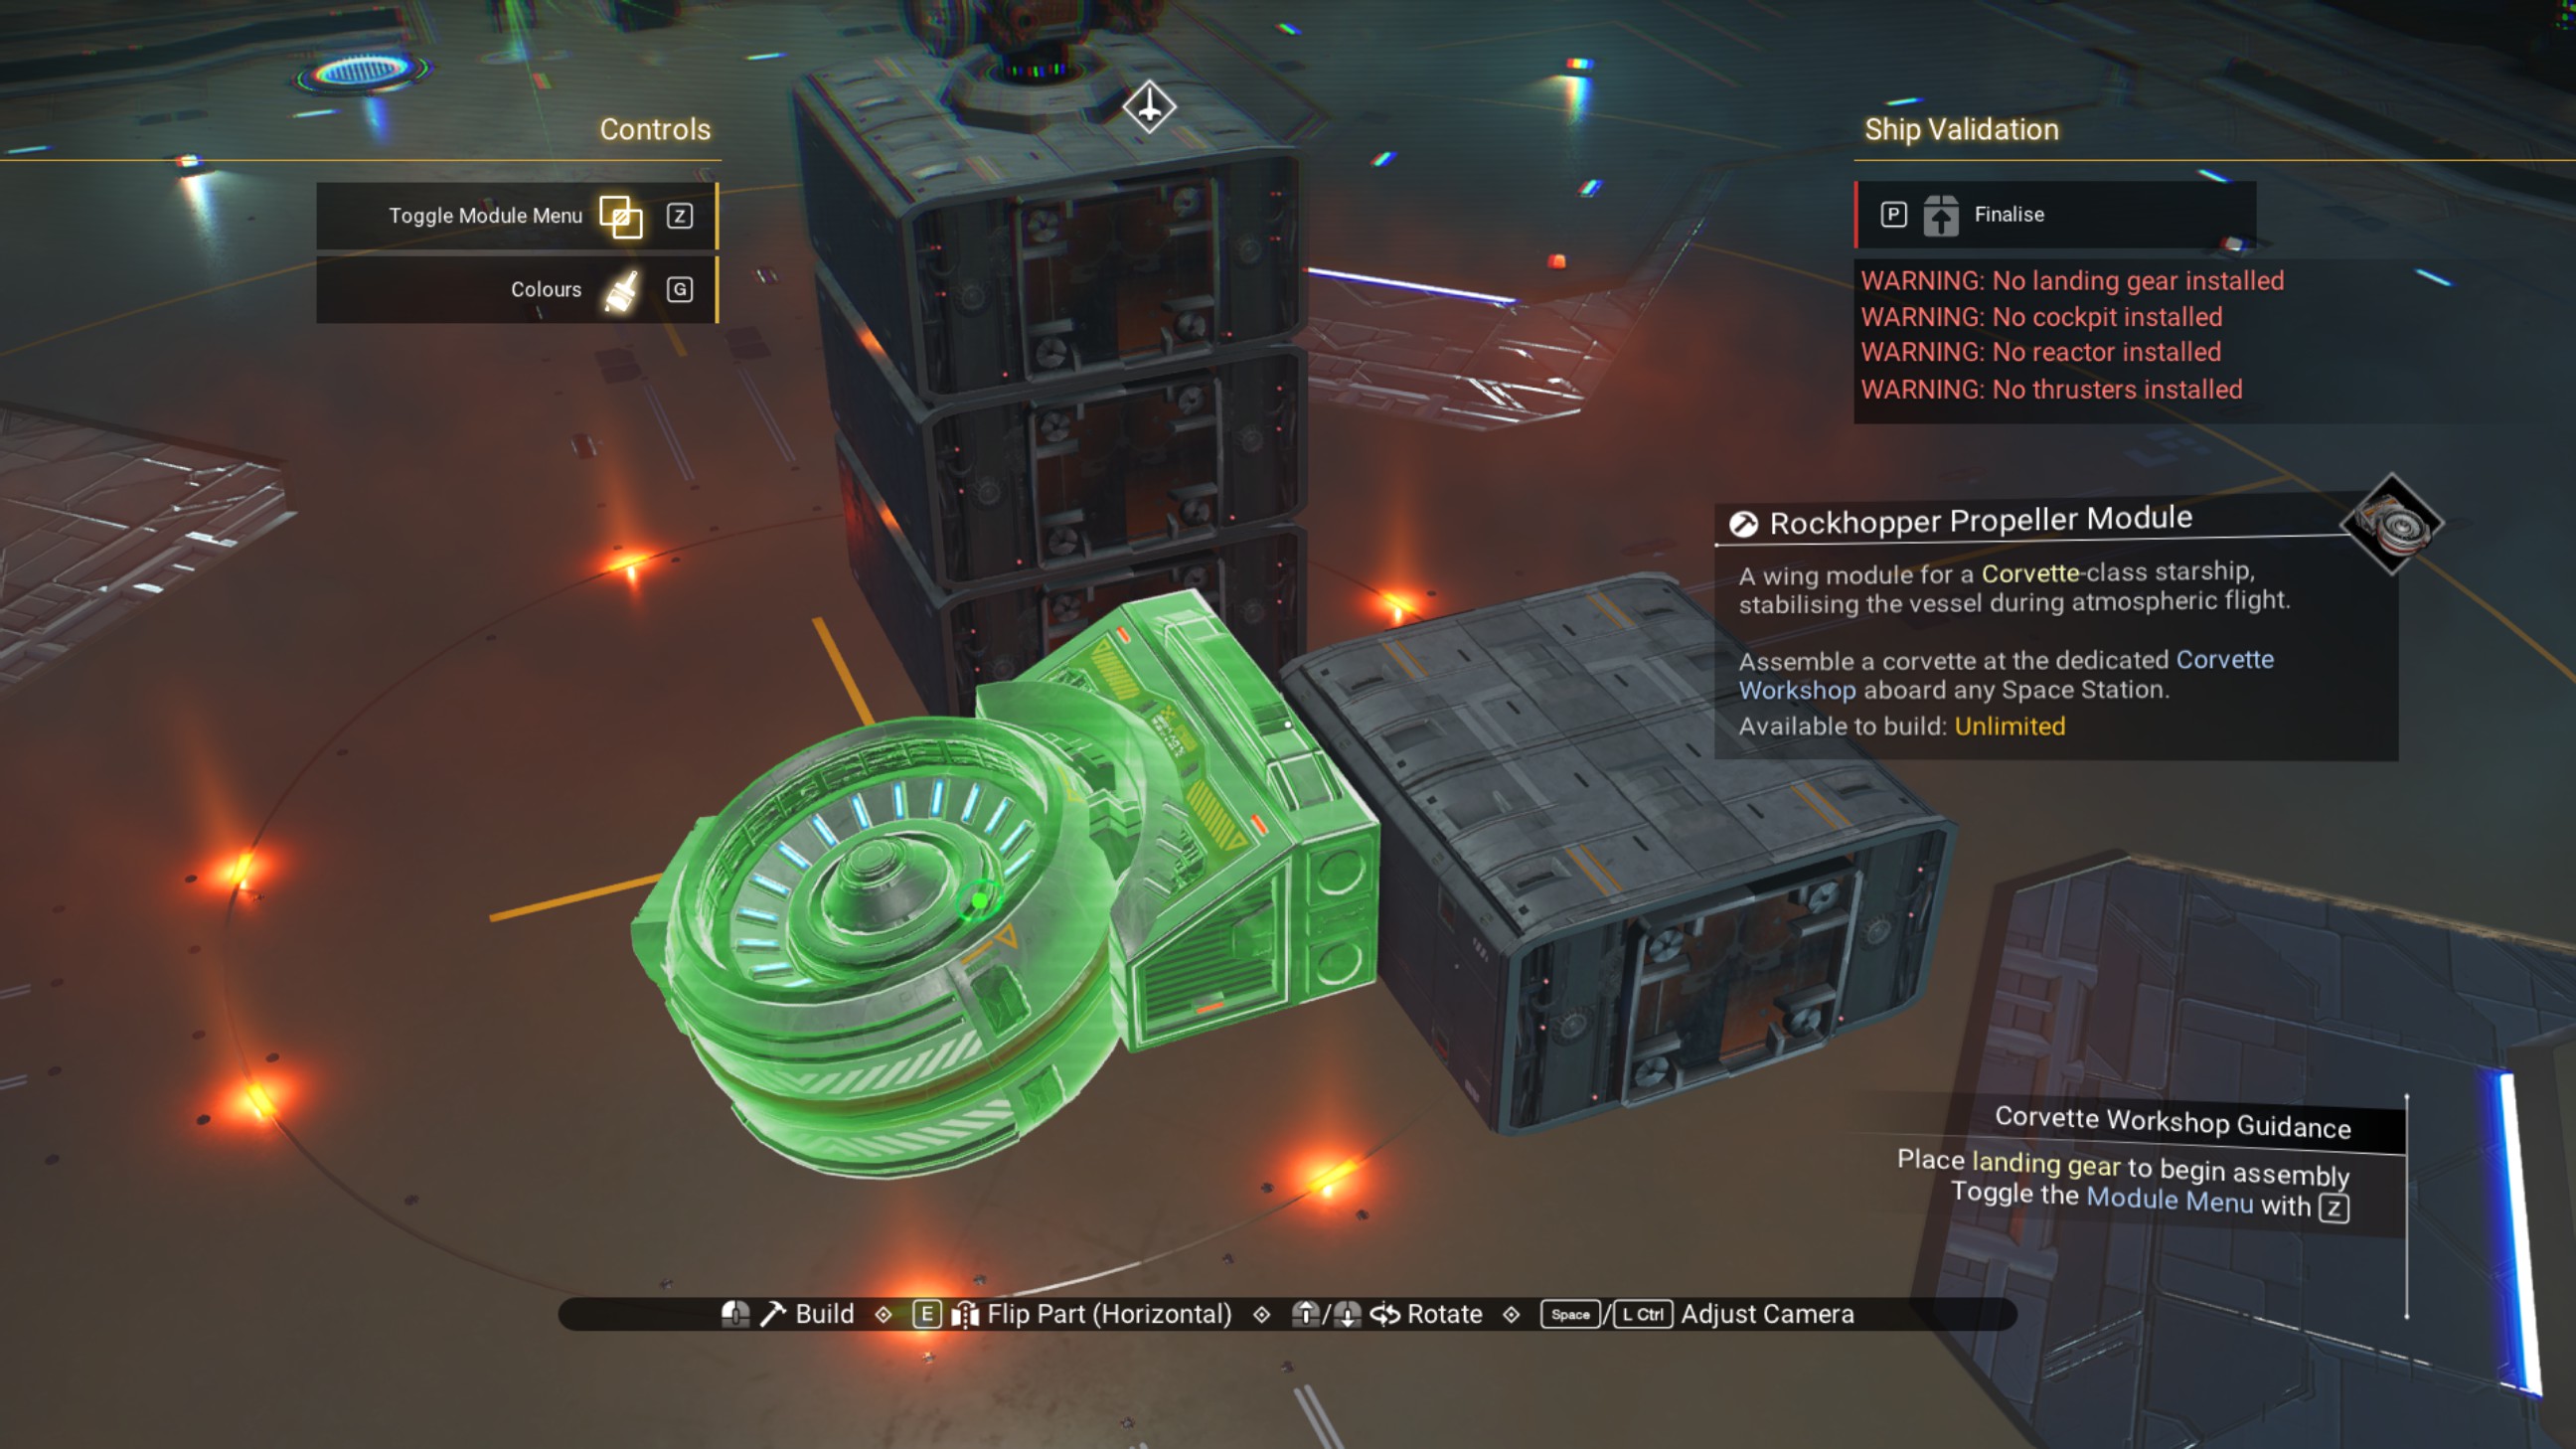
Shift the walkway back half a step along the propeller module.
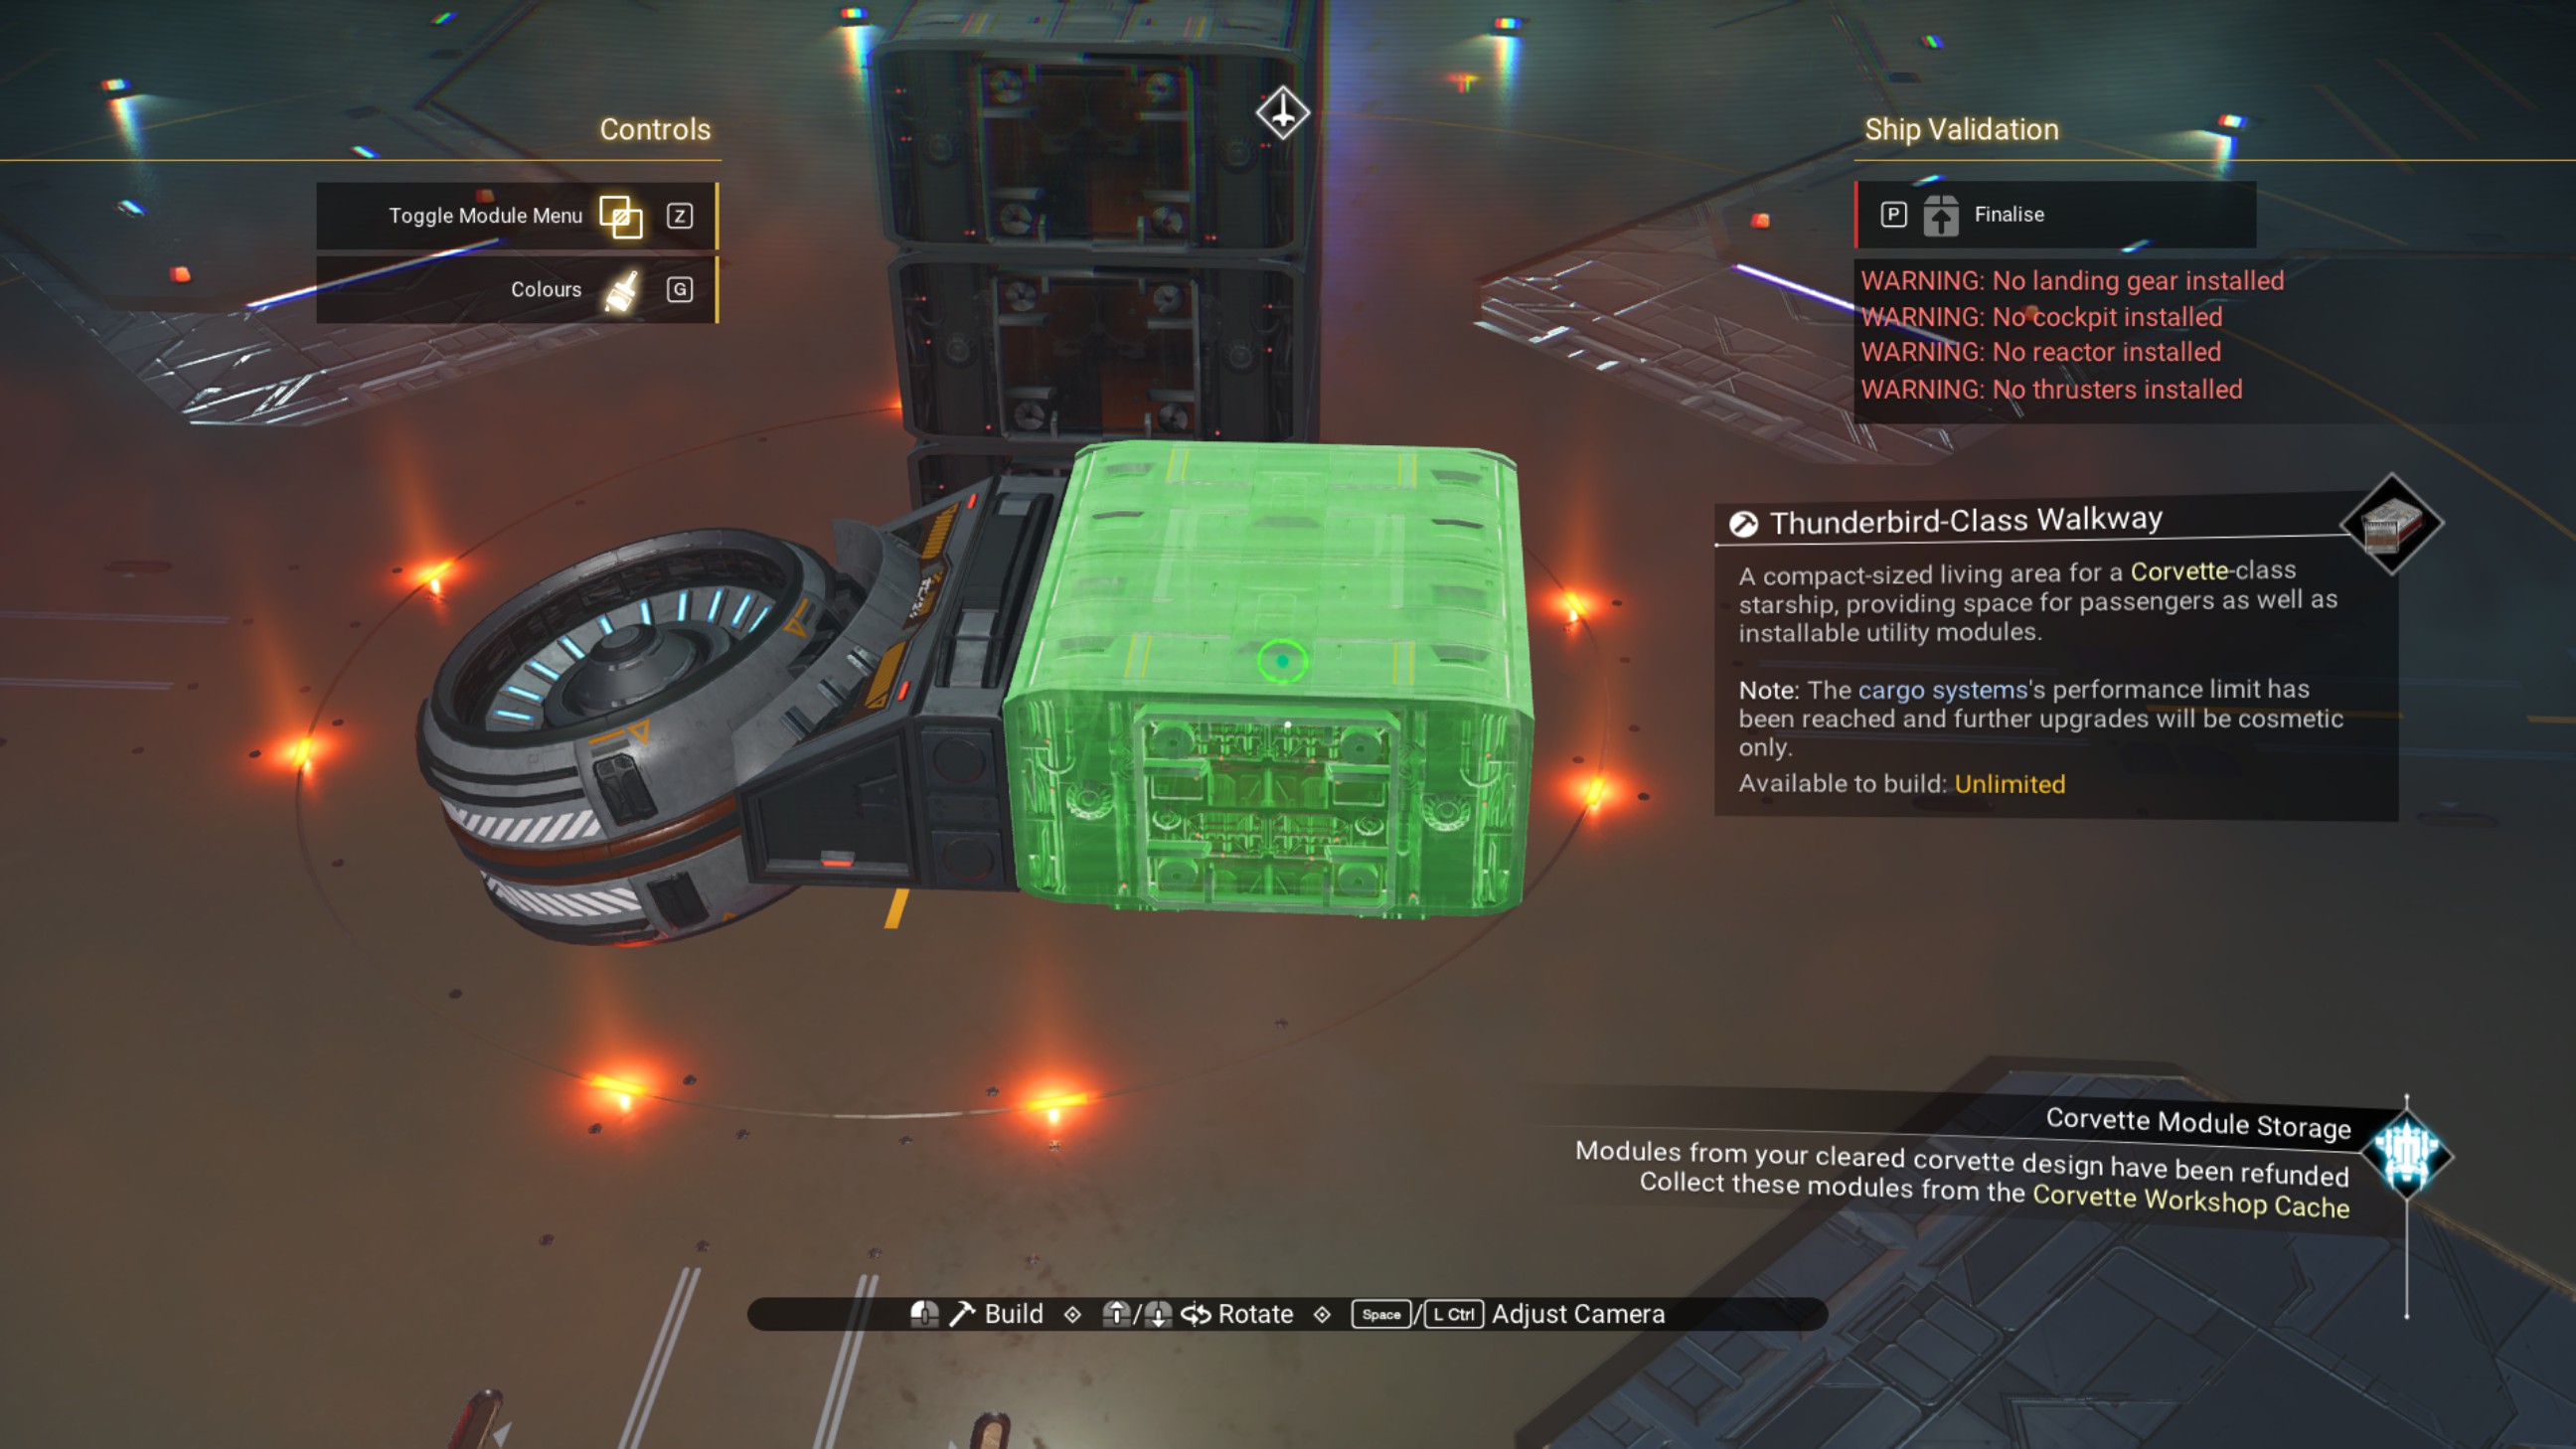
Delete the propeller module and place another walkway on the rear of the one we've been moving around.
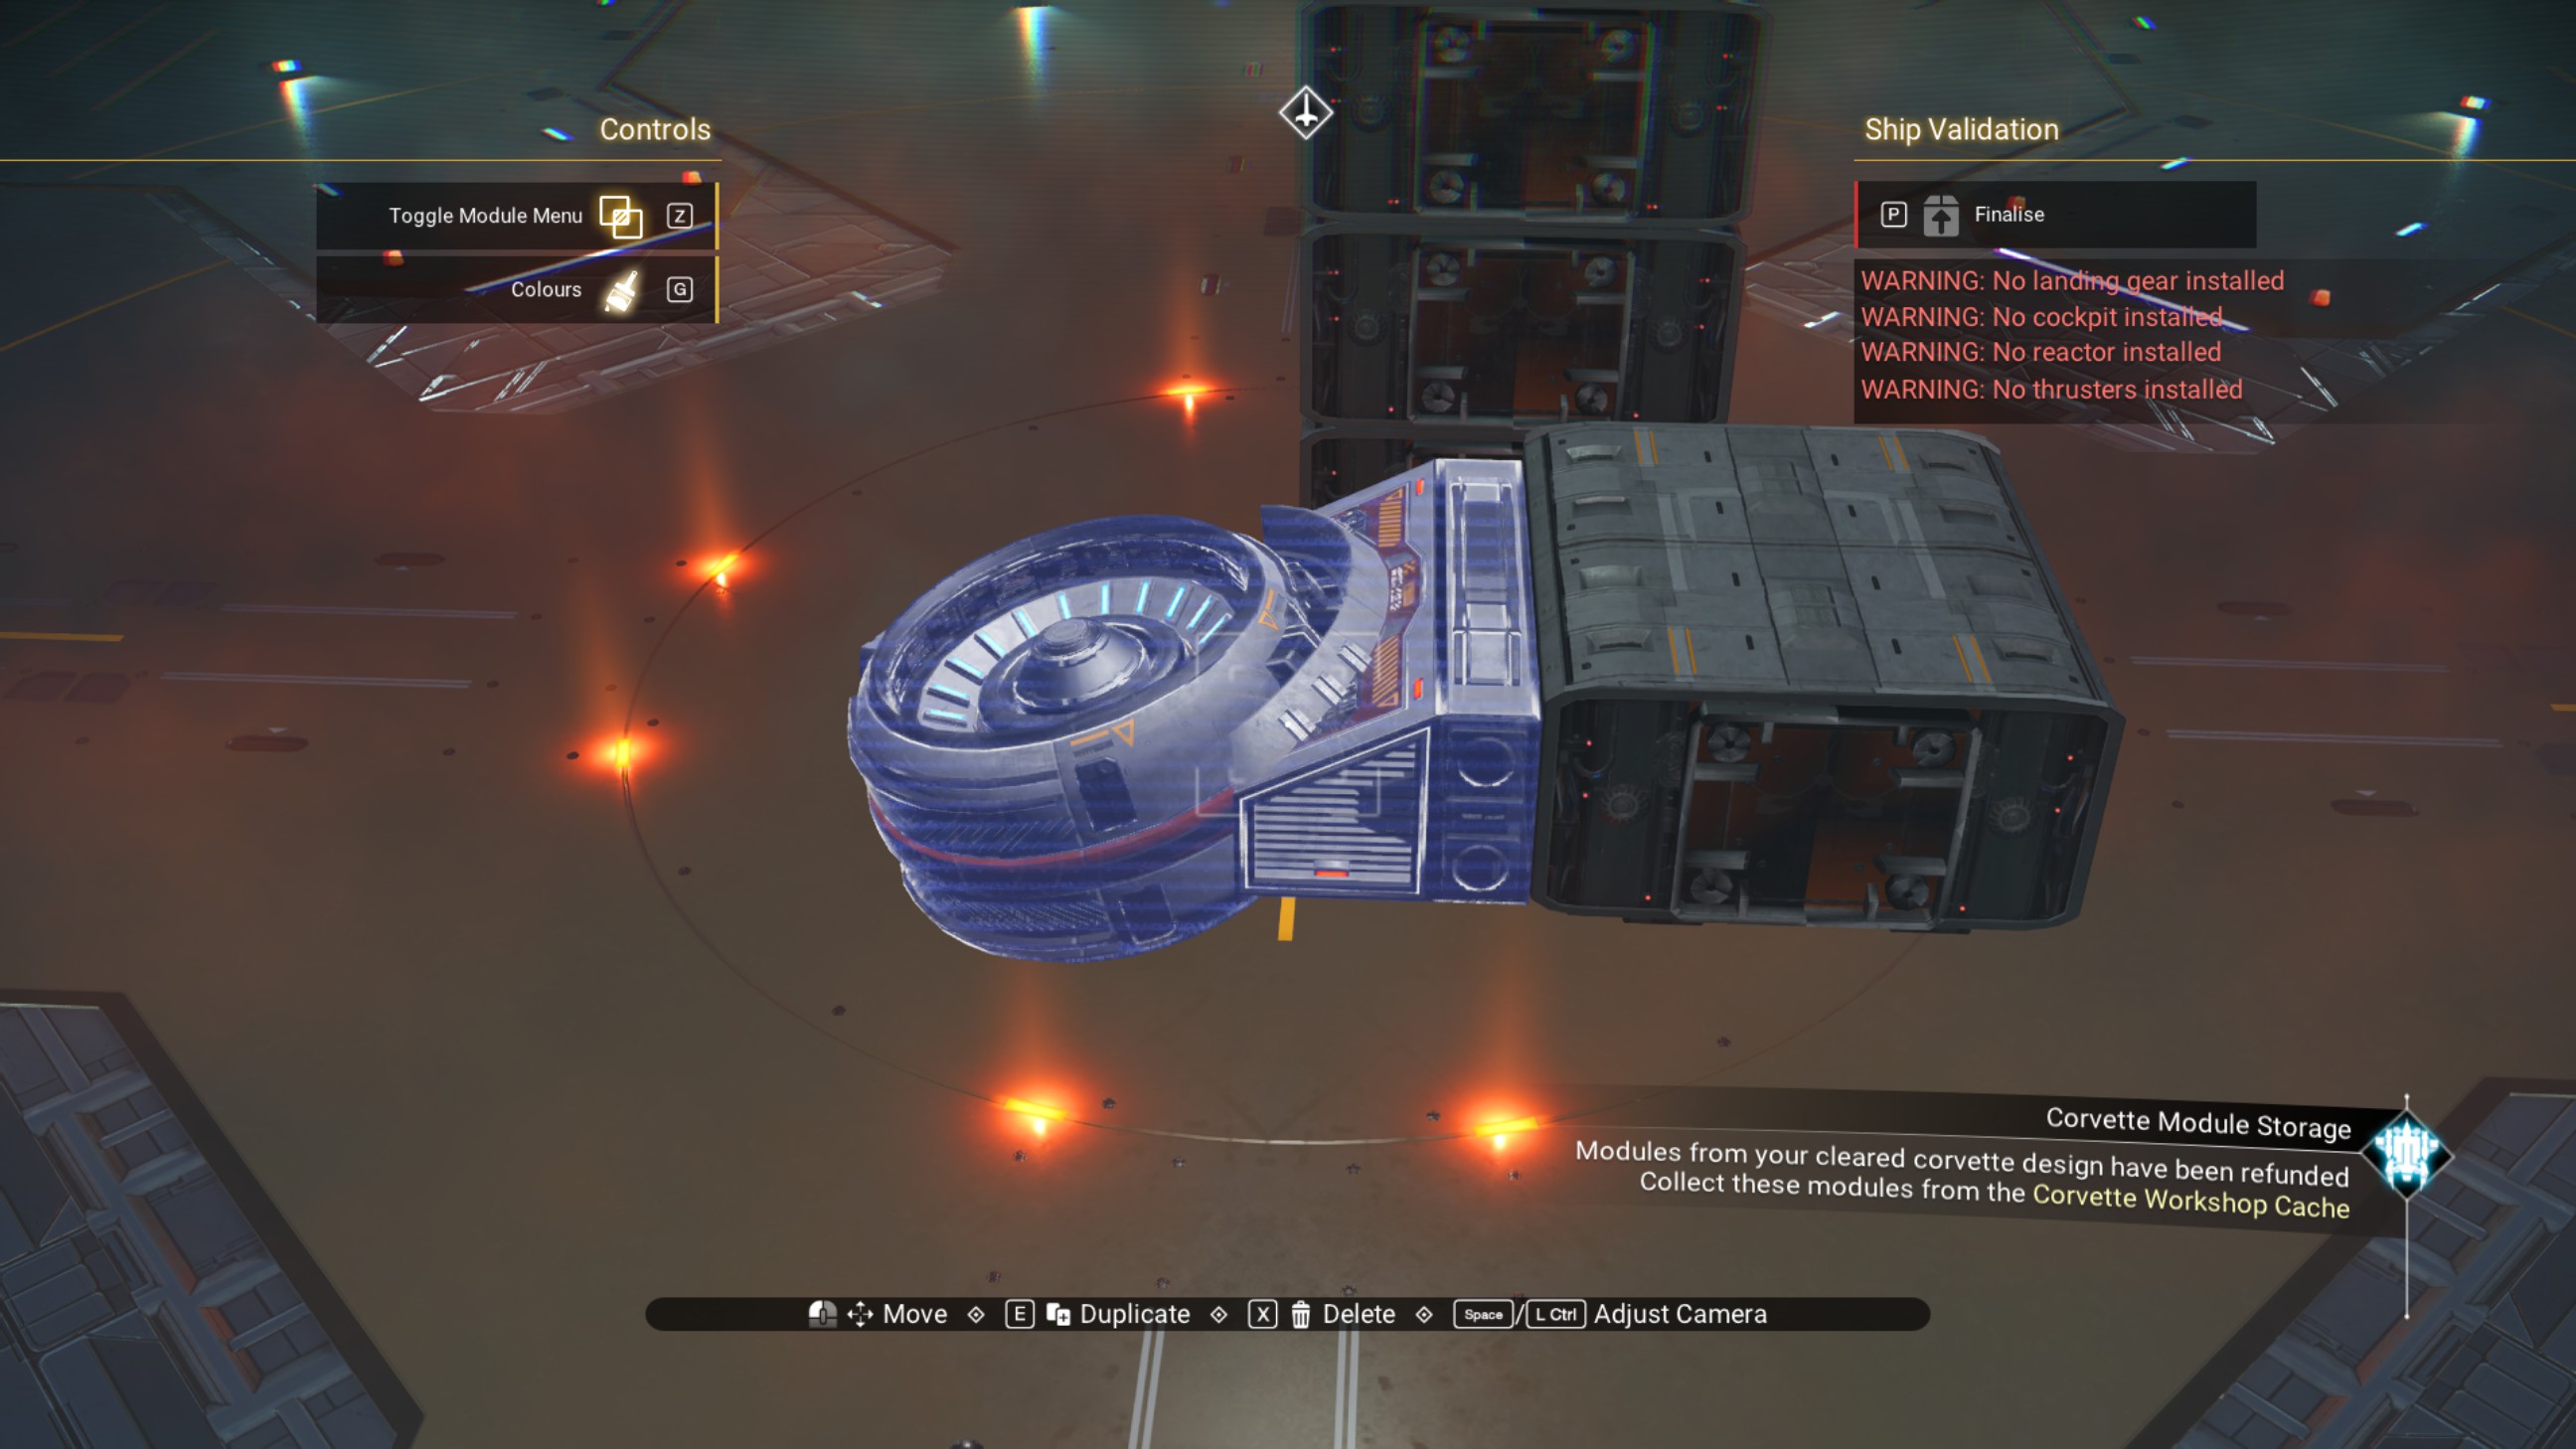
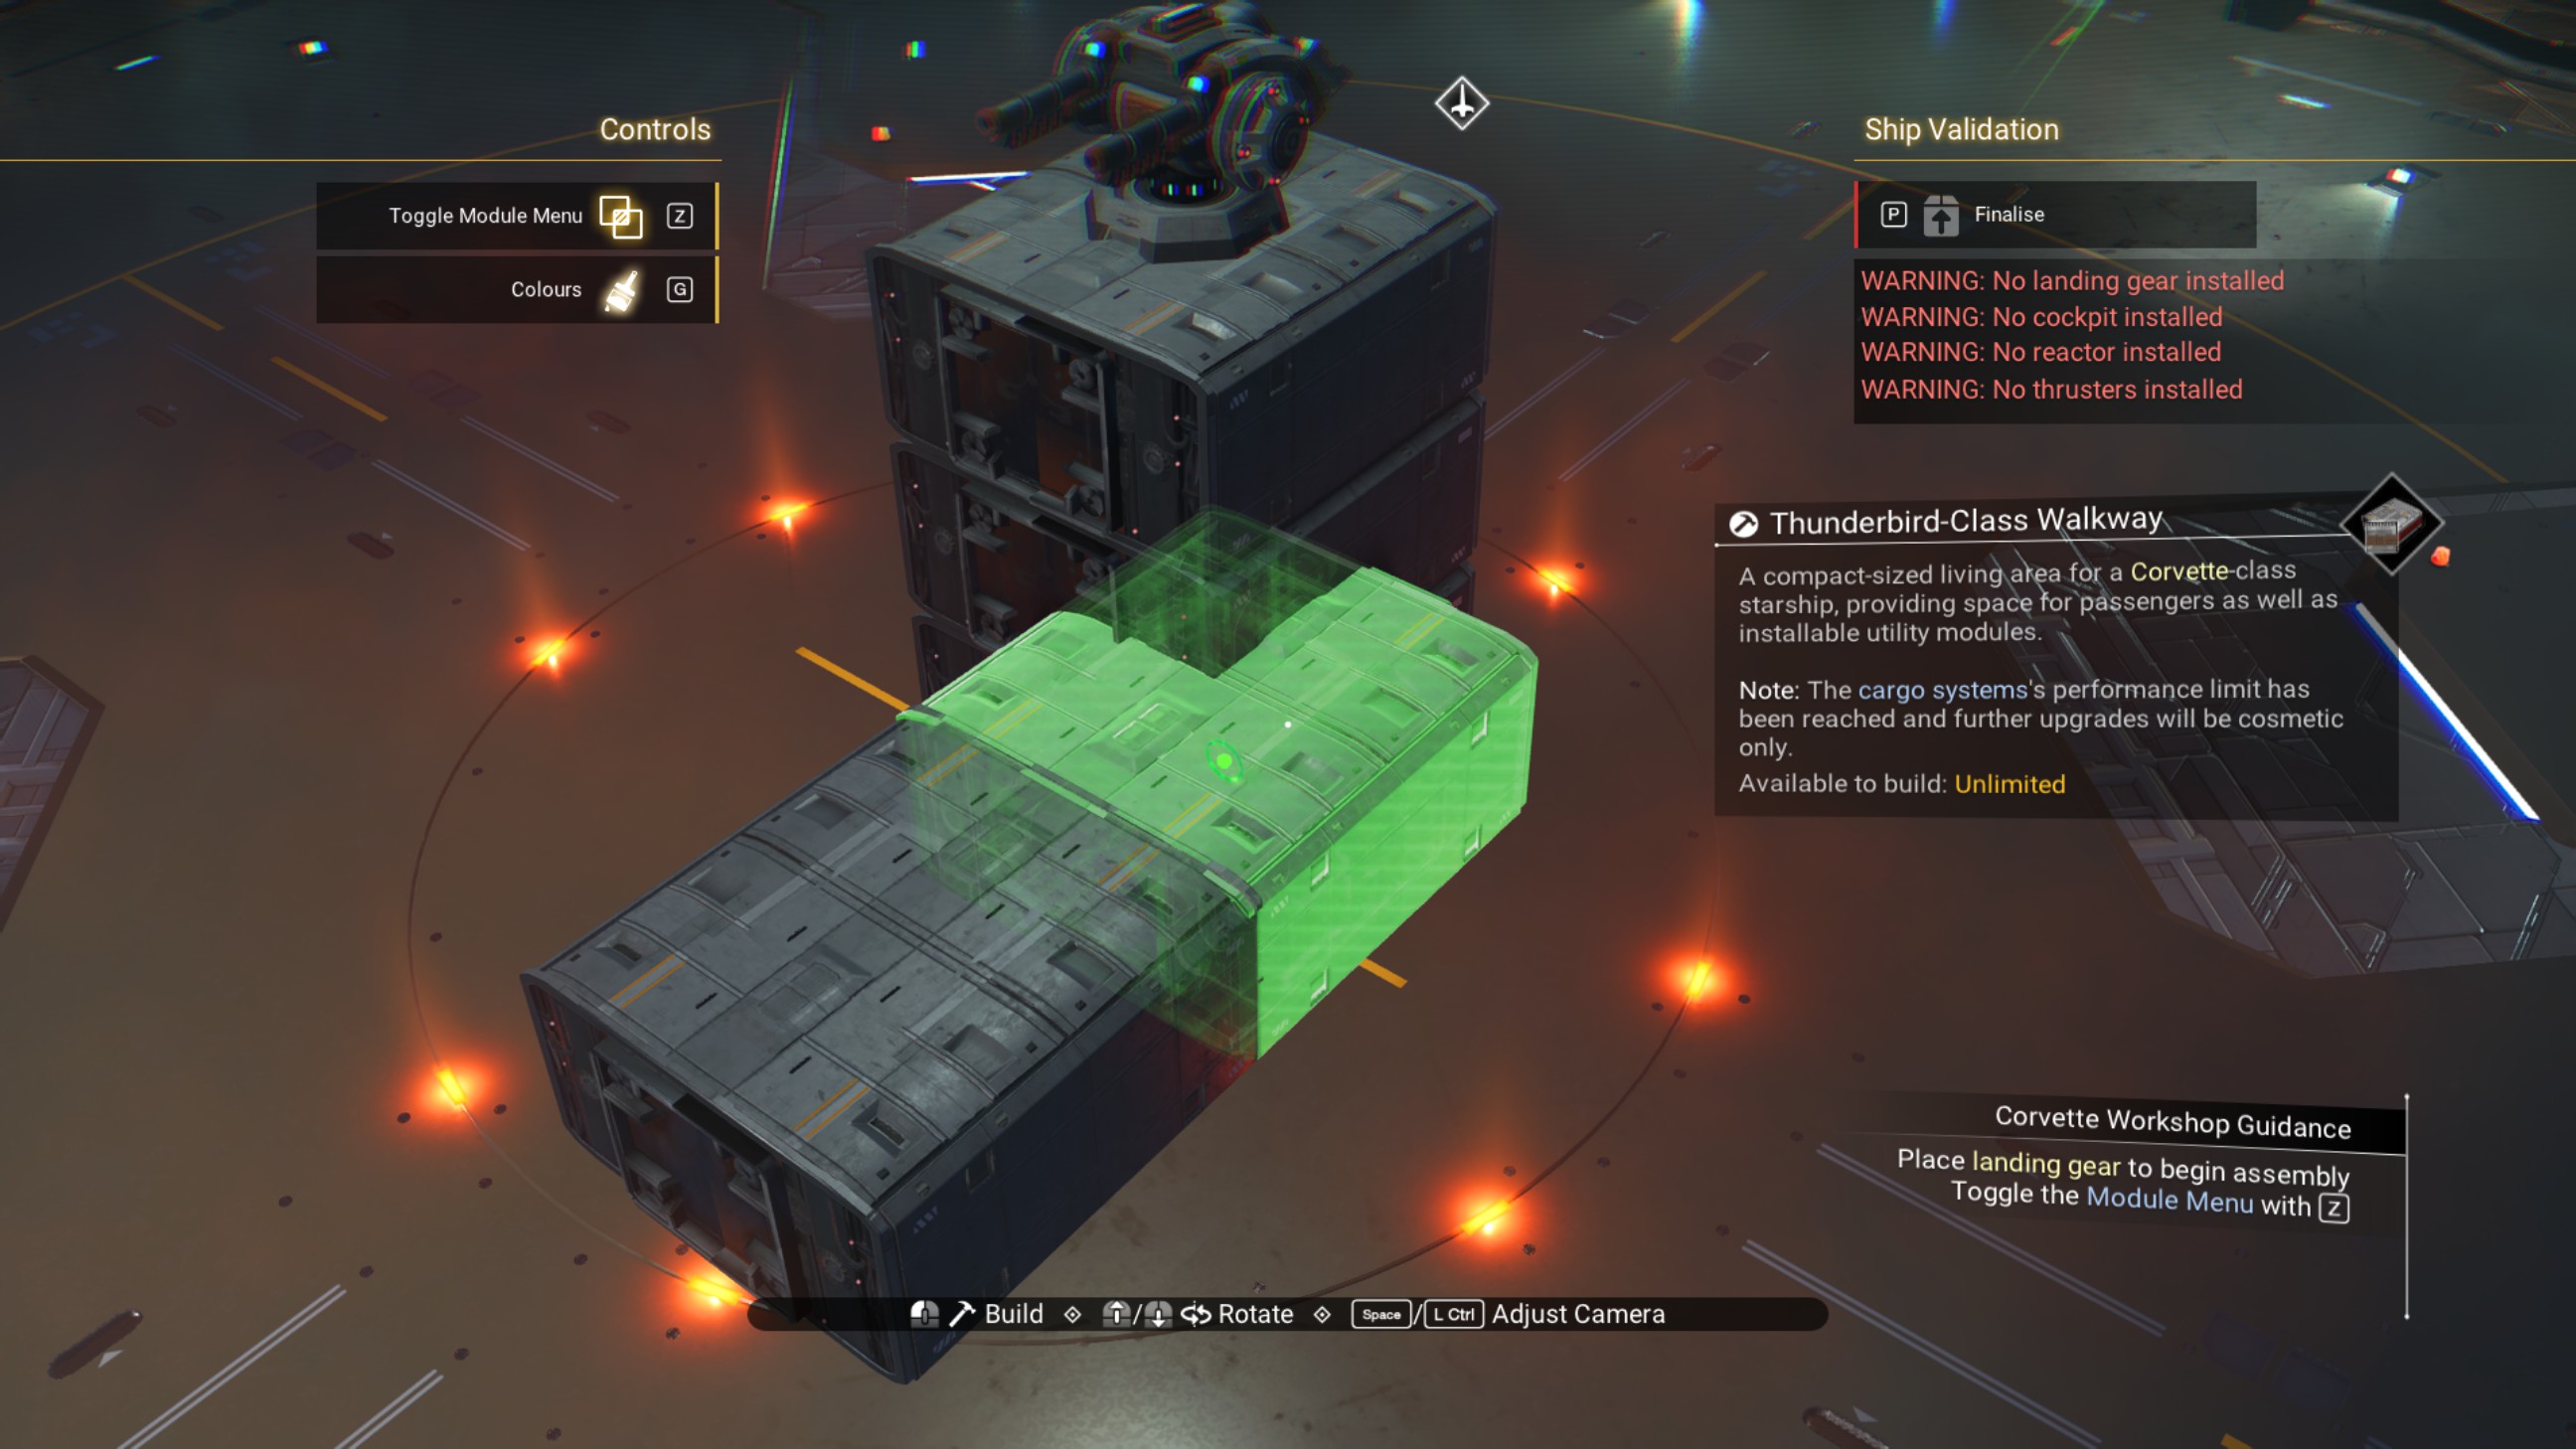
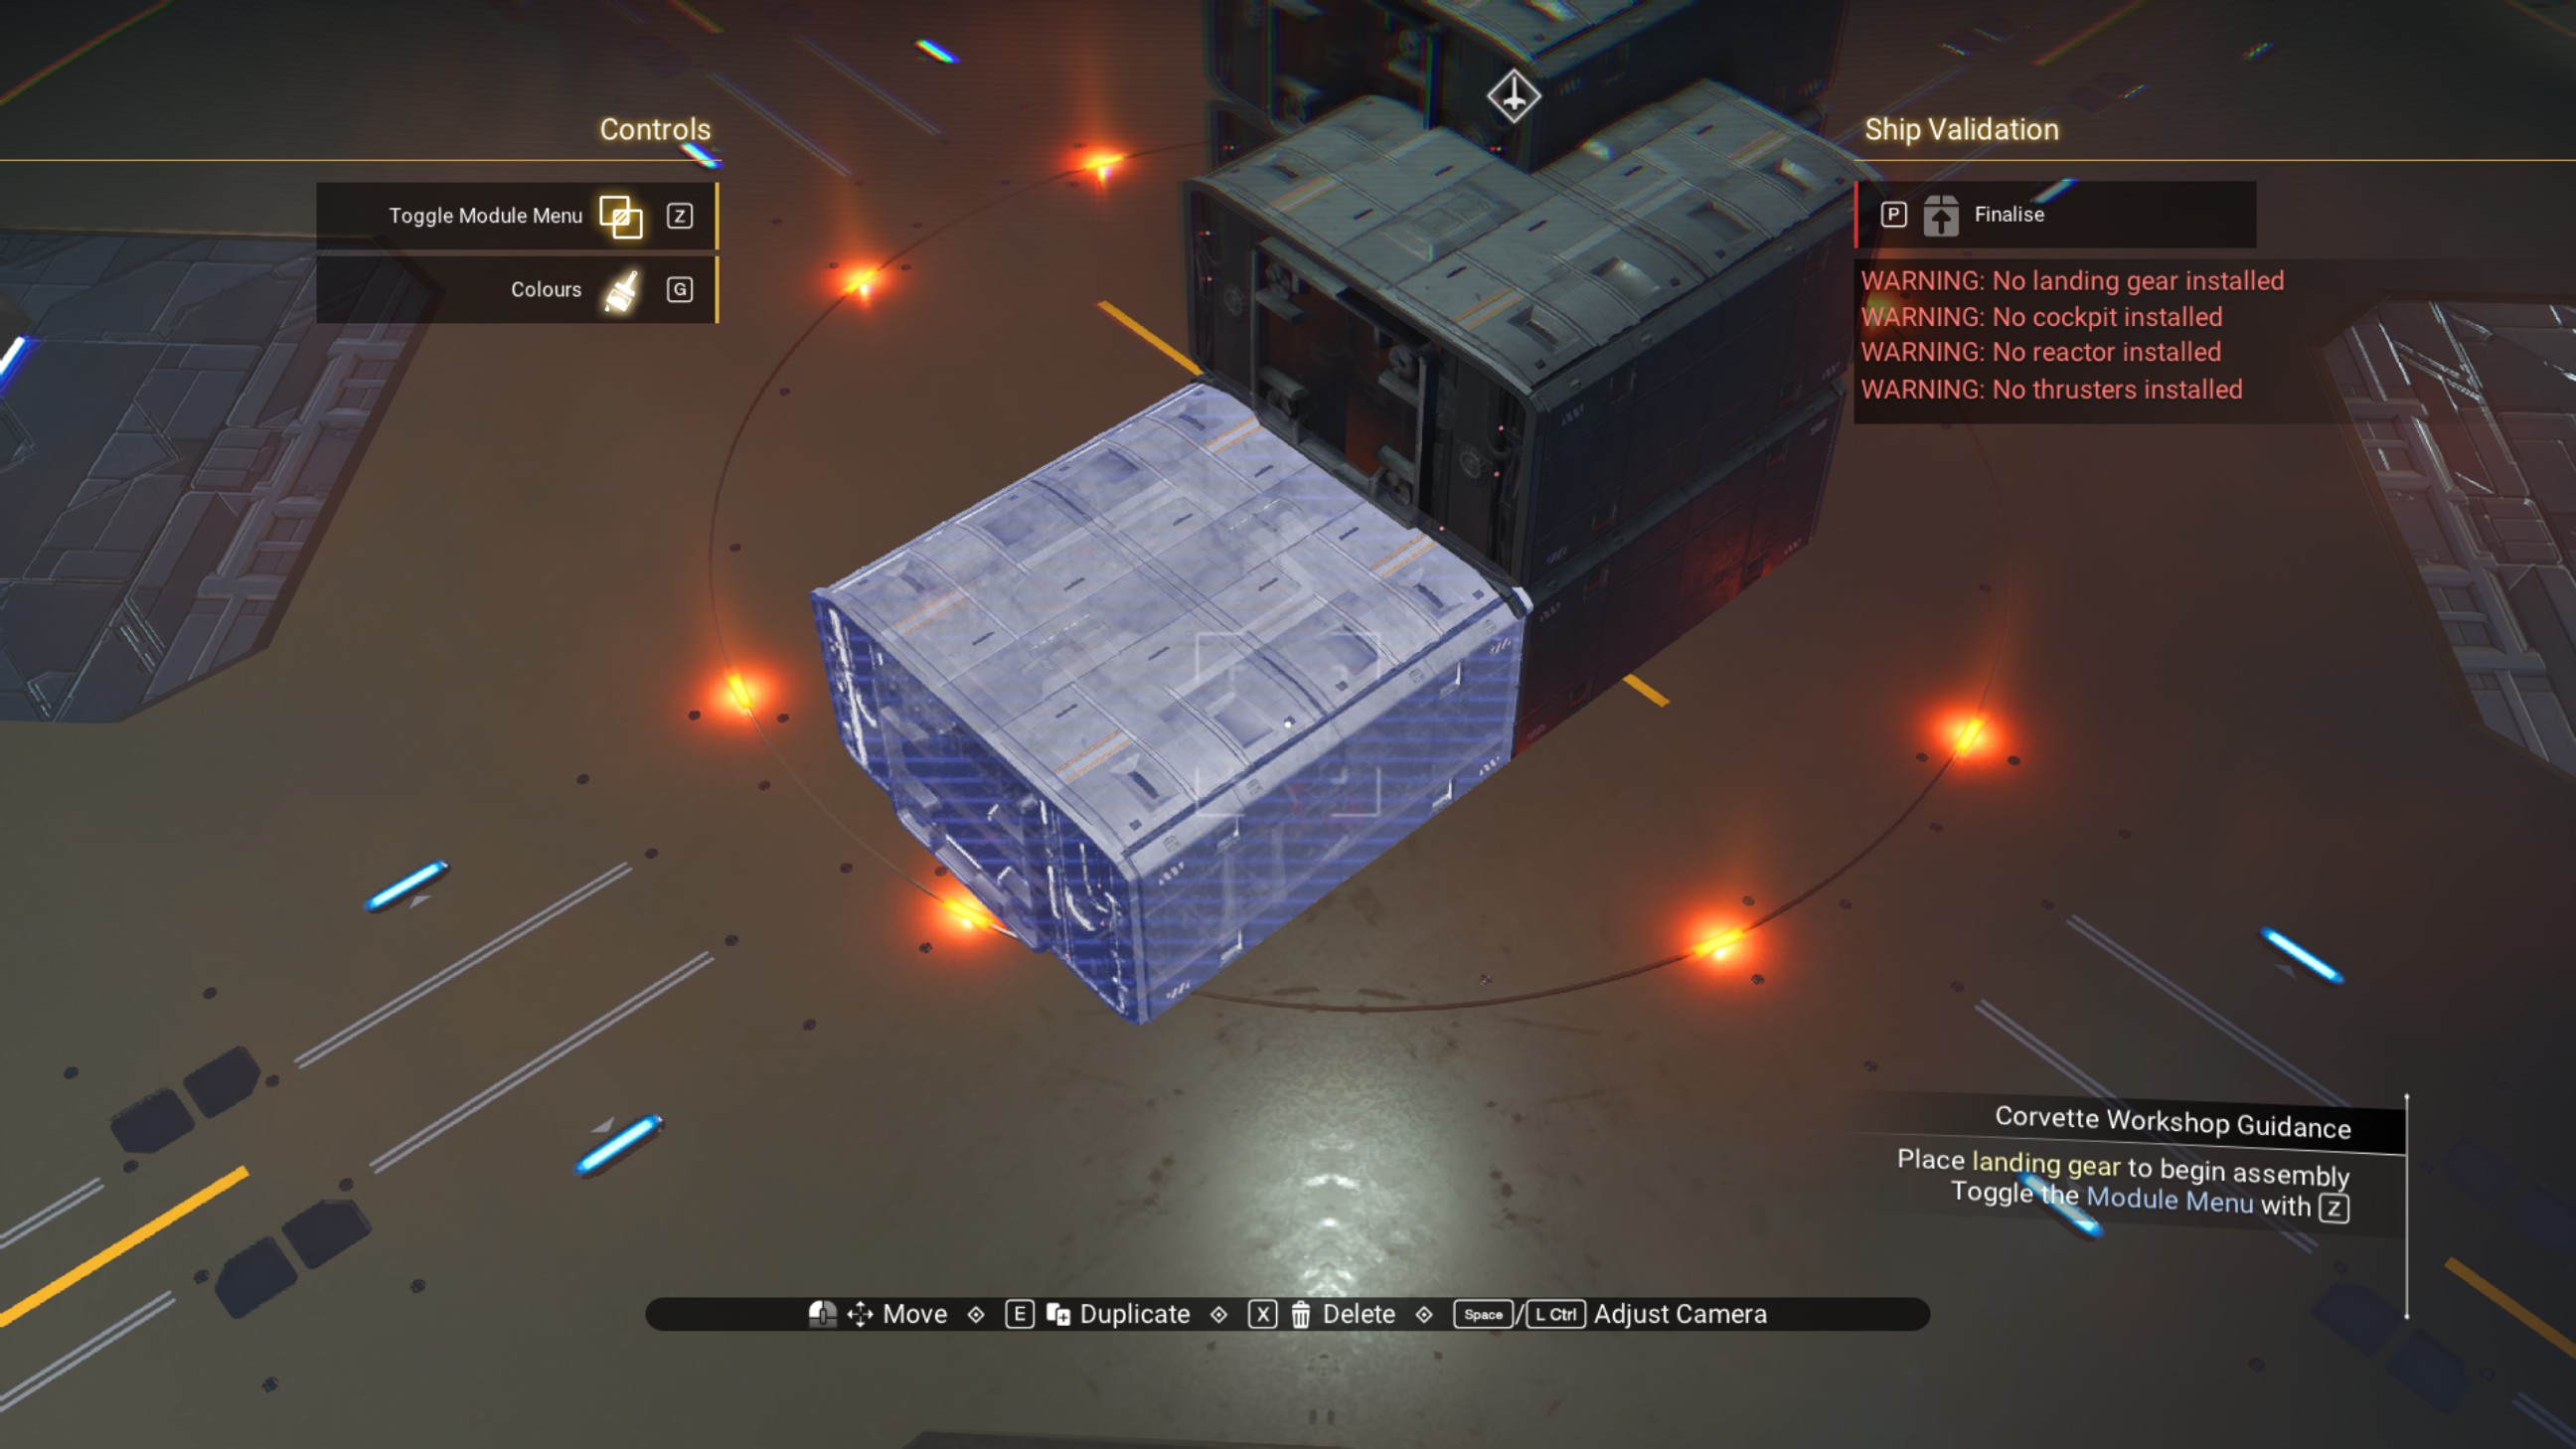
Place another walkway on top of that one, then delete the extra walkway.
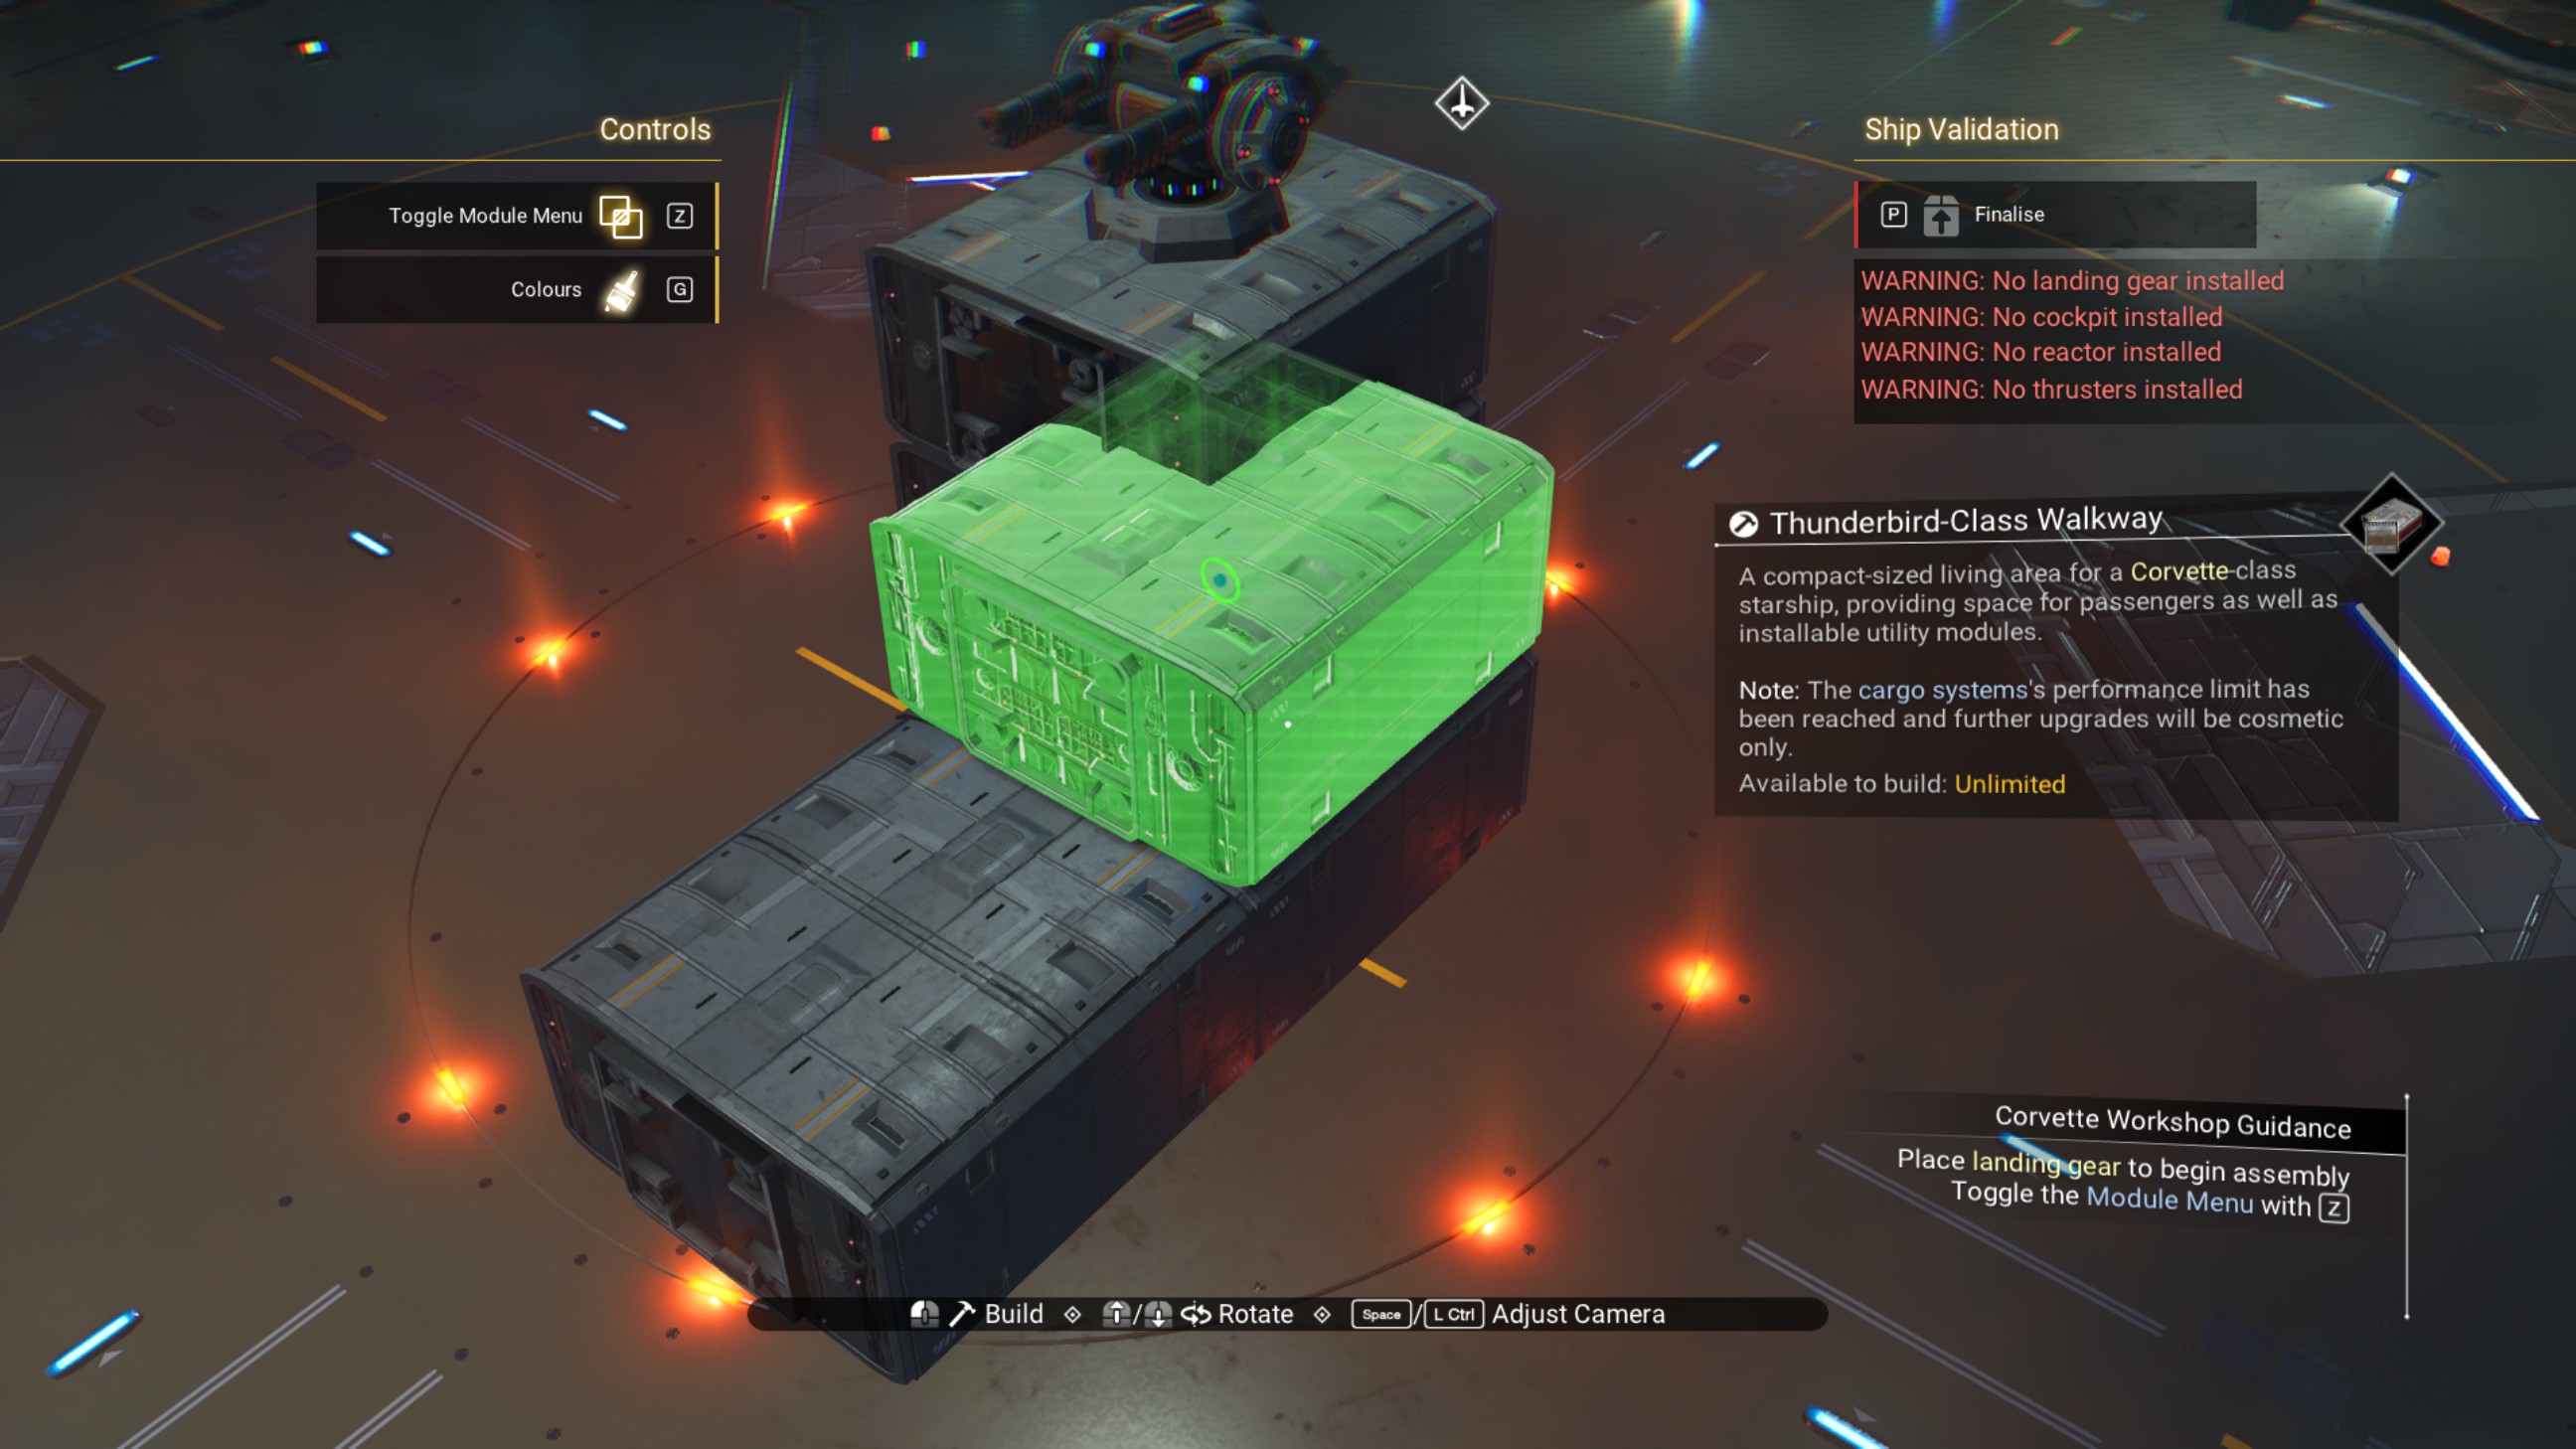
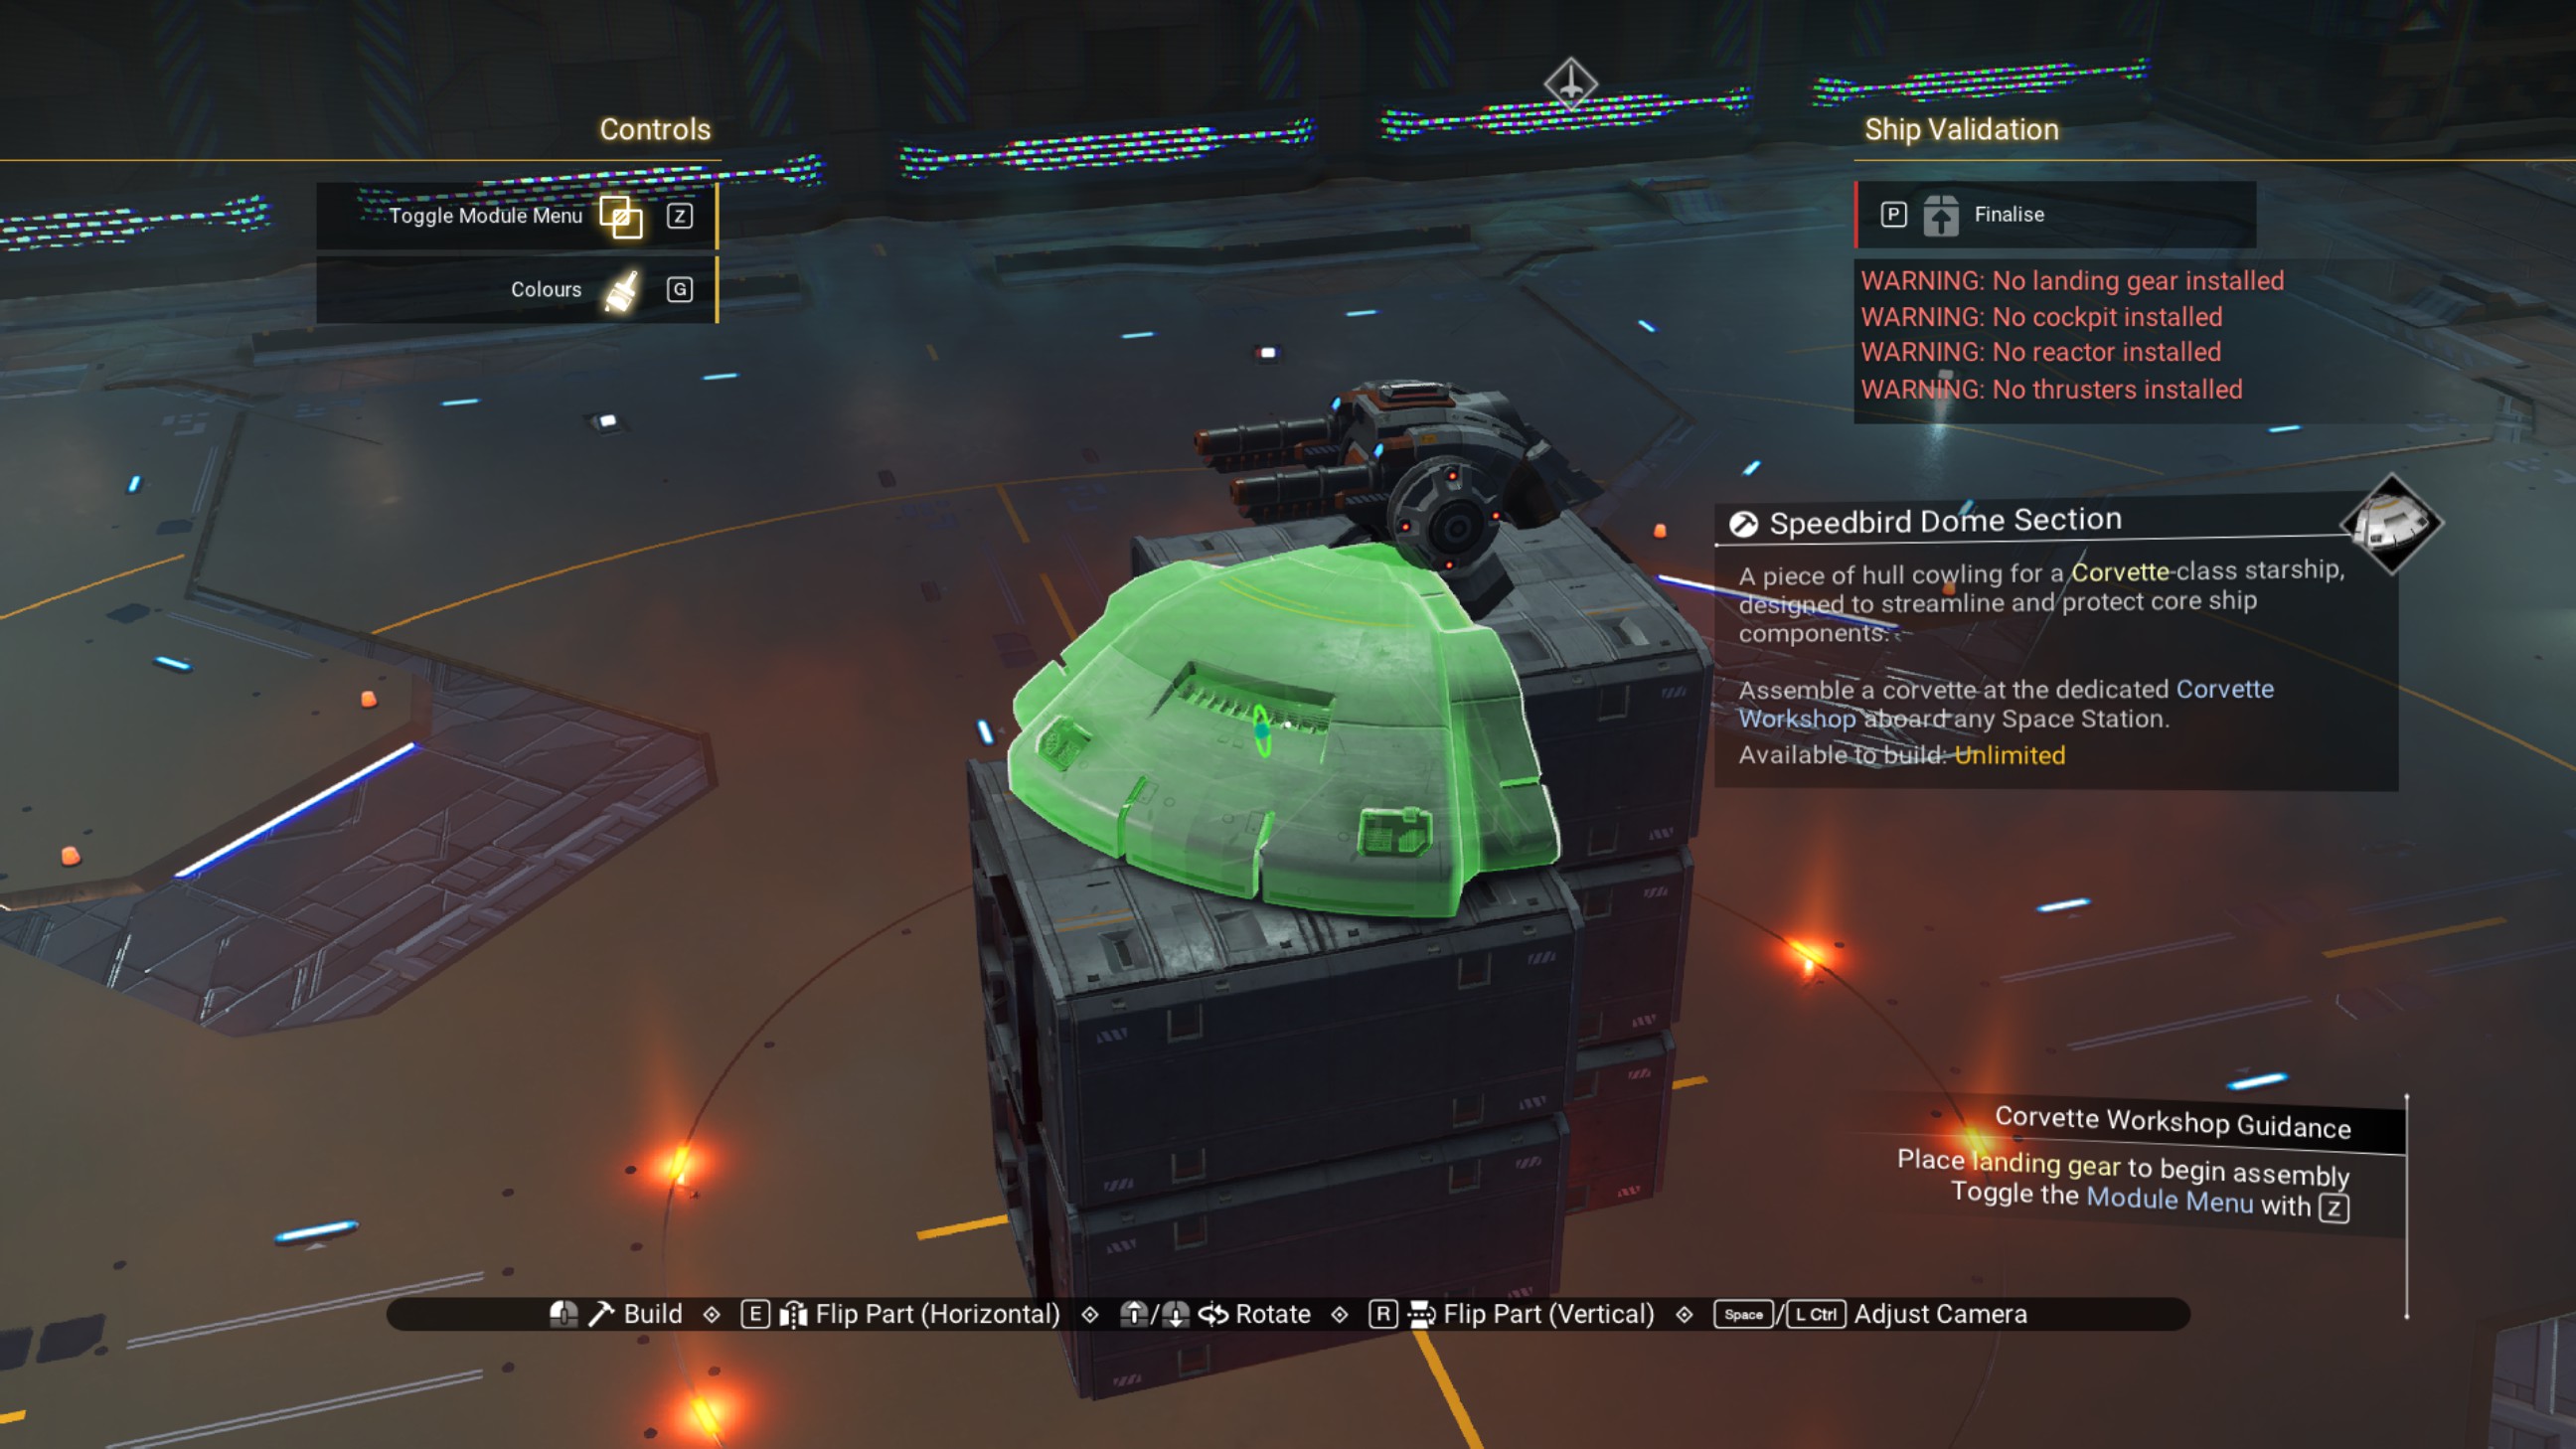
Place speedbird dome sections on top of the walkway and around the turret, as shown.
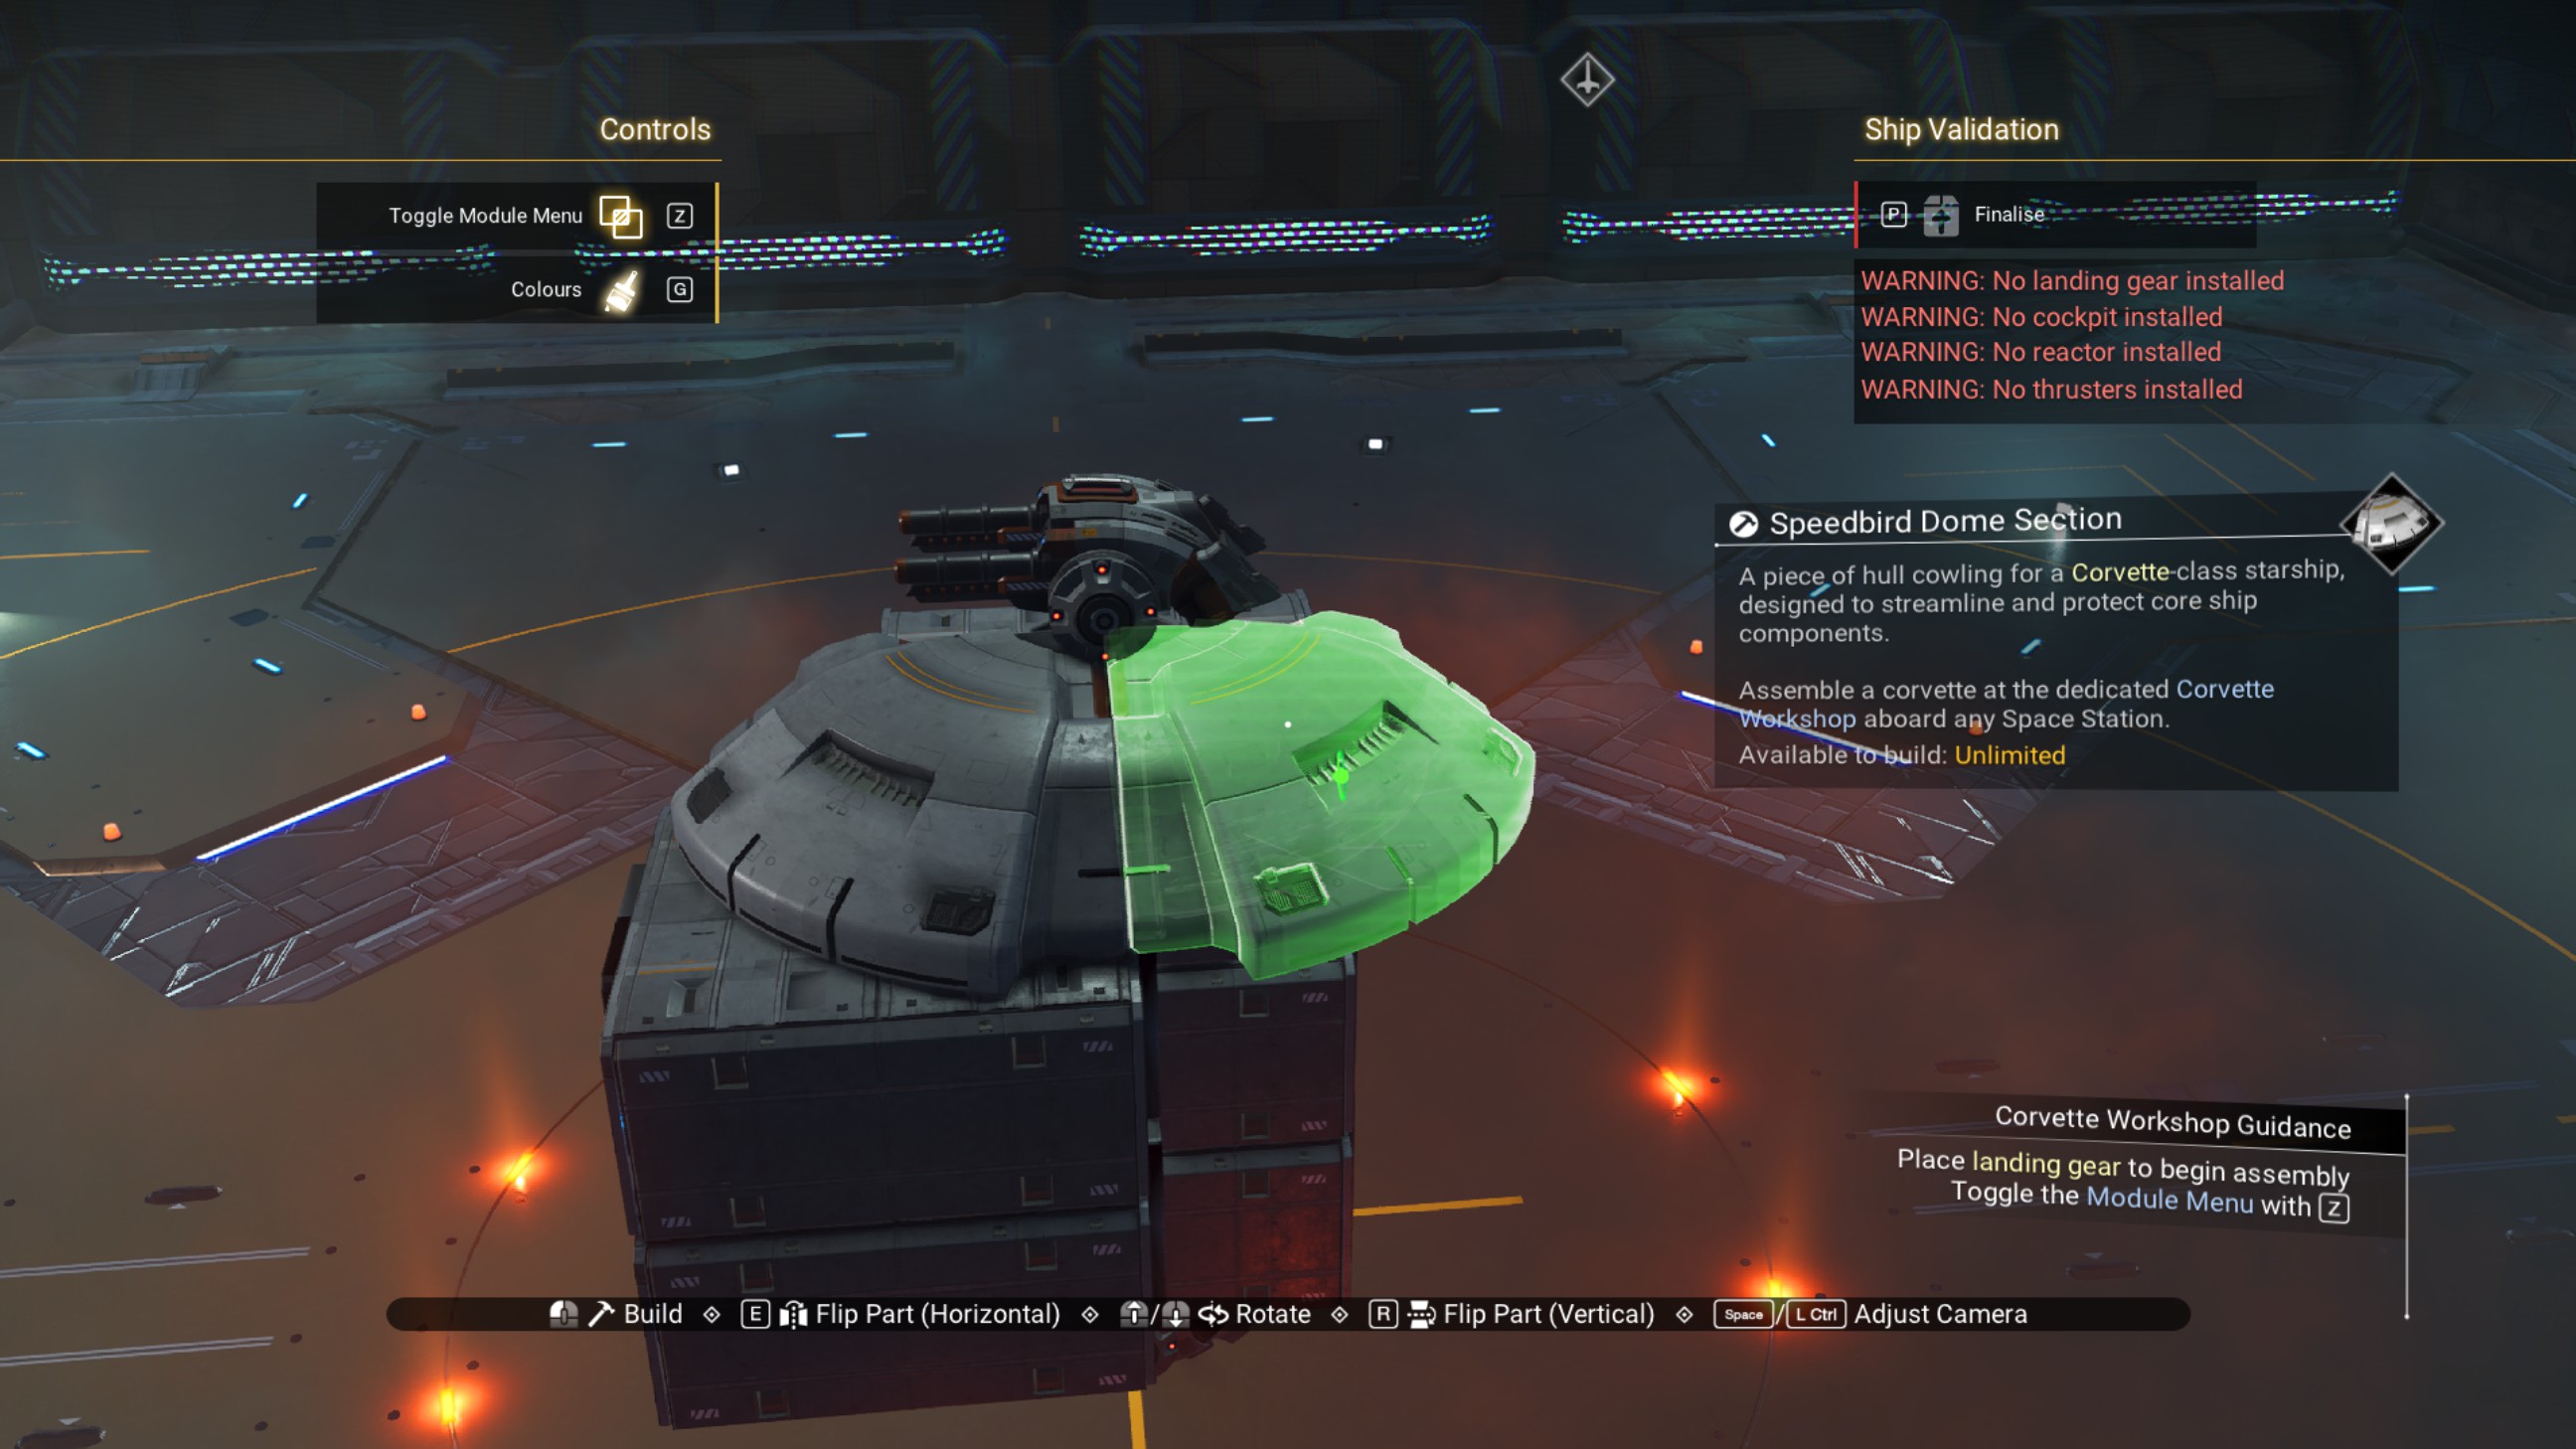
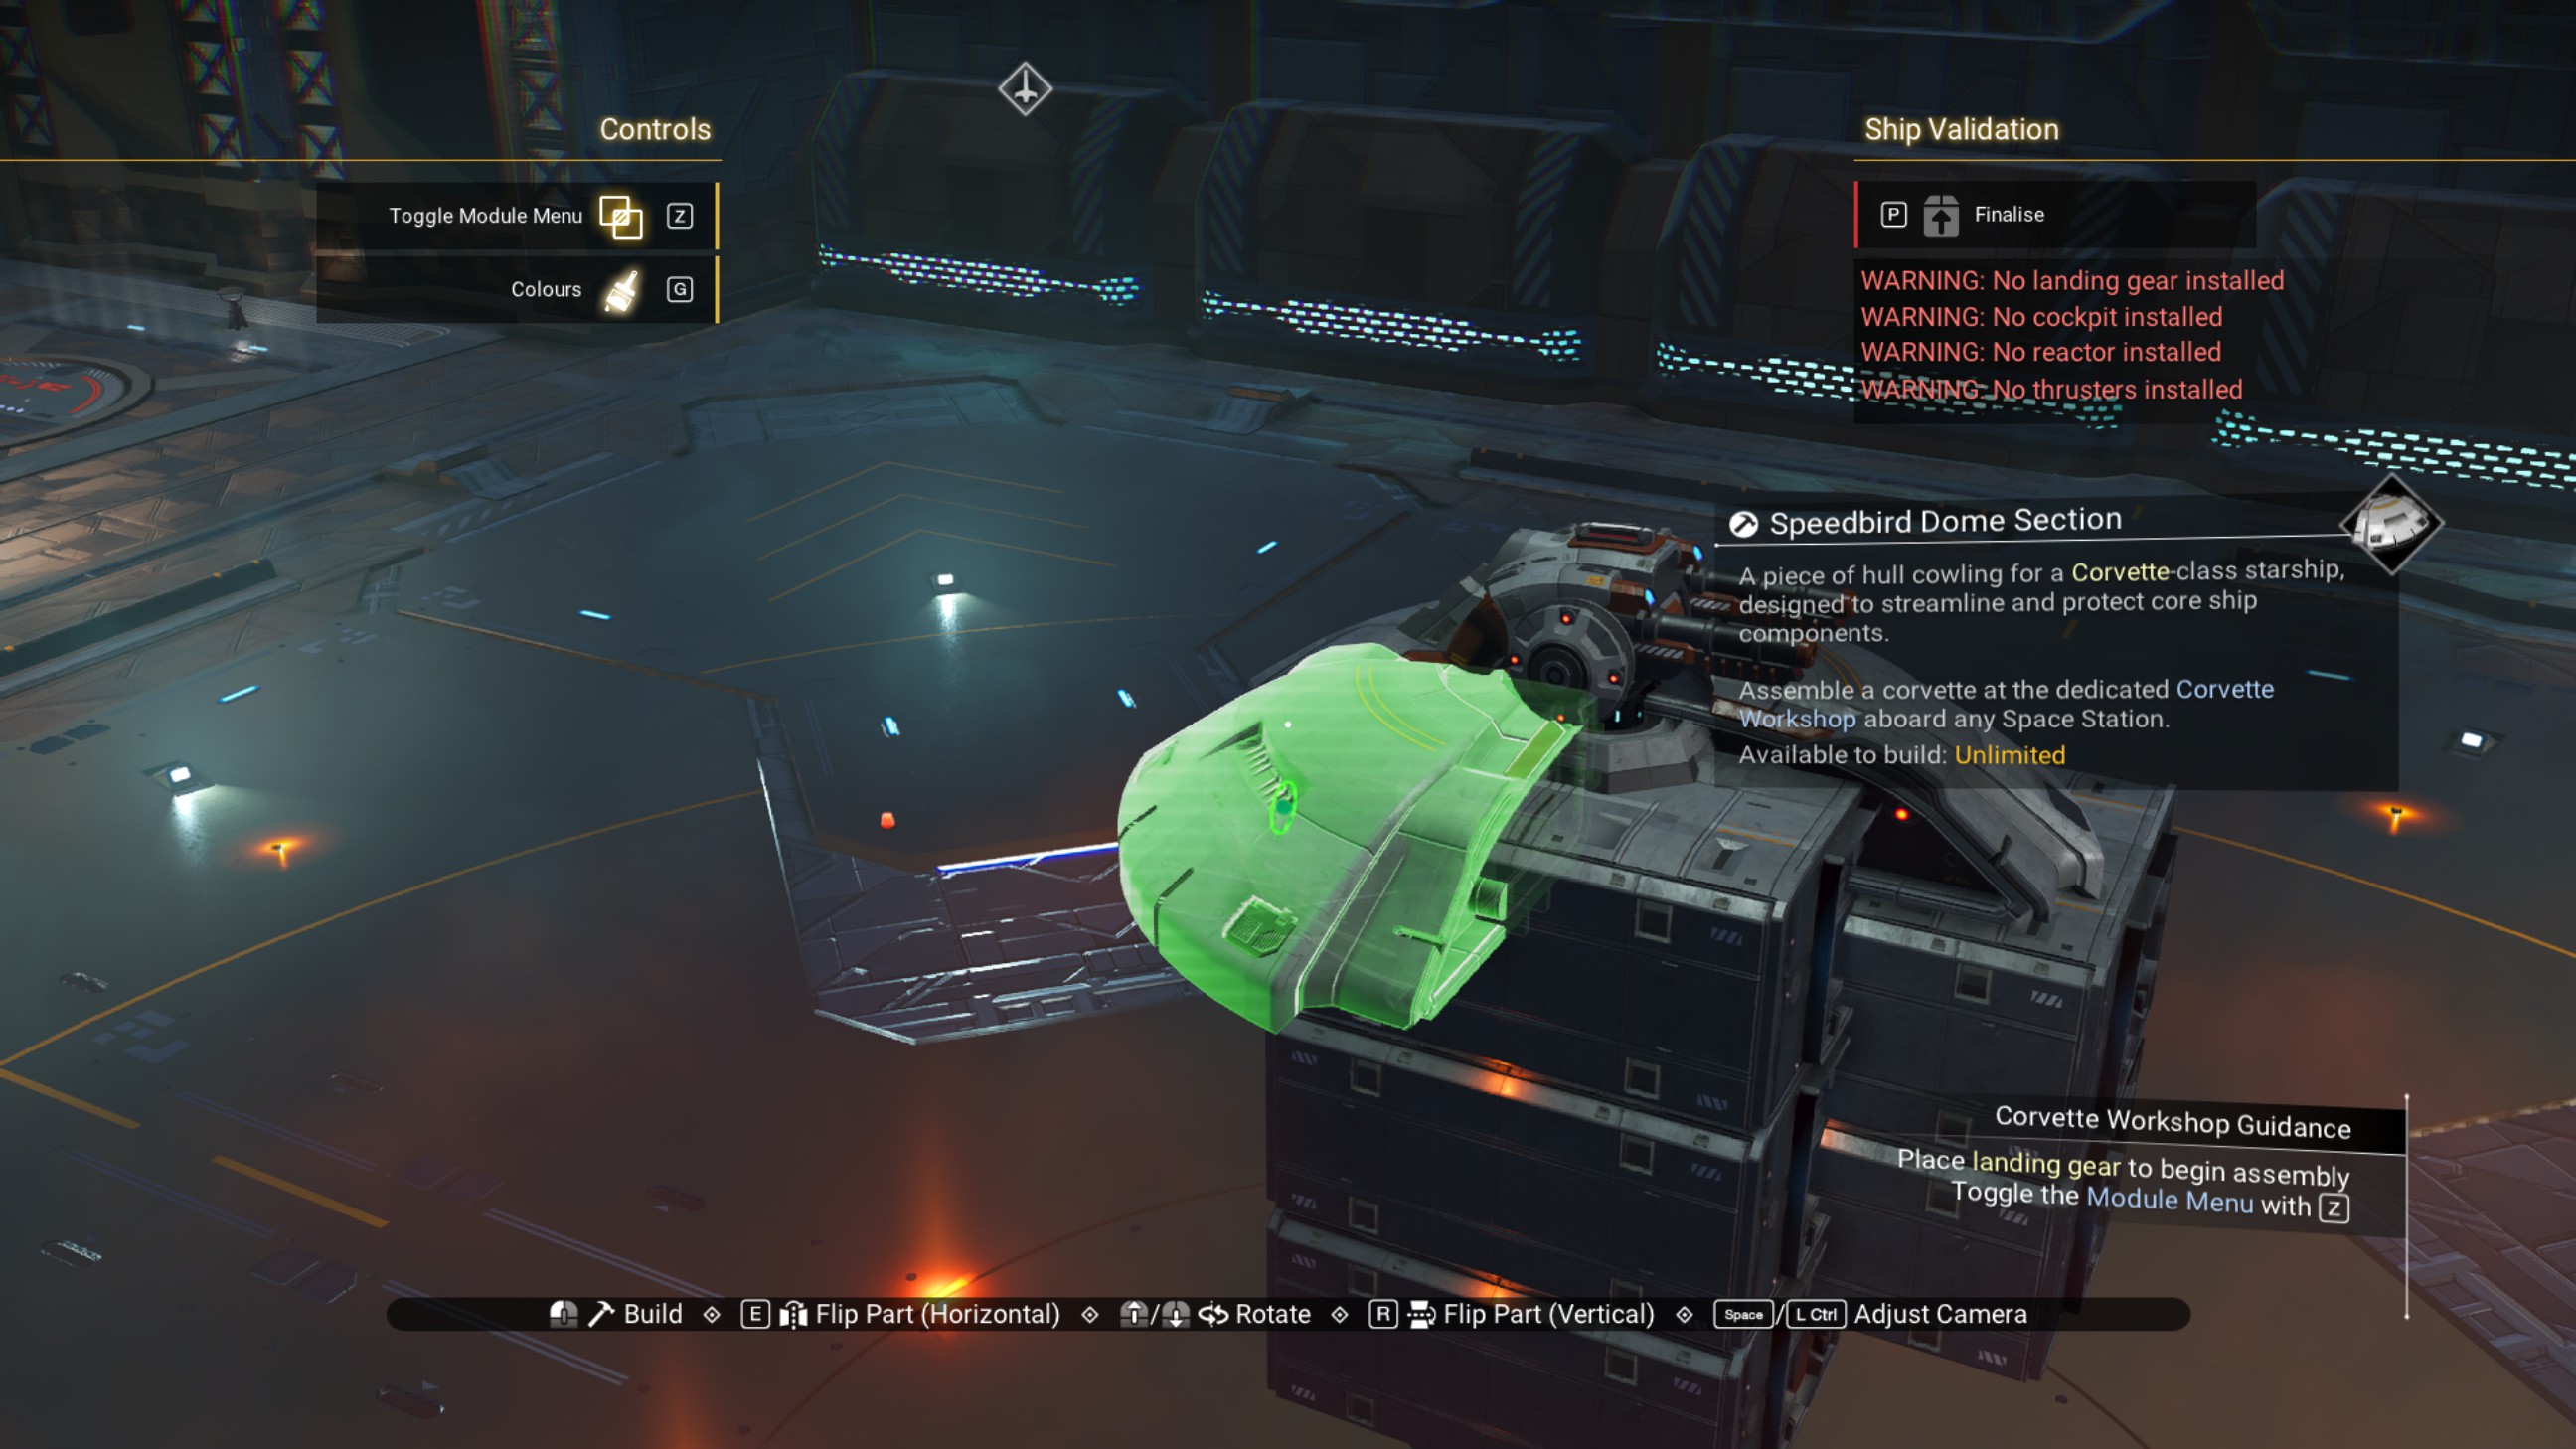
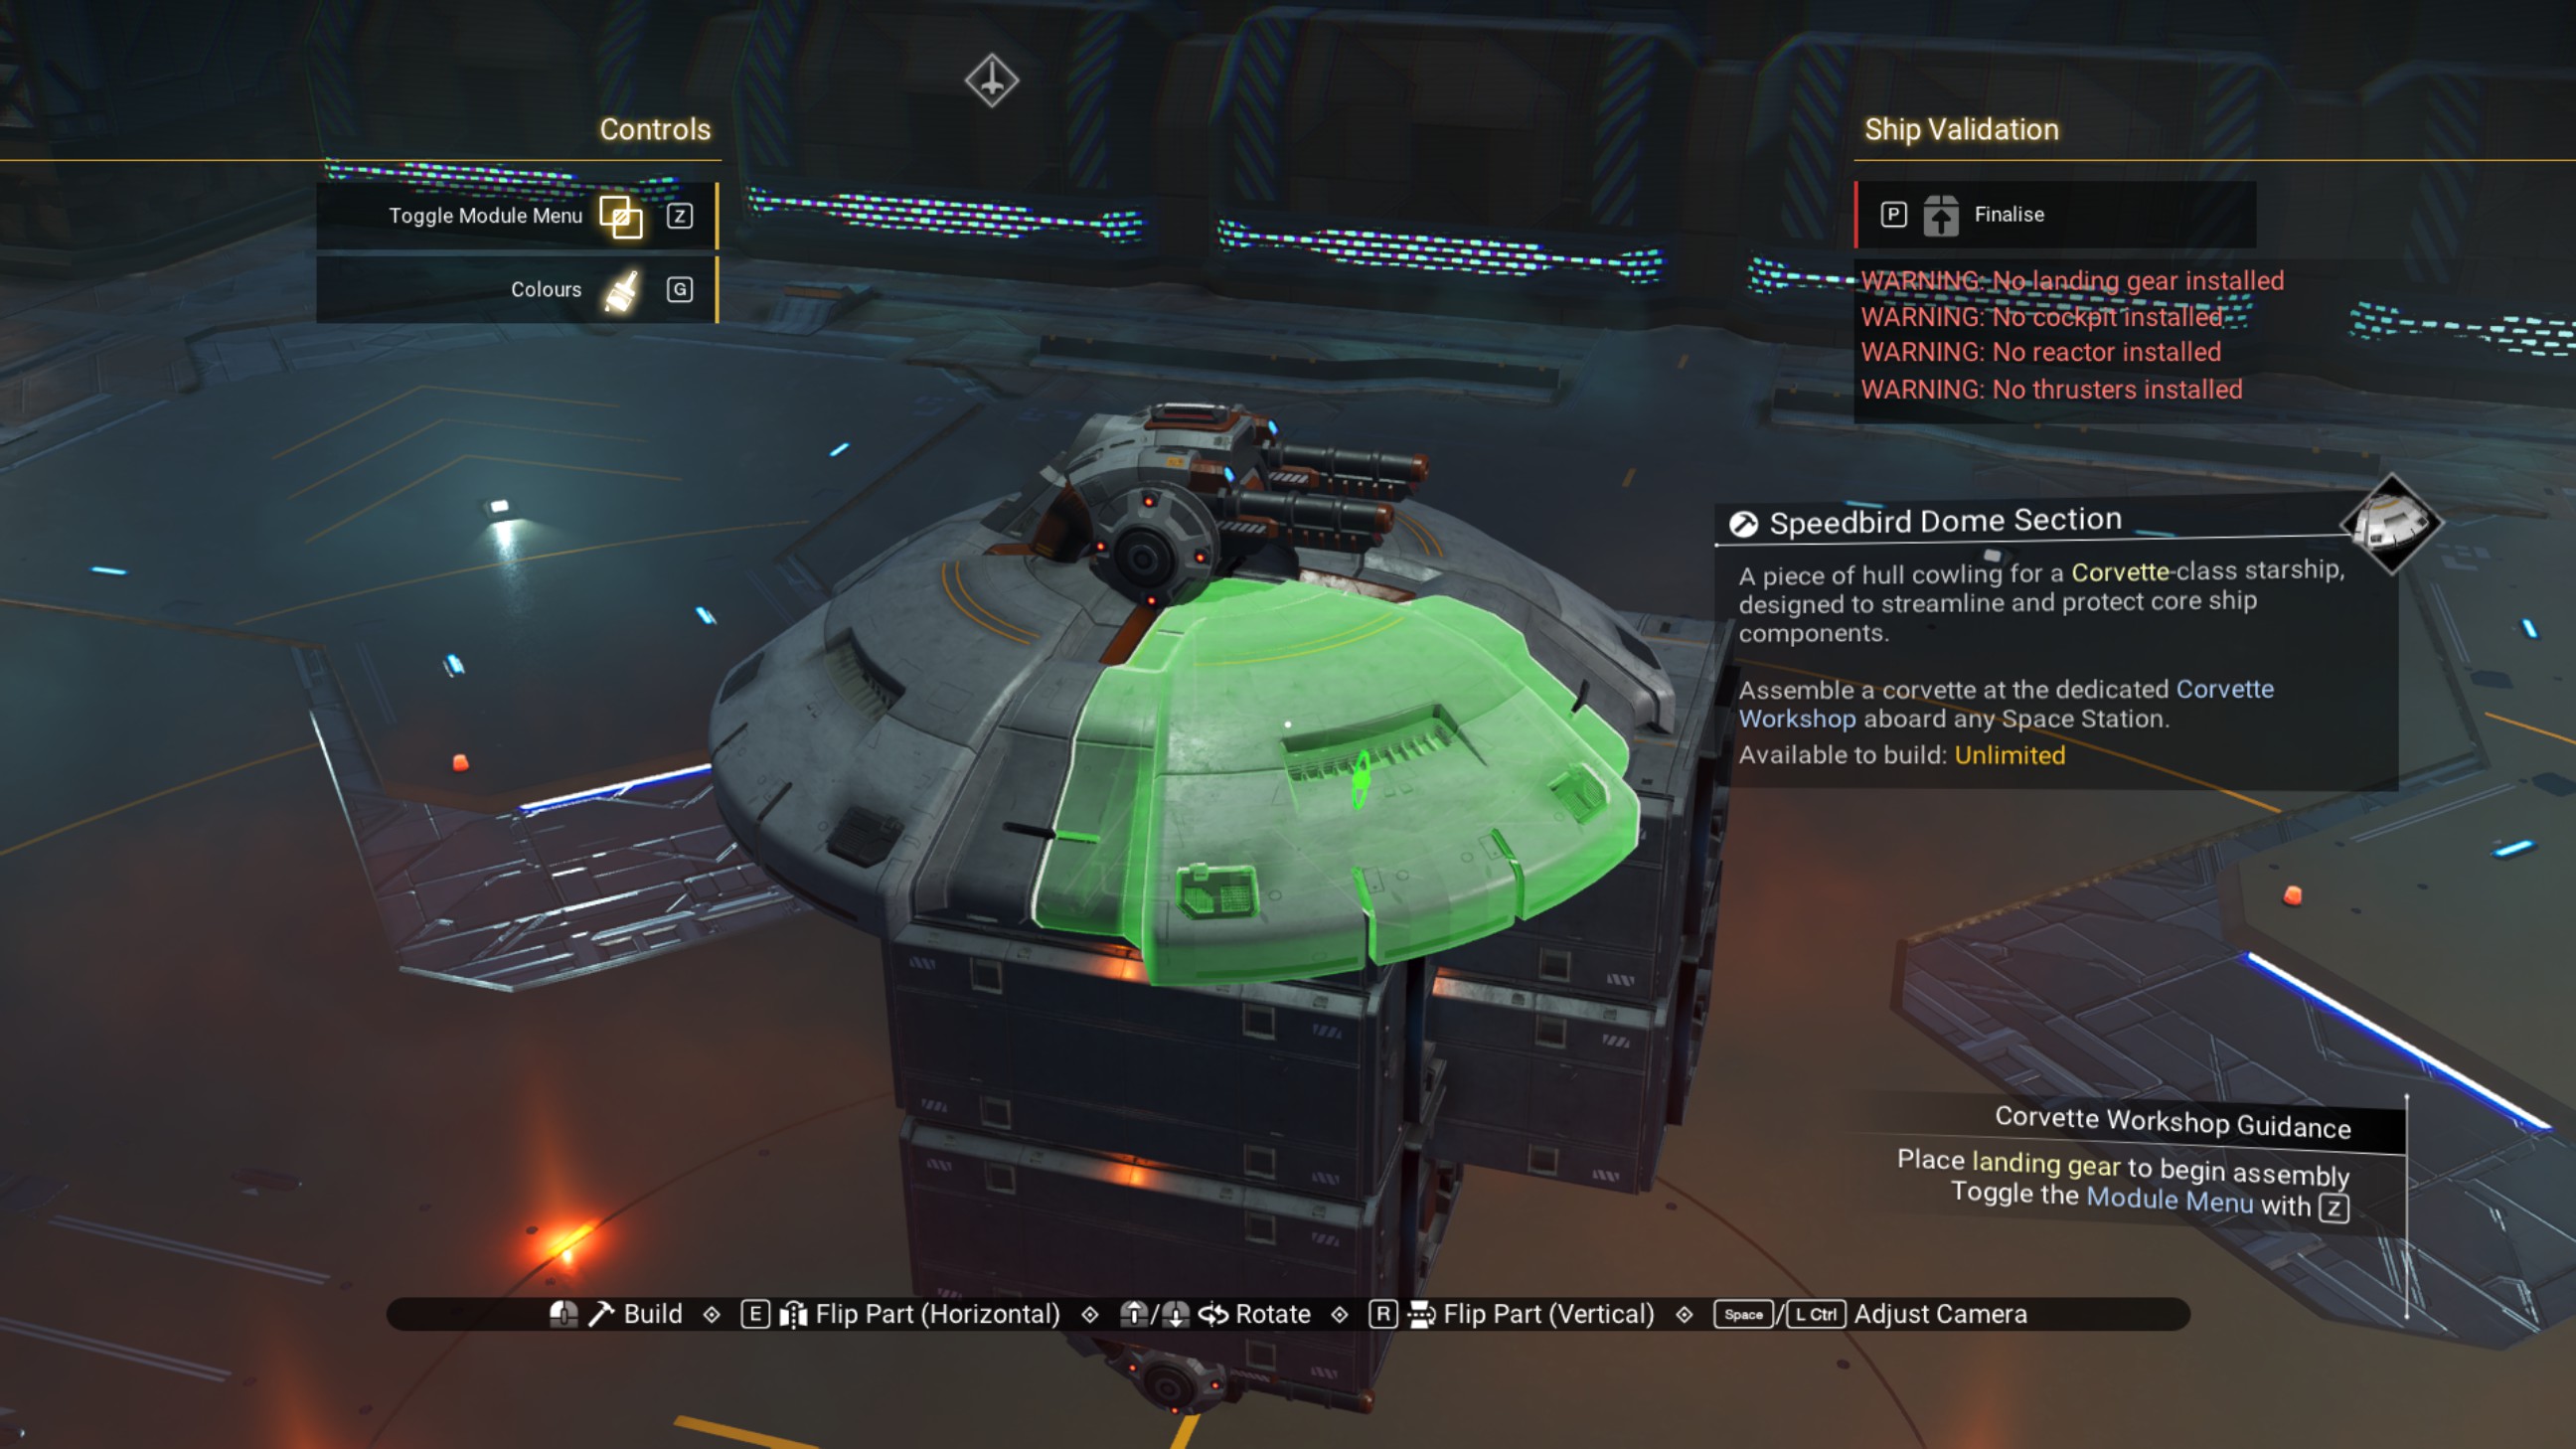
We're going to place dome sections below as well, but we need a base for them first because they don't like to position correctly. So, place a walkway behind the lower offset walkway, as shown, and then another walkway below that.
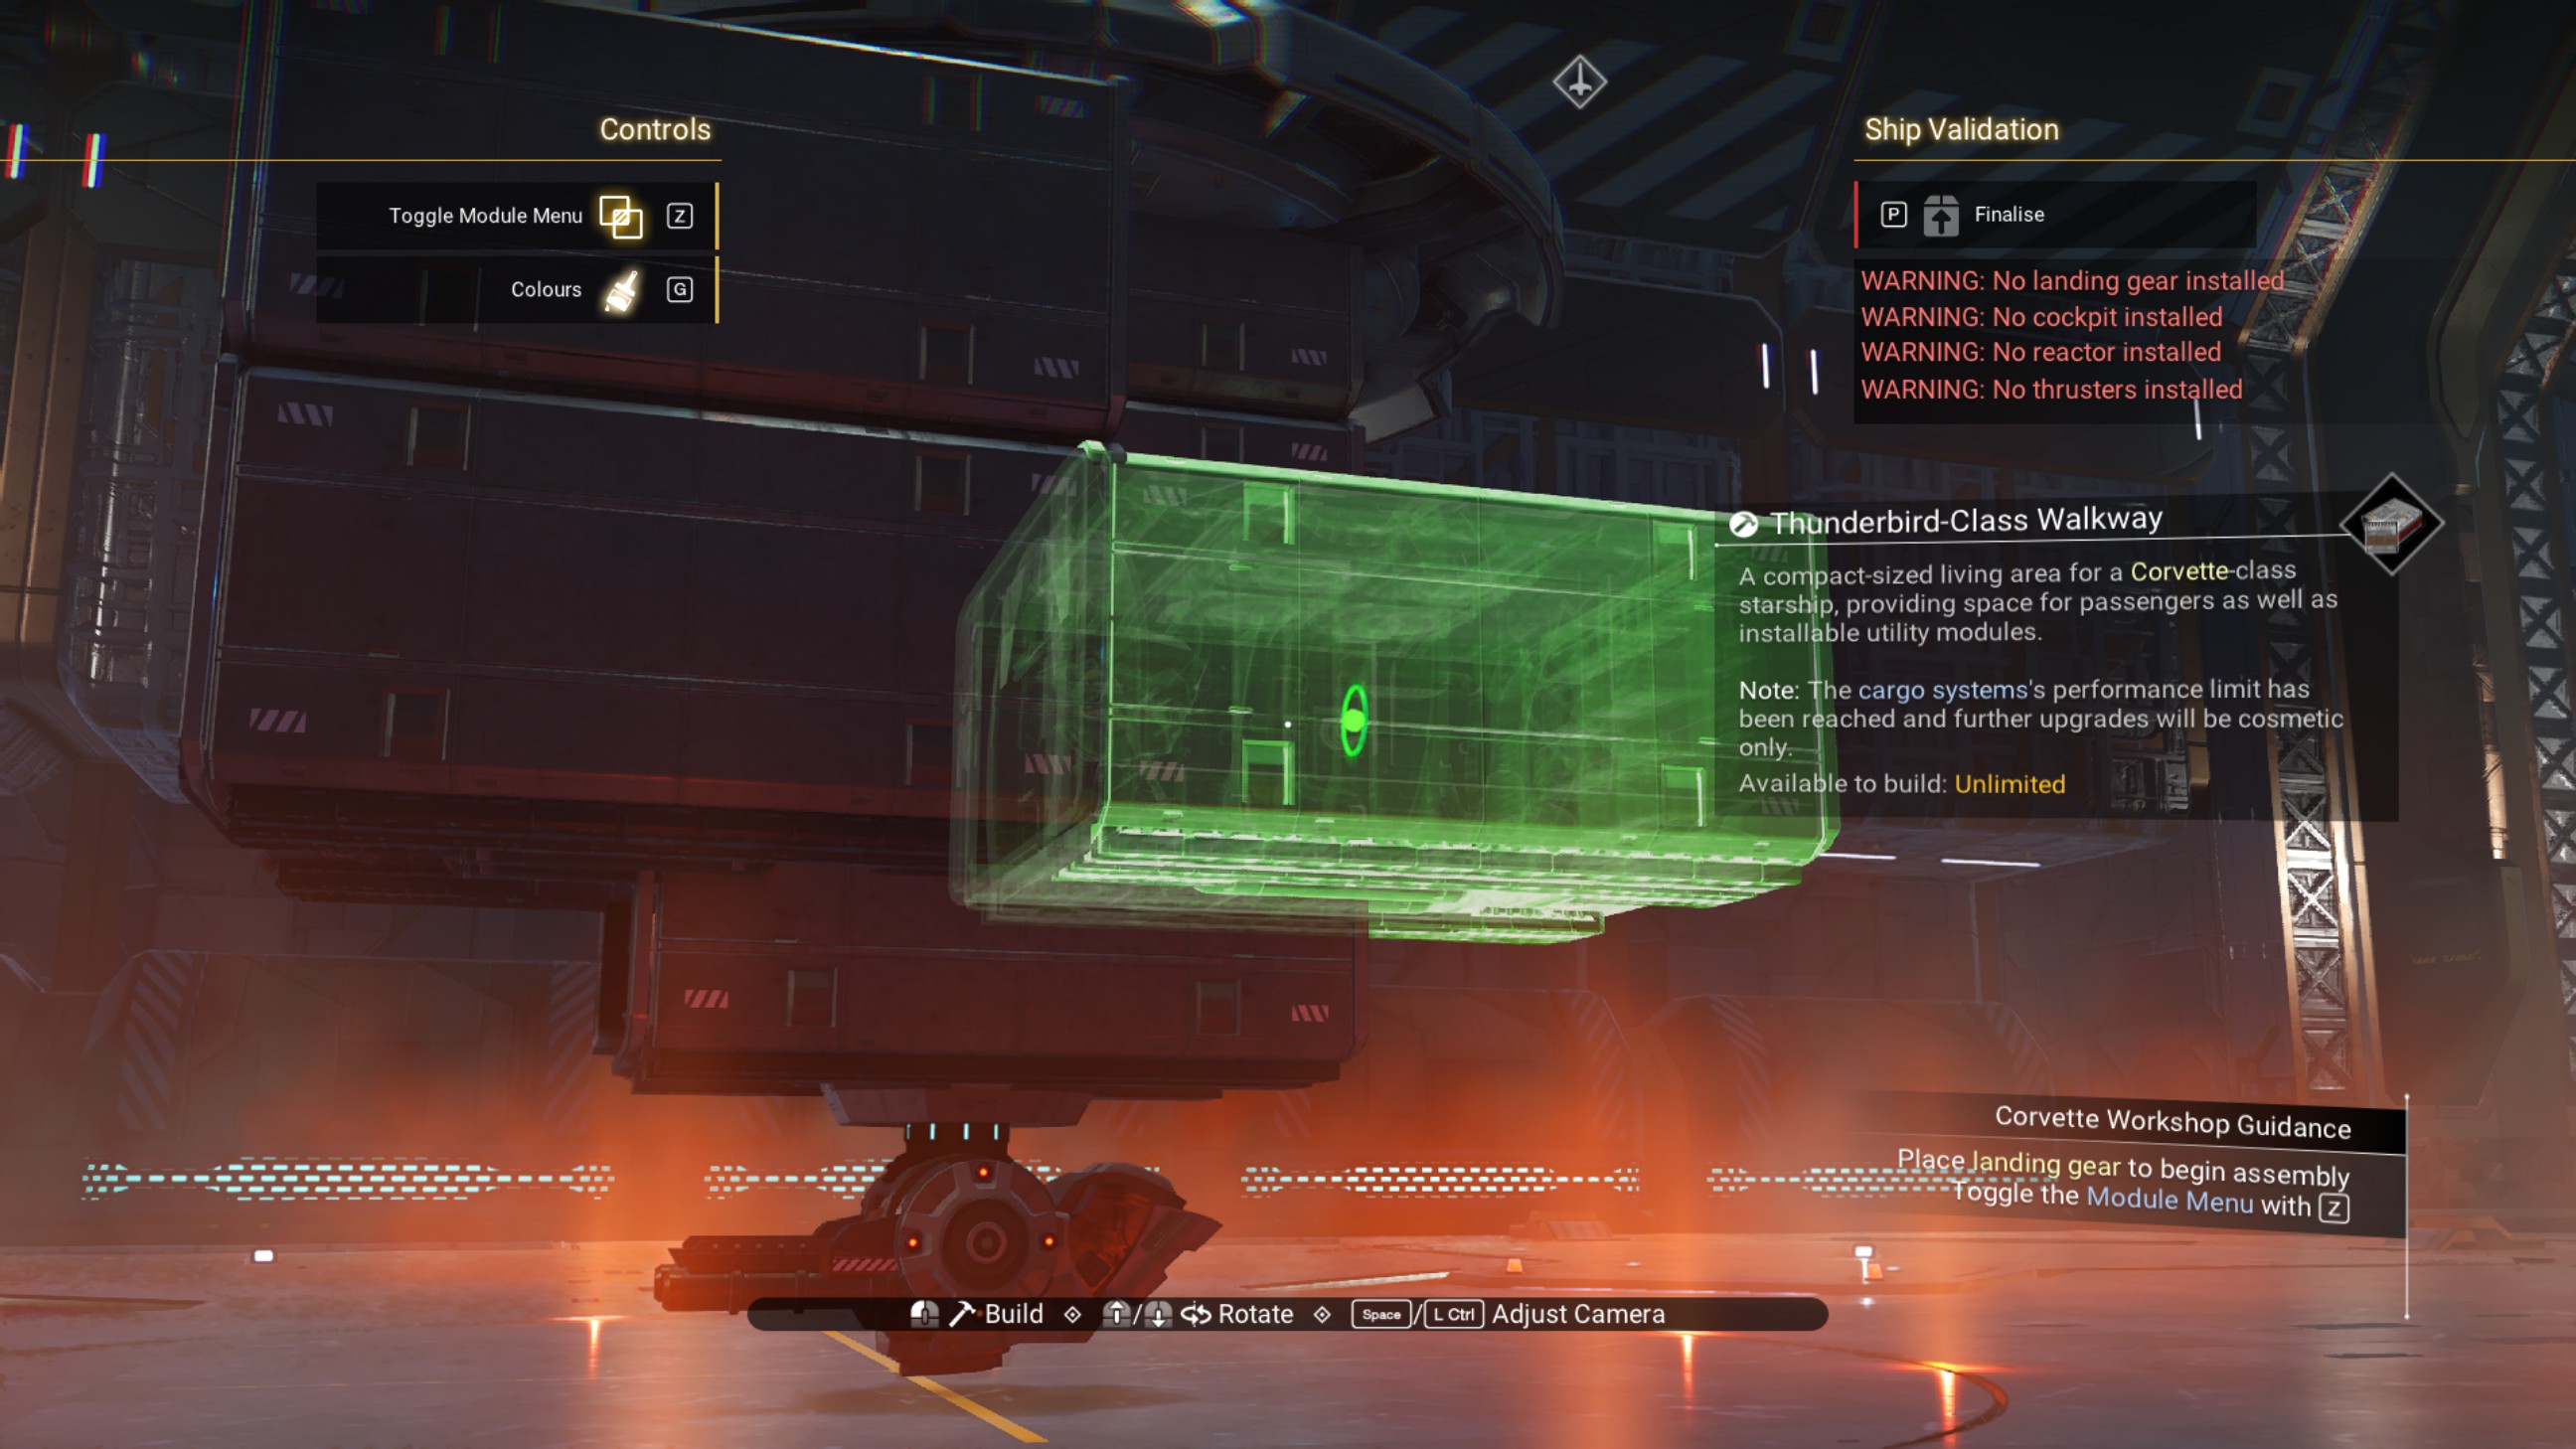
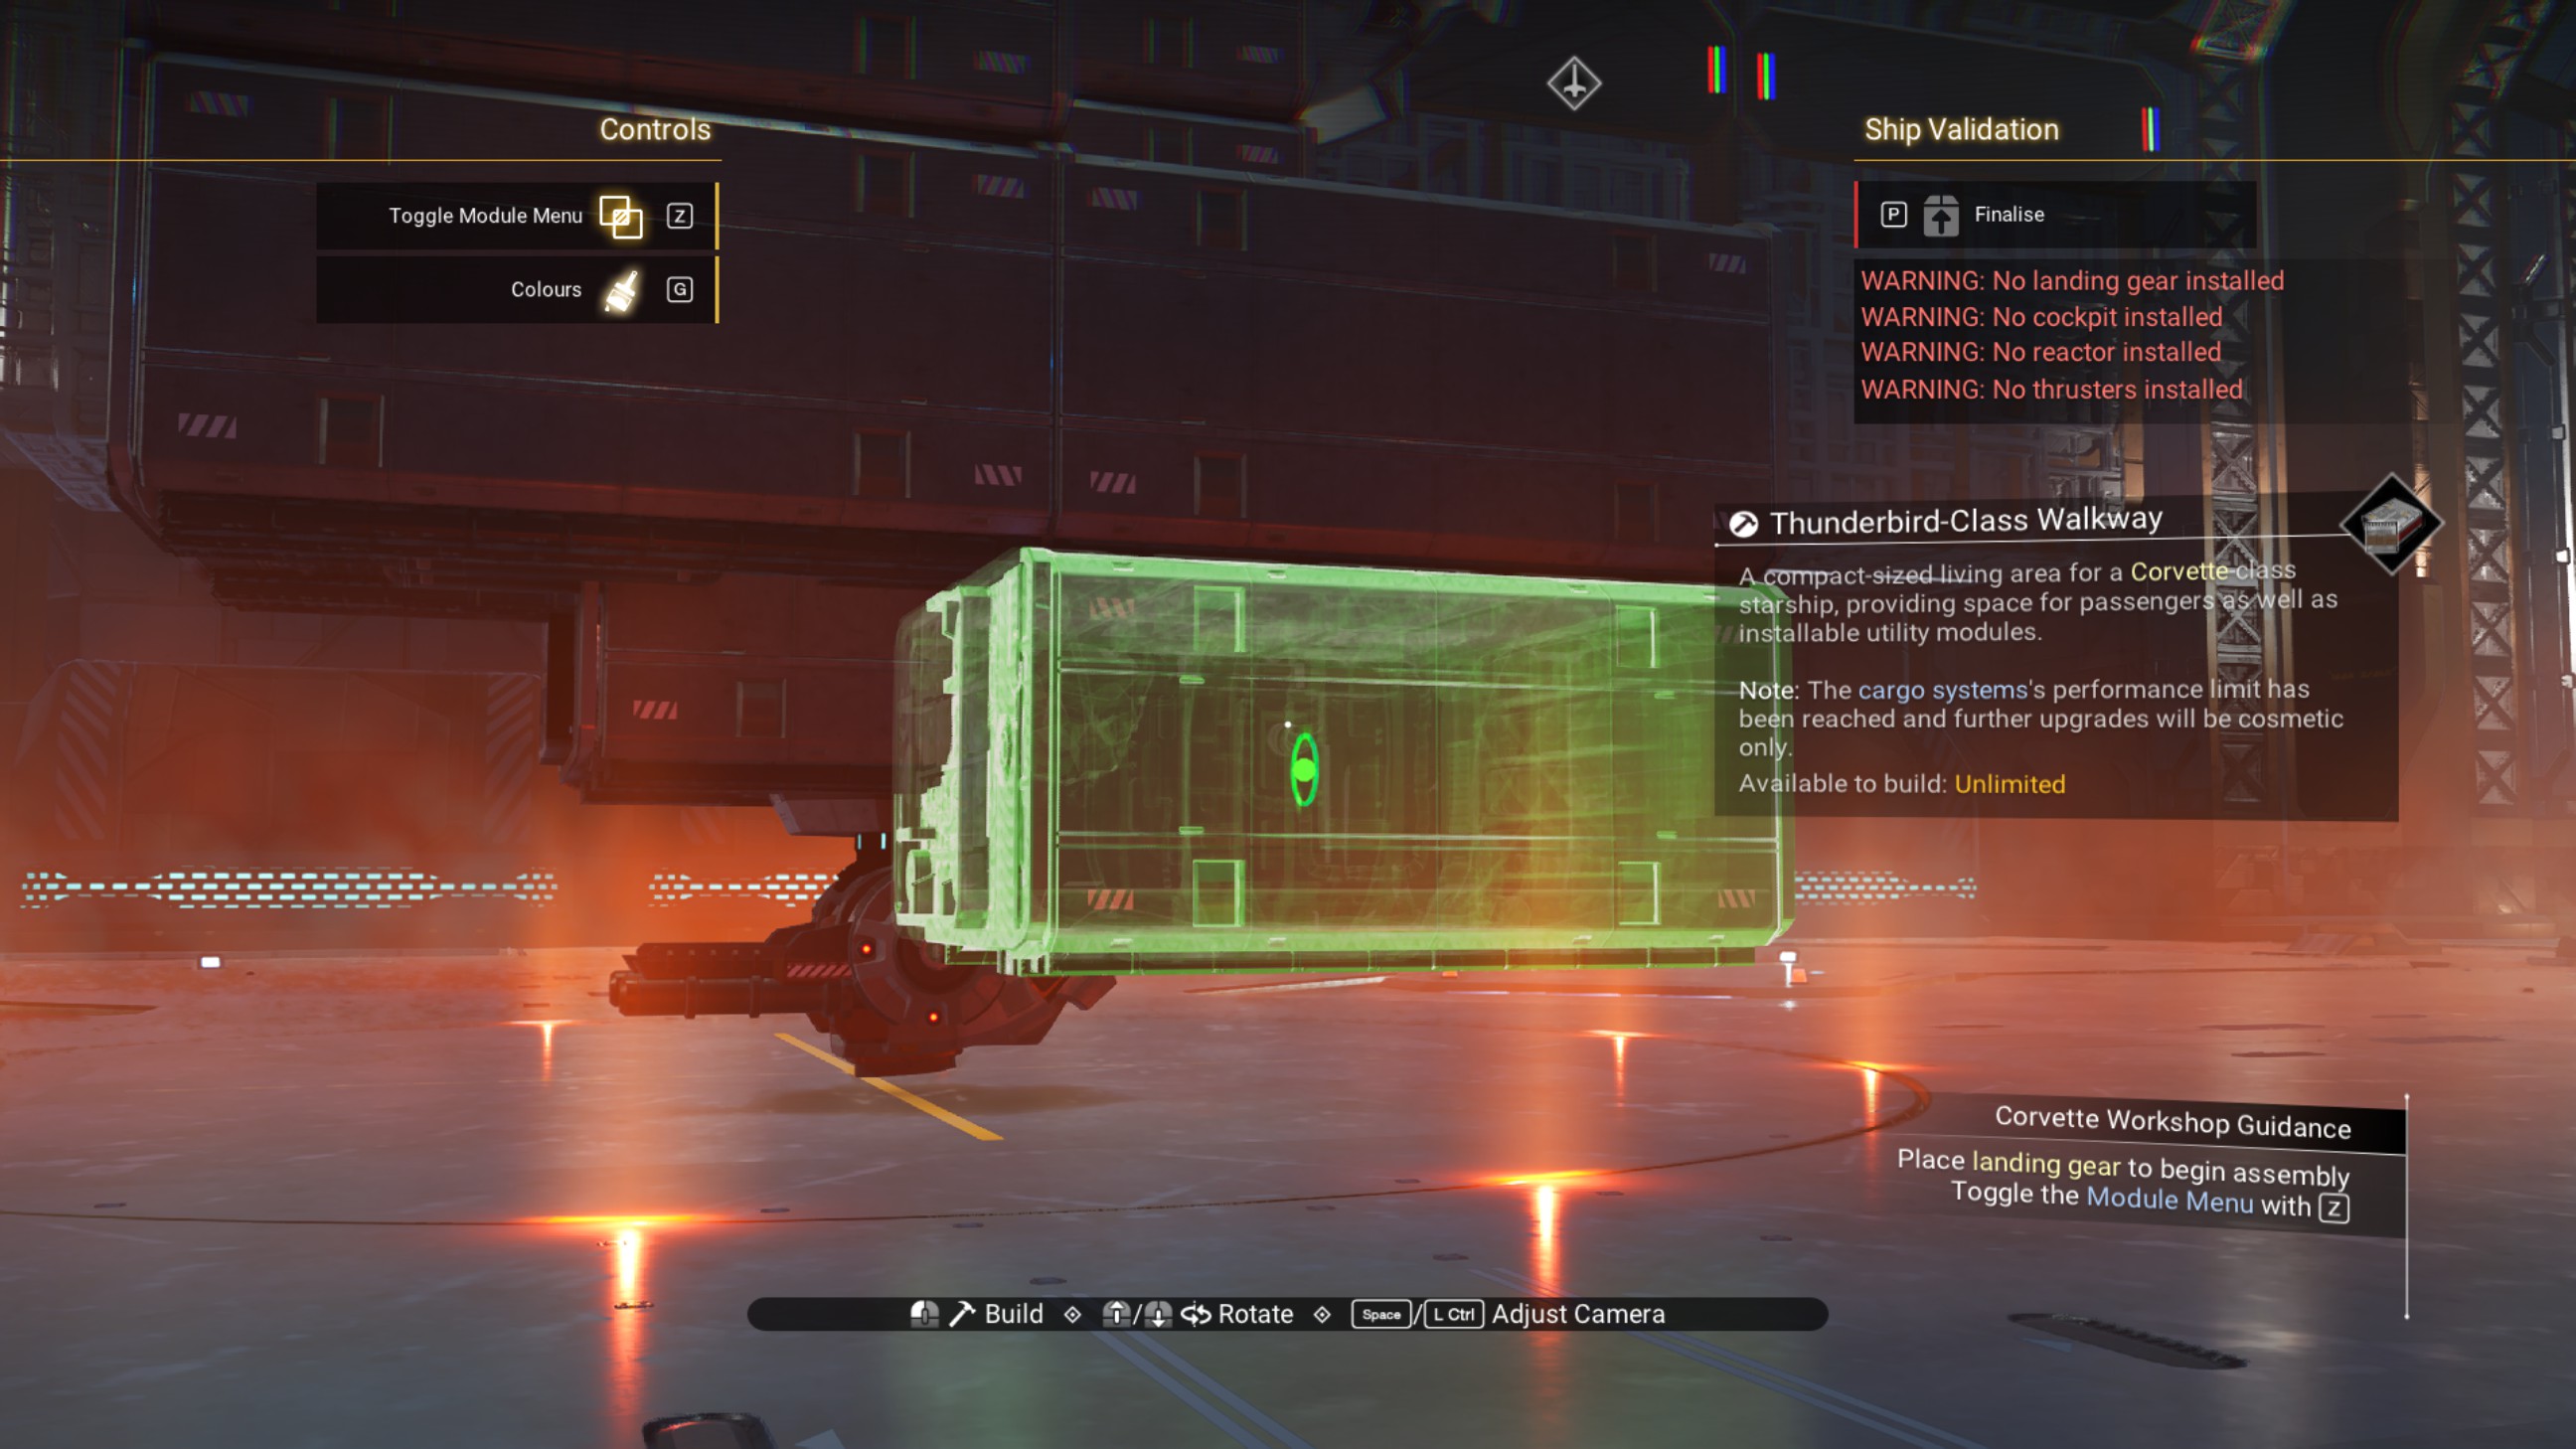
Place the first dome section.
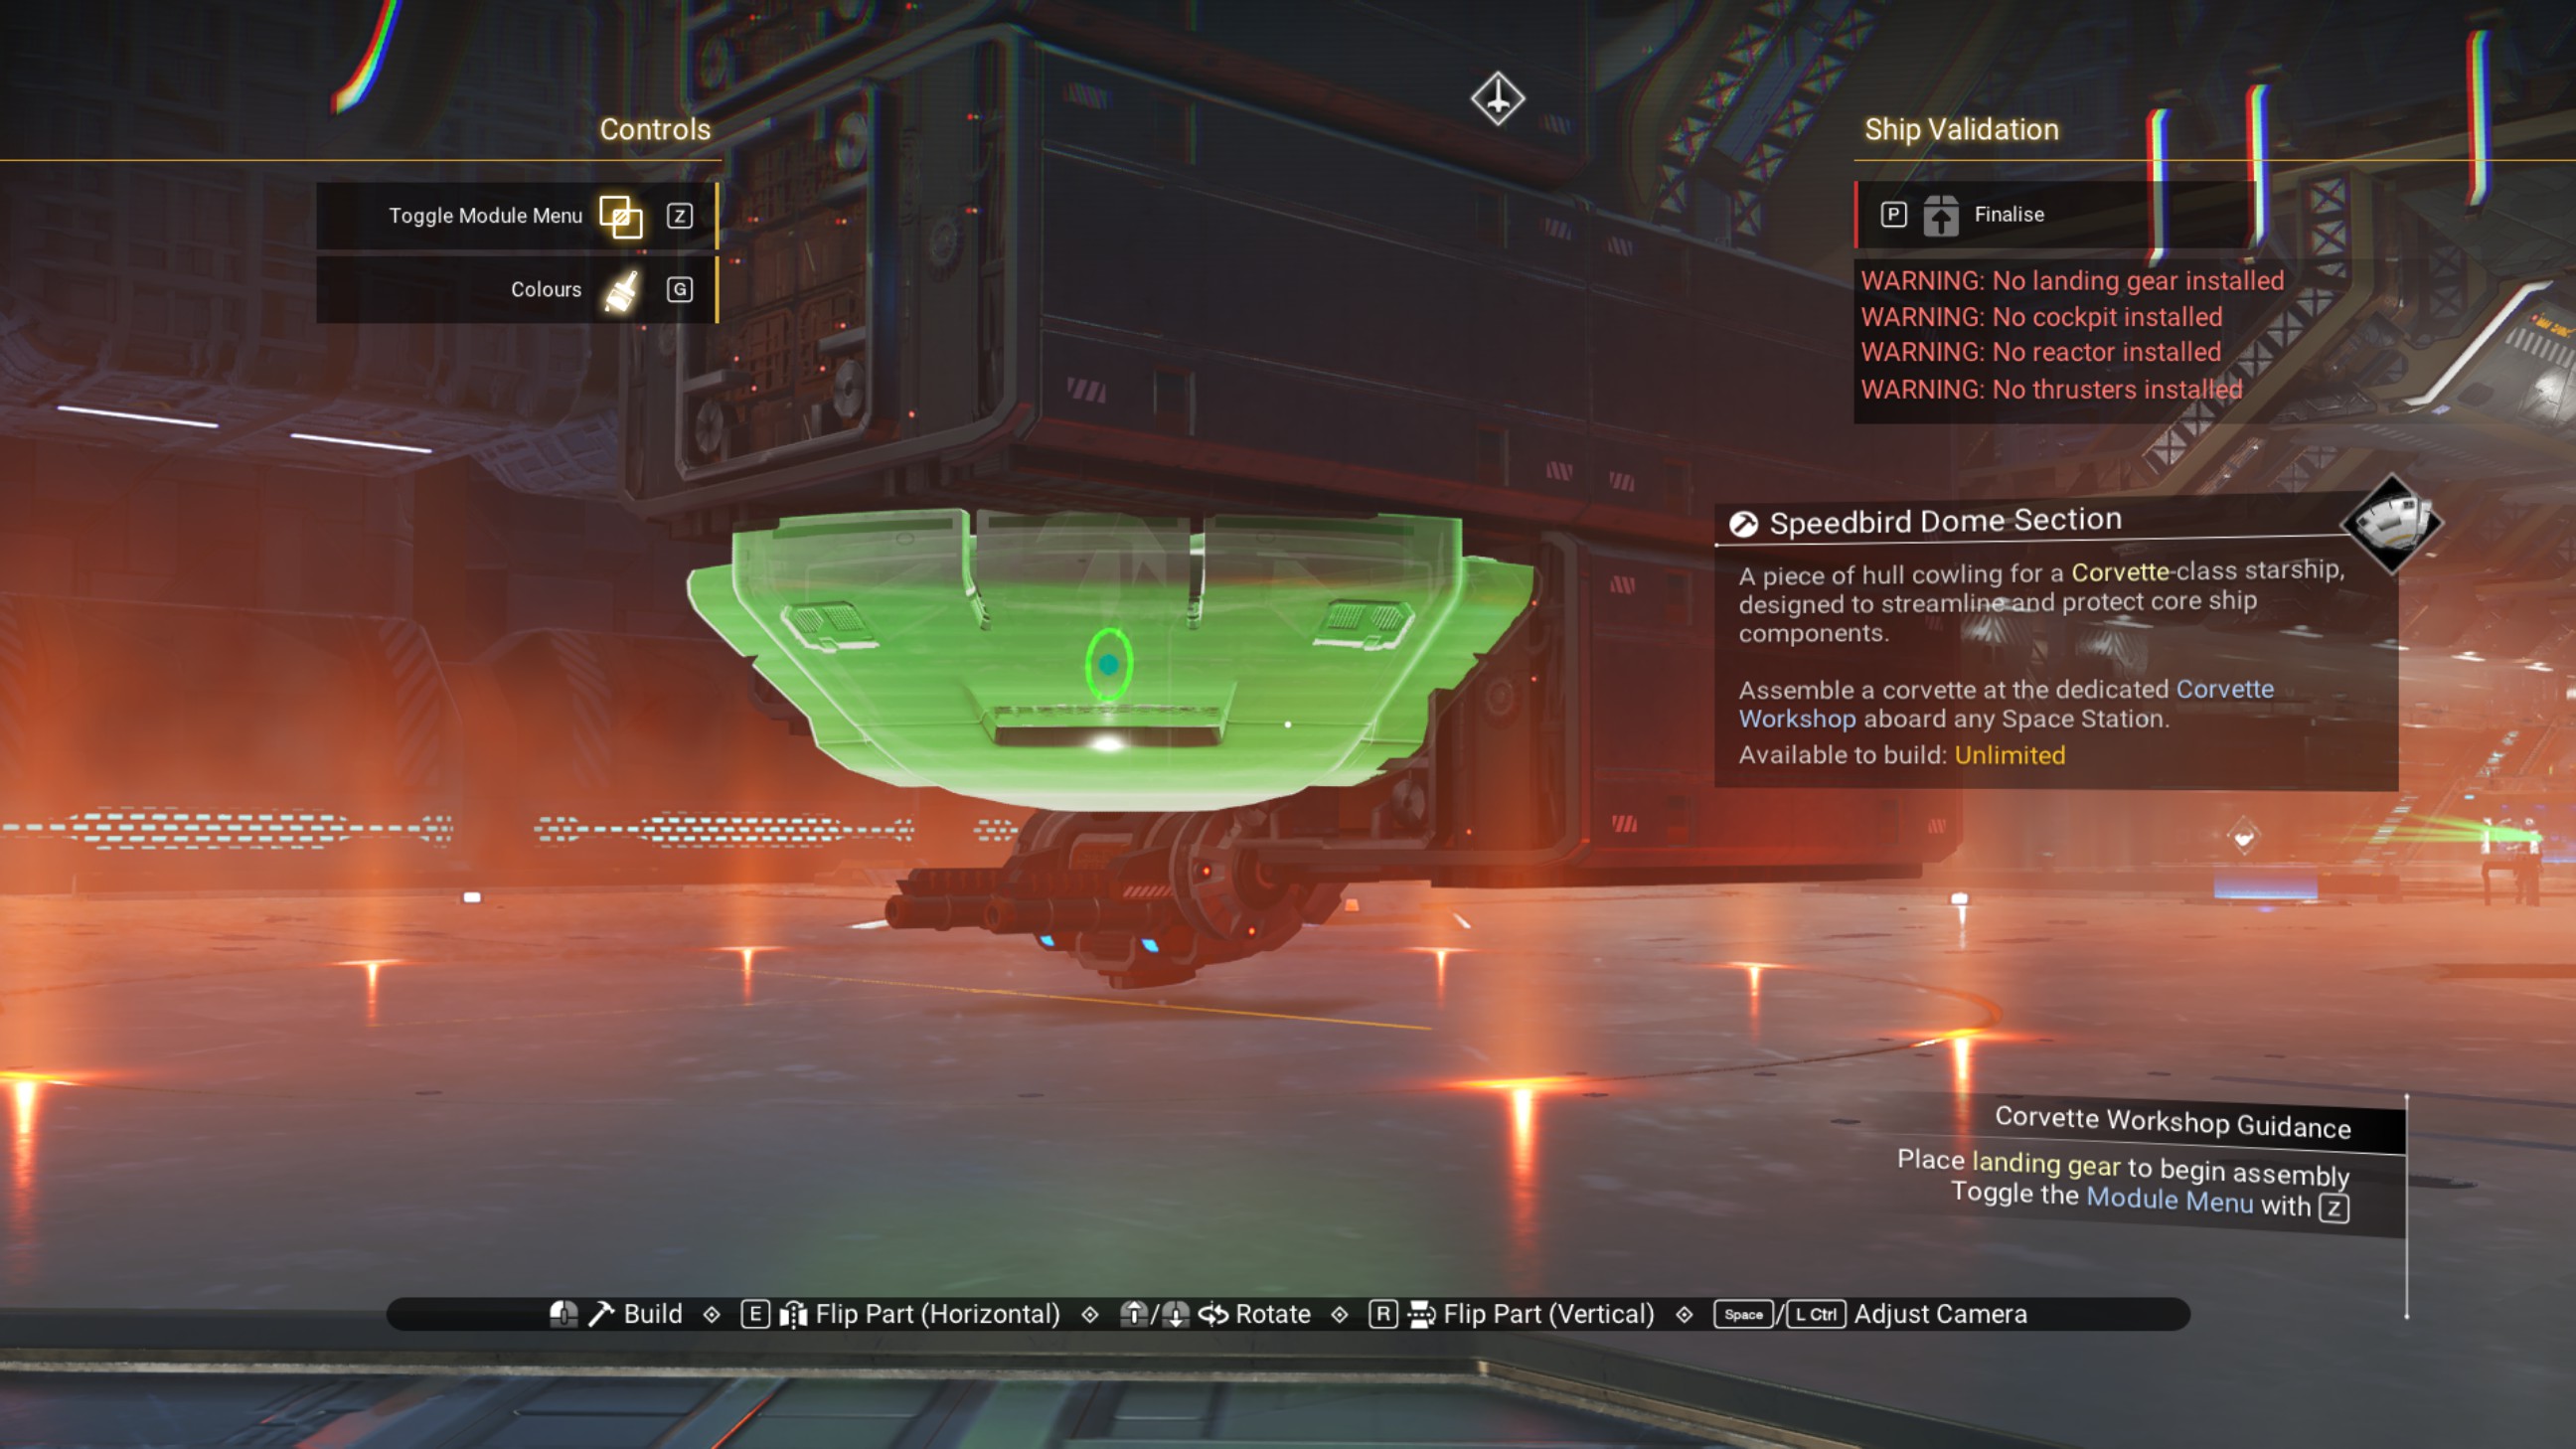
Delete the two walkways we just placed.
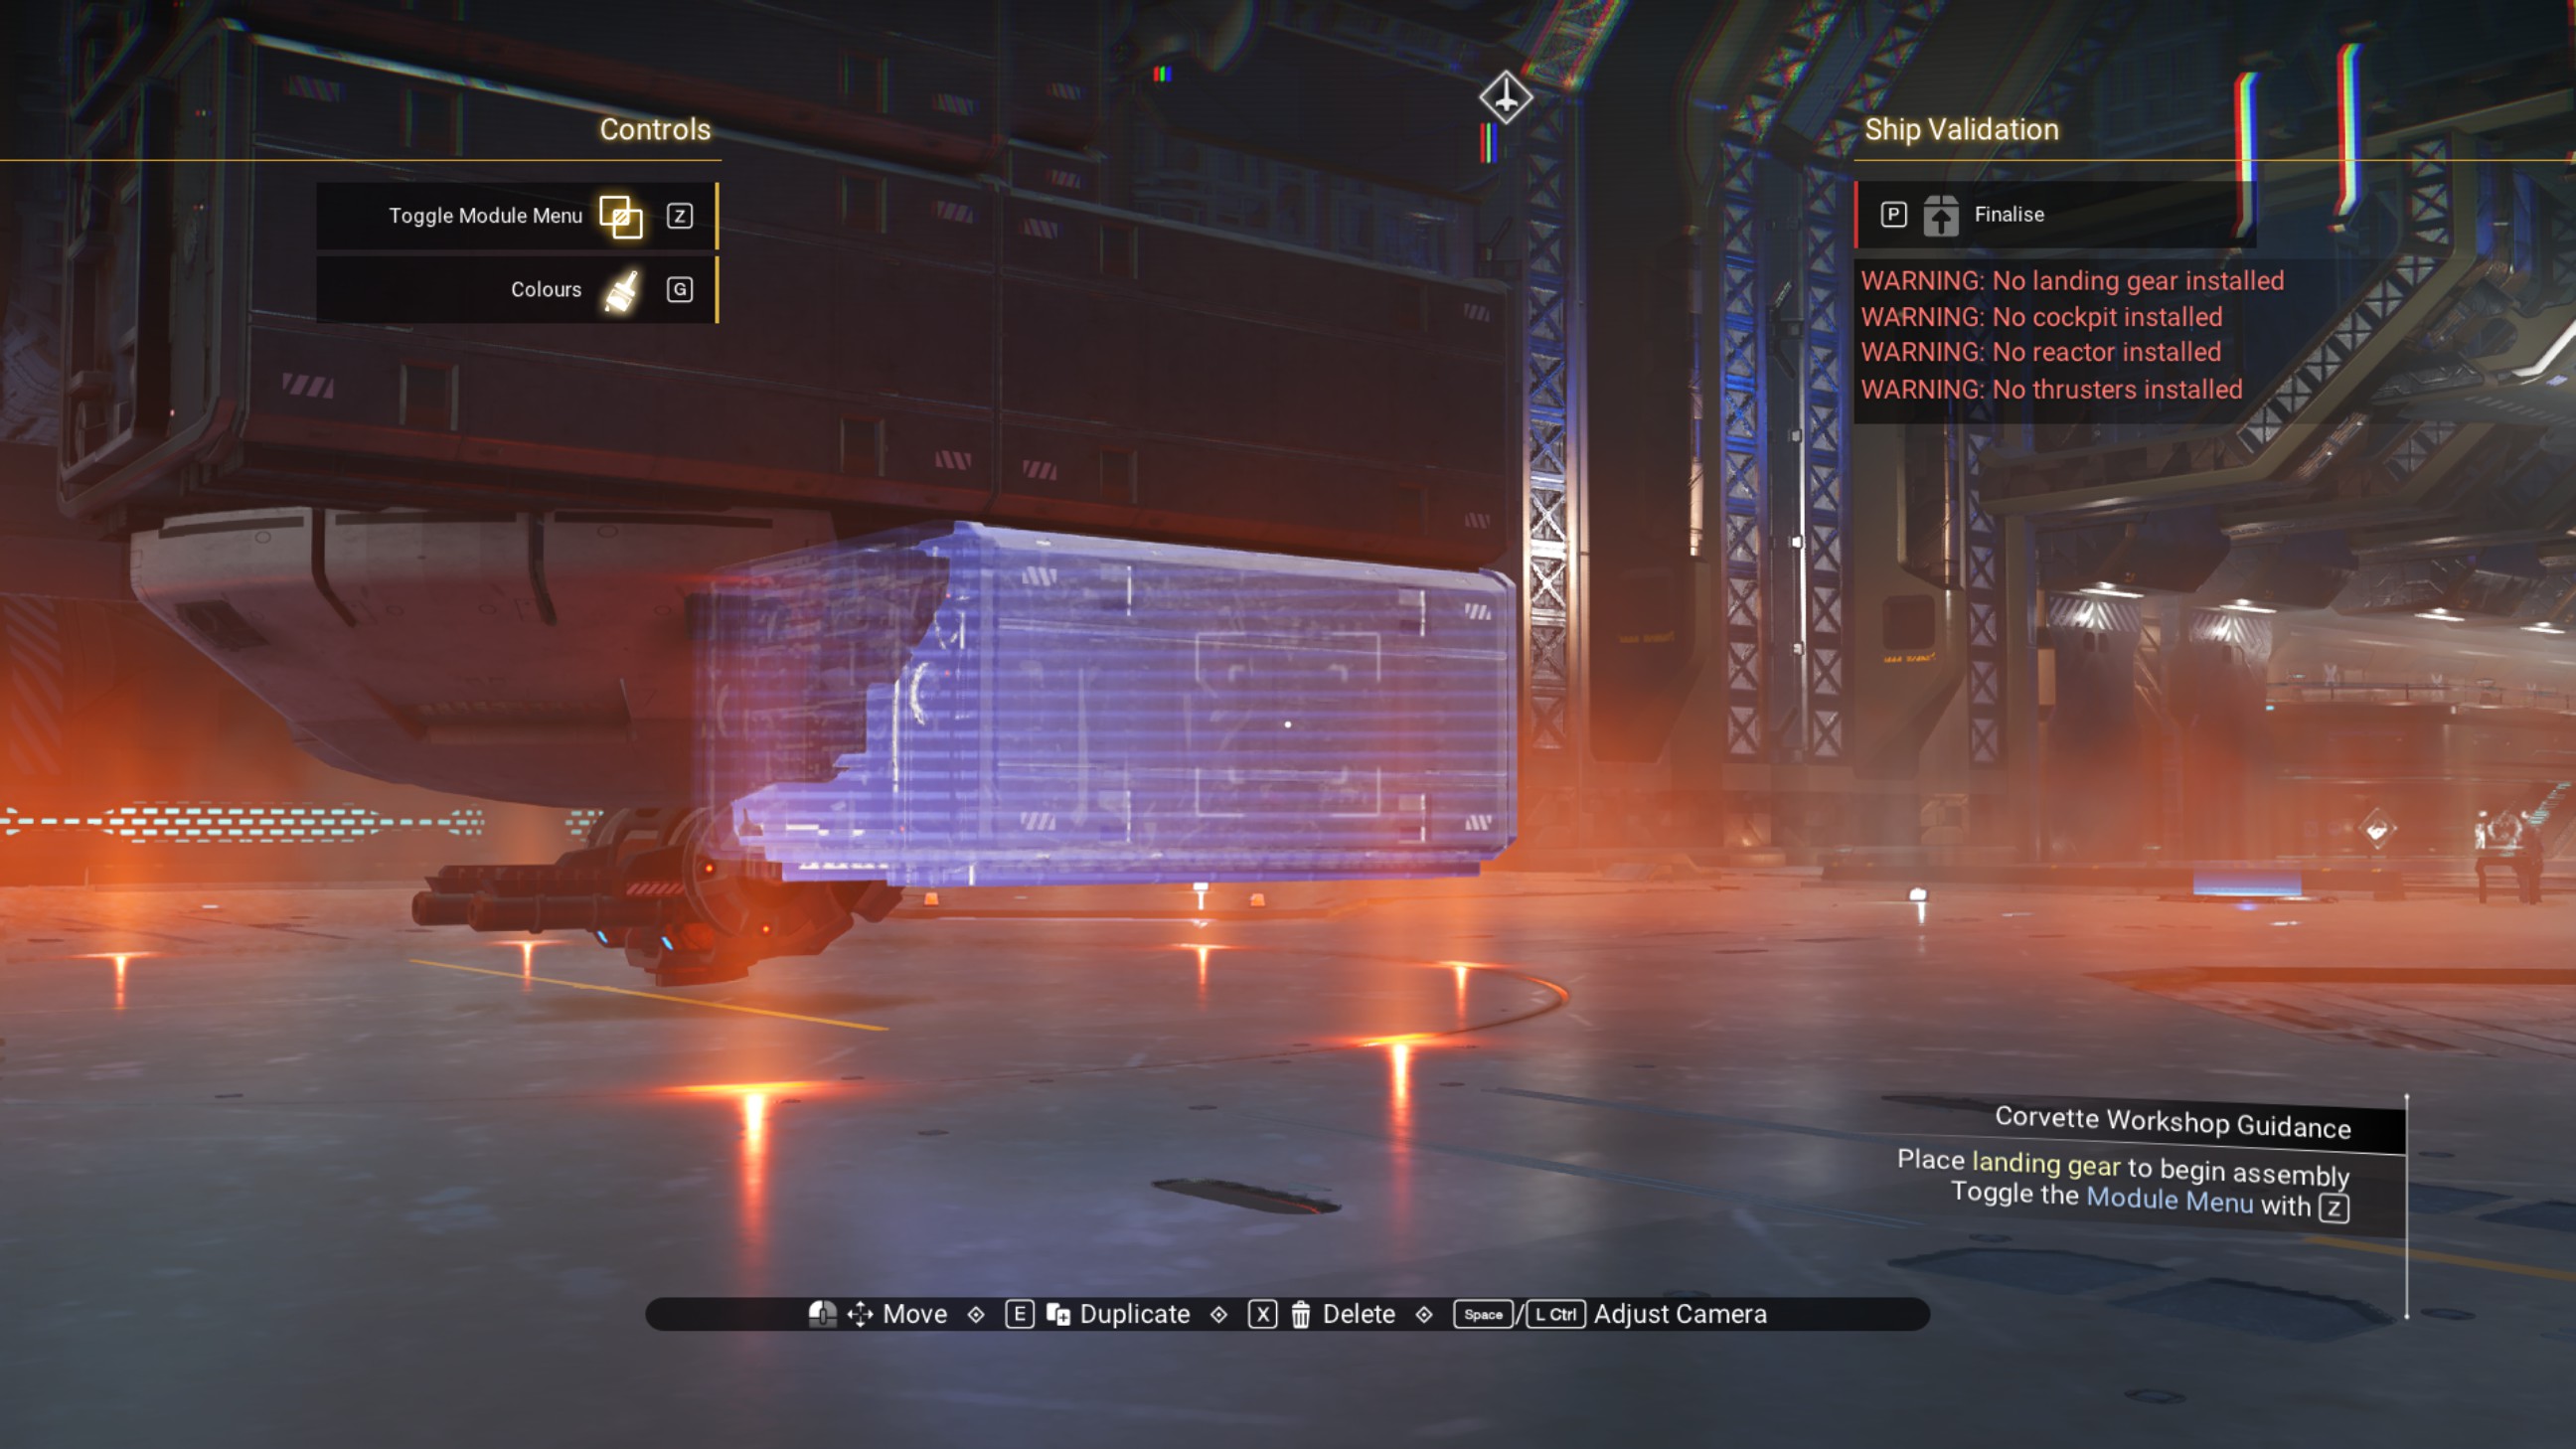
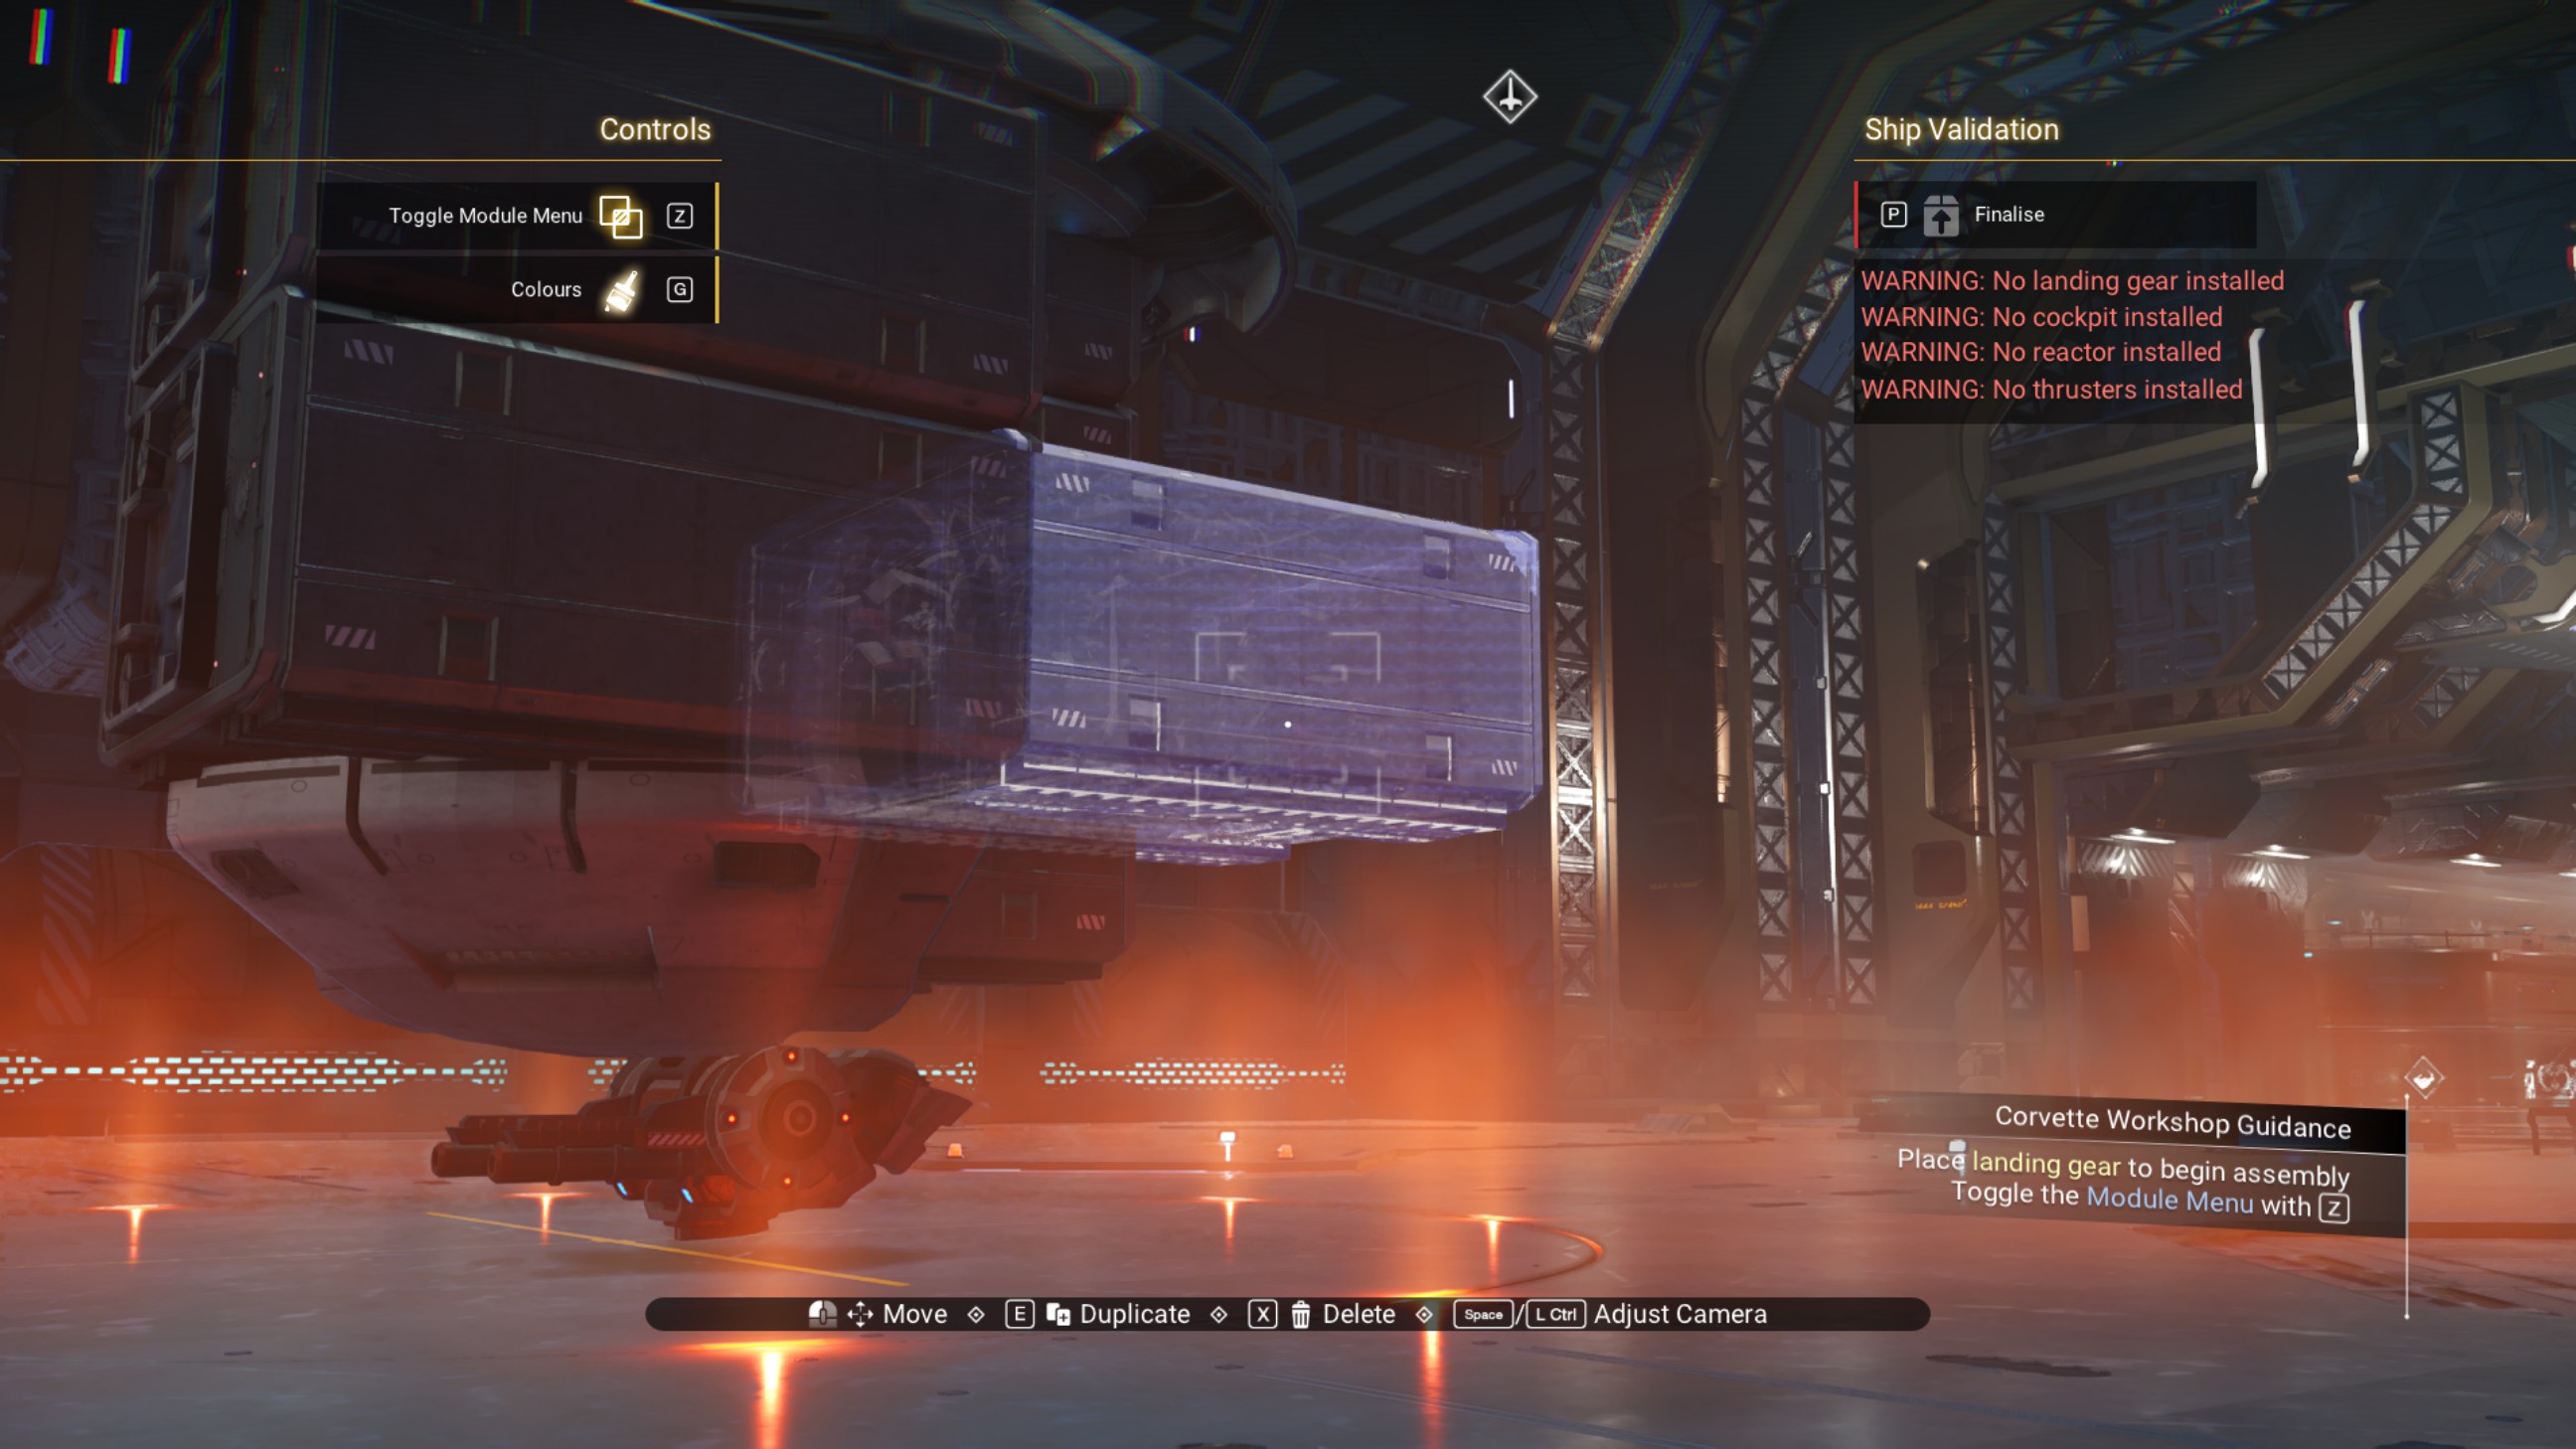
Then, place the remaining three dome sections.
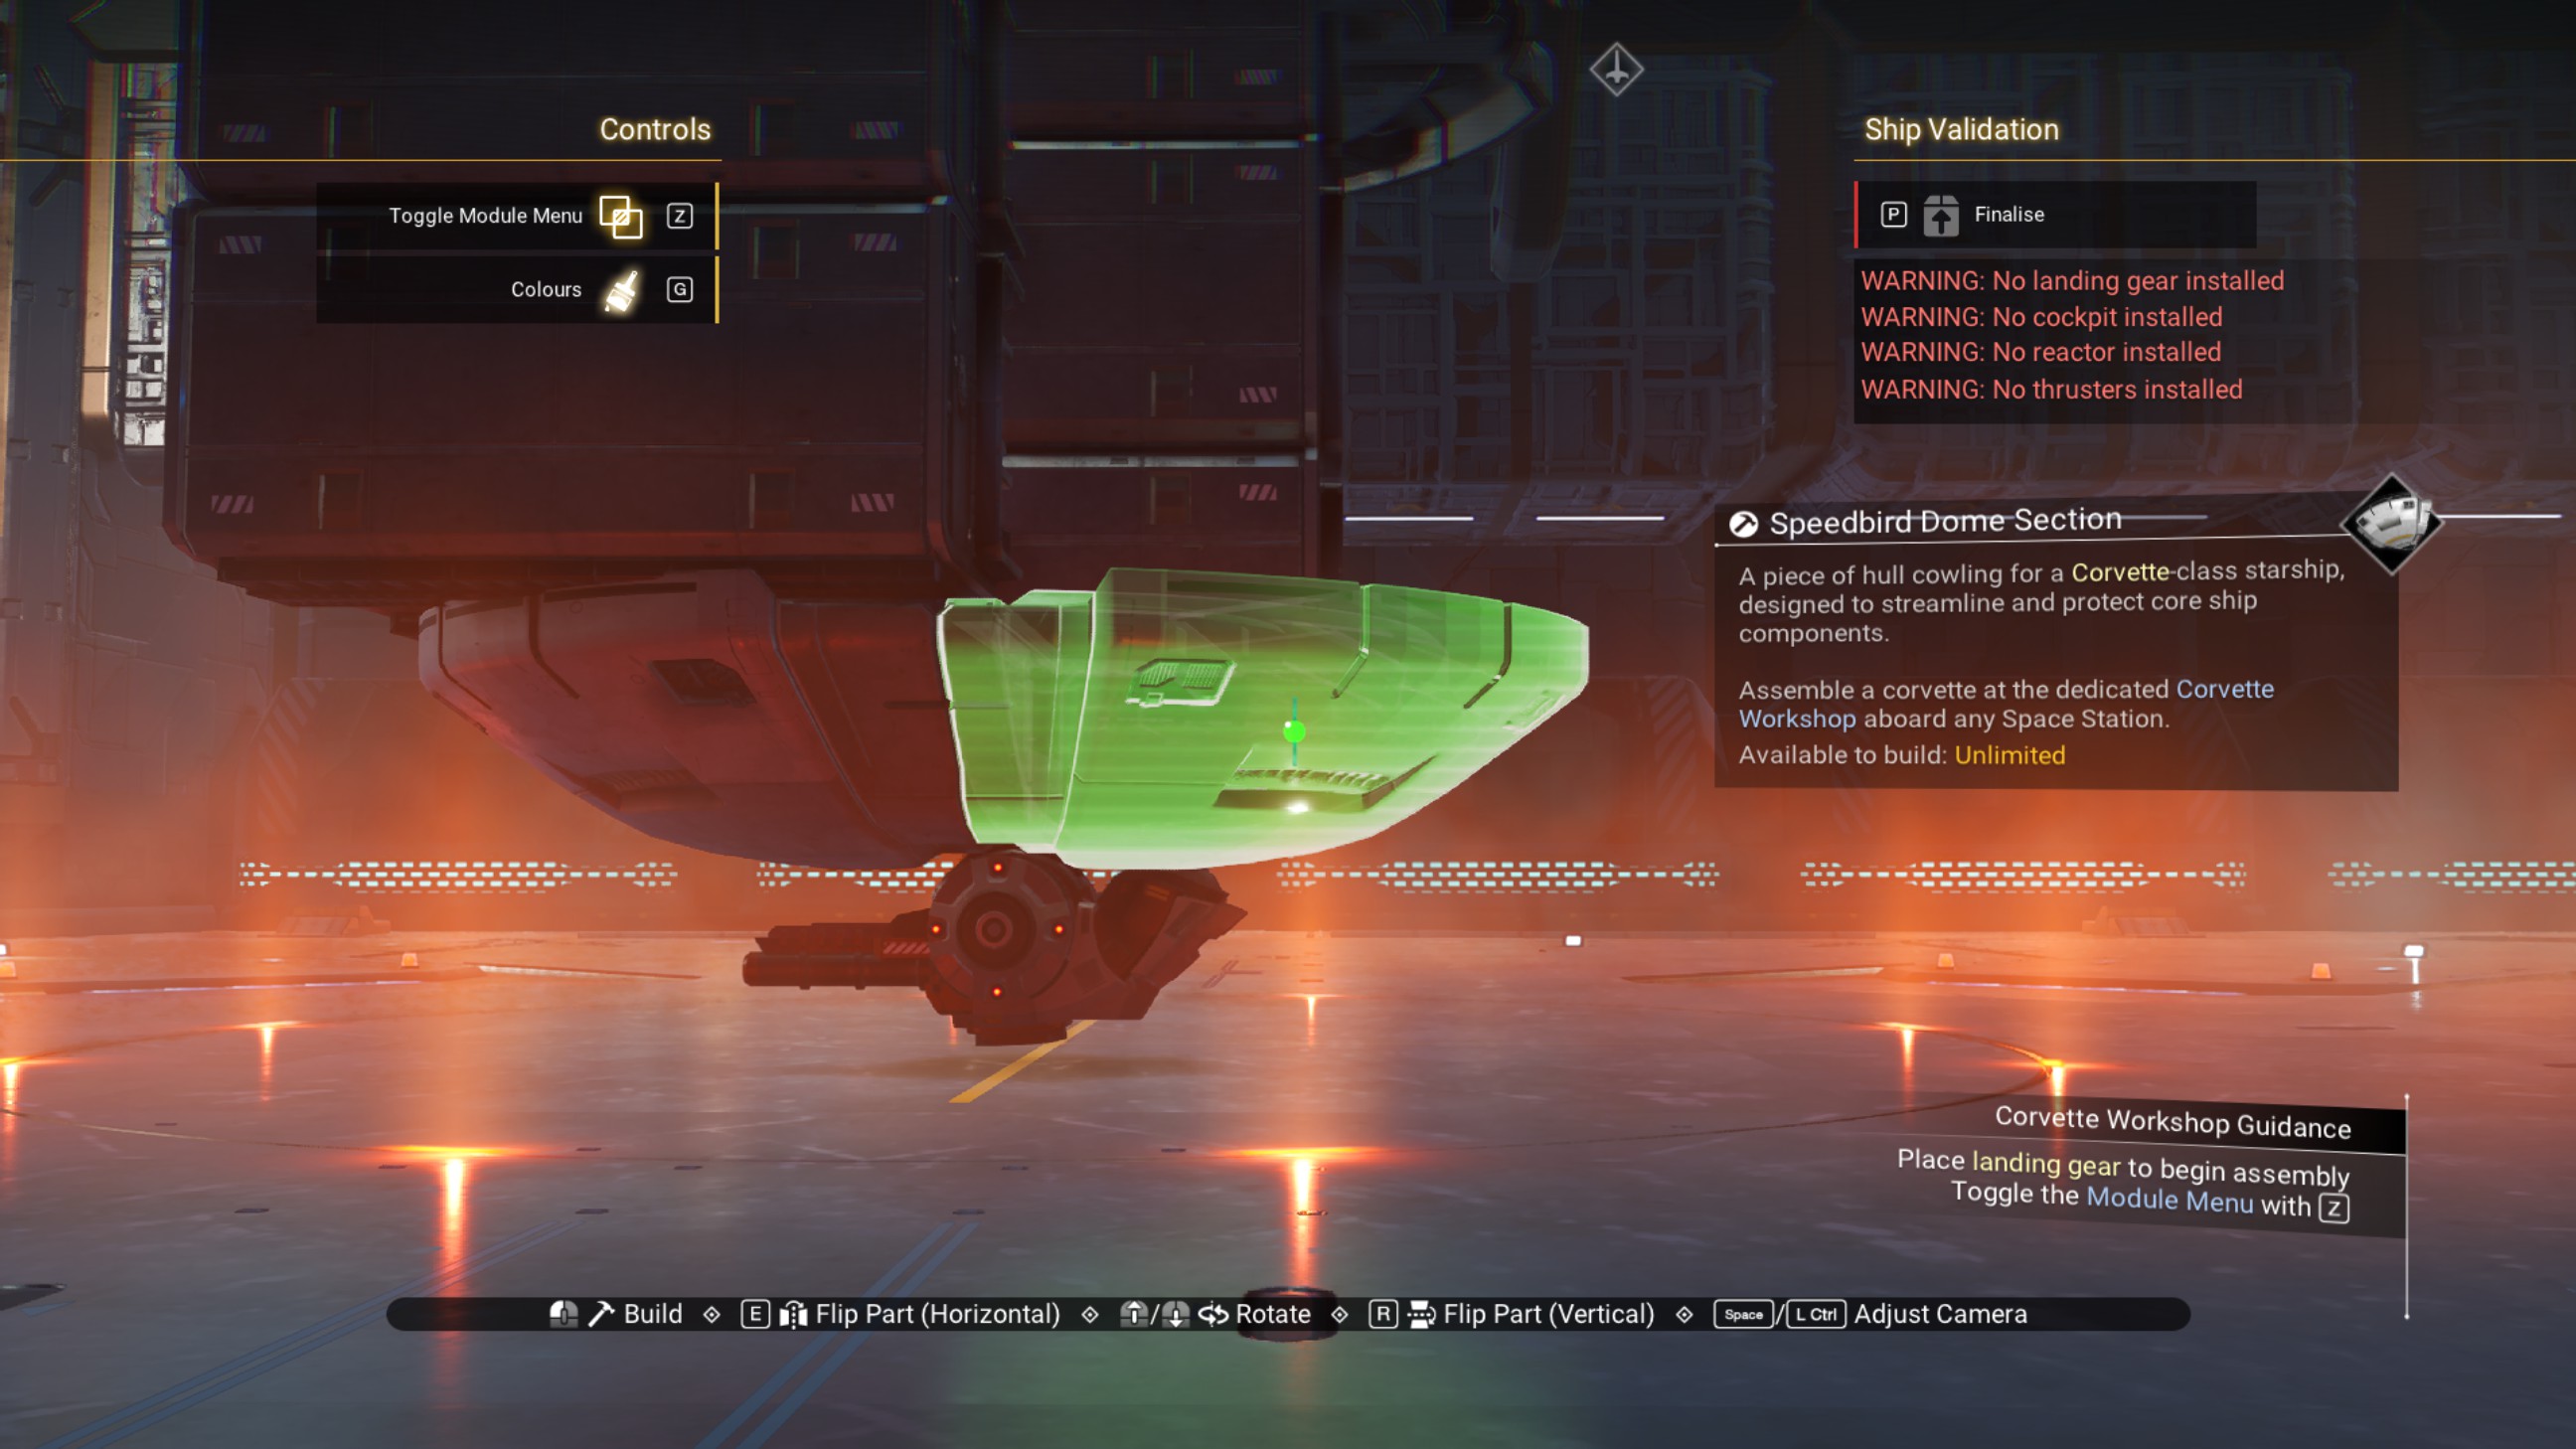
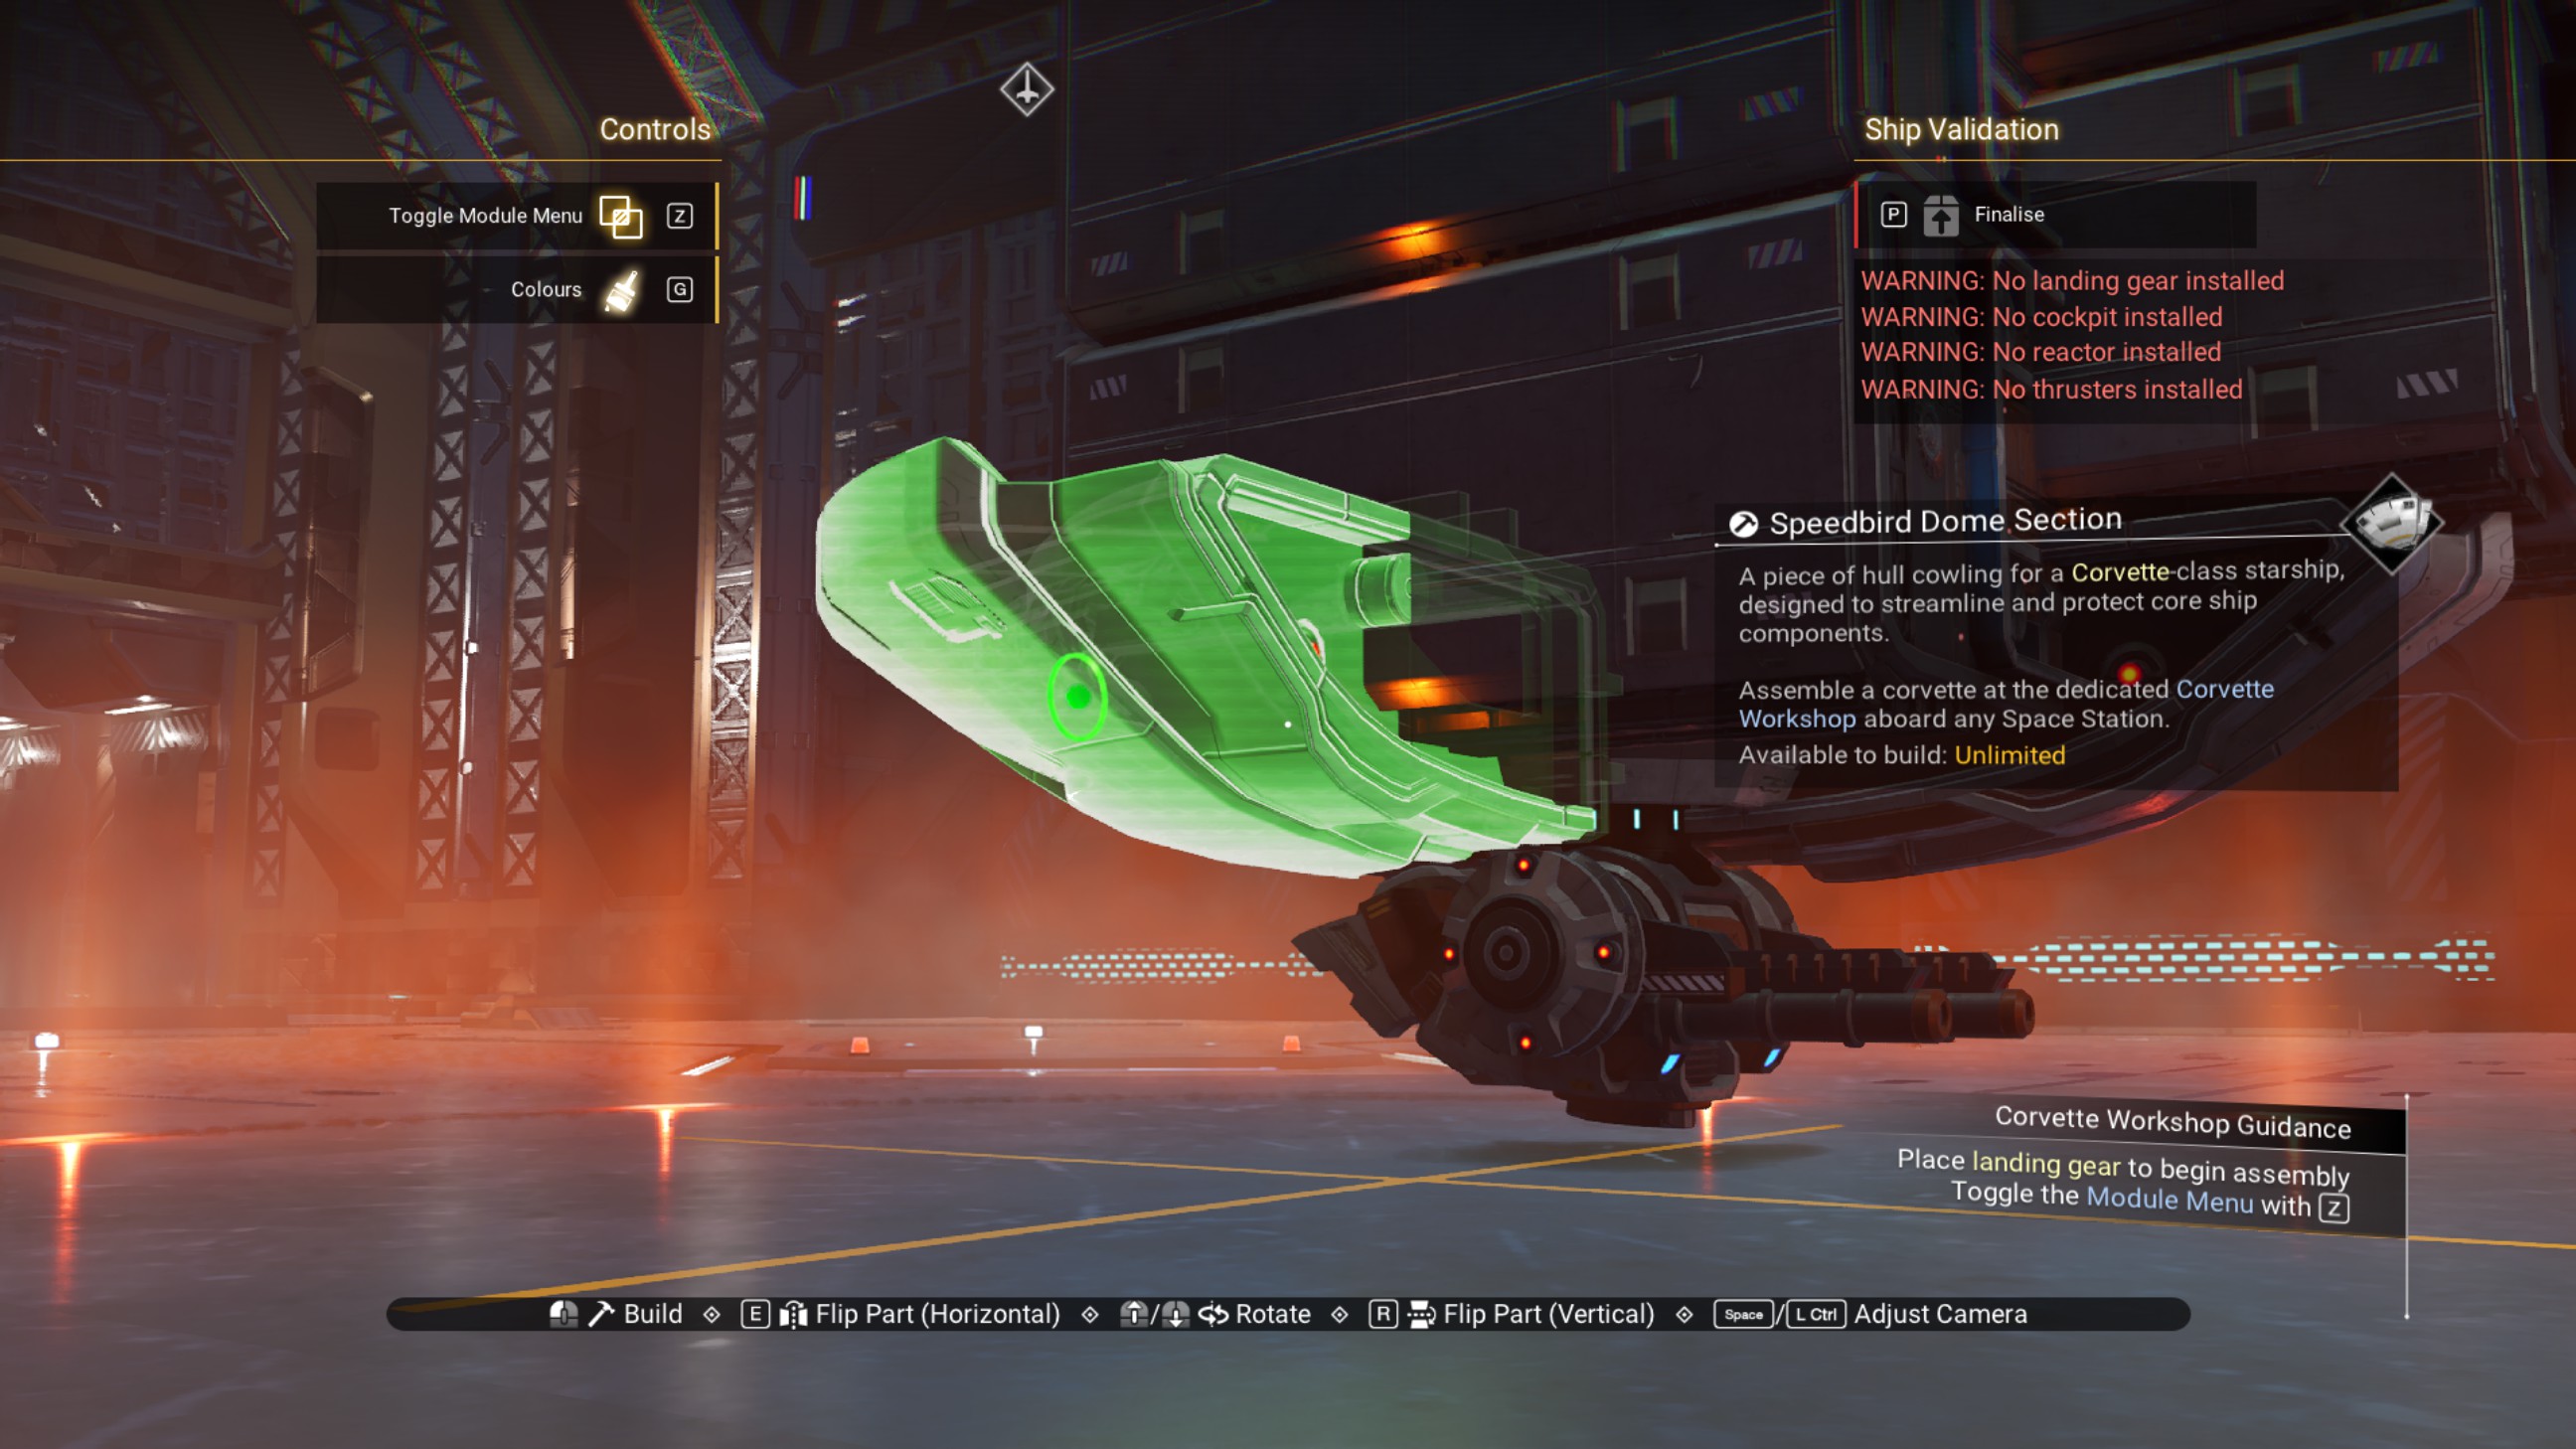
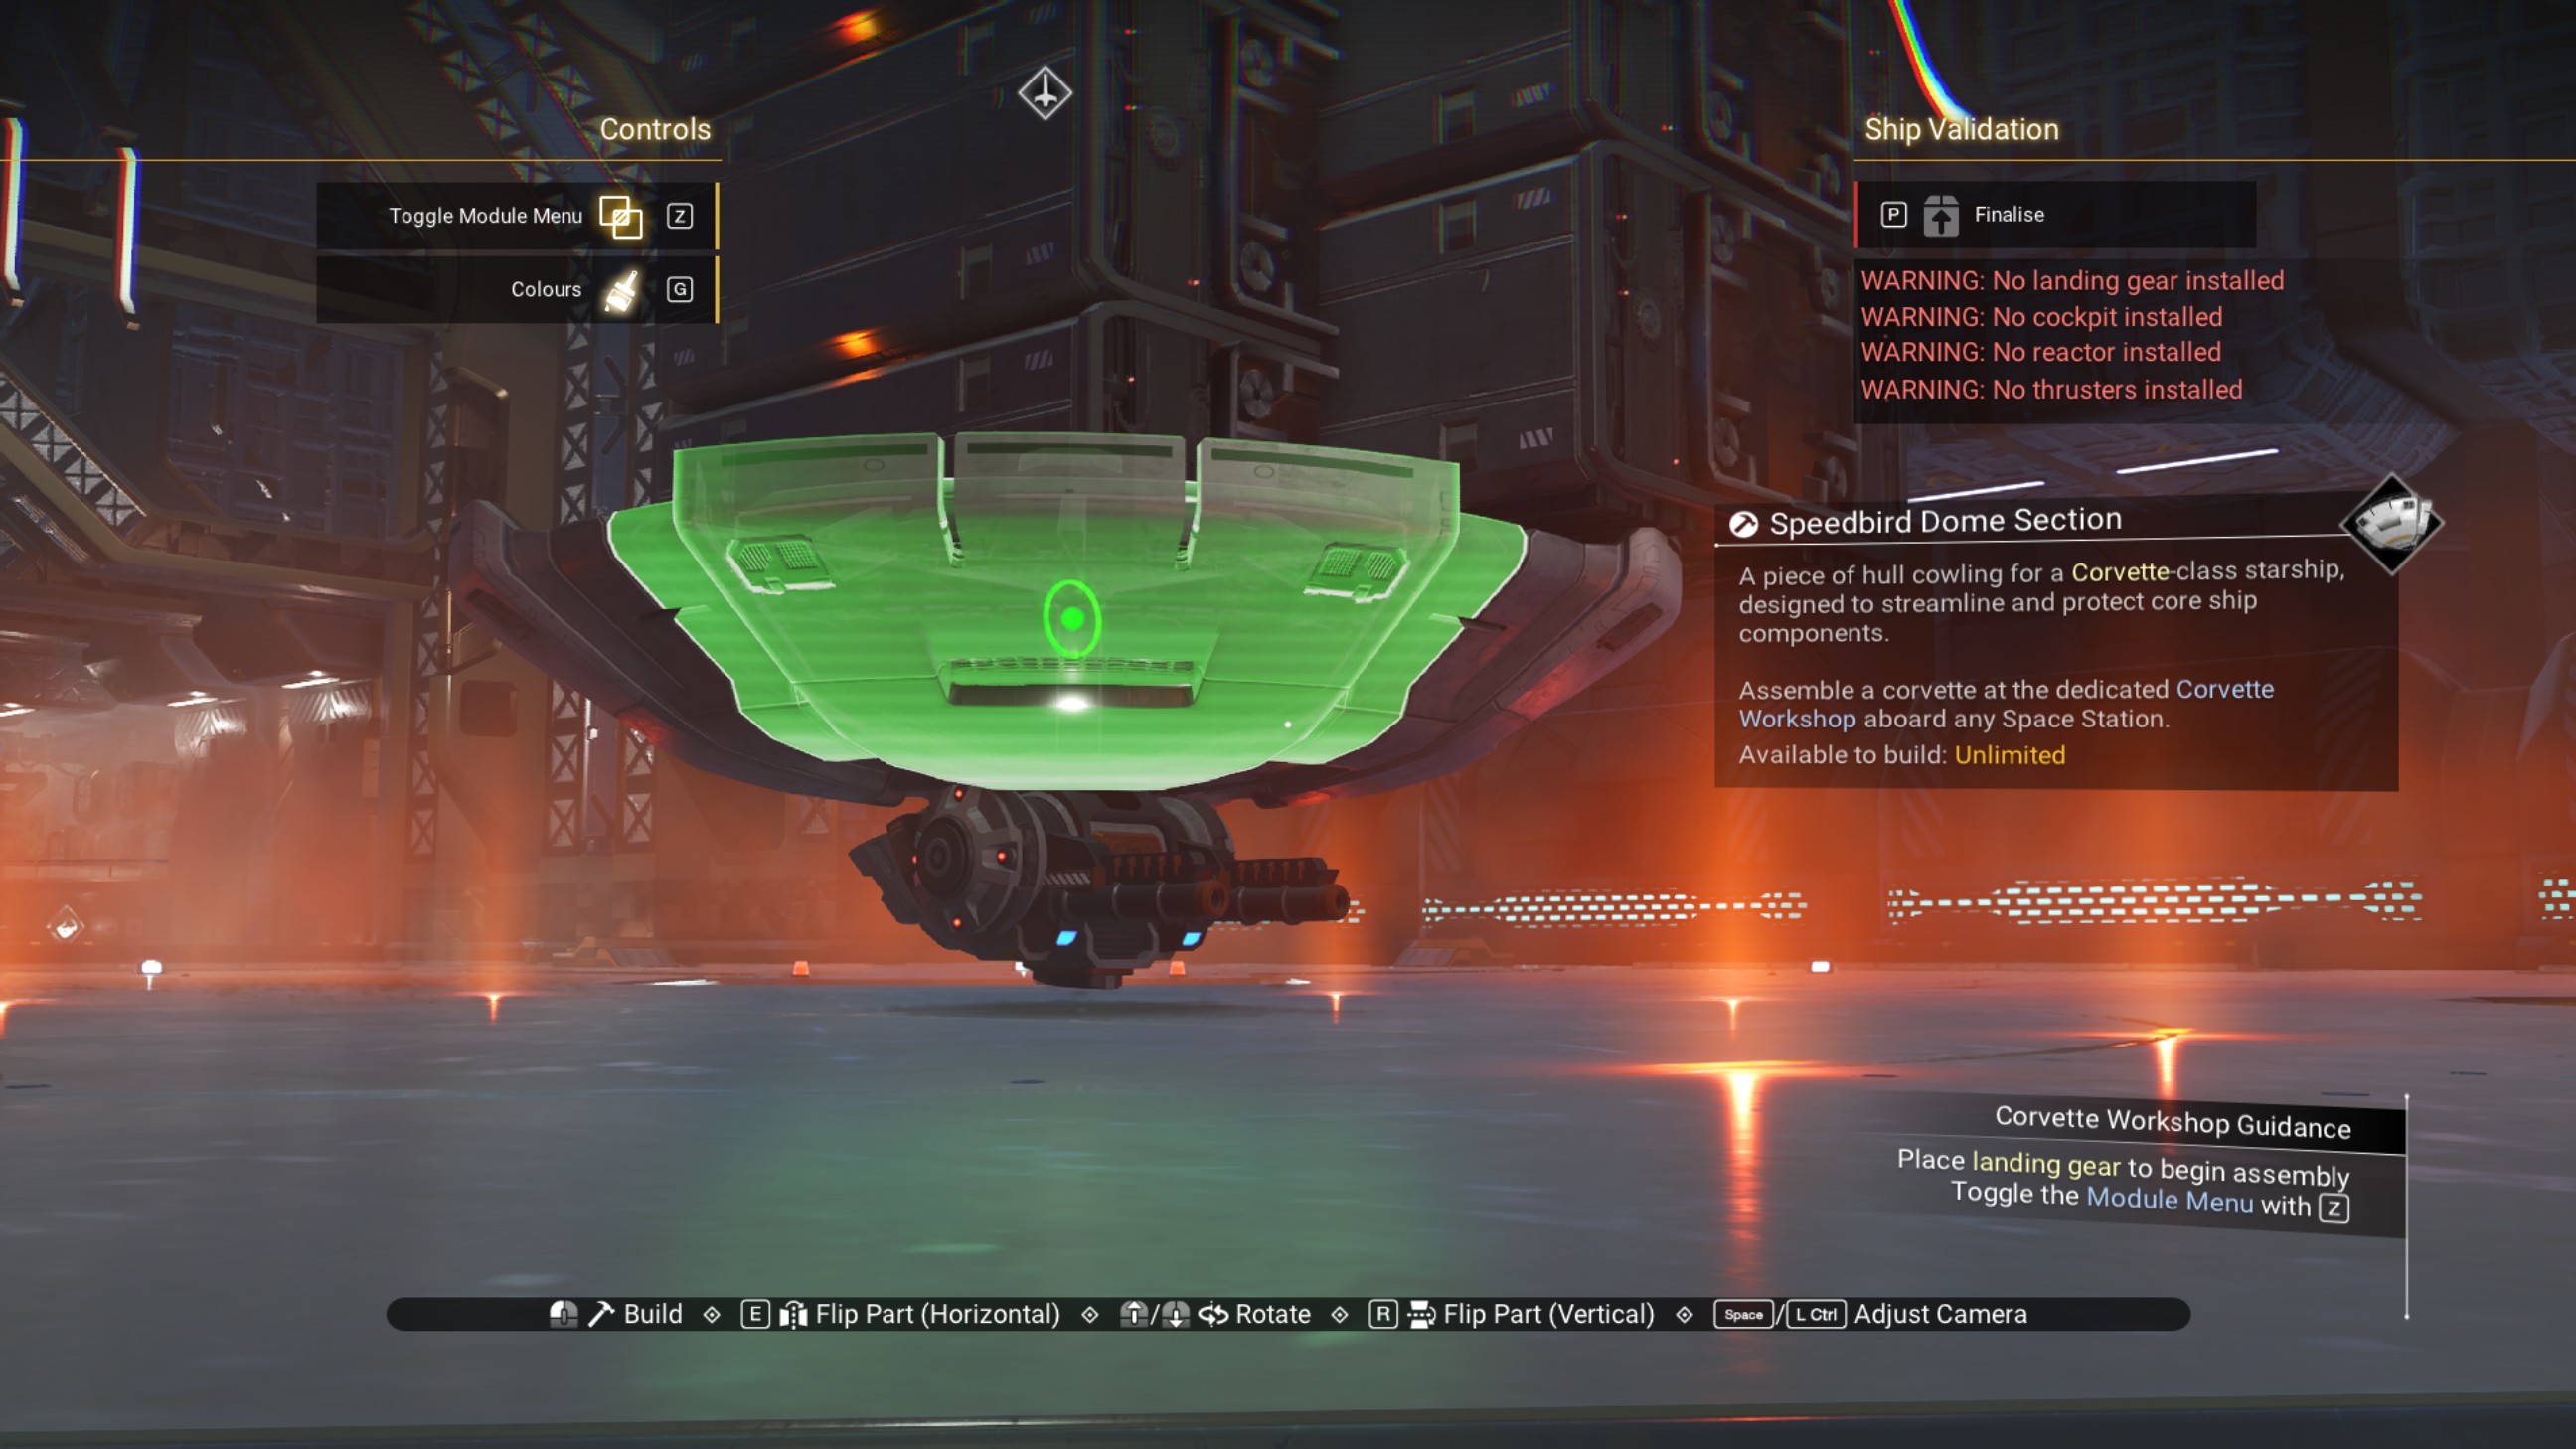
Delete the extraneous walkways.
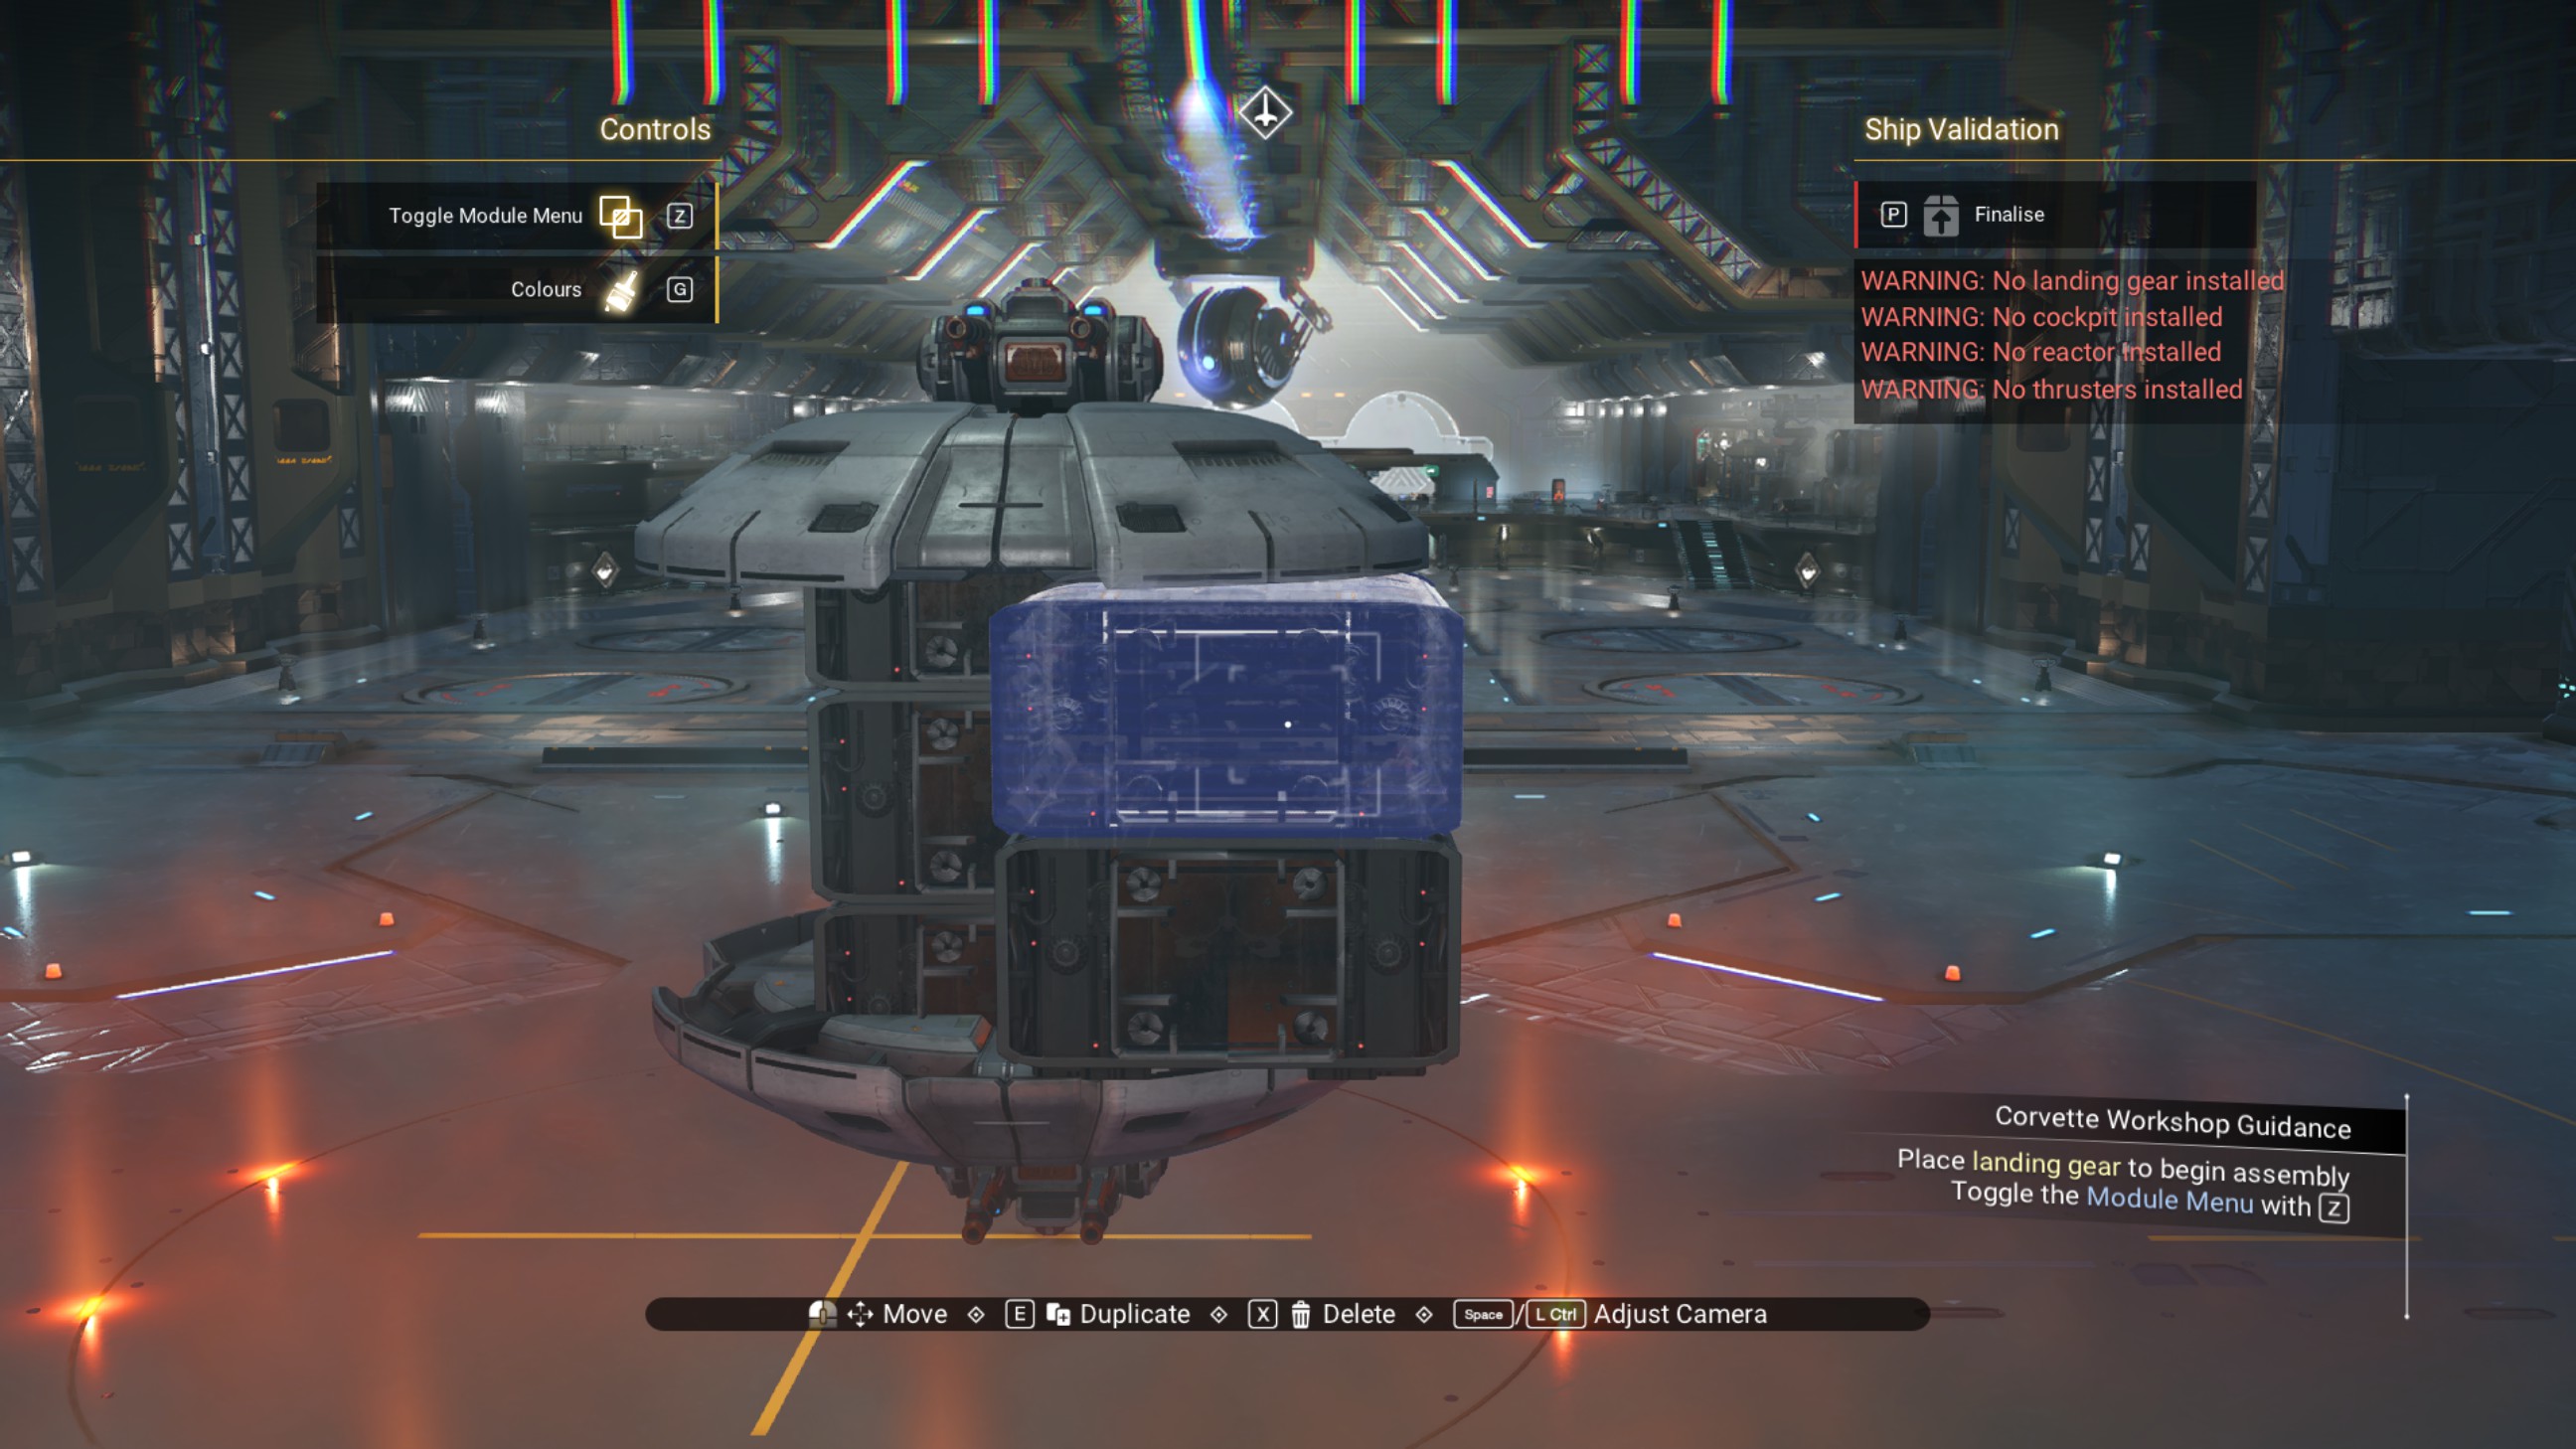
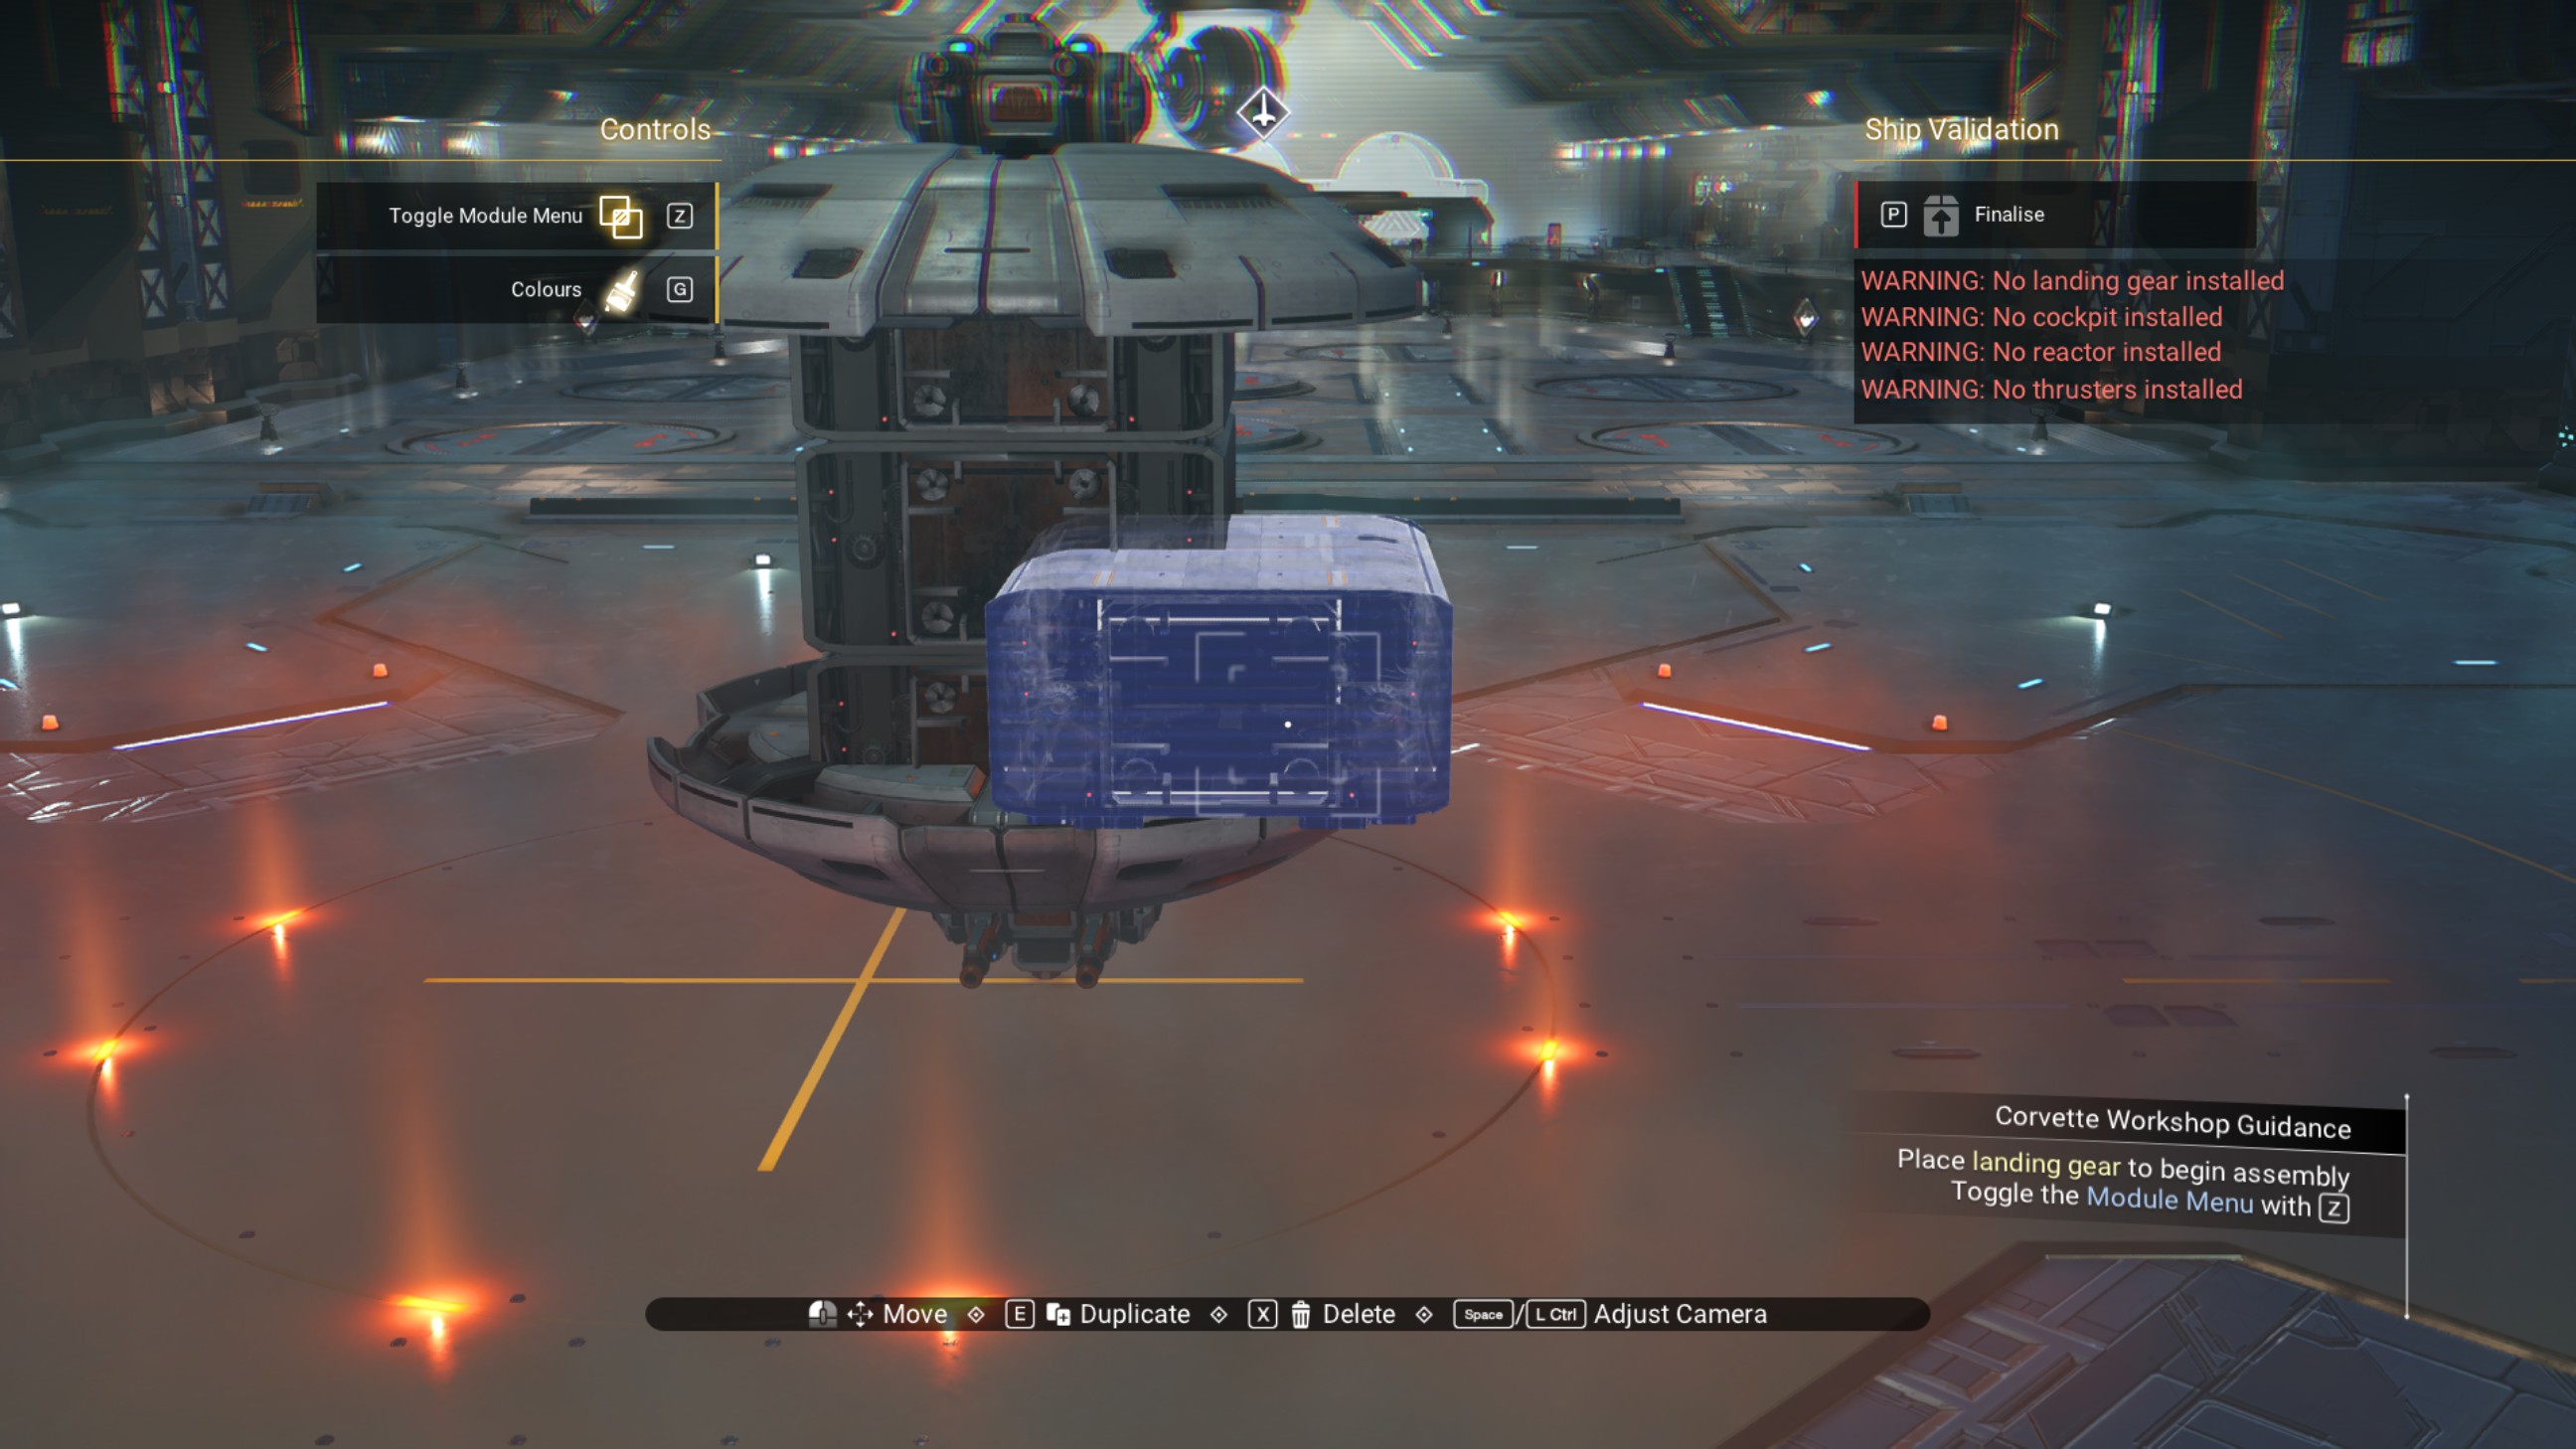
Building for Success
From the port side to the front of the ship, we're going to zigzag out from the central structure to the floor. Diagonally, we want three walkways from the center.
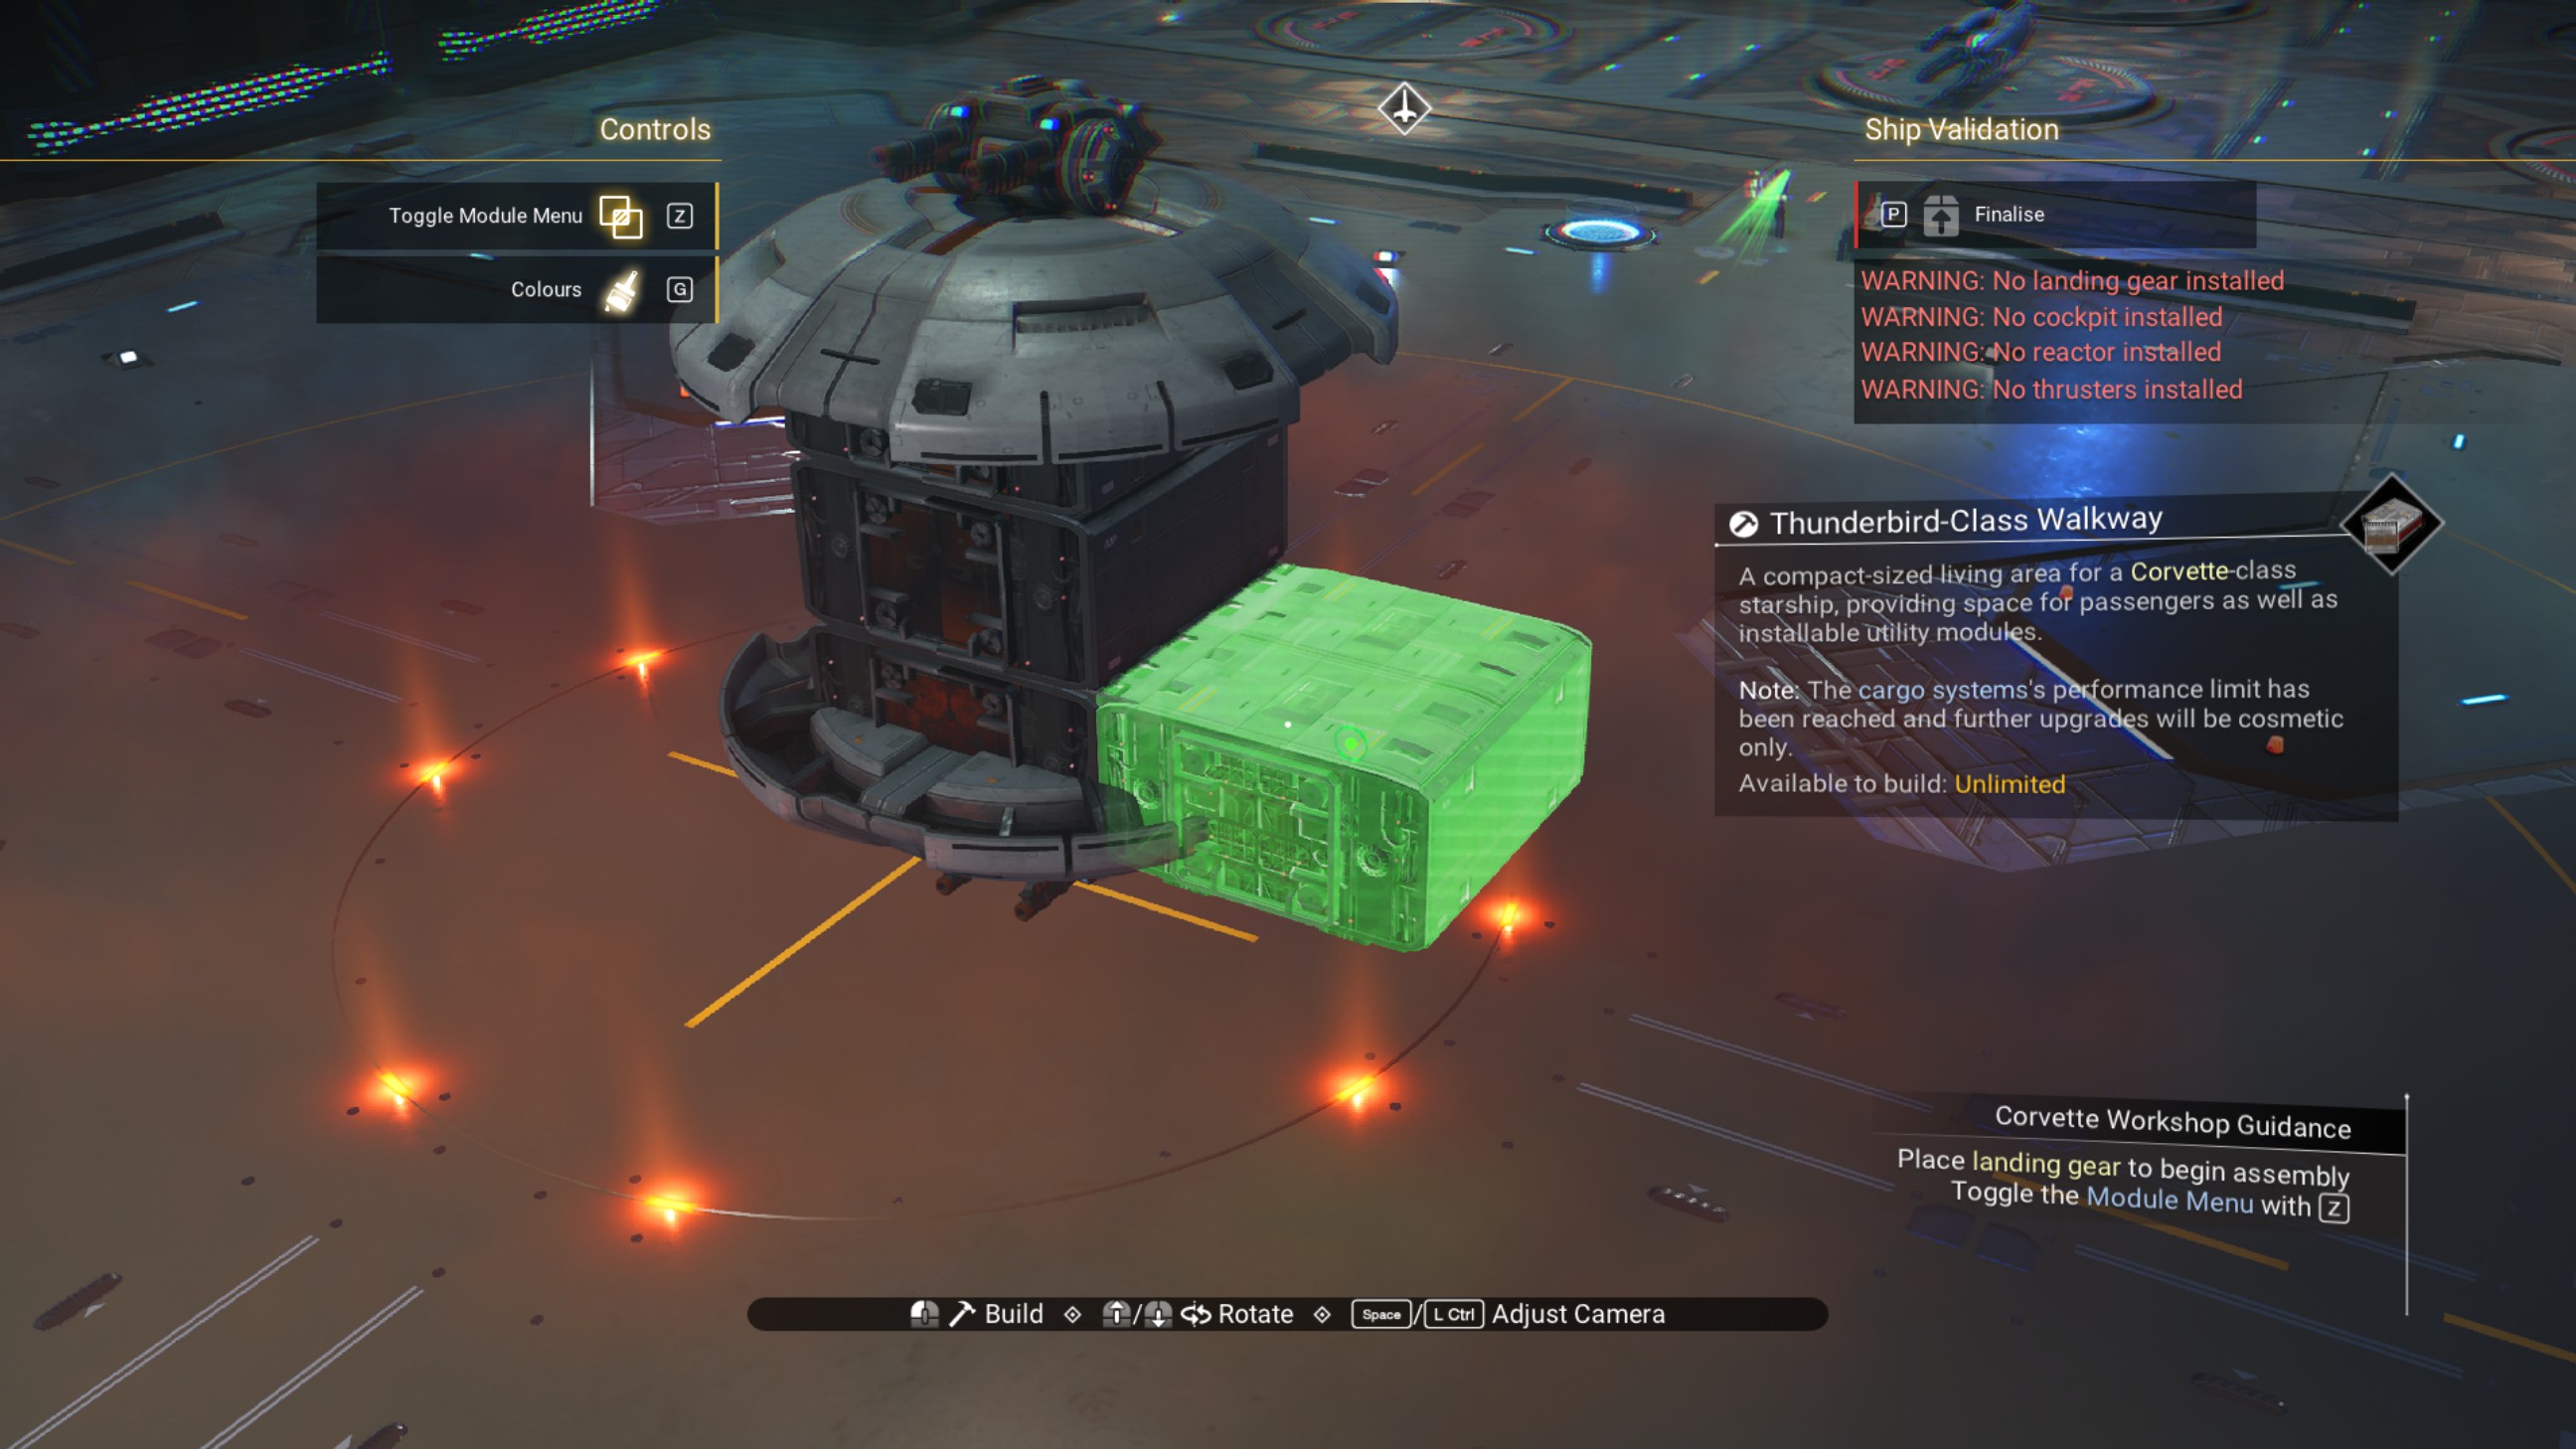
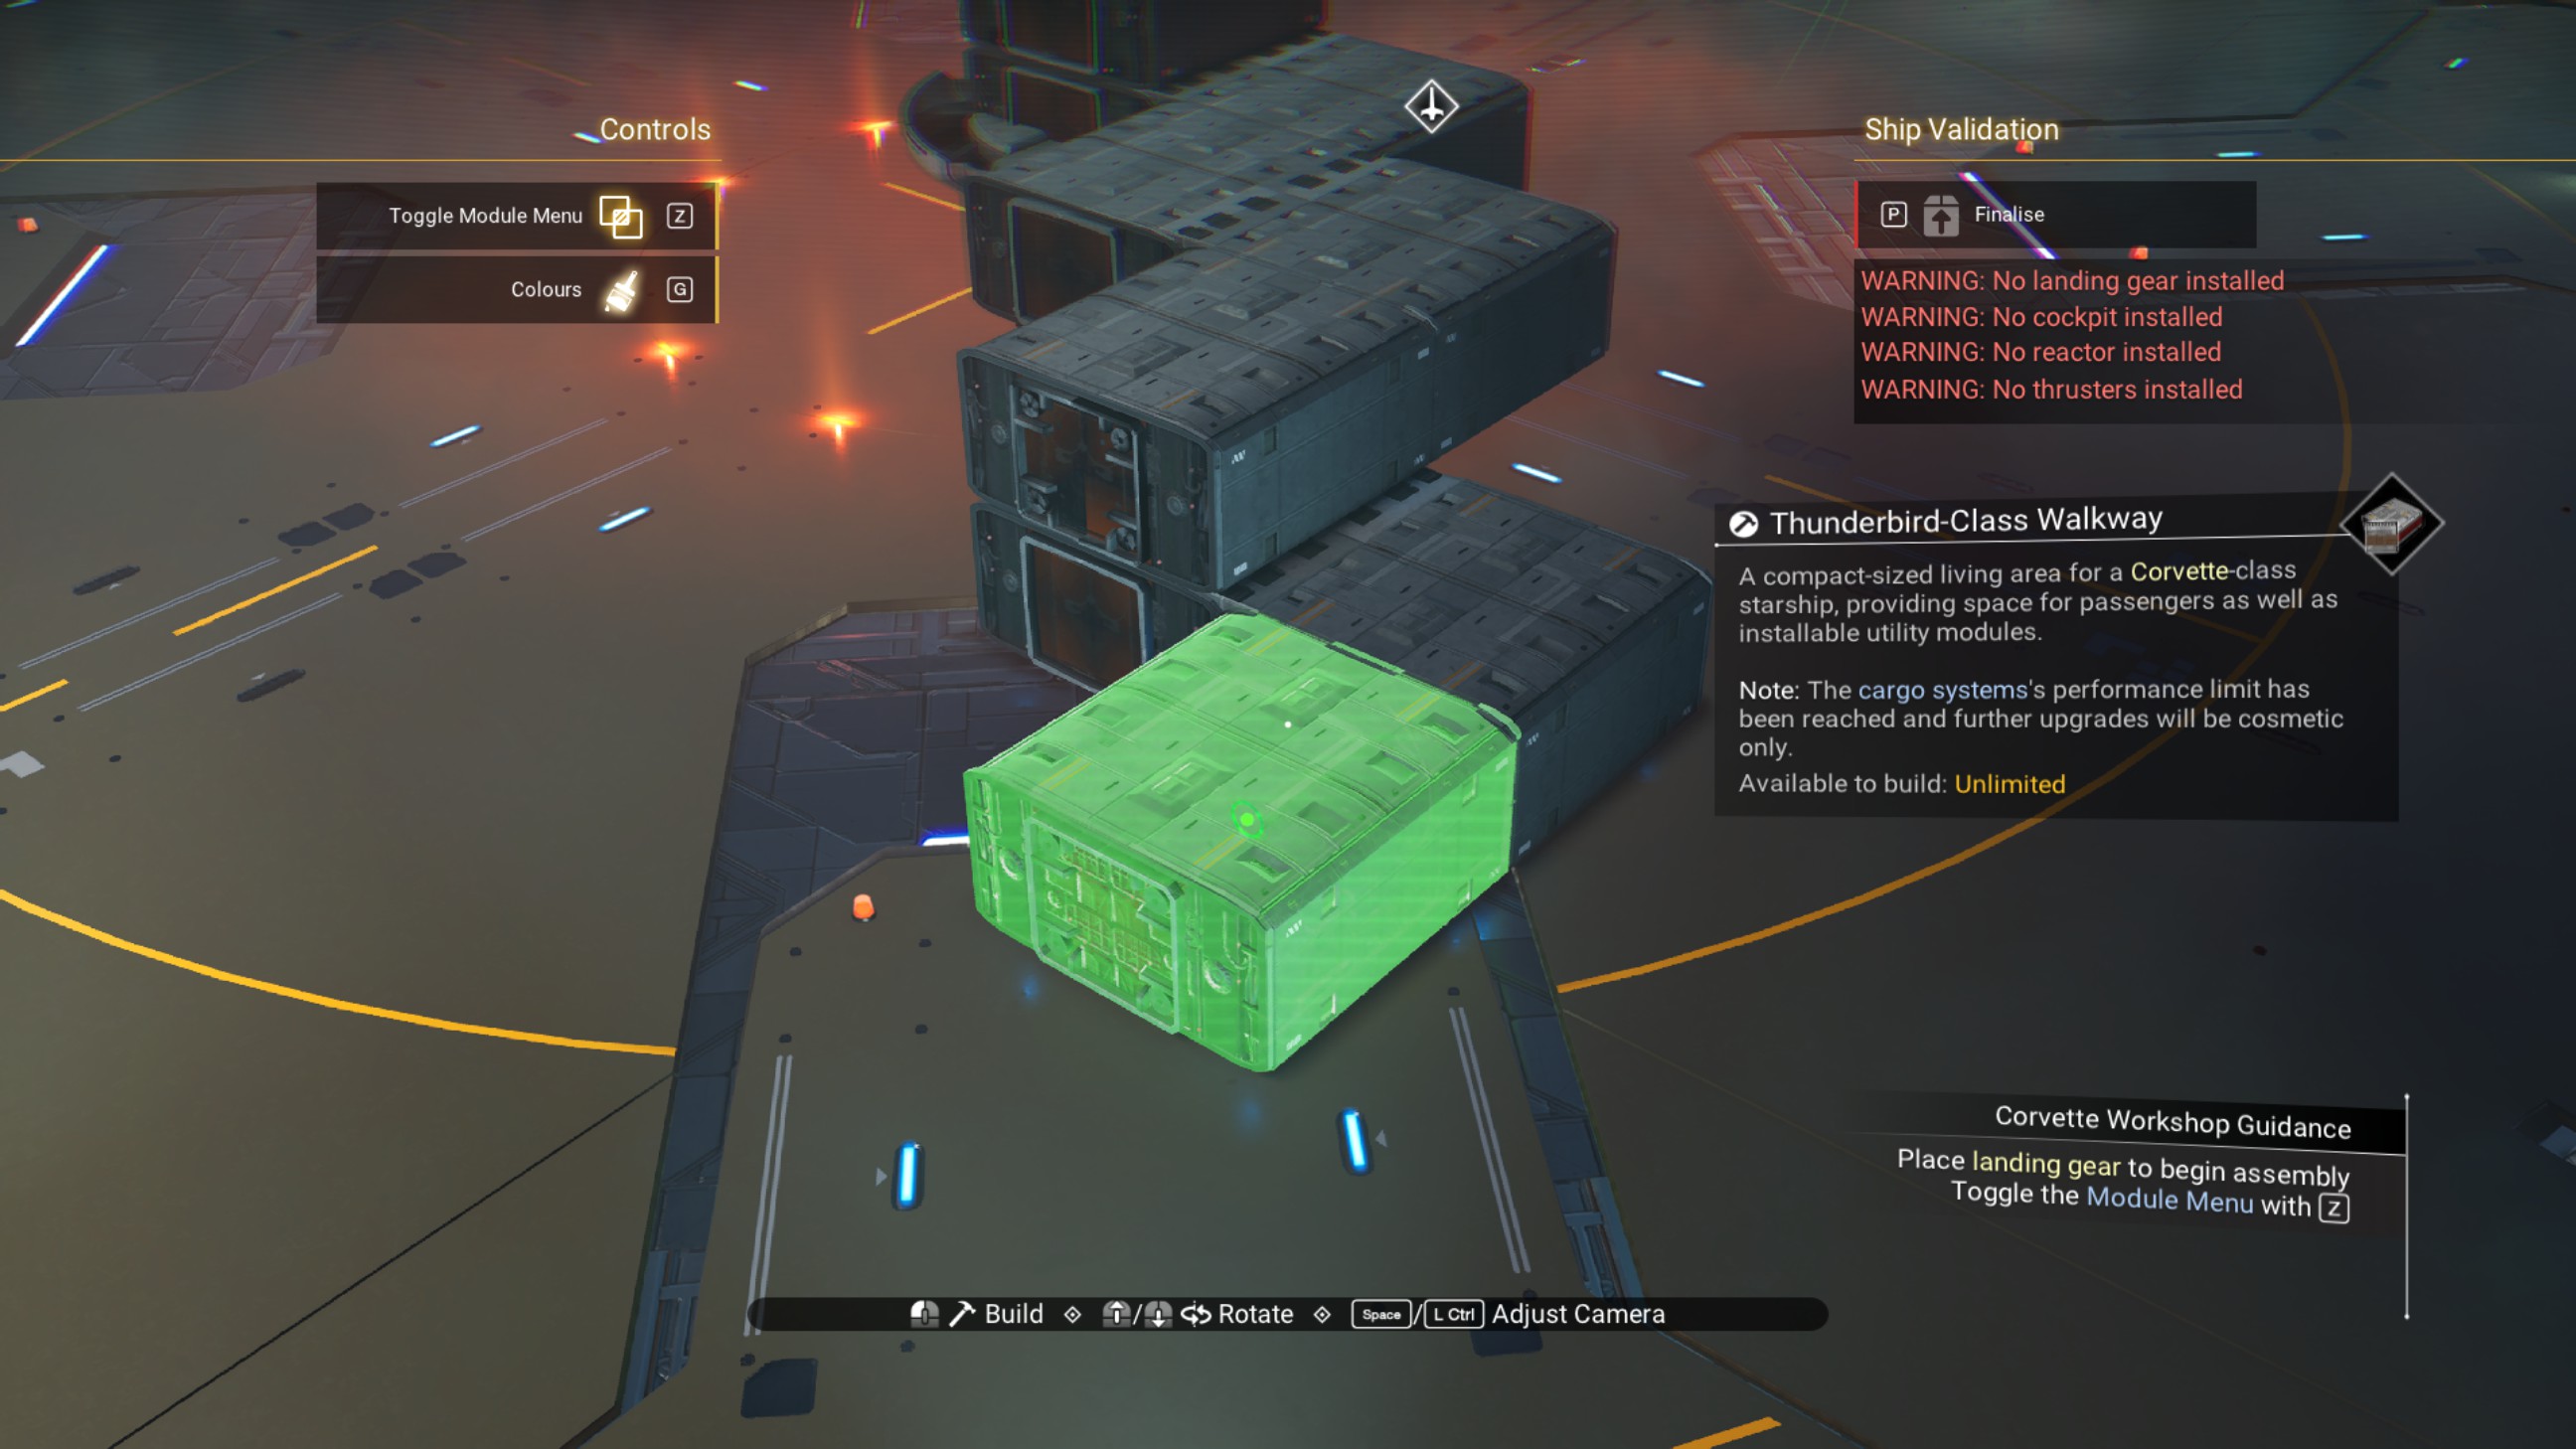
Delete the extra one on top so we still have room to work.
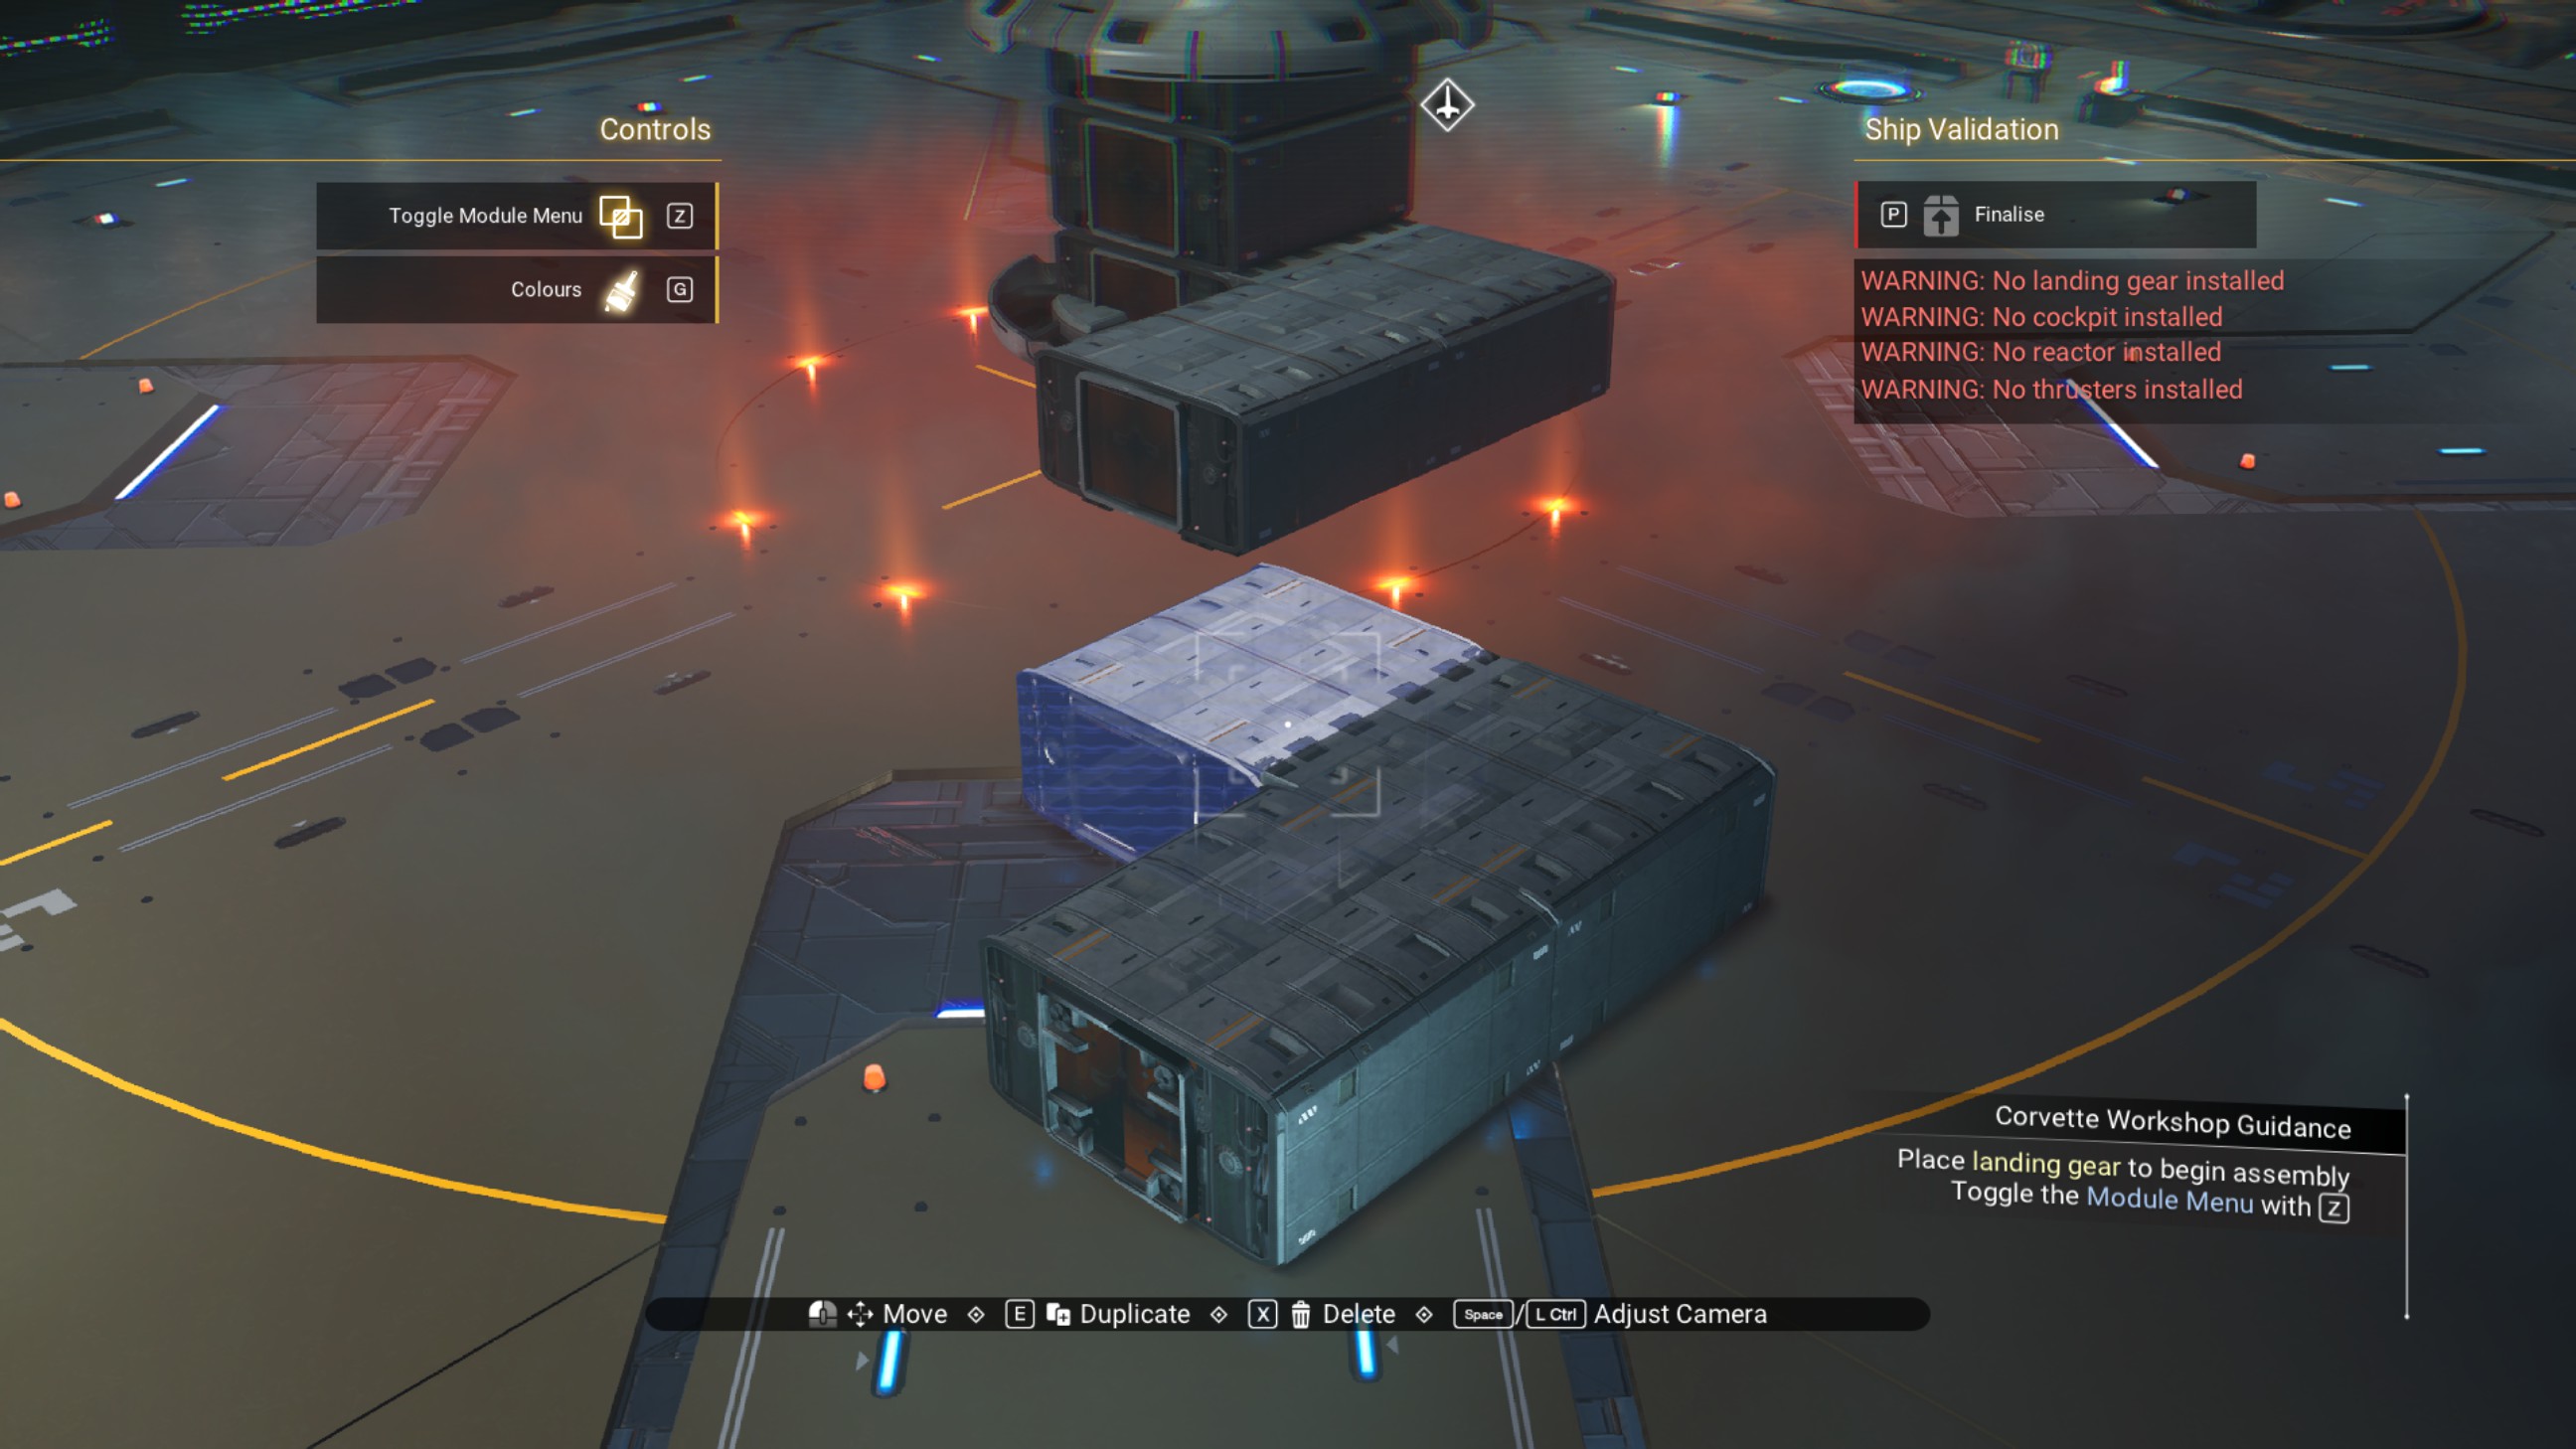
We're going to do the same thing to the rear of the ship, also on the port side. Zigzag out from the center to the floor so that the last walkway is the third diagonally from the center.
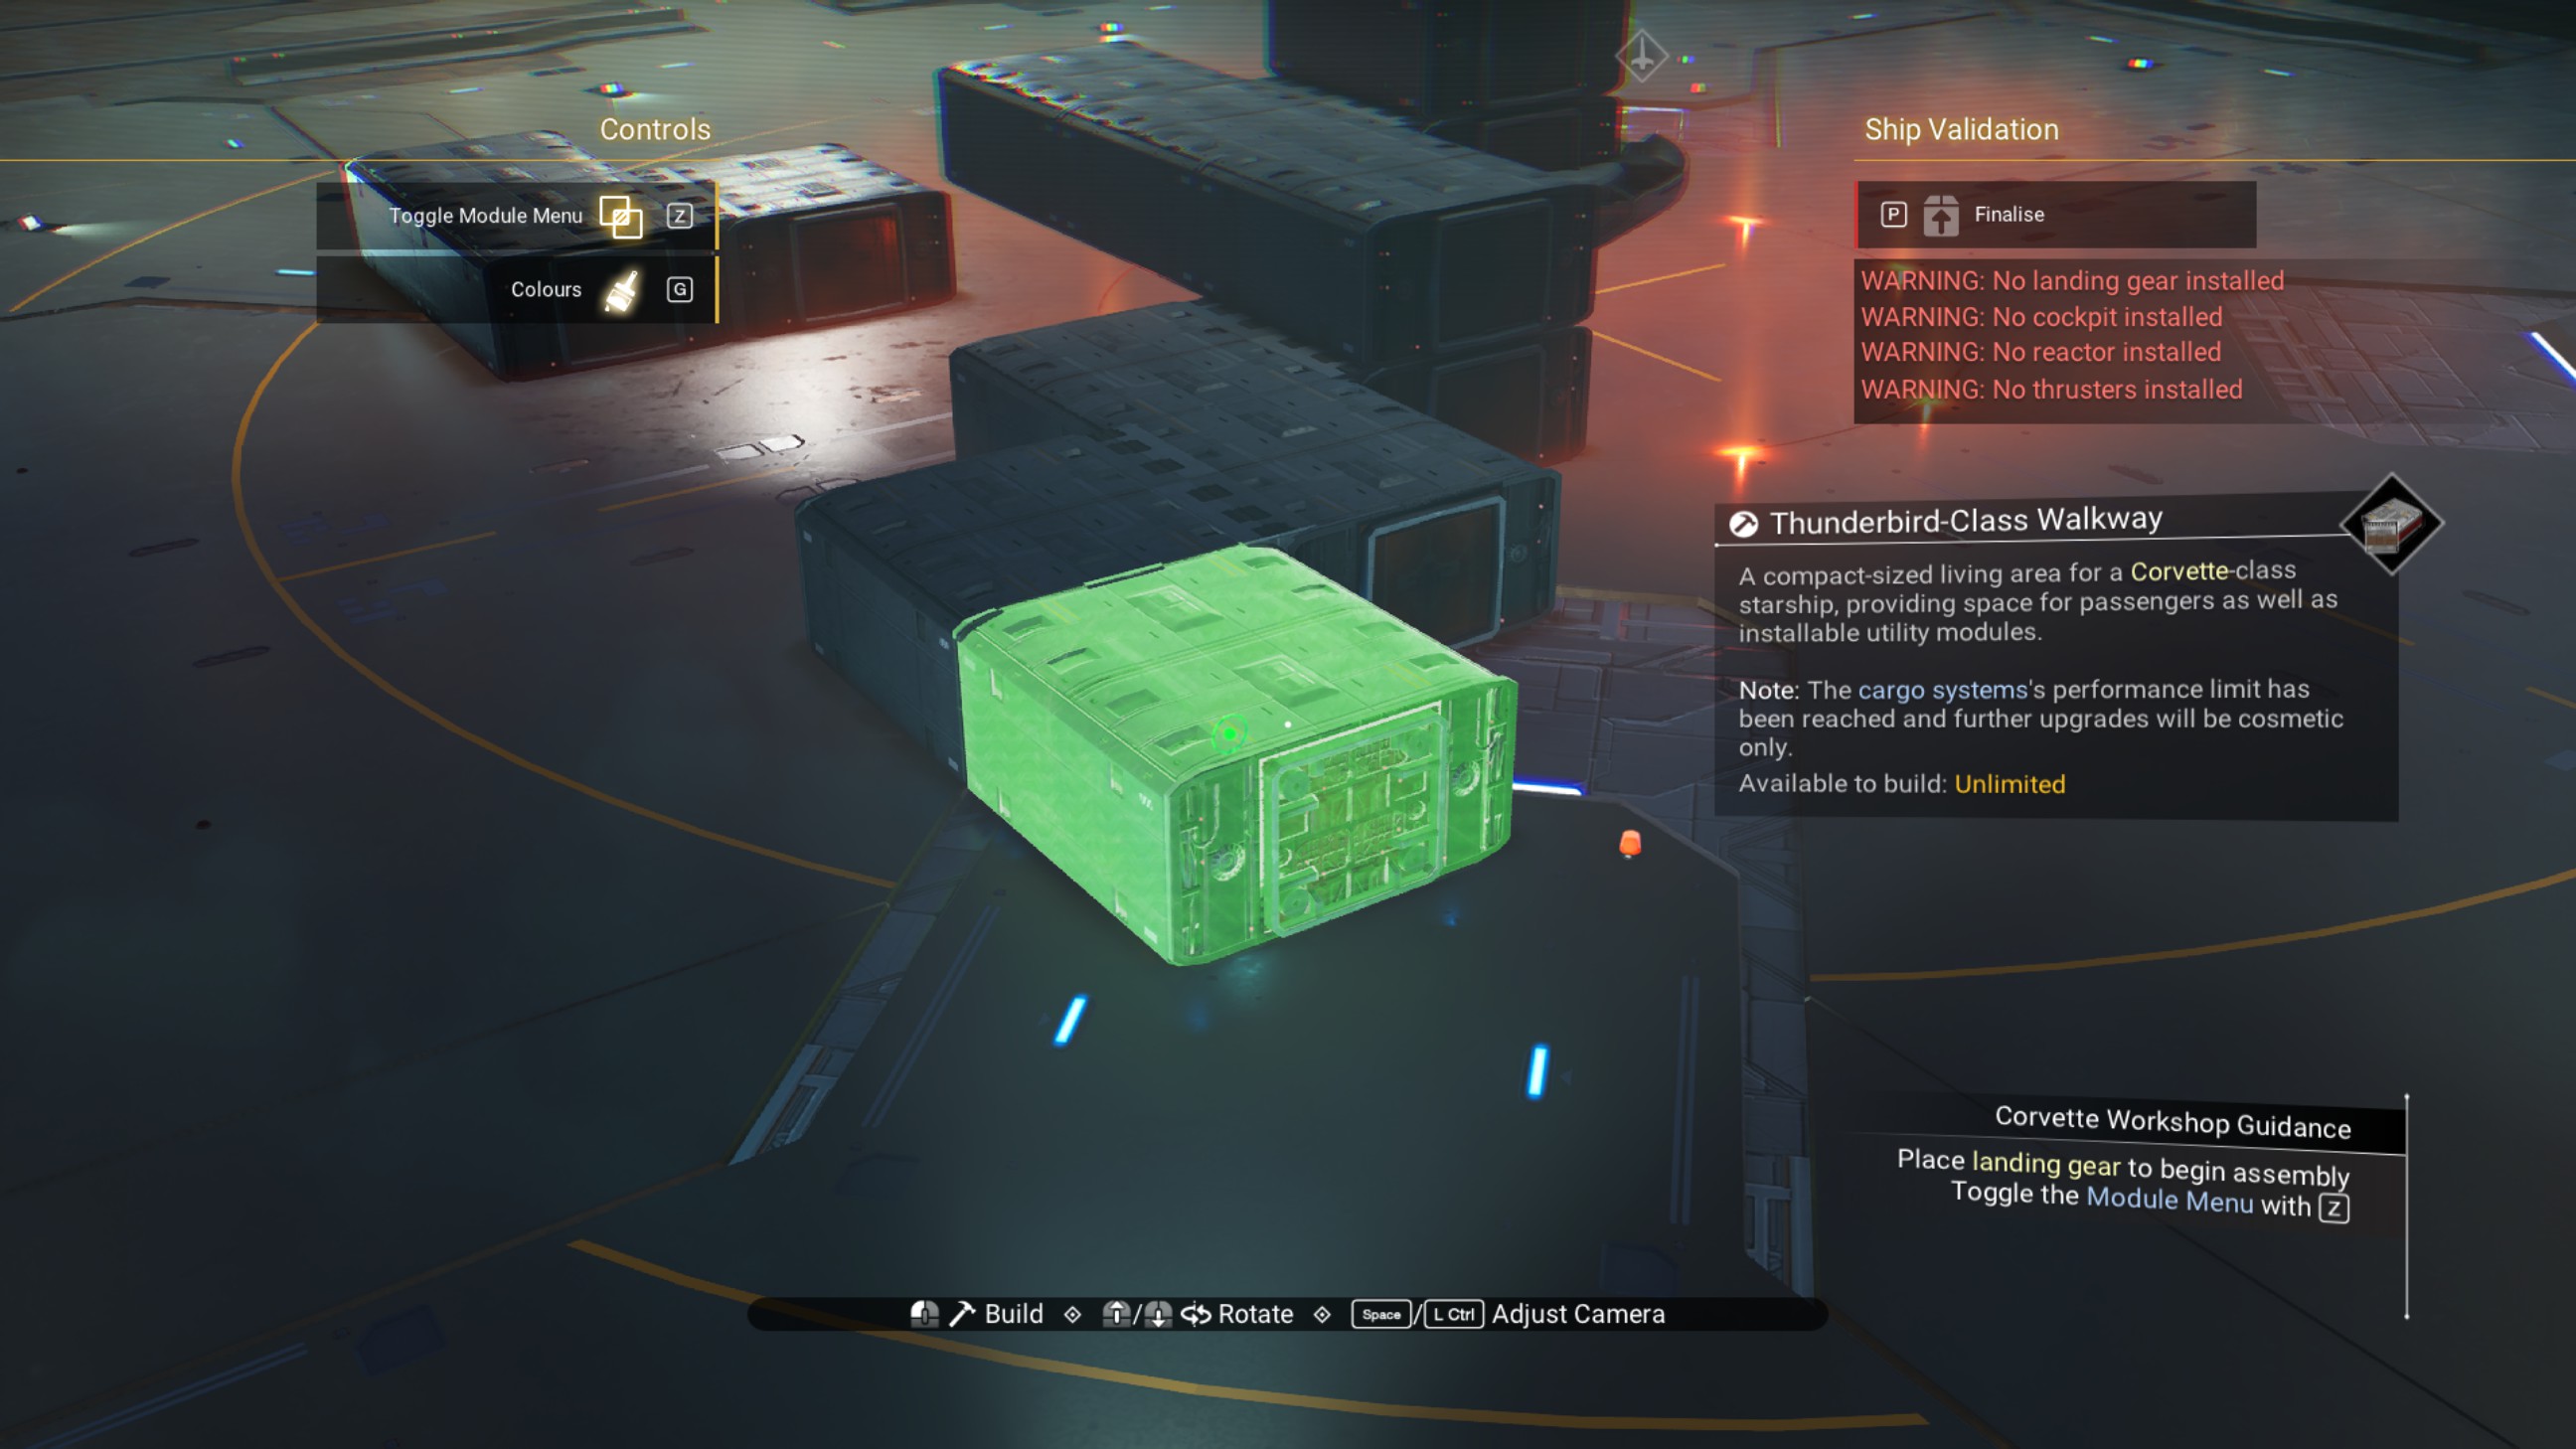
You can delete the extra walkways so it looks like this.
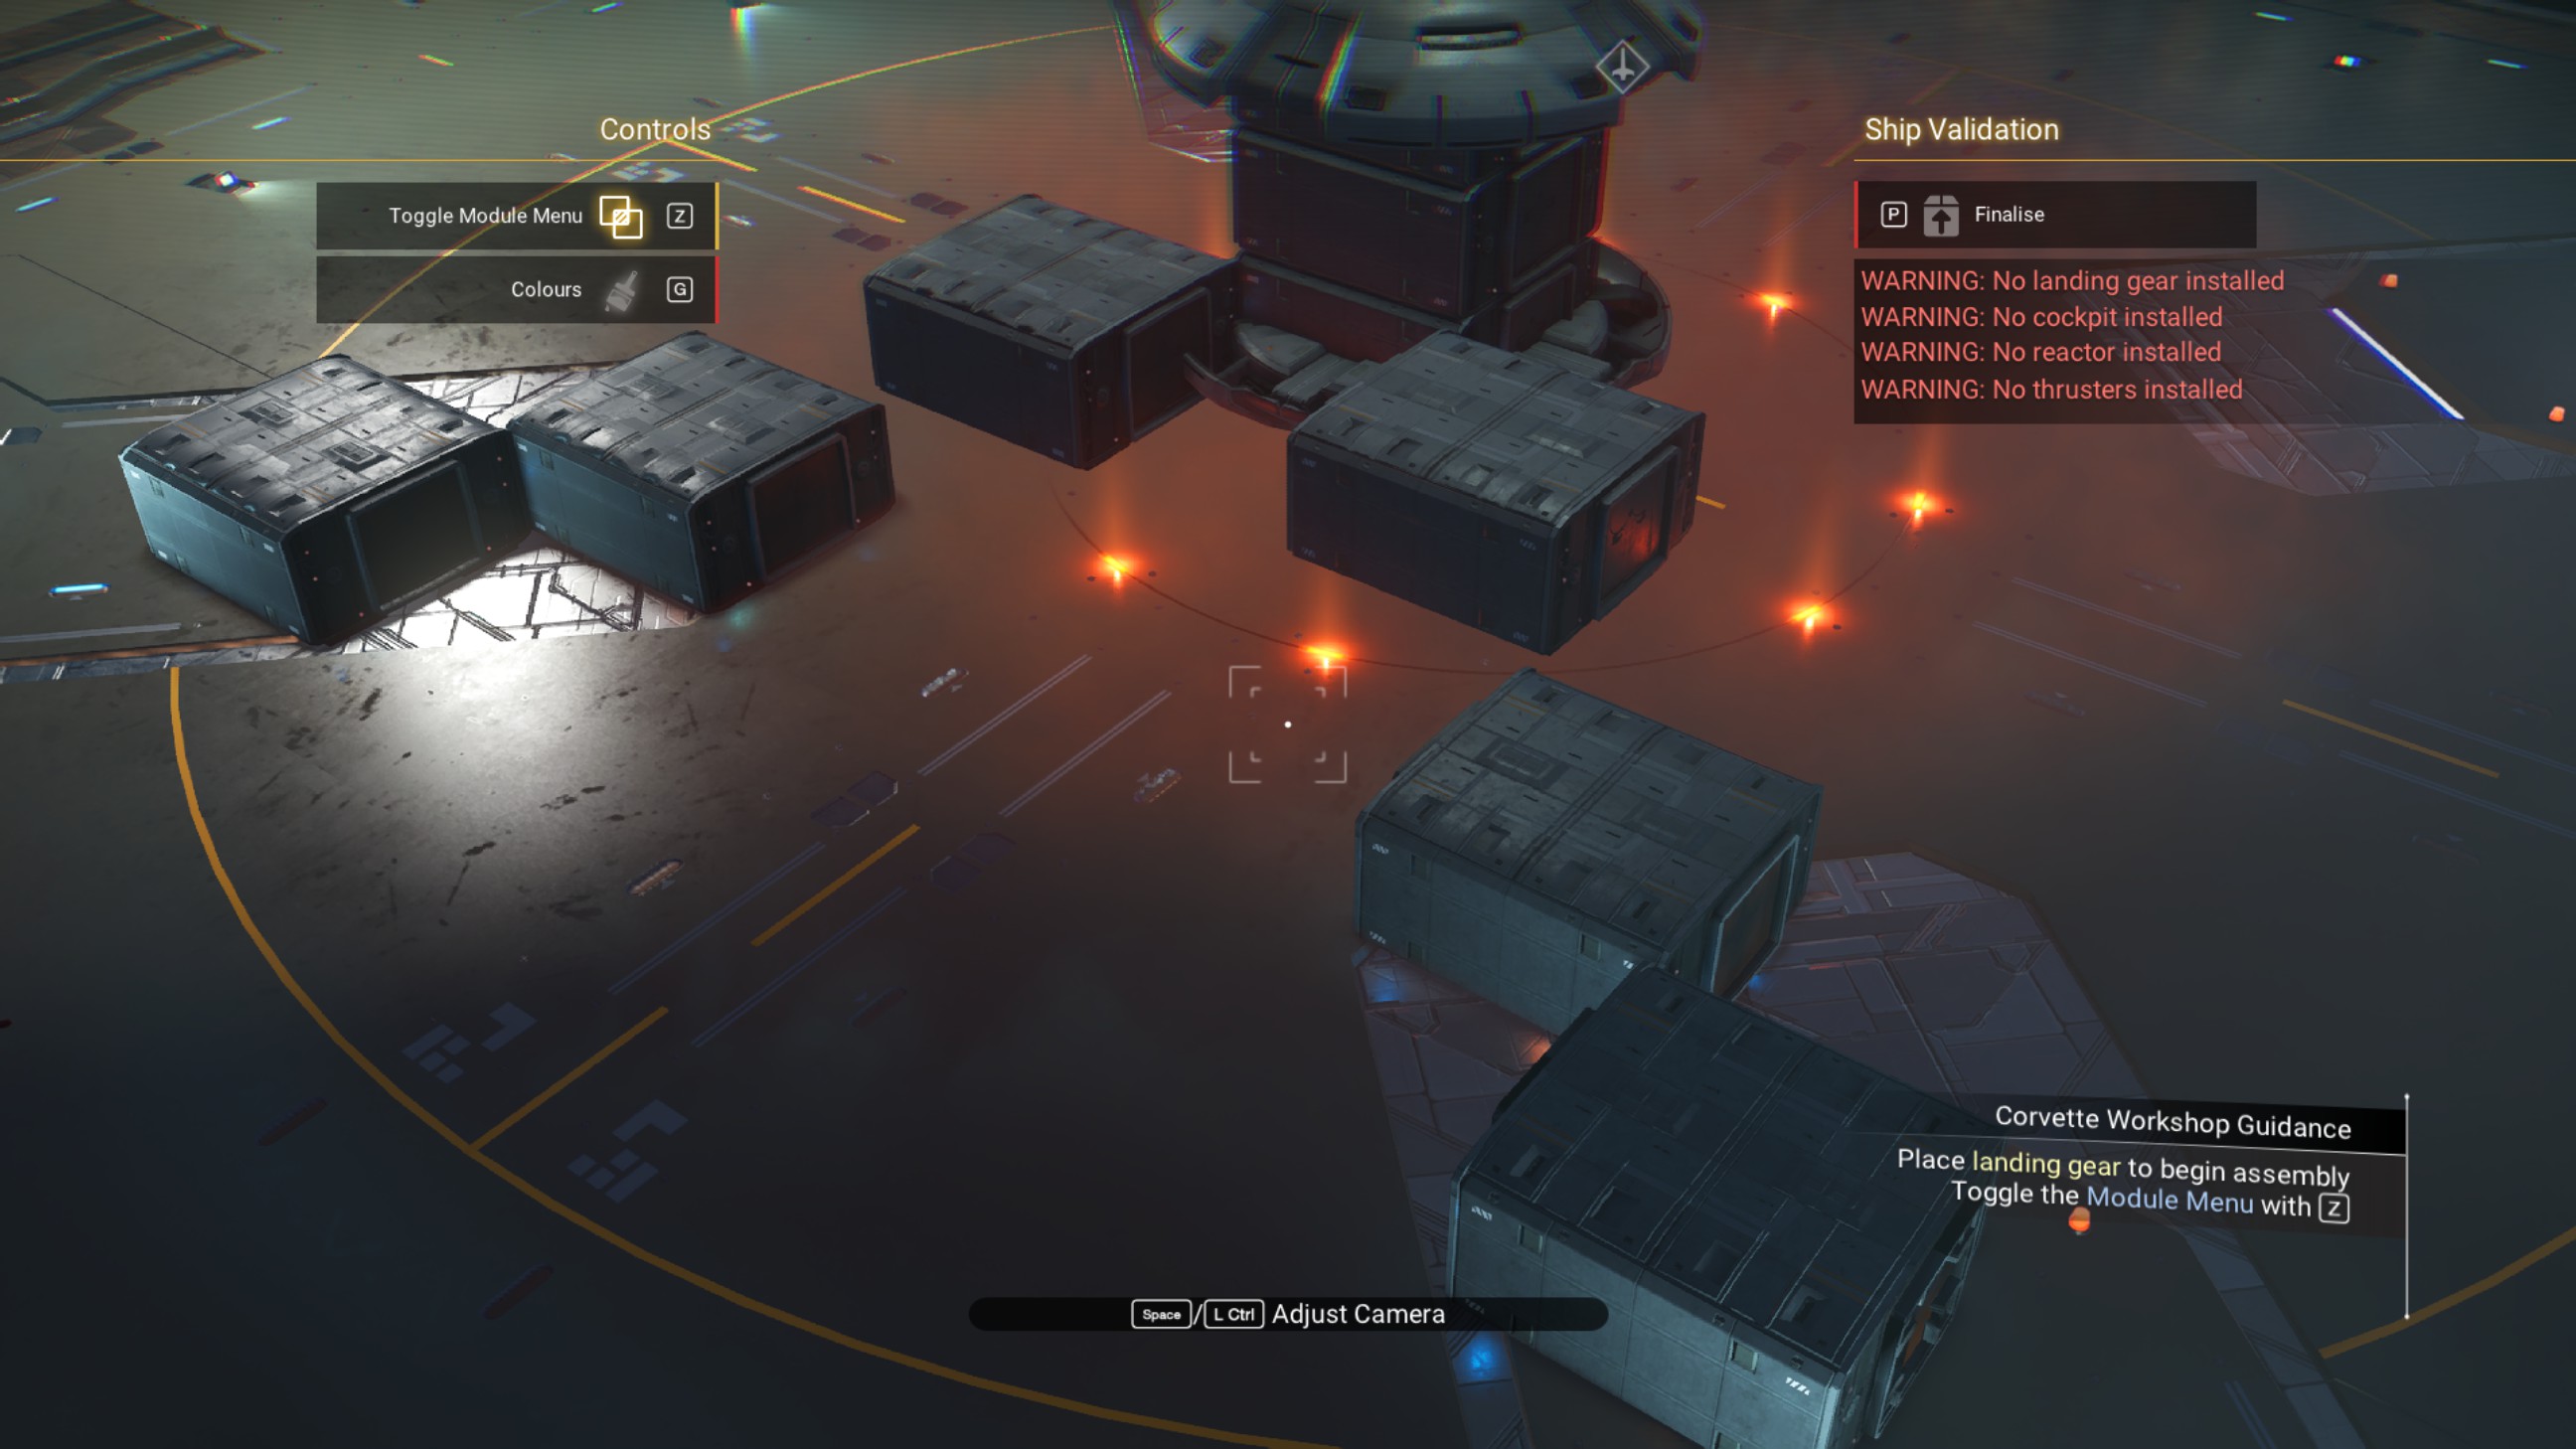
On the port bow (front left of the ship), place three zenith-class reactors: one forward of the farthest zigzagged walkway, one to port, and one on top, as shown.
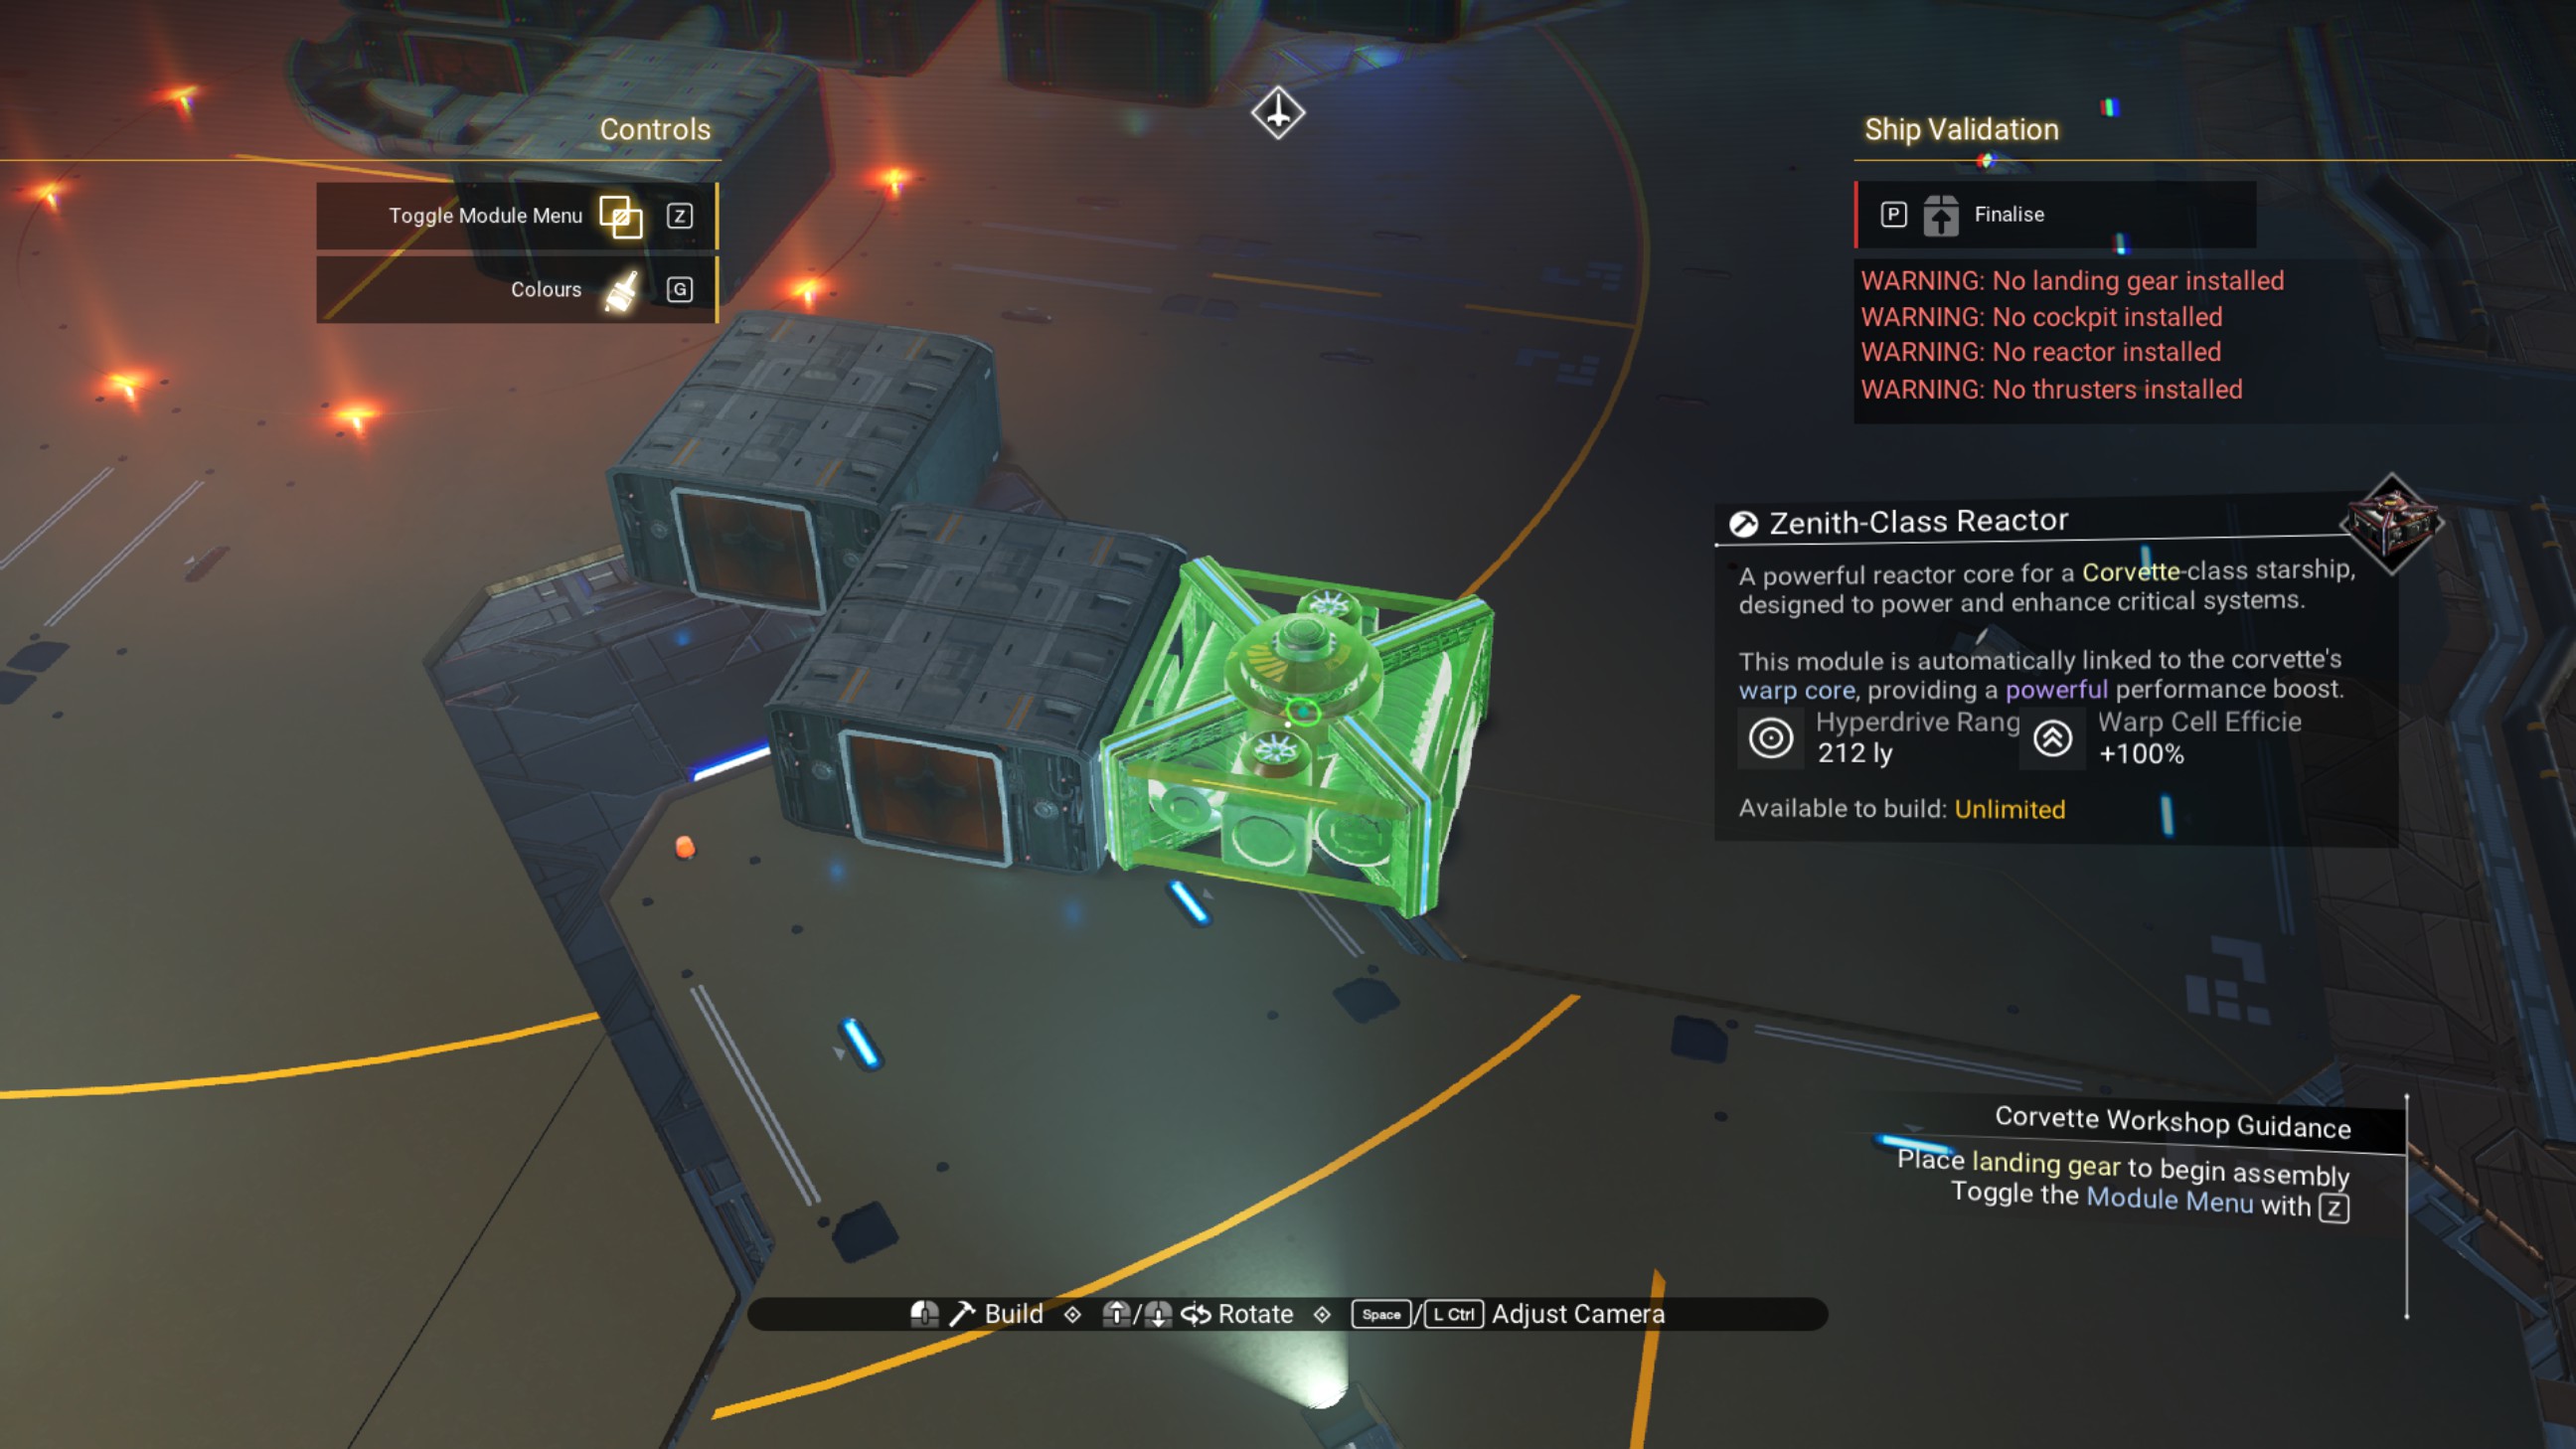
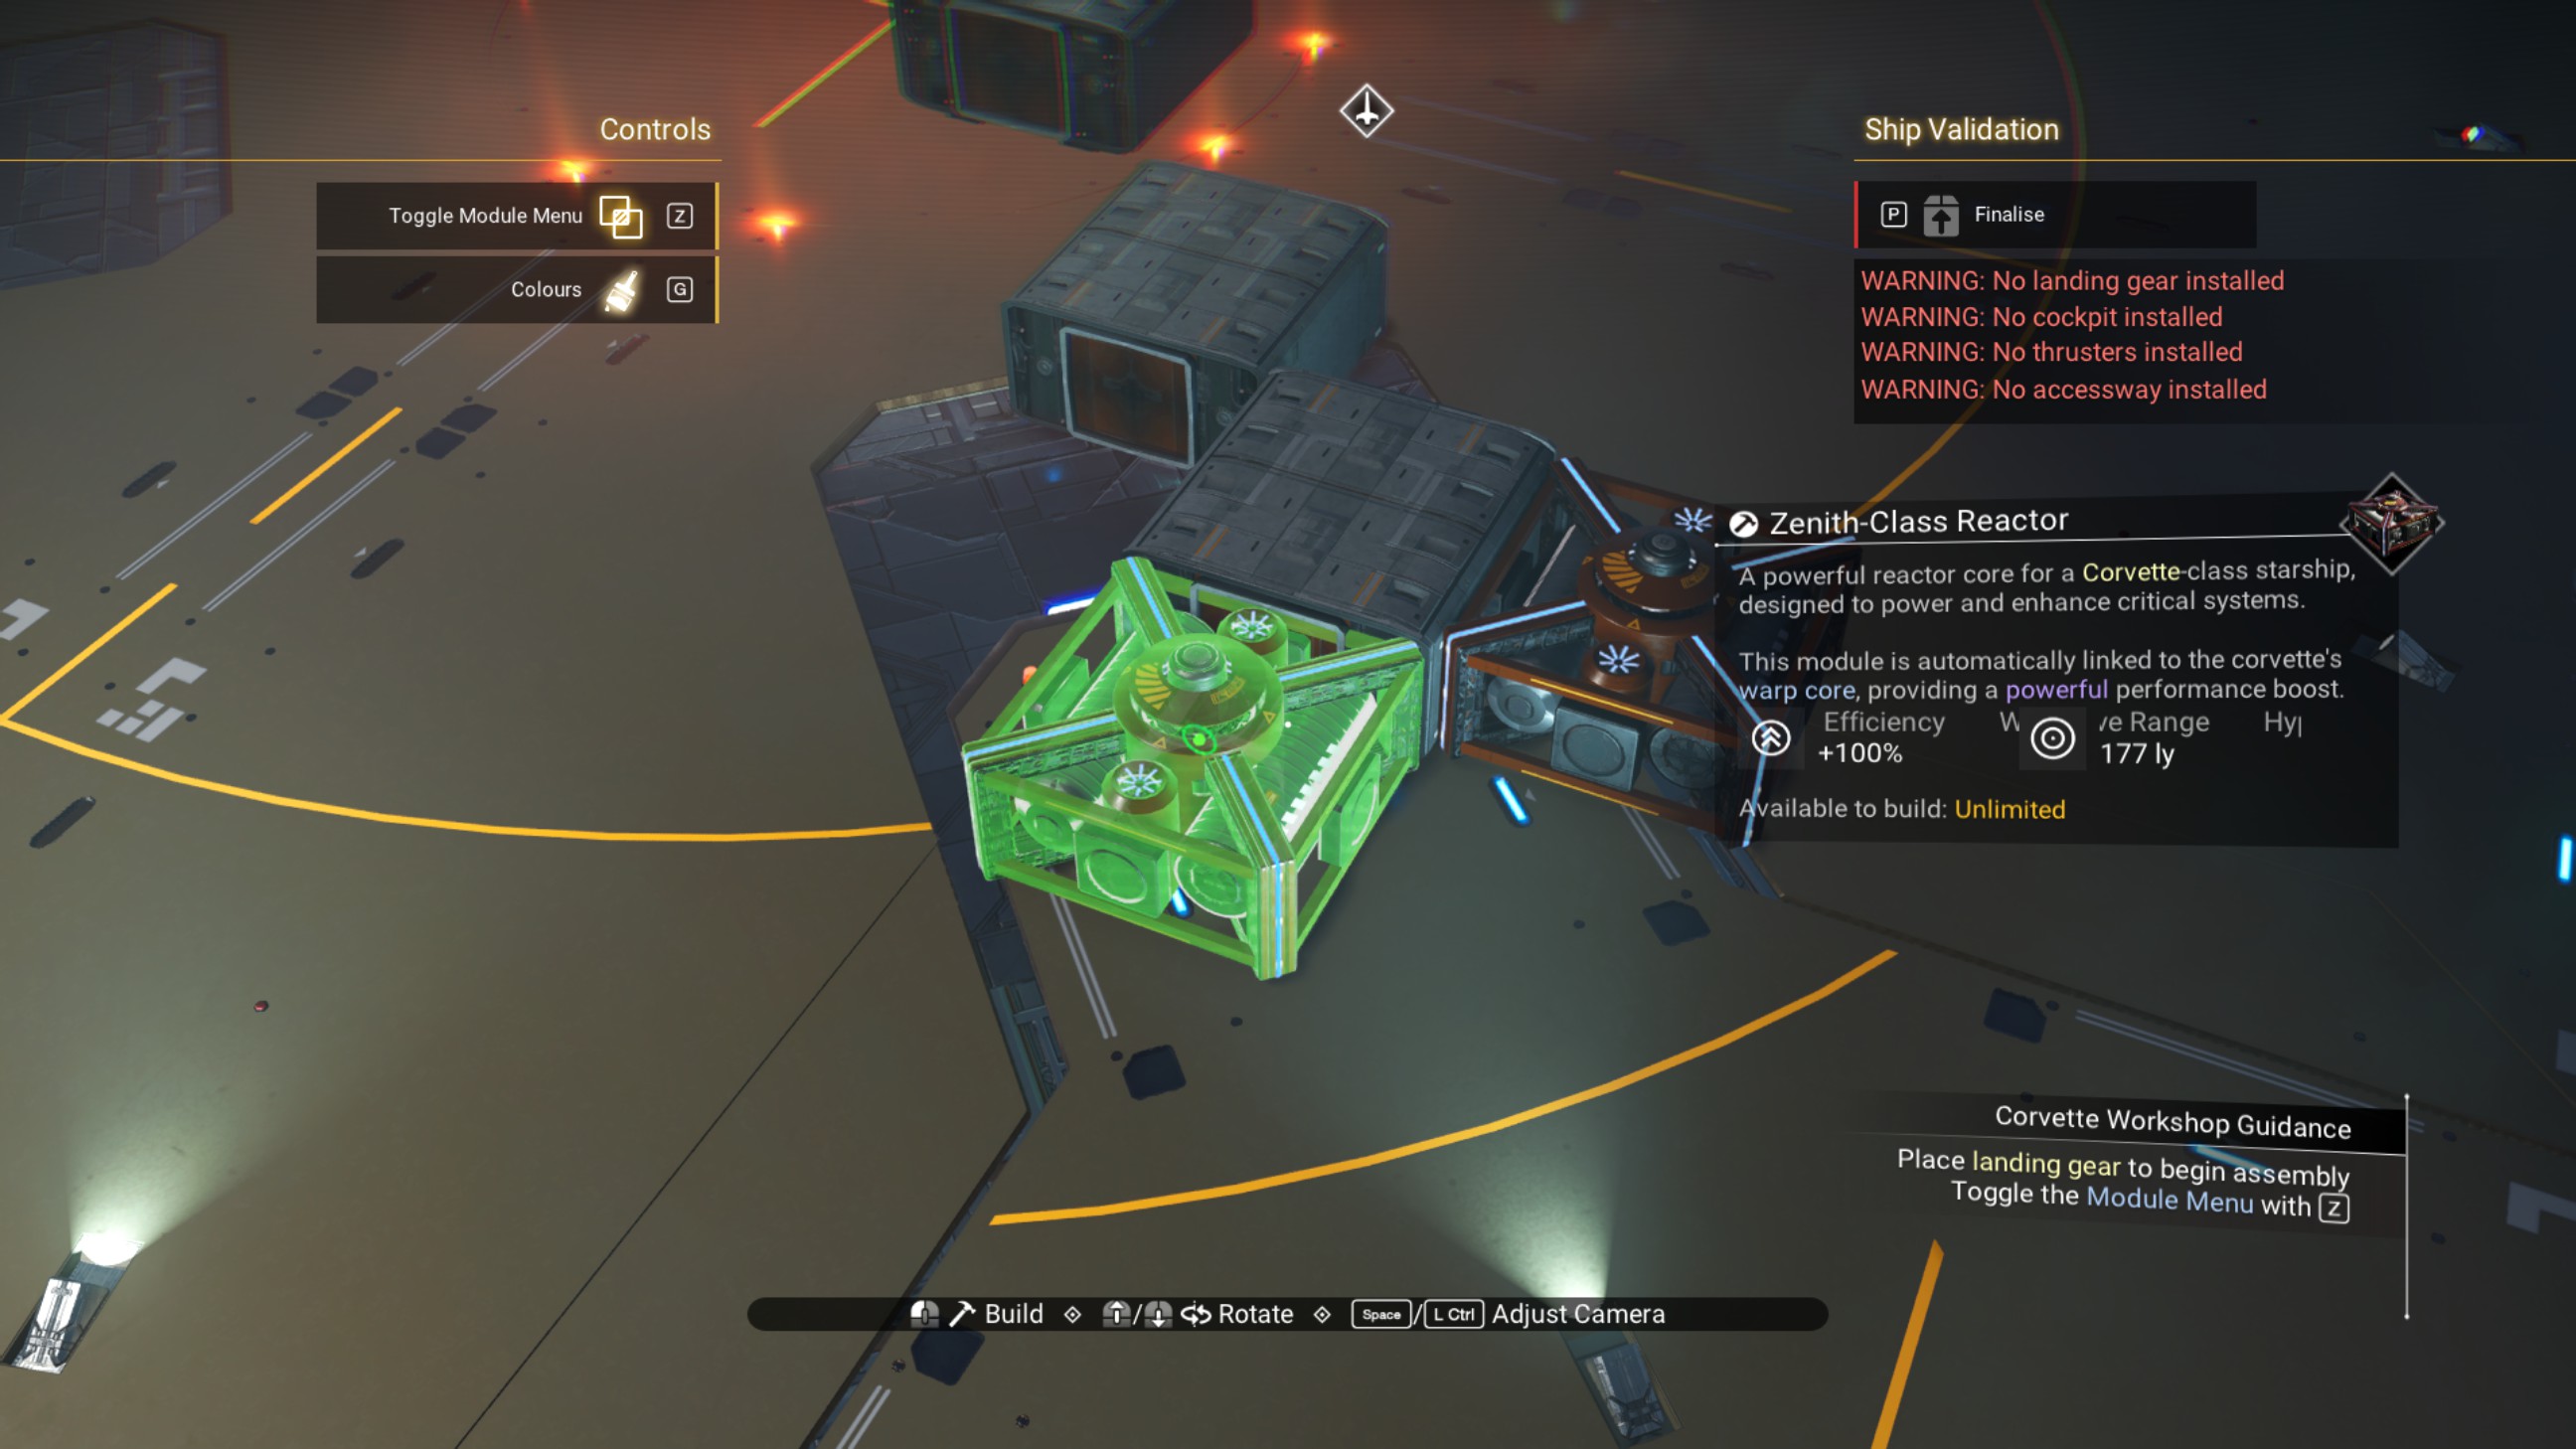
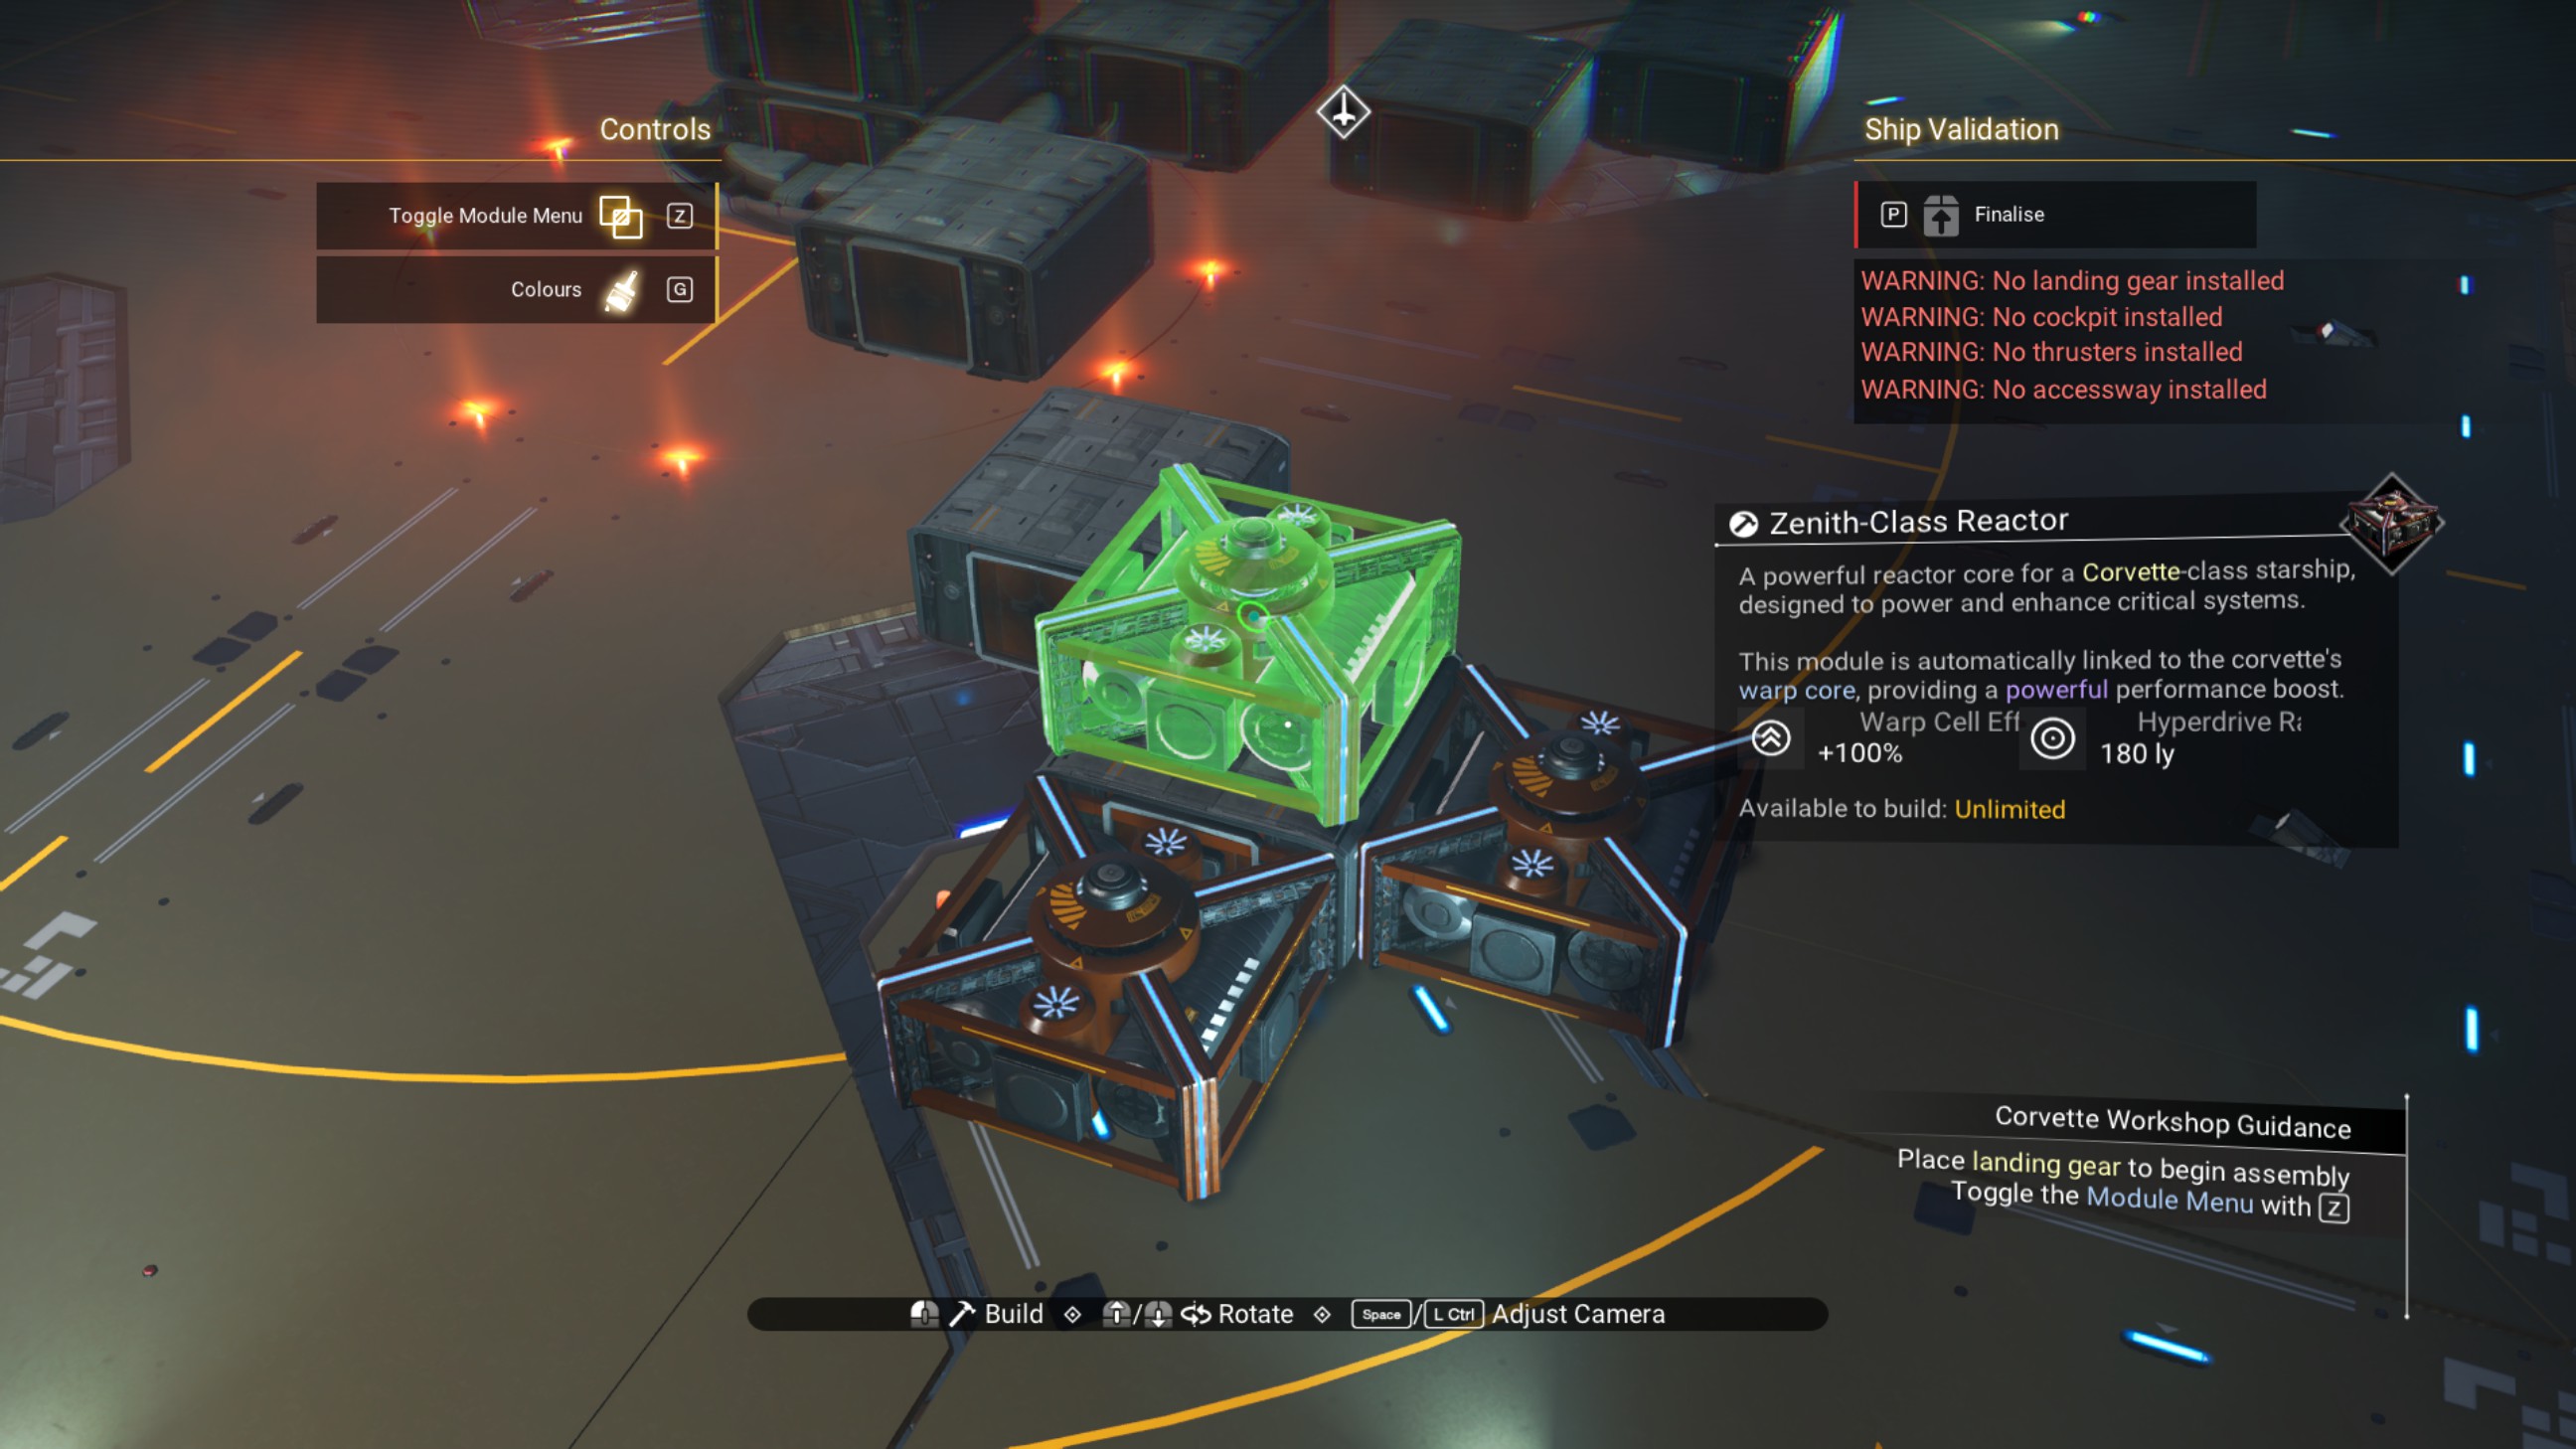
Do the same for the farthest walkway on both sets of zigzags. For port astern, one goes behind the farthest zigzagged walkway, one to port, and one on top, as shown.
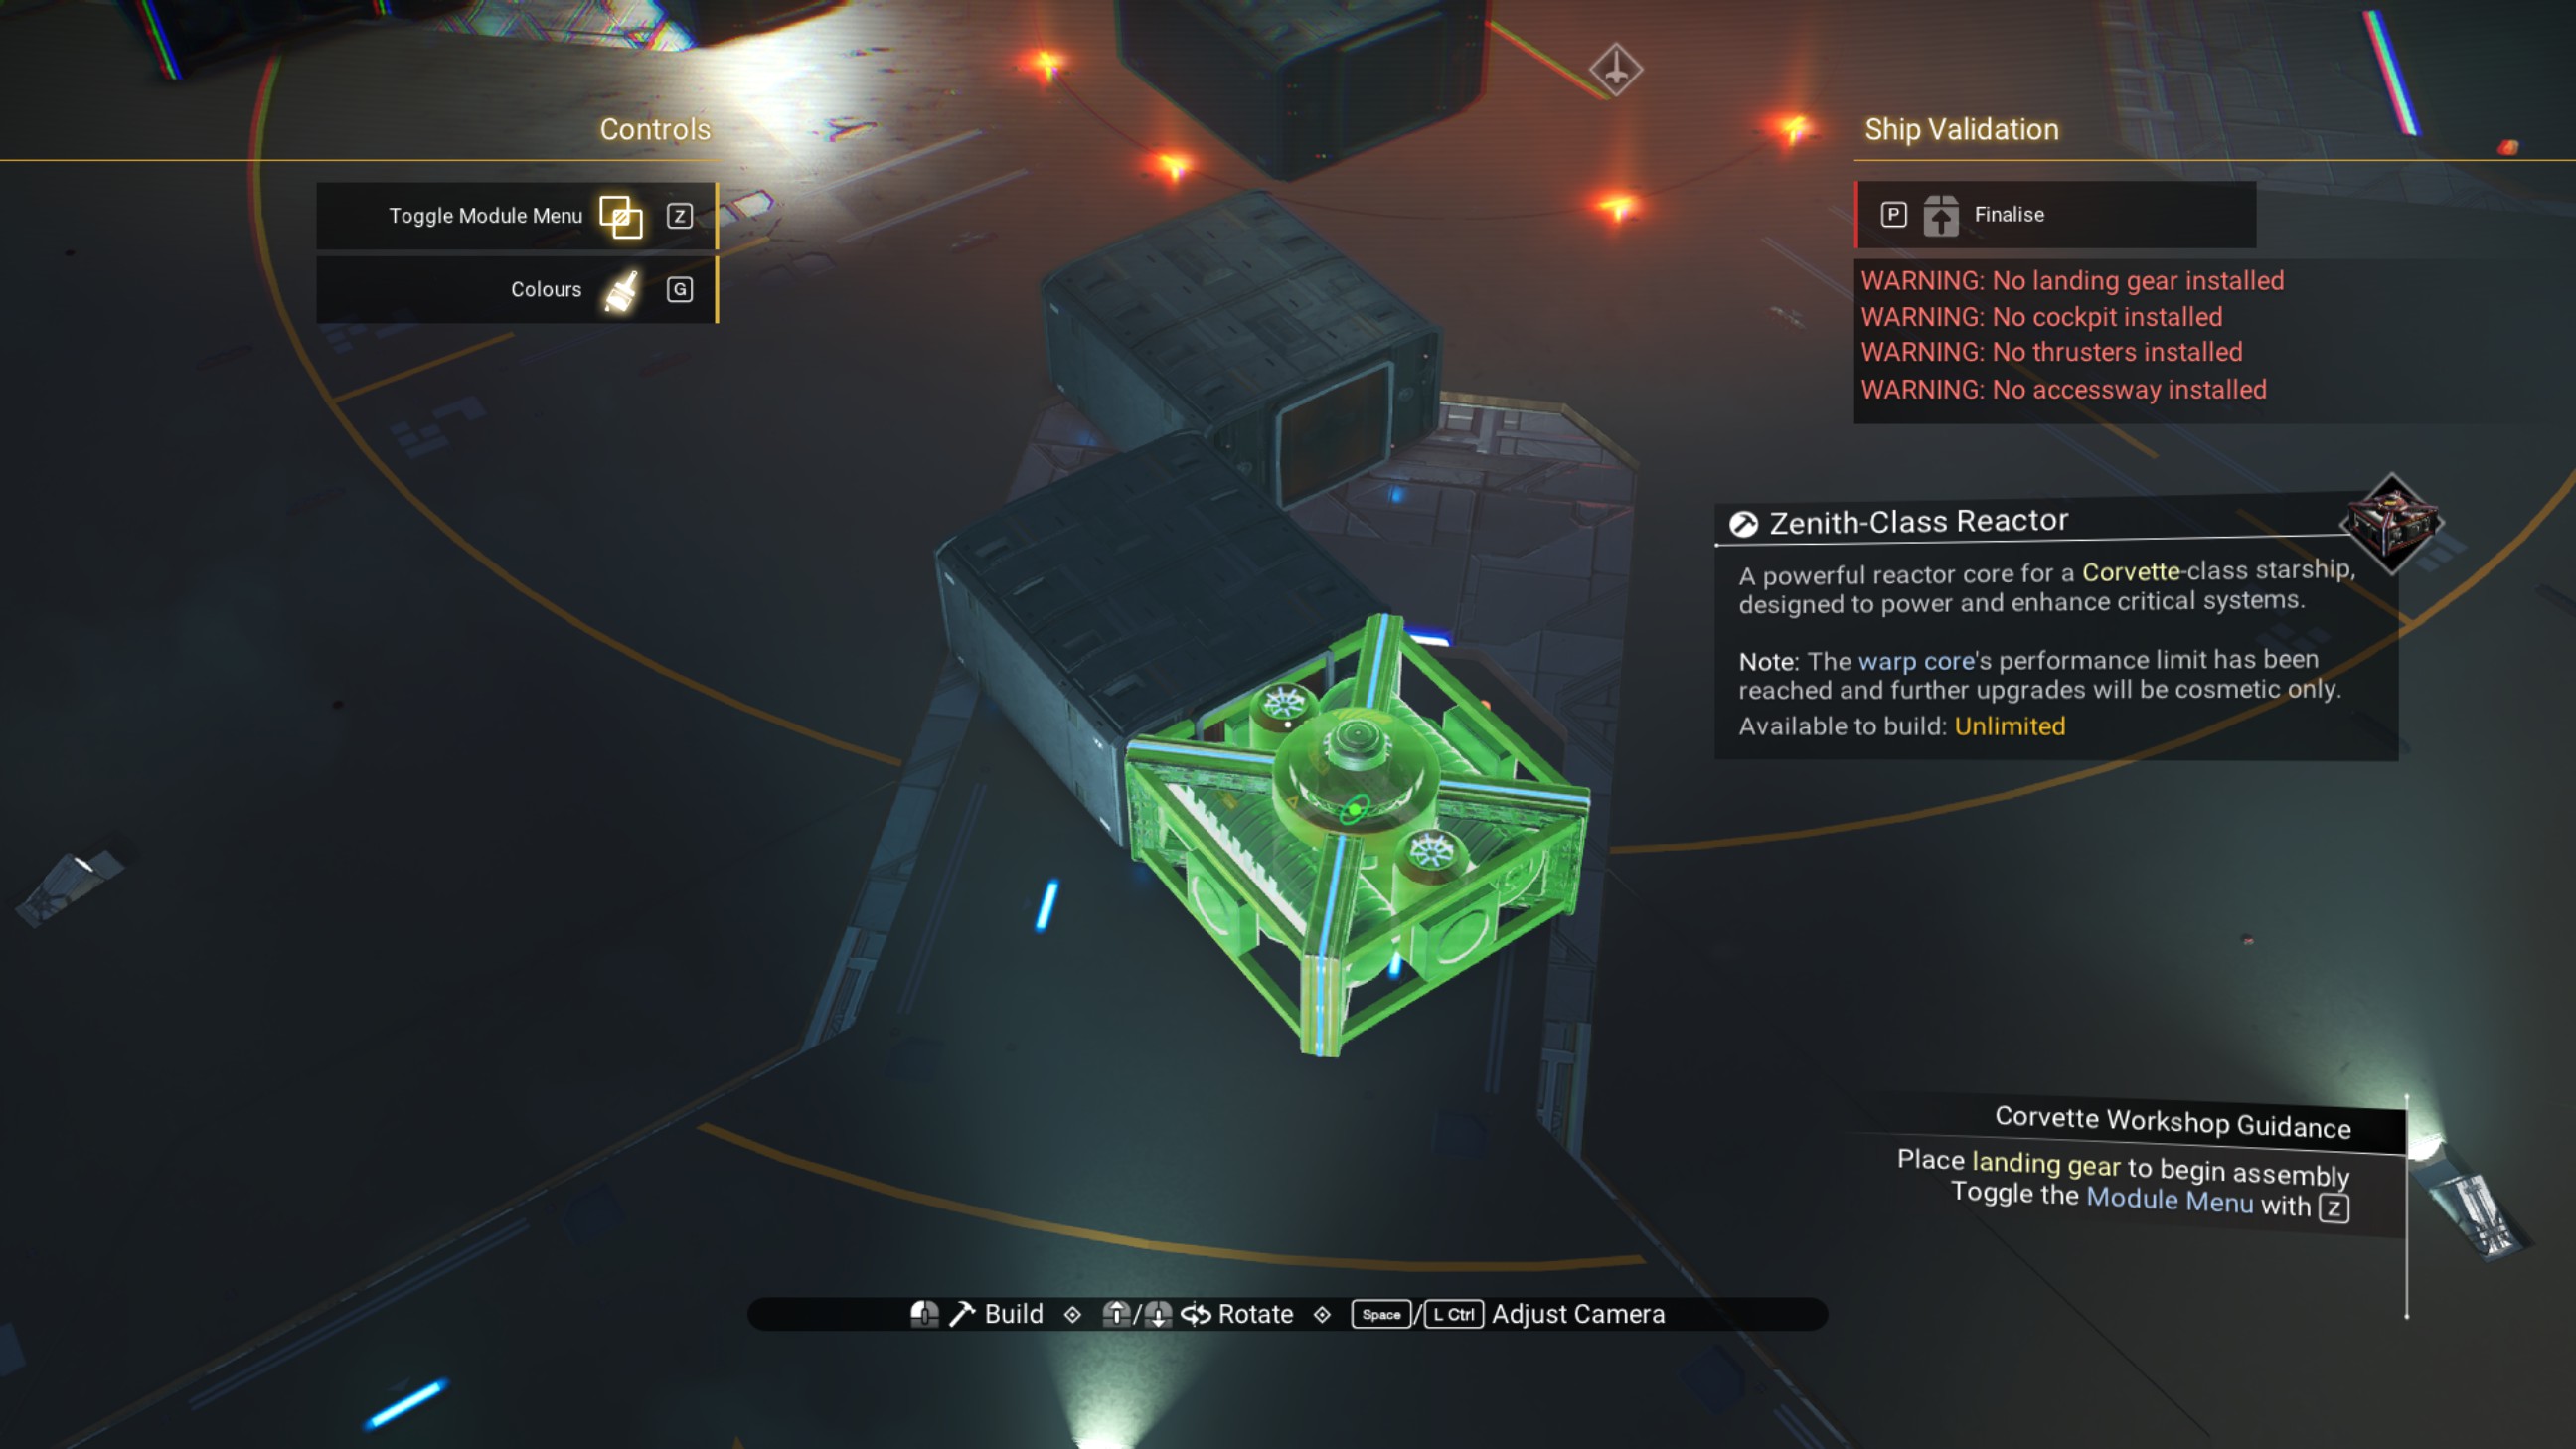
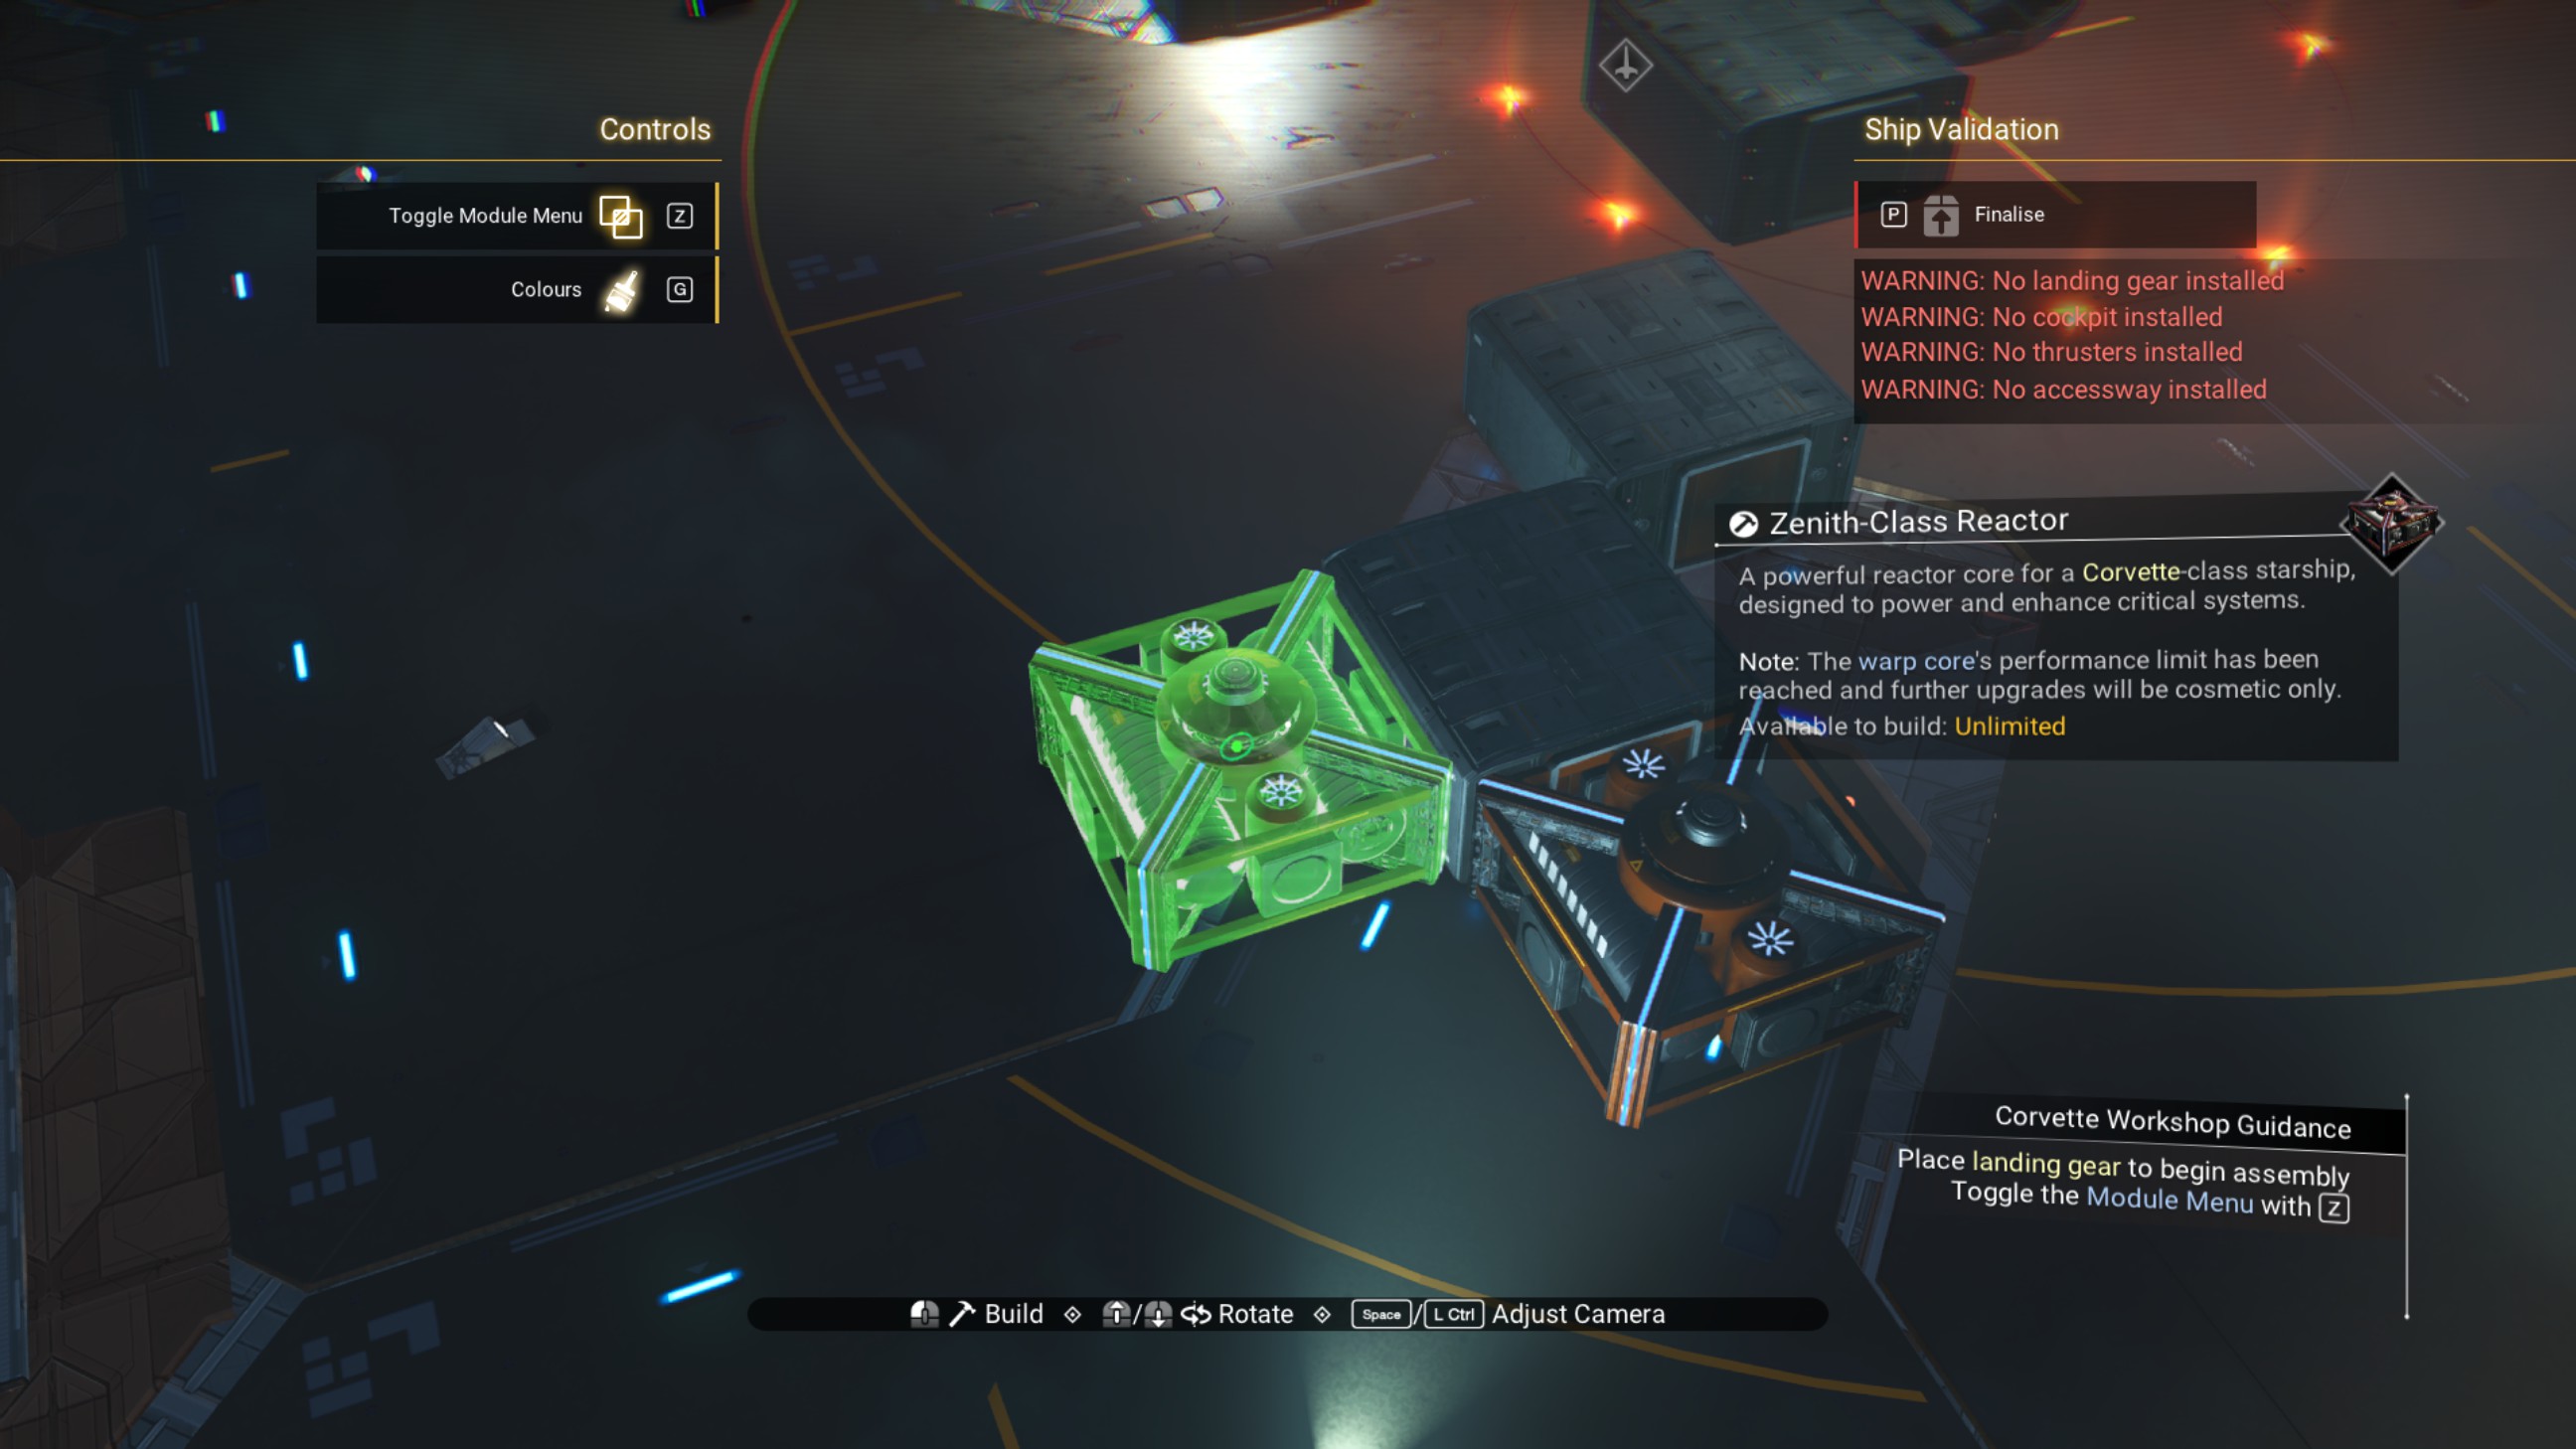
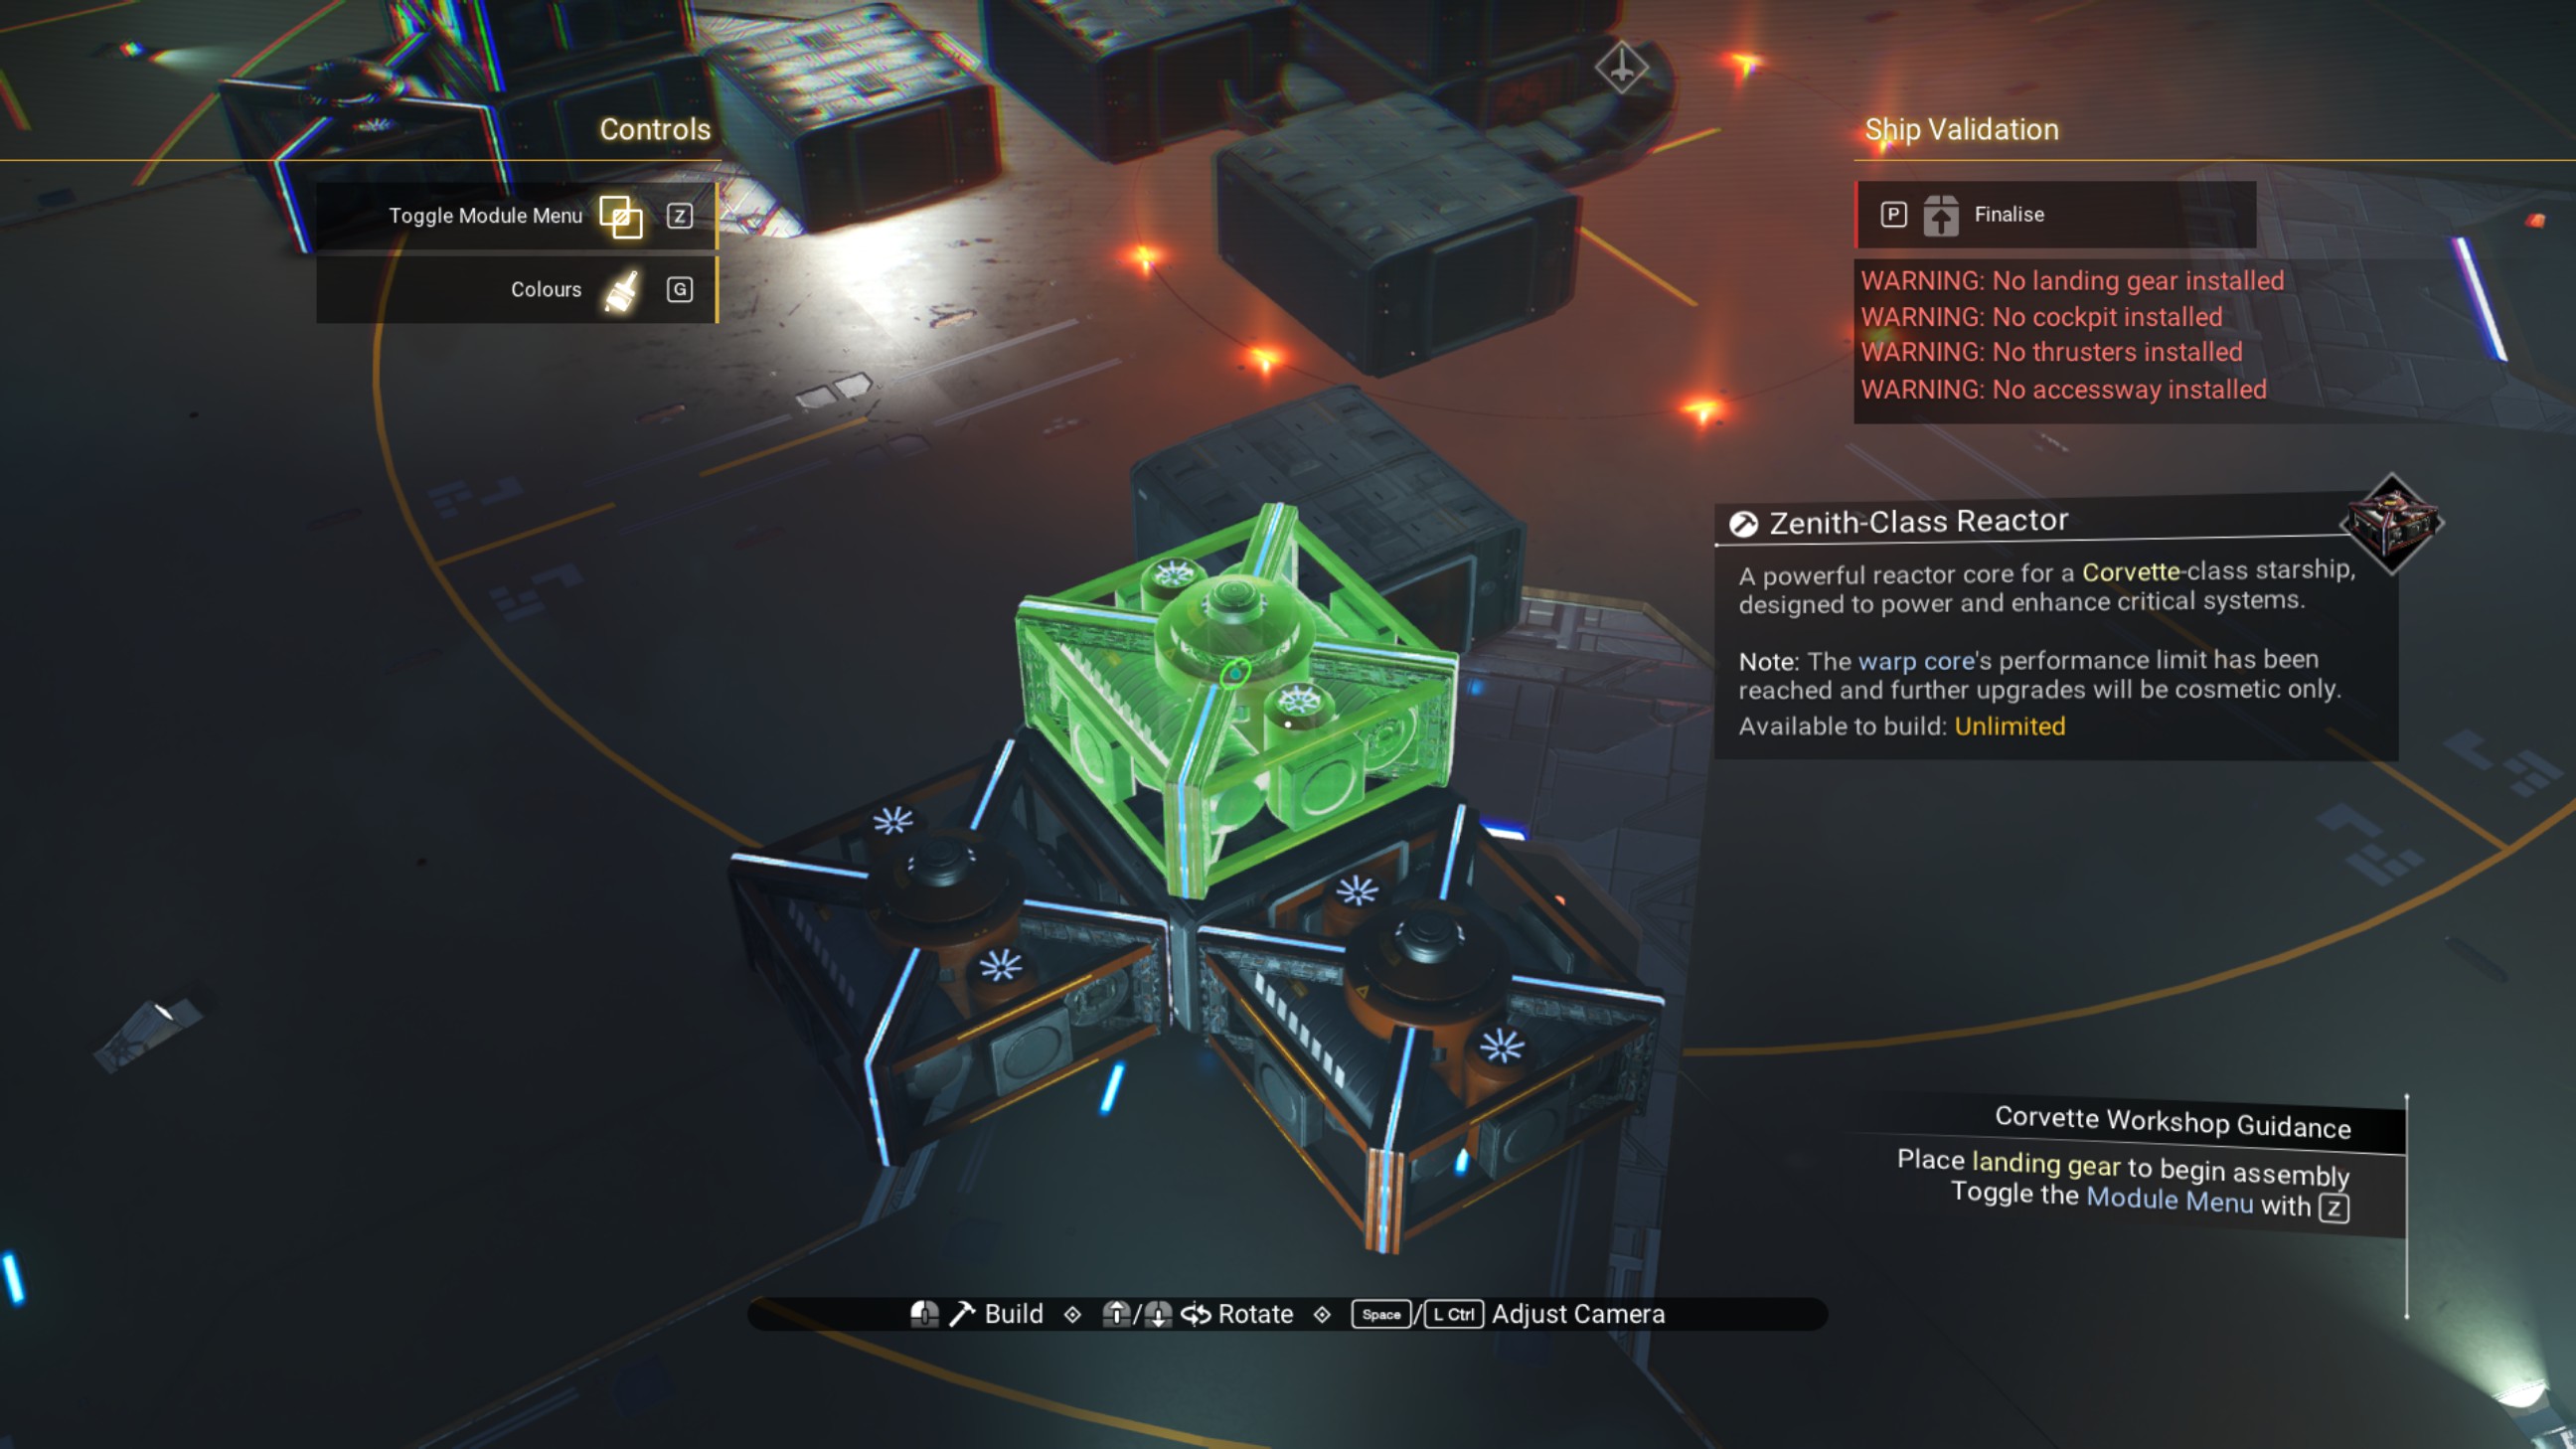
Delete the walkways we just surrounded with zenith reactors.
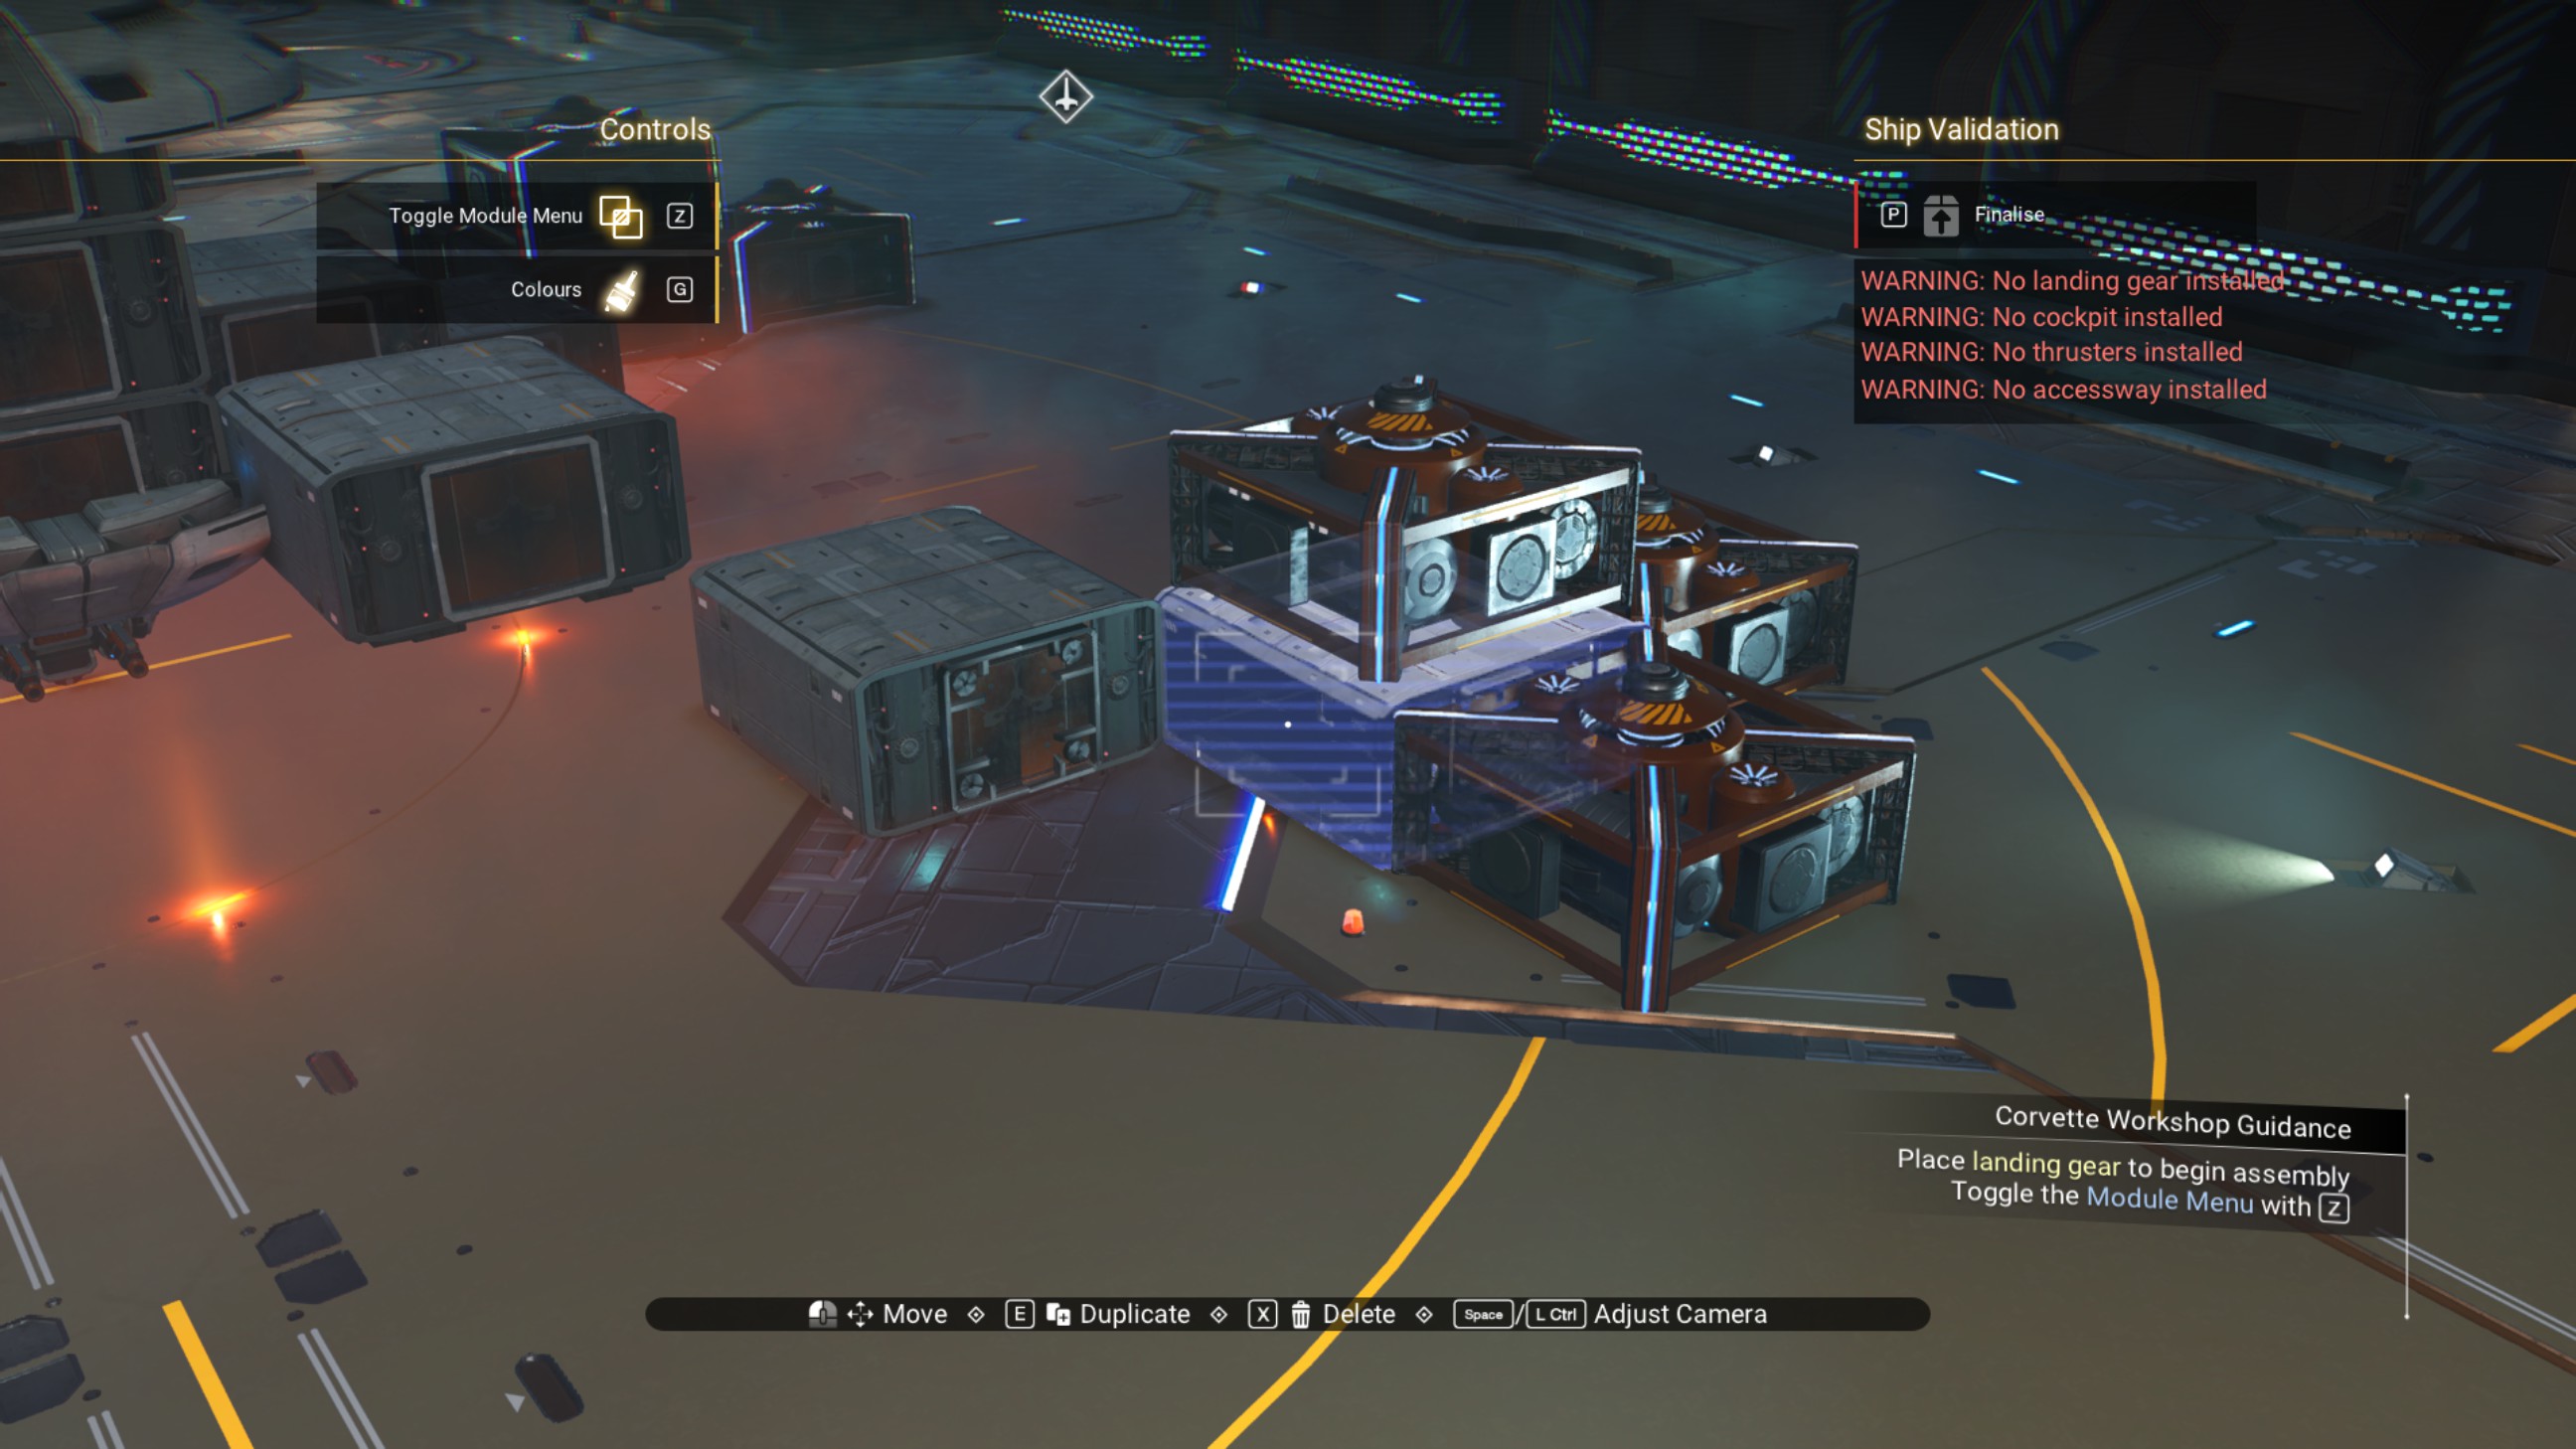
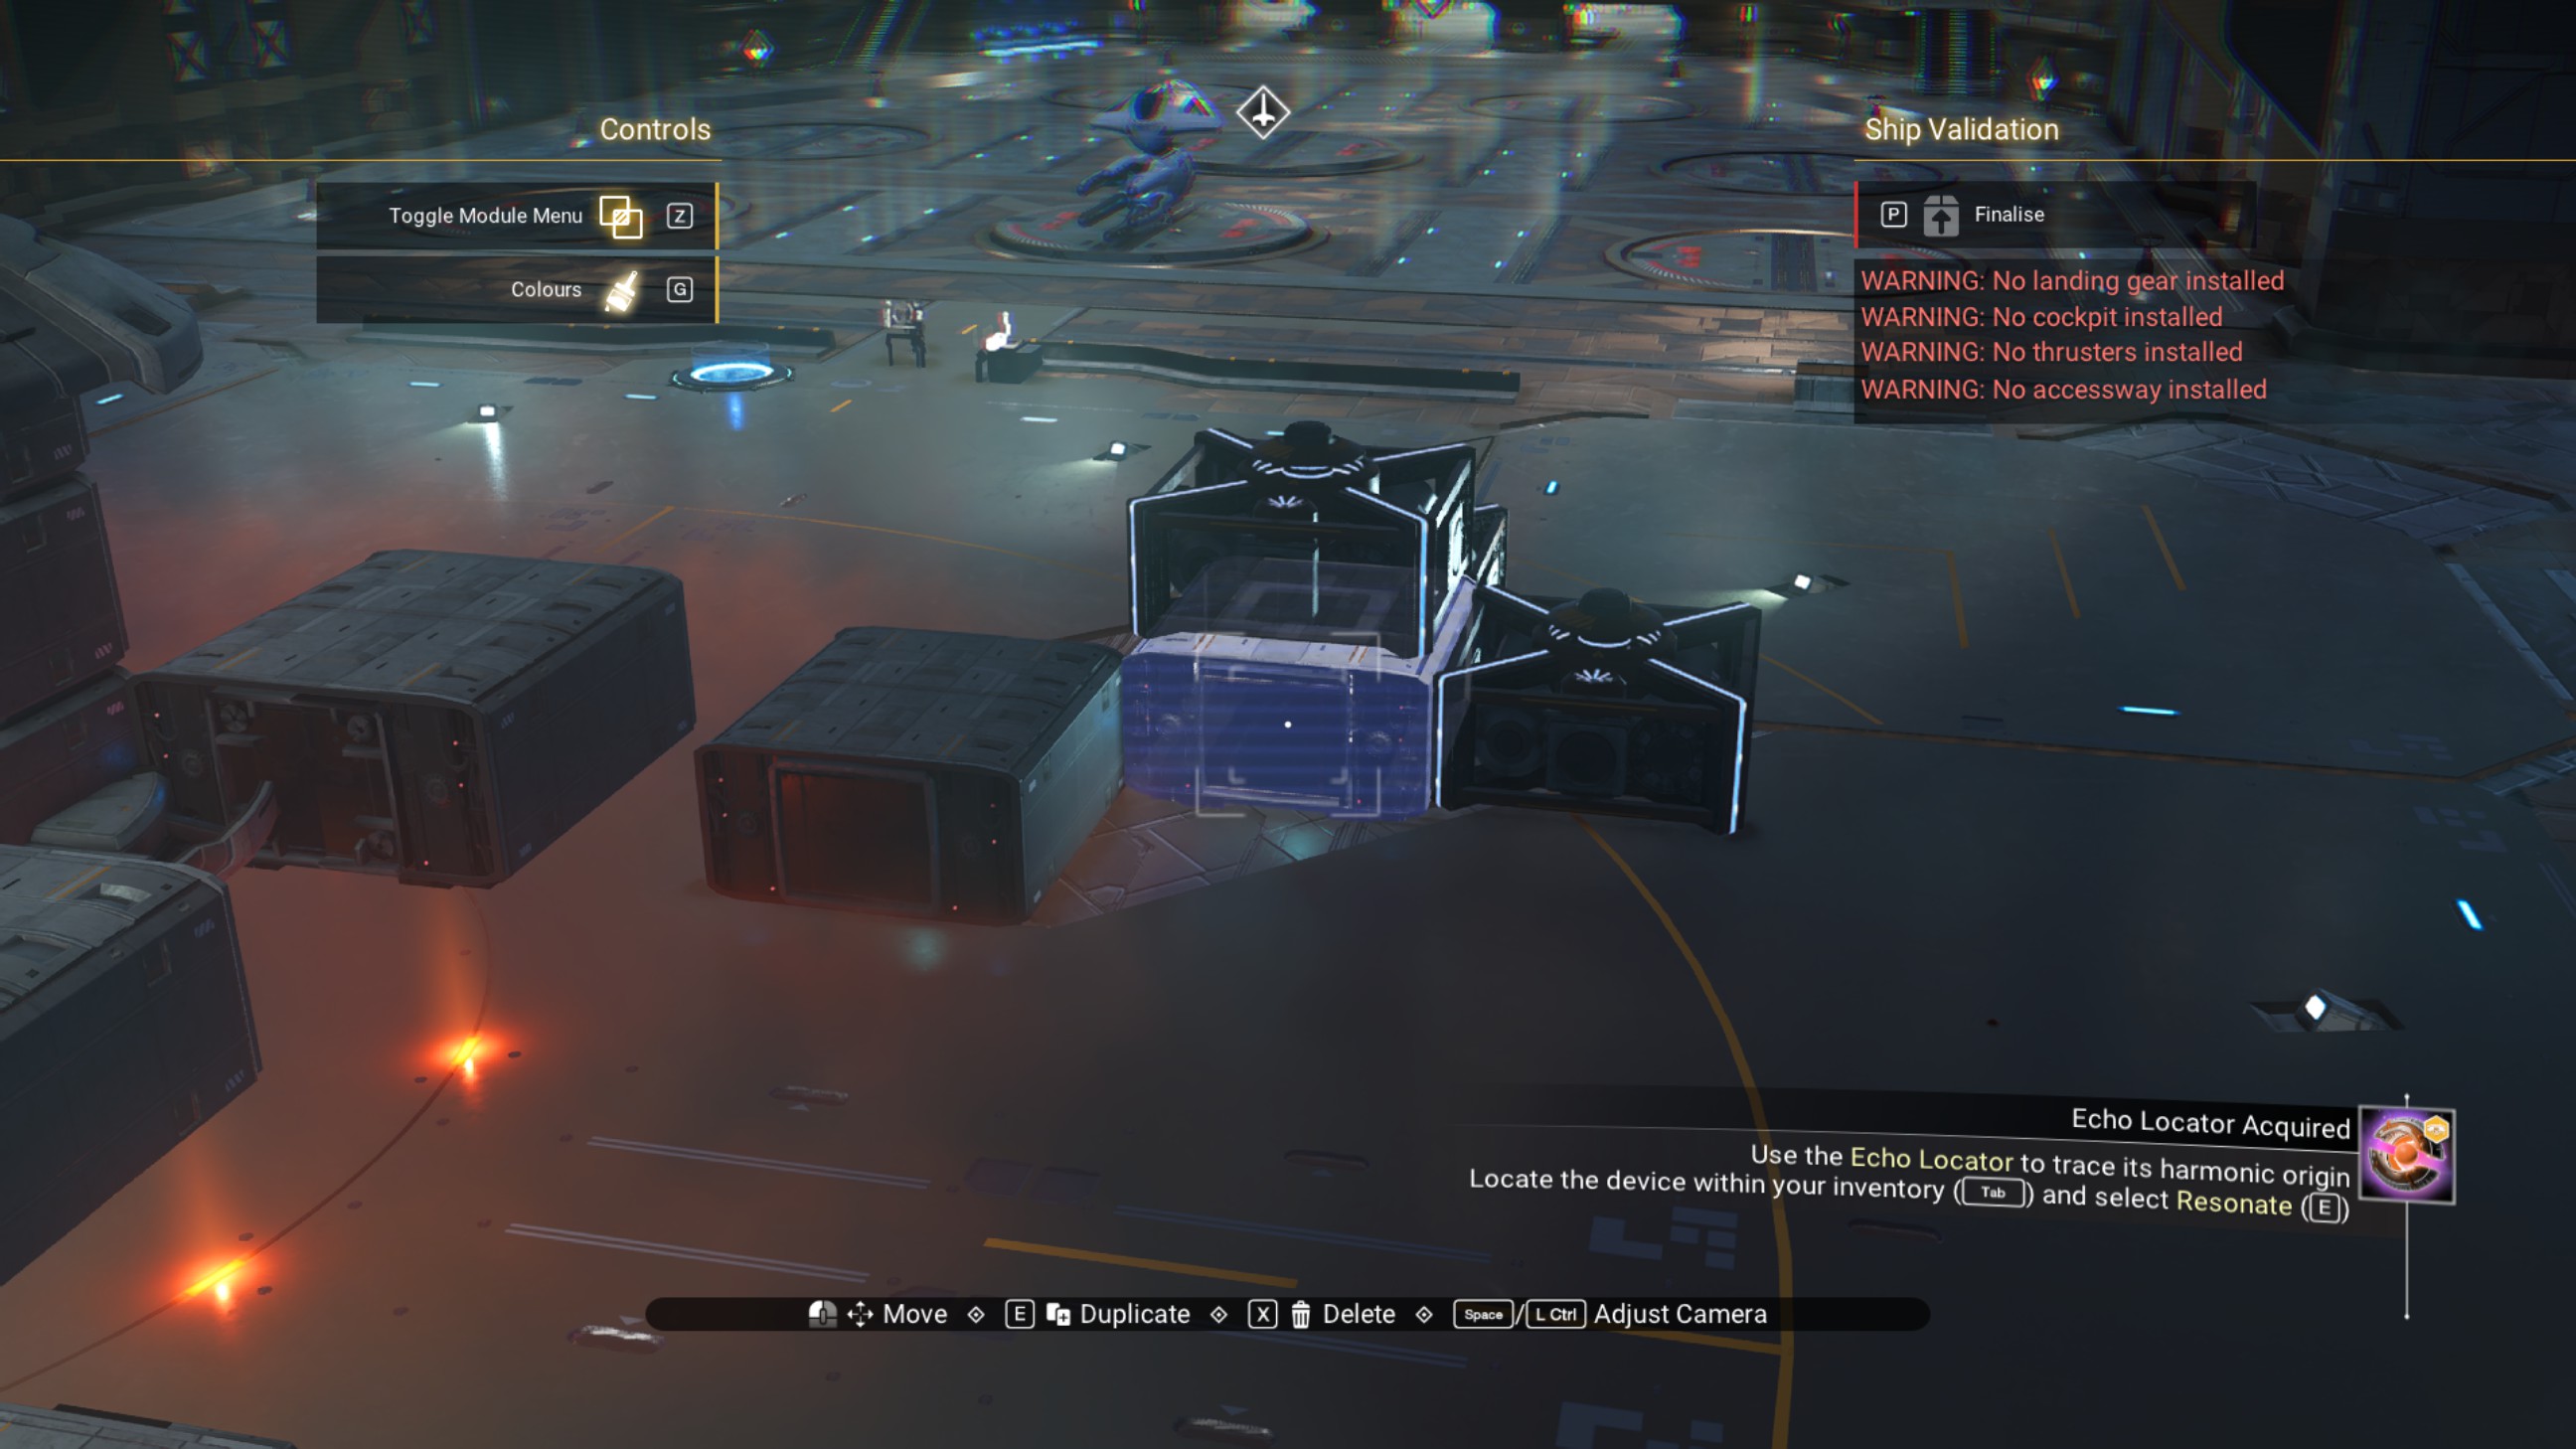
It should look like this when finished.
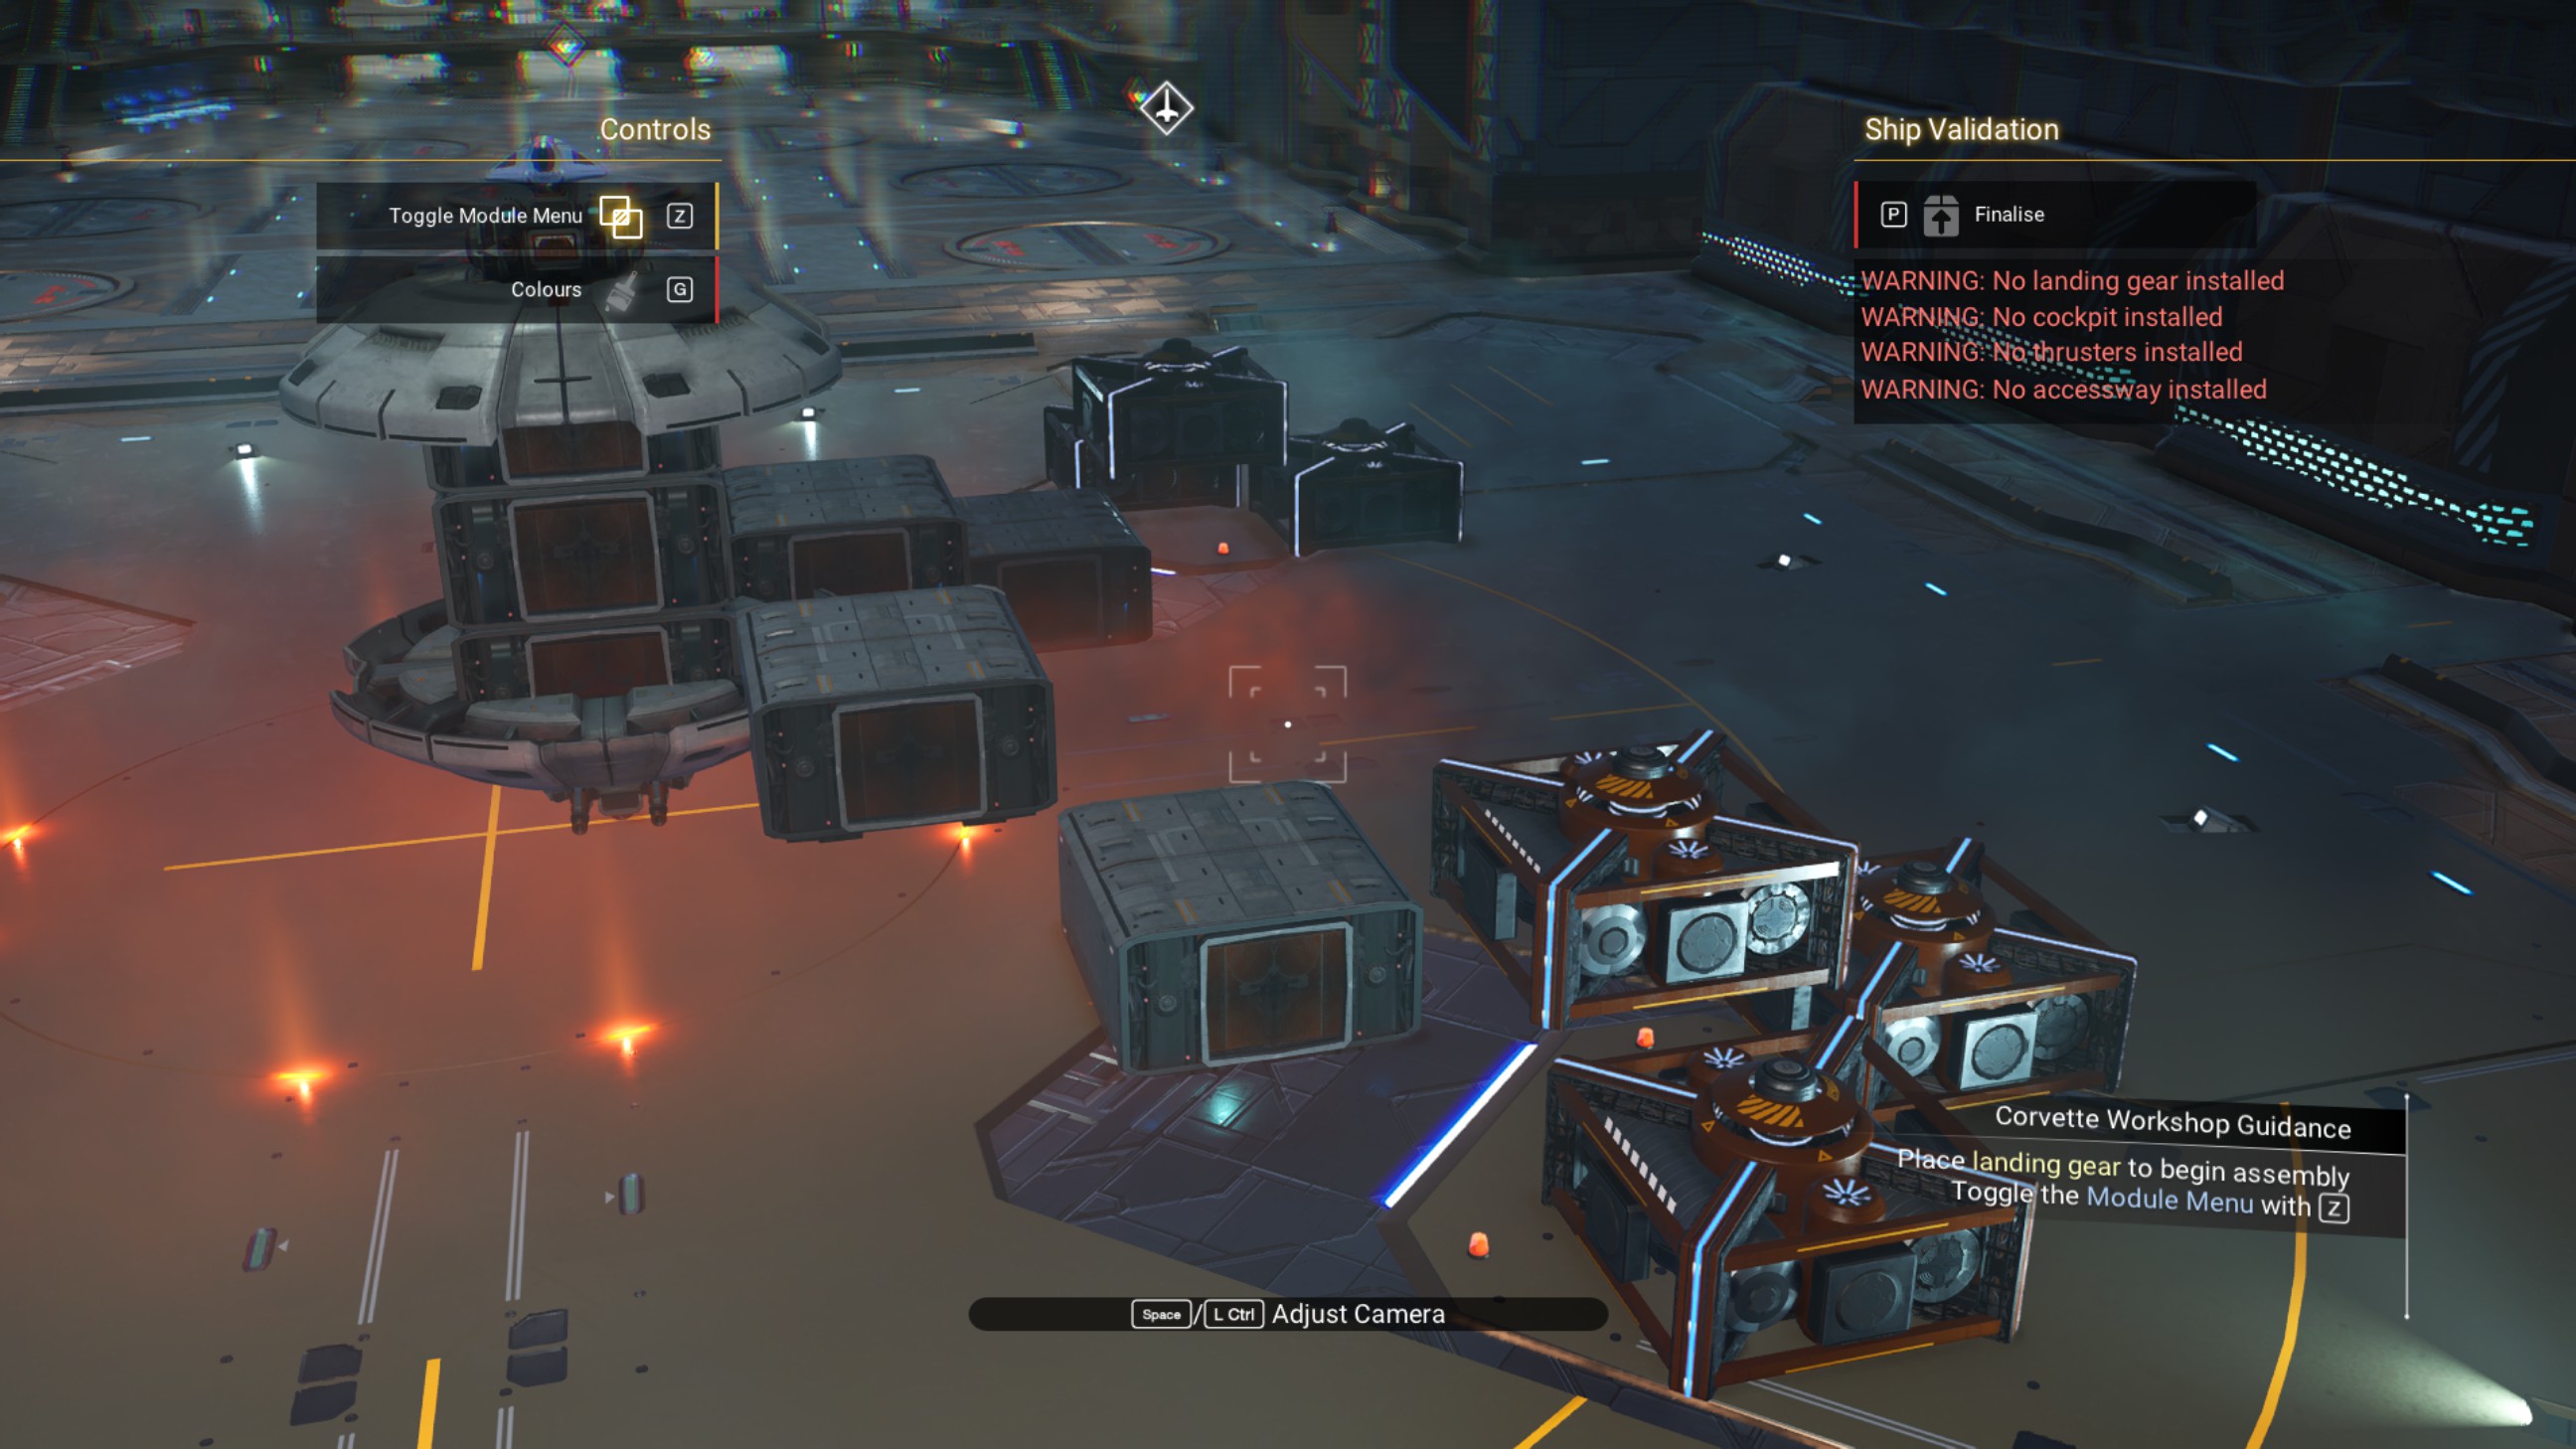
Cockpit
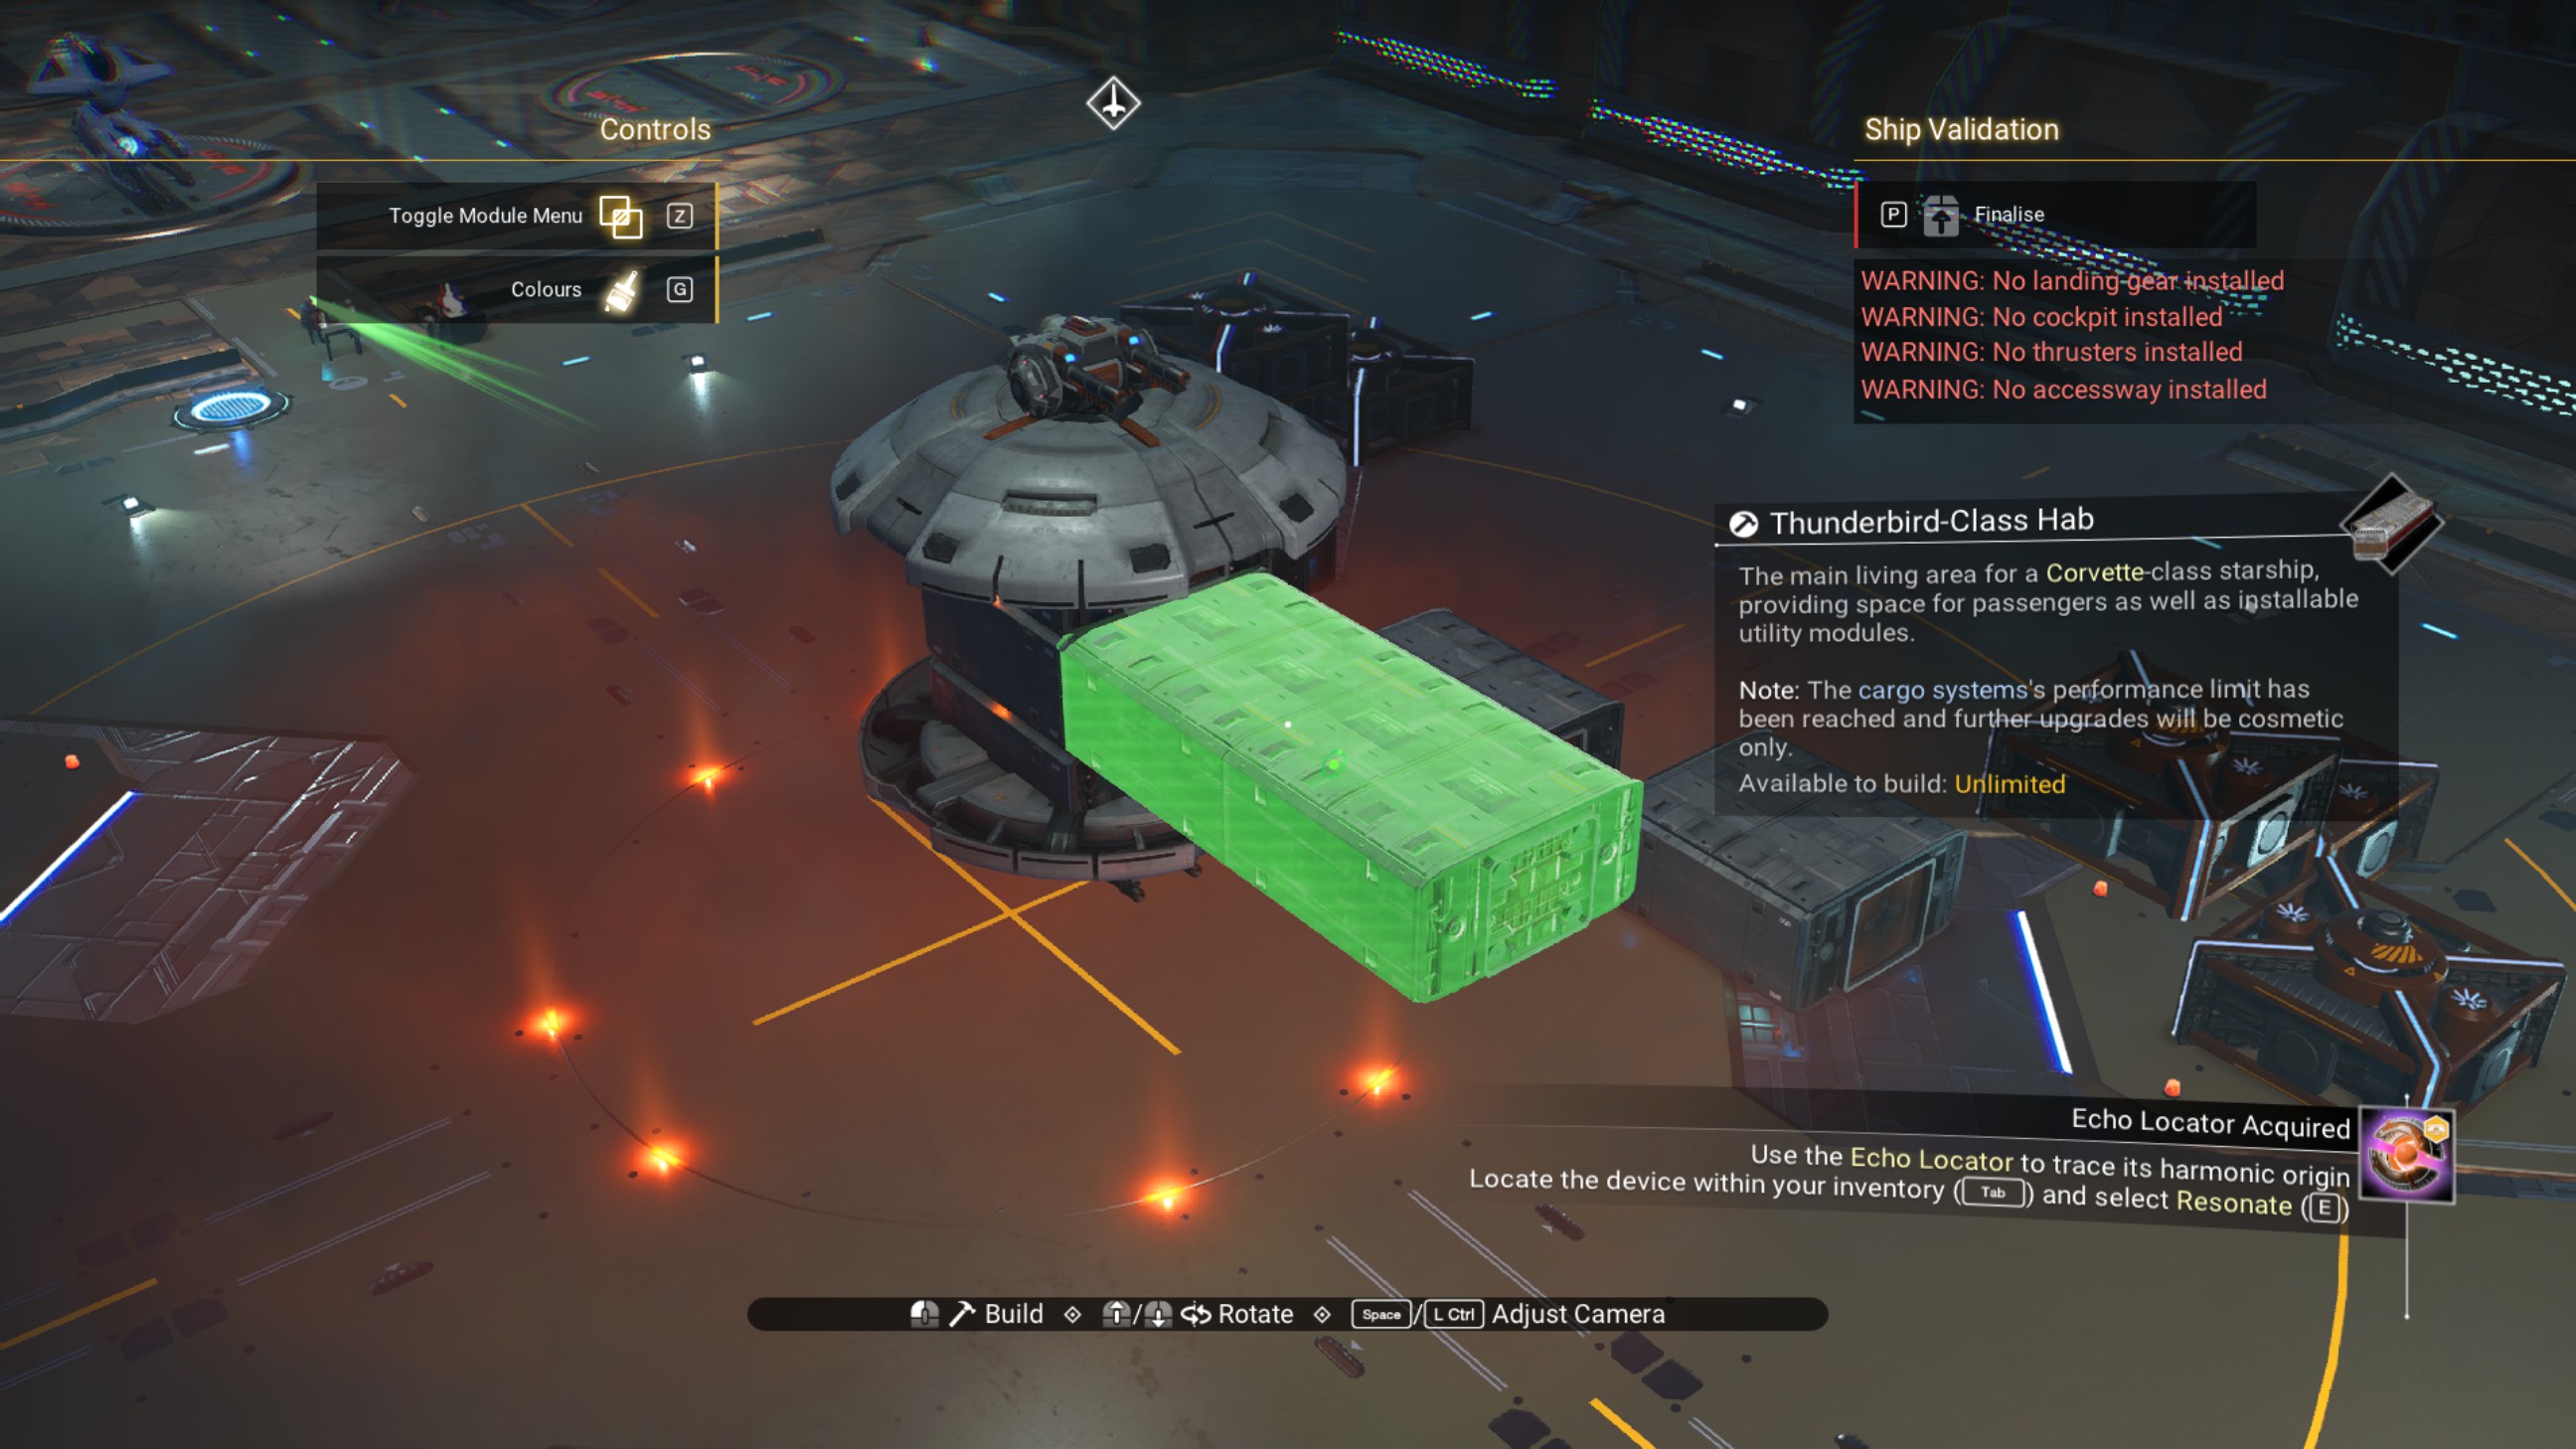
Place a walkway on the starboard side of the center structure, and another habitation module in front of it.
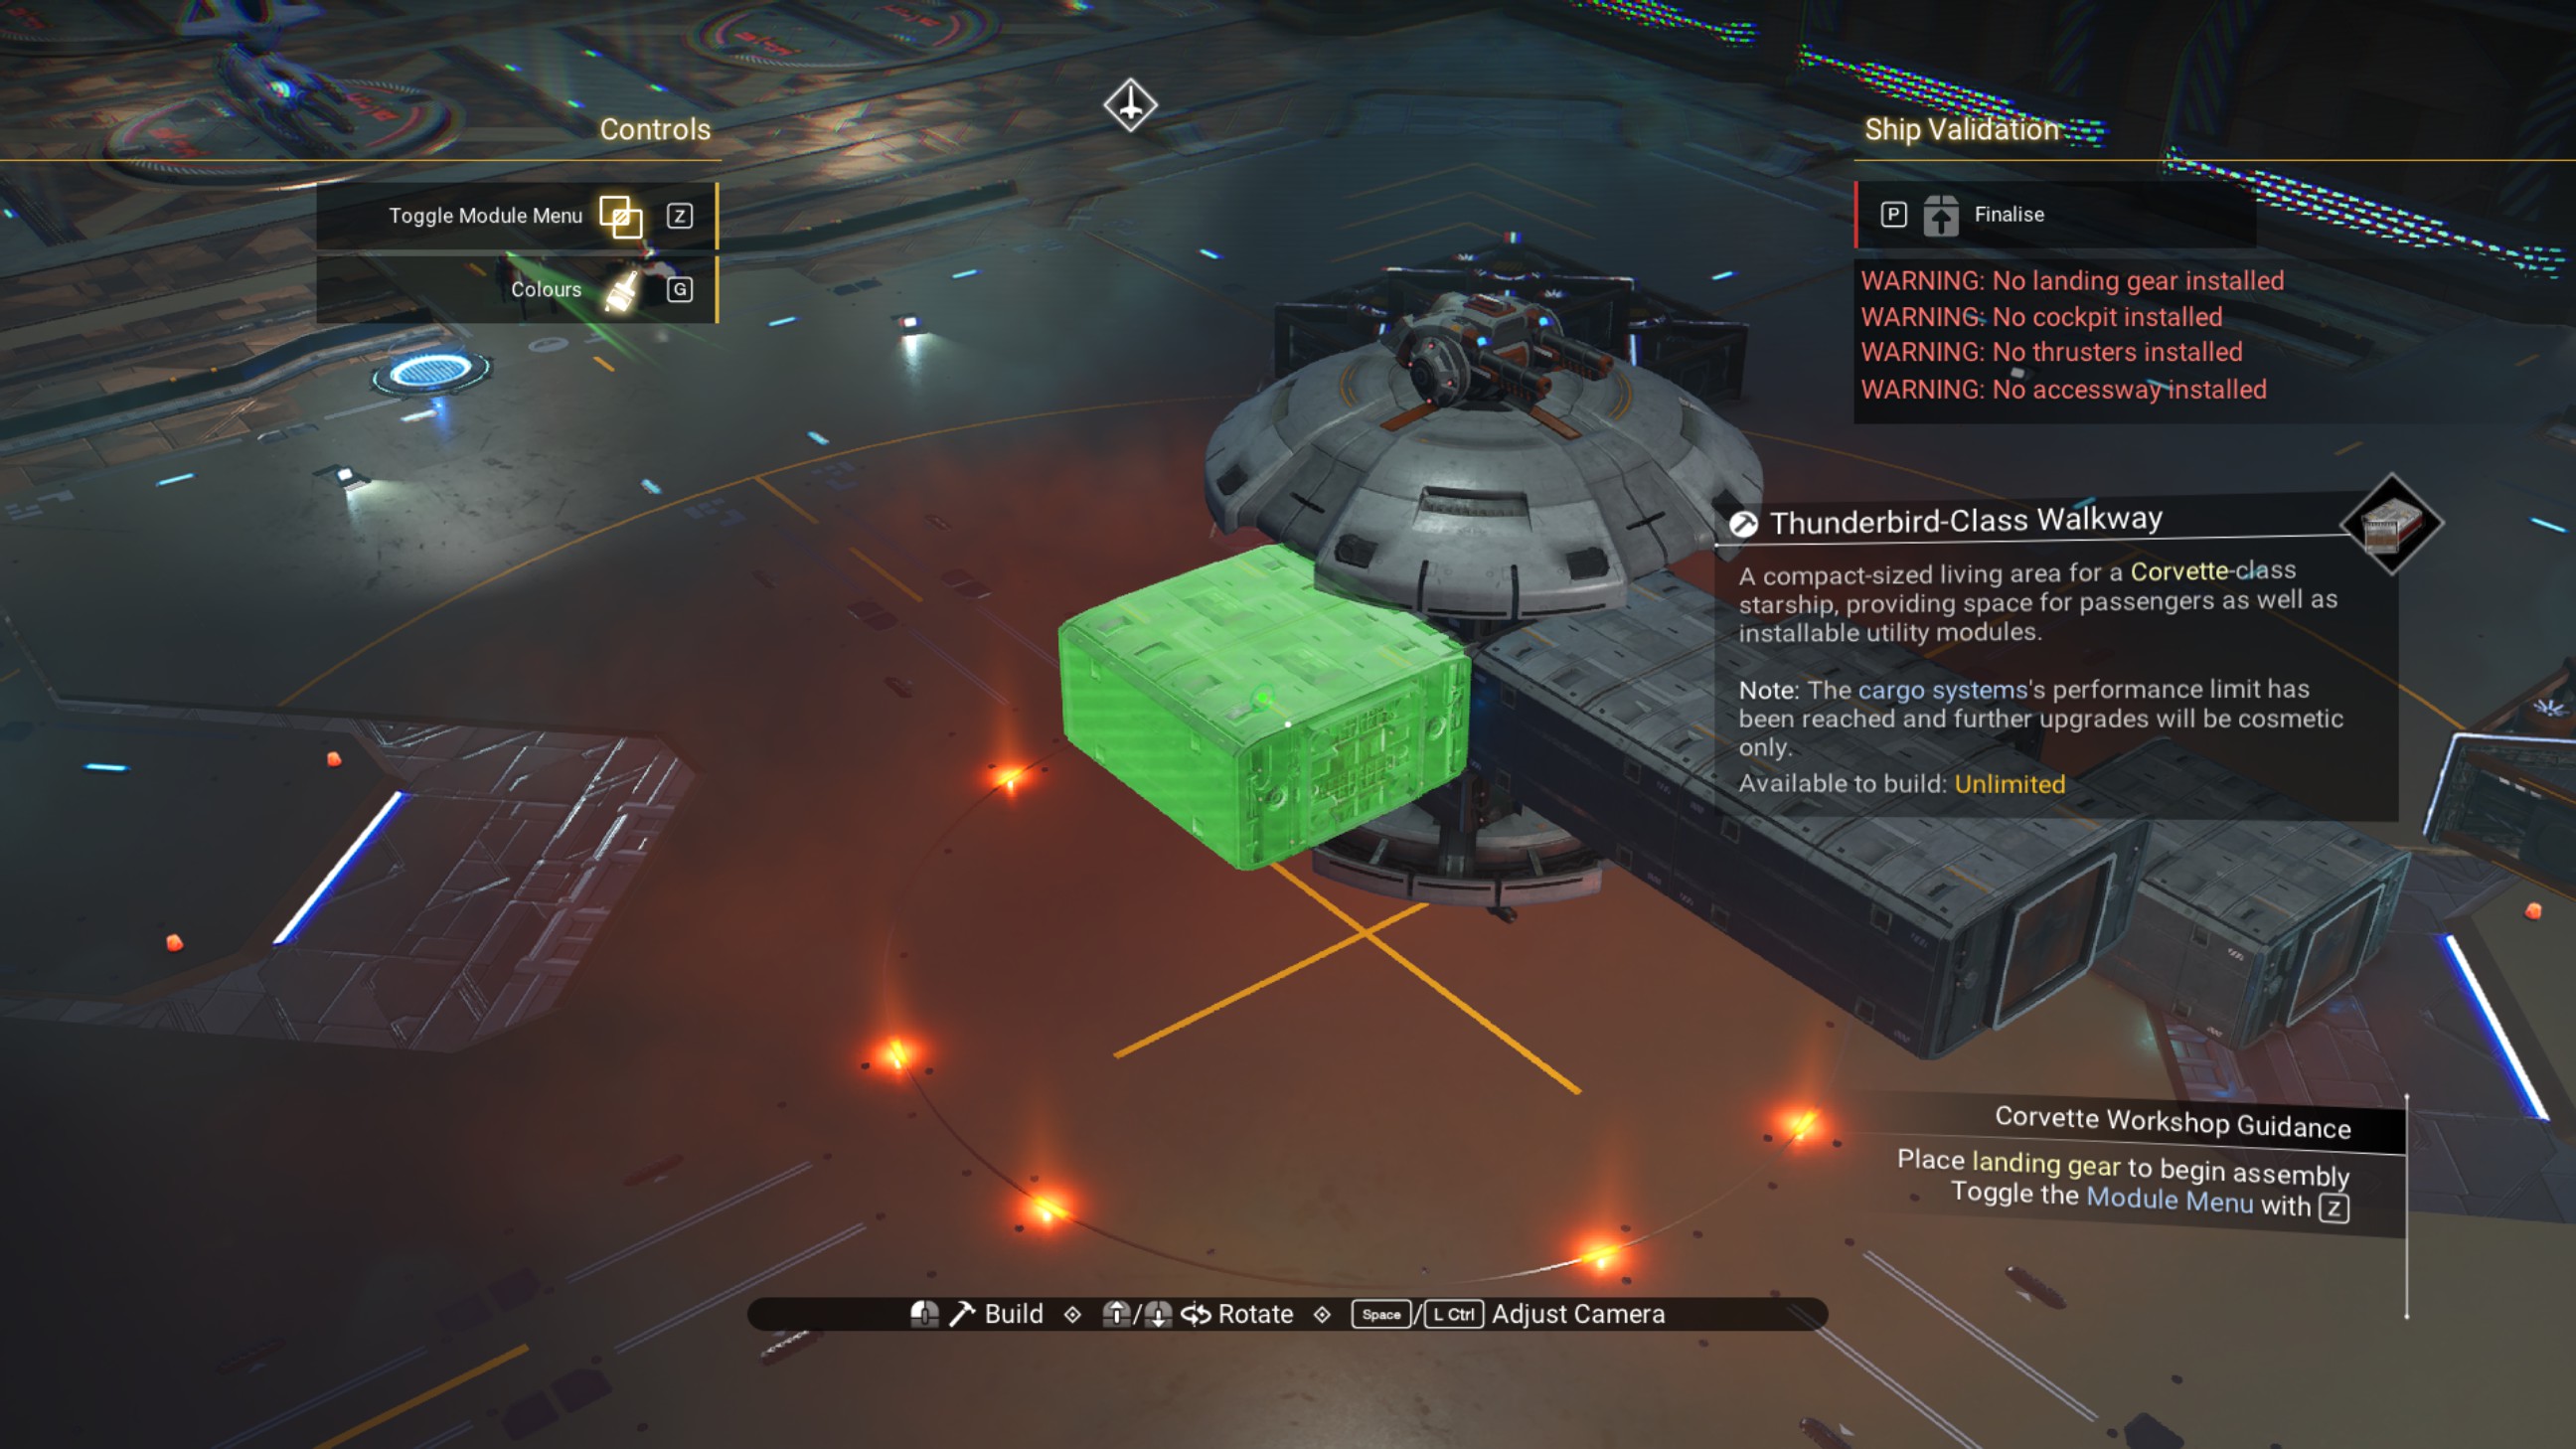
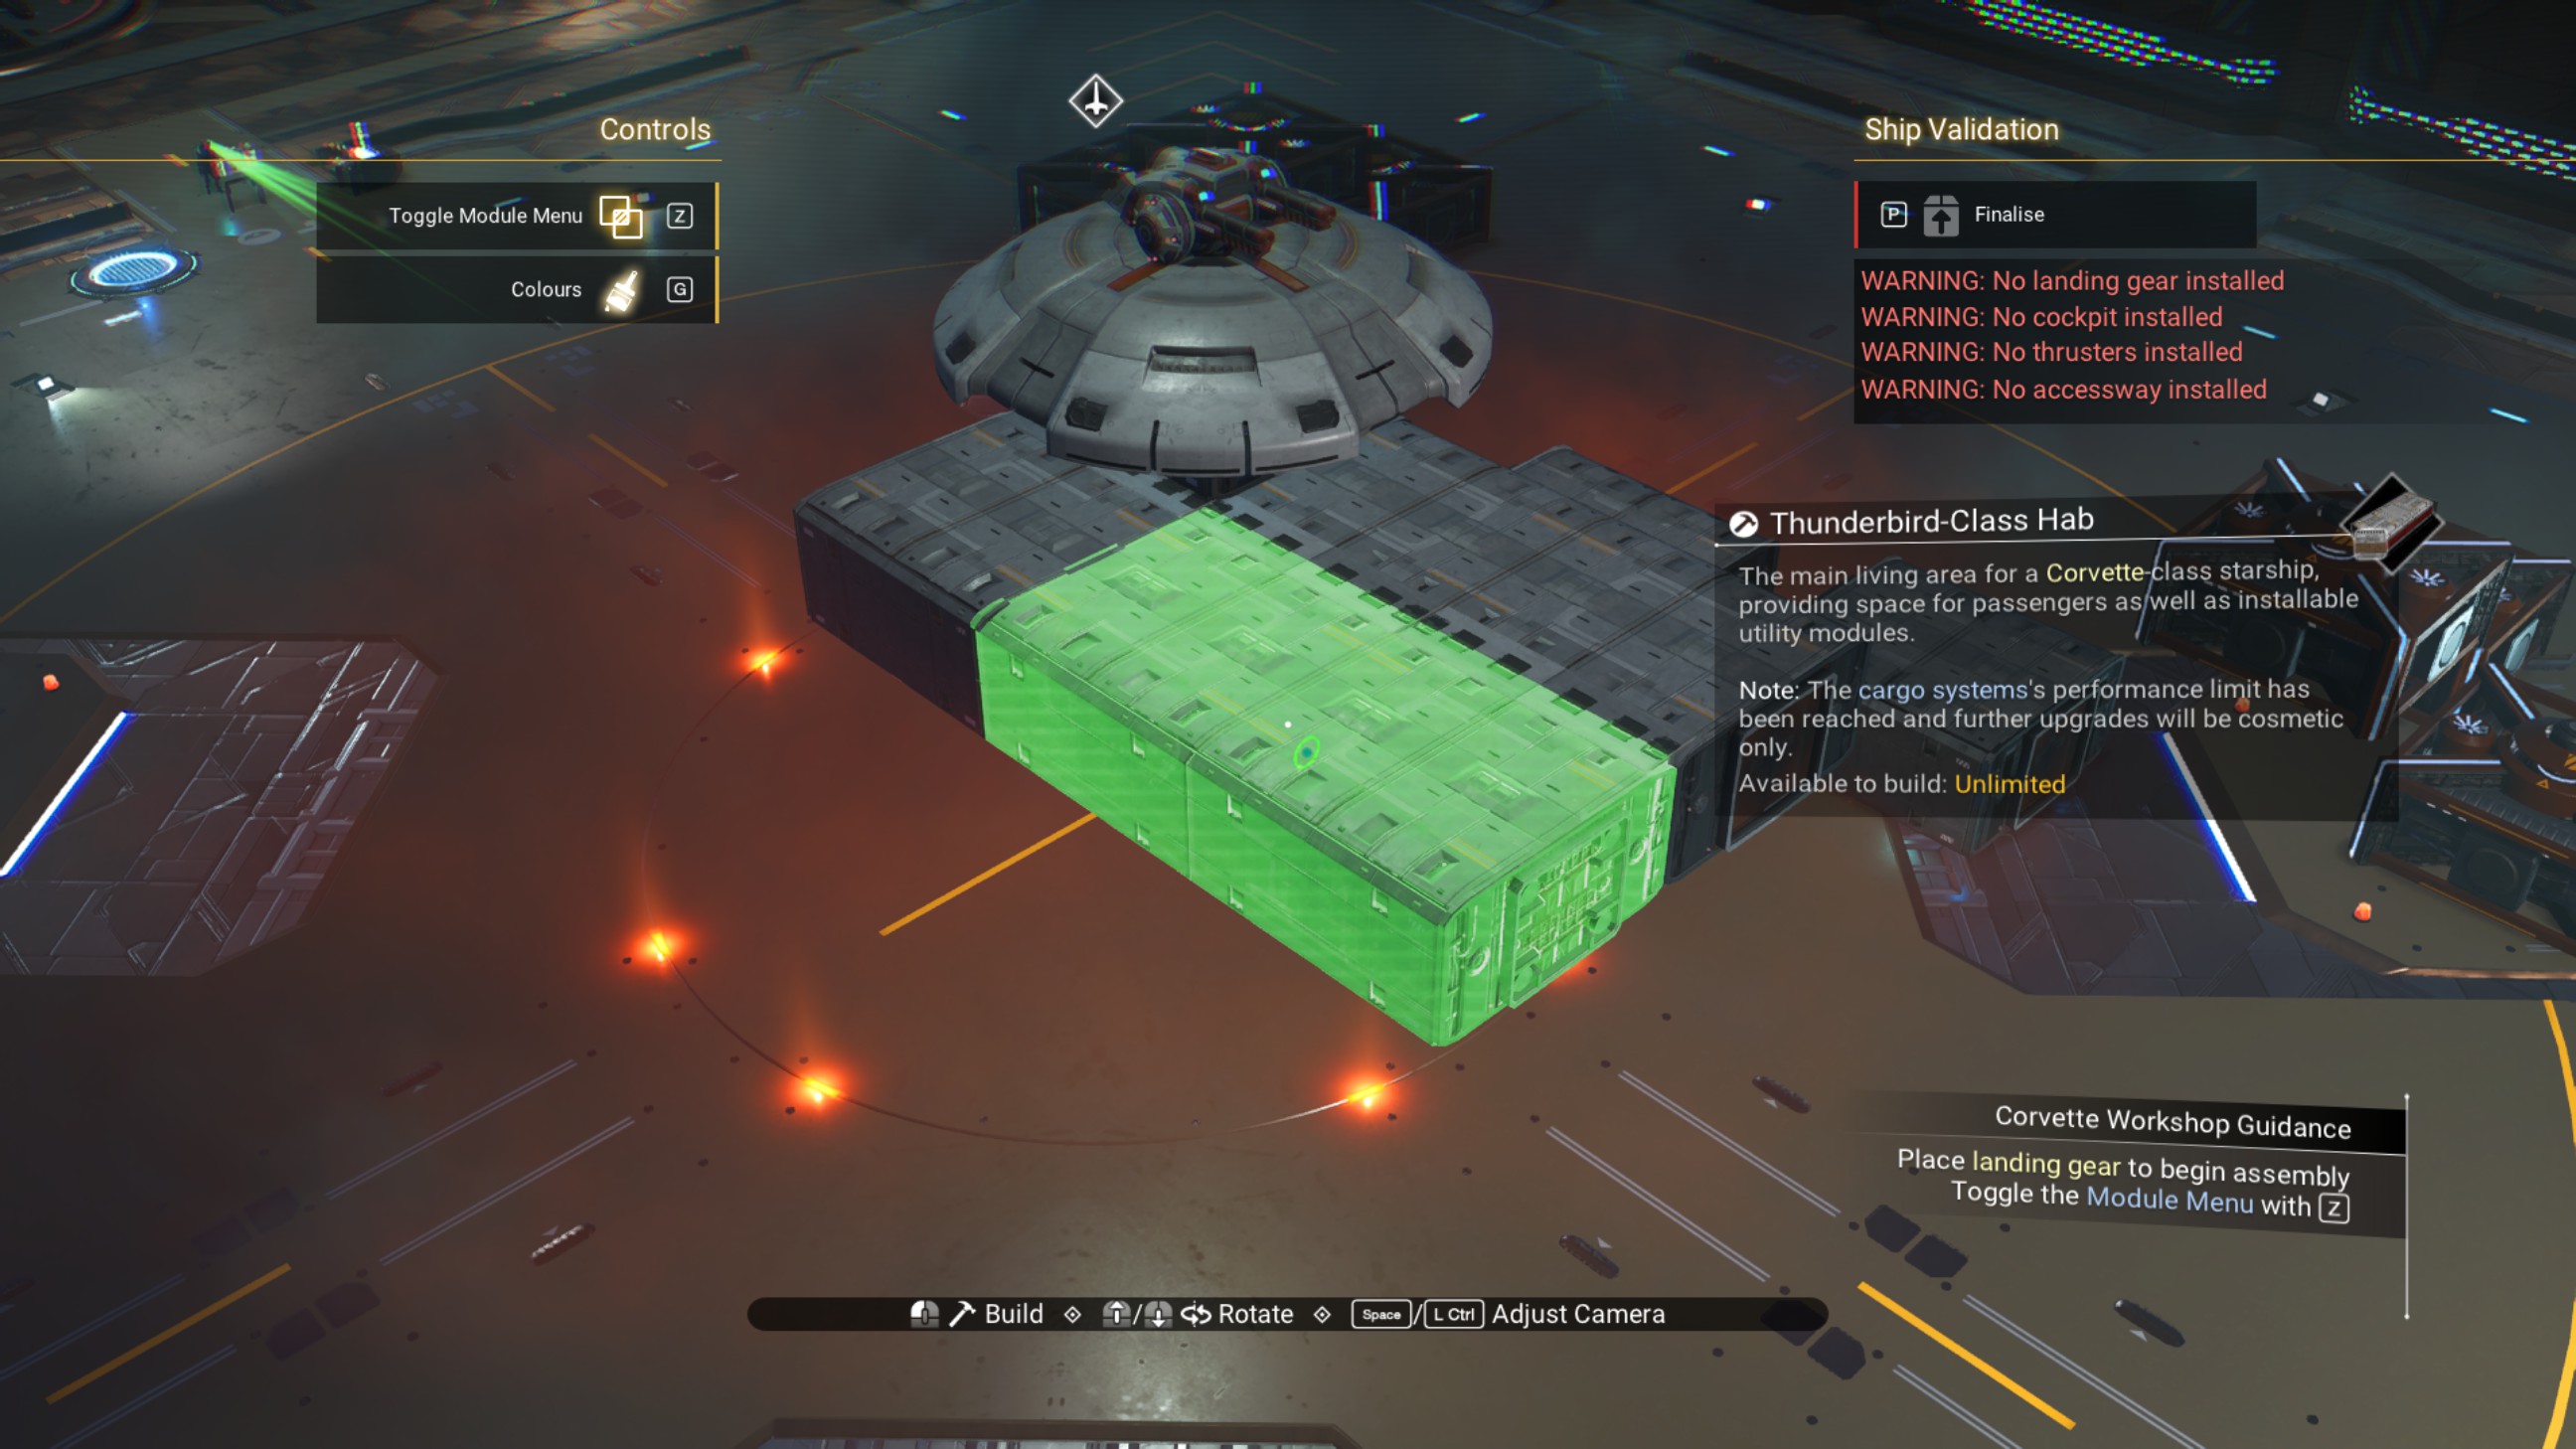
Place two walkways on the starboard side of that habitation module, as shown.
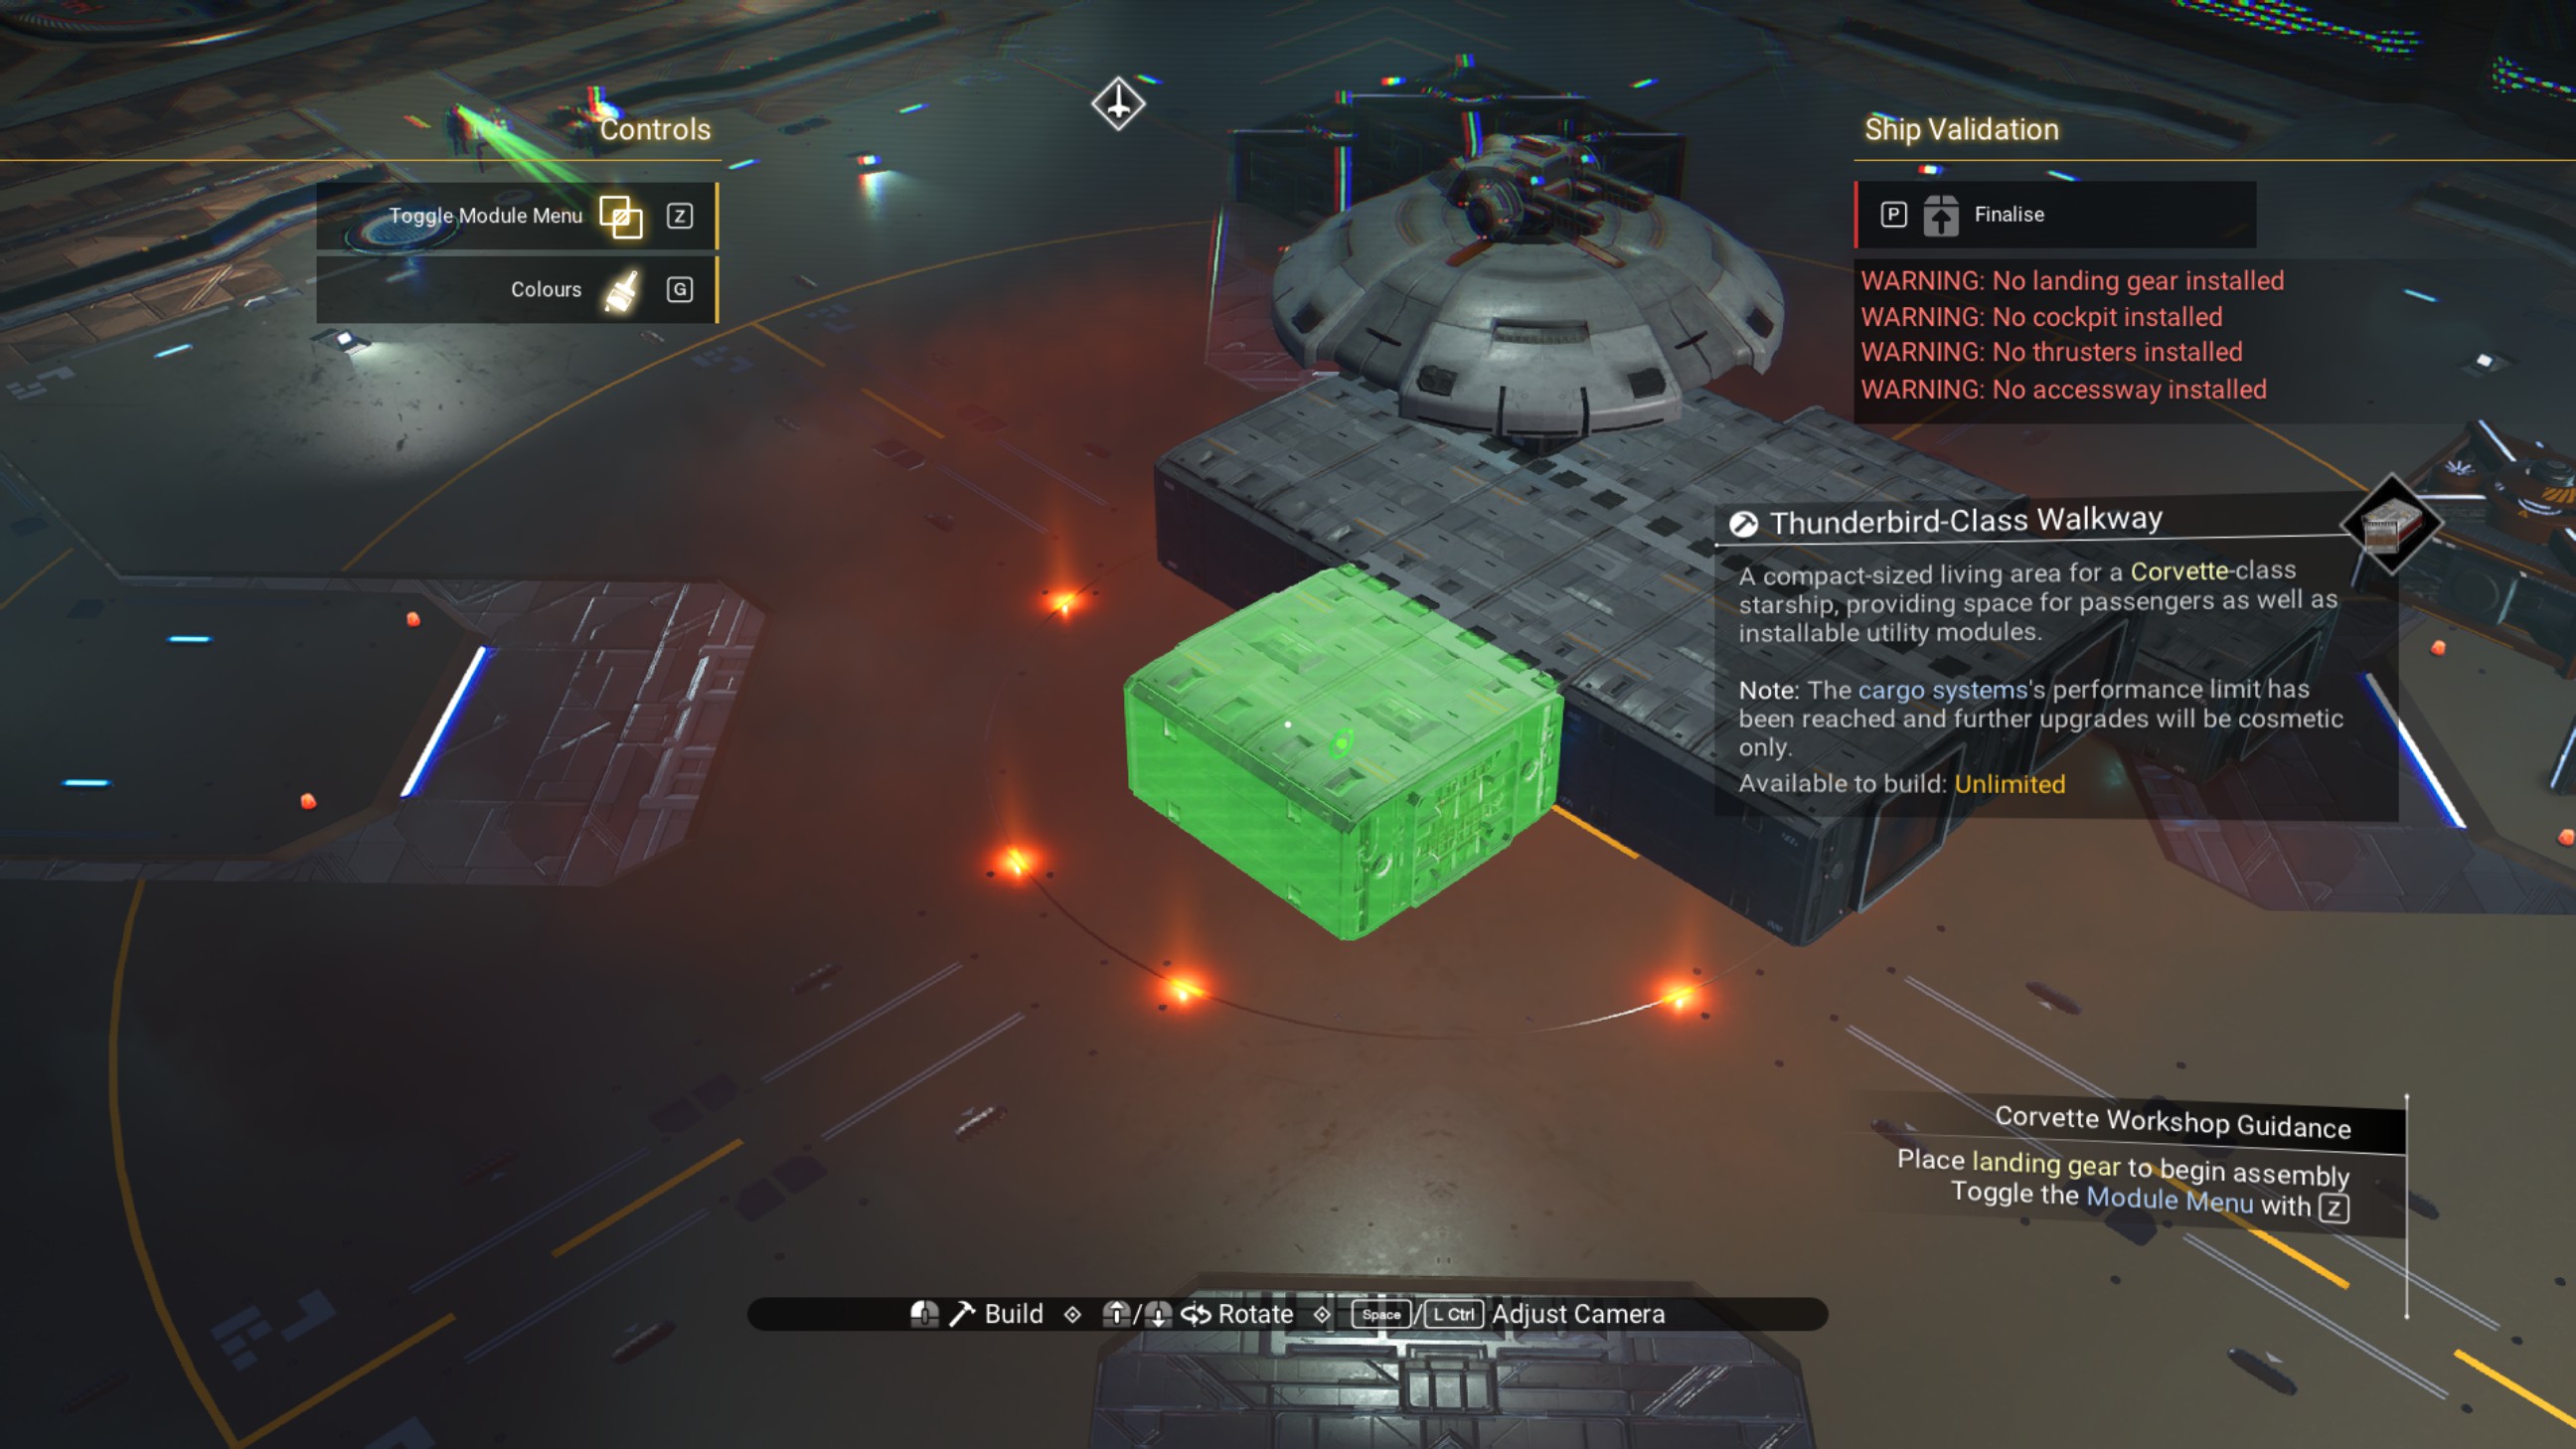
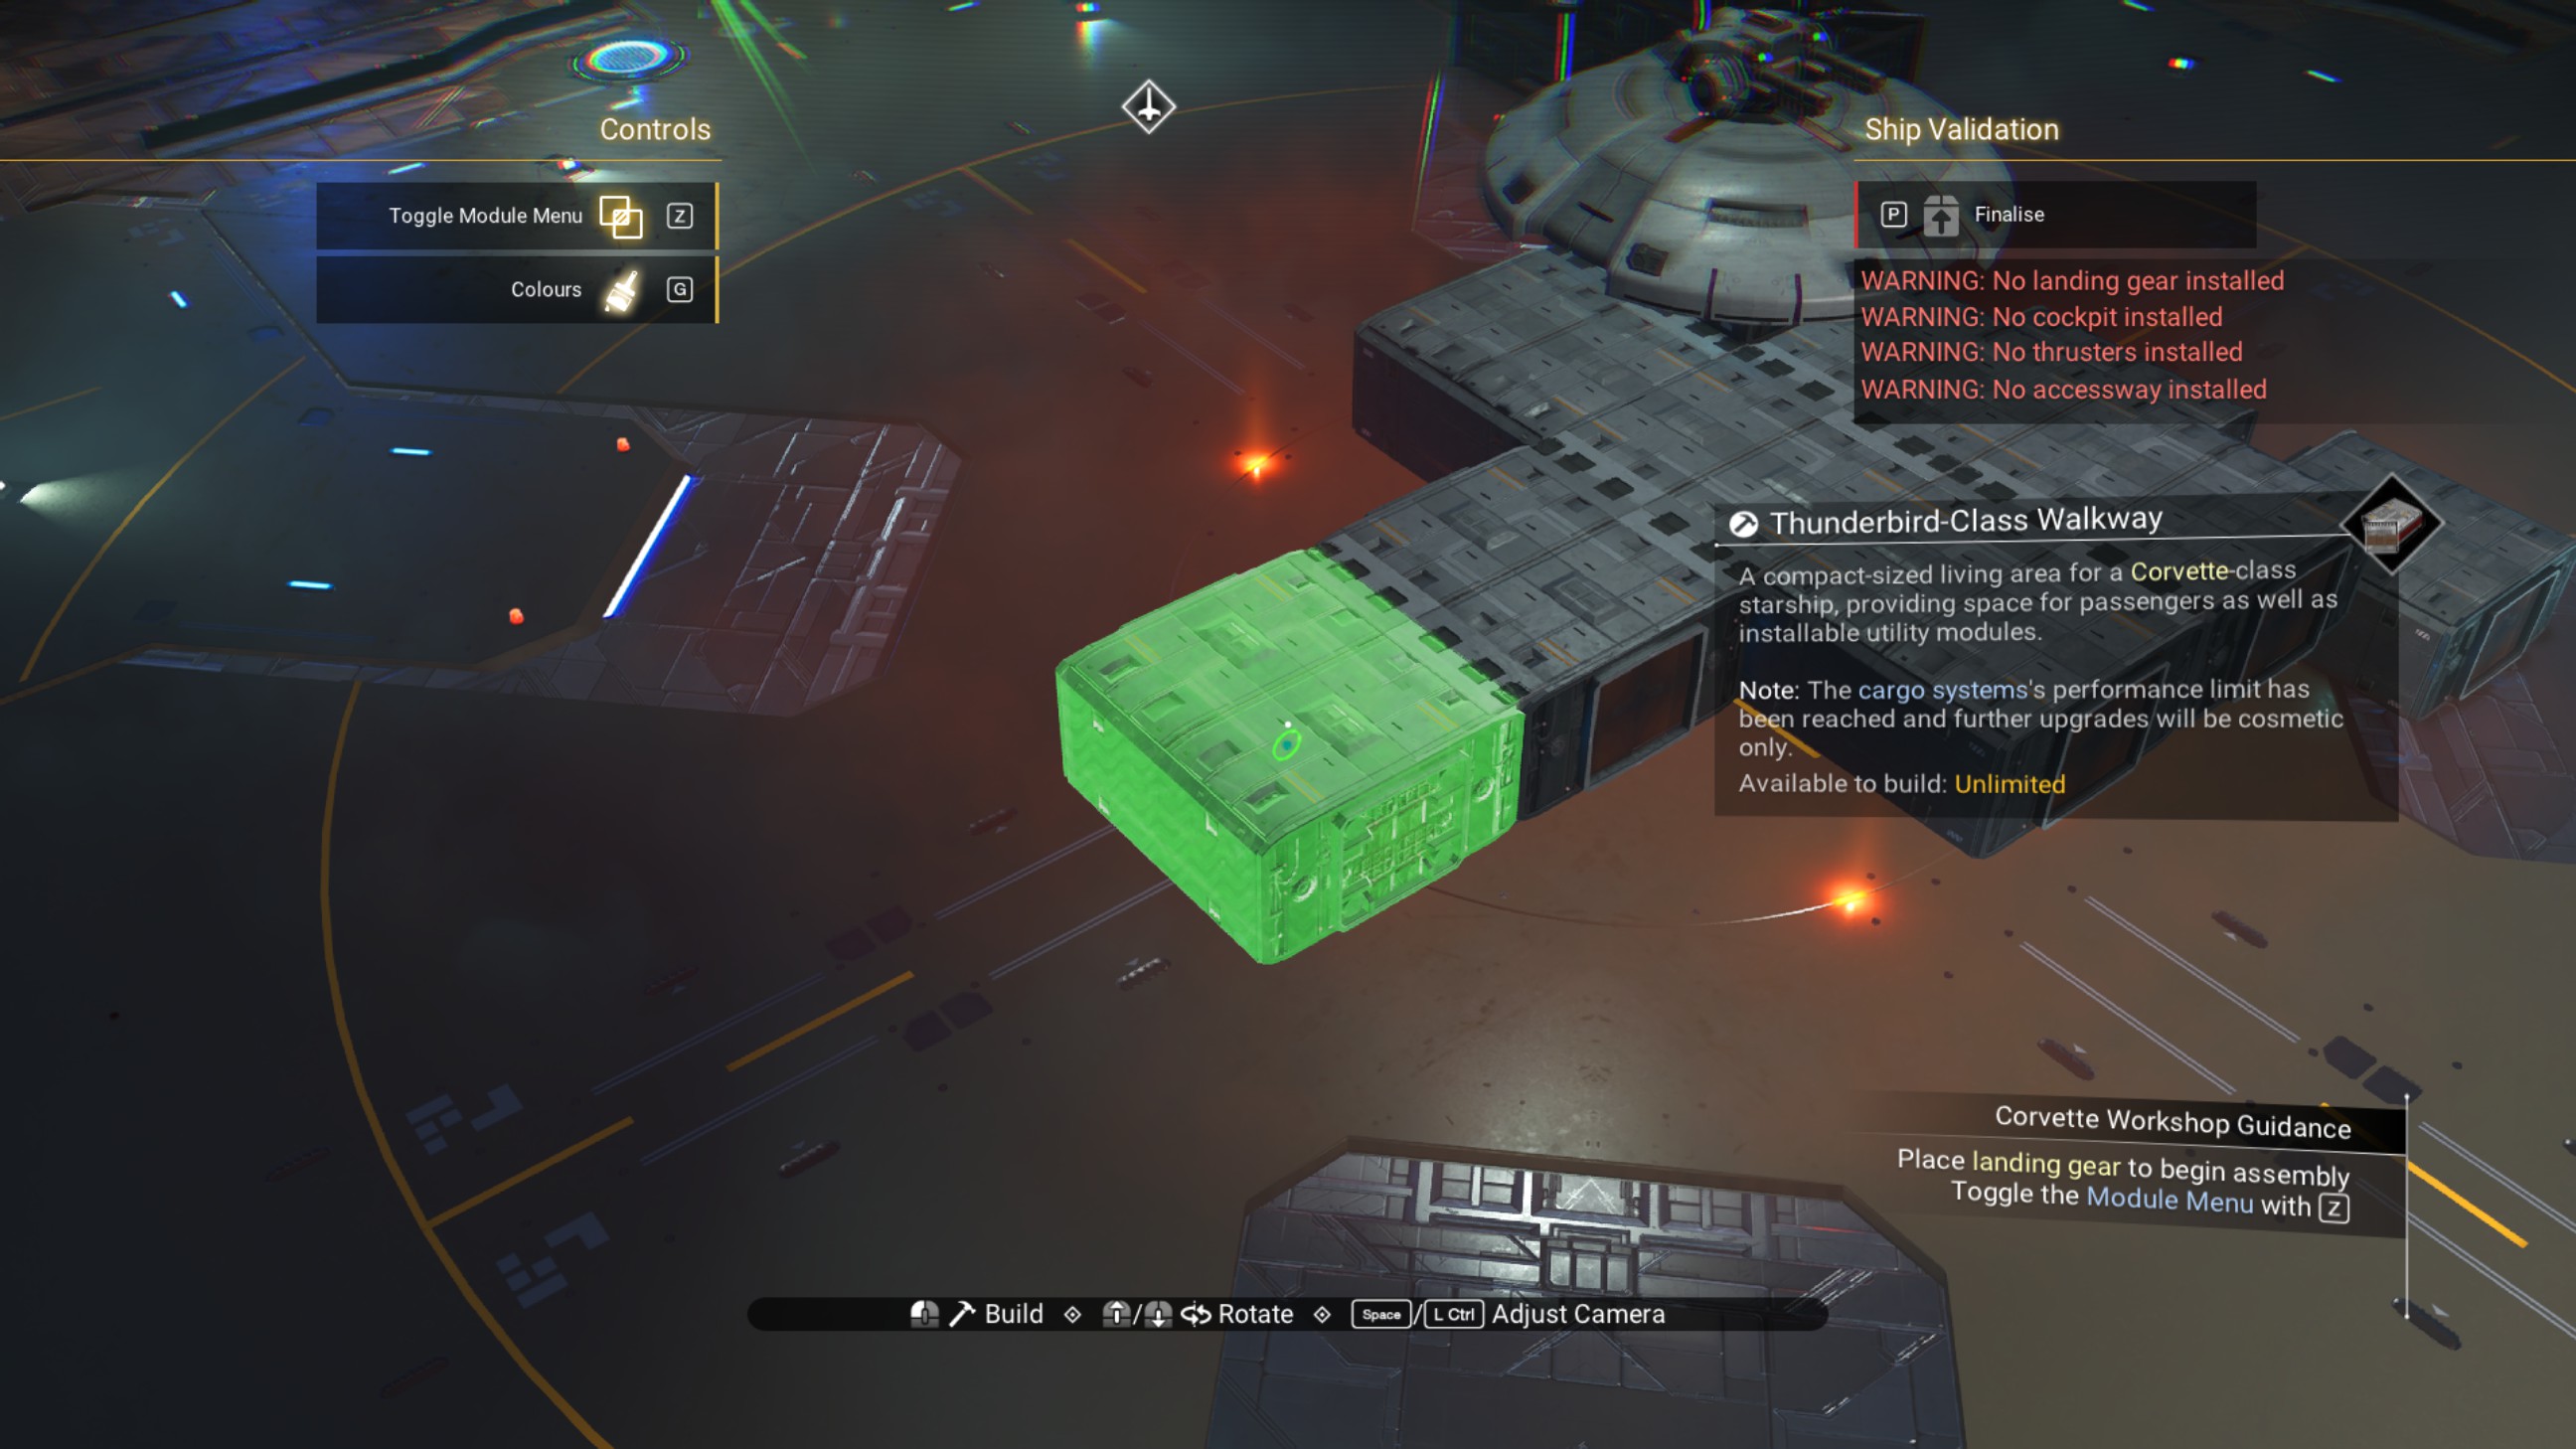
Then, two more walkways to begin building out the cockpit structure.
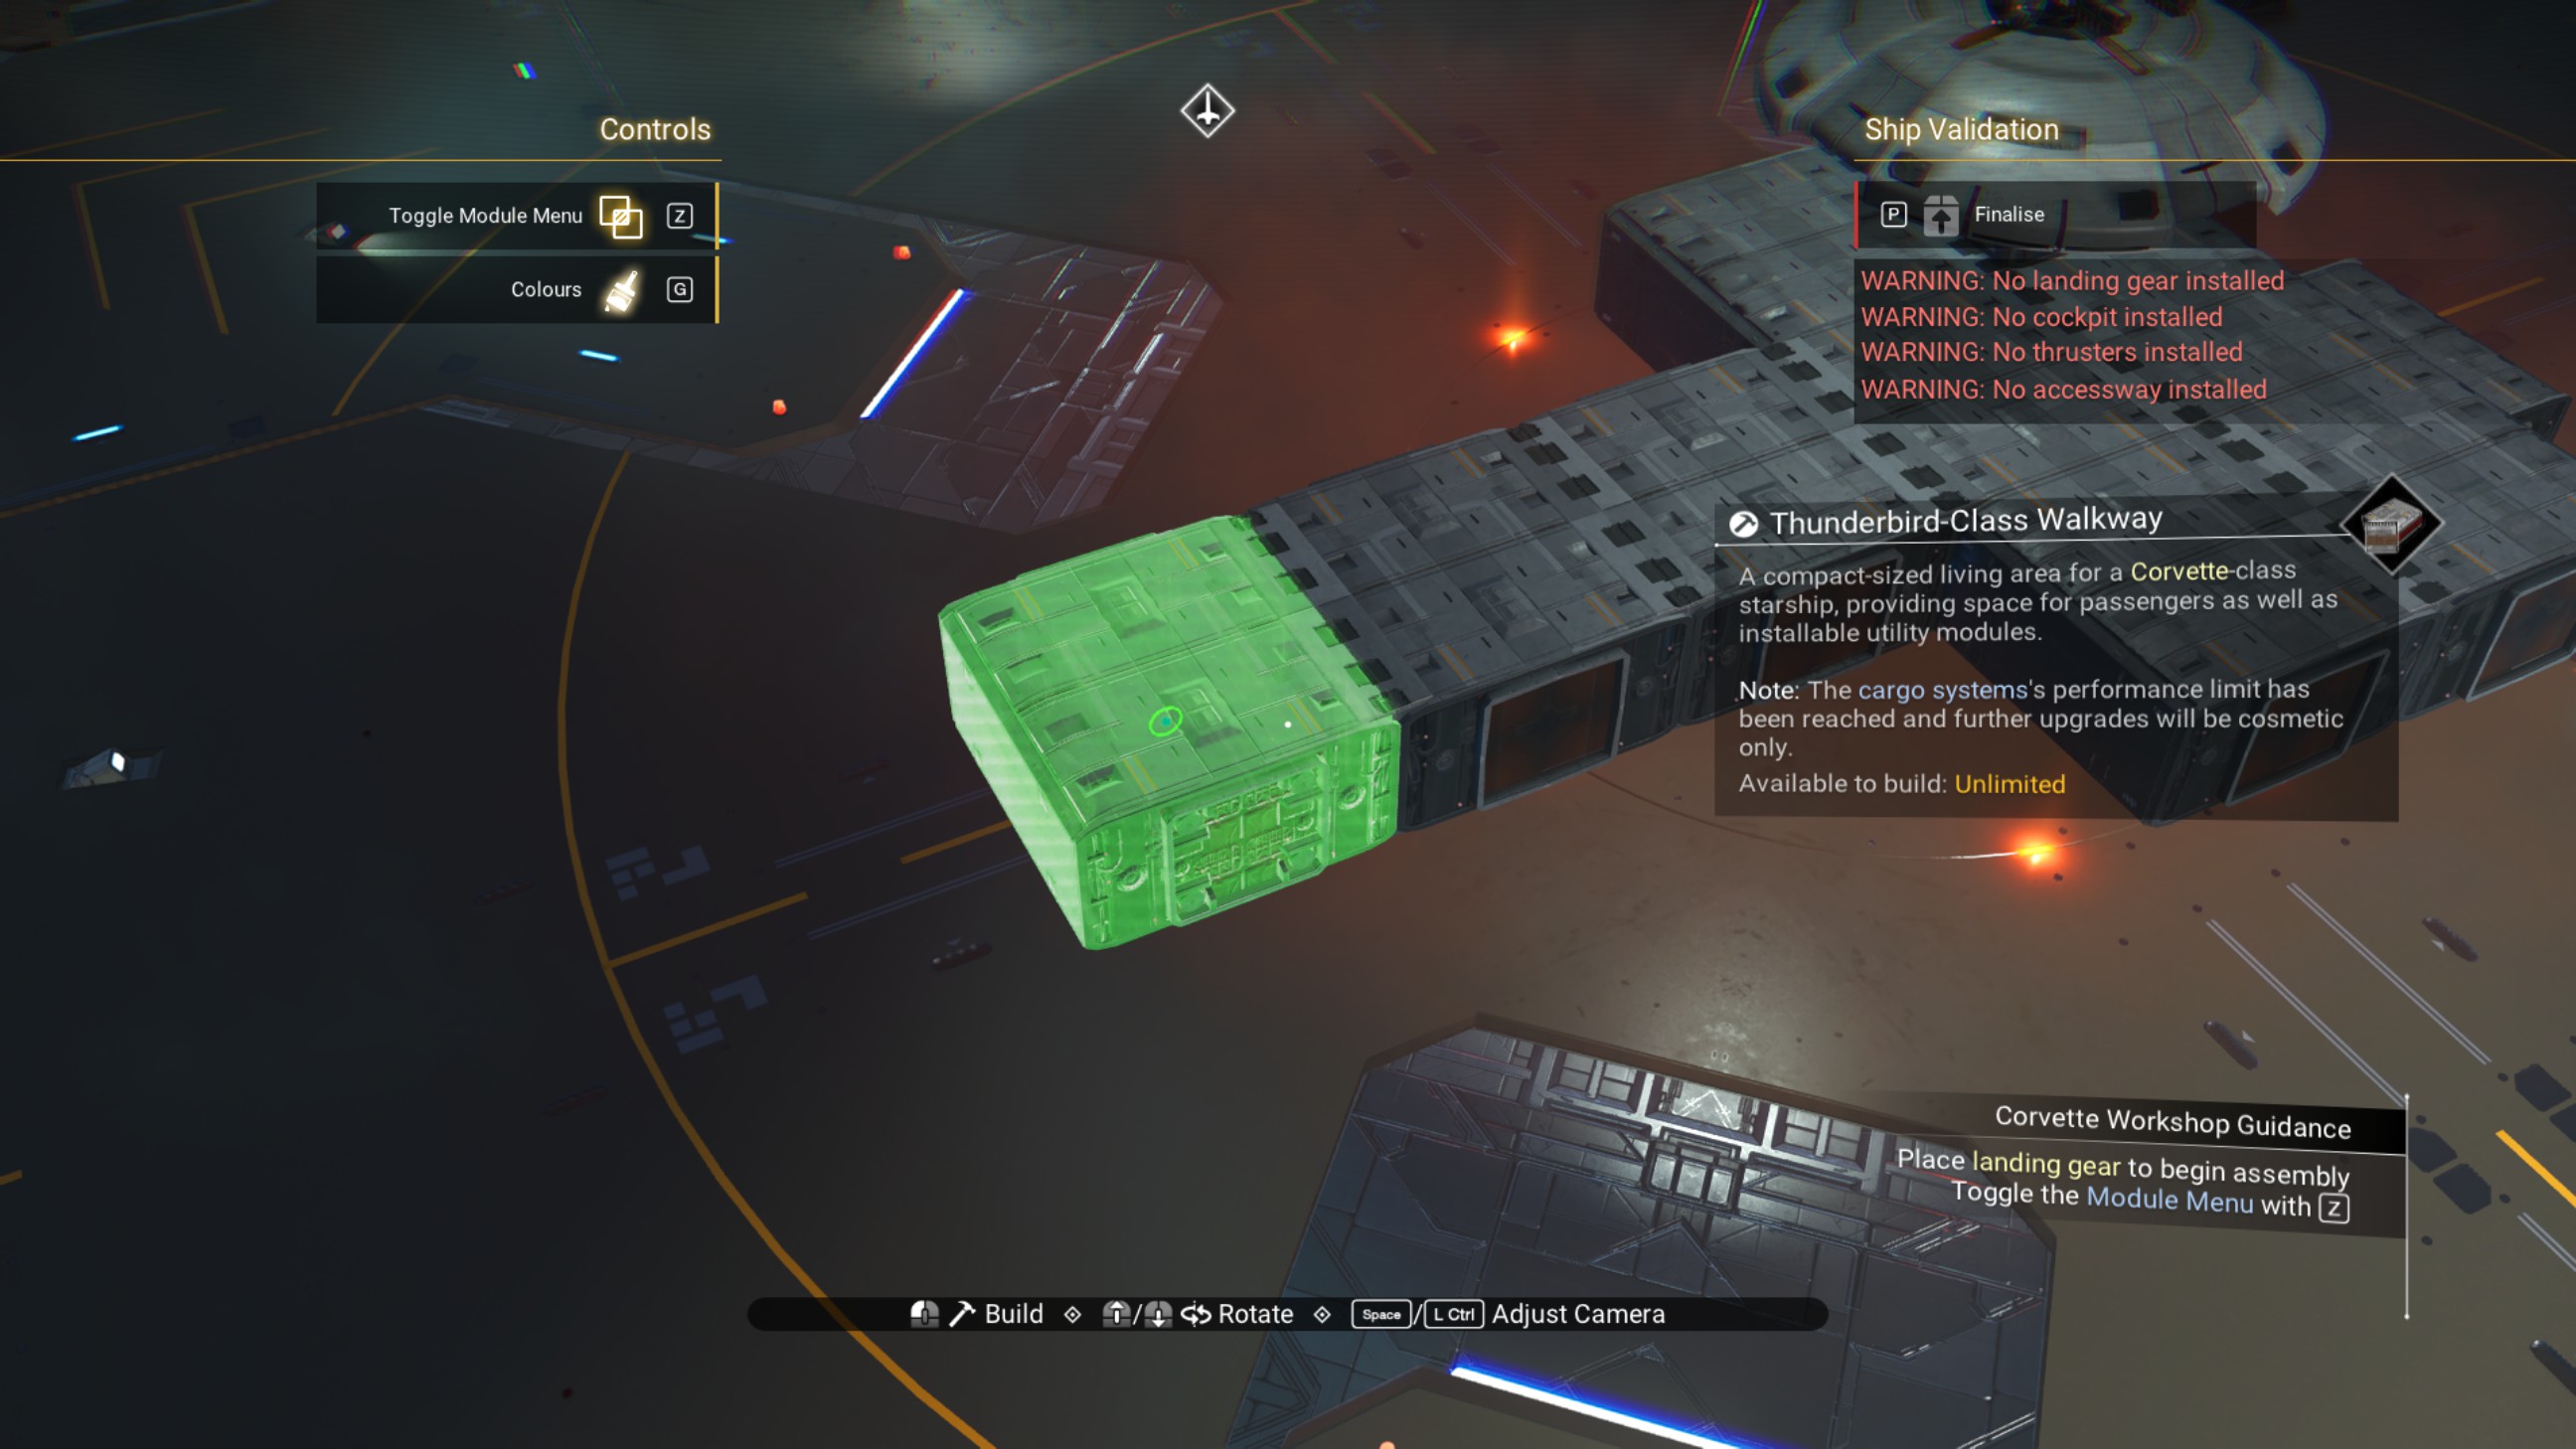
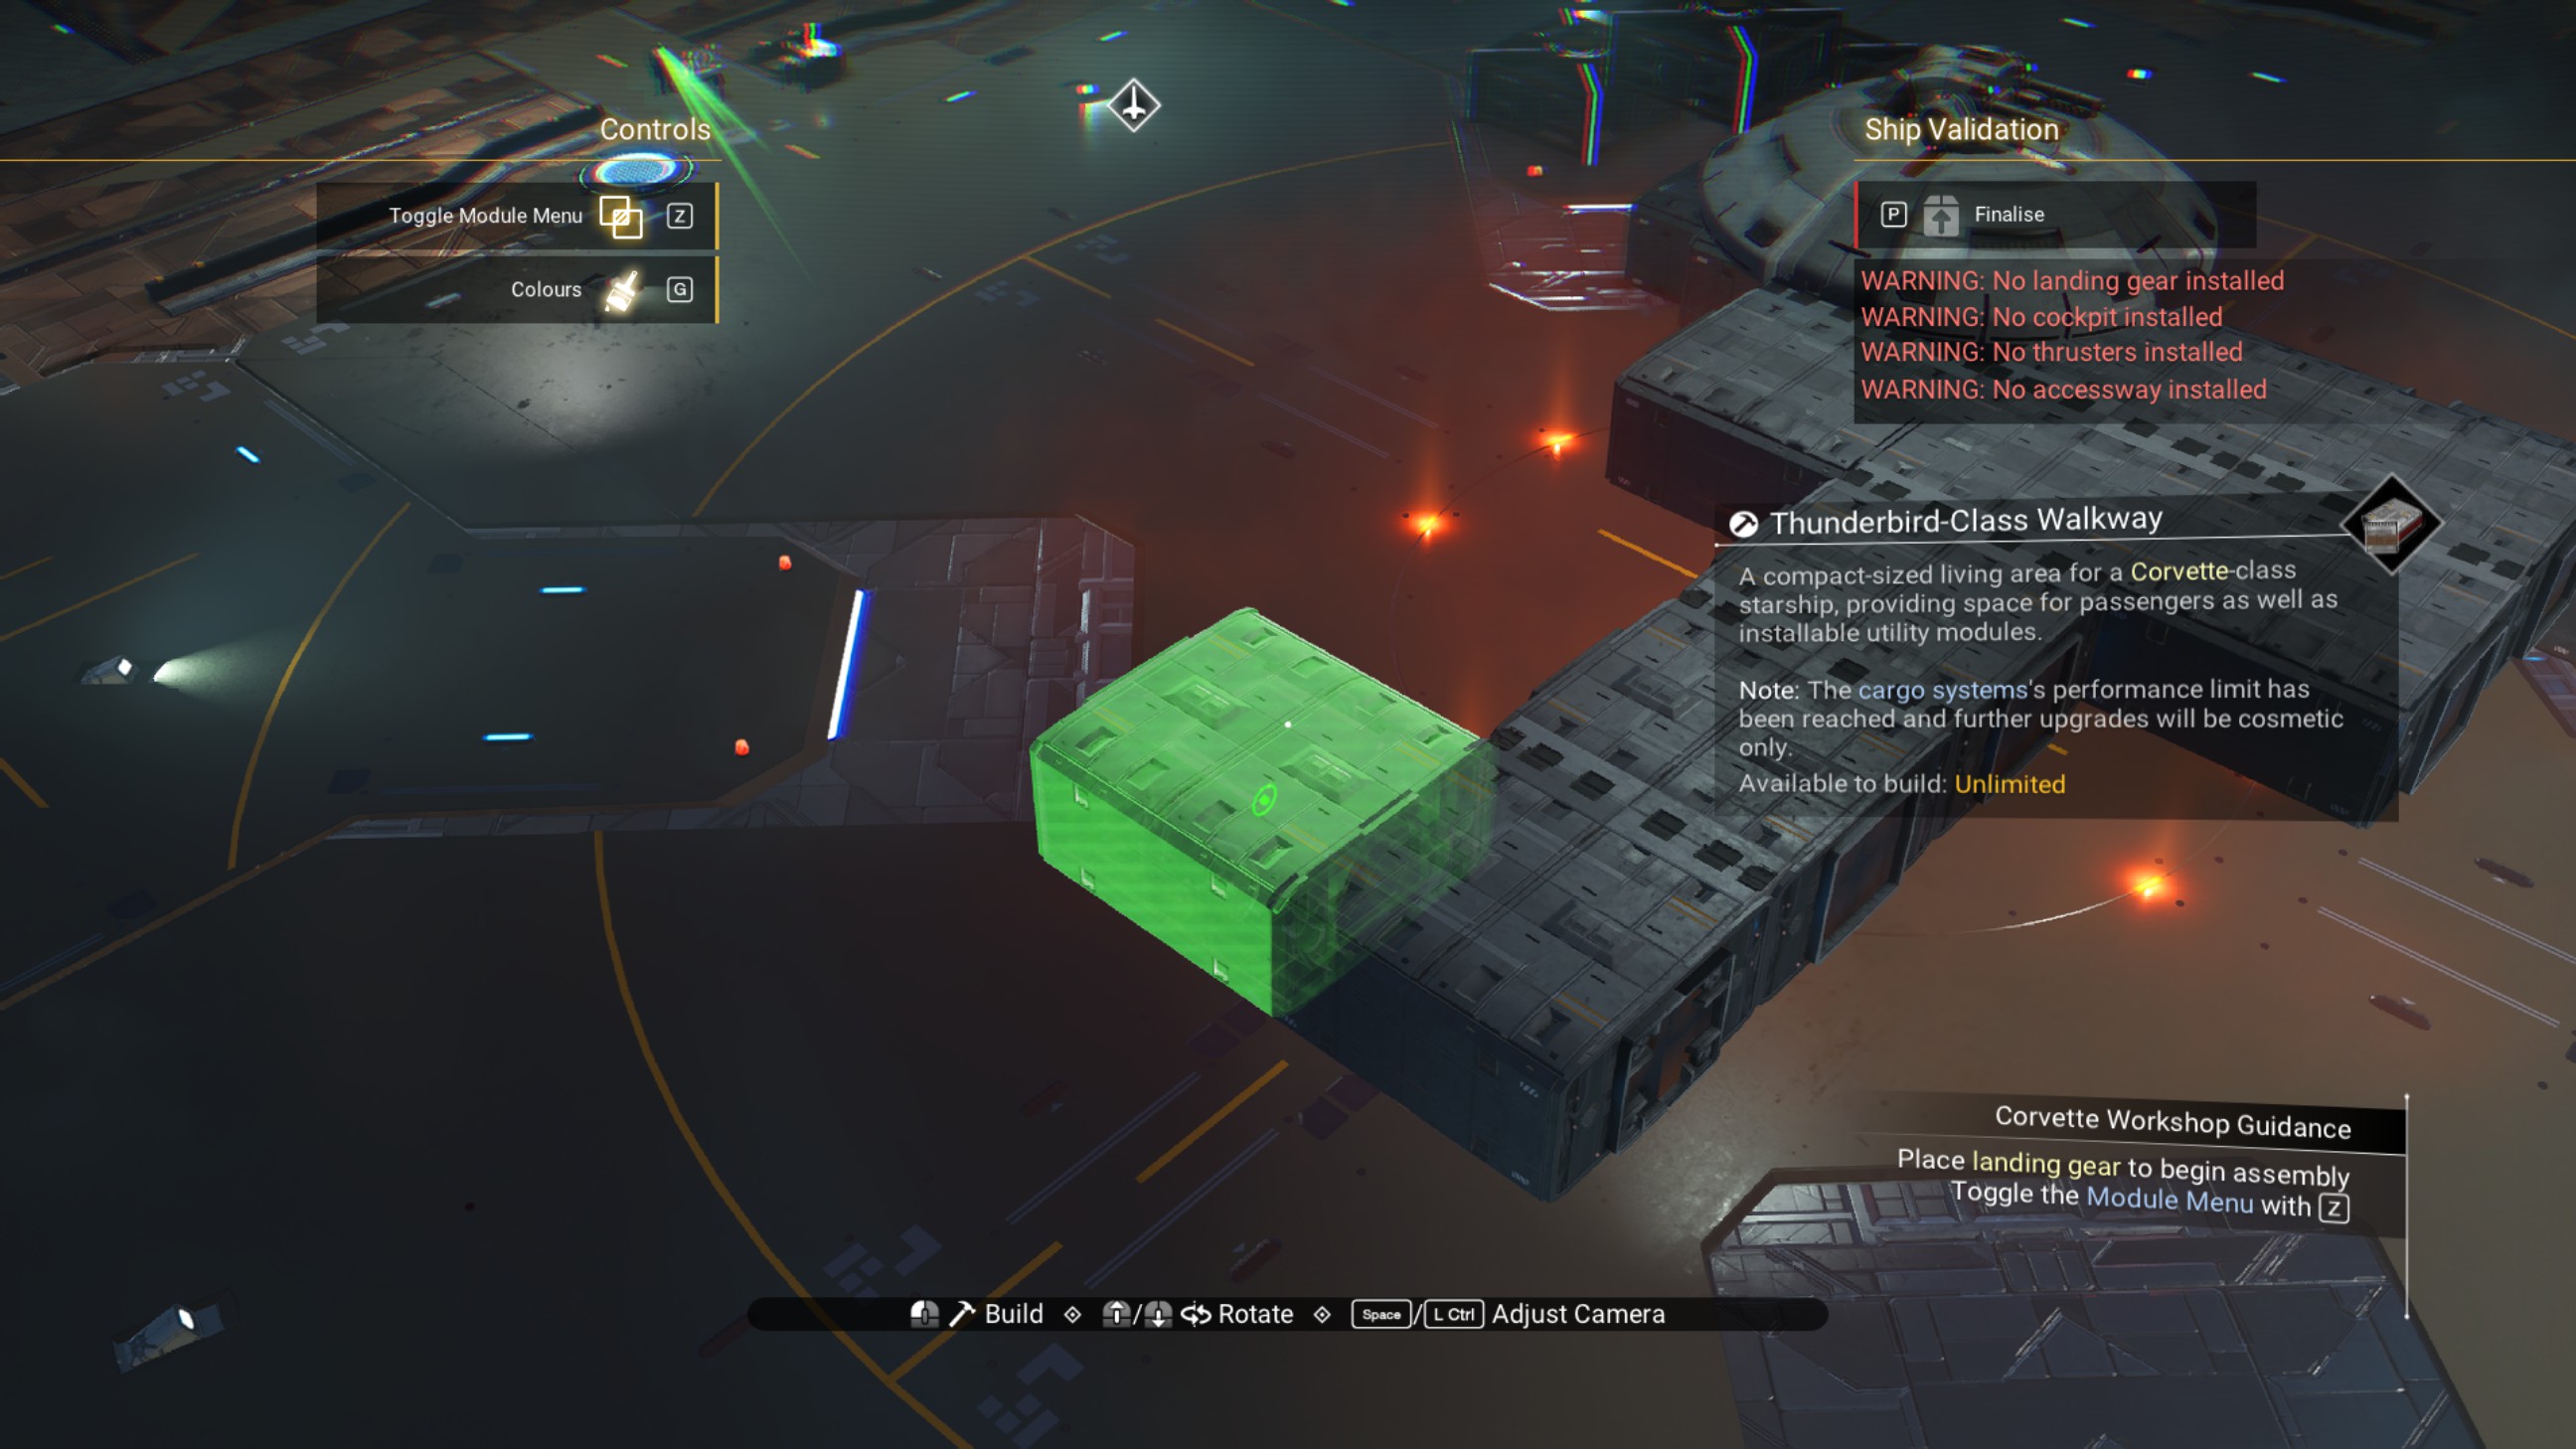
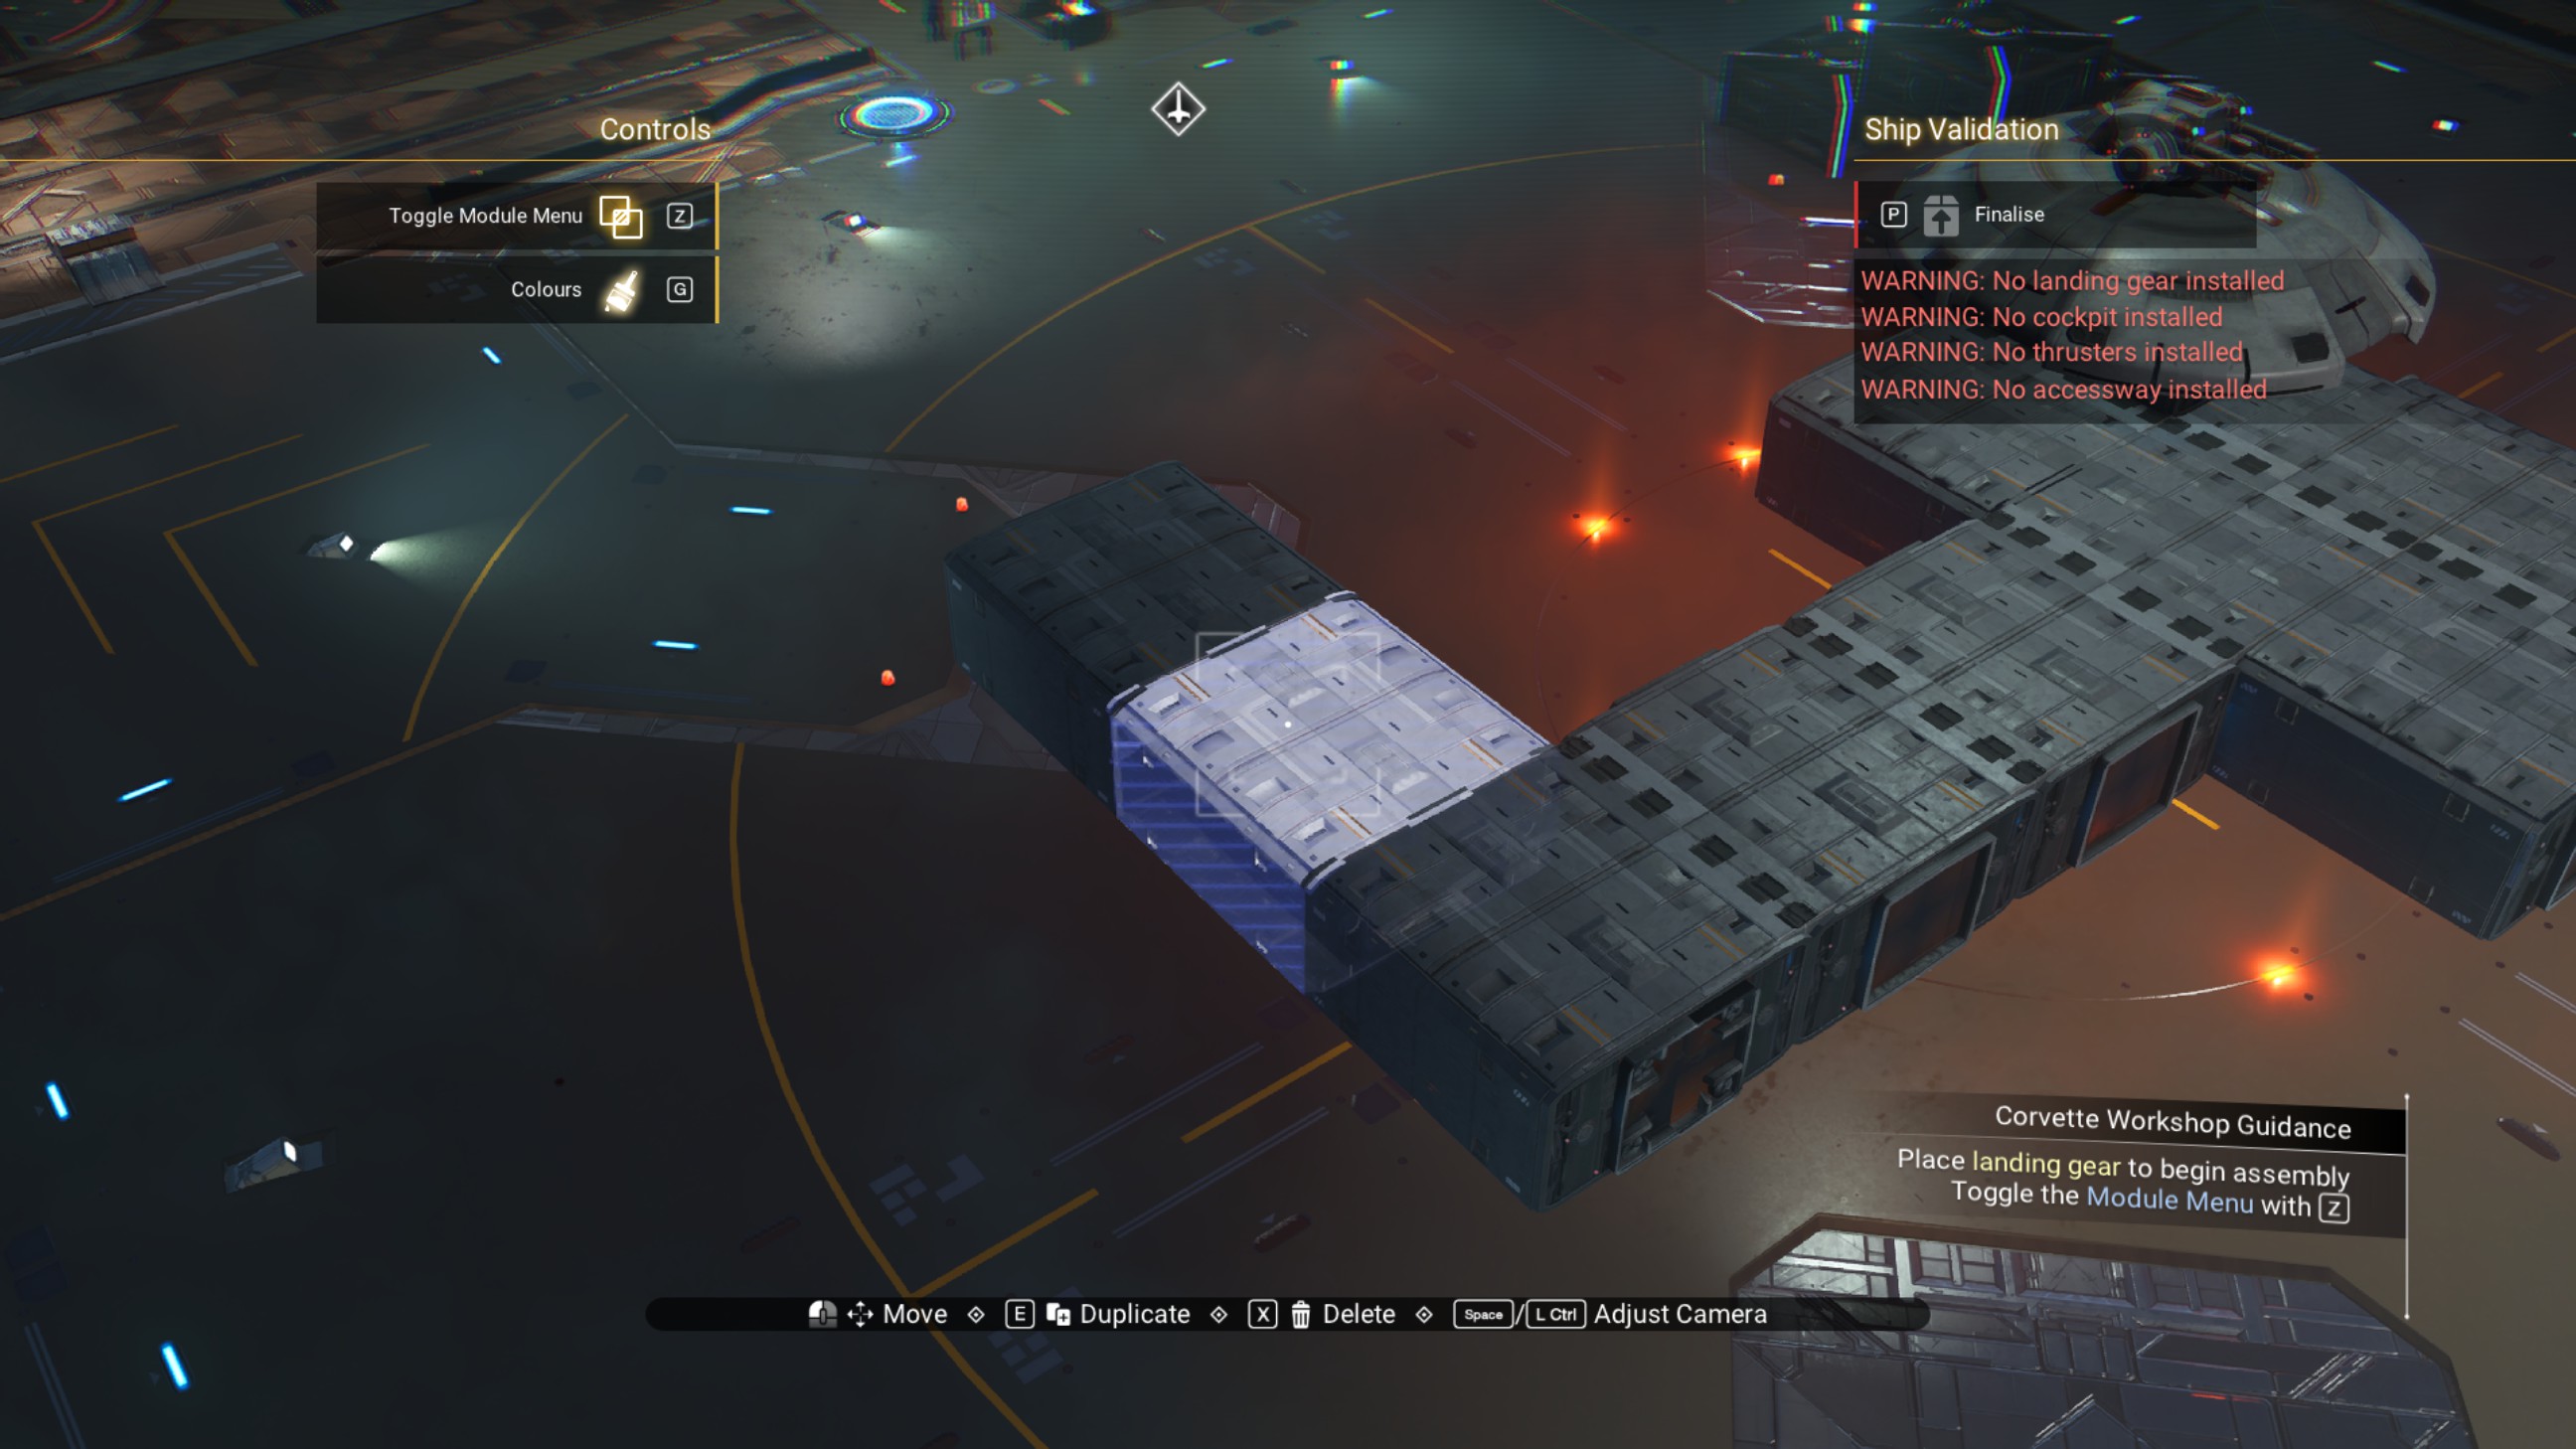
Place a third walkway on the rear of the cockpit structure, then delete the middle walkway.
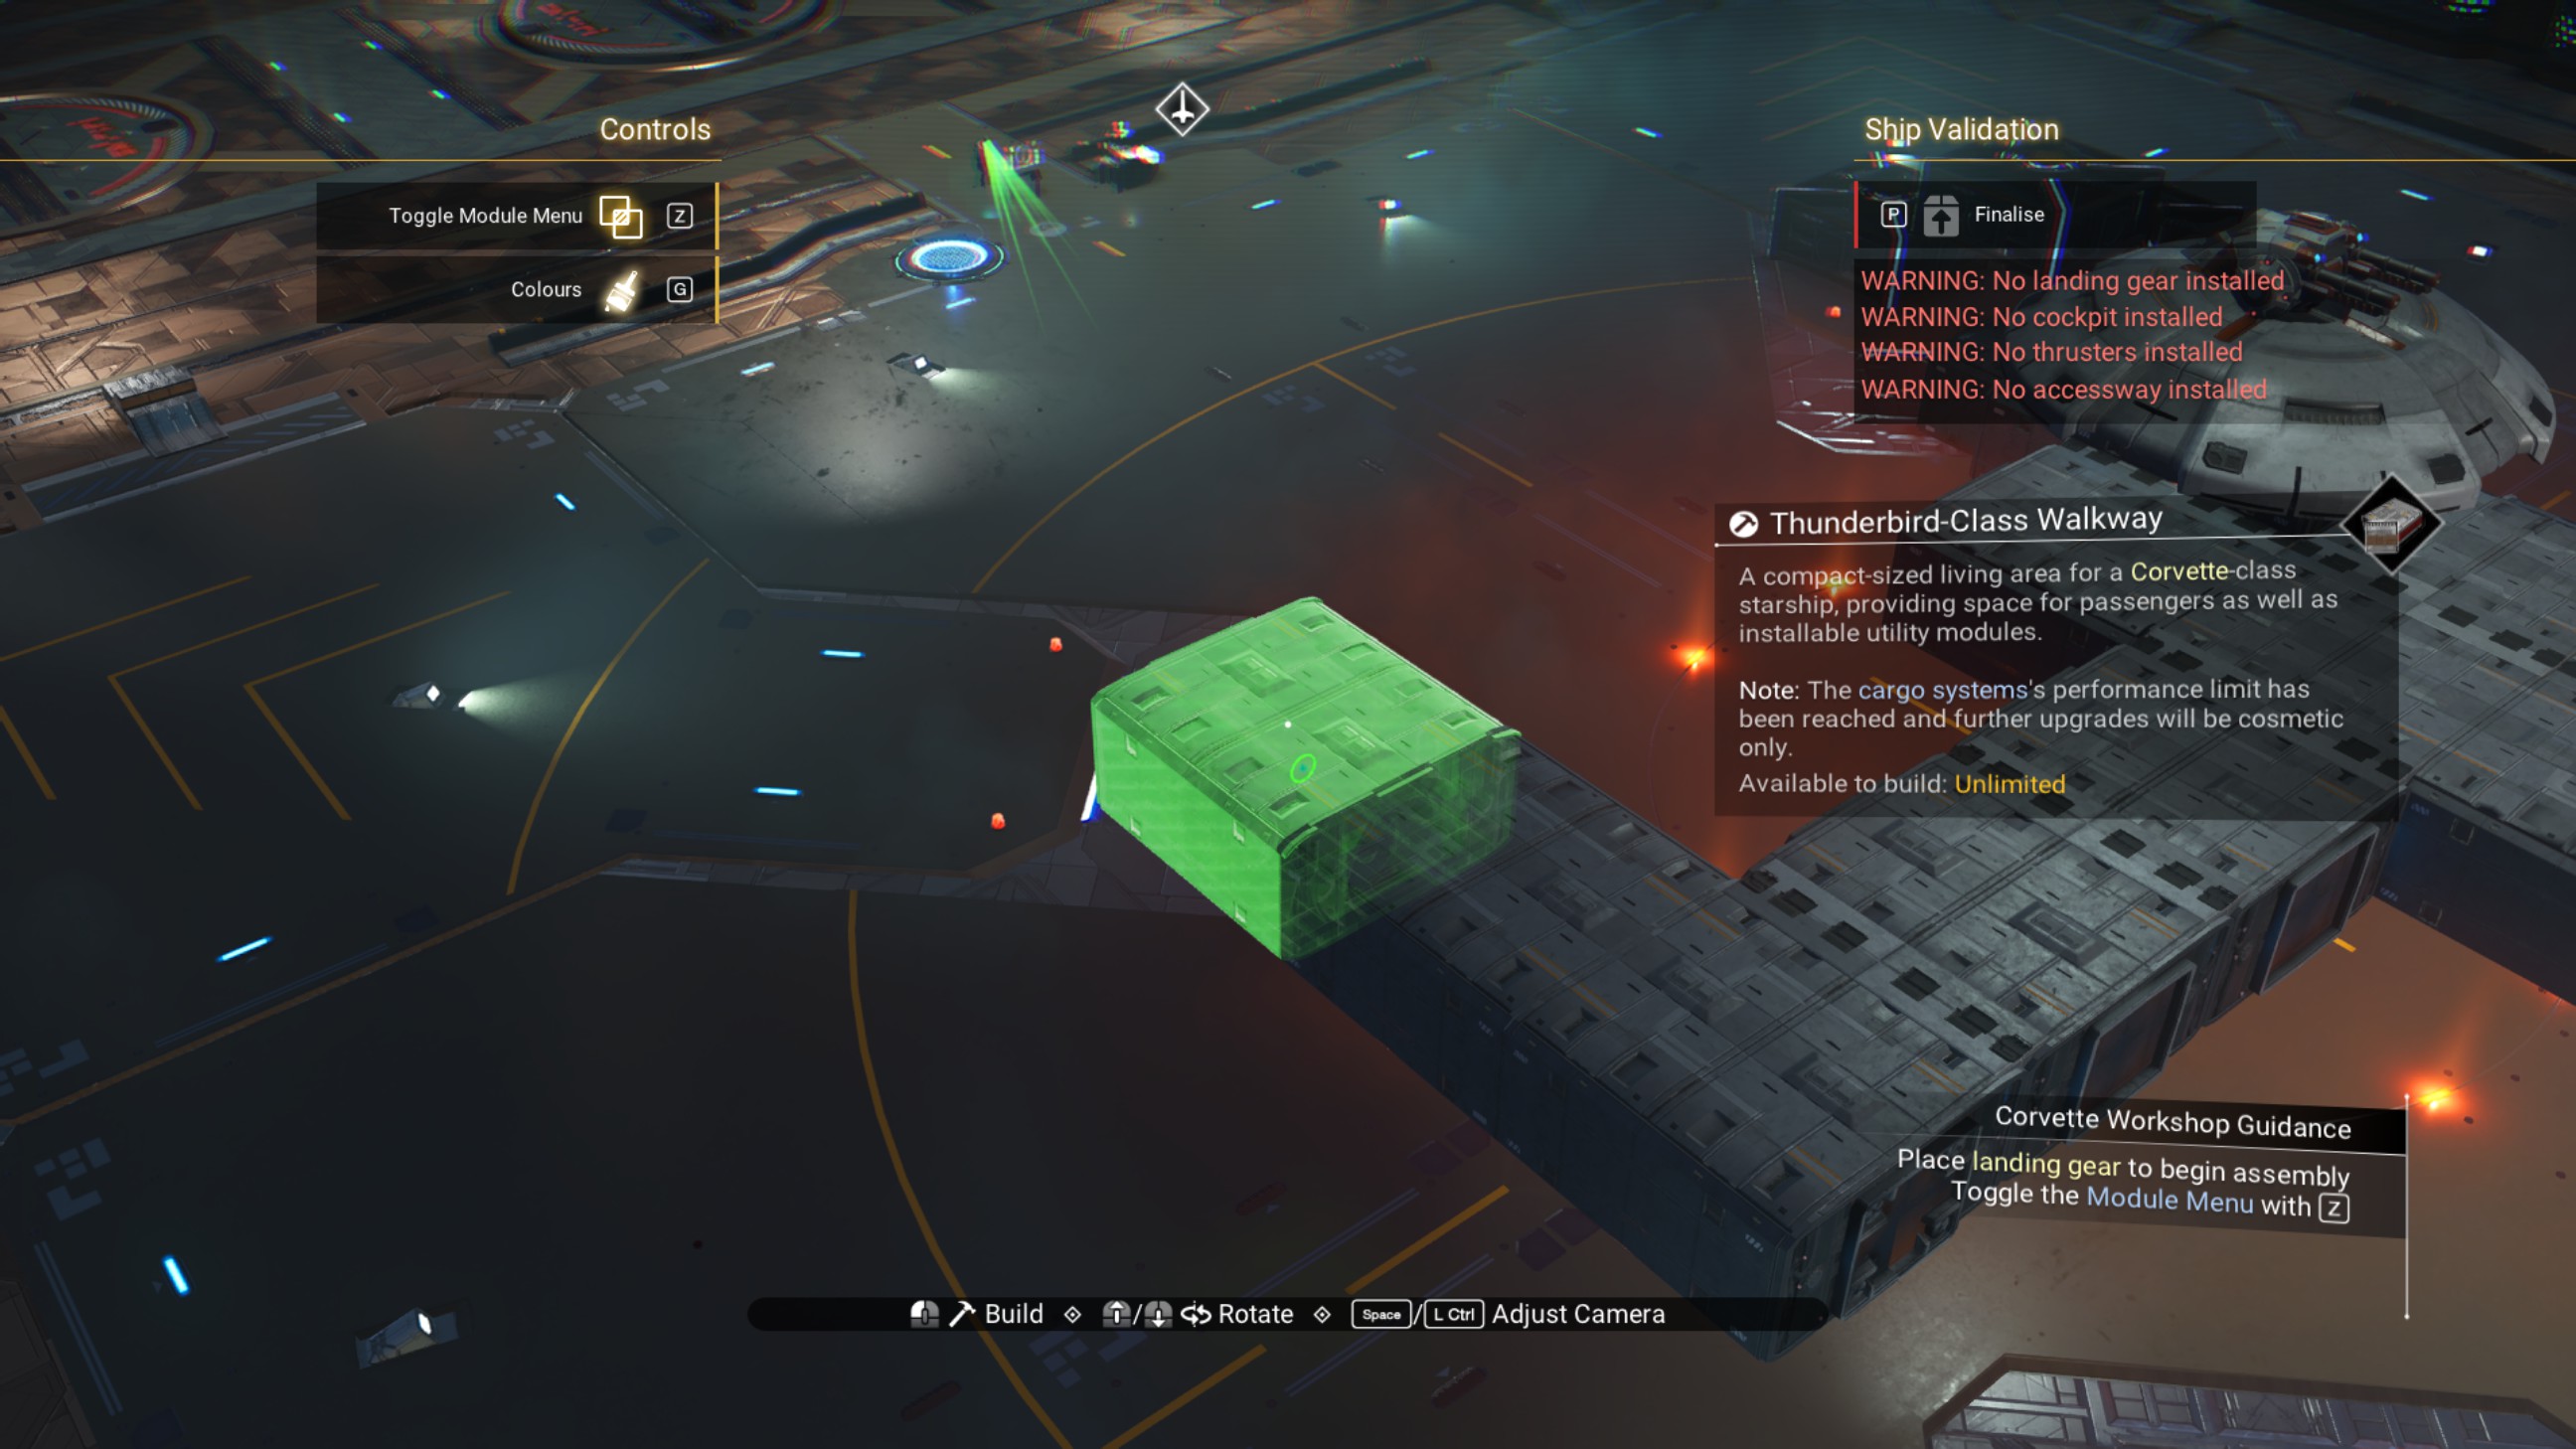
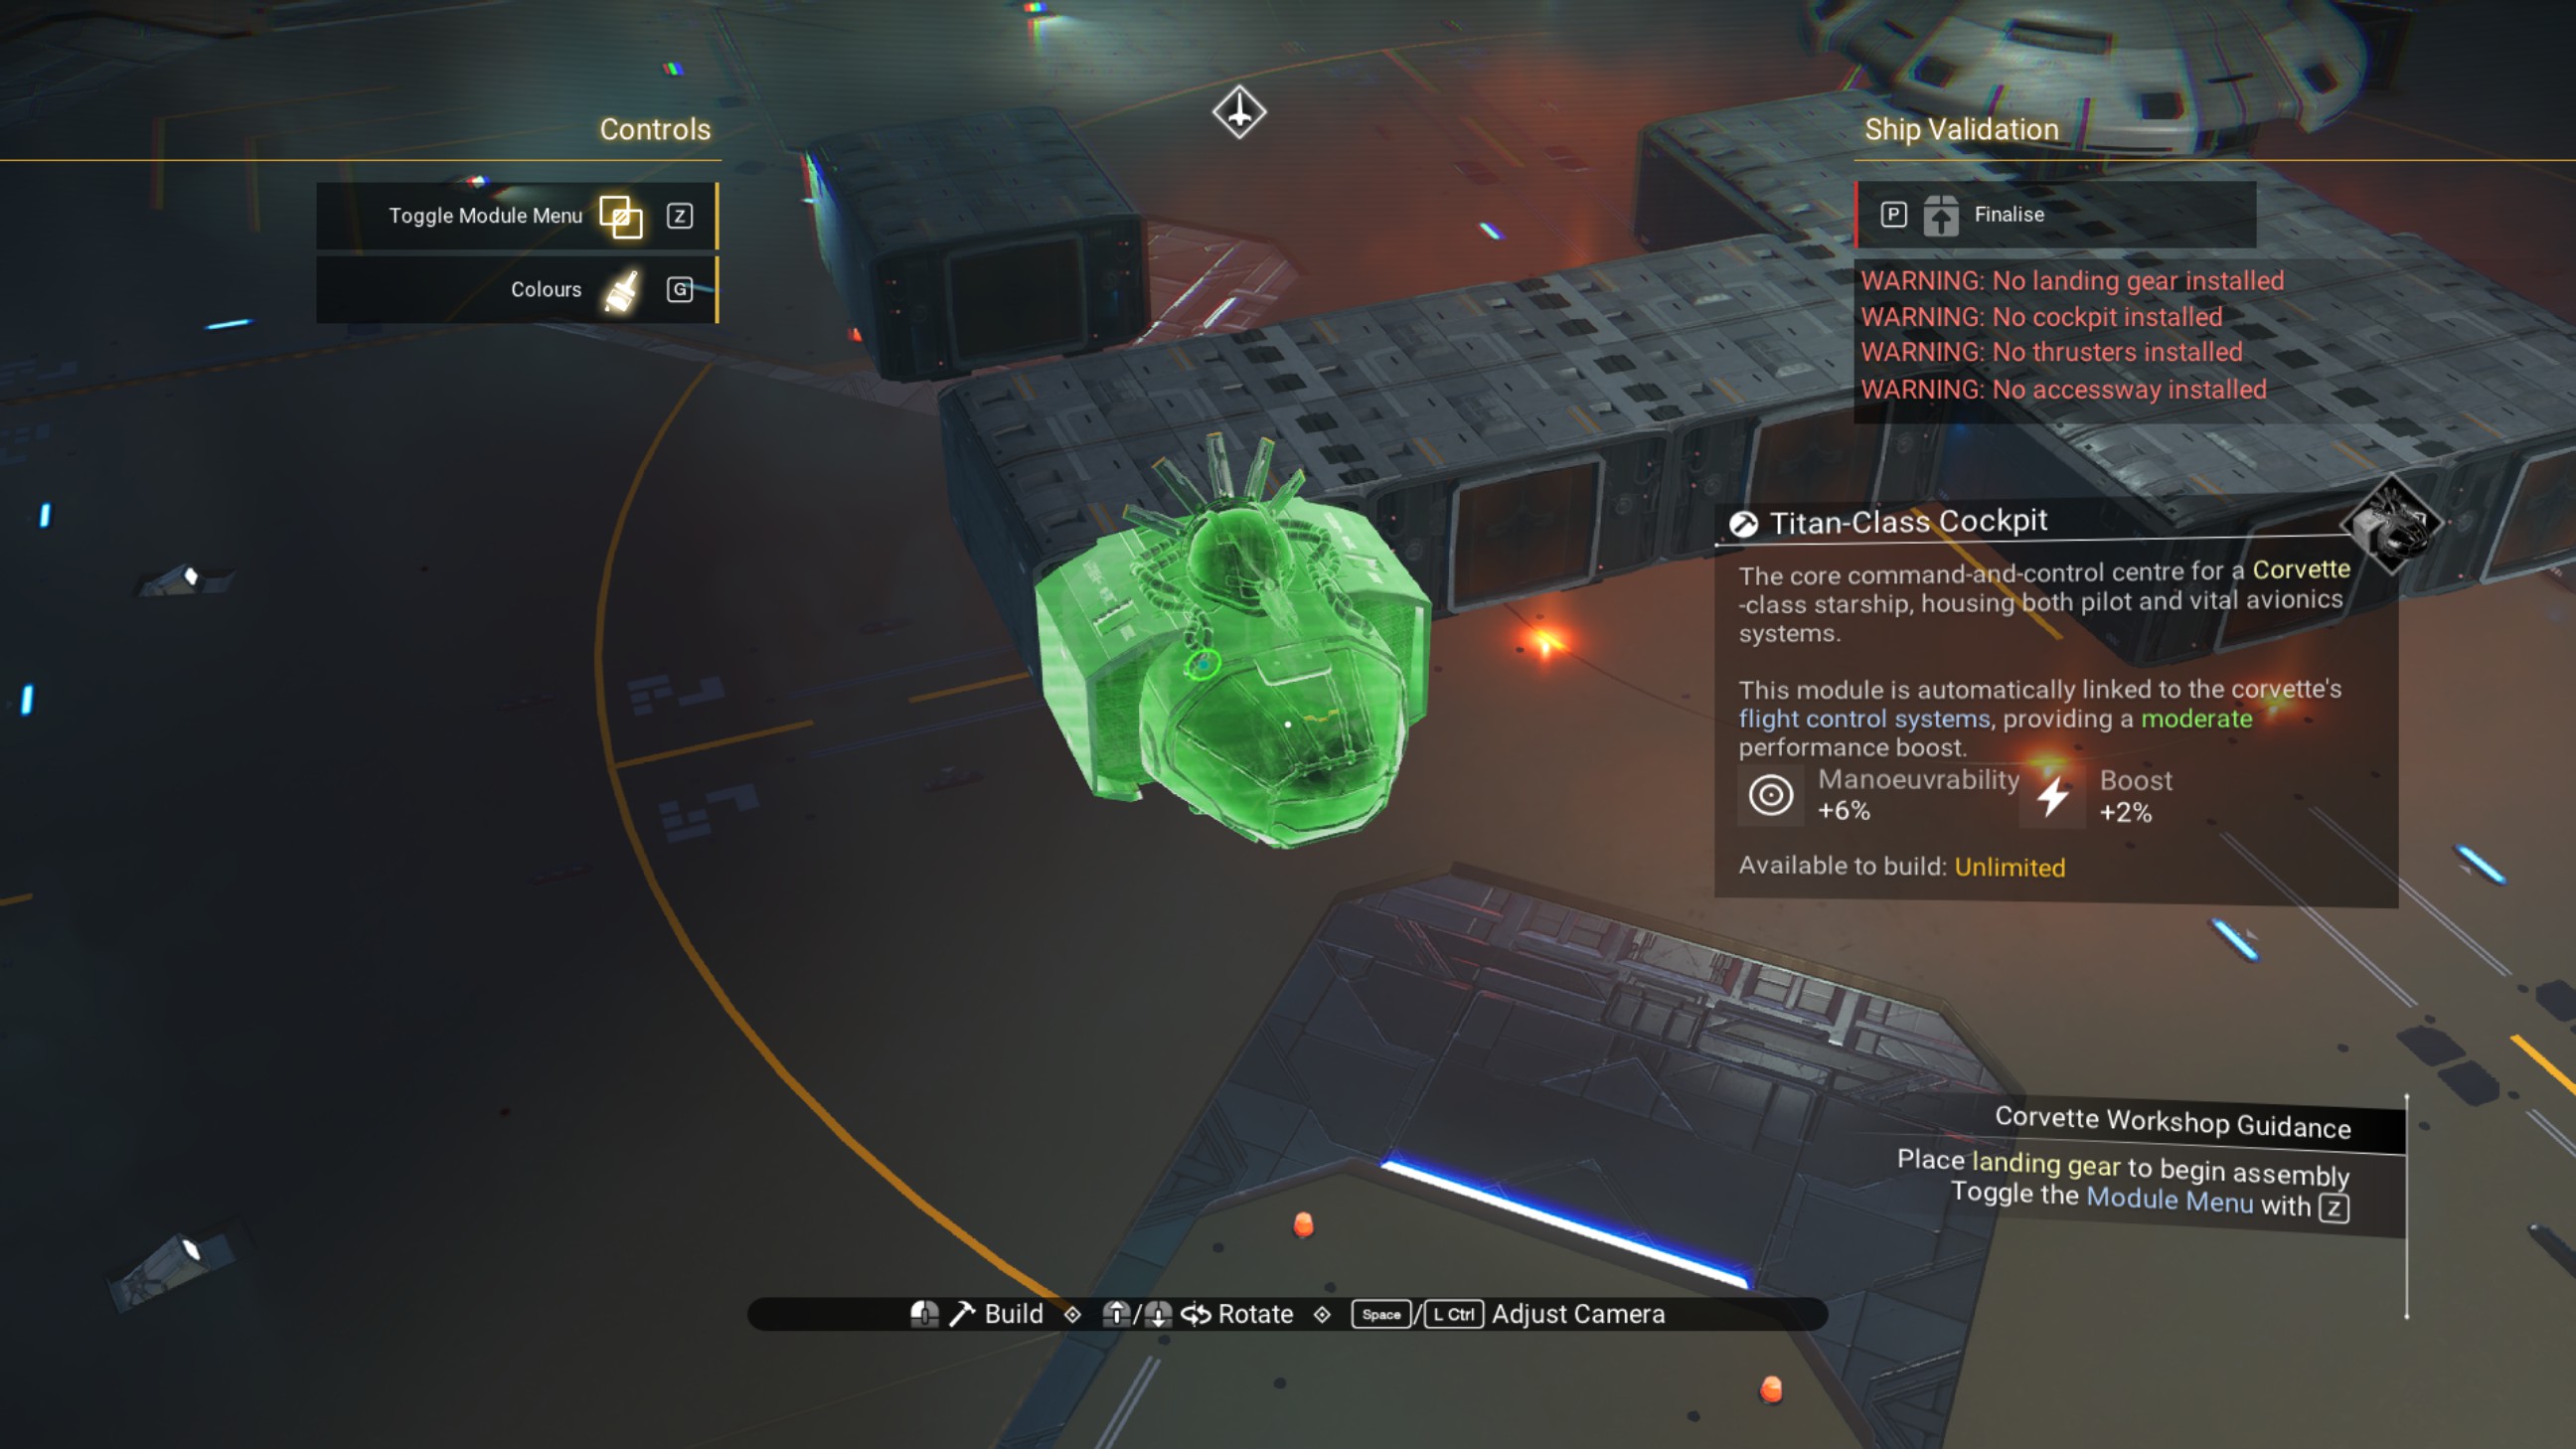
Place a cockpit module on the front of the structure.
Place a walkway on the starboard side of the rear walkway, then place a ducting outlet on top of it.
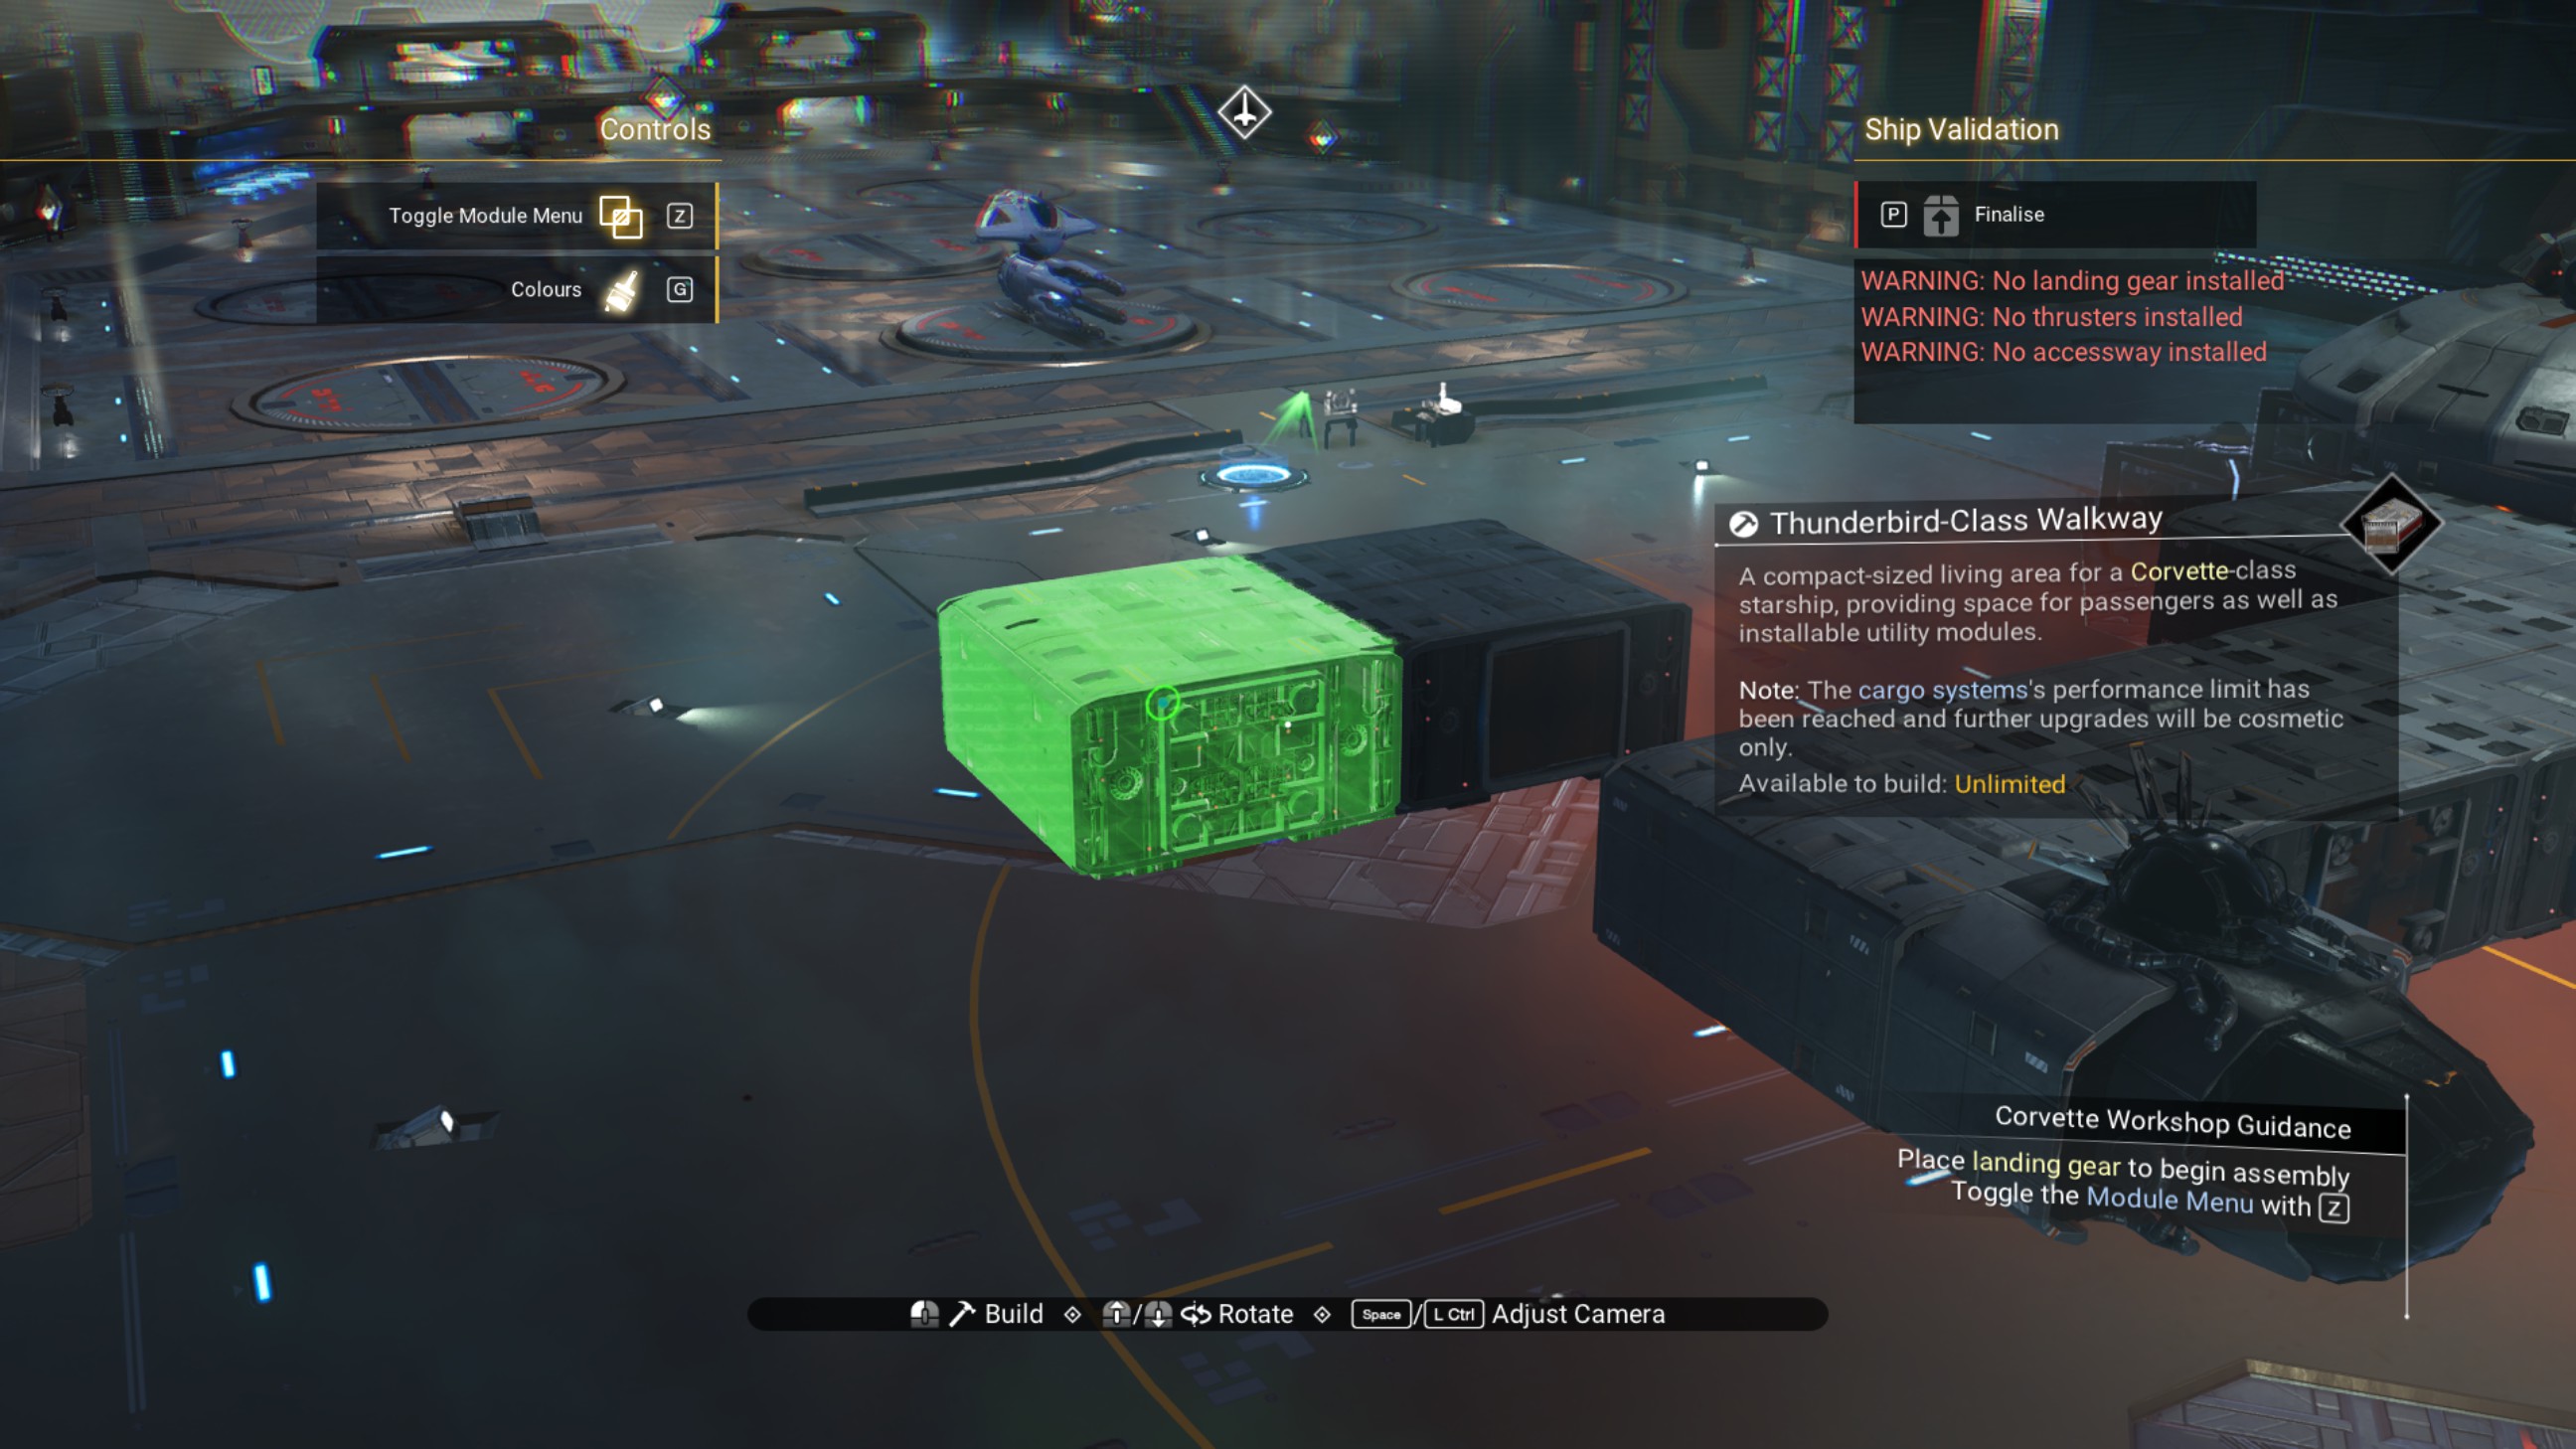
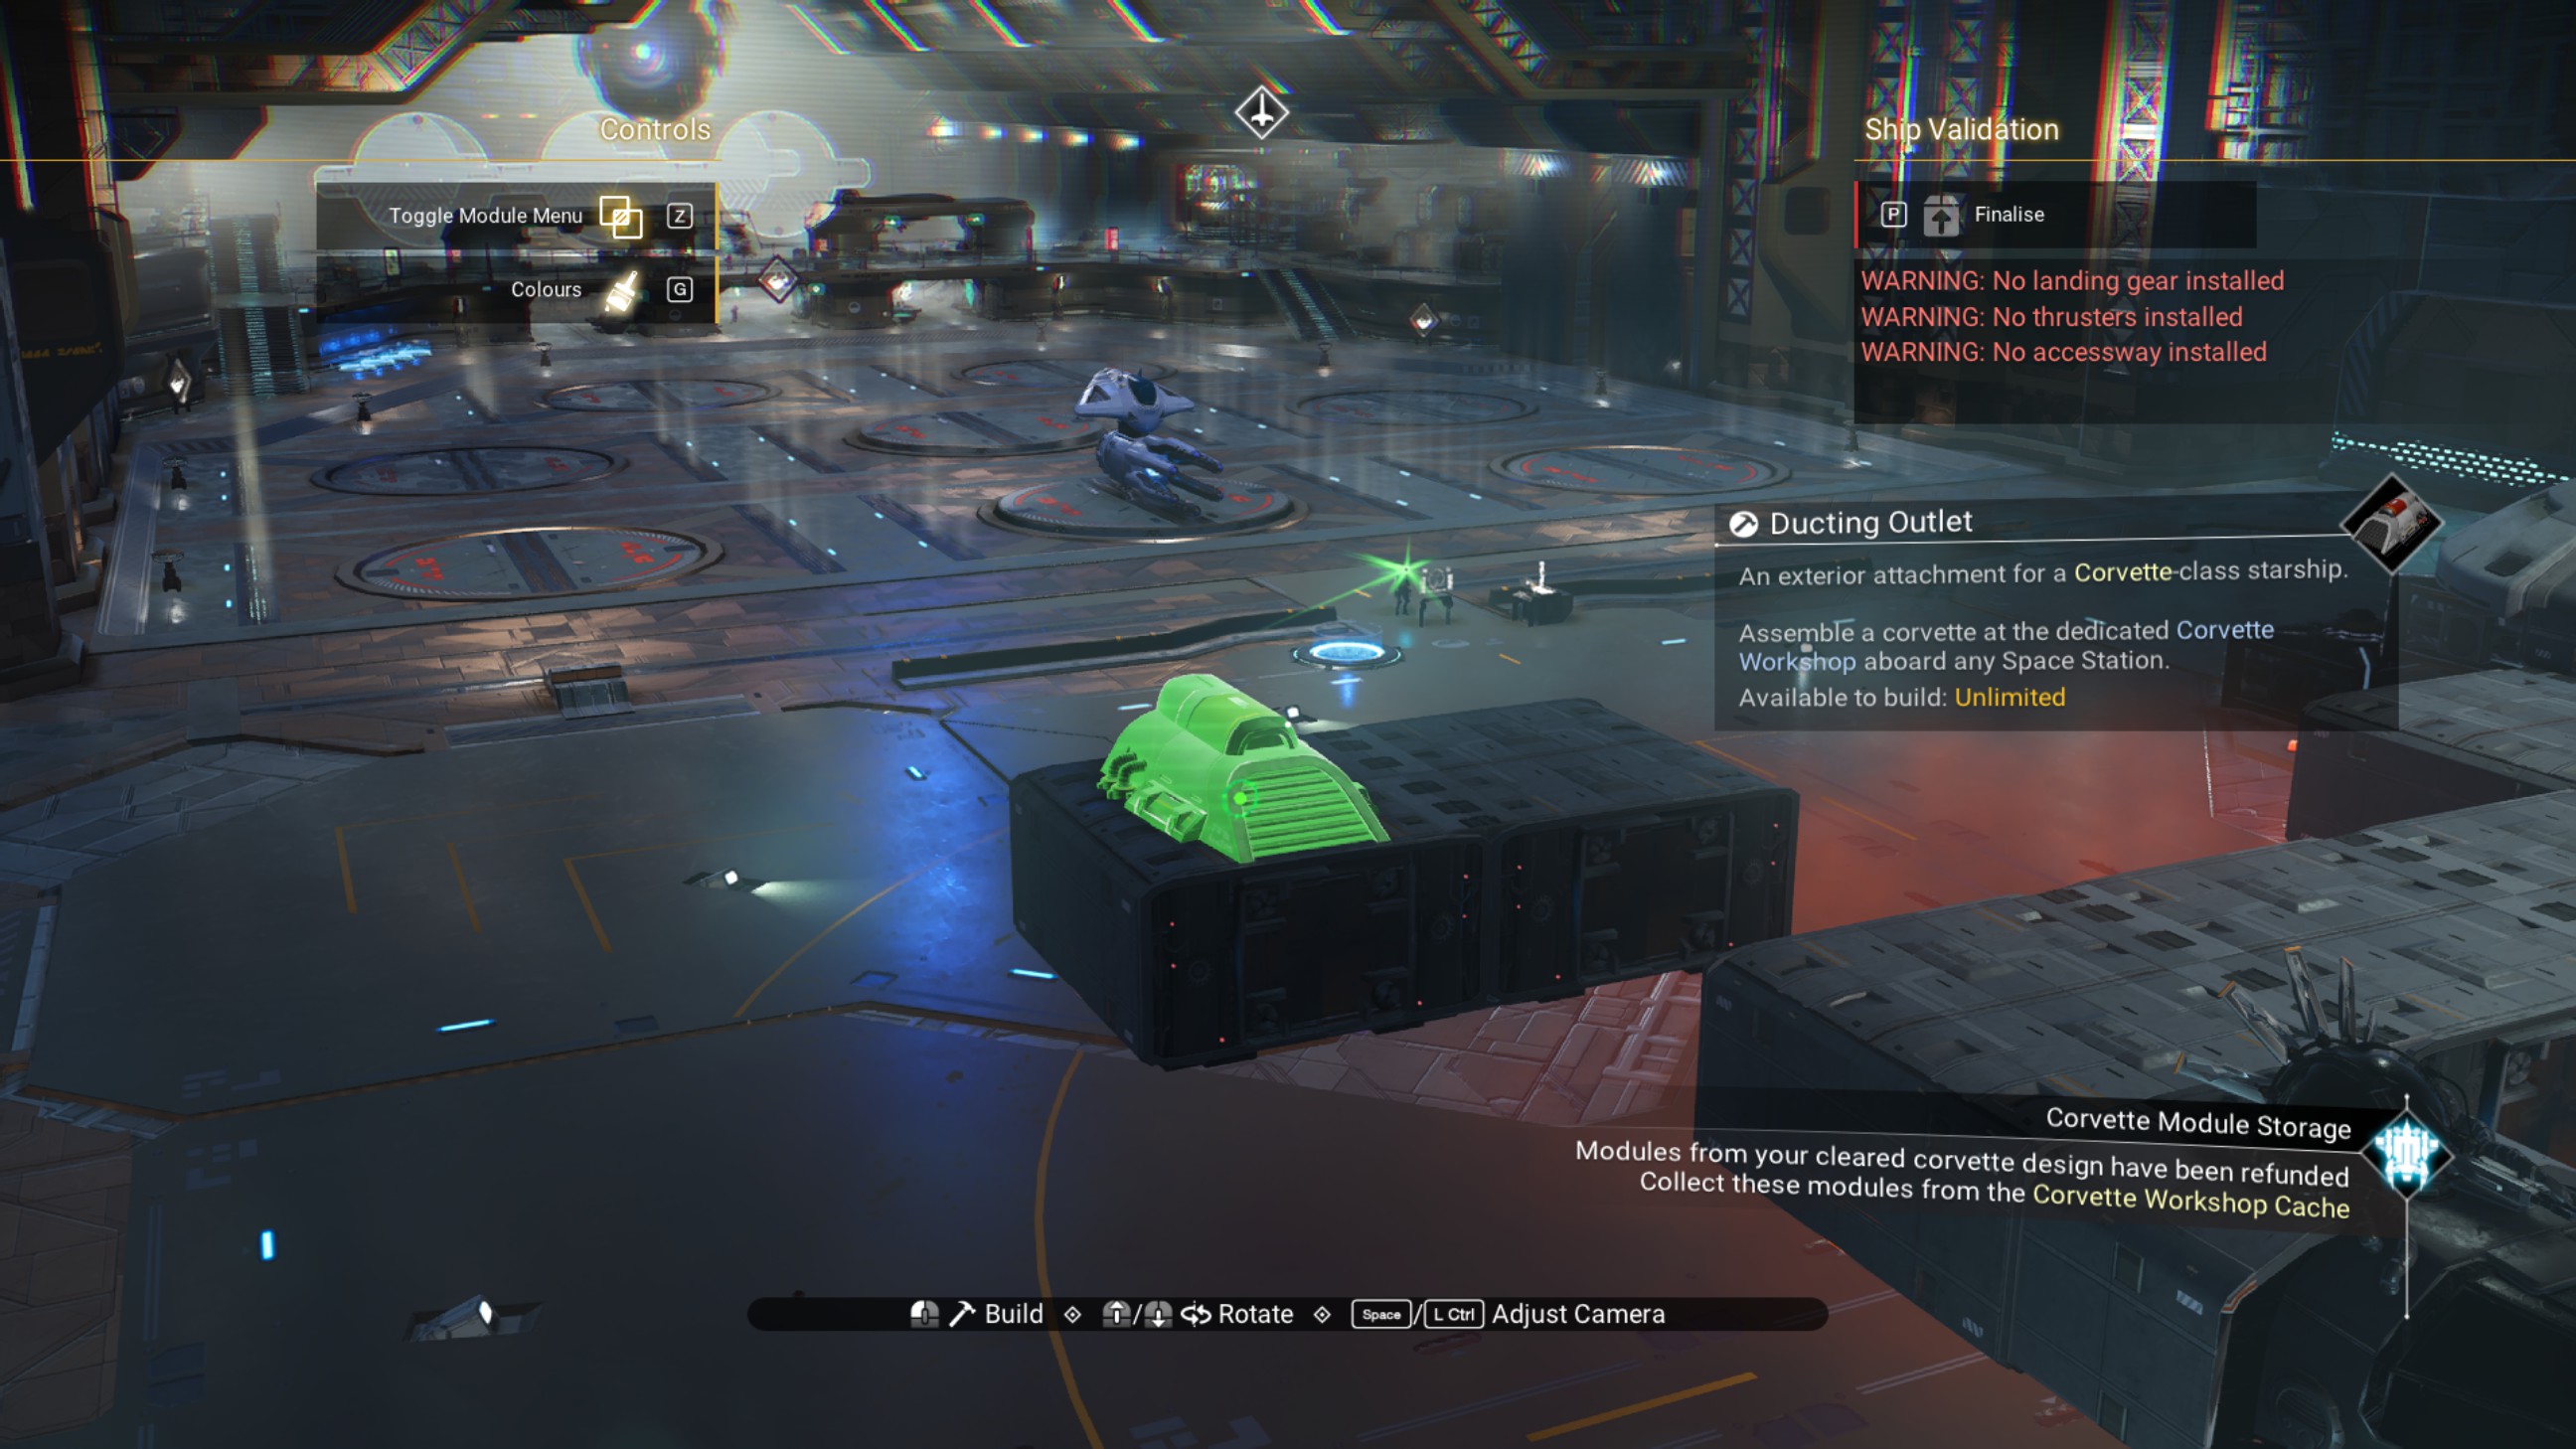
Offset the walkway so the ducting outlet is on its starboard side, then delete the ducting outlet.
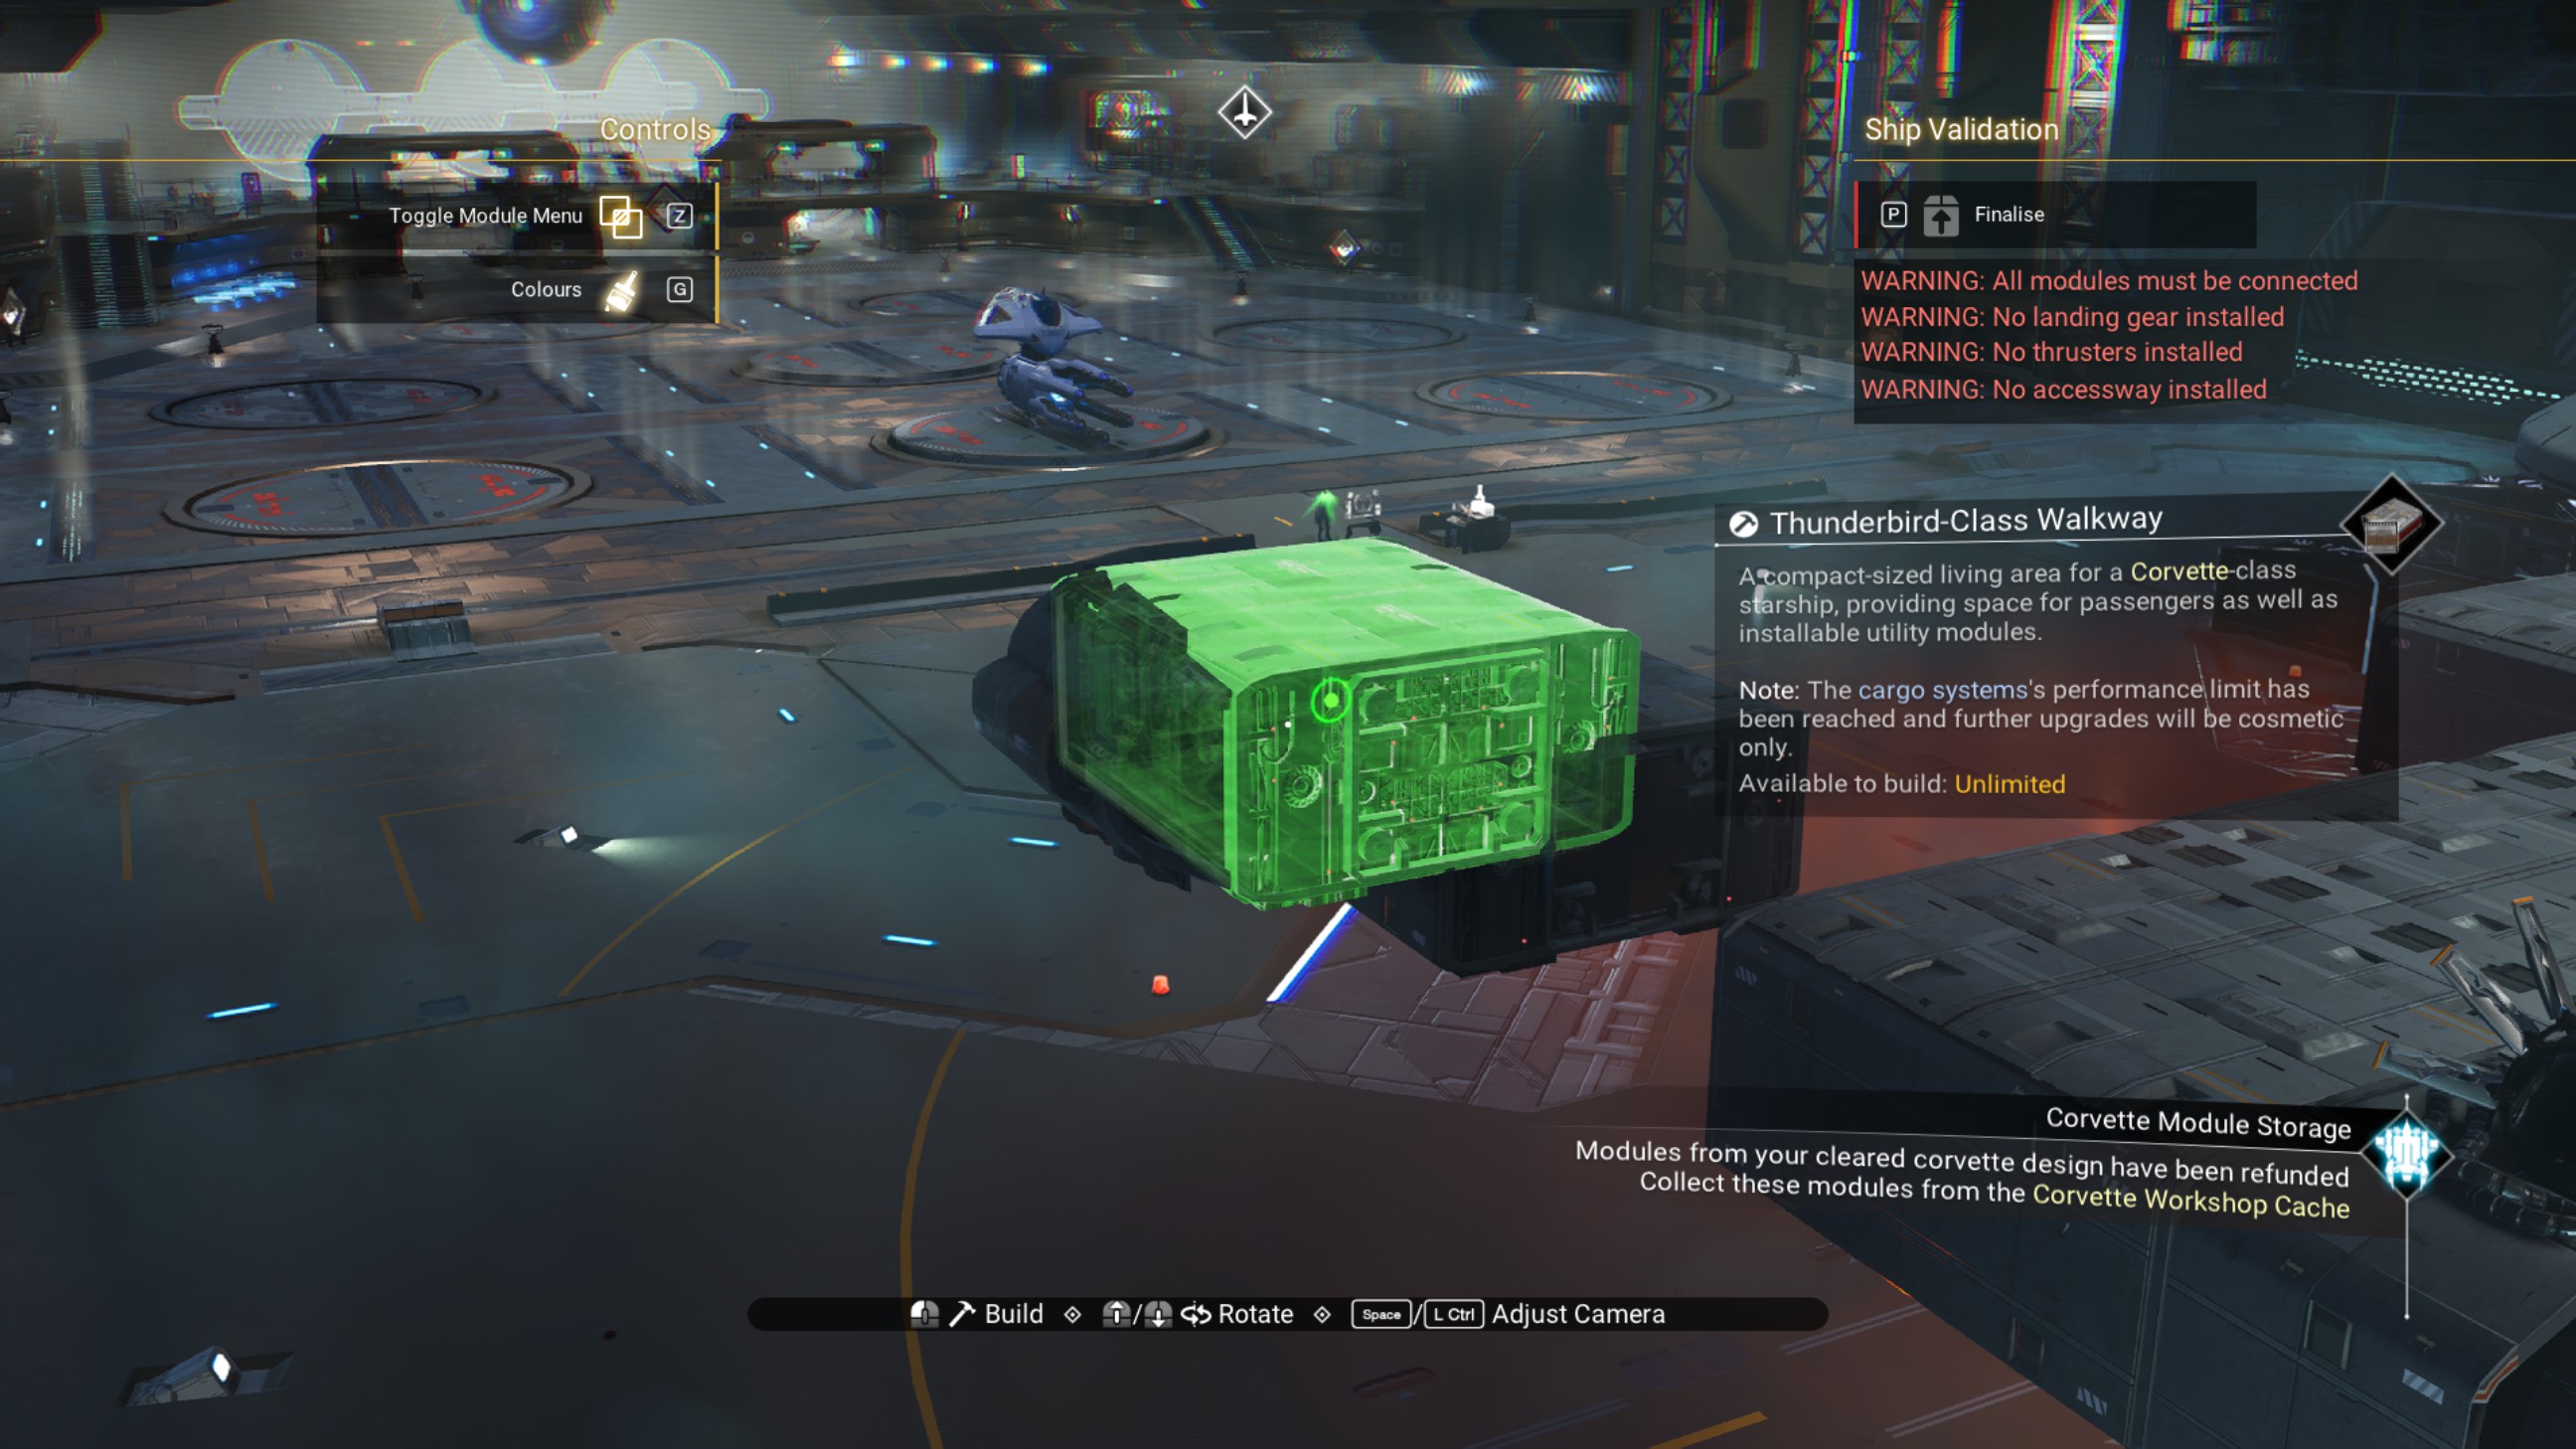
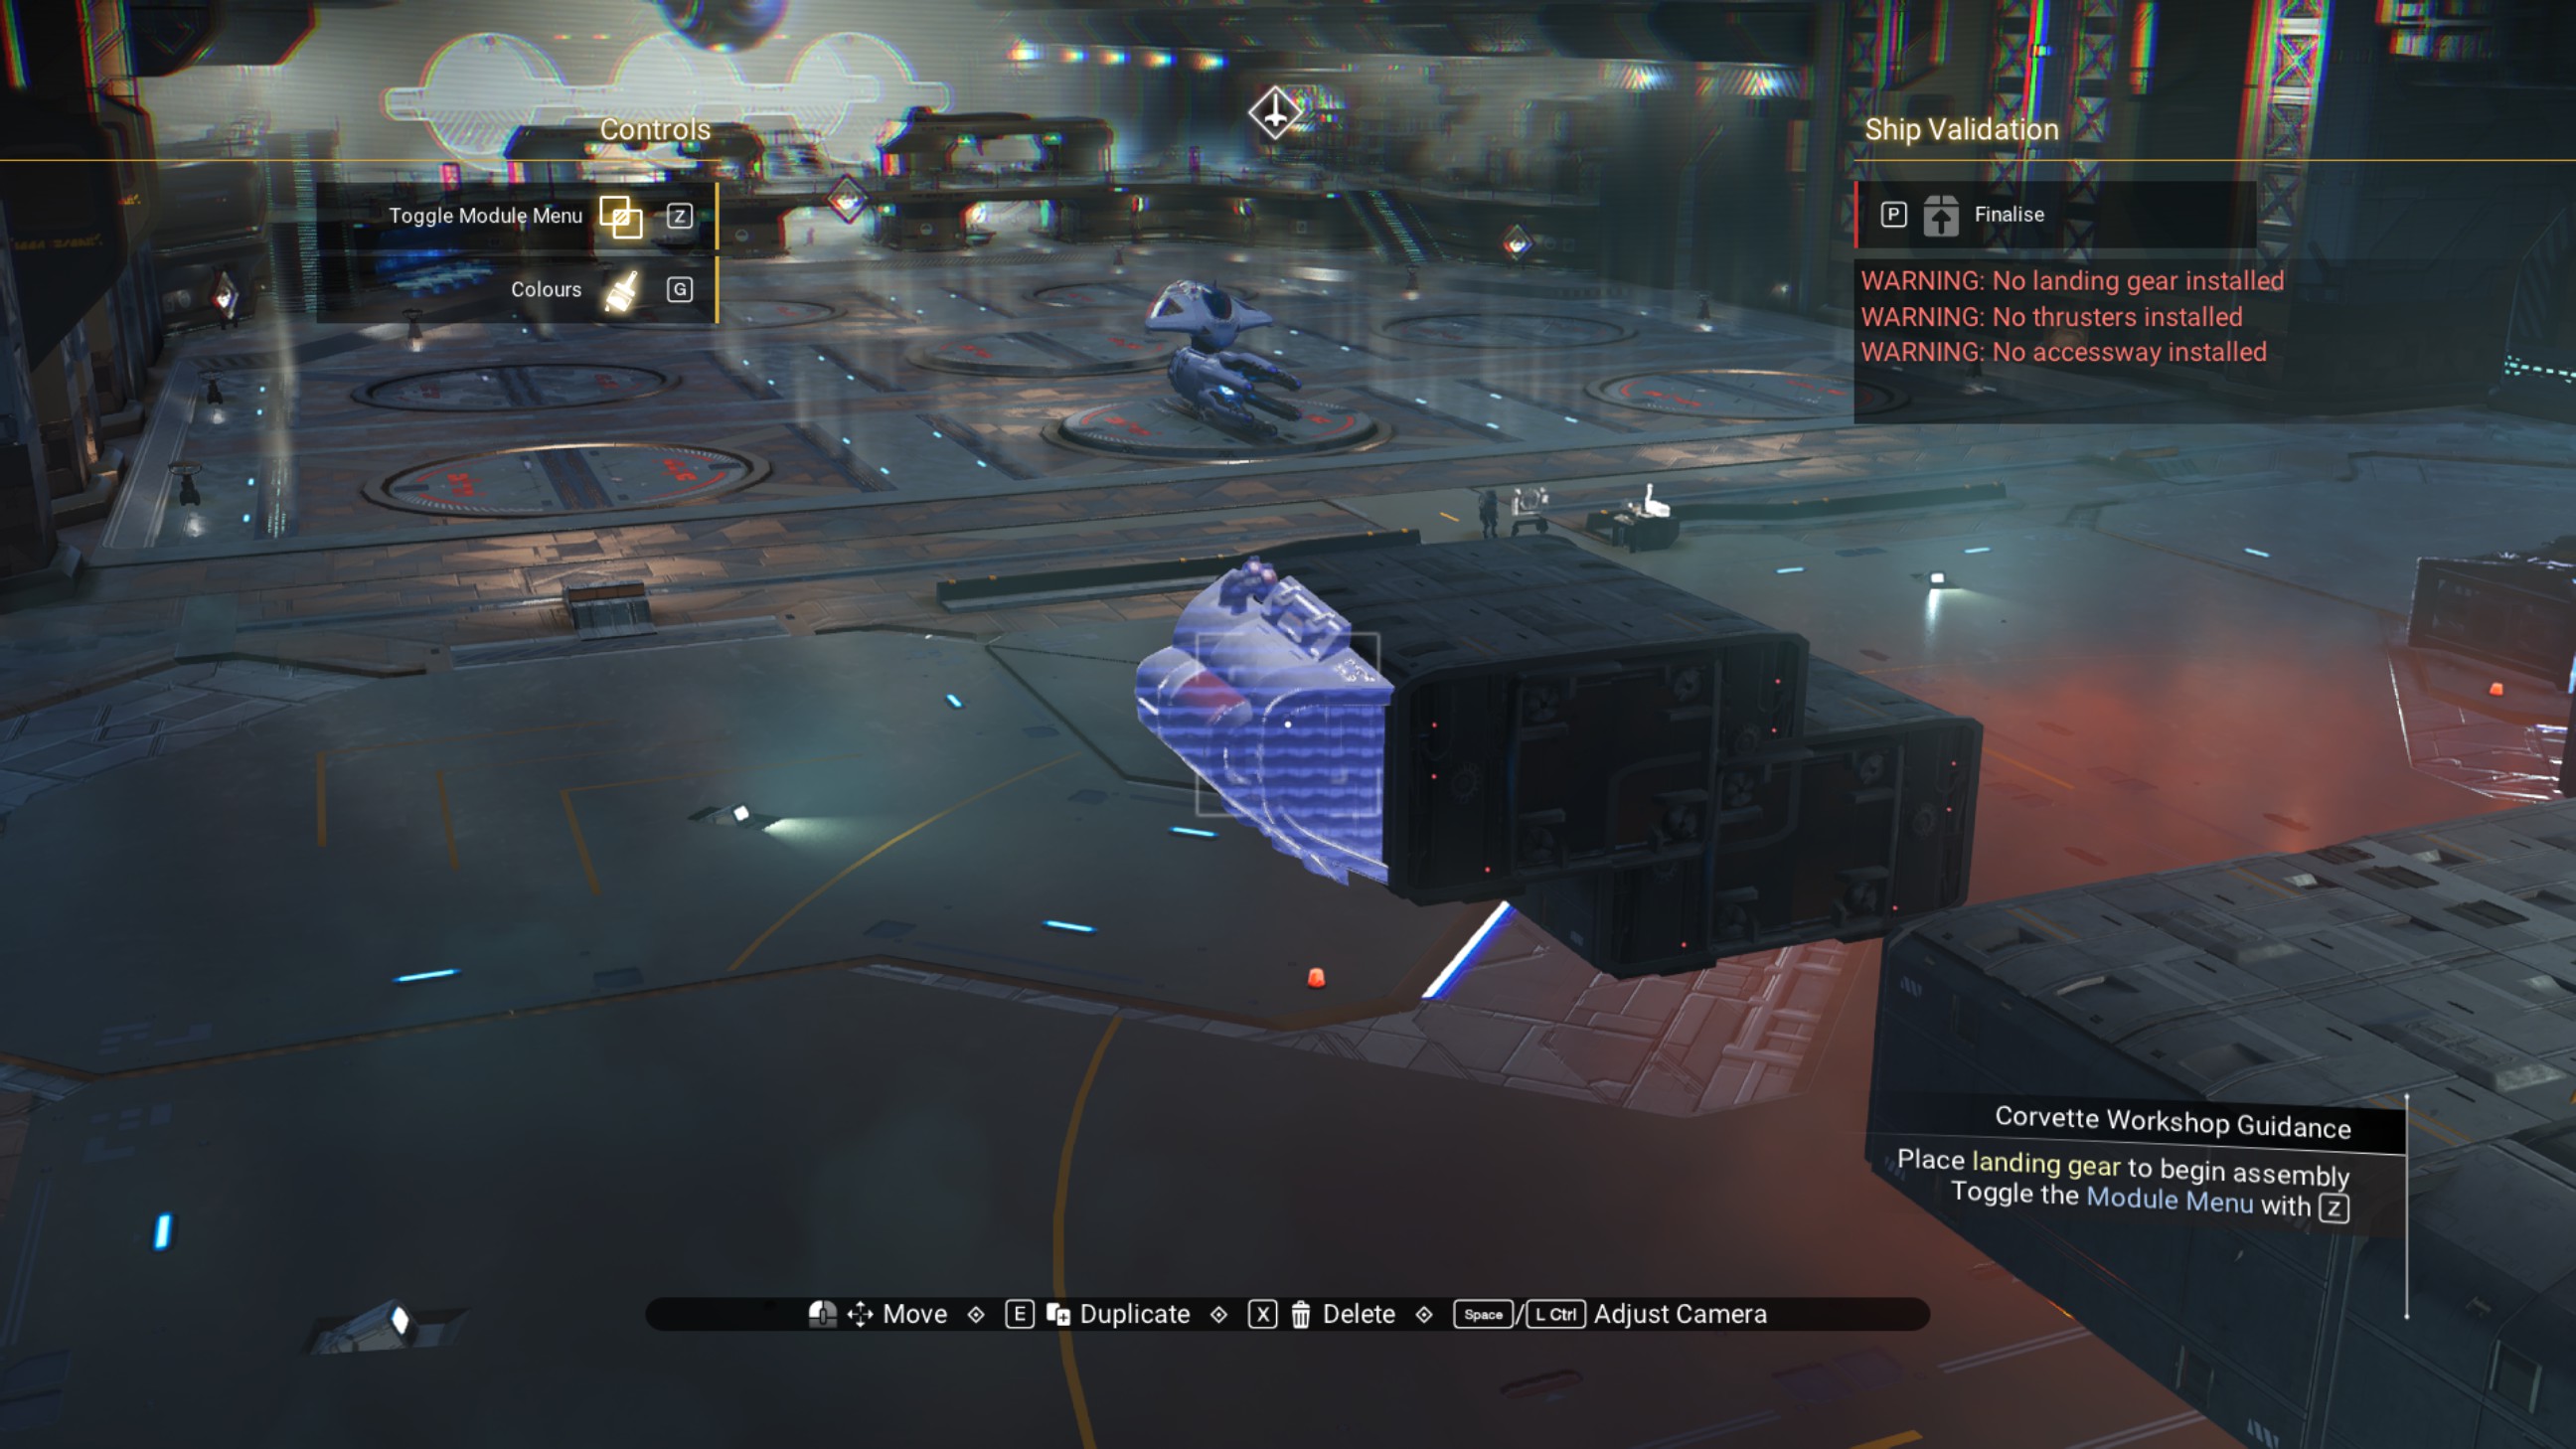
Place an engine cover along the port side of the walkway we just offset, then place another walkway below that first offset walkway.
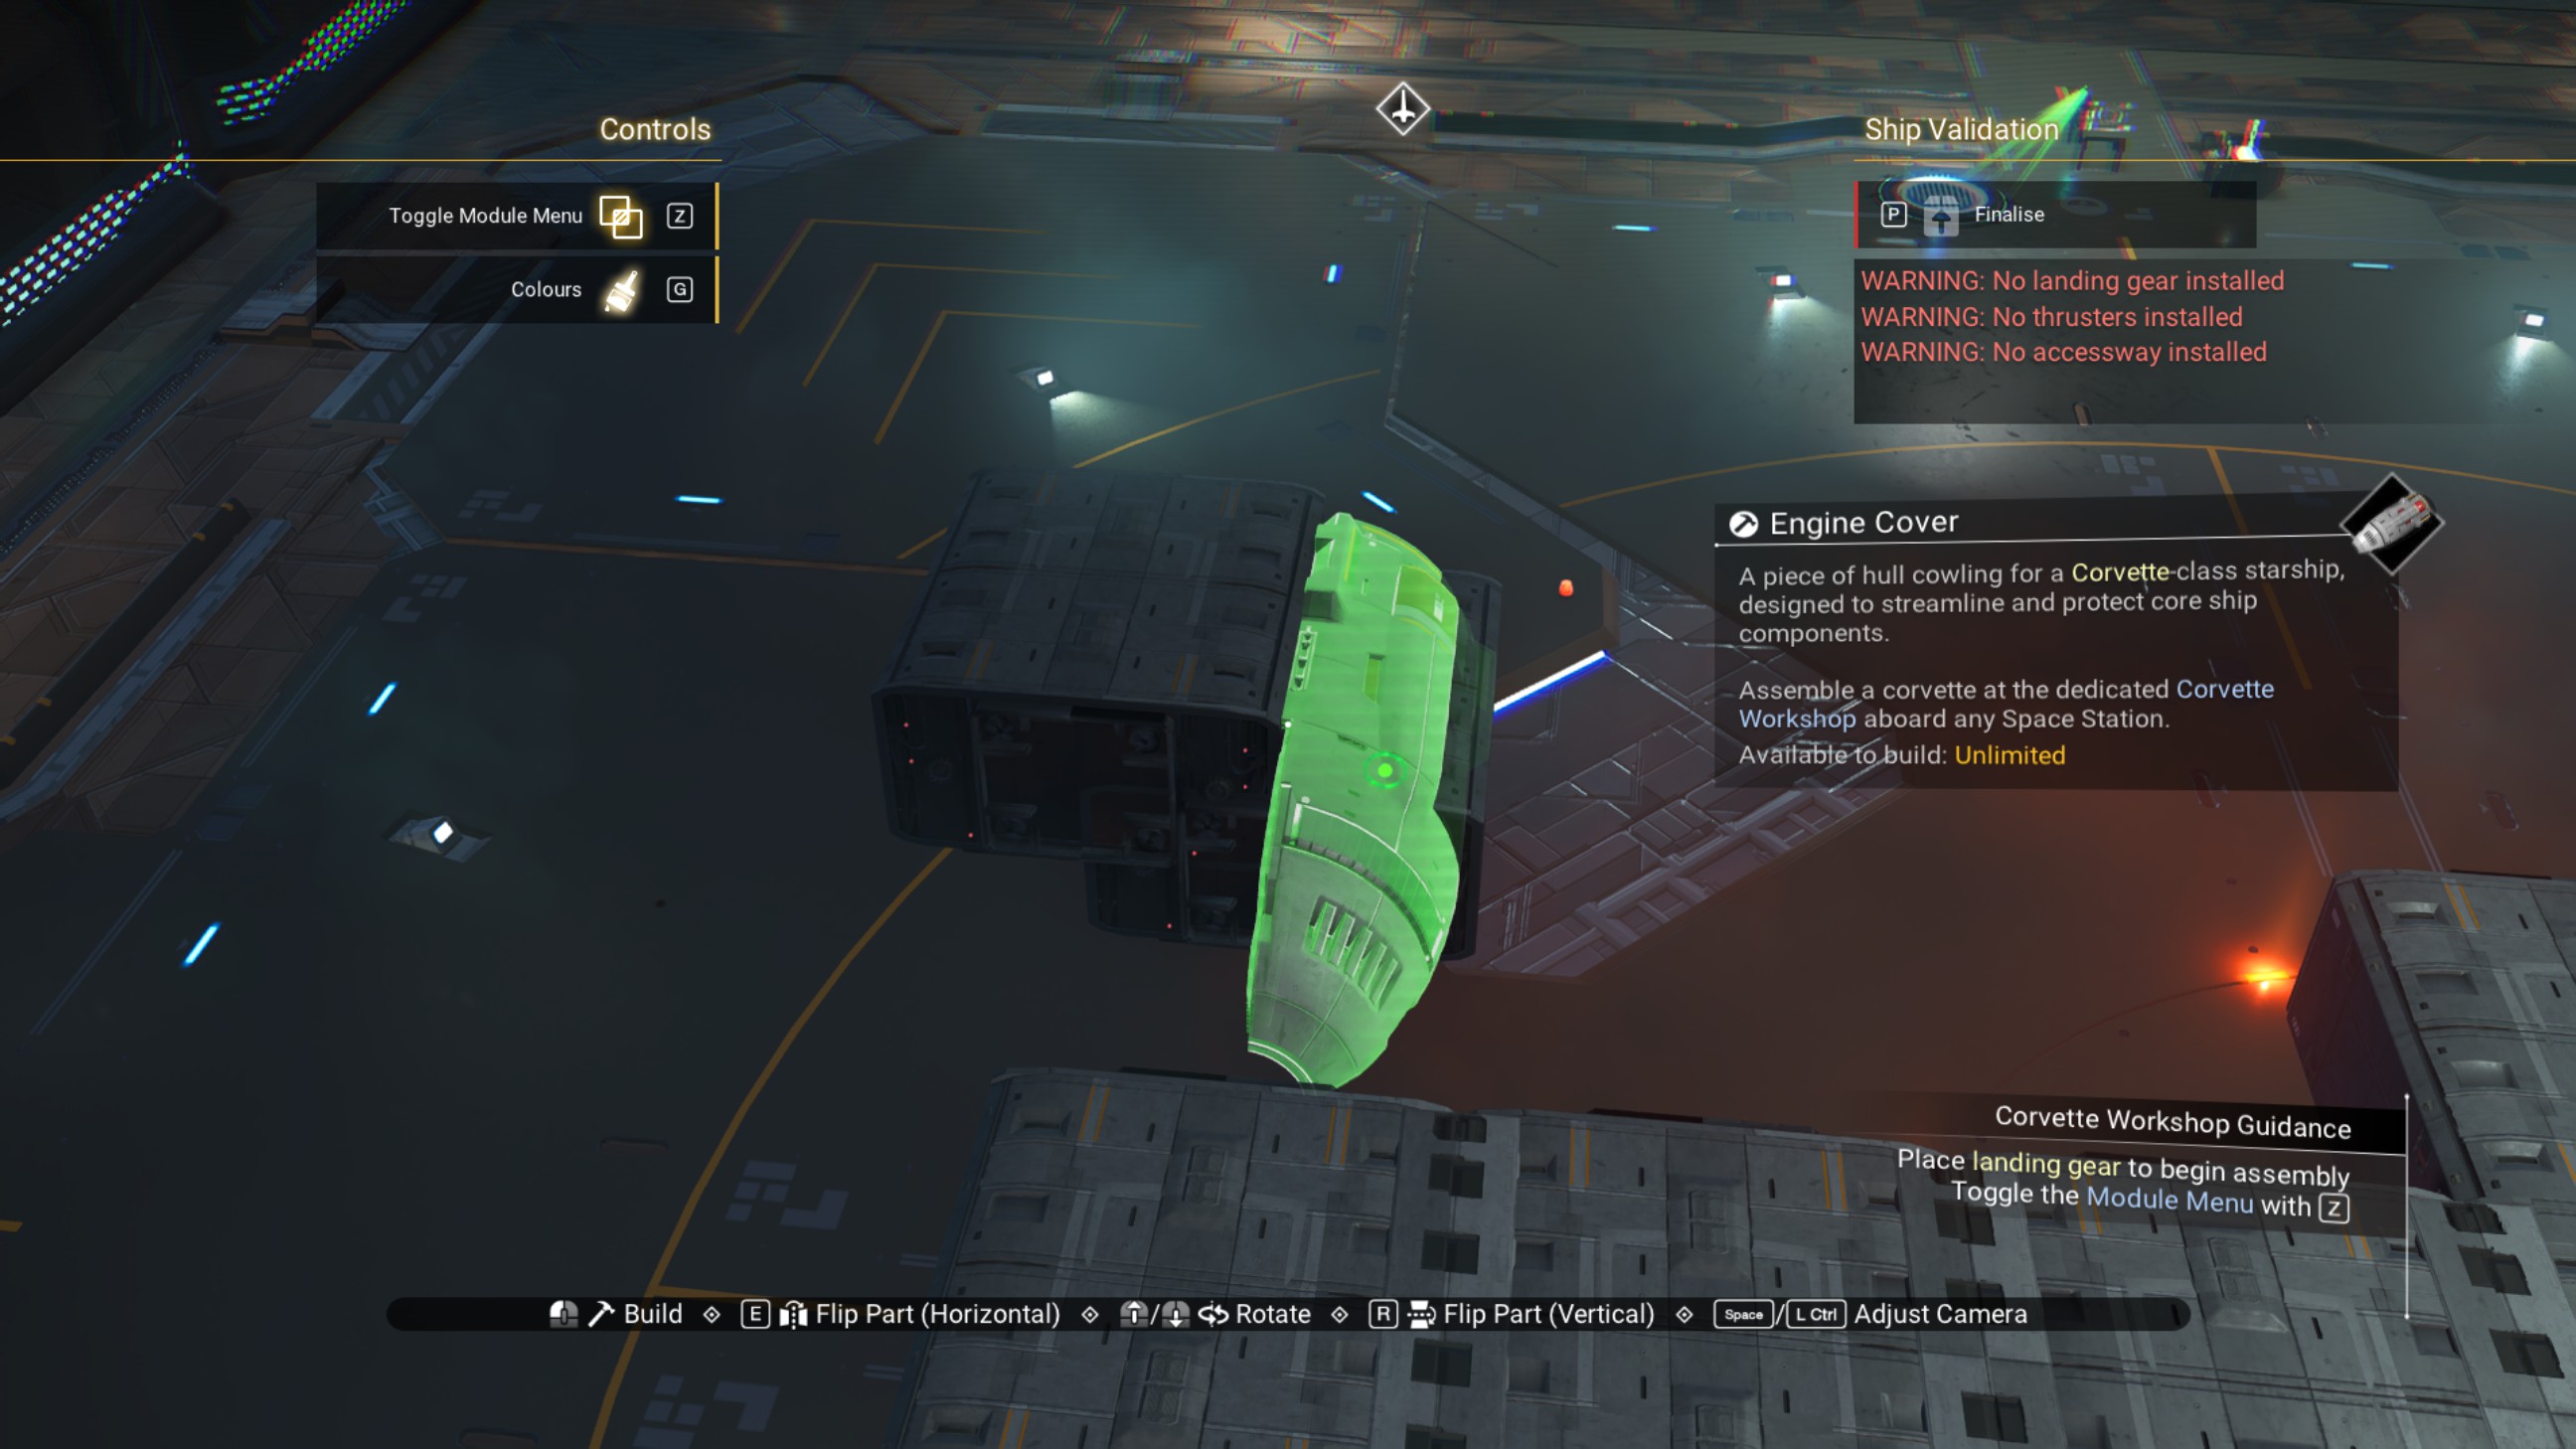
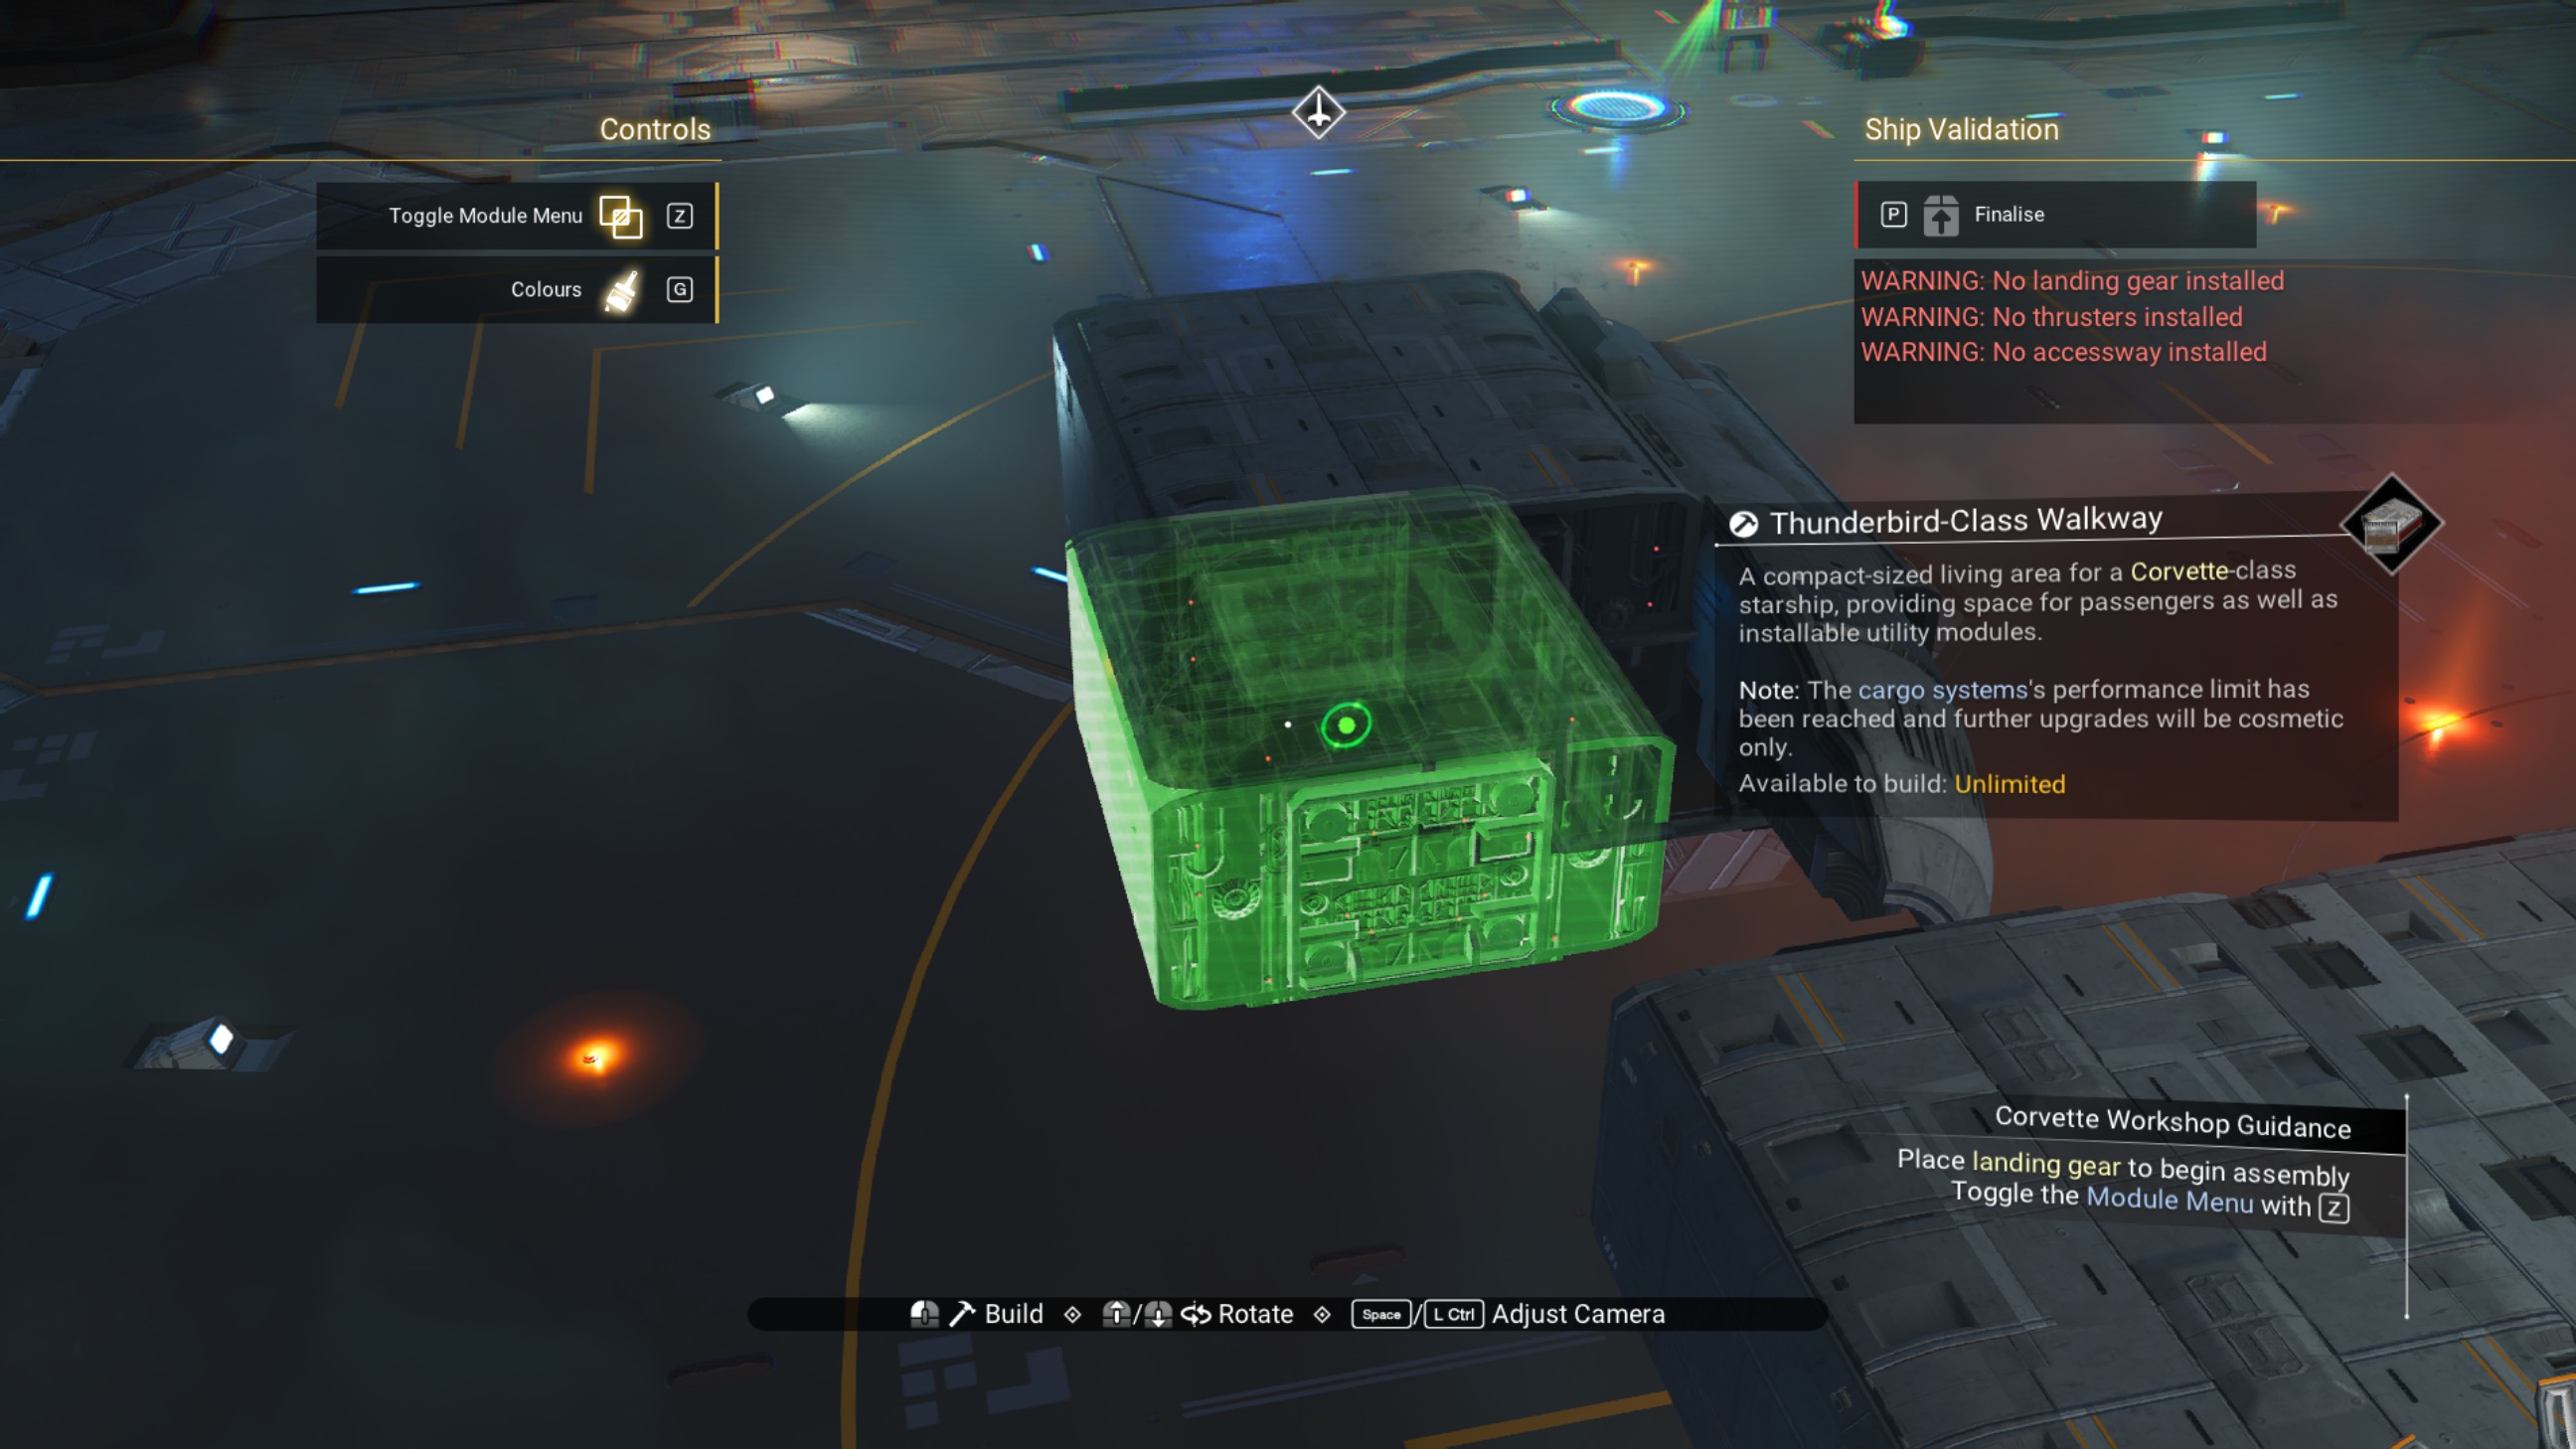
Place another engine cover below the other engine cover, and delete the top offset walkway.
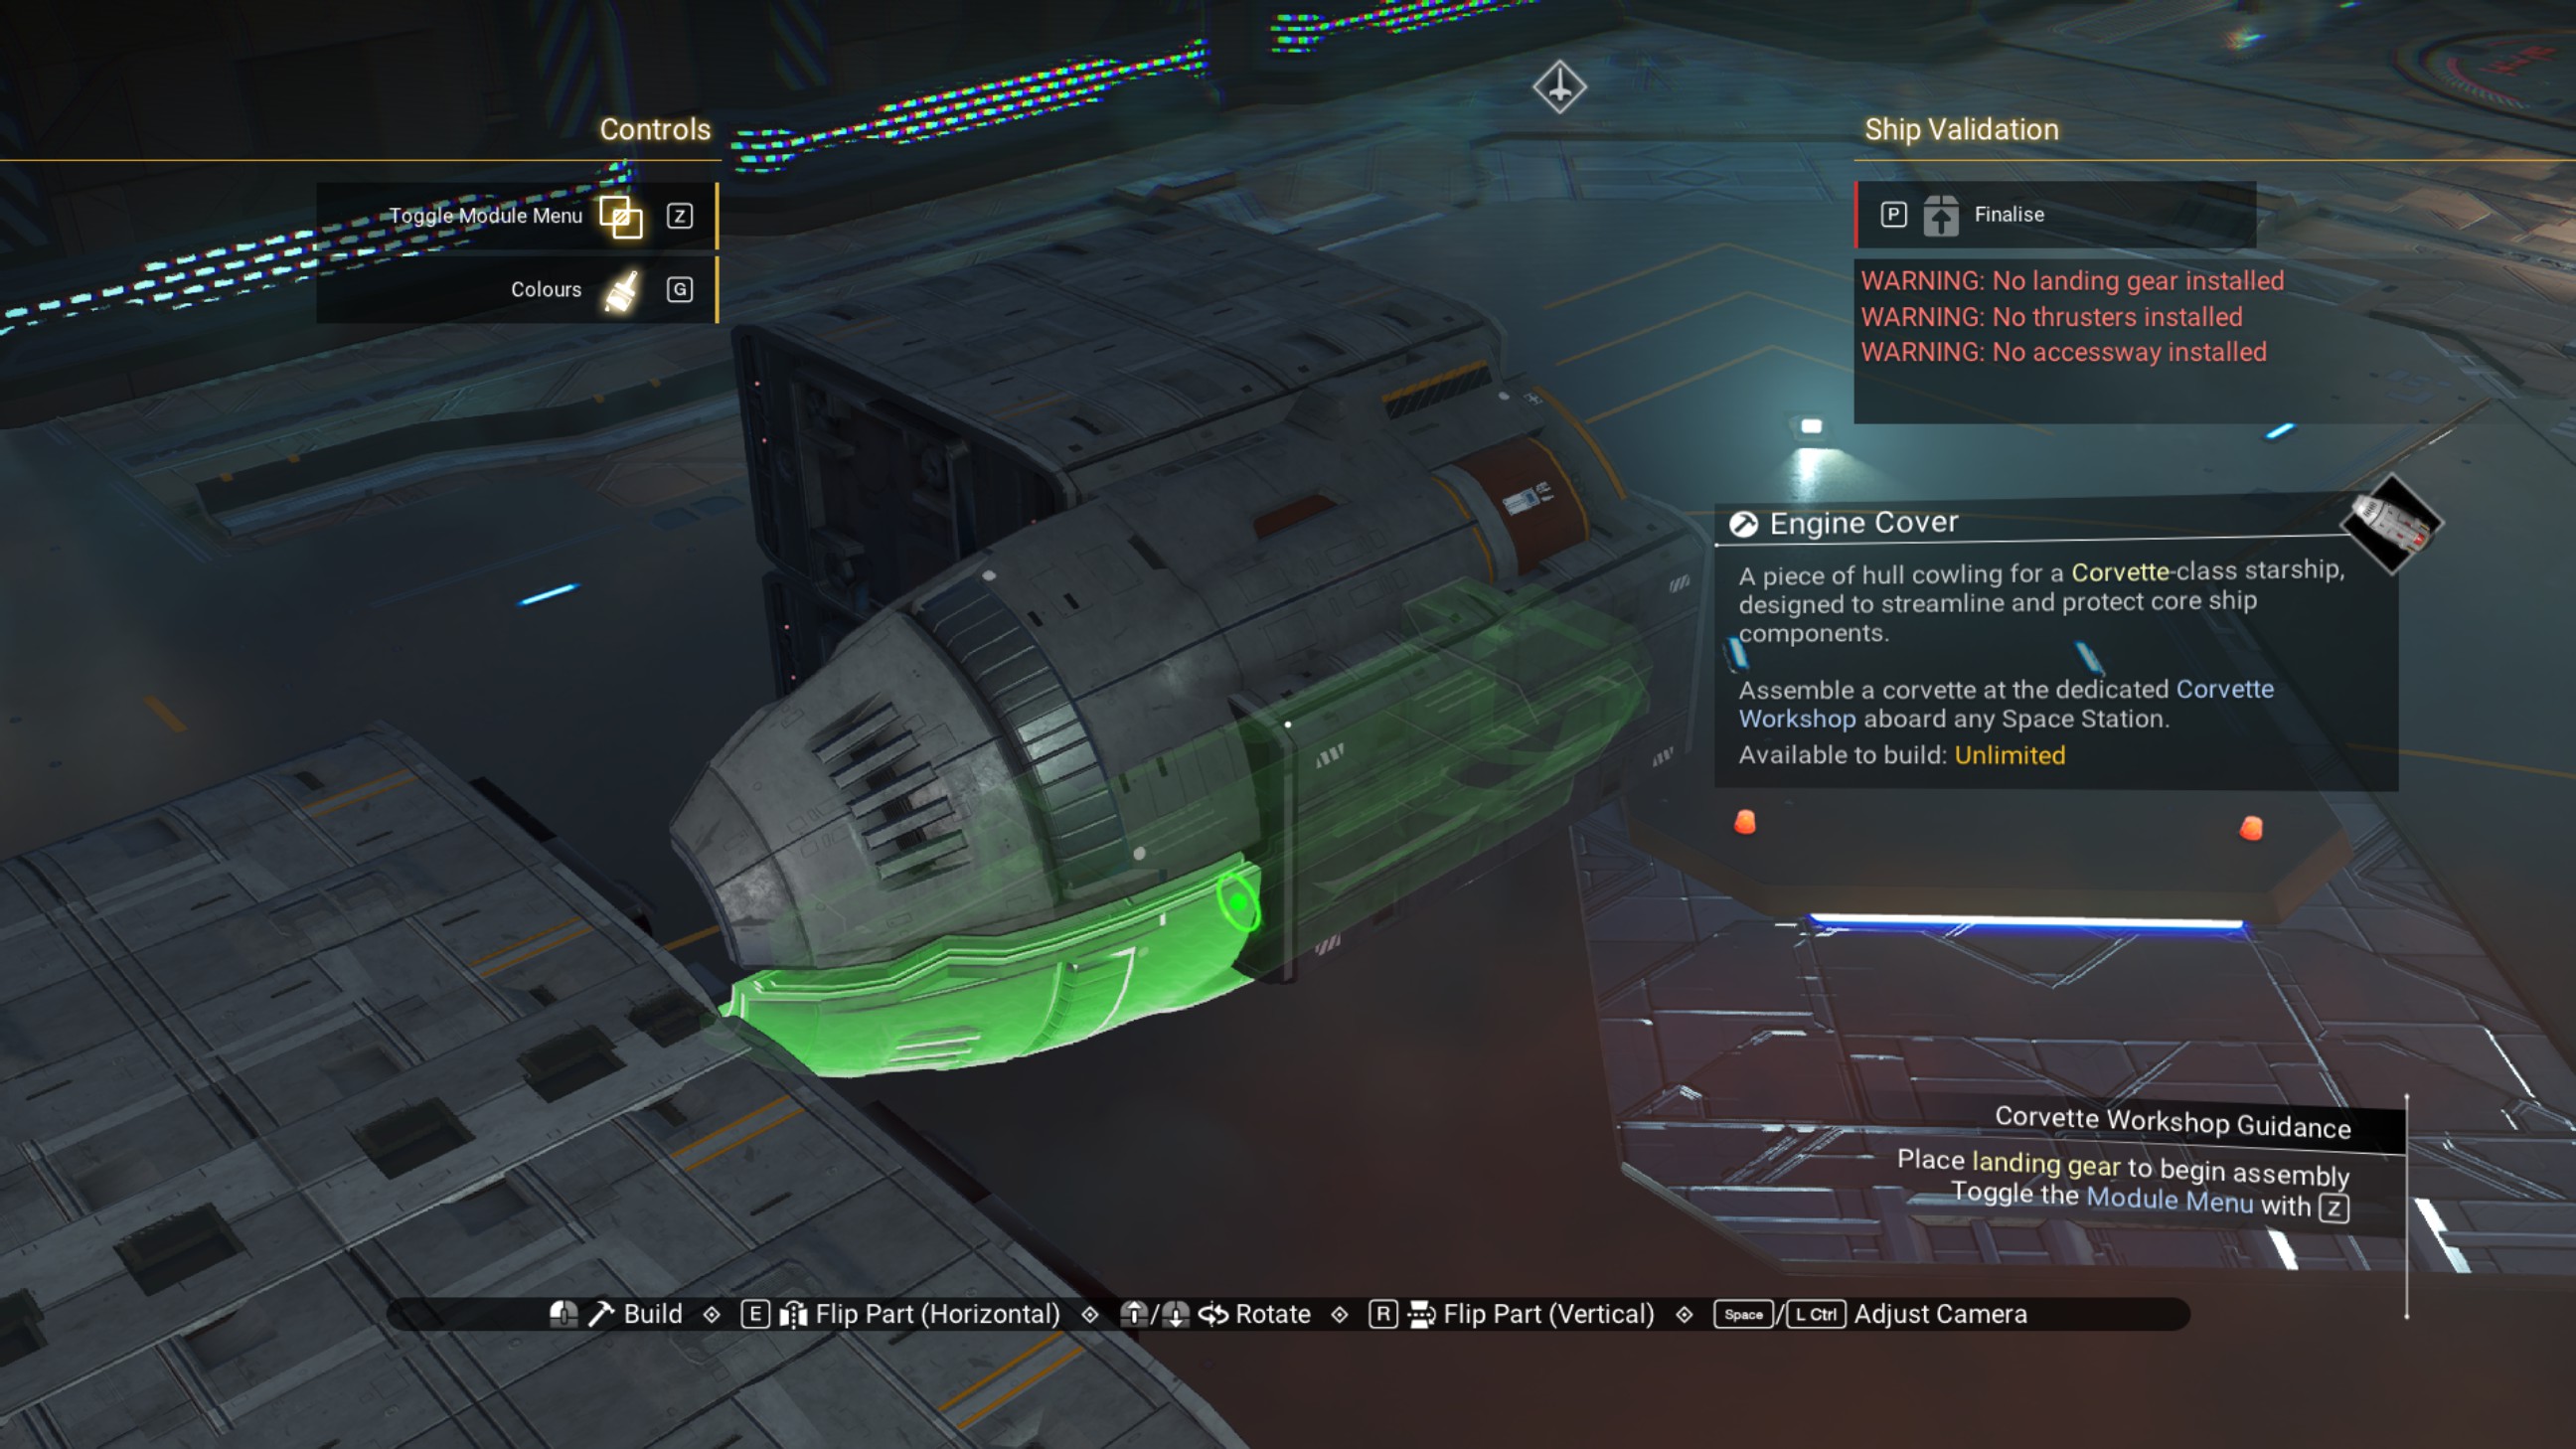
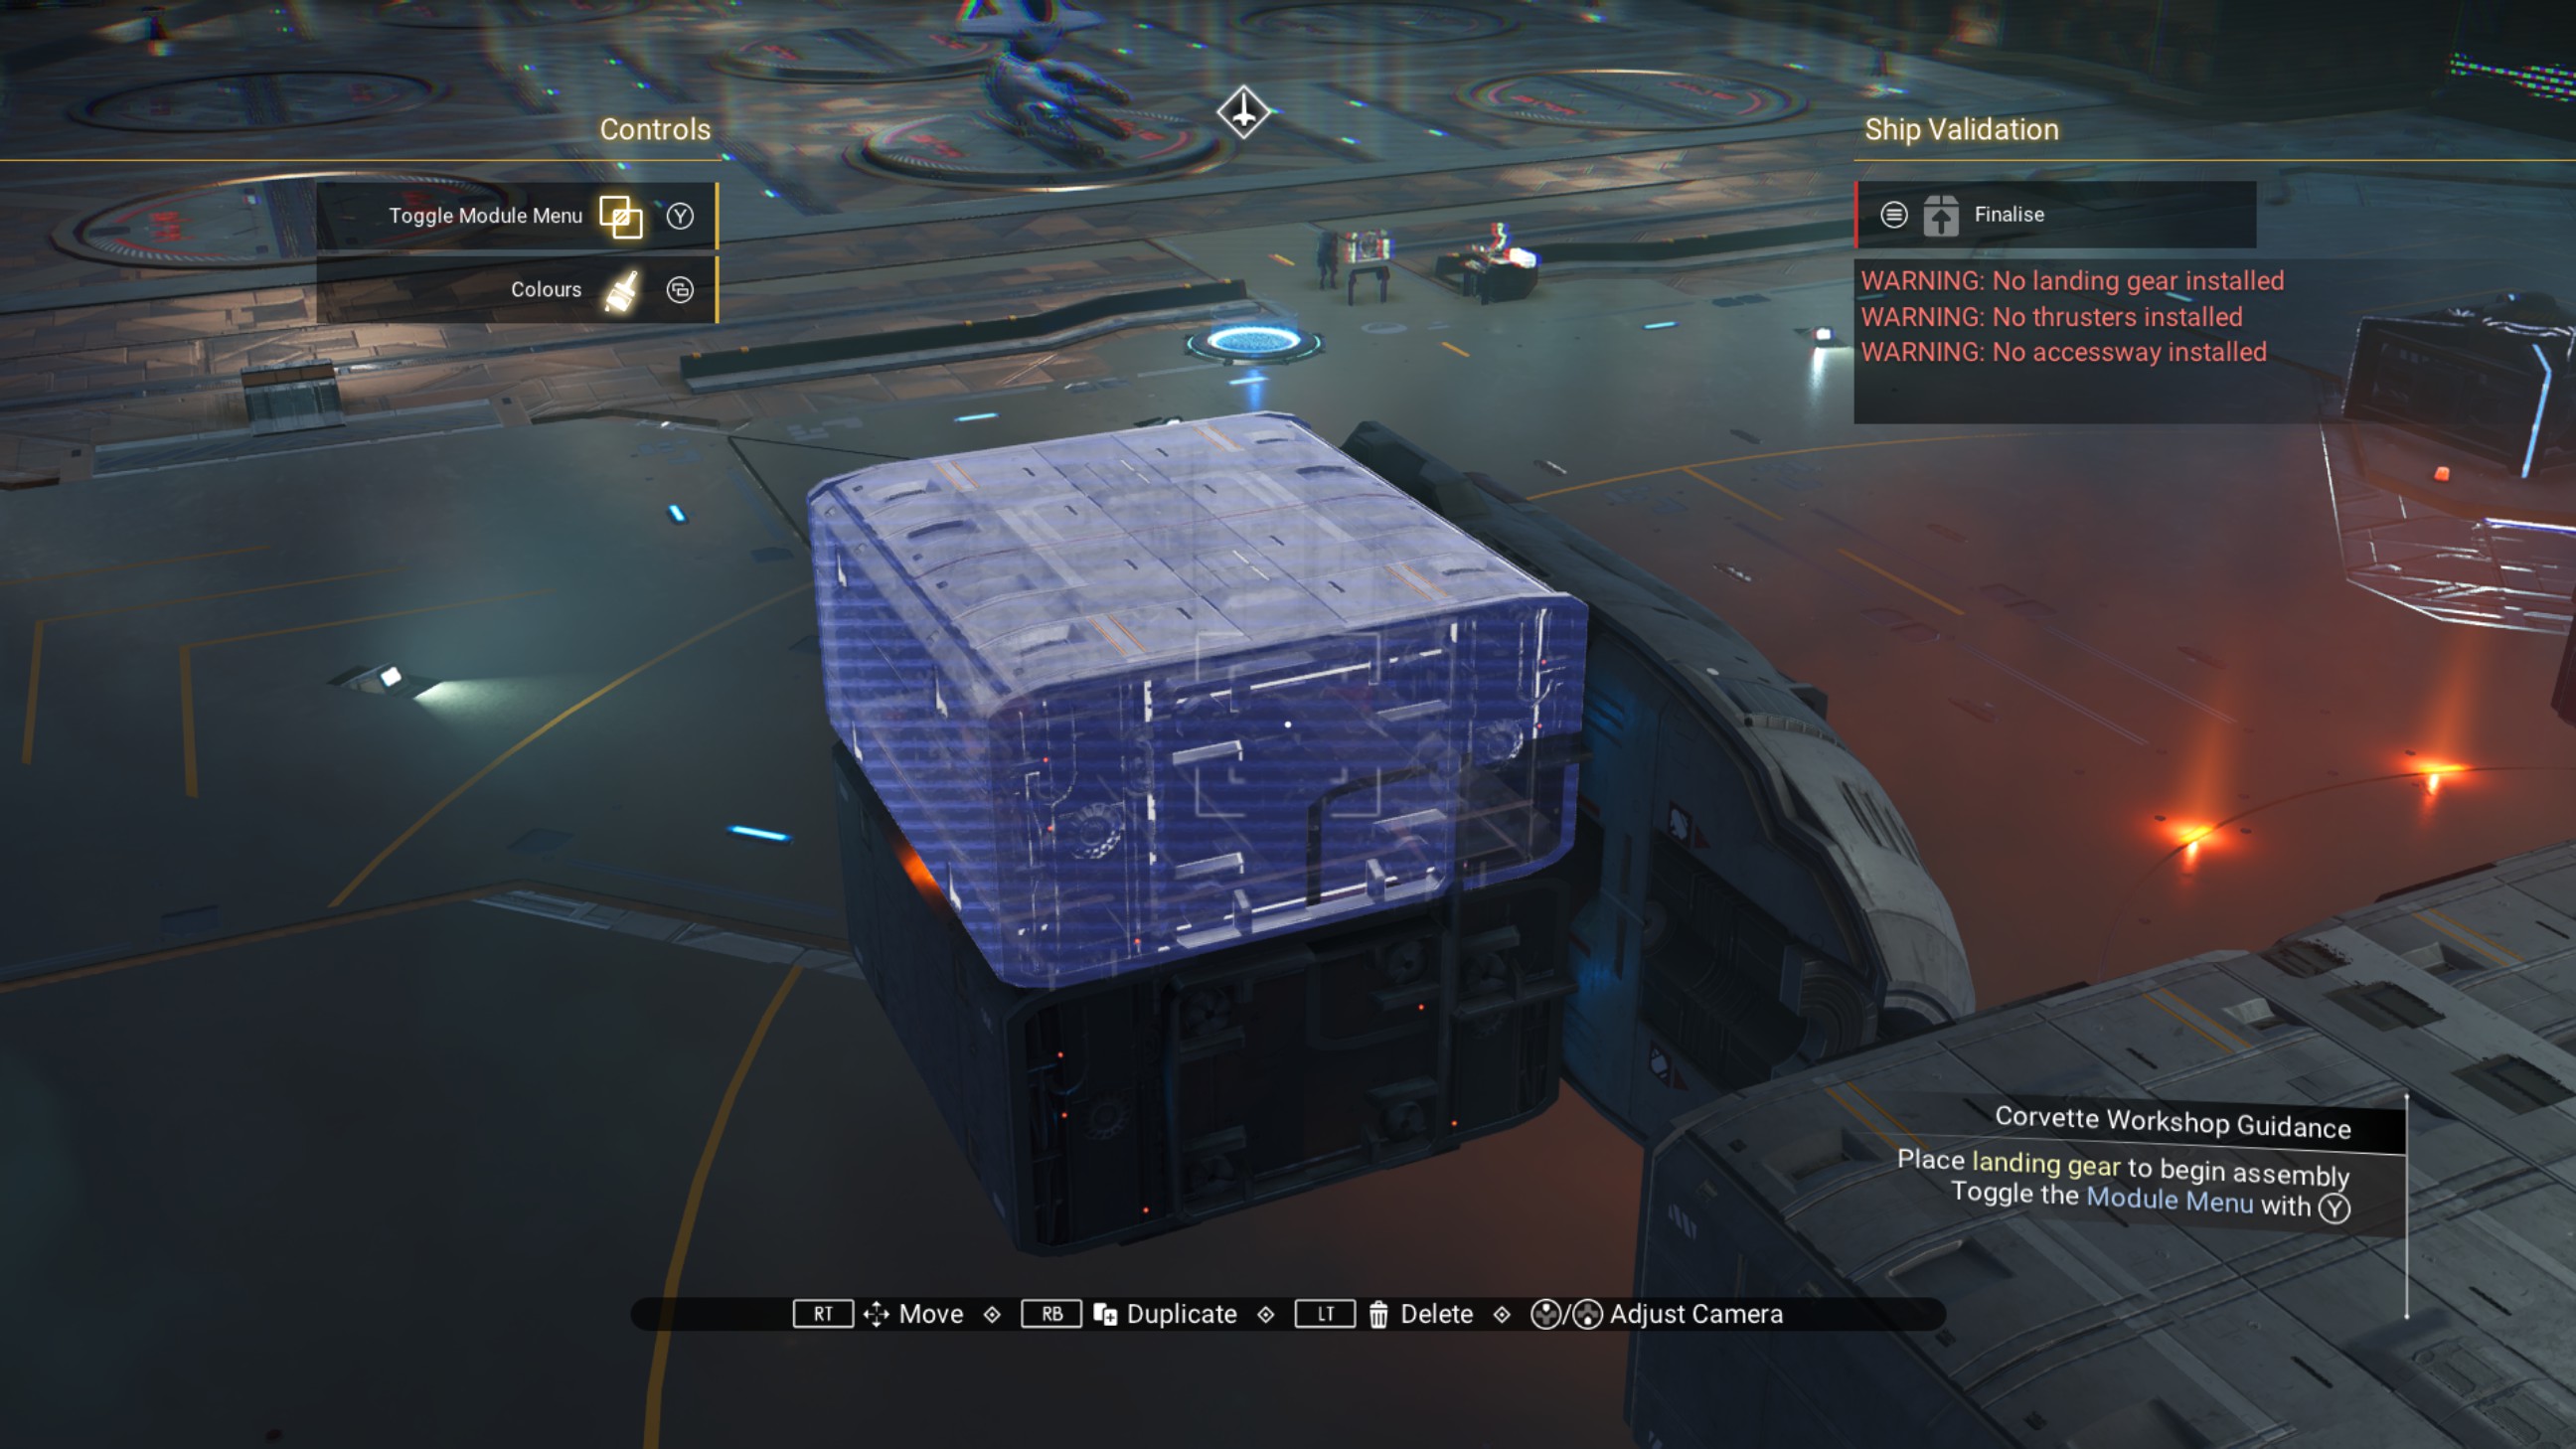
Place a third engine cover, then place a walkway to the starboard side of the remaining offset walkway.
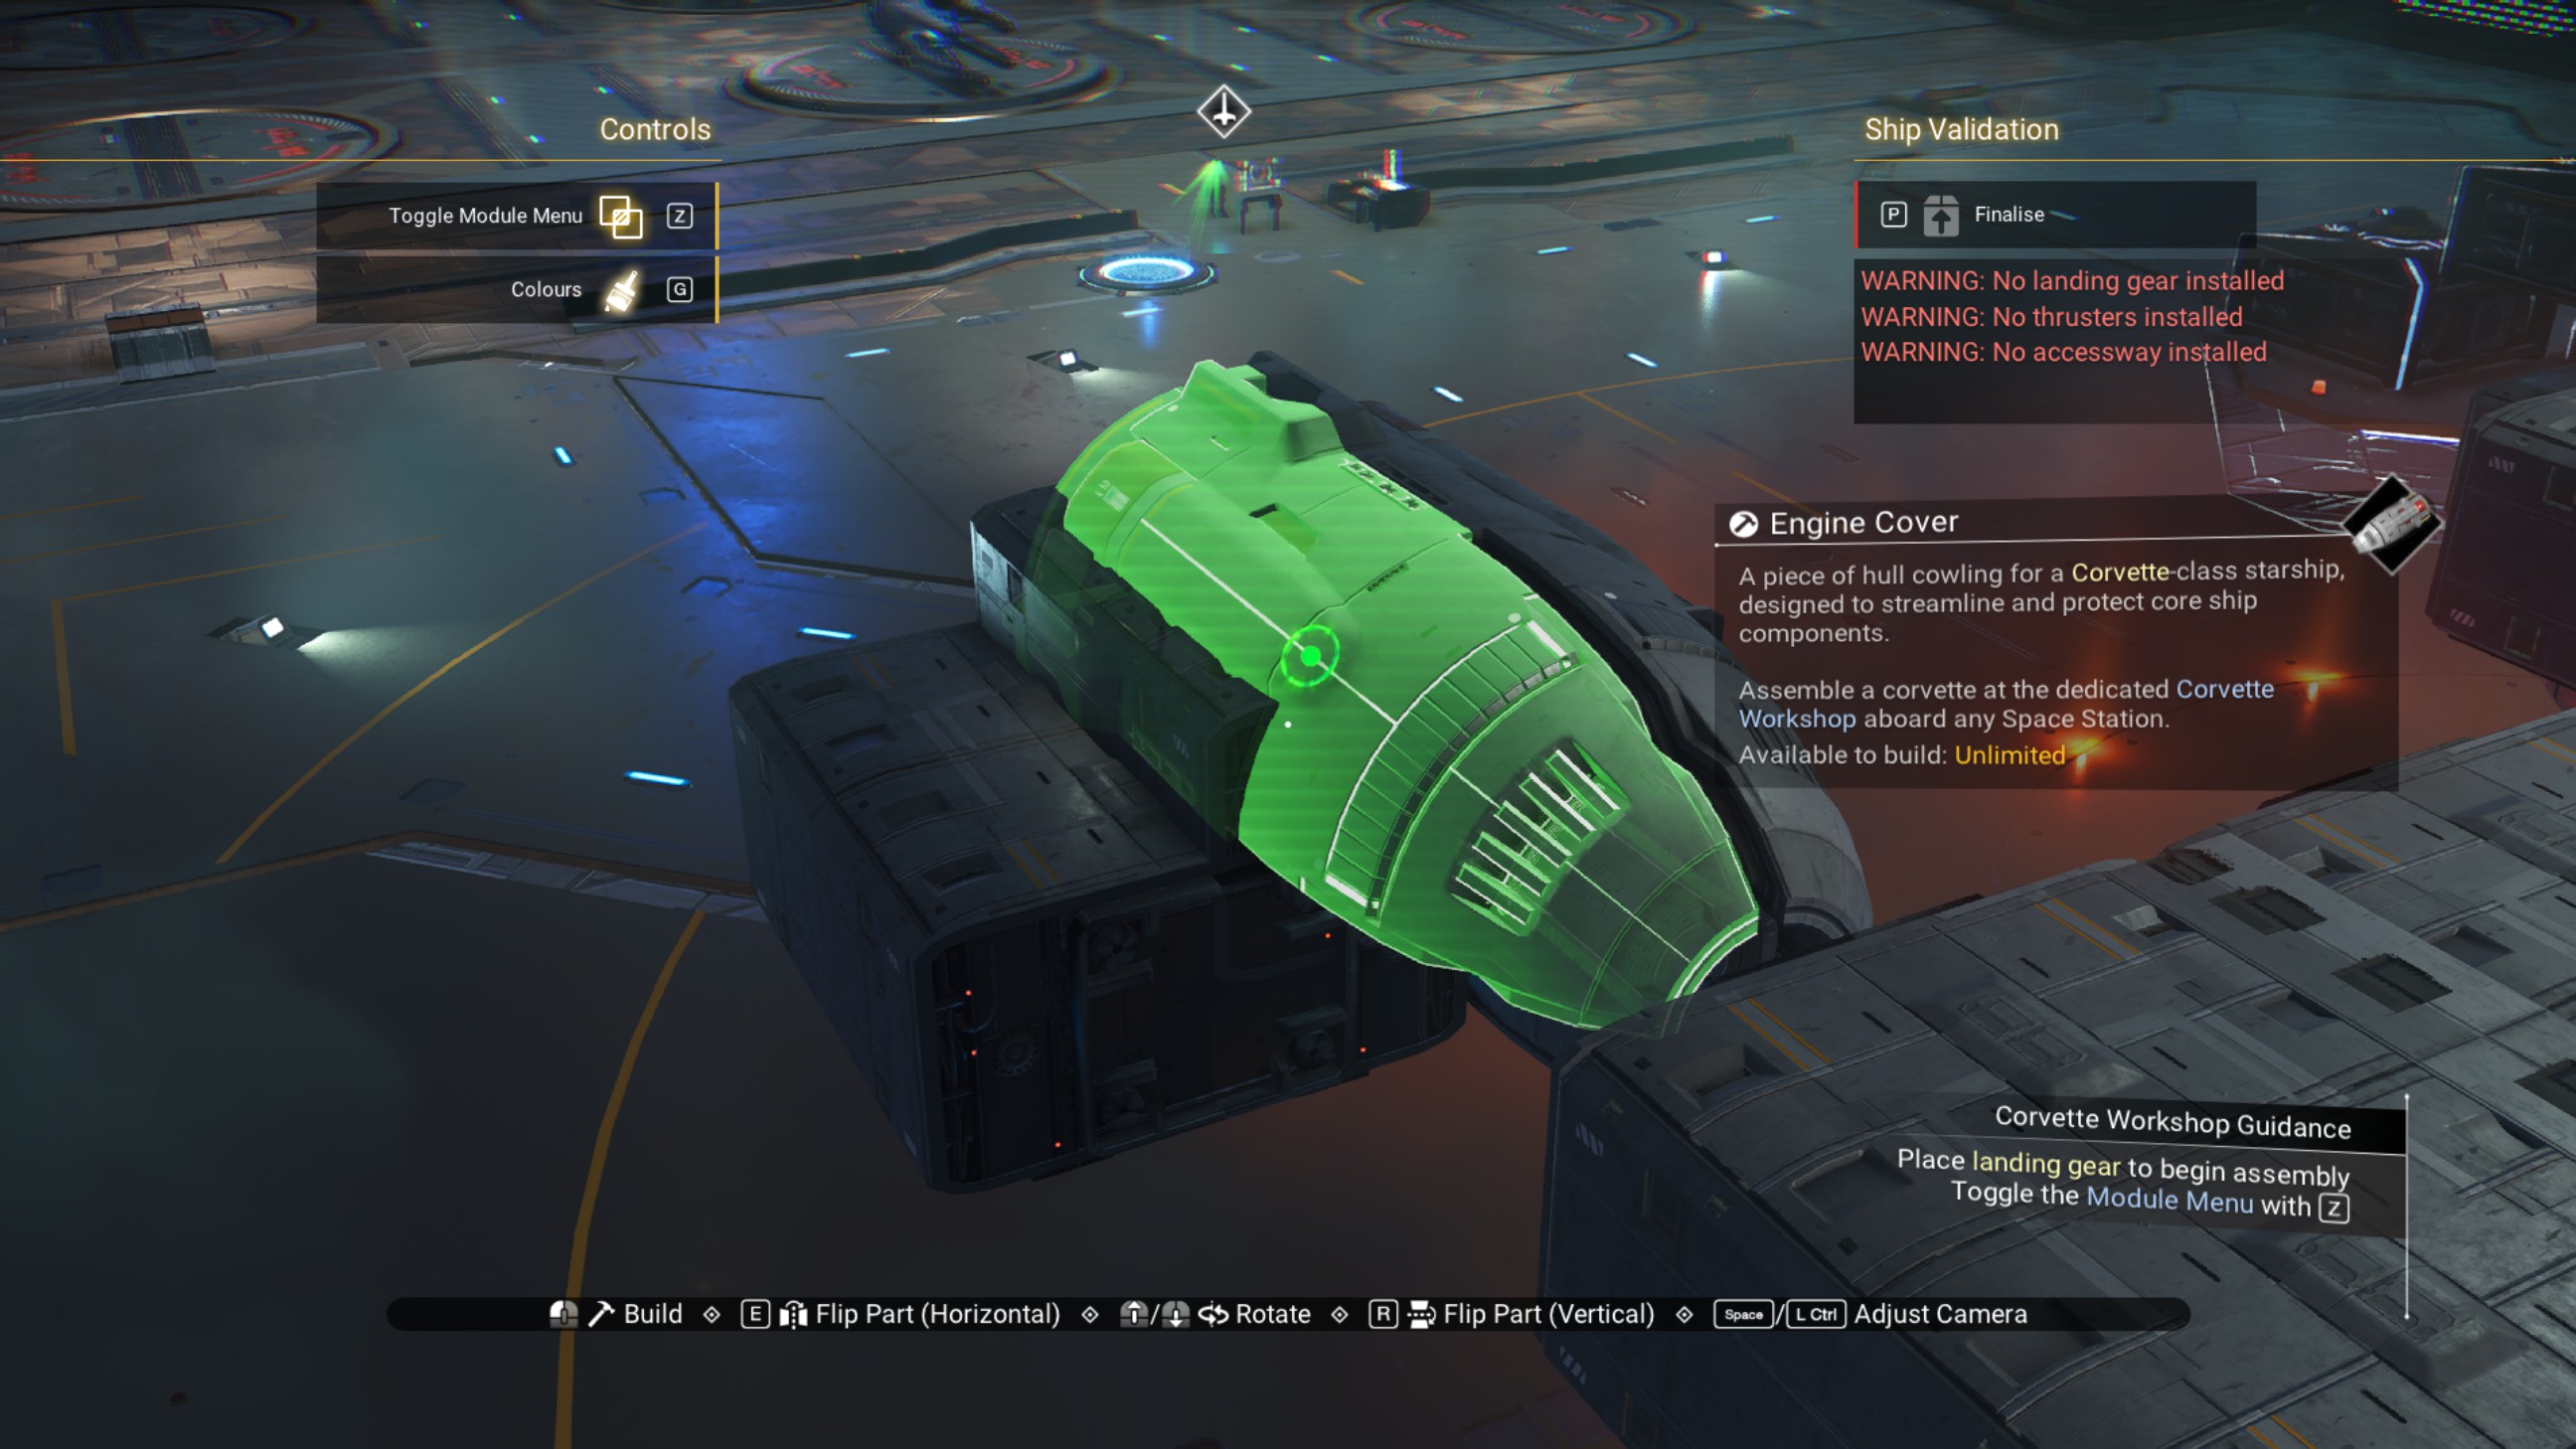
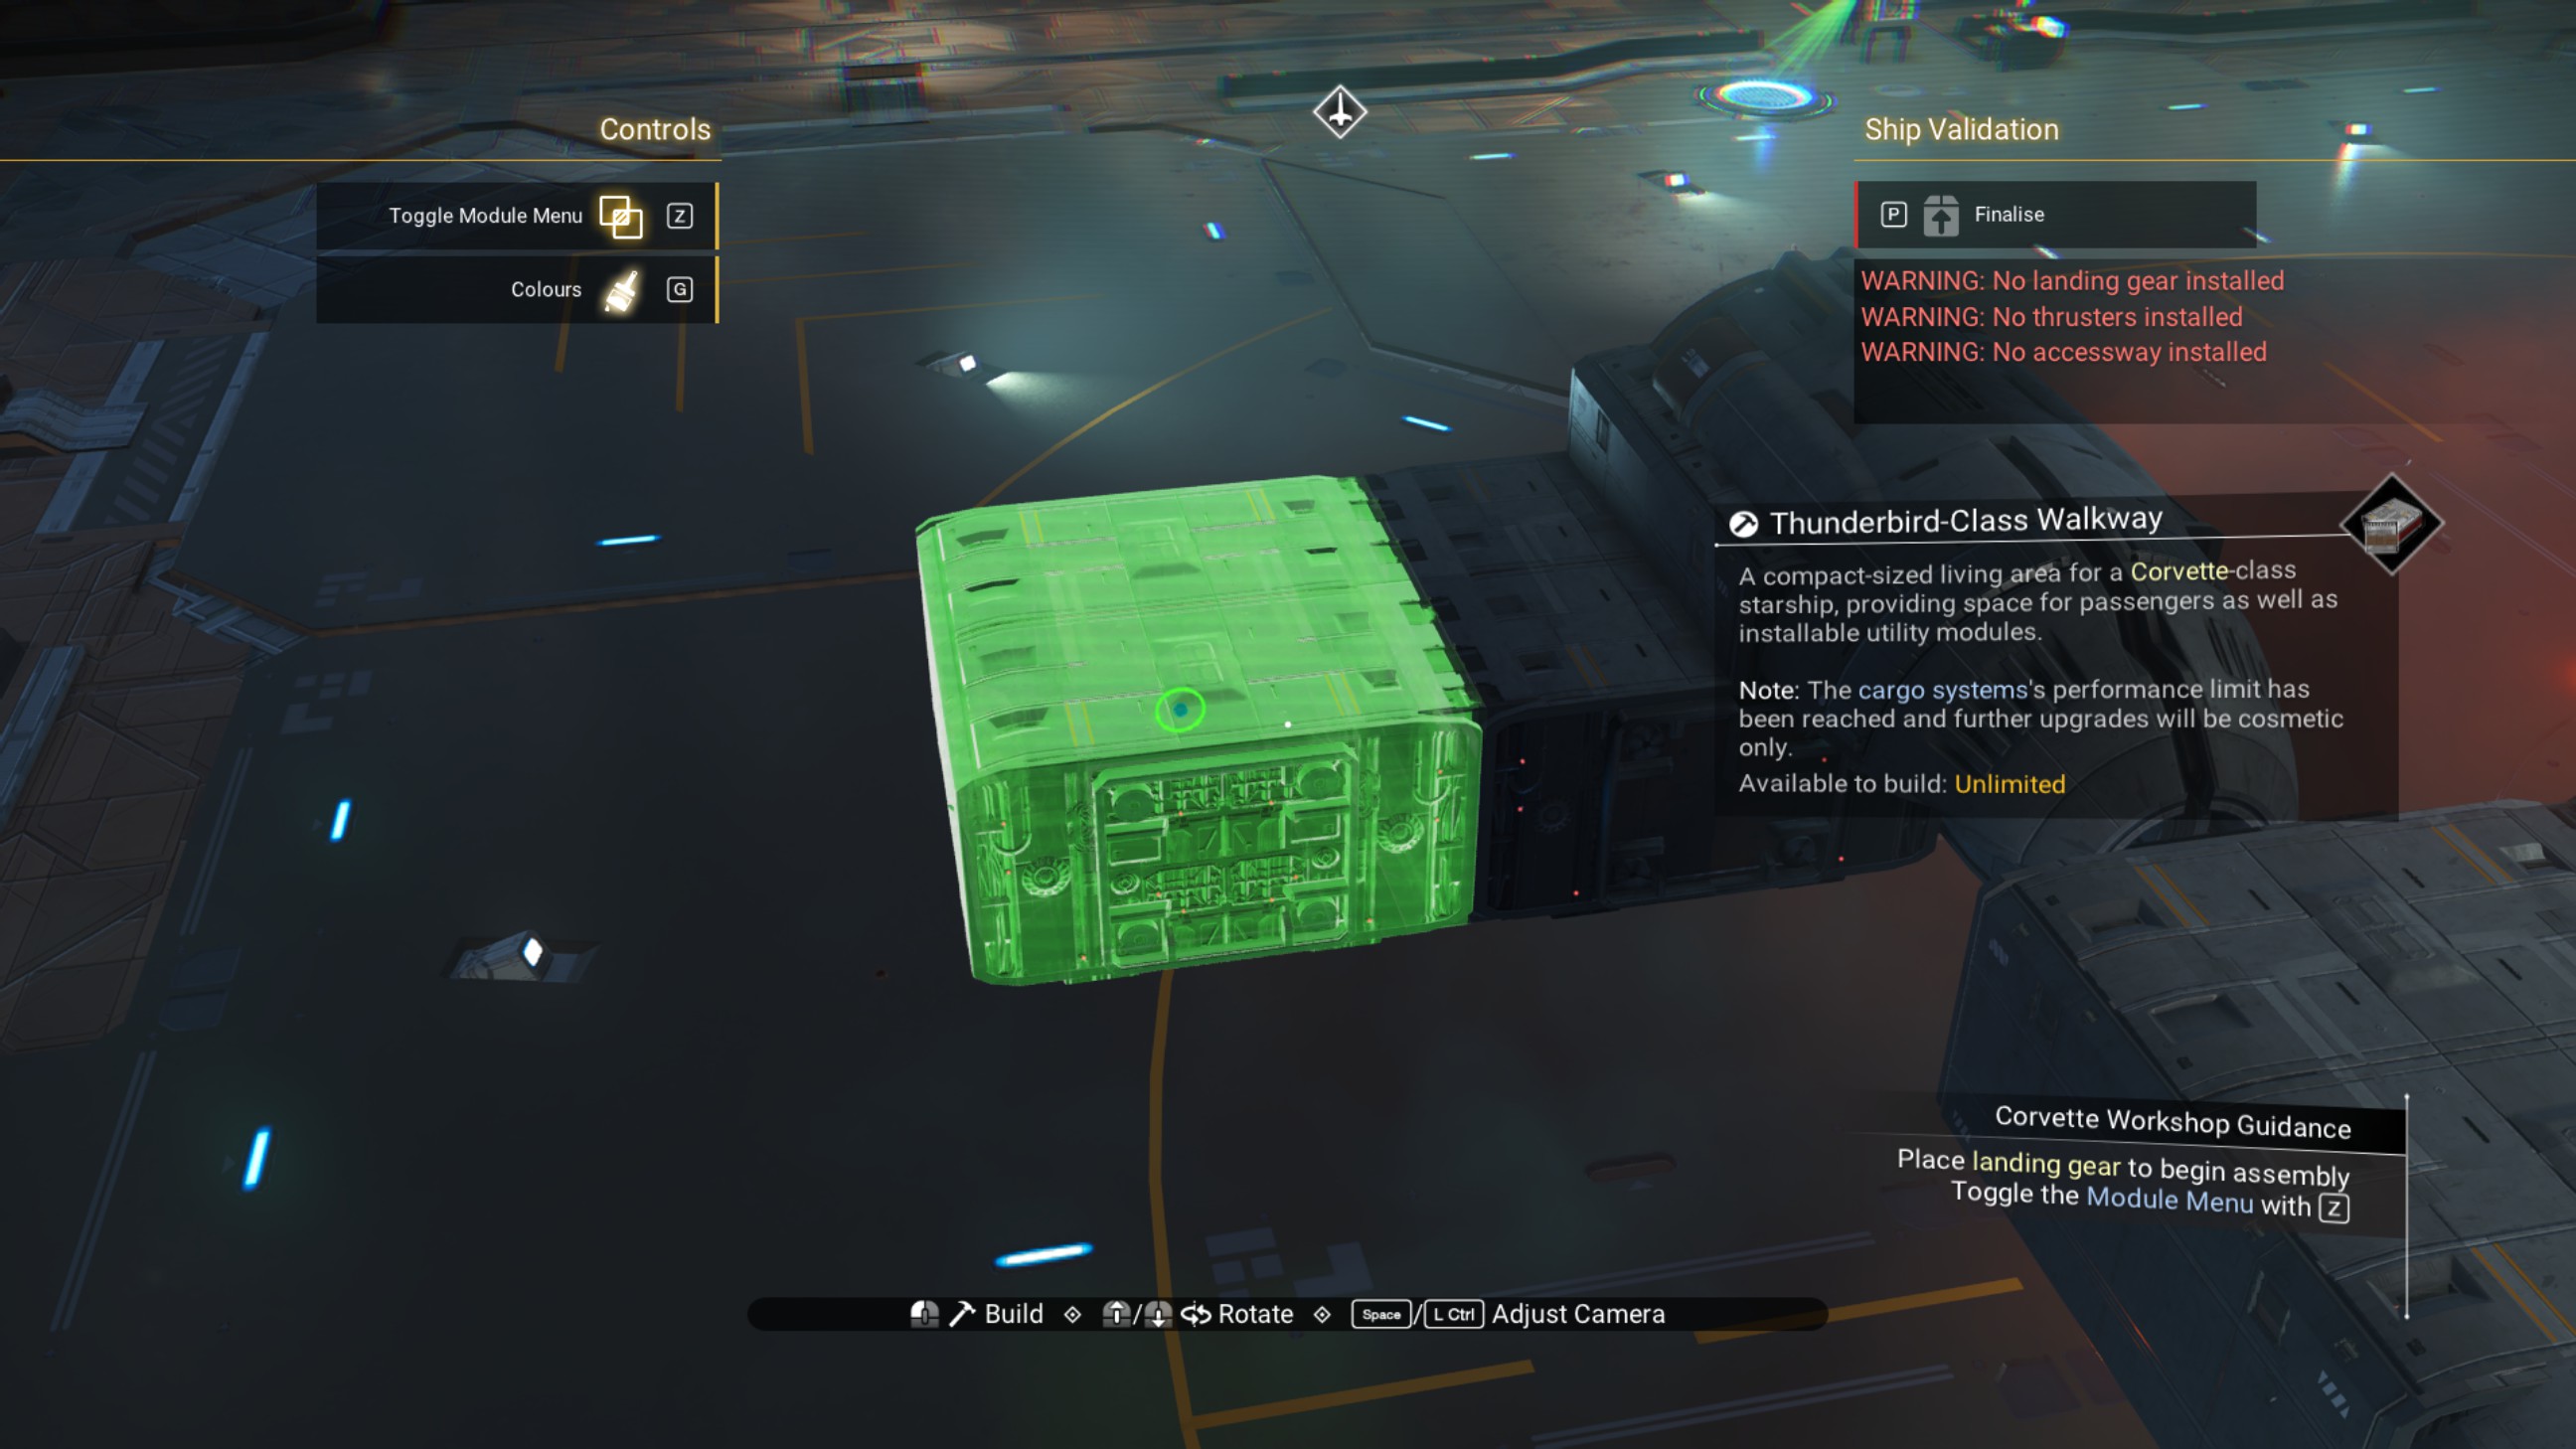
Delete the lower offset walkway (not the one we just placed), and then place the fourth engine cover where that walkway just was.
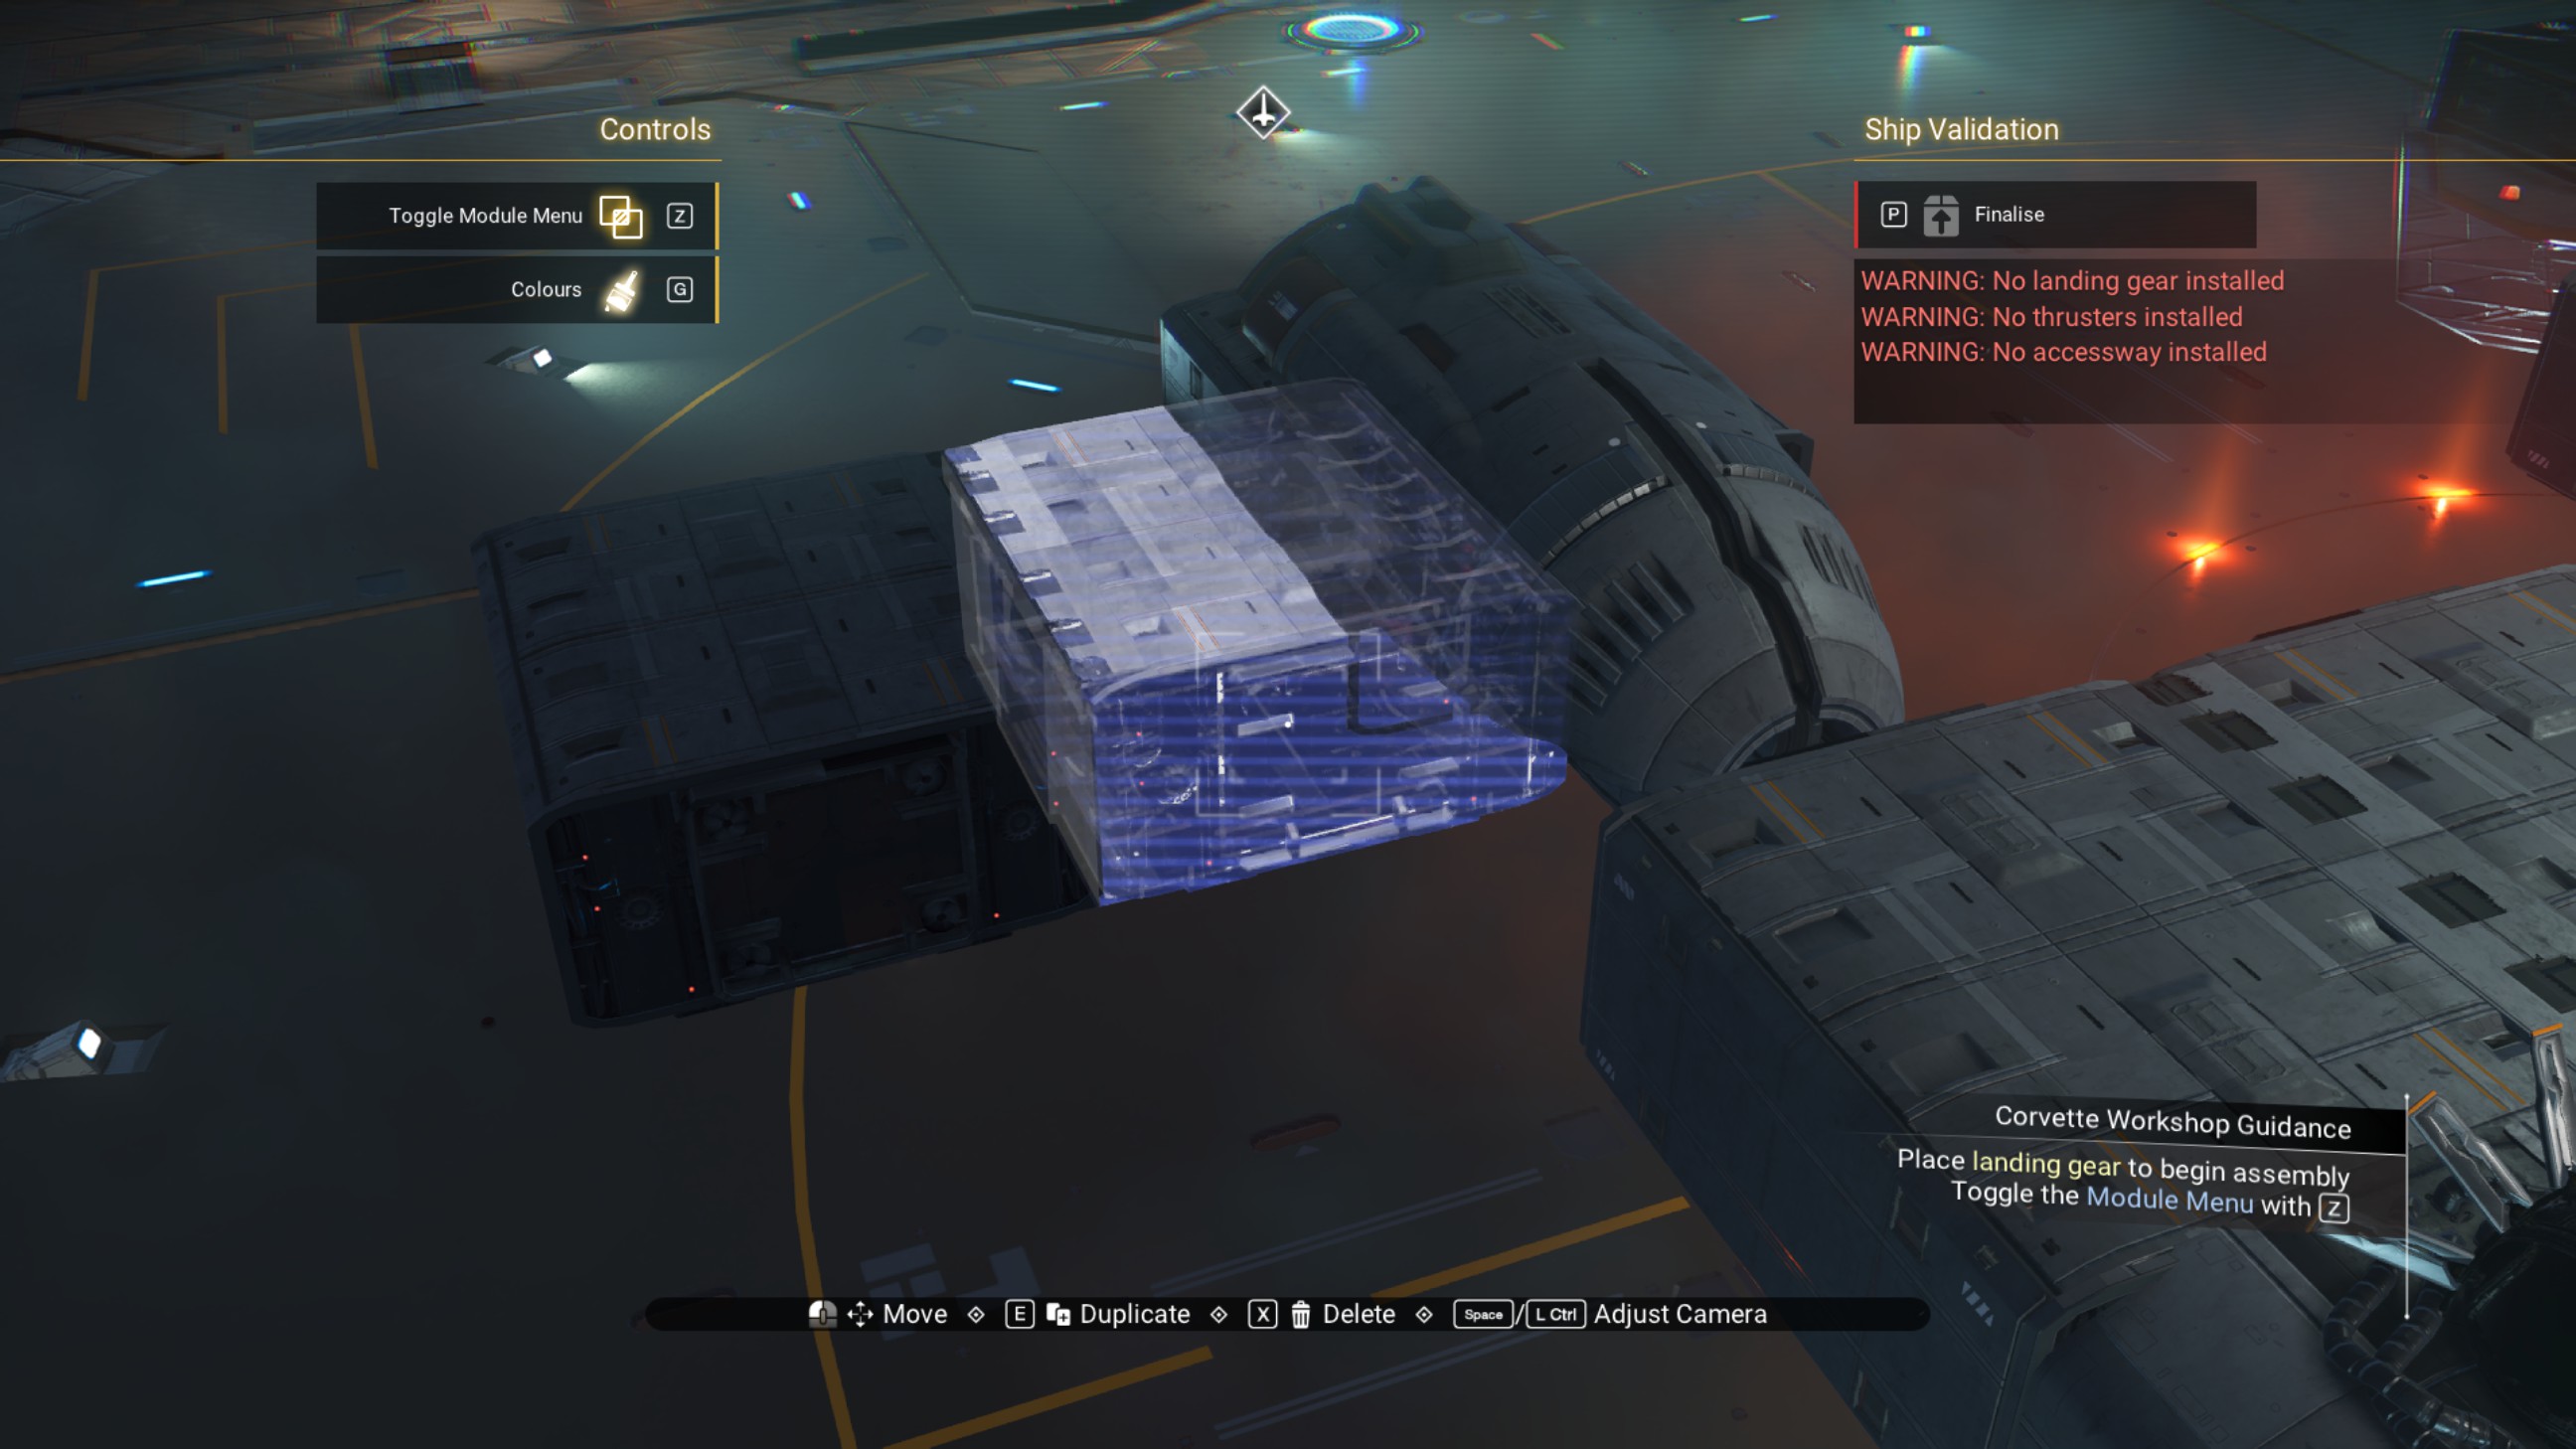
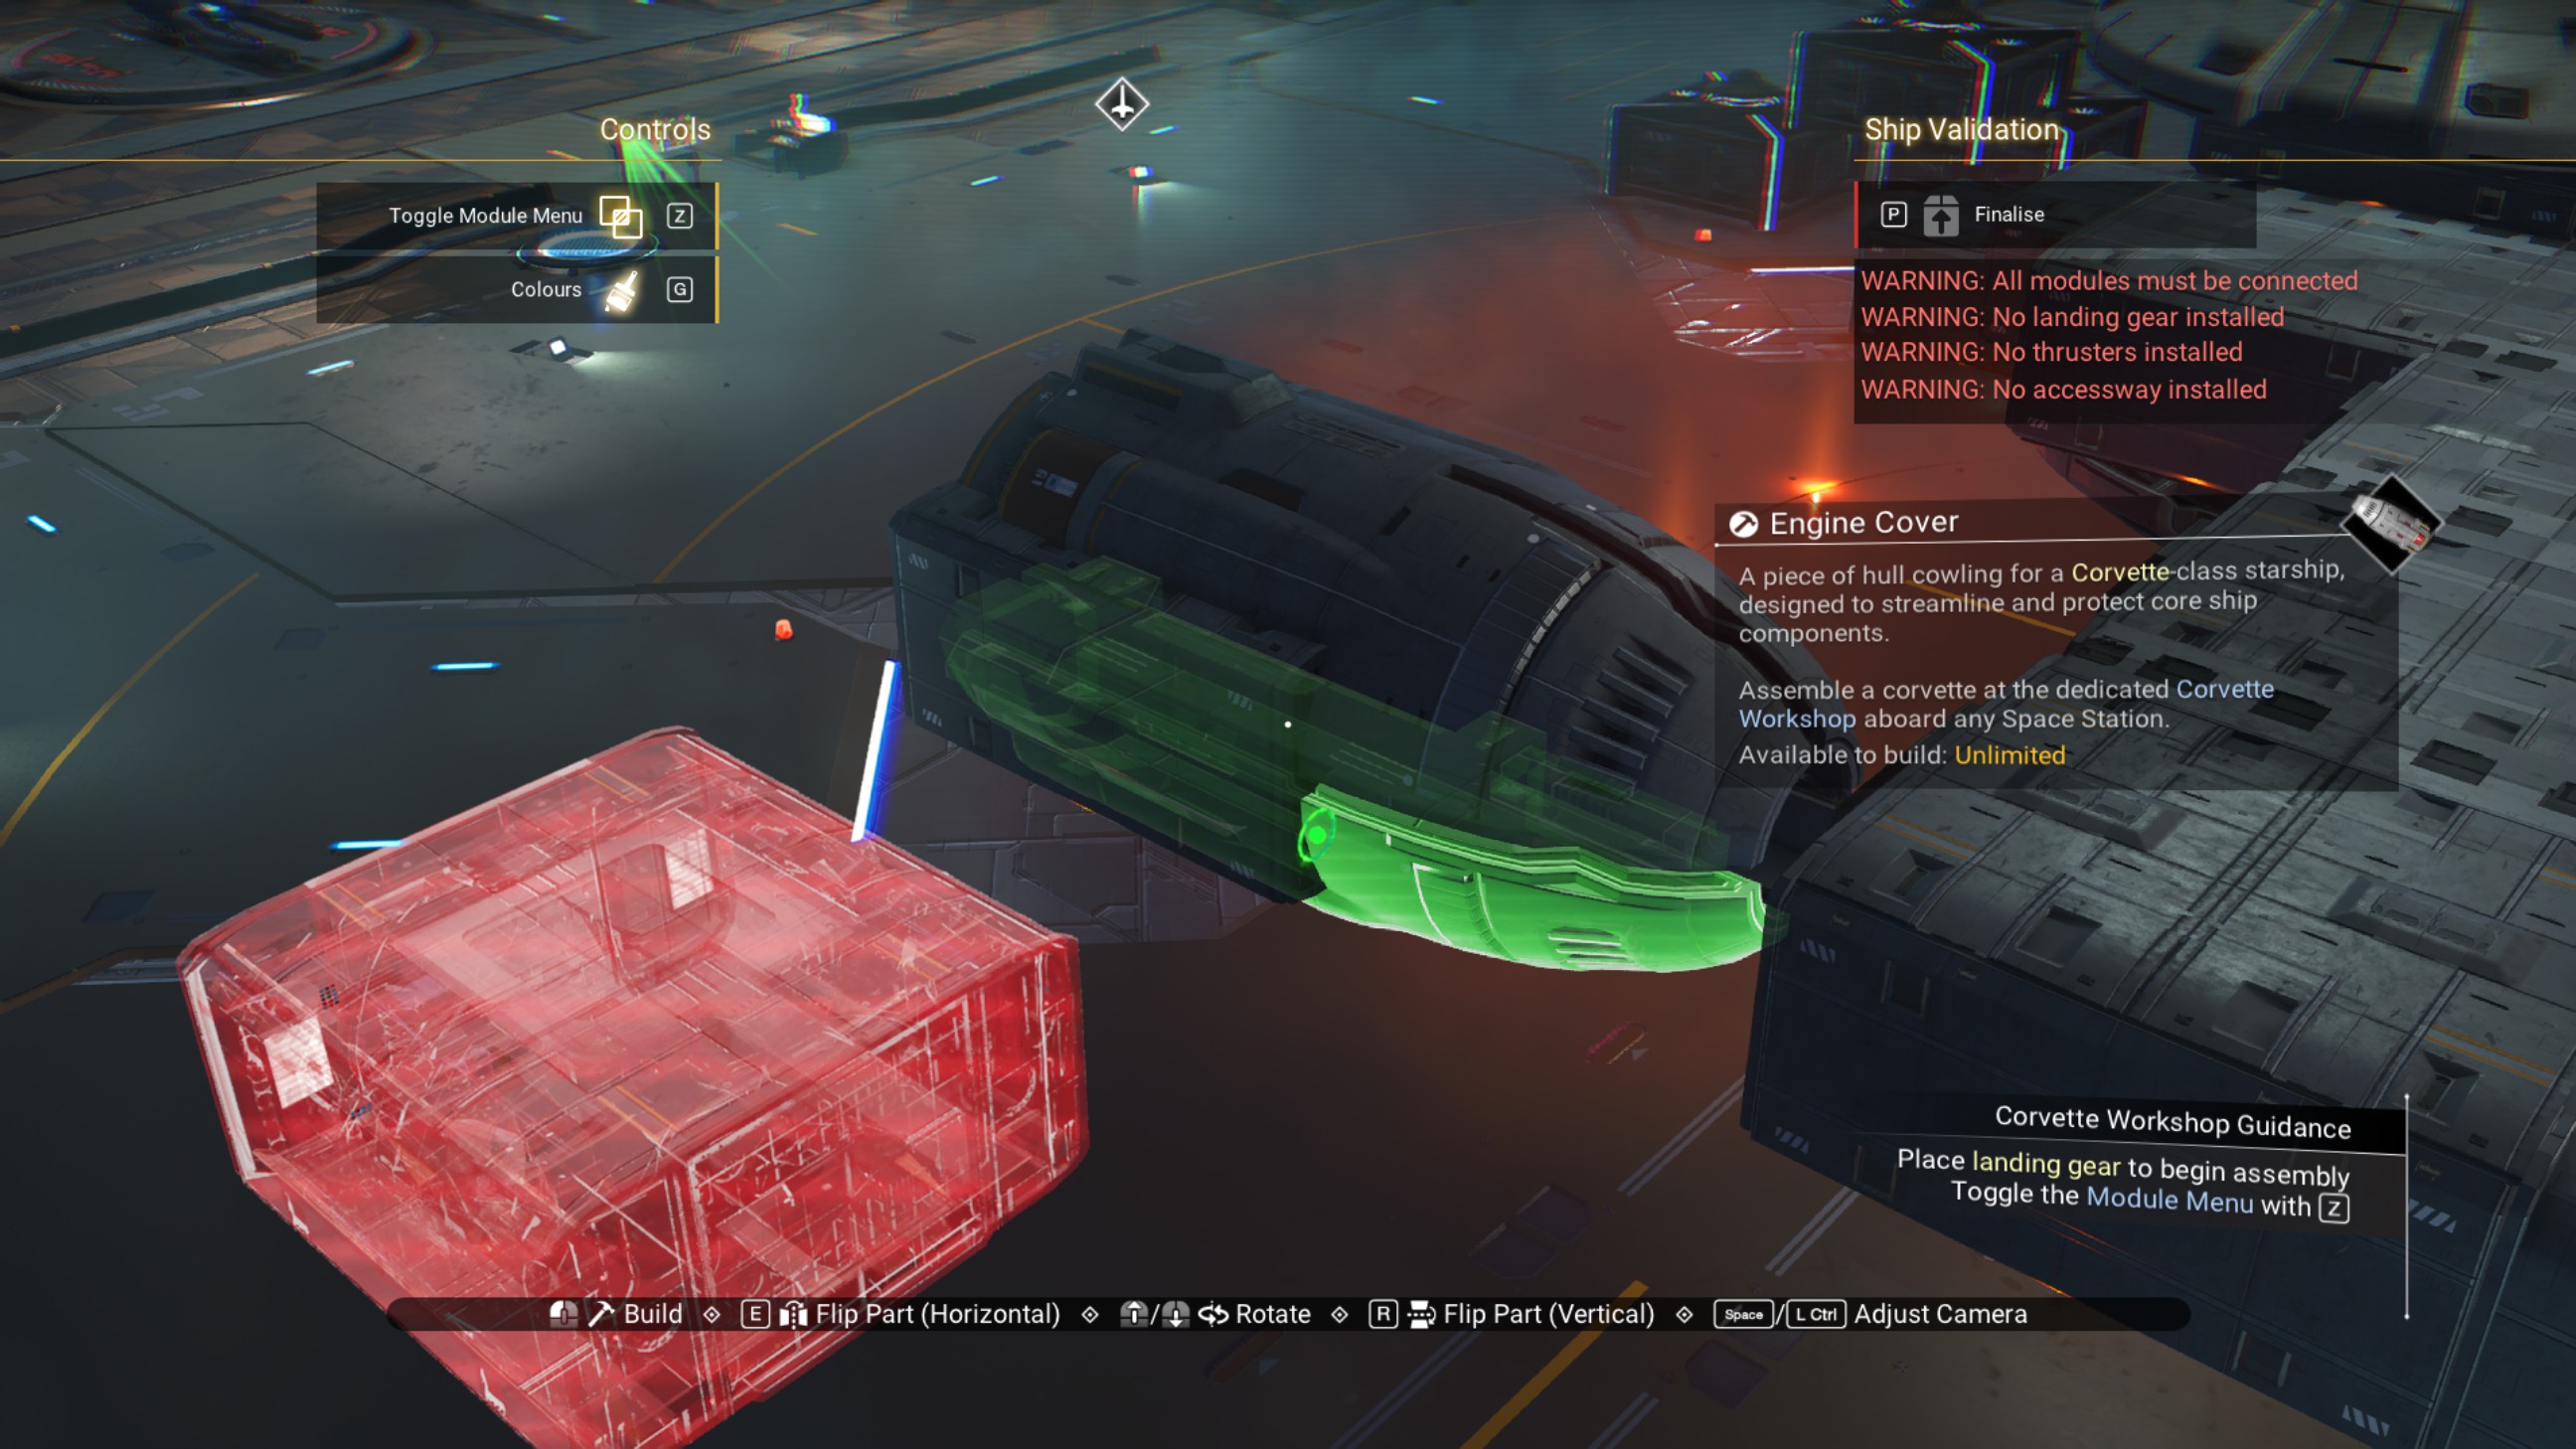
Place a rotated propeller module along the starboard side of the last offset walkway, the shift the walkway forward half a step along the propeller module.
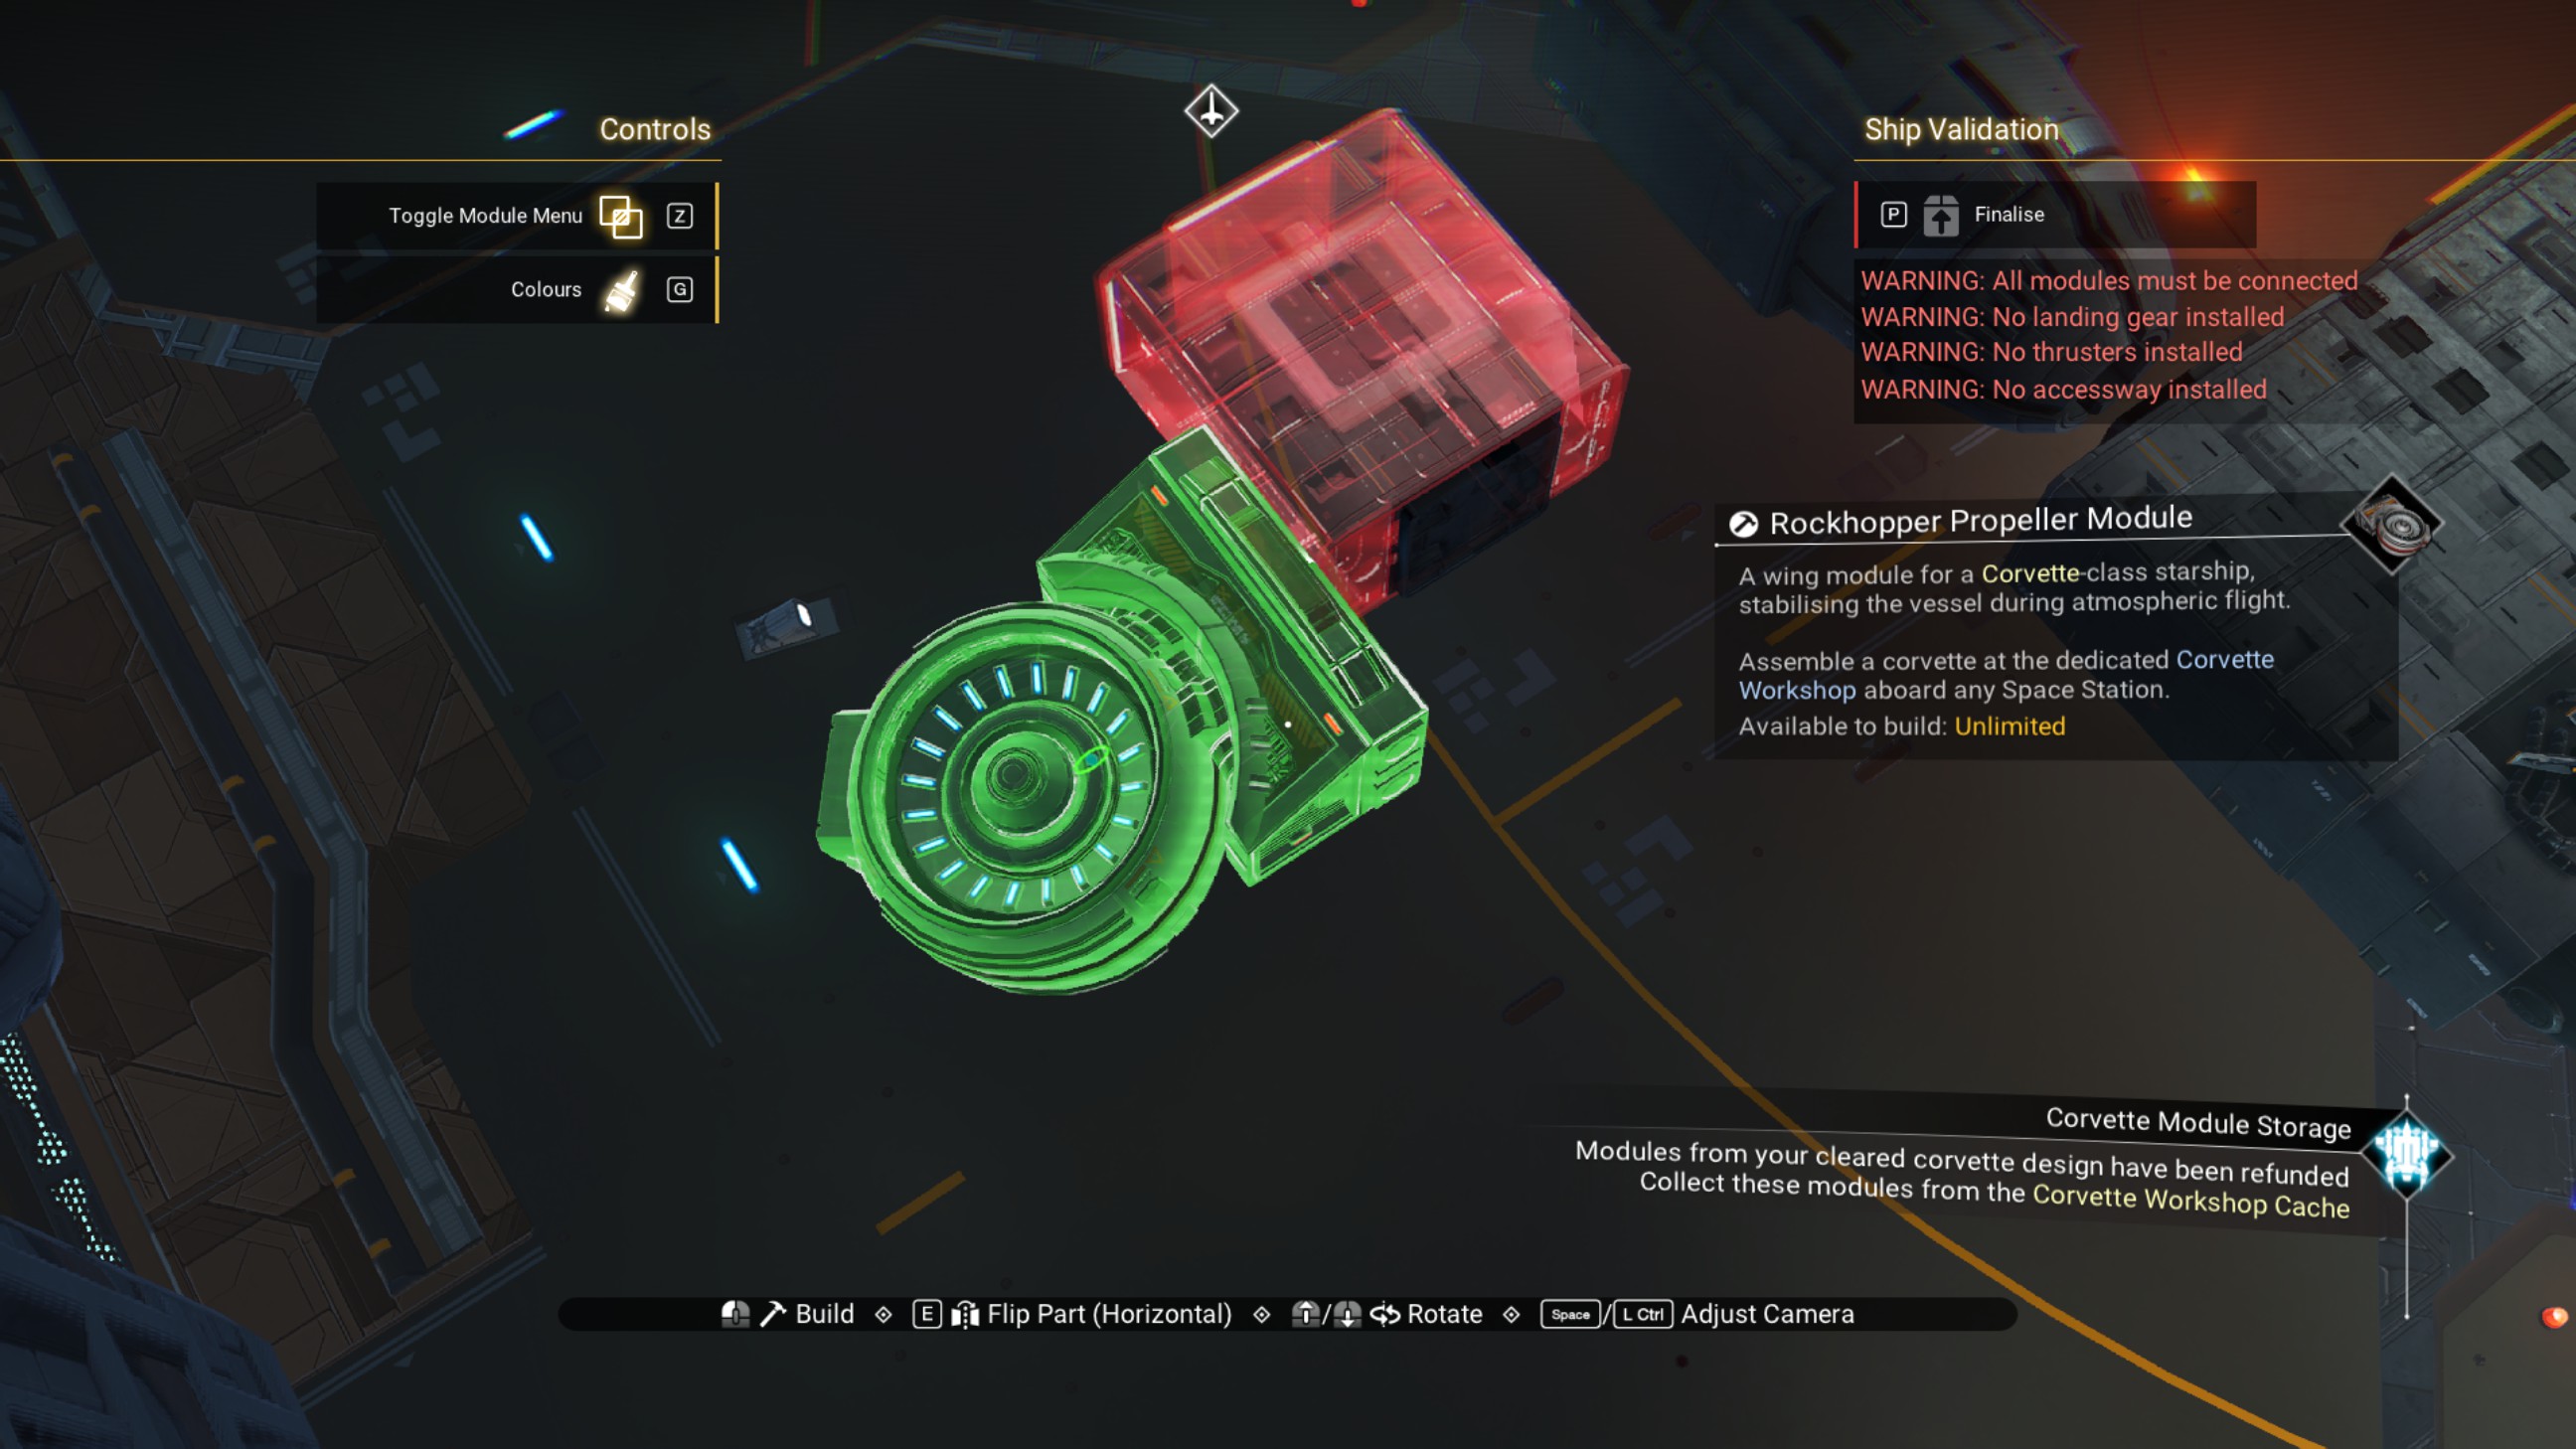
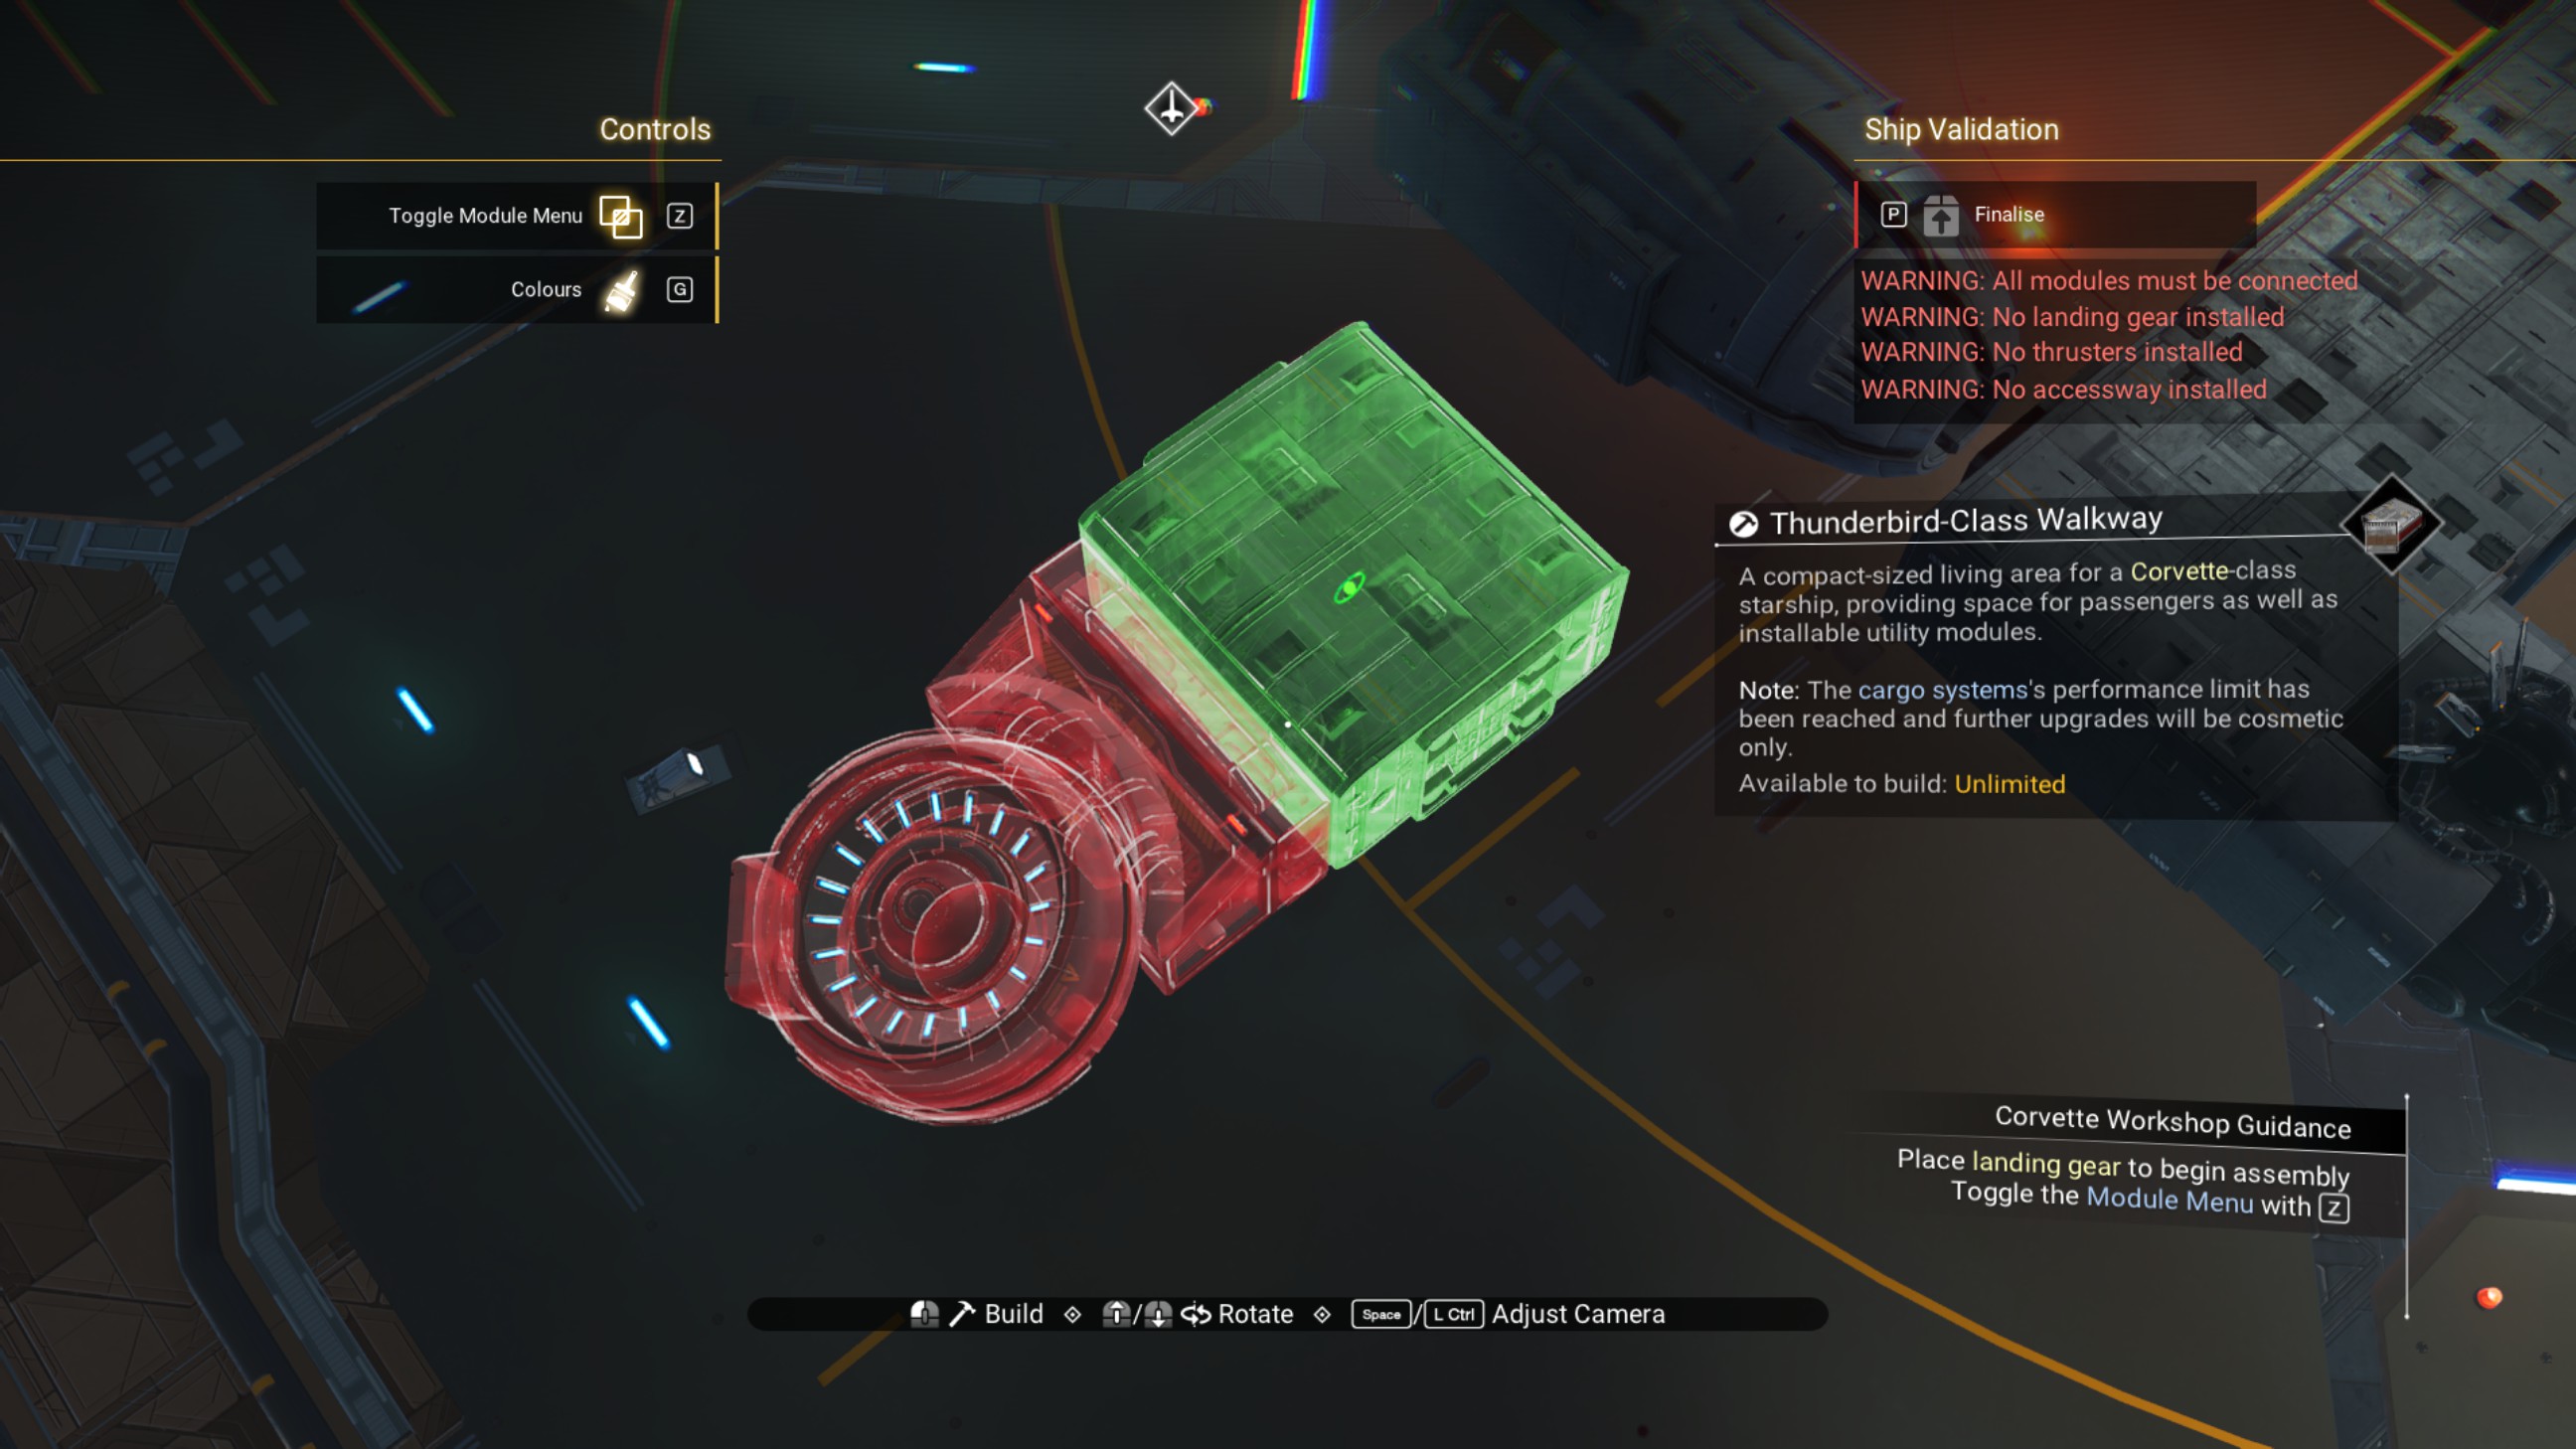
Delete the propeller module, then place a walkway on the port side of the one we just shifted forward.
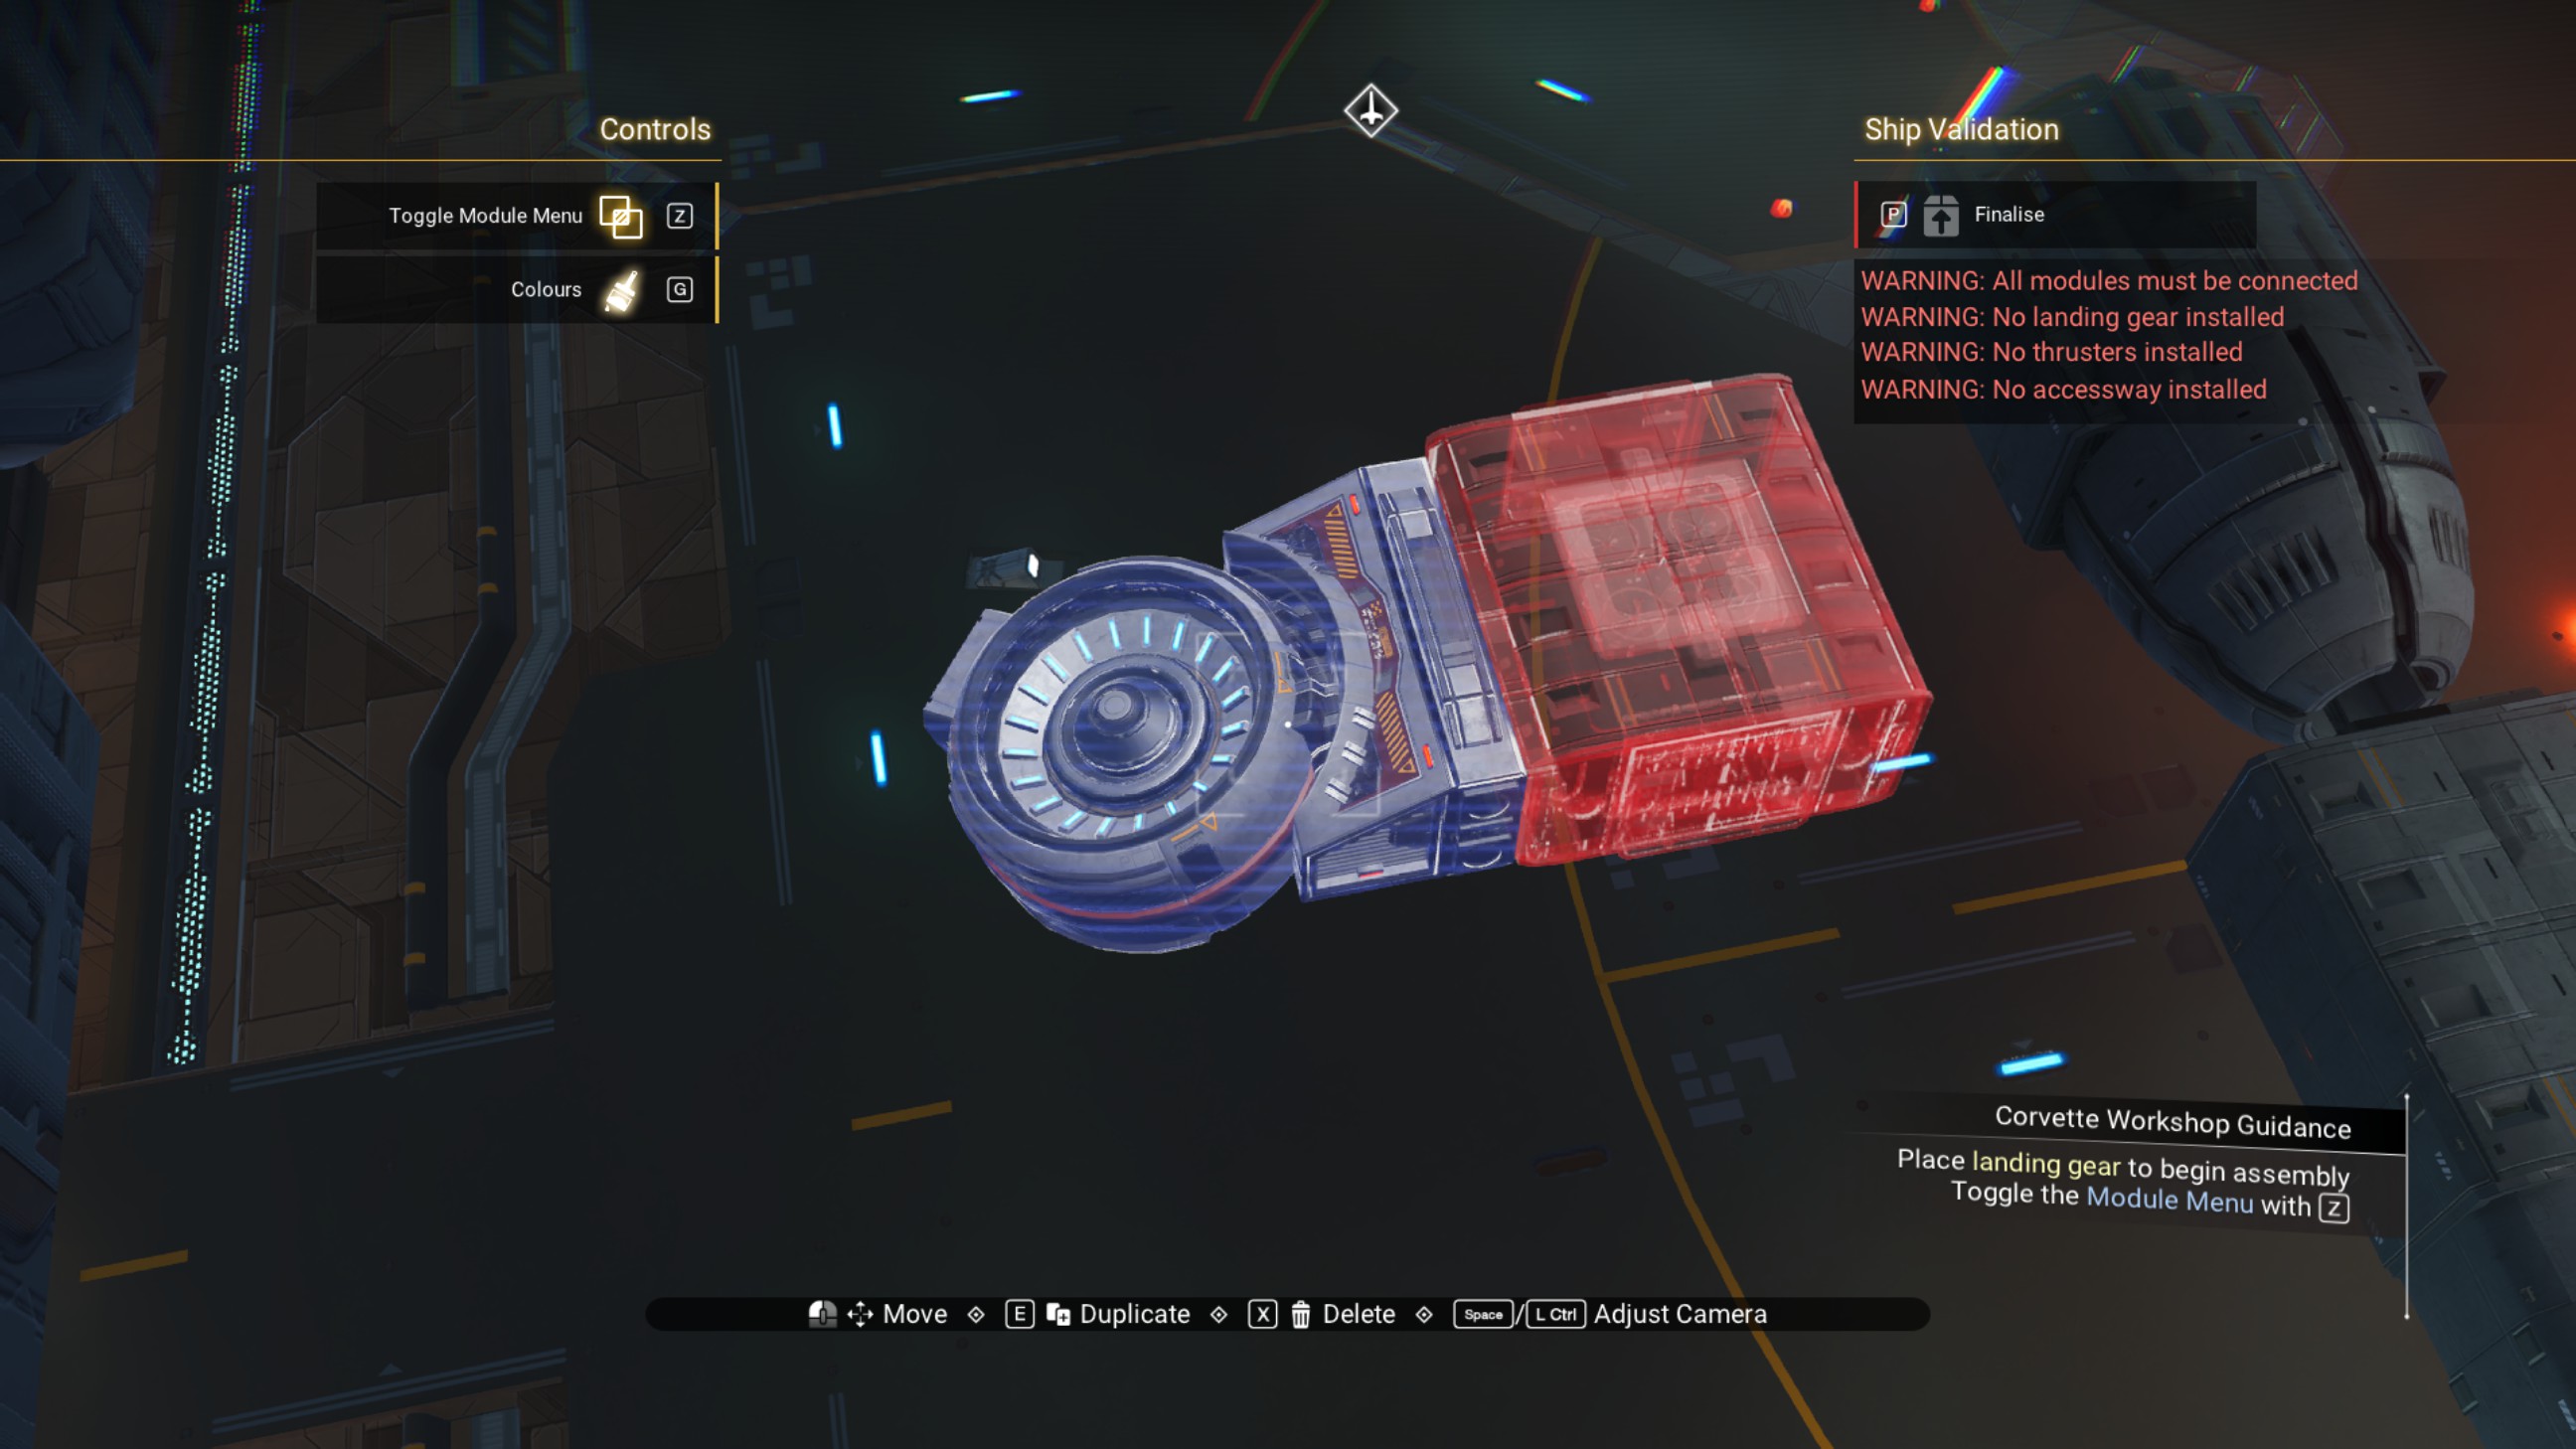
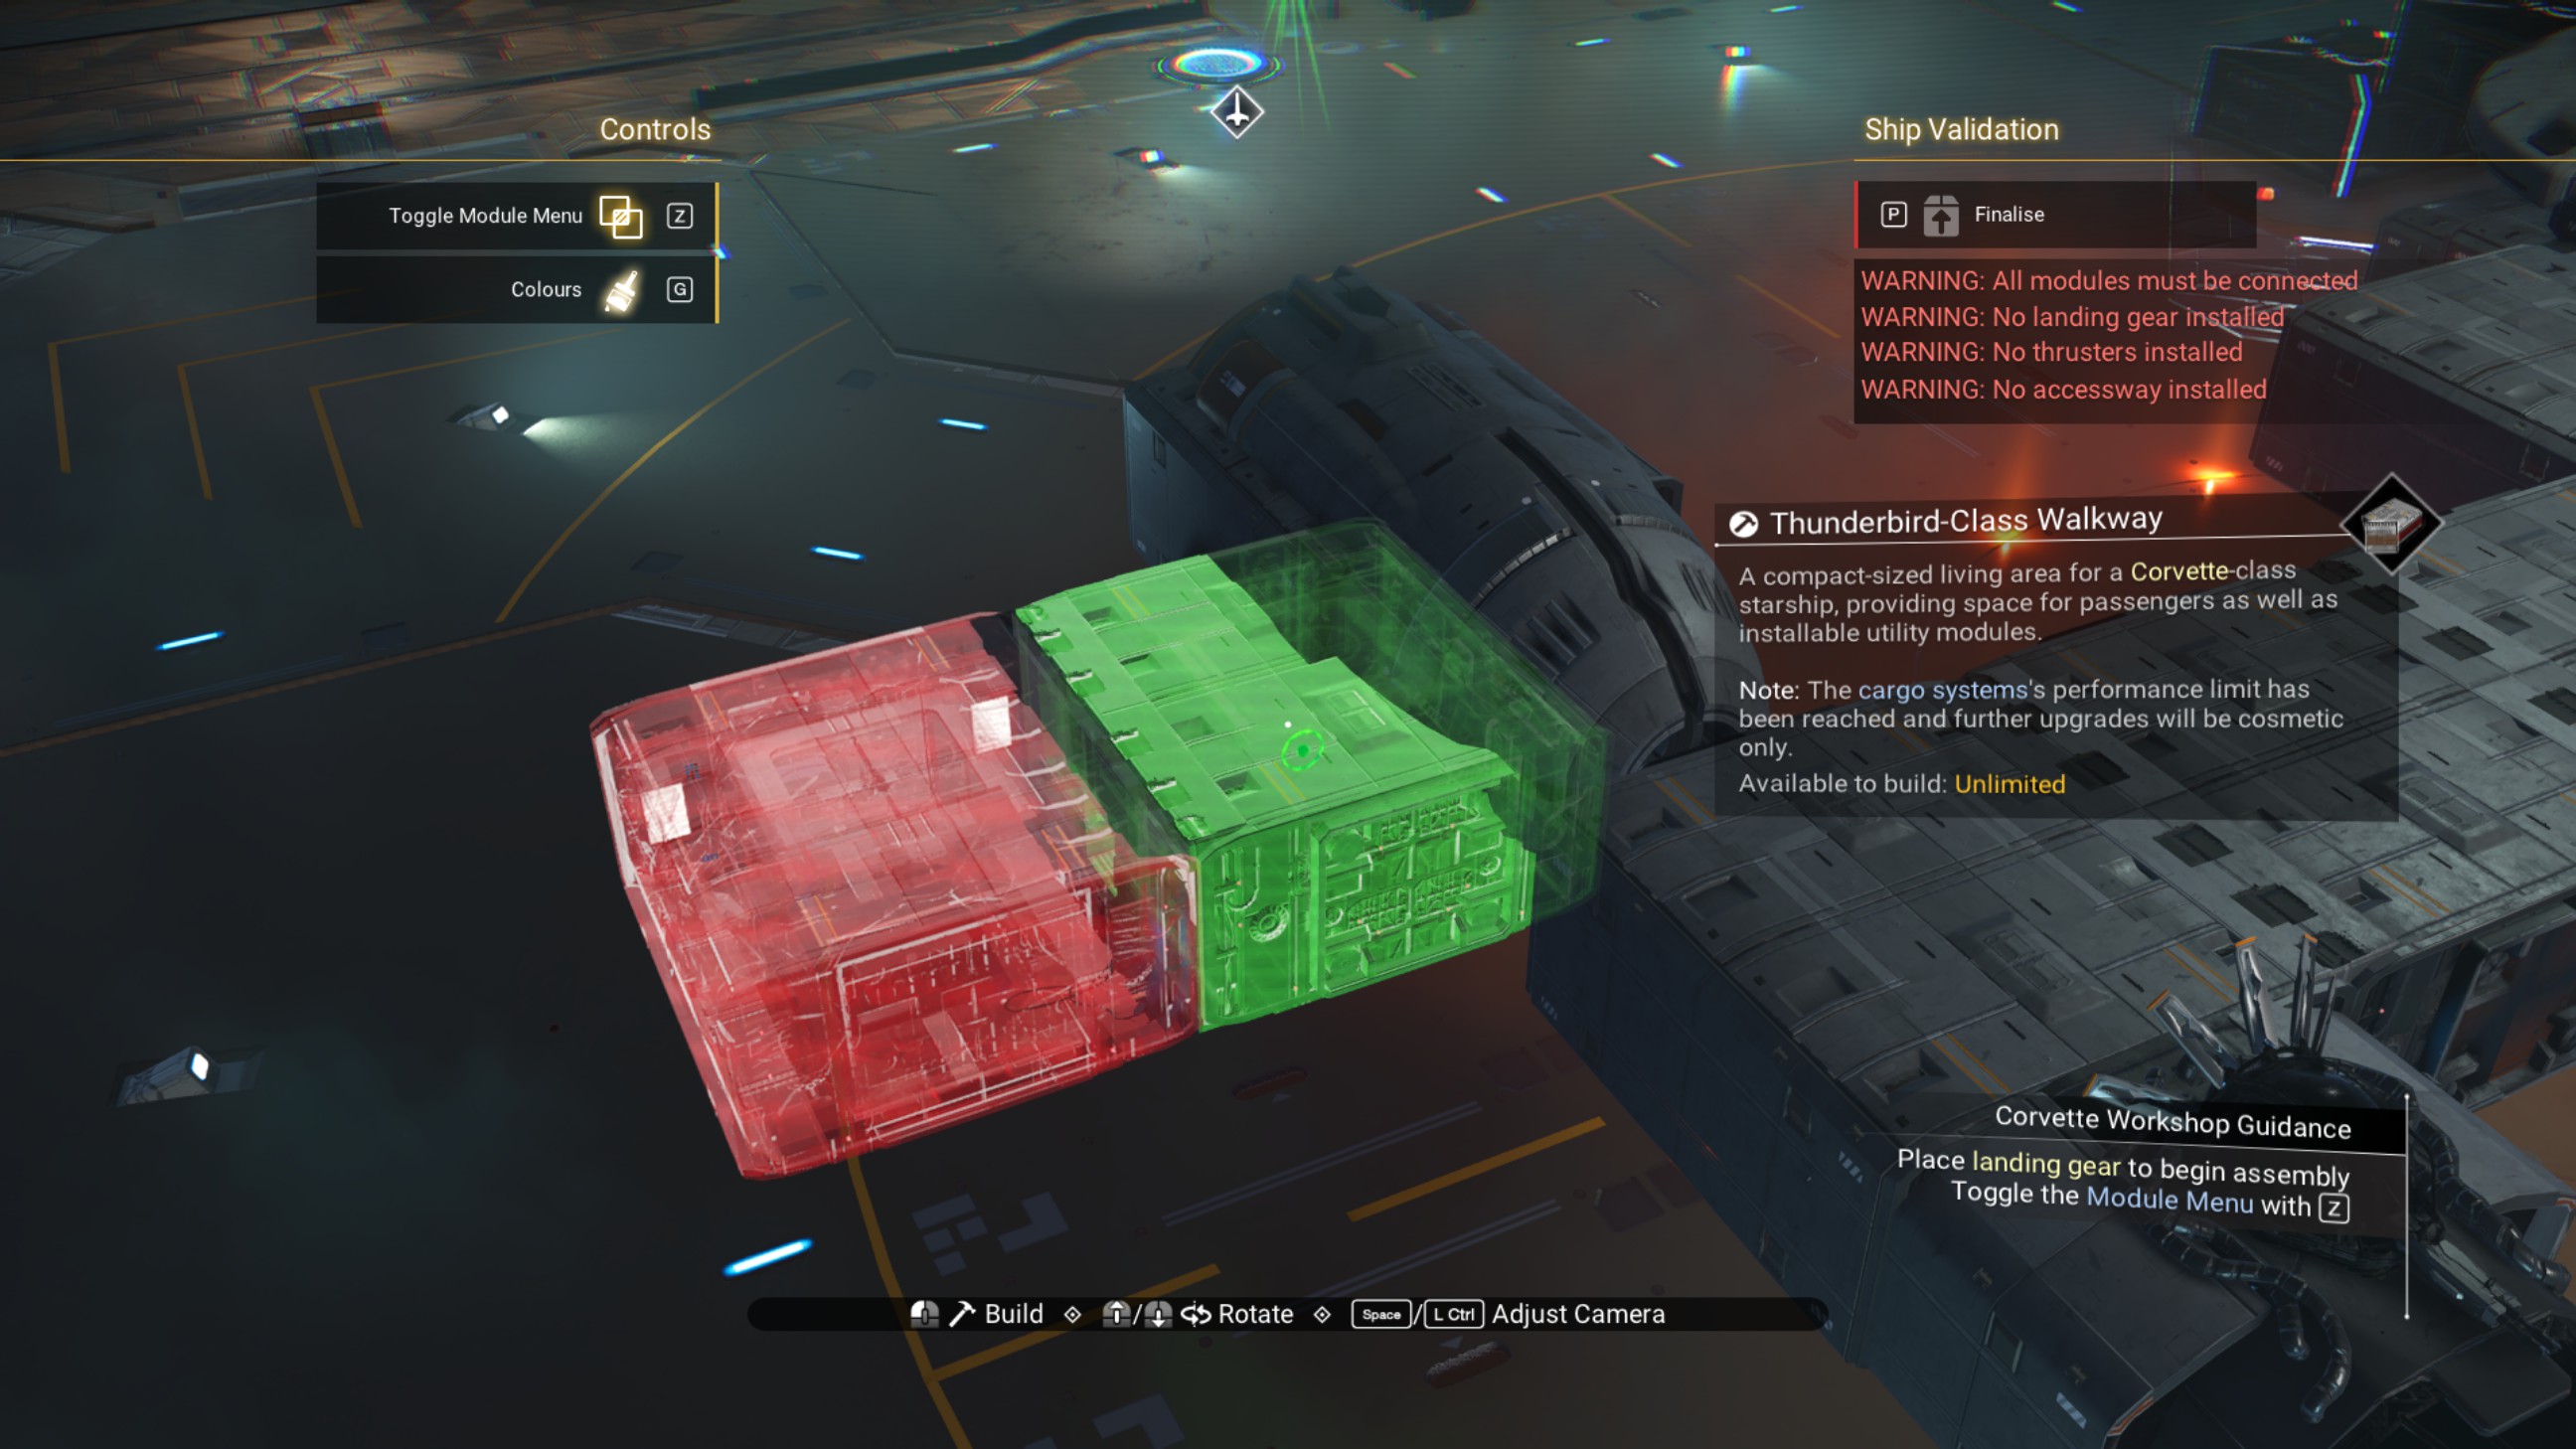
Place another walkway on top of that one, then place an engine cover alongside it.
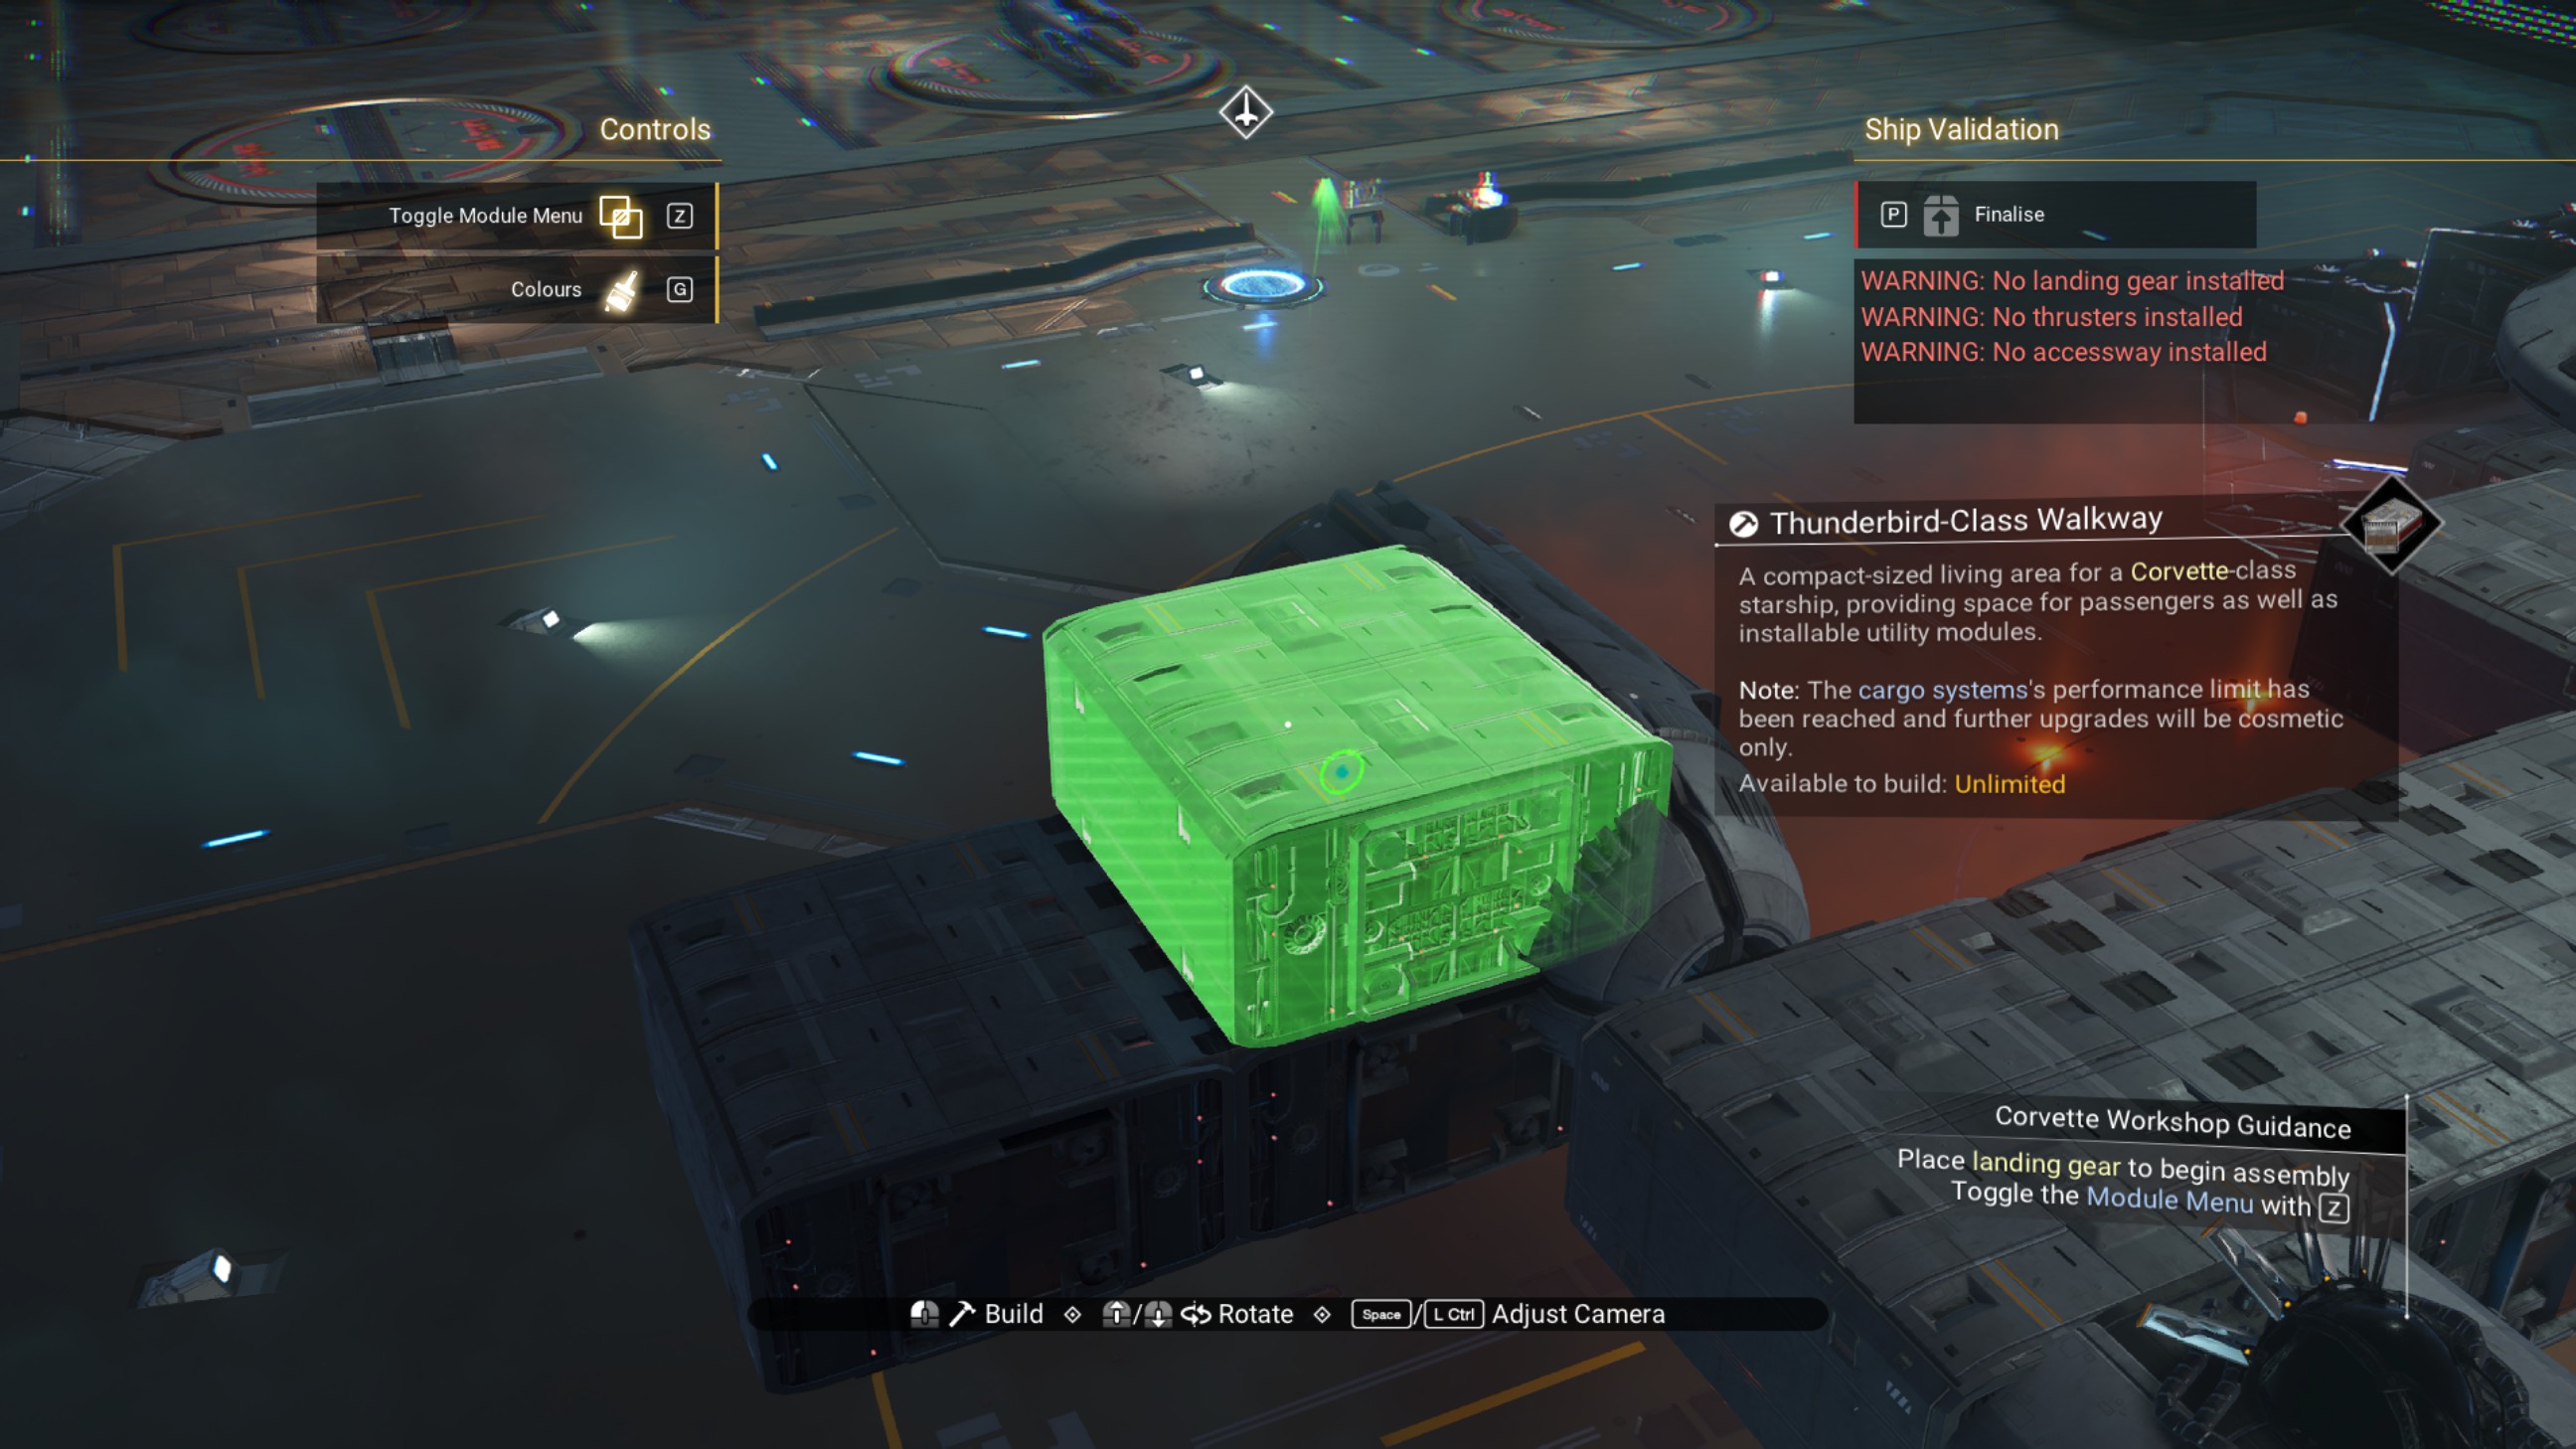
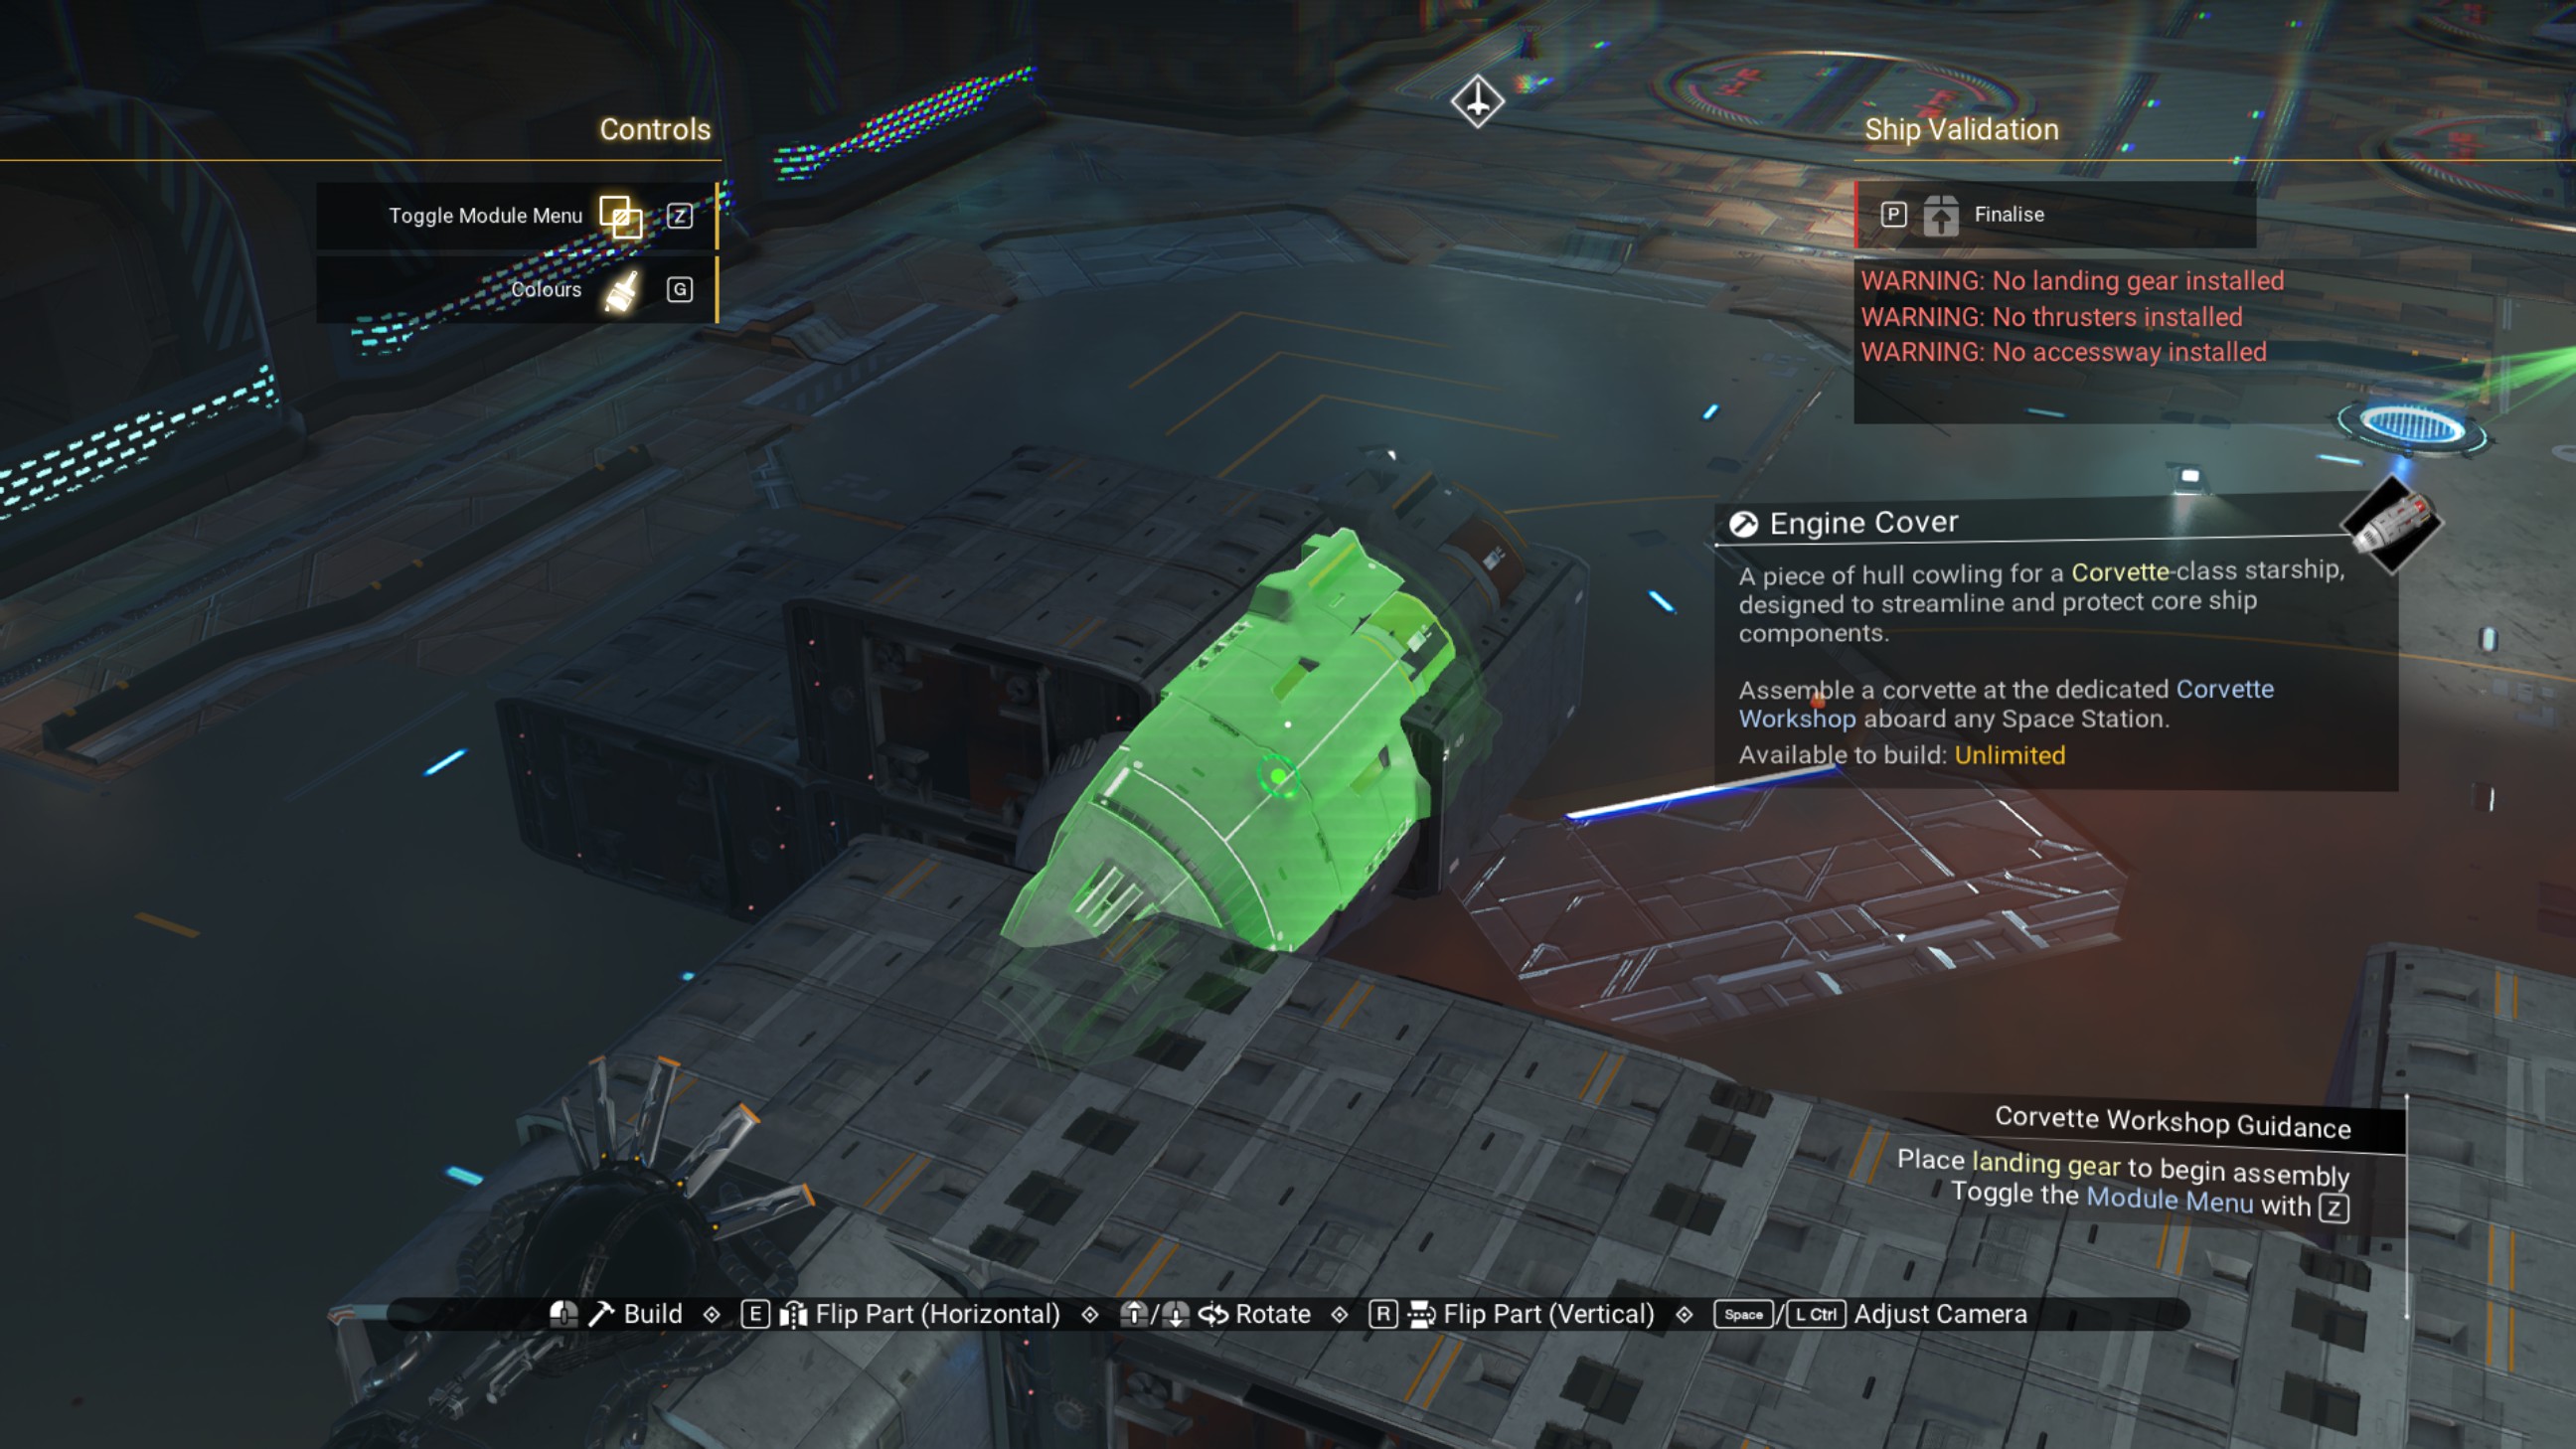
Place another engine cover below on the port side, then delete the top offset walkway.
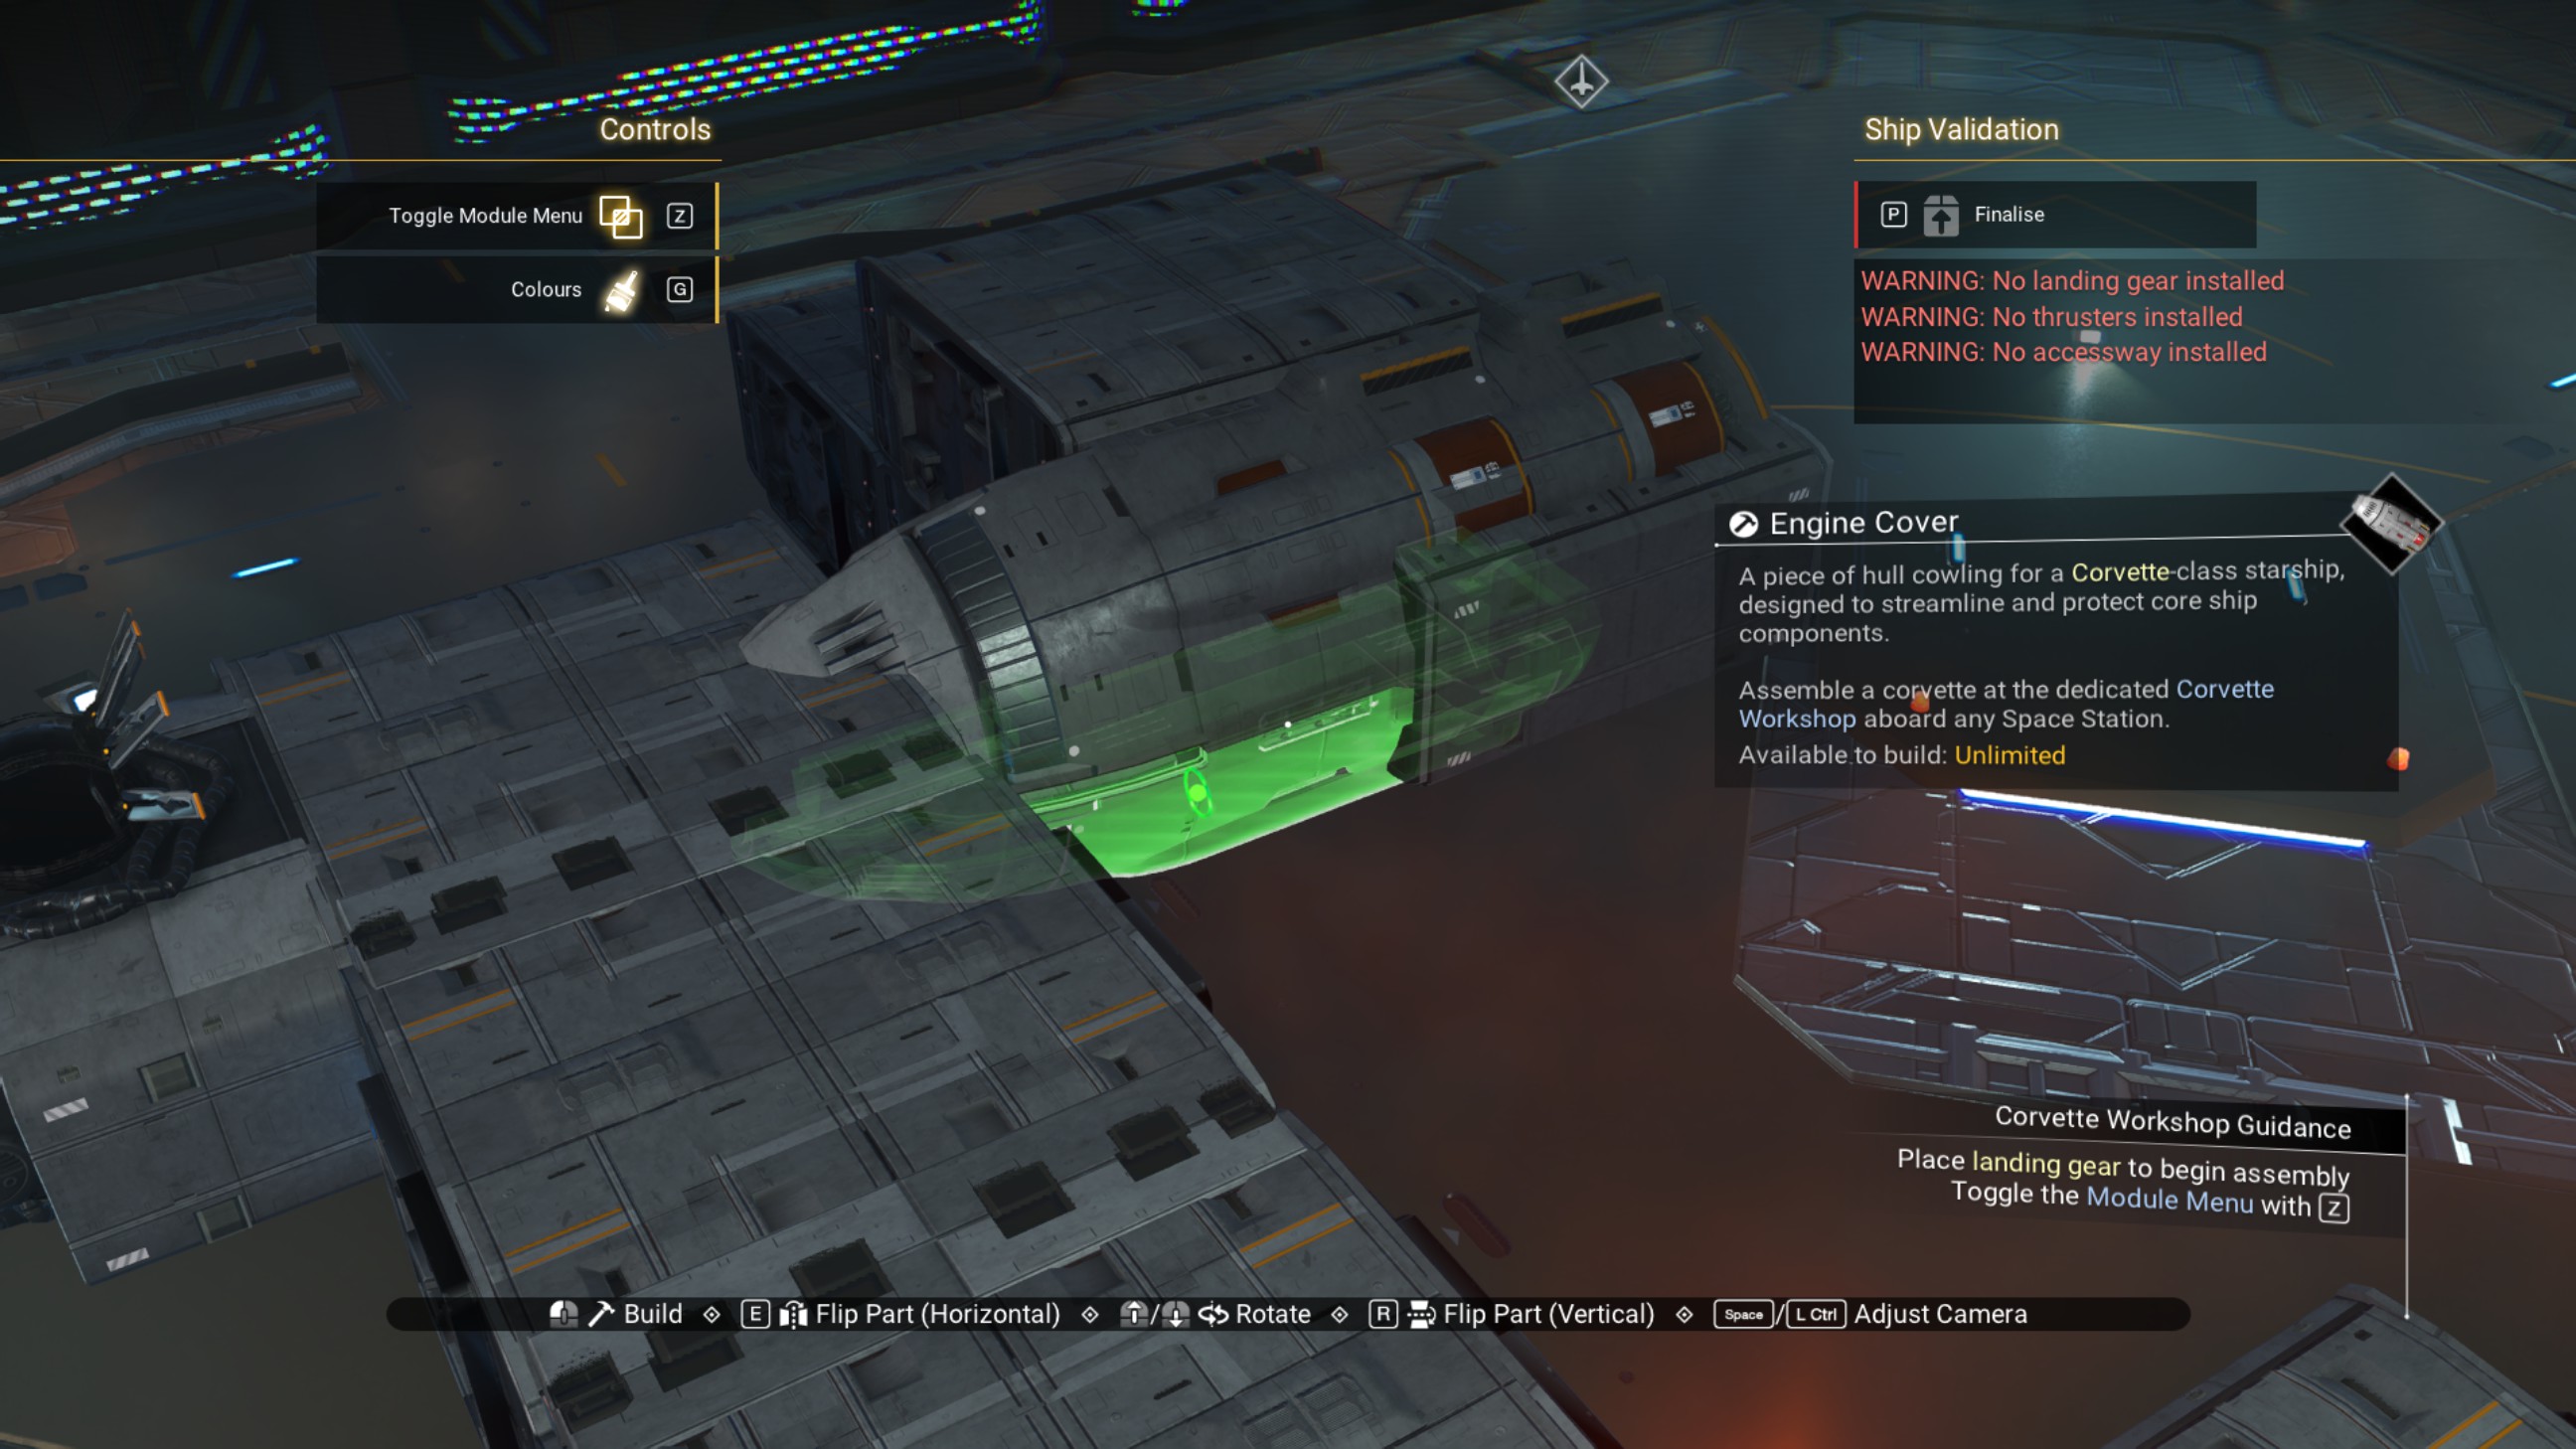
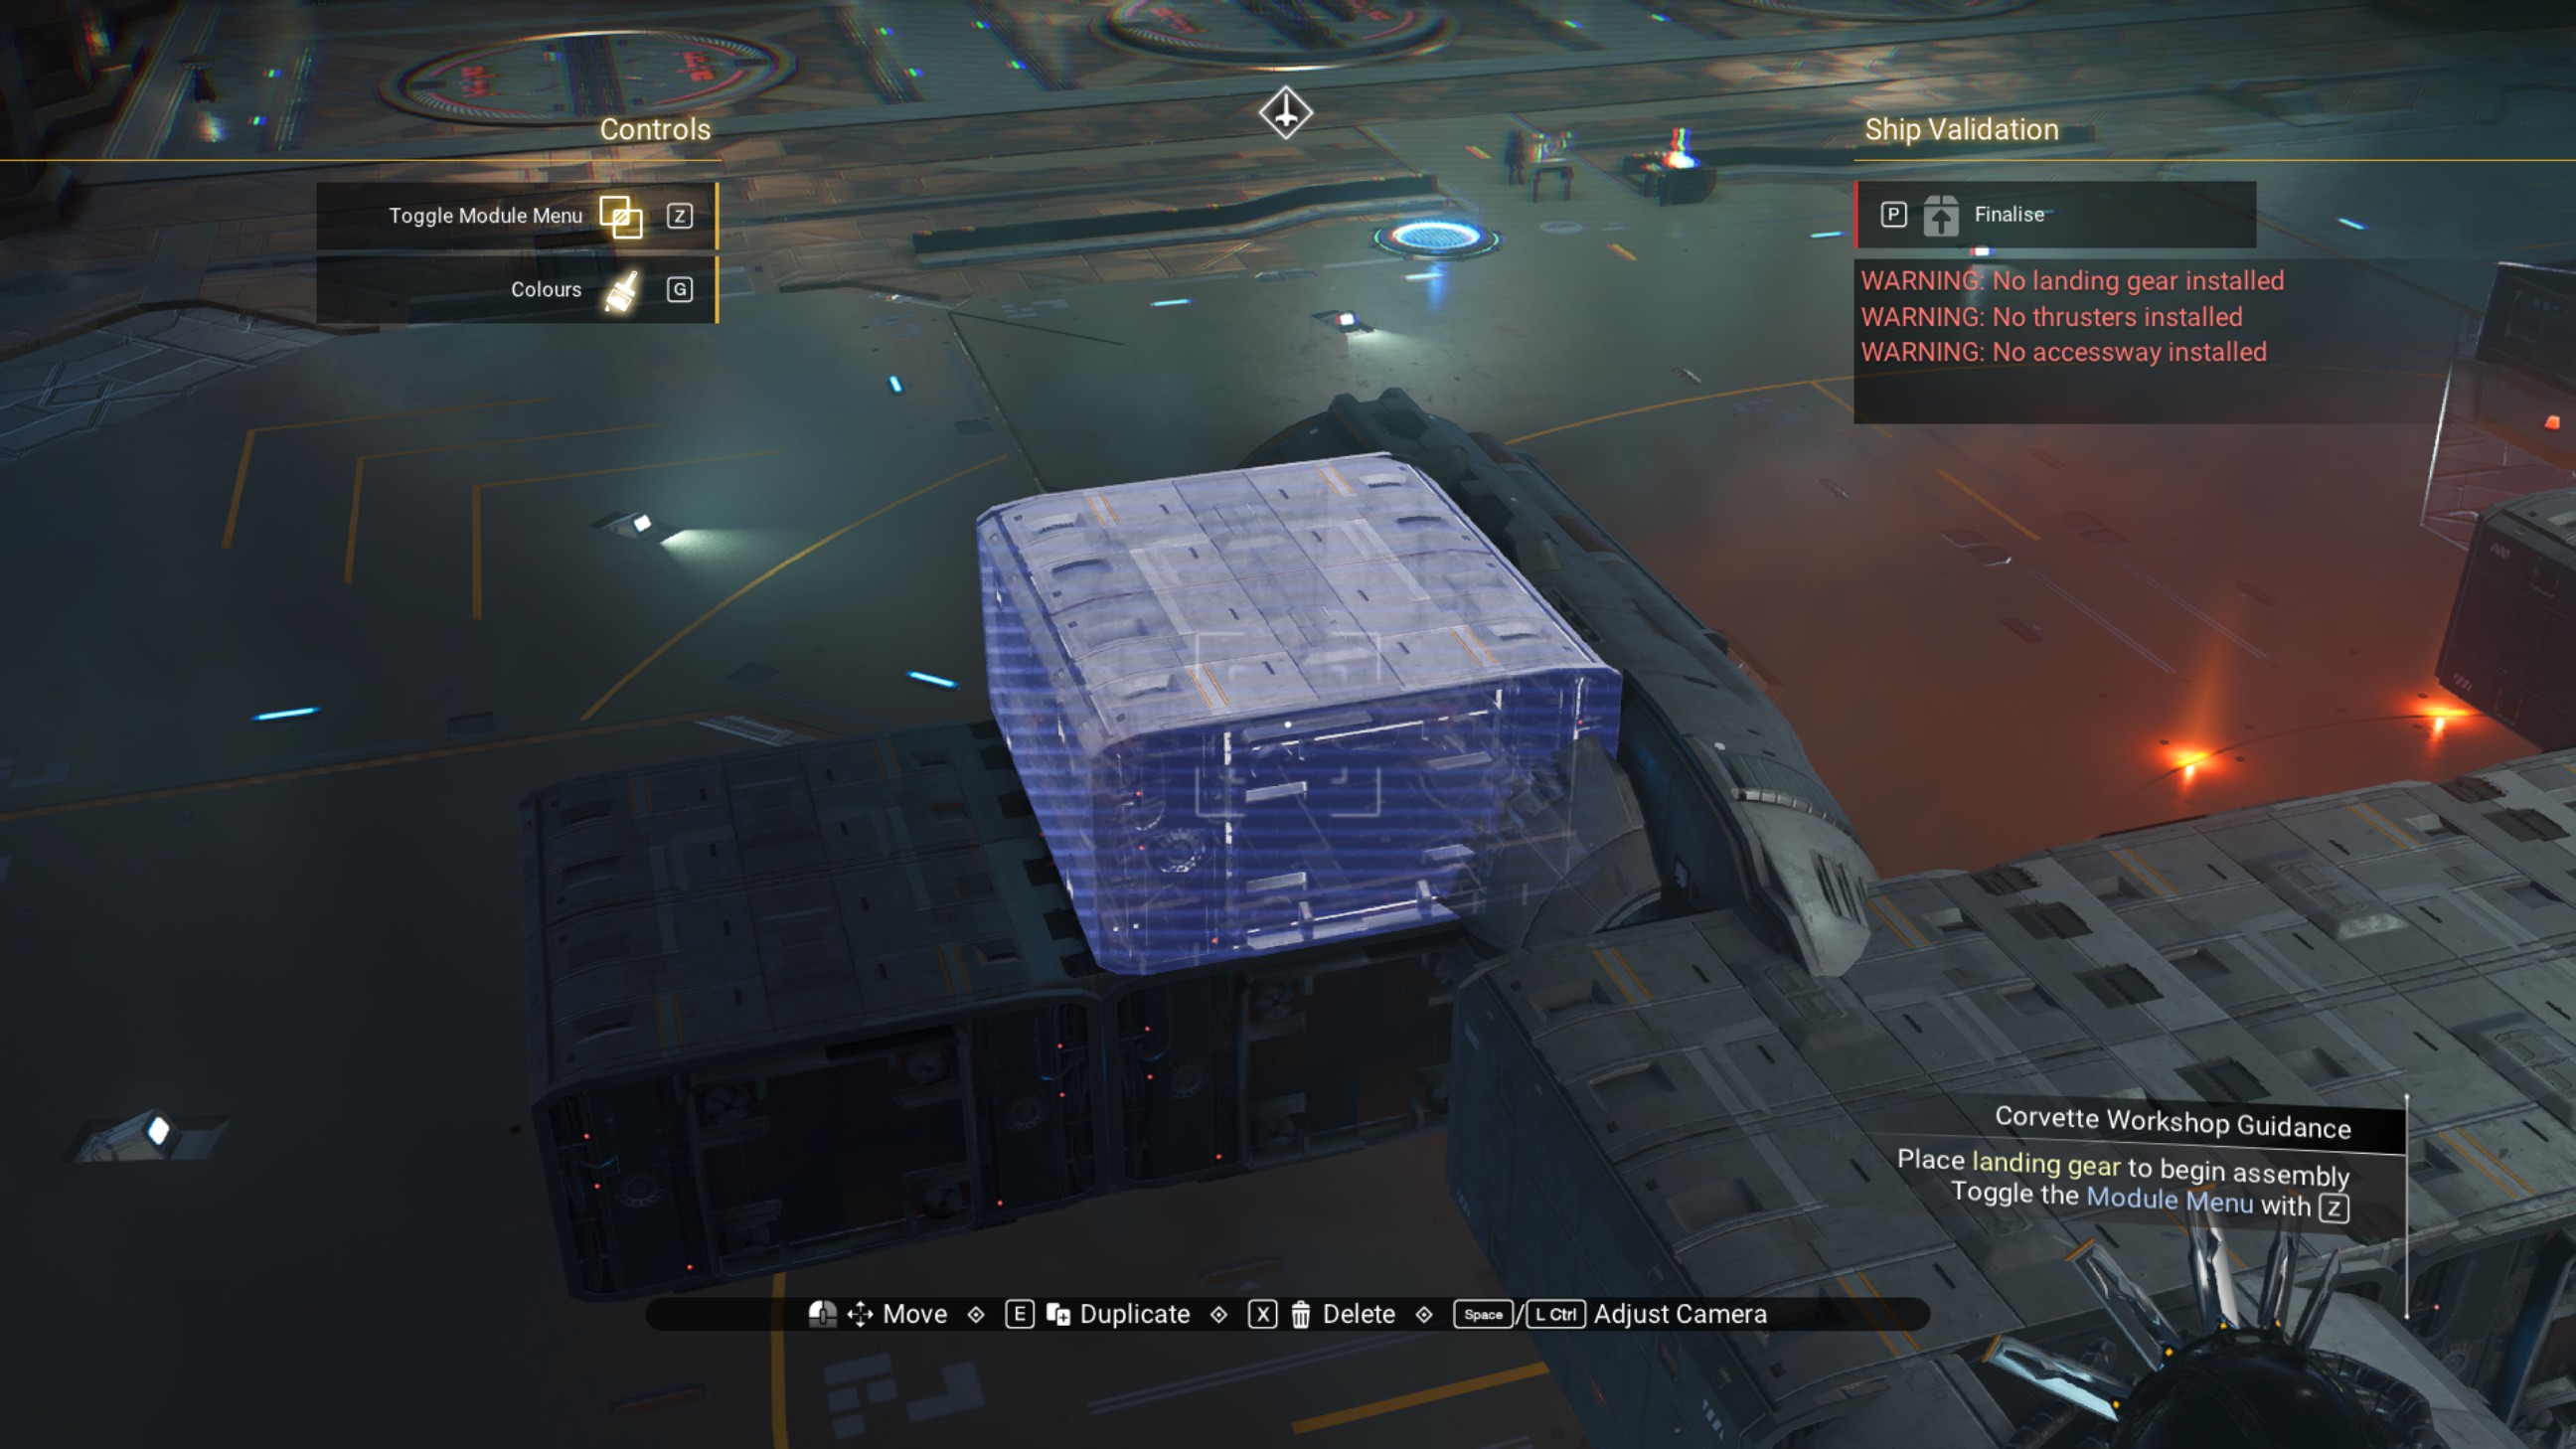
Place an engine cover where that walkway just was, then delete the walkway below it.
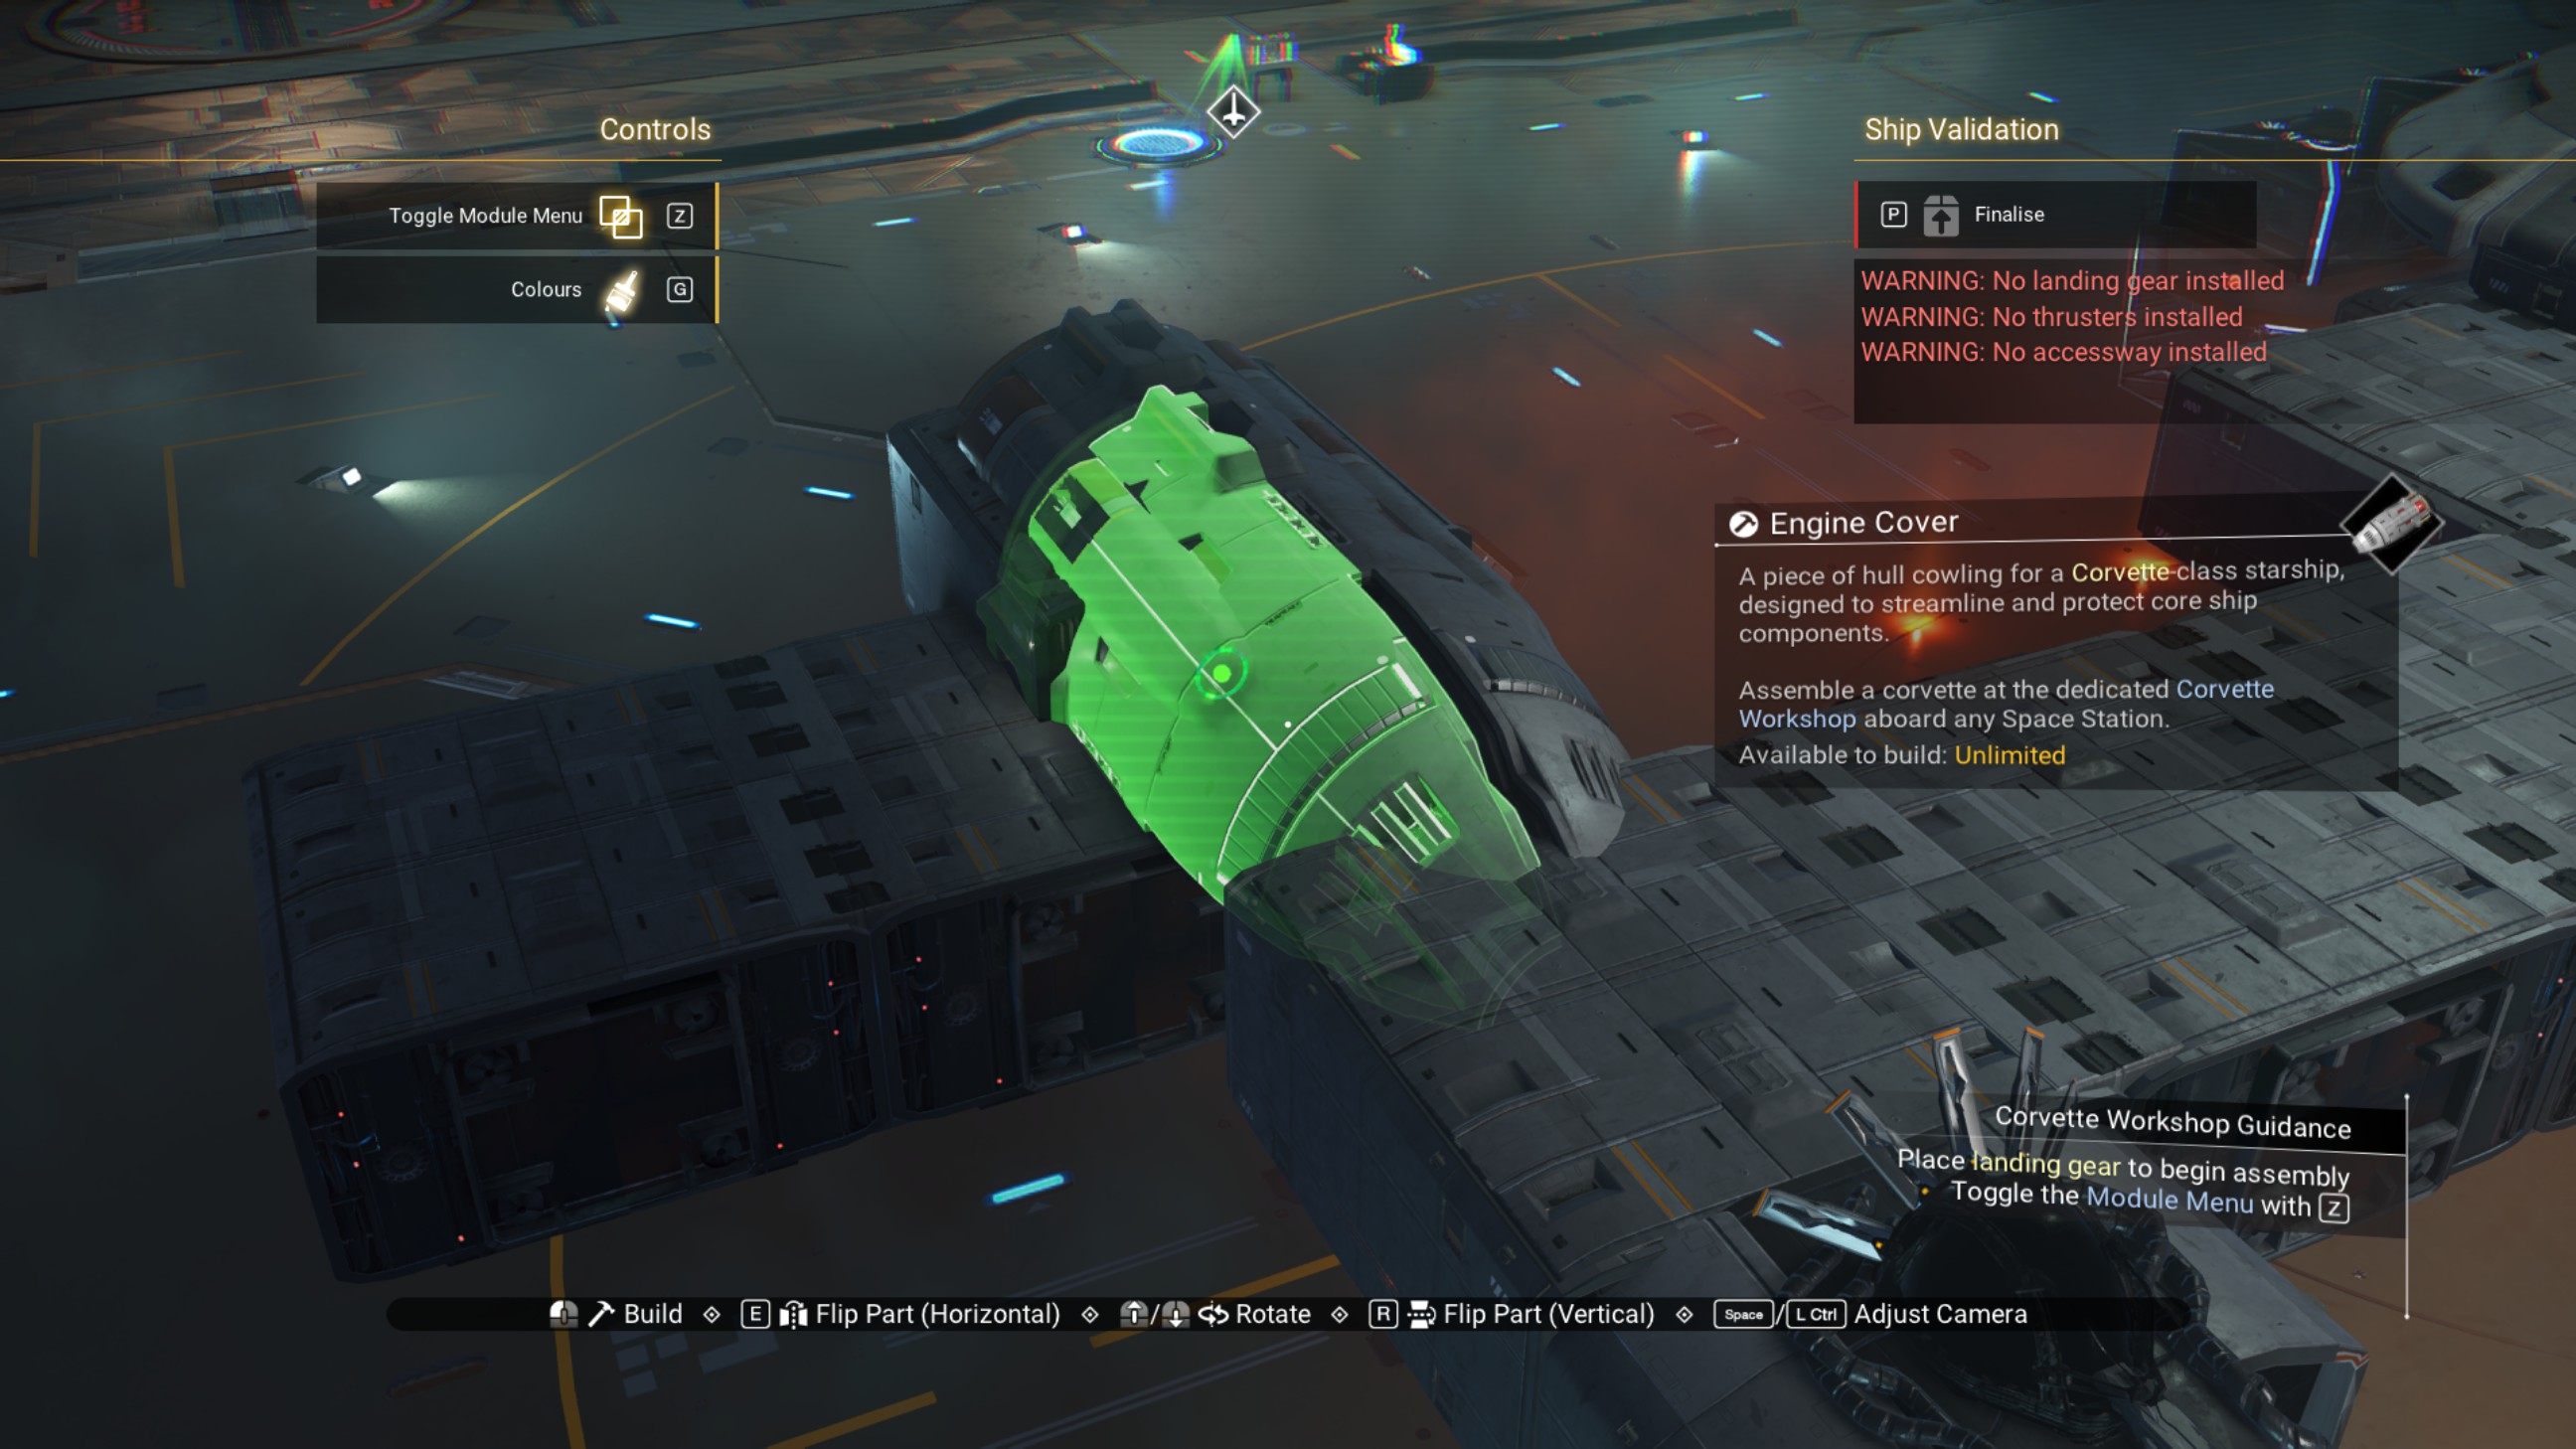
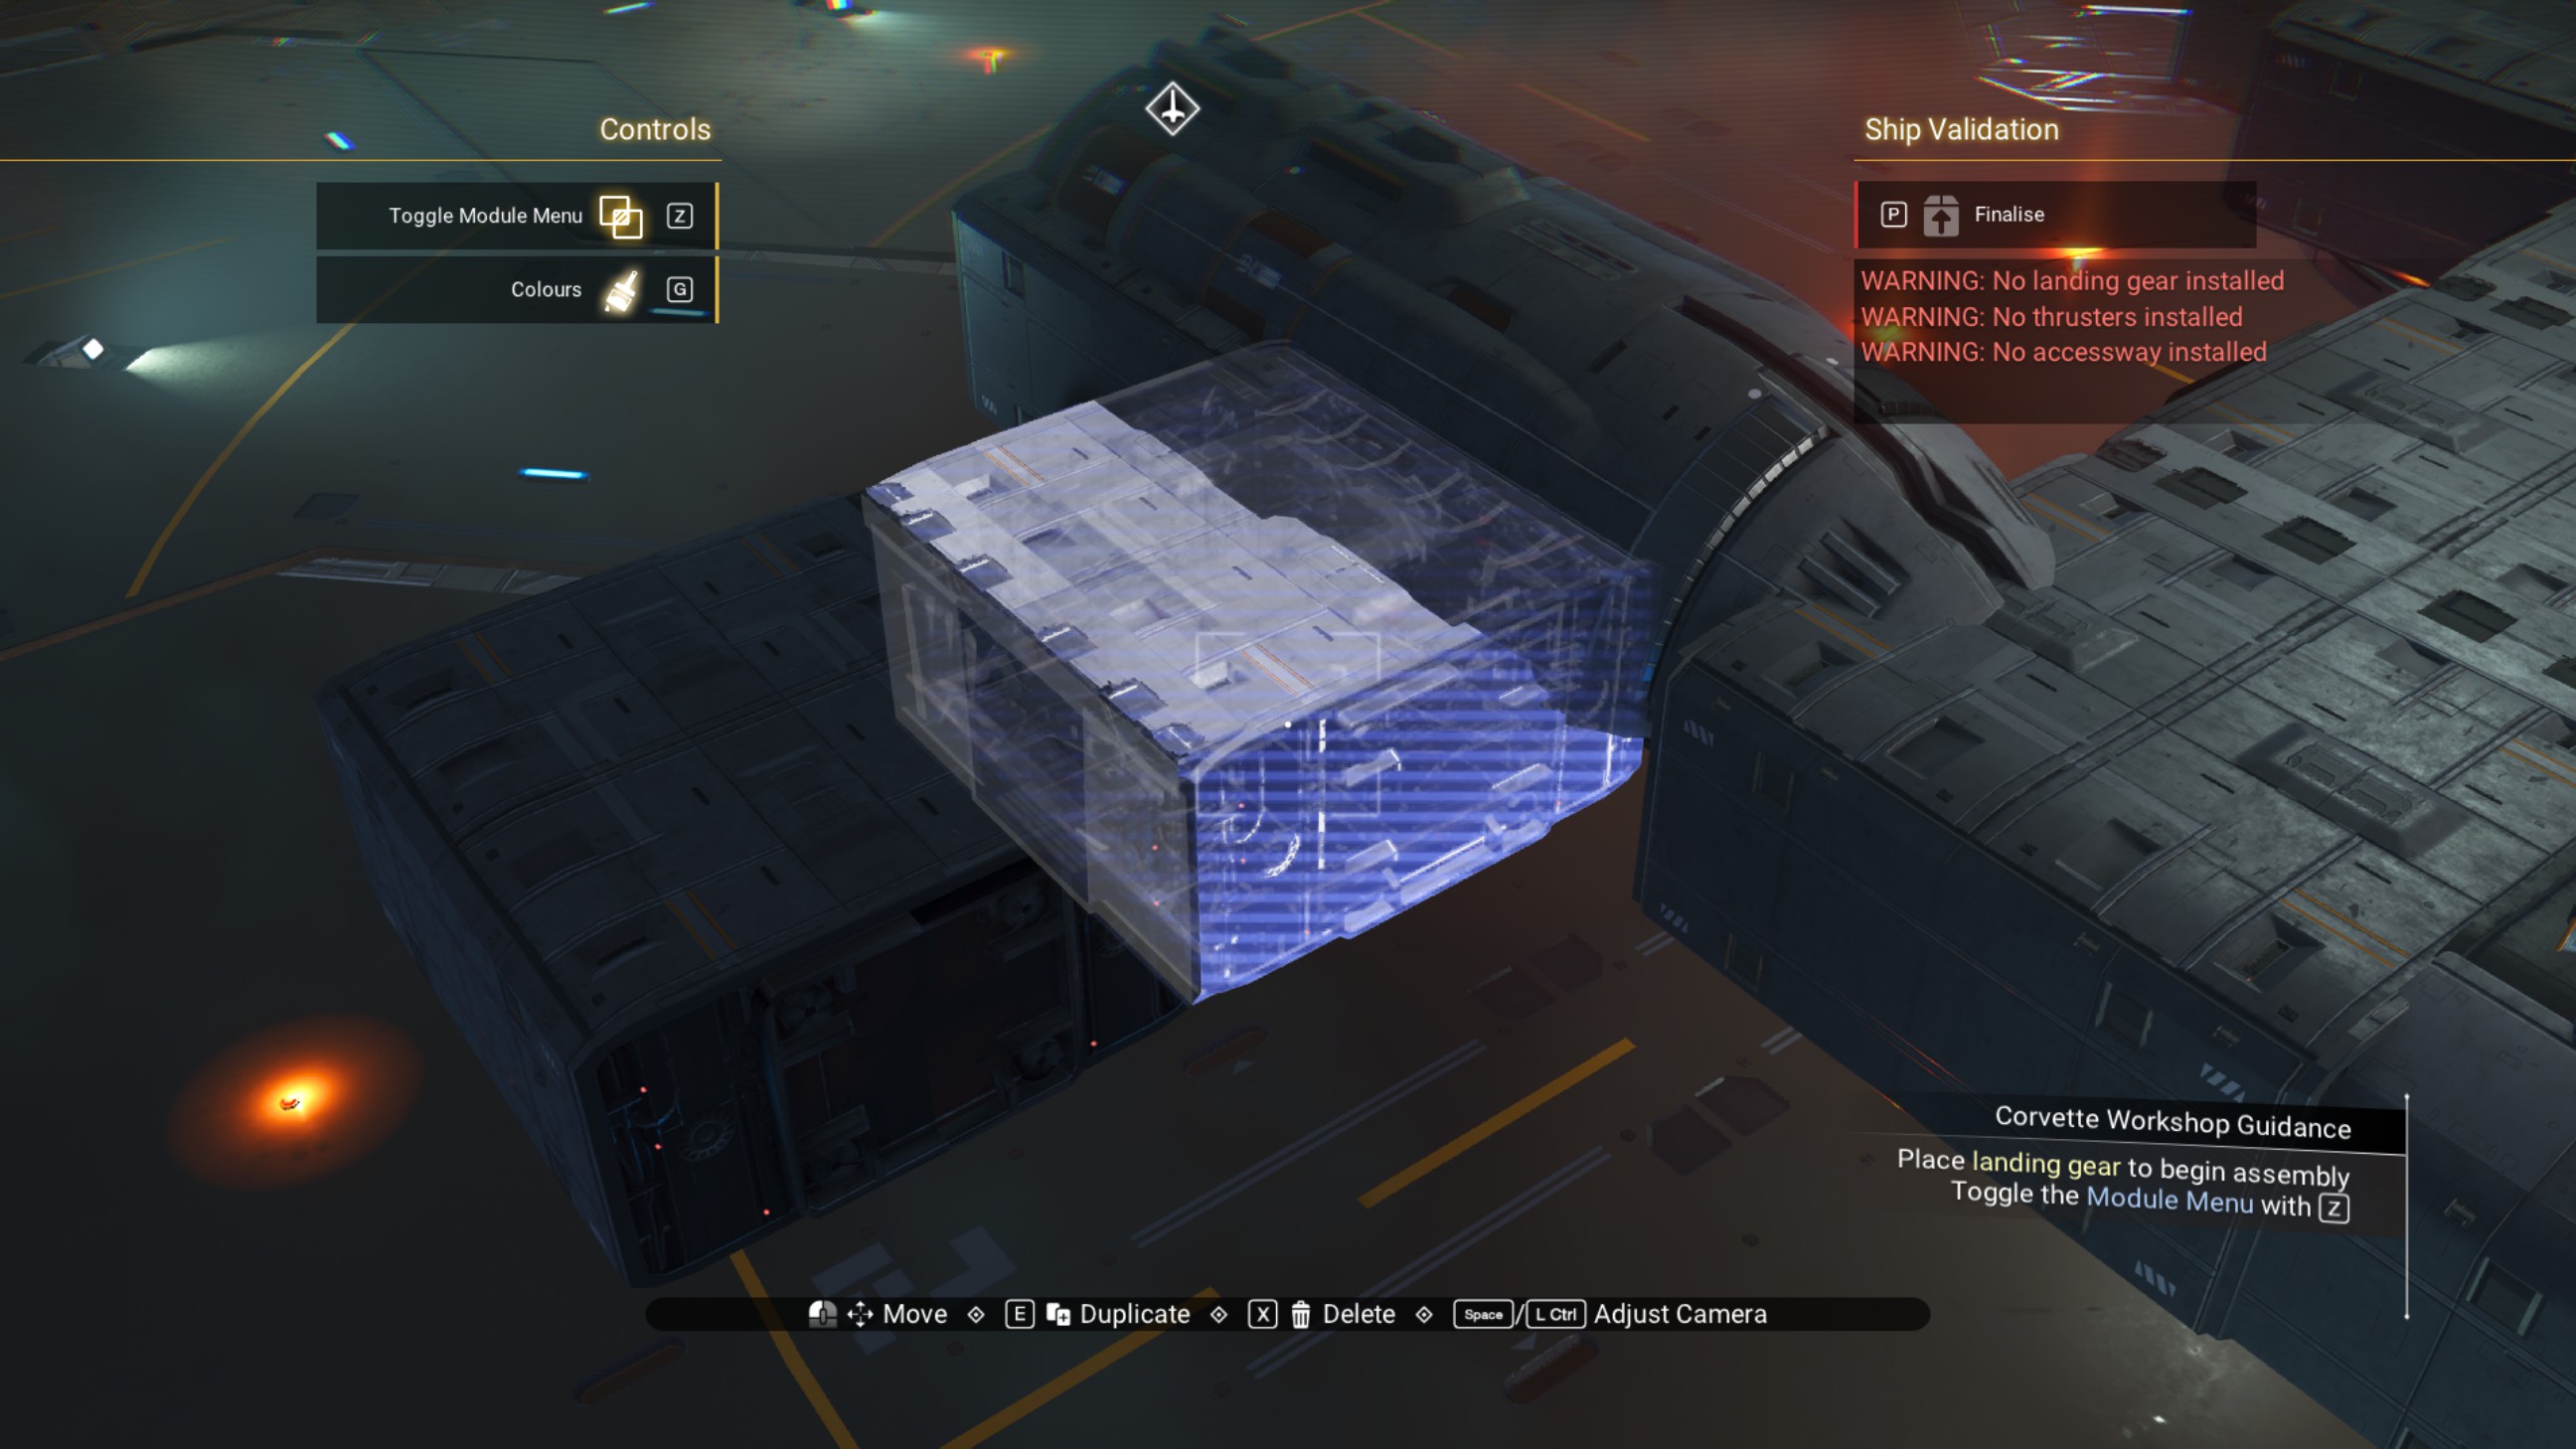
Place the fourth engine cover where that walkway was, then place another walkway to the front of the remaining offset walkway.
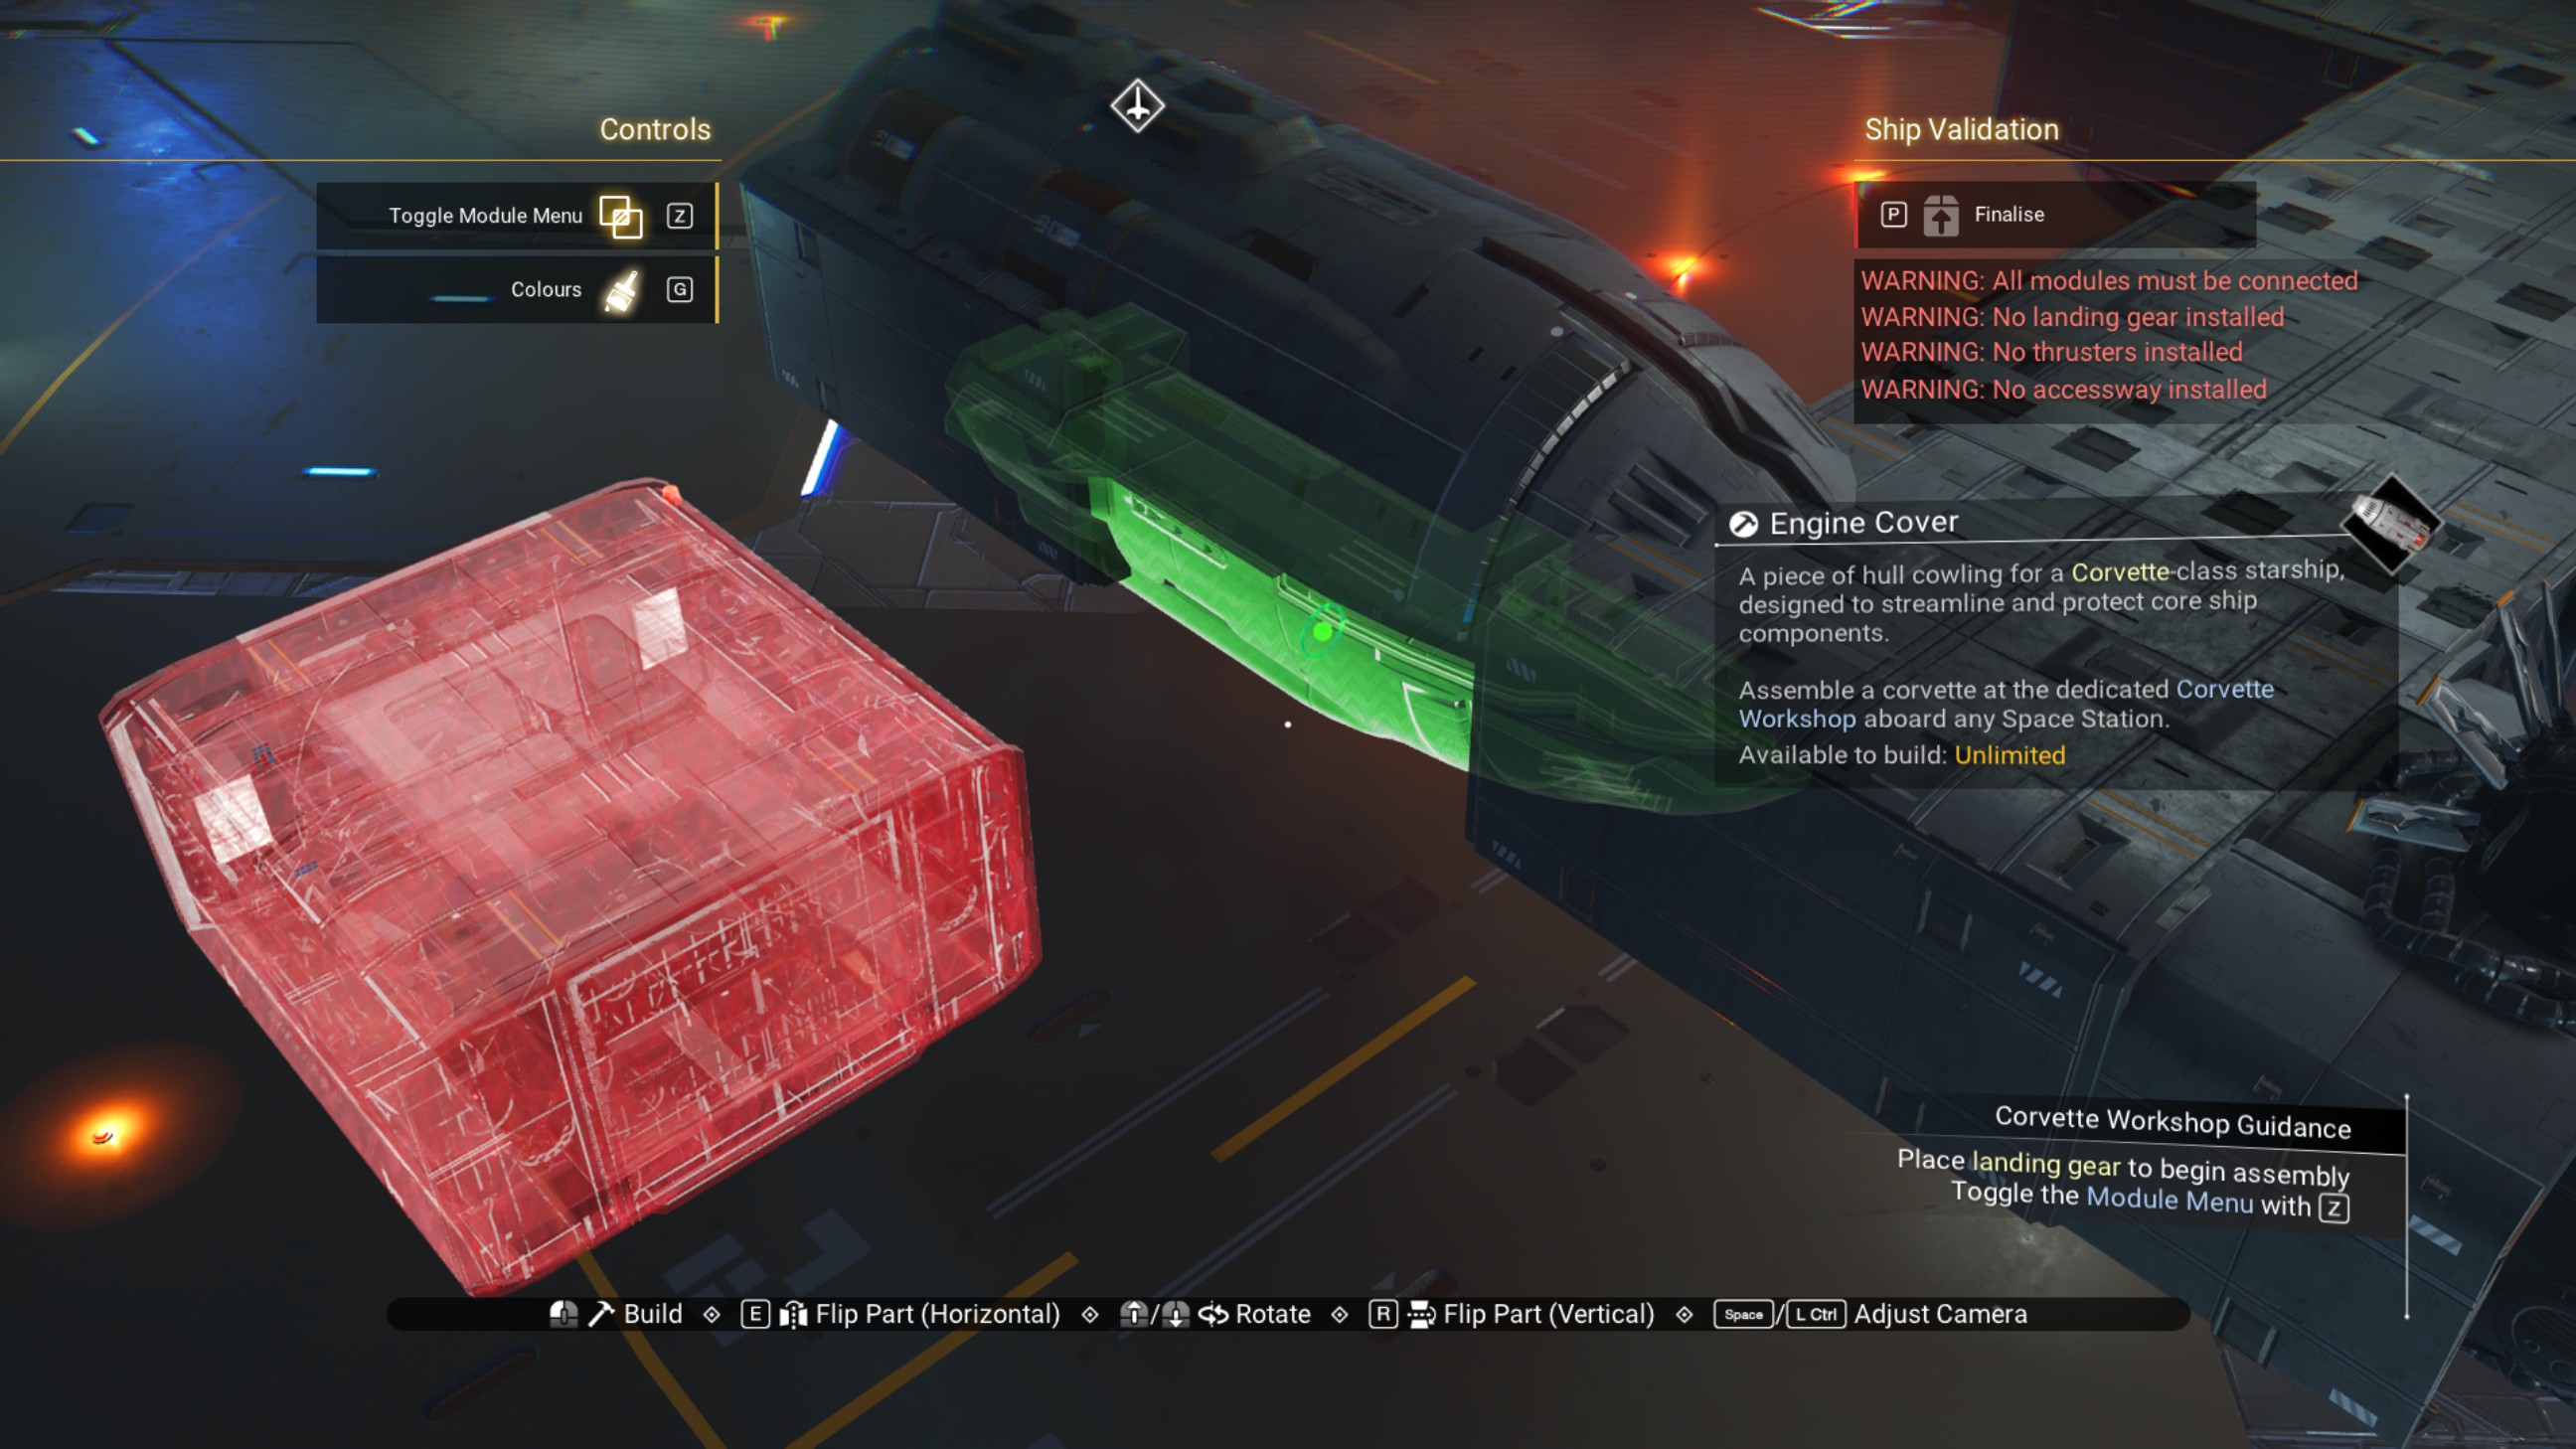
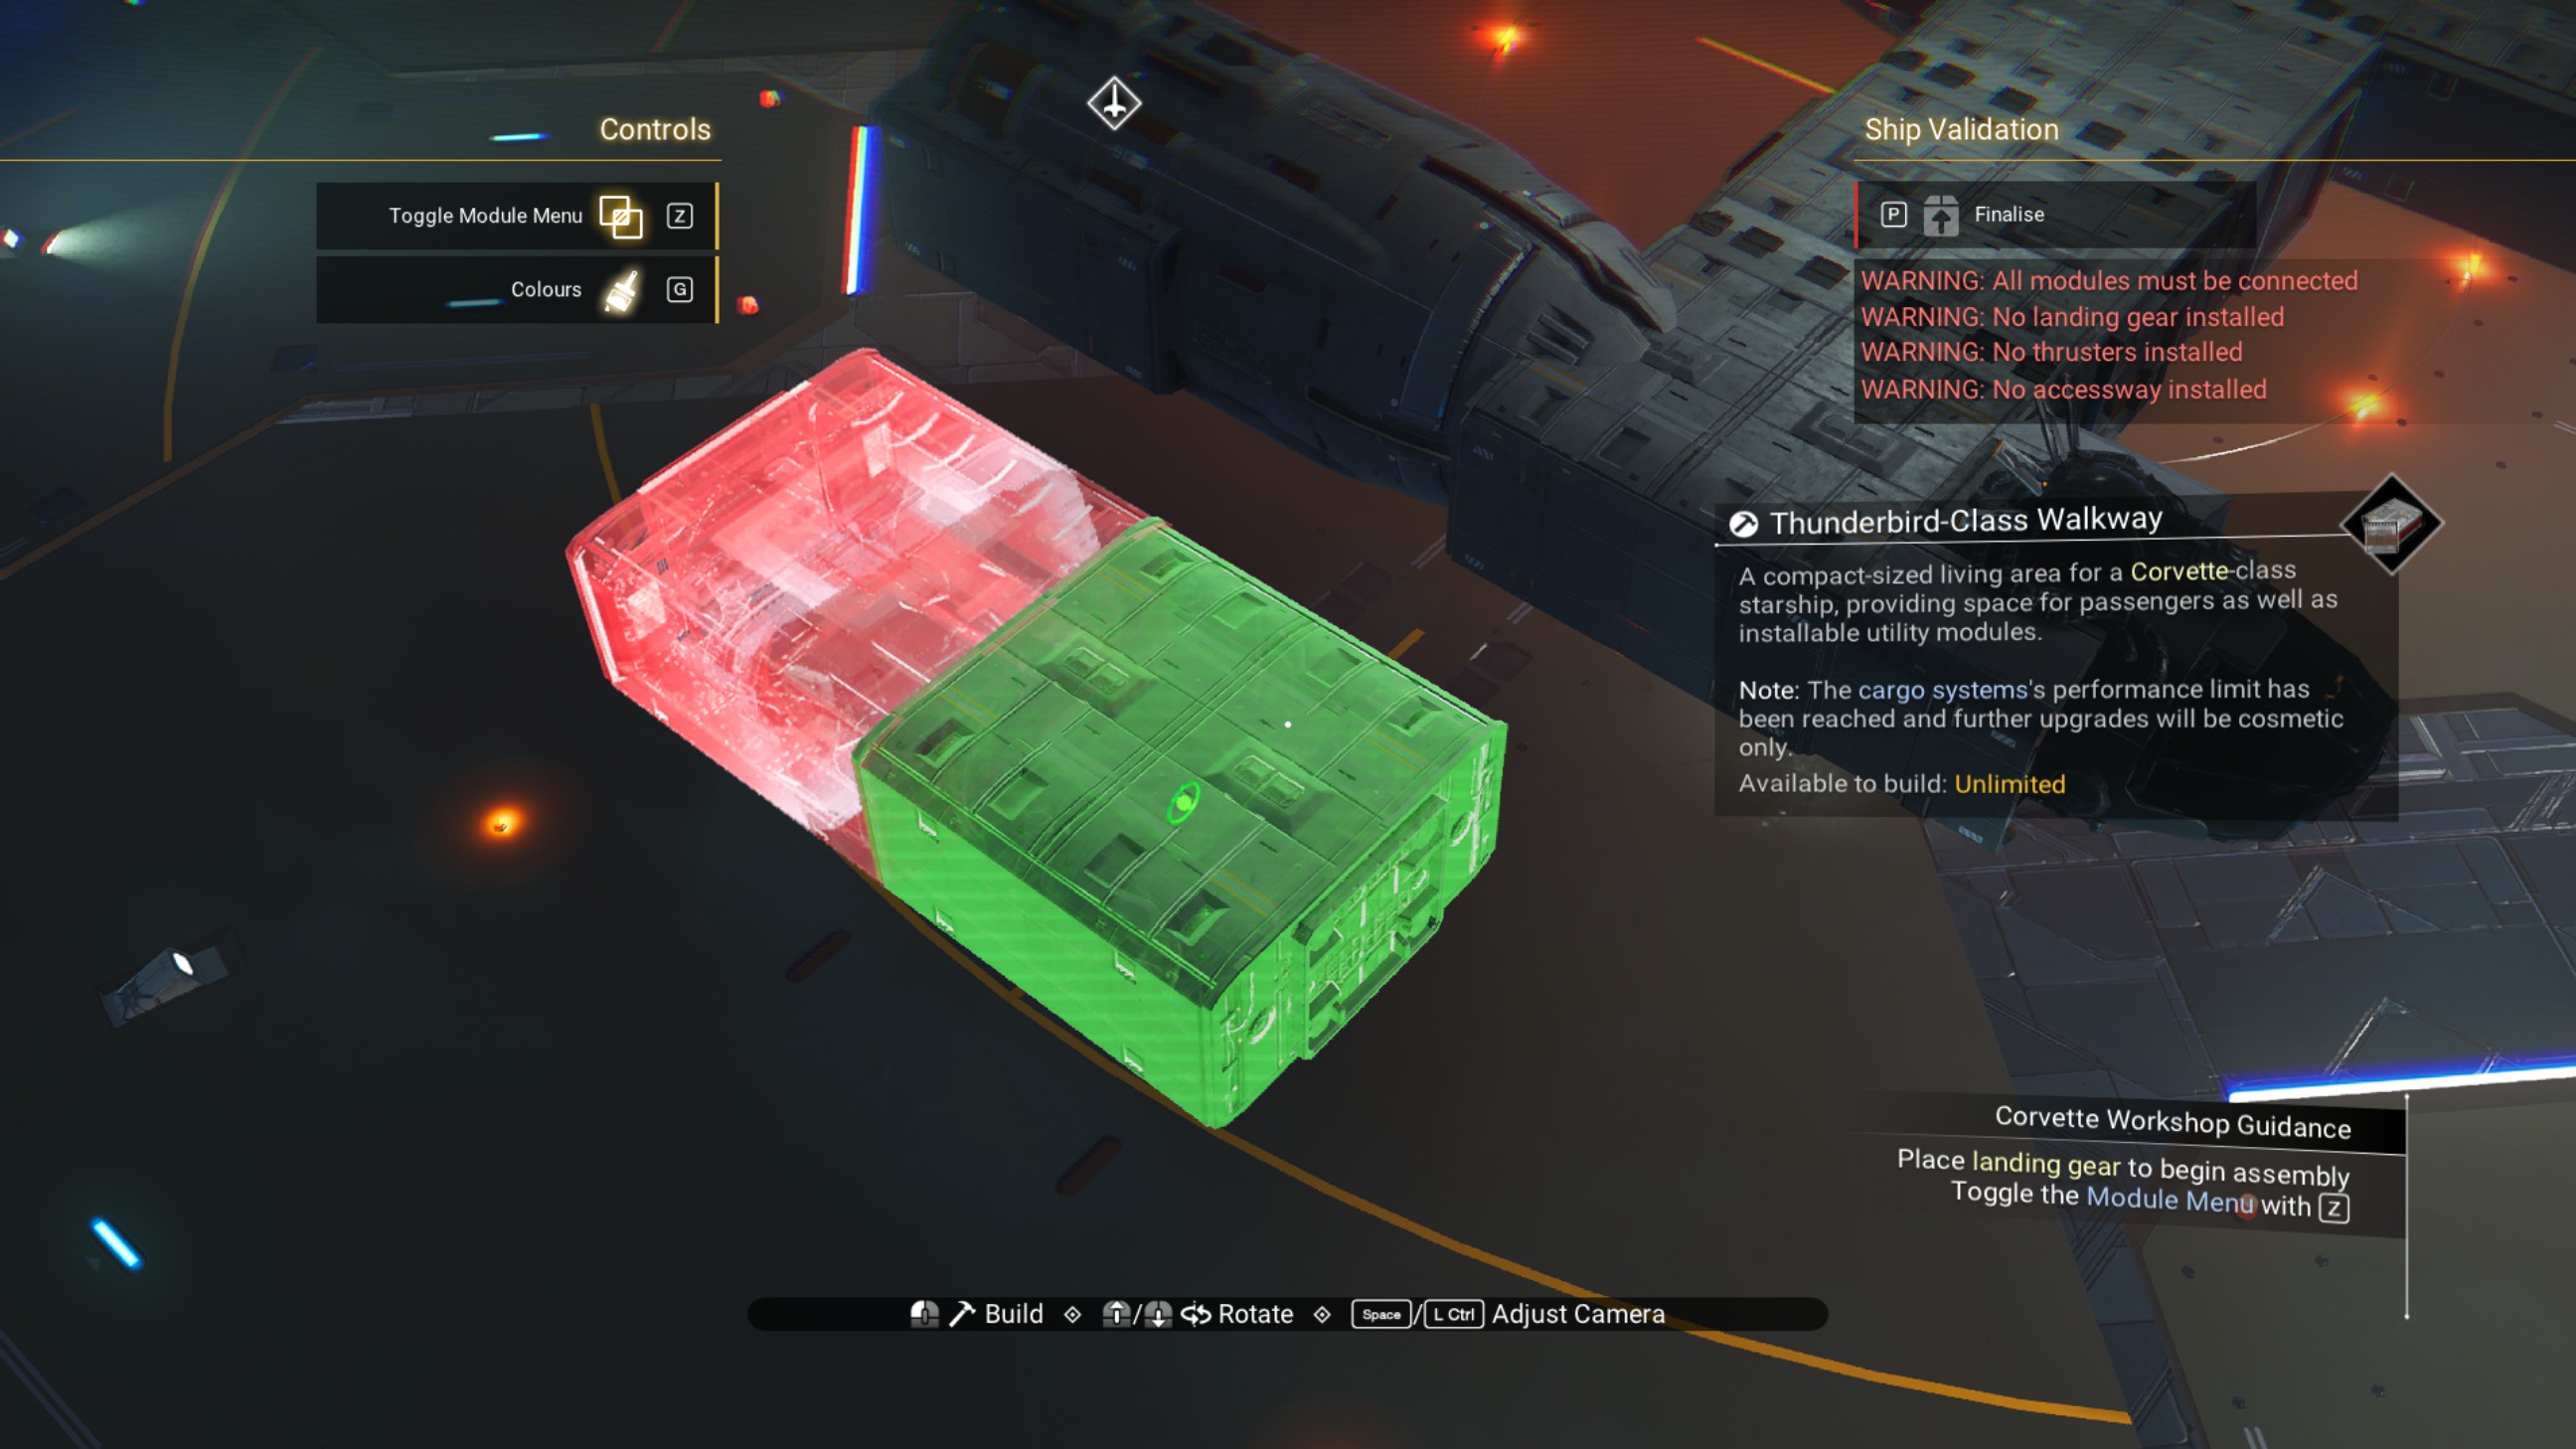
Delete the rear offset walkway, then place another walkway to the port of the one that's left.
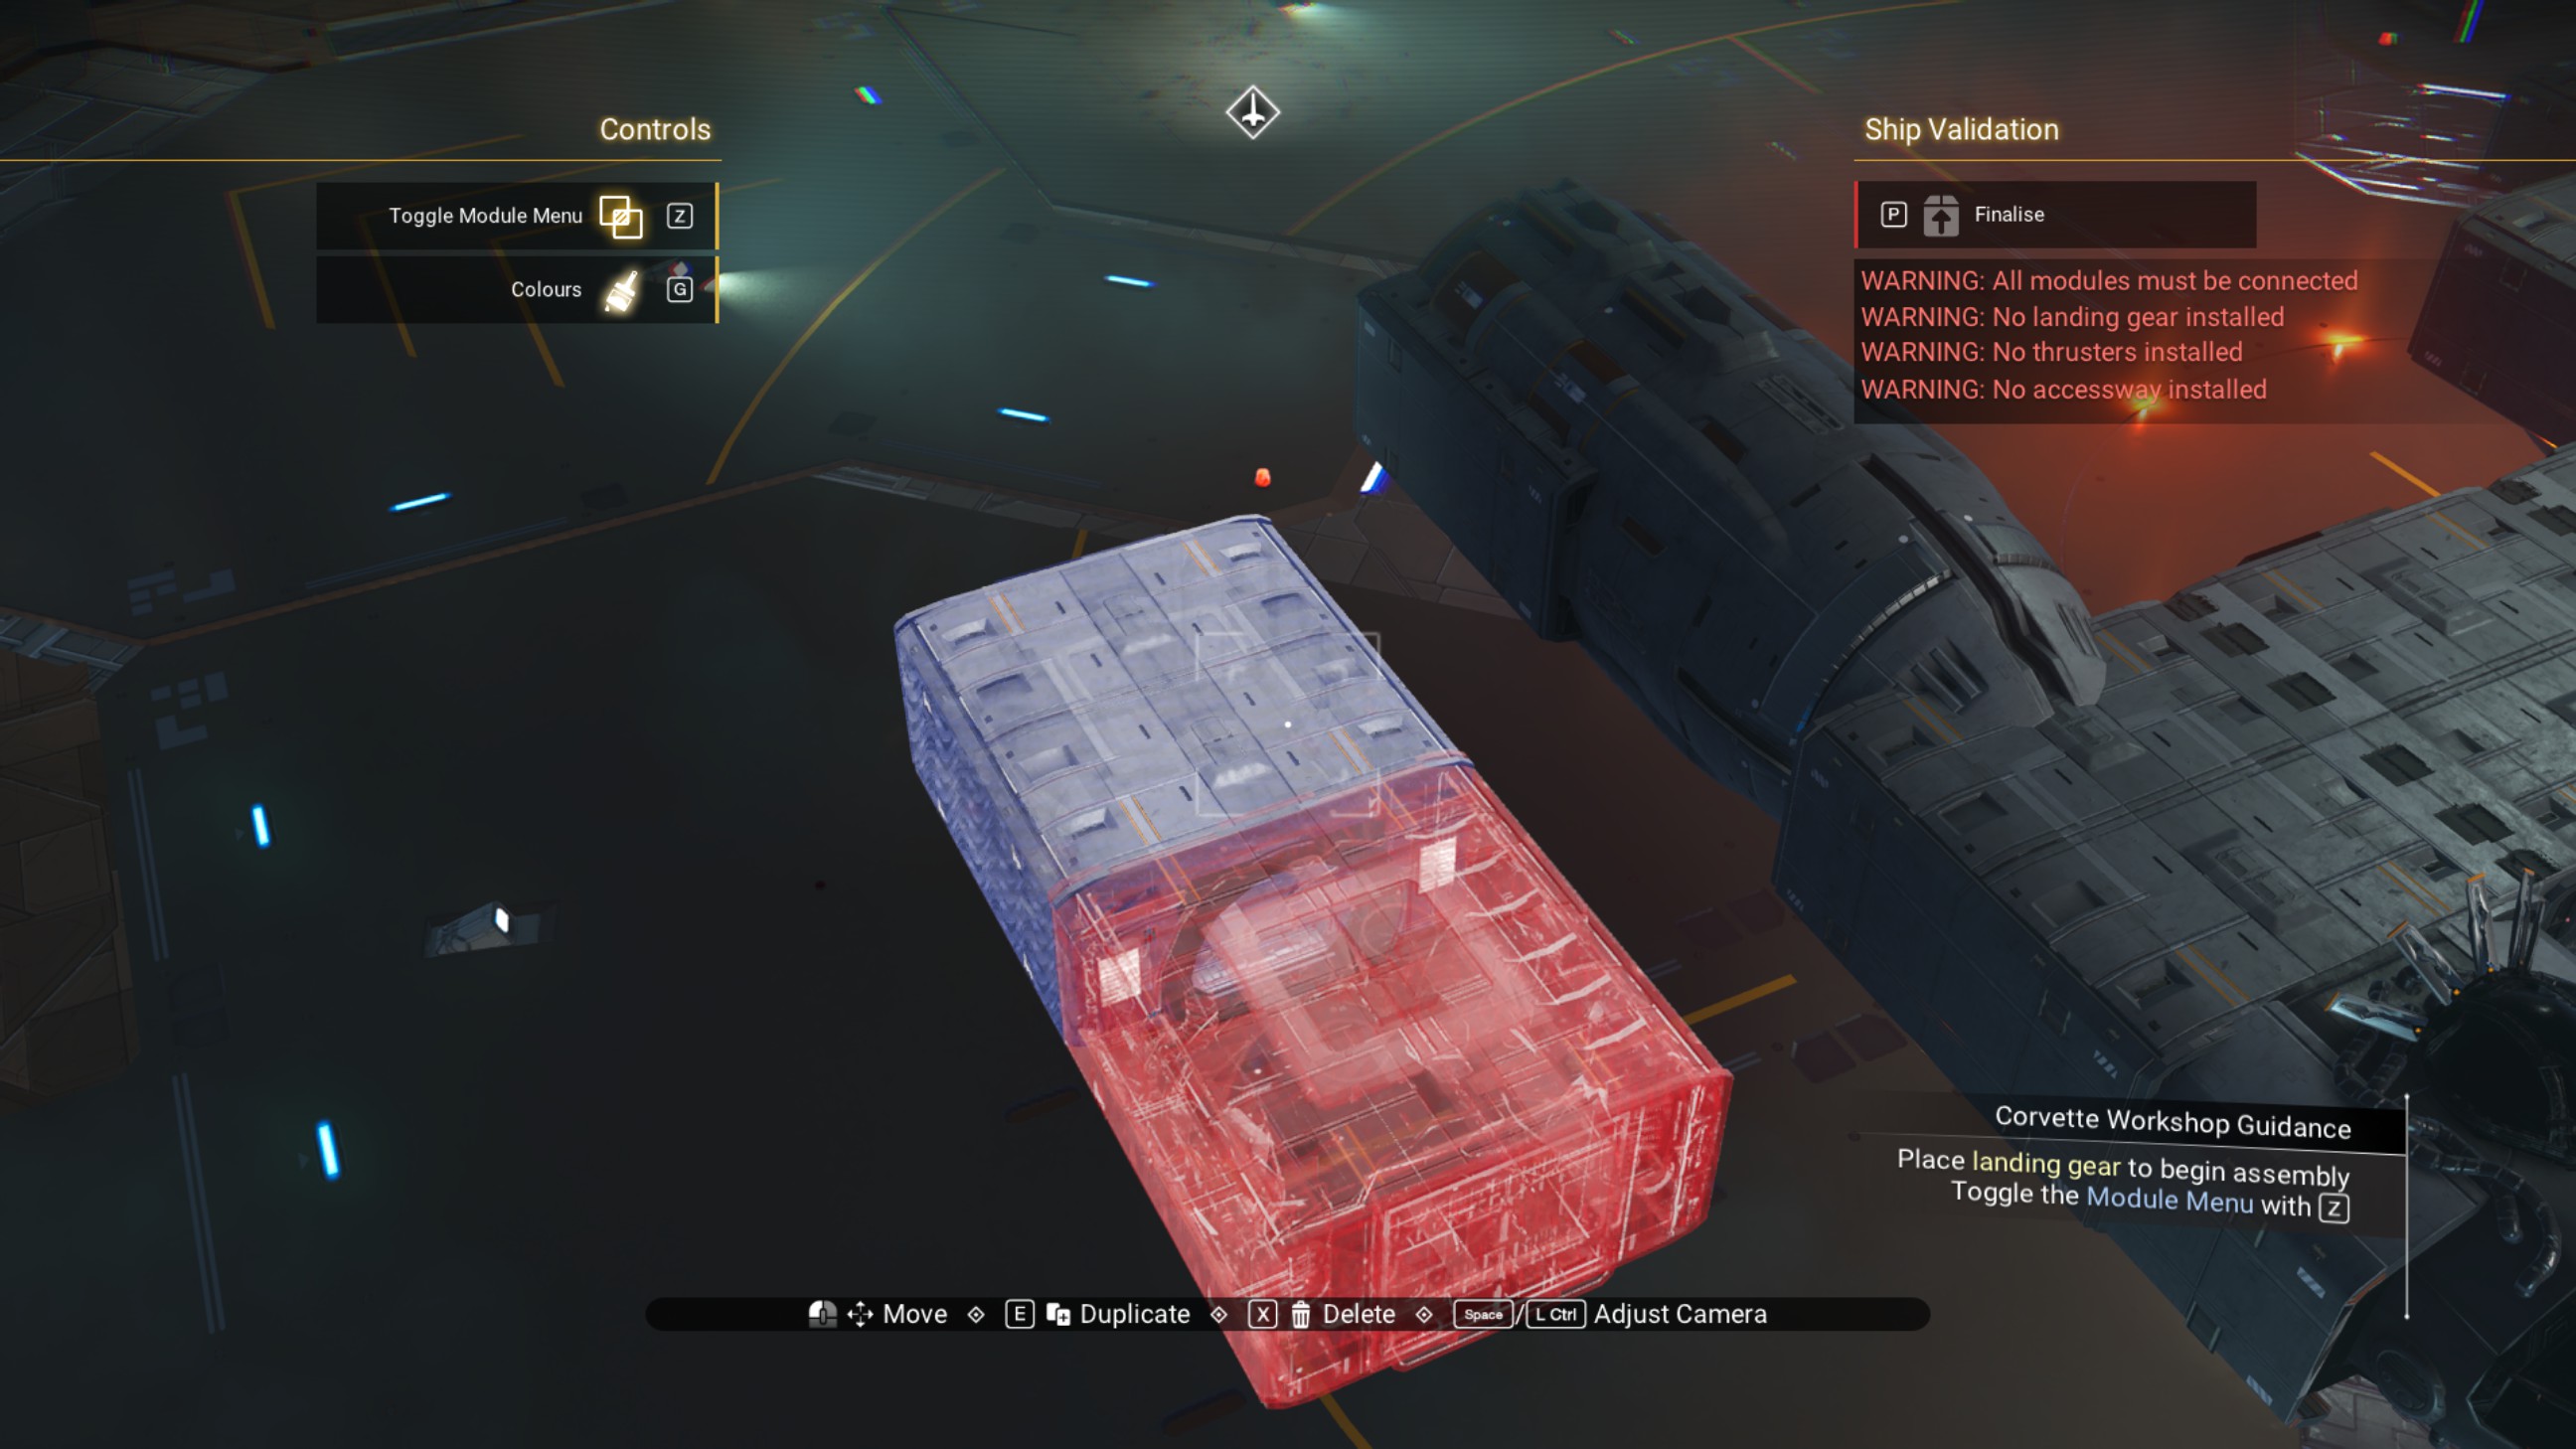
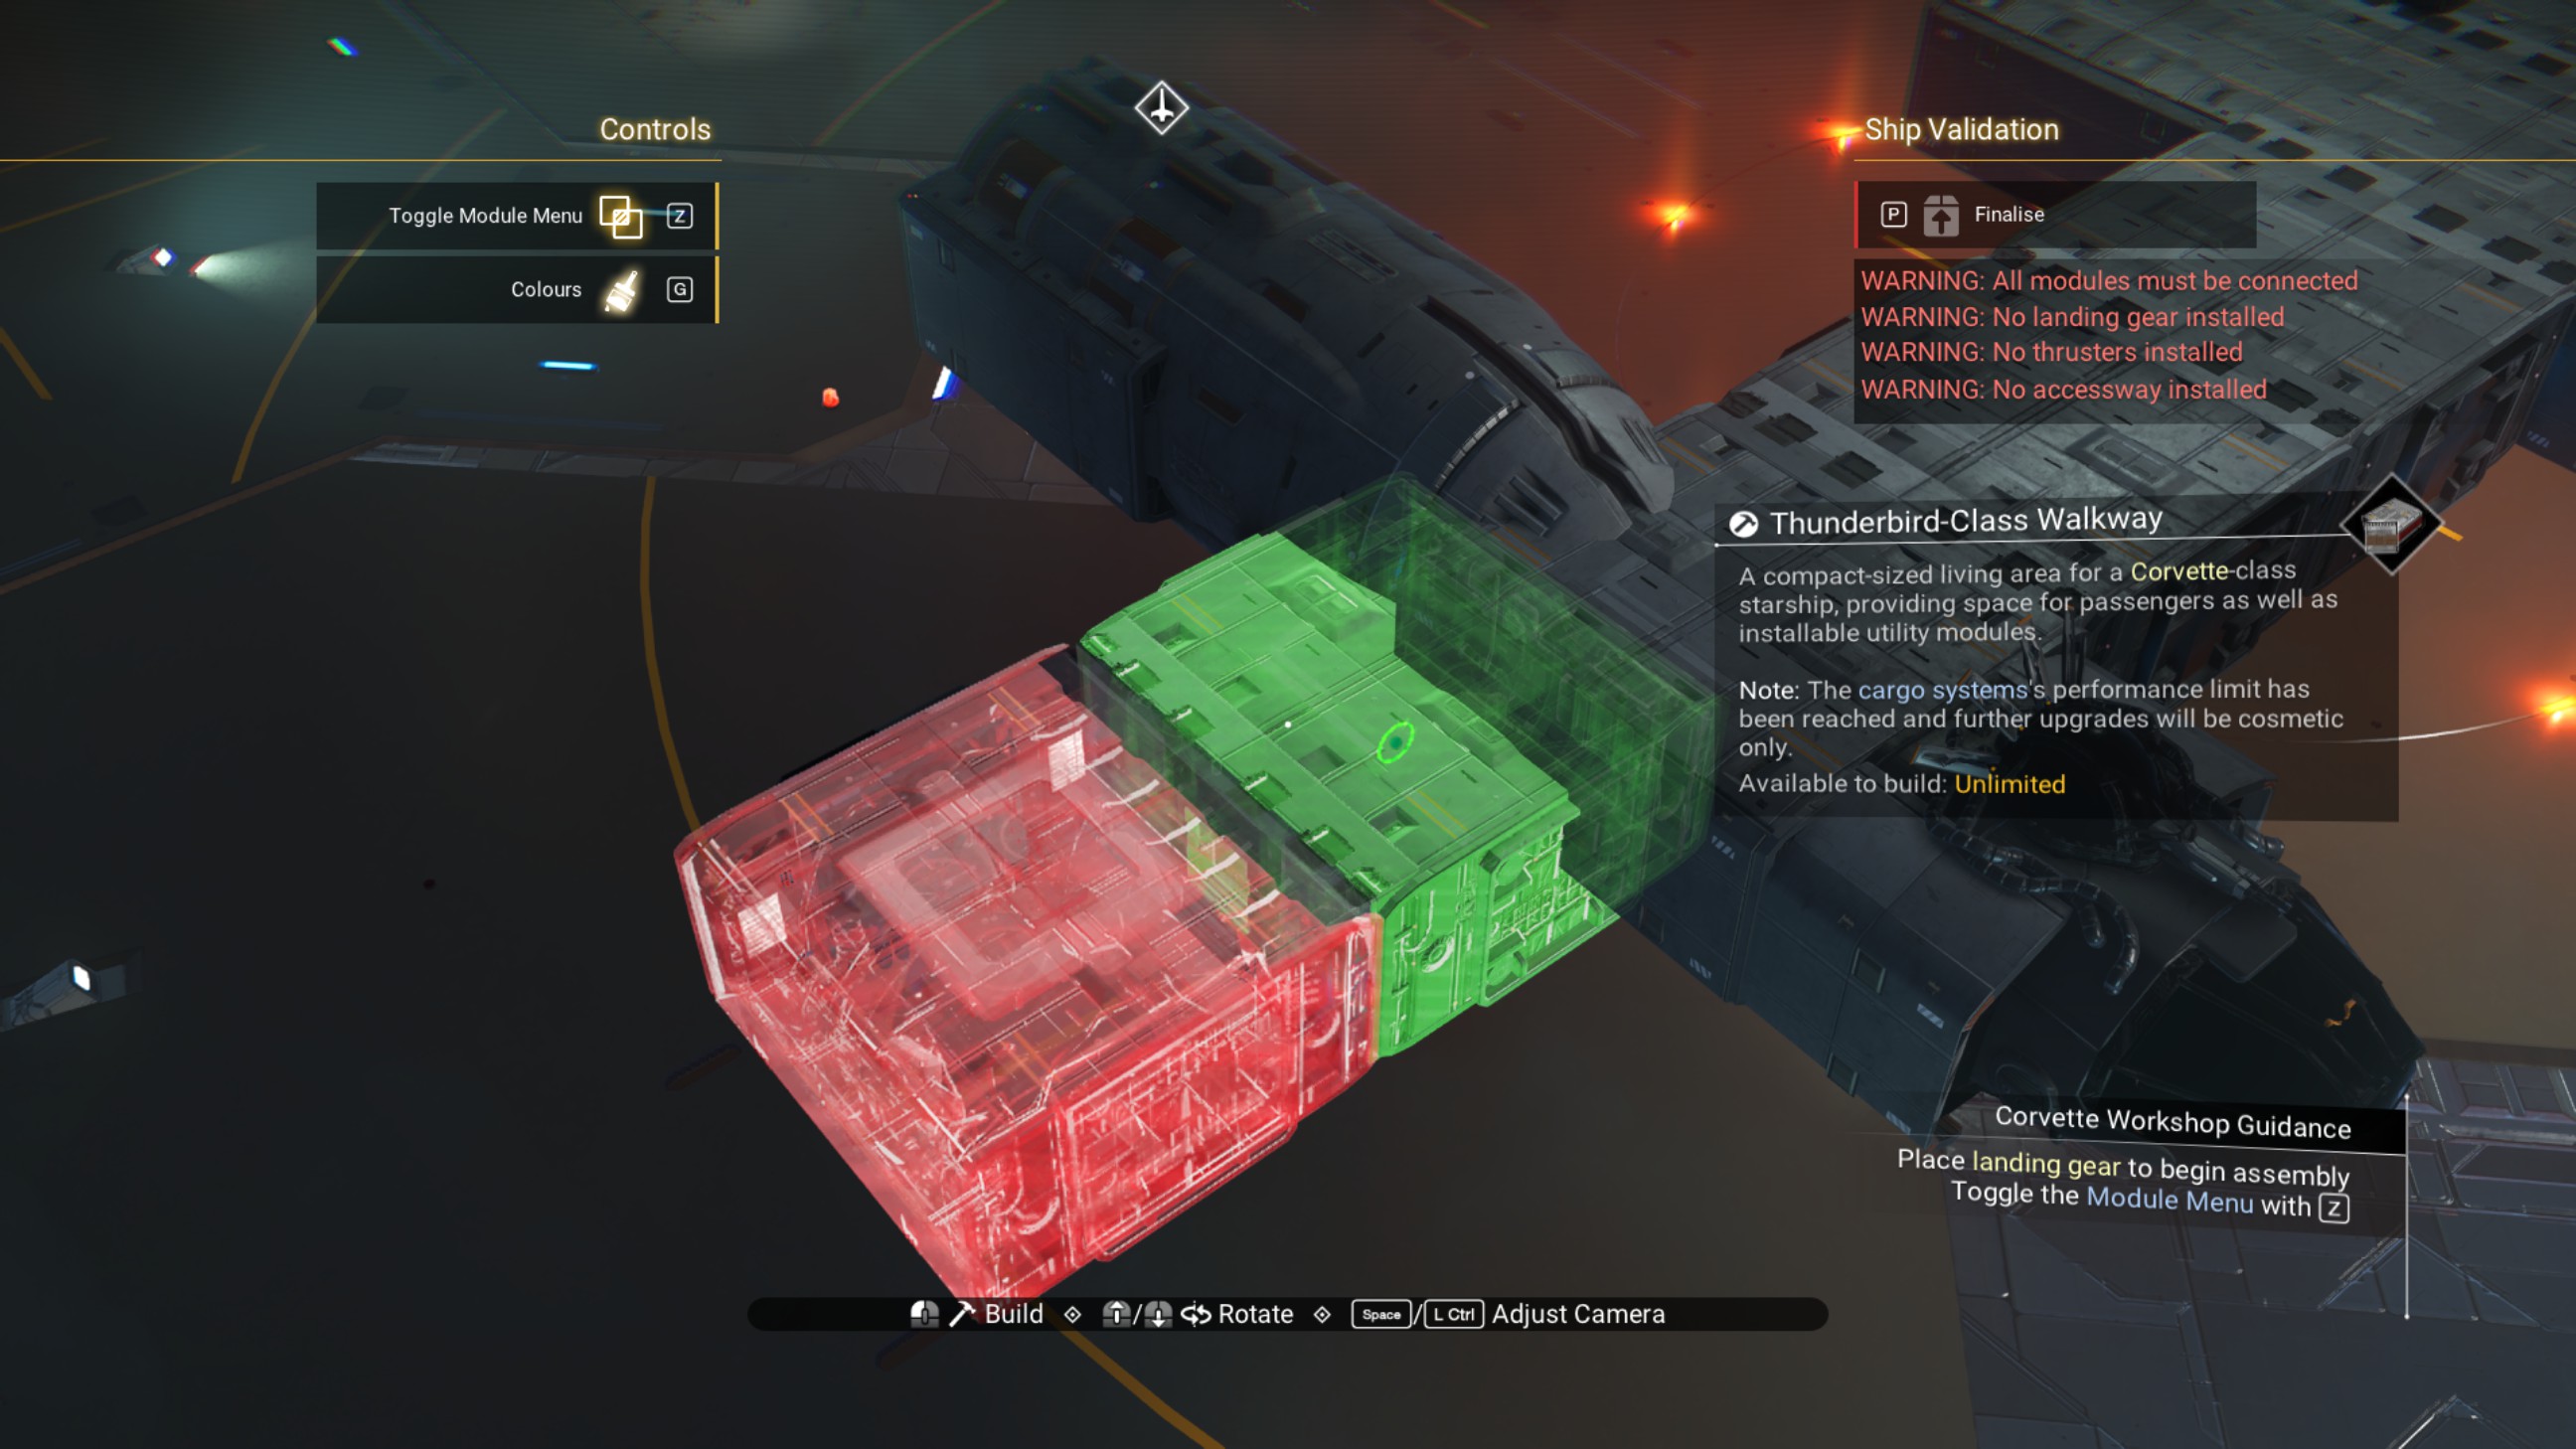
Place a walkway on top of that, then place a fuel pod cover alongside it.
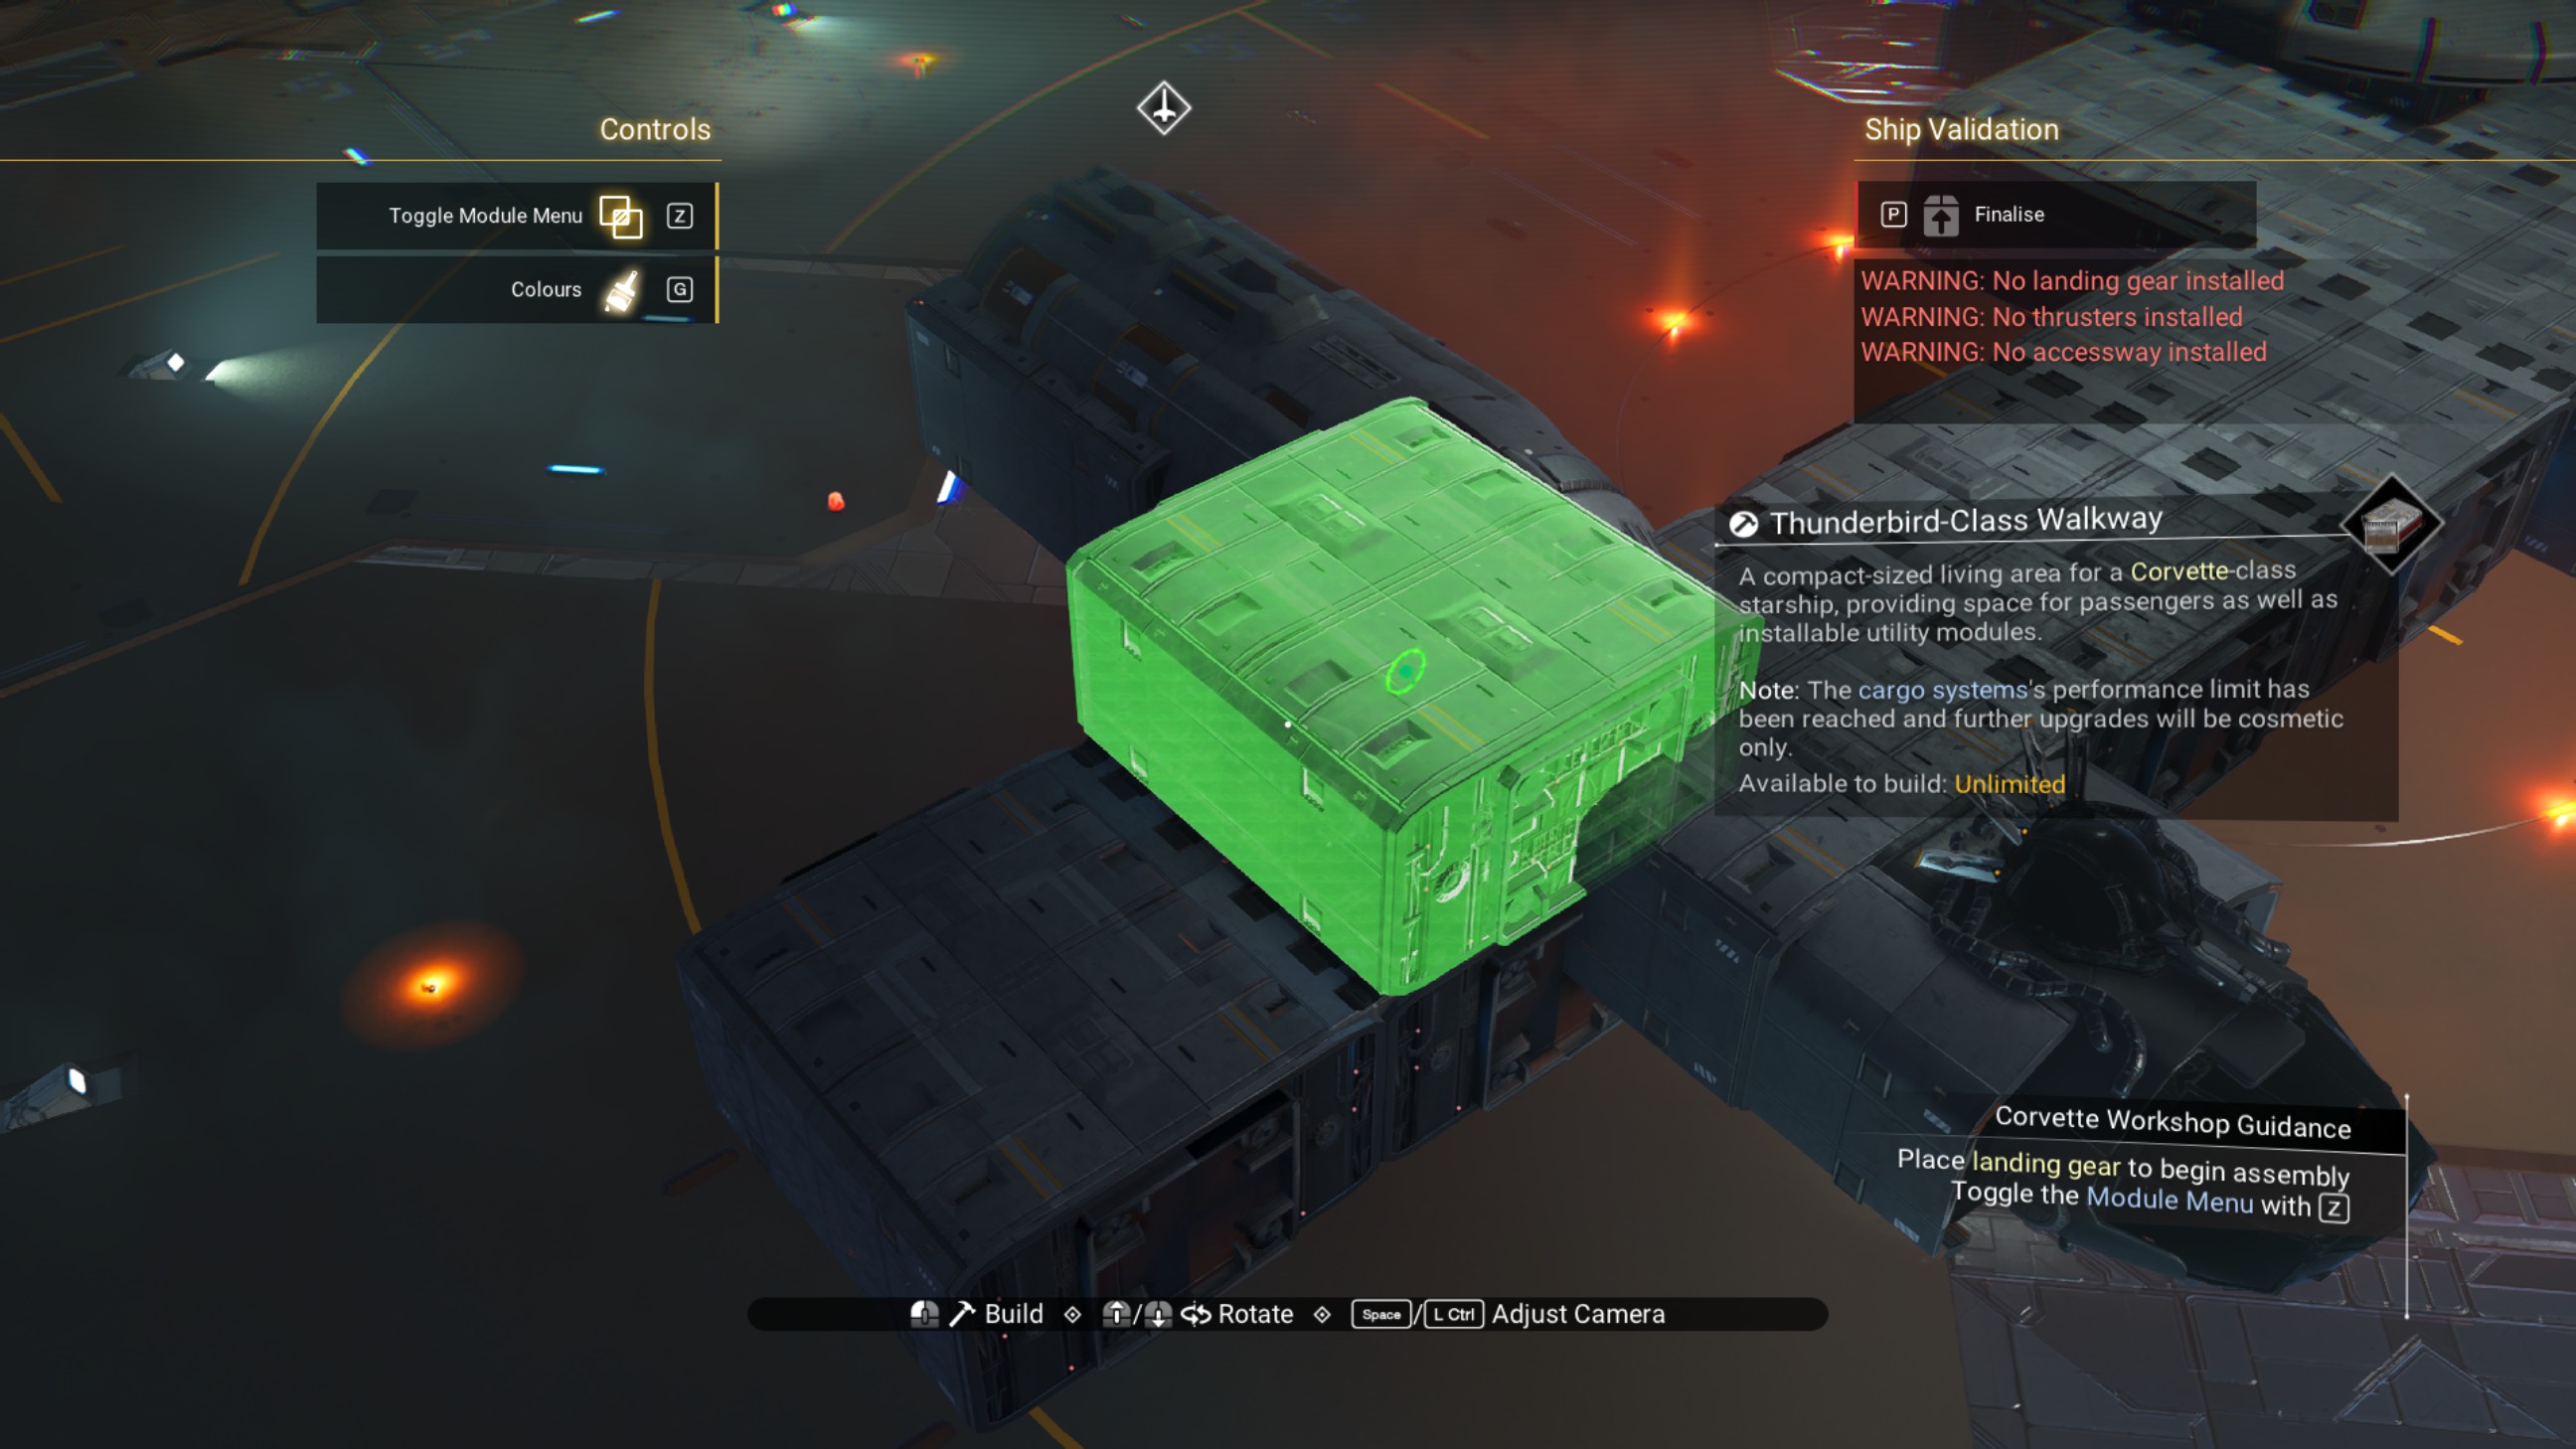
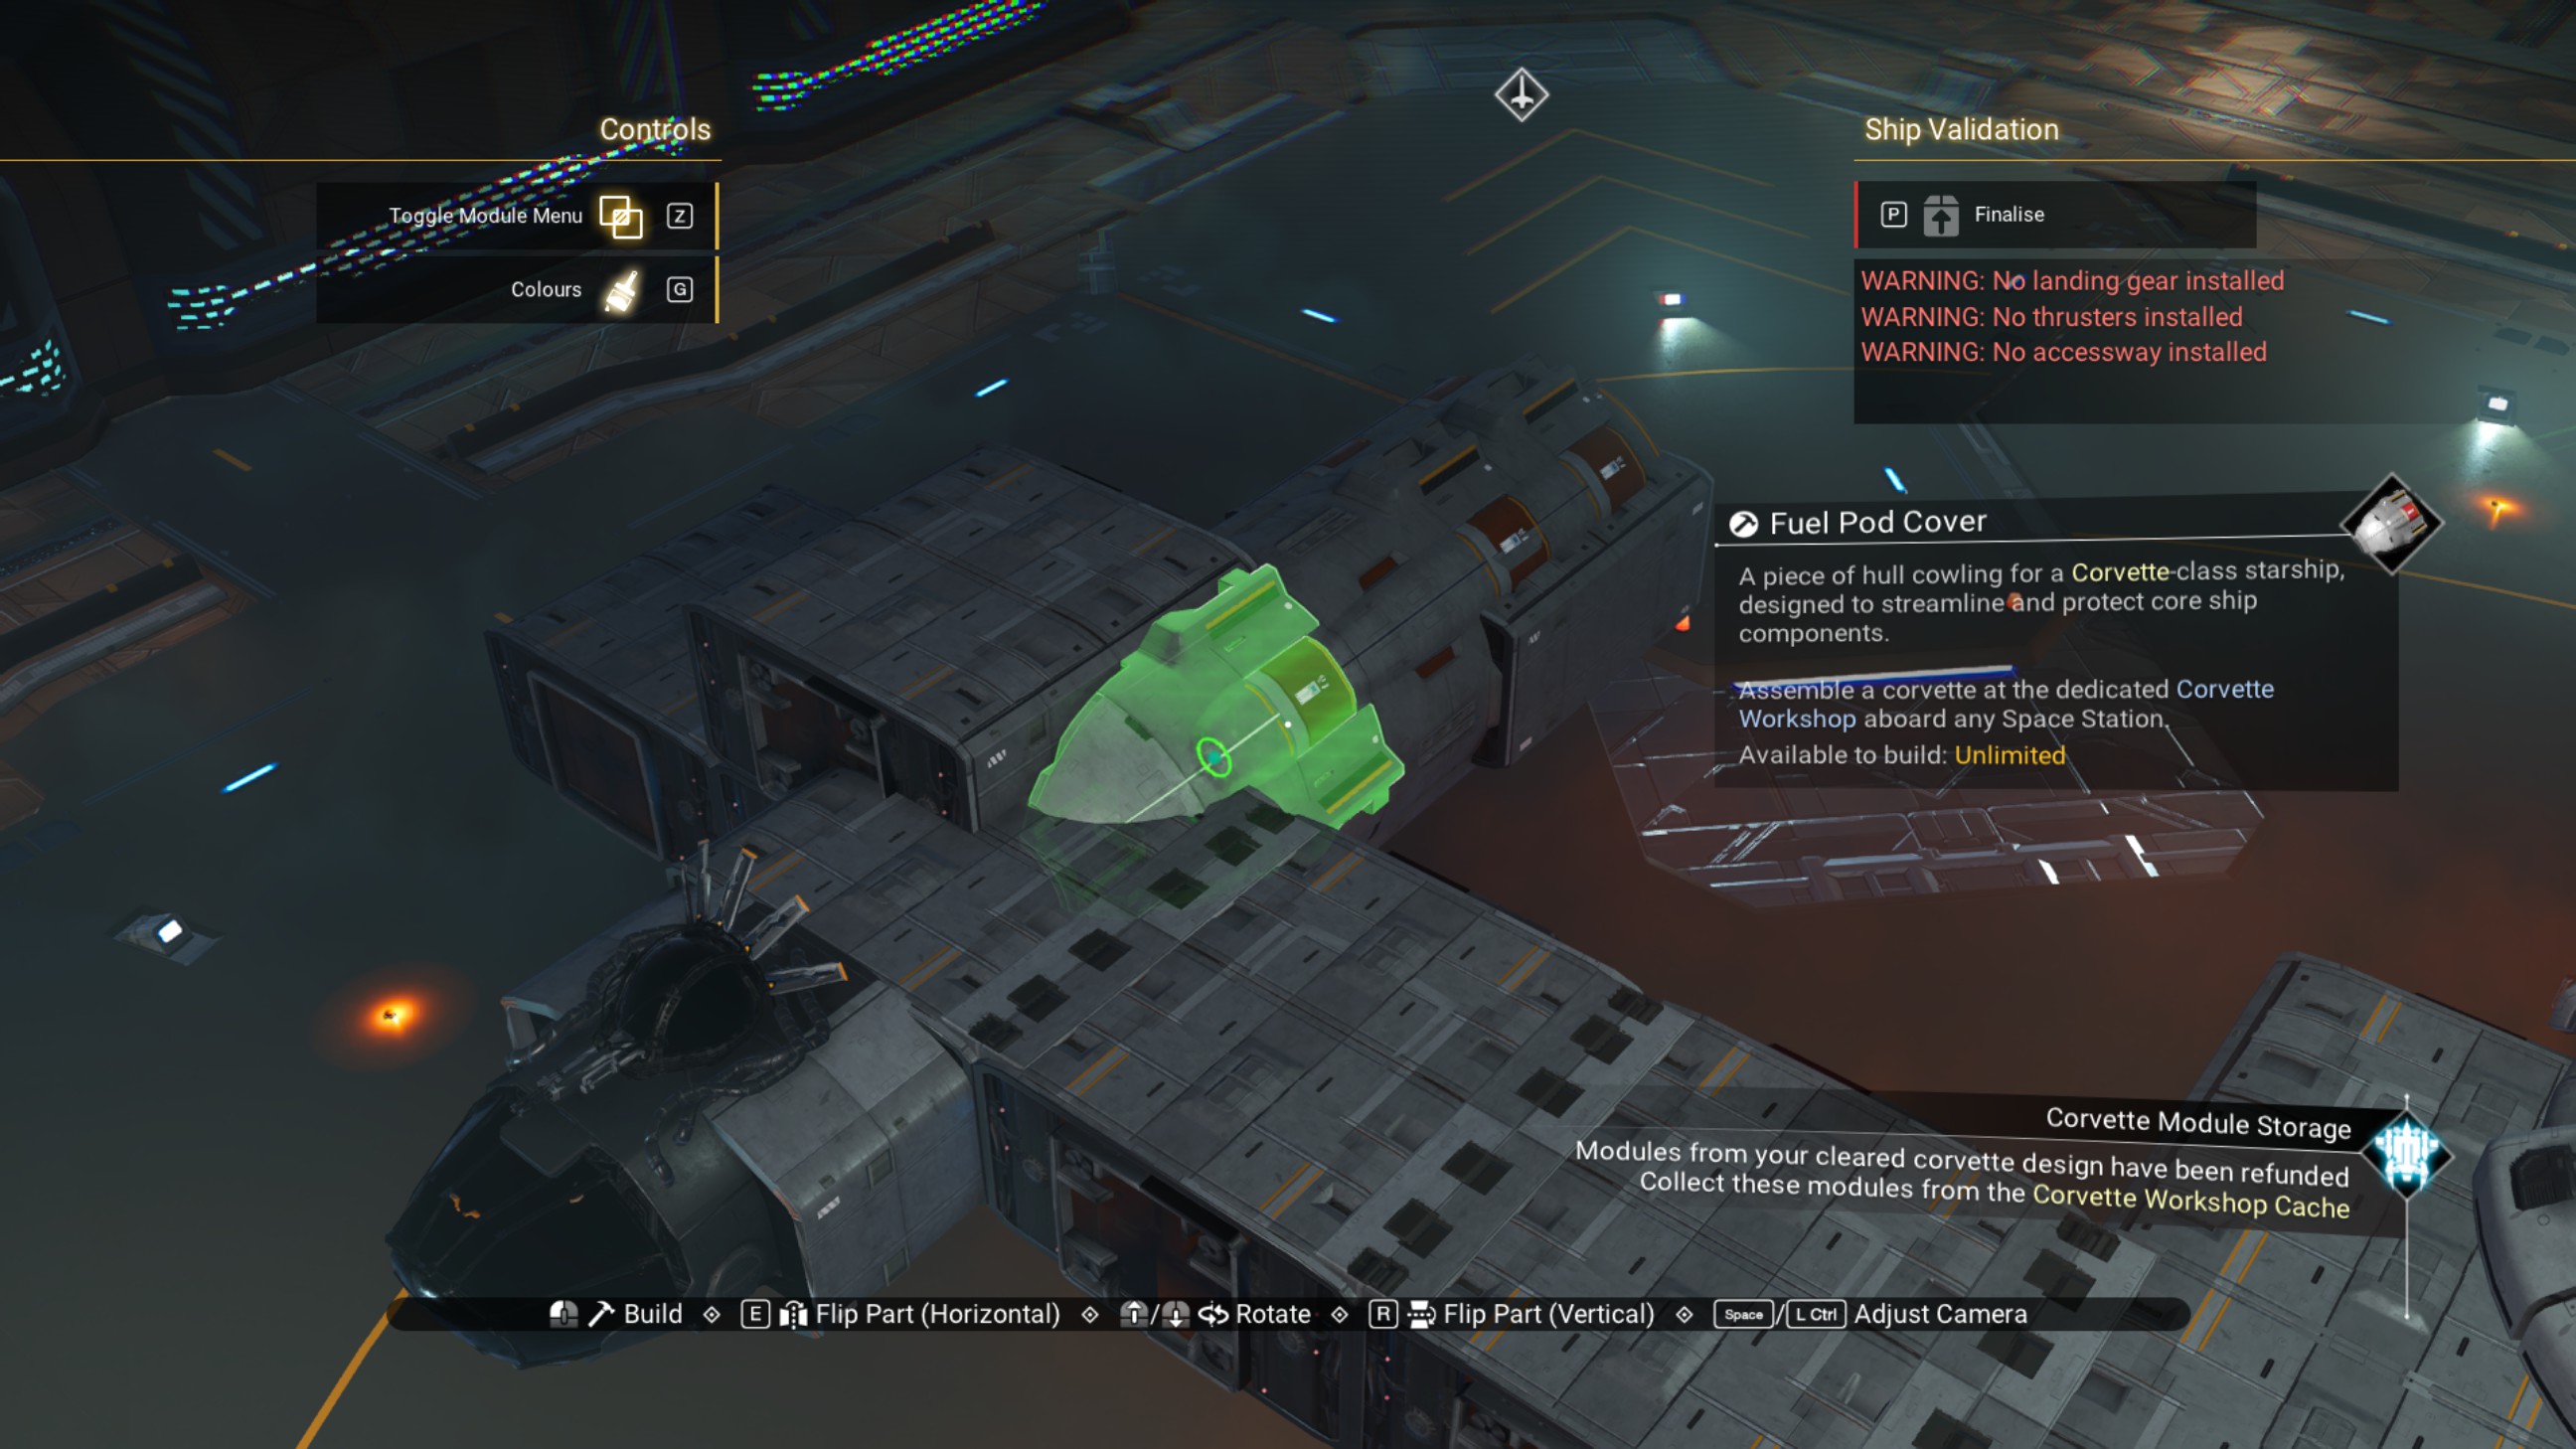
Place another fuel pod cover below, then delete the top offset walkway.
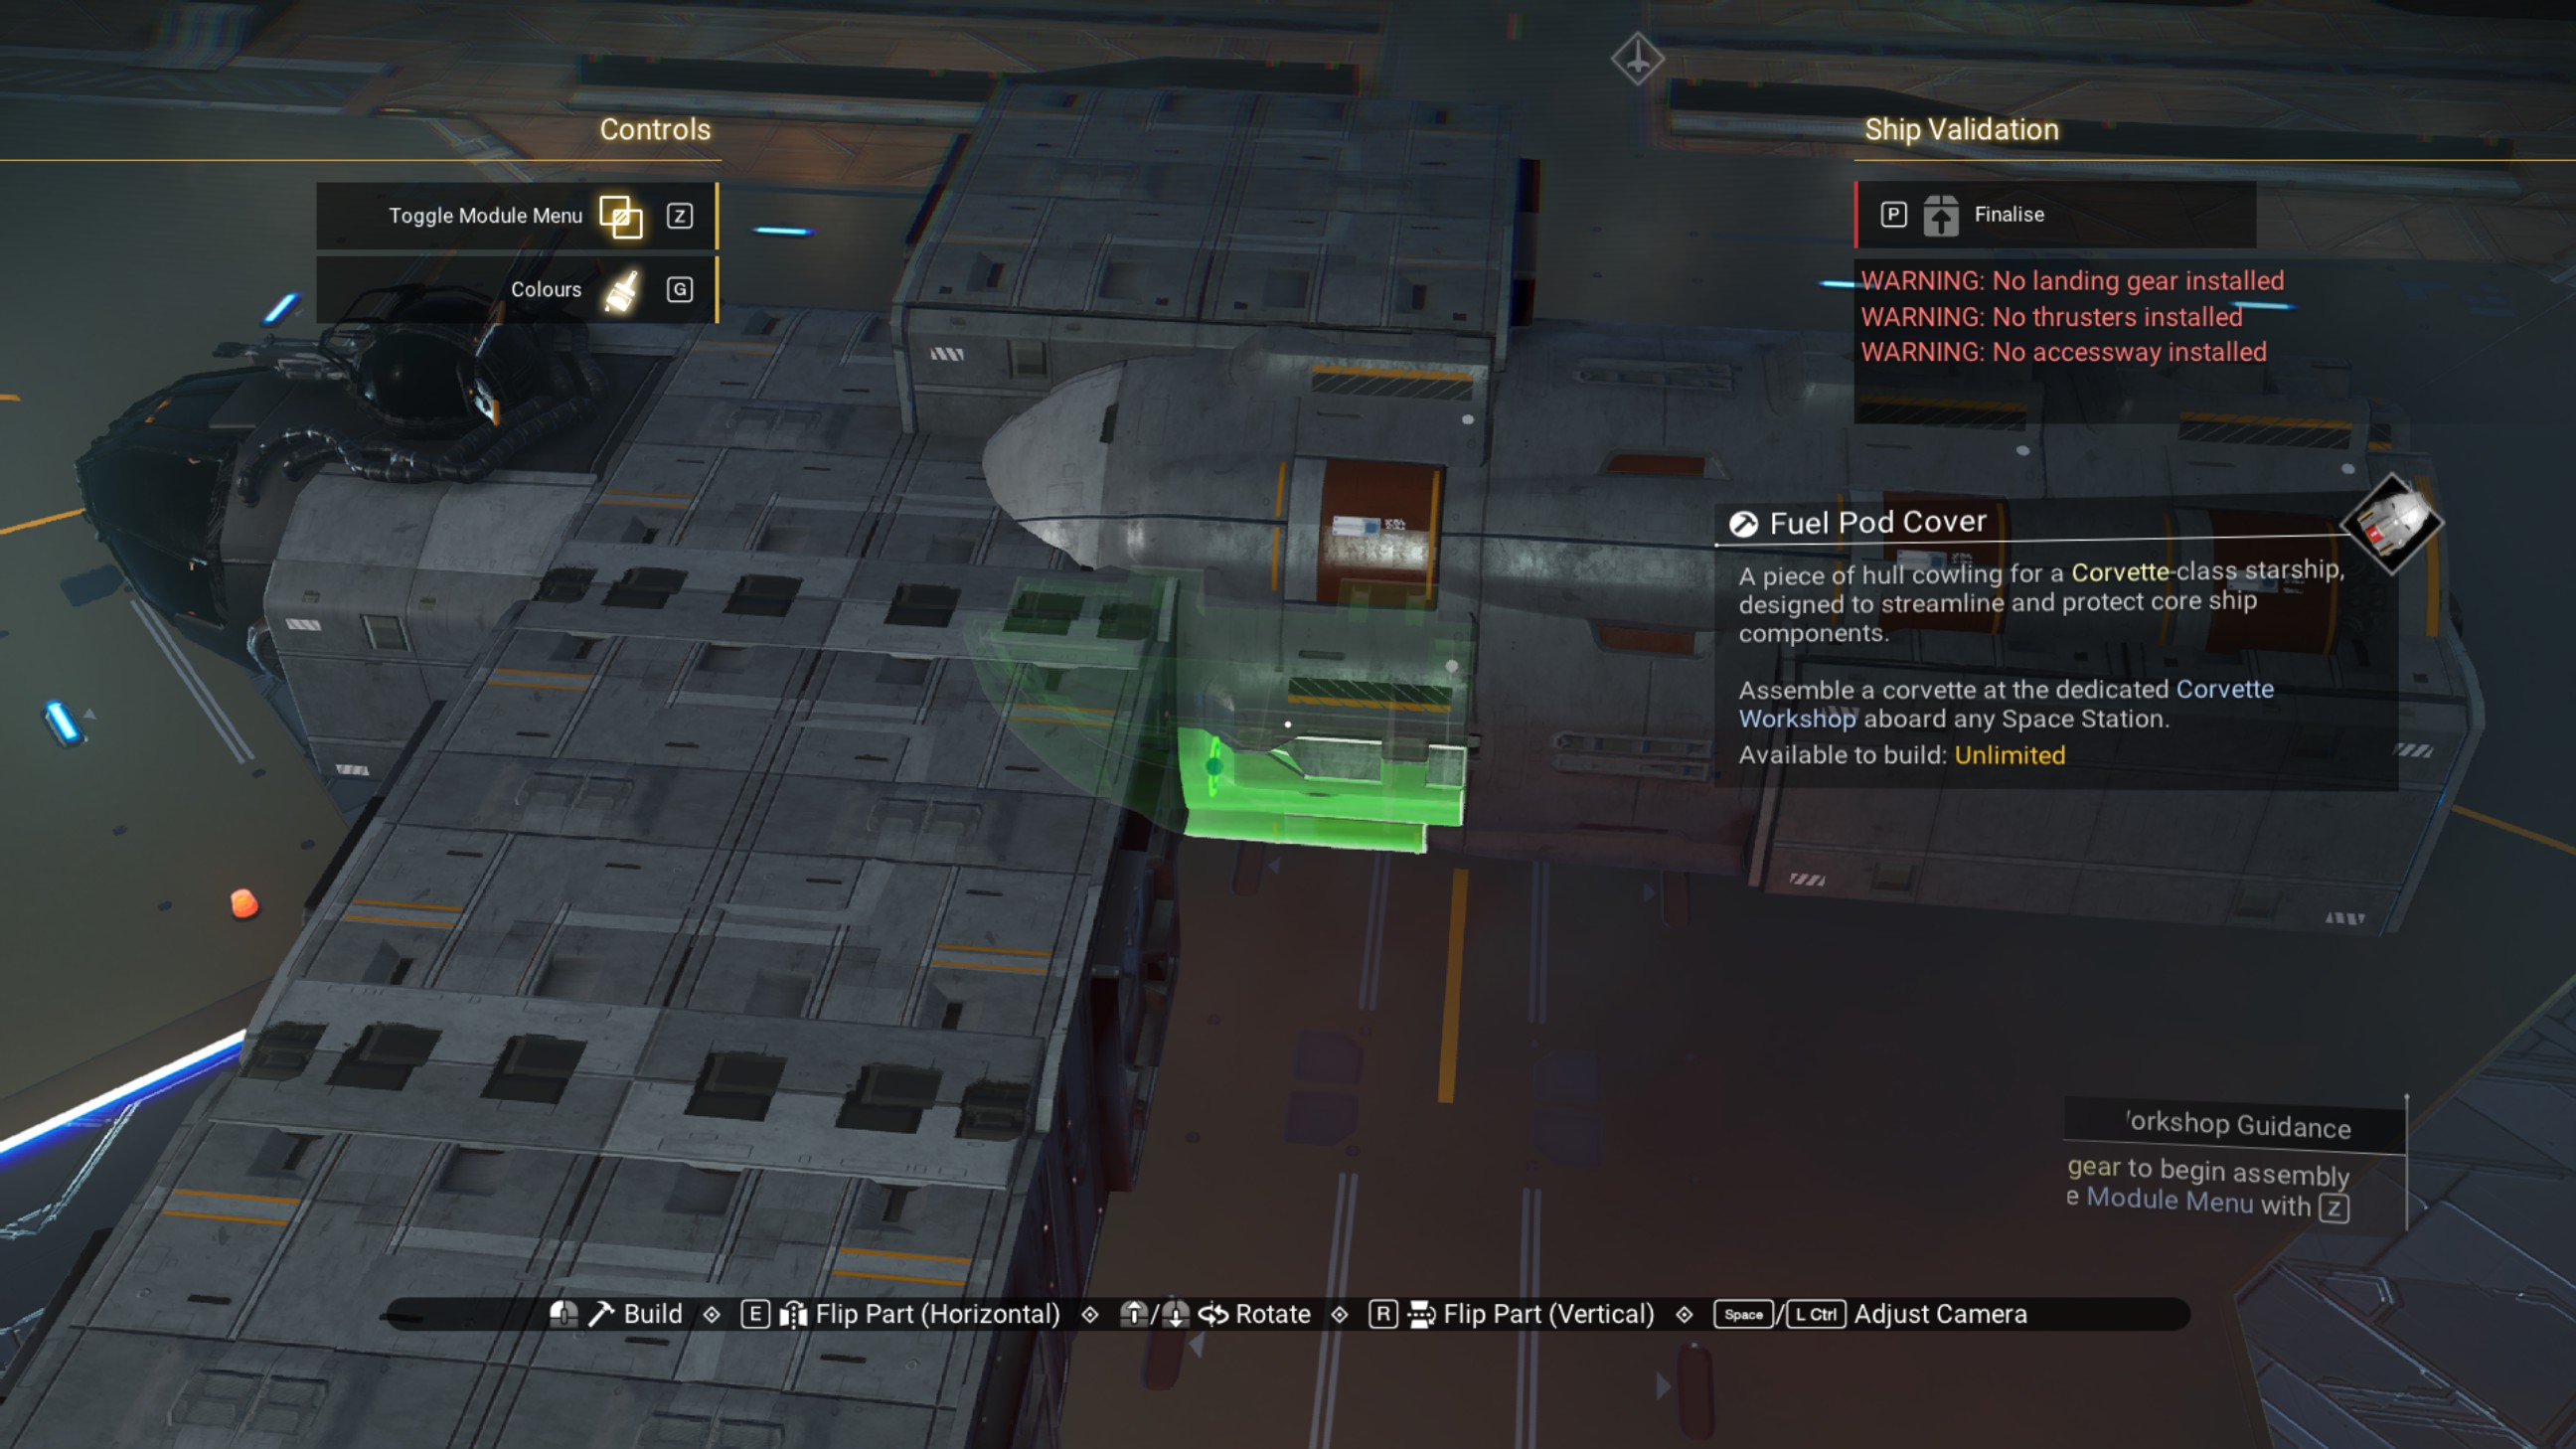
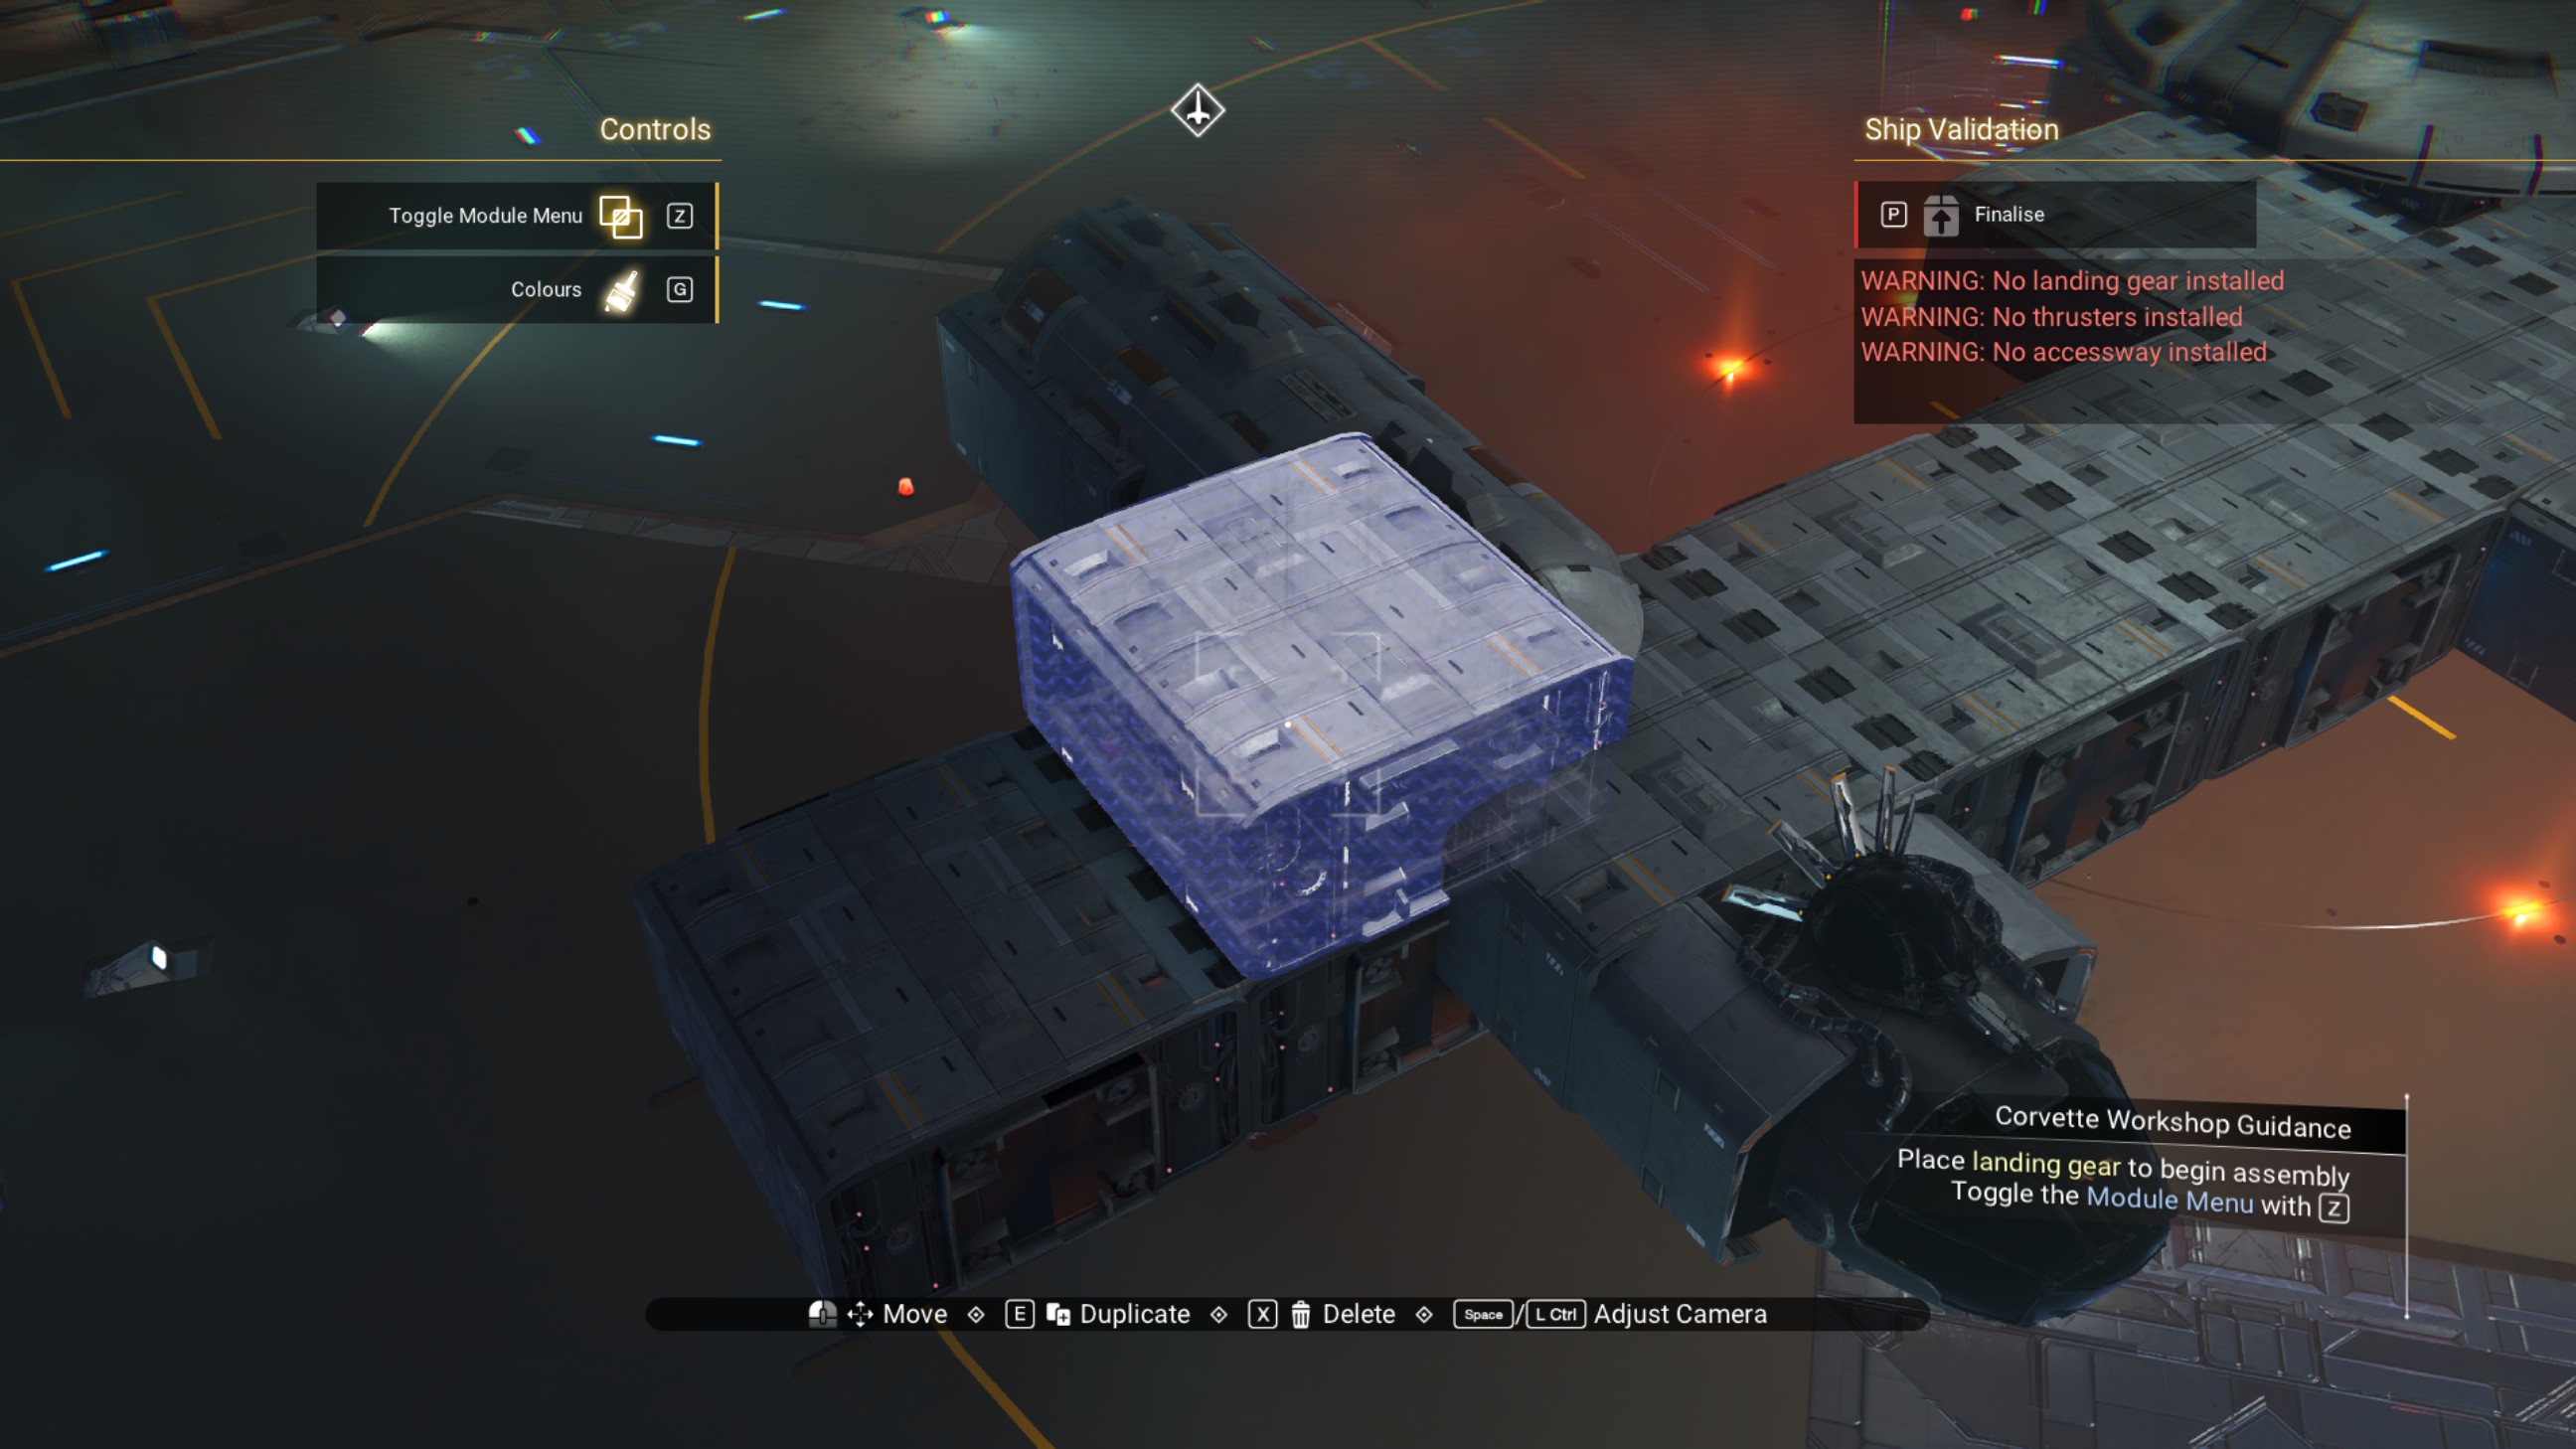
Place a third fuel pod cover on the starboard side of the cockpit structure, then delete the walkway below it.
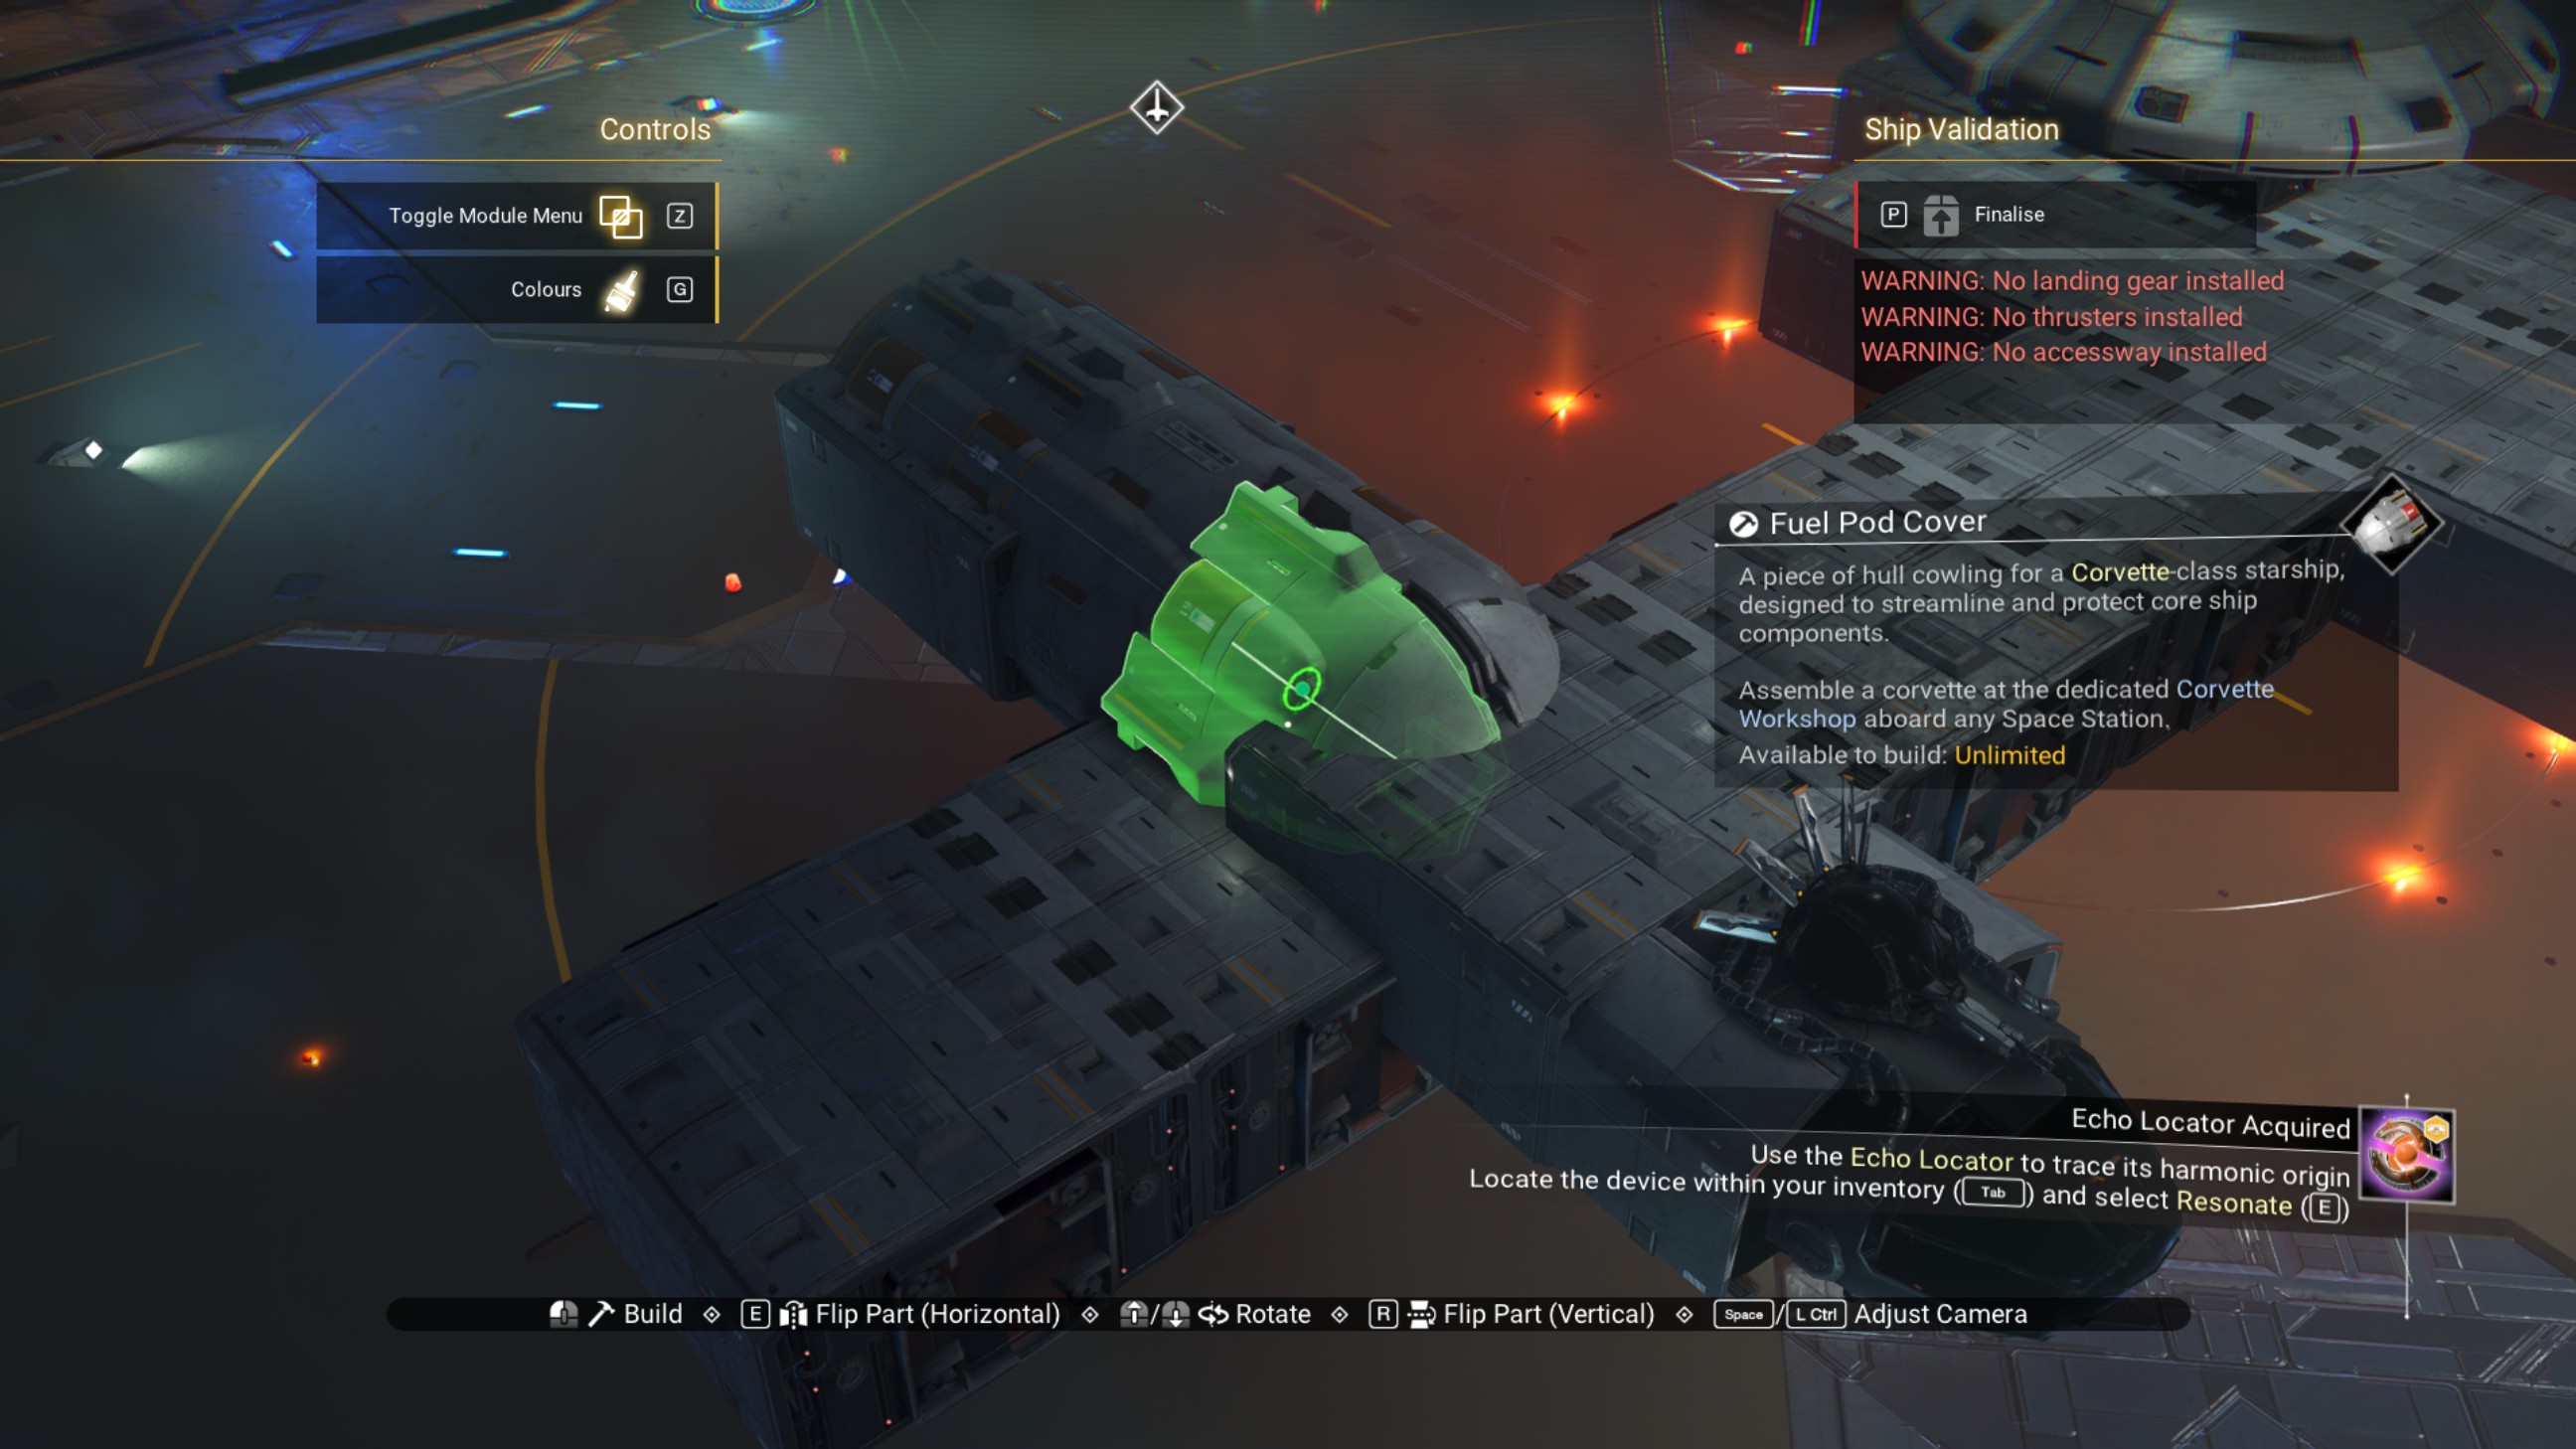
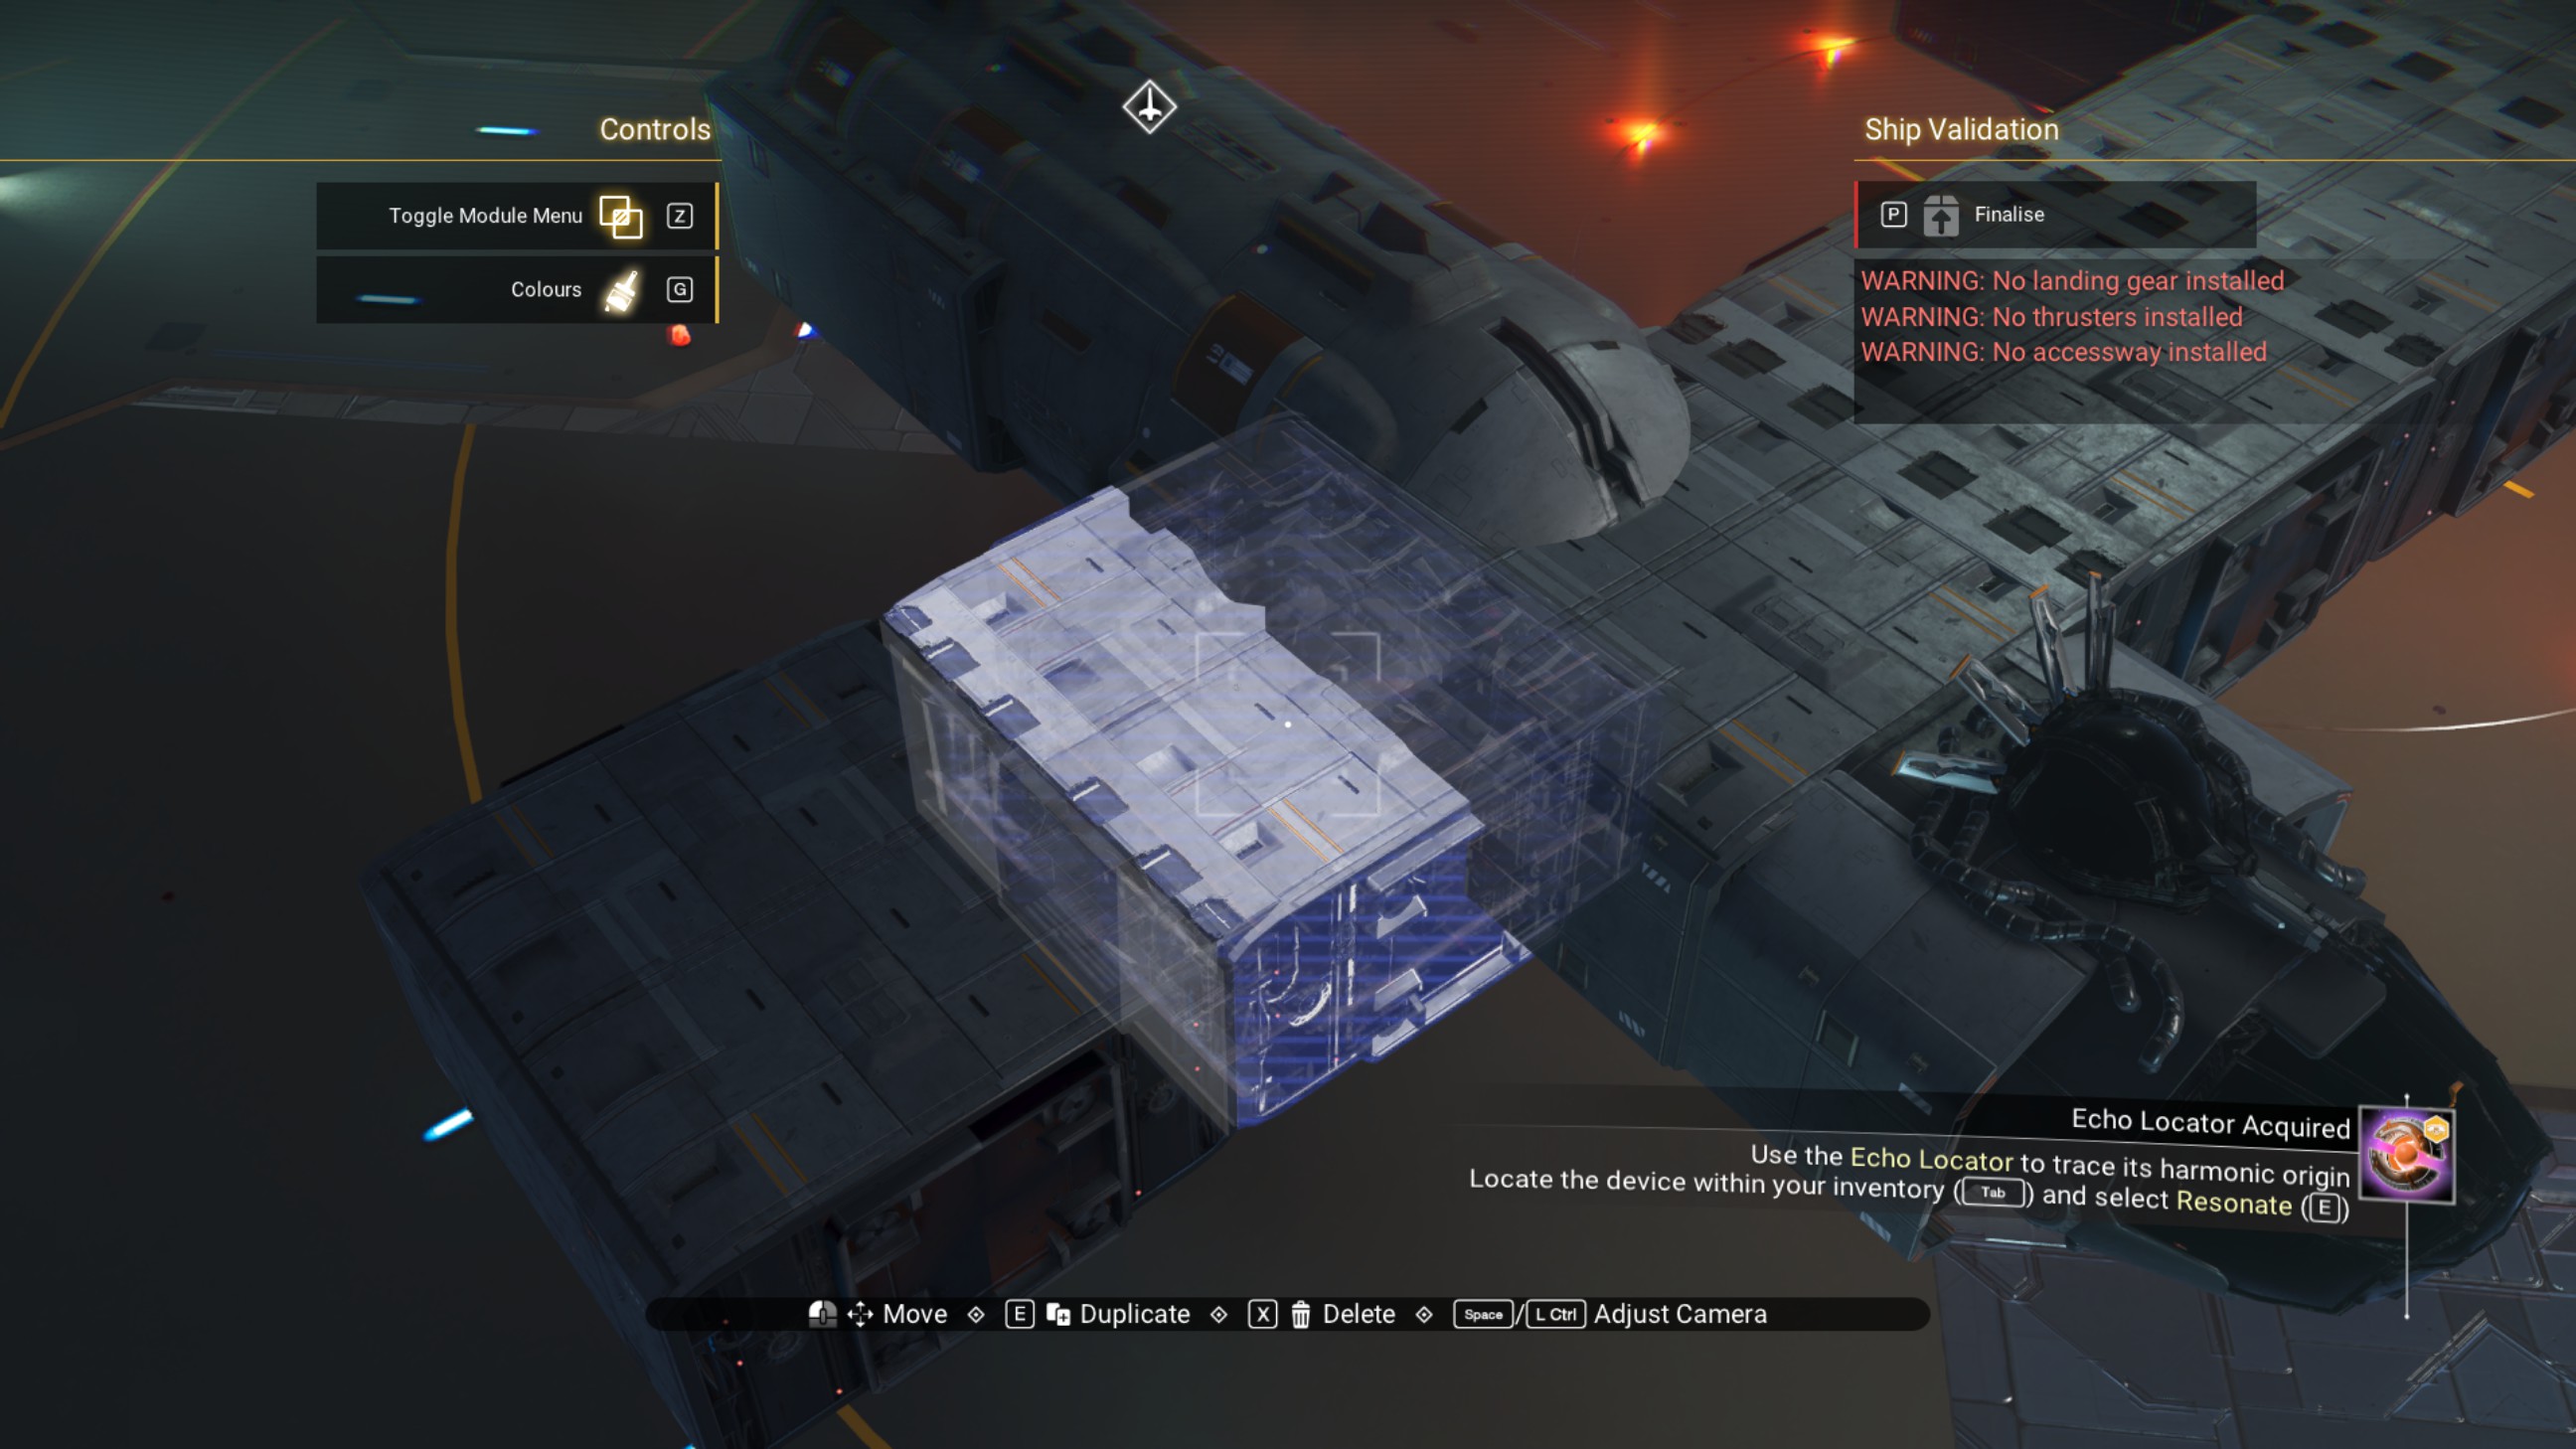
Place the fourth and final fuel pod cover.
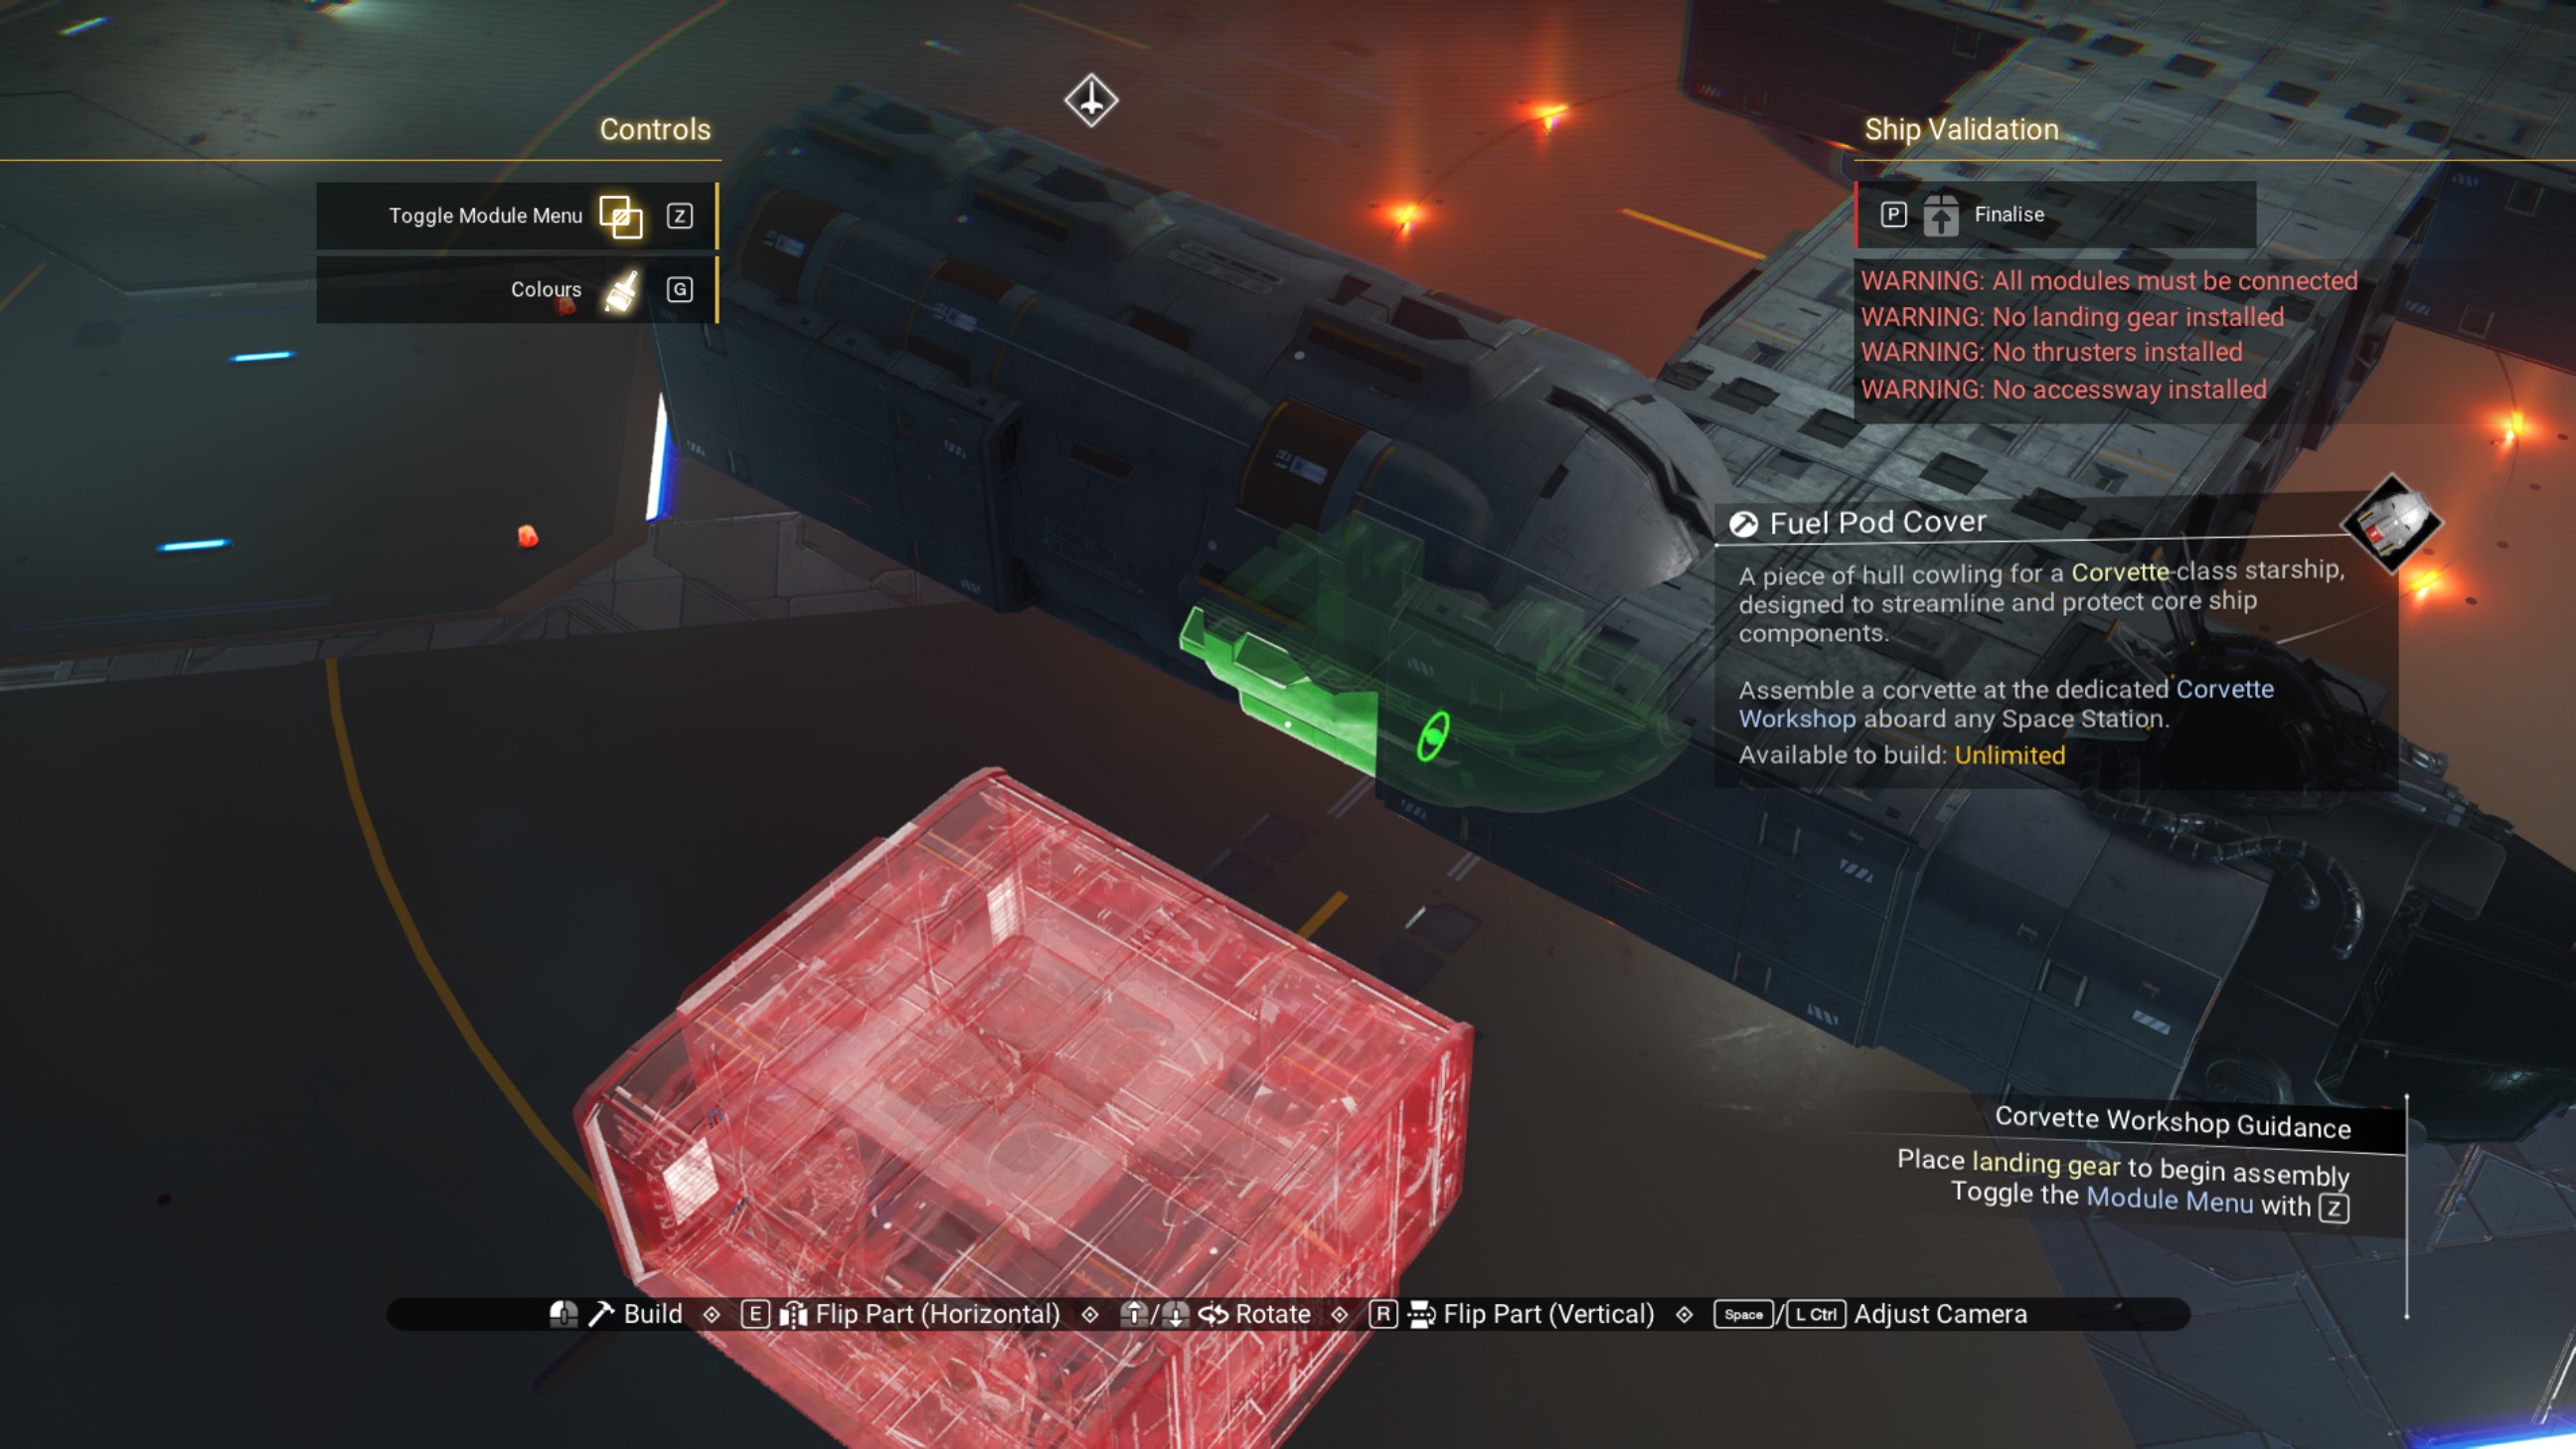
Take the remaining offset walkway and move it alongside the cockpit structure on the starboard side.
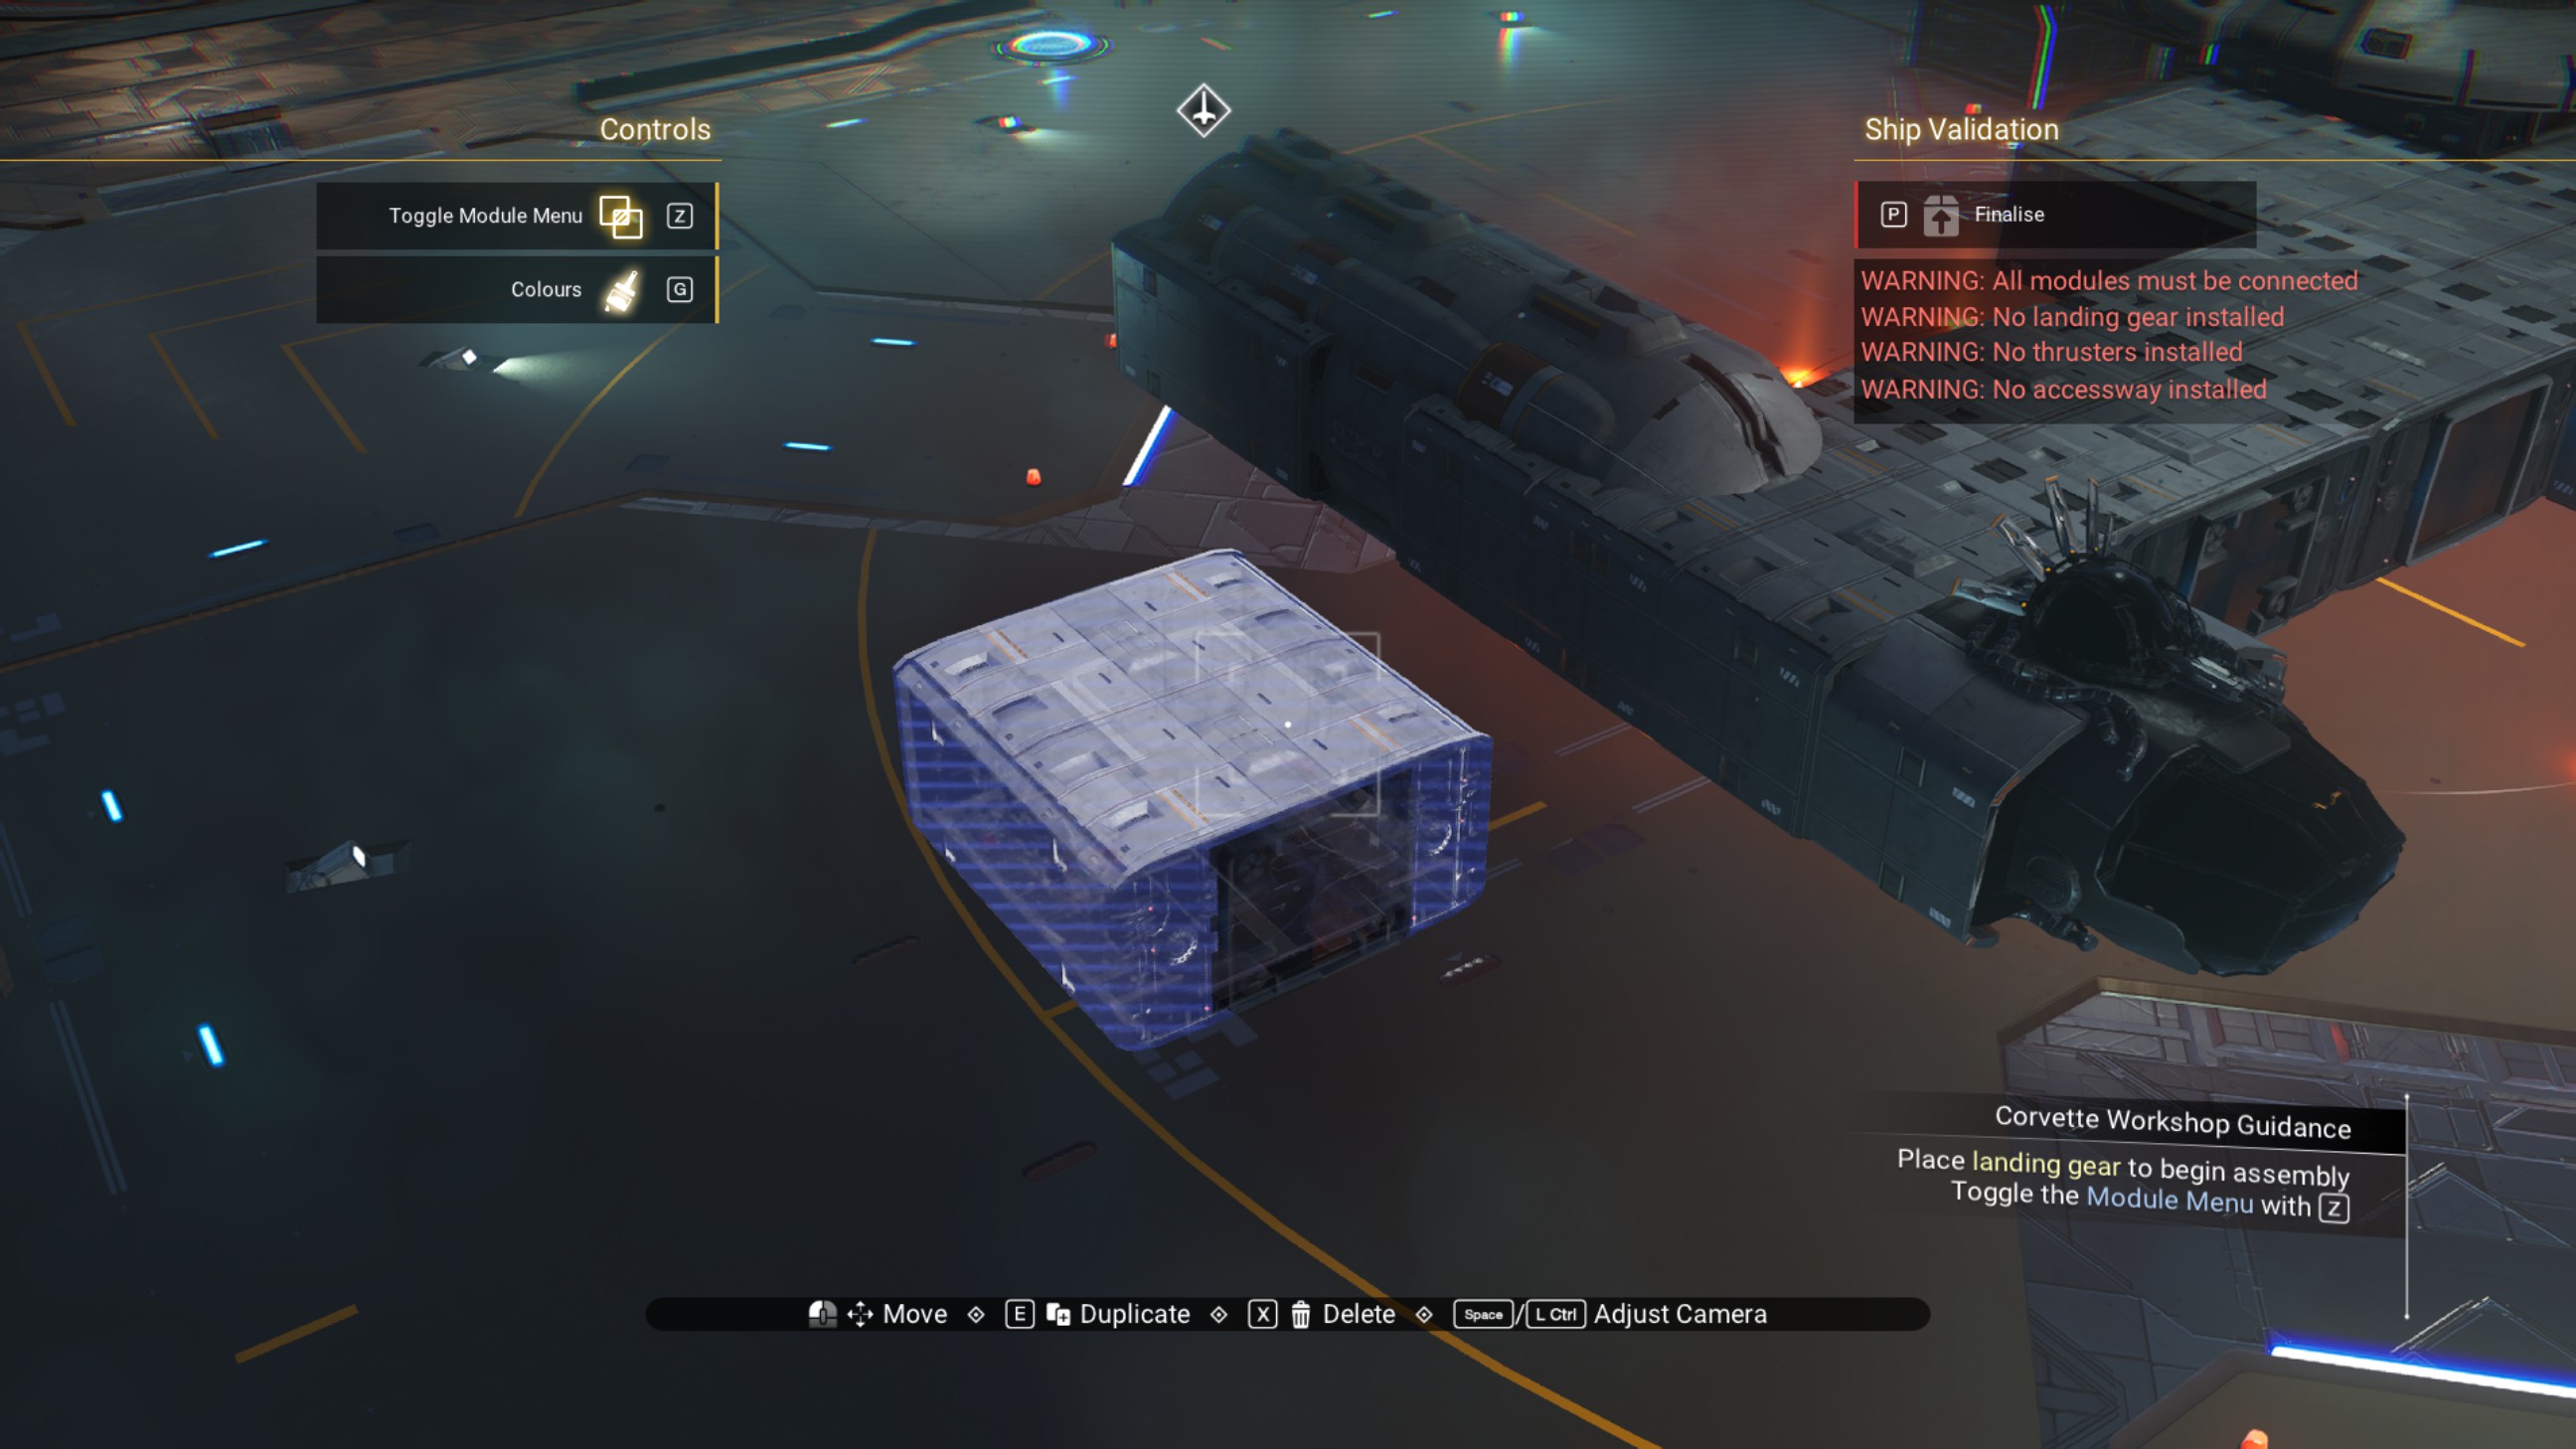
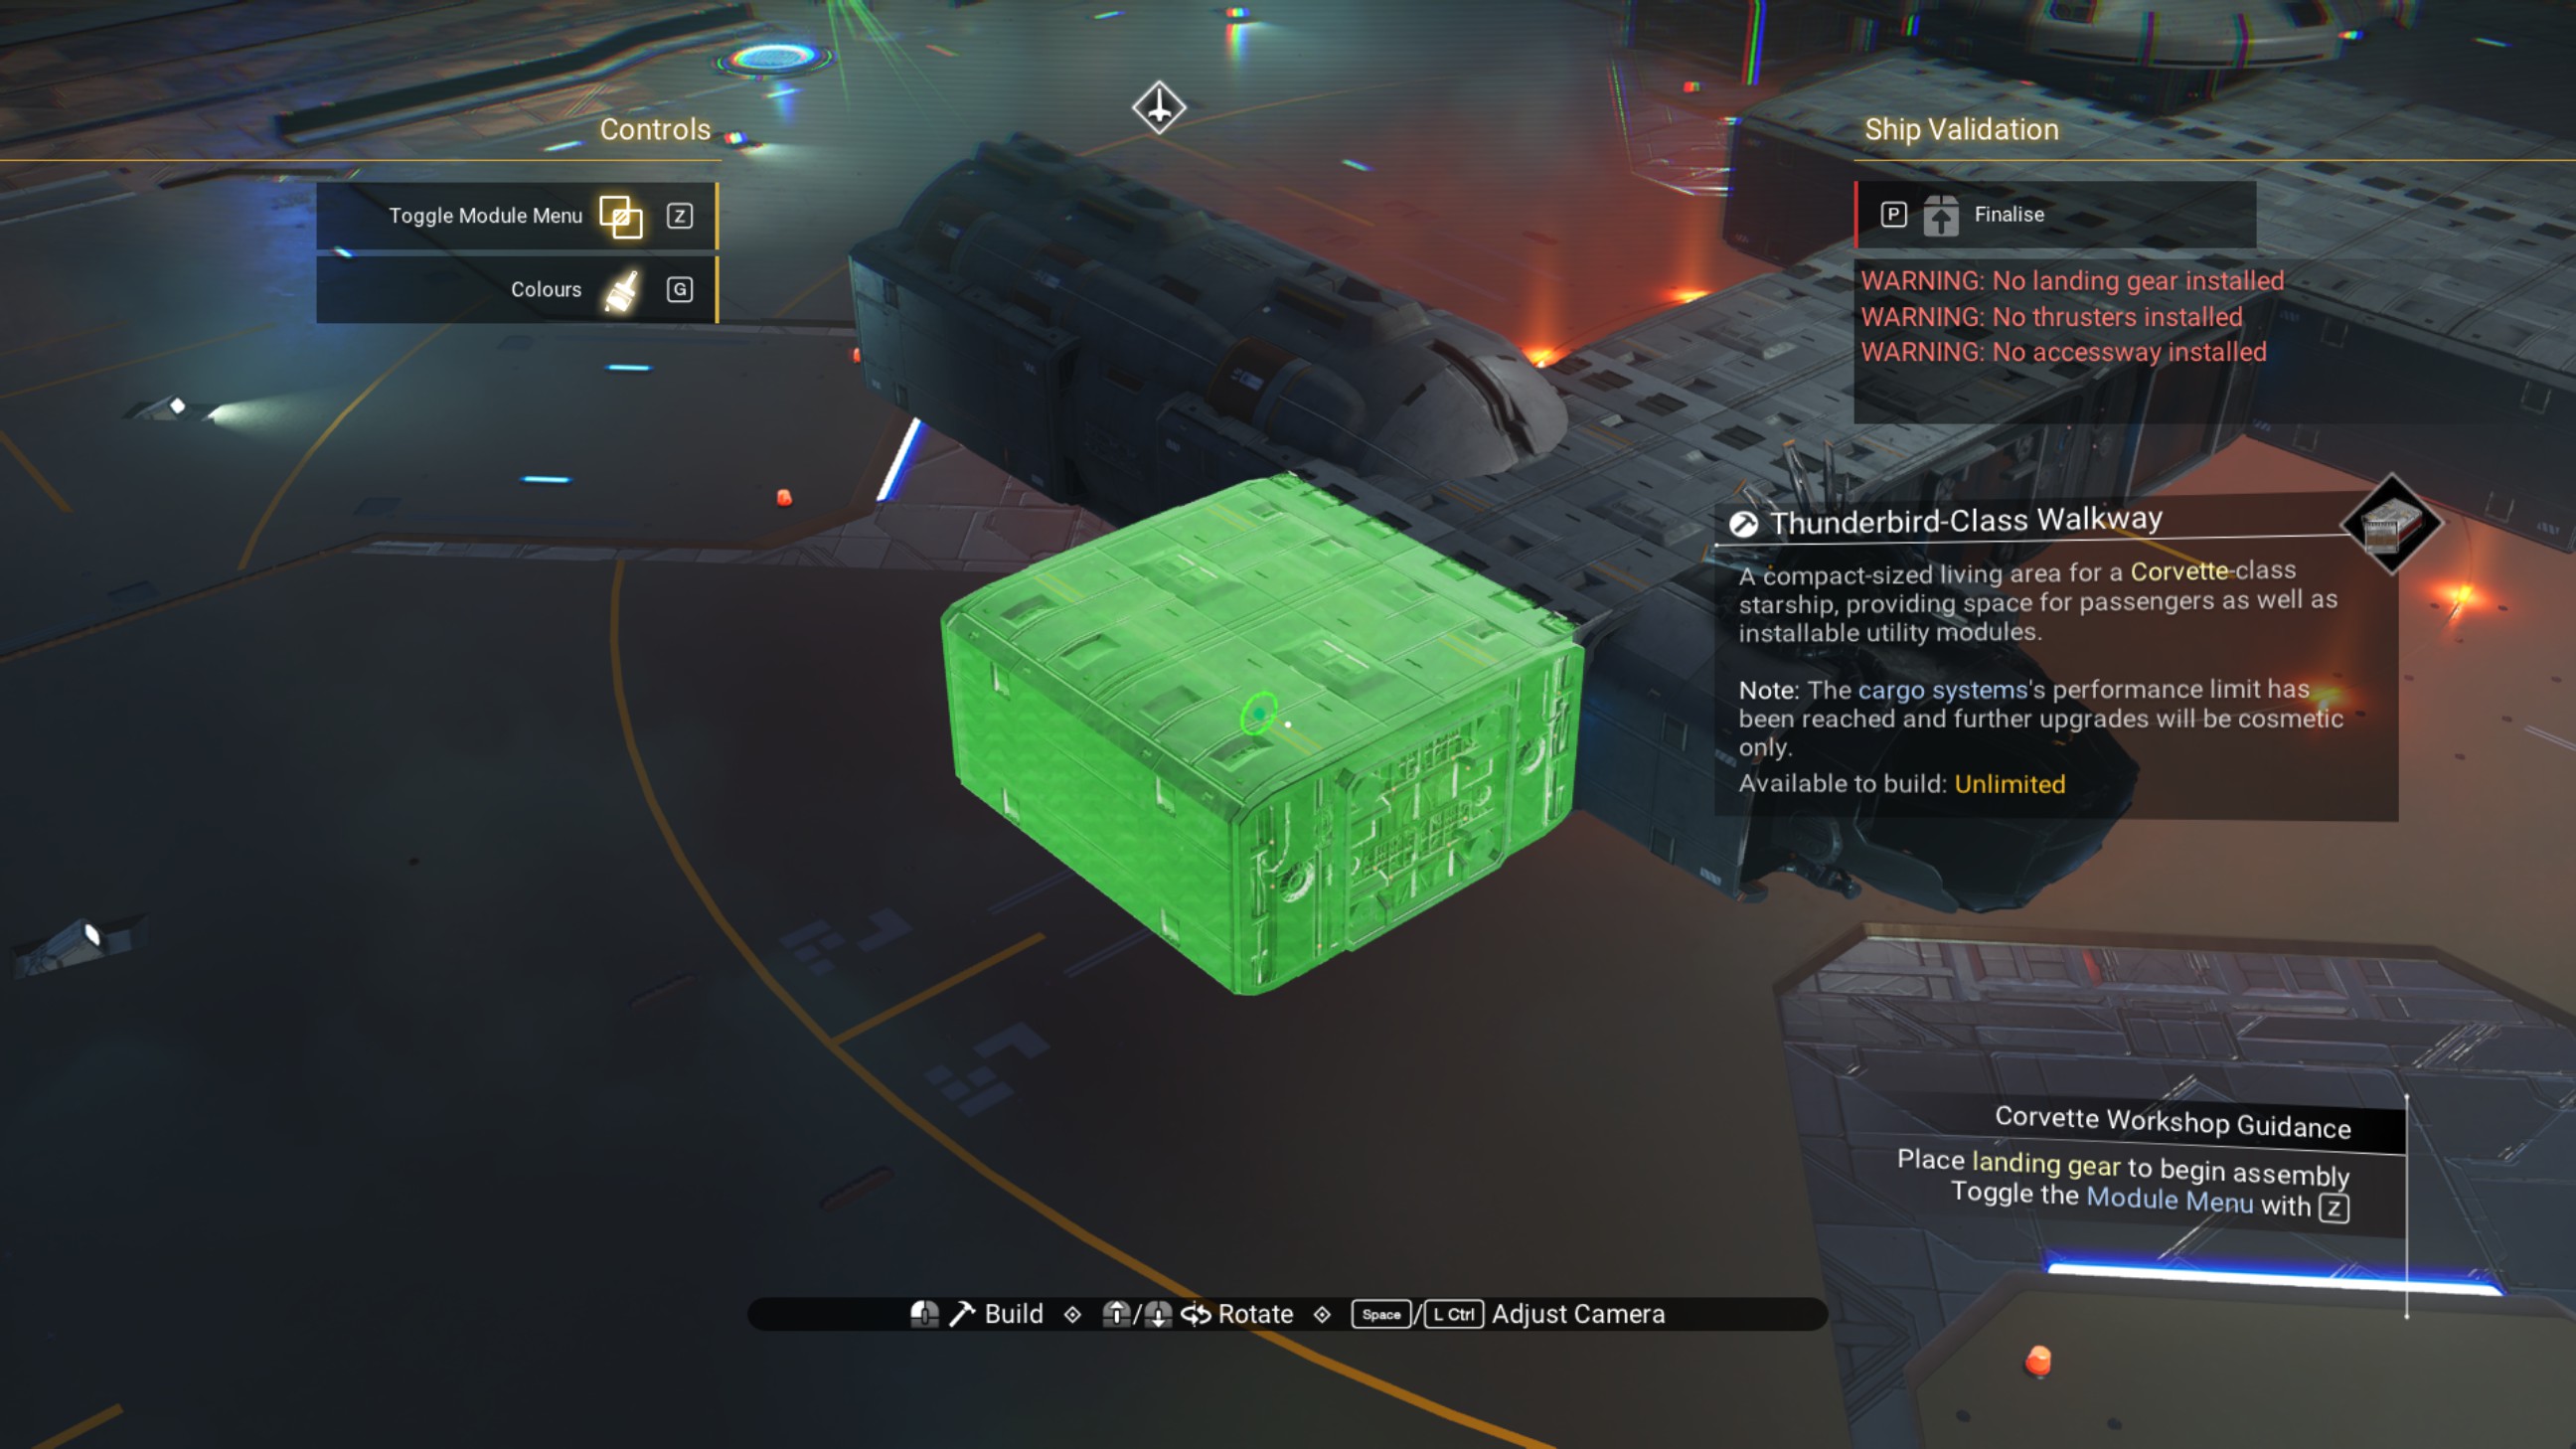
Using a rotated propeller module, shift that walkway forward half a step.
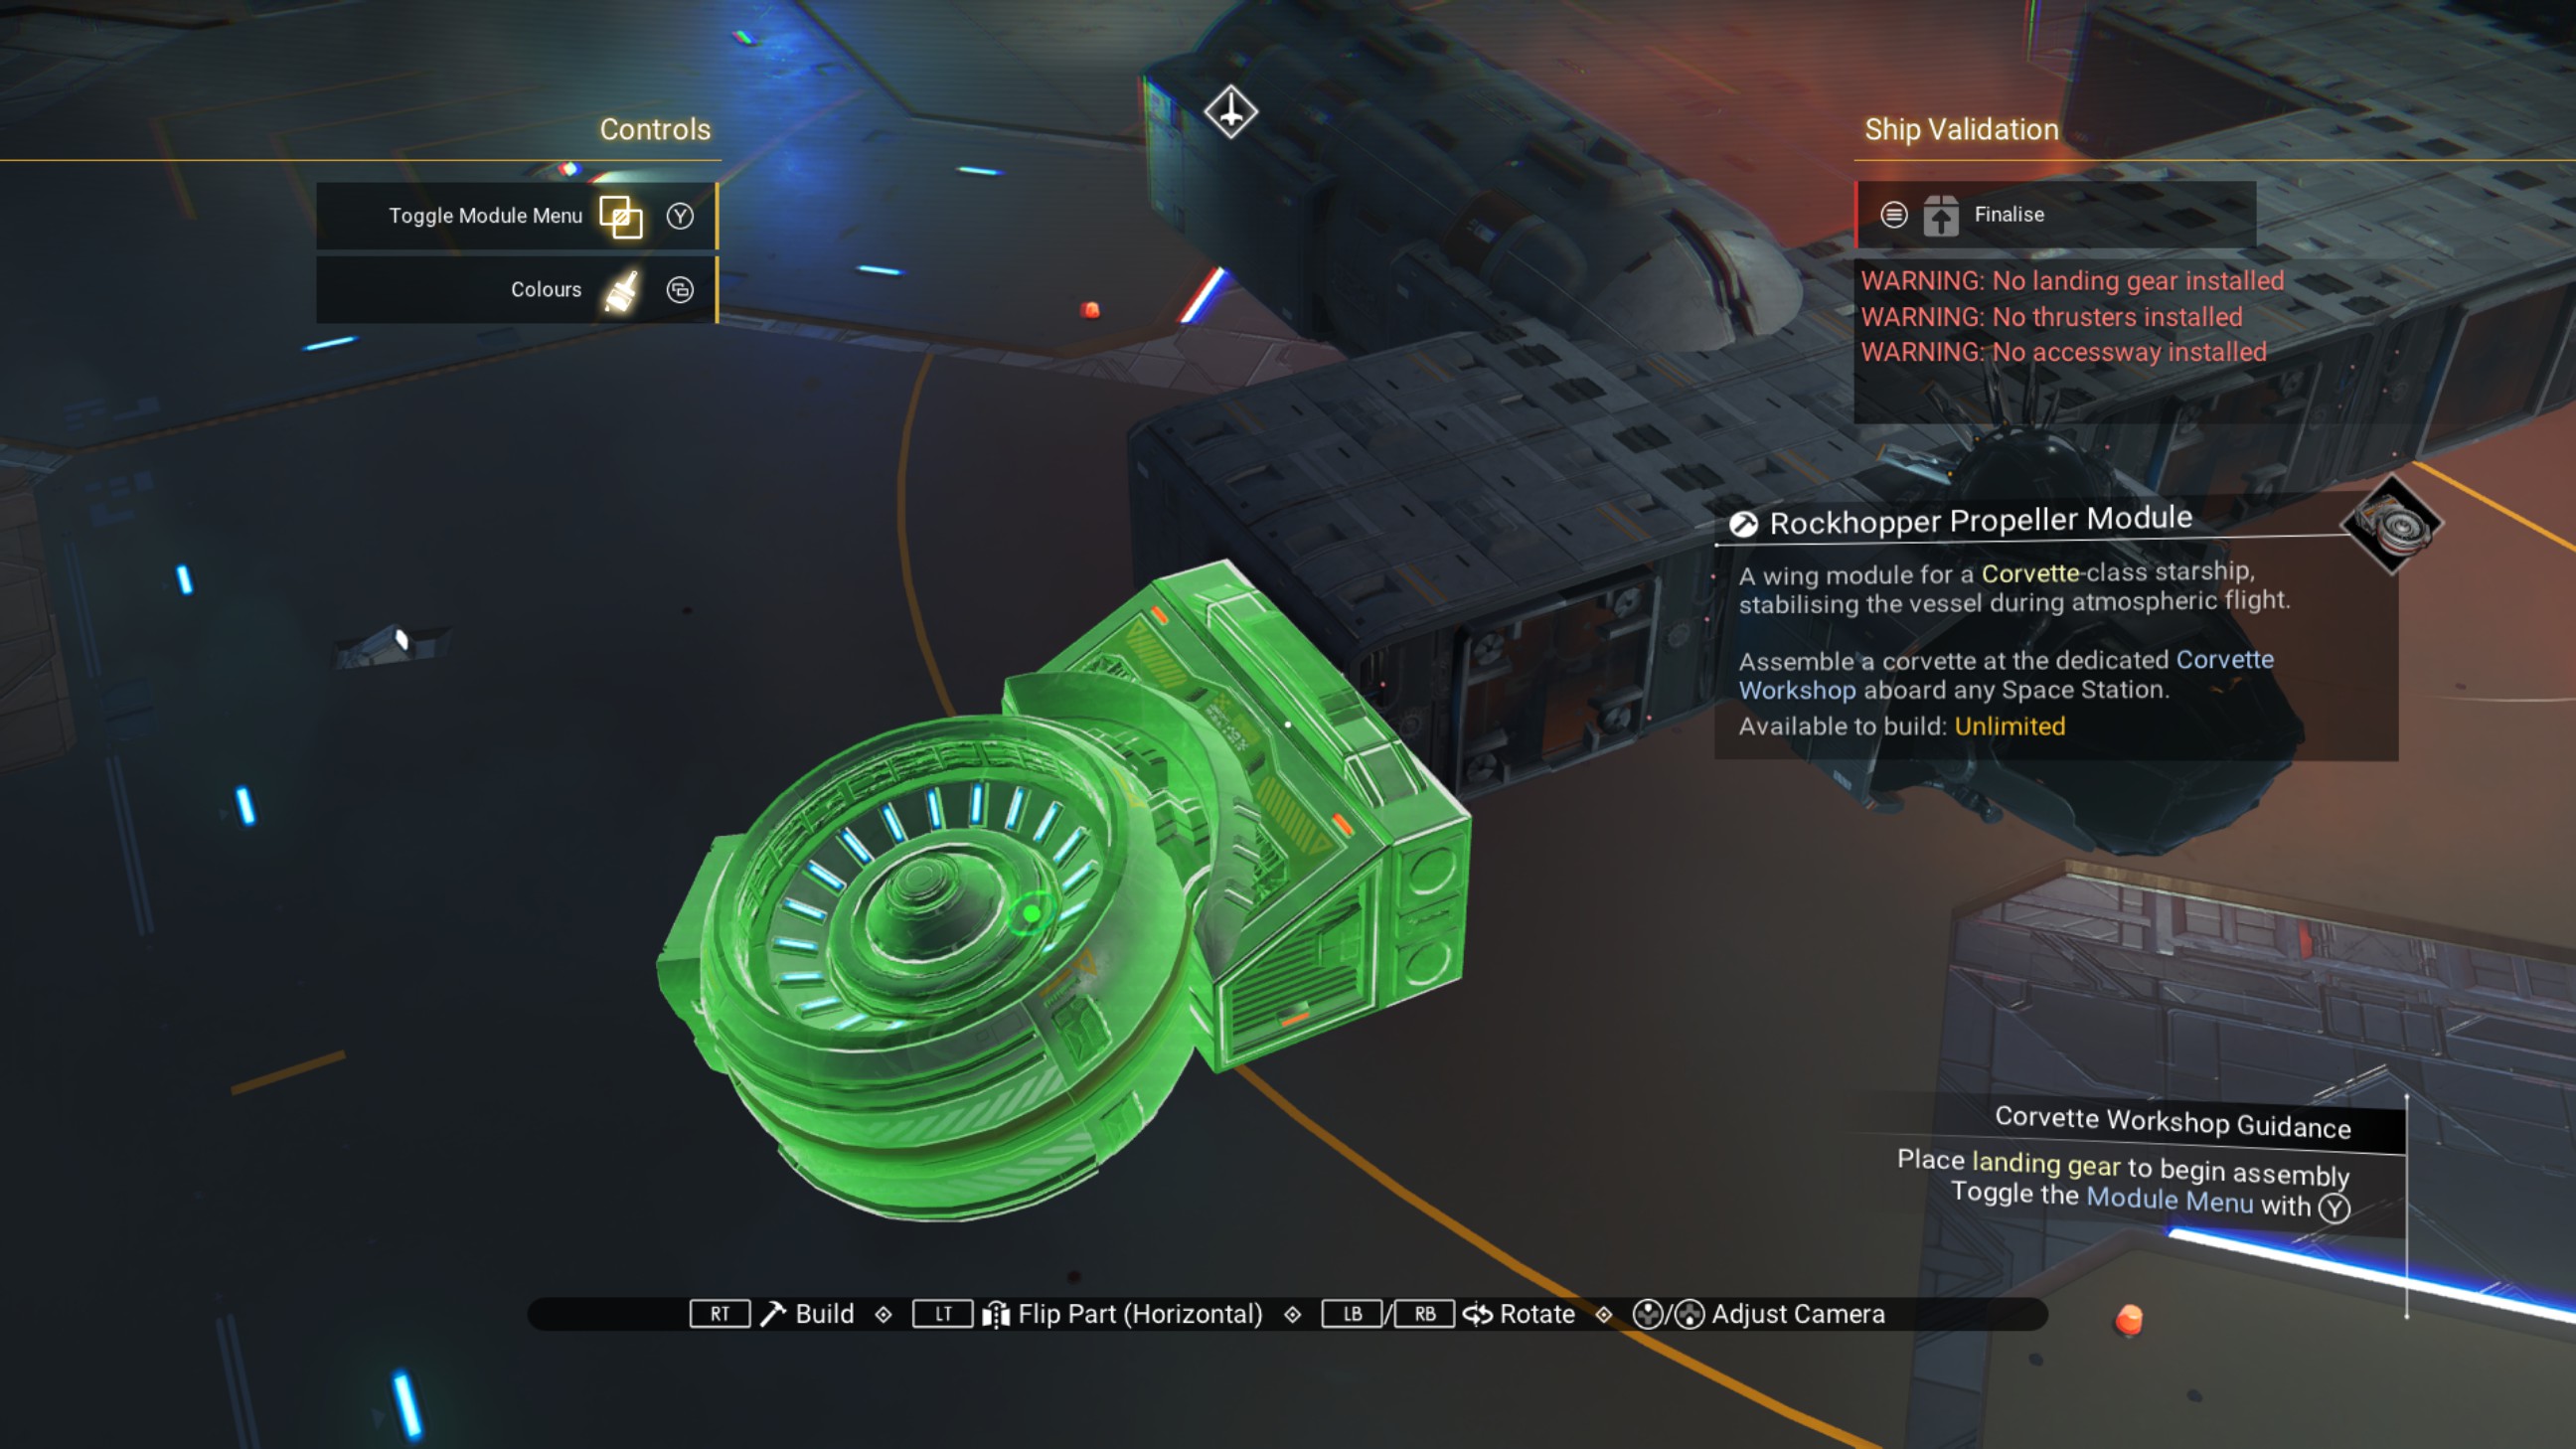
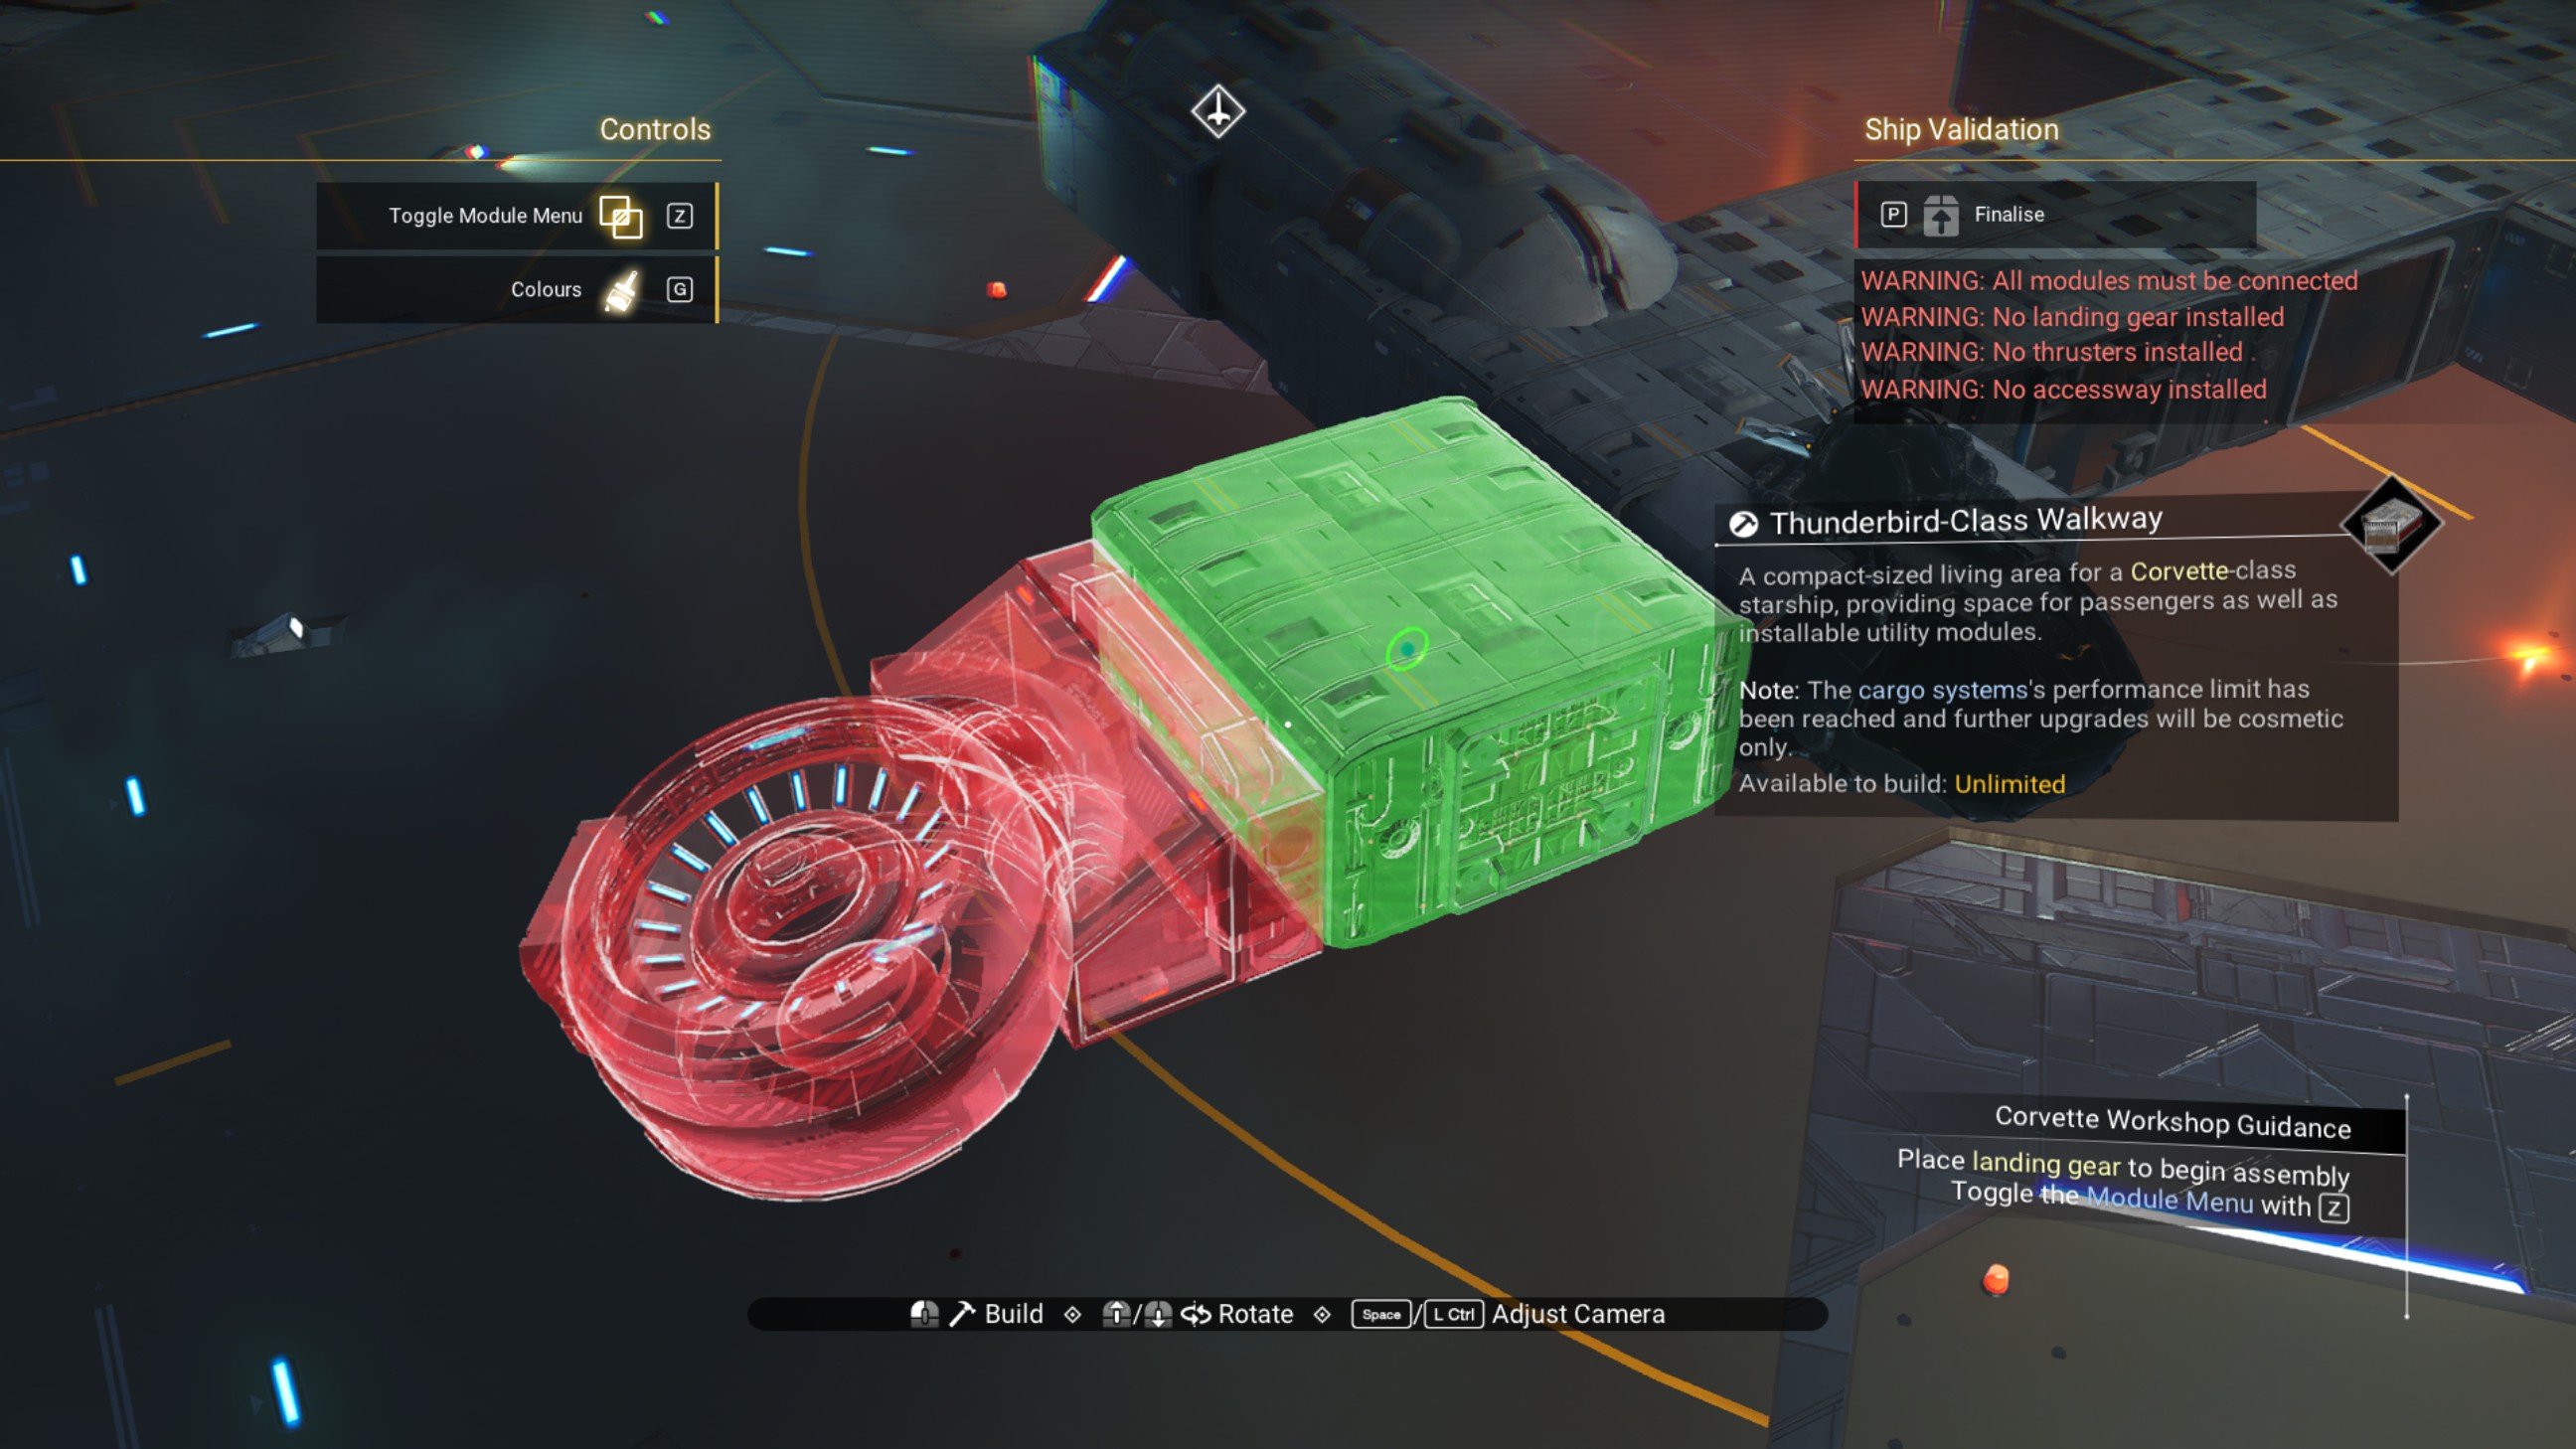
Delete the propeller module, then place a walkway to the port of the newly offset walkway, overlapping the cockpit structure.
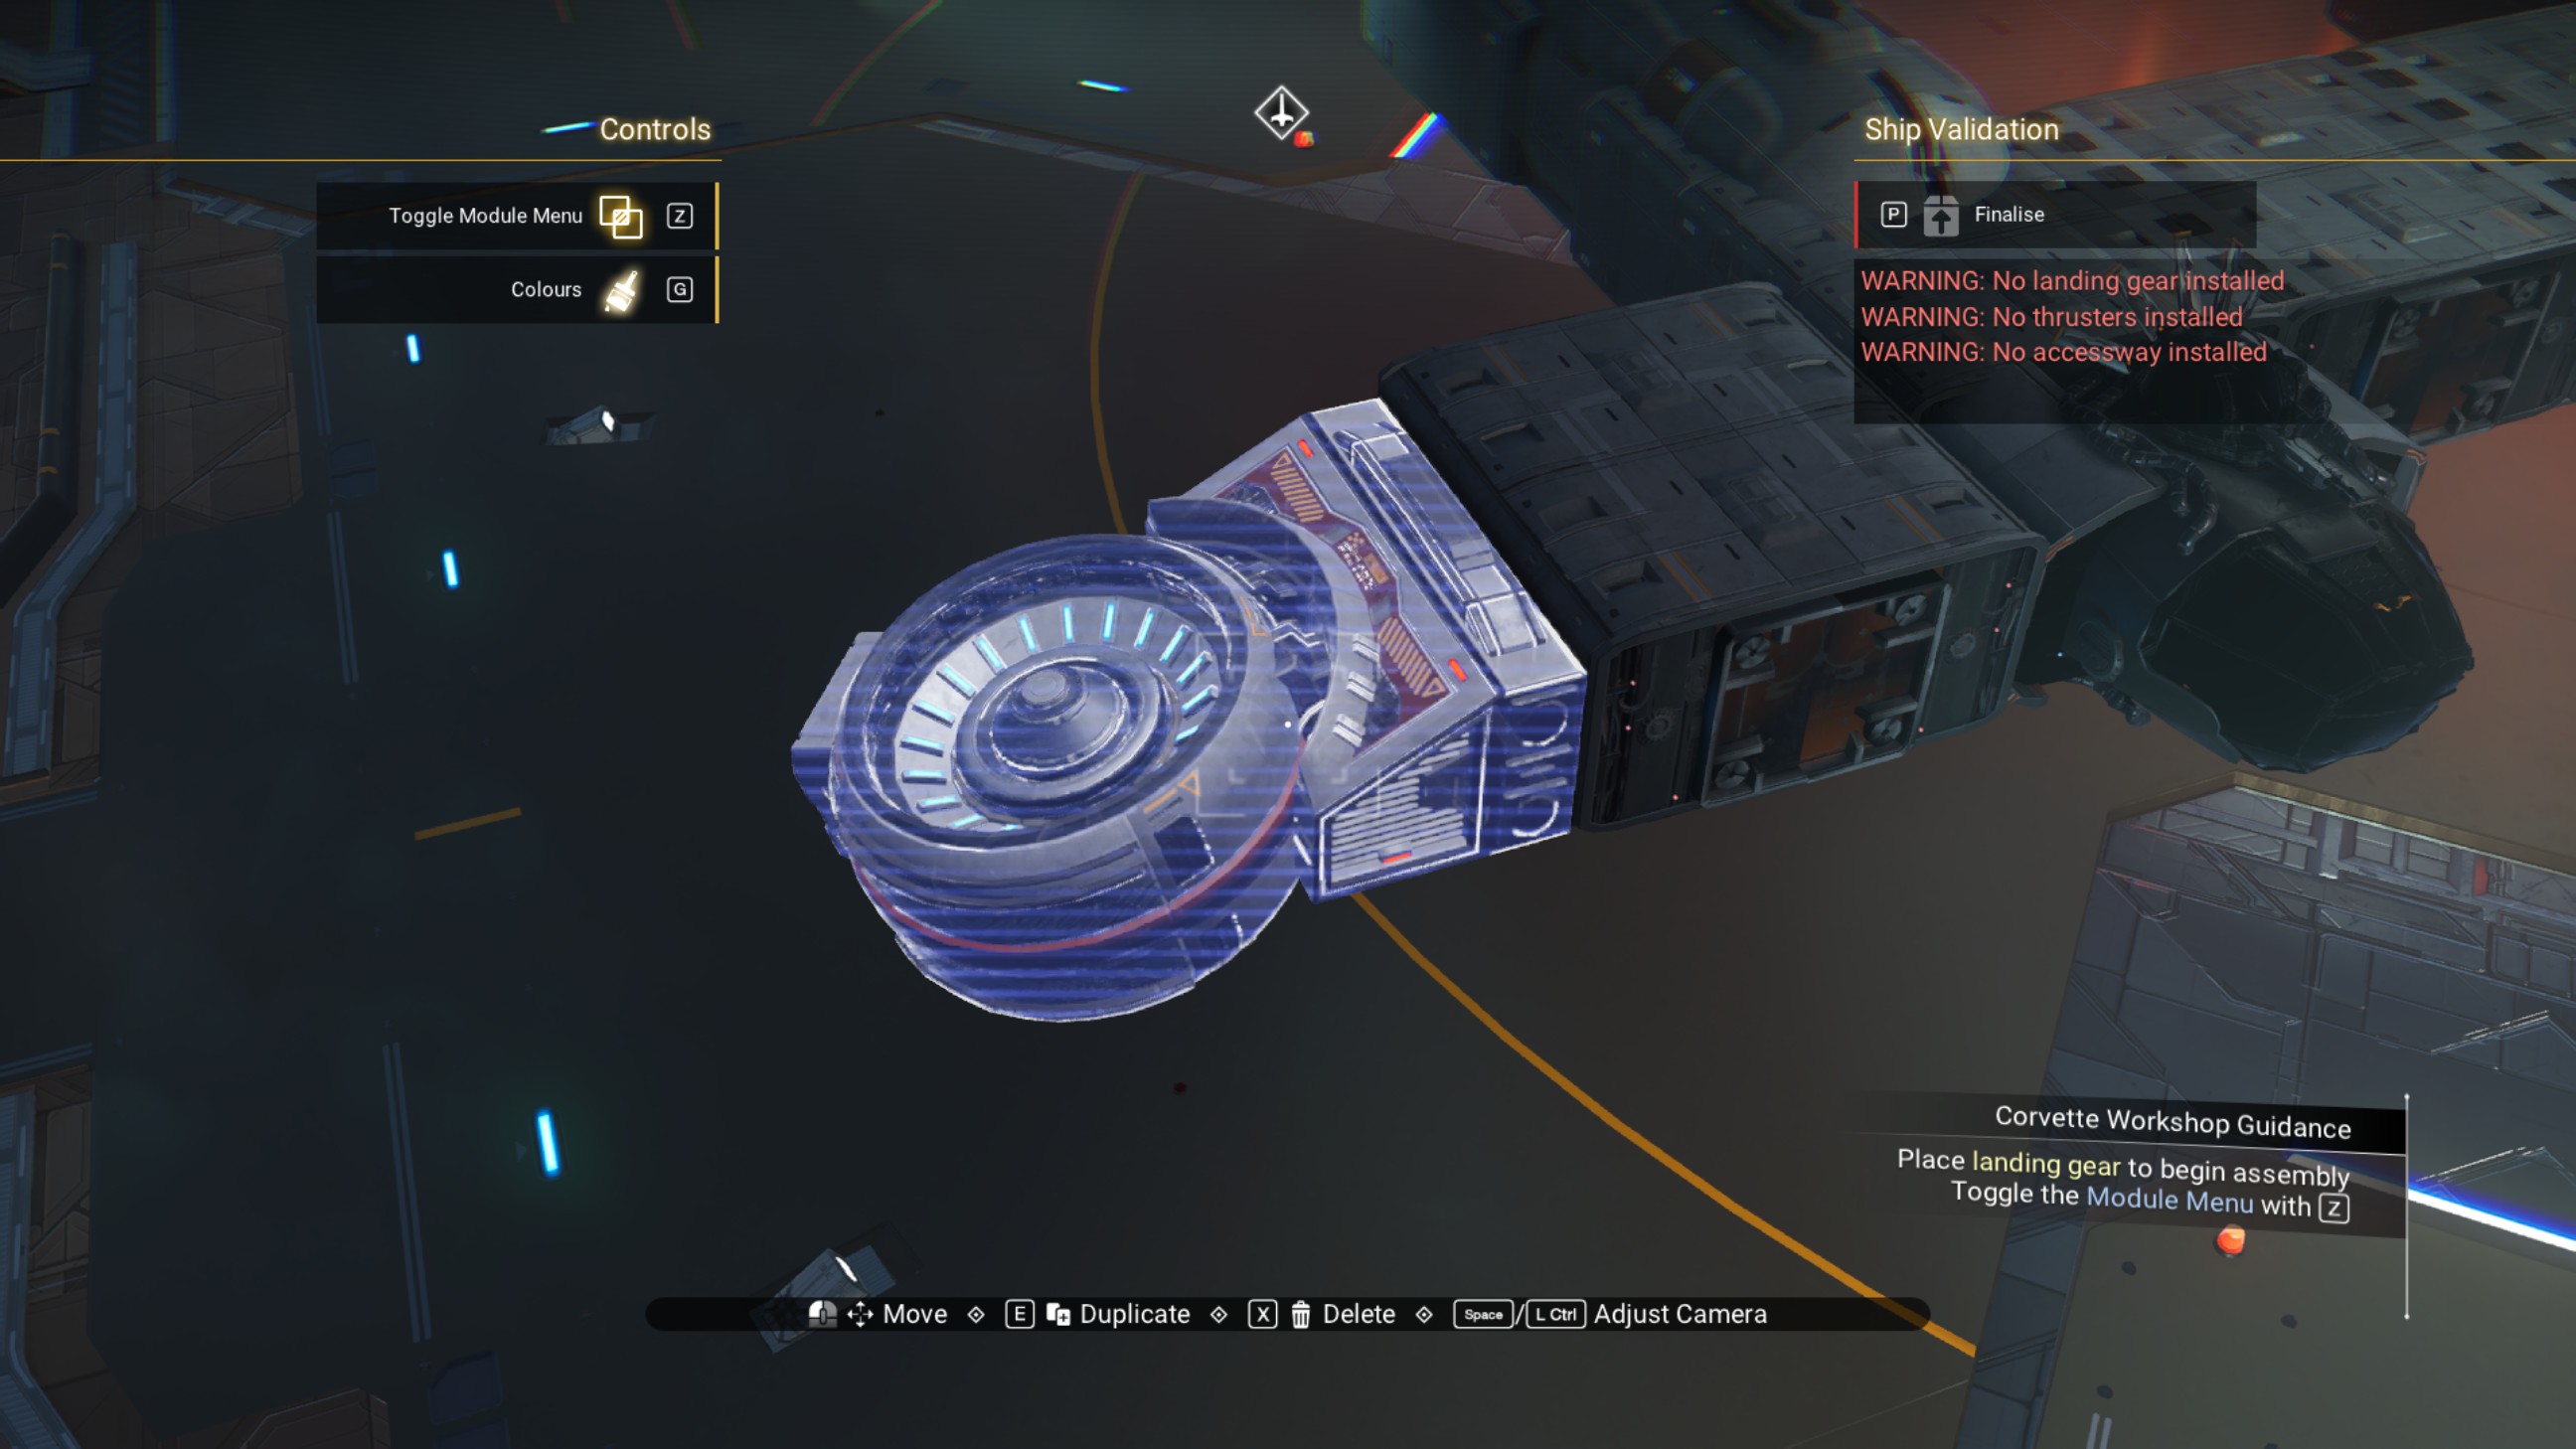
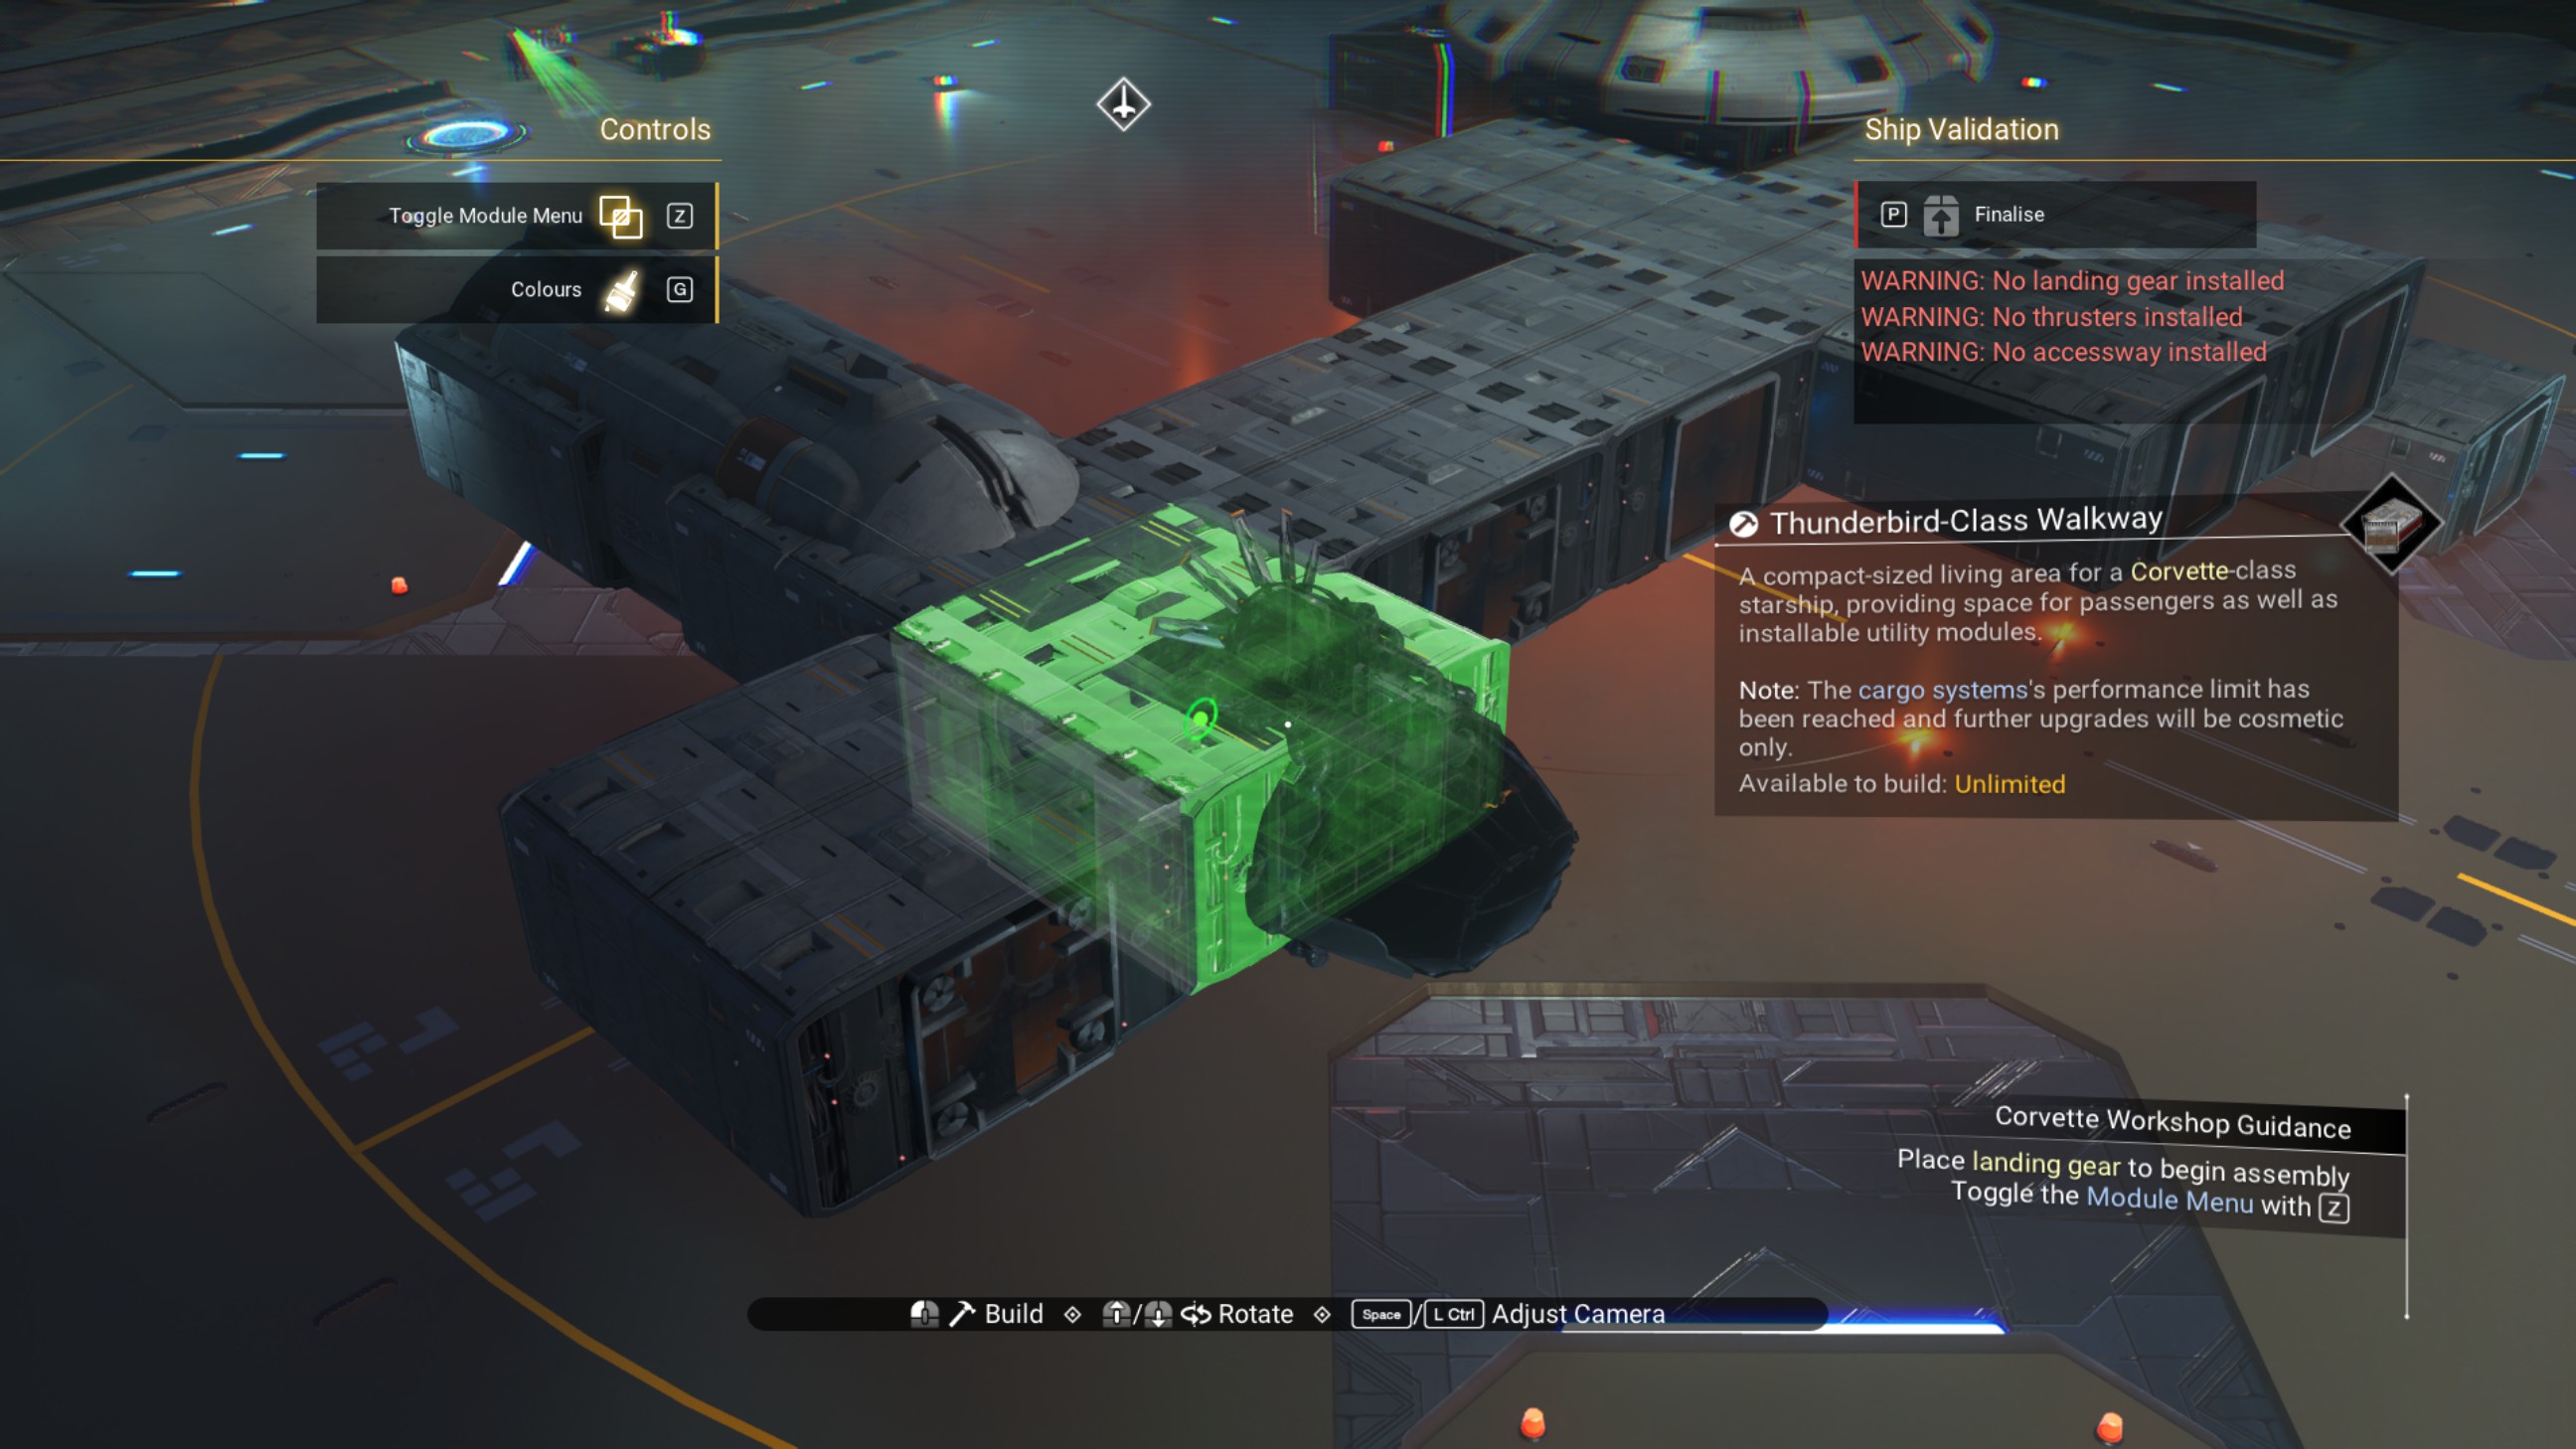
Delete the extra offset walkway, and place a ducting outlet on top of the cockpit structure, as shown.
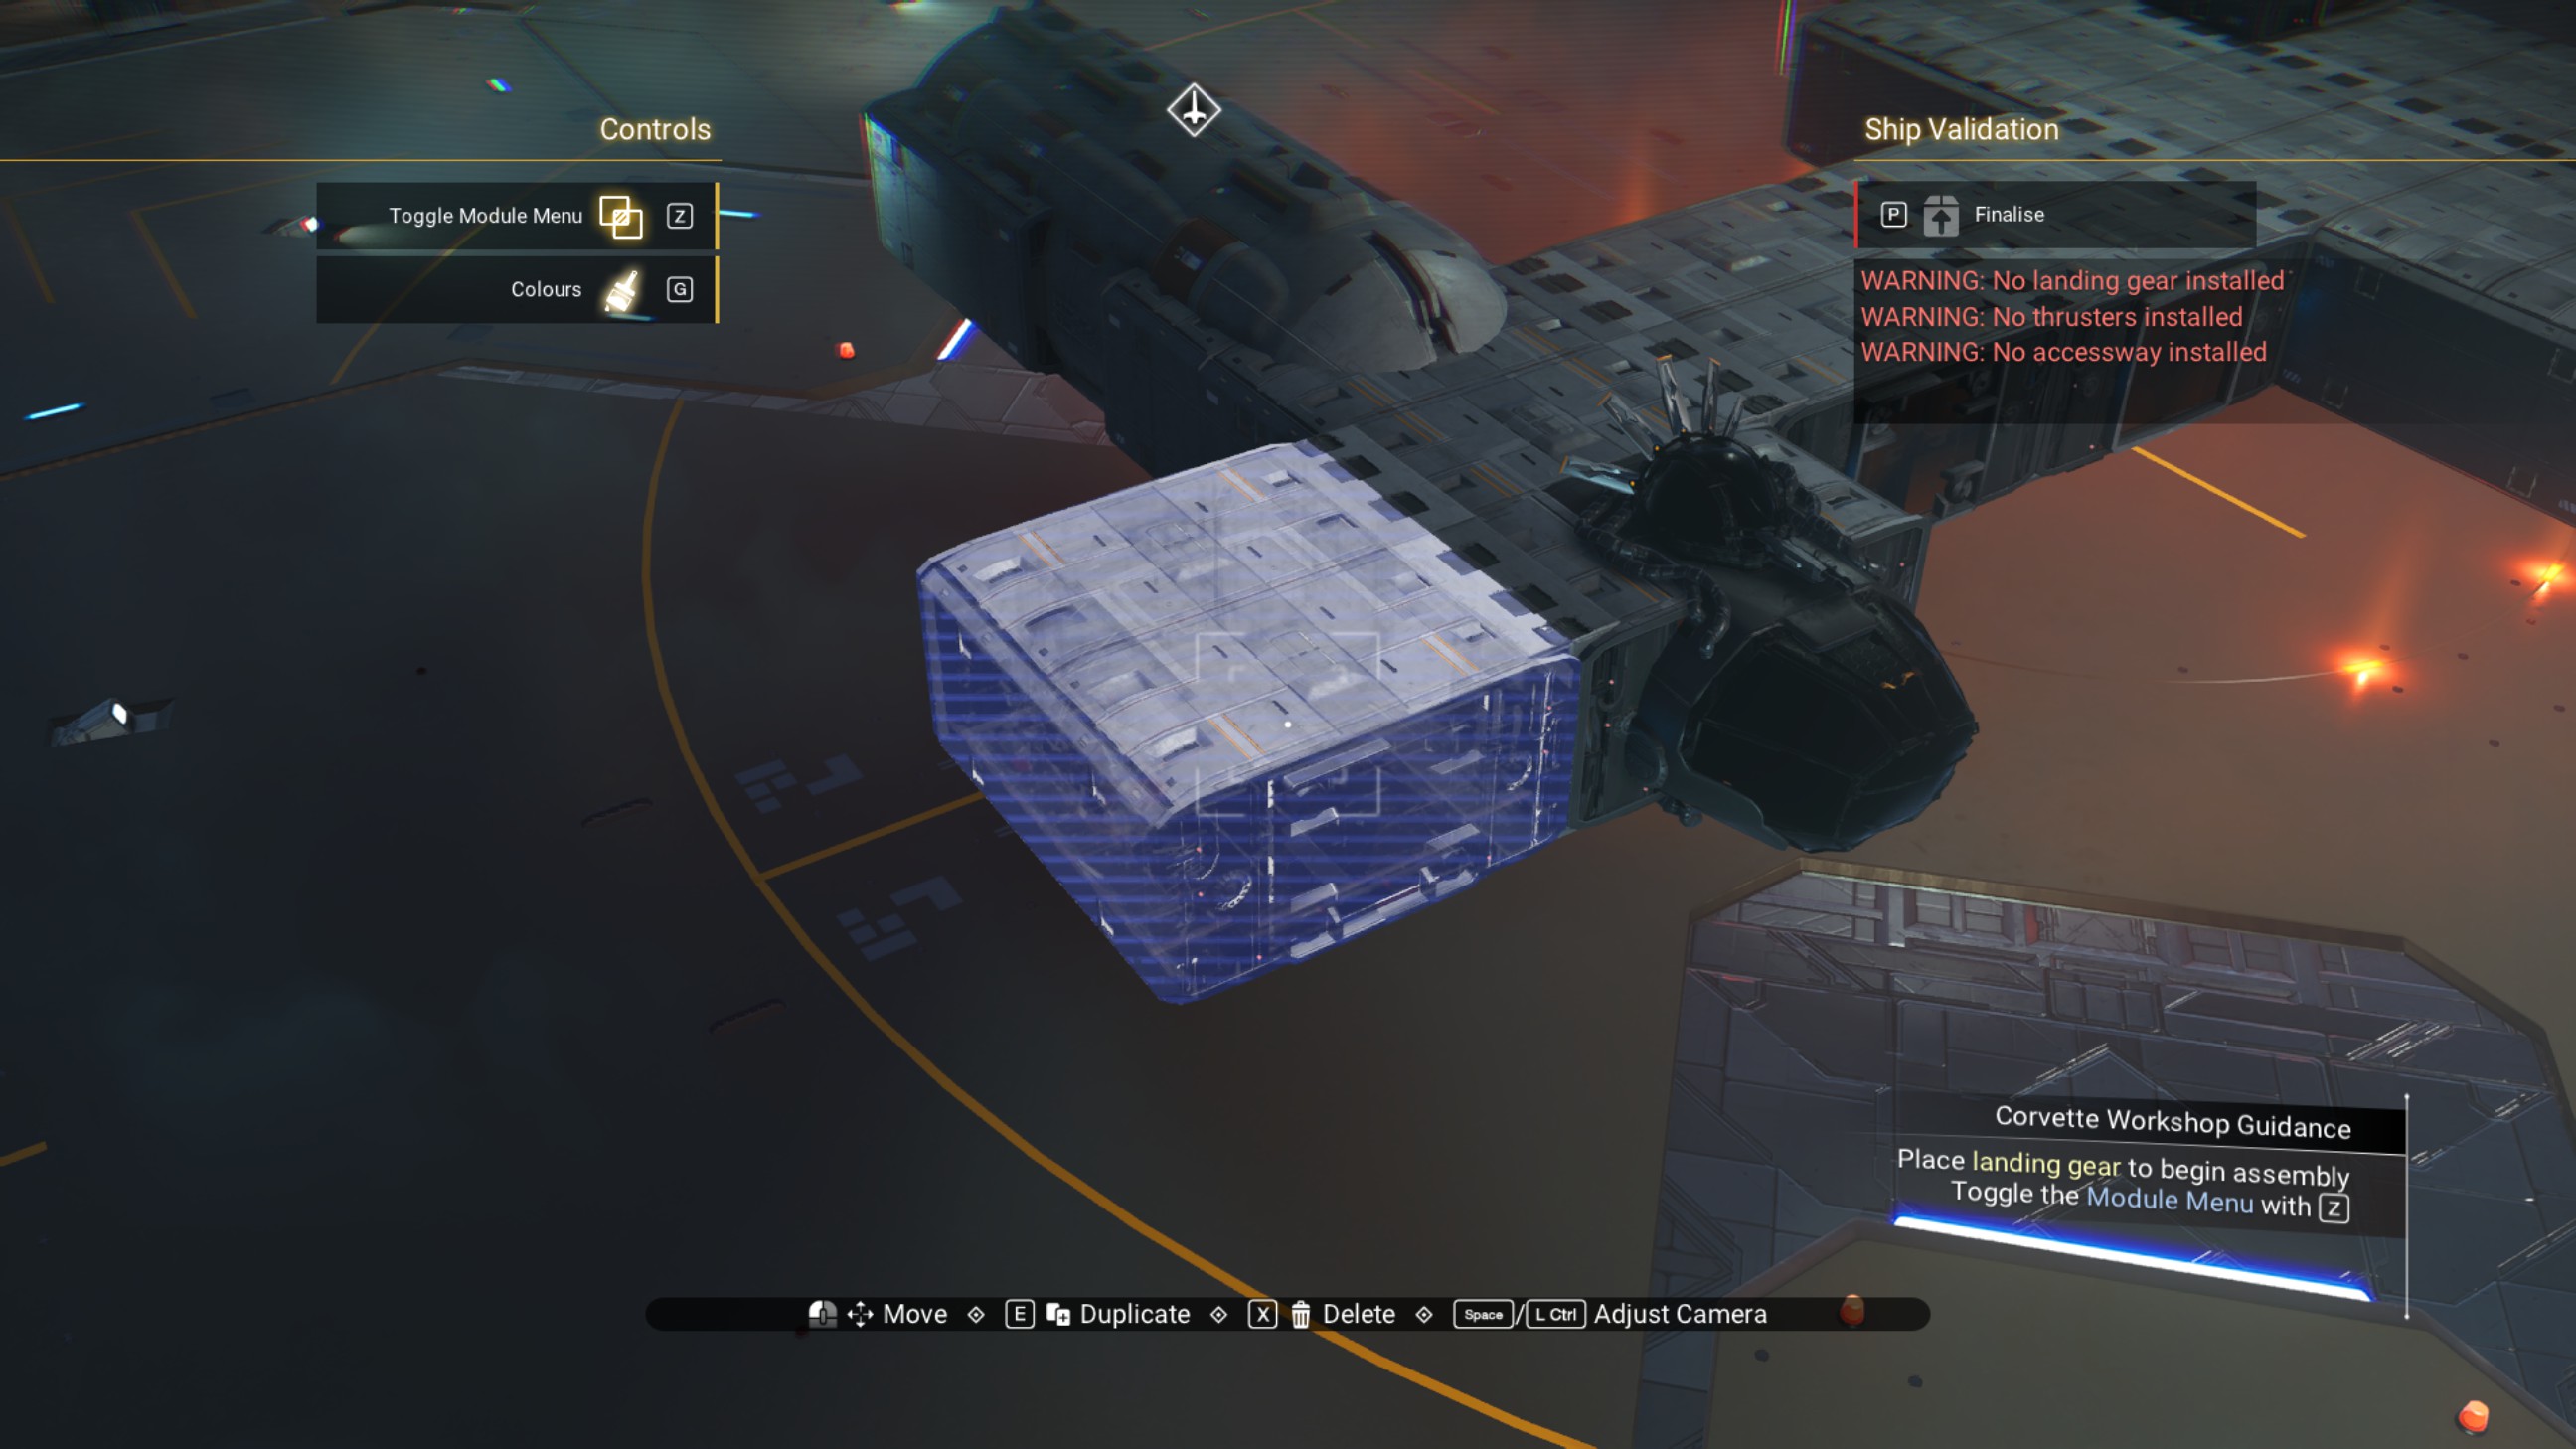
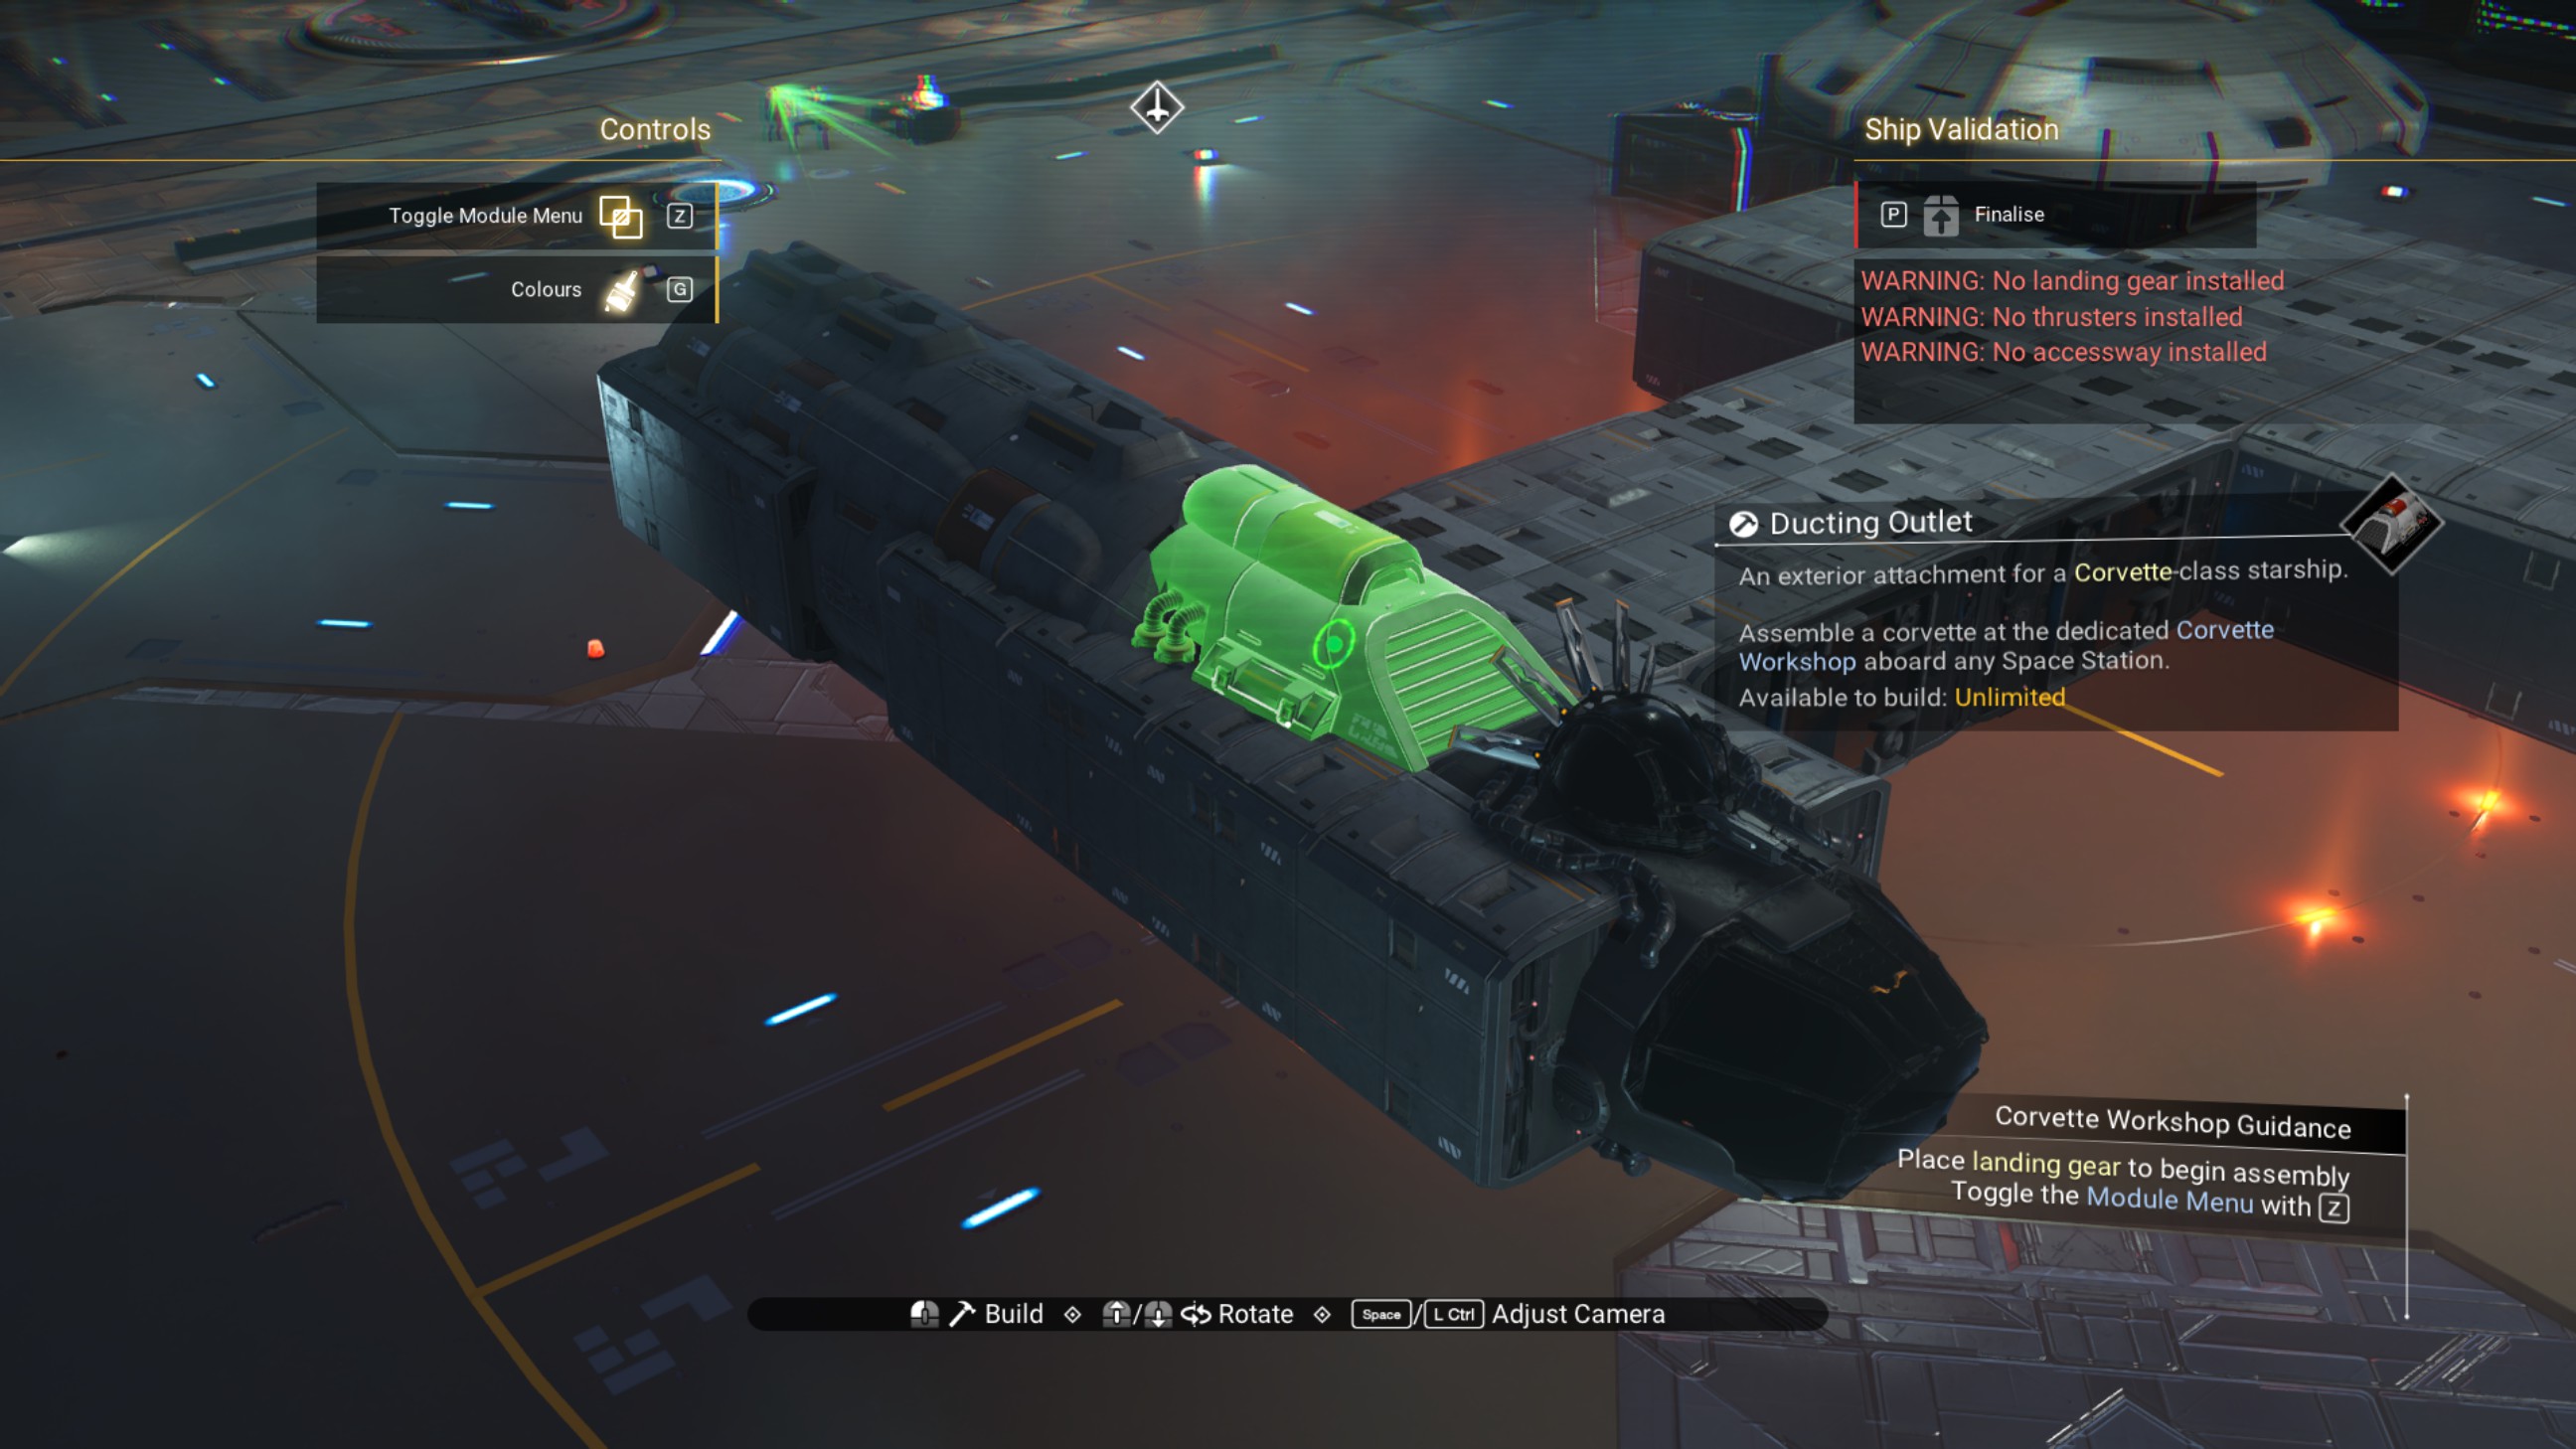
Place a second ducting outlet on top, overlapping the first, then place another ducting outlet on the bottom of the cockpit structure, as shown.
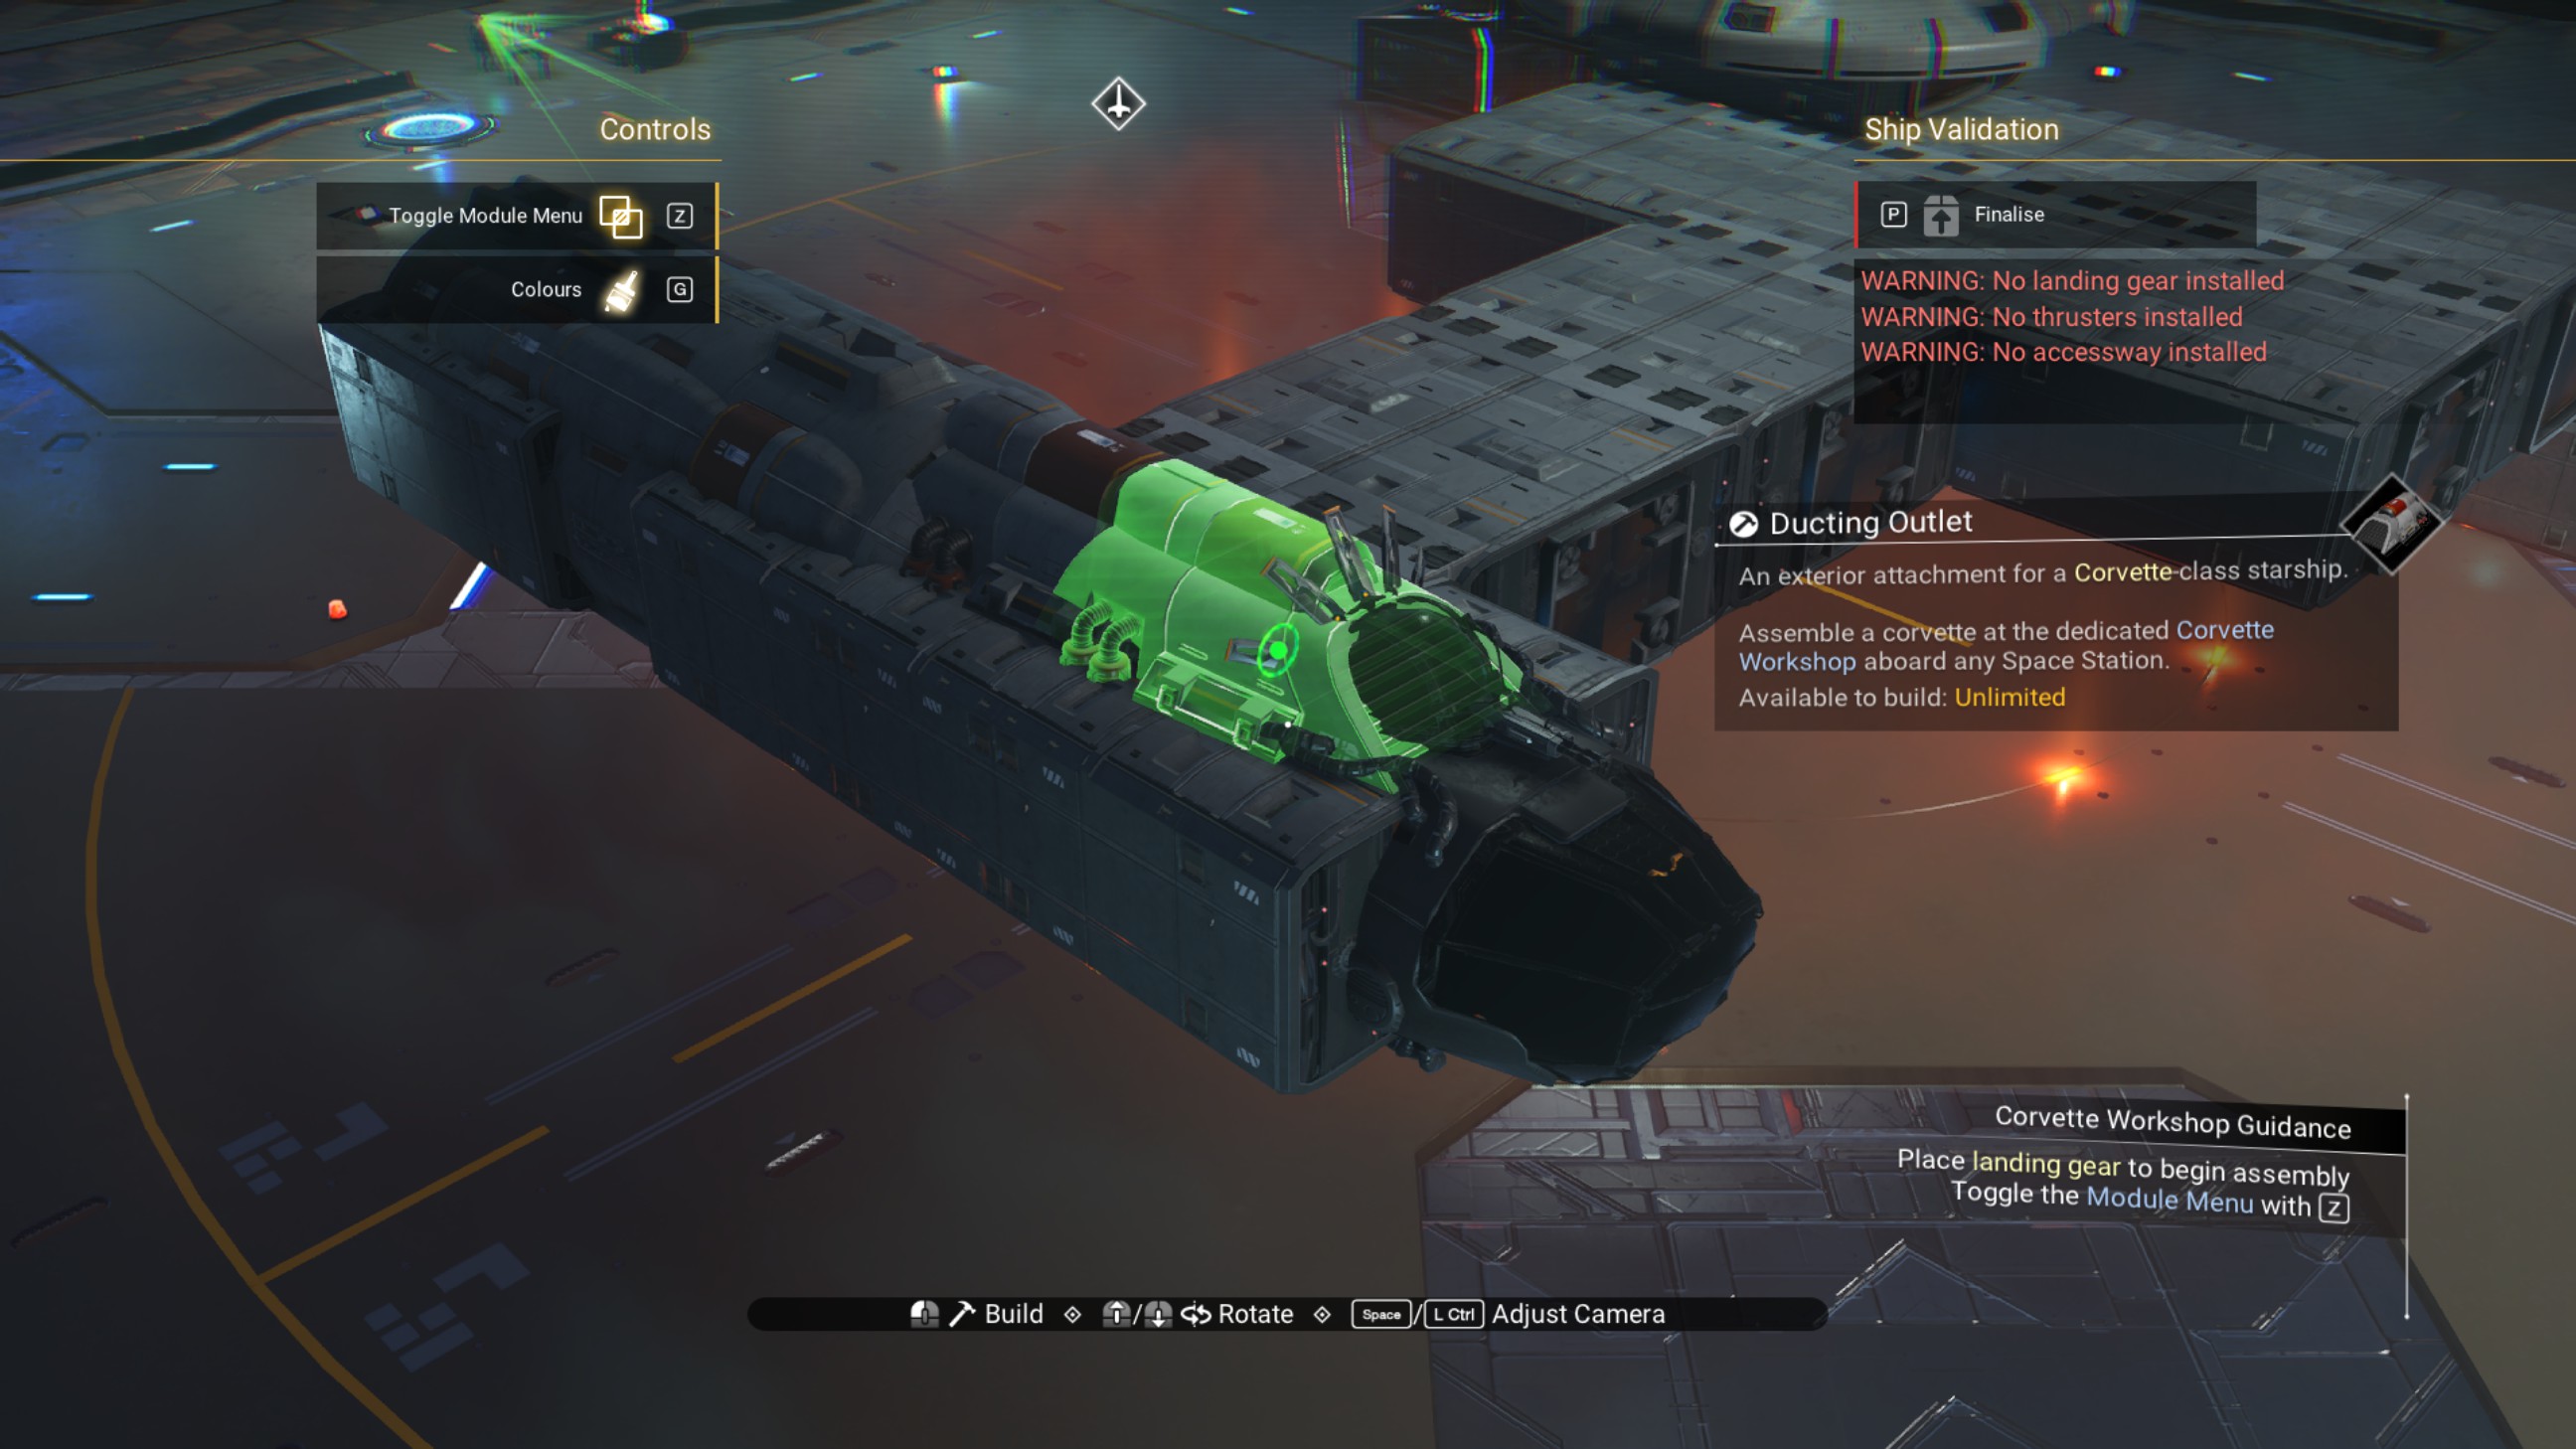
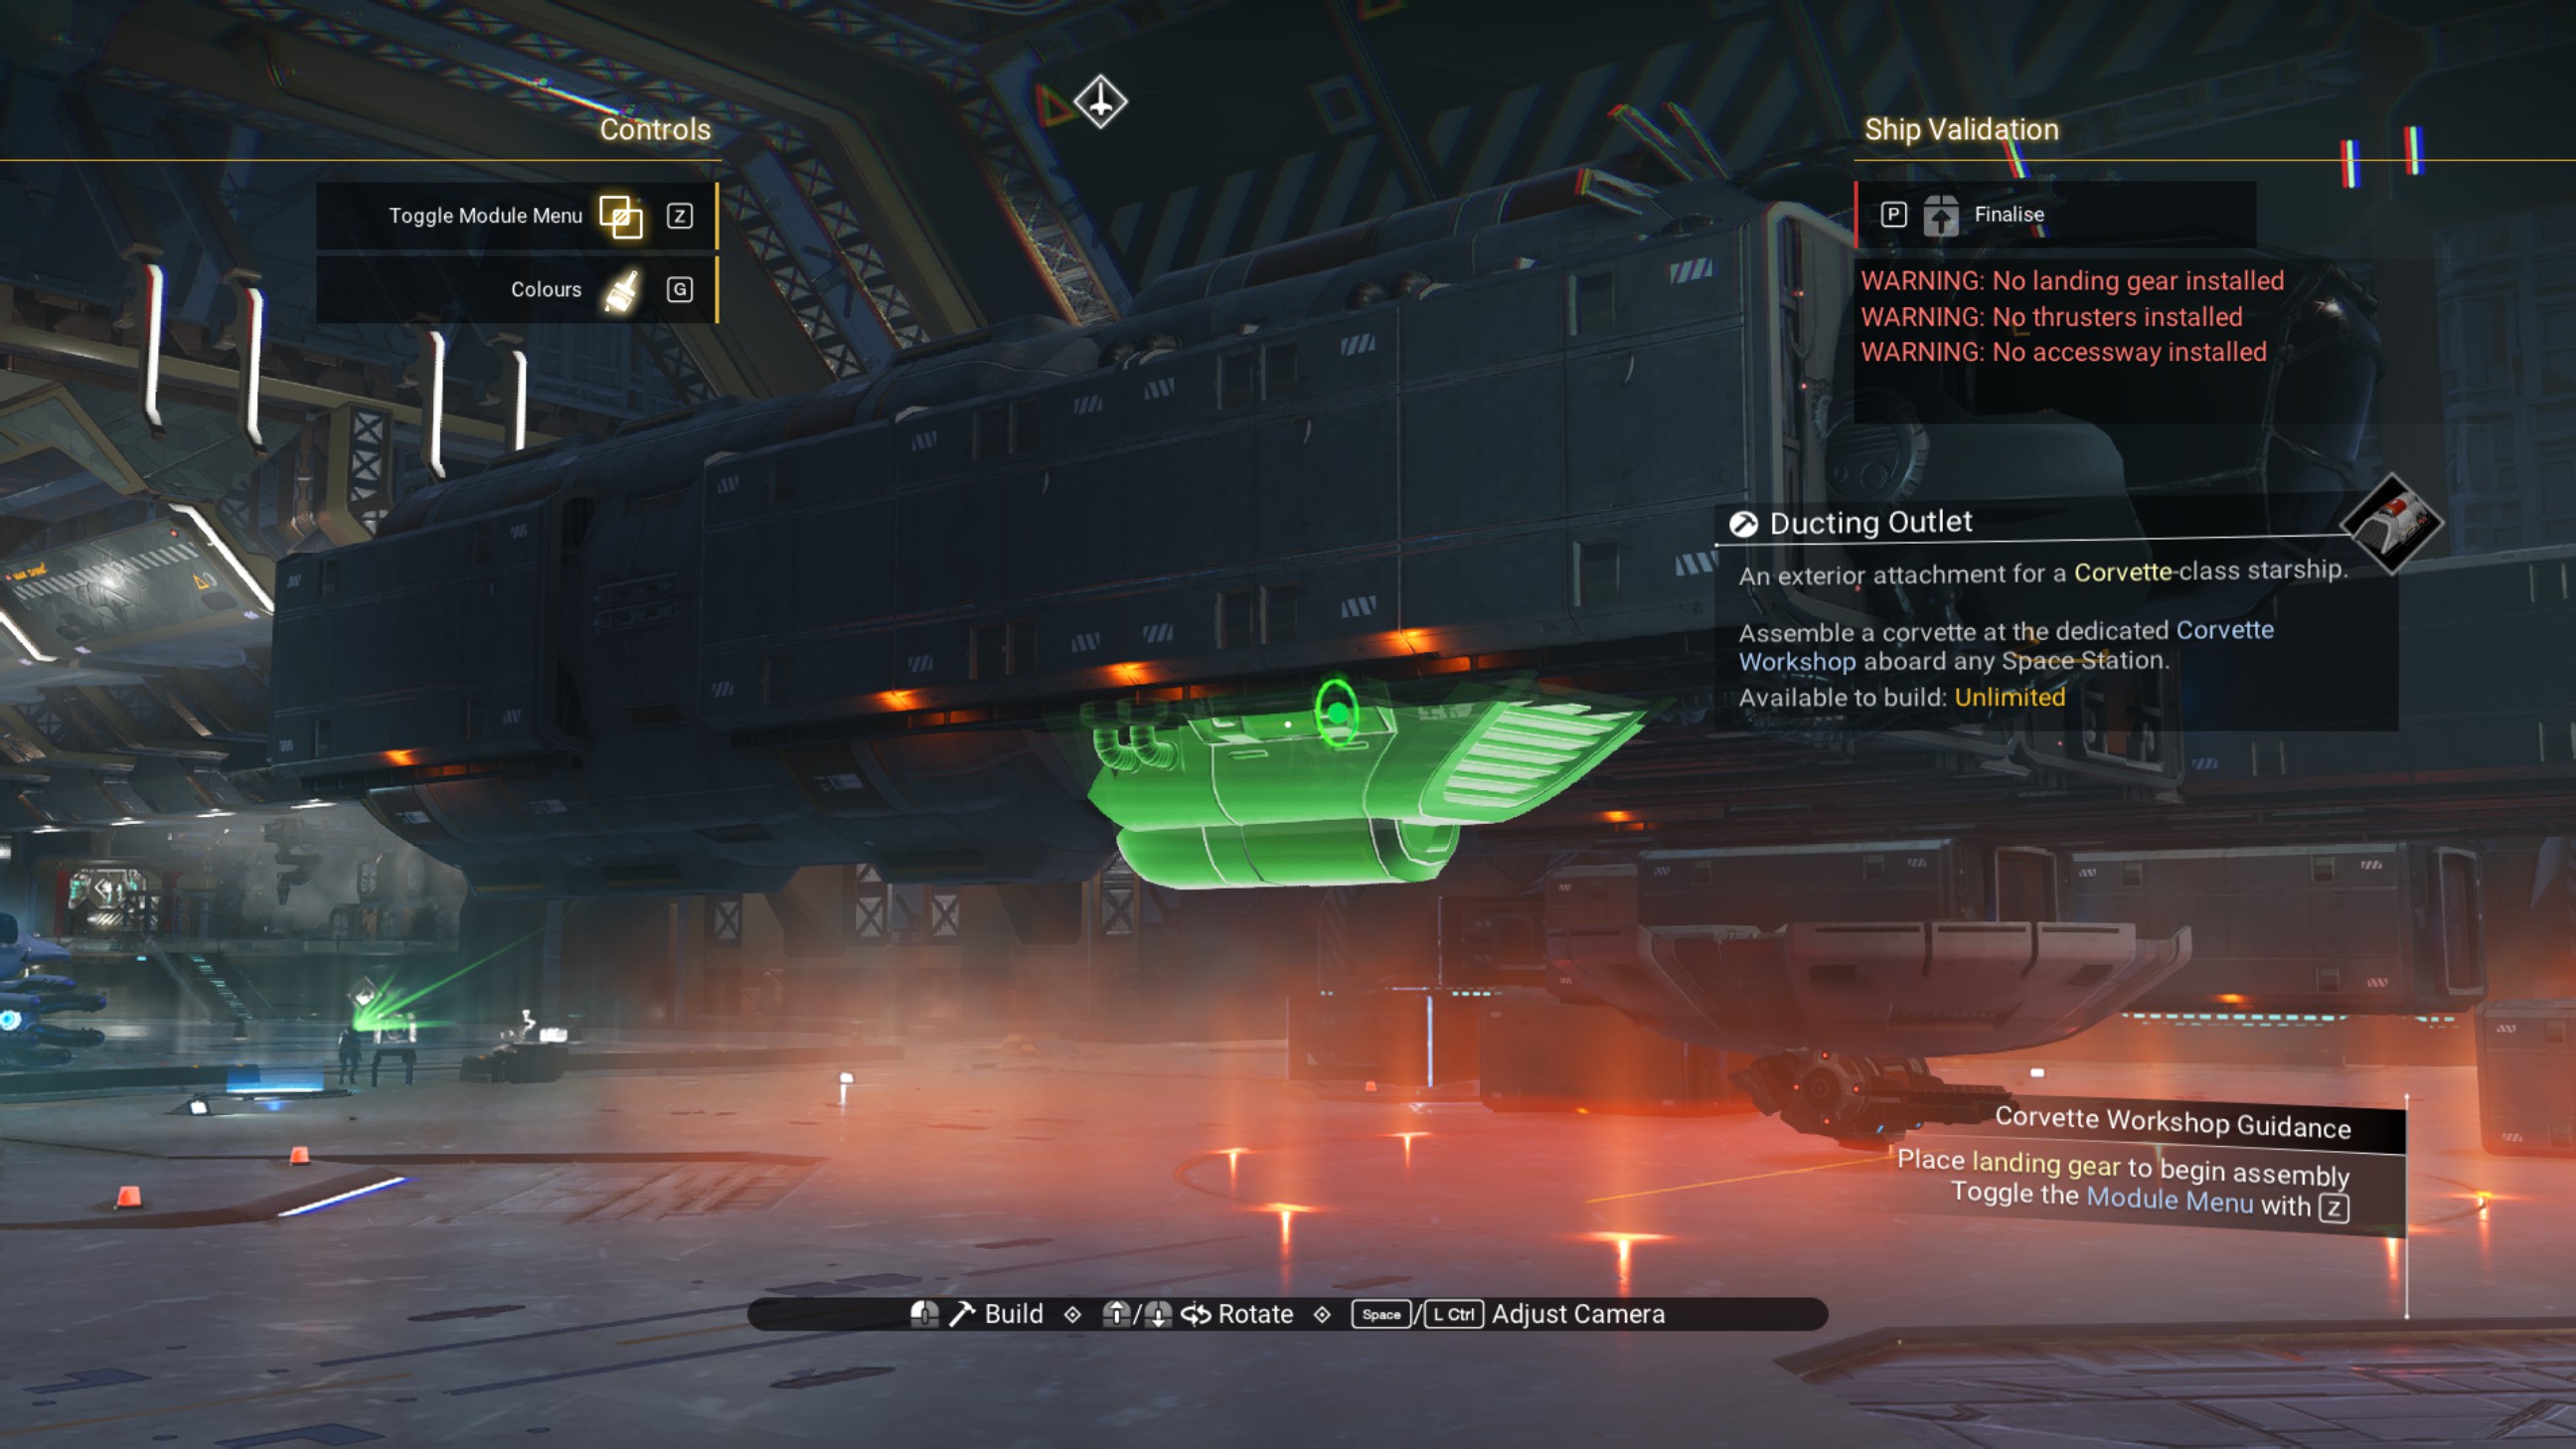
Do NOT place a ducting outlet on the bottom in the forward position or it will cause problems when you remove the extra walkways.
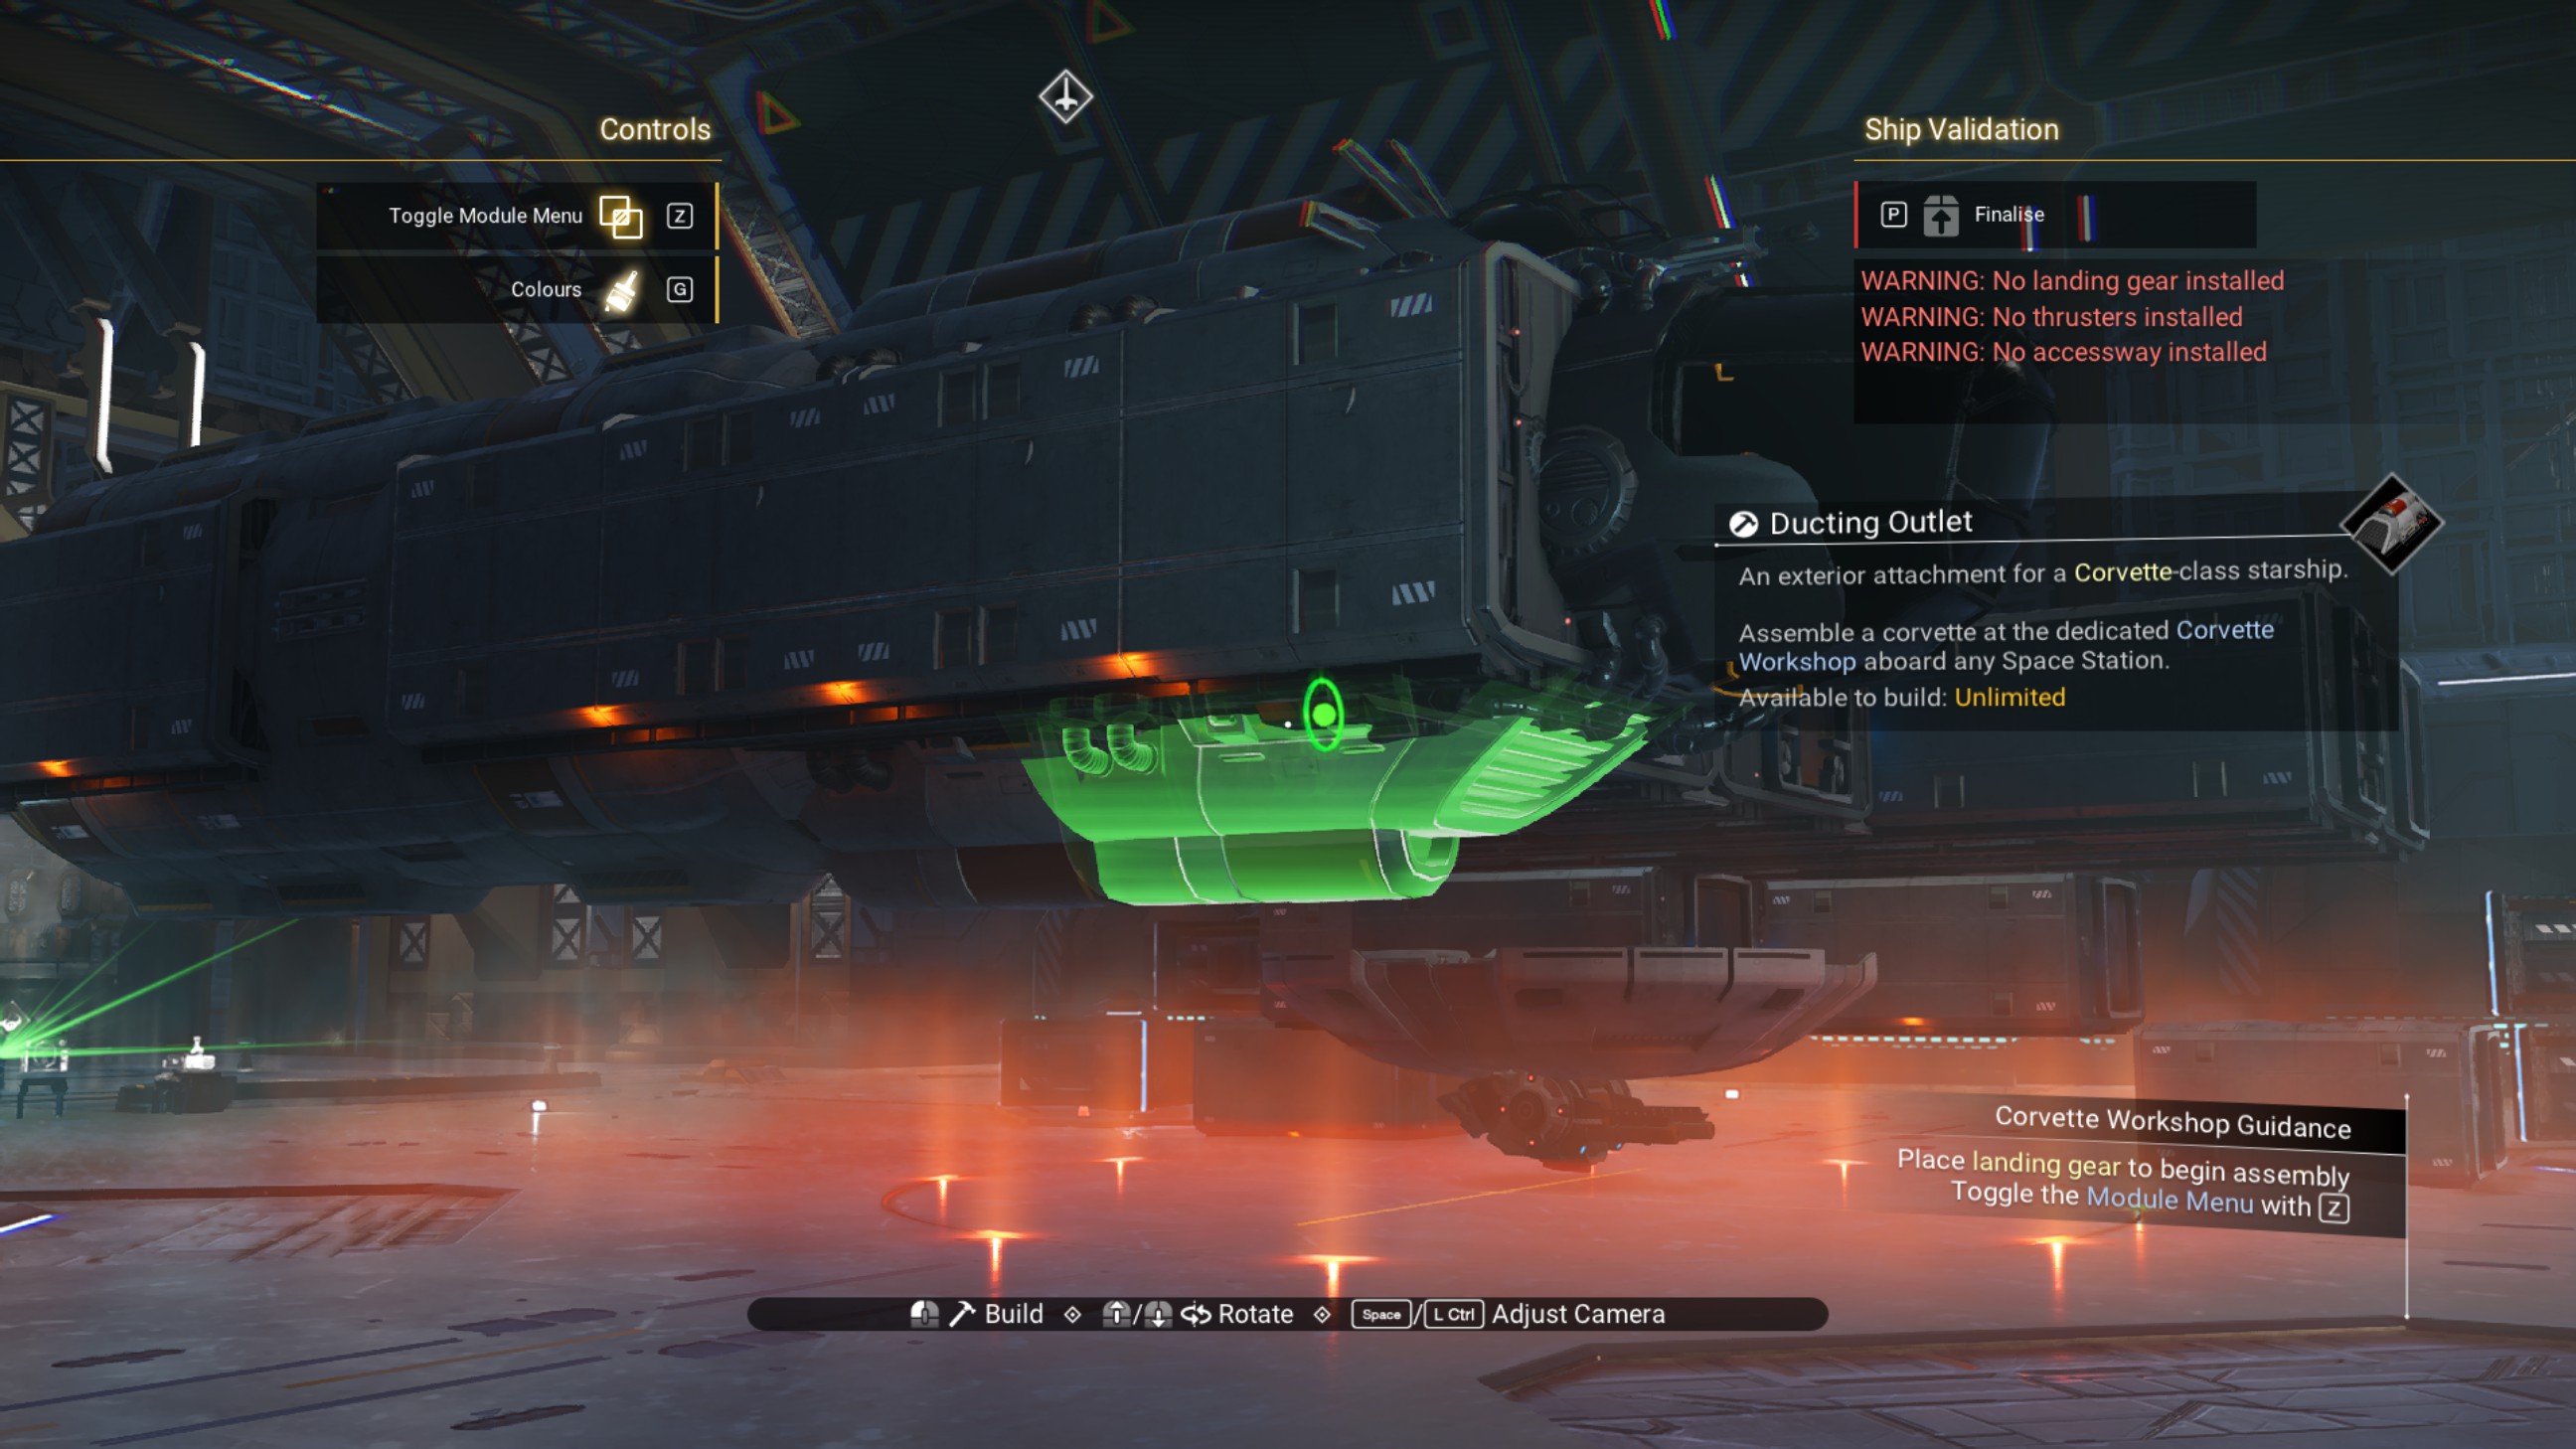
Delete the forward overlapping walkway, and the center walkway in the cockpit structure.
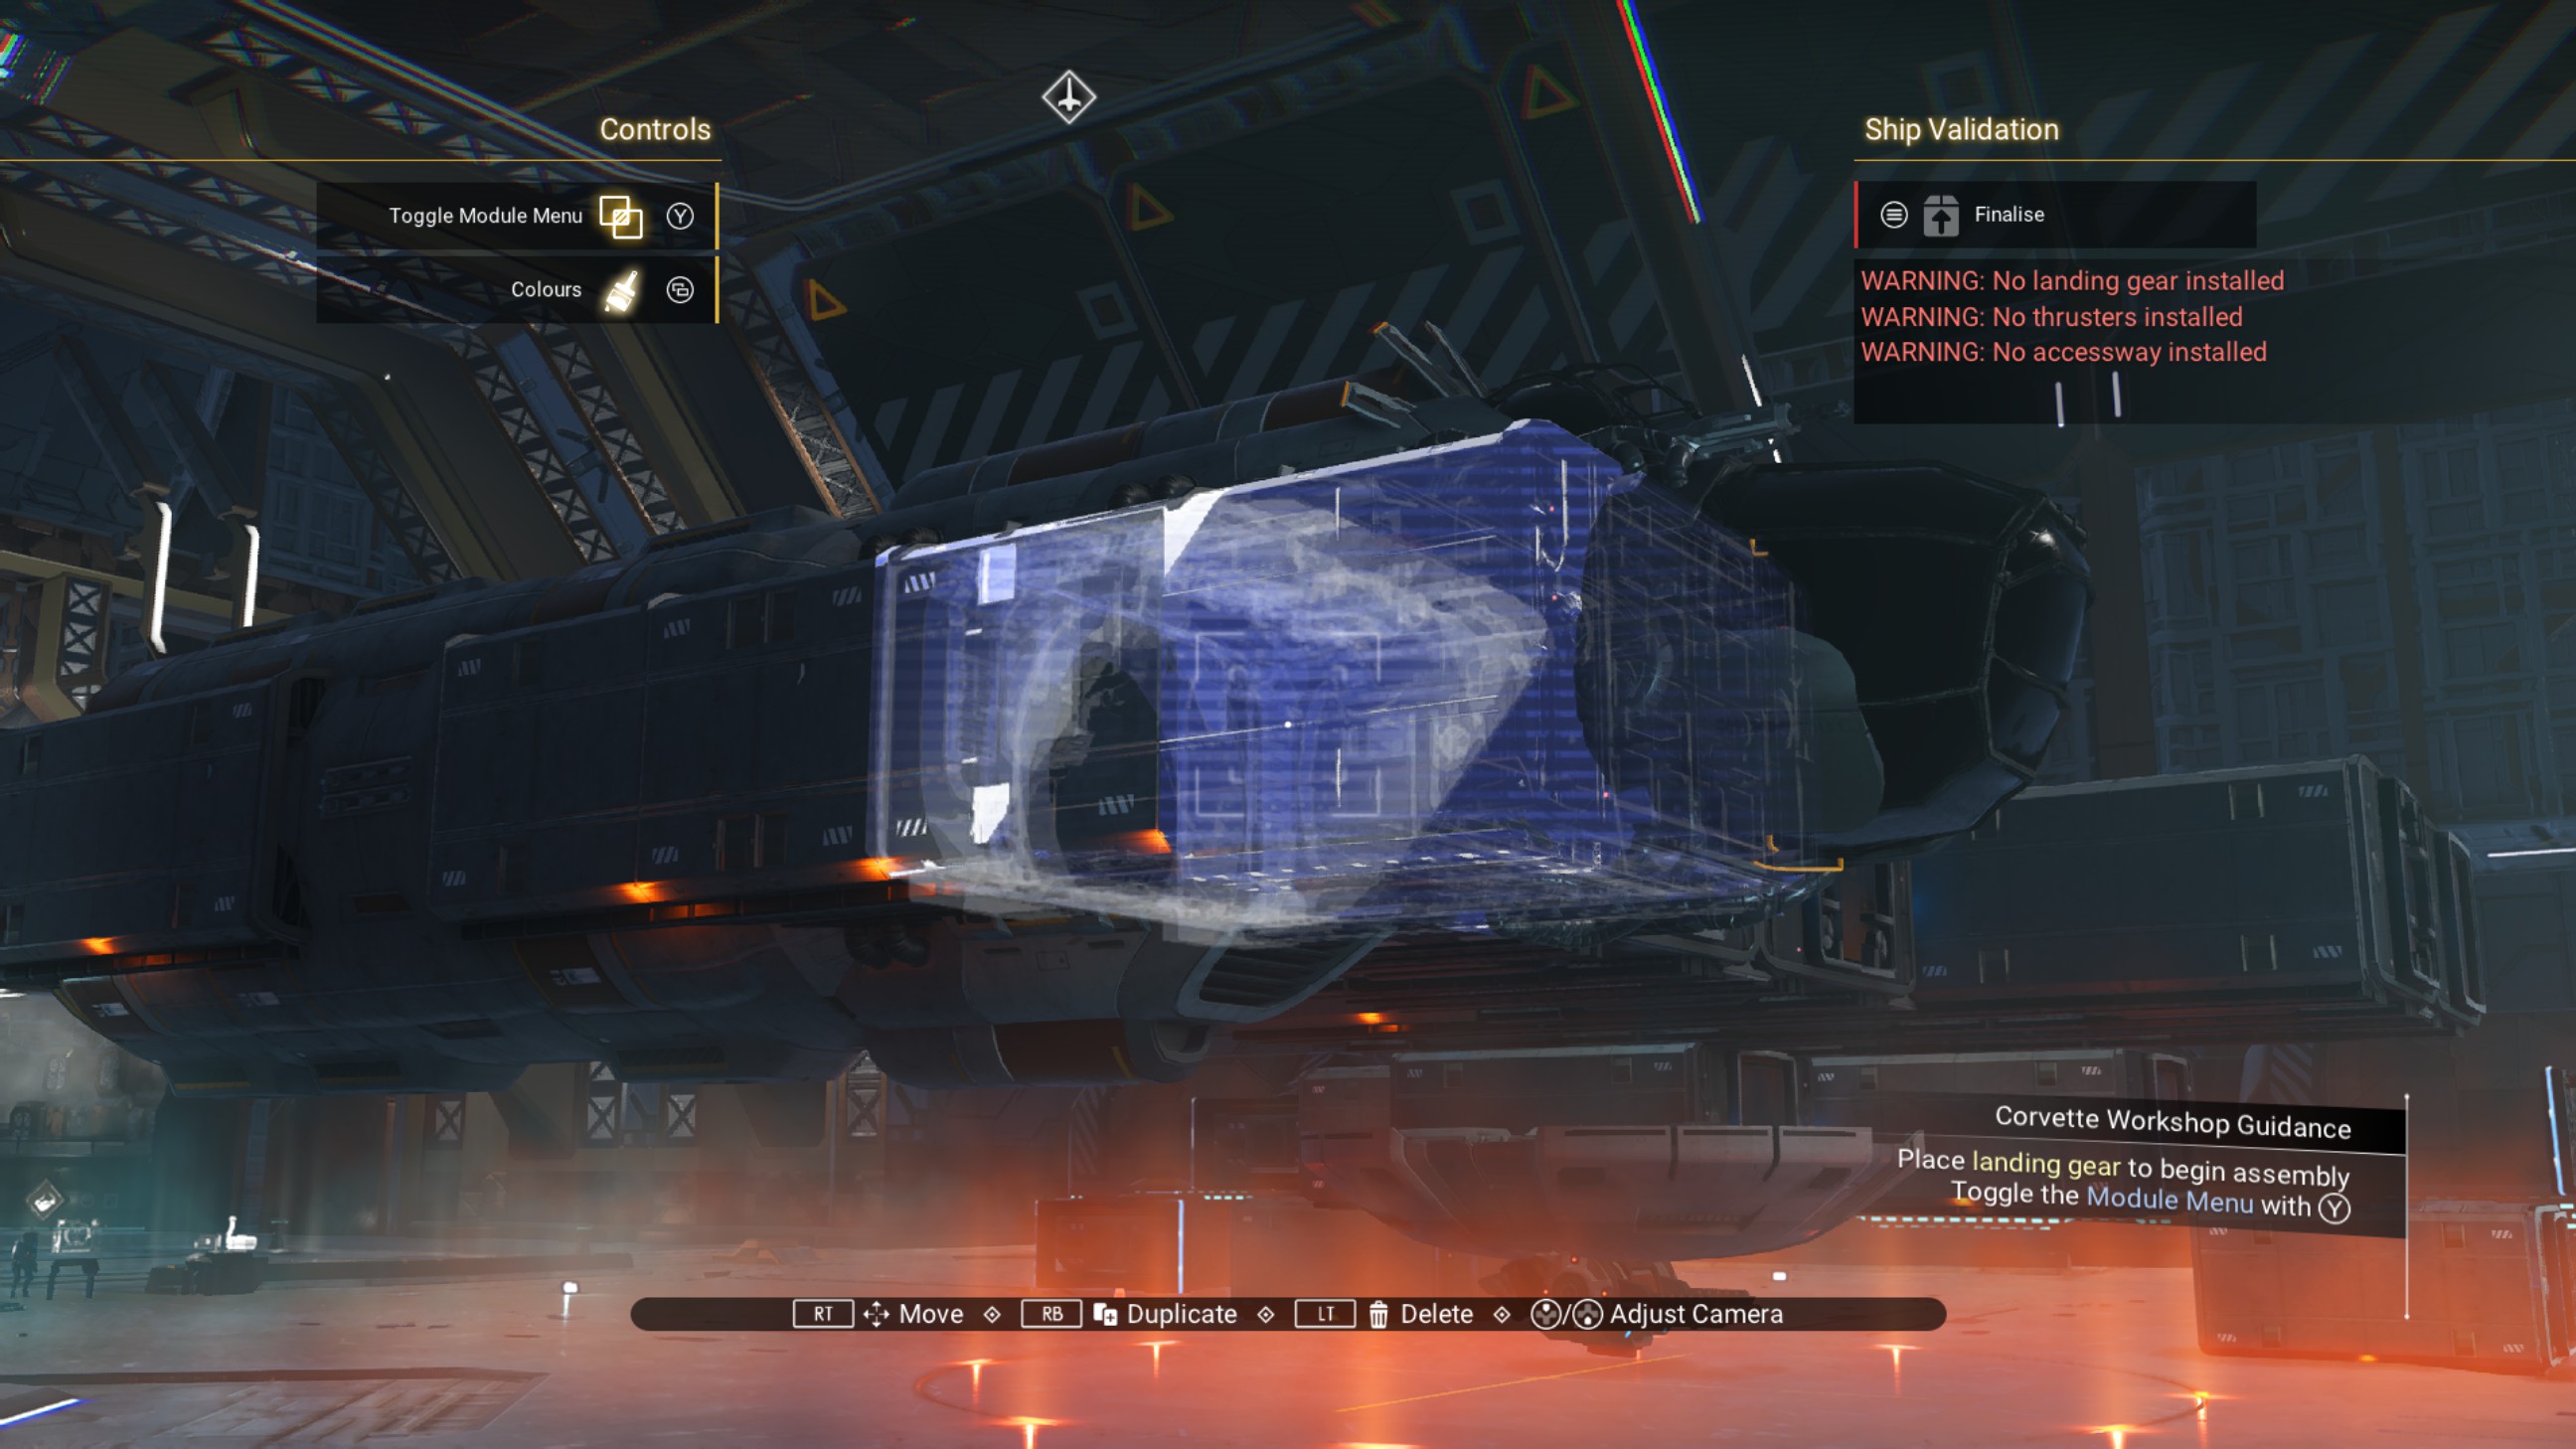
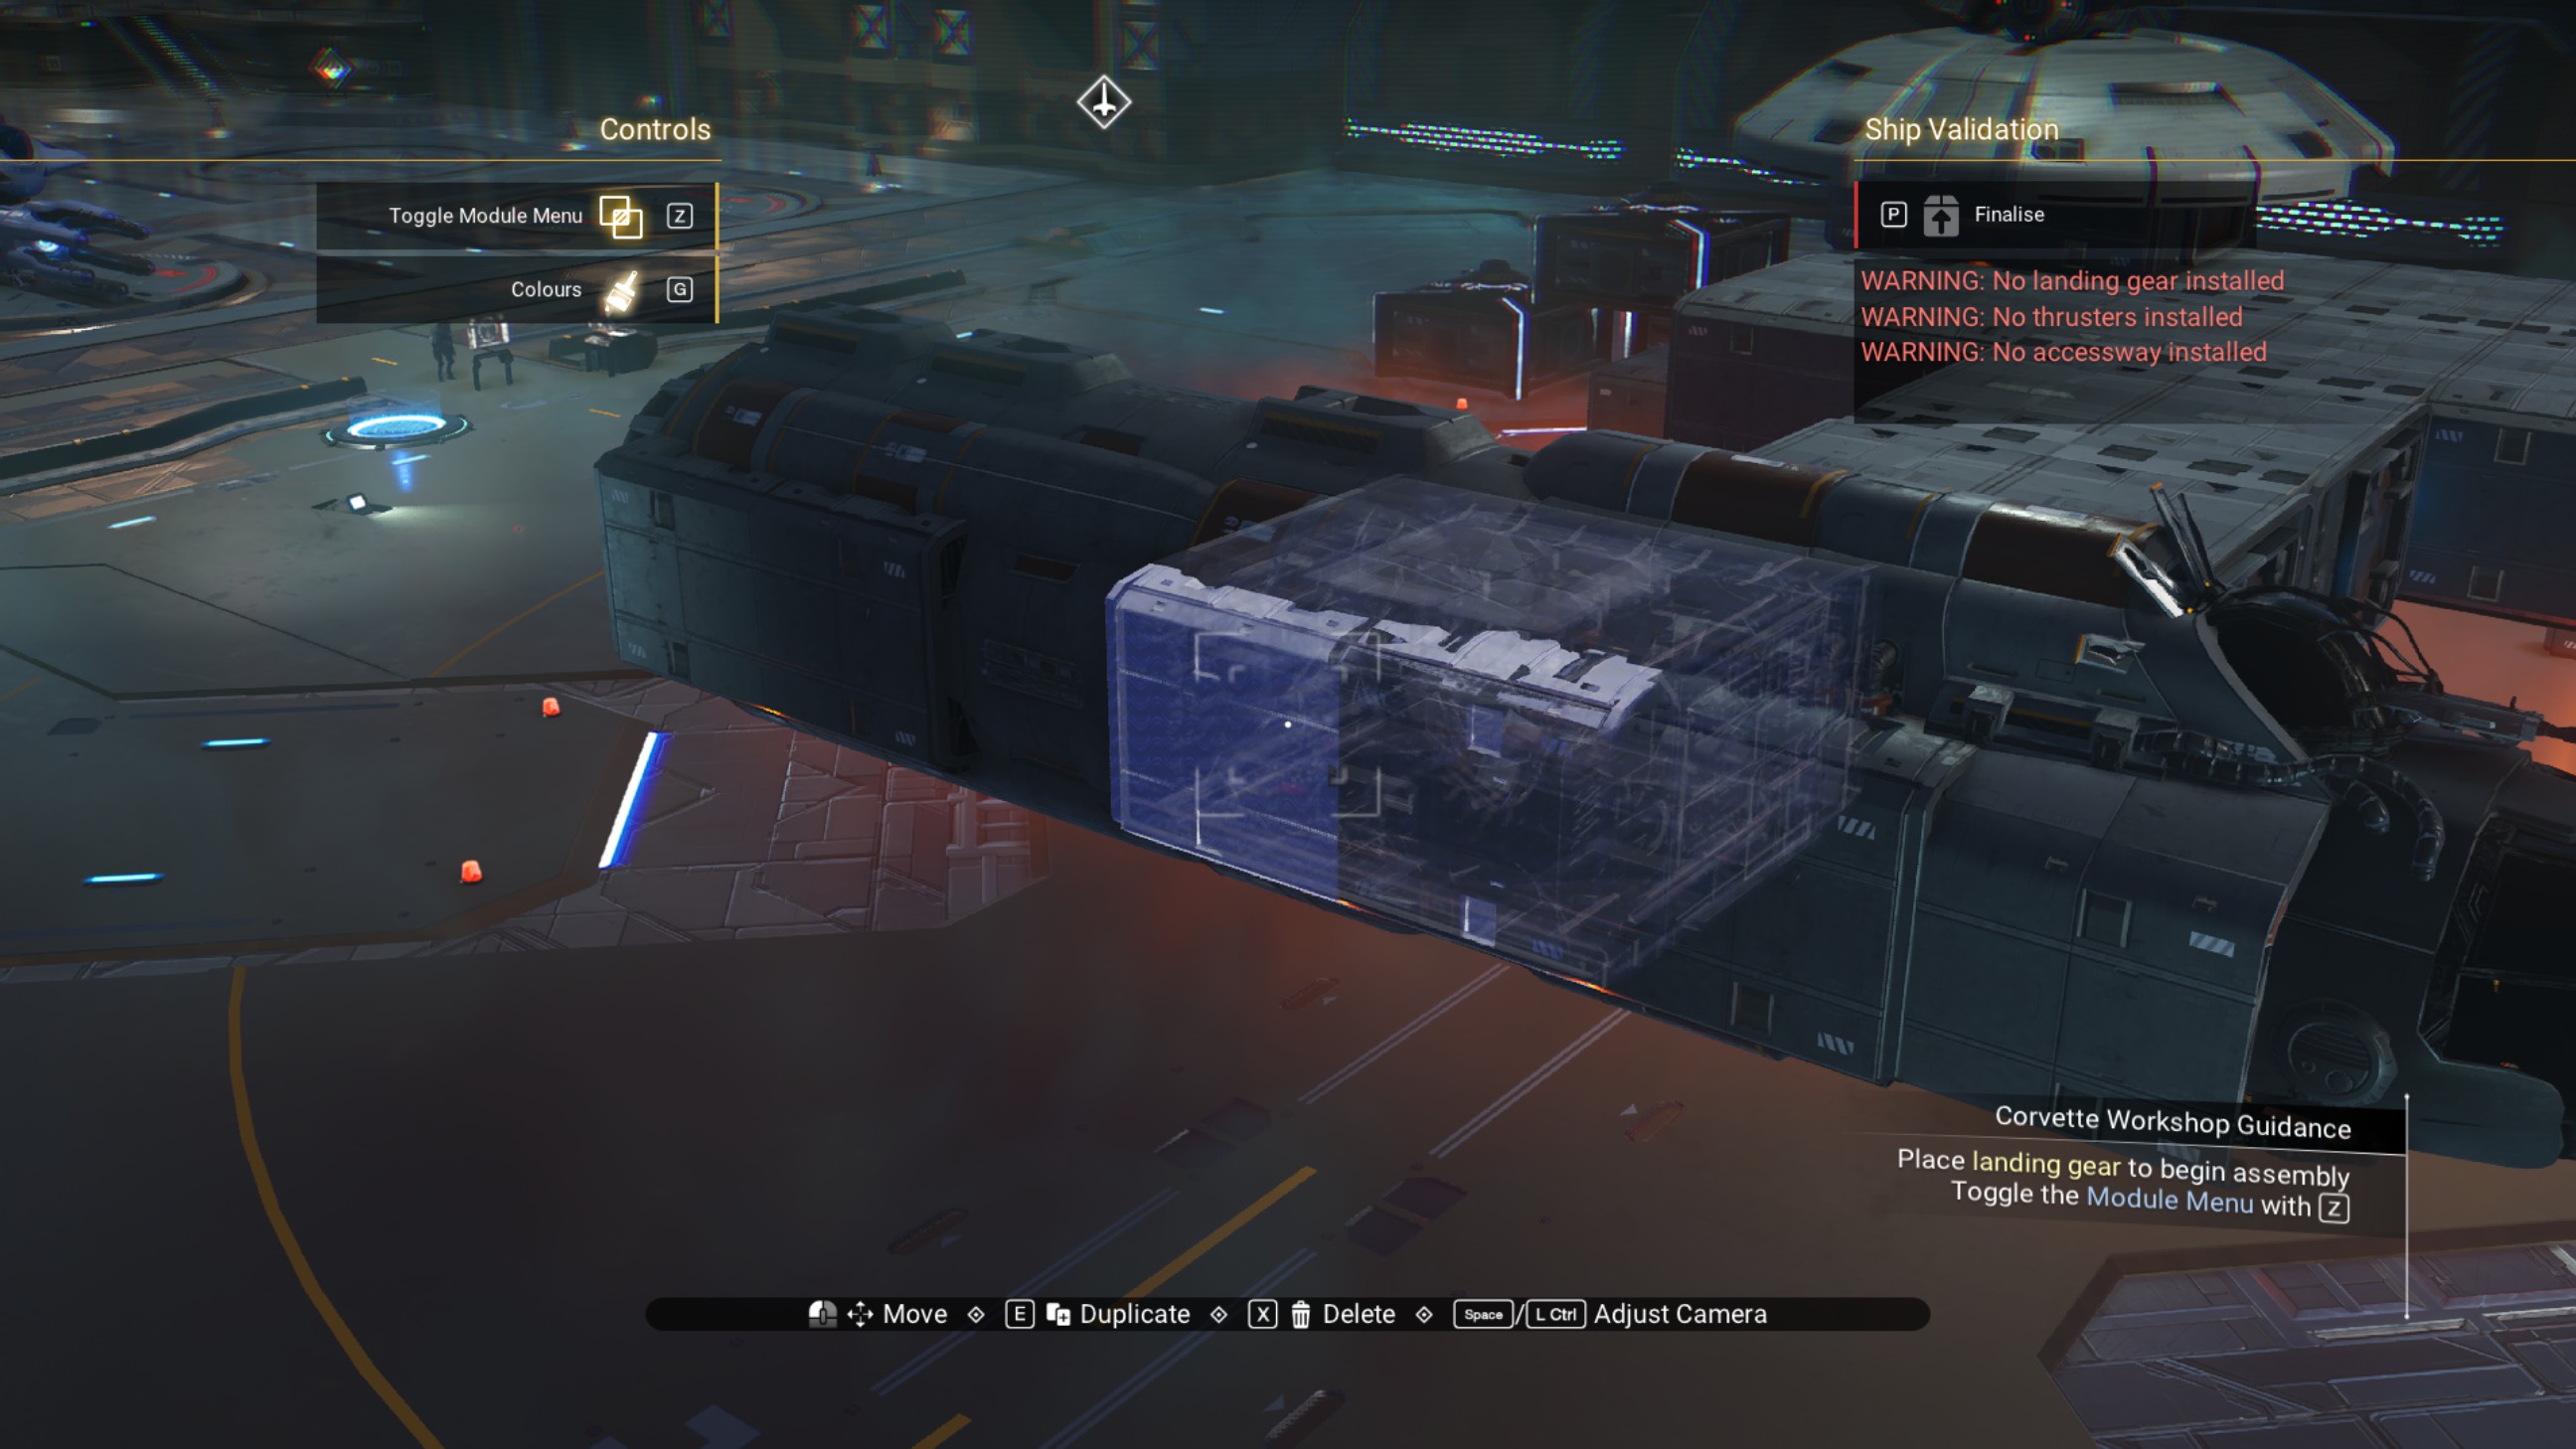
The front of the cockpit structure should look like this.
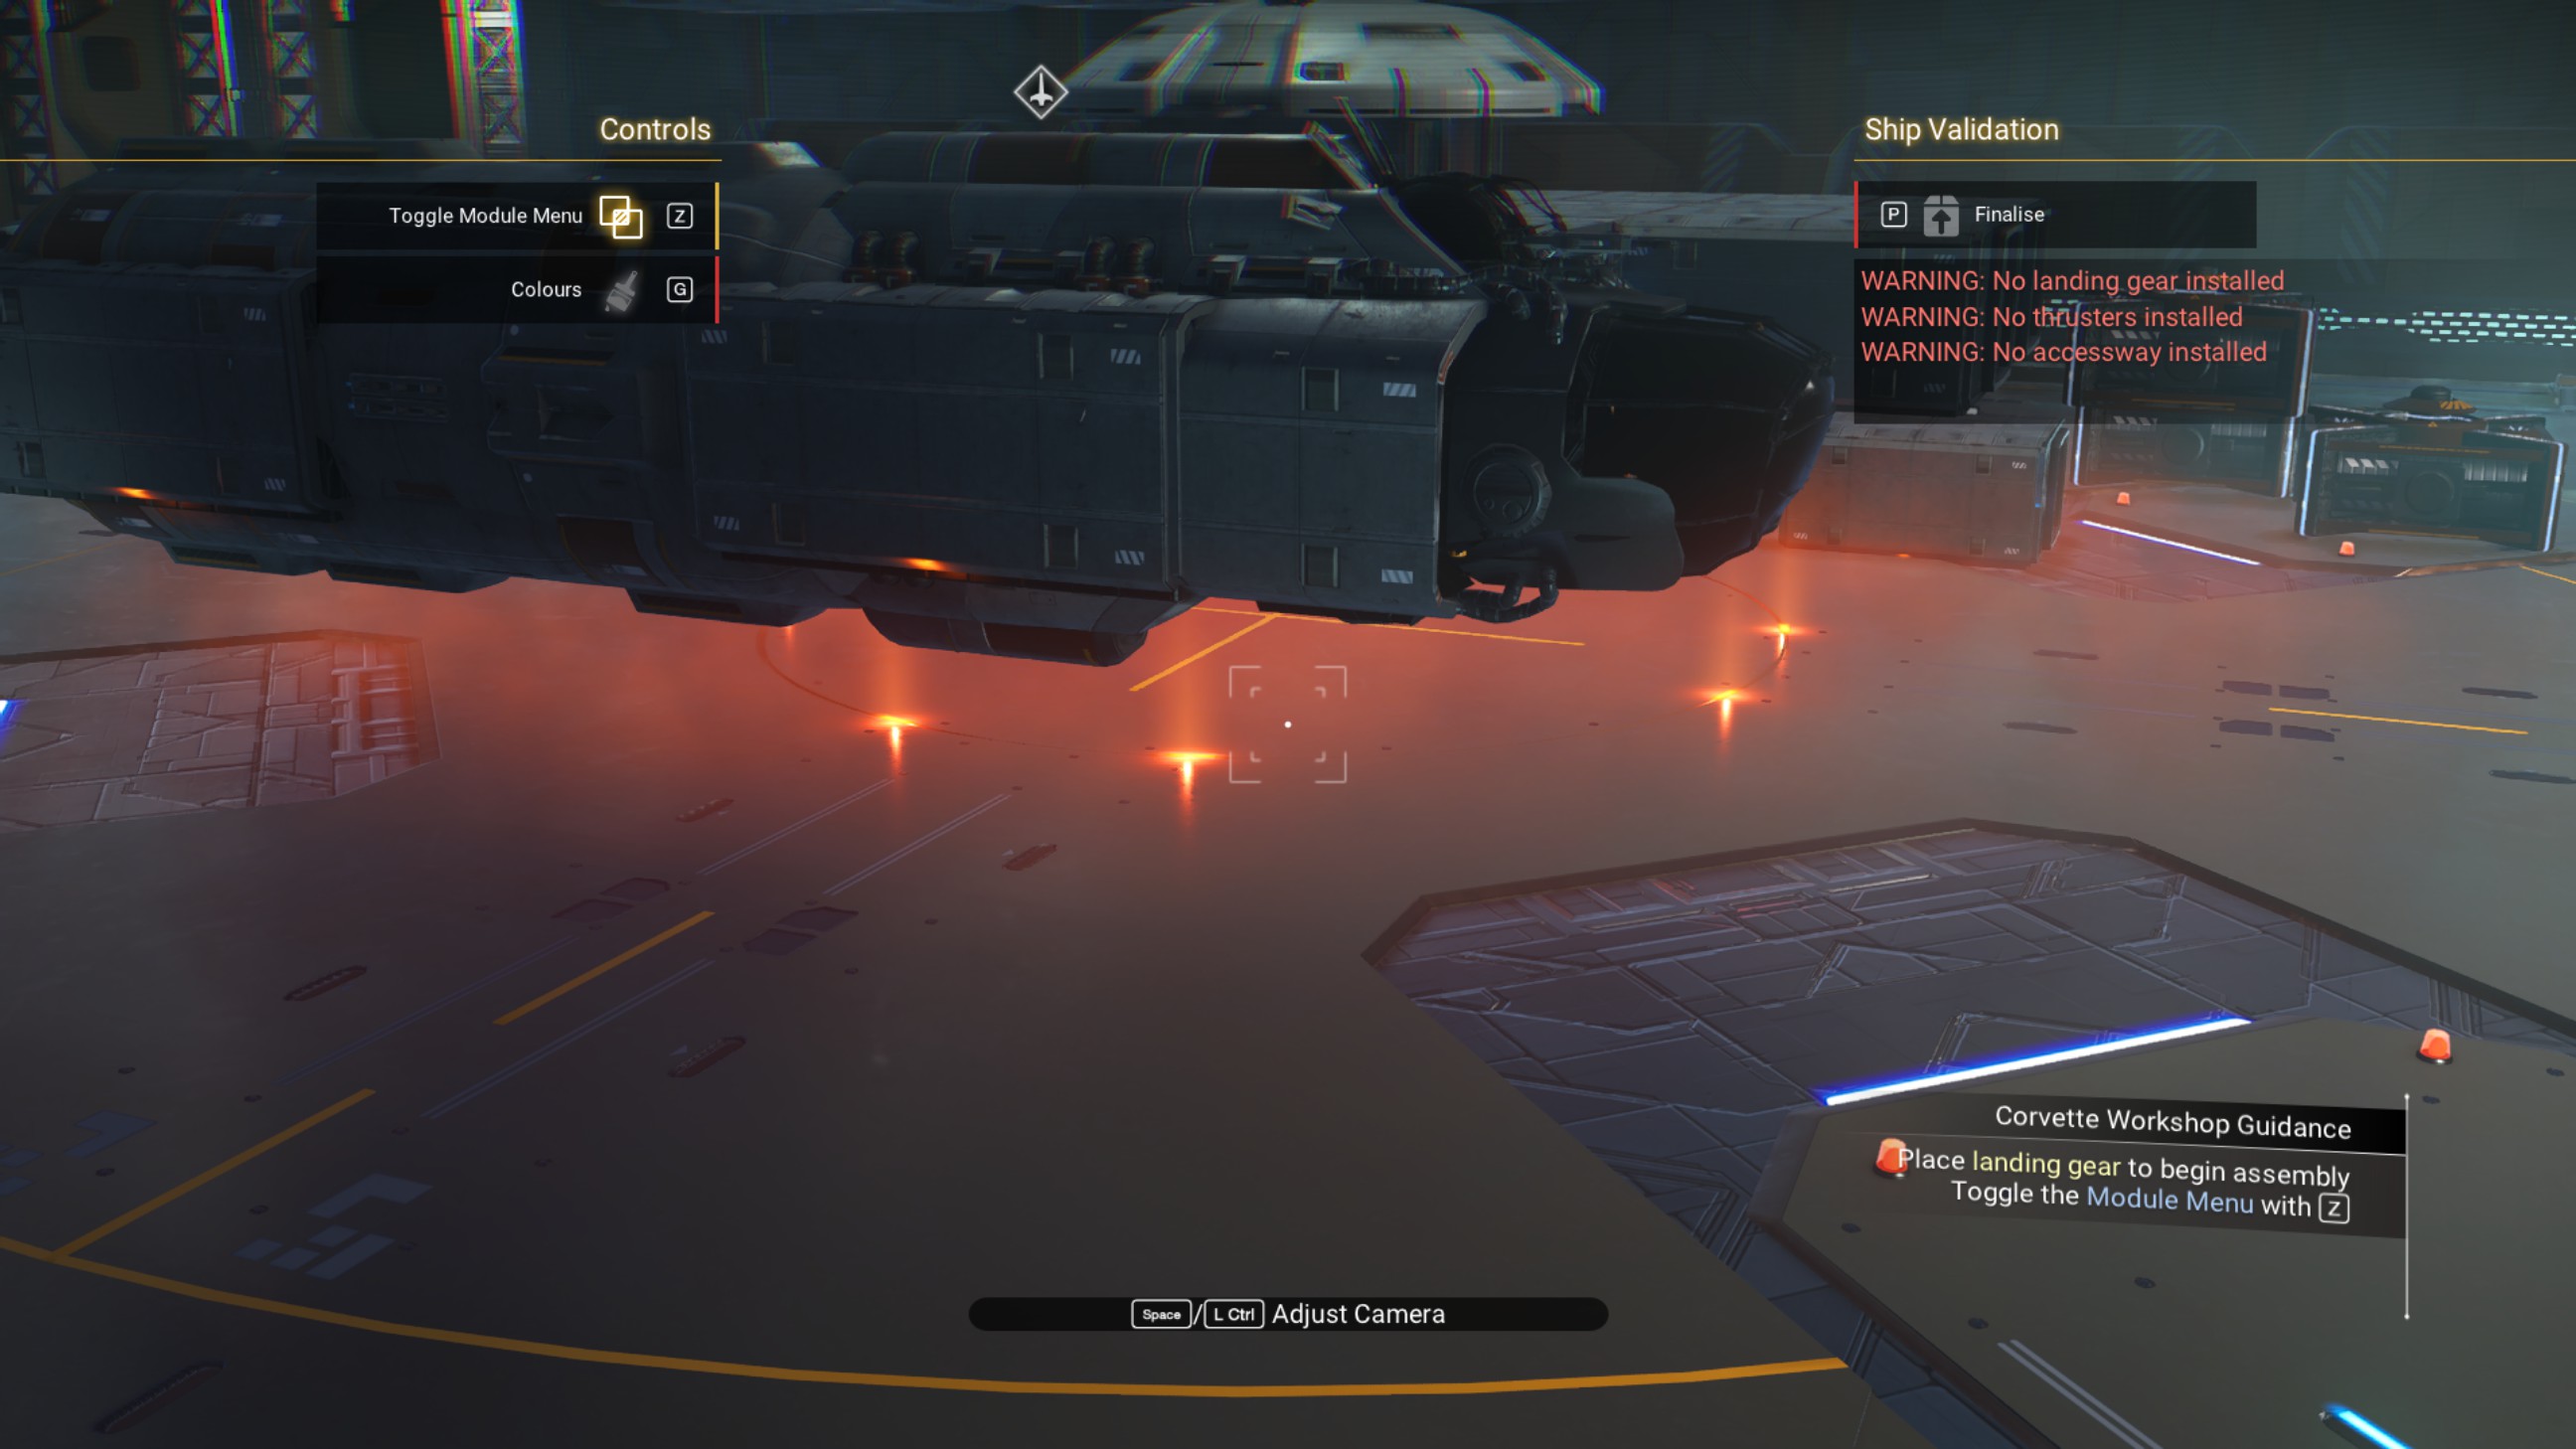
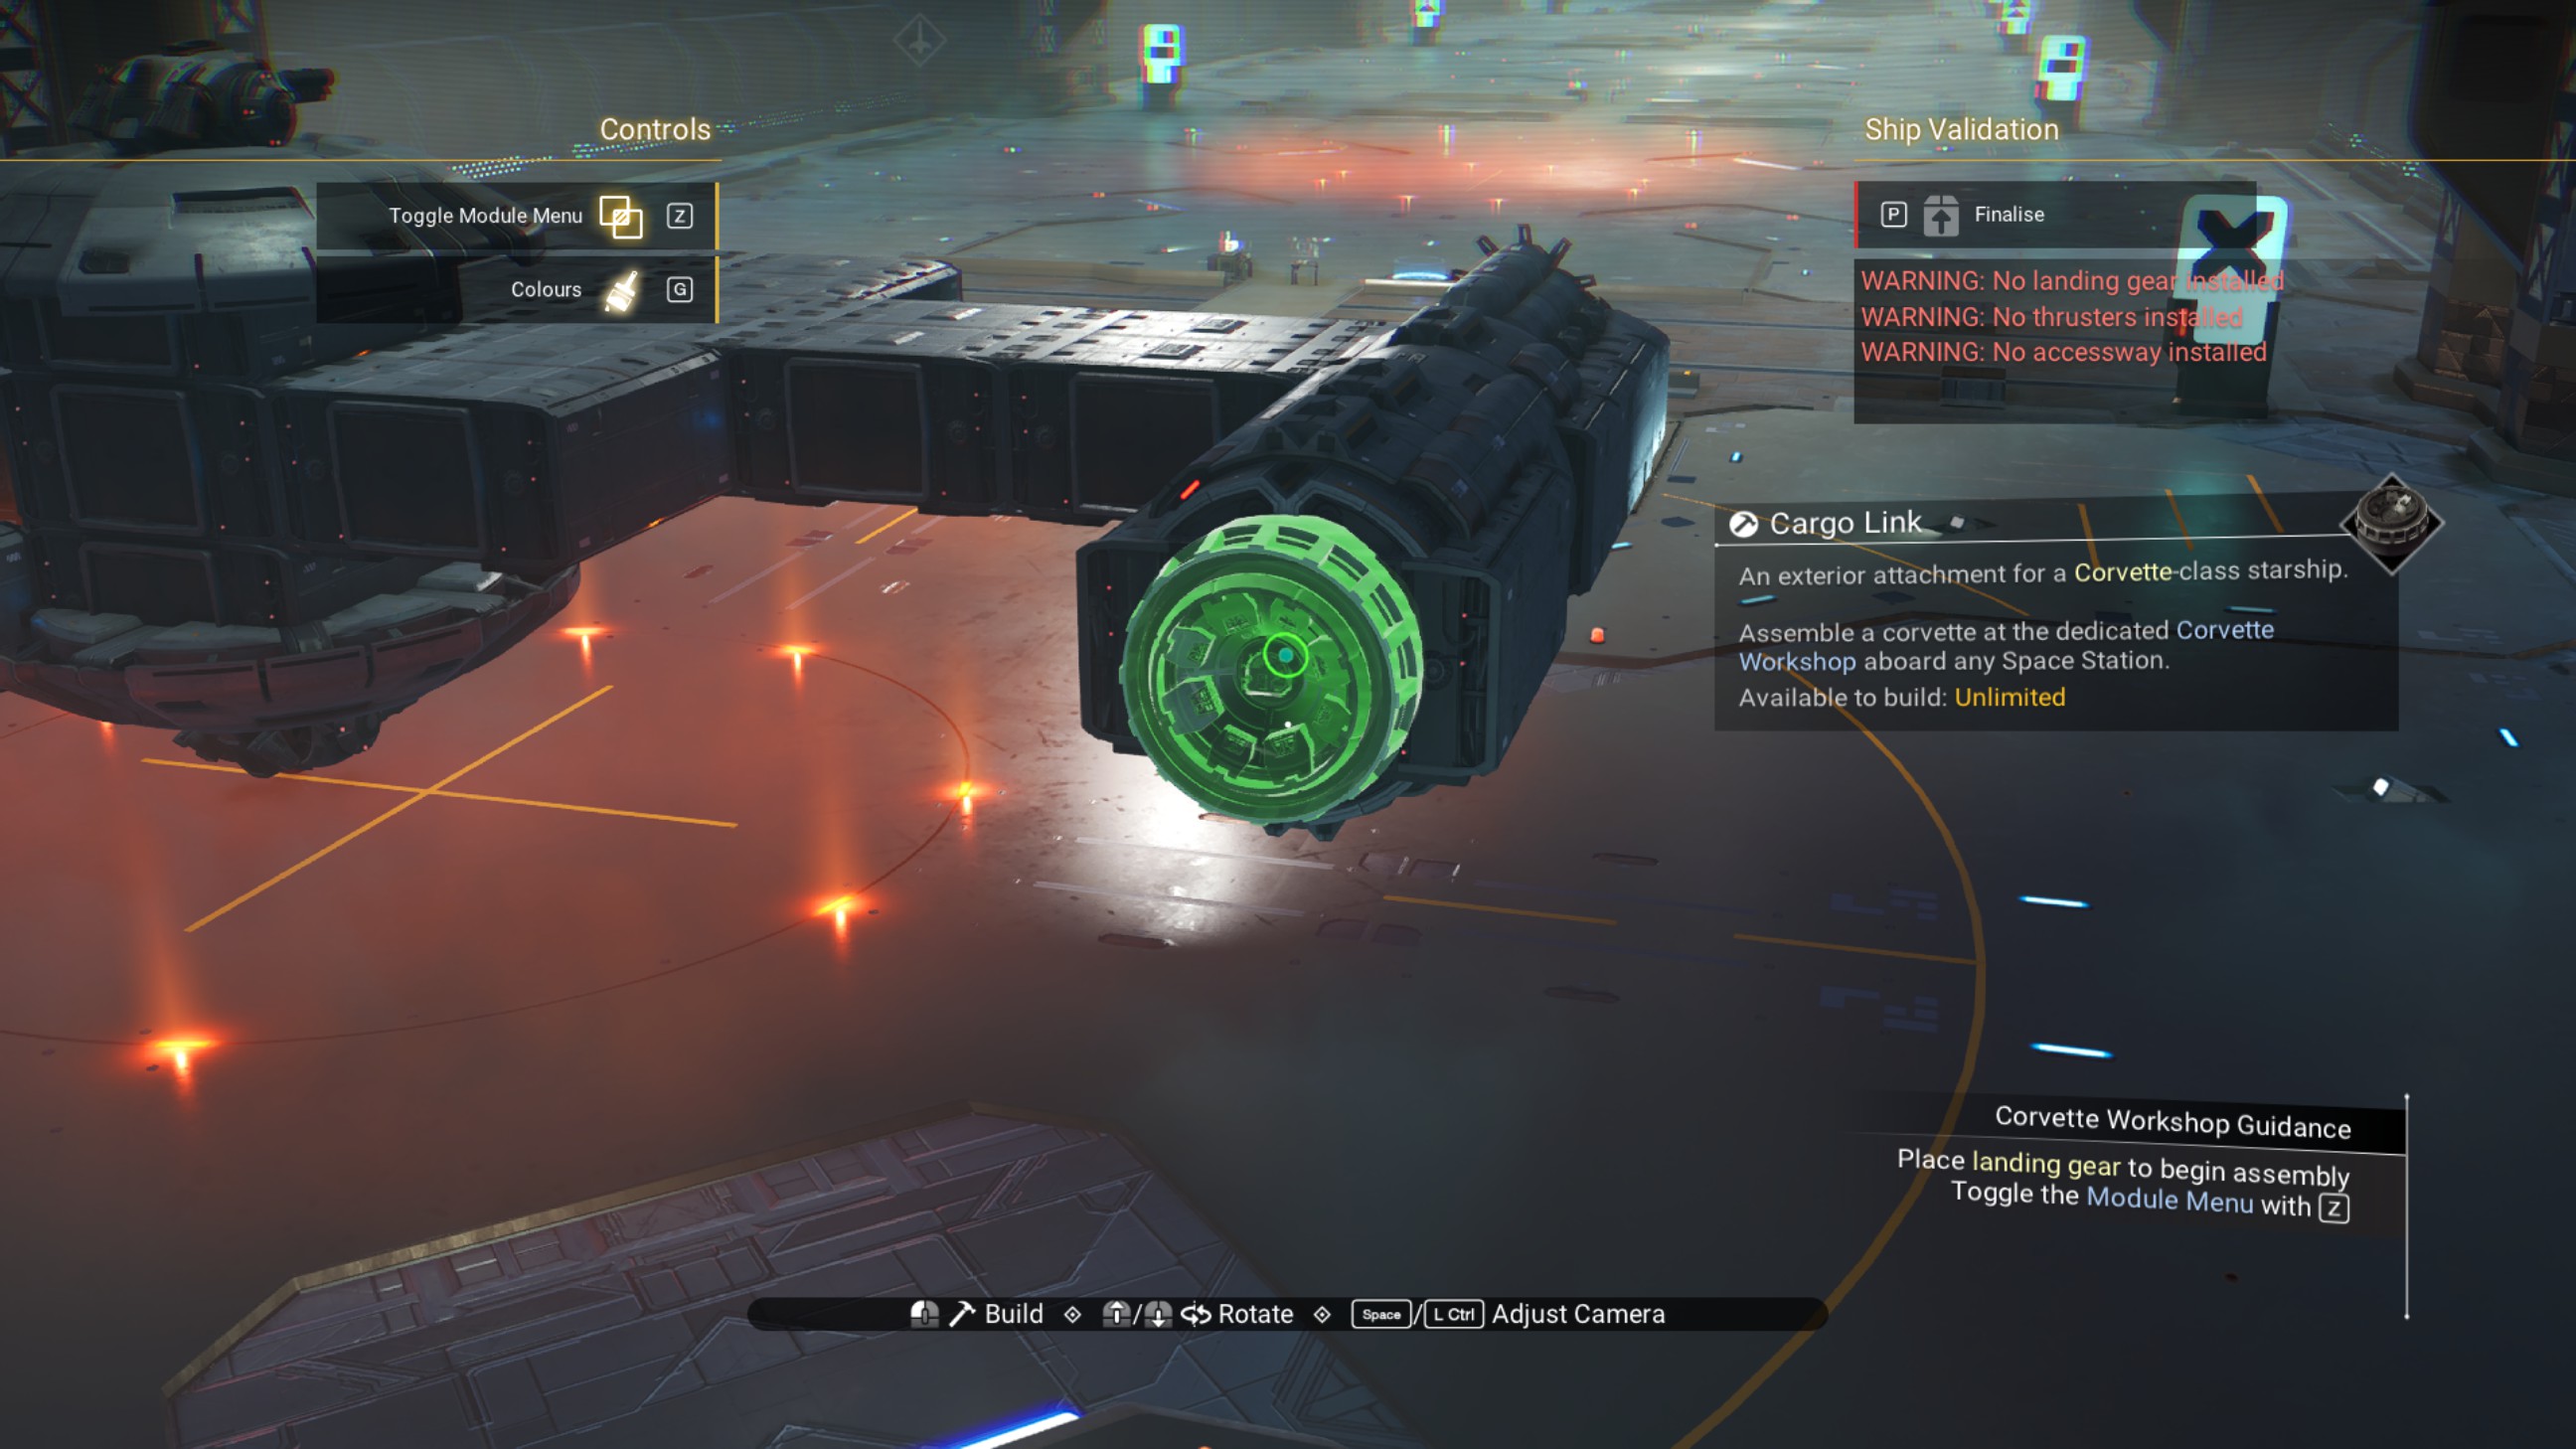
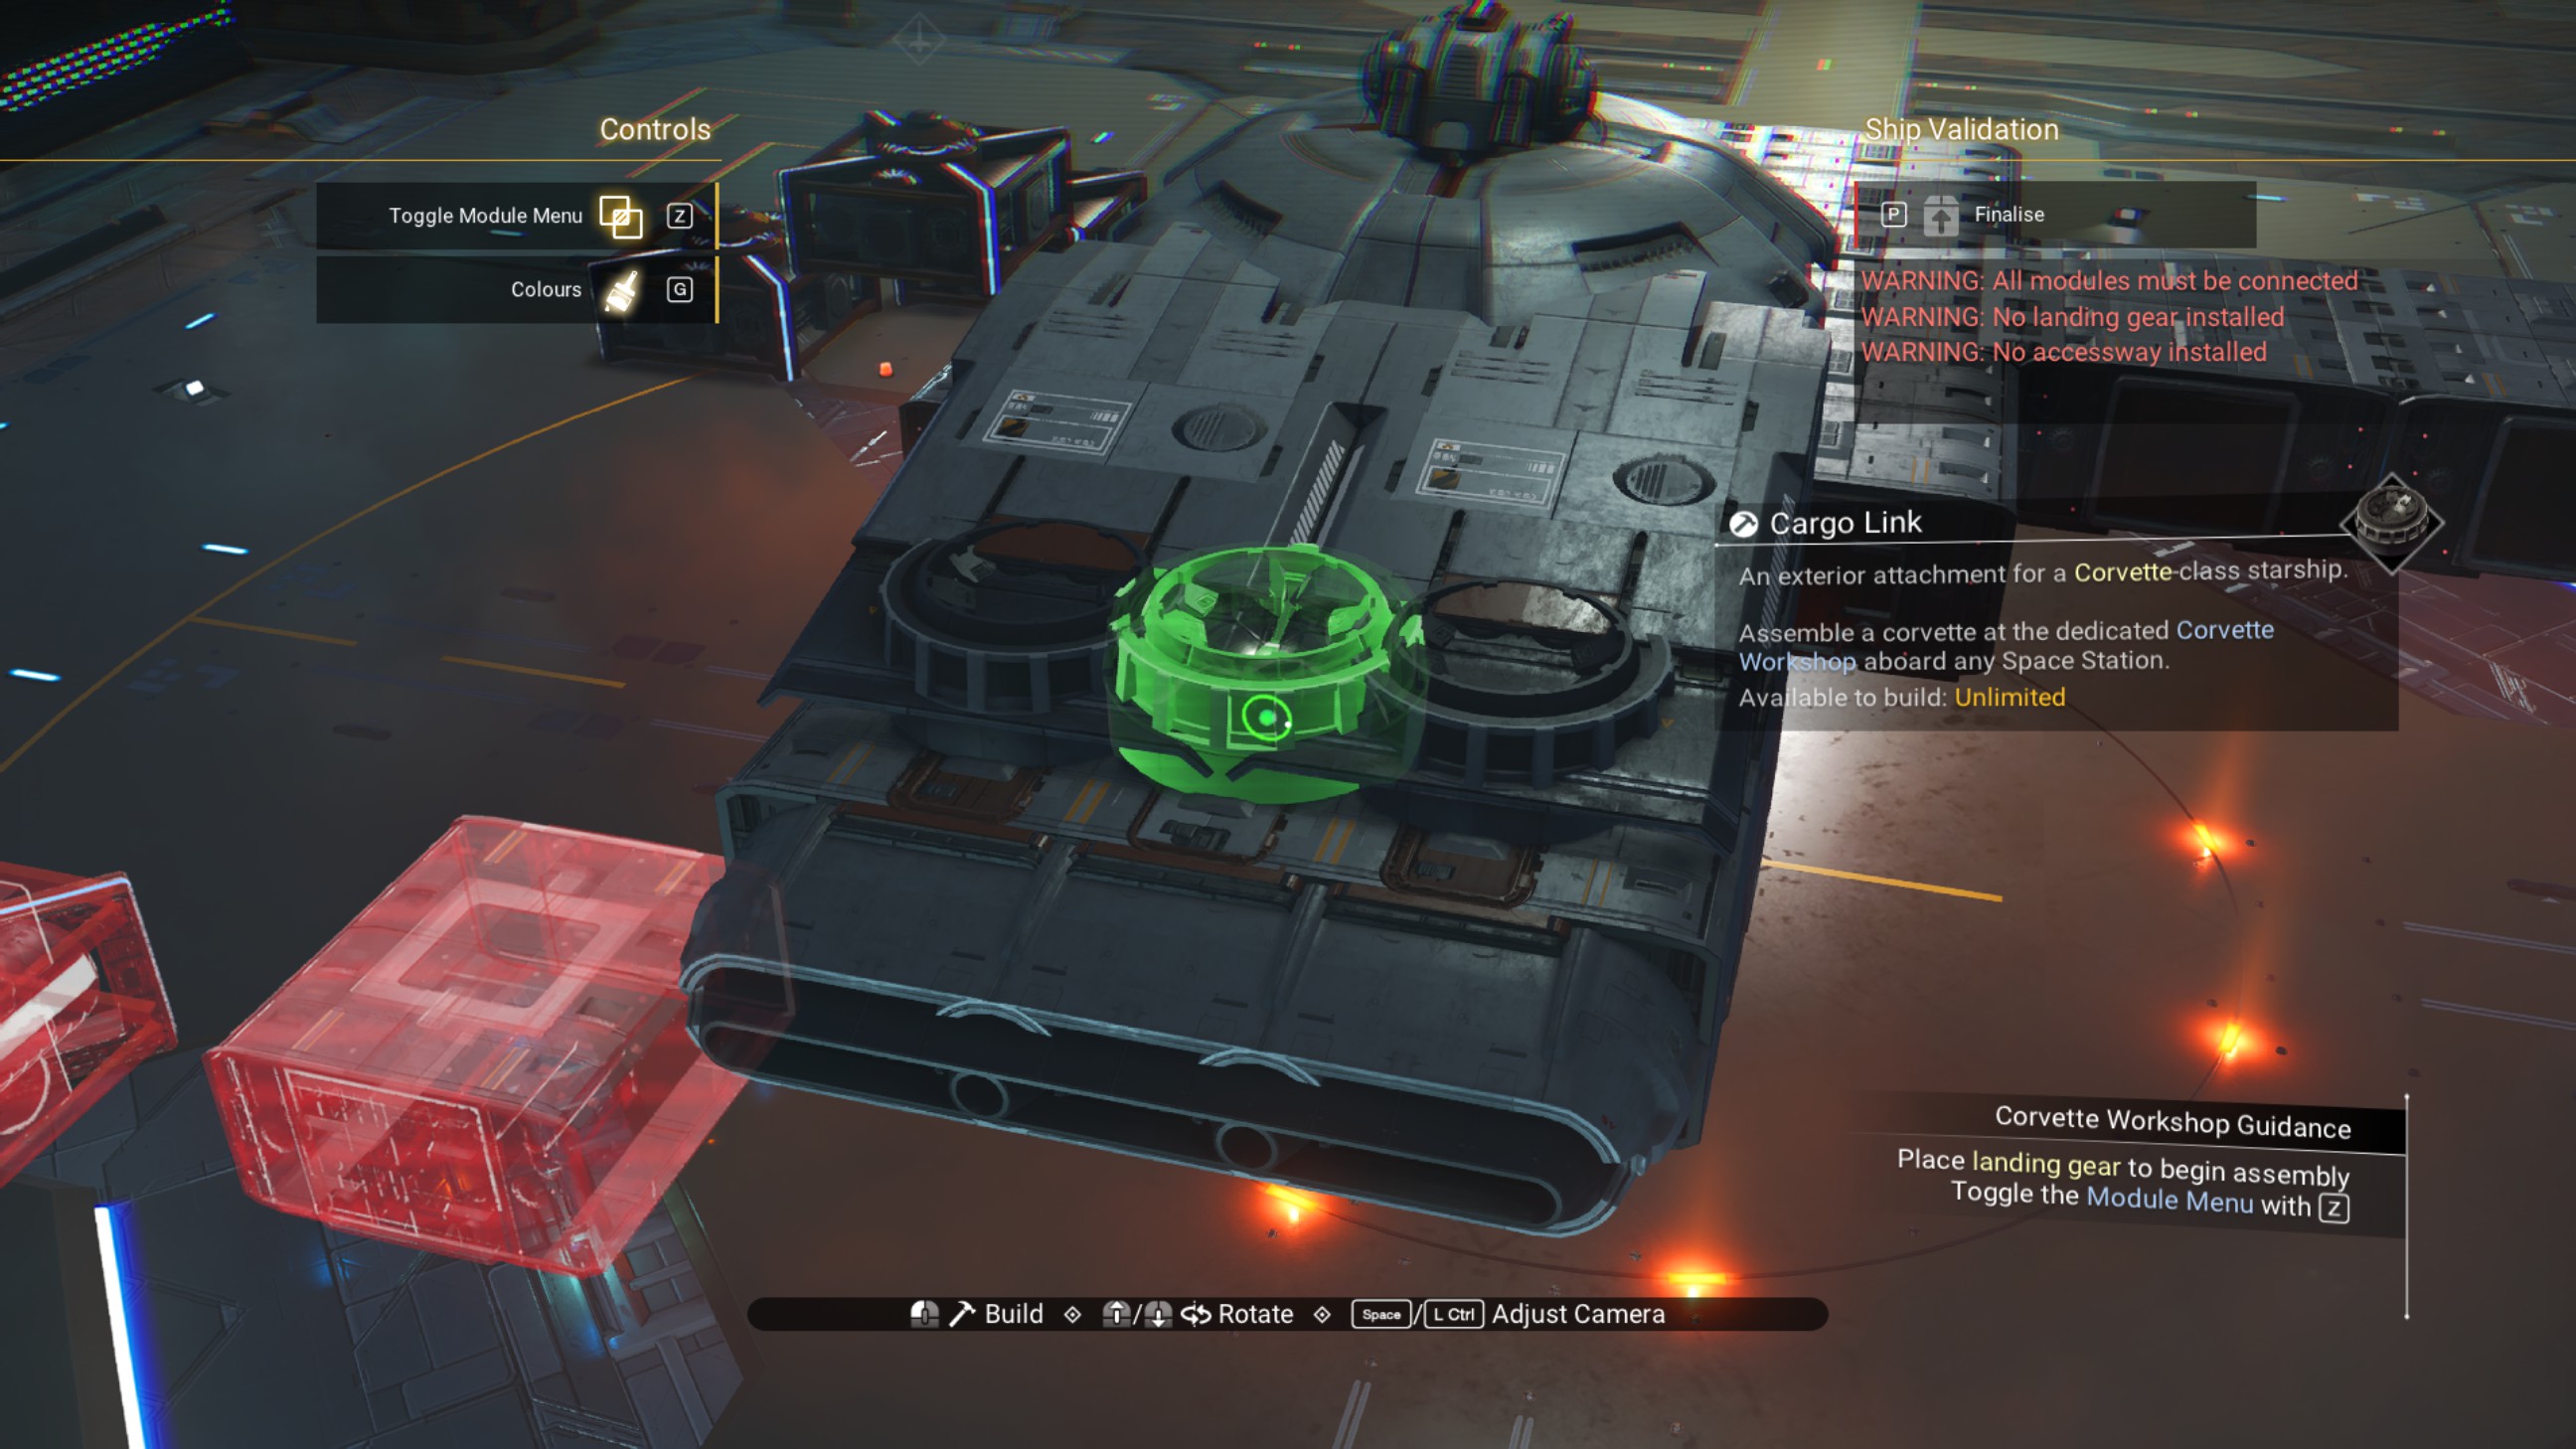
Finish the cockpit structure by adding a cargo link on the back side.
Engines
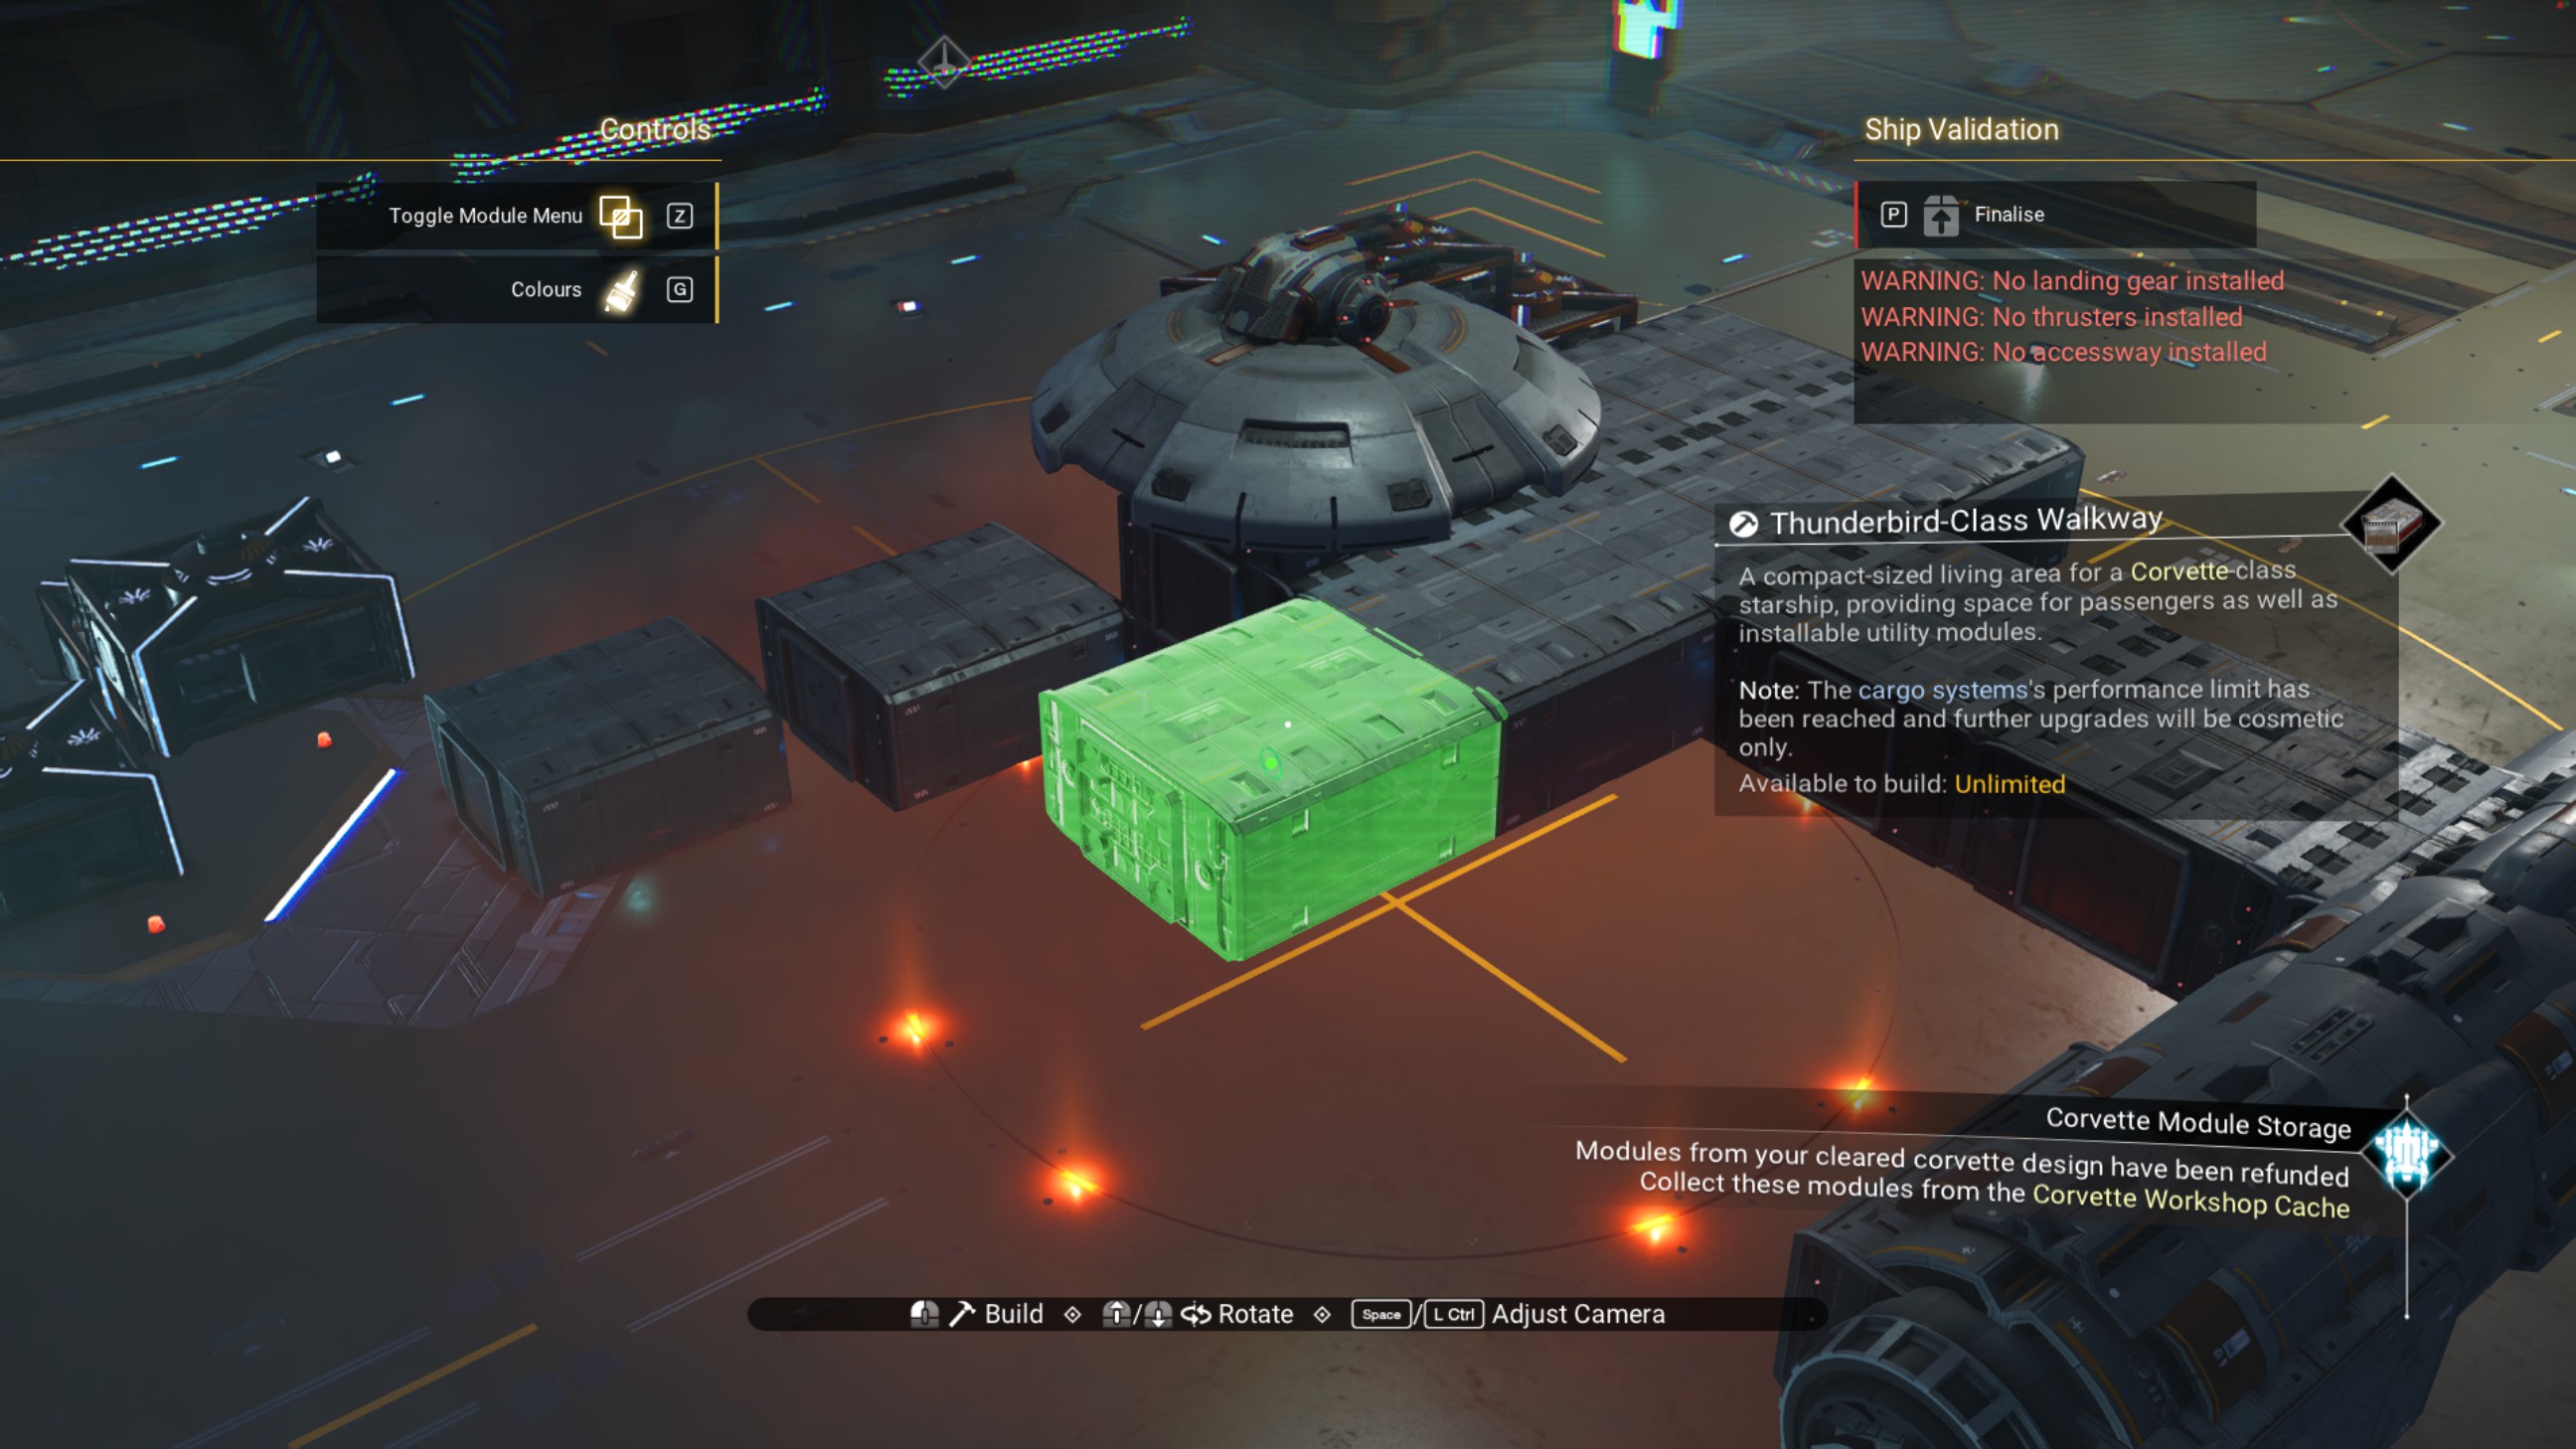
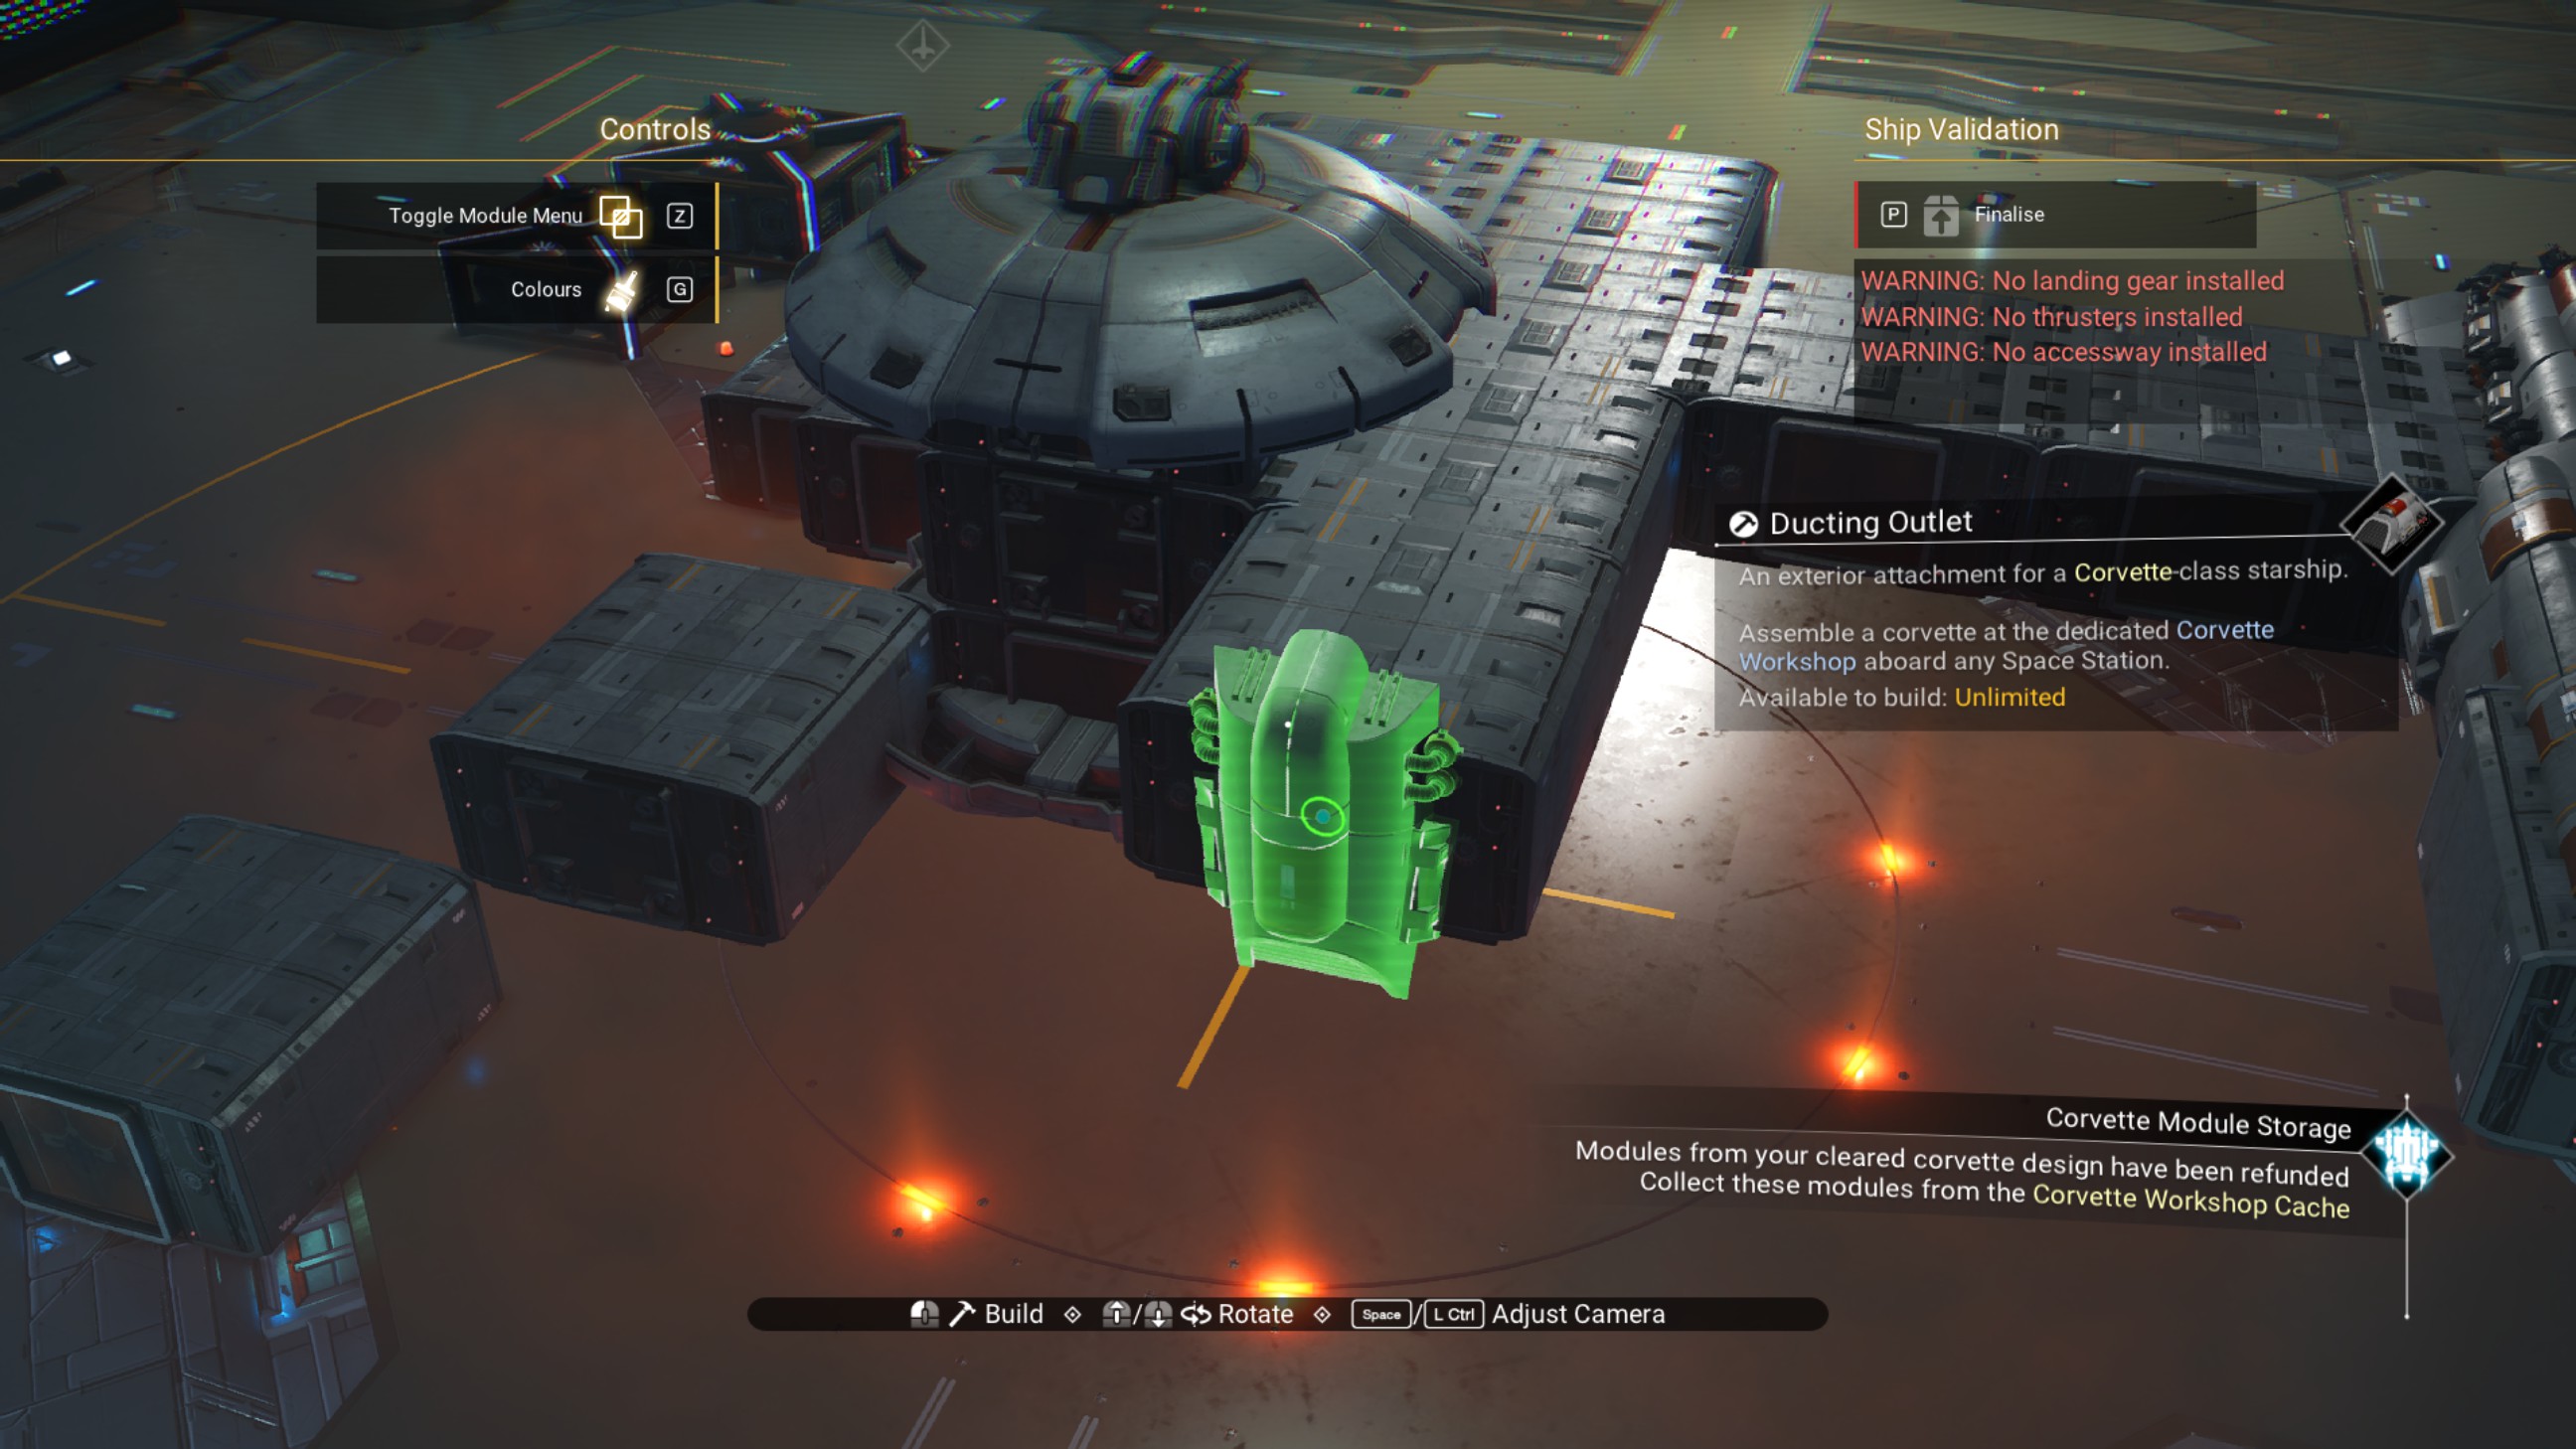
Offset the walkway so the ducting outlet is on its starboard side, then delete the ducting outlet.
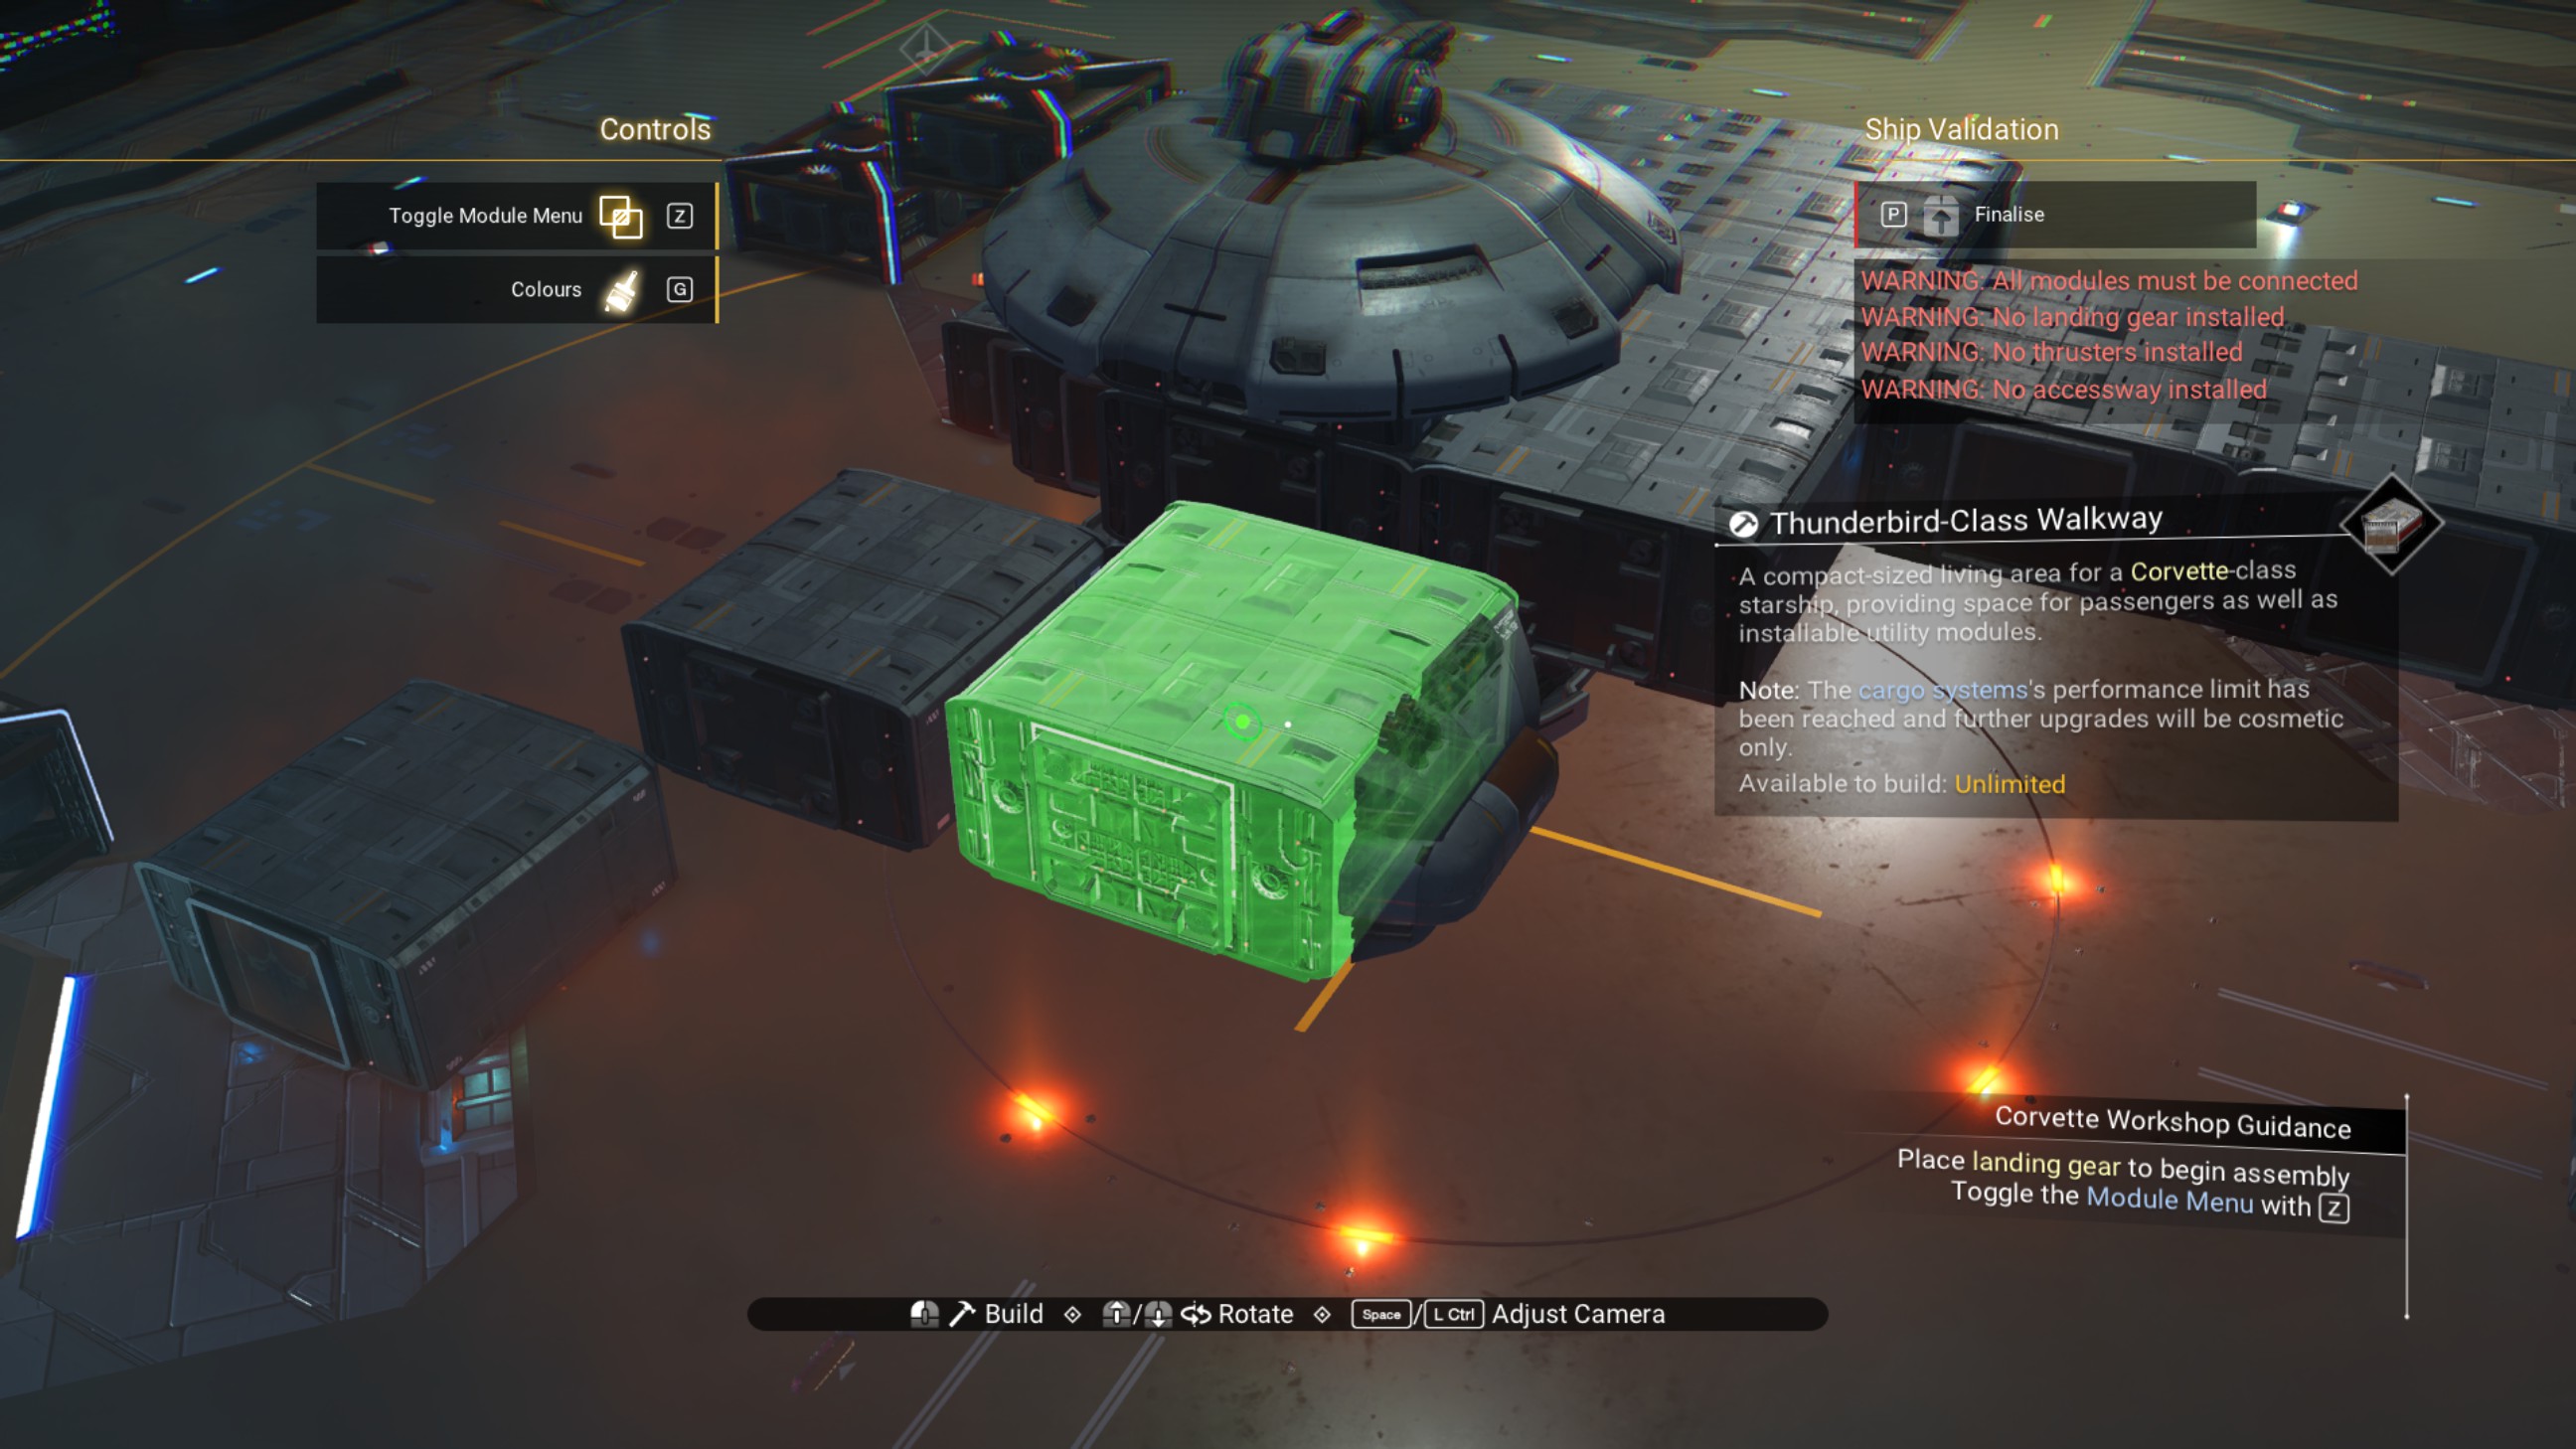
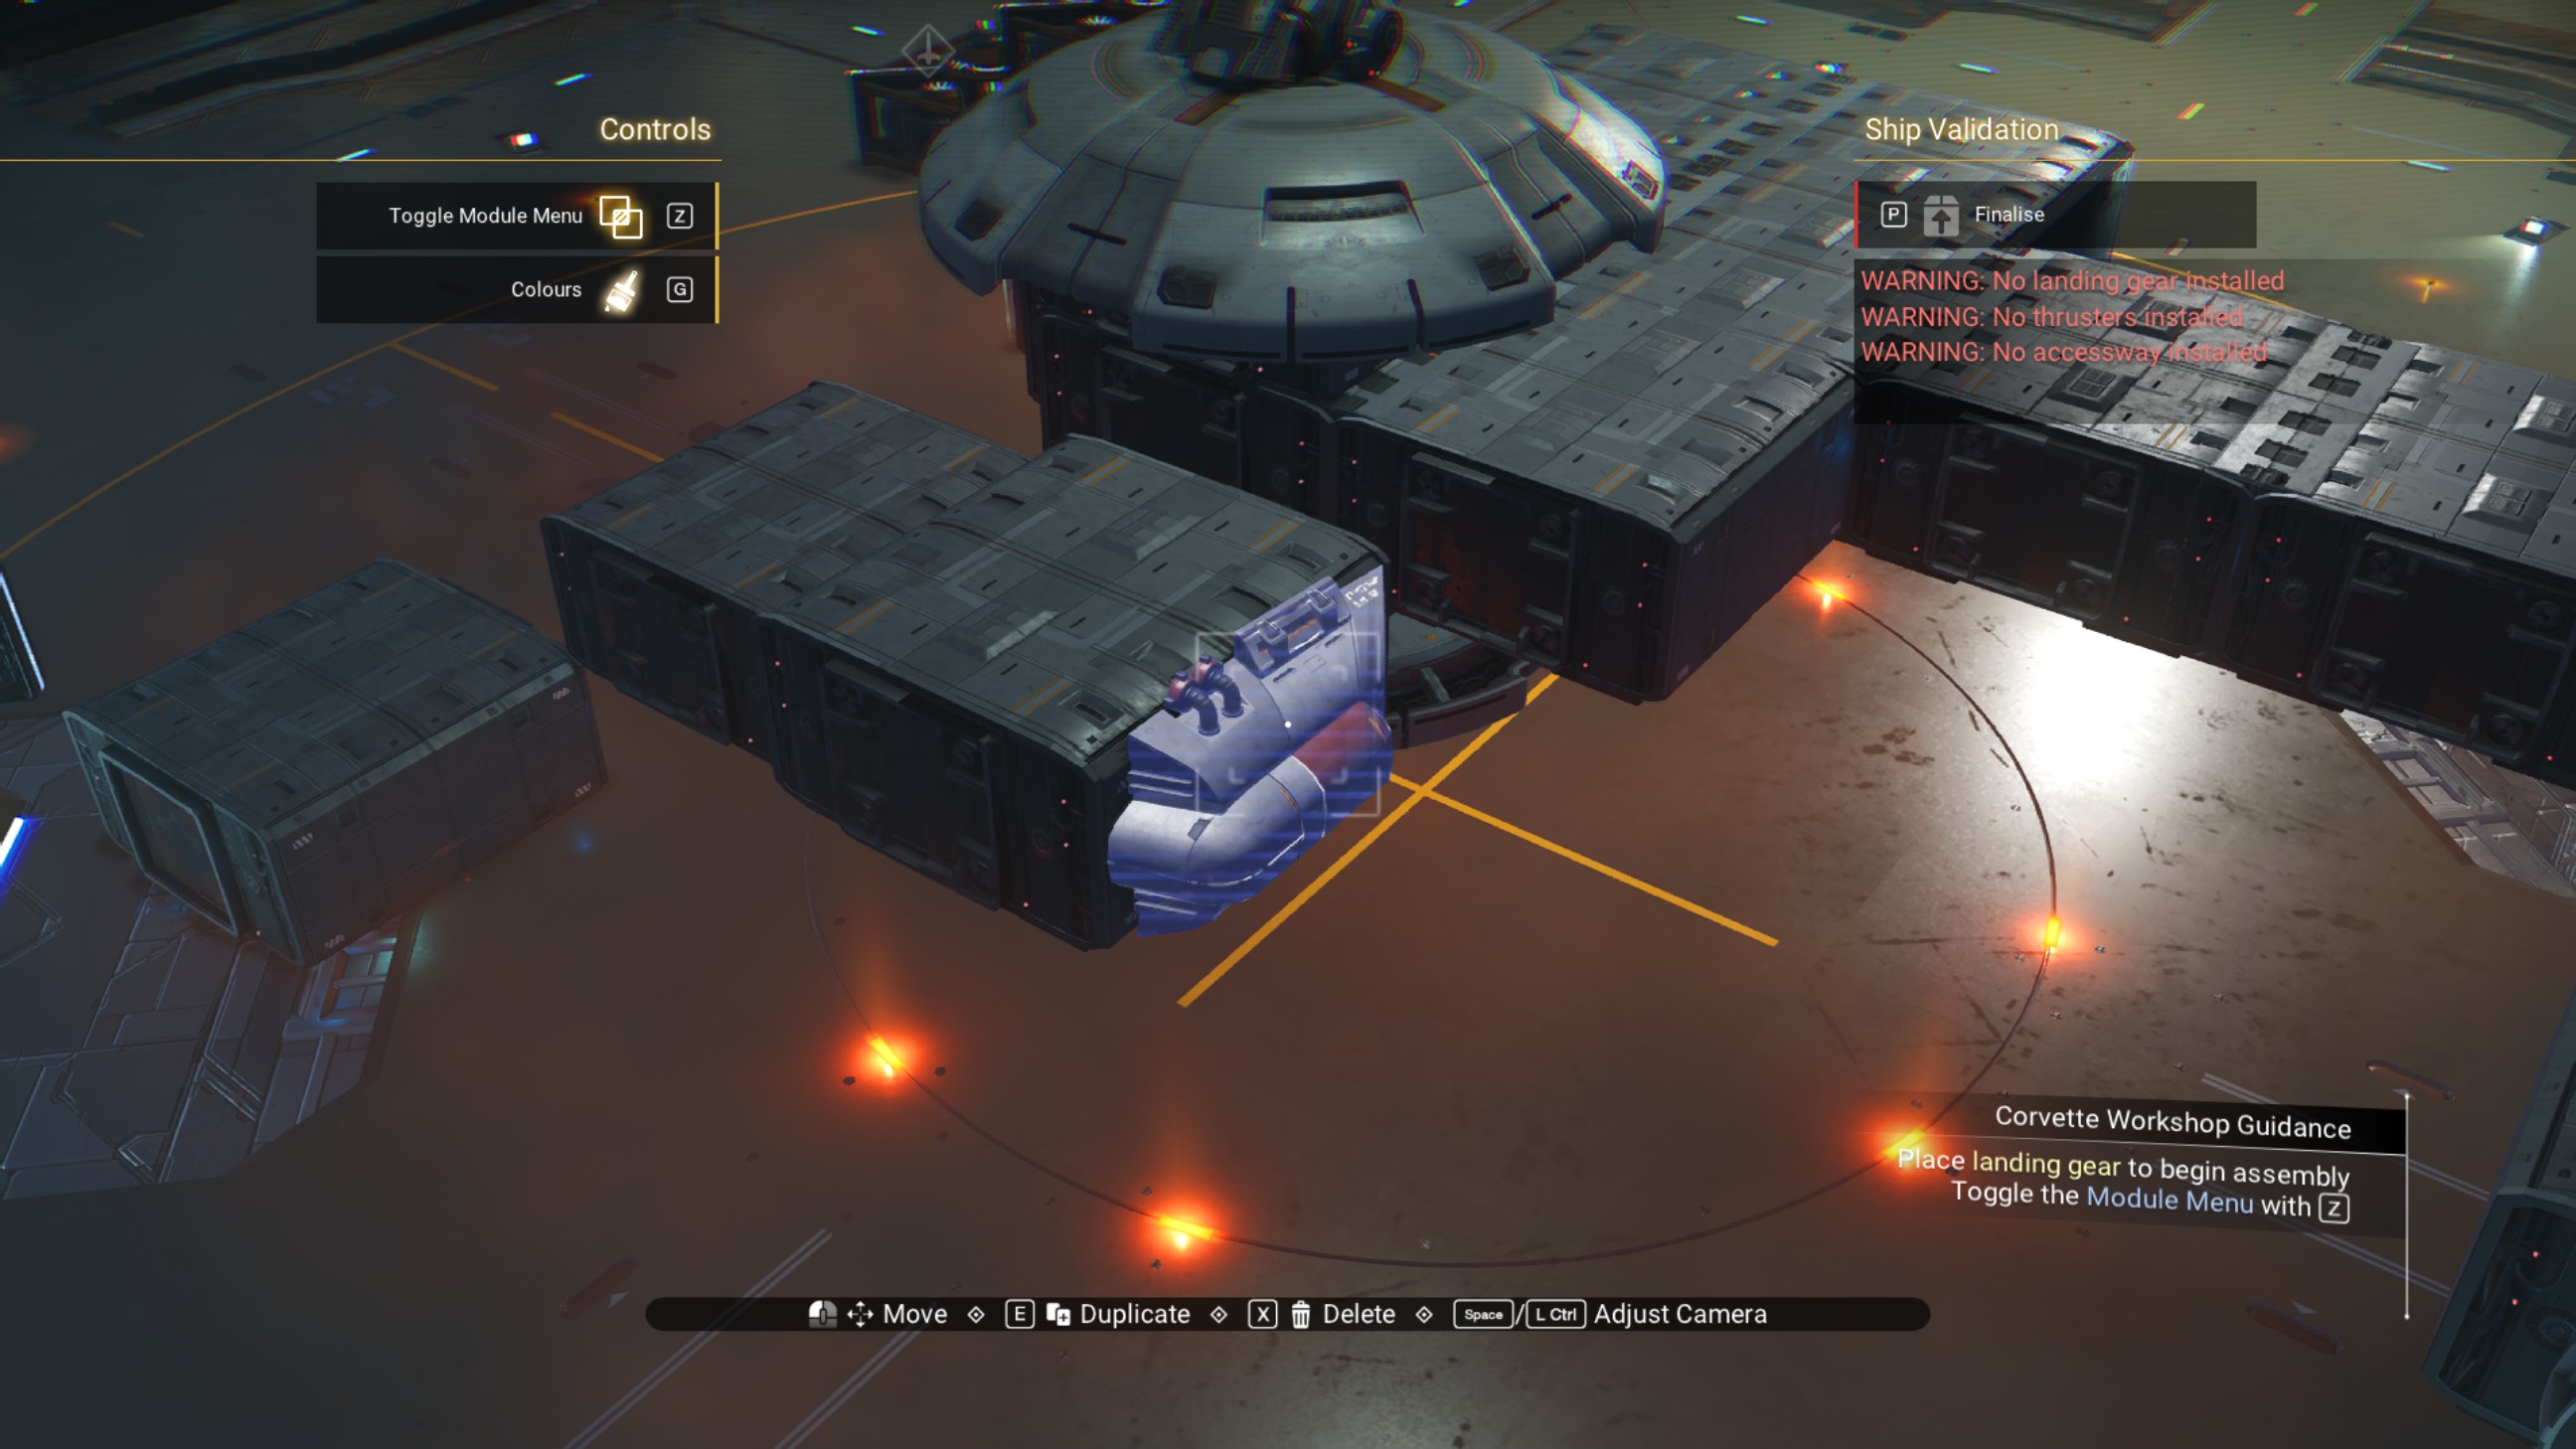
Place a rotated propeller module on the starboard side of that walkway, then shift the walkway forward half a step.
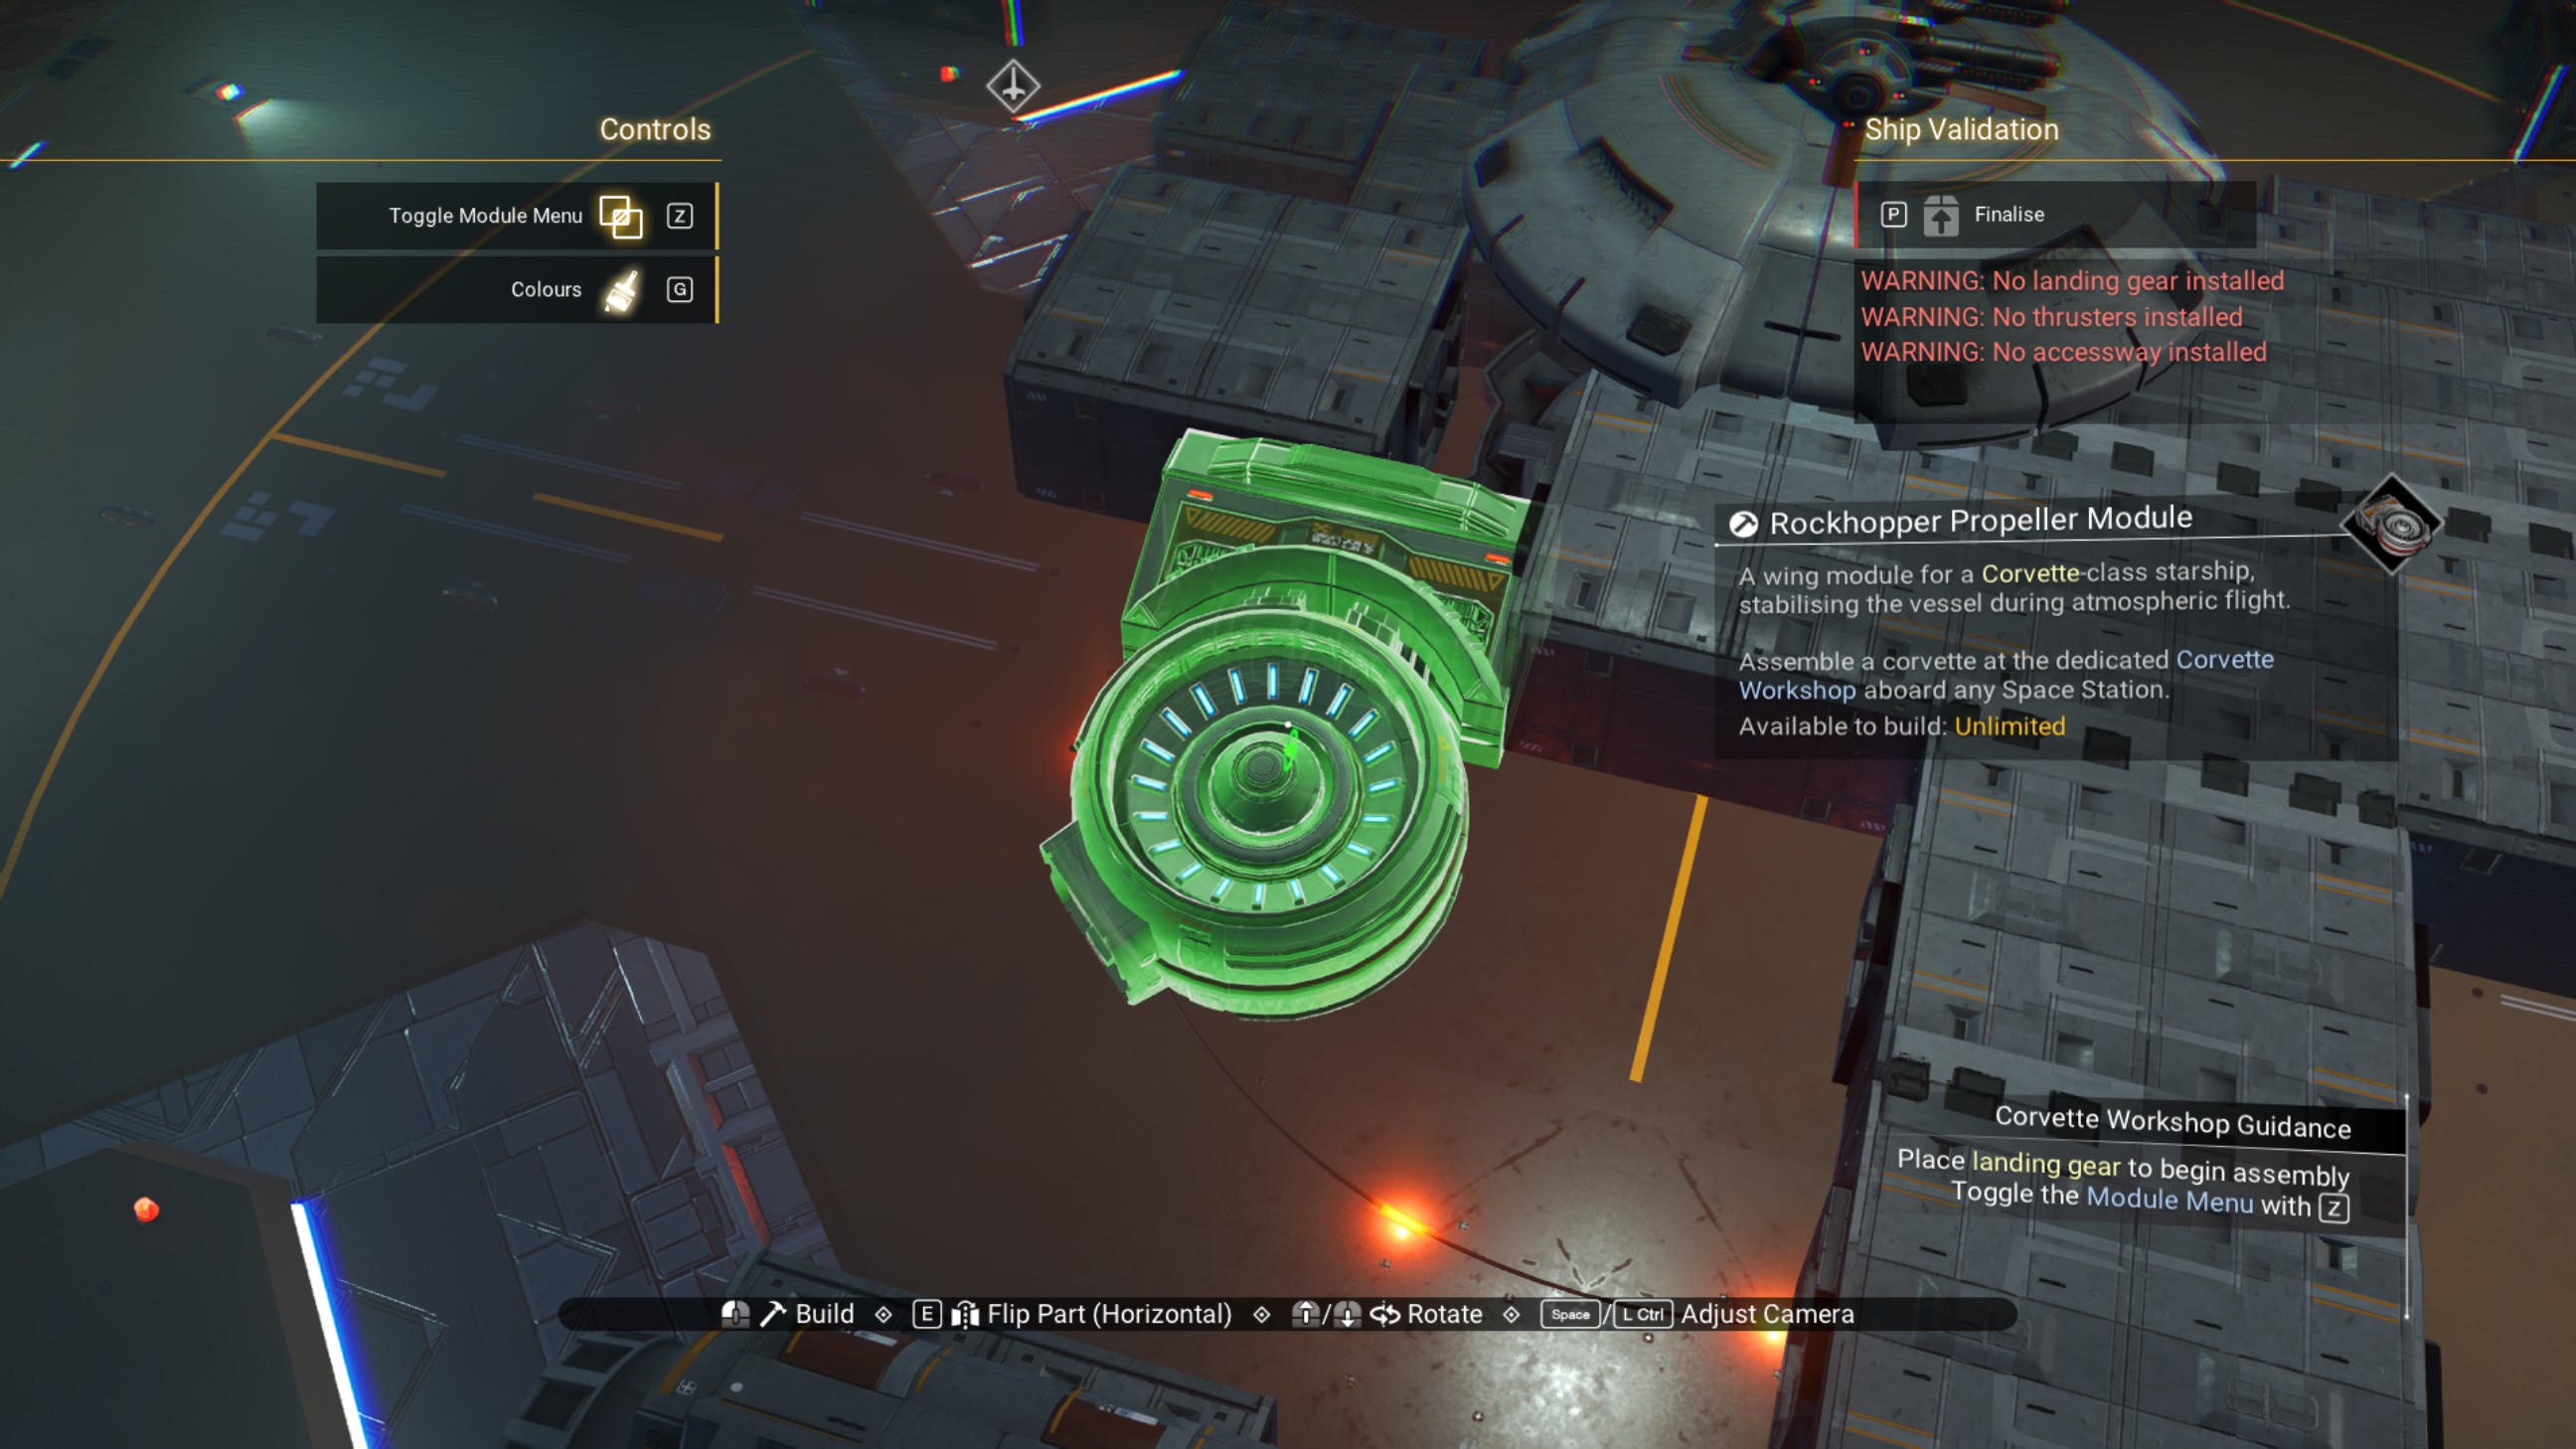
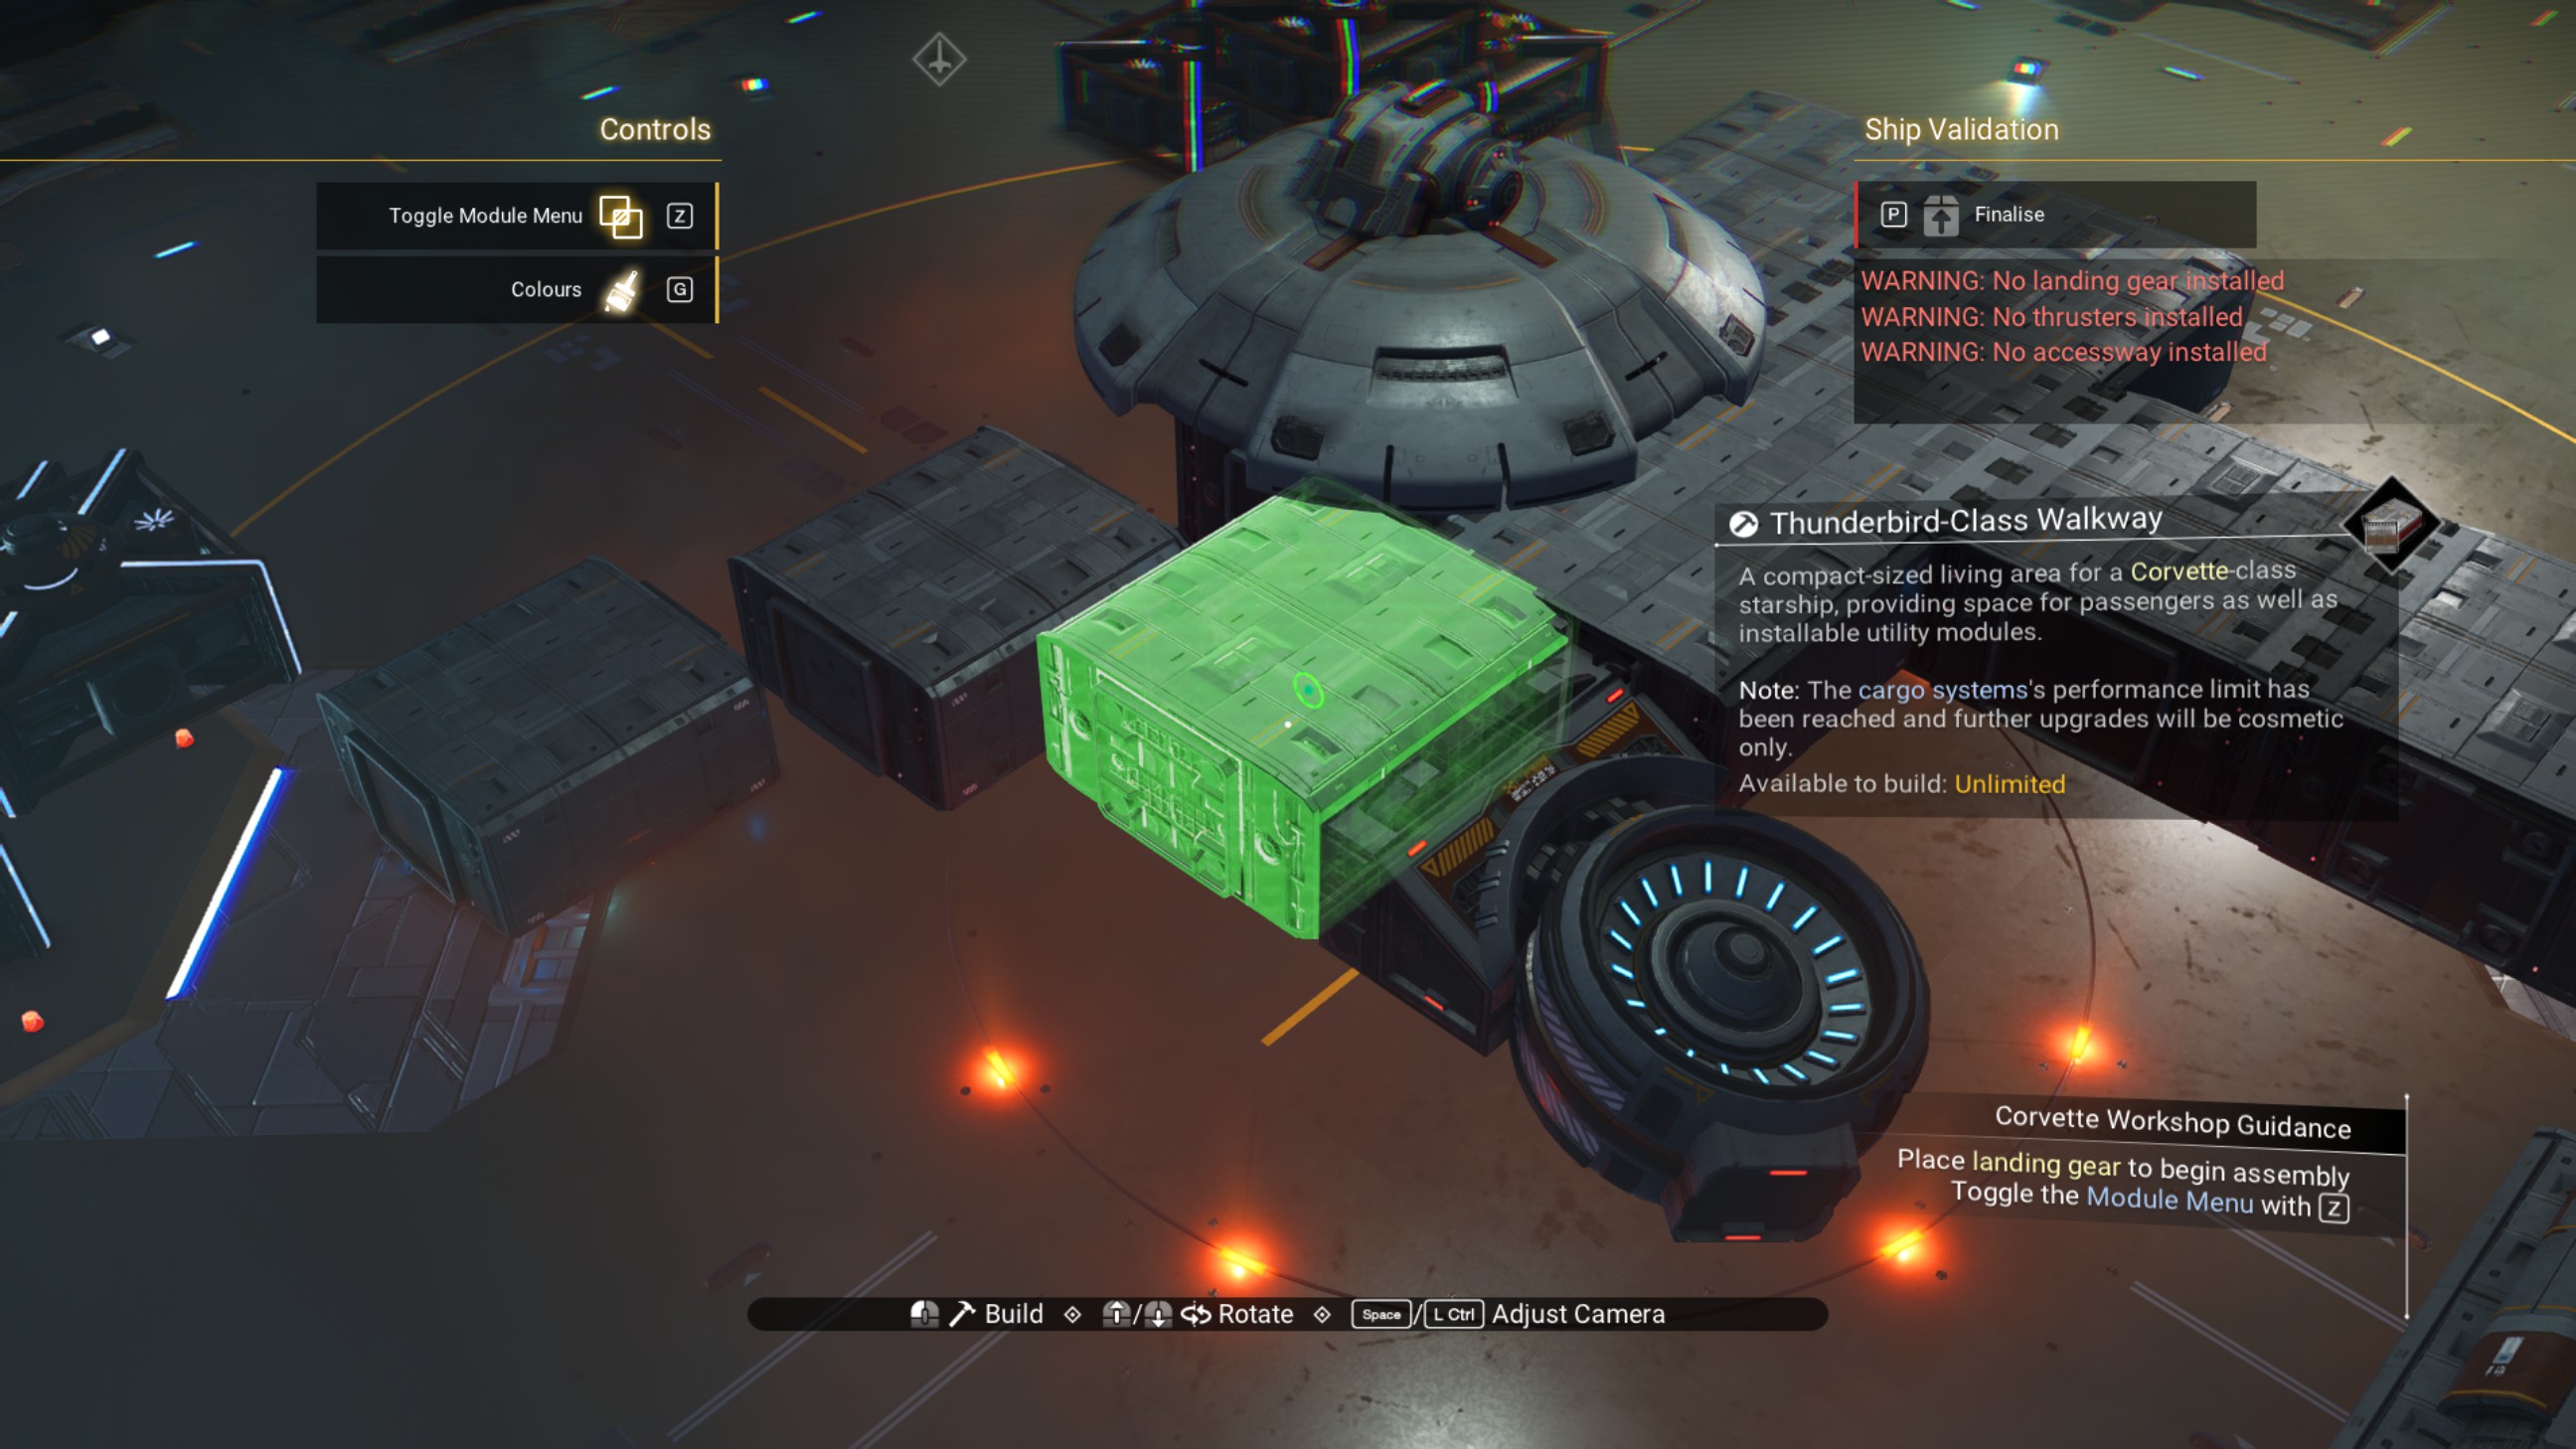
Delete the propeller module.
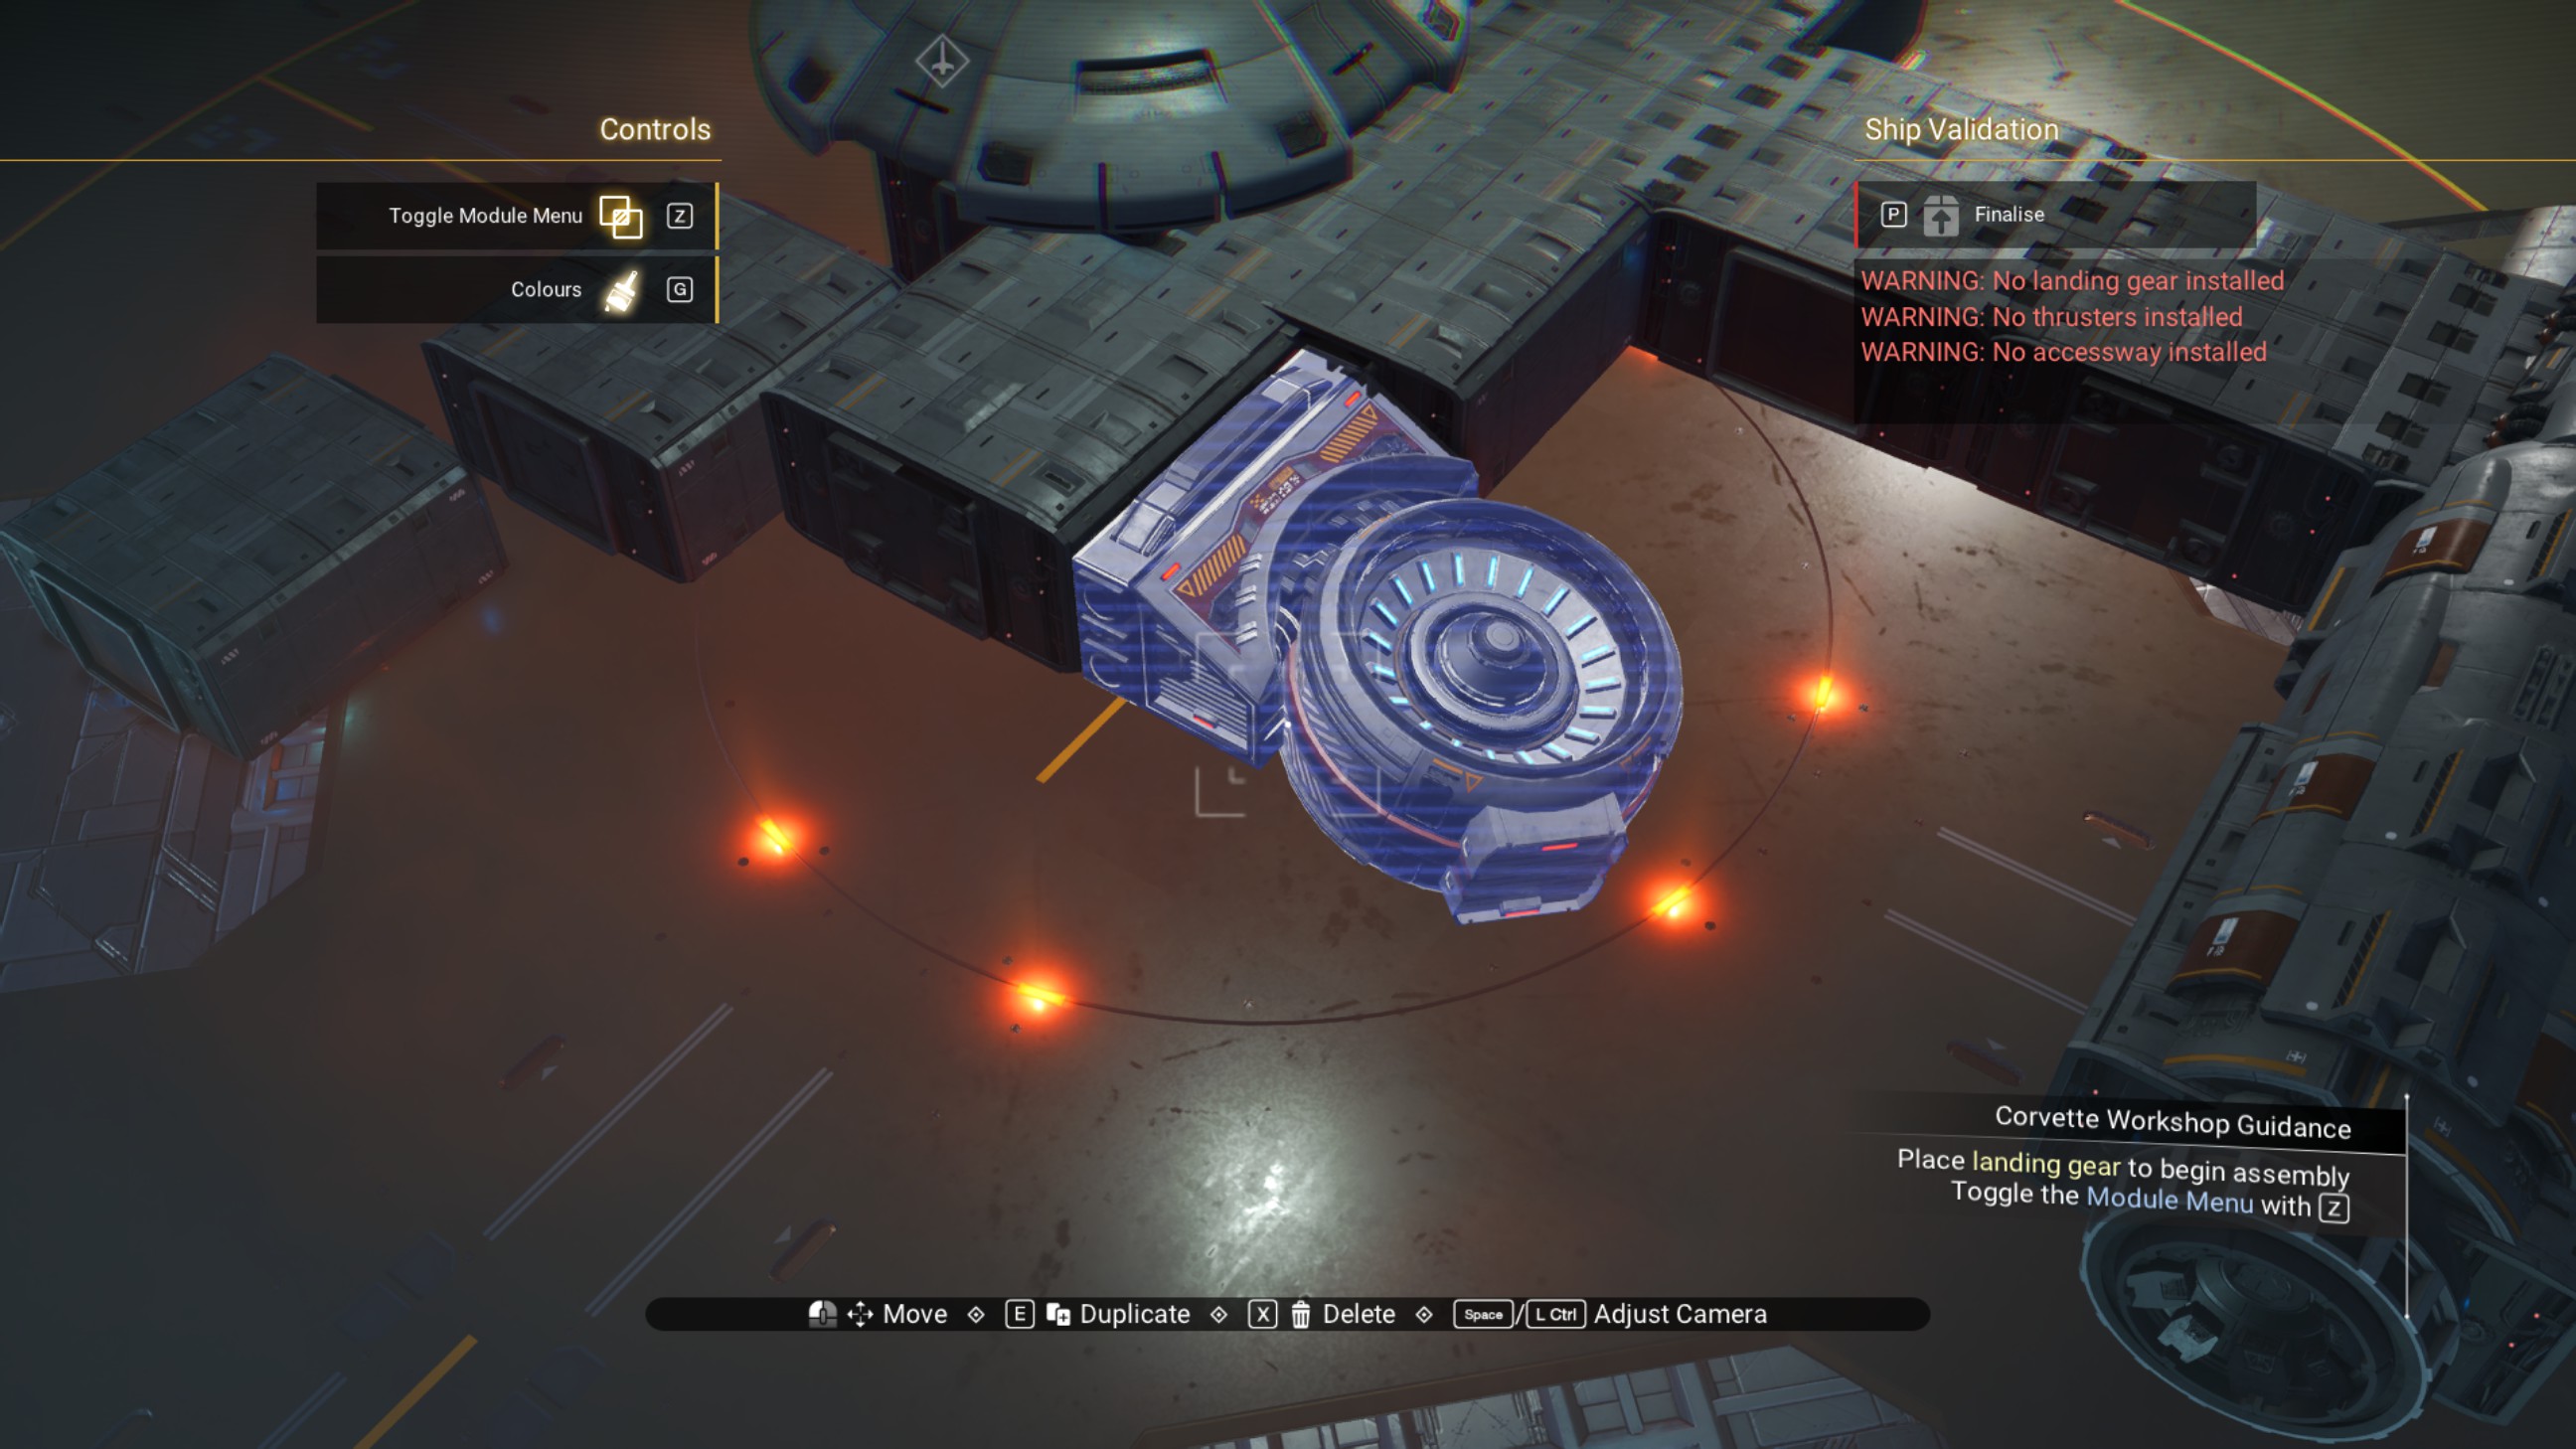
Place a vesper cowling above that walkway, and second vesper cowling beside the first one.
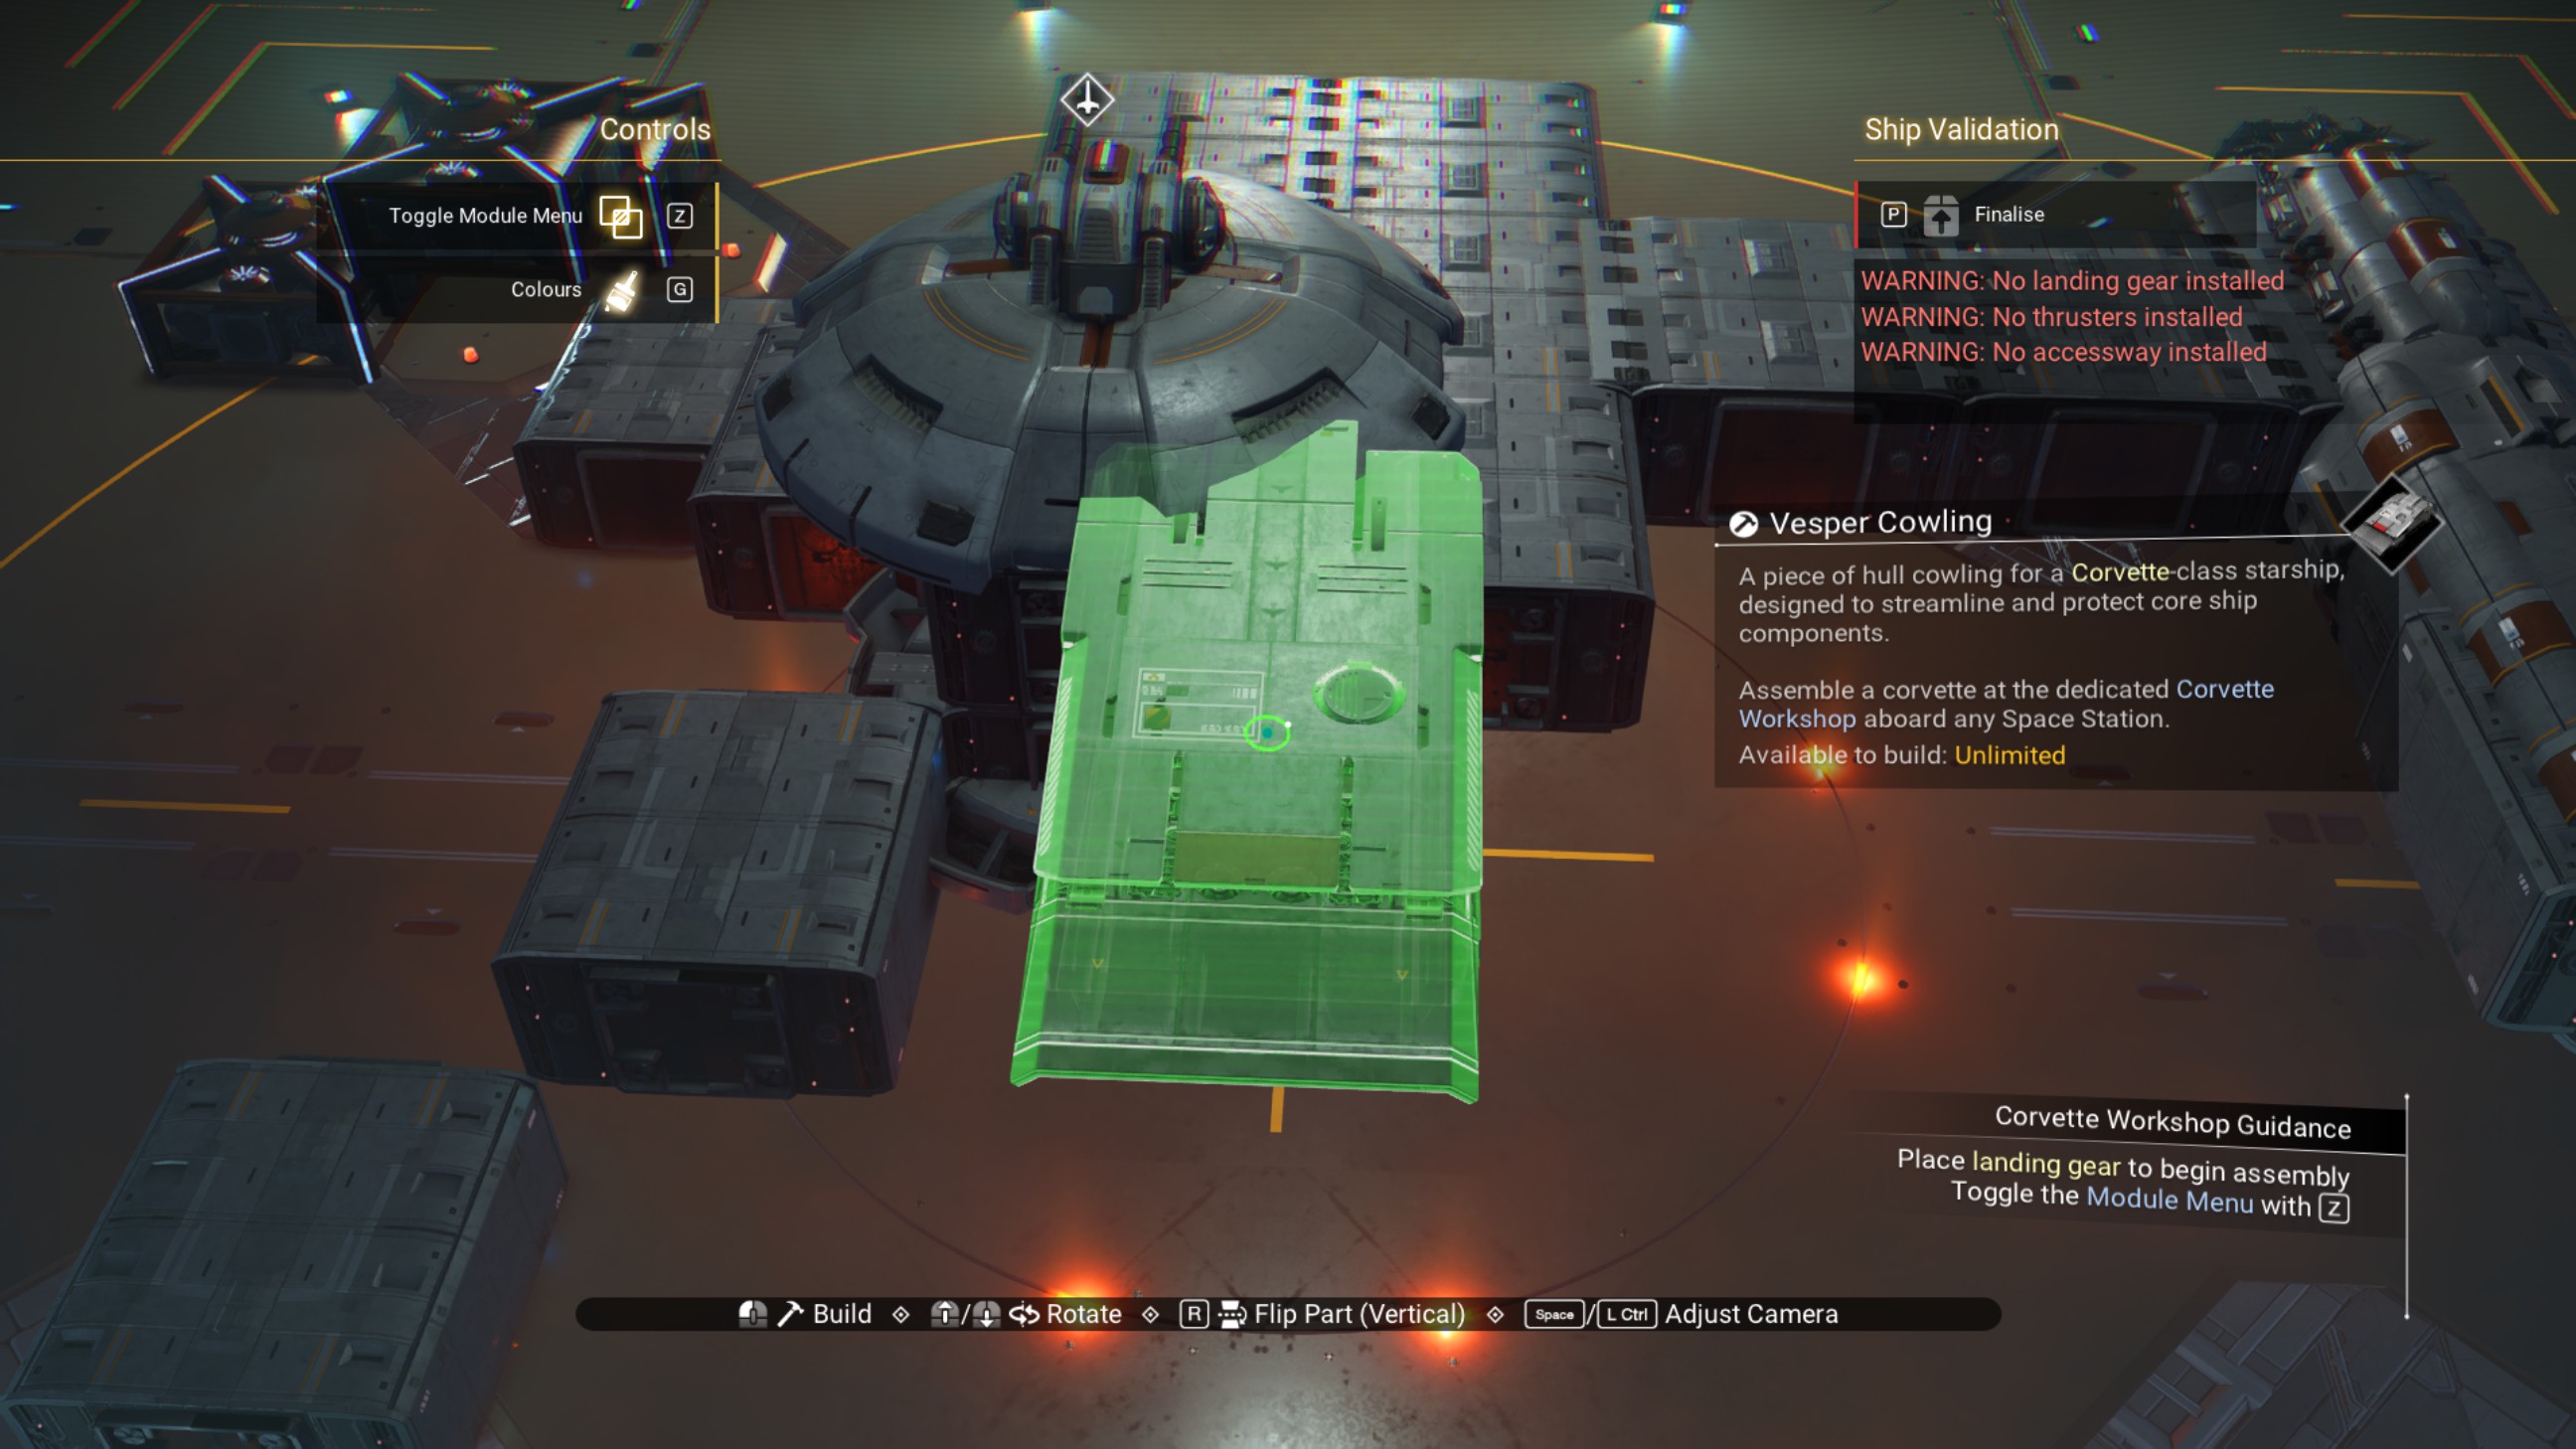
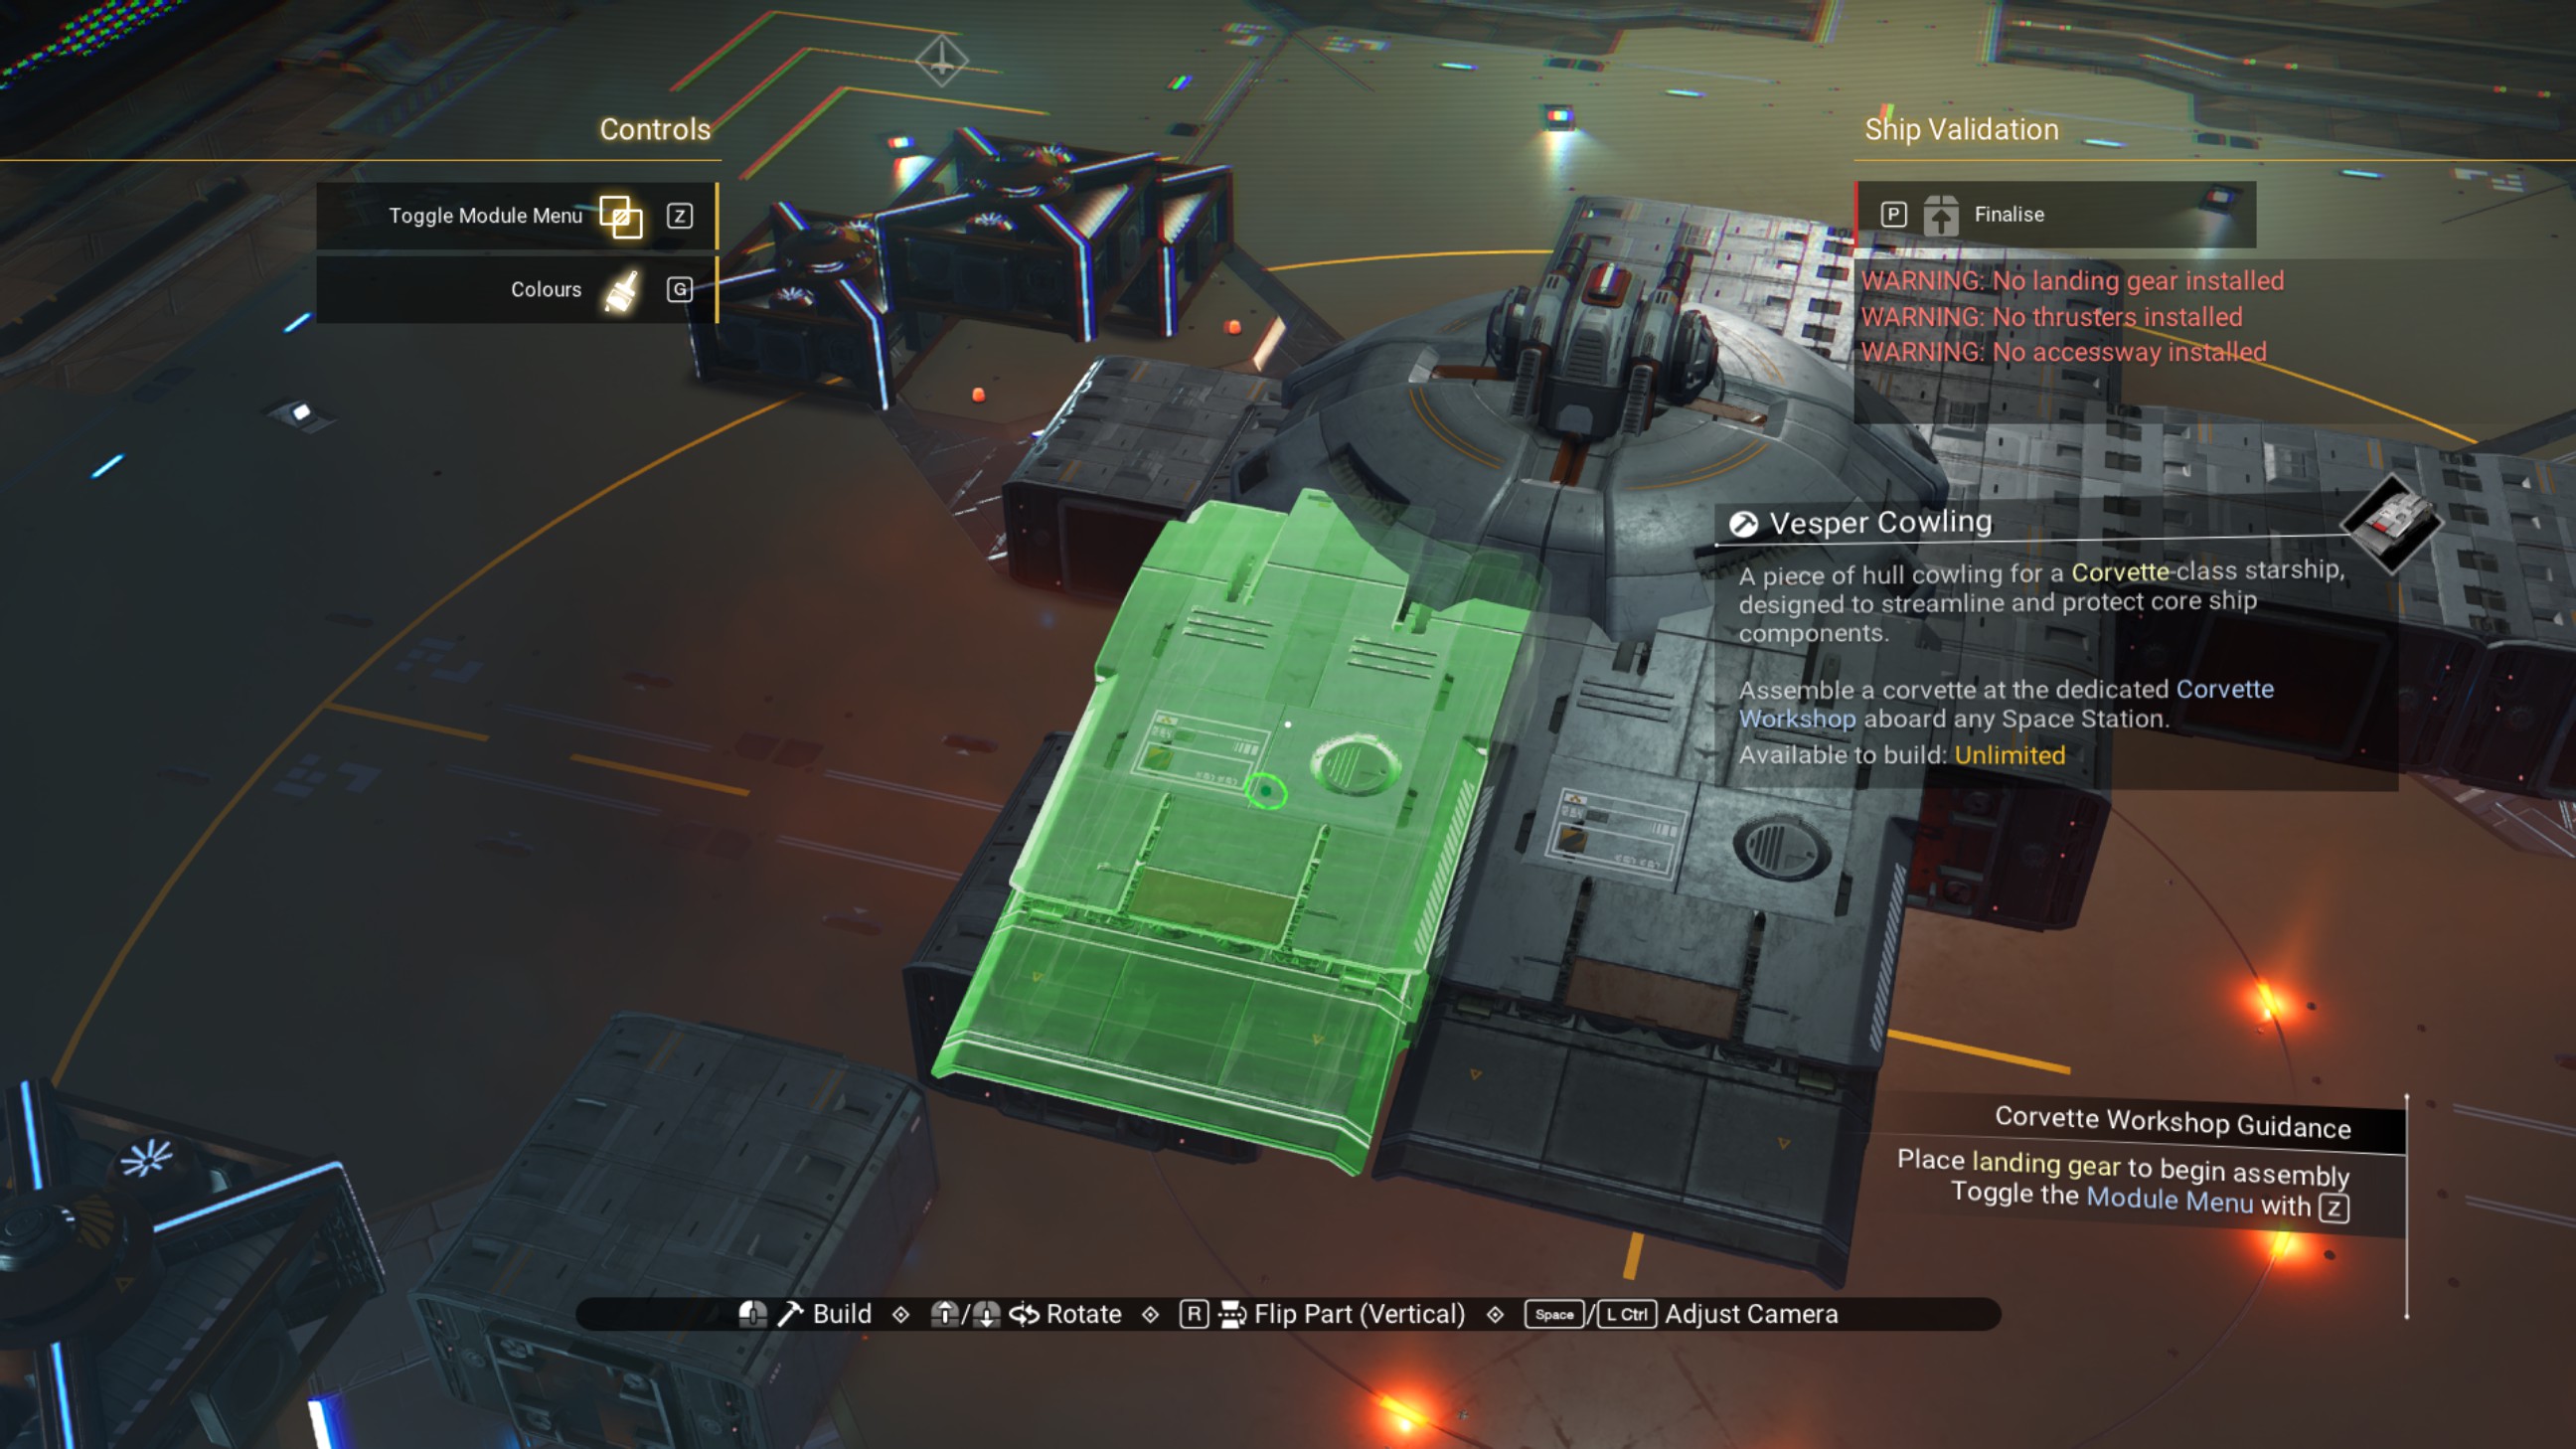
Place two more vesper cowlings underneath.
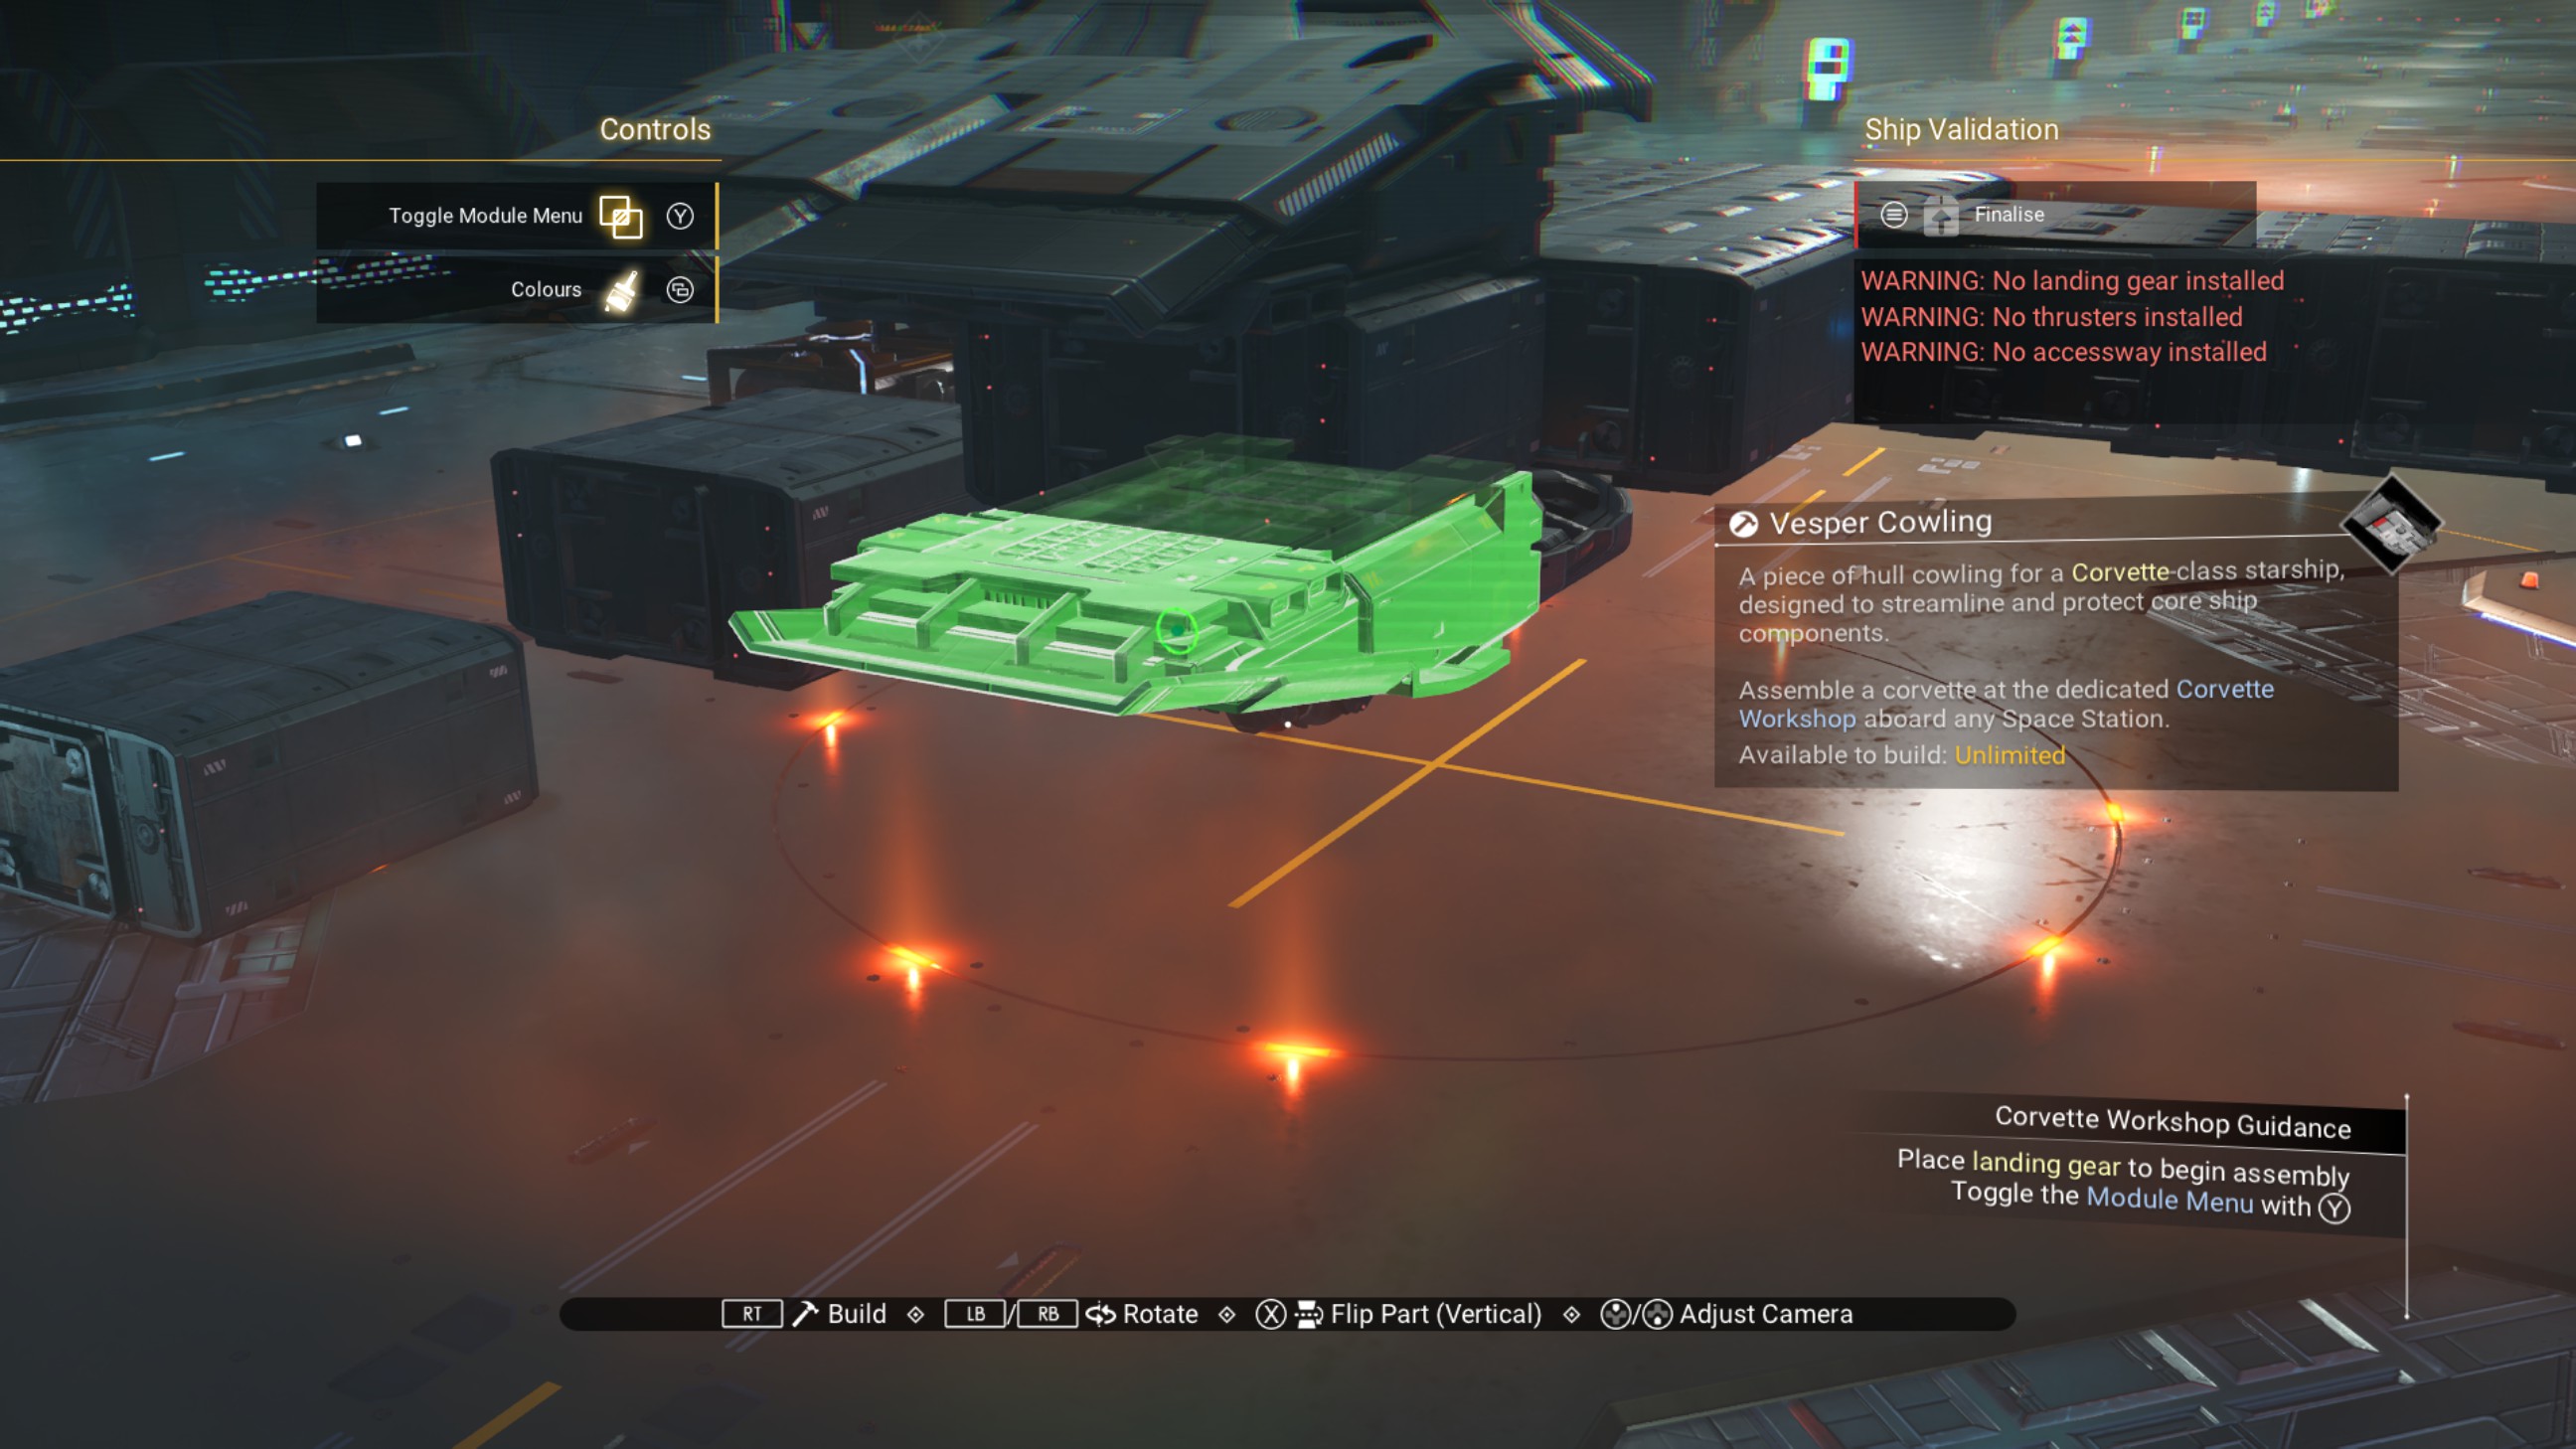
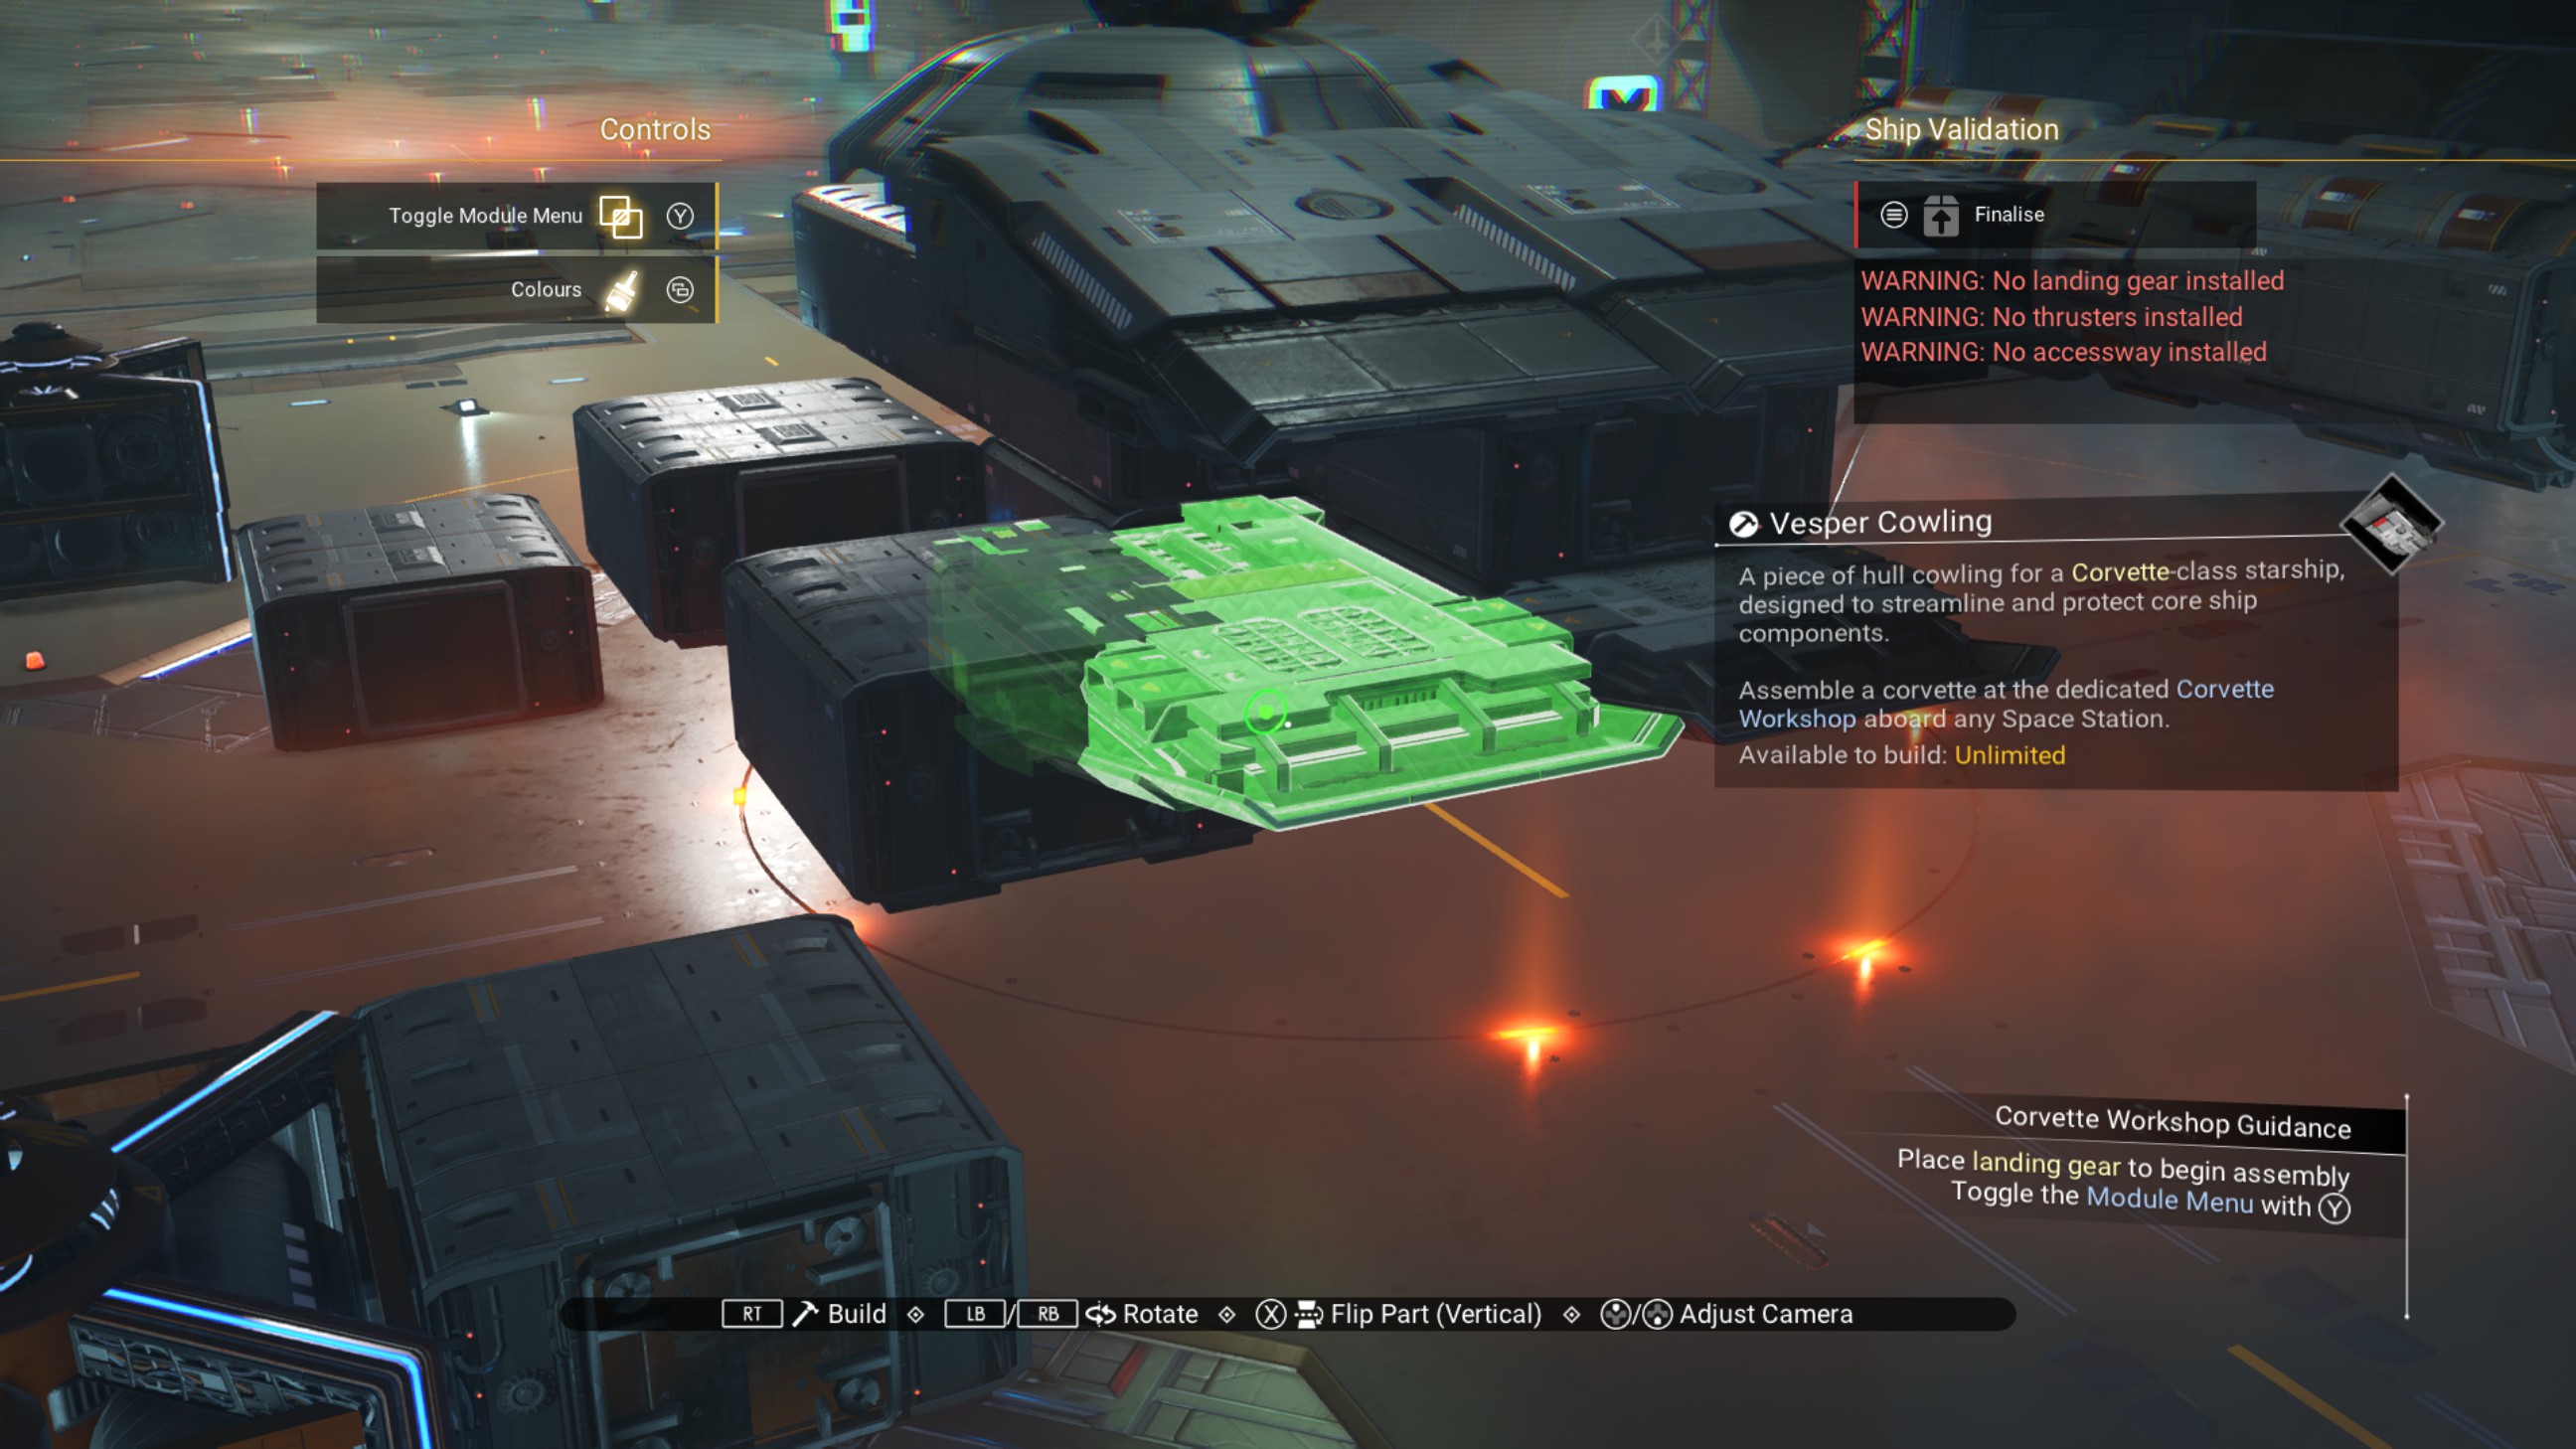
Get rid of this first zigzagged walkway to the rear of the ship to make more room to work.
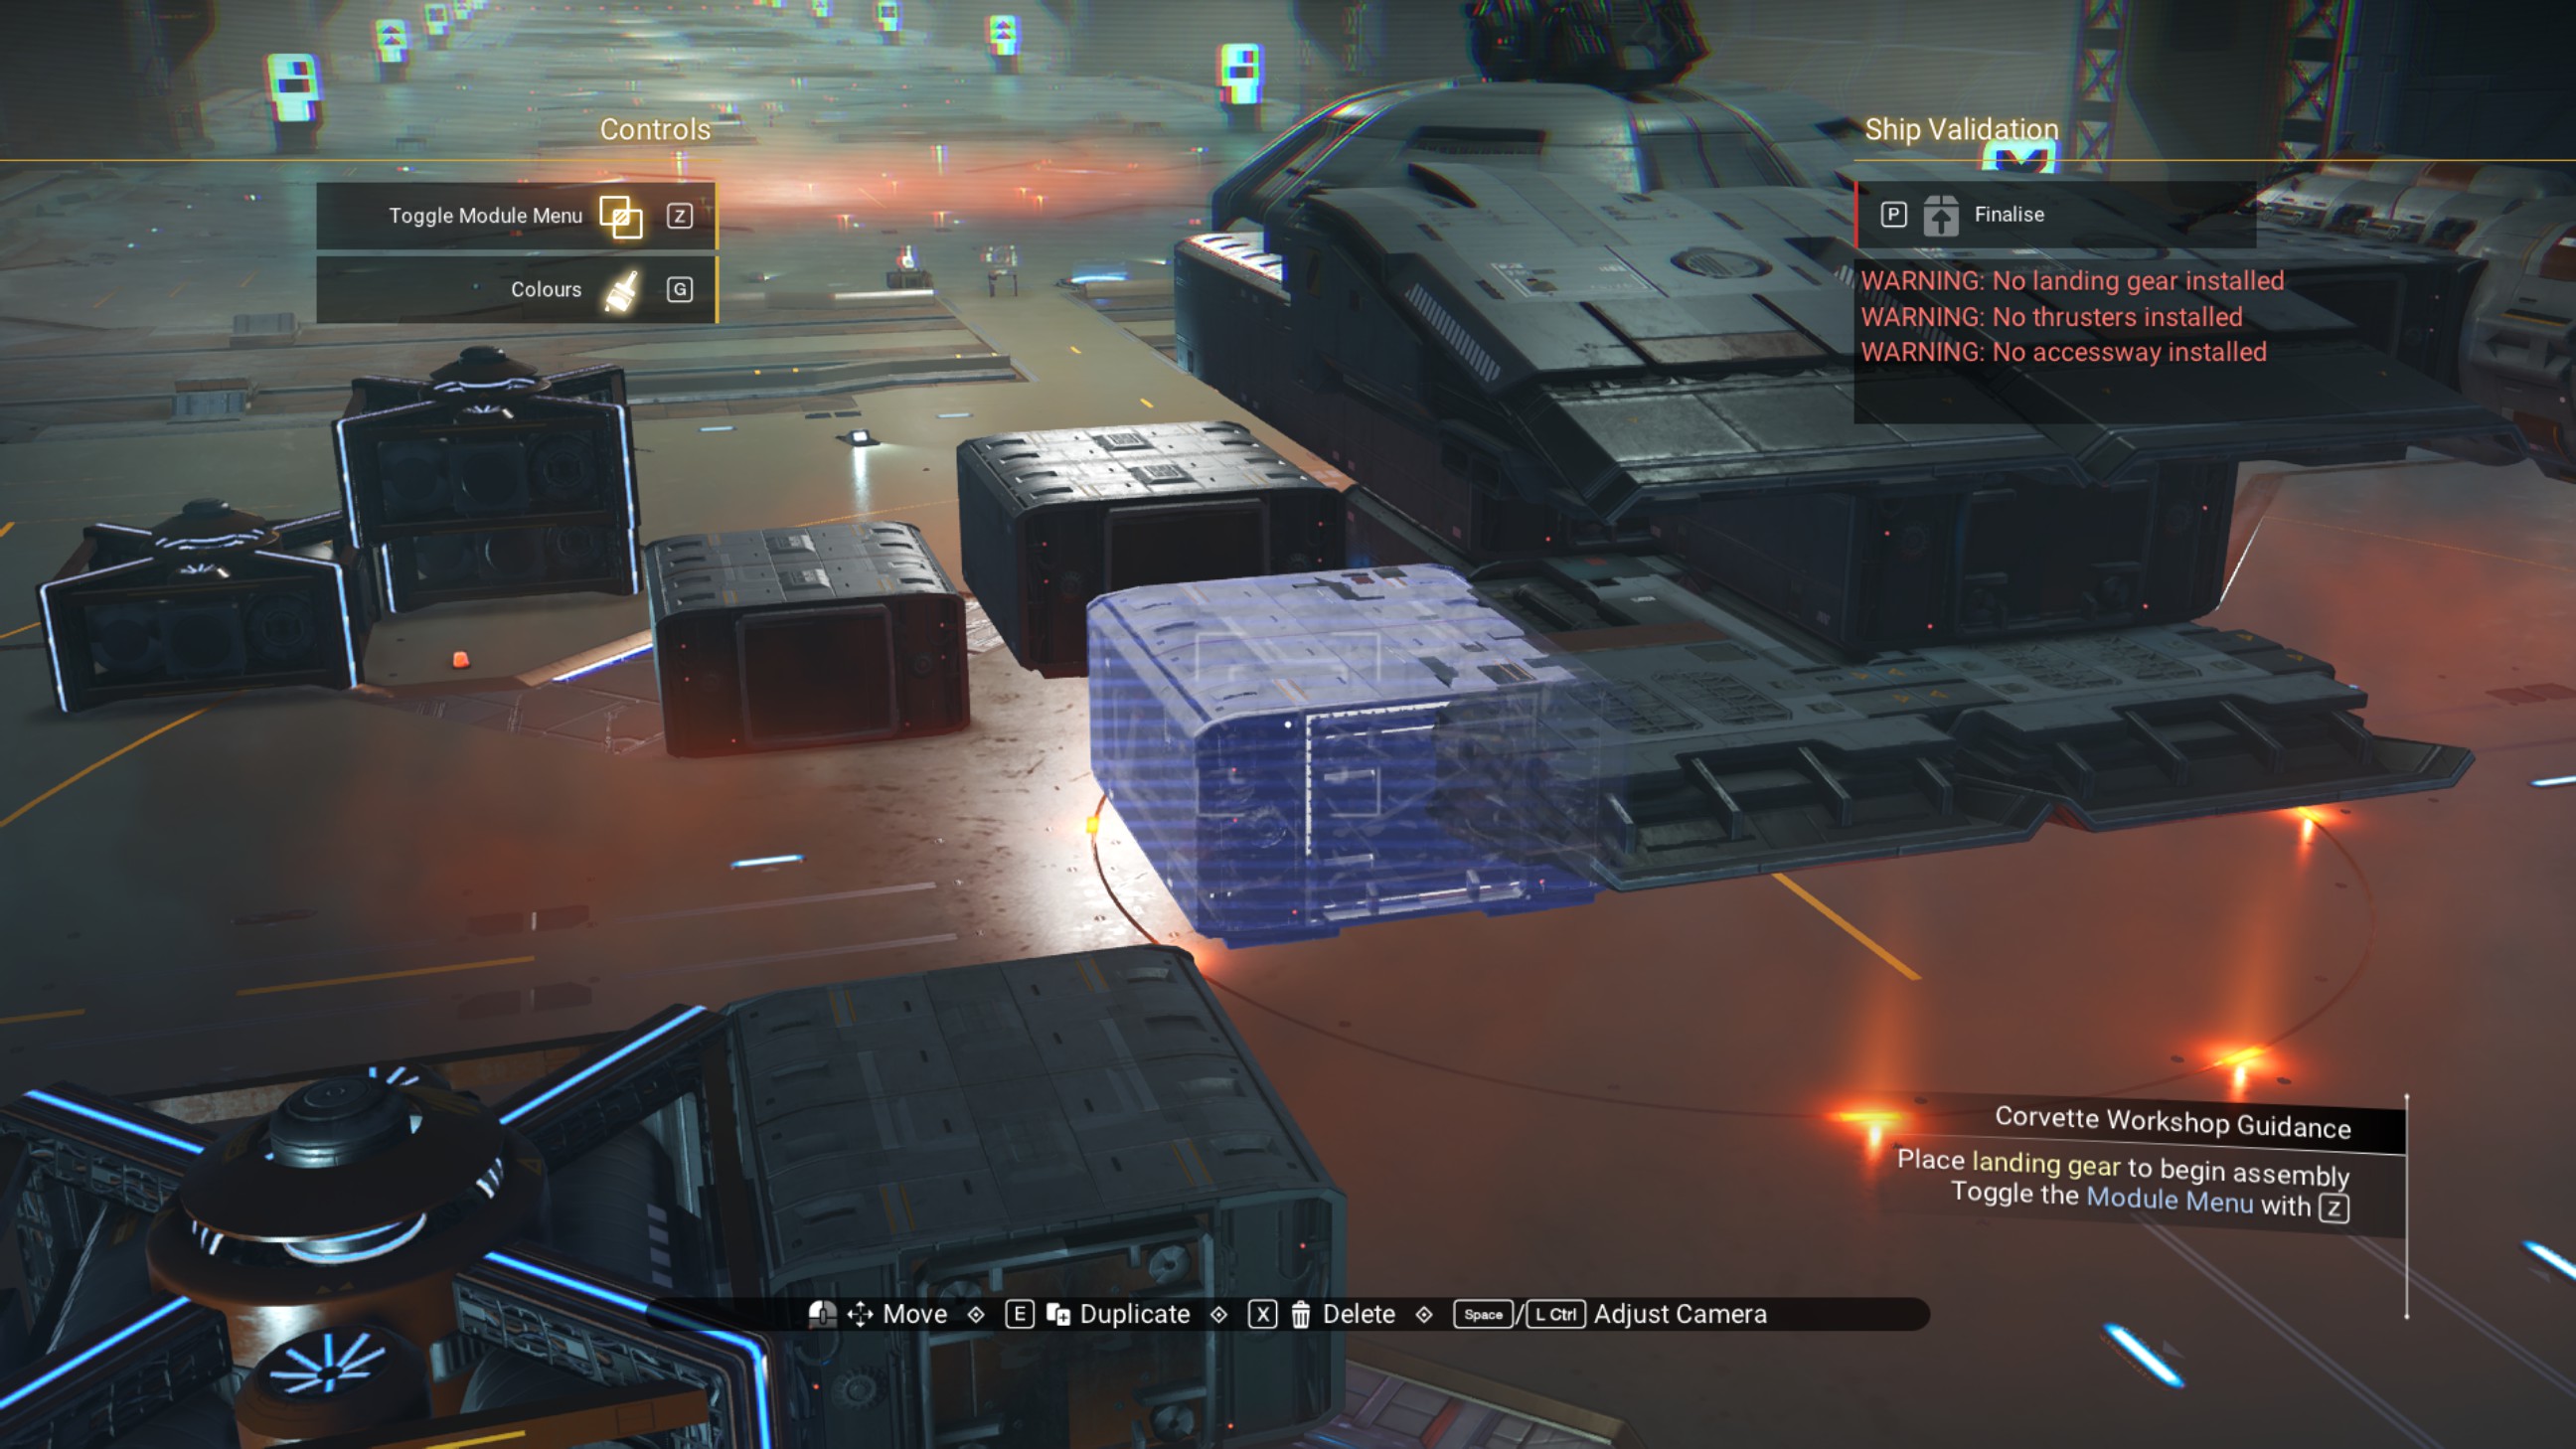
Place a walkway between the starboard side vesper cowlings, as shown.
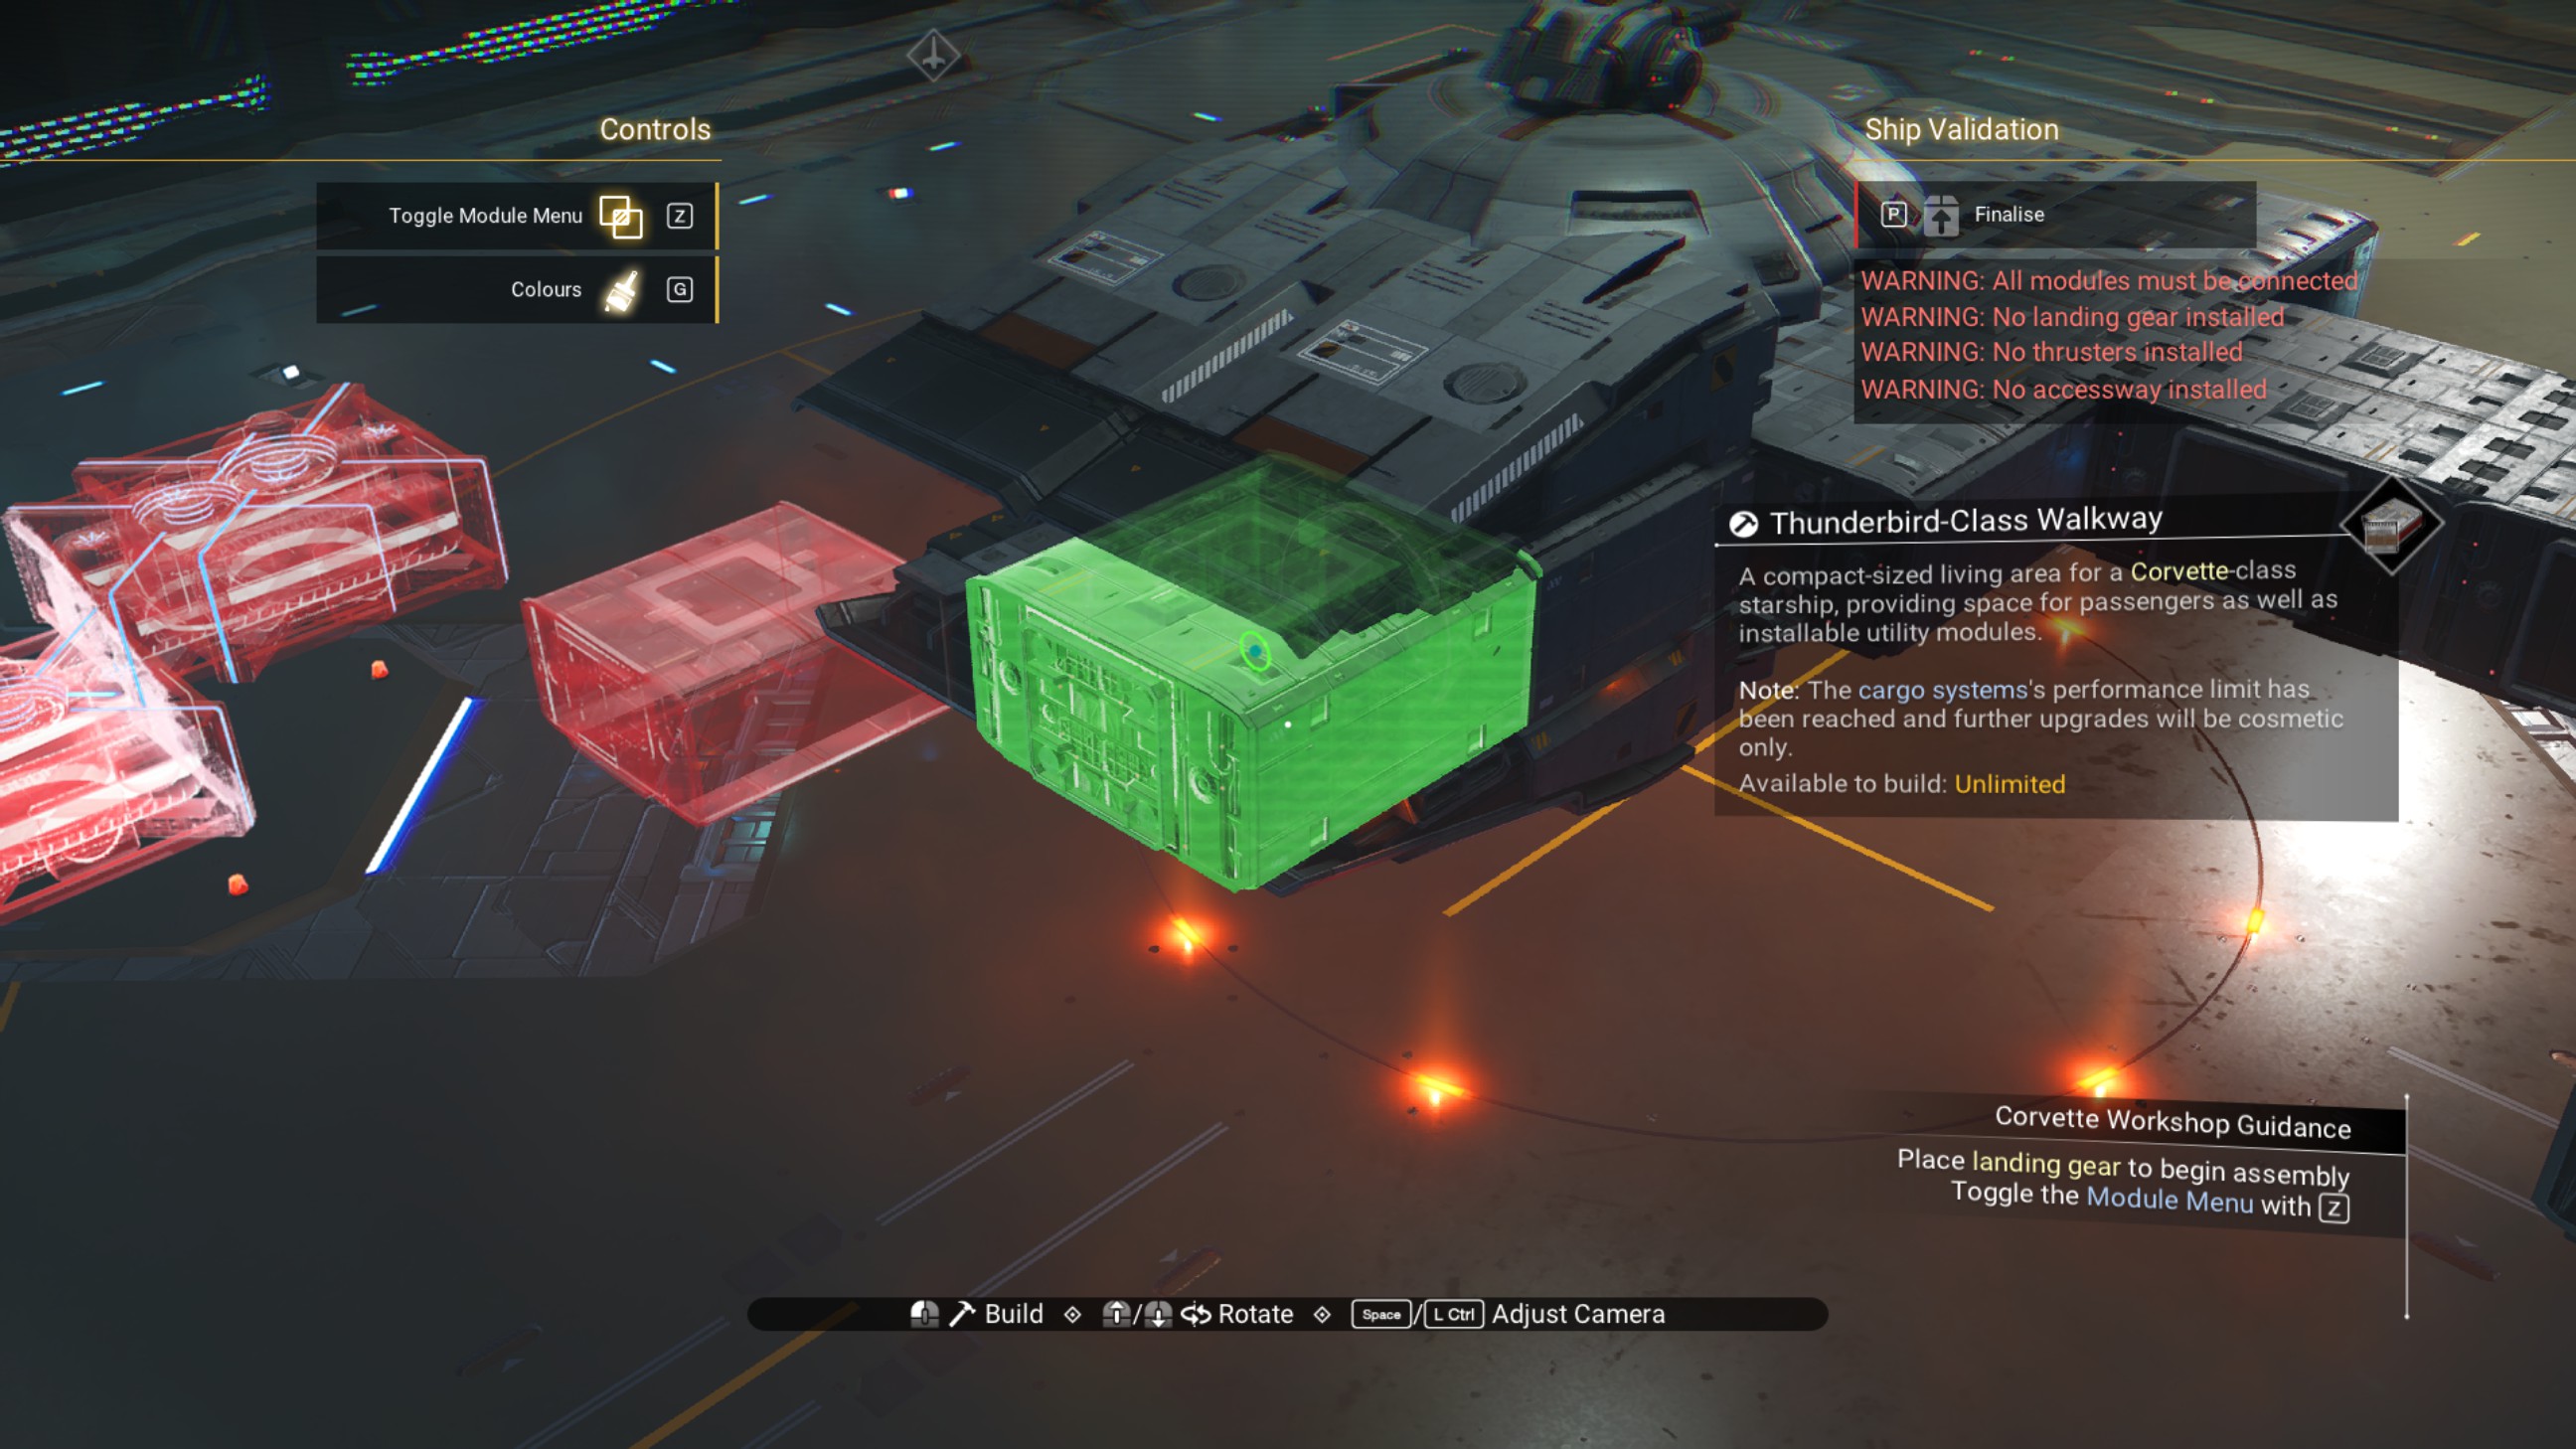
Place a rotated propeller module on that walkway, and shift the walkway forward half a step.
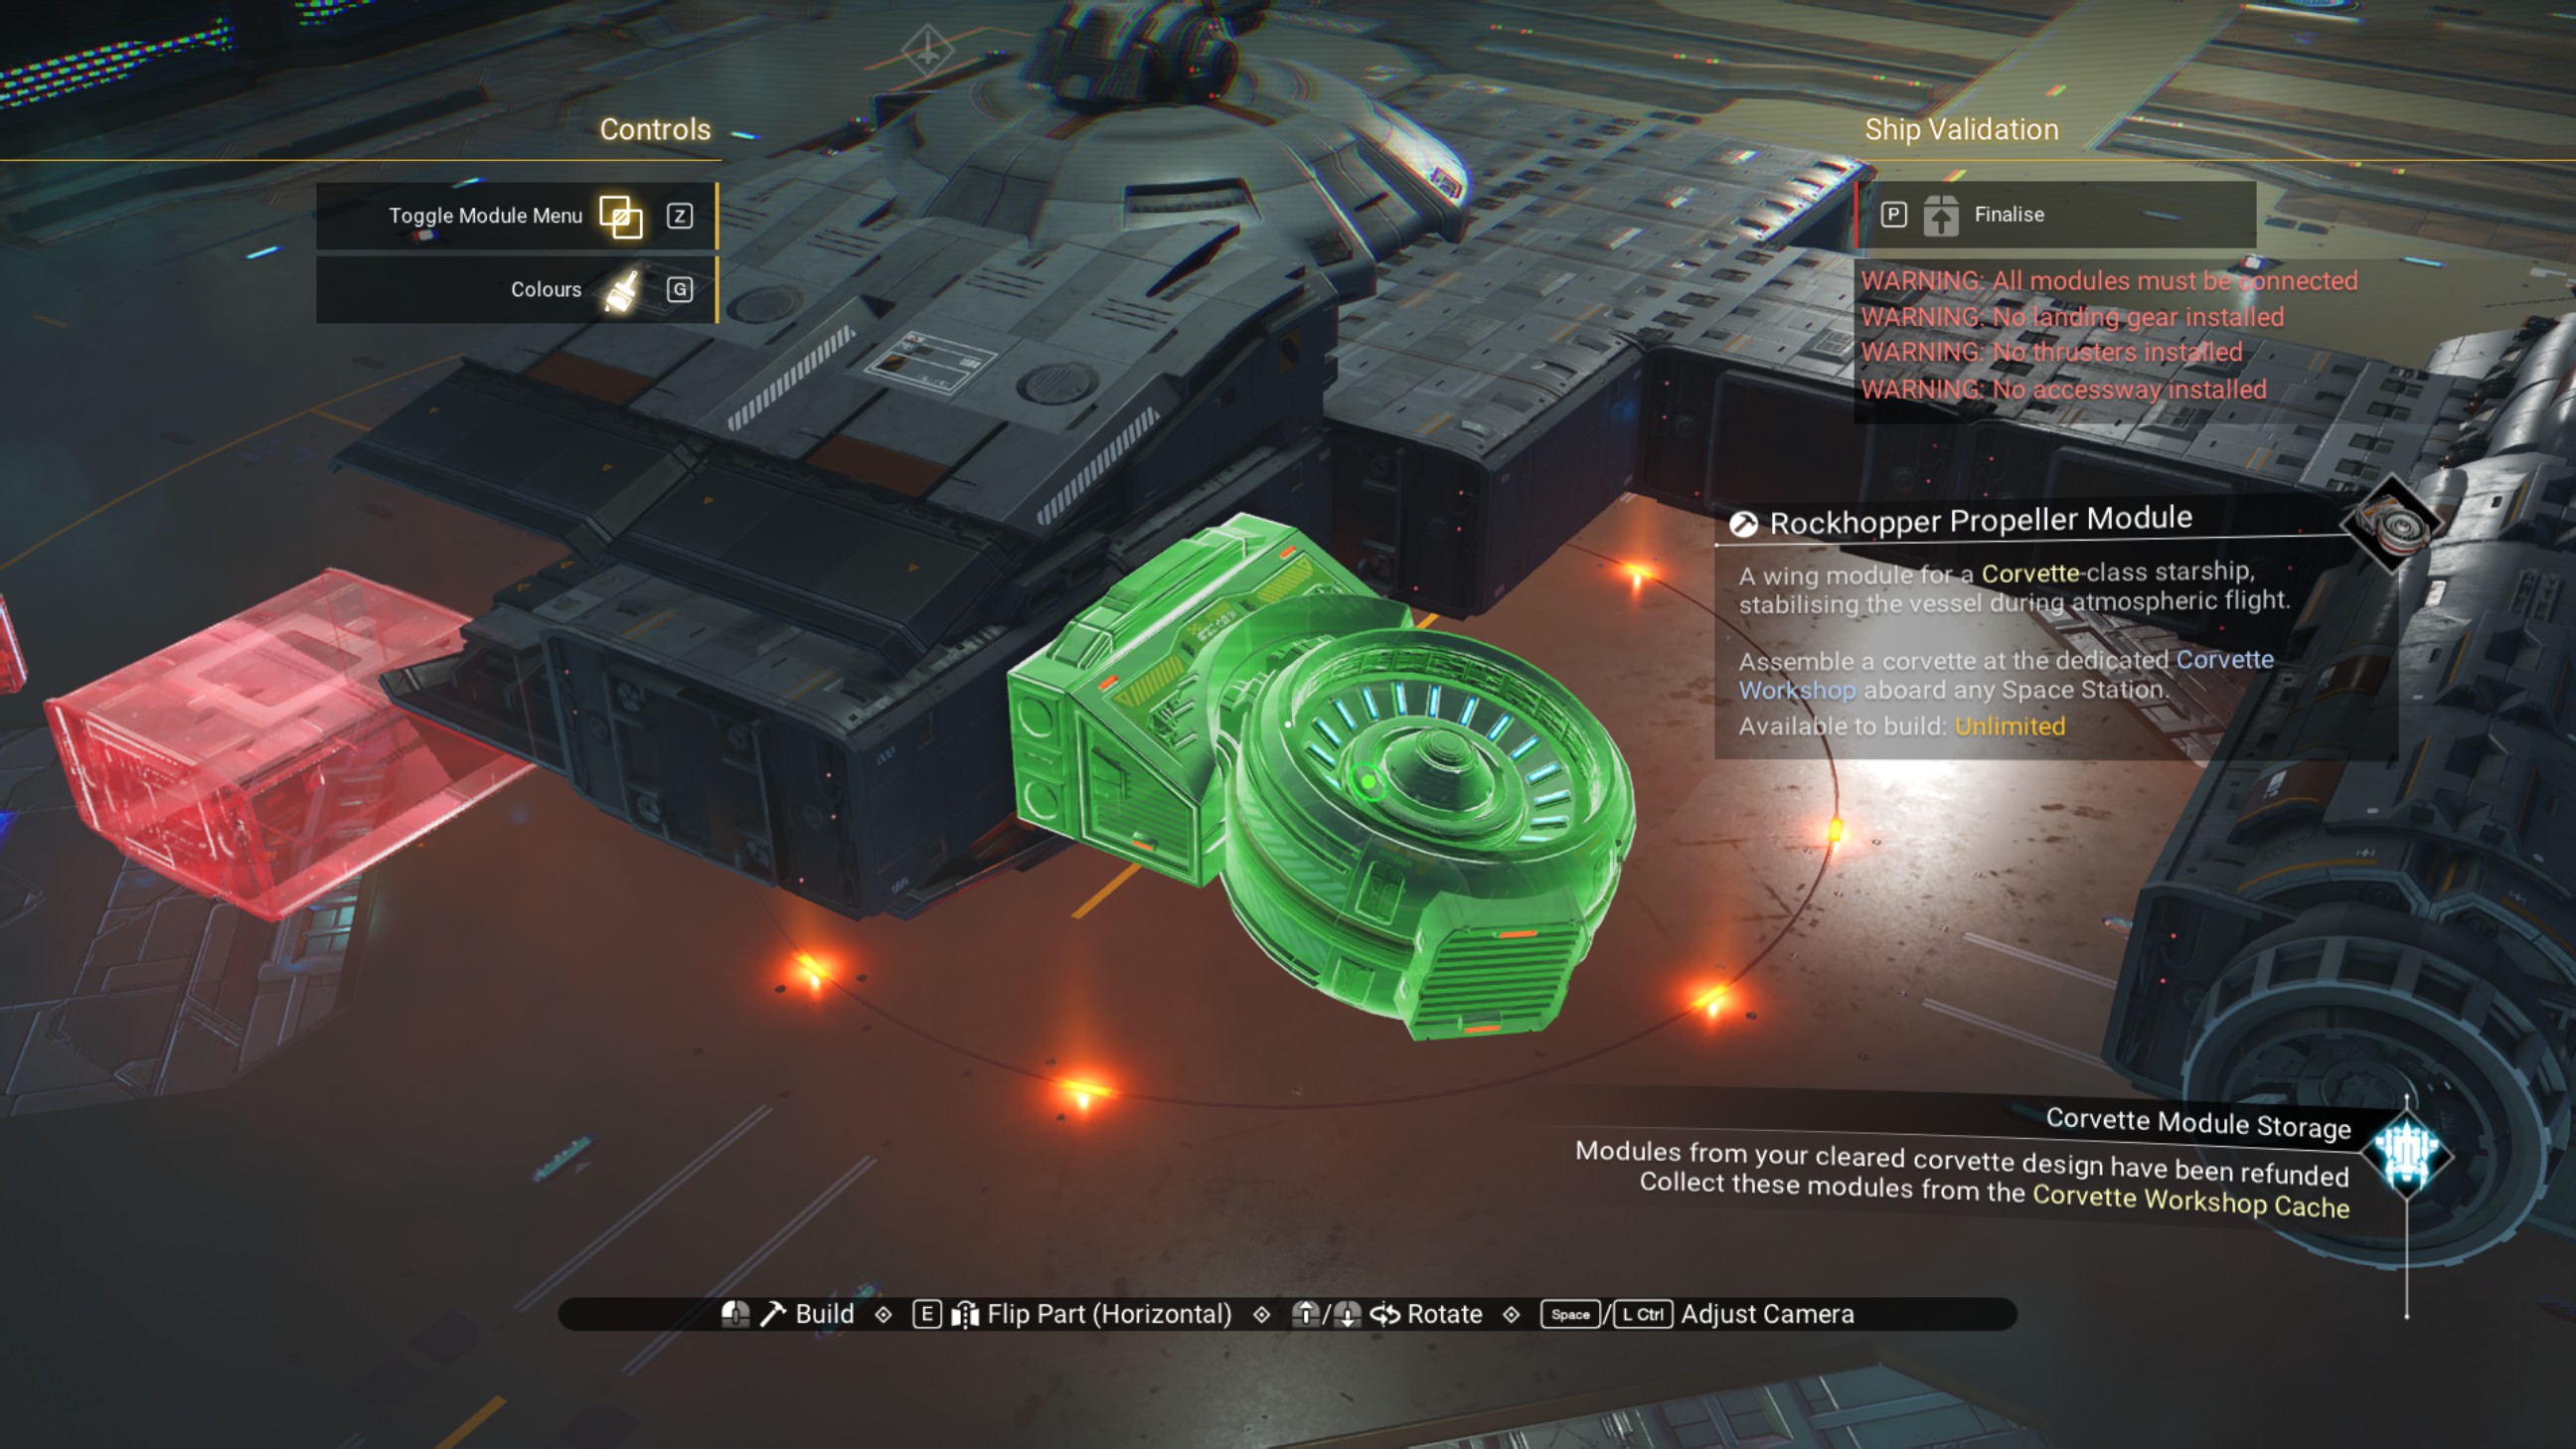
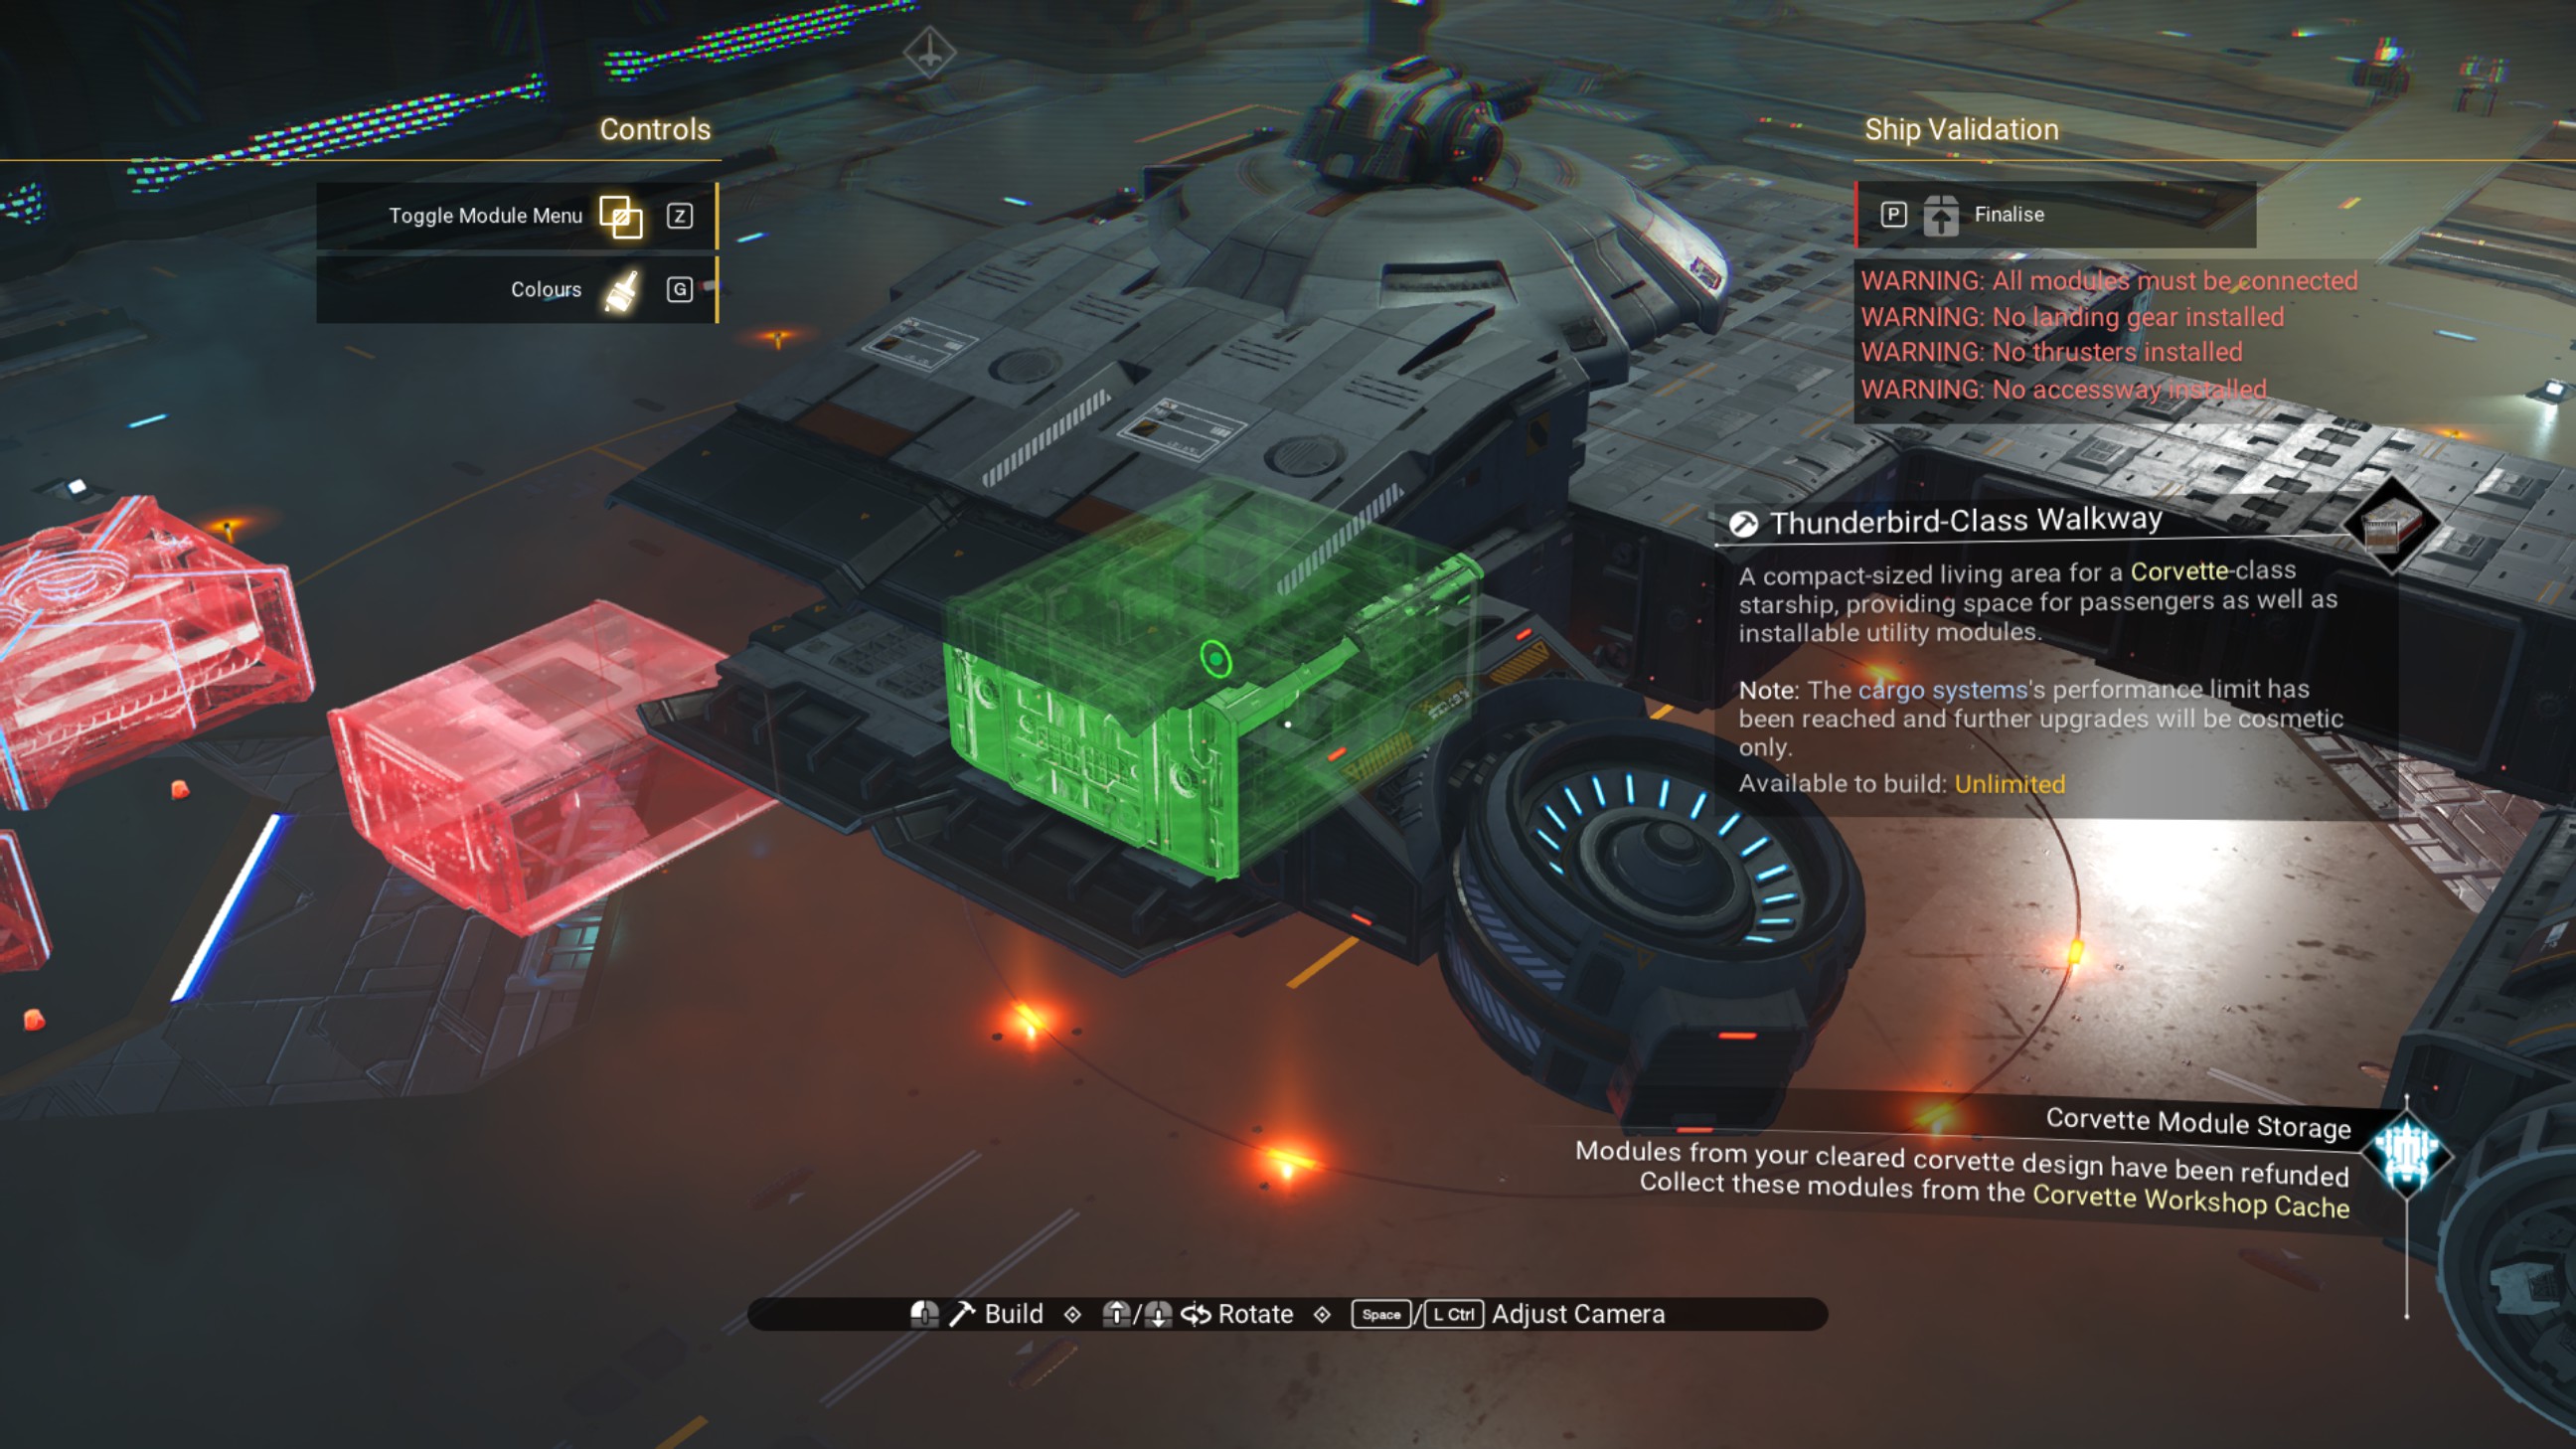
Delete the propeller module, and place another walkway beside the one we just offset.
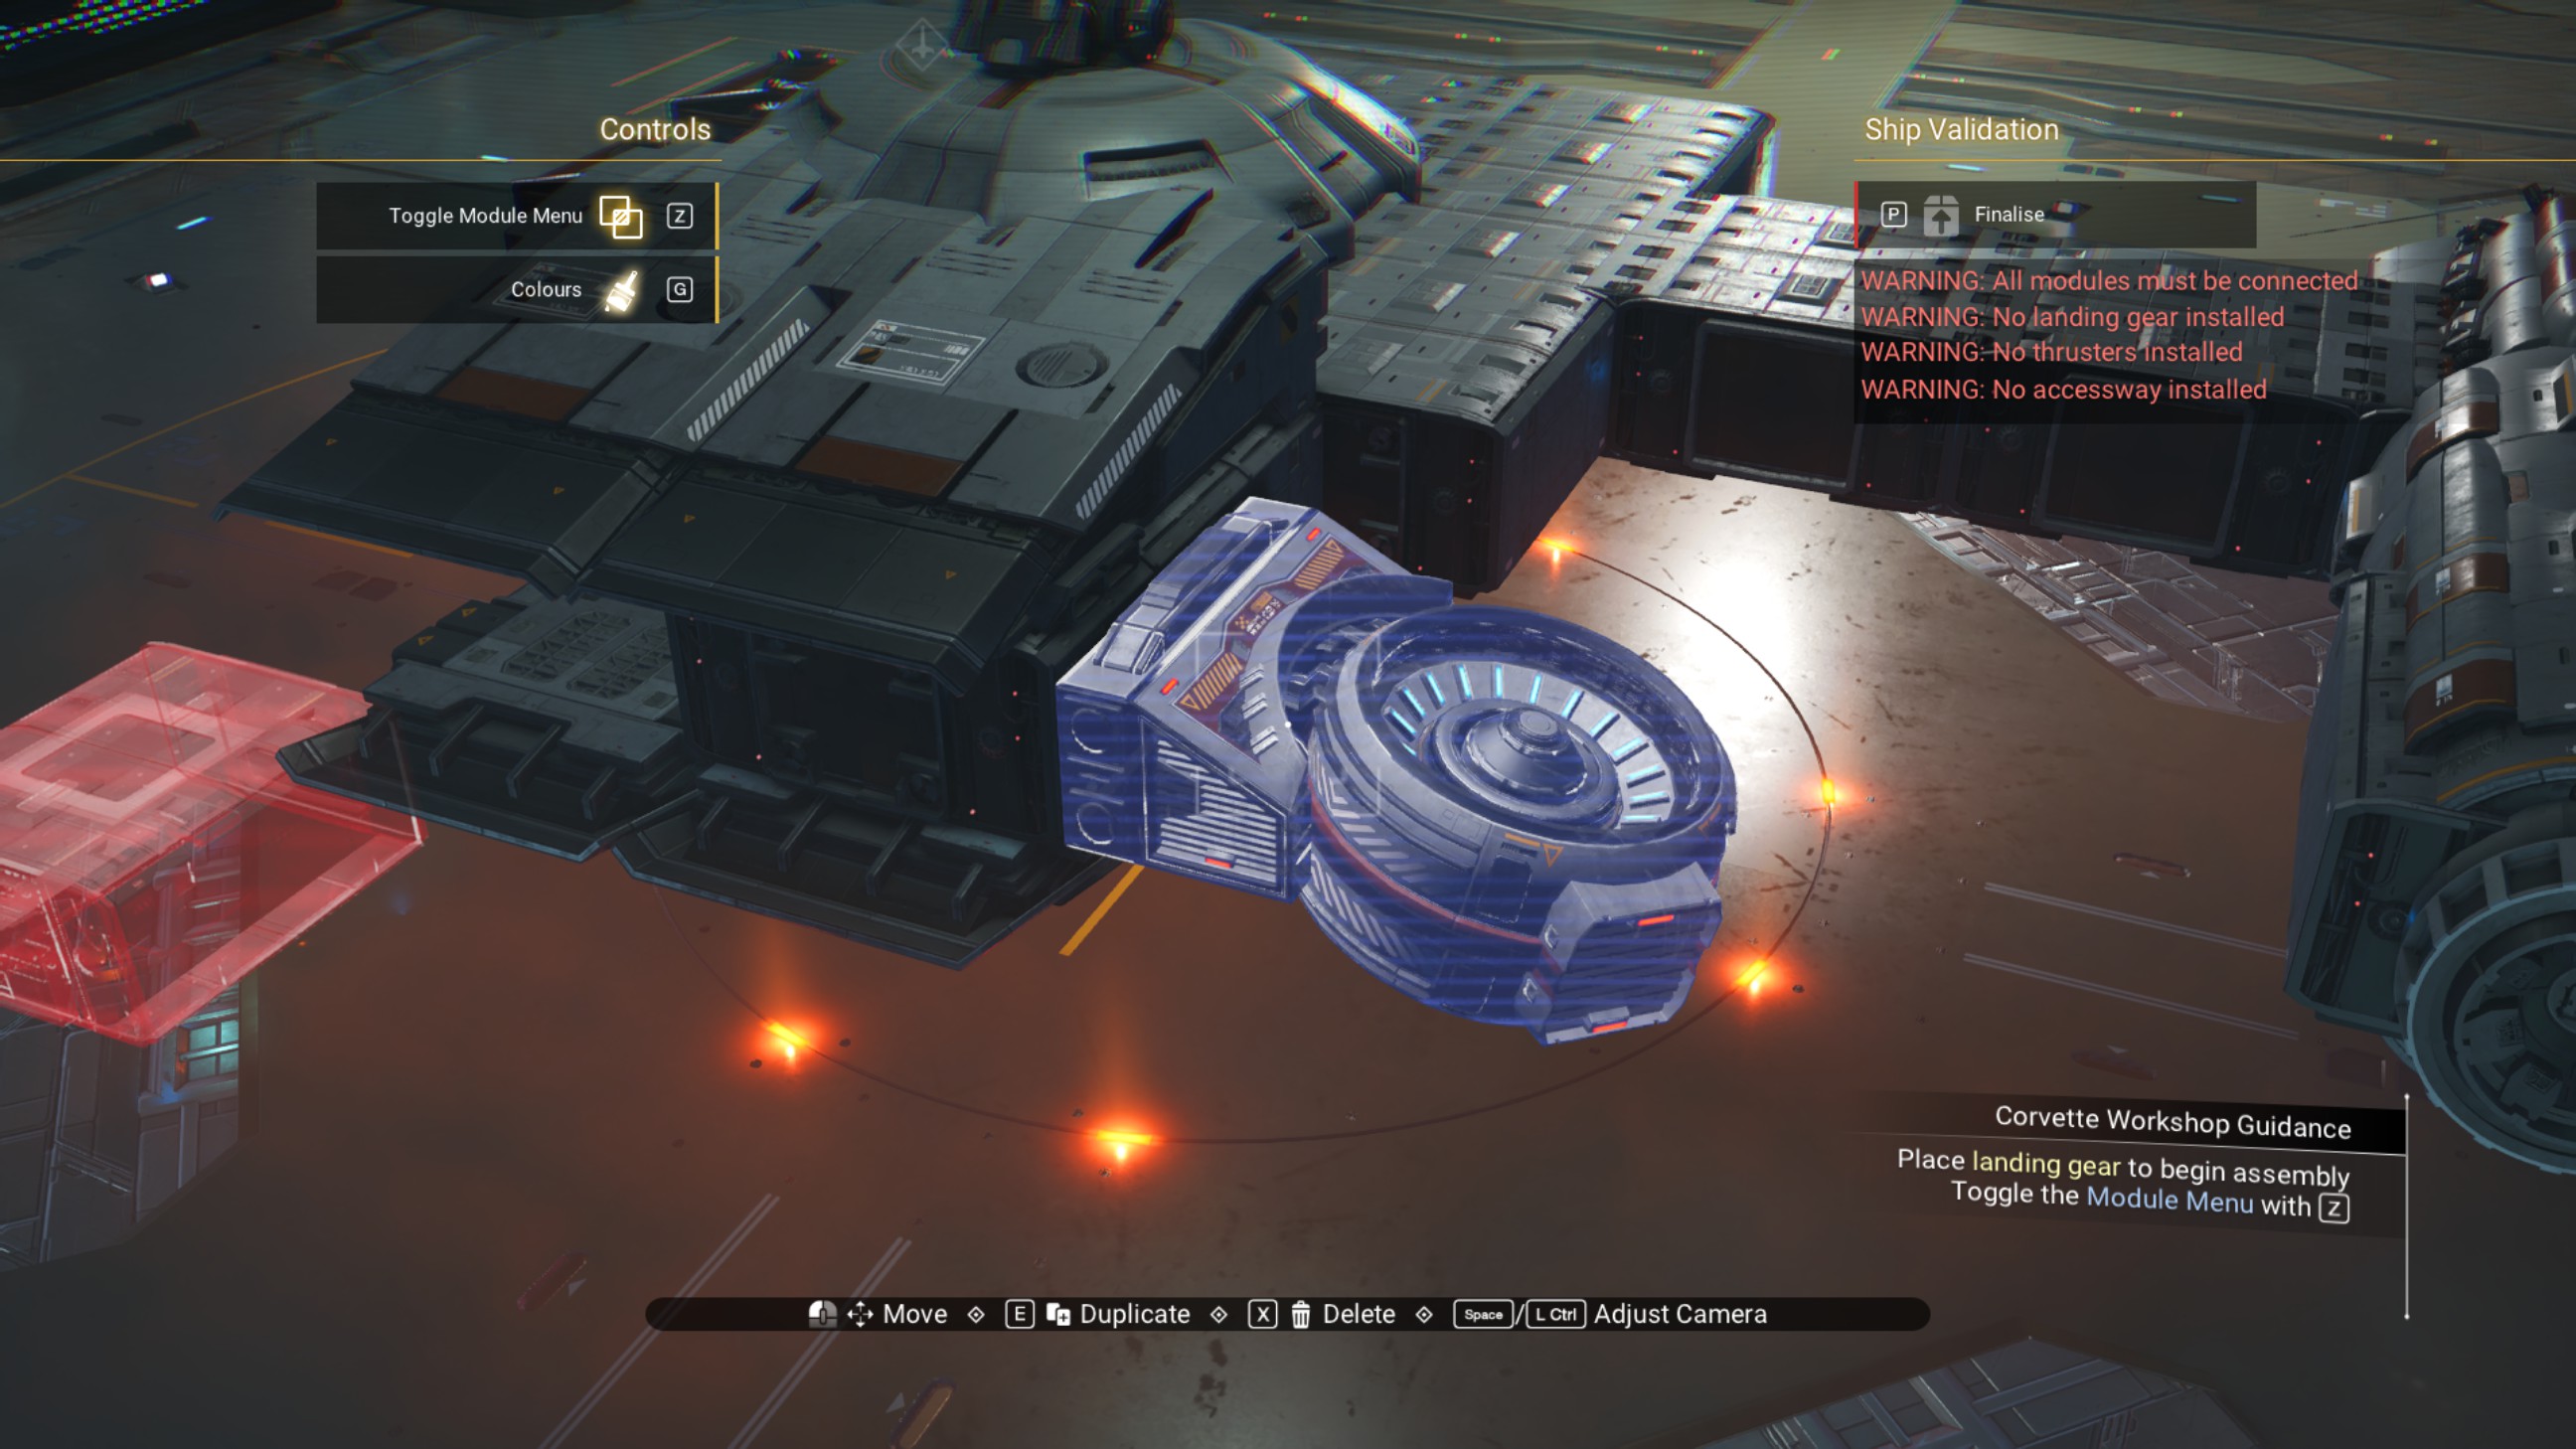
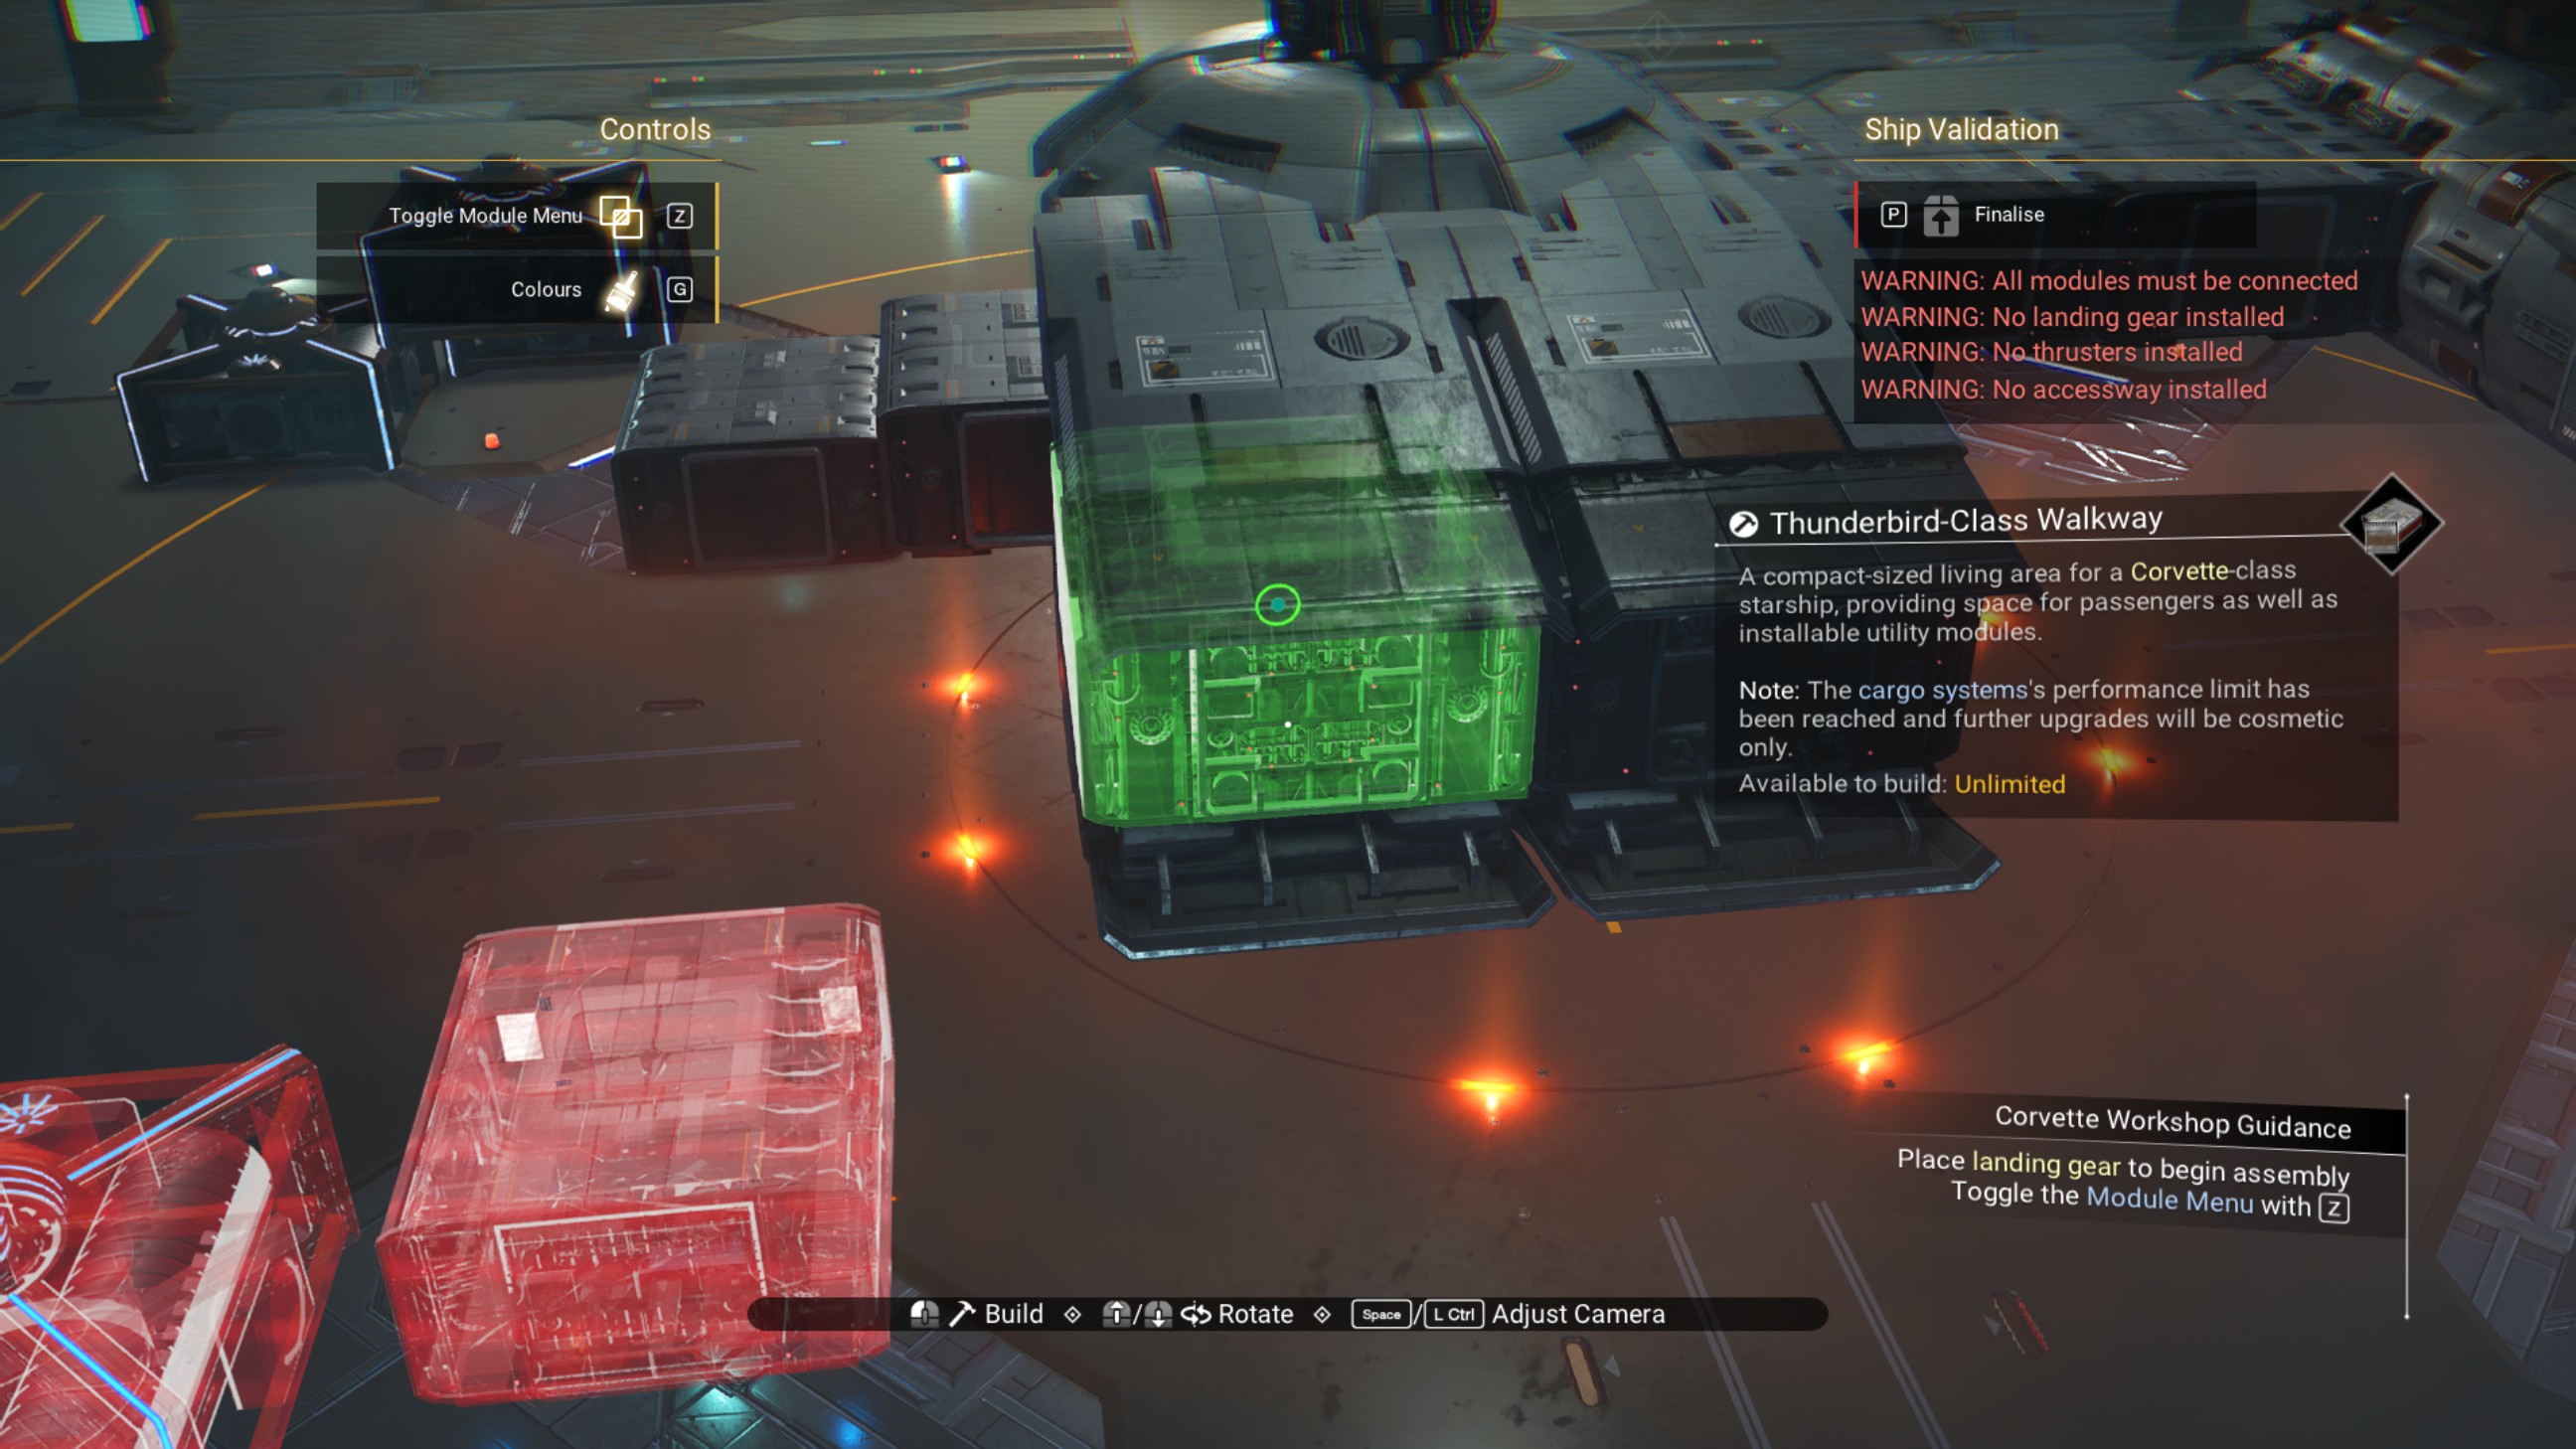
Place a ducting outlet on the rear of that new walkway, and shift the walkway so that the ducting outlet is now on the walkway's port side.
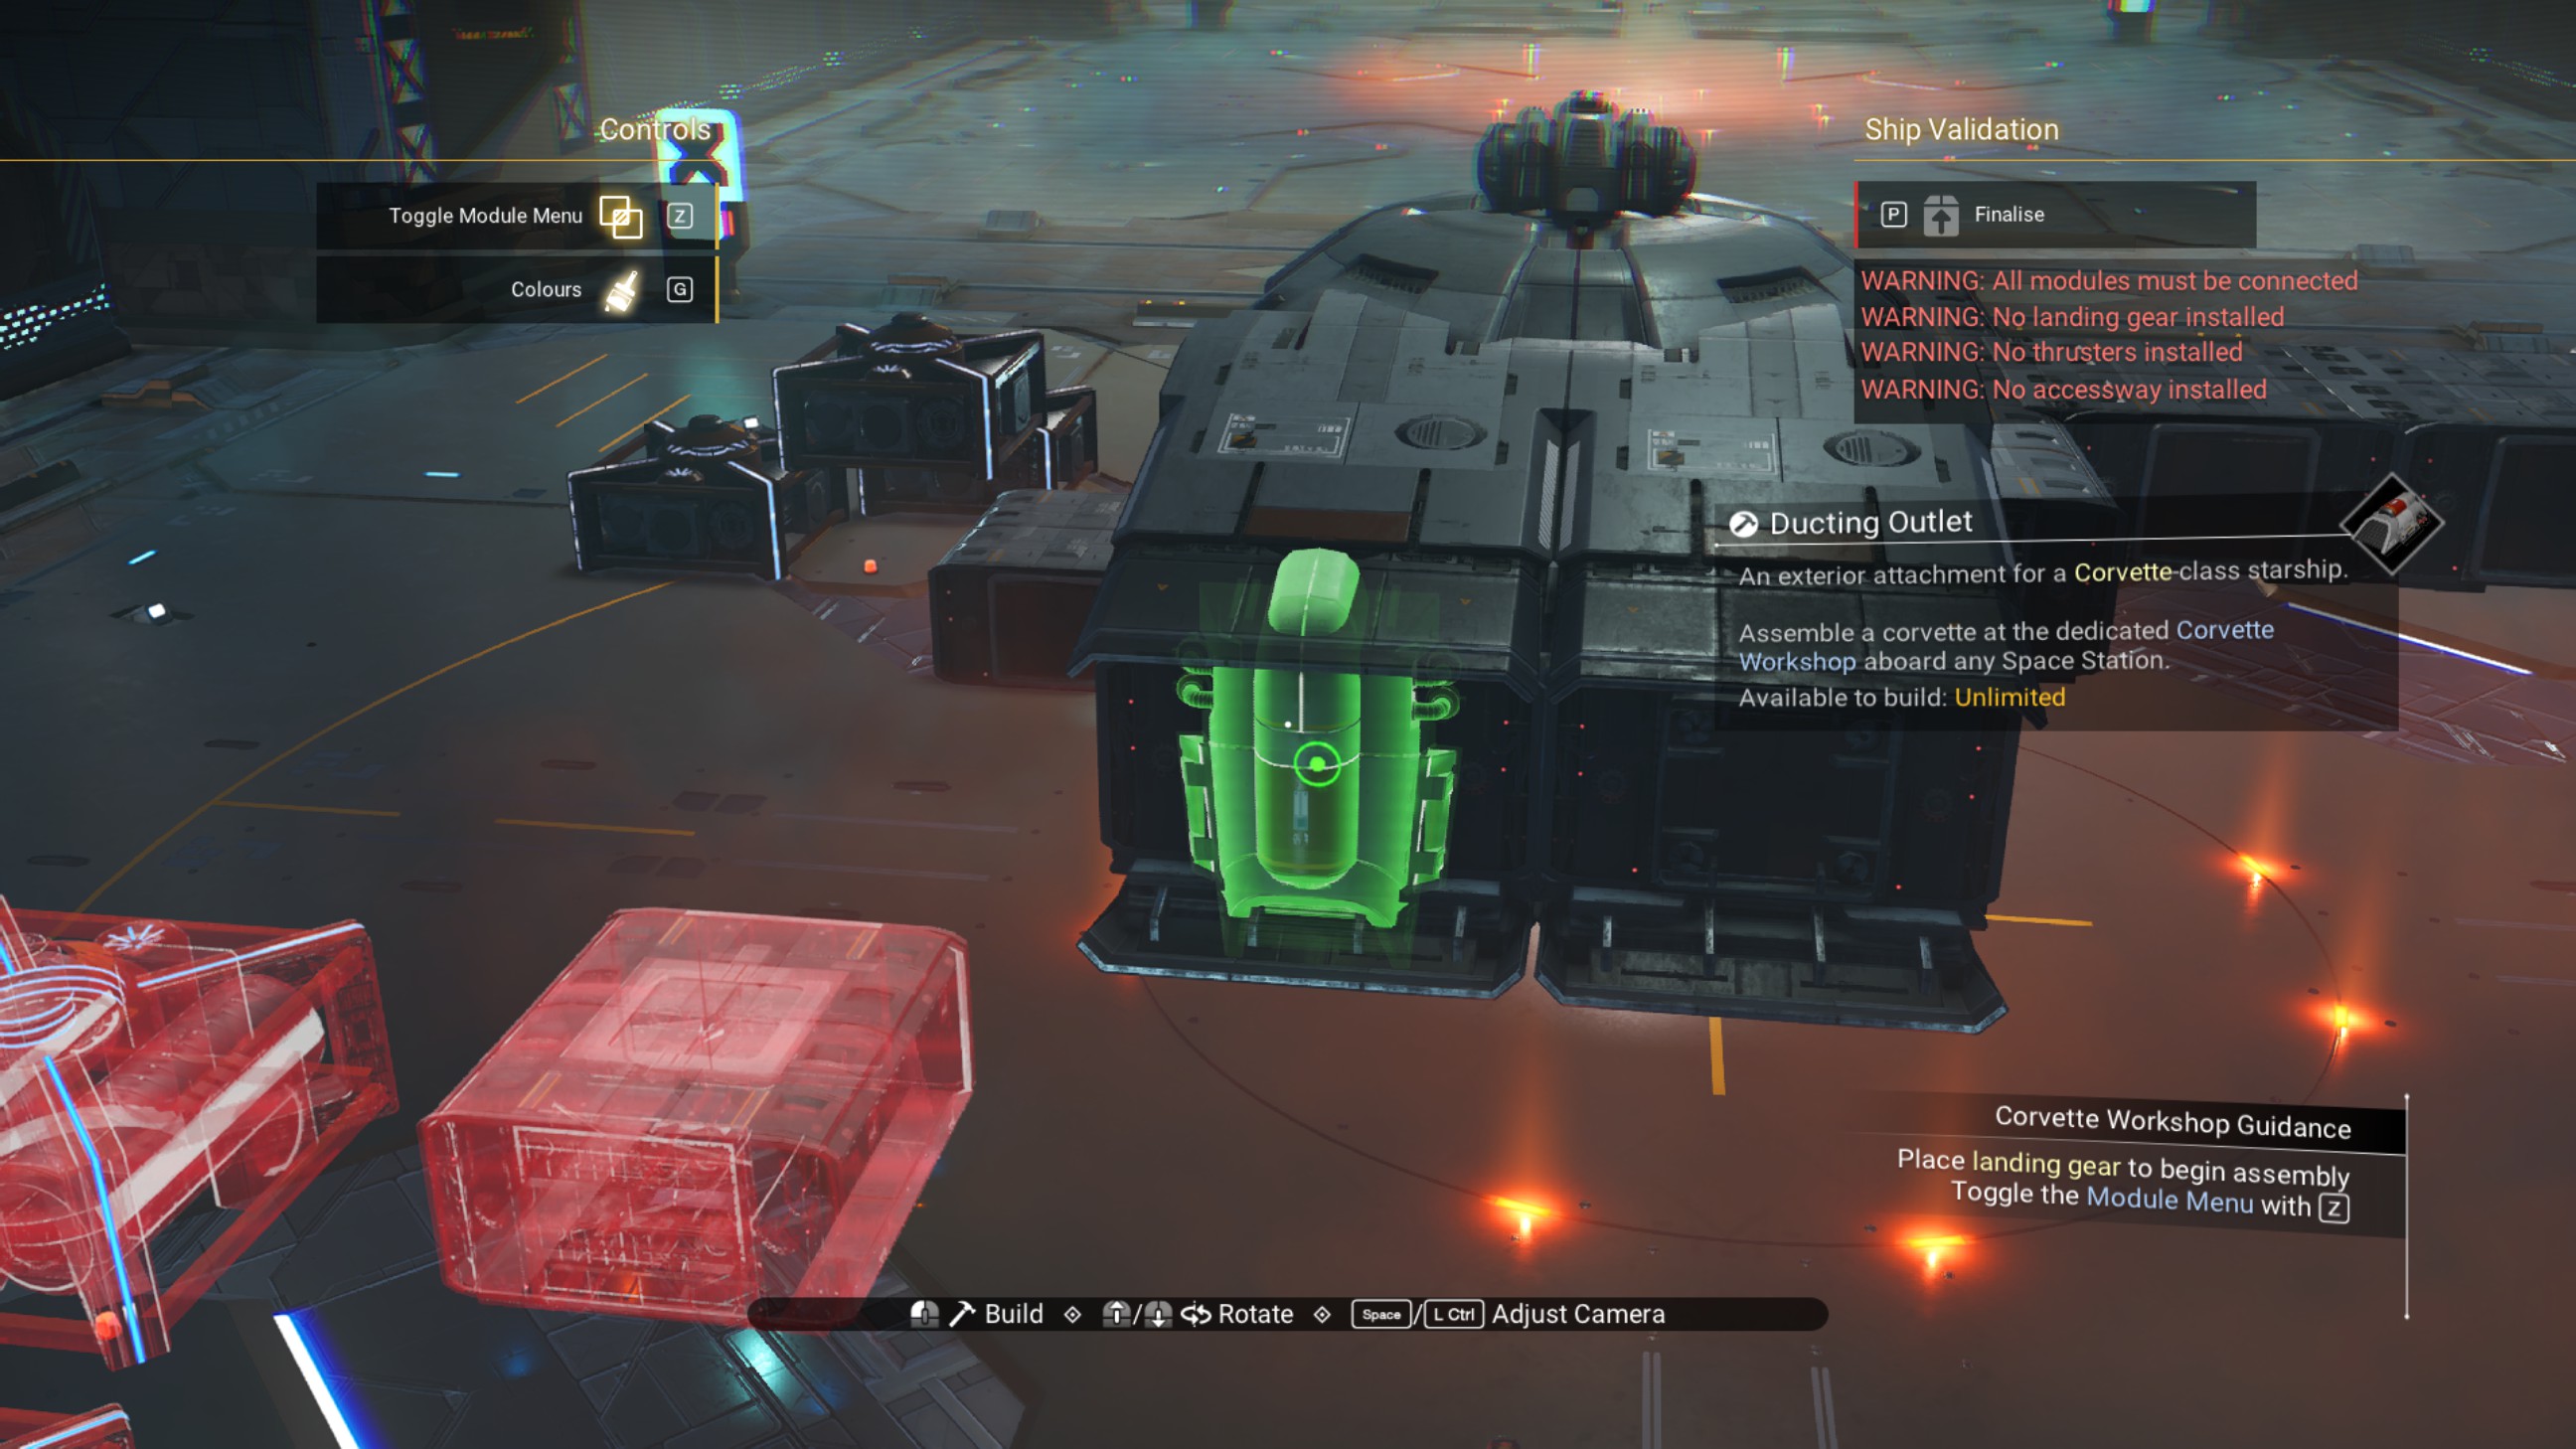
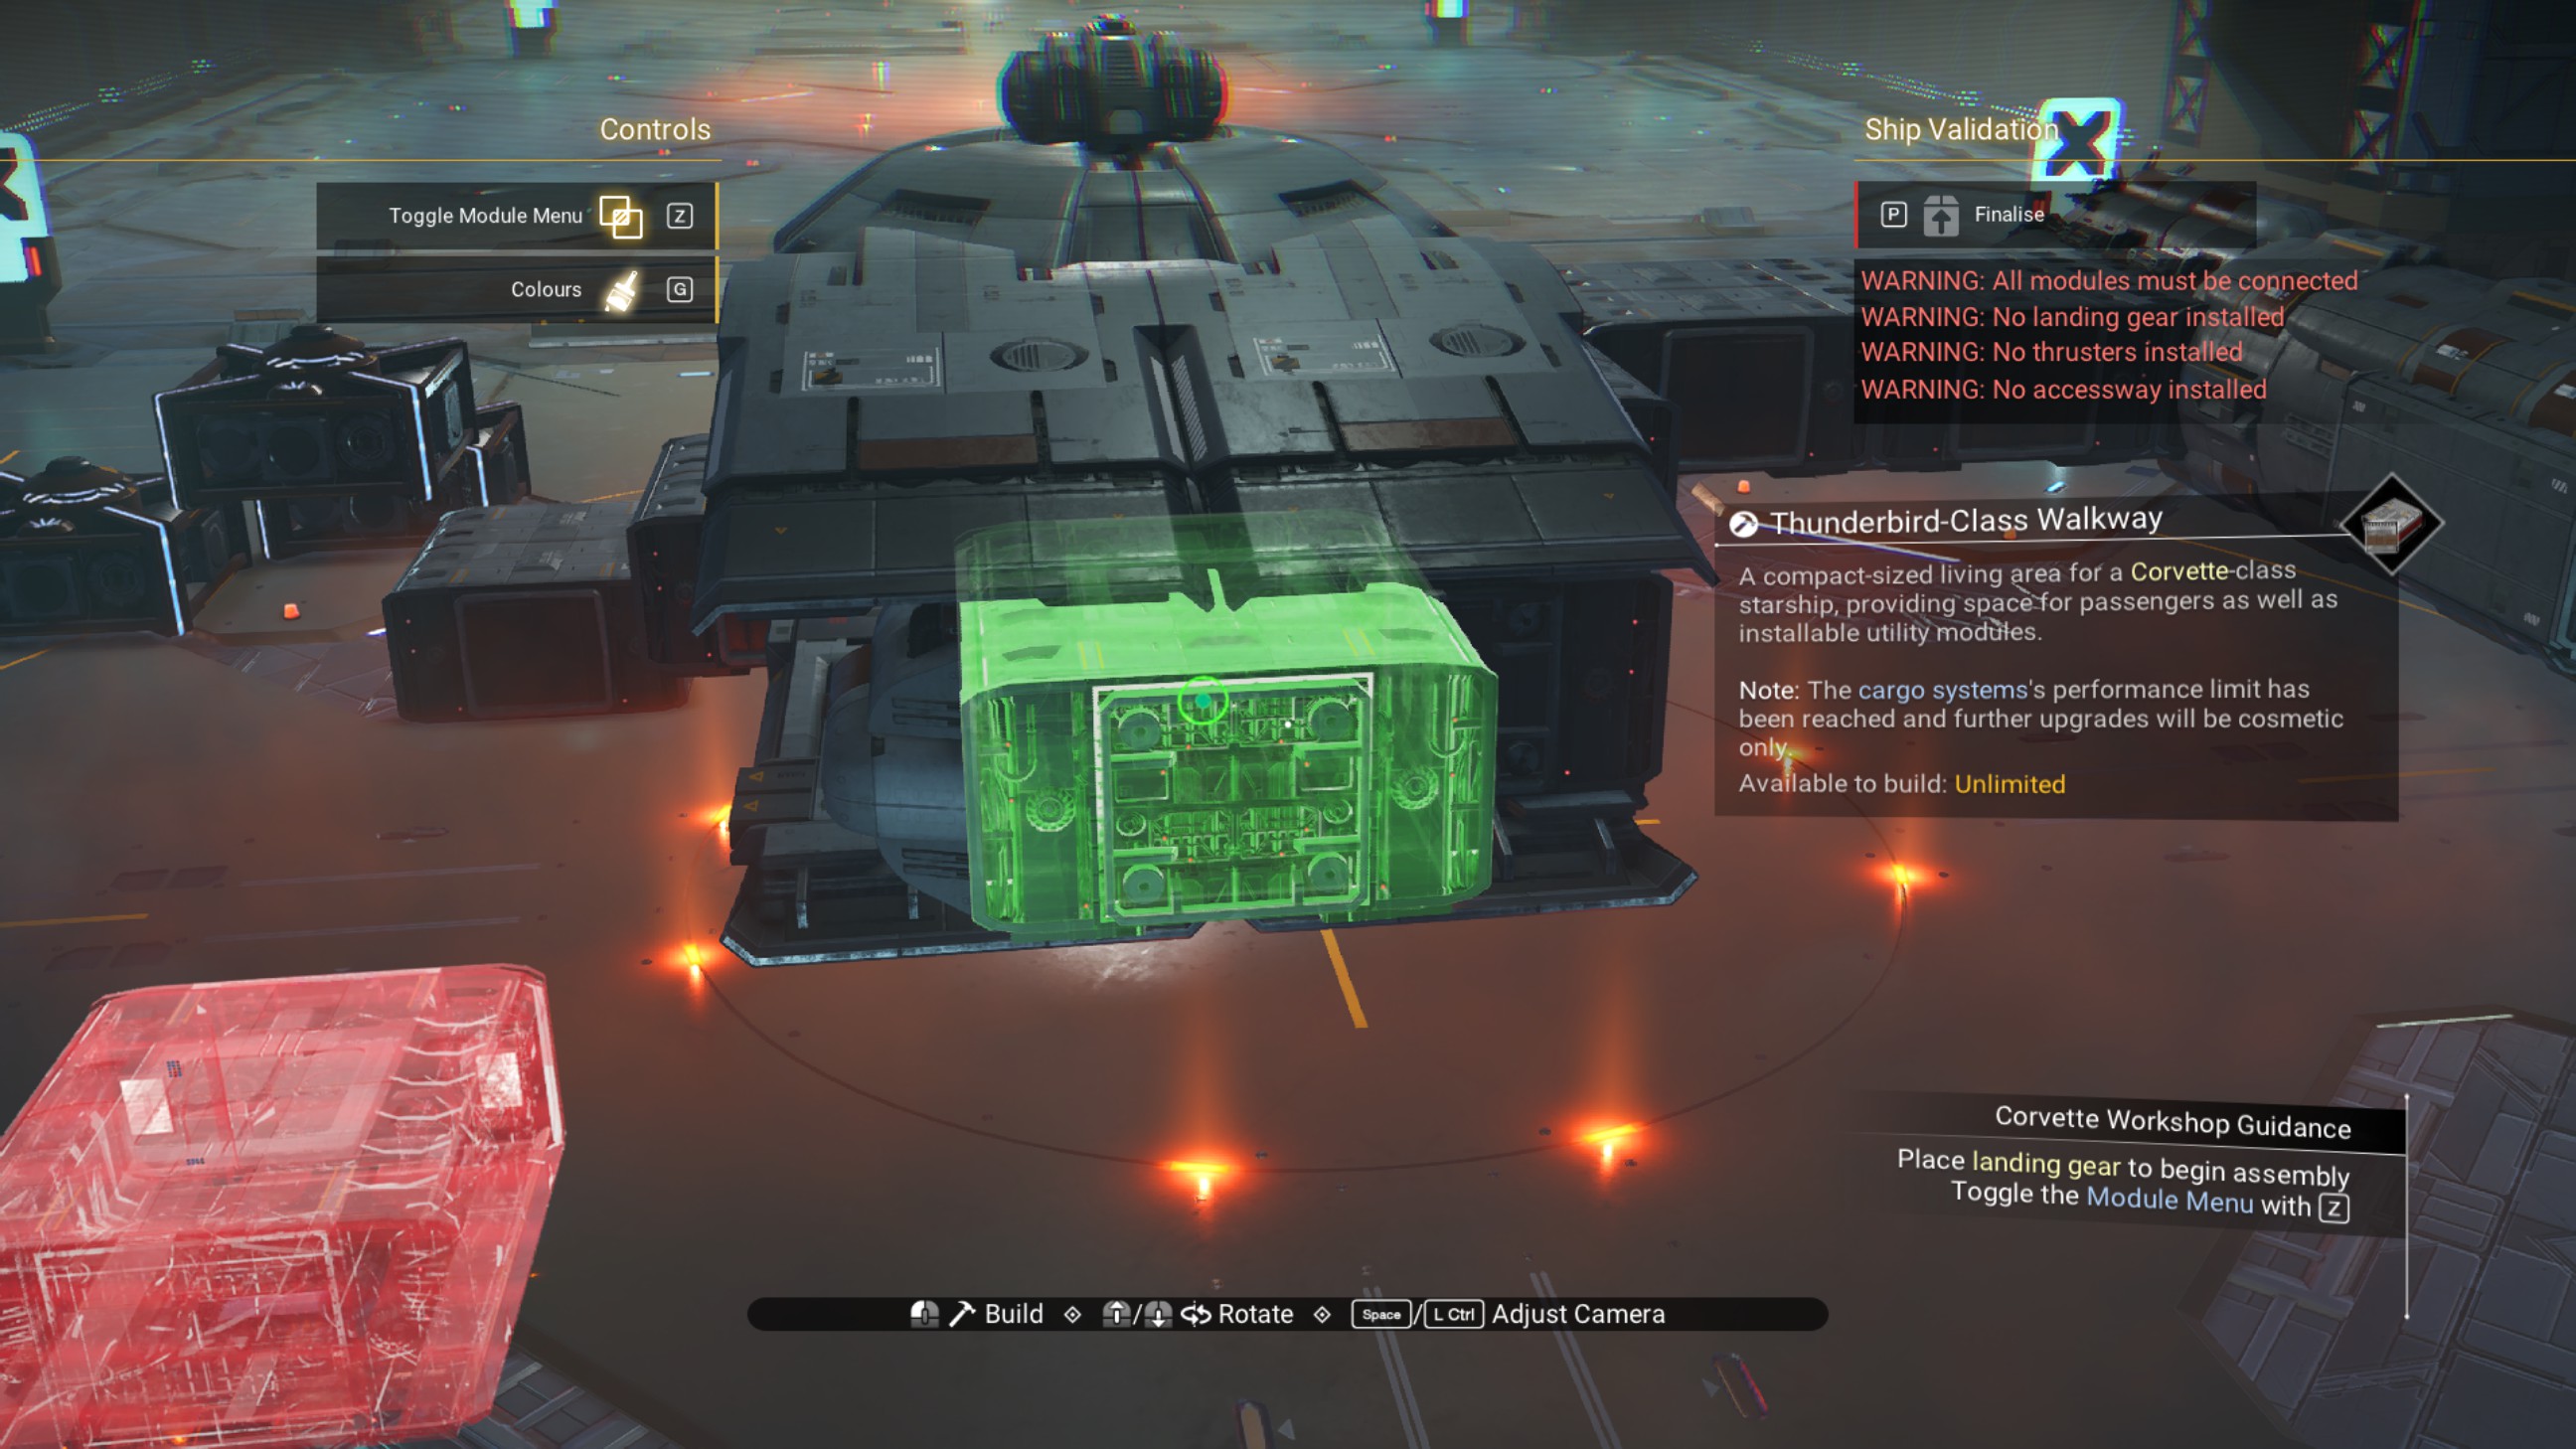
Delete the ducting outlet, and place a rotated propeller module on that same walkway.
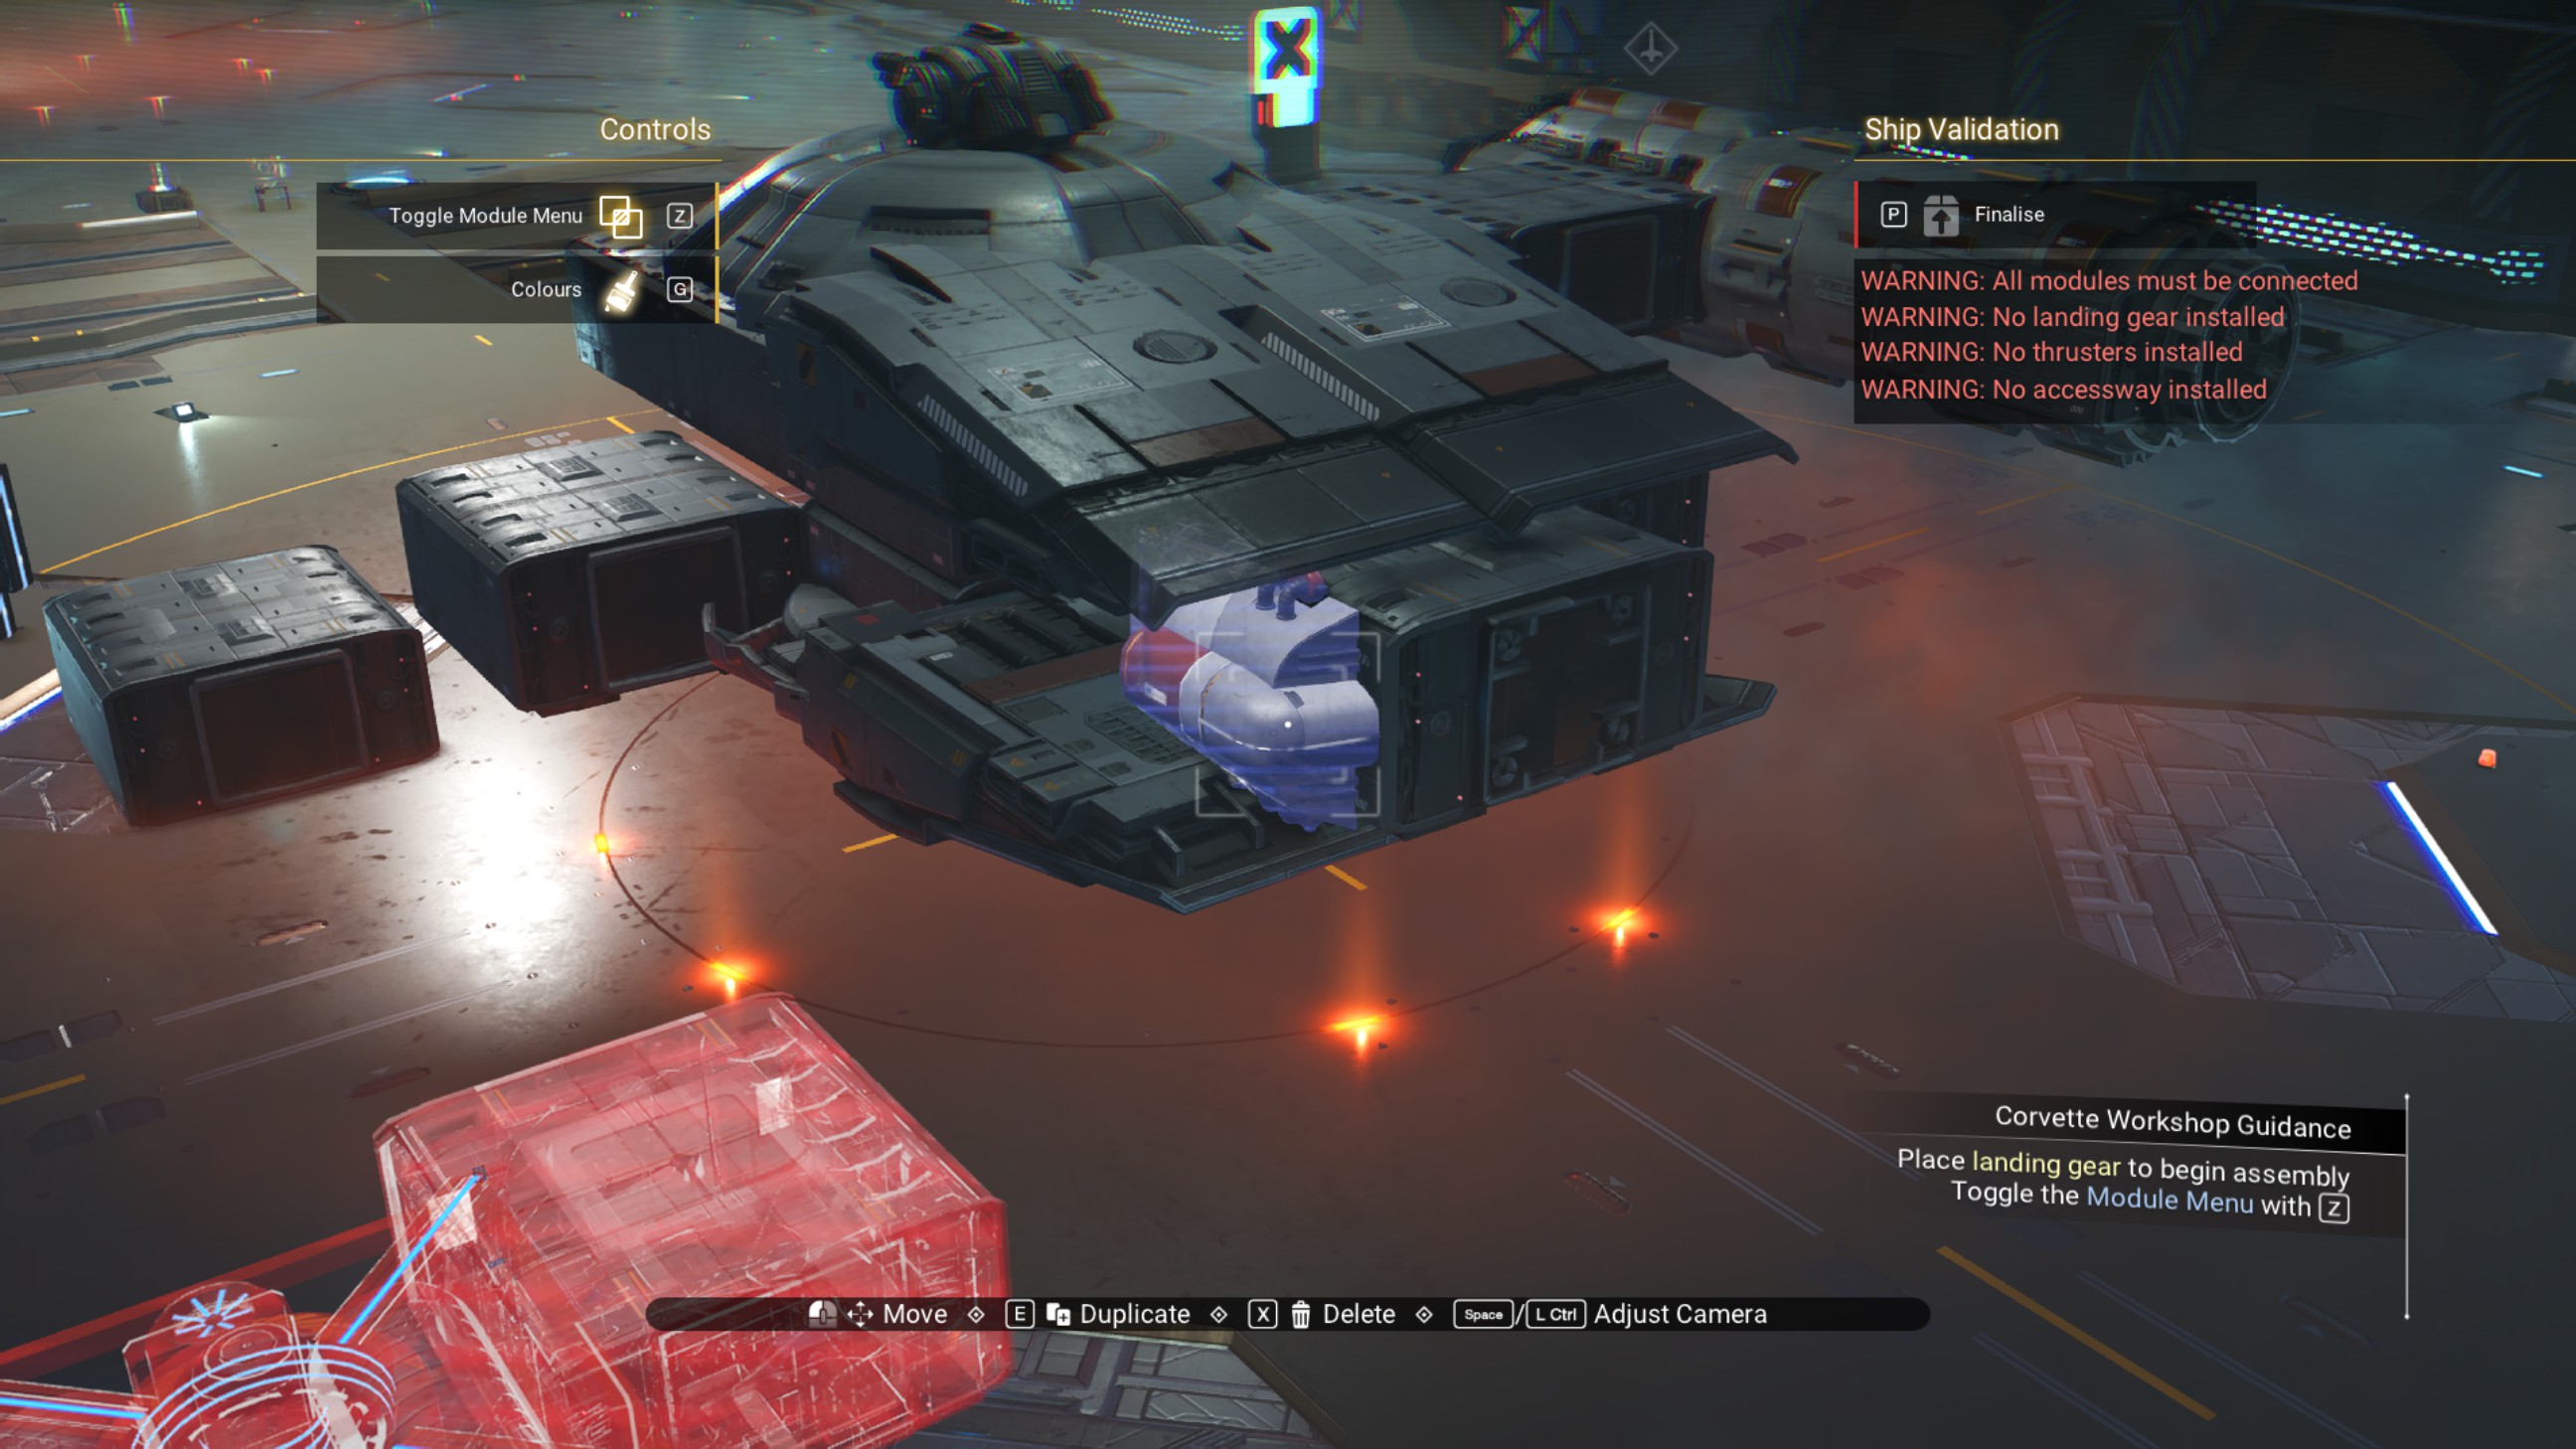
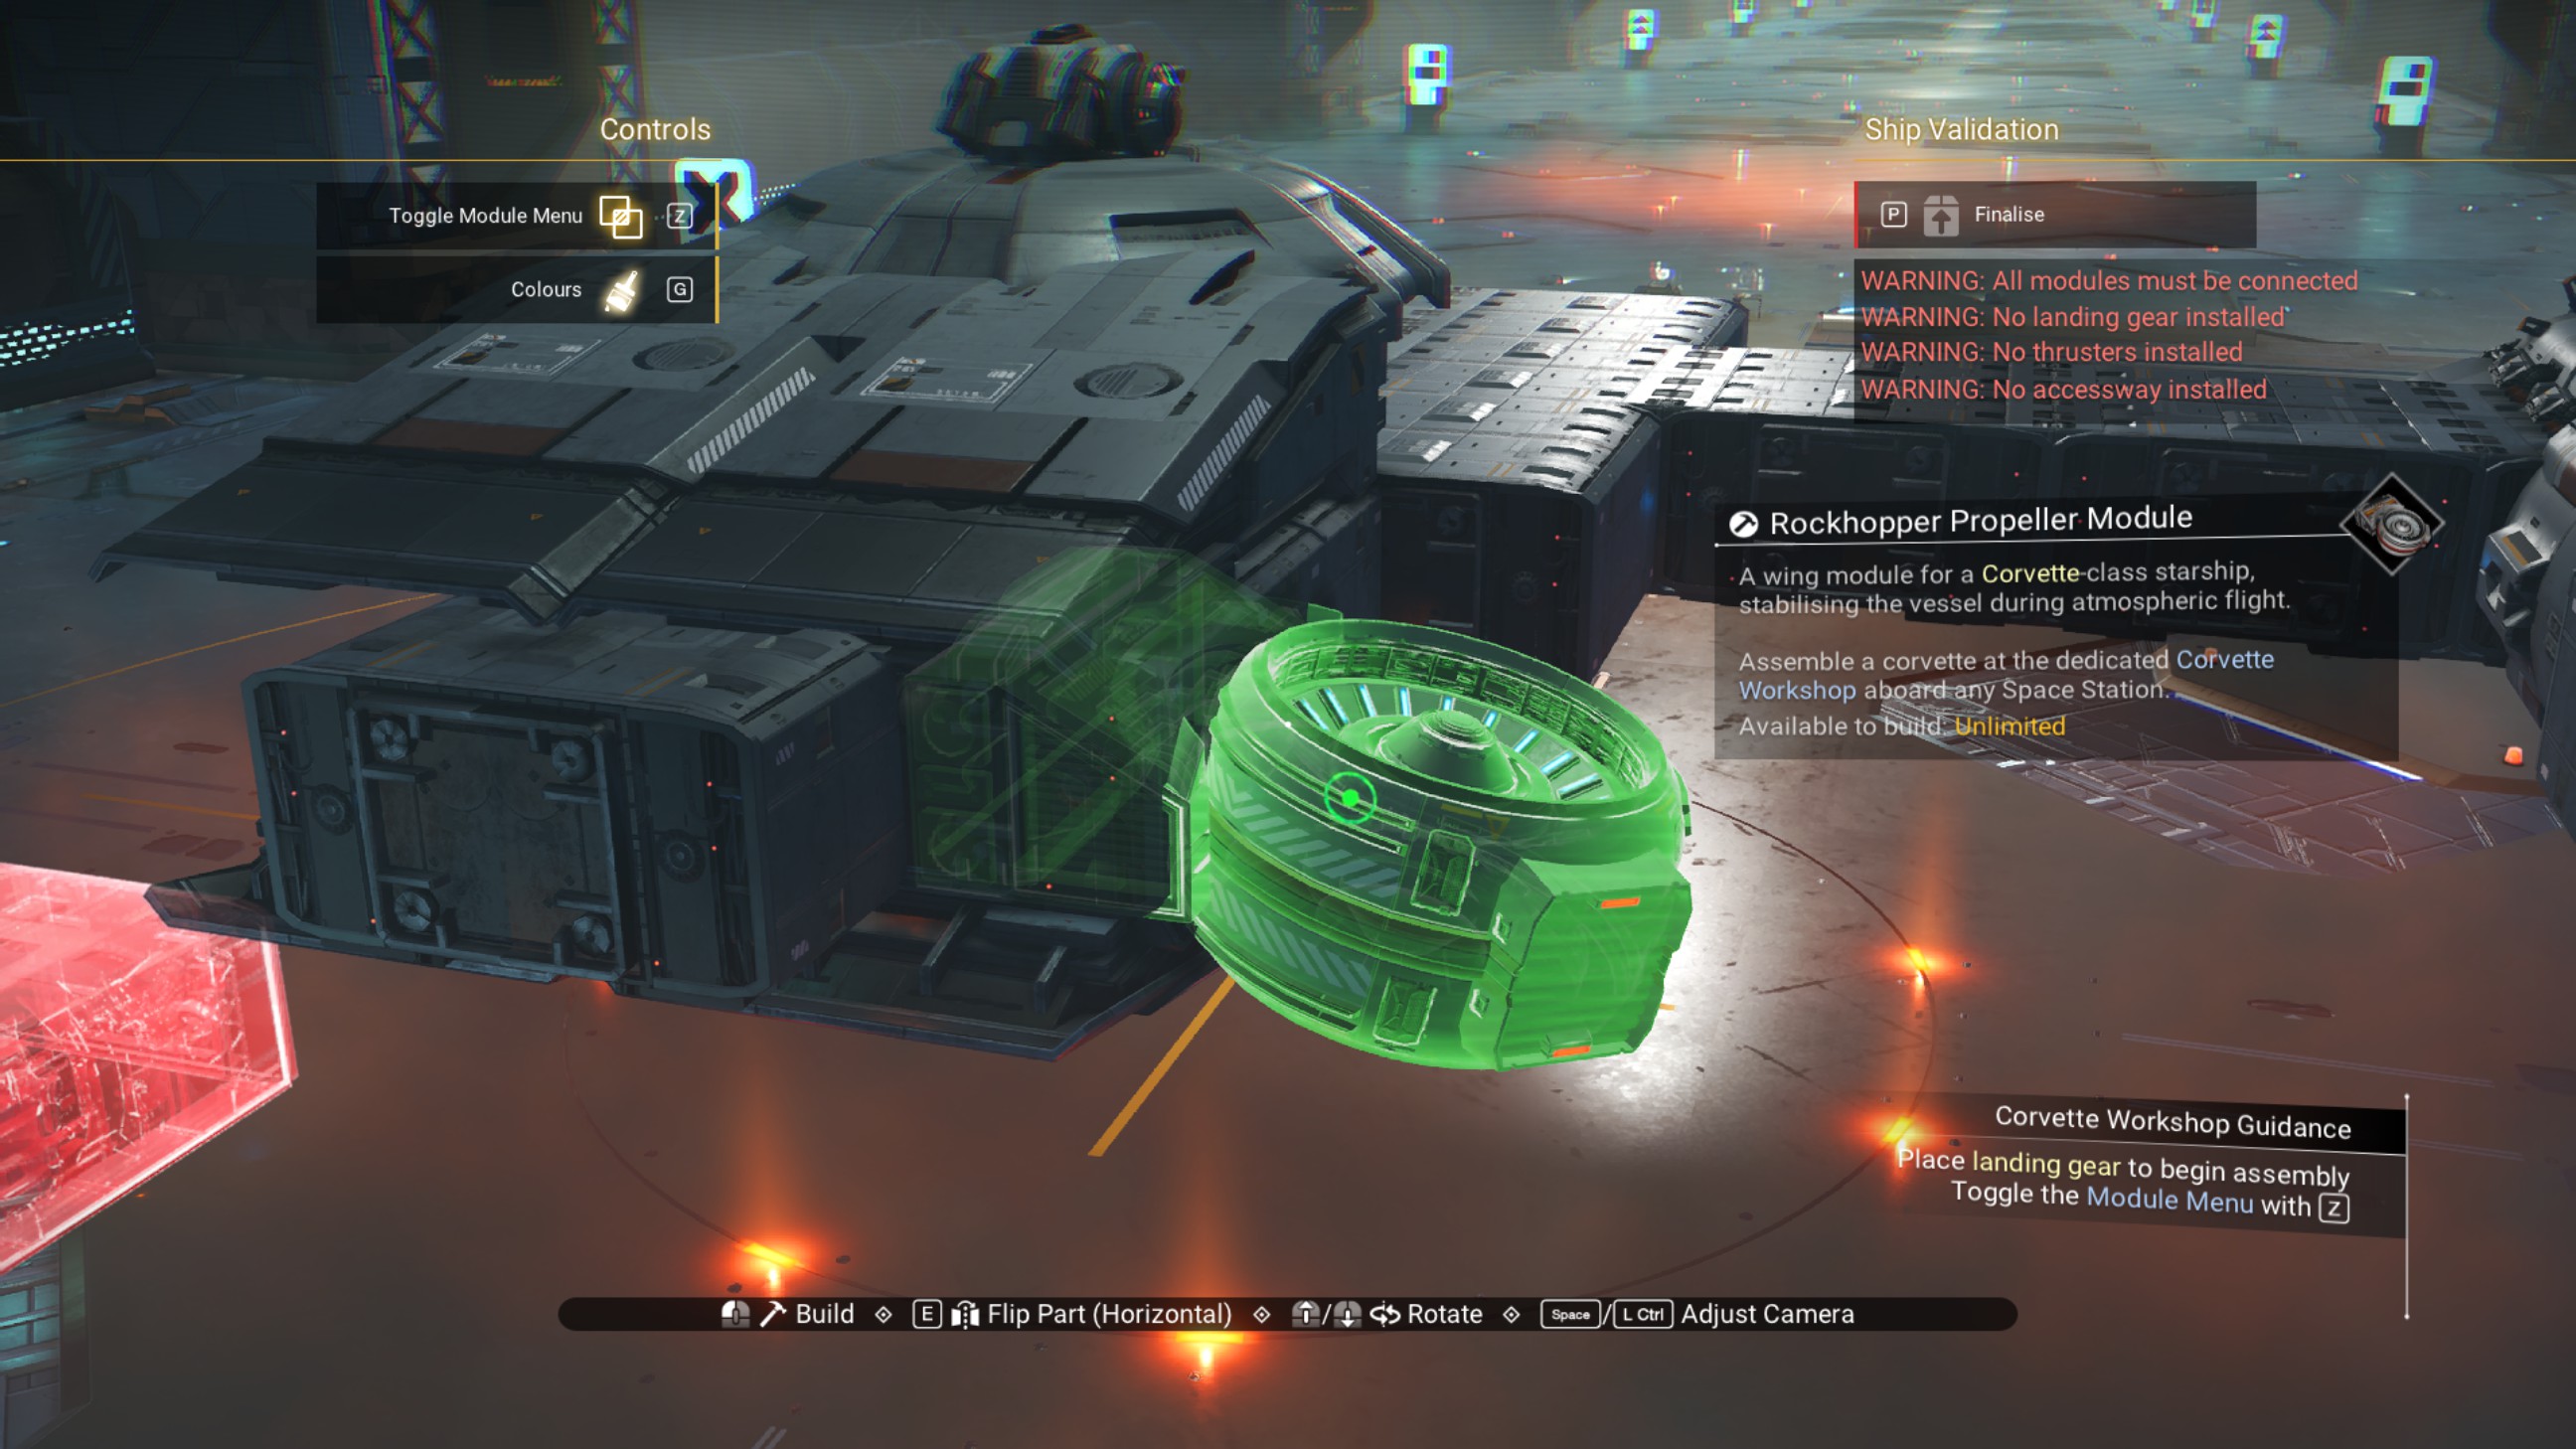
Shift the walkway forward half a step, and delete the propeller module.
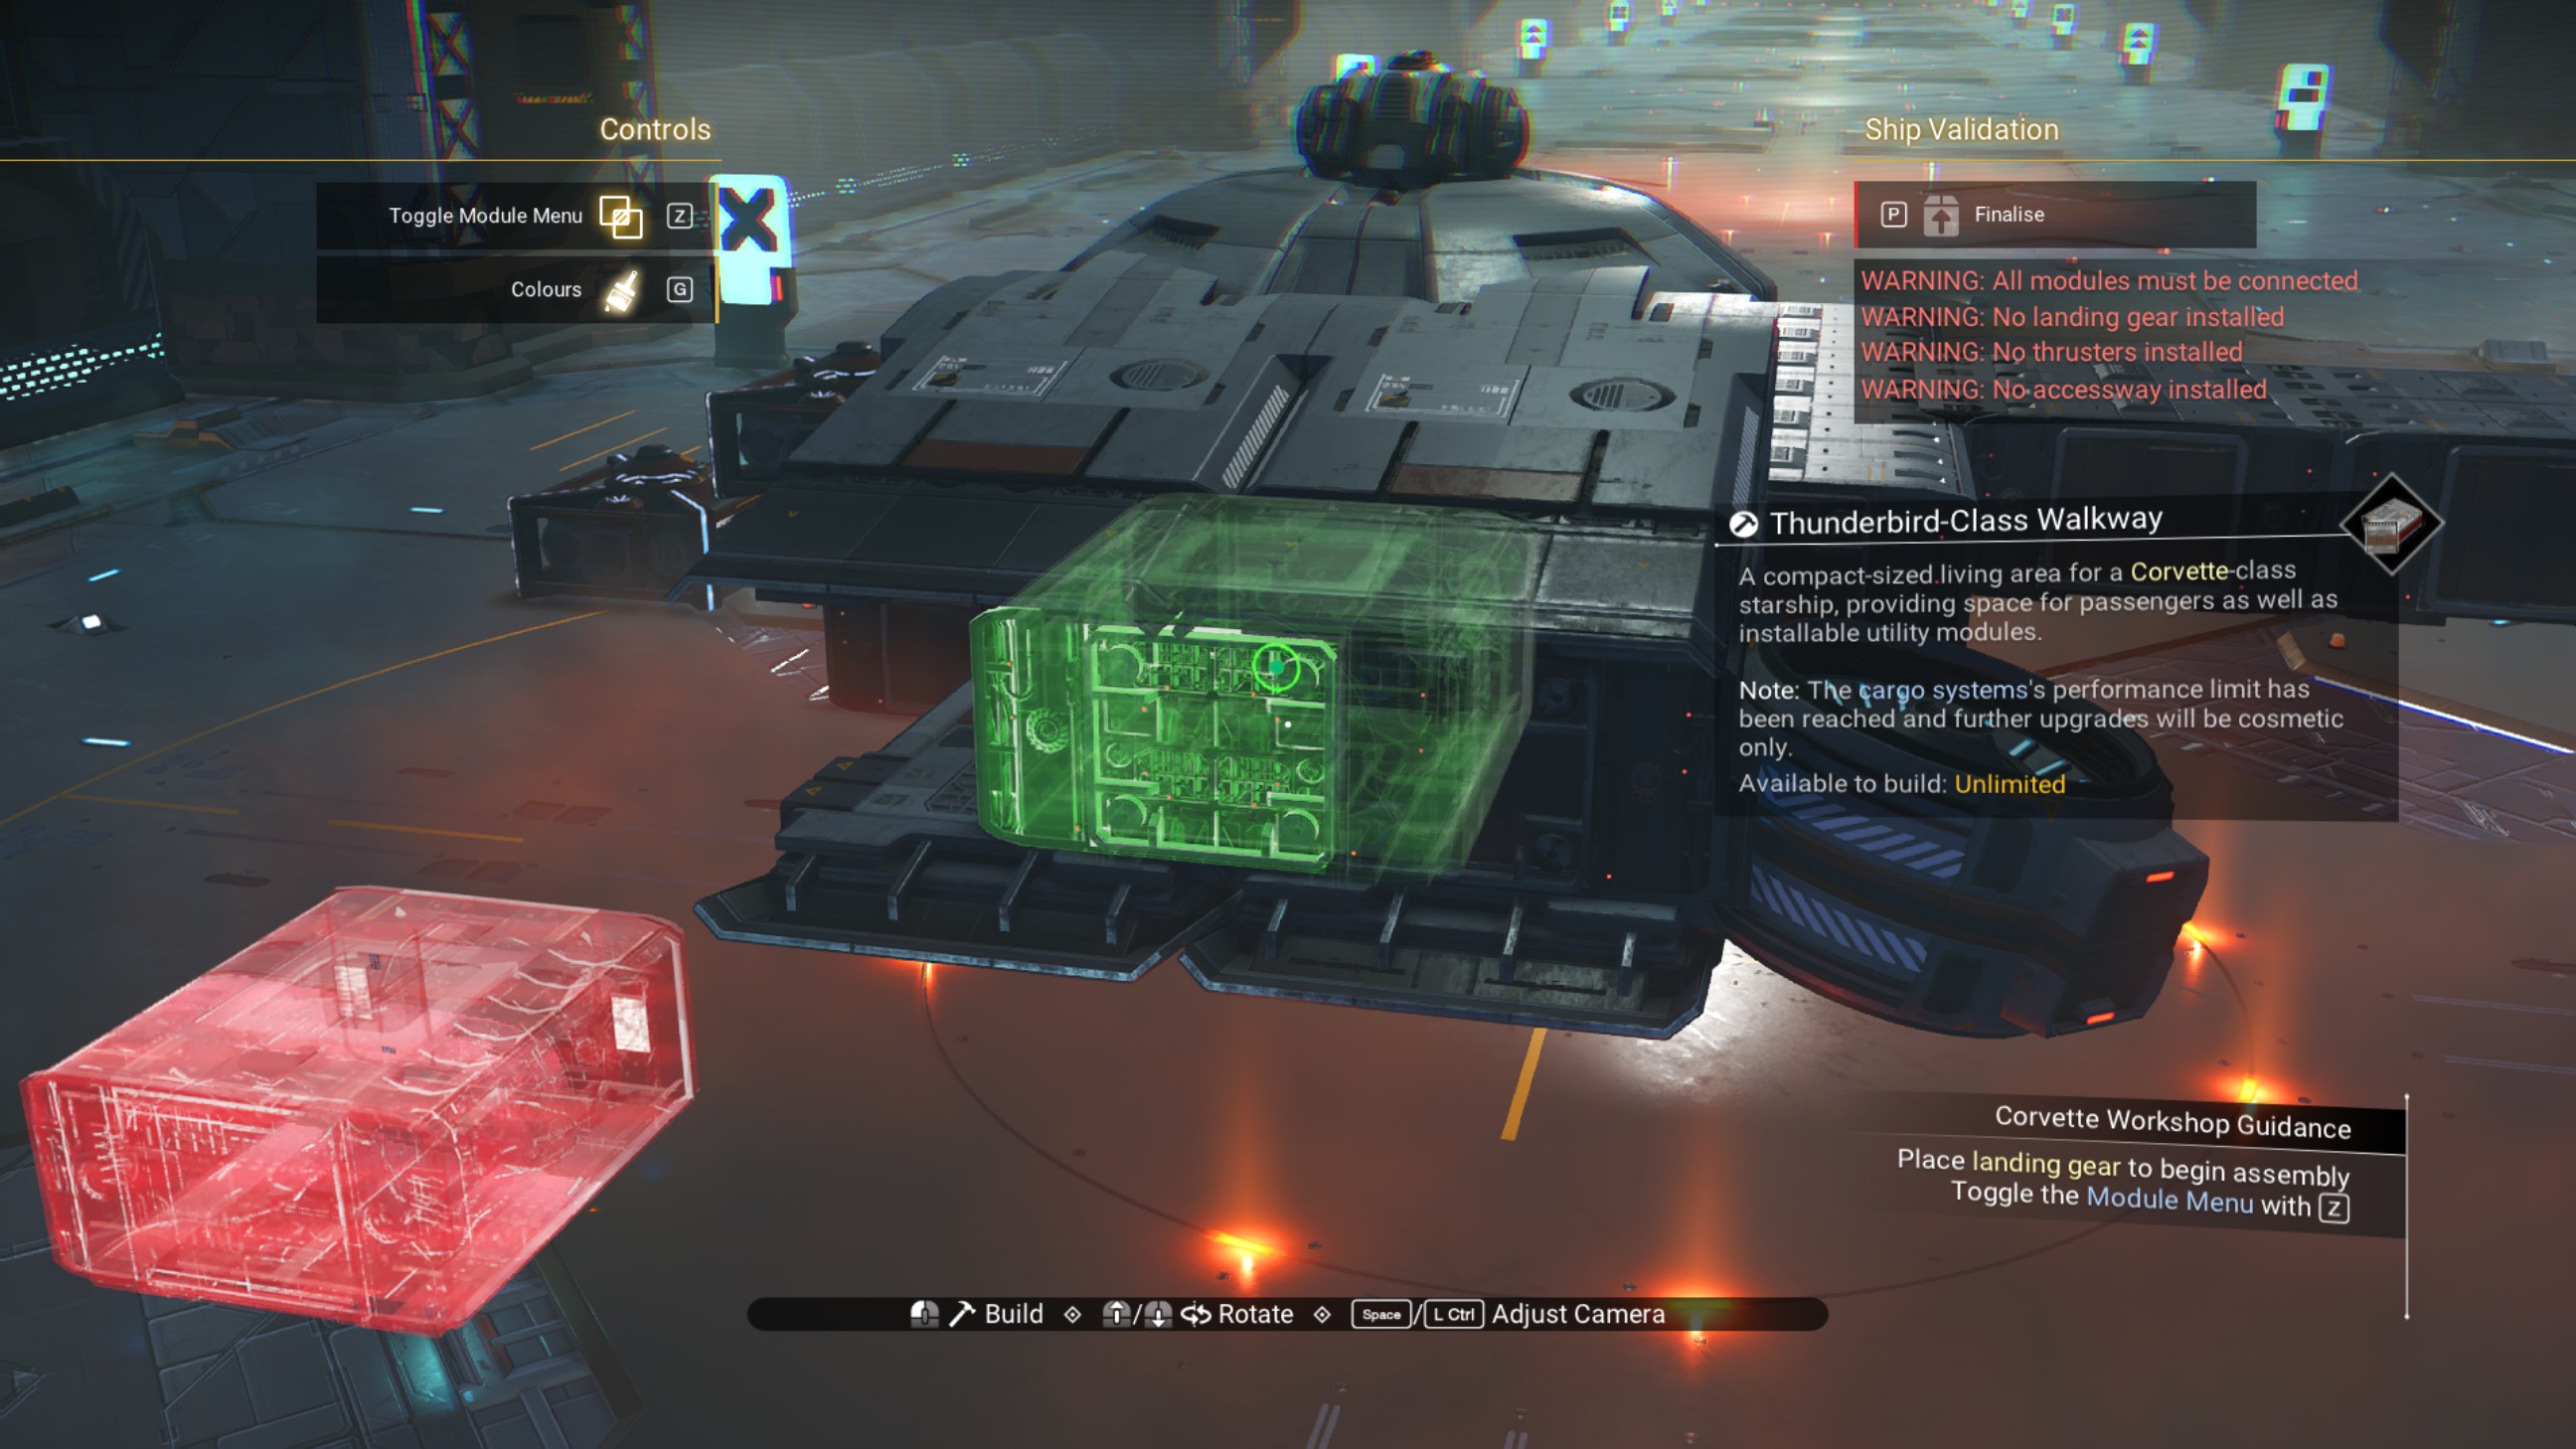
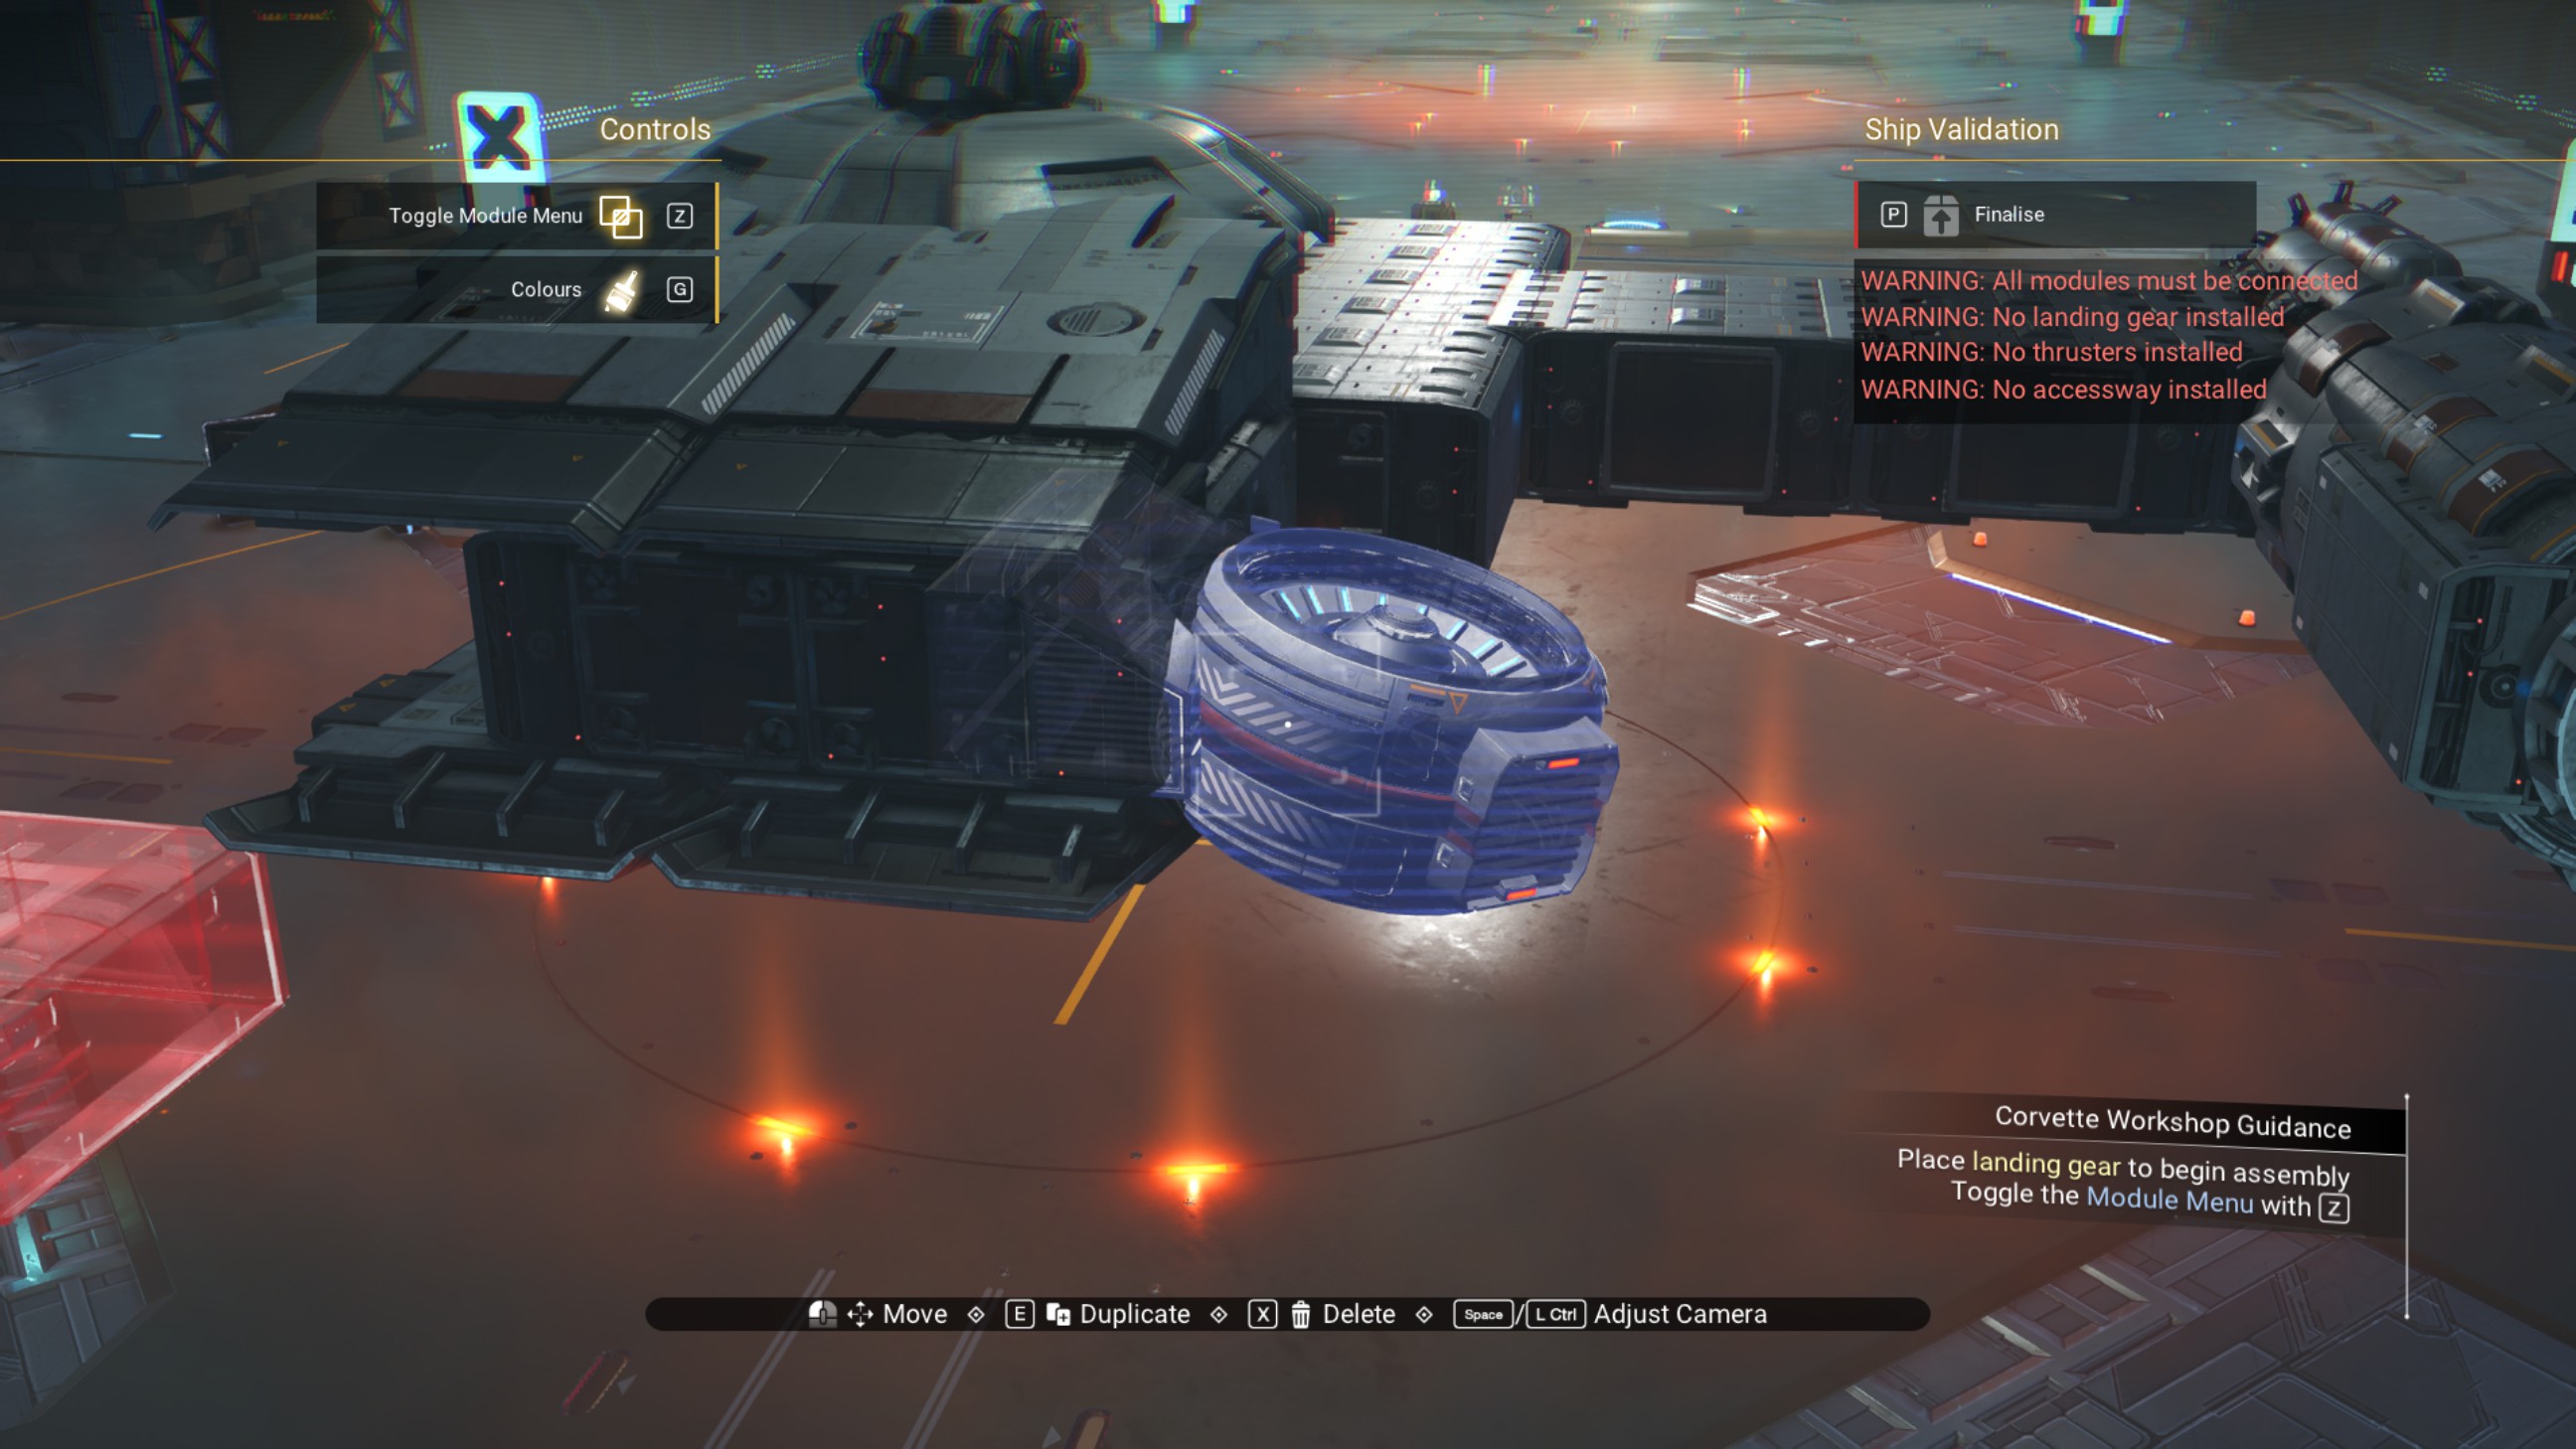
Place another walkway behind the one we just offset, then place a rotated propeller module, as shown.
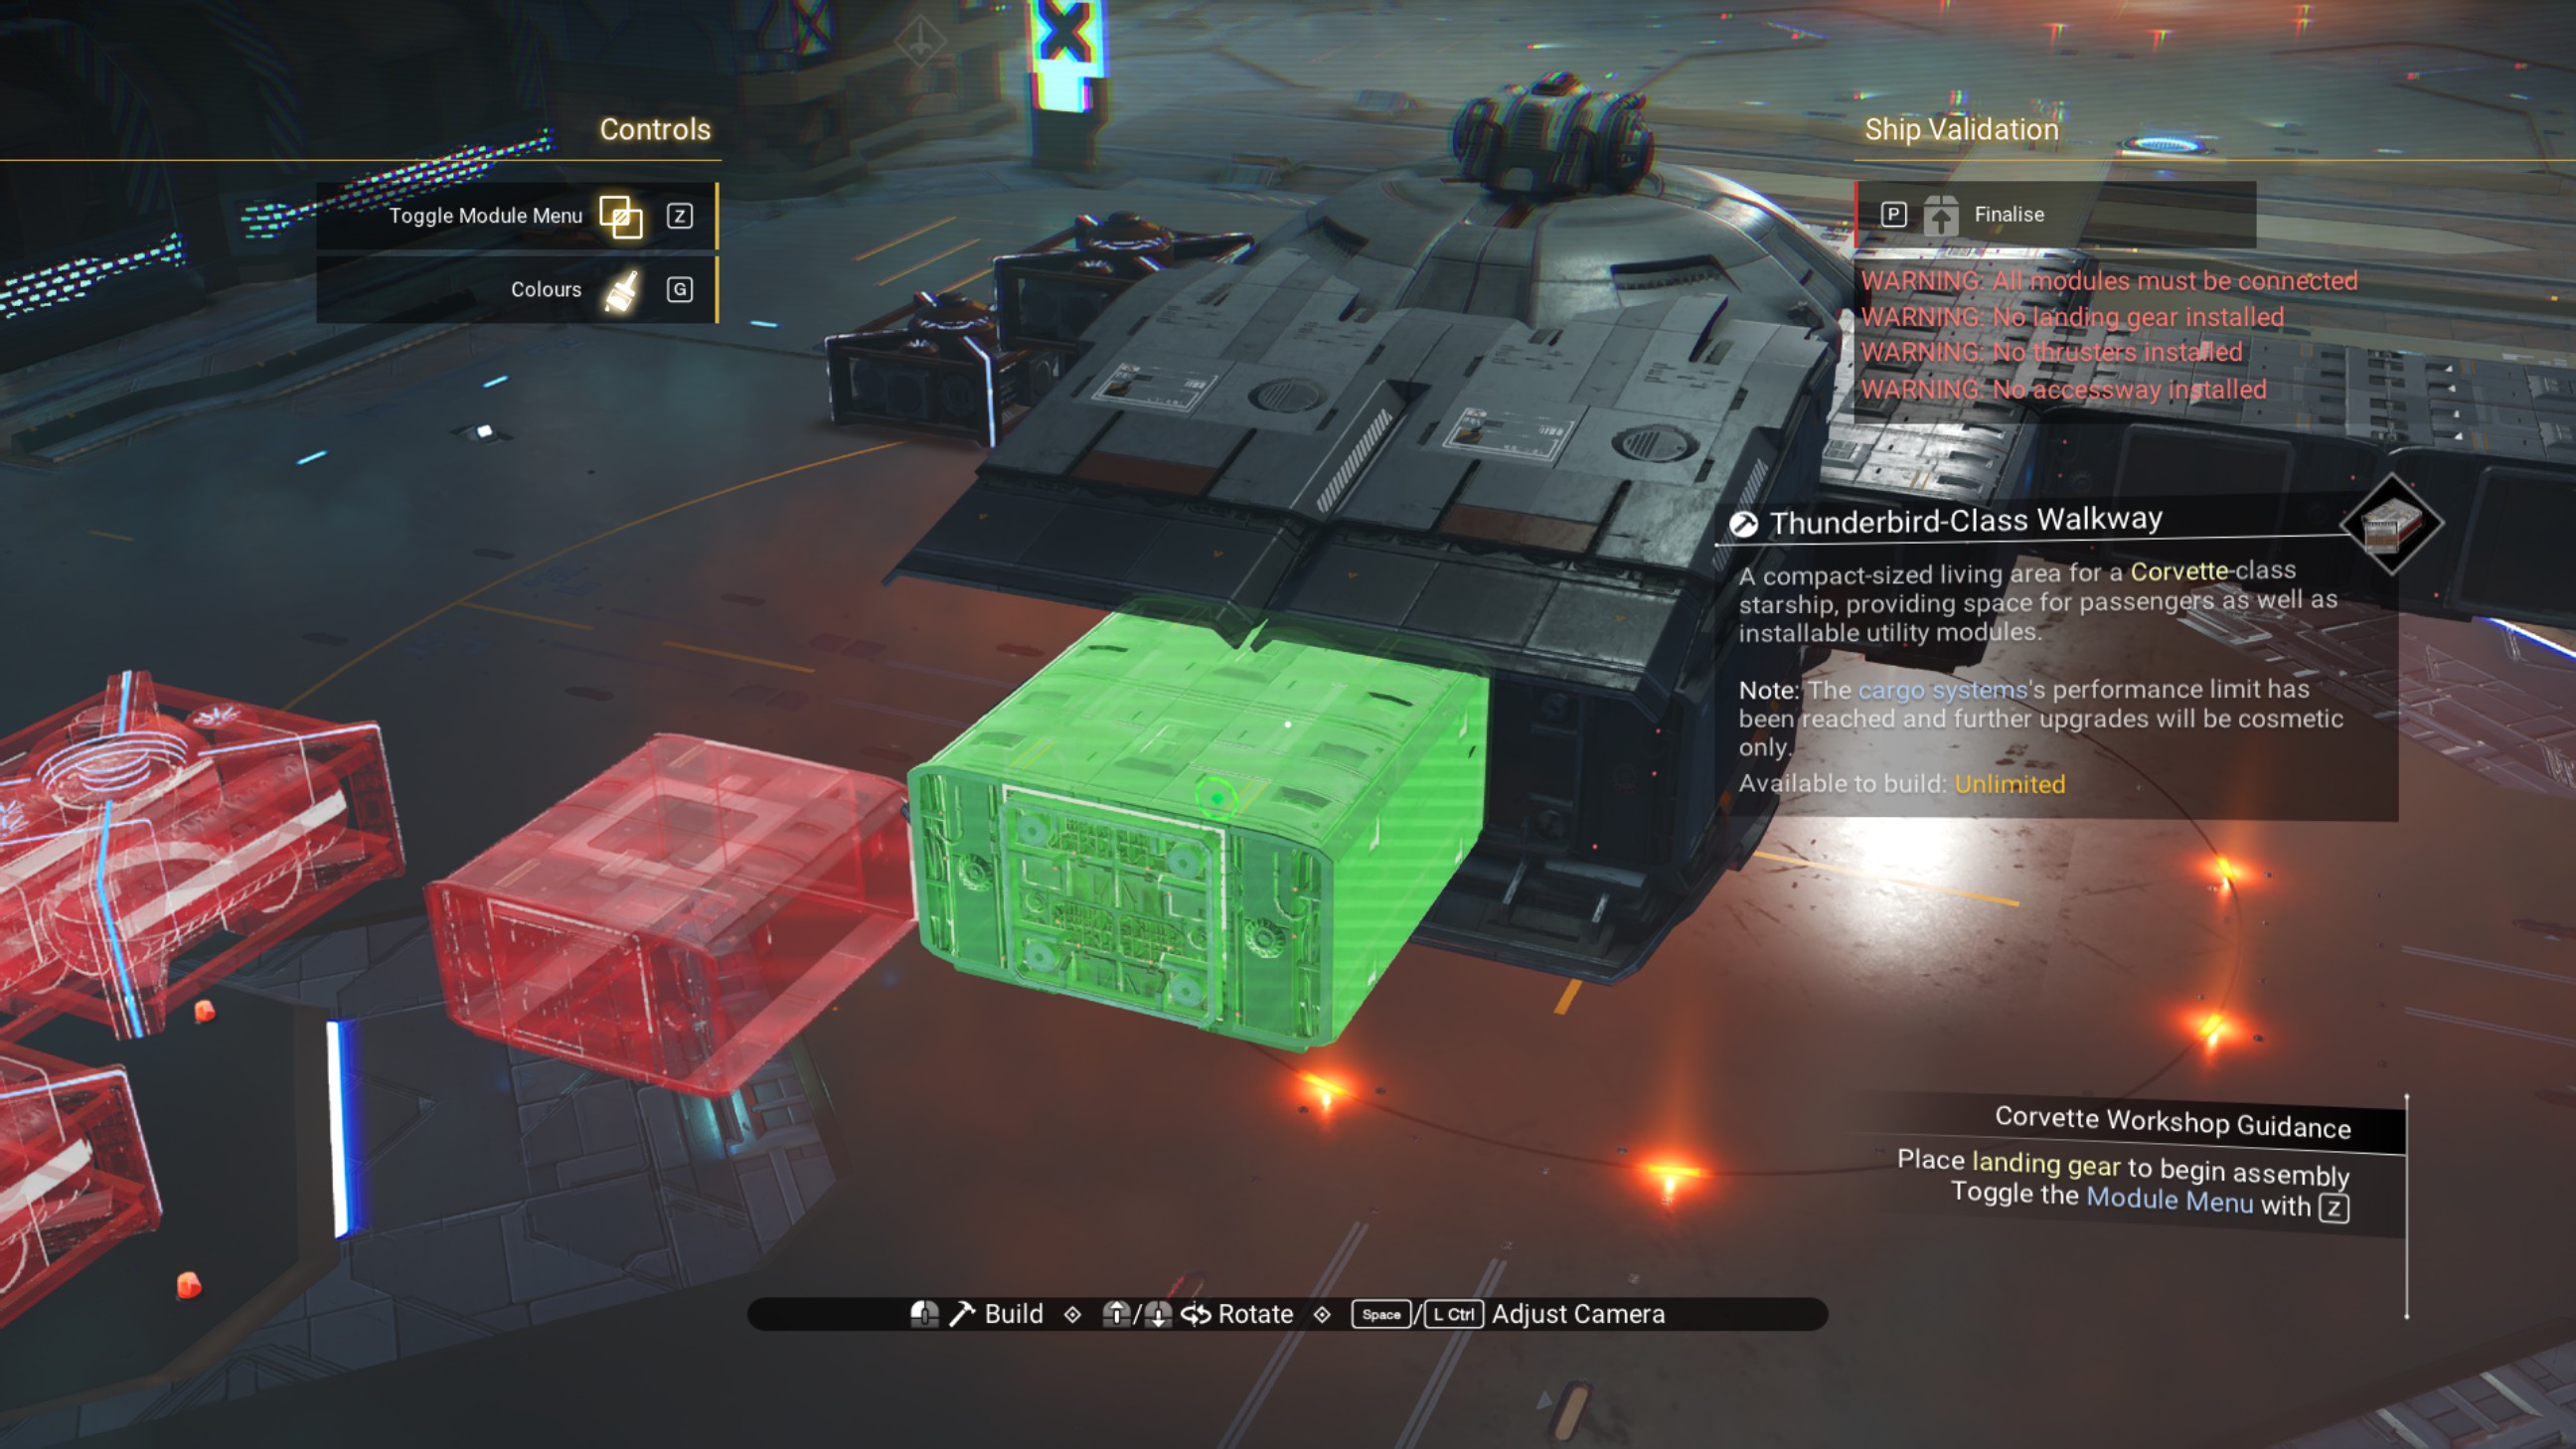
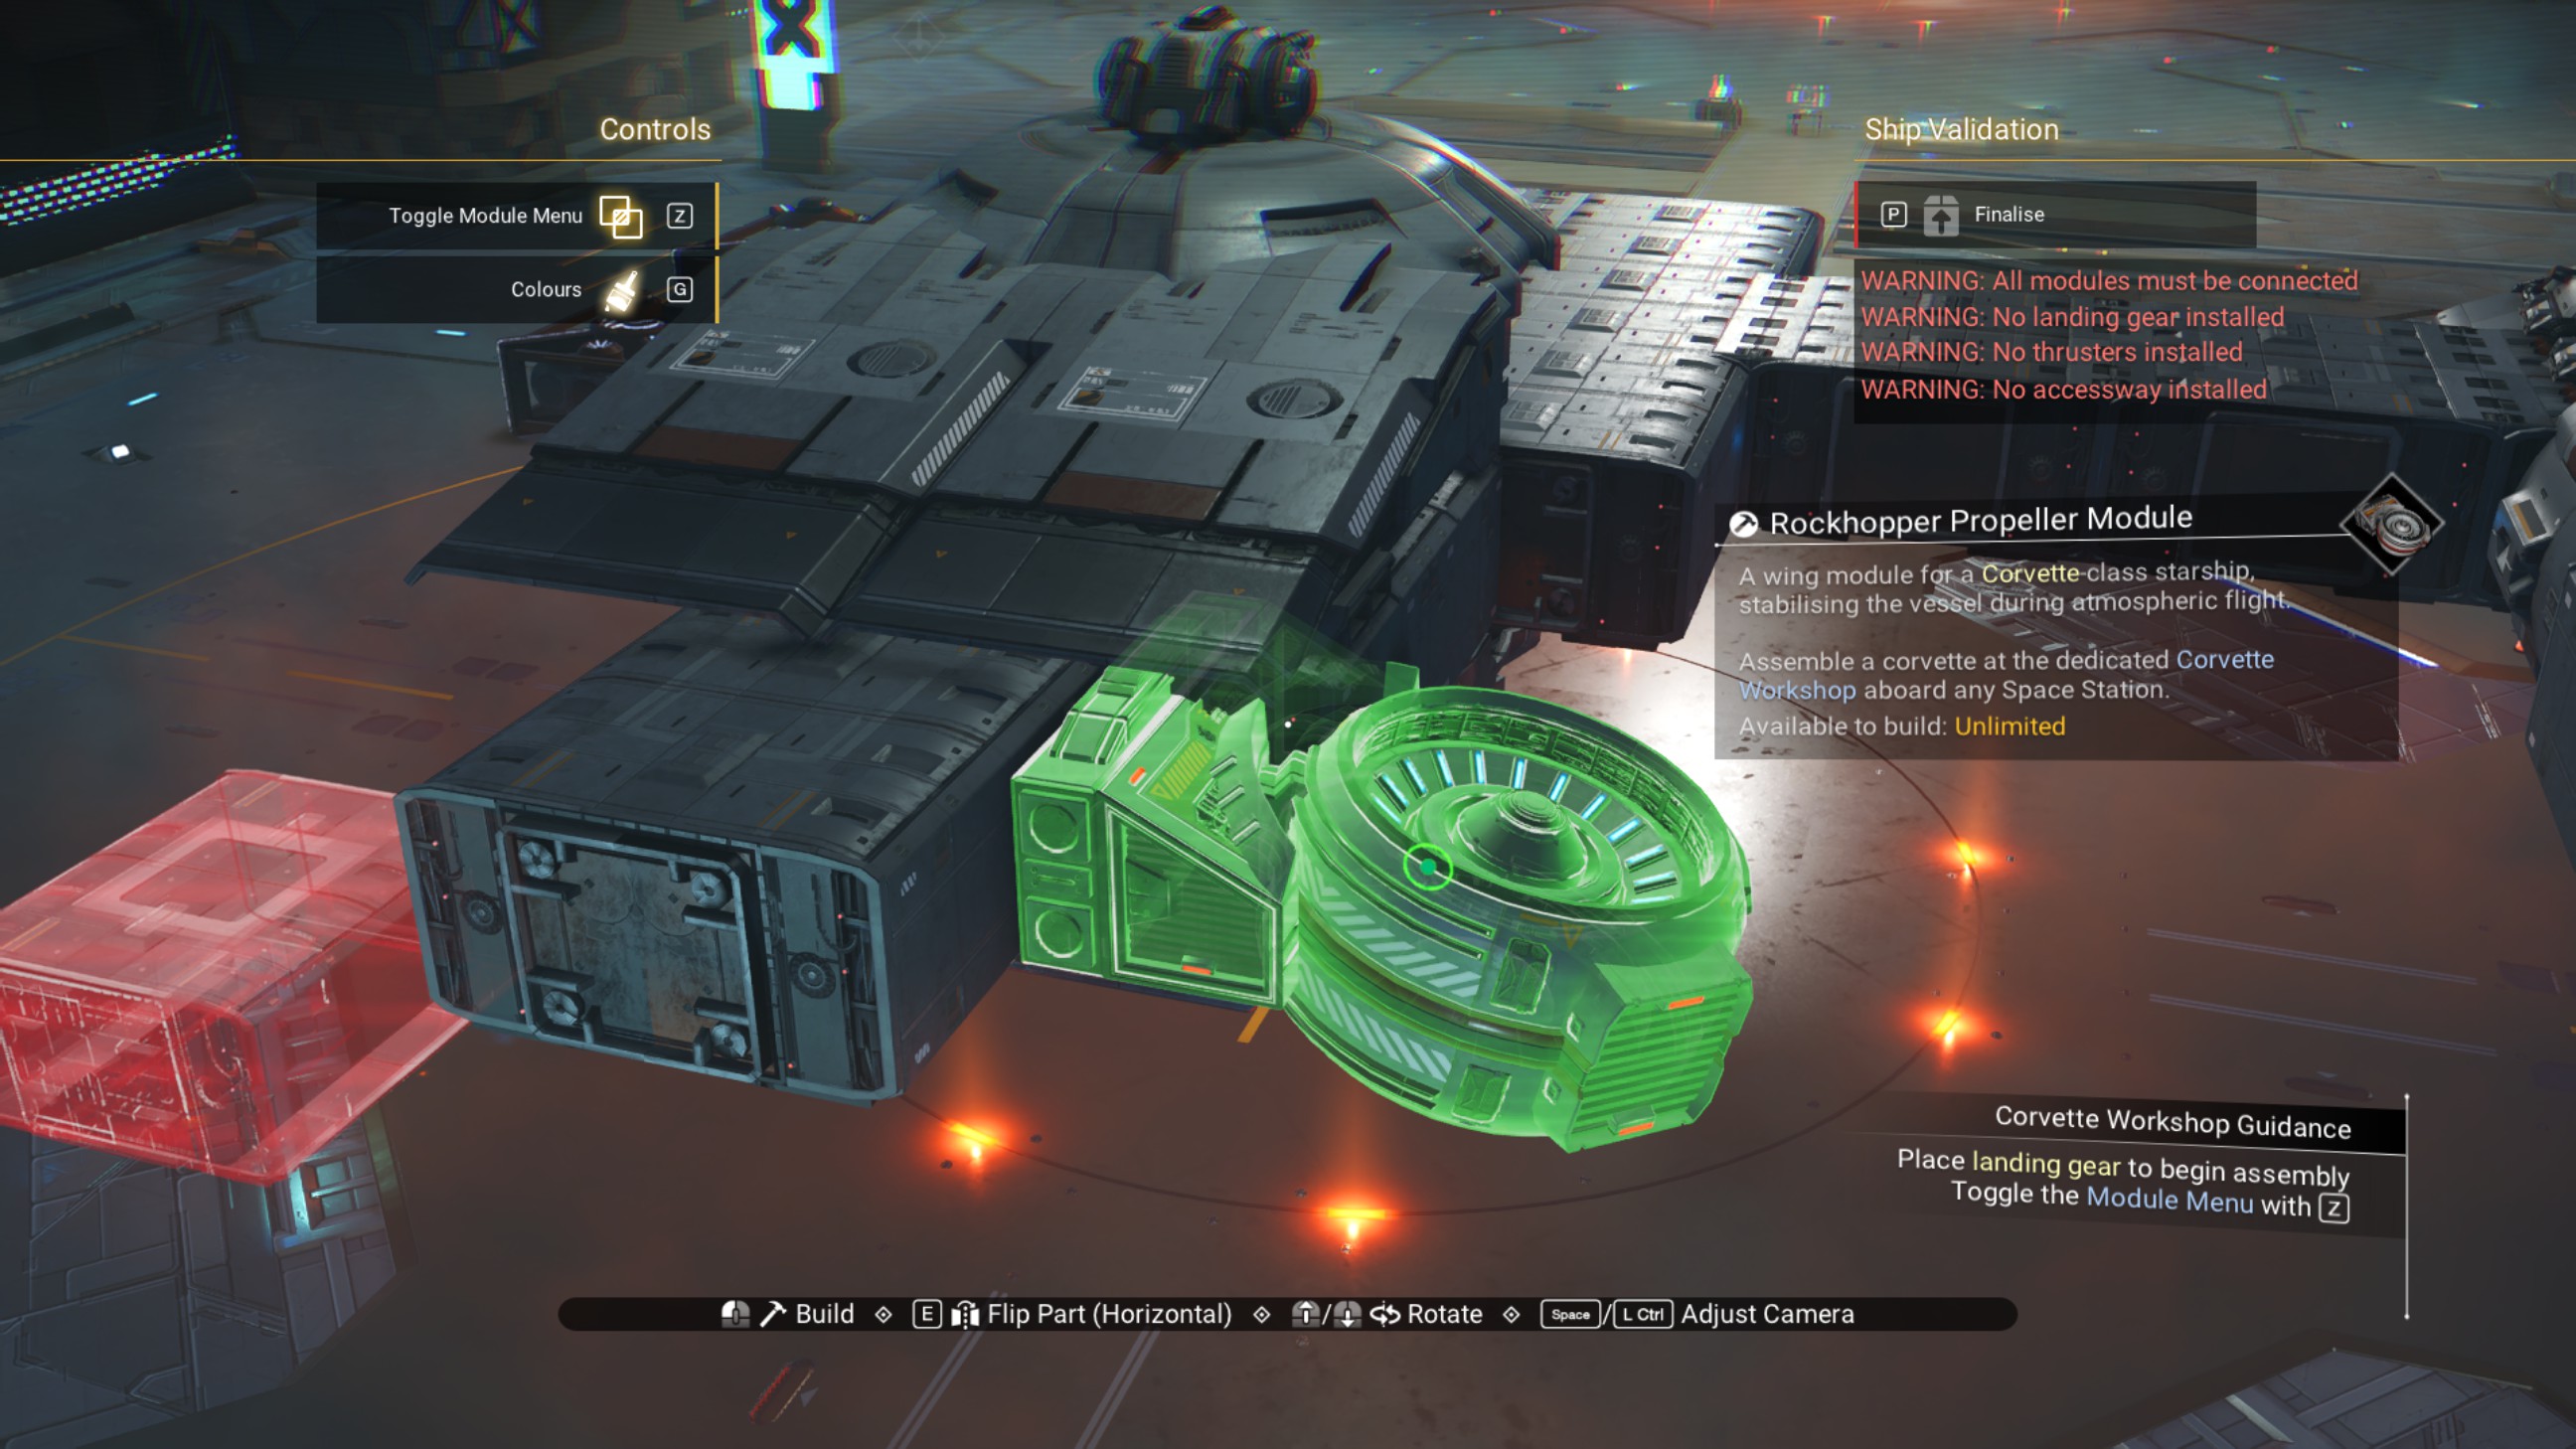
Shift the walkway forward half a step, then delete the propeller module.
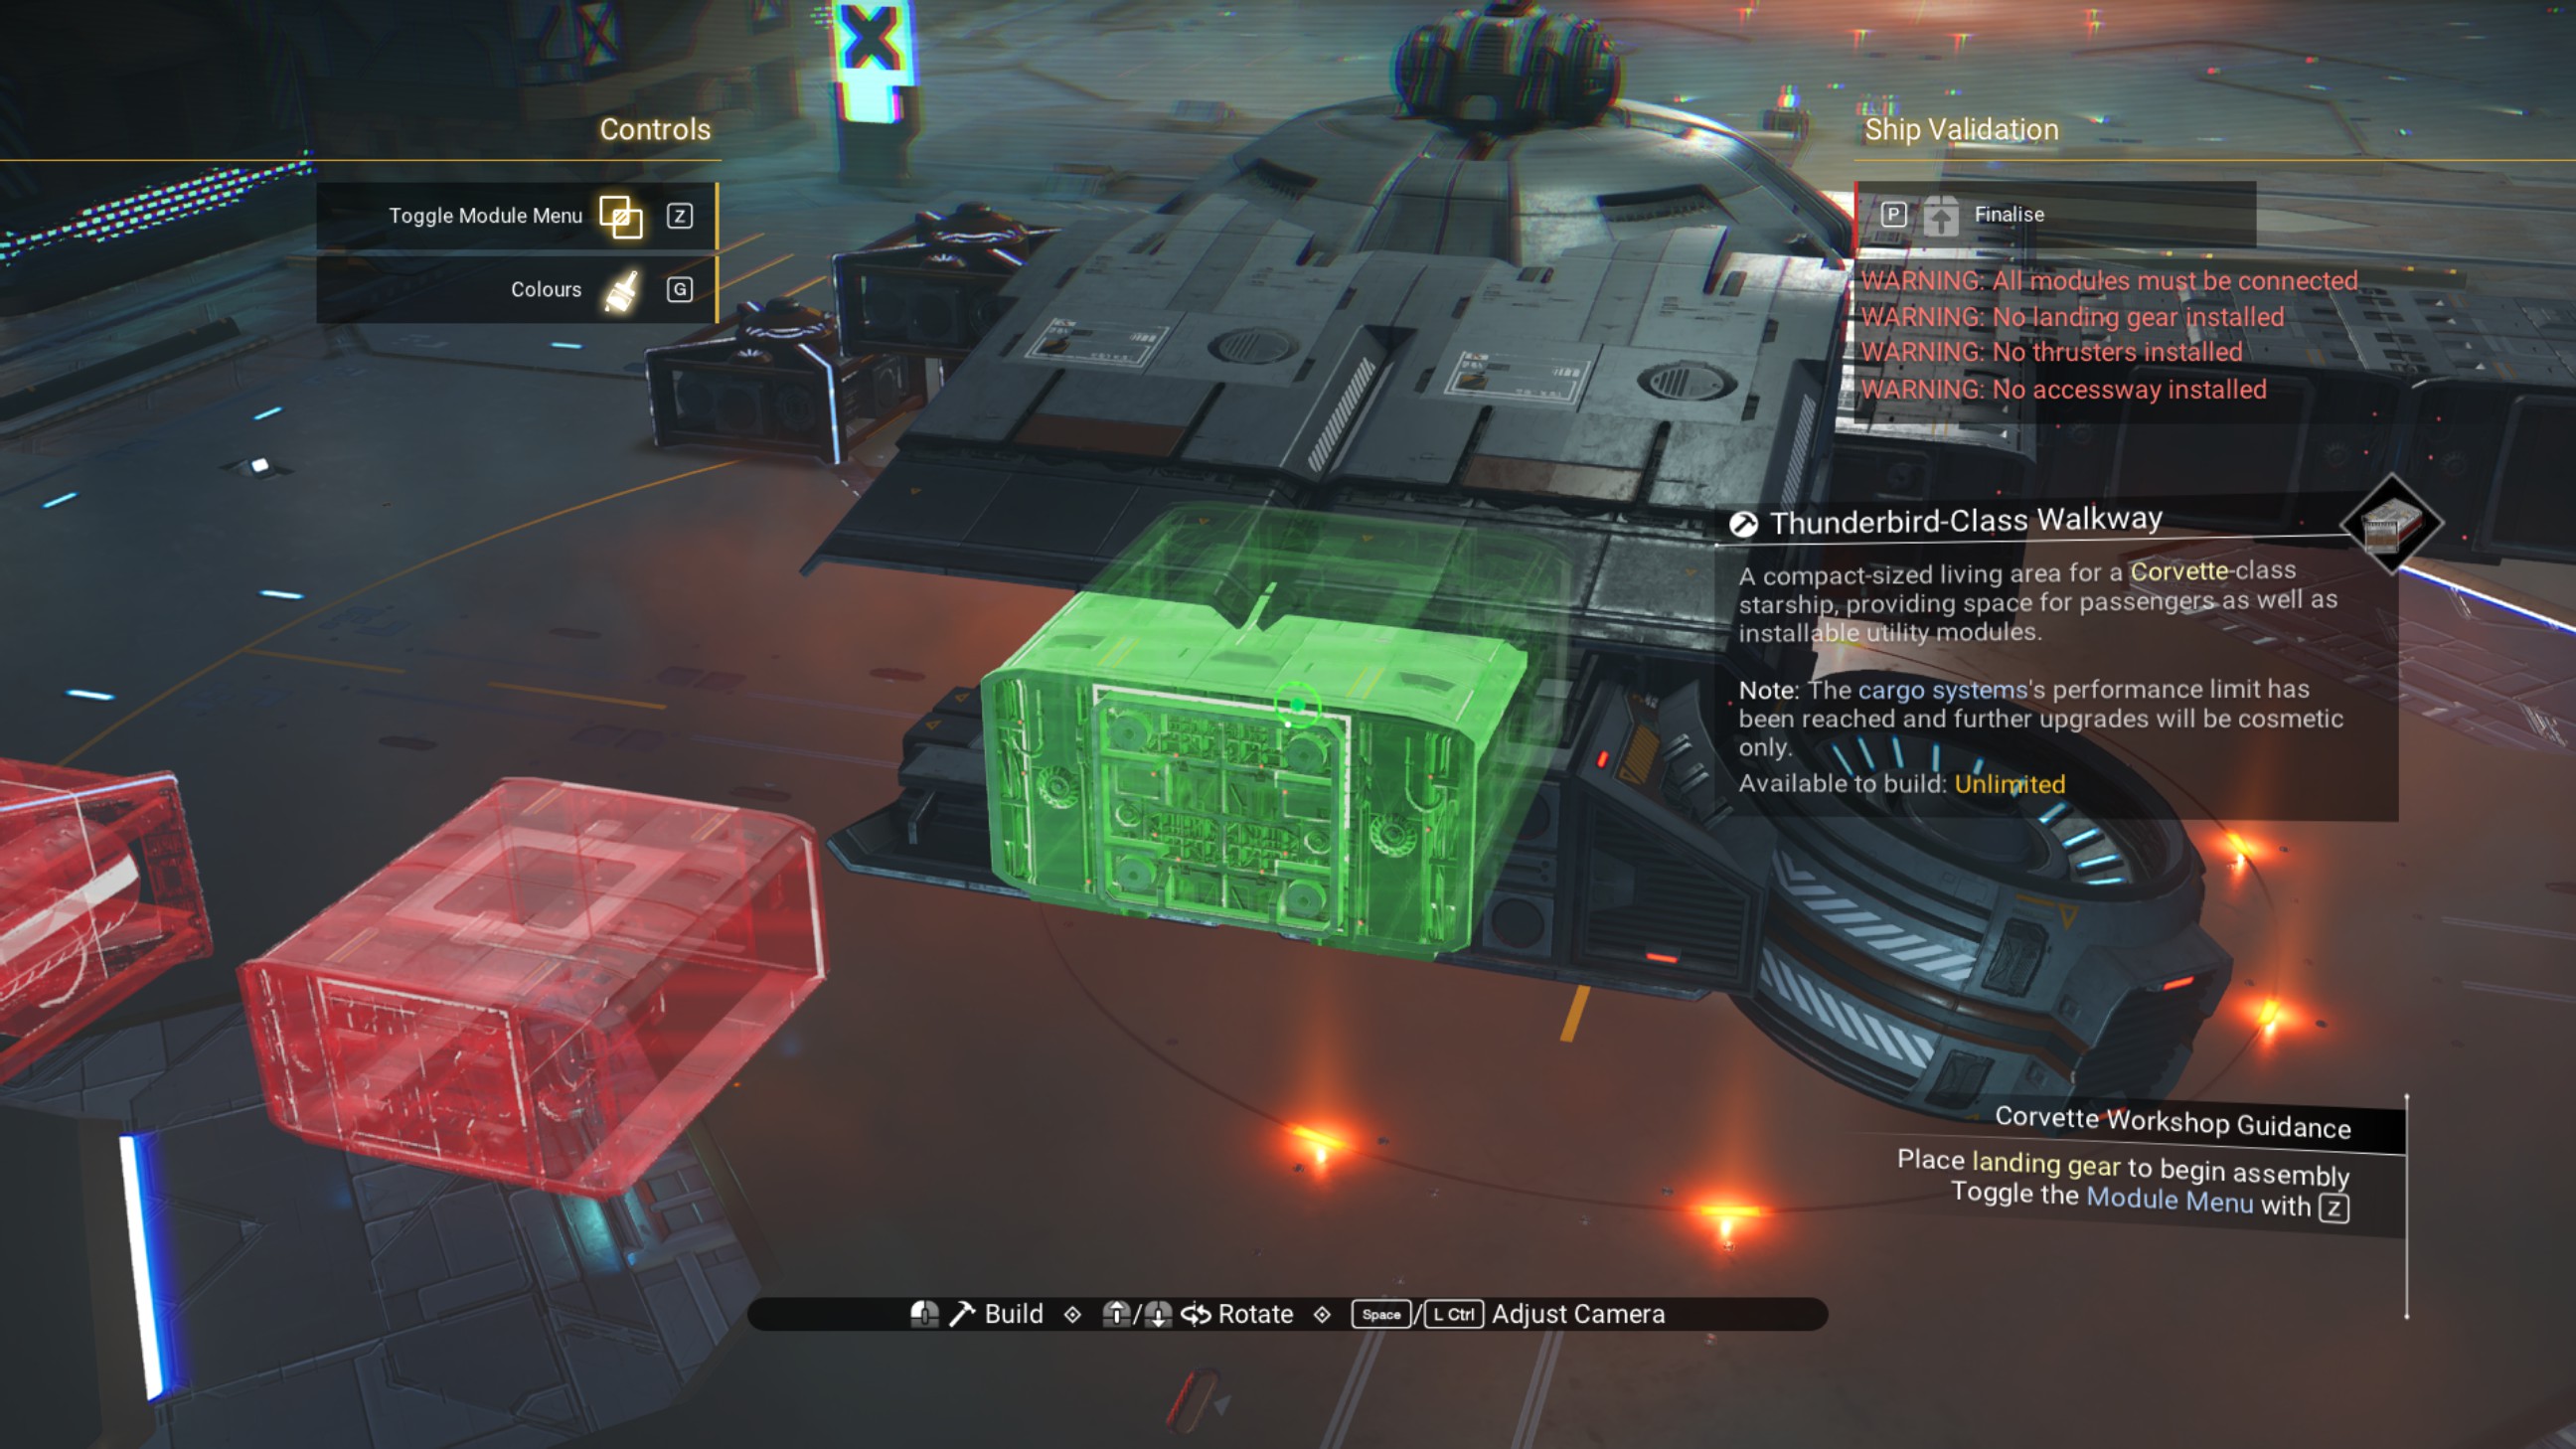
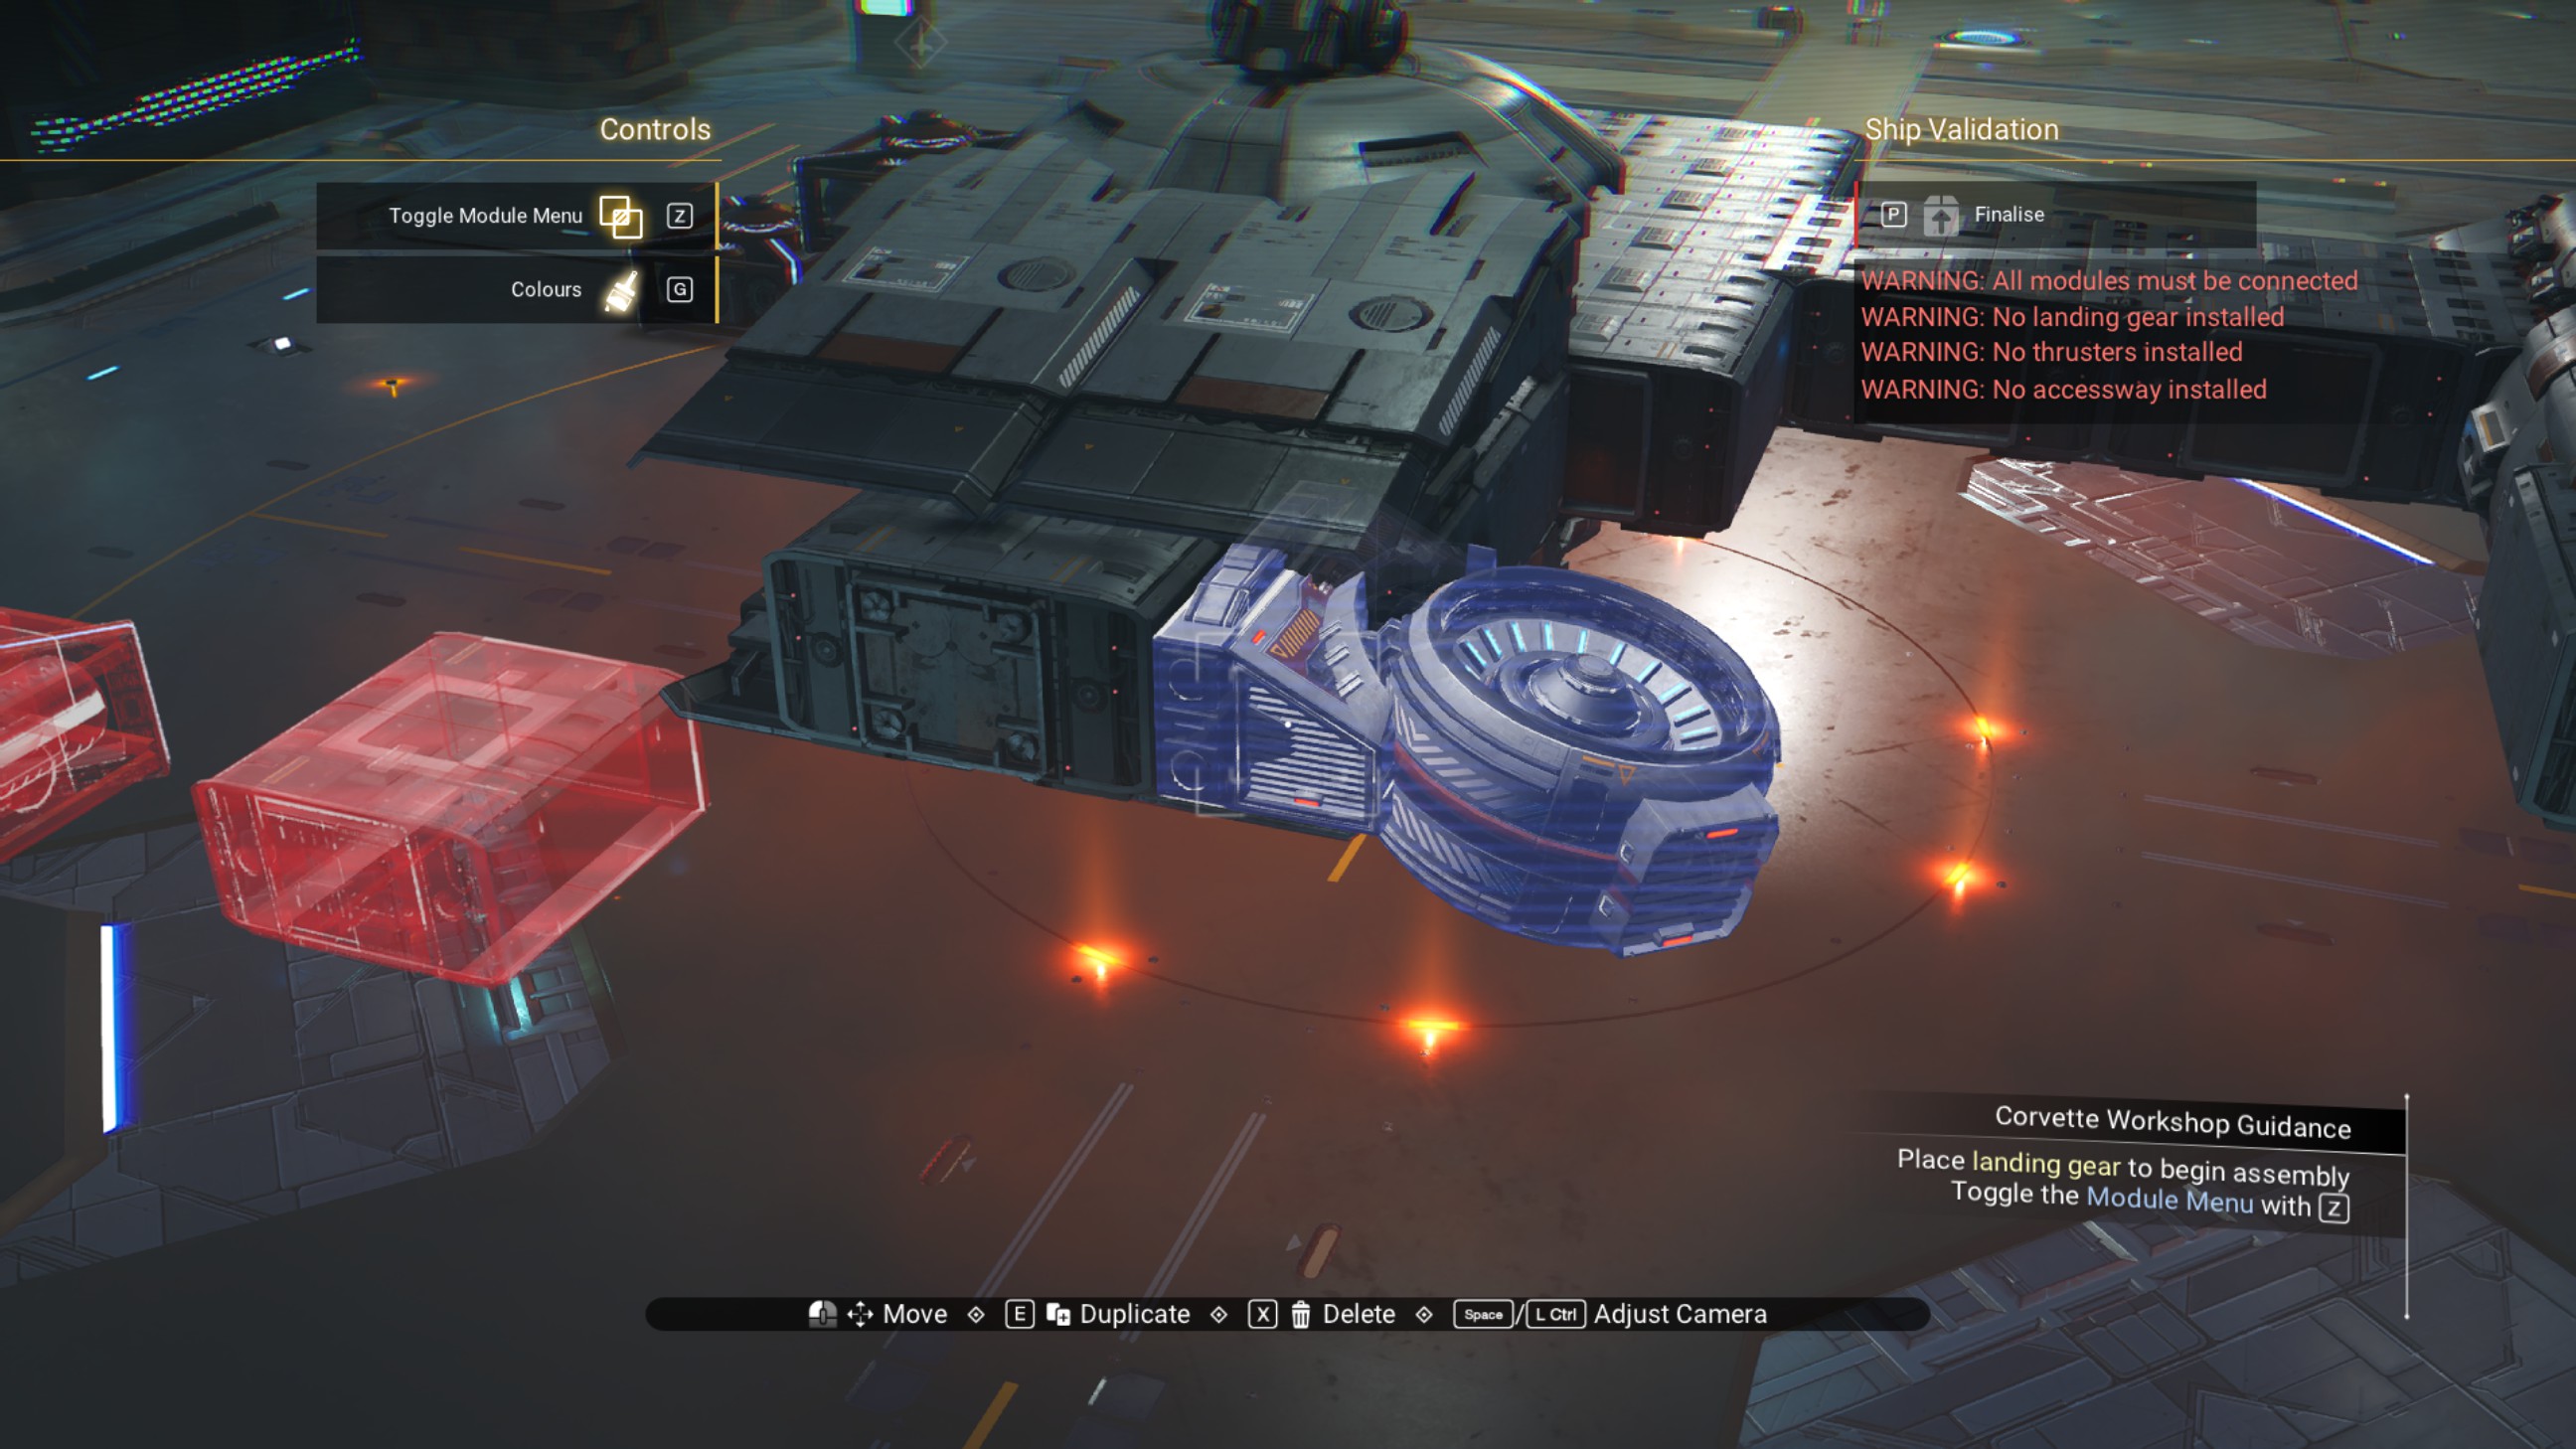
Place two more walkways under the port side vesper cowling, as shown.
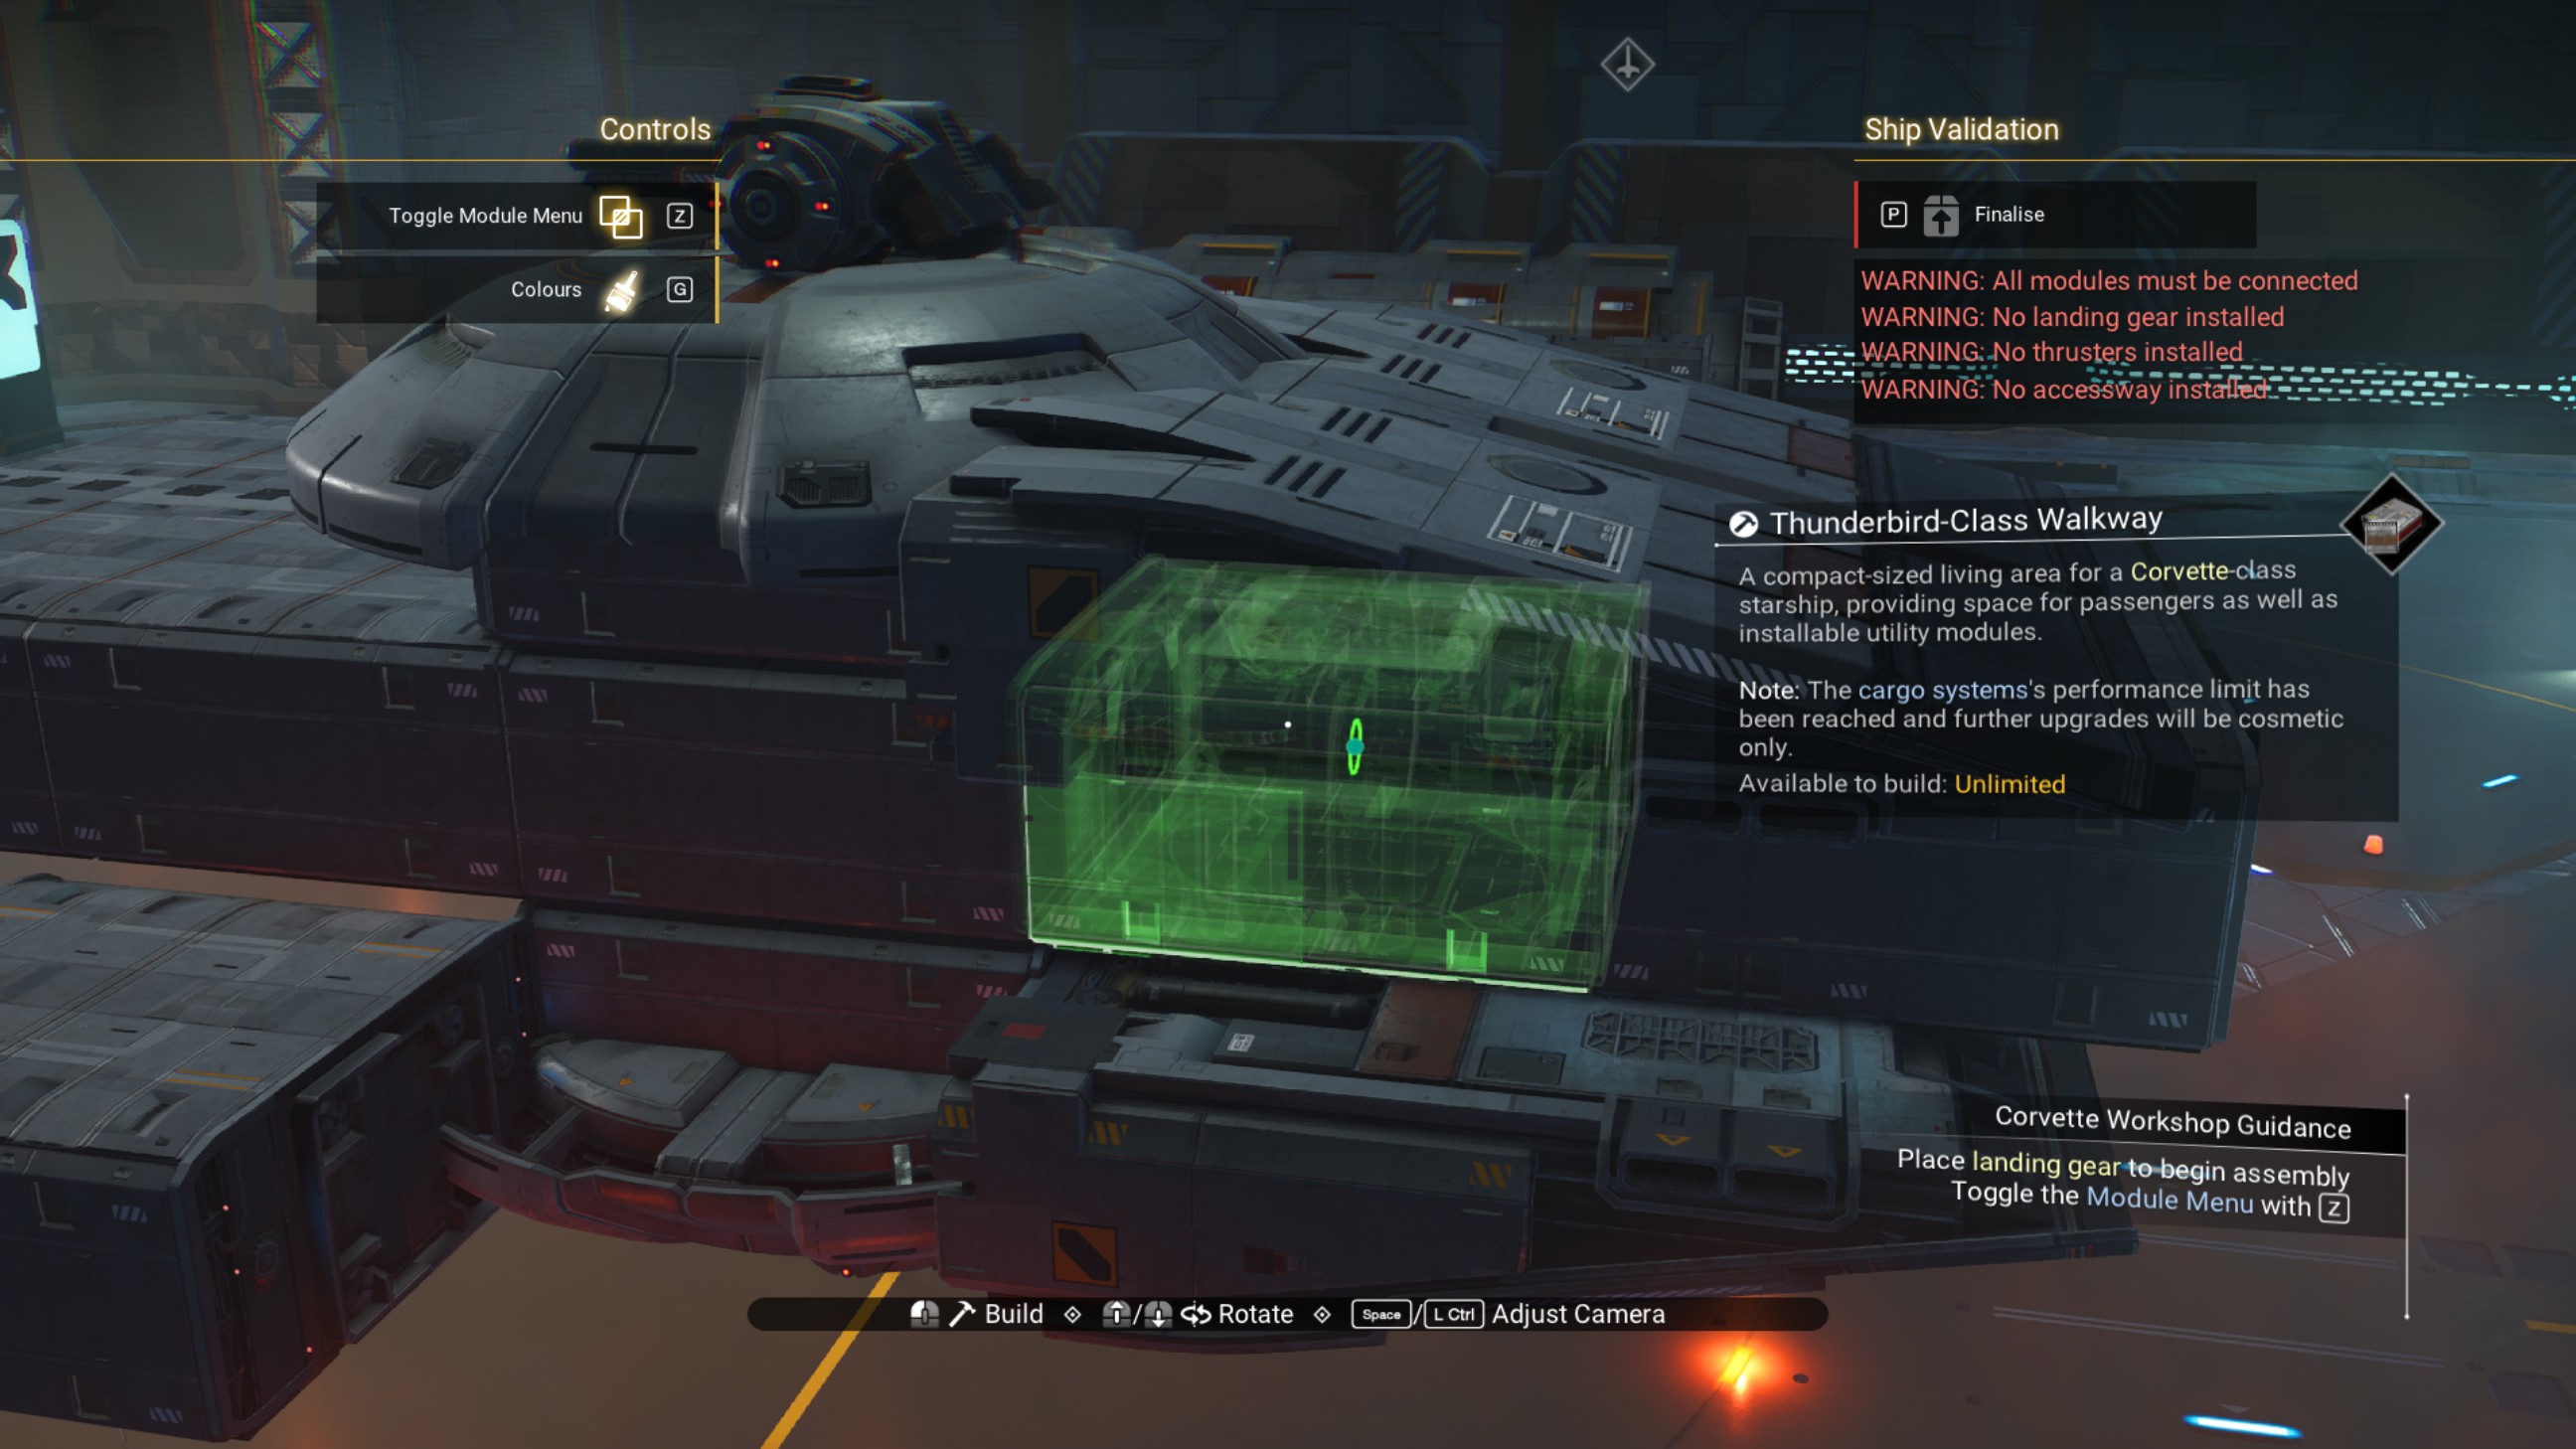
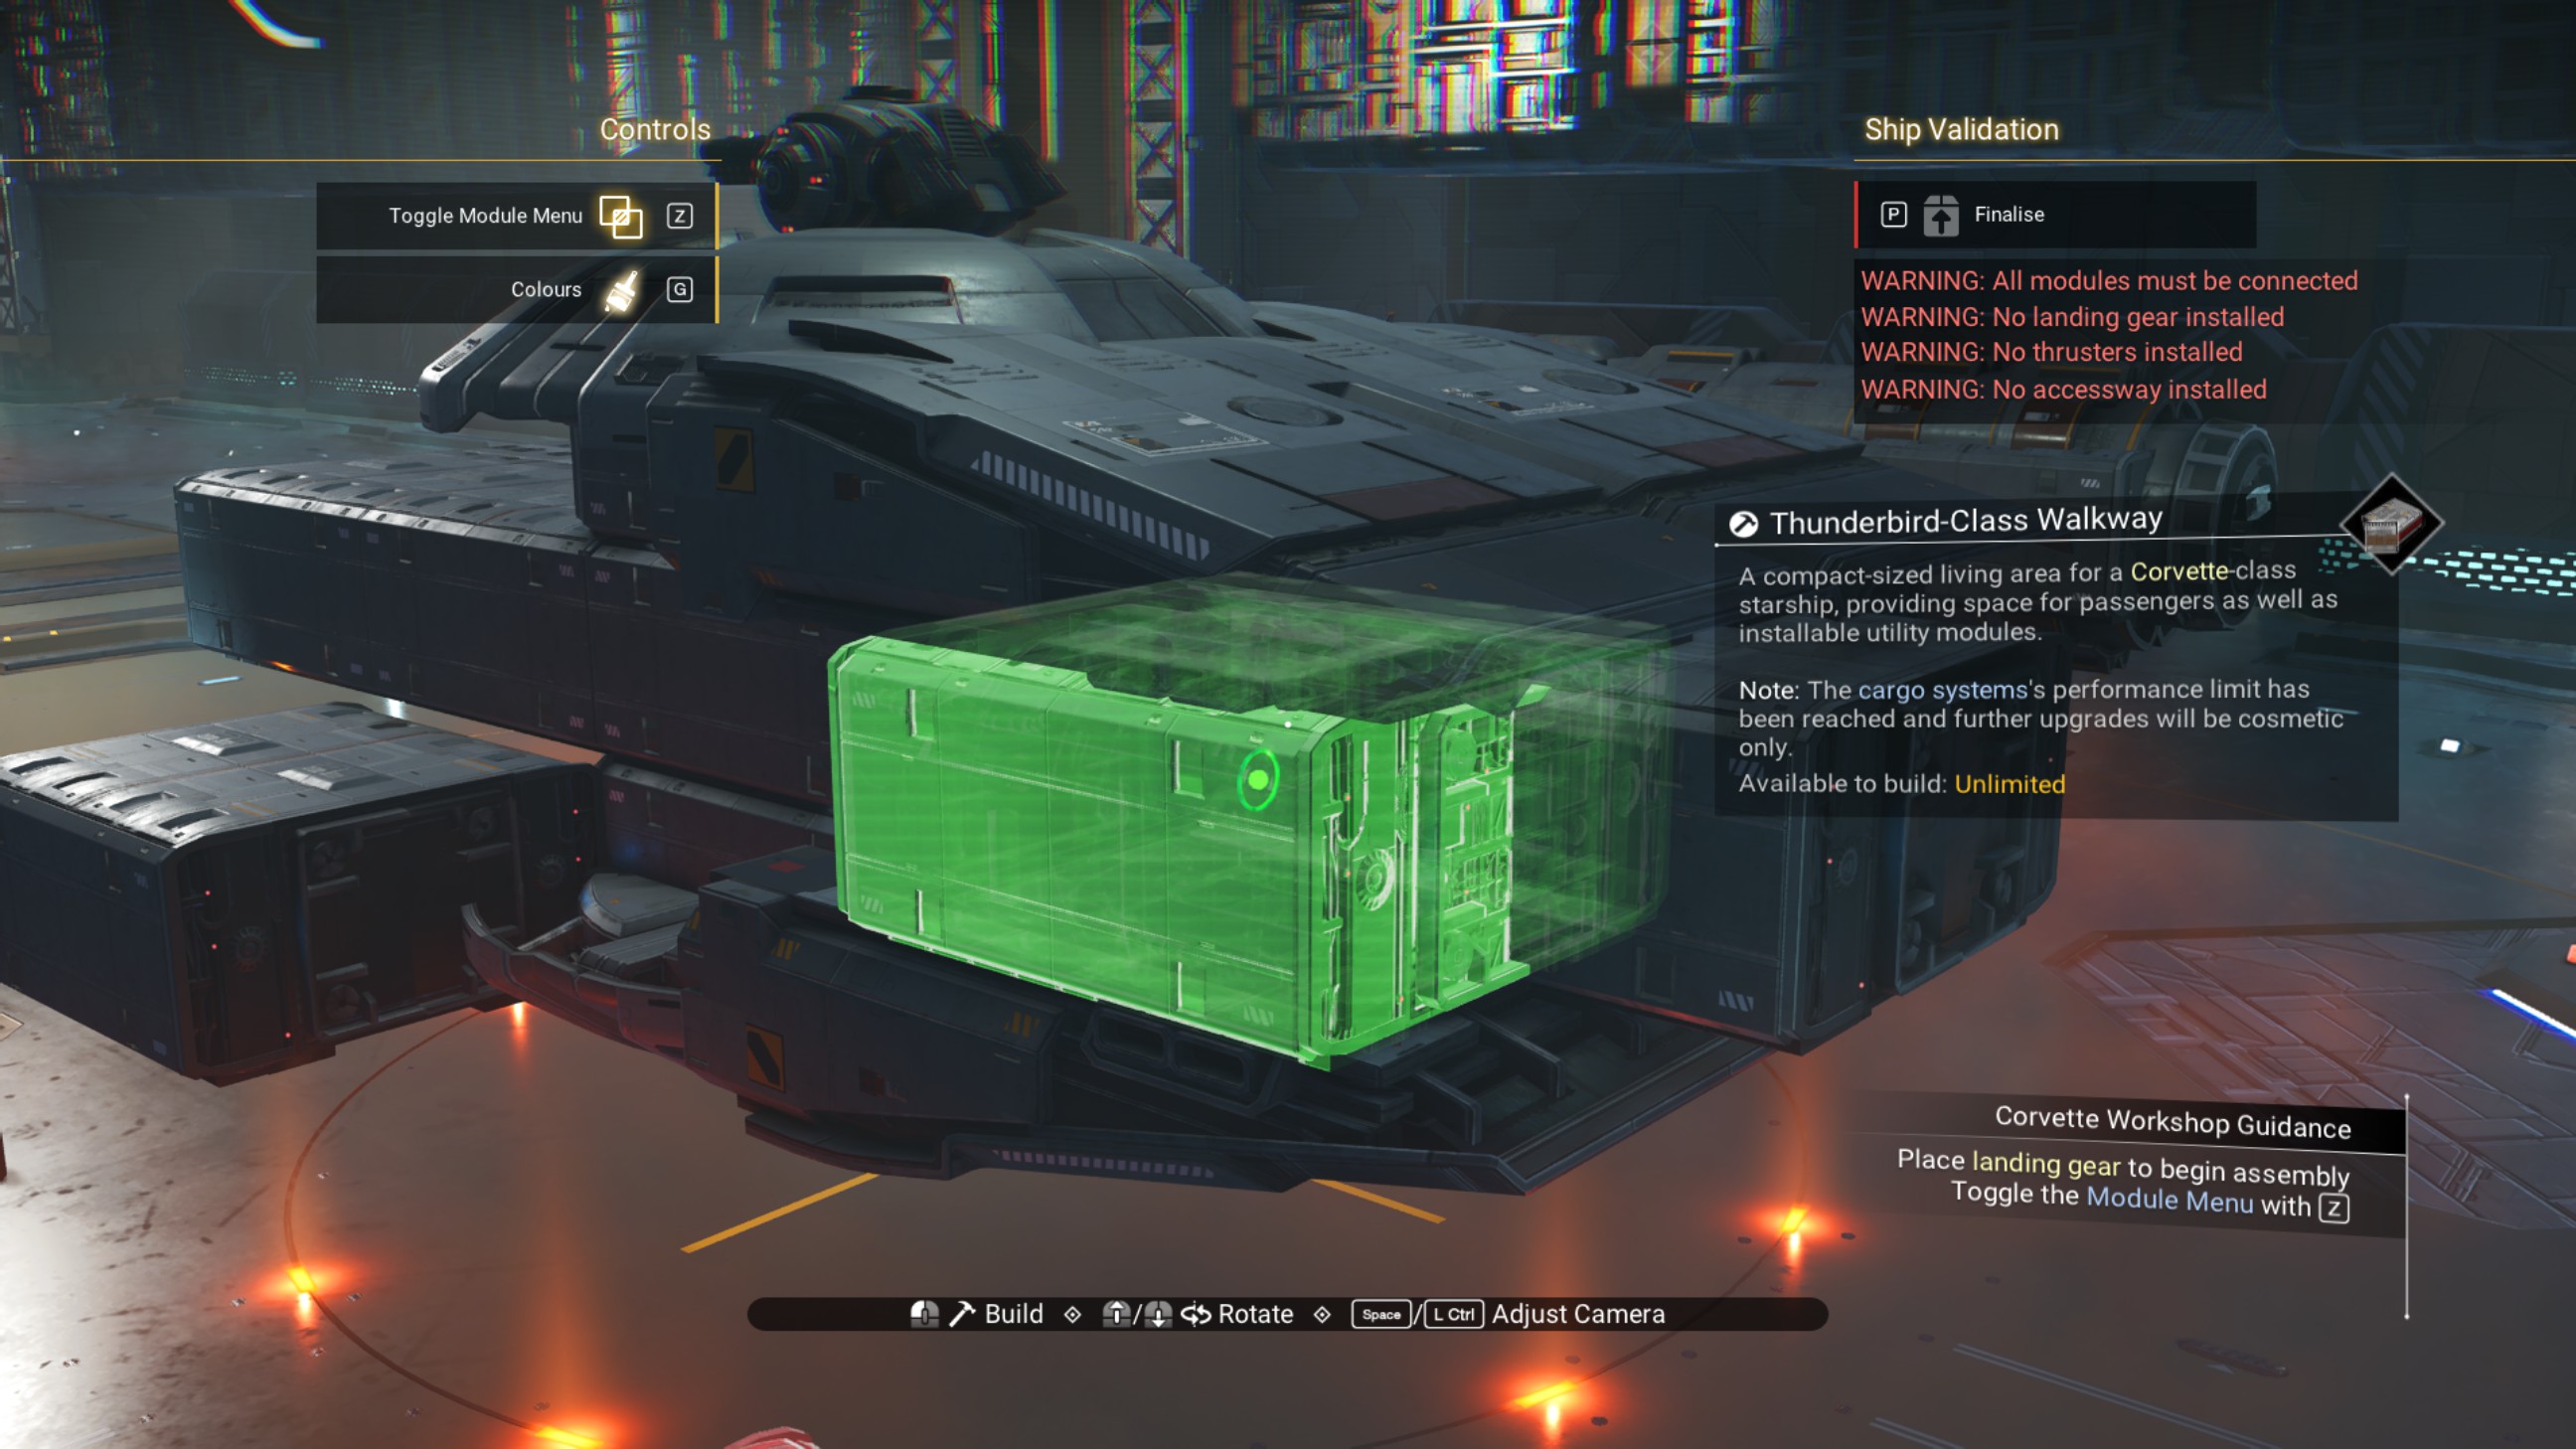
Place three longshore thrusters, overlapping, as shown.
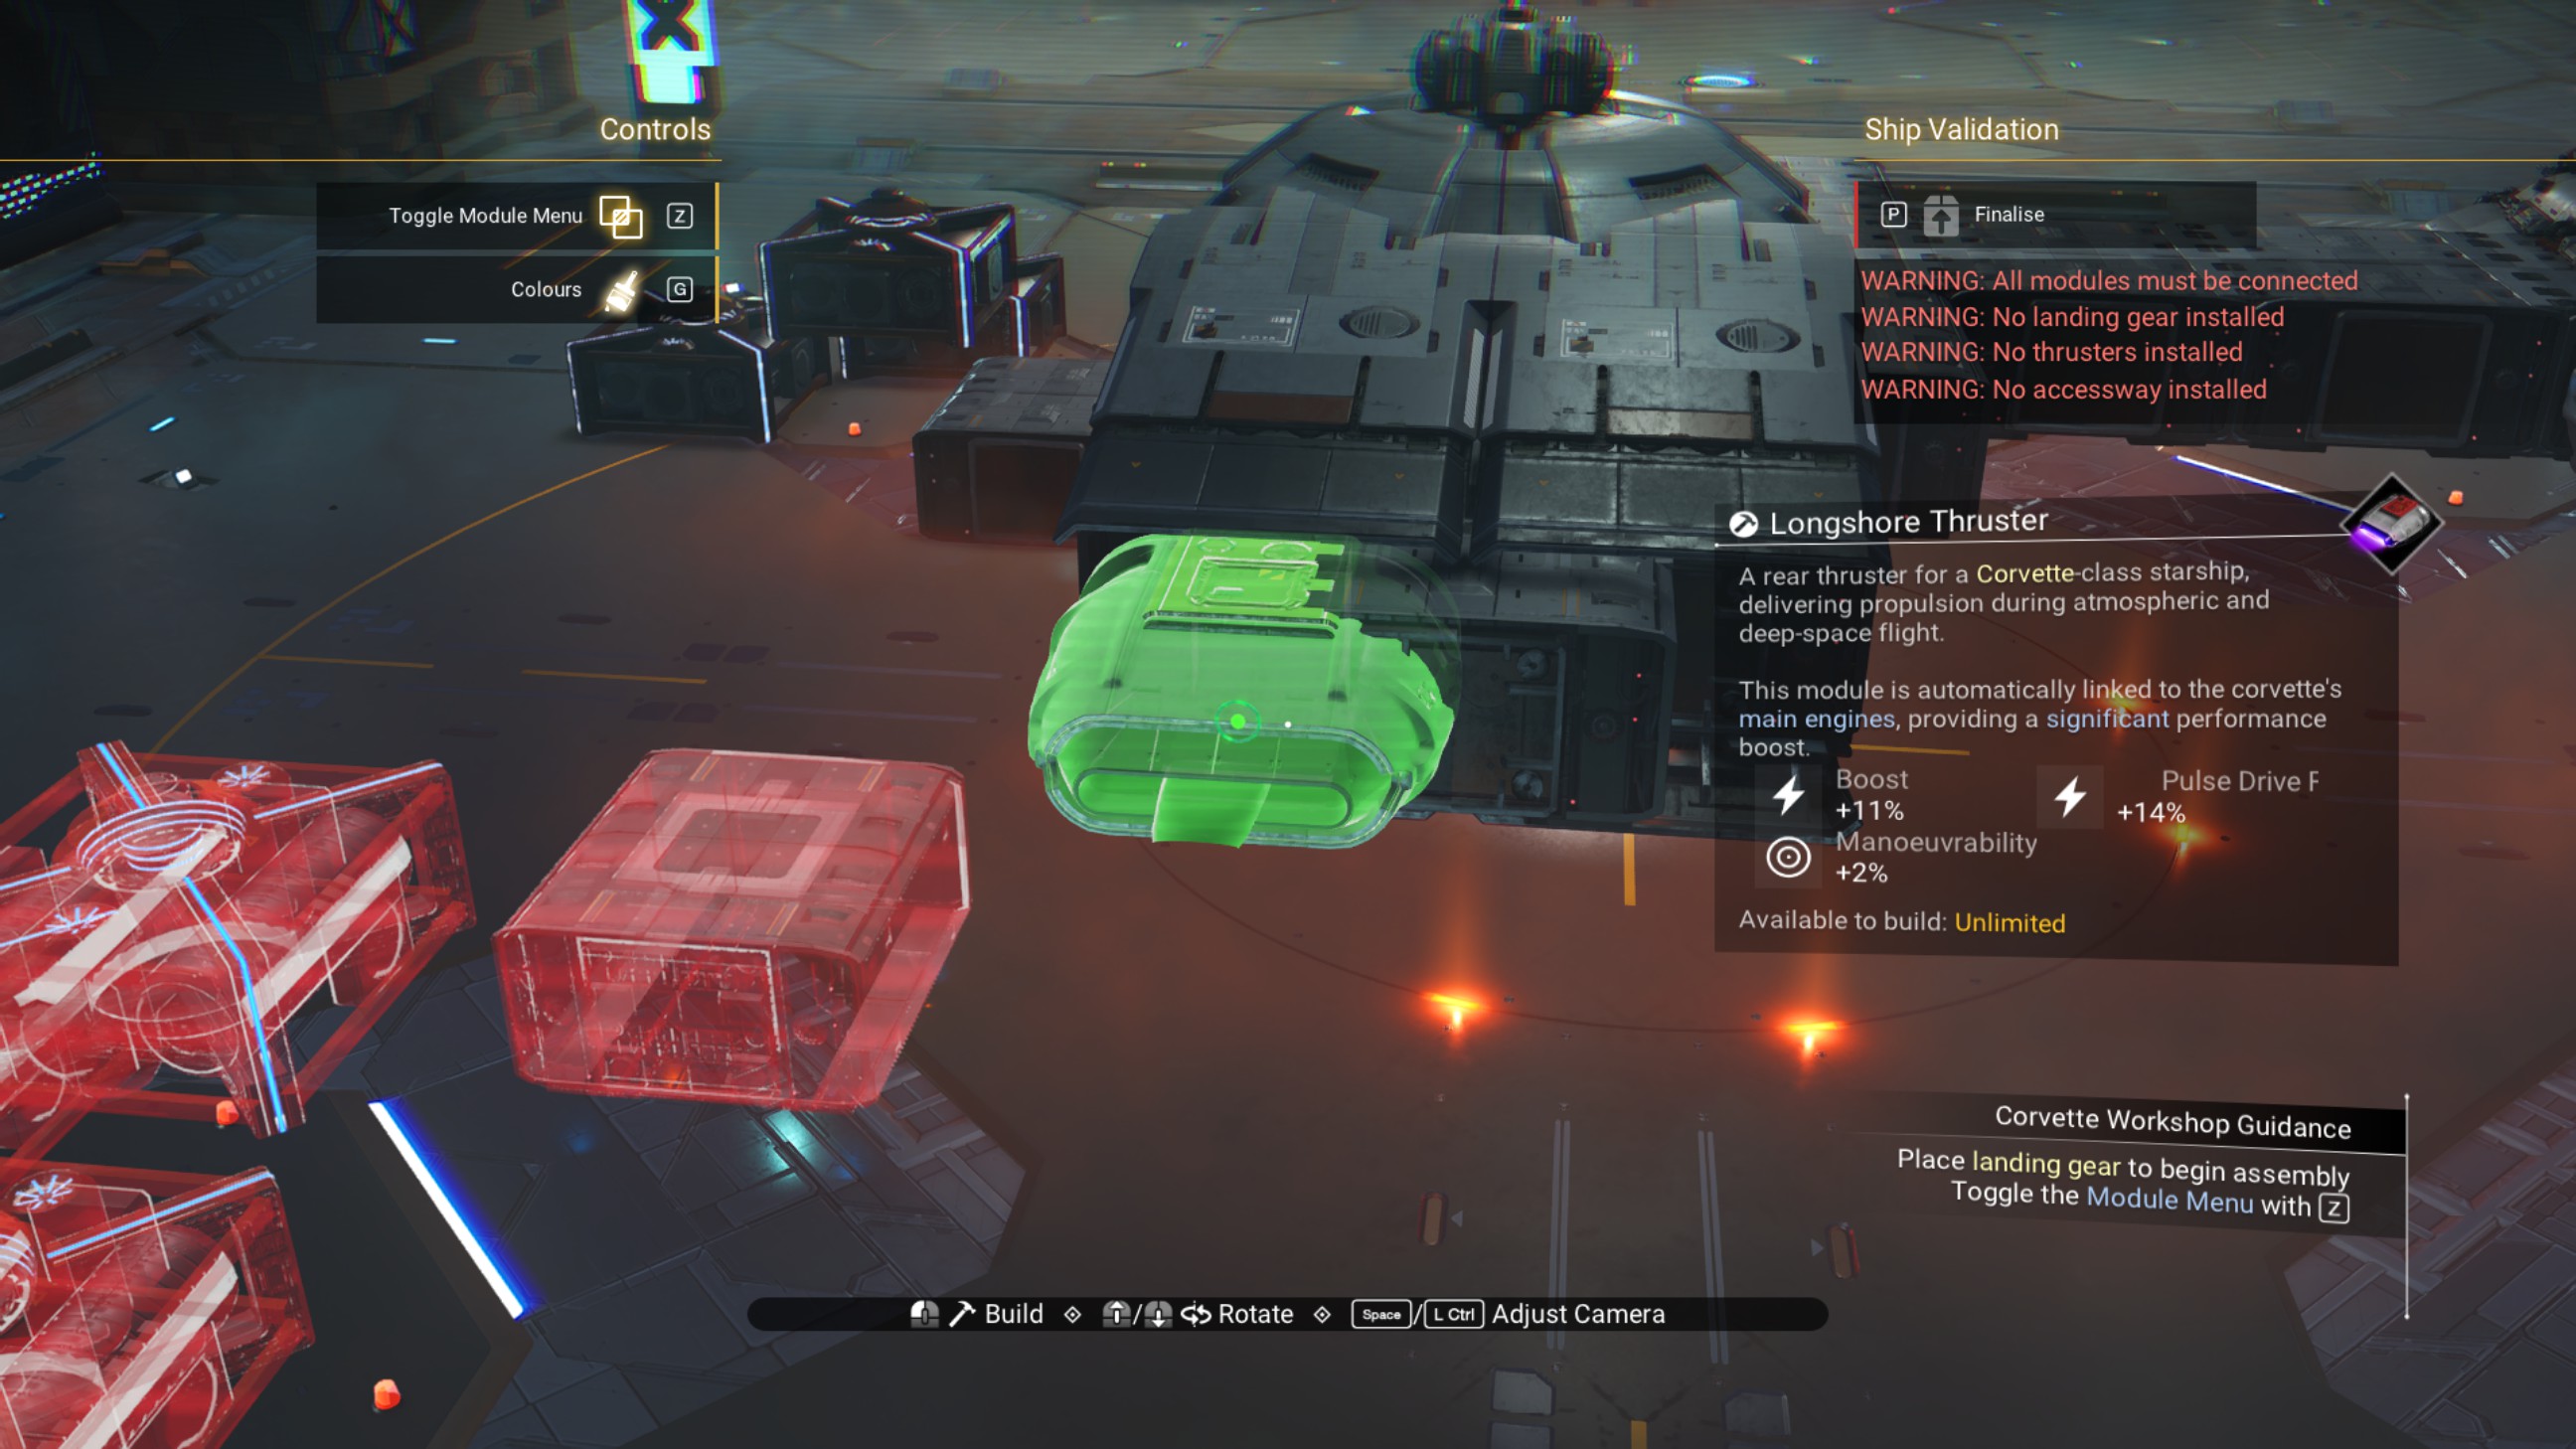
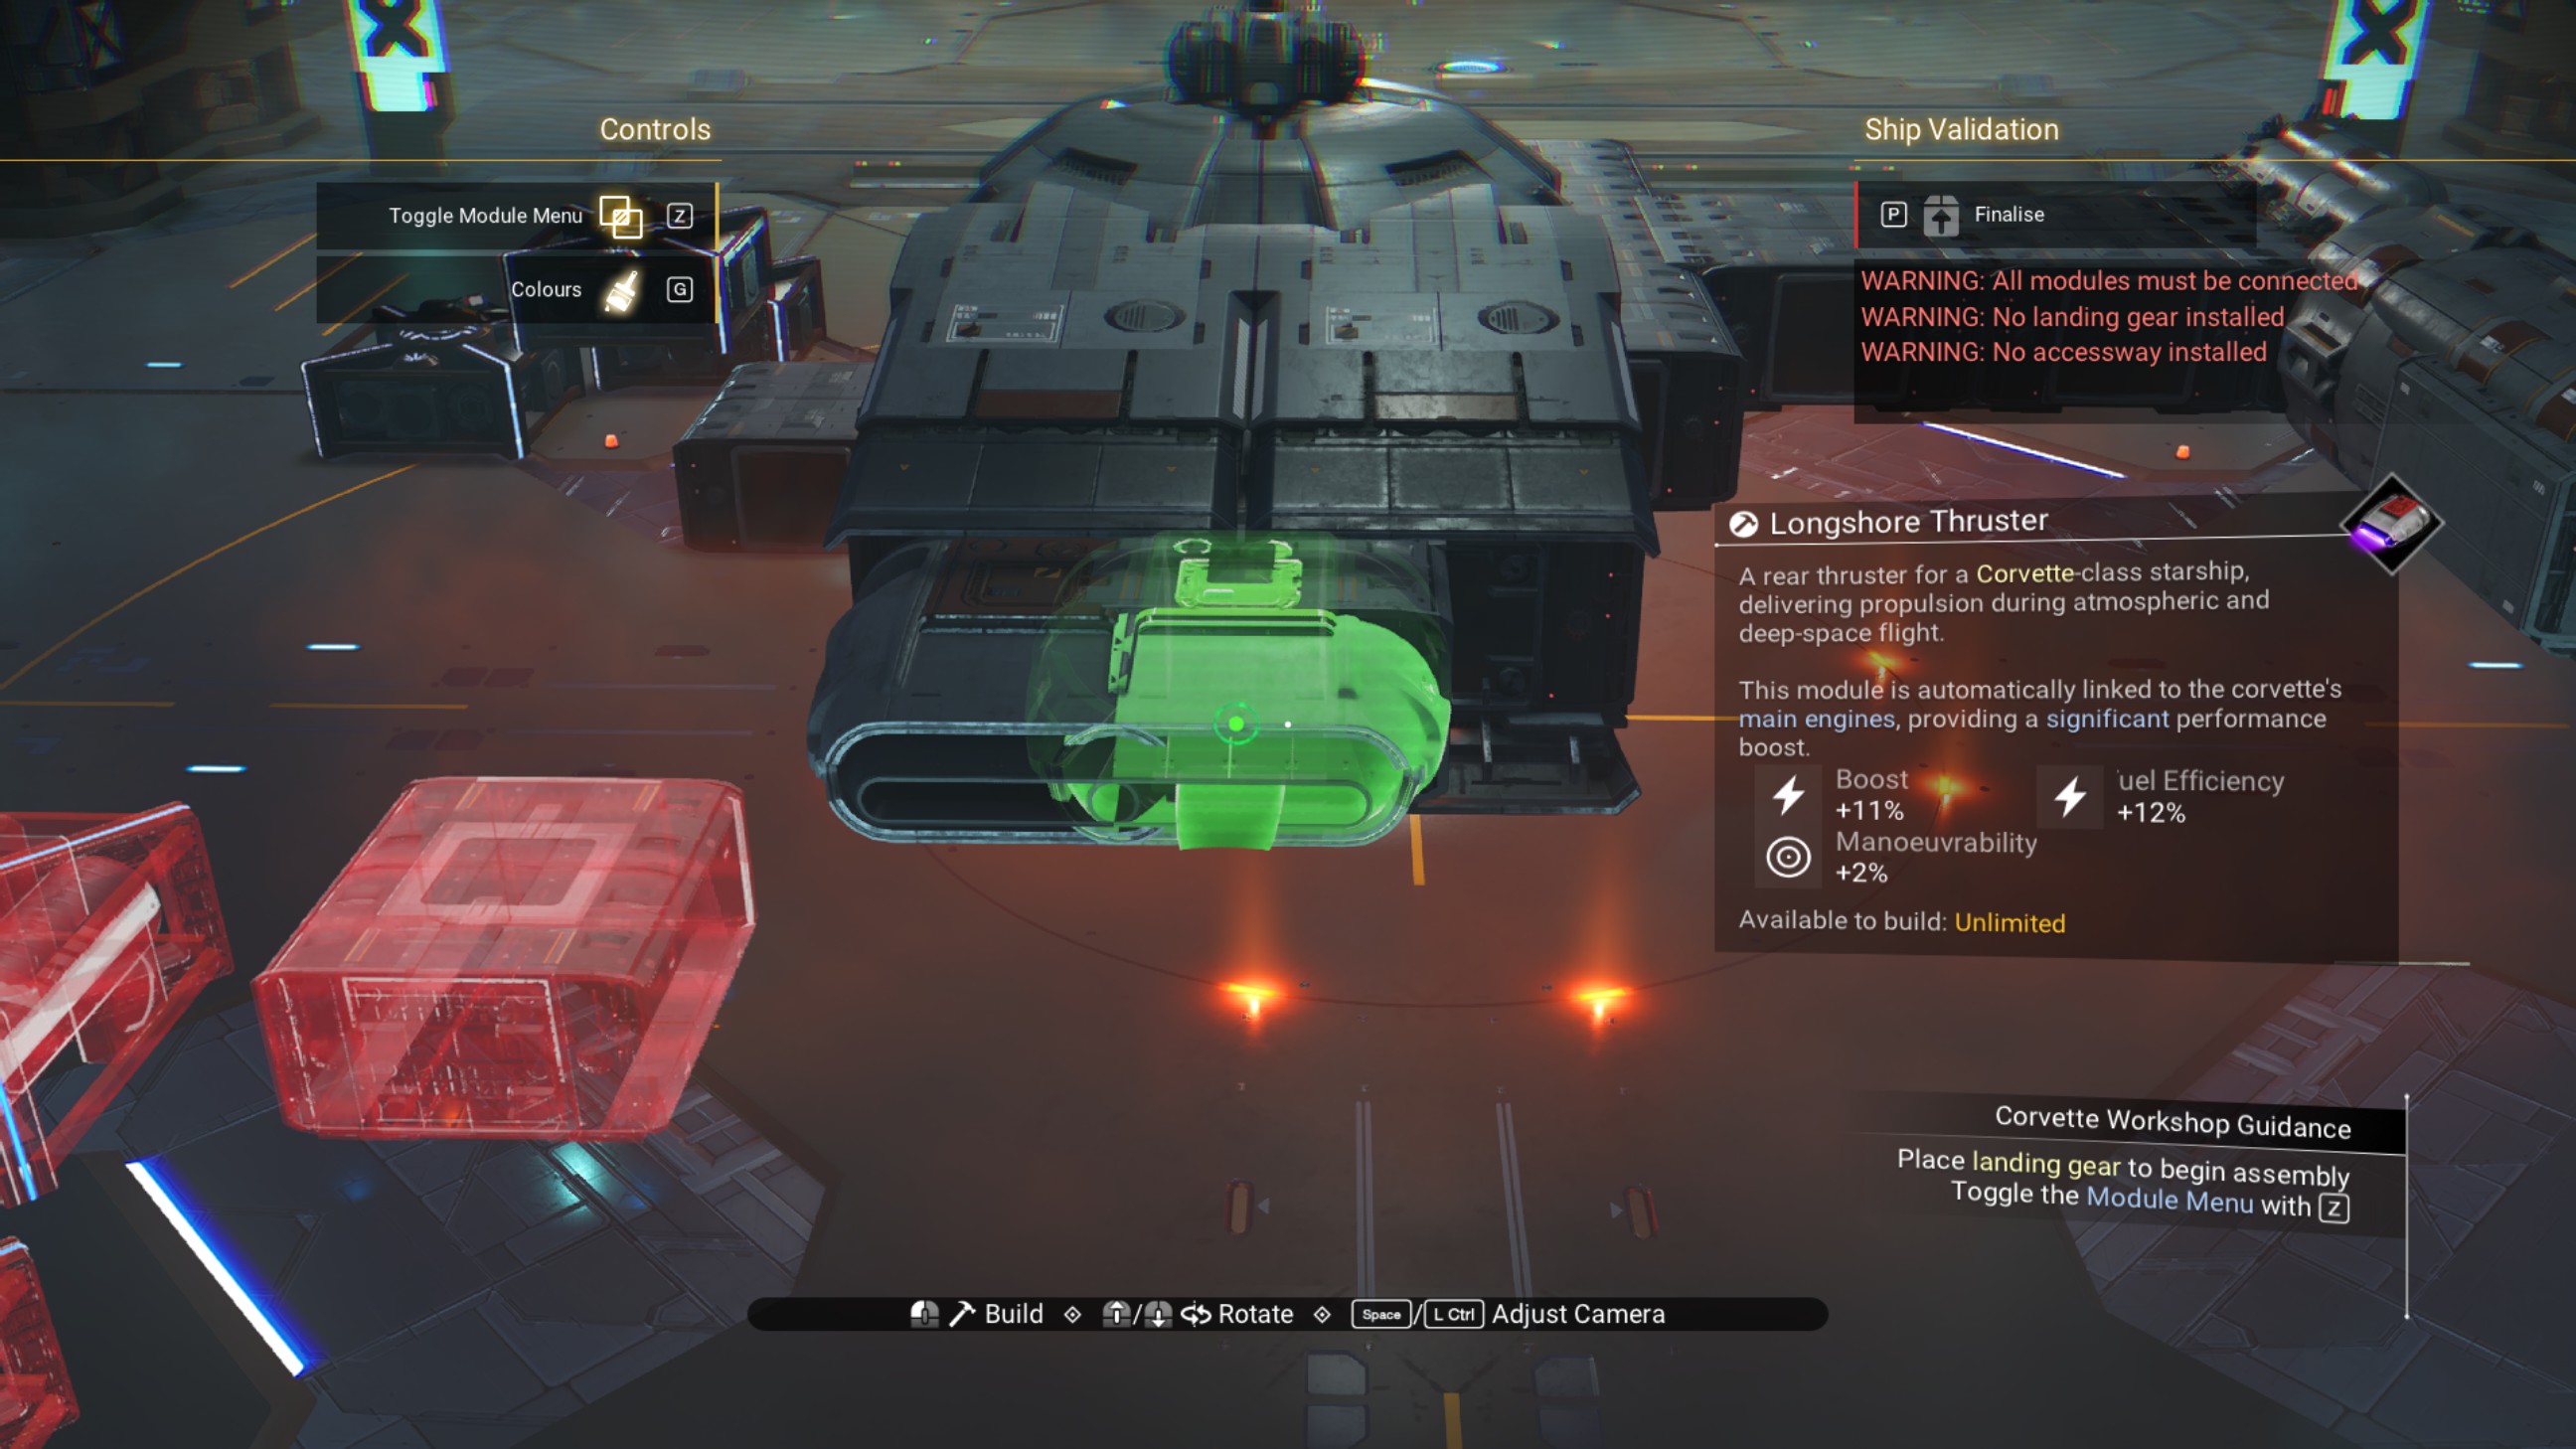
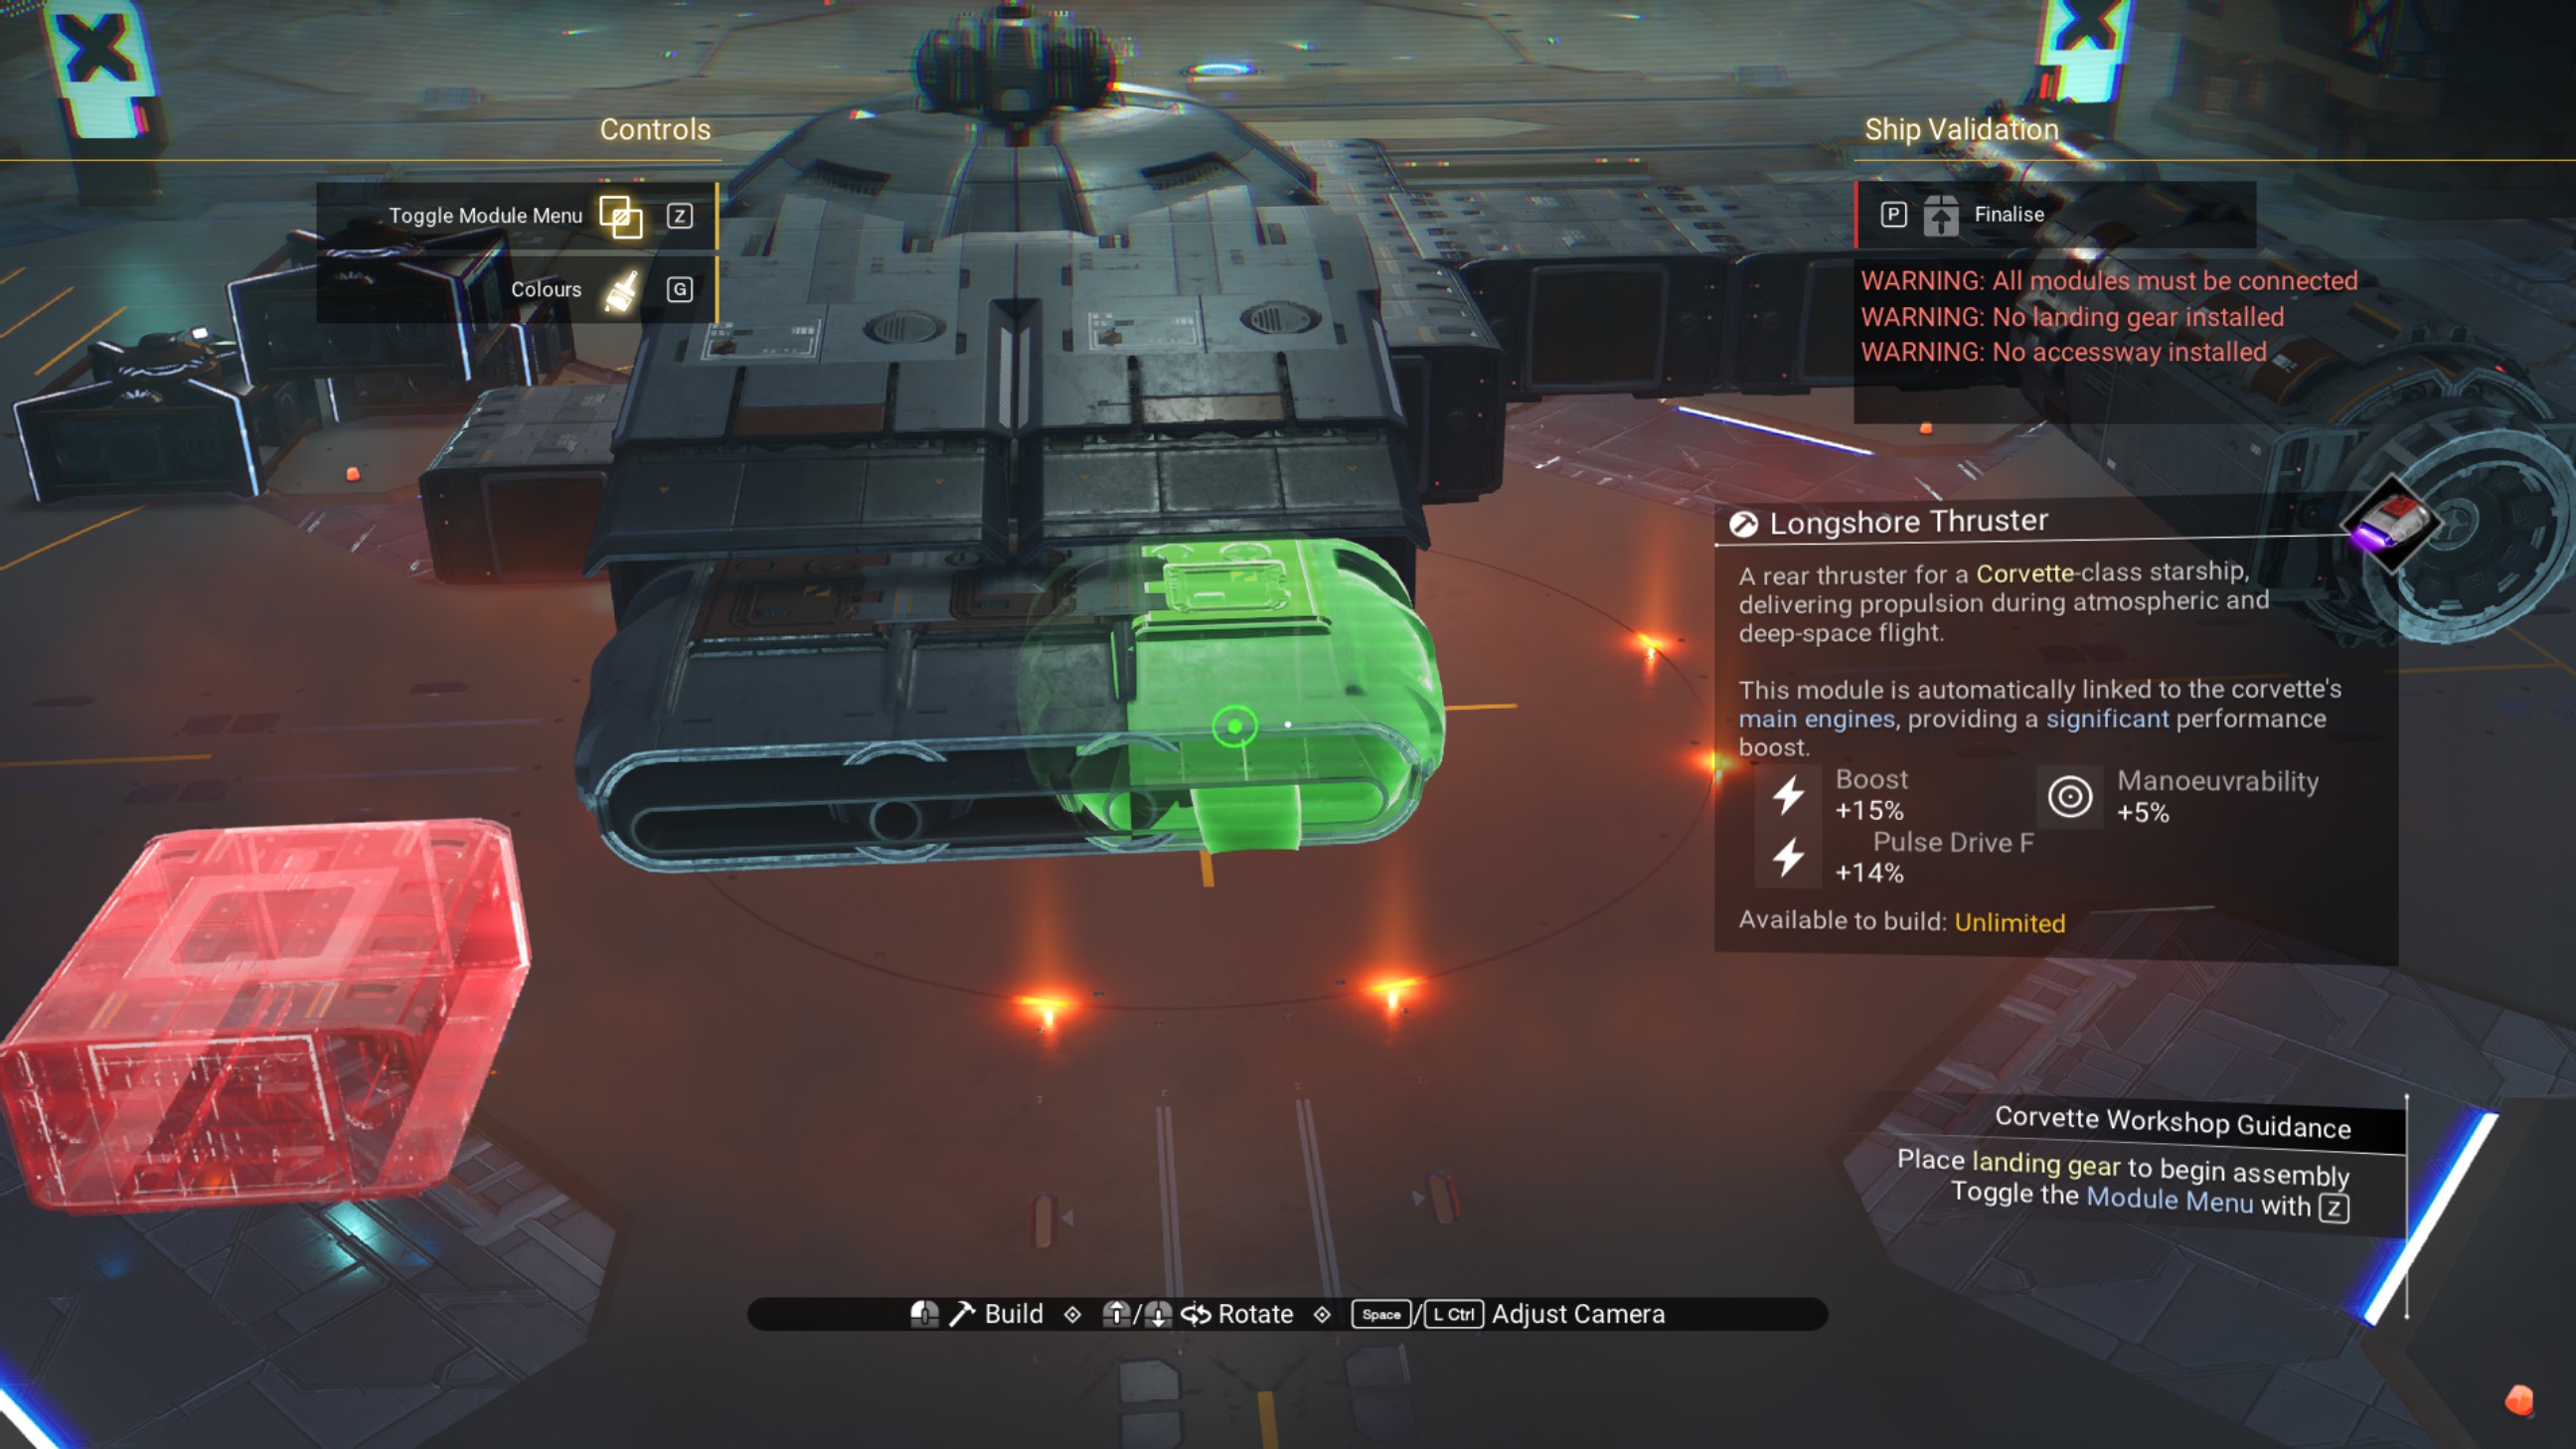
Place two more walkways, one under each vesper cowling, as shown.
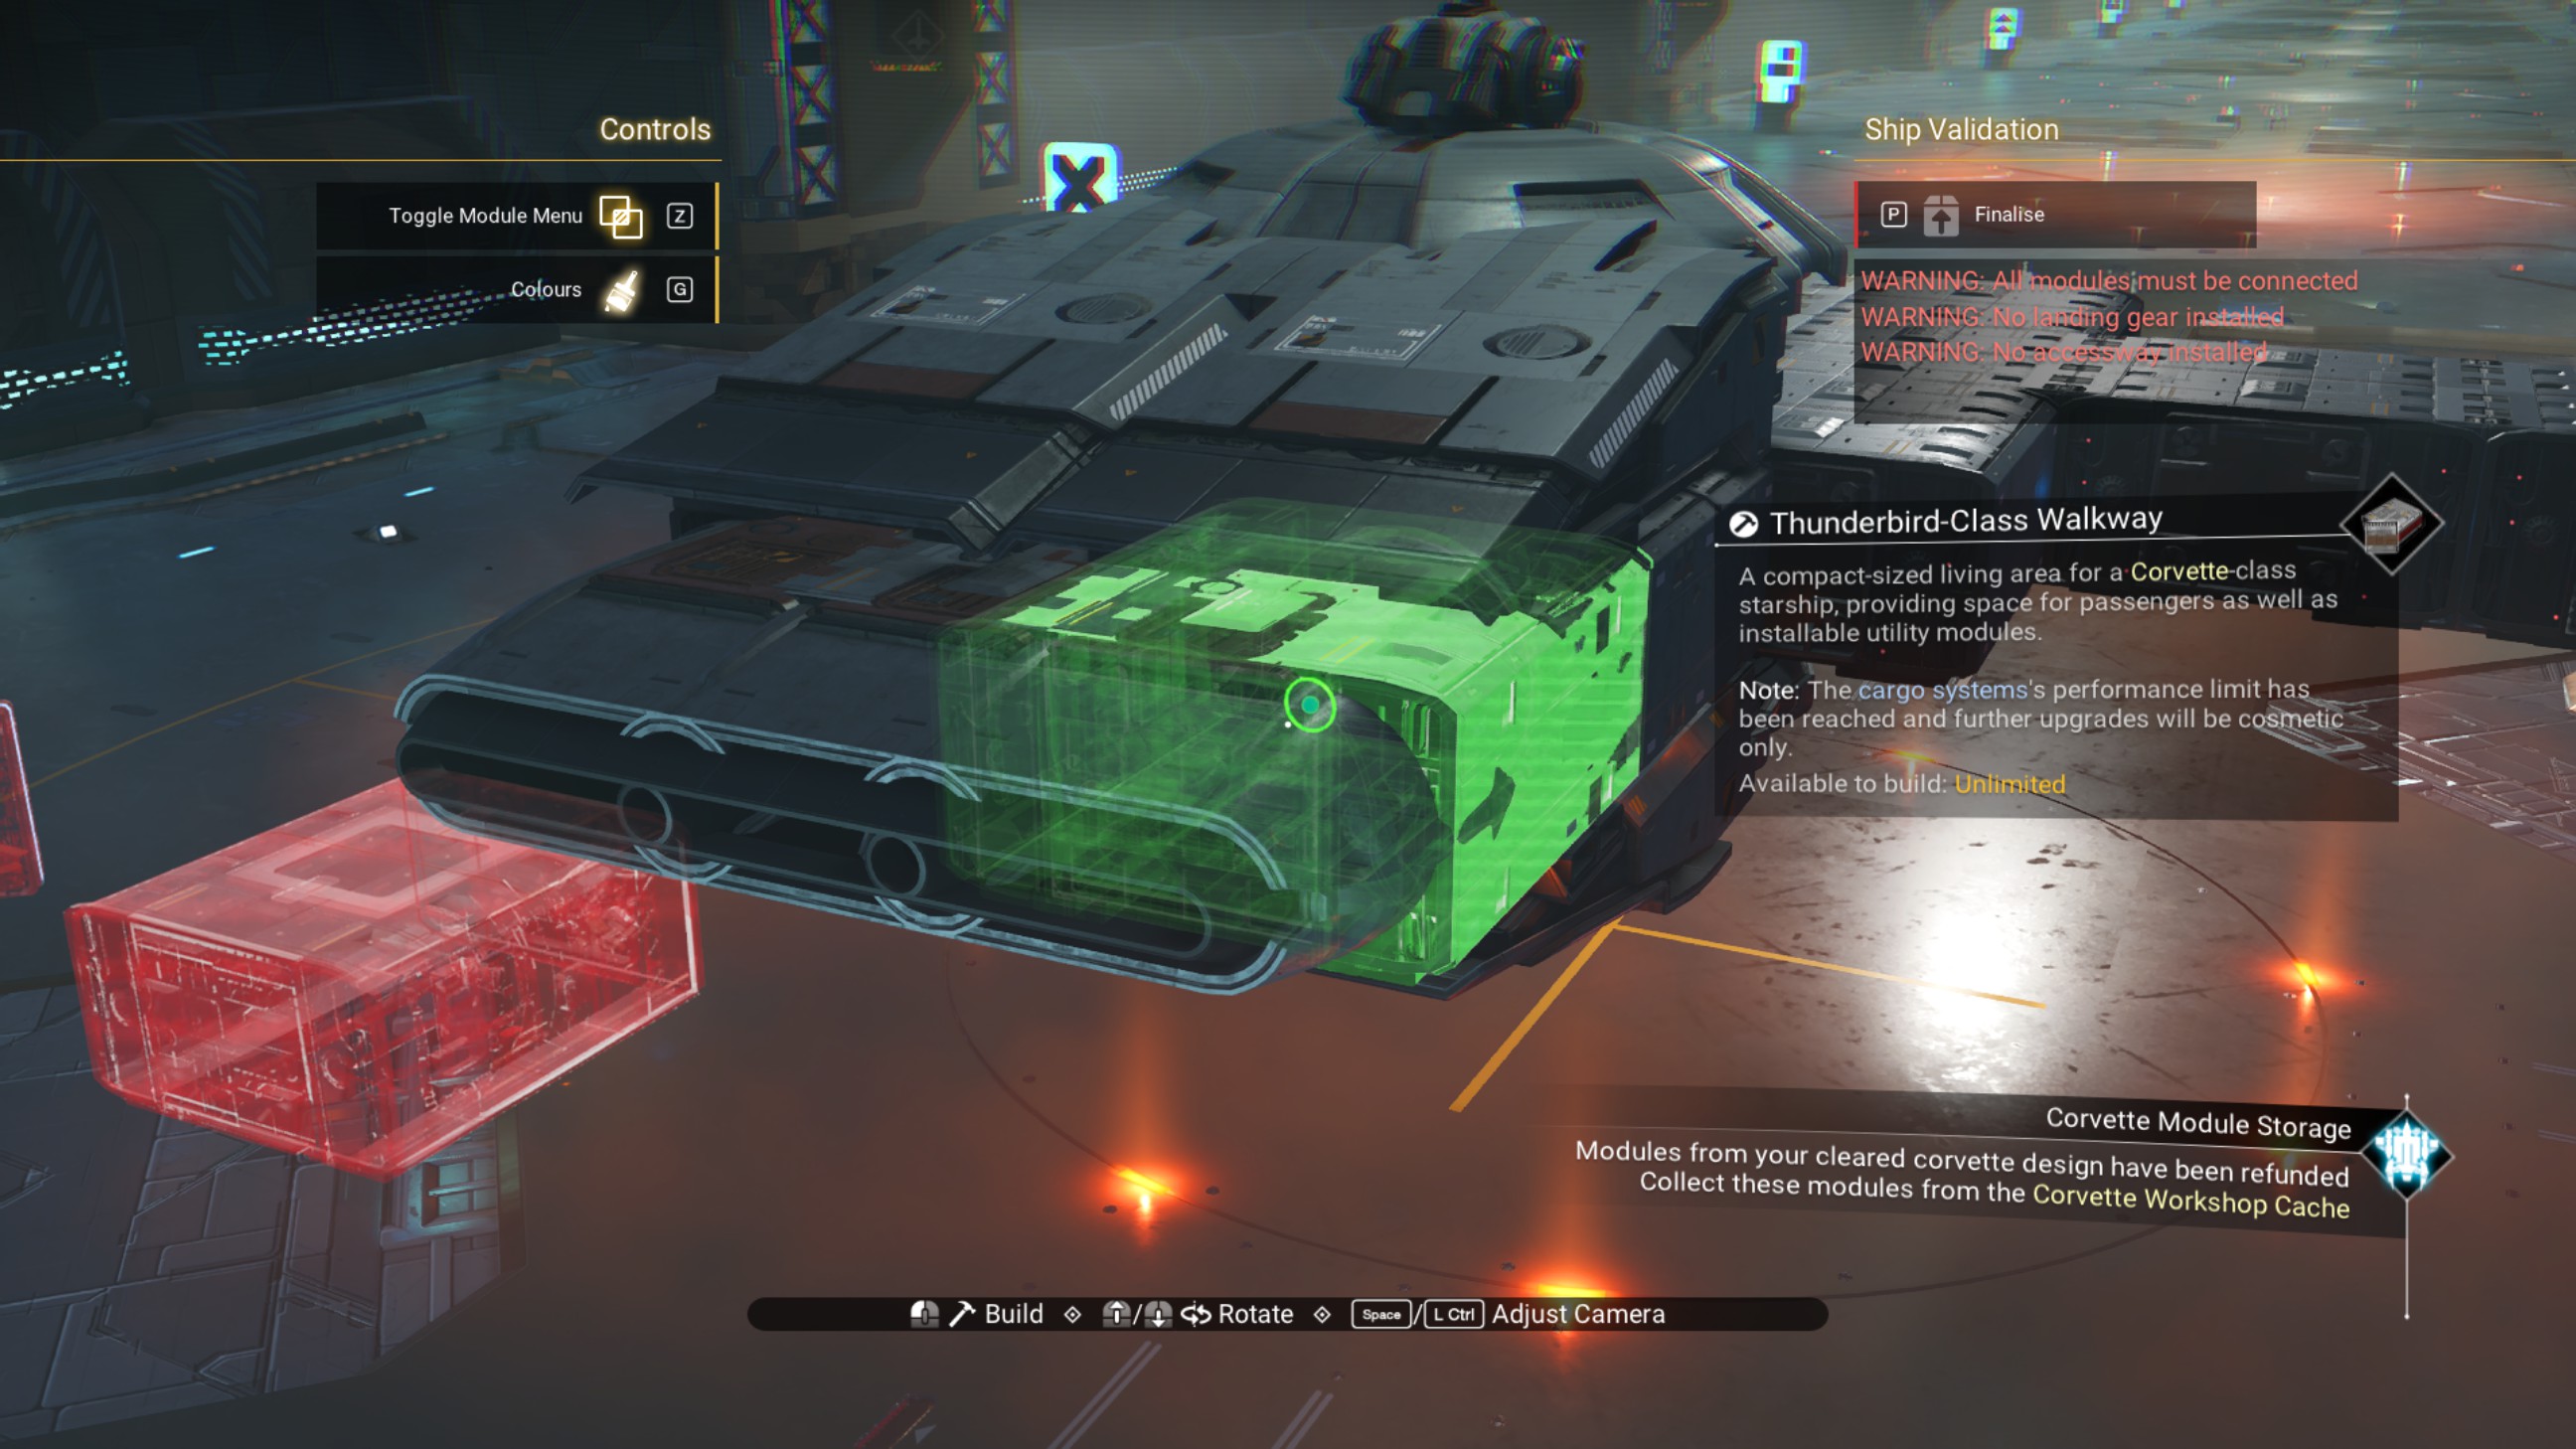
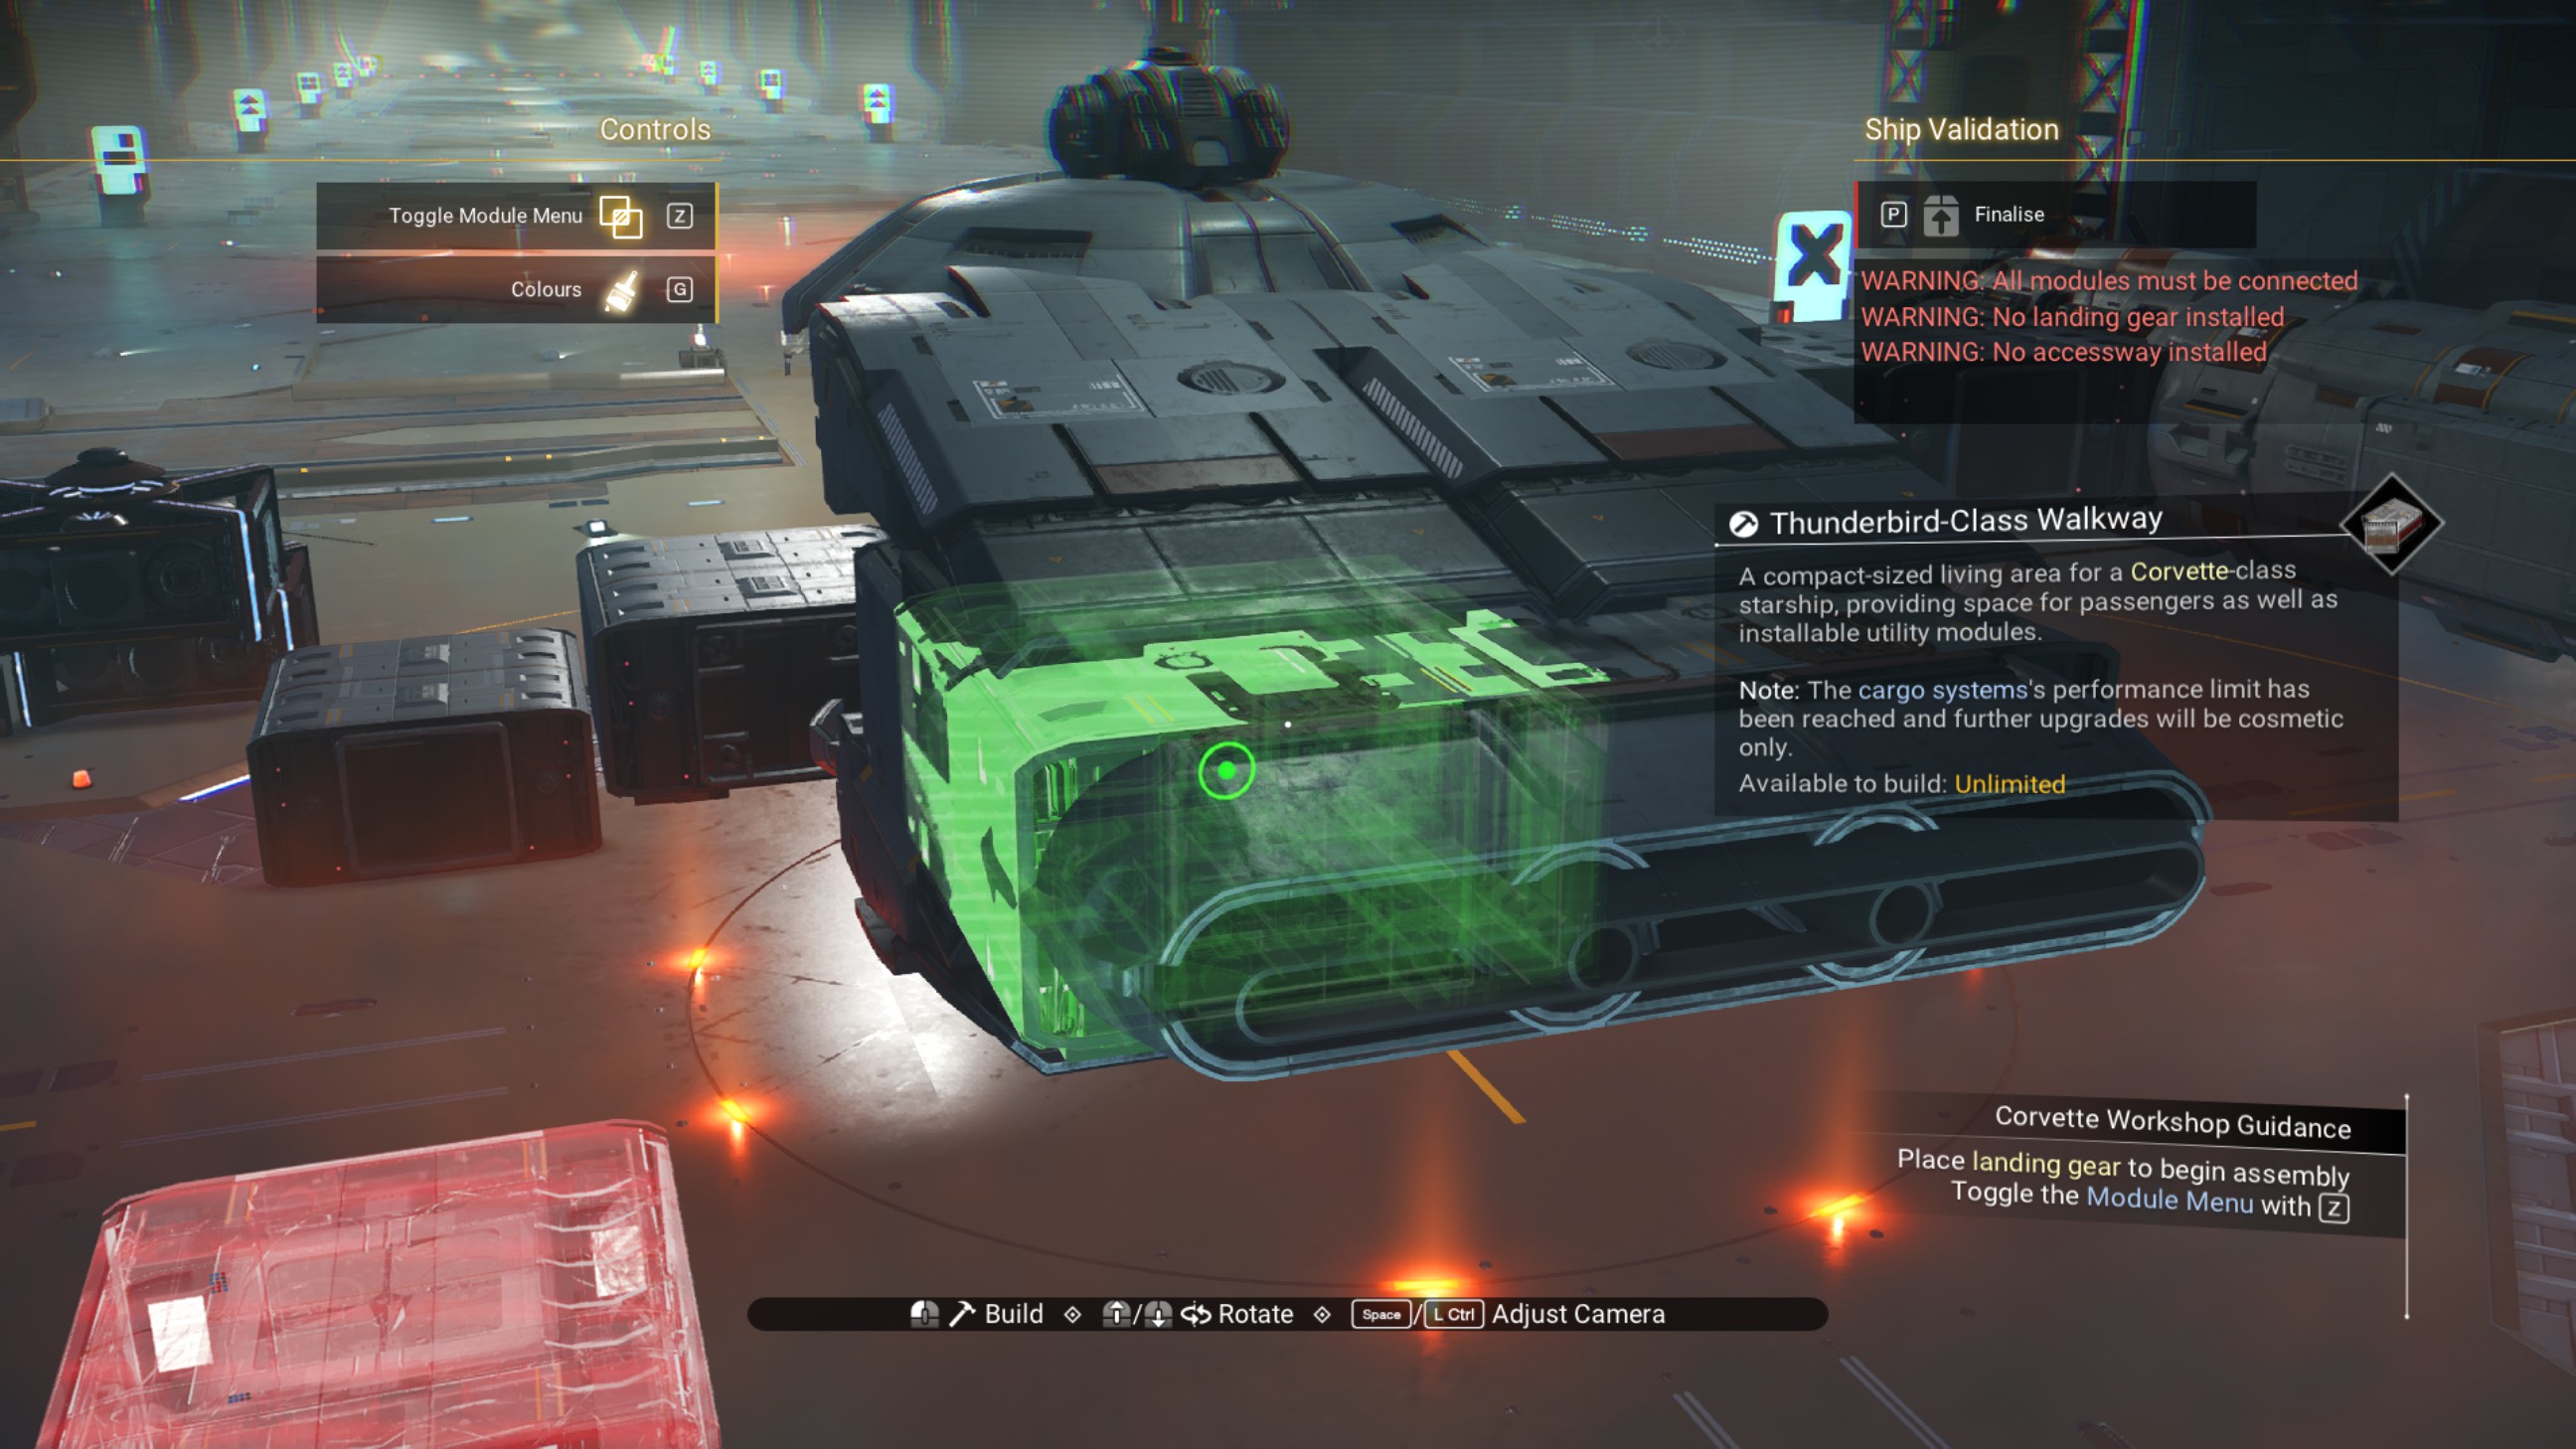
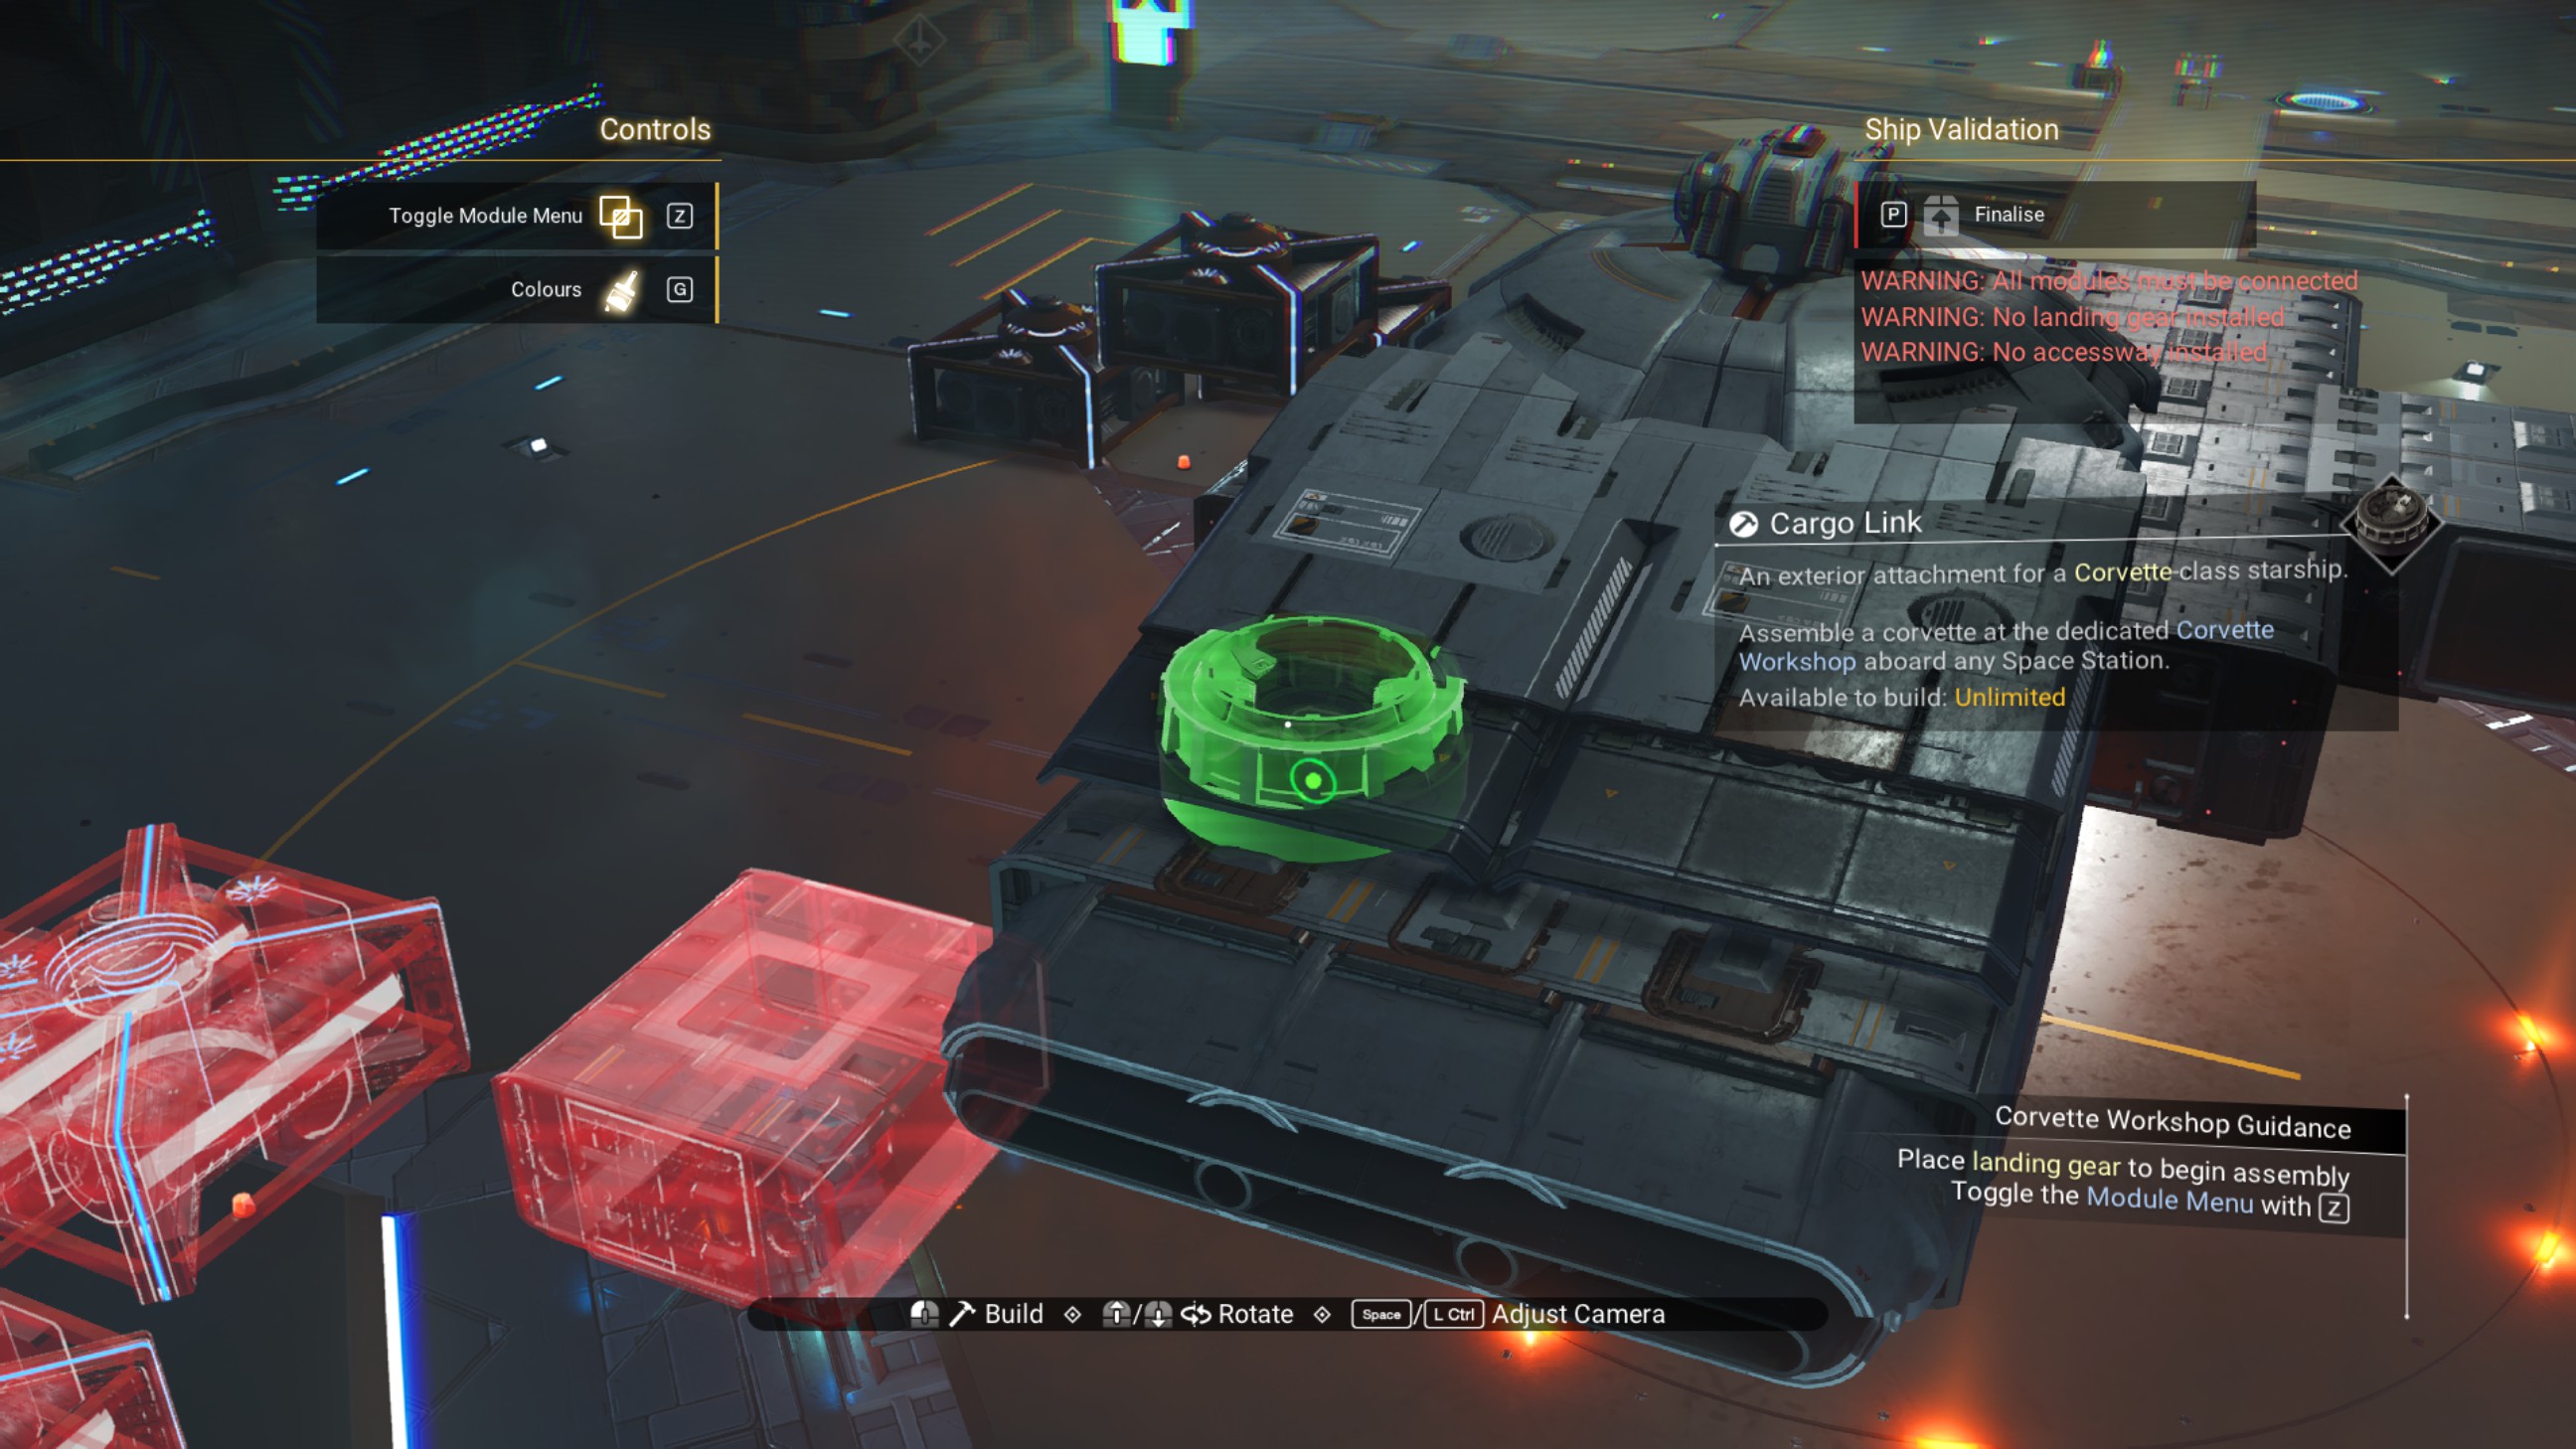
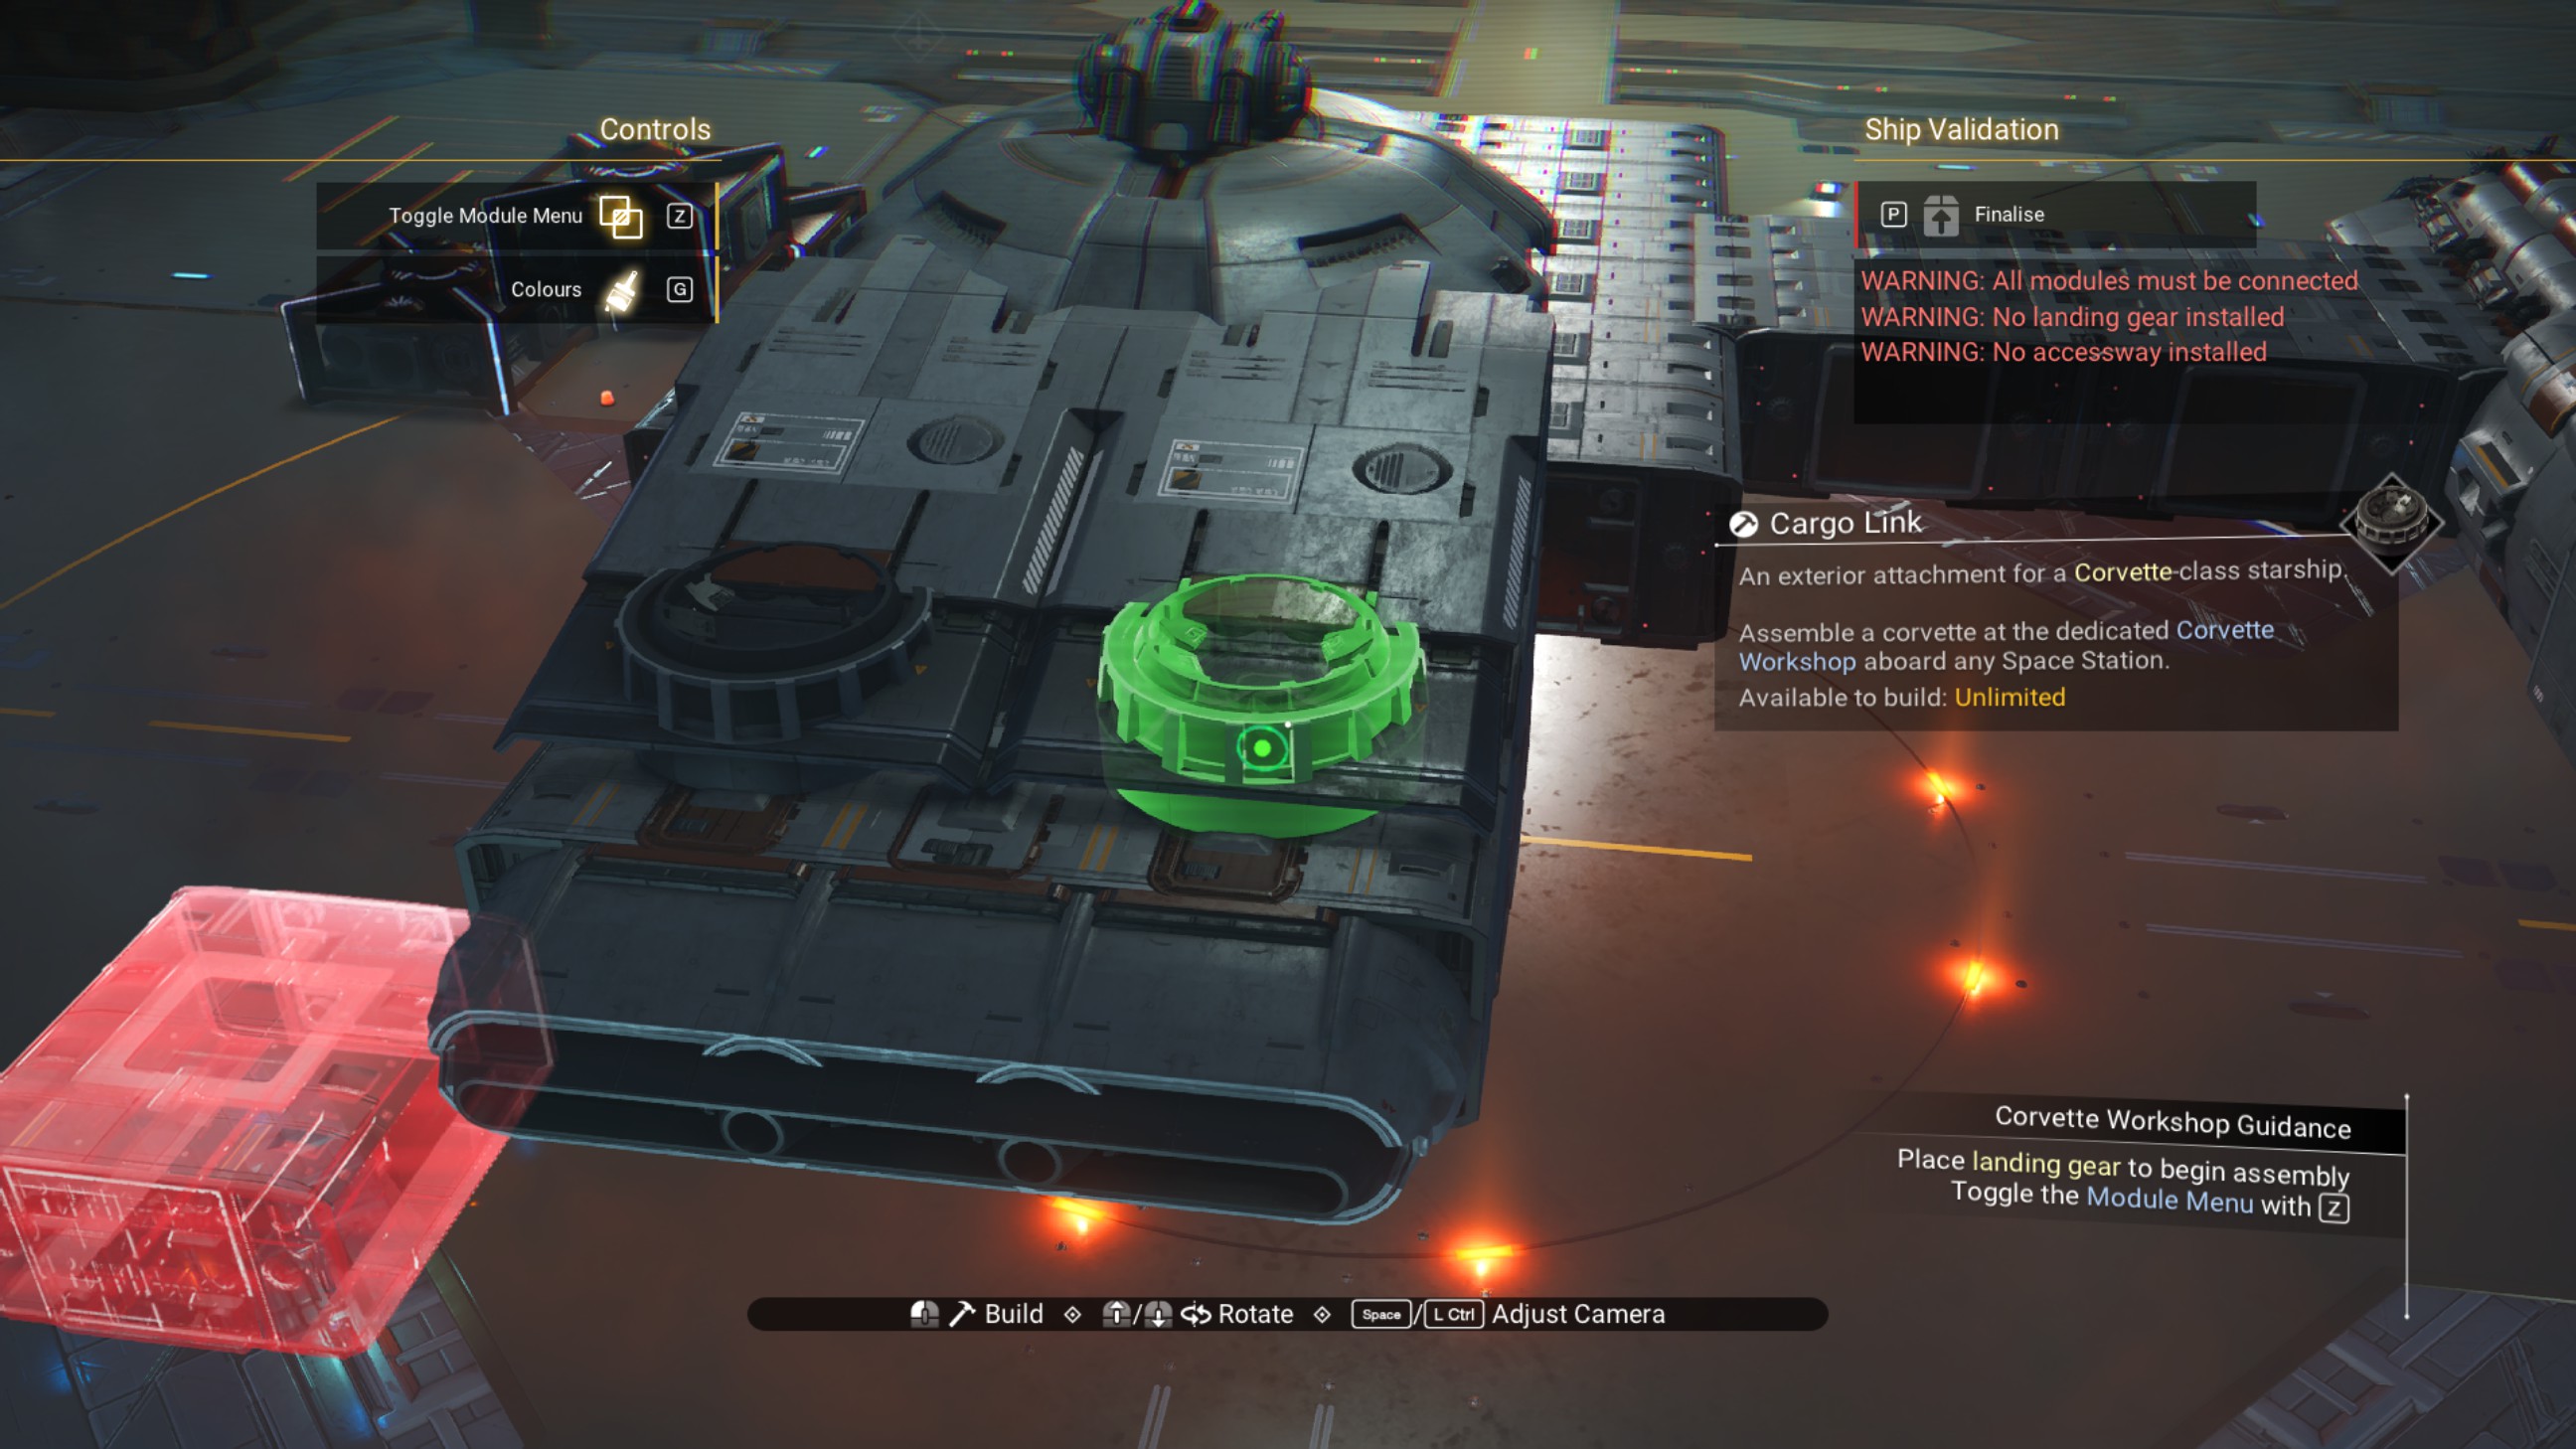
Place three cargo links on top of the engine structure.
Hull
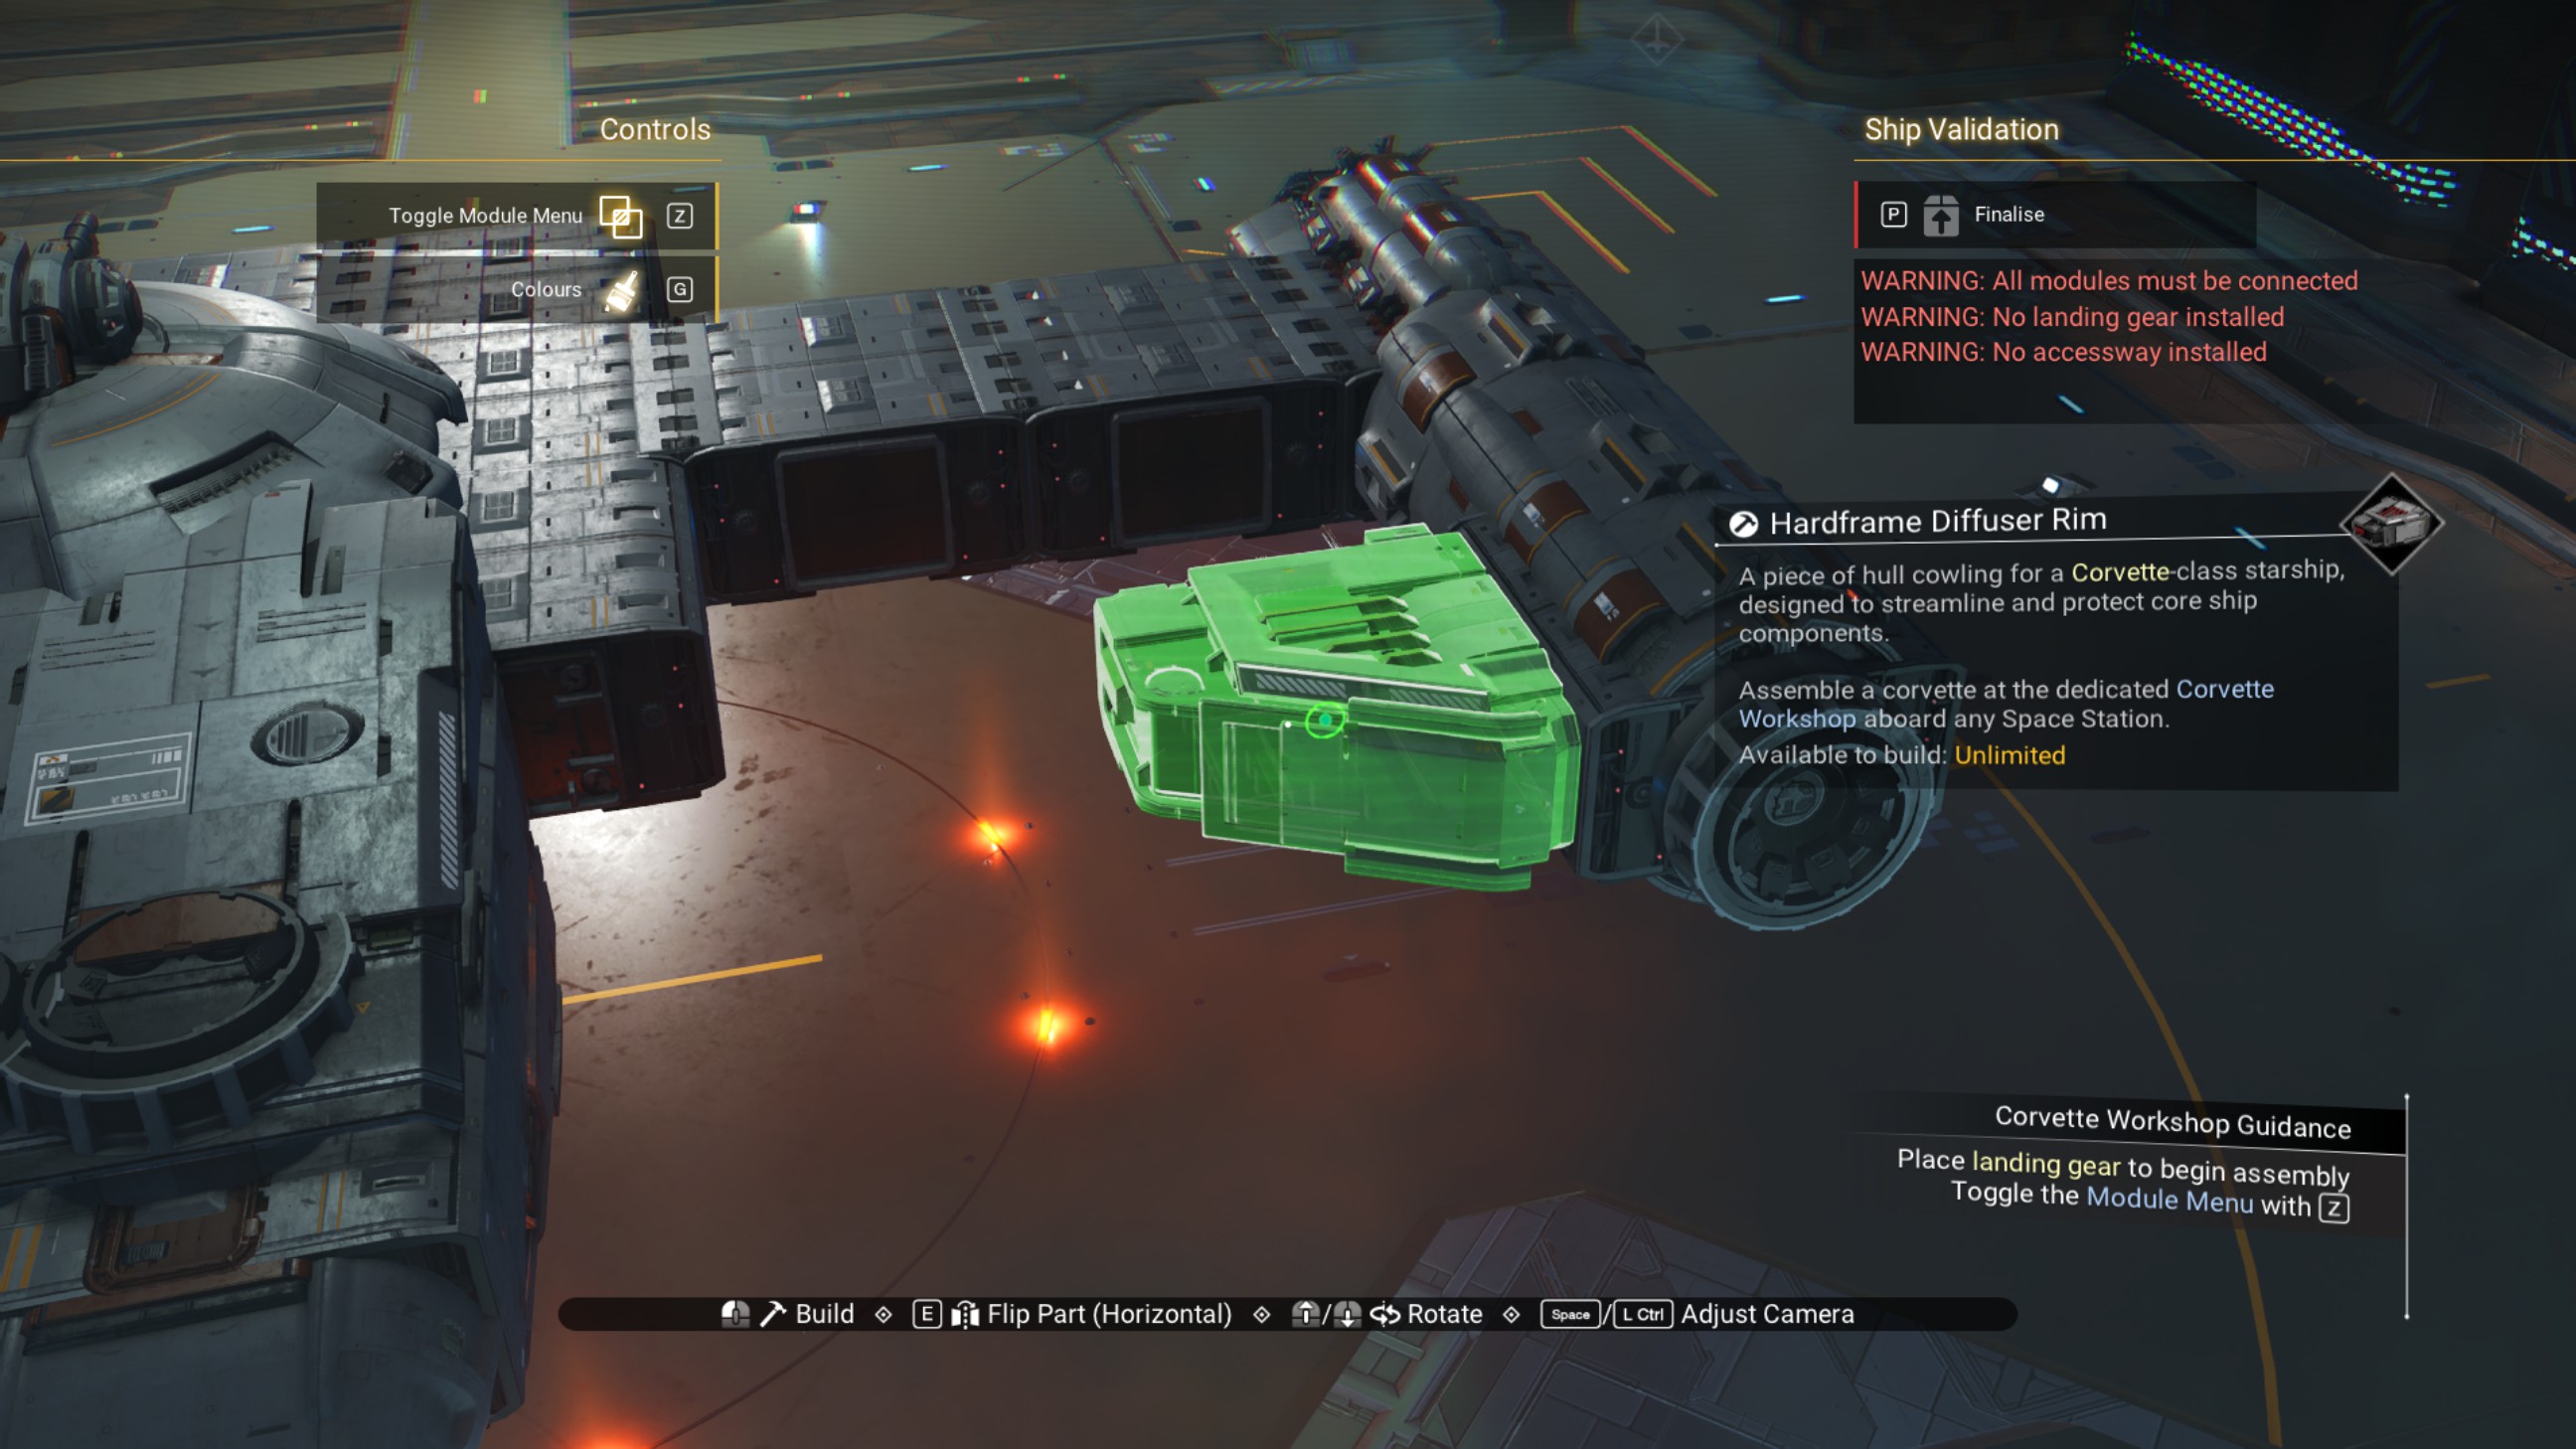
Select the indicated walkway from the engine structure, and shift it starboard by half a step.
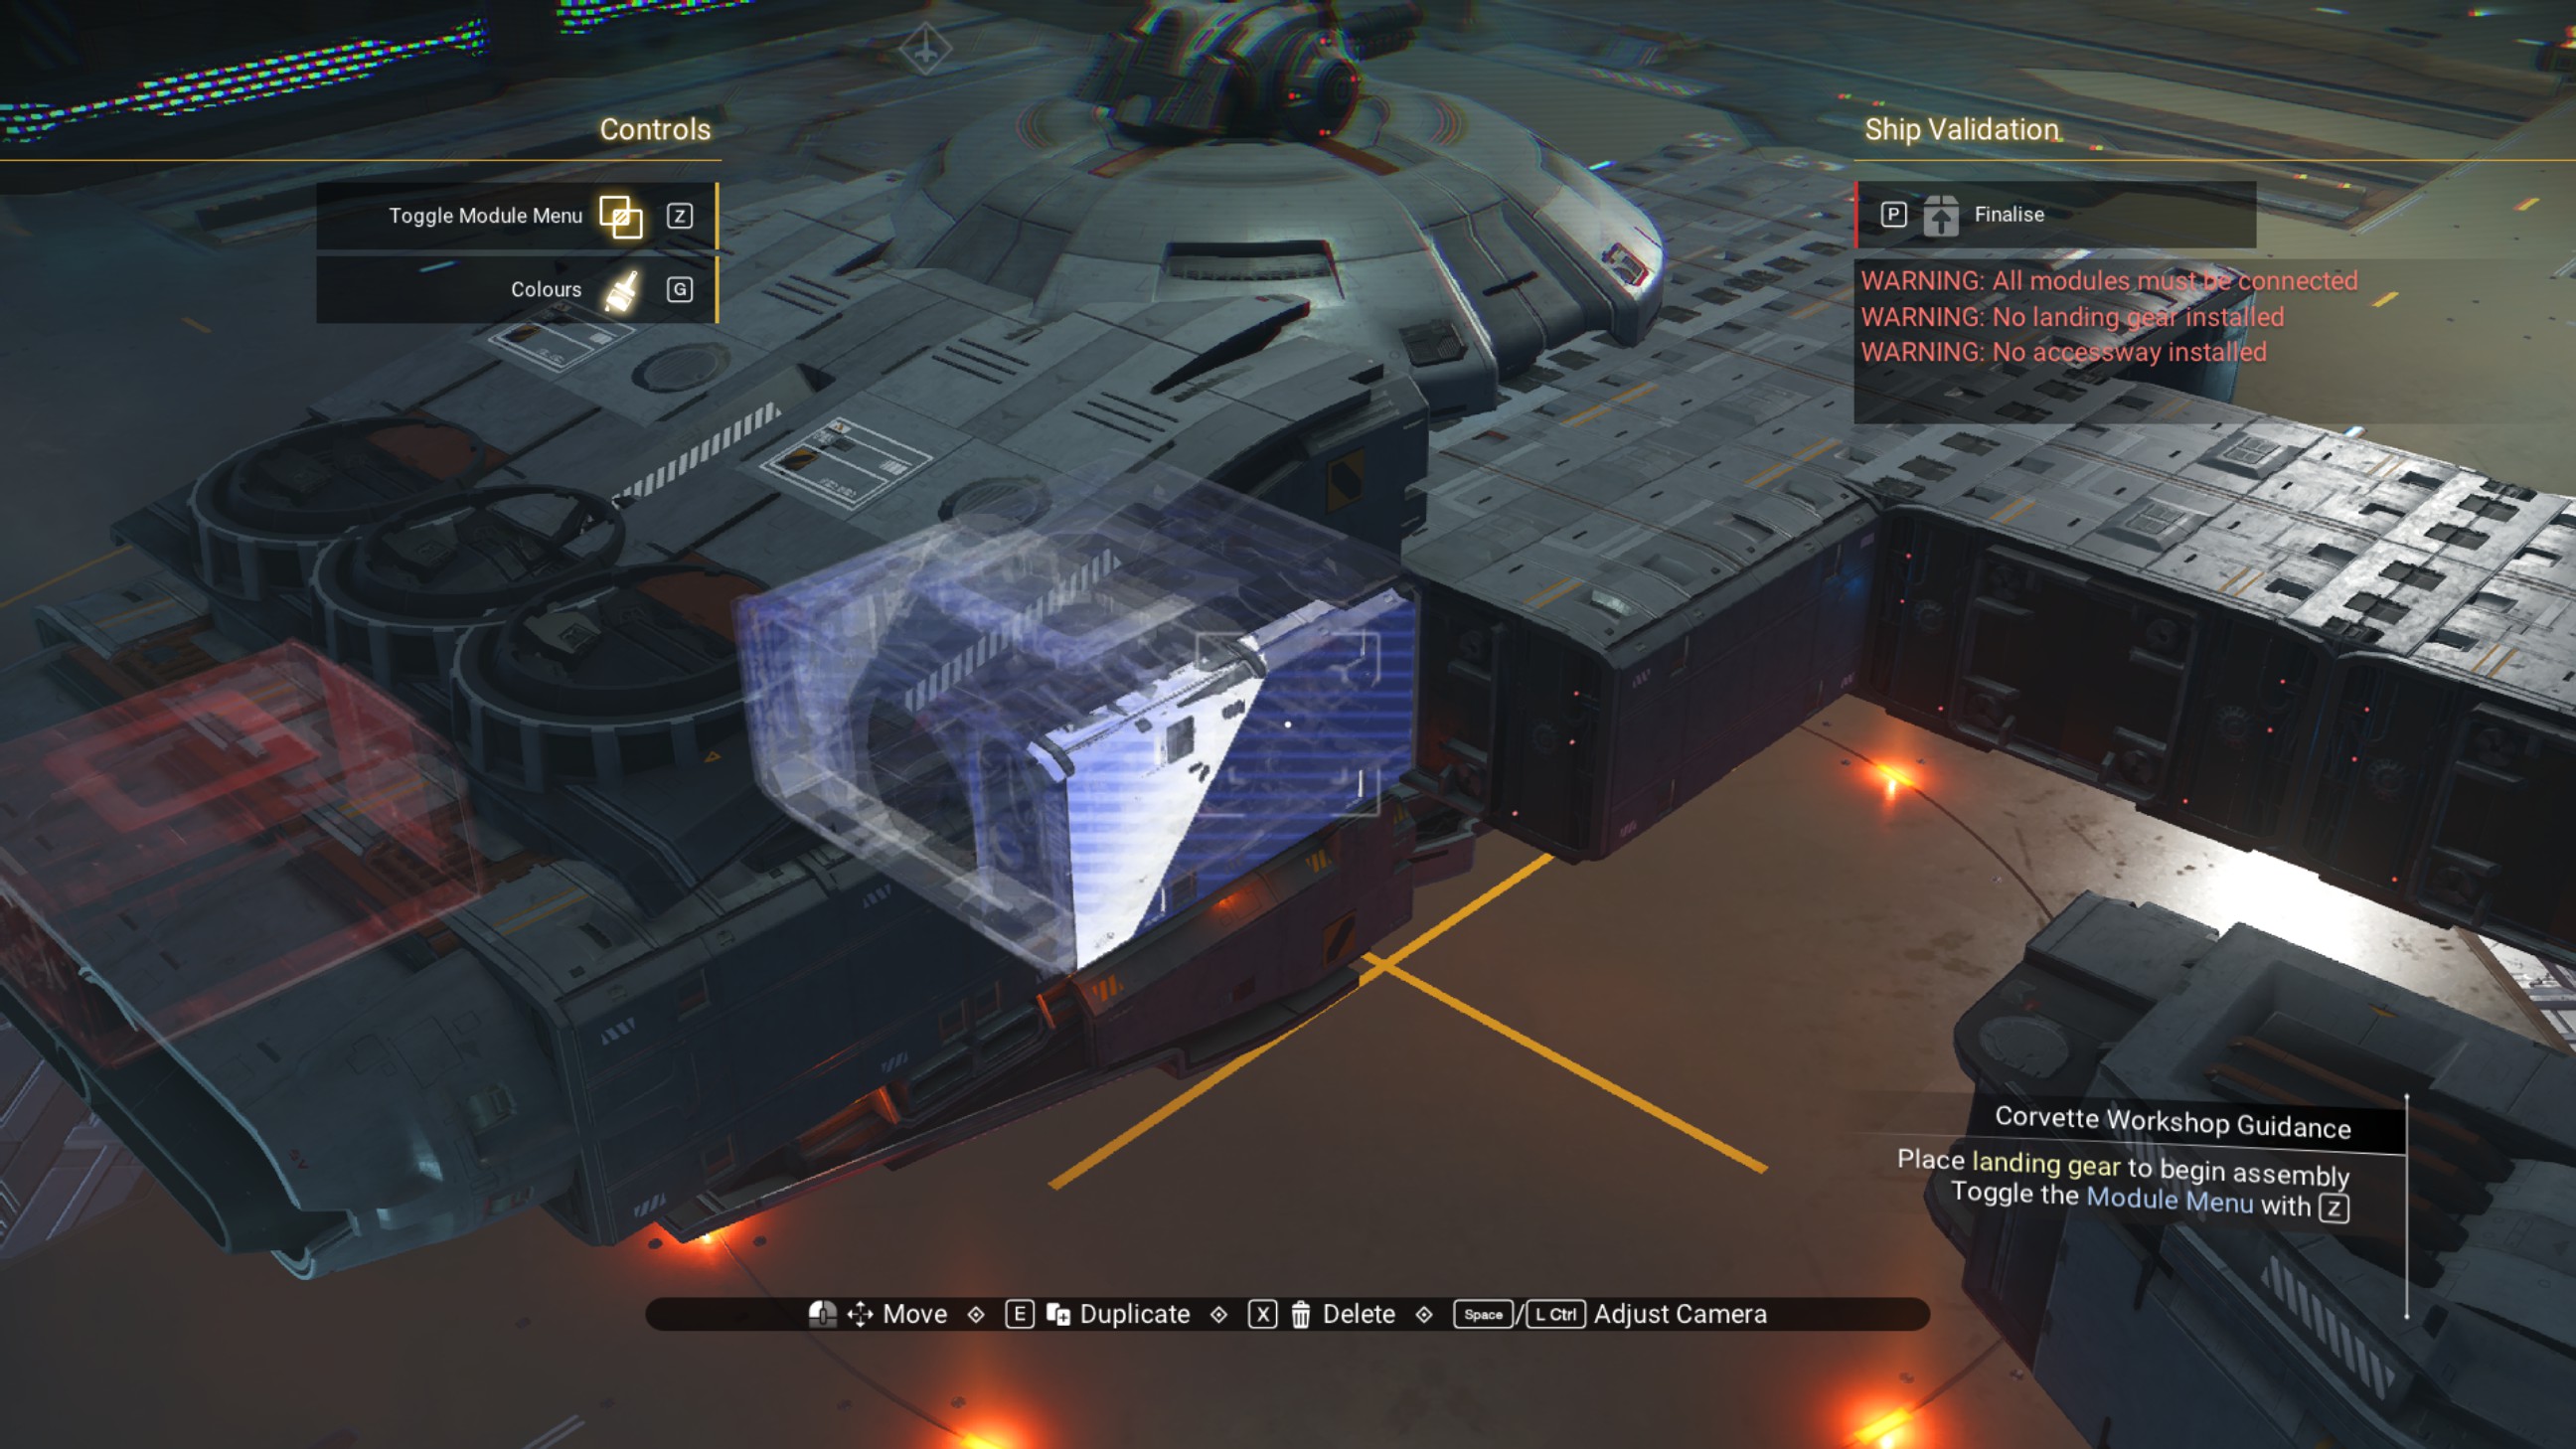
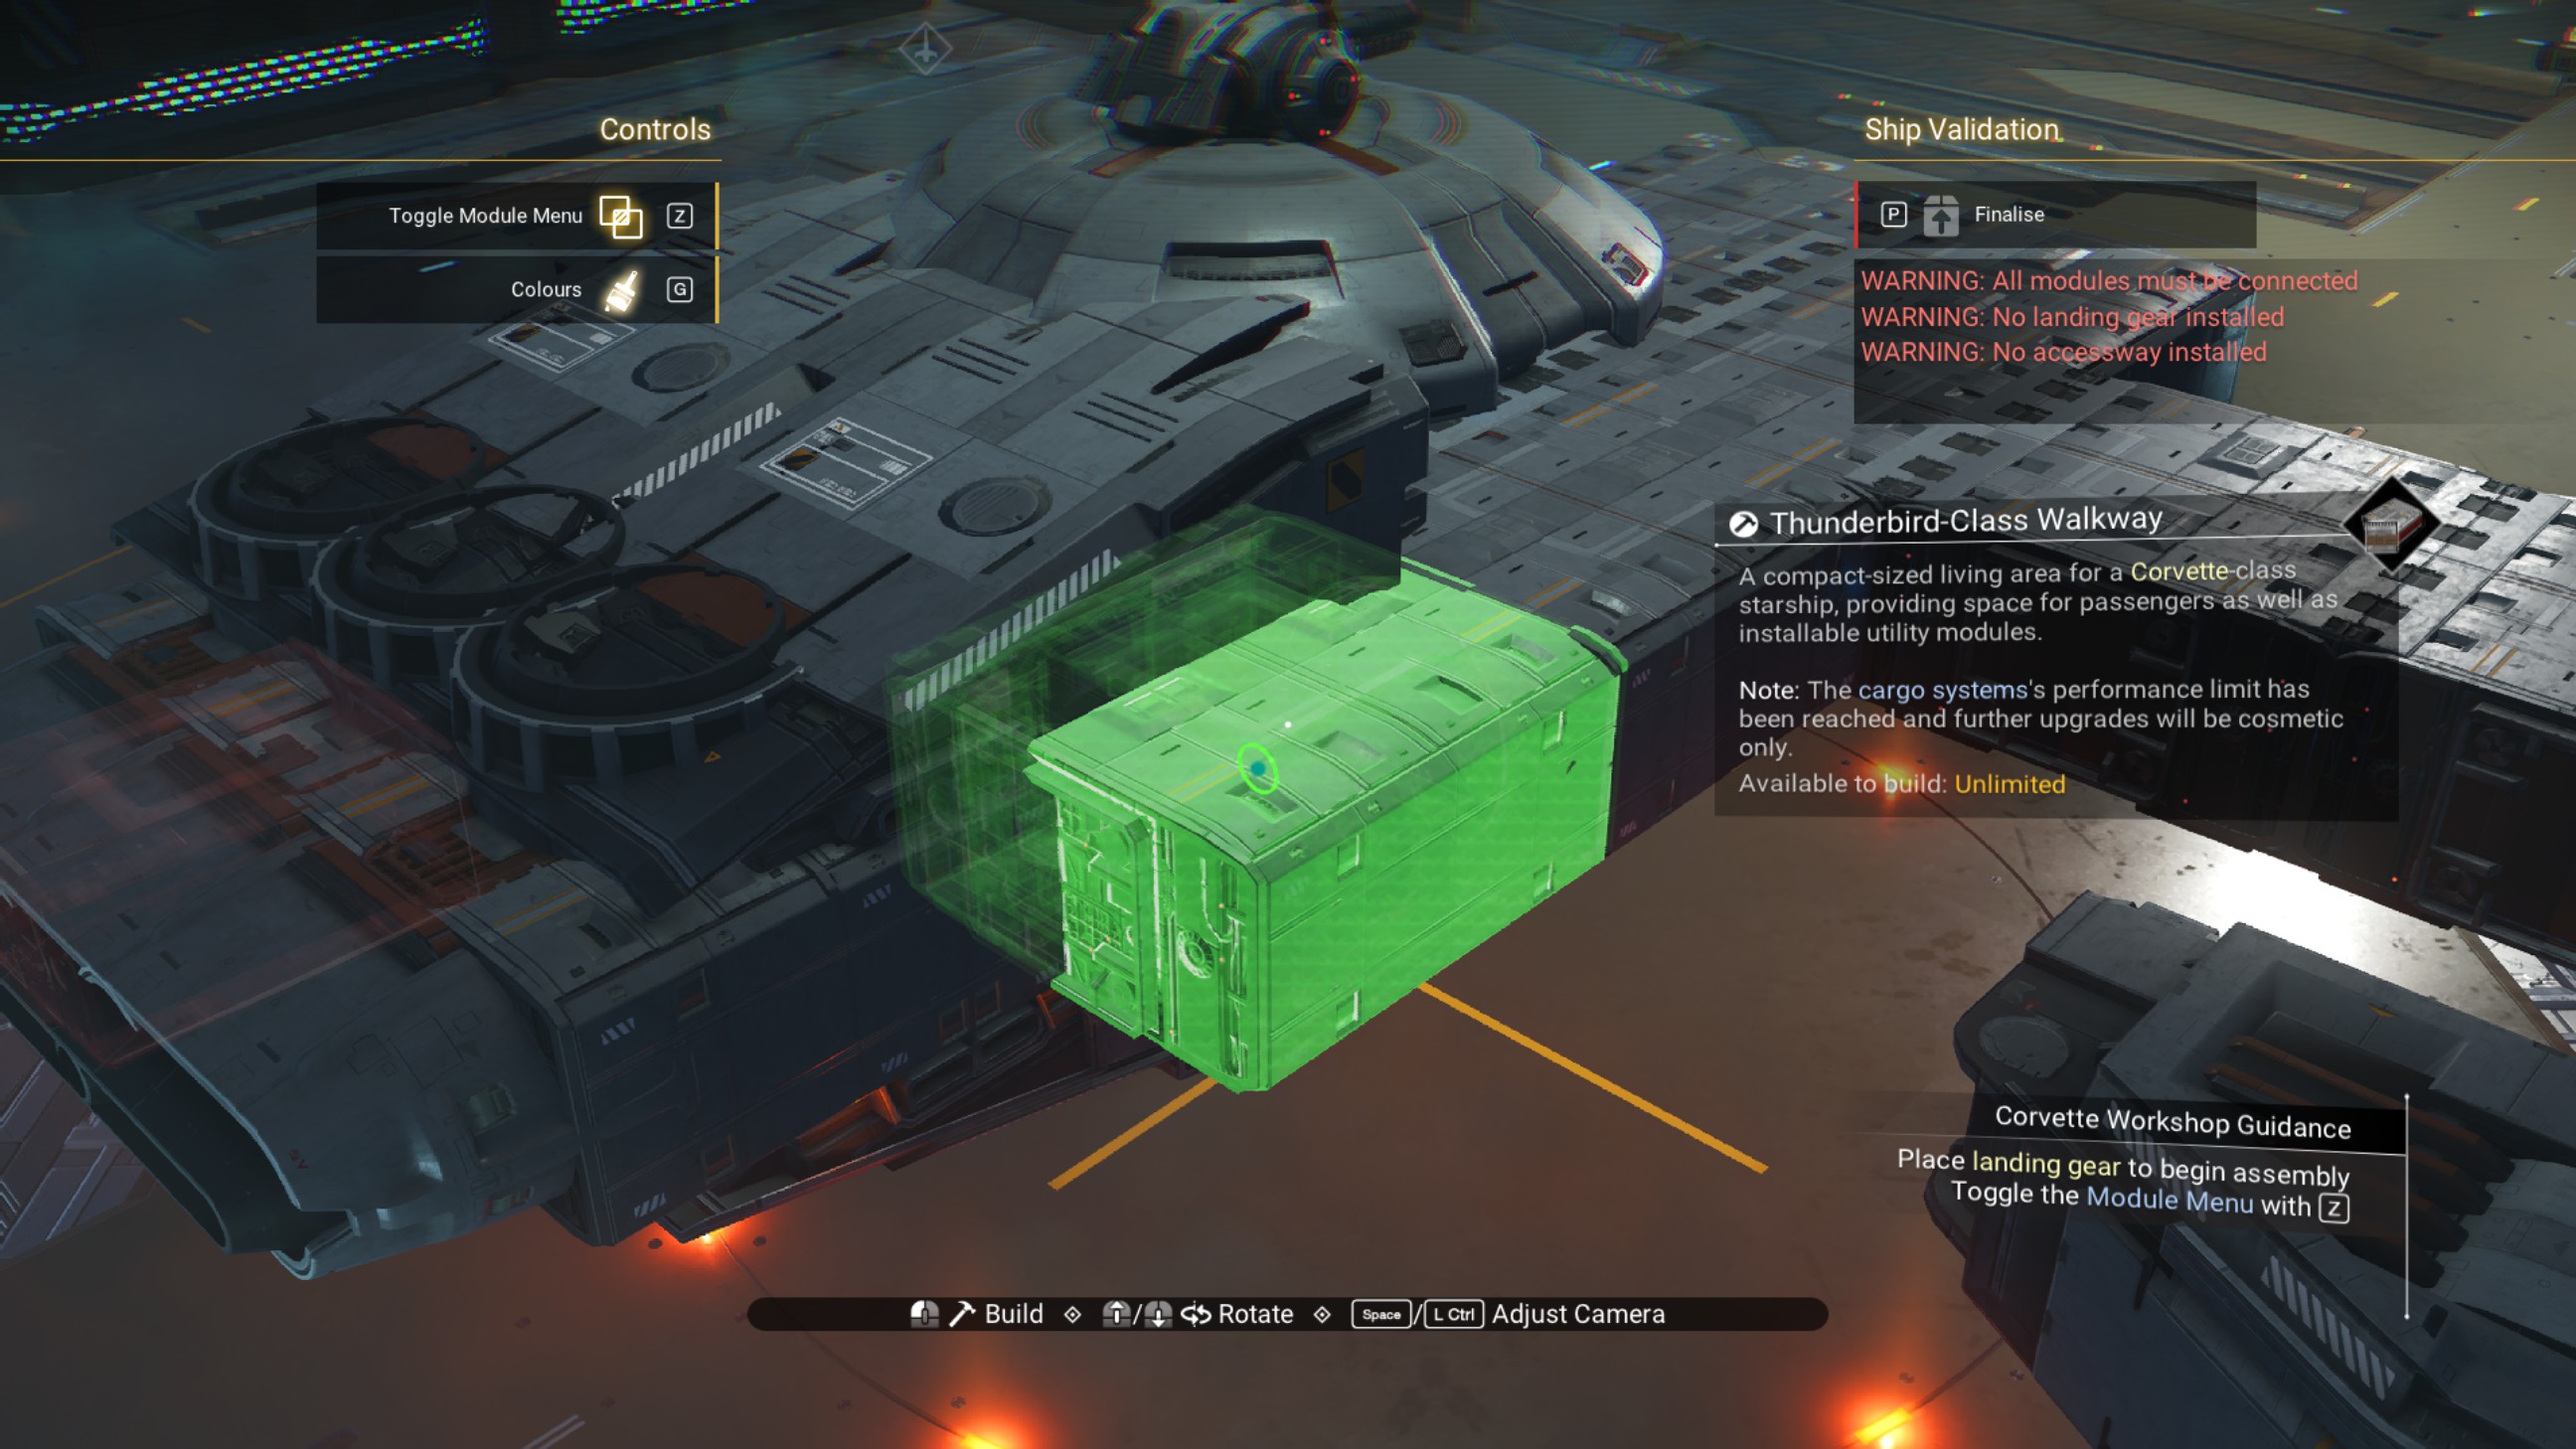
Place a vesper diffuser rim to connect the hull to the cockpit structure, then place a speedbird dome rim, as shown.
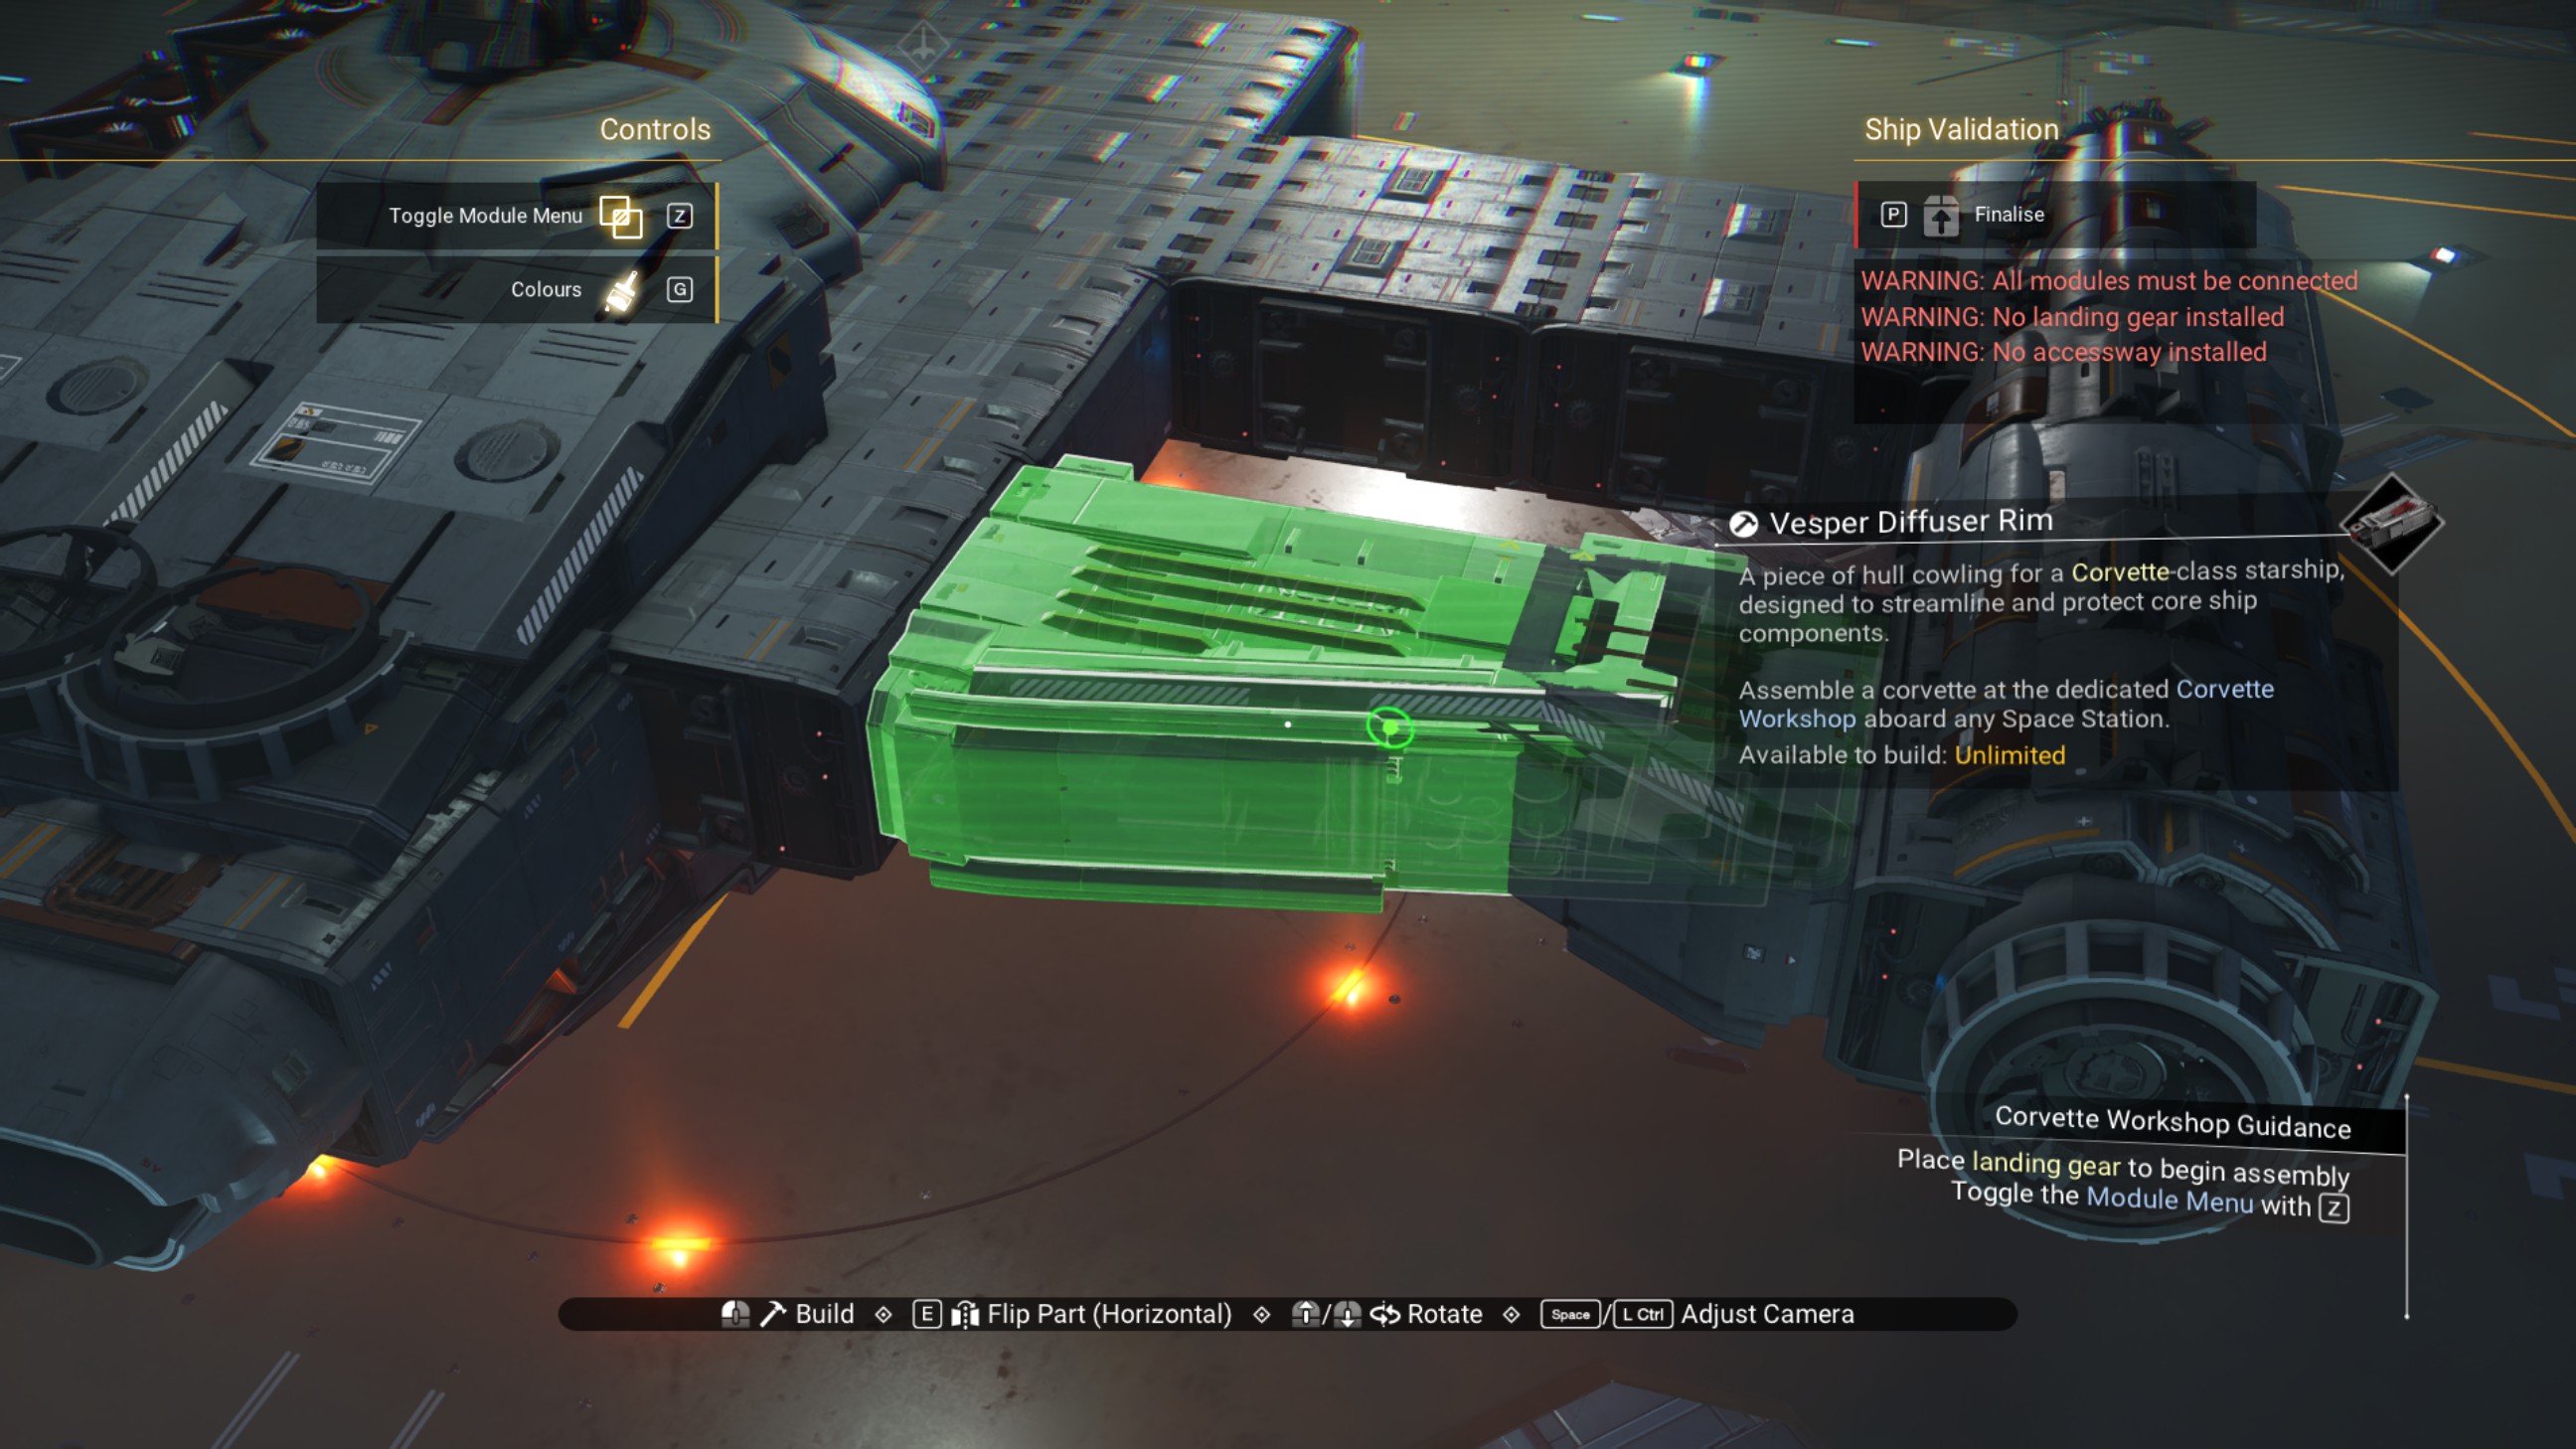
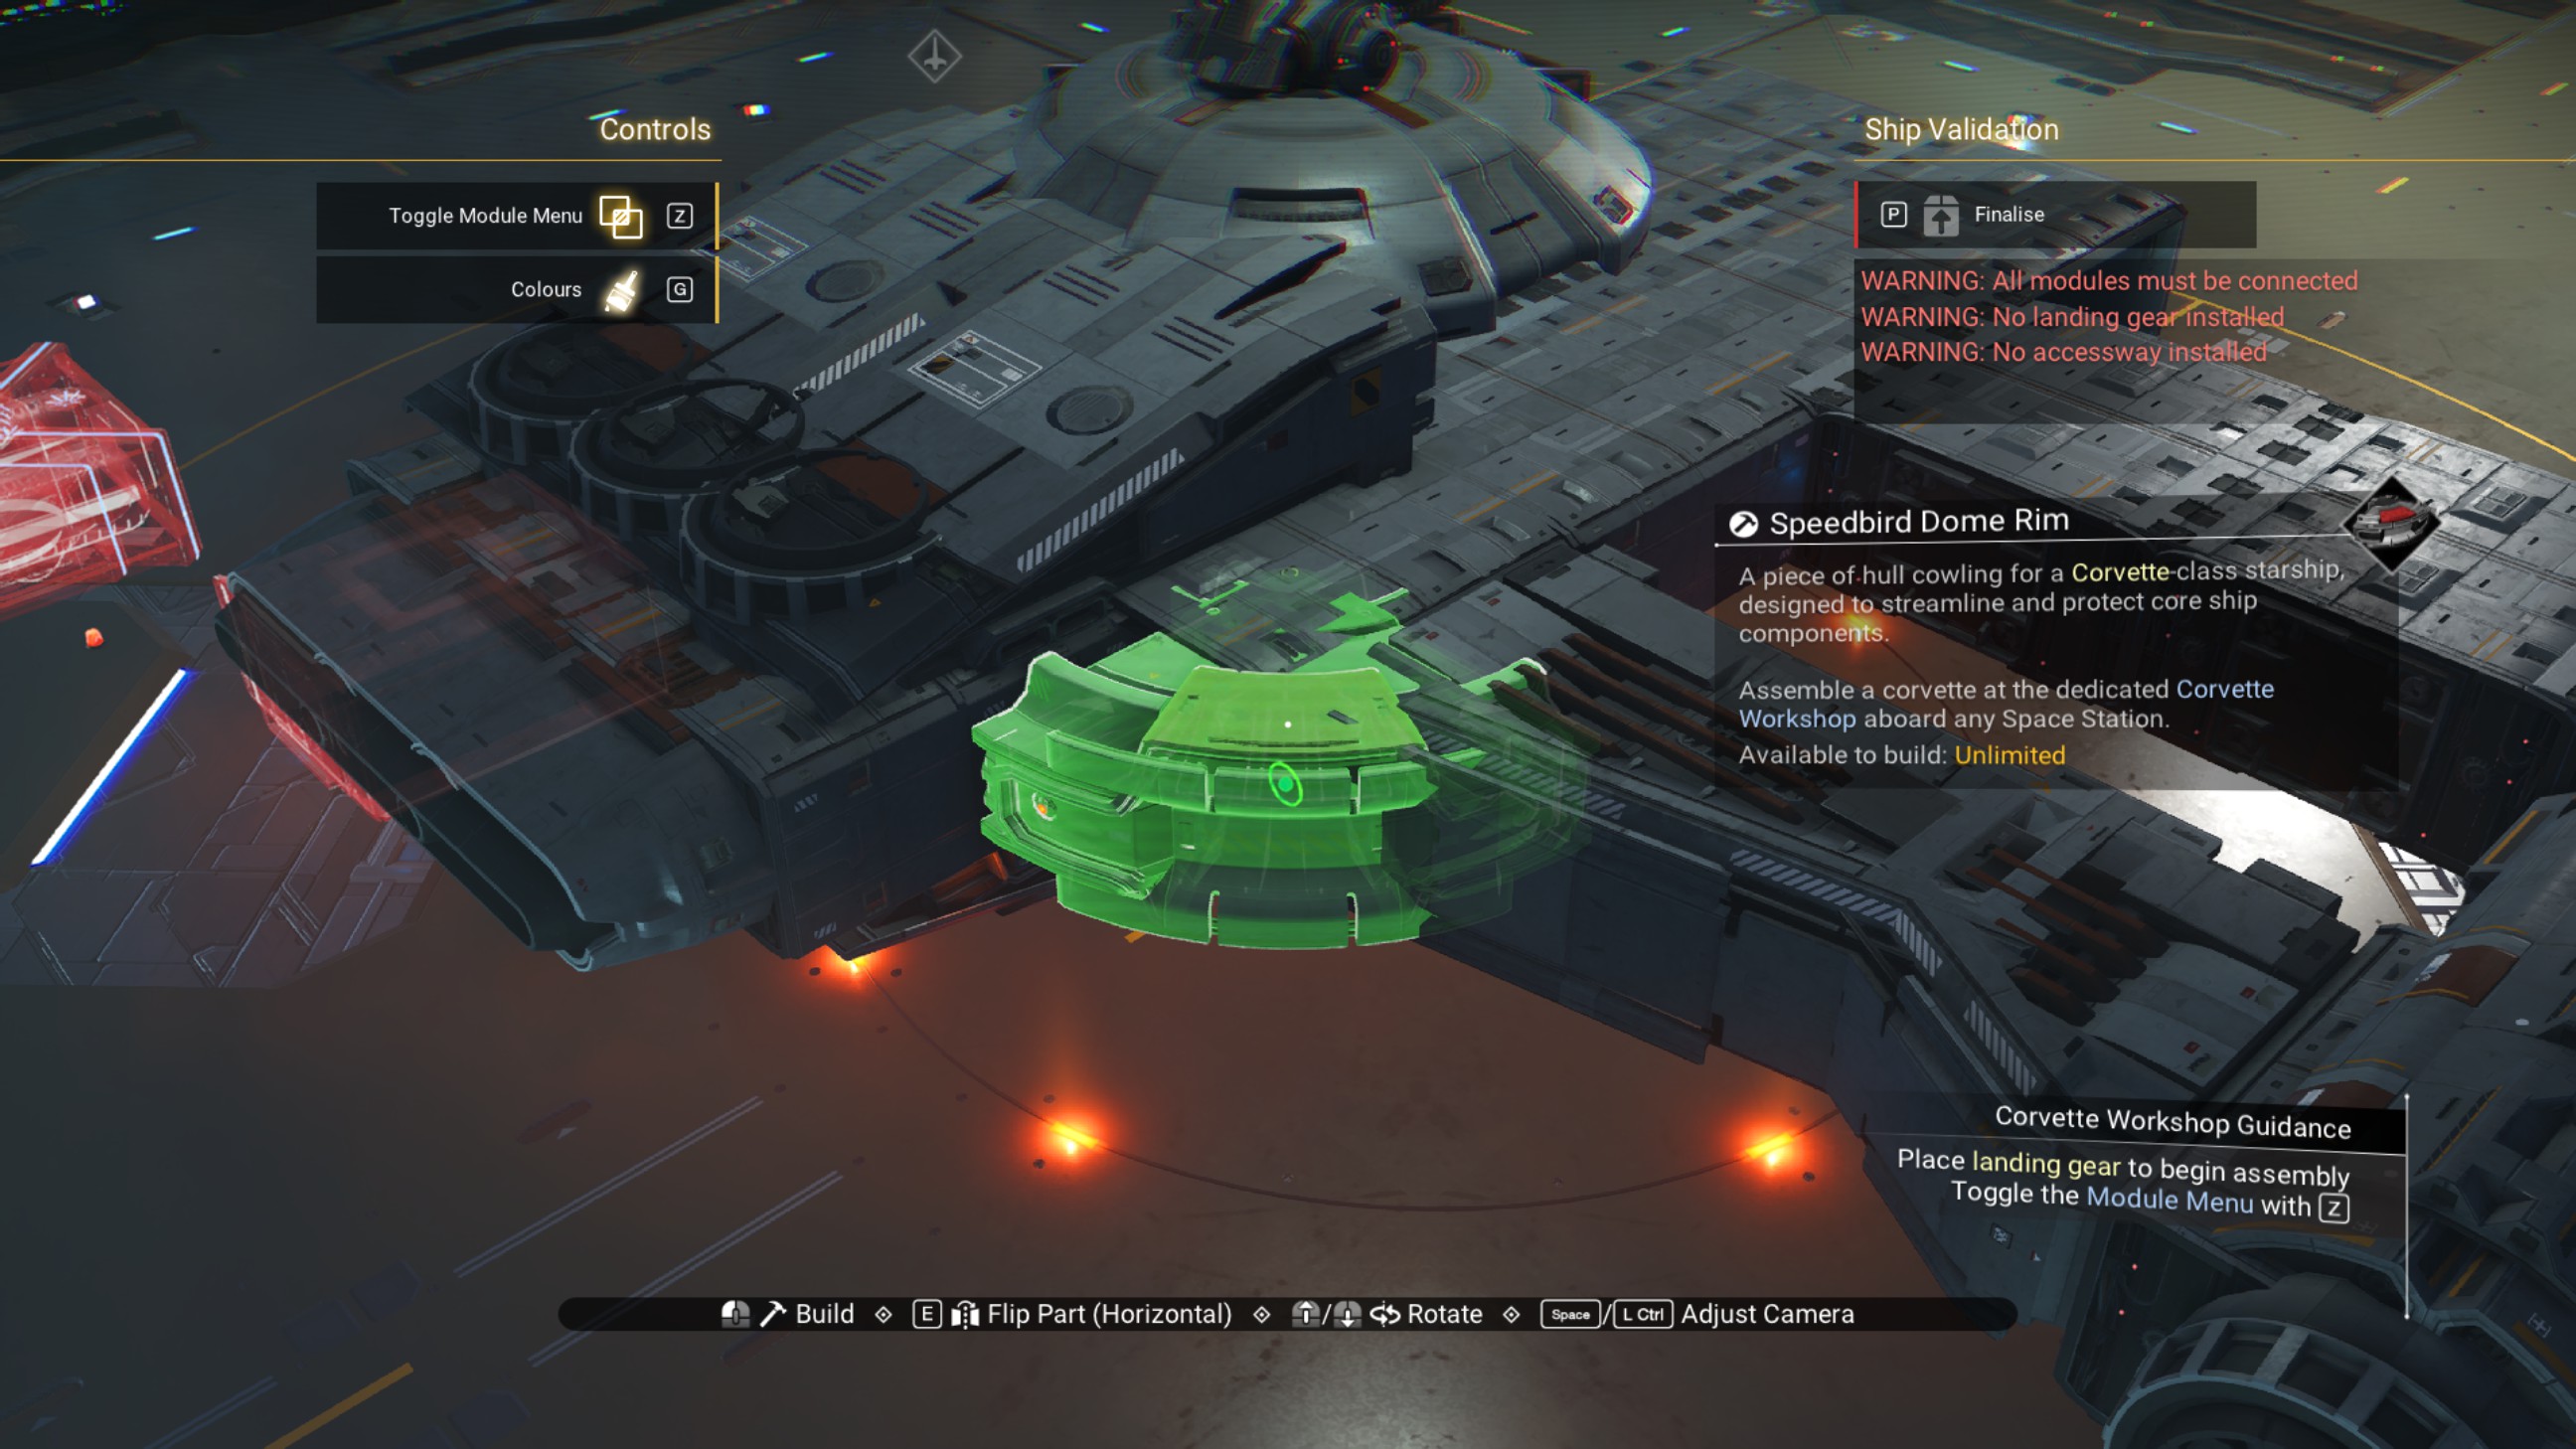
Place a speedbird fairing on the starboard side of the center structure, as shown.
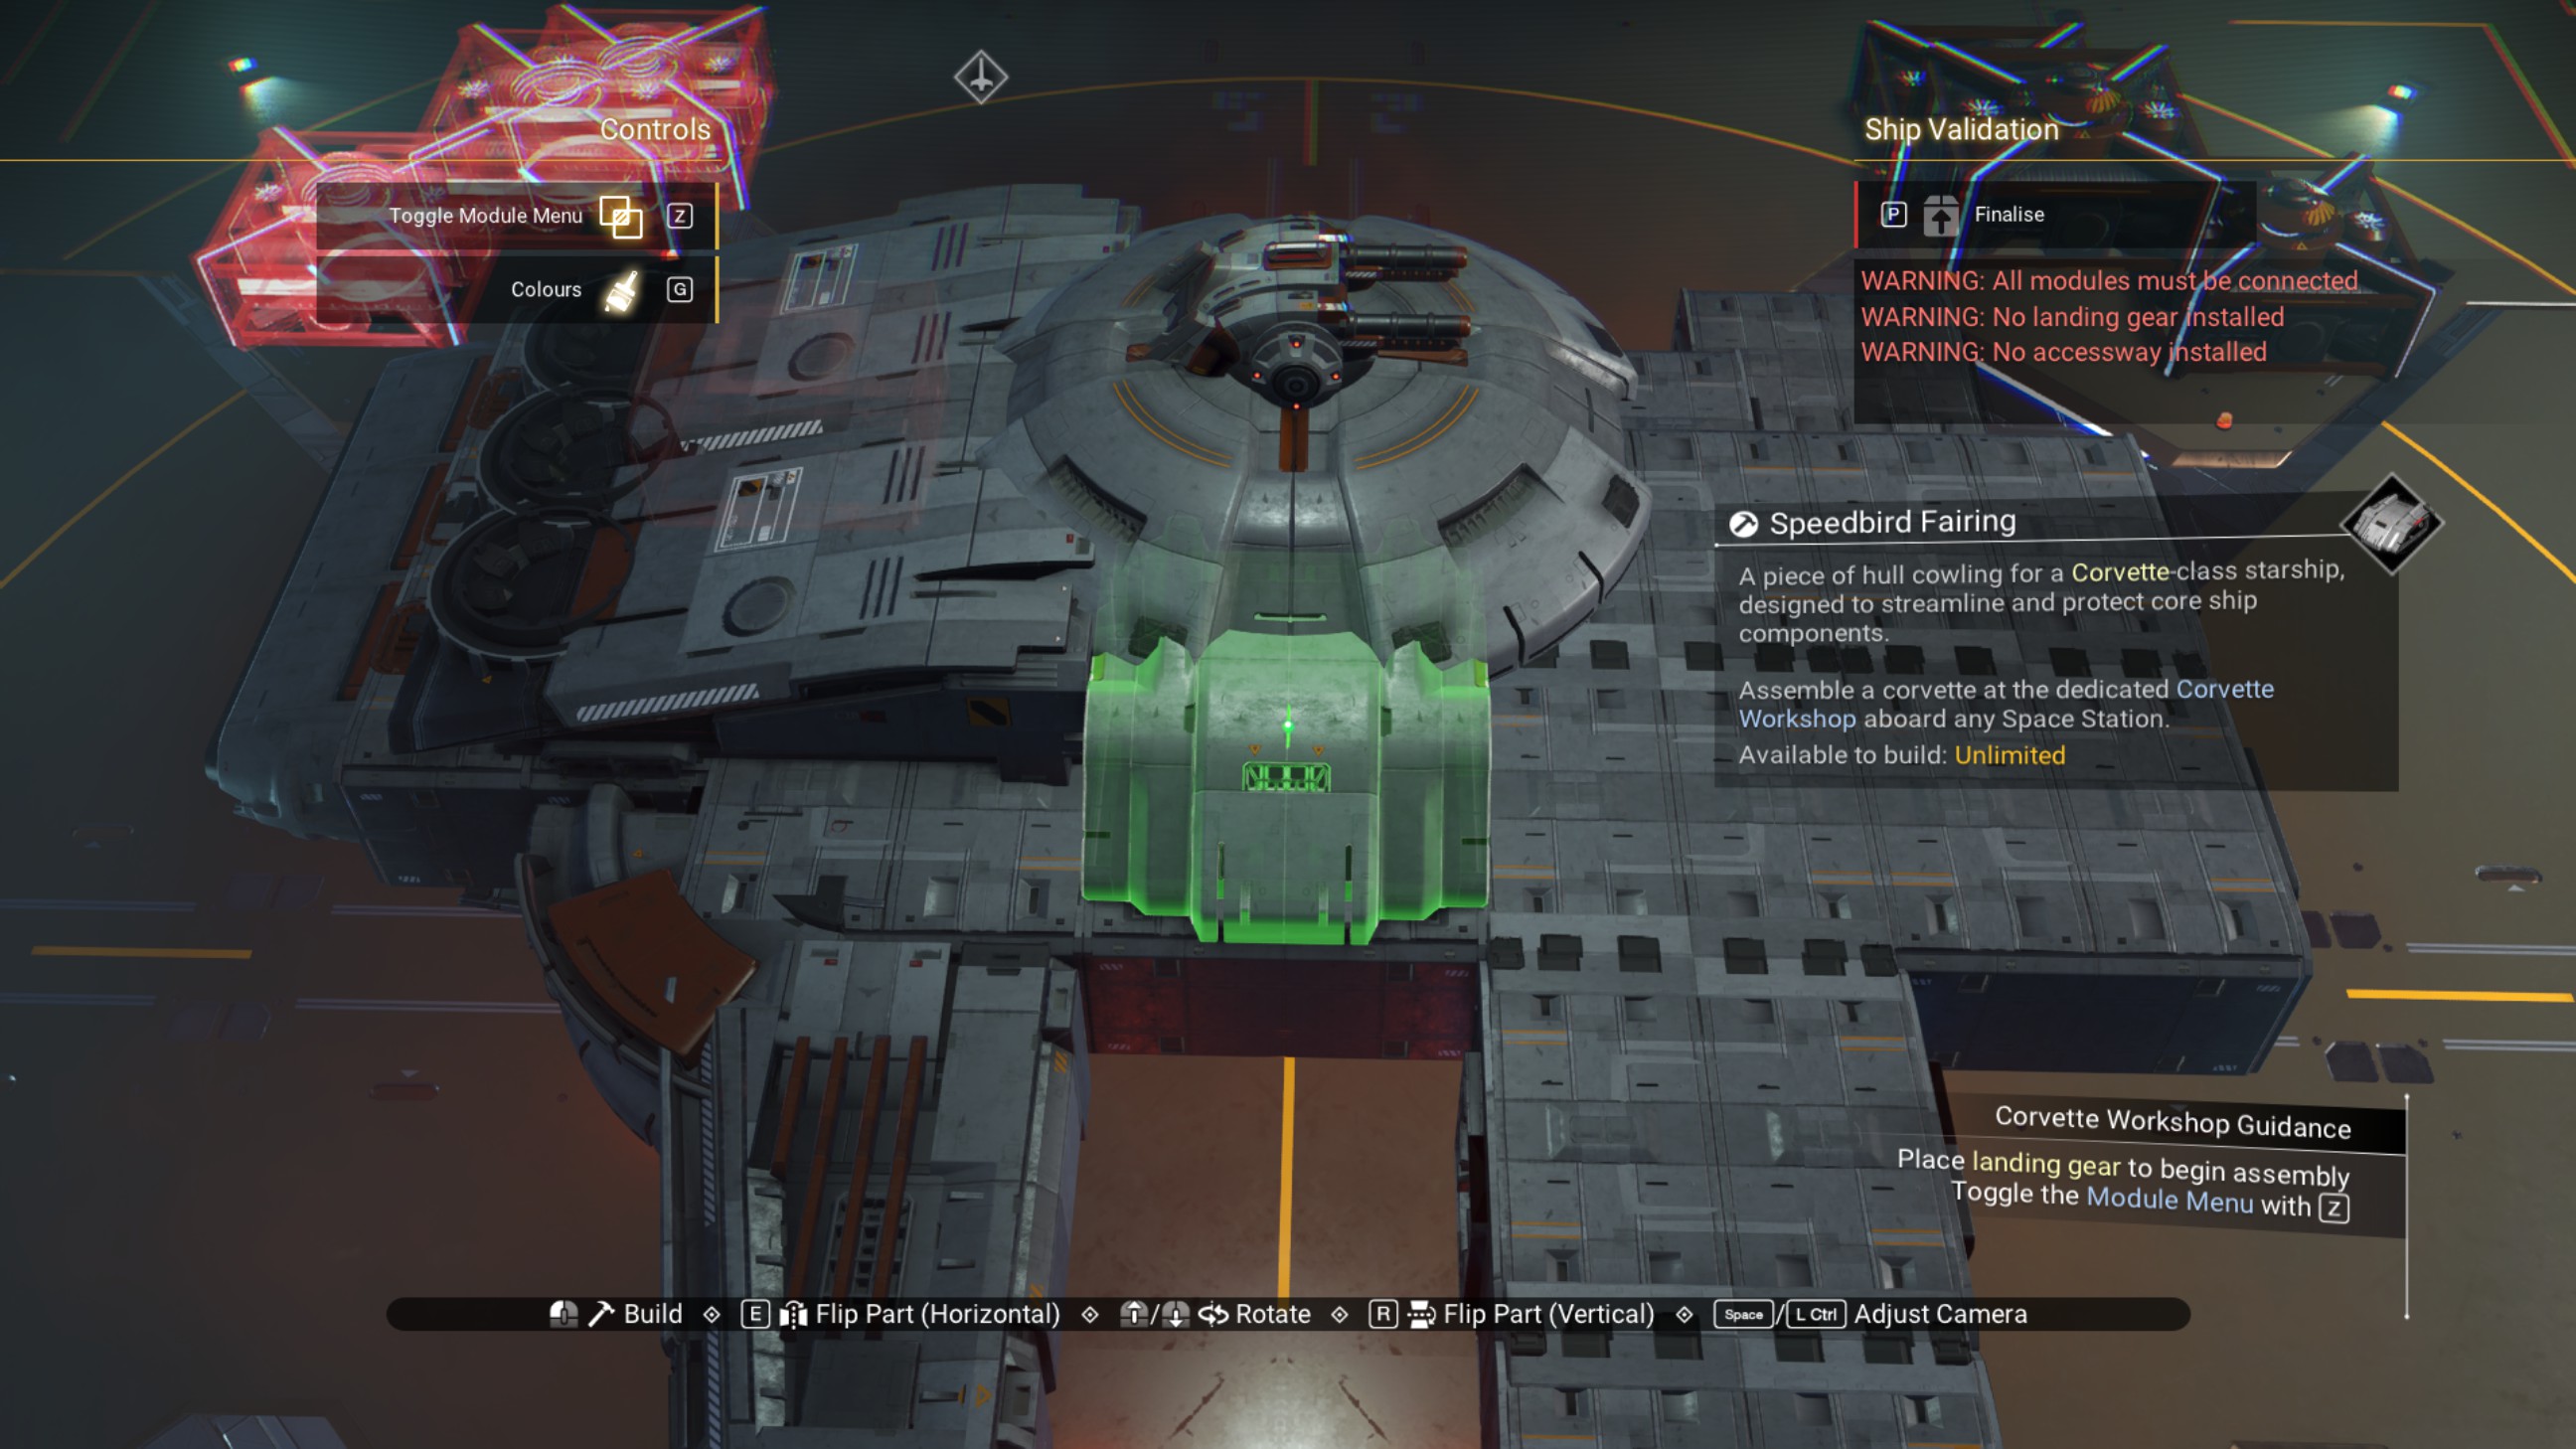
Continue around the center structure, placing speedbird fairings and speedbird dome sections, as shown.
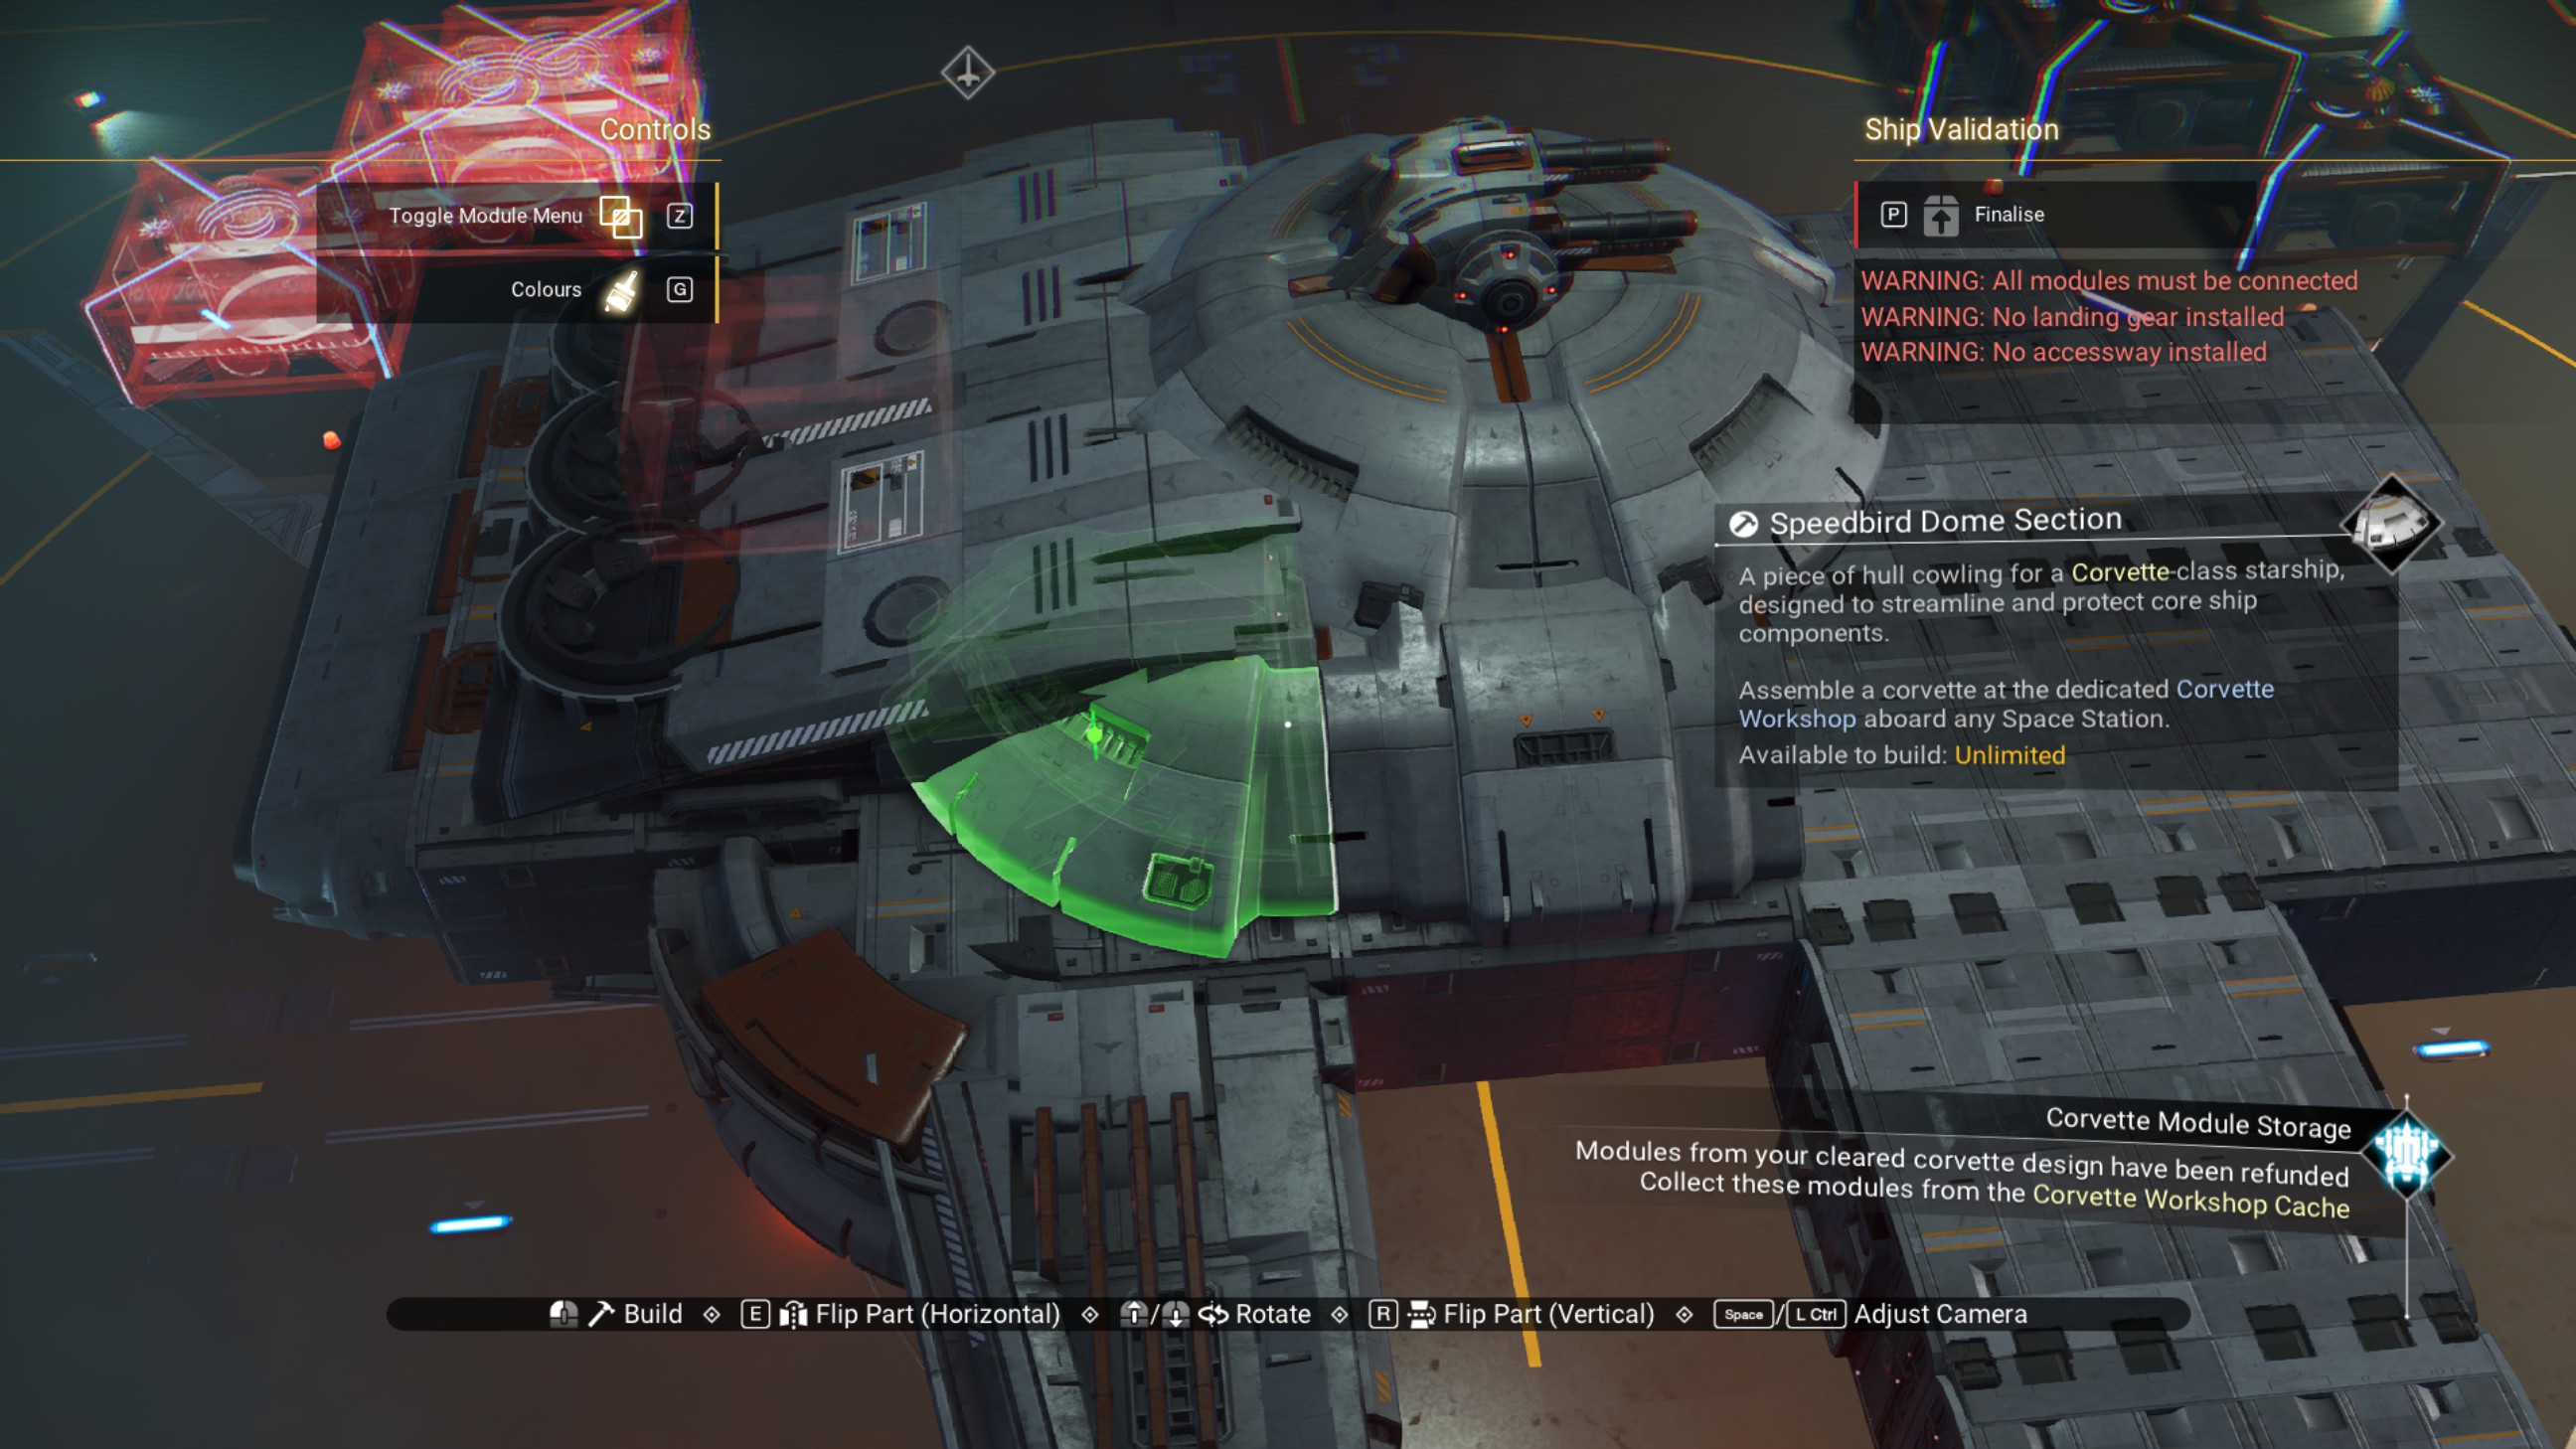
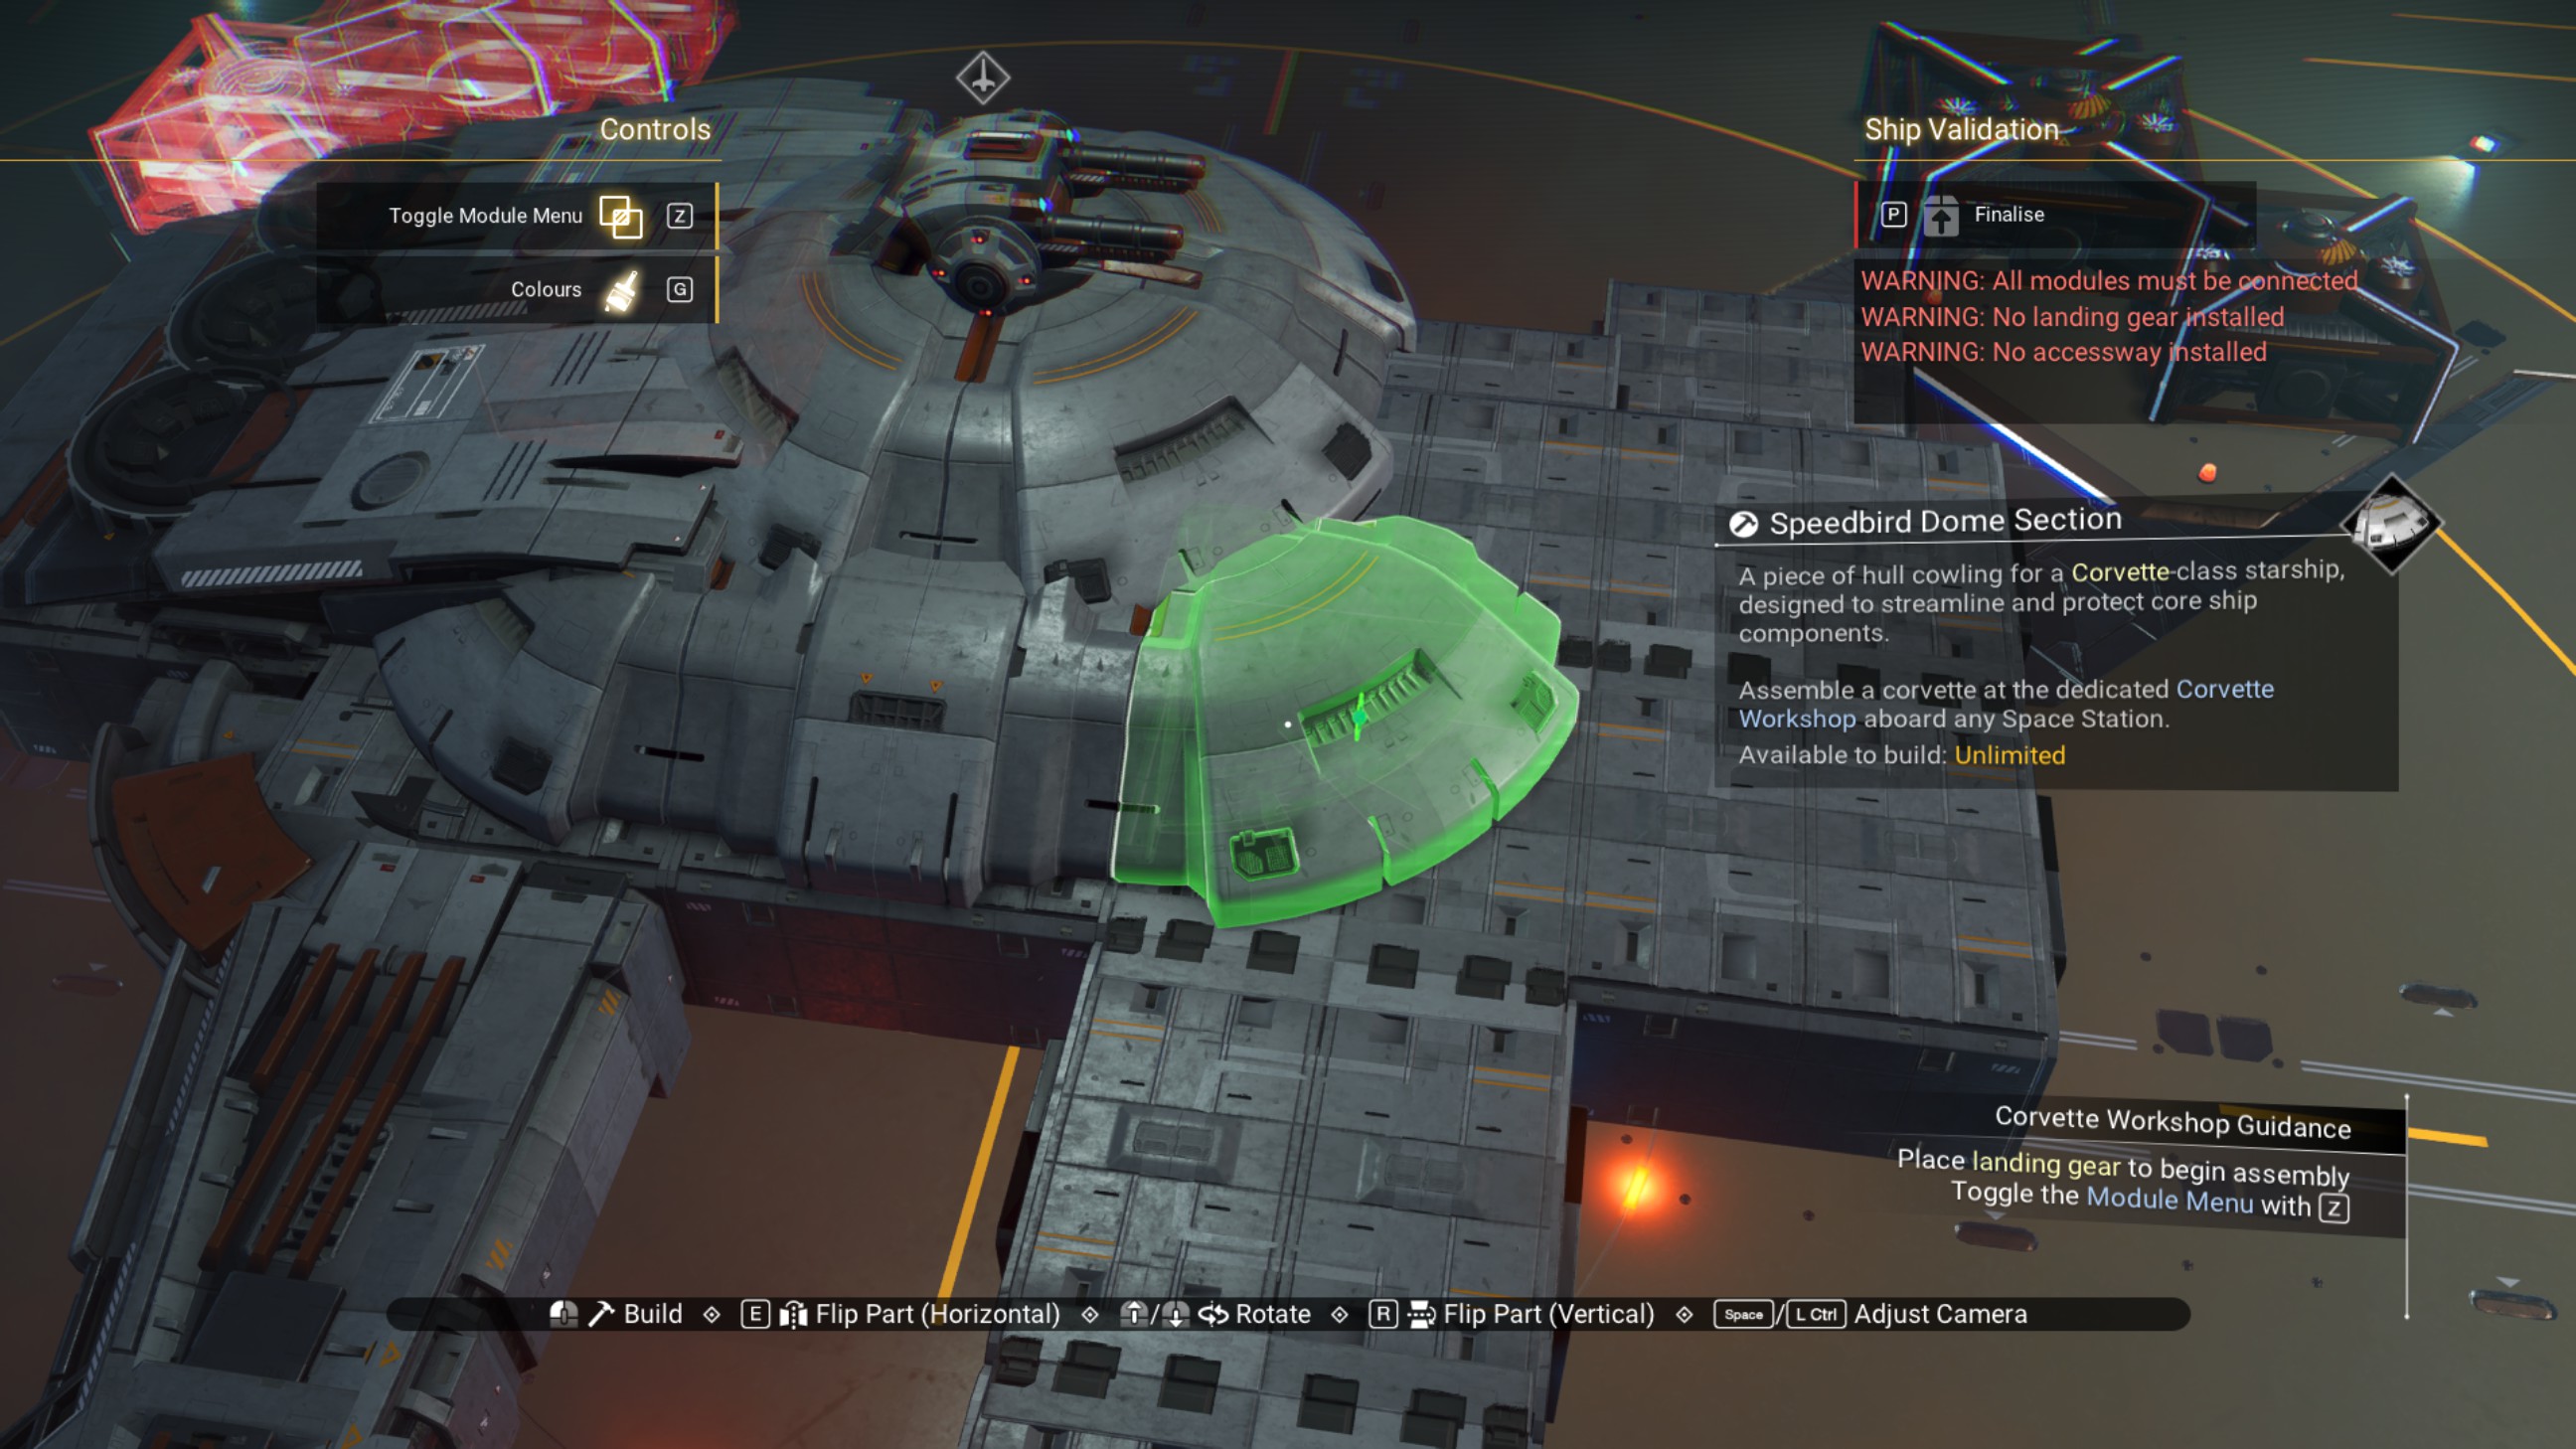
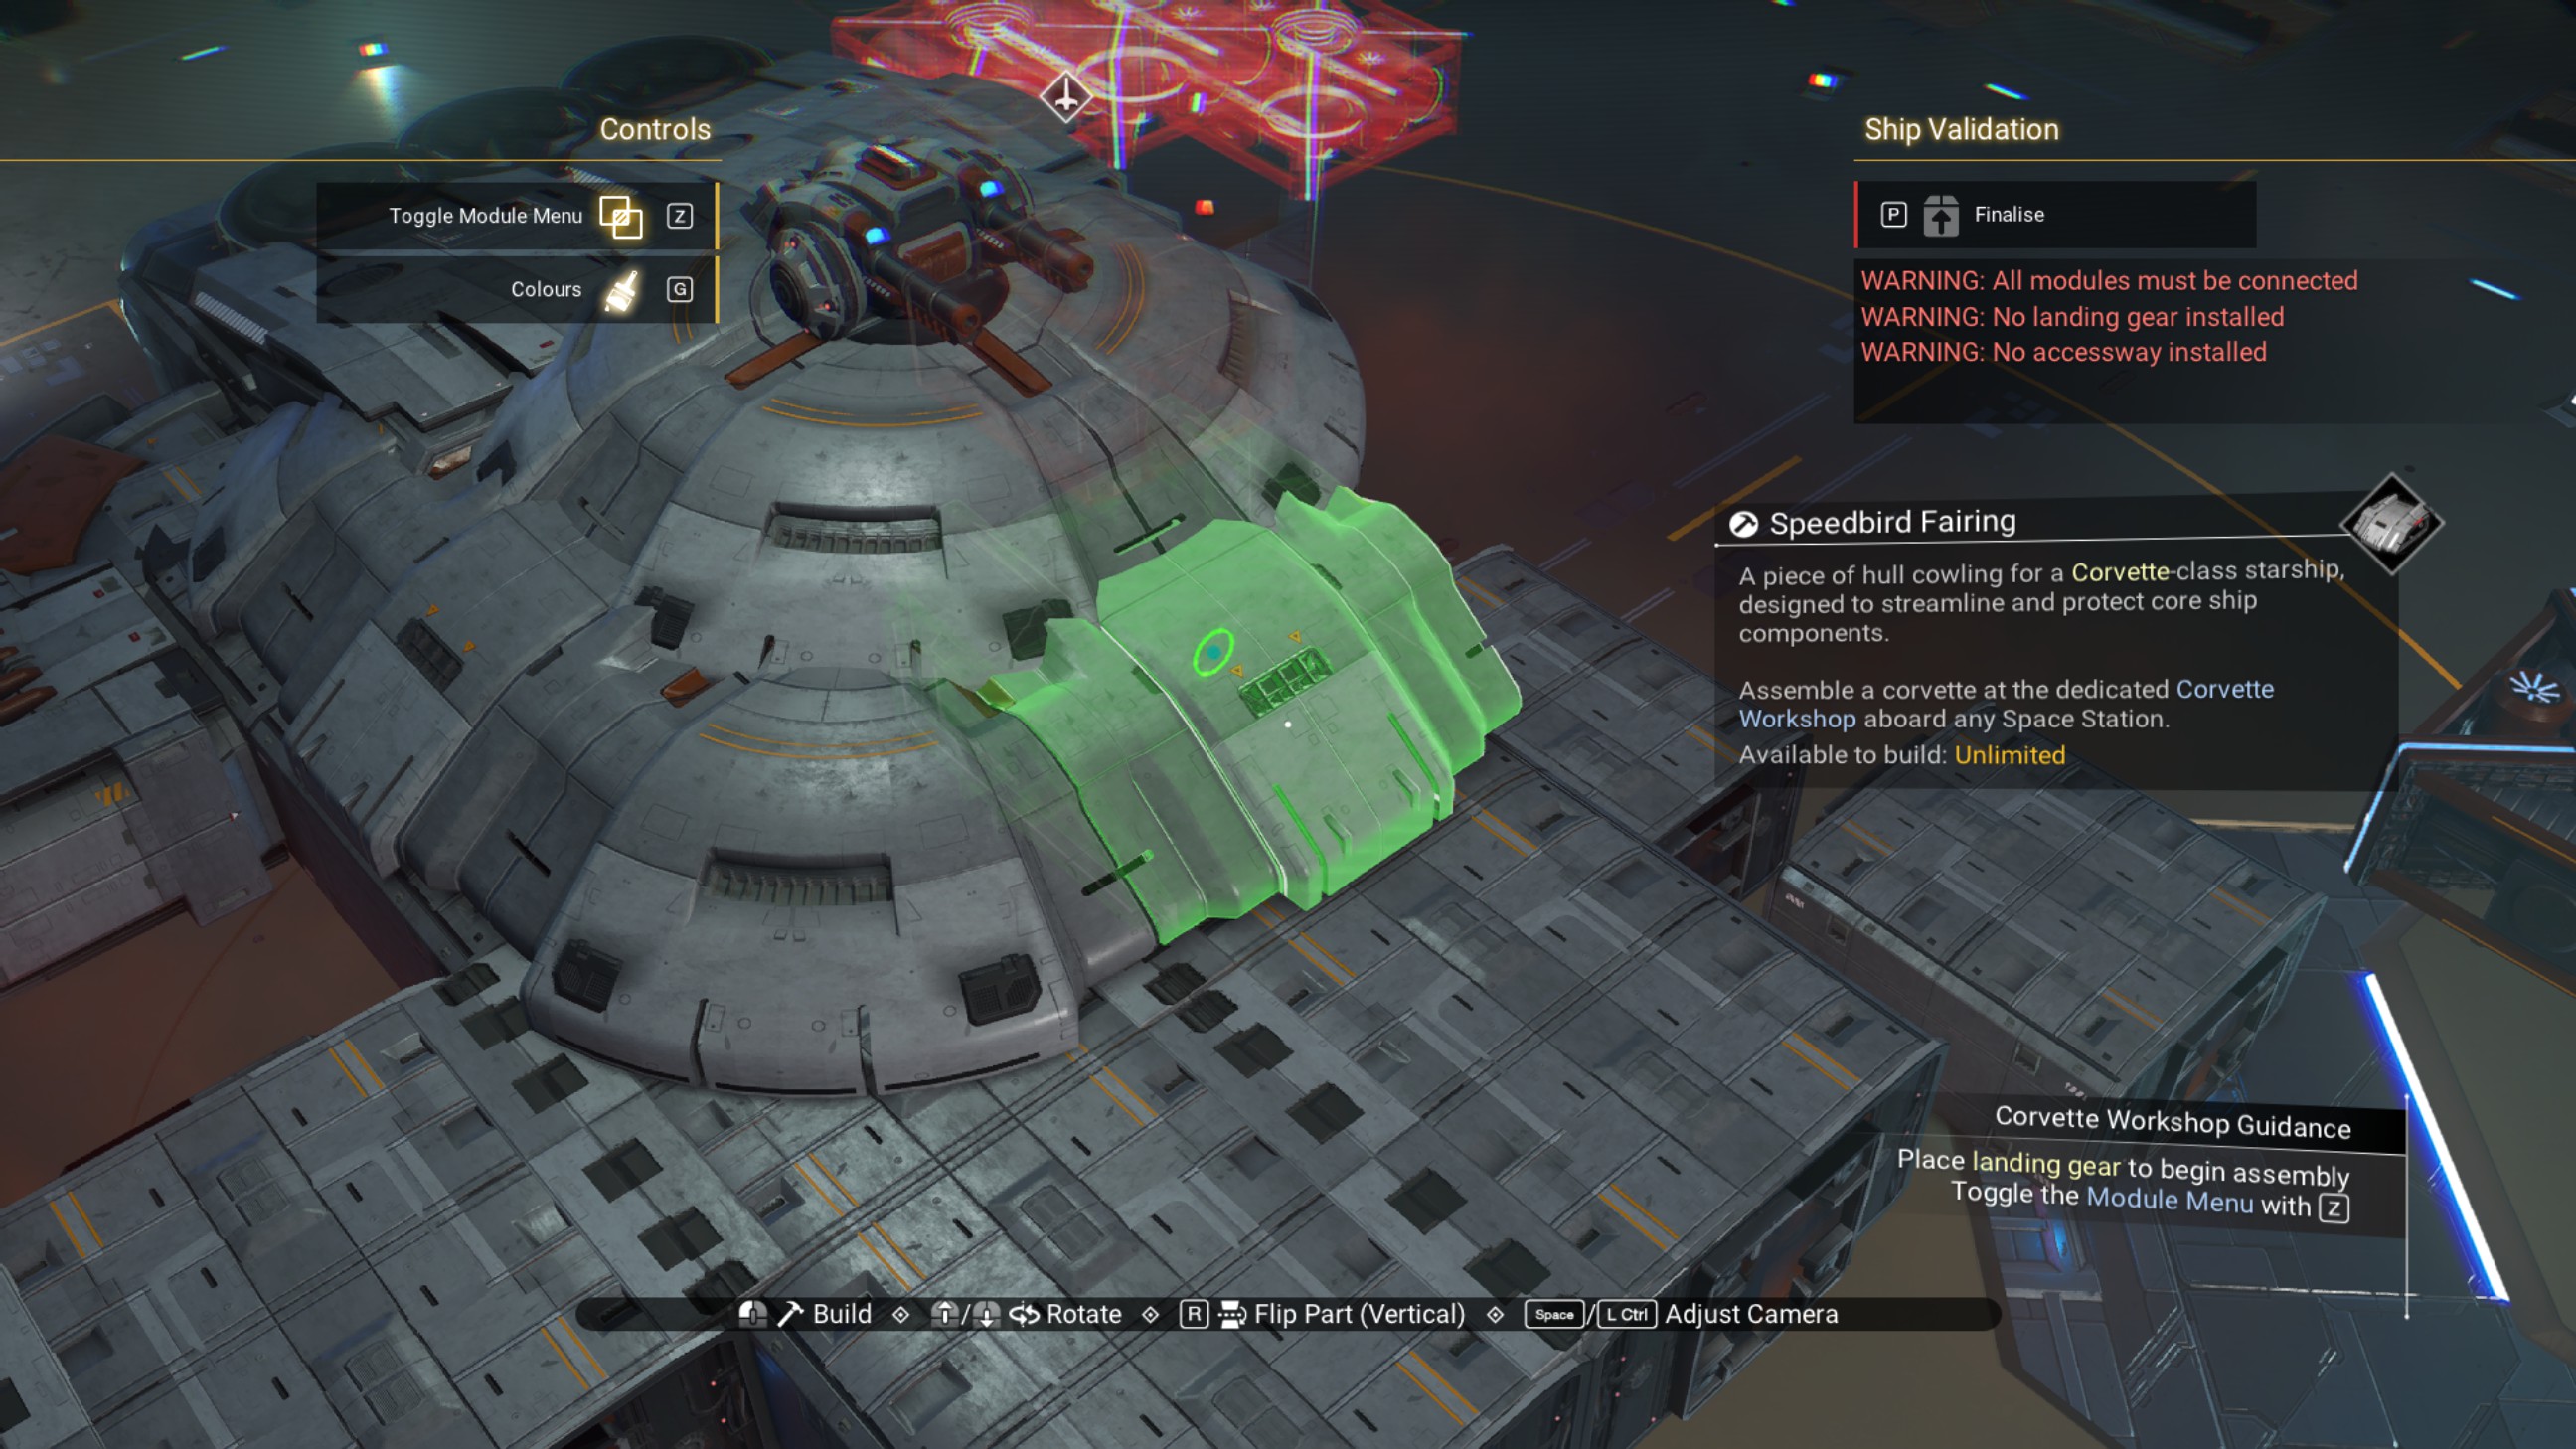
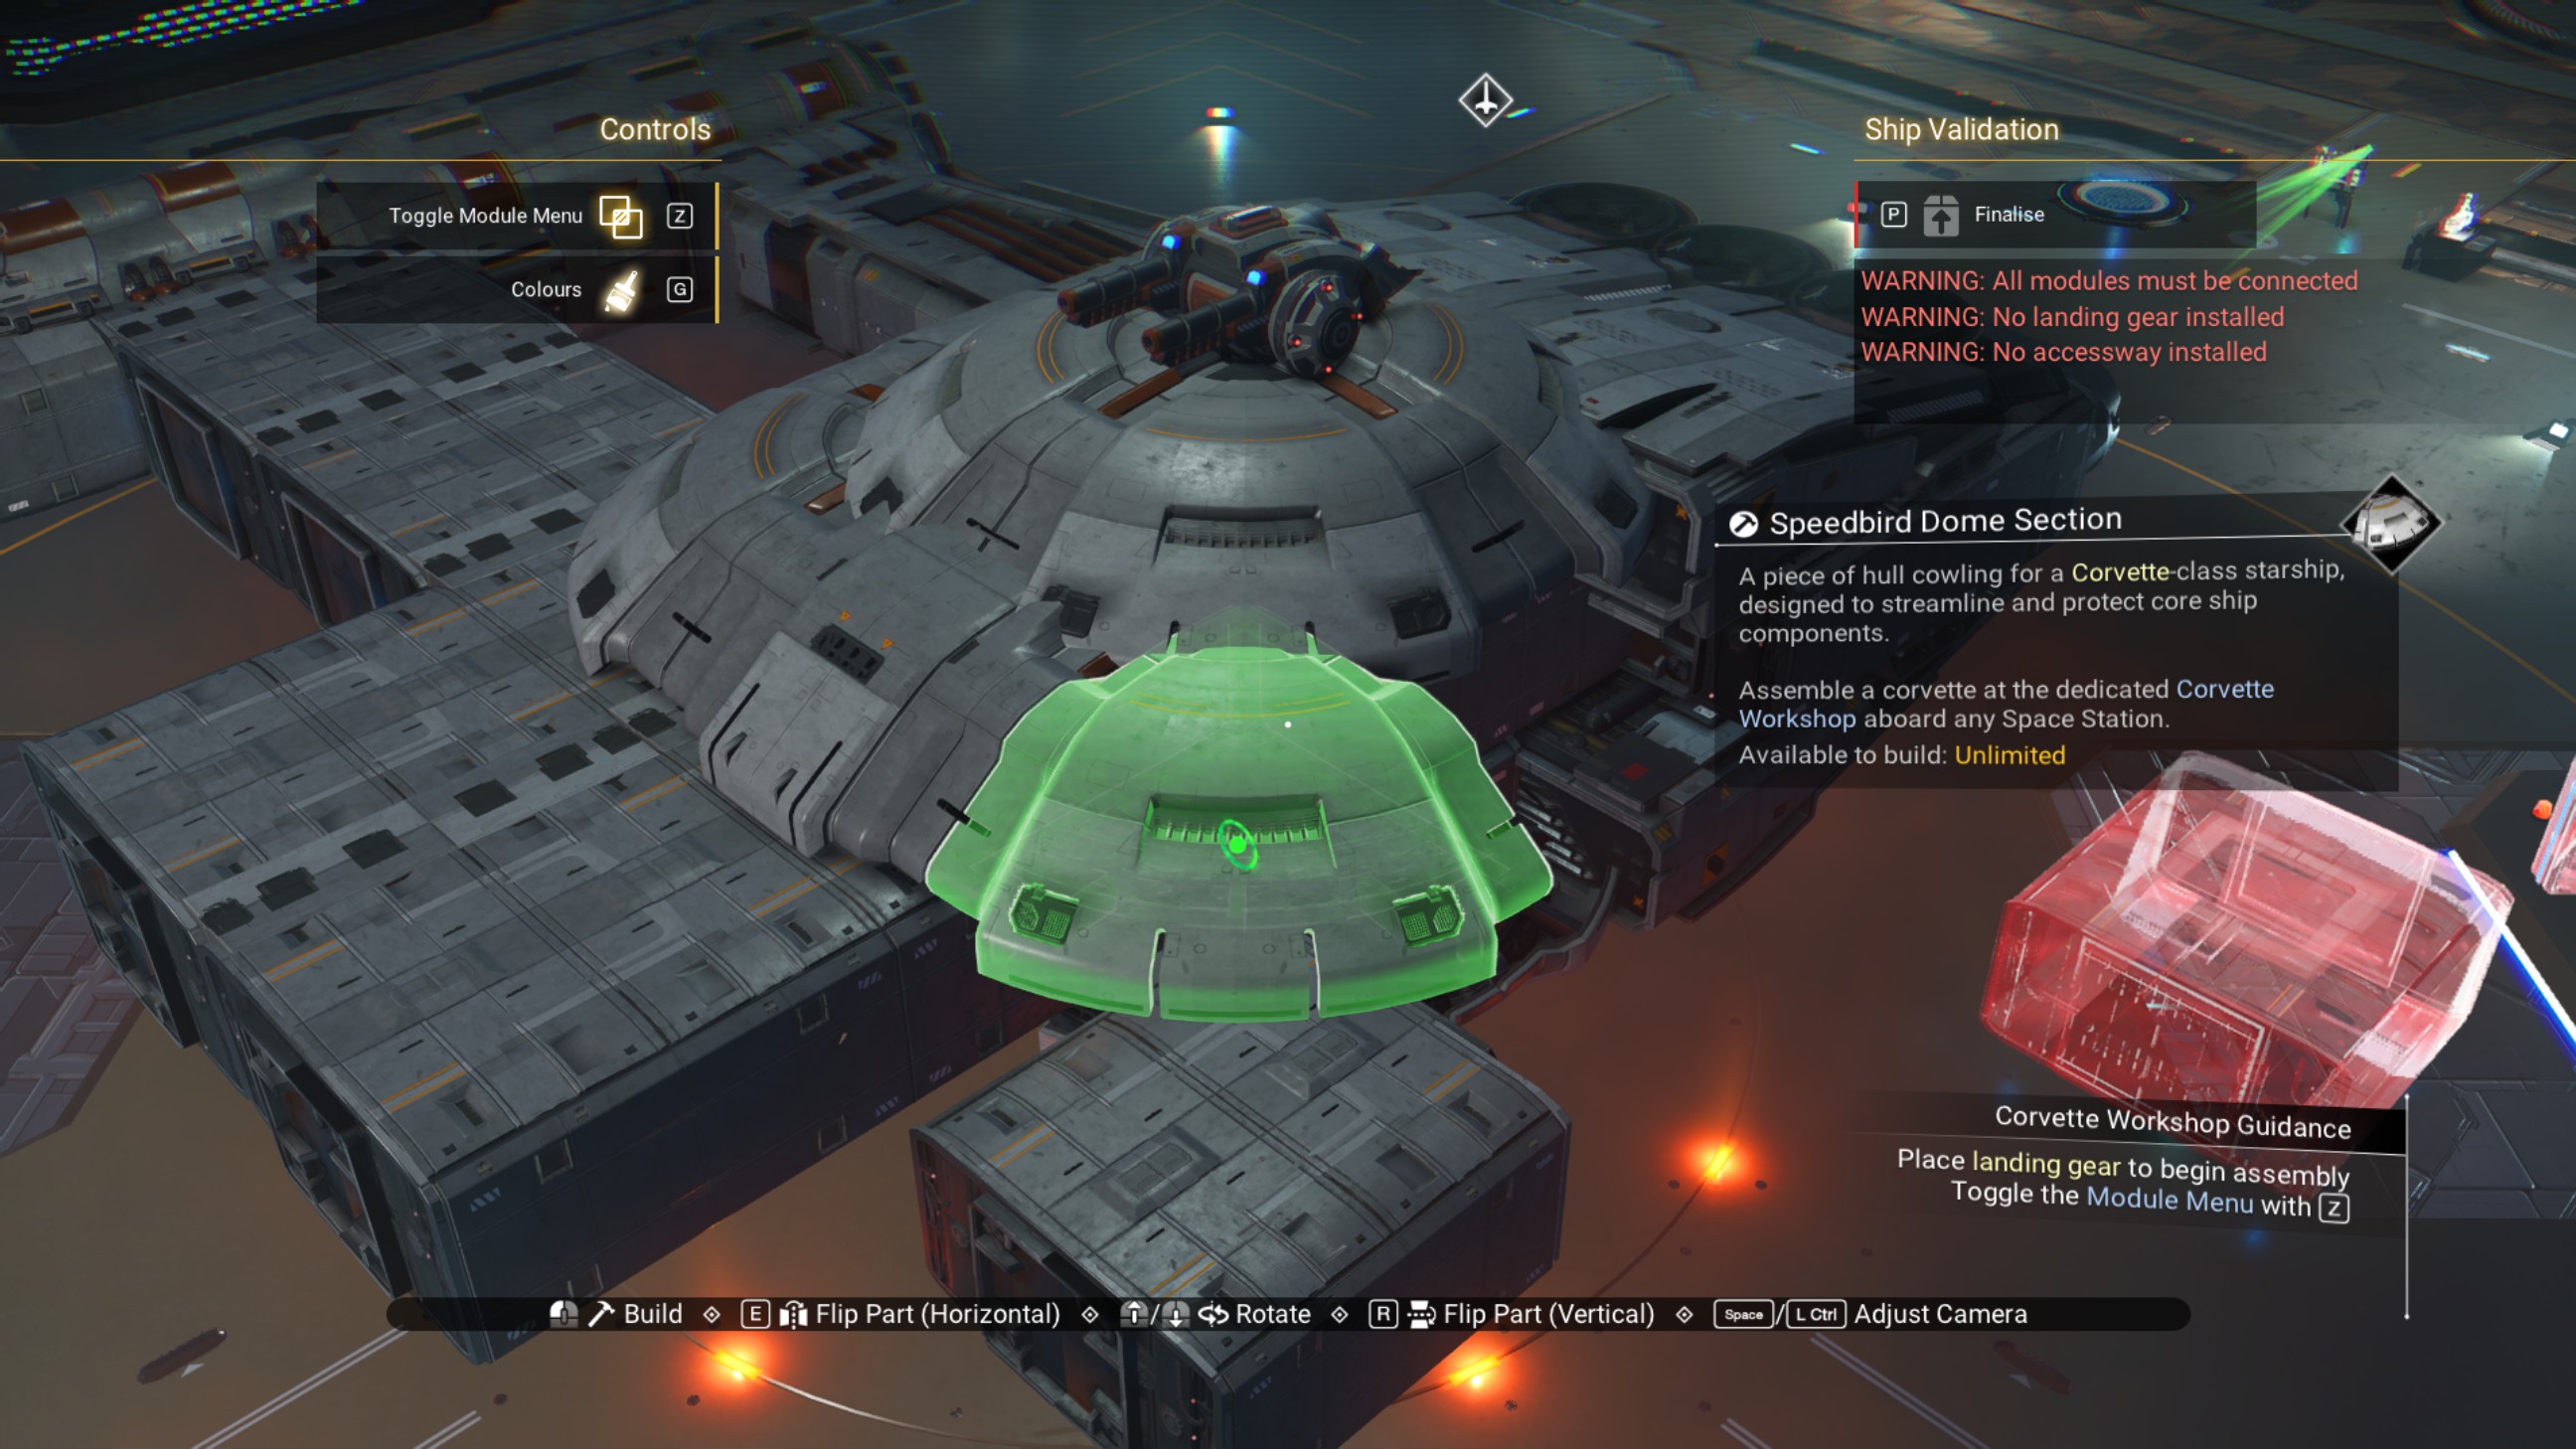
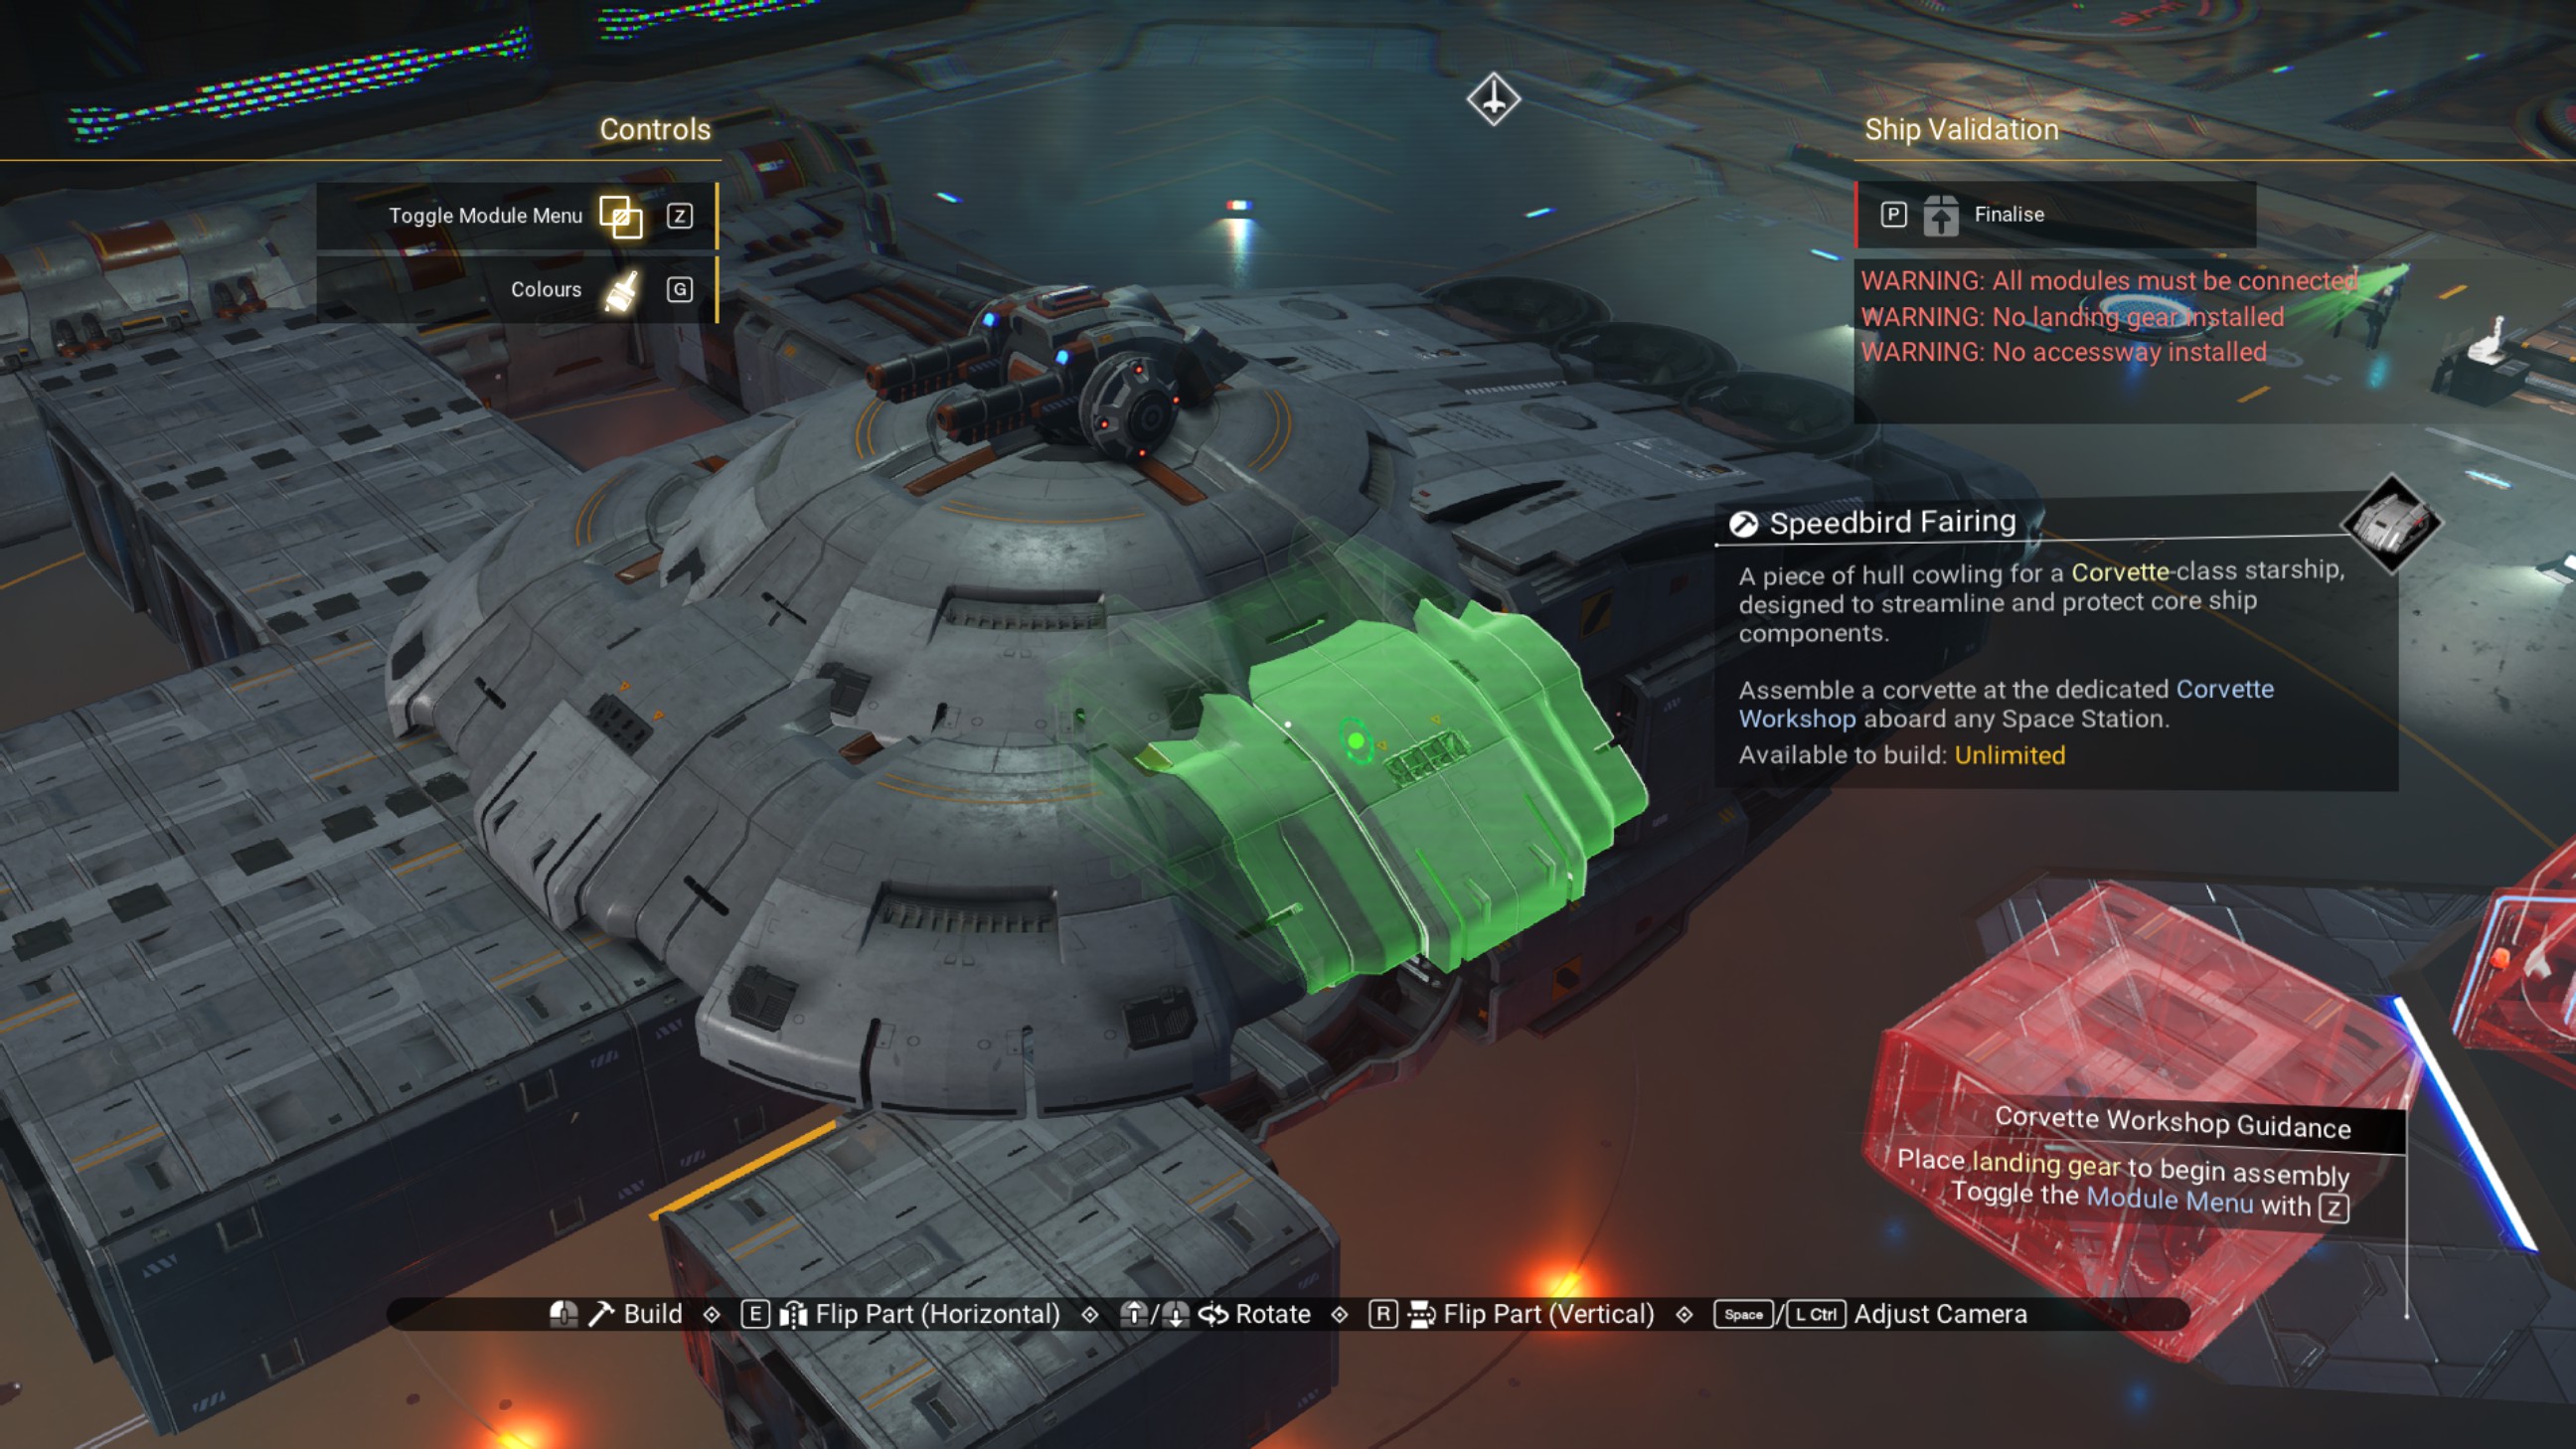
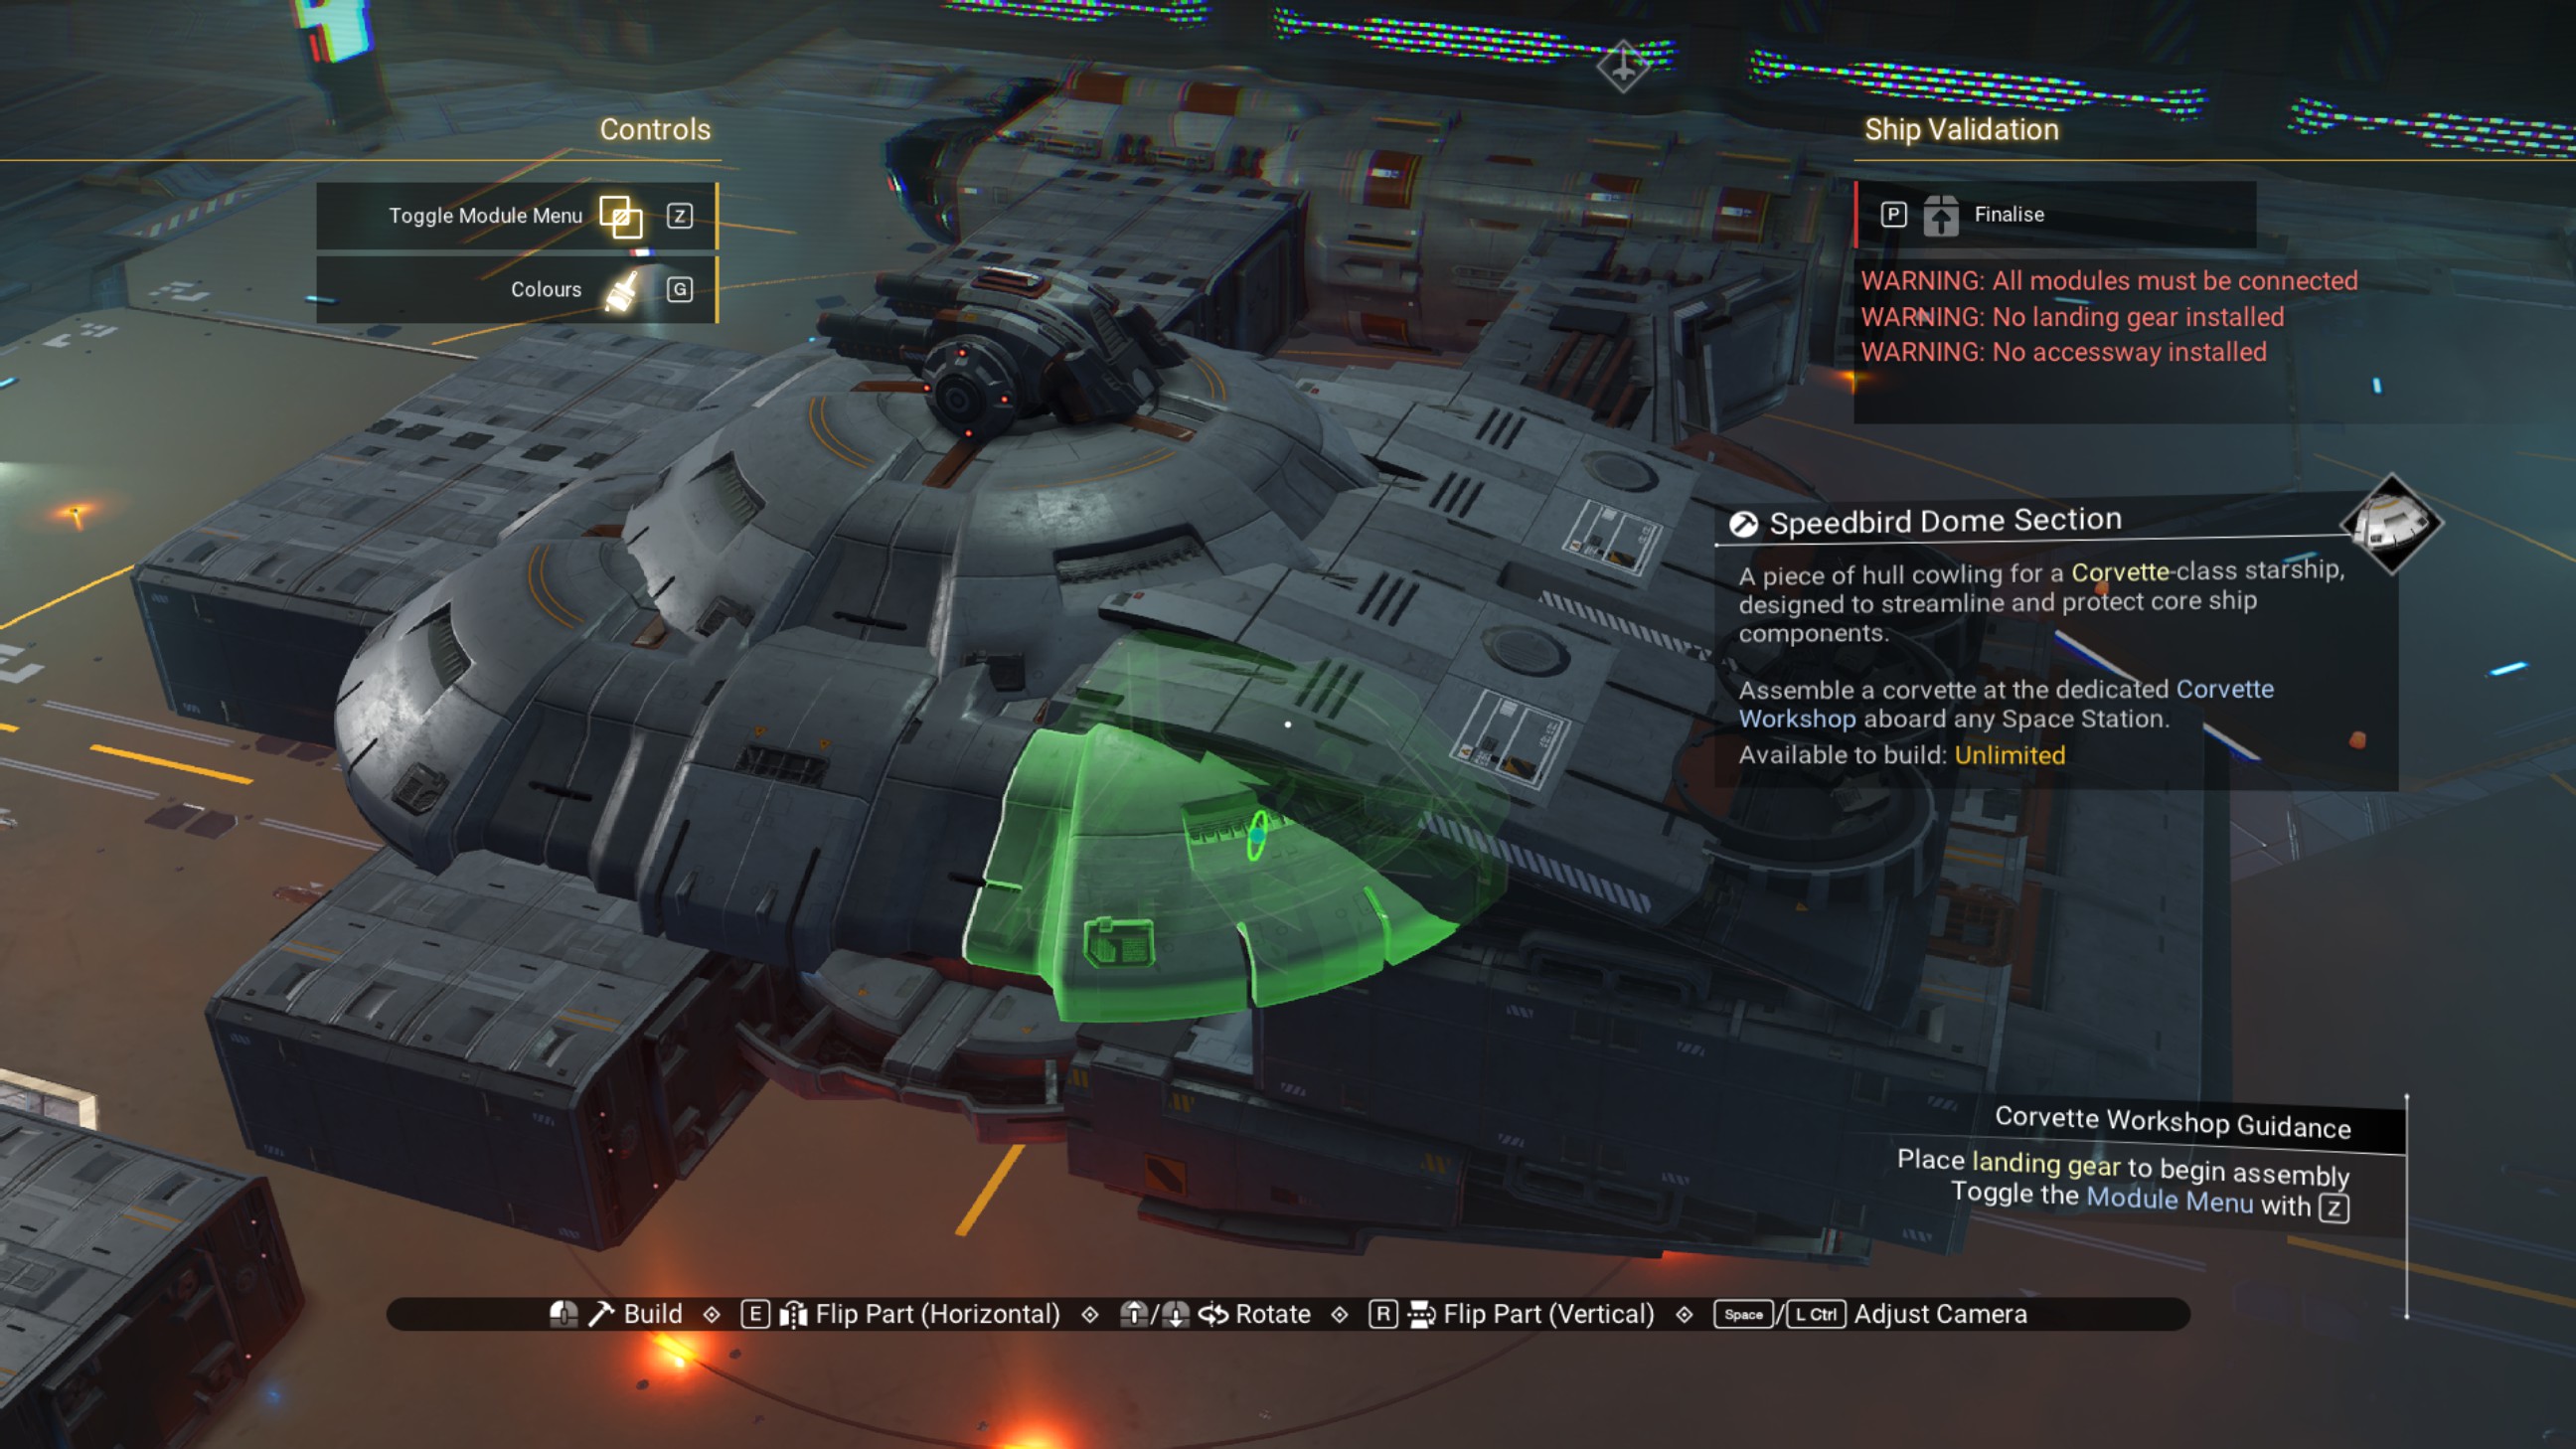
We'll do the same thing underneath, placing speedbird fairings and speedbird dome sections around the central structure.
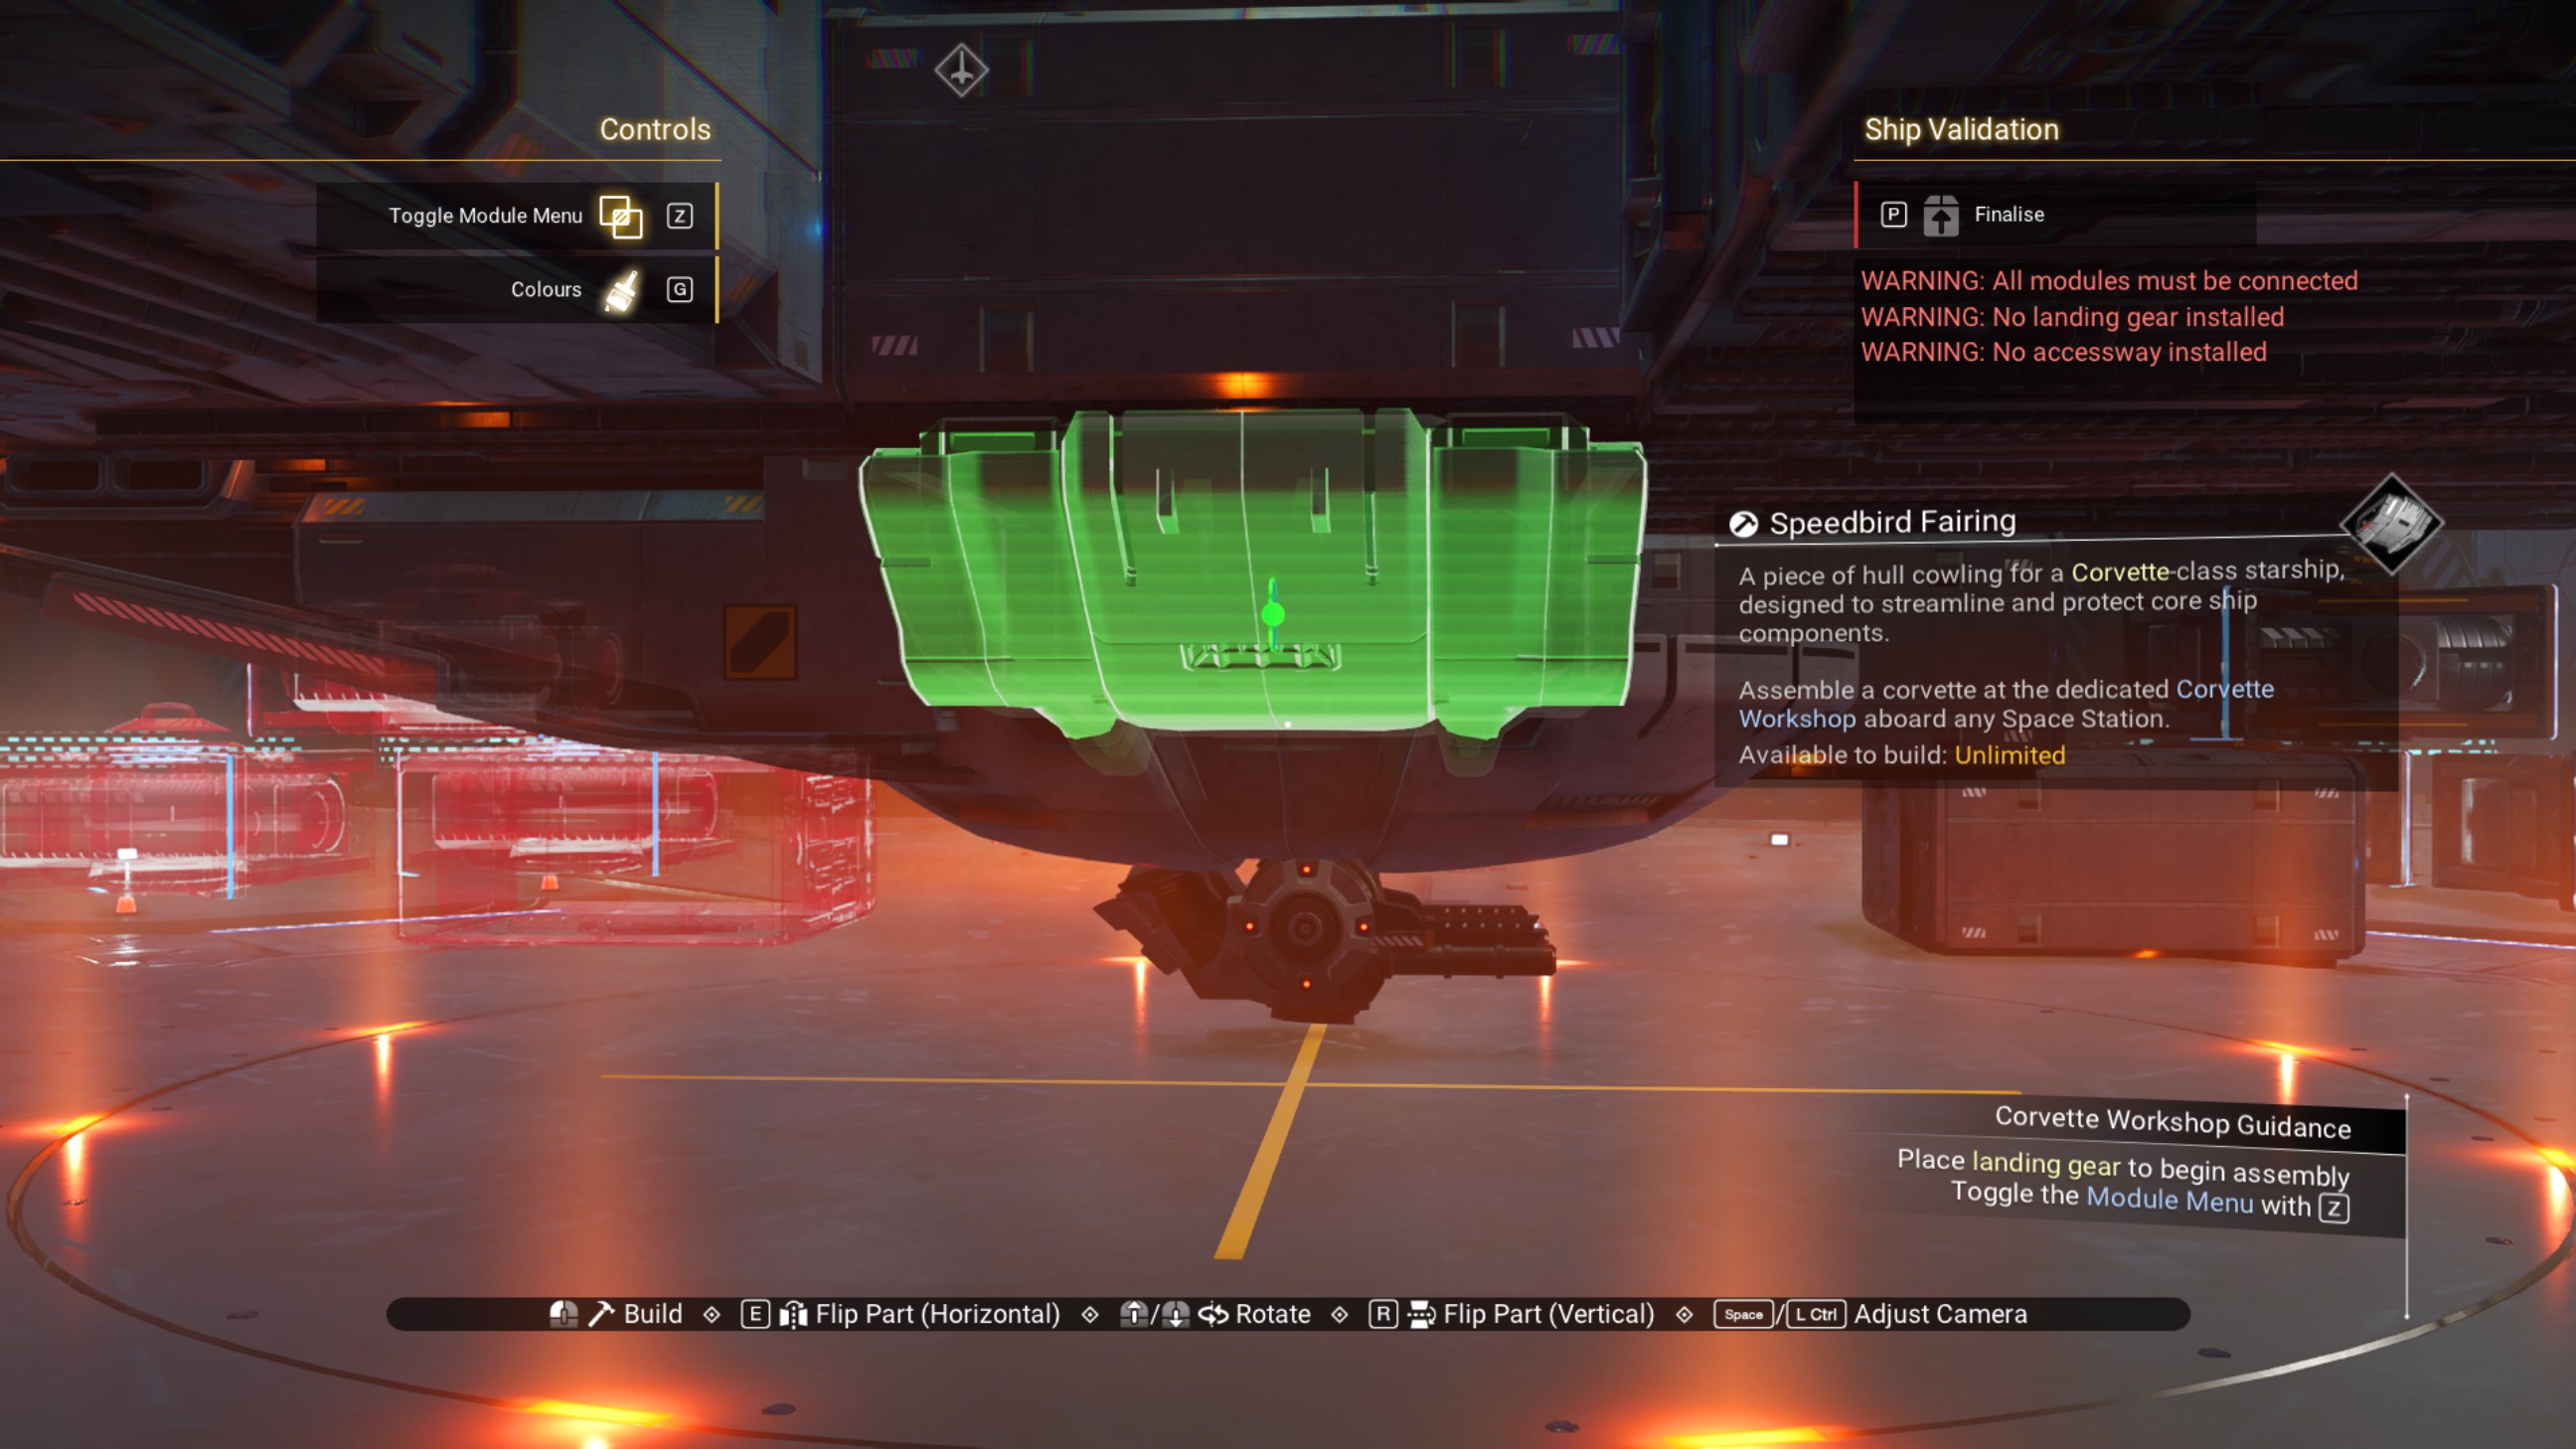
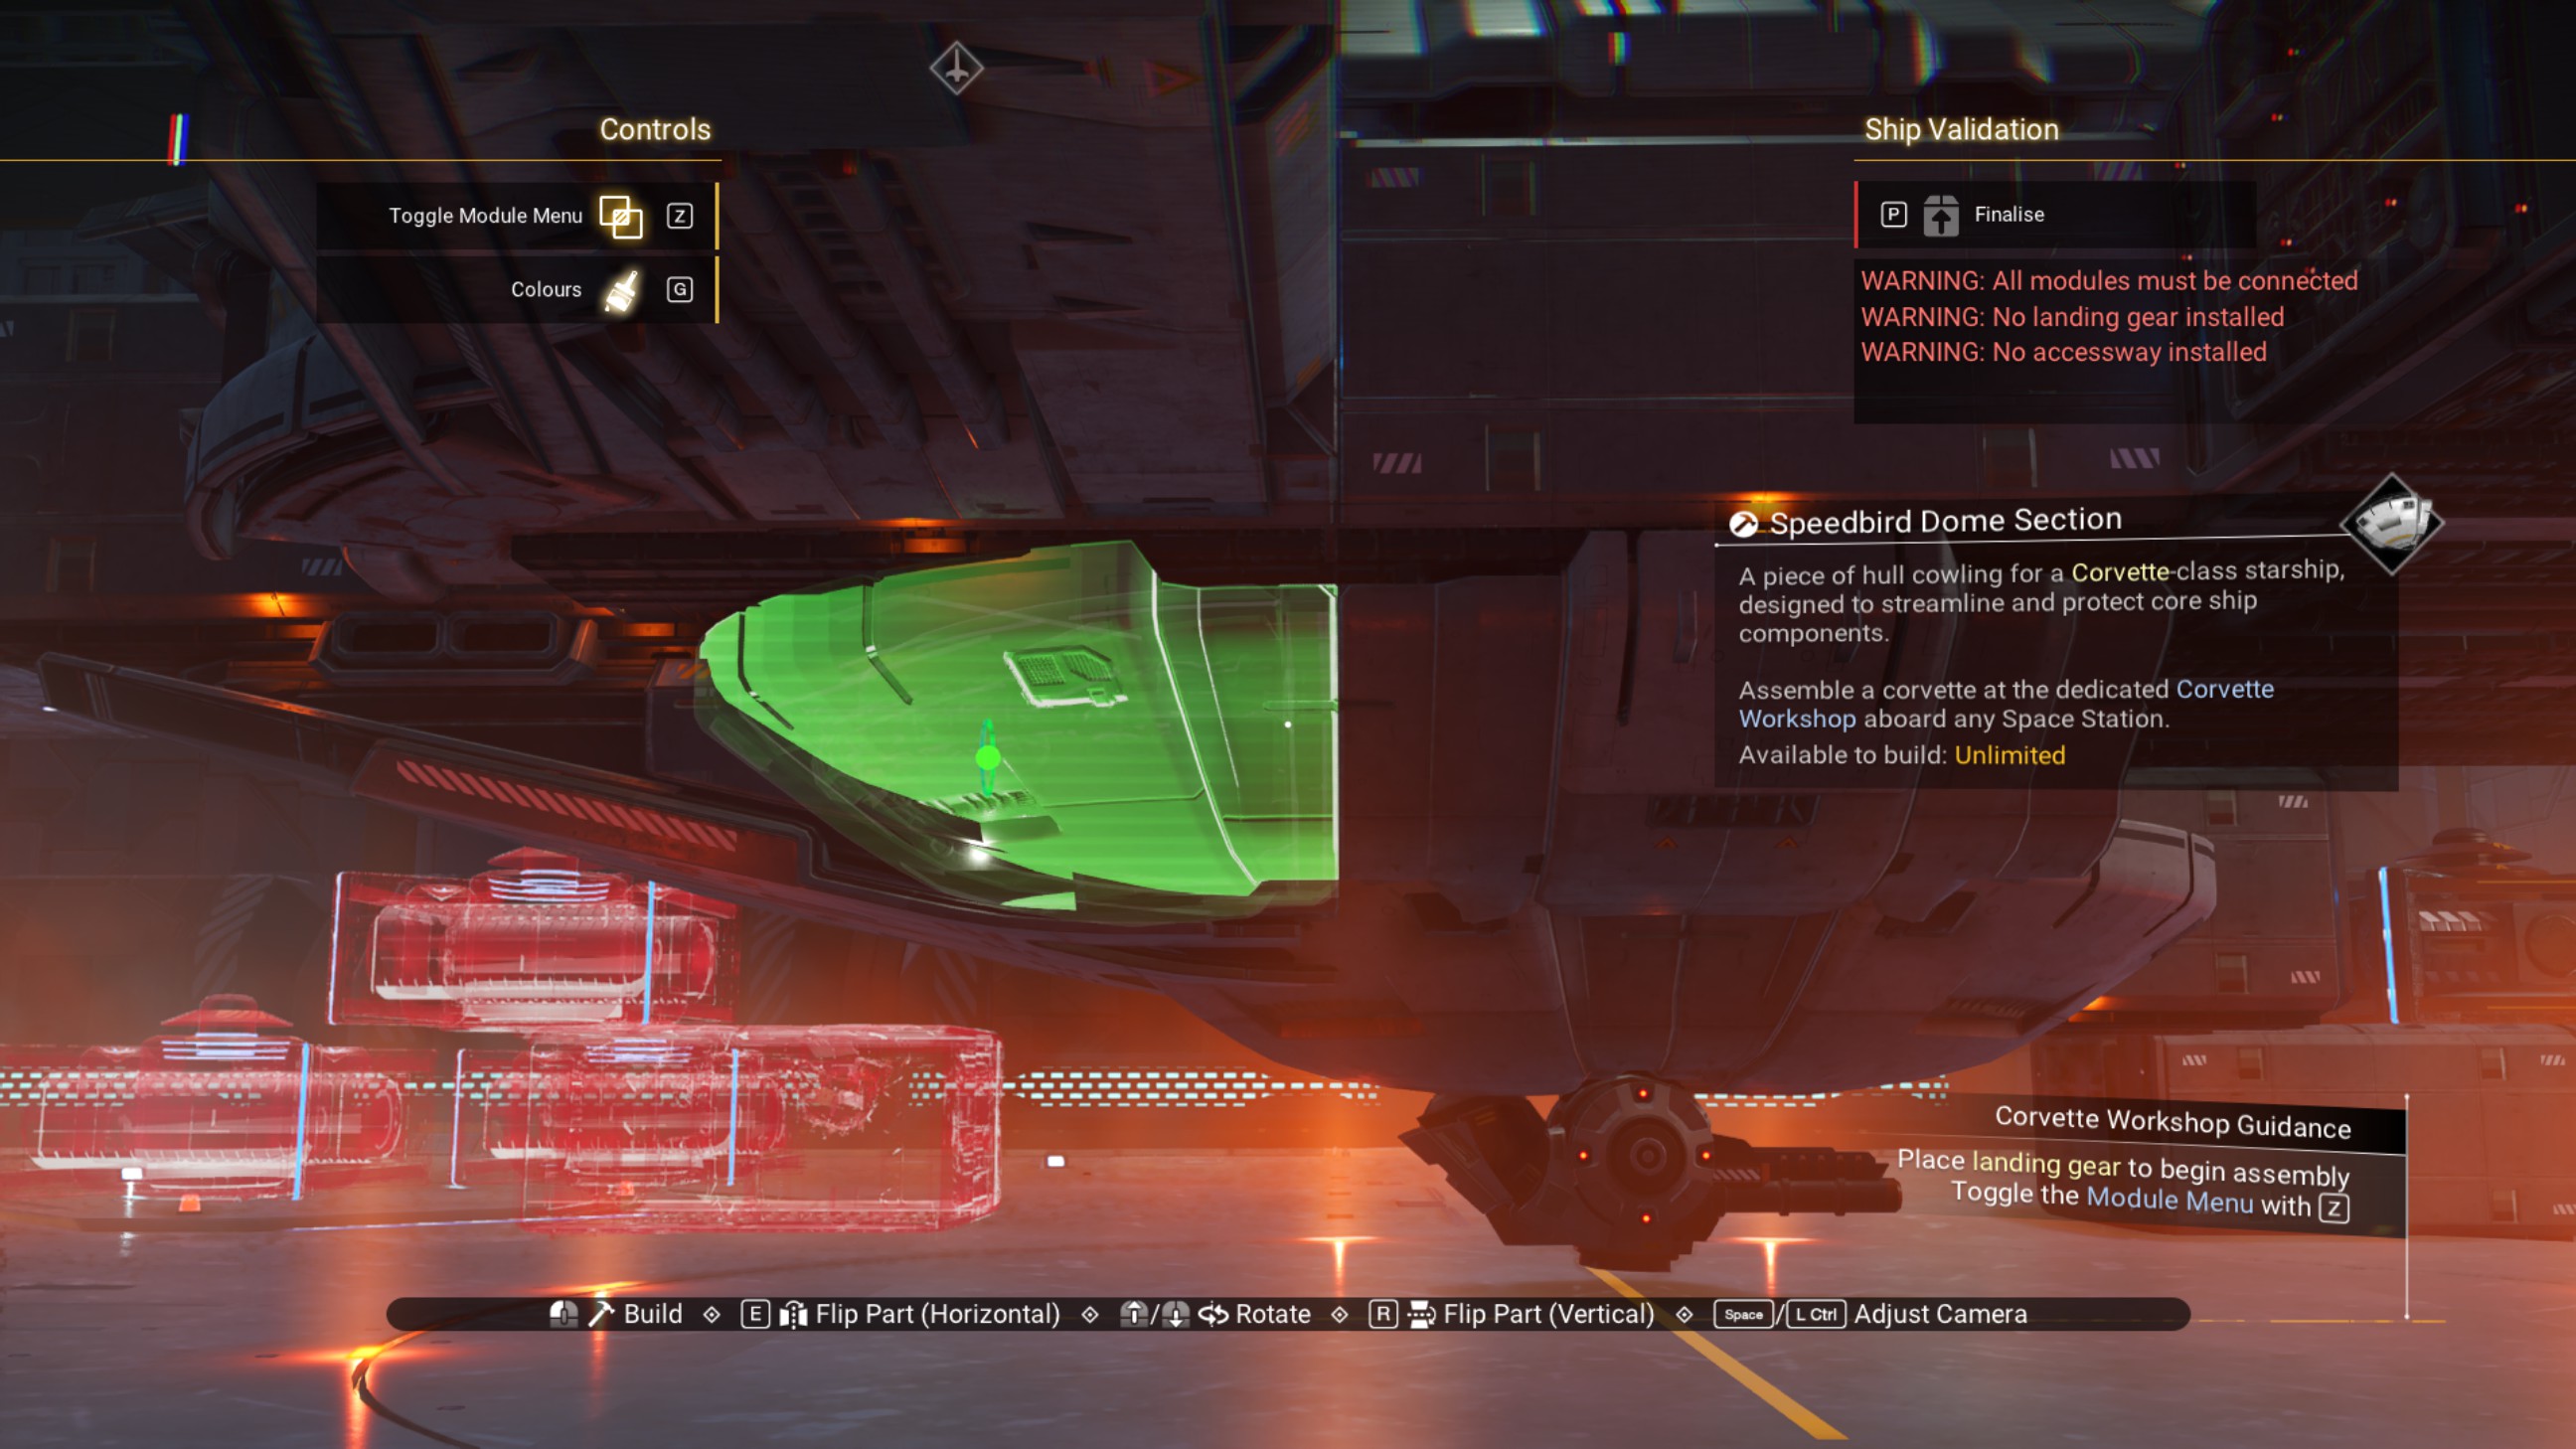
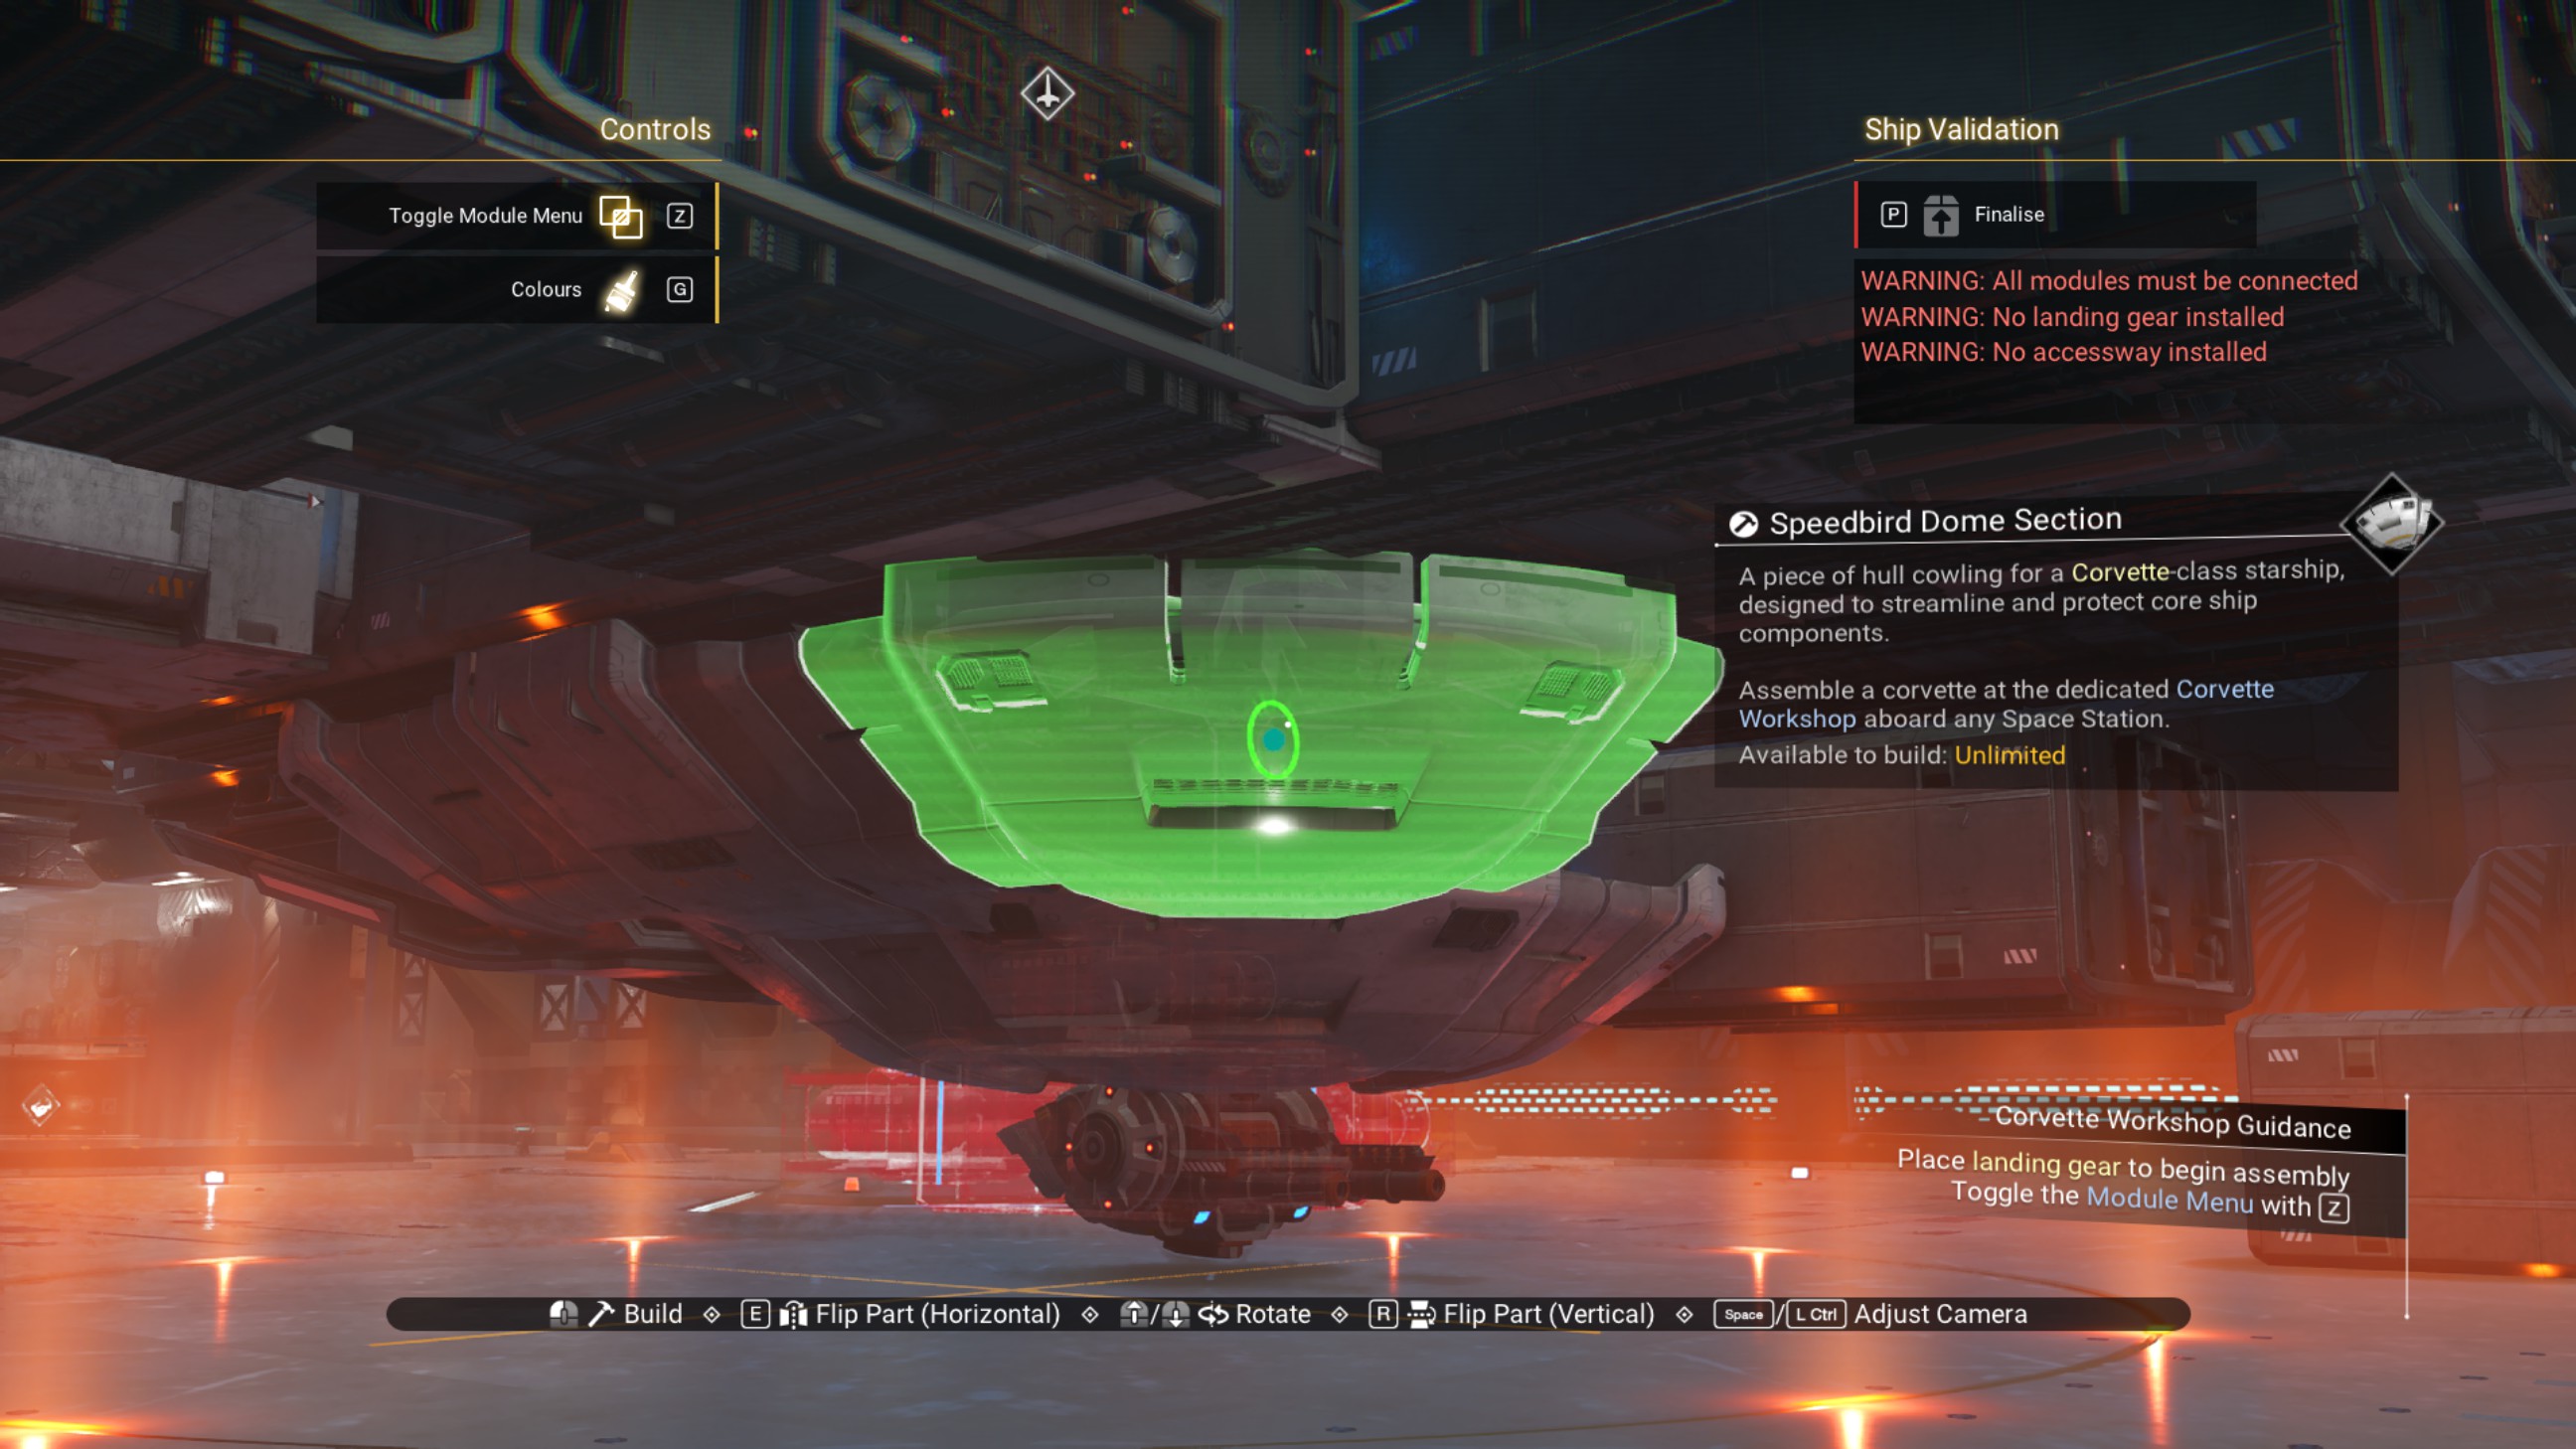
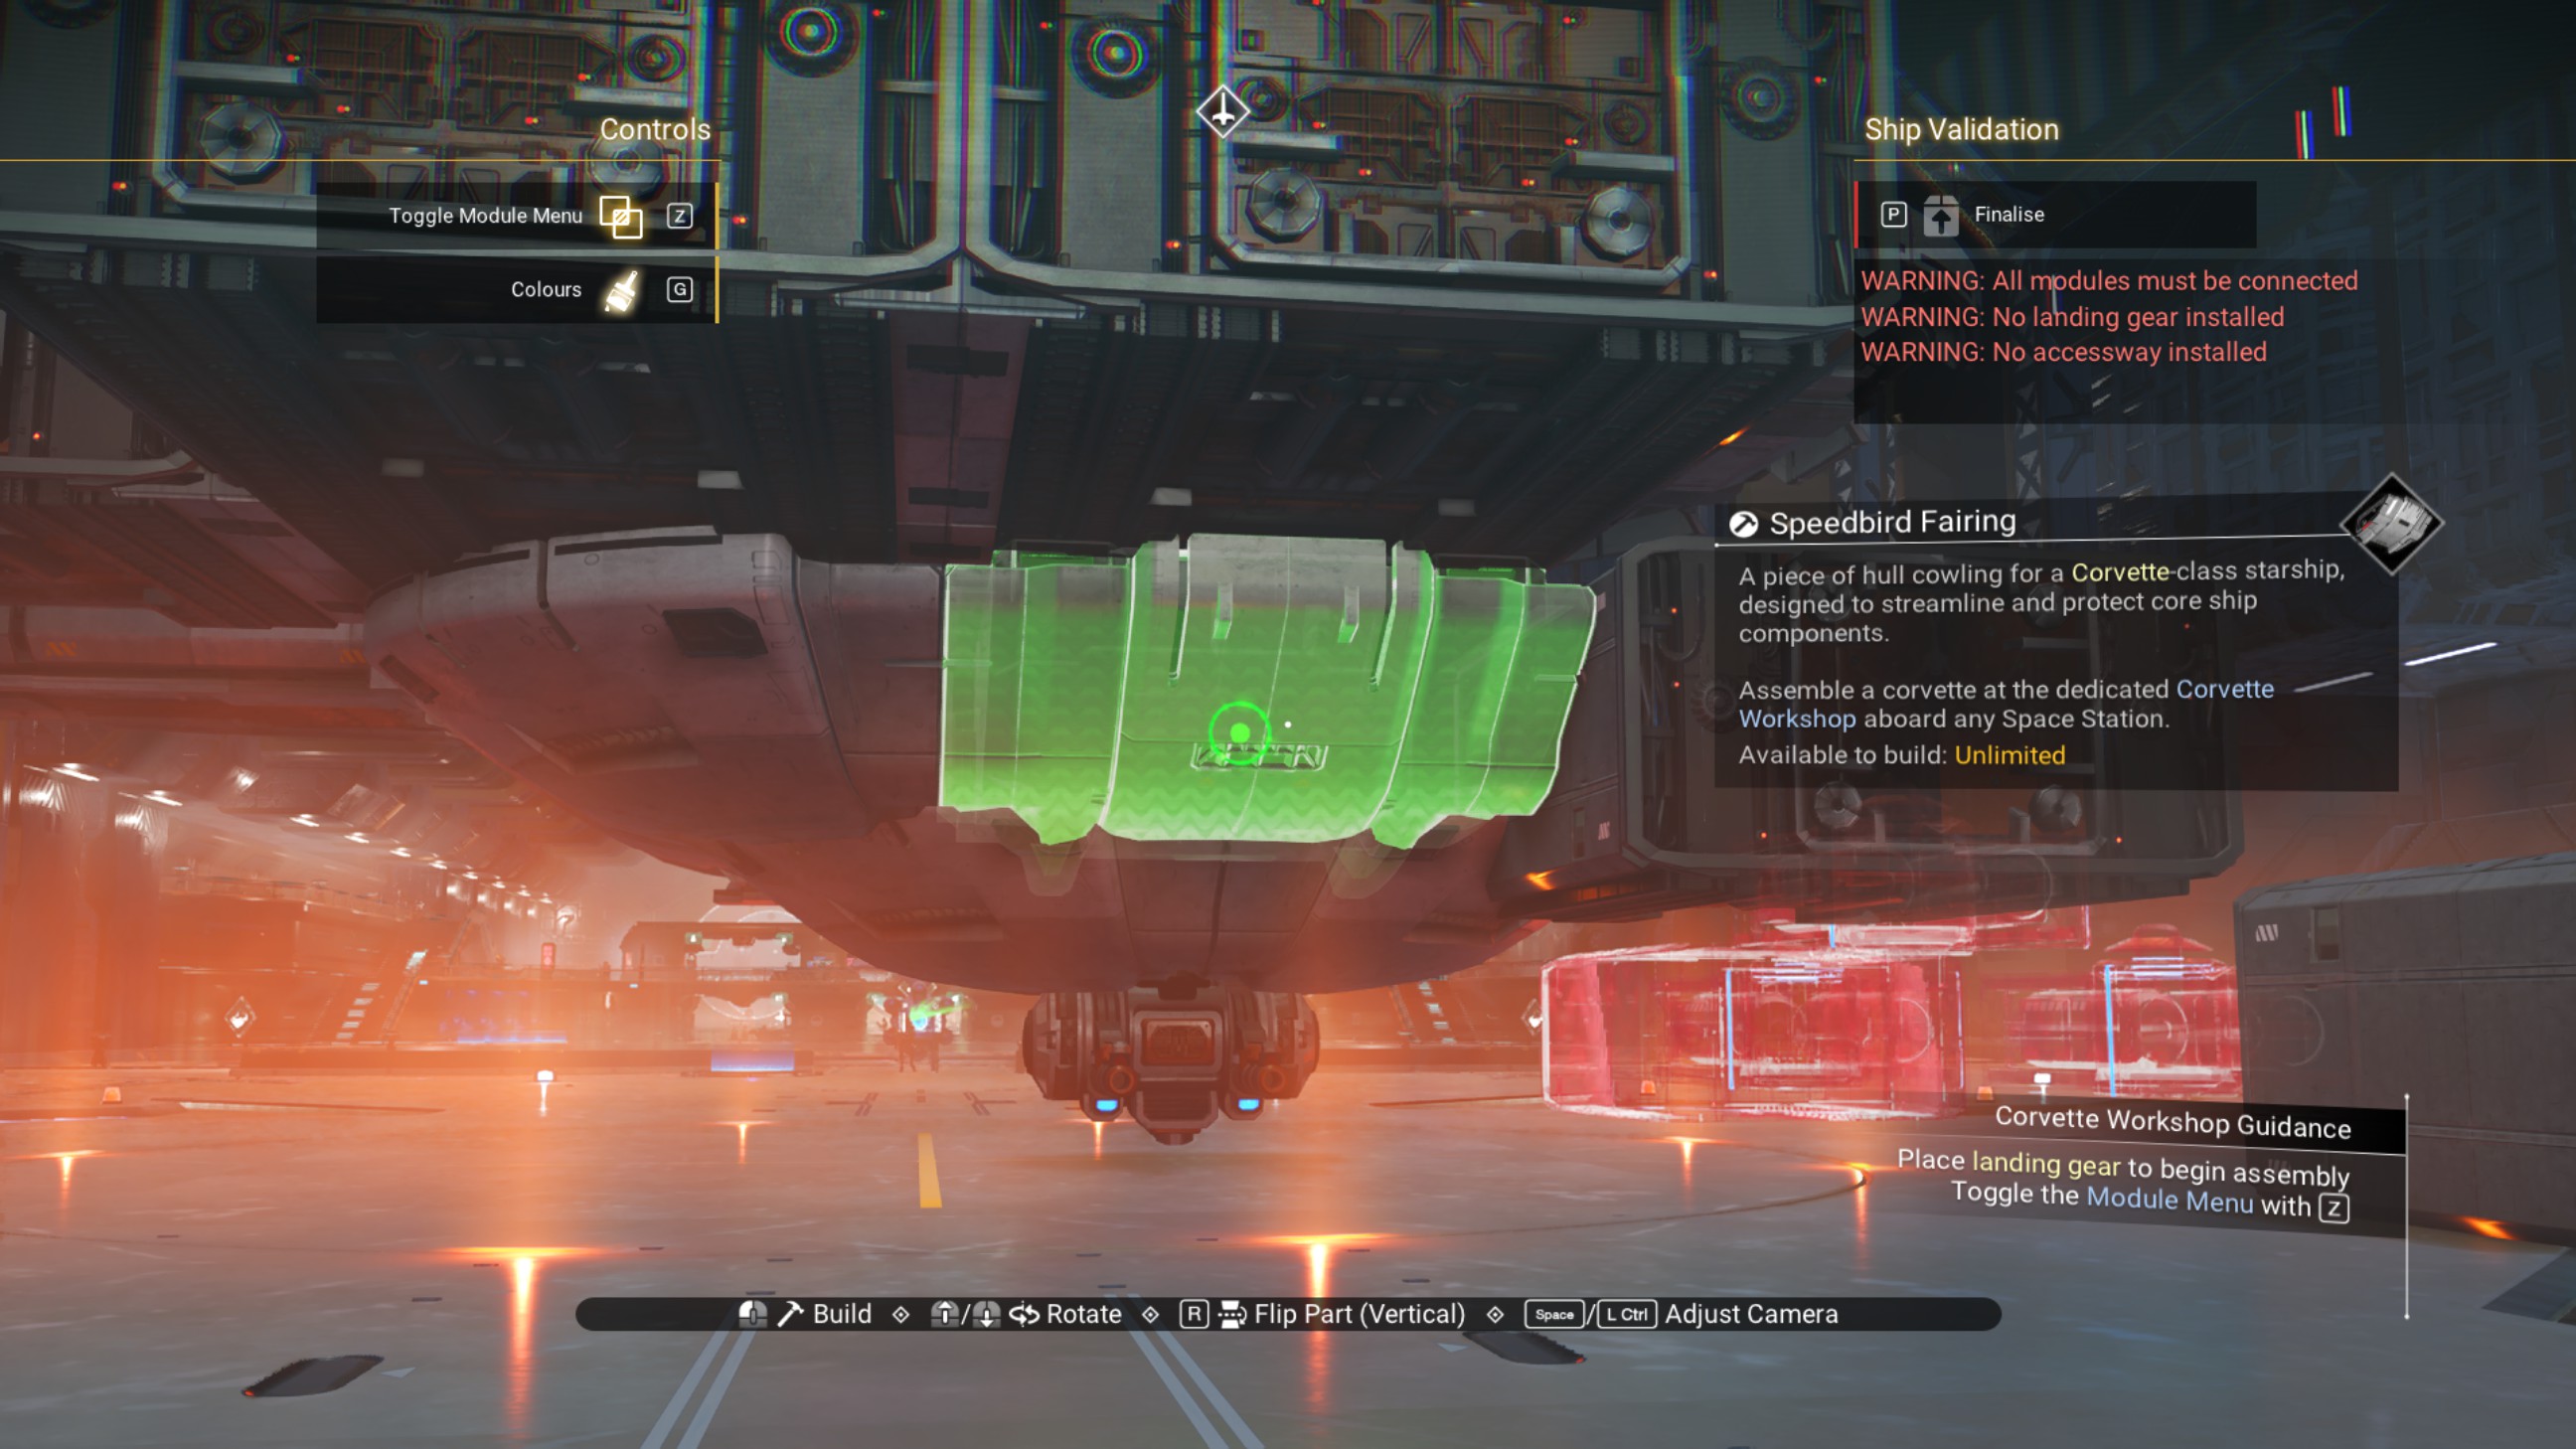
Deleting the closest zigzagged walkway can help give space to make building easier.
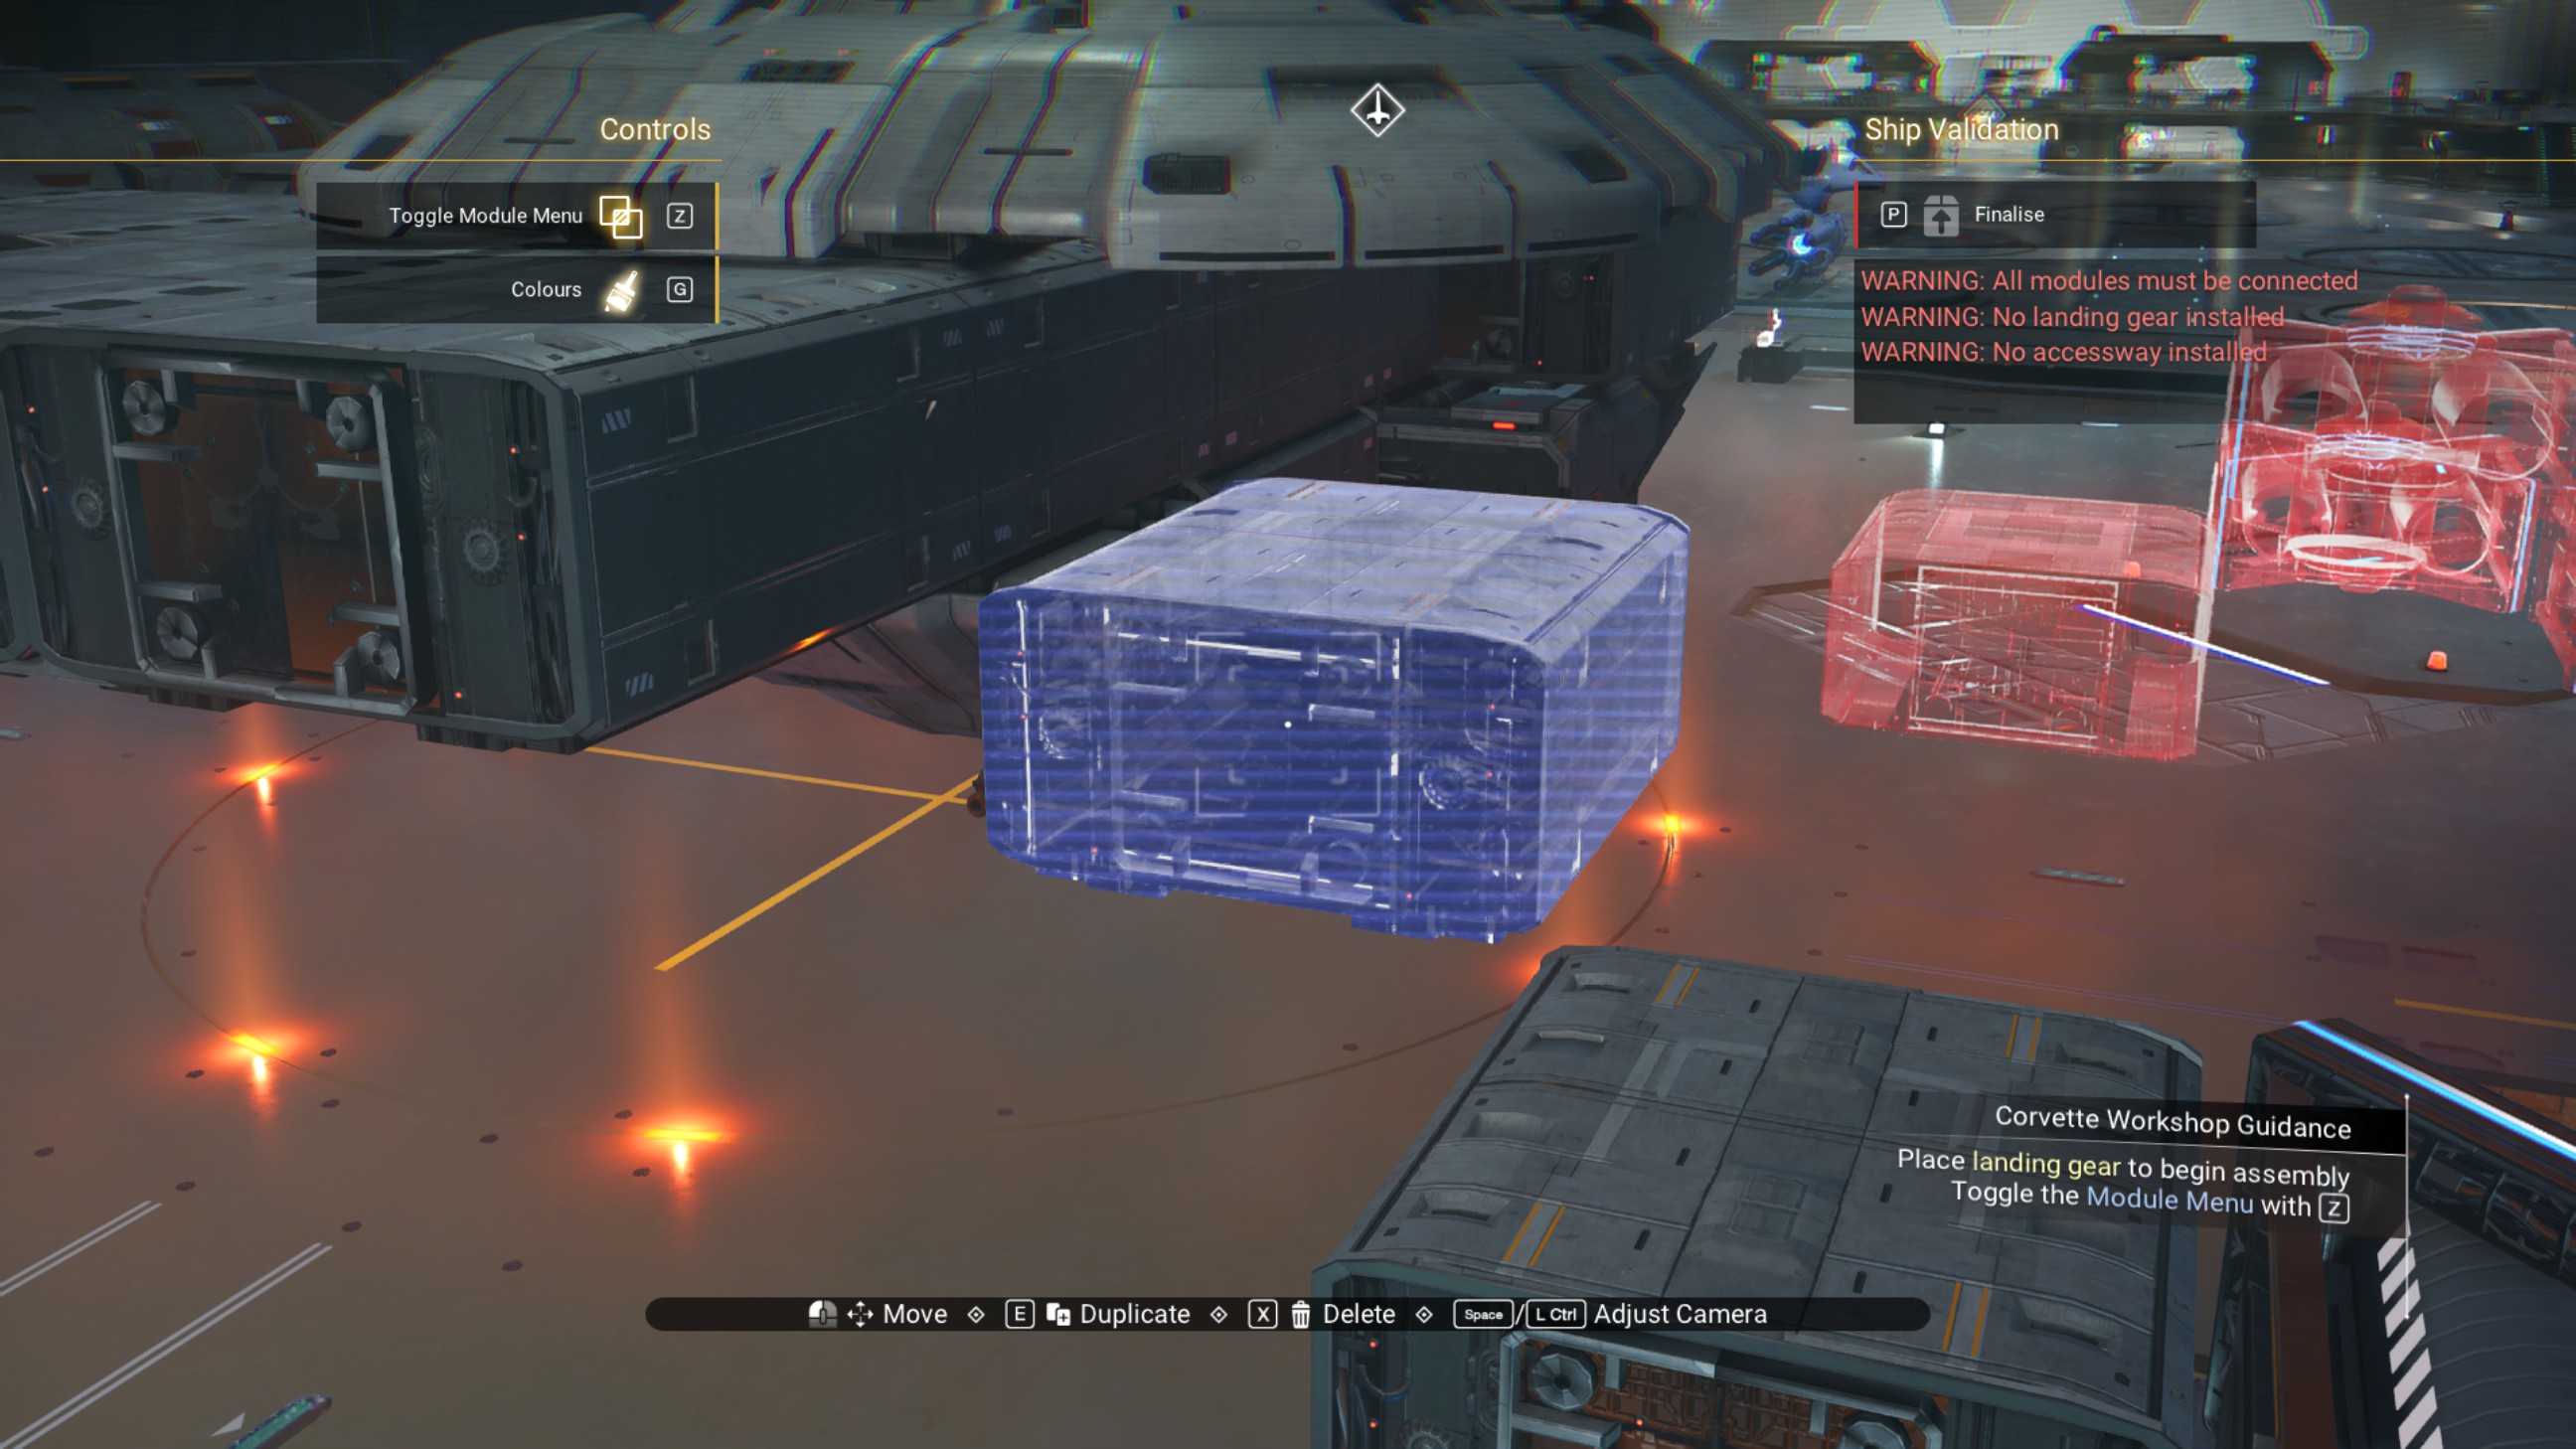
Finish placing the speedbird fairings and speedbird dome sections around the central structure.
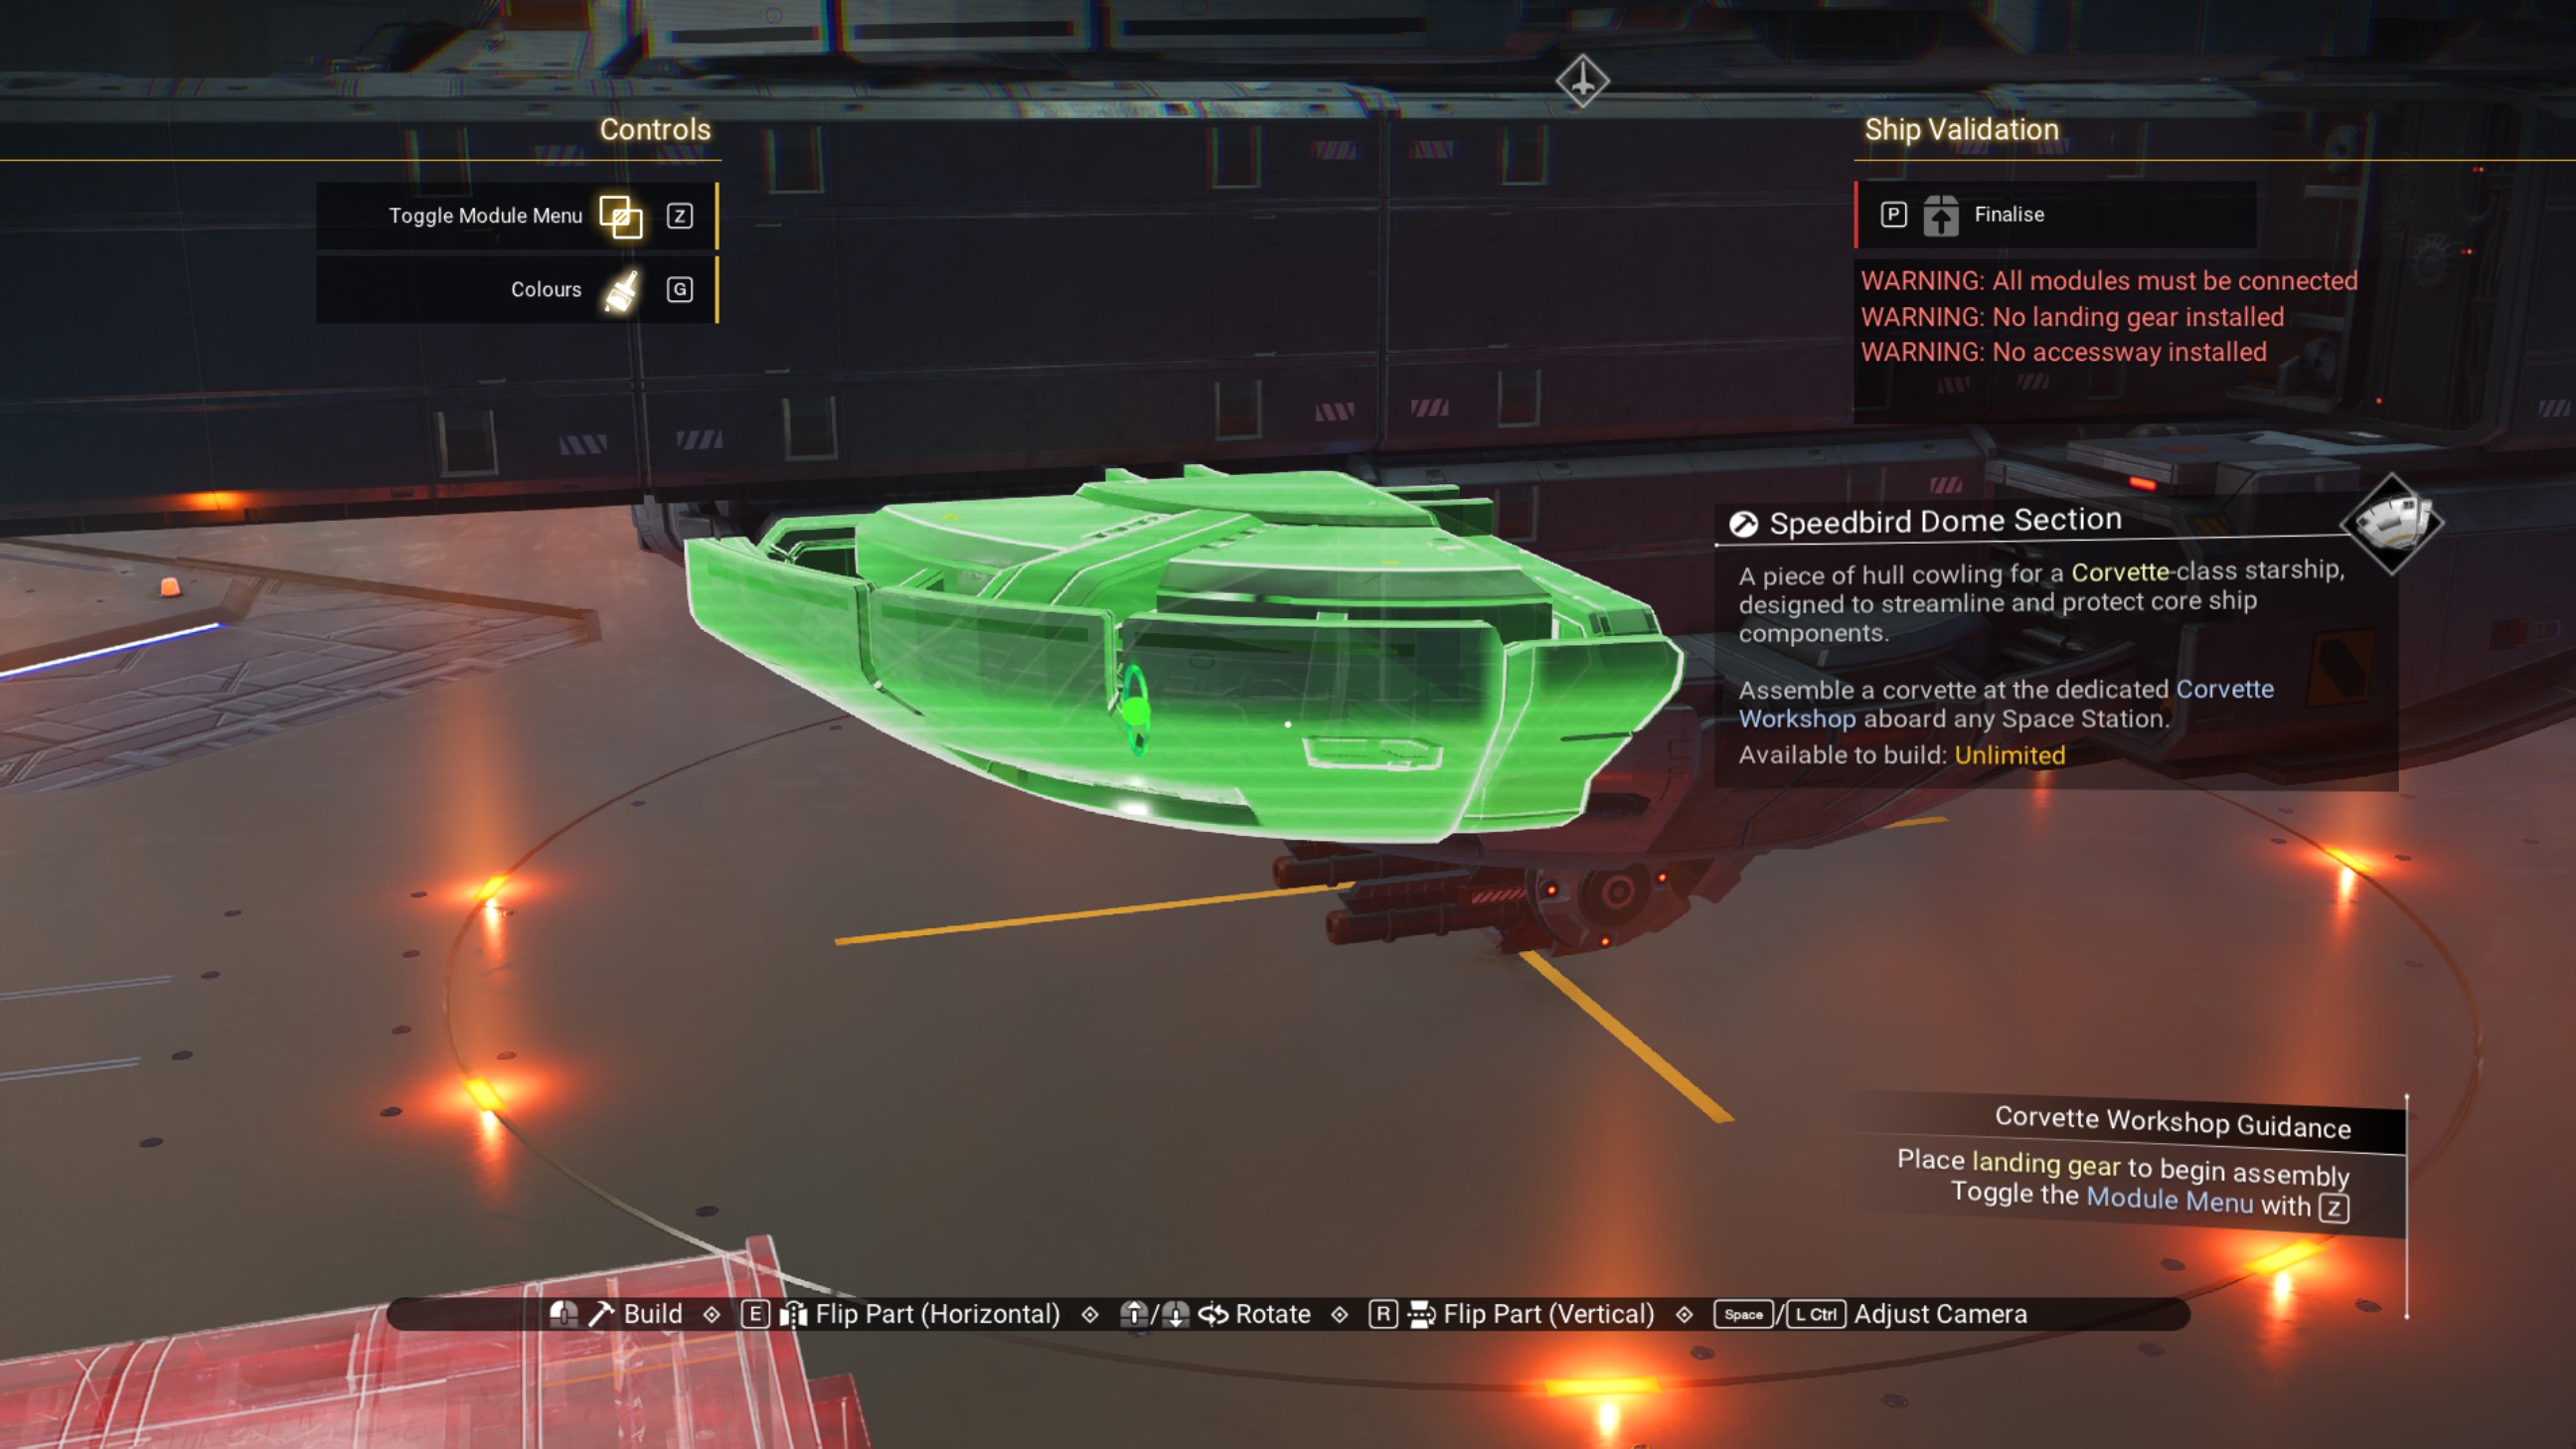
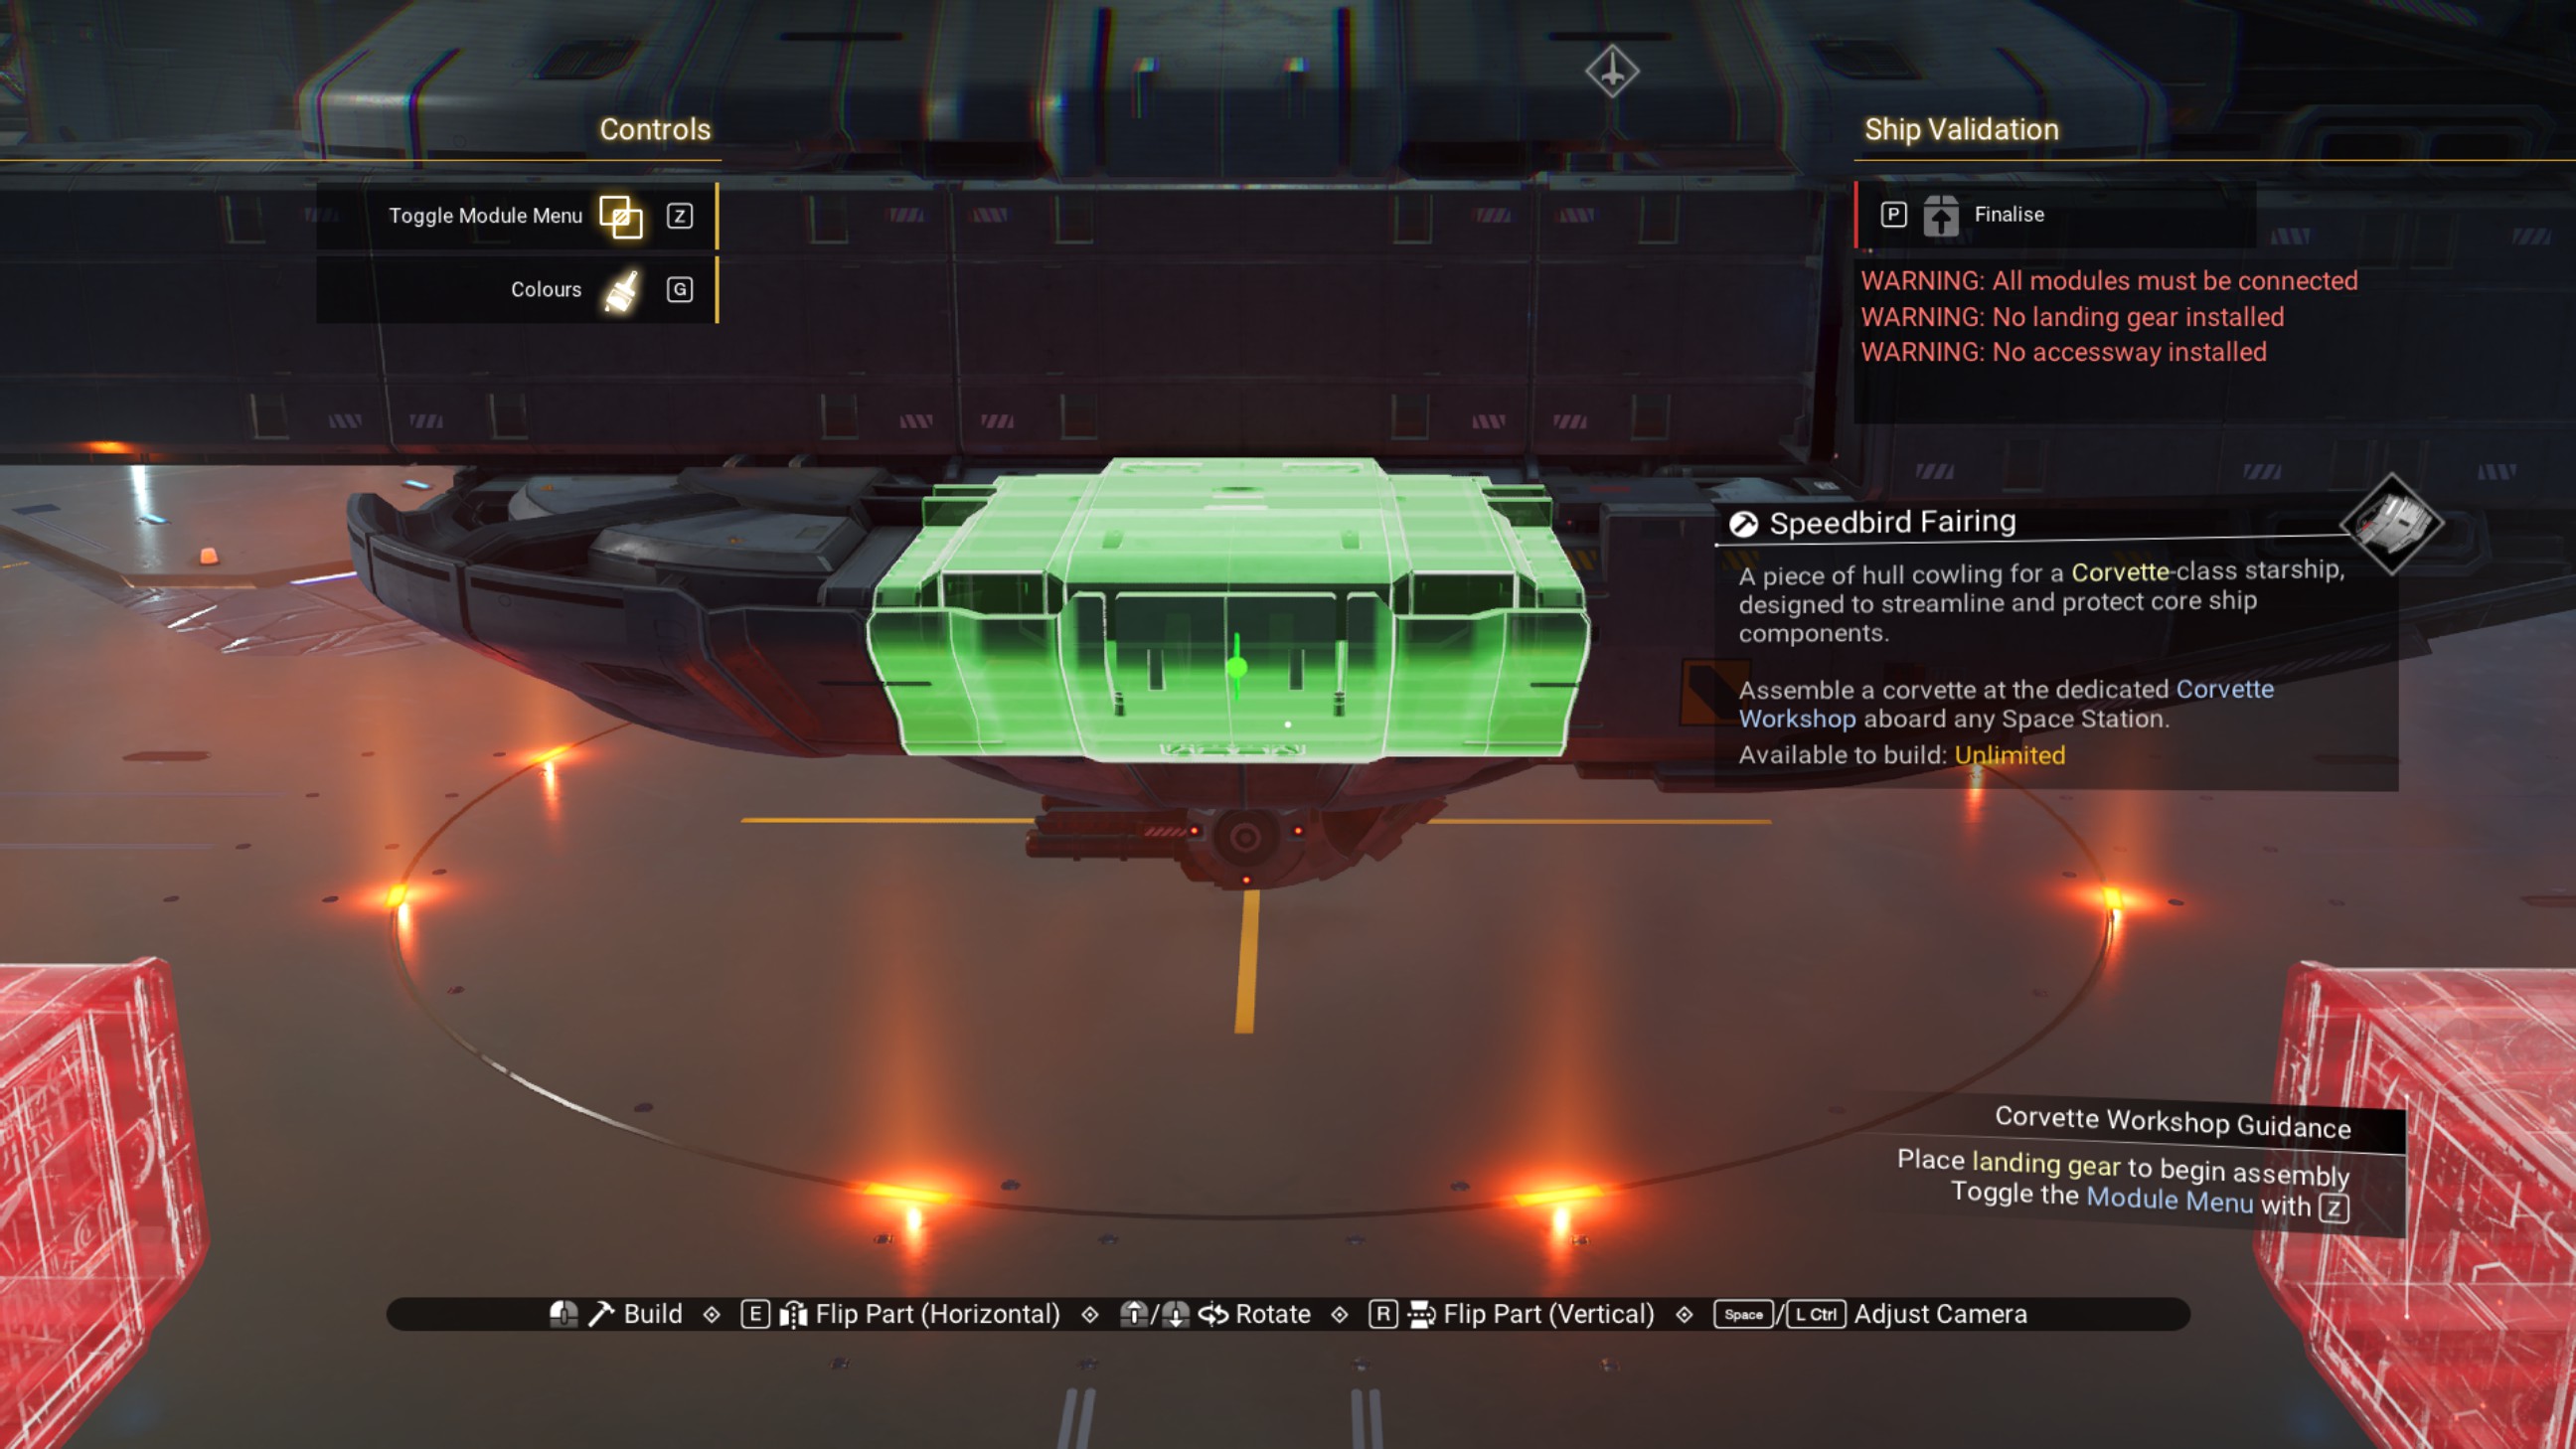
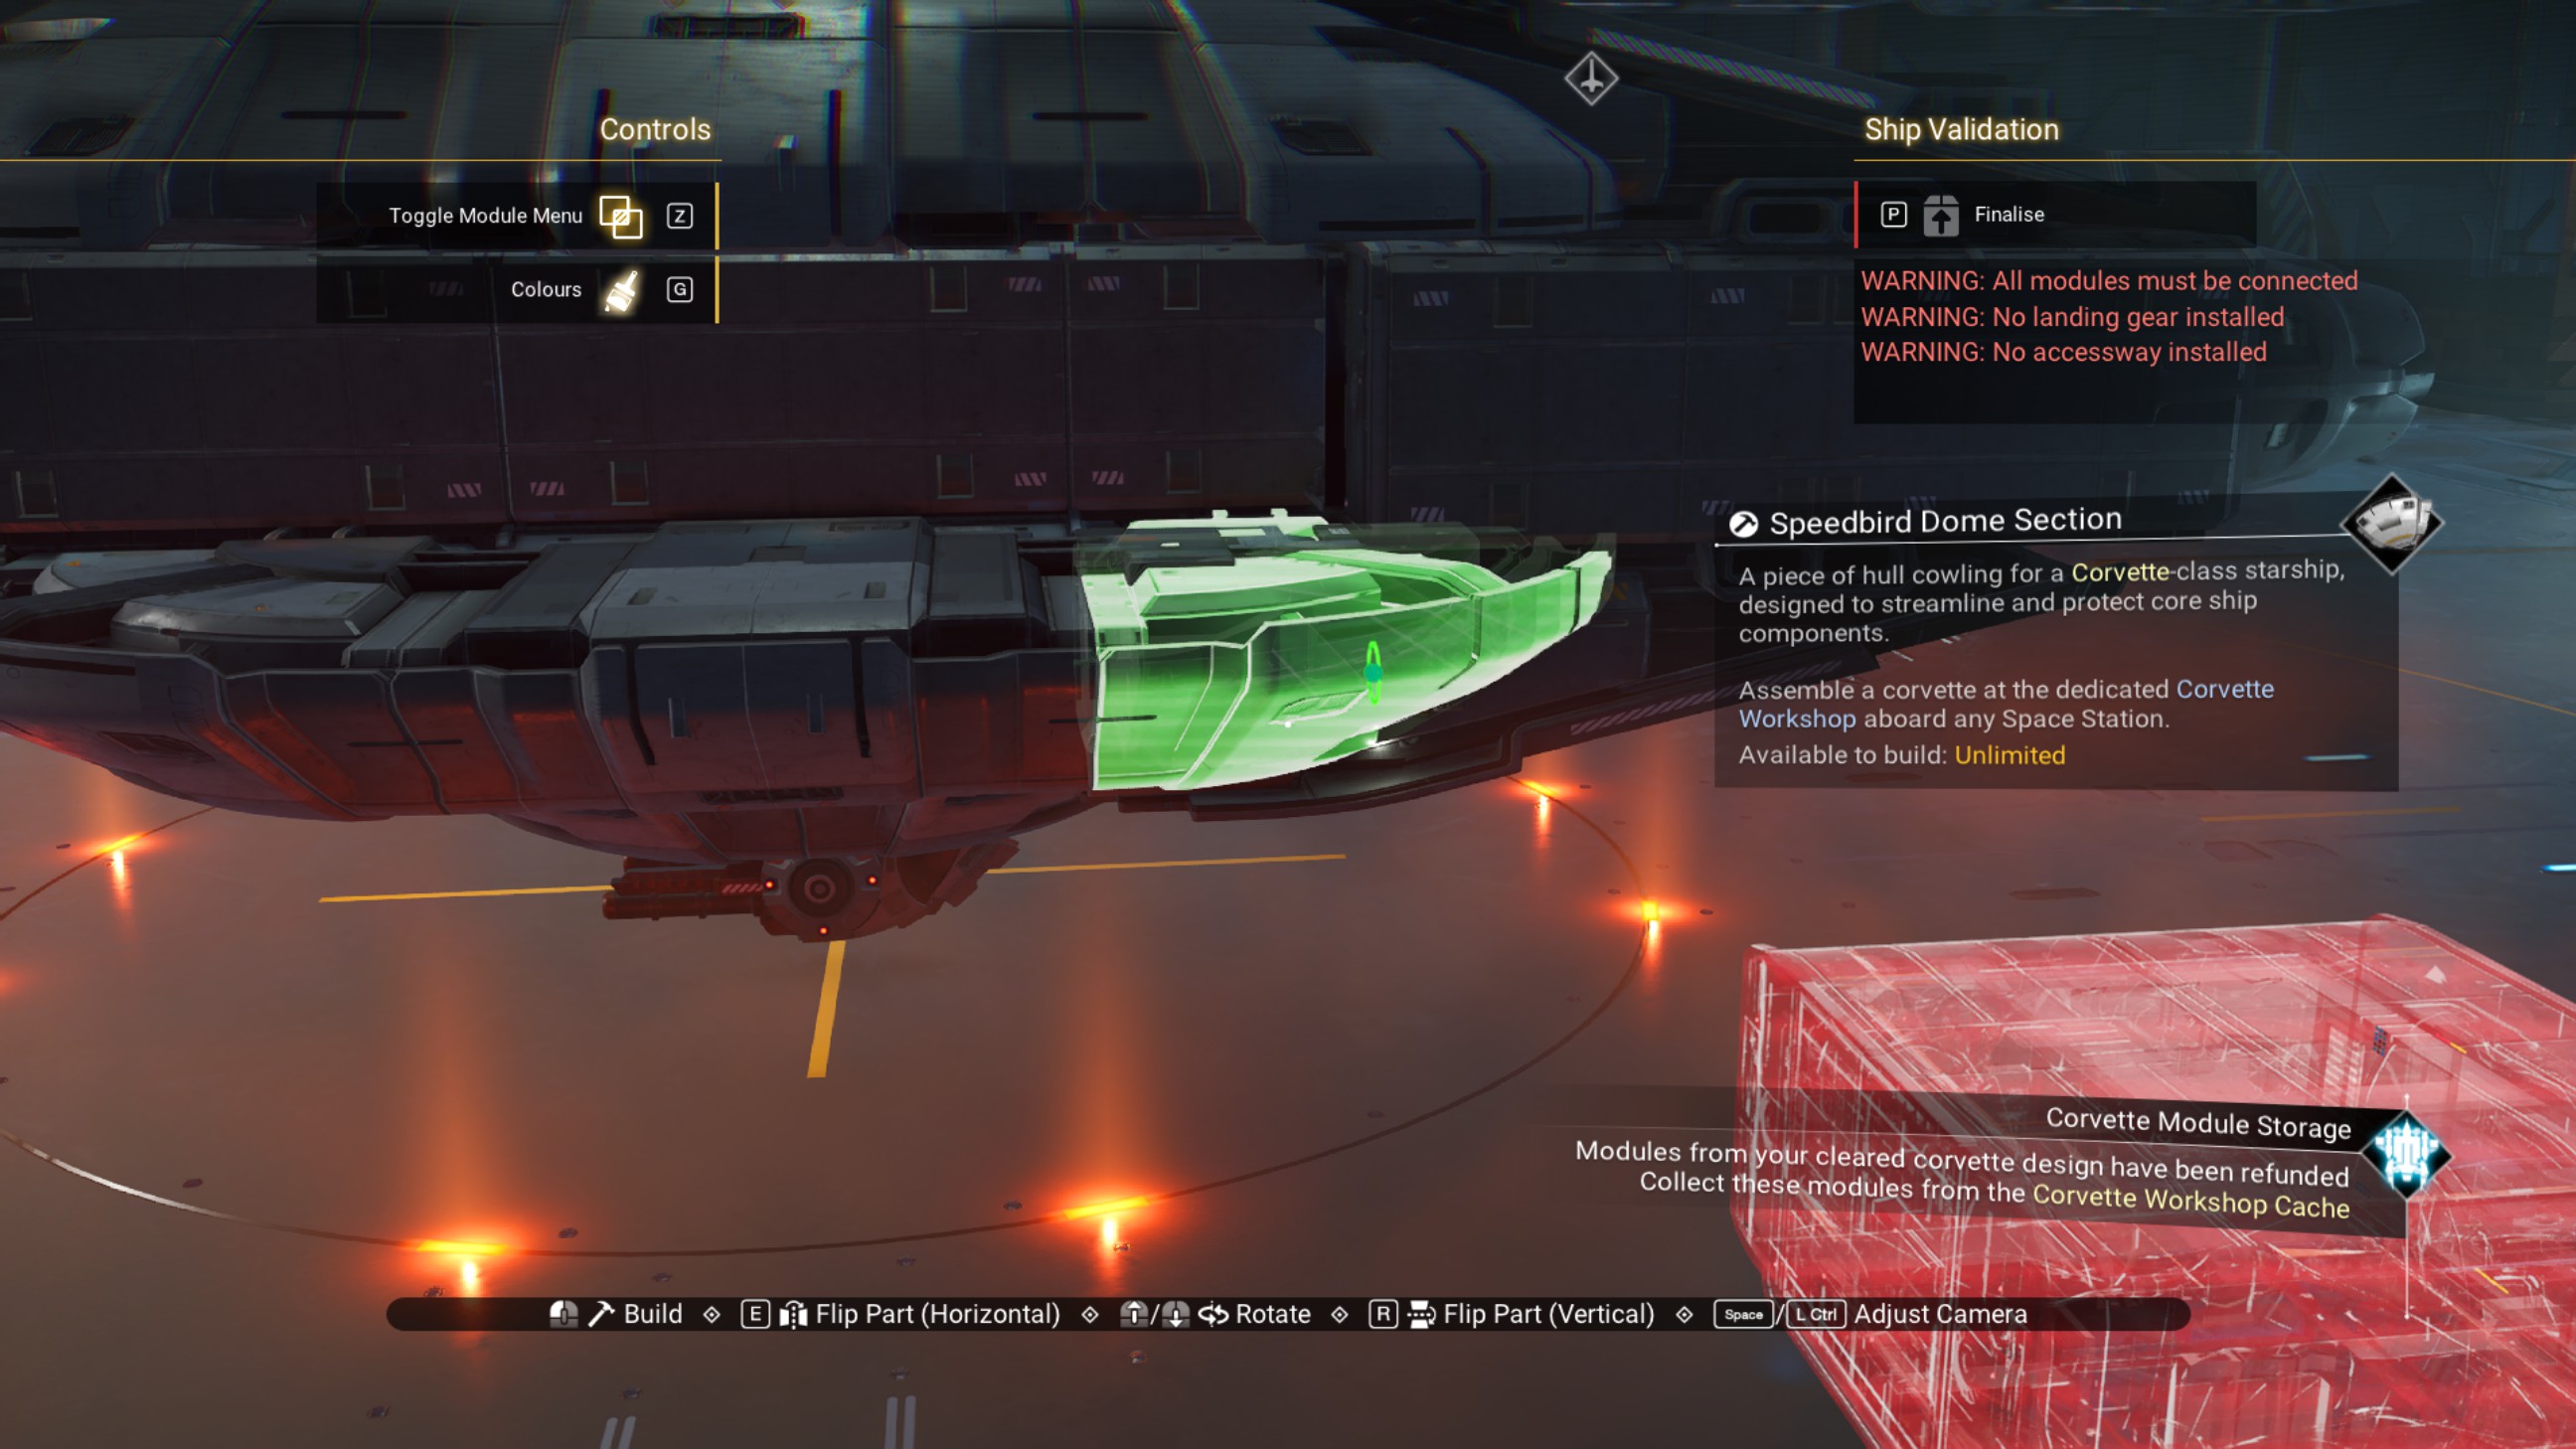
Delete the first walkway closest to the cockpit, and replace it with a thunderbird-class landing bay.
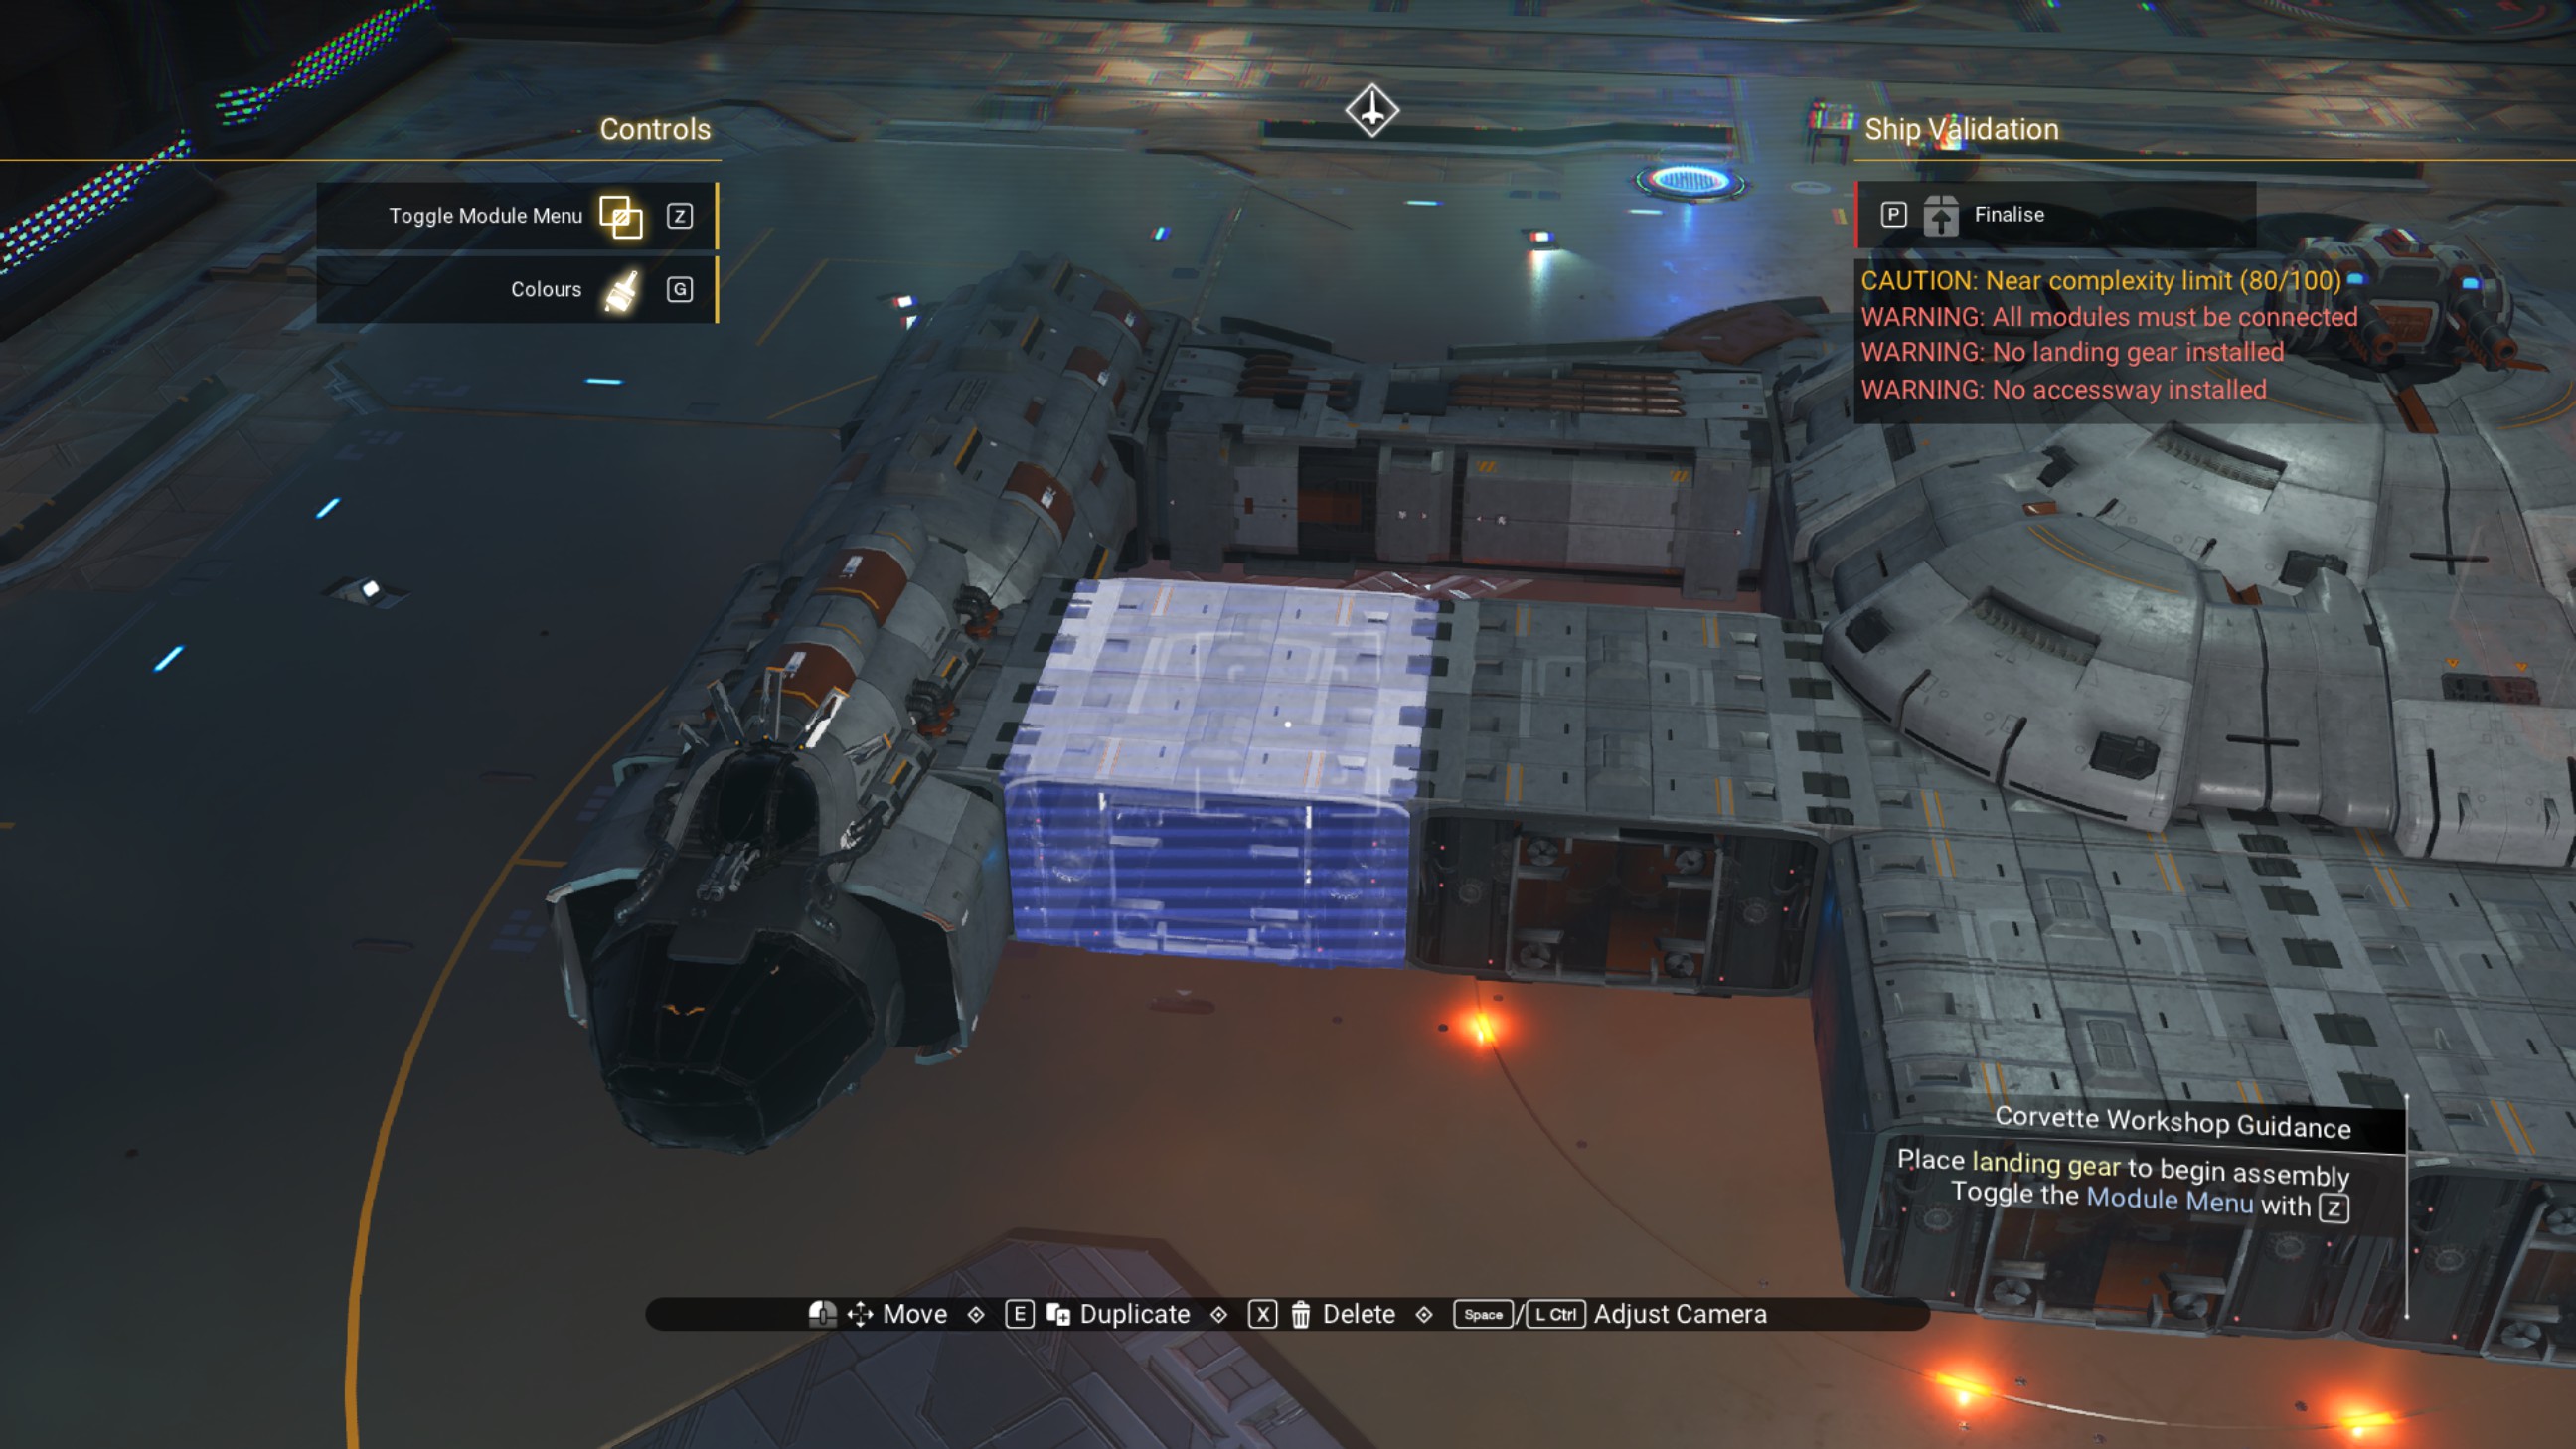
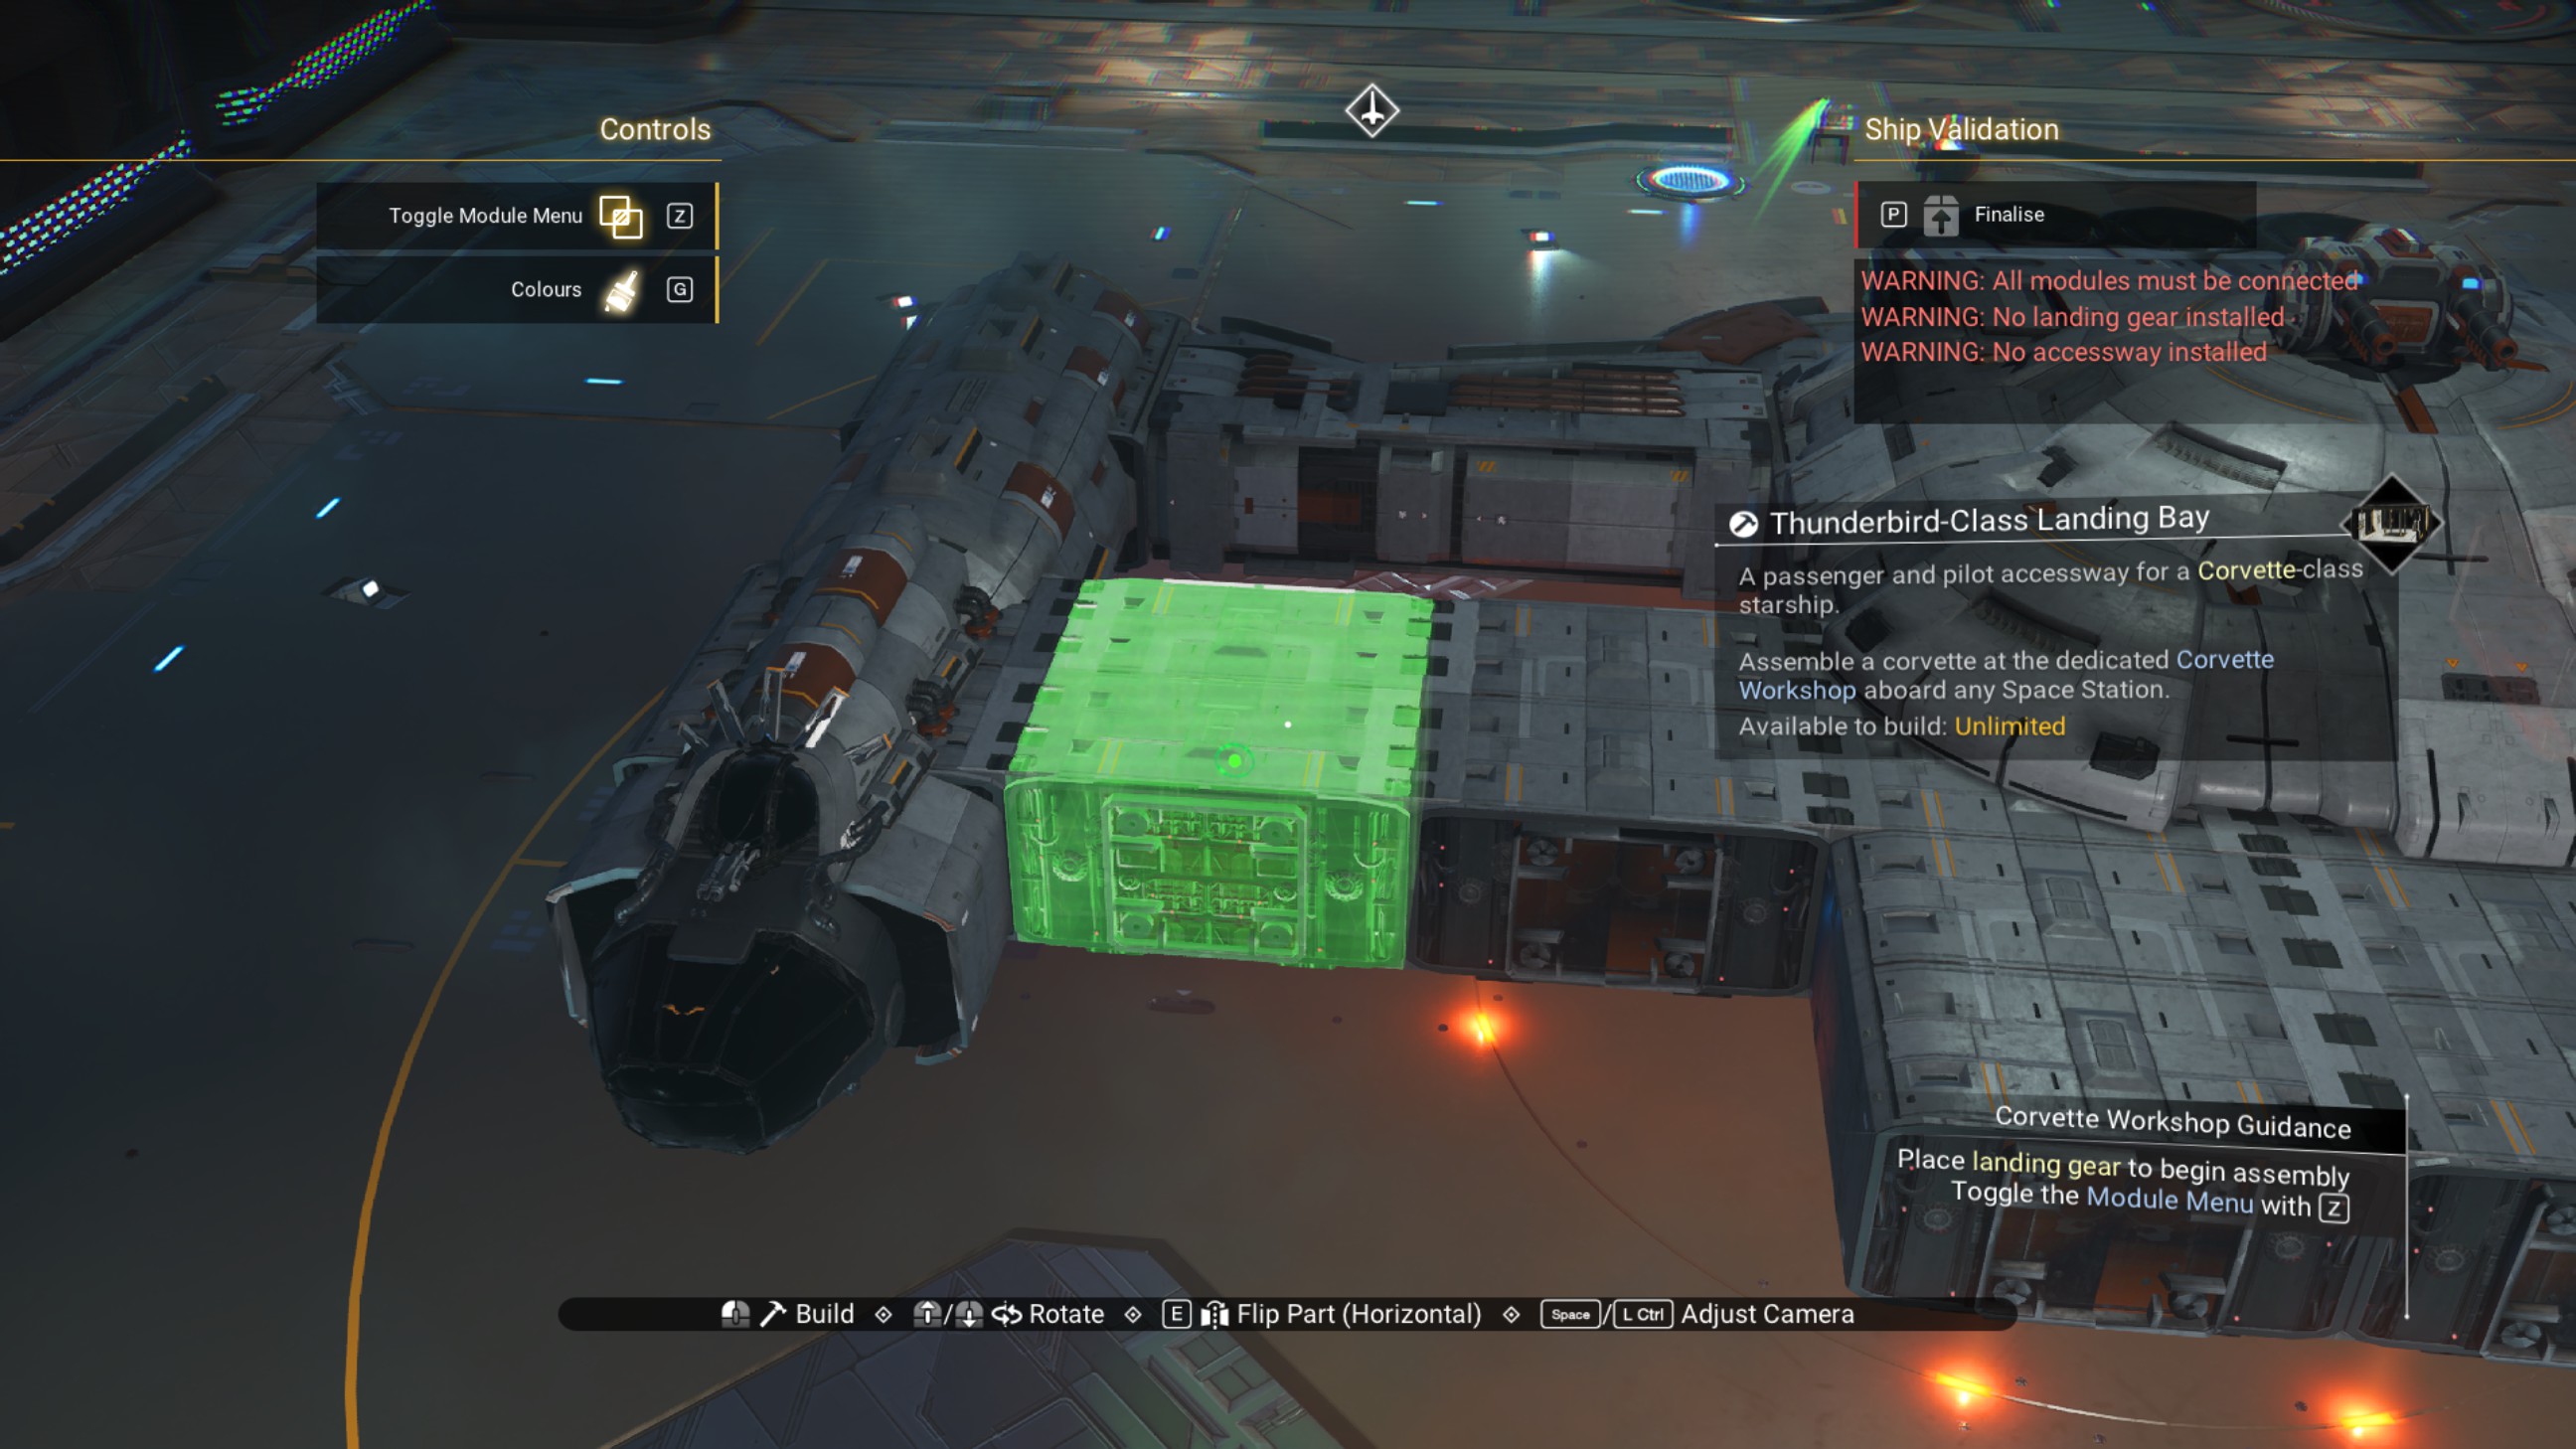
Place a vesper diffusing rim on the forward arm connecting the hull to the cockpit structure.
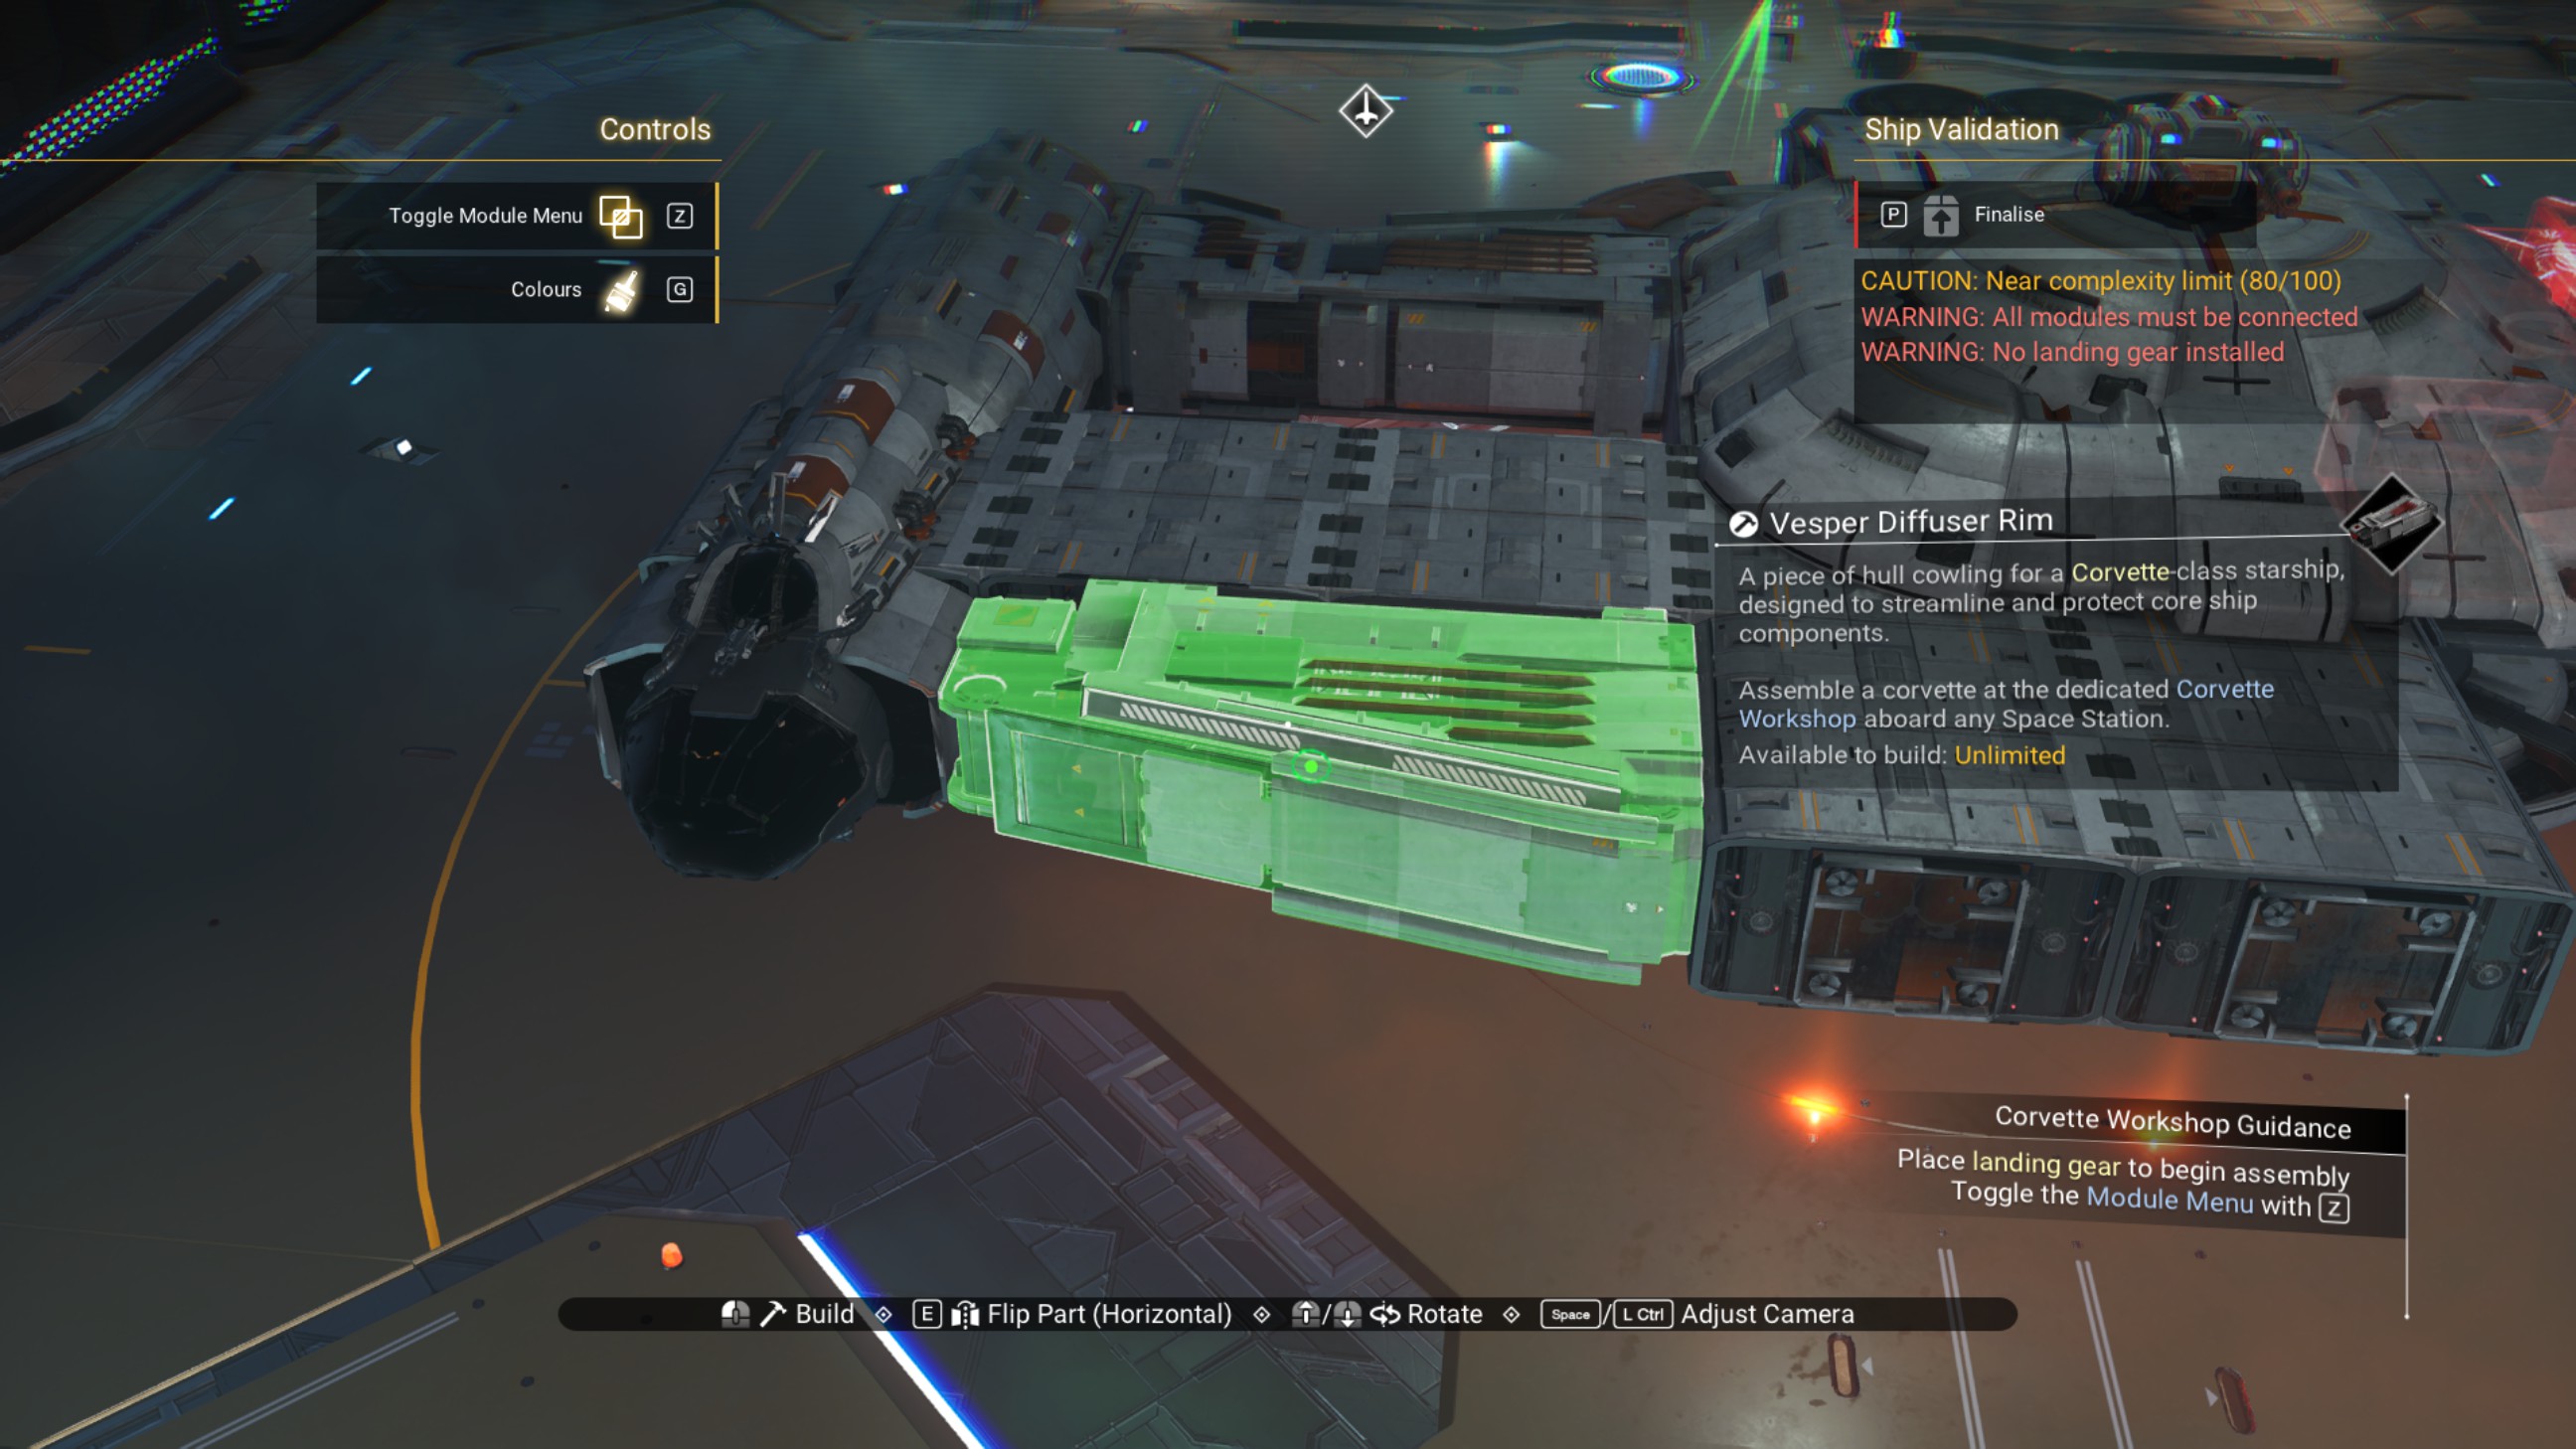
Place a walkway on the front of the hull, as shown. Then, place a ducting outlet on the front of the walkway.
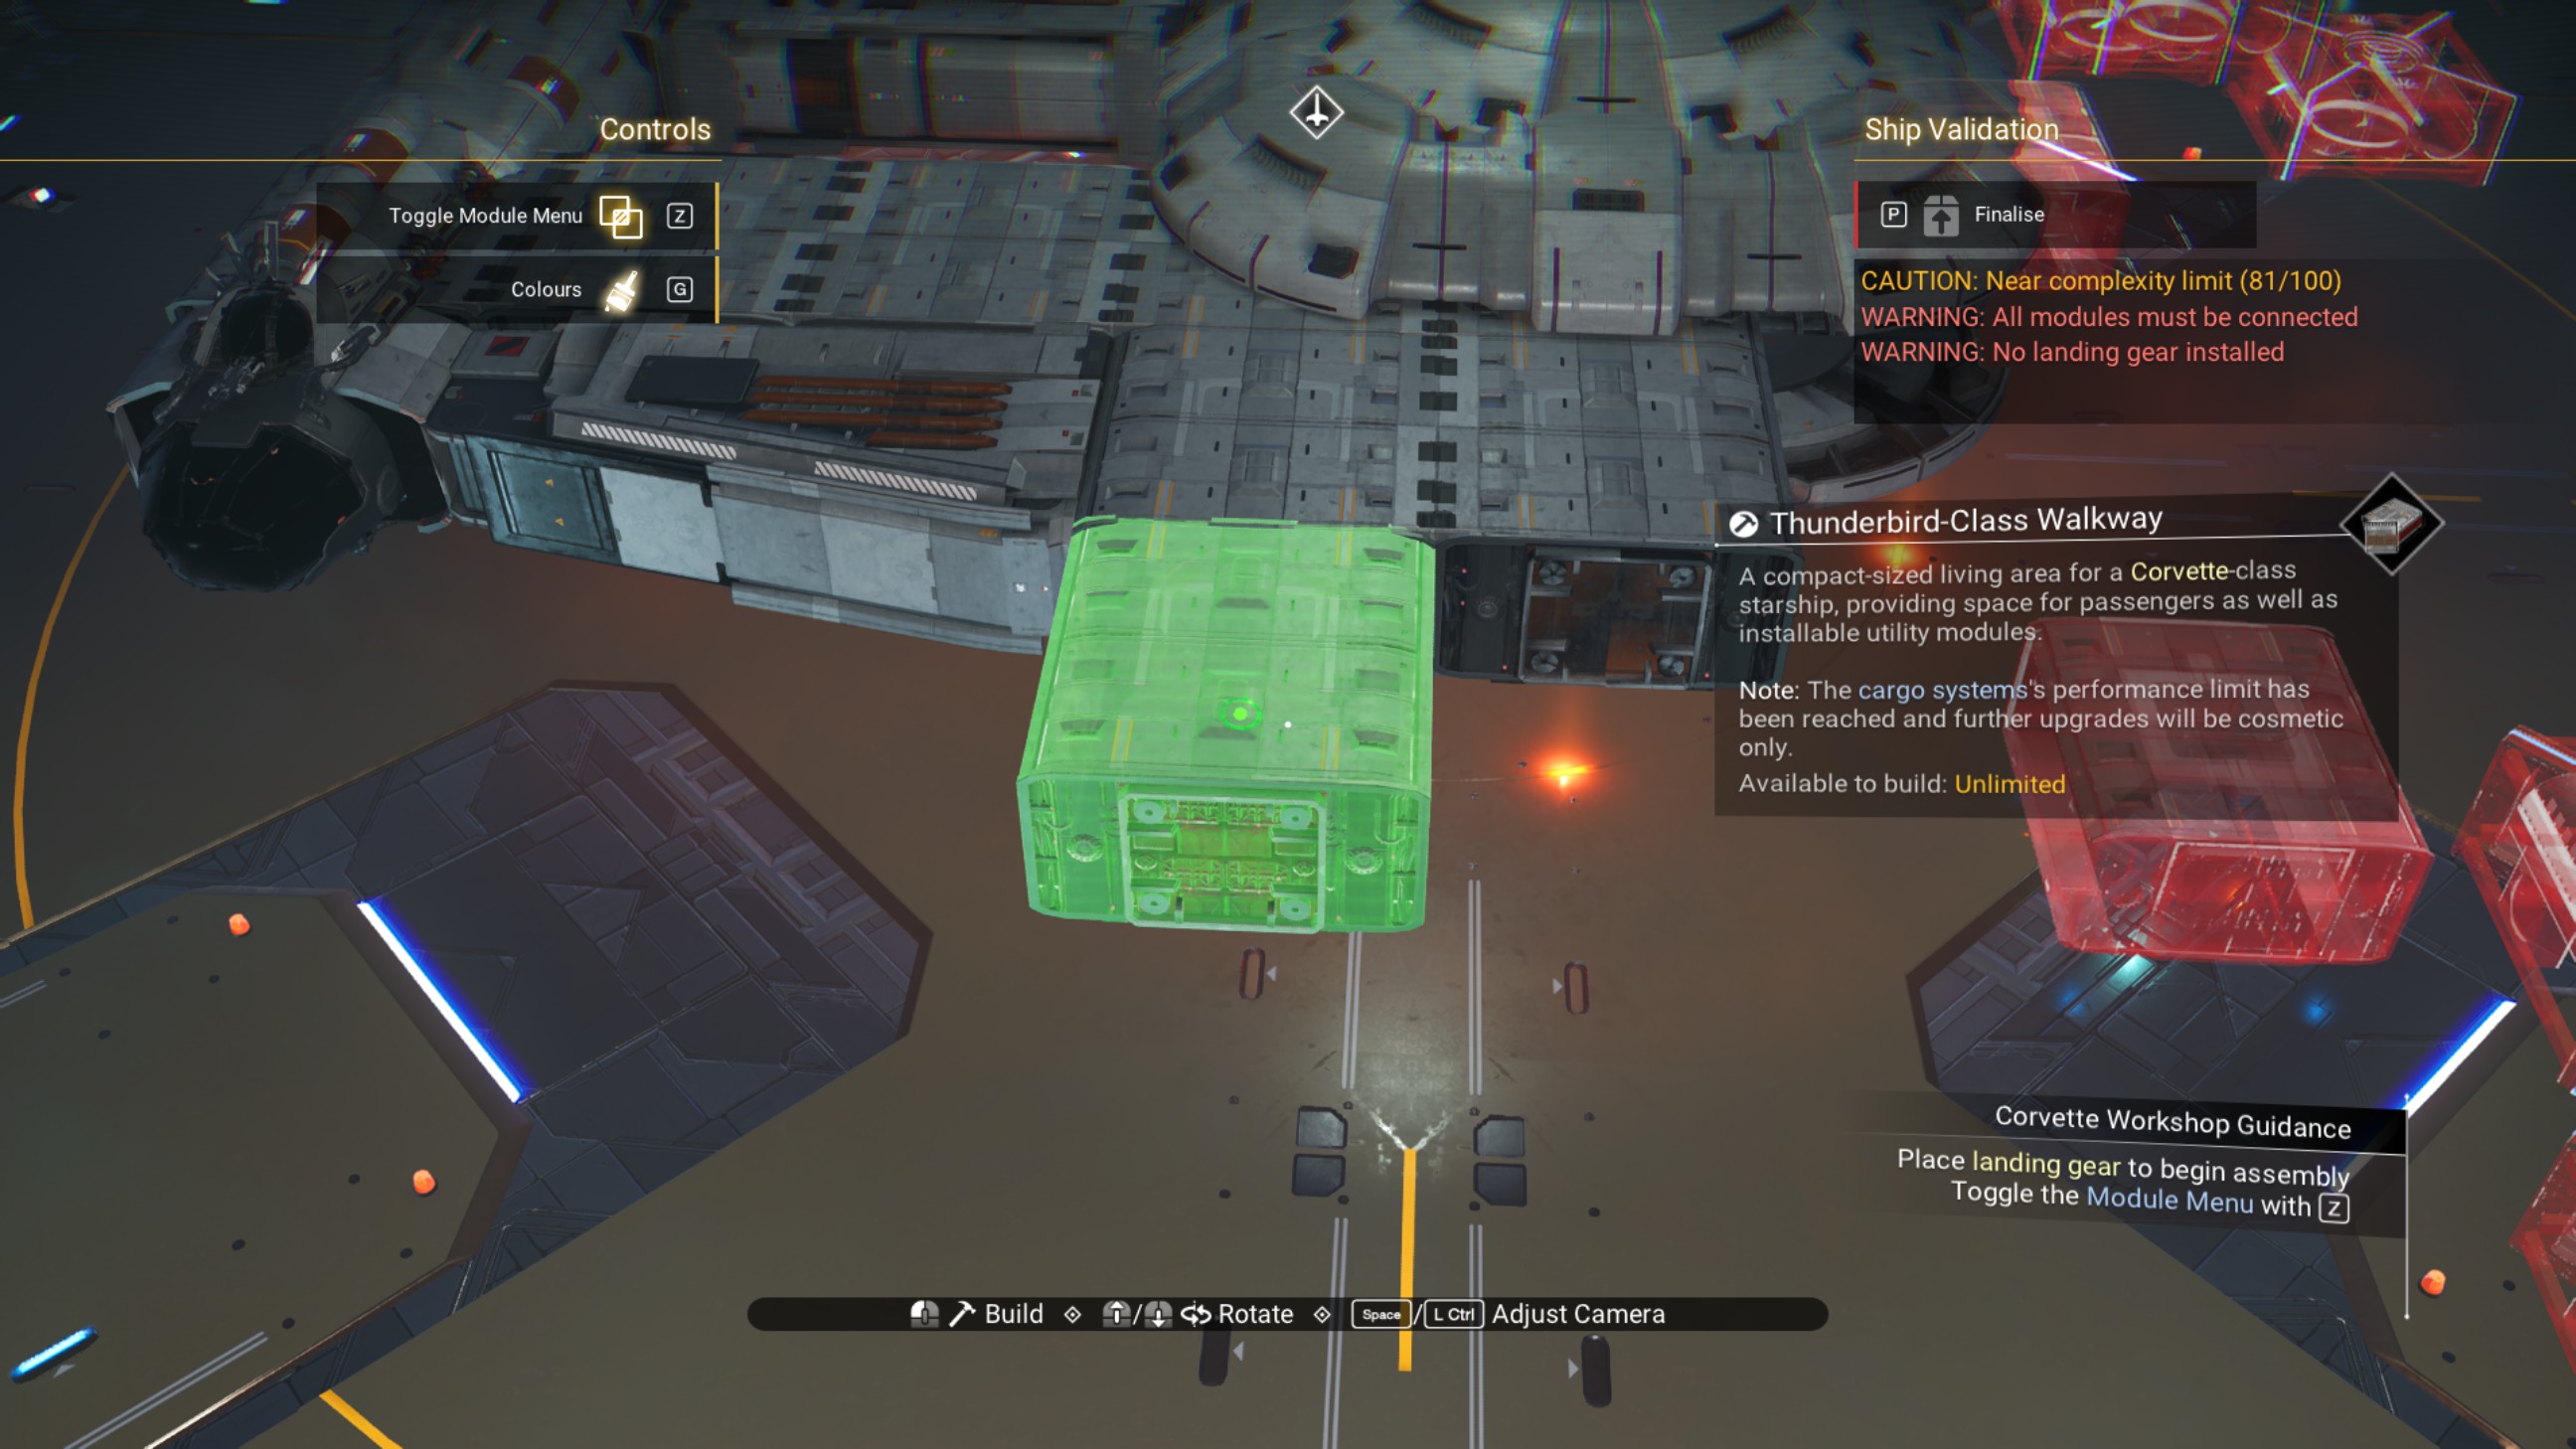
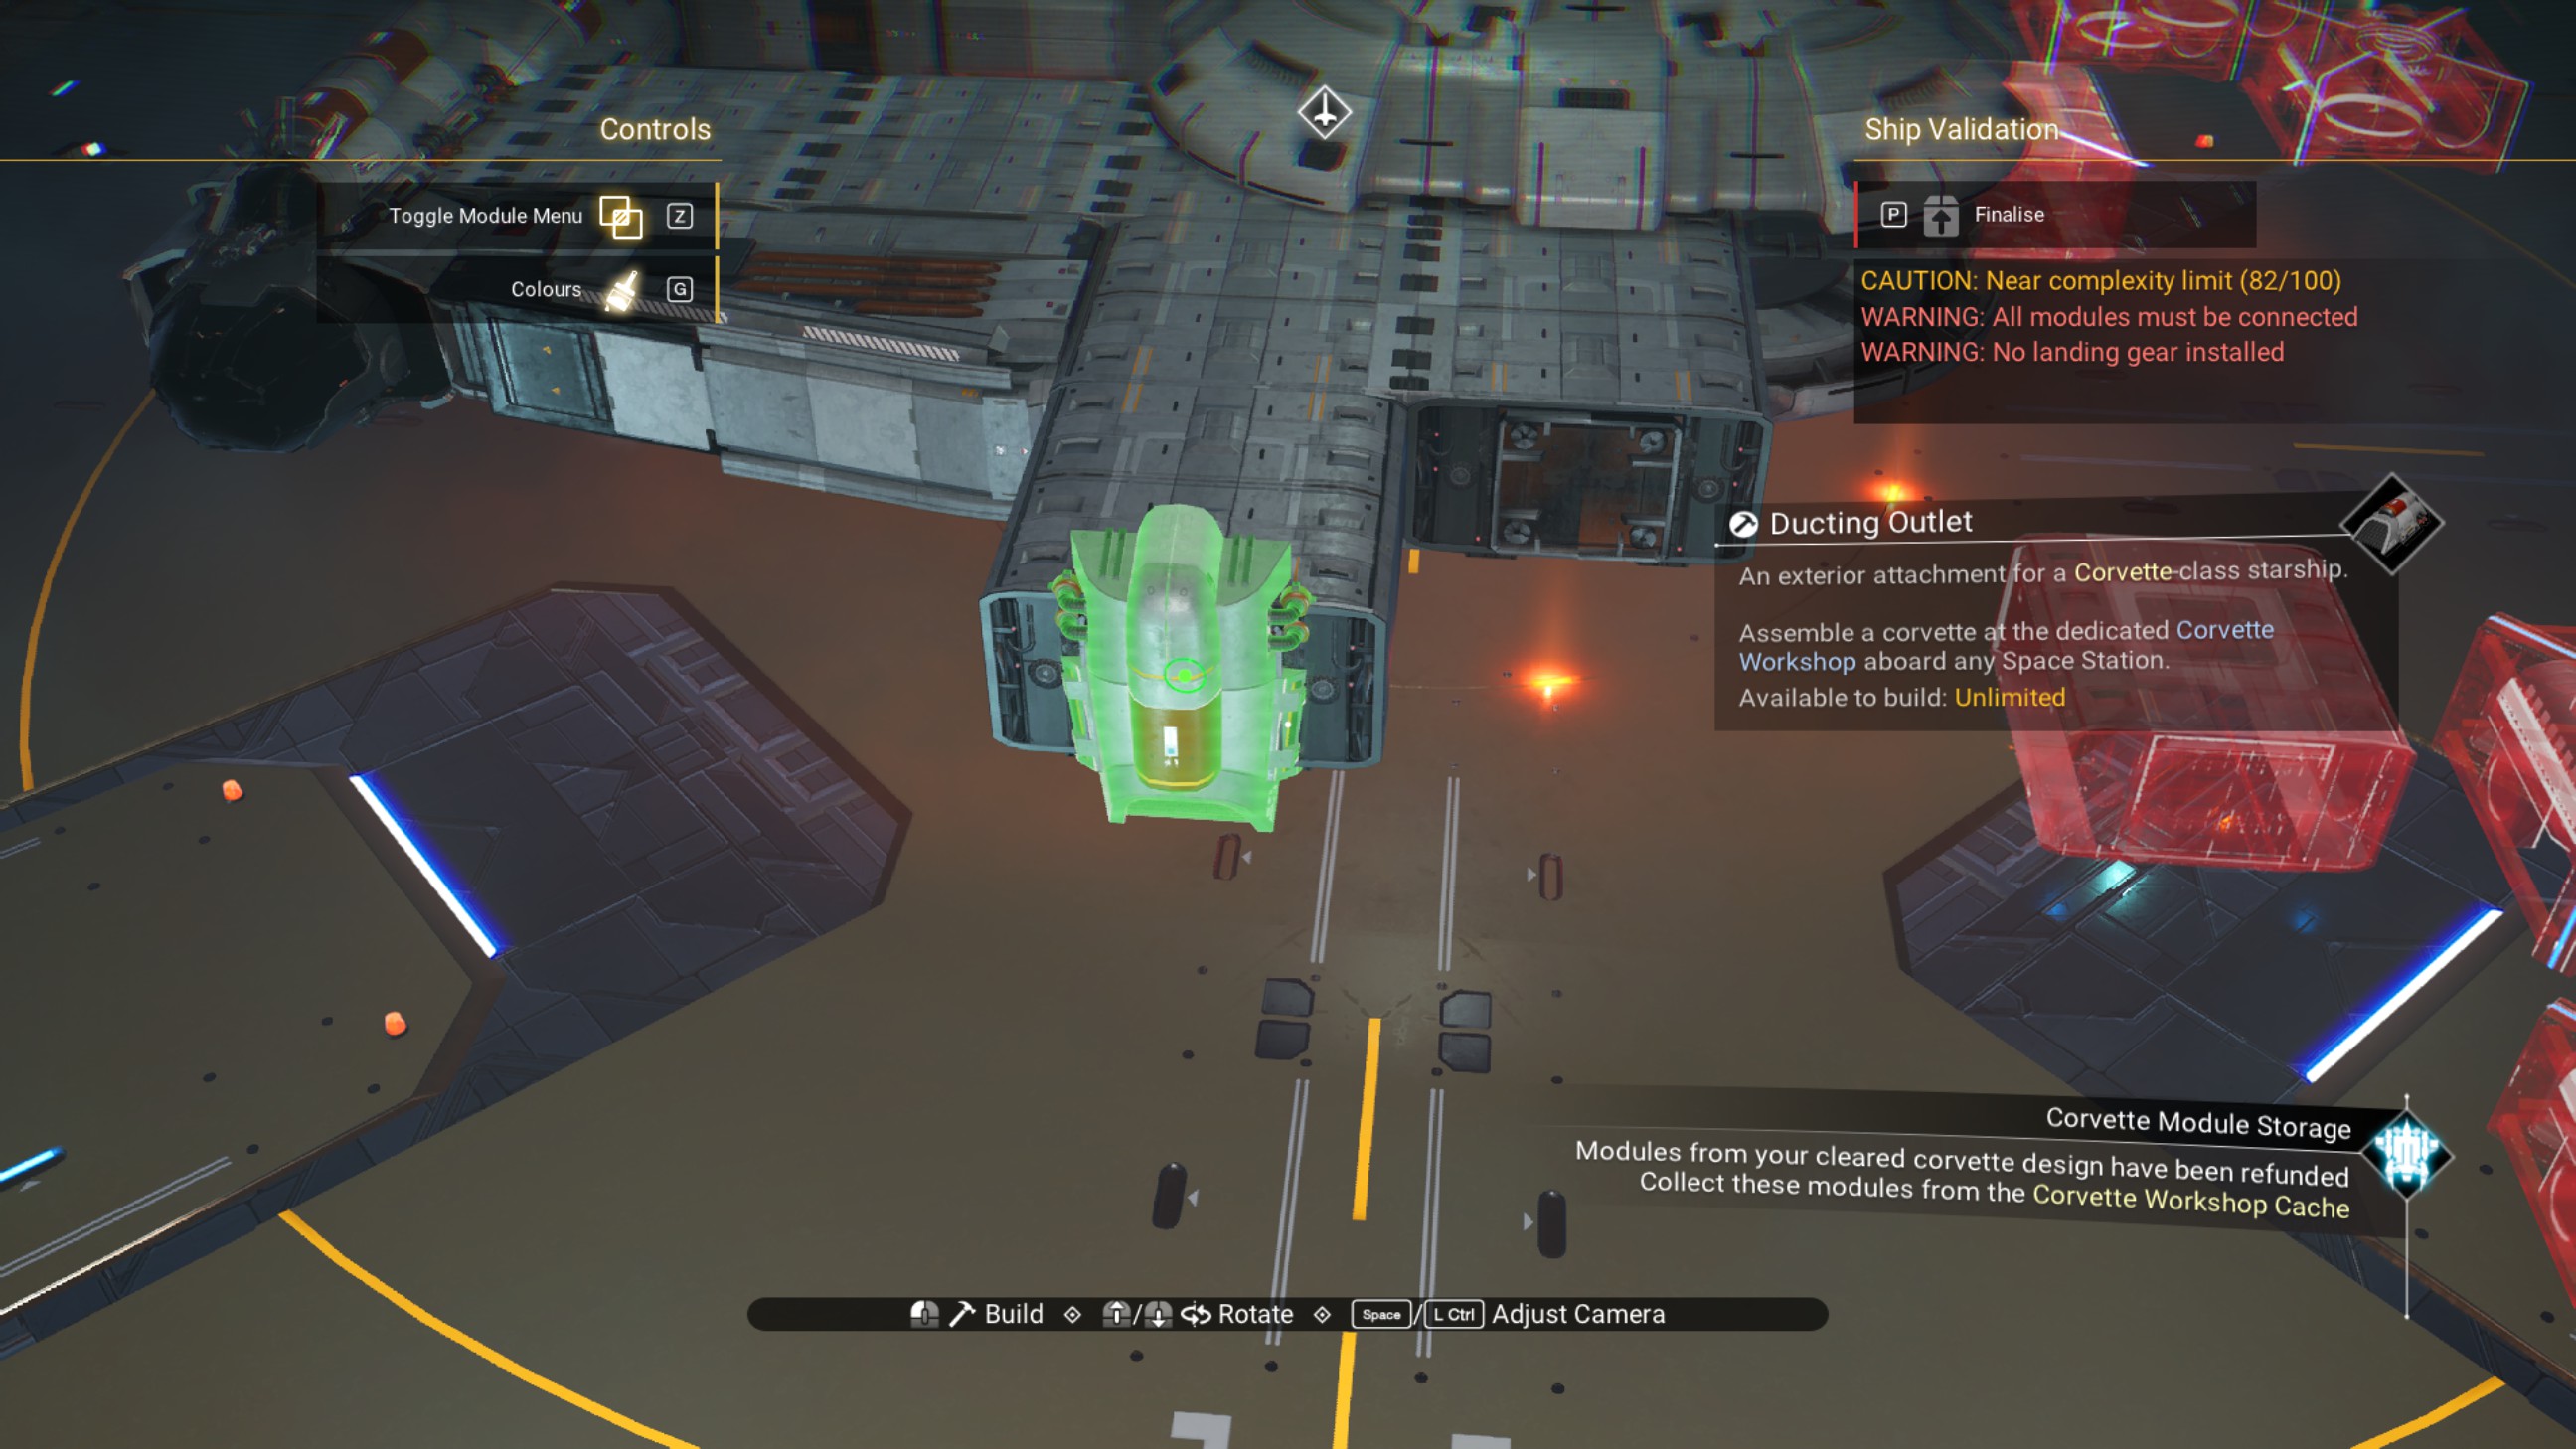
Shift the walkway so the ducting outlet is on the starboard side of the walkway, then delete the ducting outlet.
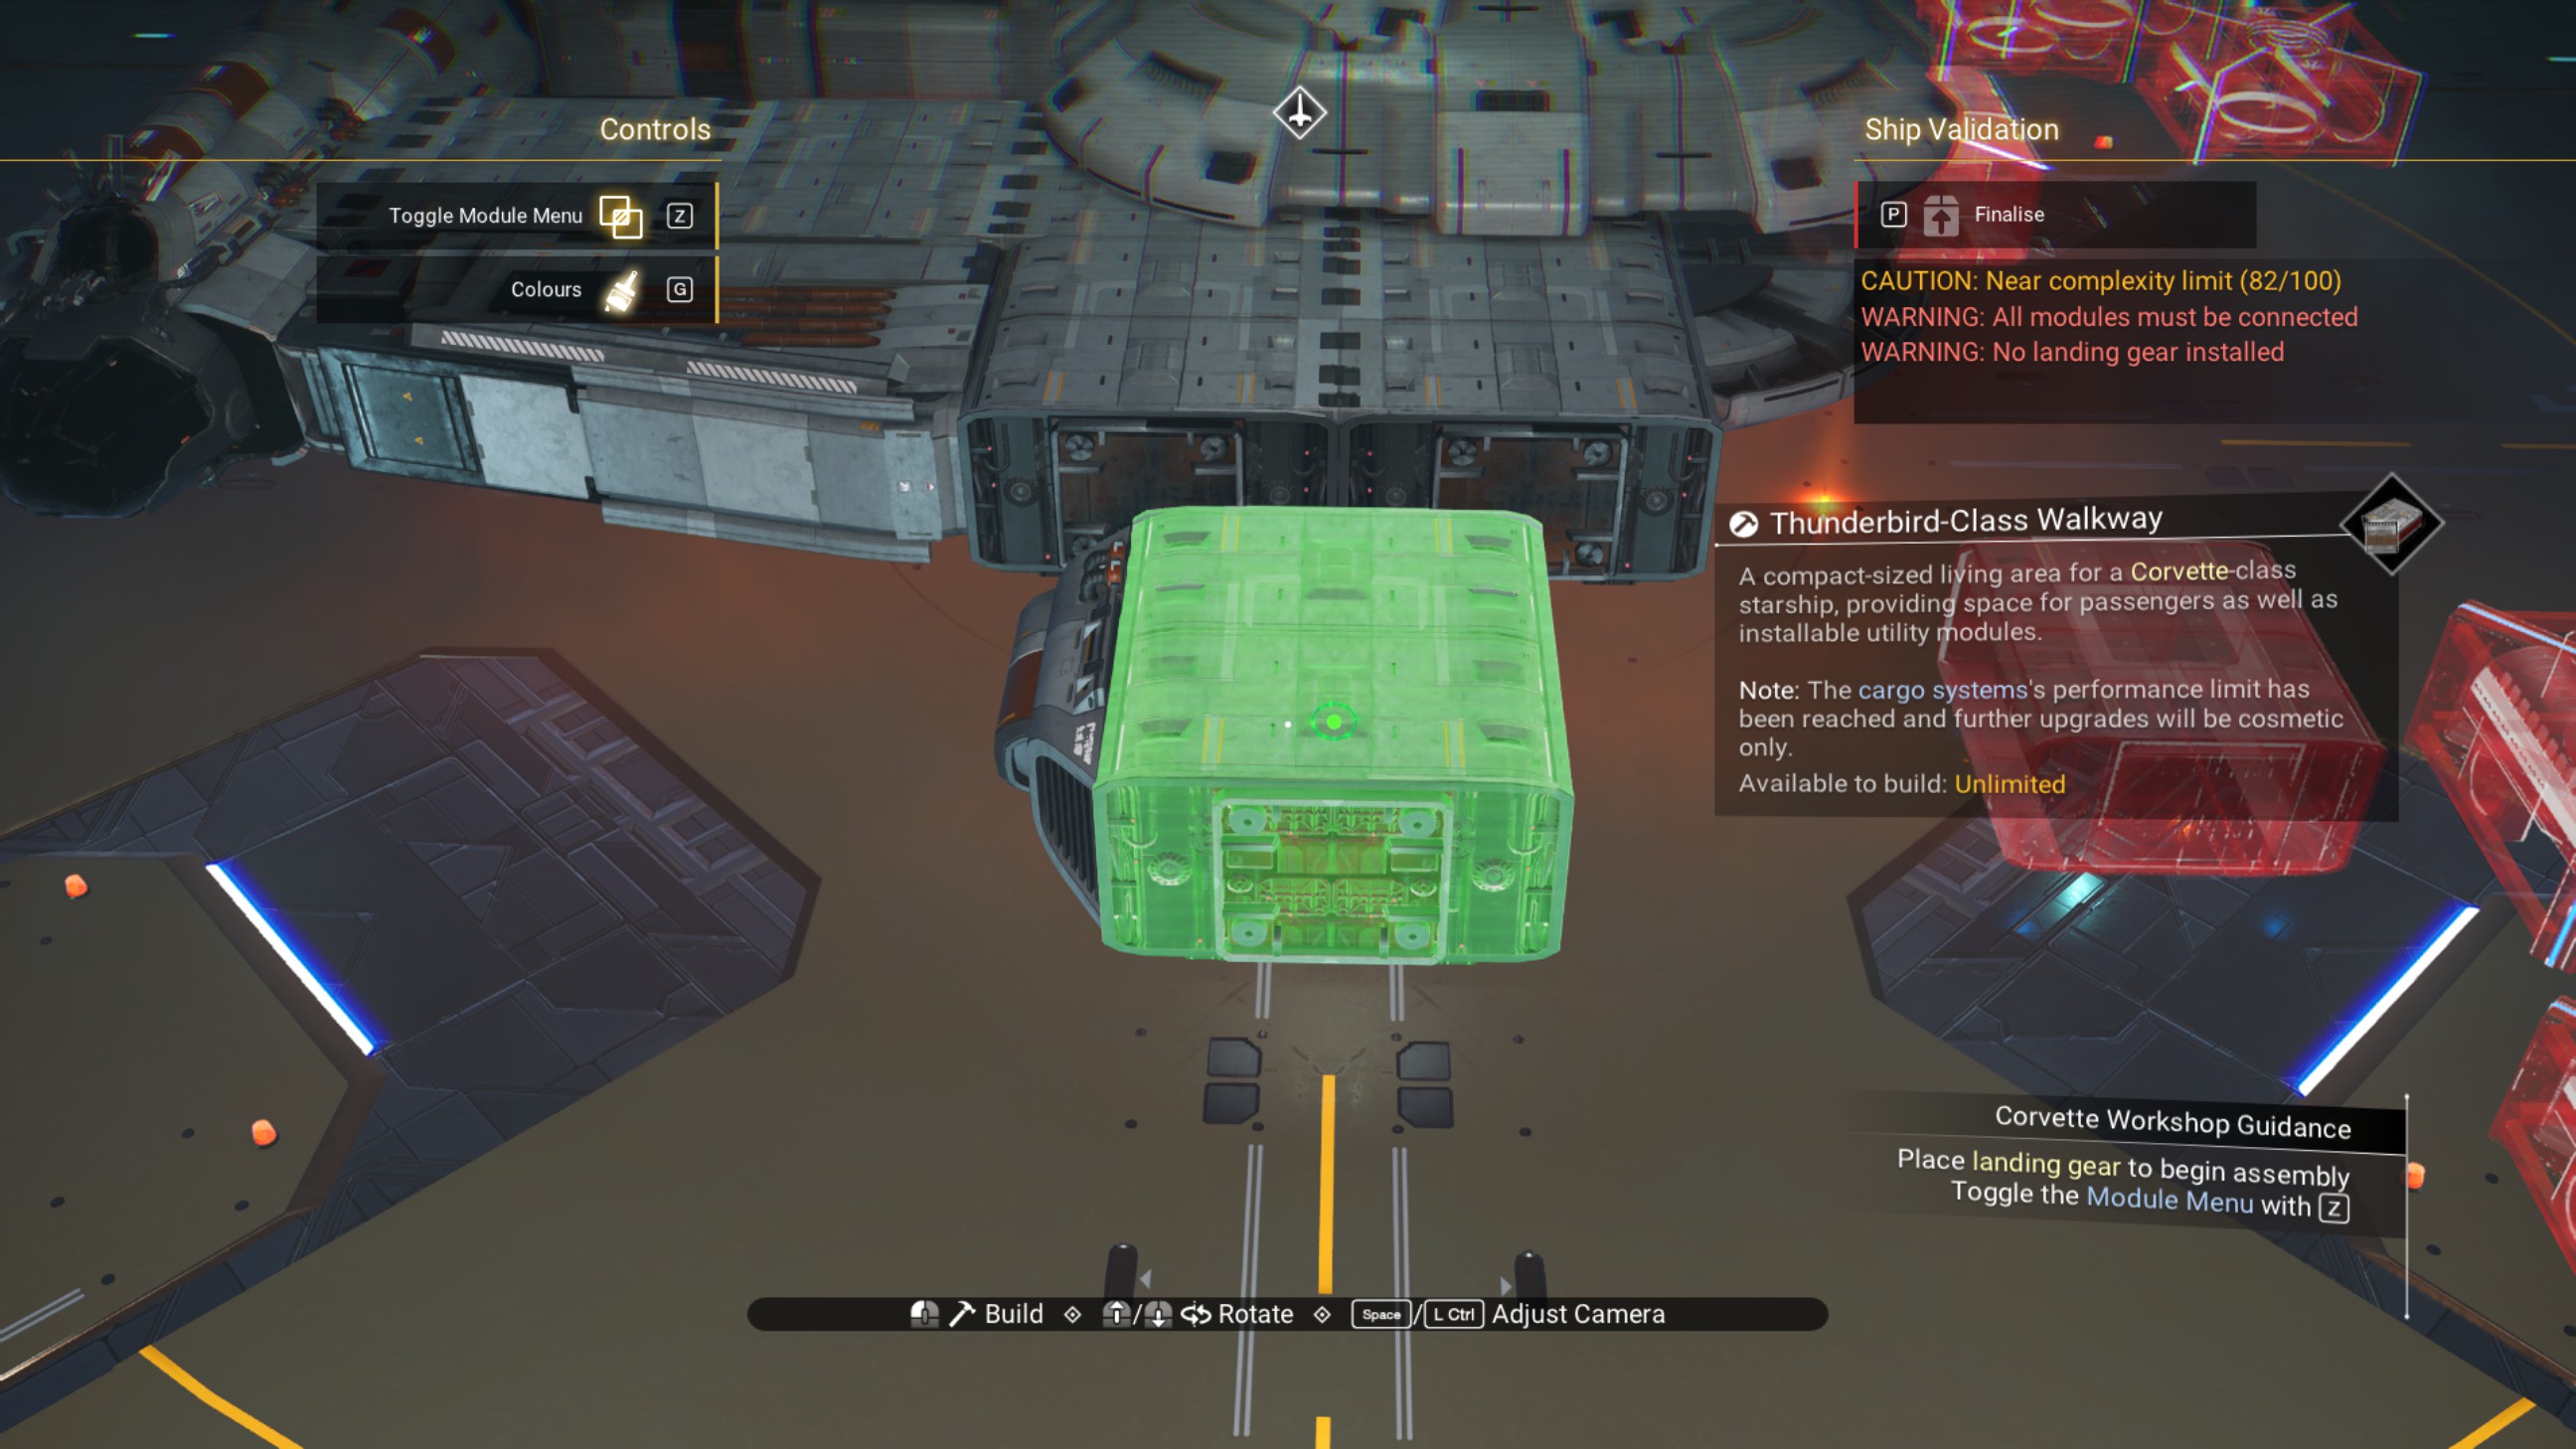
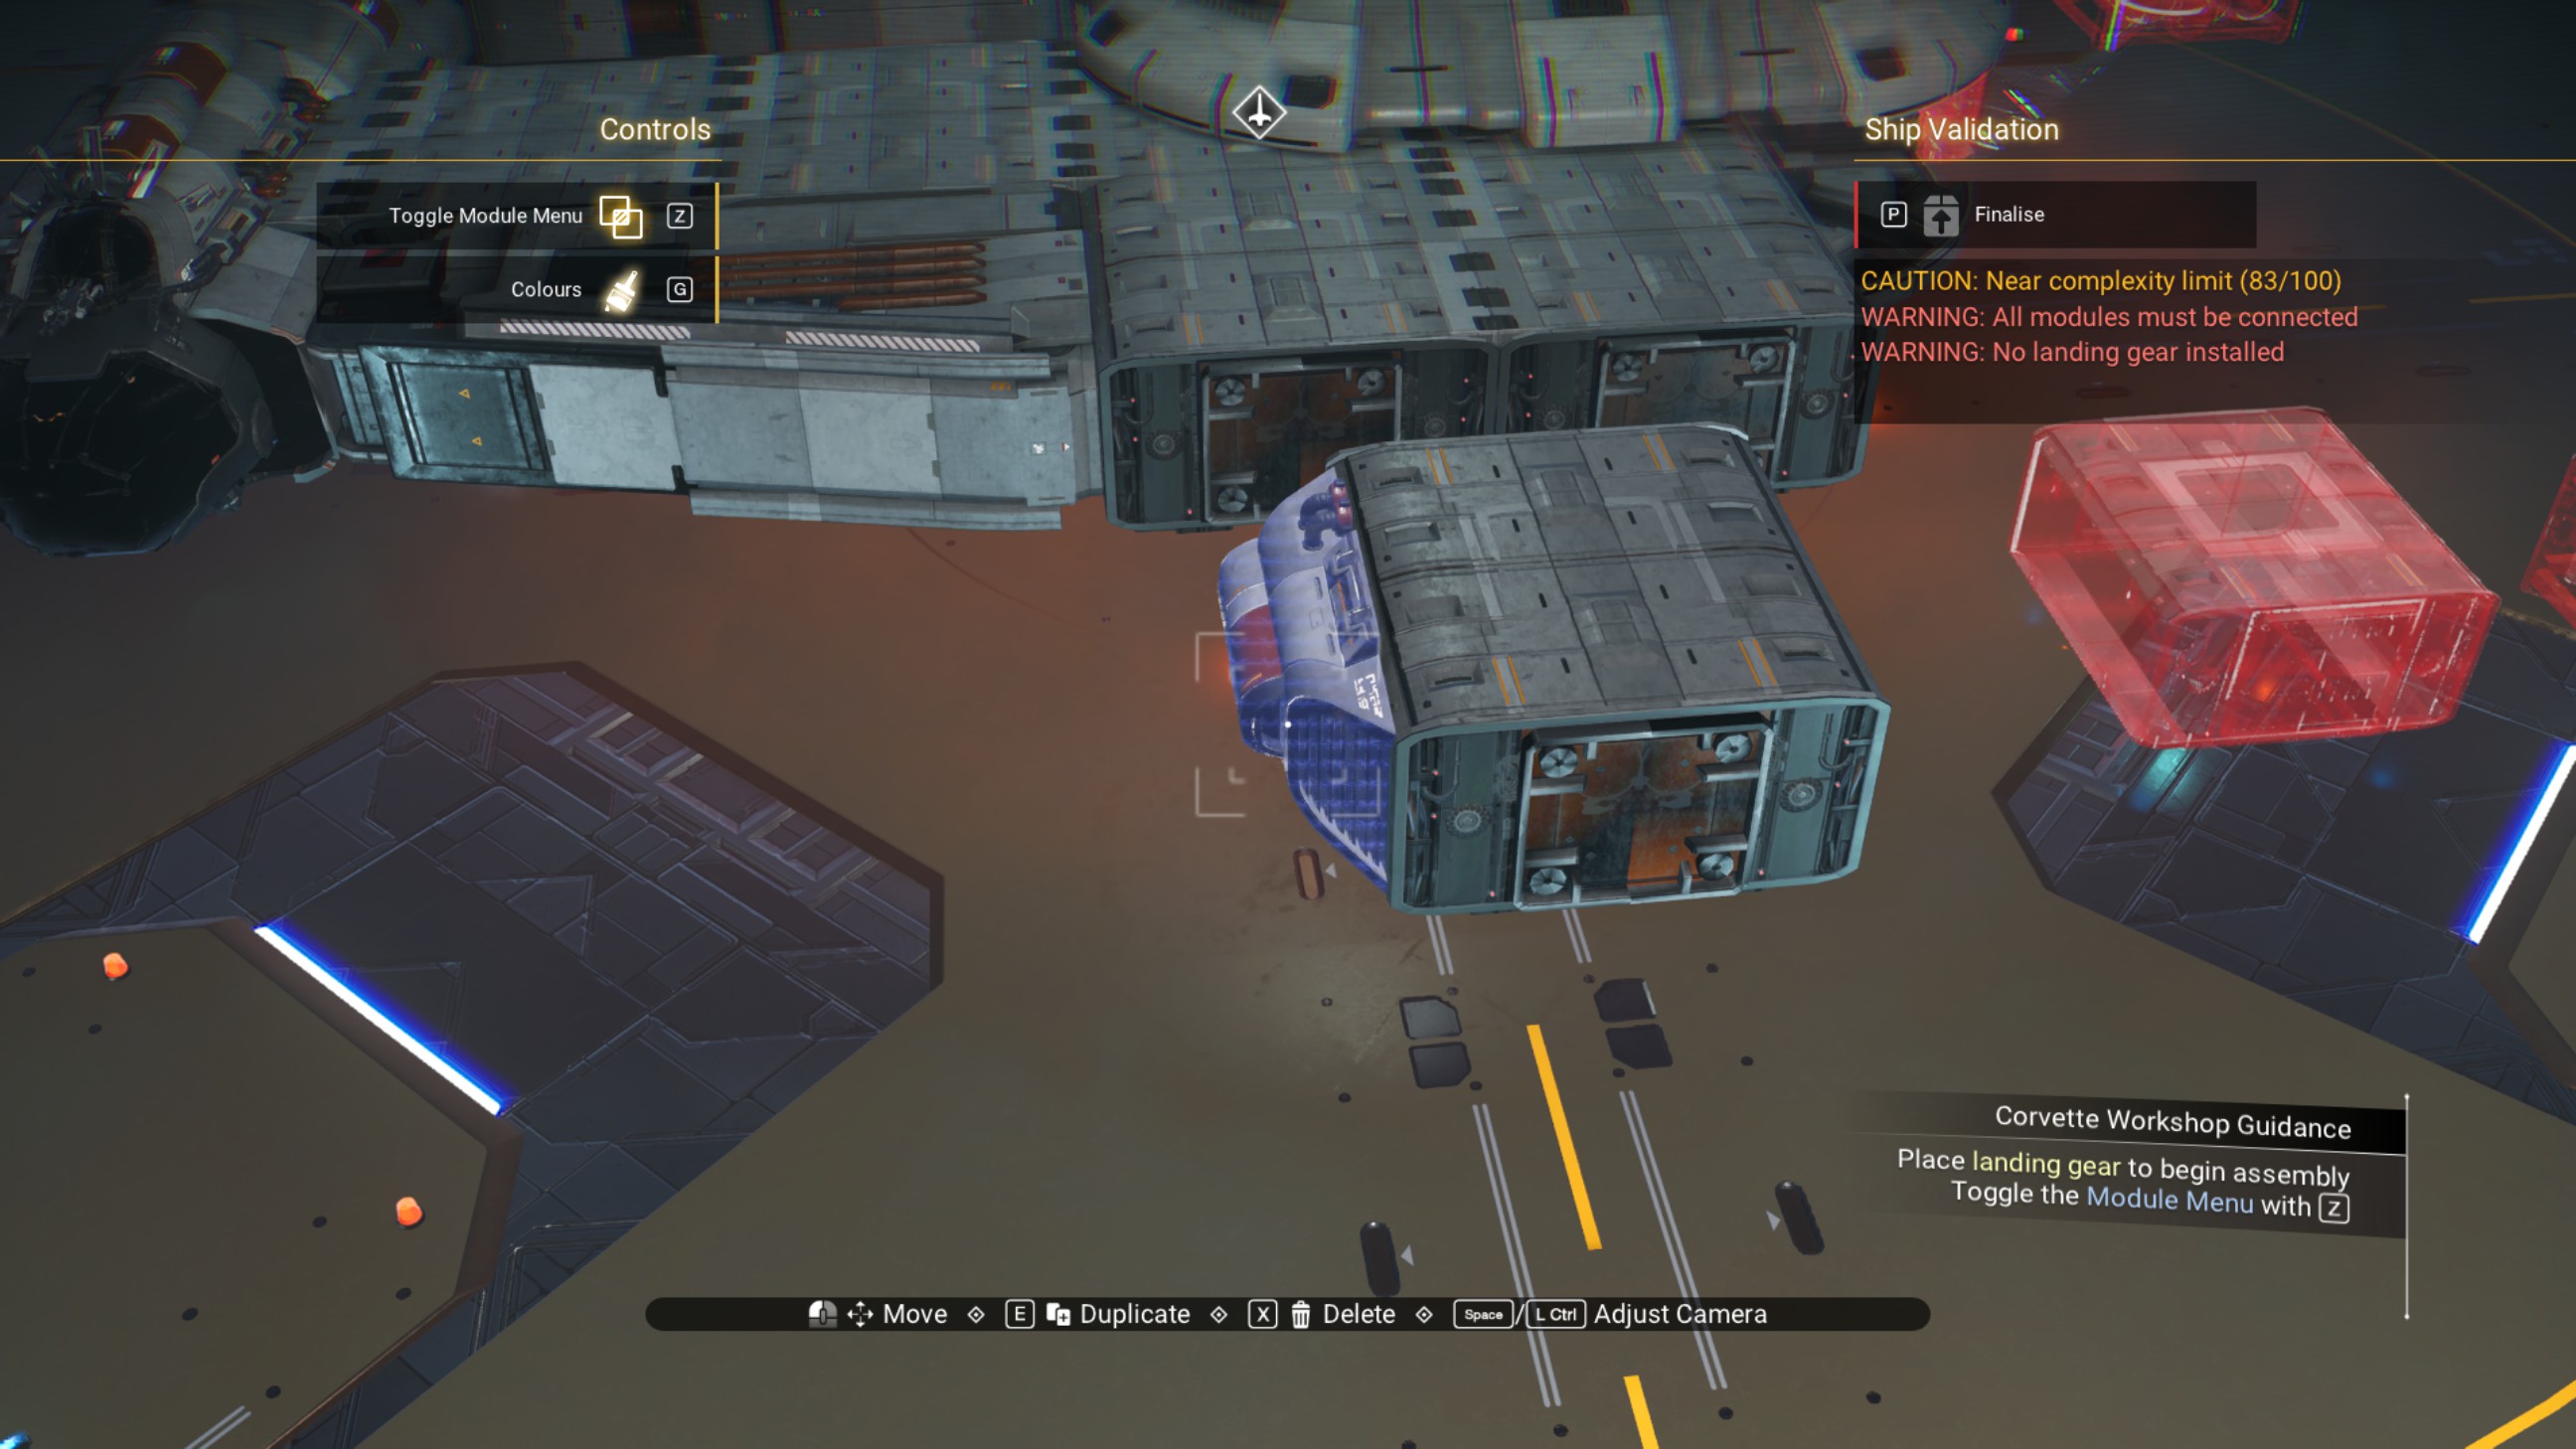
Place two more walkways, one behind the other, on the rear of the walkway we just offset.
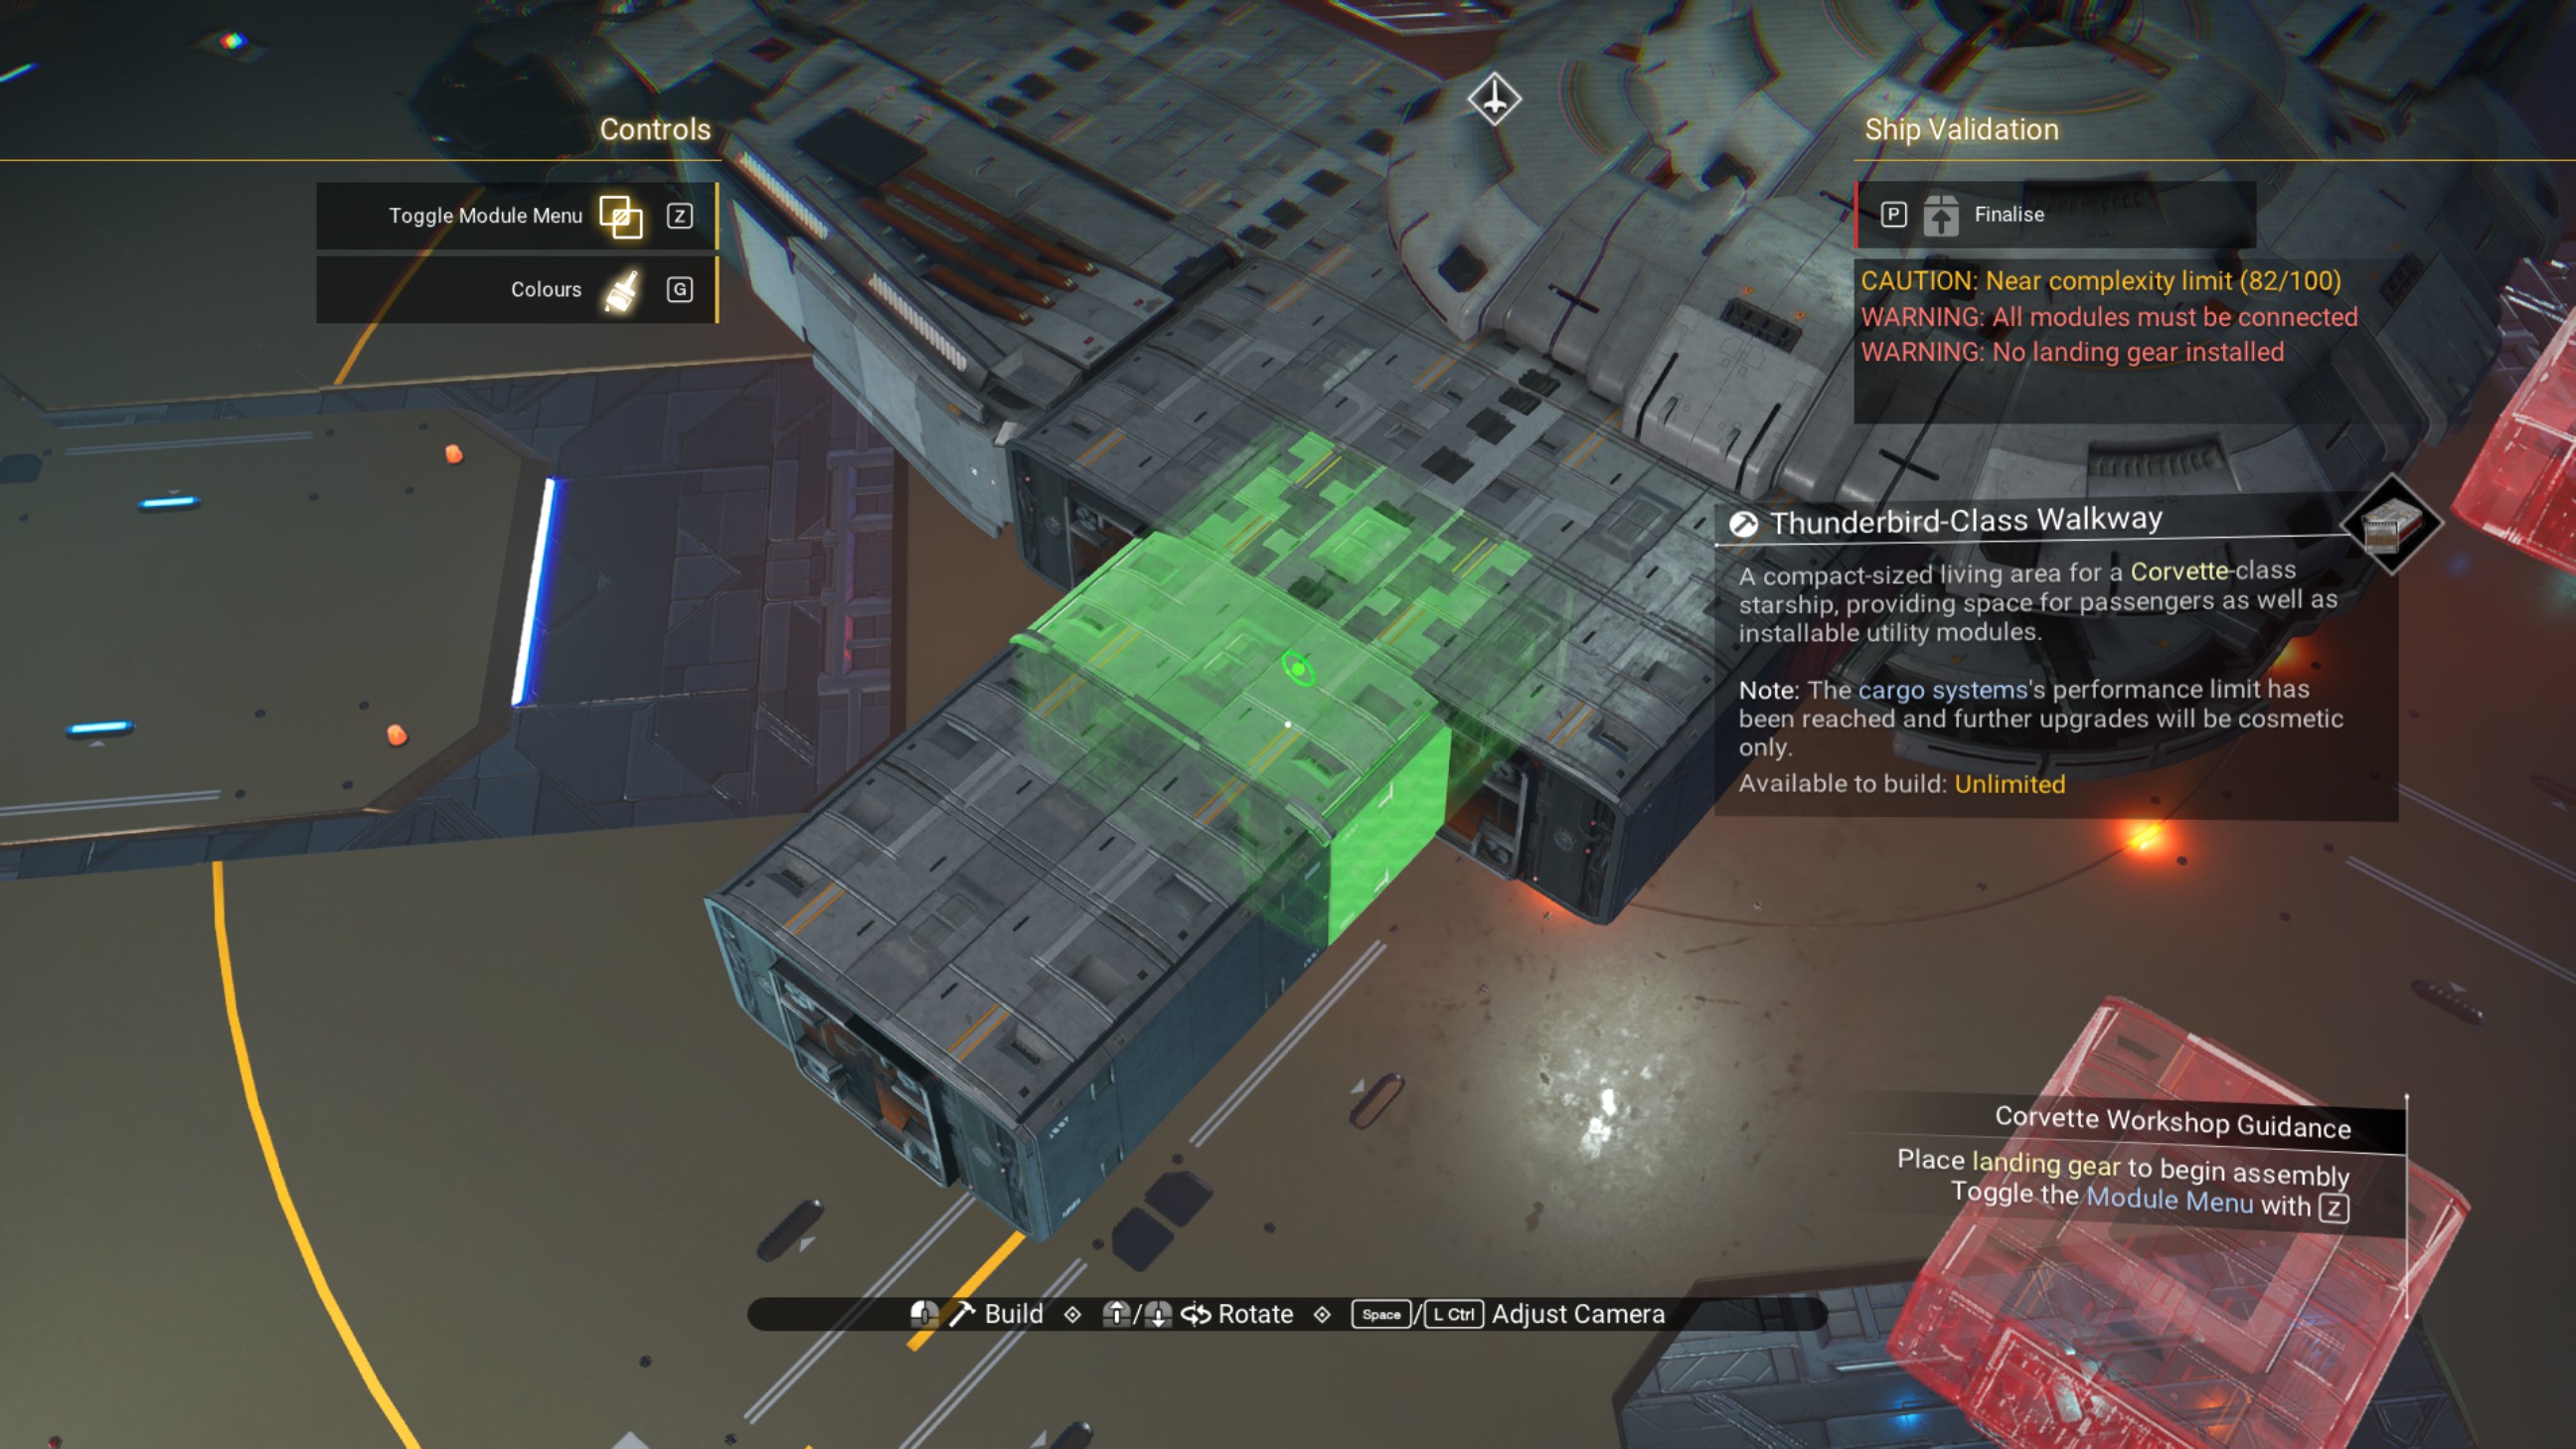
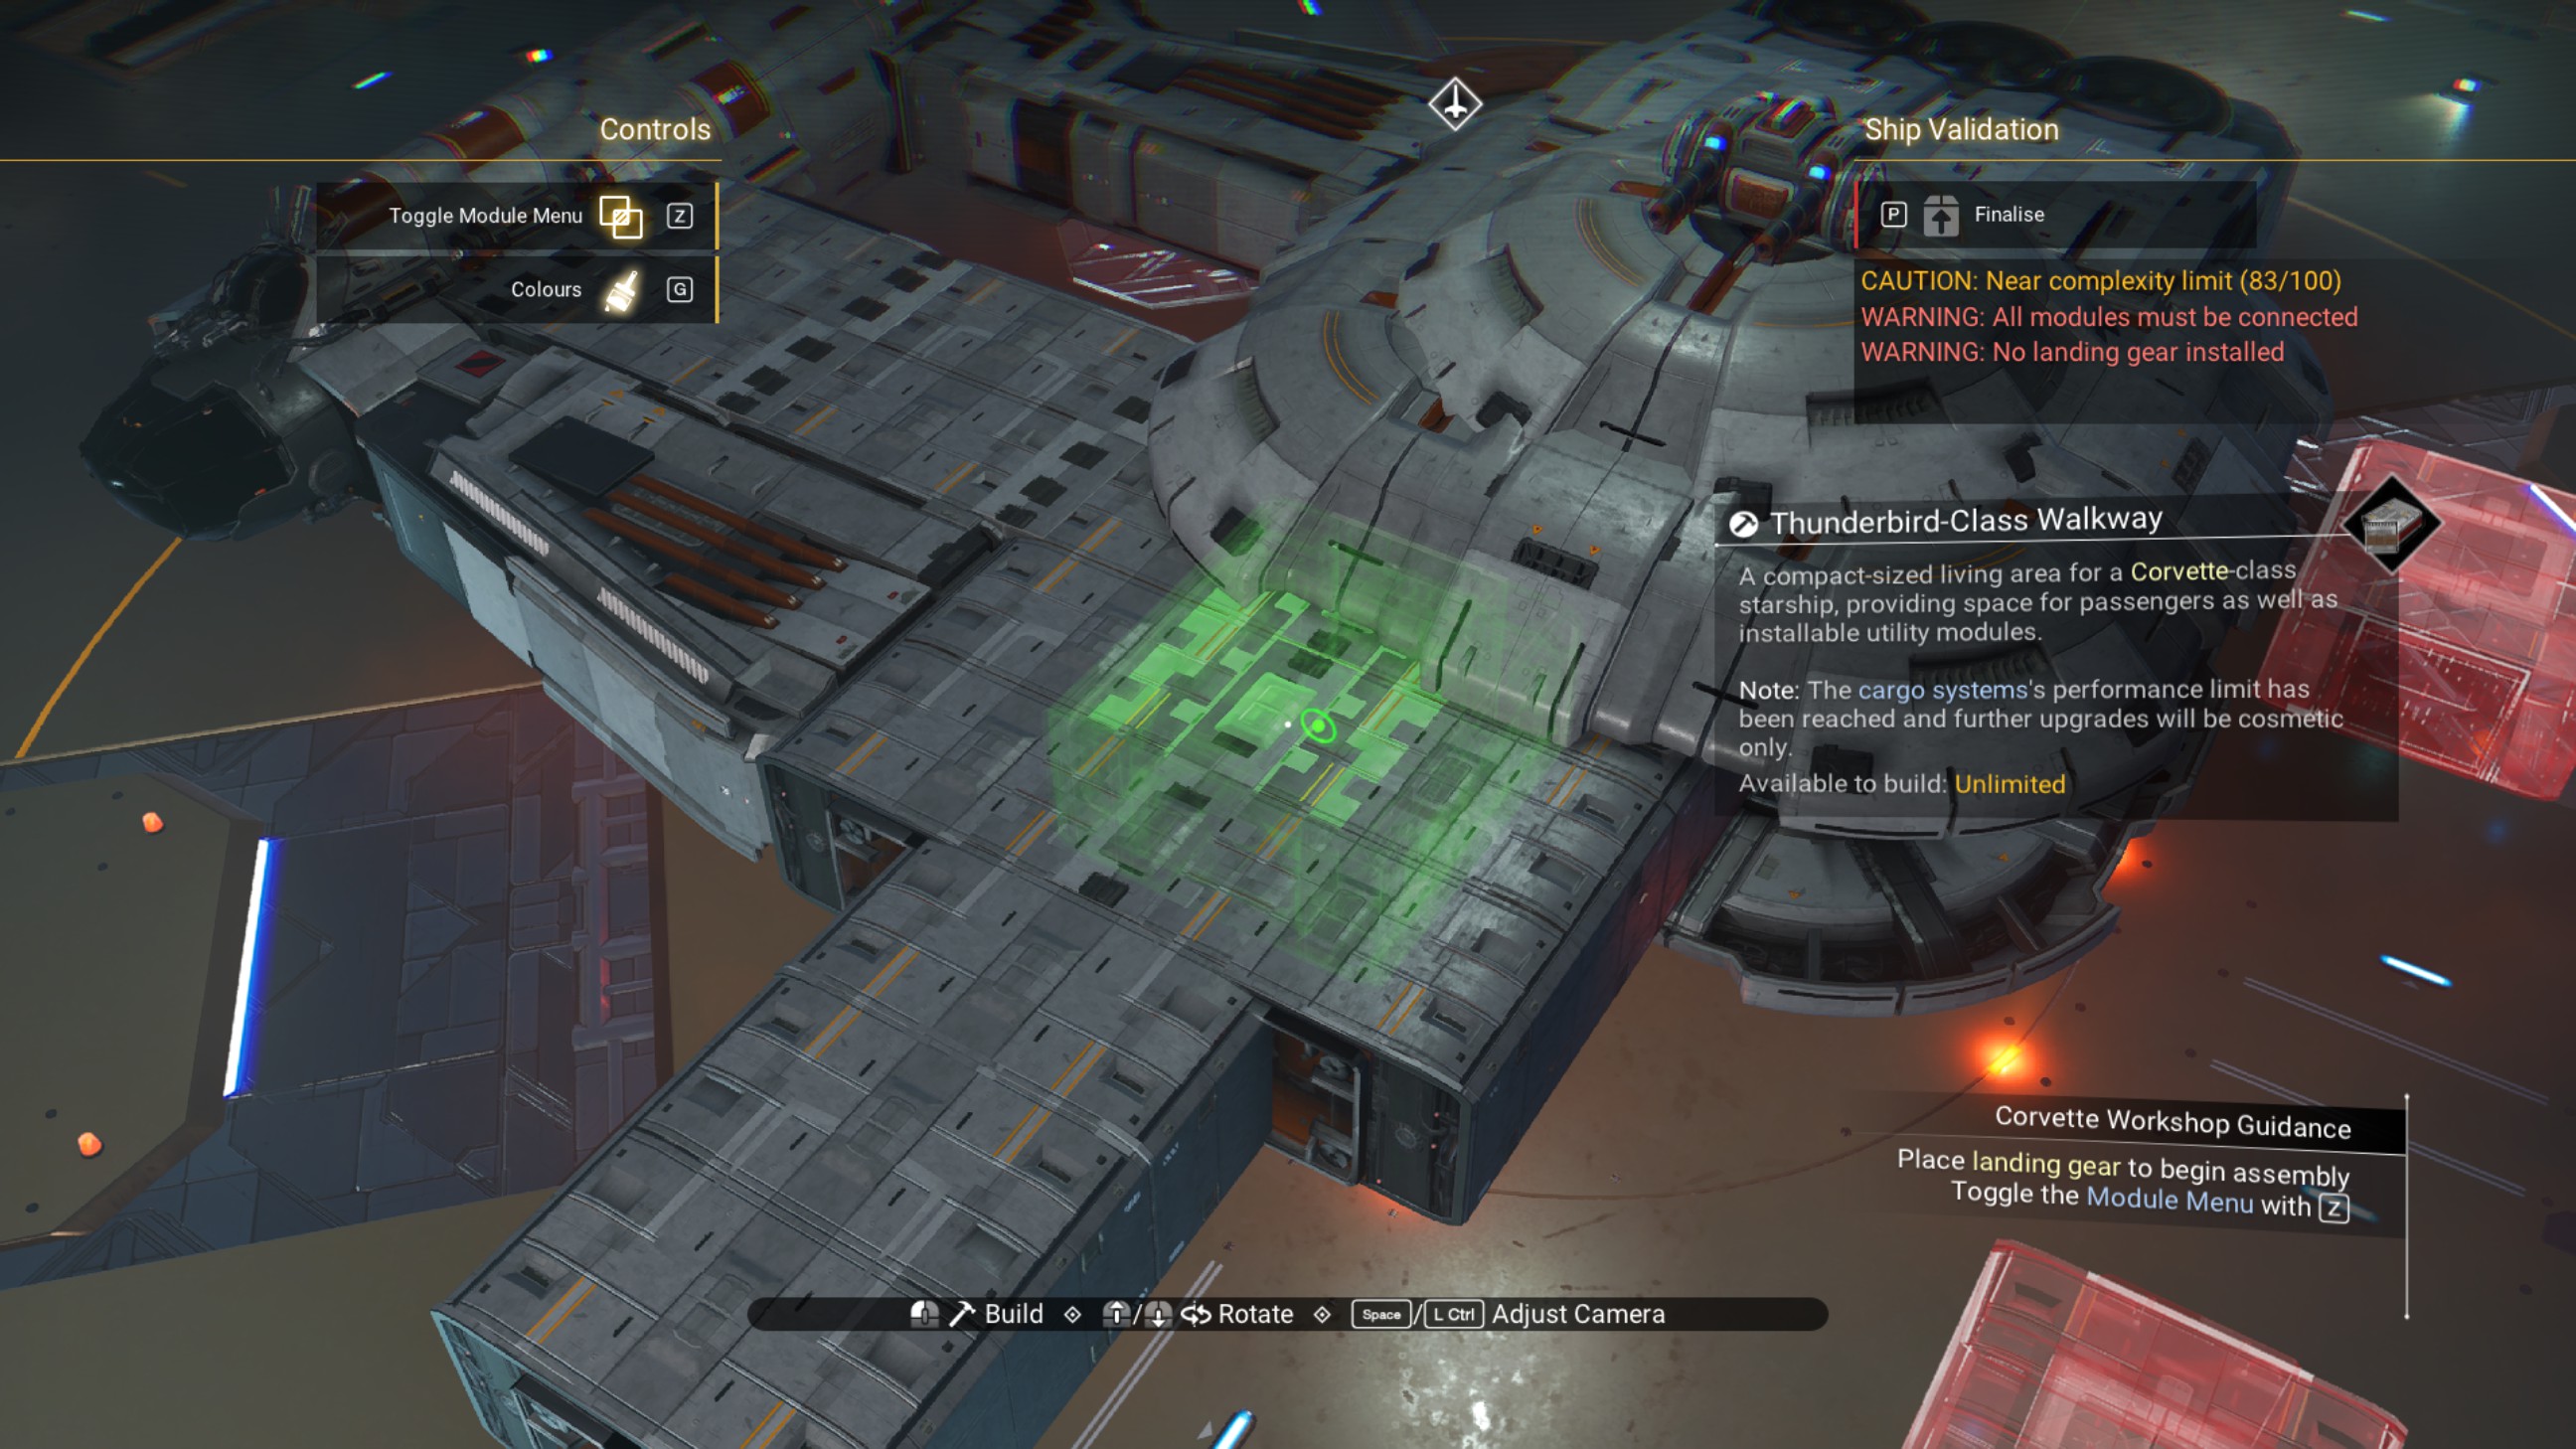
Delete the middle walkway.
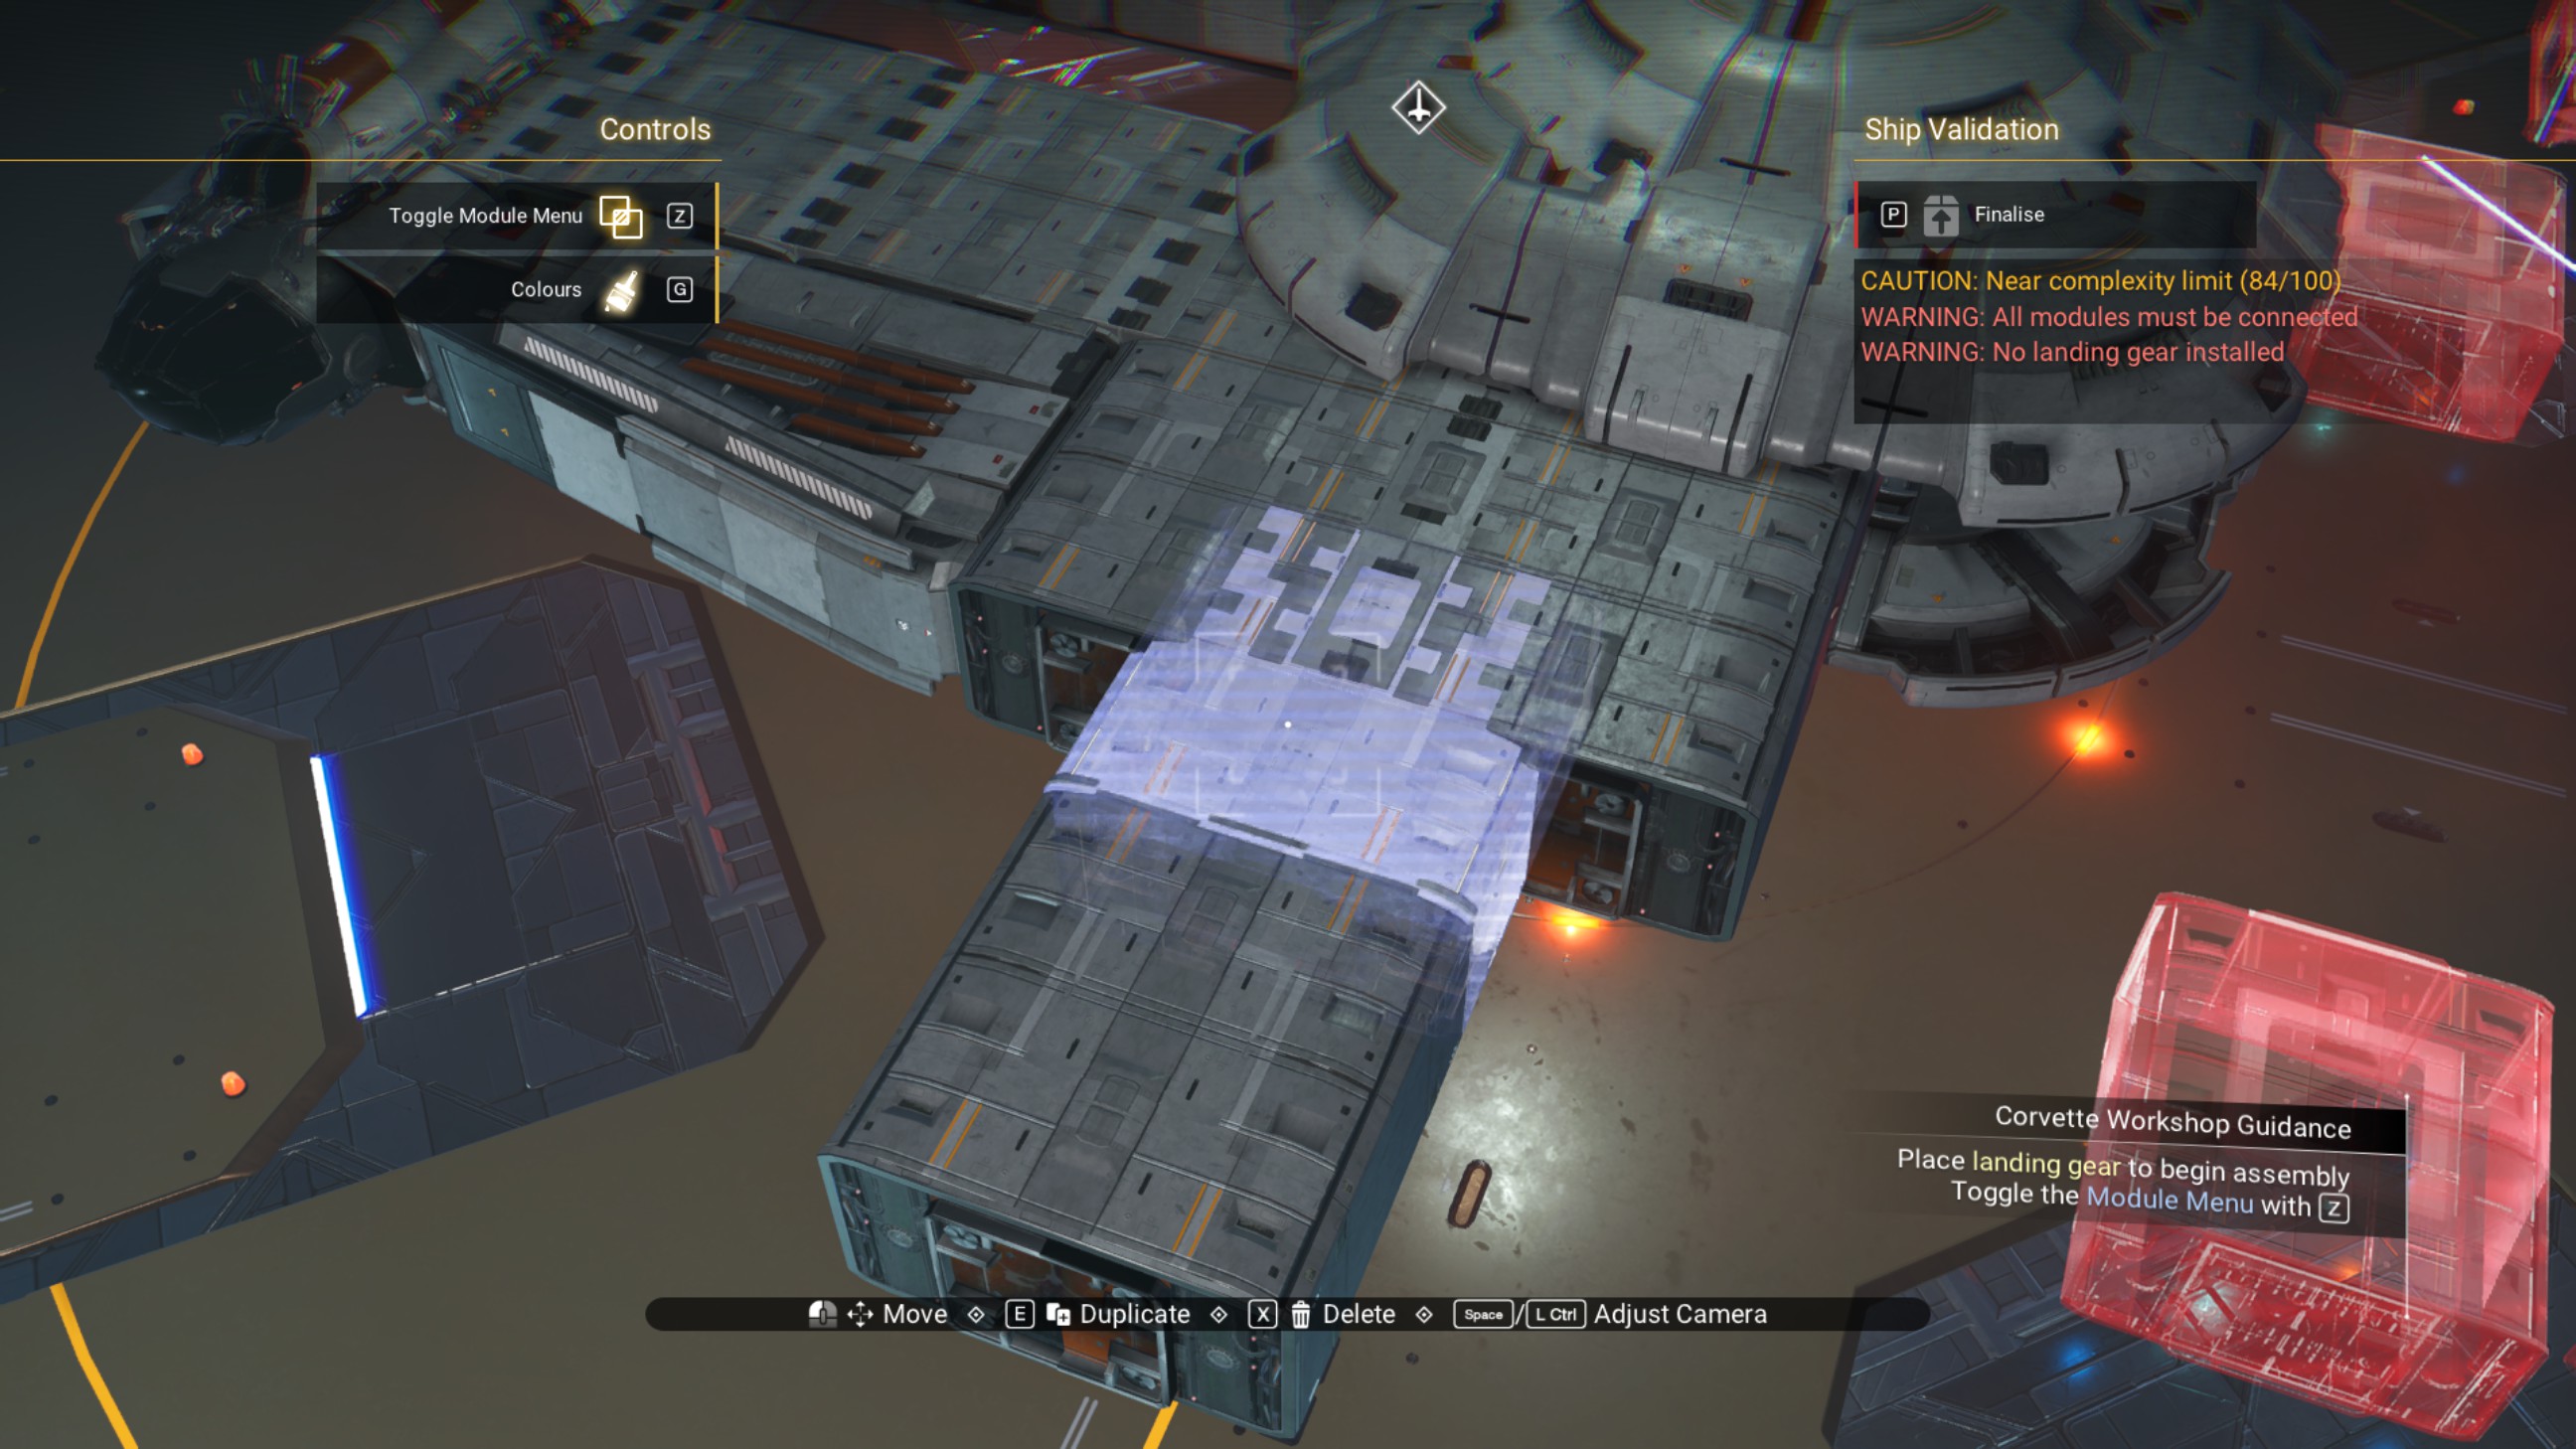
Place a speedbird nacelle rim on the rear offset overlapped walkway, centered on the hull and oriented to starboard. Then, place another nacelle rim oriented to port.
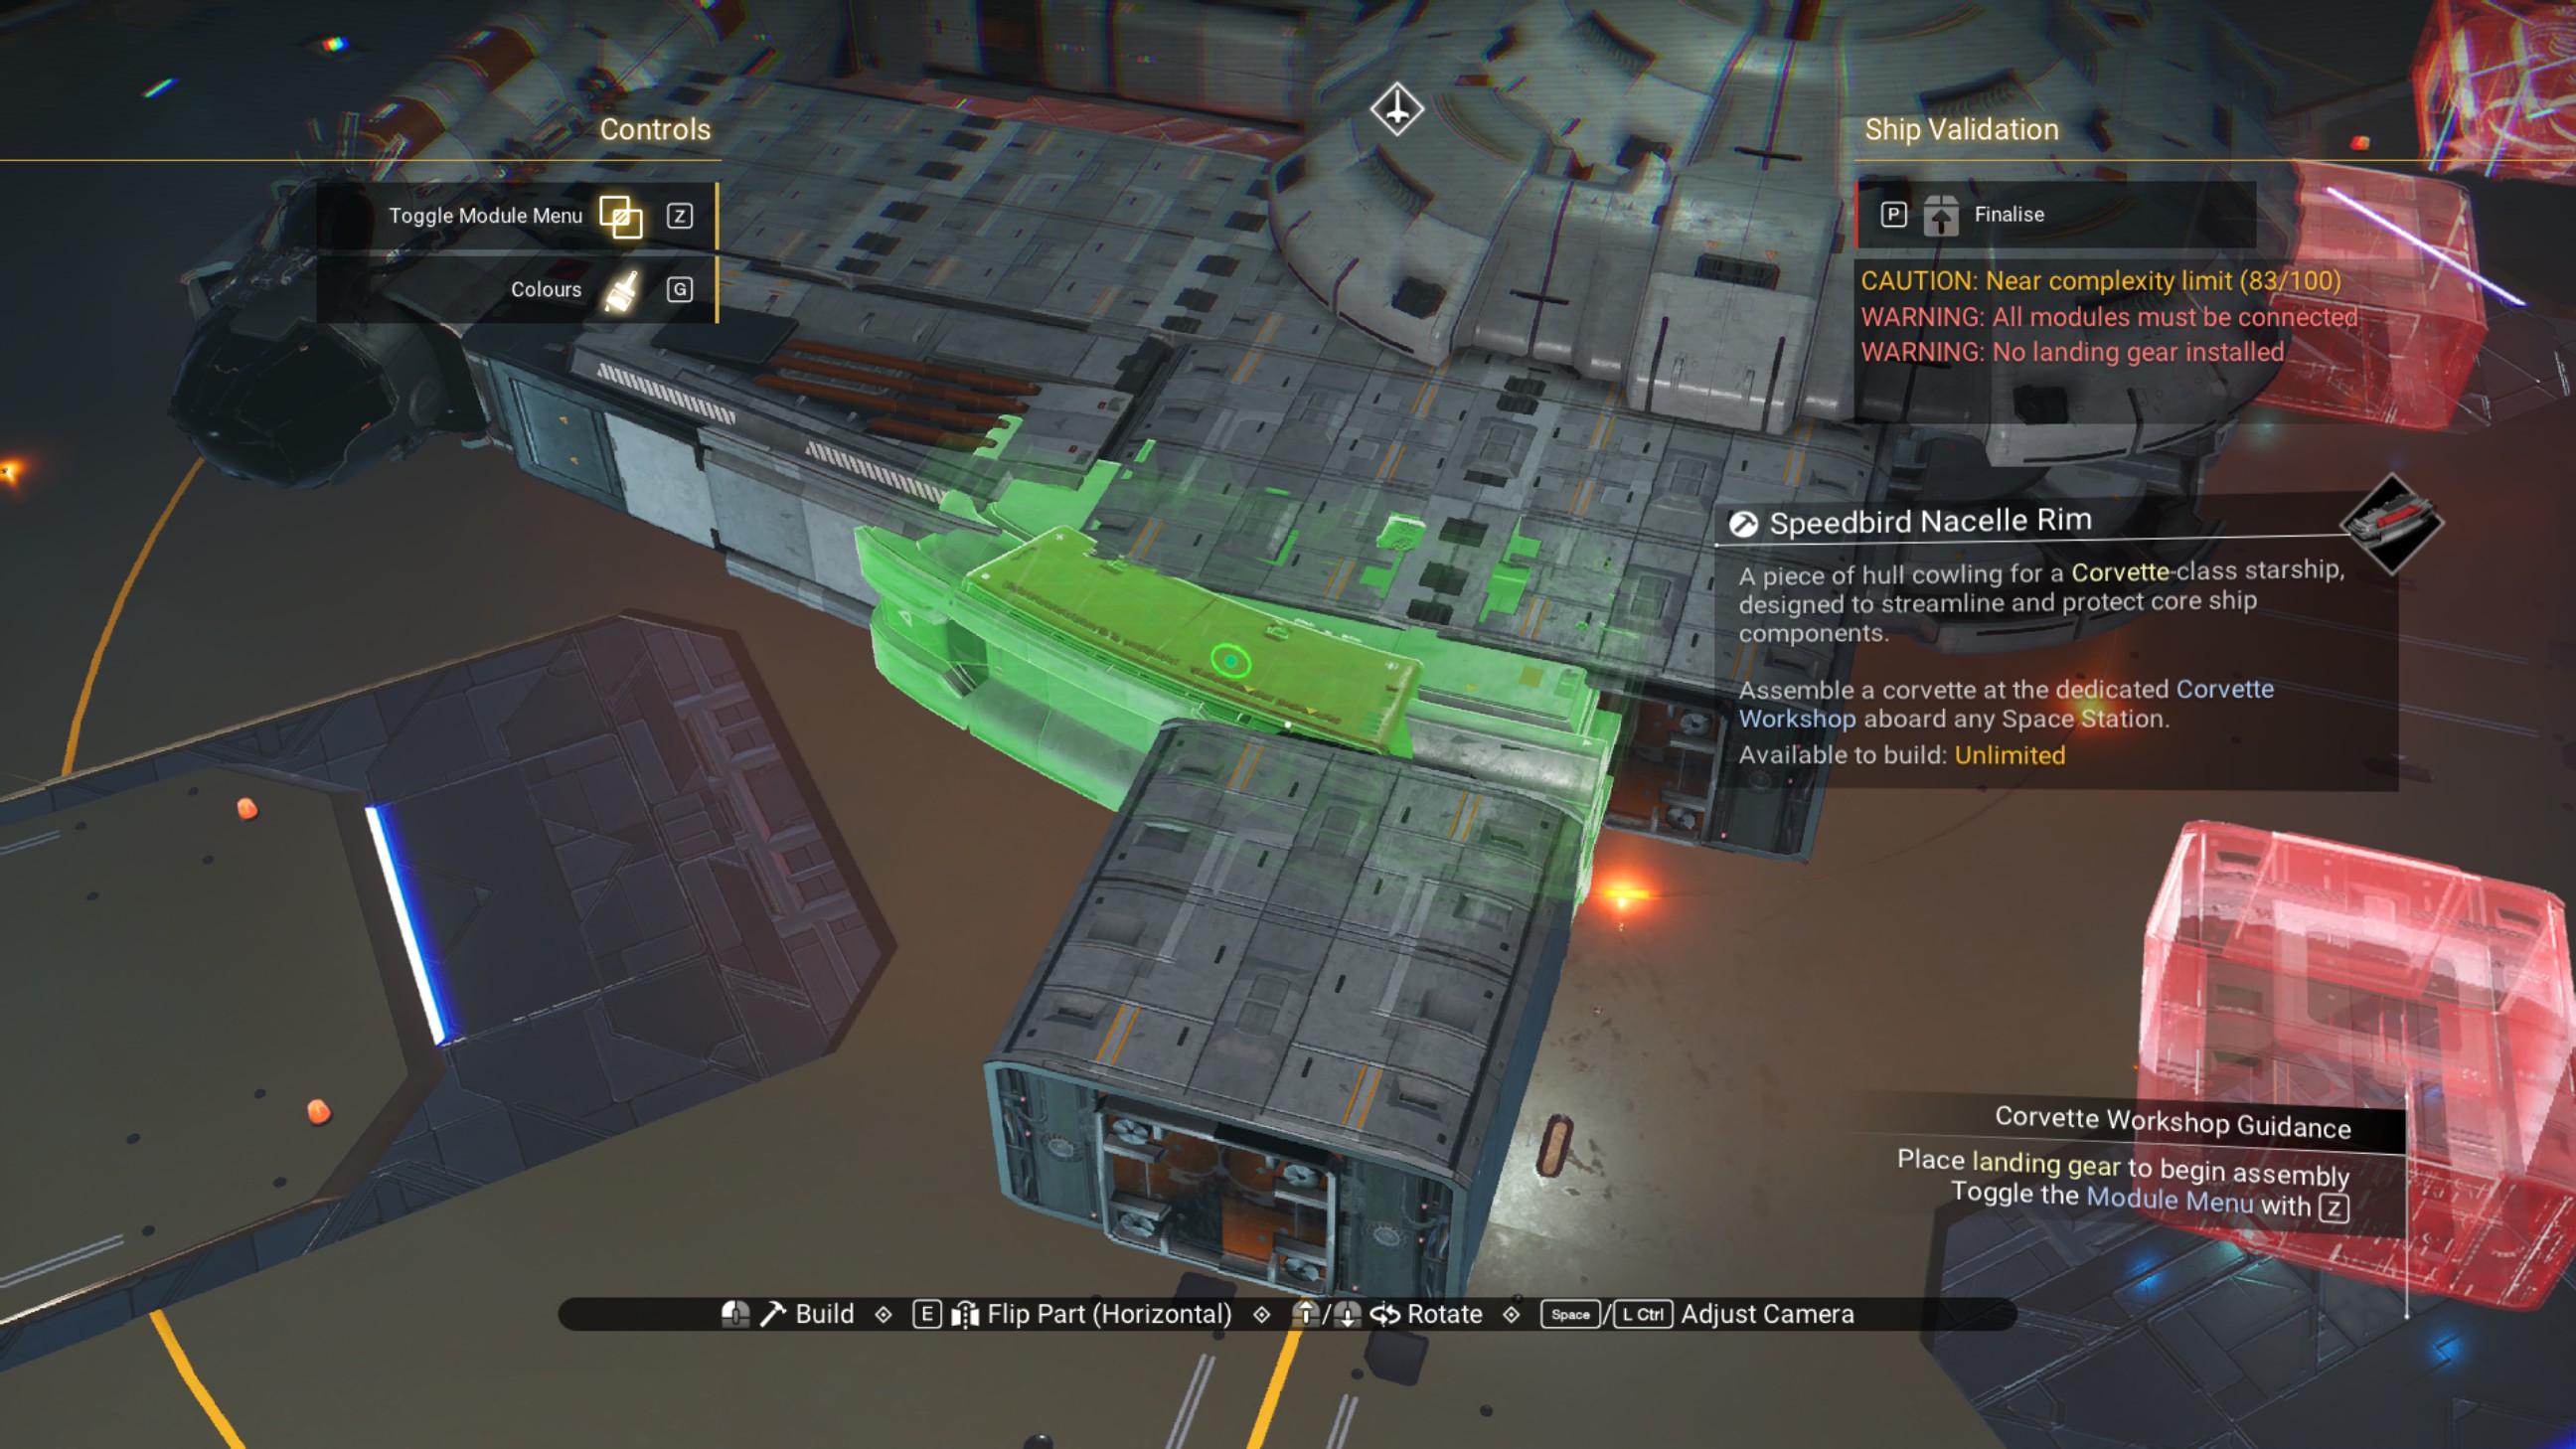
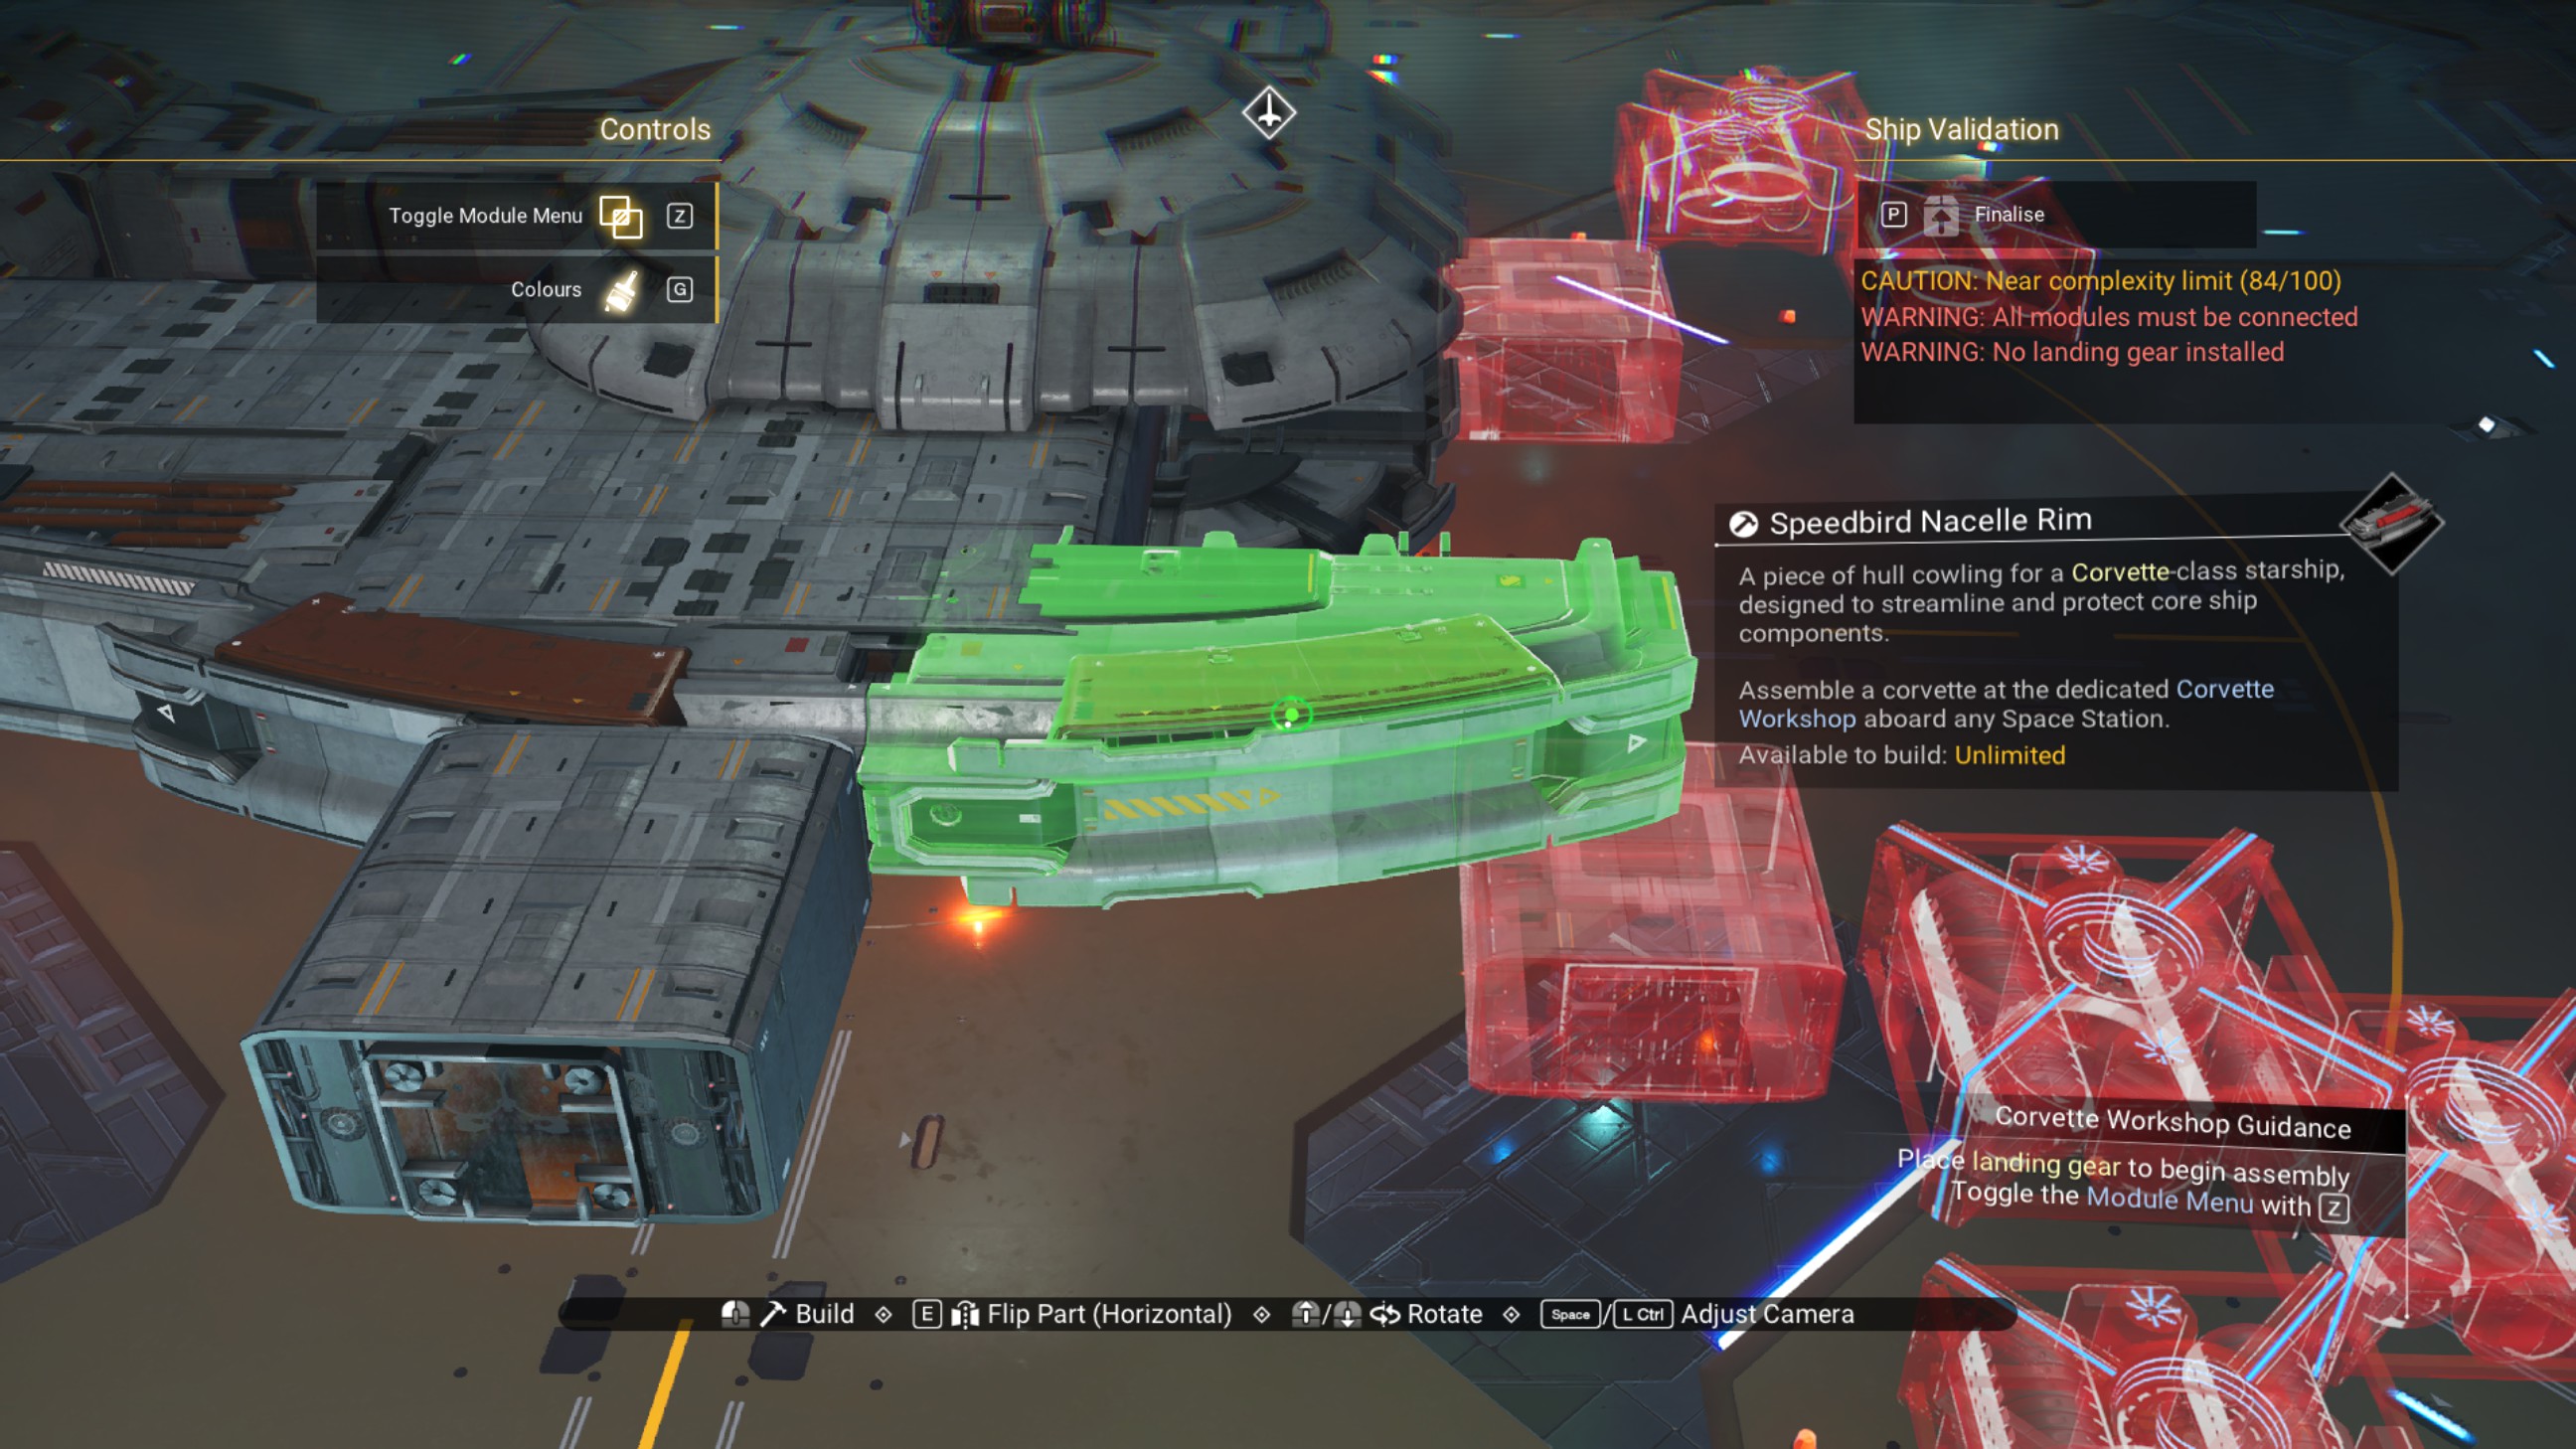
Delete the rear overlapped walkway and the extraneous offset walkway.
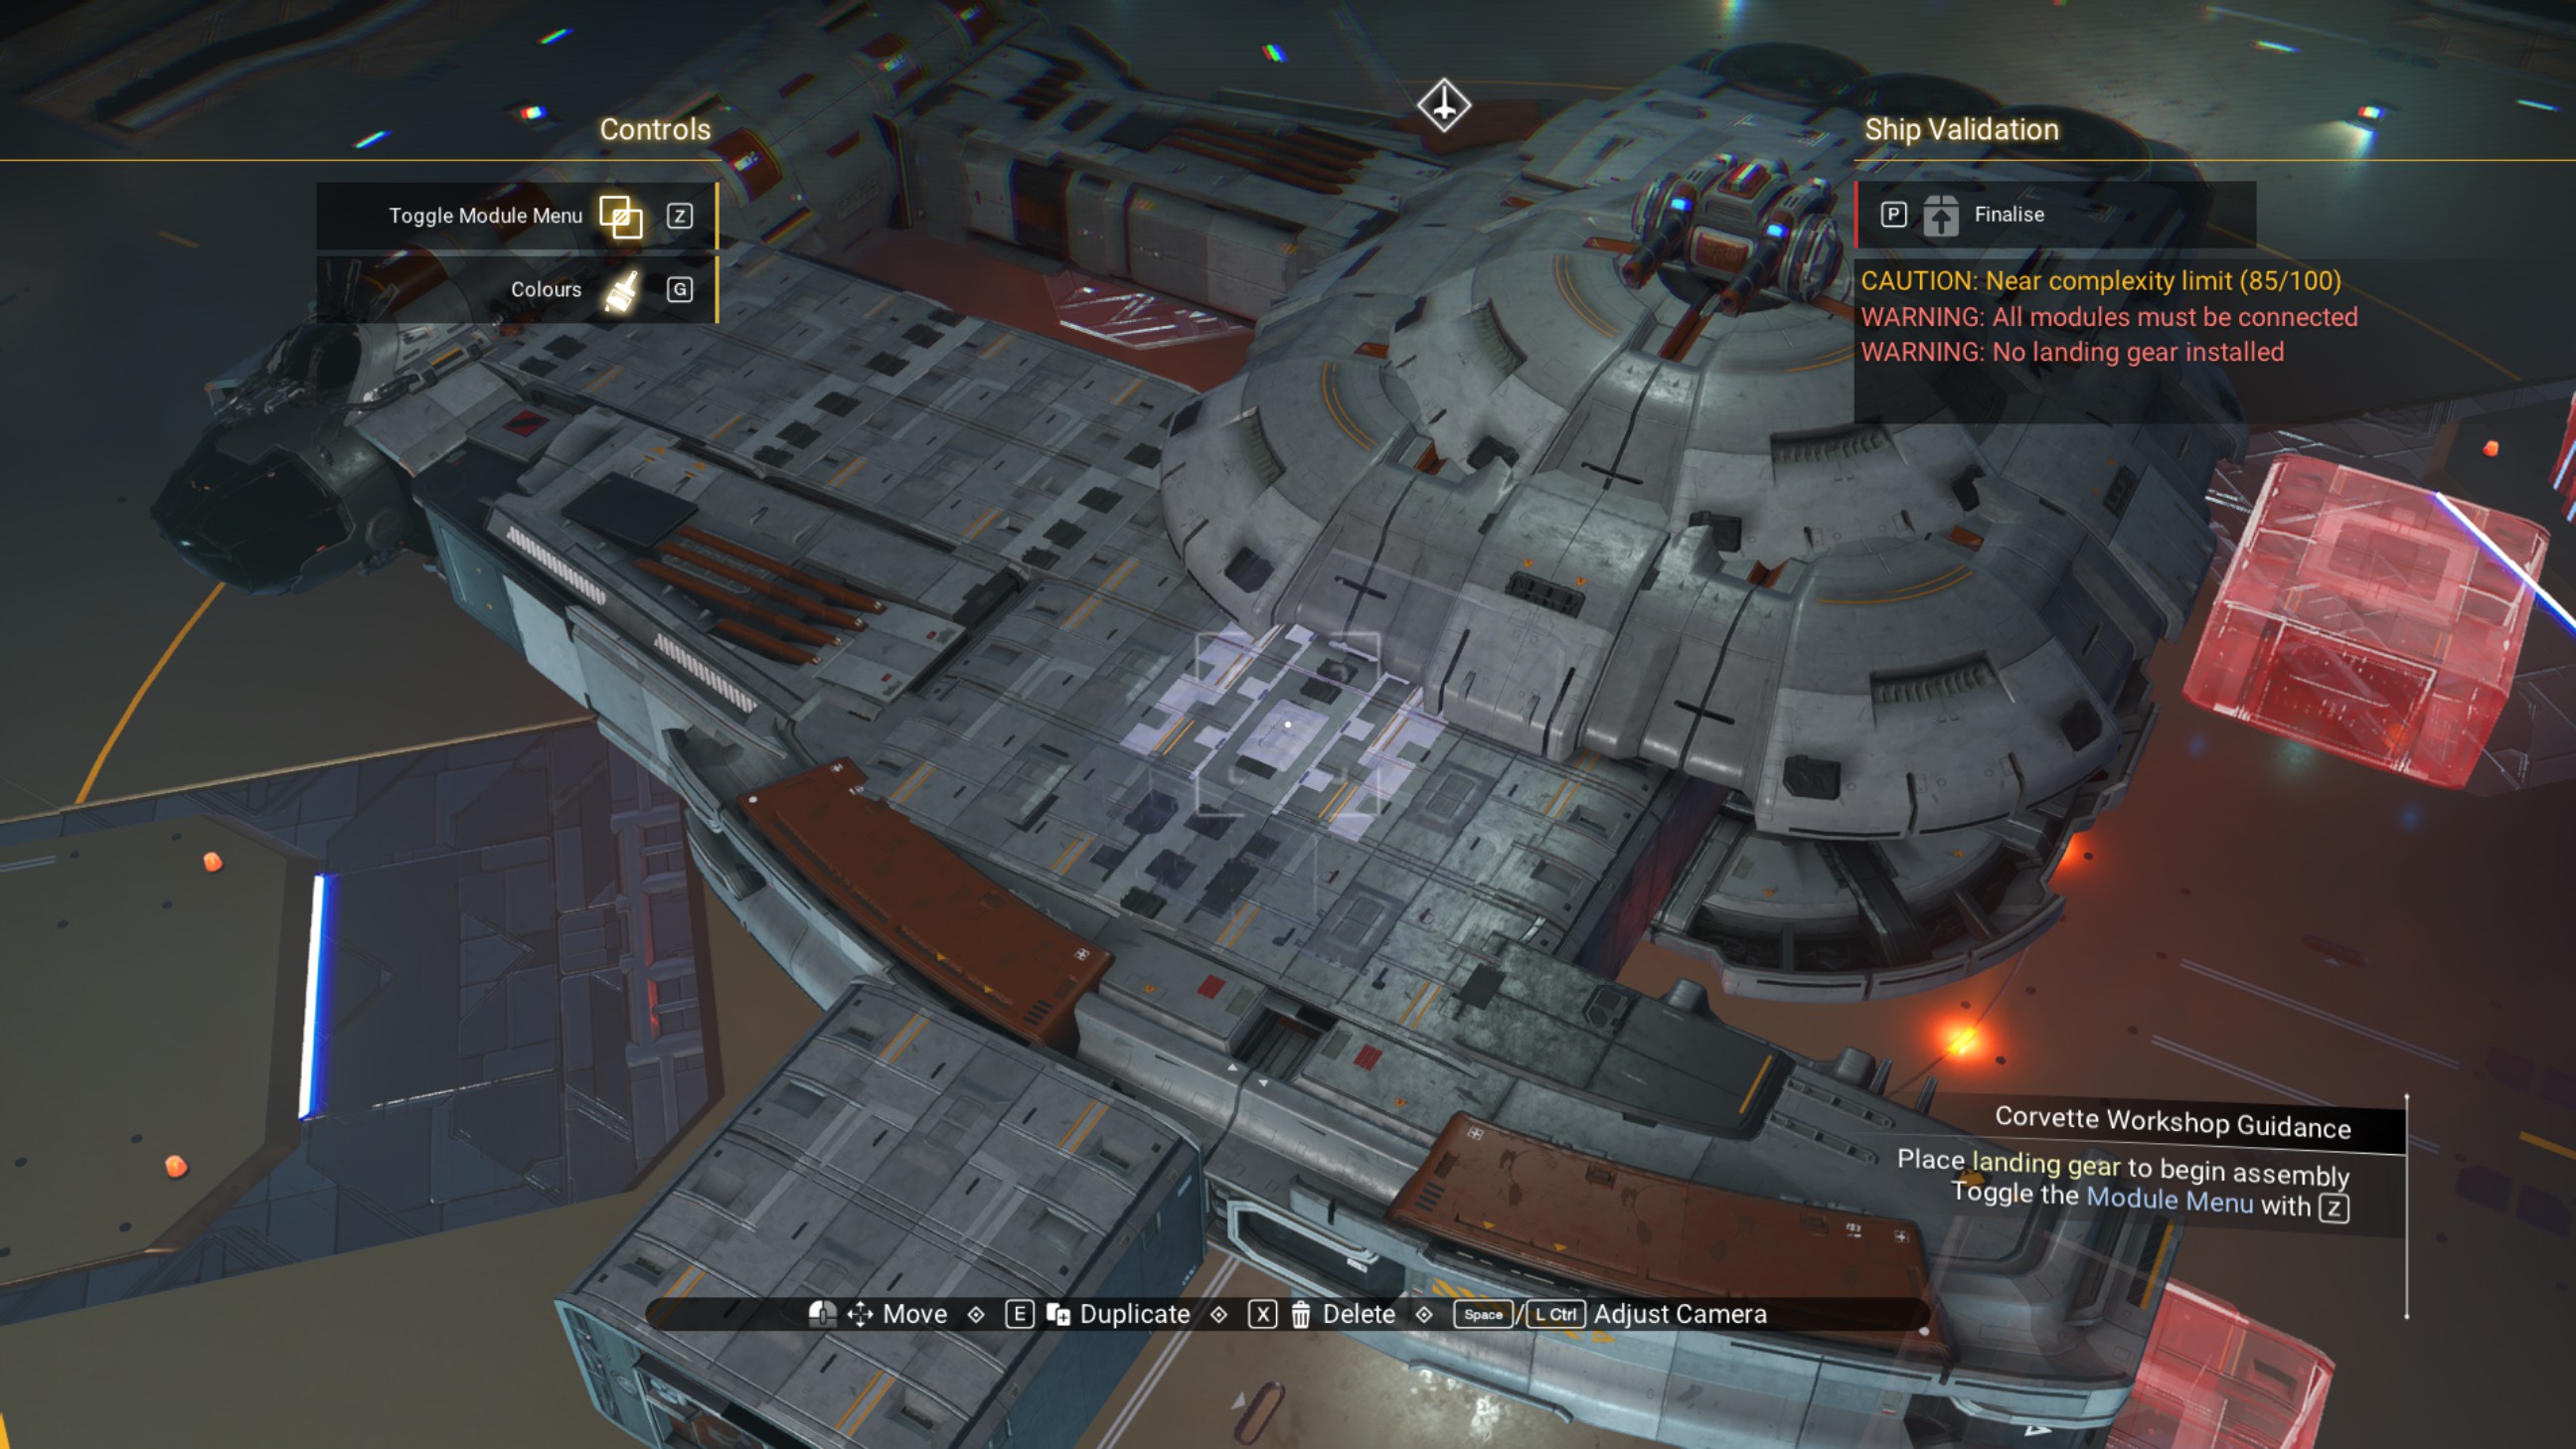
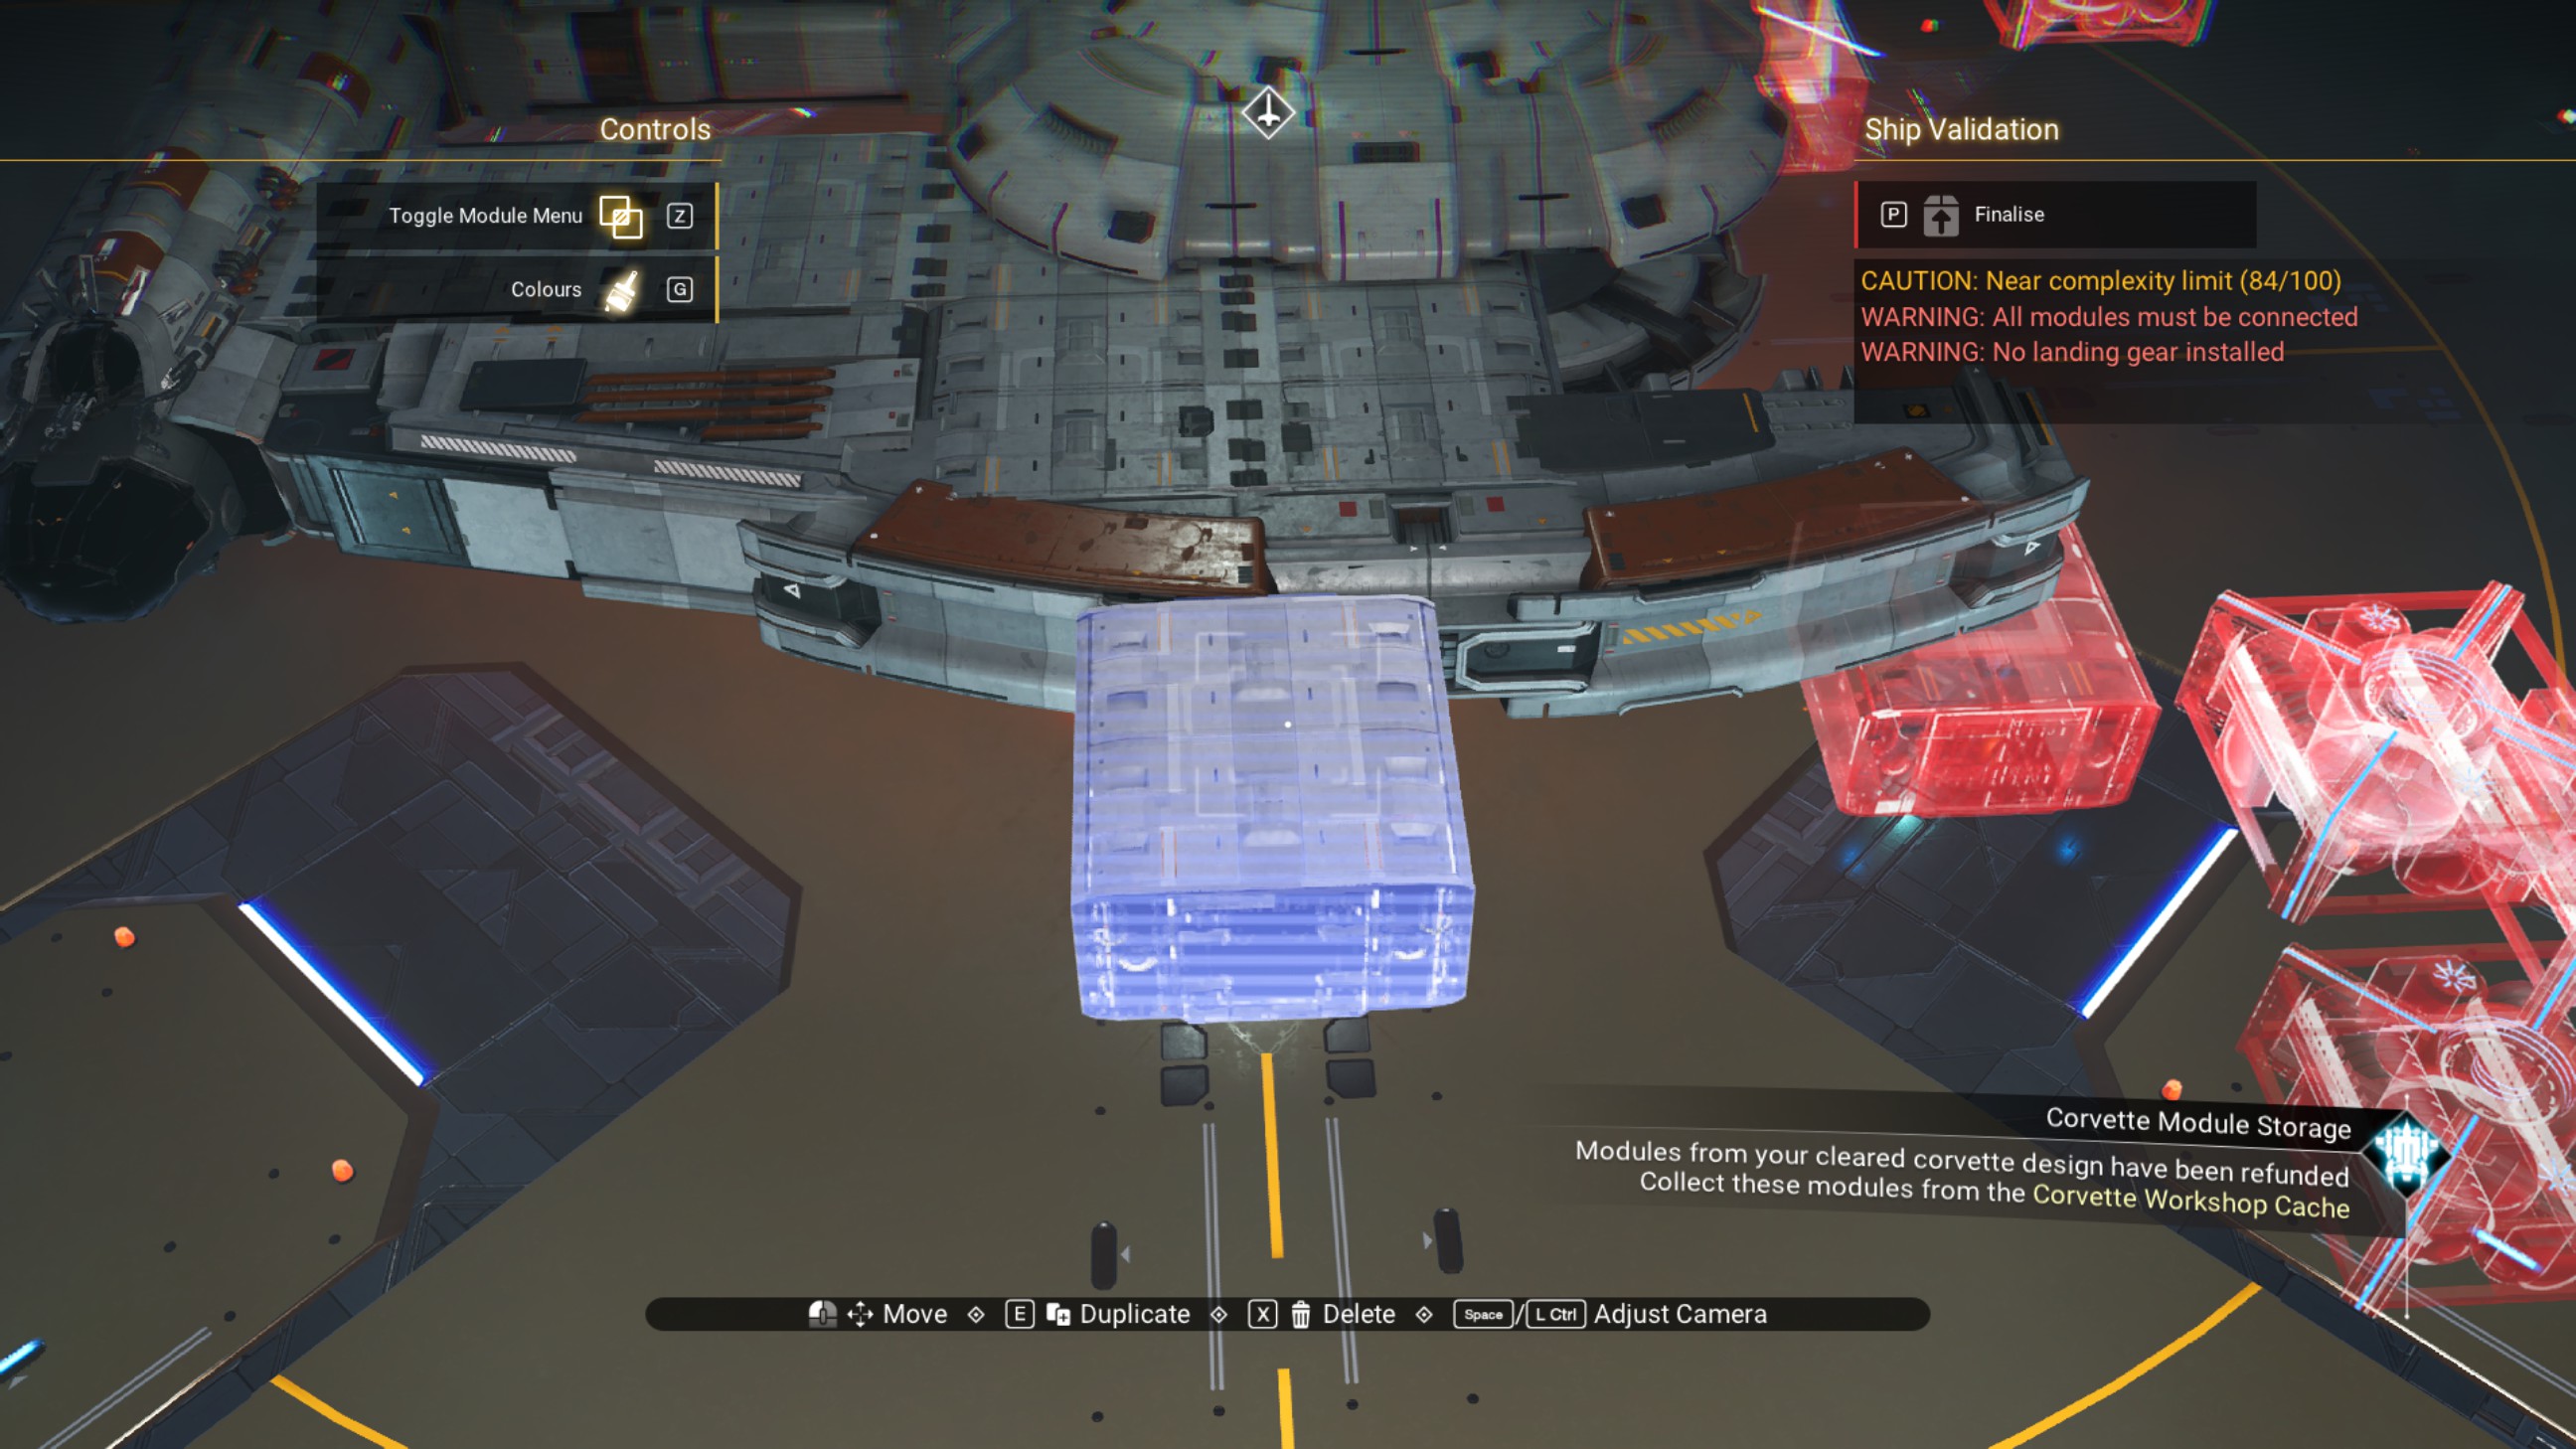
Make another zigzagged line of walkways out from the center structure, just like the previous zigzagged walkways.
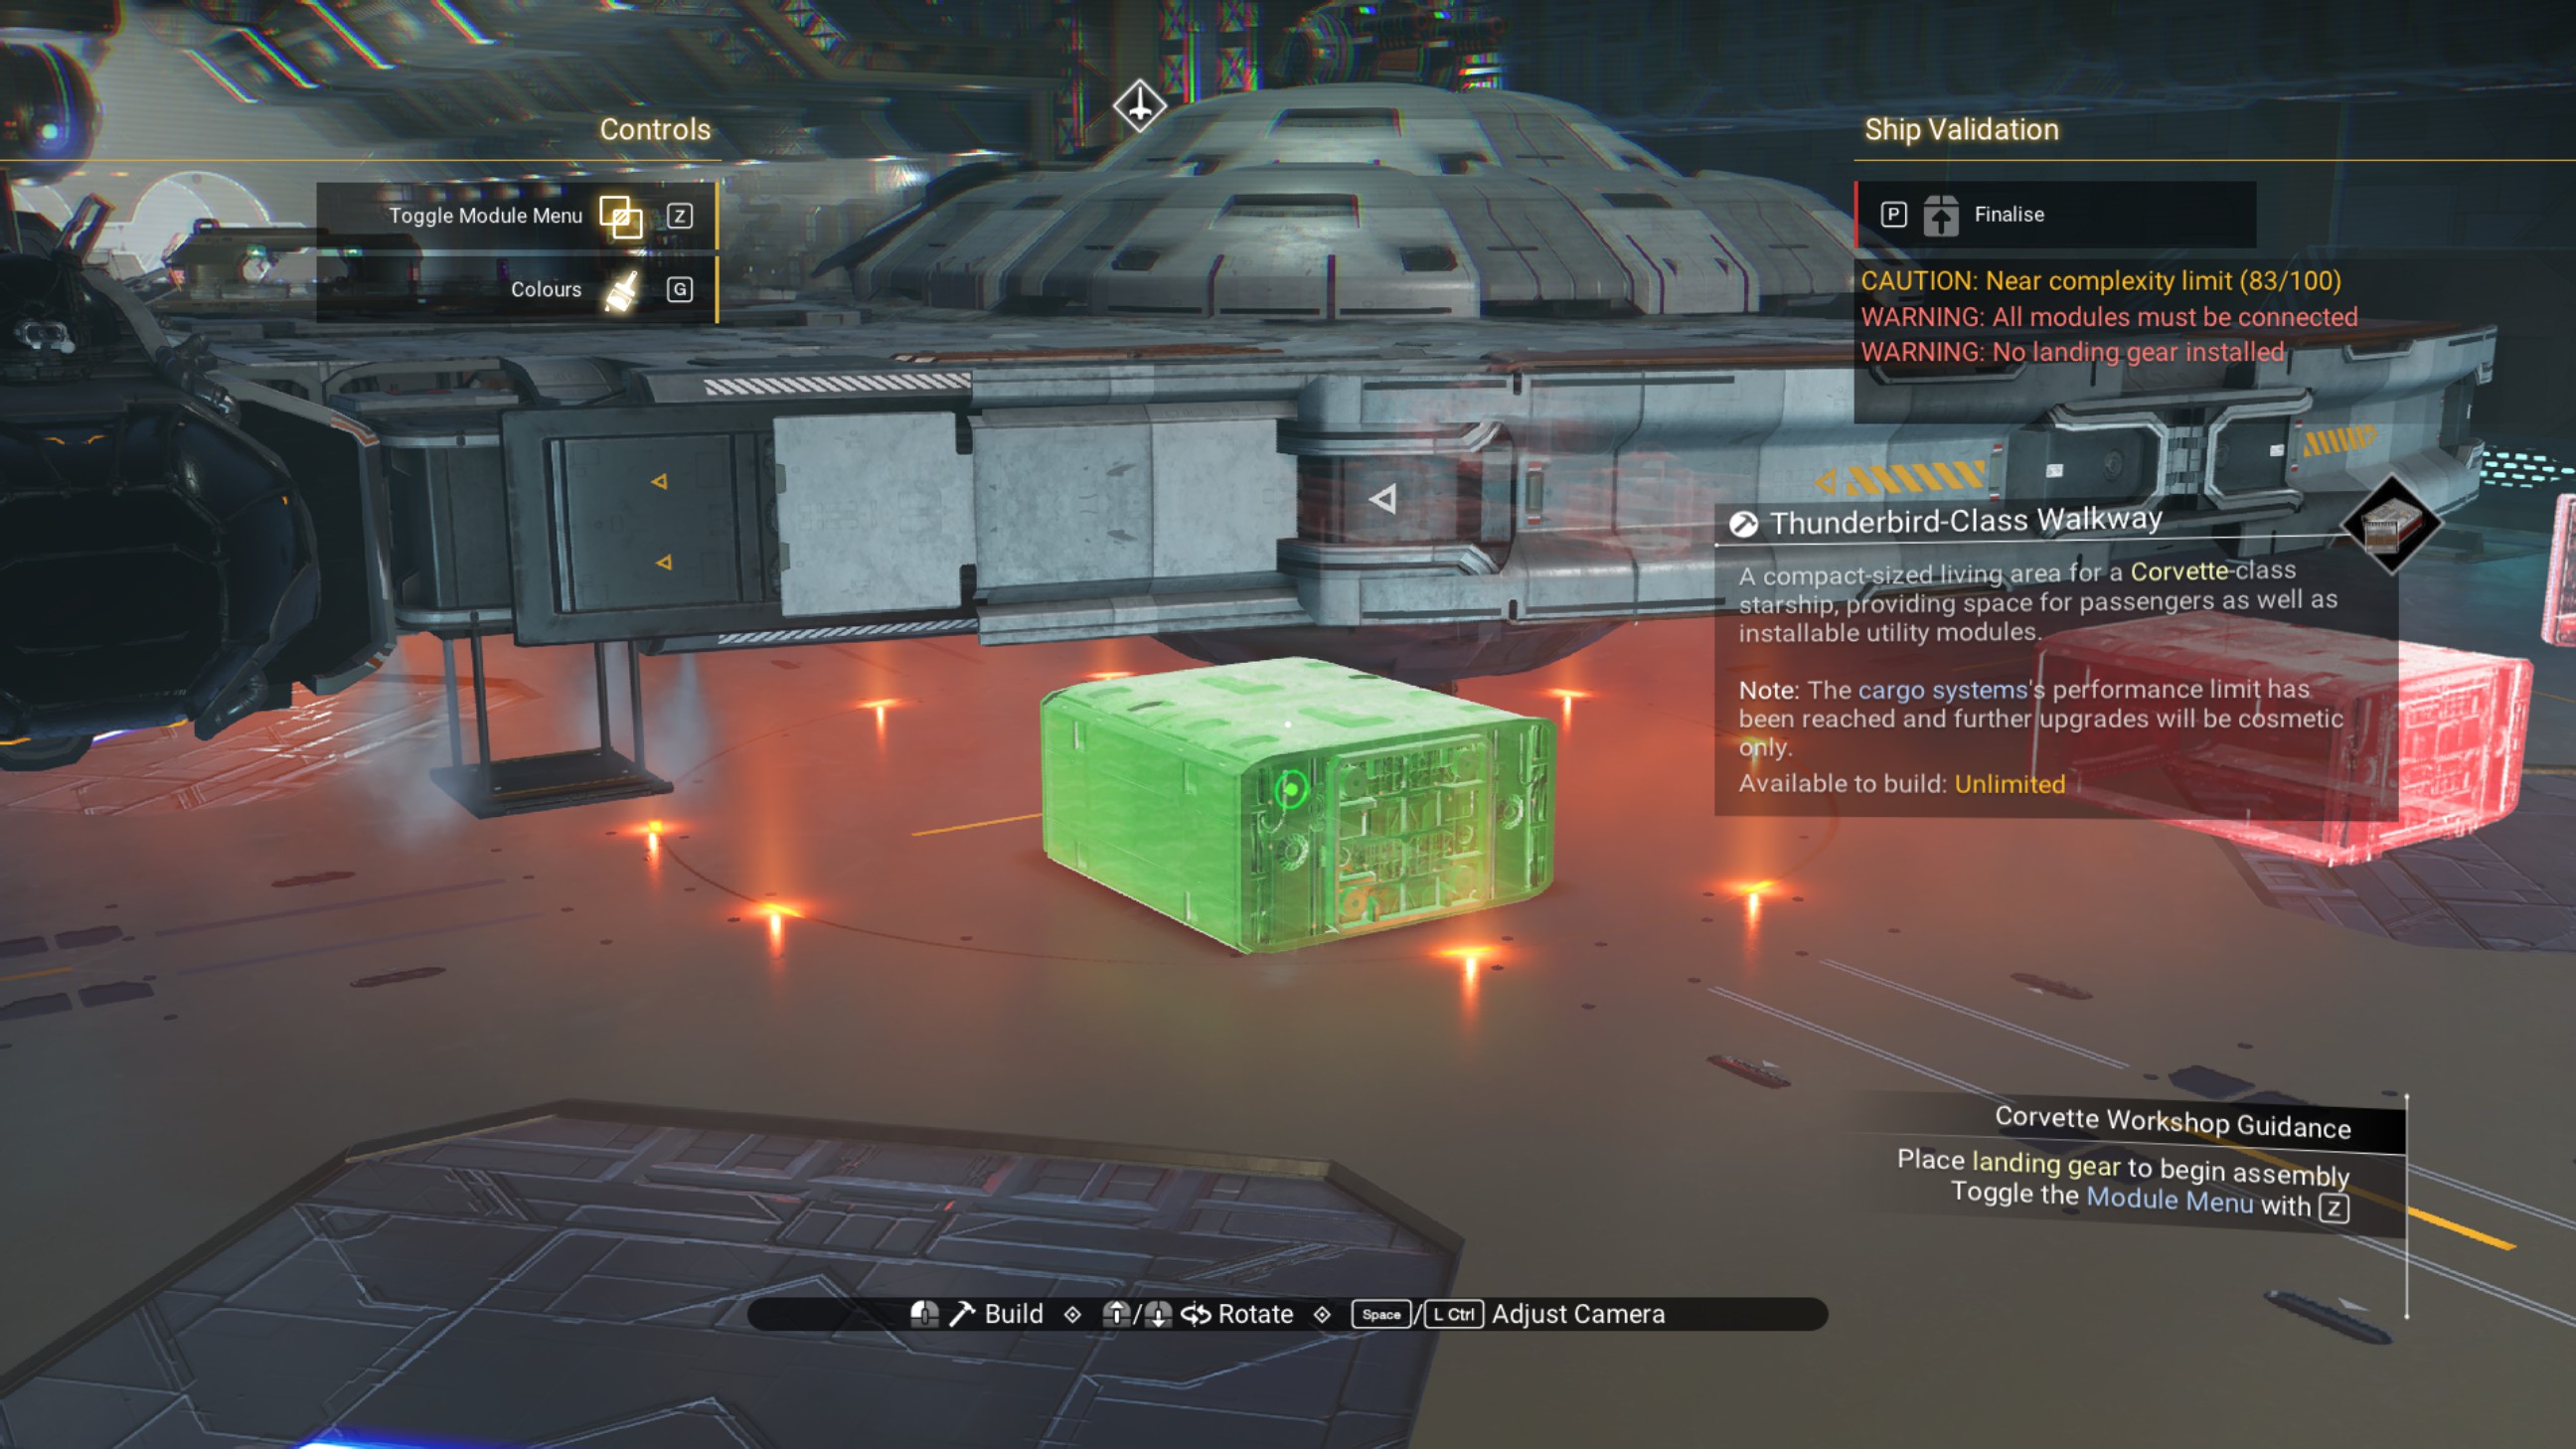
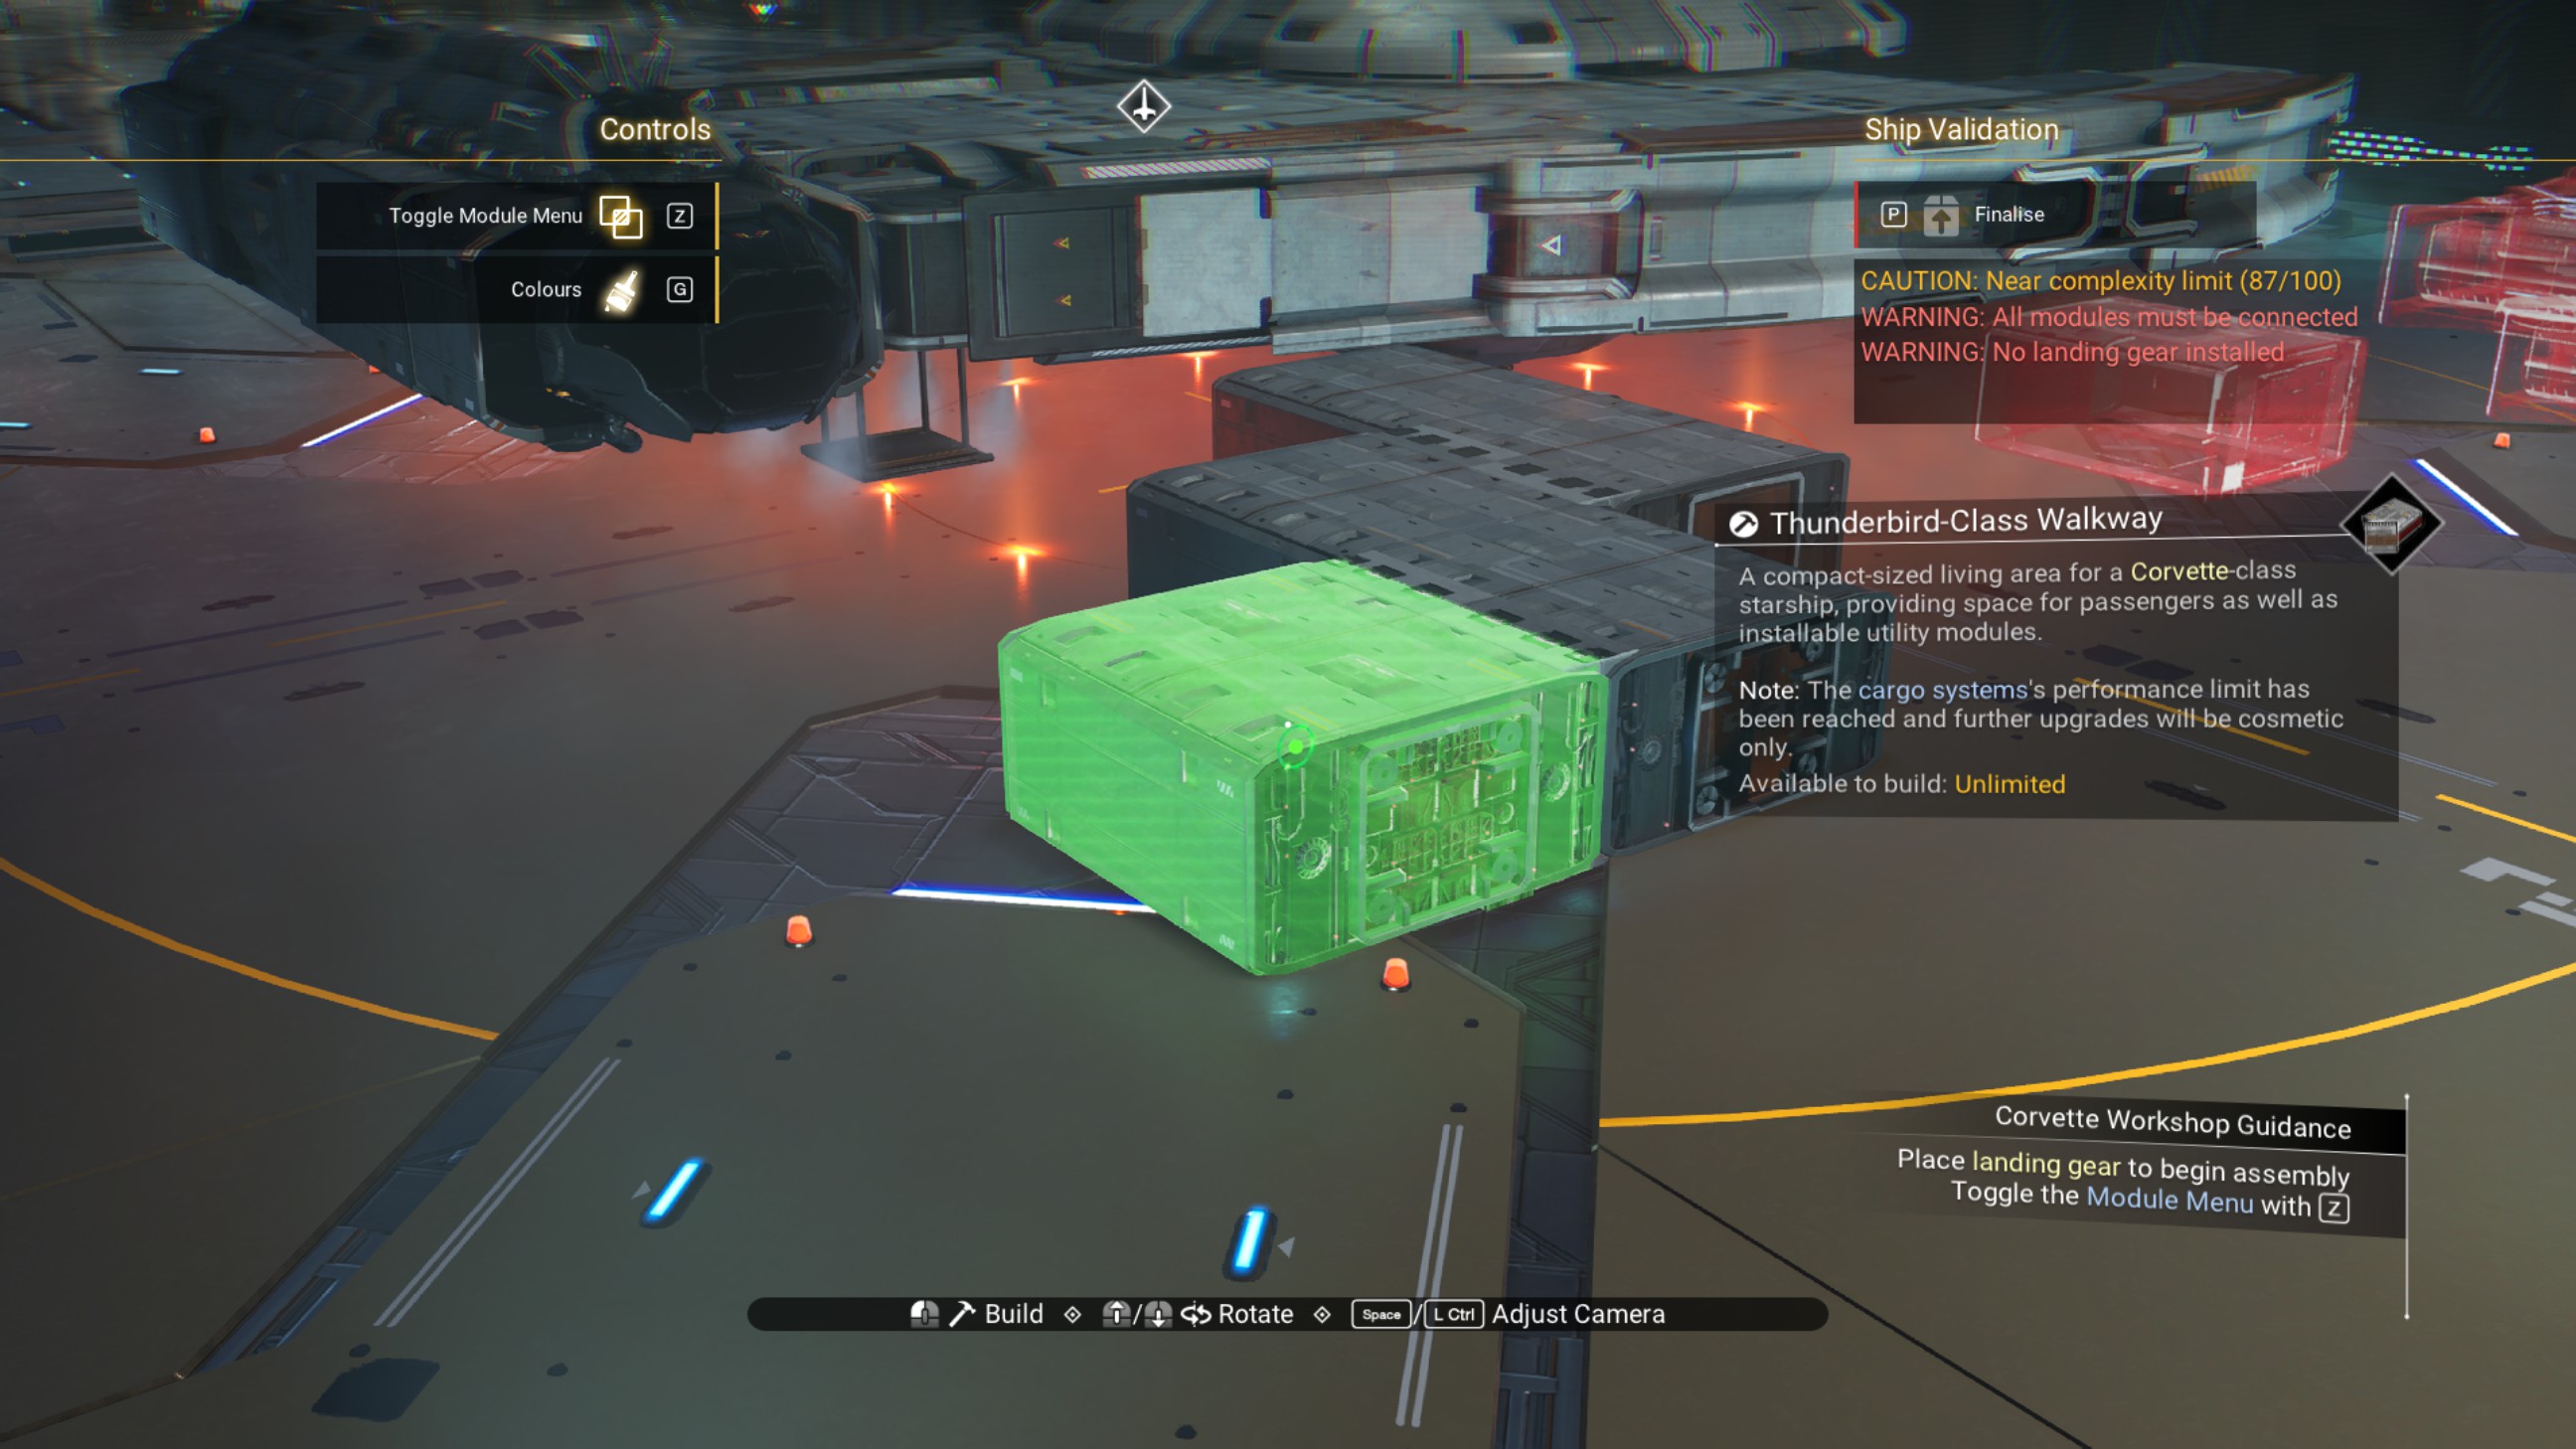
Place three zenith reactors, two on either side of the most distant walkway and one on top.
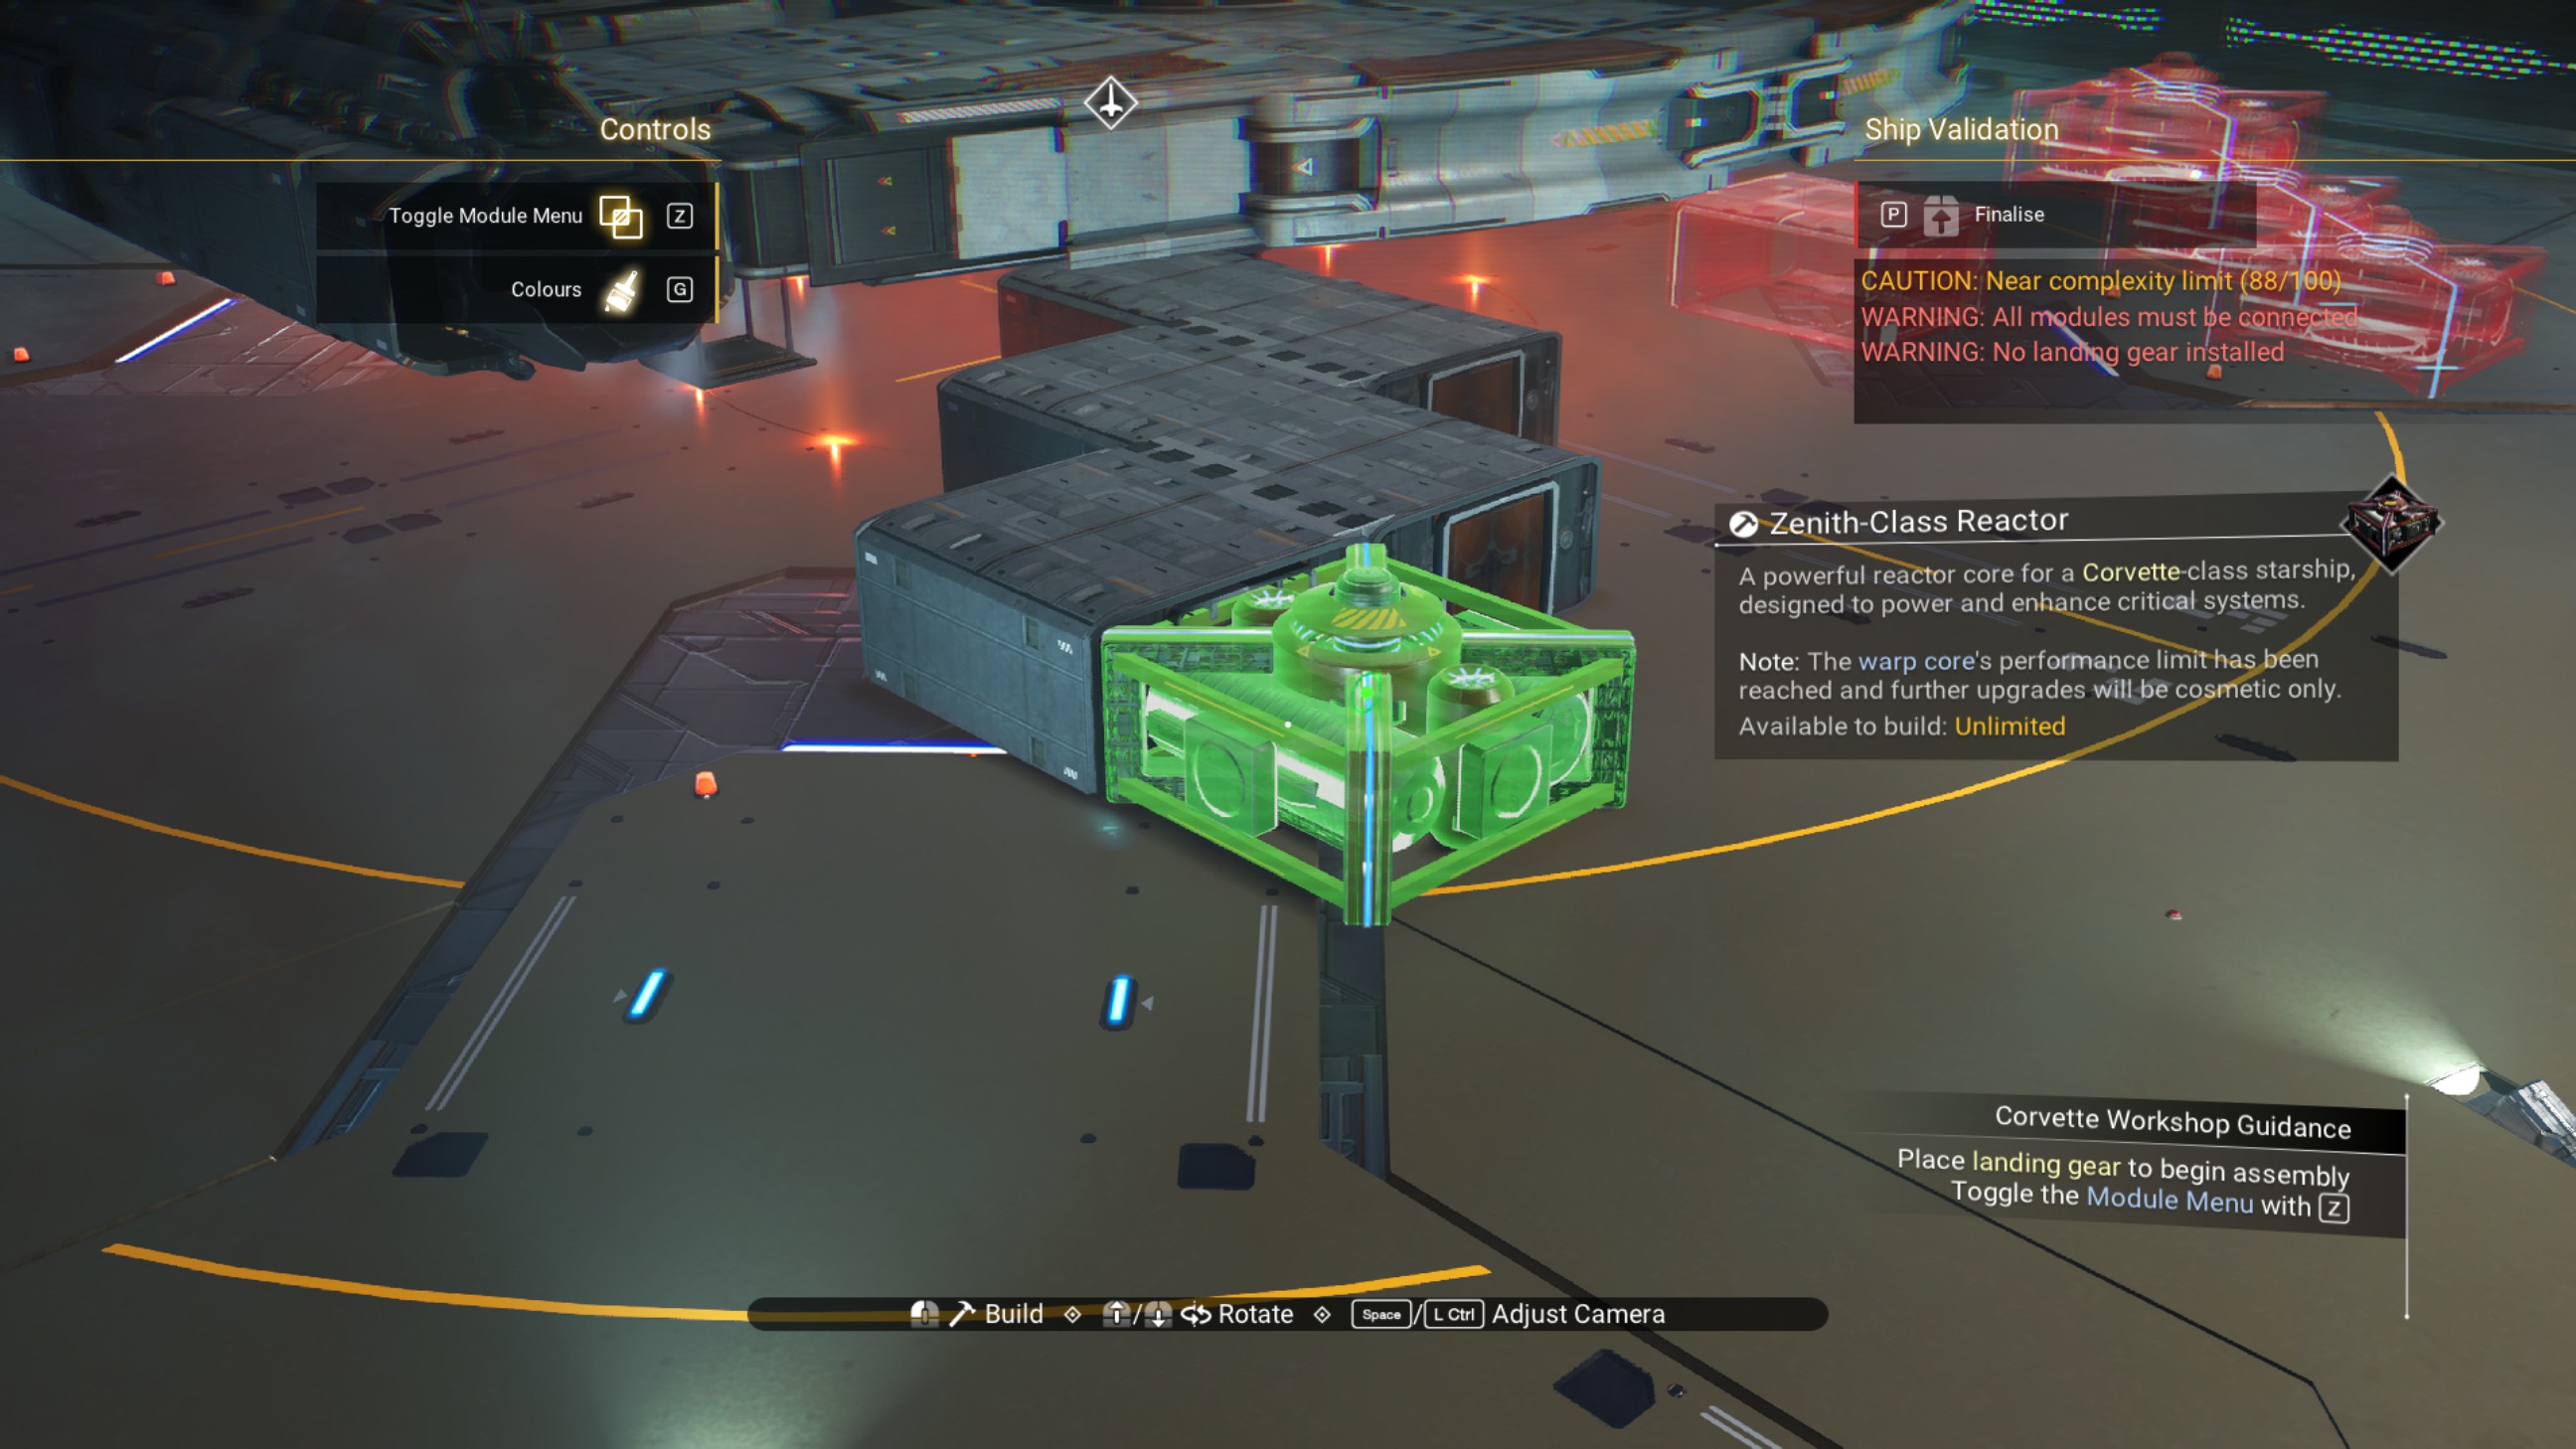
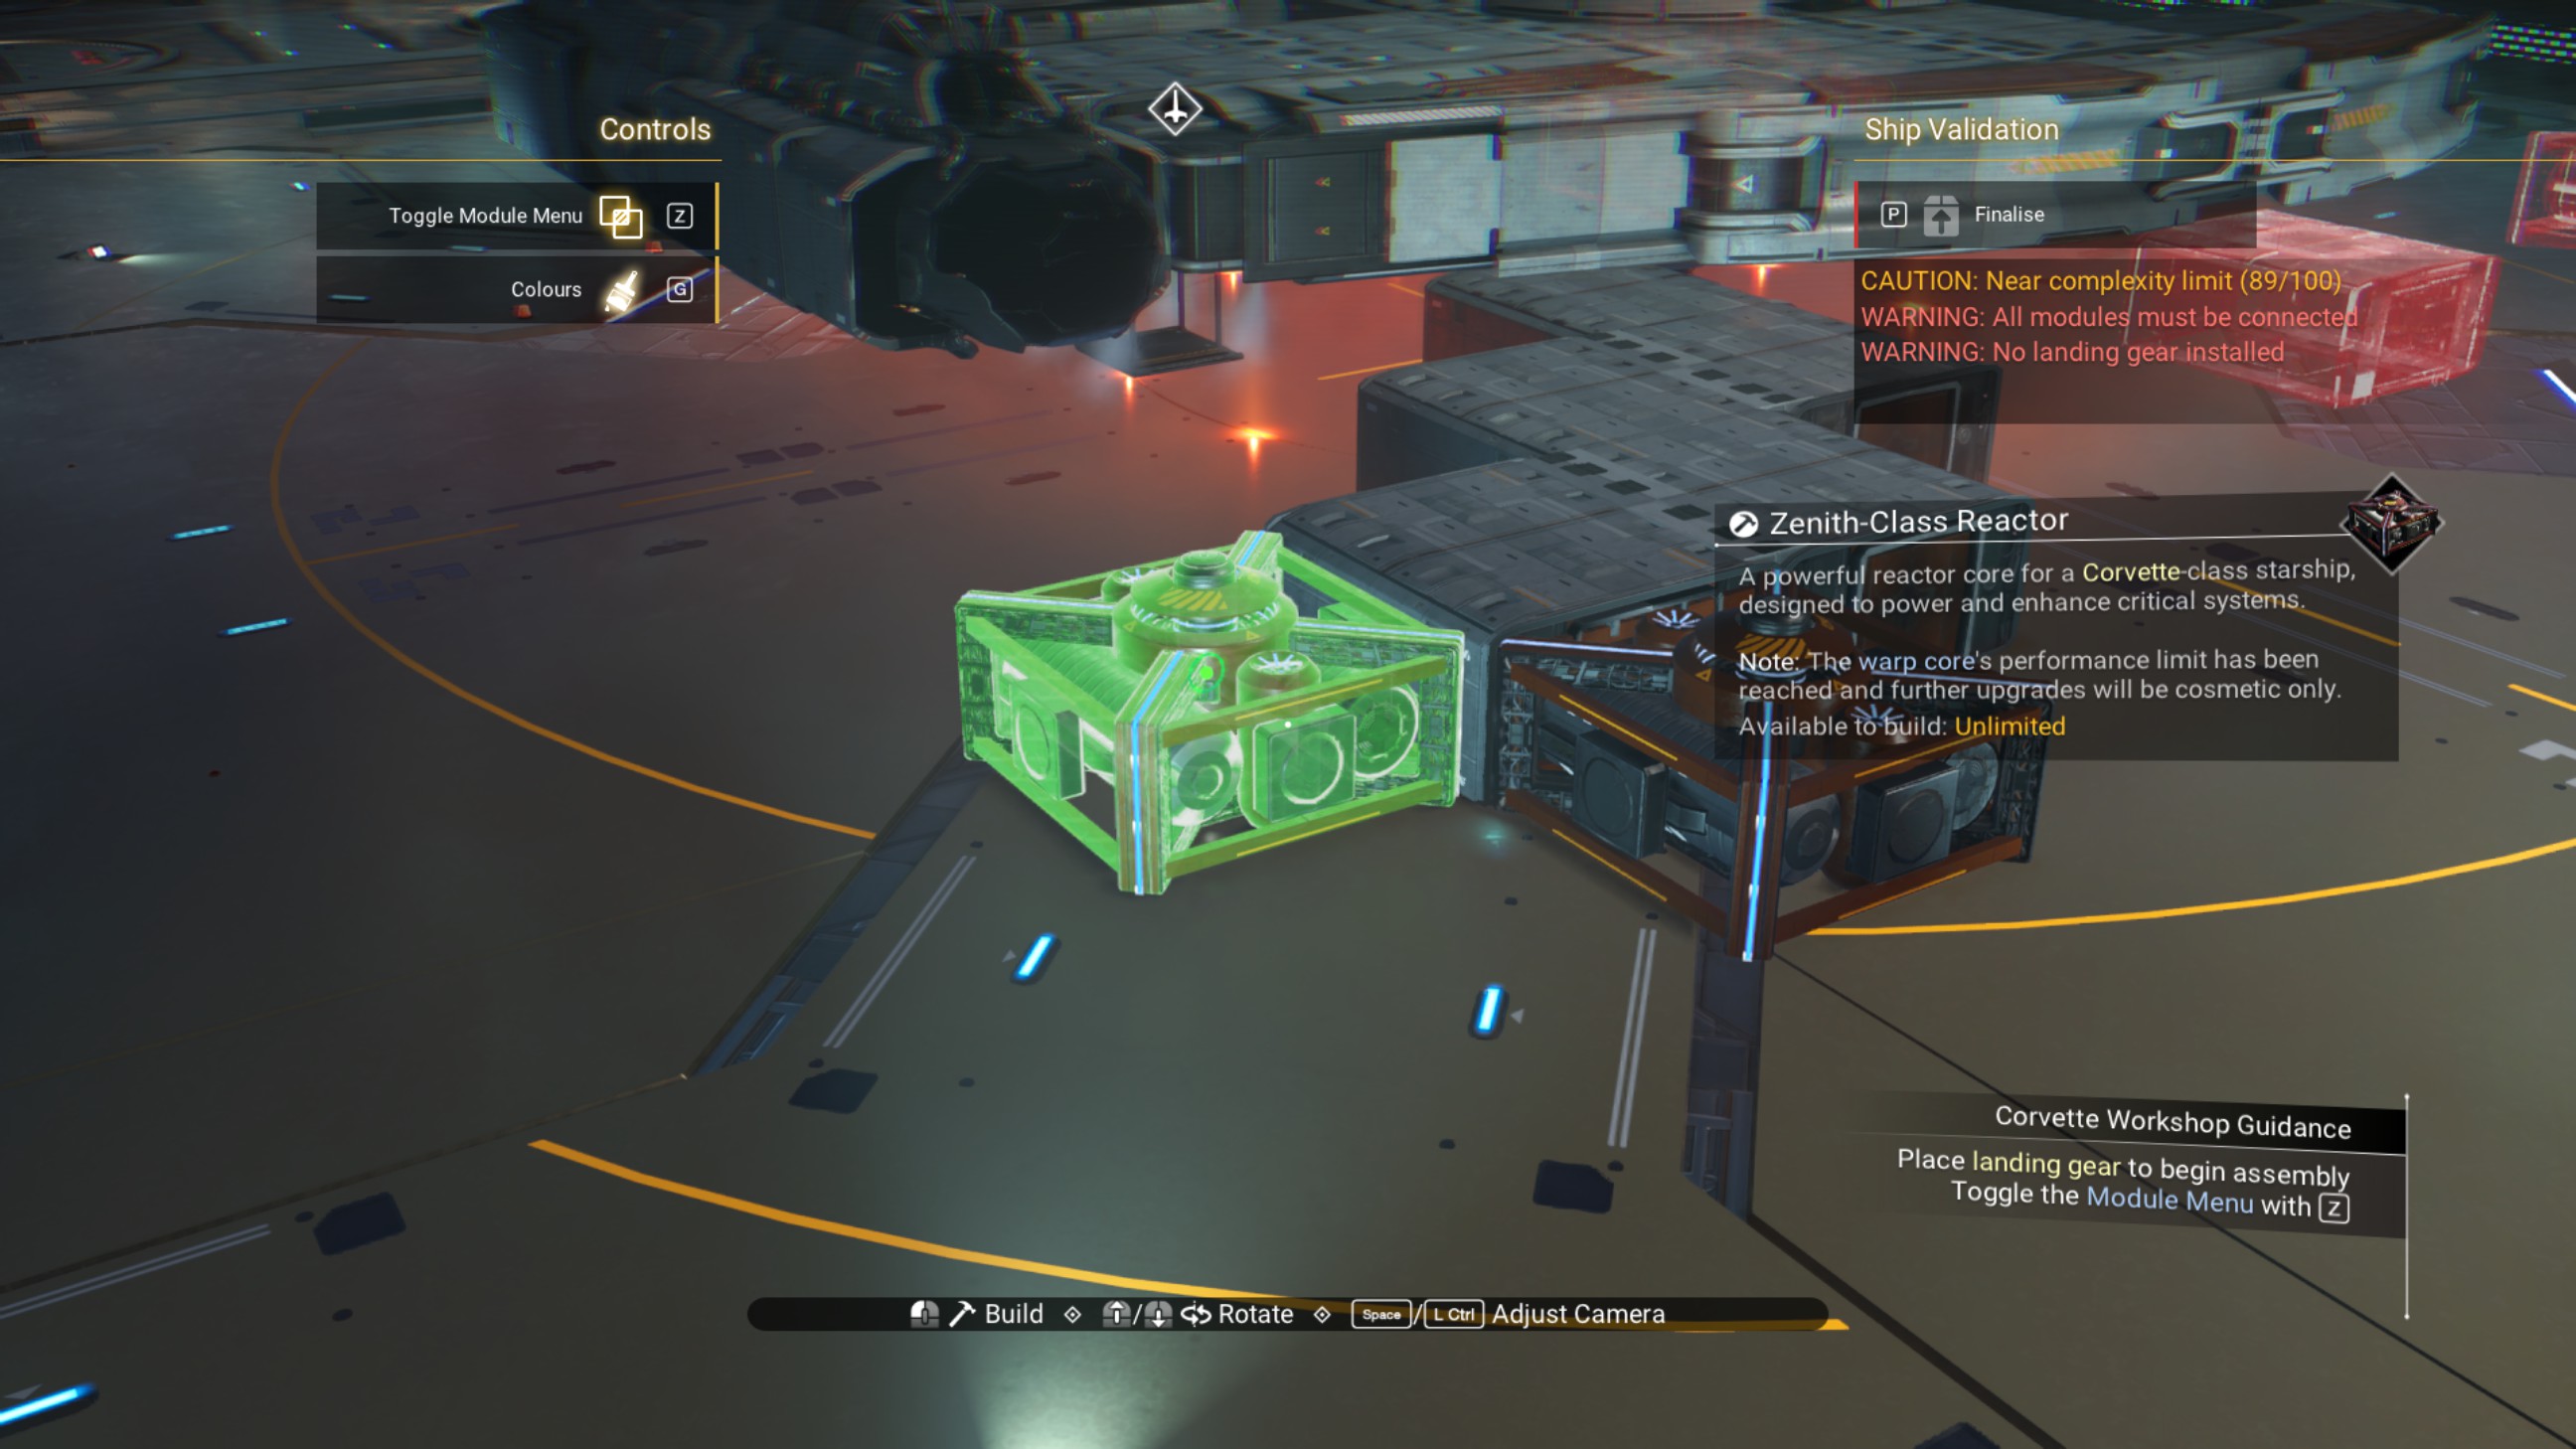
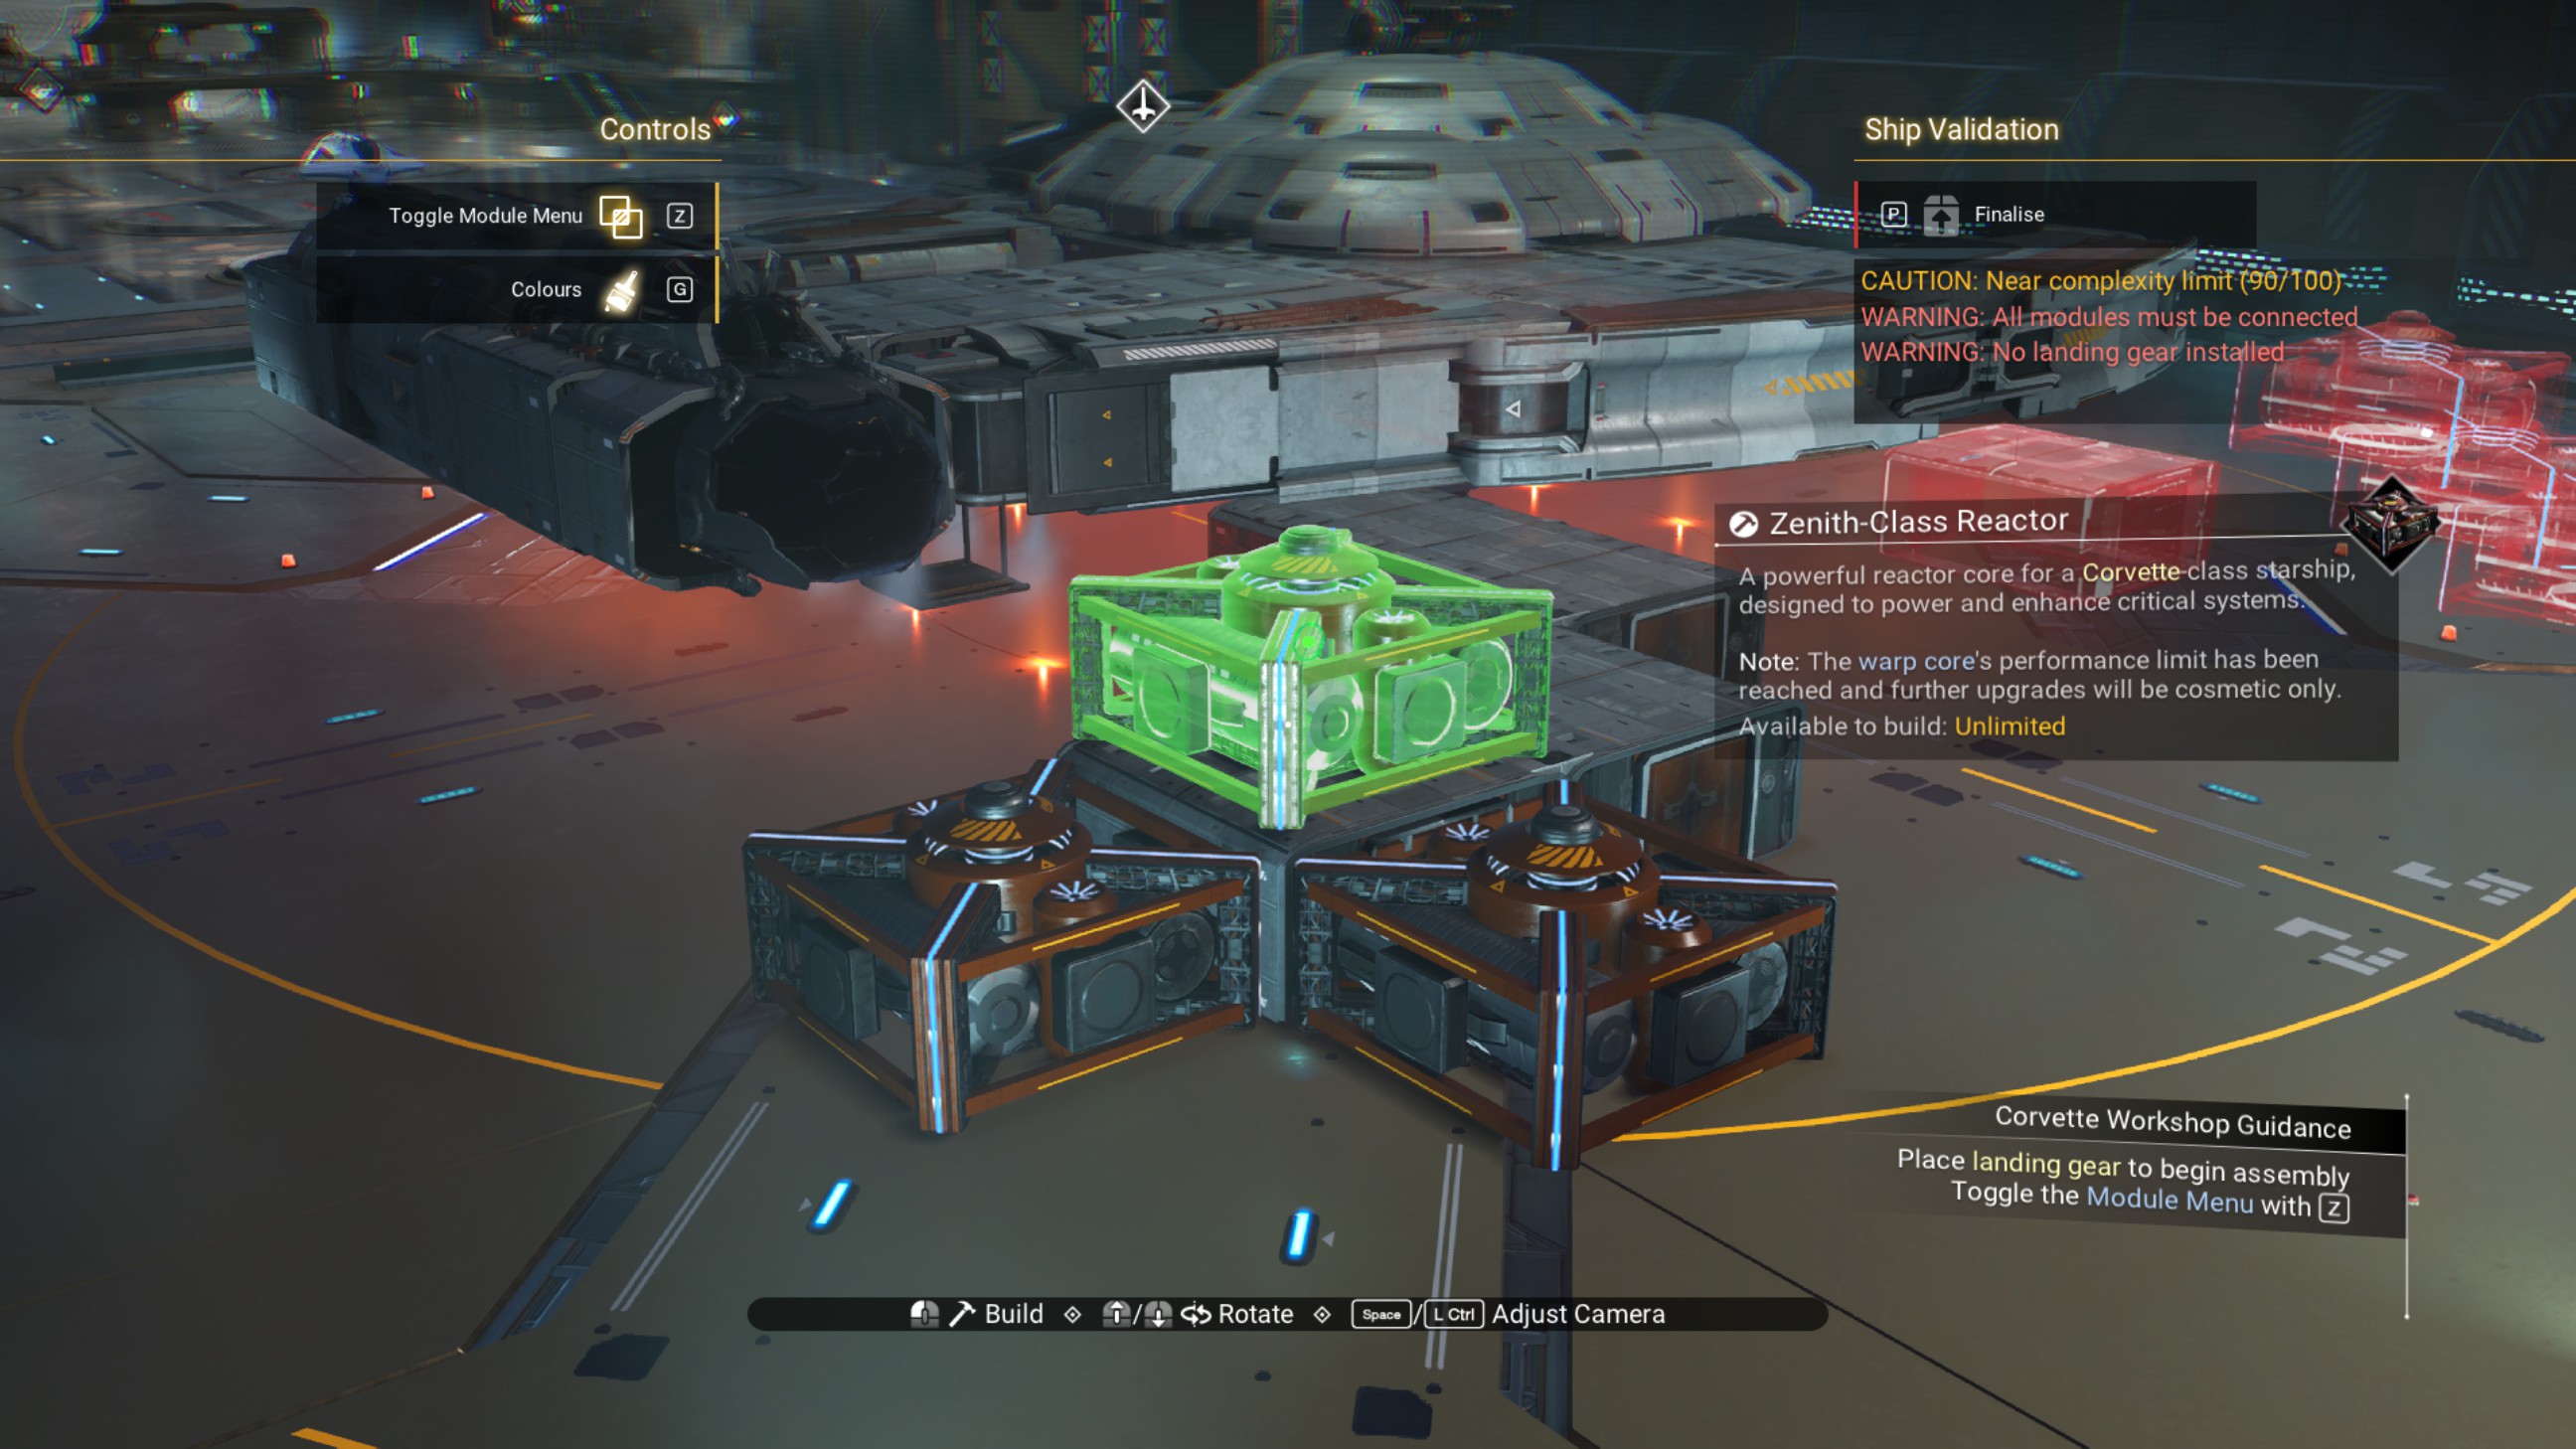
Delete the extra walkways.
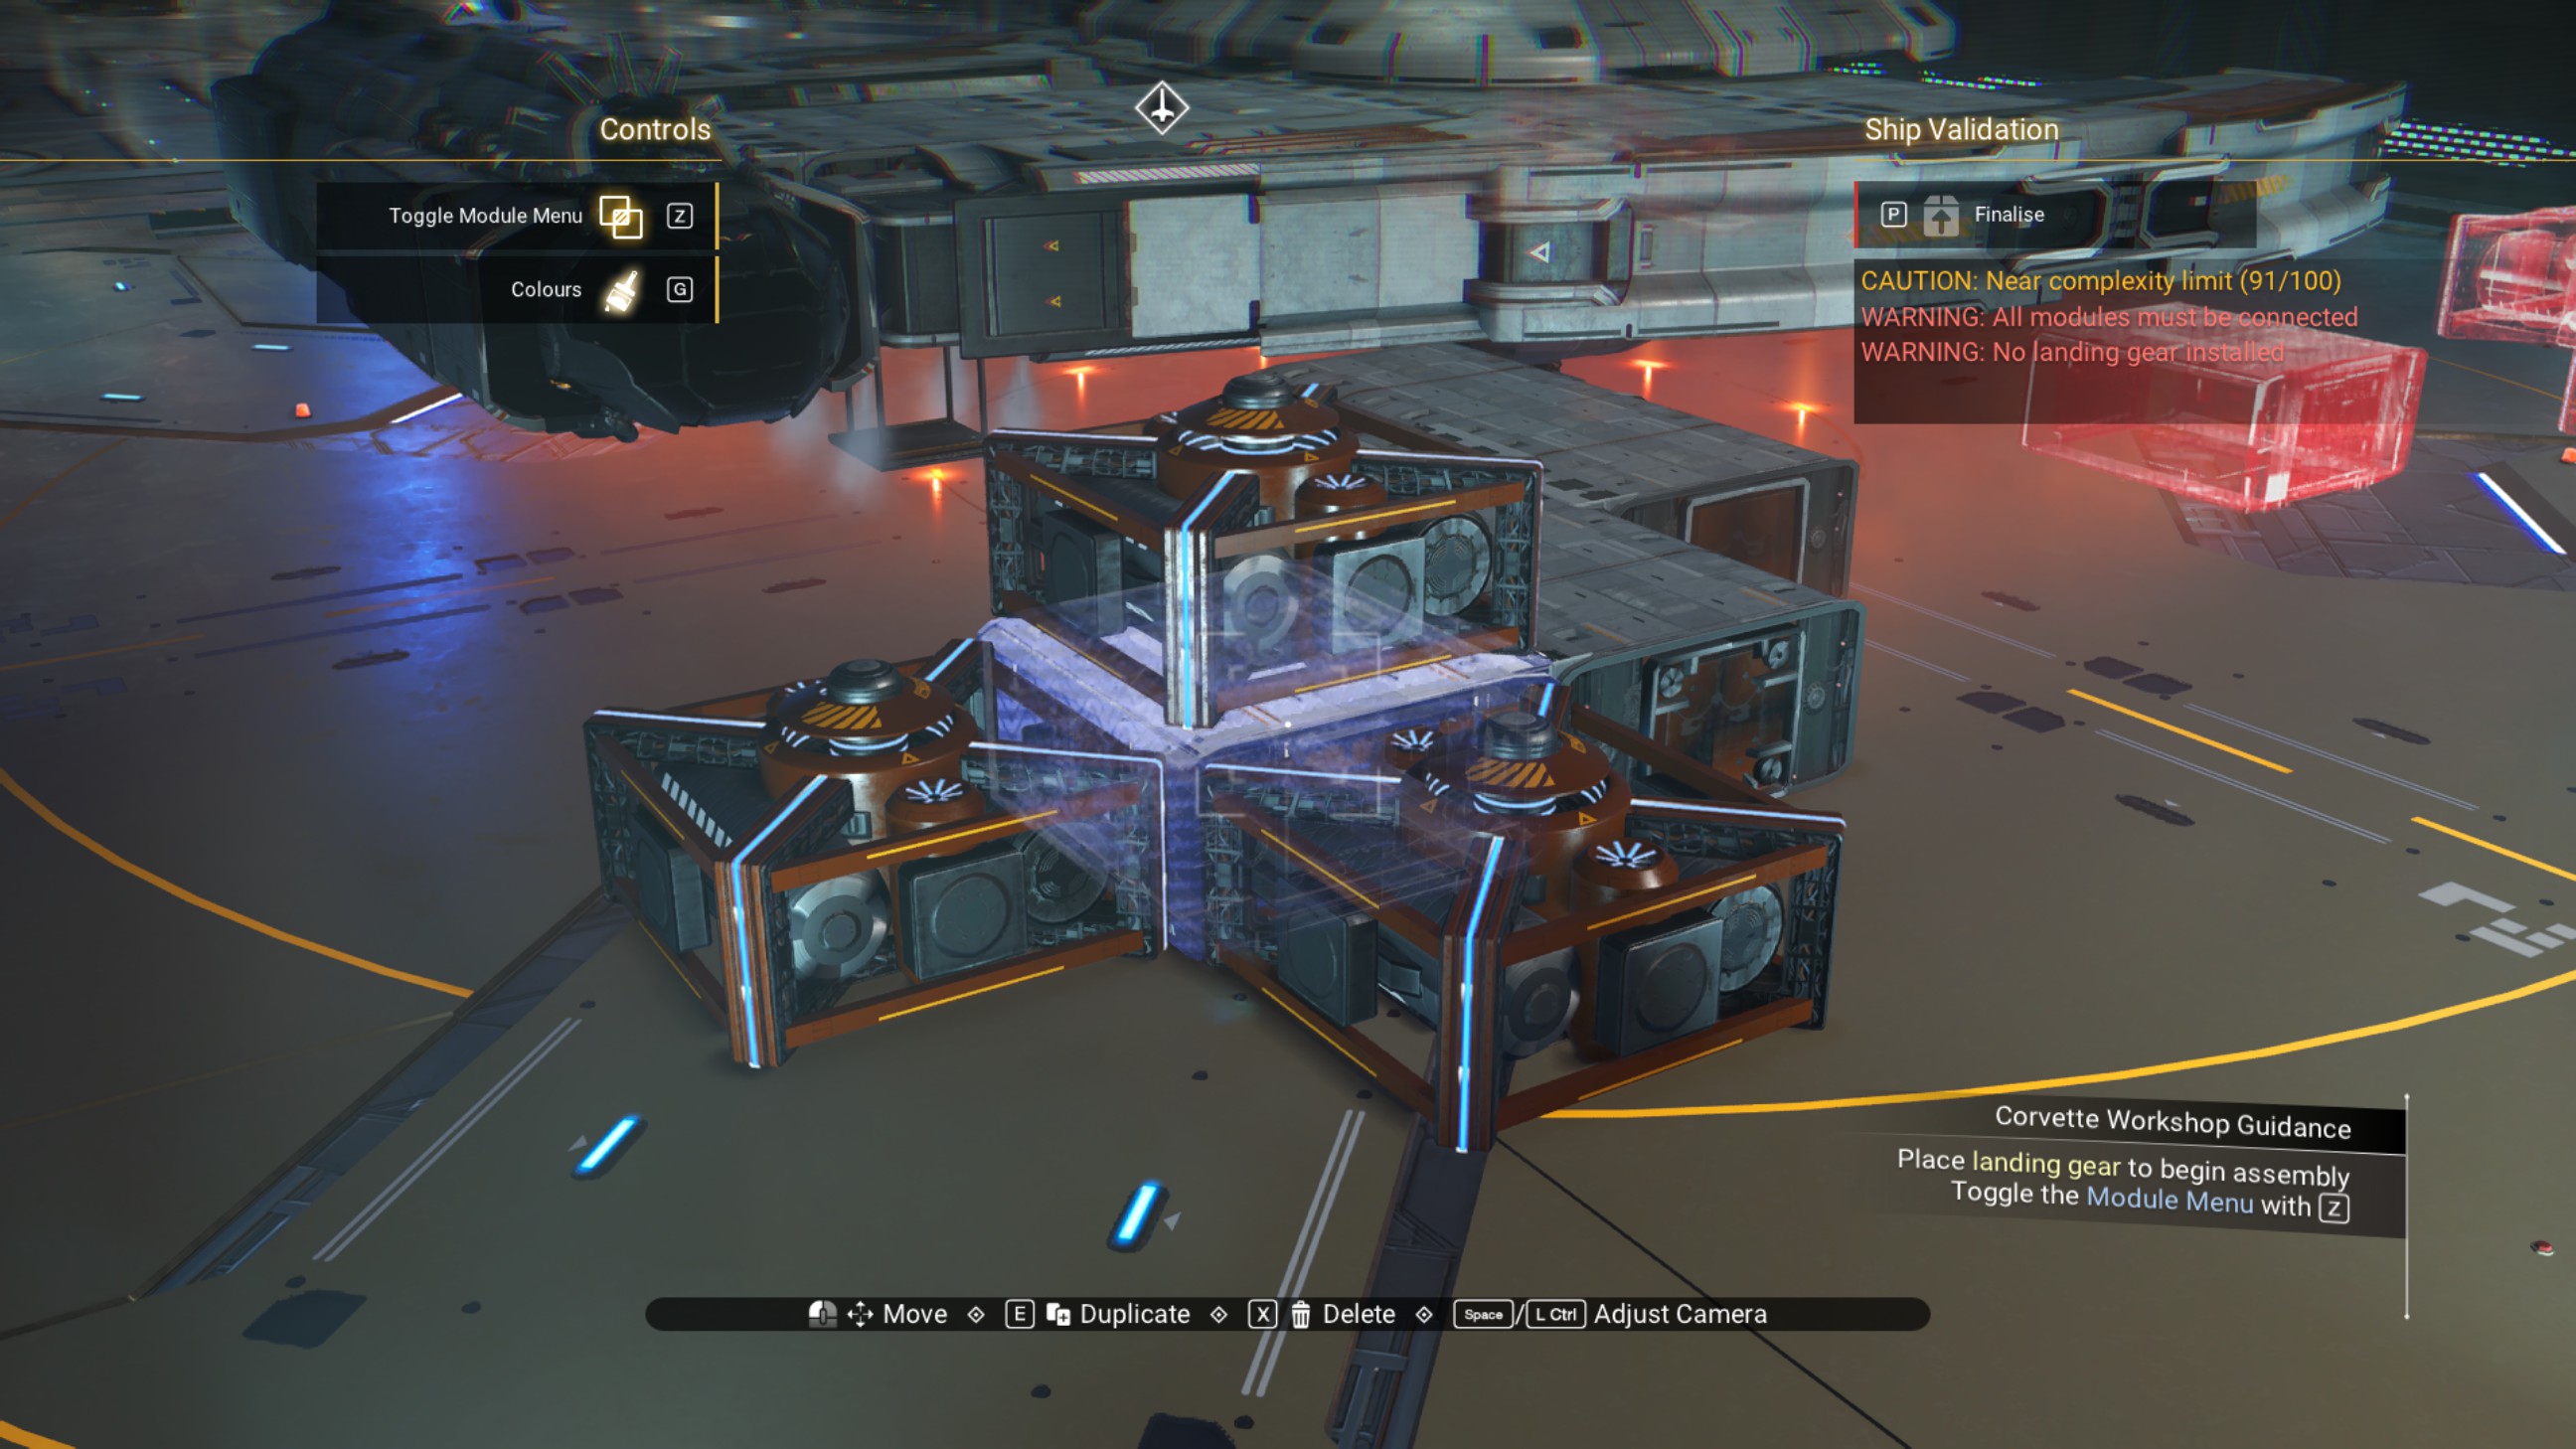
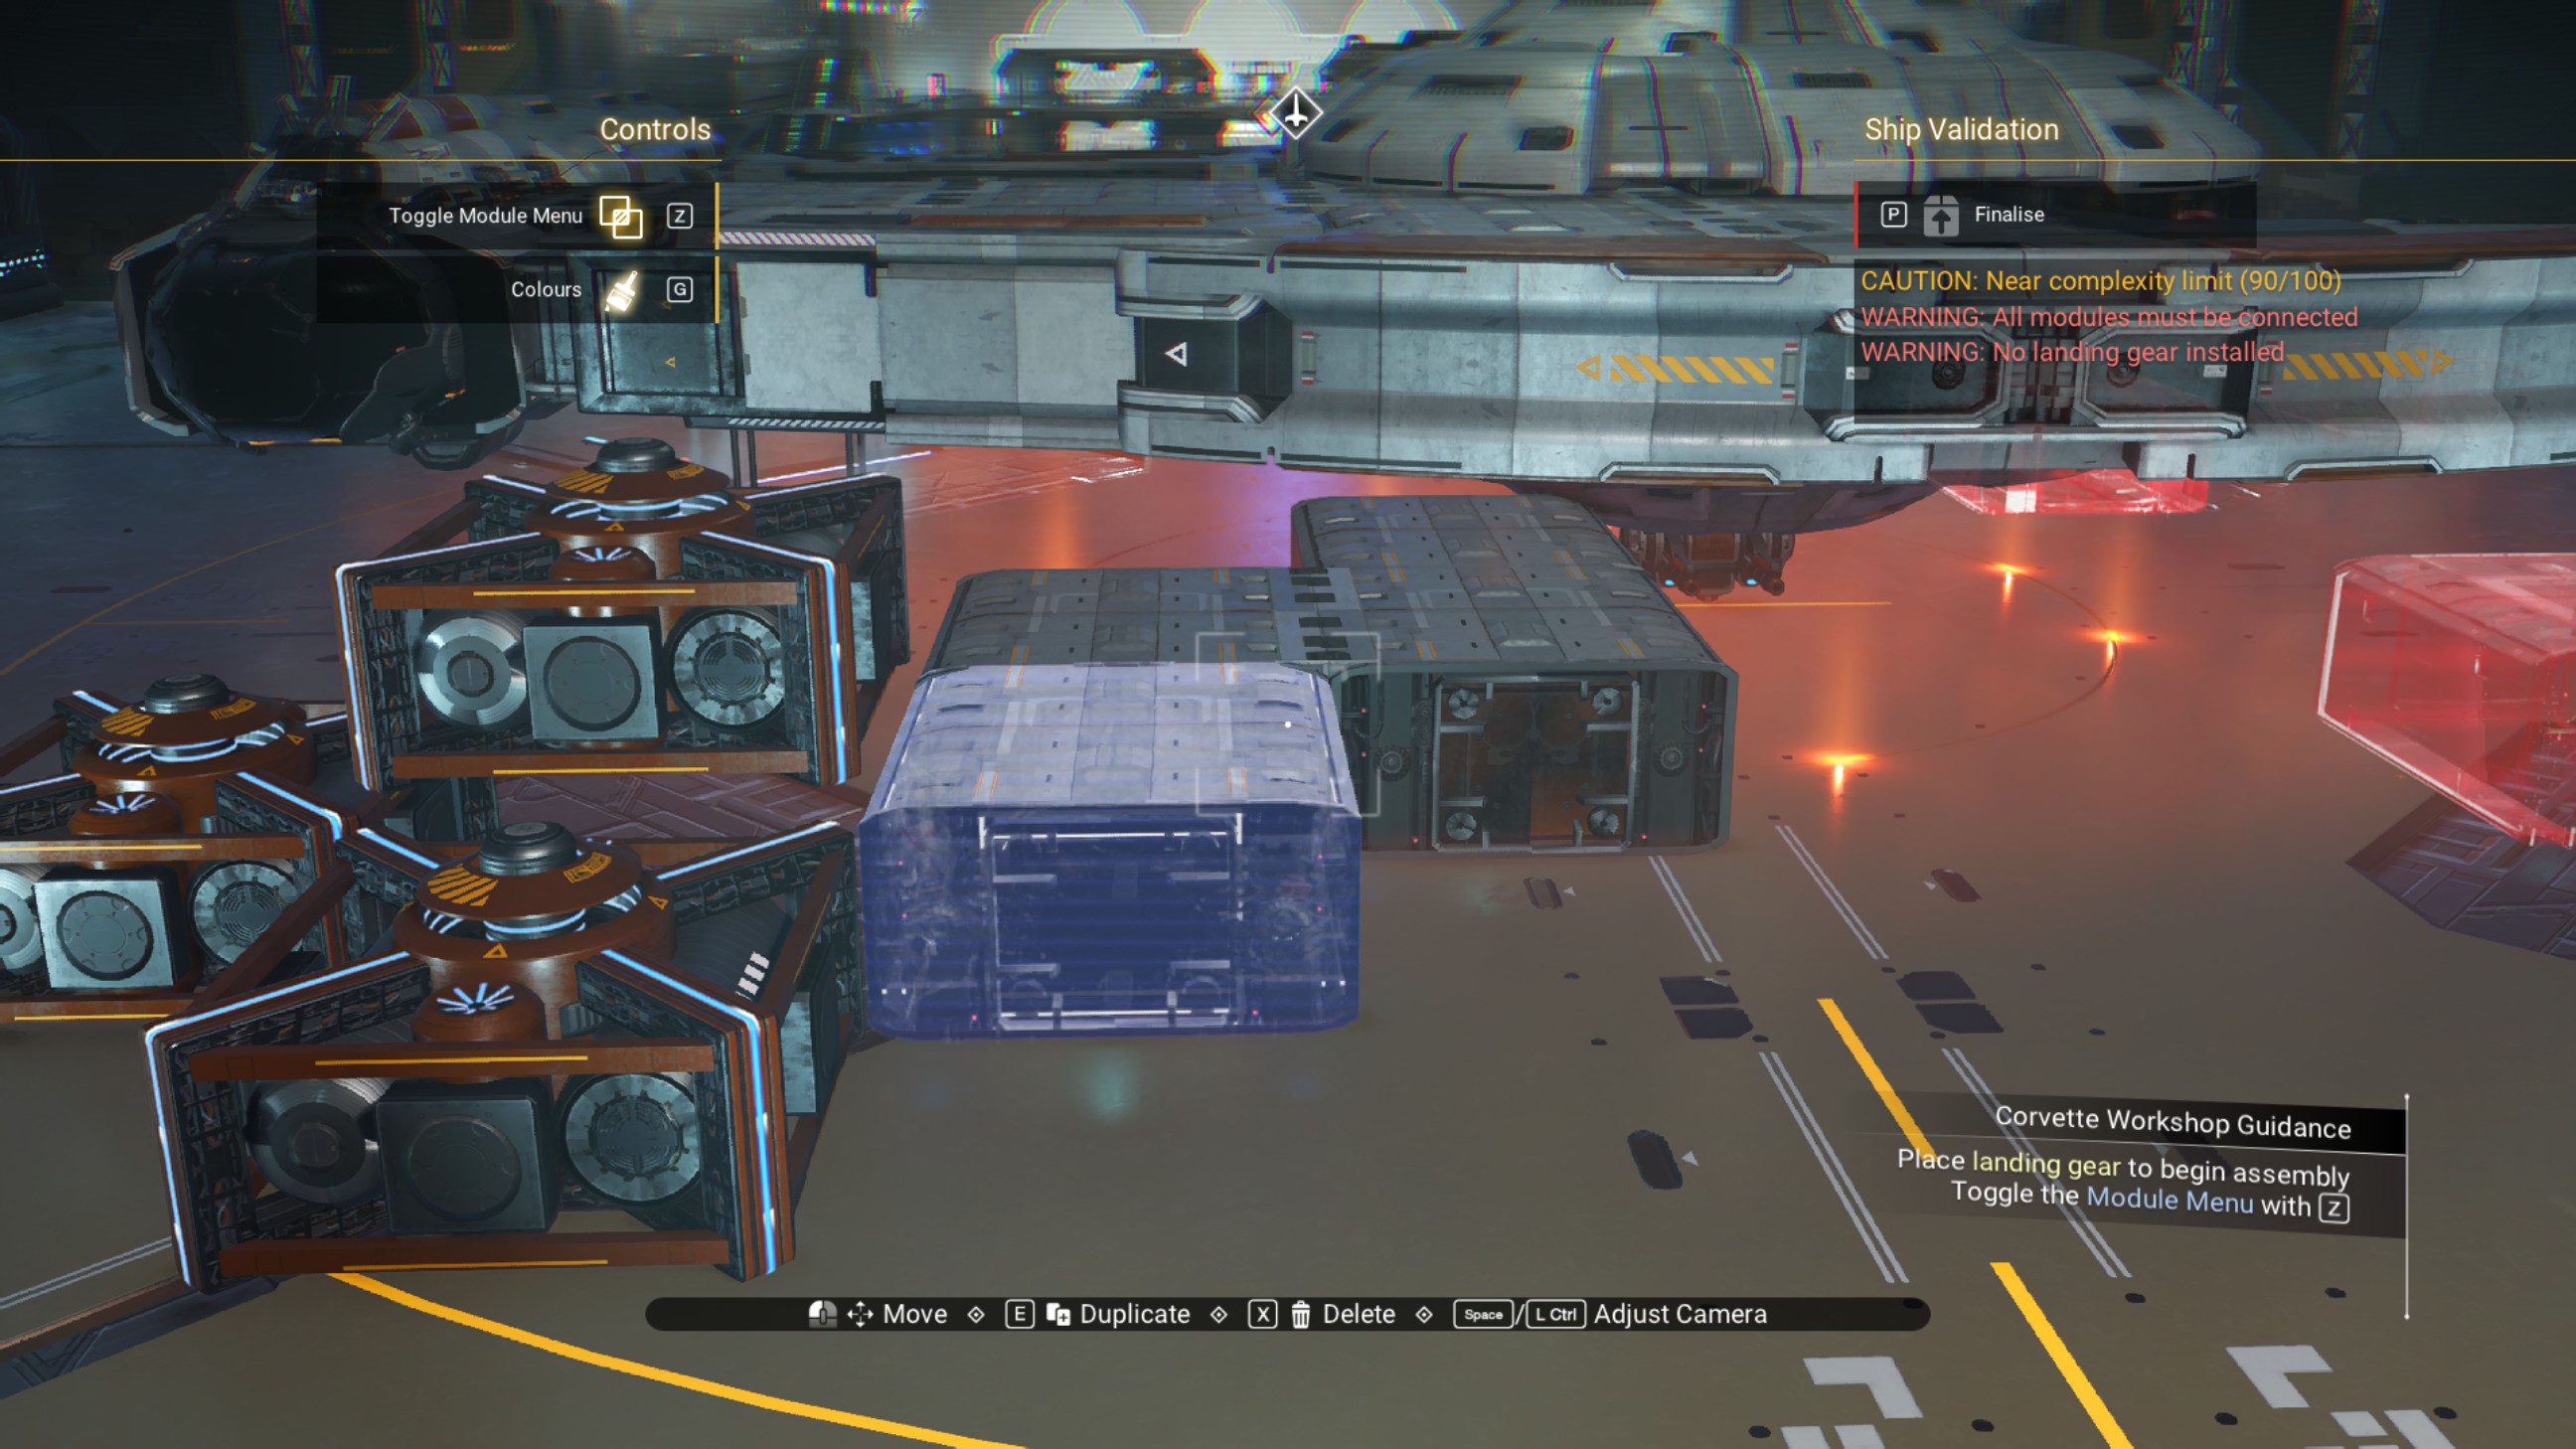
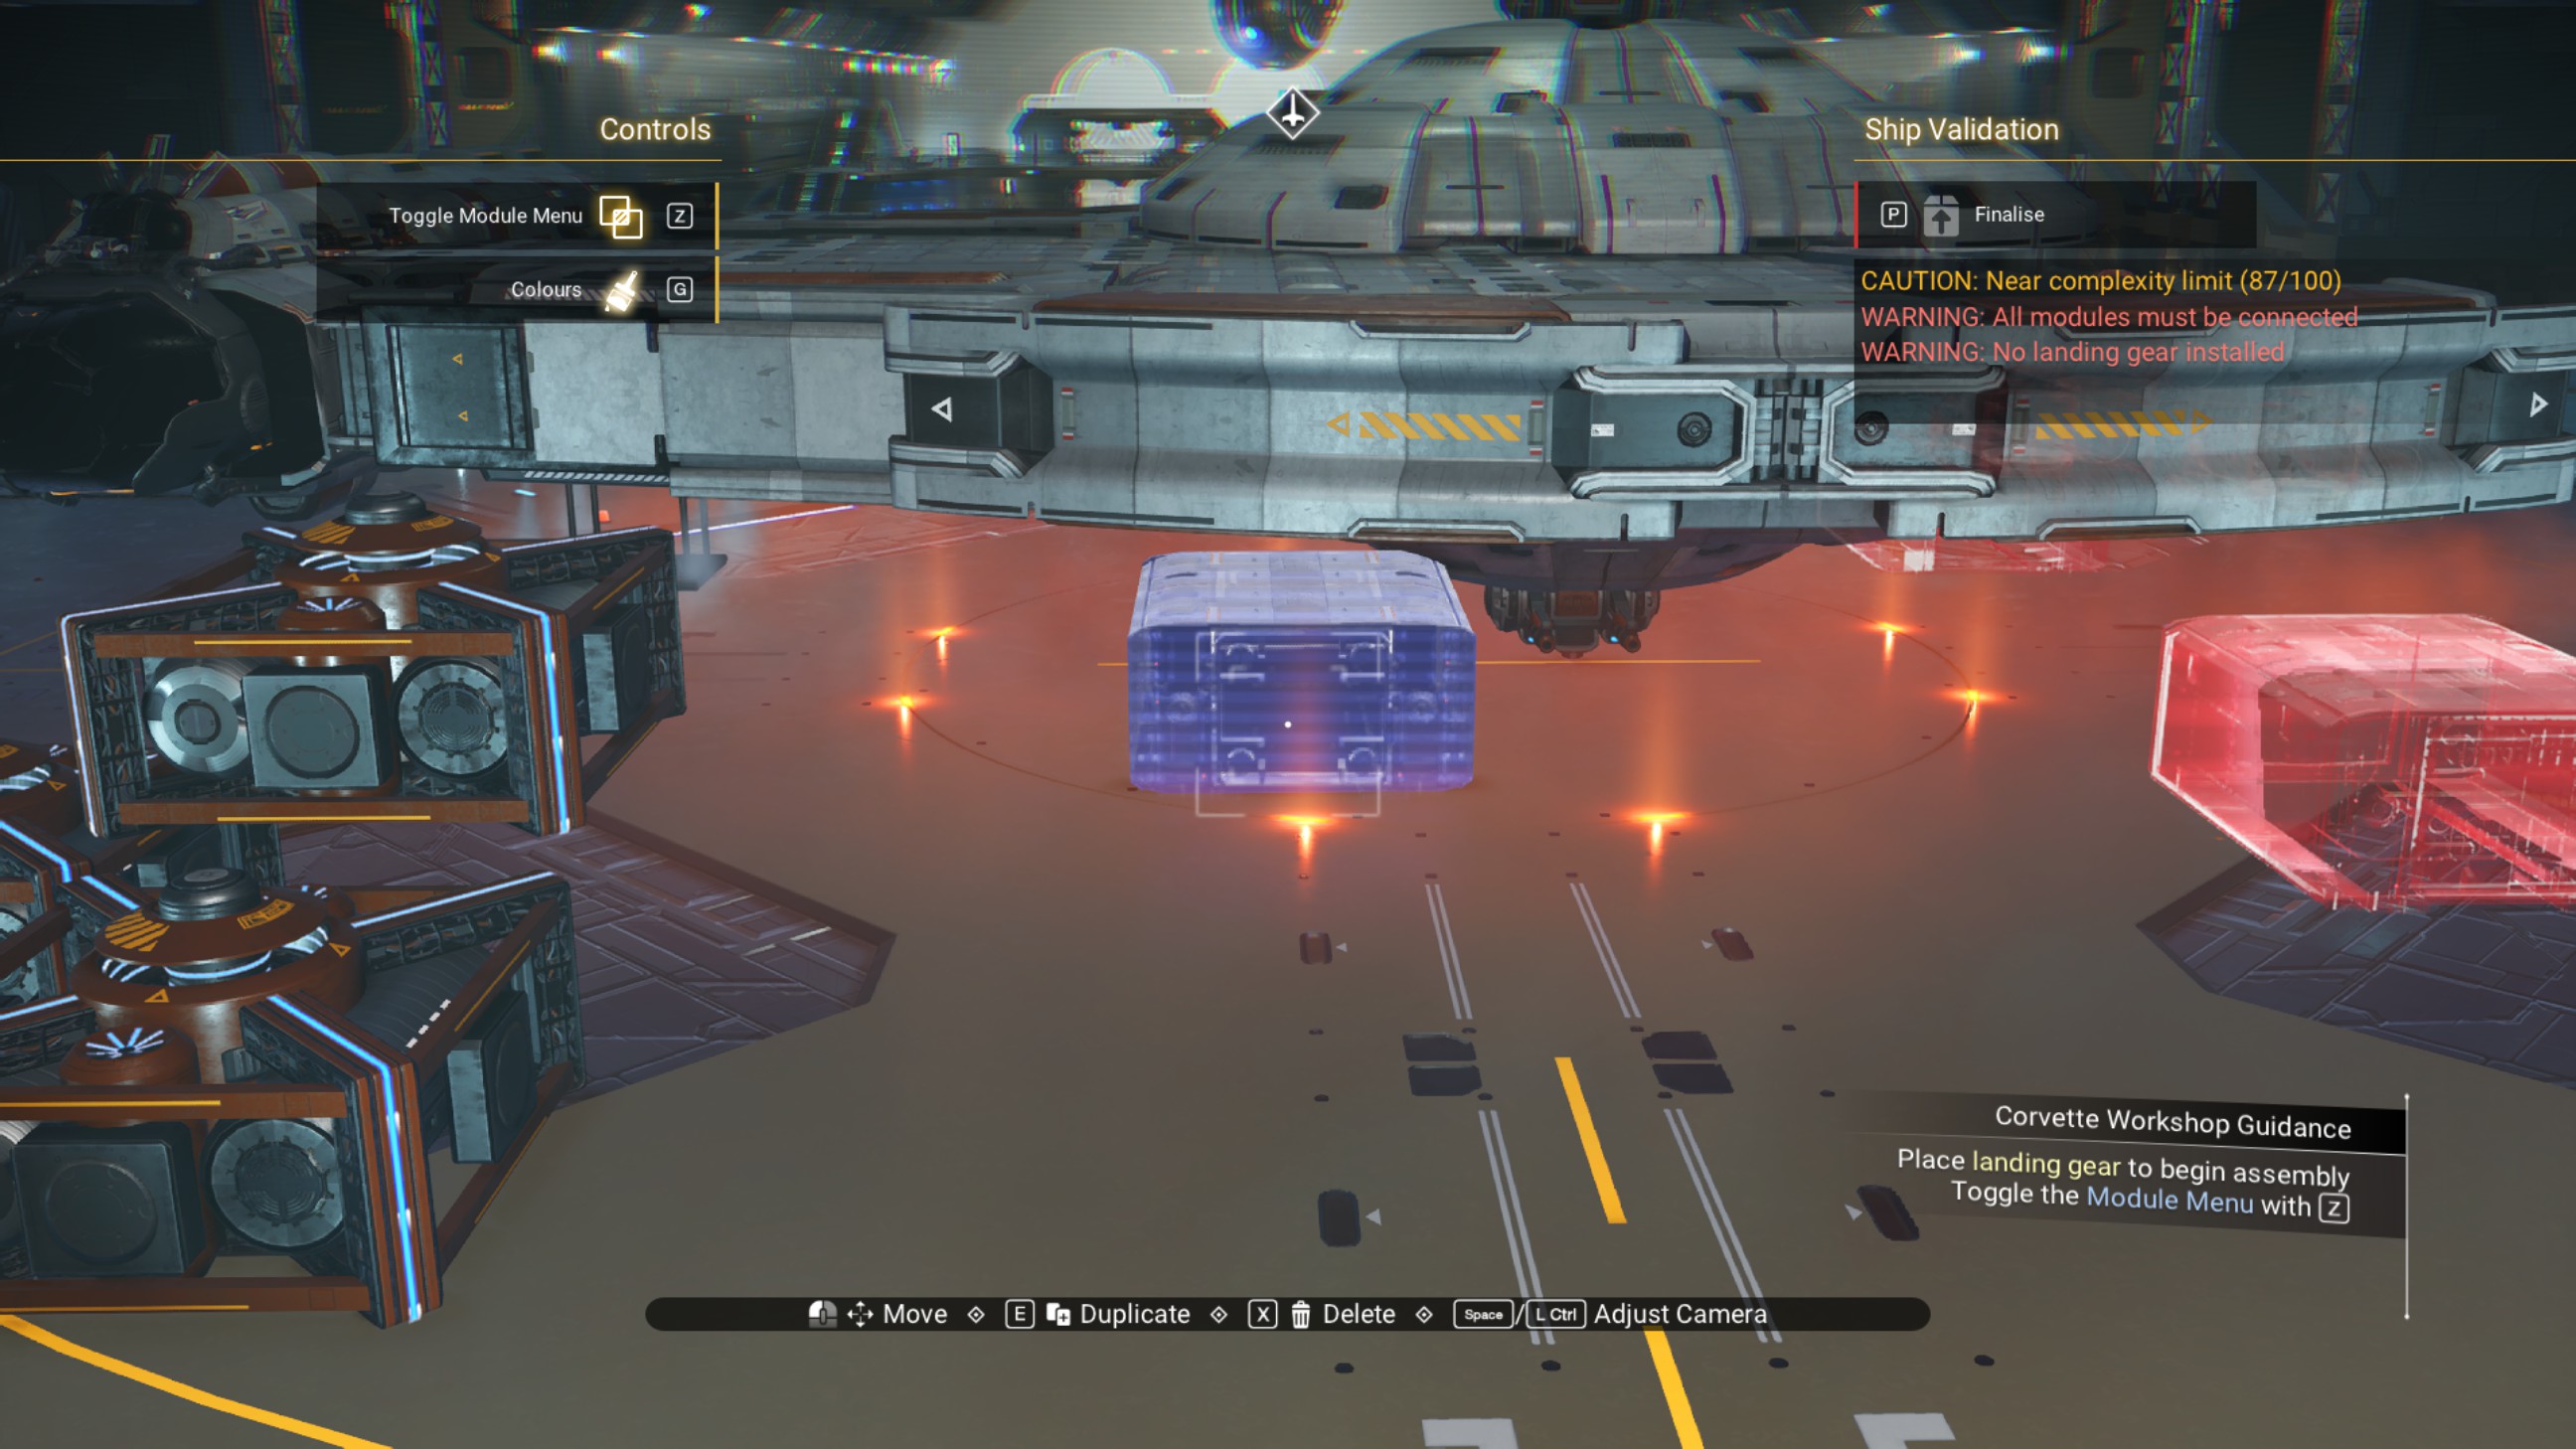
On the port side of the ship, place a walkway in the center of the structure.
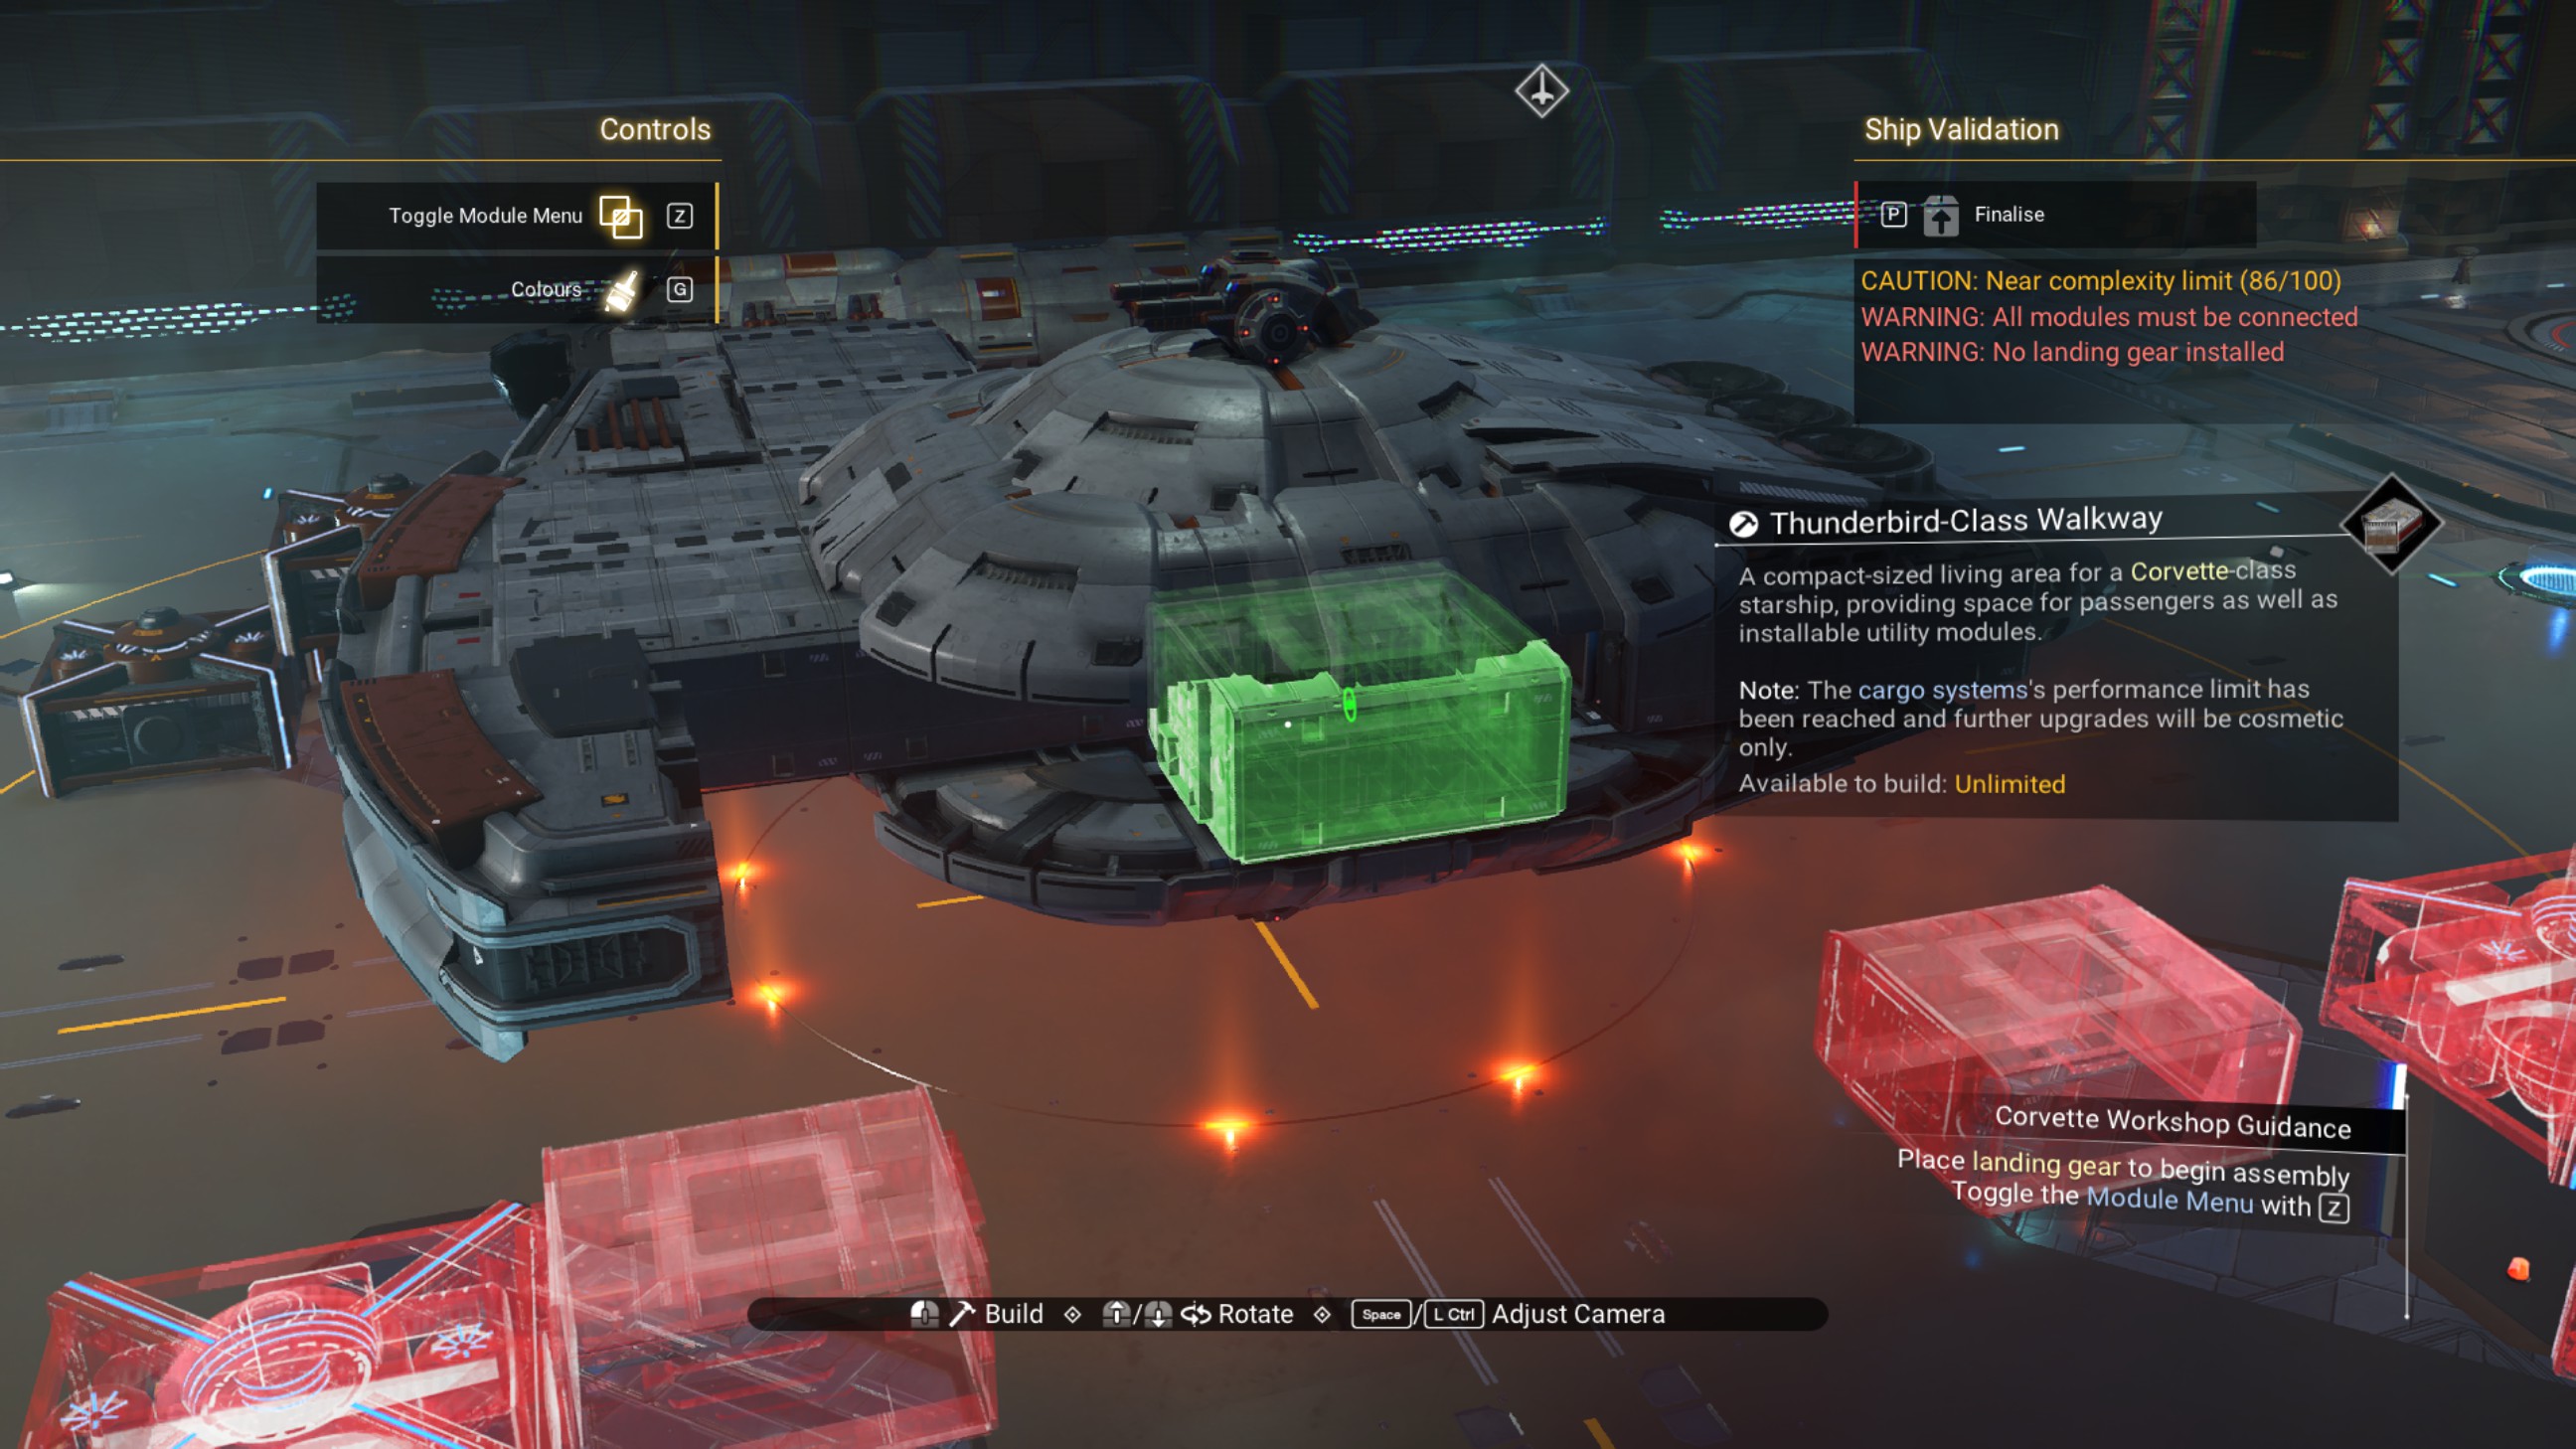
Place a ducting outlet on the port side of the walkway, and shift the walkway so the ducting outlet is on the rear of the walkway.
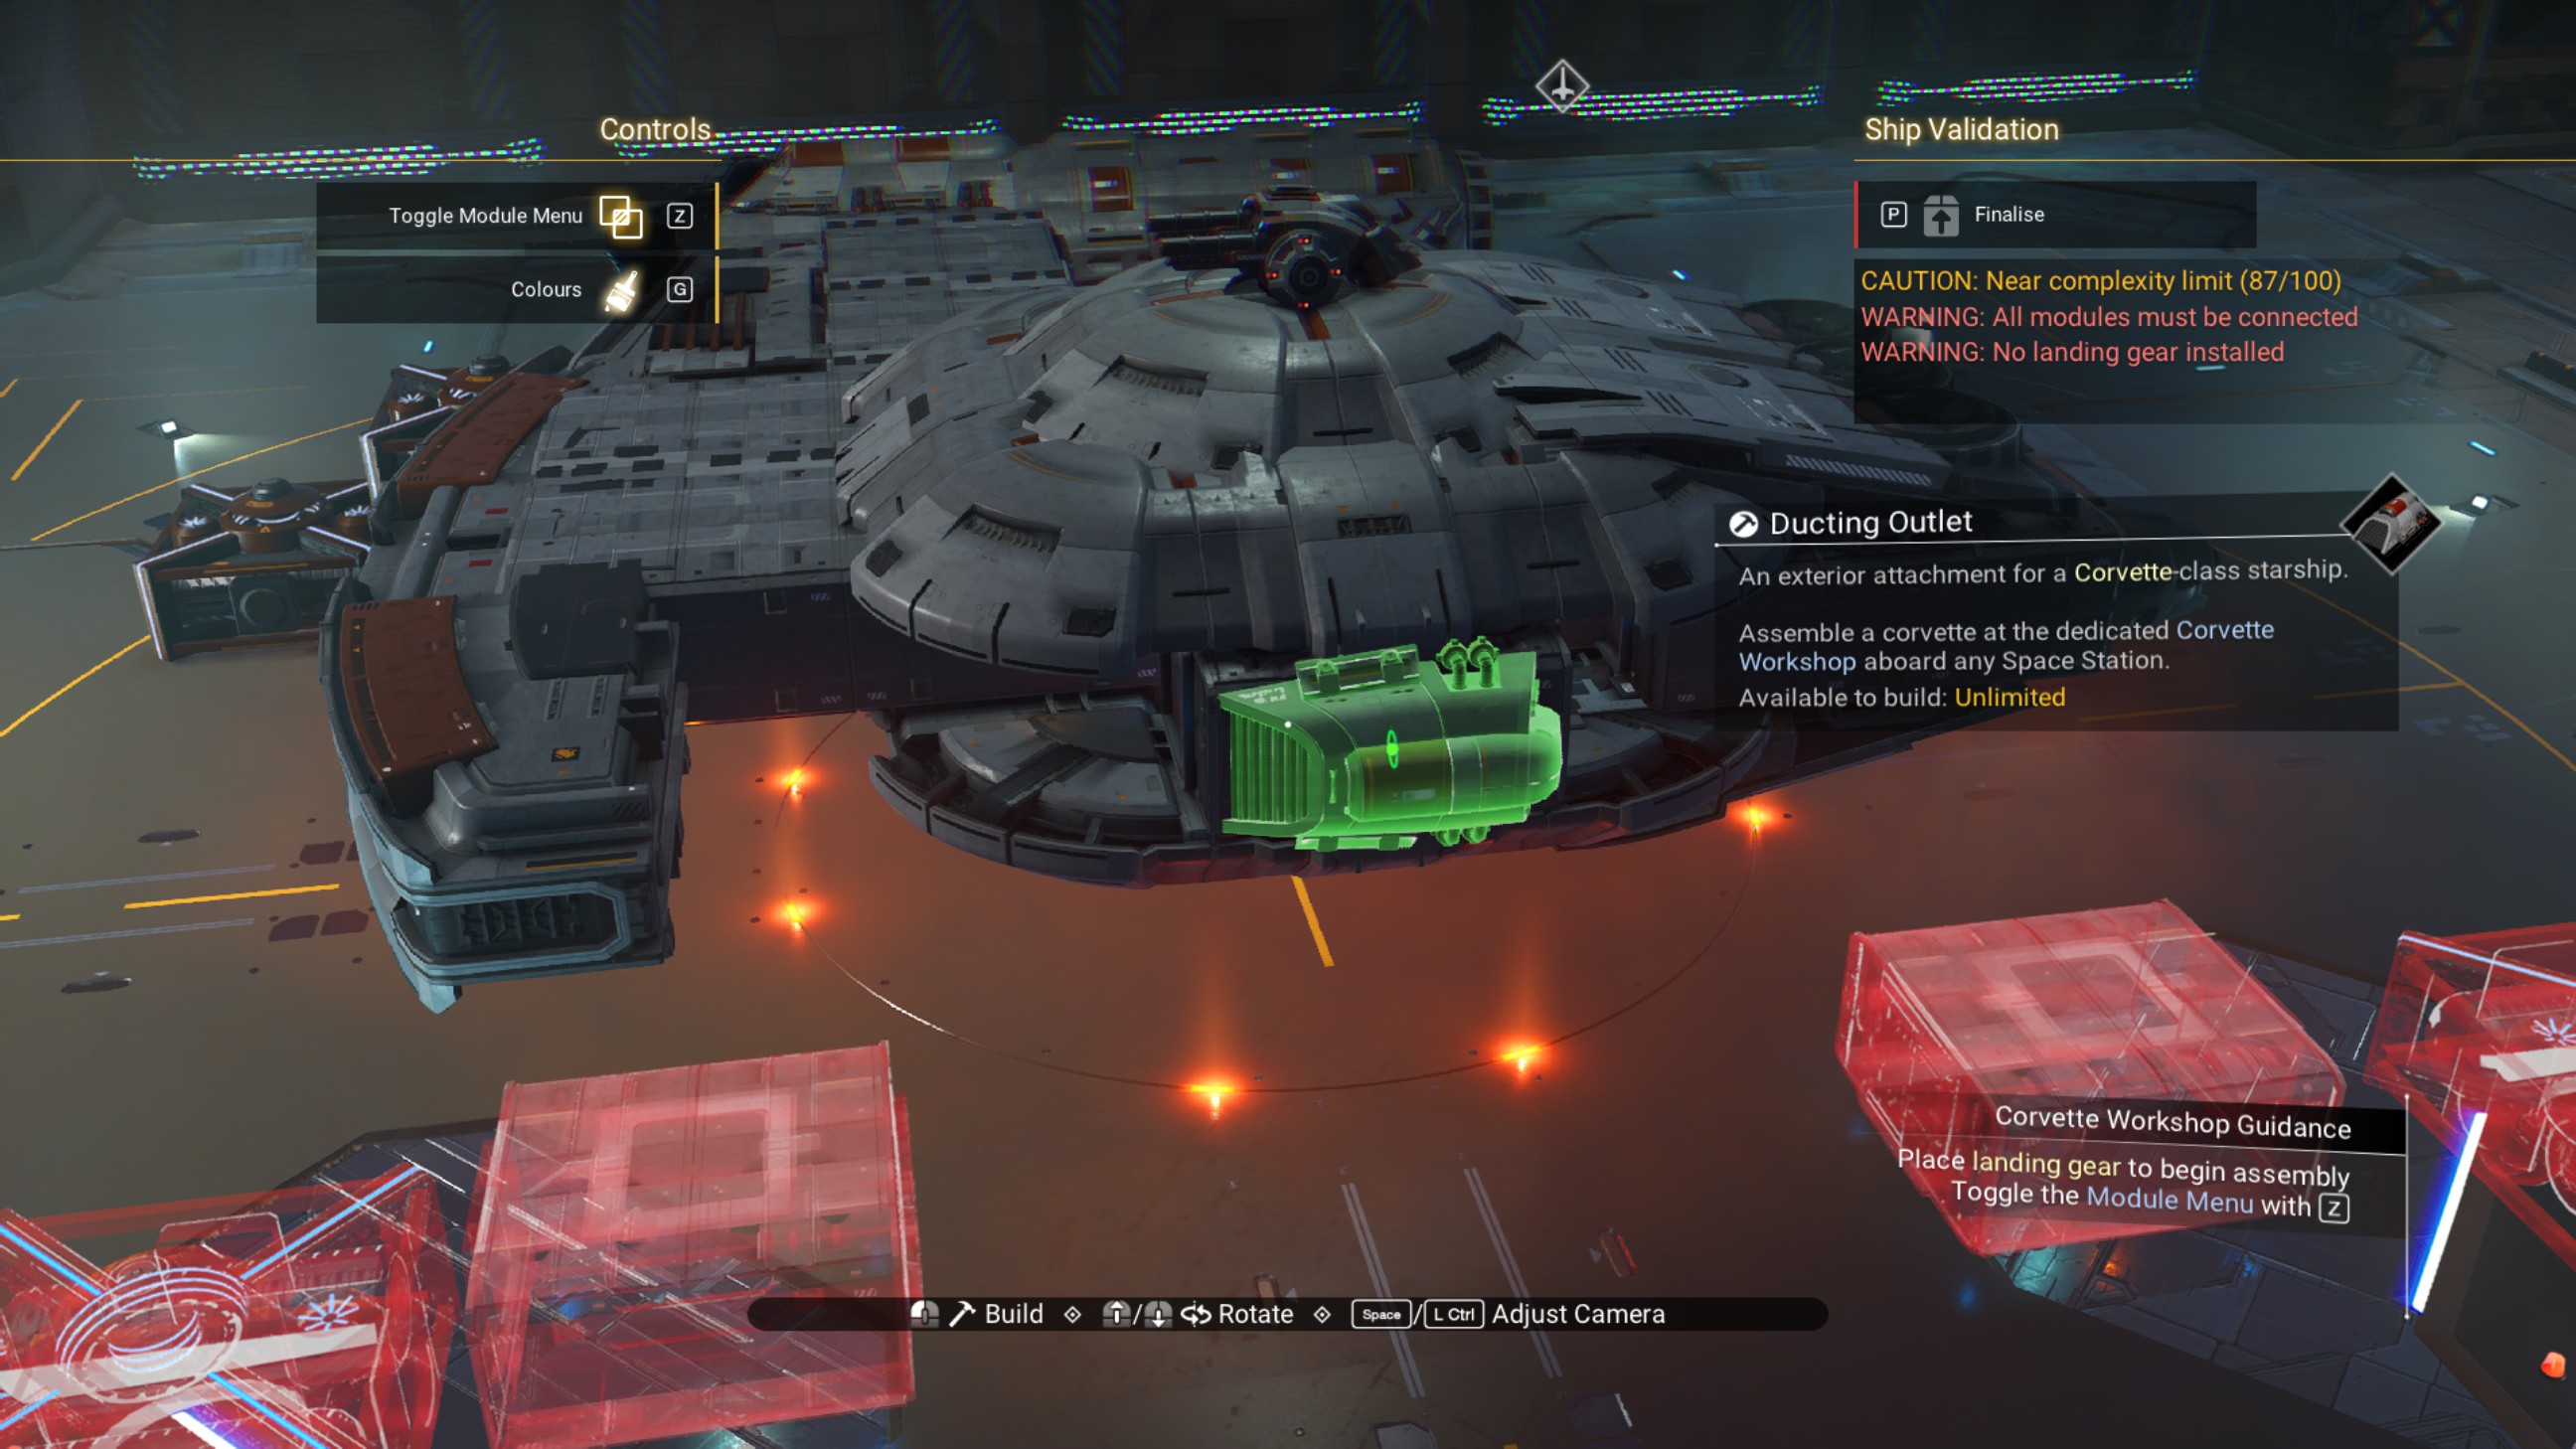
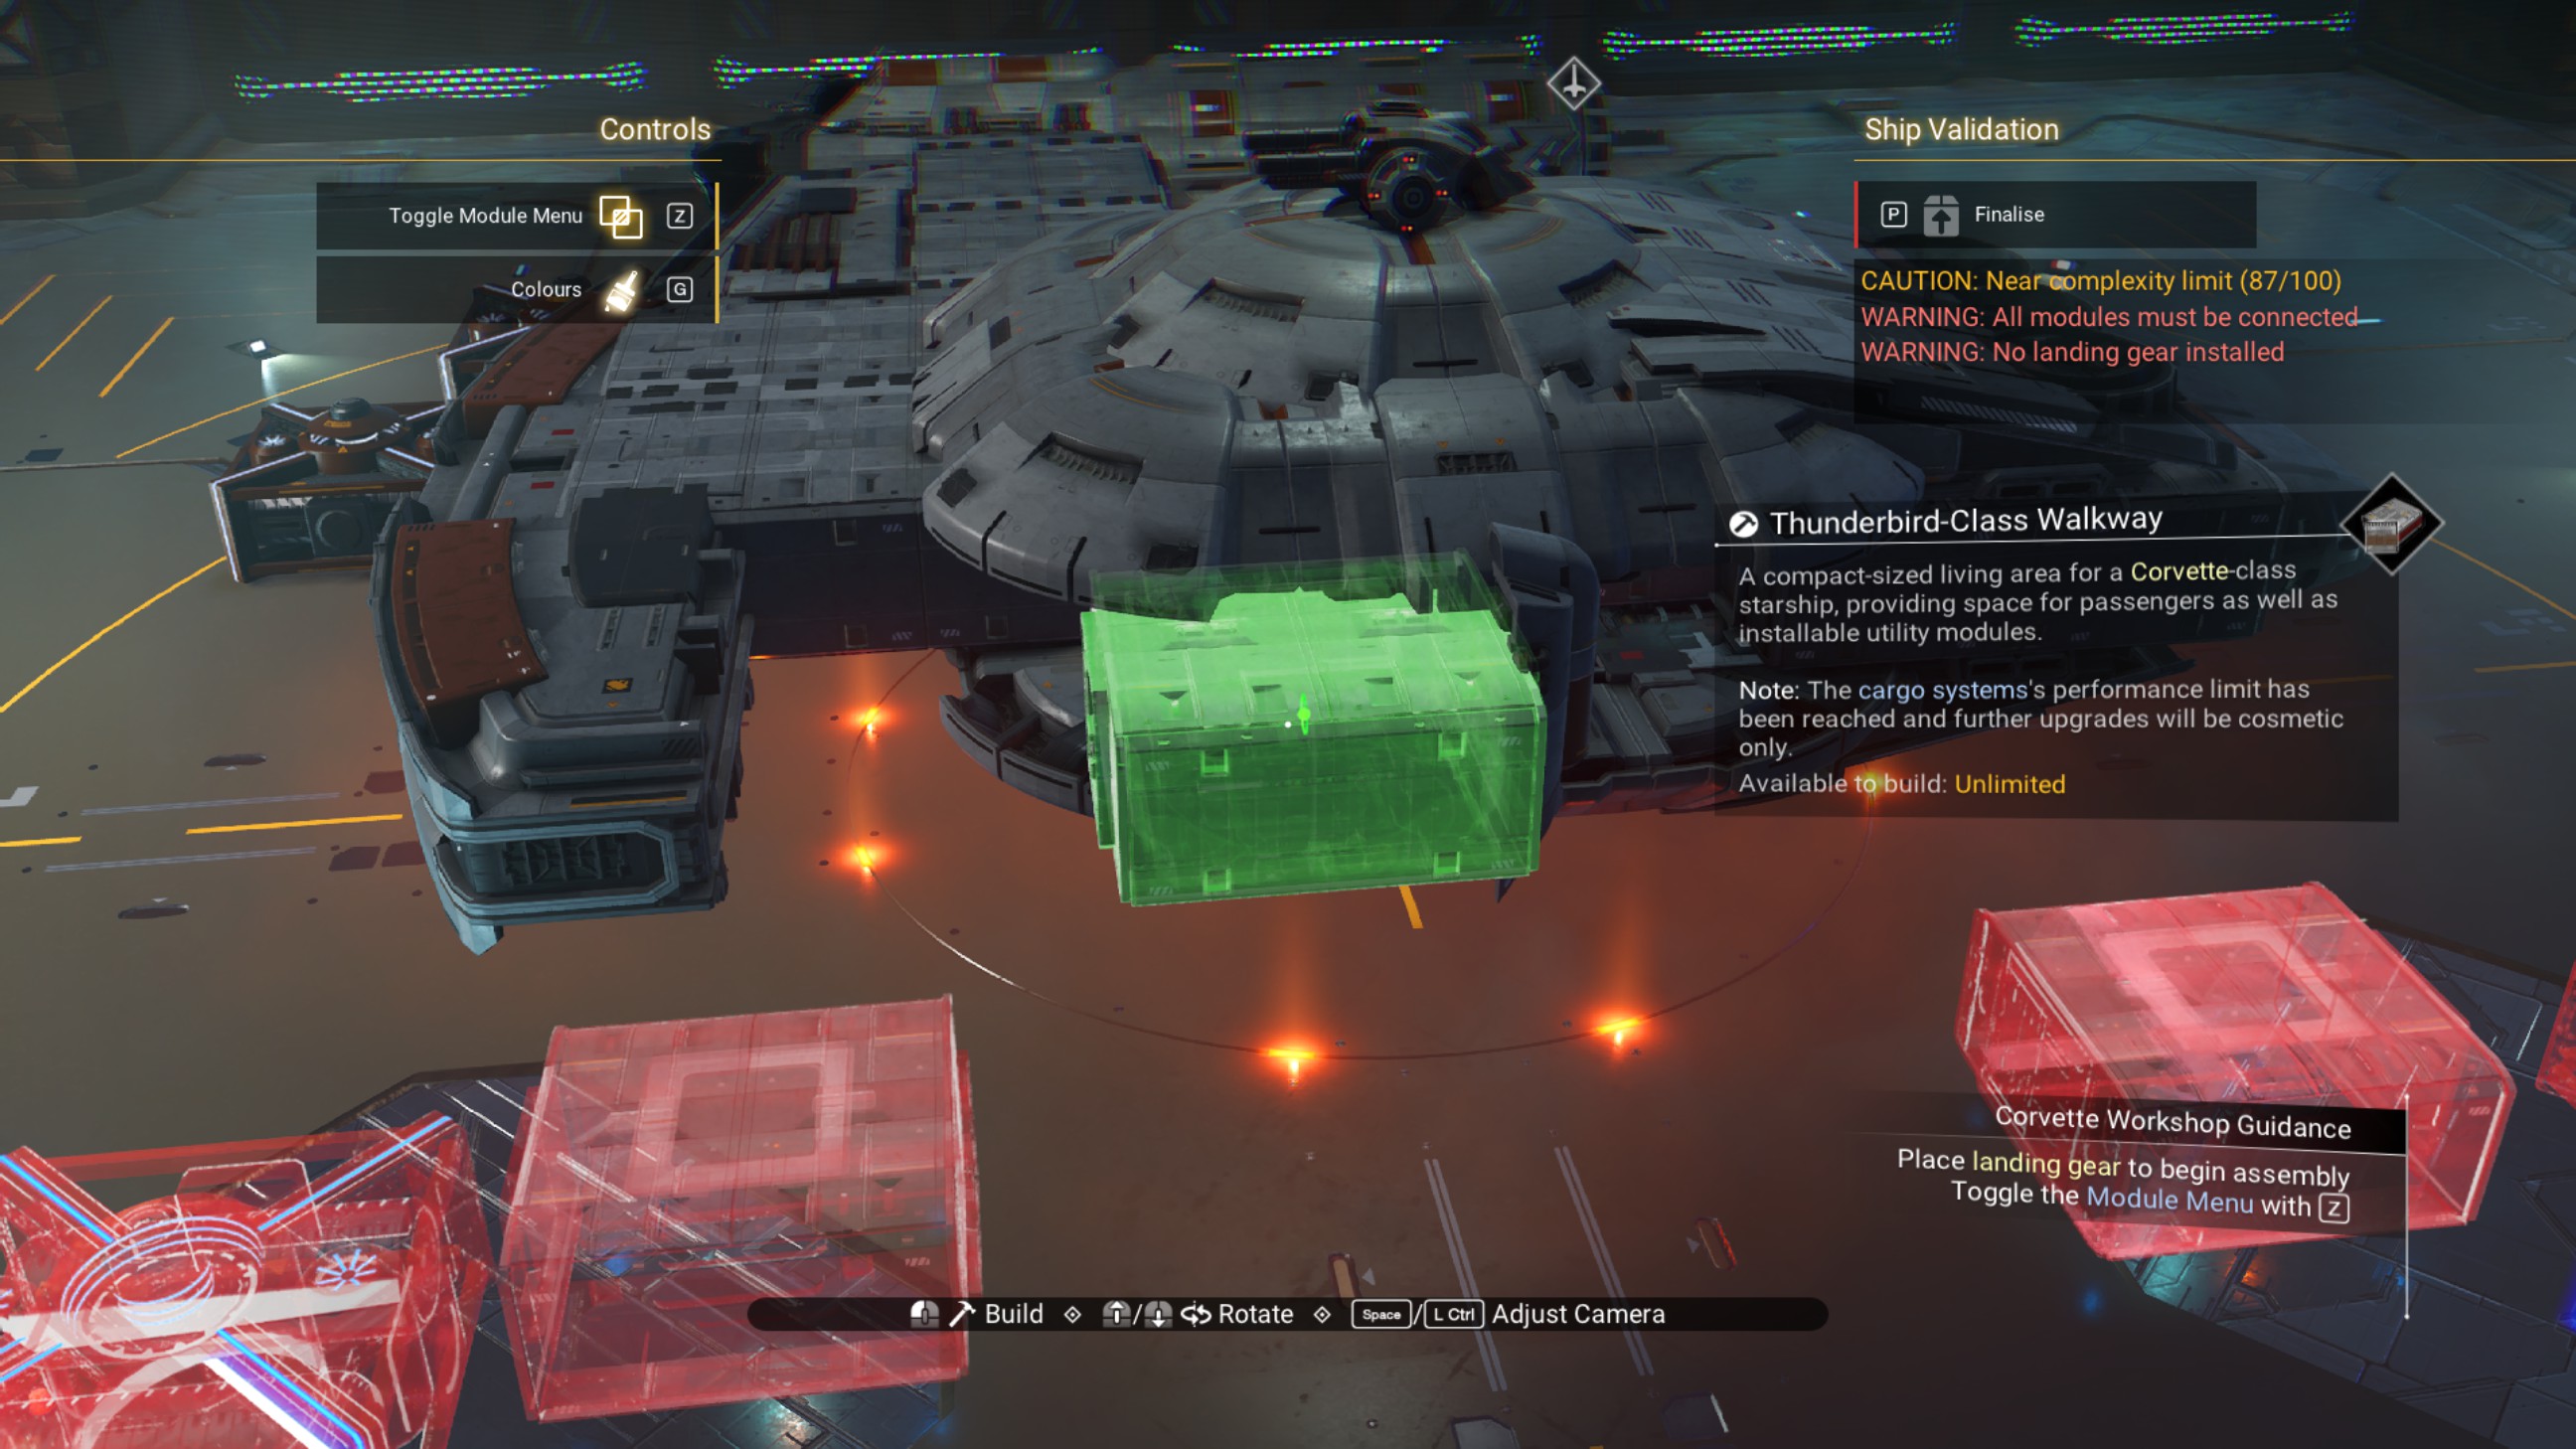
Delete the ducting outlet, and place a speedbird nacelle rim on the offset walkway, oriented to the front.
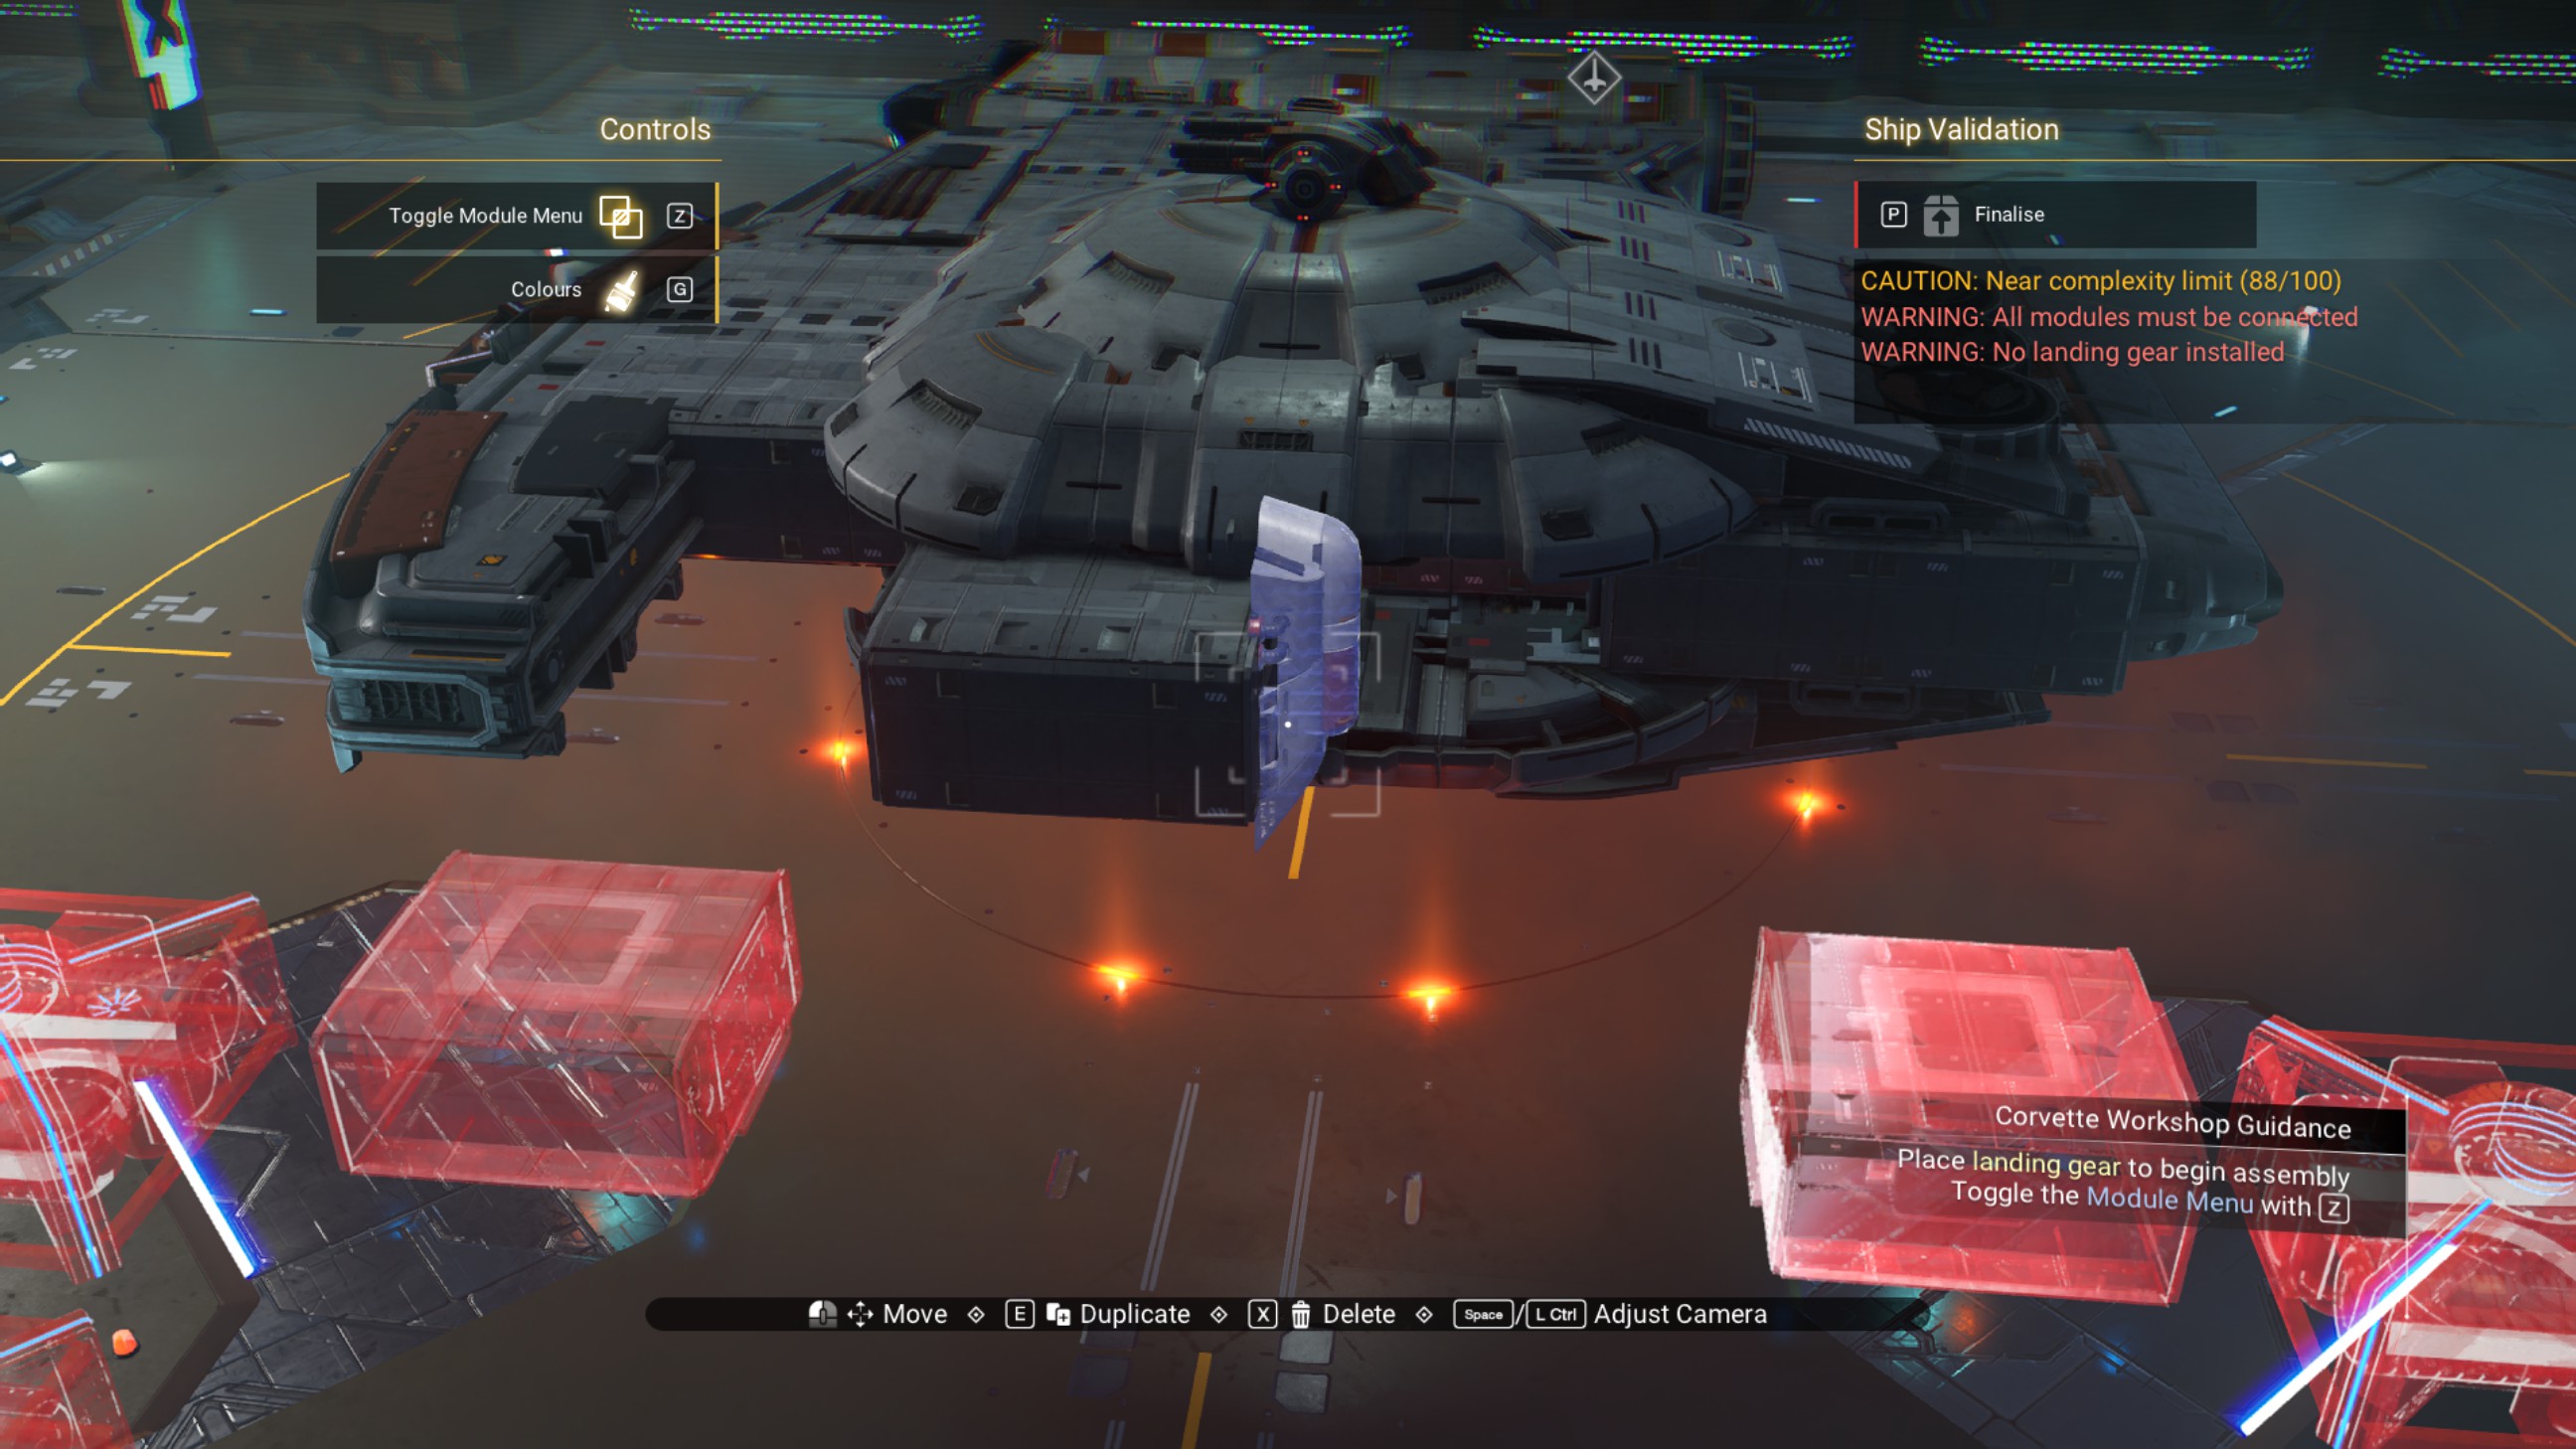
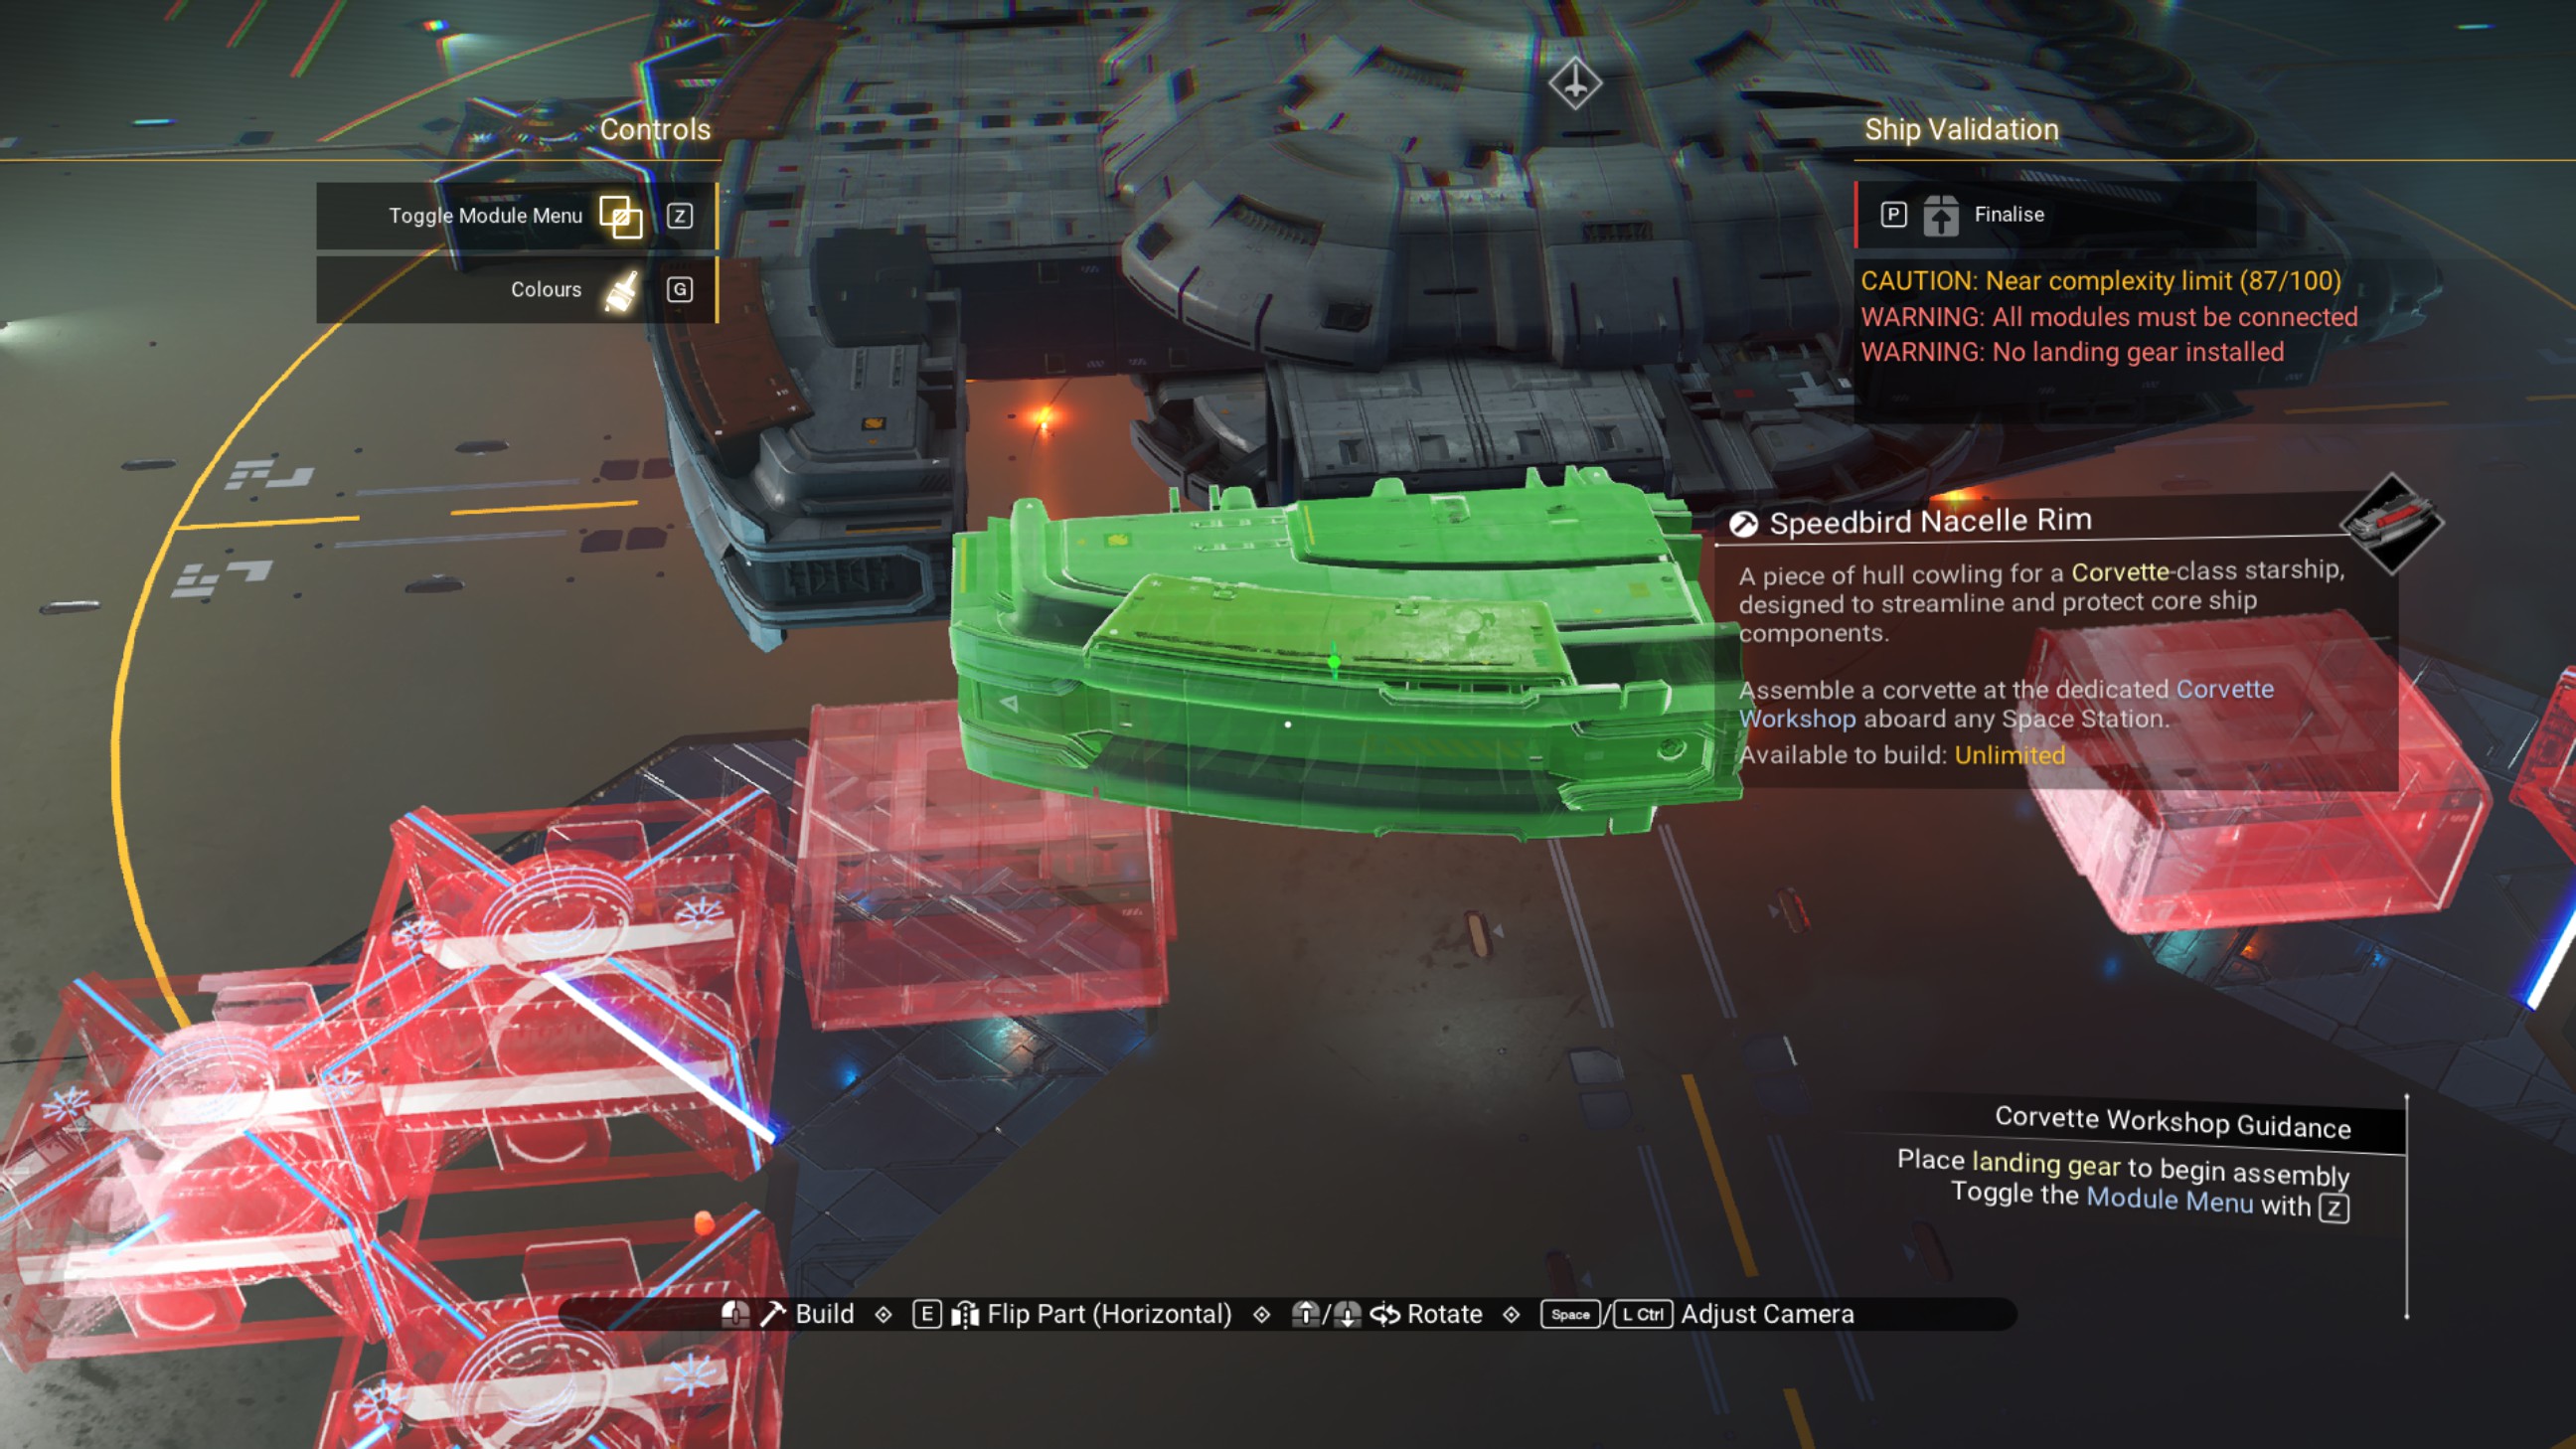
Place another nacelle rim oriented to the rear, and delete the offset walkway.
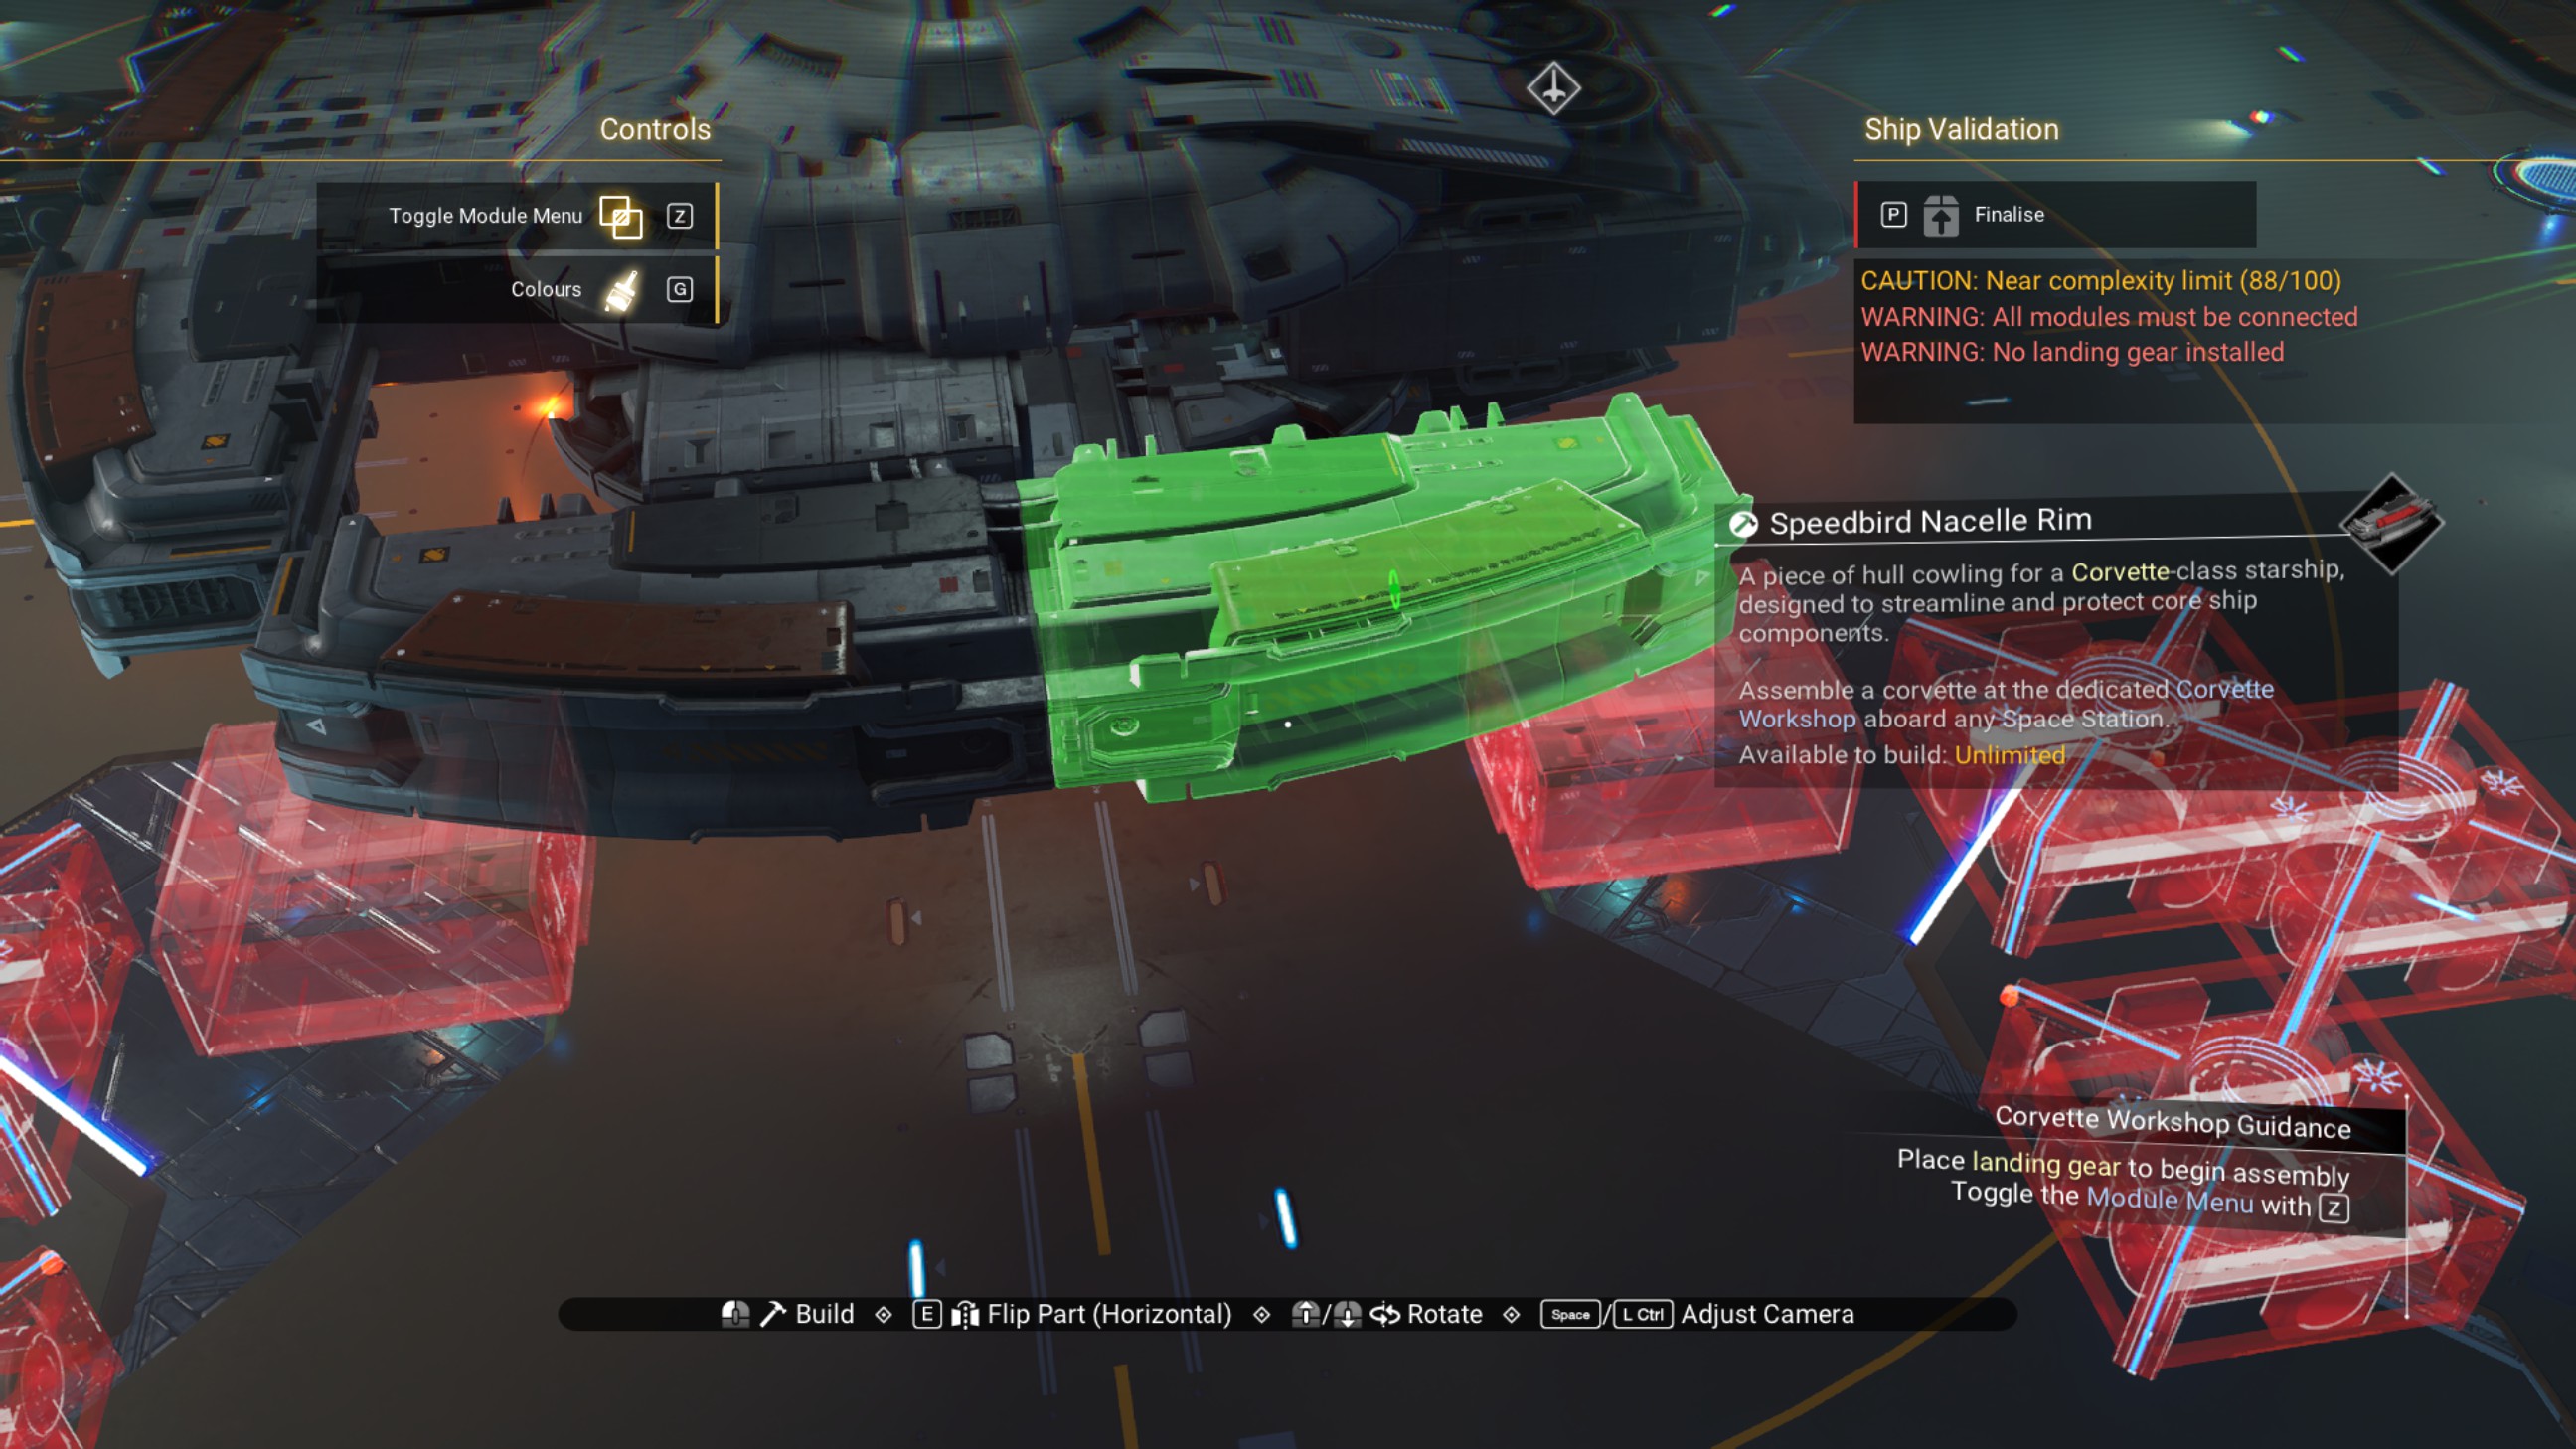
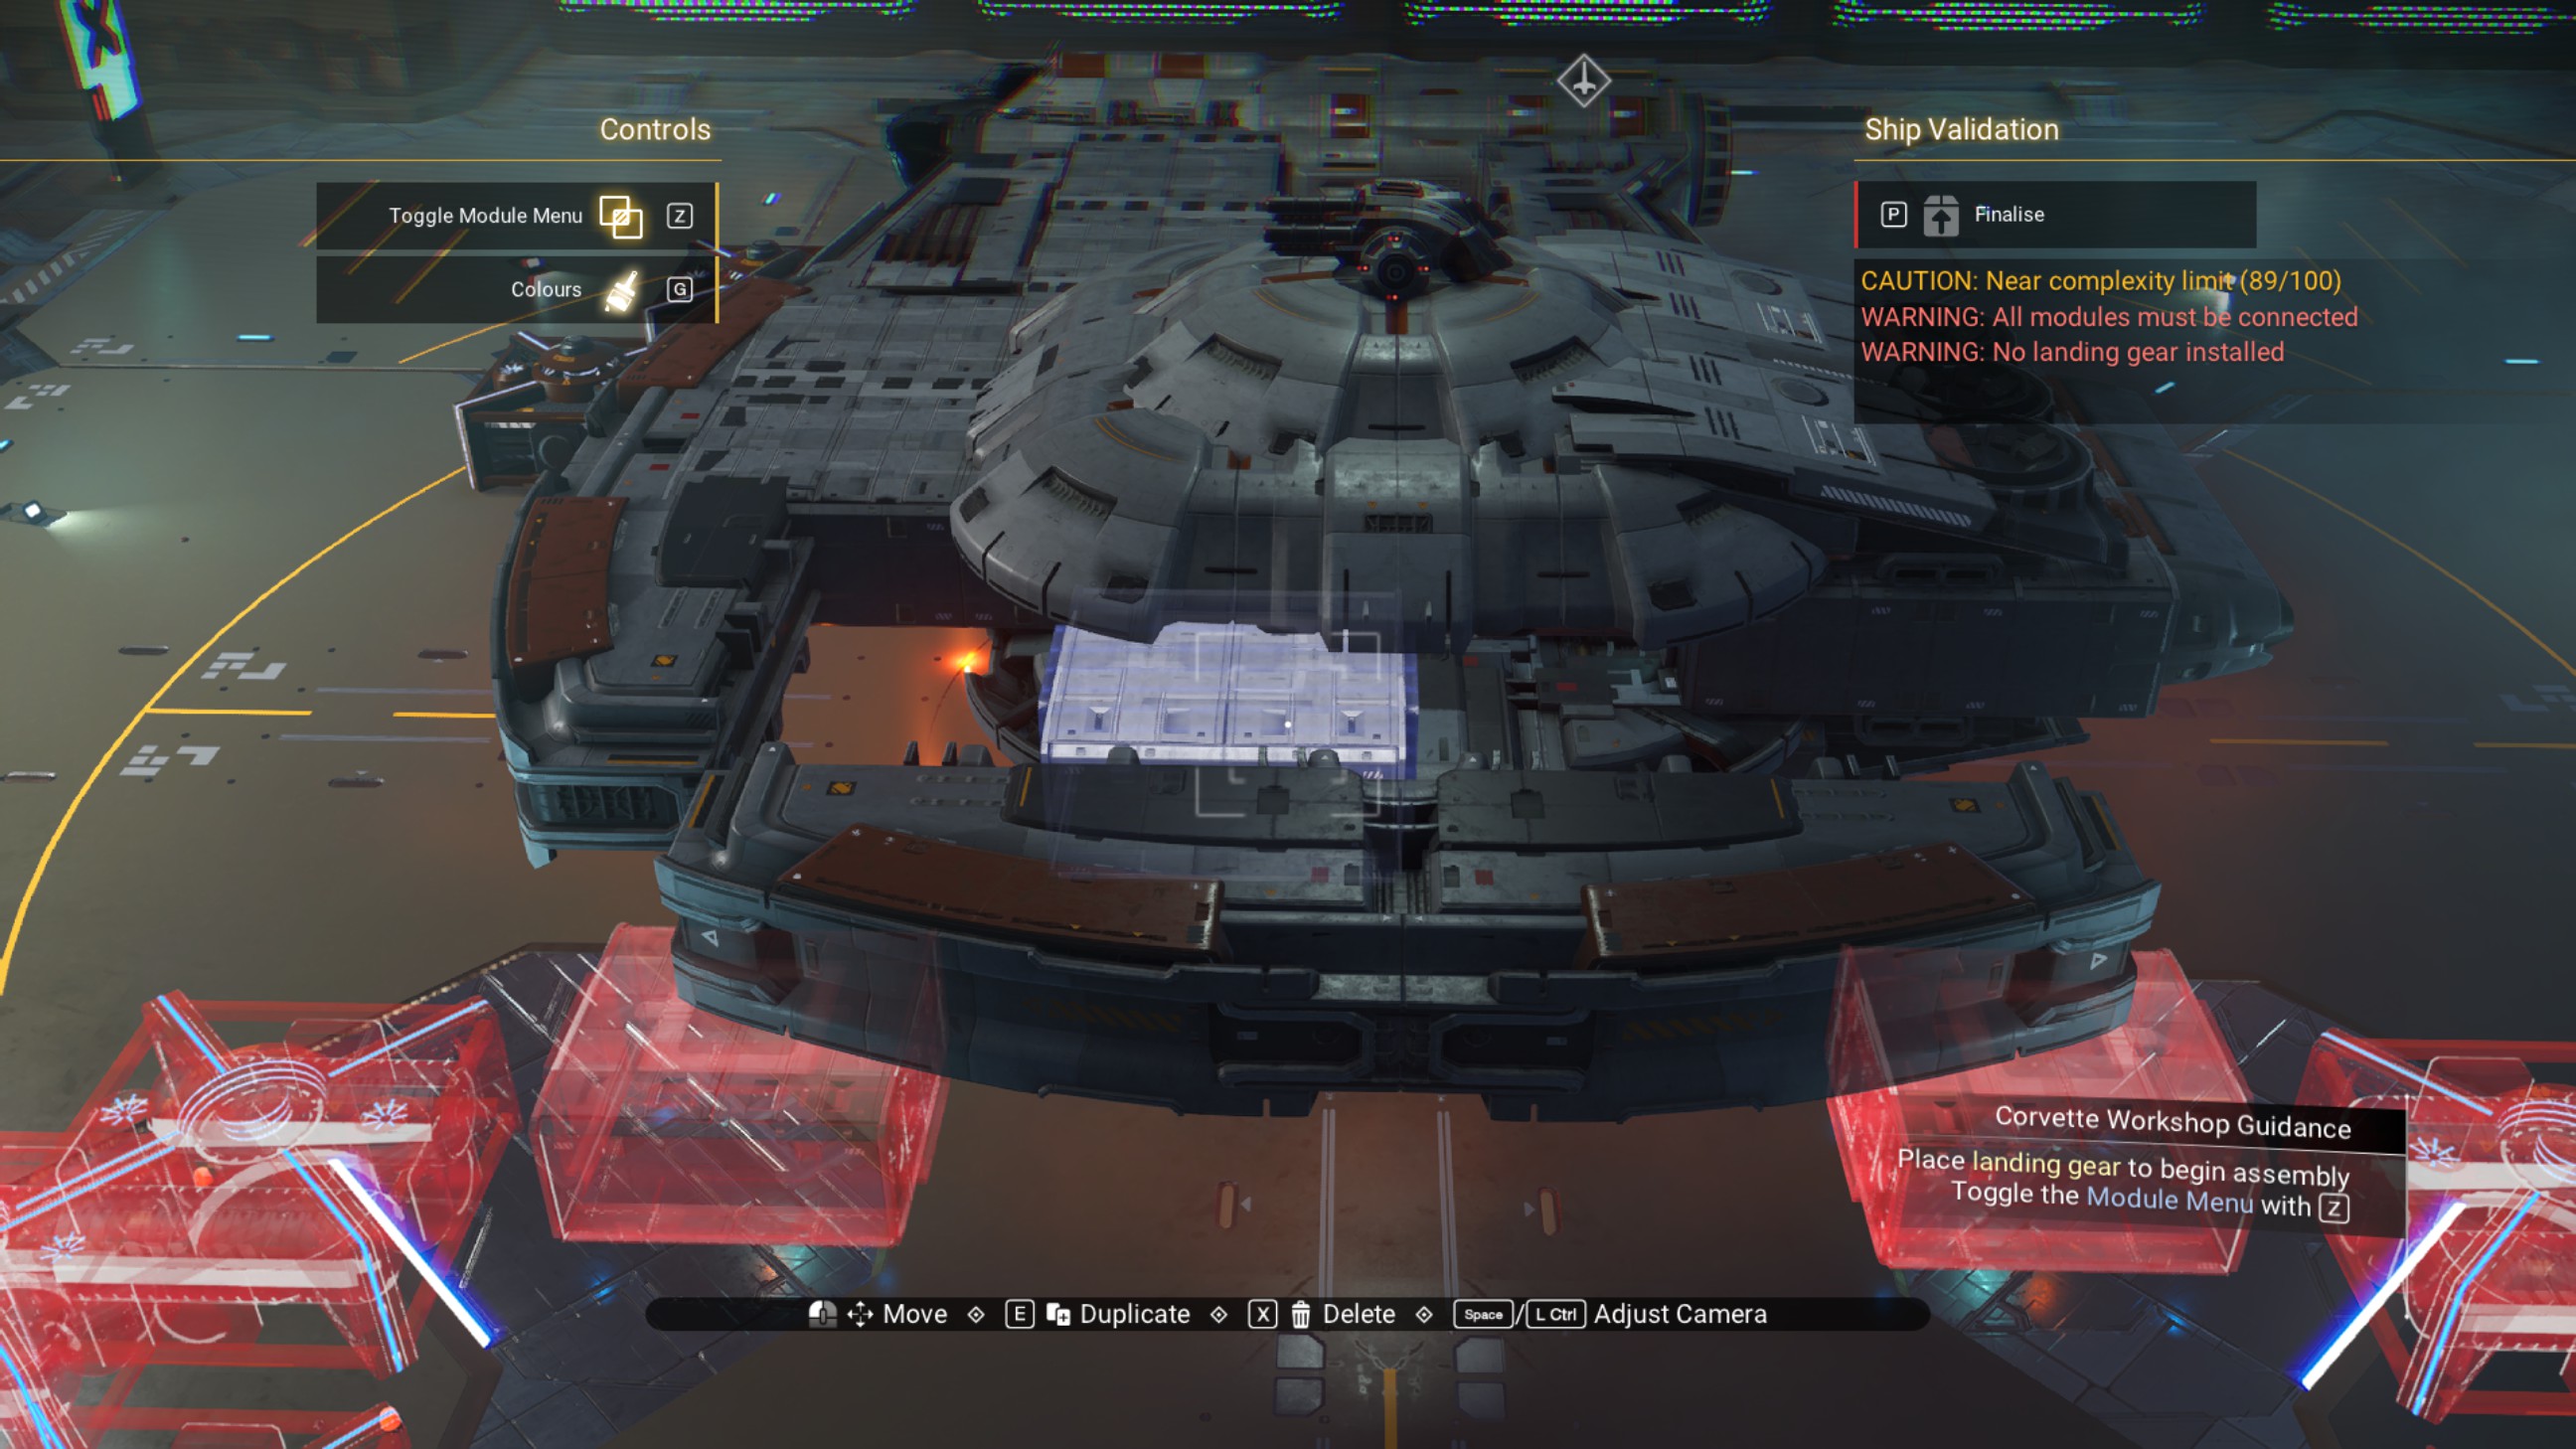
All These Squares Will Make a Circle
Delete the zigzagged walkway on the port side toward the front of the ship, then place one on top of the zenith reactor, as shown.
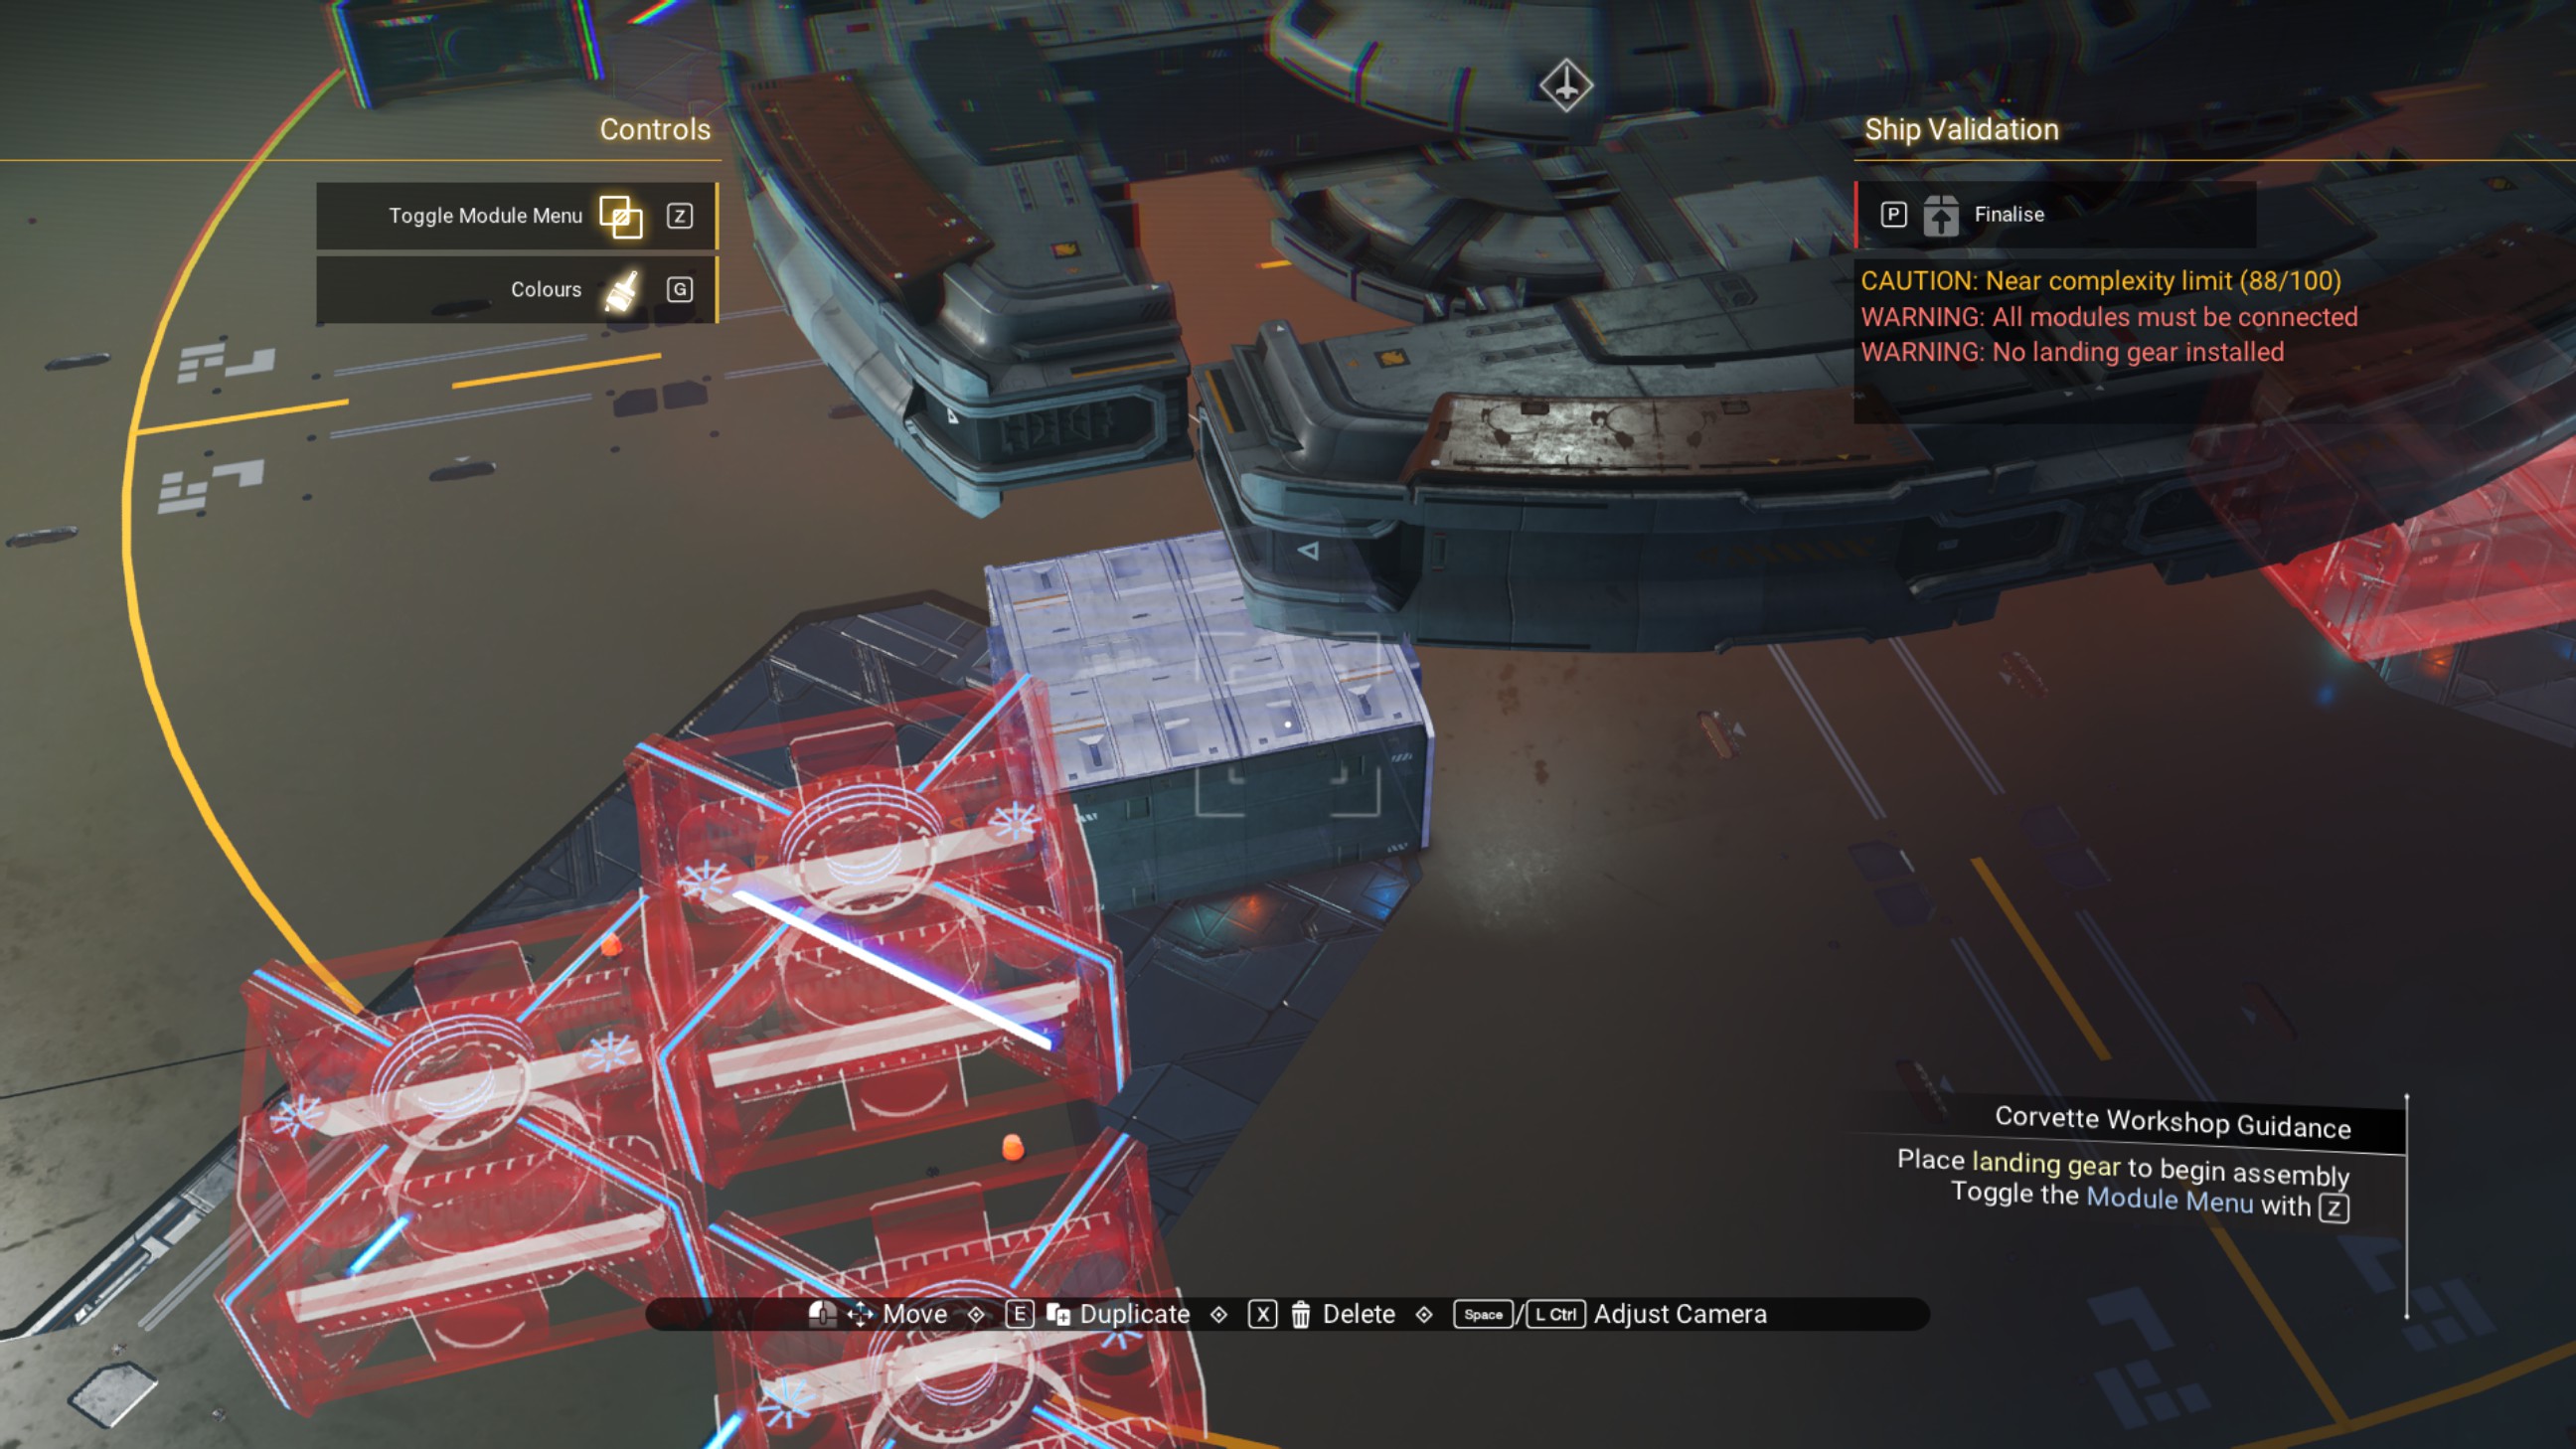
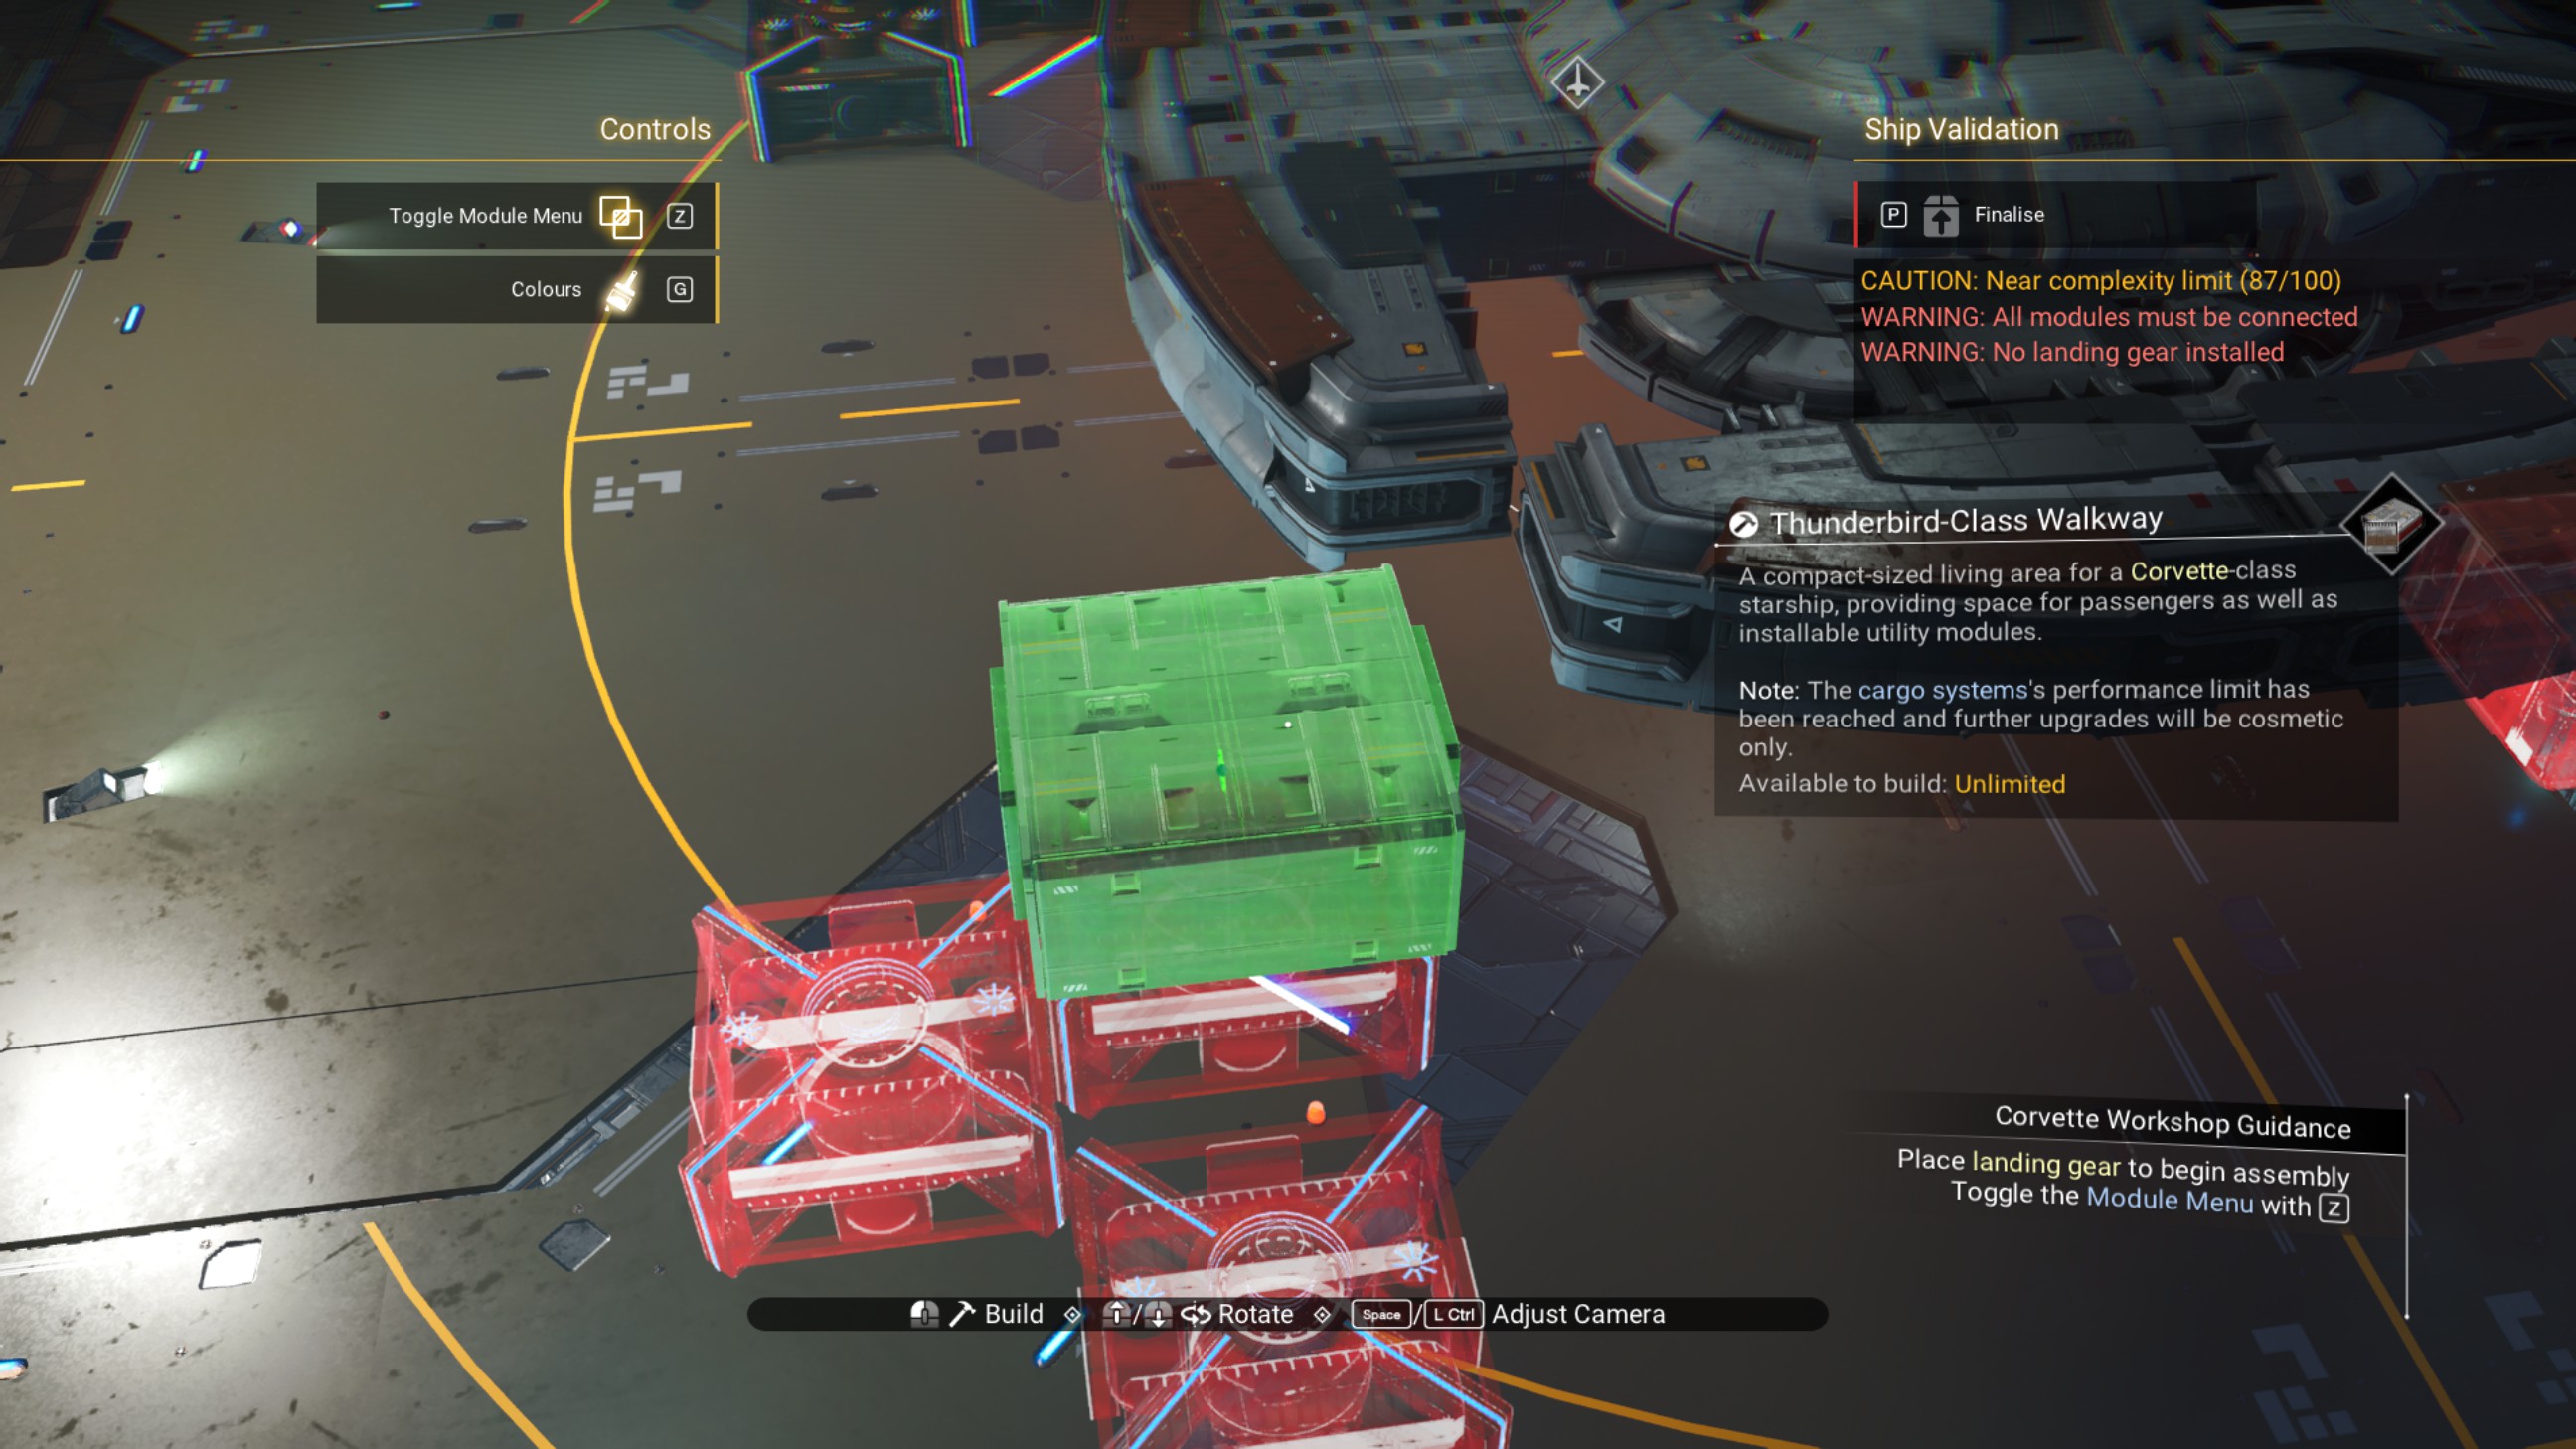
Do the same thing with the other zigzagged walkway toward the rear of the ship.
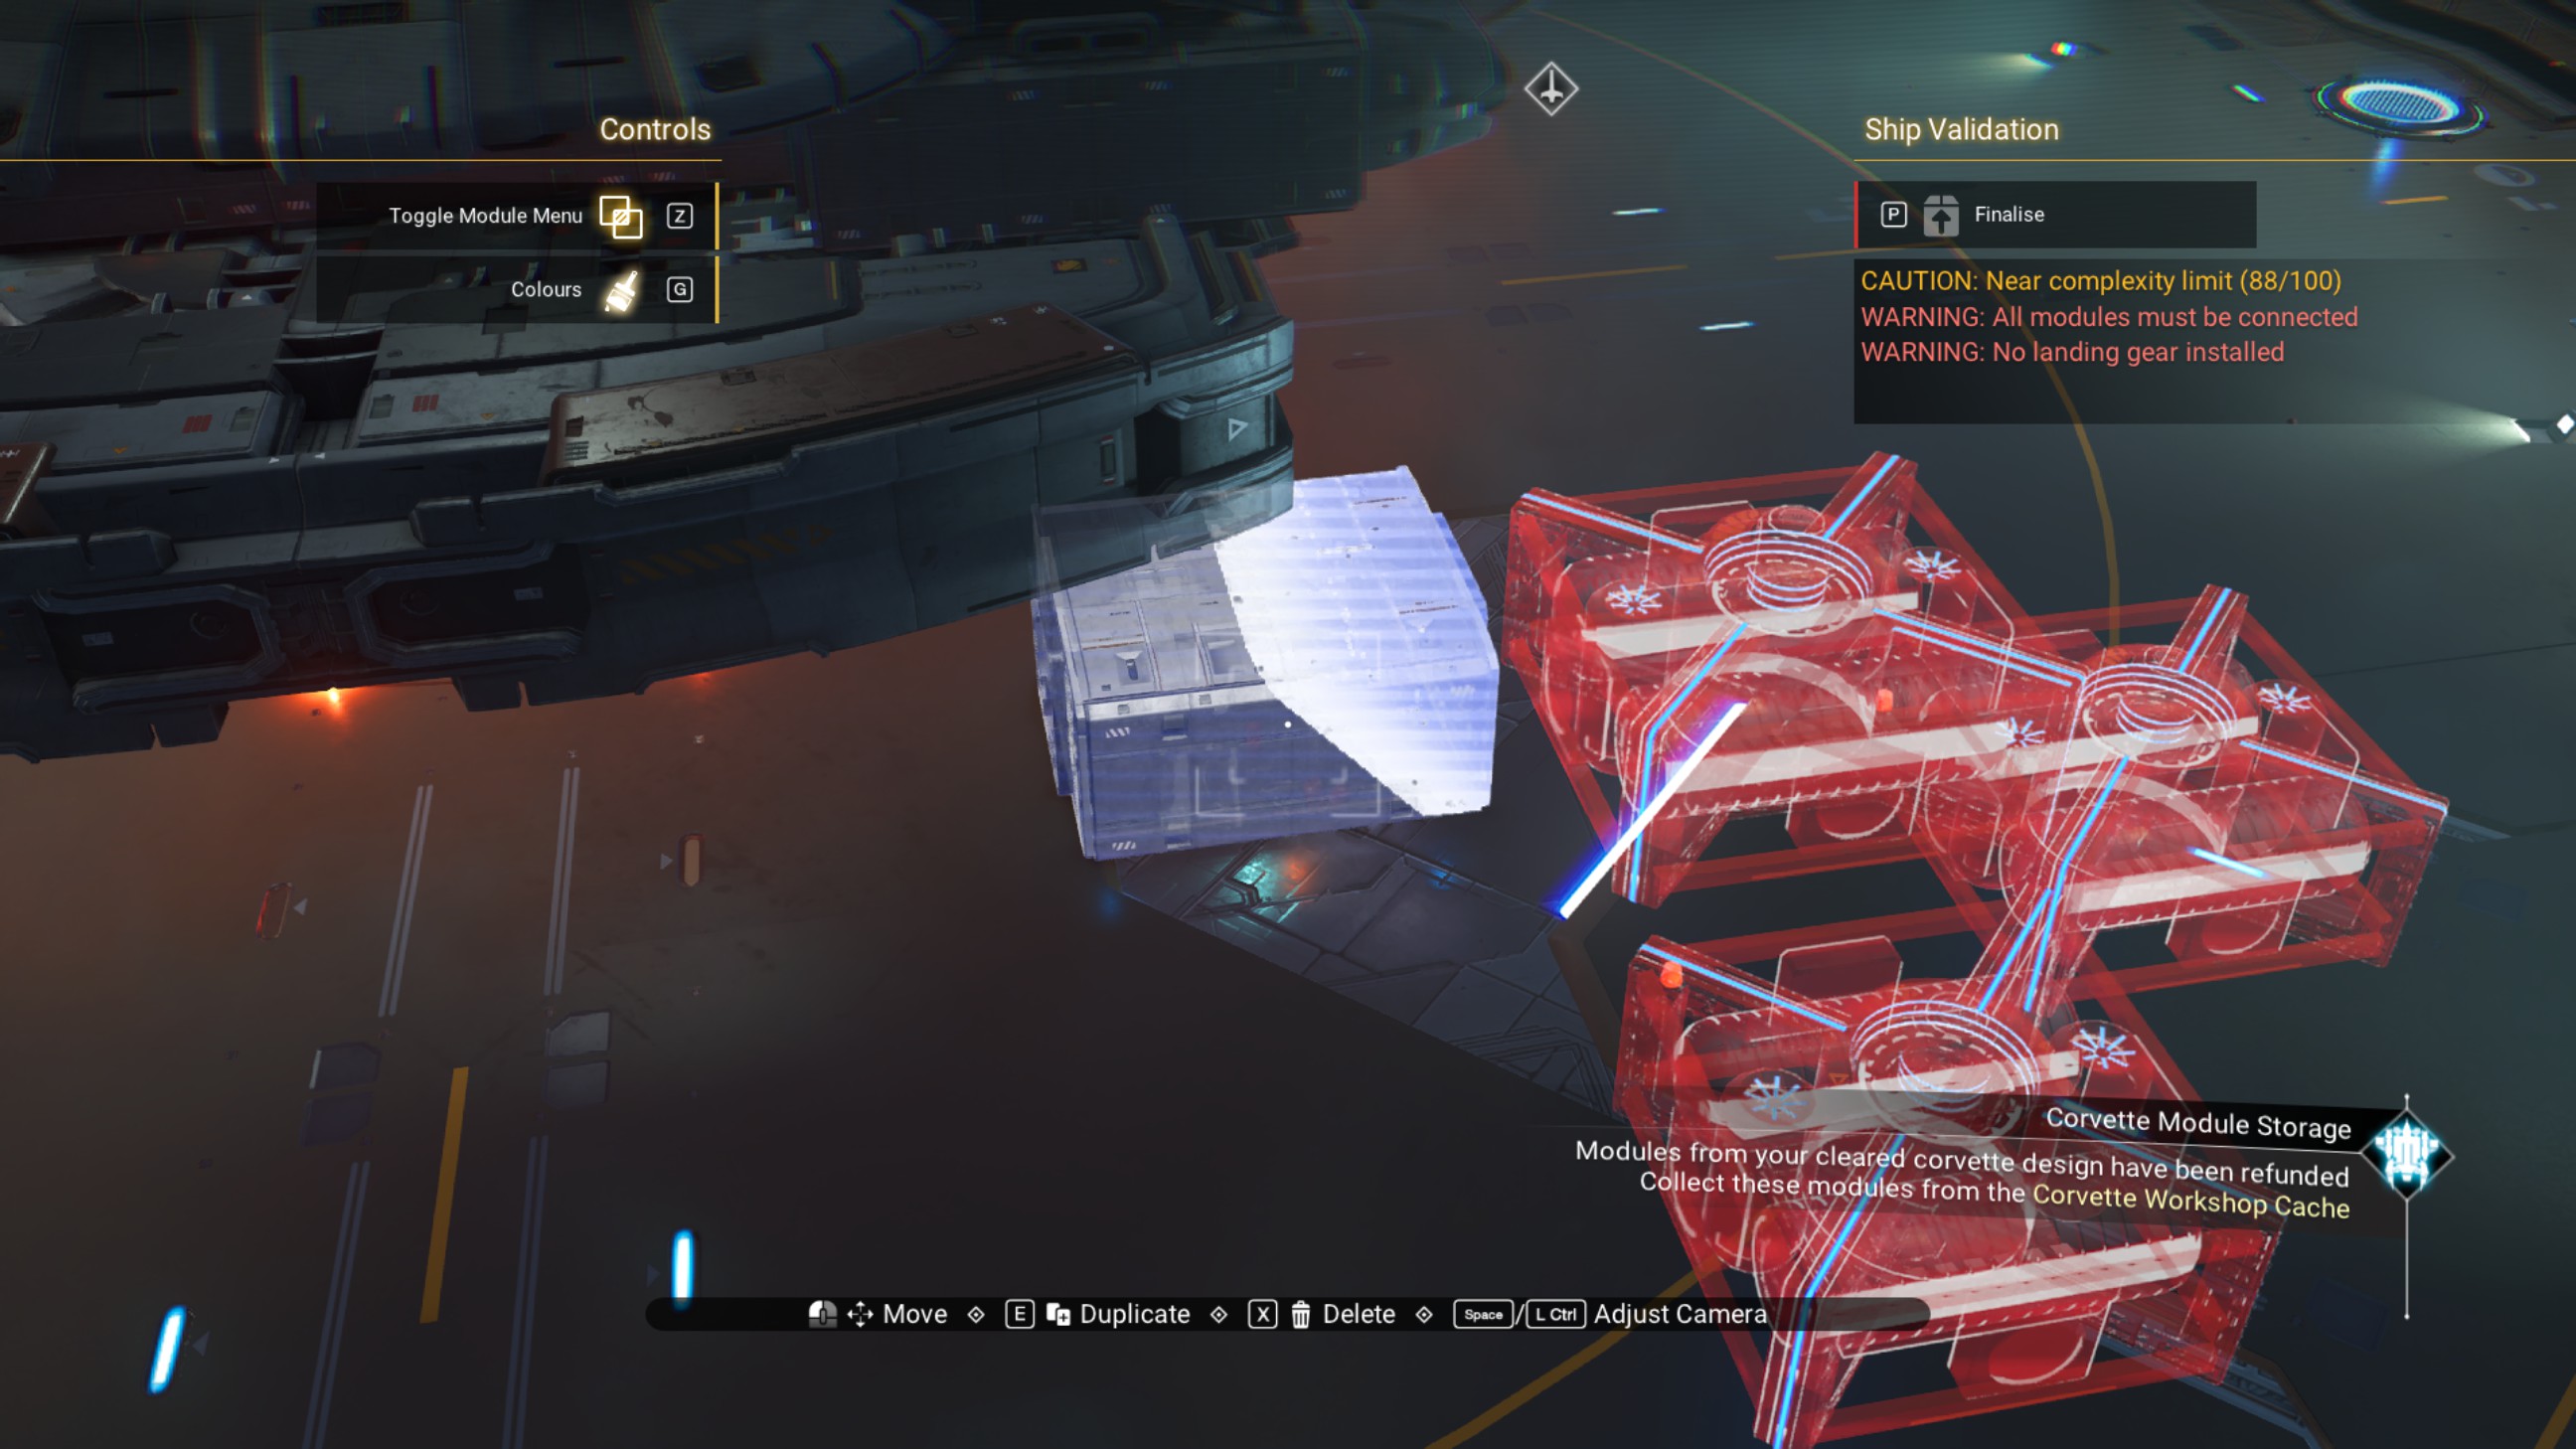
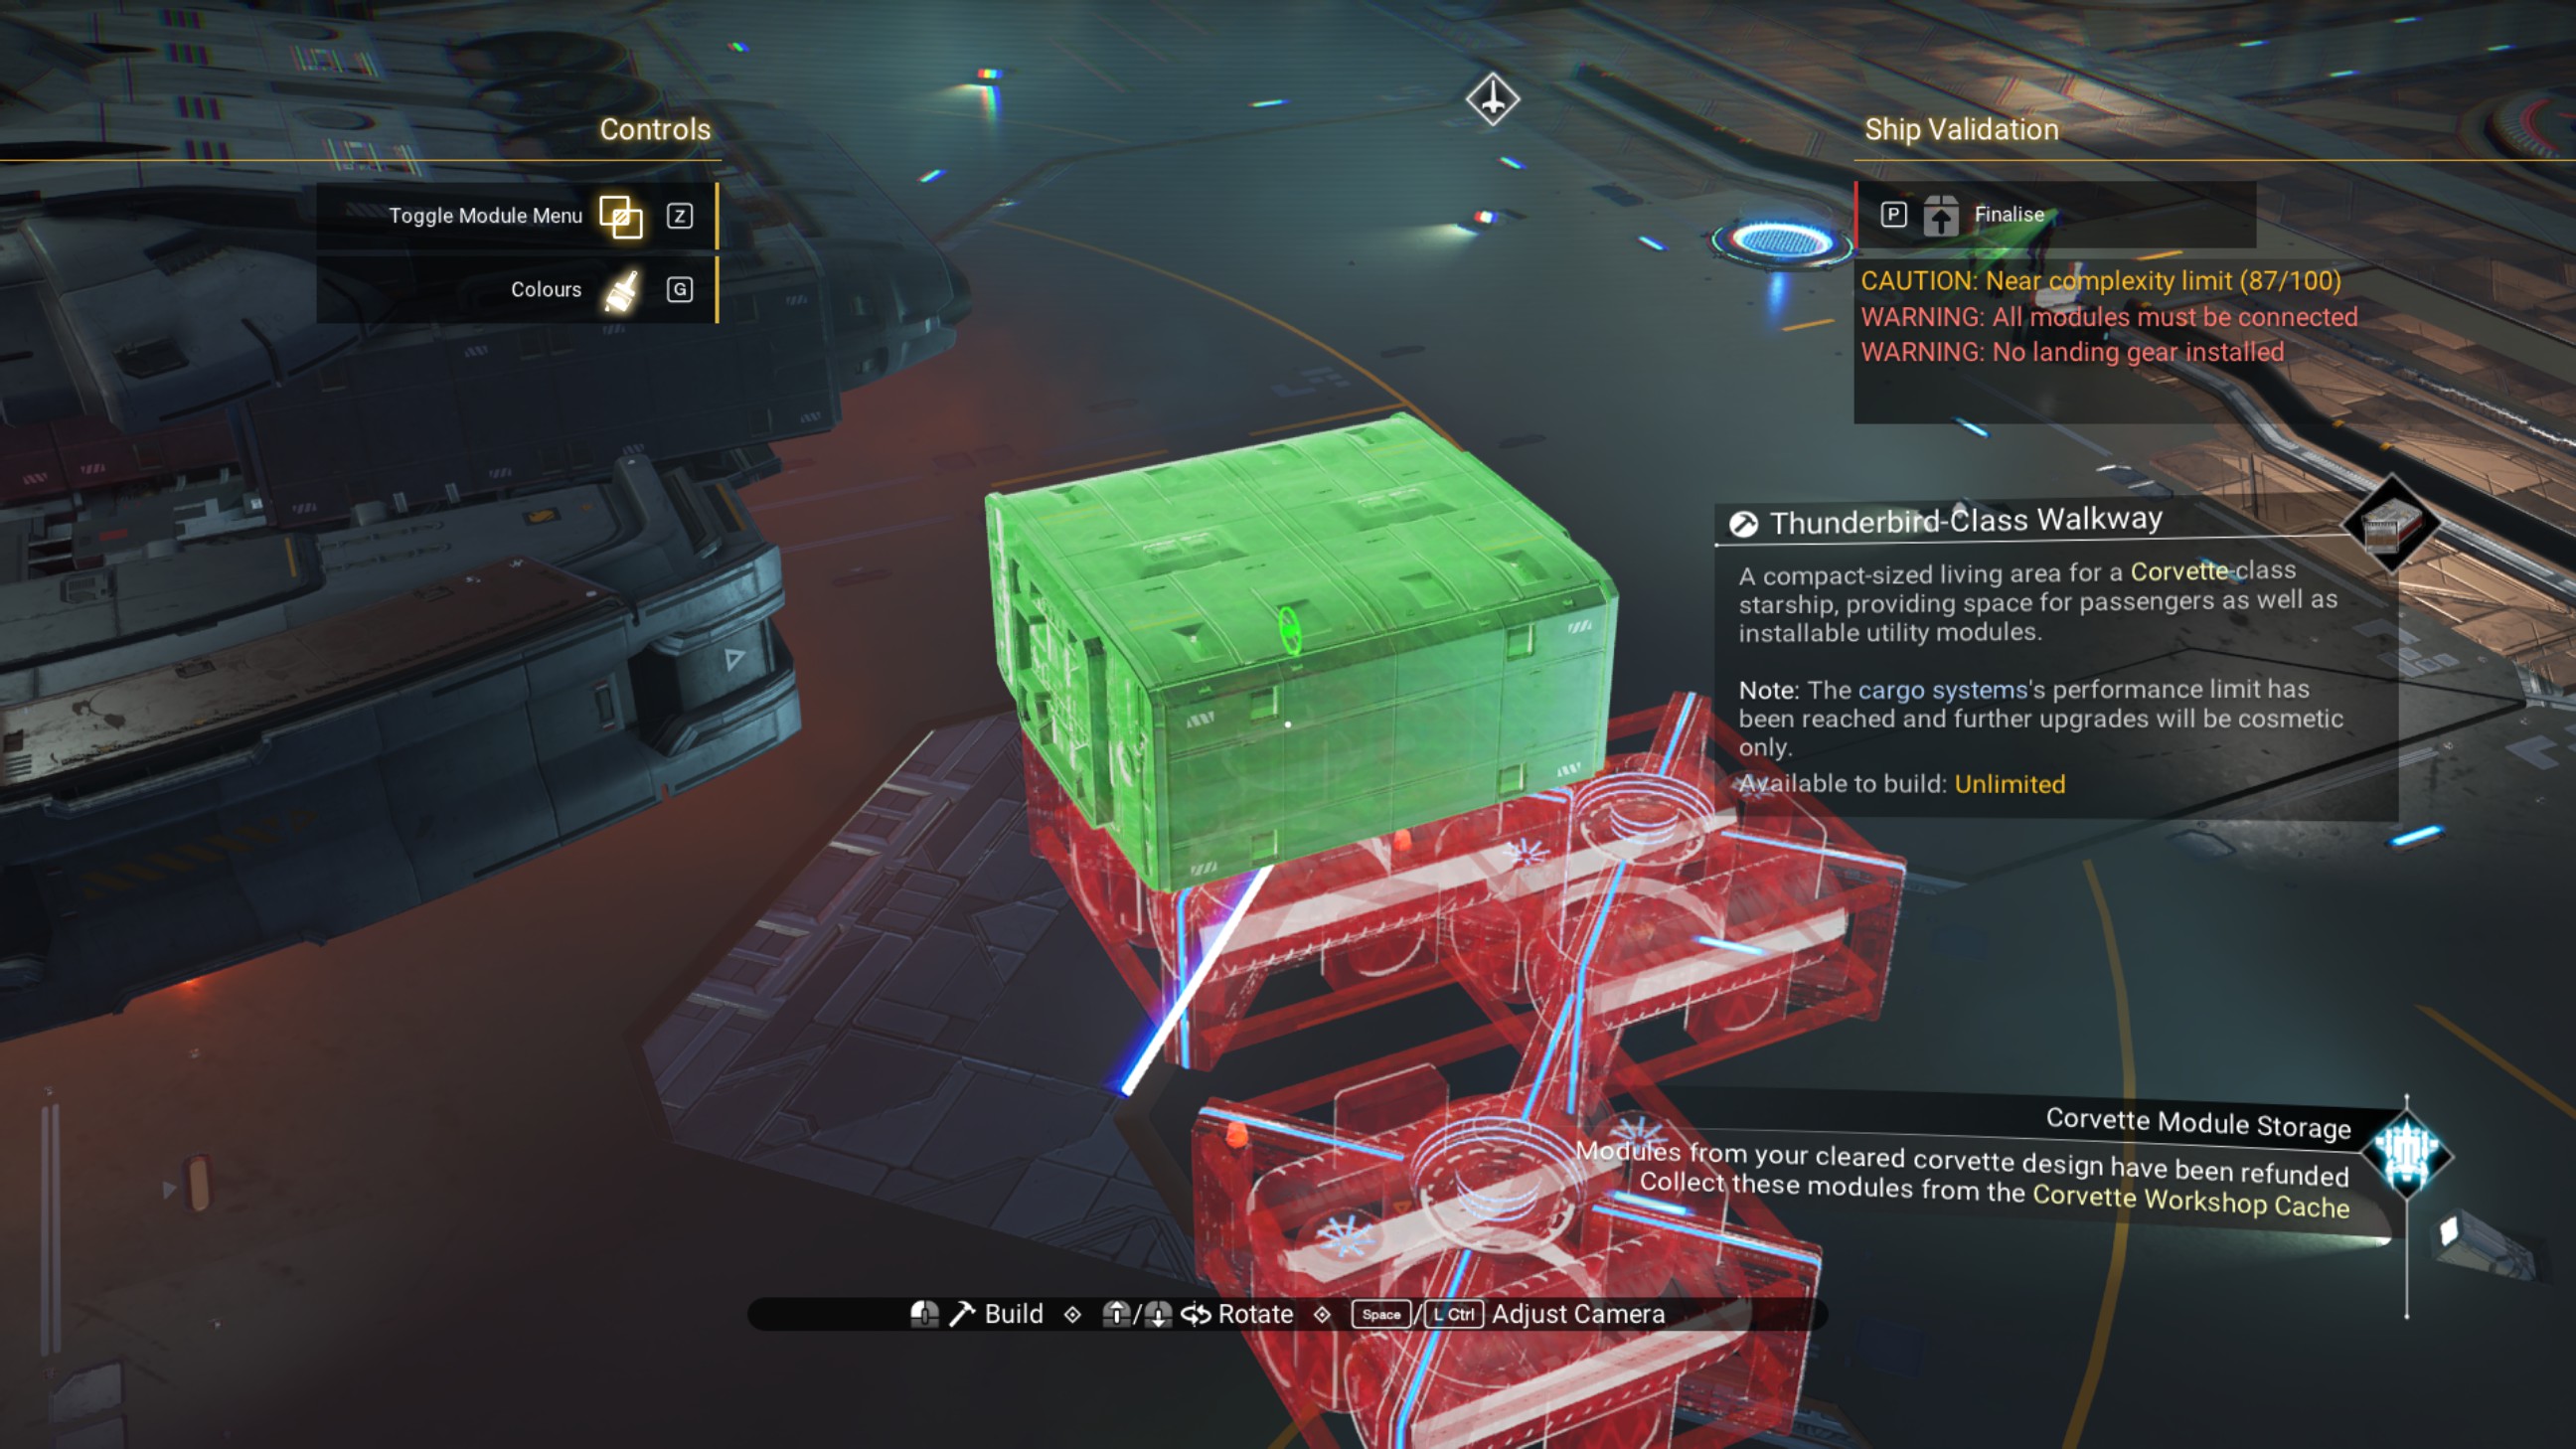
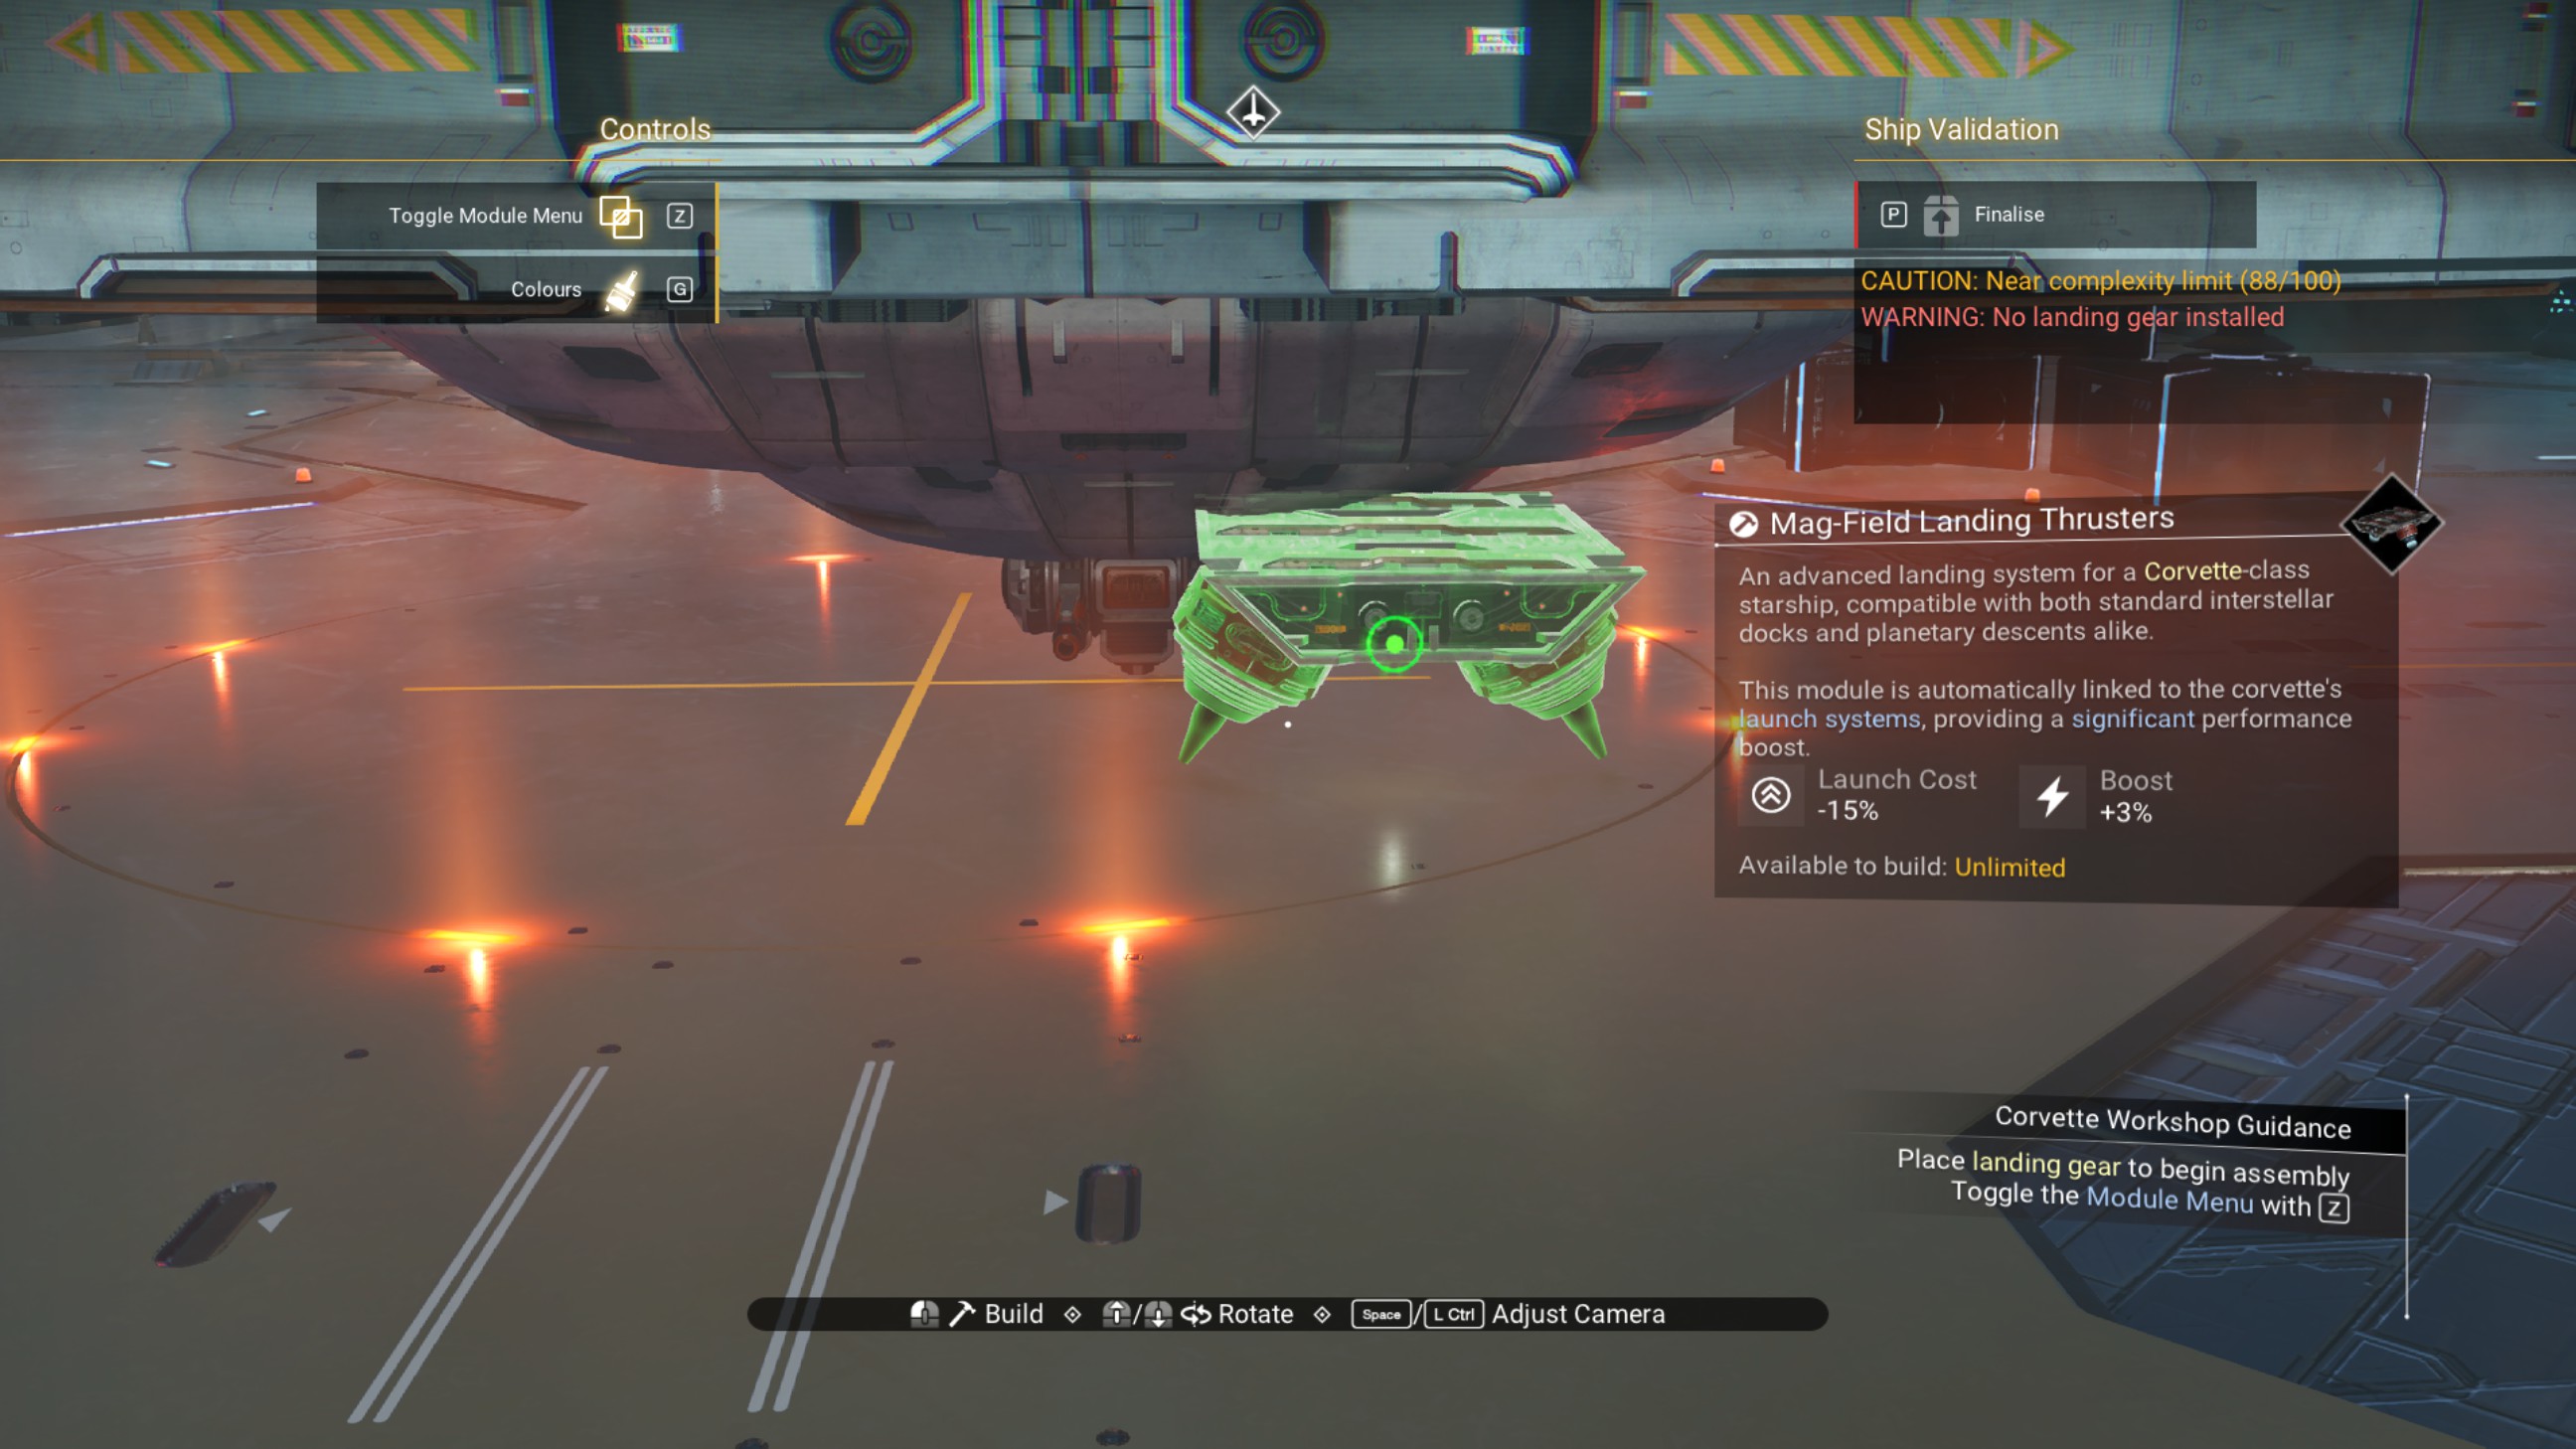
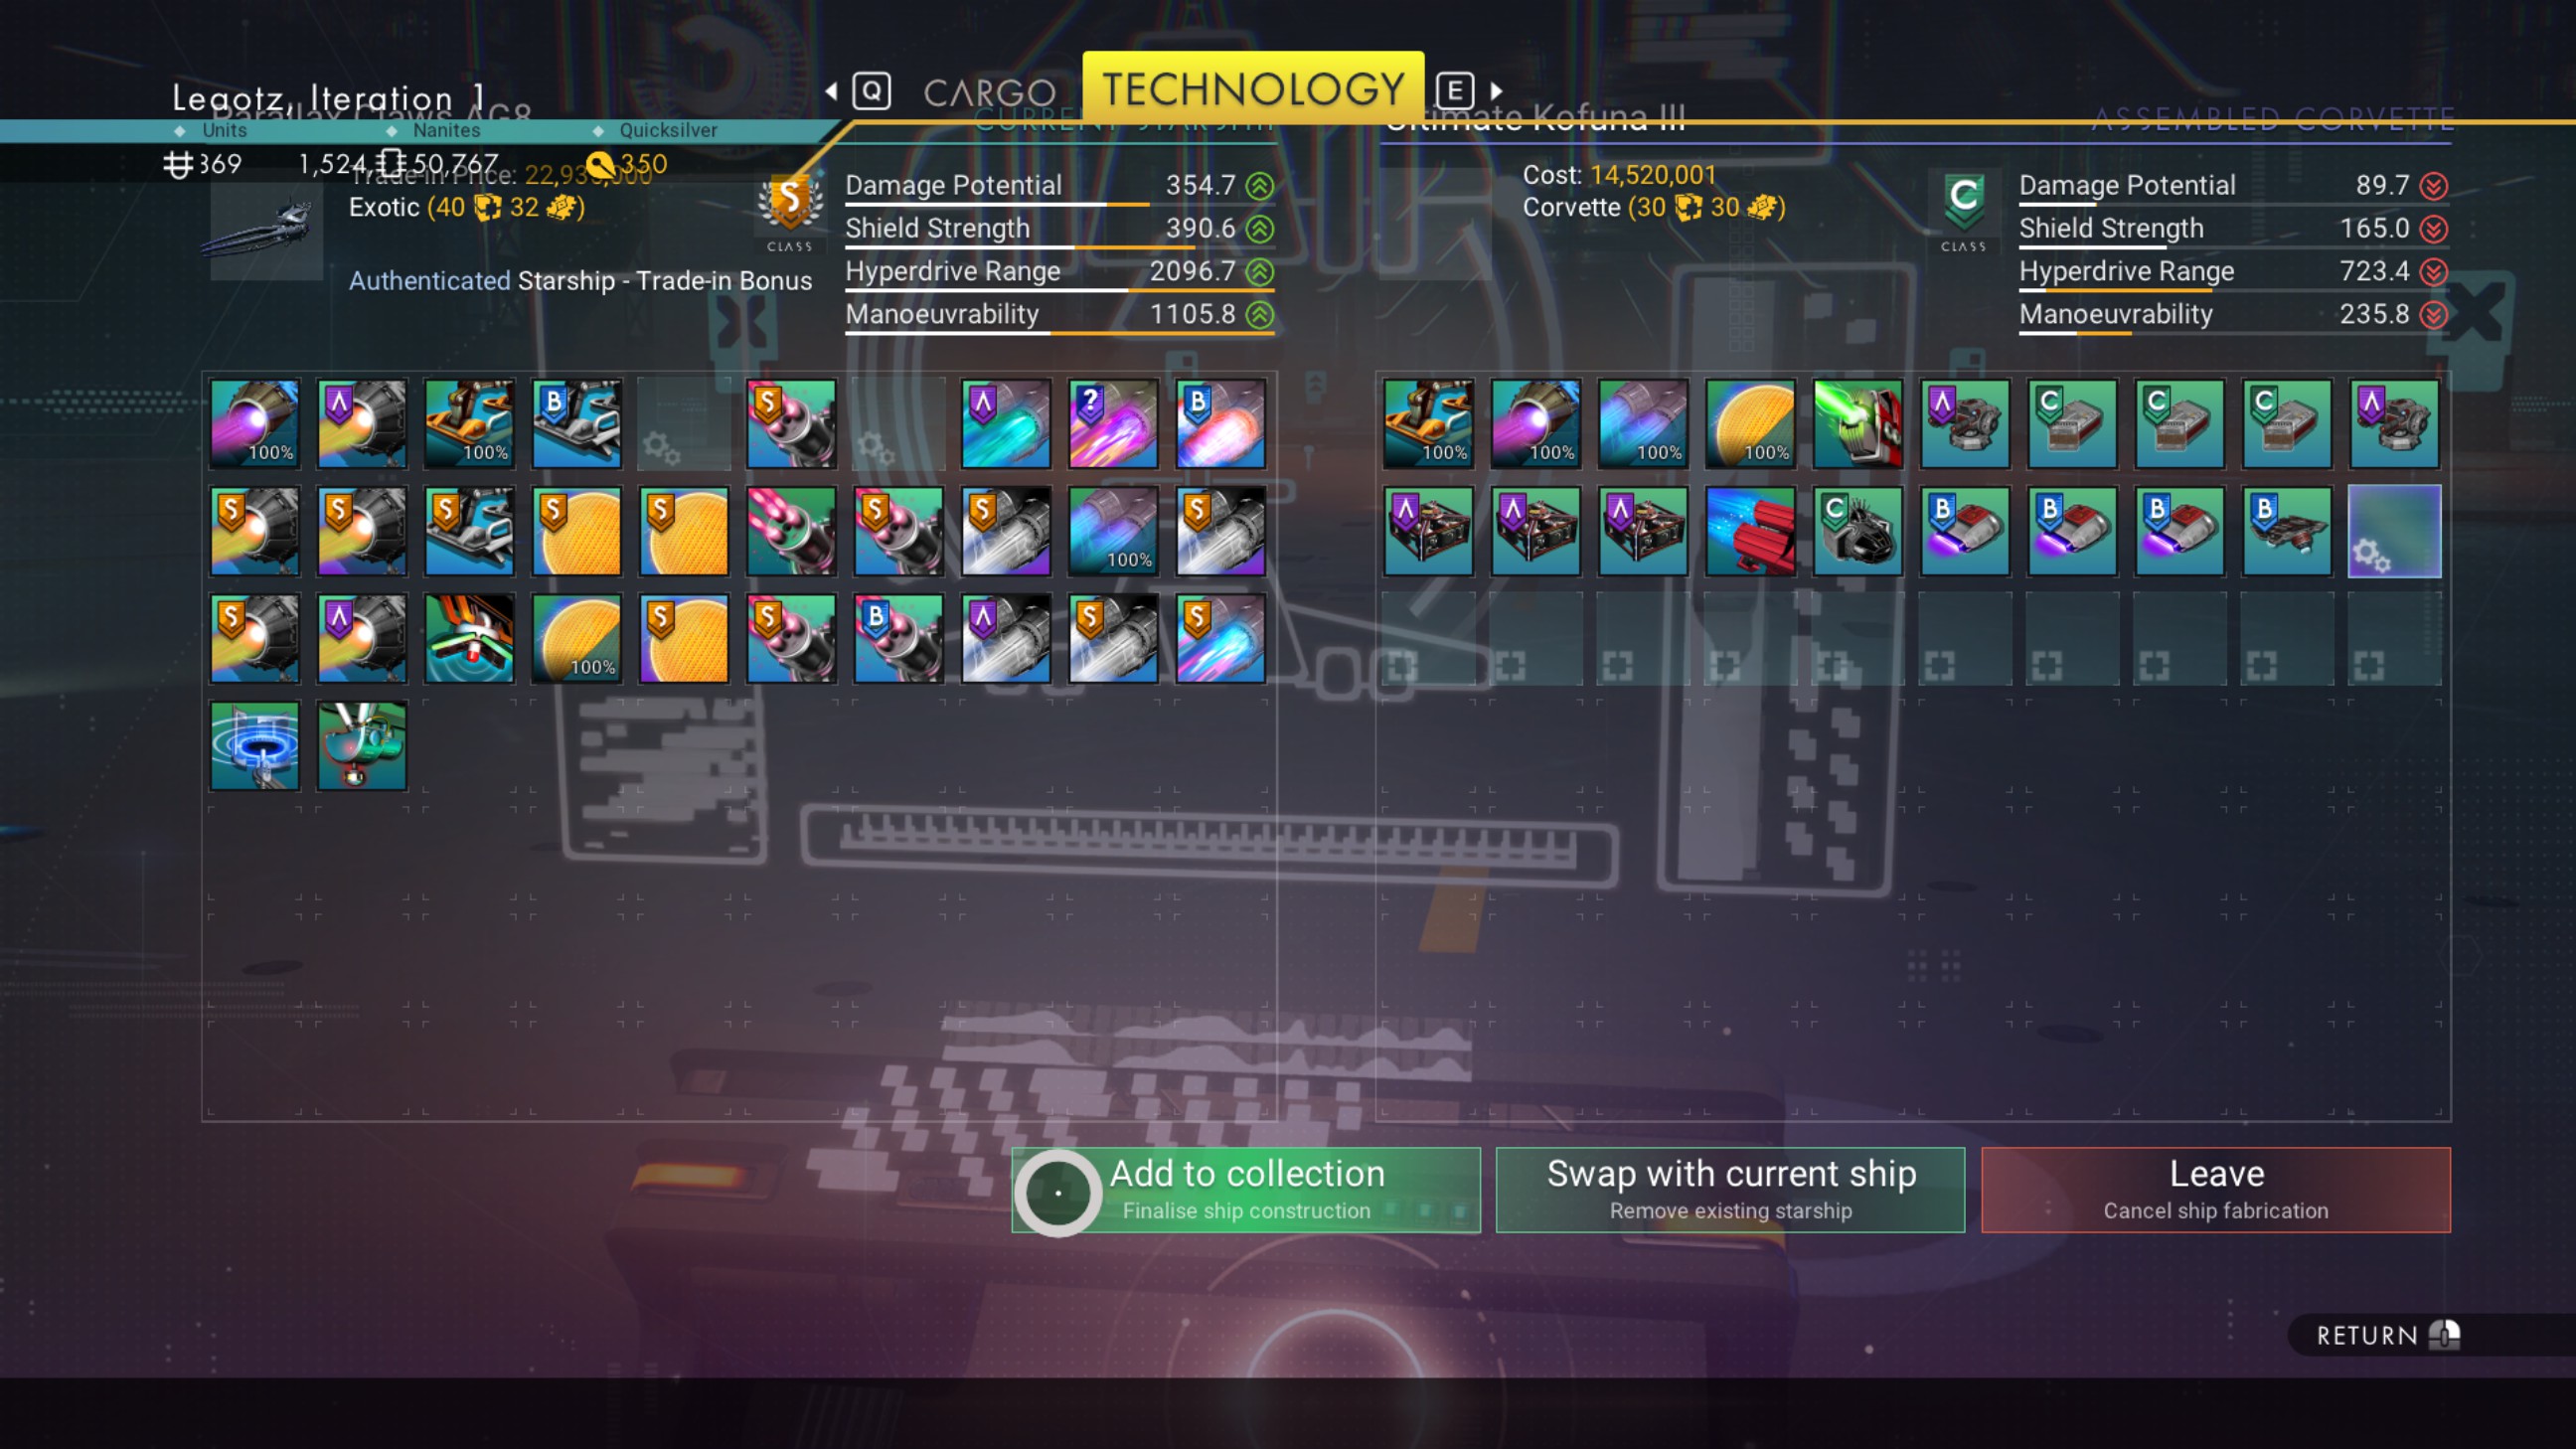
Place a landing gear toward the front so the ship can be finalized. (The ship needs to be finalized before we can do the next steps.)
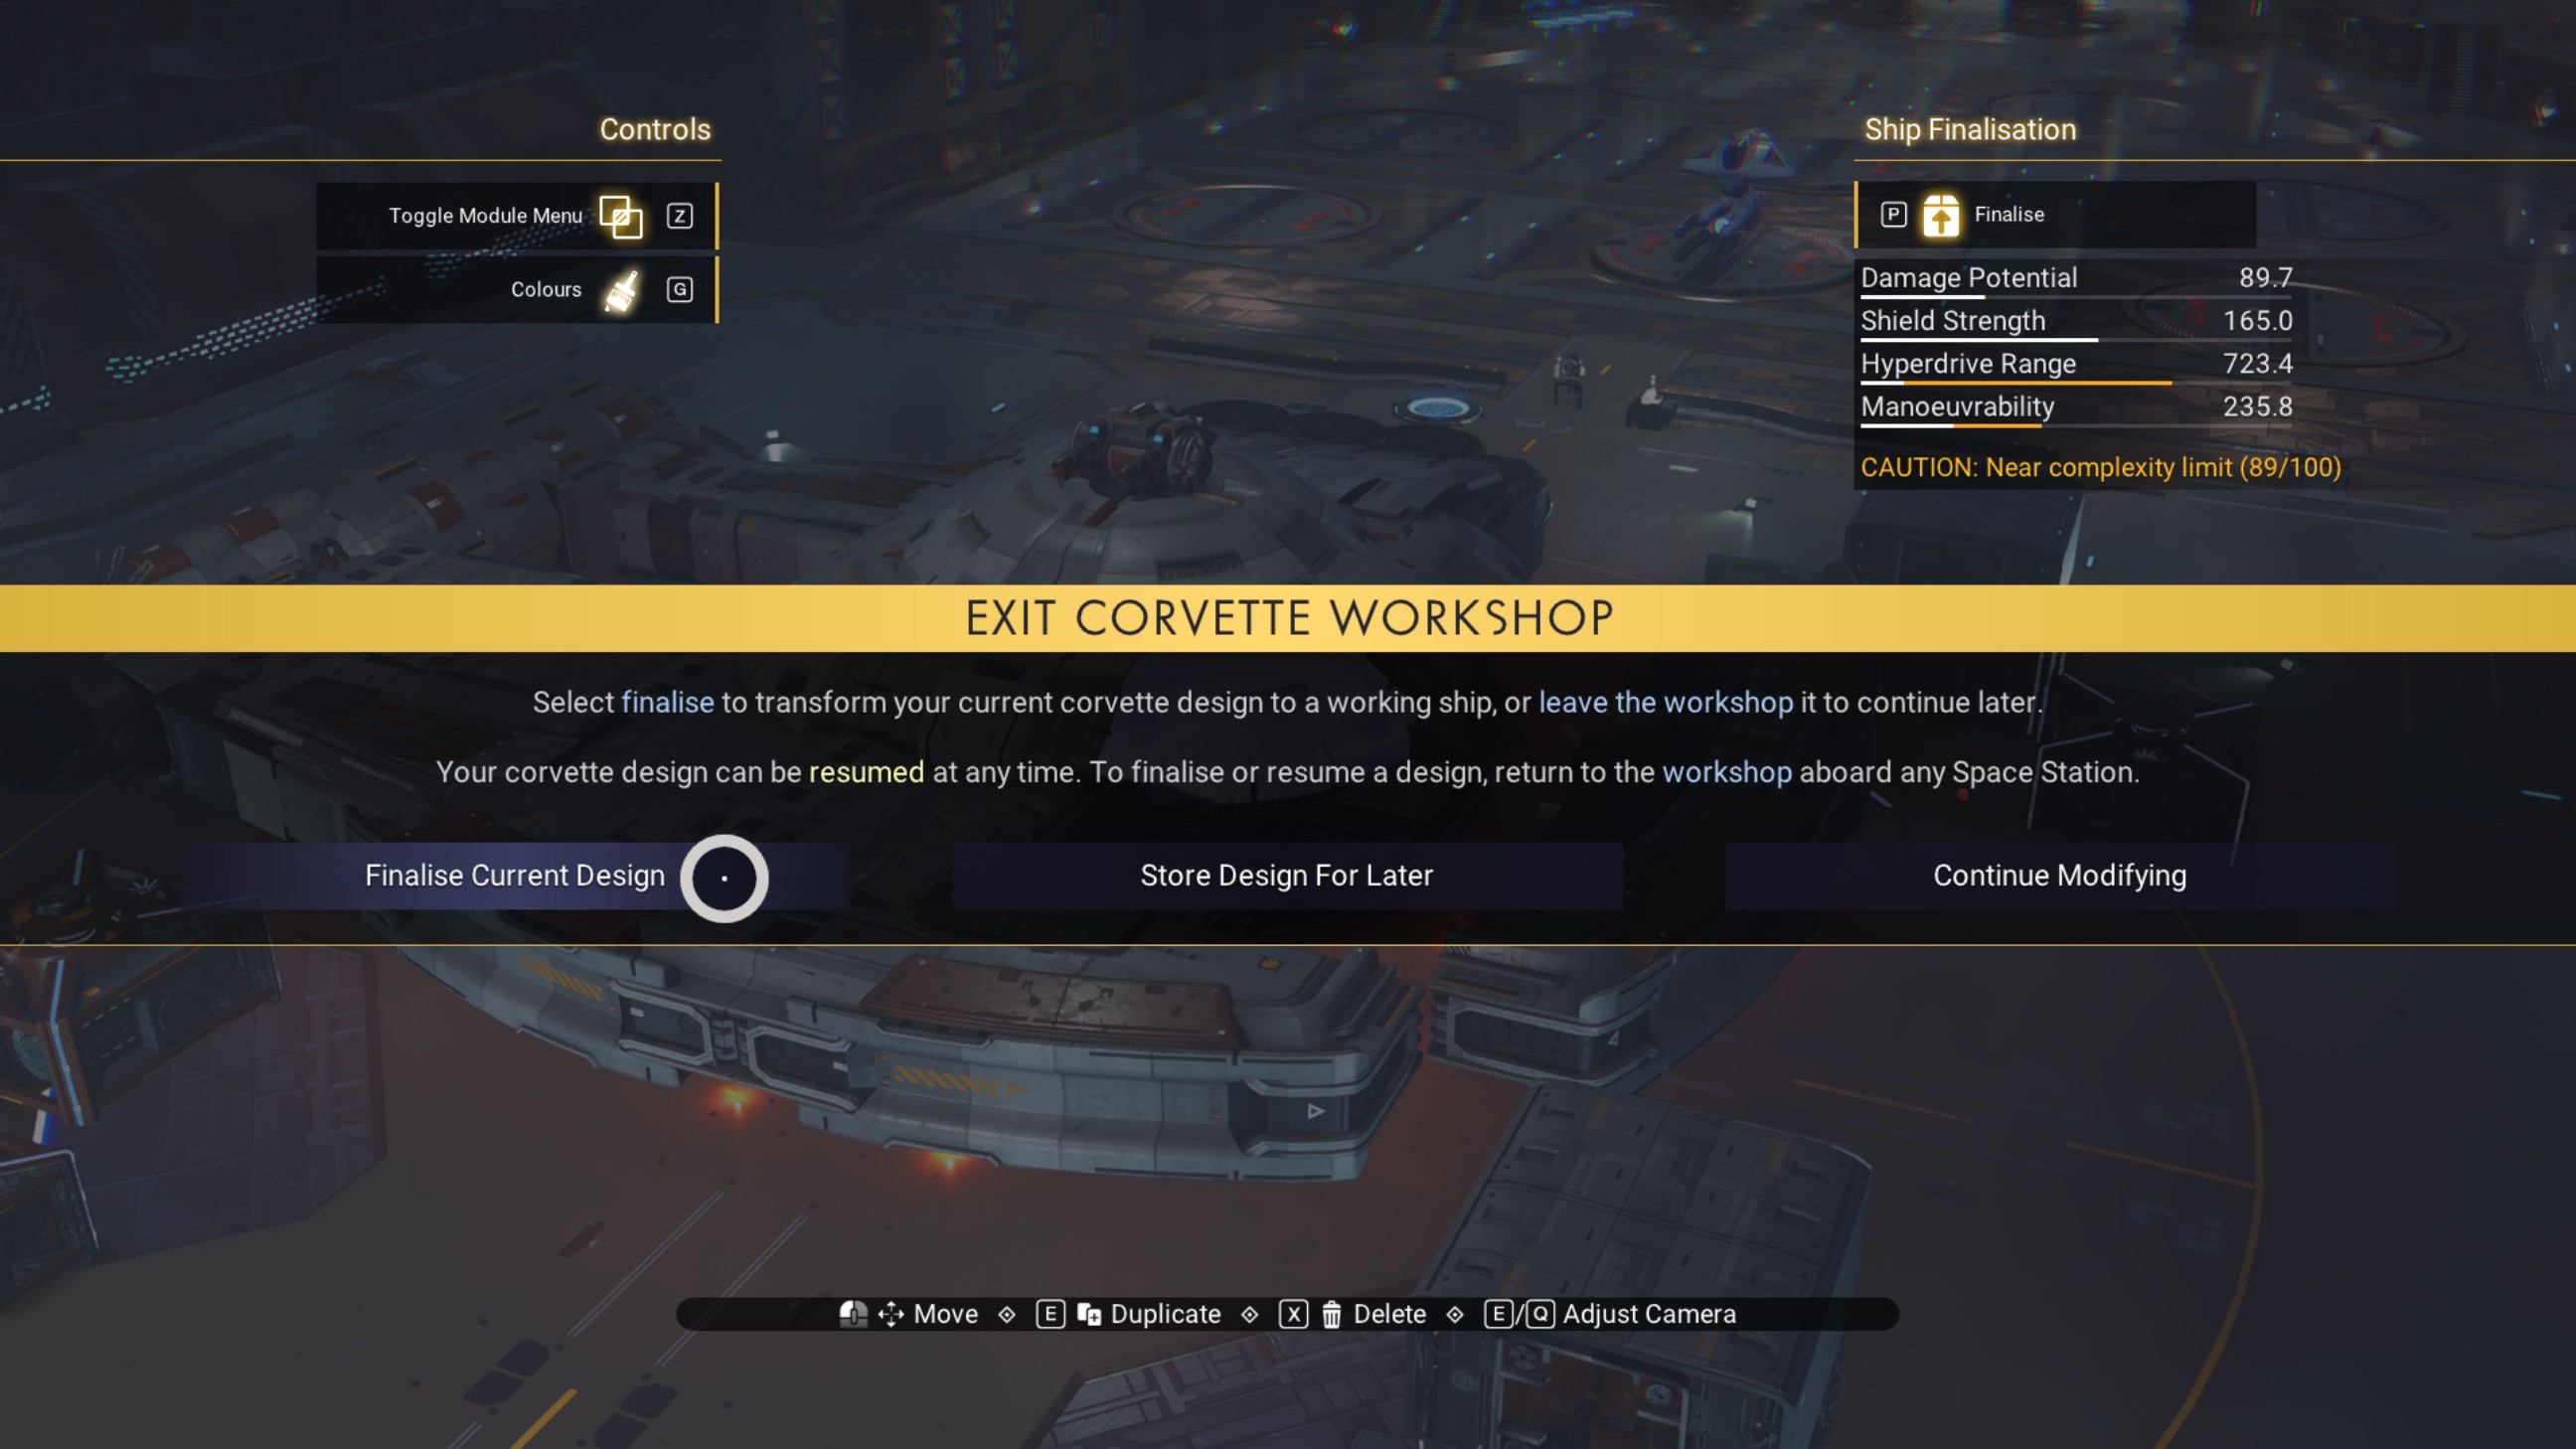
Finalize the ship, and add it to your collection.
We're going to start with the rear set of zenith reactors on the port side. Walk over to the reactors and line yourself up between the lower two where their corners meet.
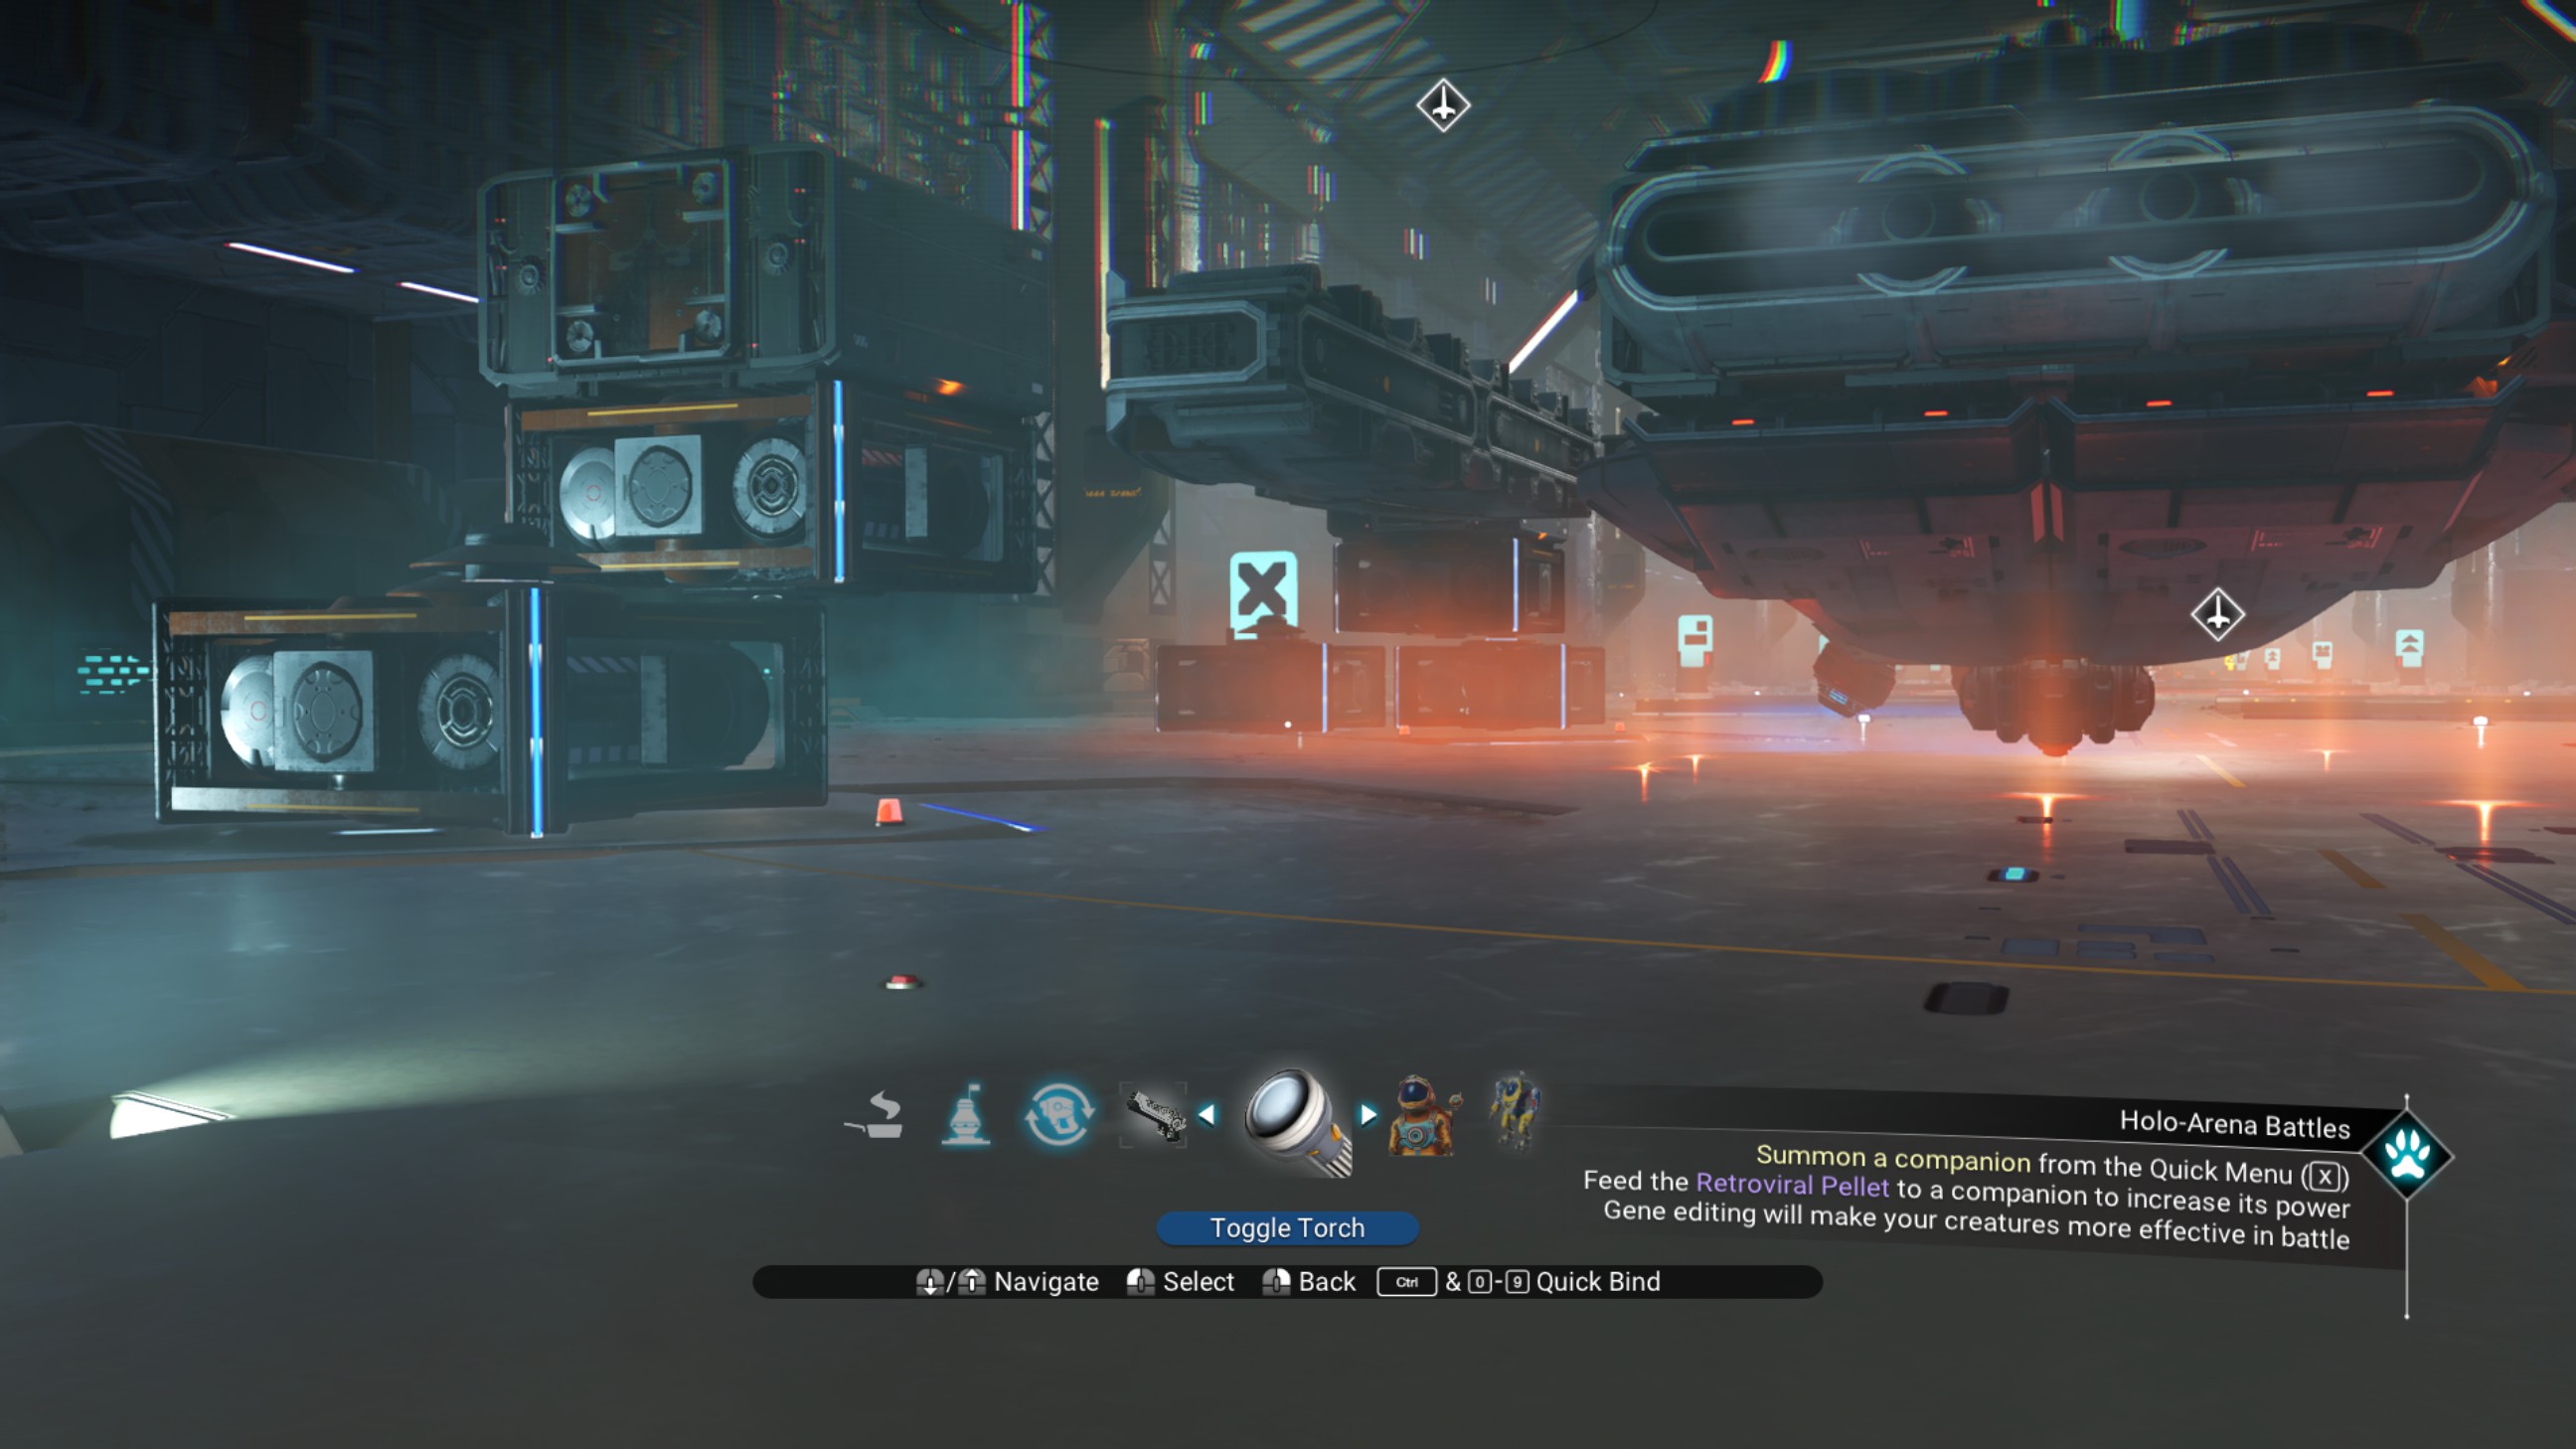
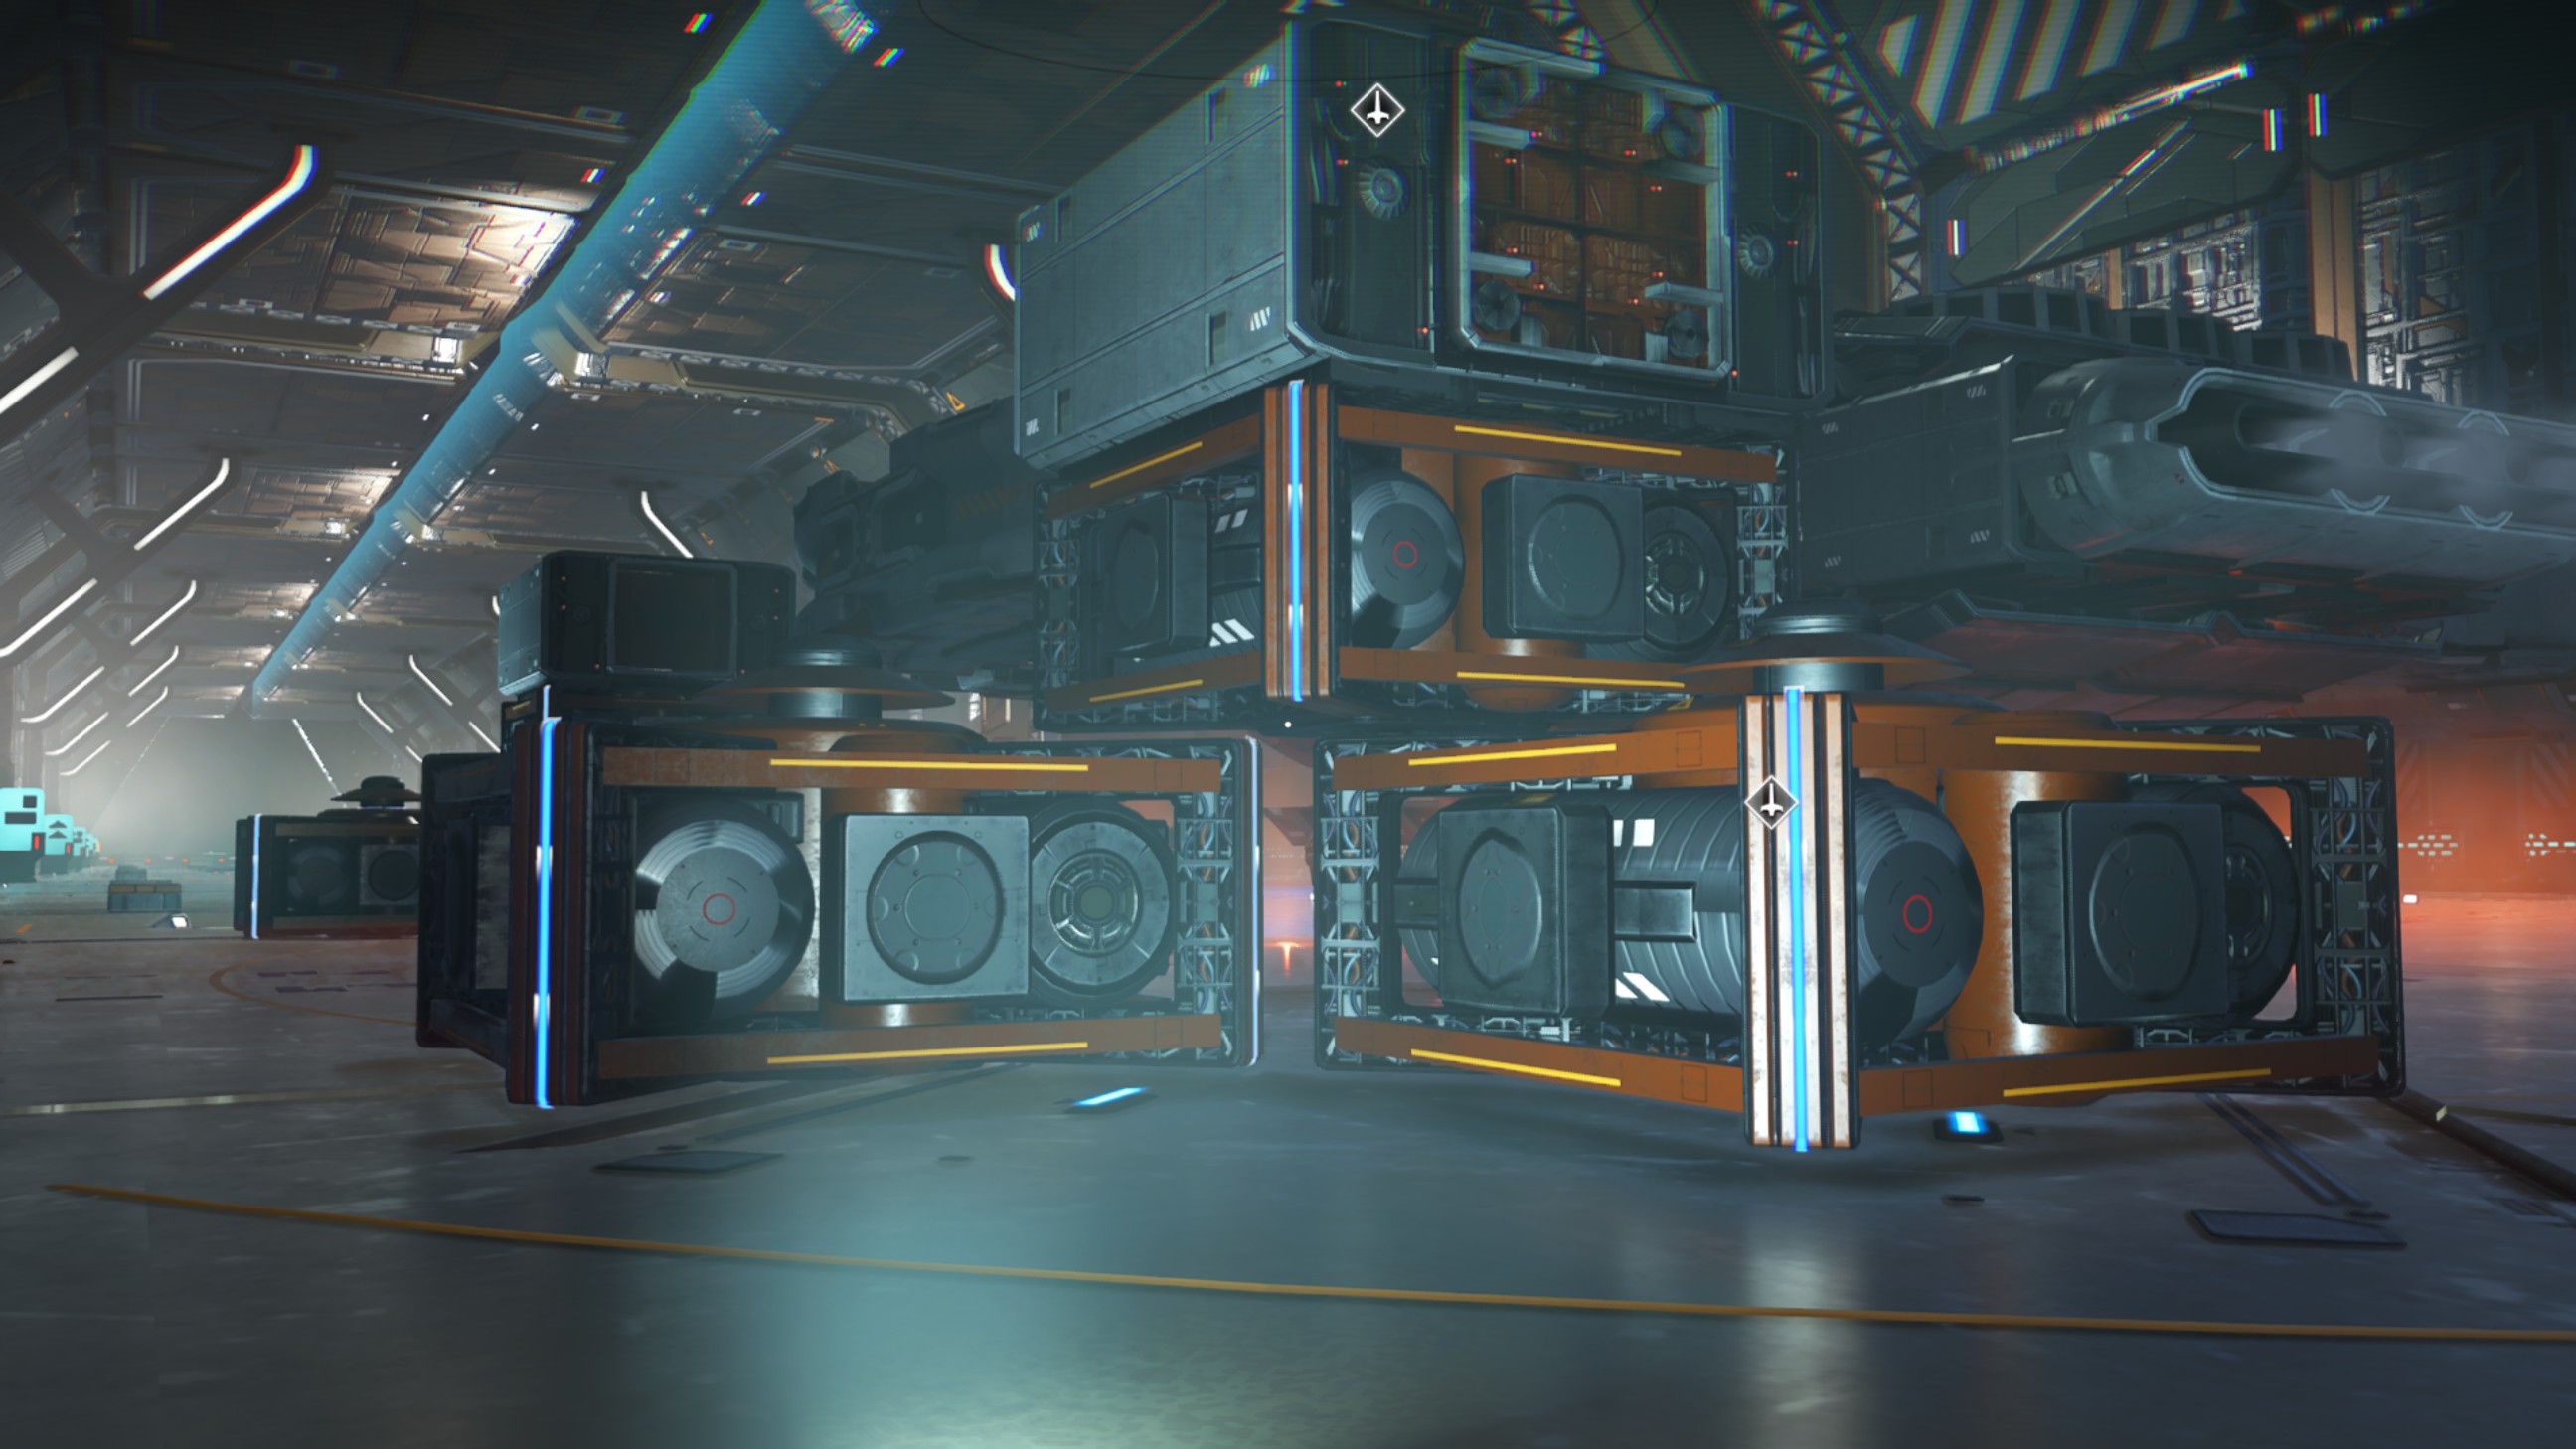
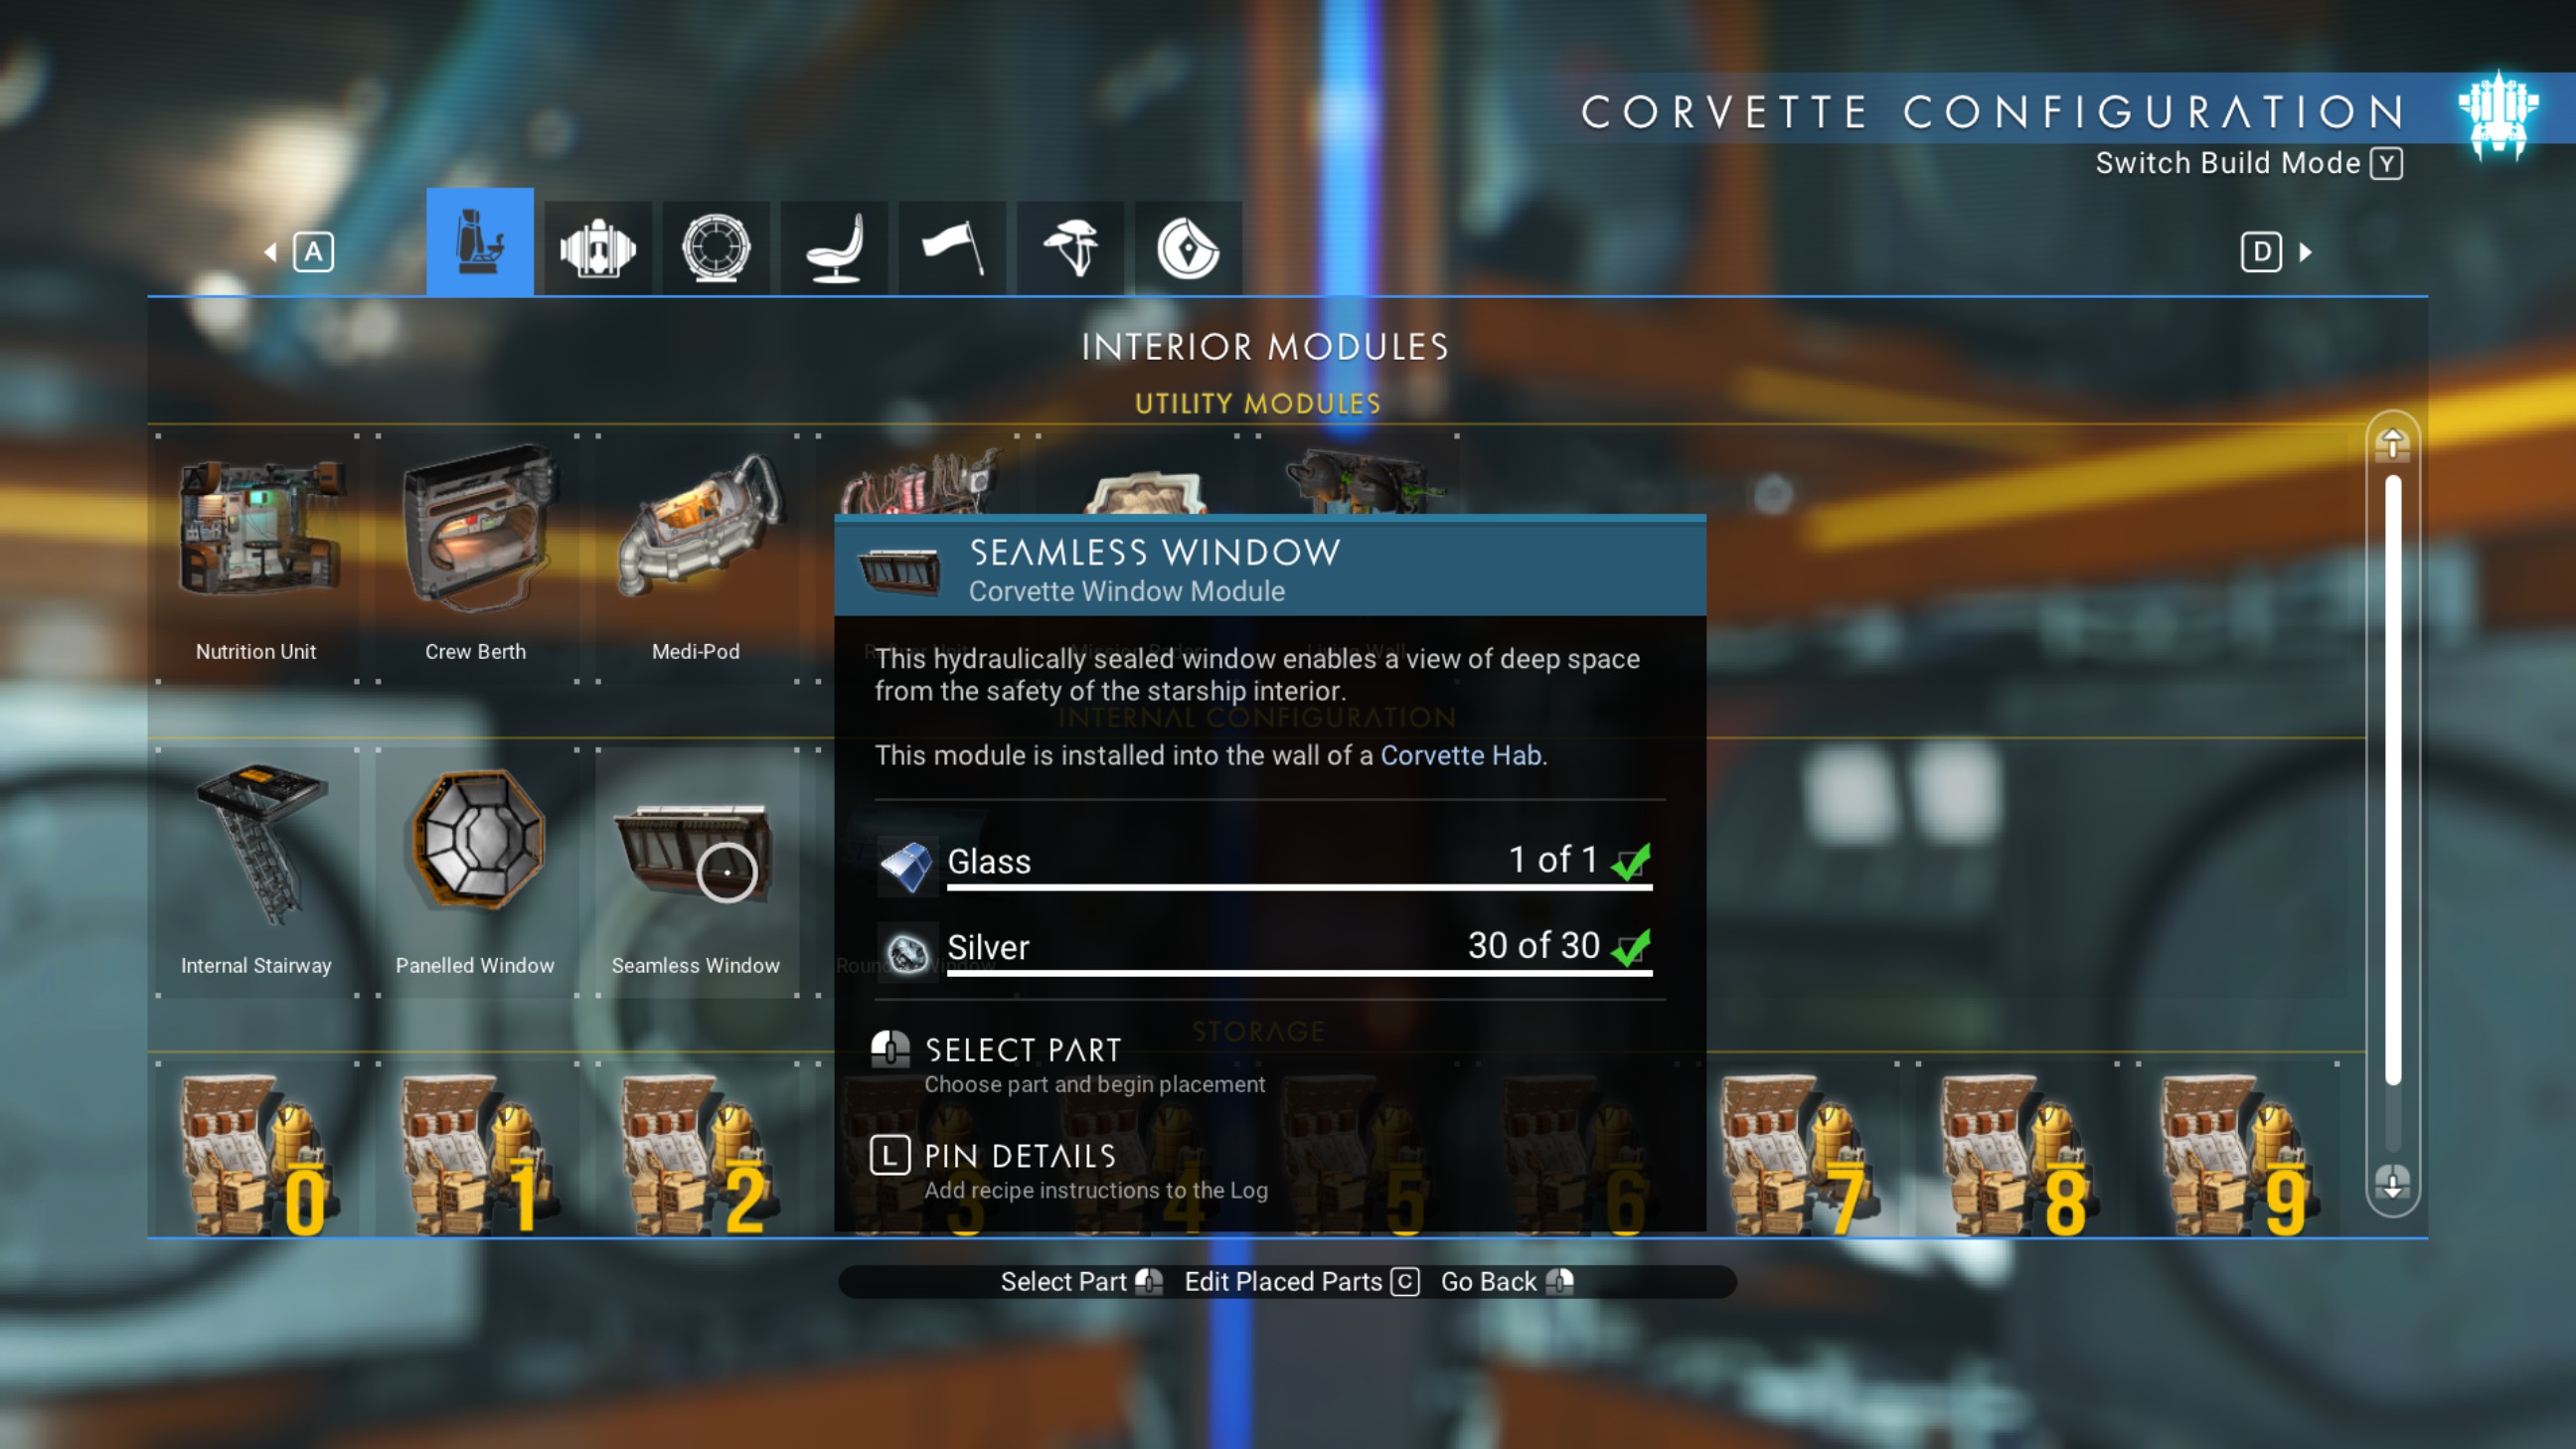
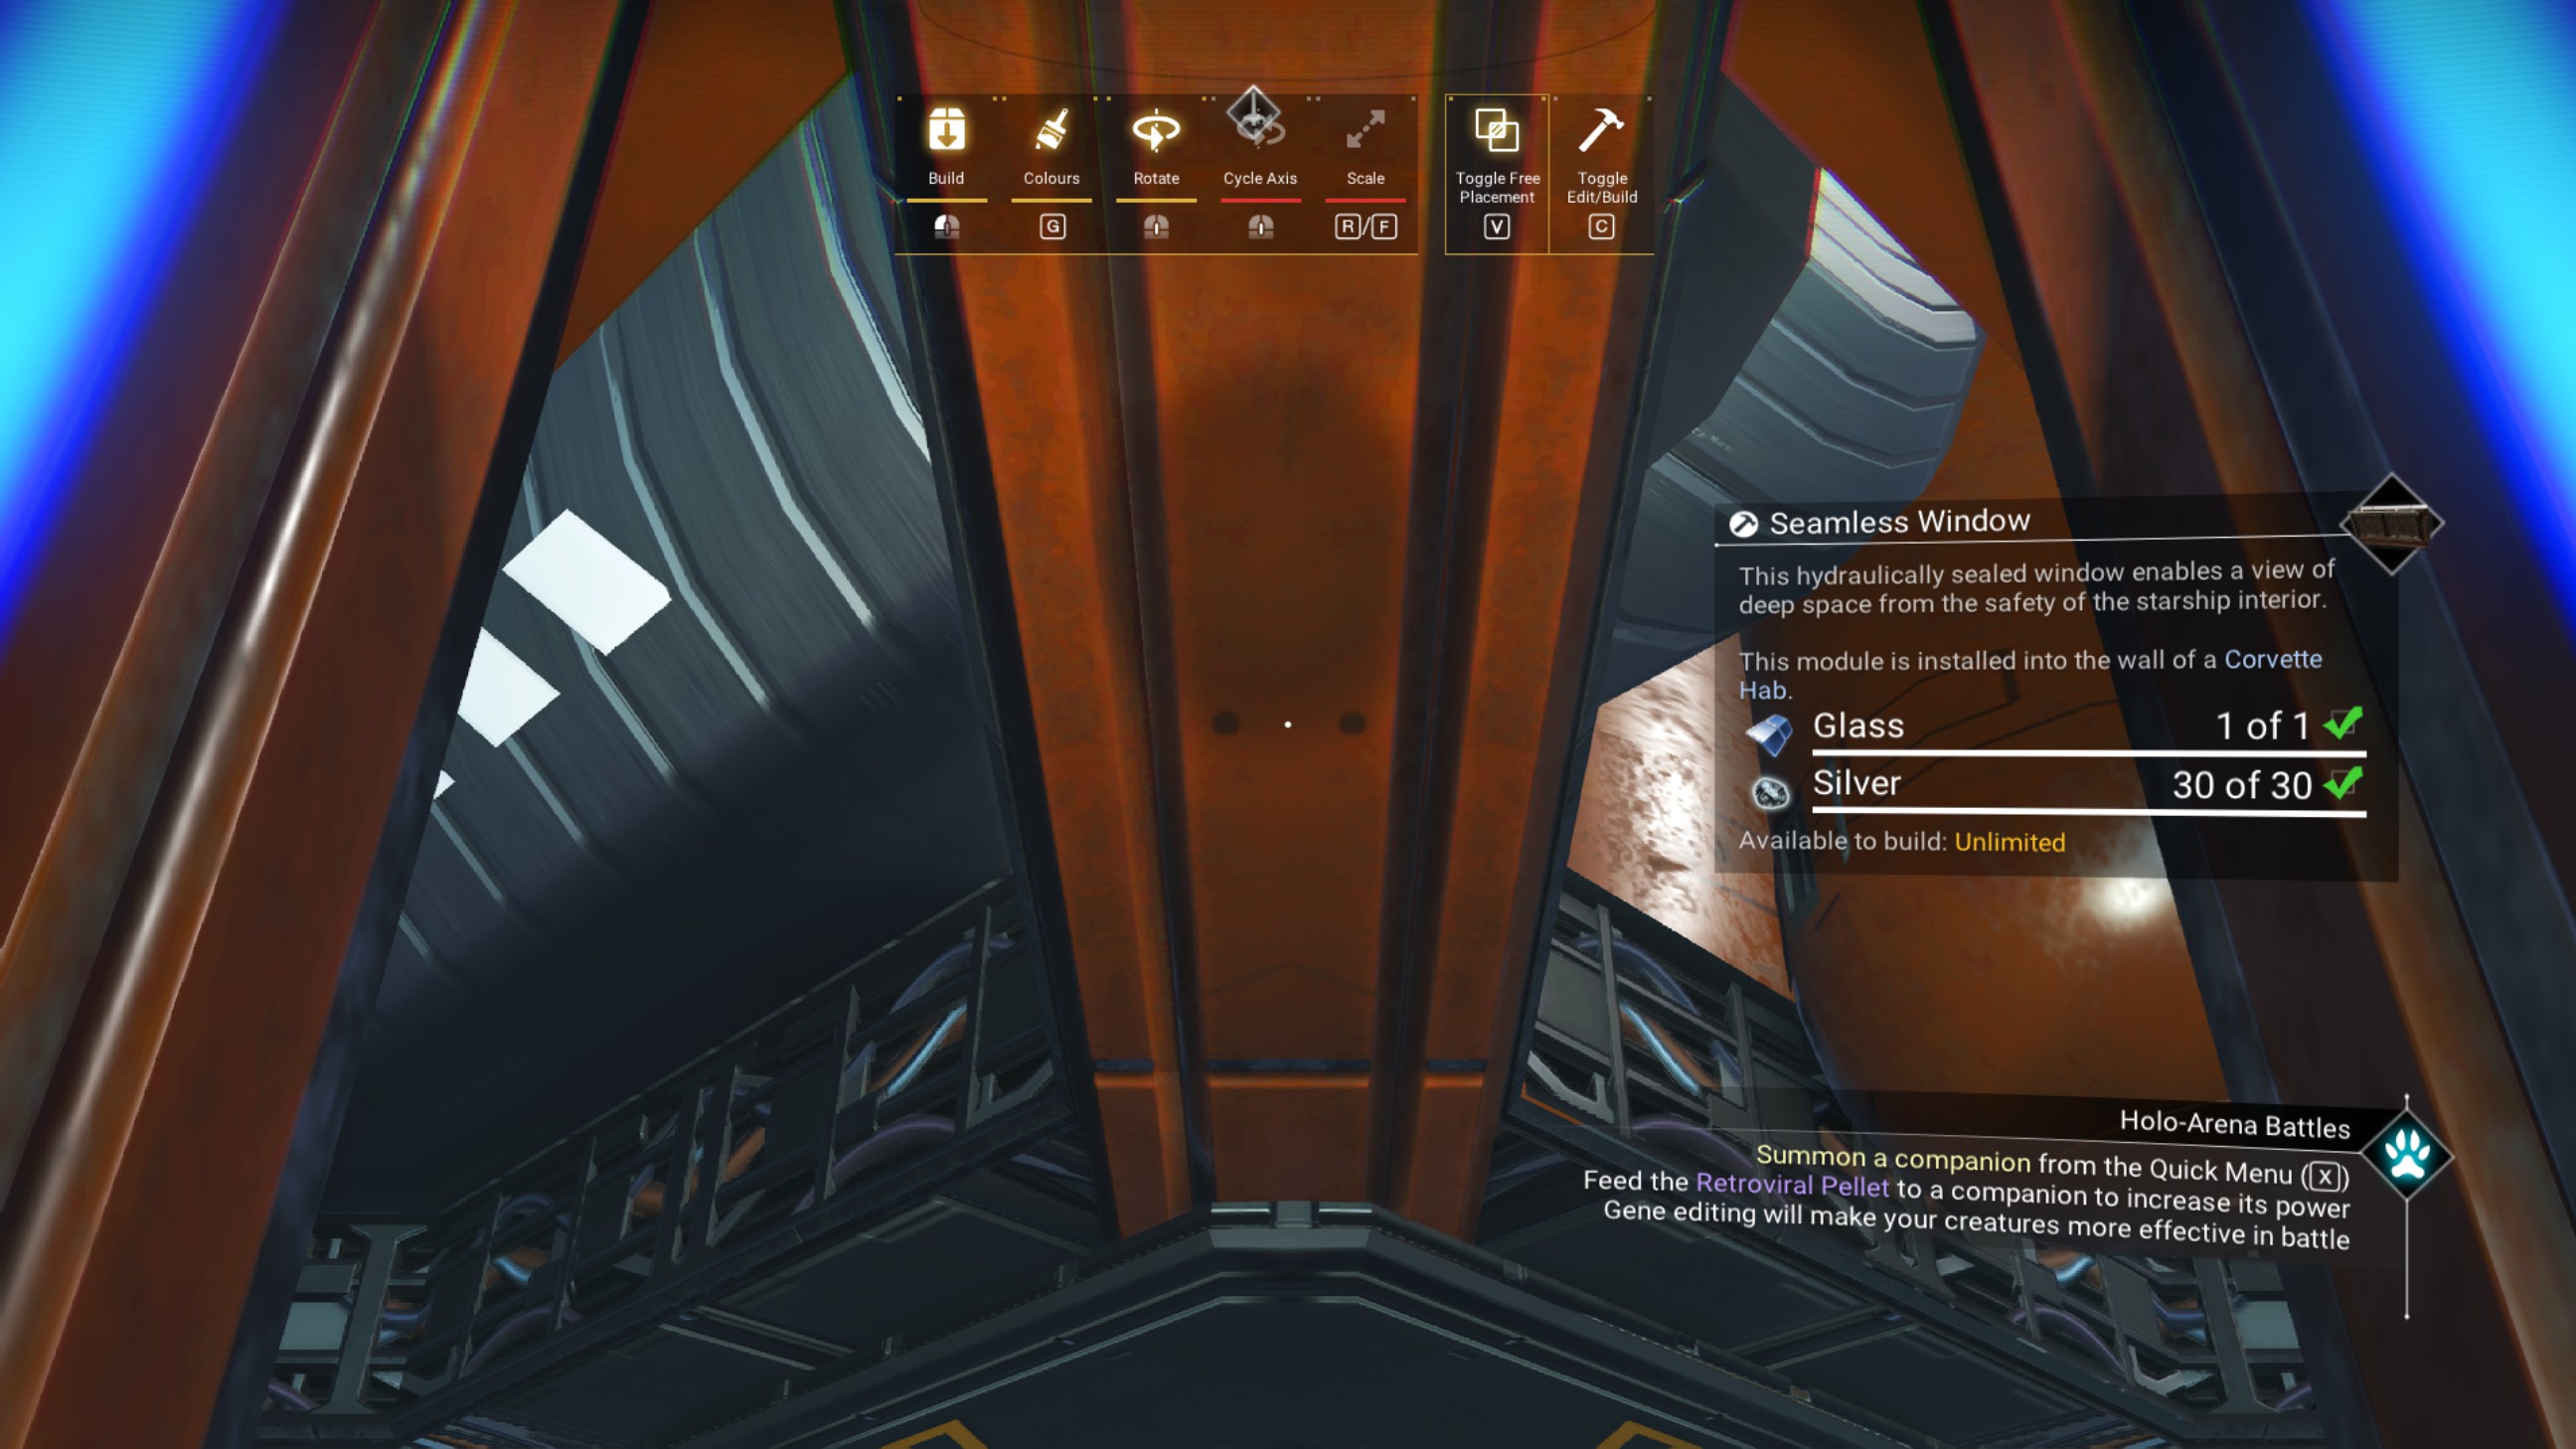
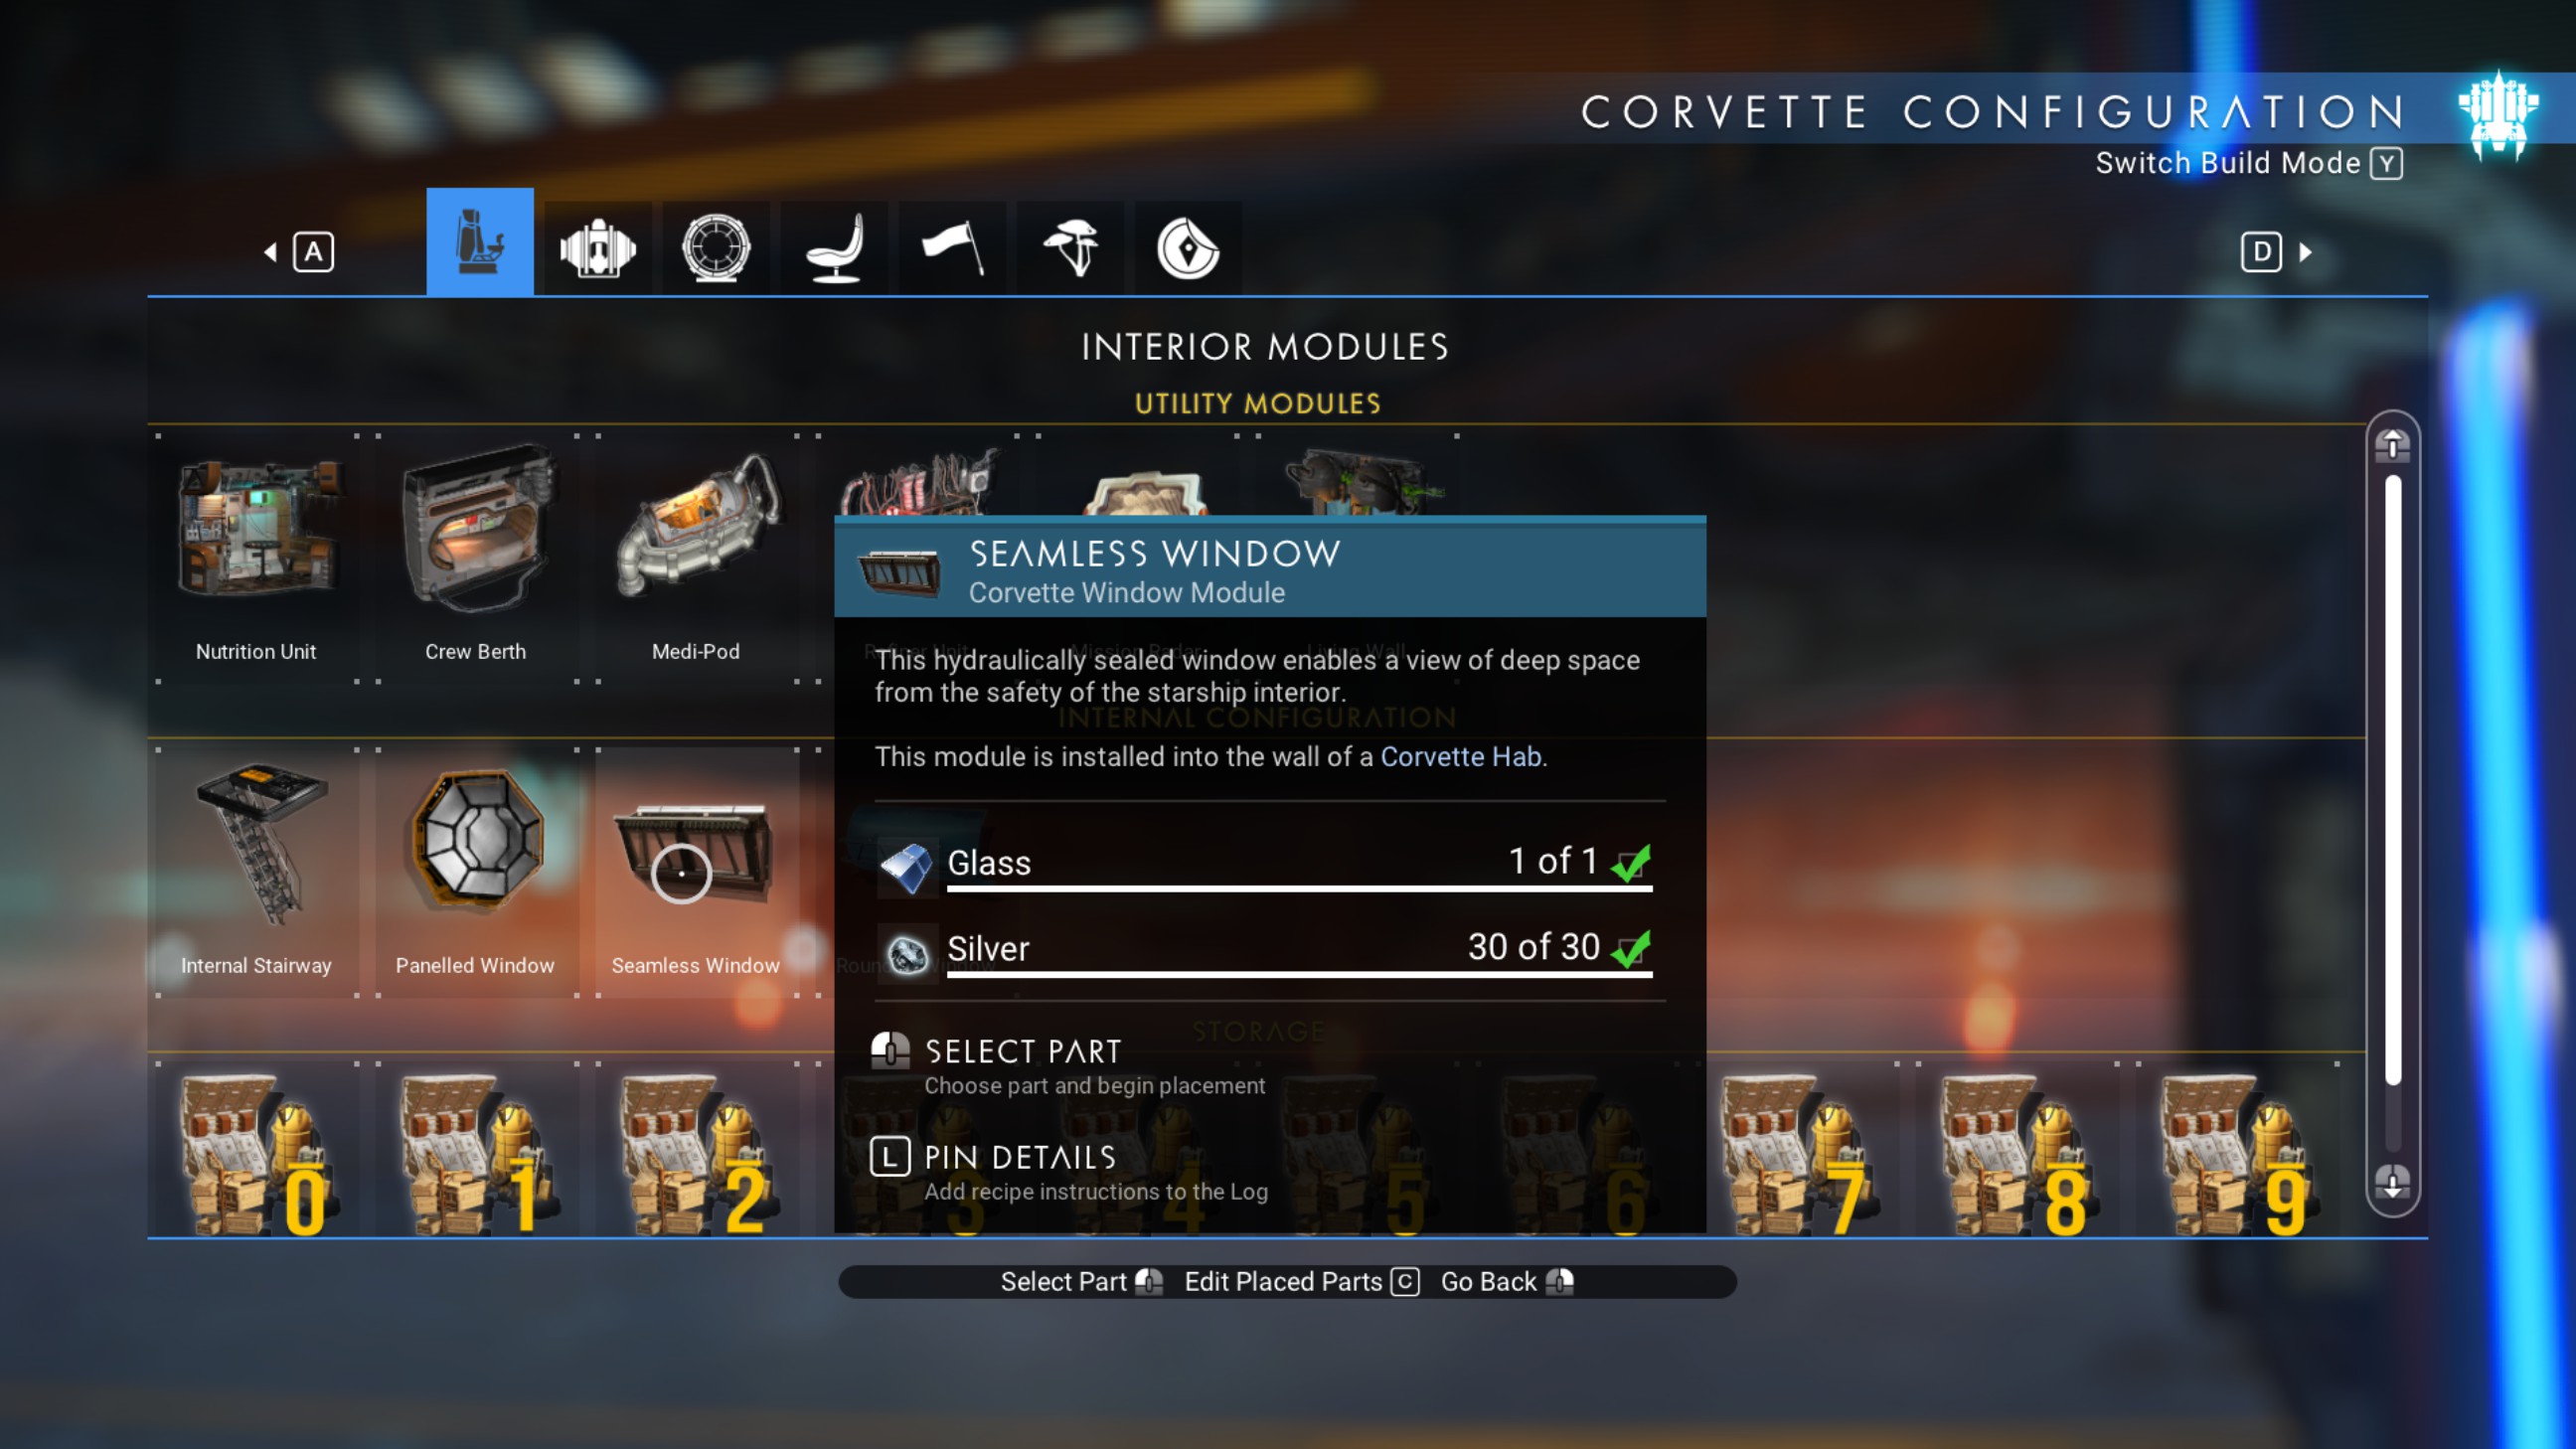
Select the seamless window from the build menu, and step forward until you are pressed into the corner between the zenith reactors. Enable free placement, then look up at the top reactor.
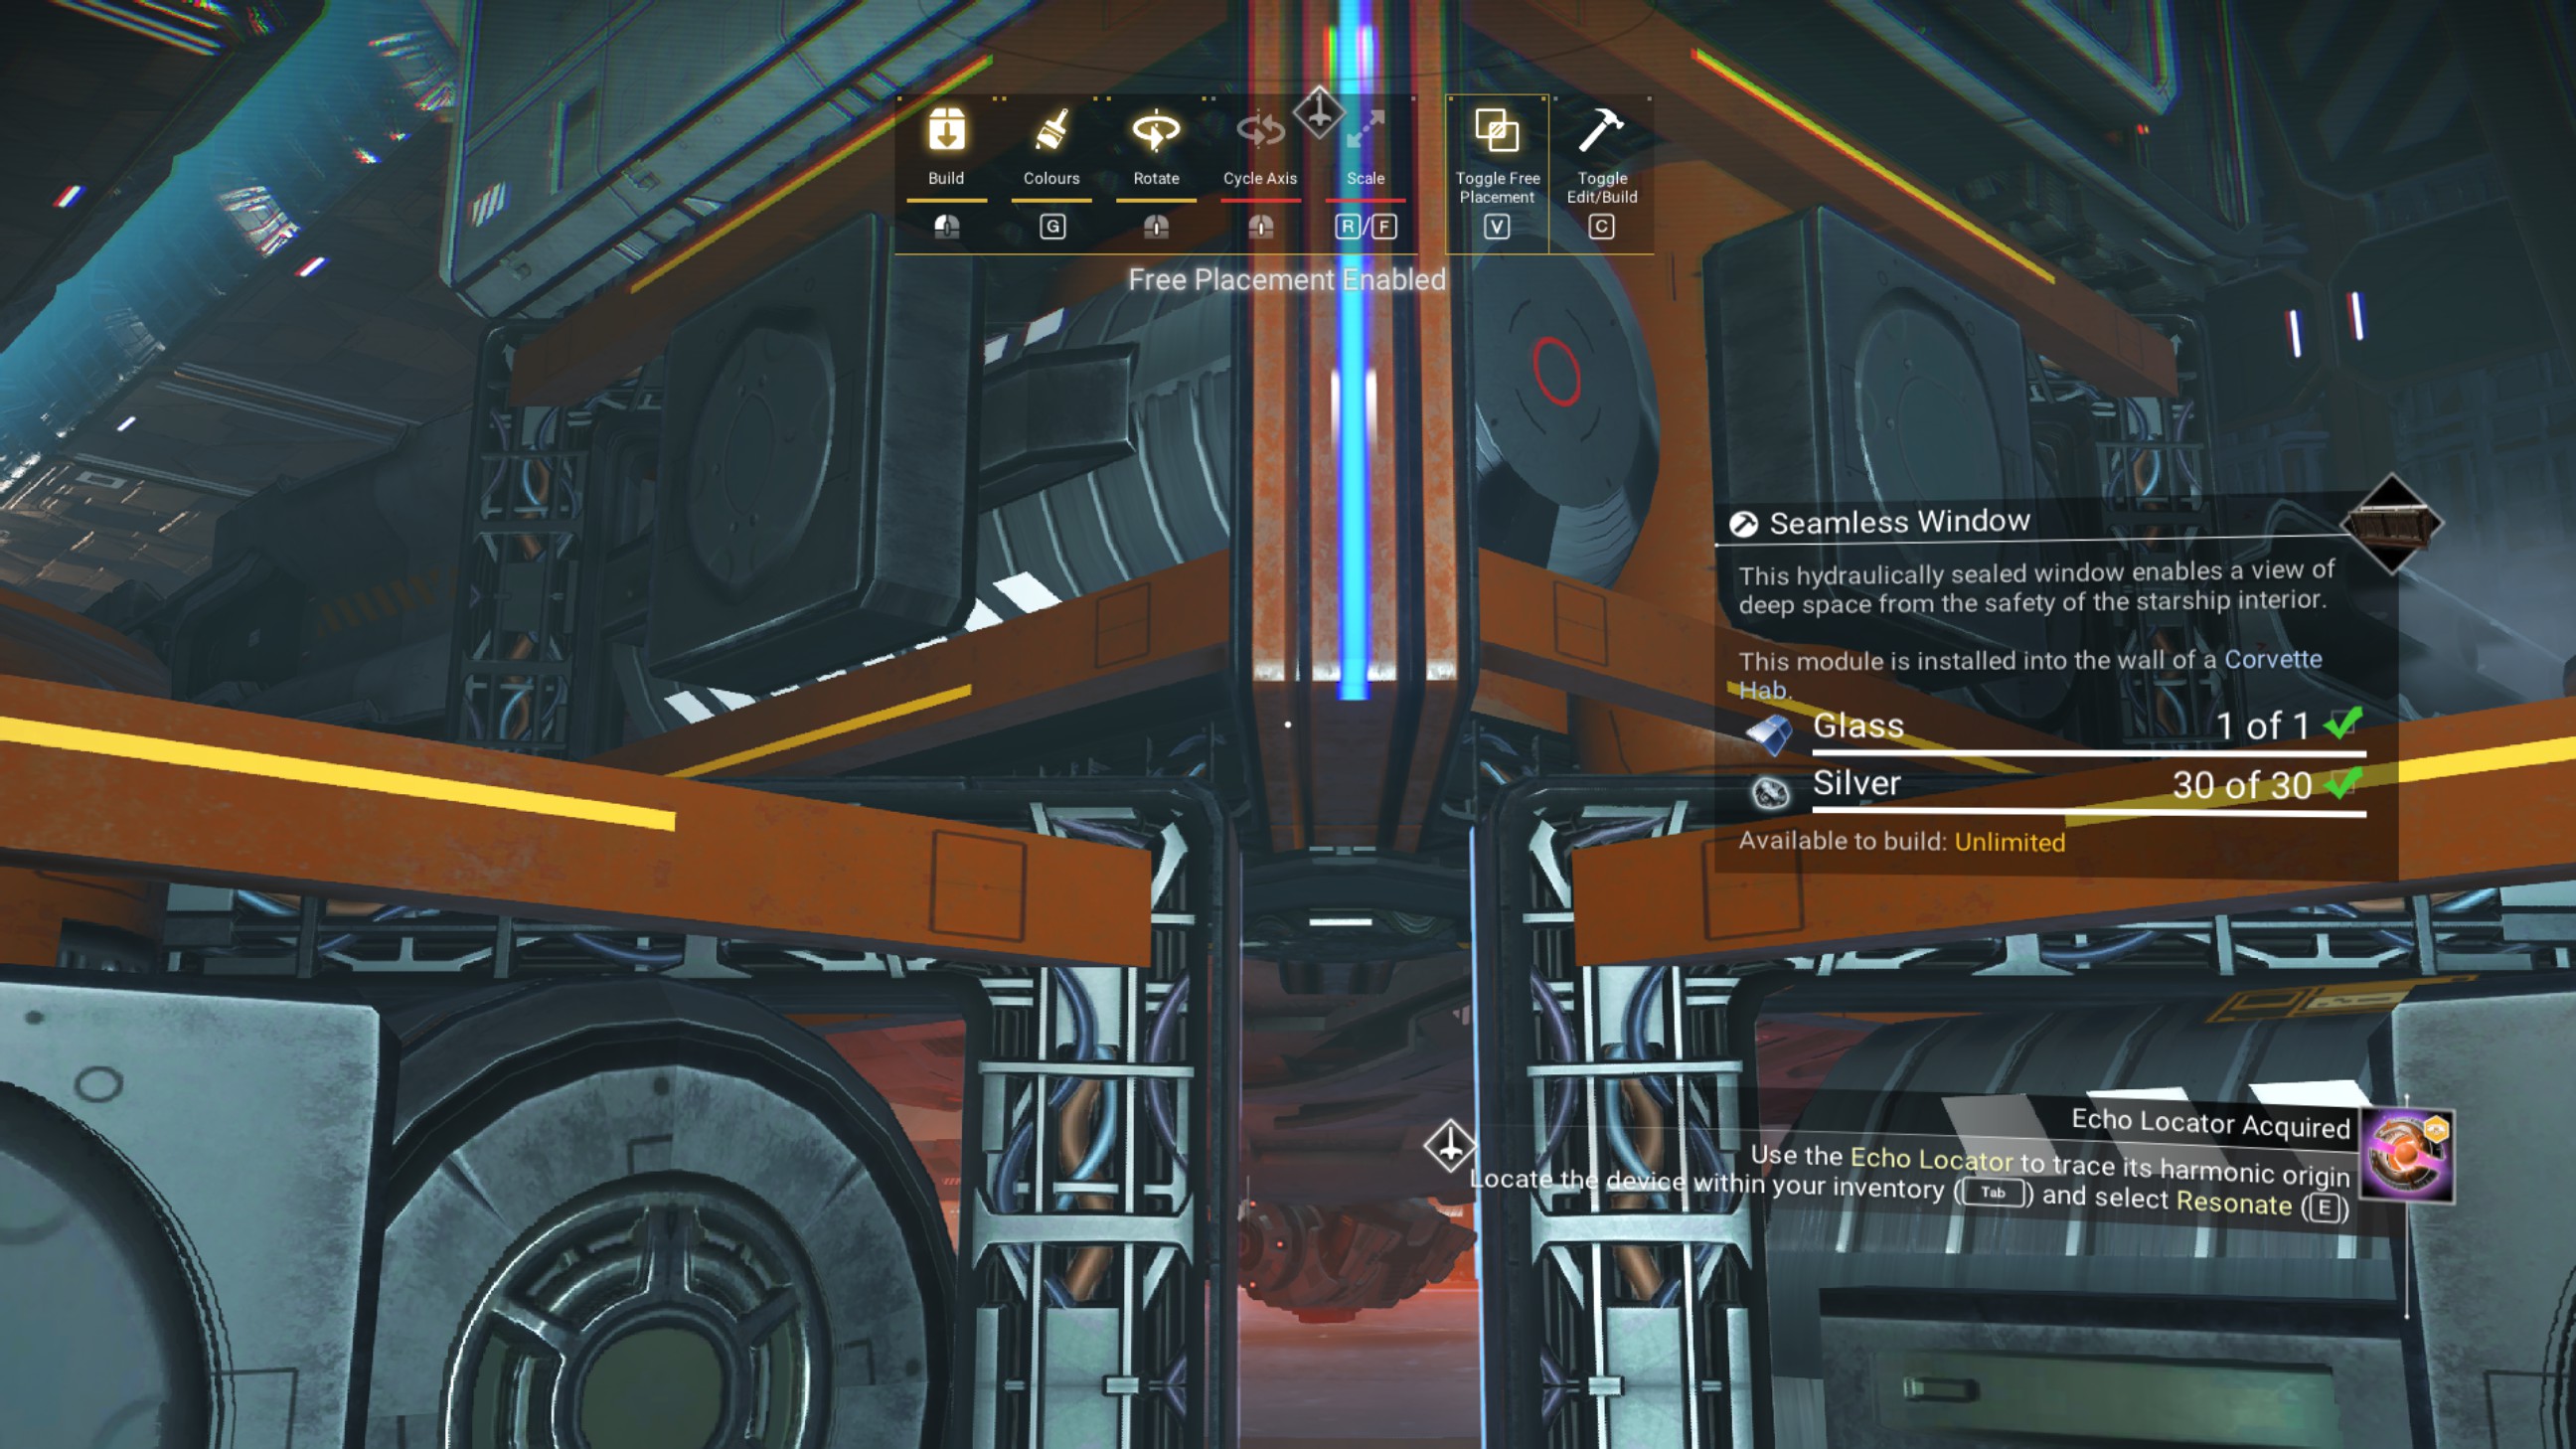
Find the two dots on the bottom of the top reactor and put your cursor right between those dots. Using free placement, place a seamless window right between those two dots, as shown.
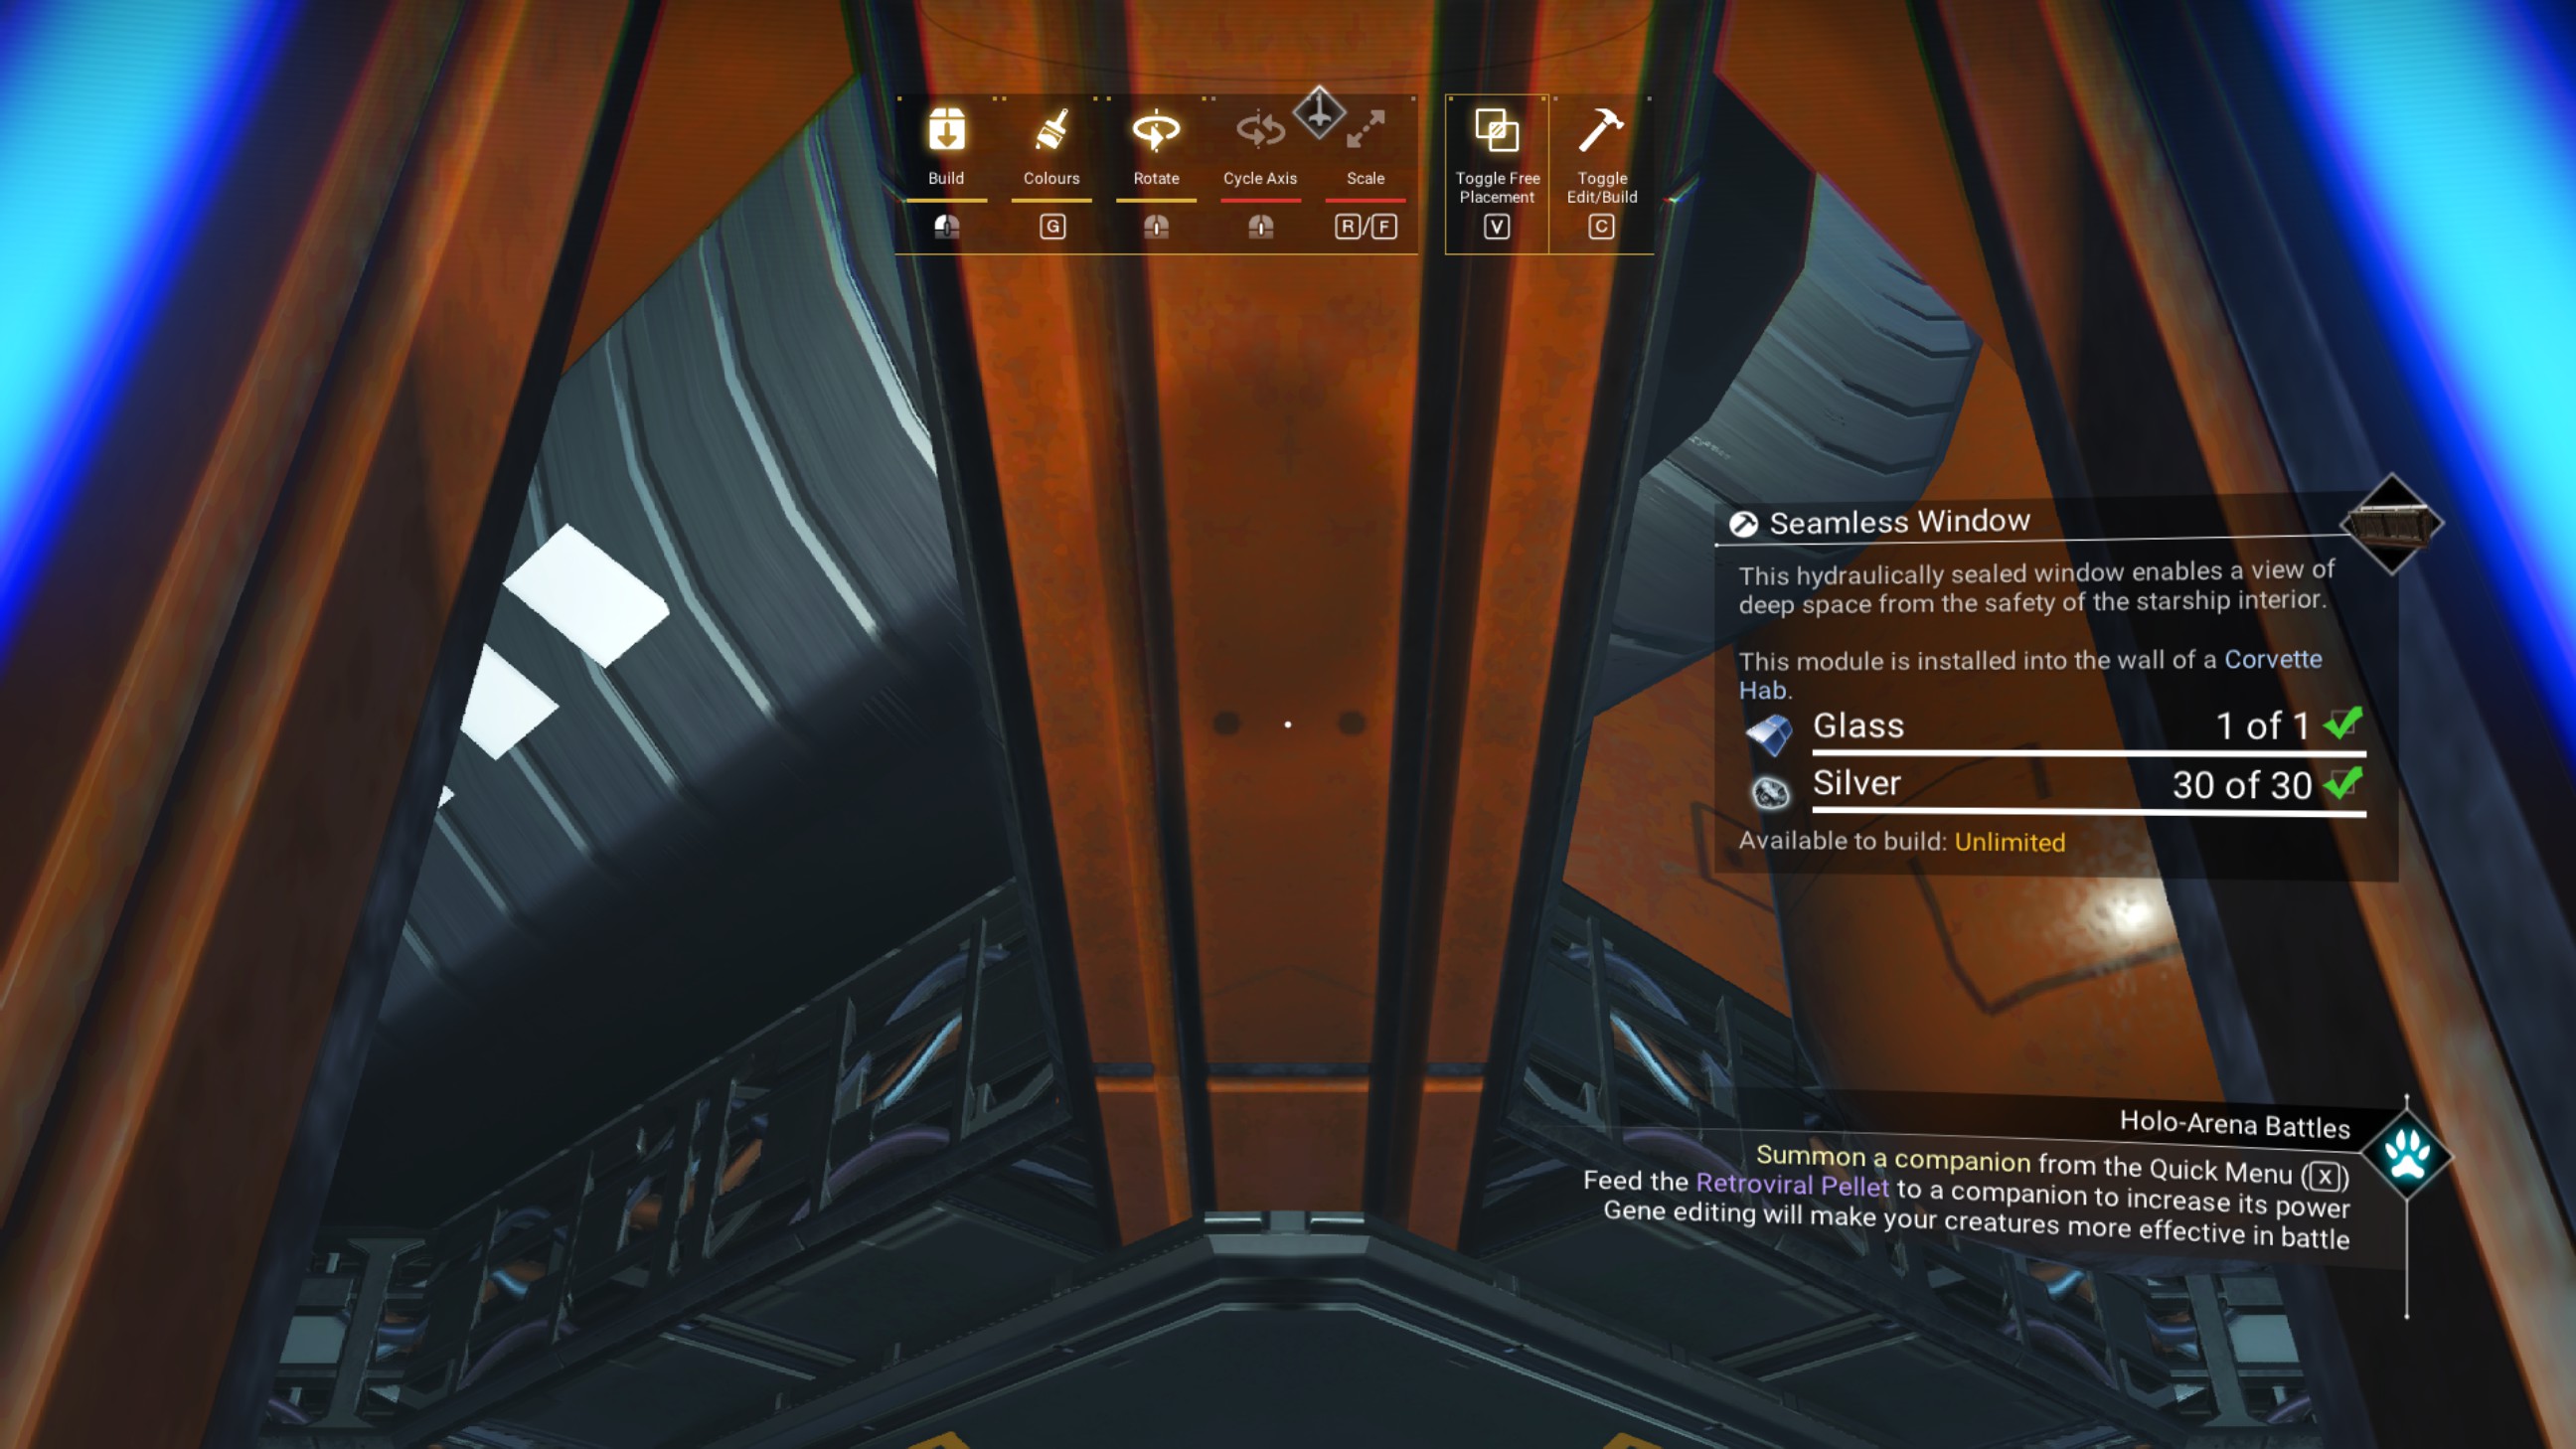
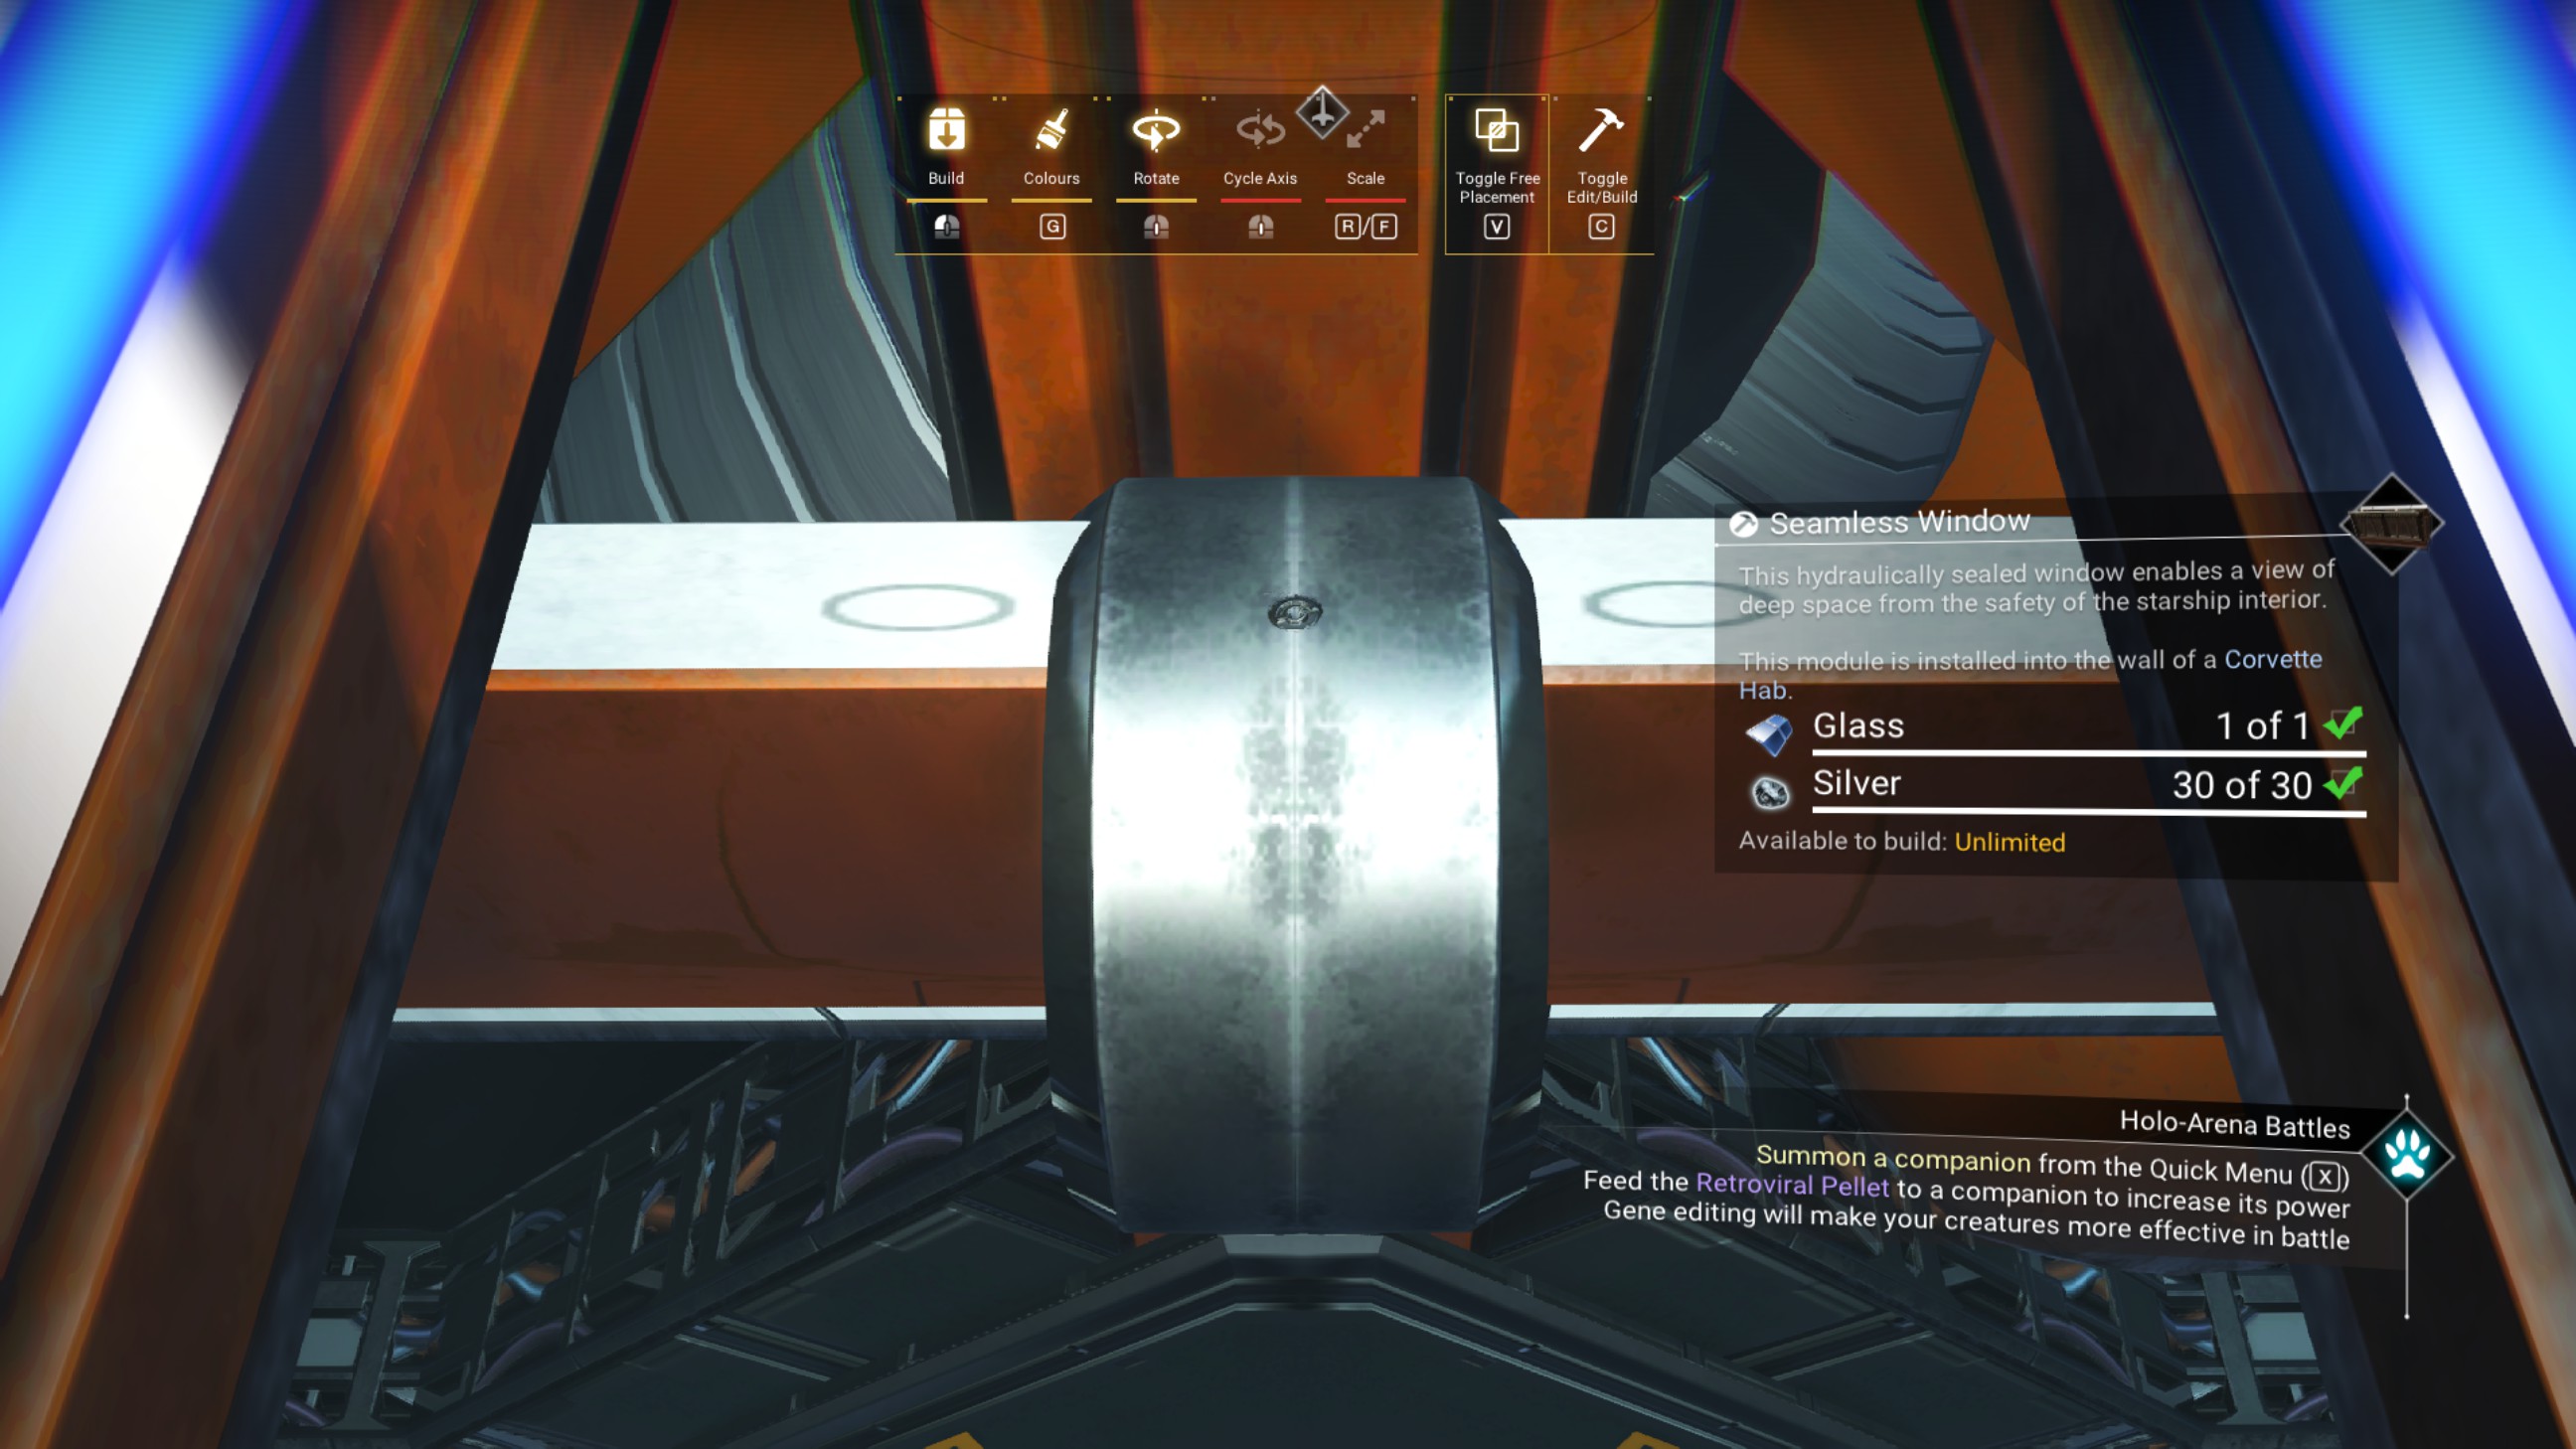
Do the same thing two more times, for the zenith reactors off the port bow and the starboard bow. Line yourself up between the two lower reactors, and place a seamless window between the two dots on the underside of the upper reactor using free placement.
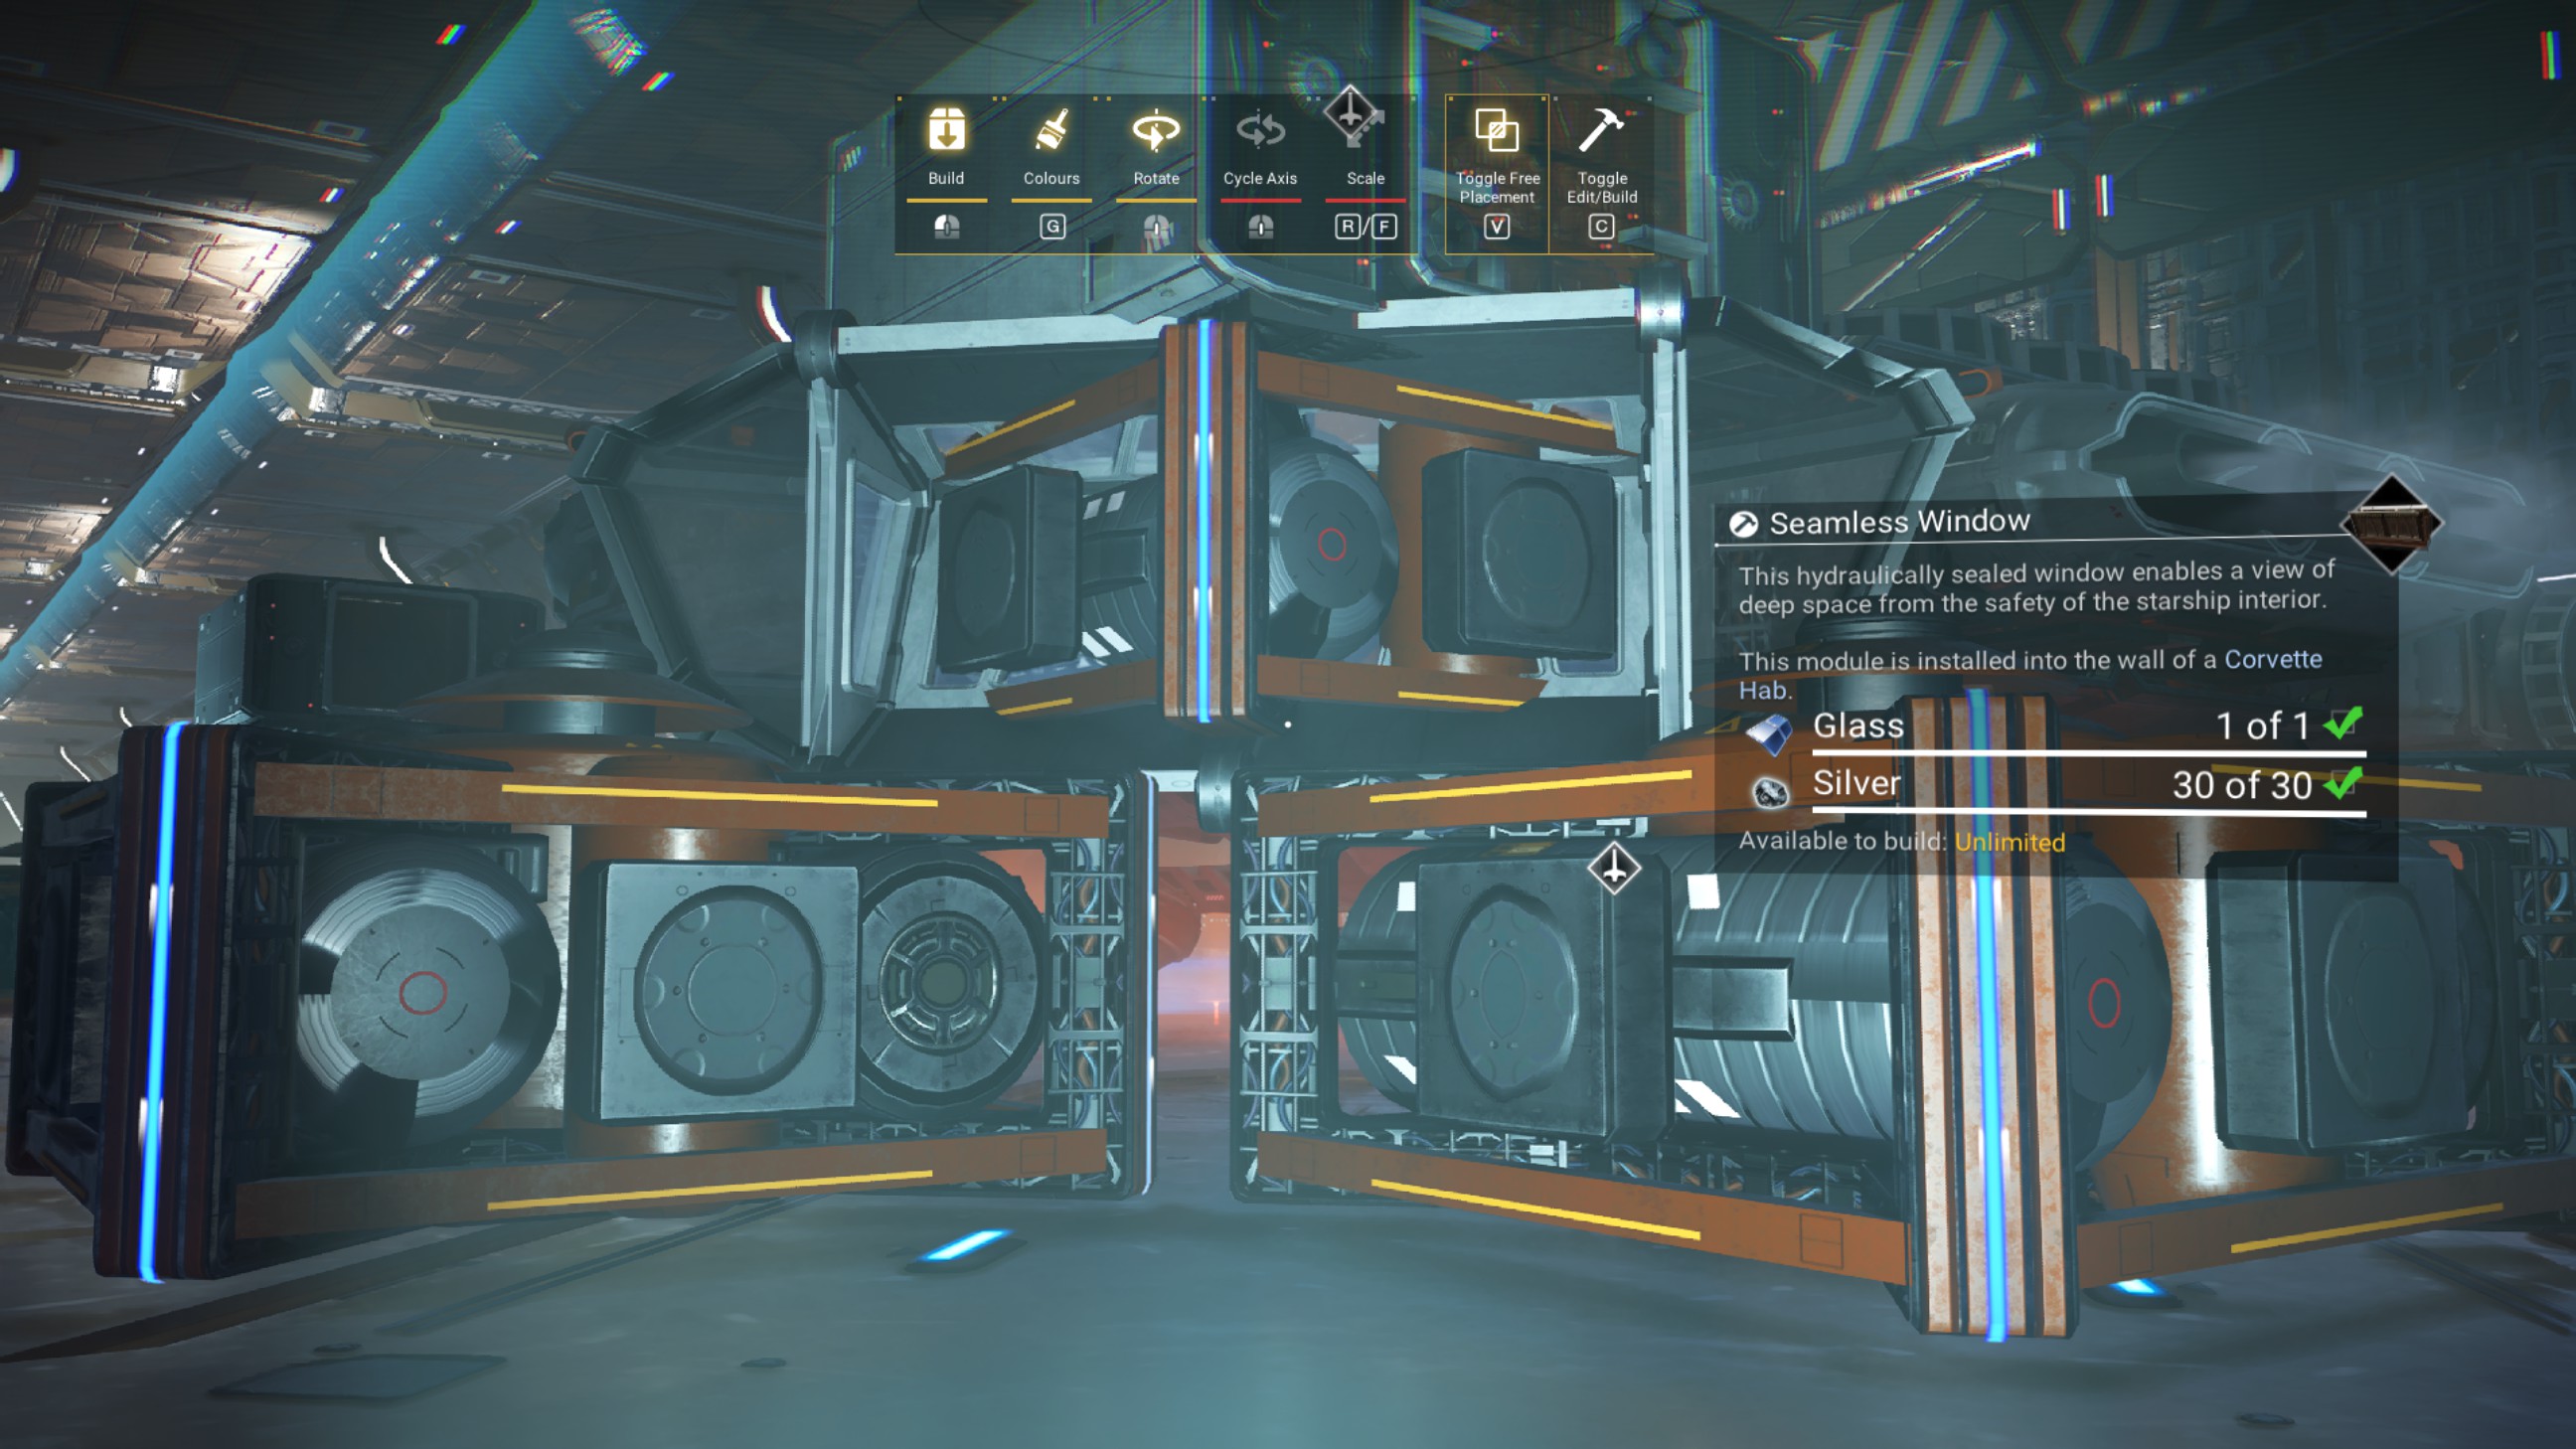
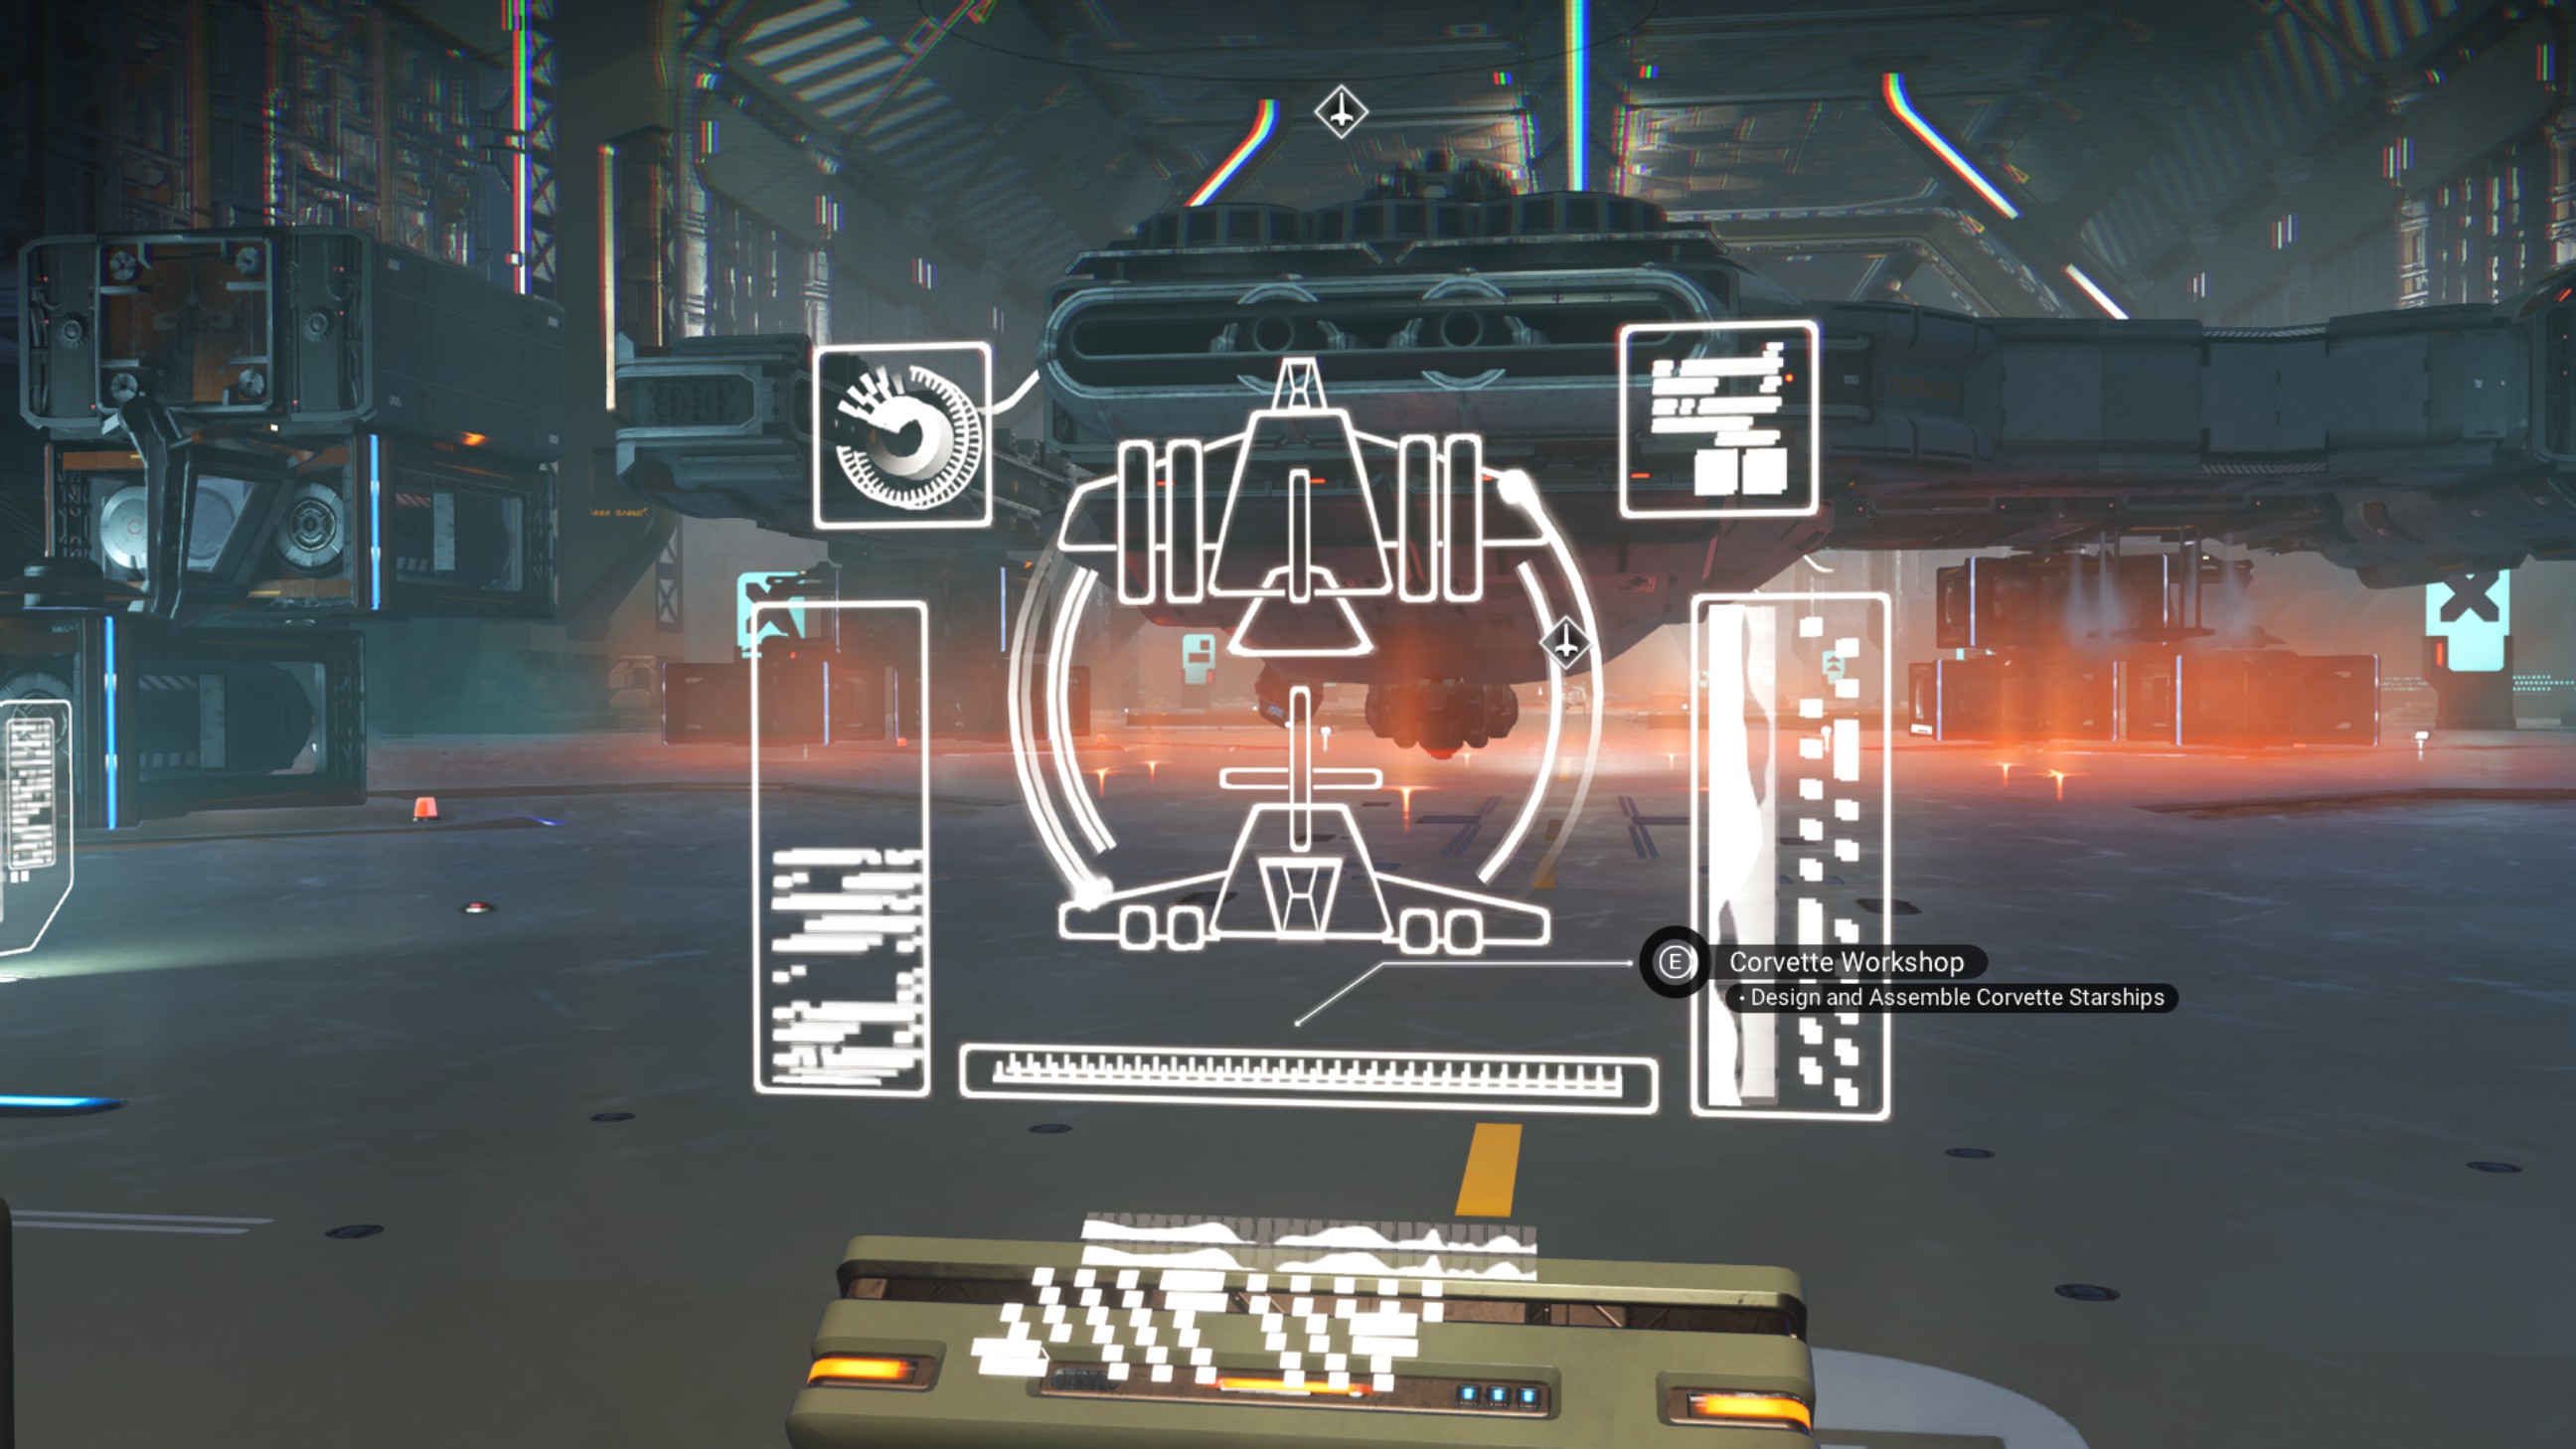
Go back into the corvette workshop to continue making changes to the ship.
Place a walkway on each of the three seamless windows. They should be at 45 degree angles to the ship.
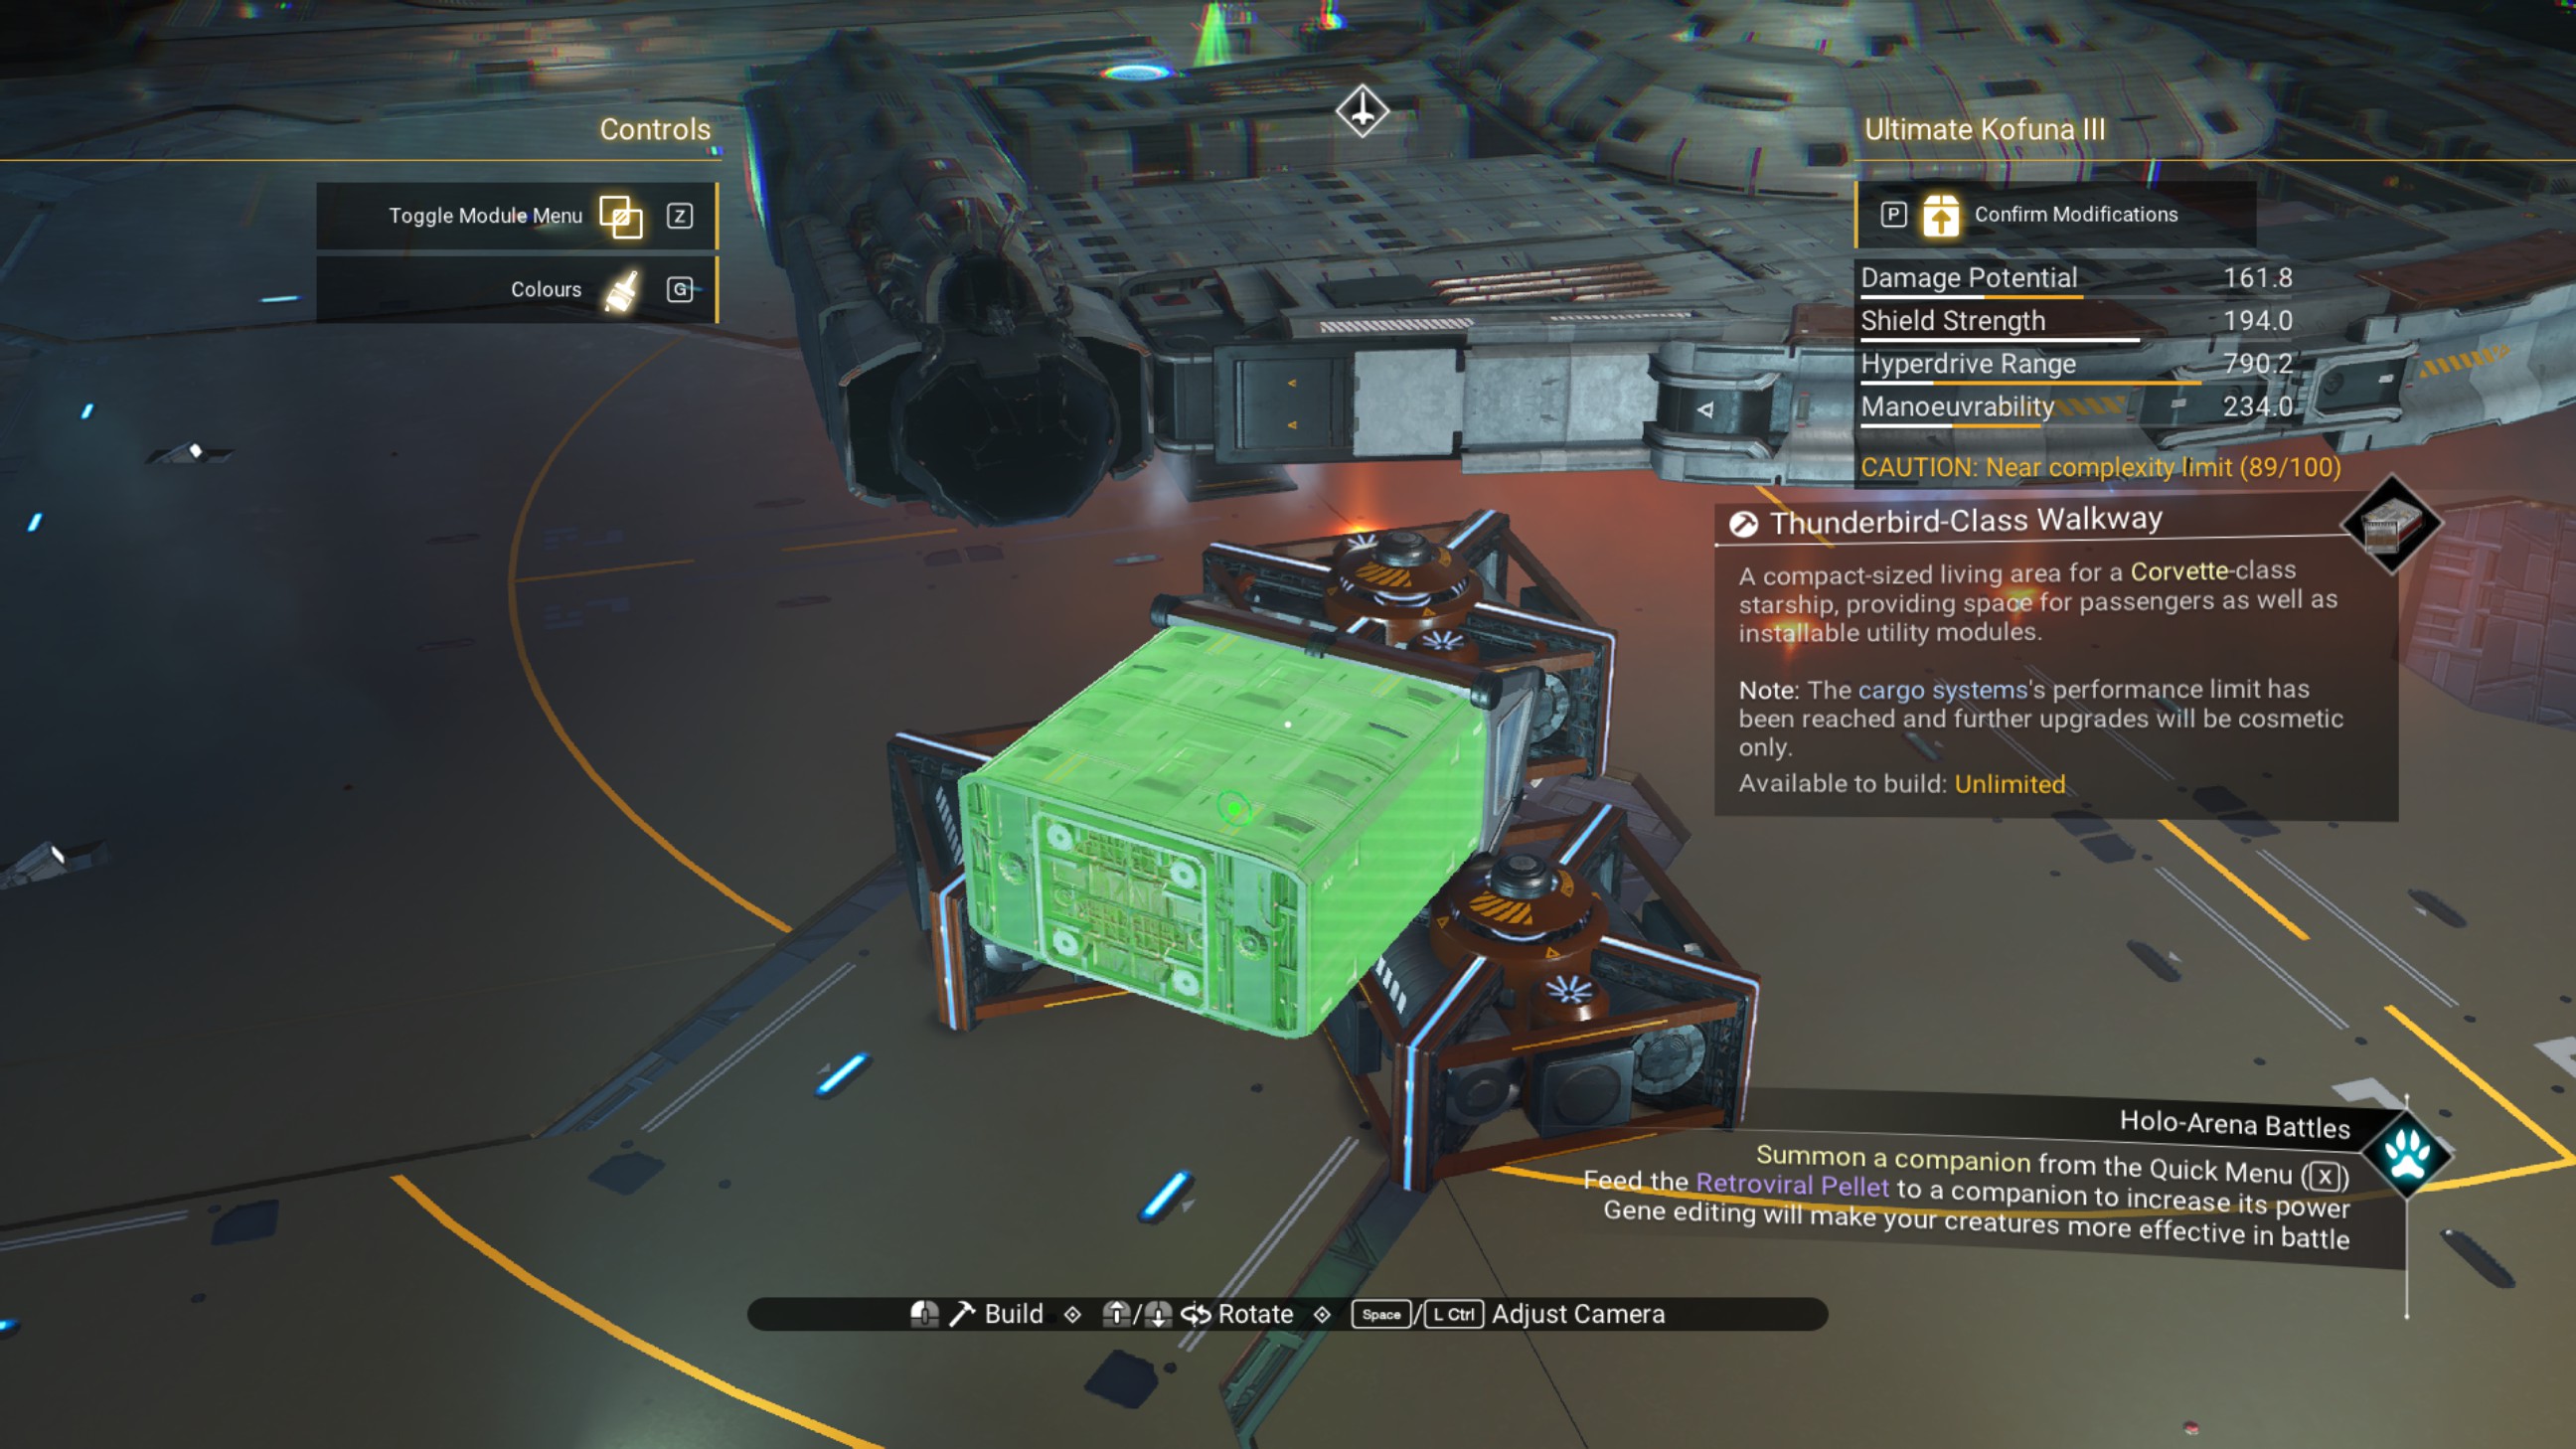
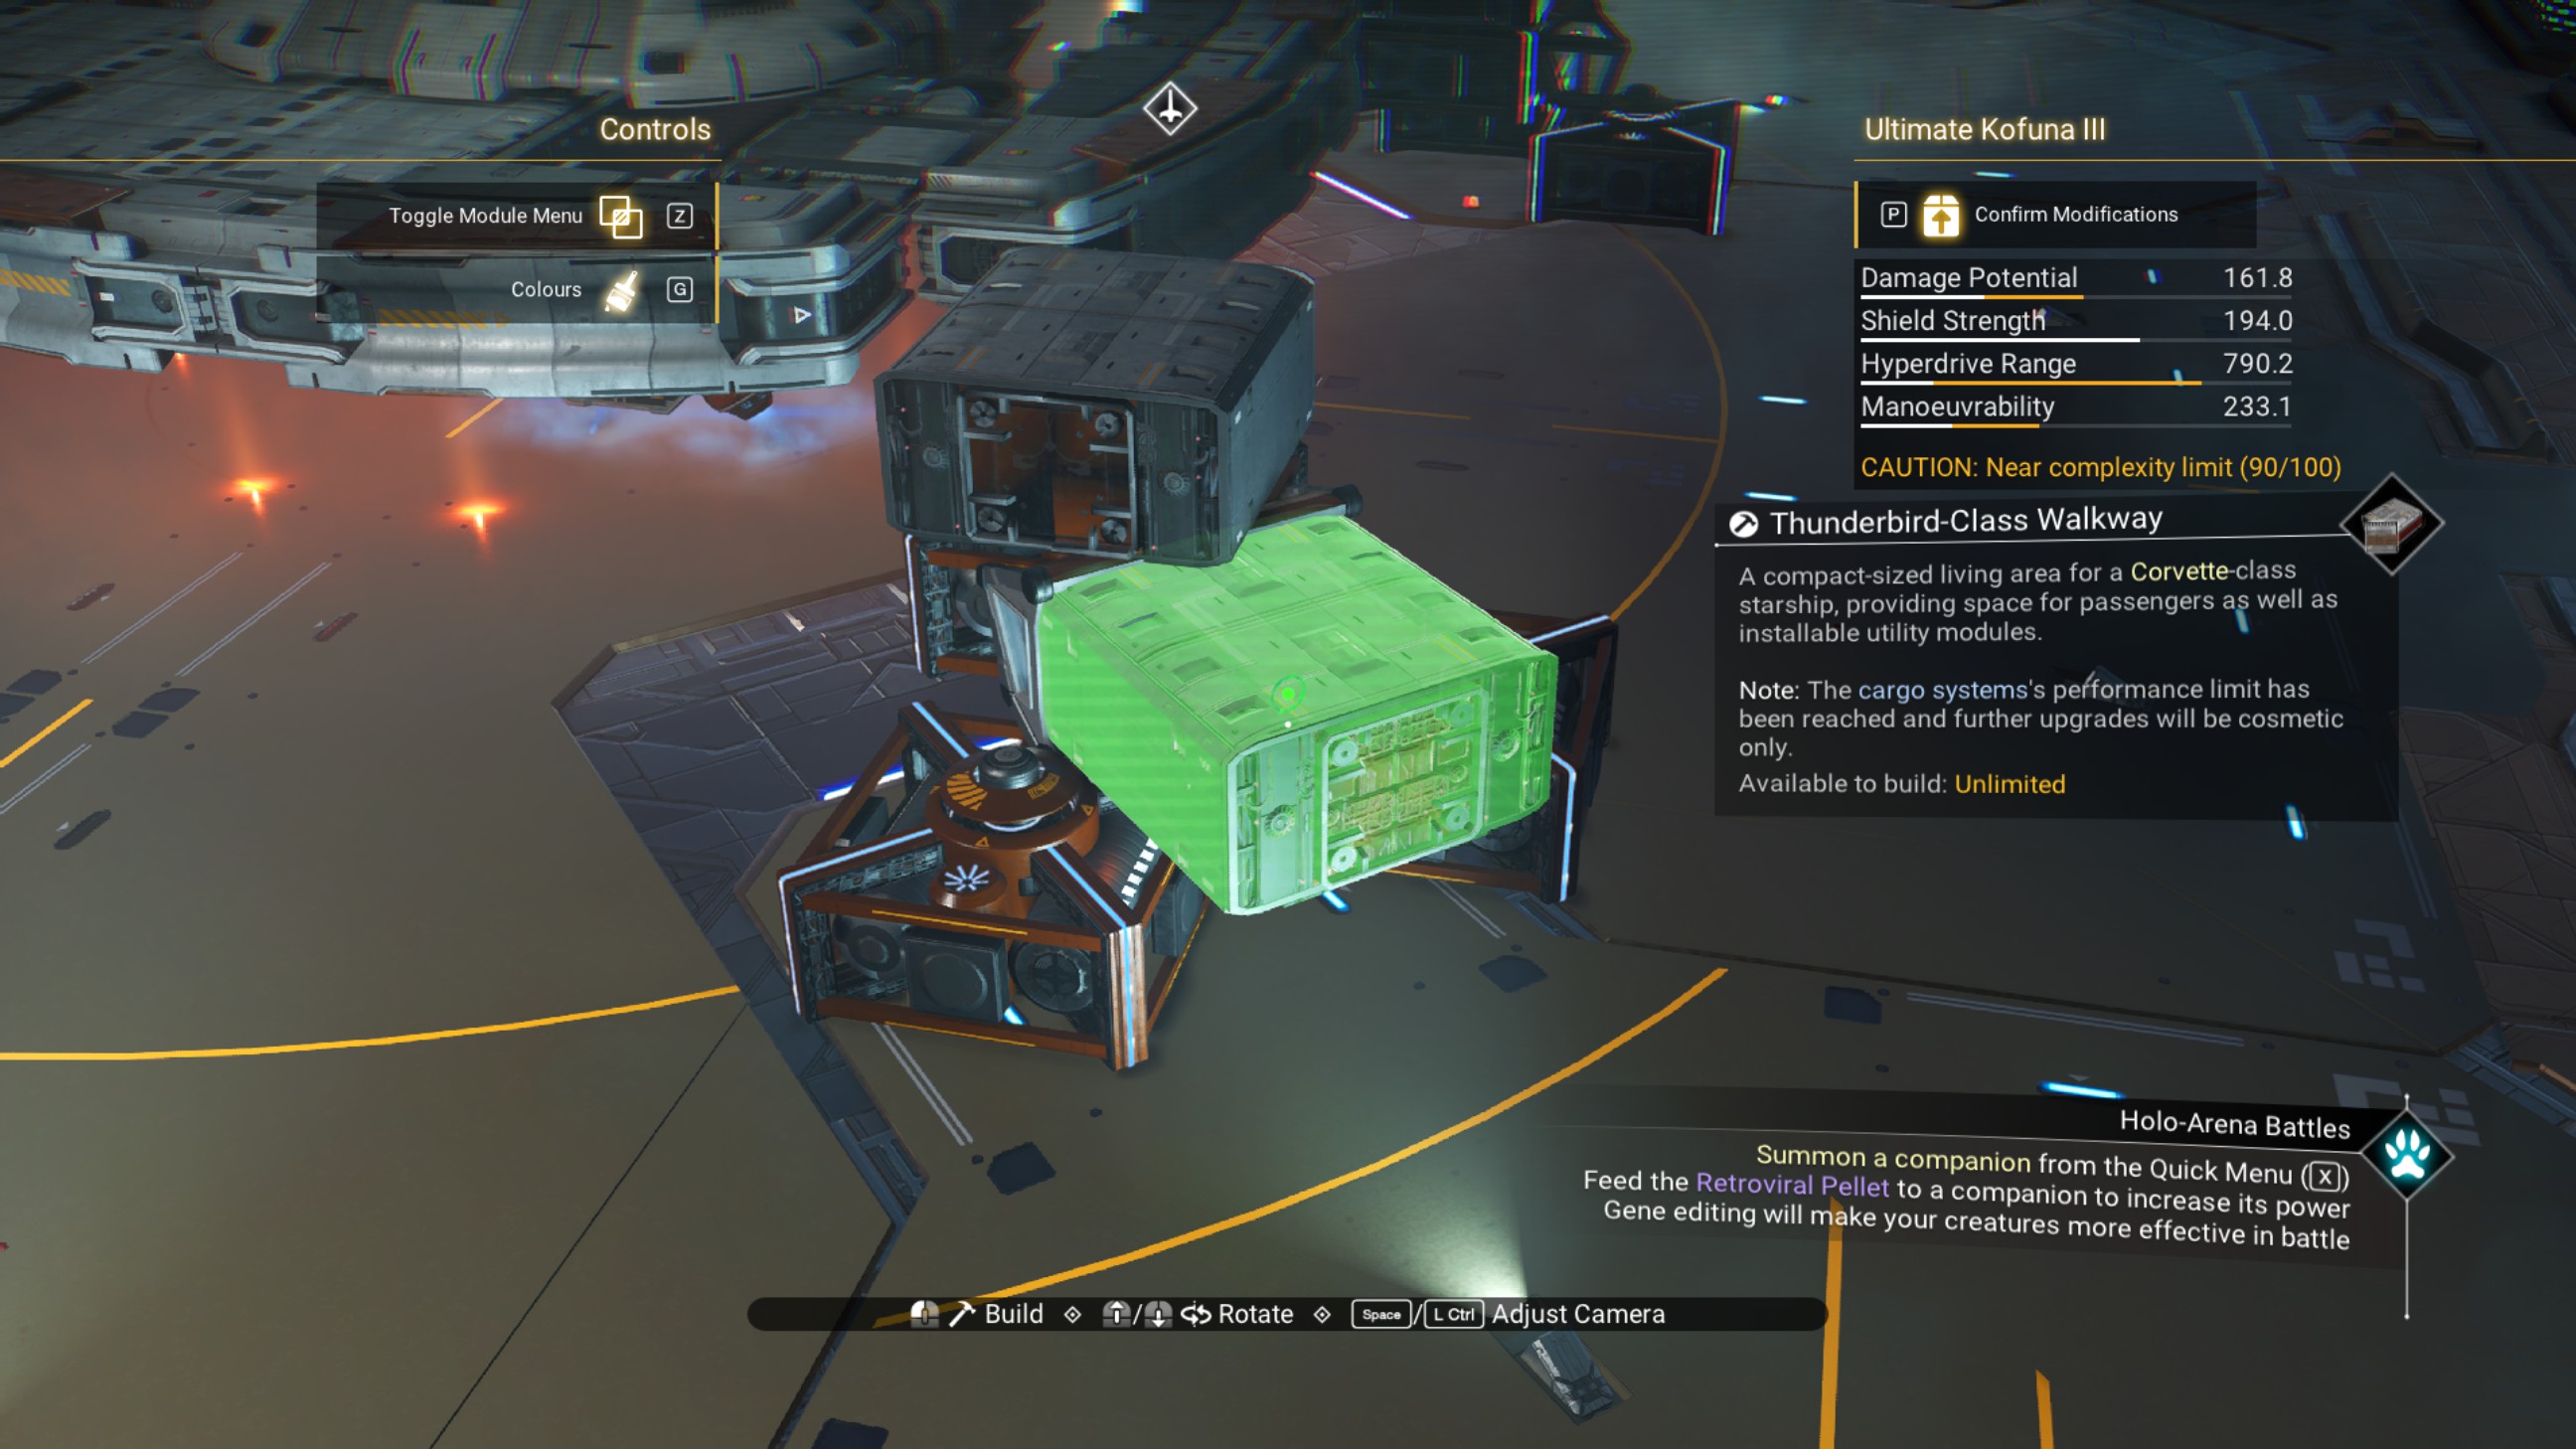
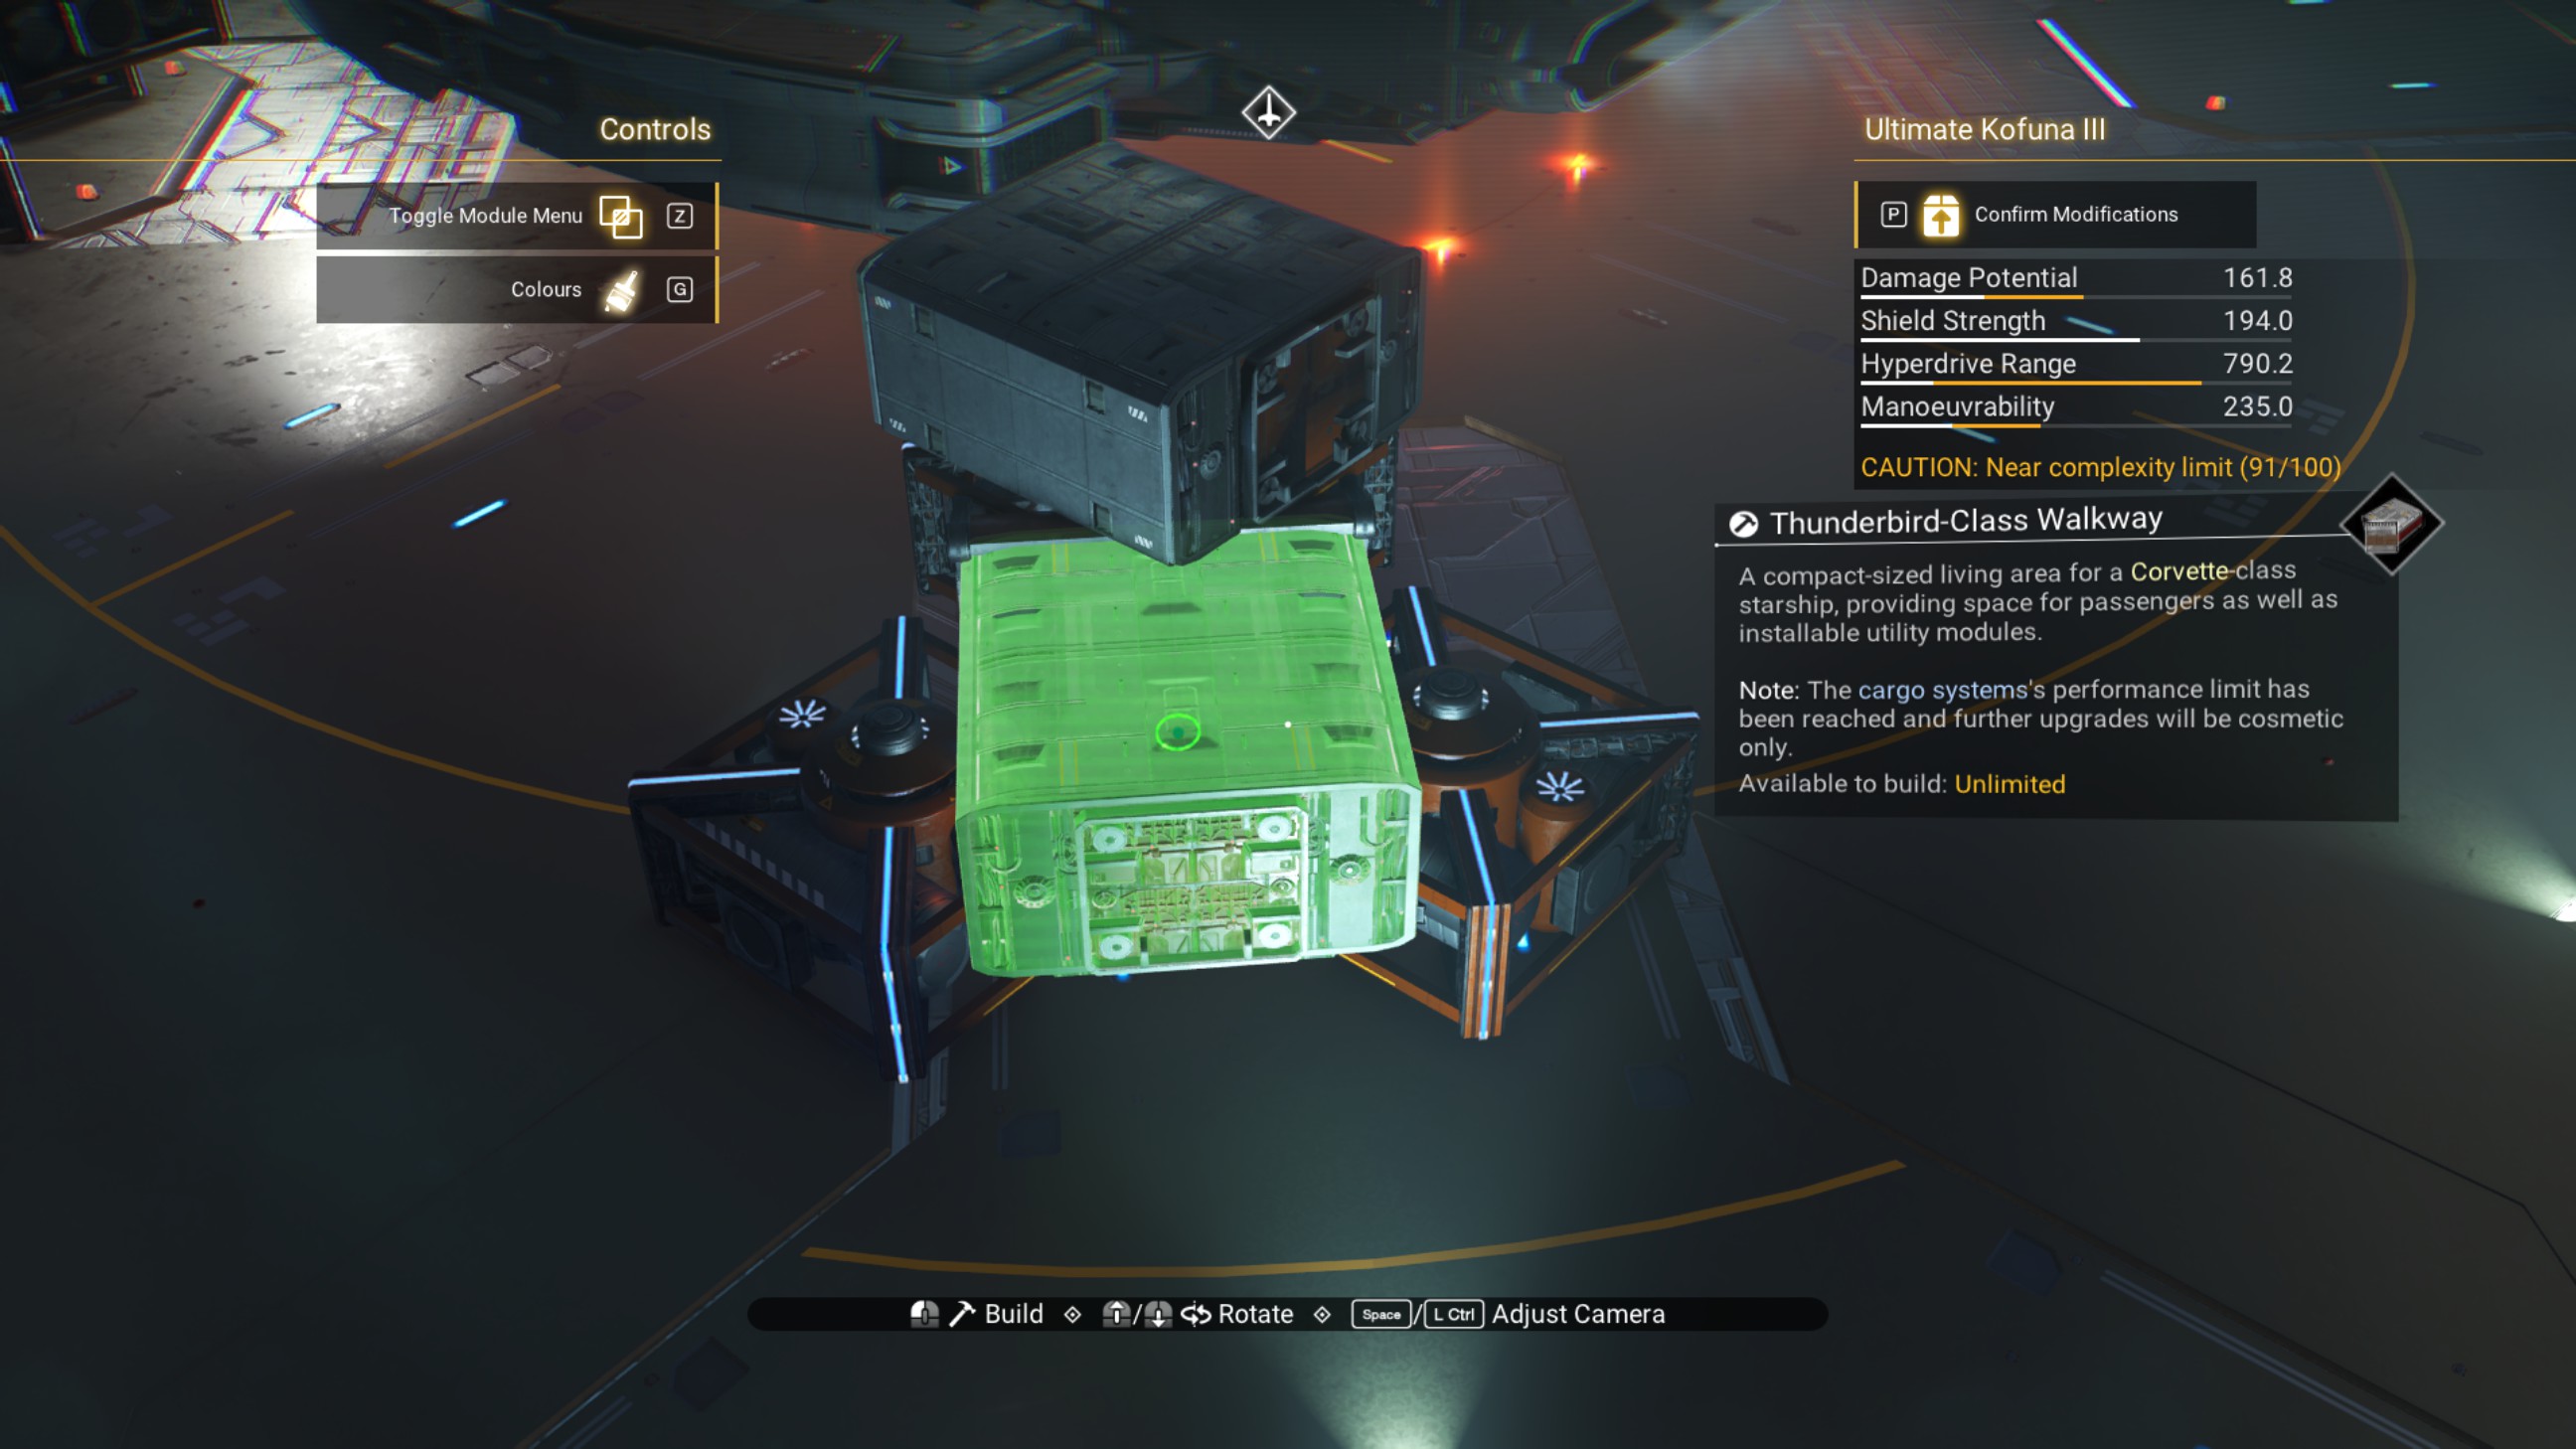
Starting off the port bow, add another walkway to the 45 degree walkway. Then, add another walkway on top of that one.
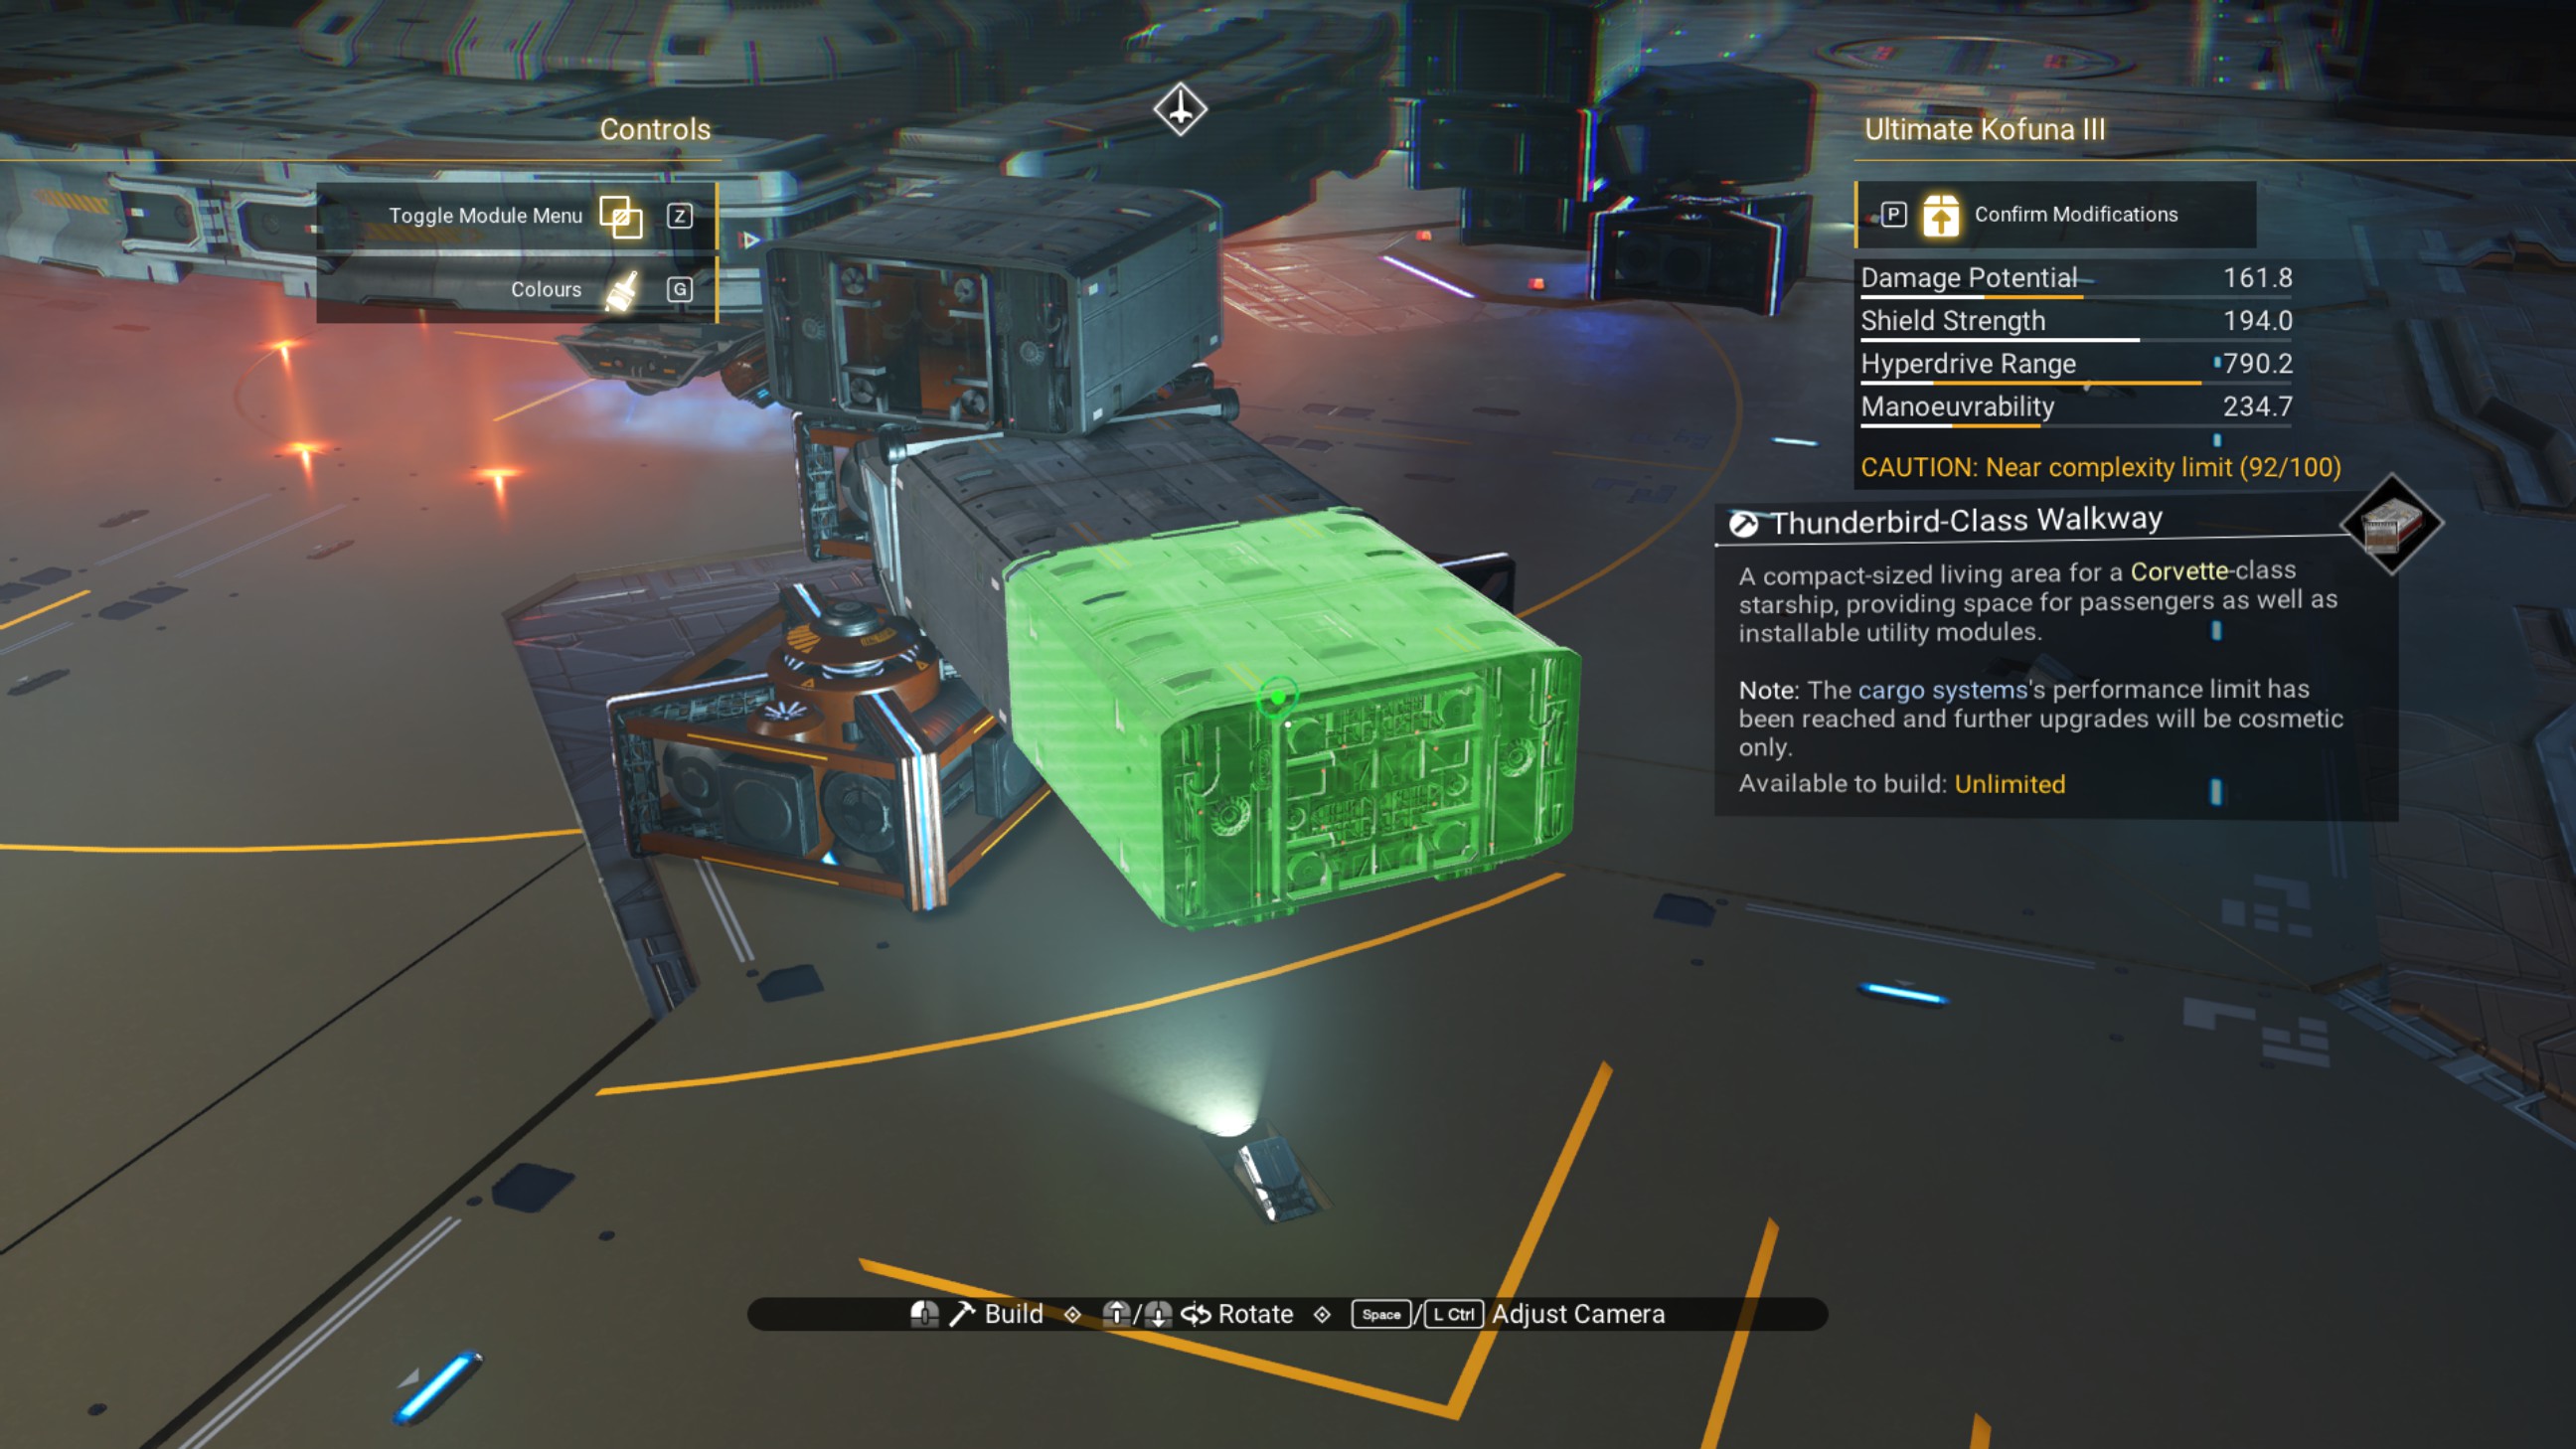
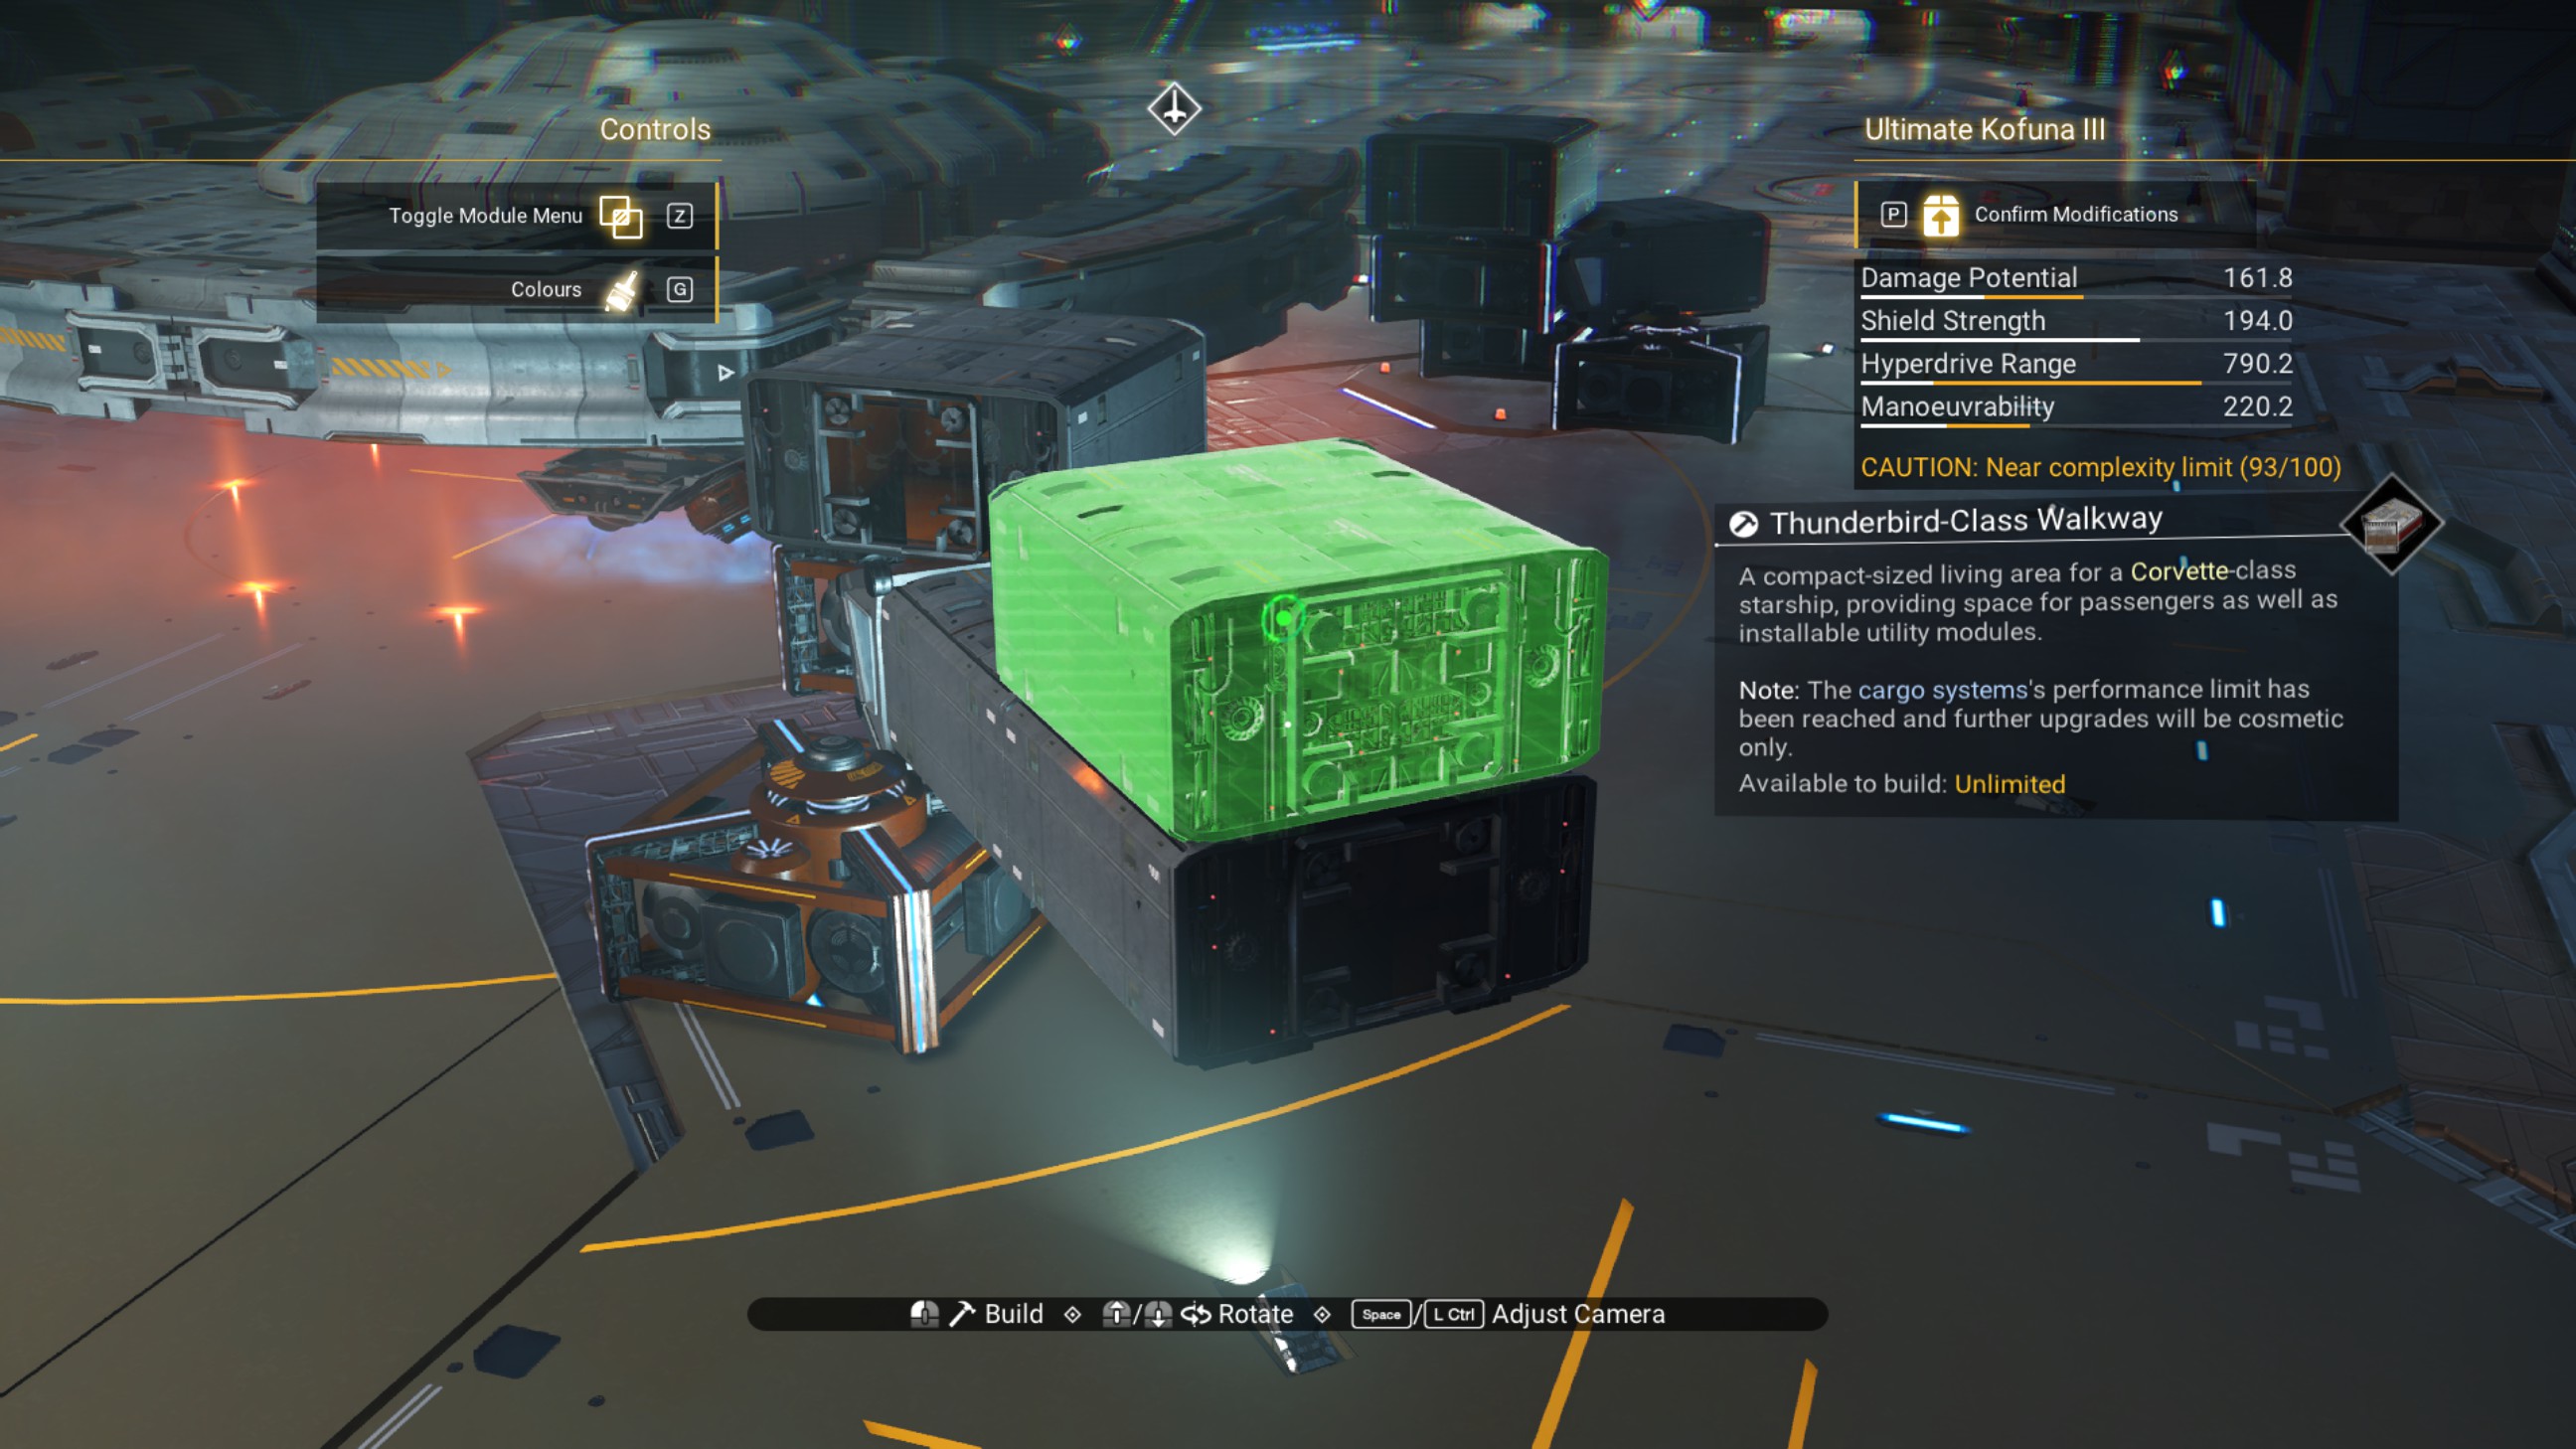
Next, add two more walkways, one on each side of the lower walkway we just placed.
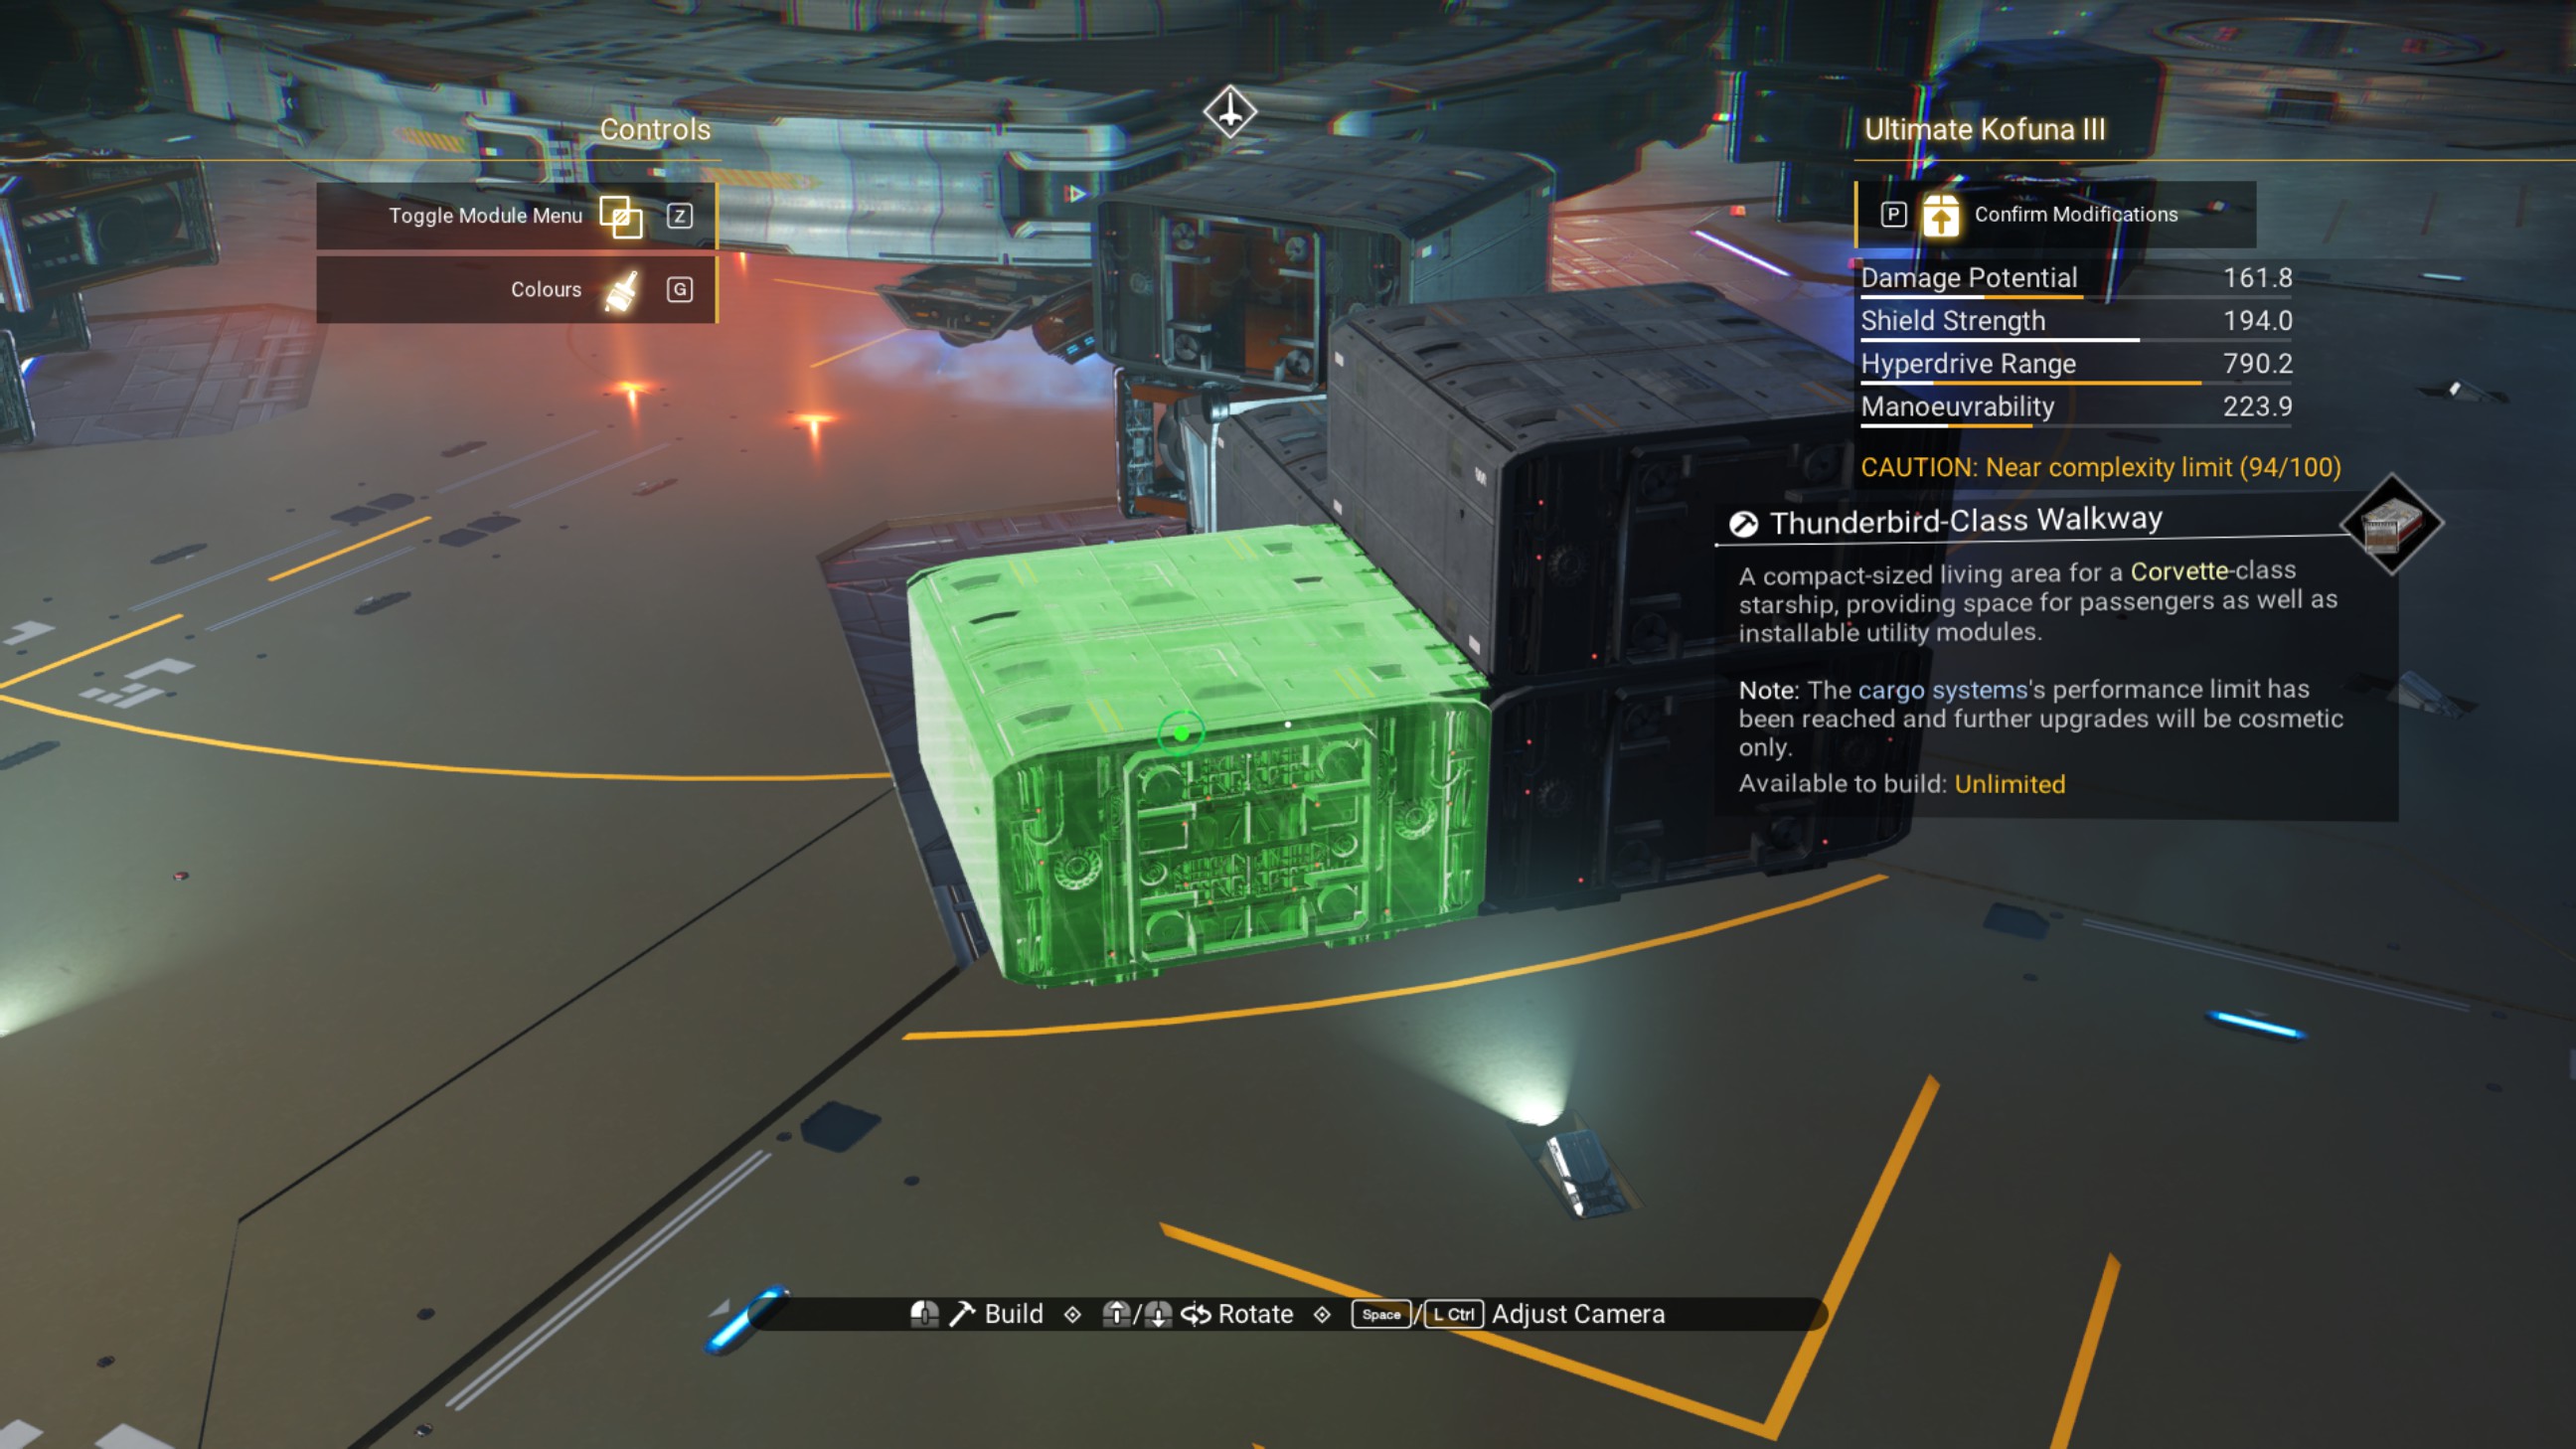
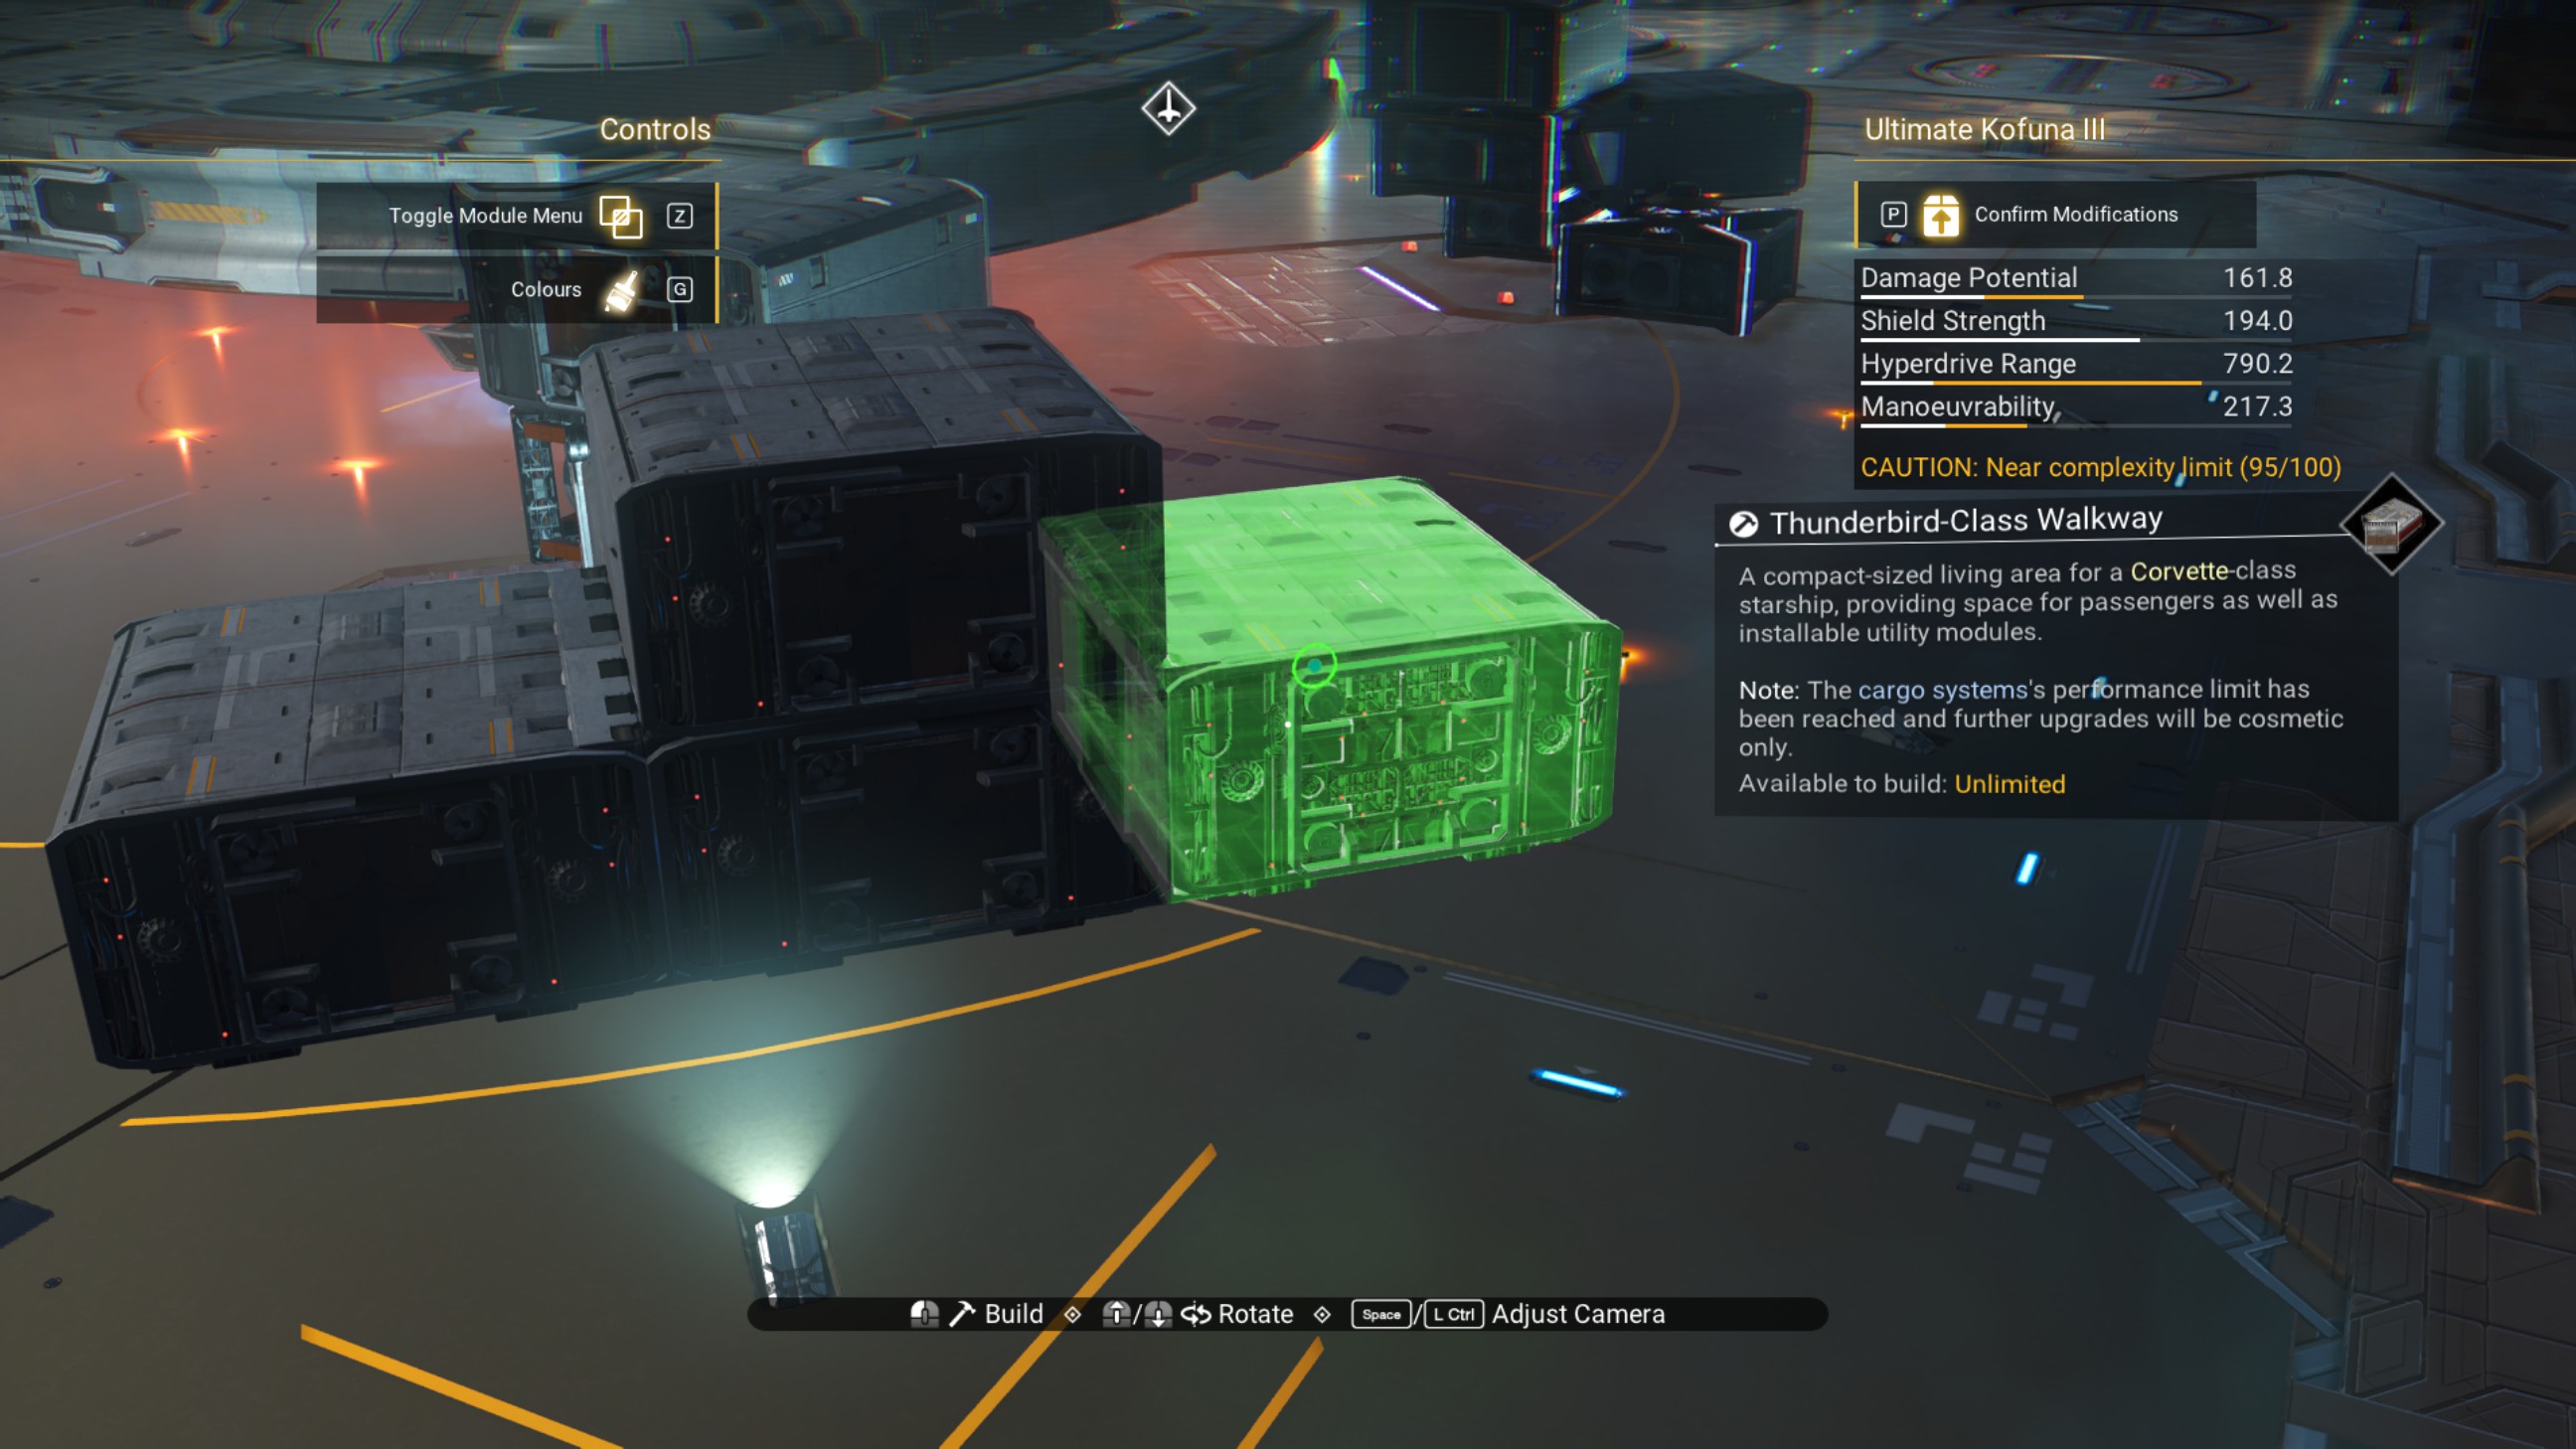
Place a landing bay on that same lower walkway. This structure will allow us to create a glitch so we can stack a normal walkway (at 45 degrees) with one rotated 180 degrees (don't worry about the math). We might have an extra walkway or two to make this work, but it's fine.
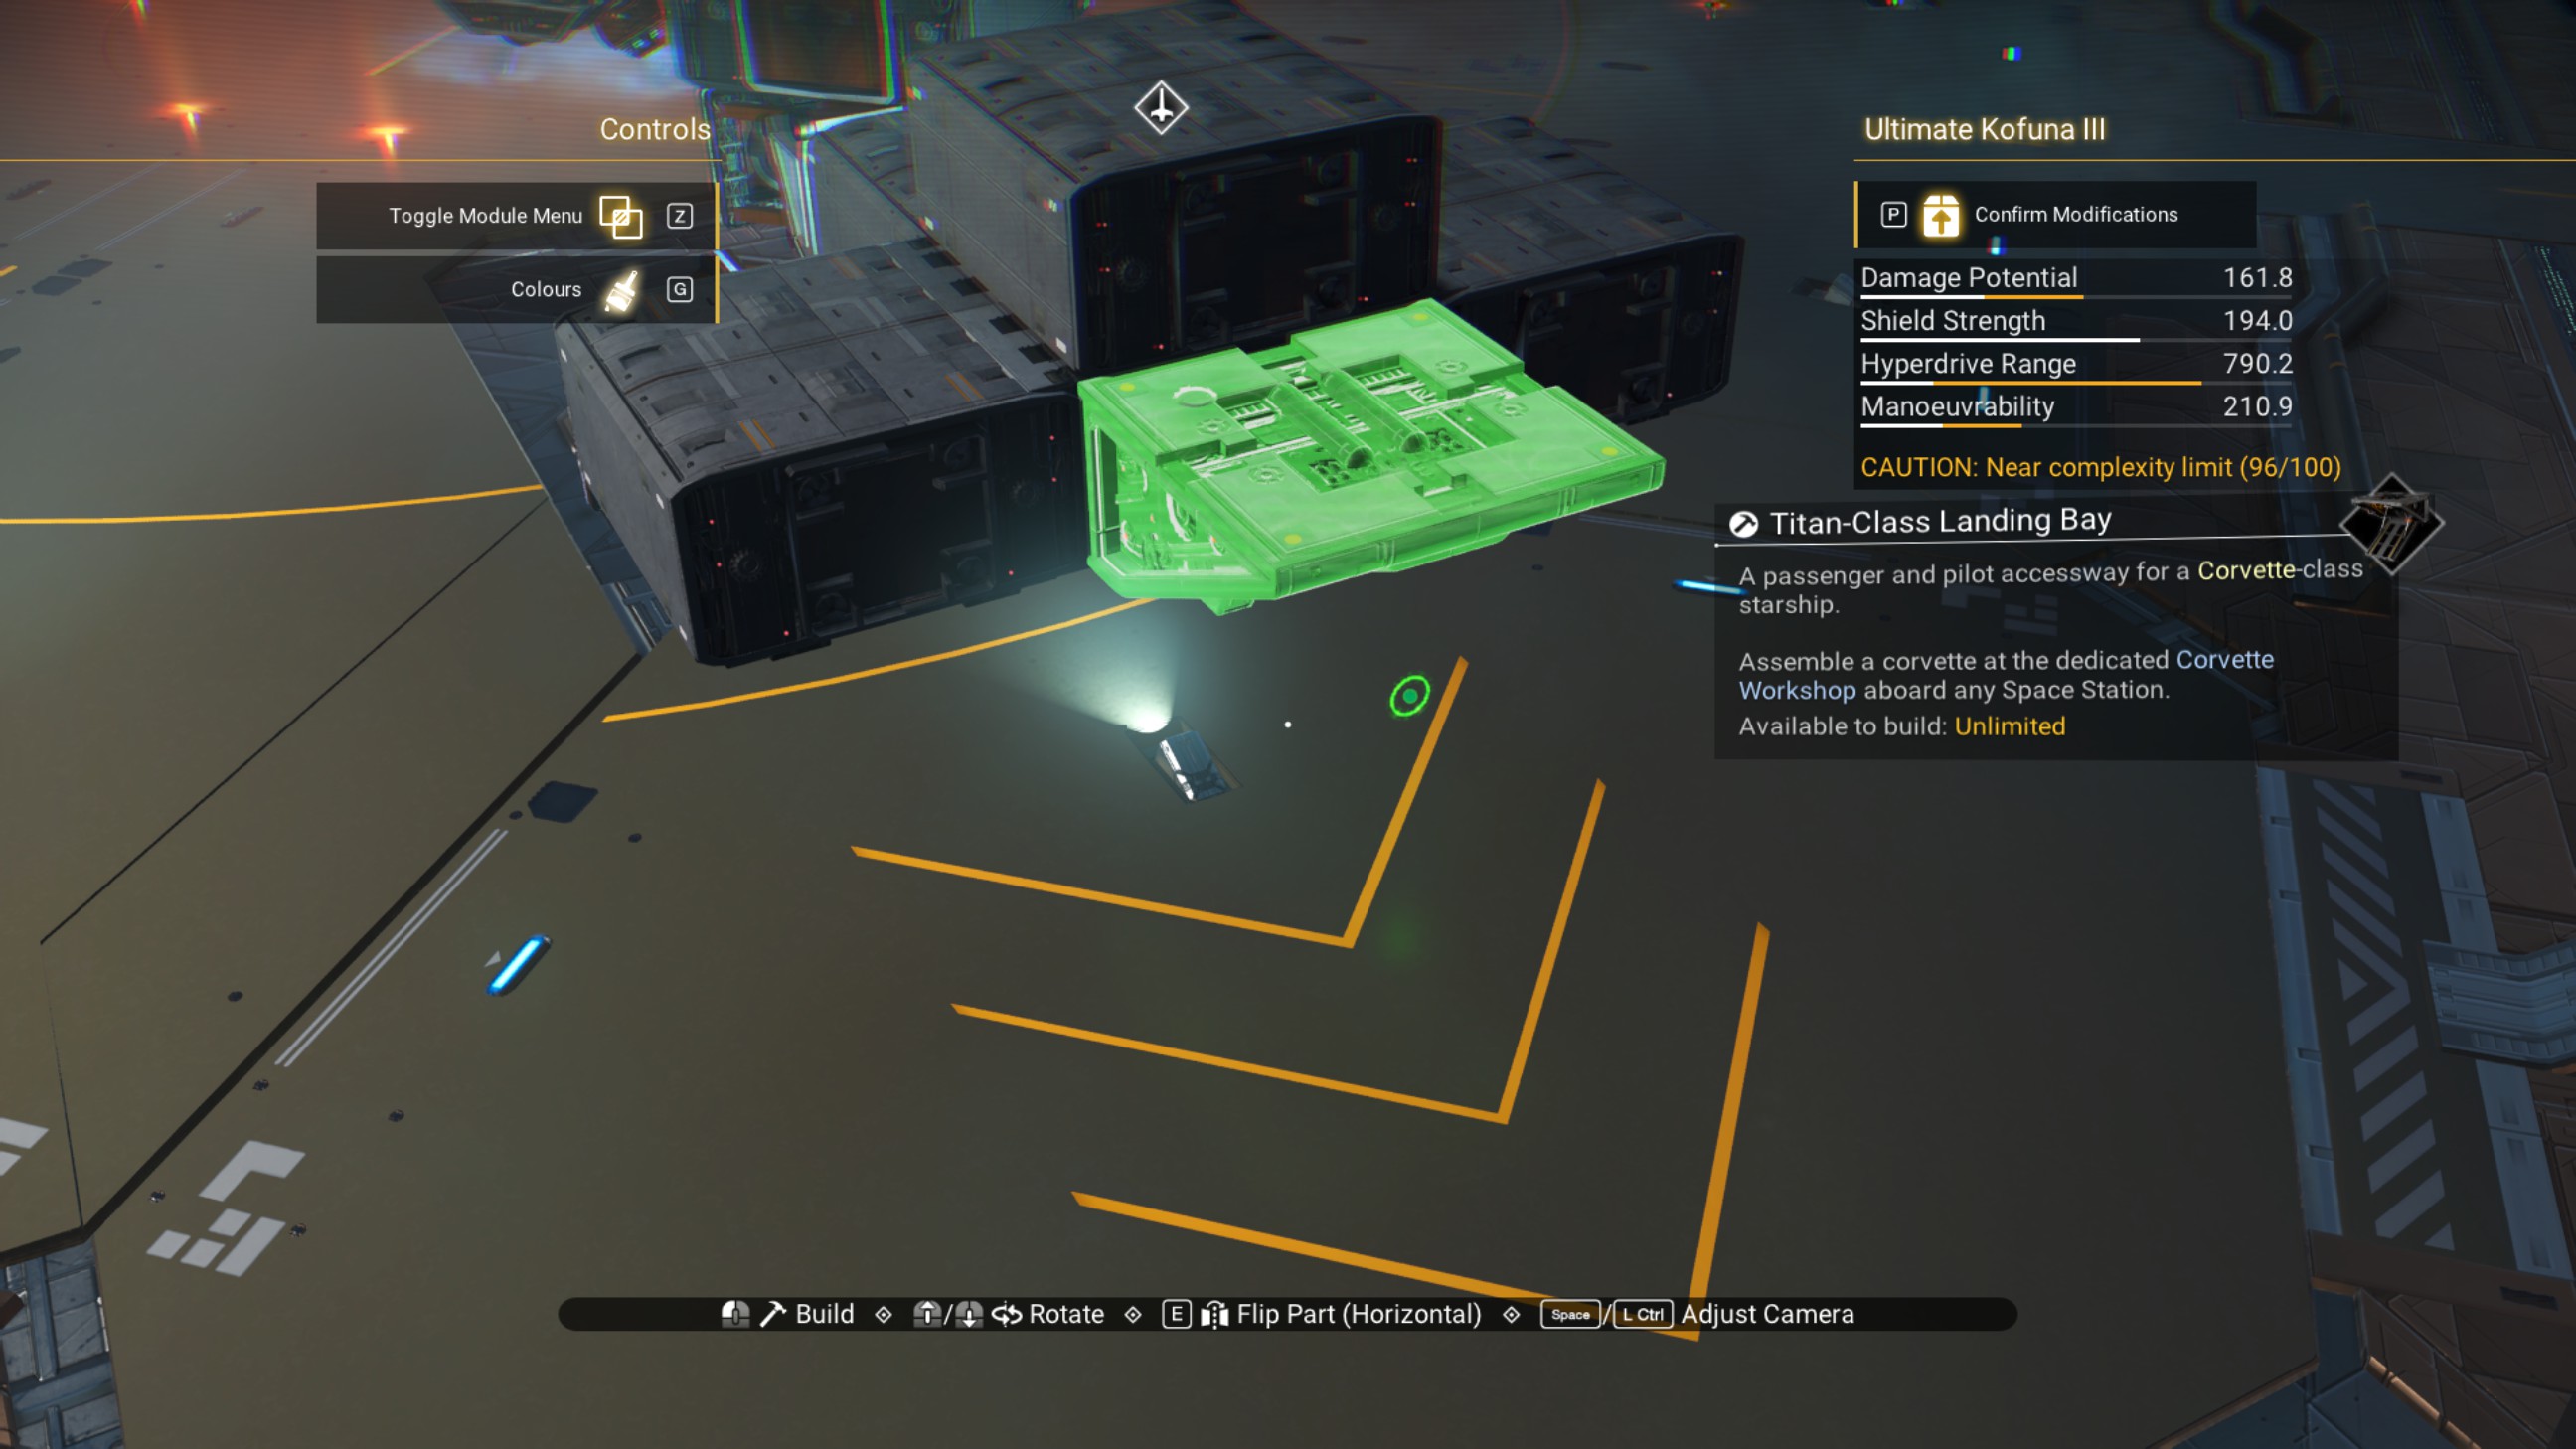
Let's do some quick cleanup. Delete all the zenith reactors scattered around these 45 degree structures. We don't need them anymore.
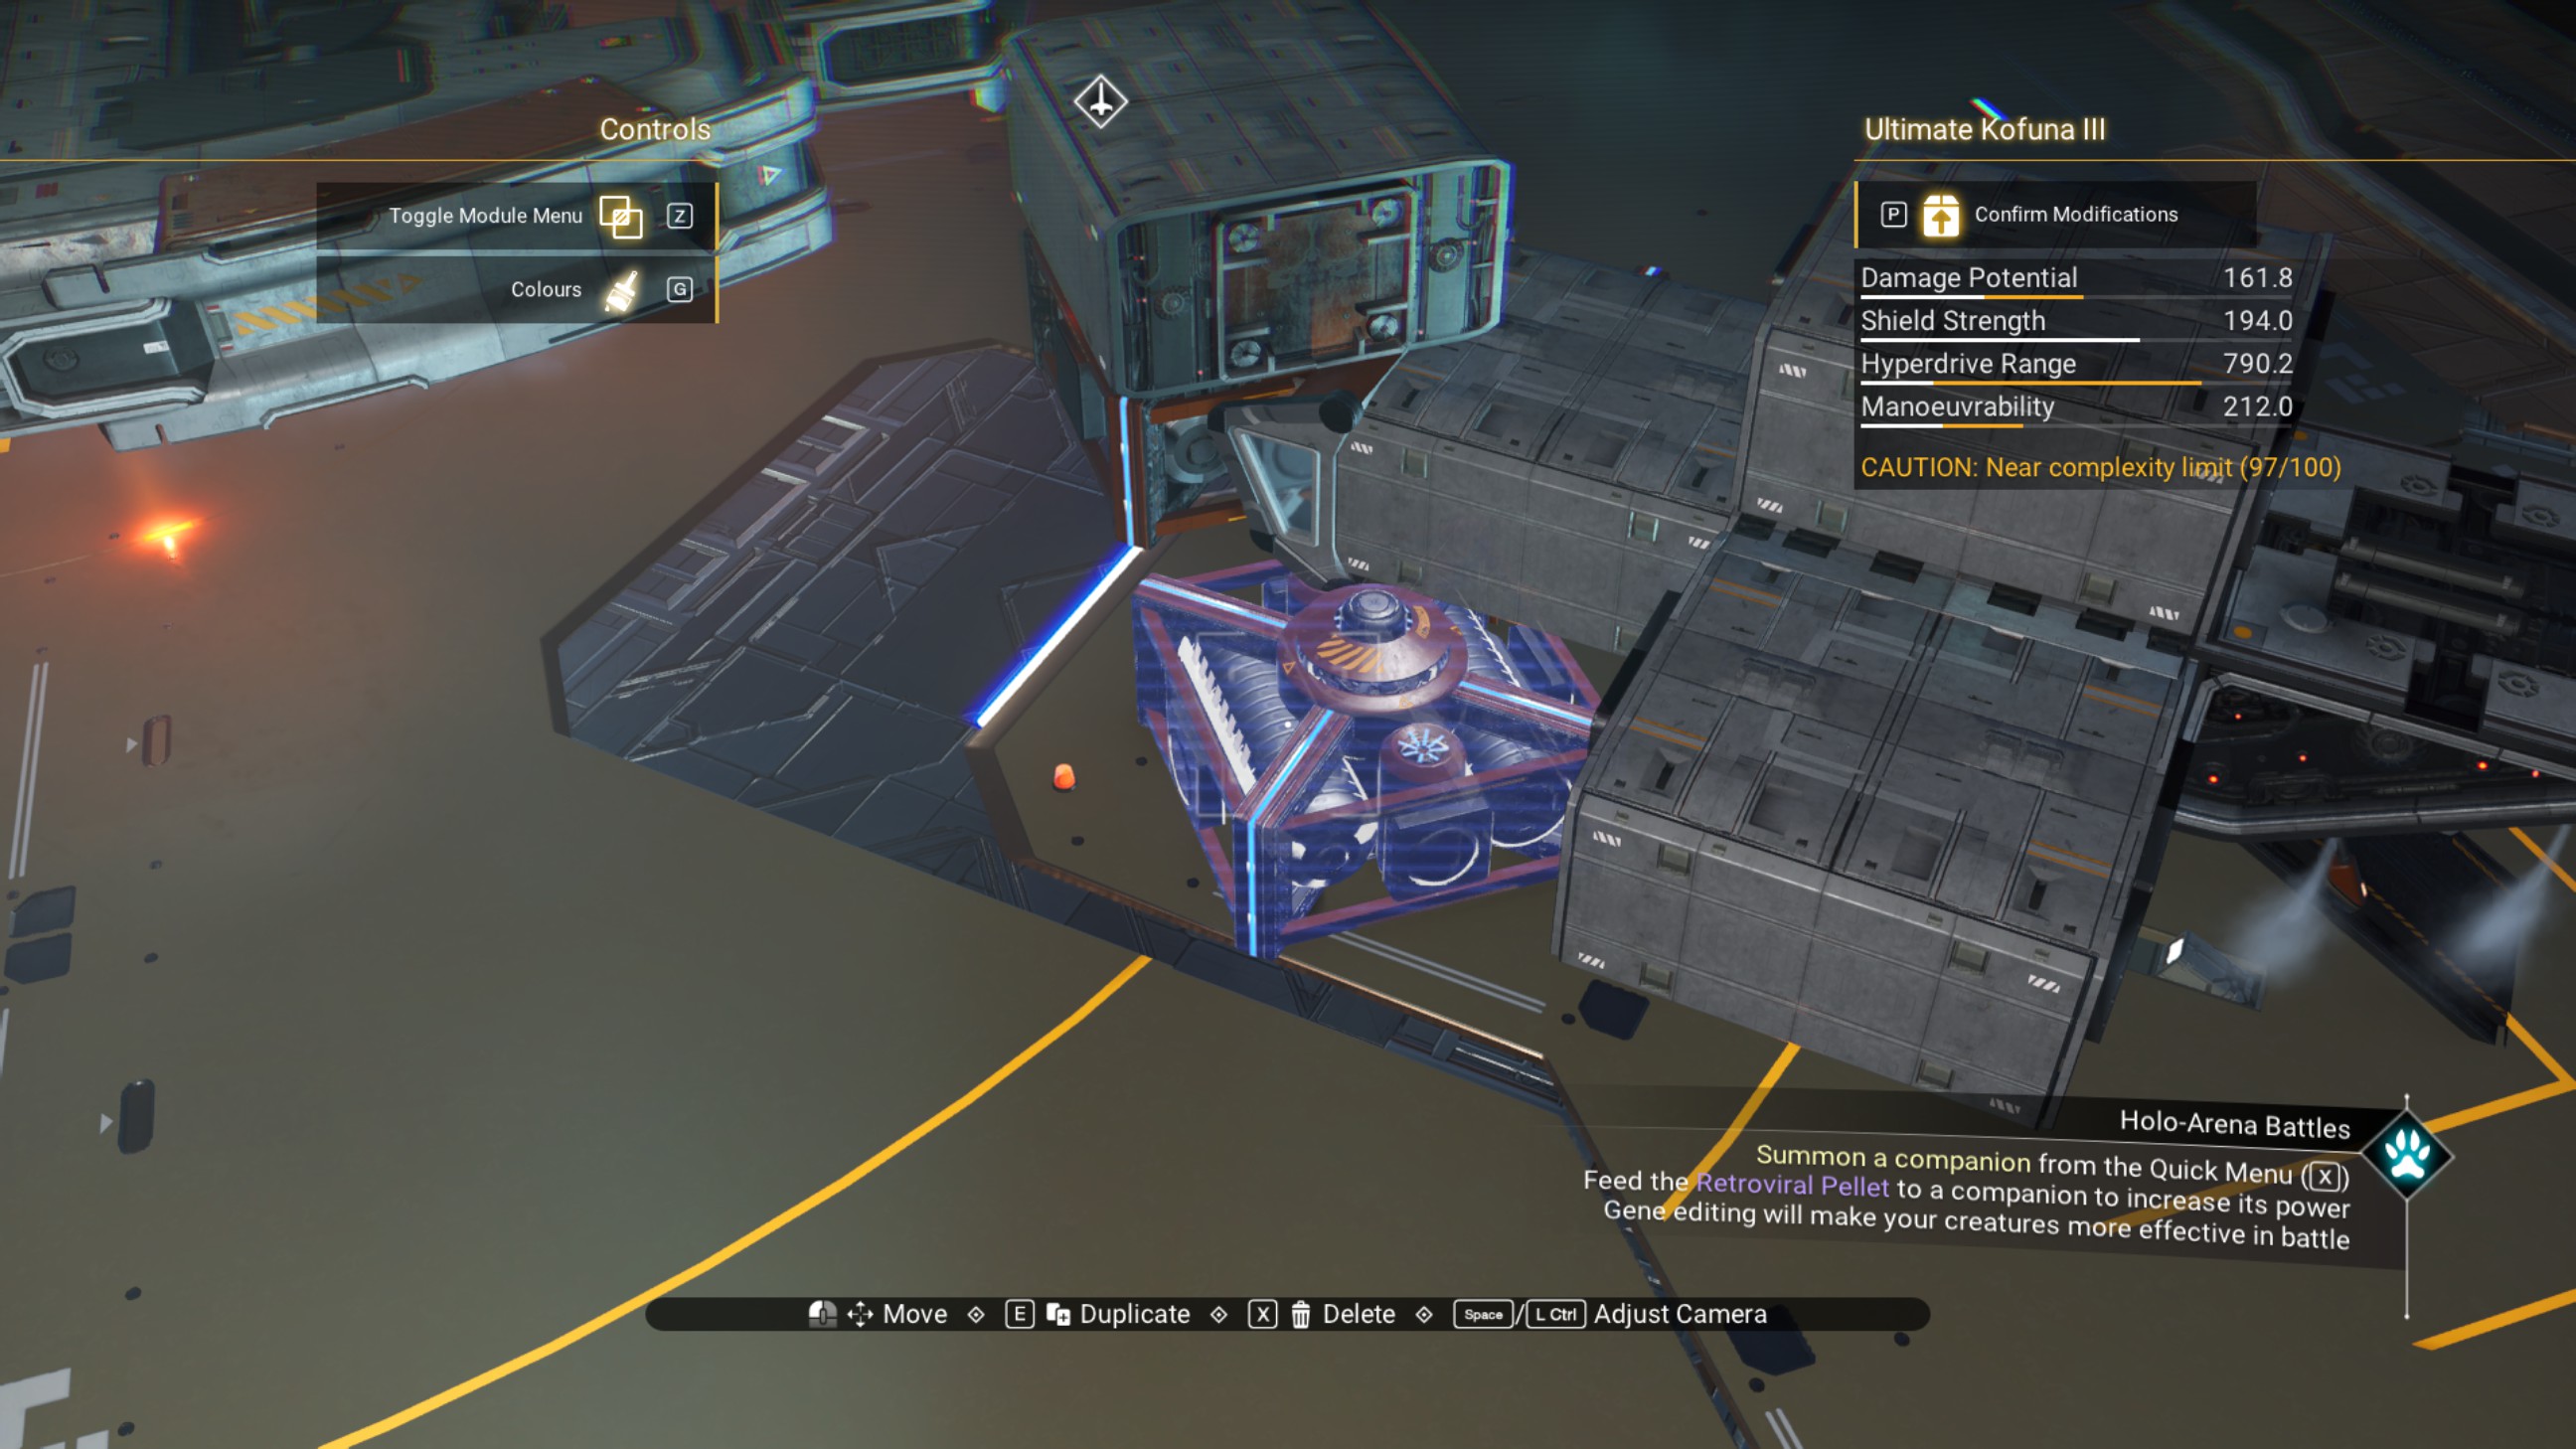
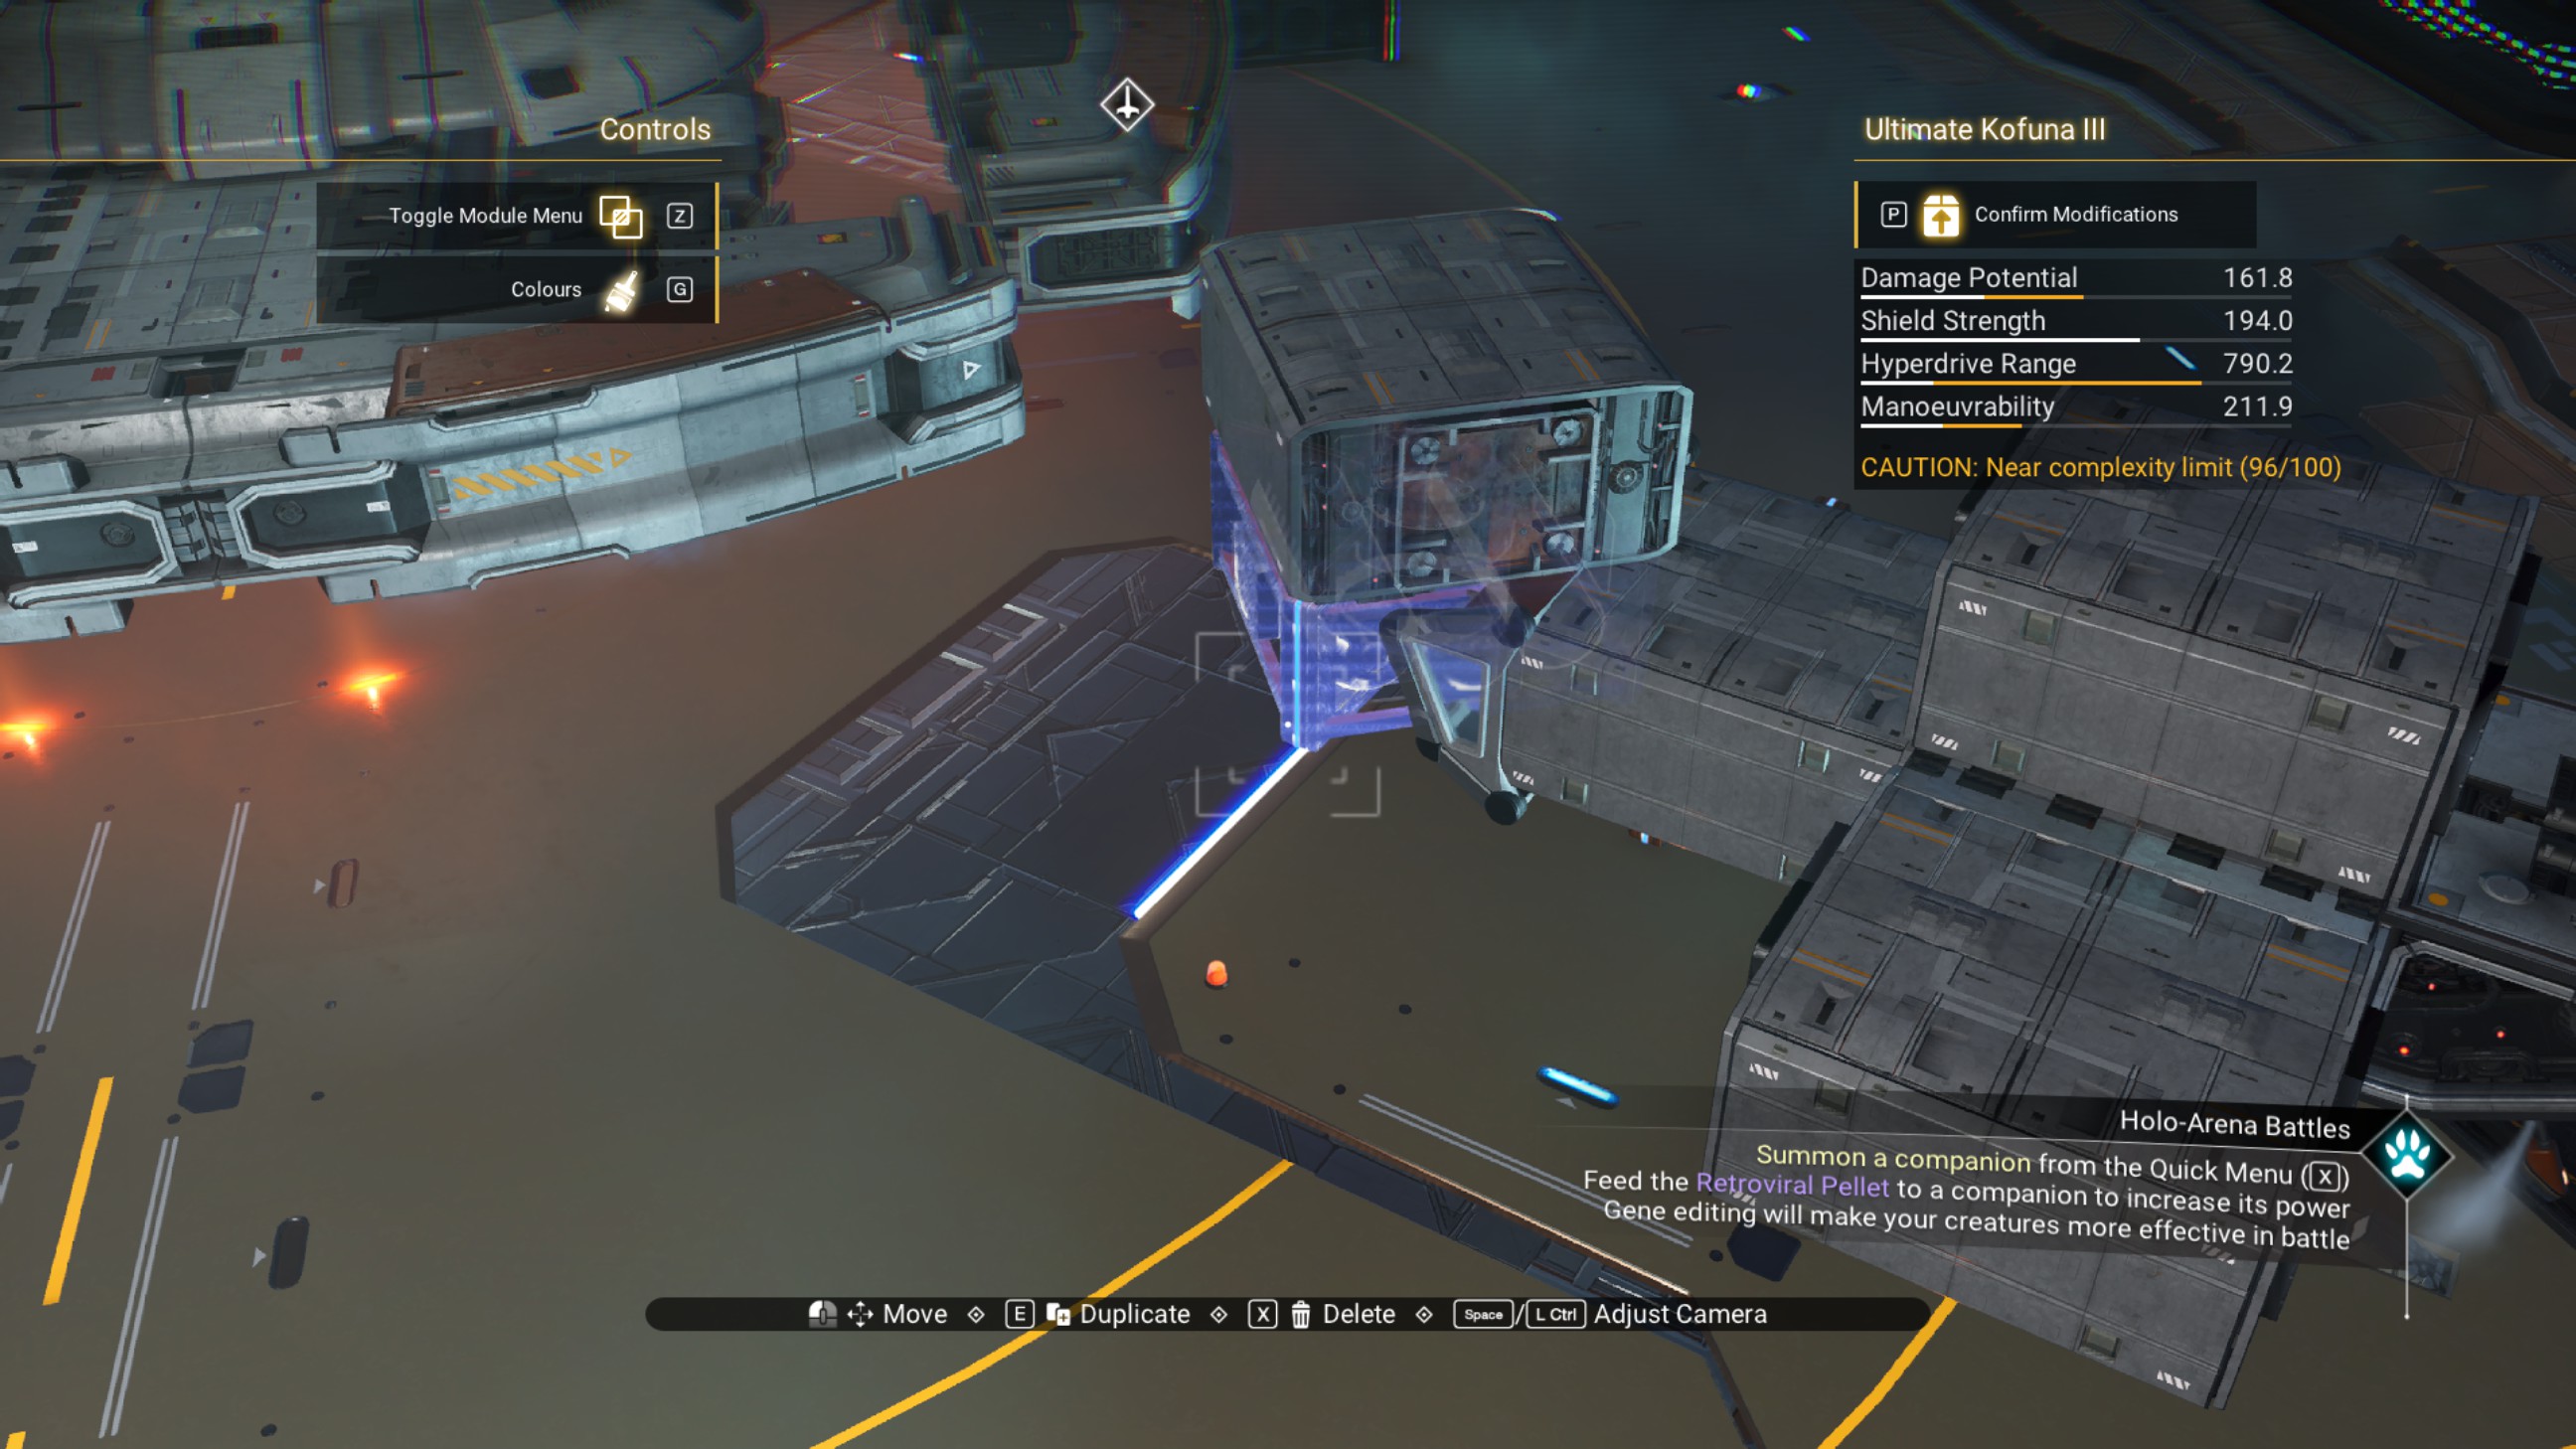
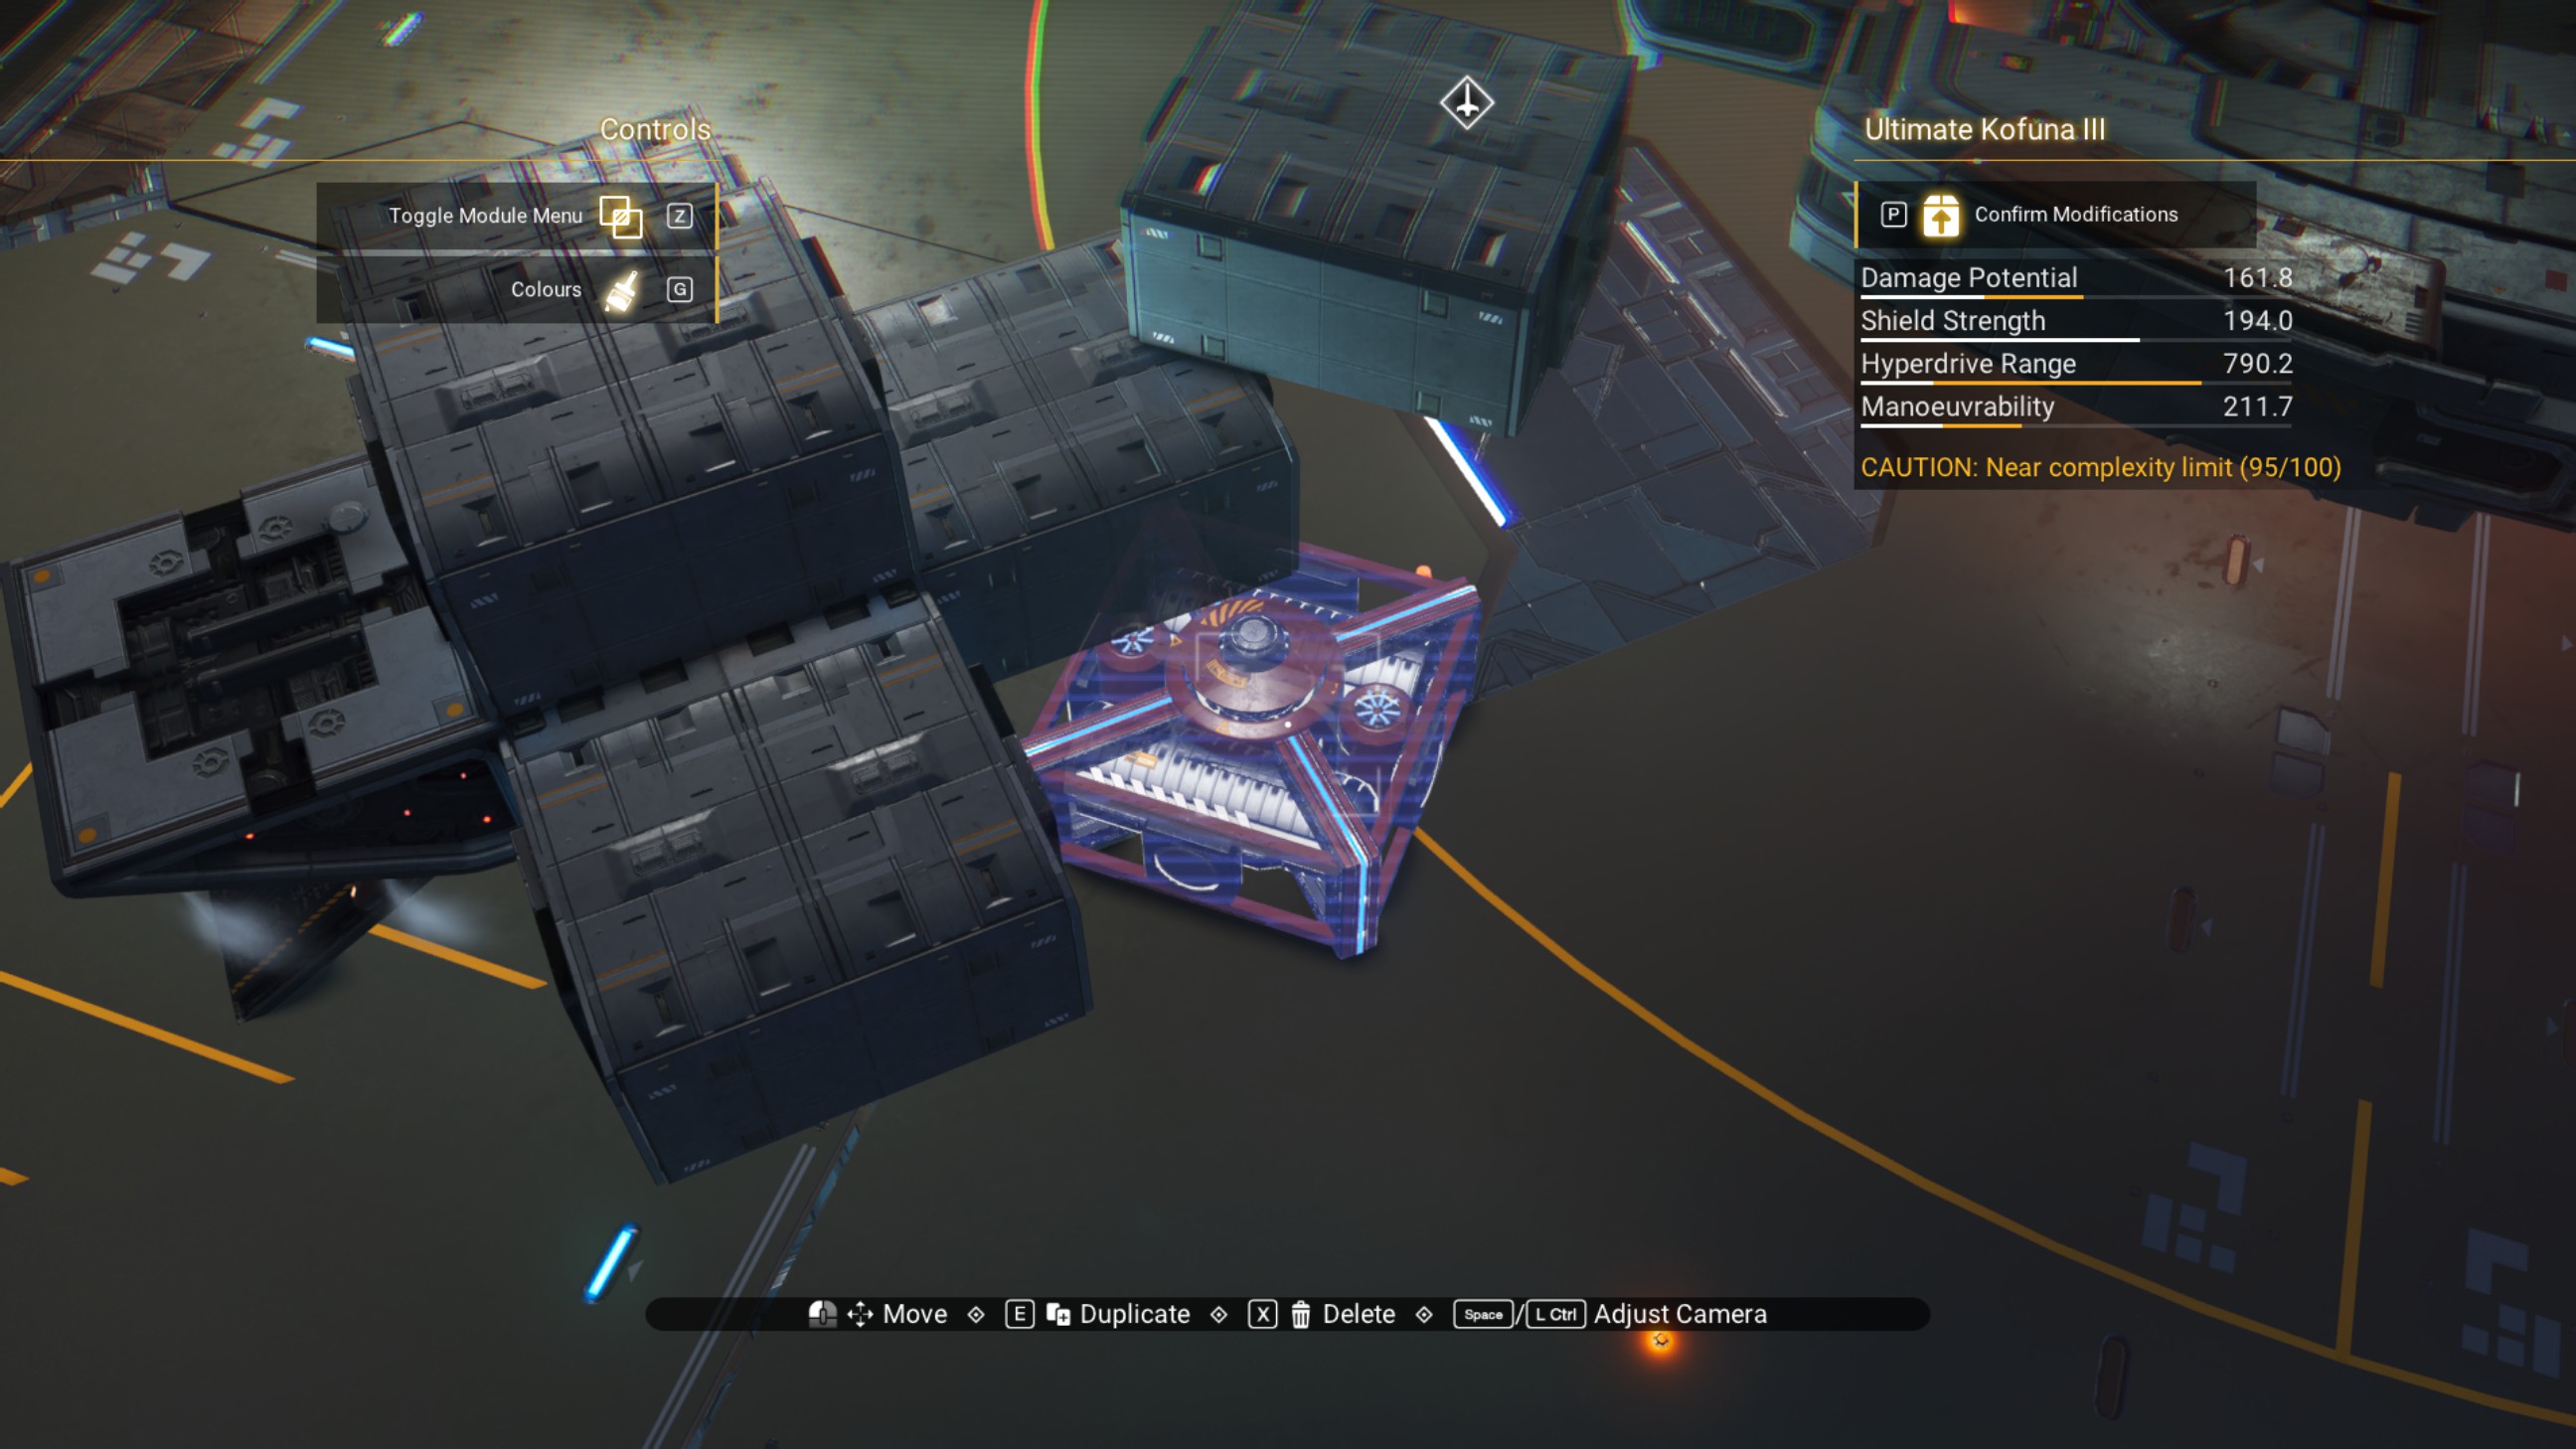
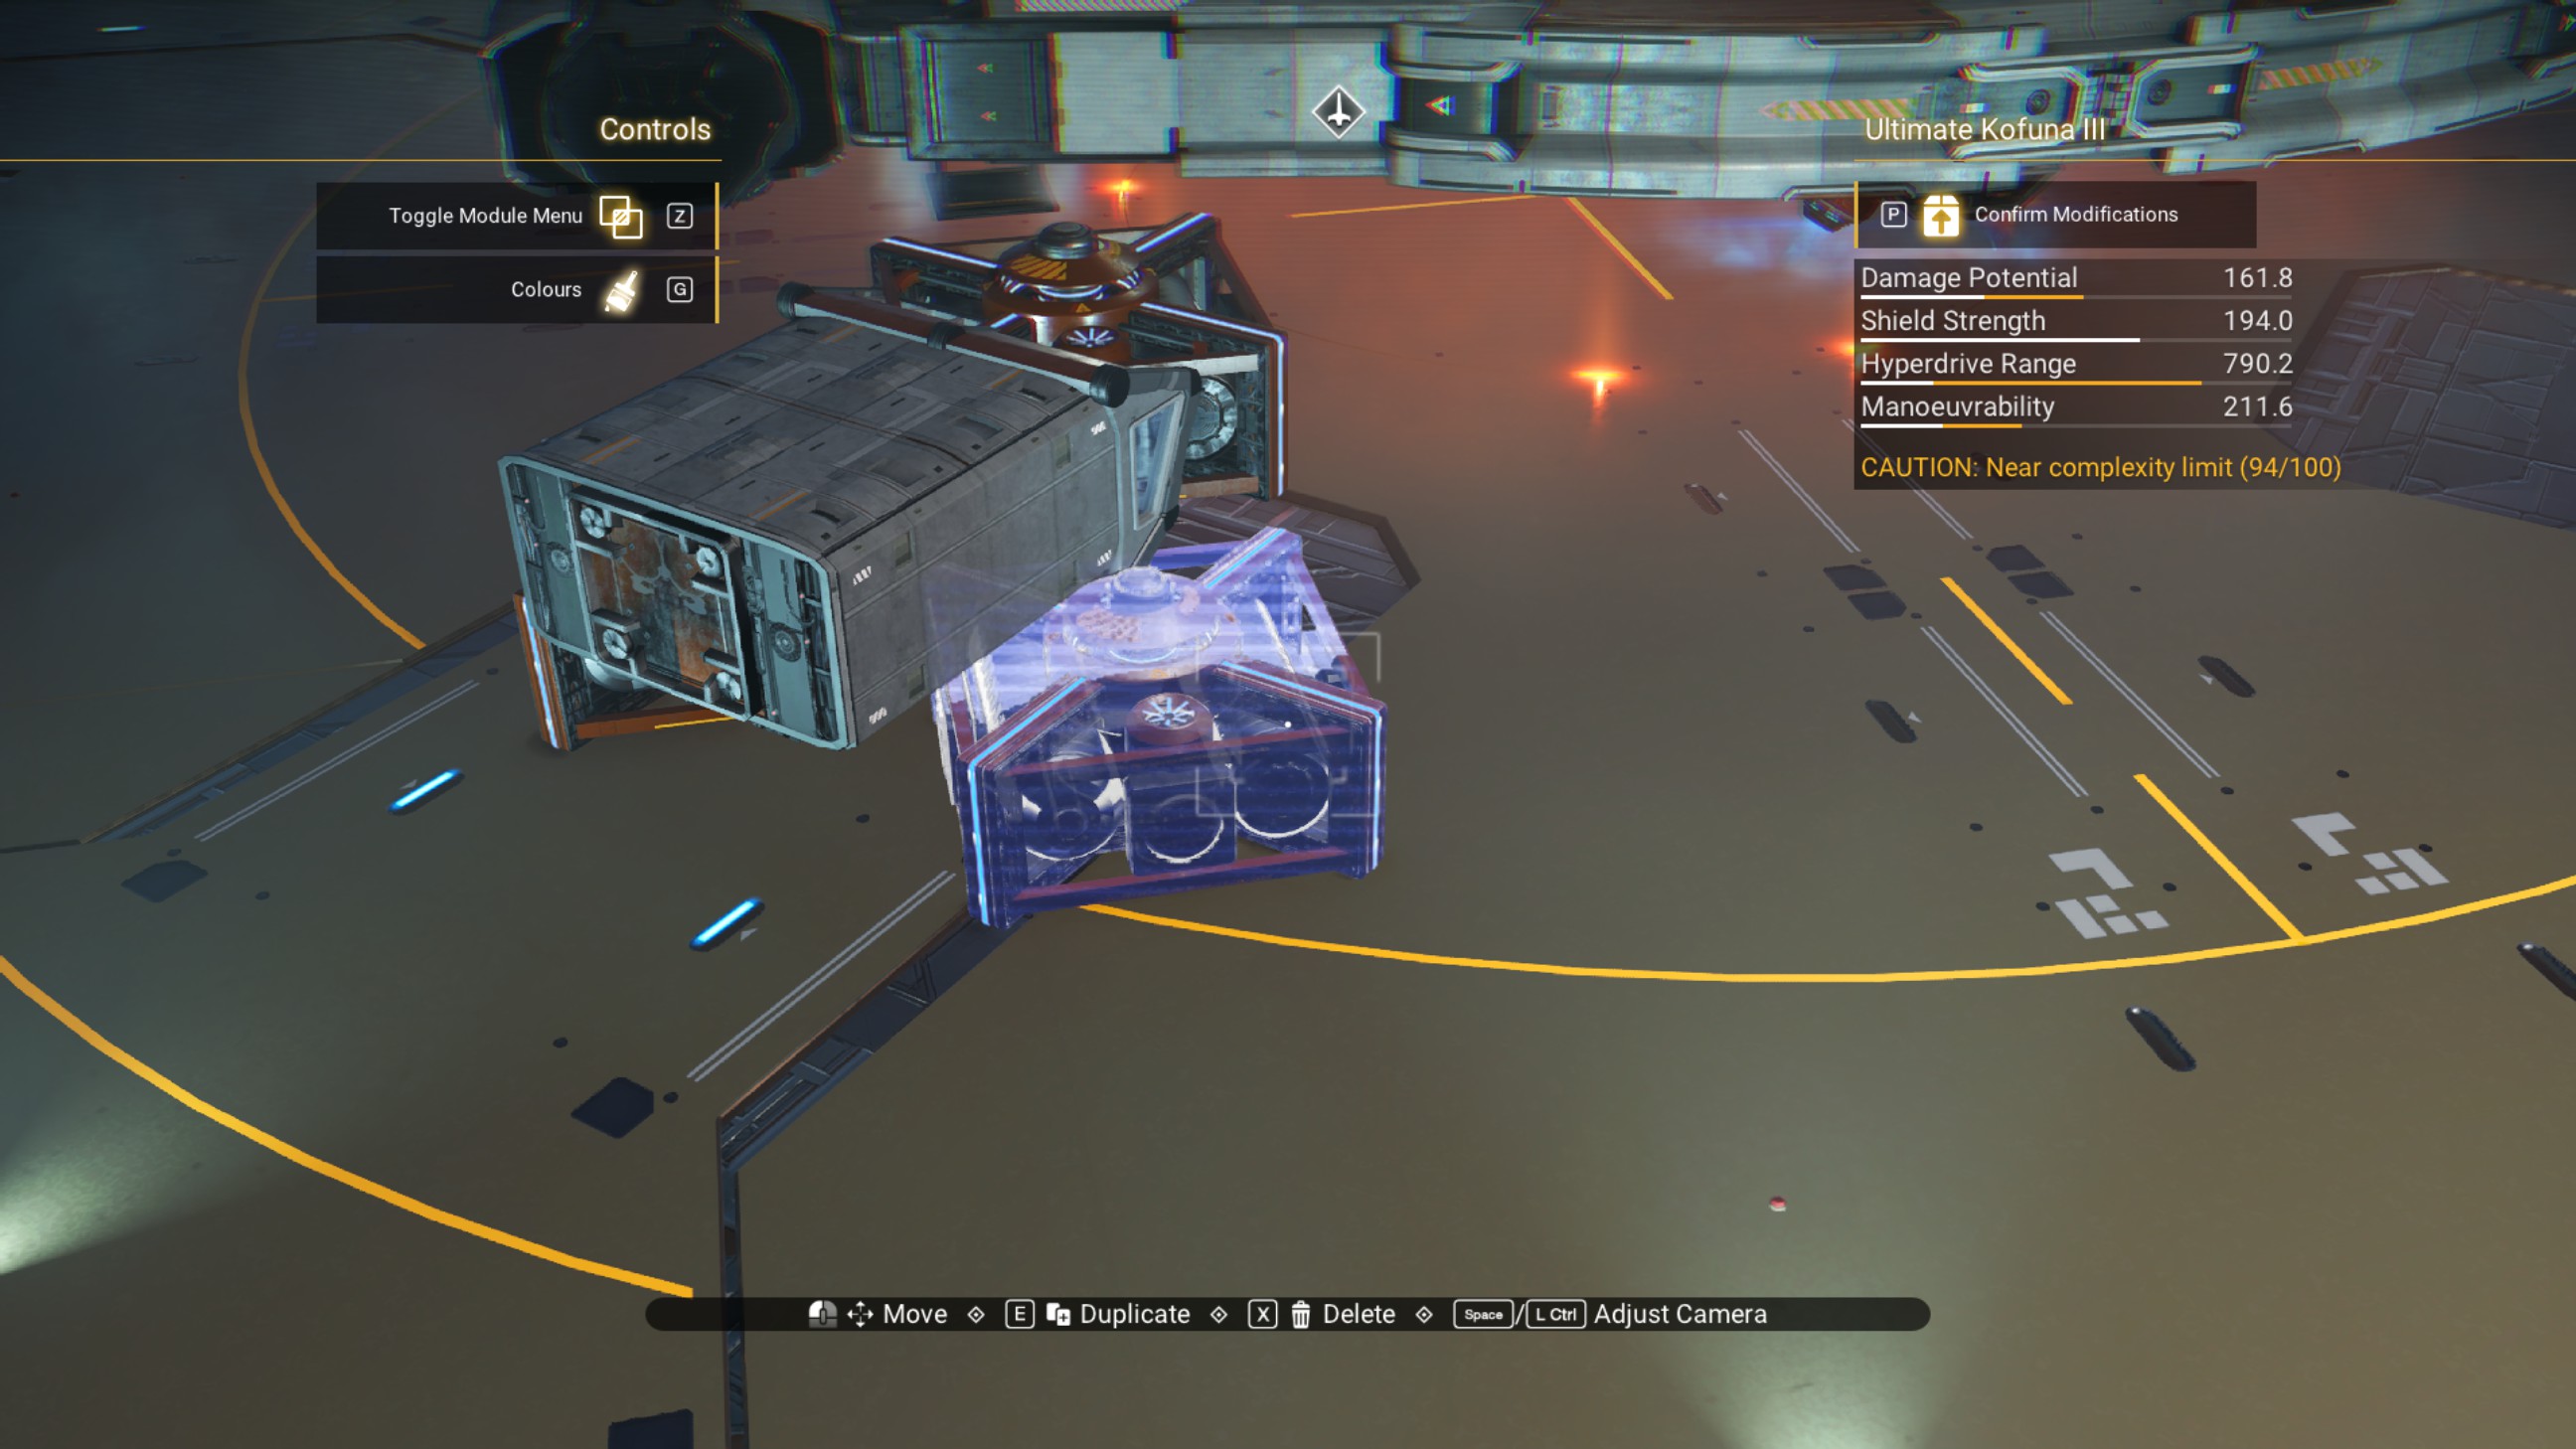
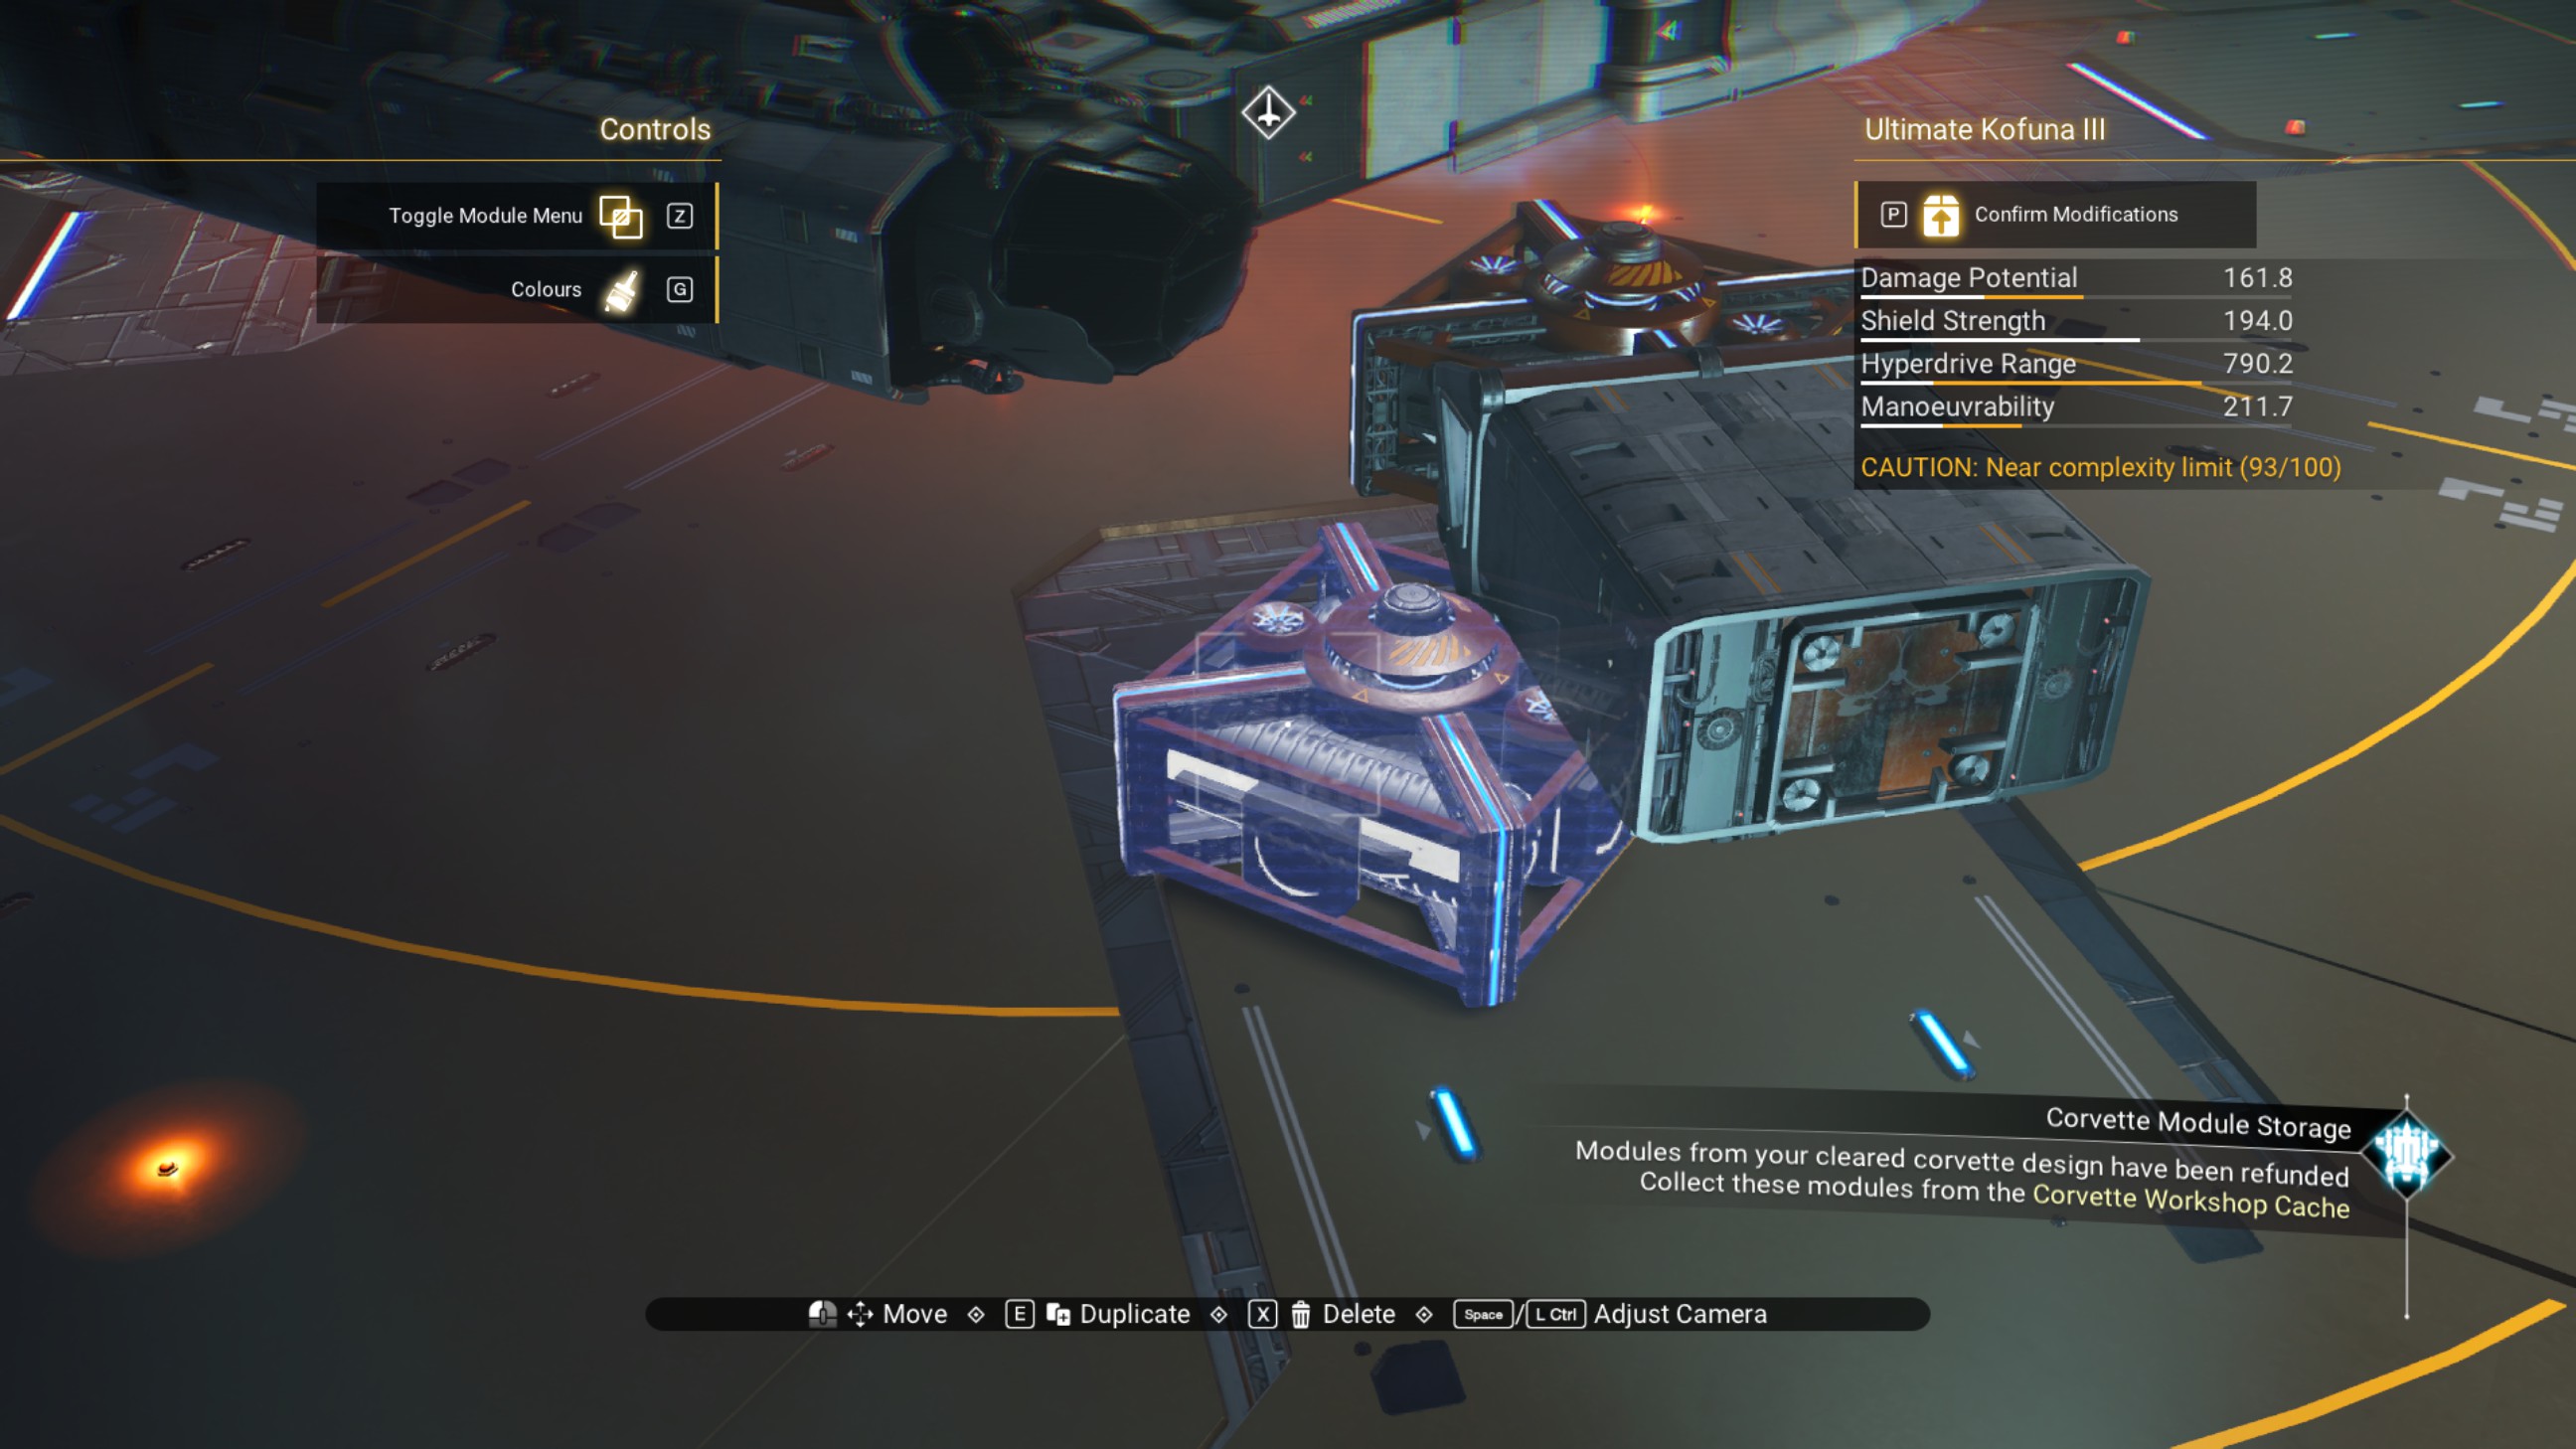
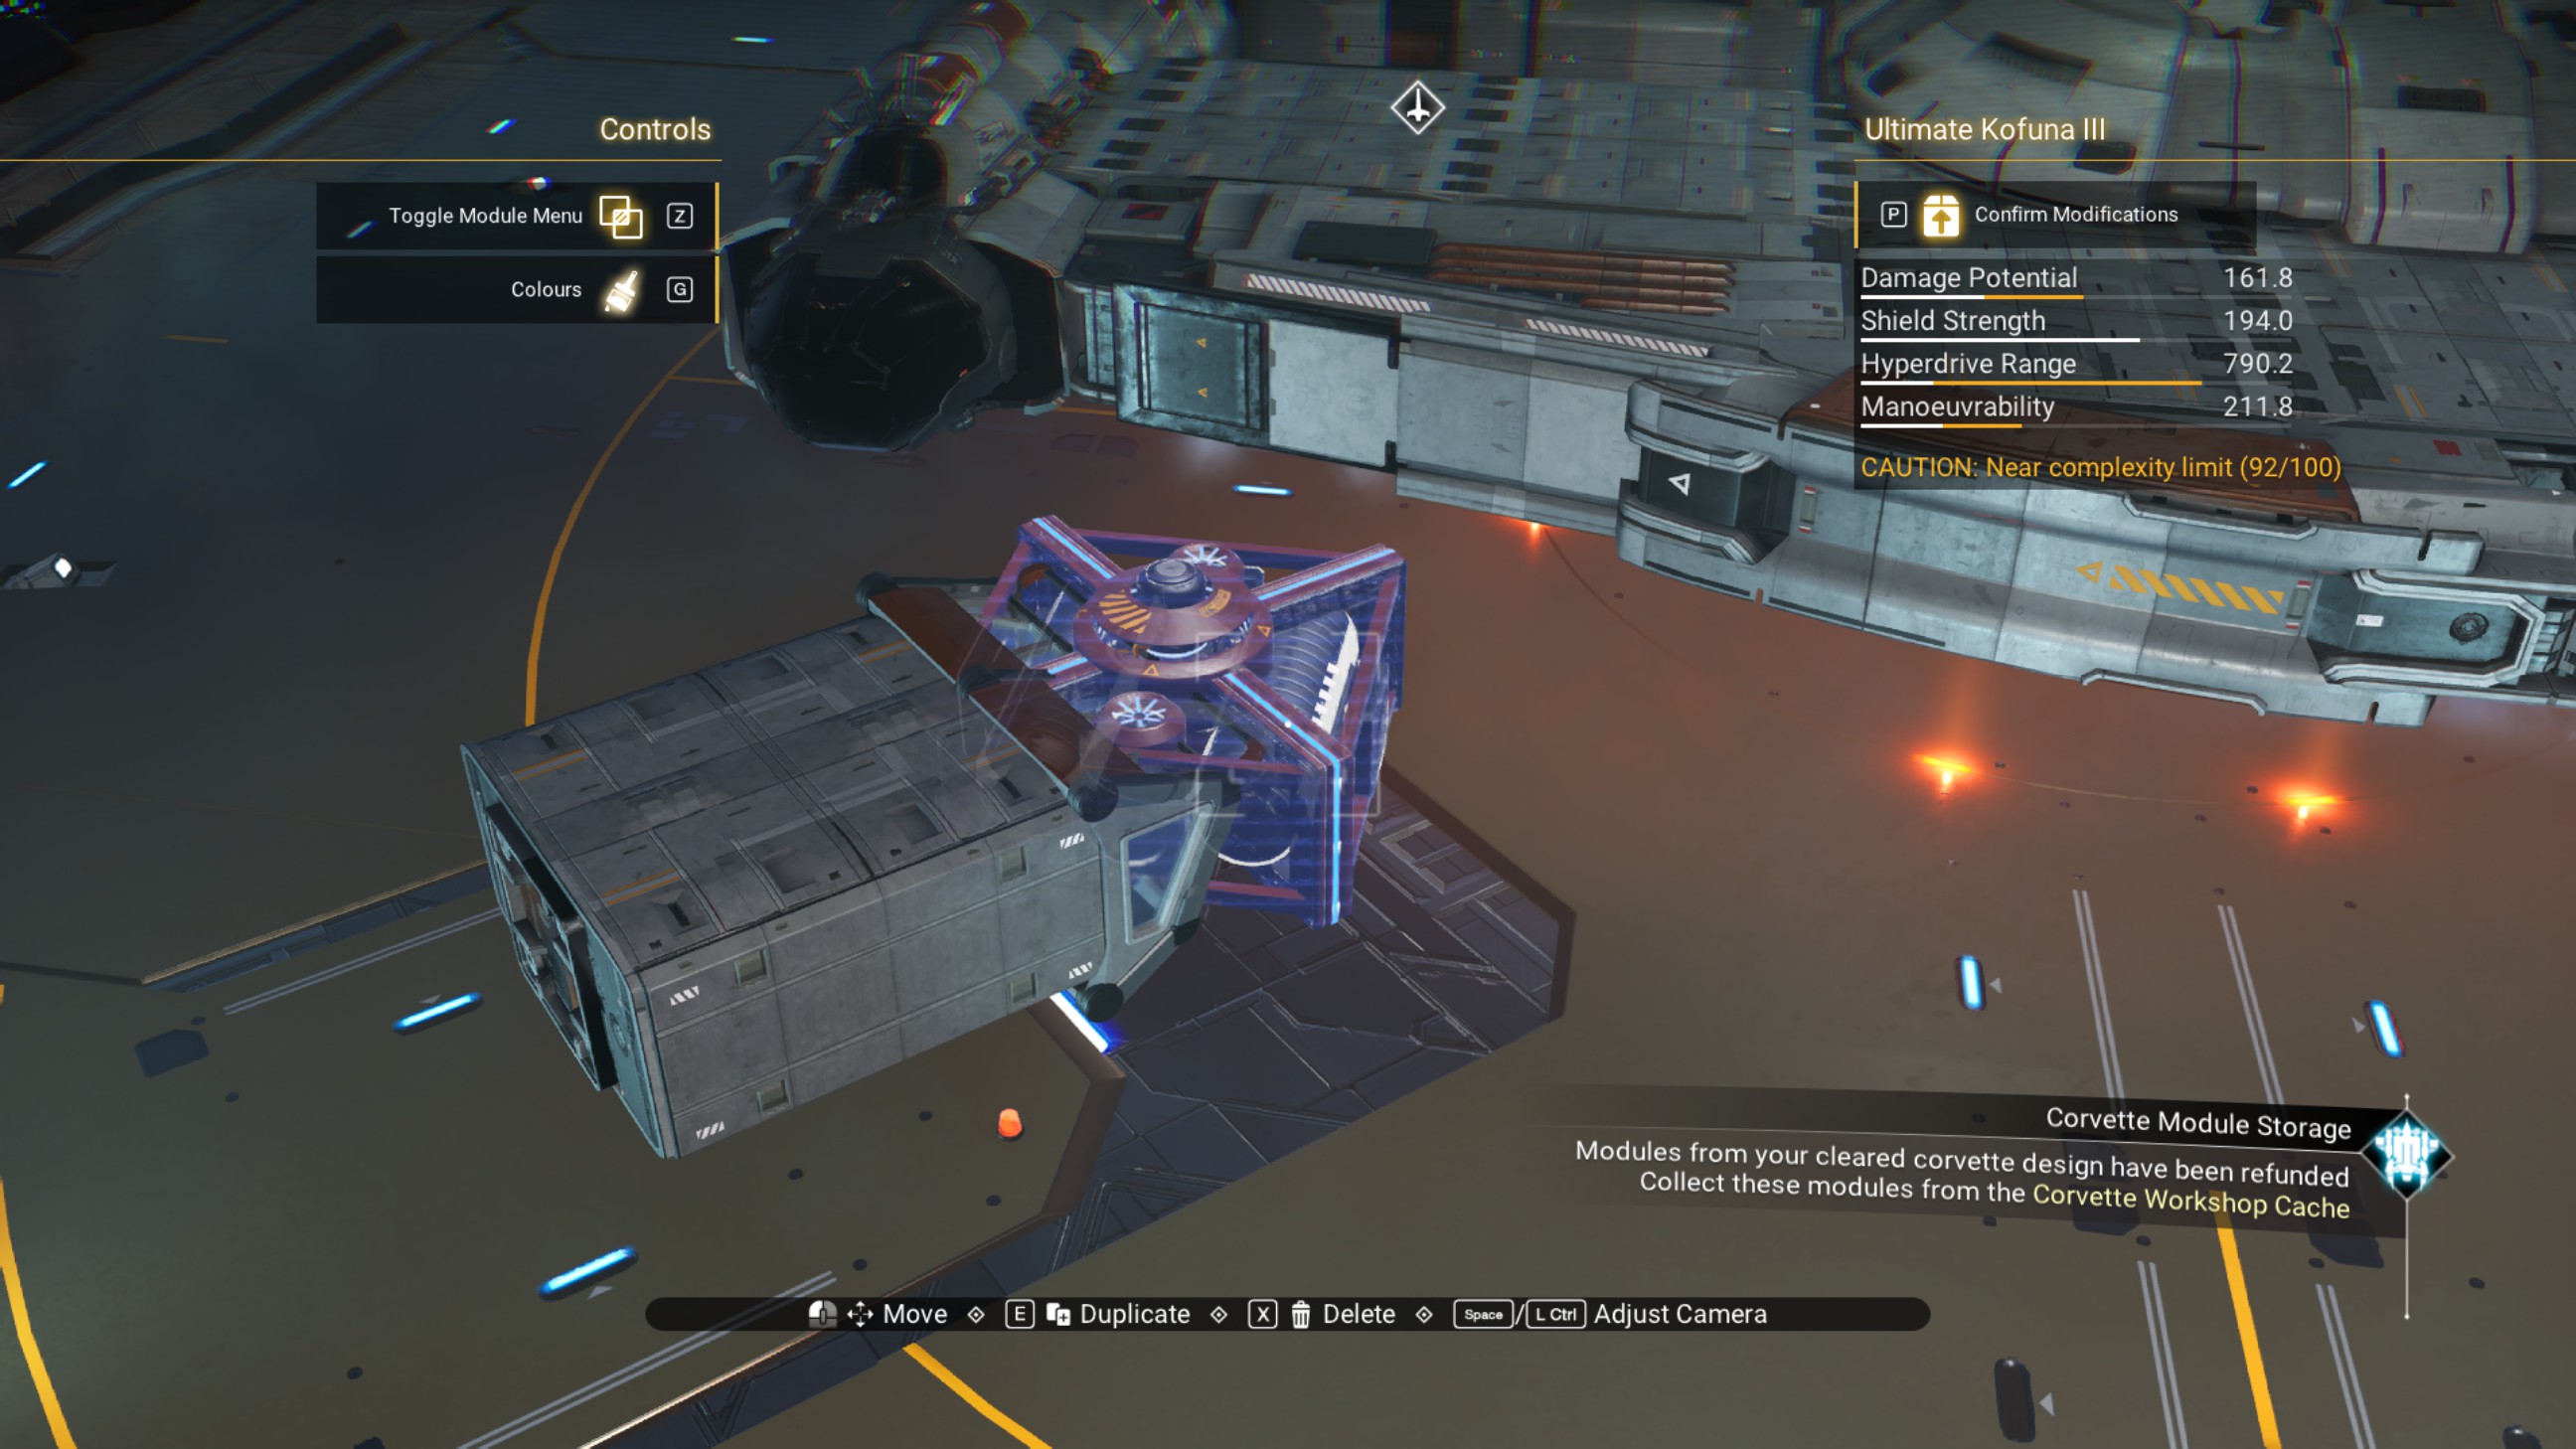
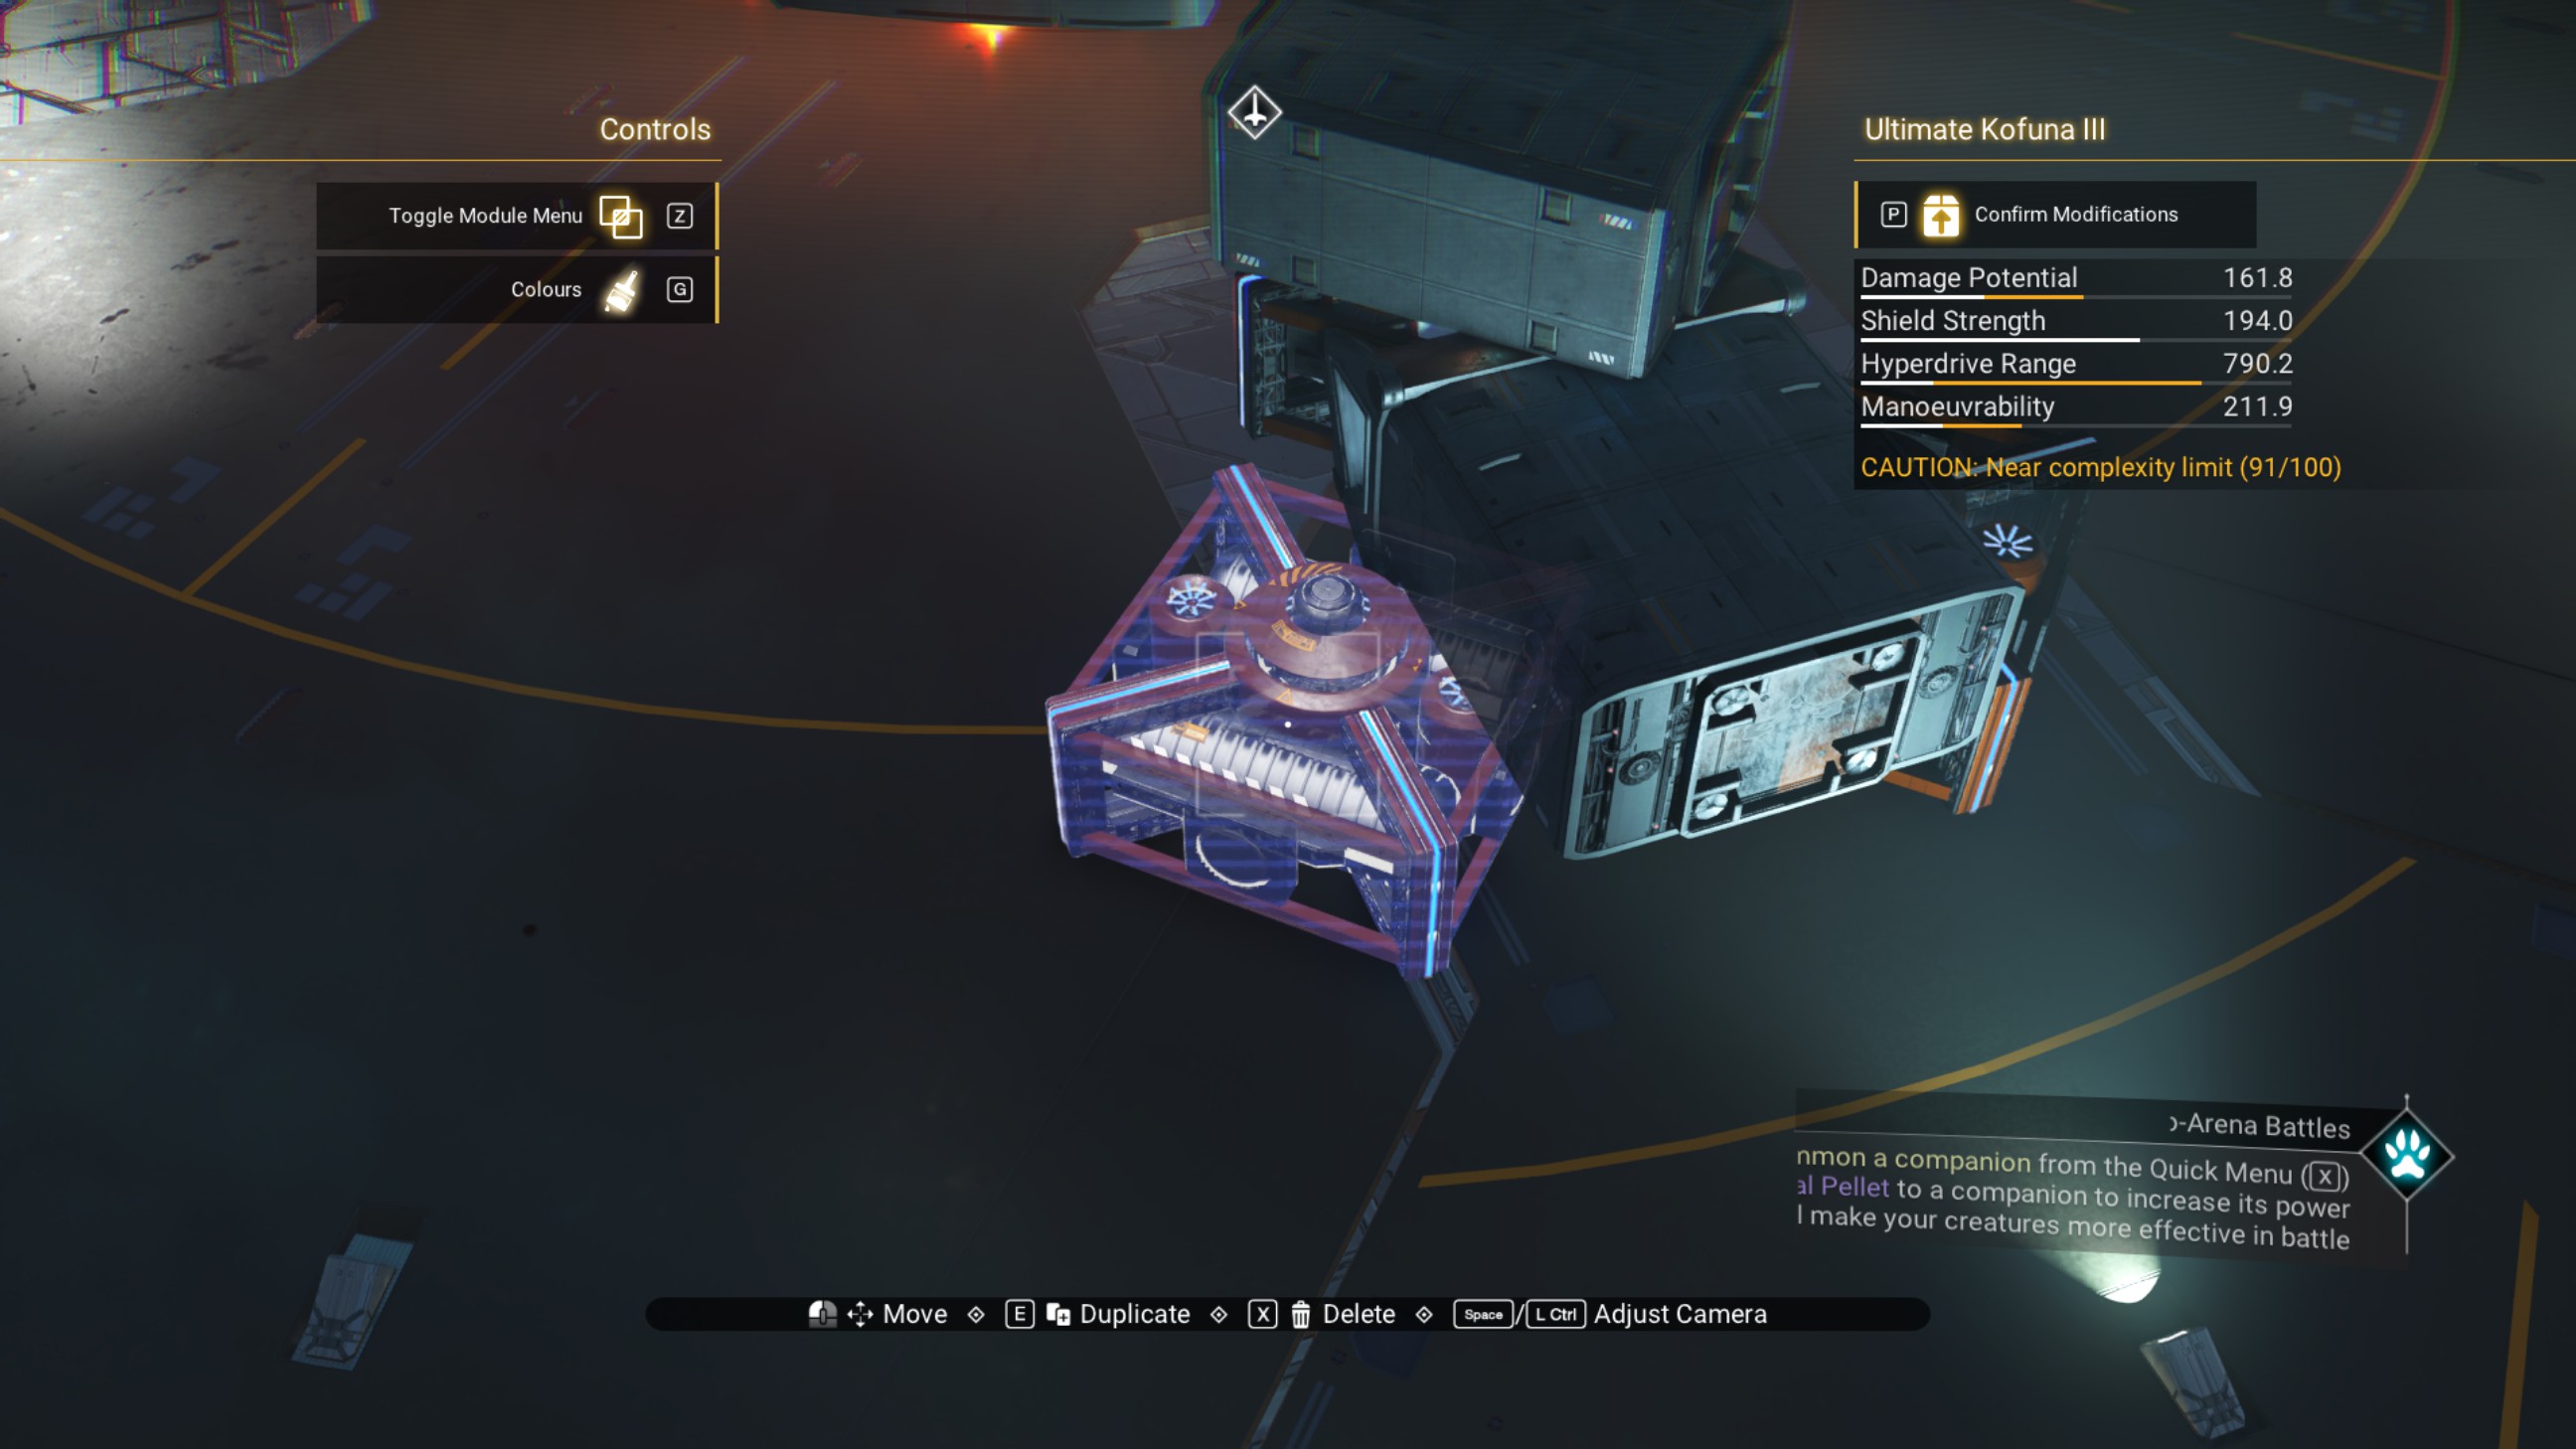
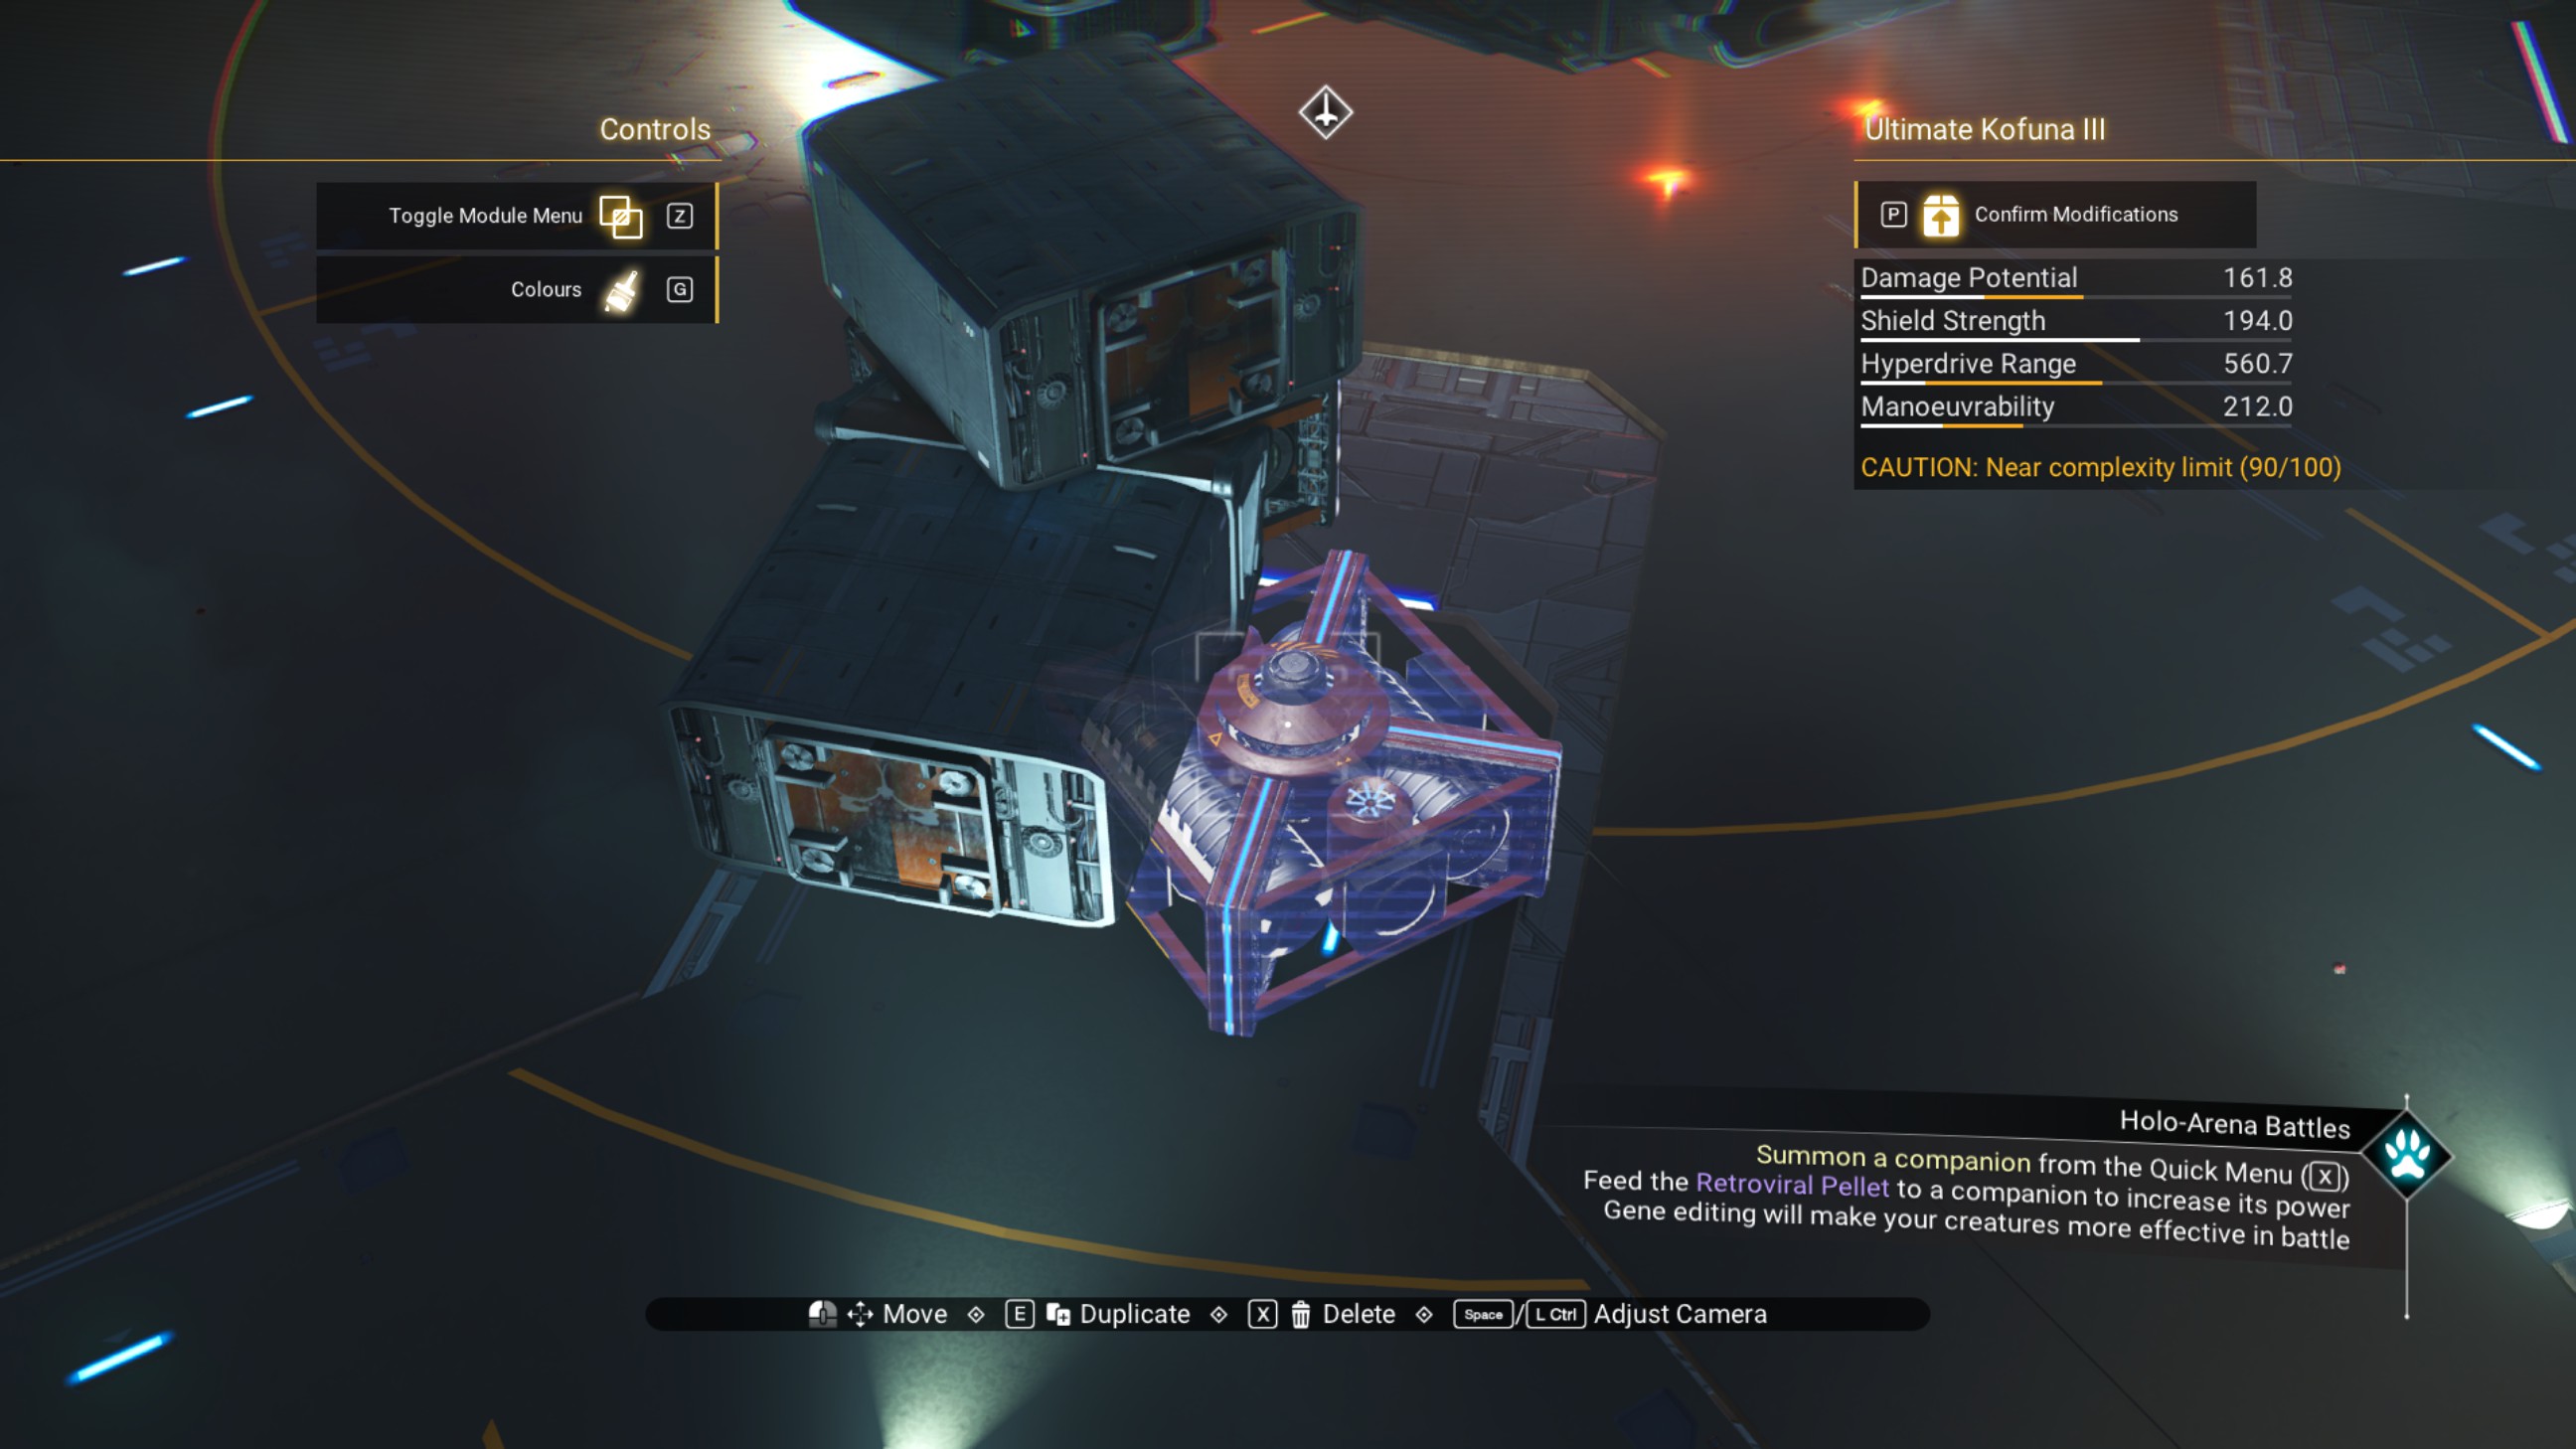
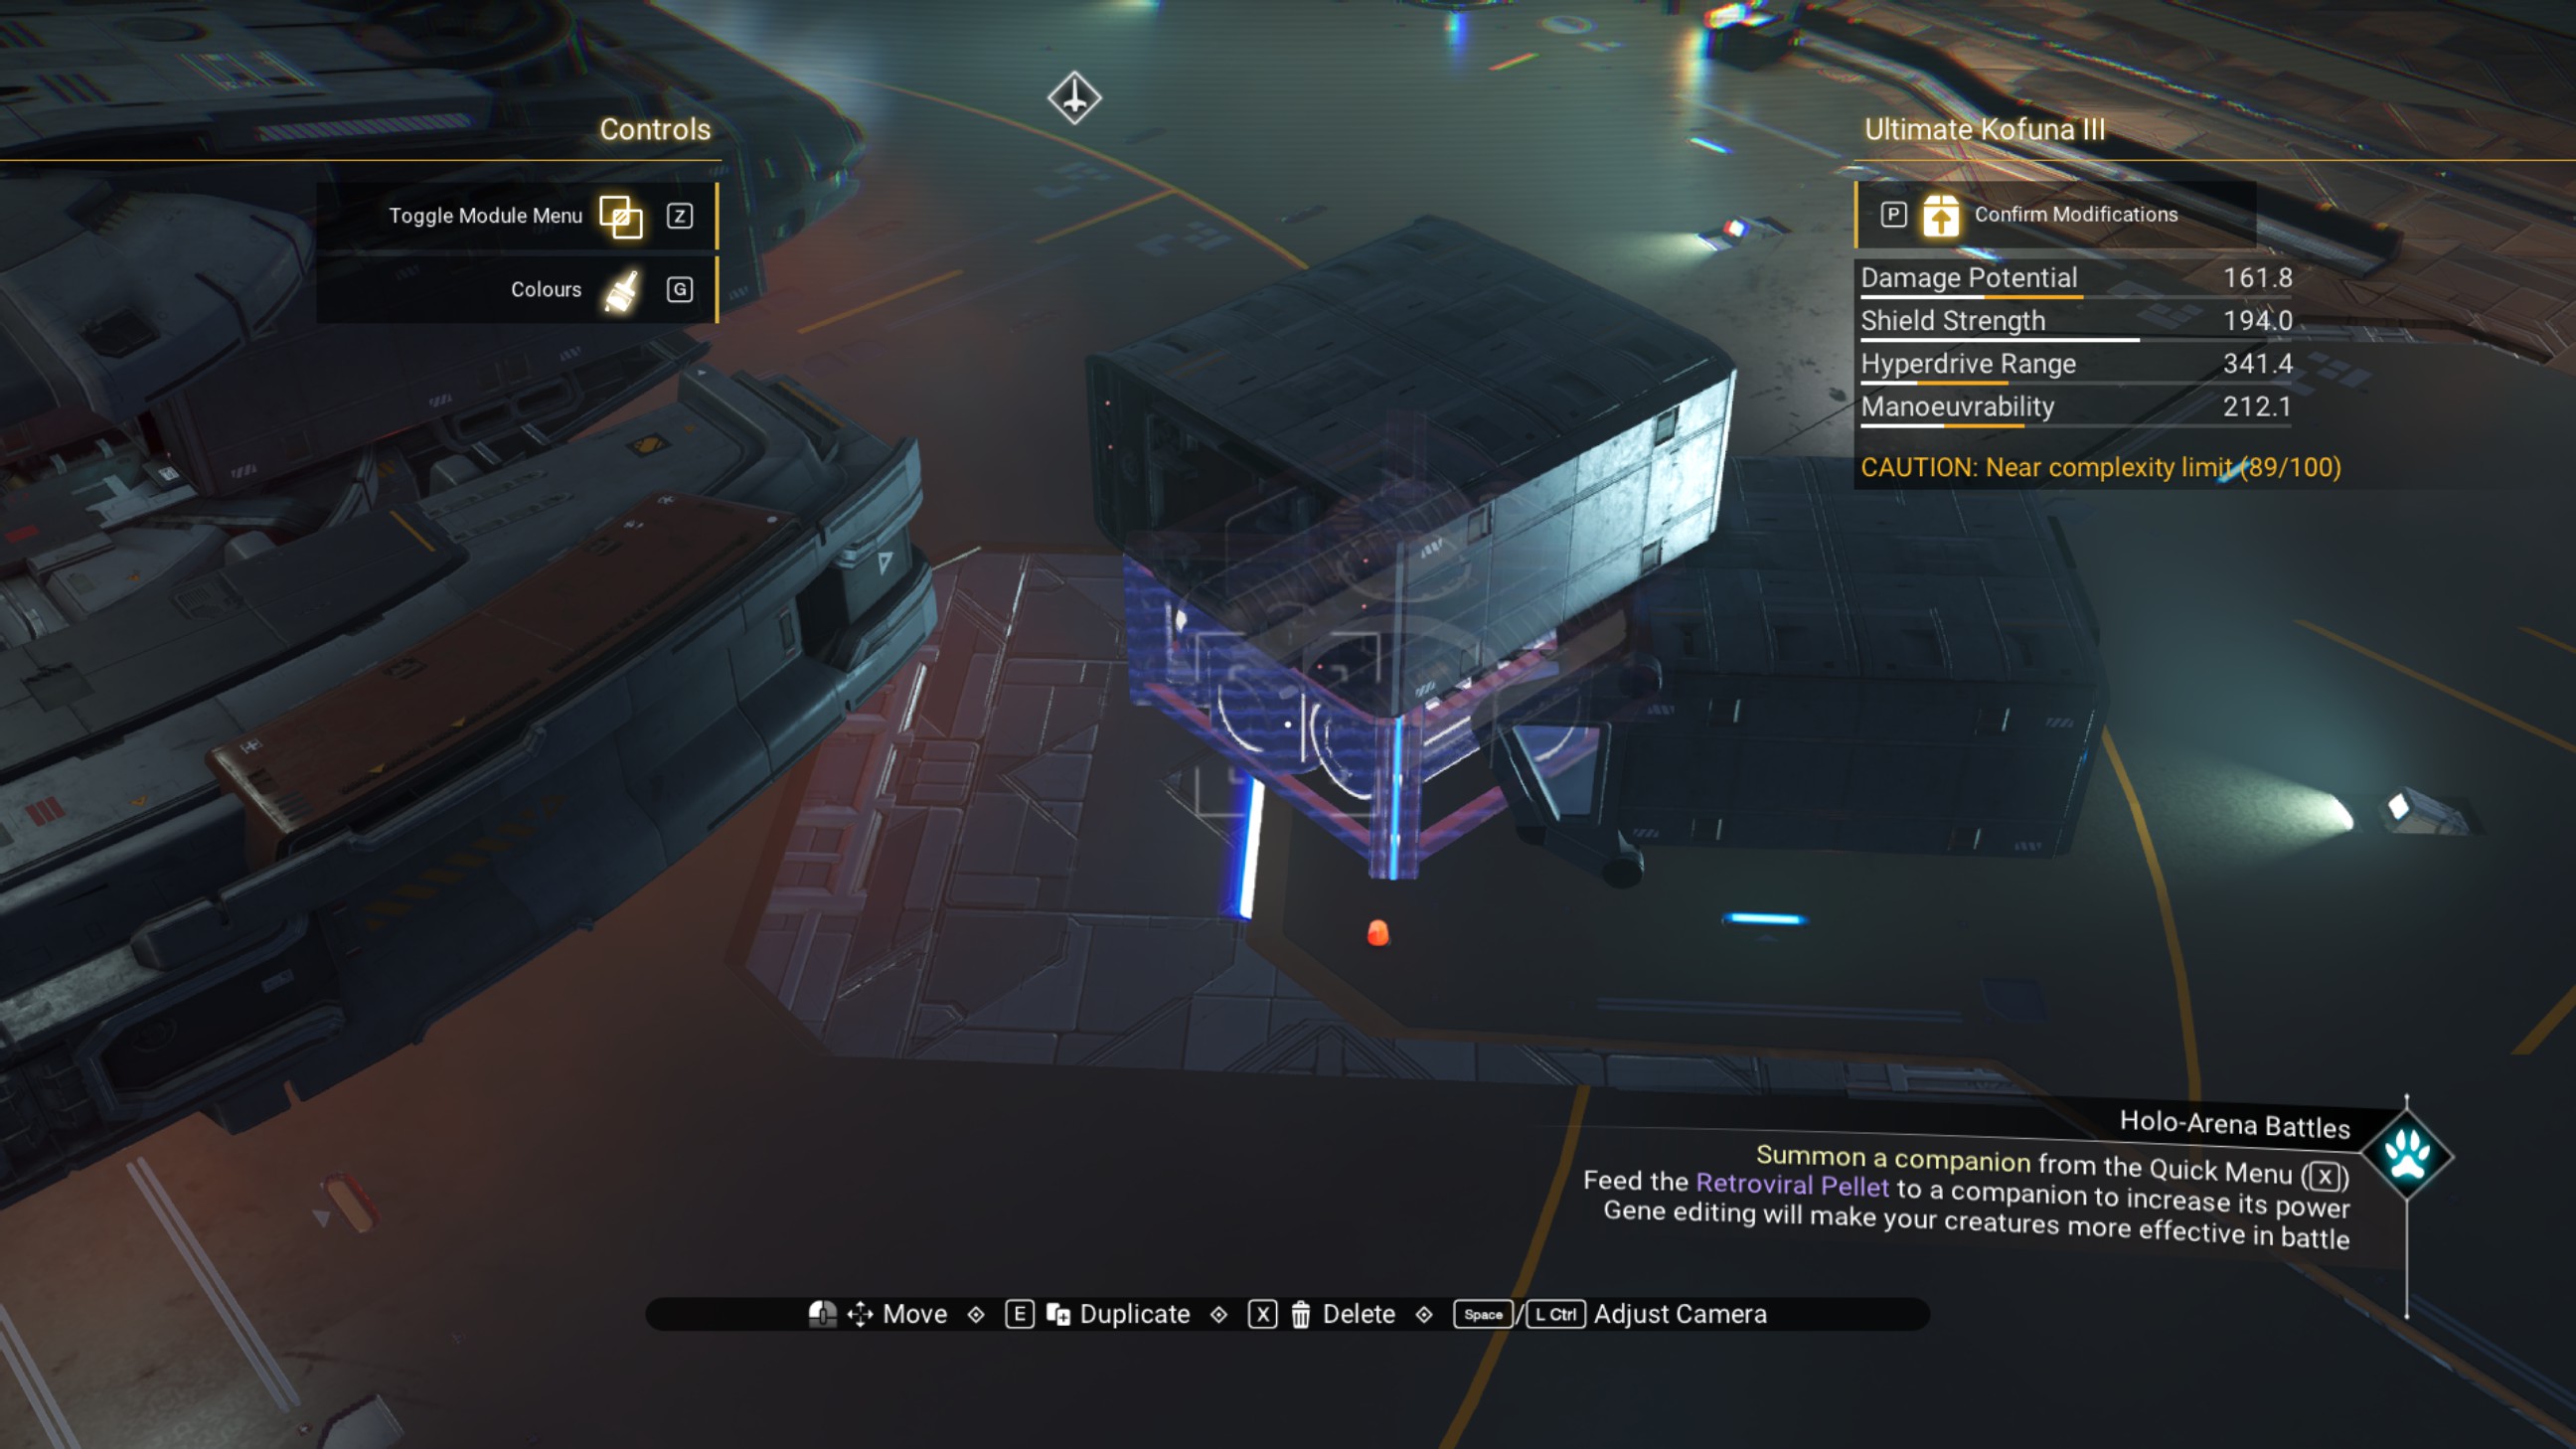
Off the port stern, we'll now make the same structure off the 45 degree walkway. Building away from the ship, place a walkway on the 45 degree walkway, then another walkway on top of that one, as shown.
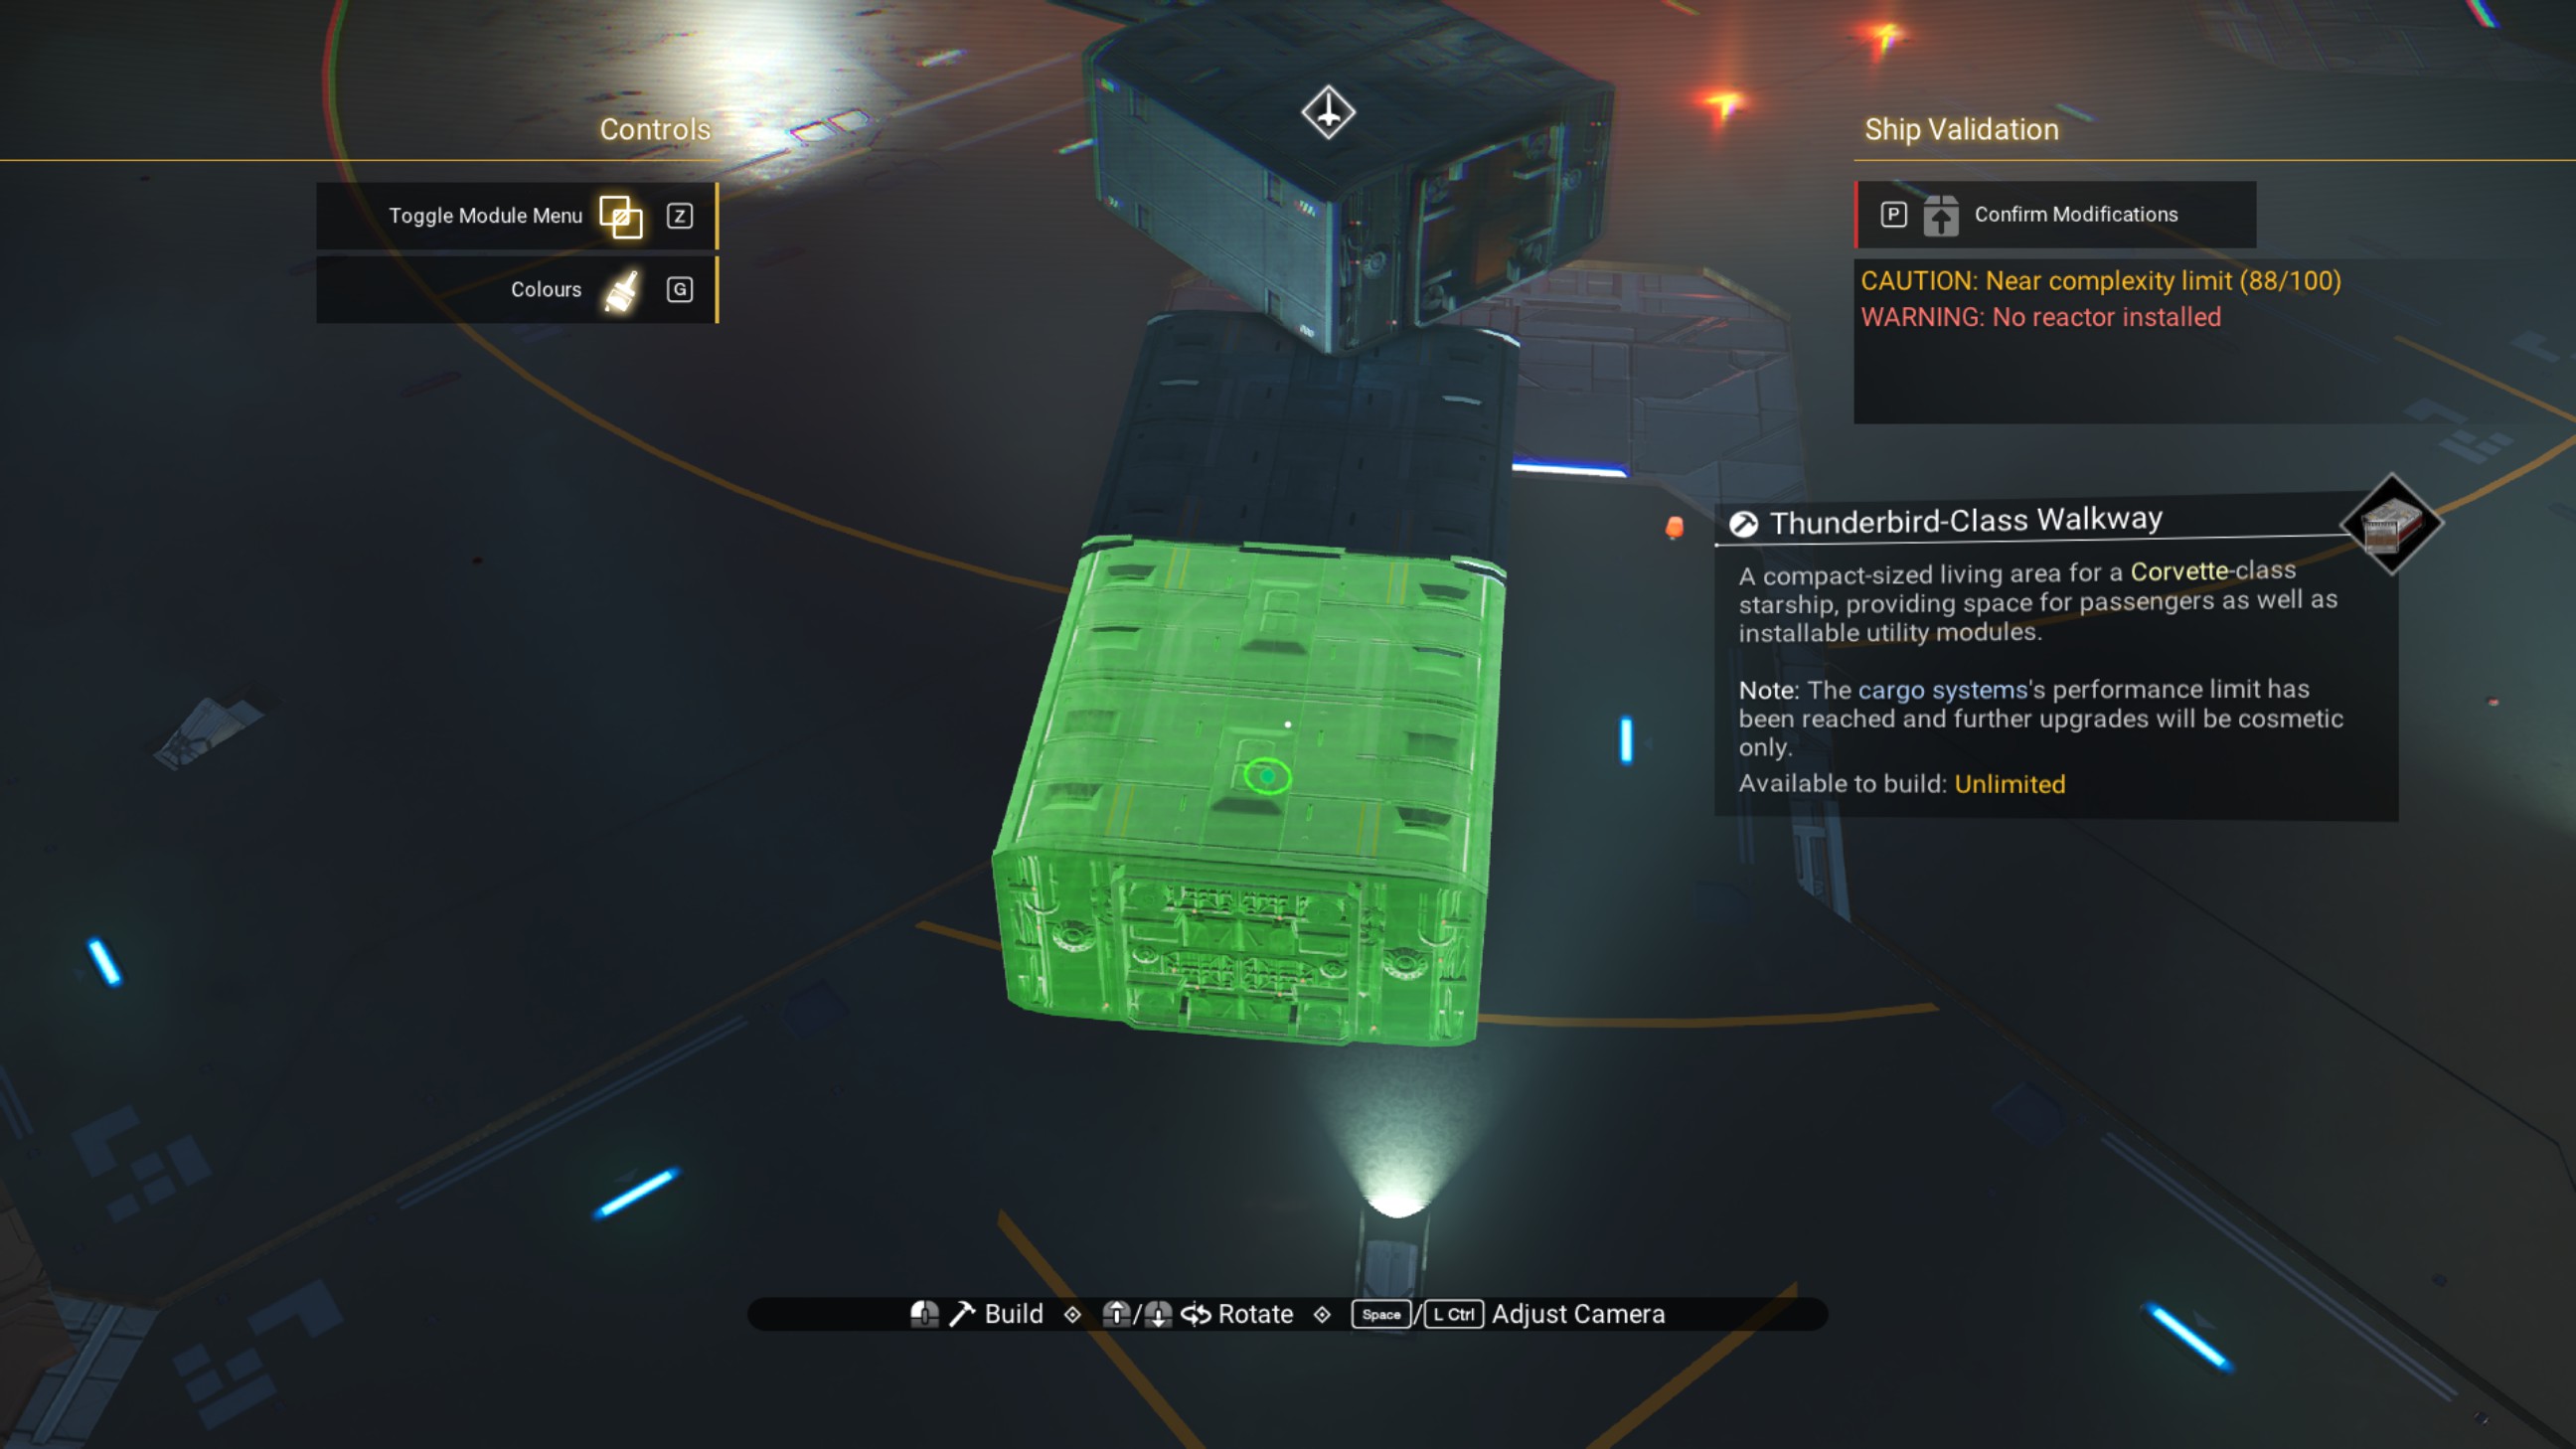
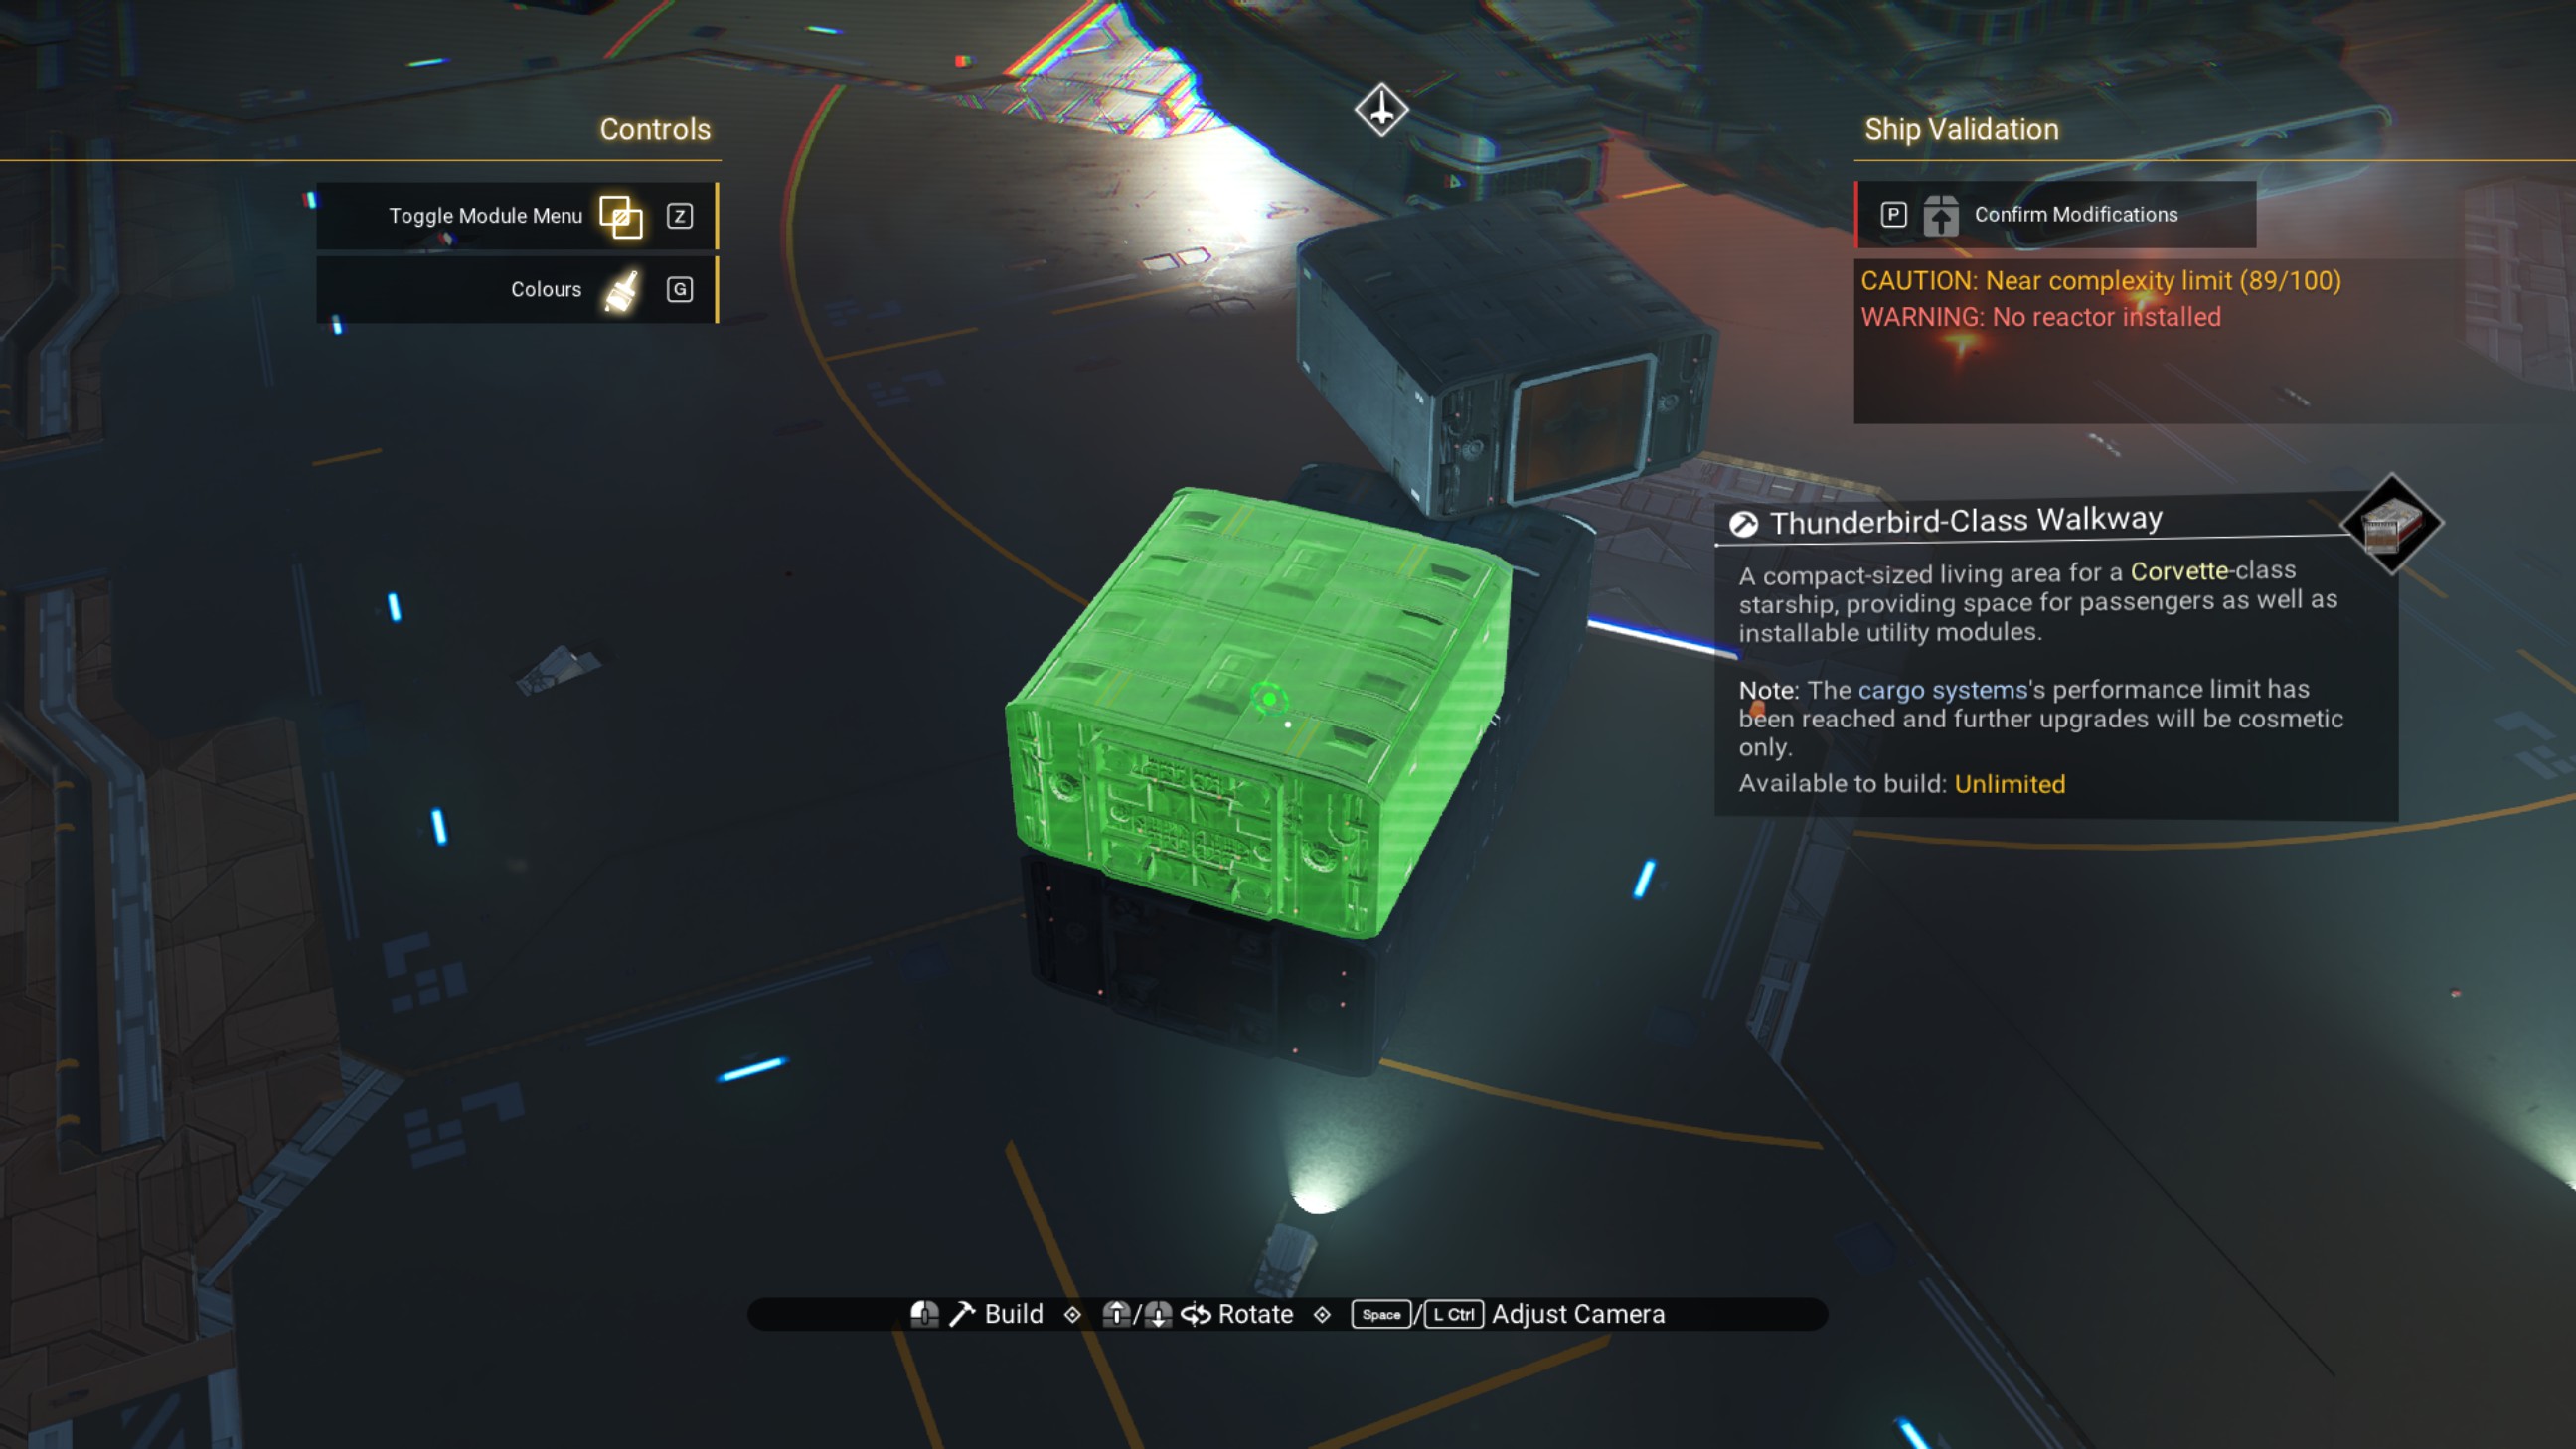
Then, a walkway on either side of the lower 45 degree walkway extended away from the ship.
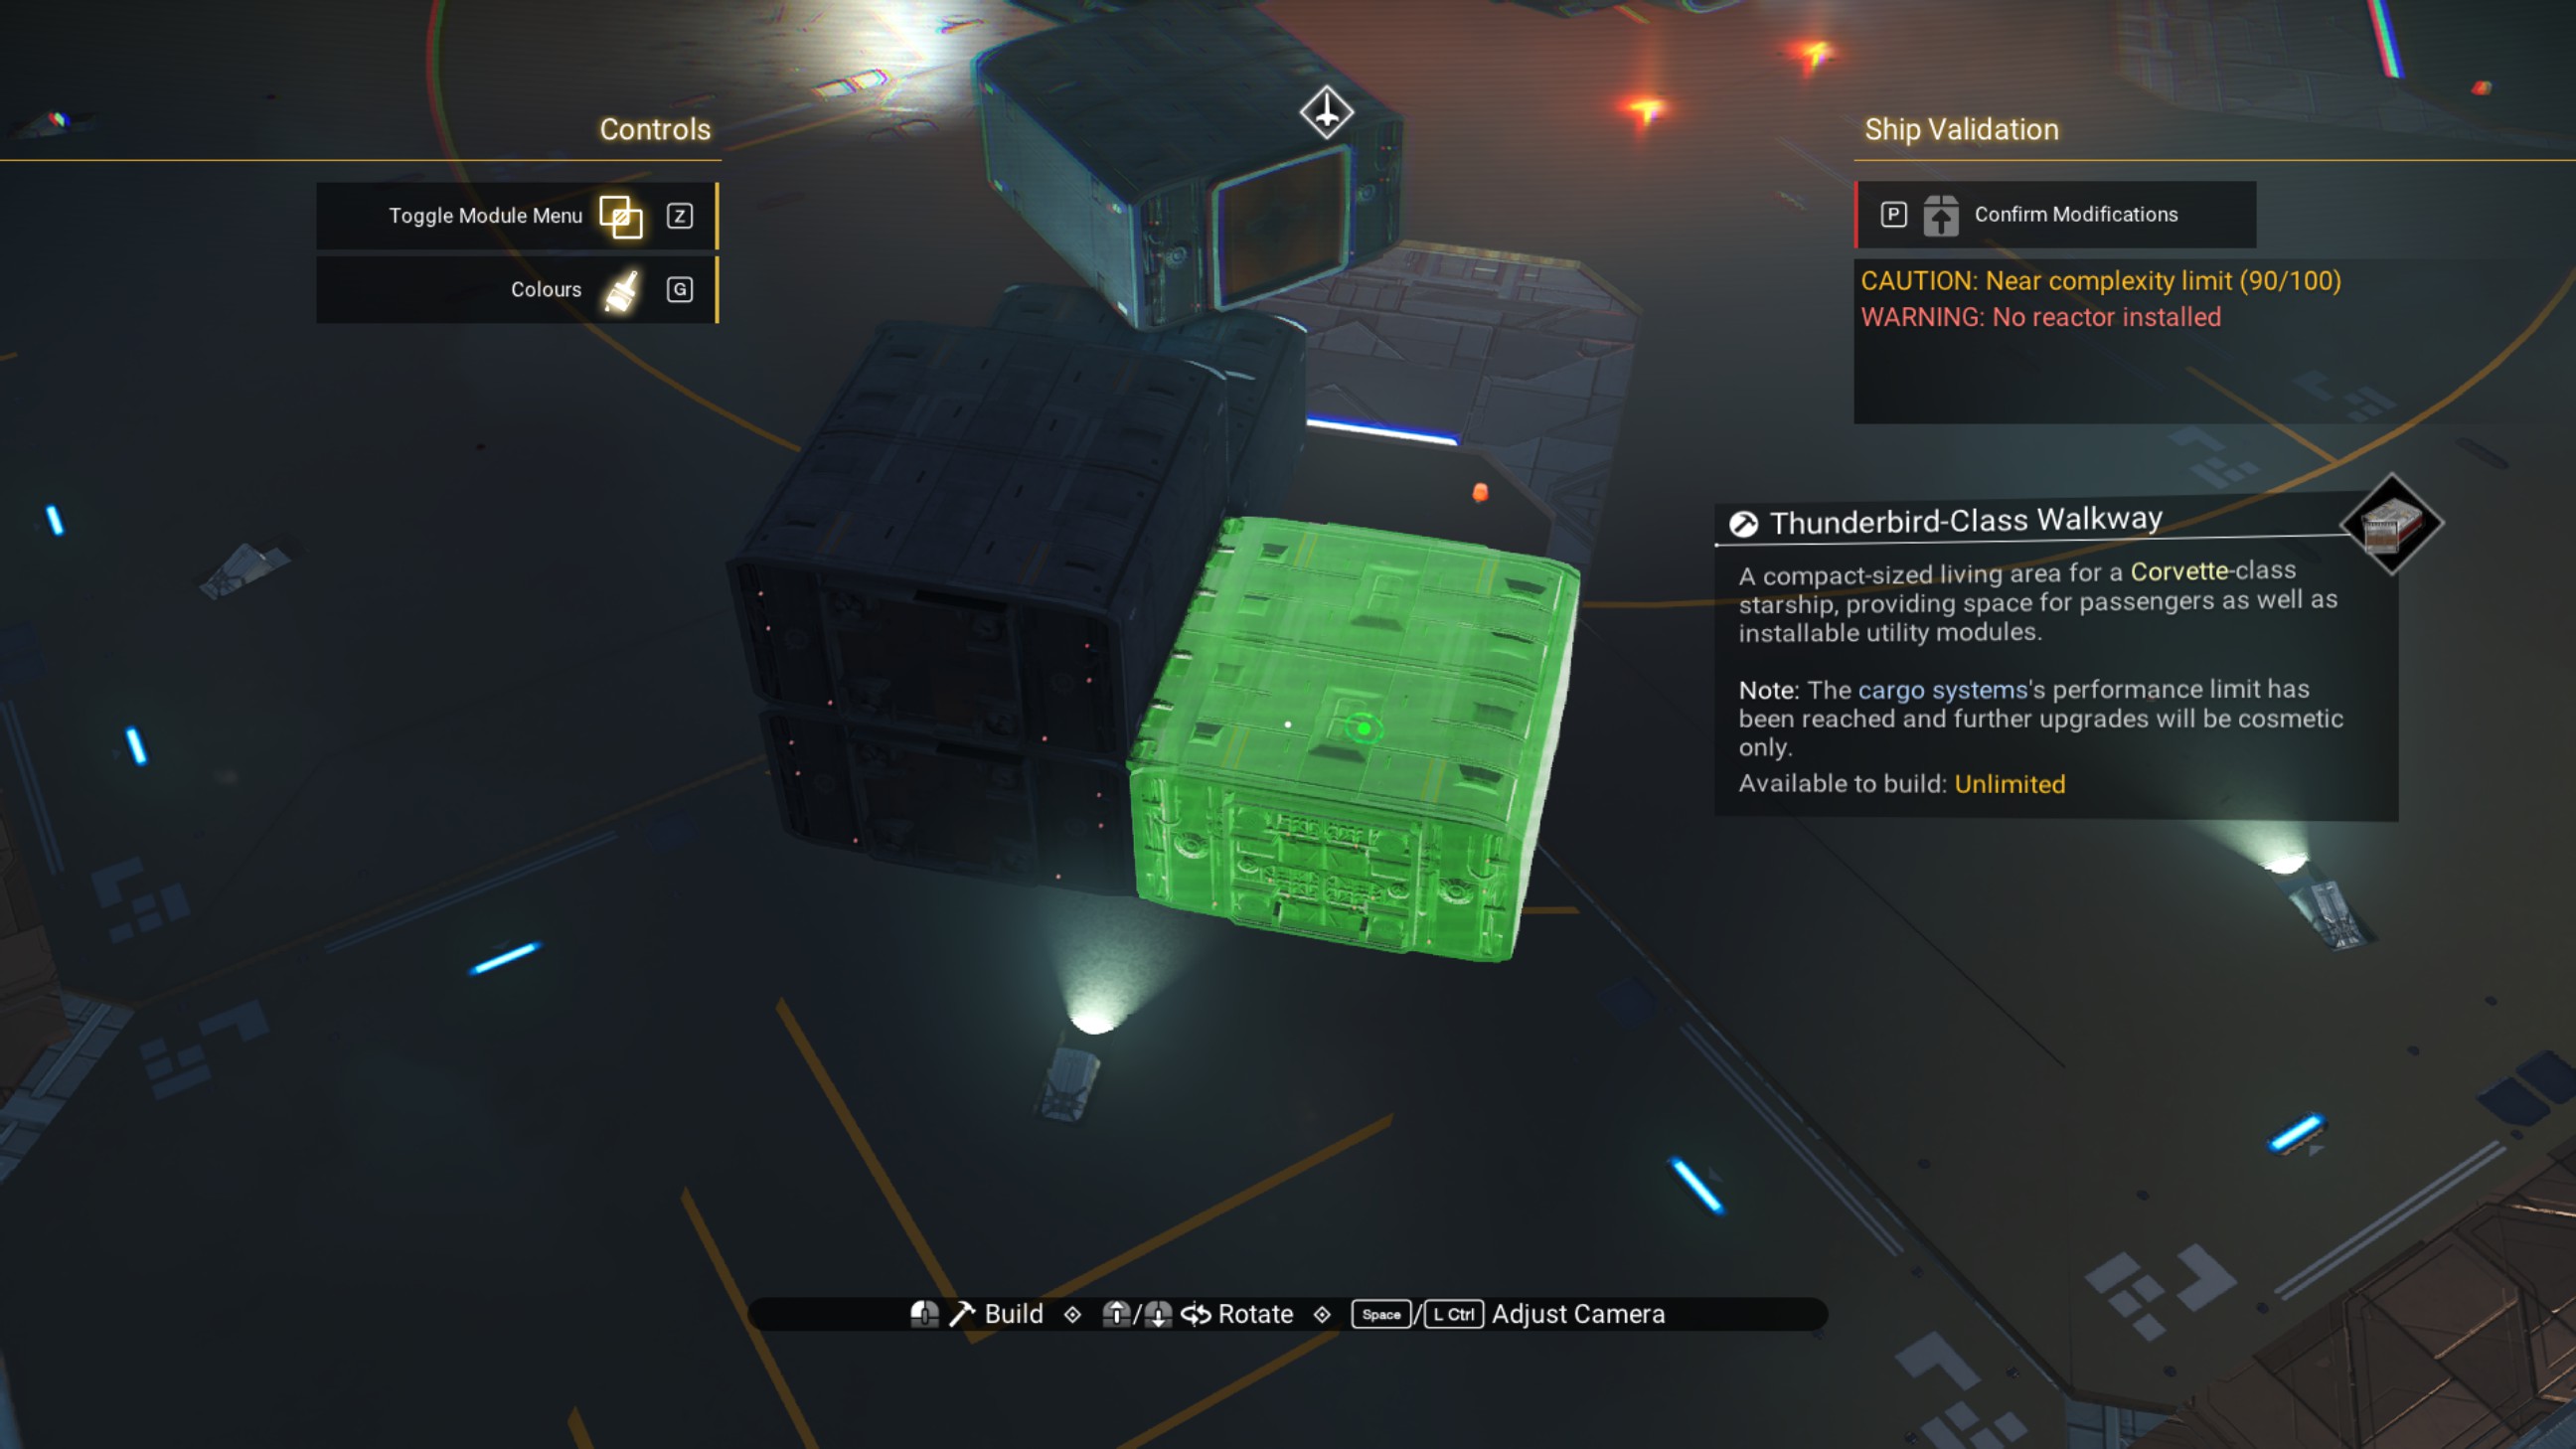
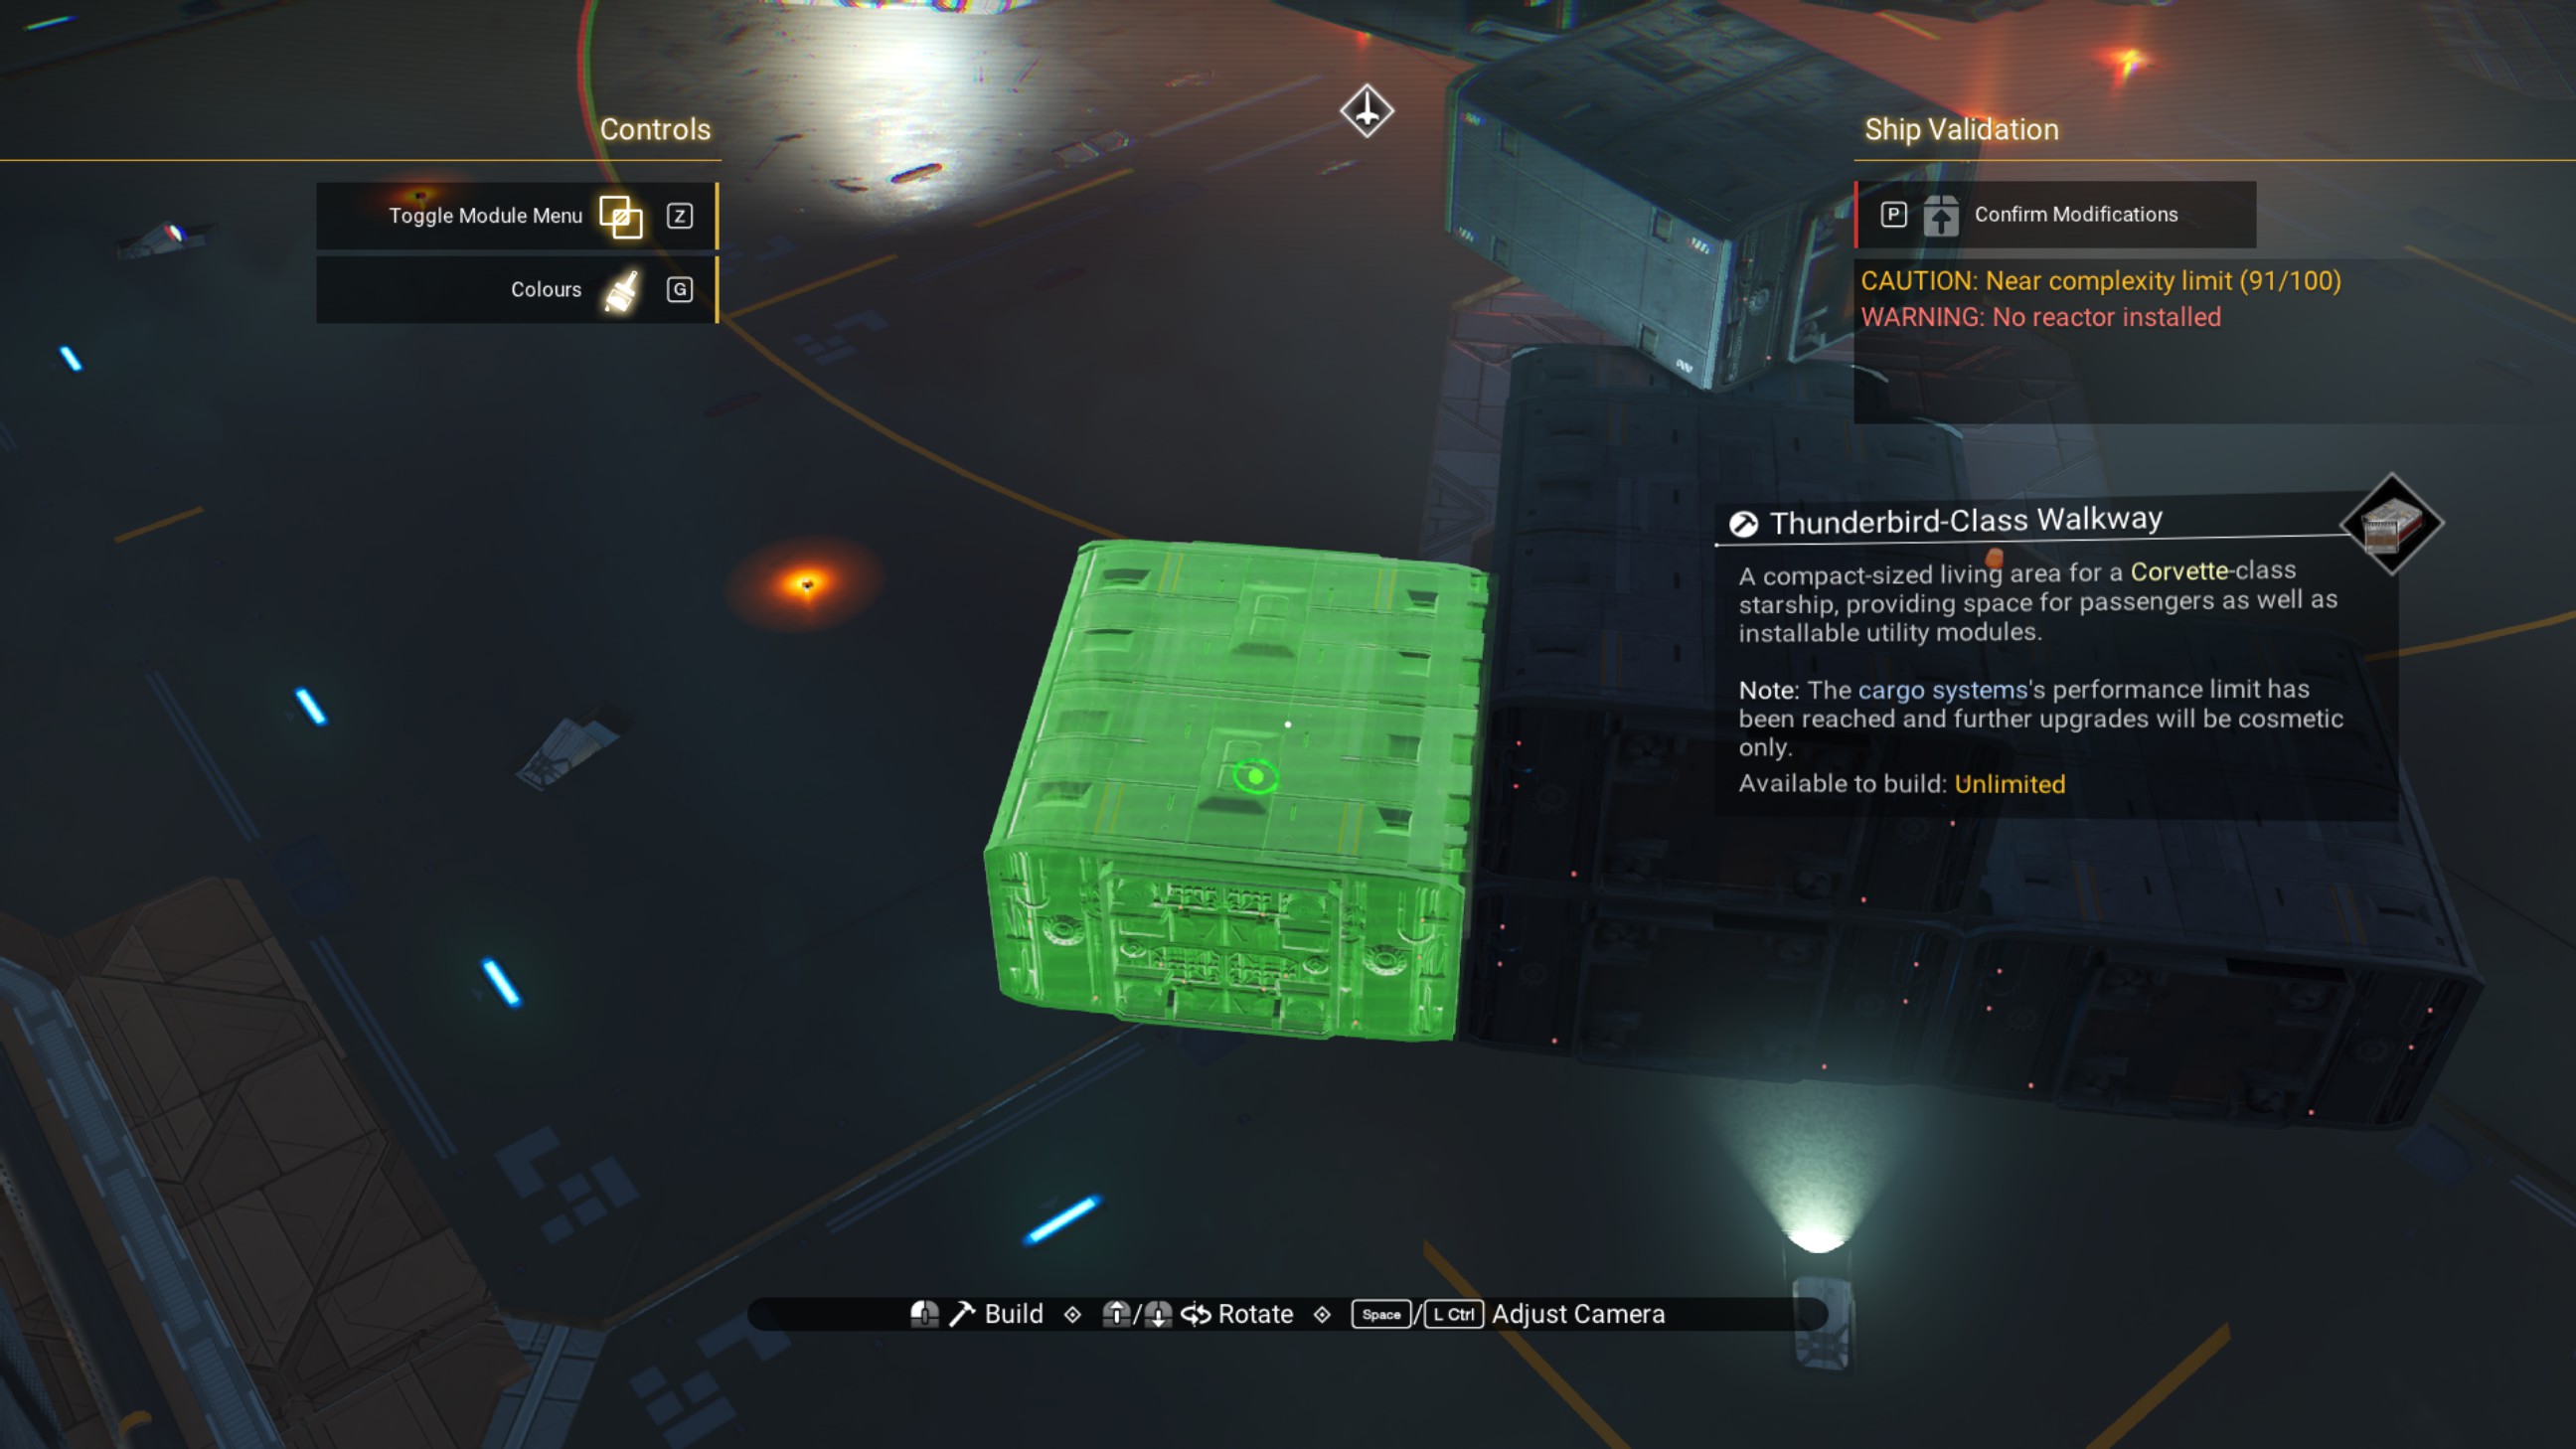
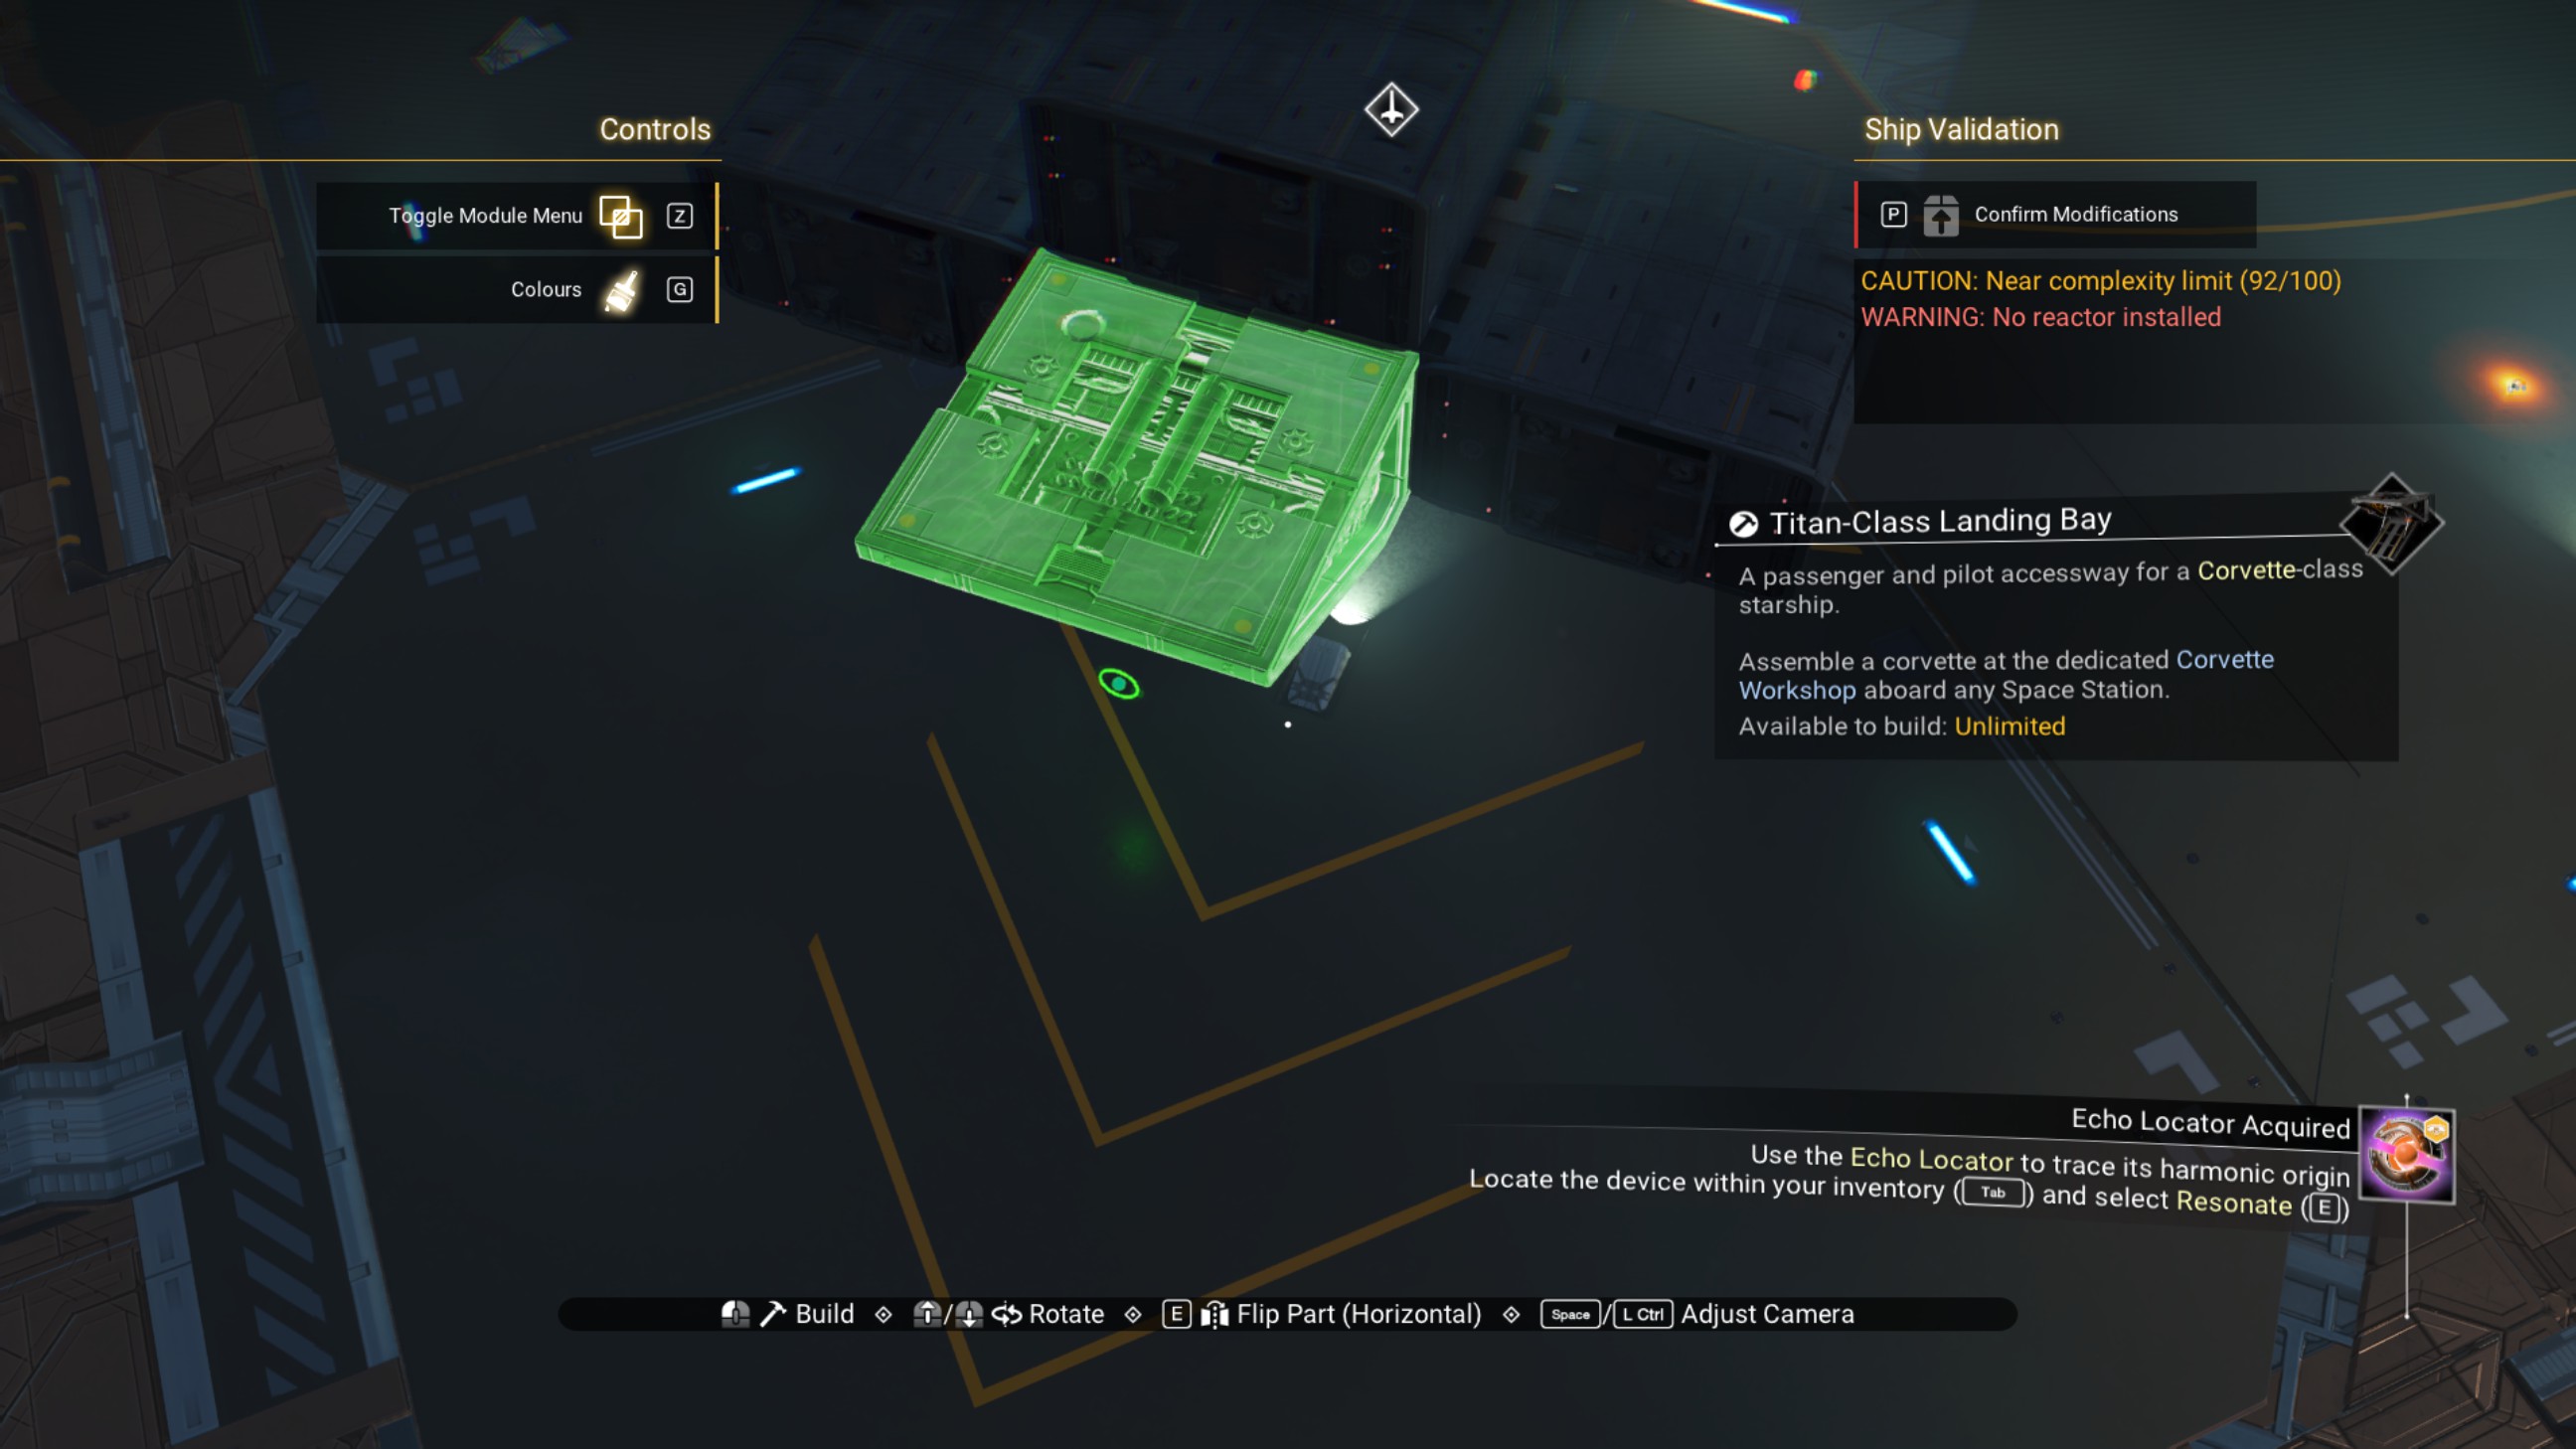
And, a landing bay on that lower central walkway, as shown.
The two structures should look like this, from the front of the ship.
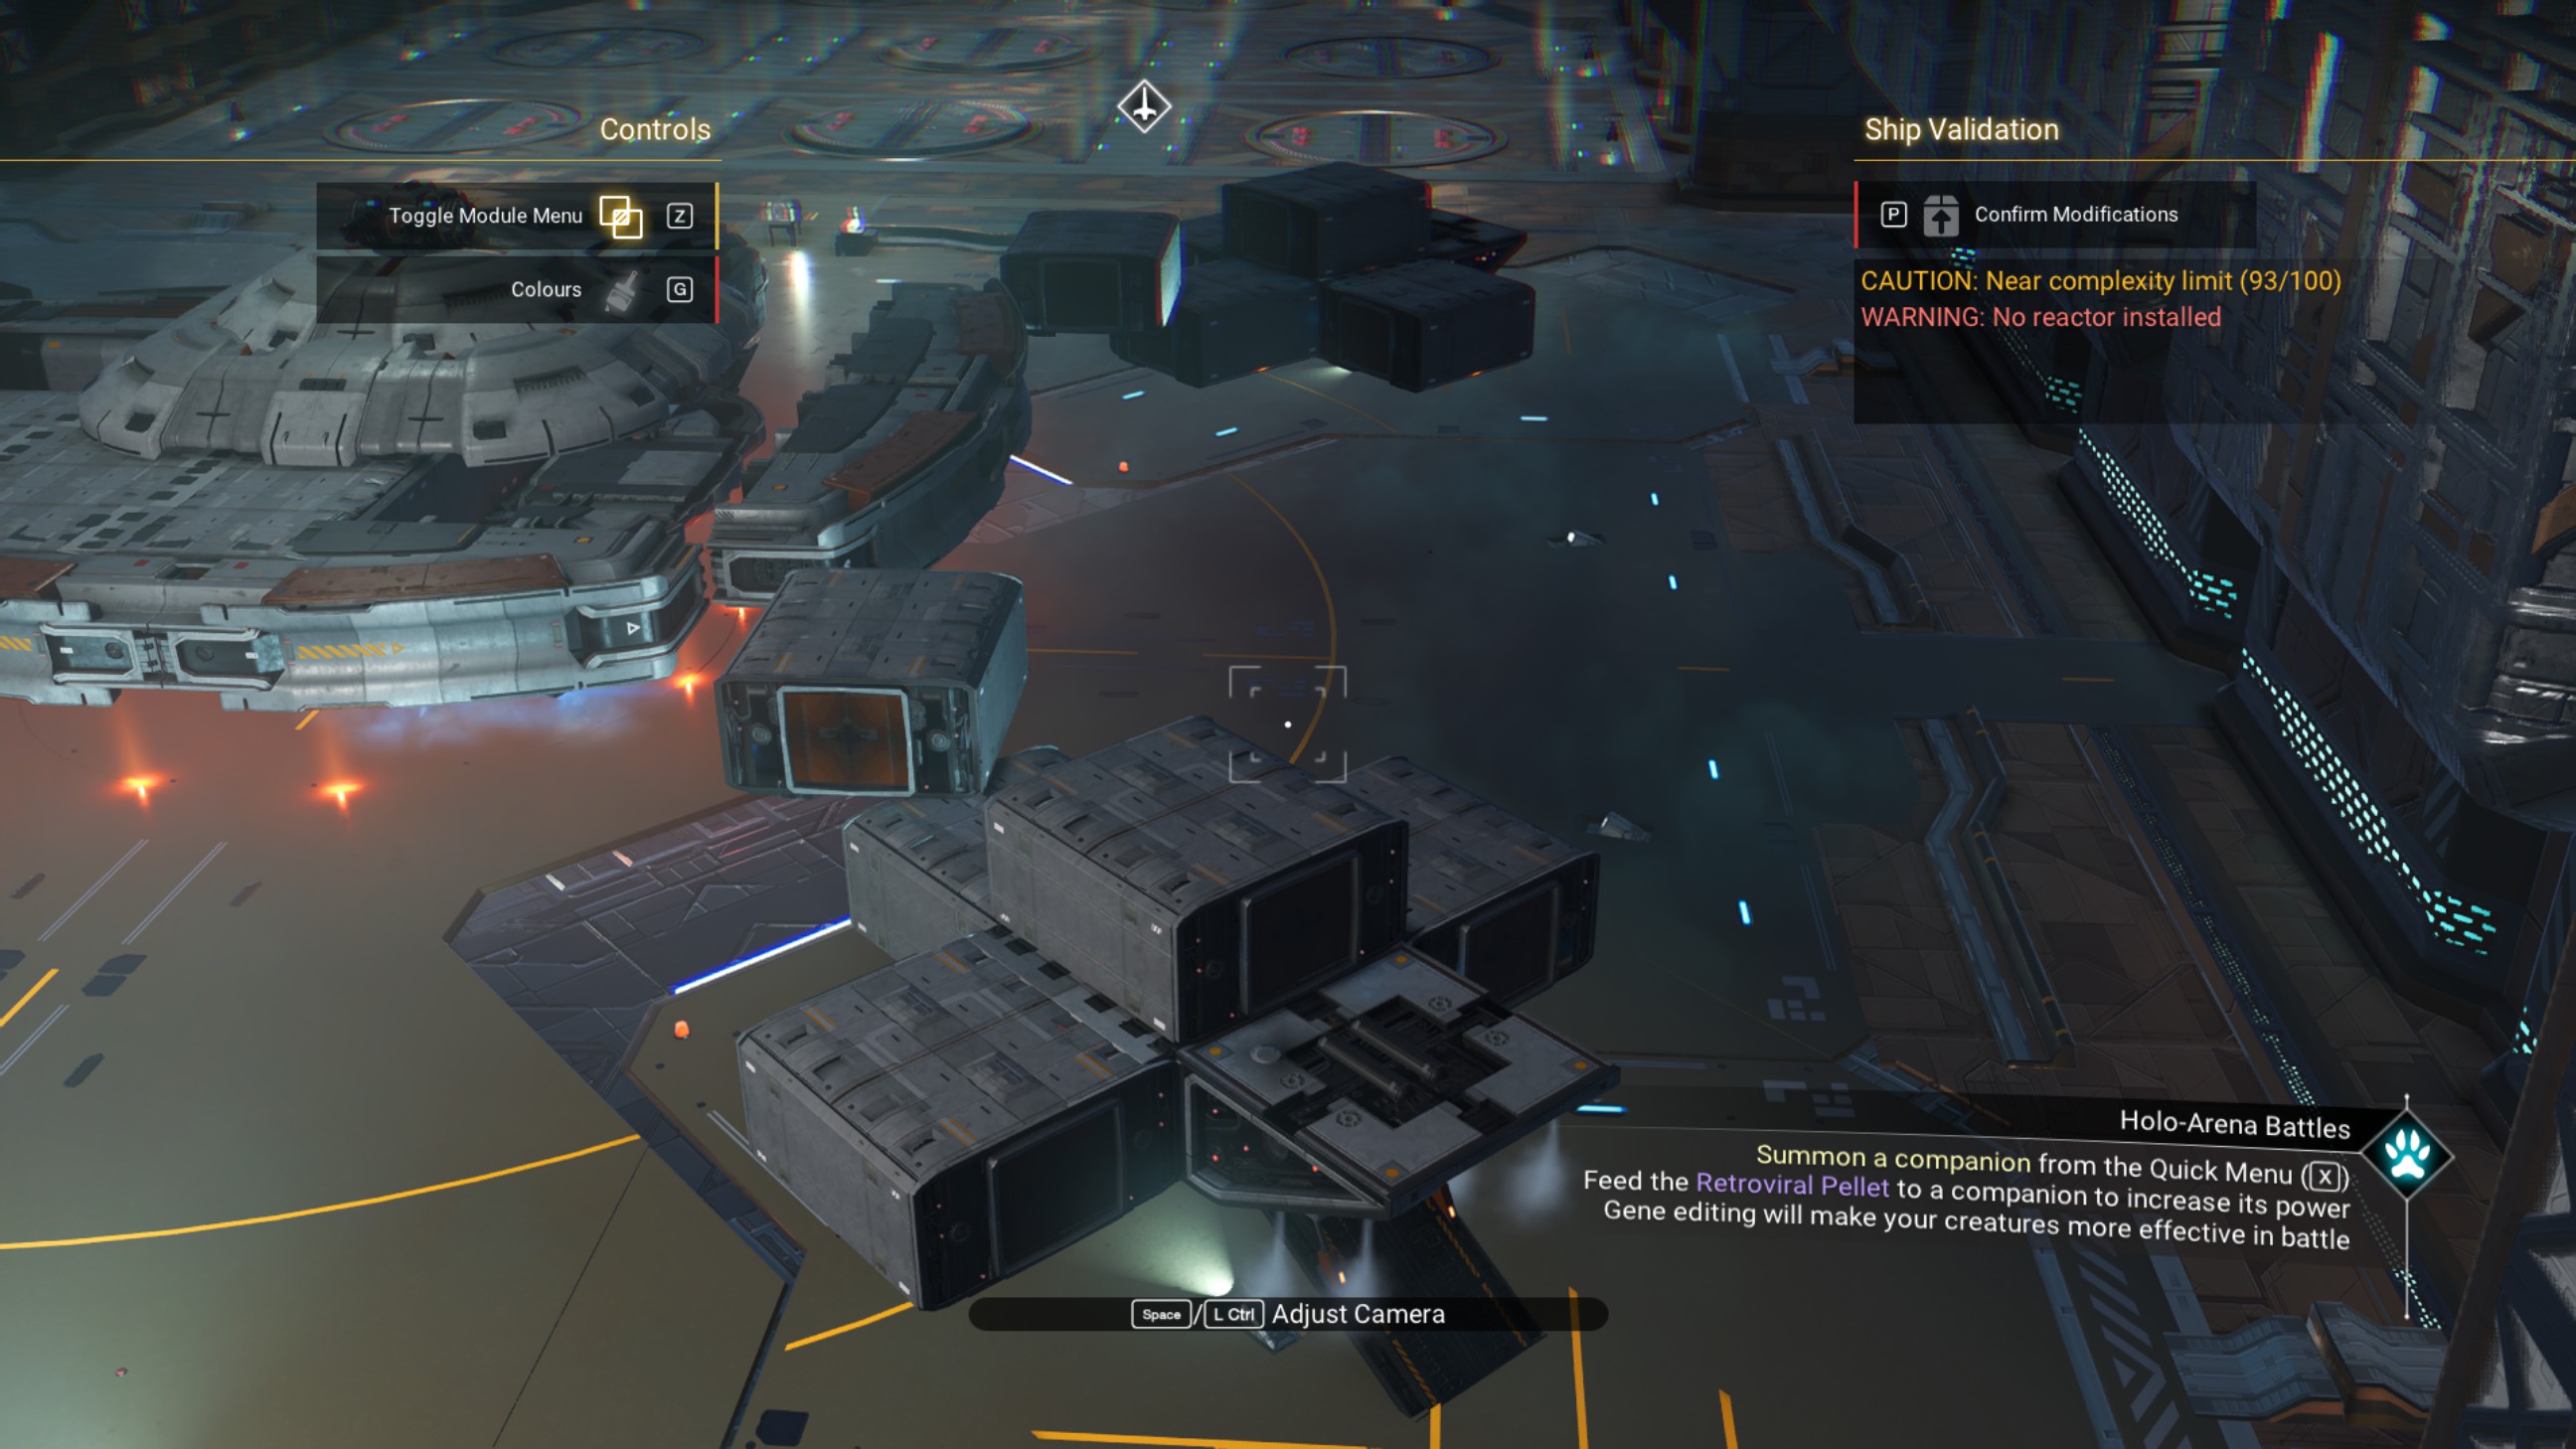
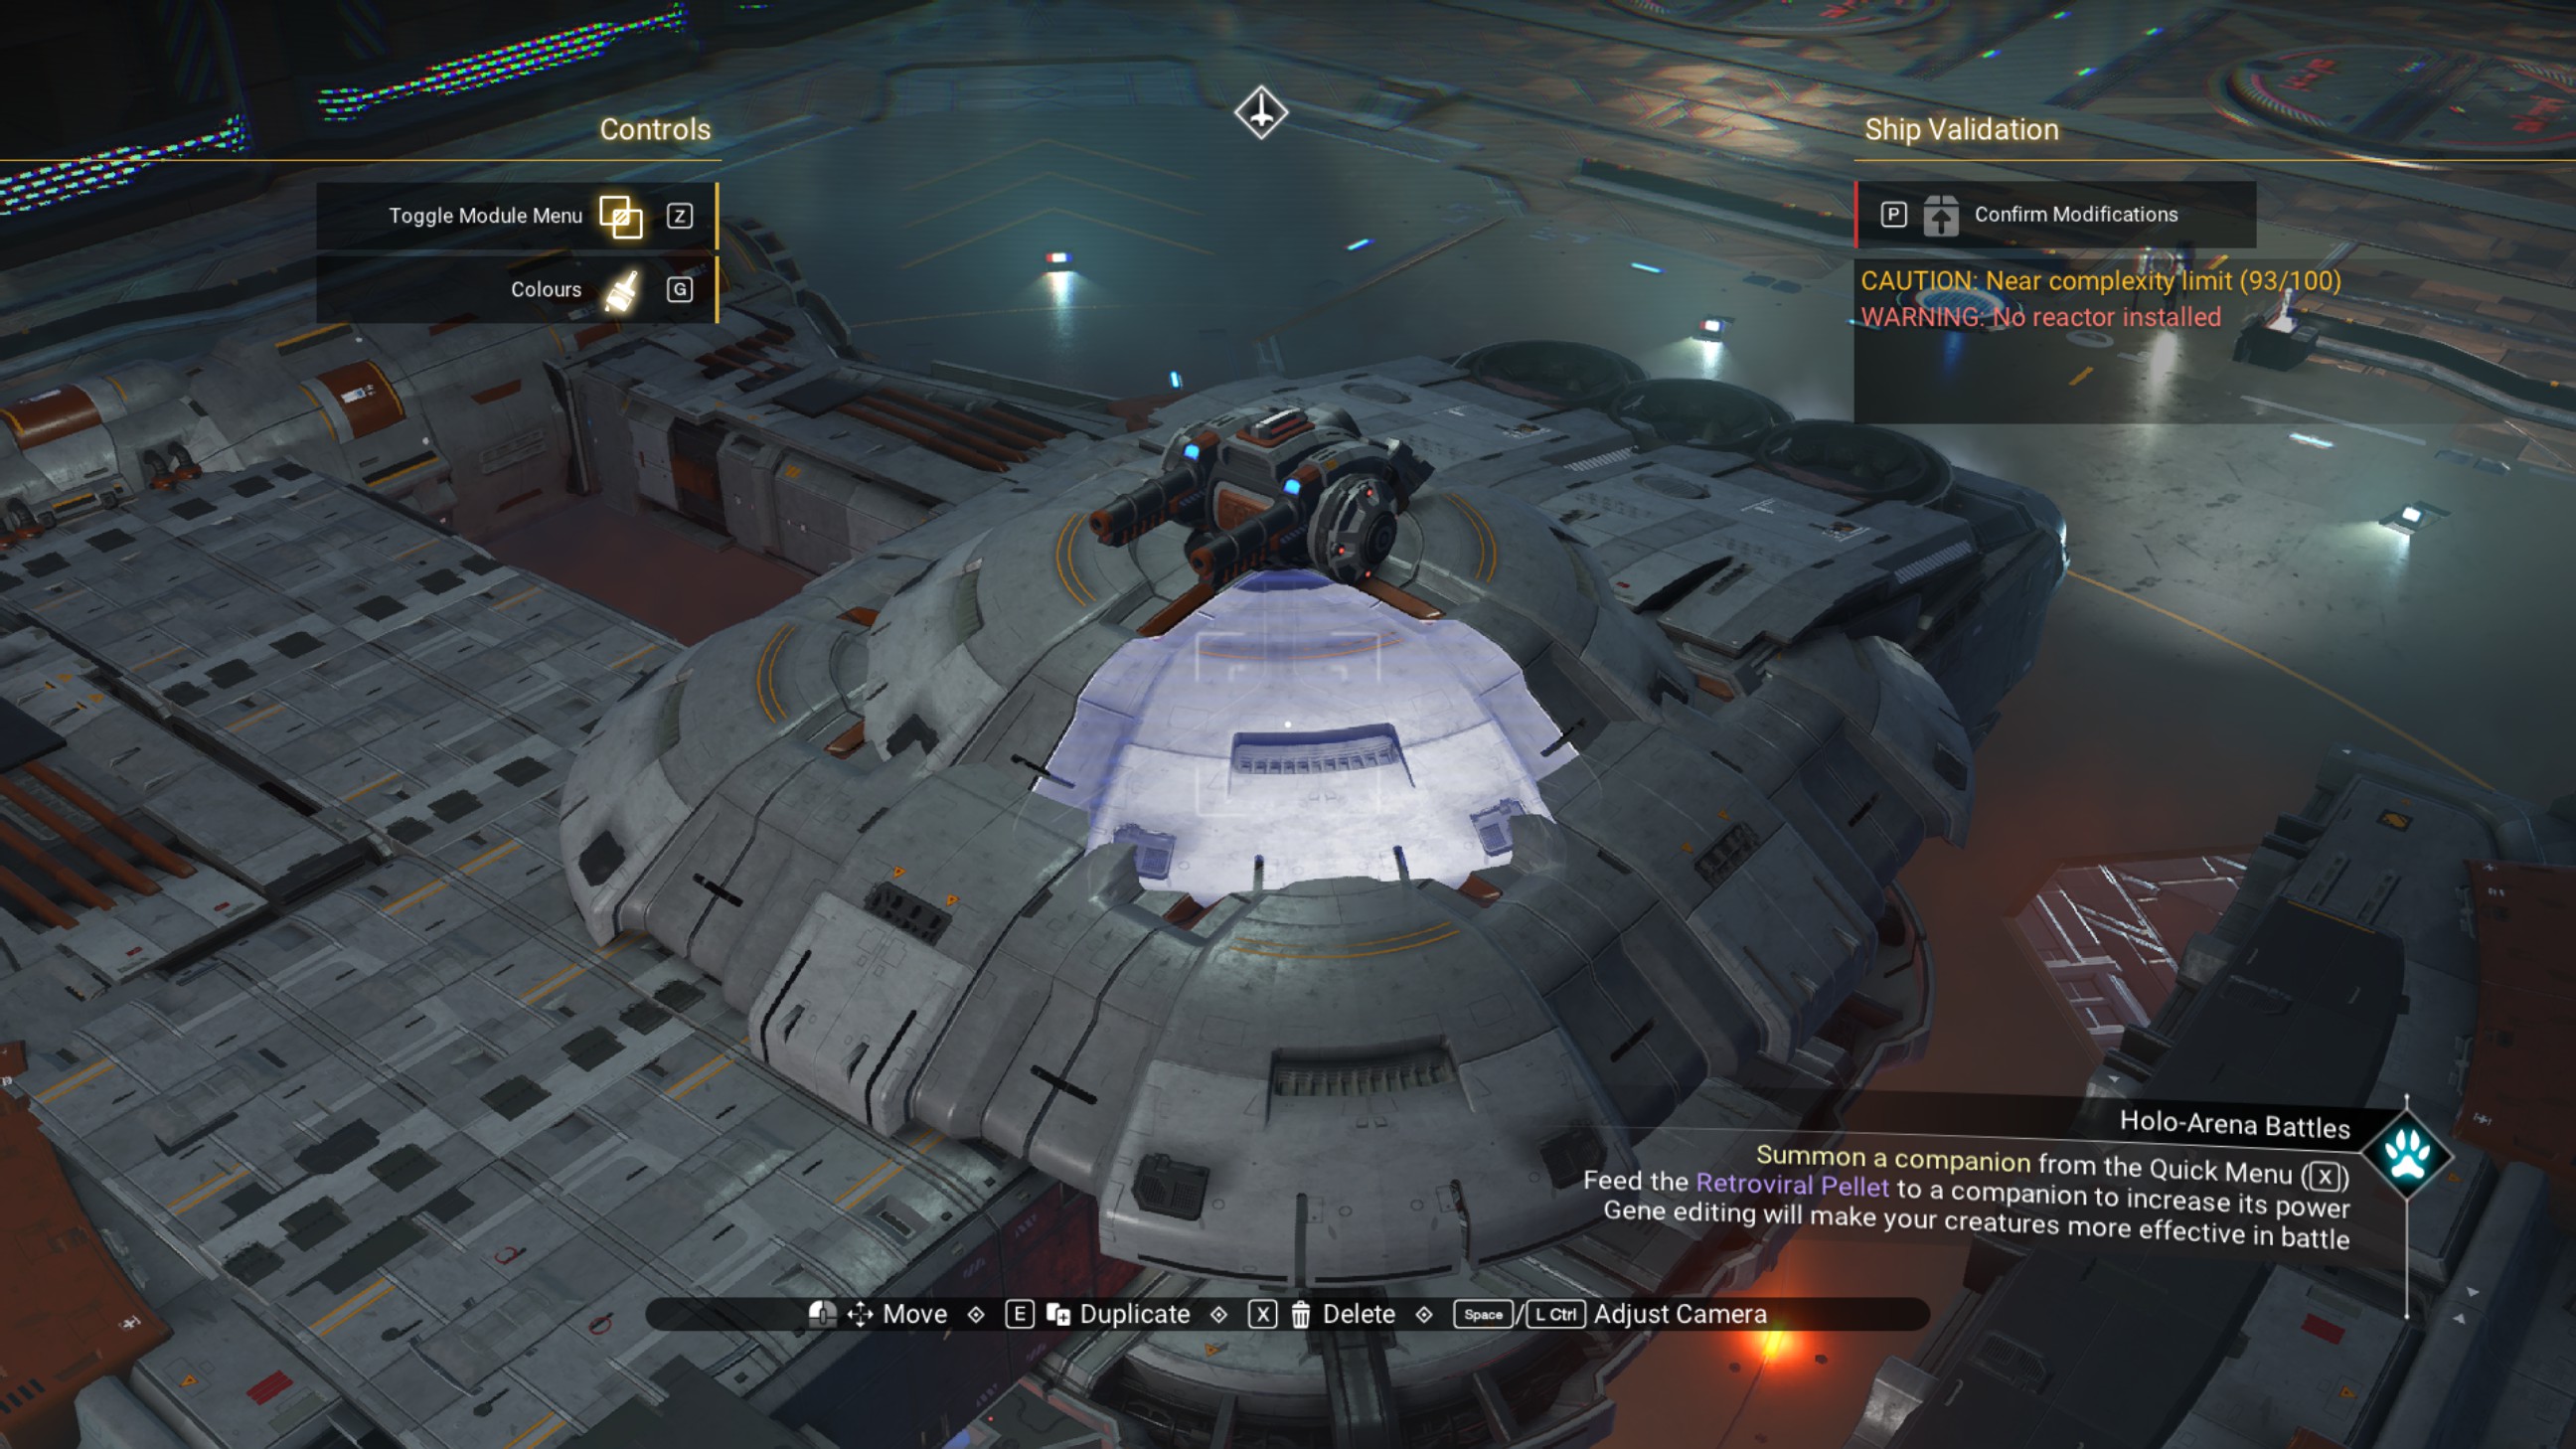
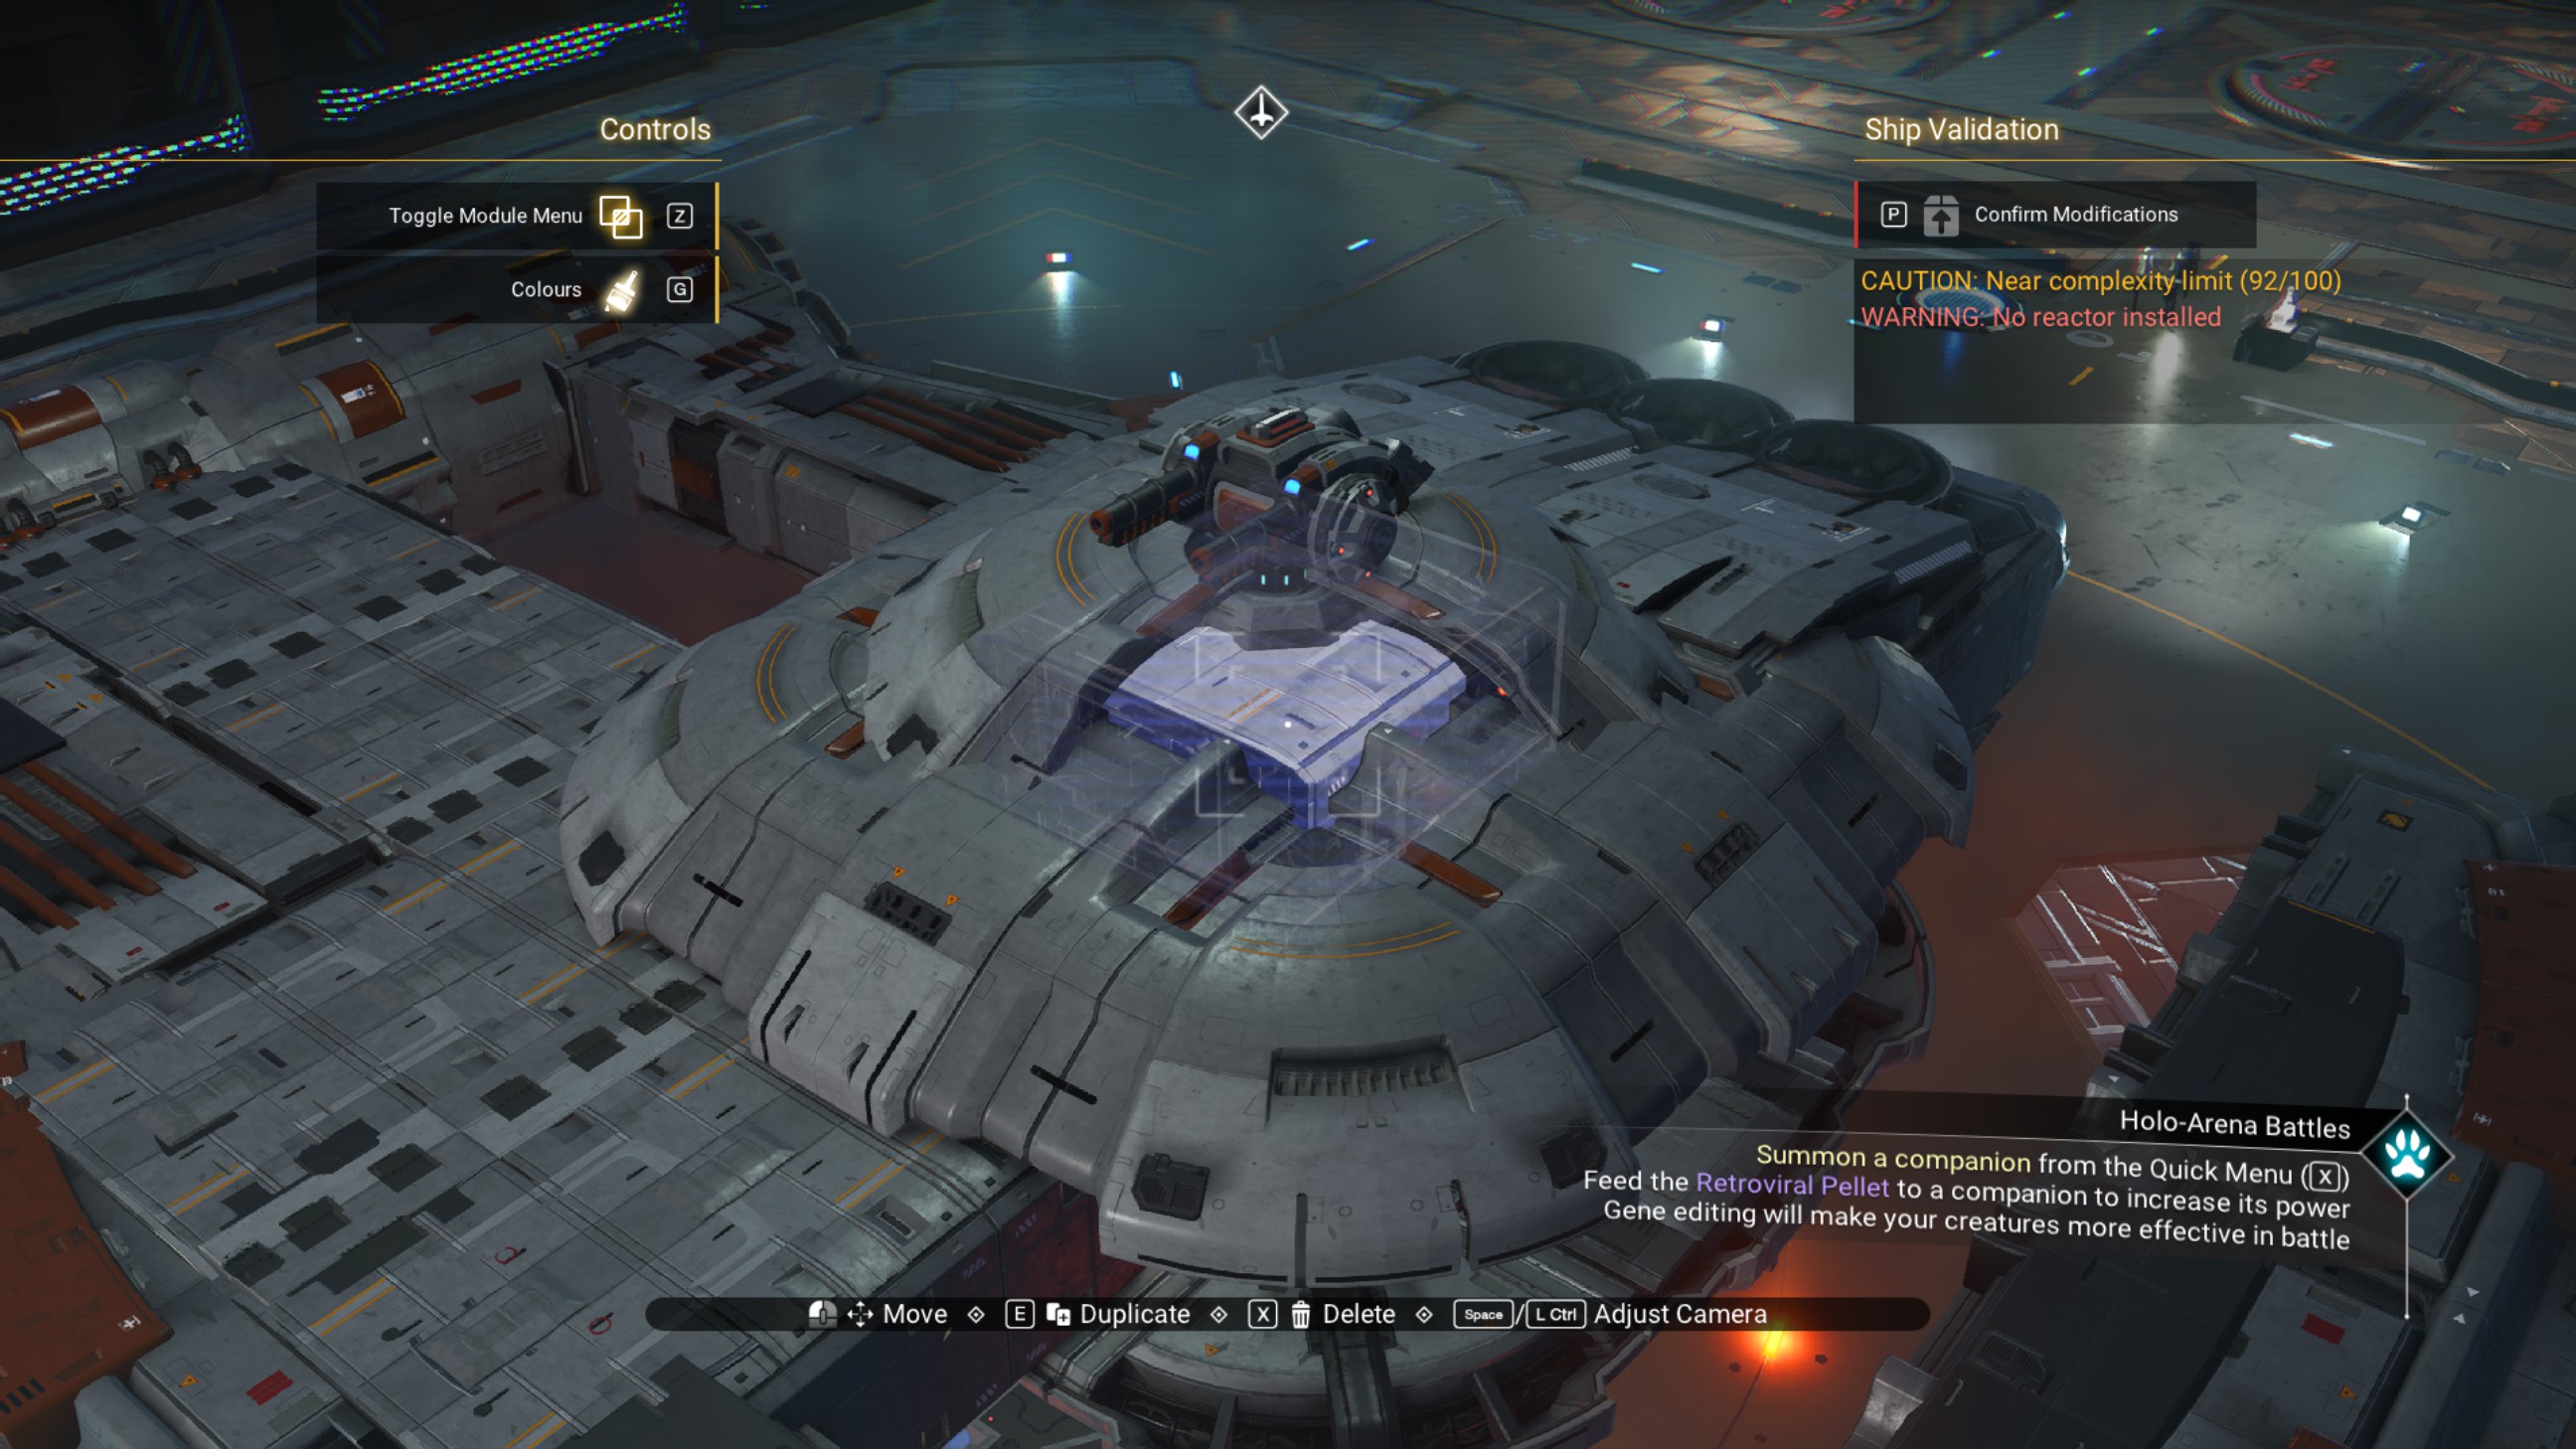
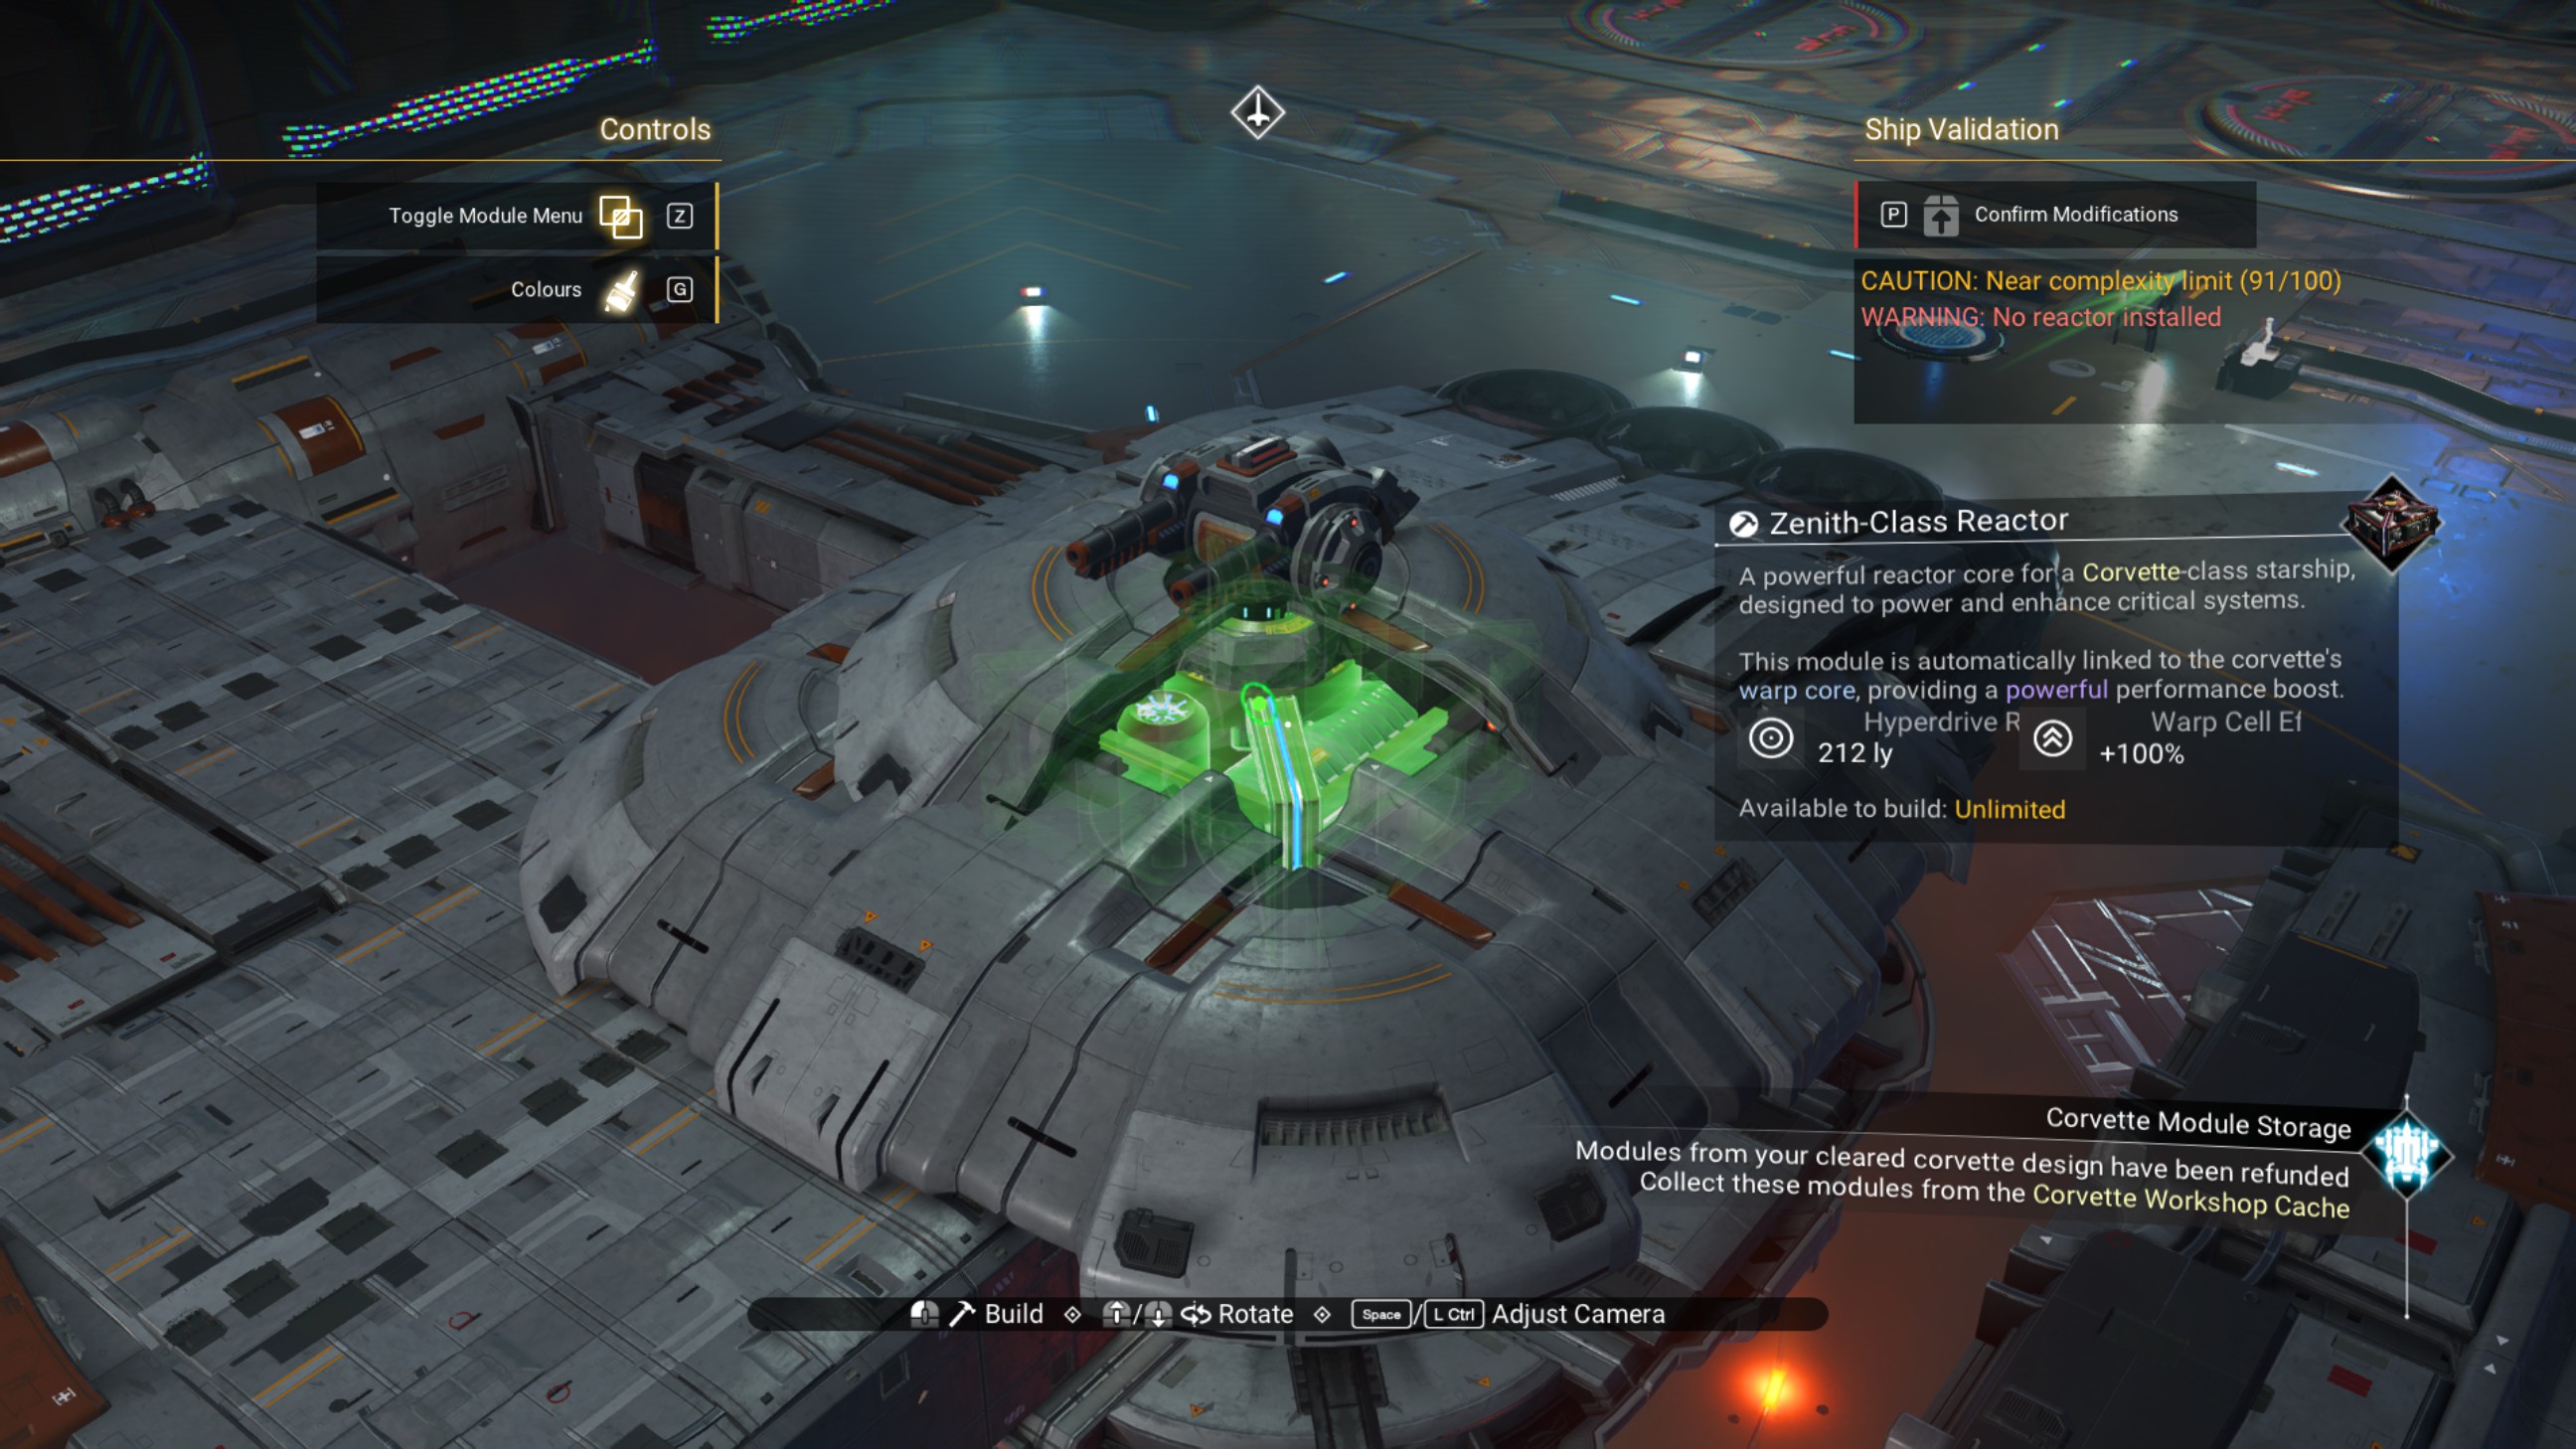
Now, if you're like me and forgot to add the reactor while building, go ahead and add one under the topside turret. (Remove a speedbird dome section, delete the top walkway directly under the turret, replace it with a zenith reactor, then replace the speedbird dome section.)
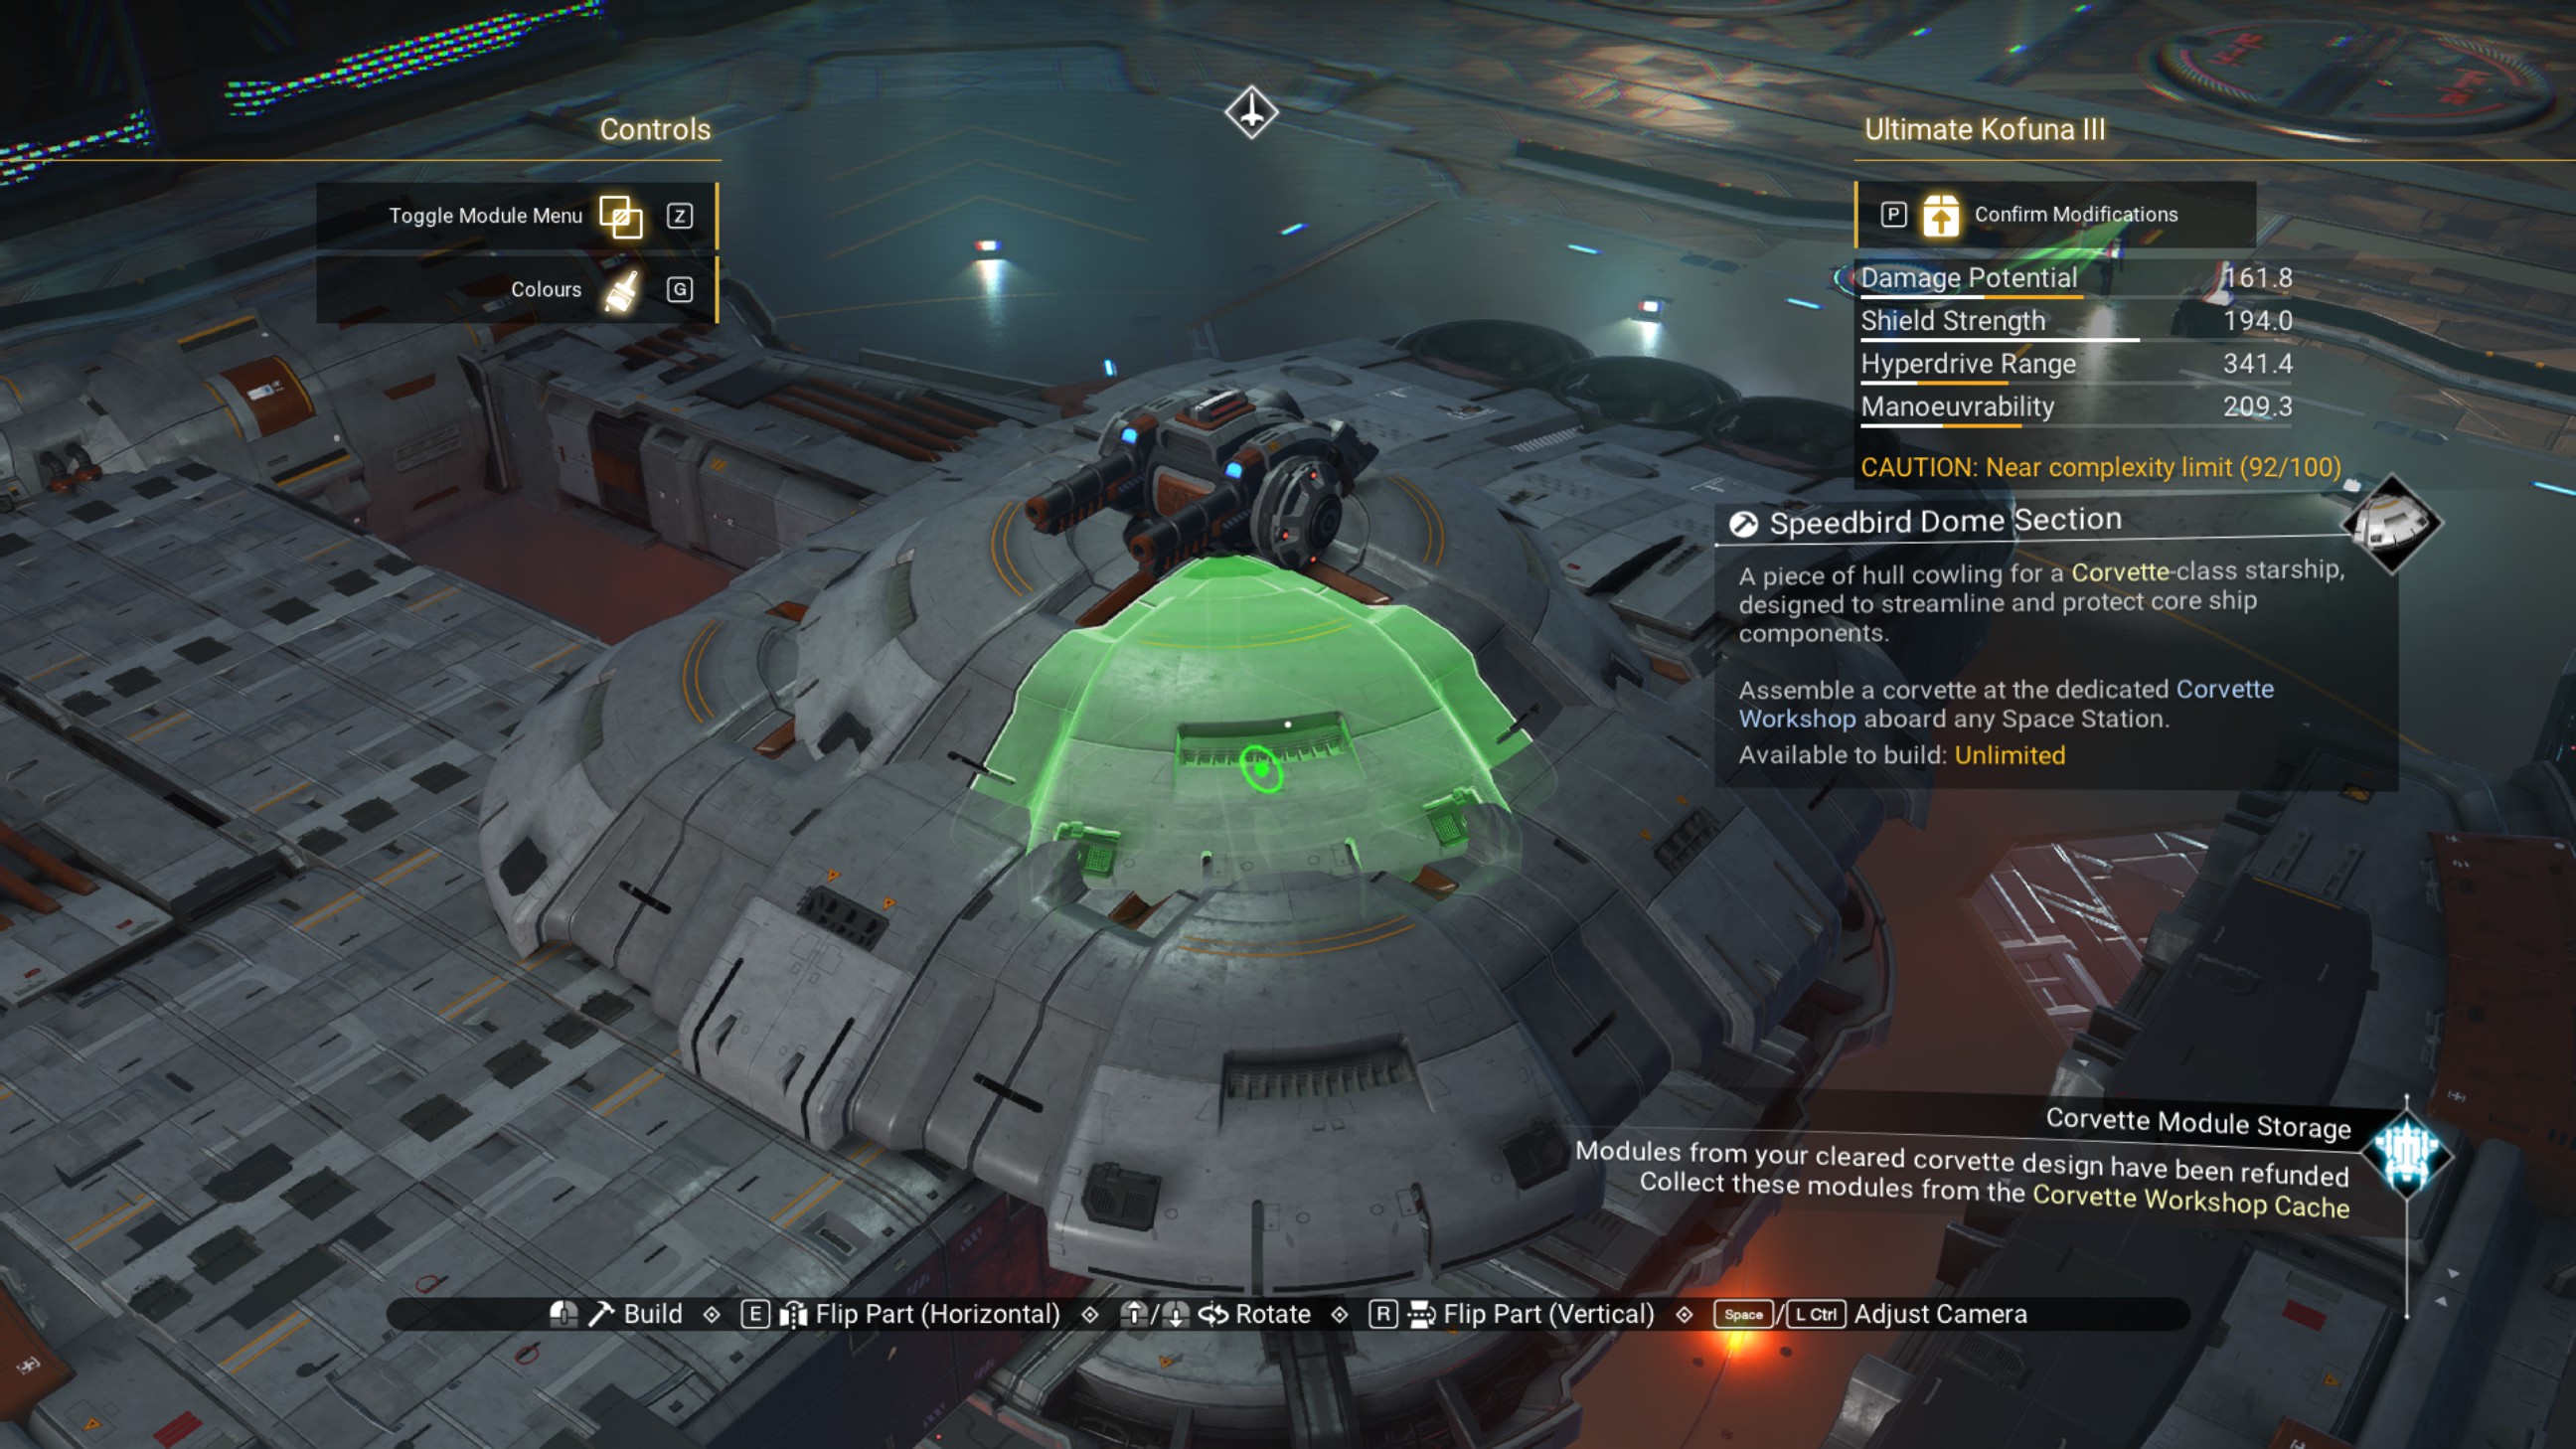
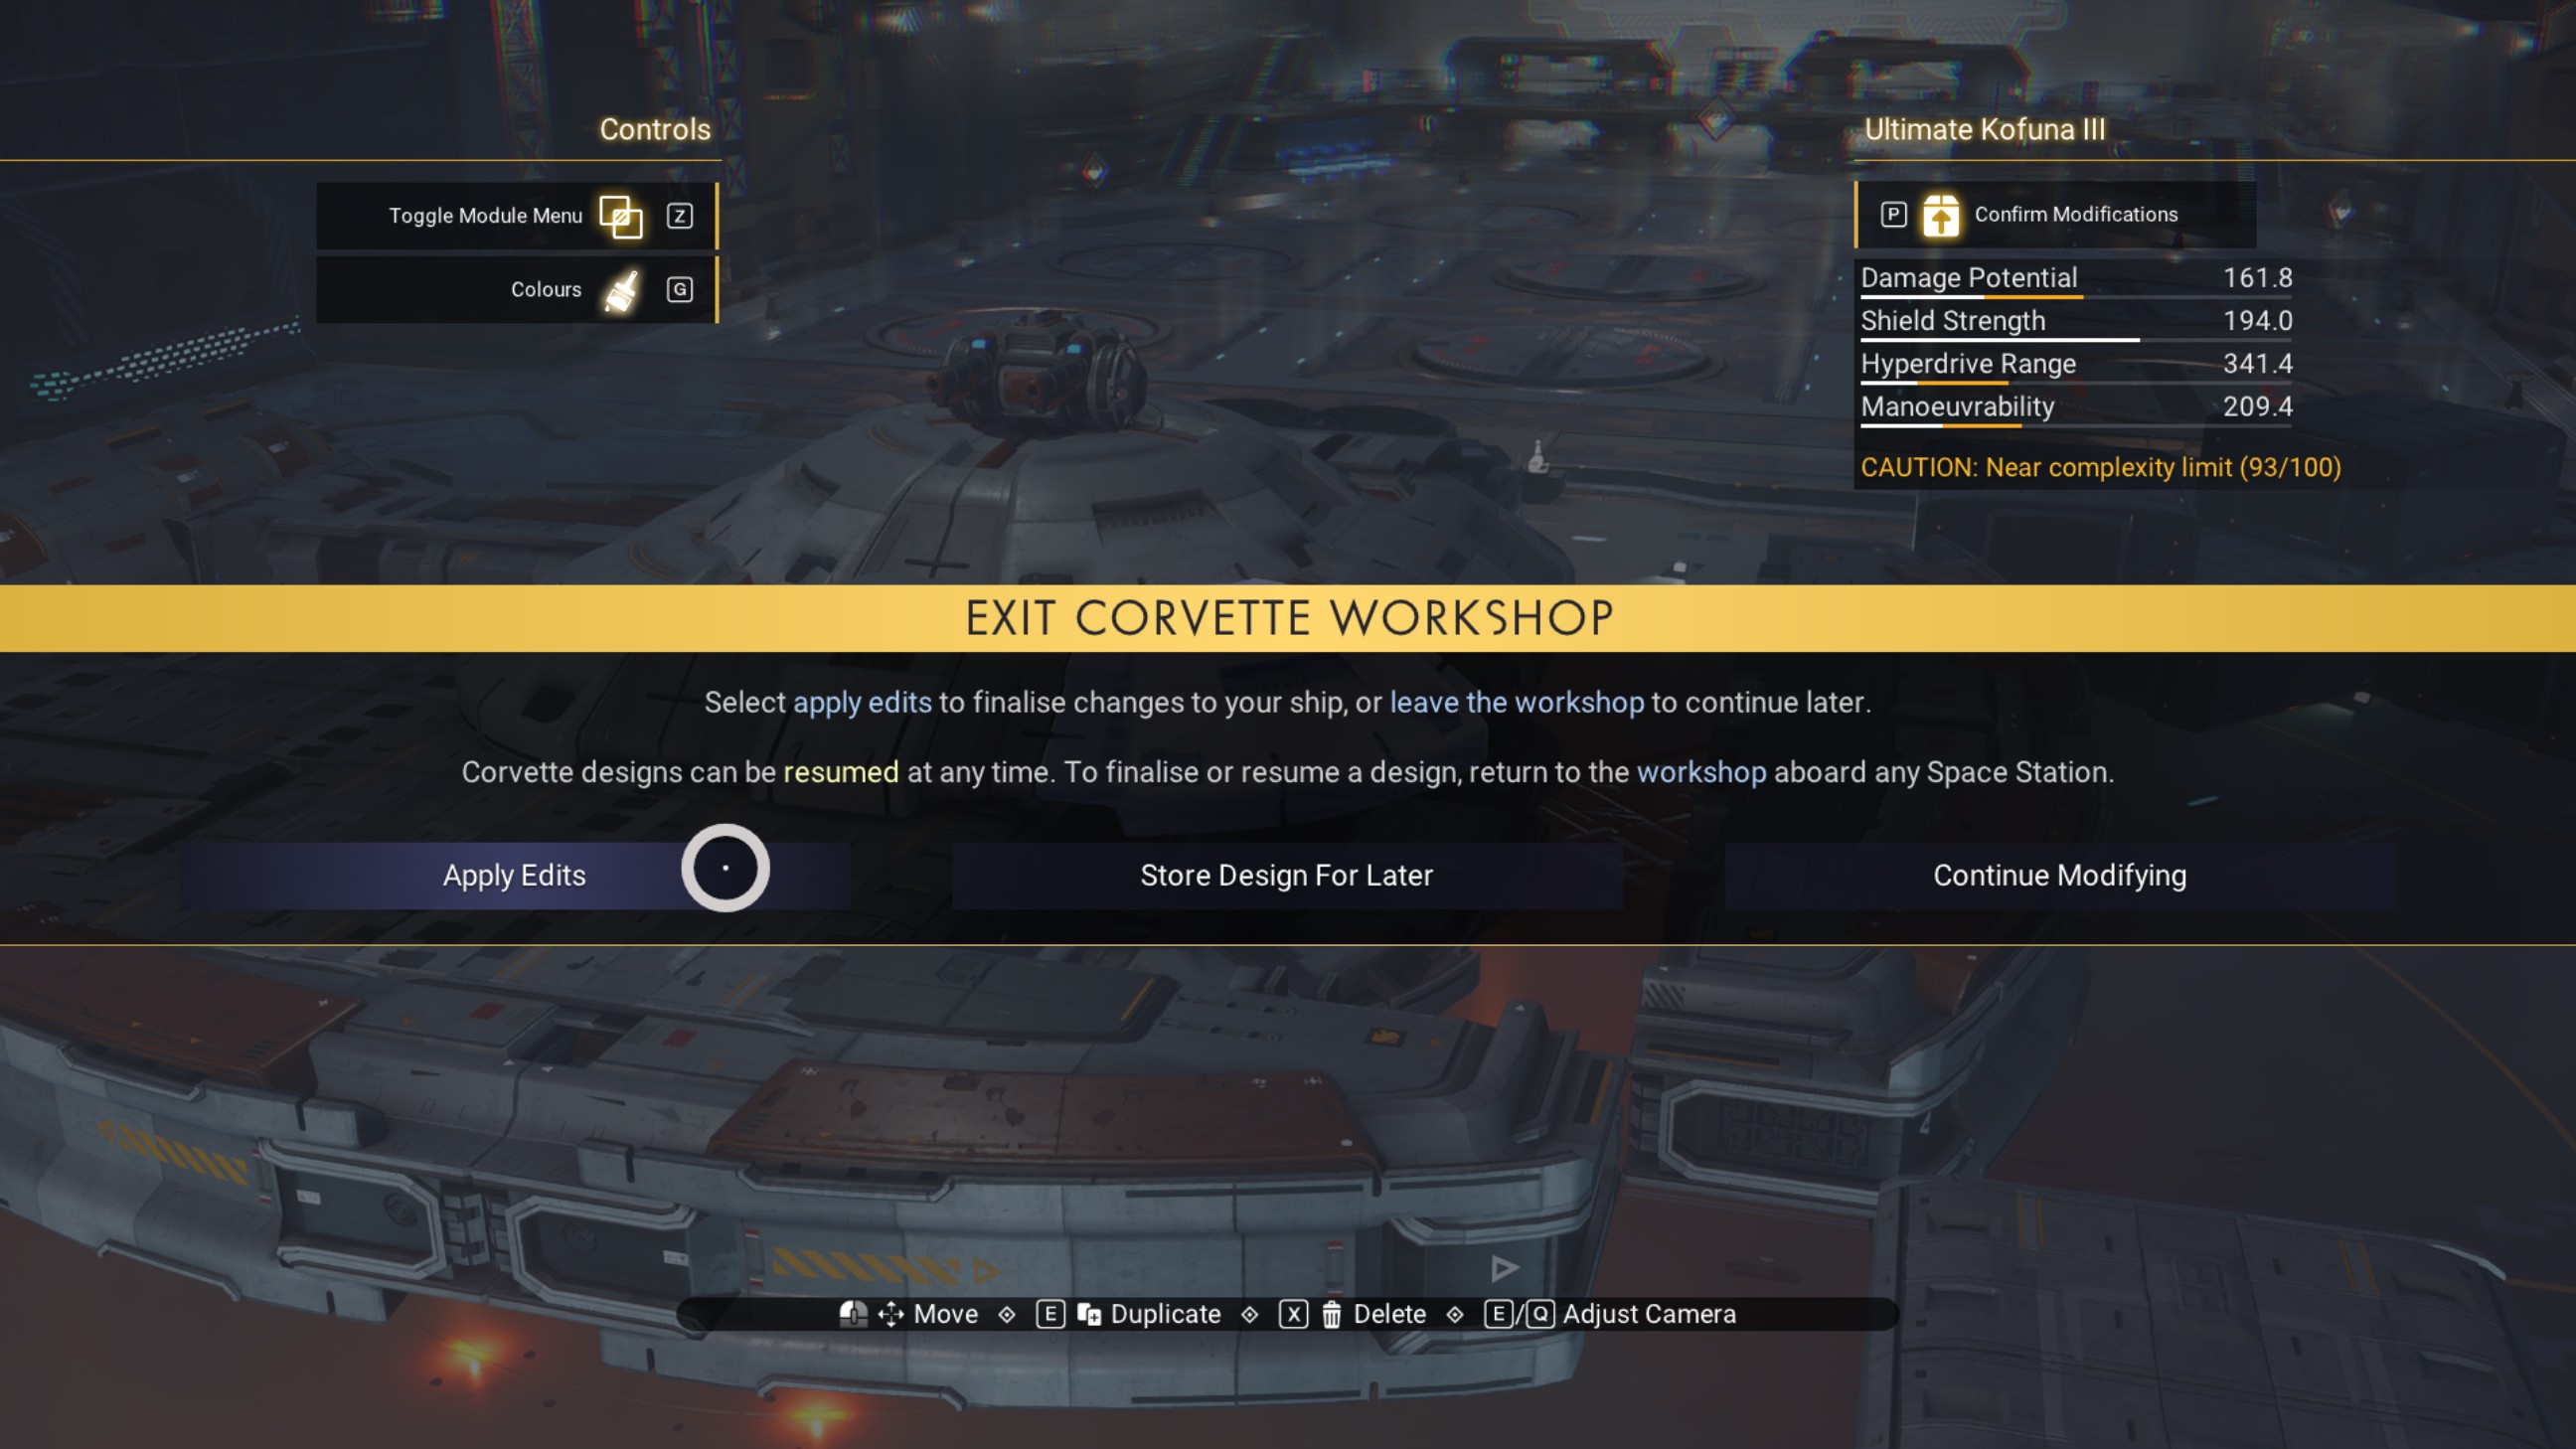
Finalize the changes again so we can continue building outside of the corvette workshop.
Overlapping Walkways
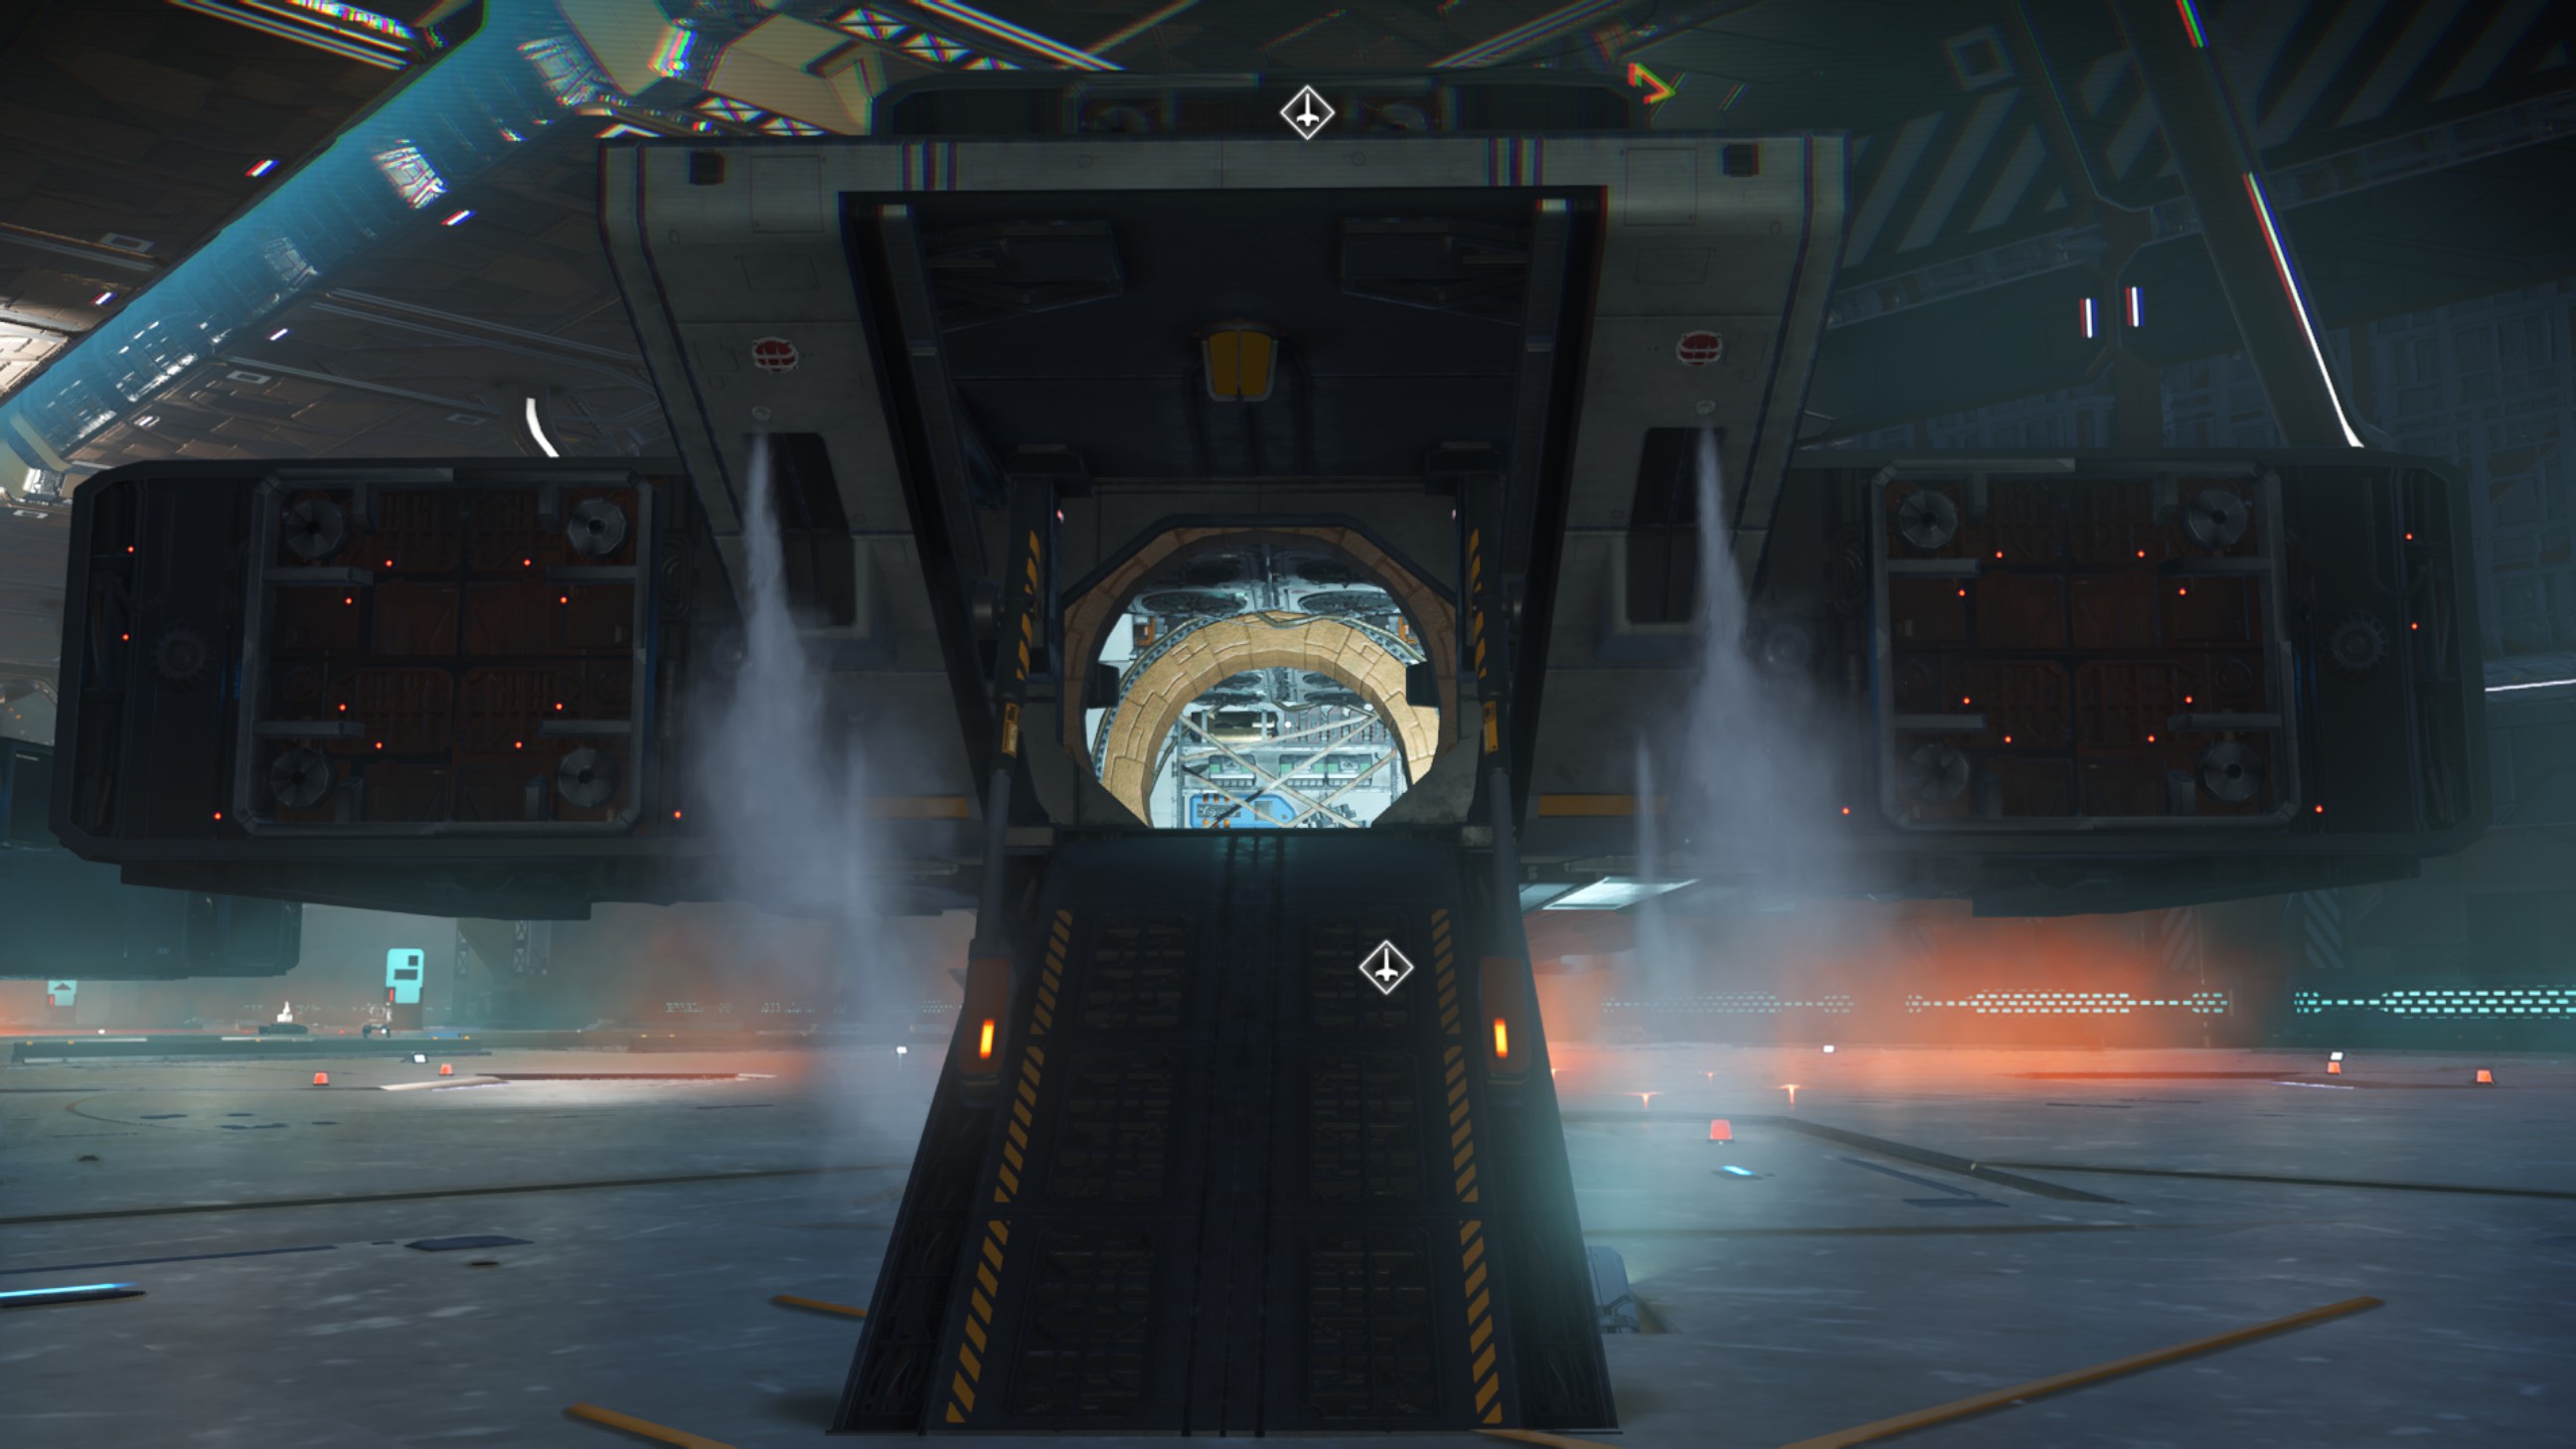
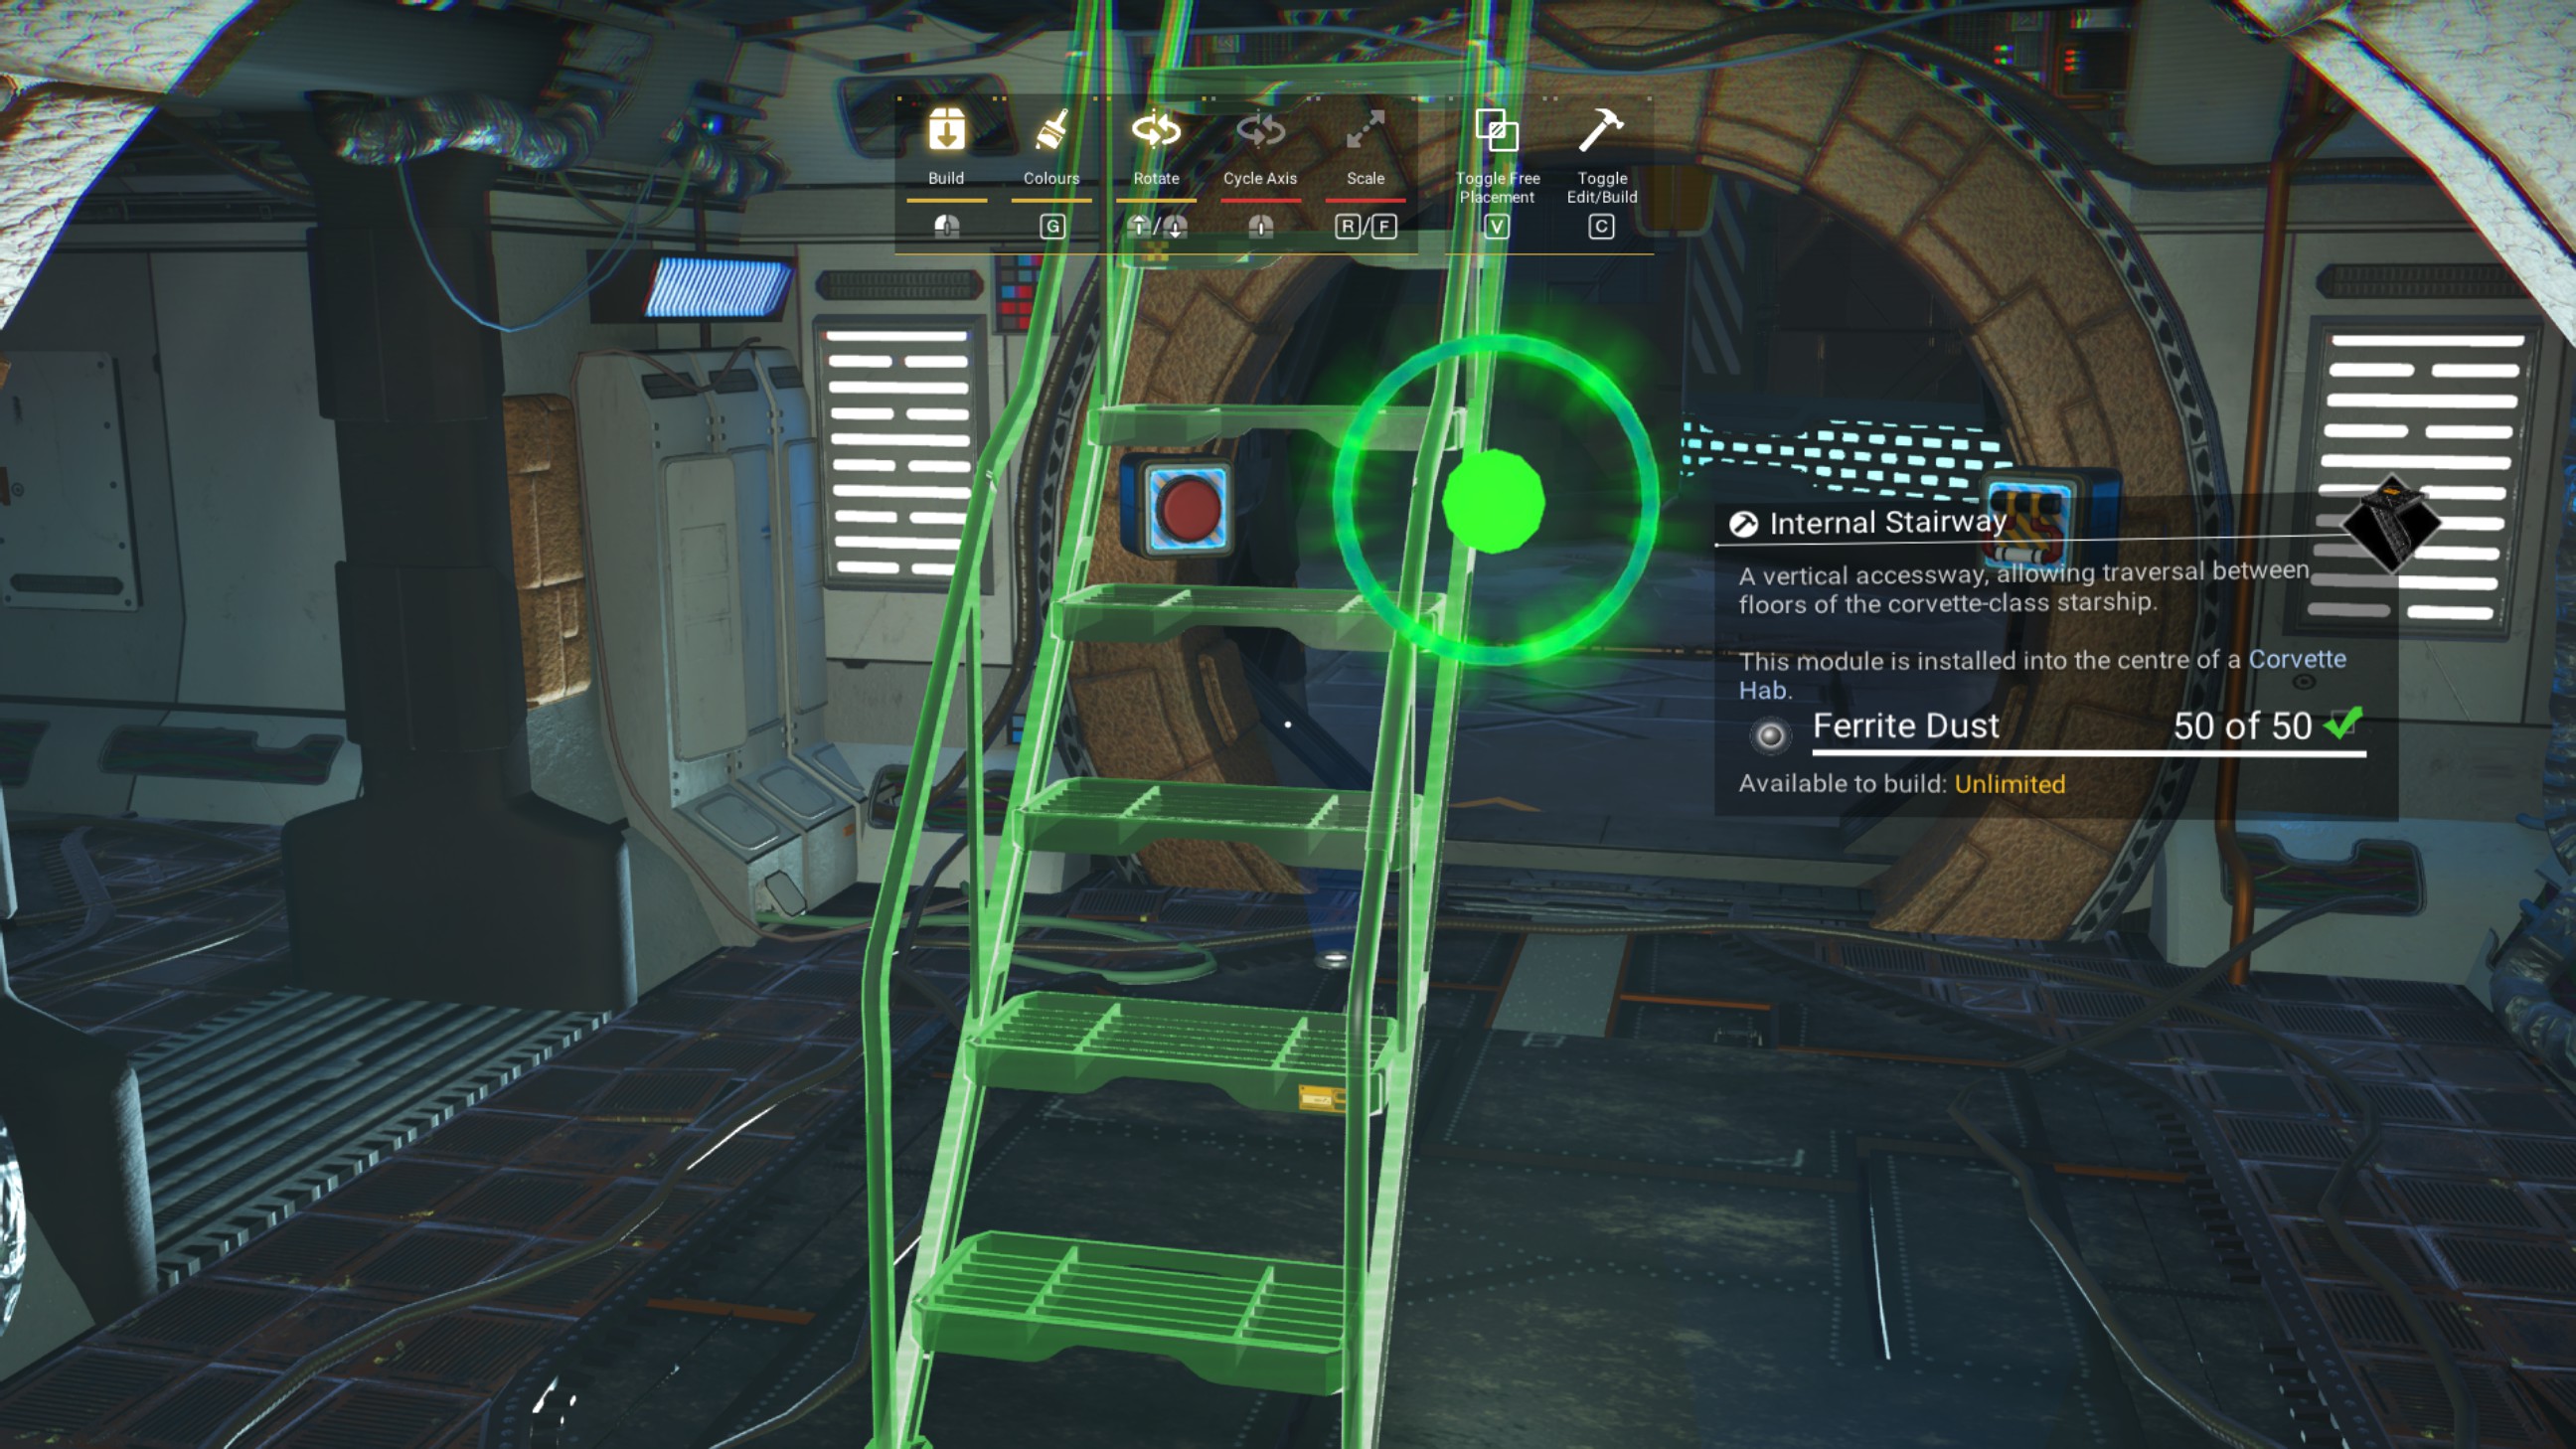
Make sure you do this for both 45 degree structures.
Reenter the corvette workshop.
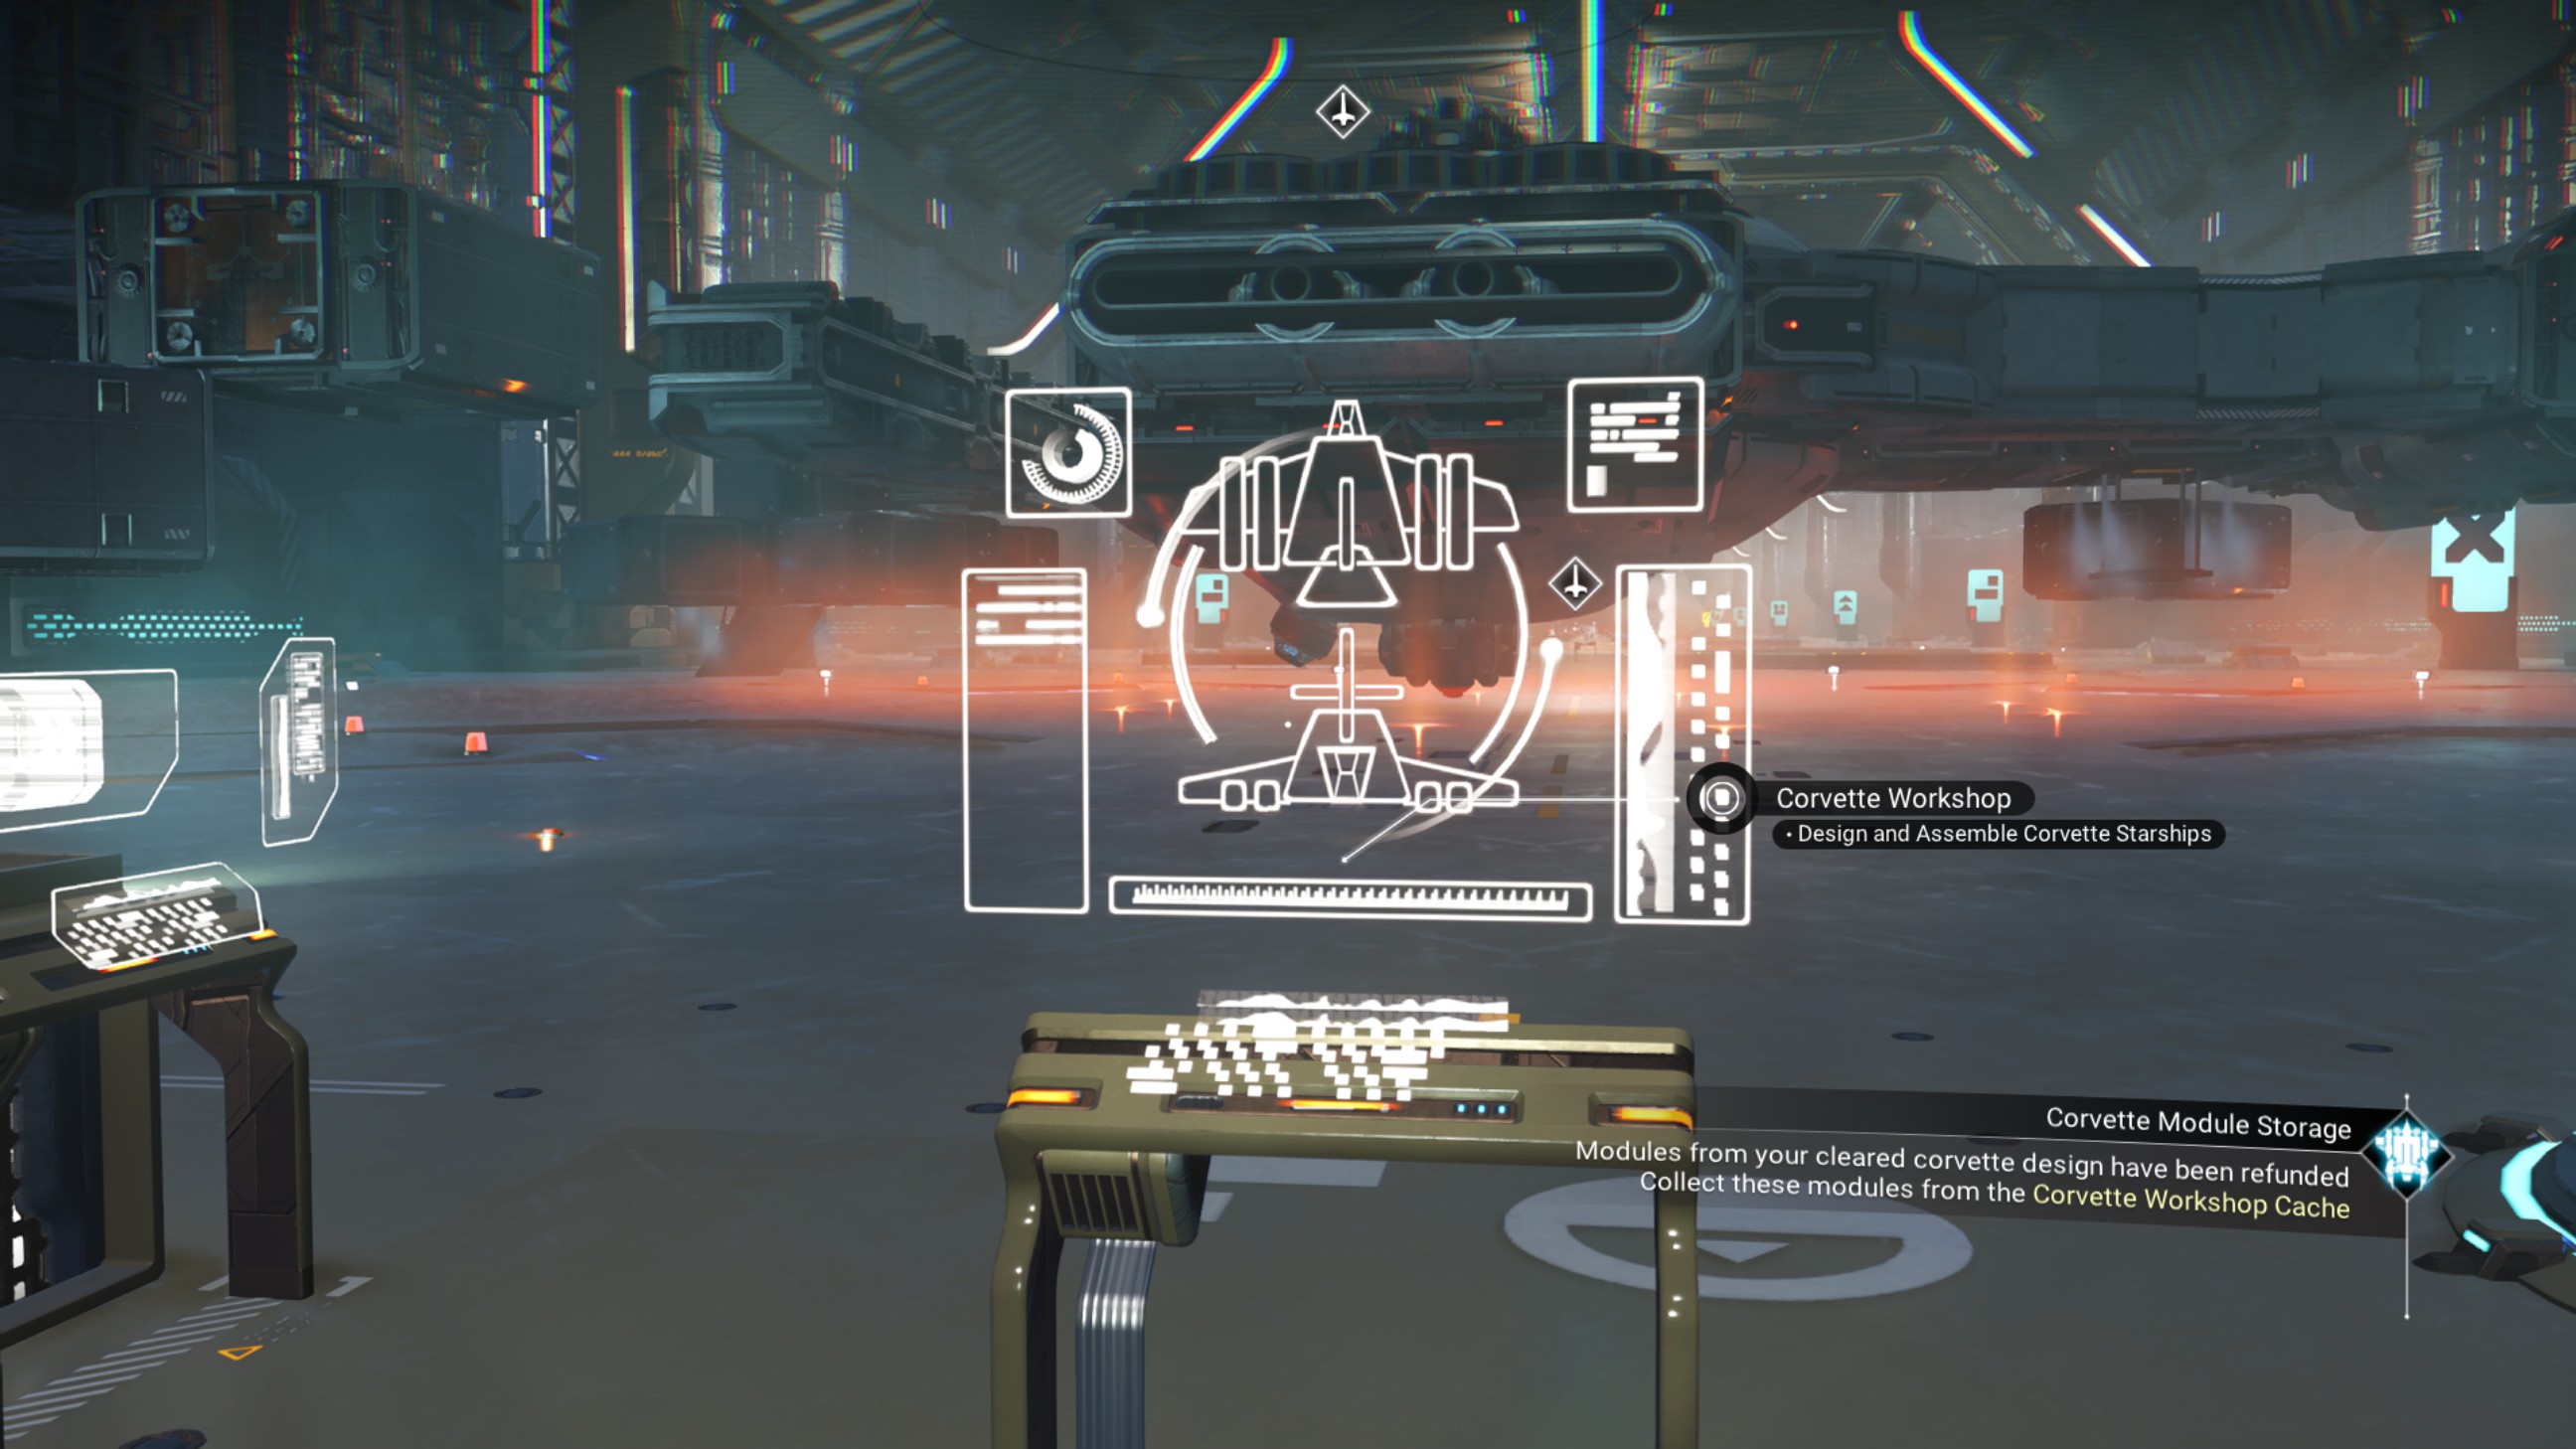
Let's start with the structure off the port stern. Delete the landing bay.
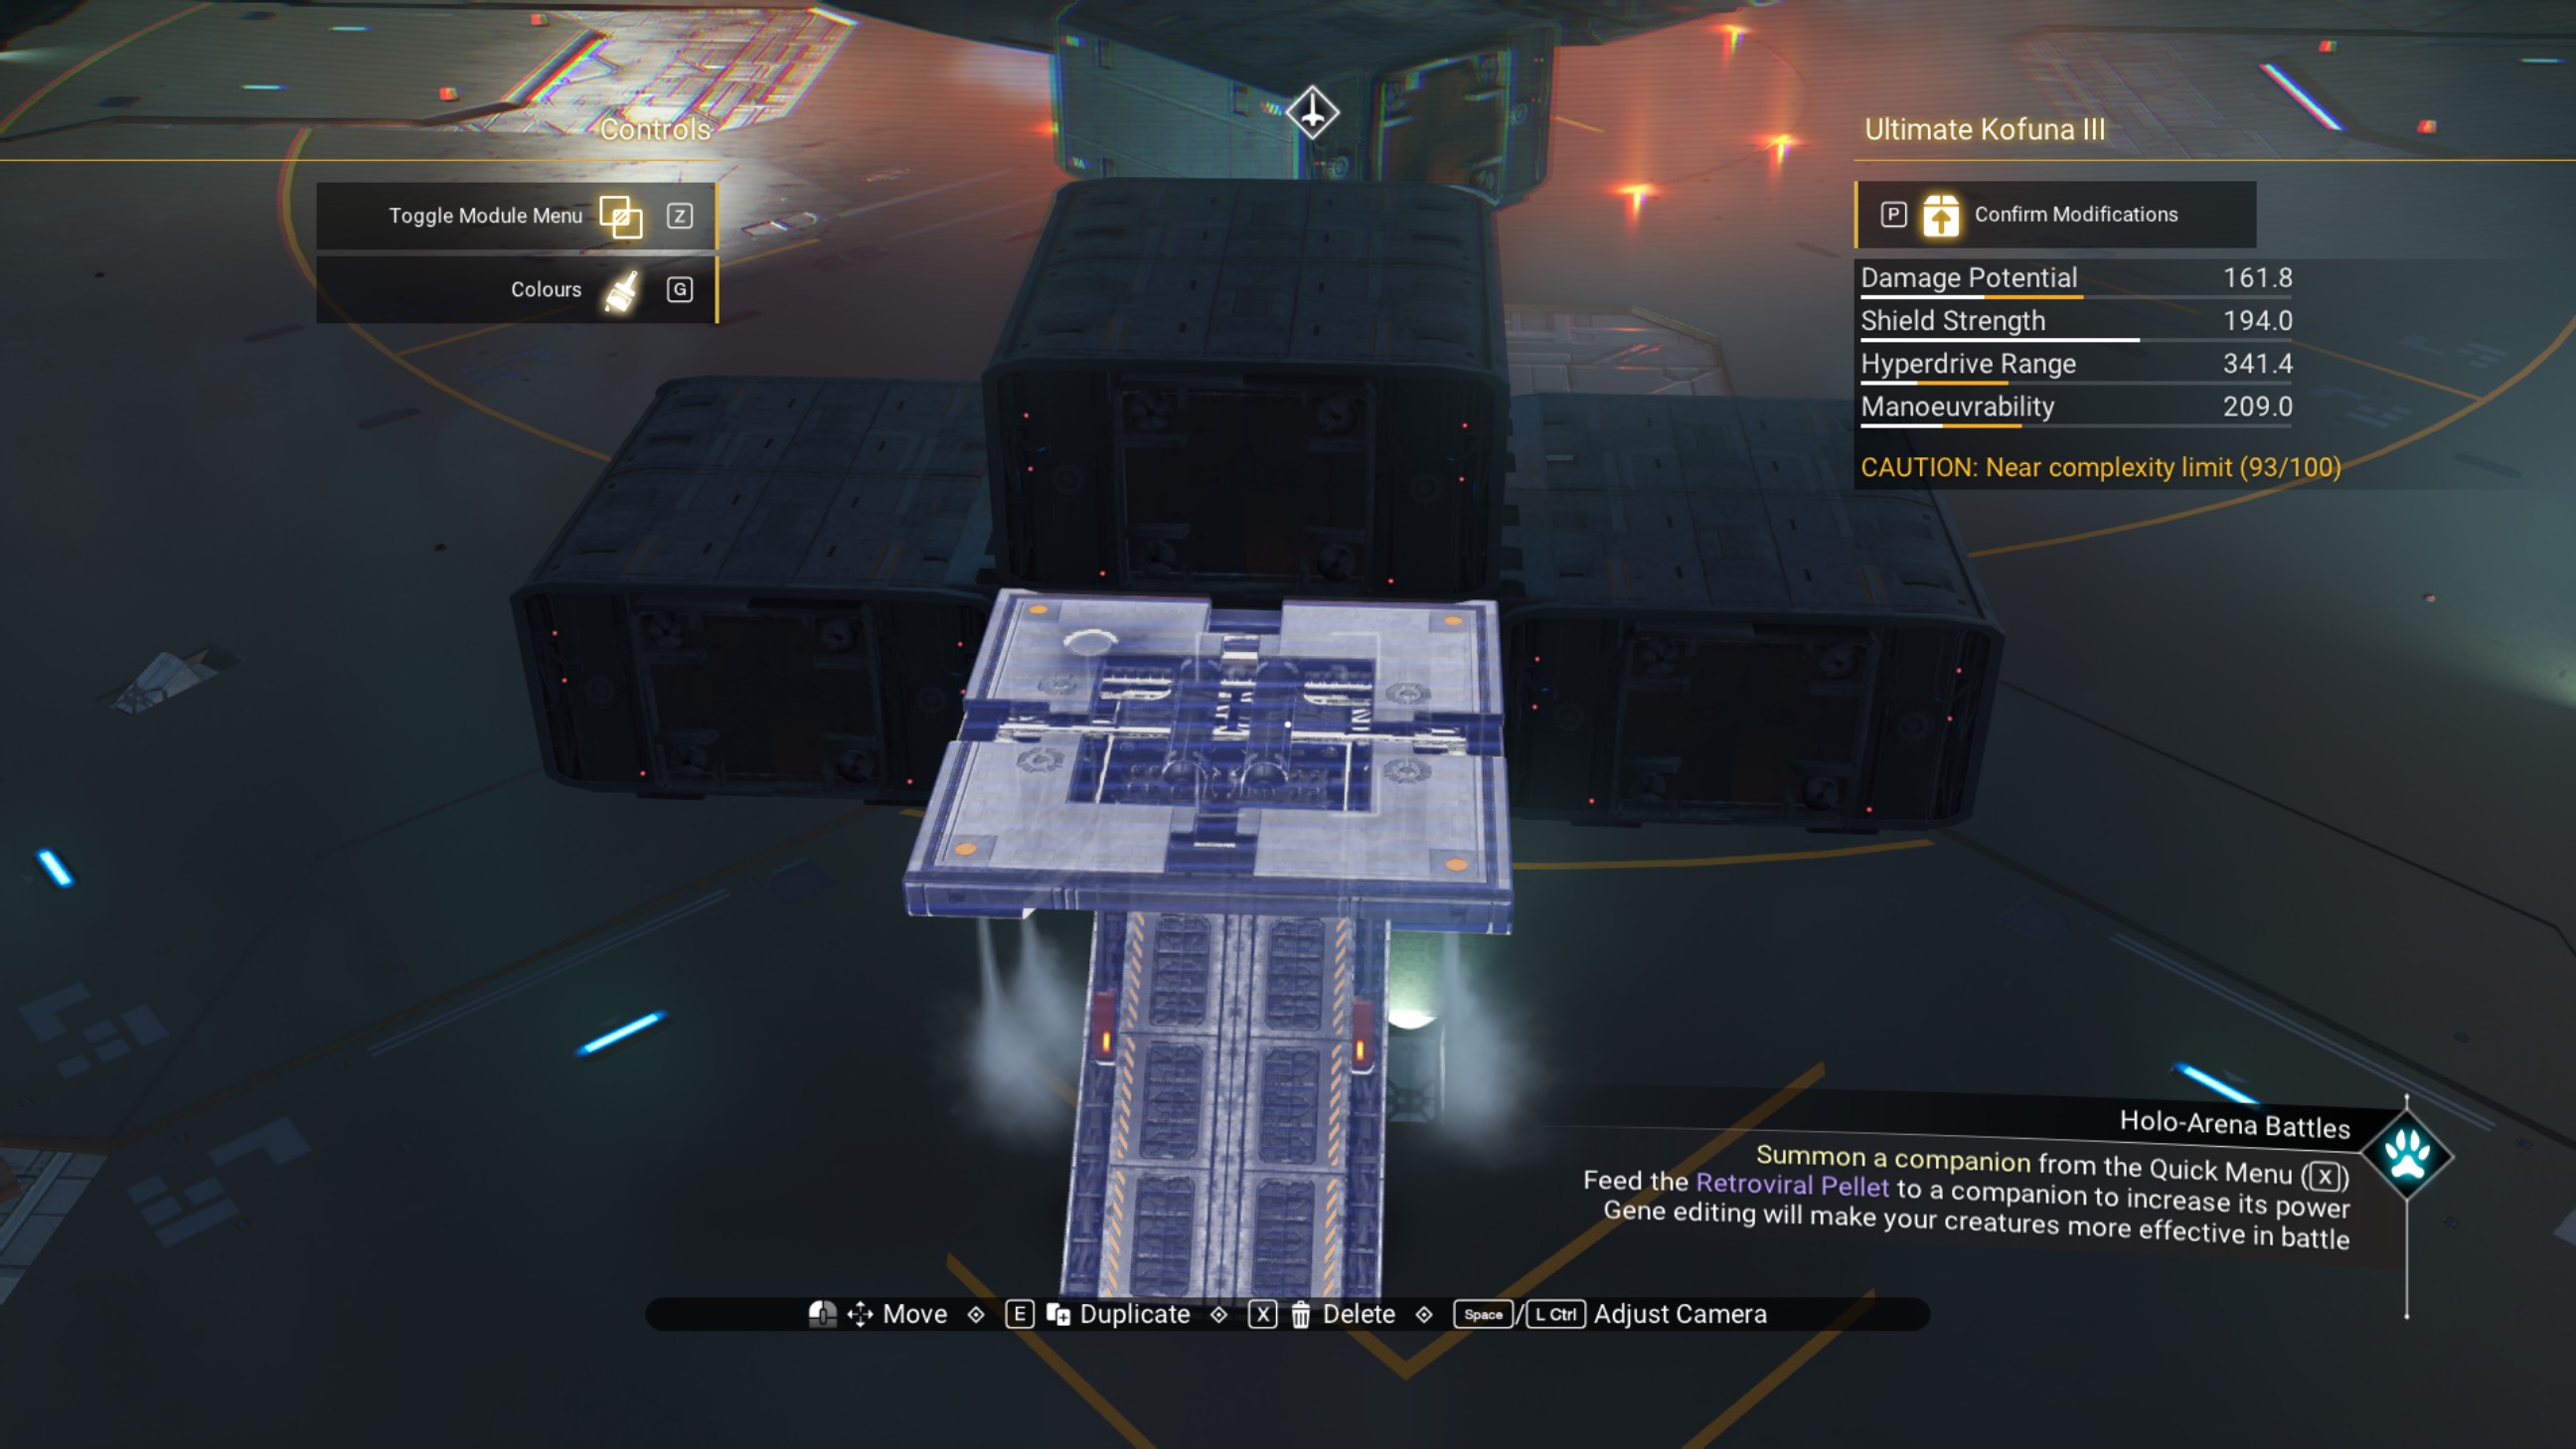
Select the lower central walkway (do NOT delete it!), rotate it and place it right back where it was.
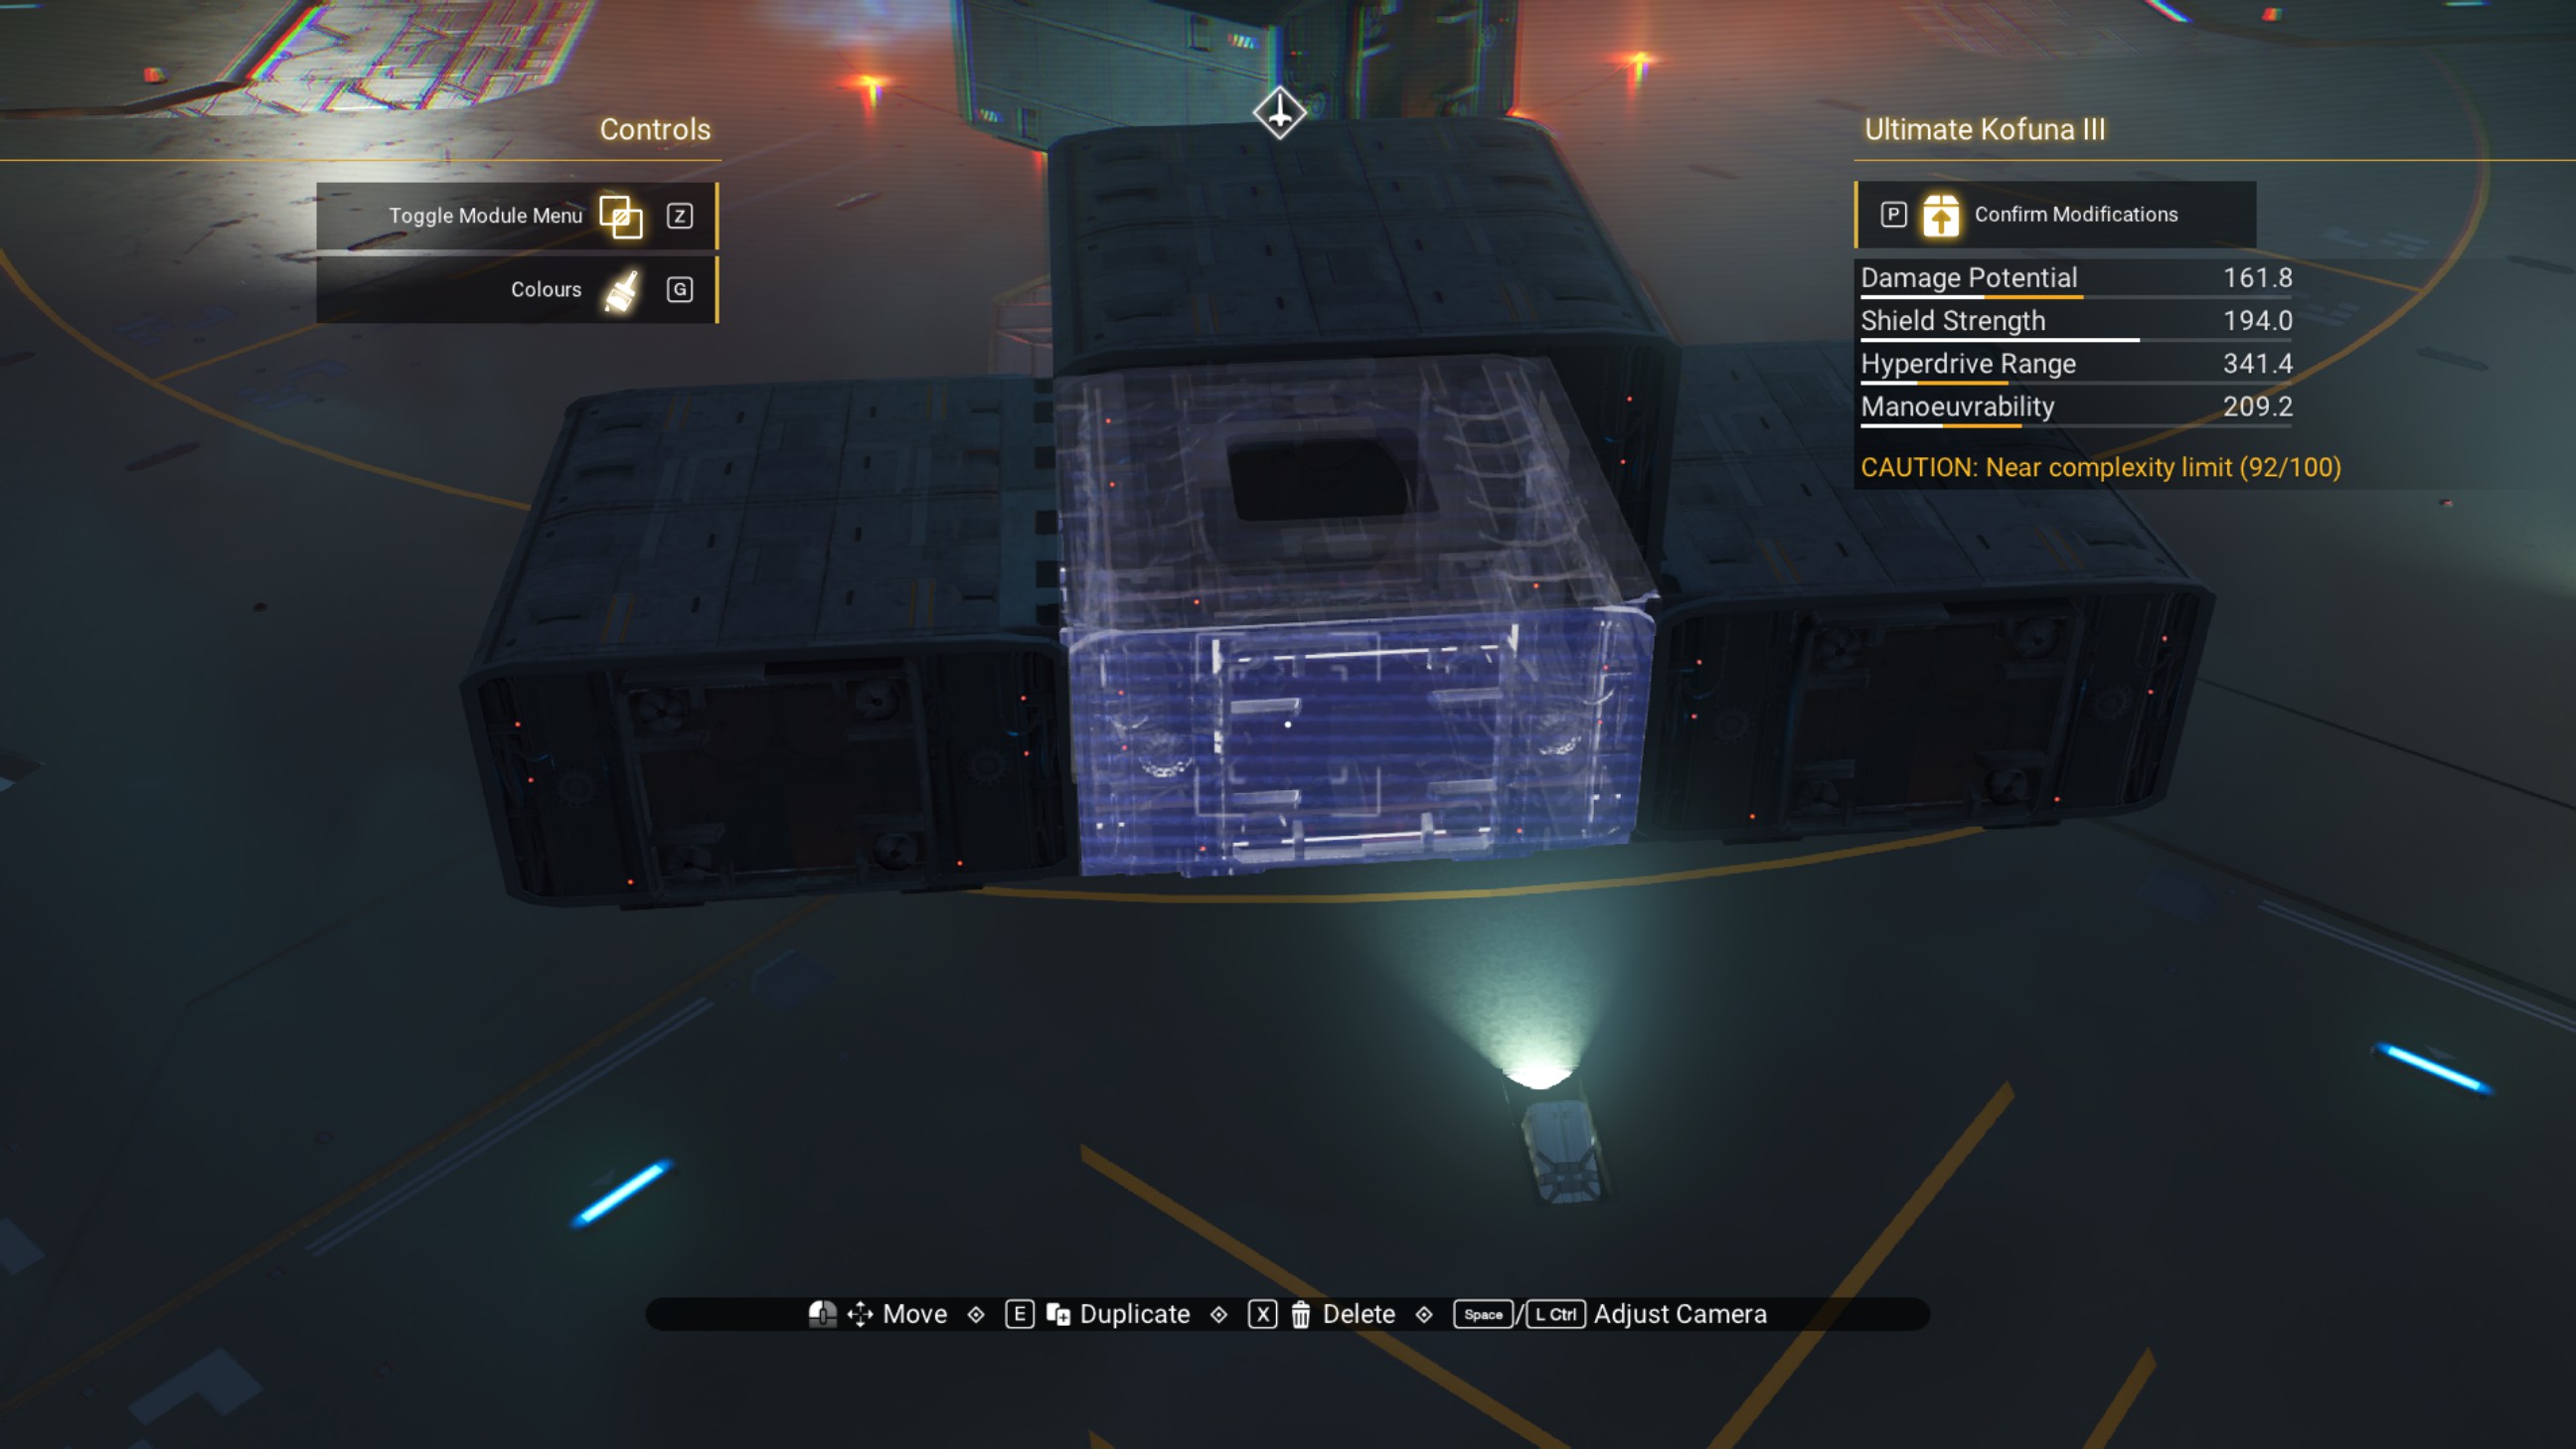
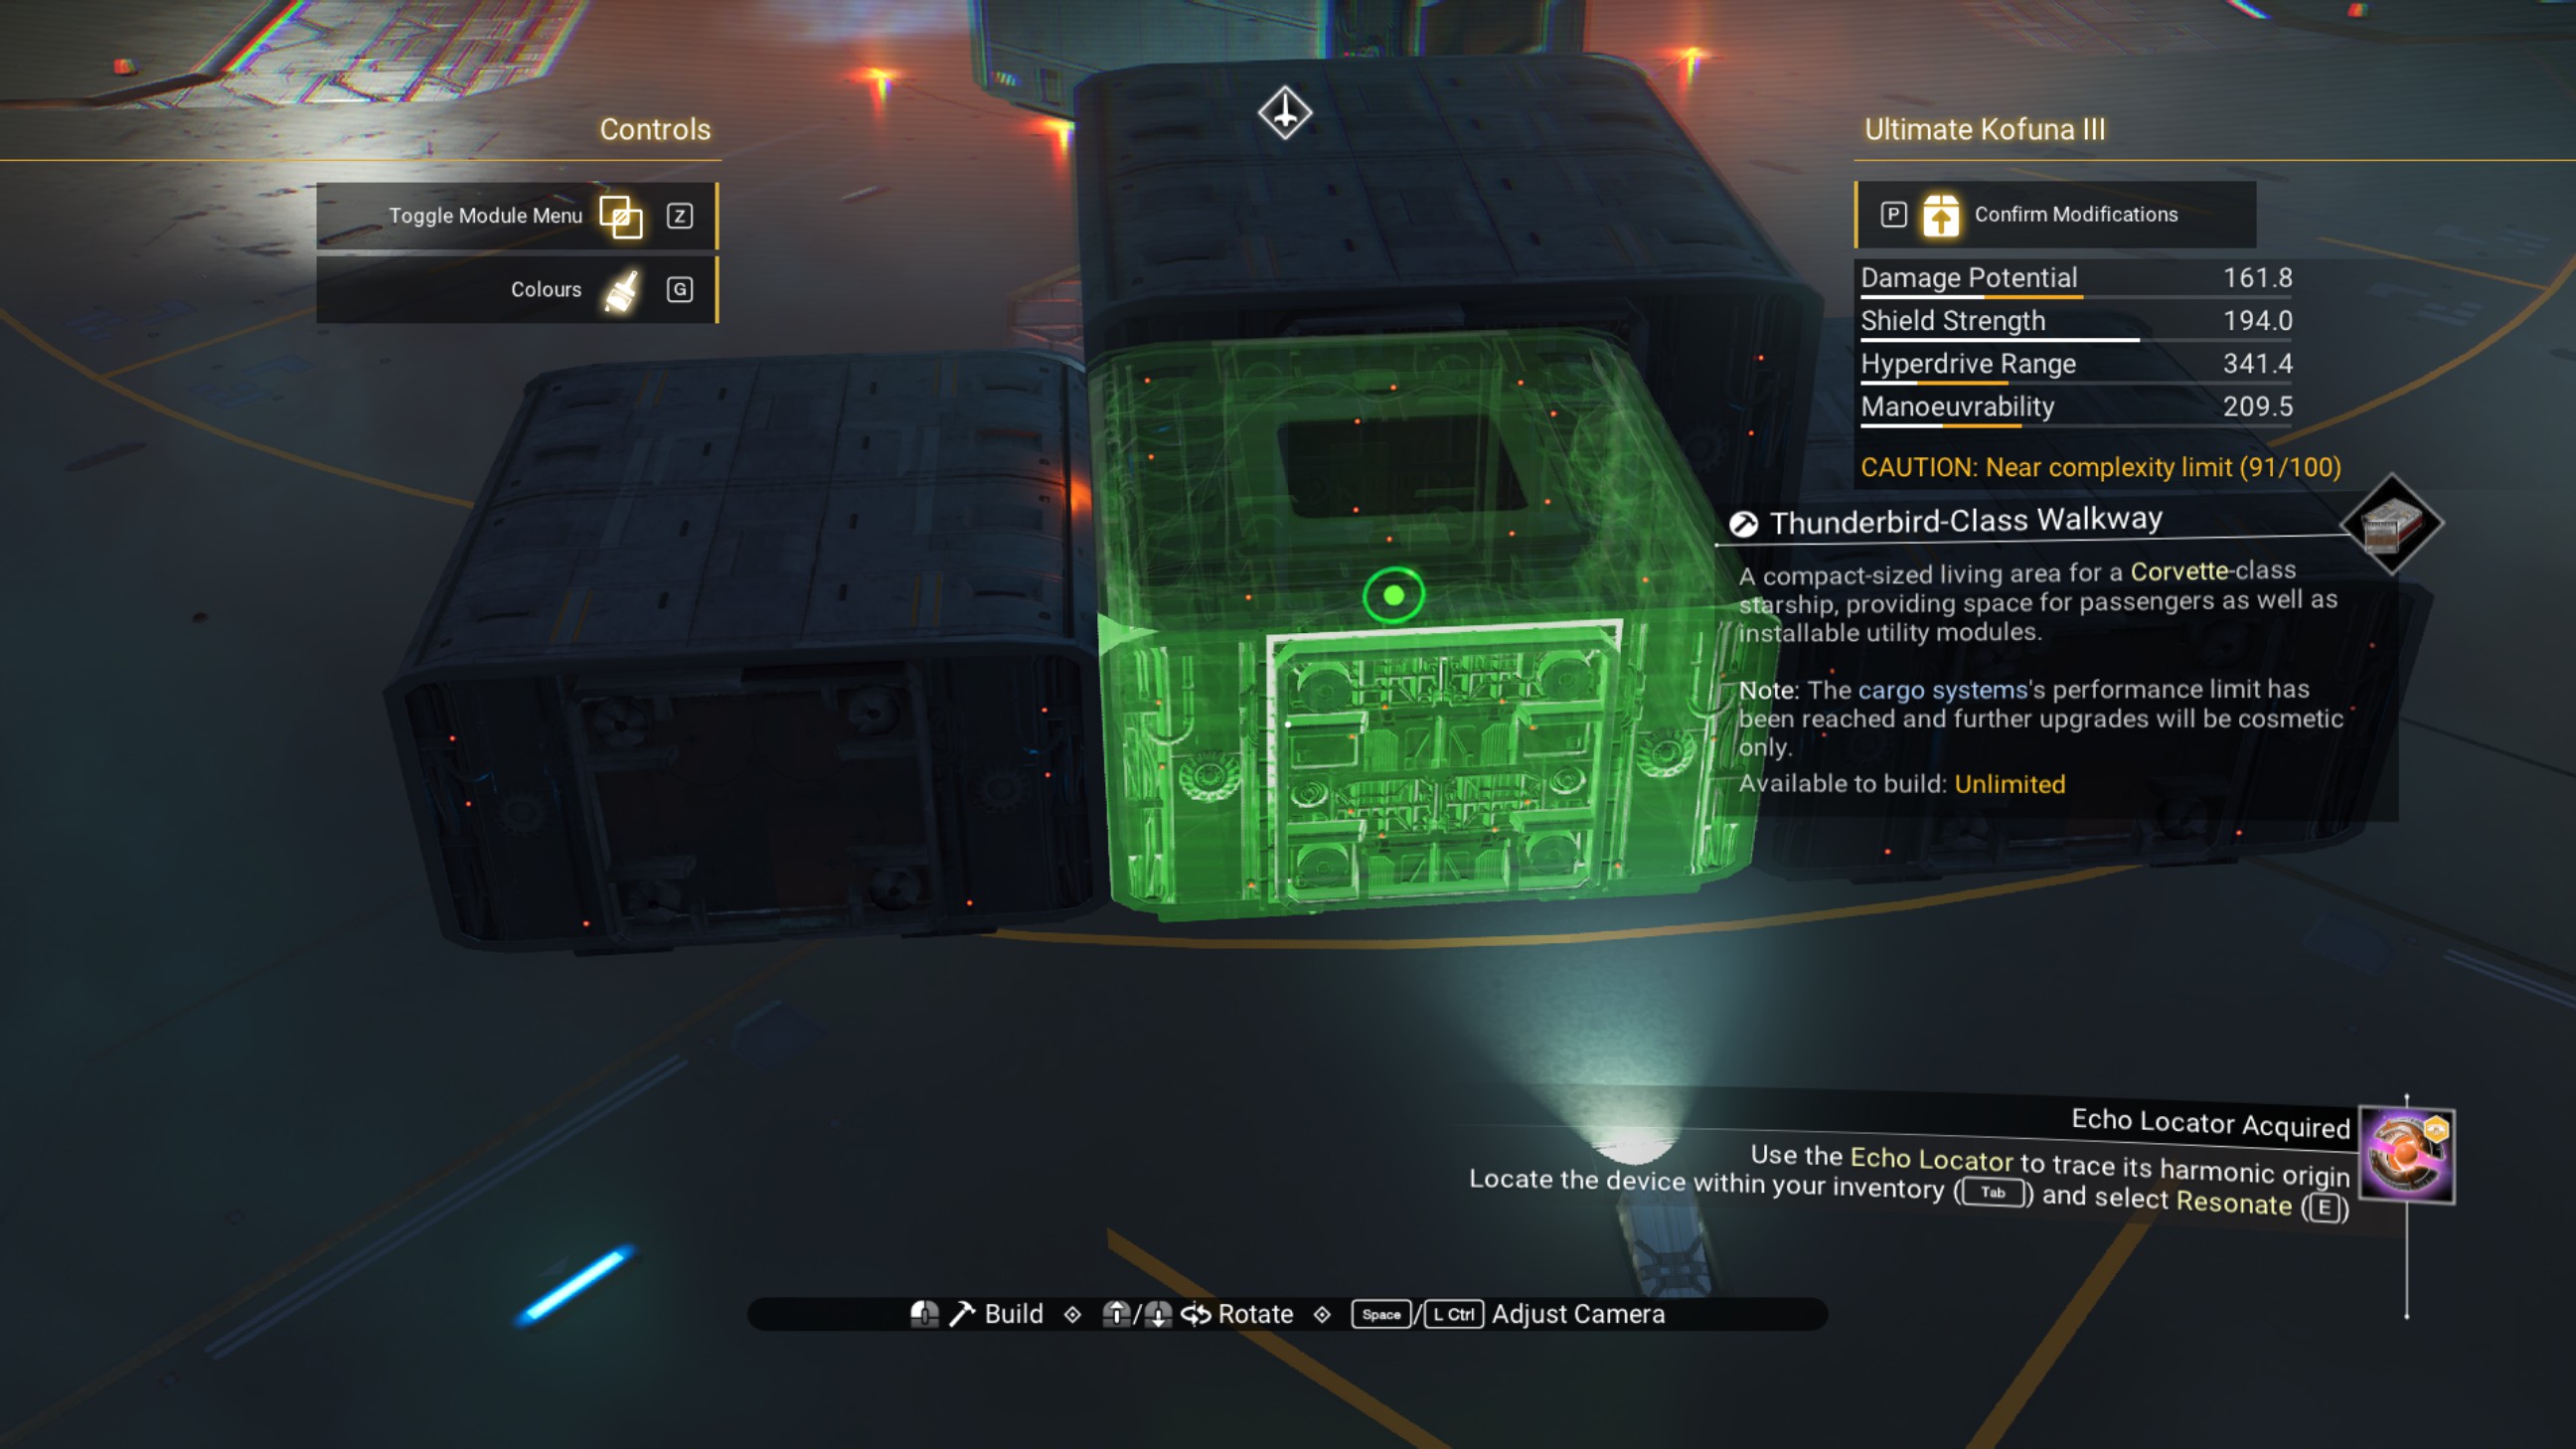
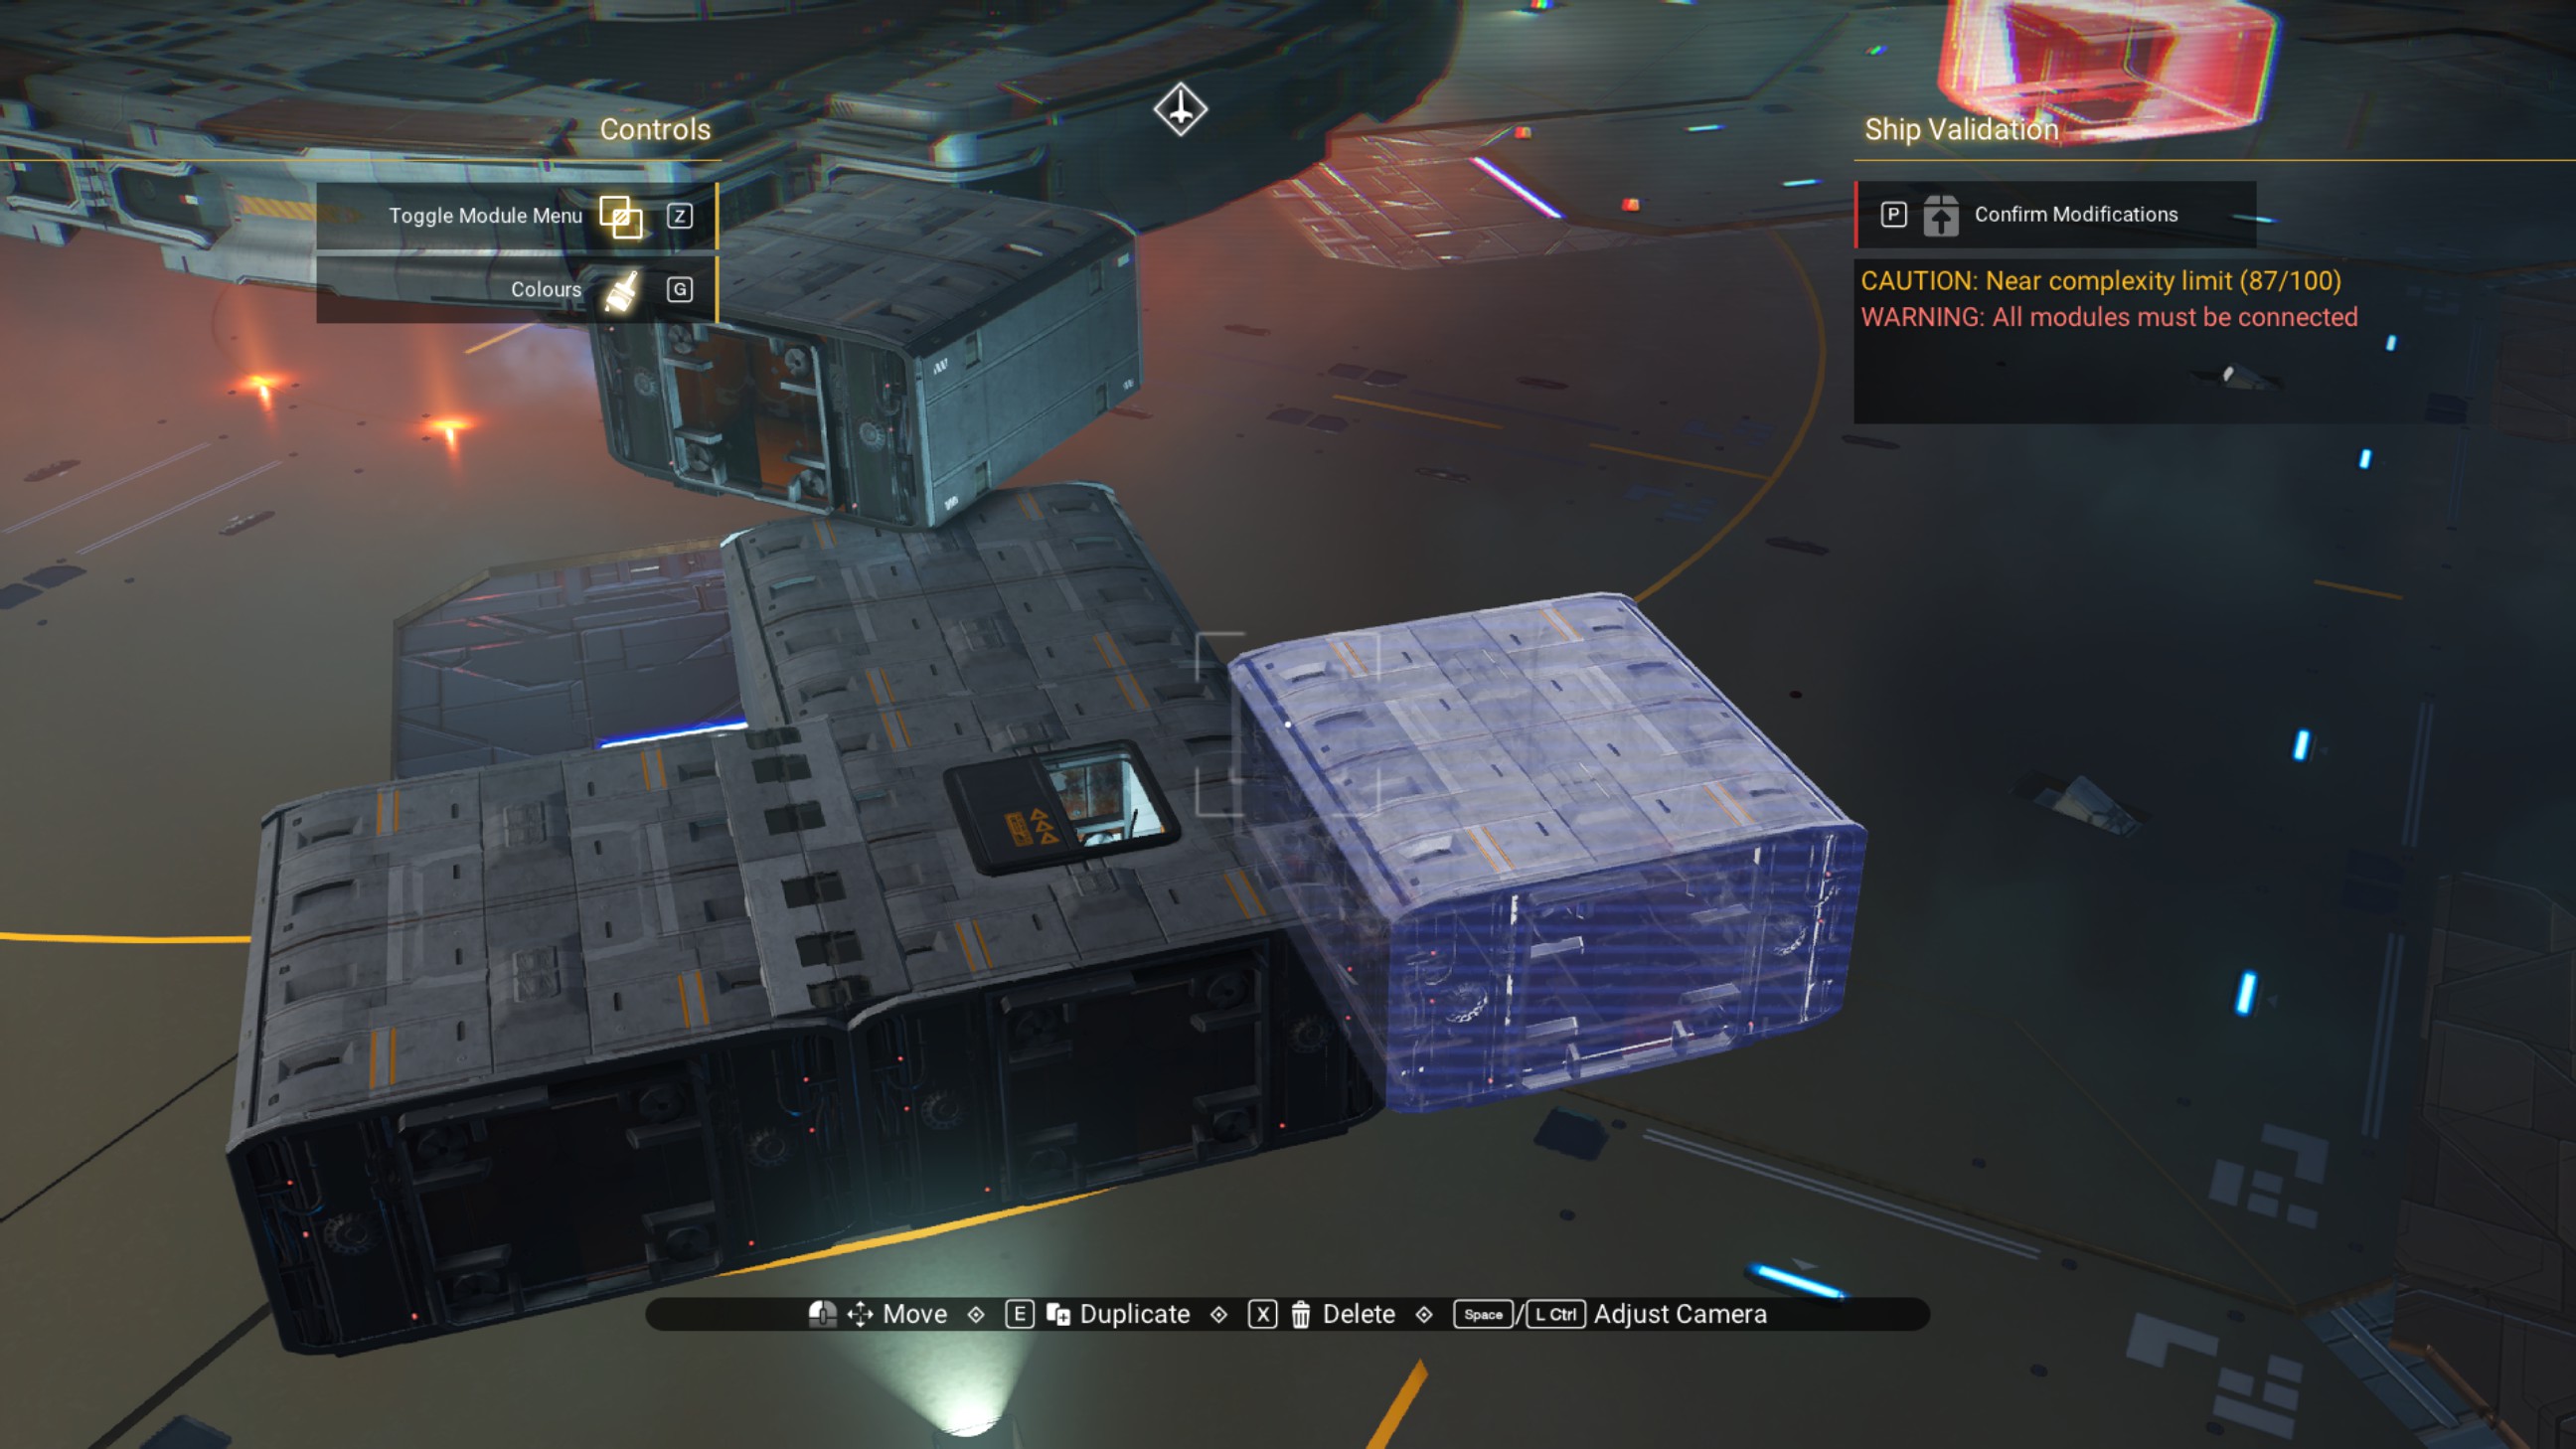
Place and rotate a walkway so it directly overlaps the walkway on the left (as we are looking at it in the pictures).
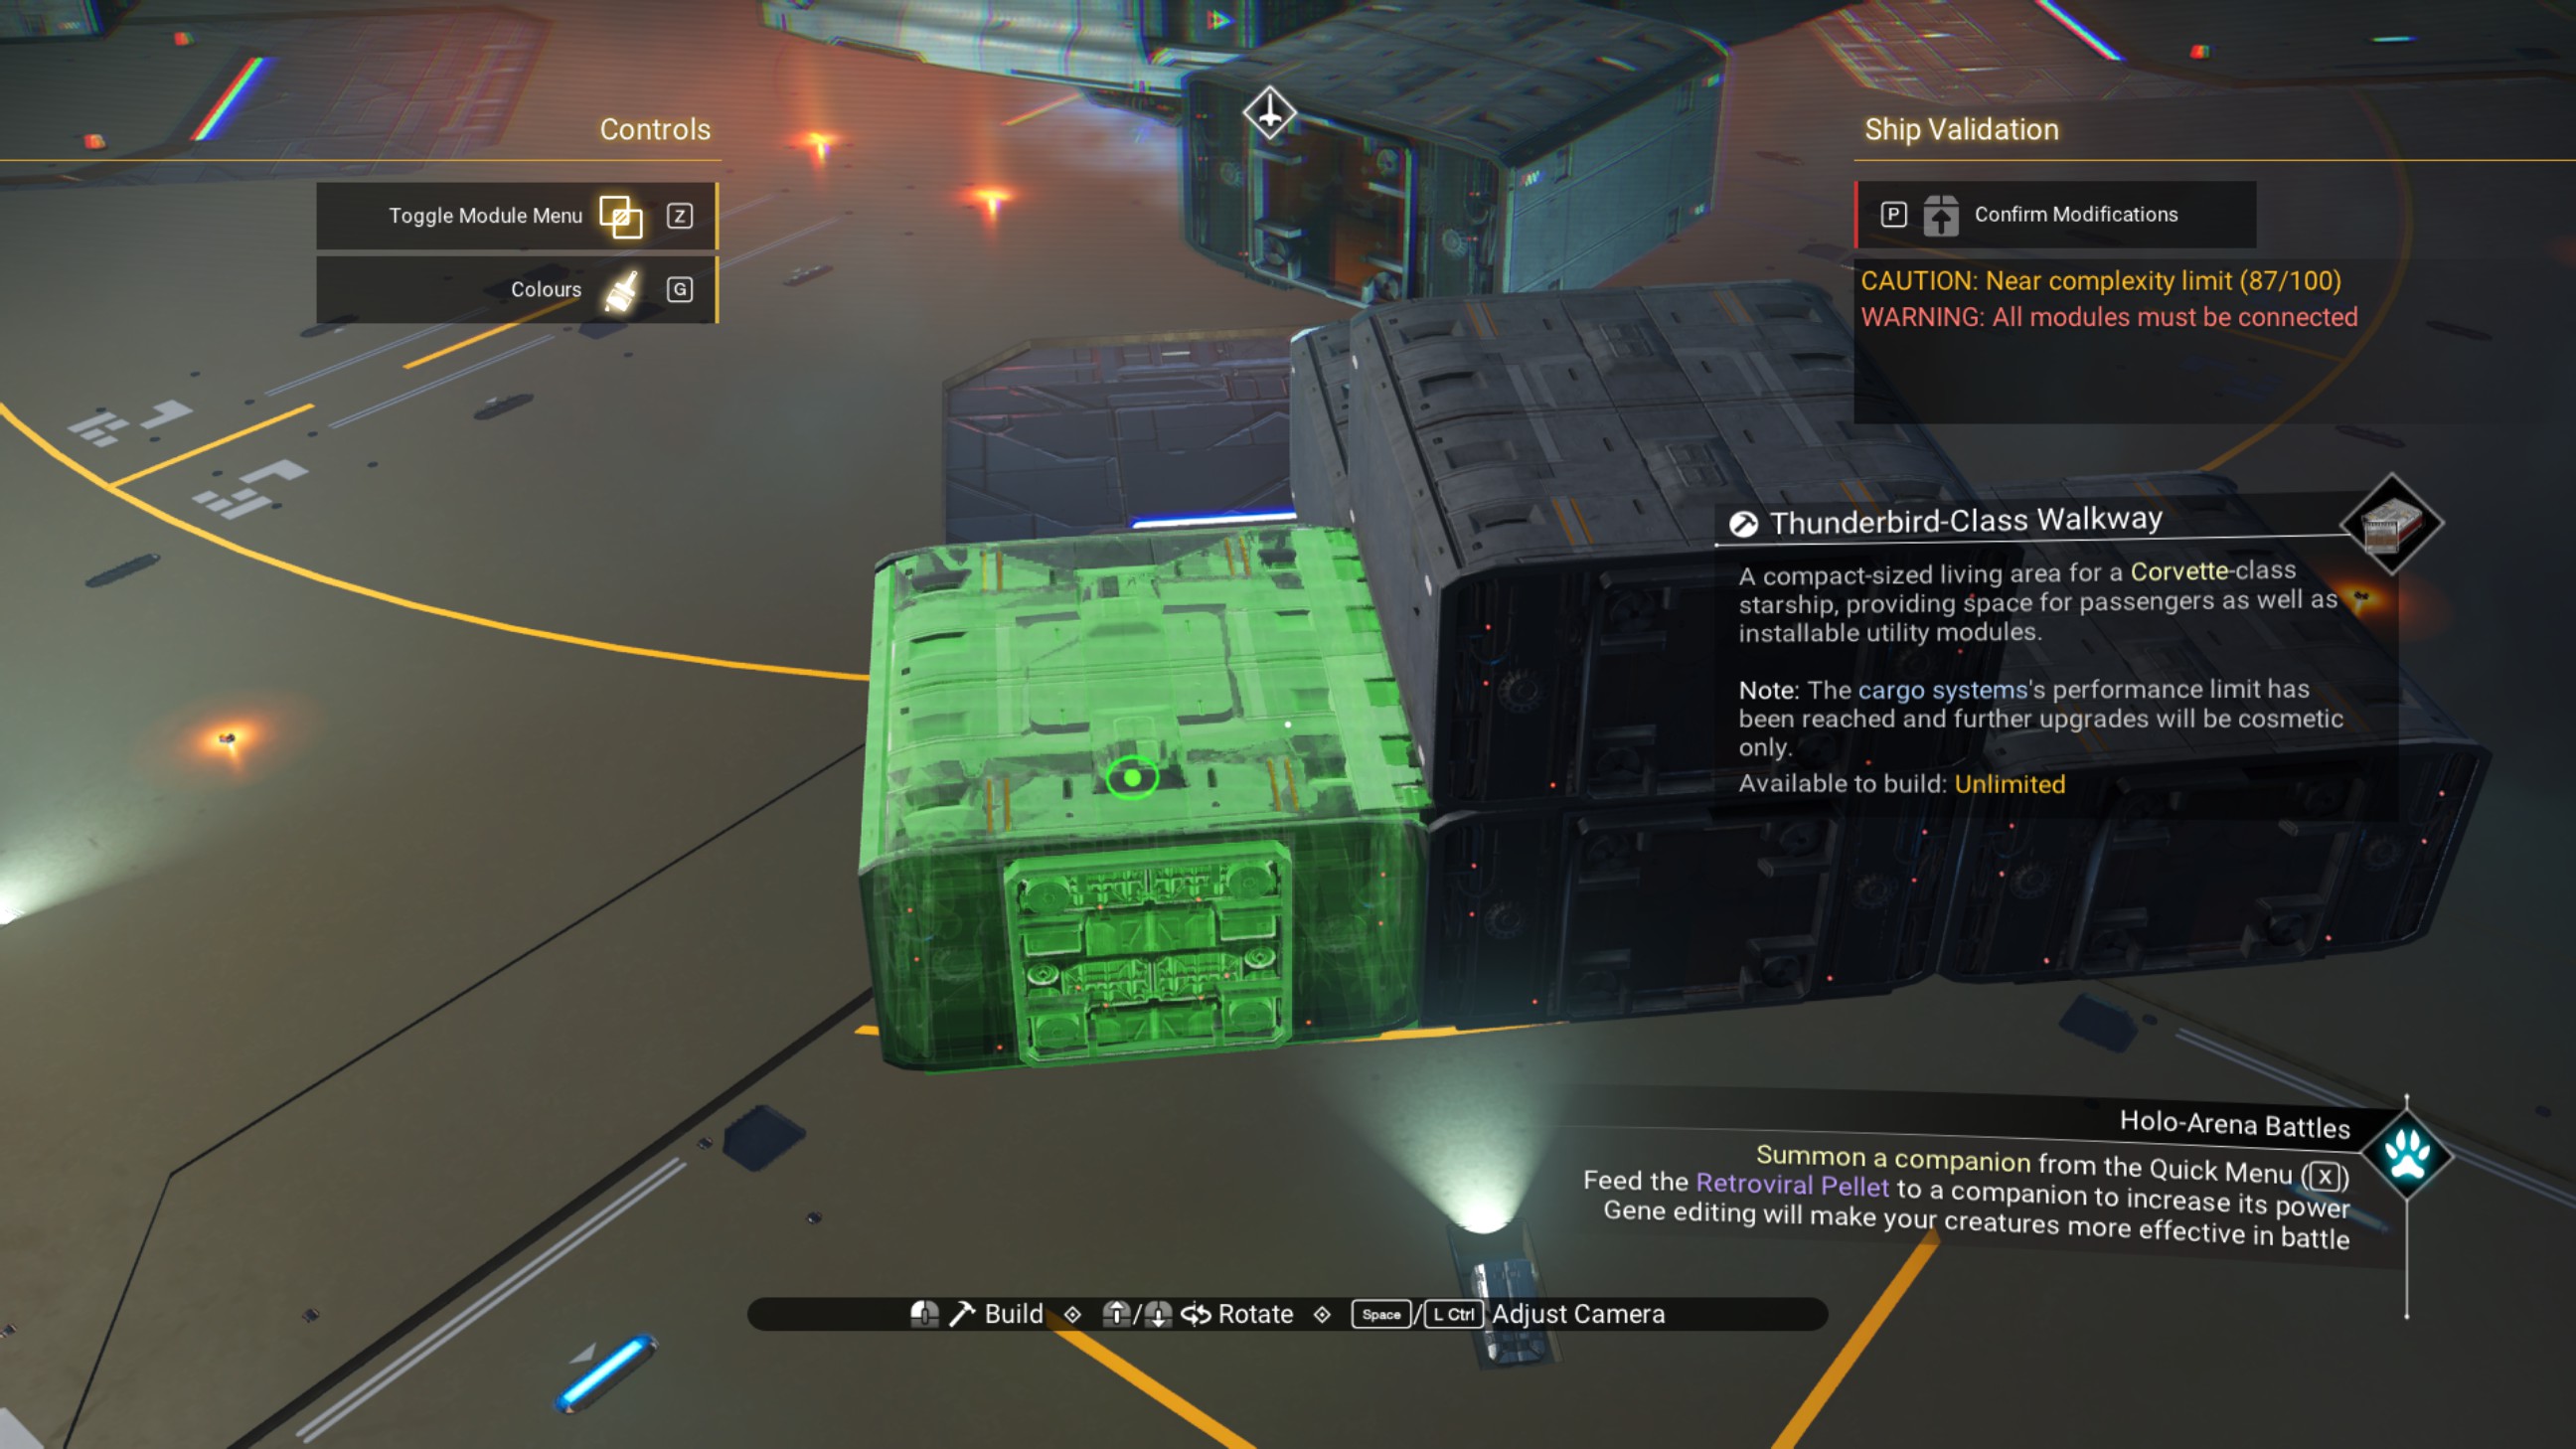
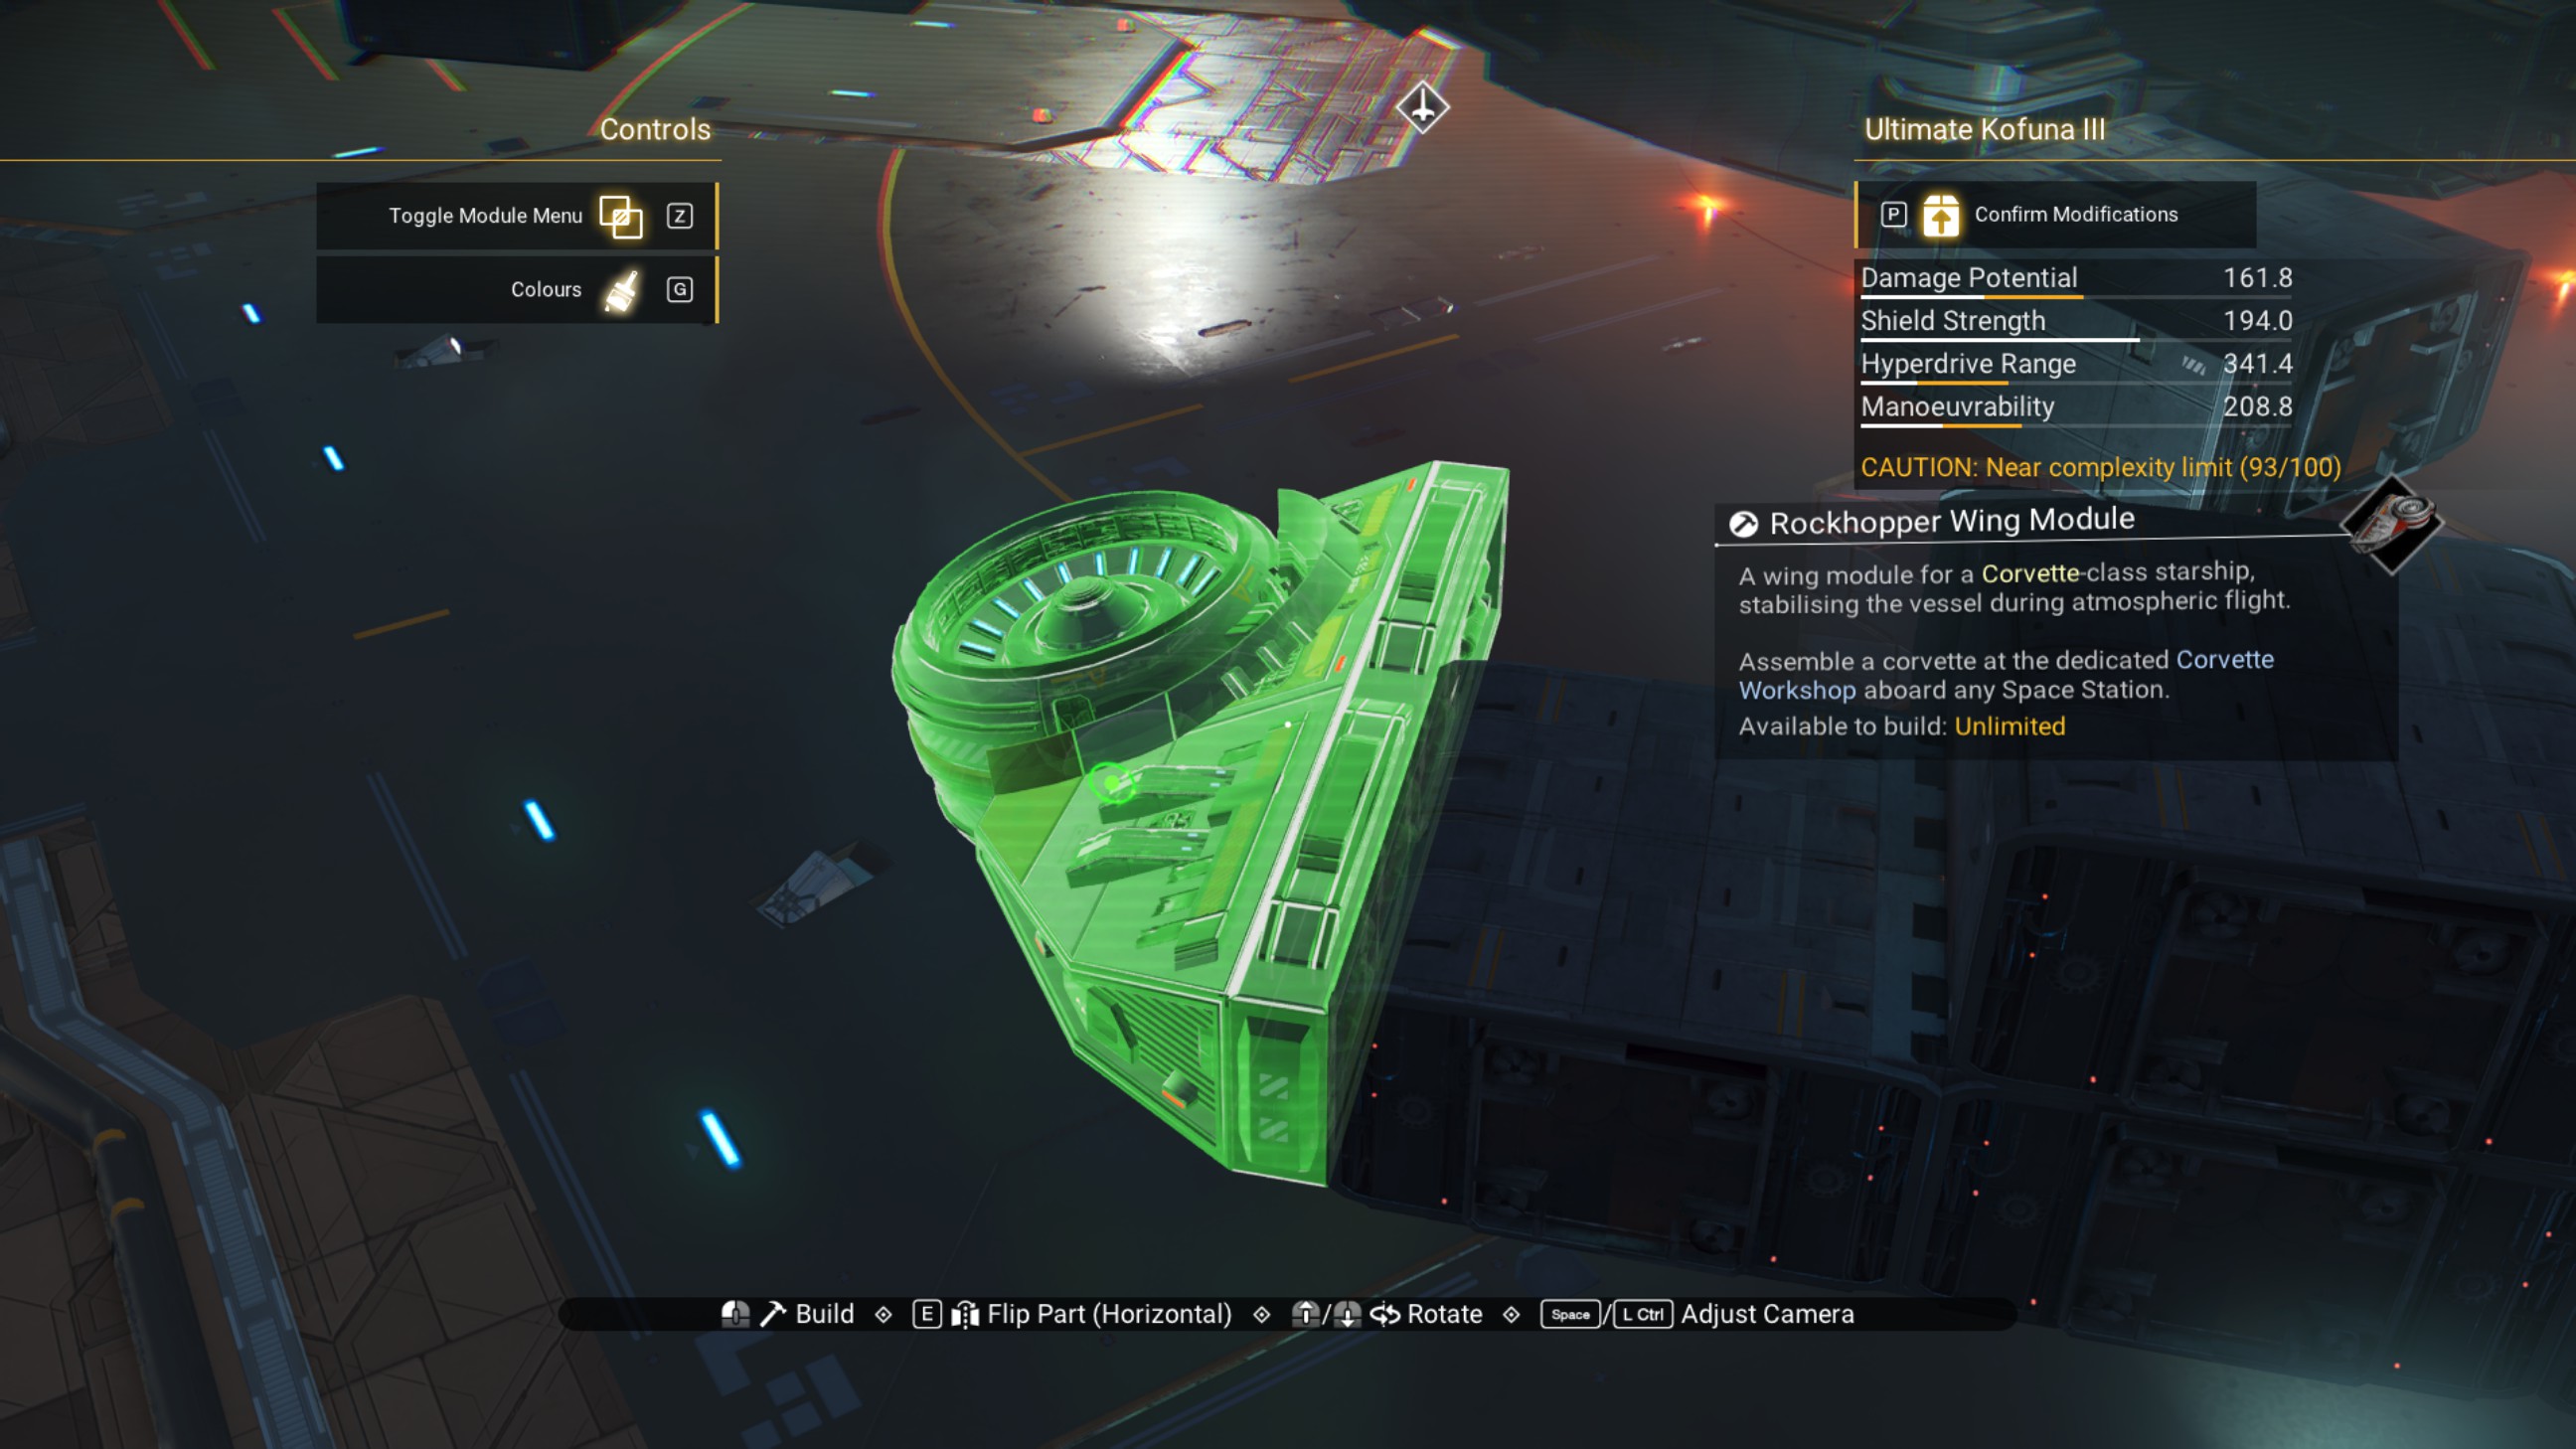
You should now be able to place a rockhopper wing module oriented 180 degrees from its normal state. We don't need the wing module though so don't actually place it.
Delete the extra walkways on the structure but be sure to leave the overlapping walkways we just created.
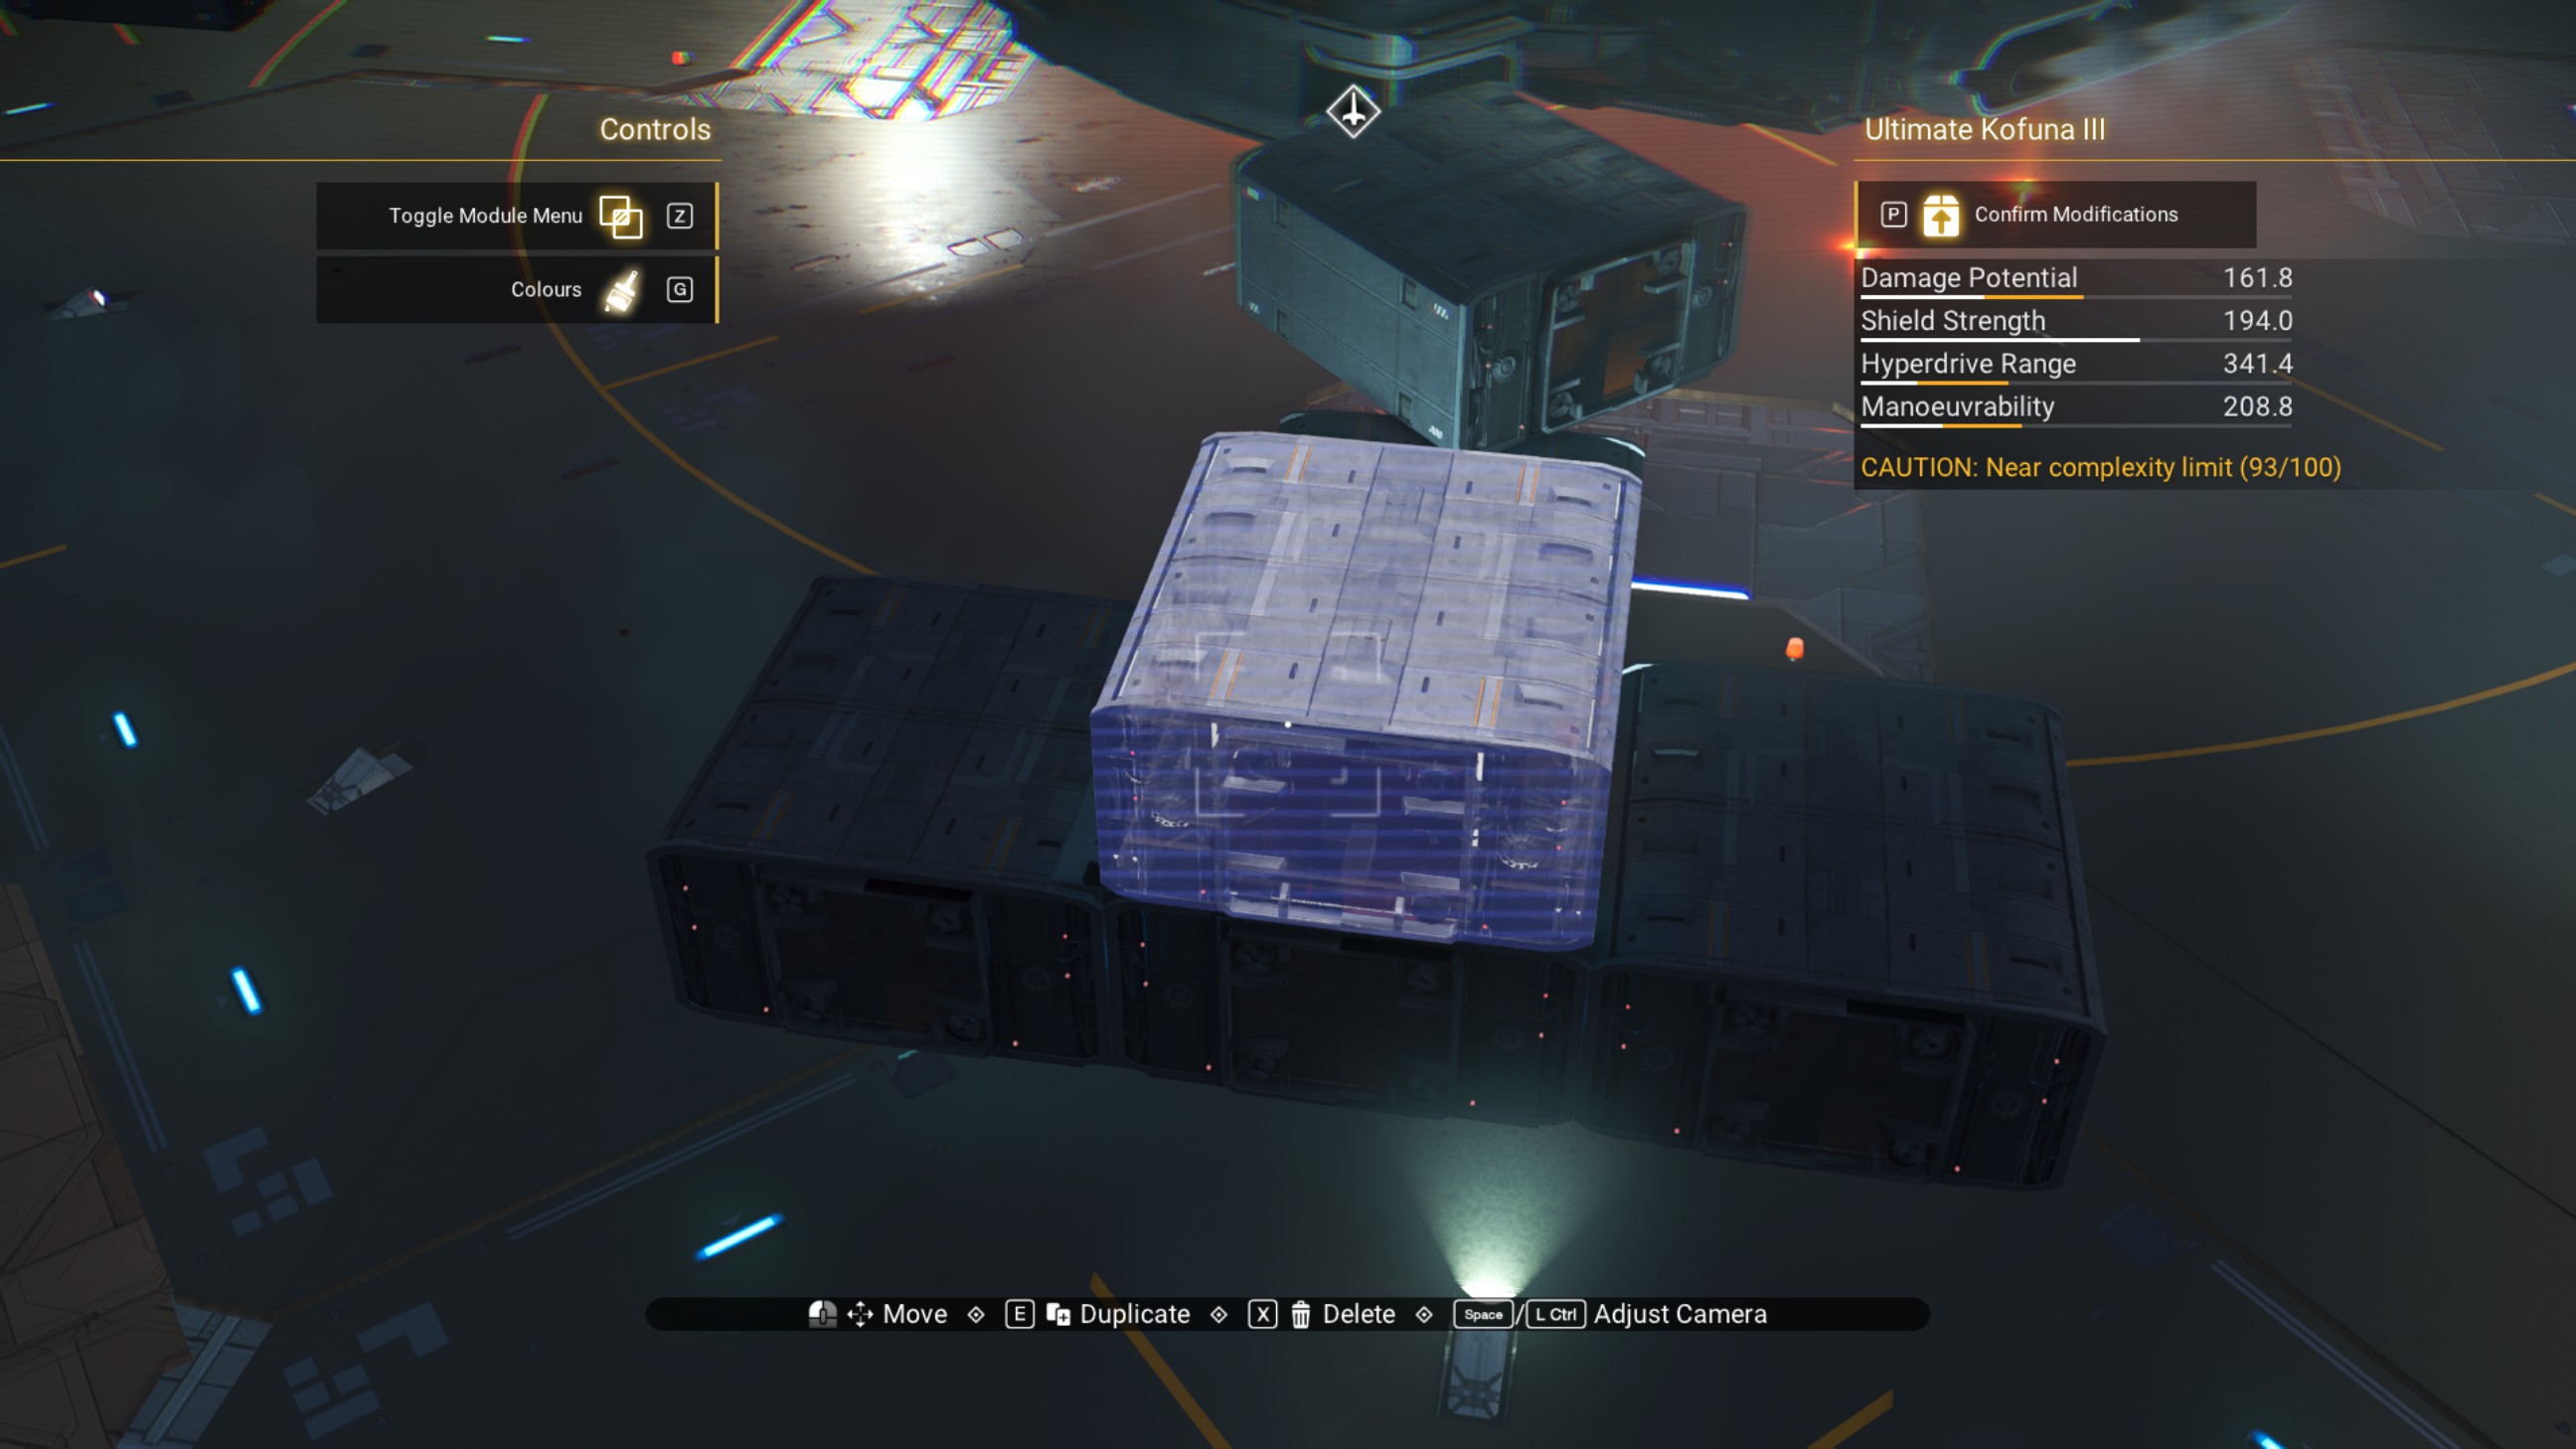
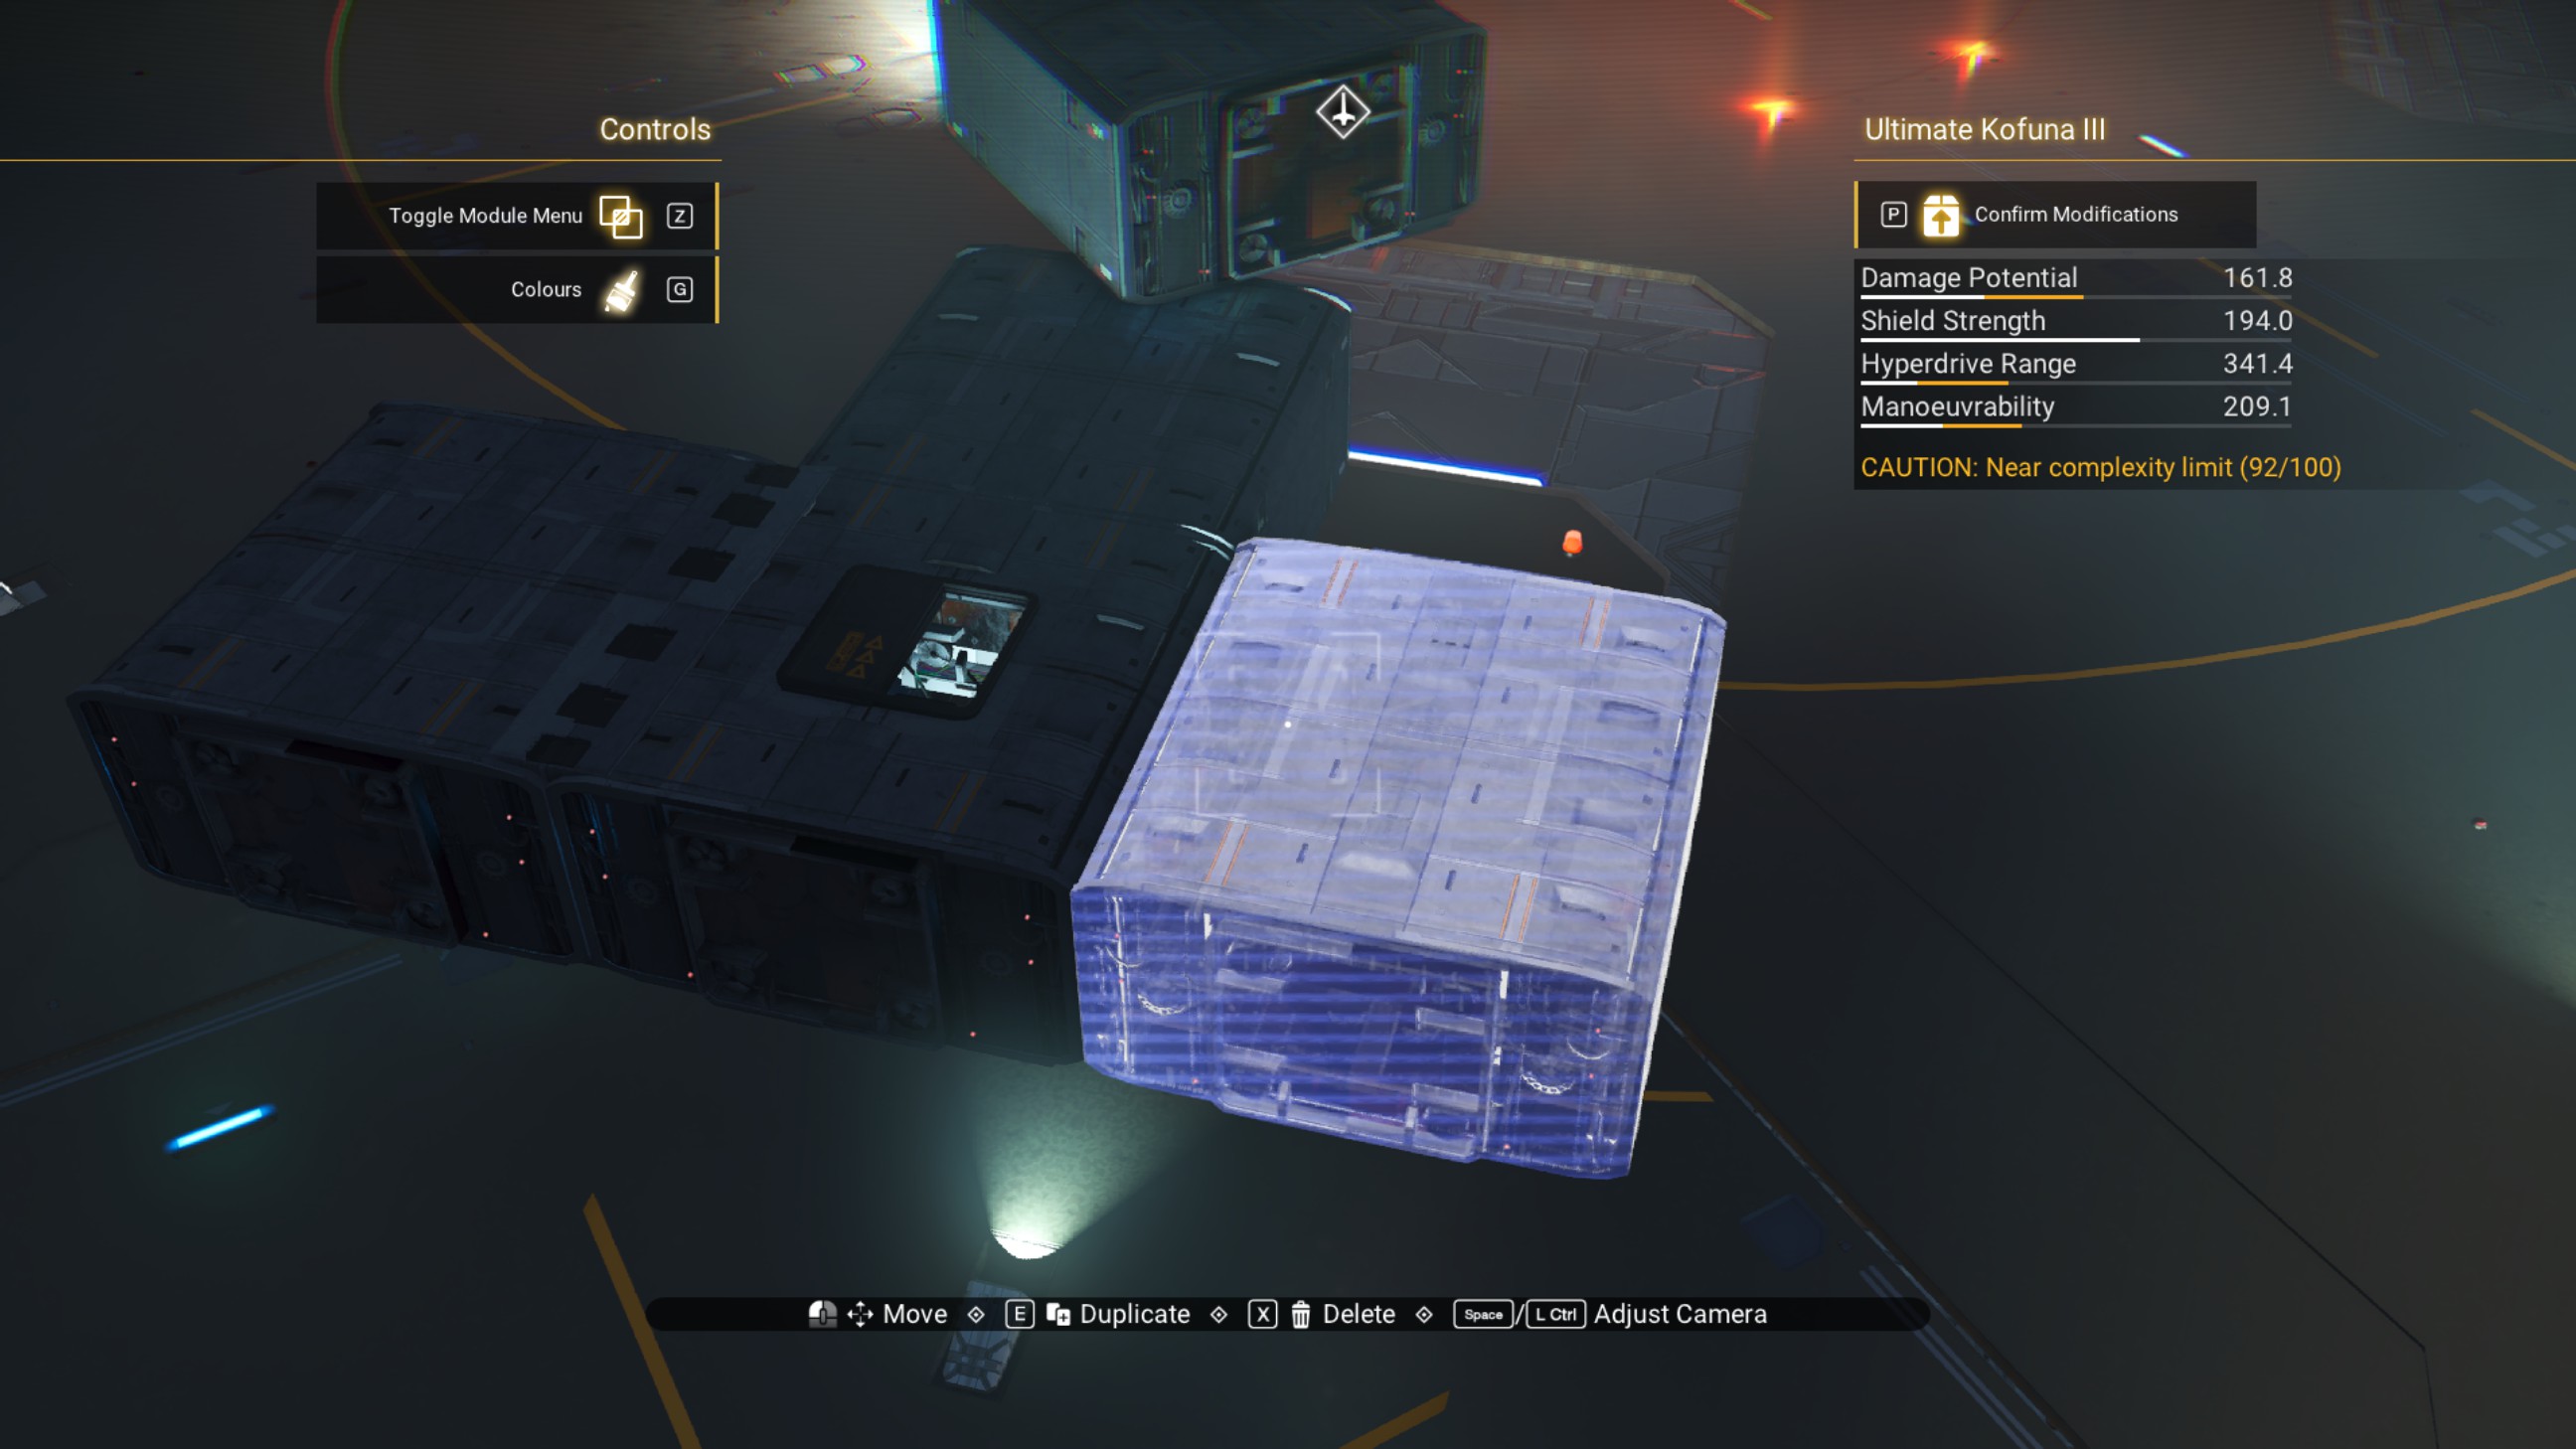
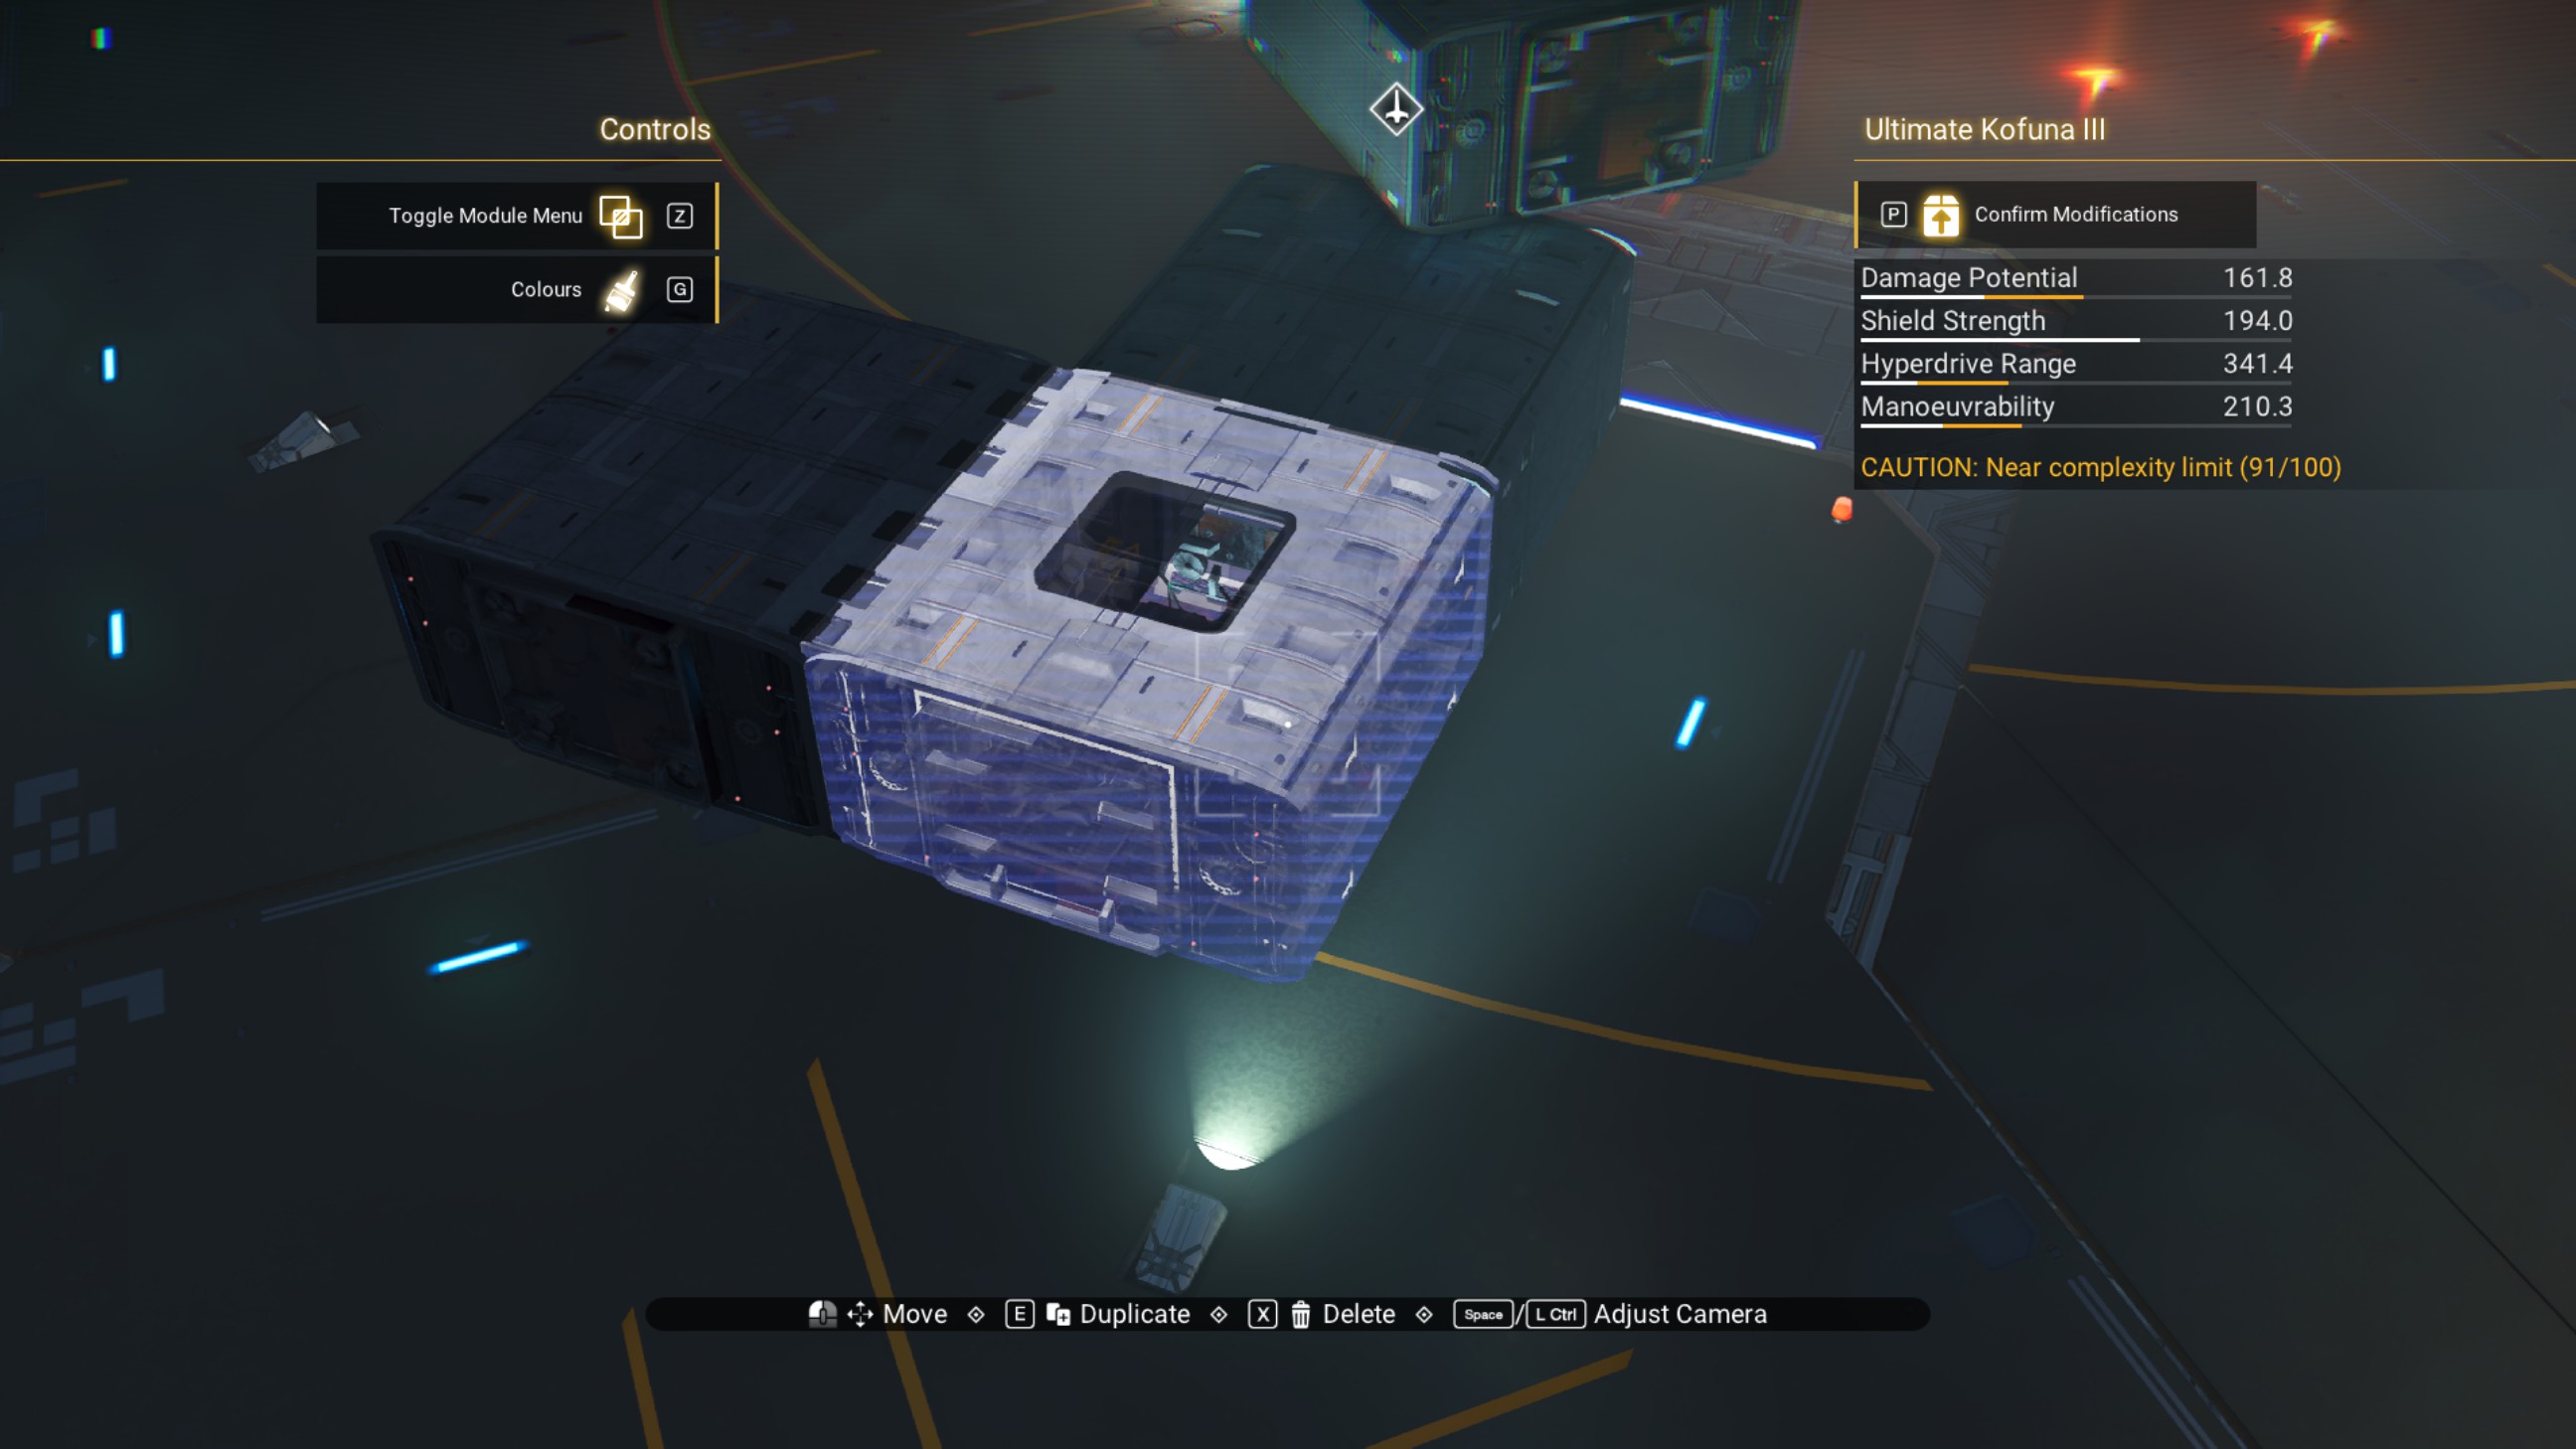
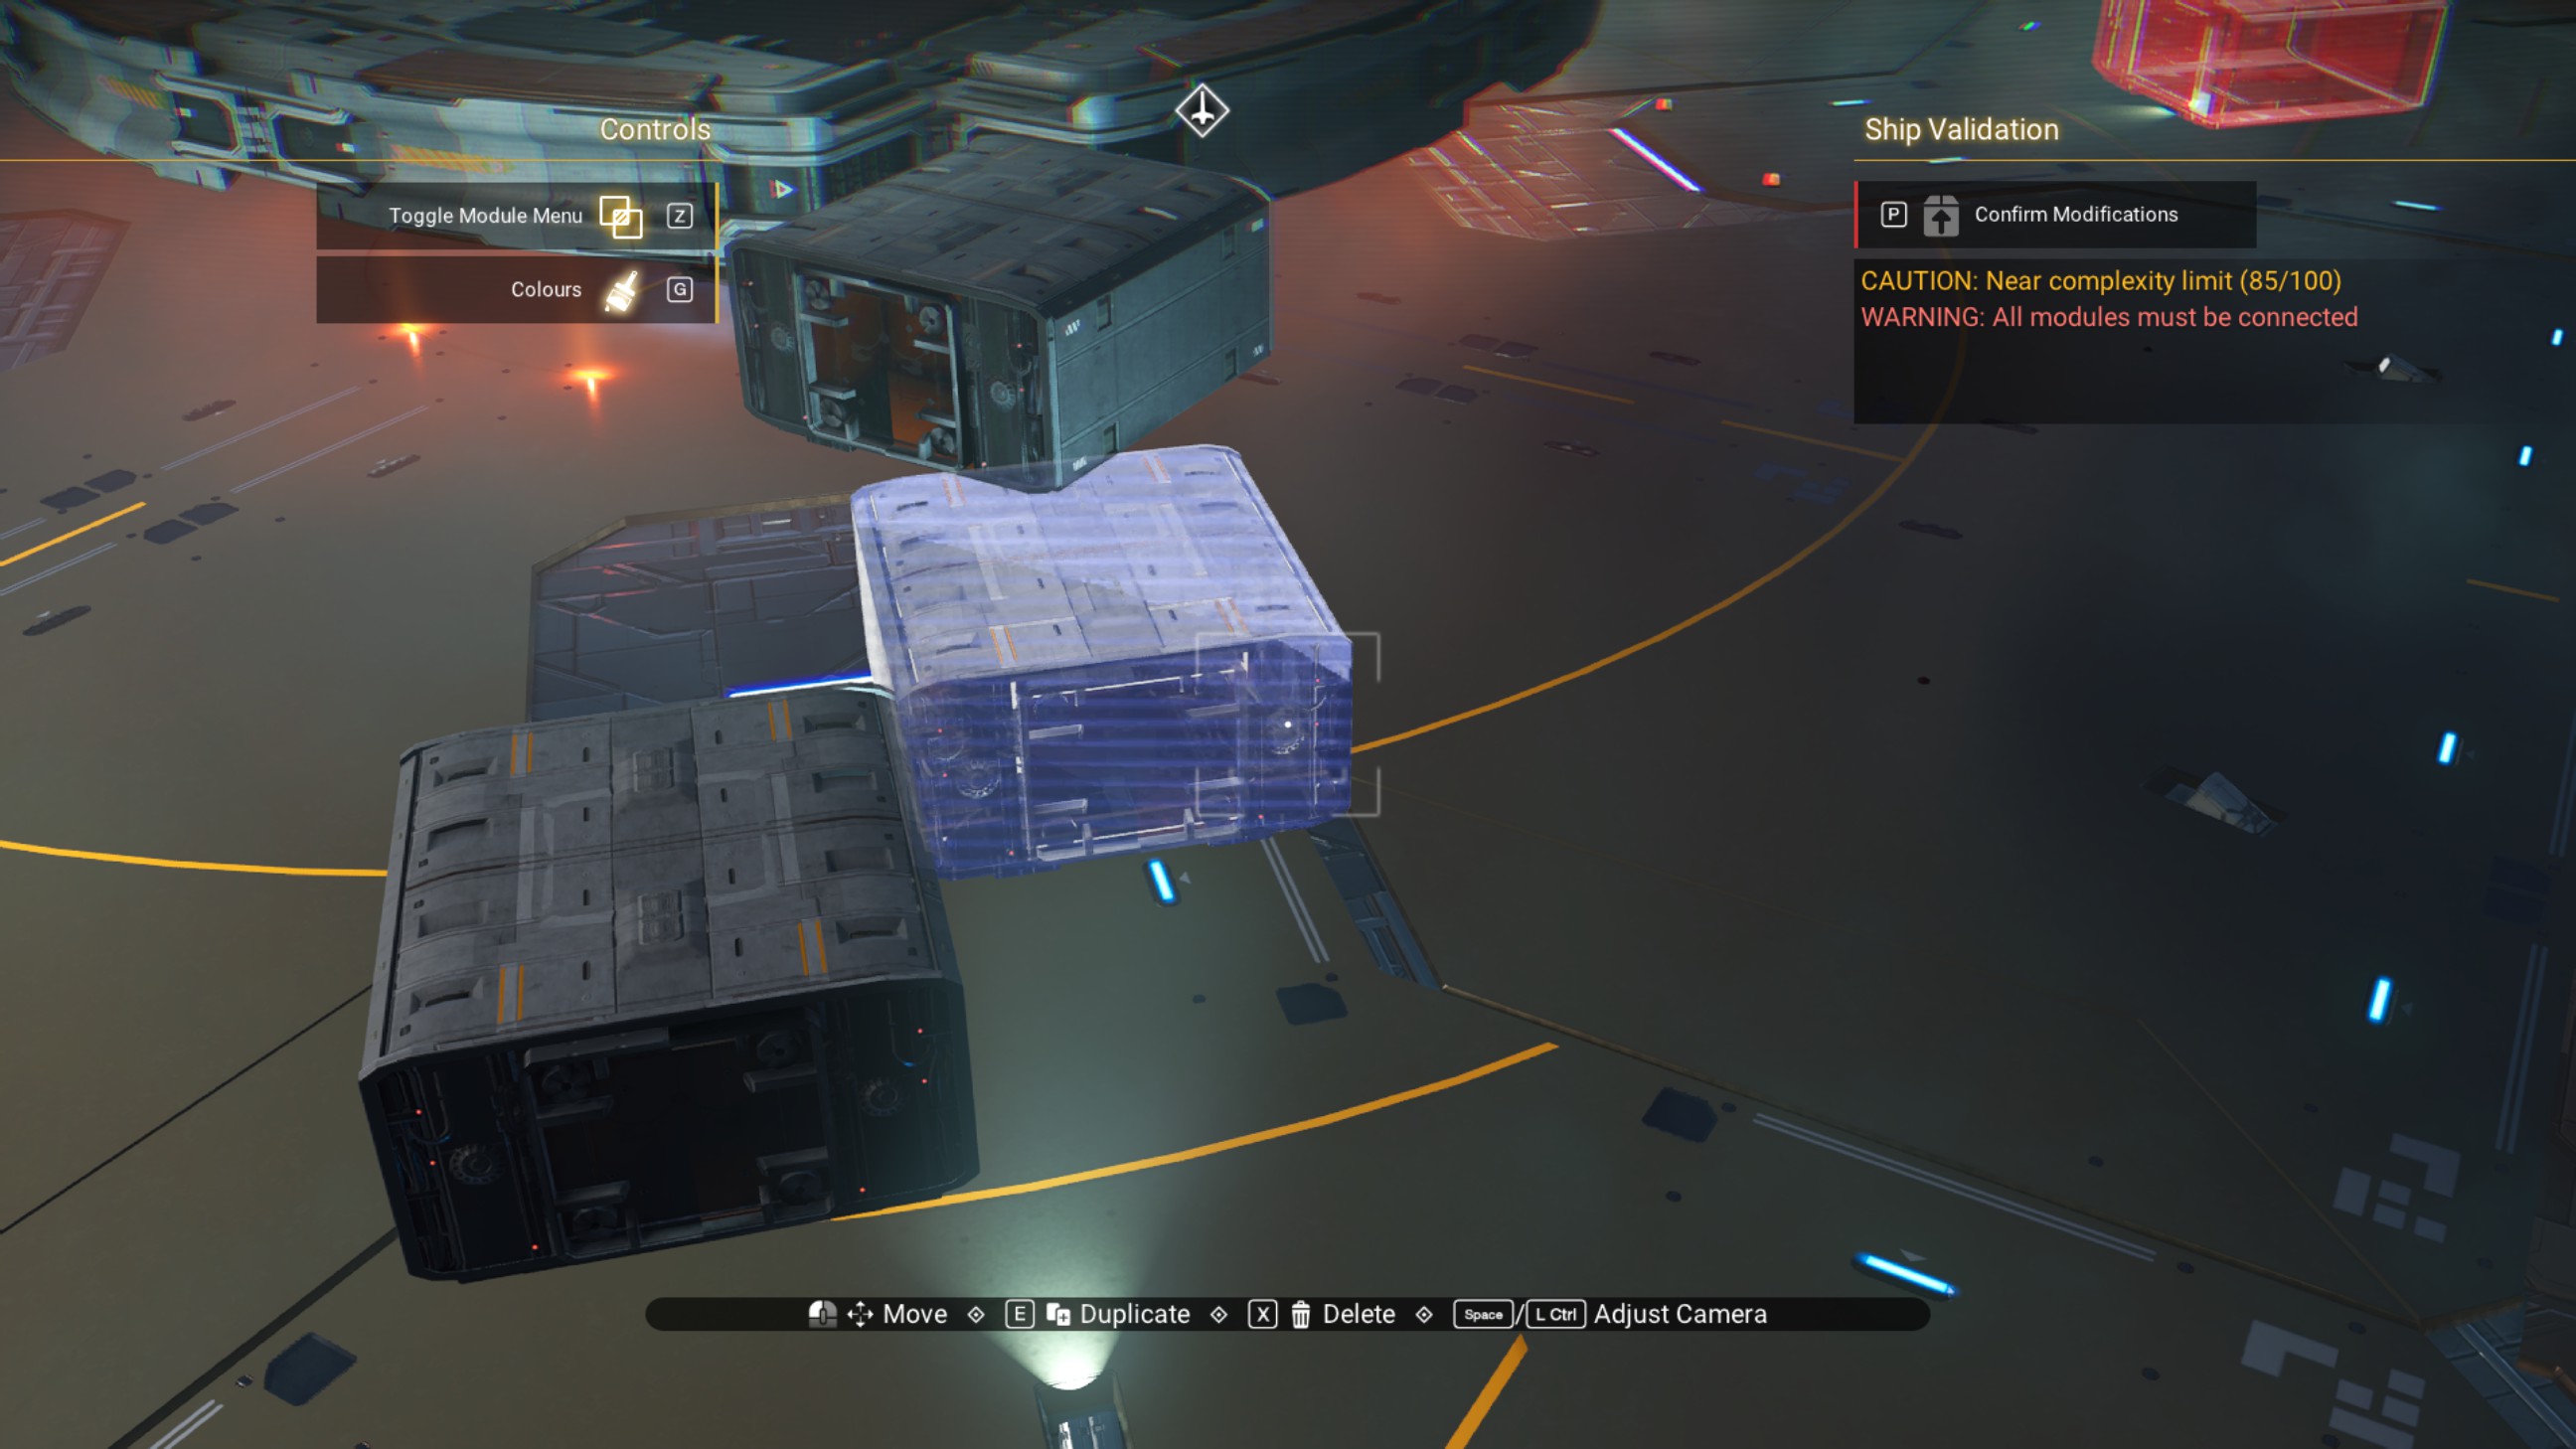
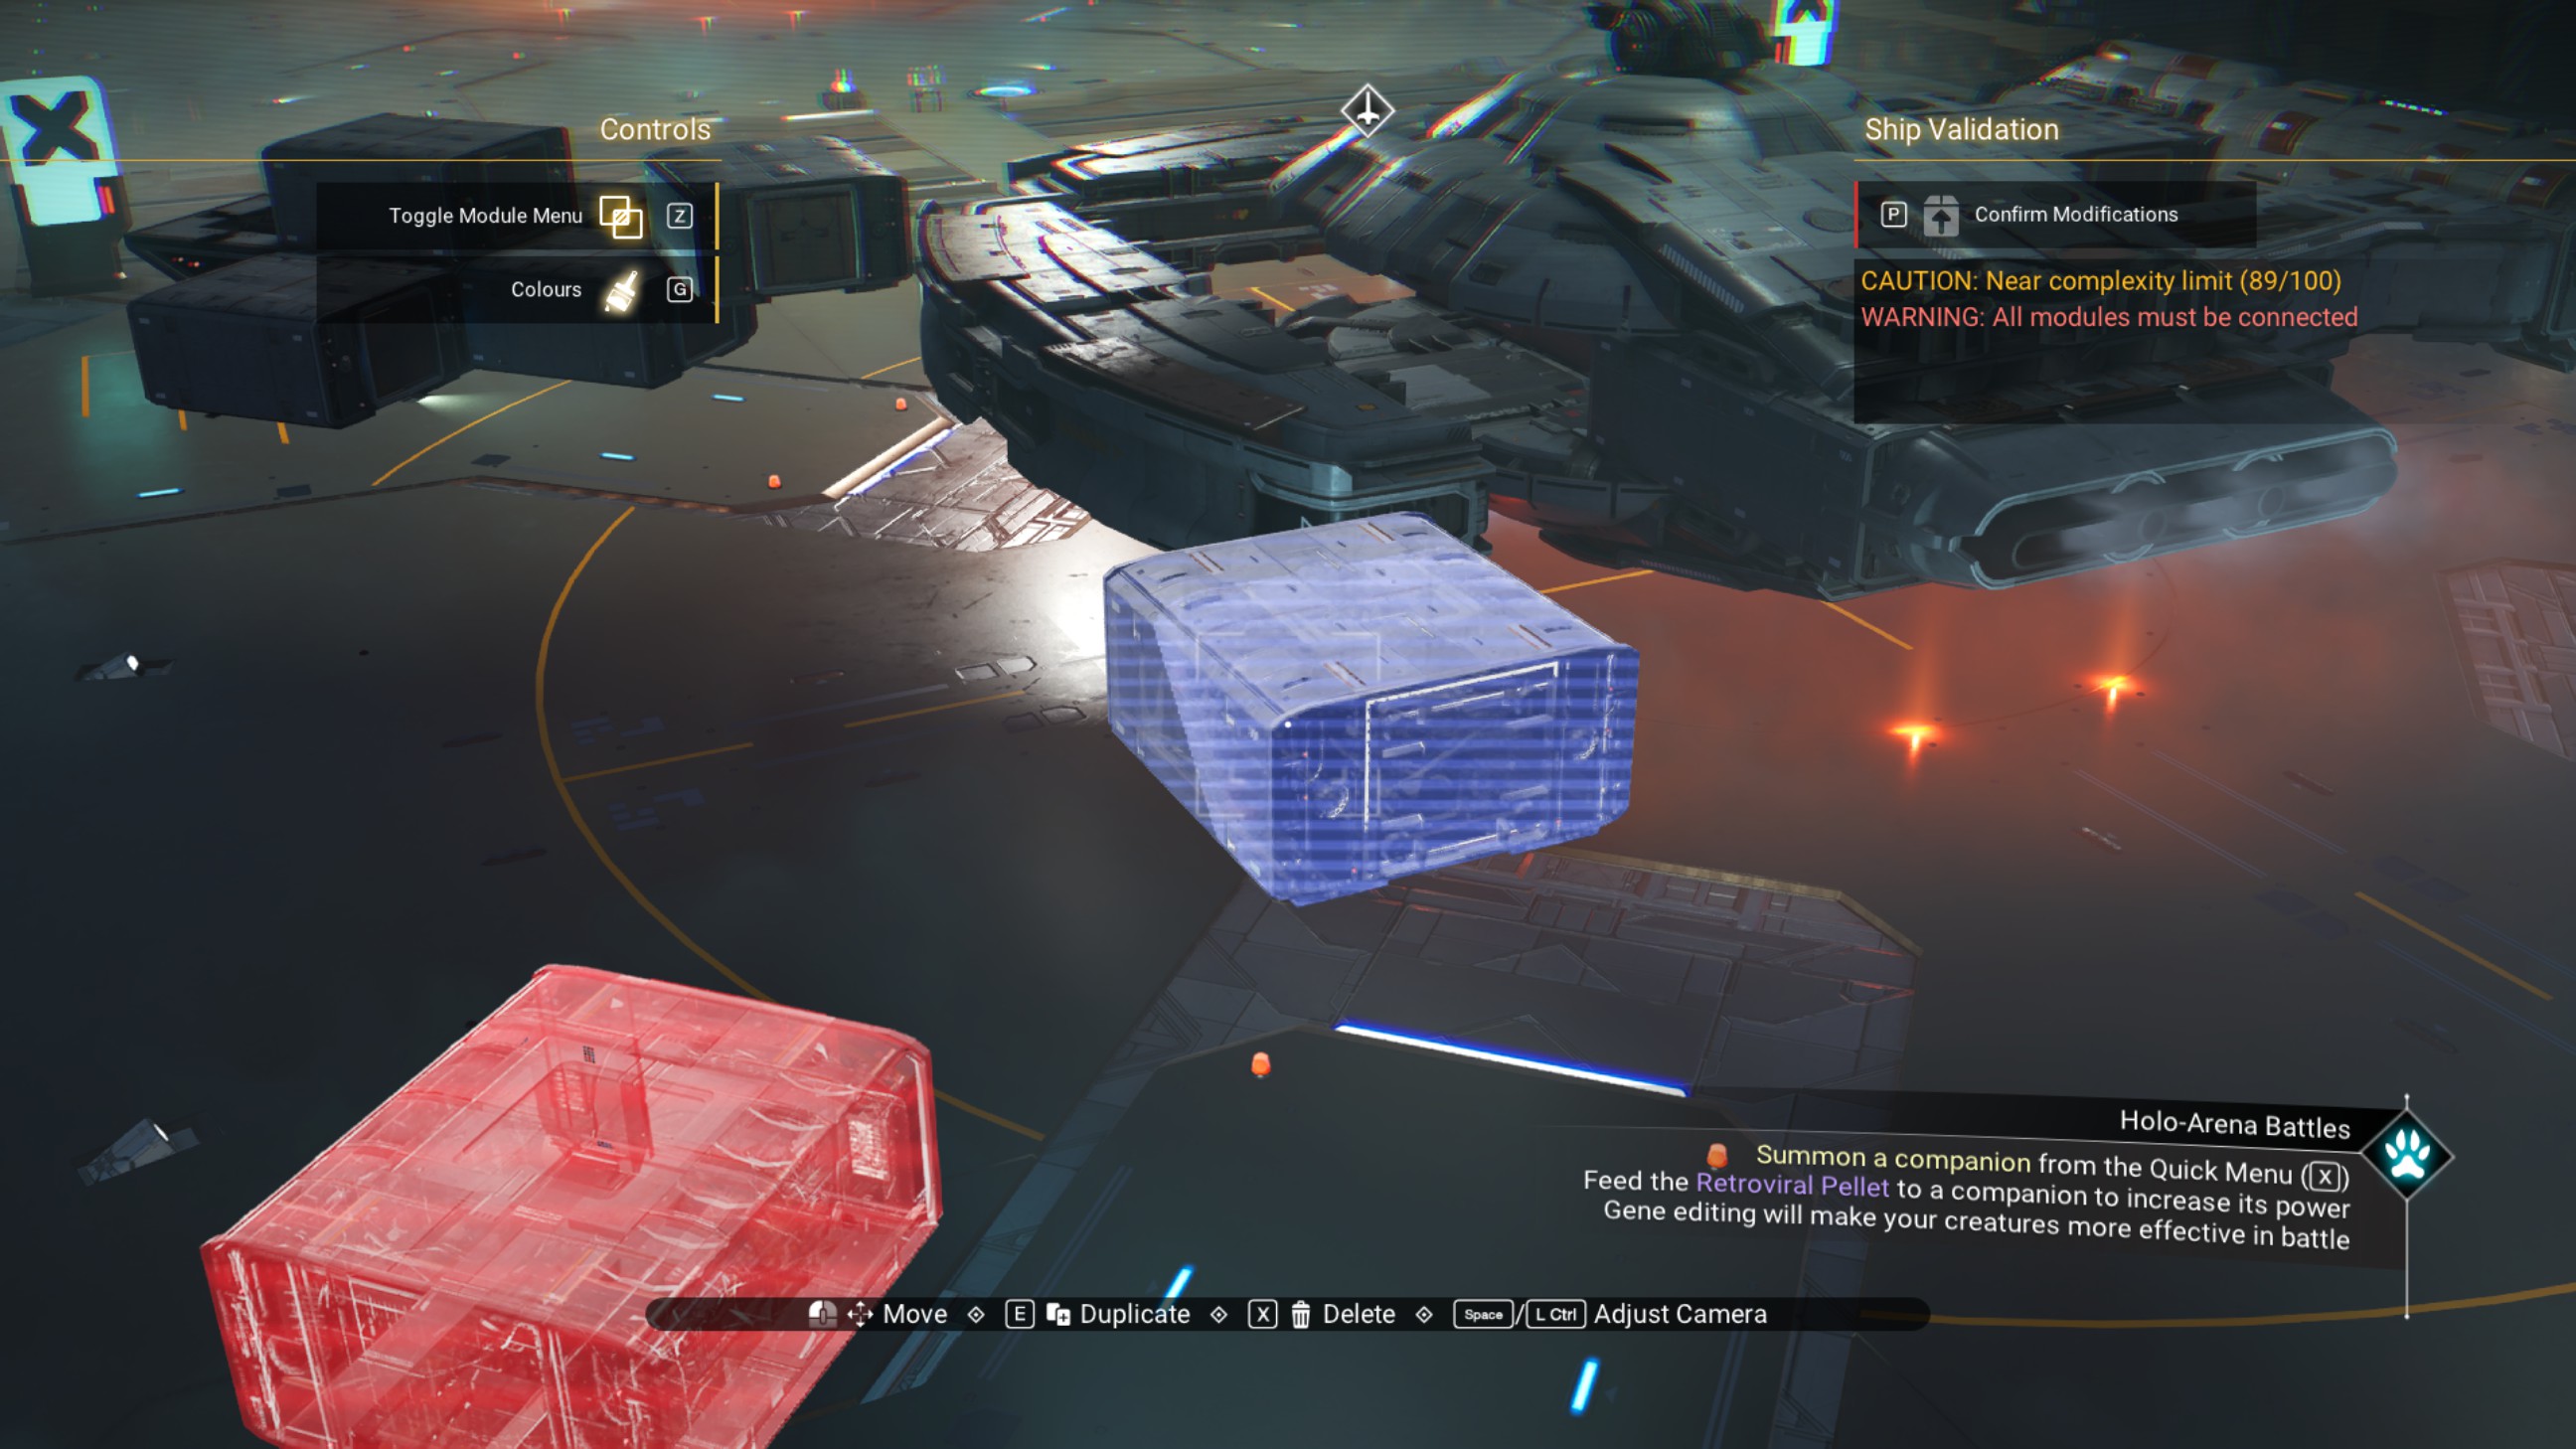
Do not move or delete the overlapping walkways or you'll have to start over.
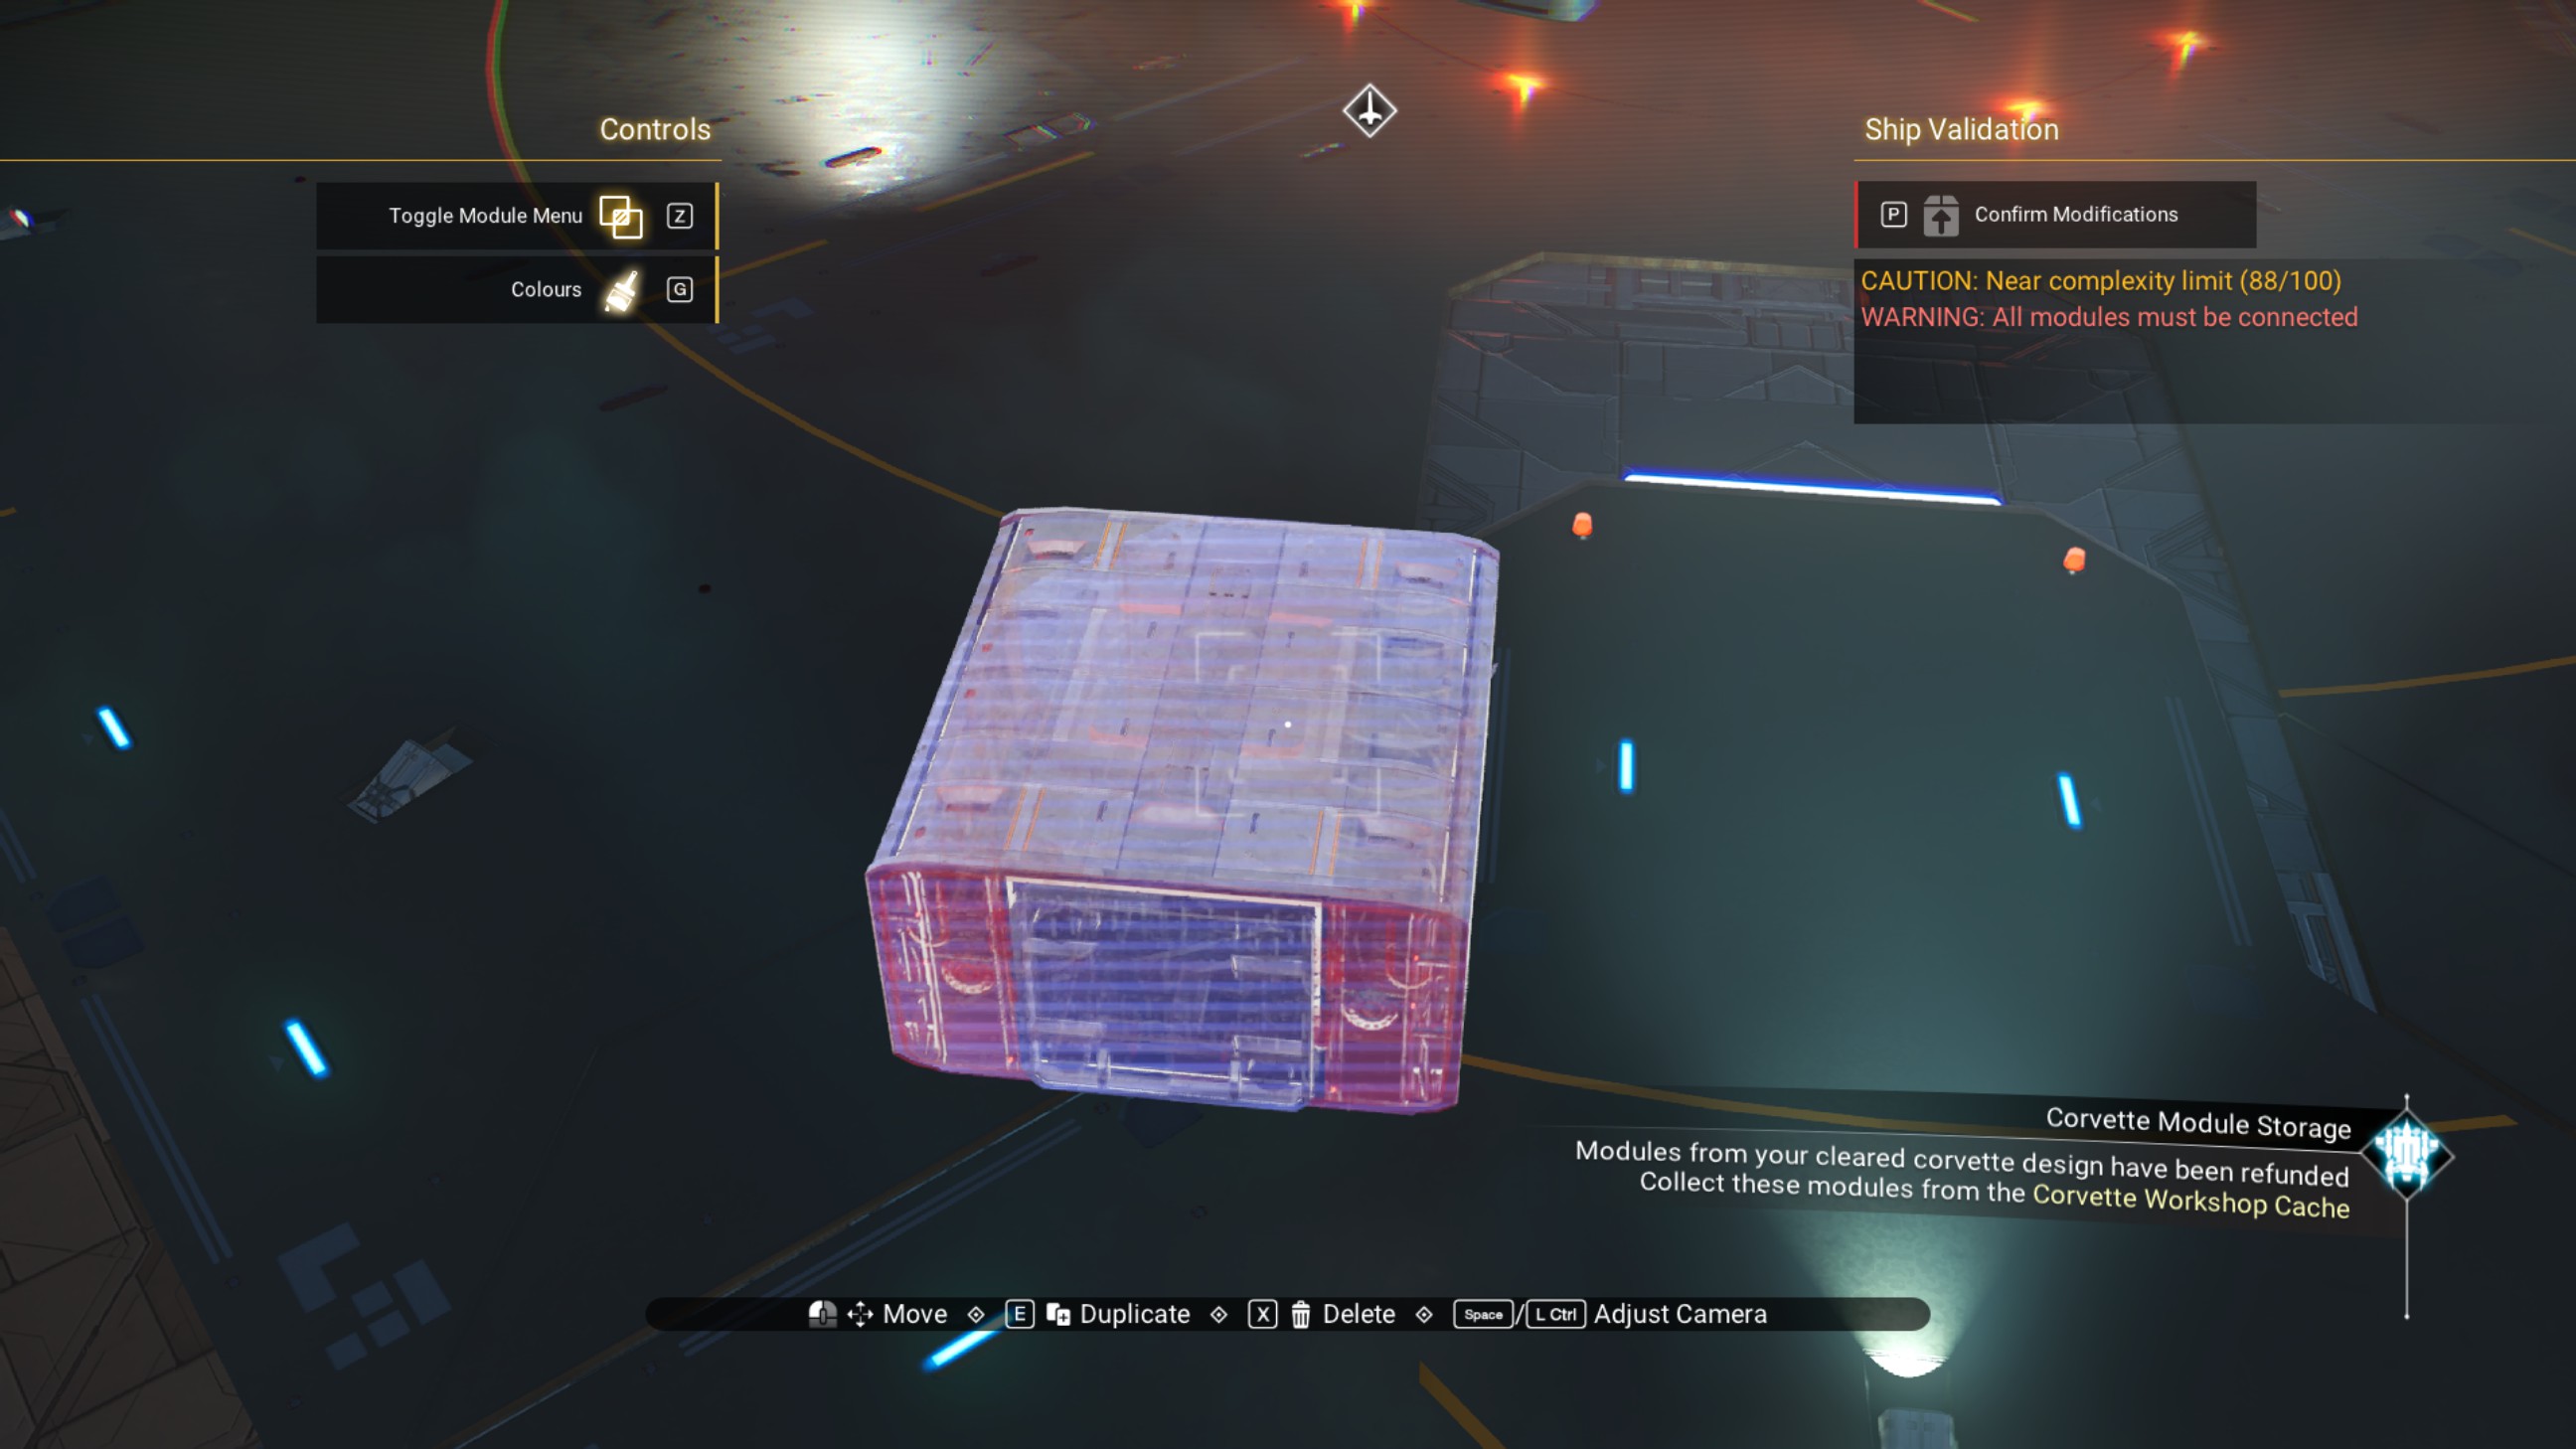
Next, the 45 degree structure off the port bow. Delete the landing bay.
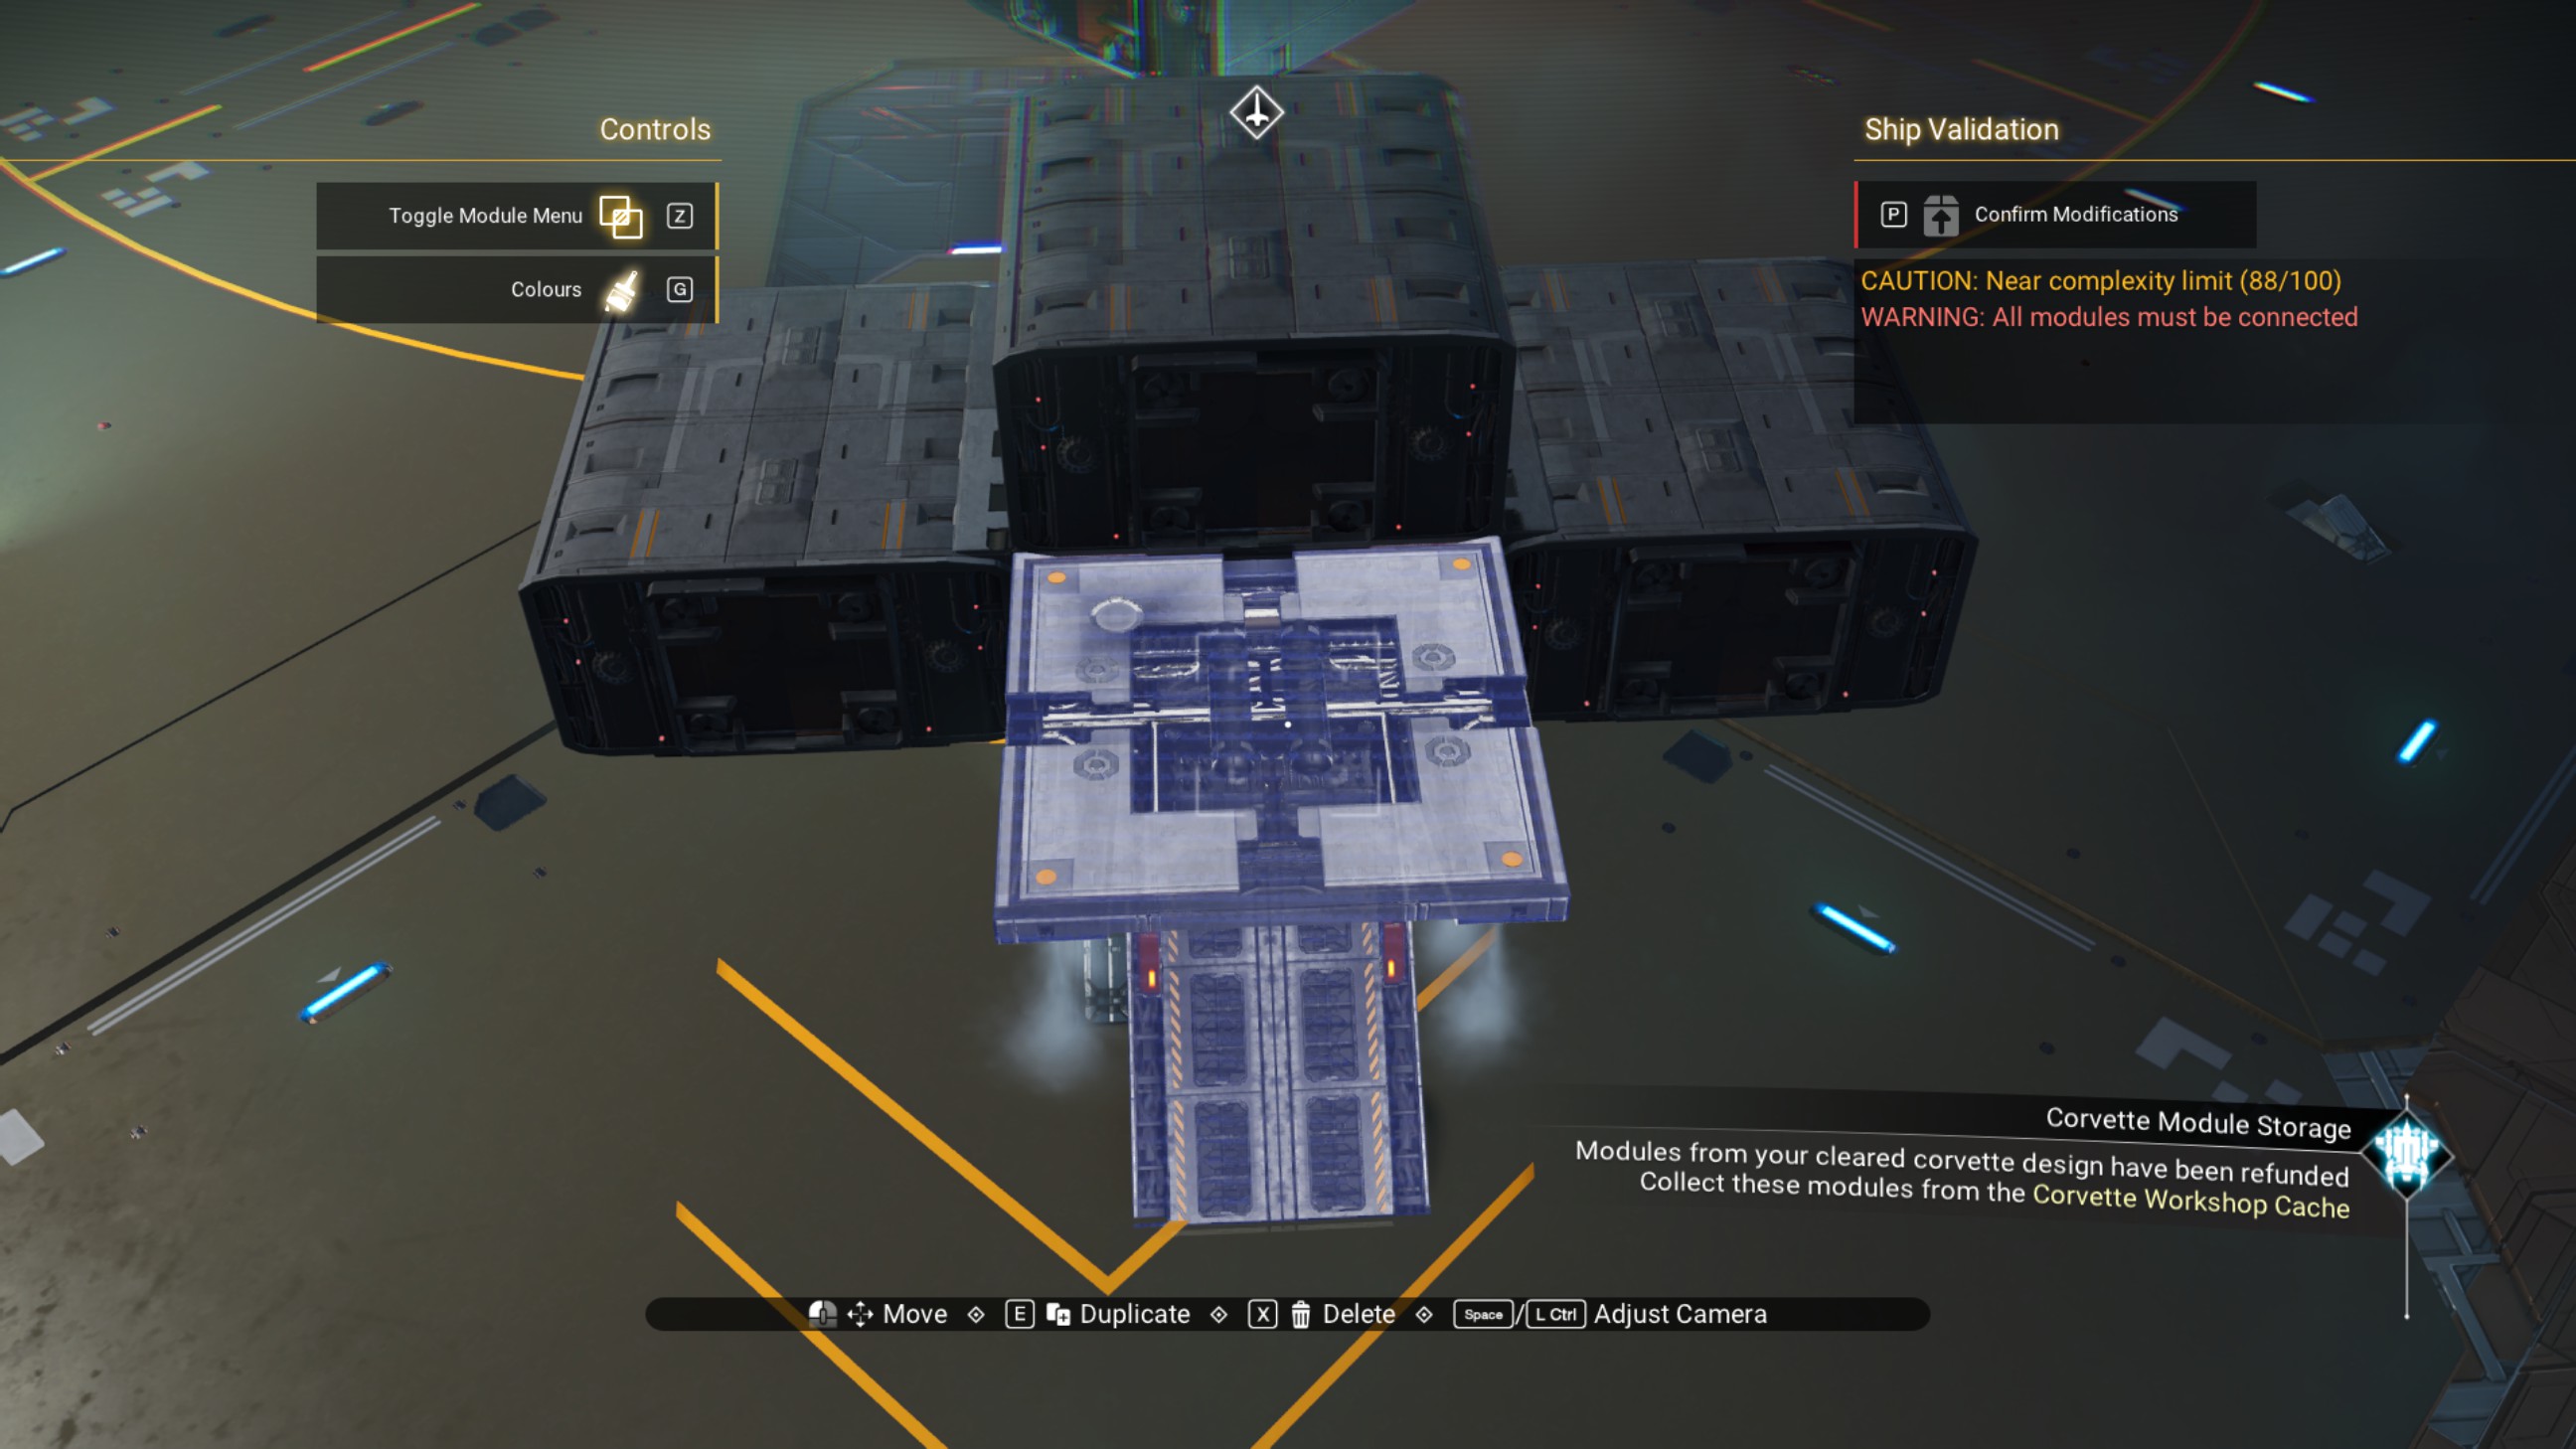
Select and rotate the lower central walkway, then put it right back where it was.
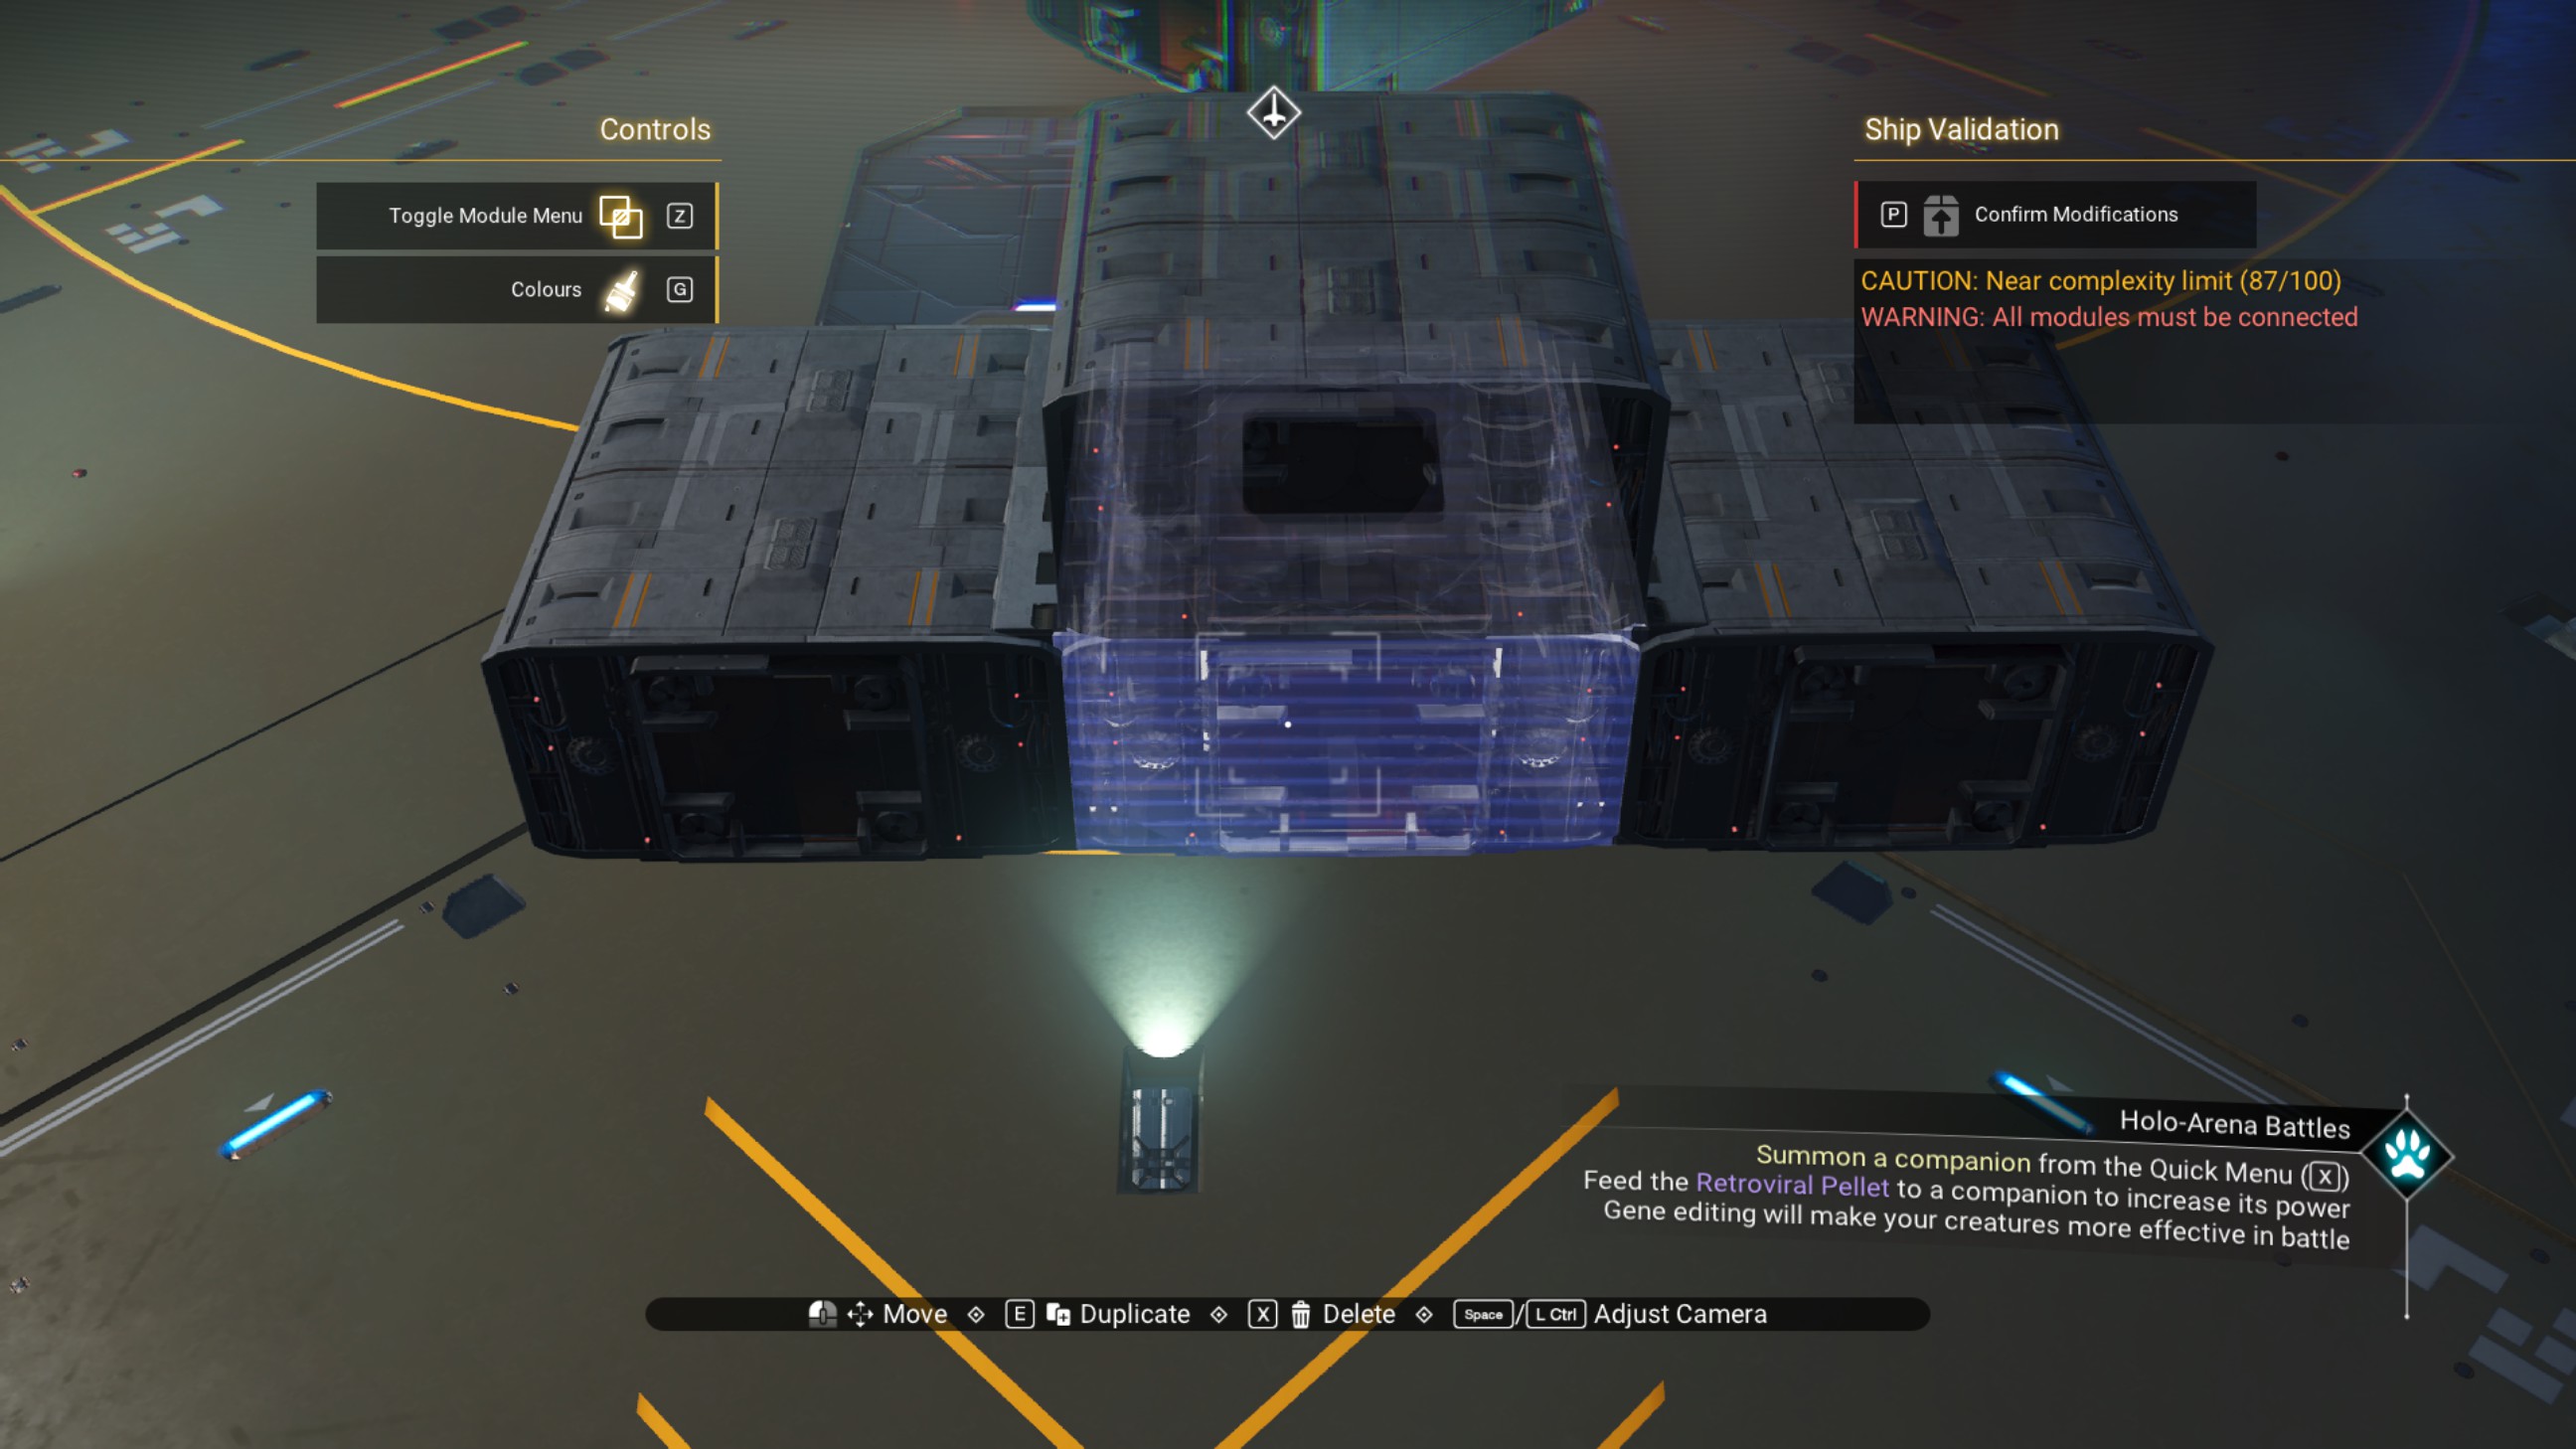
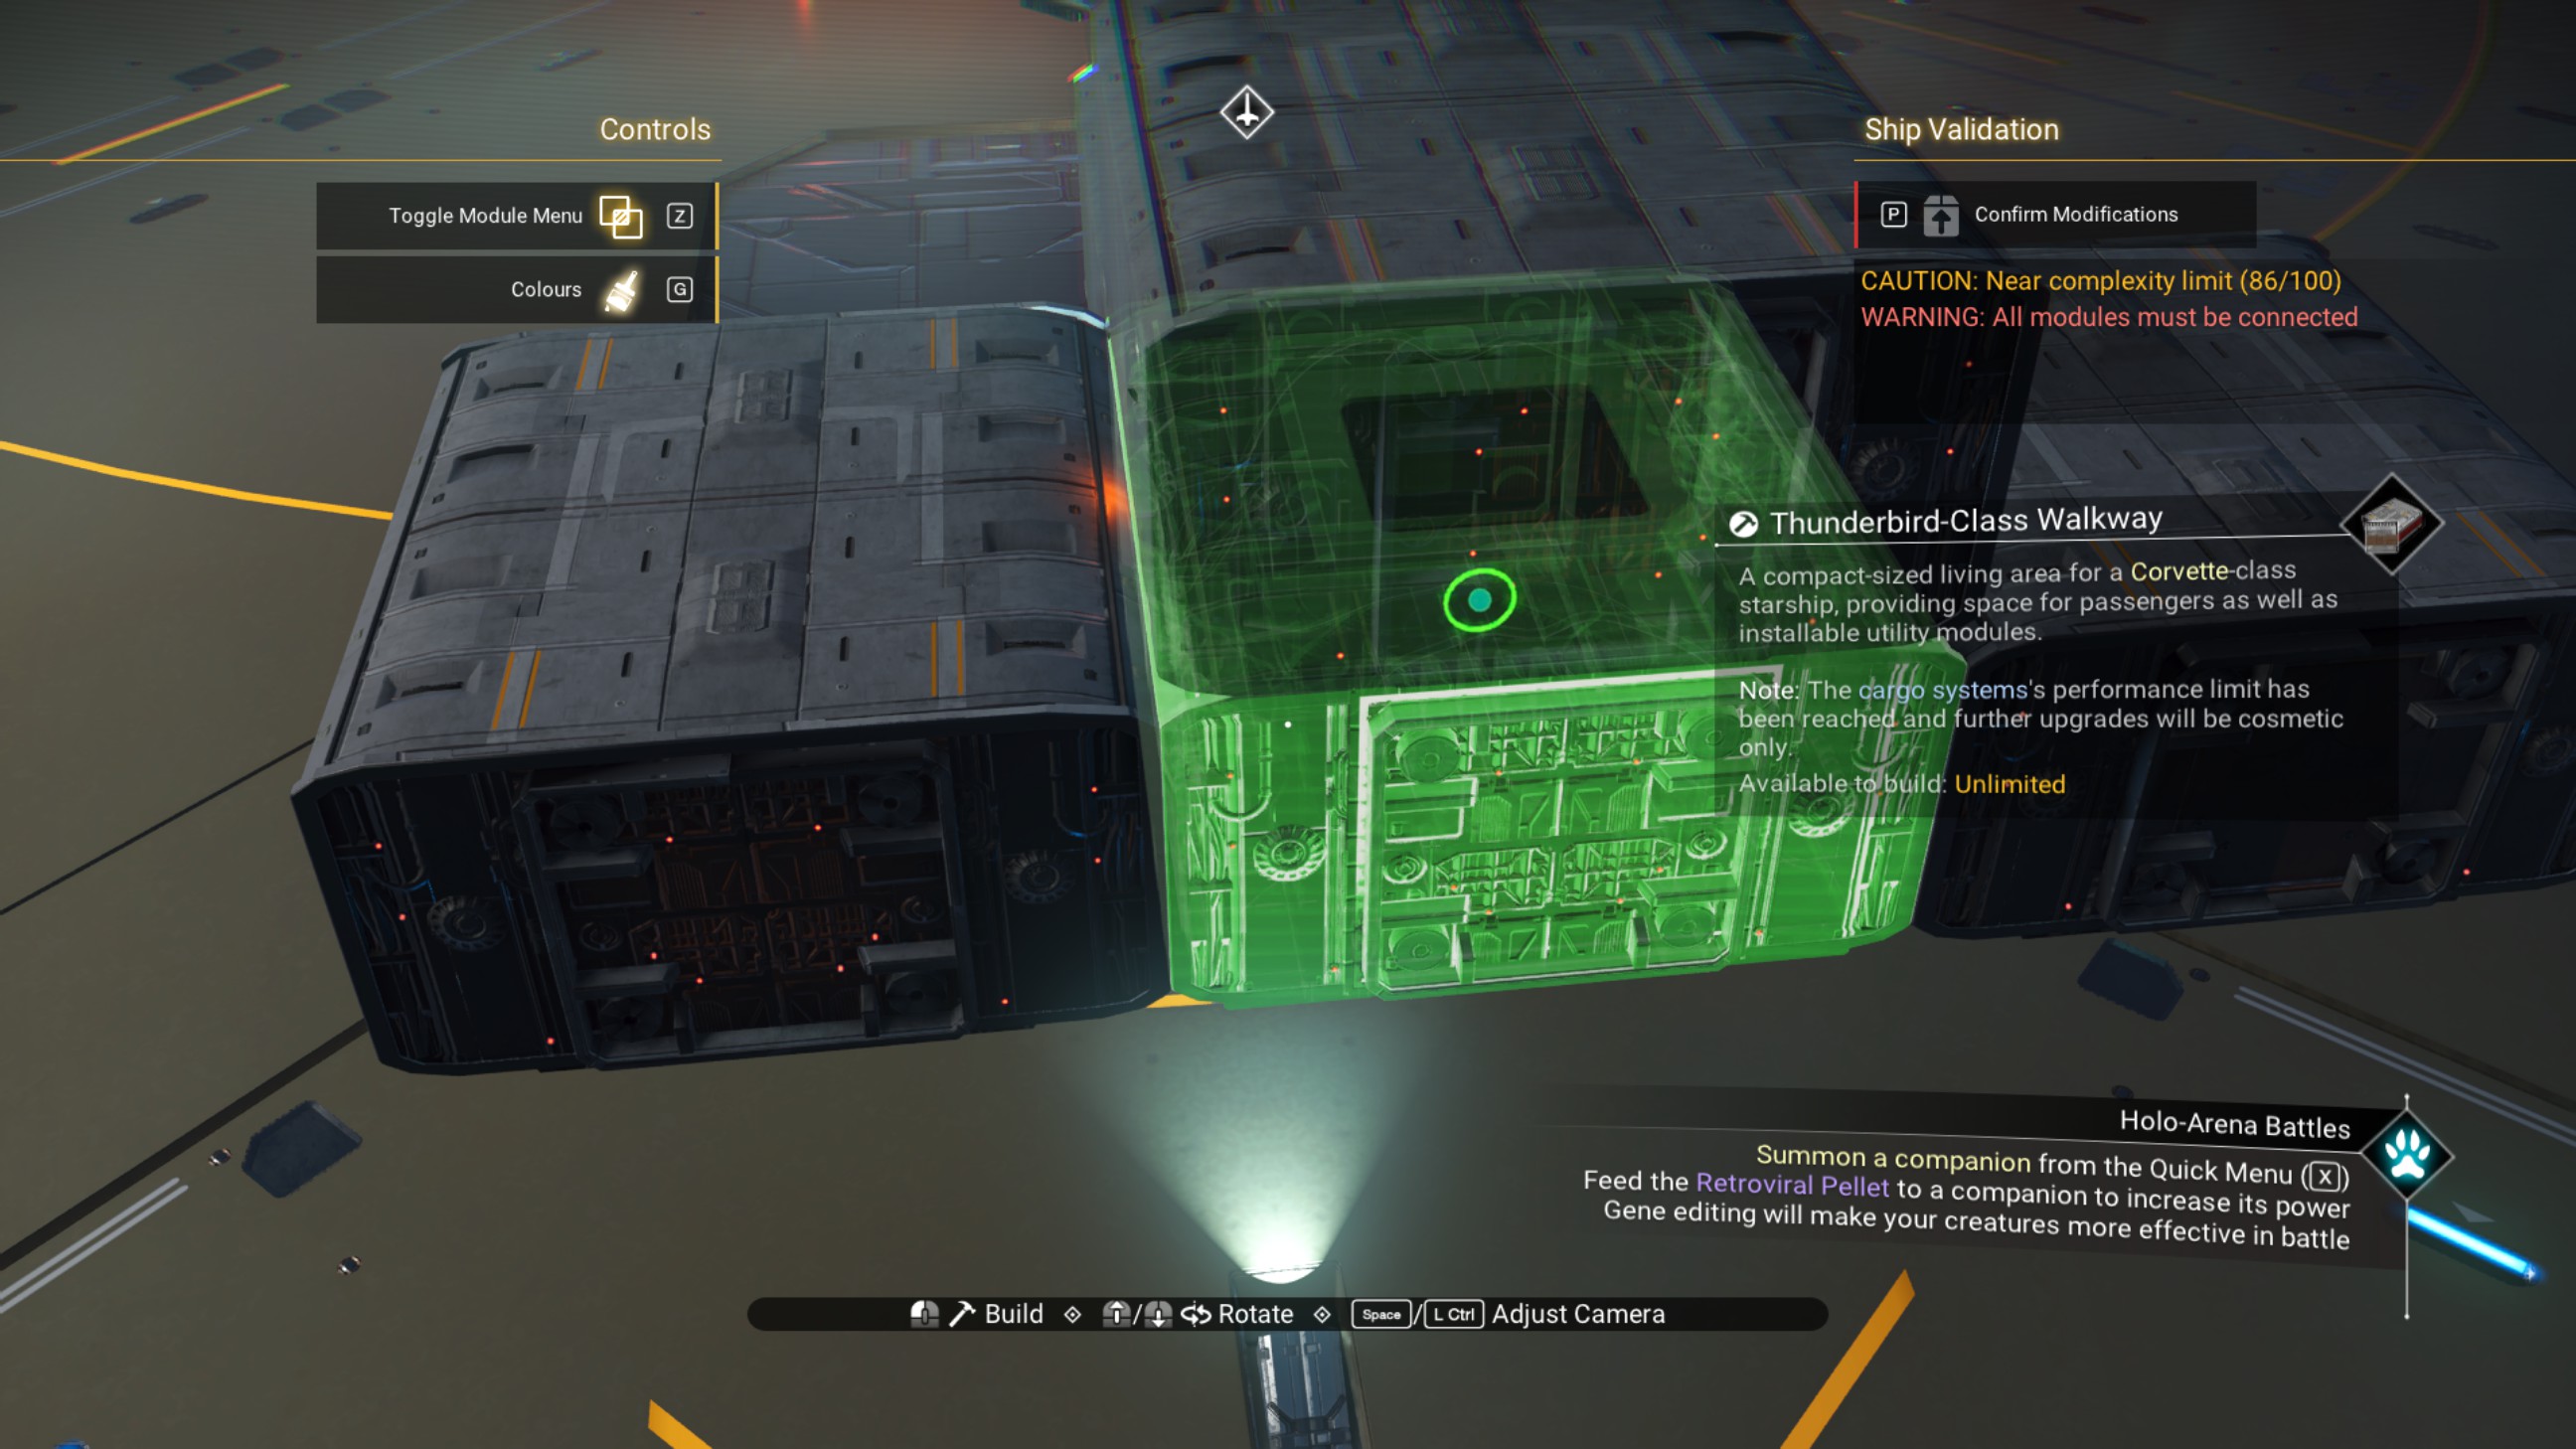
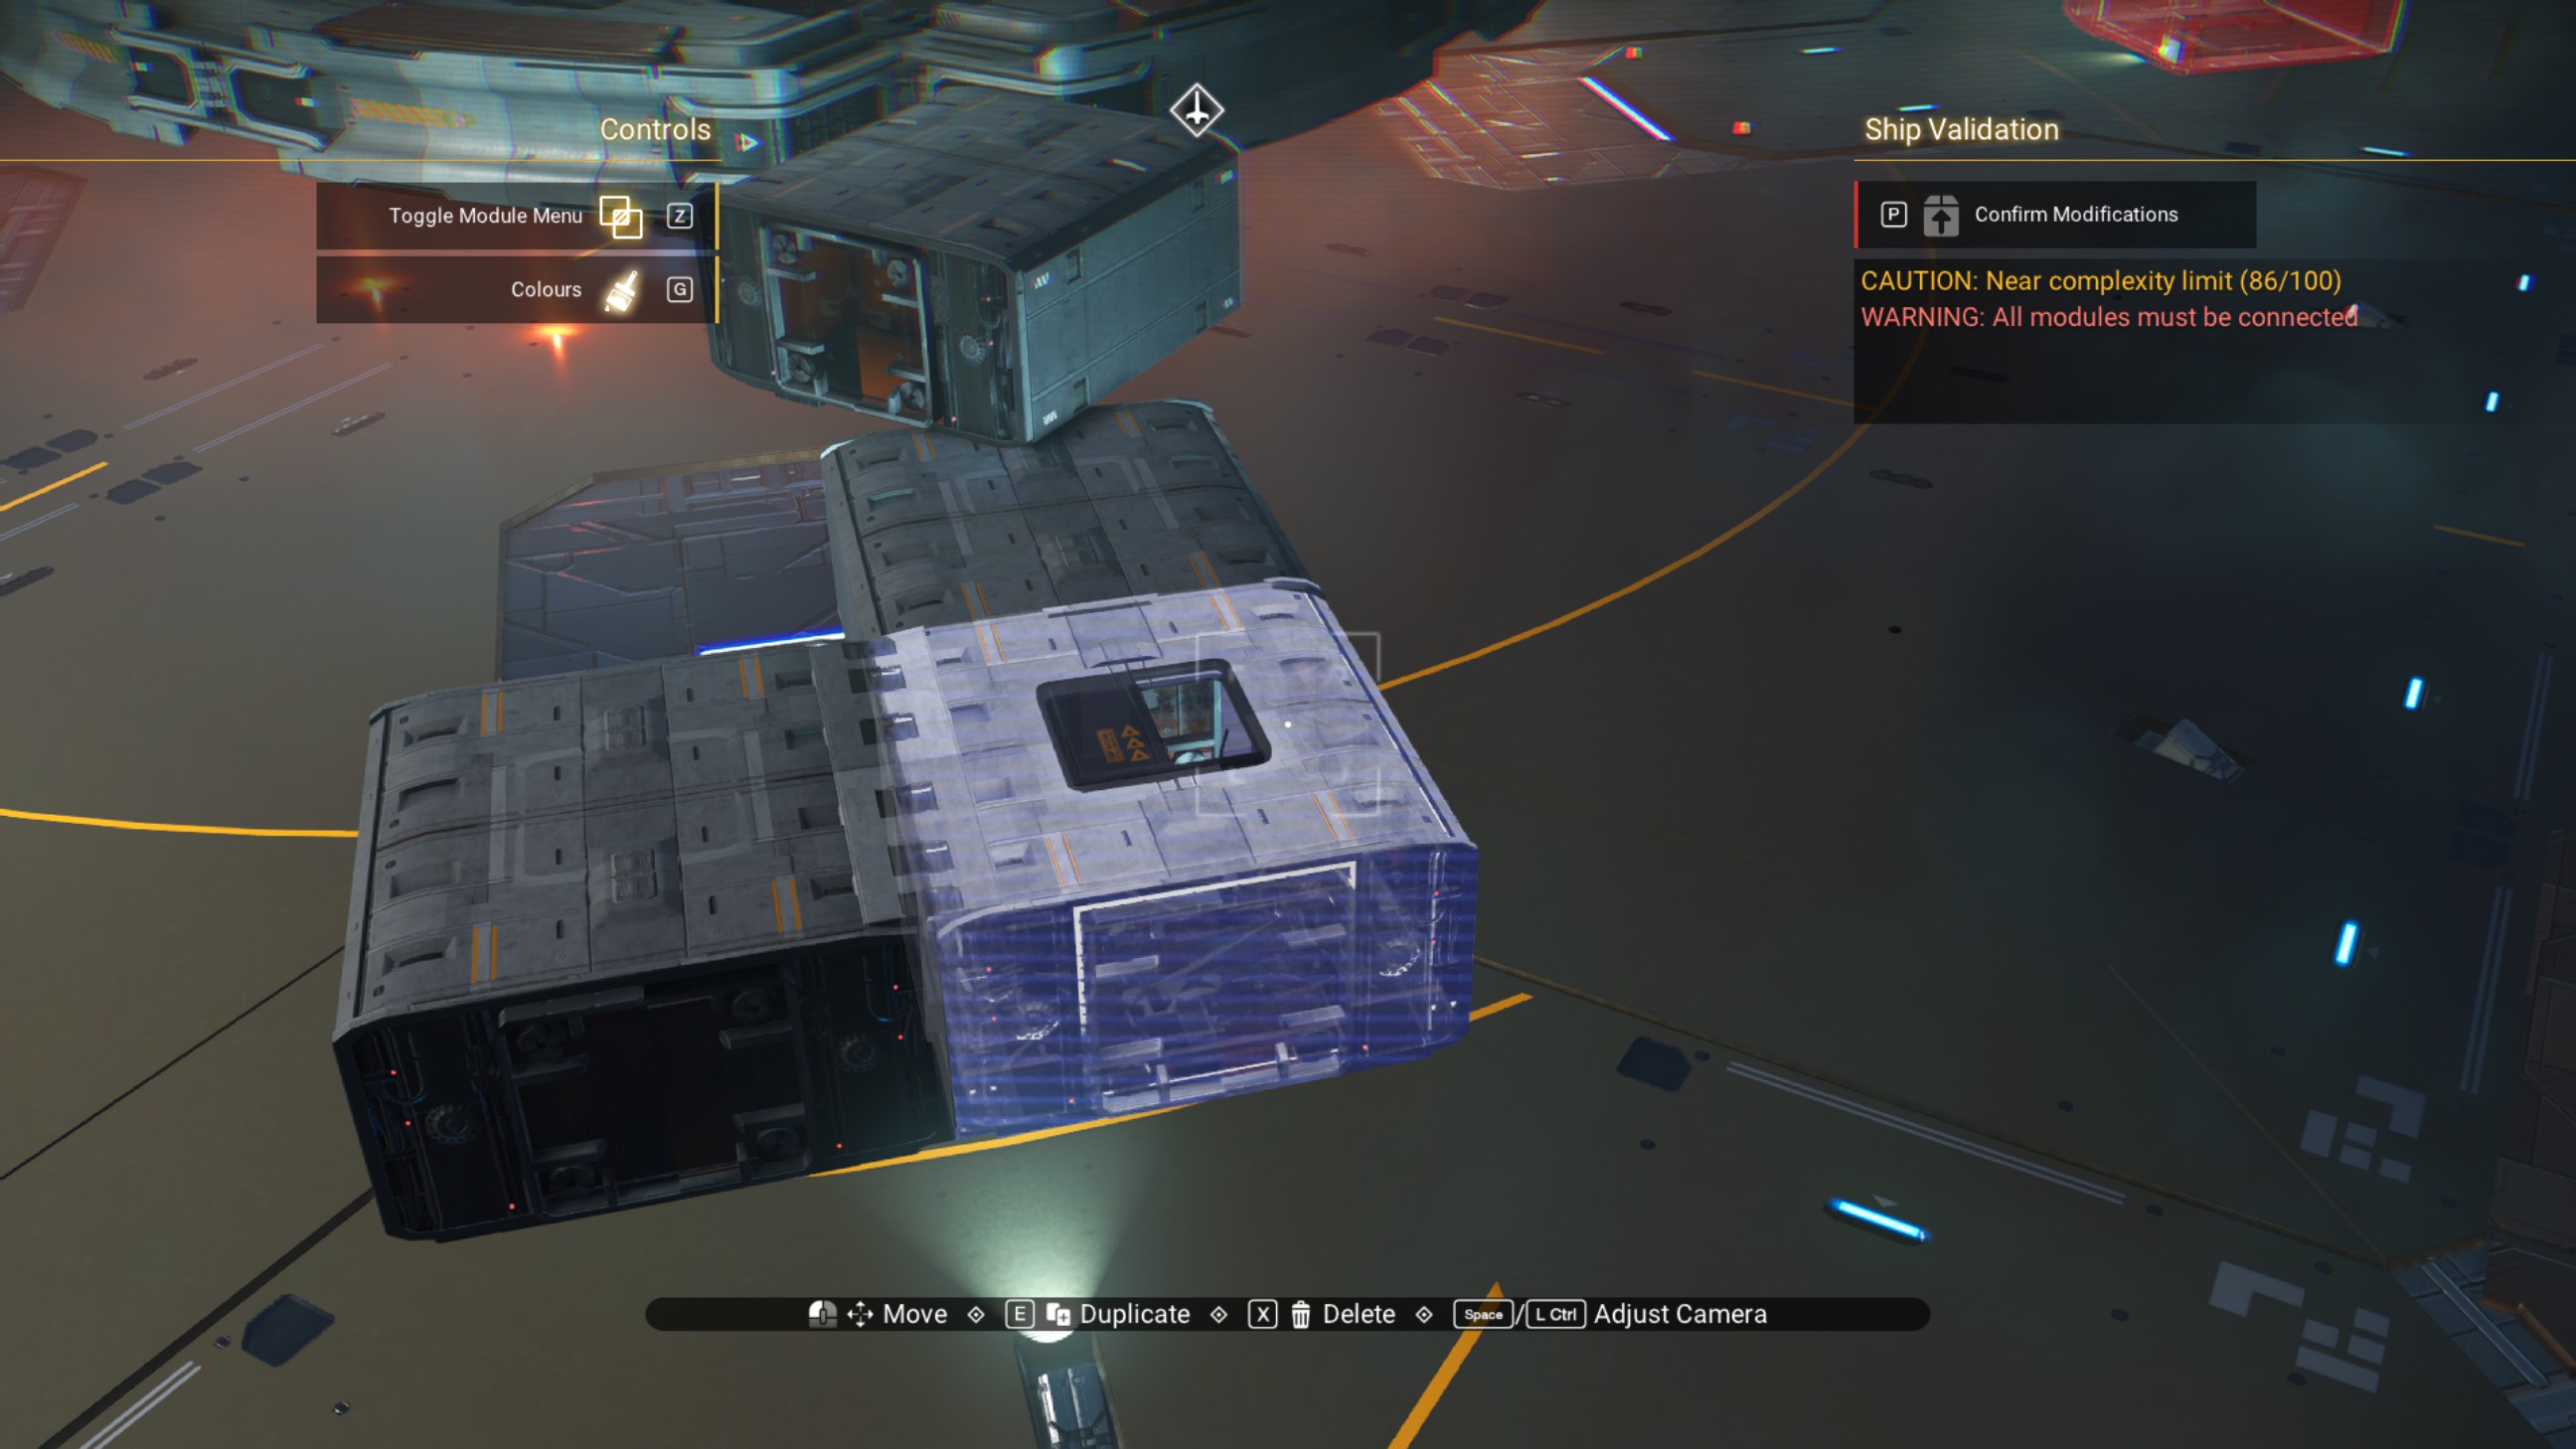
Add a walkway to overlap the lower walkway on the left, as we are looking at it (in line with the picture).
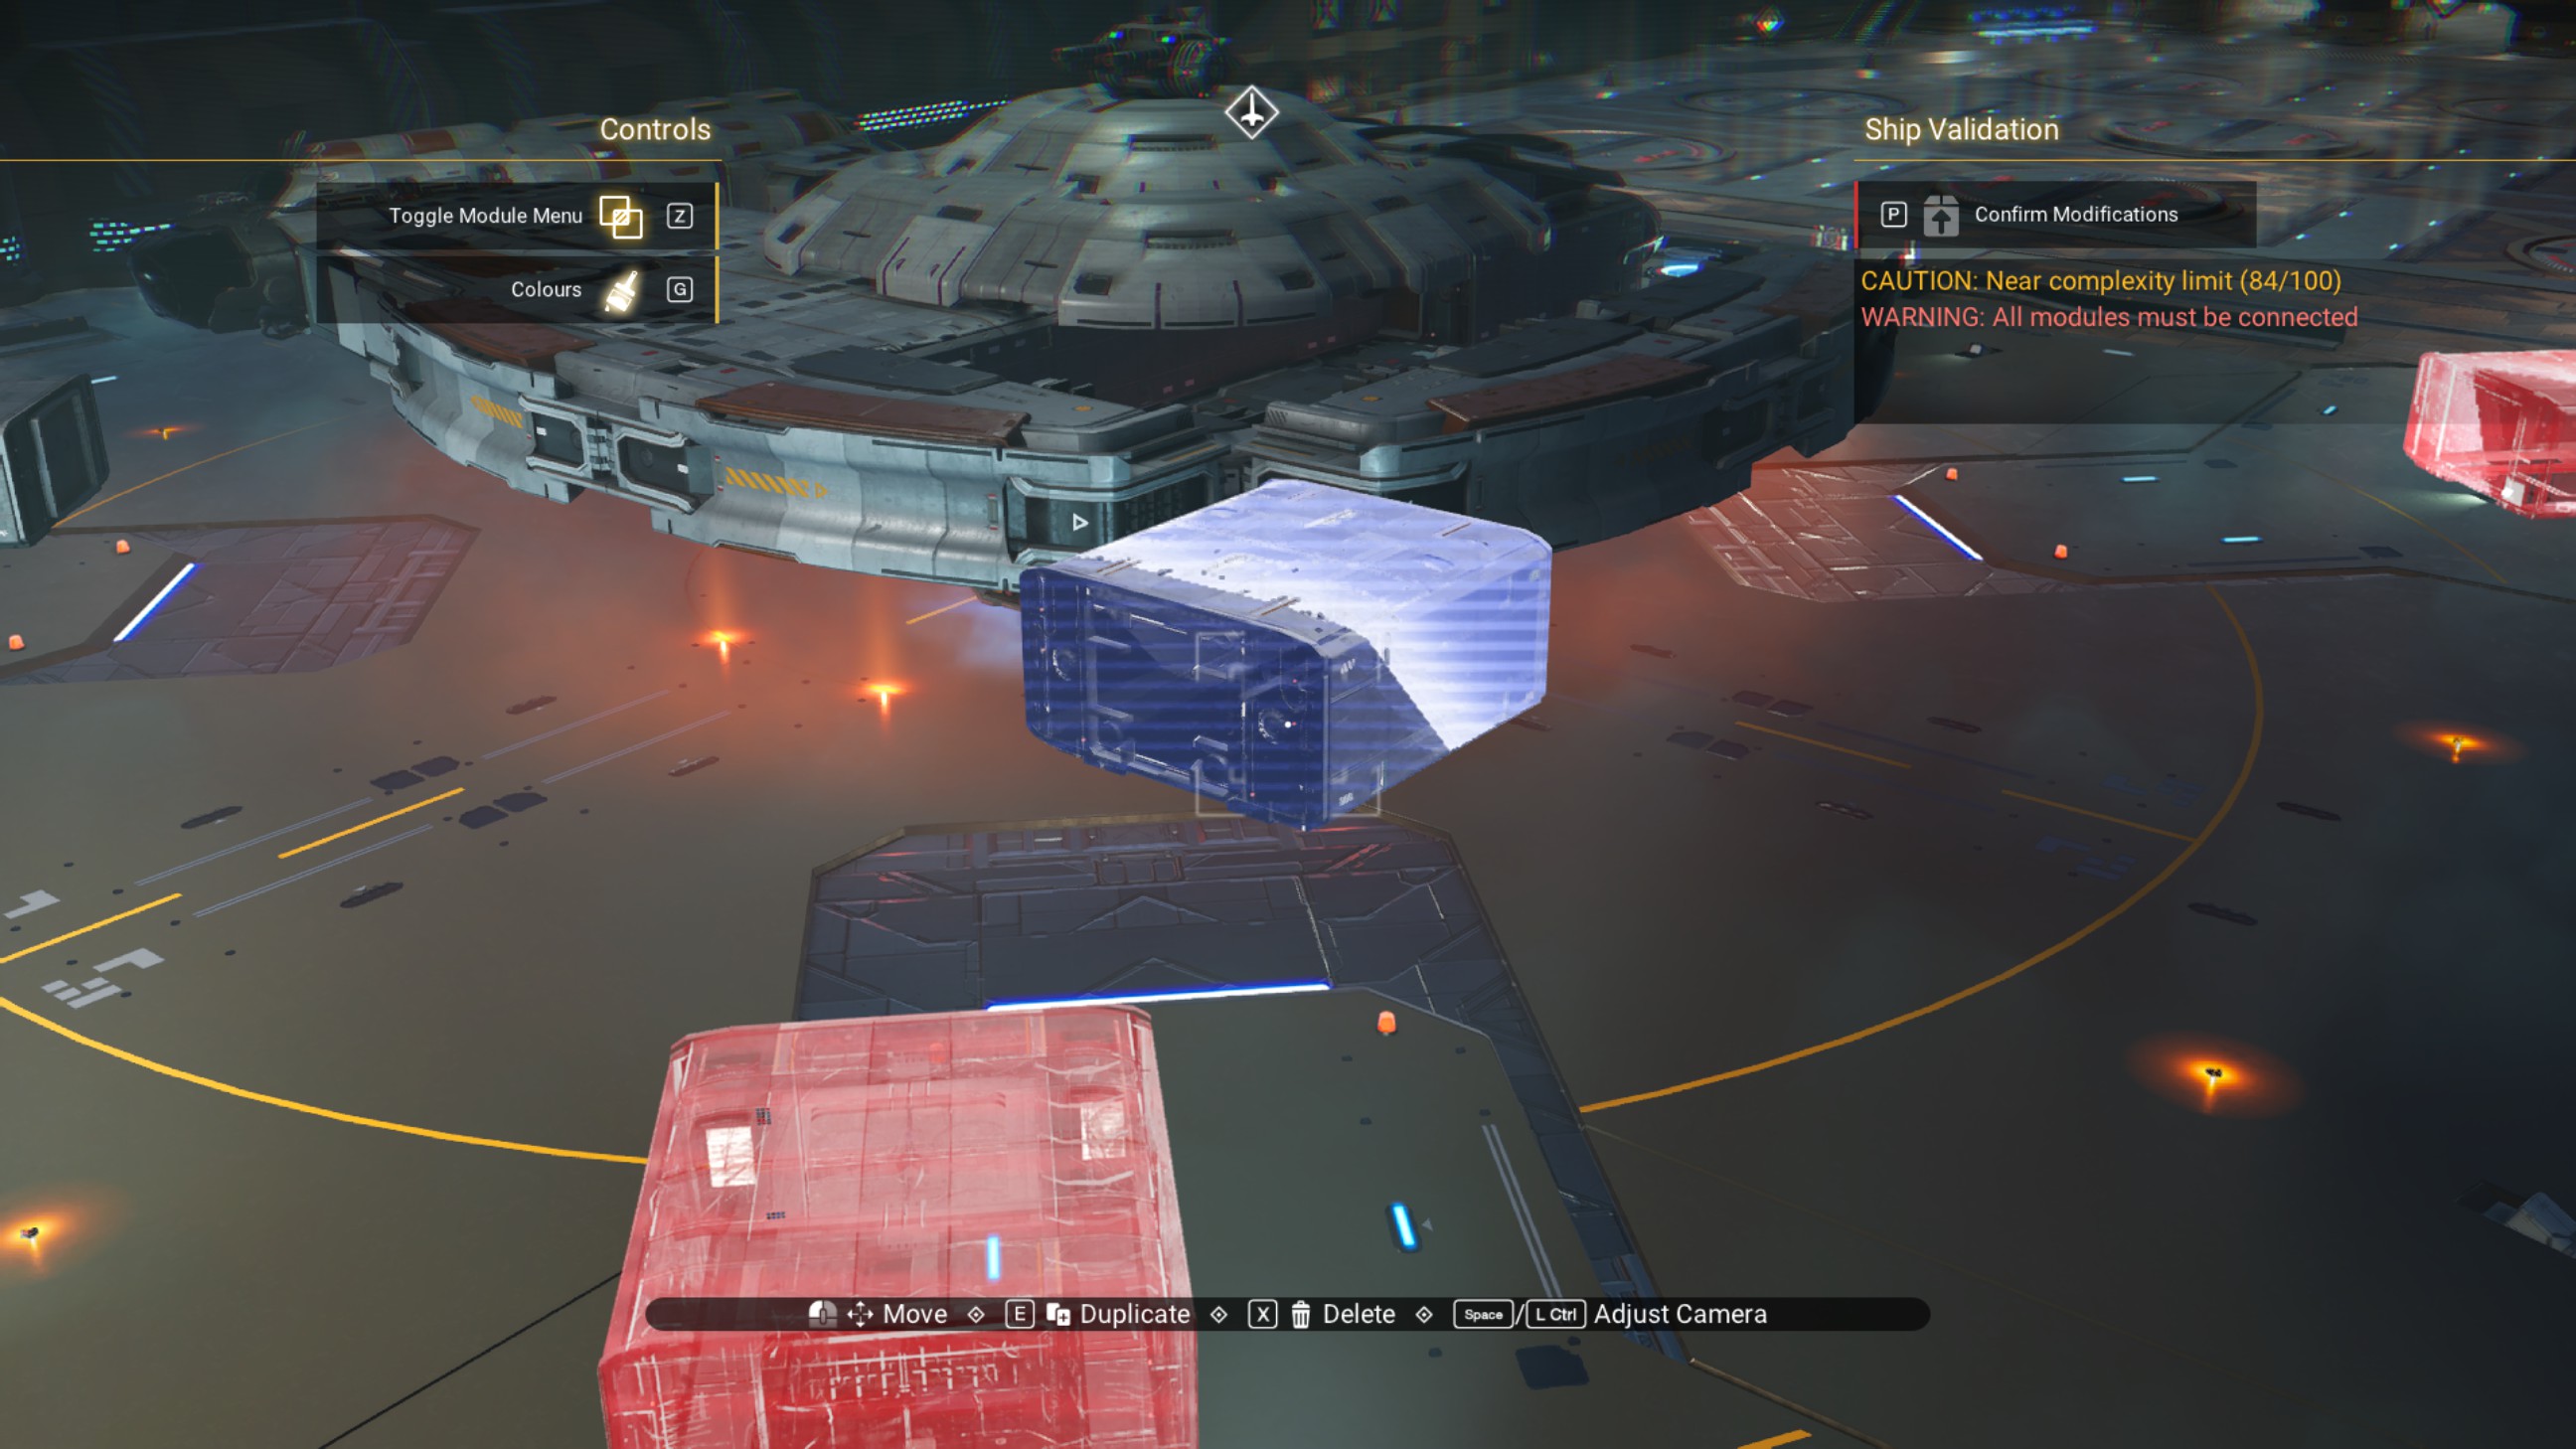
Delete the extra walkways from the structure.
Finishing the Saucer Outline
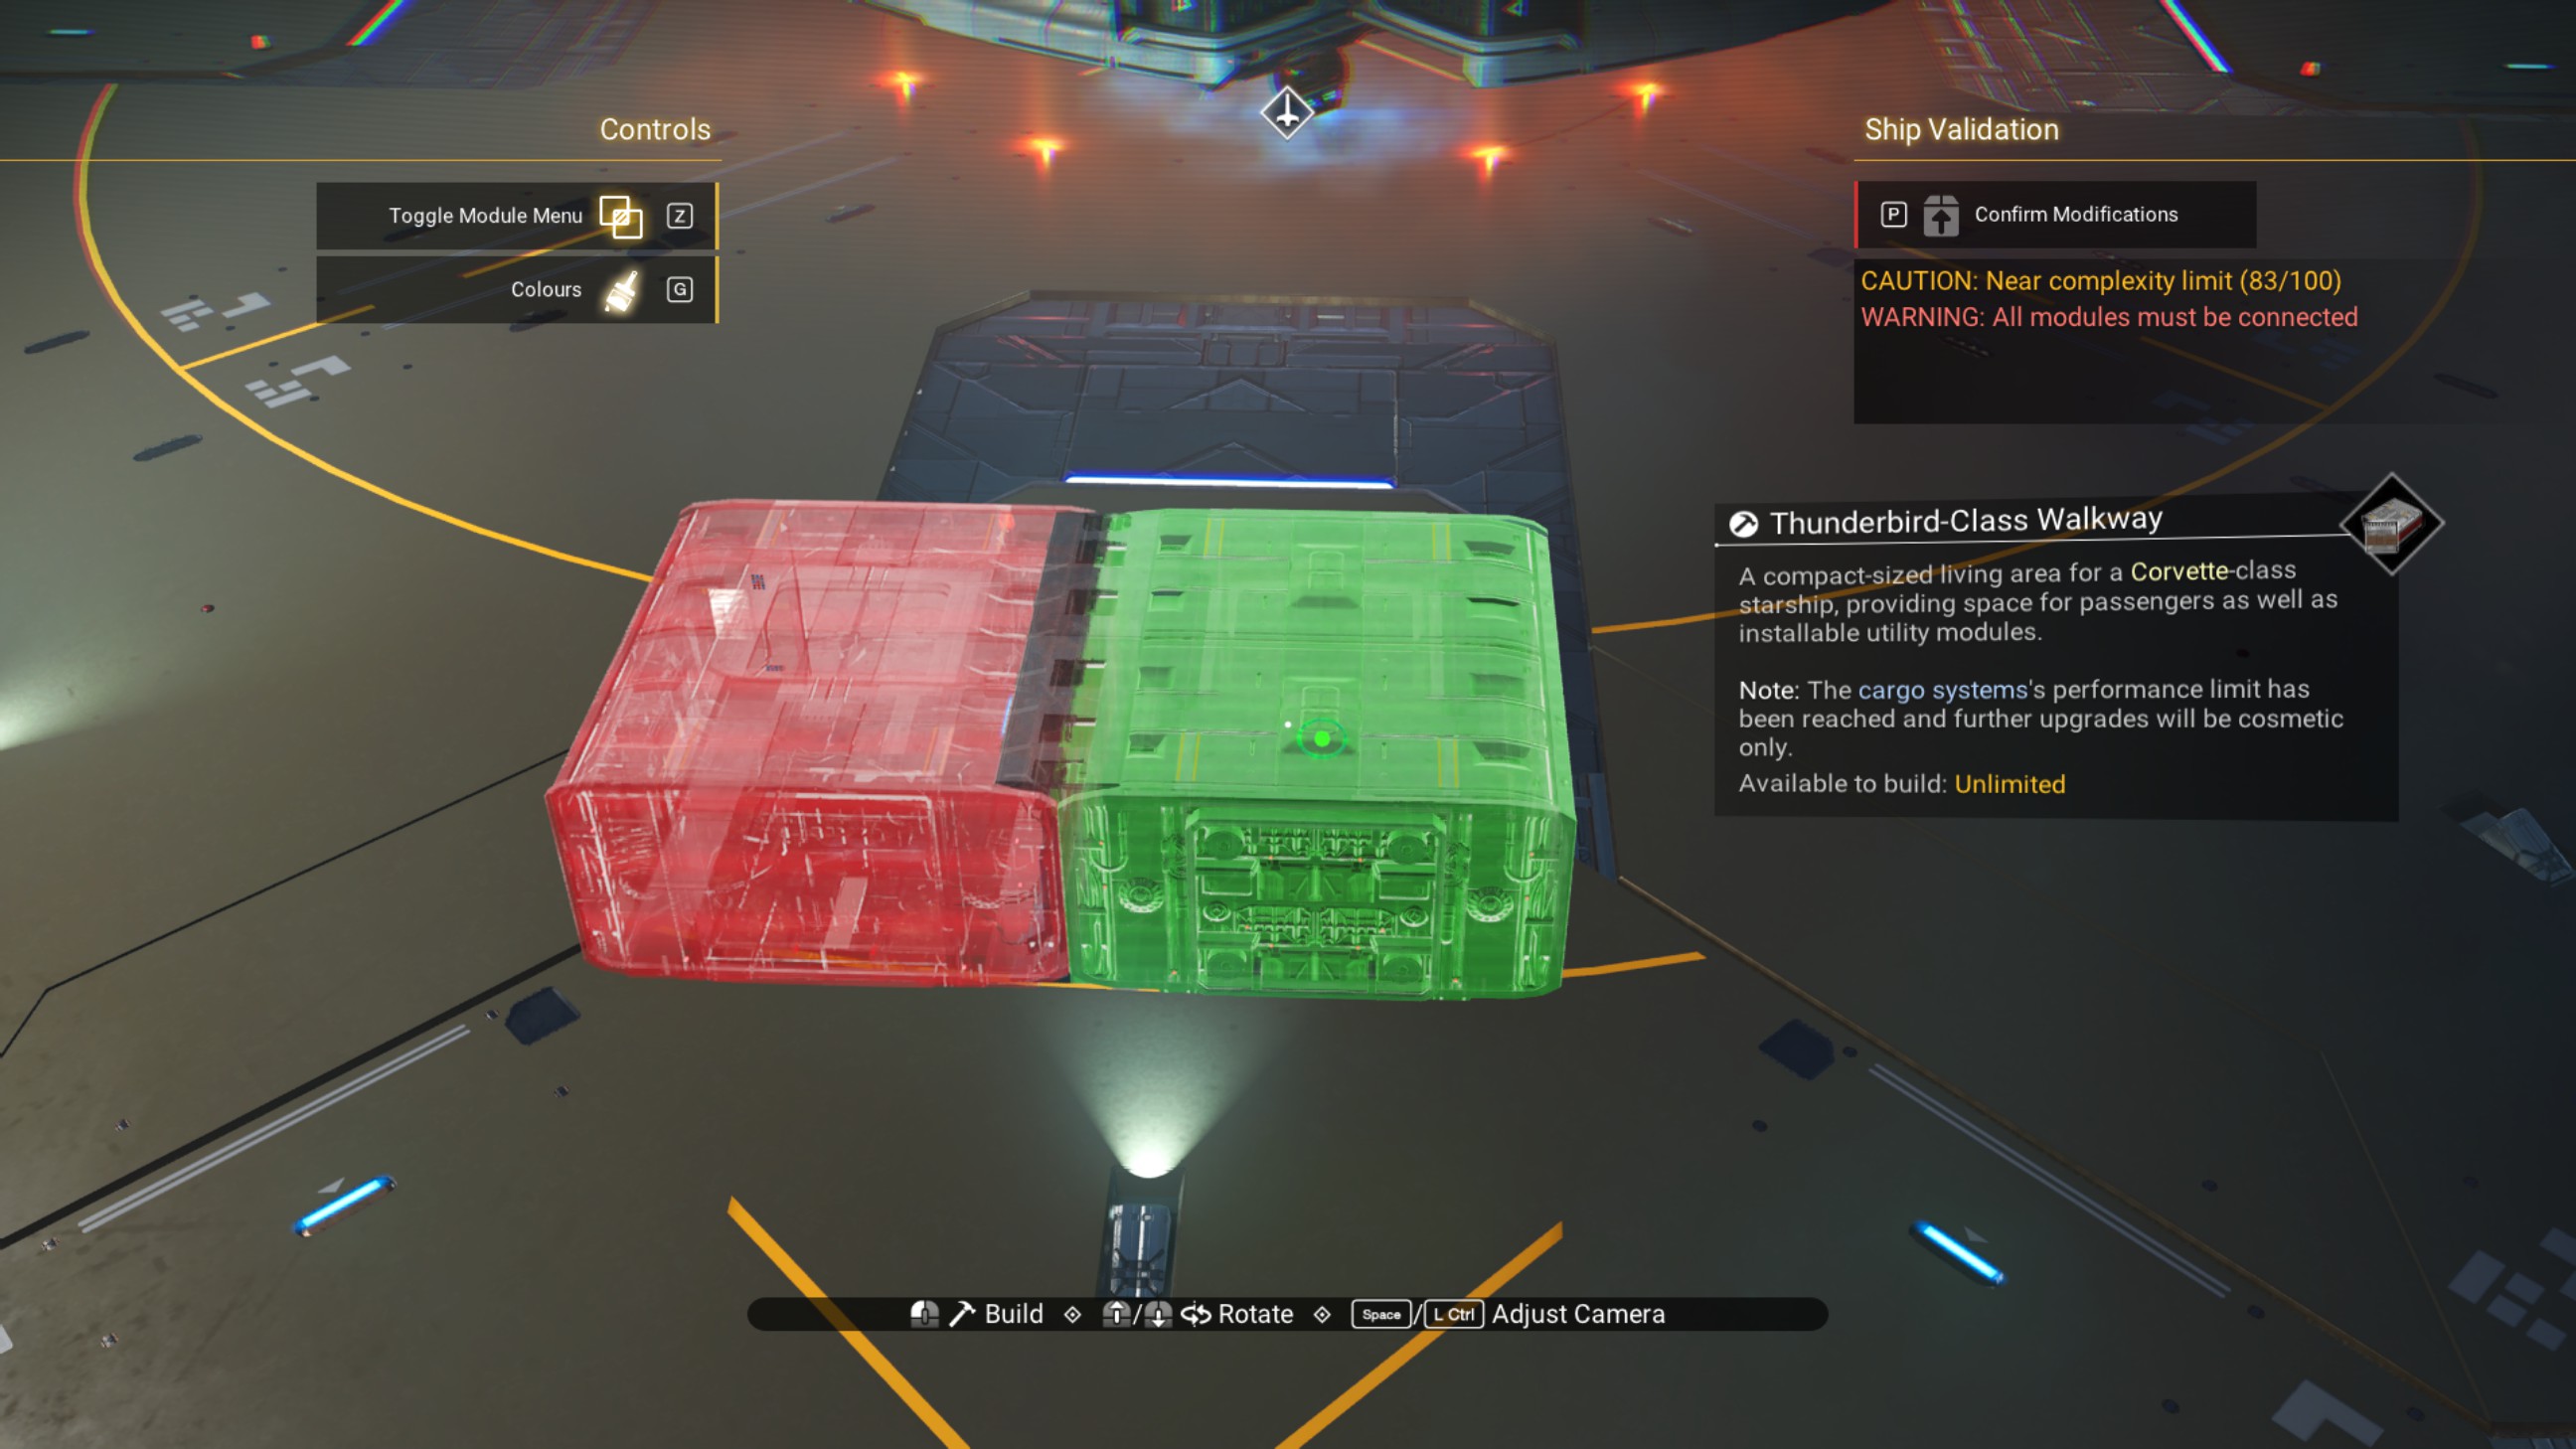
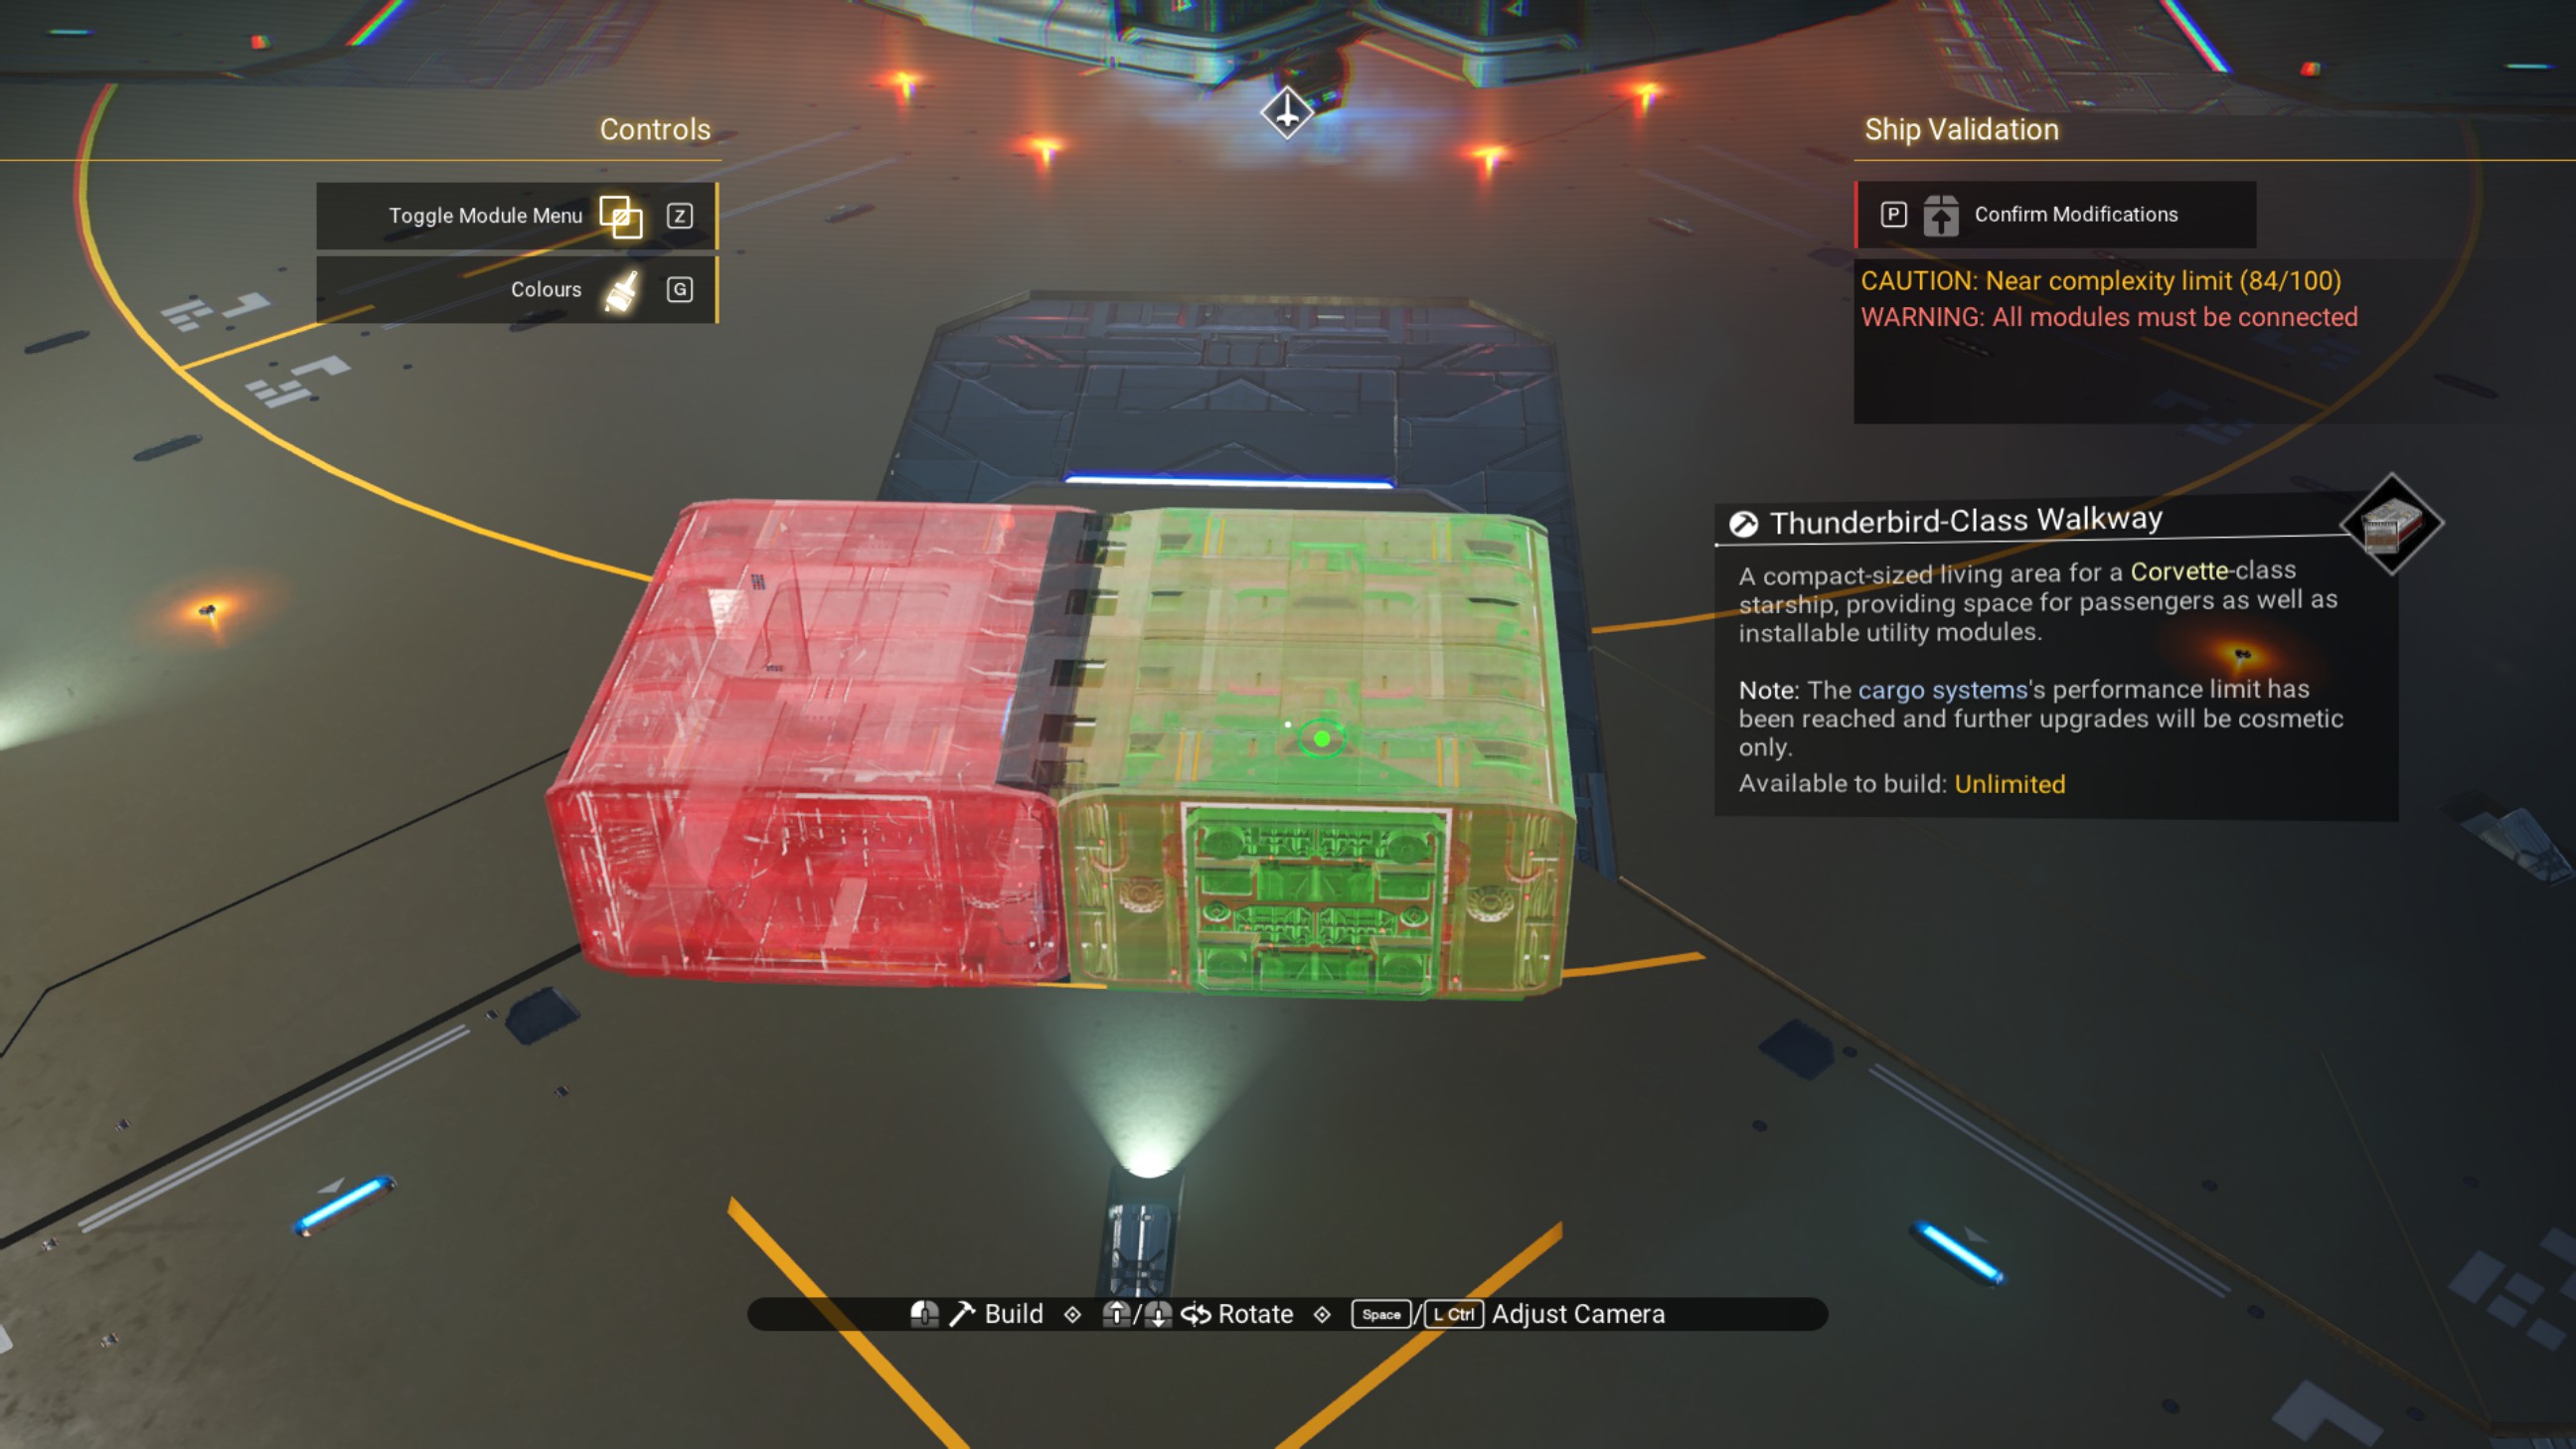
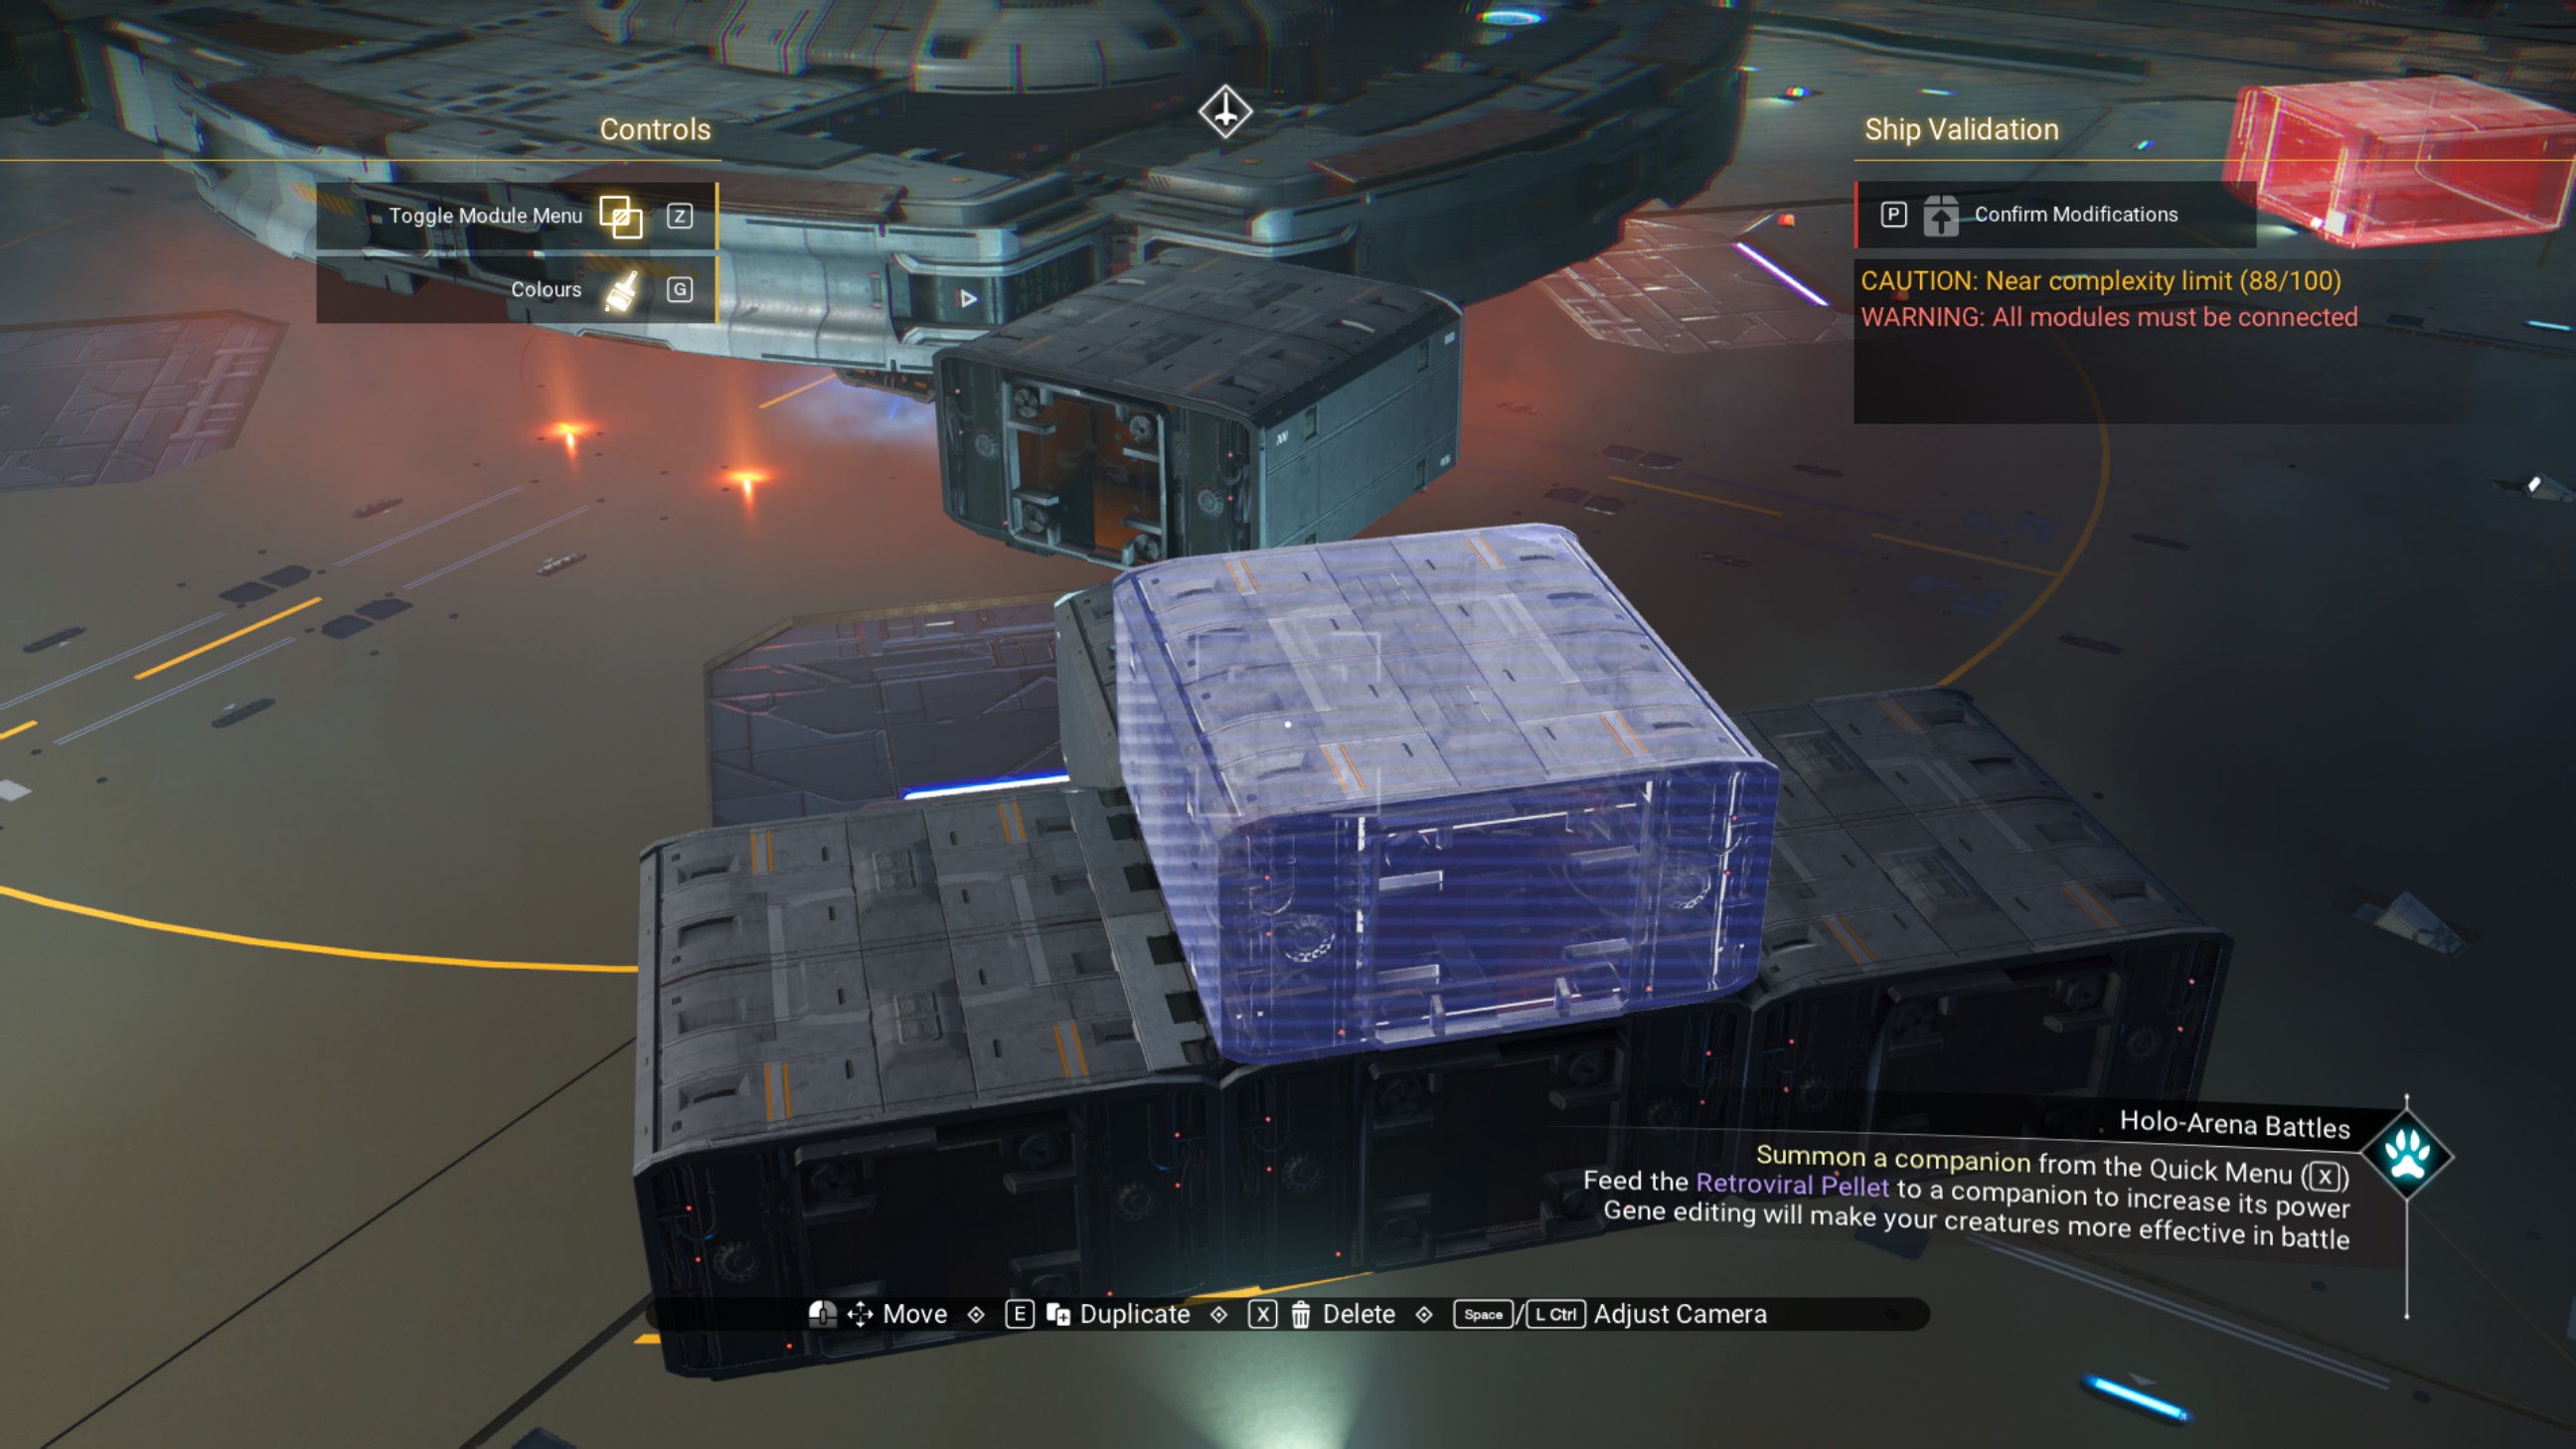
Place two more overlapped walkways on top of that set.
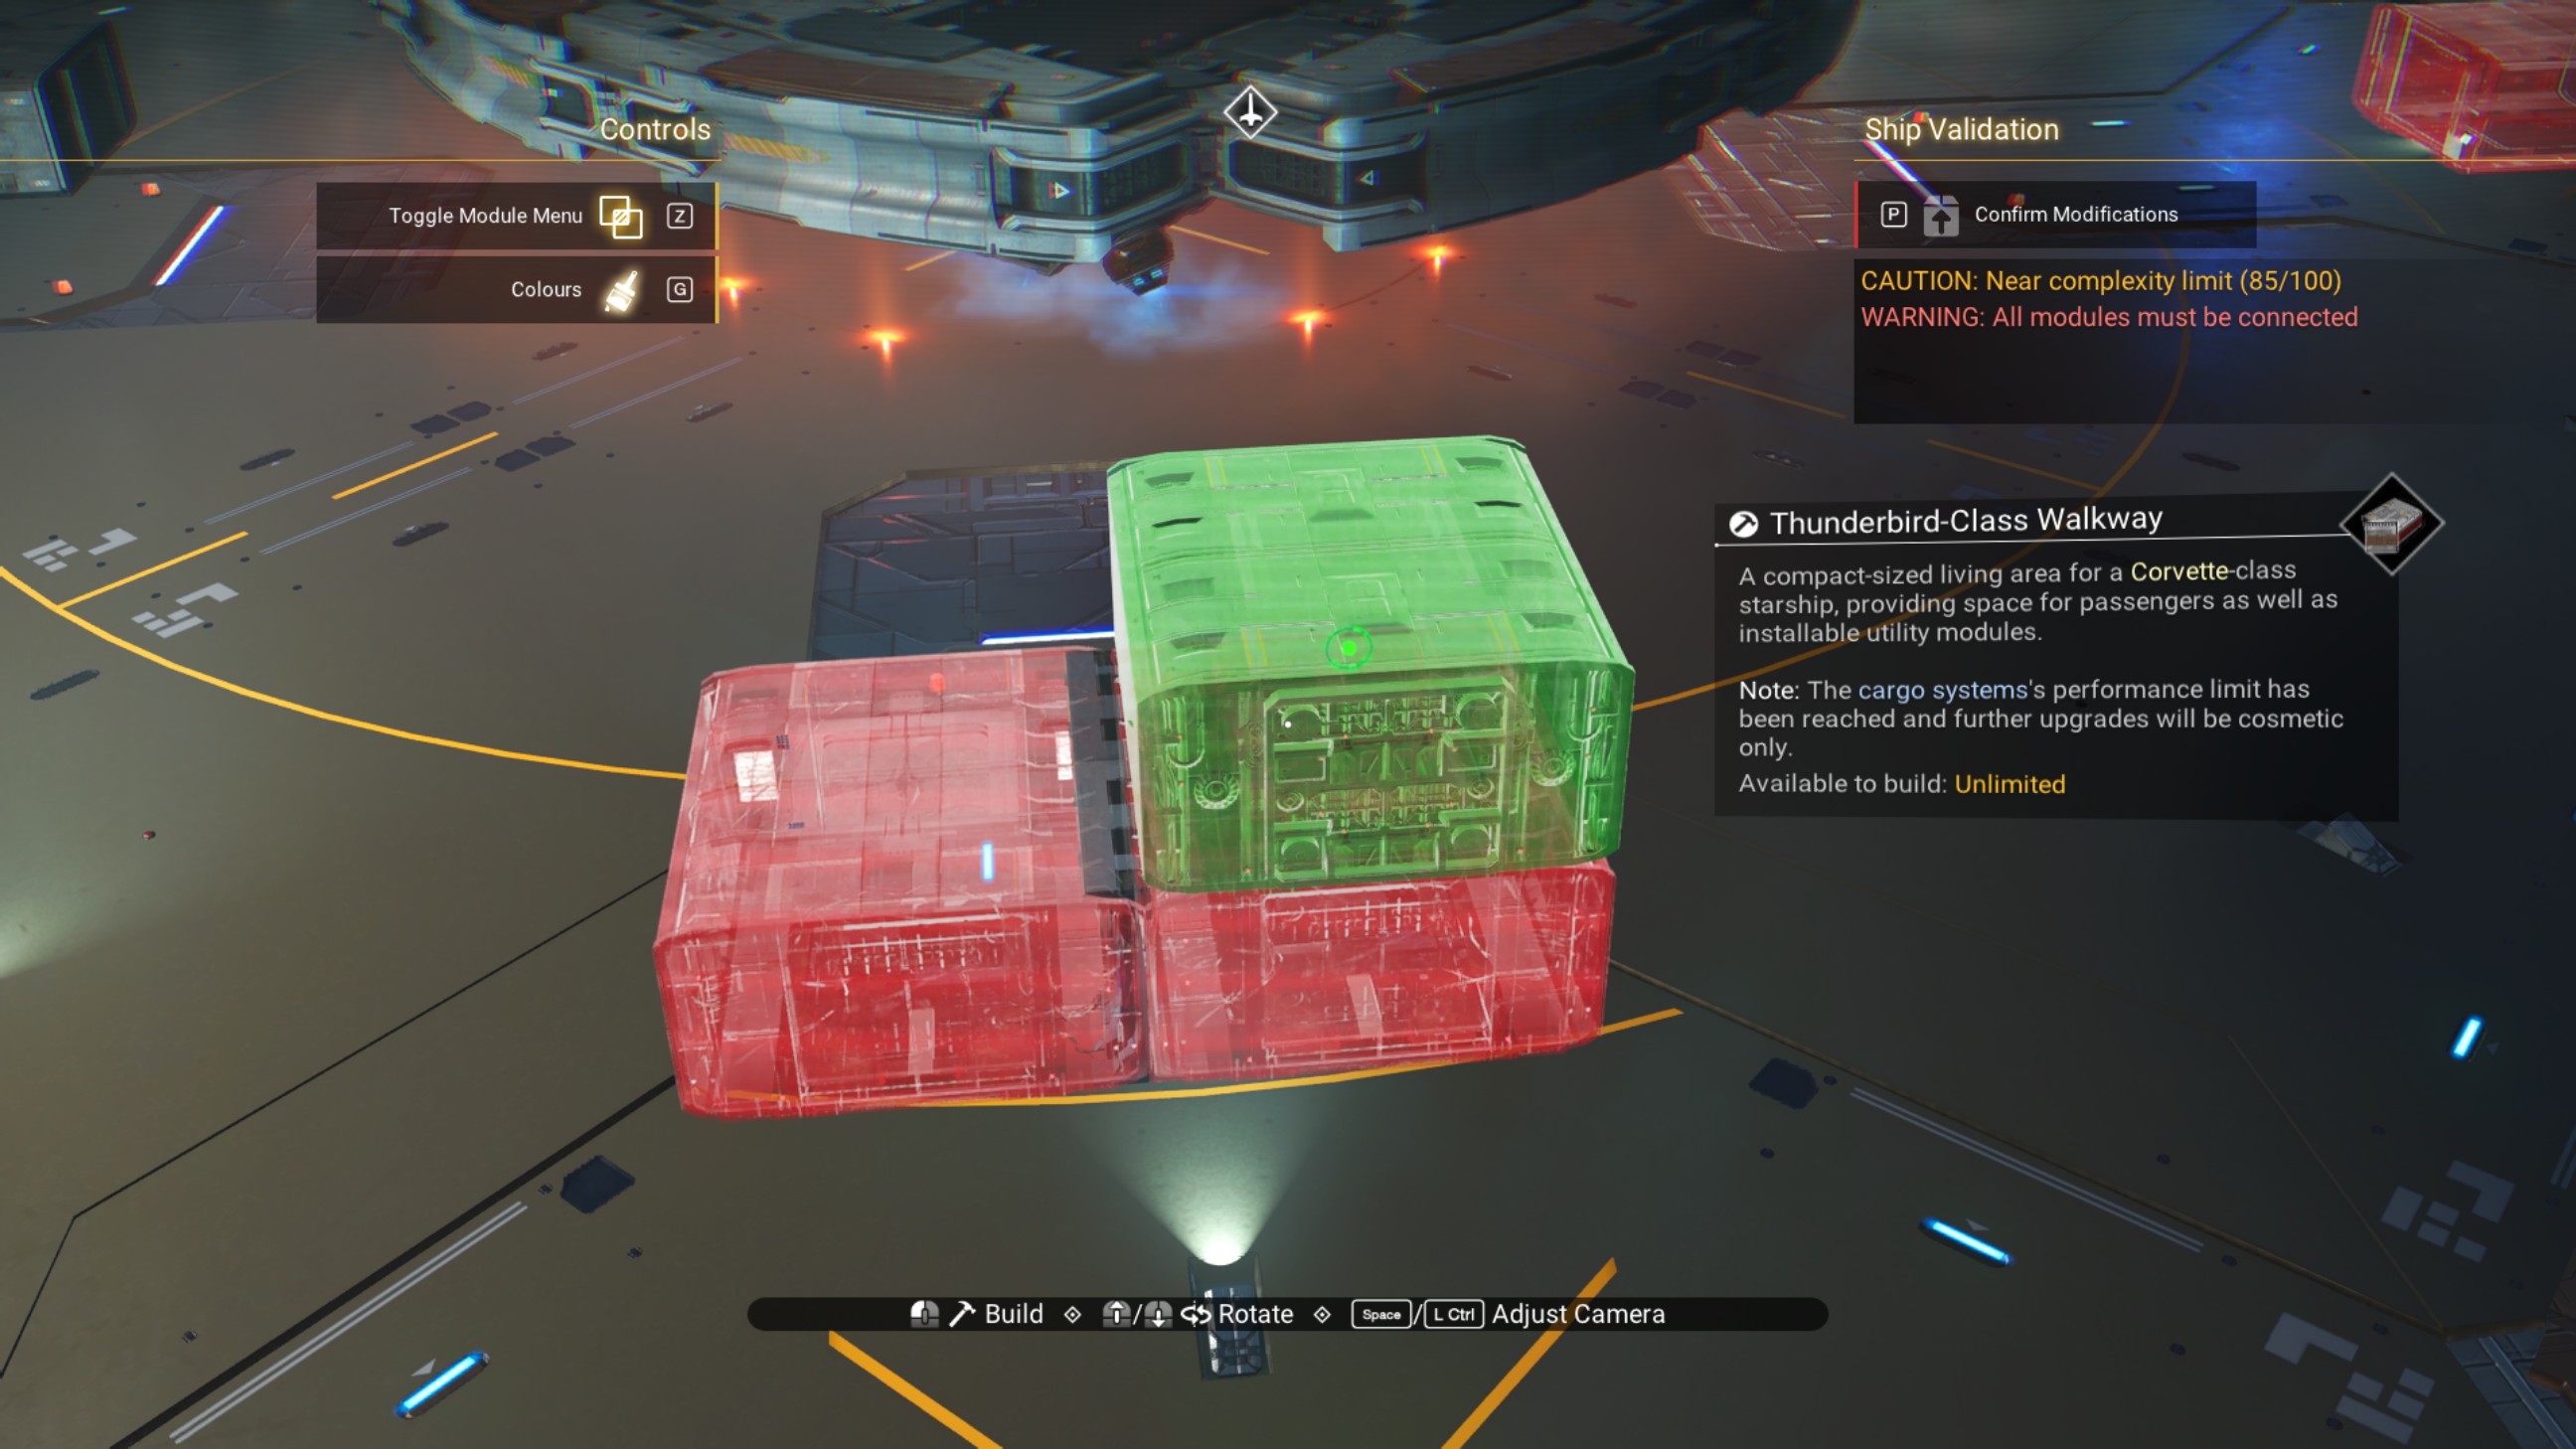
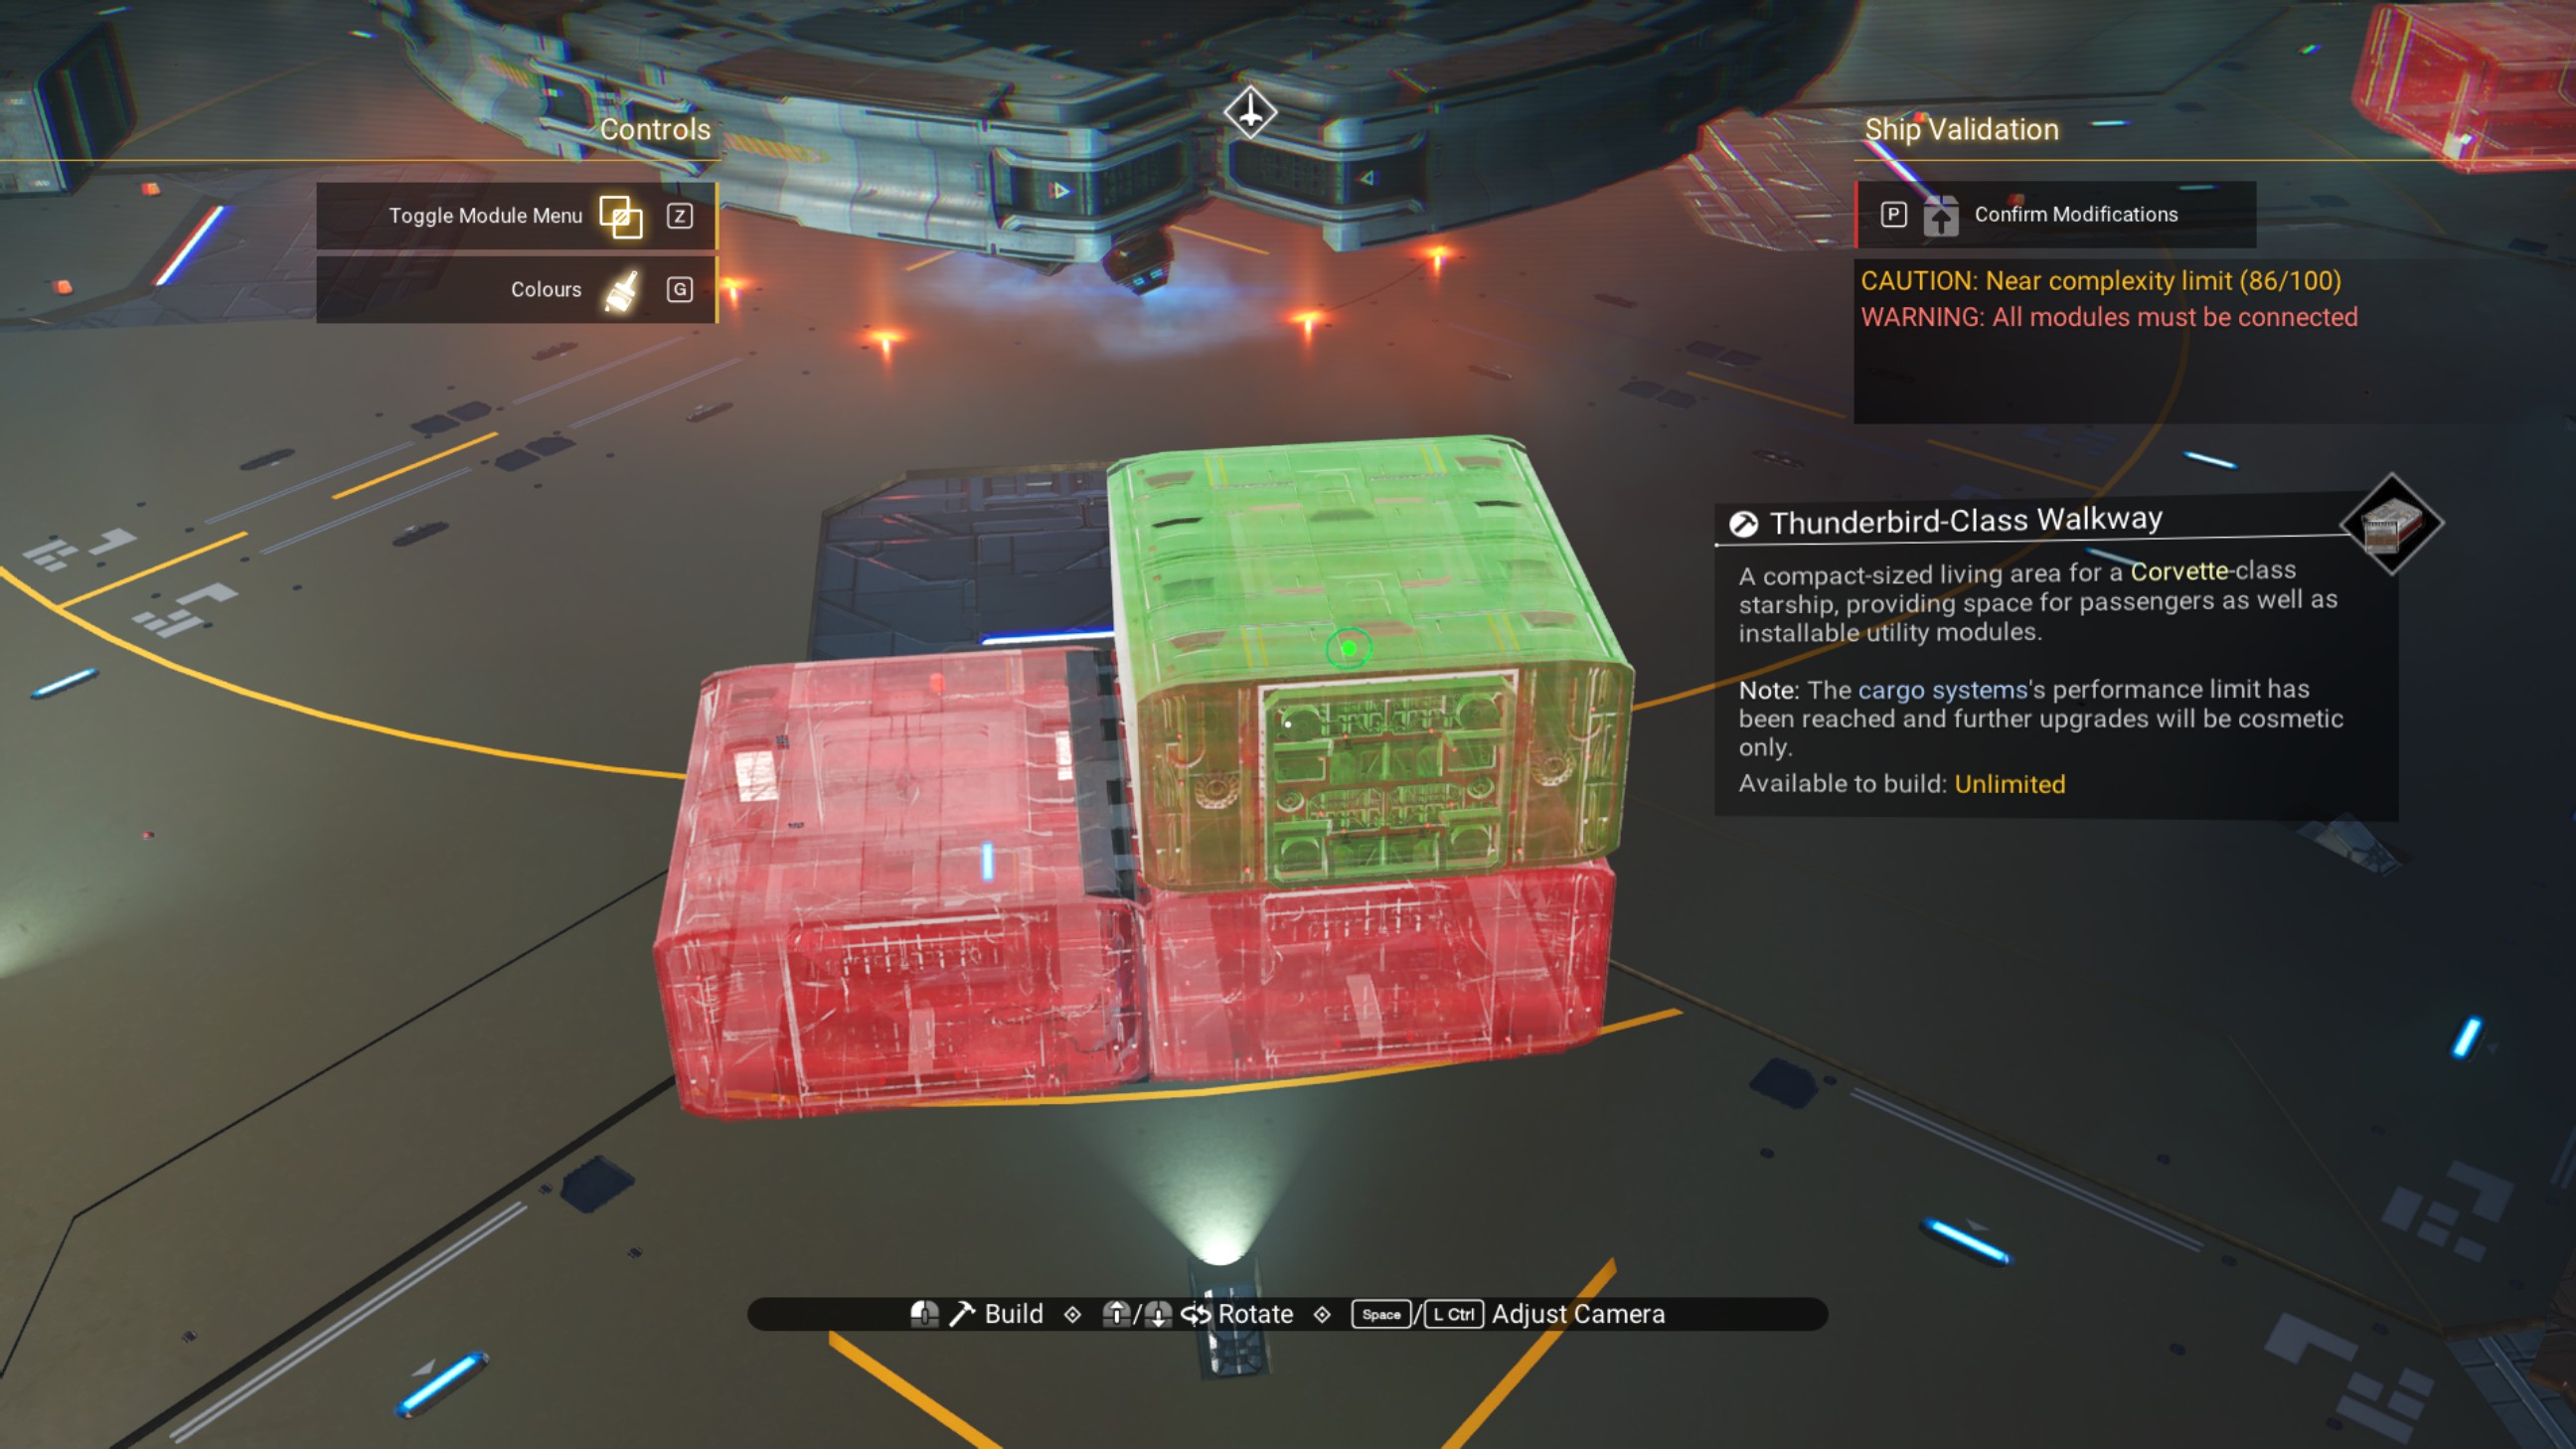
Delete the previous walkways, but be very careful Not to touch the top set or you'll have to start all over.
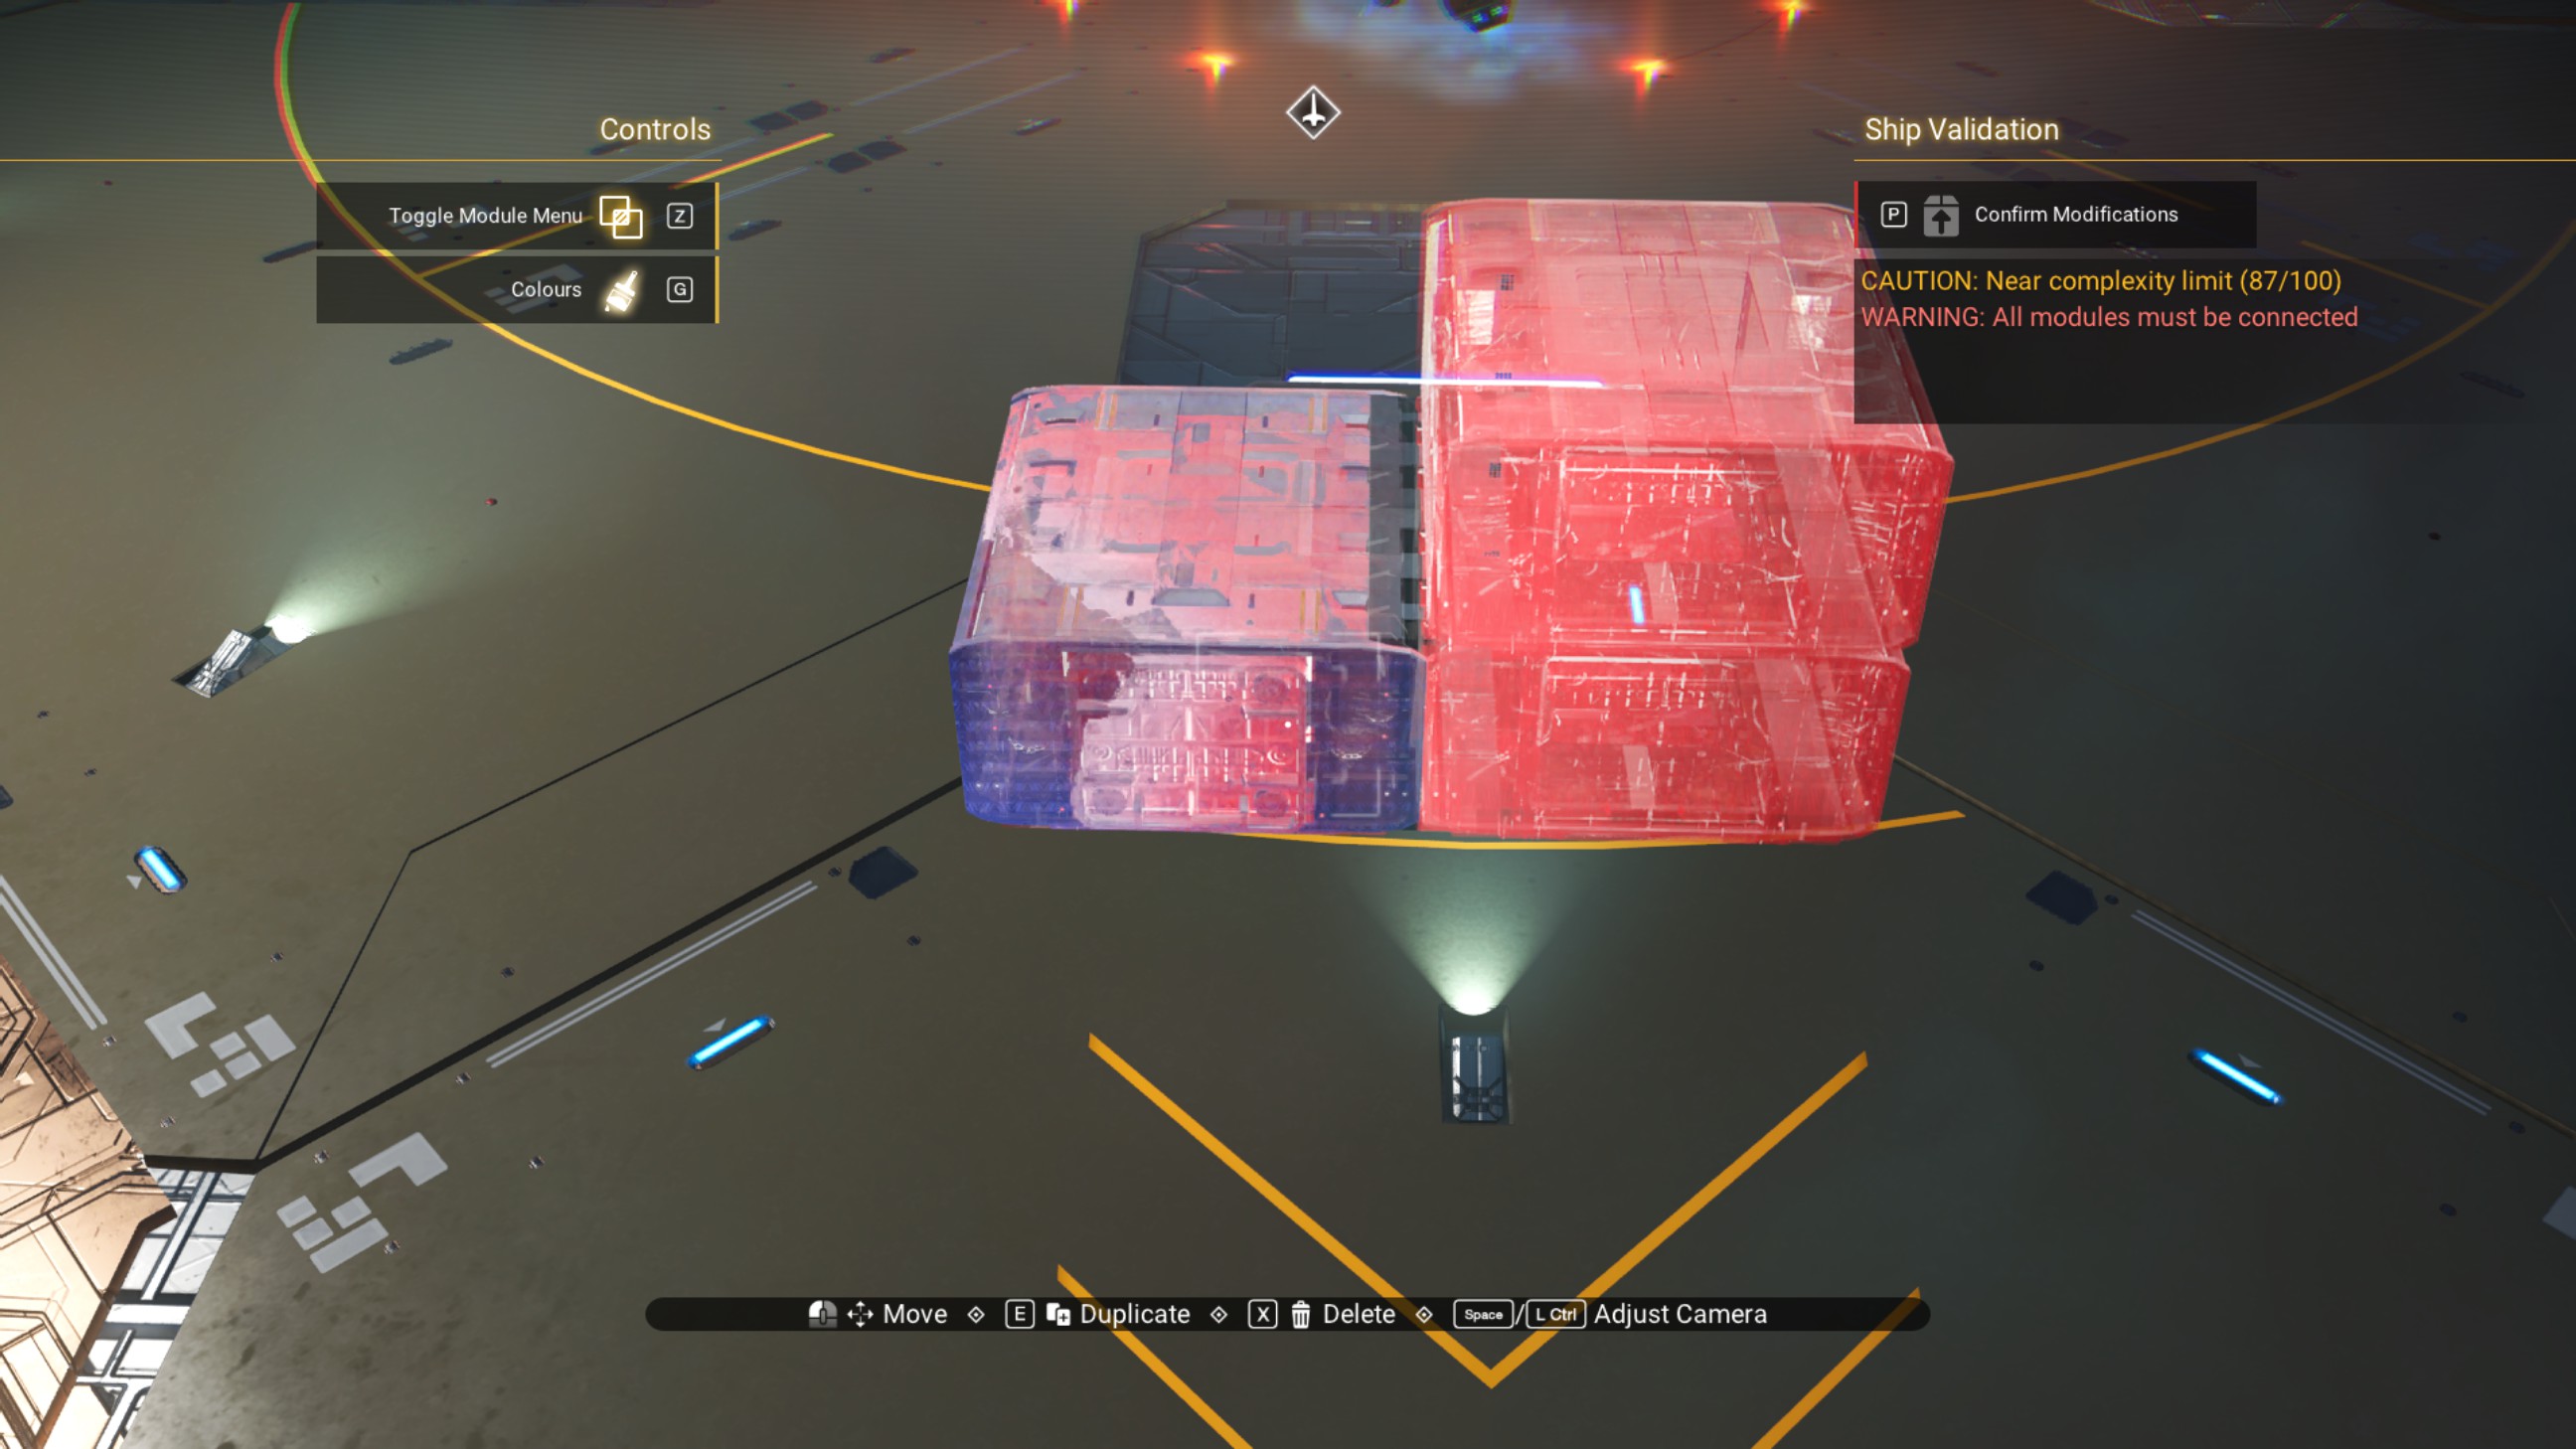
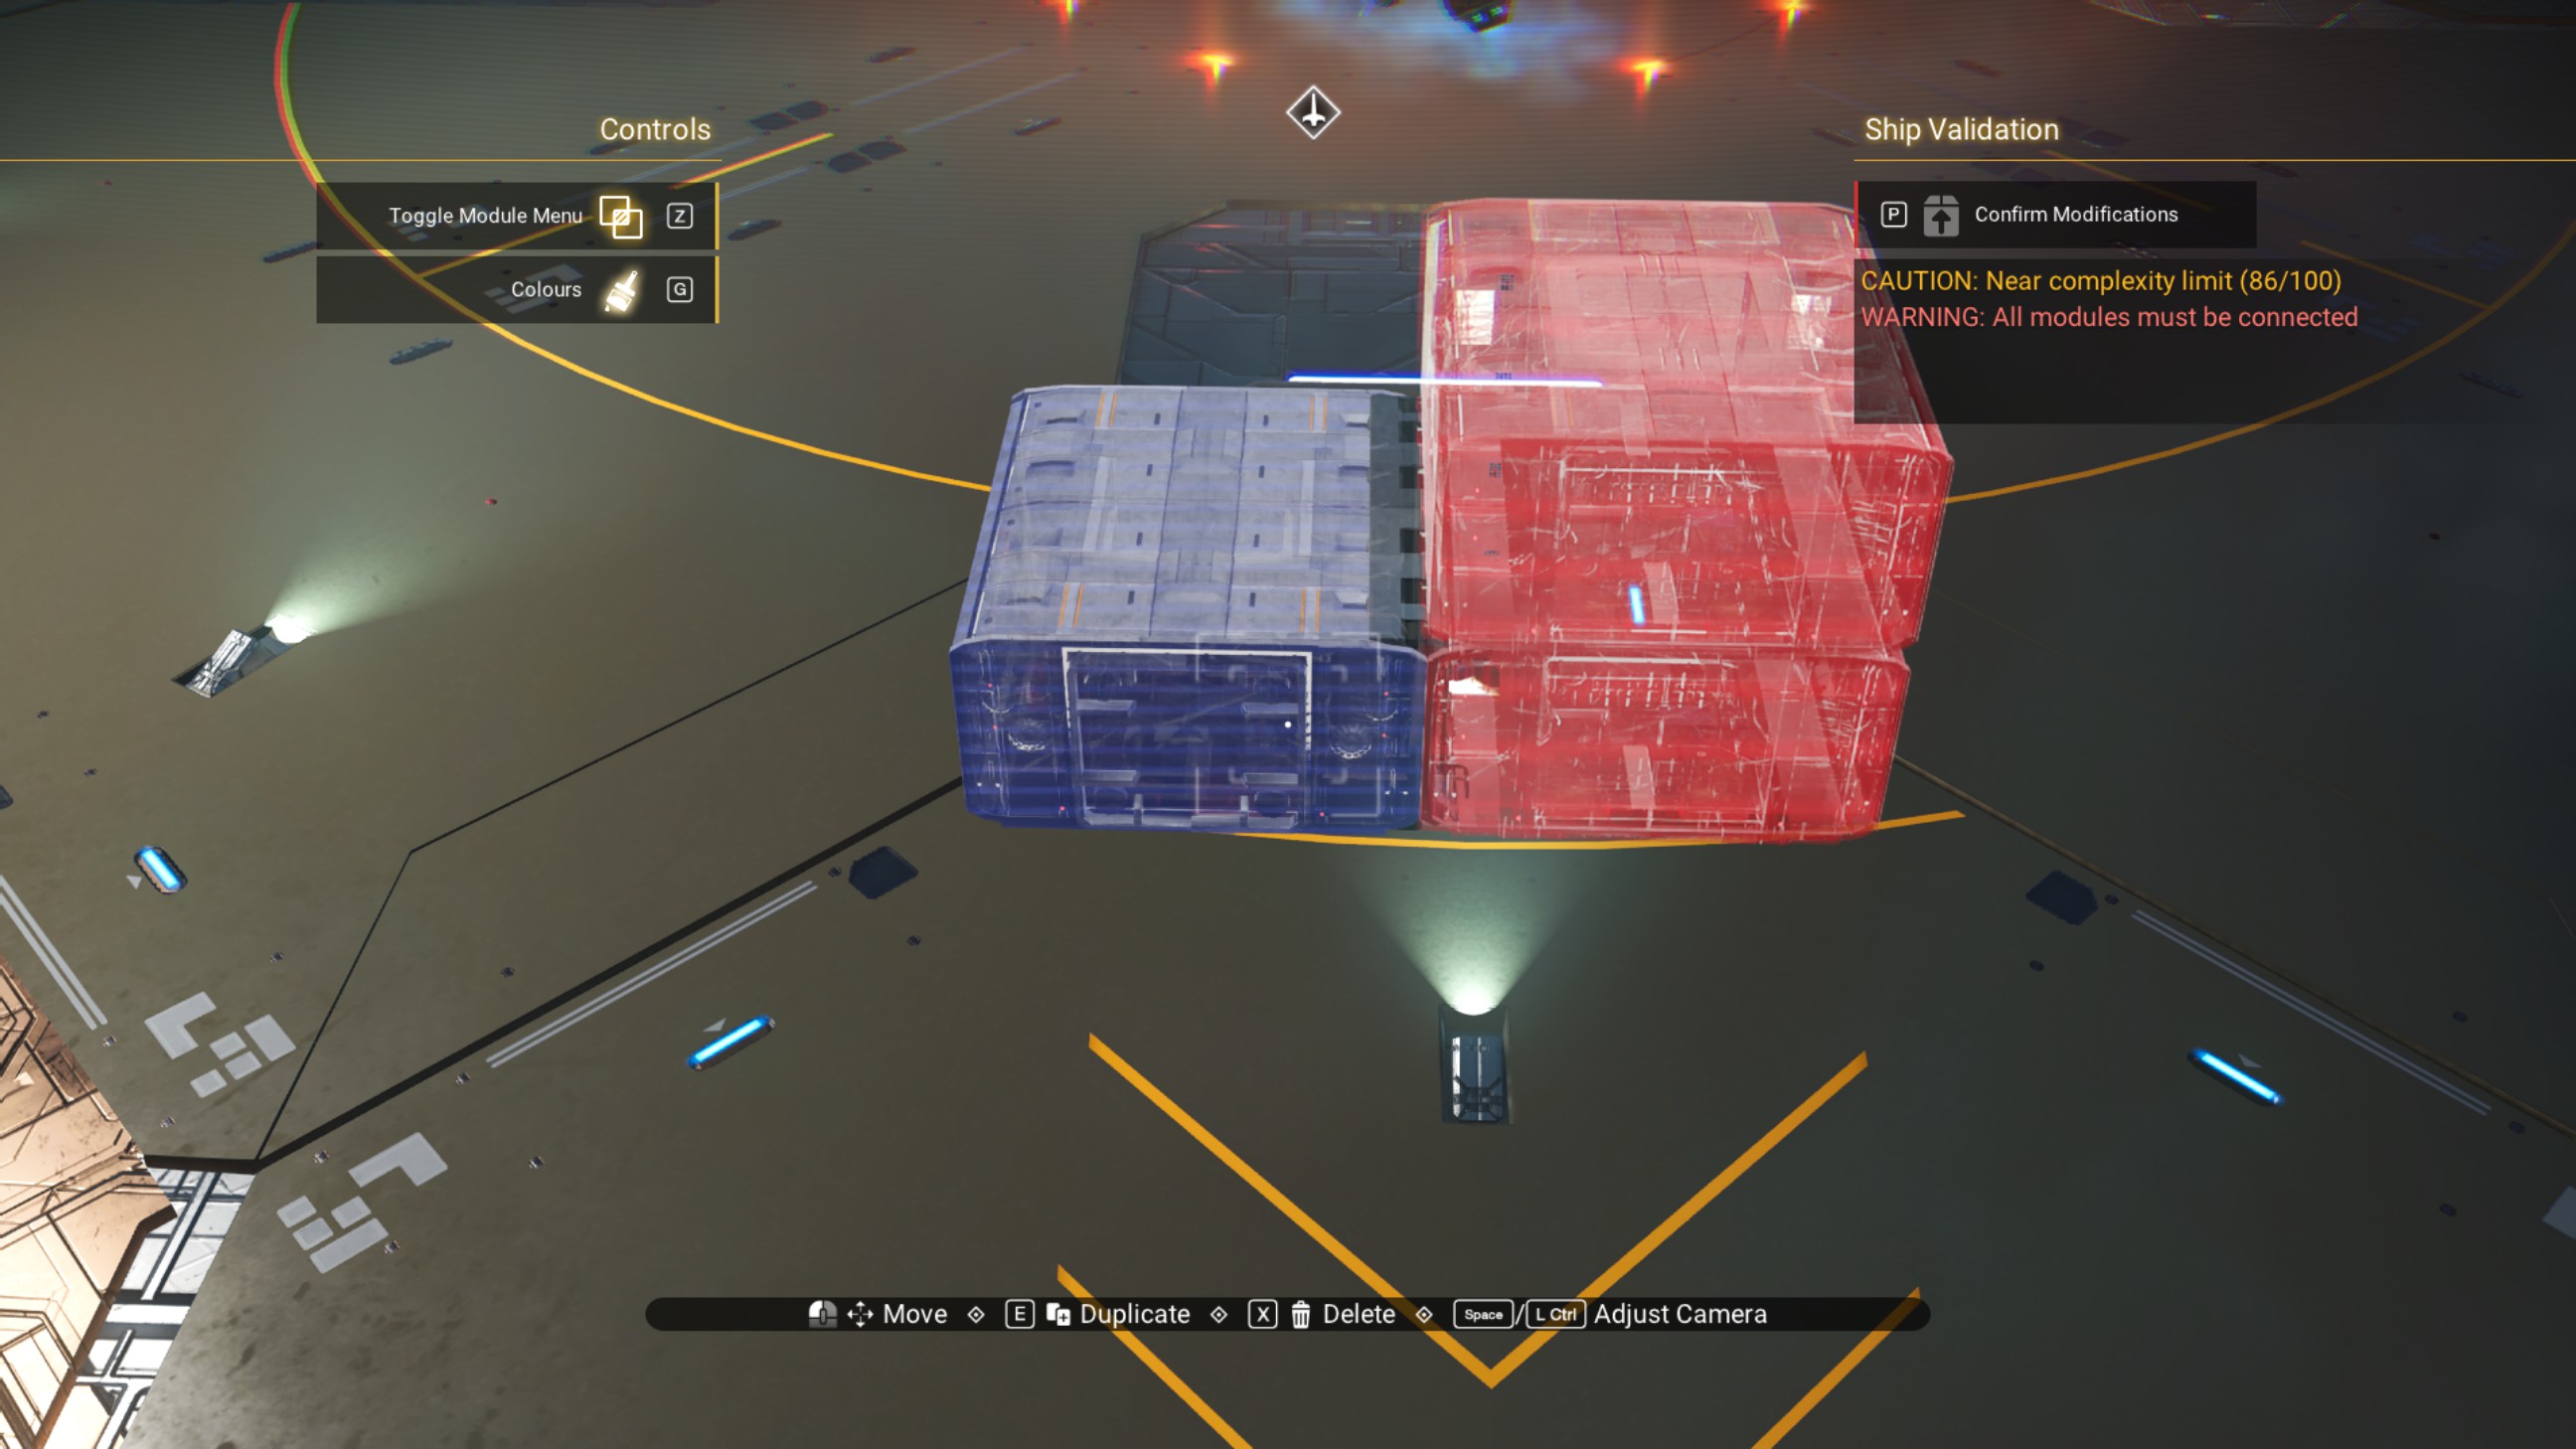
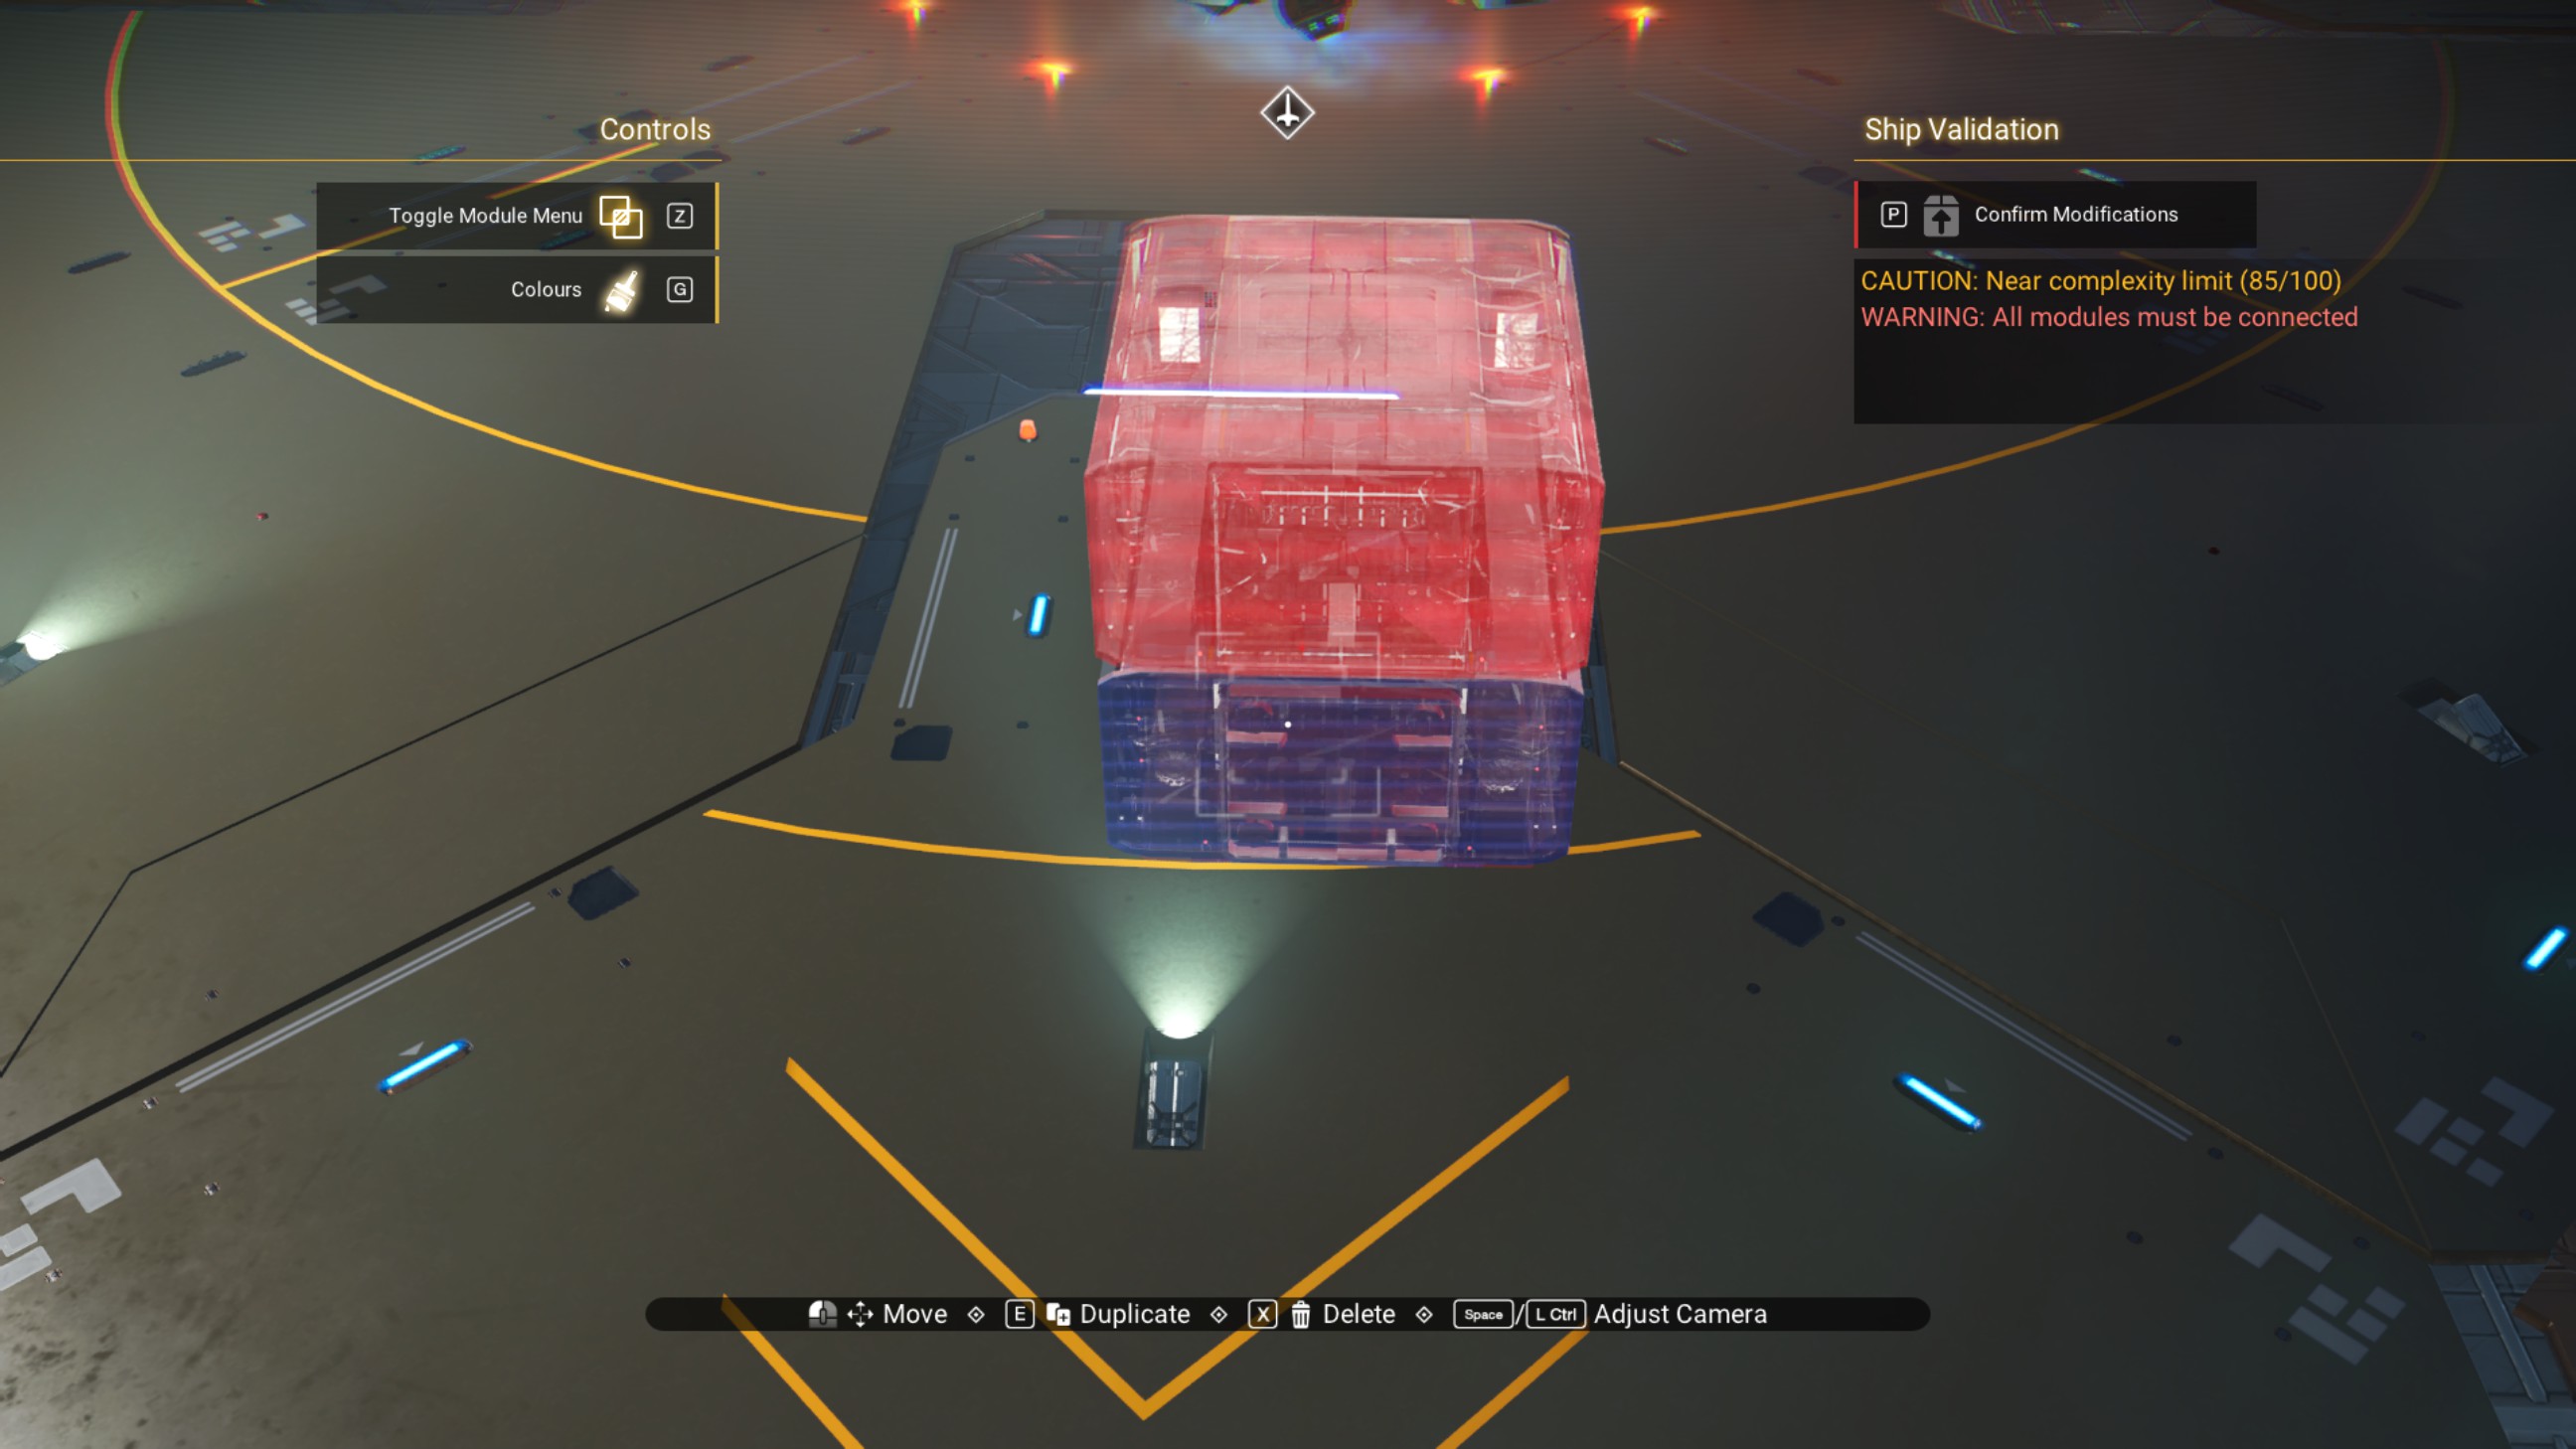
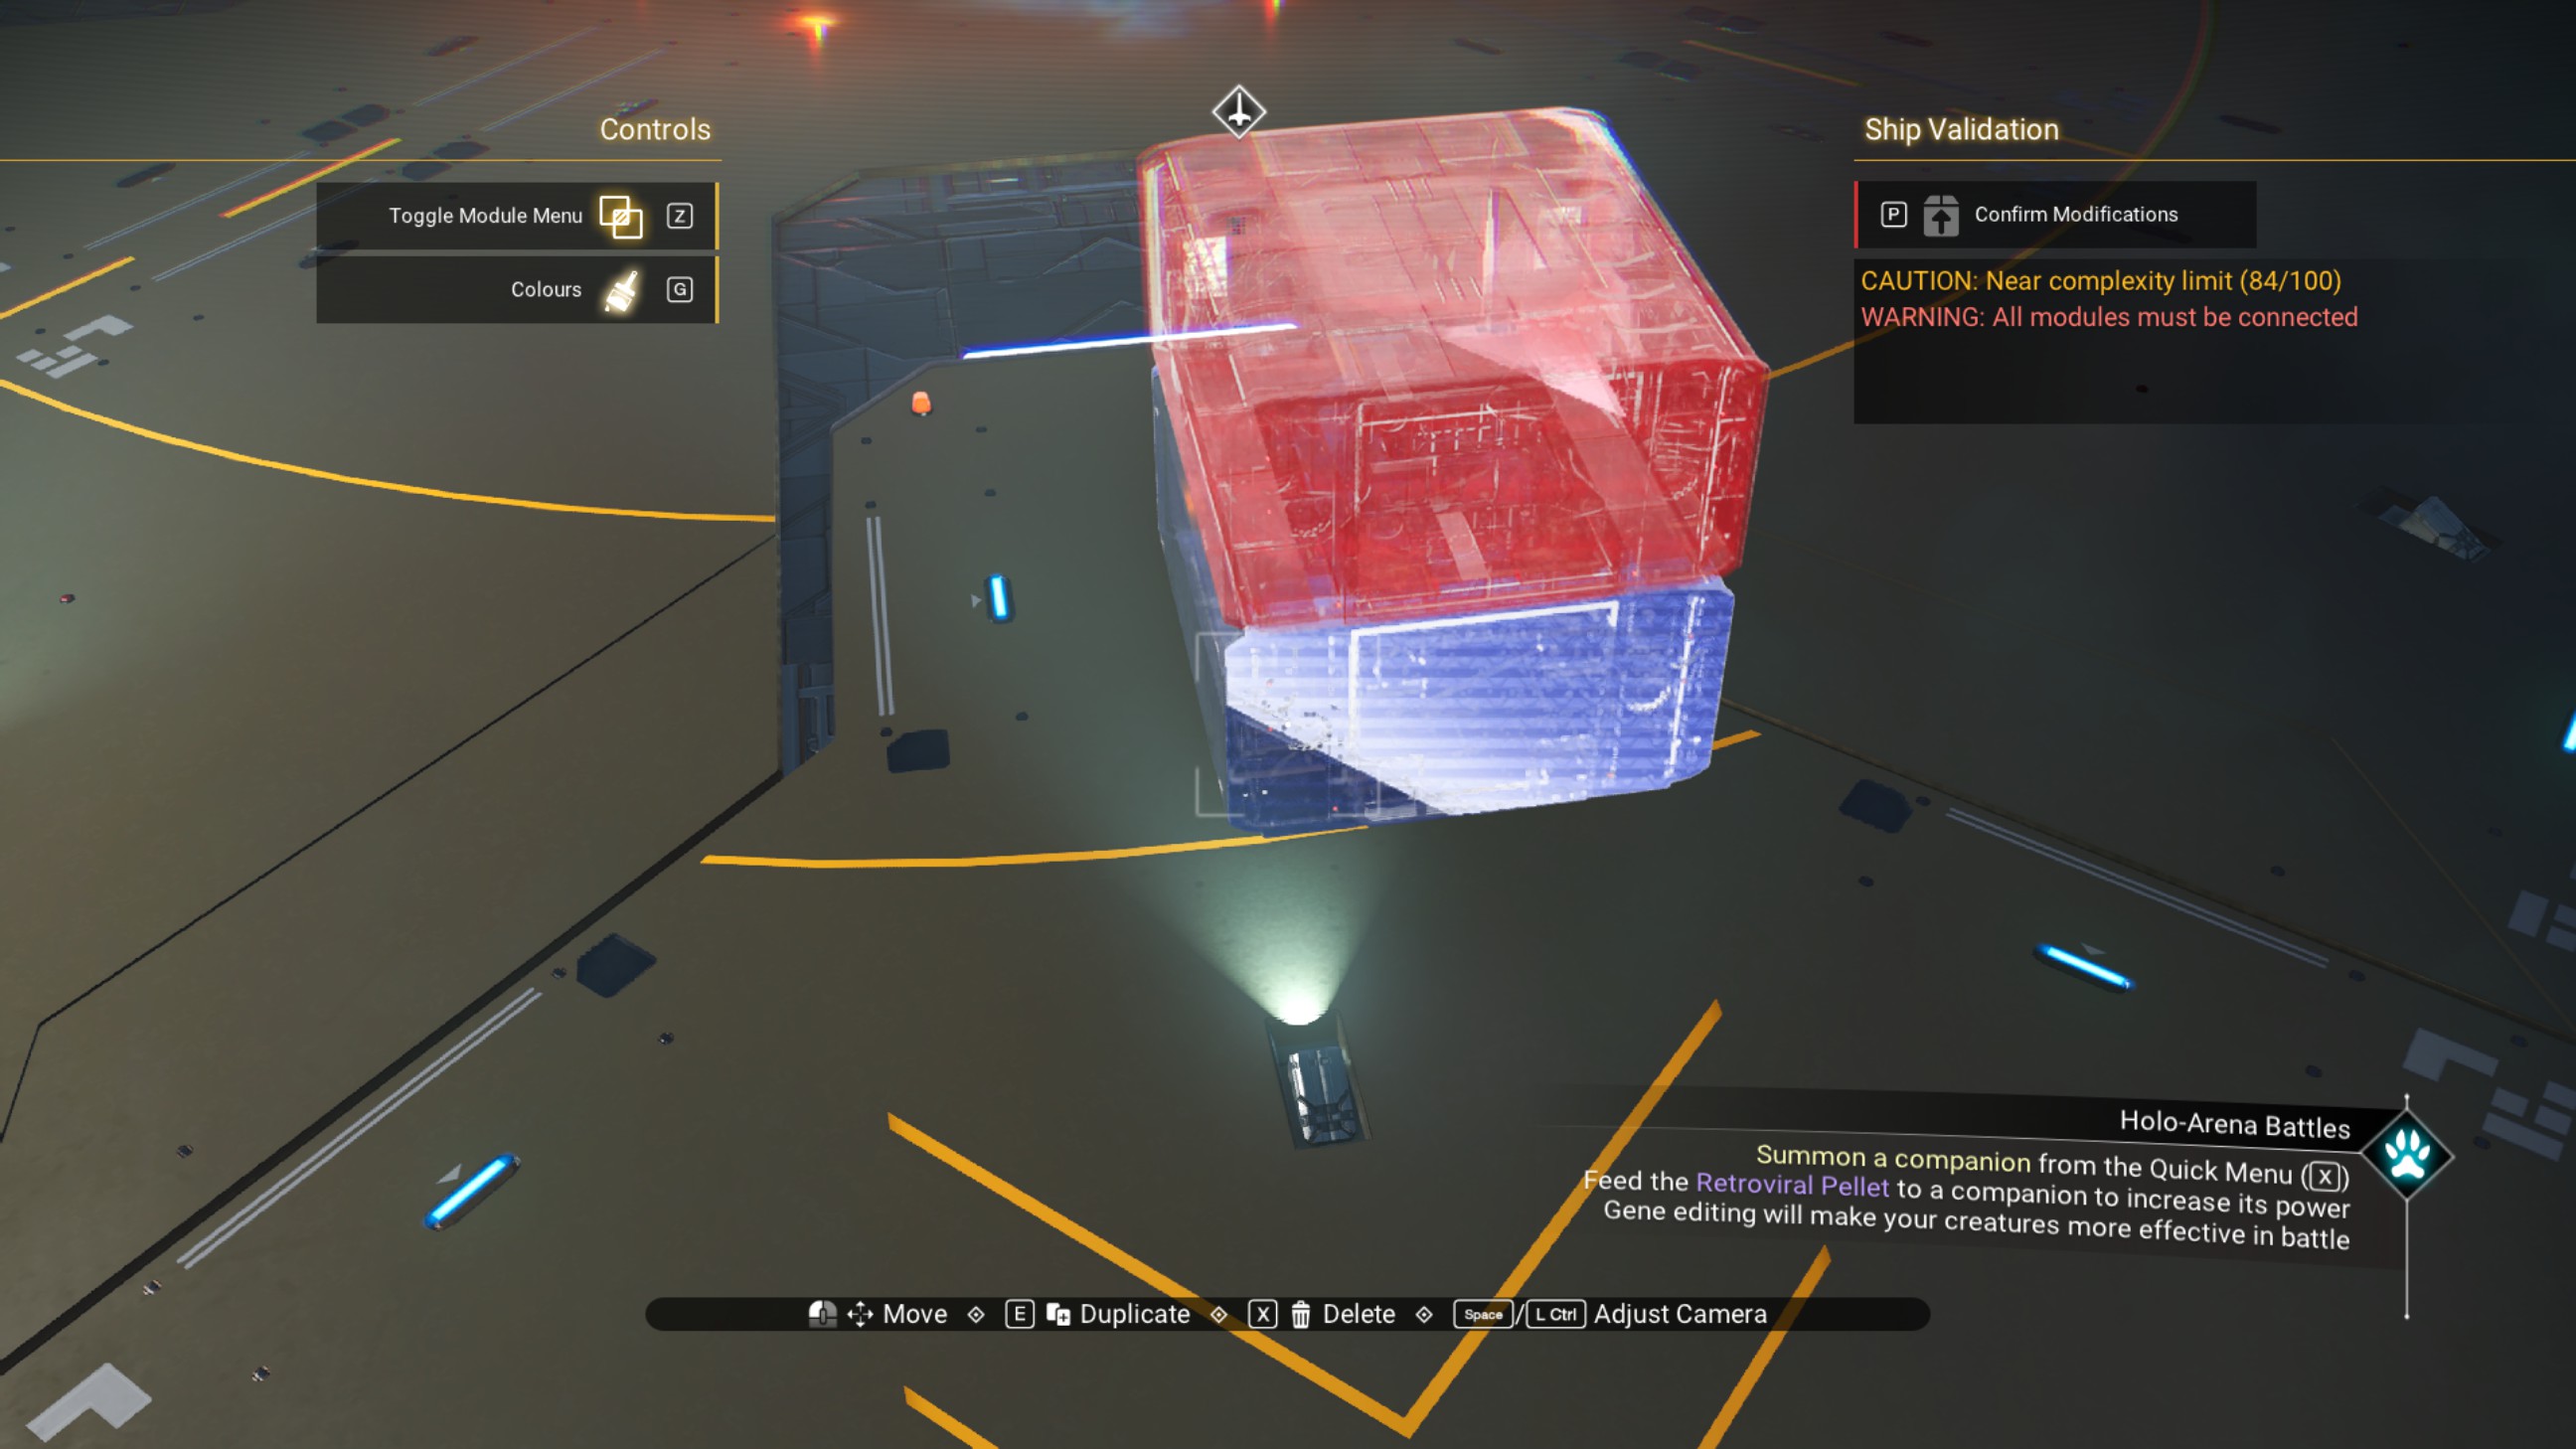
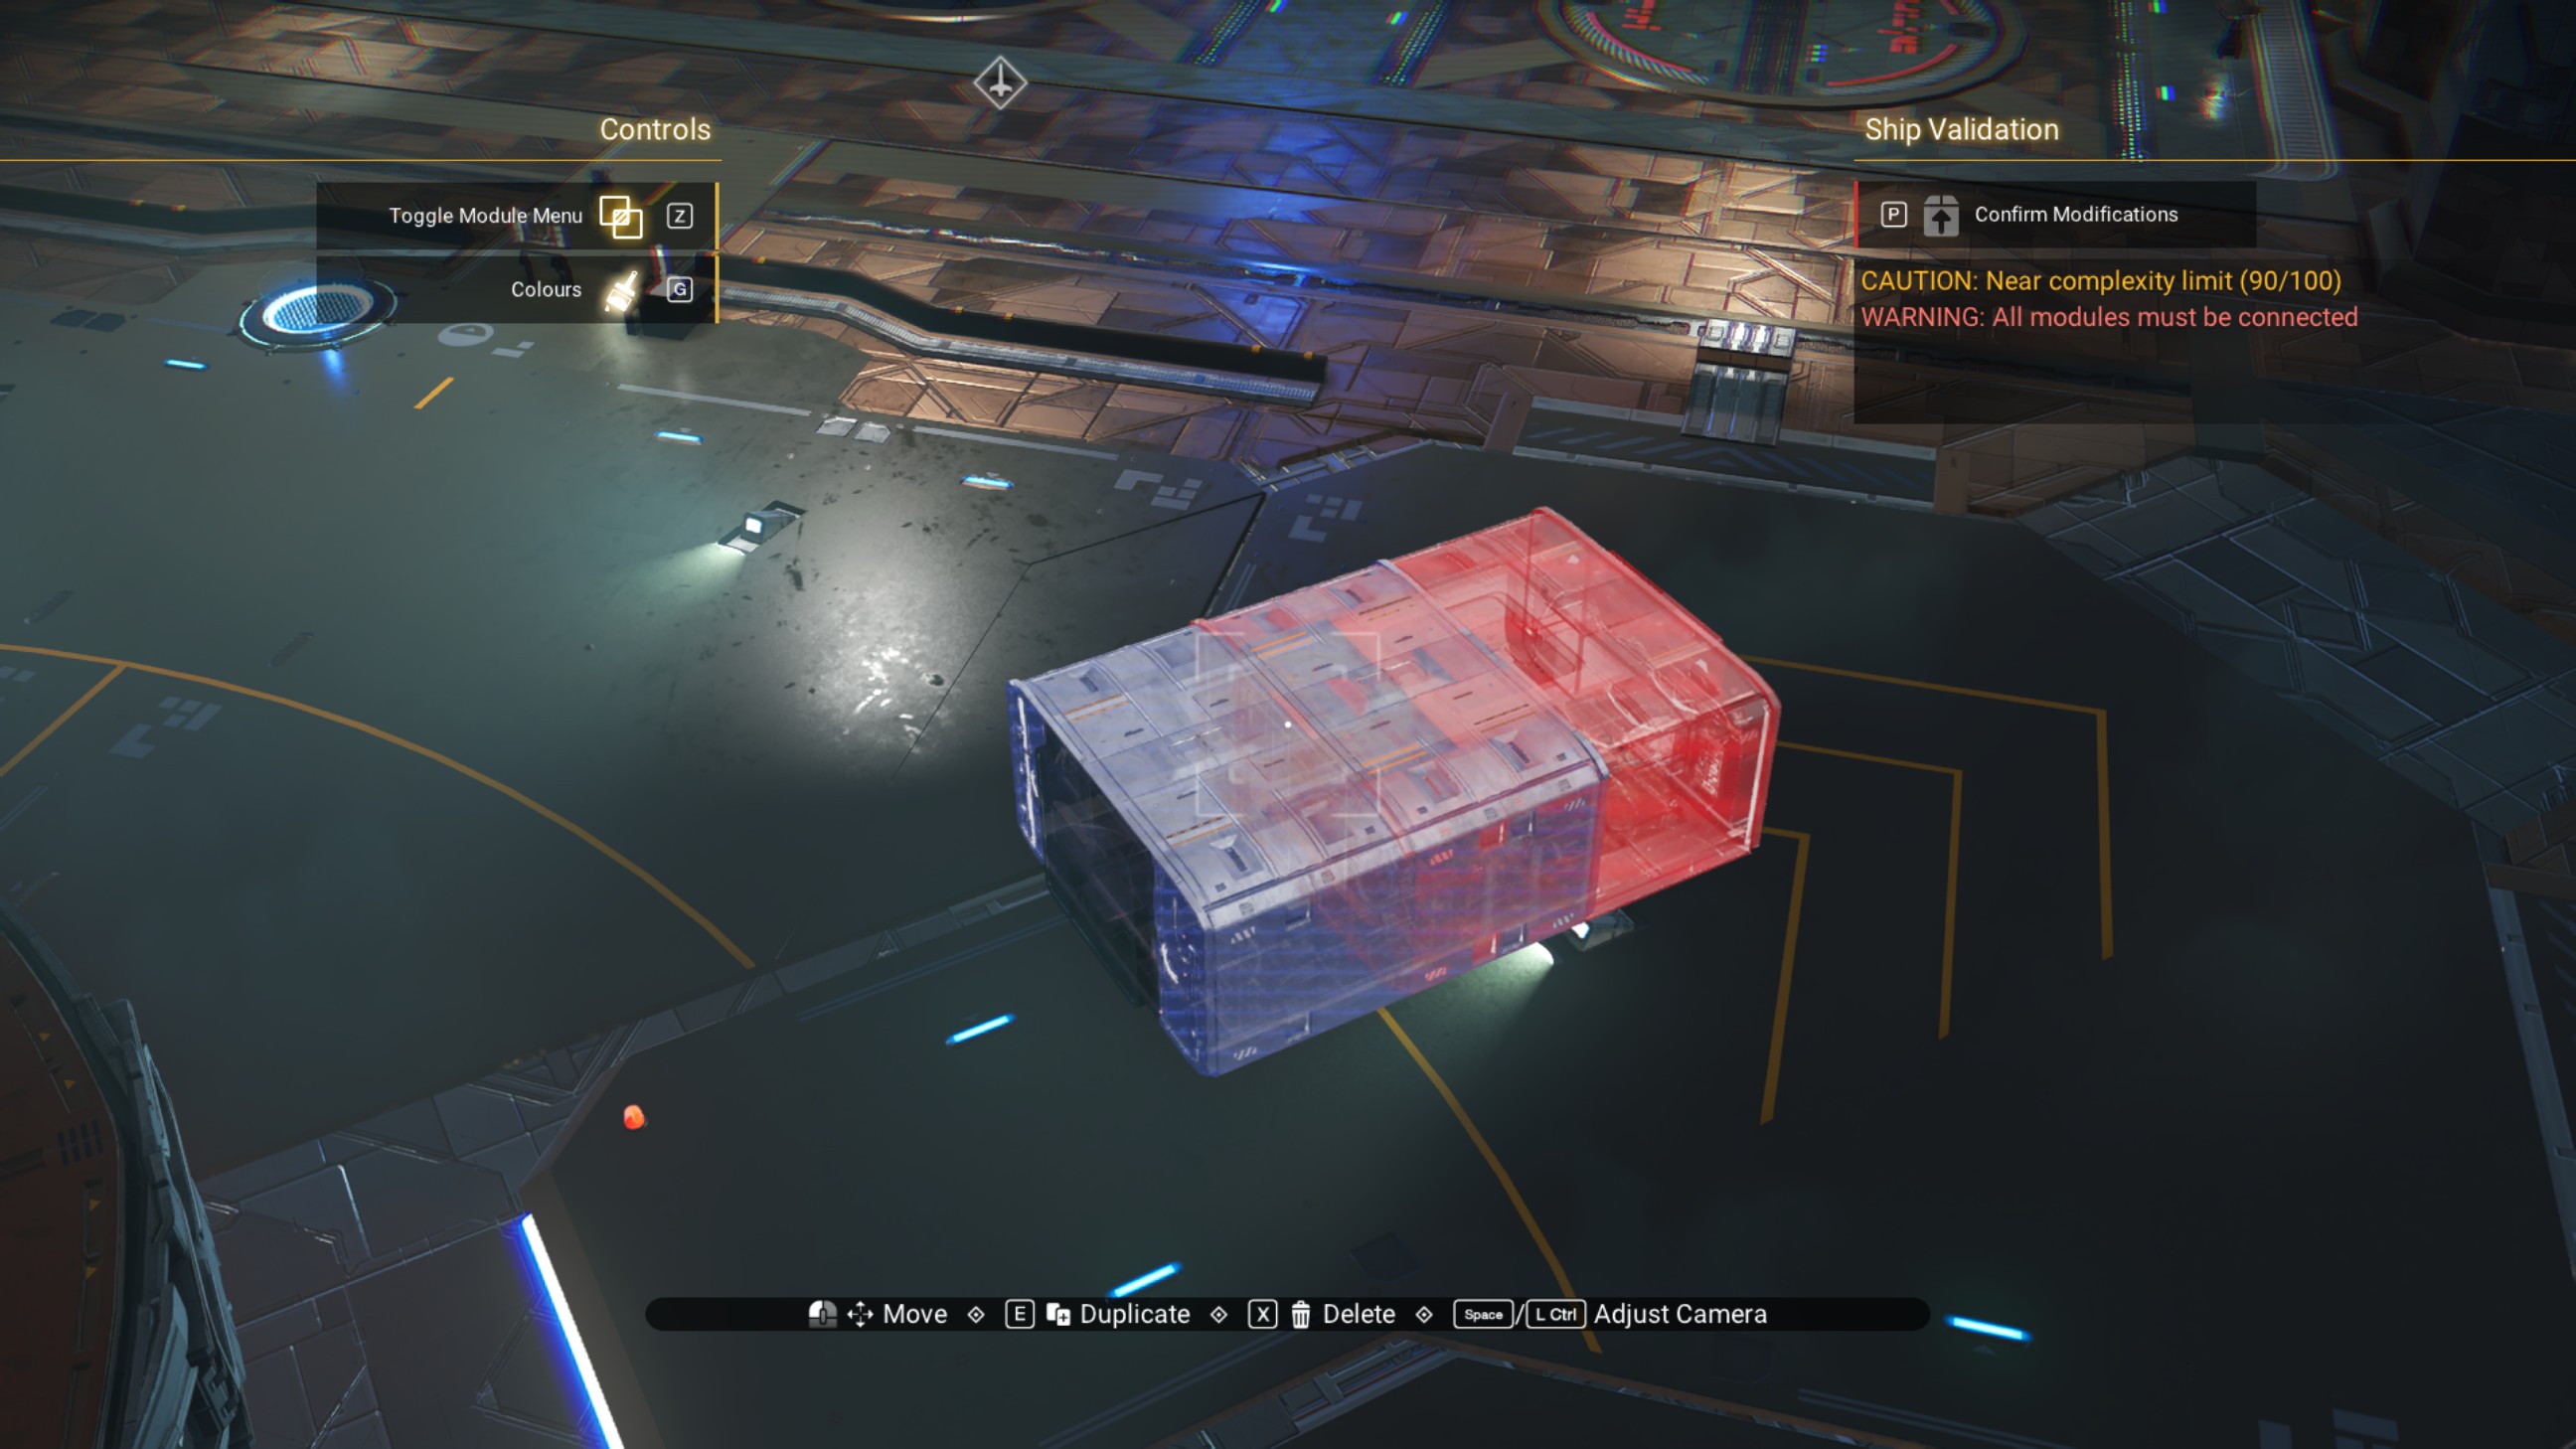
Next, we're going to offset the remaining overlapped walkways. Start by placing a *rotated* rockhopper propeller module on both sides, as shown.
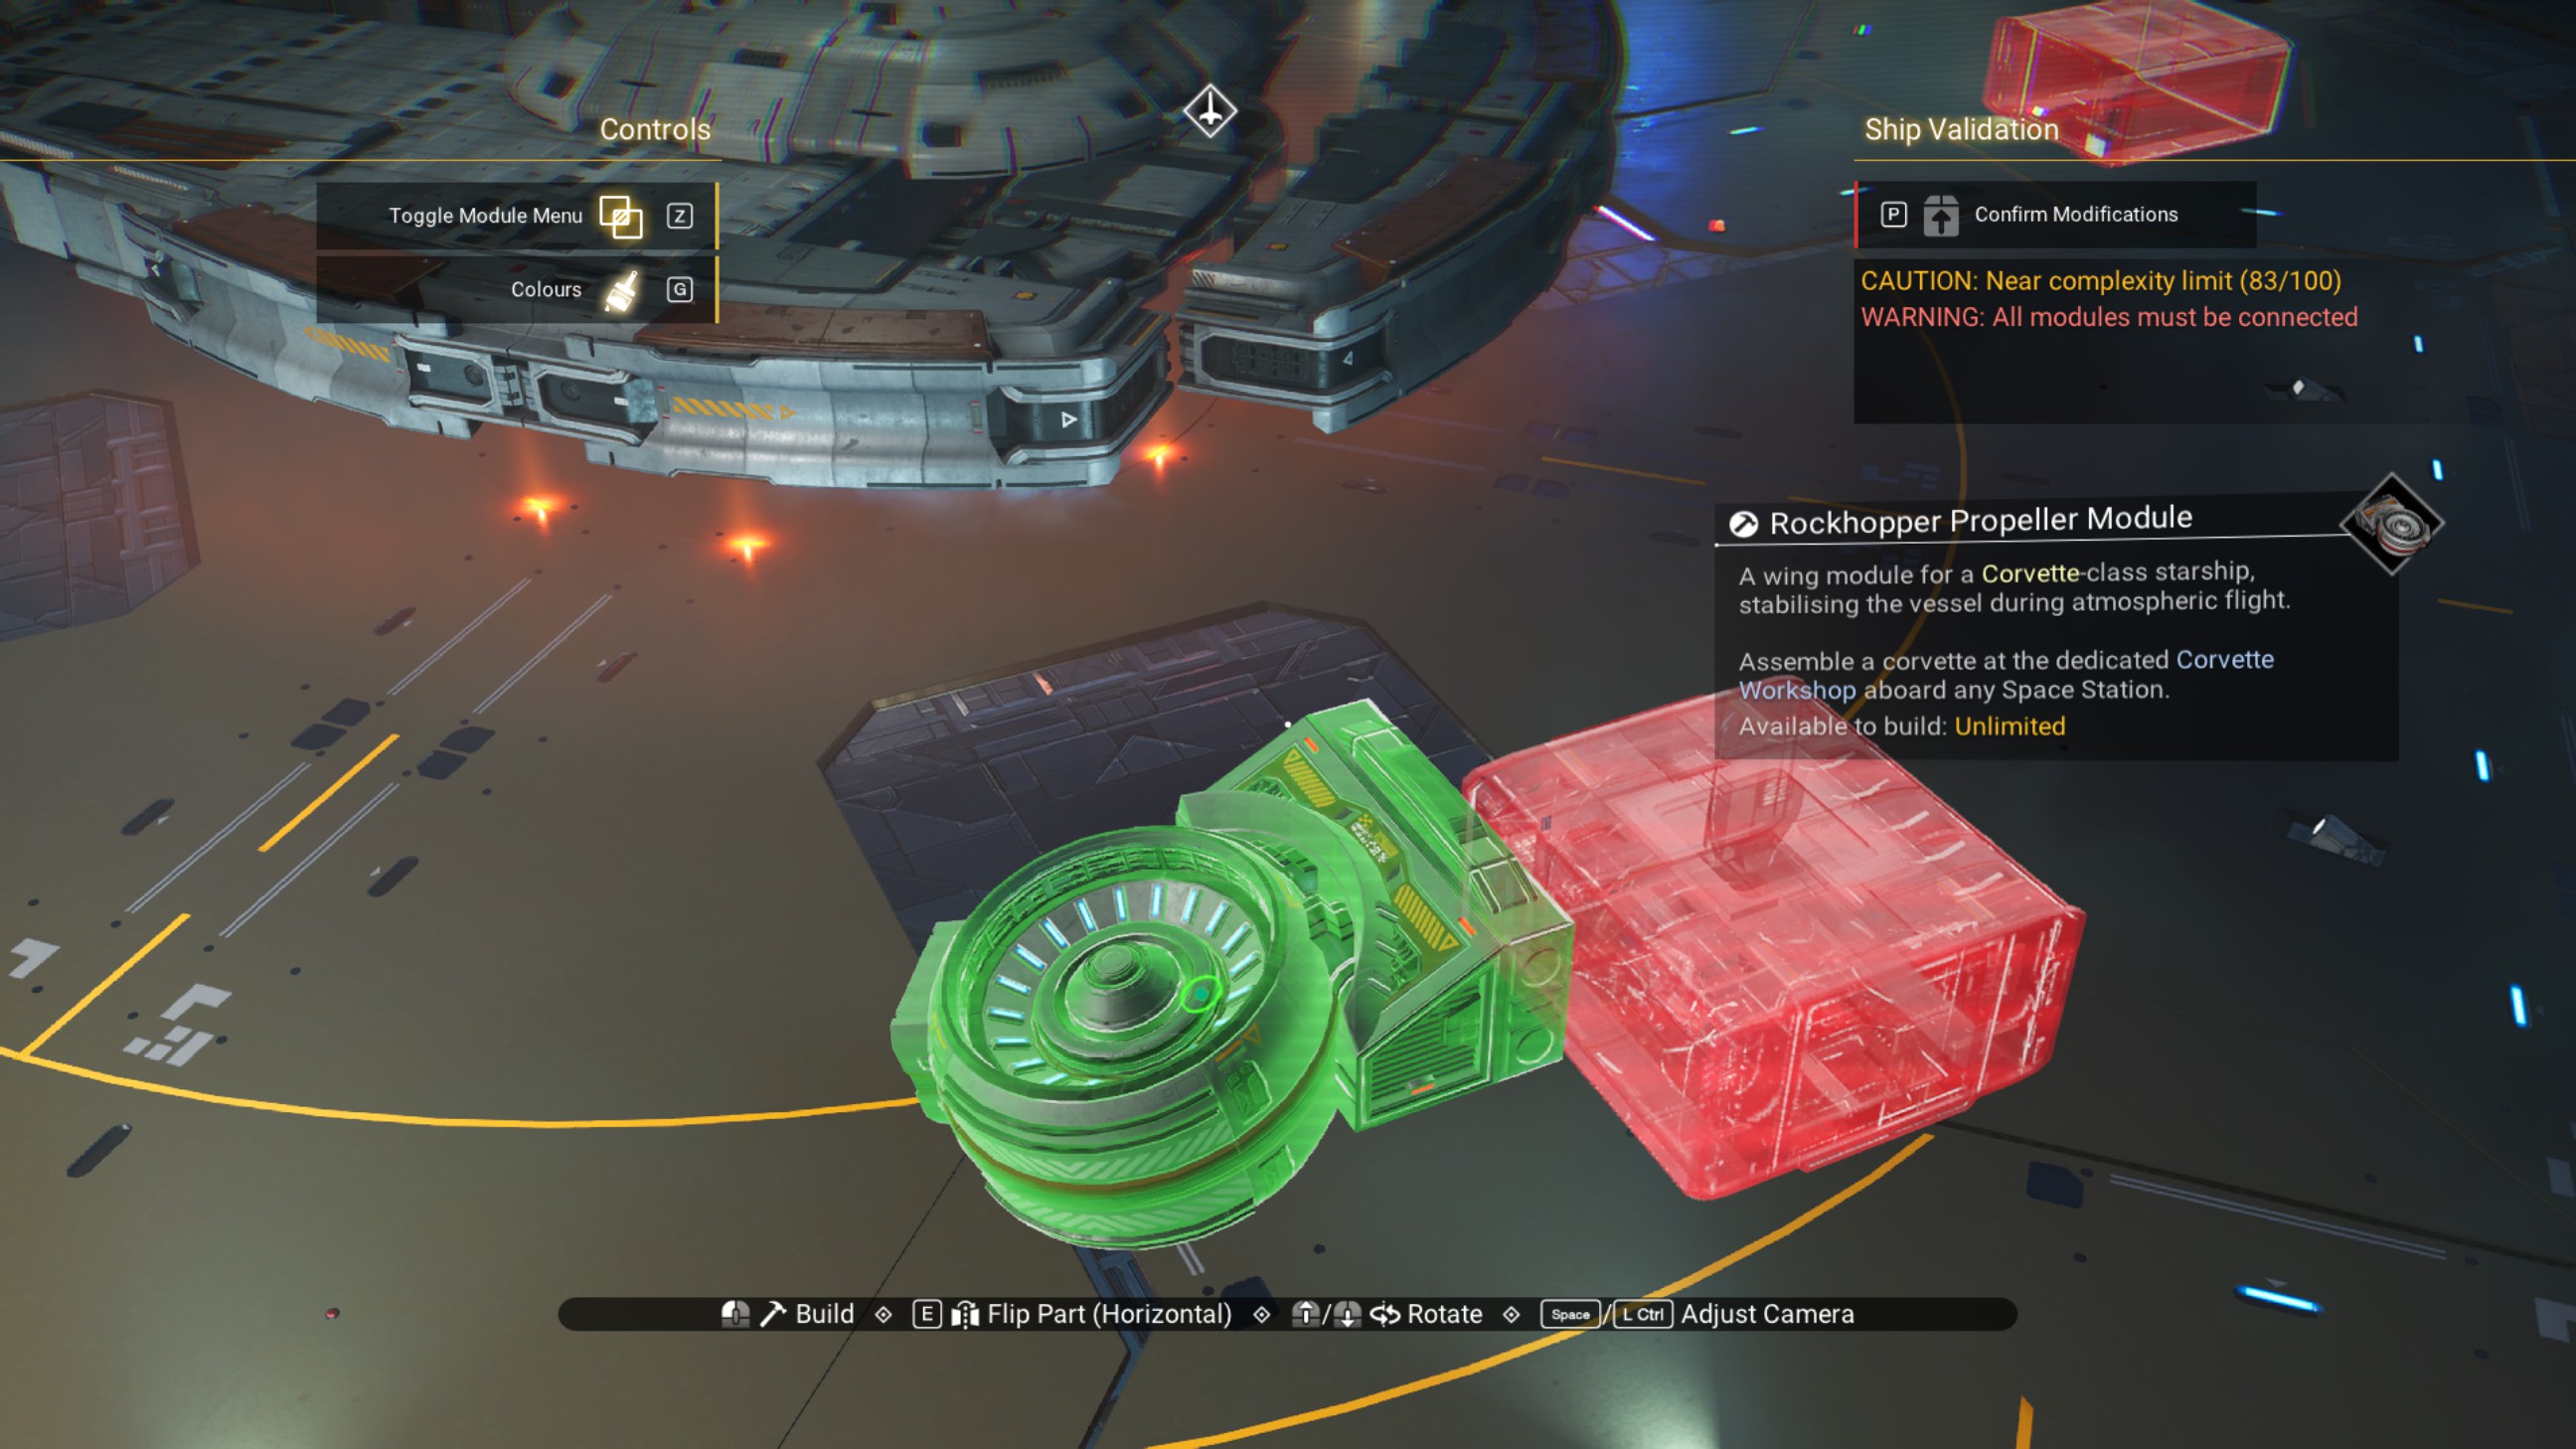
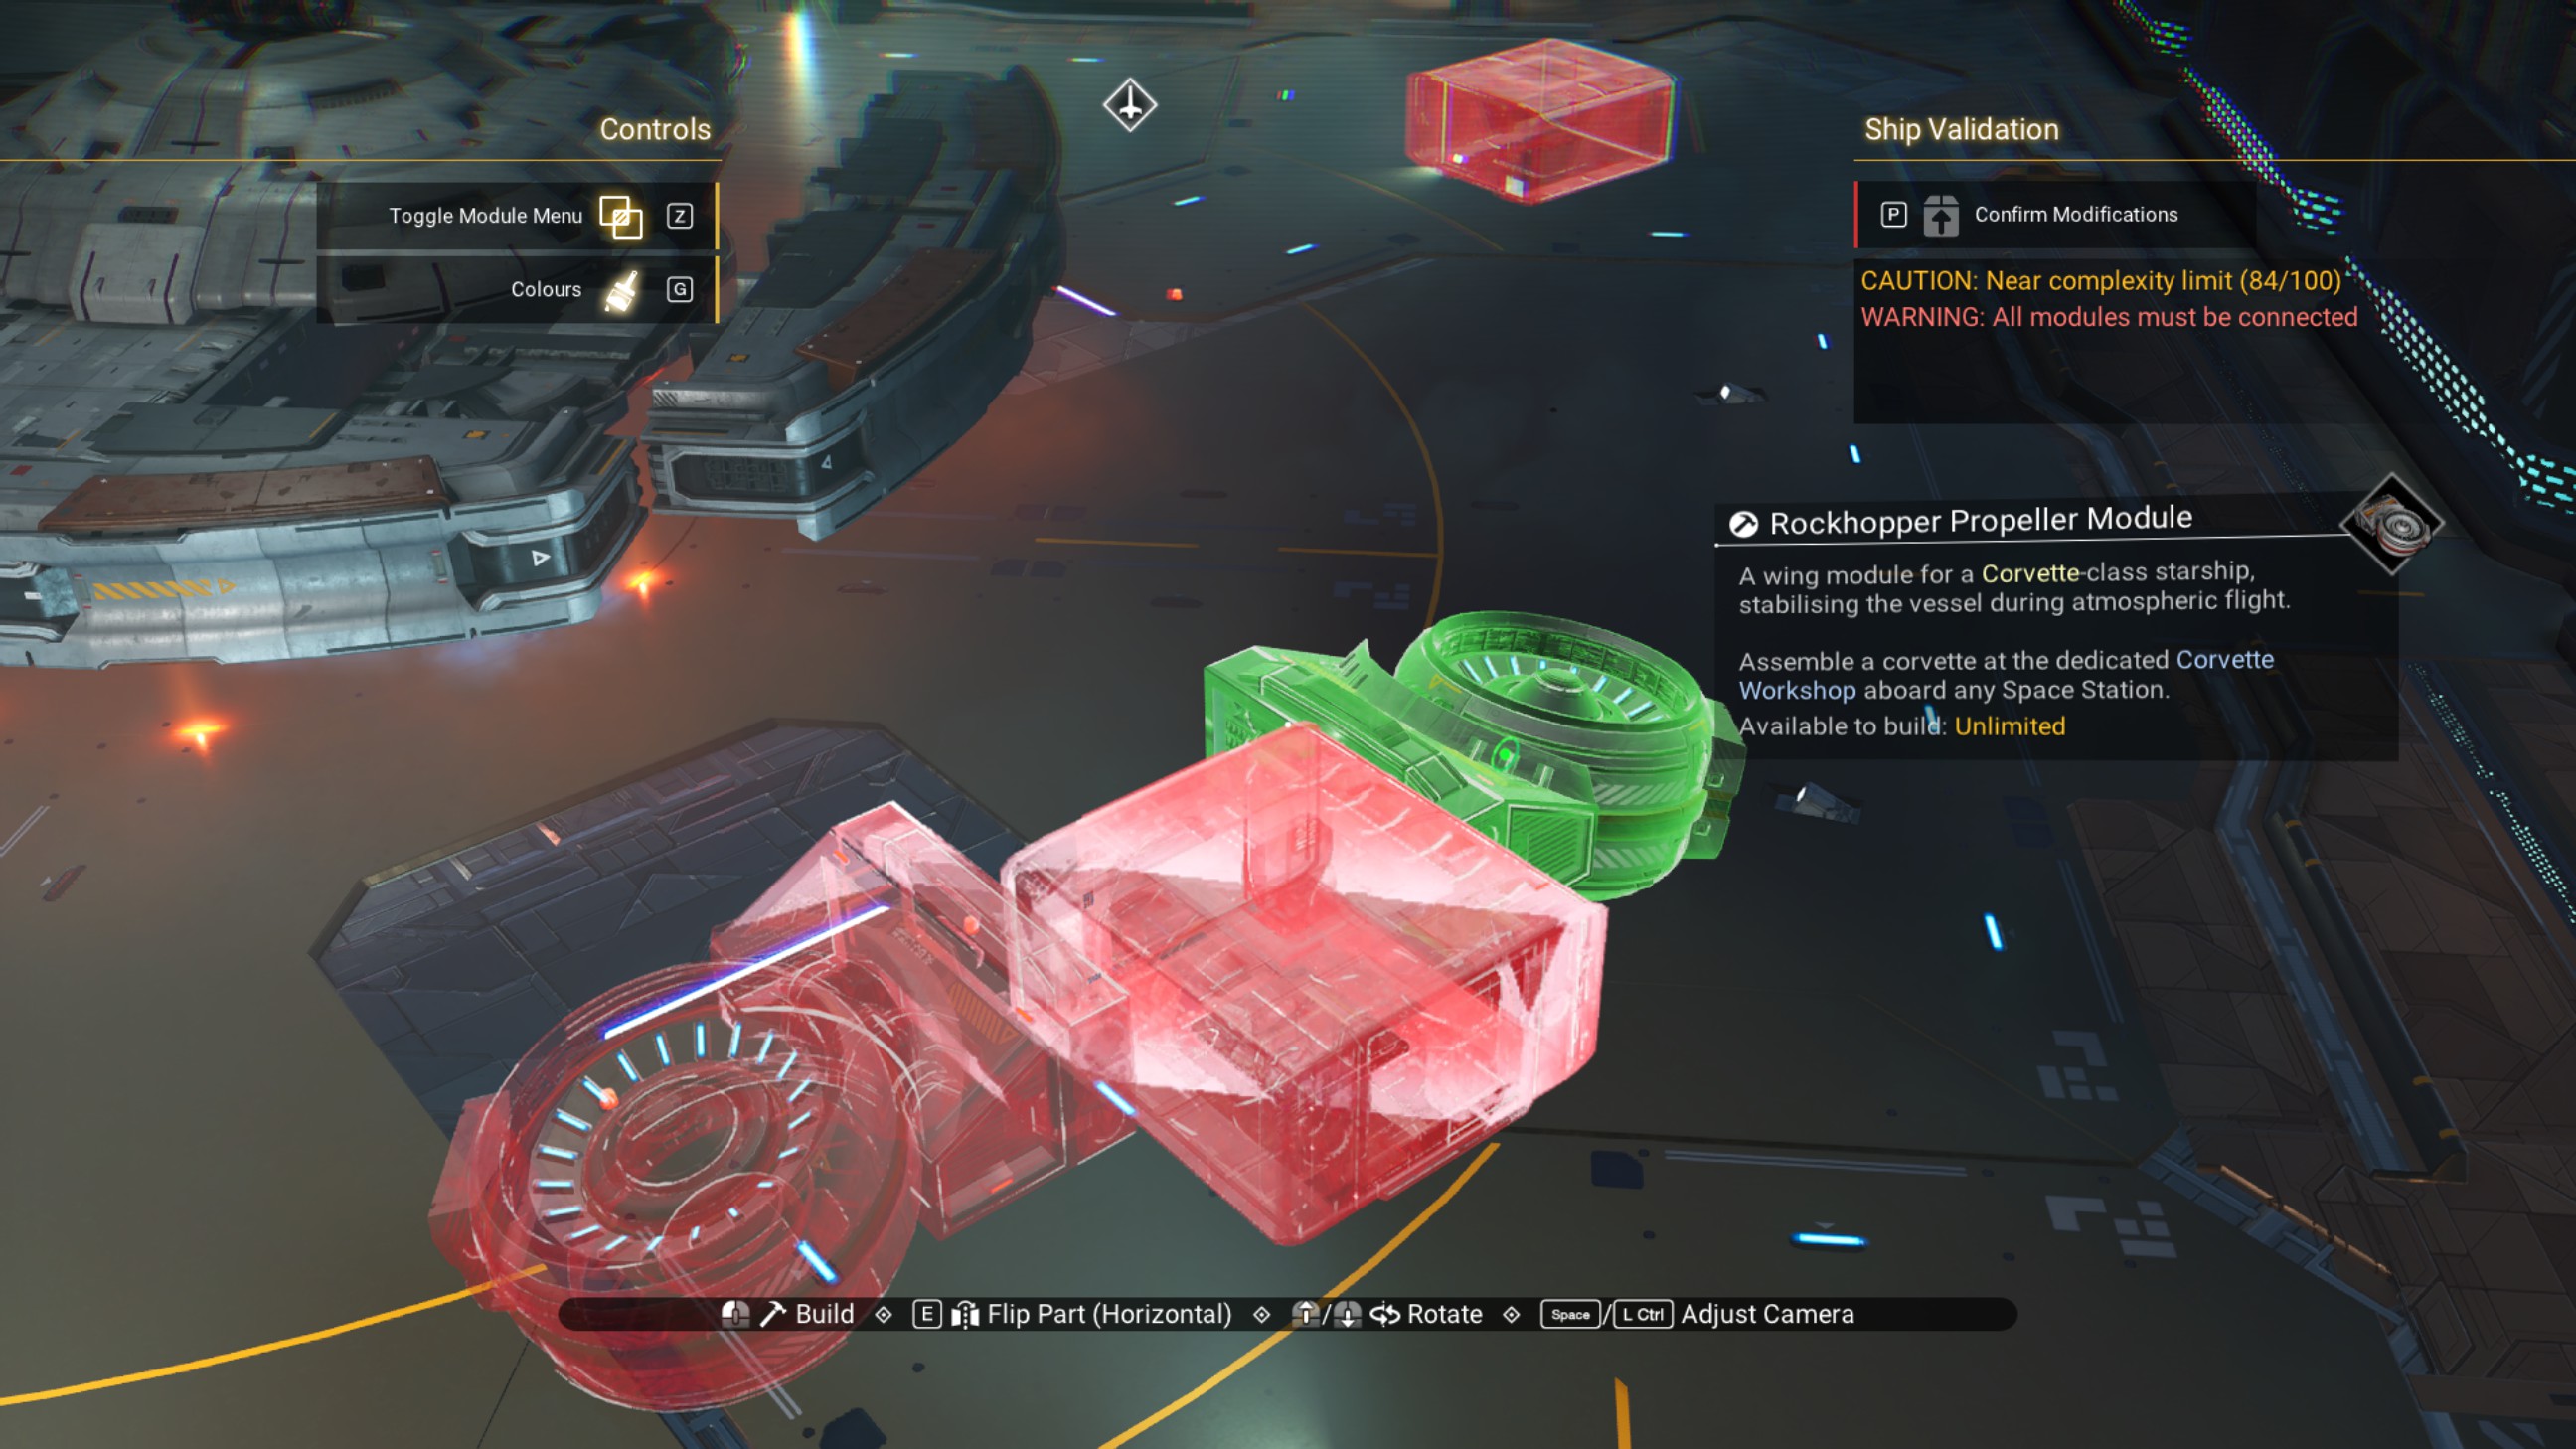
To be safe, we're going to place two new overlapped walkways in this new offset position using the propeller modules.
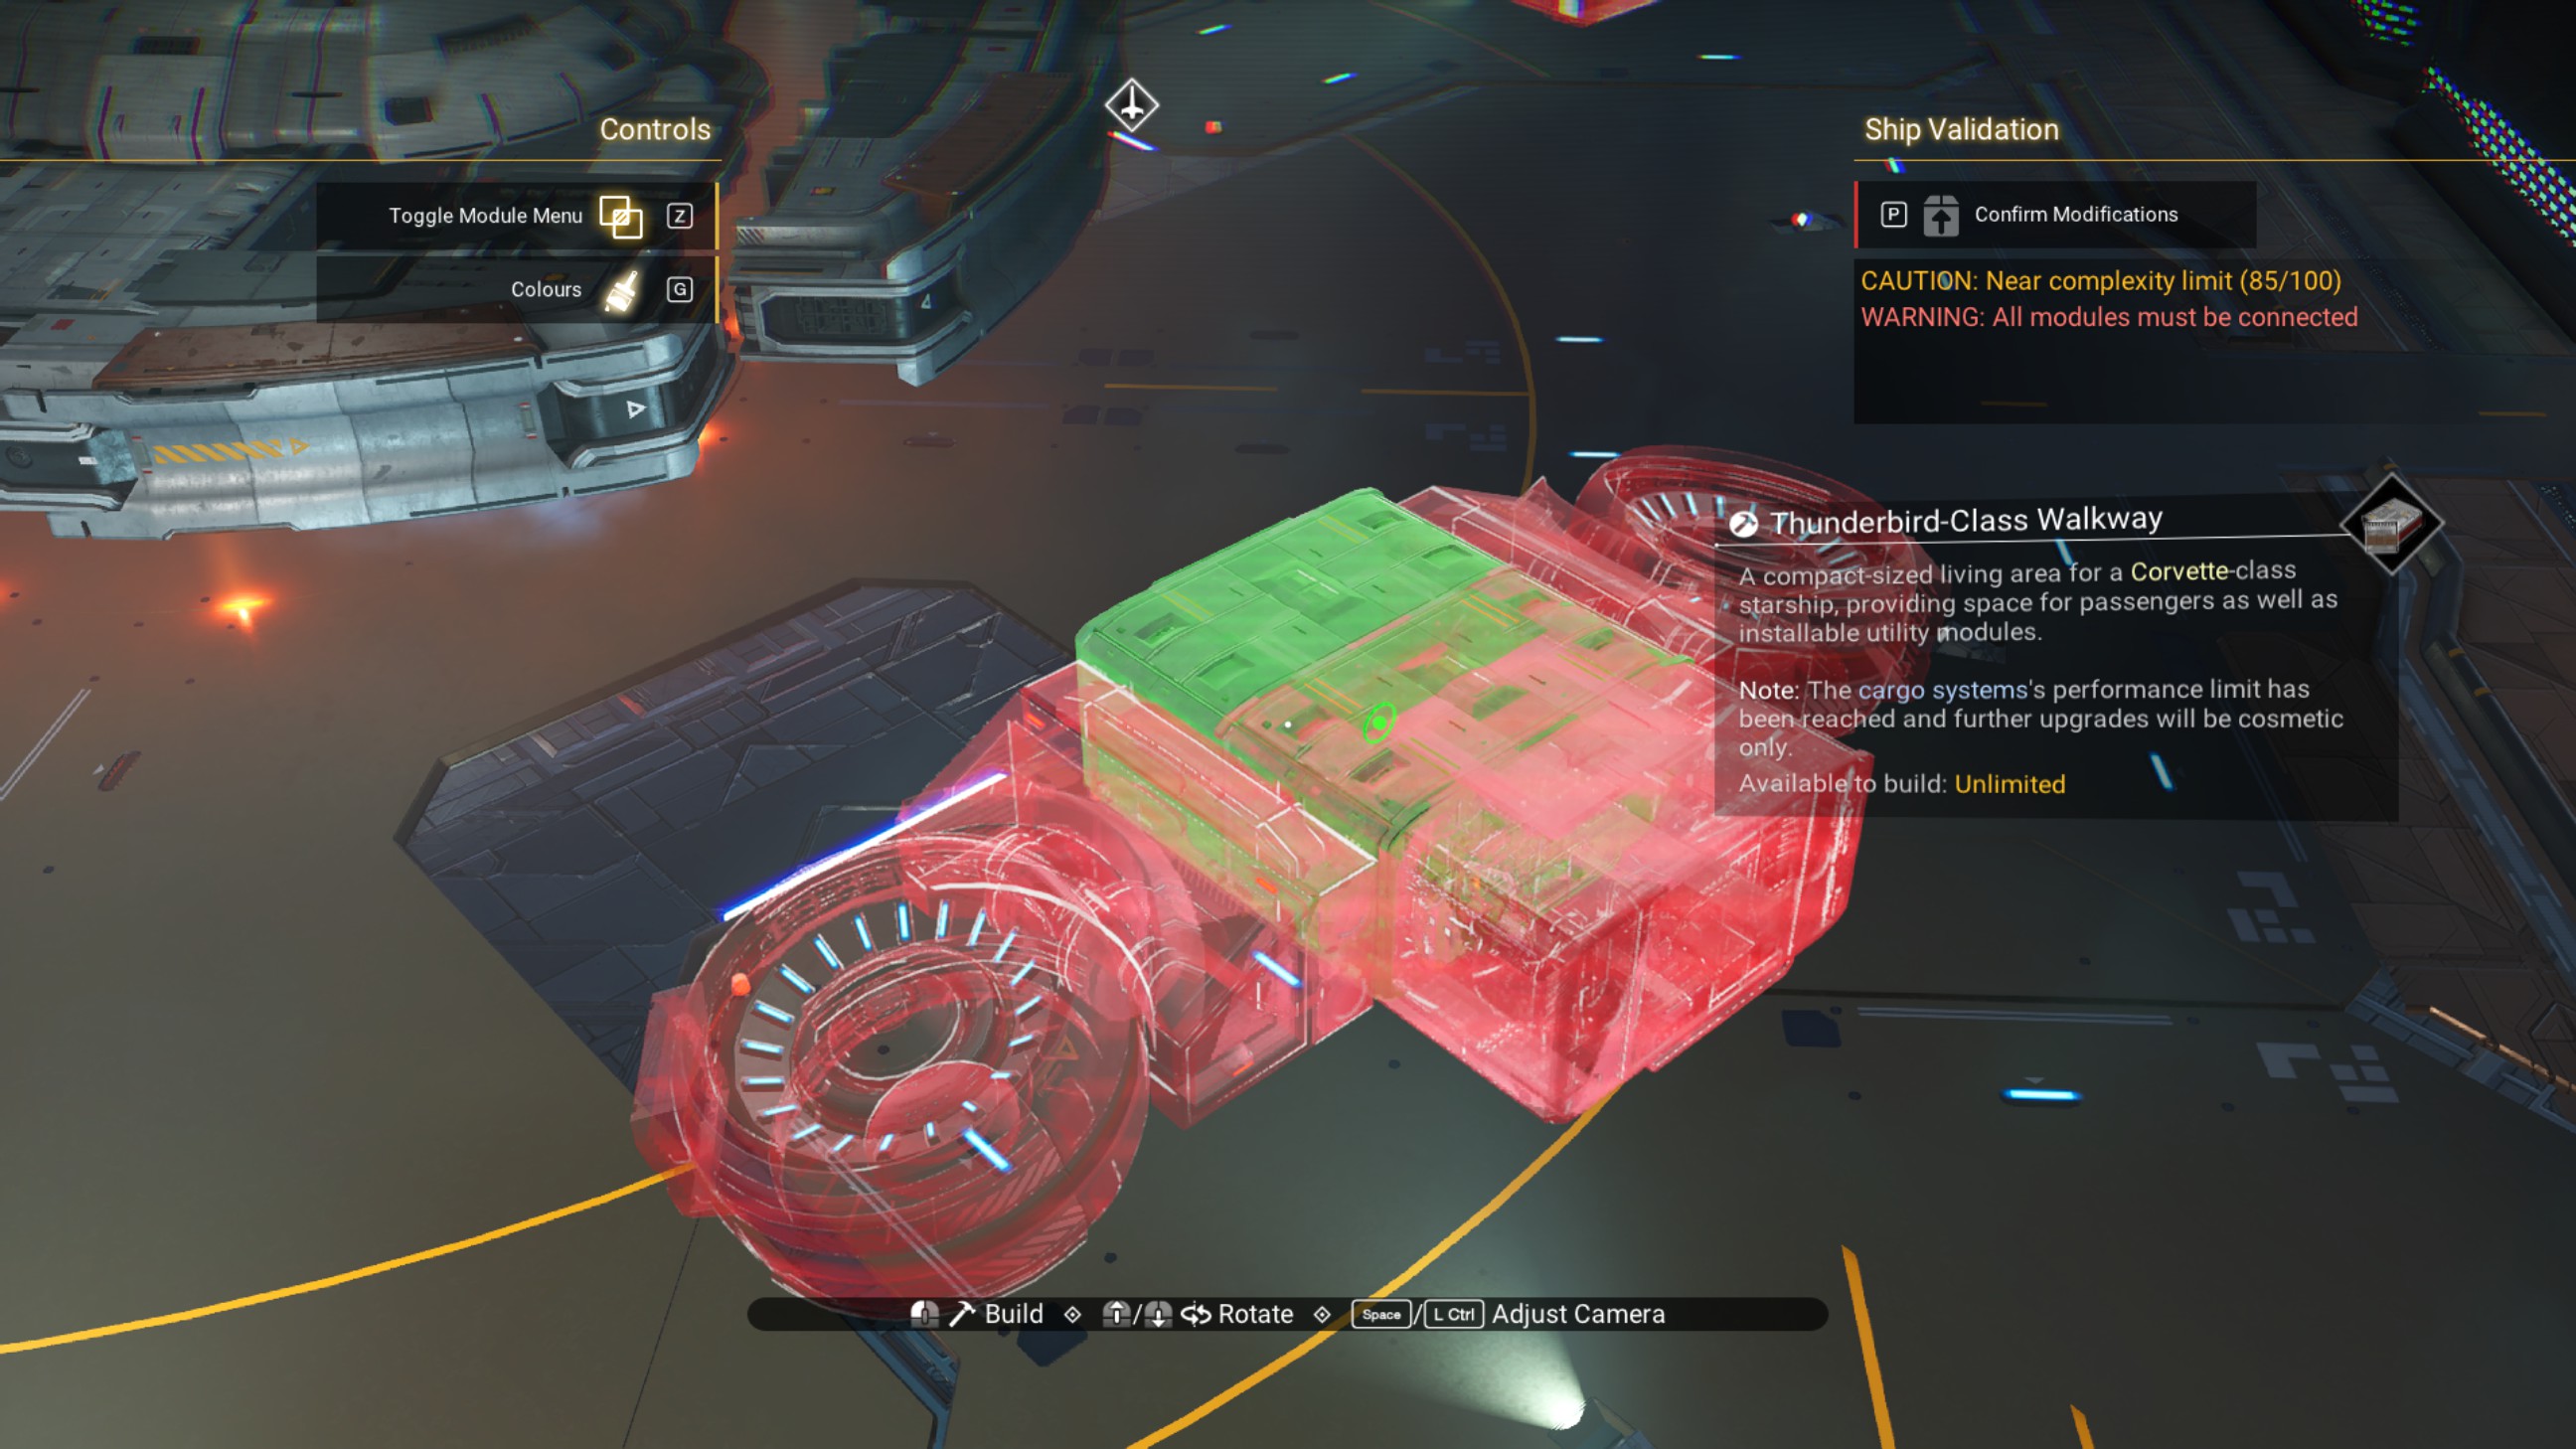
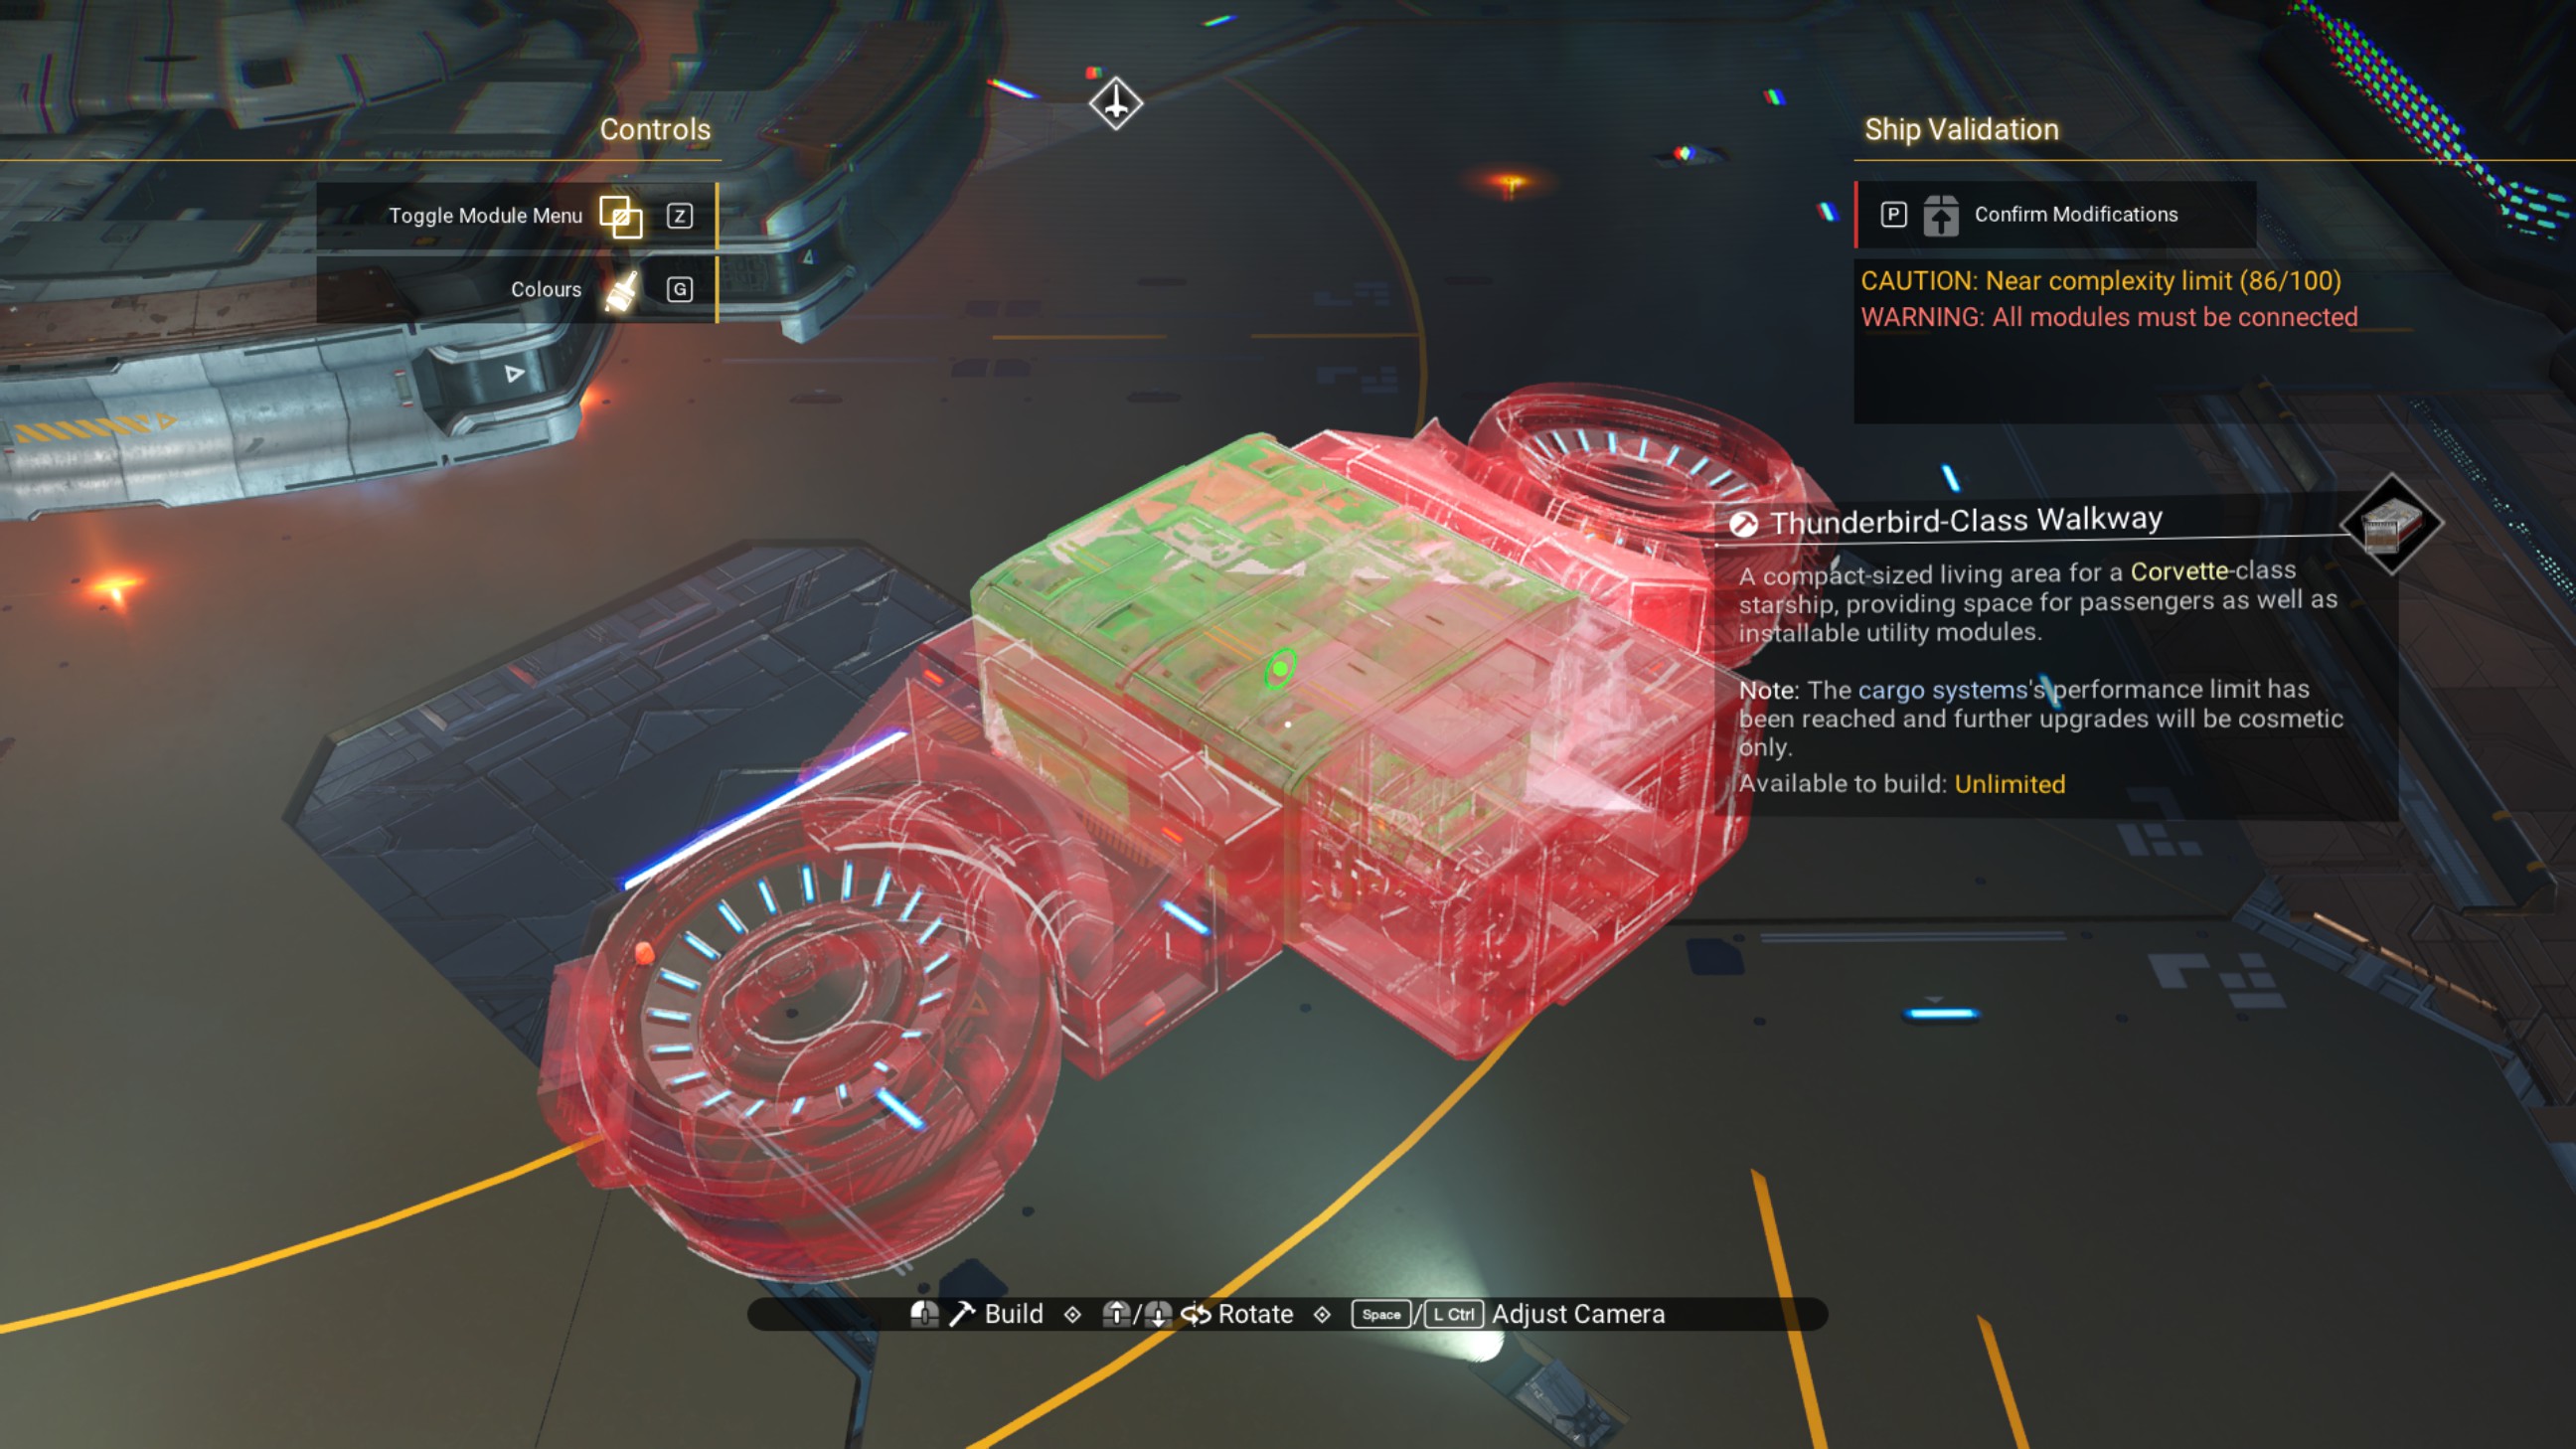
Delete the propeller modules once both new overlapped walkways are placed.
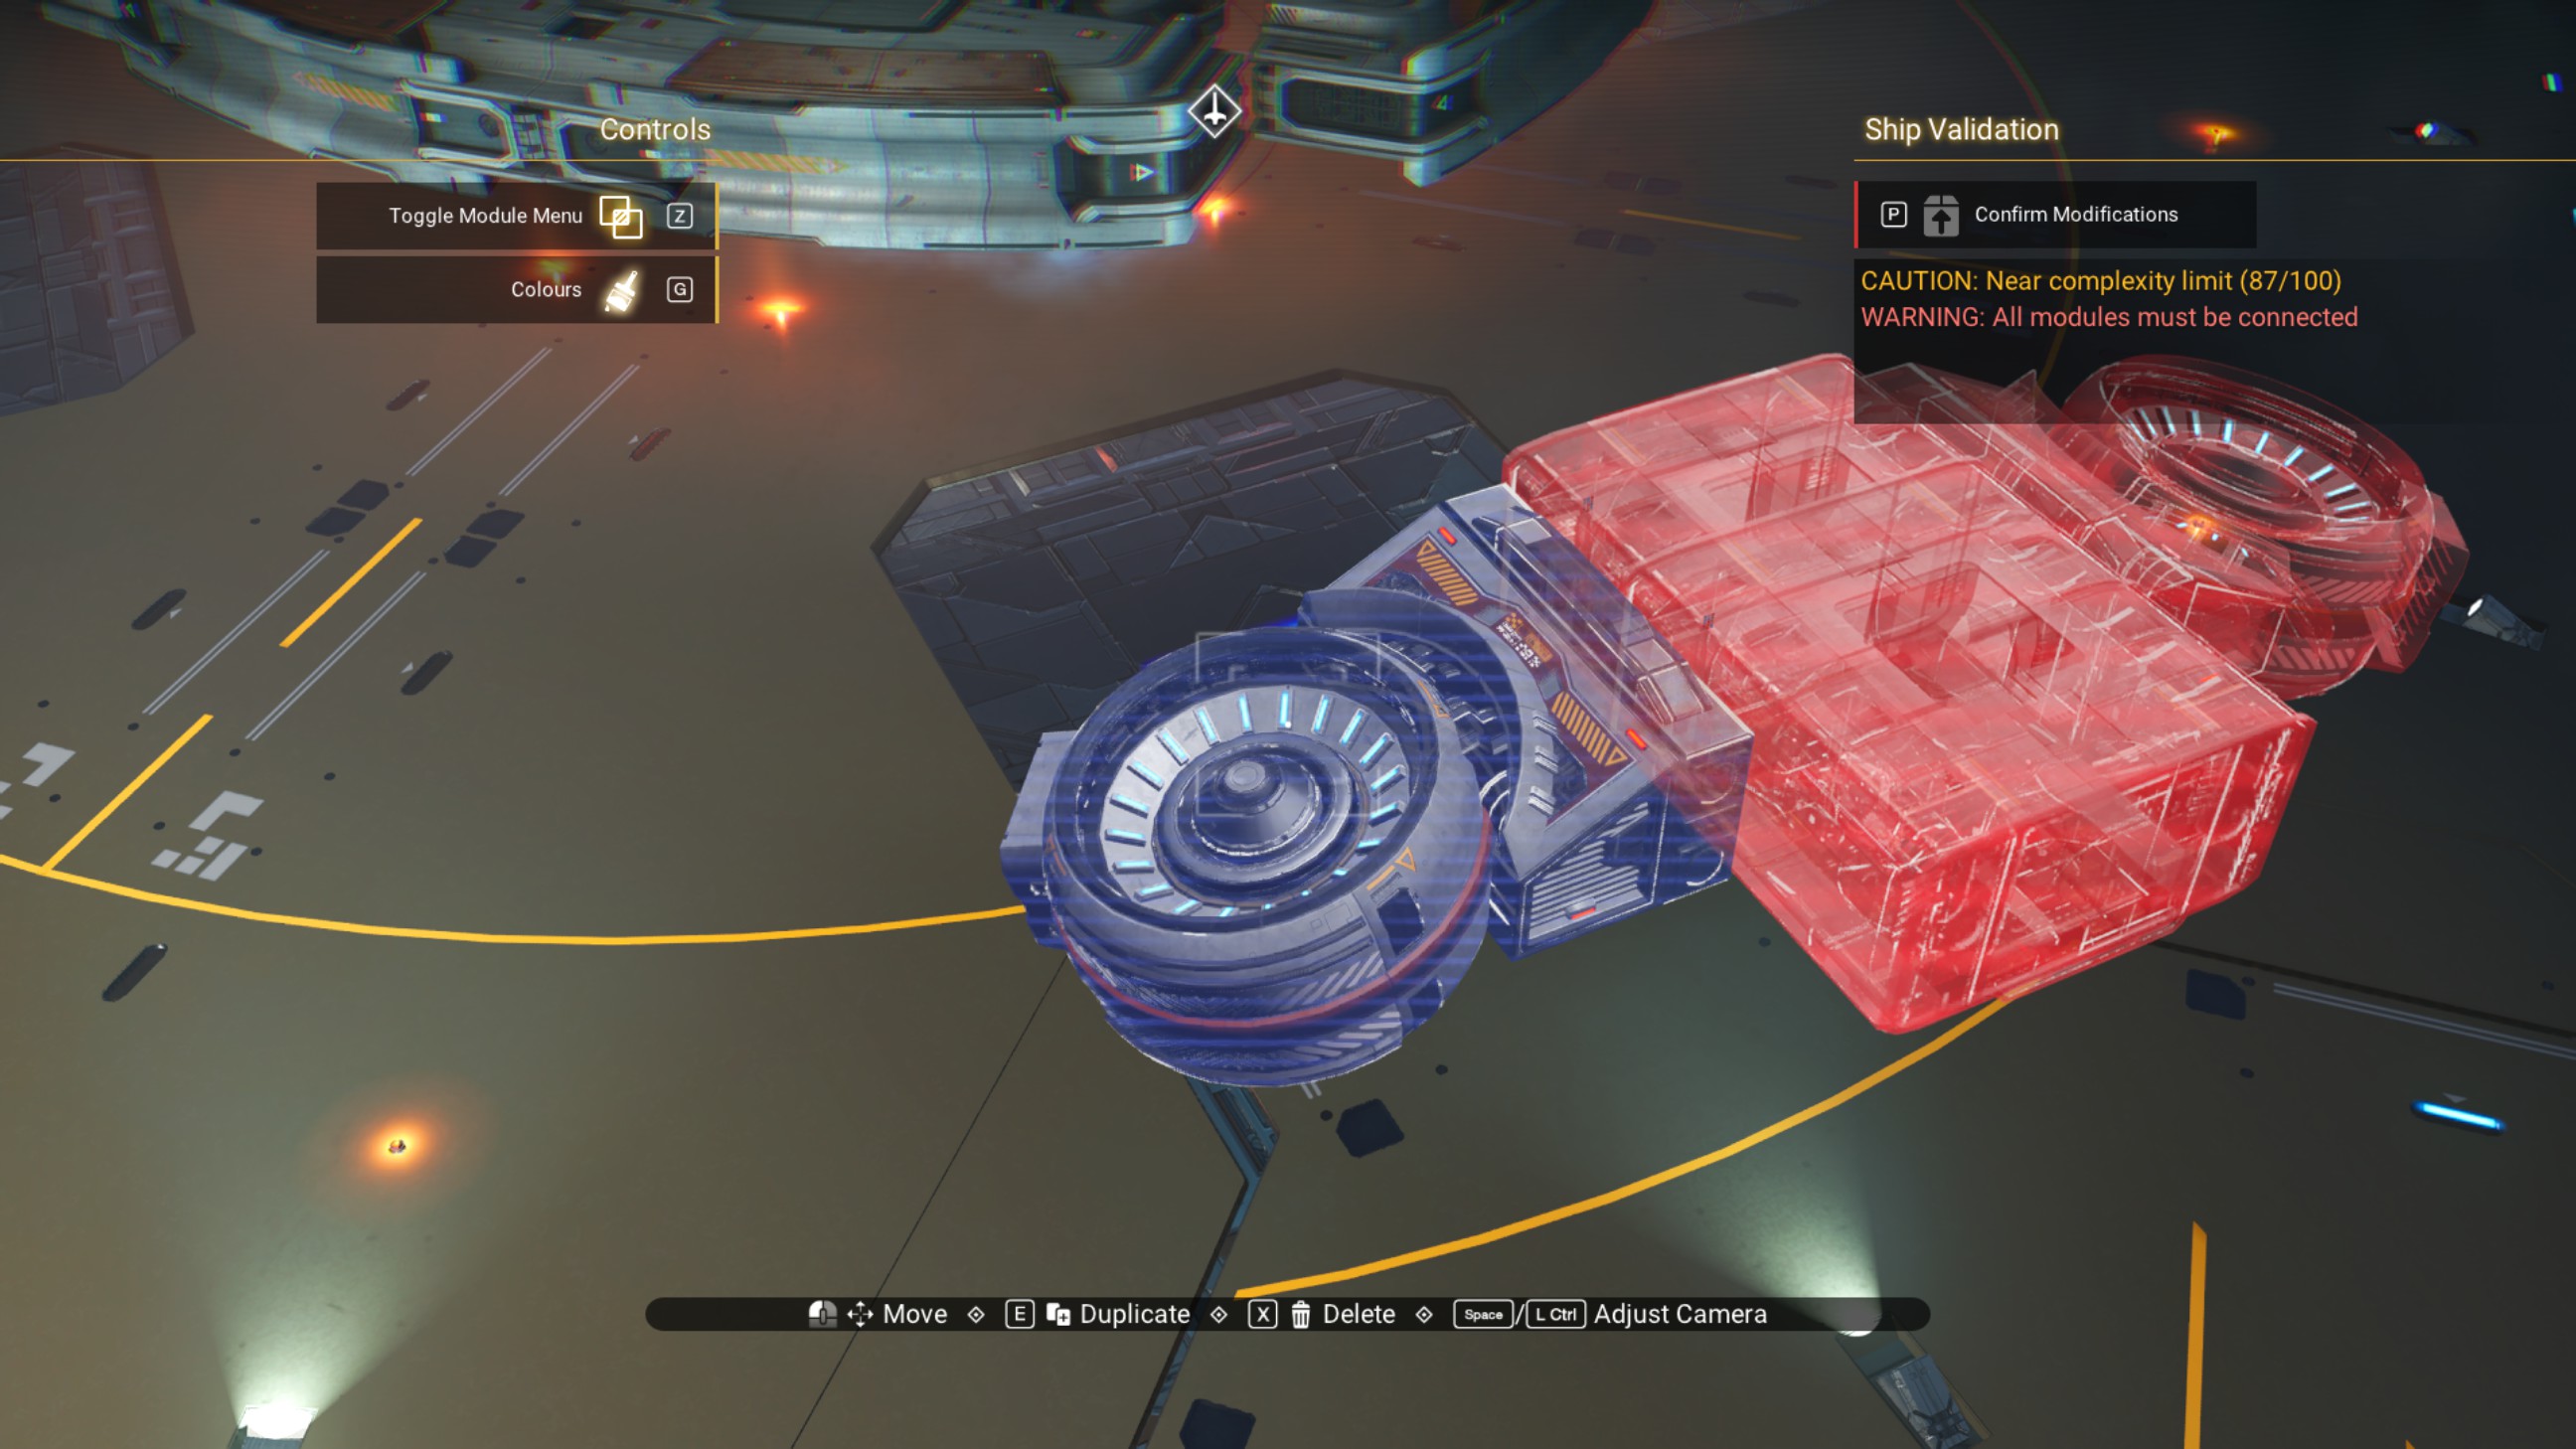
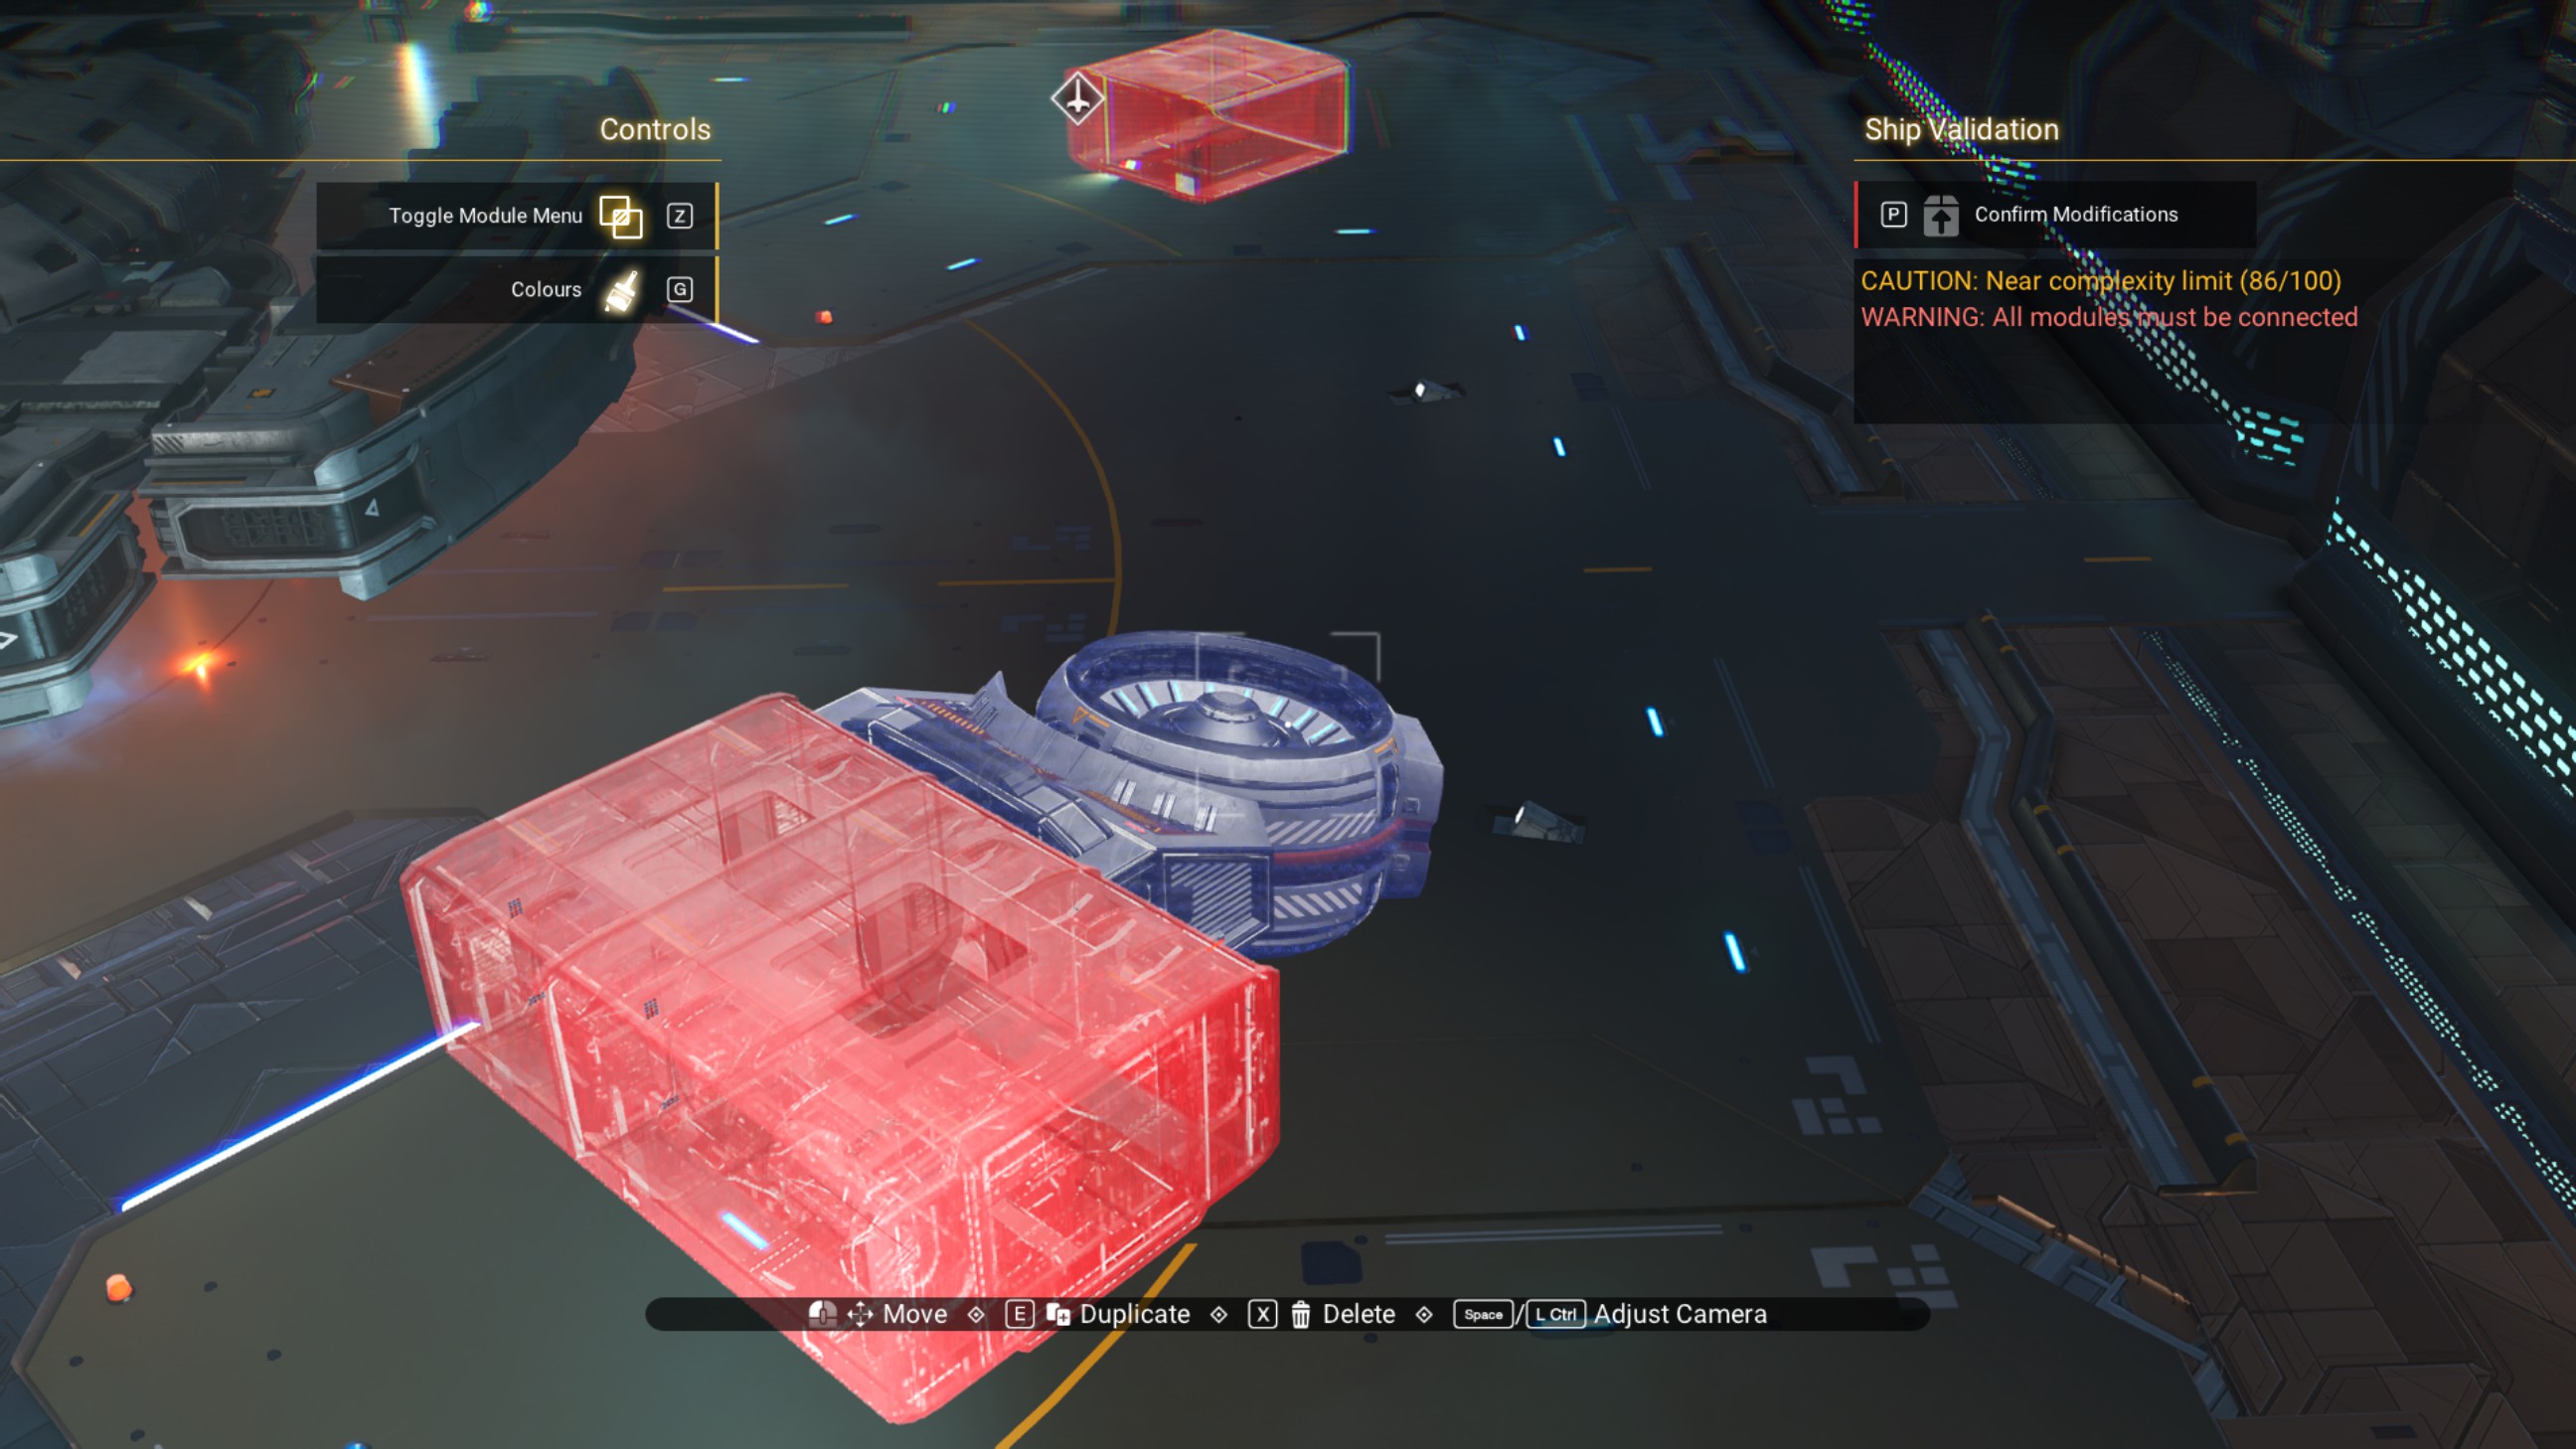
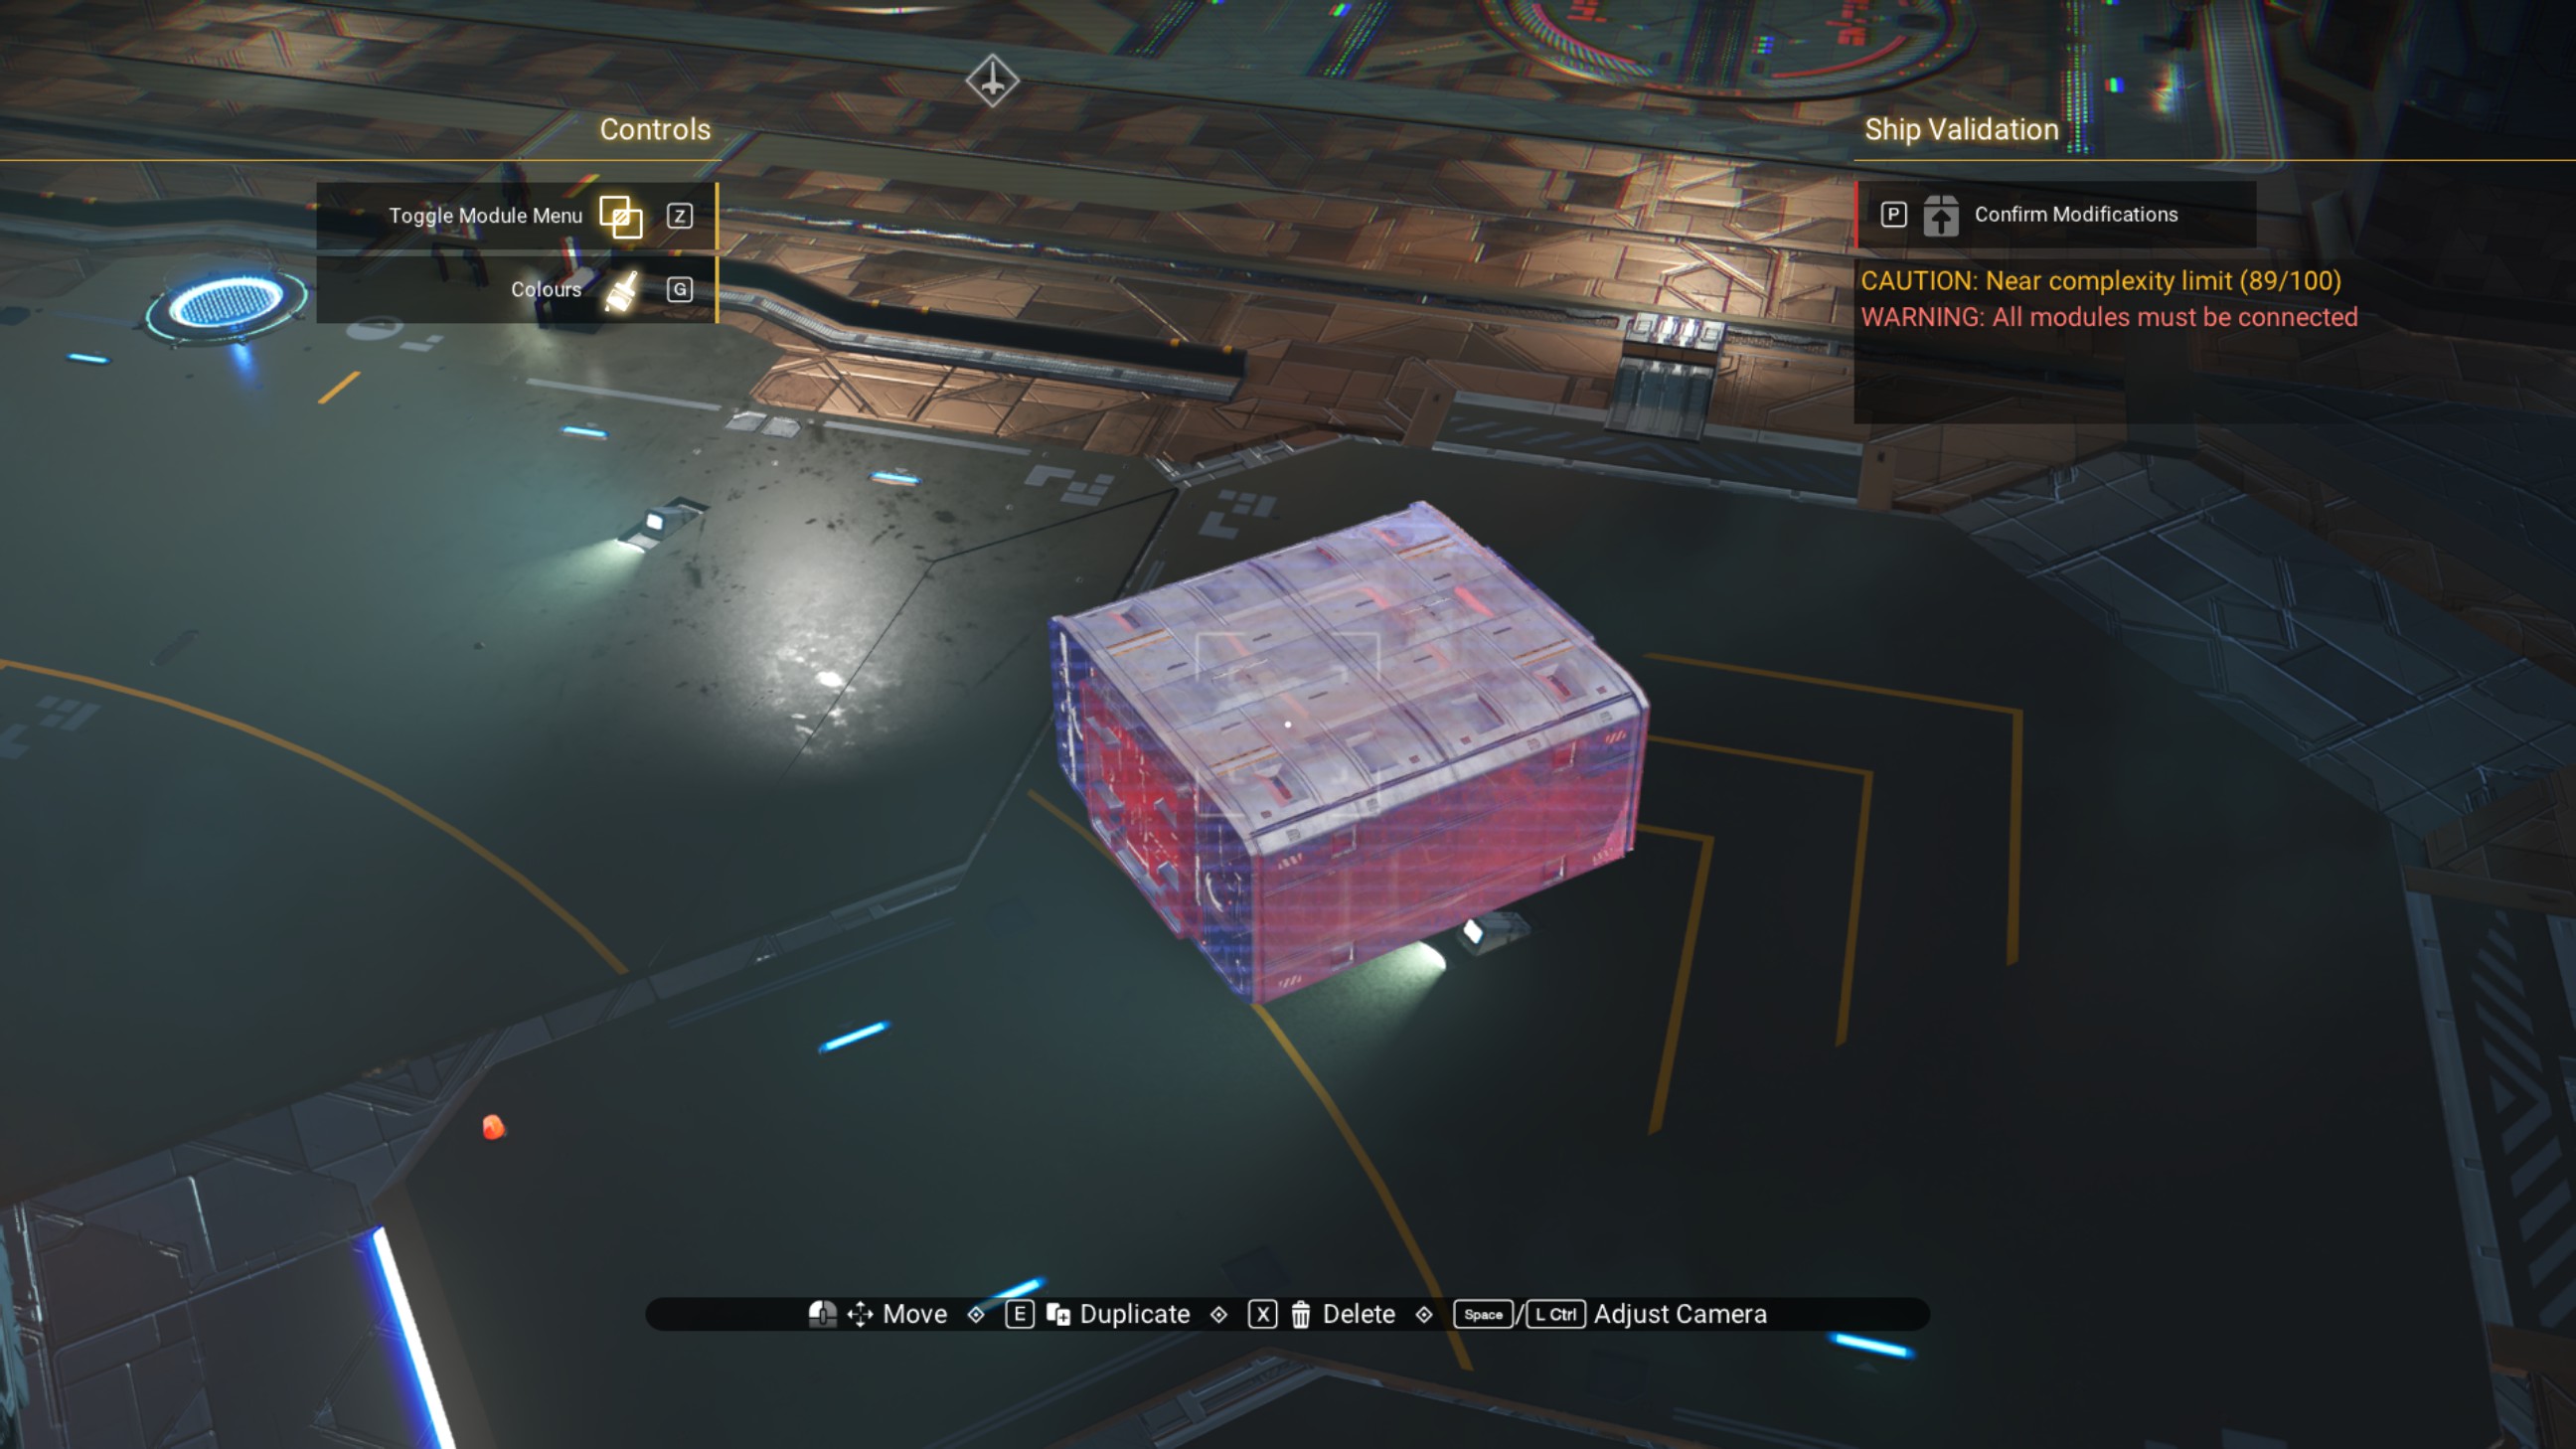
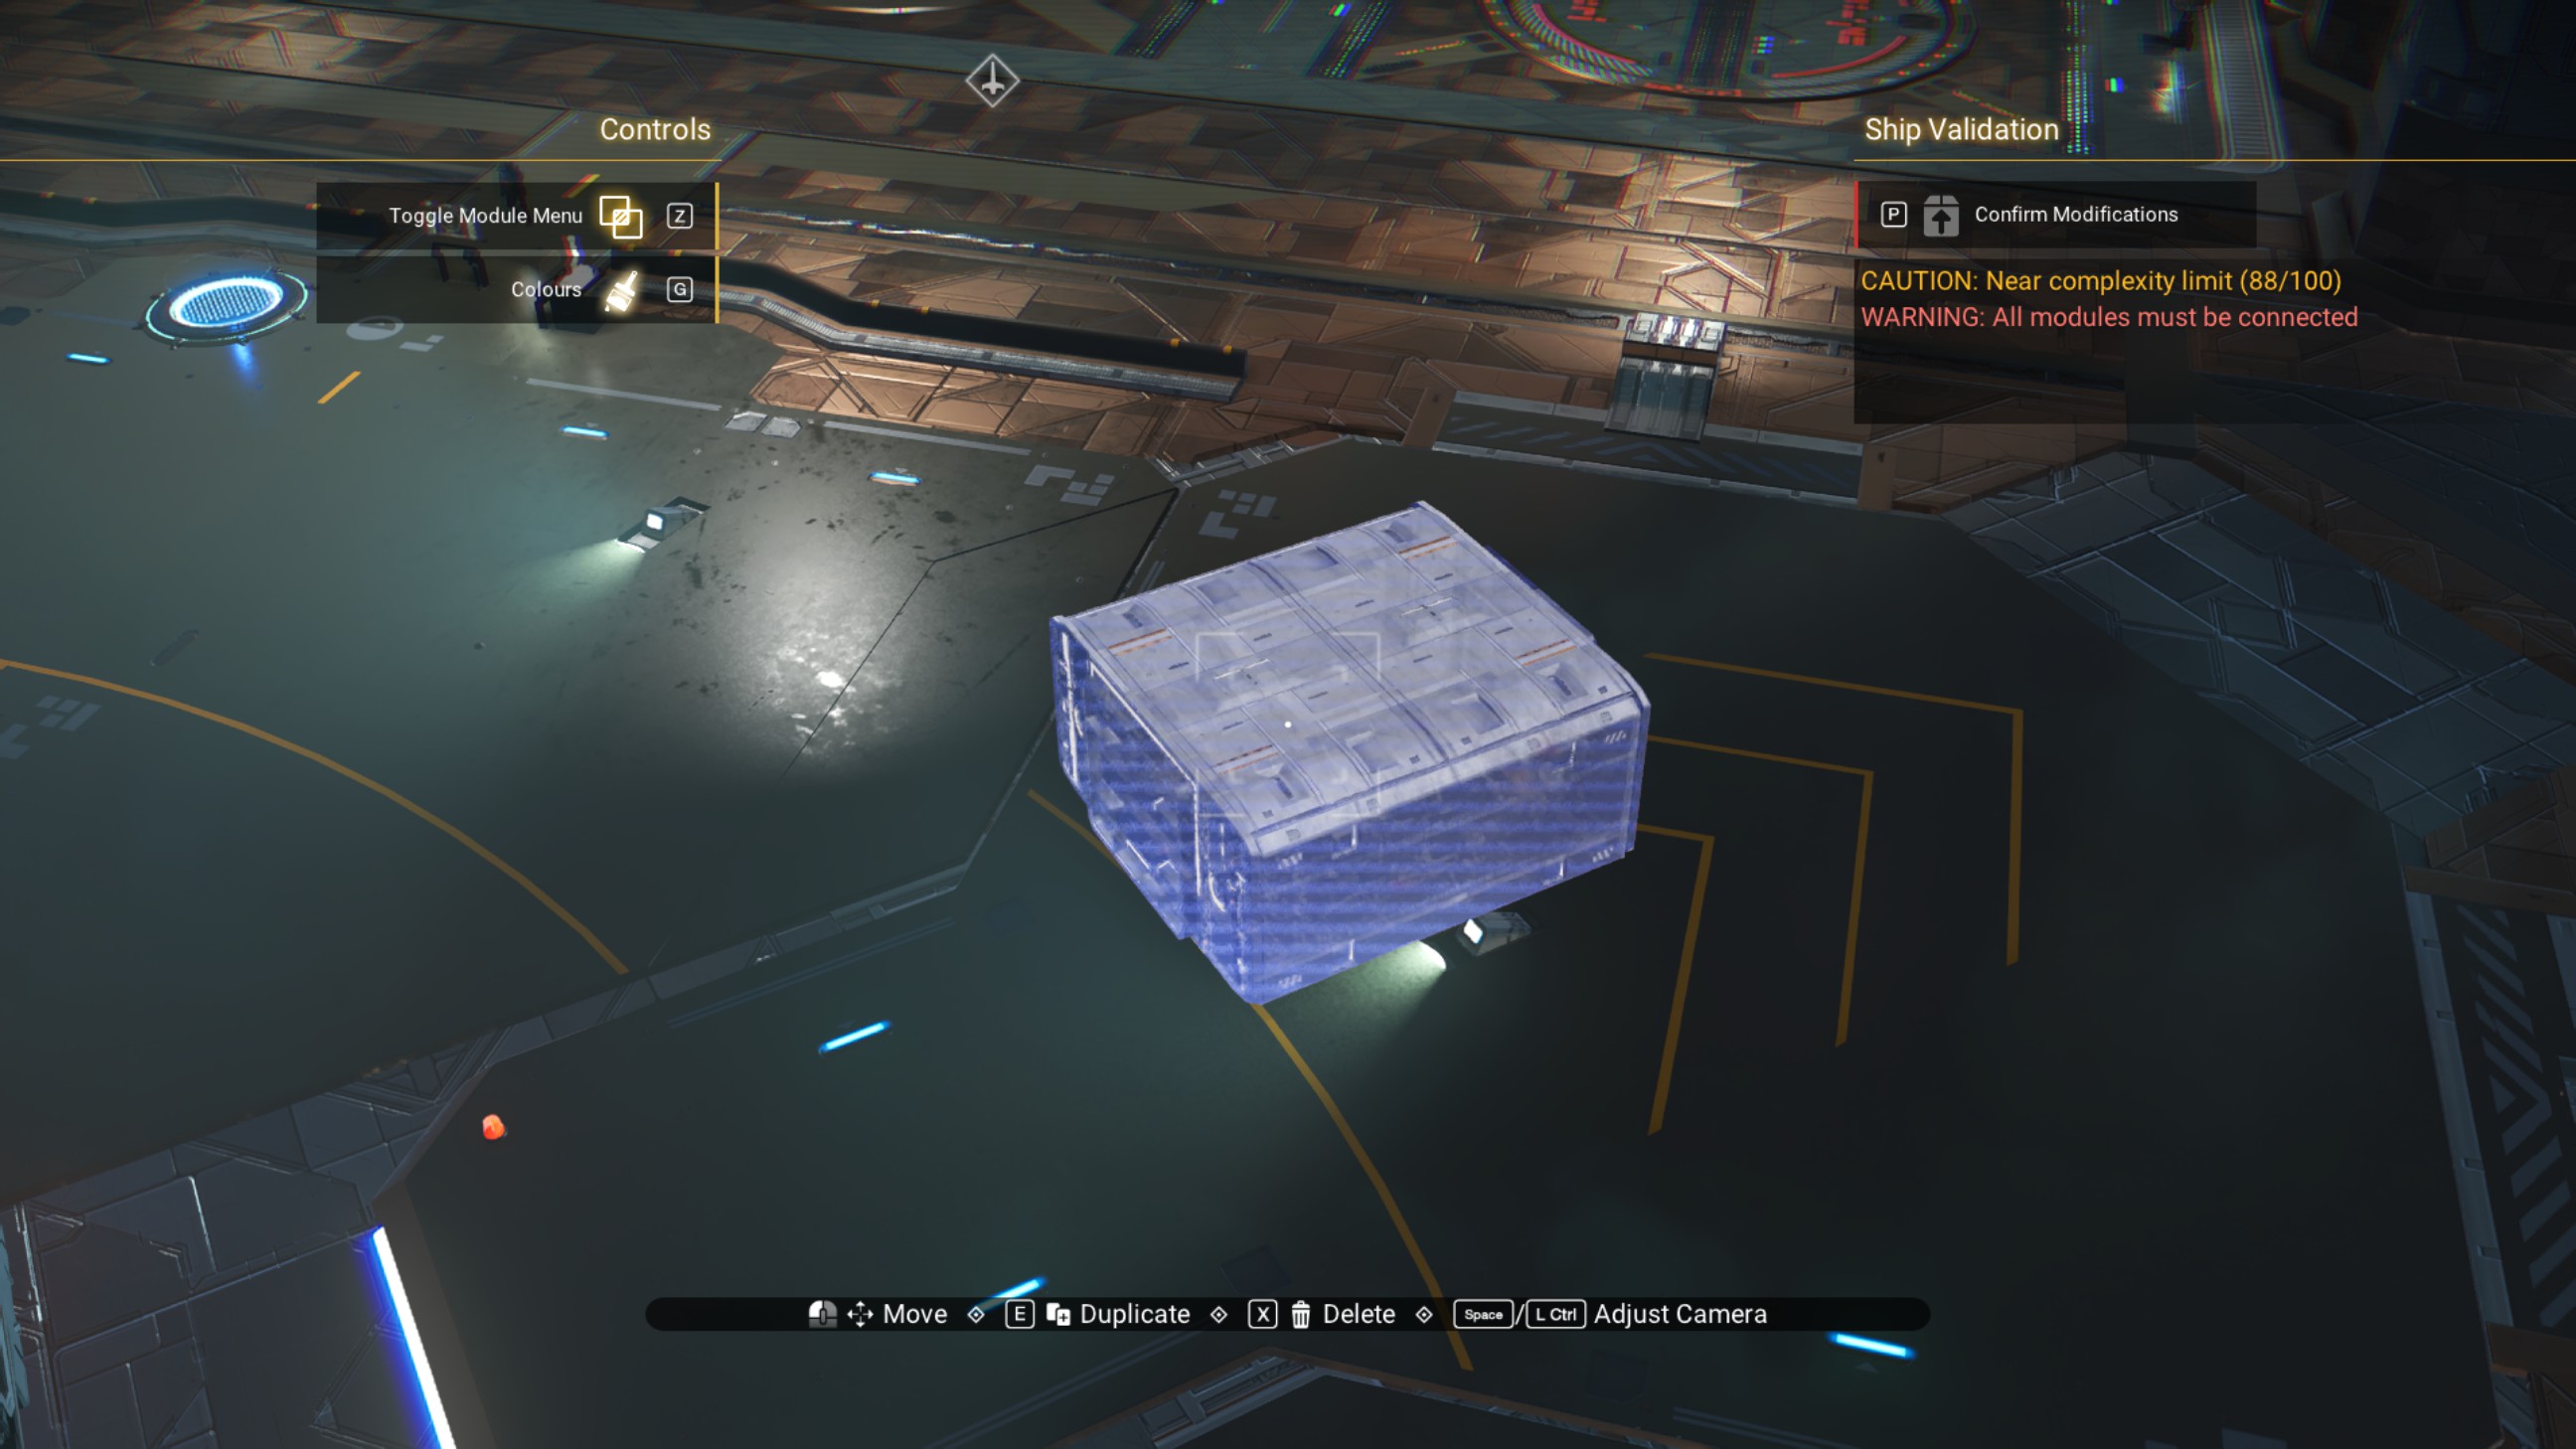
We're going to walk these walkways forward one block at a time, overlapping them each step of the way, for a total of four blocks (eight total walkways, overlapped).
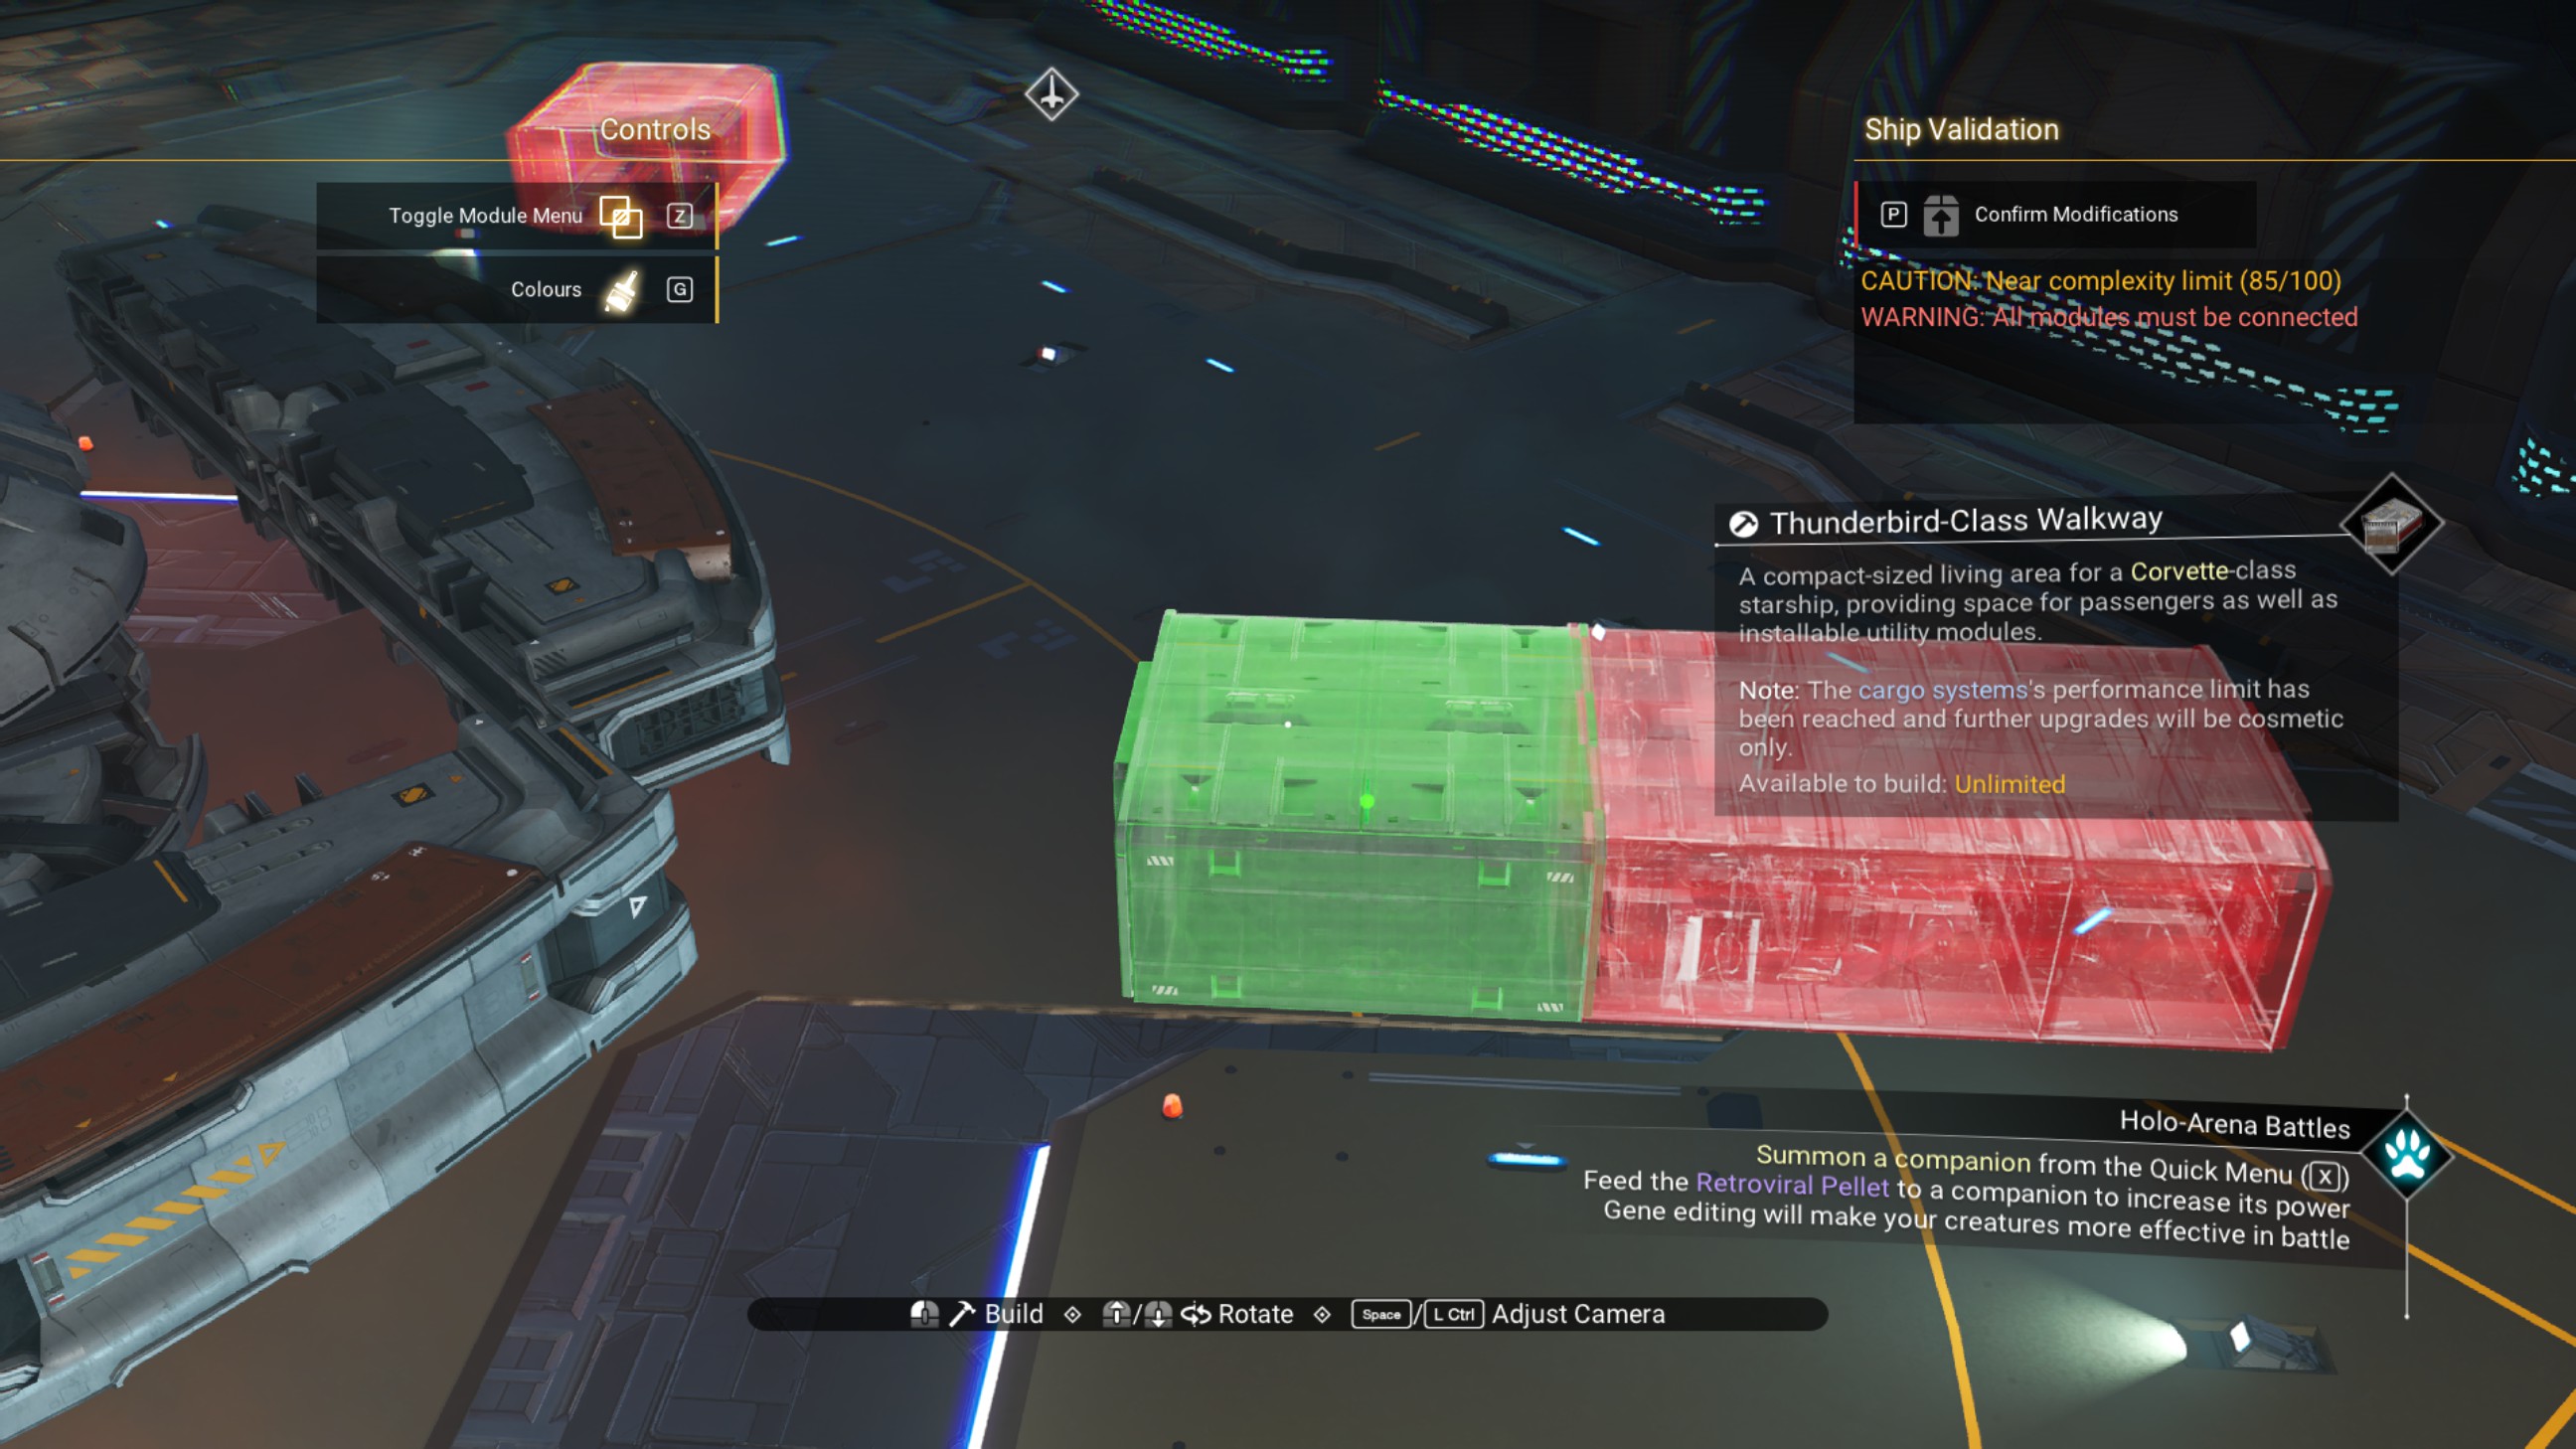
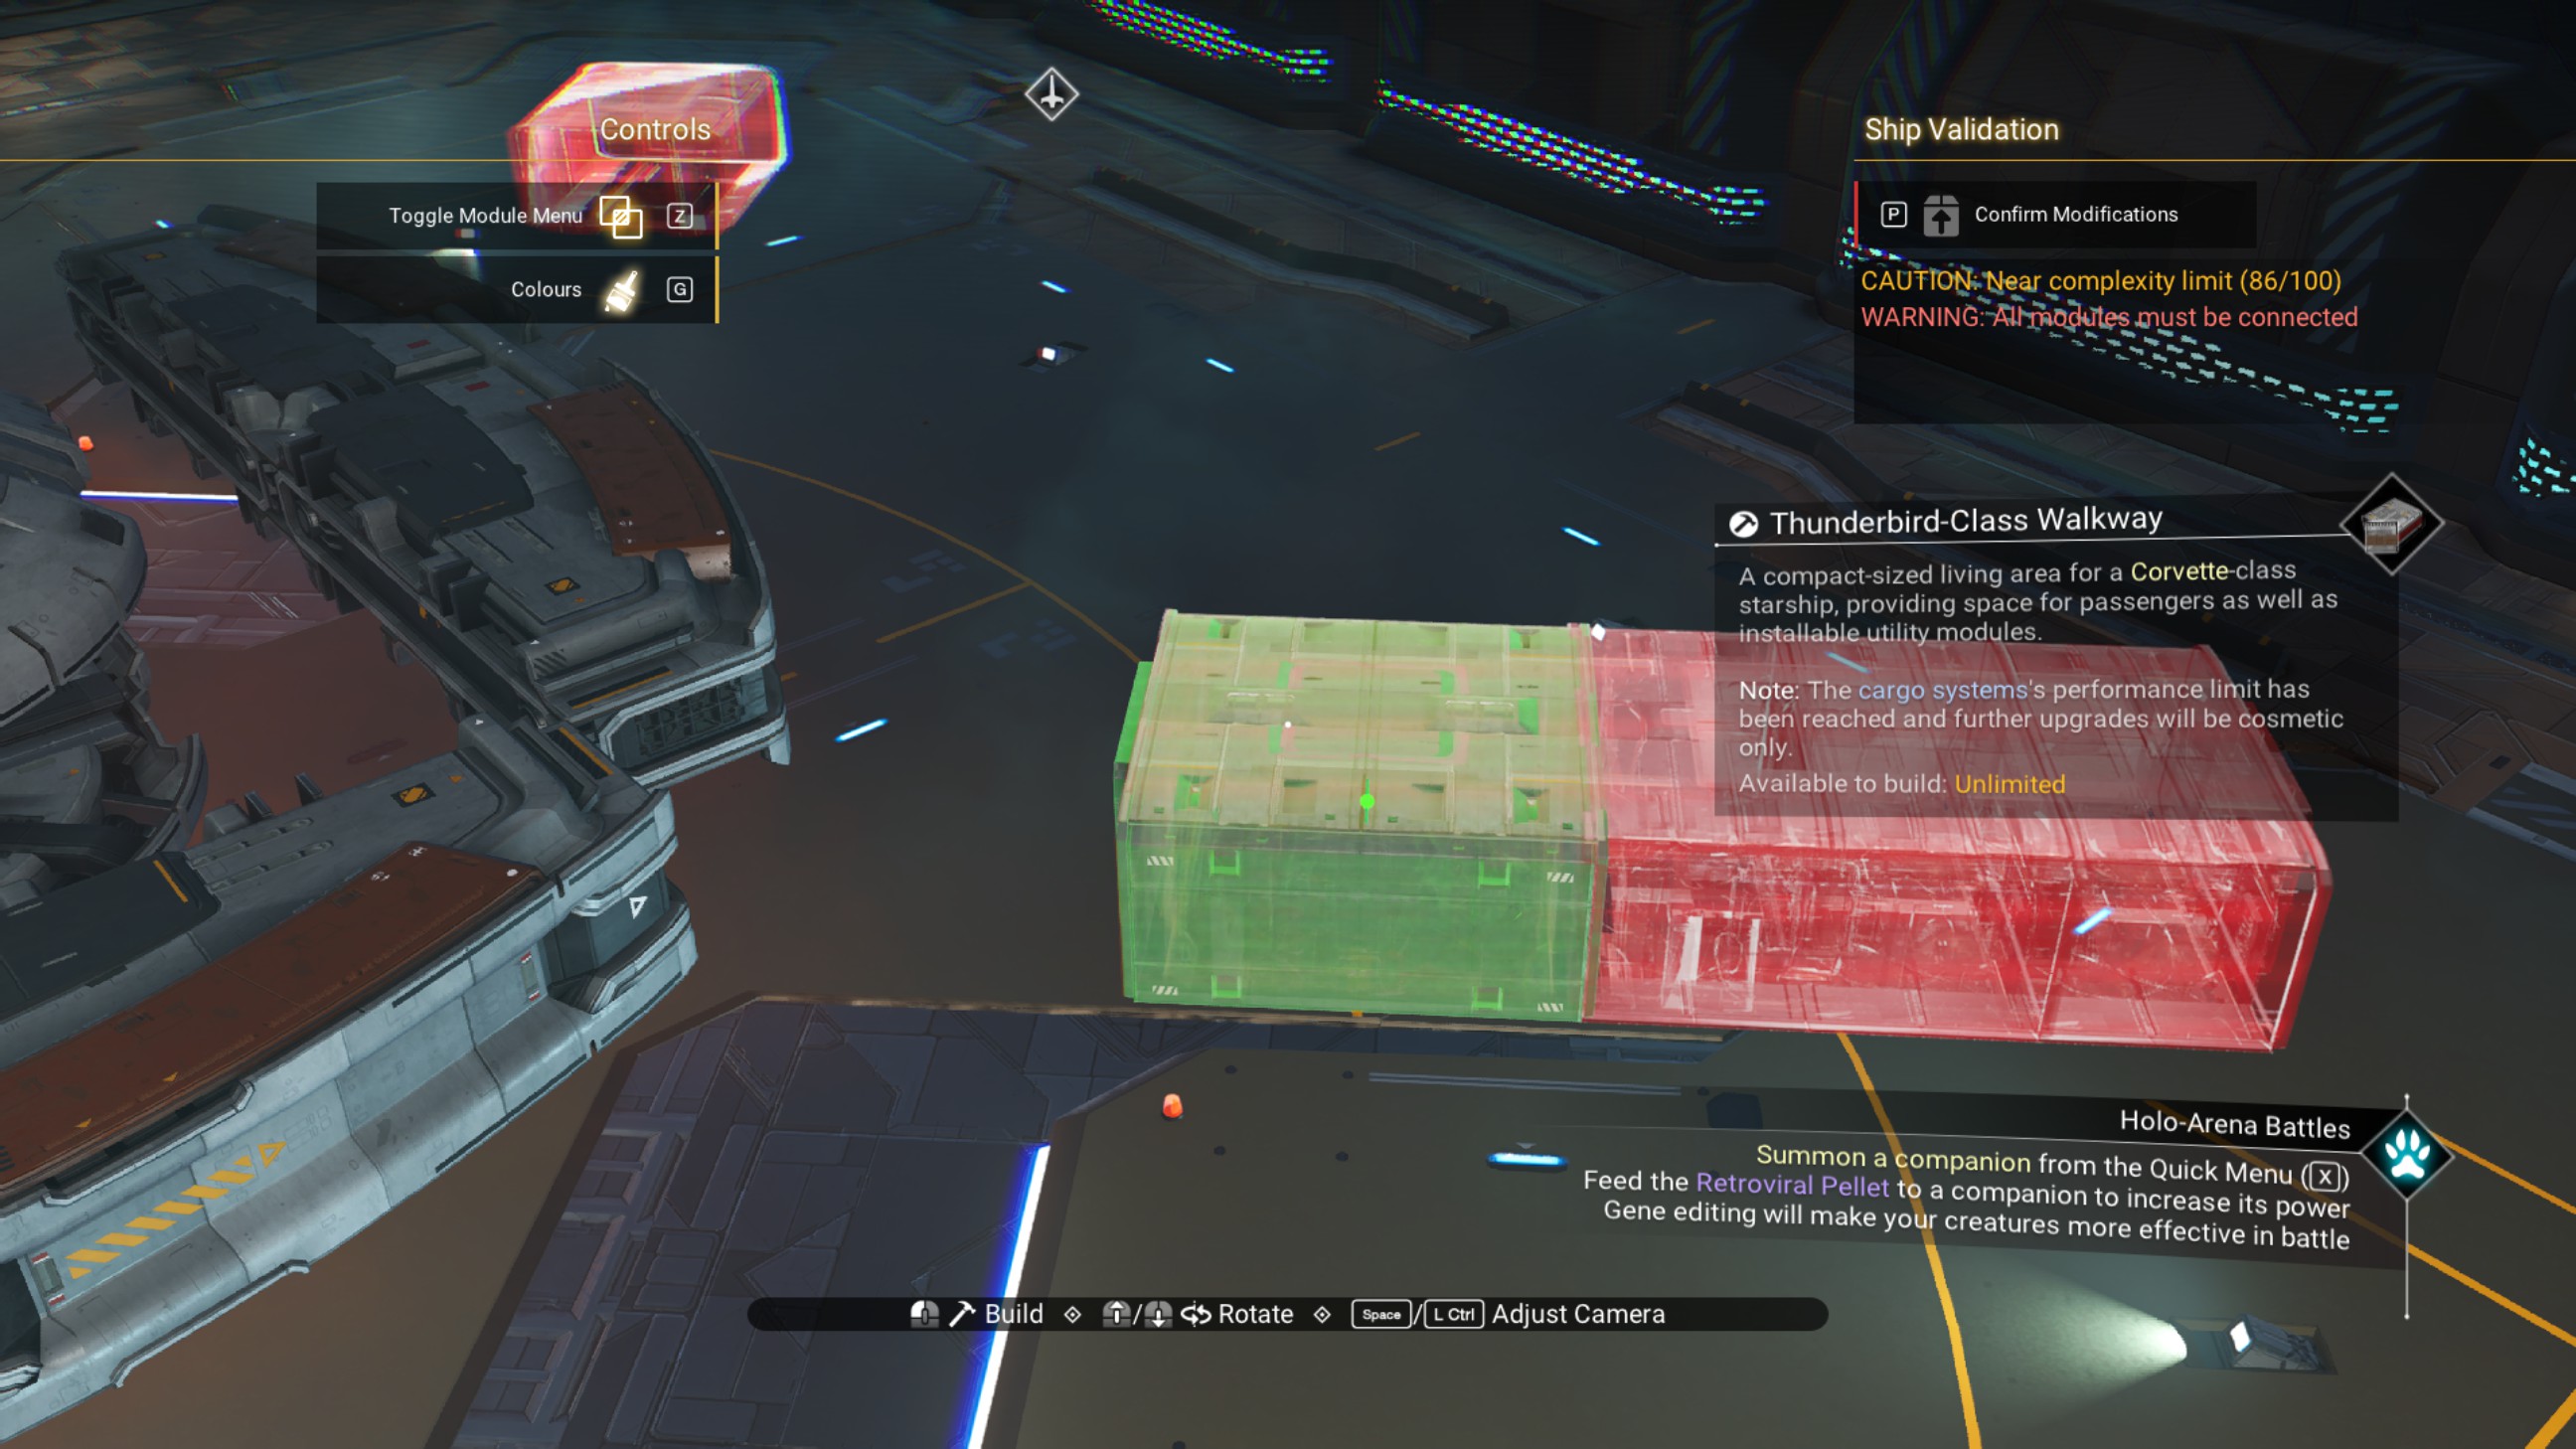
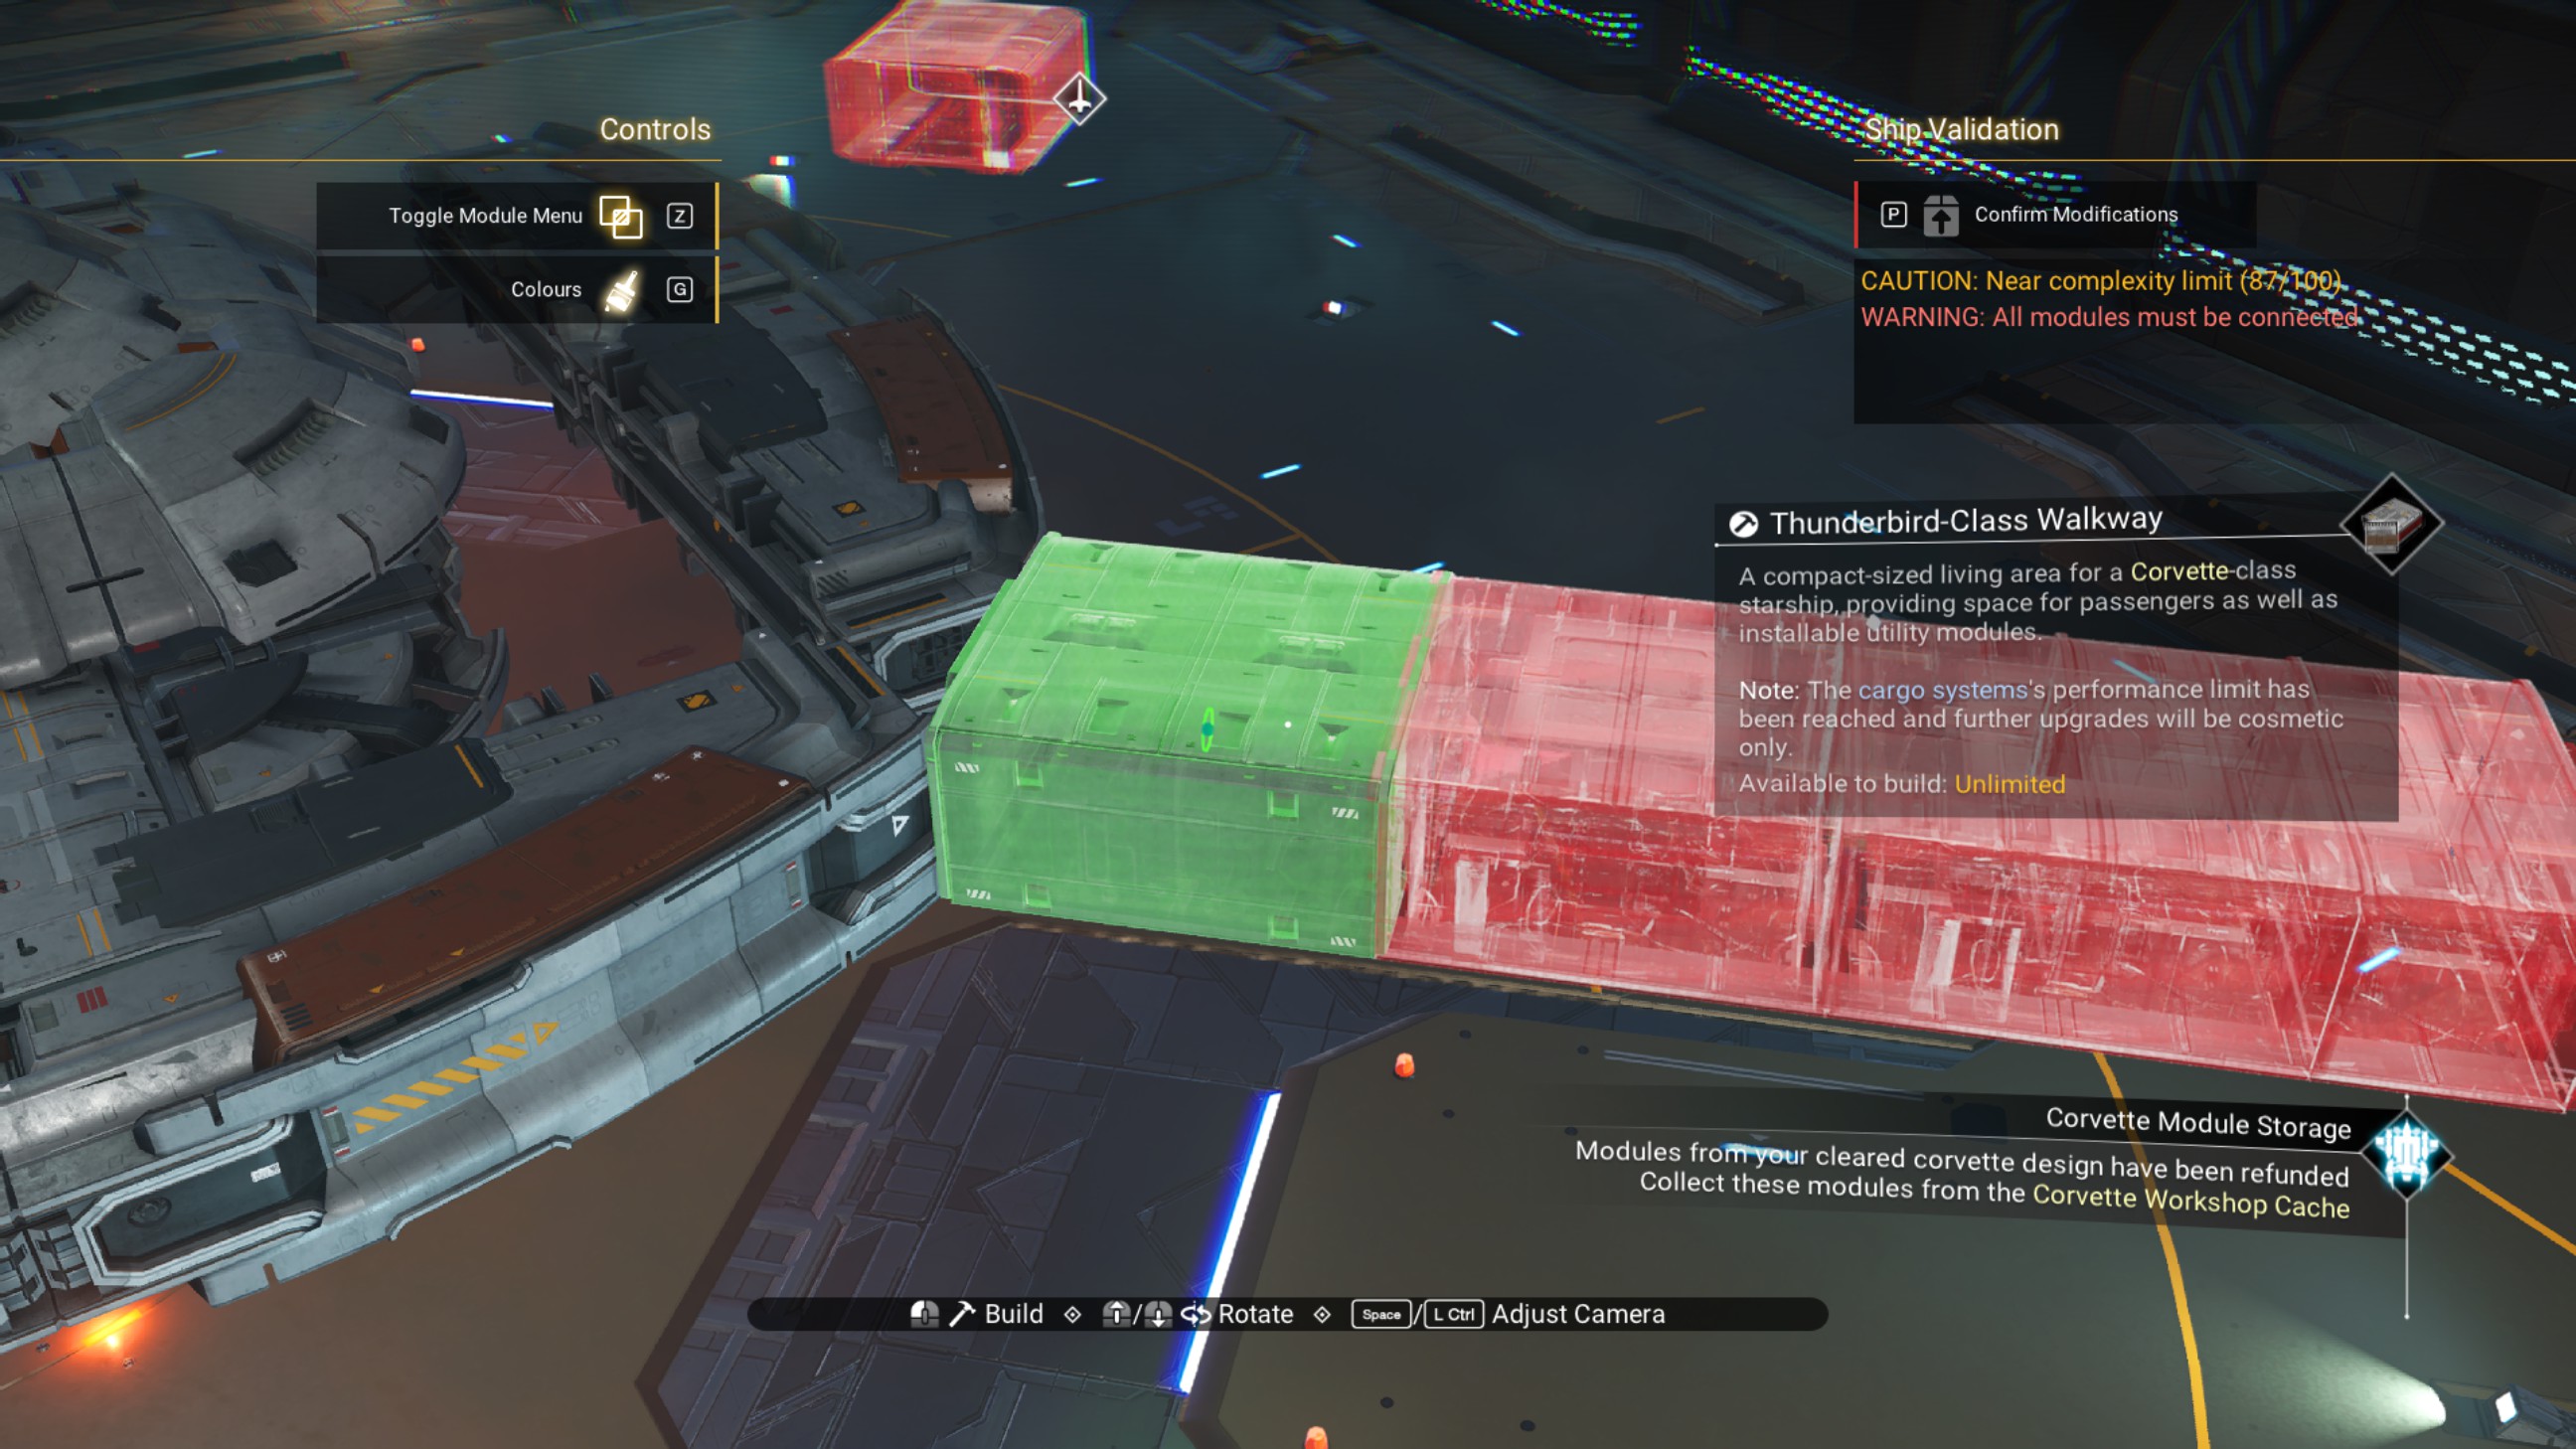
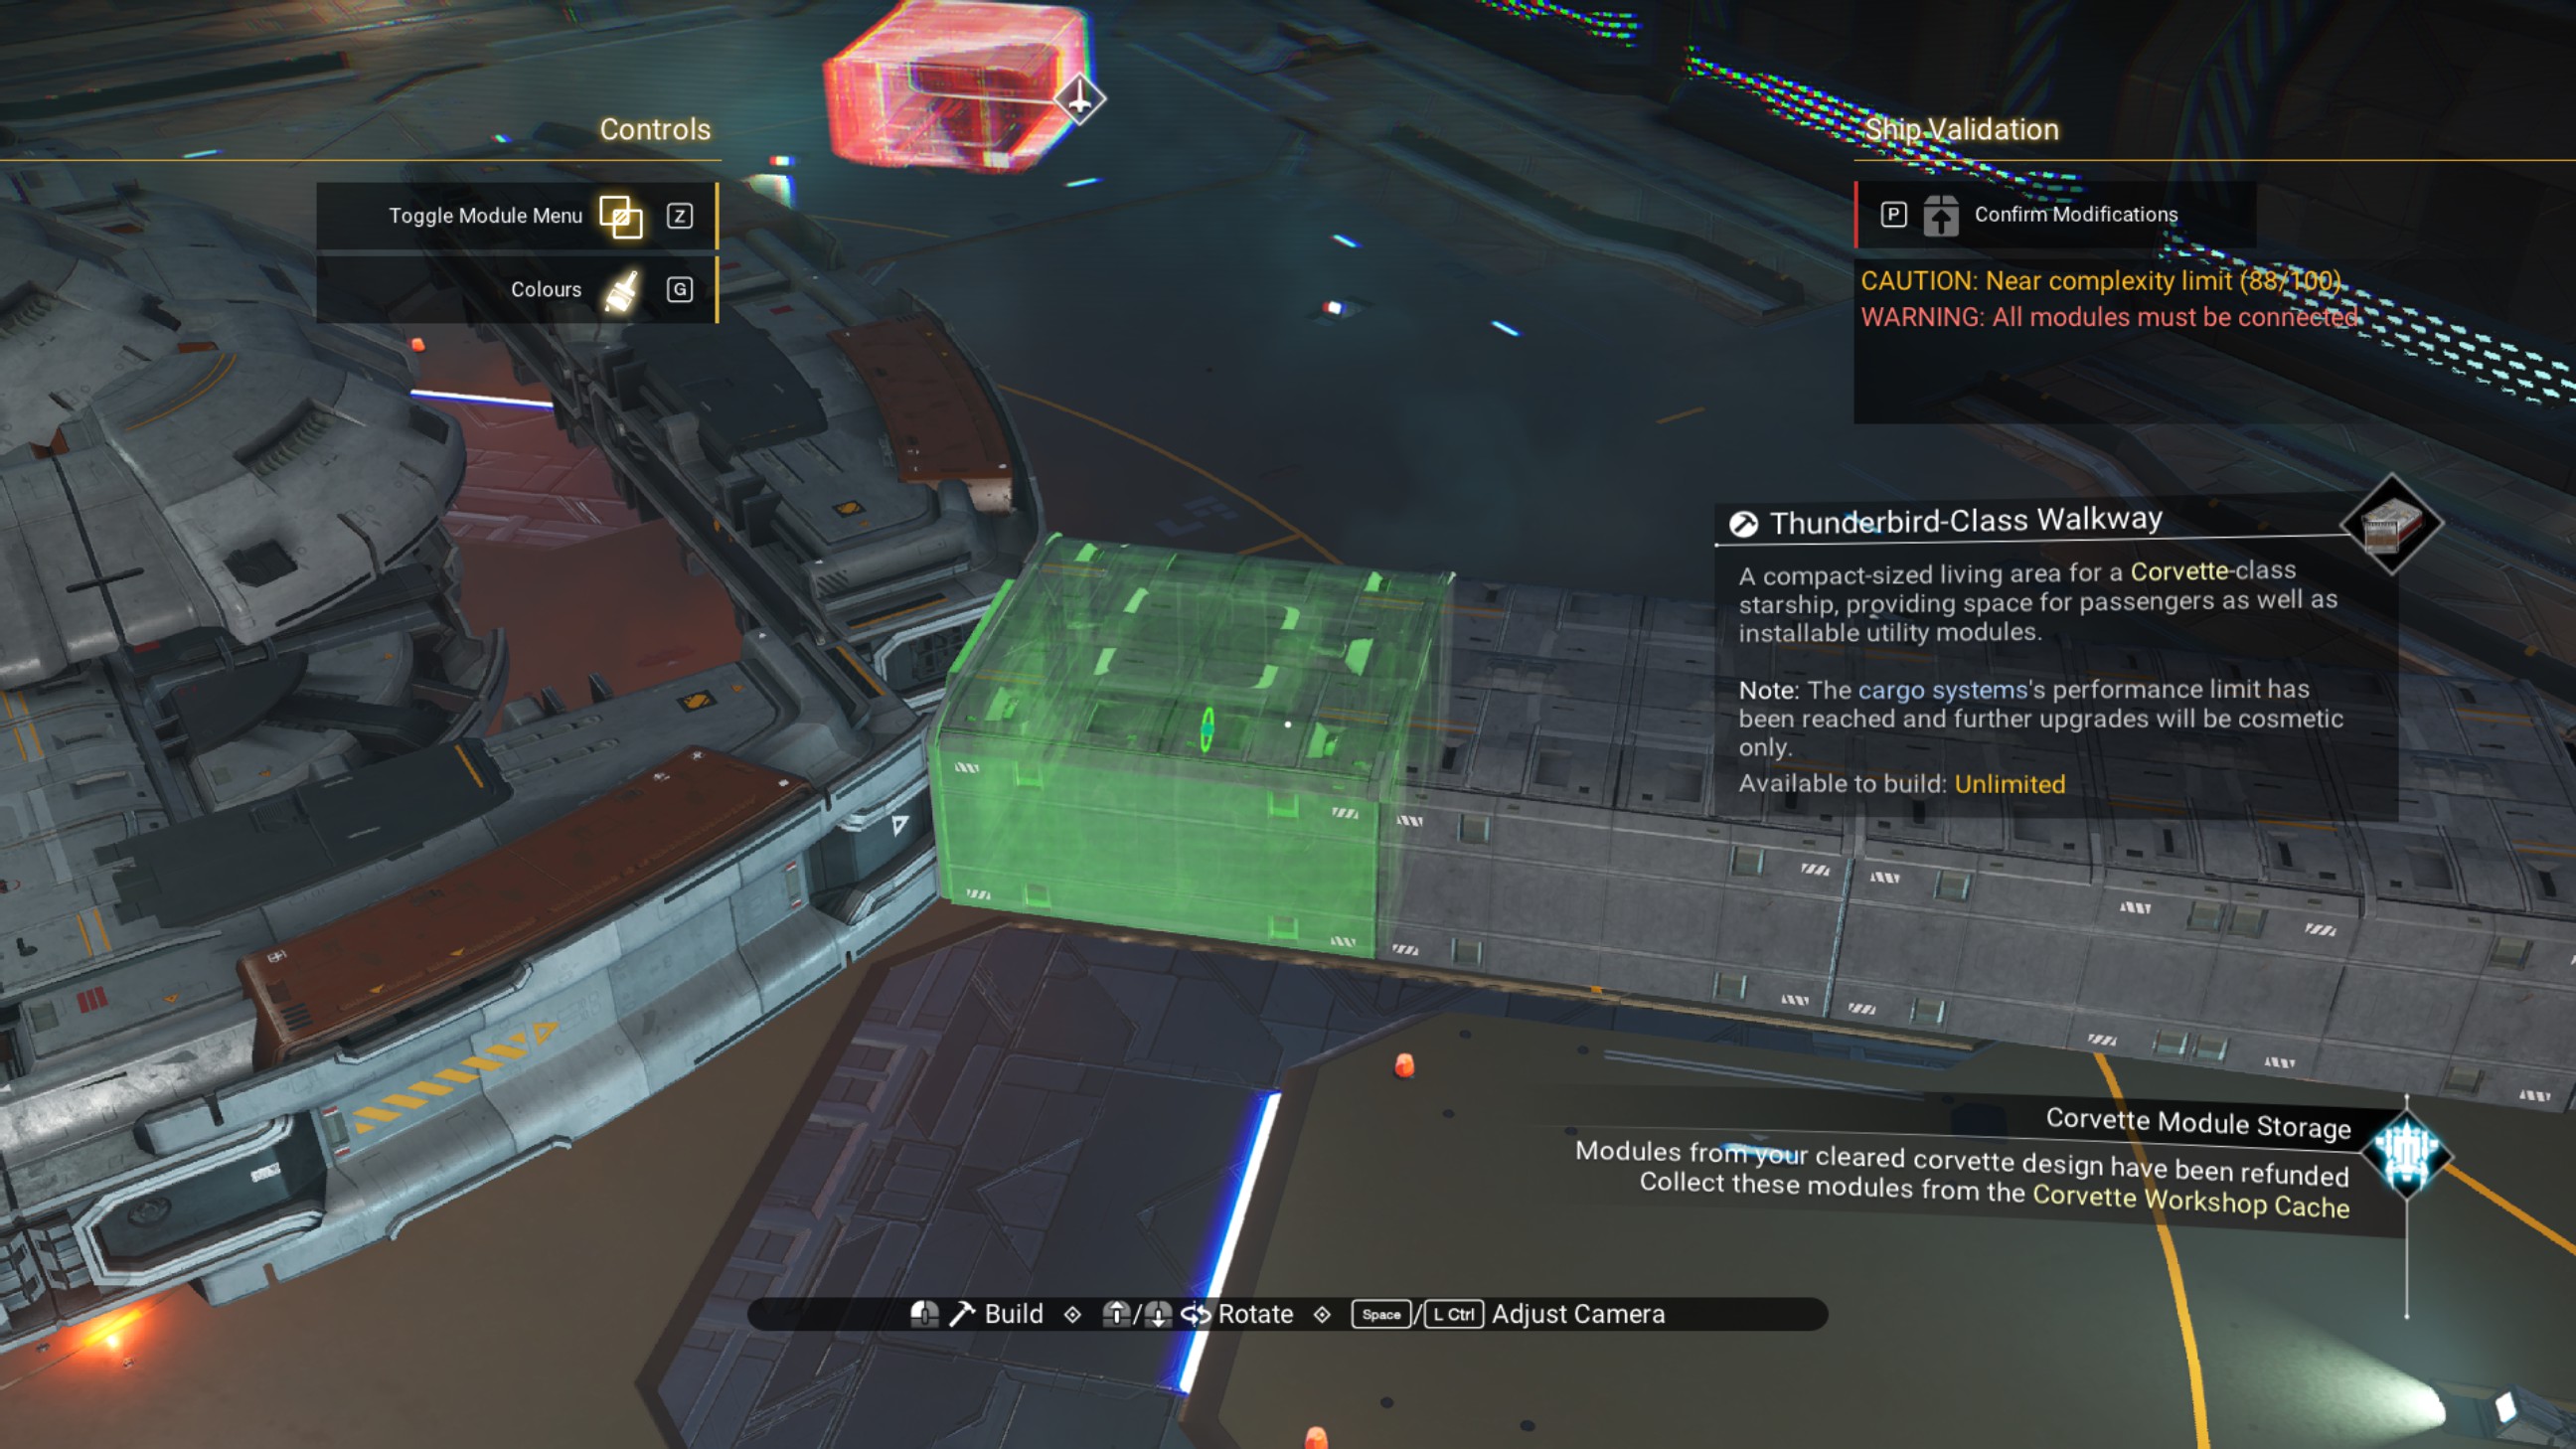
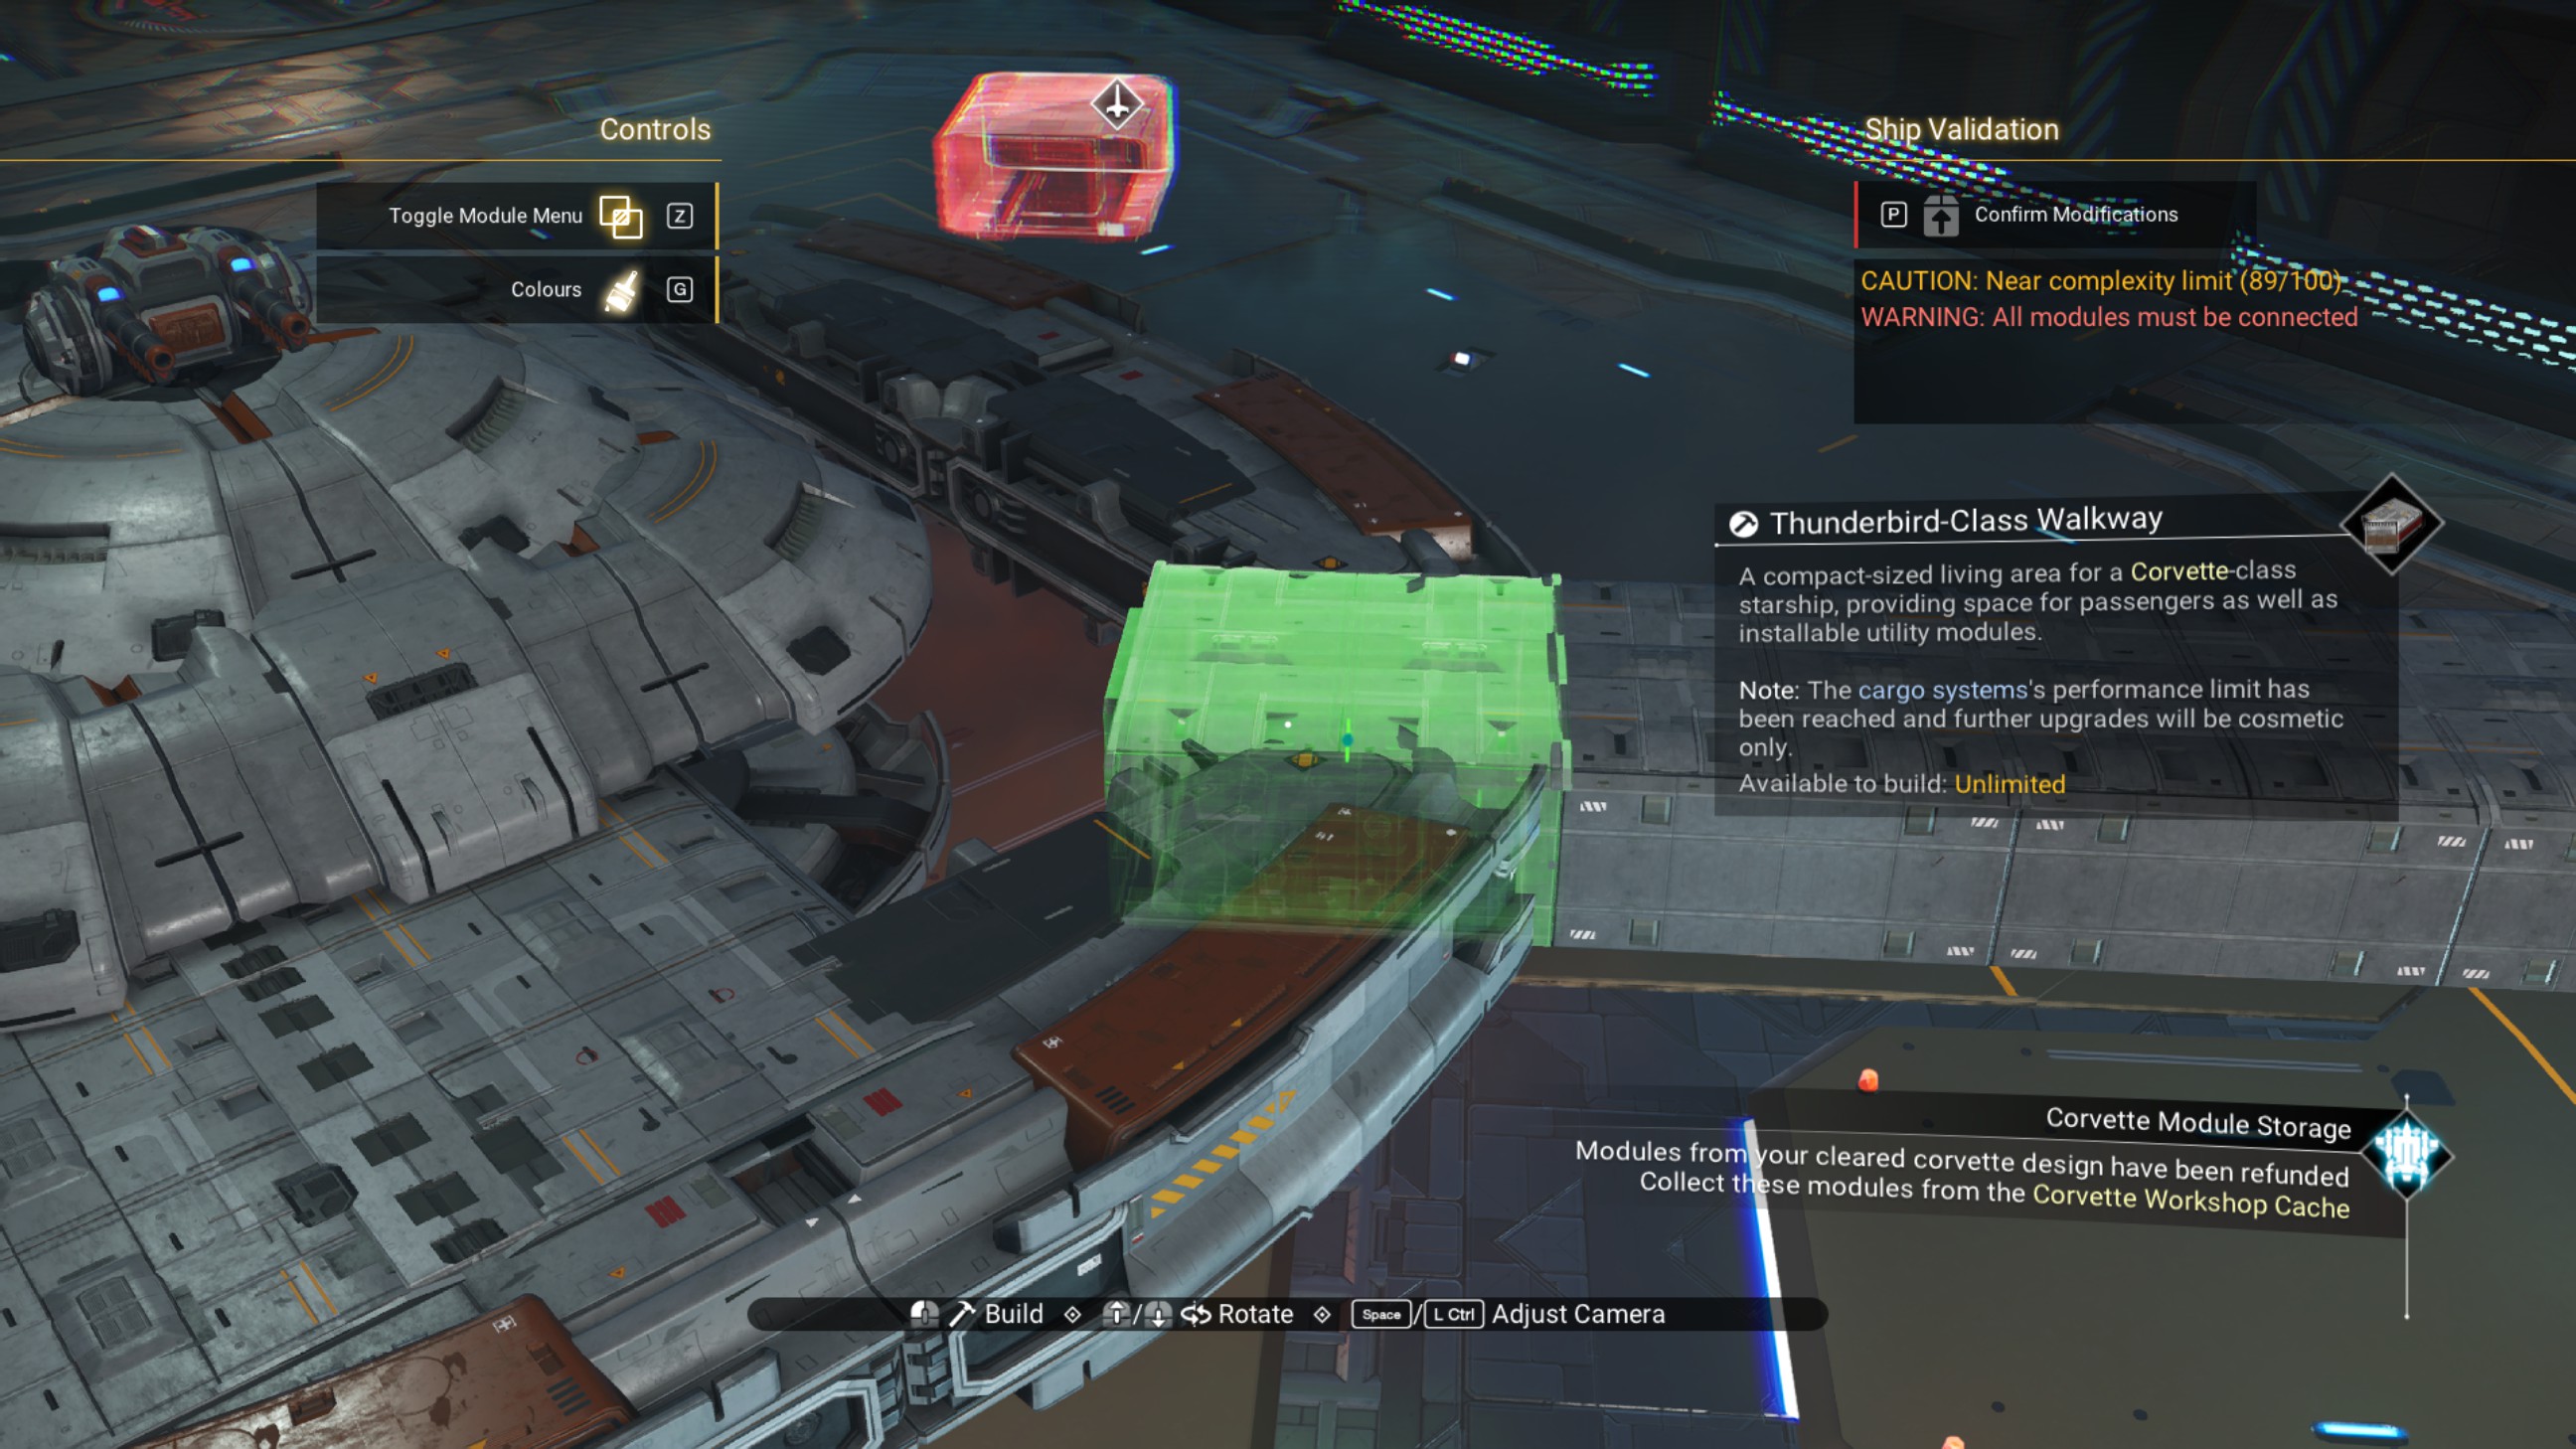
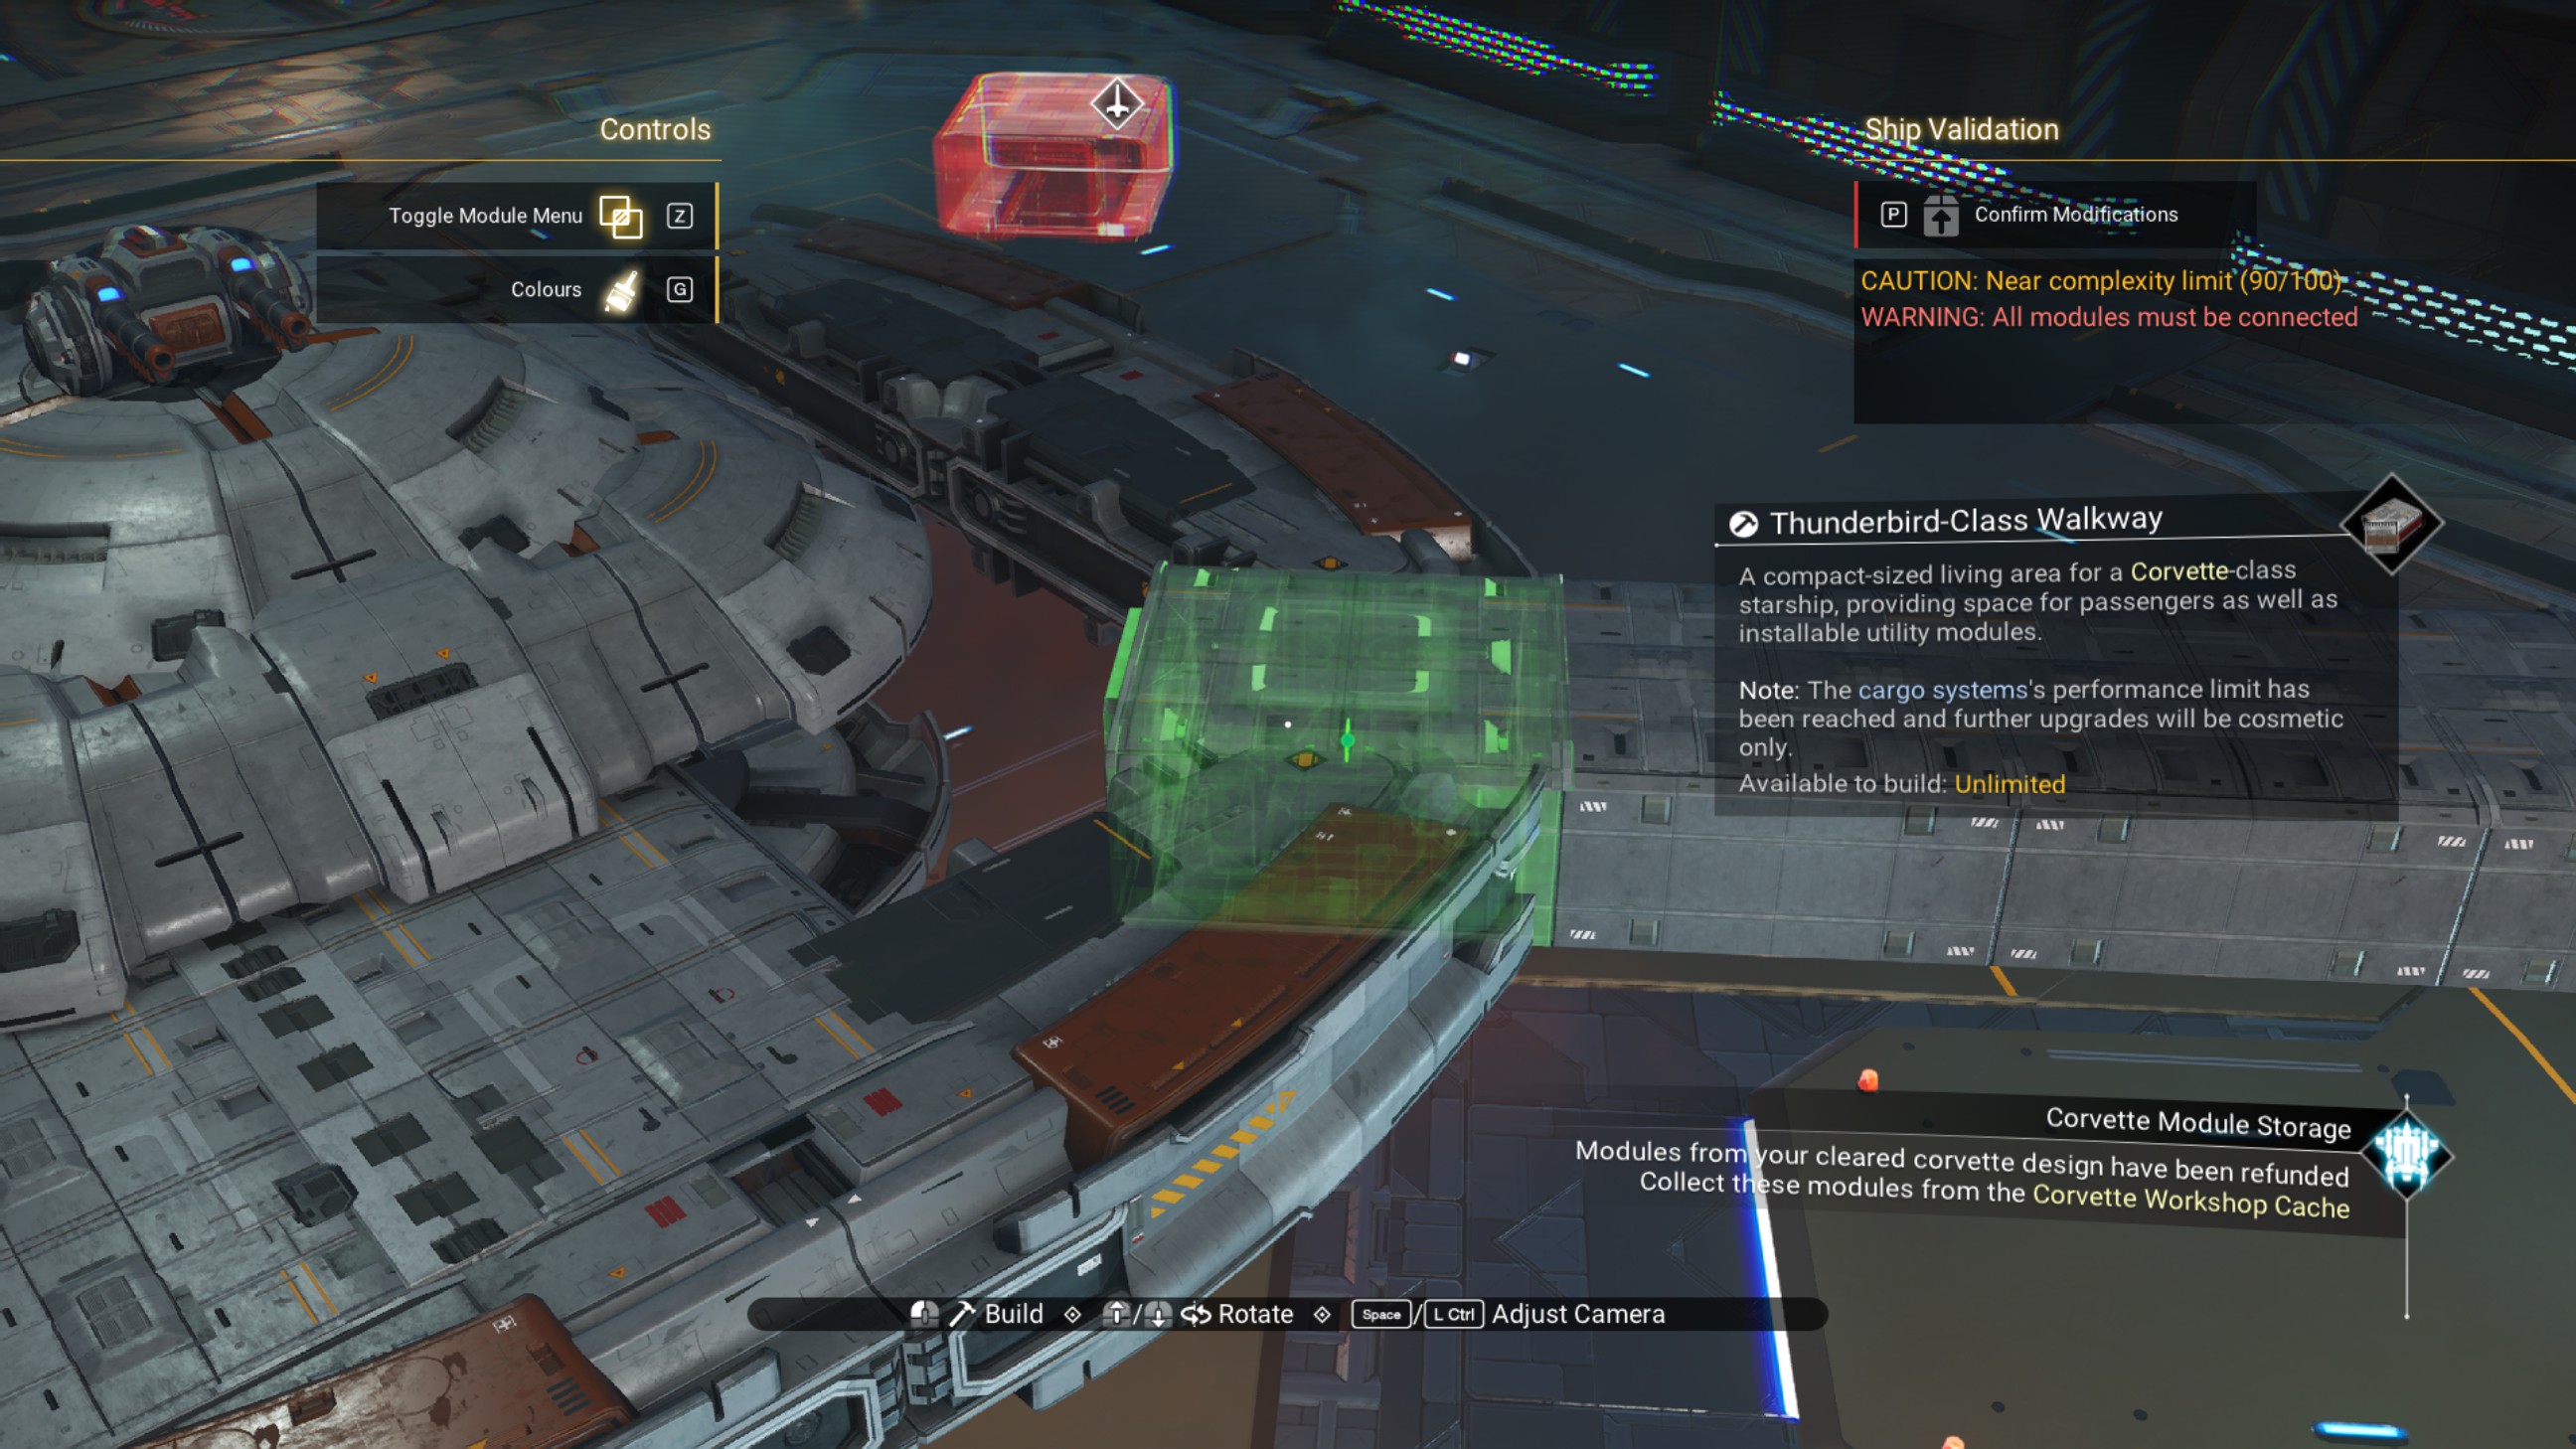
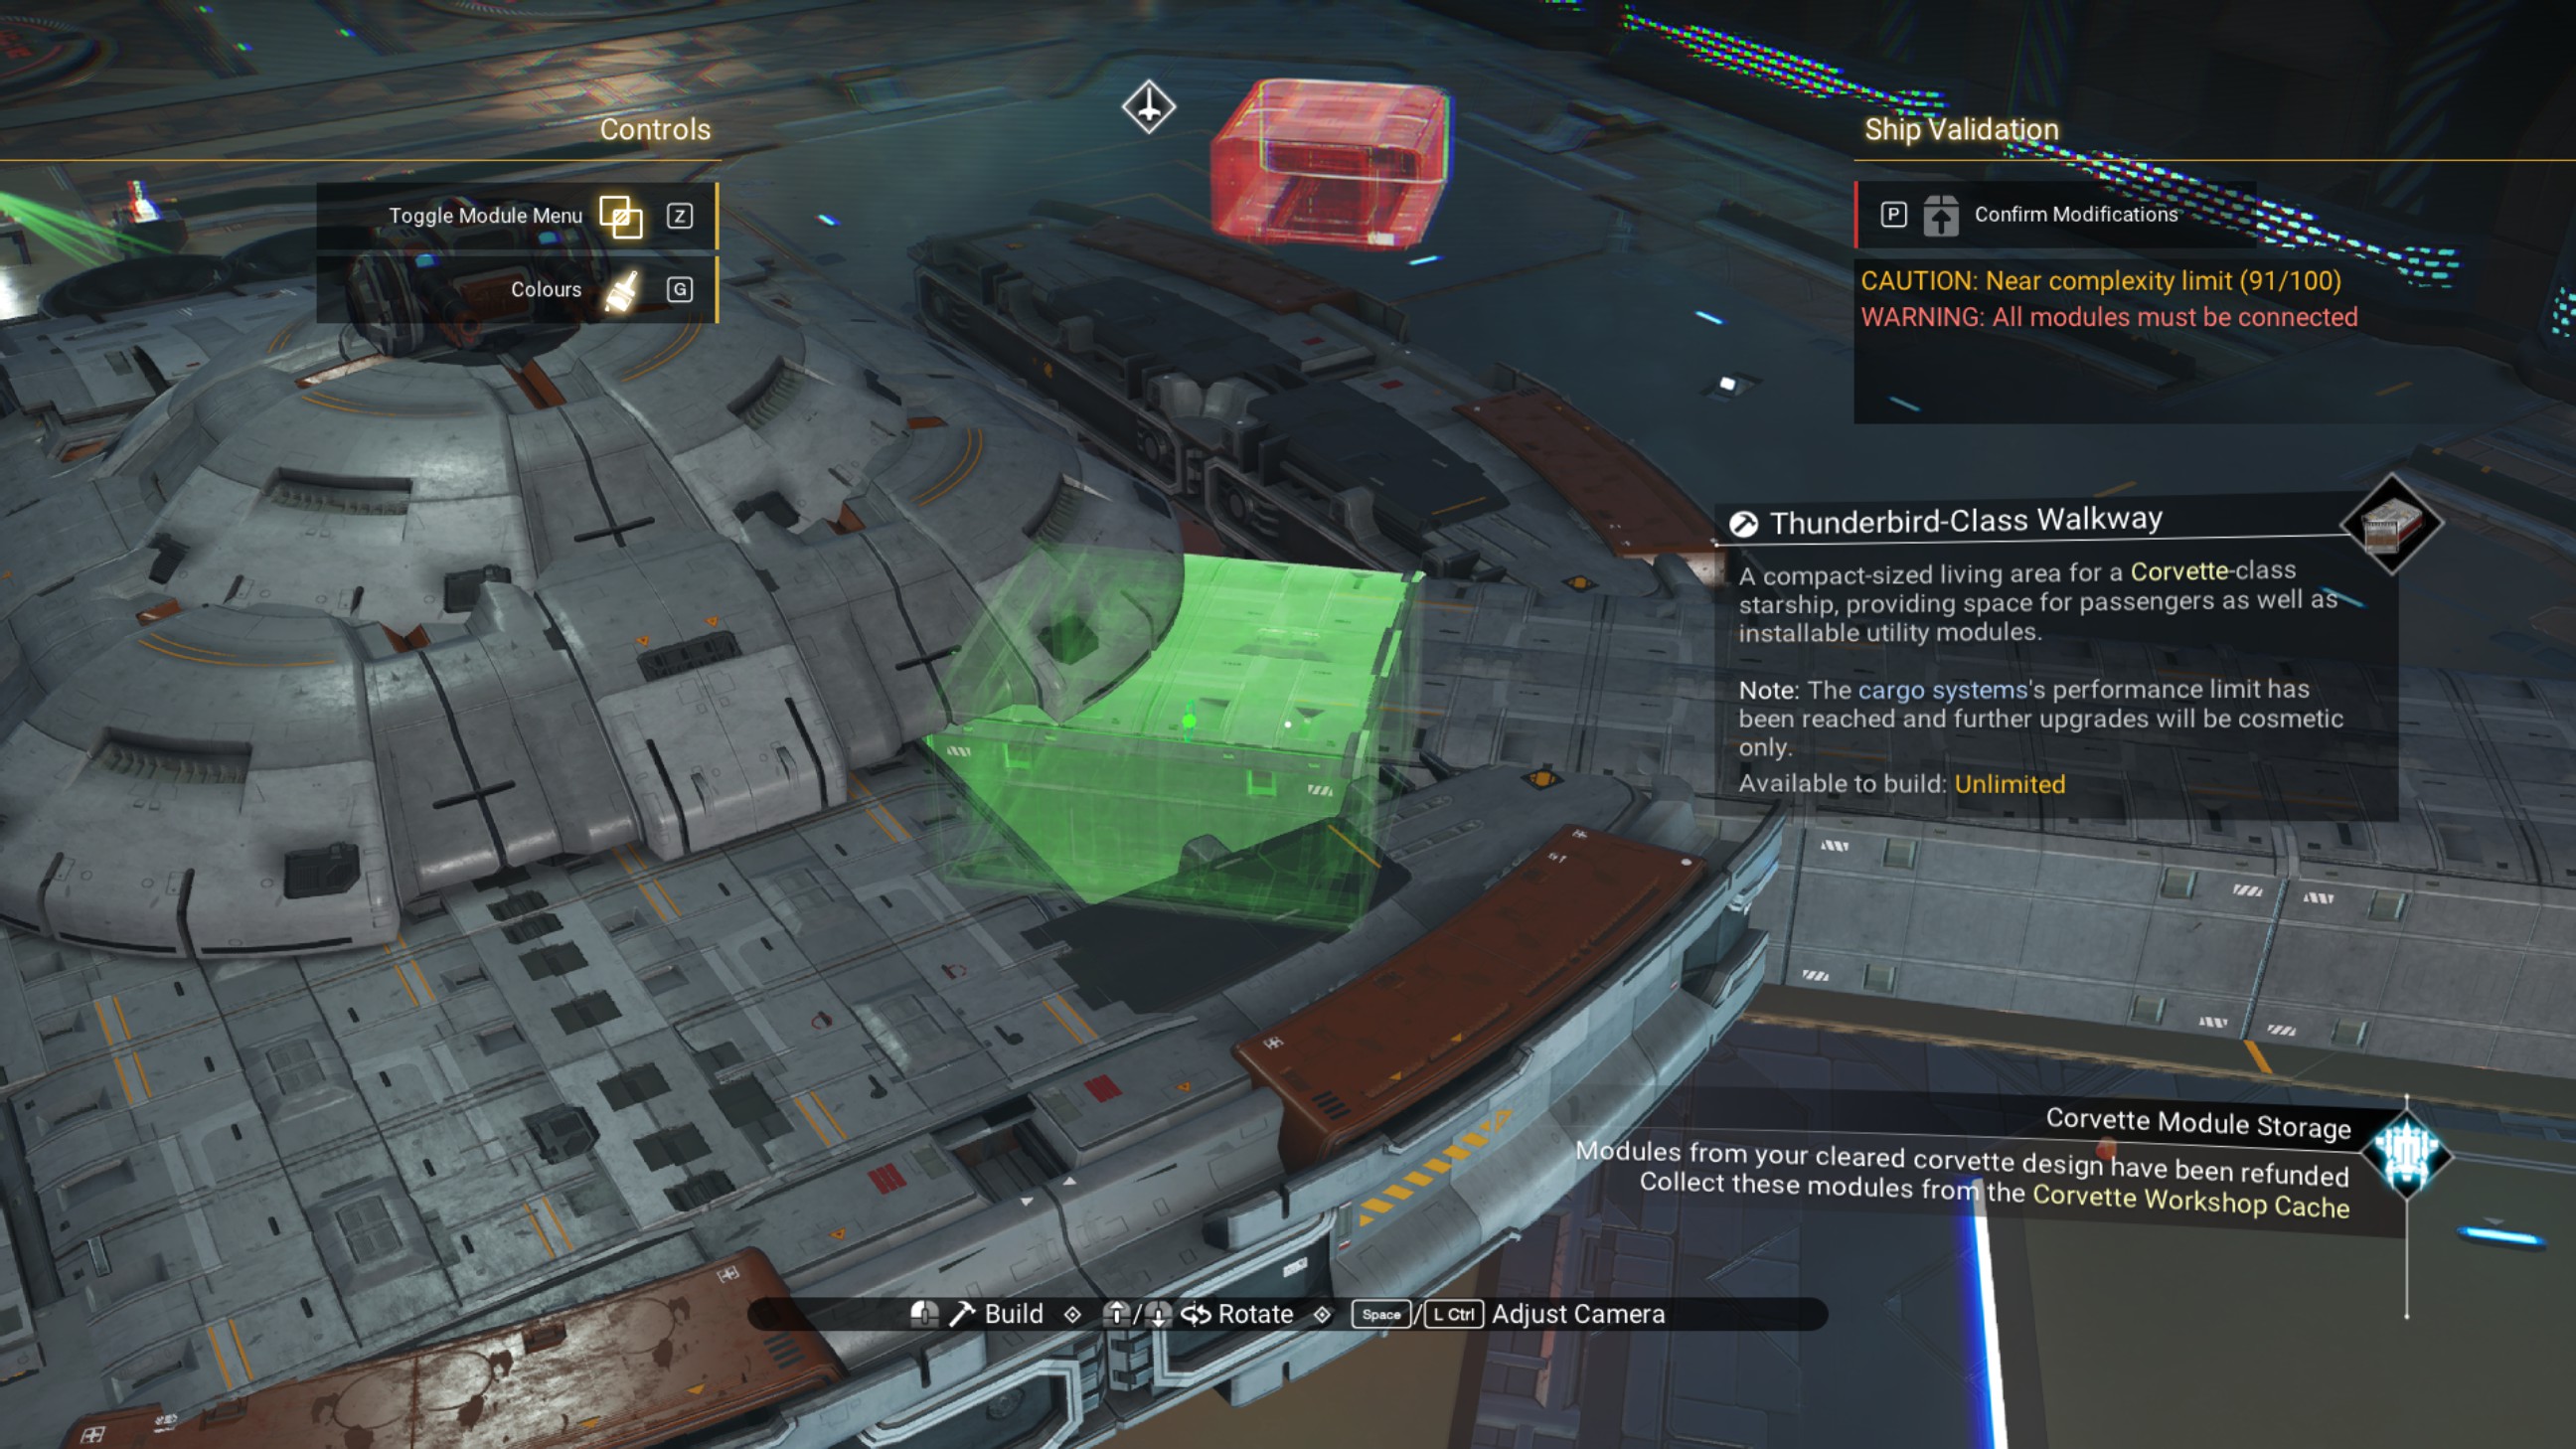
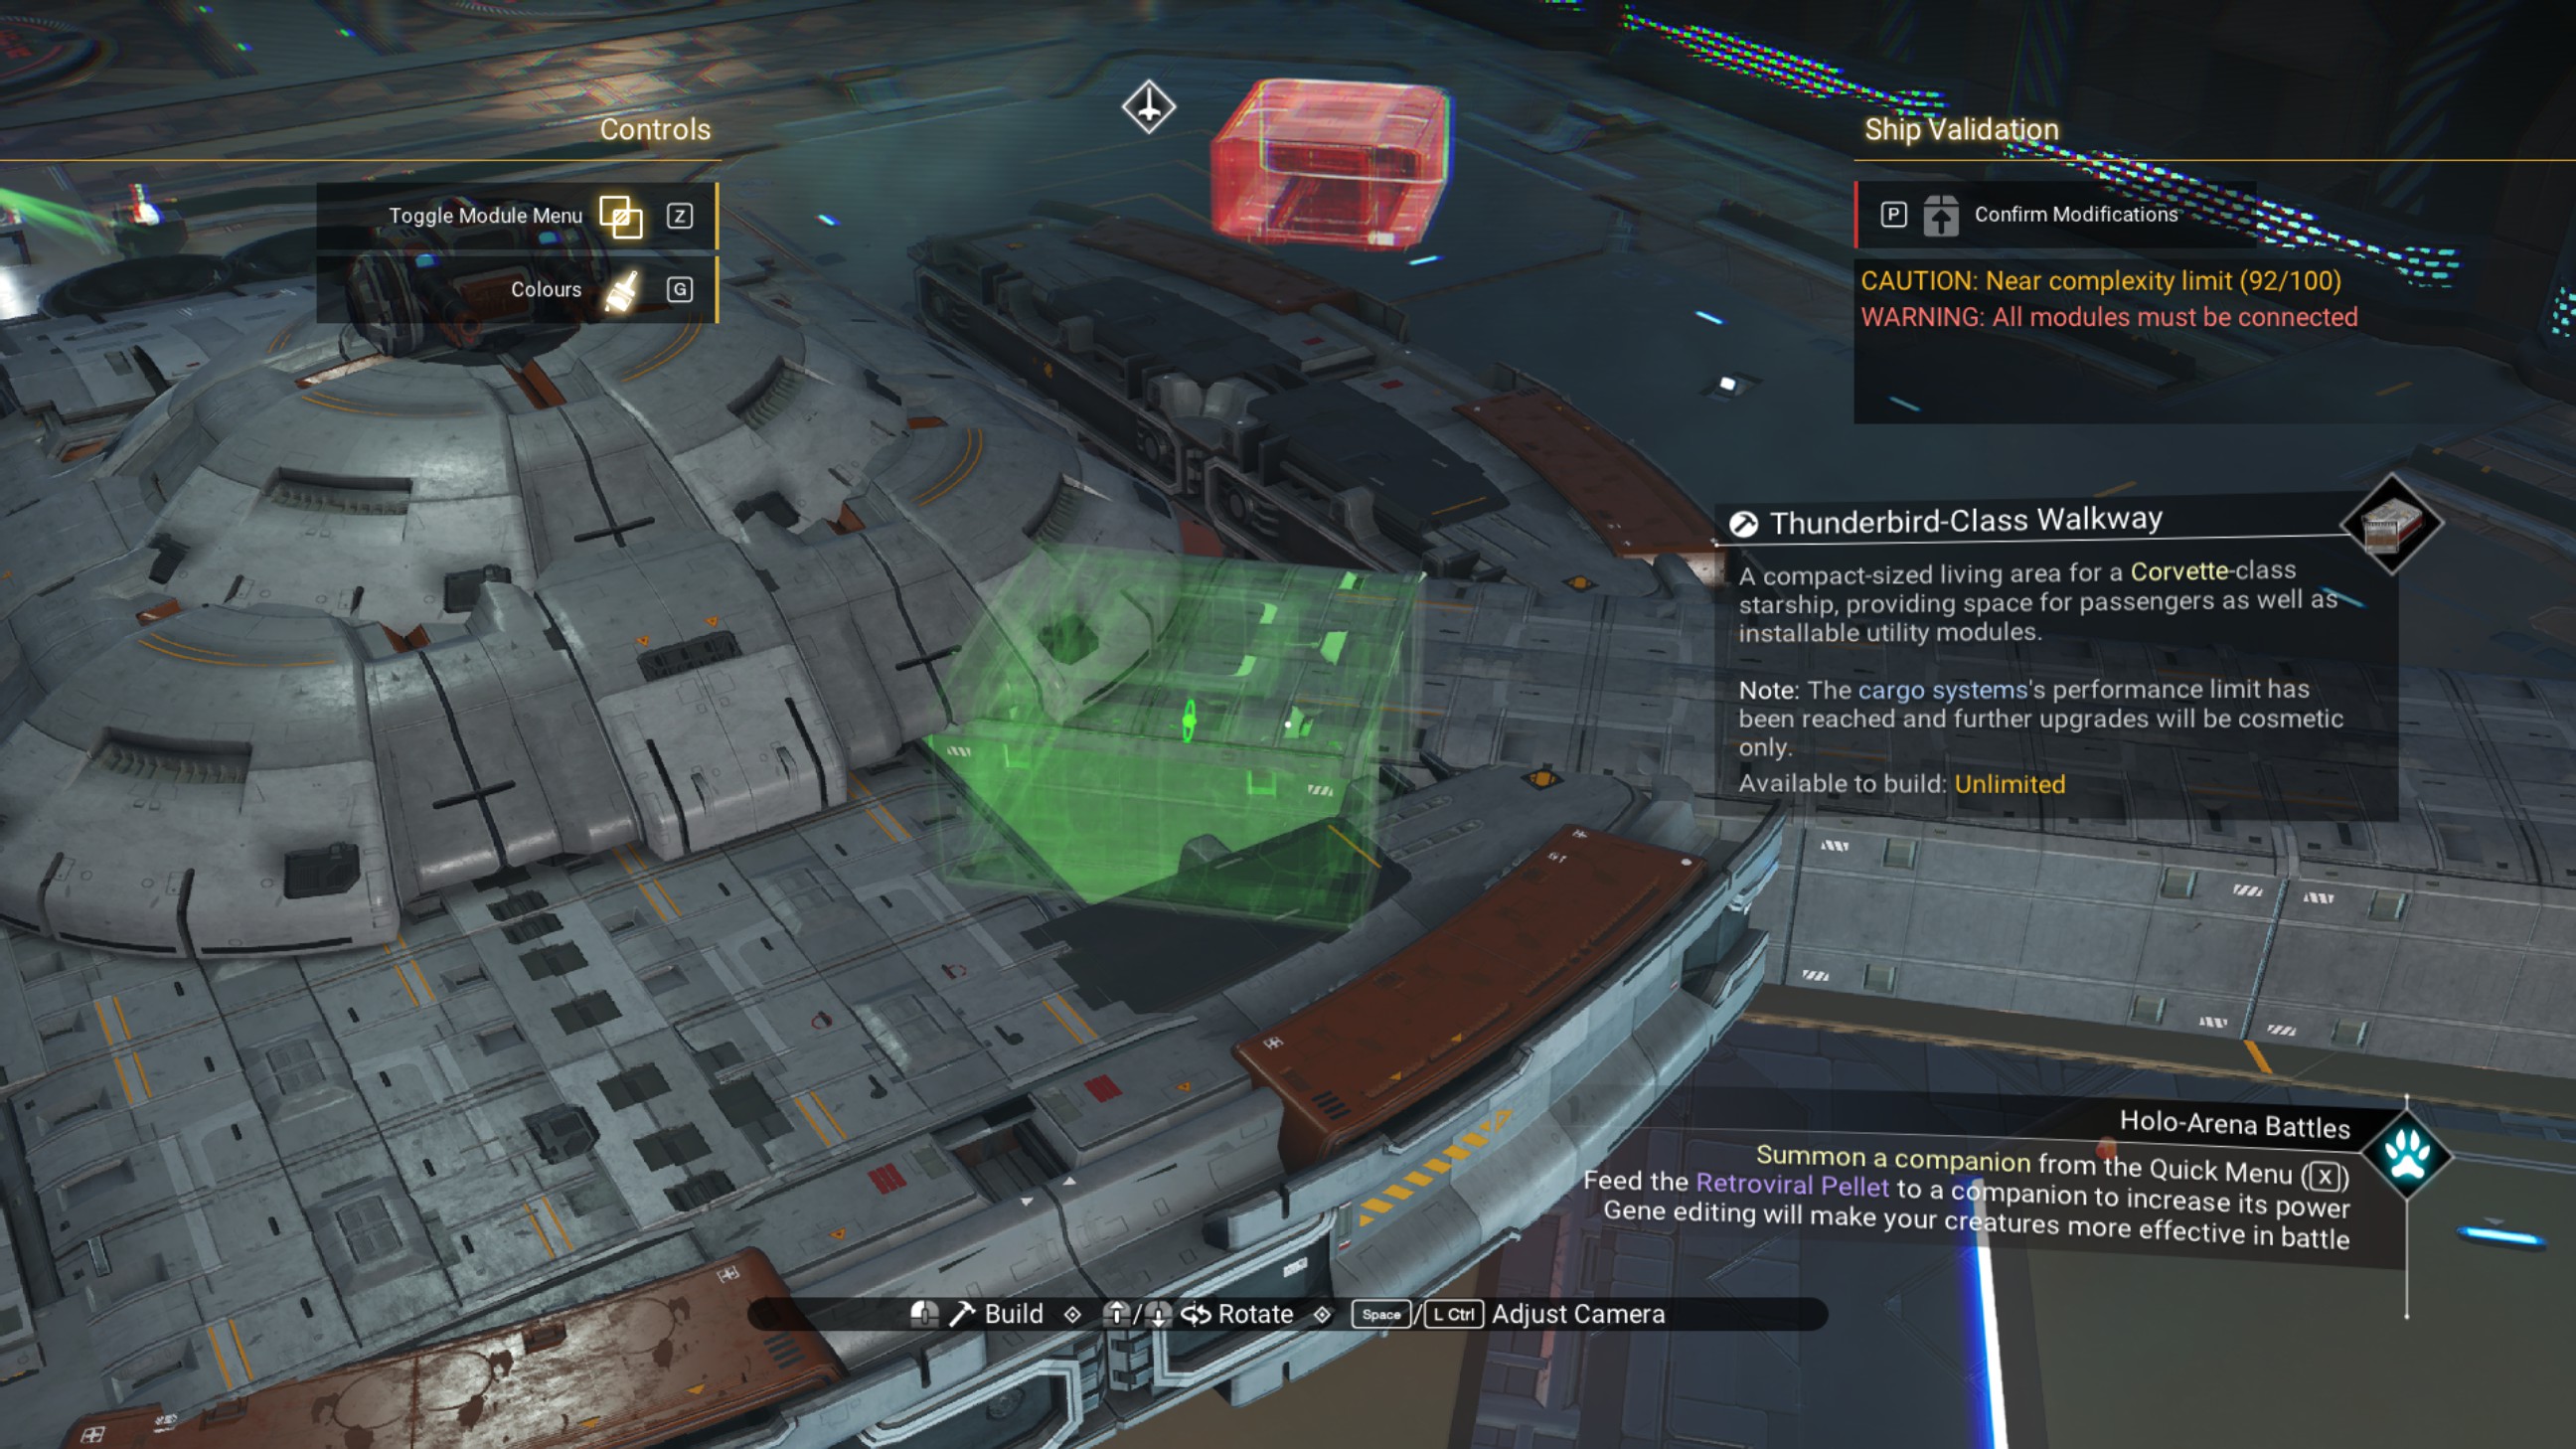
Carefully, delete the middle walkways we just placed. Be sure to leave the final set of overlapped walkways, and leave the original sets just to be safe.
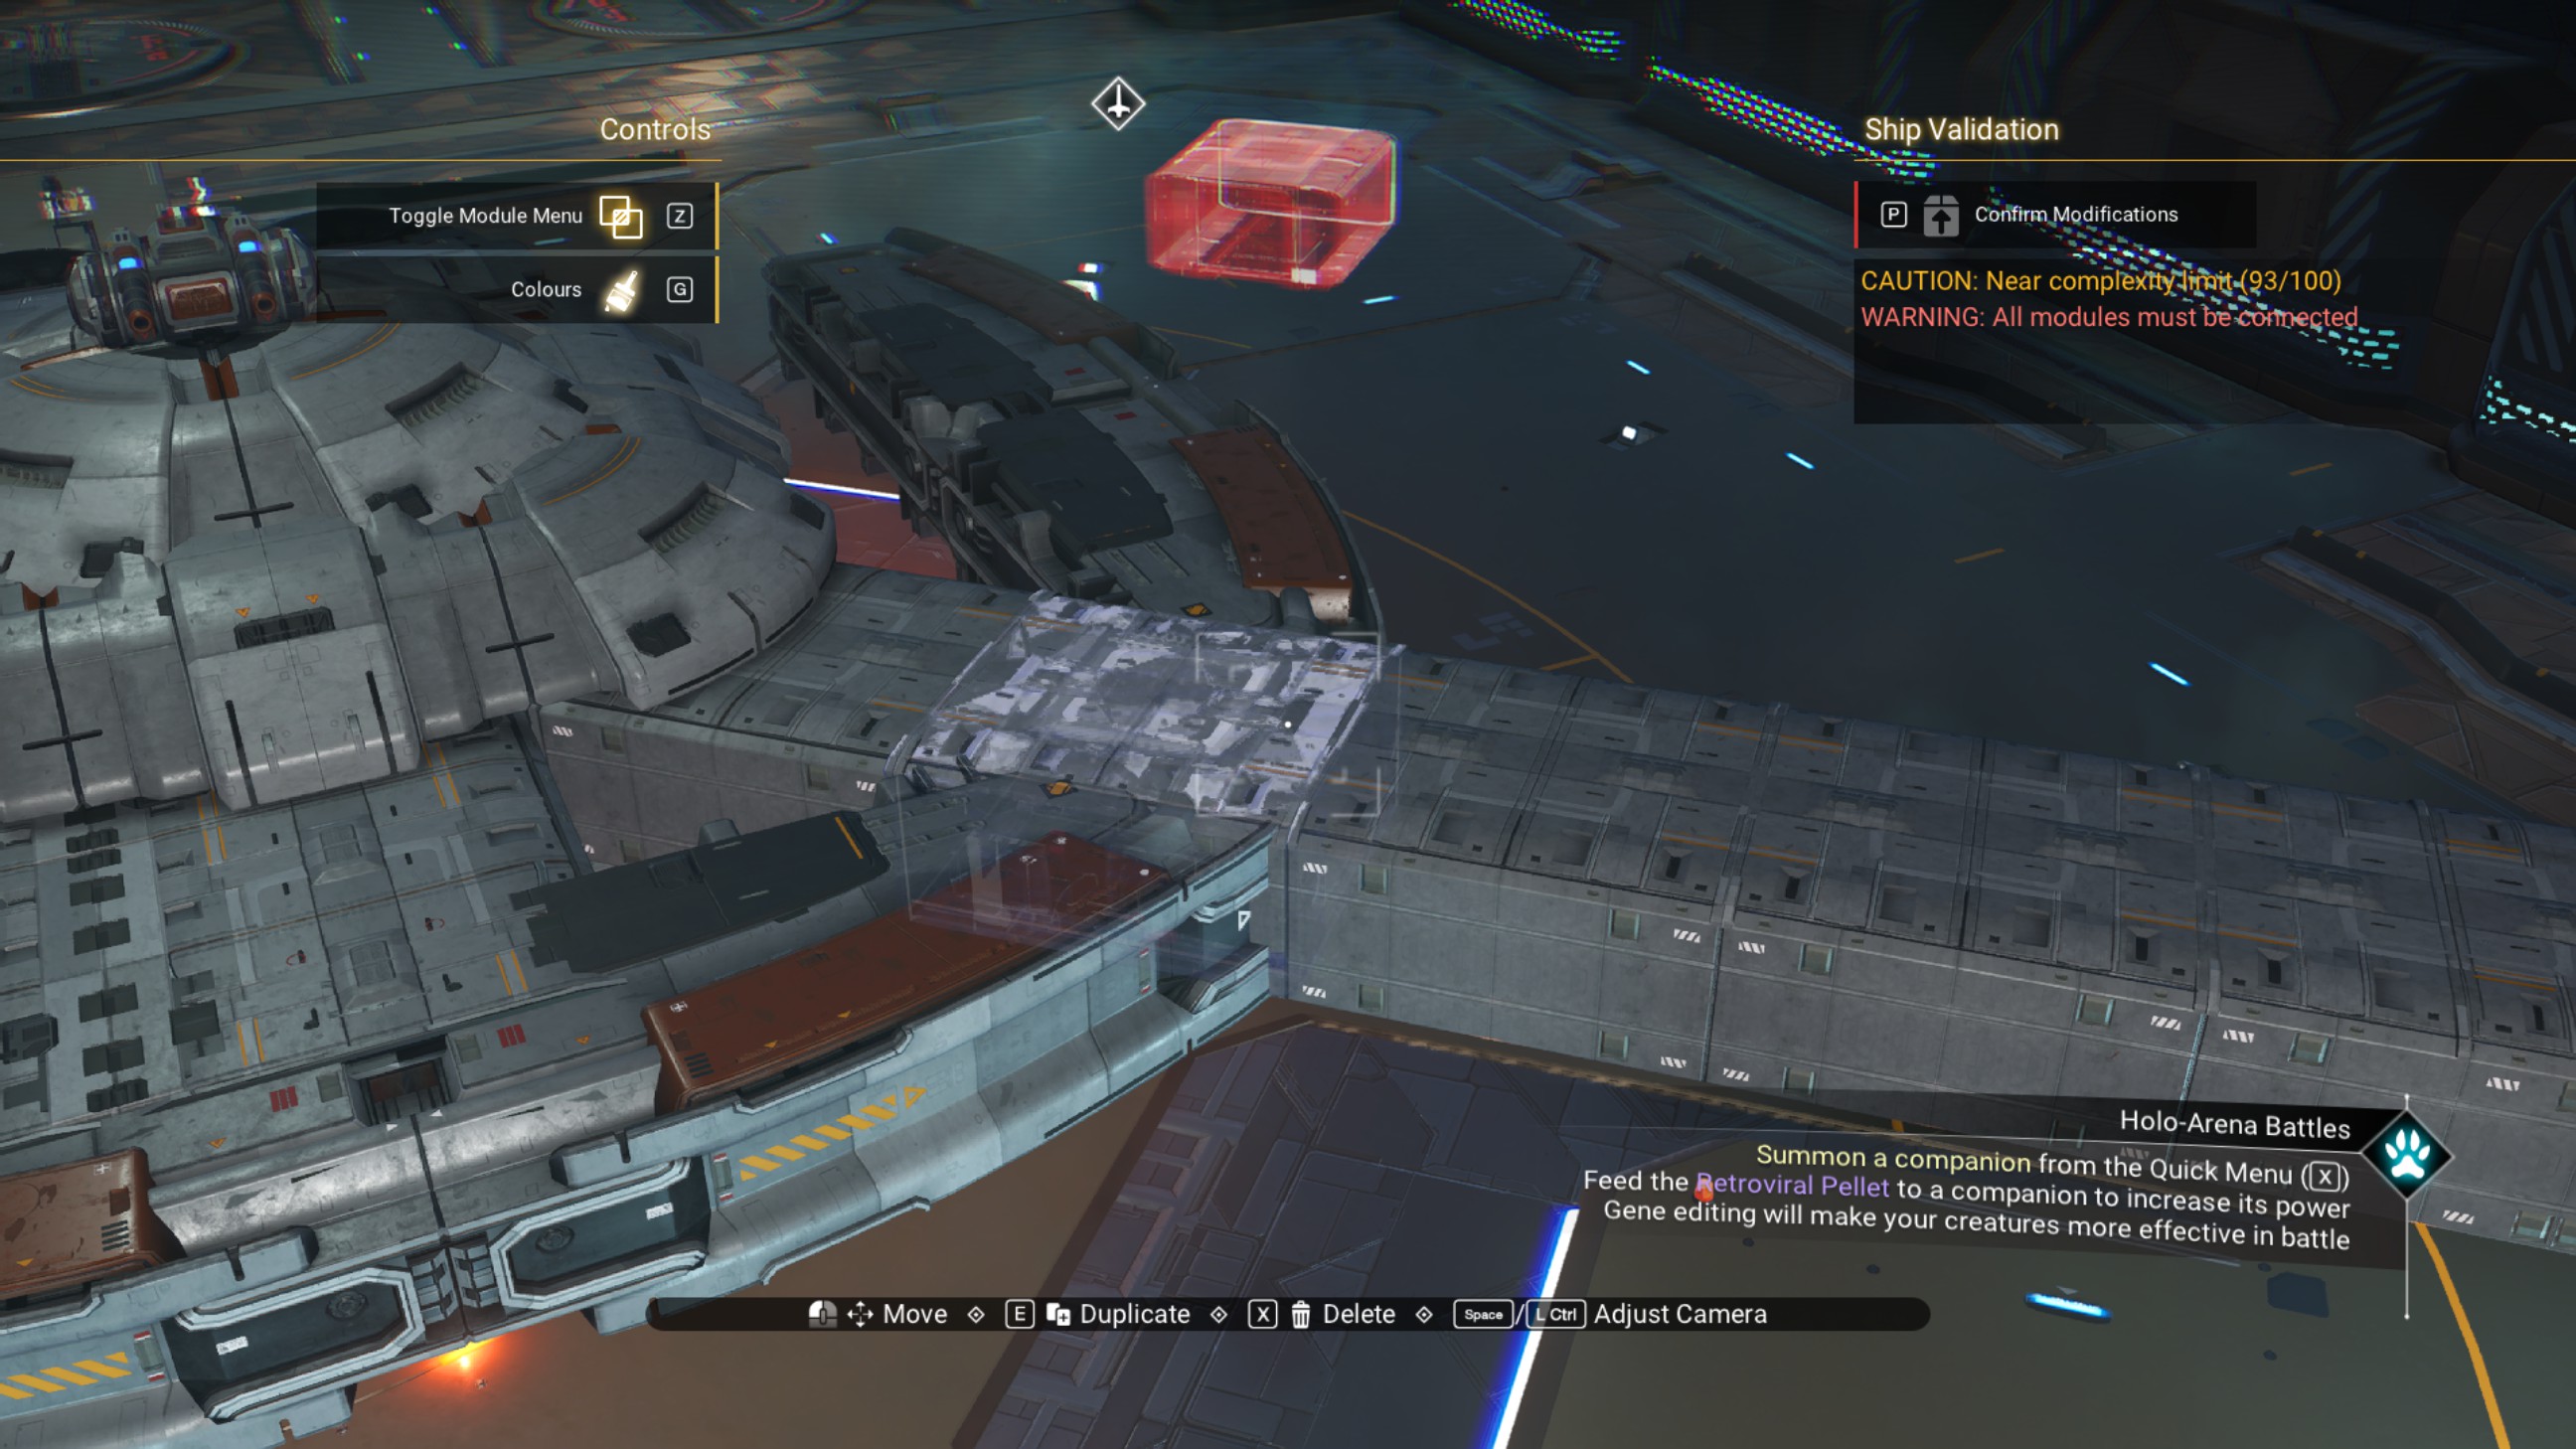
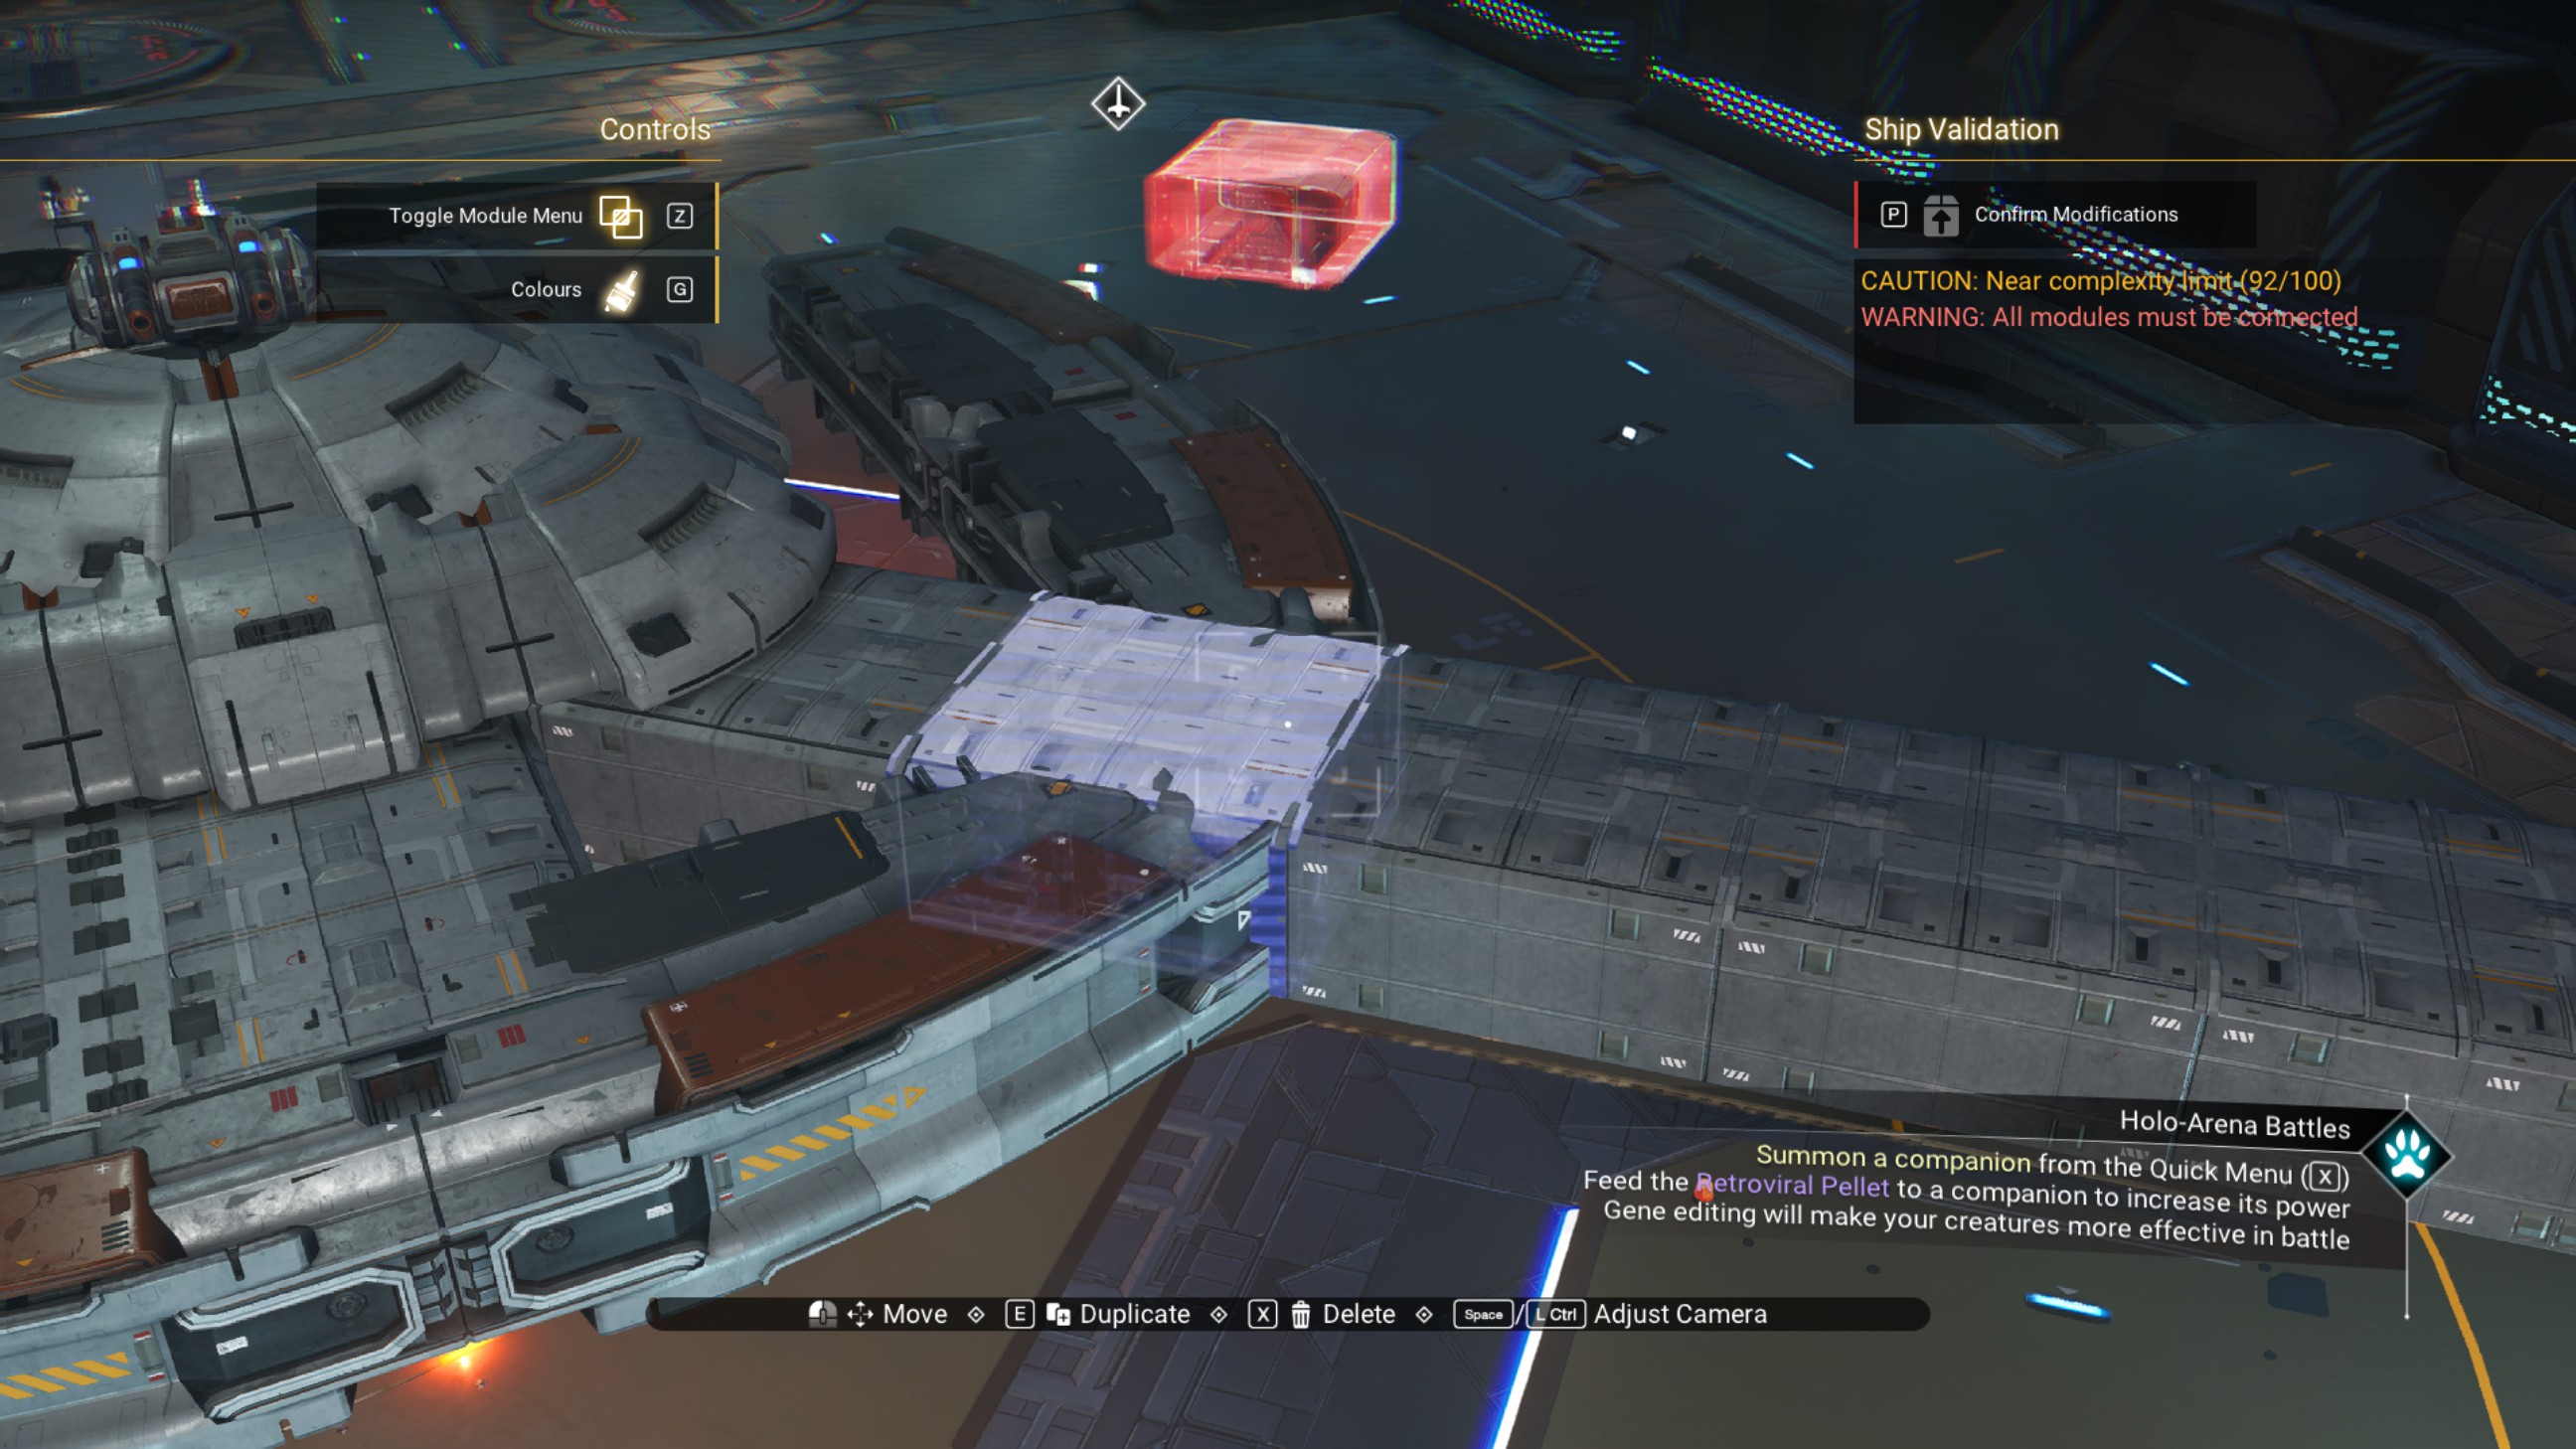
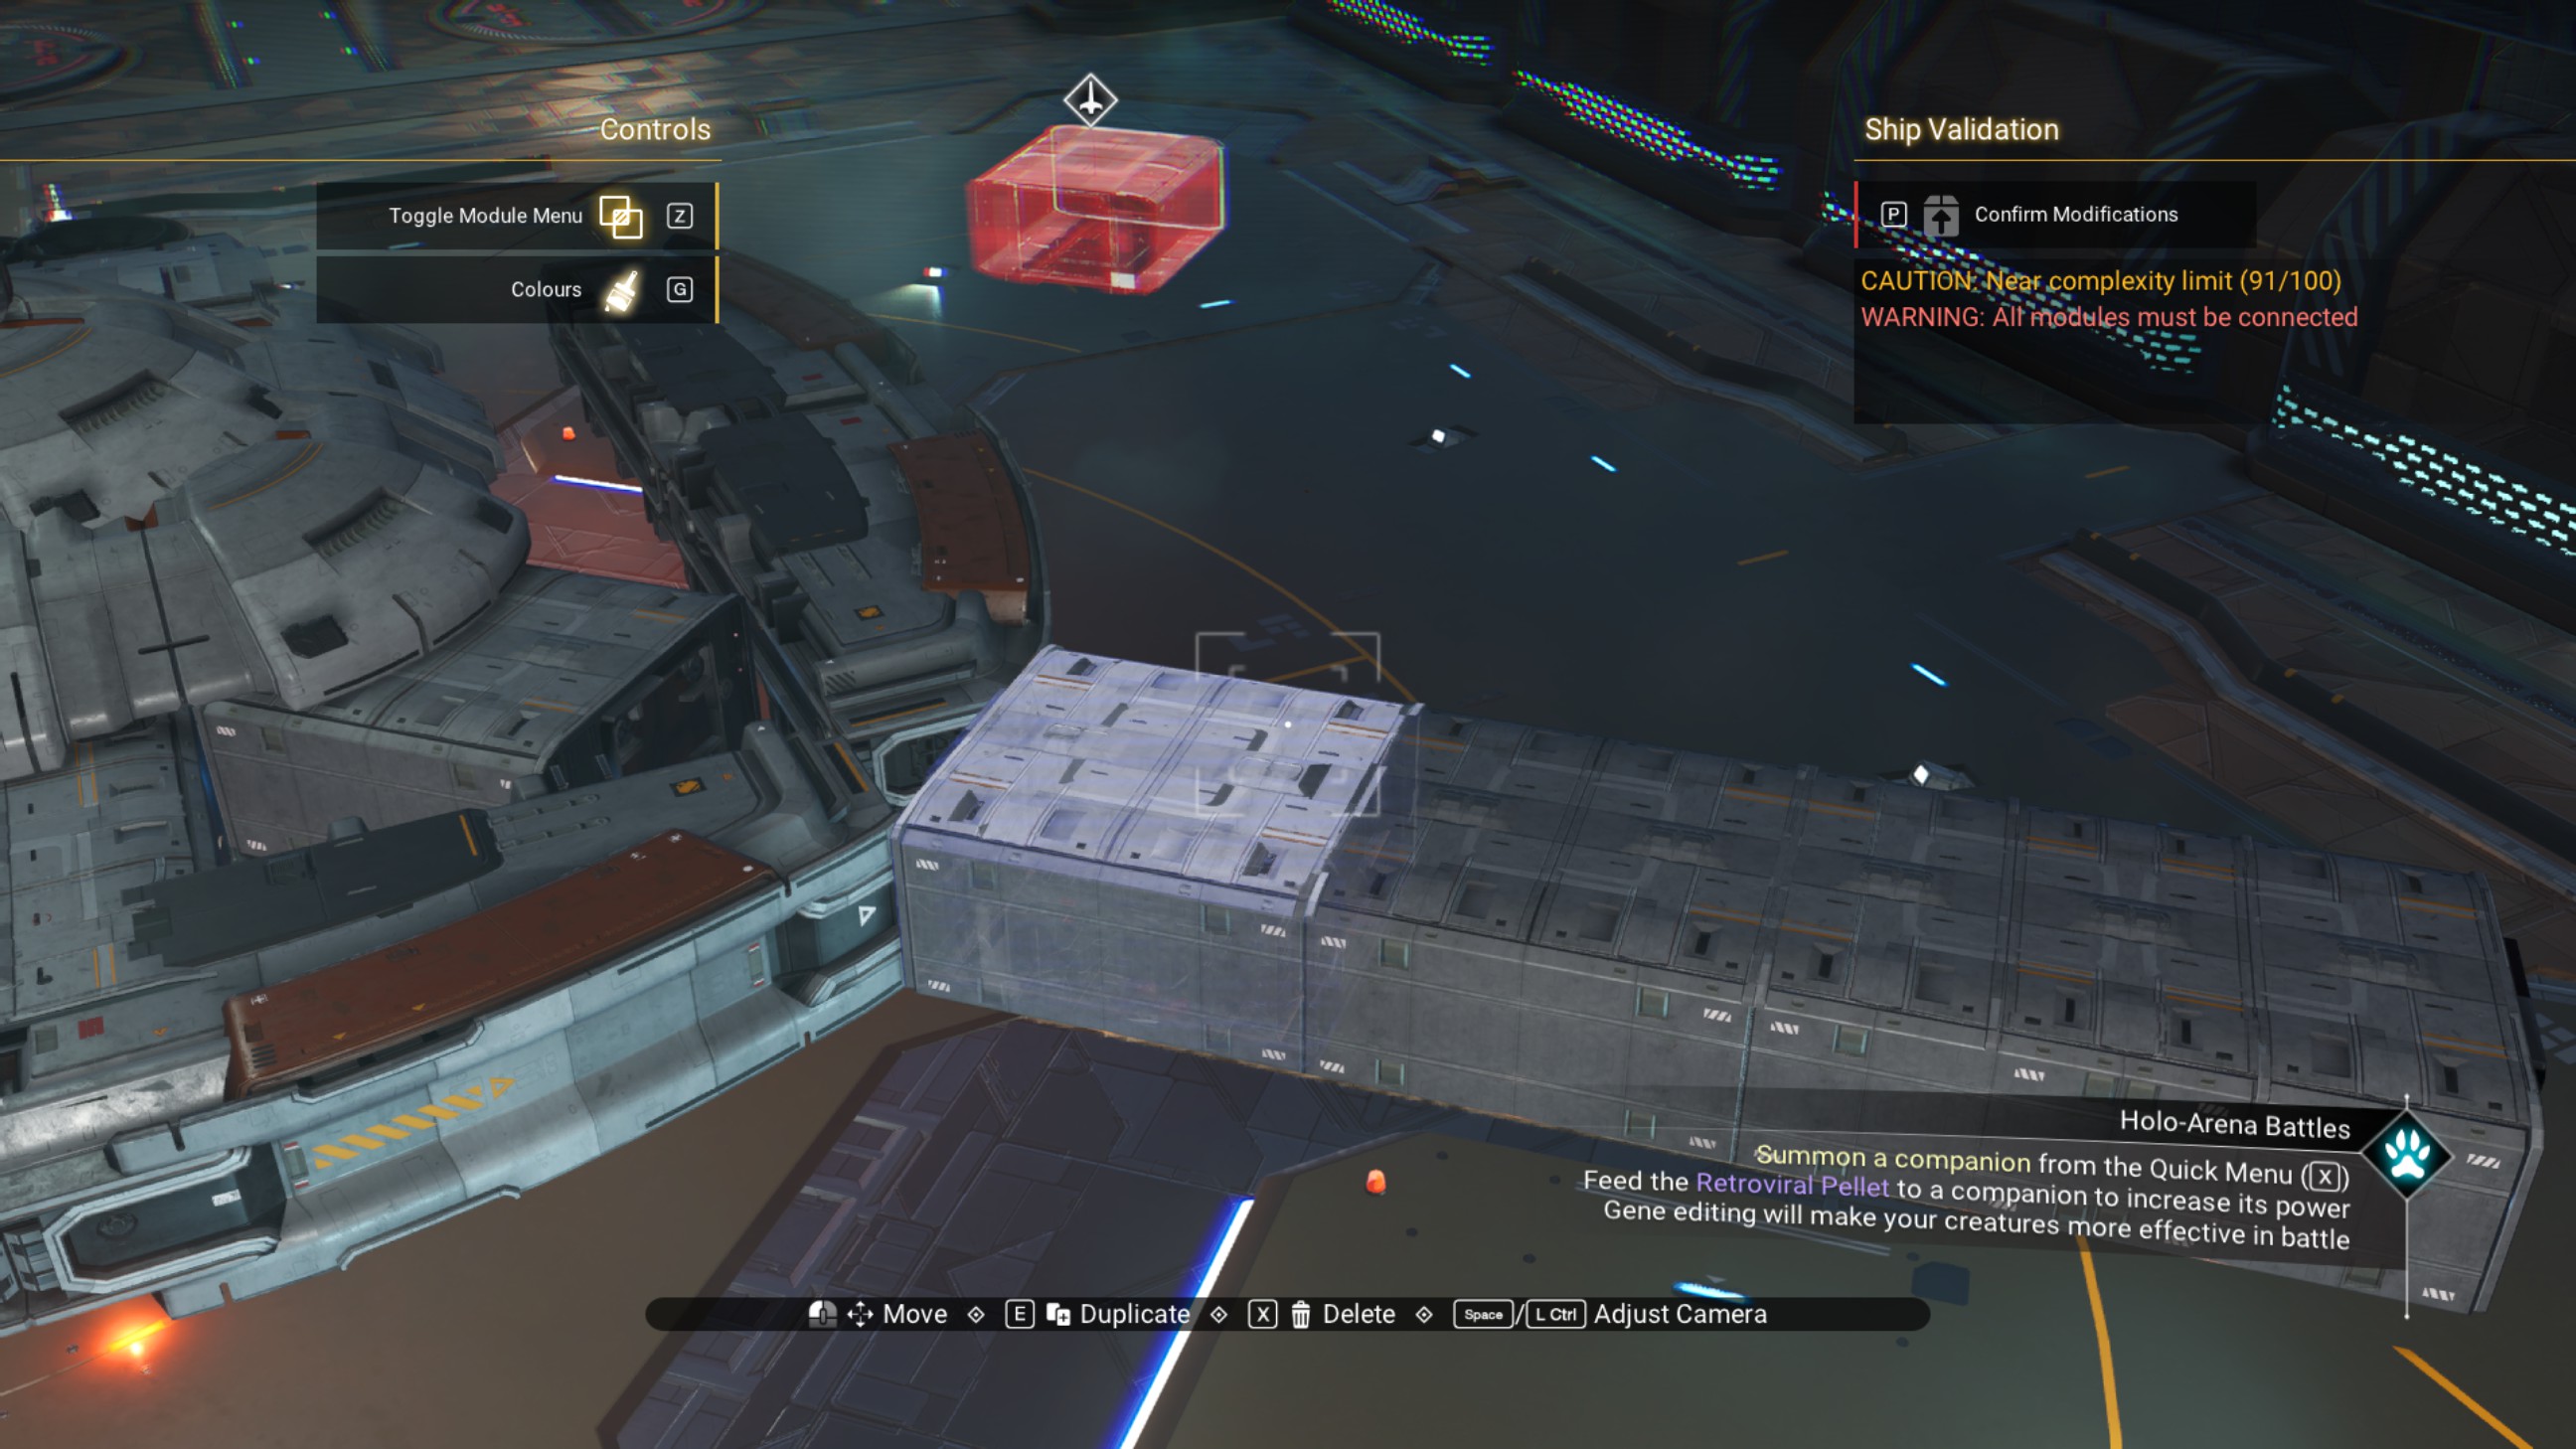
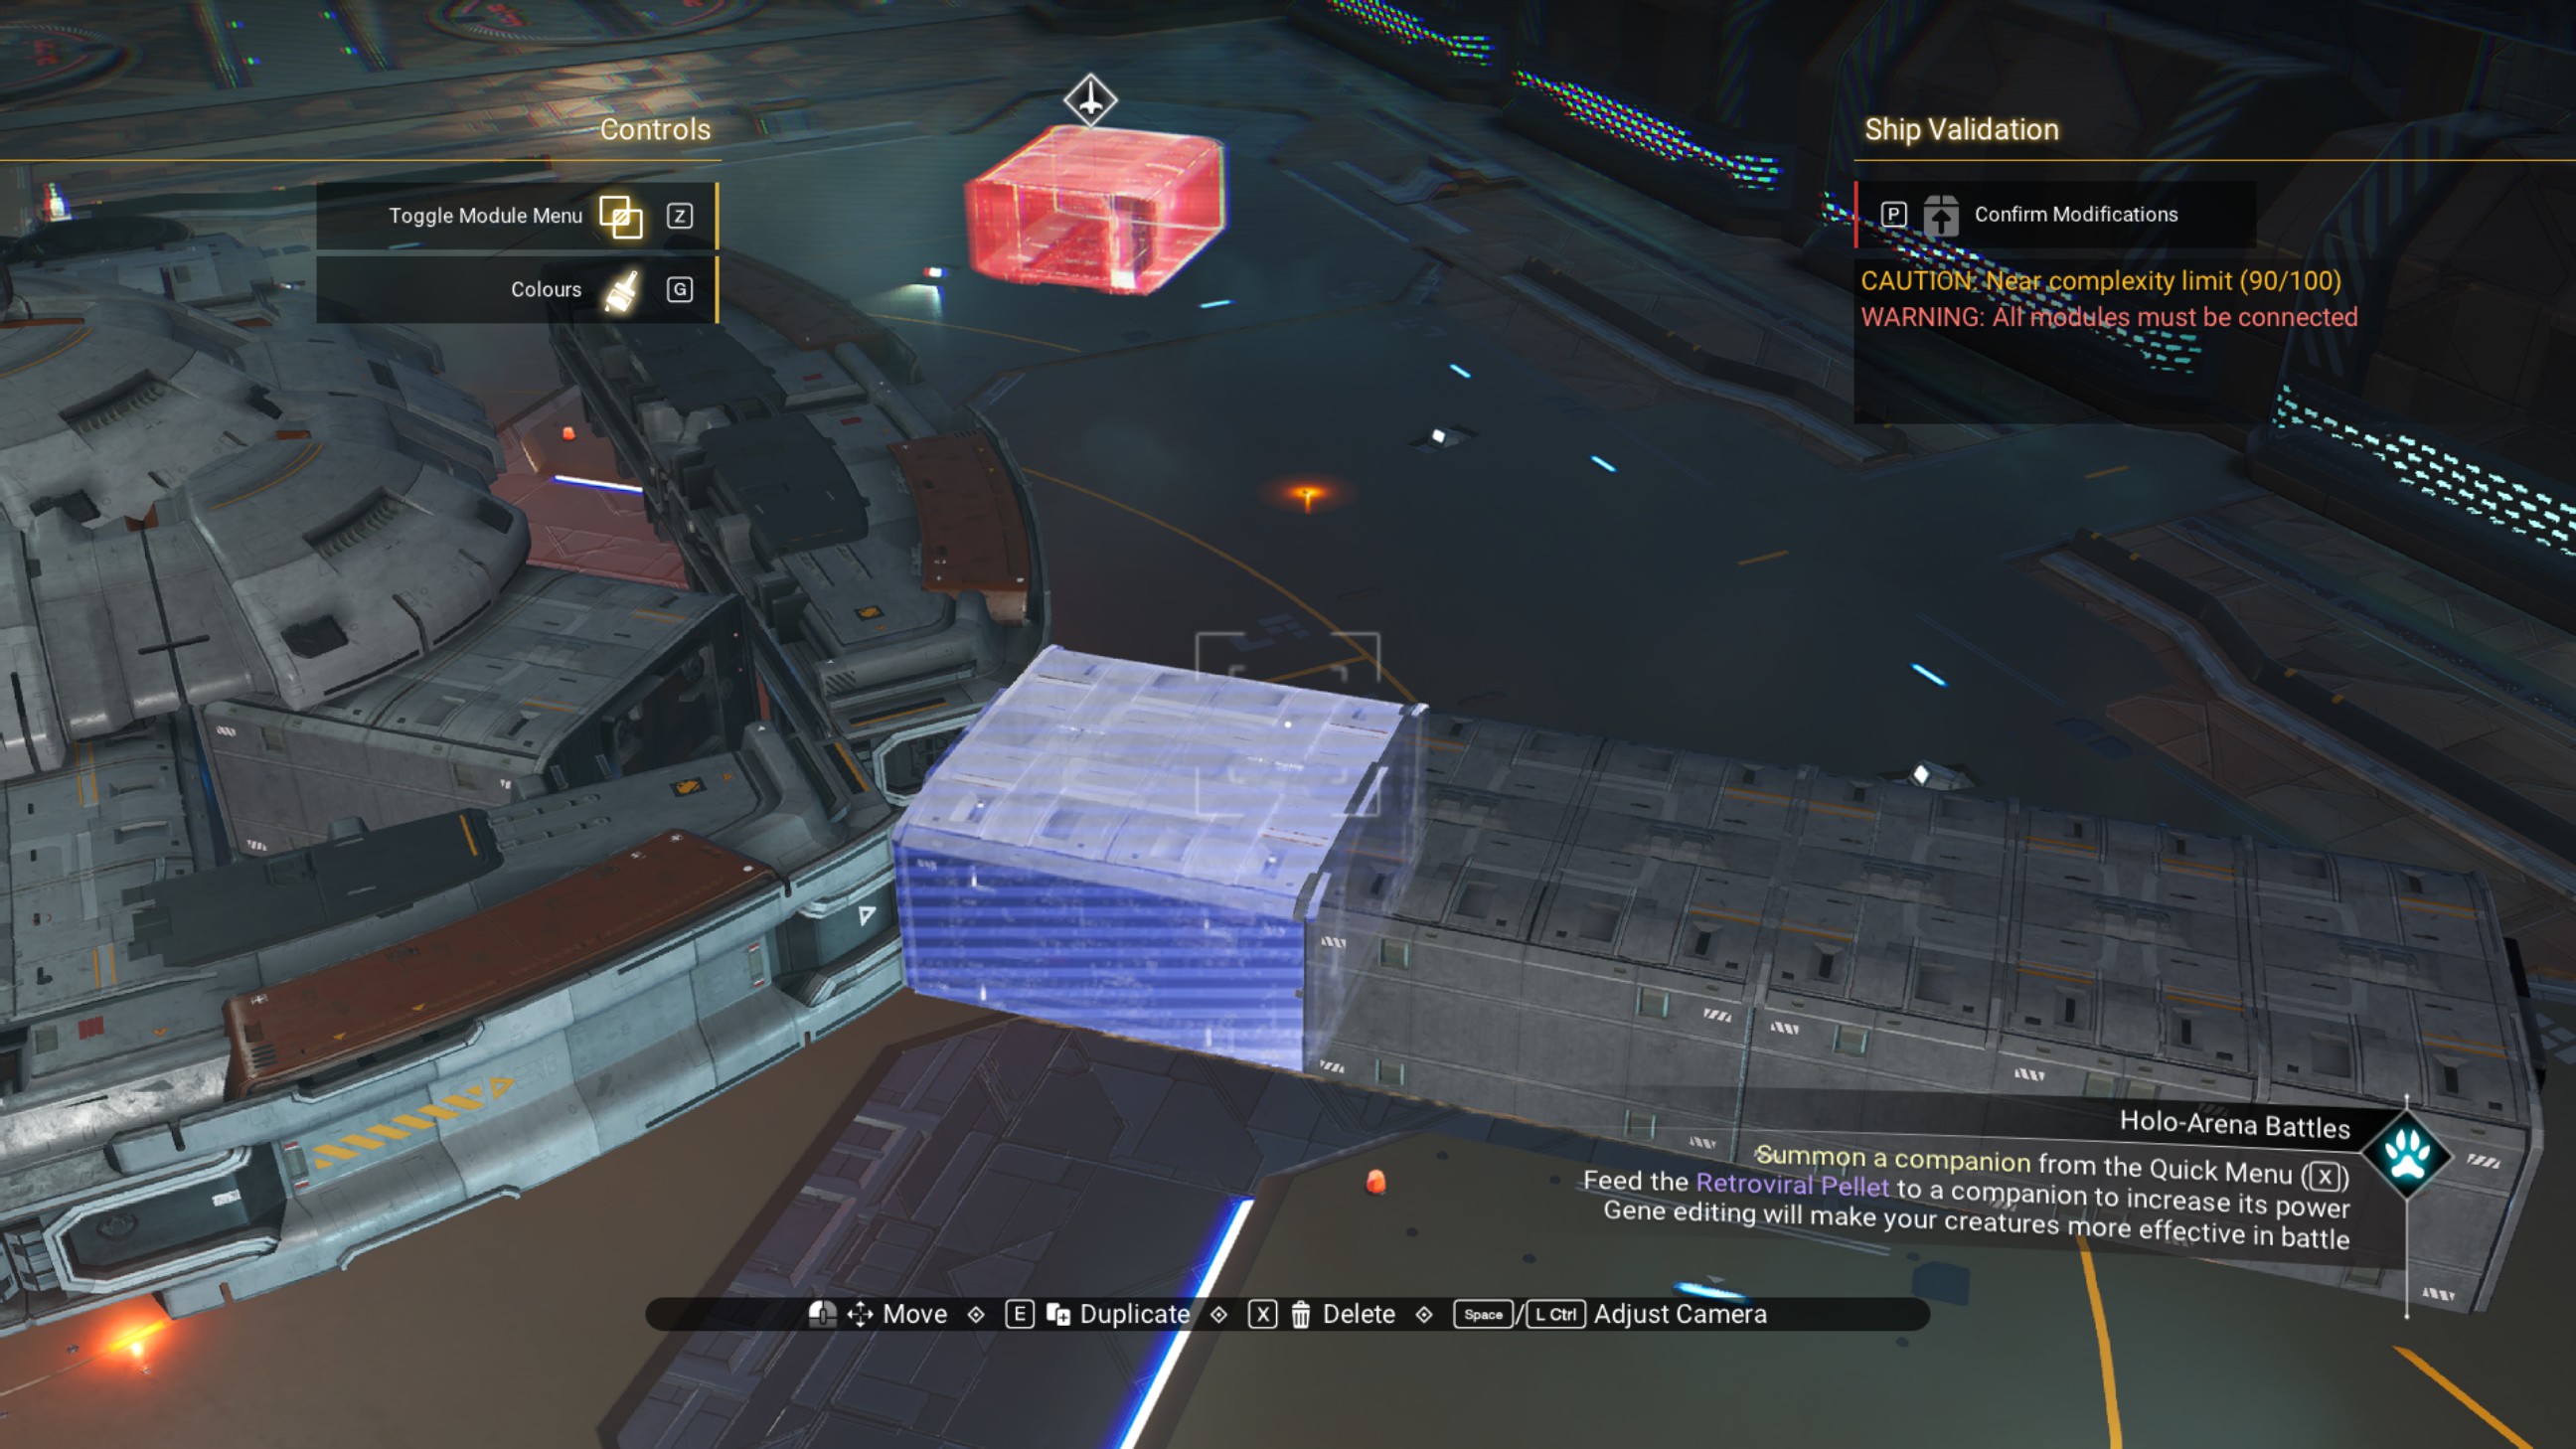
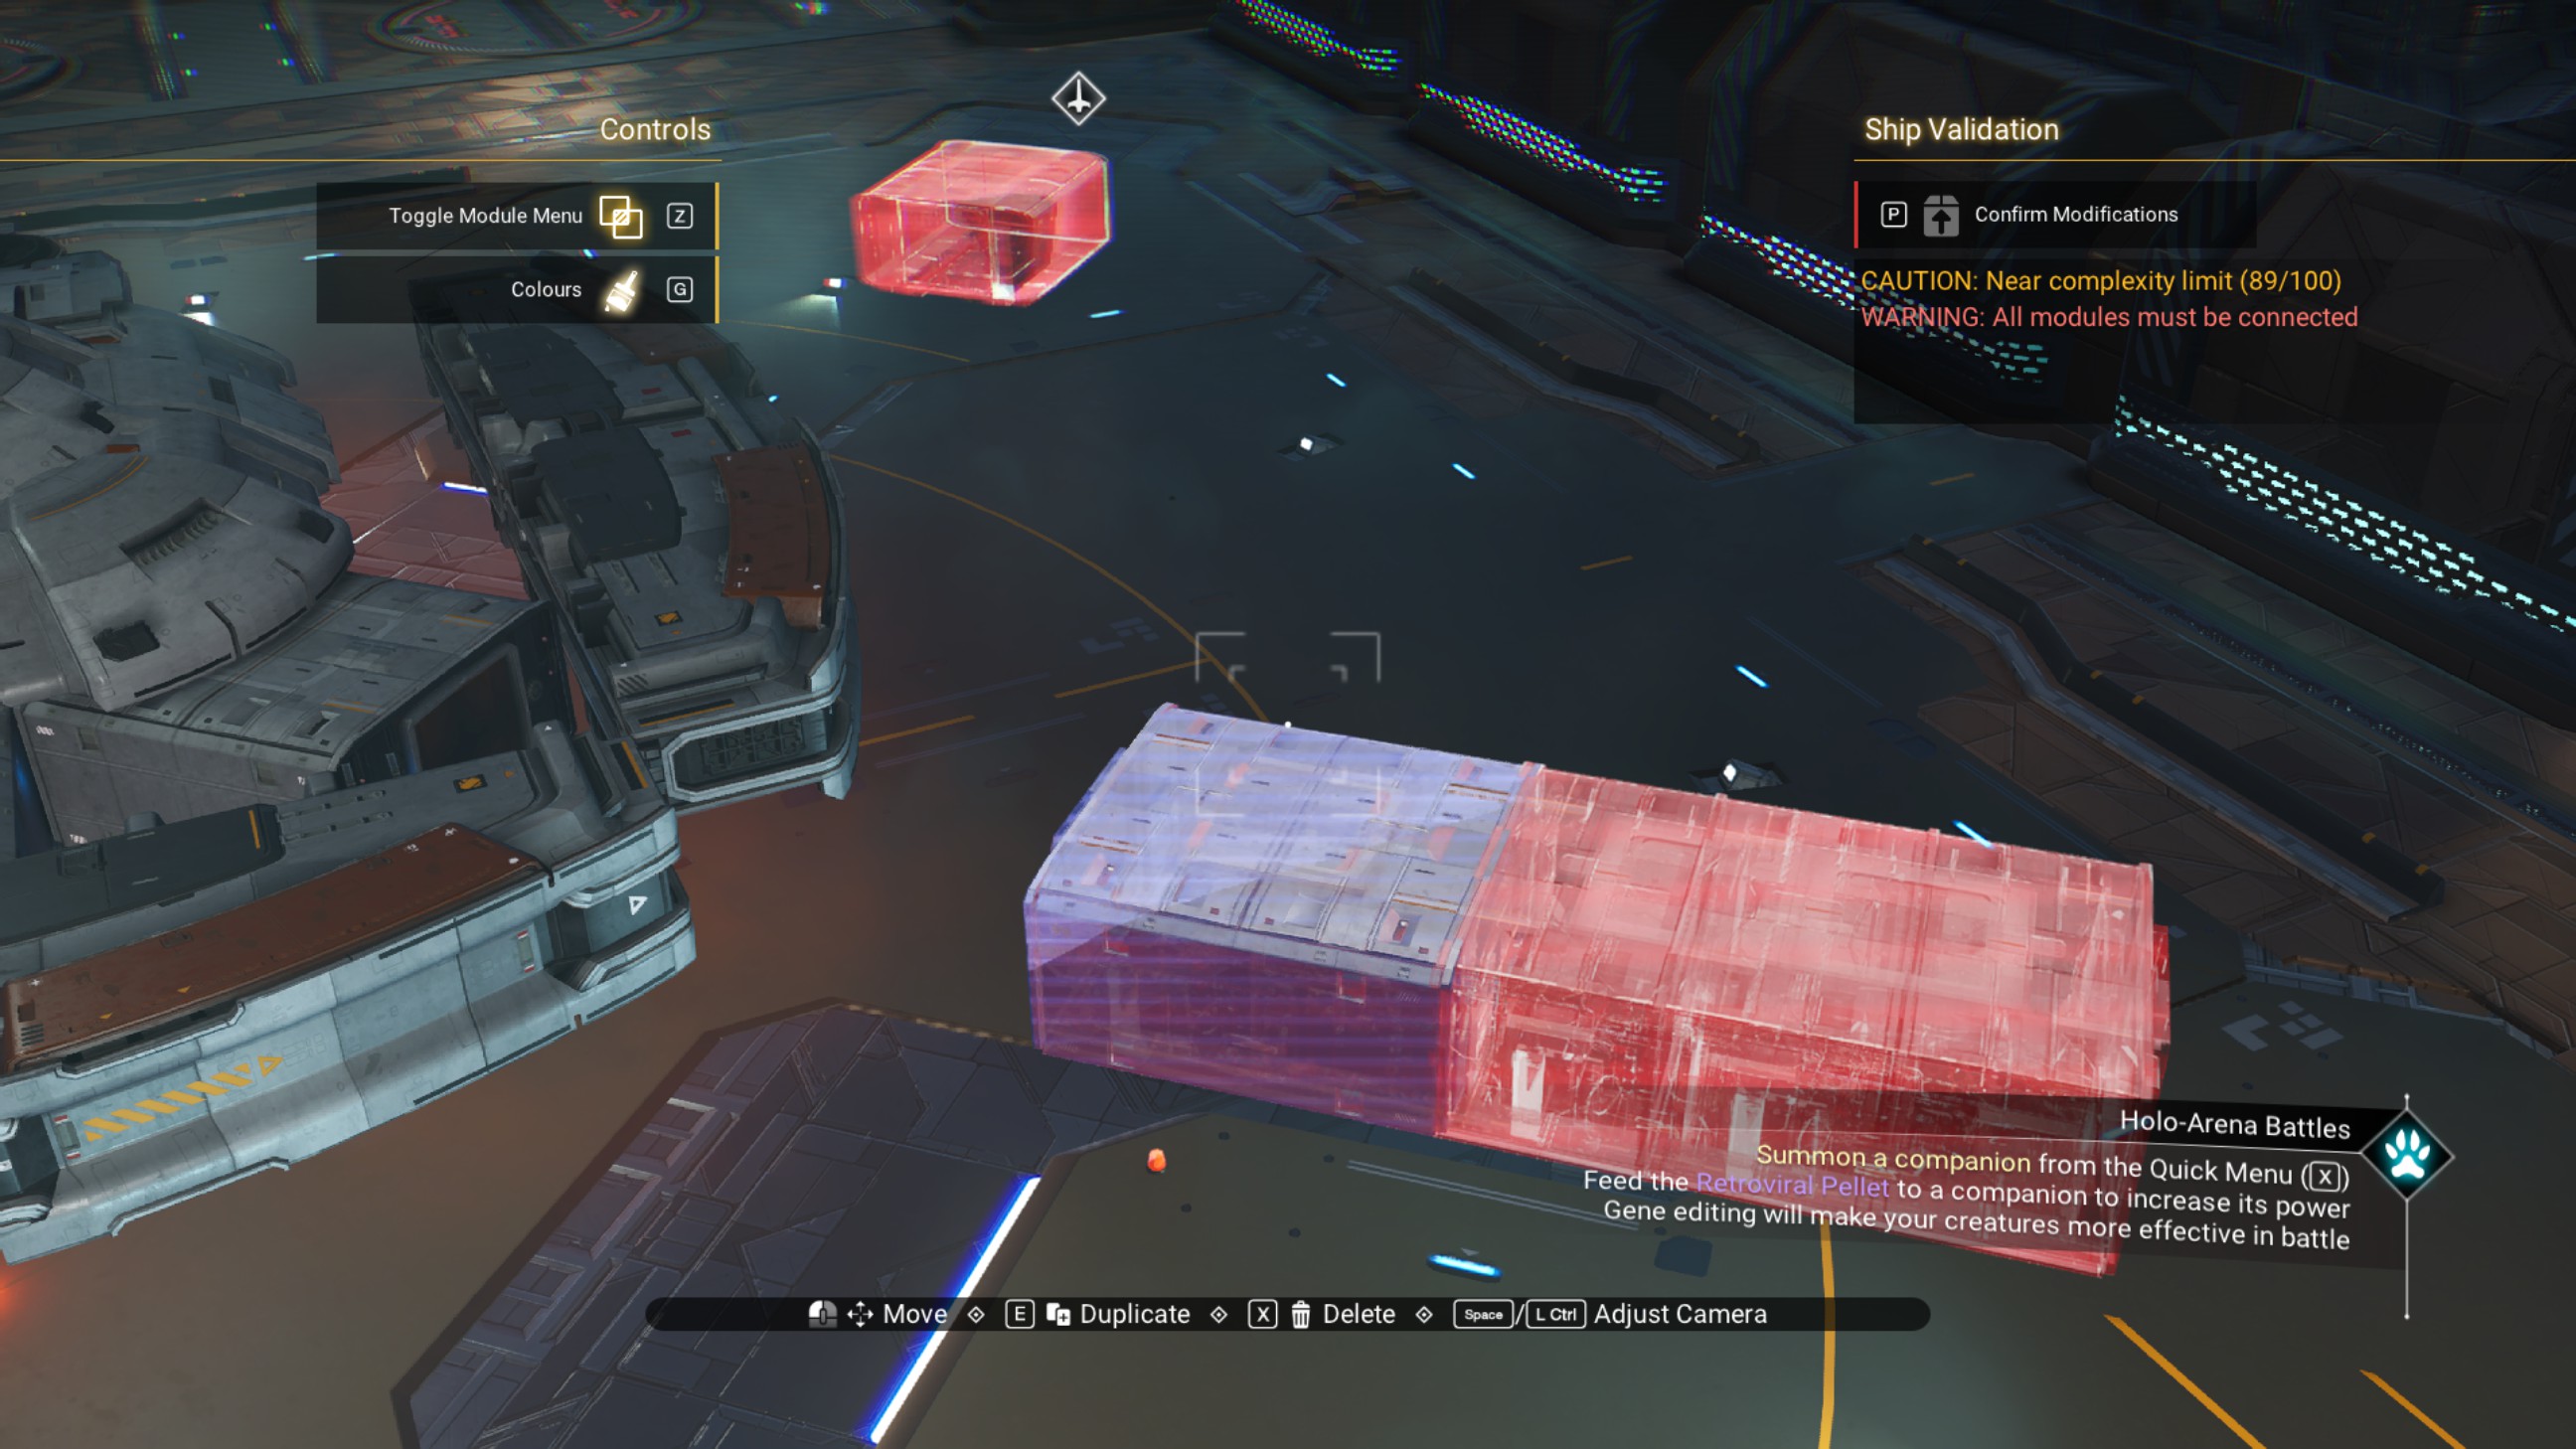
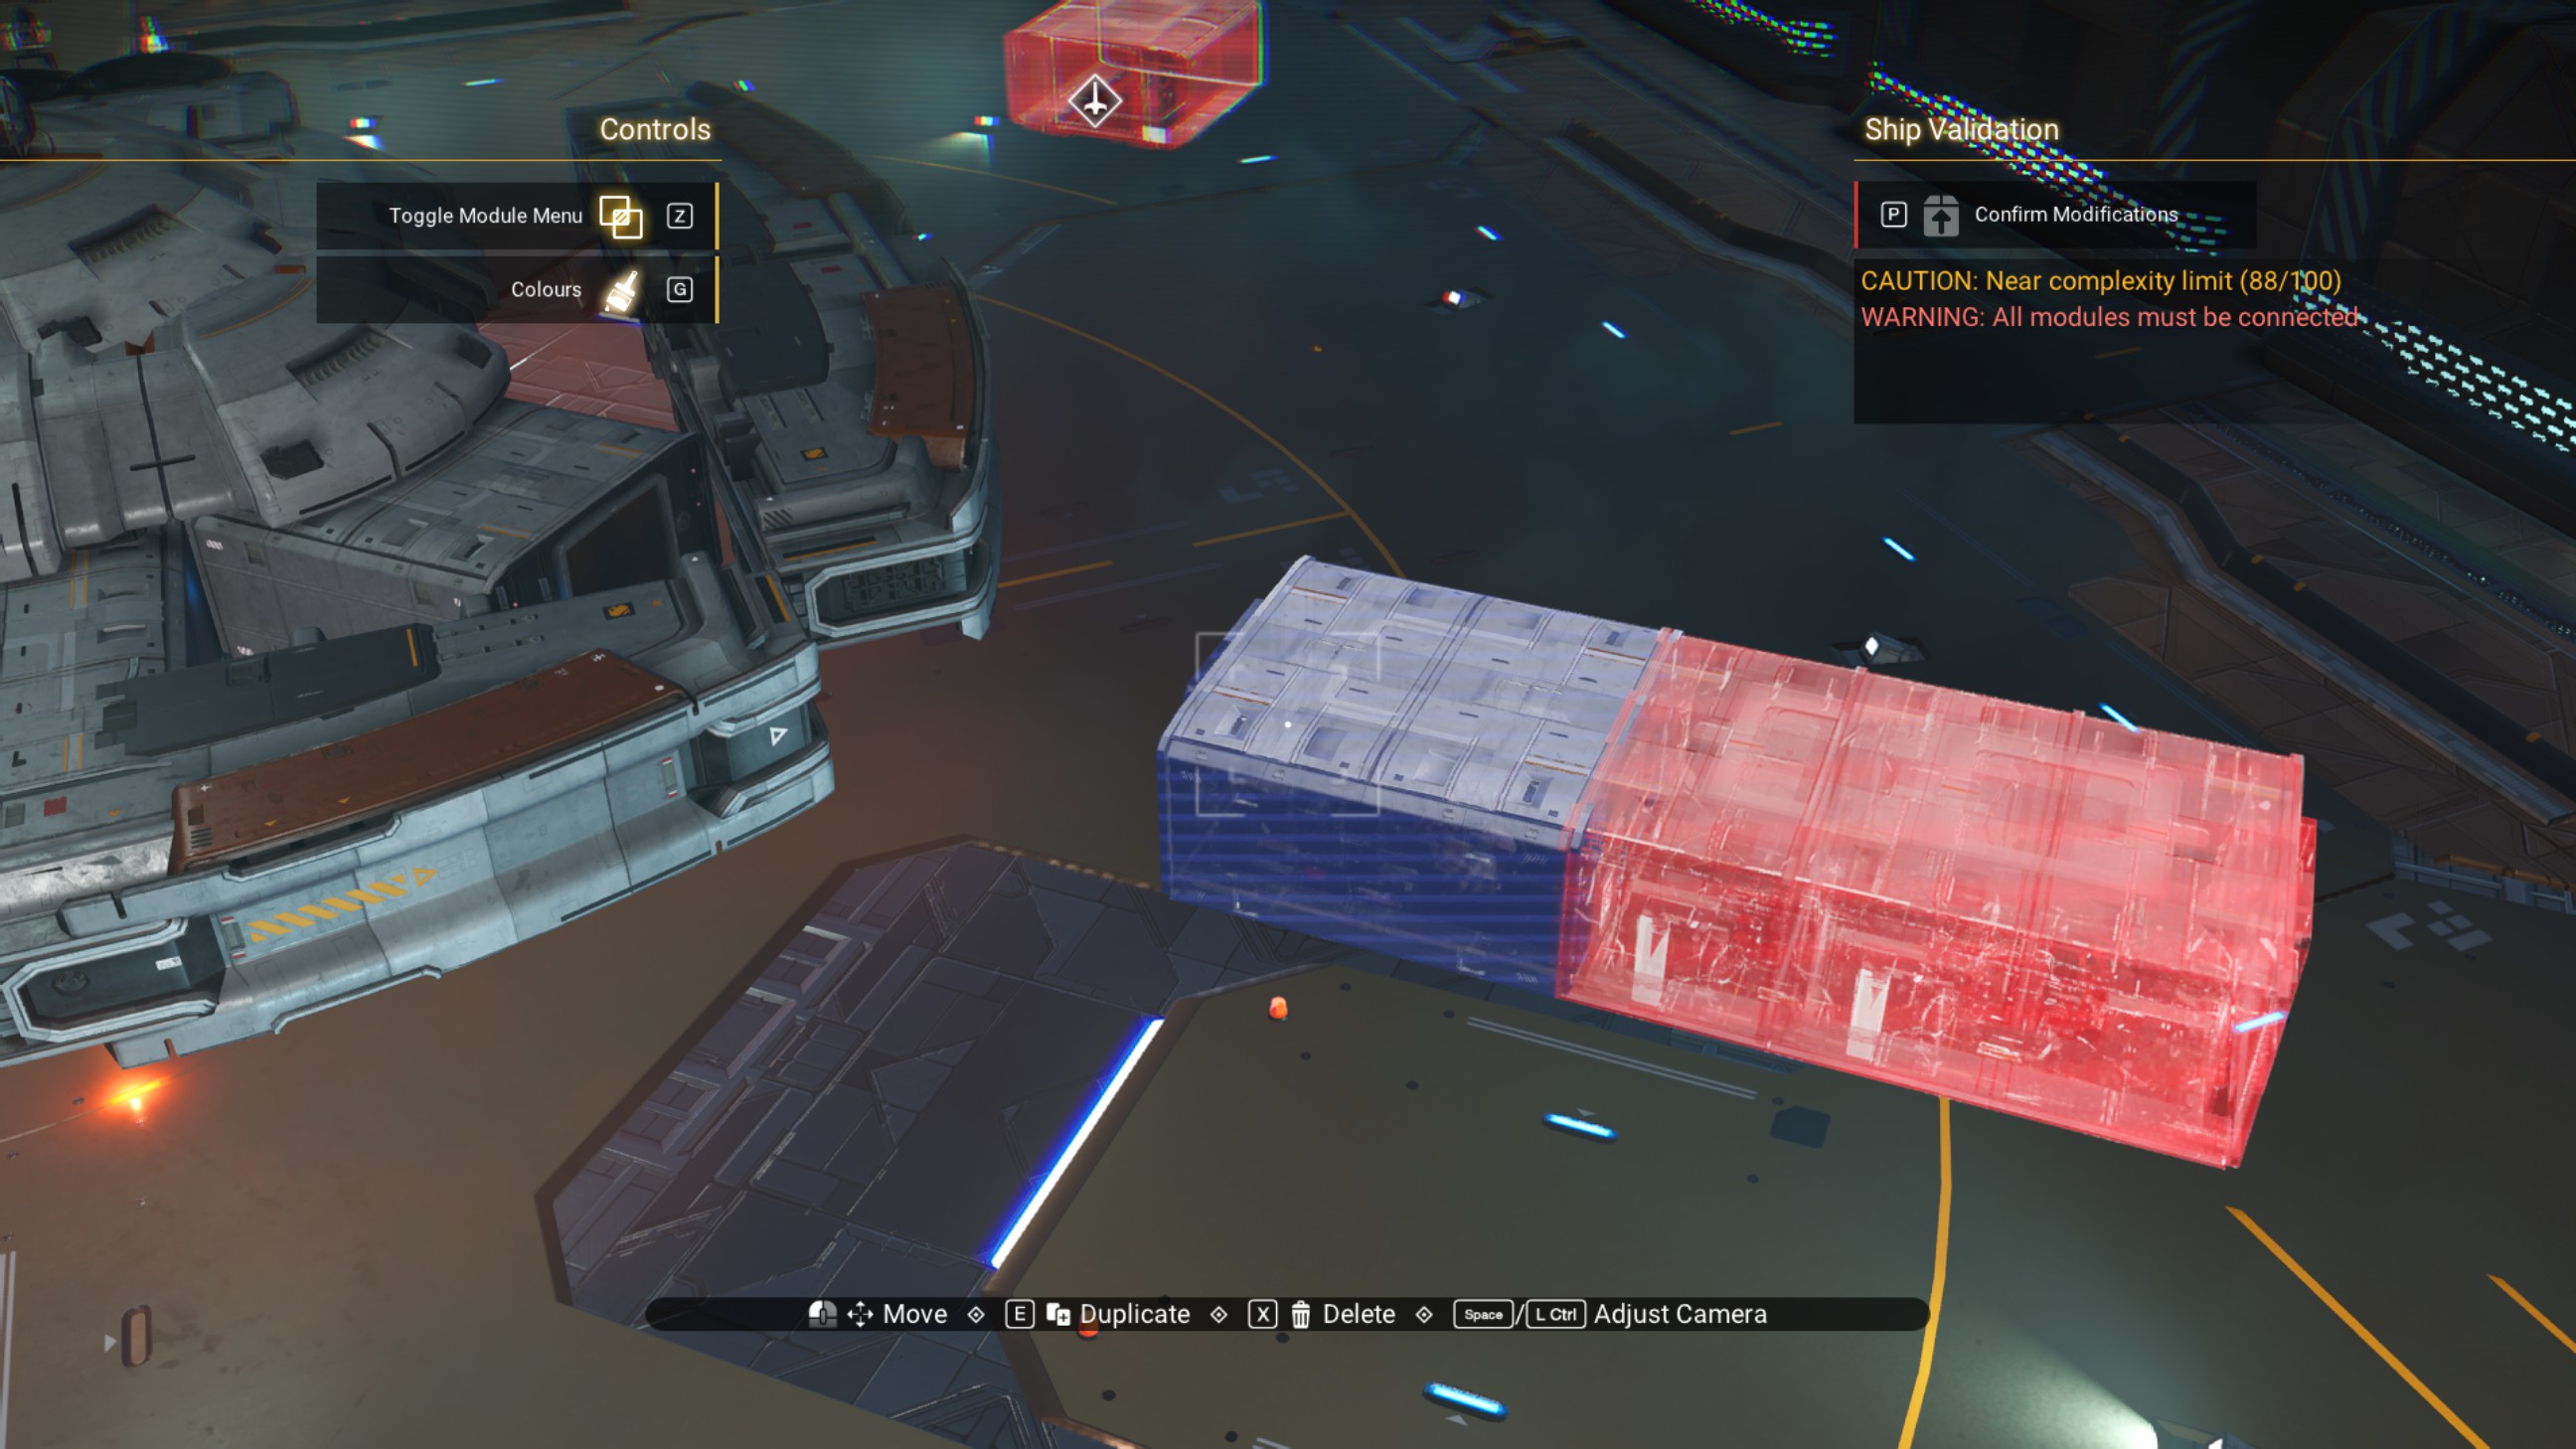
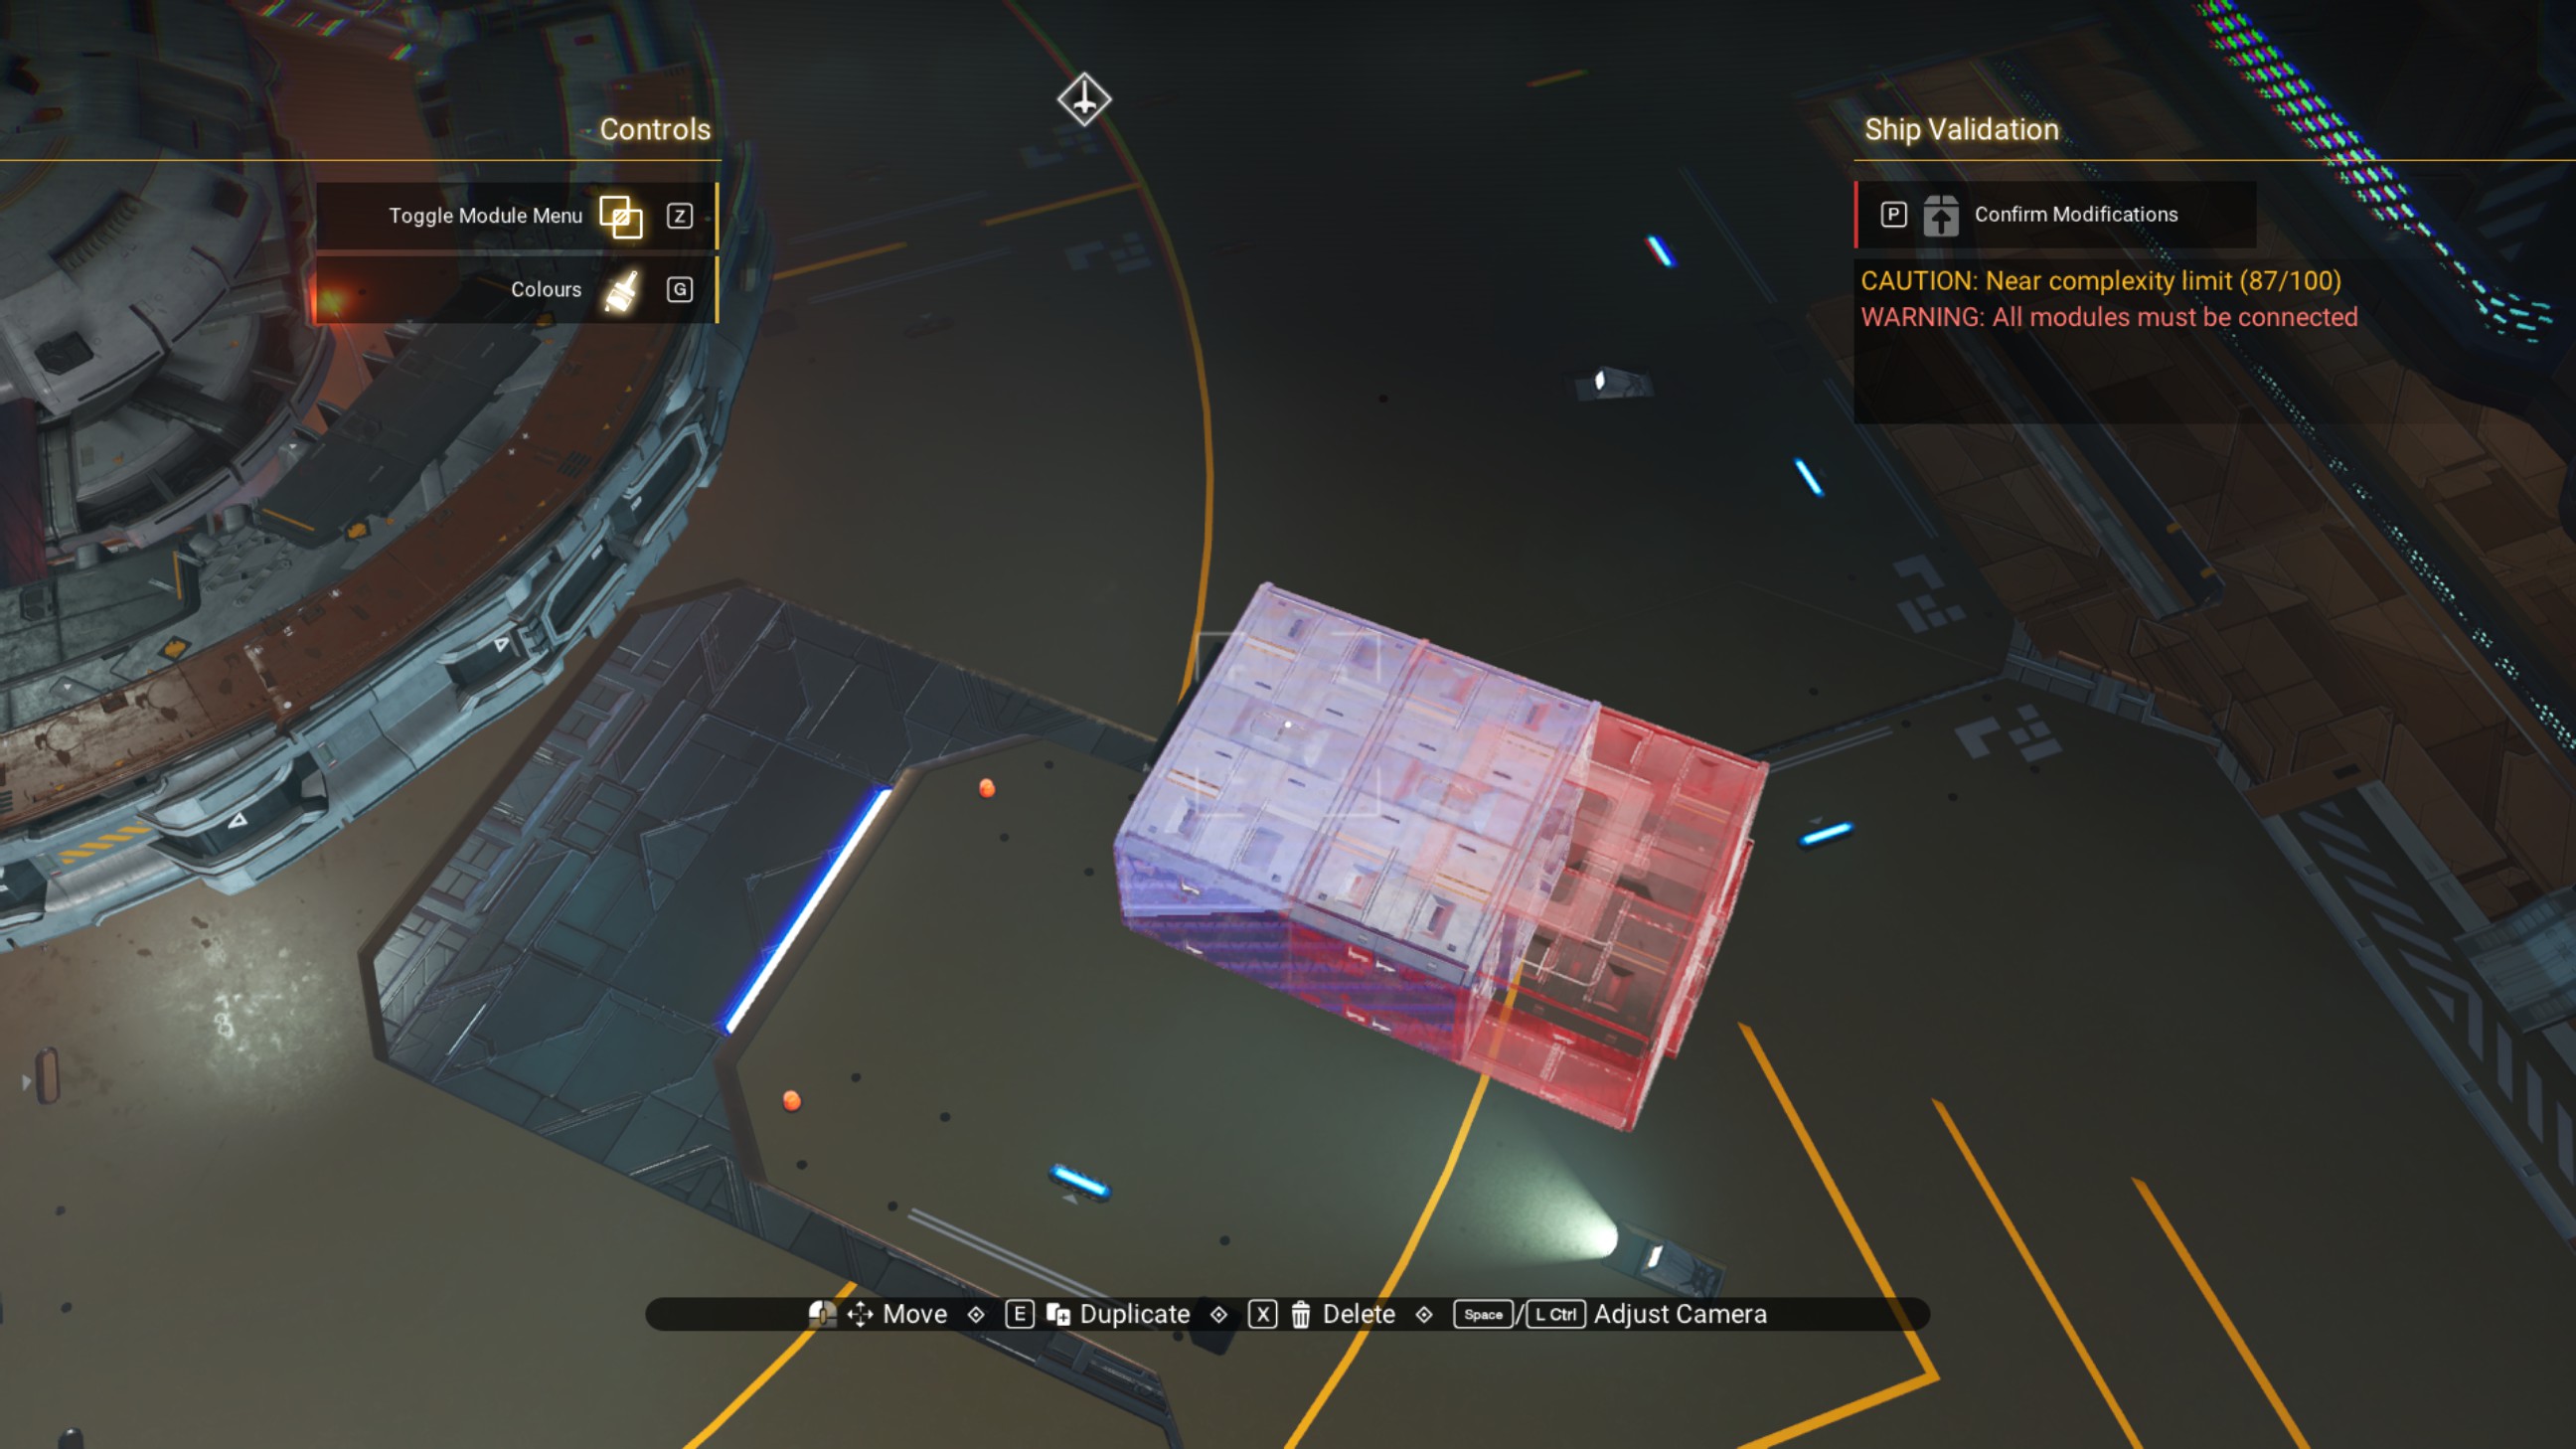
Using the overlapped 45 degree walkways we just placed within the ship, place two speedbird nacelle rims on the overlapped walkways. One should be oriented toward the front of the ship and the other should be oriented toward the rear of the ship.
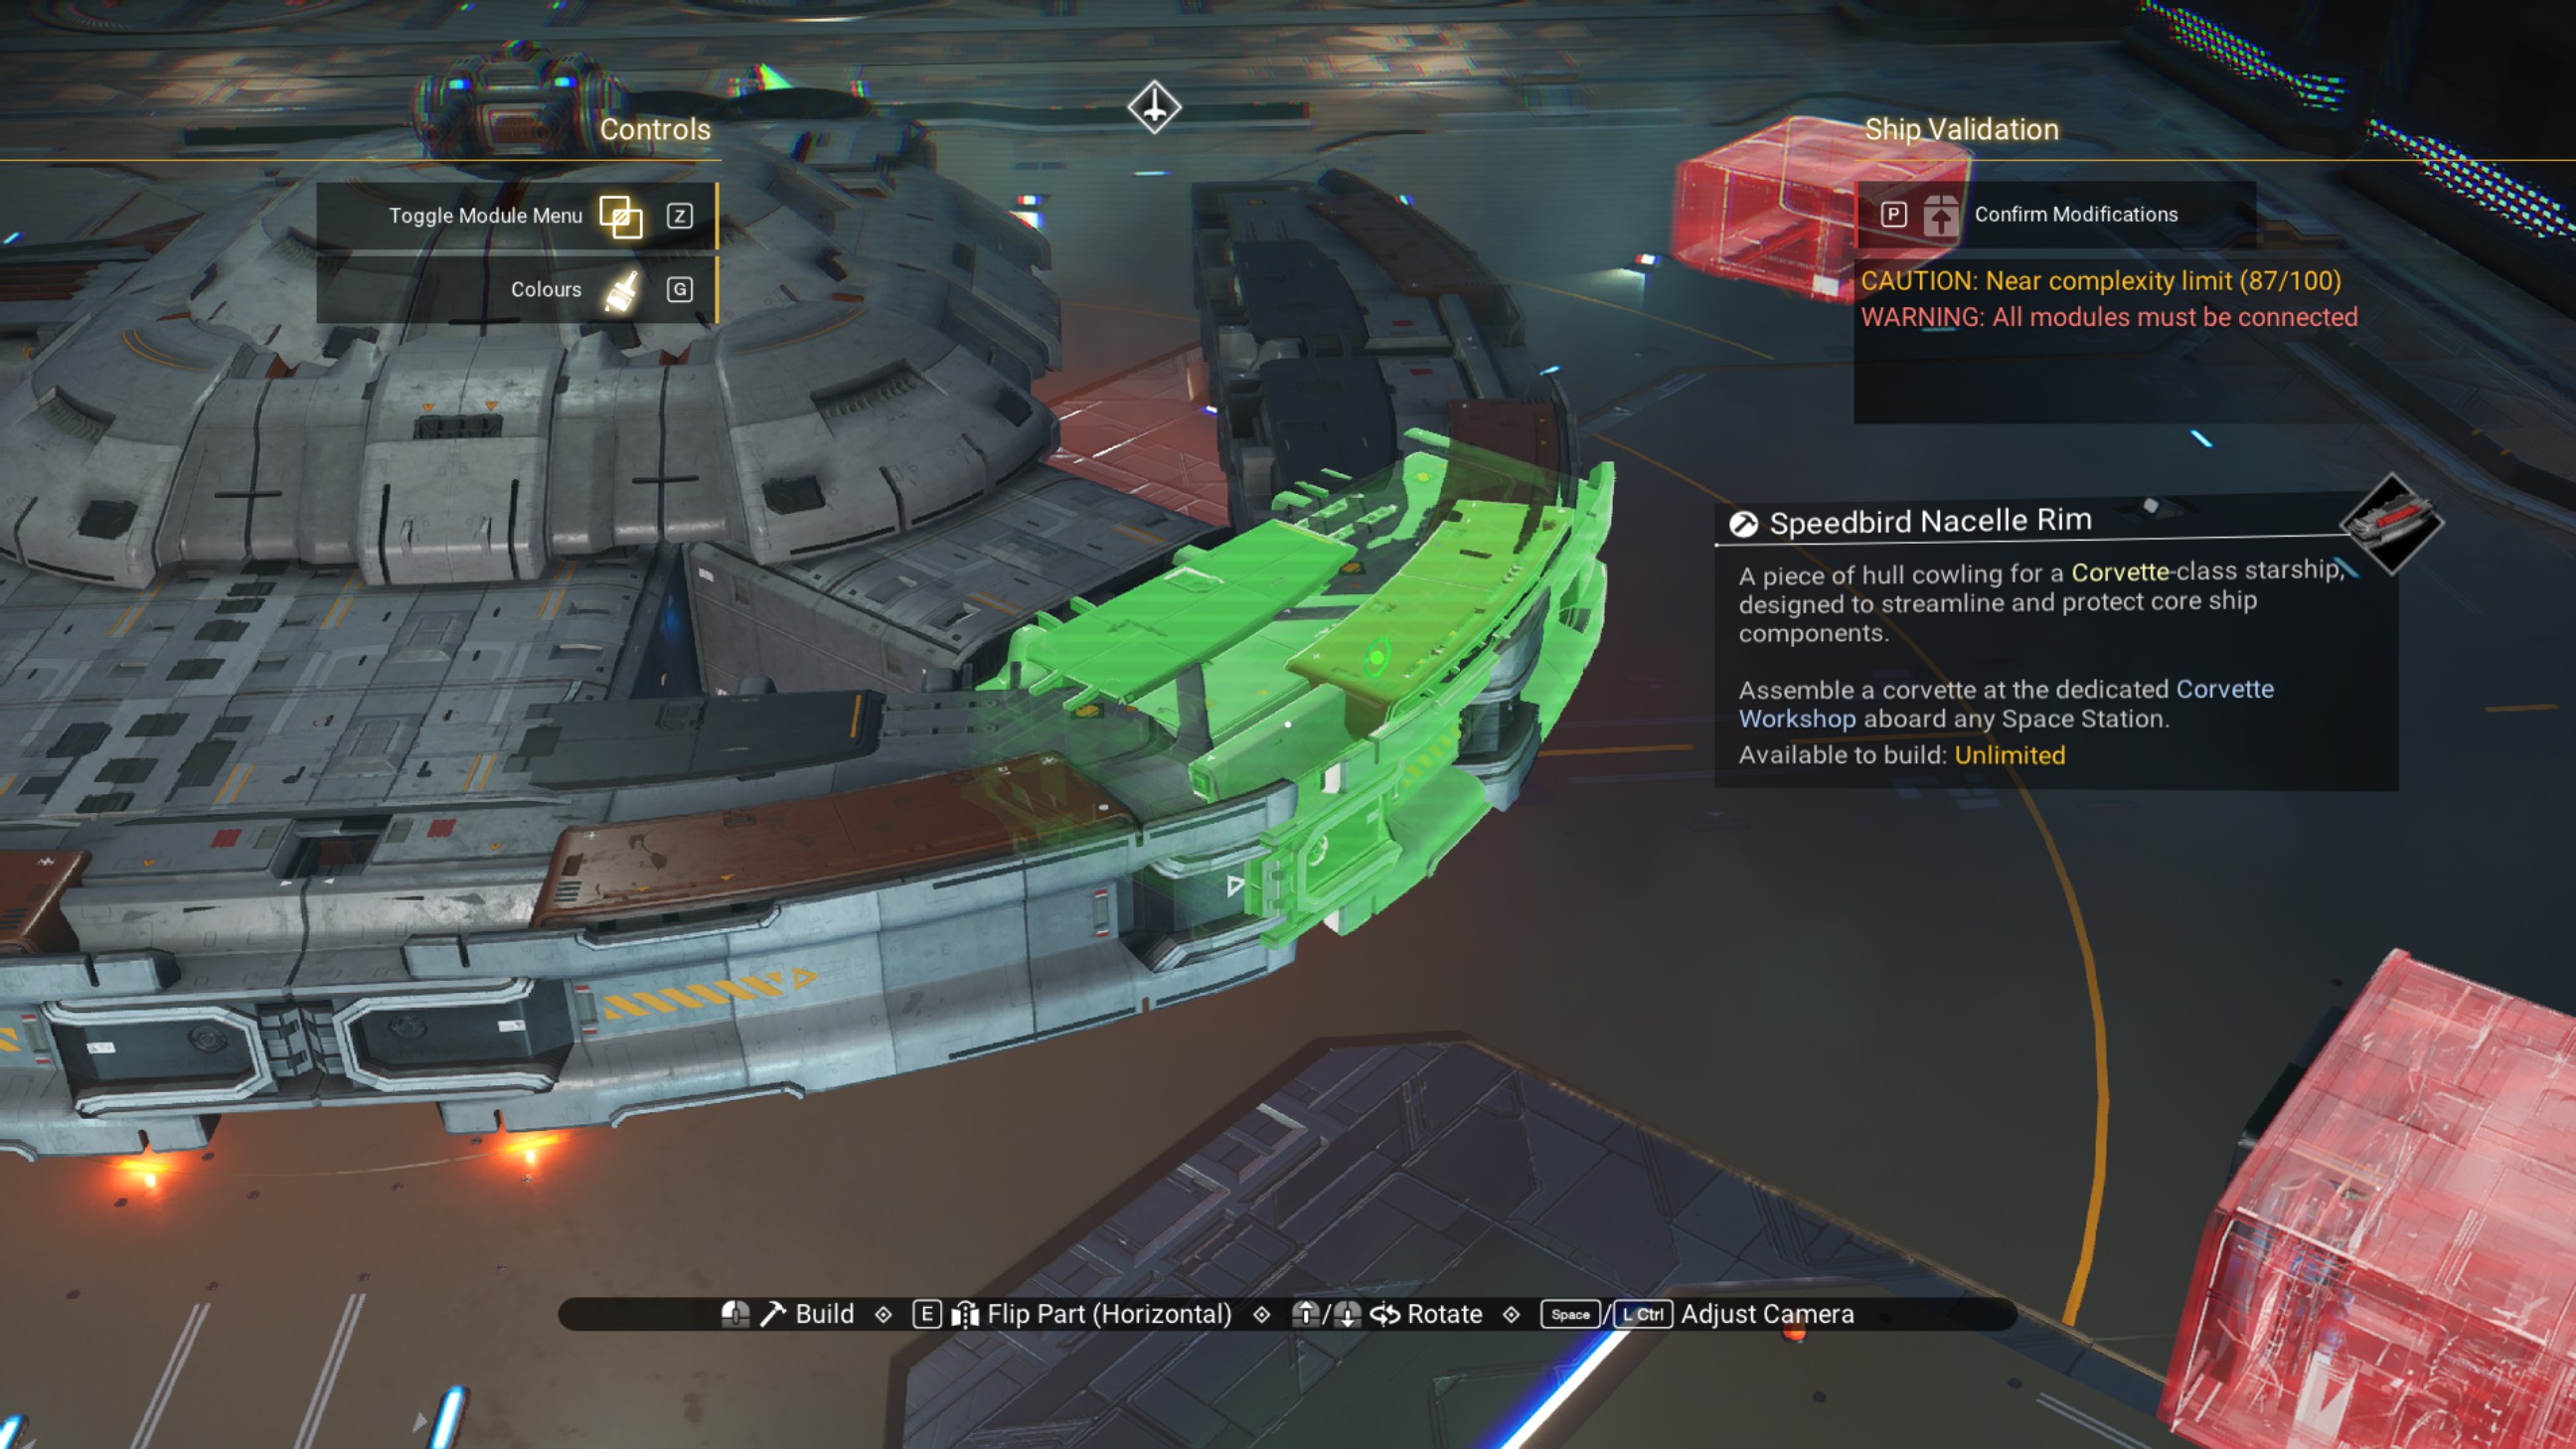
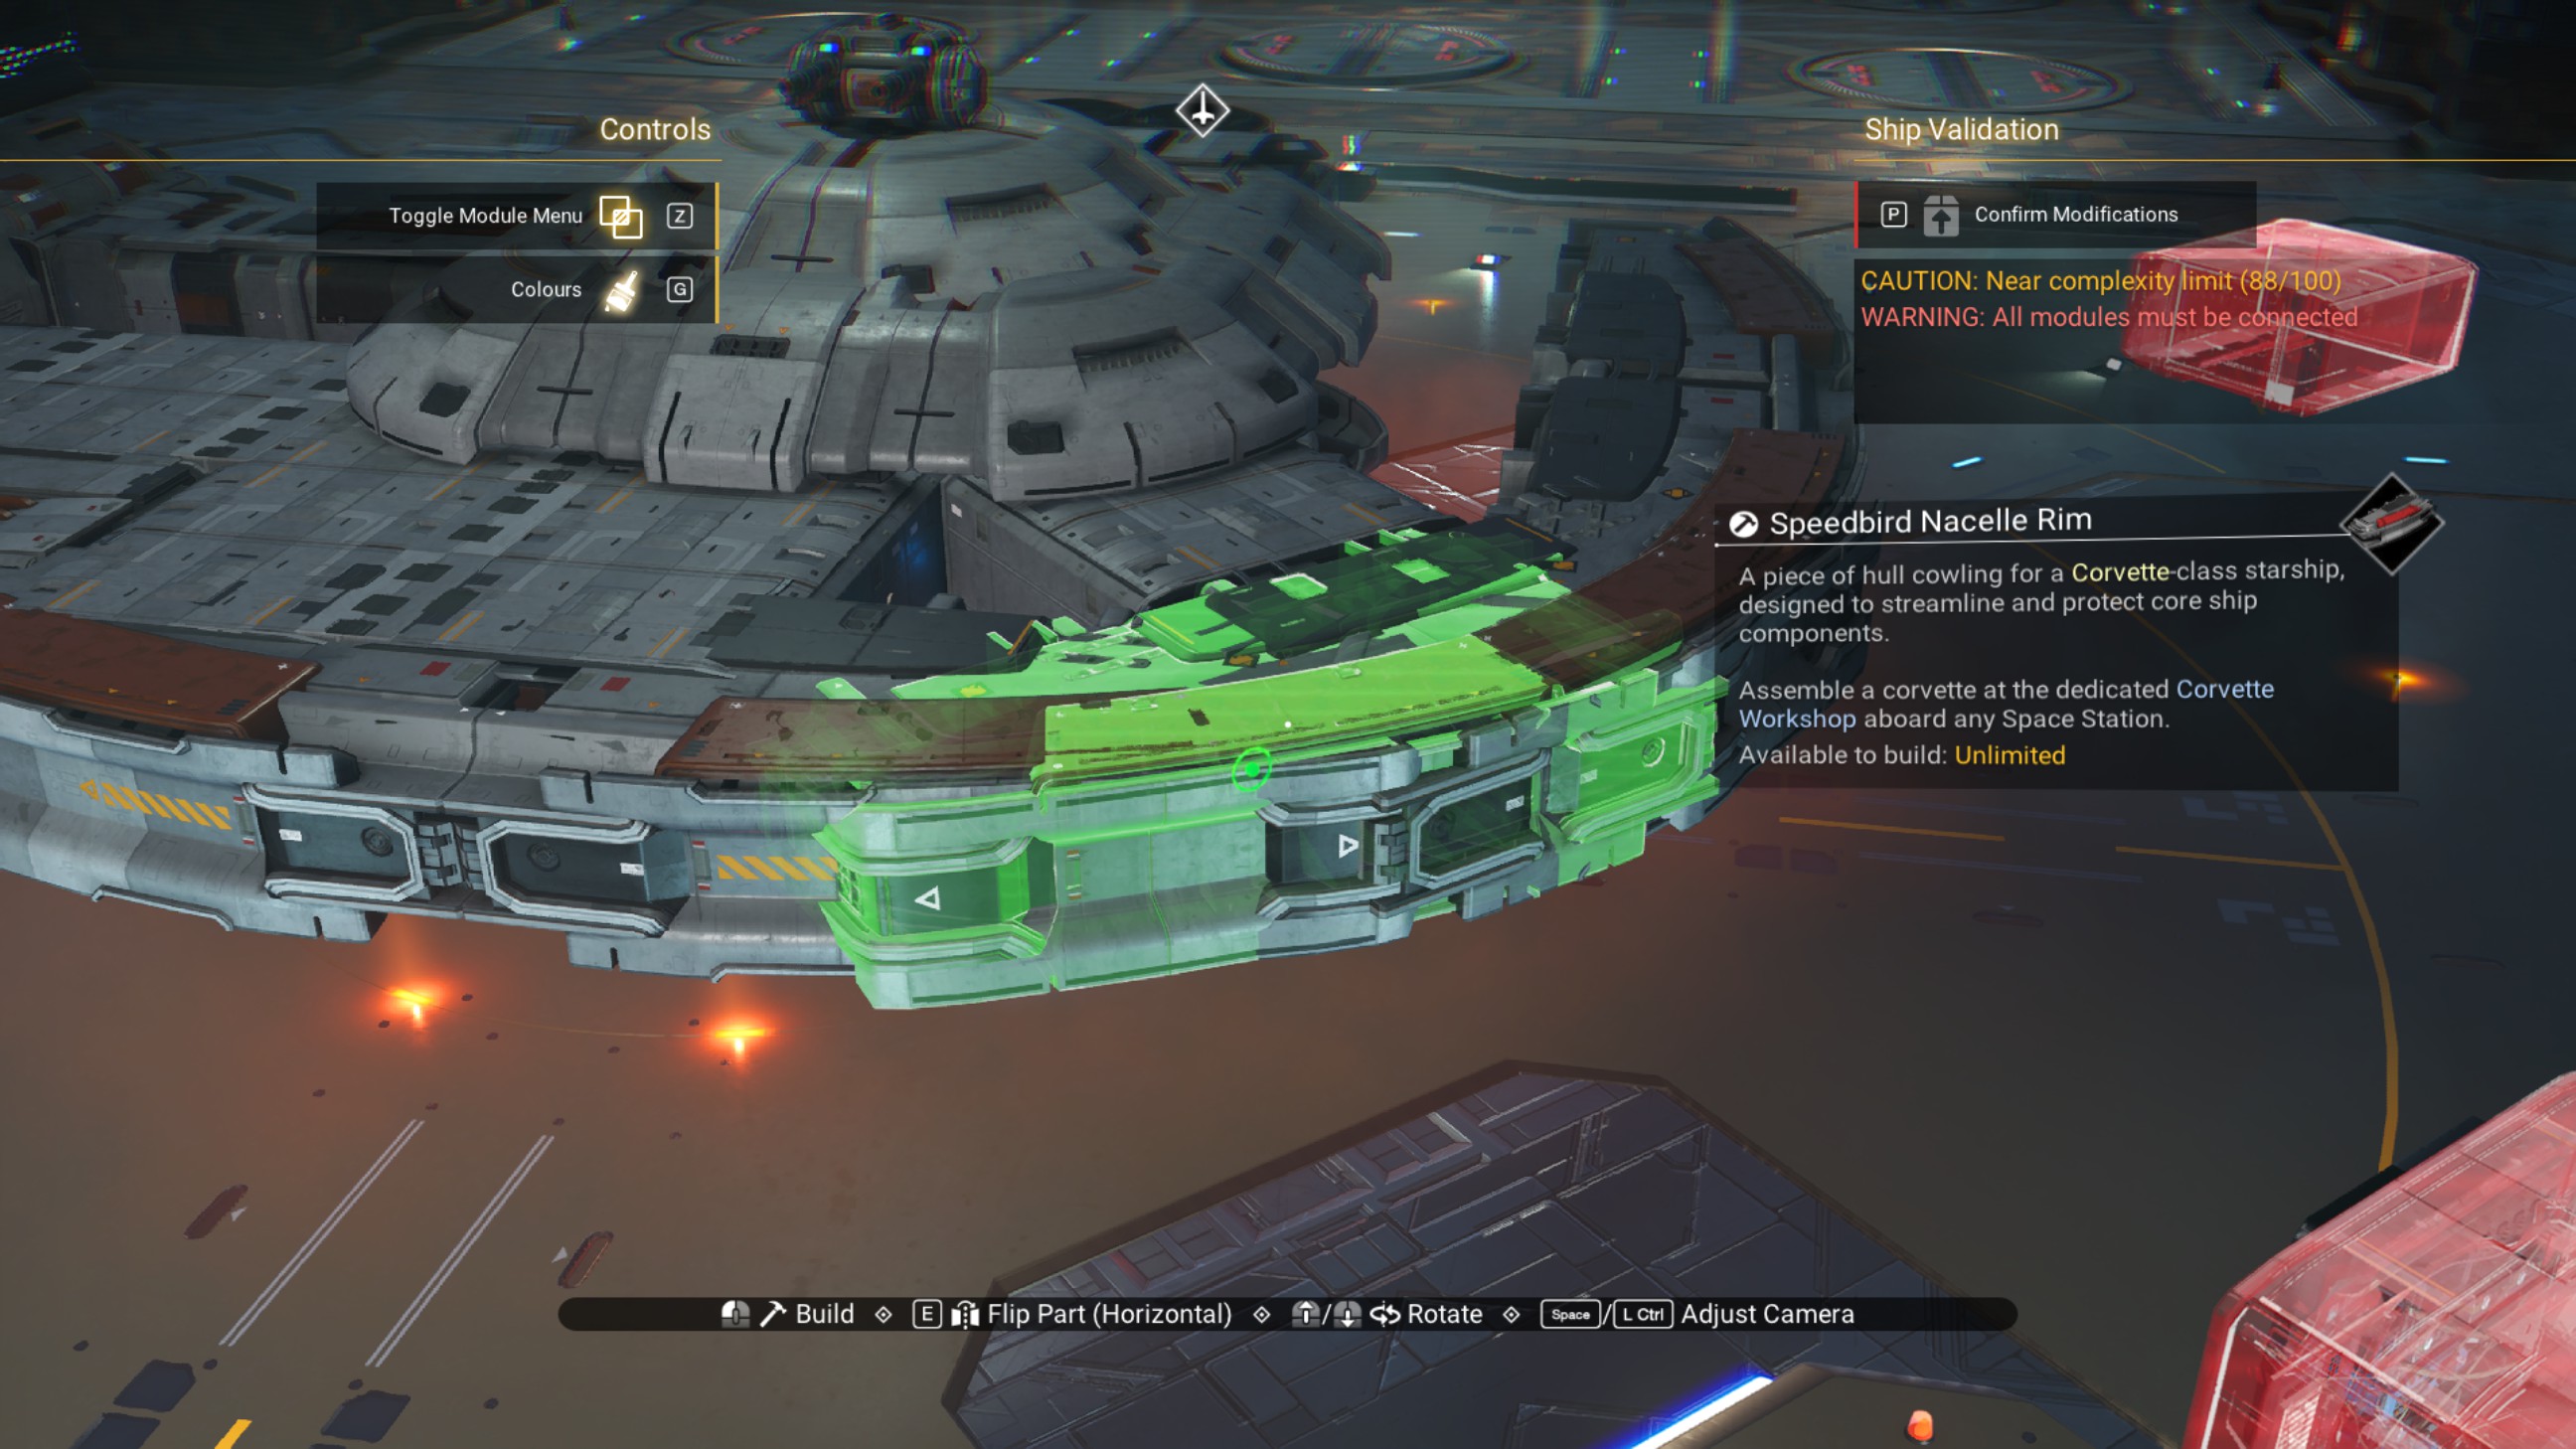
Delete the overlapped 45 degree walkways within the ship.
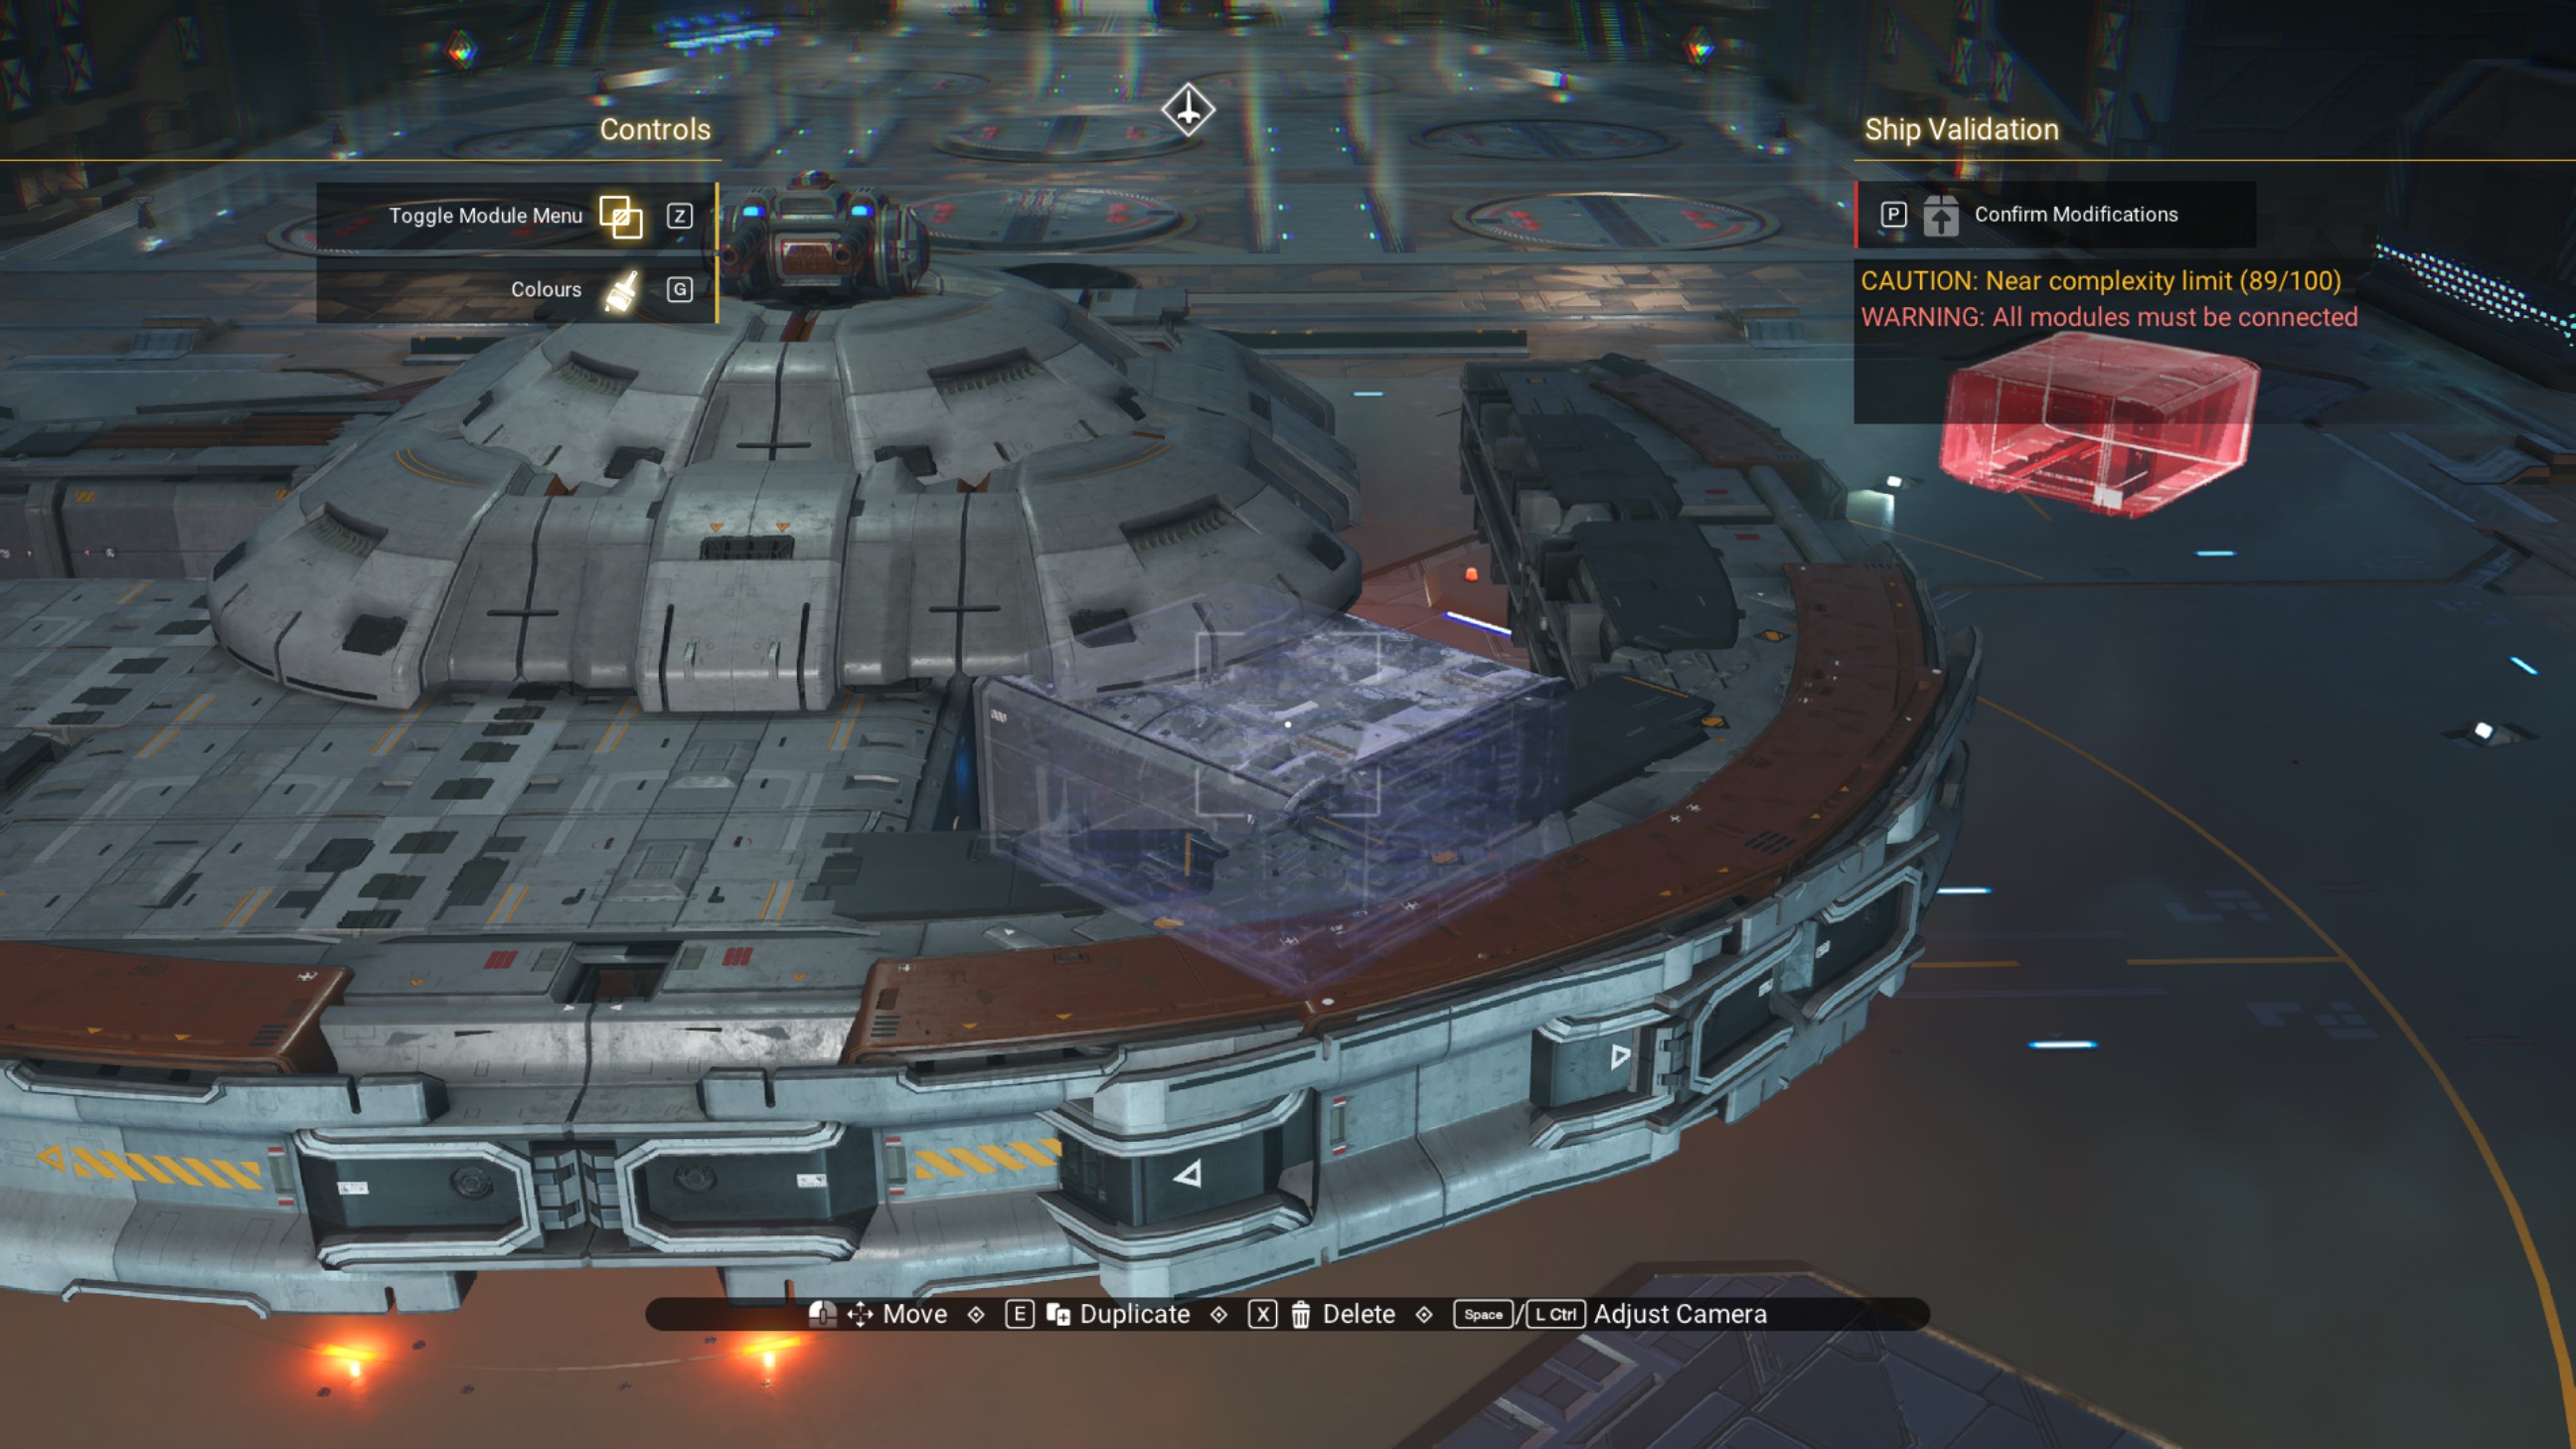
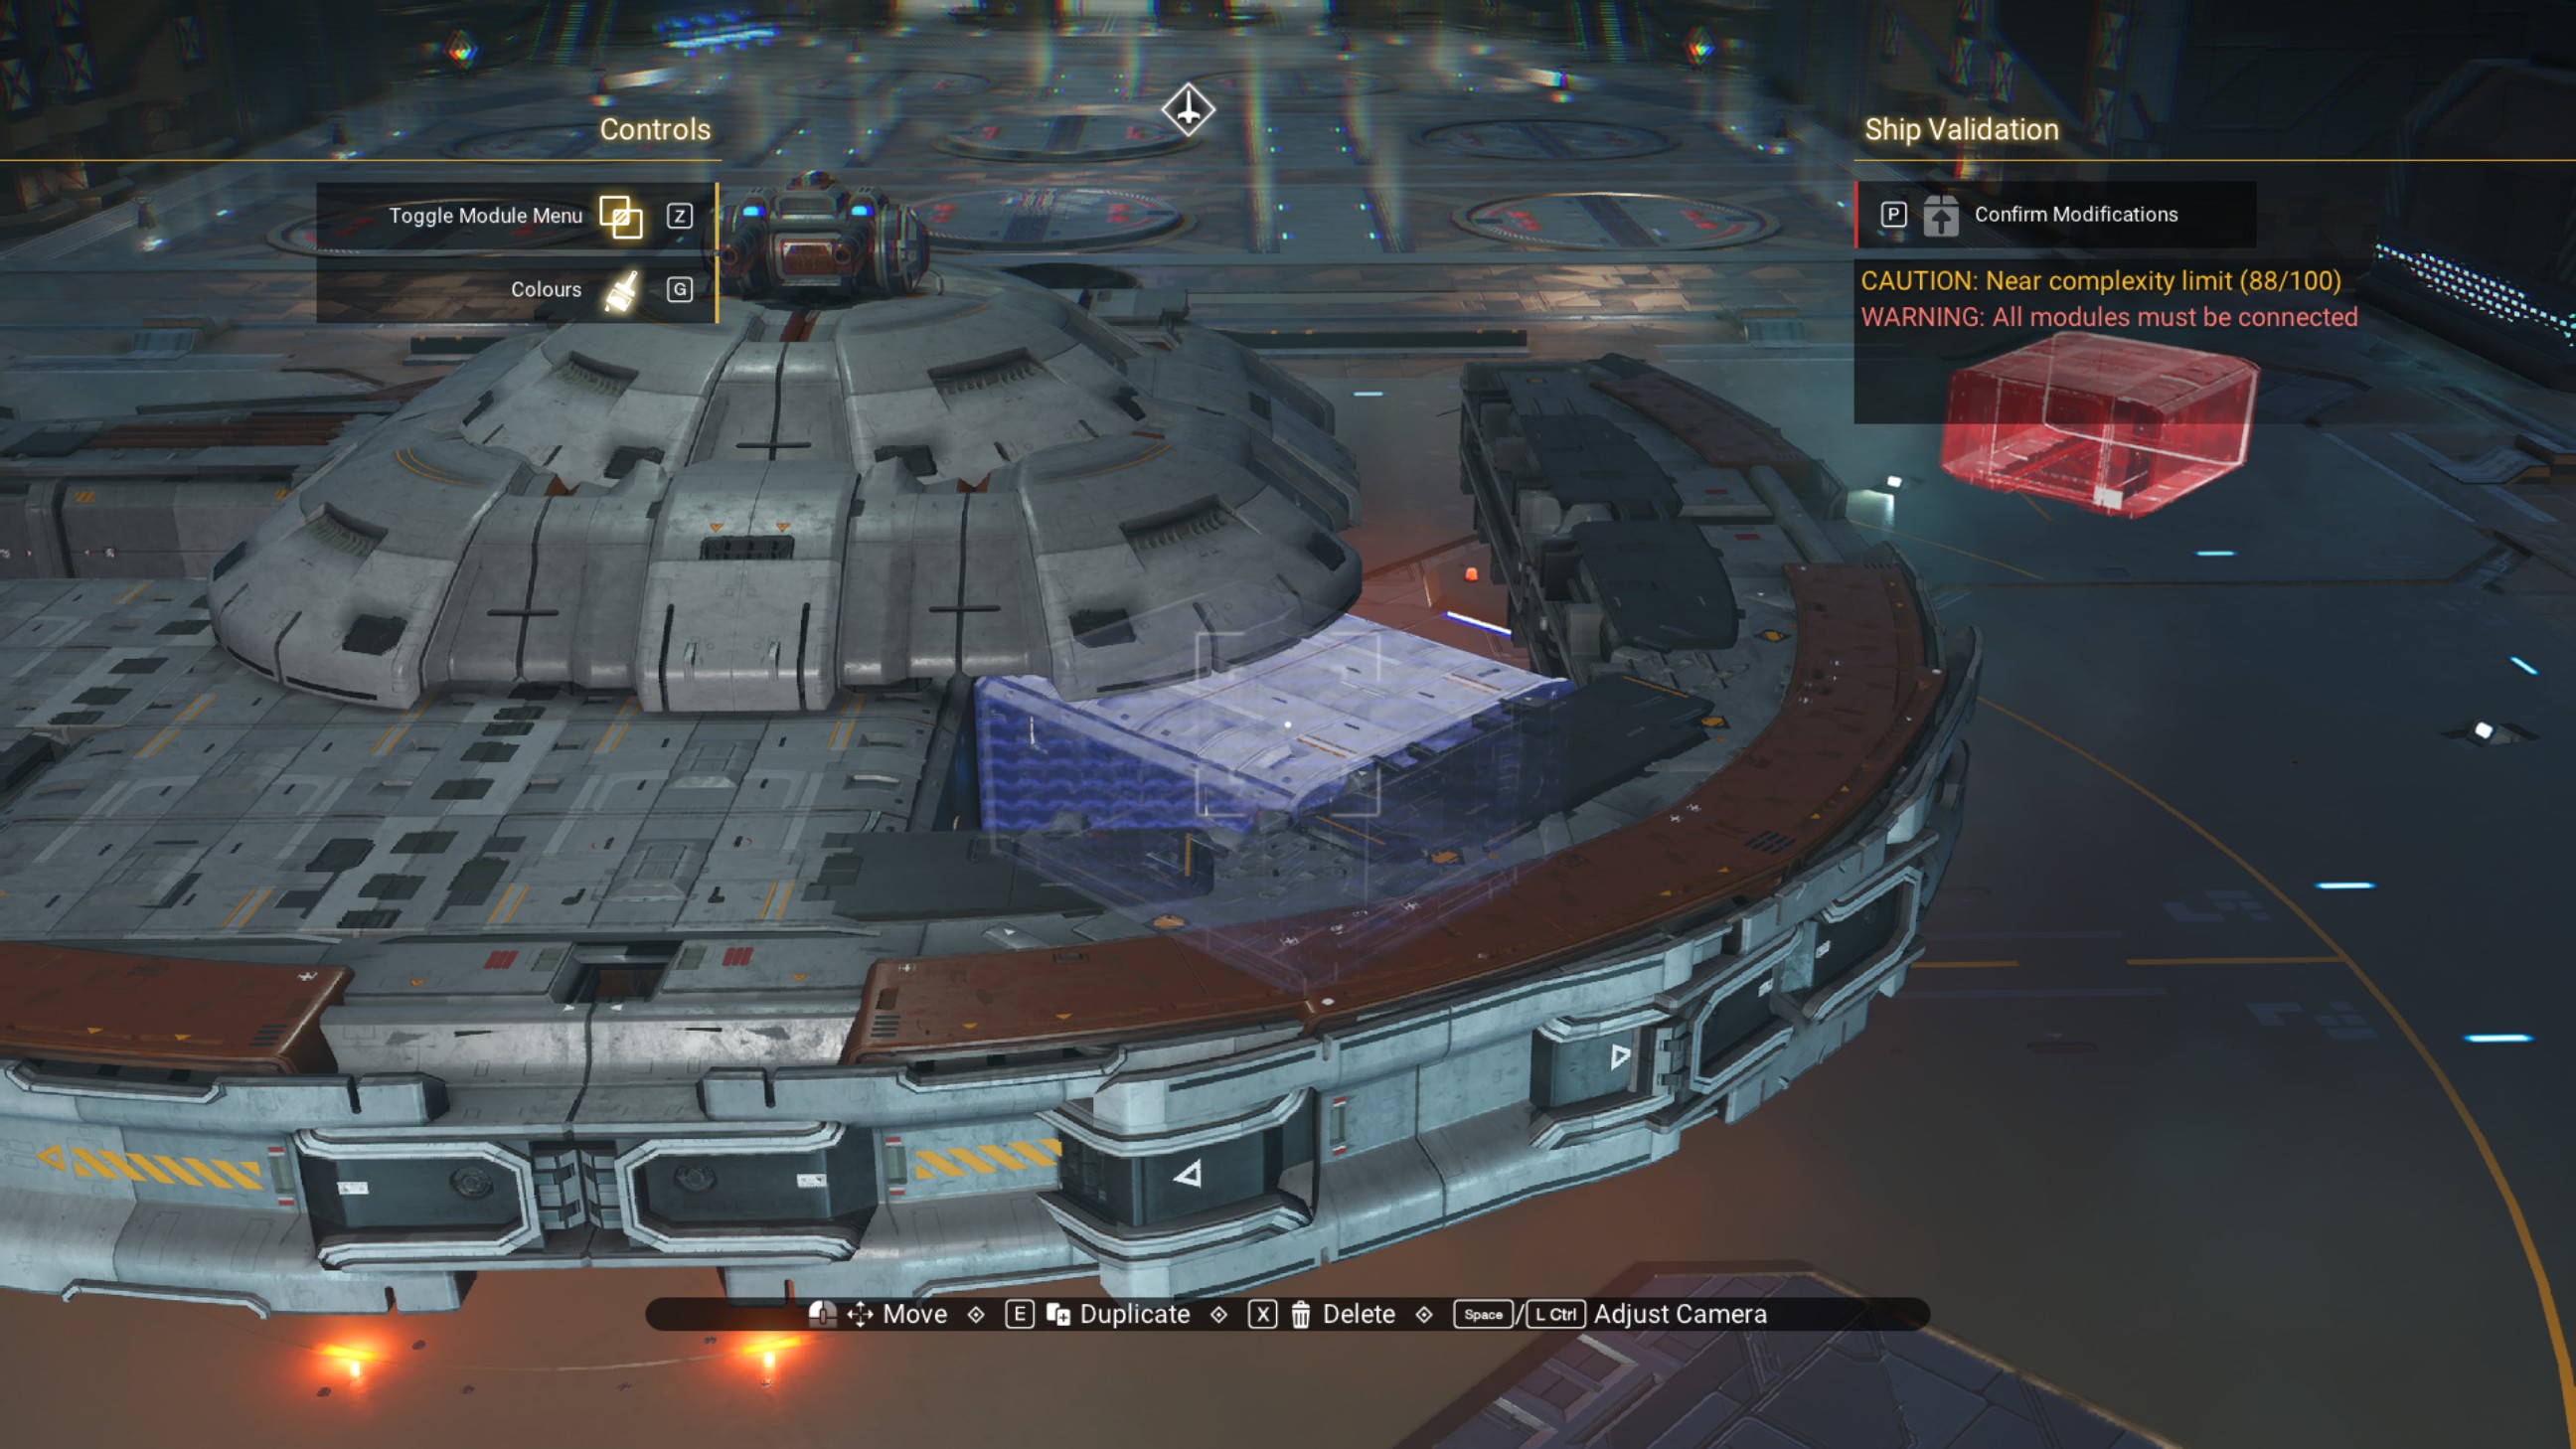
Now, port stern. Add two overlapped walkways adjacent to the ones we already have, as shown.
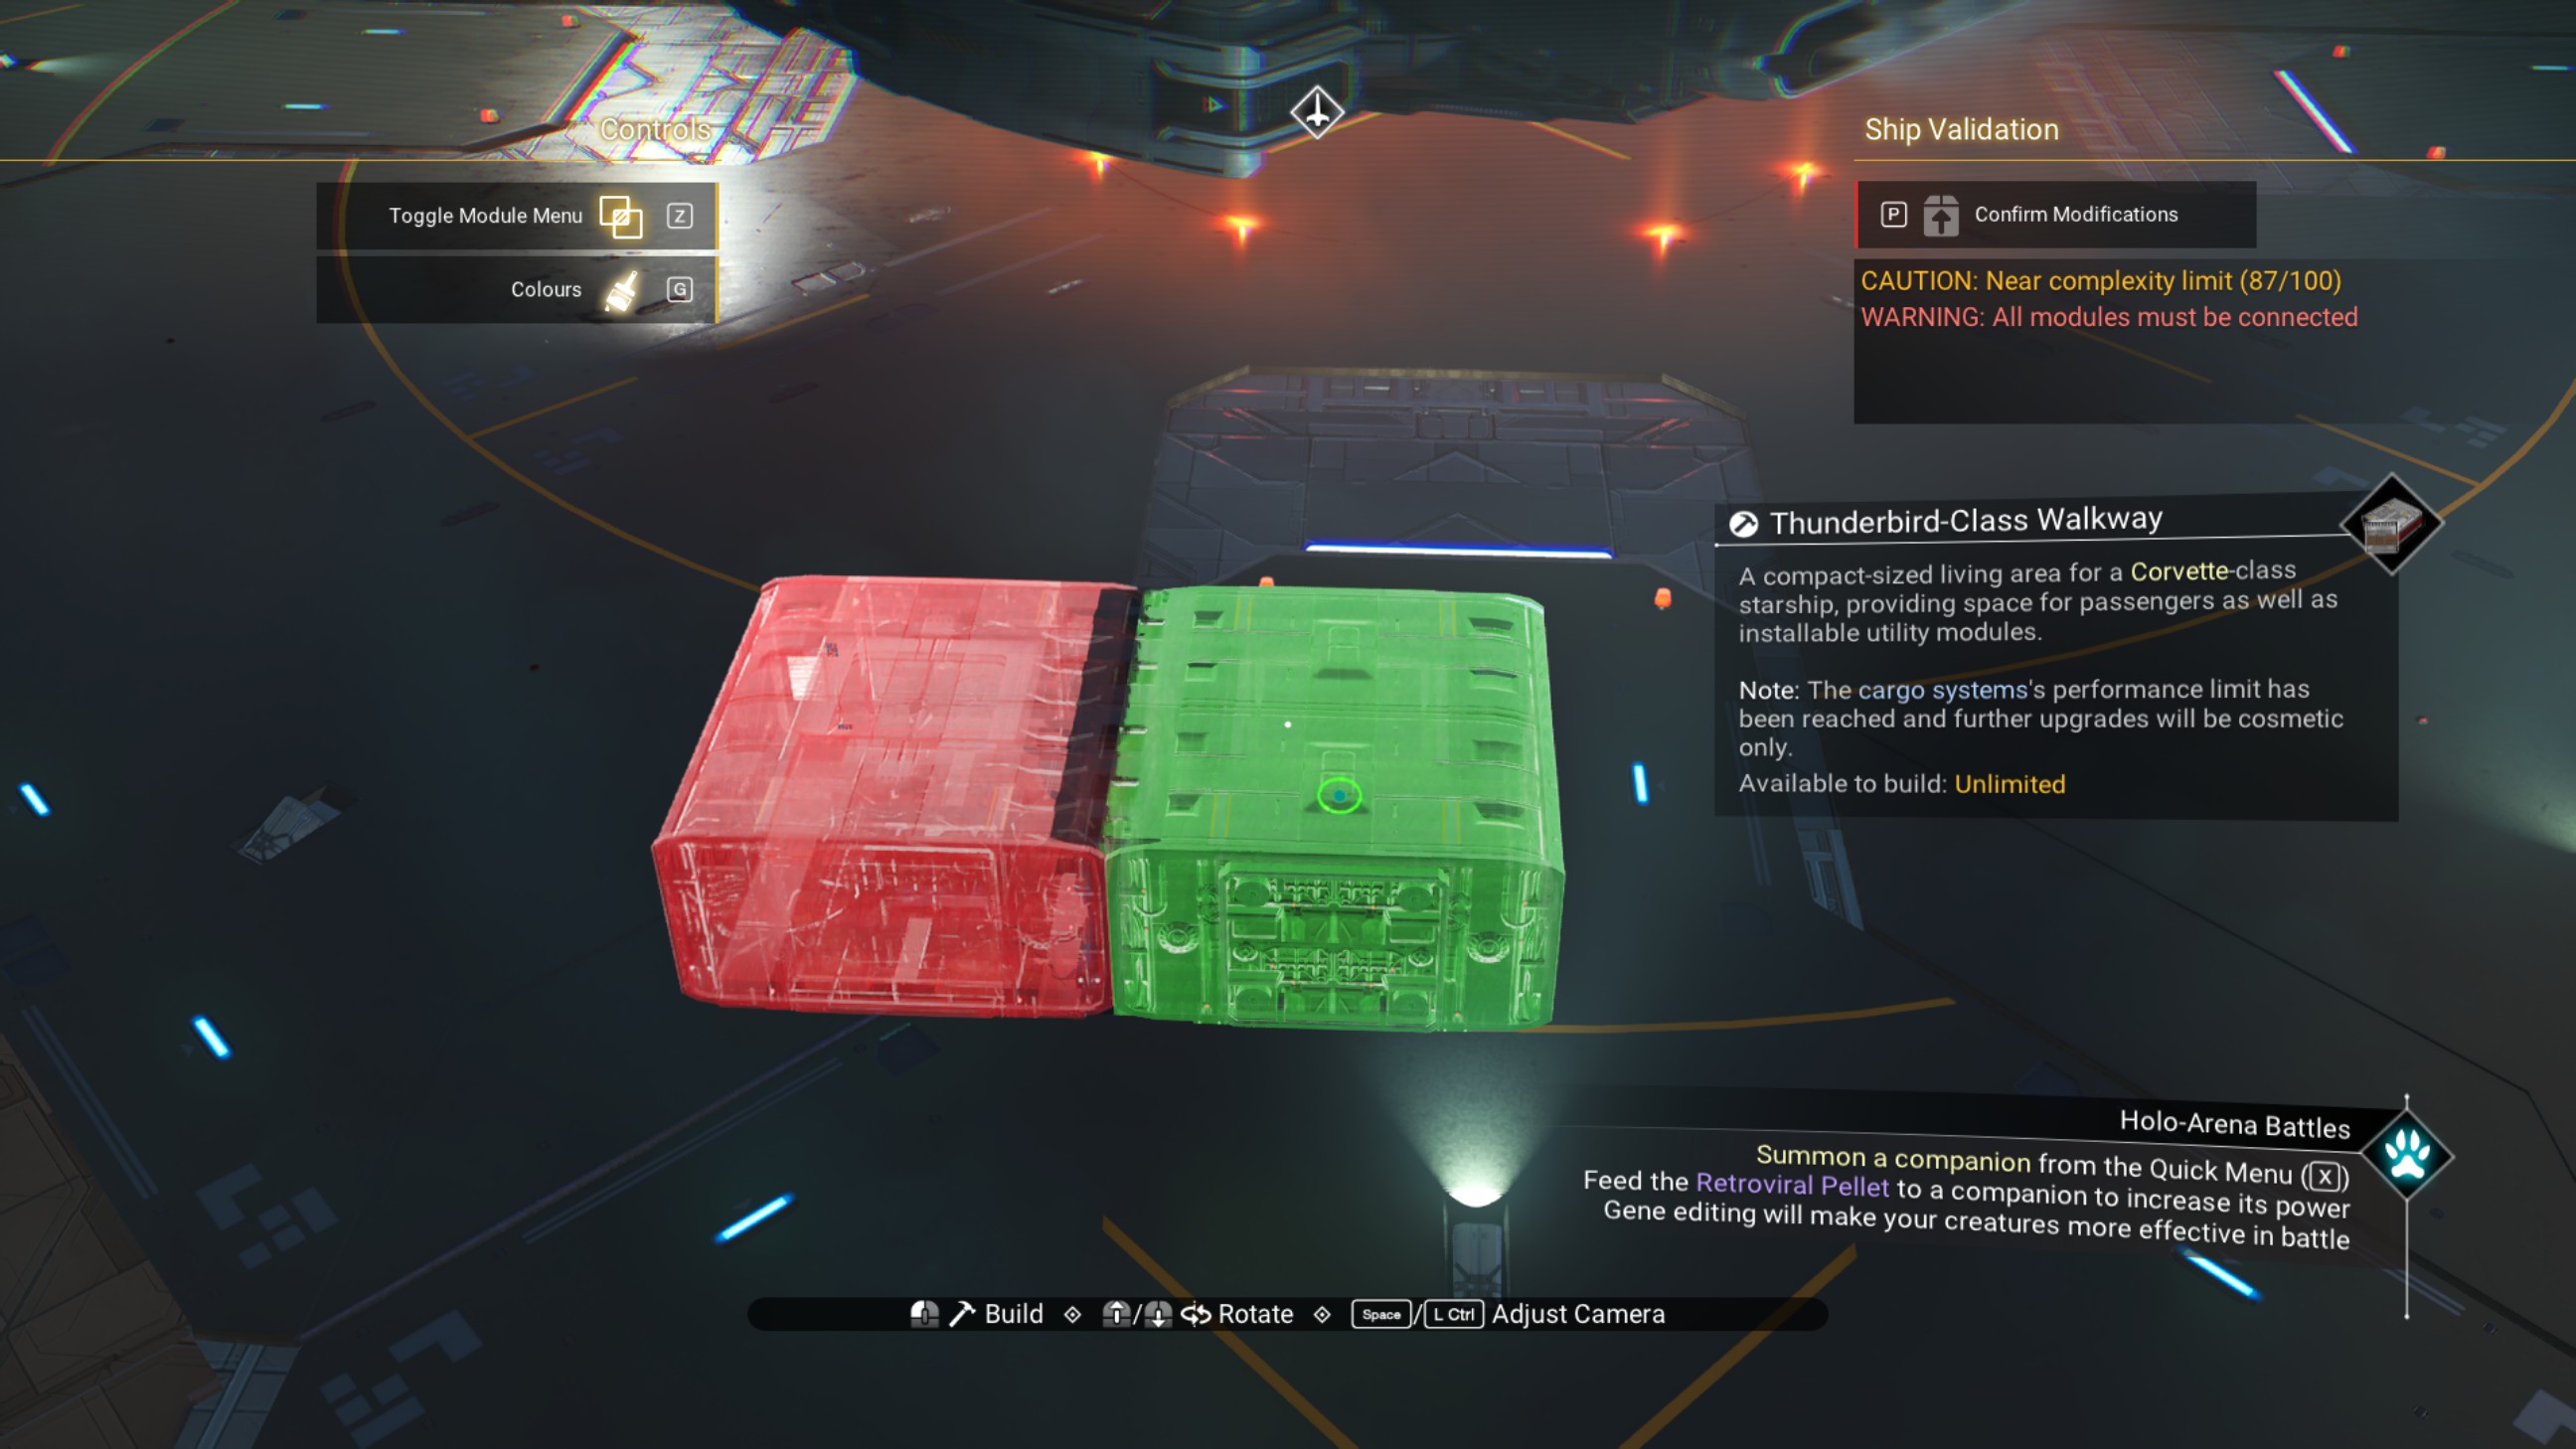
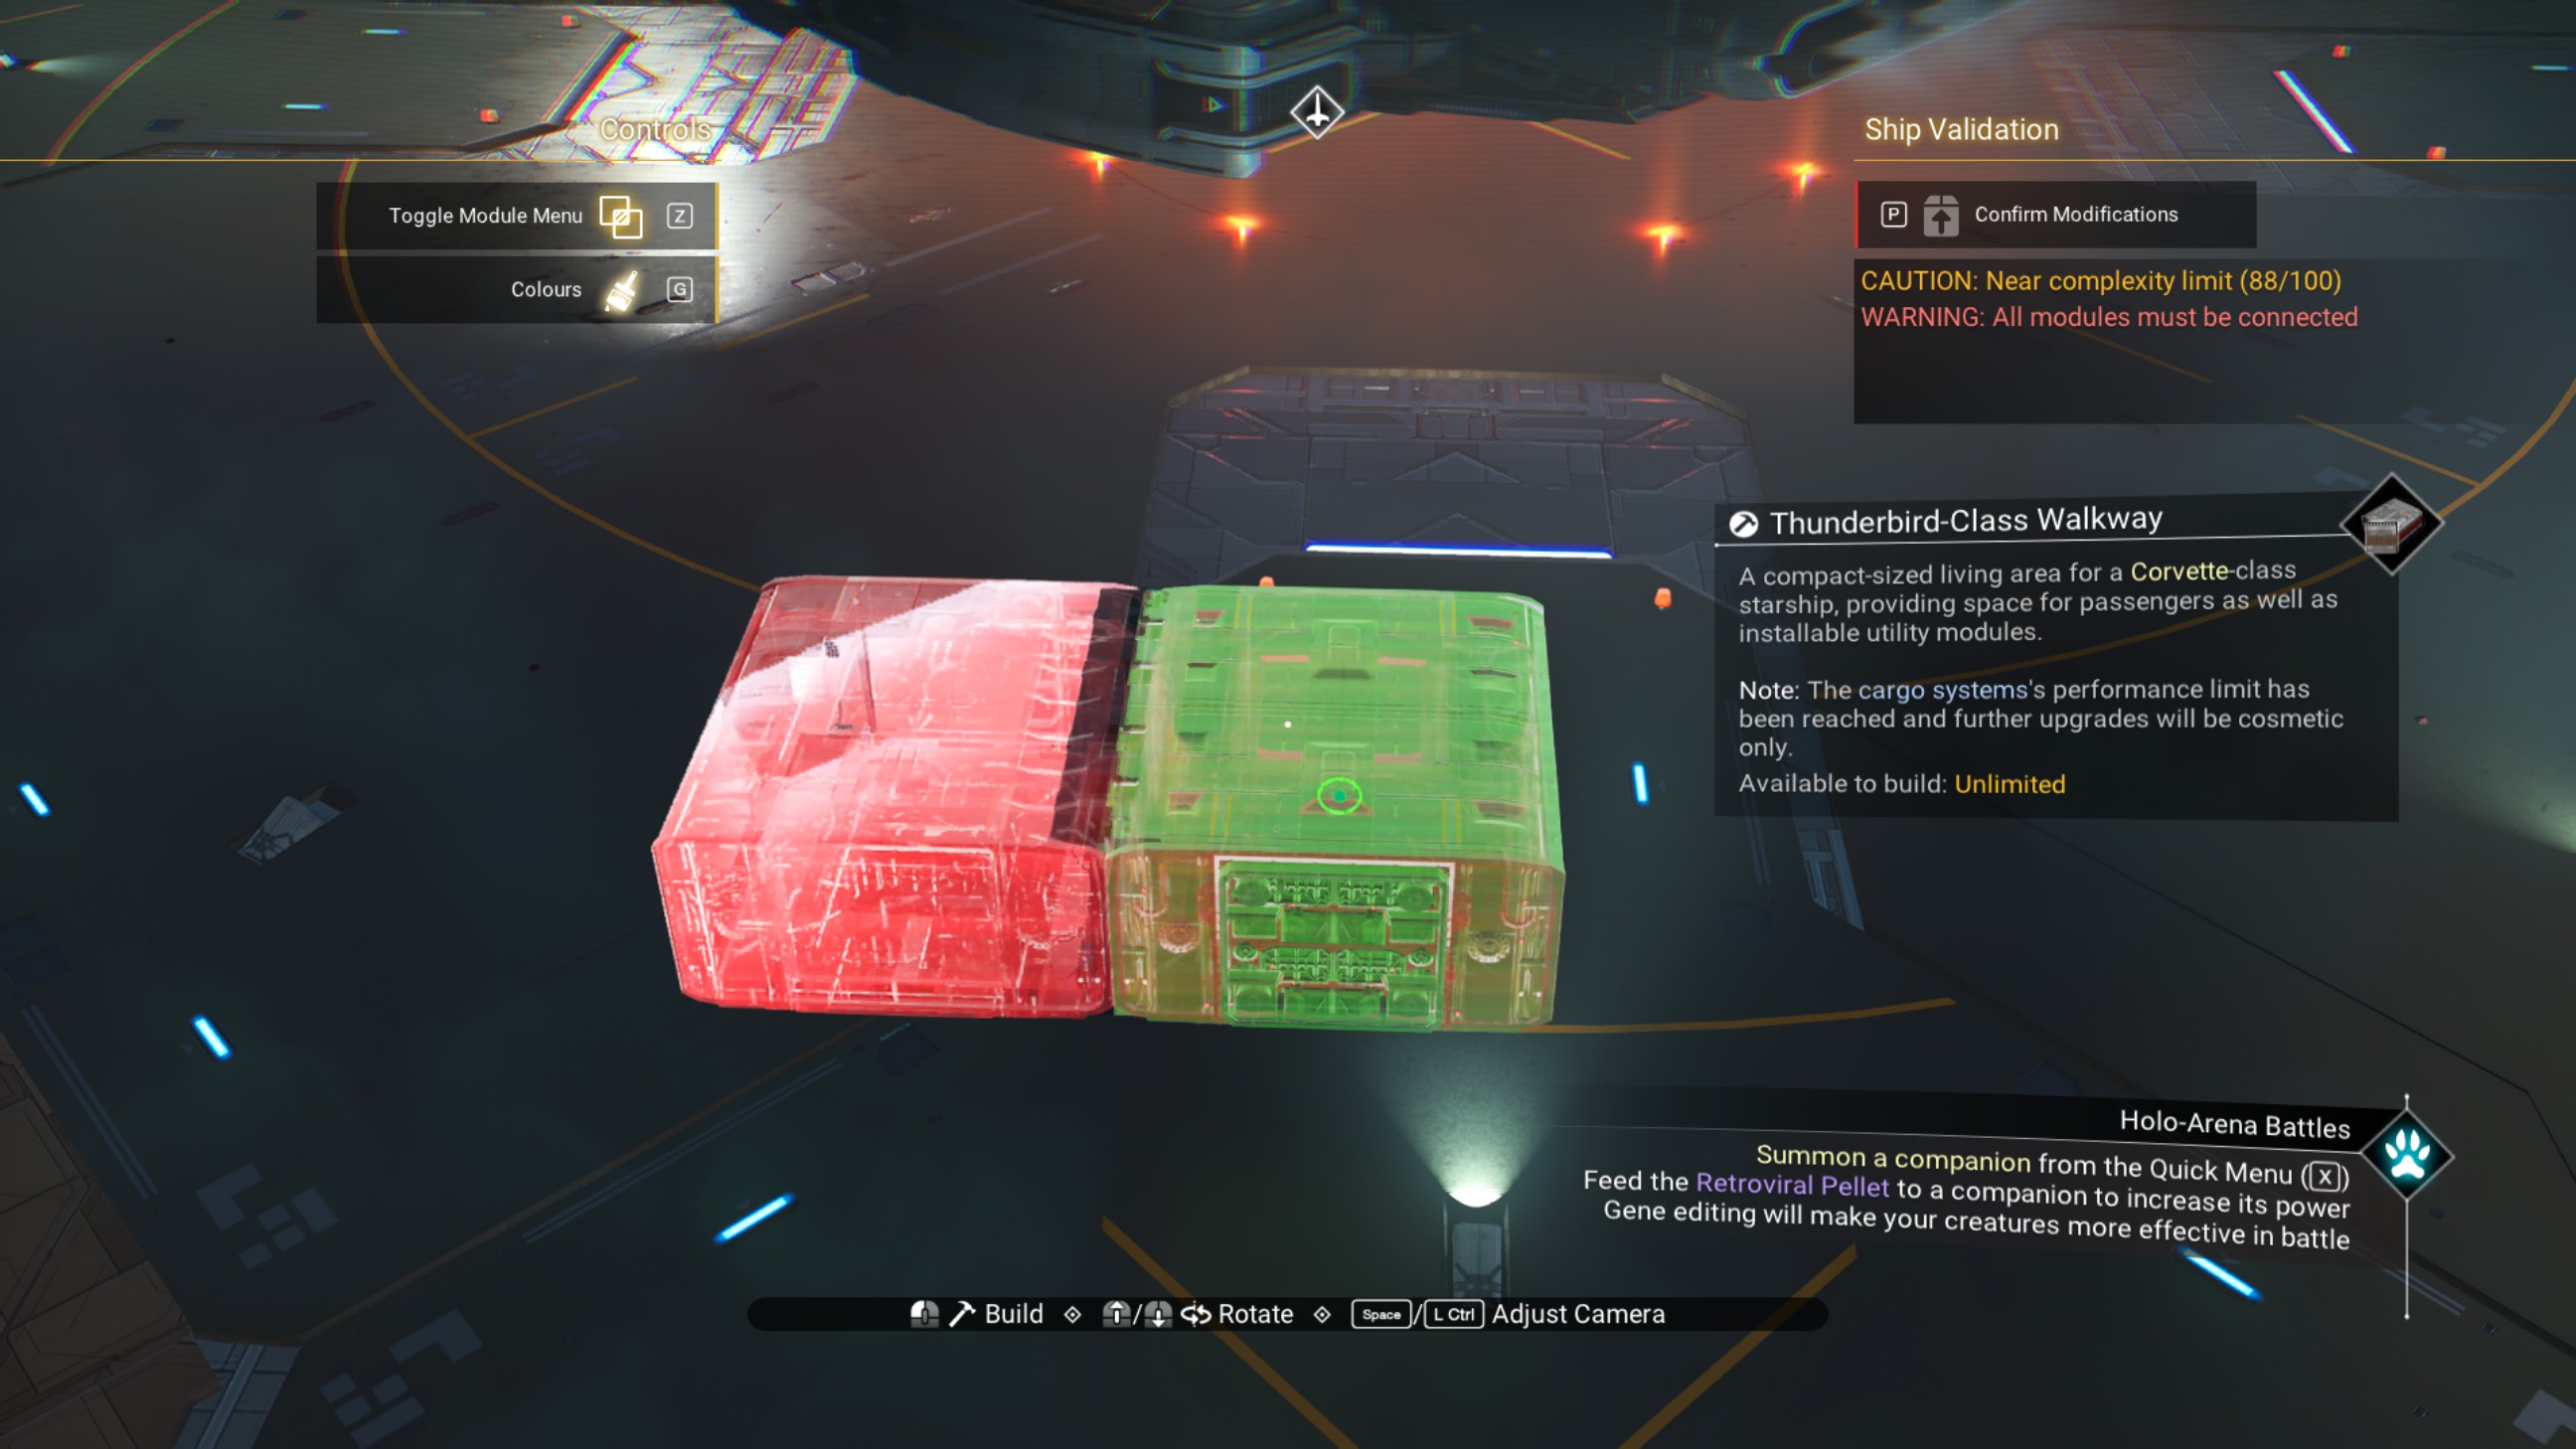
Then, two more overlapped walkways on top of those.
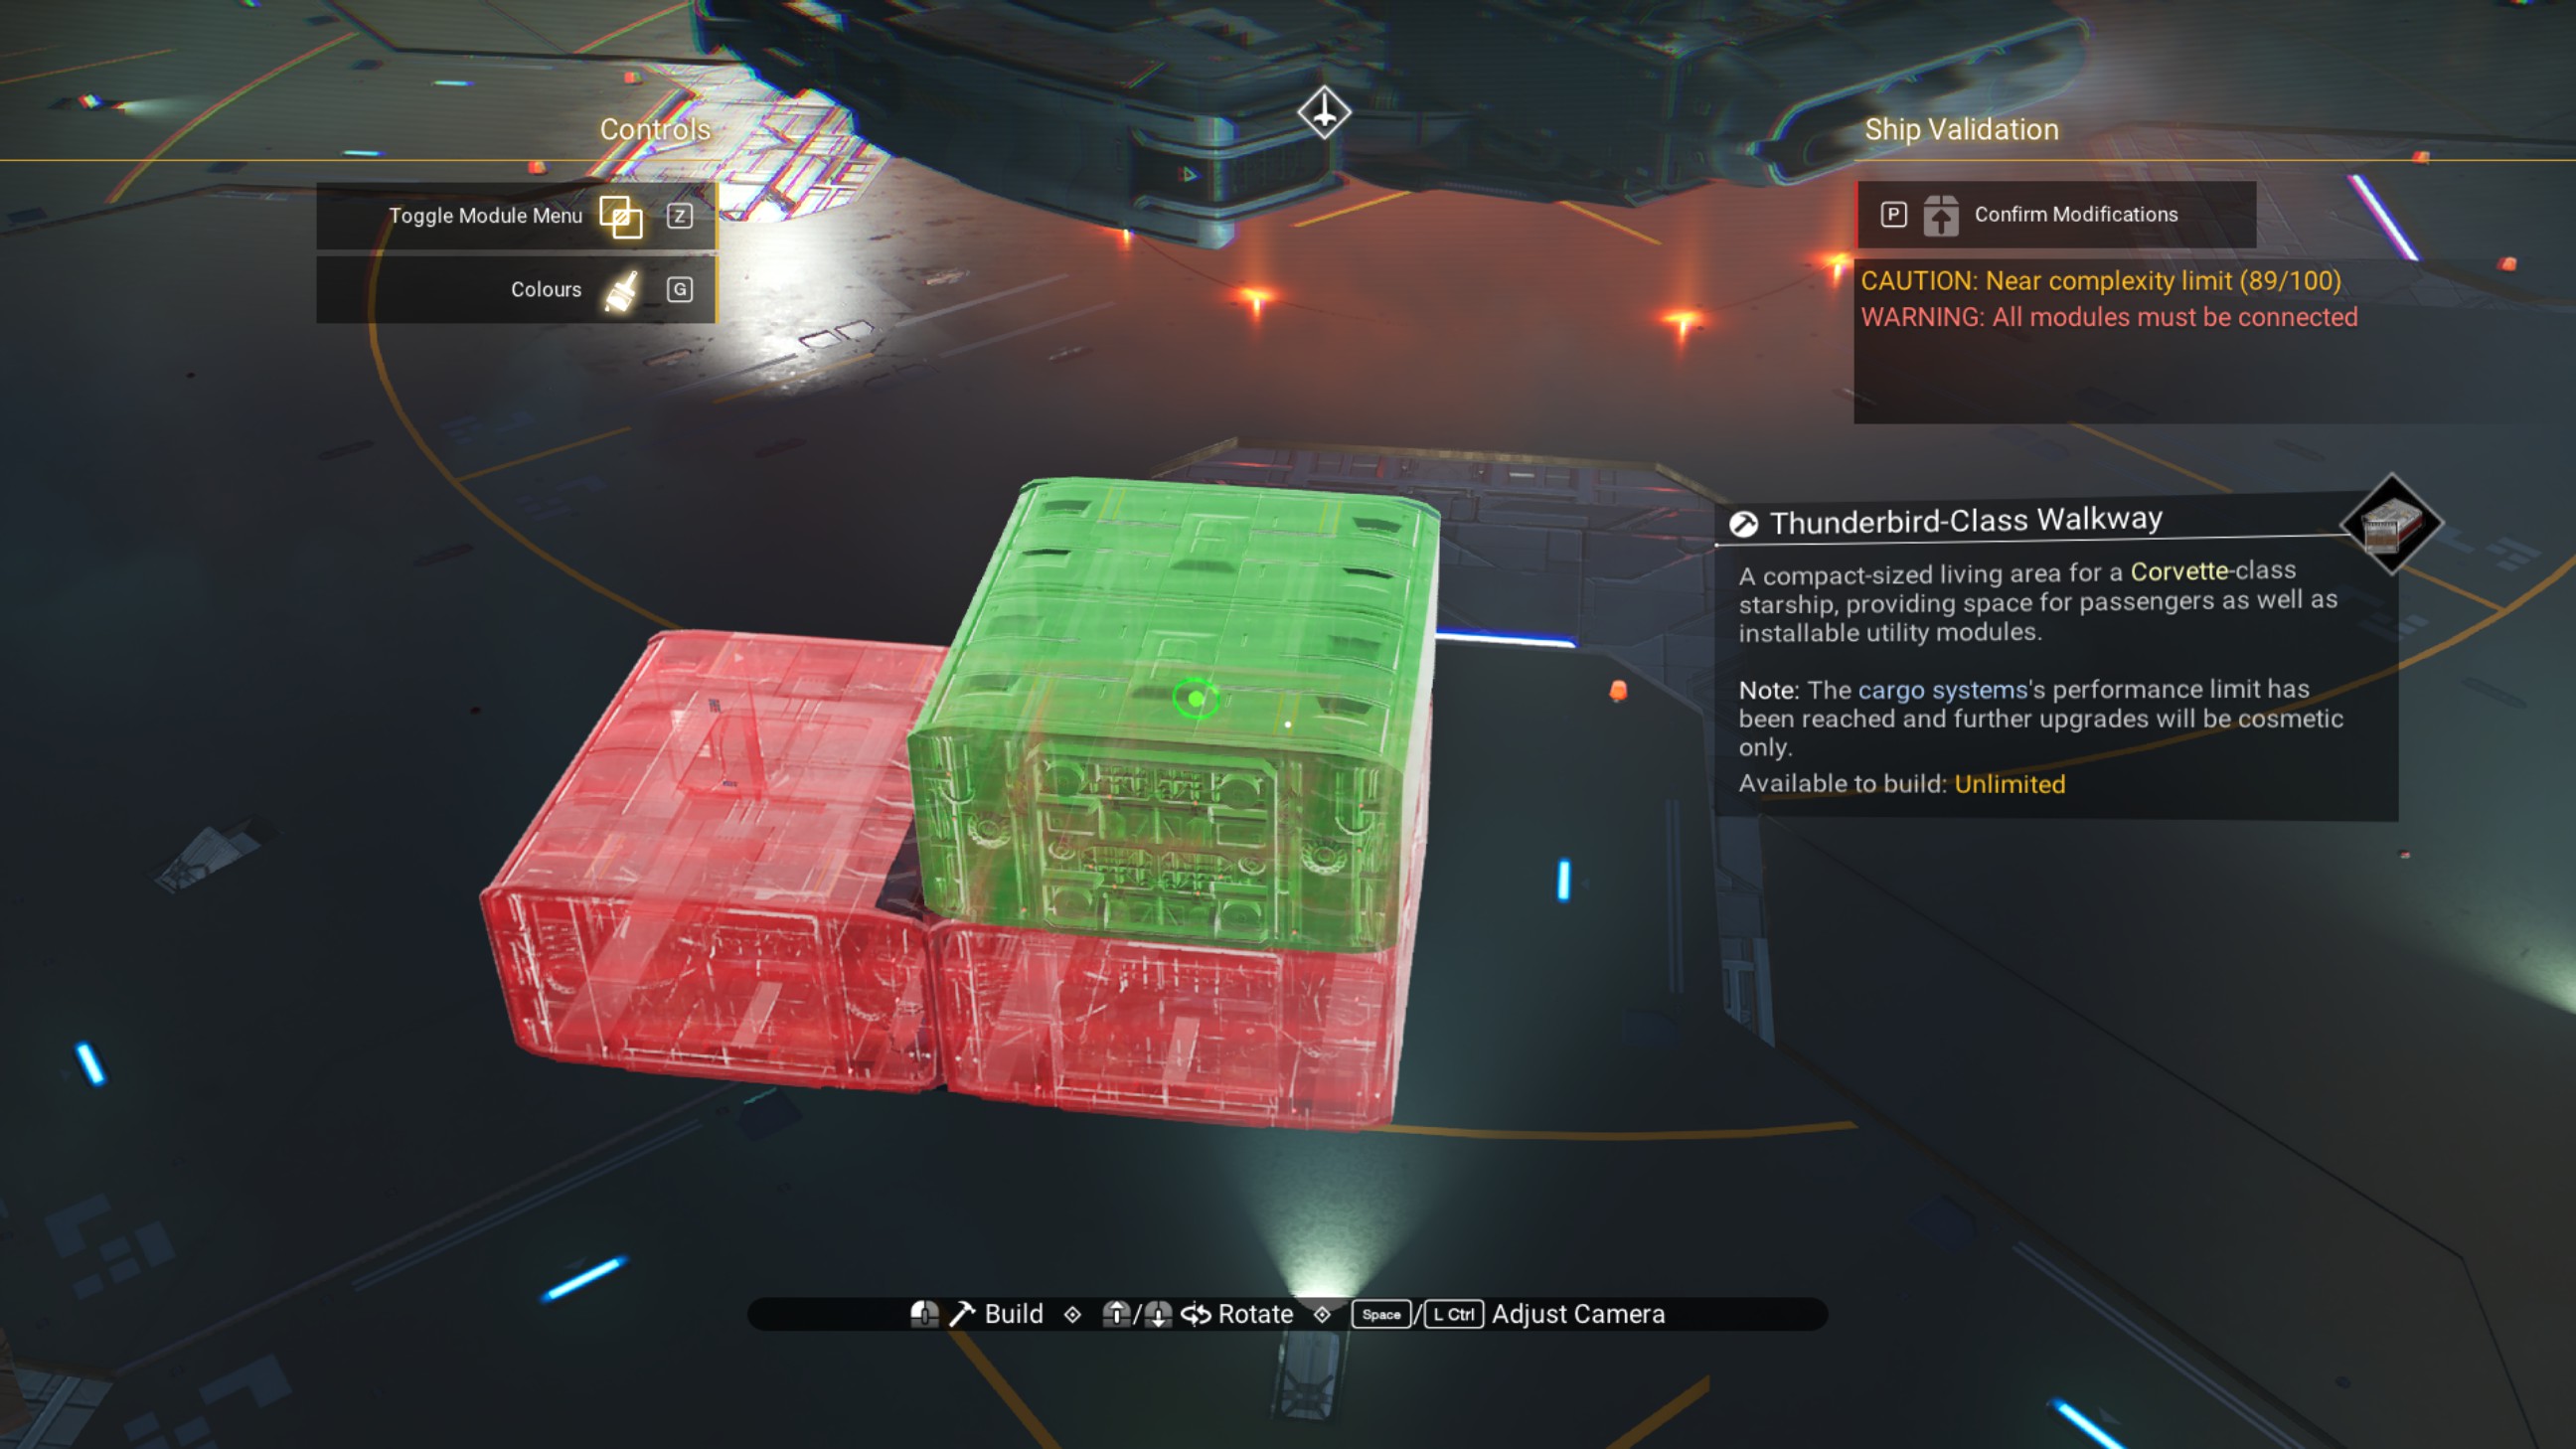
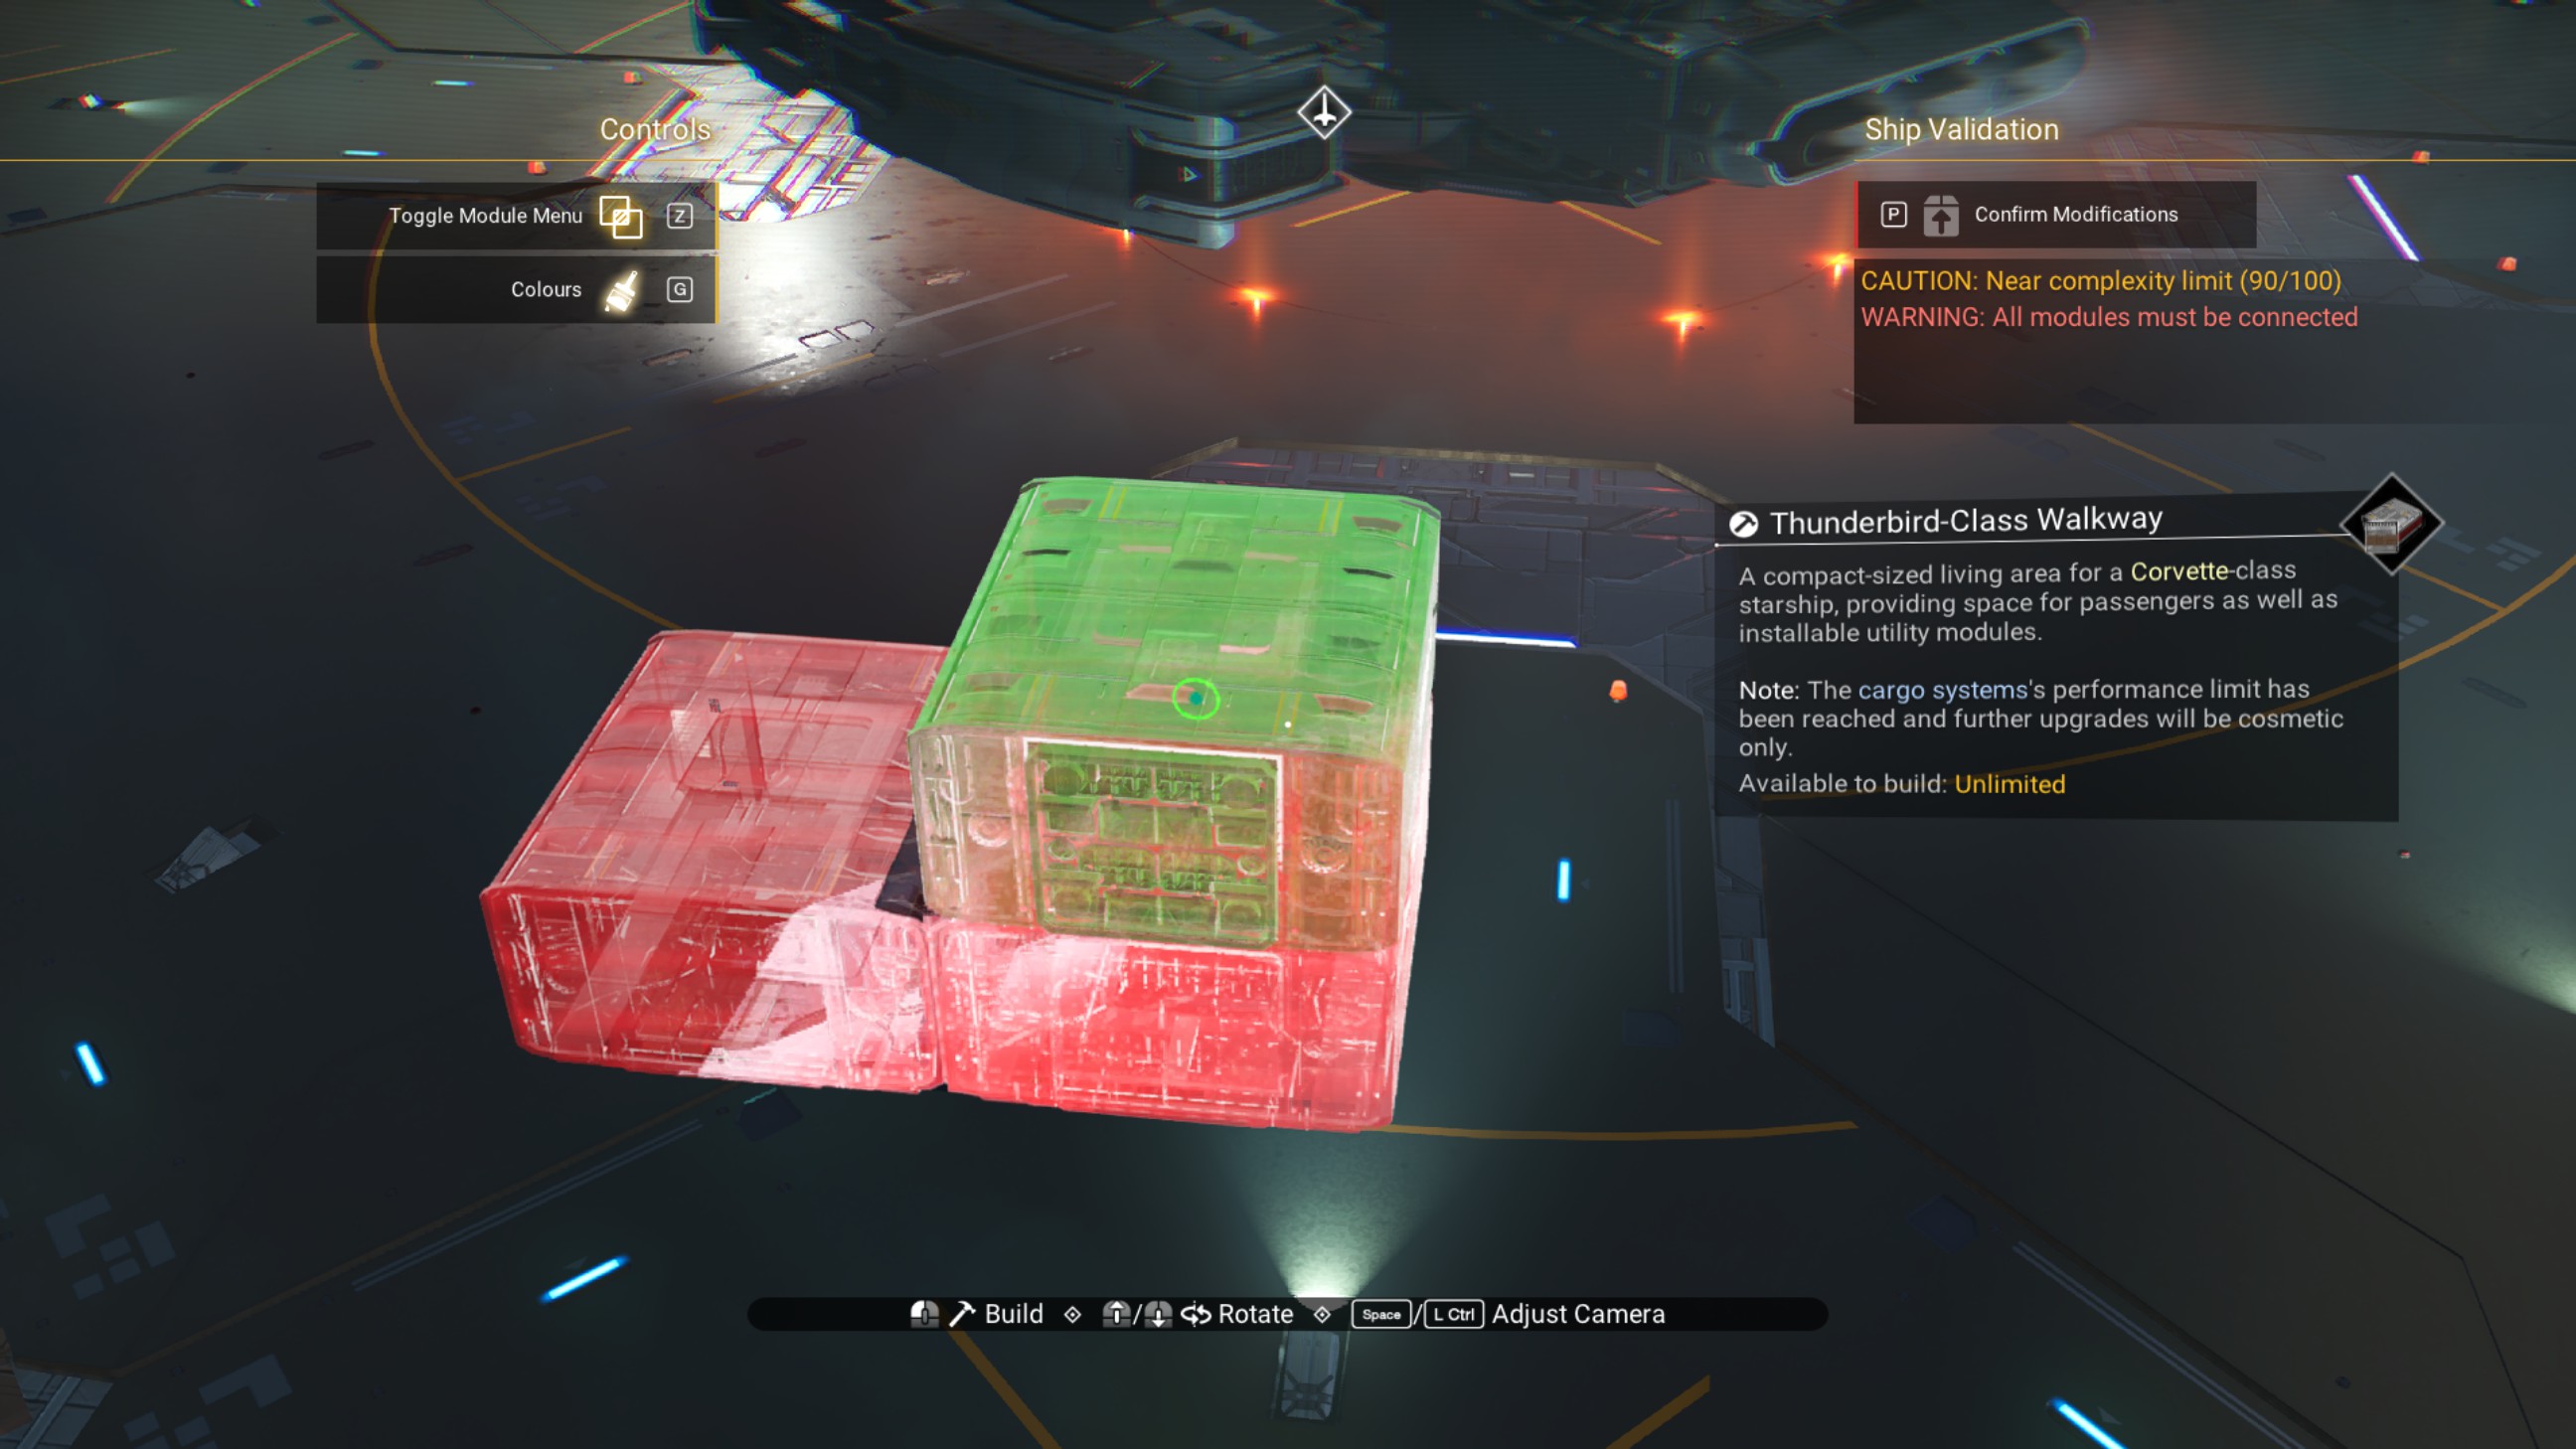
Delete the extra overlapped walkways, but be careful not to touch the ones on top.
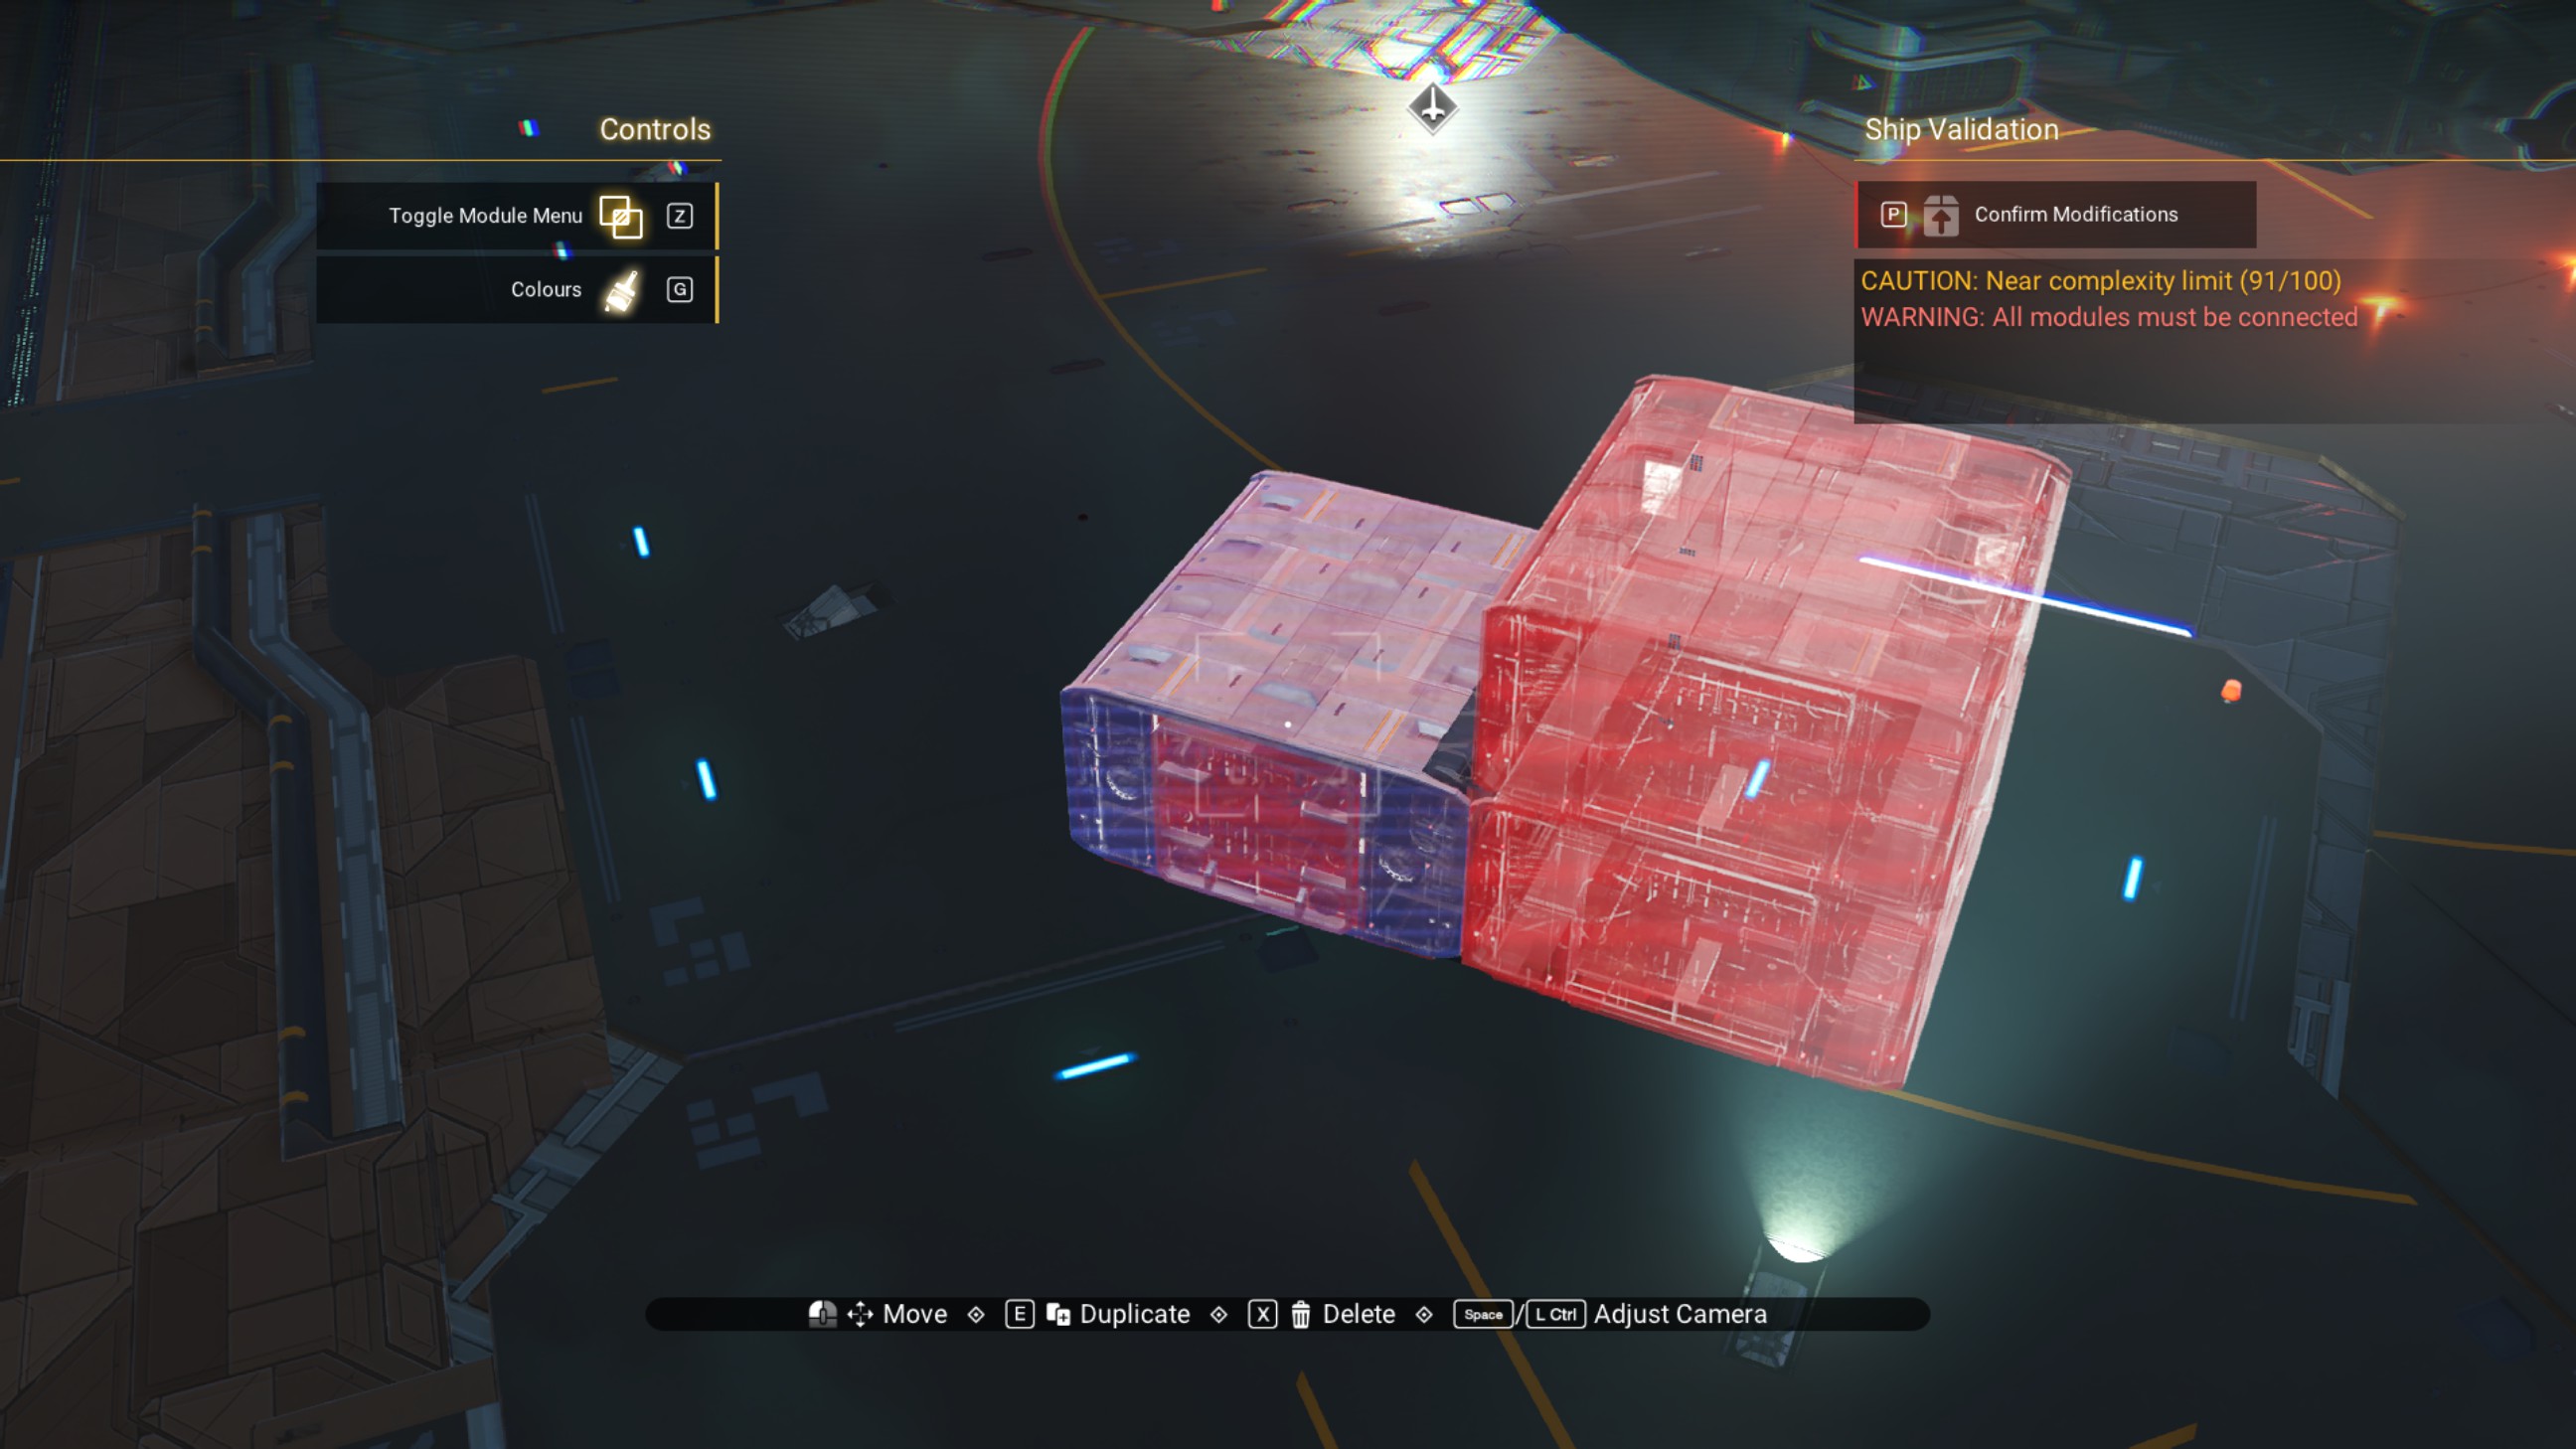
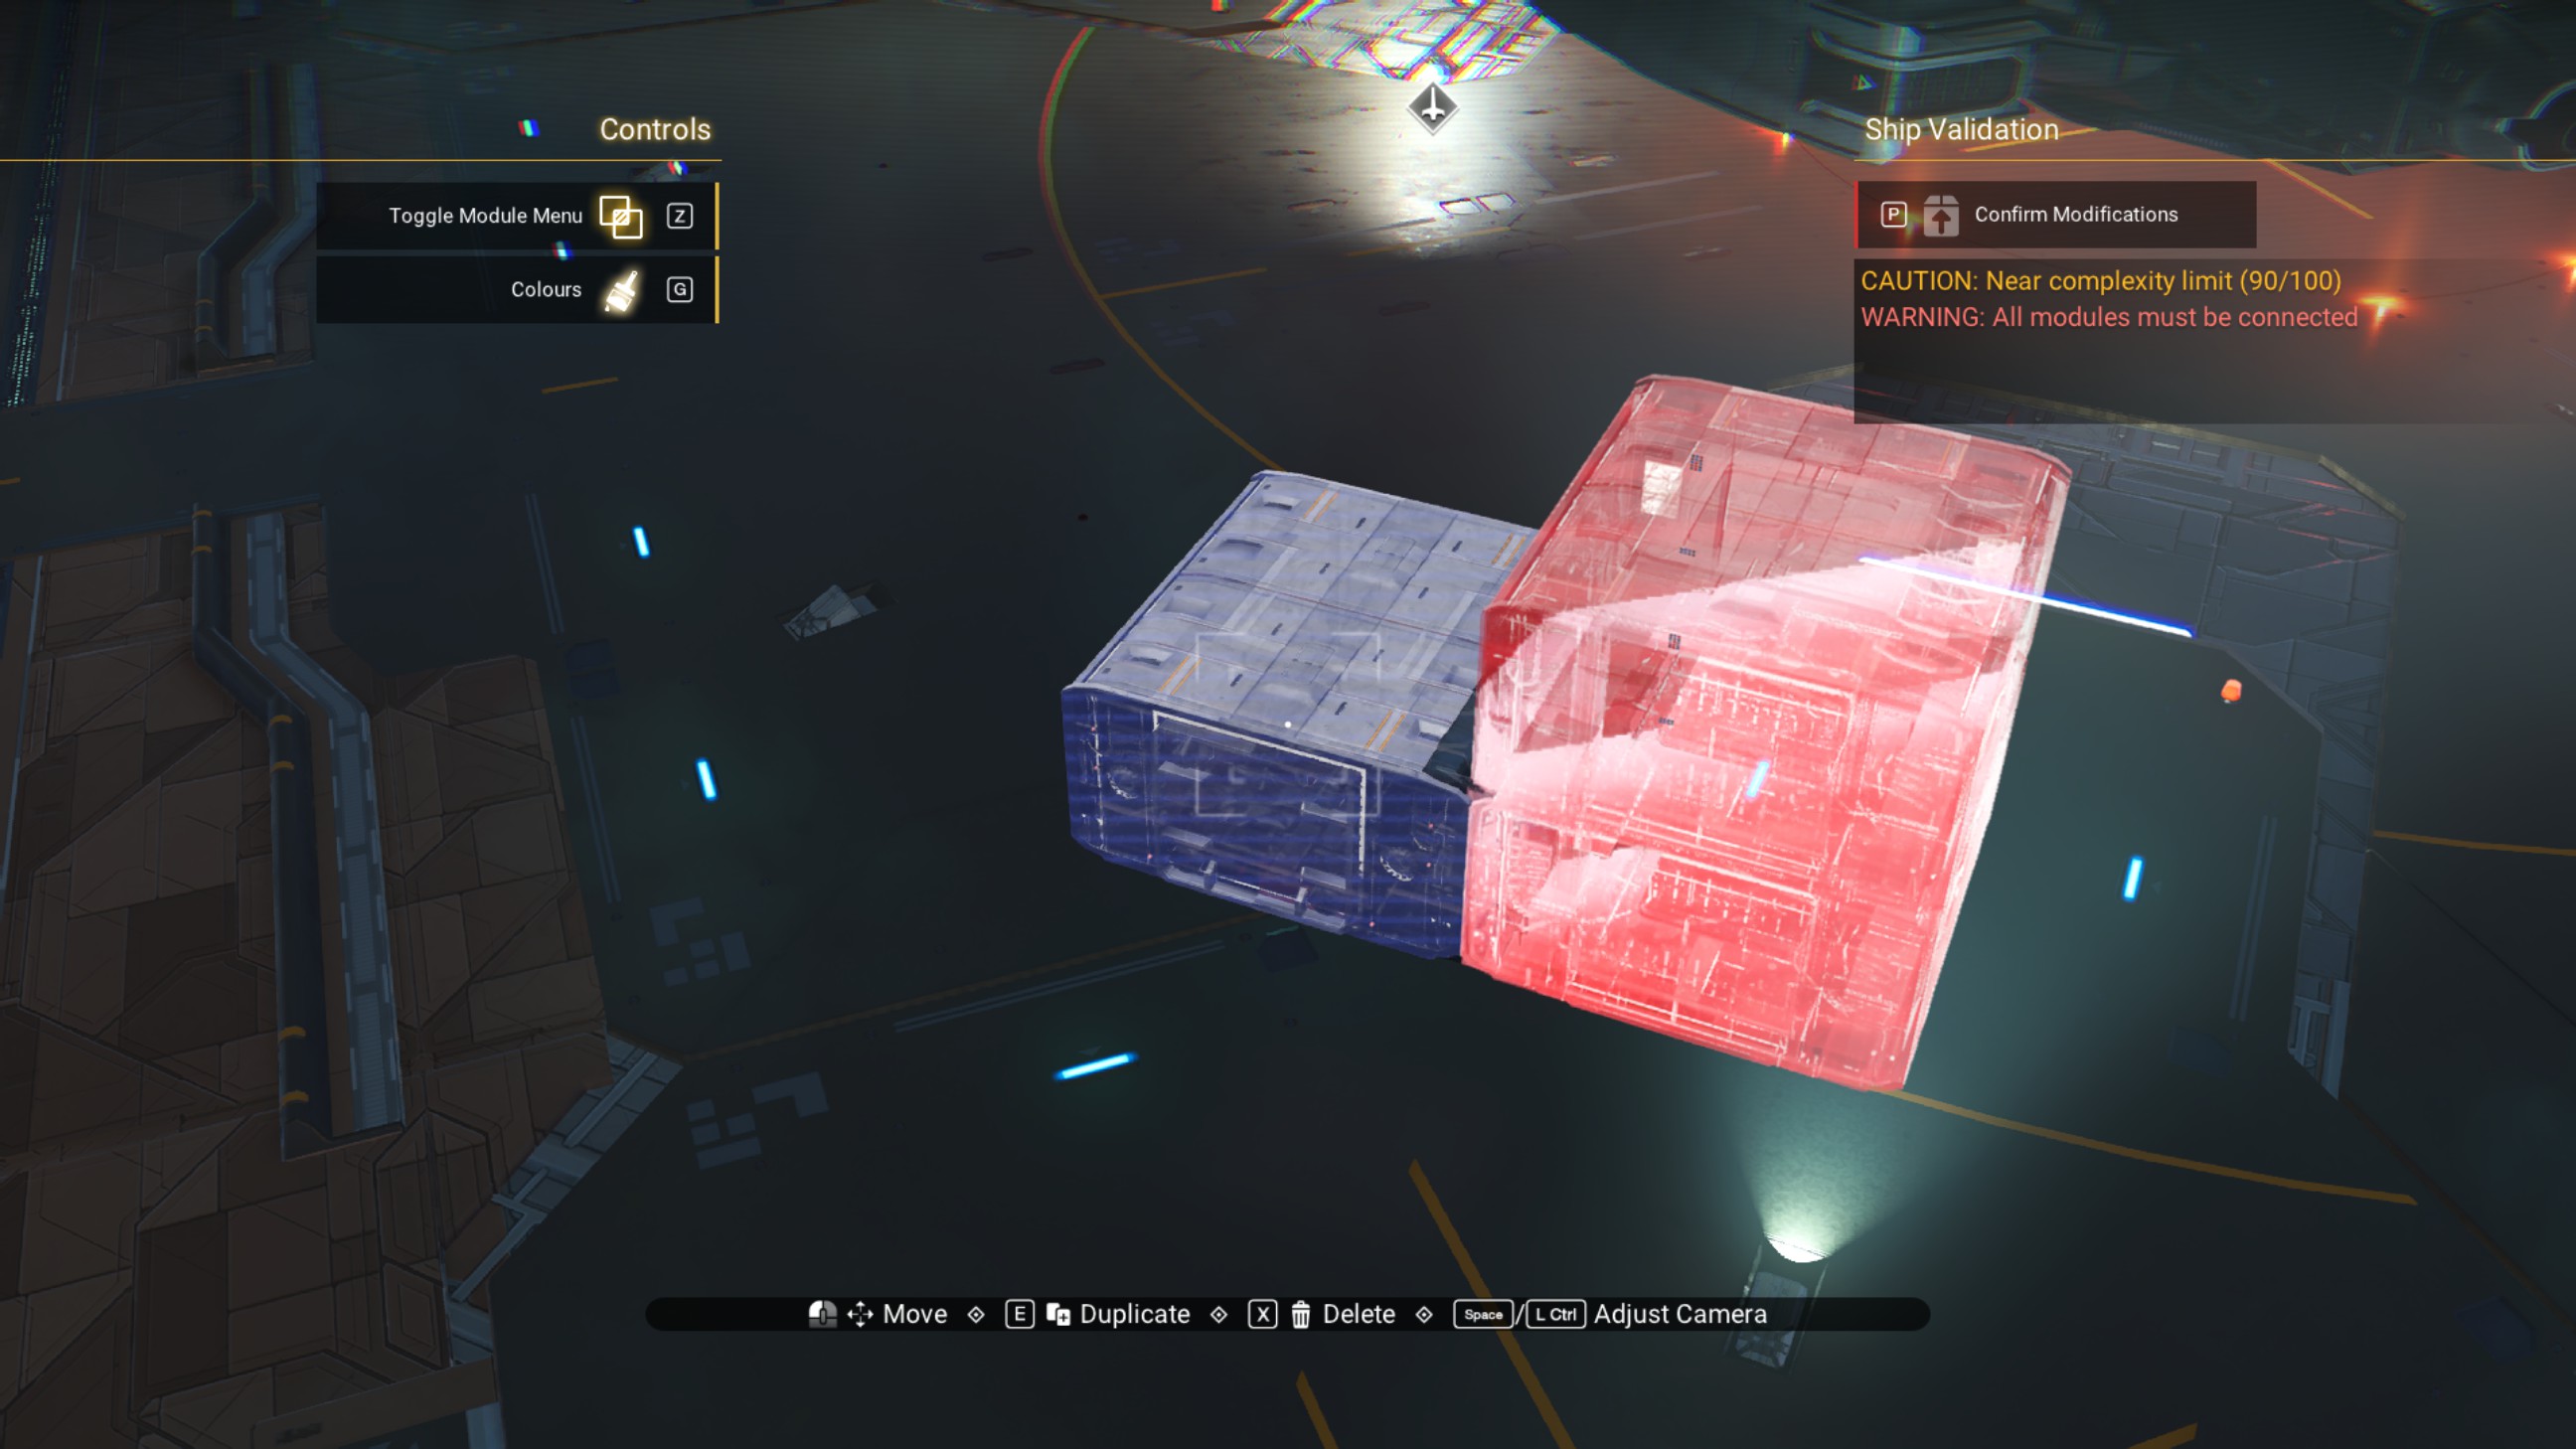
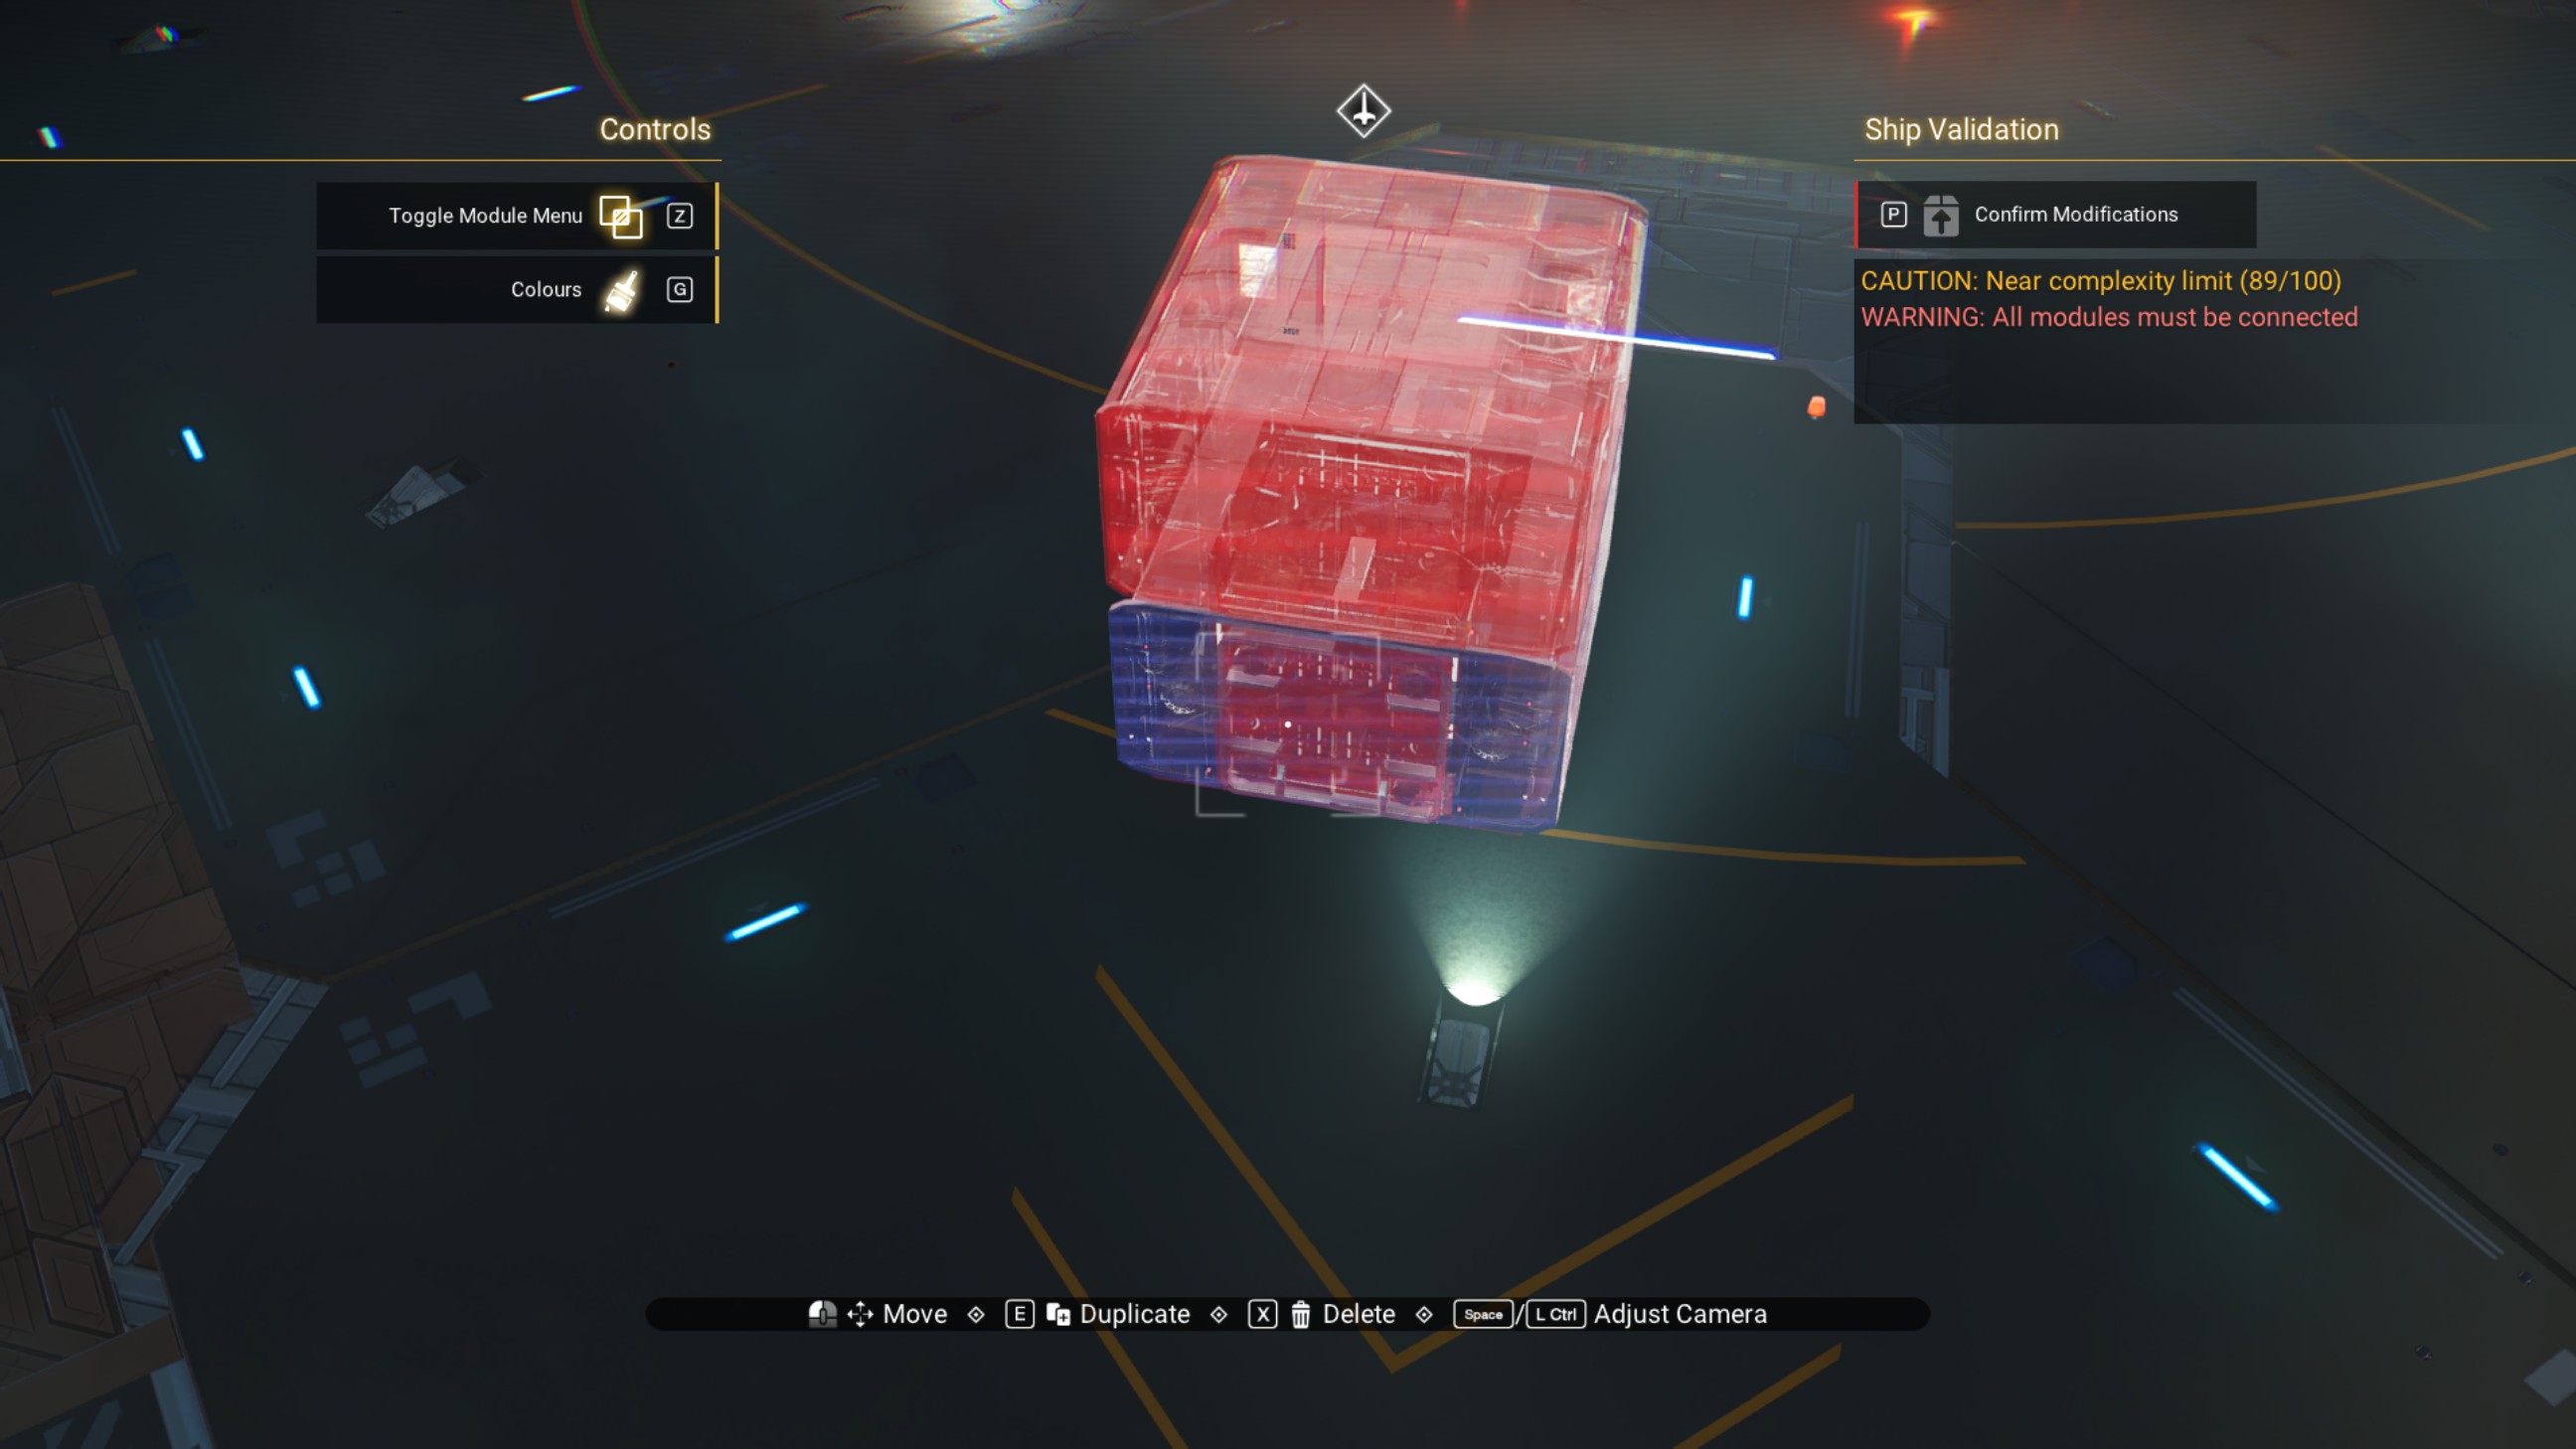
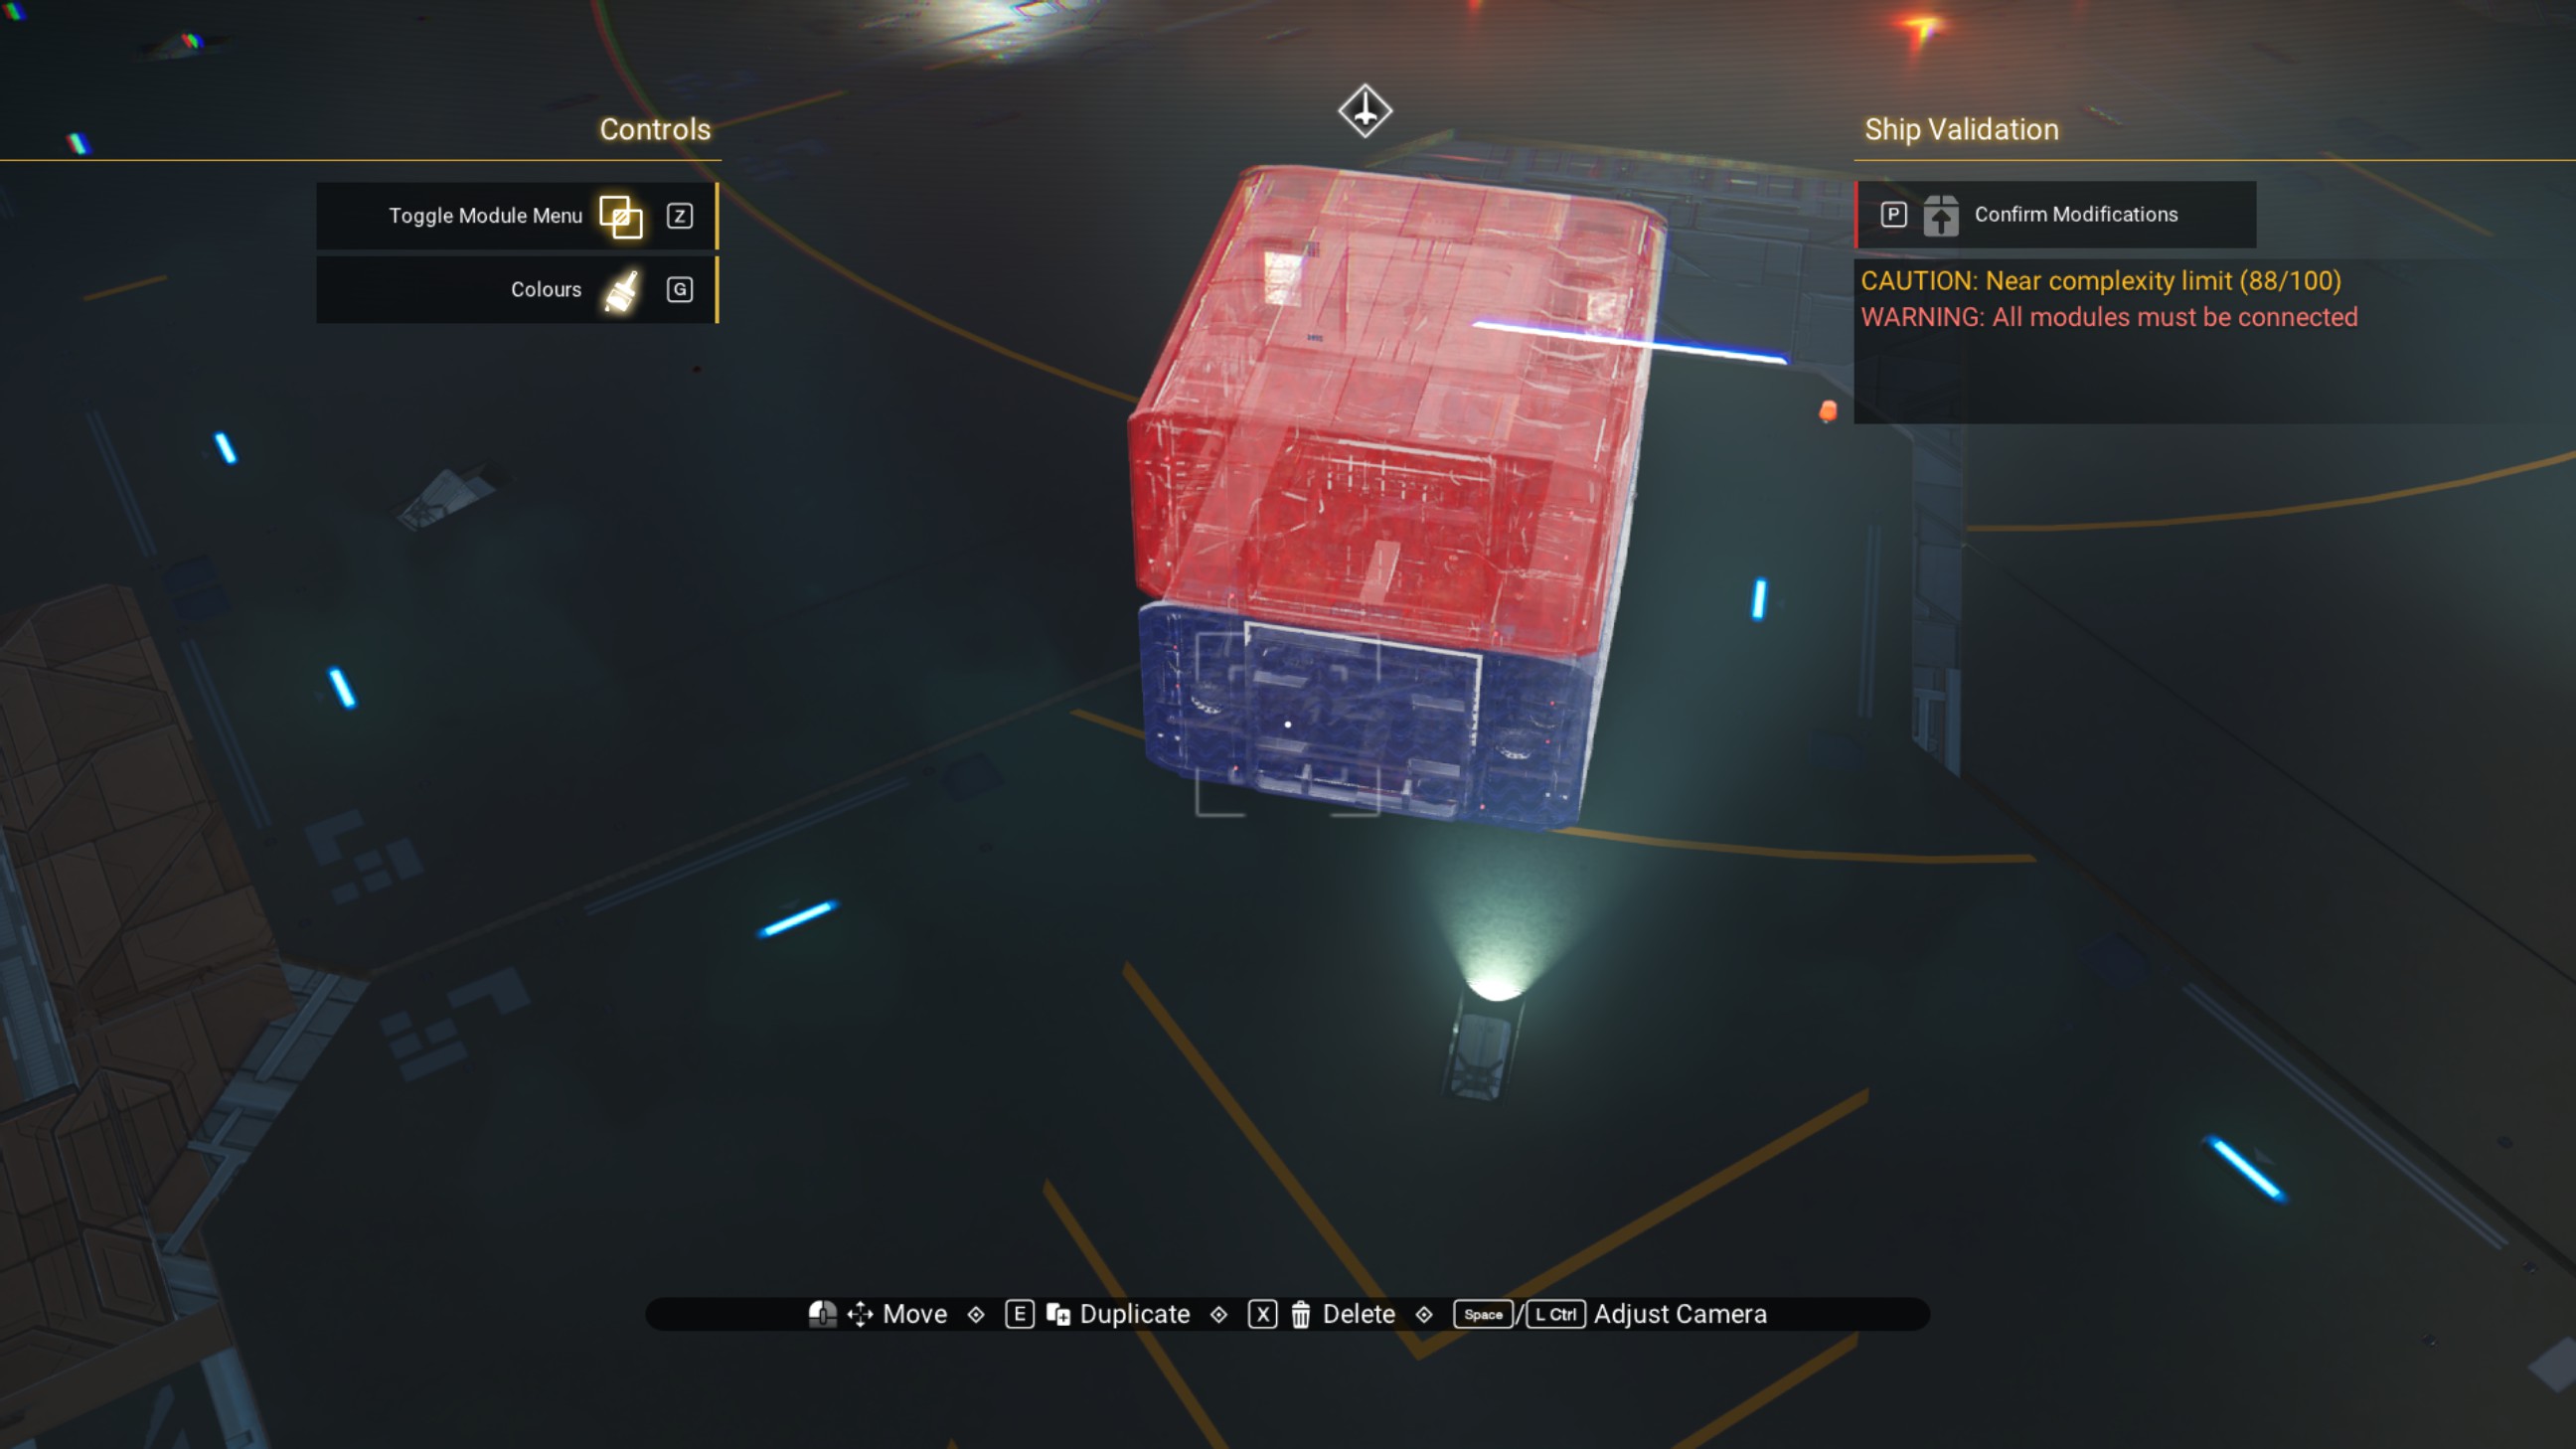
Place a rotated rockhopper propeller module on either side of the overlapped walkways, as shown.
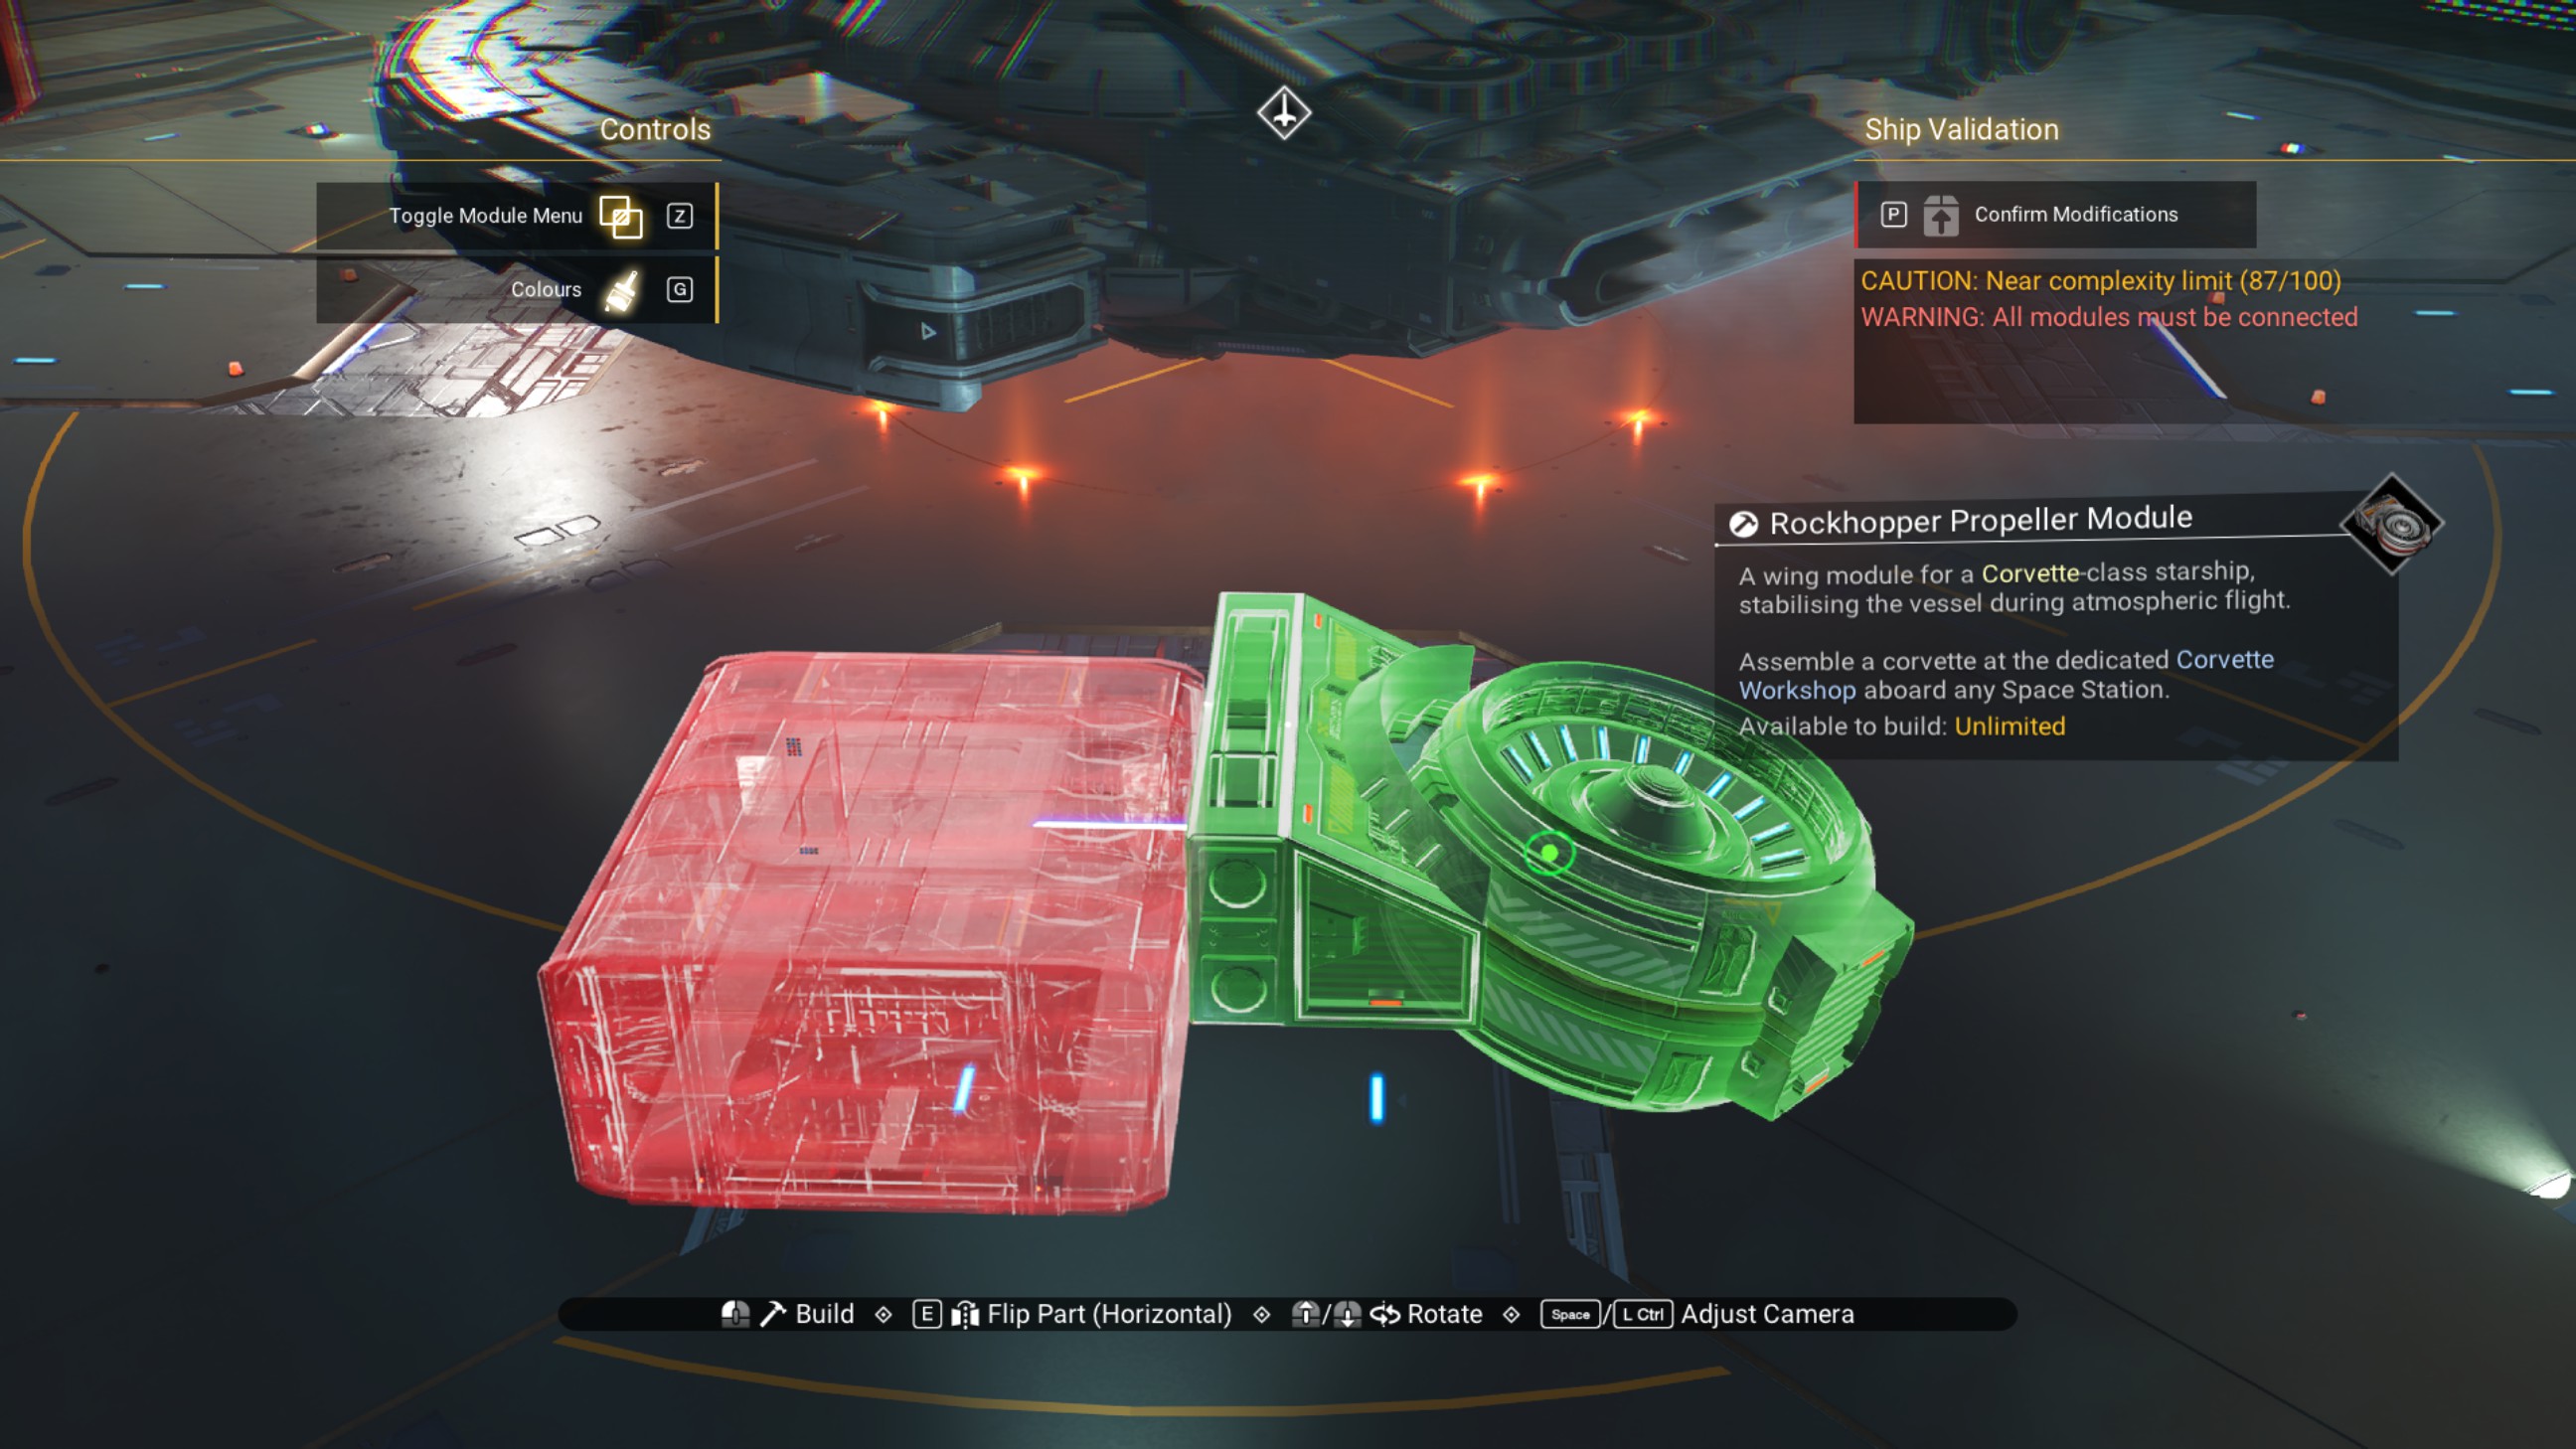
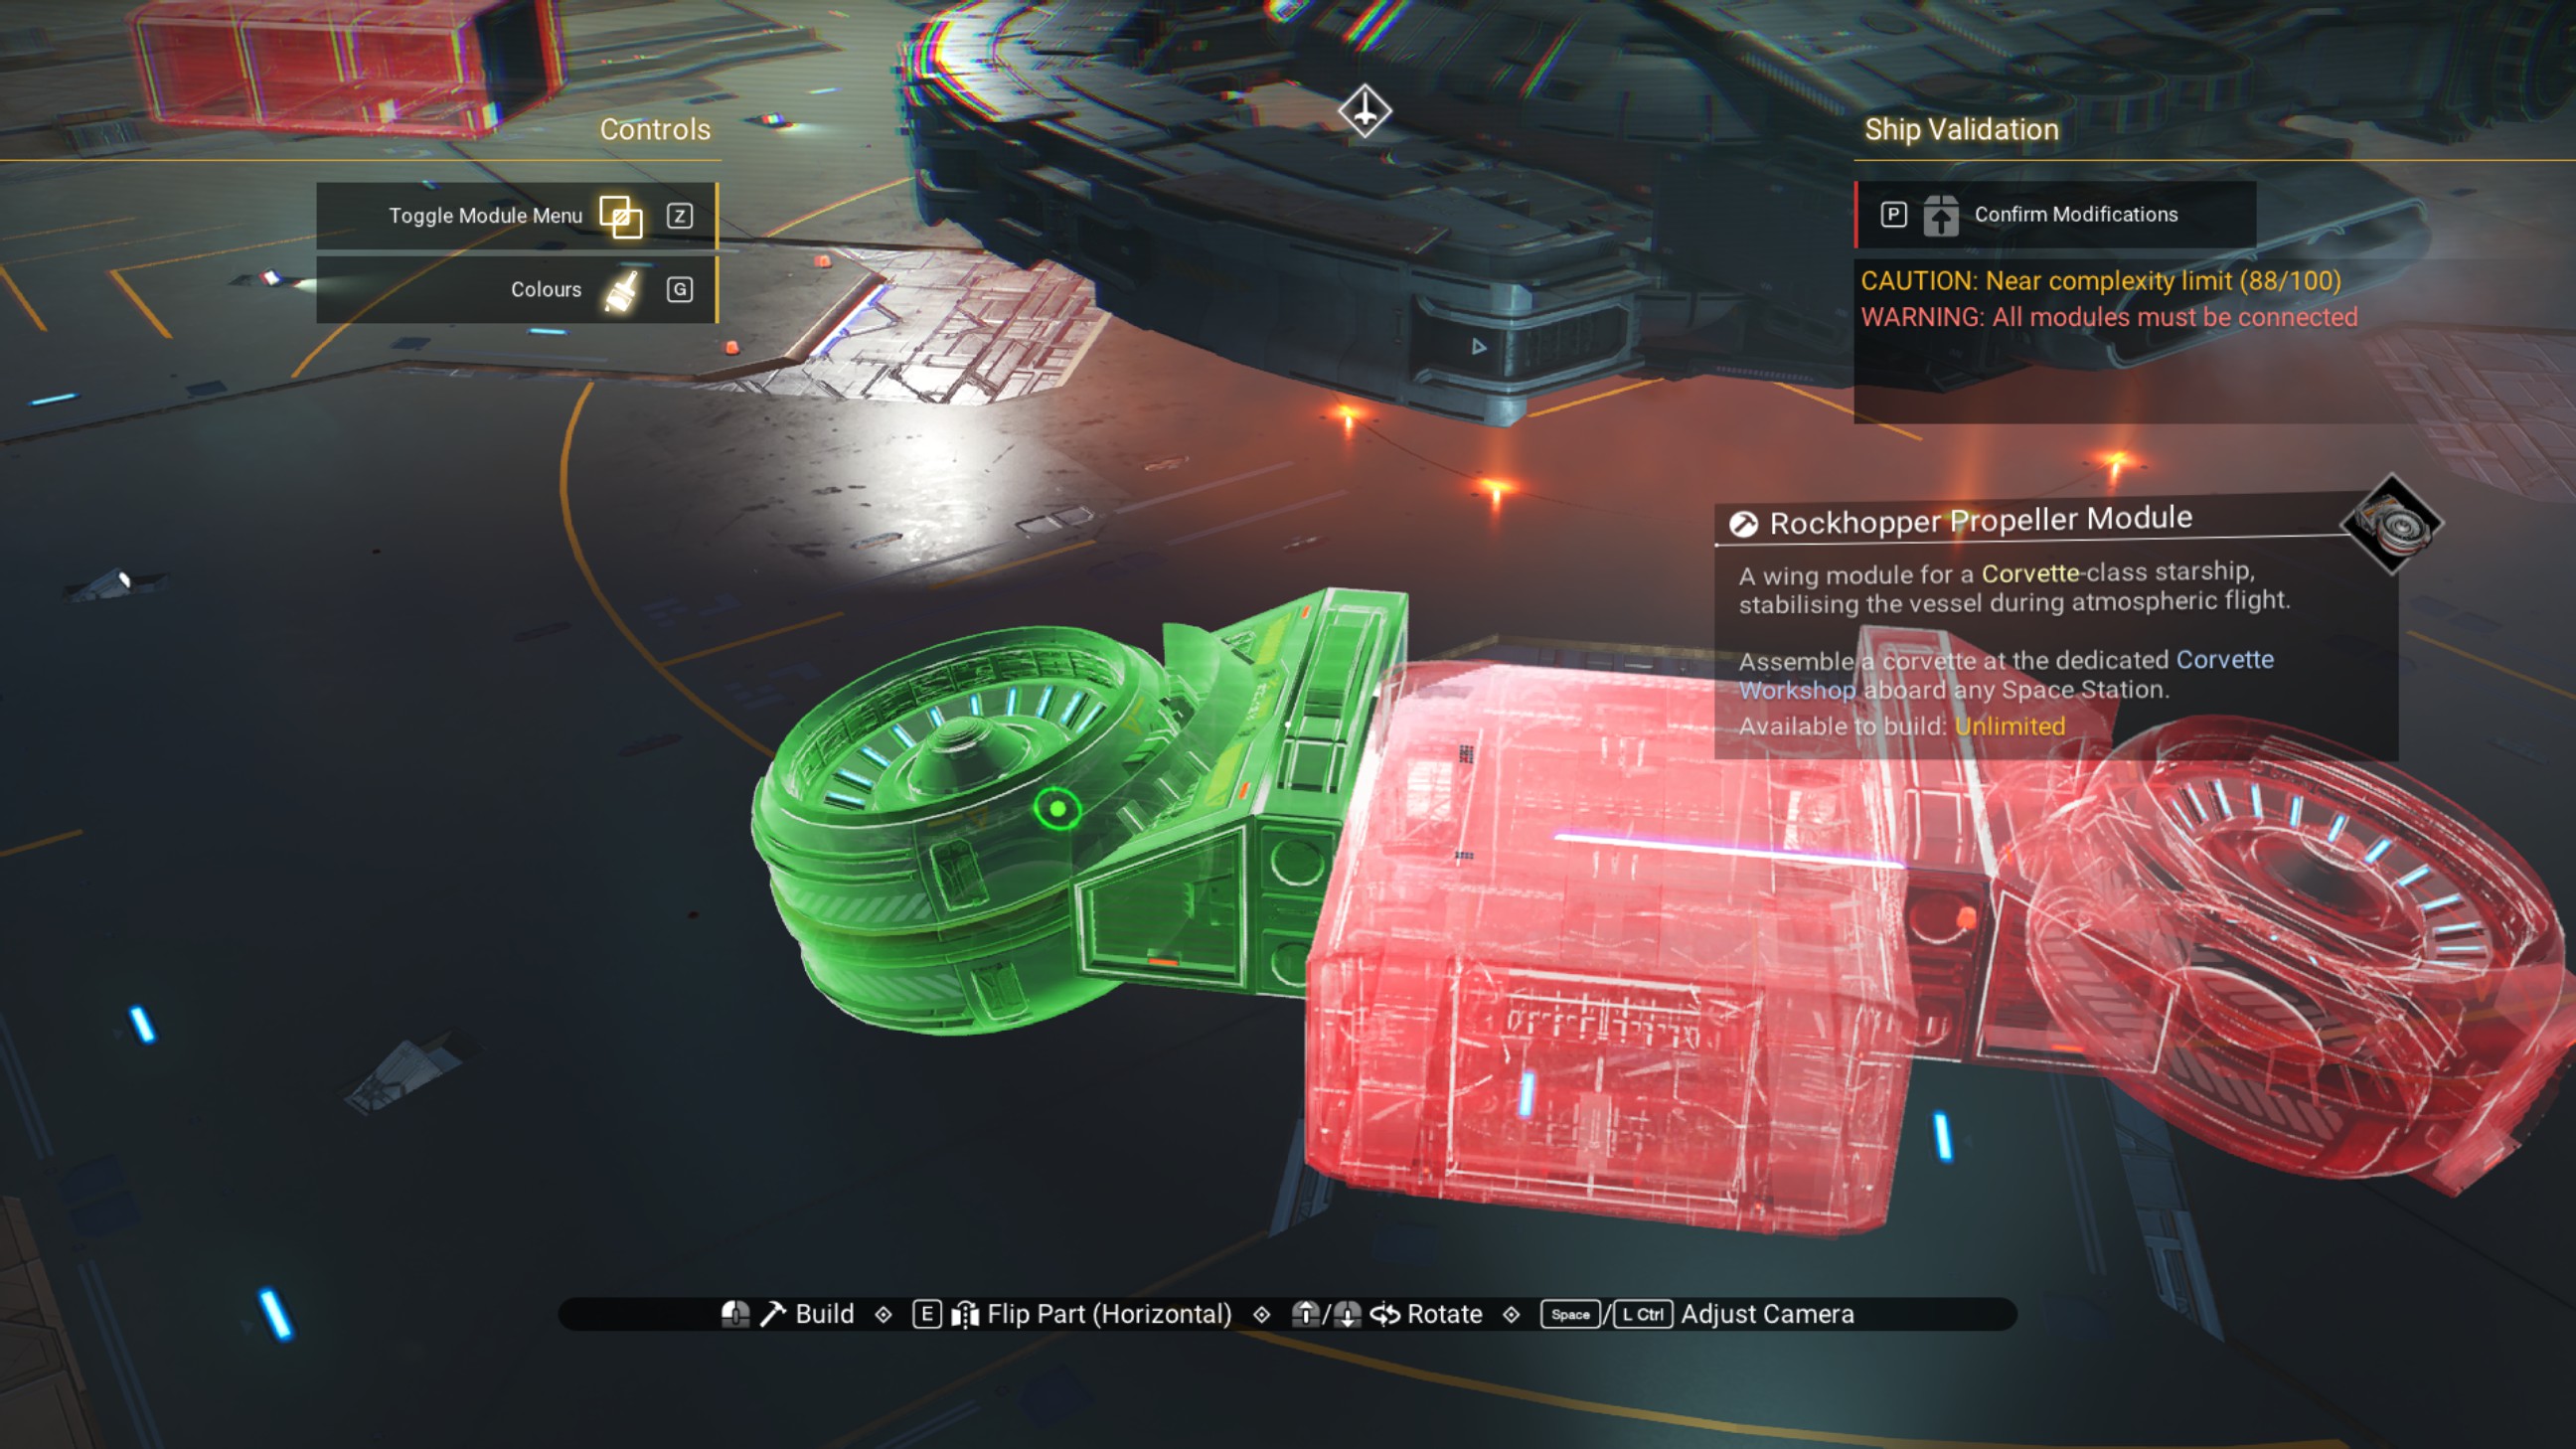
Place two more overlapped walkways on the new offset position between the propeller modules.
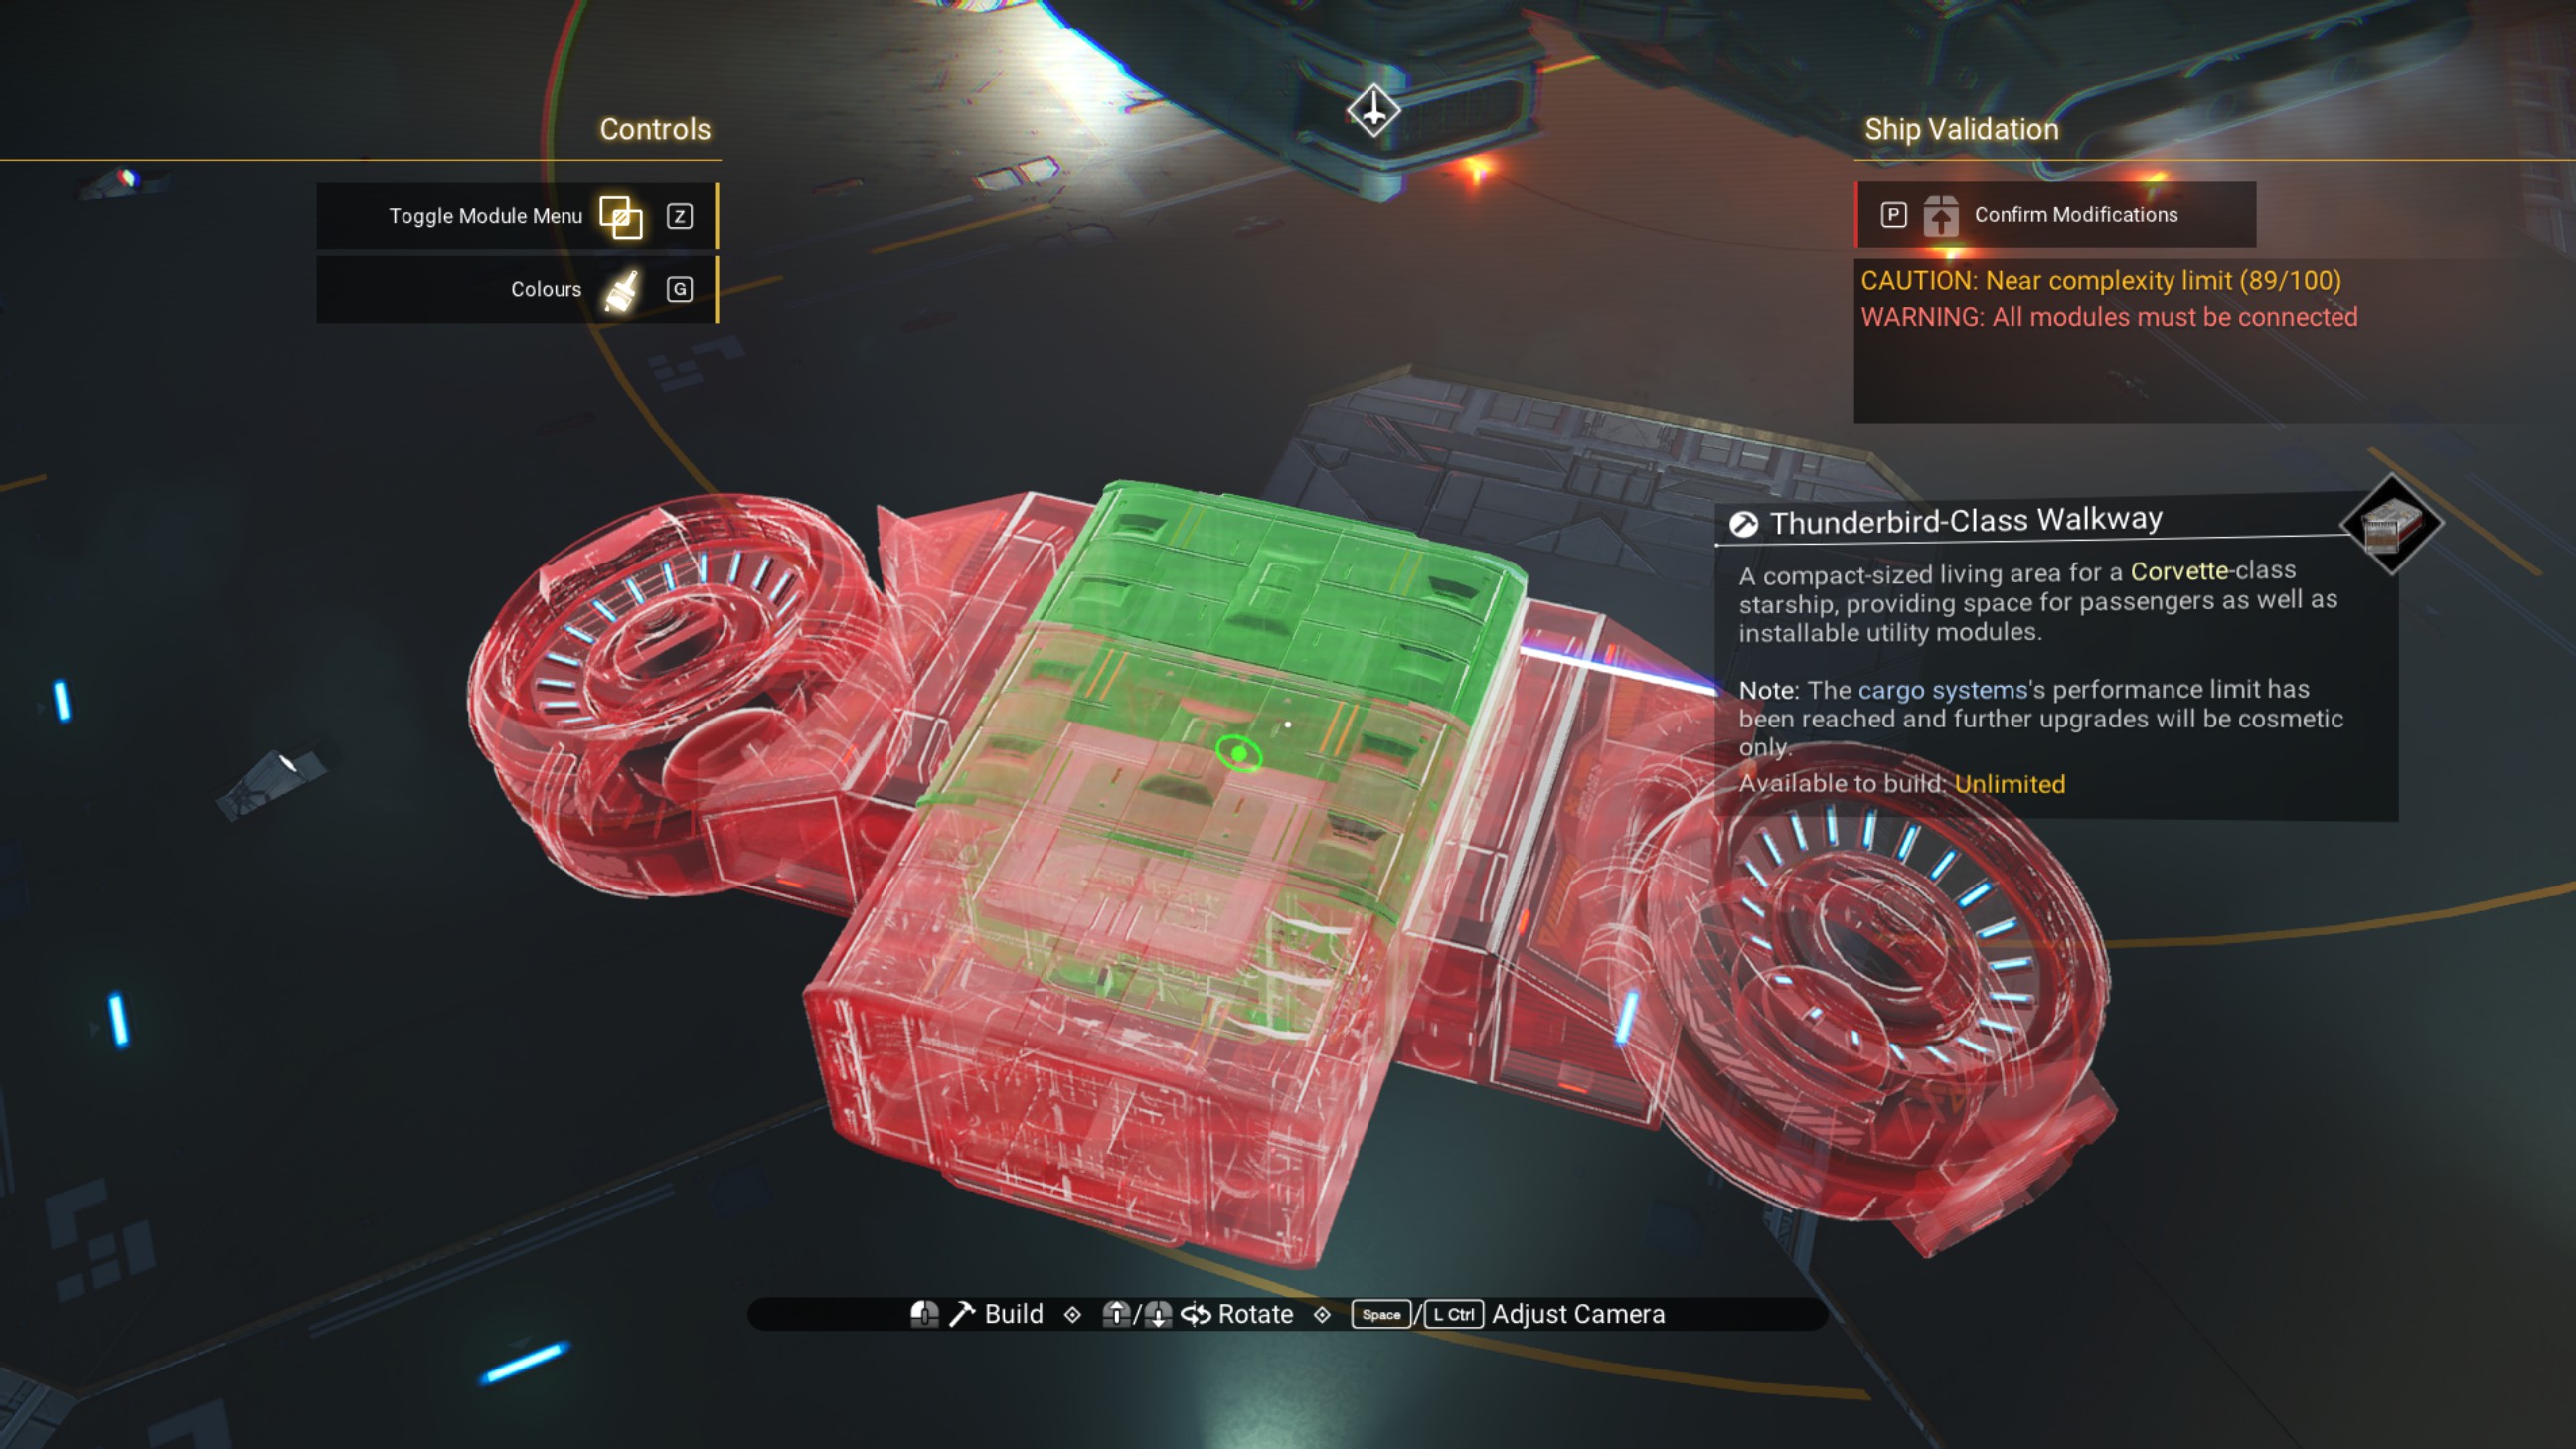
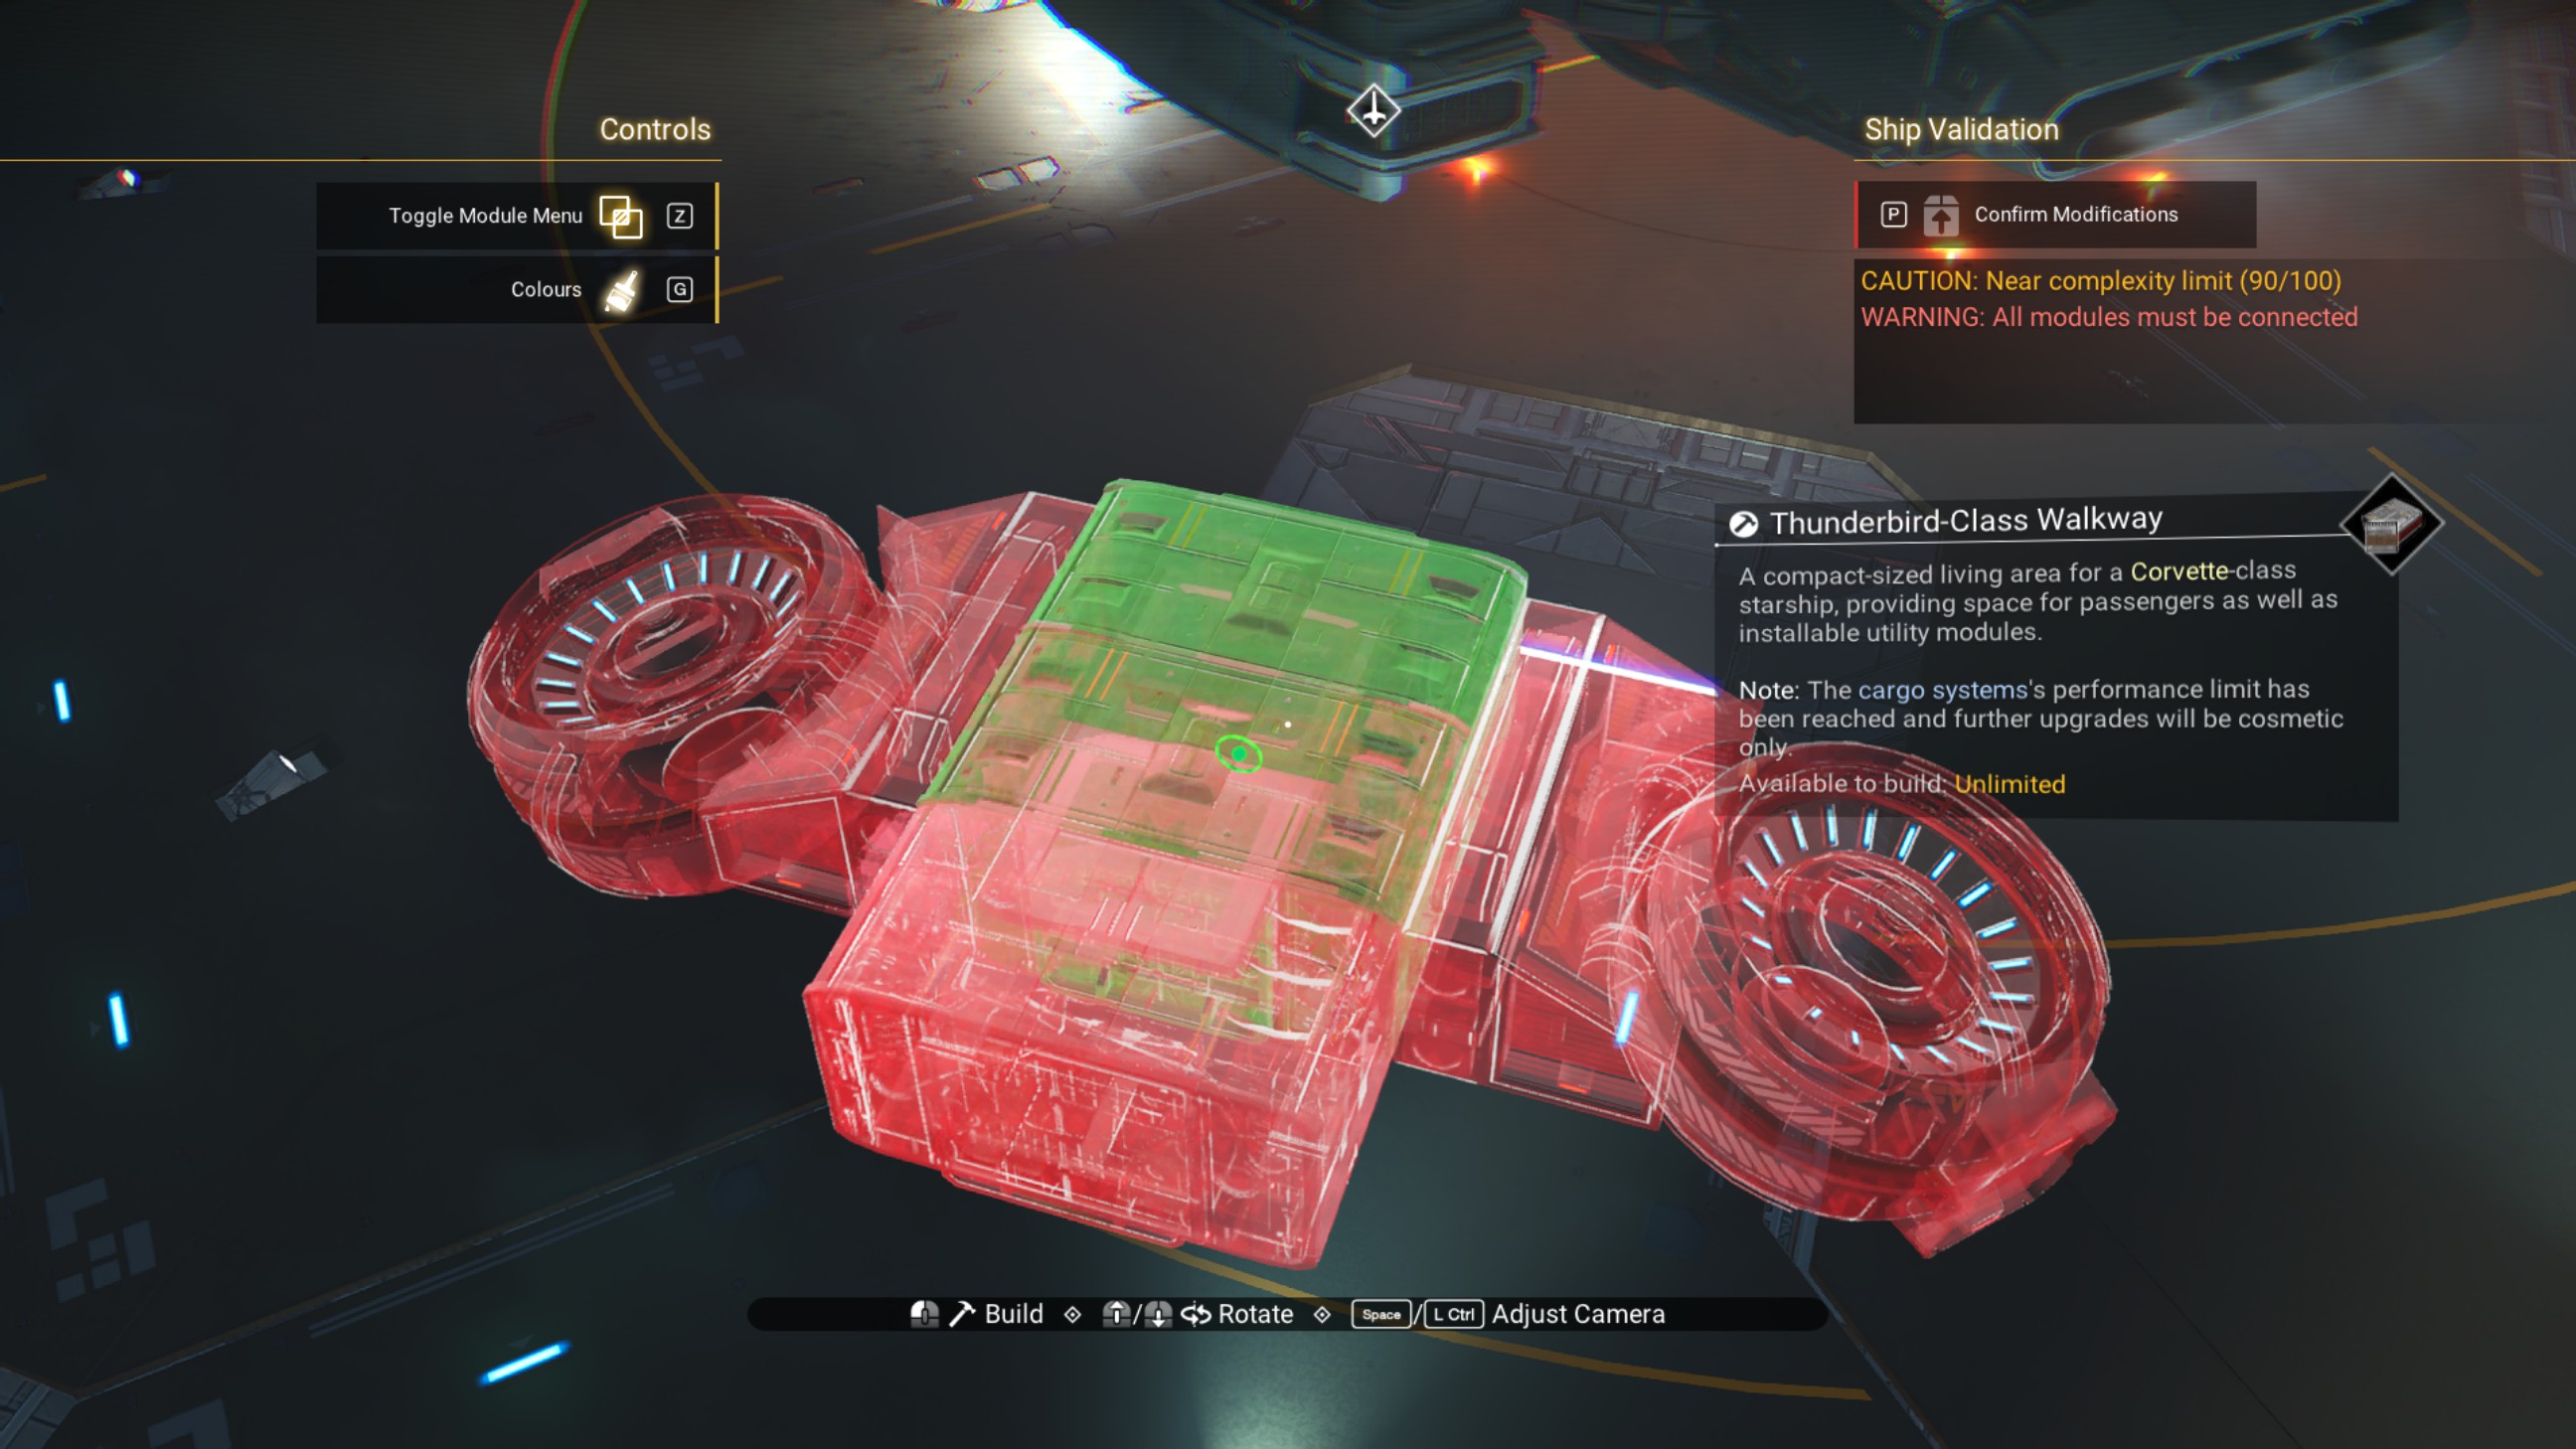
Delete the propeller modules.
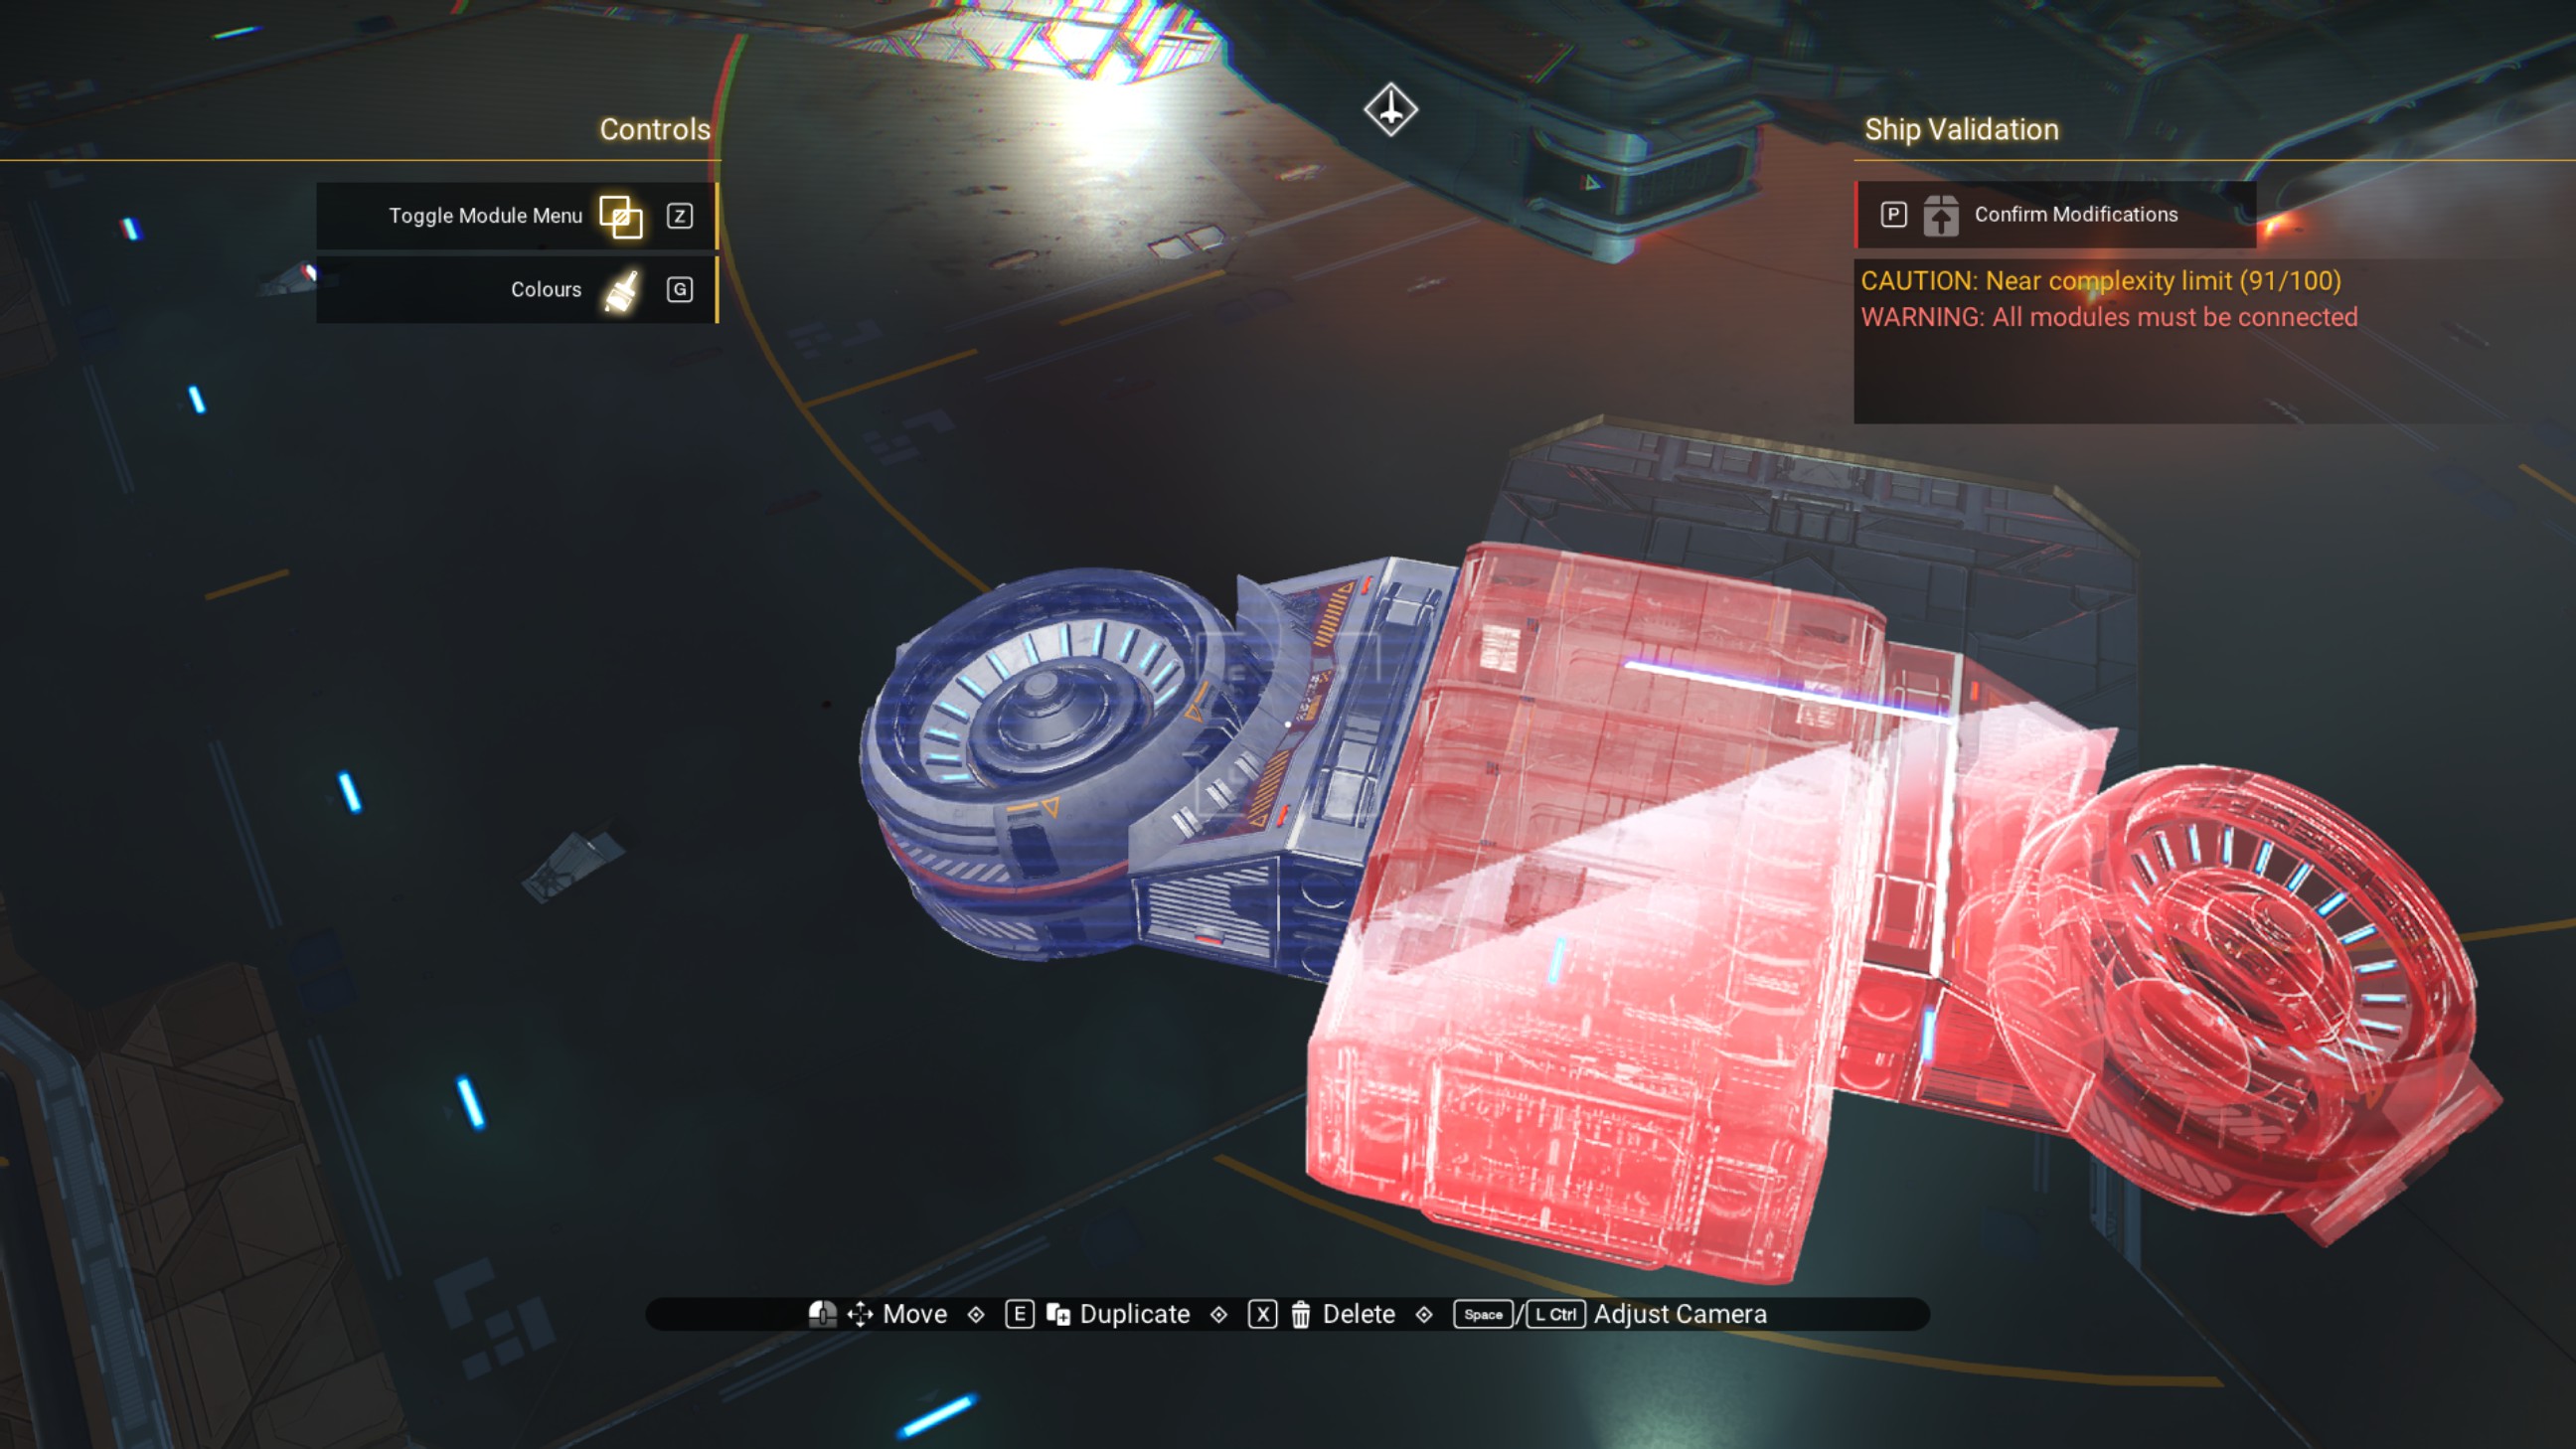
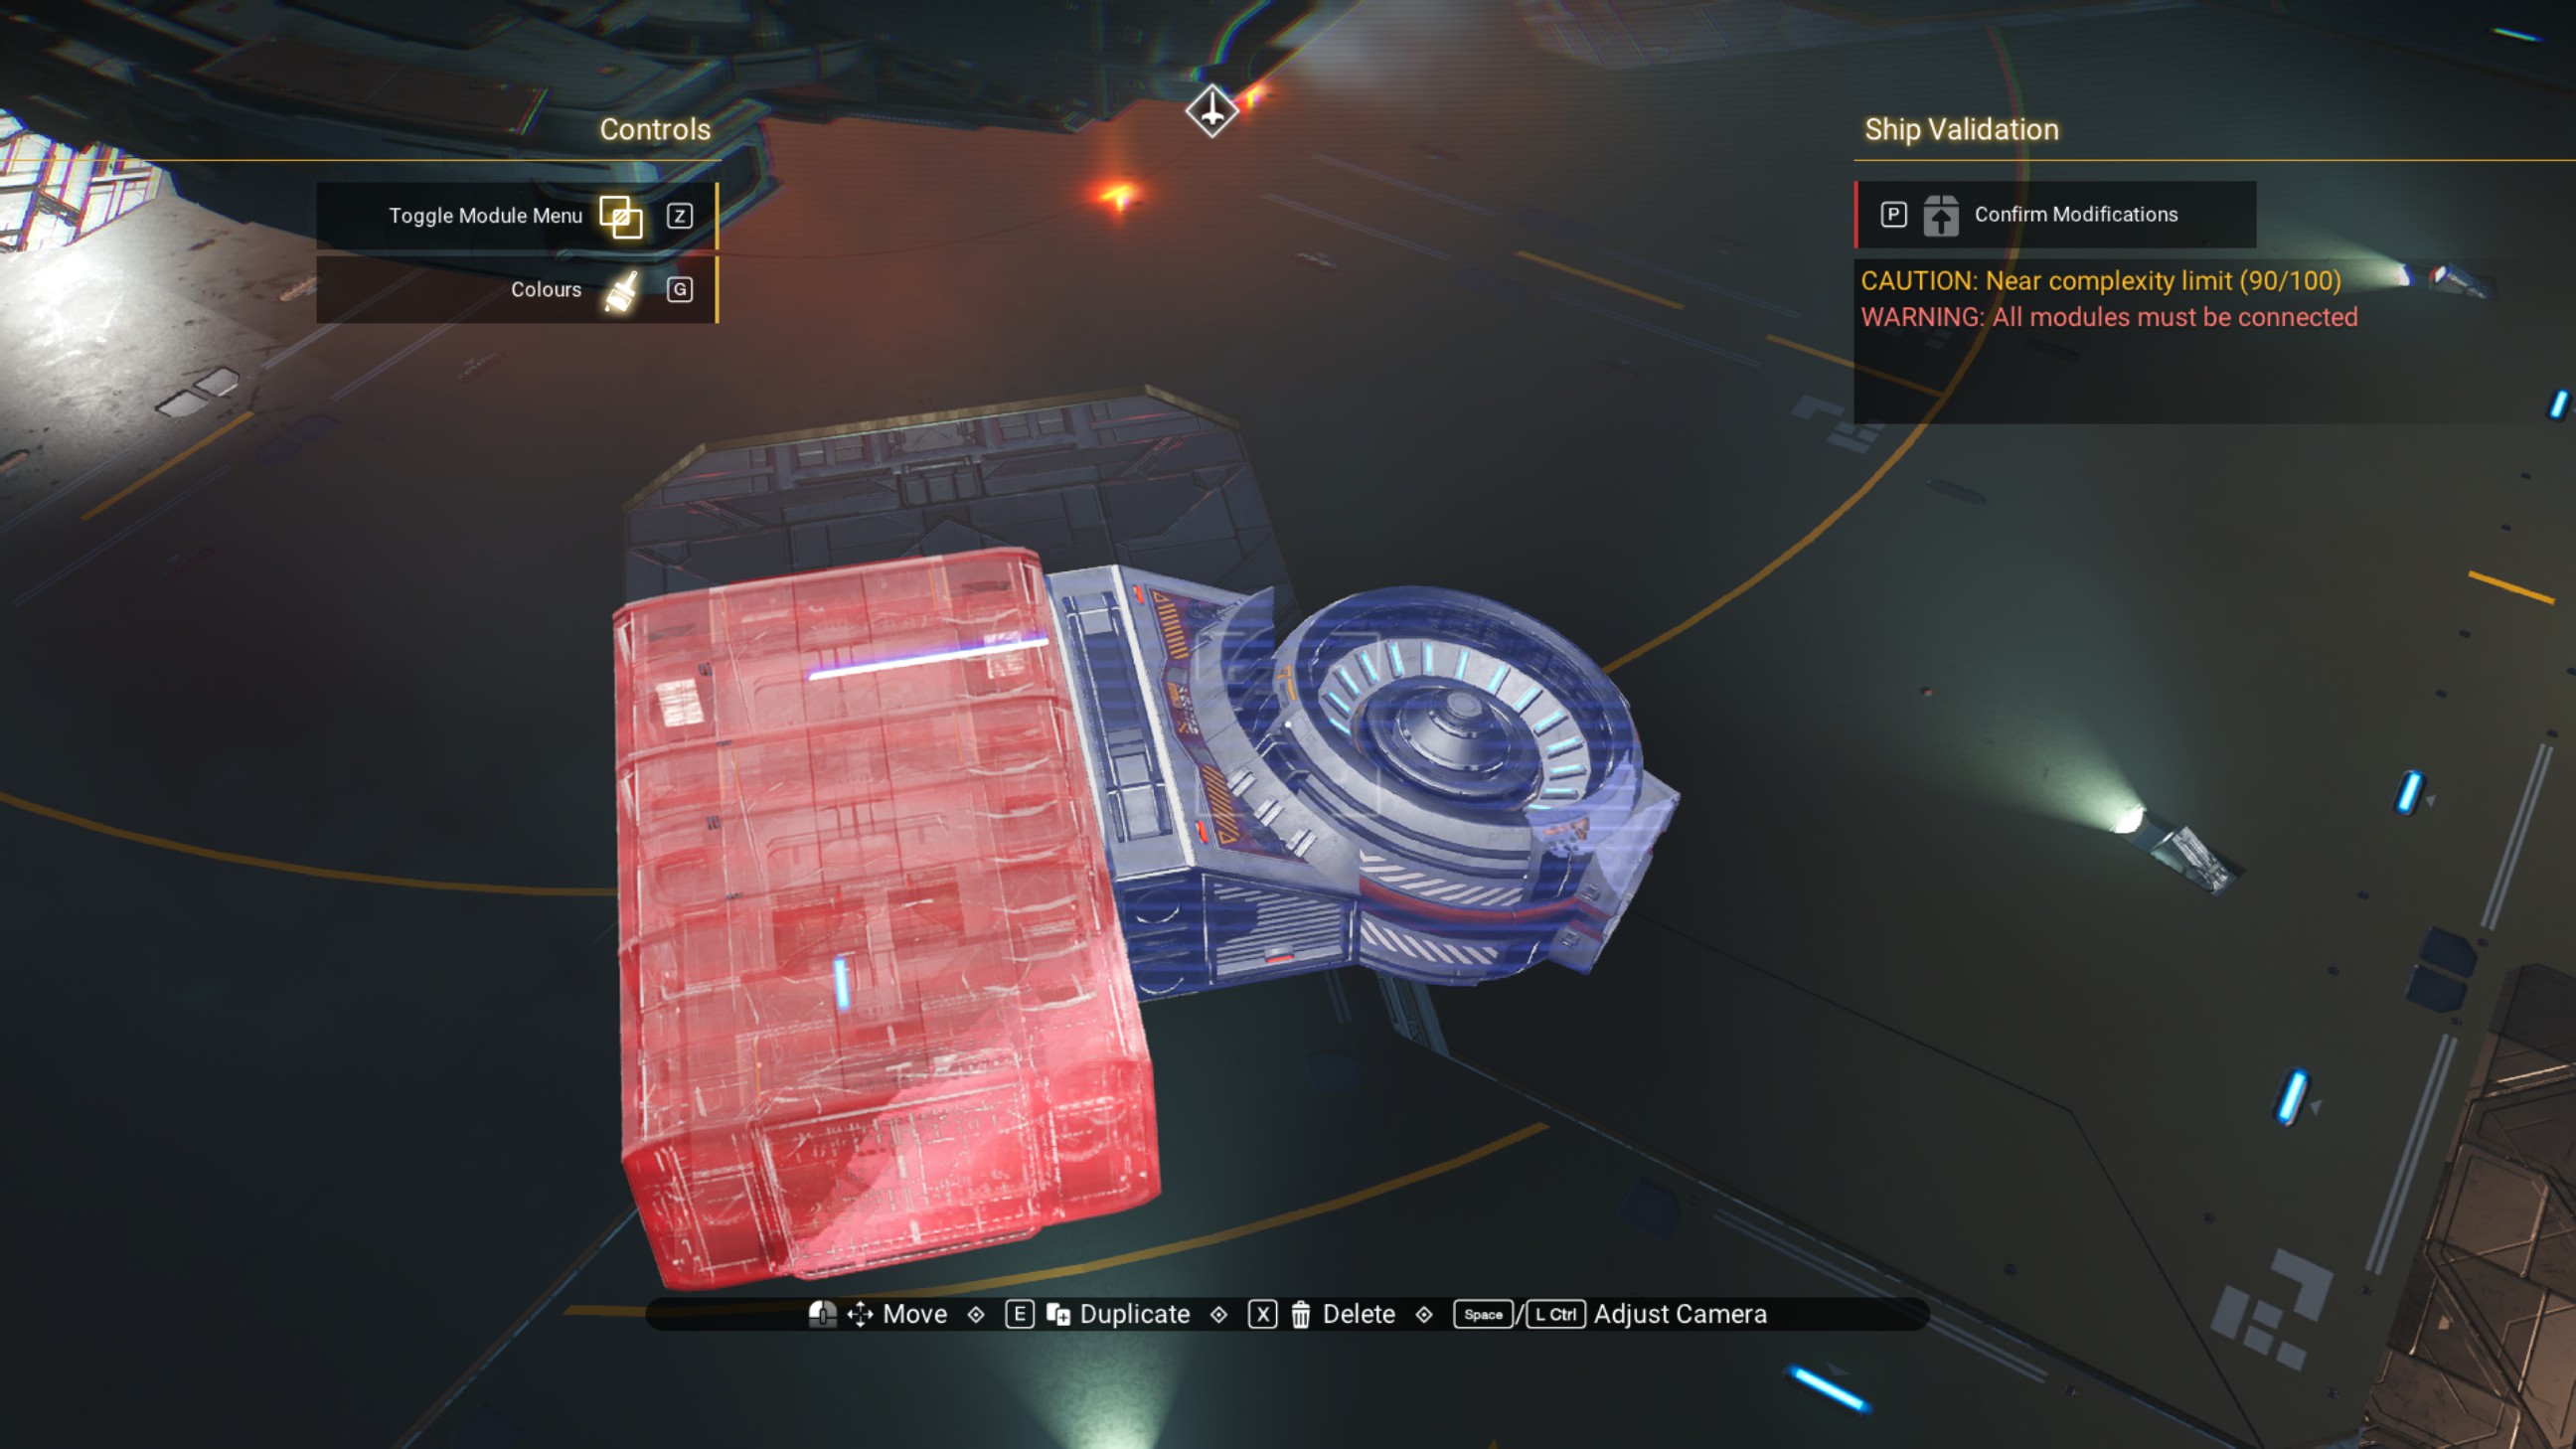
Just like before, place overlapped walkways for a total of four blocks (and a total of eight walkways), as shown.
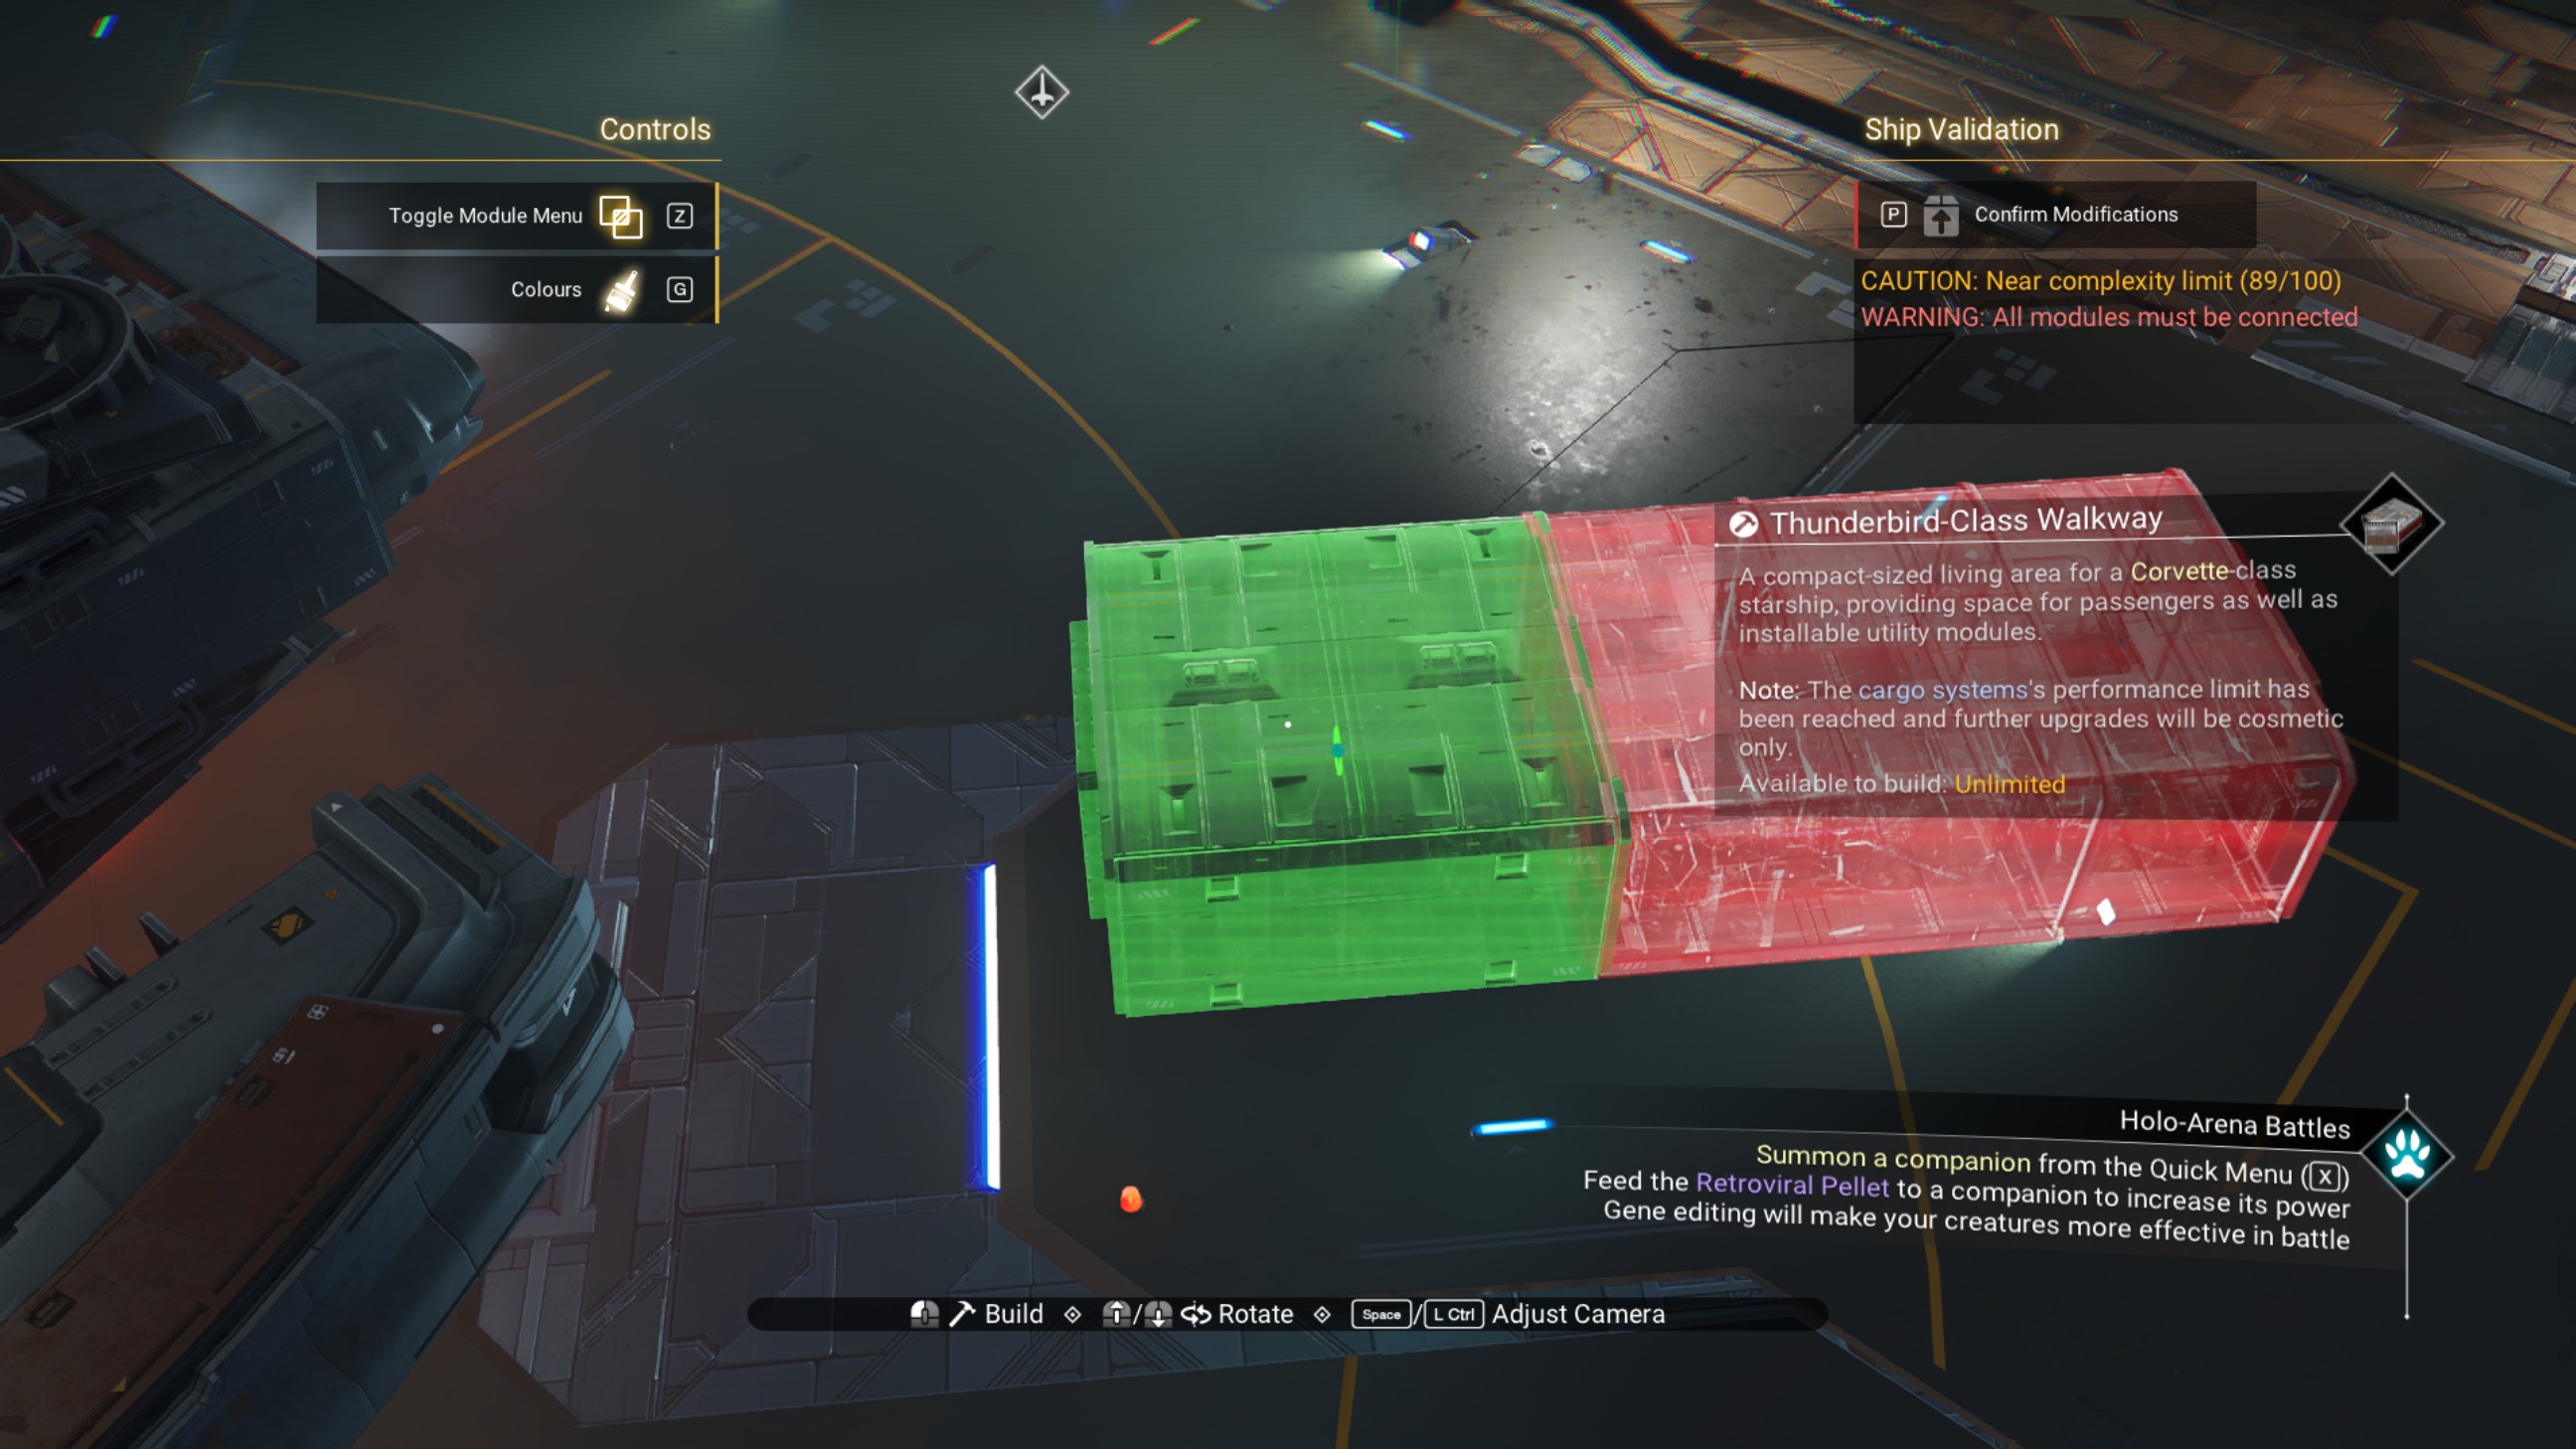
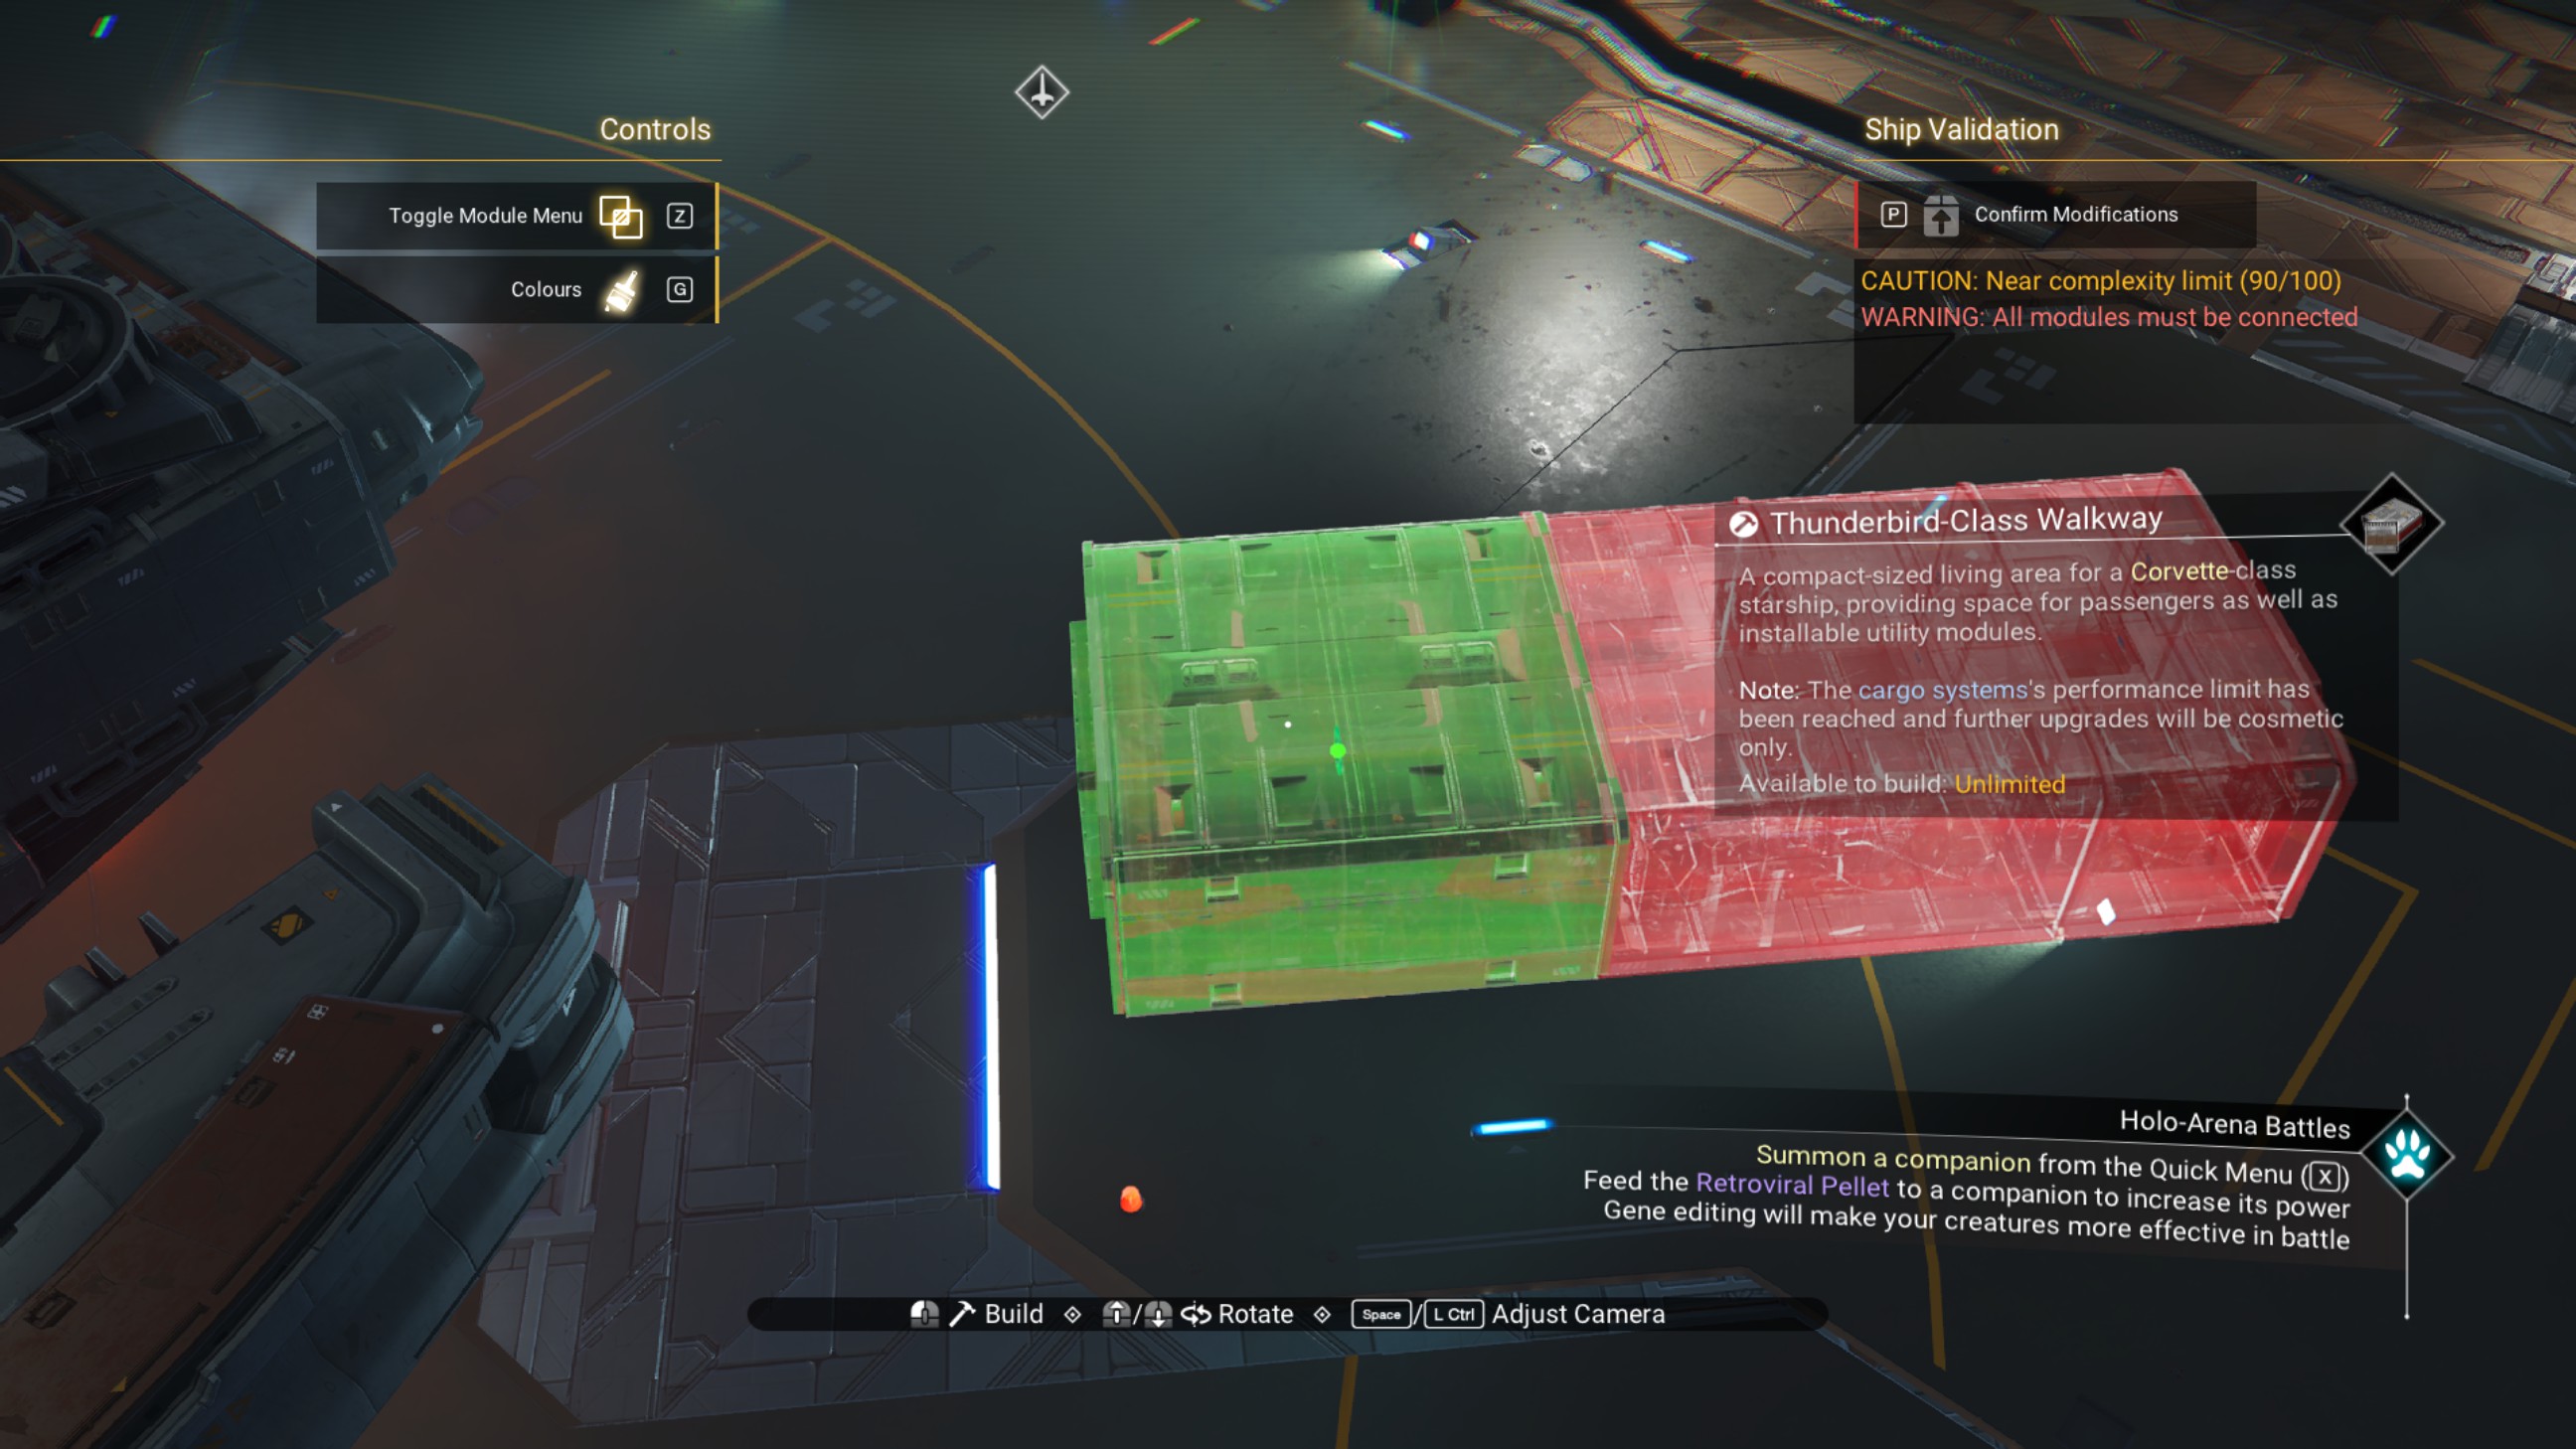
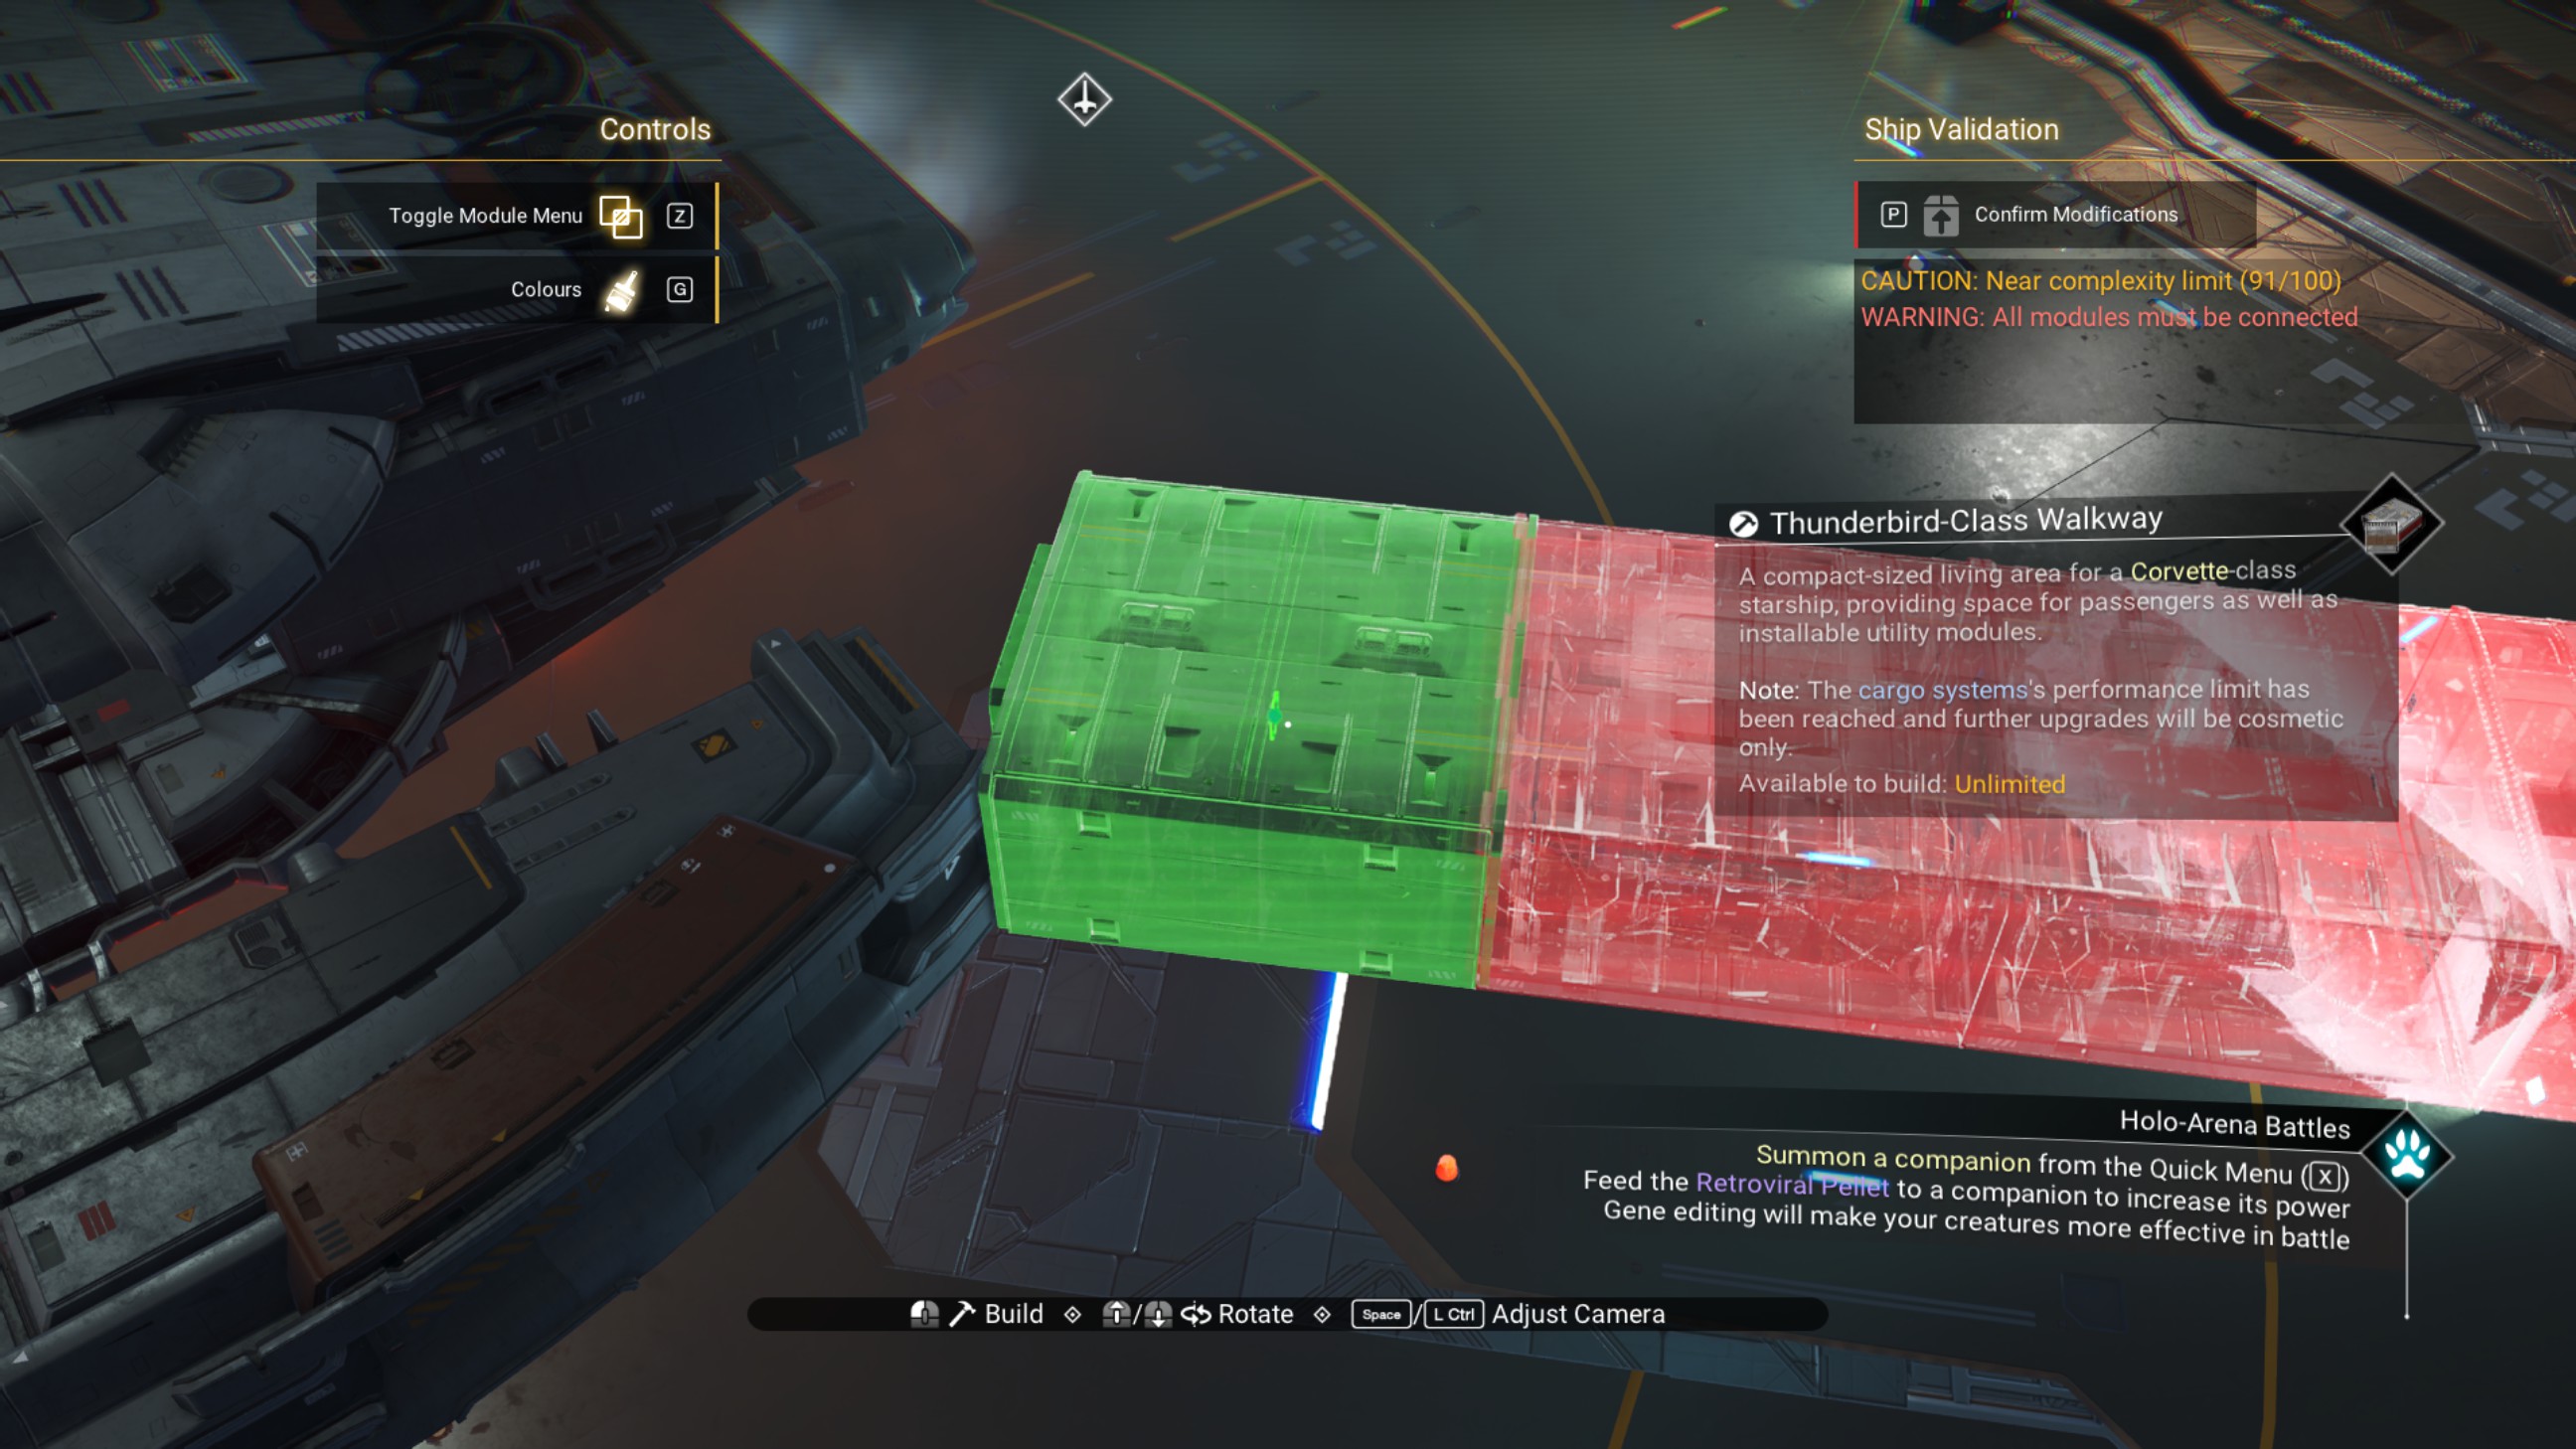
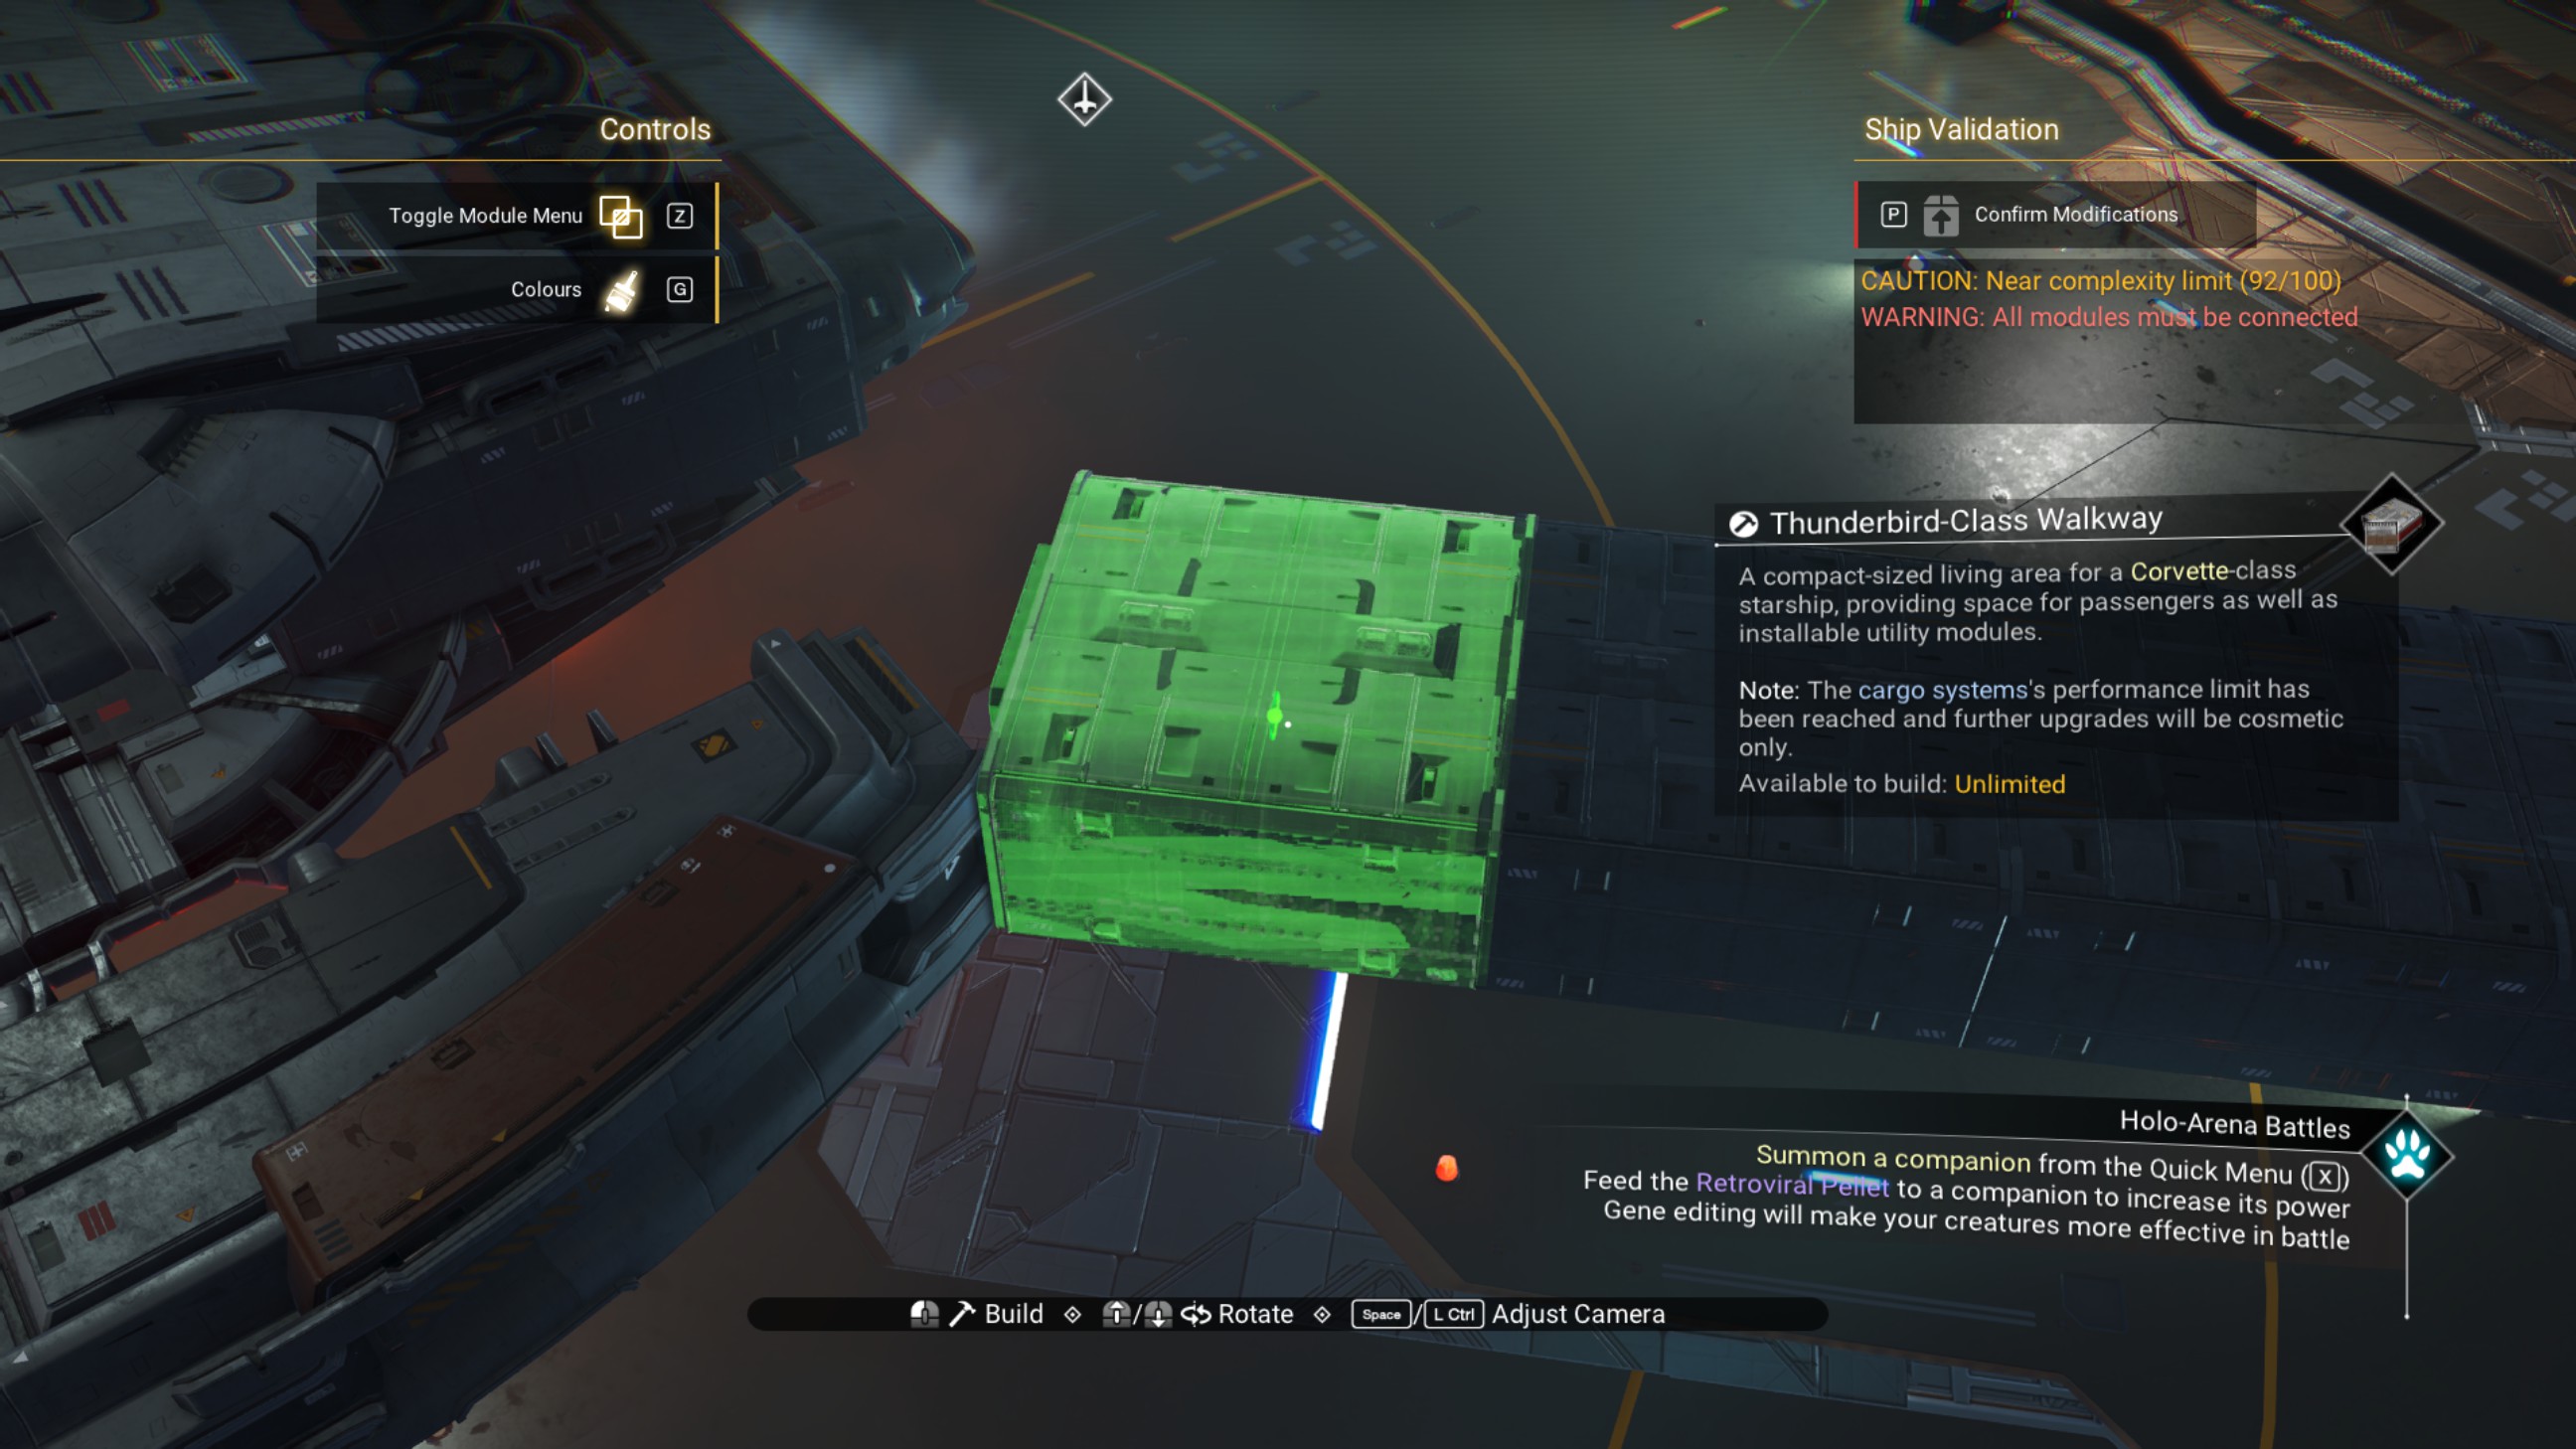
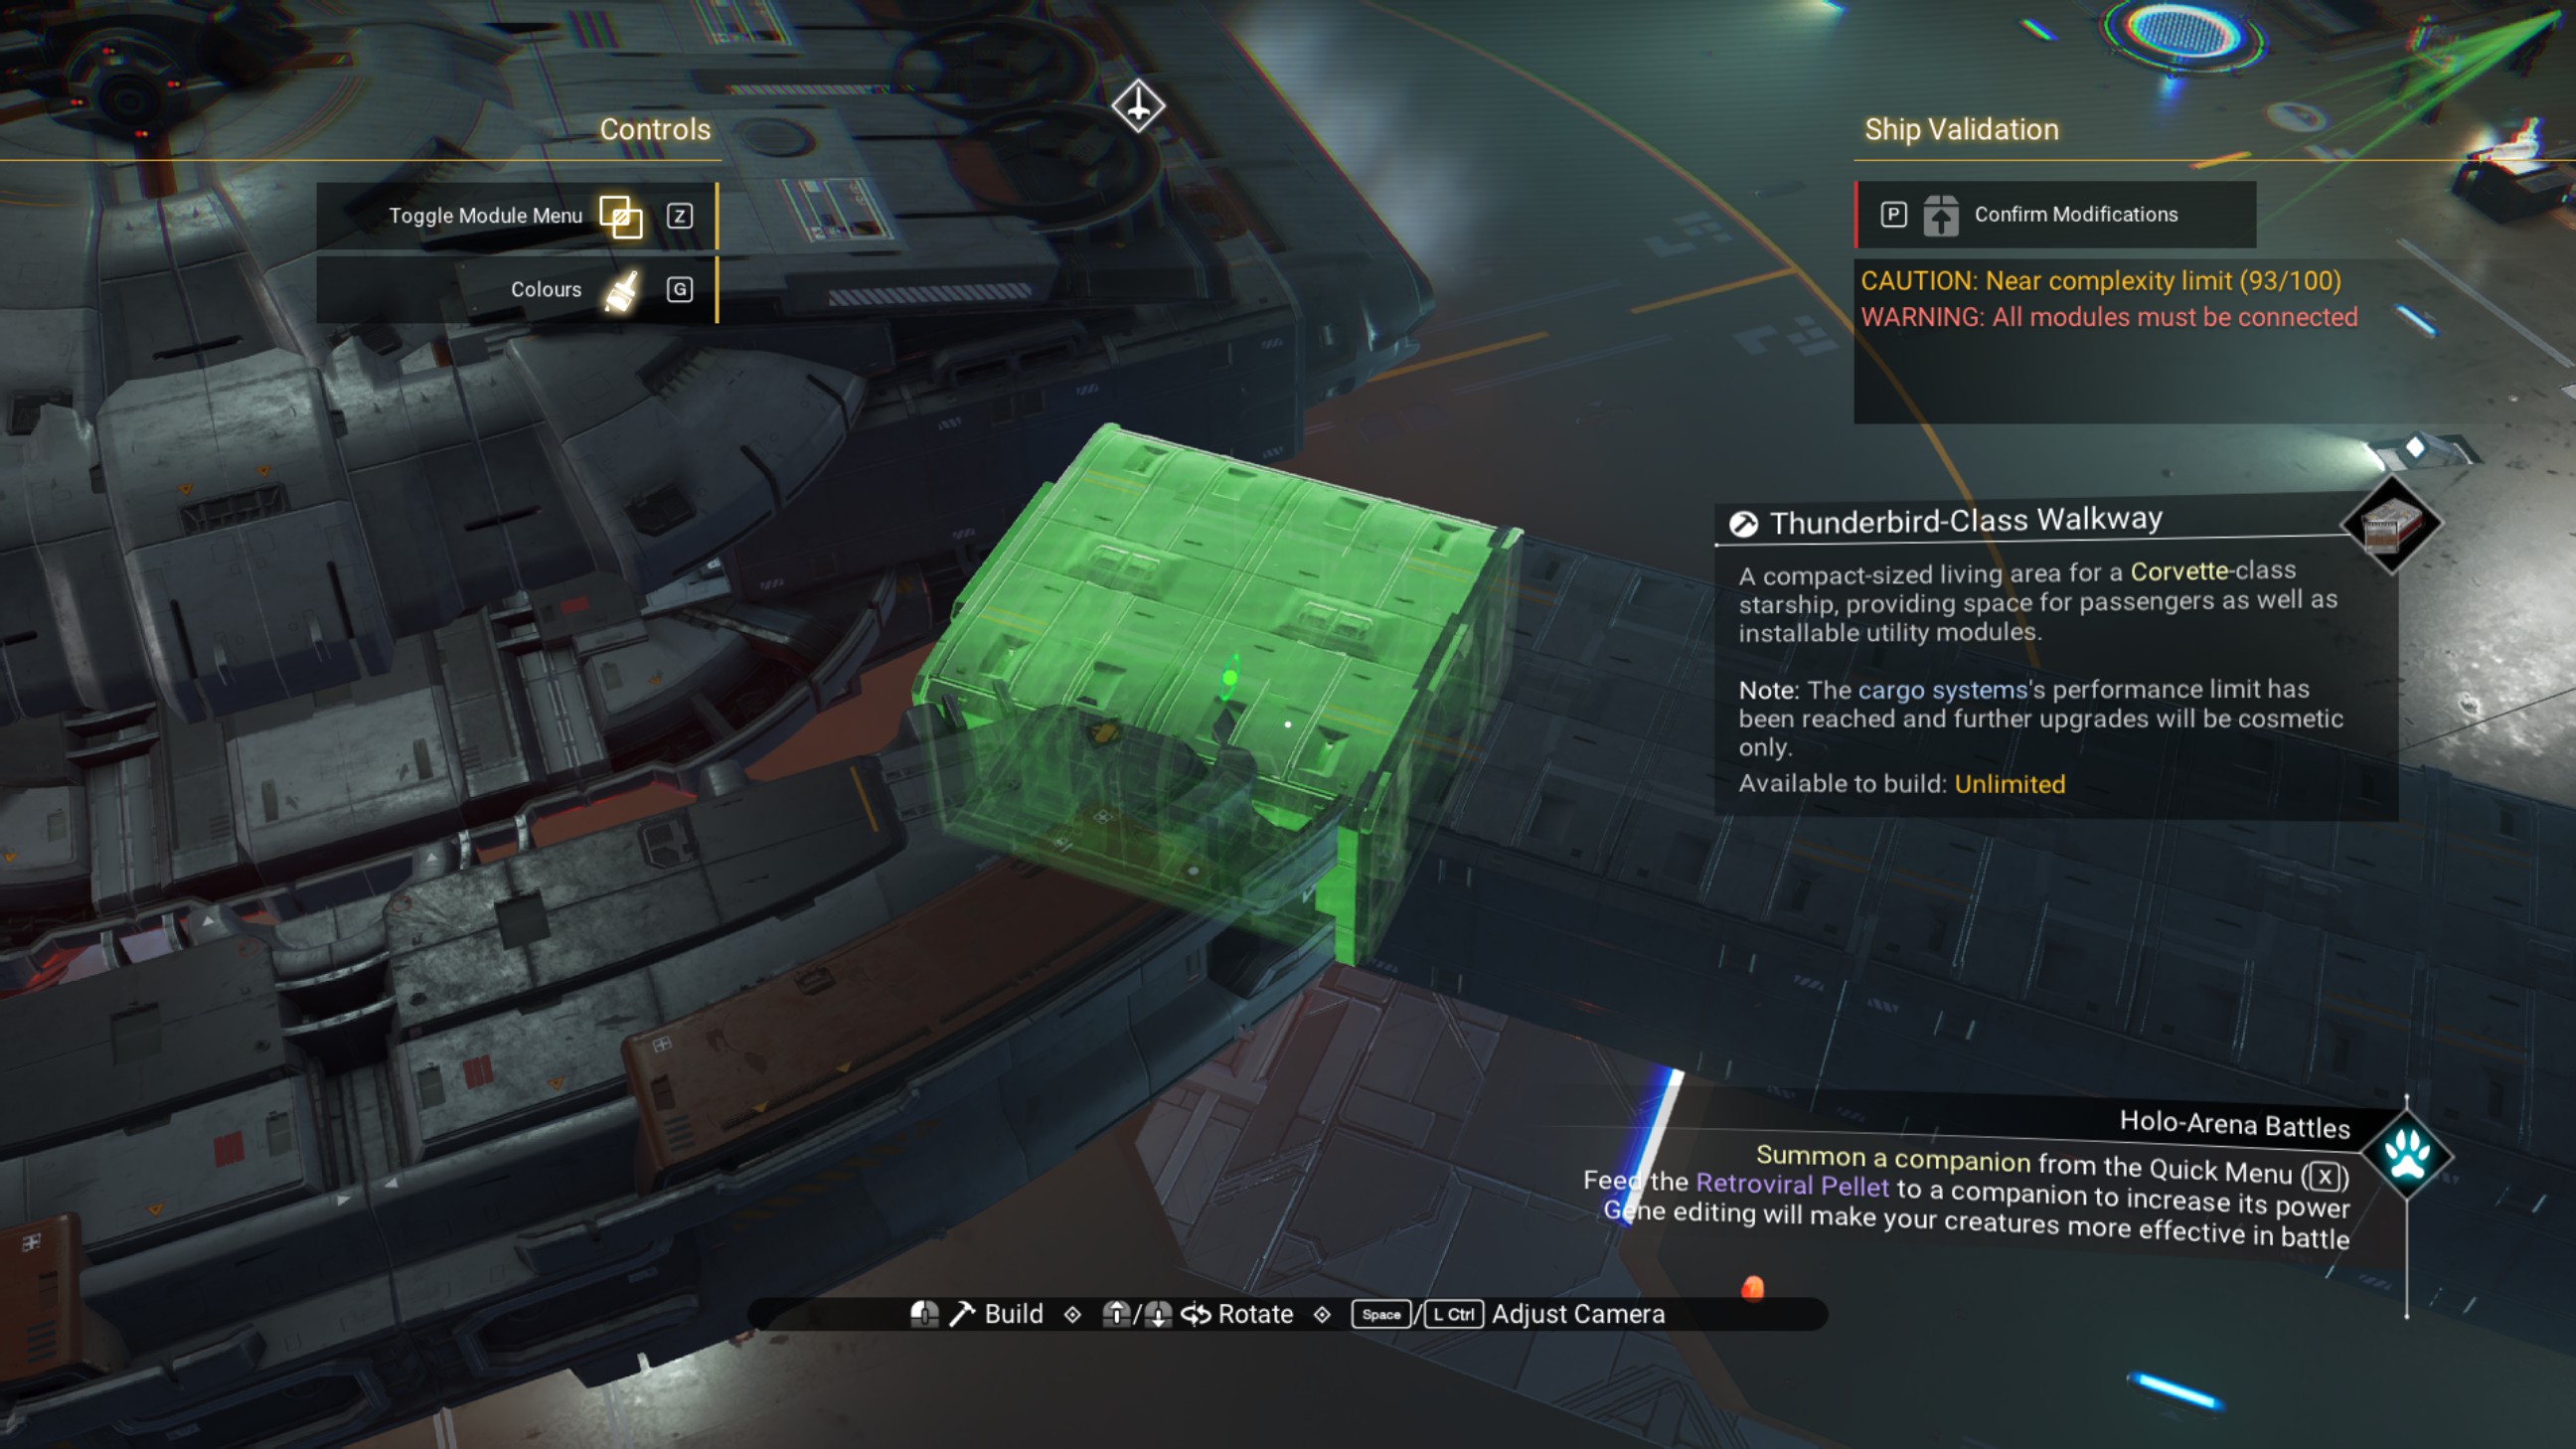
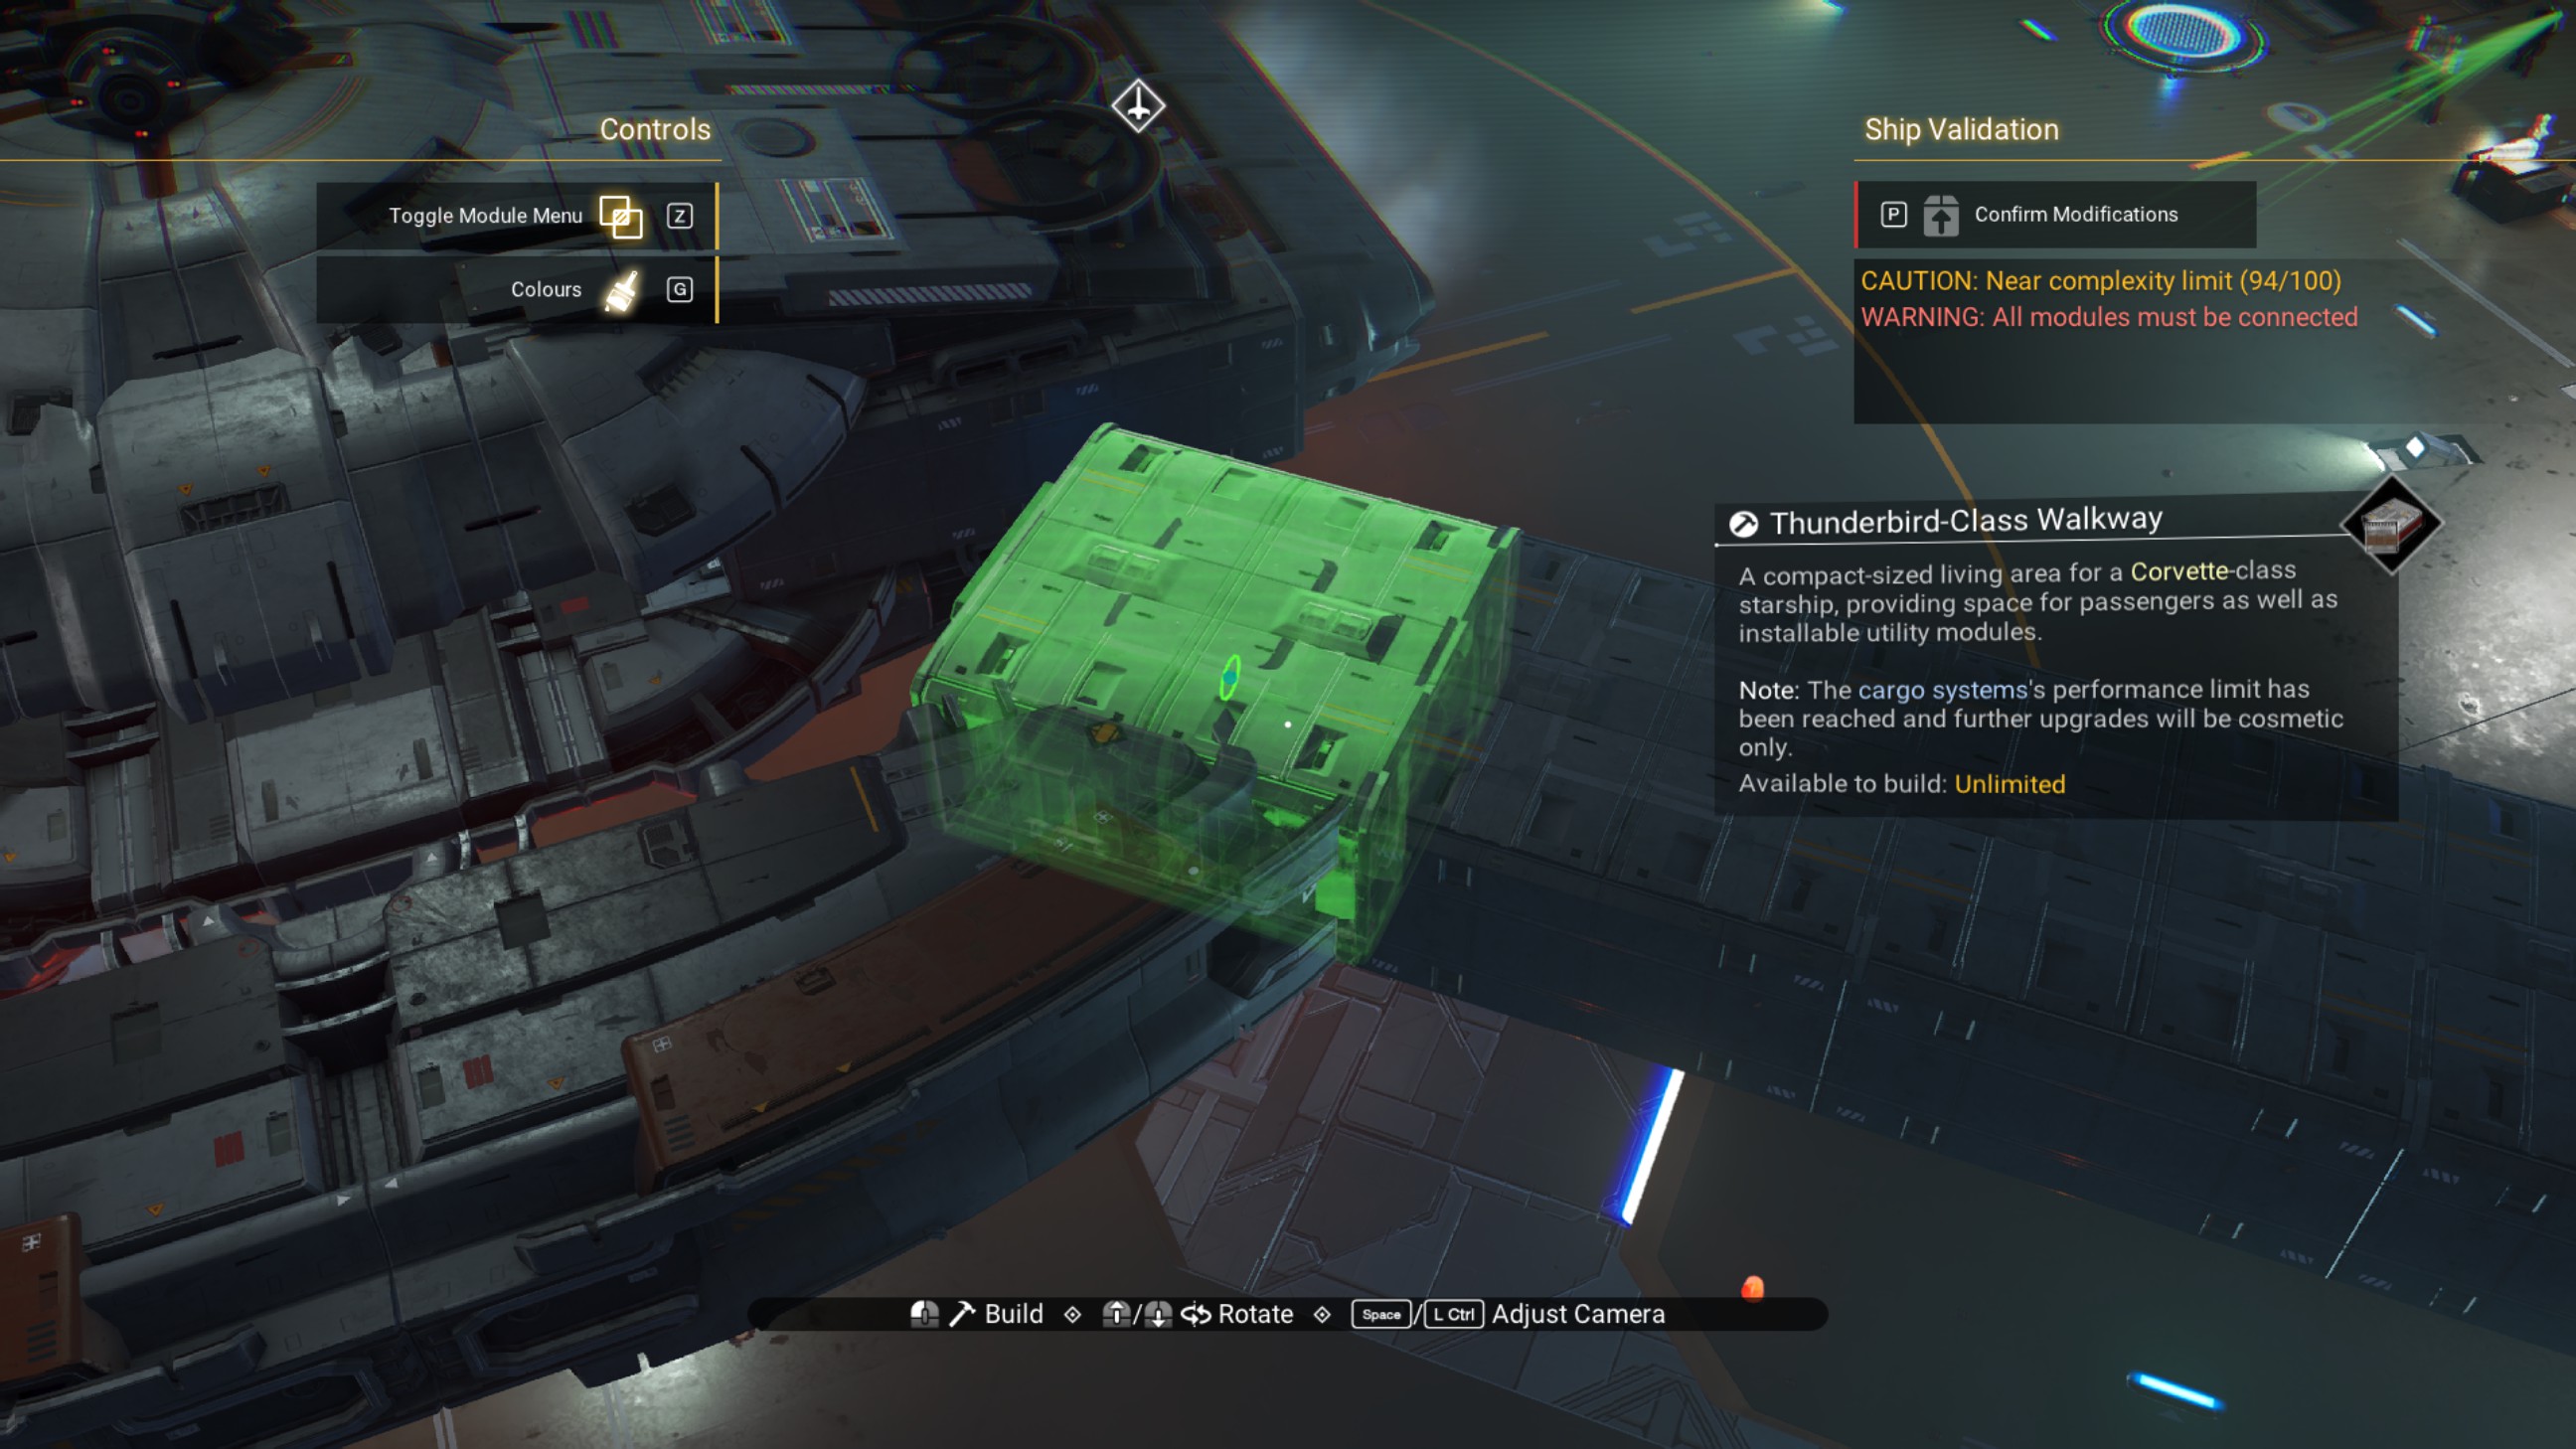
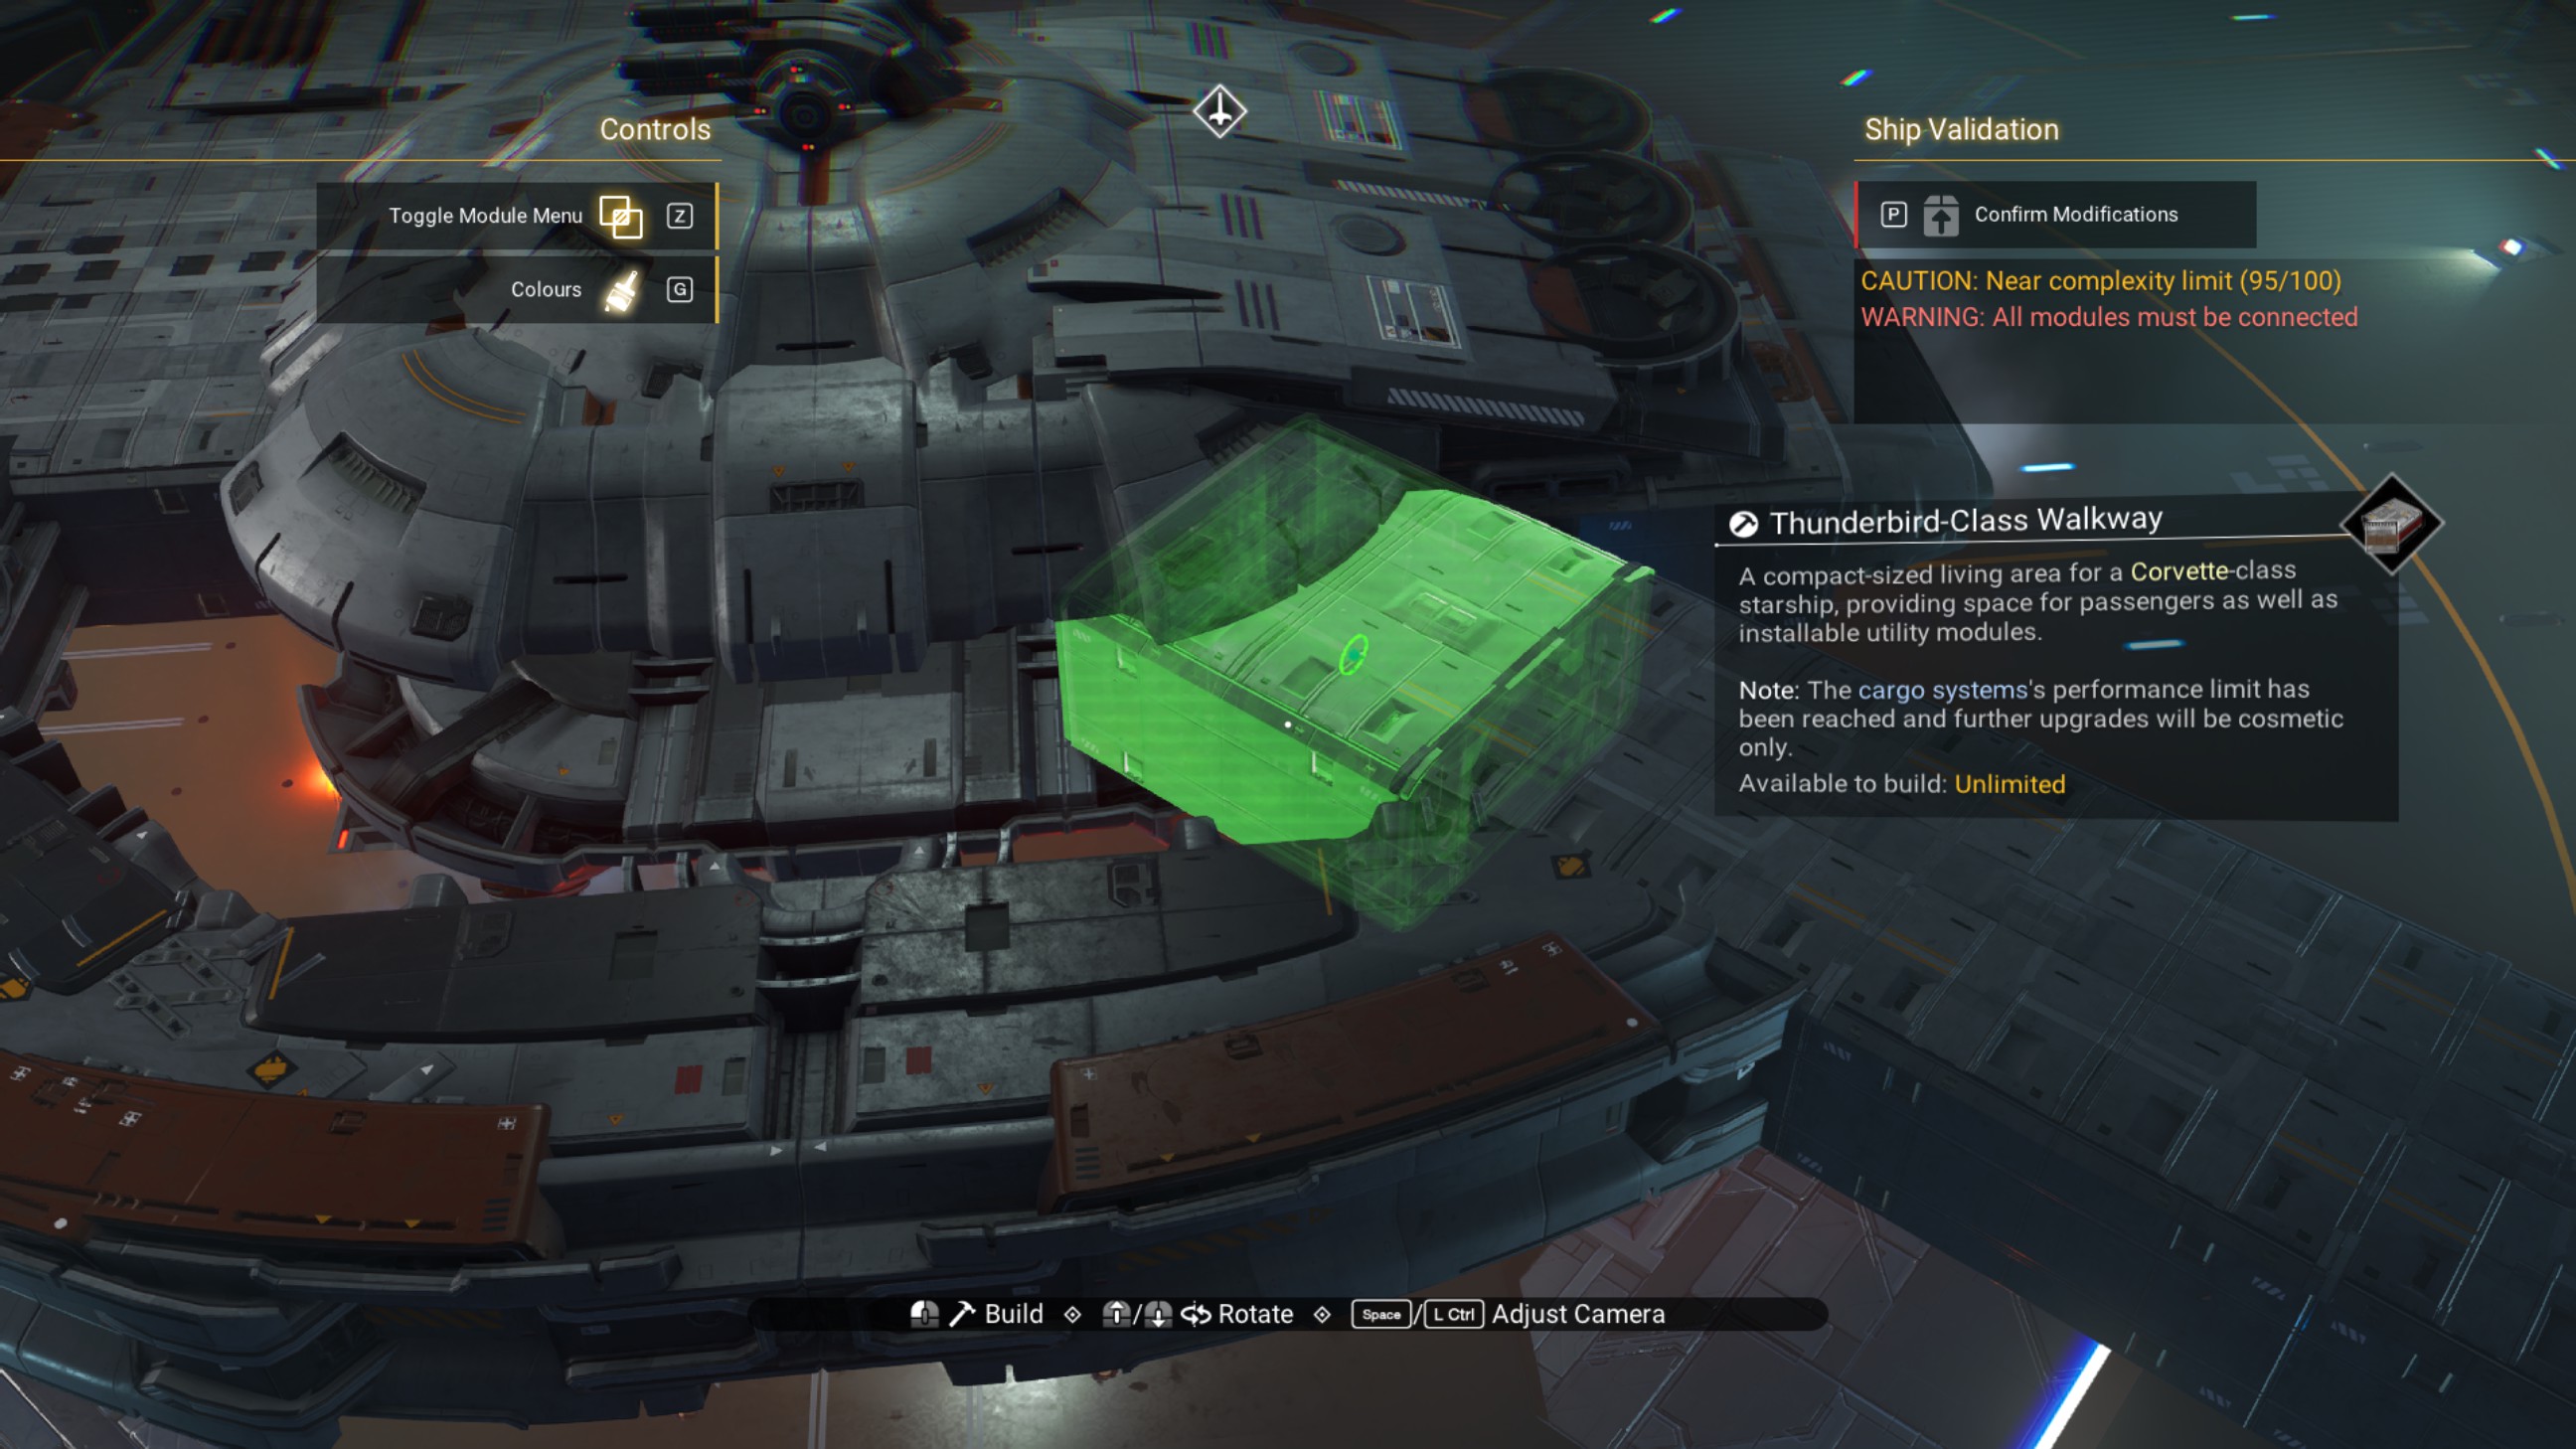
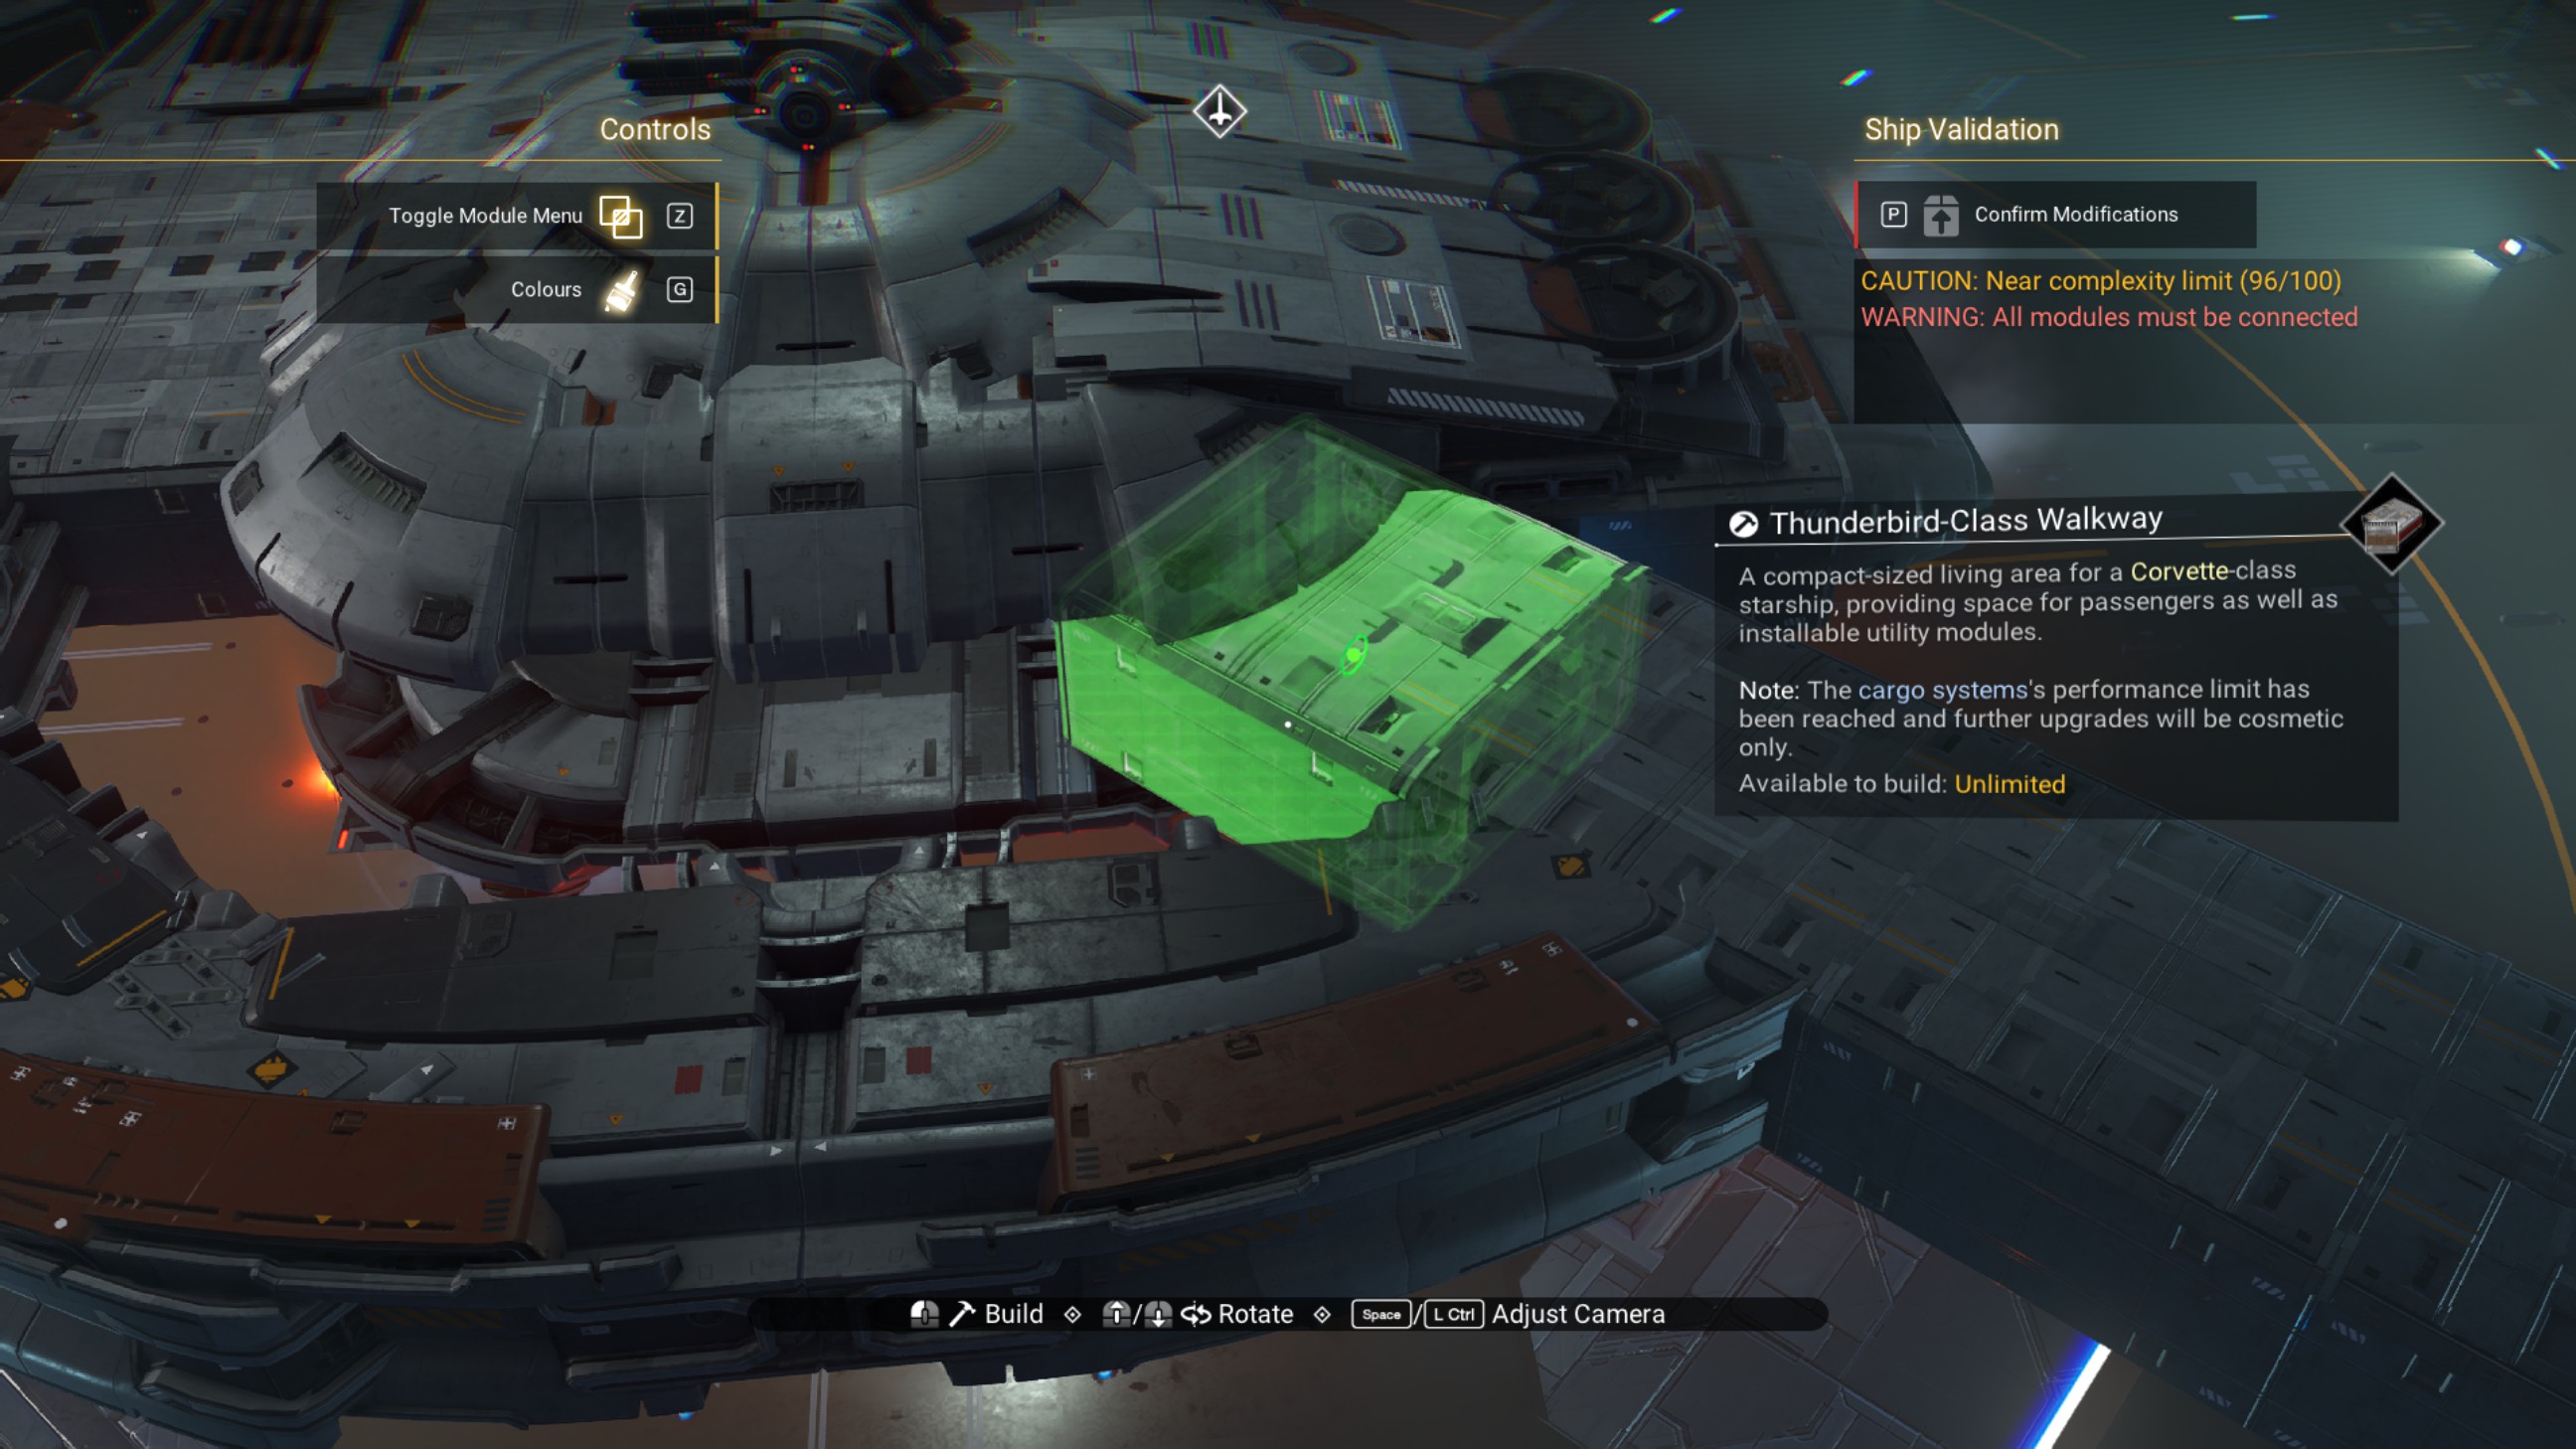
Delete the middle overlapped walkways, but be careful not to delete the fourth set we just placed.
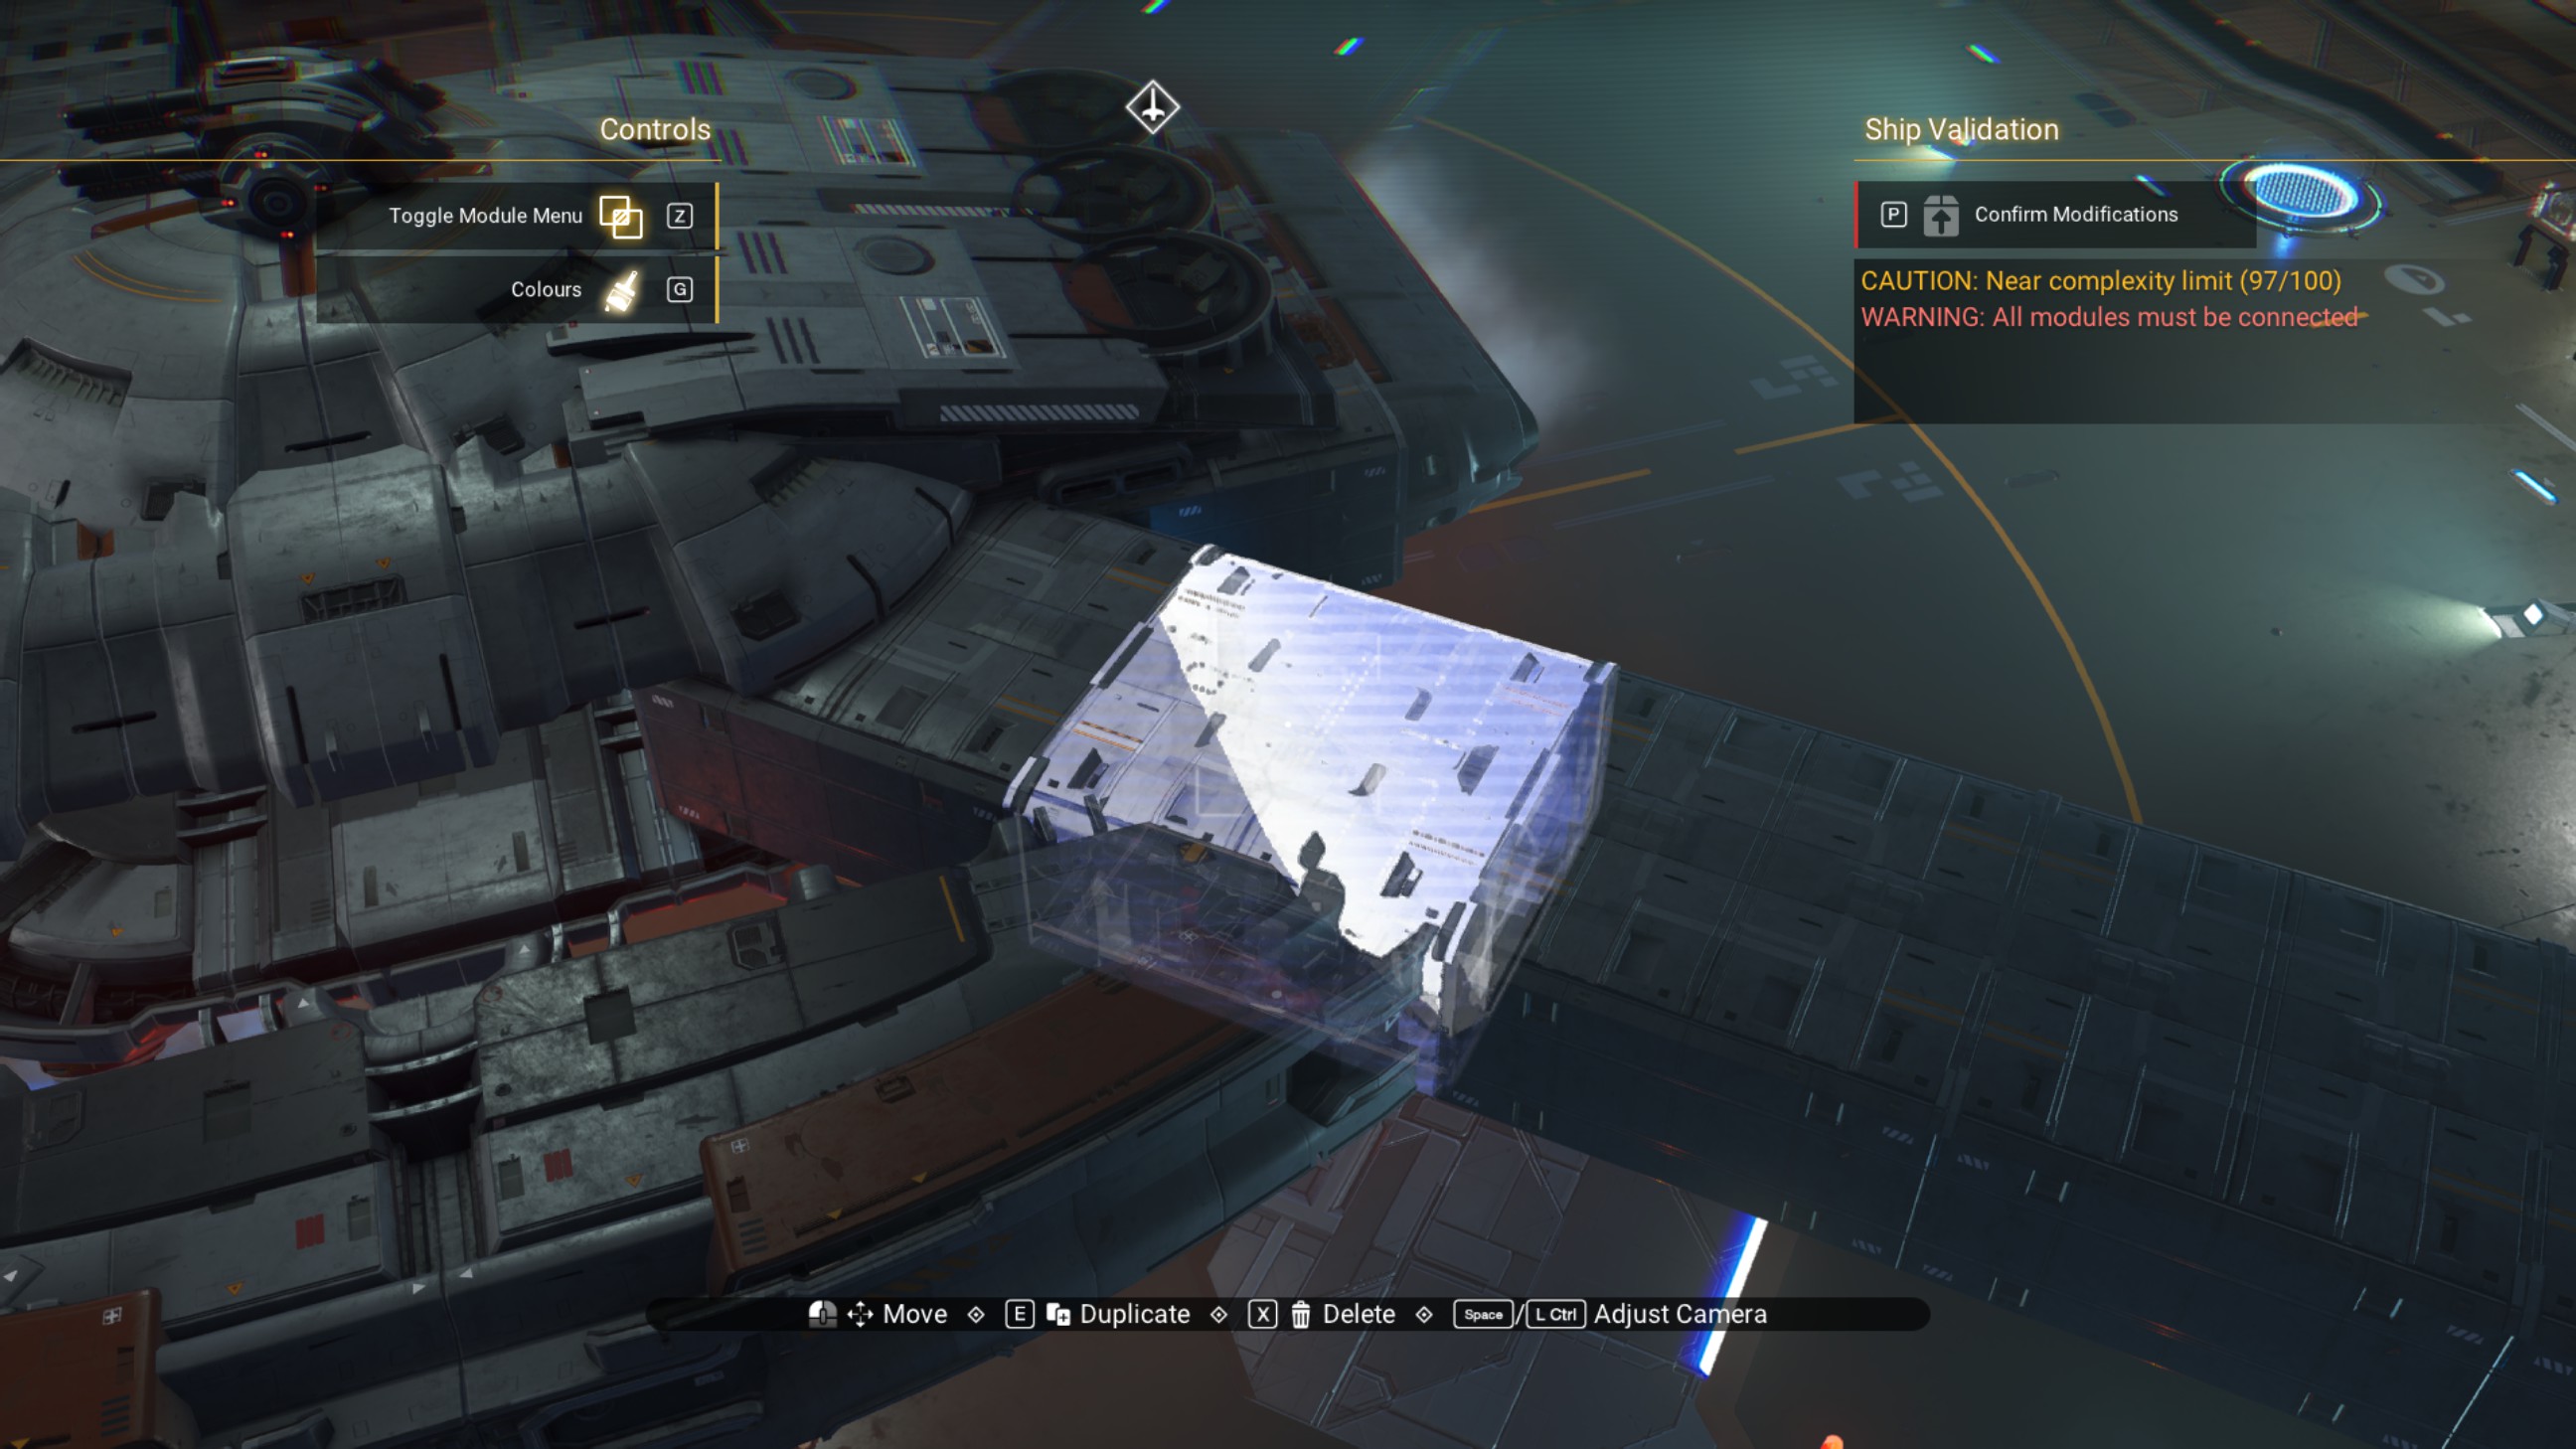
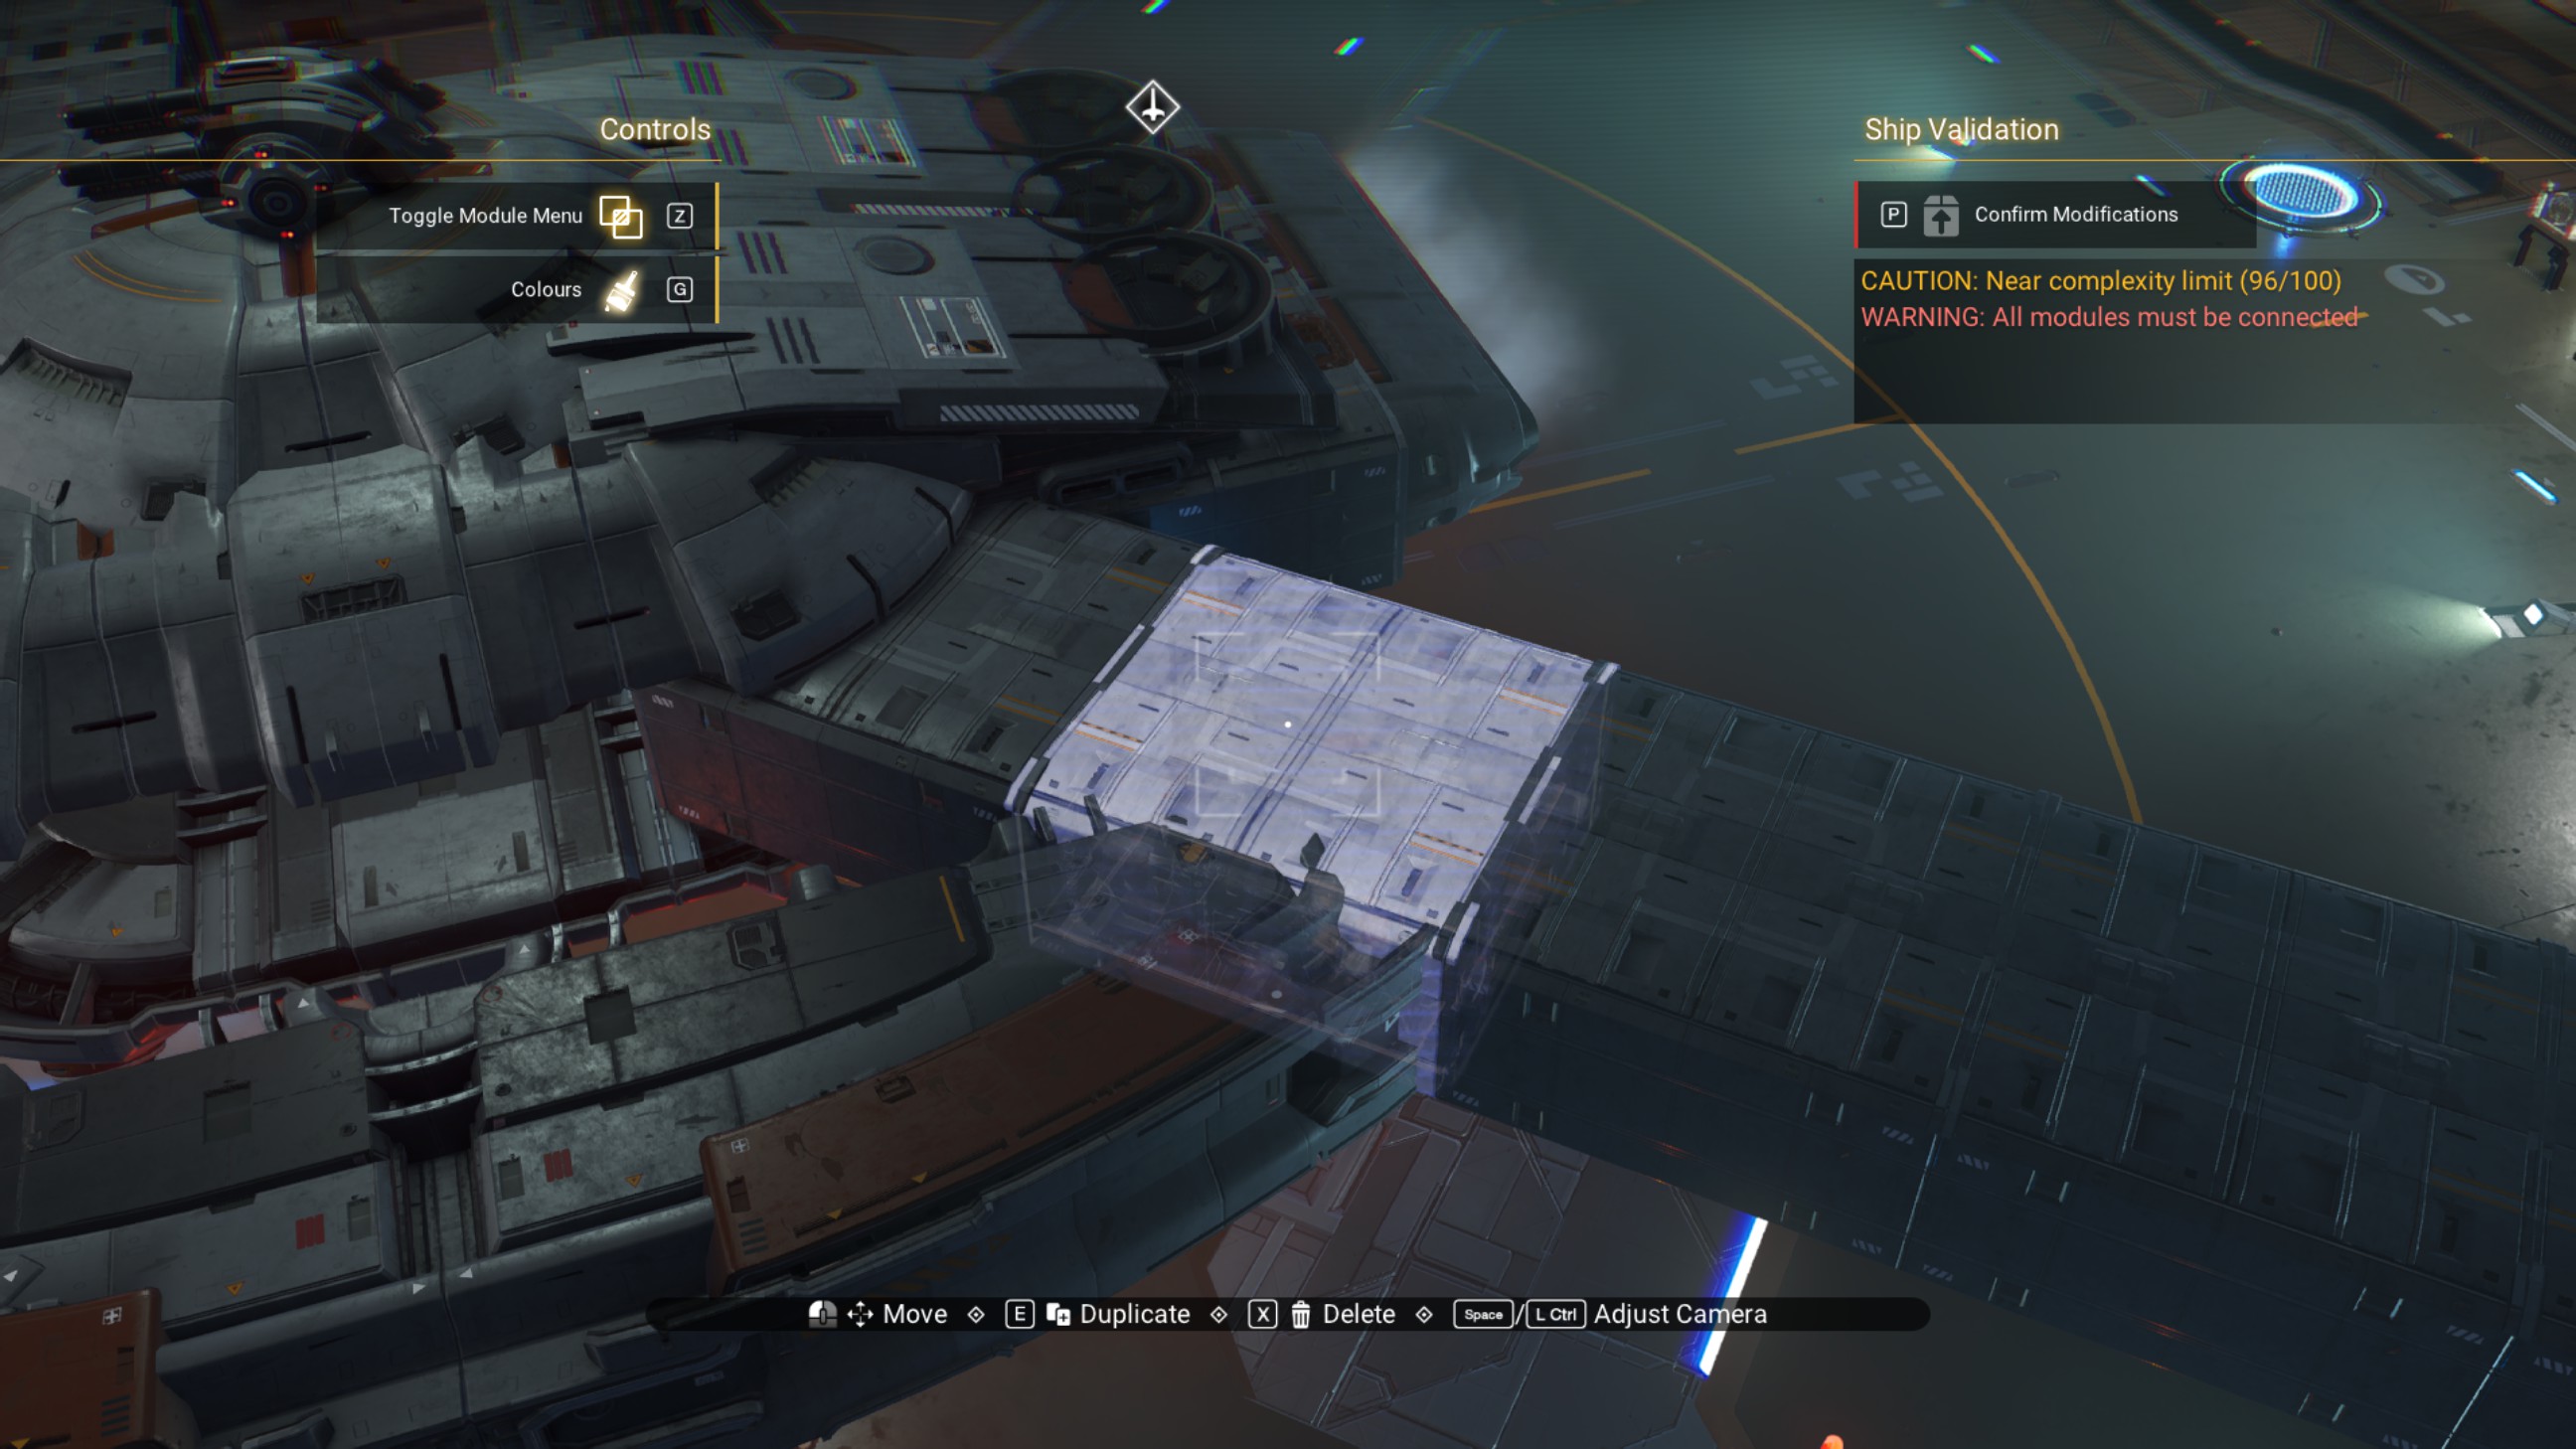
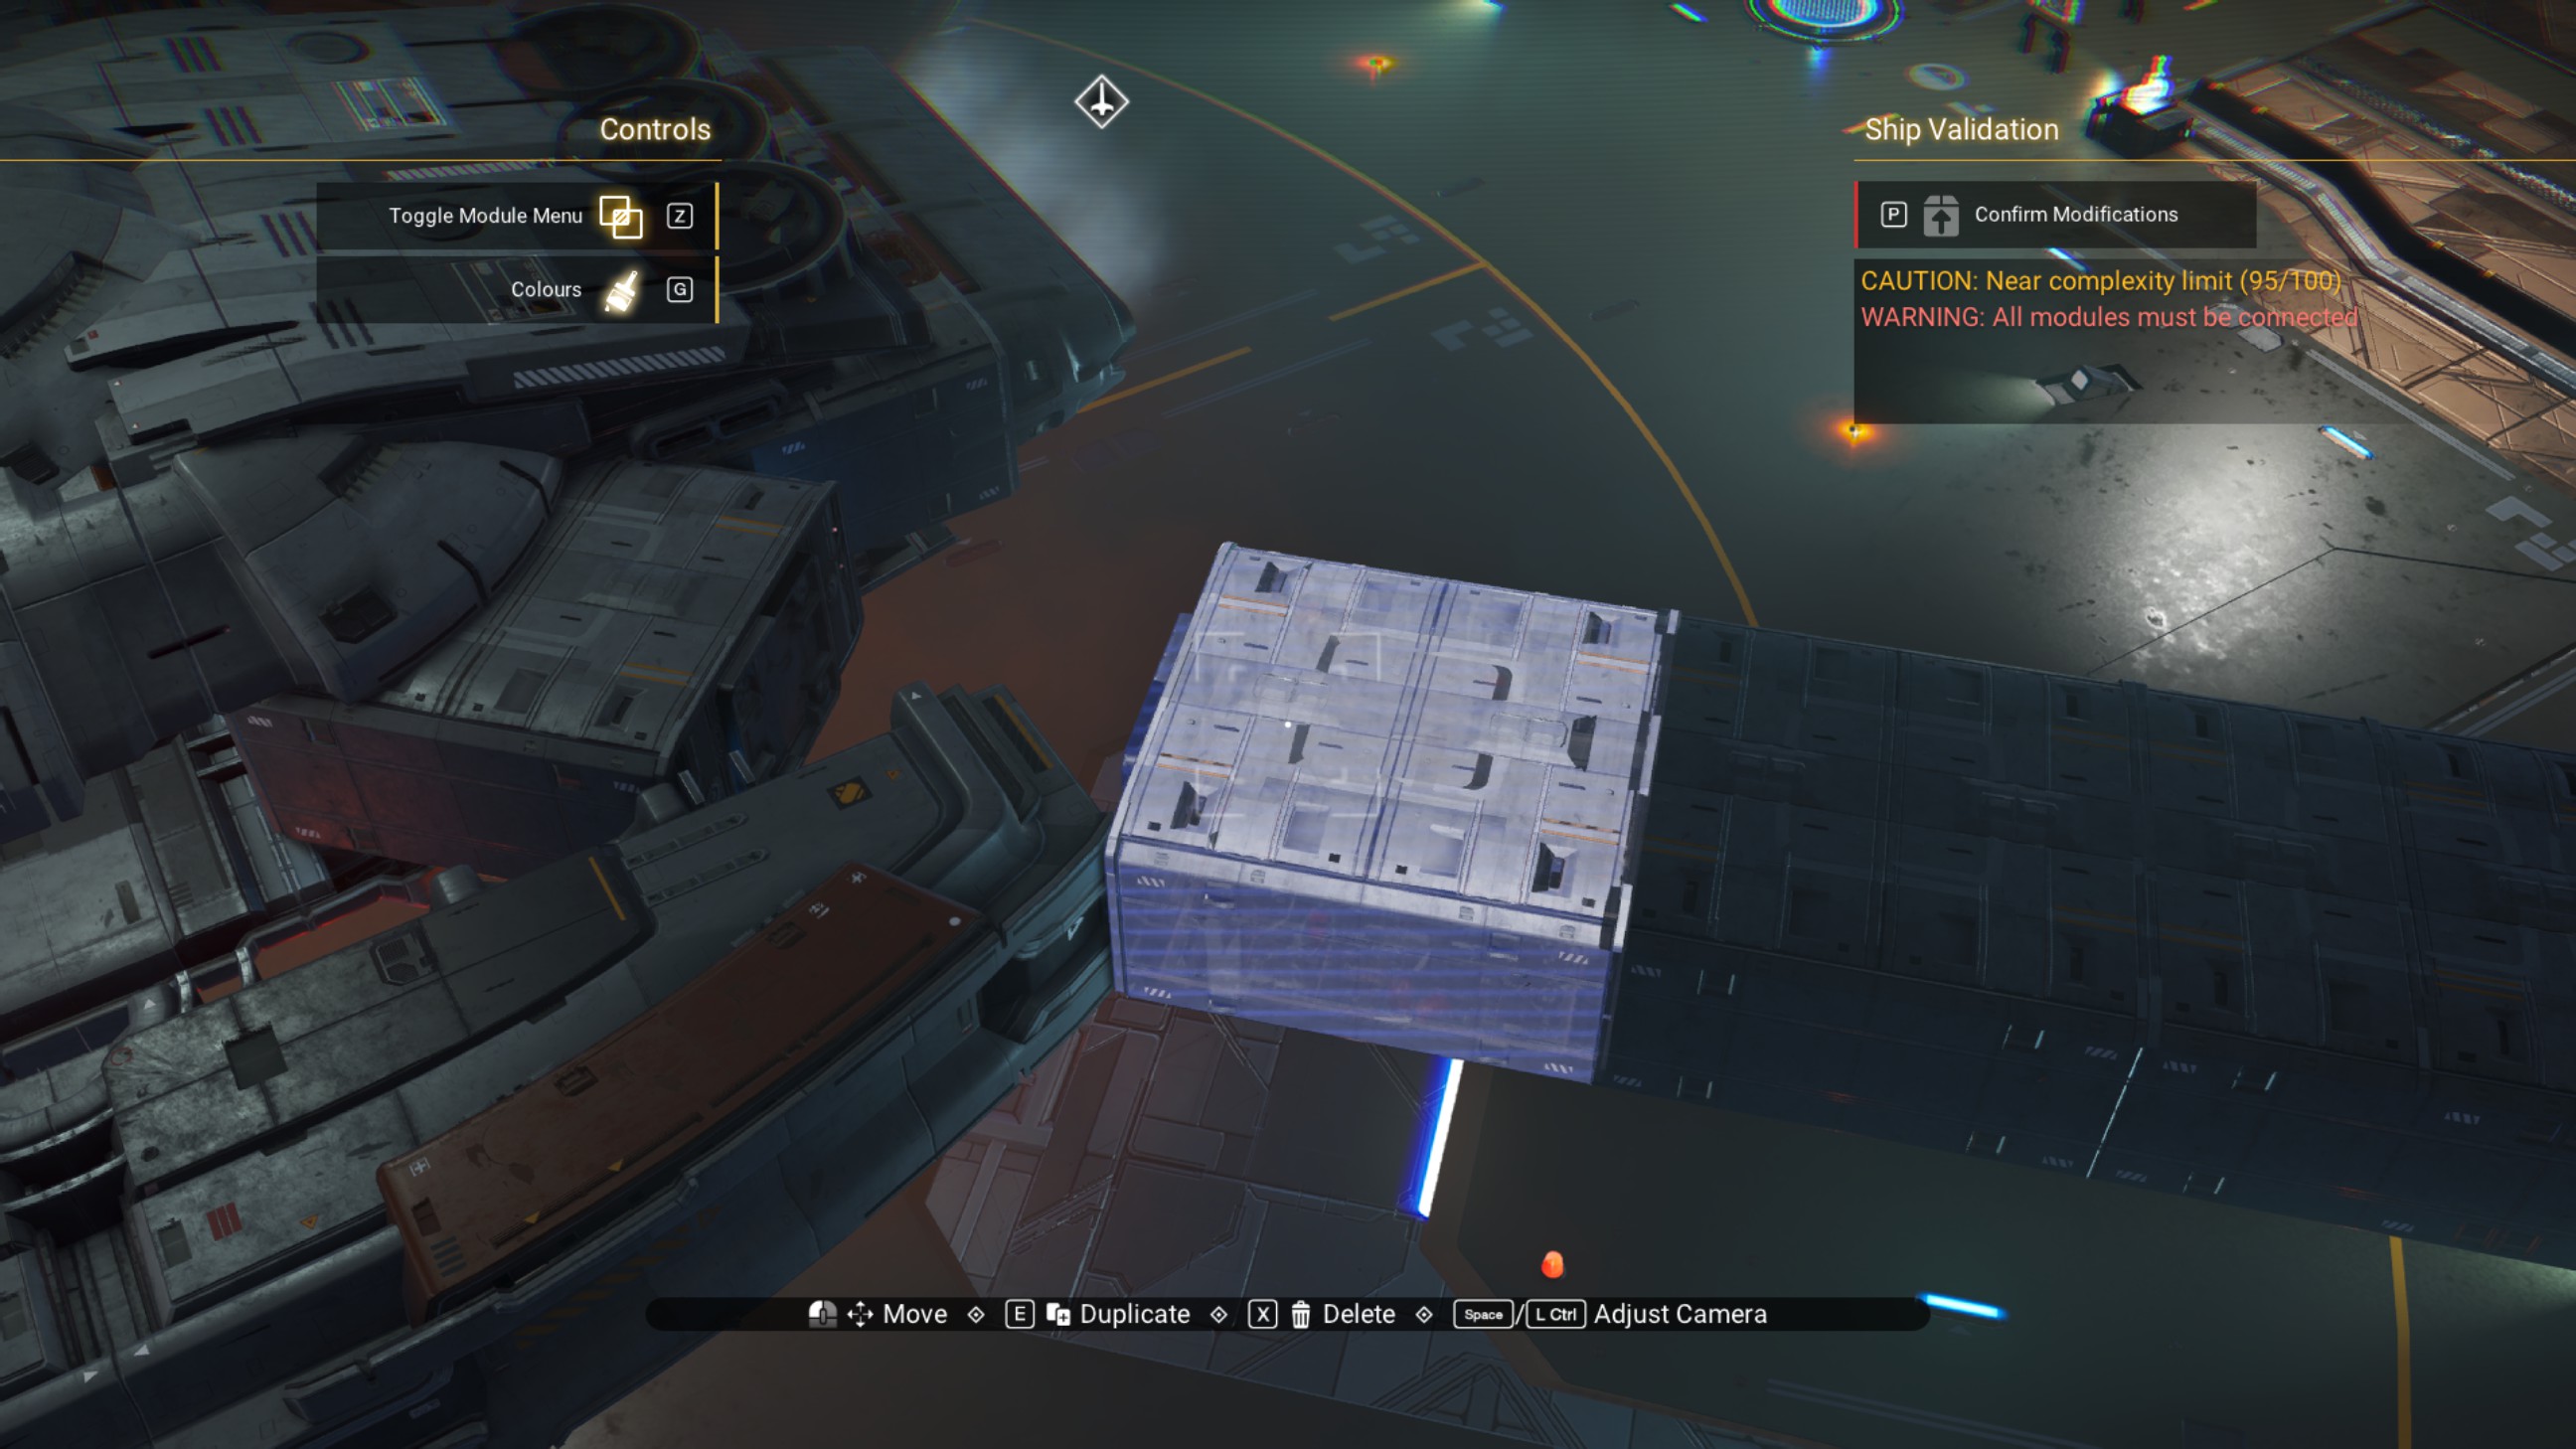
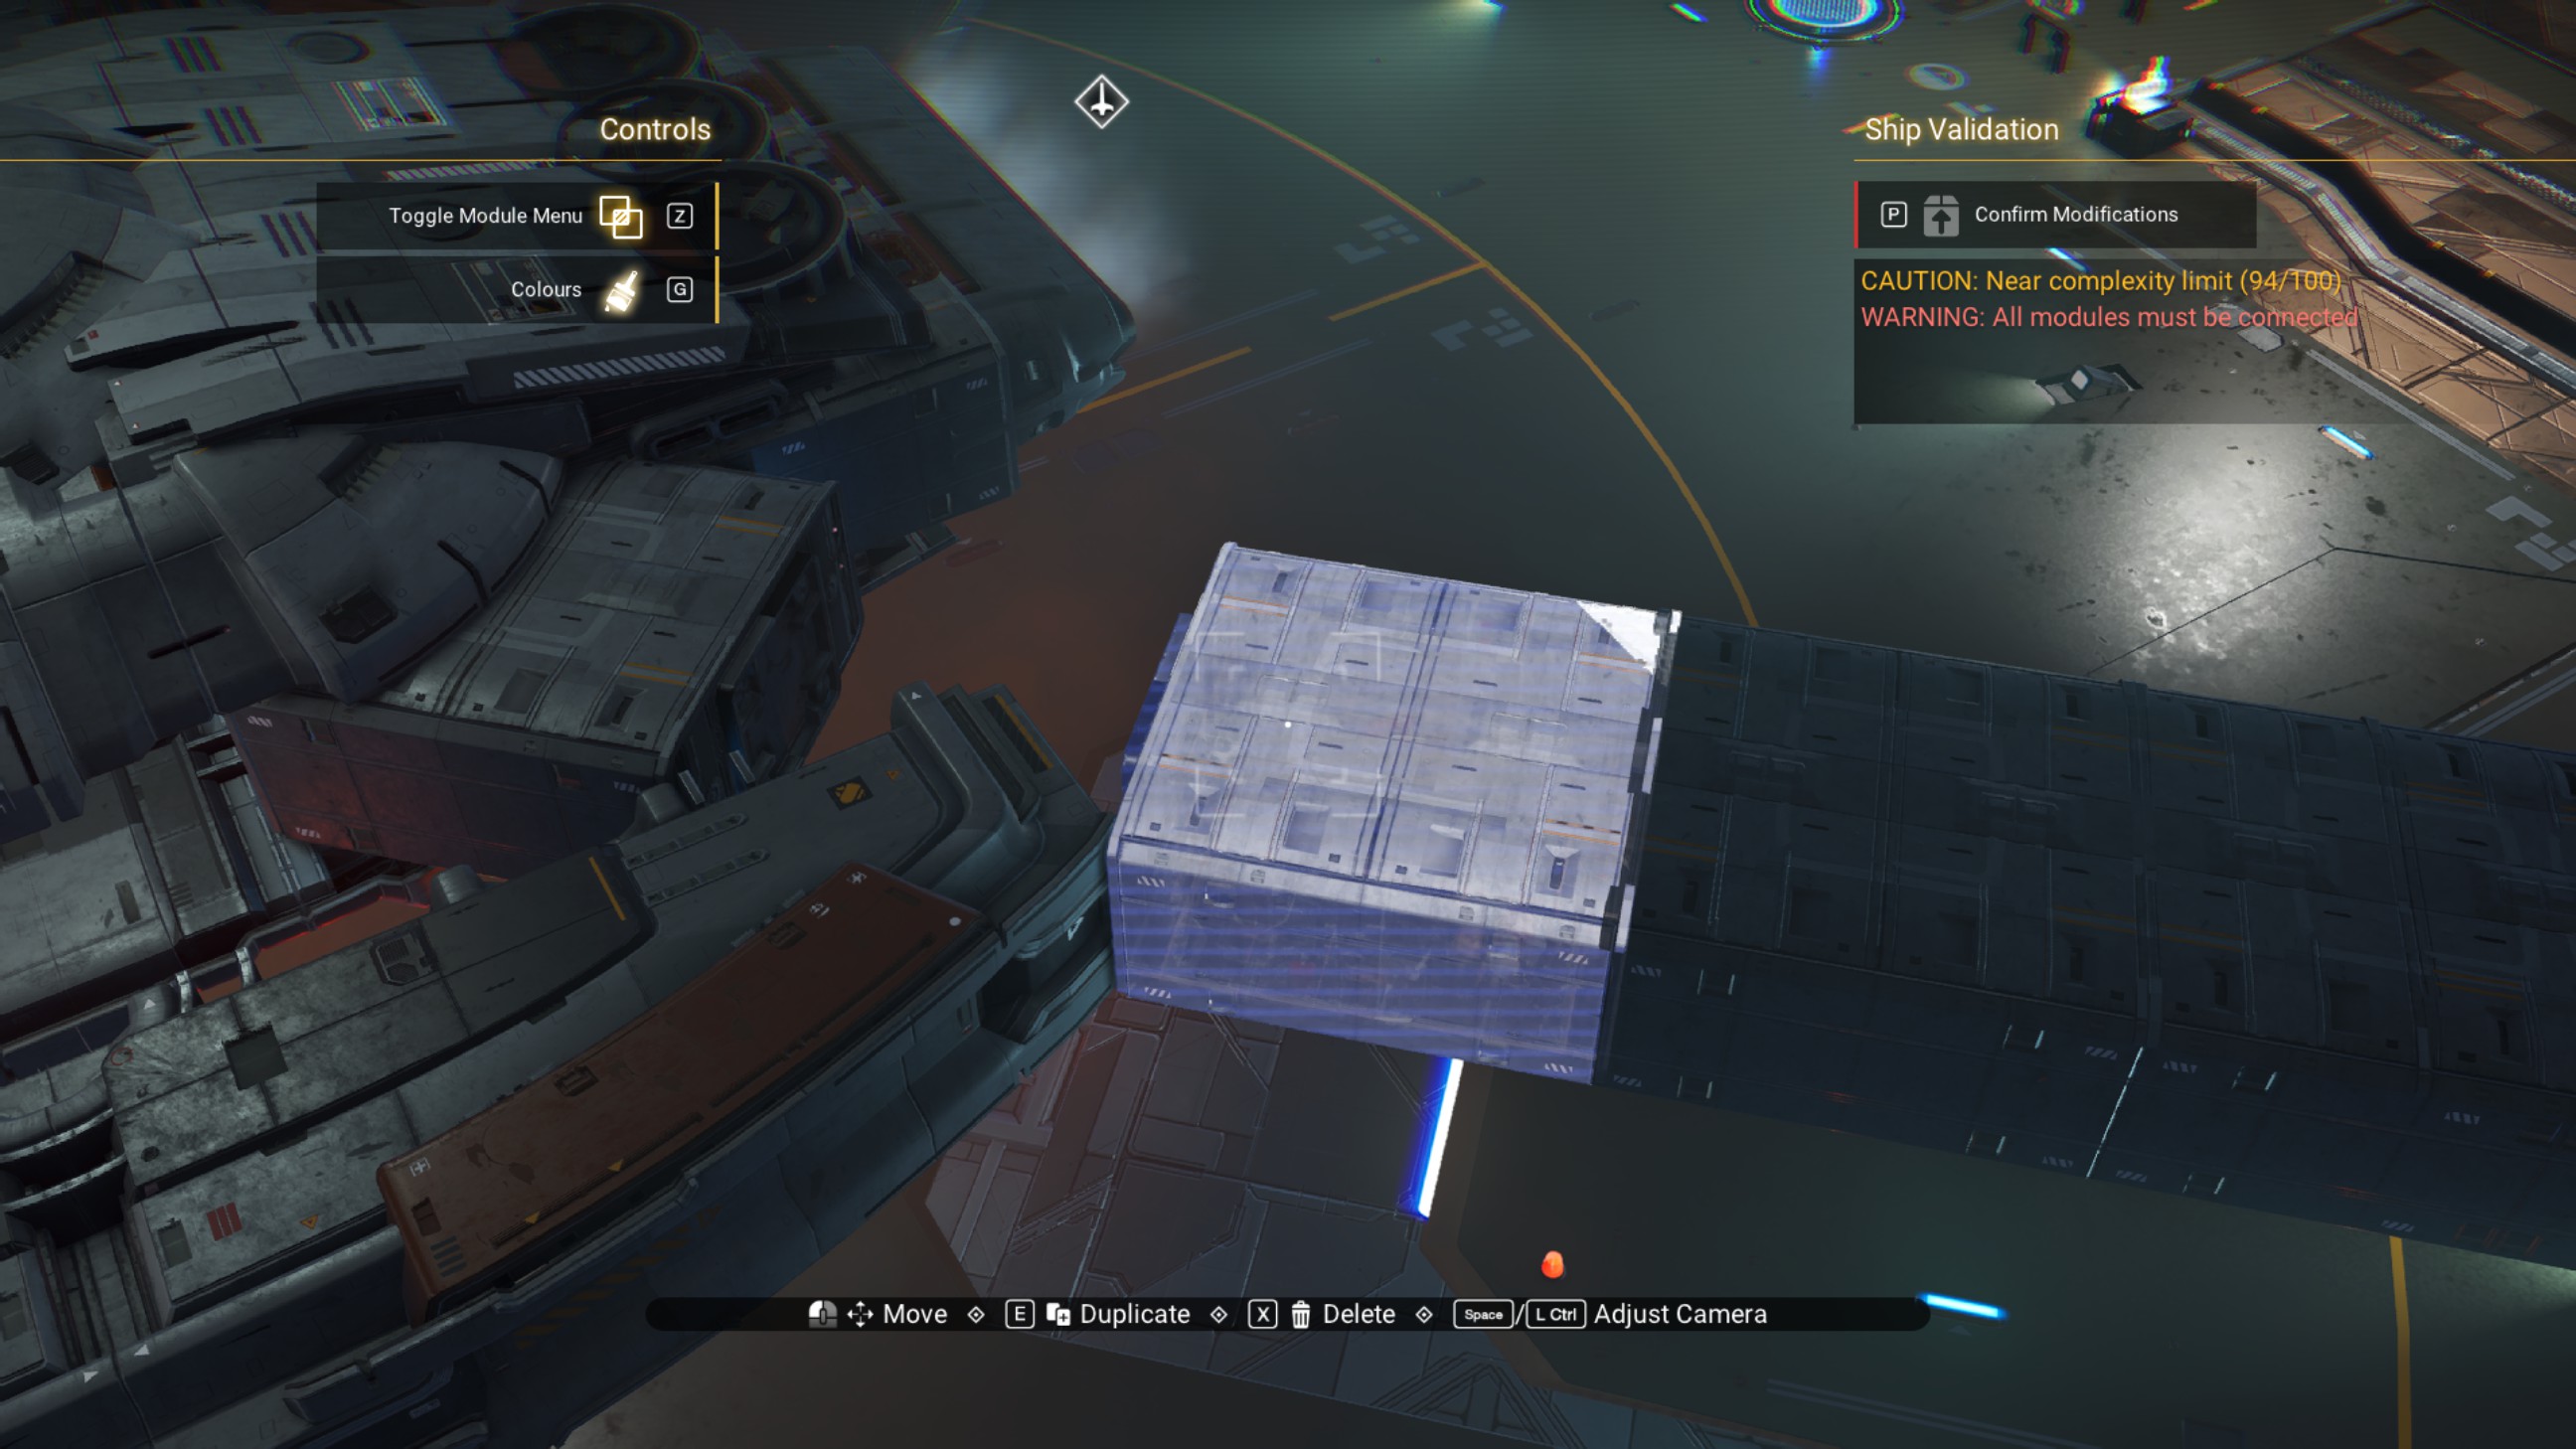
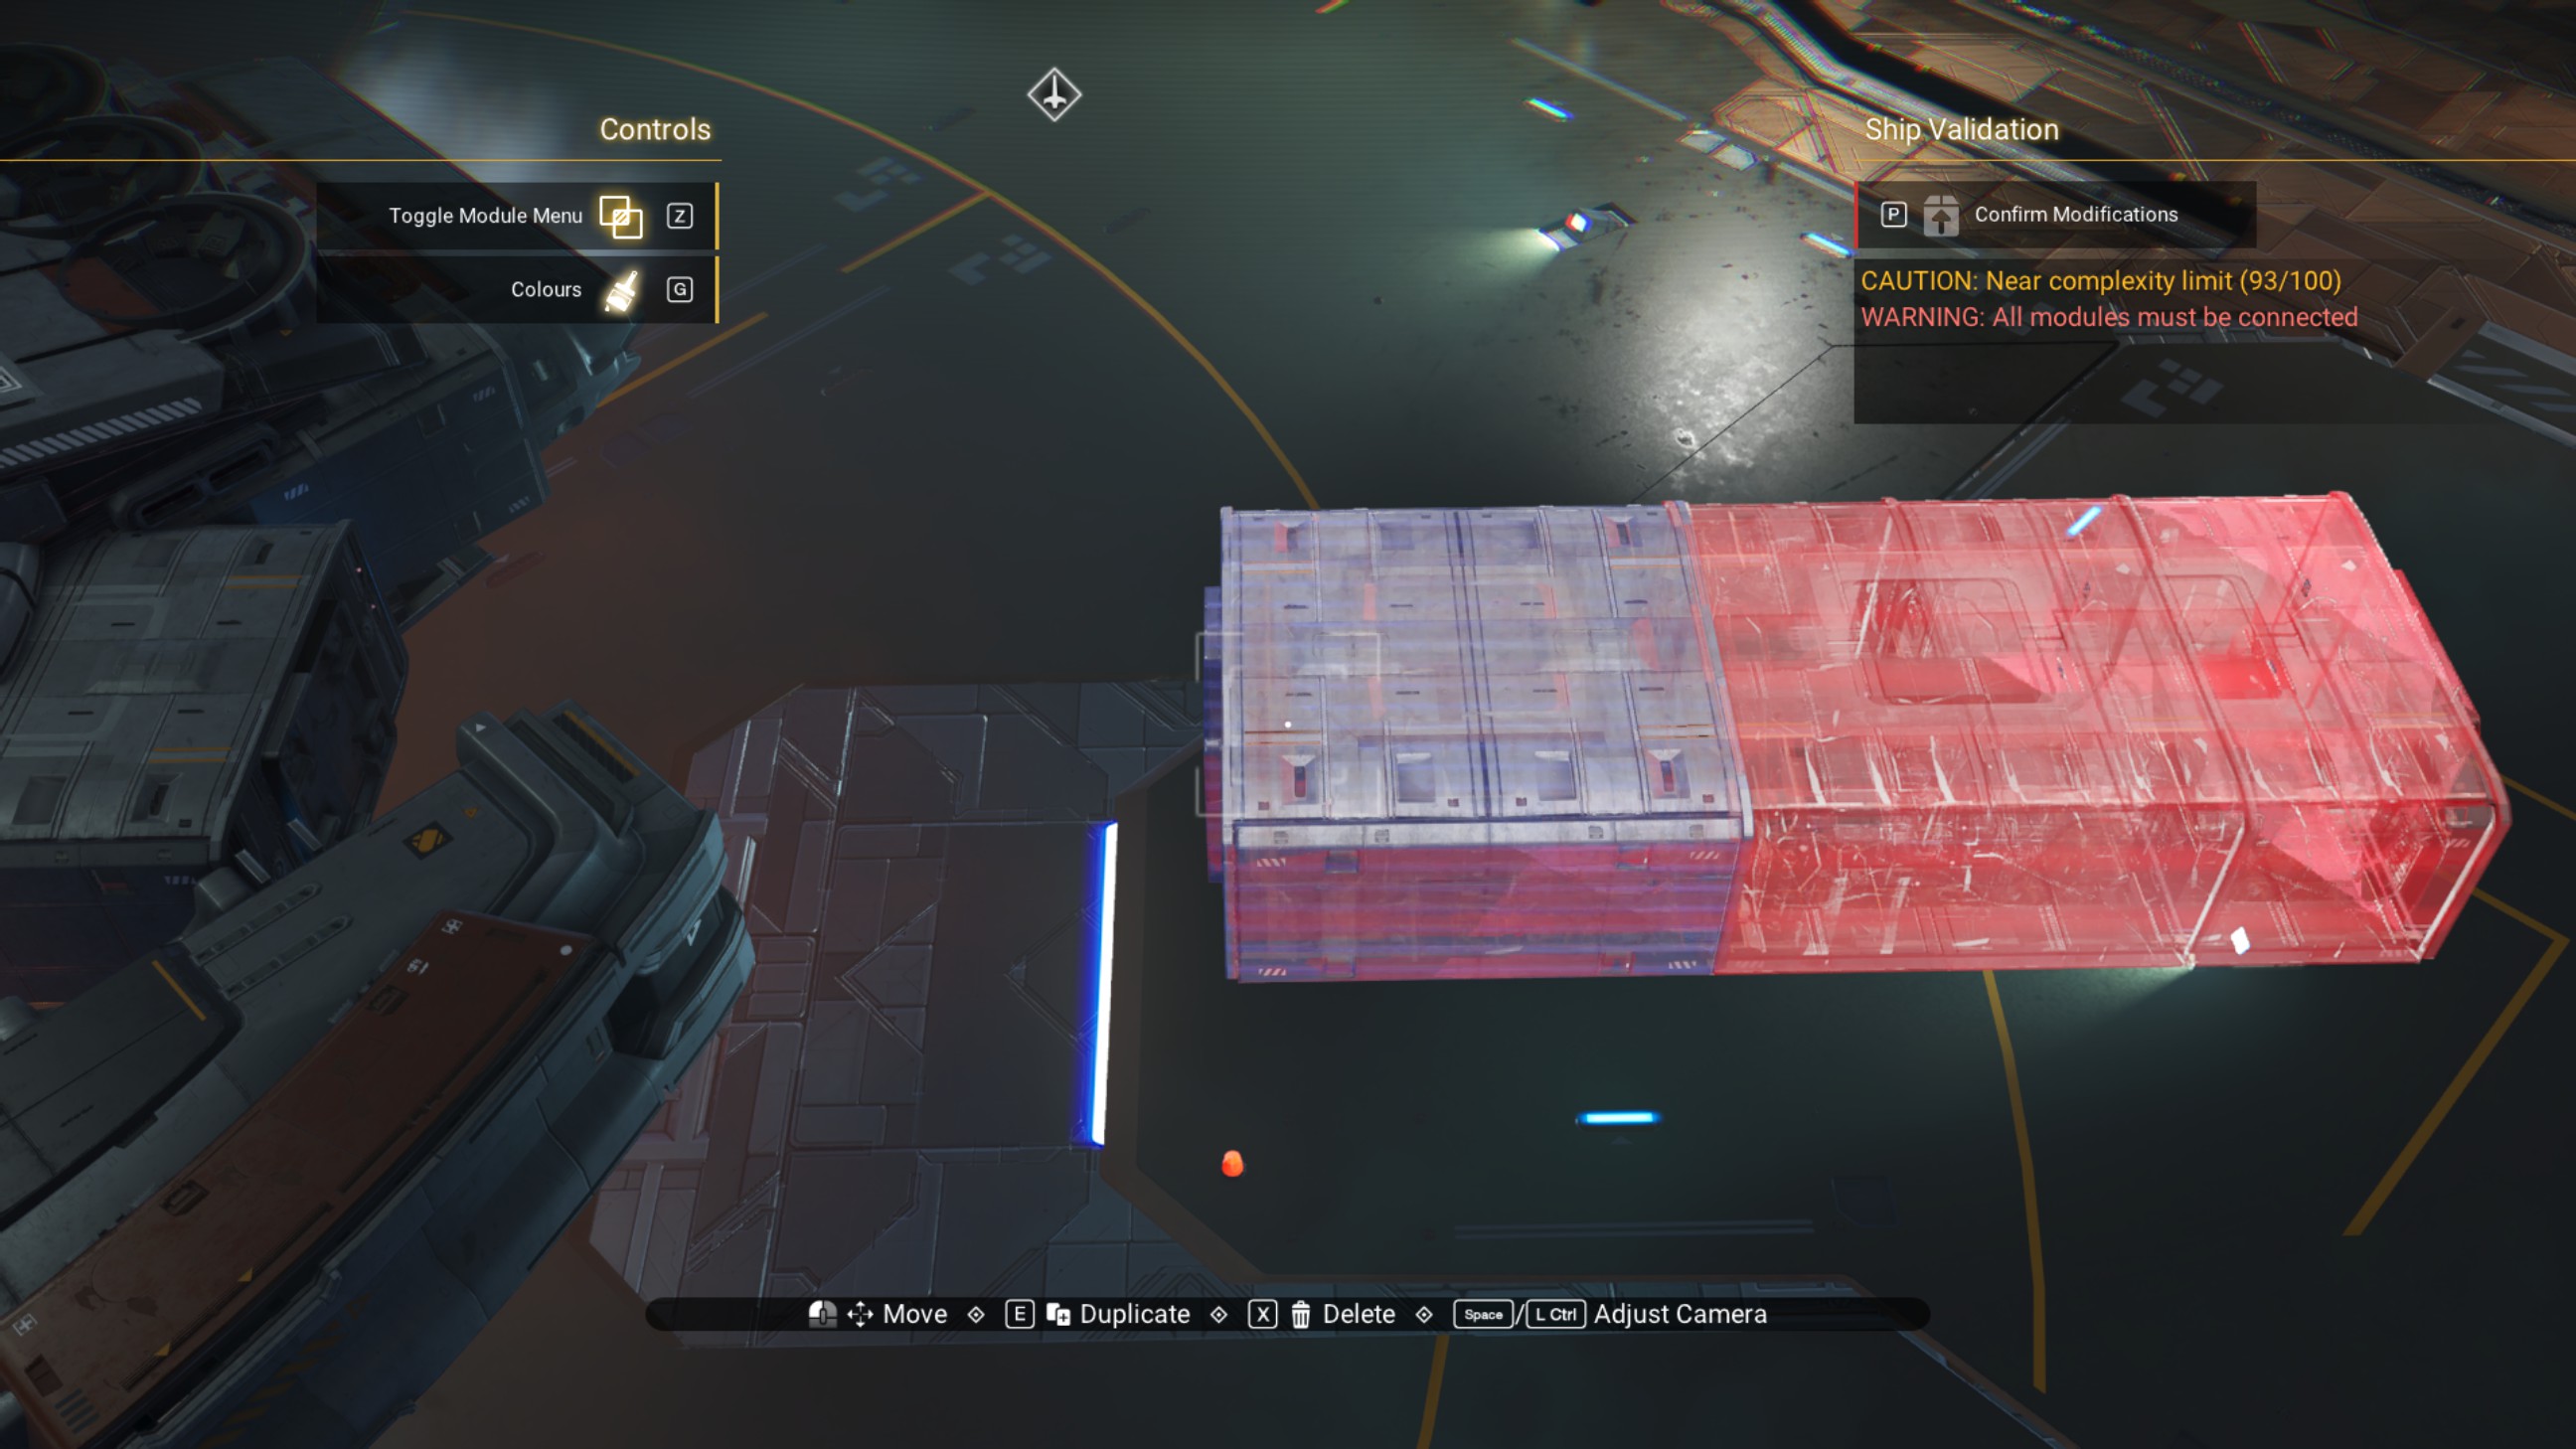
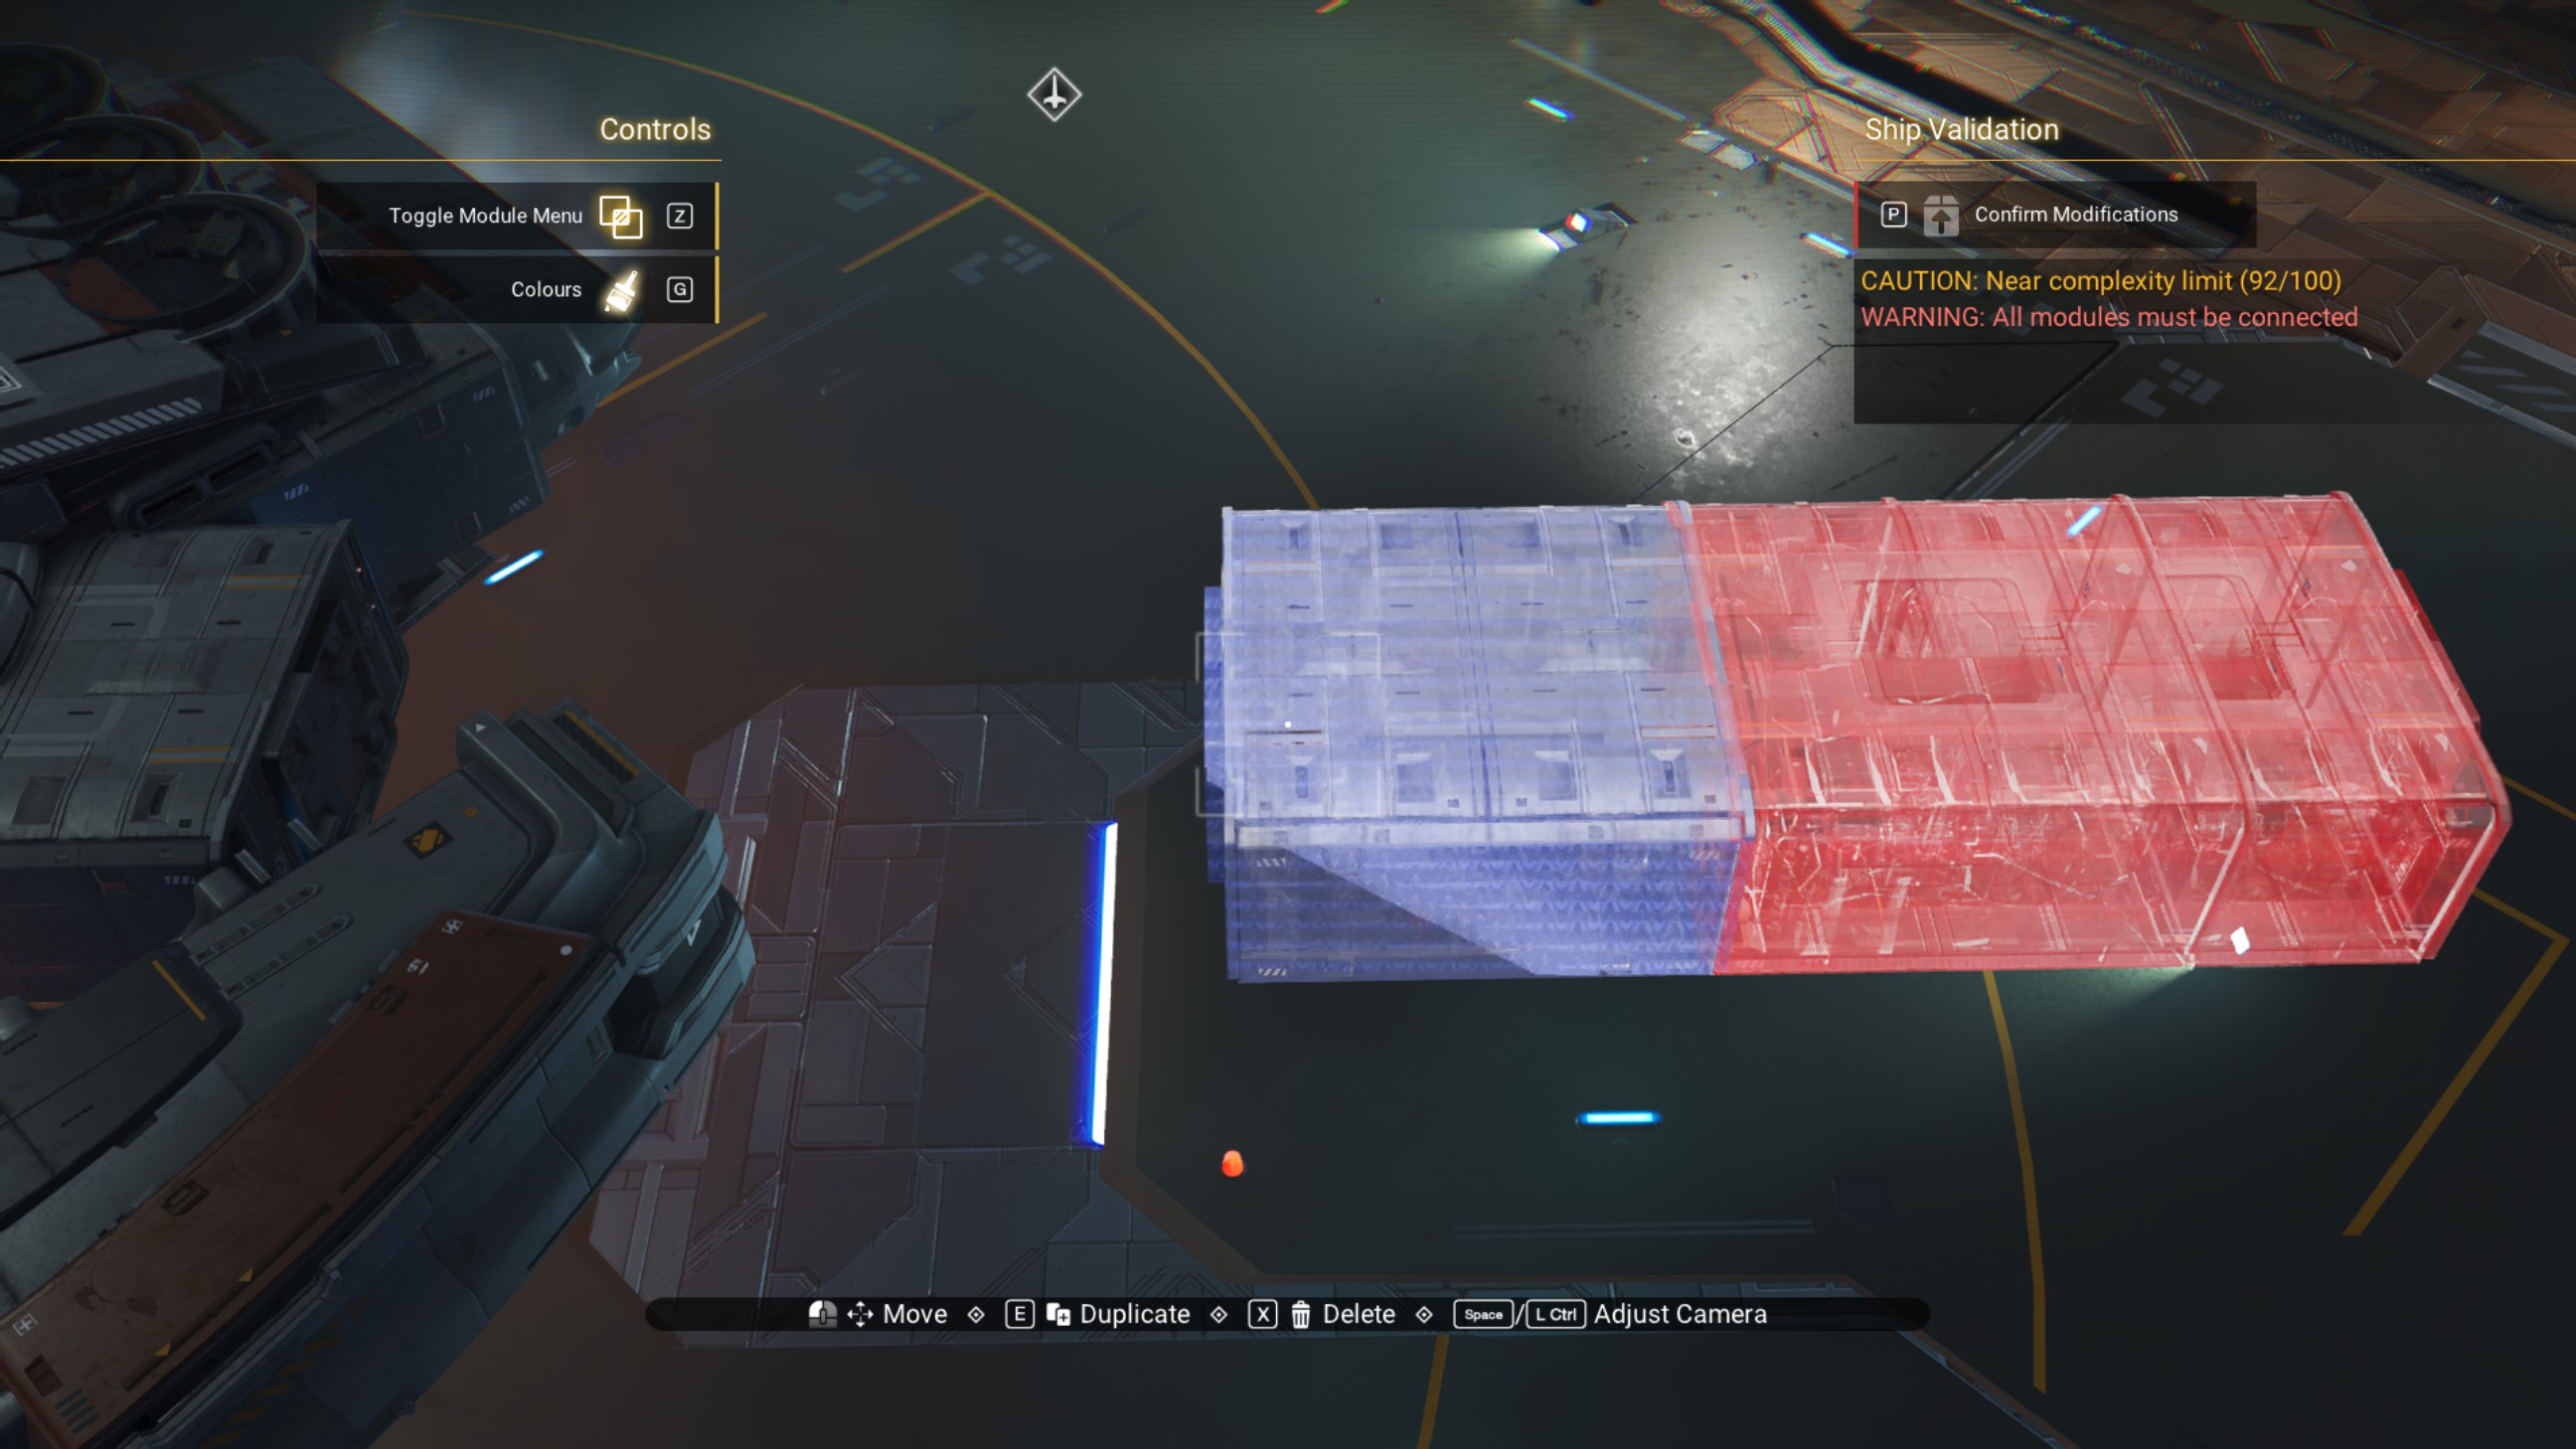
Place two speedbird nacelle rims on the overlapped walkways we just placed within the ship, one nacelle rim facing forward and one facing to the rear.
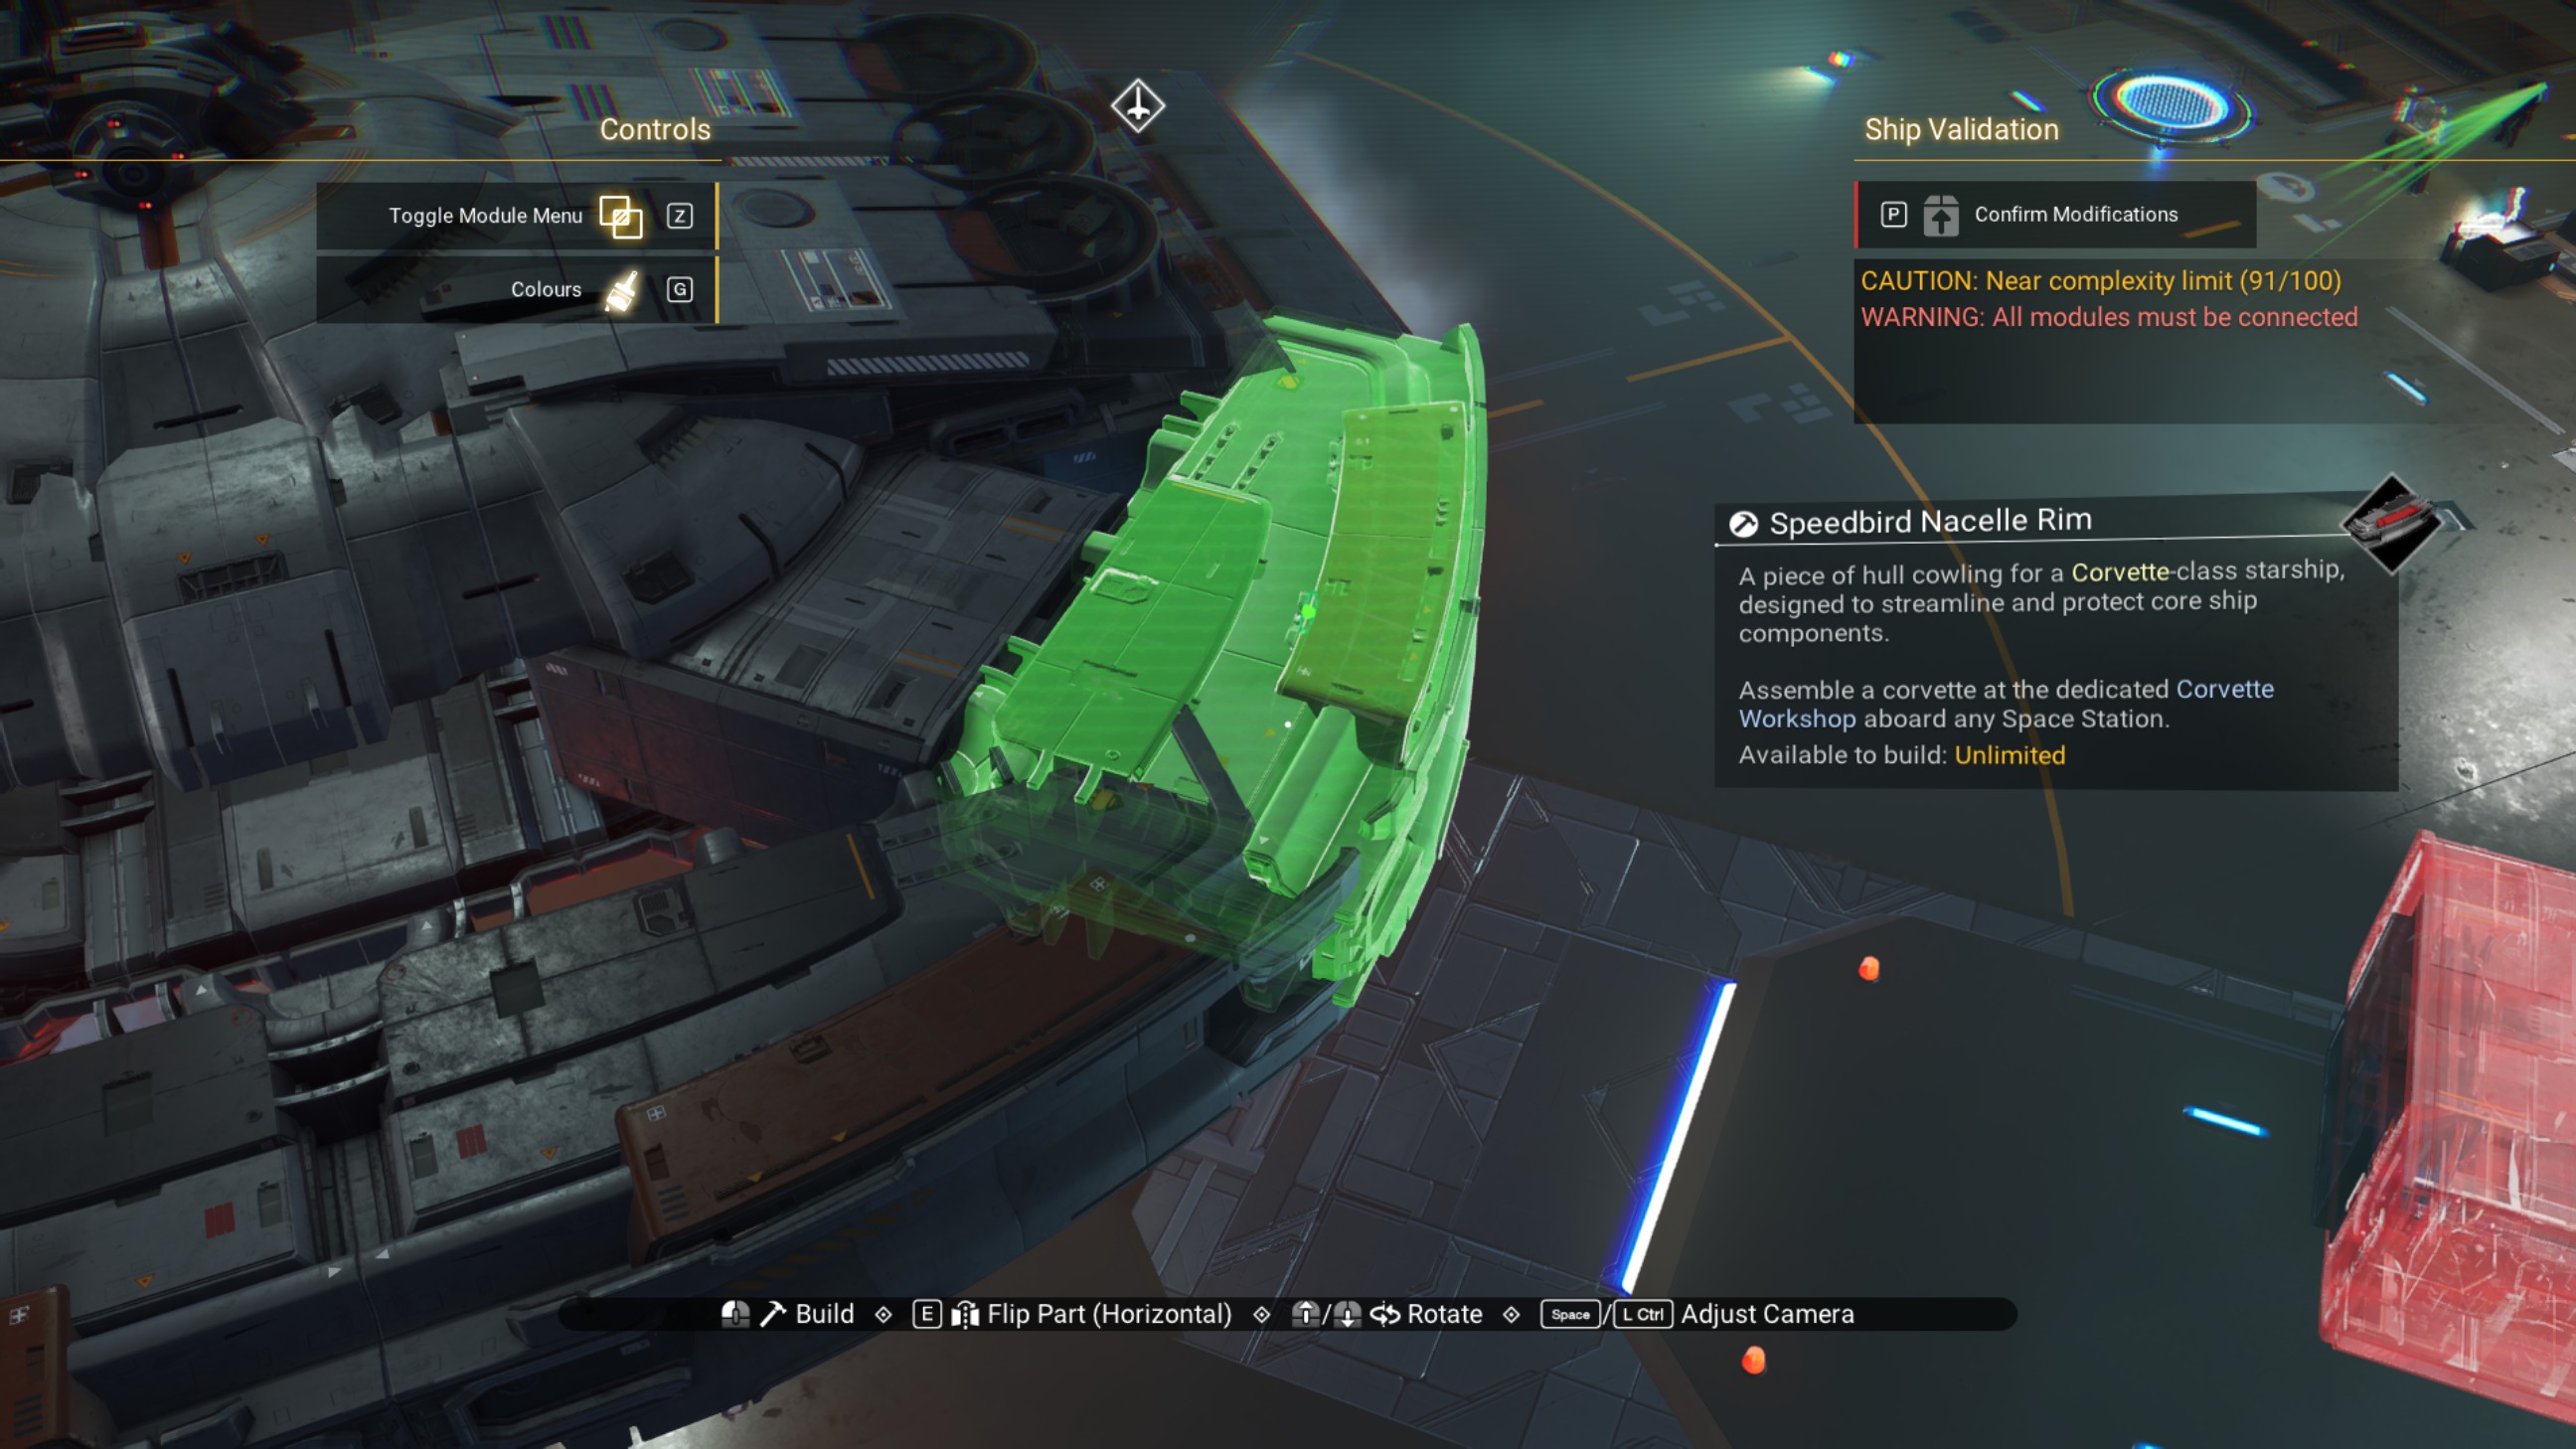
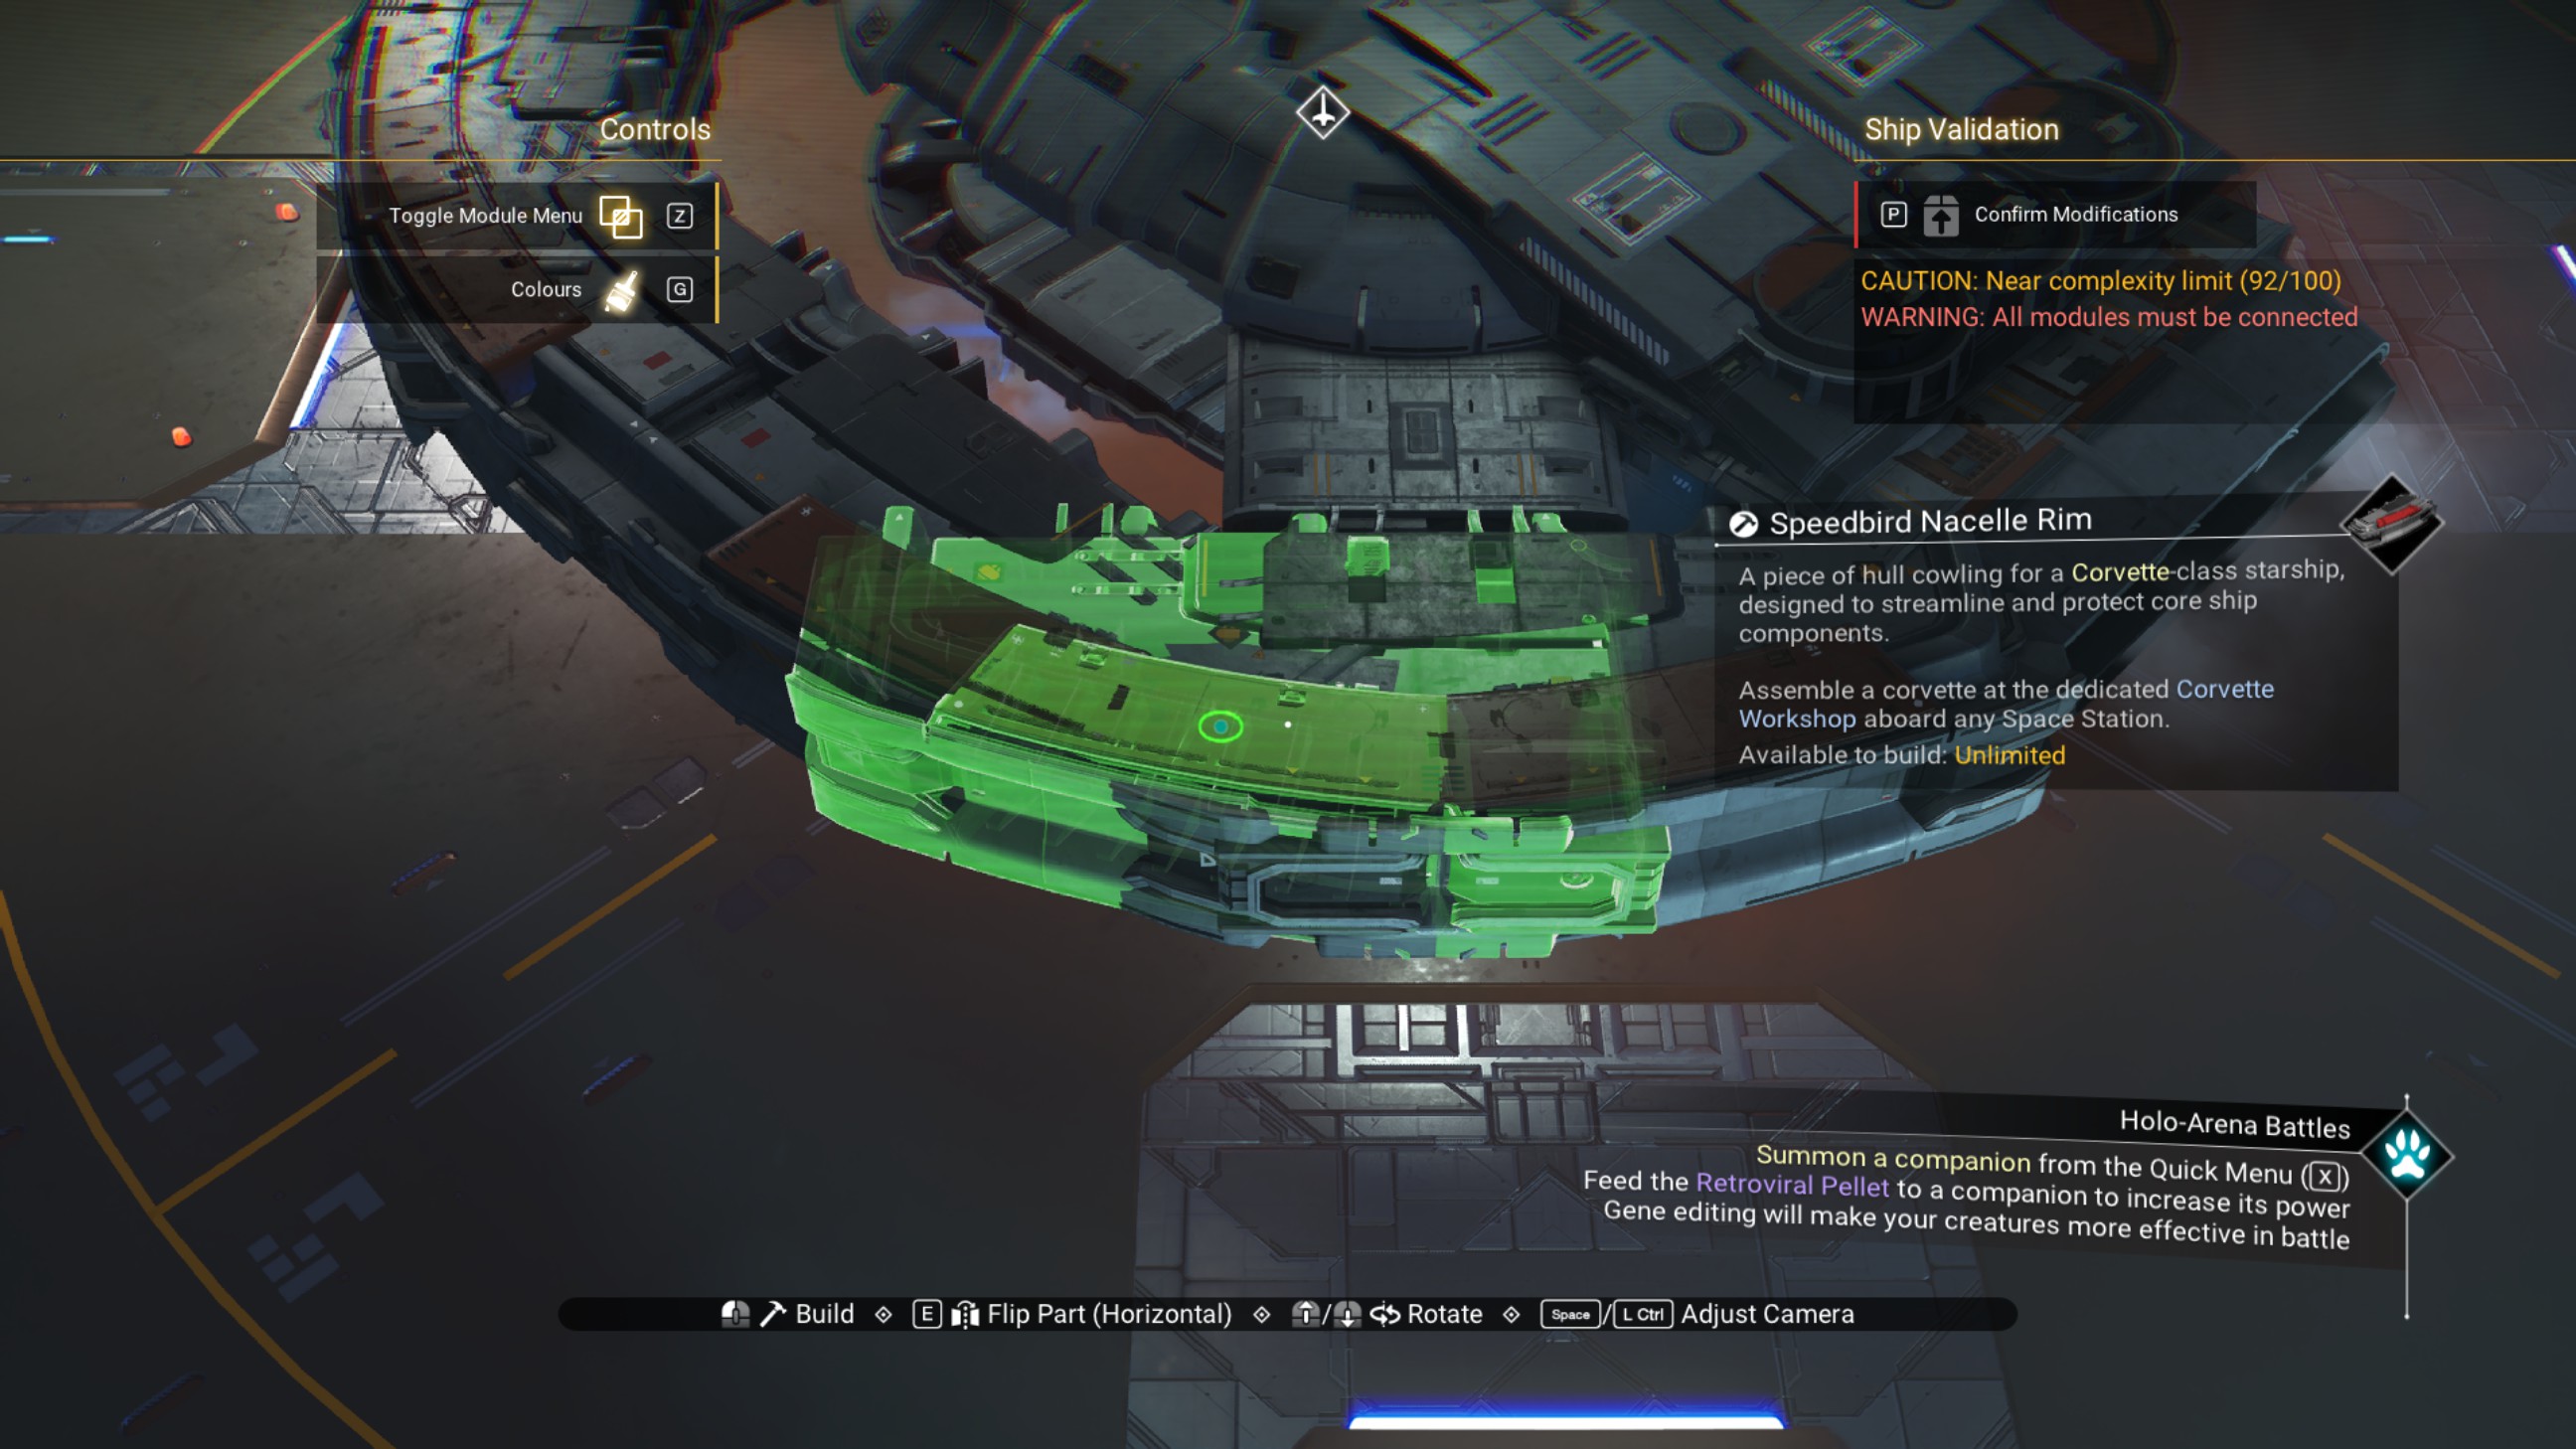
Delete the overlapped walkways within the ship.
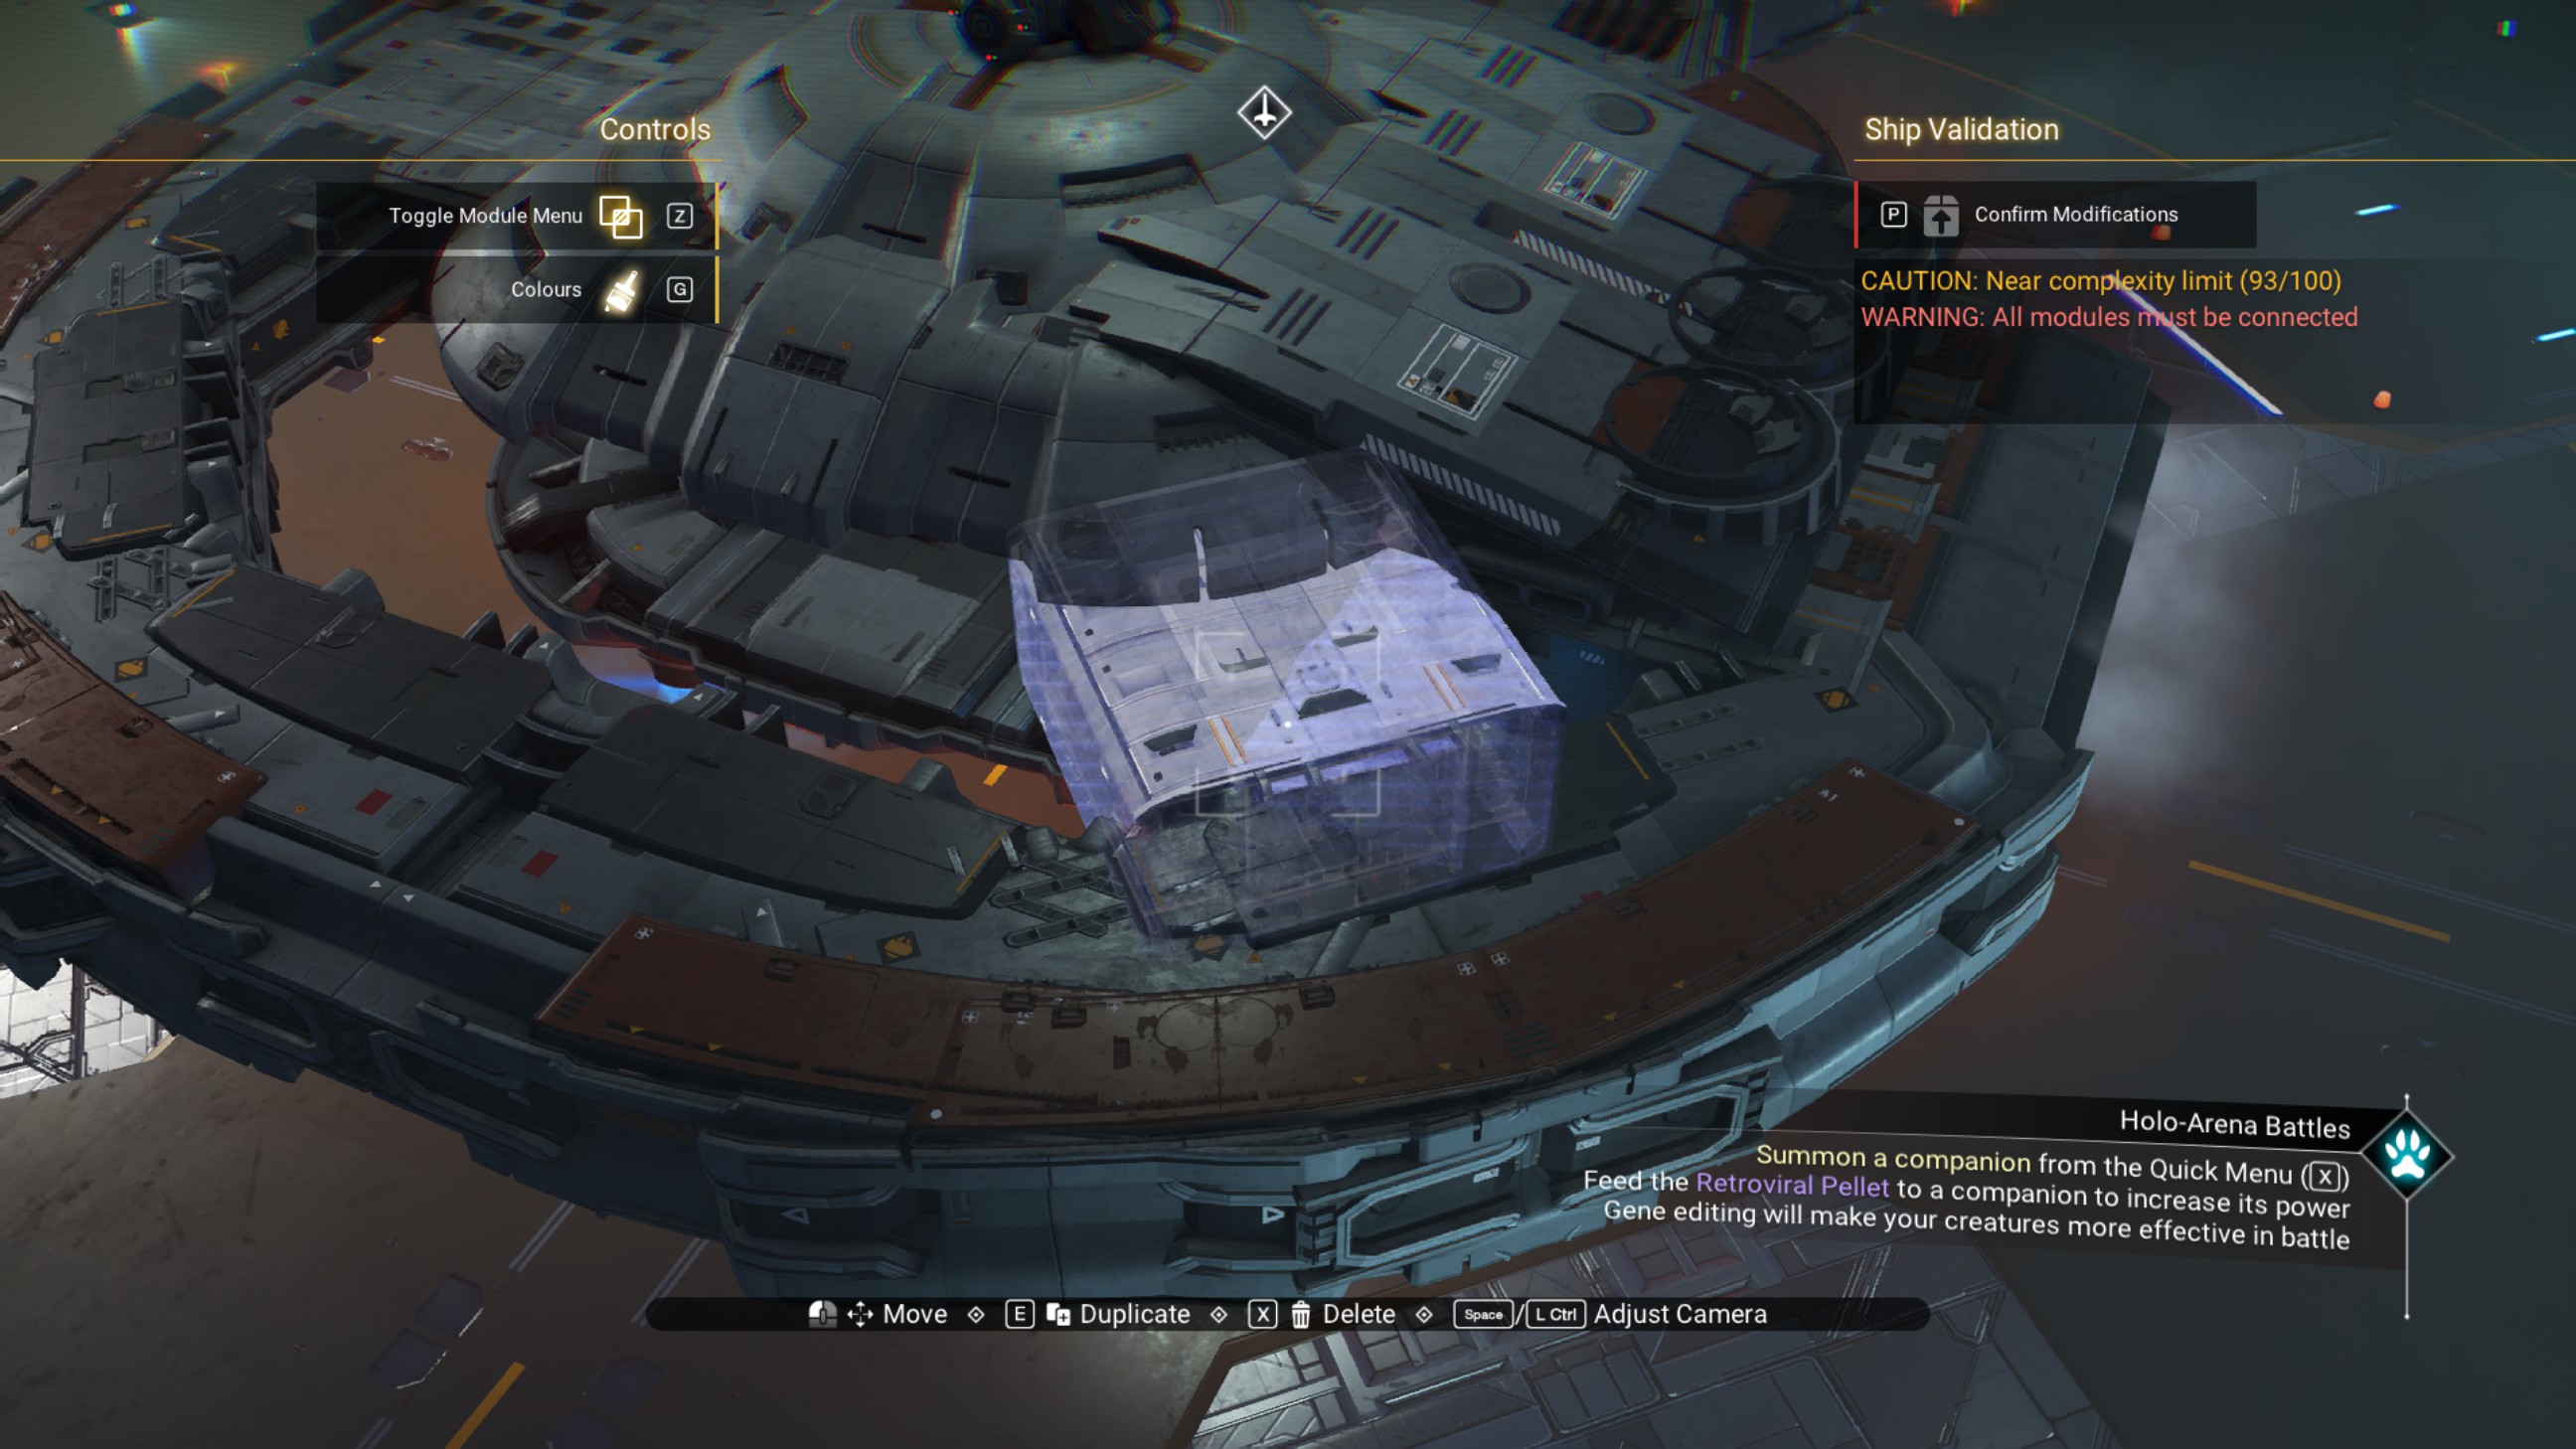
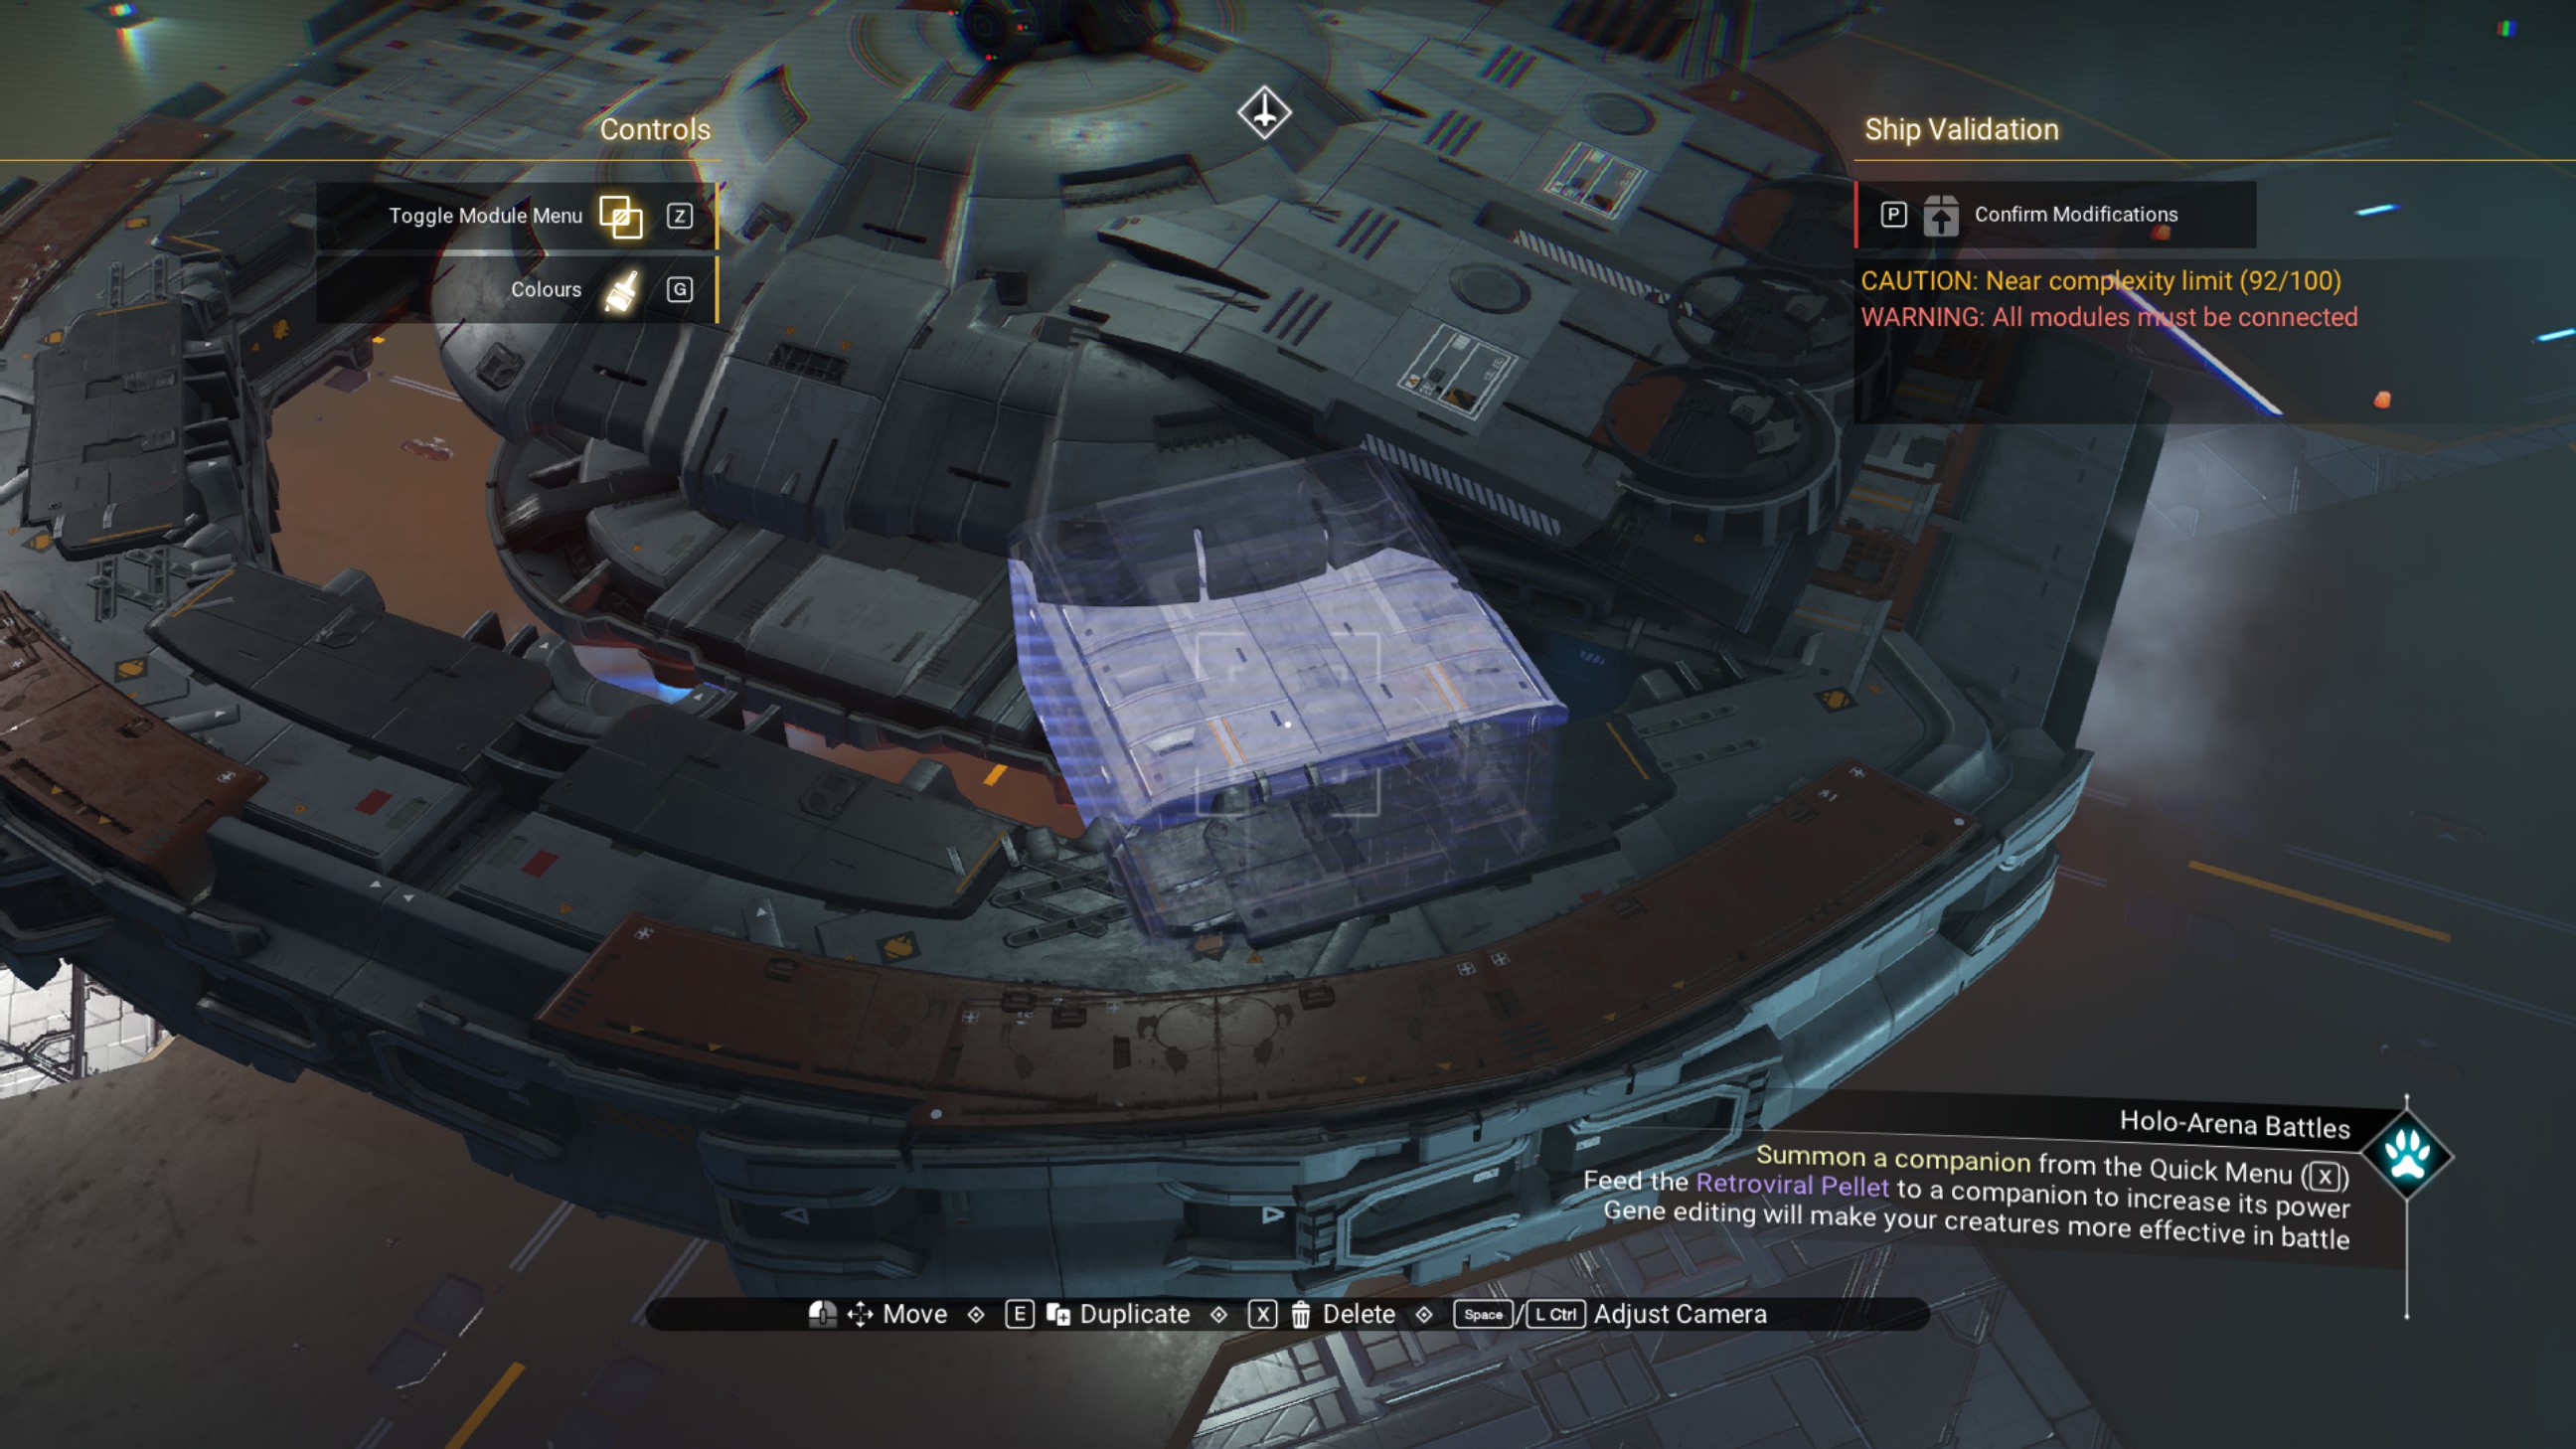
Now, we can delete the remaining overlapped walkways off the port bow and port stern.
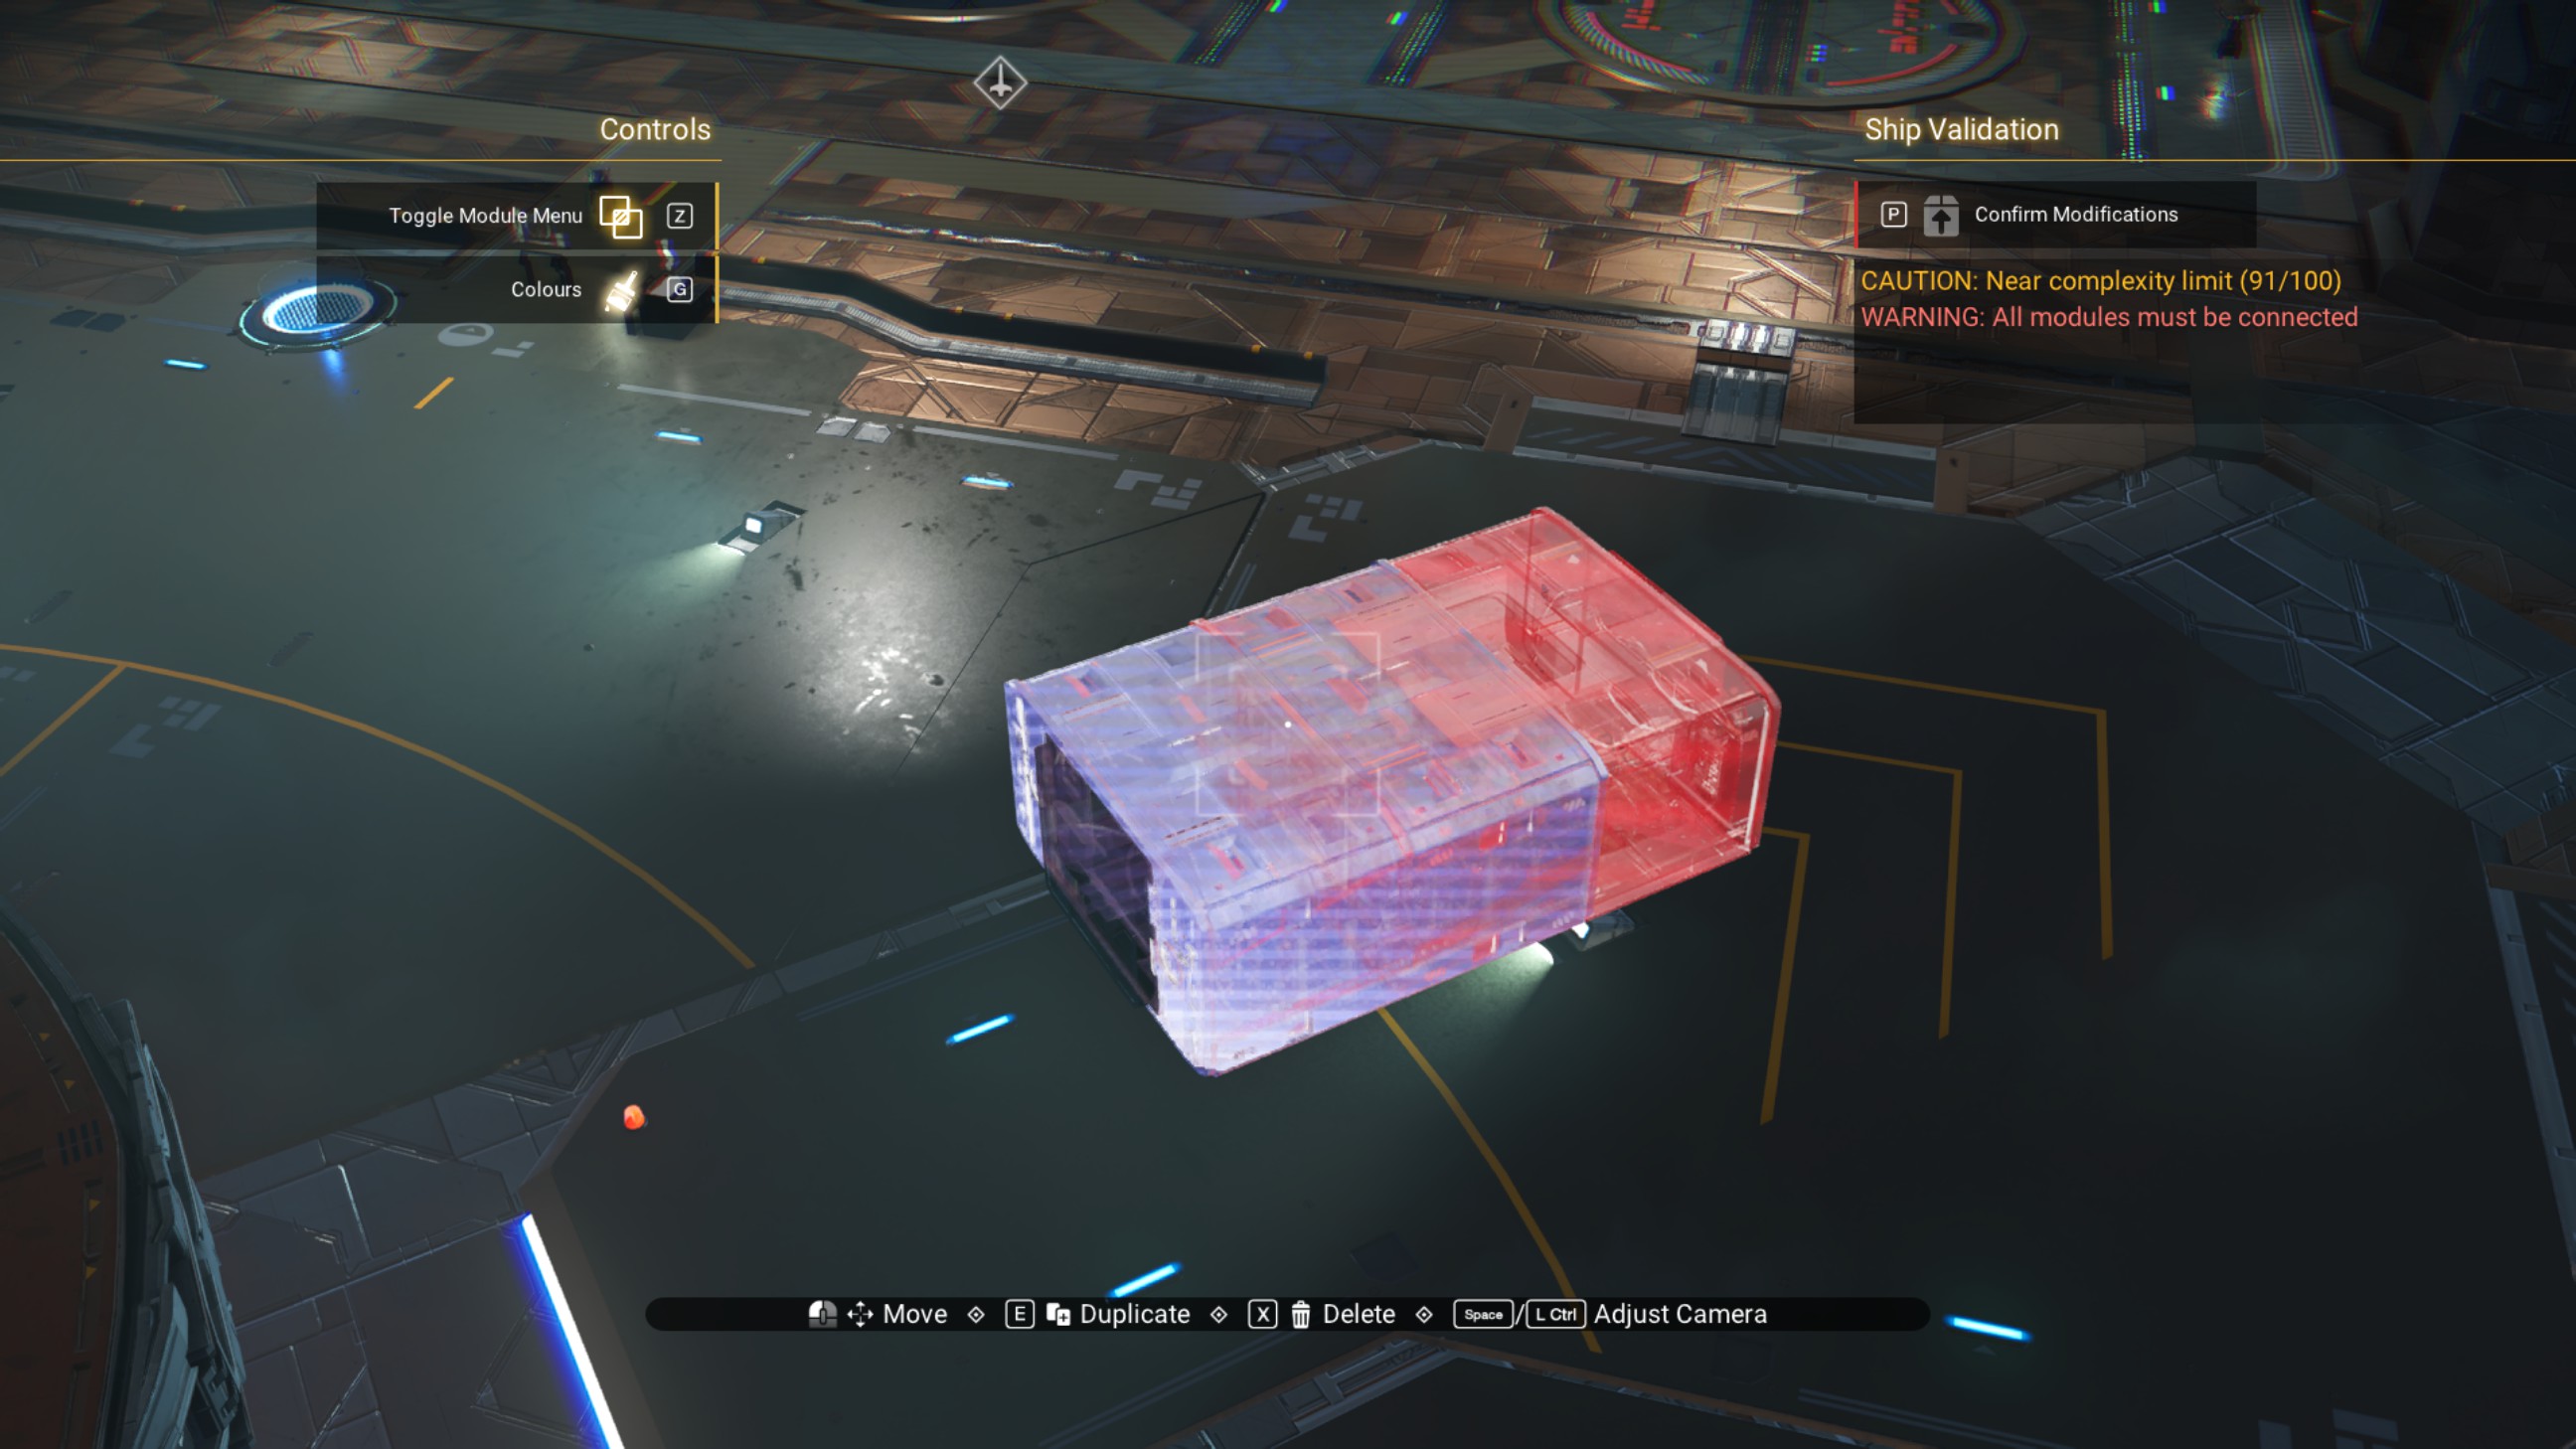
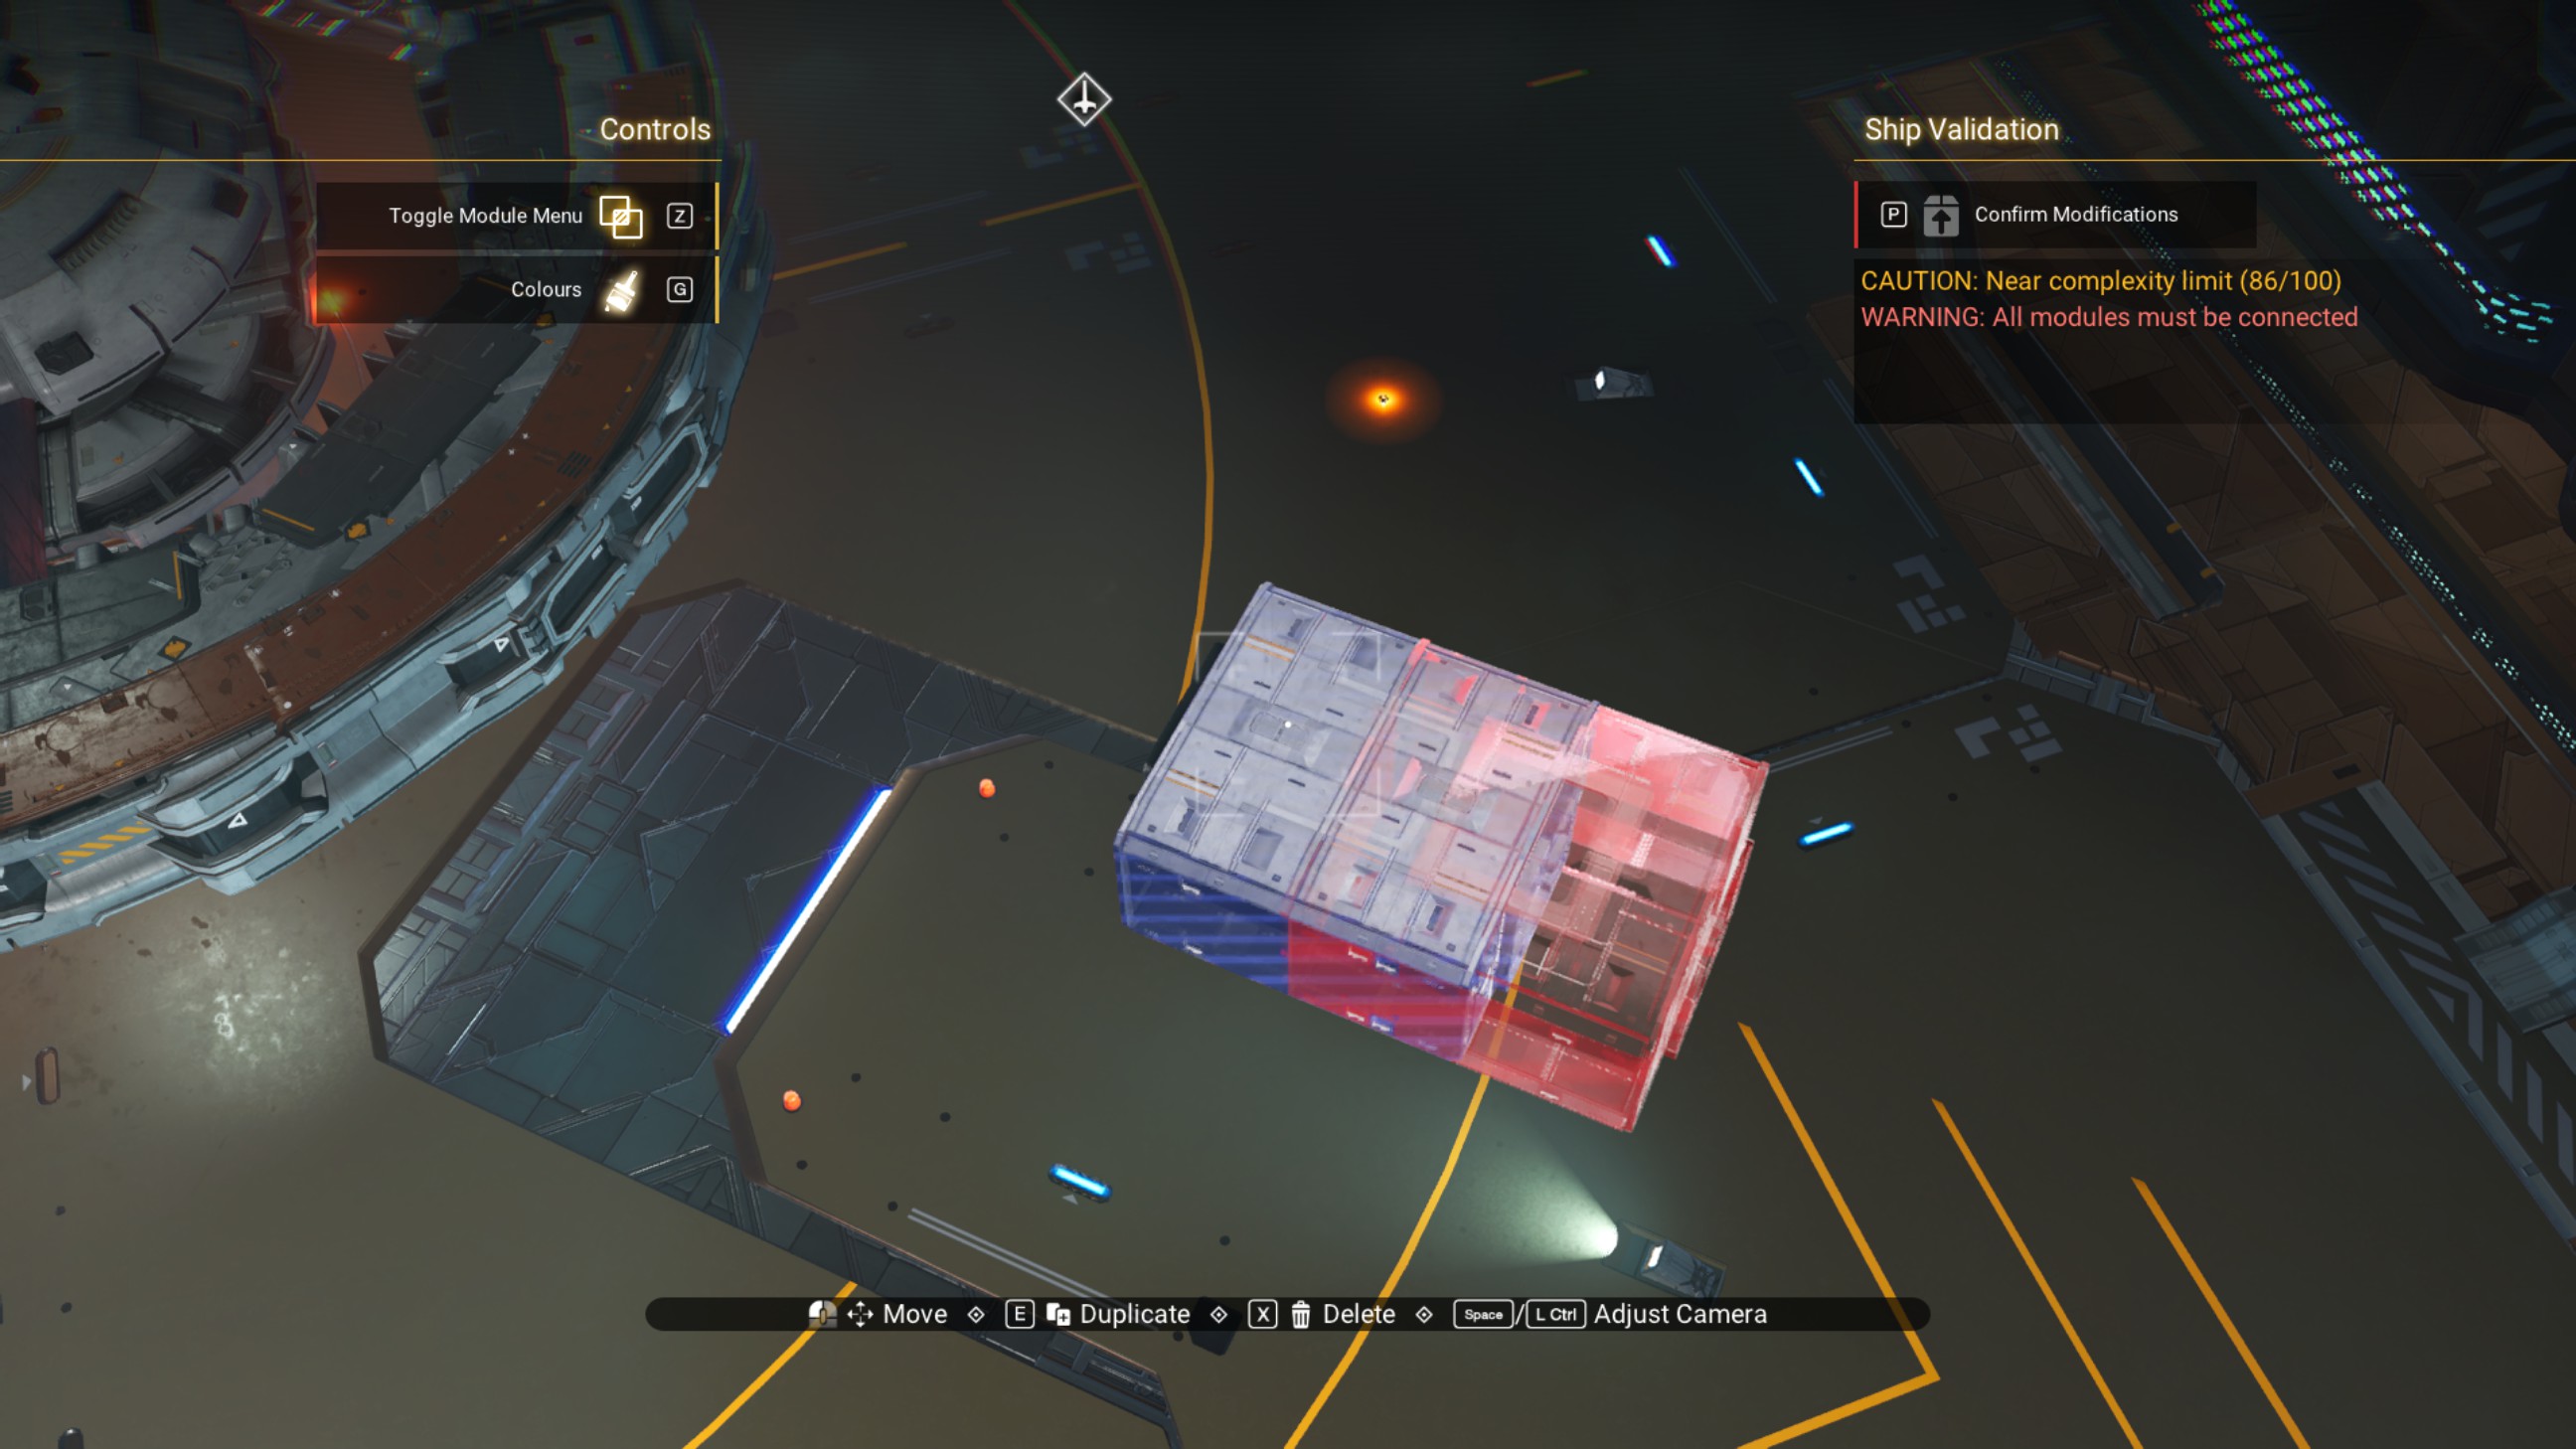
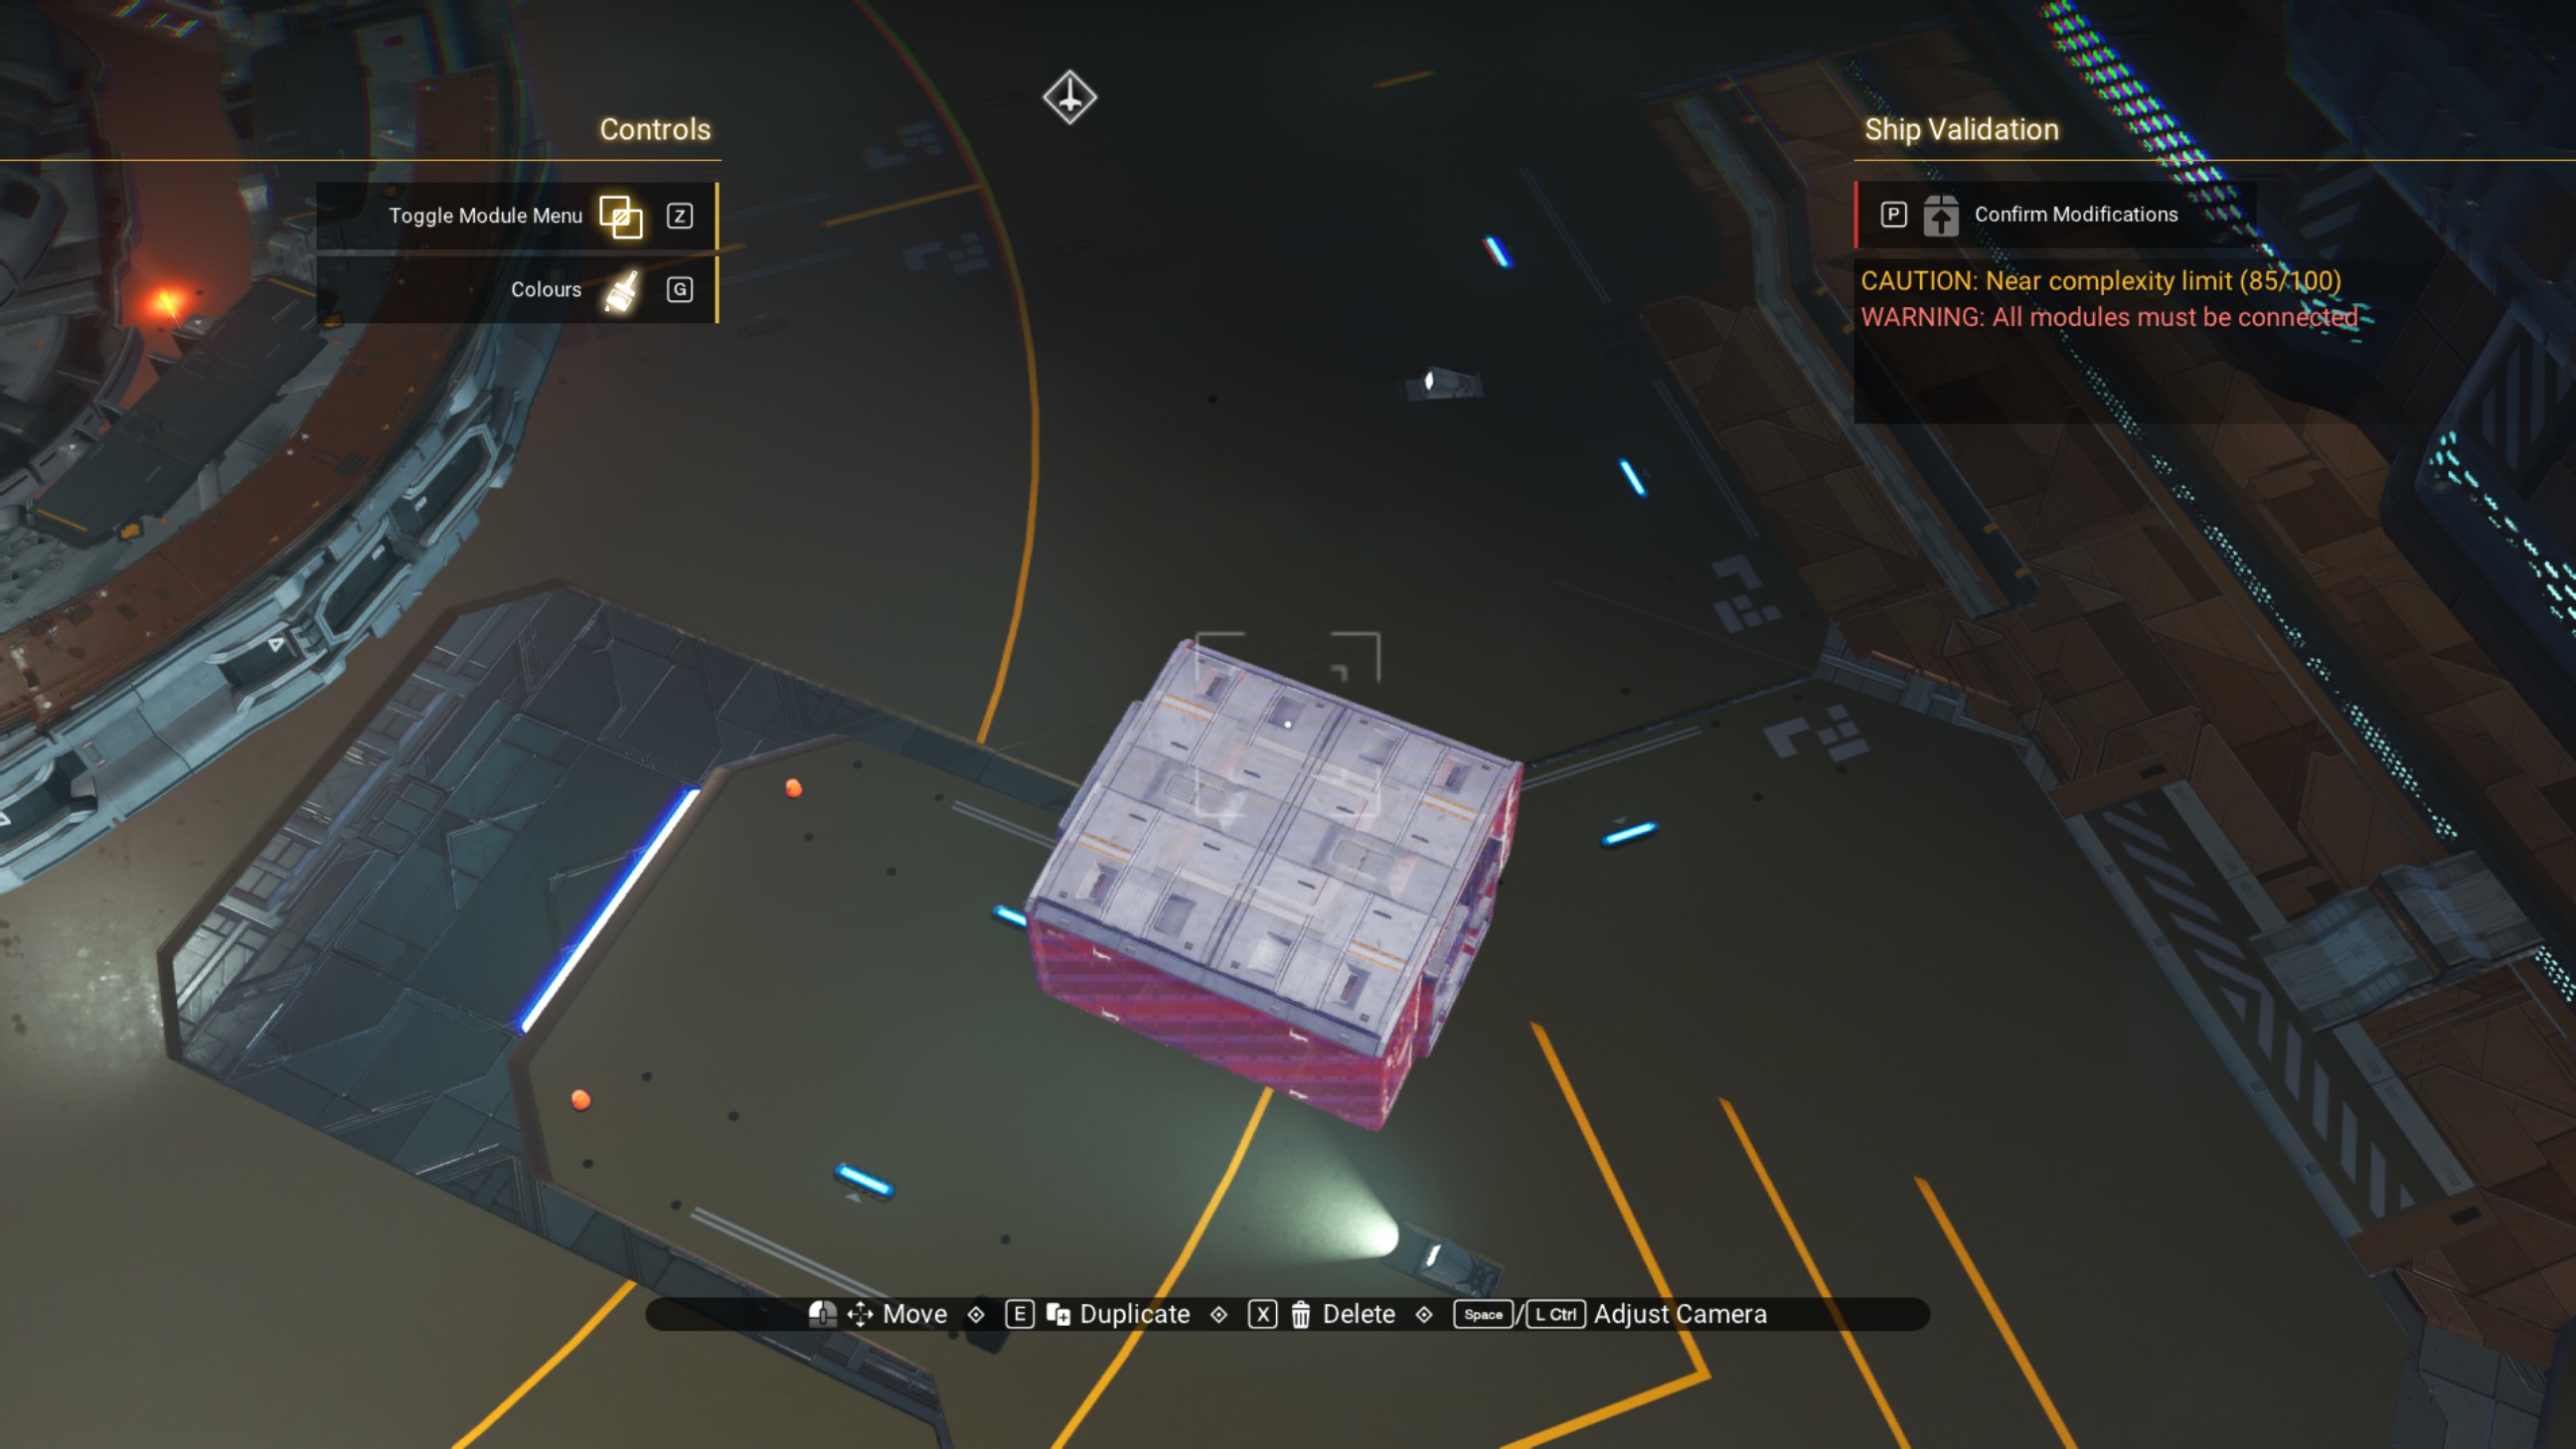
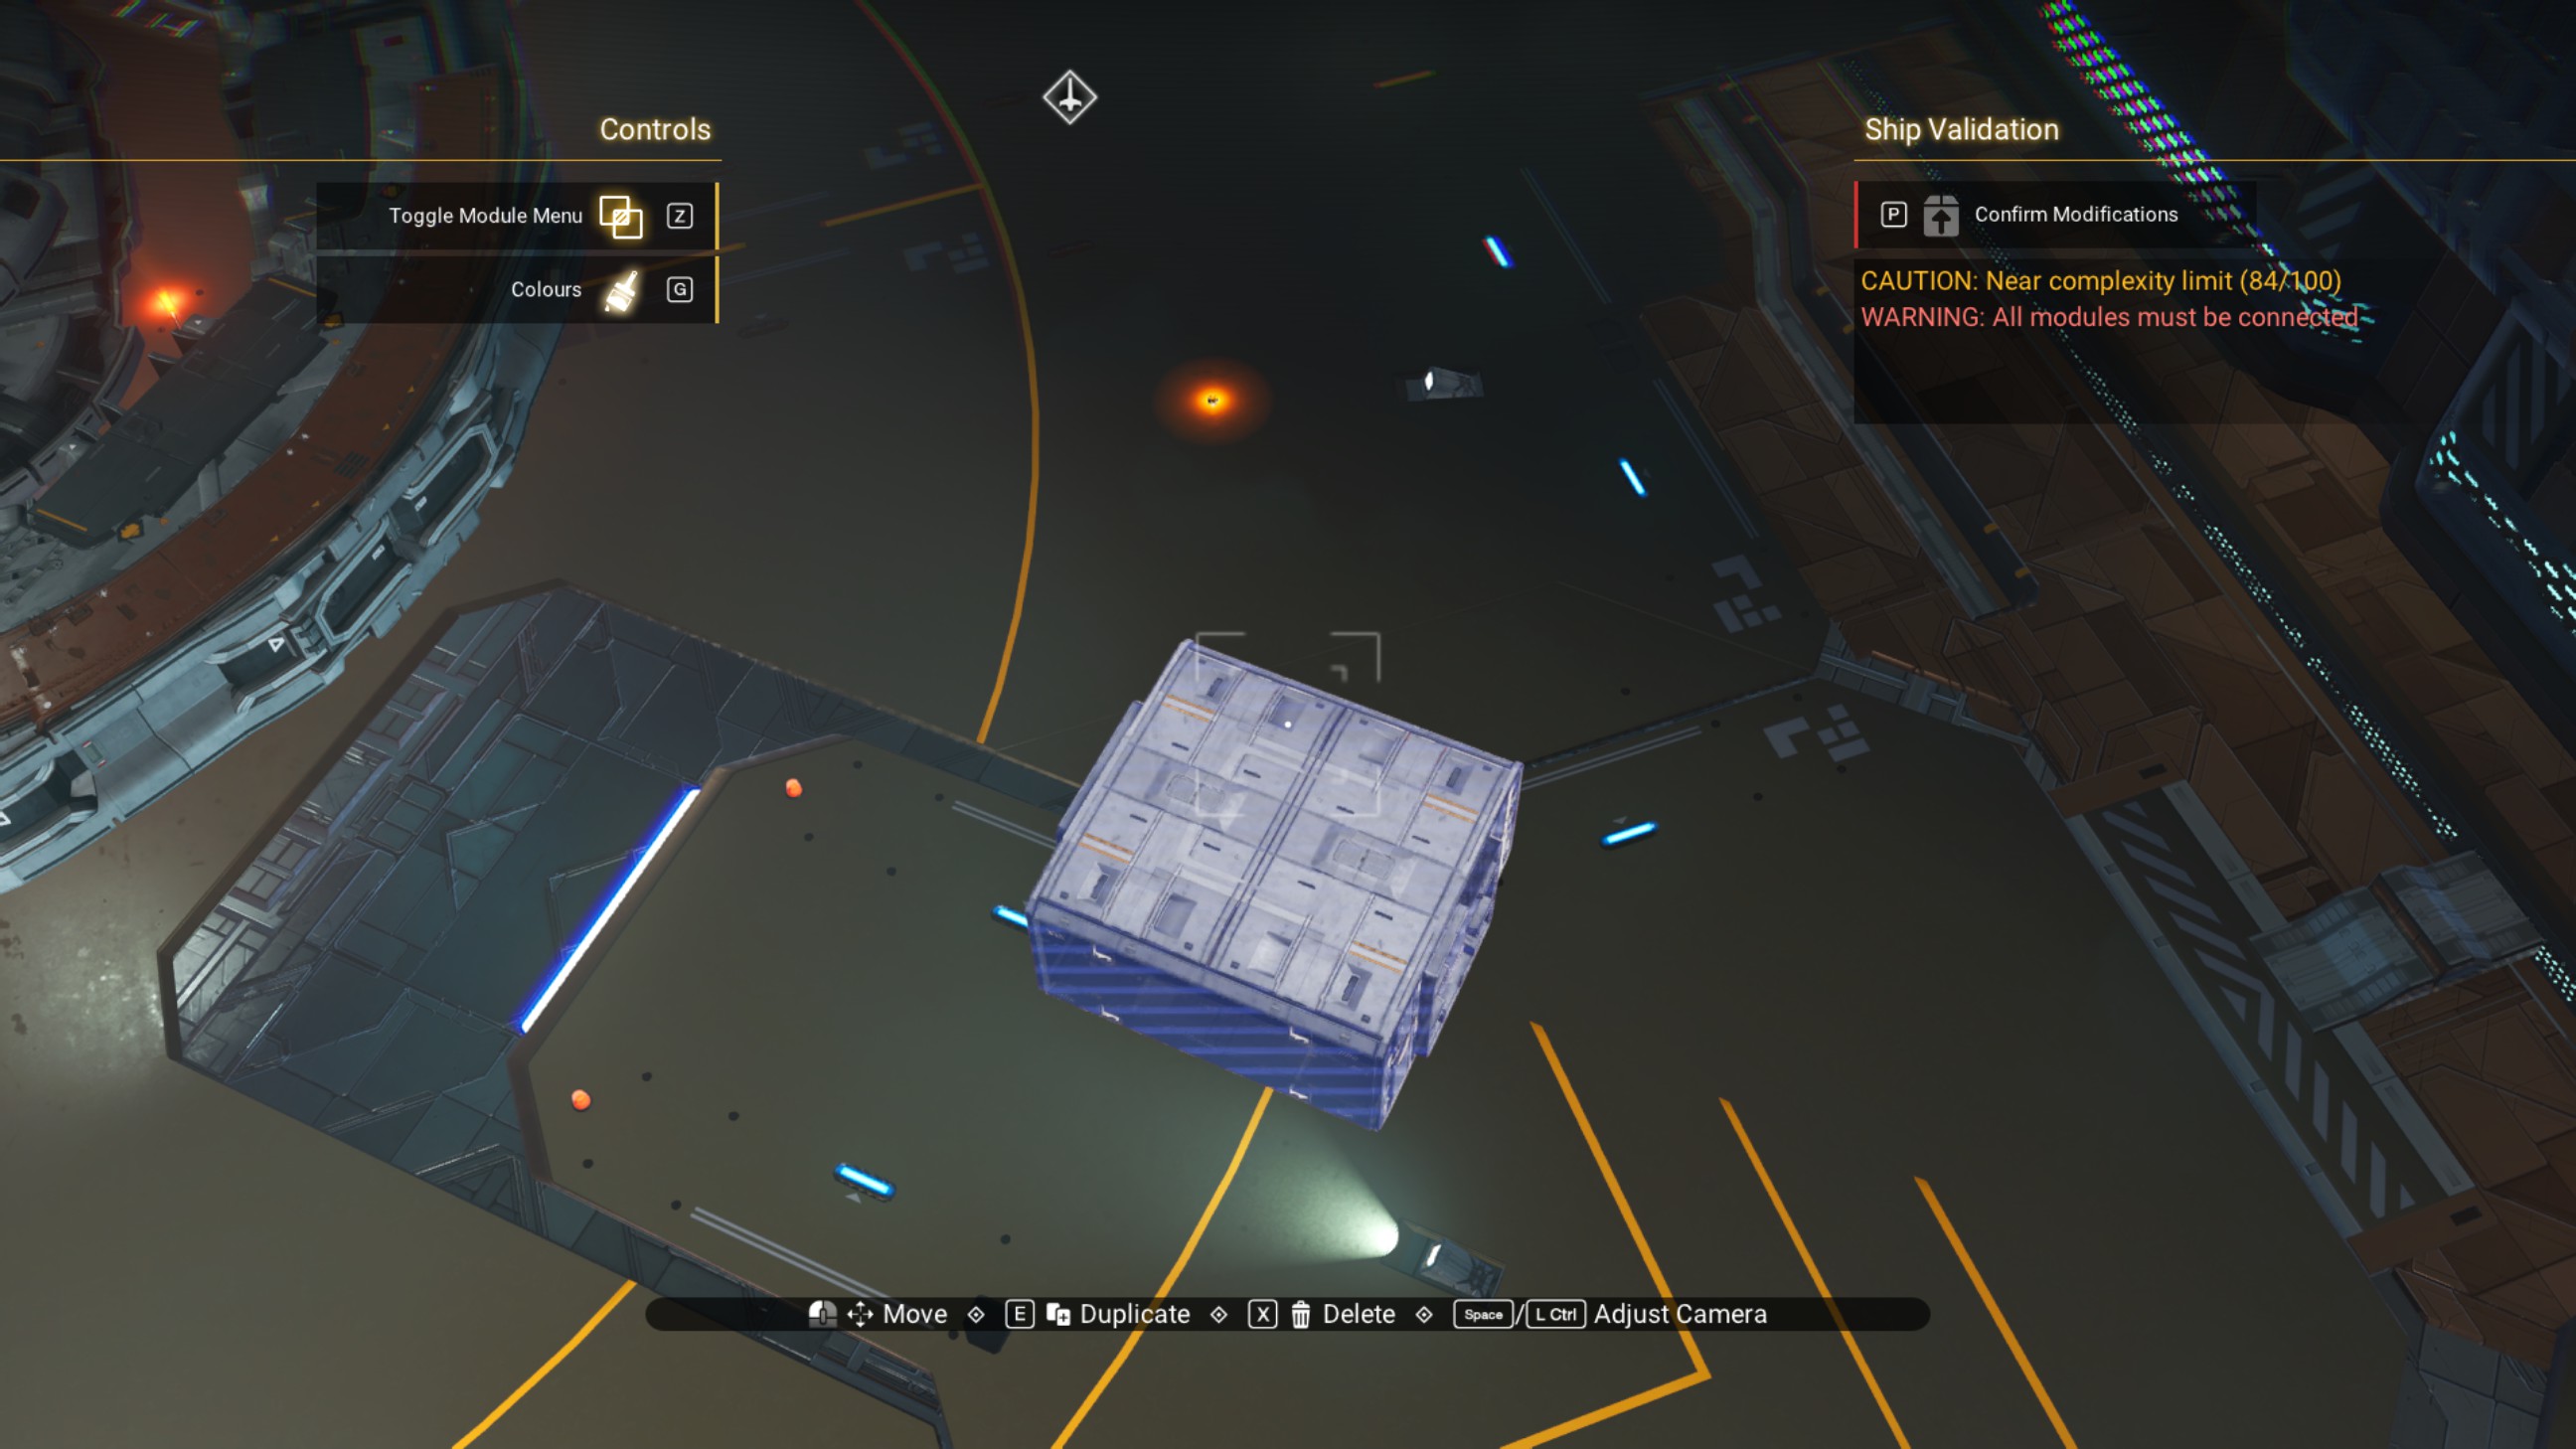
Last of the Angled Building
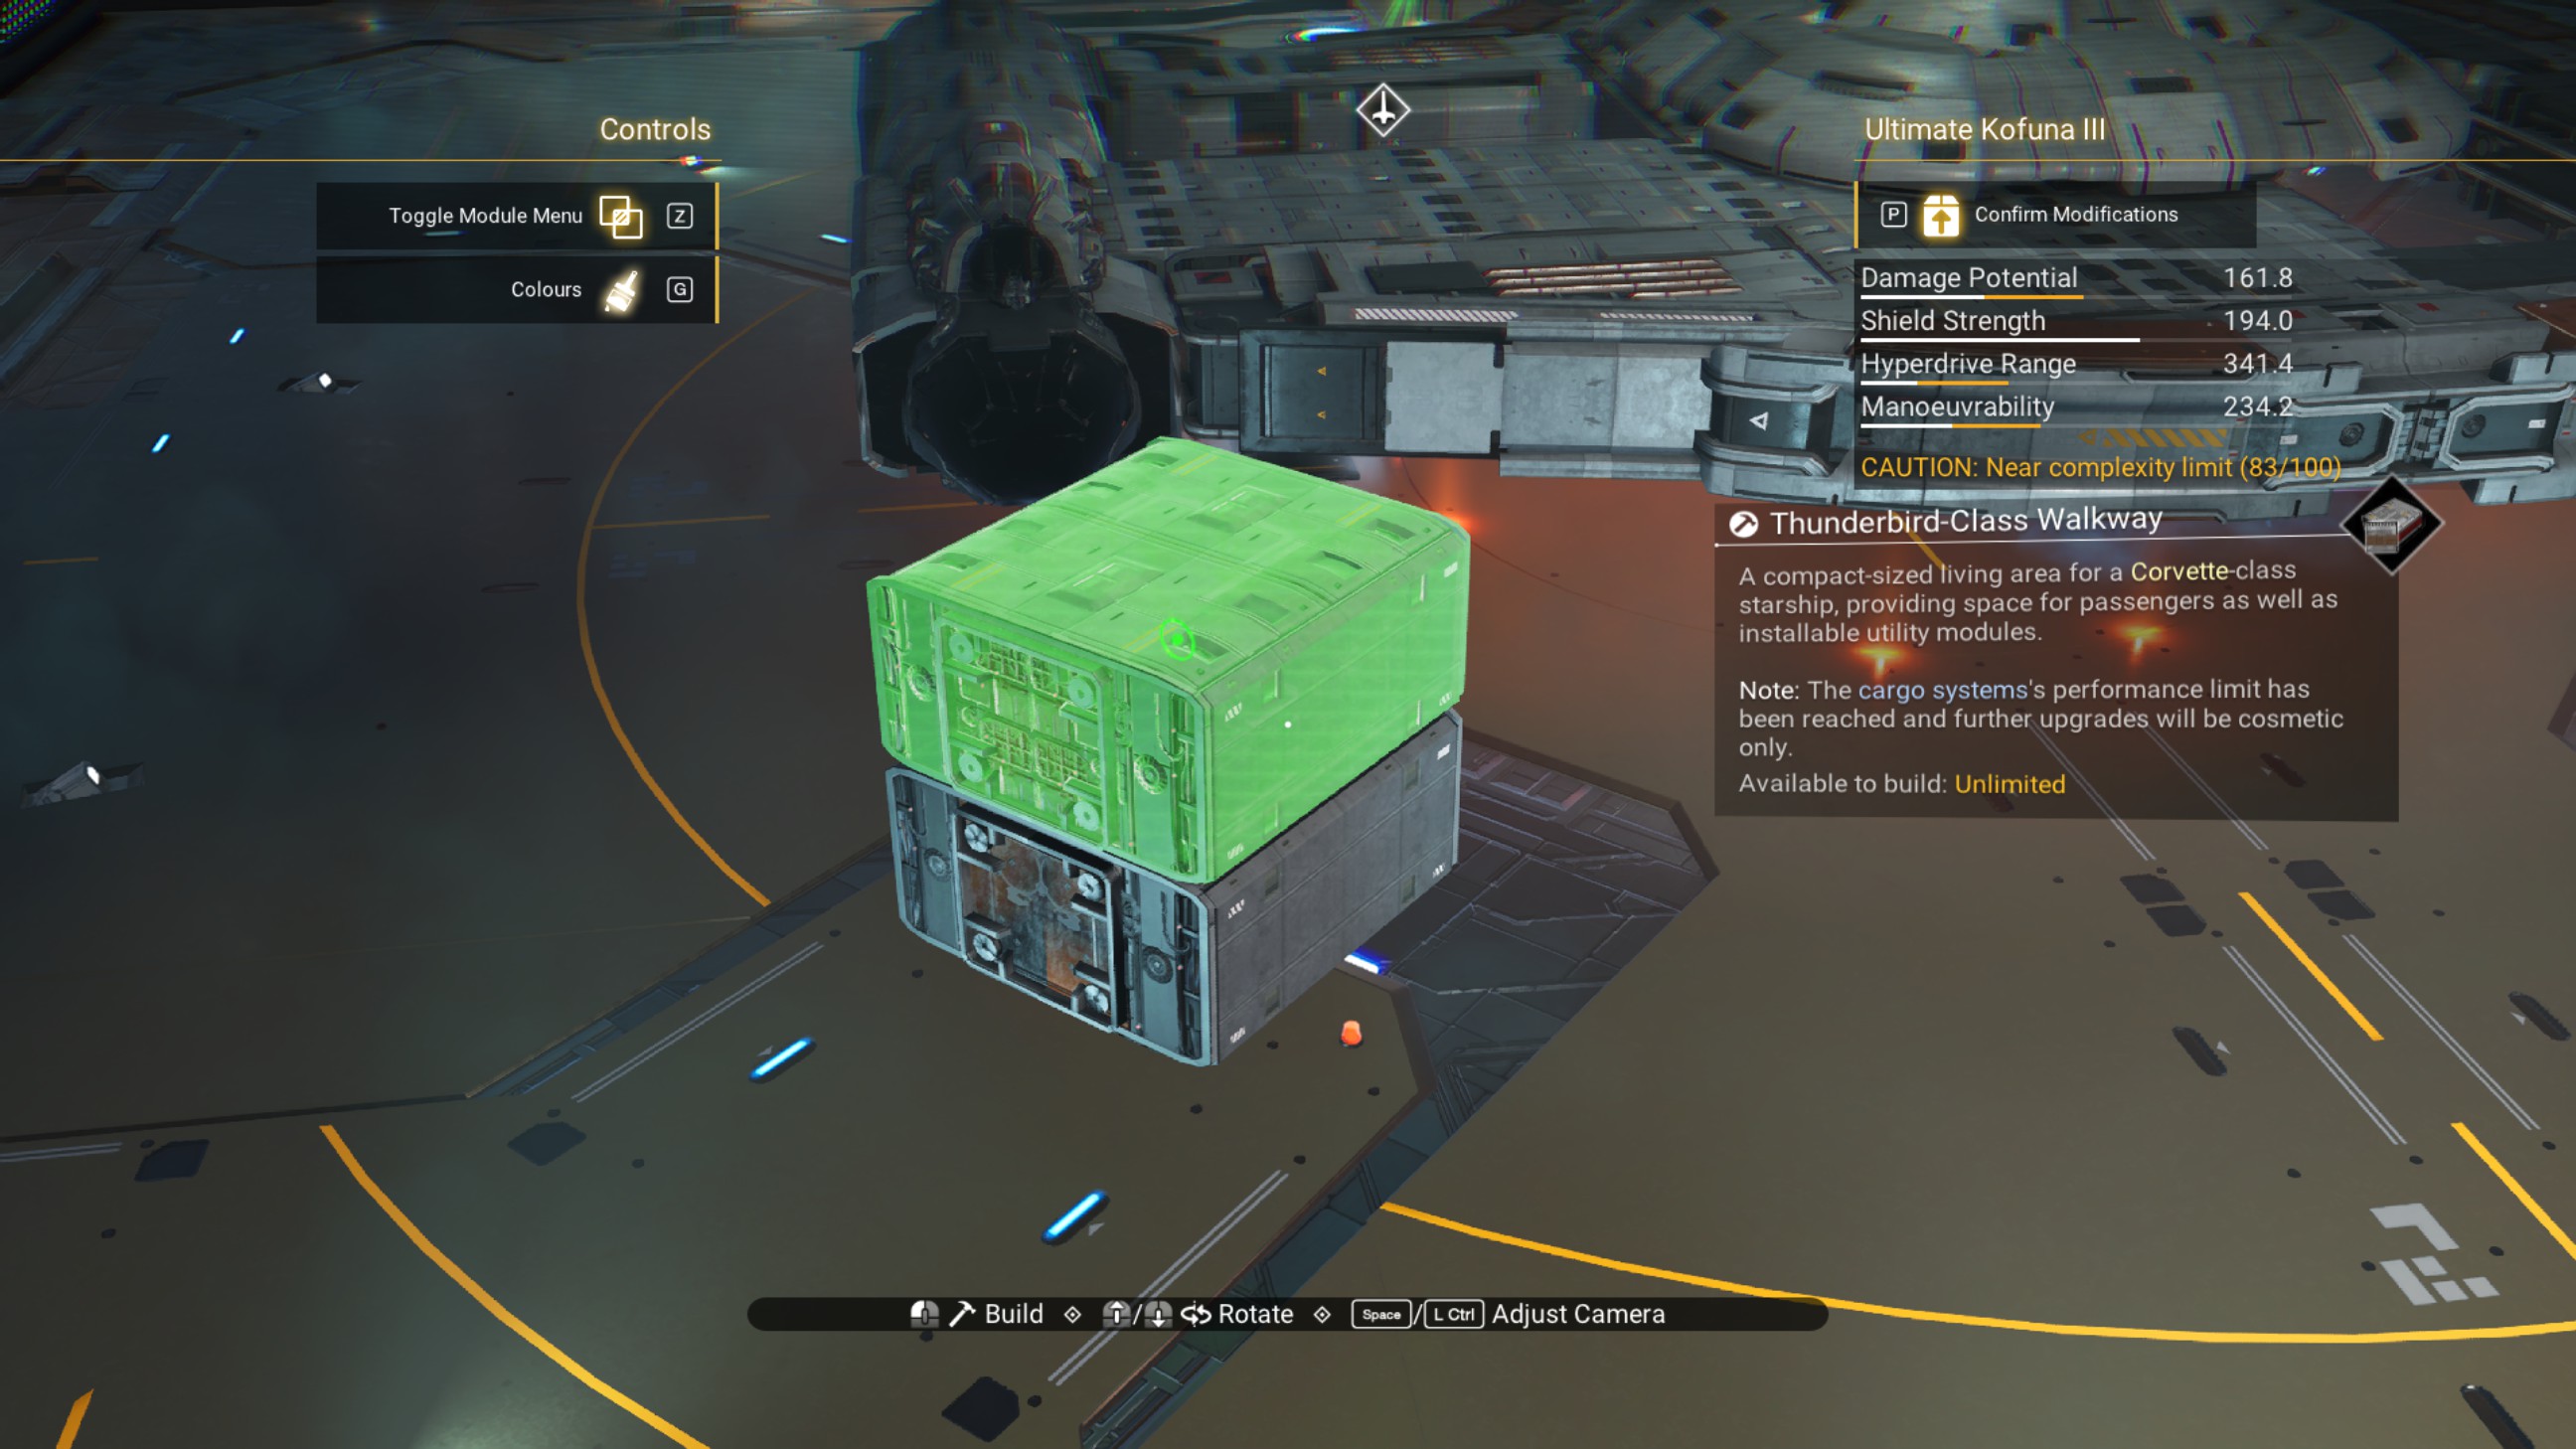
Place a rotated rockhopper propeller module on that top 45 degree walkway, and shift the walkway forward half a step.
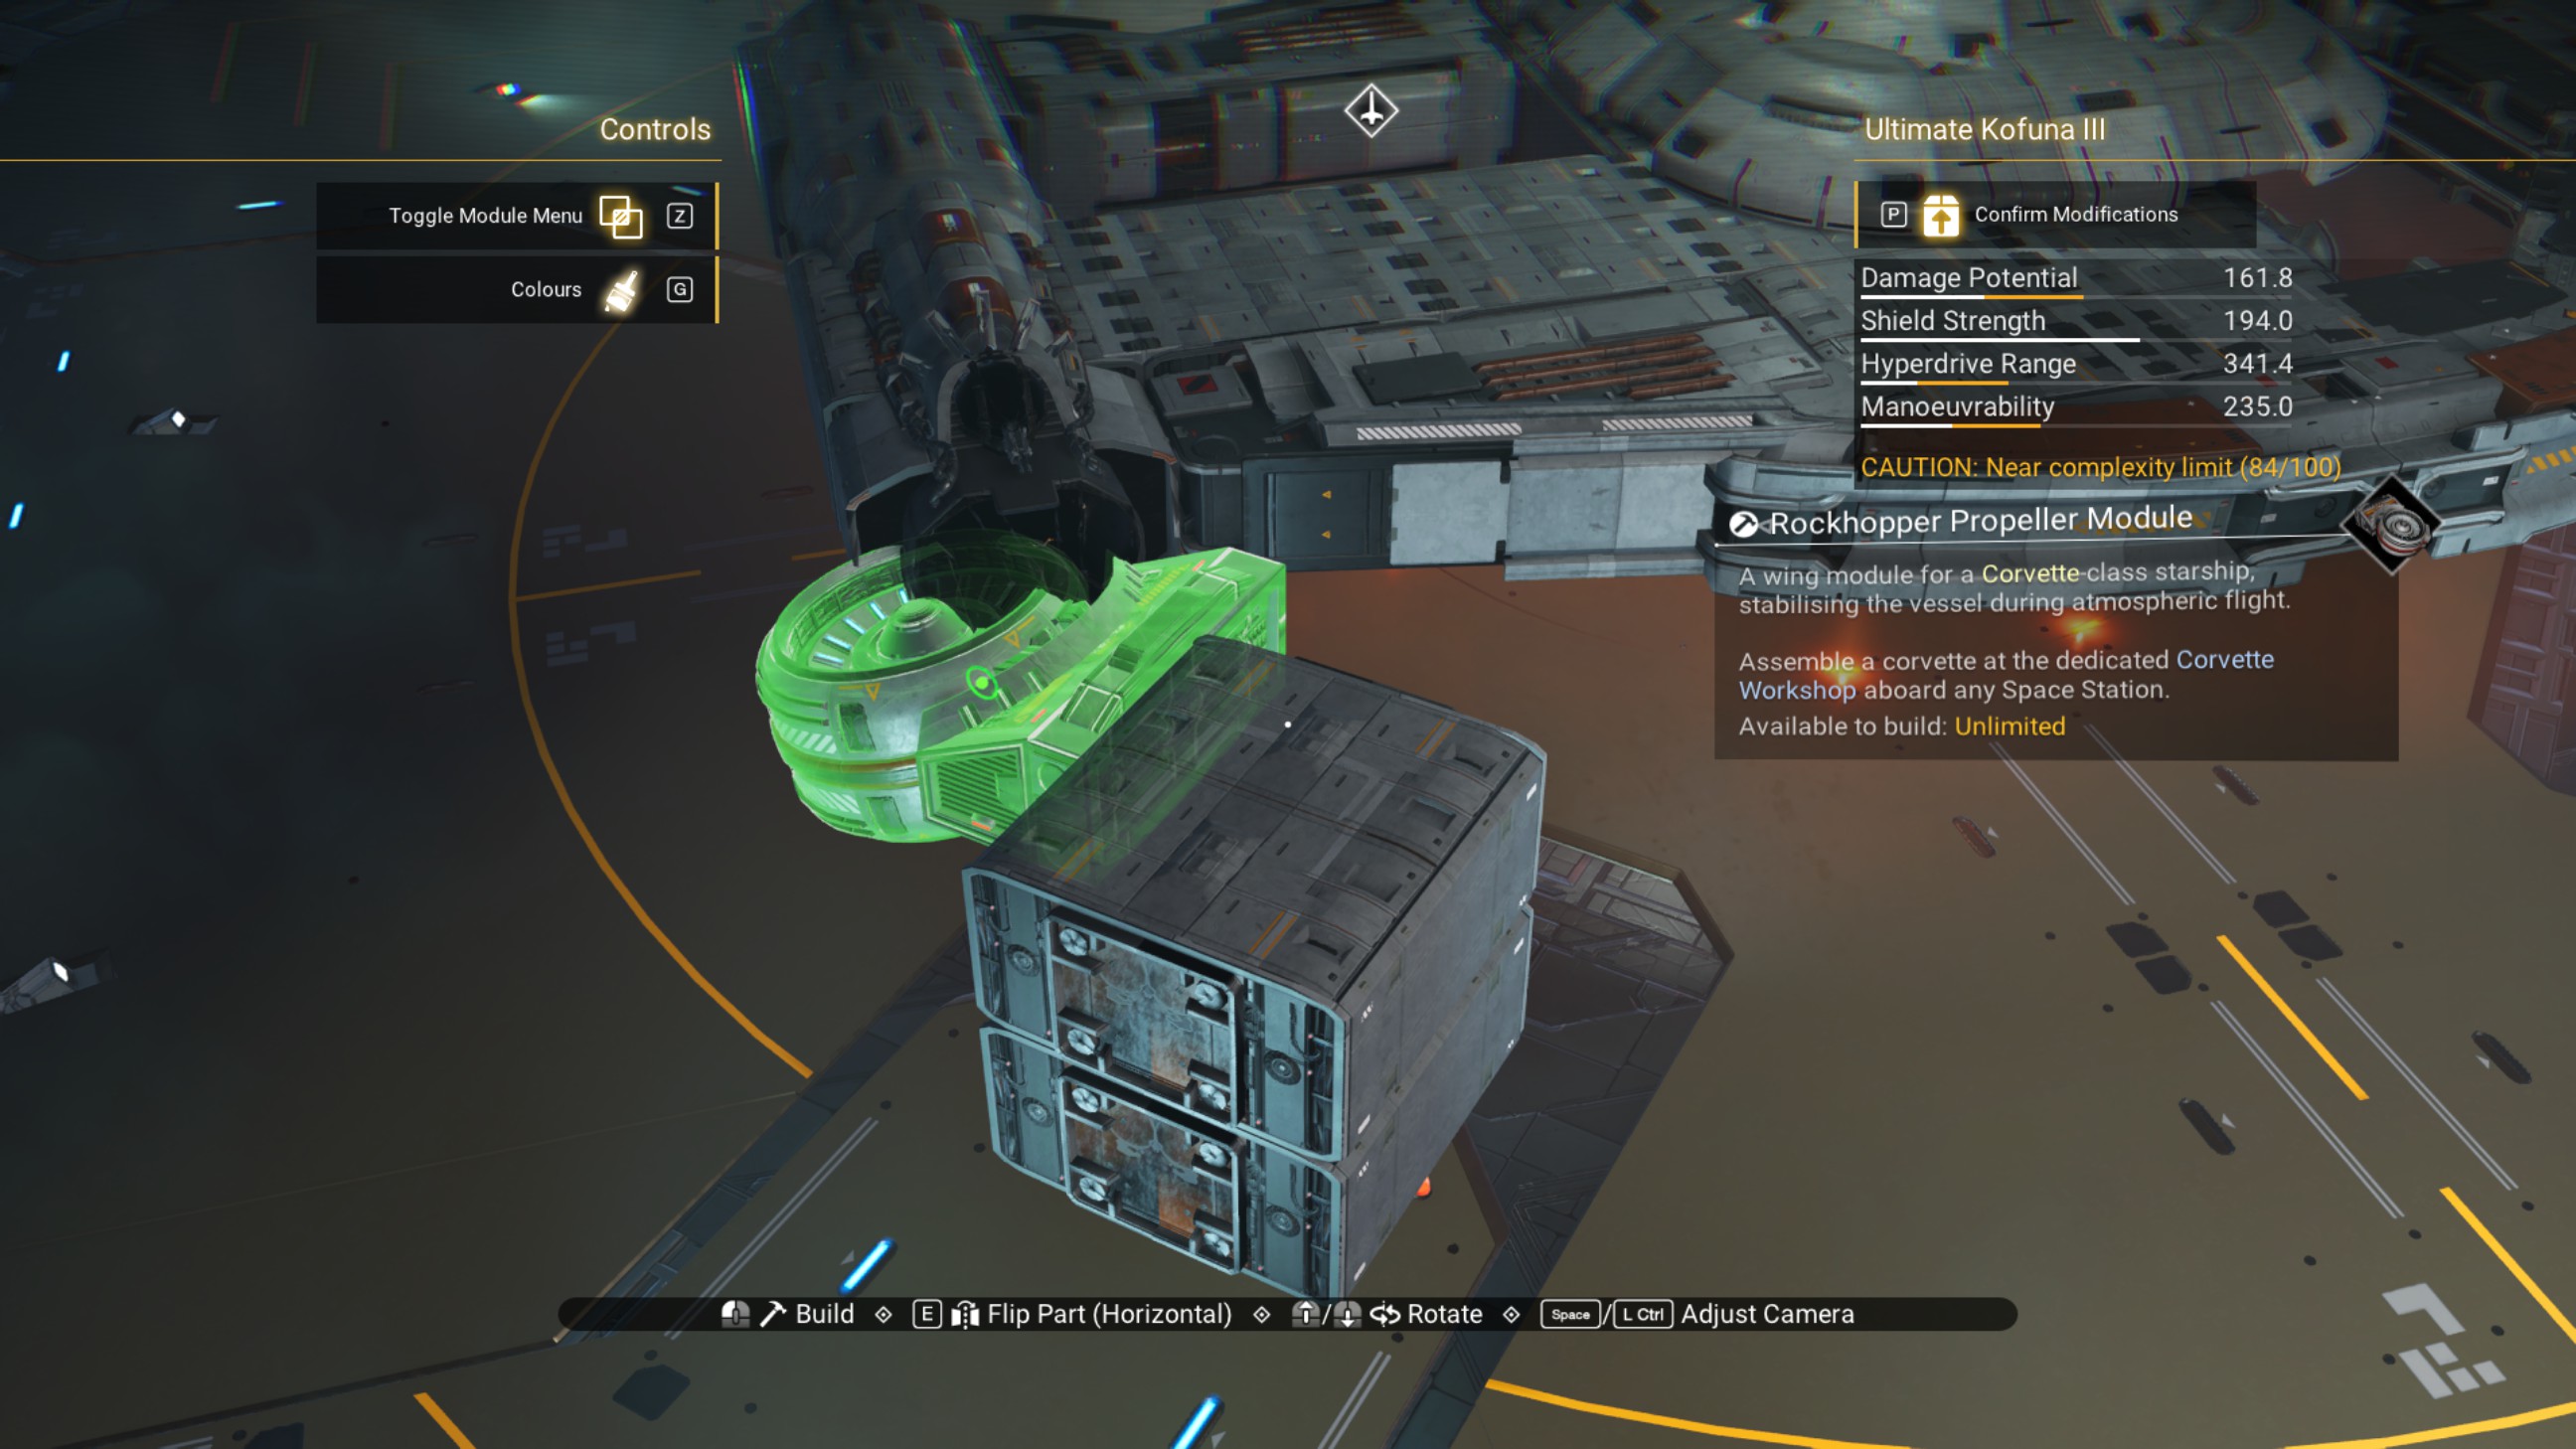
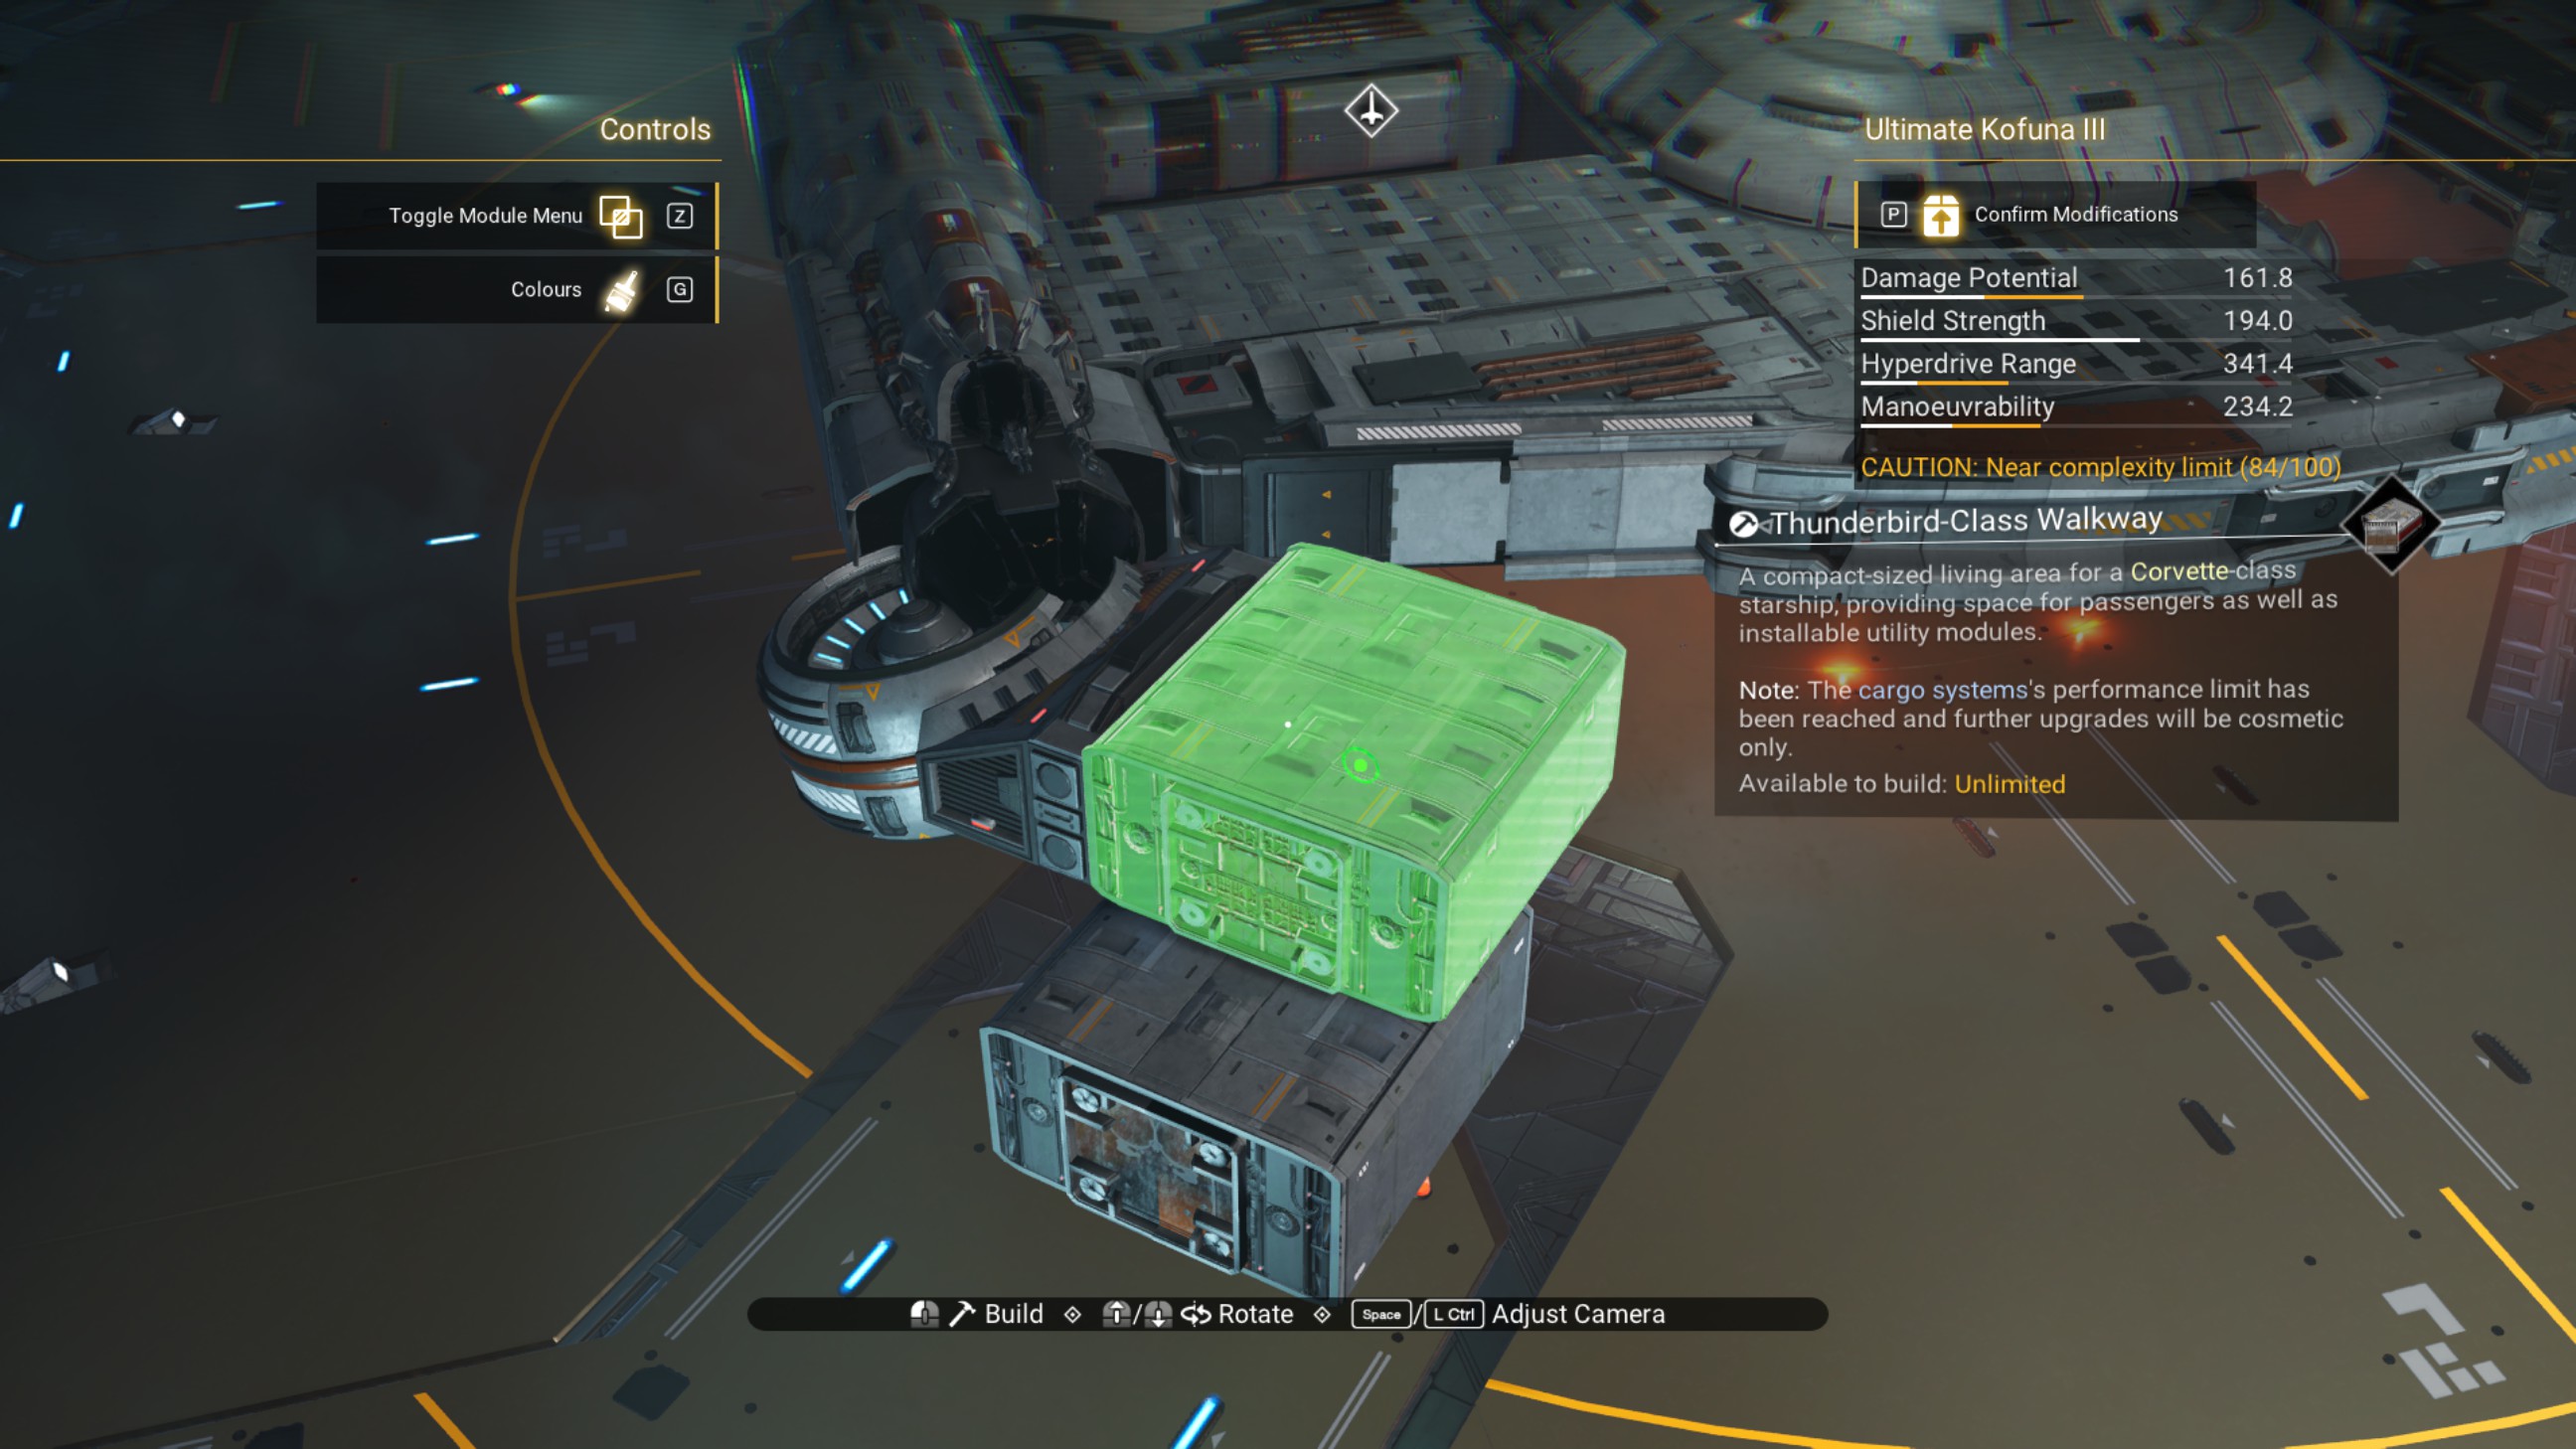
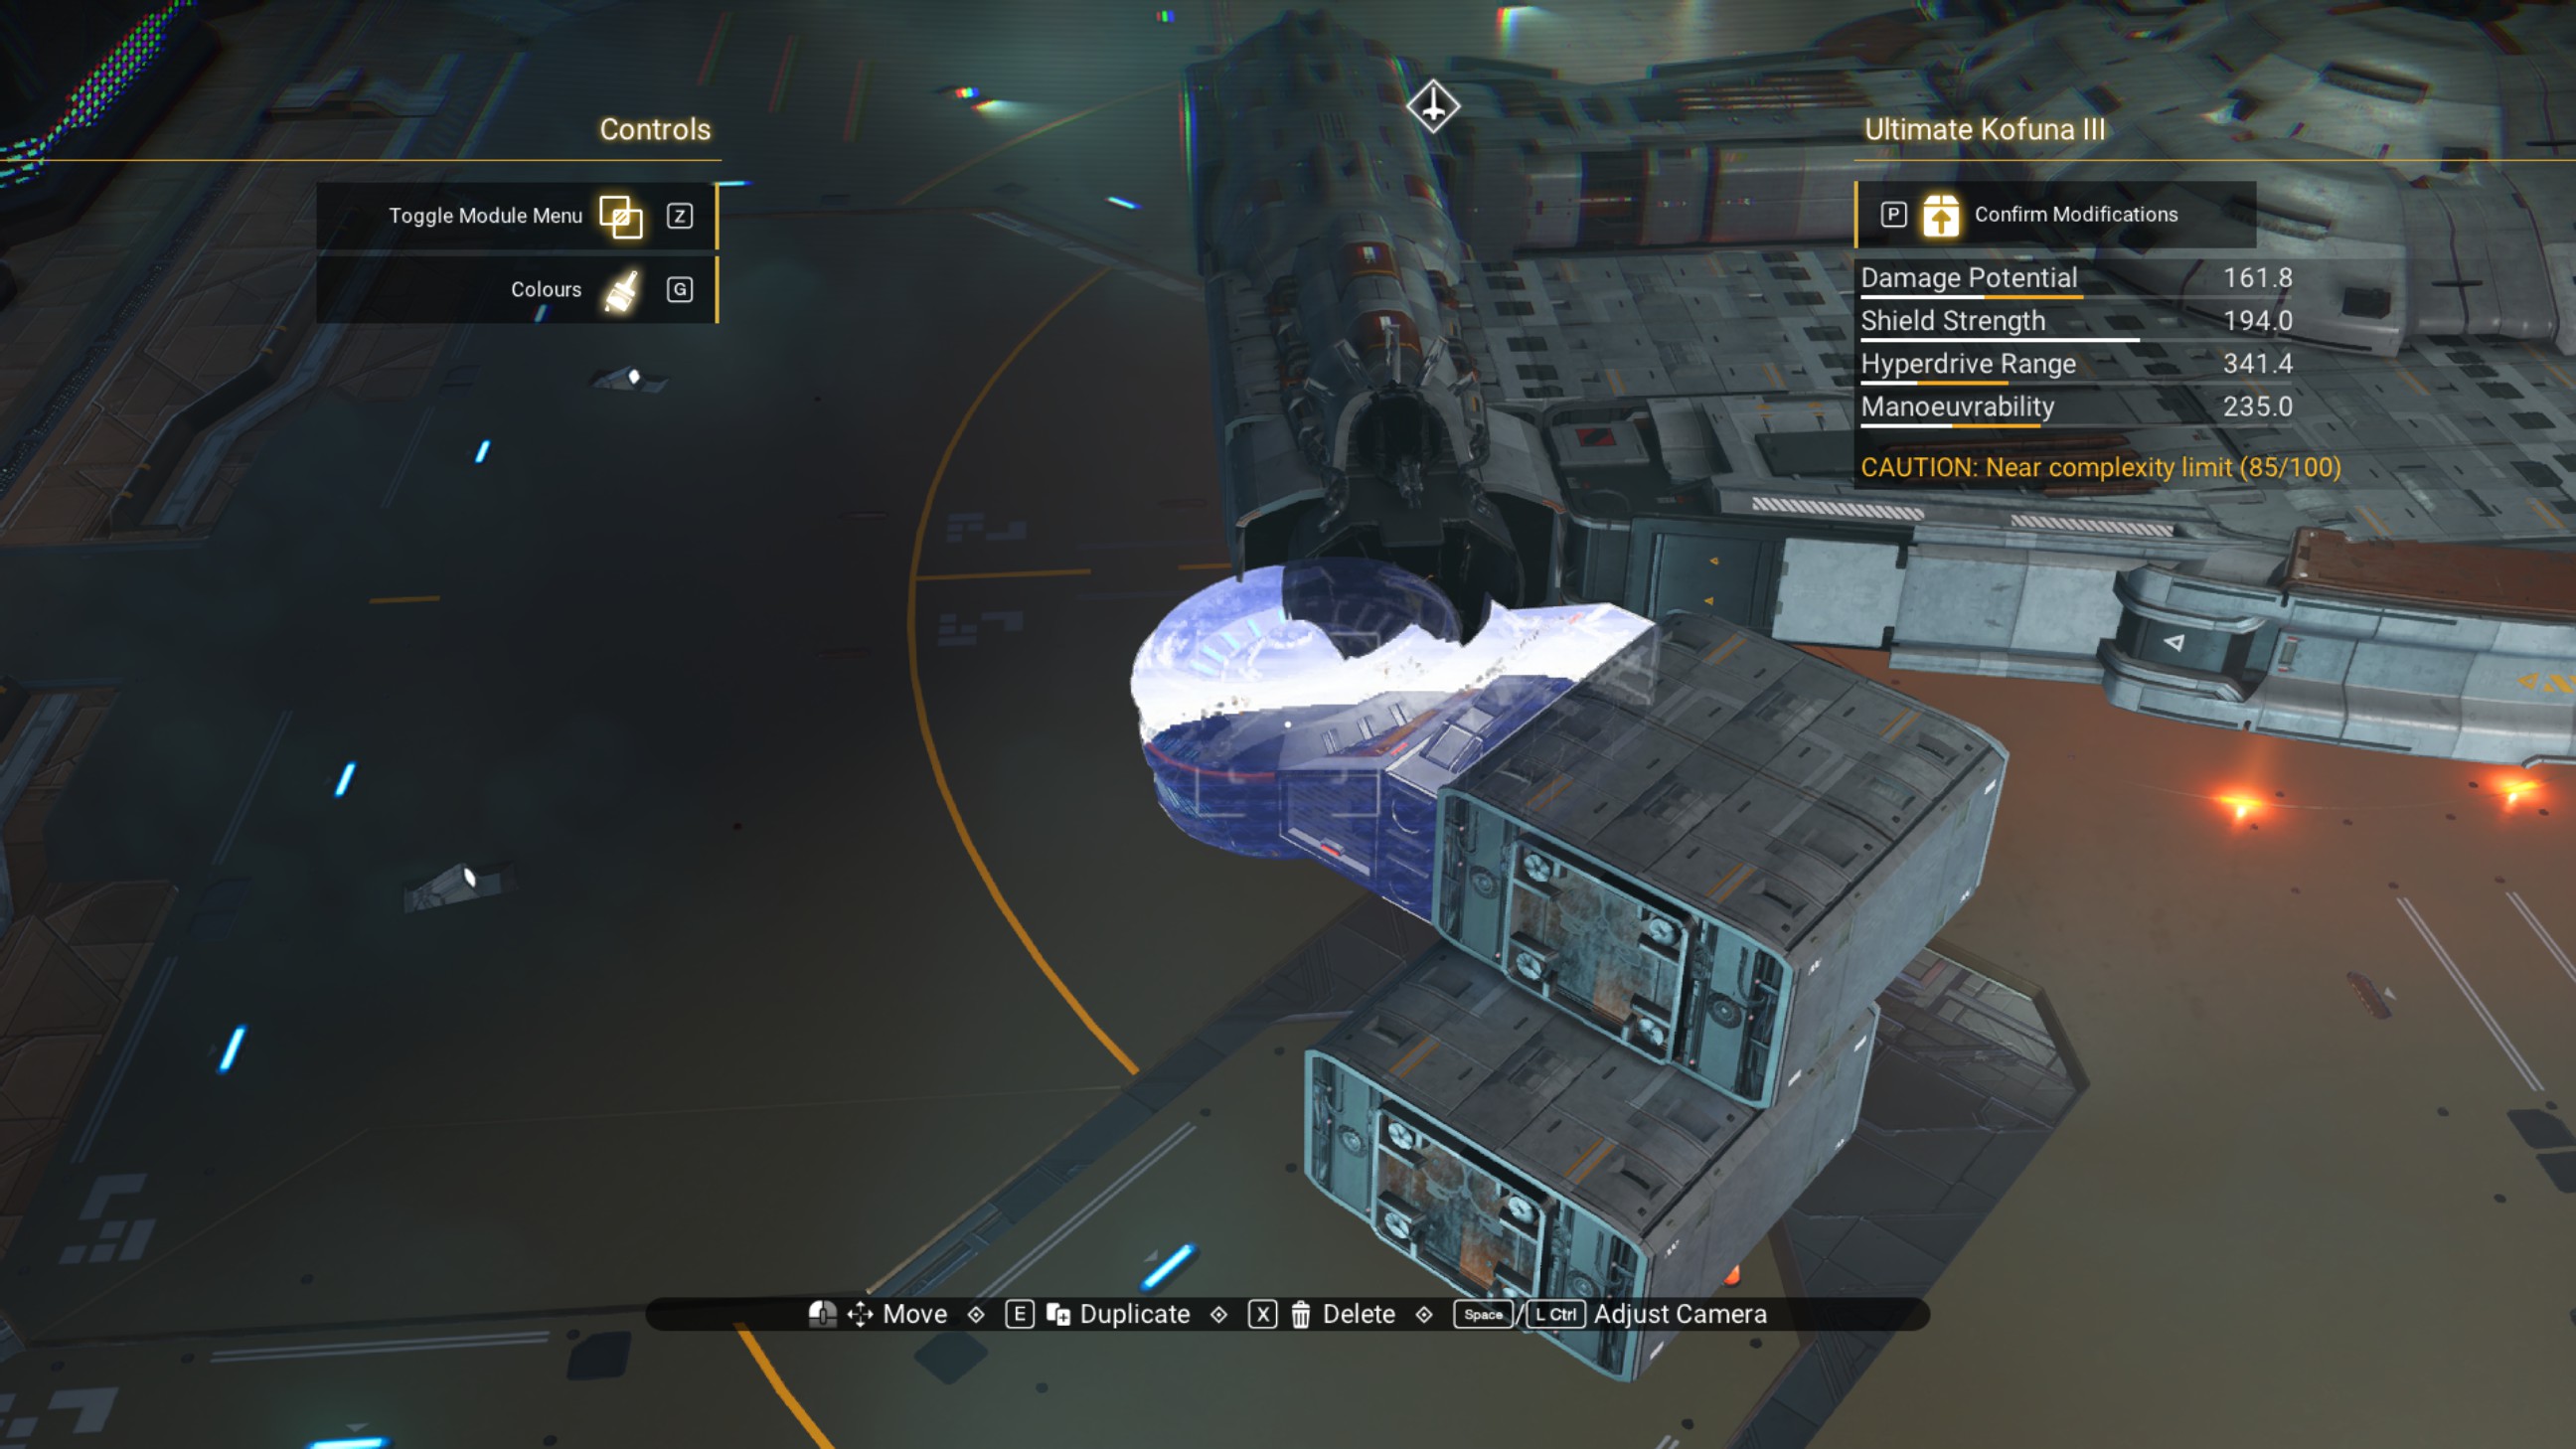
Delete the propeller module.
Place three more walkways, one behind the other, as shown.
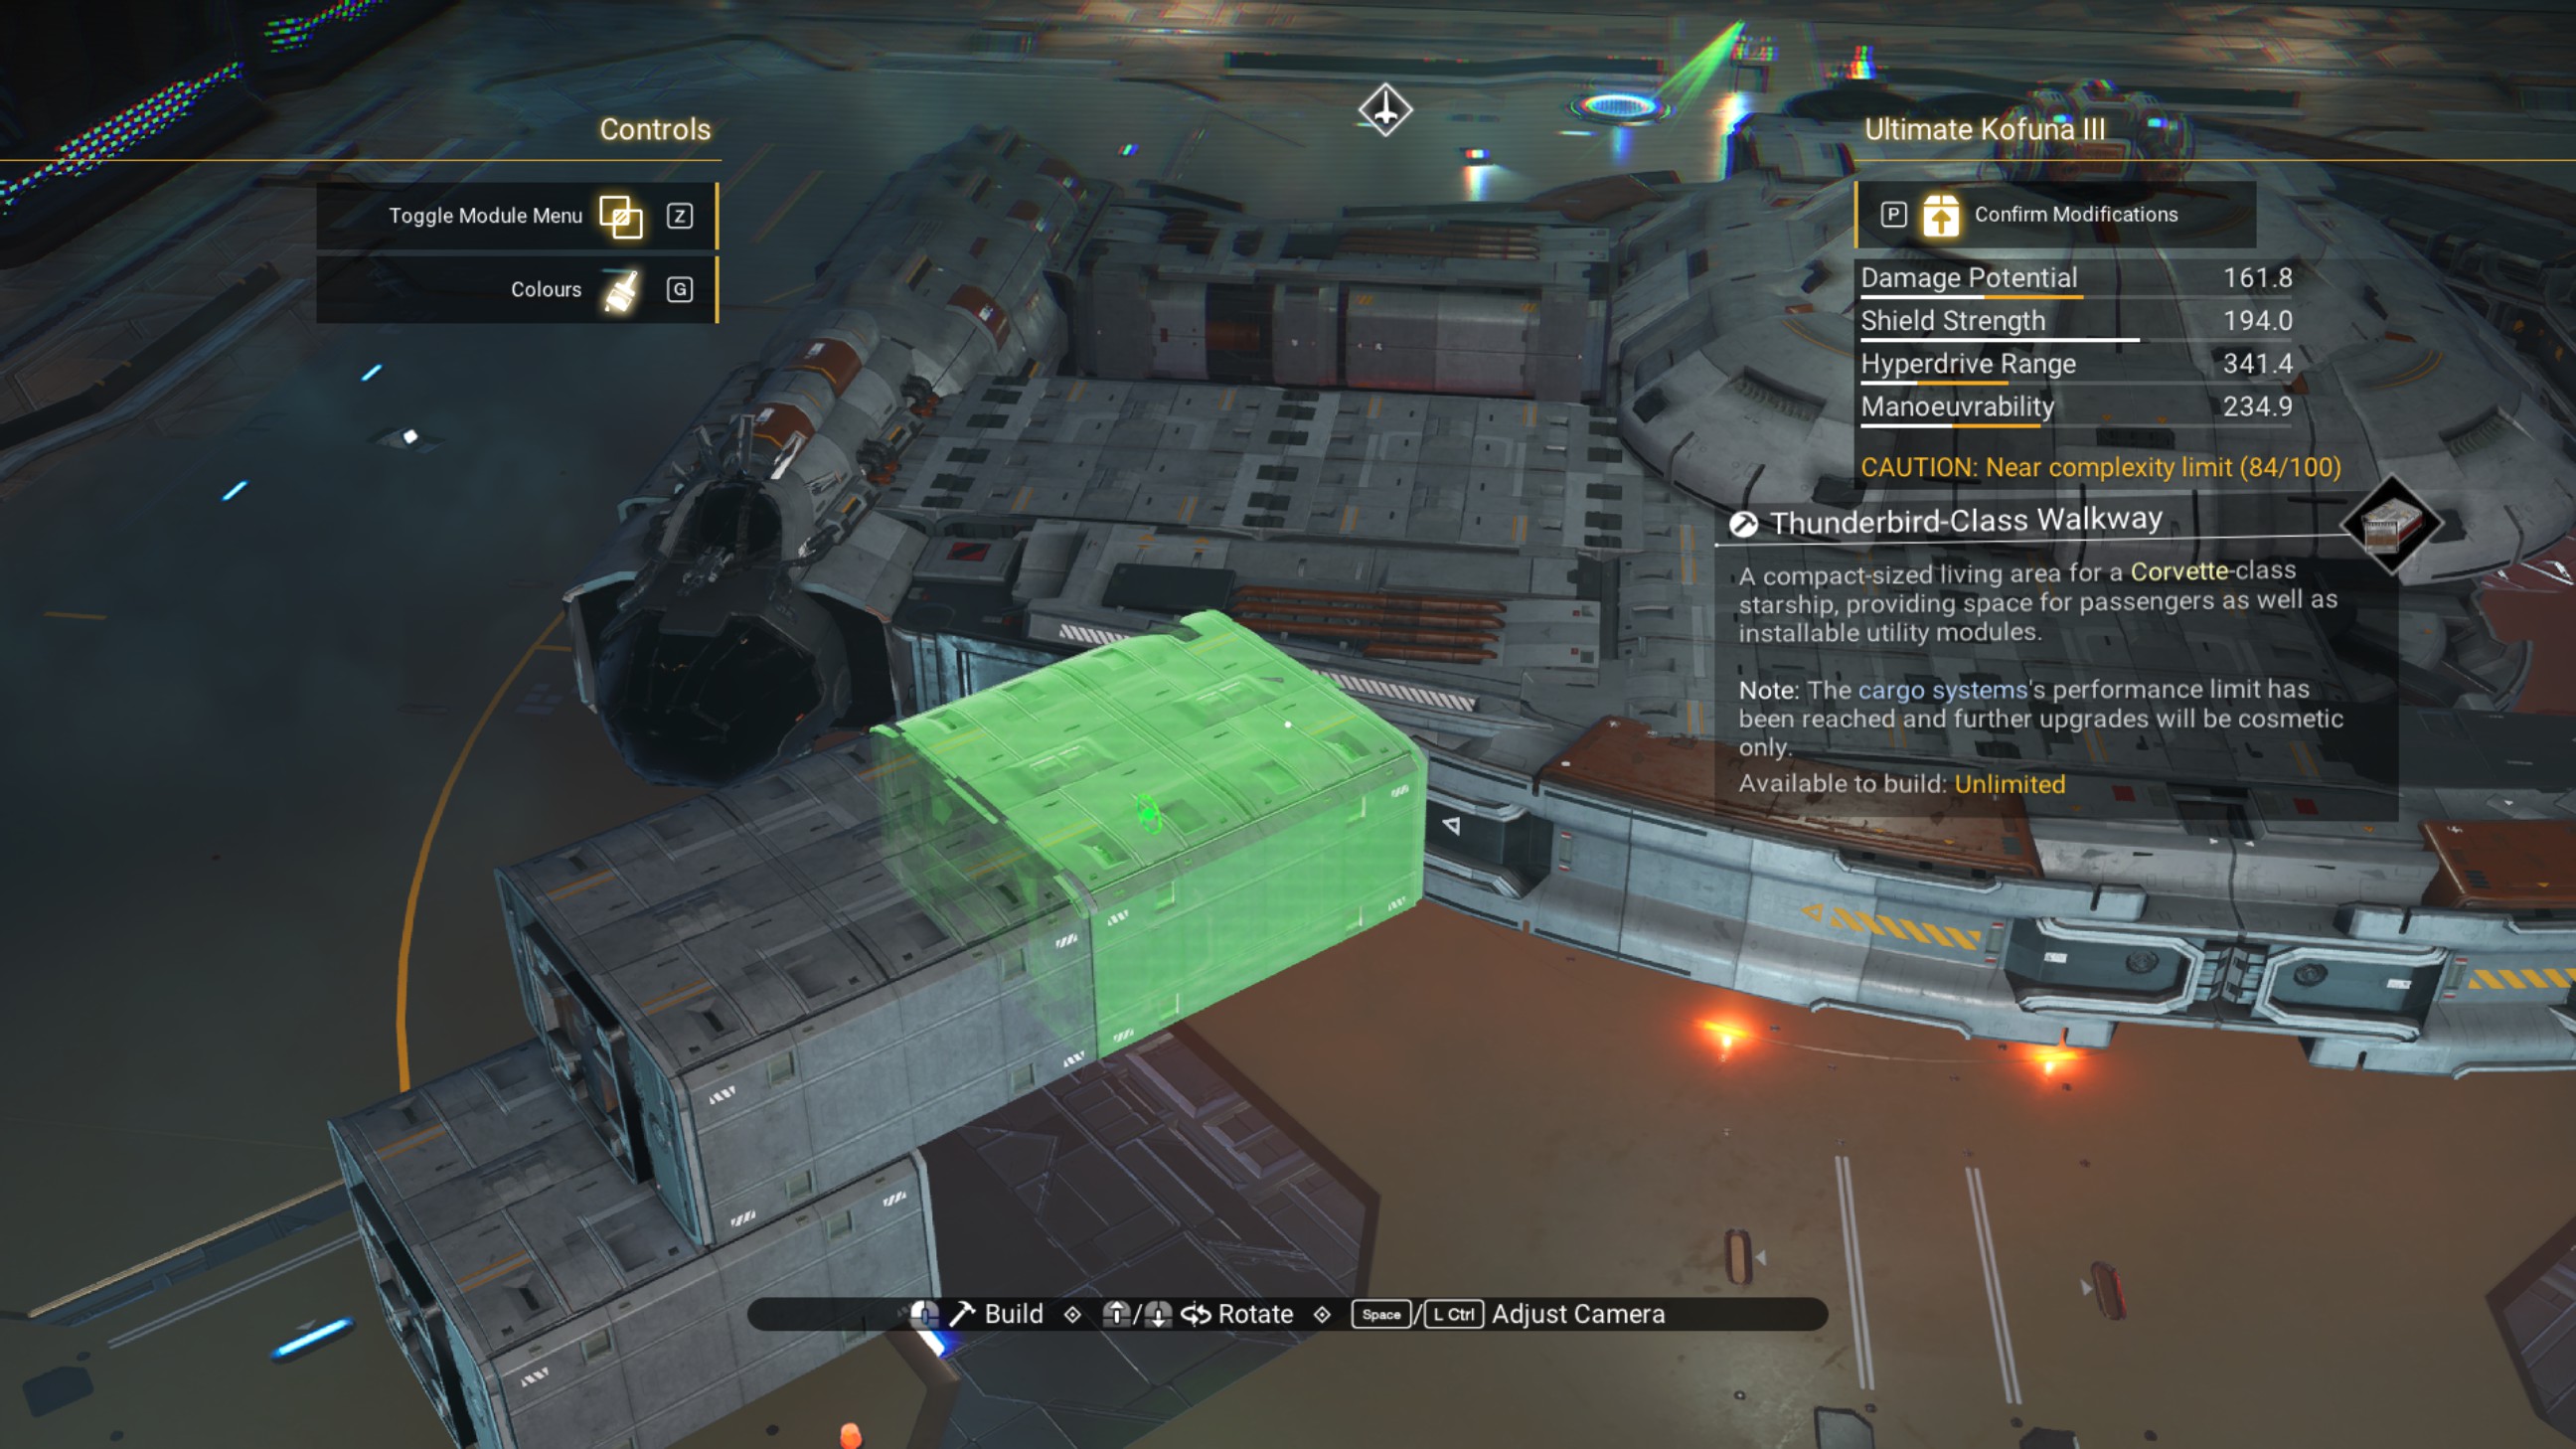
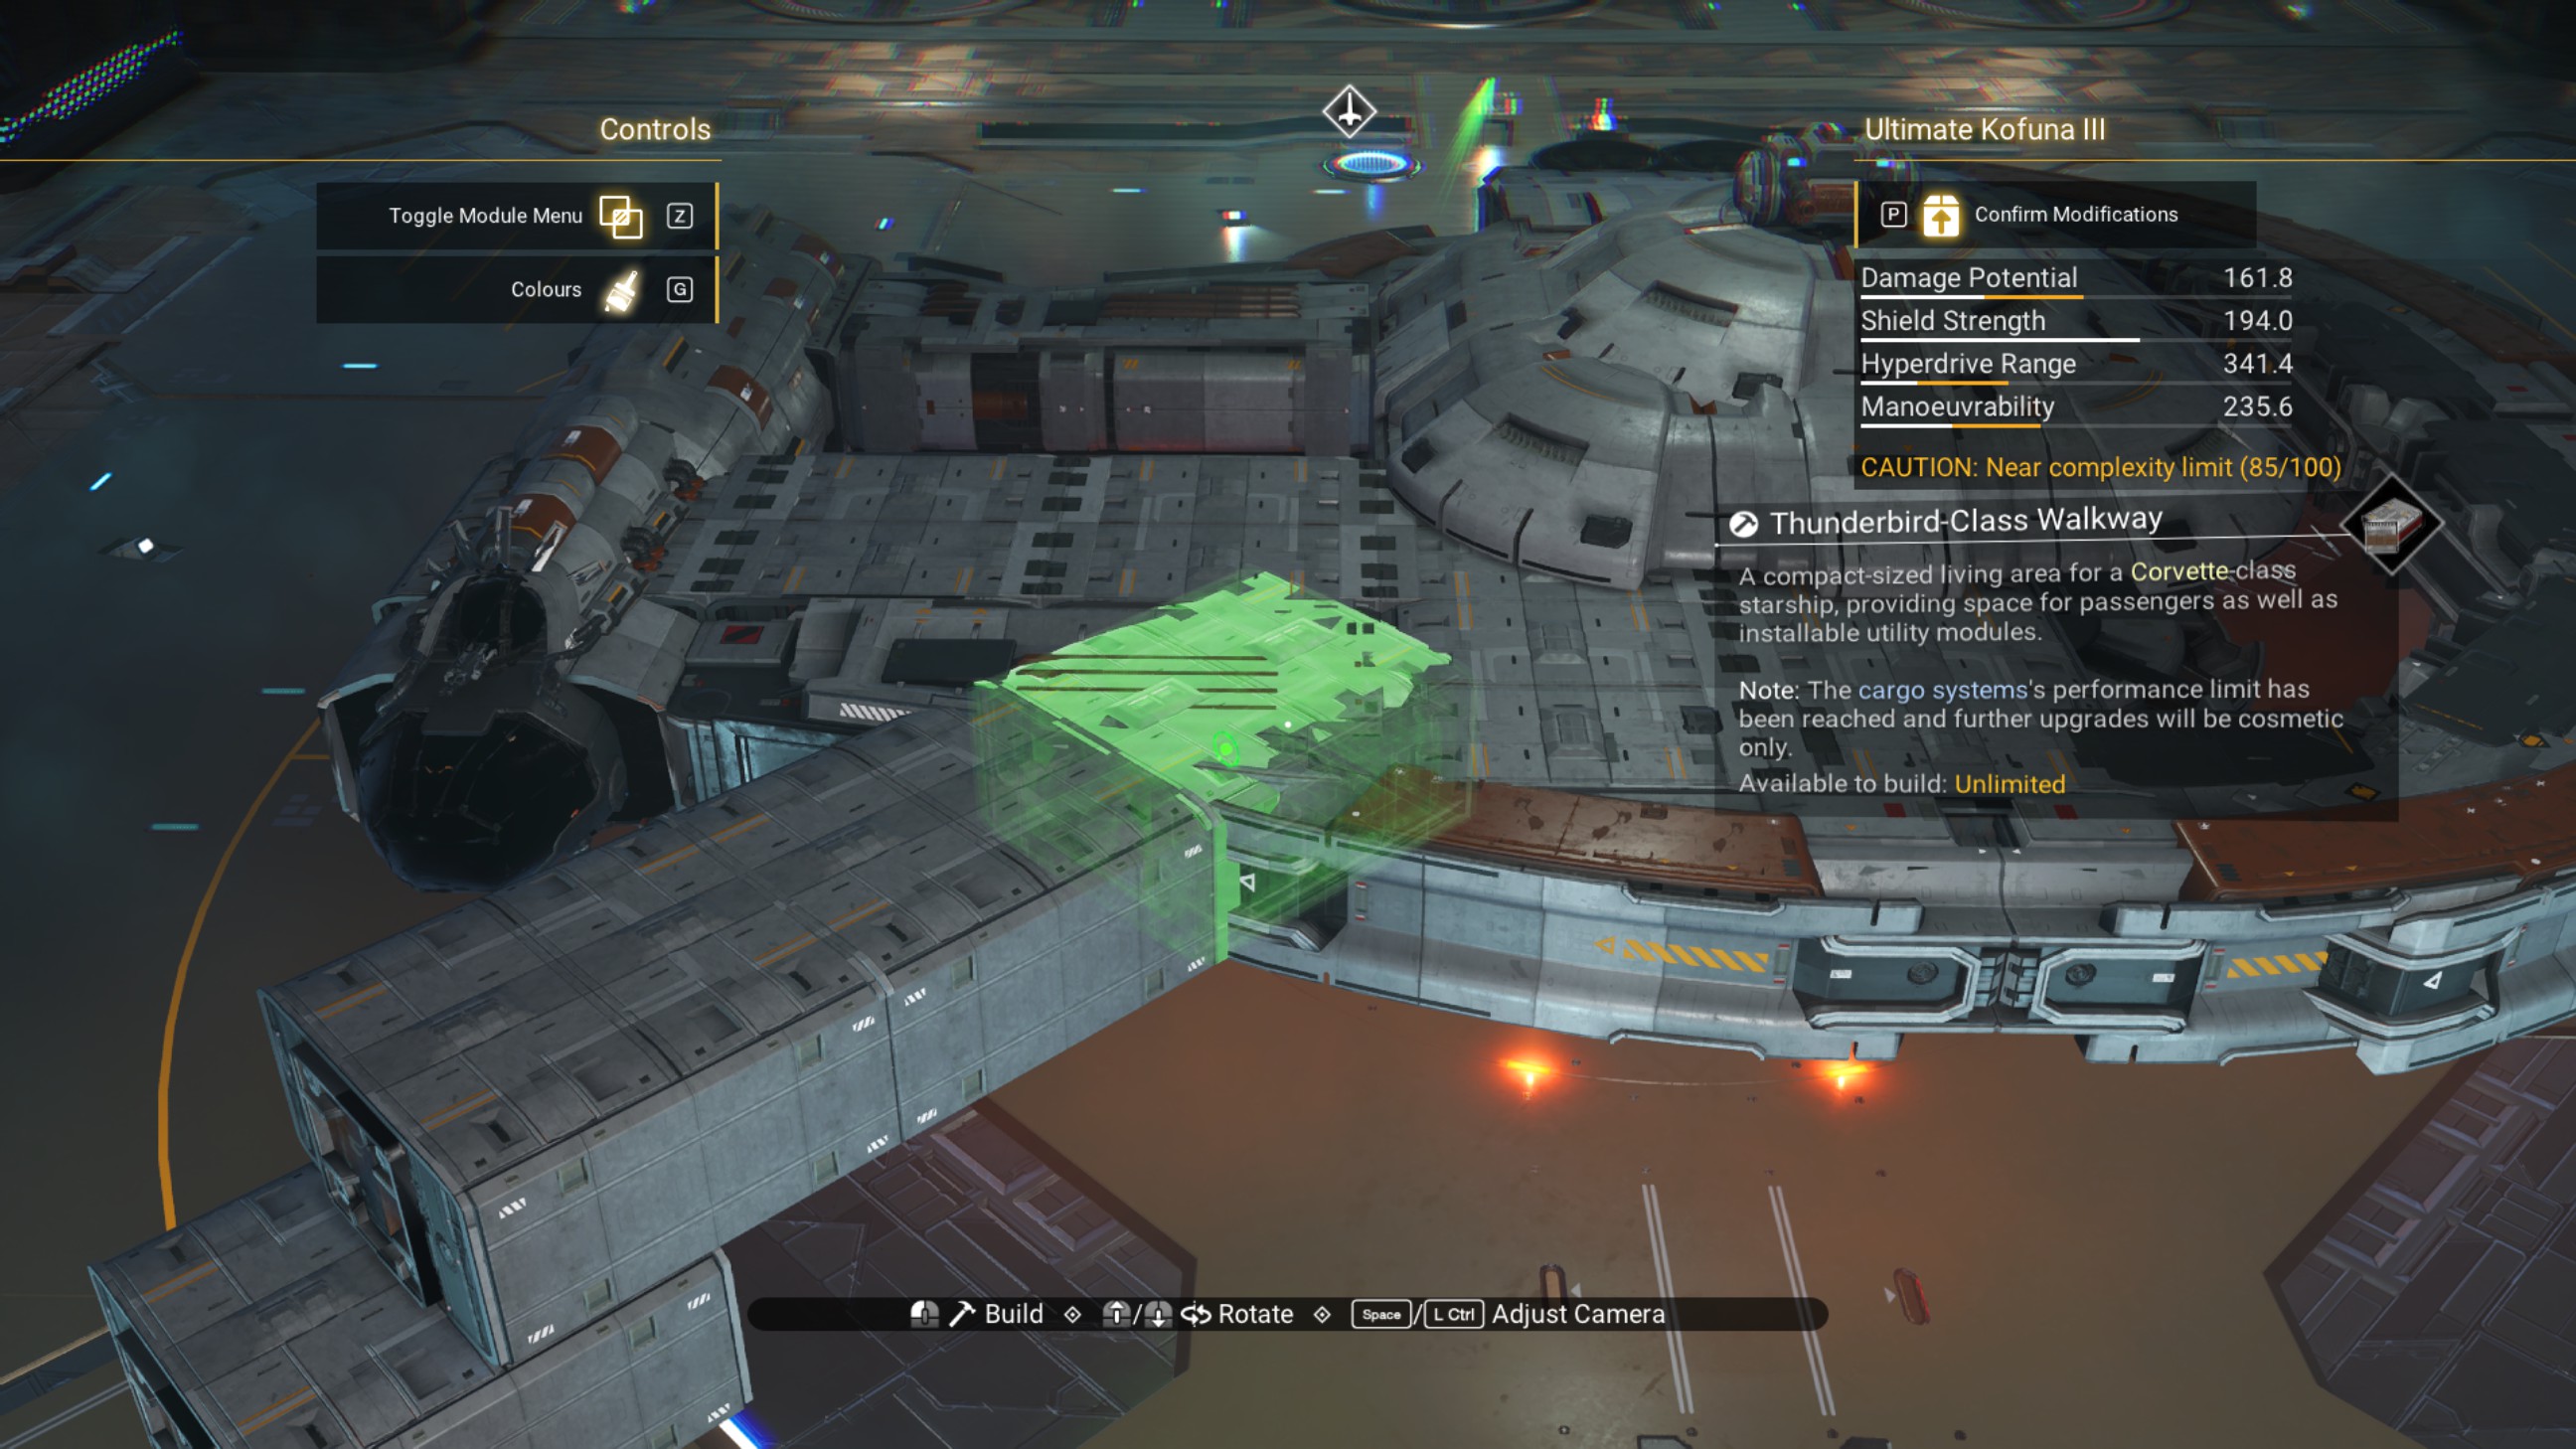
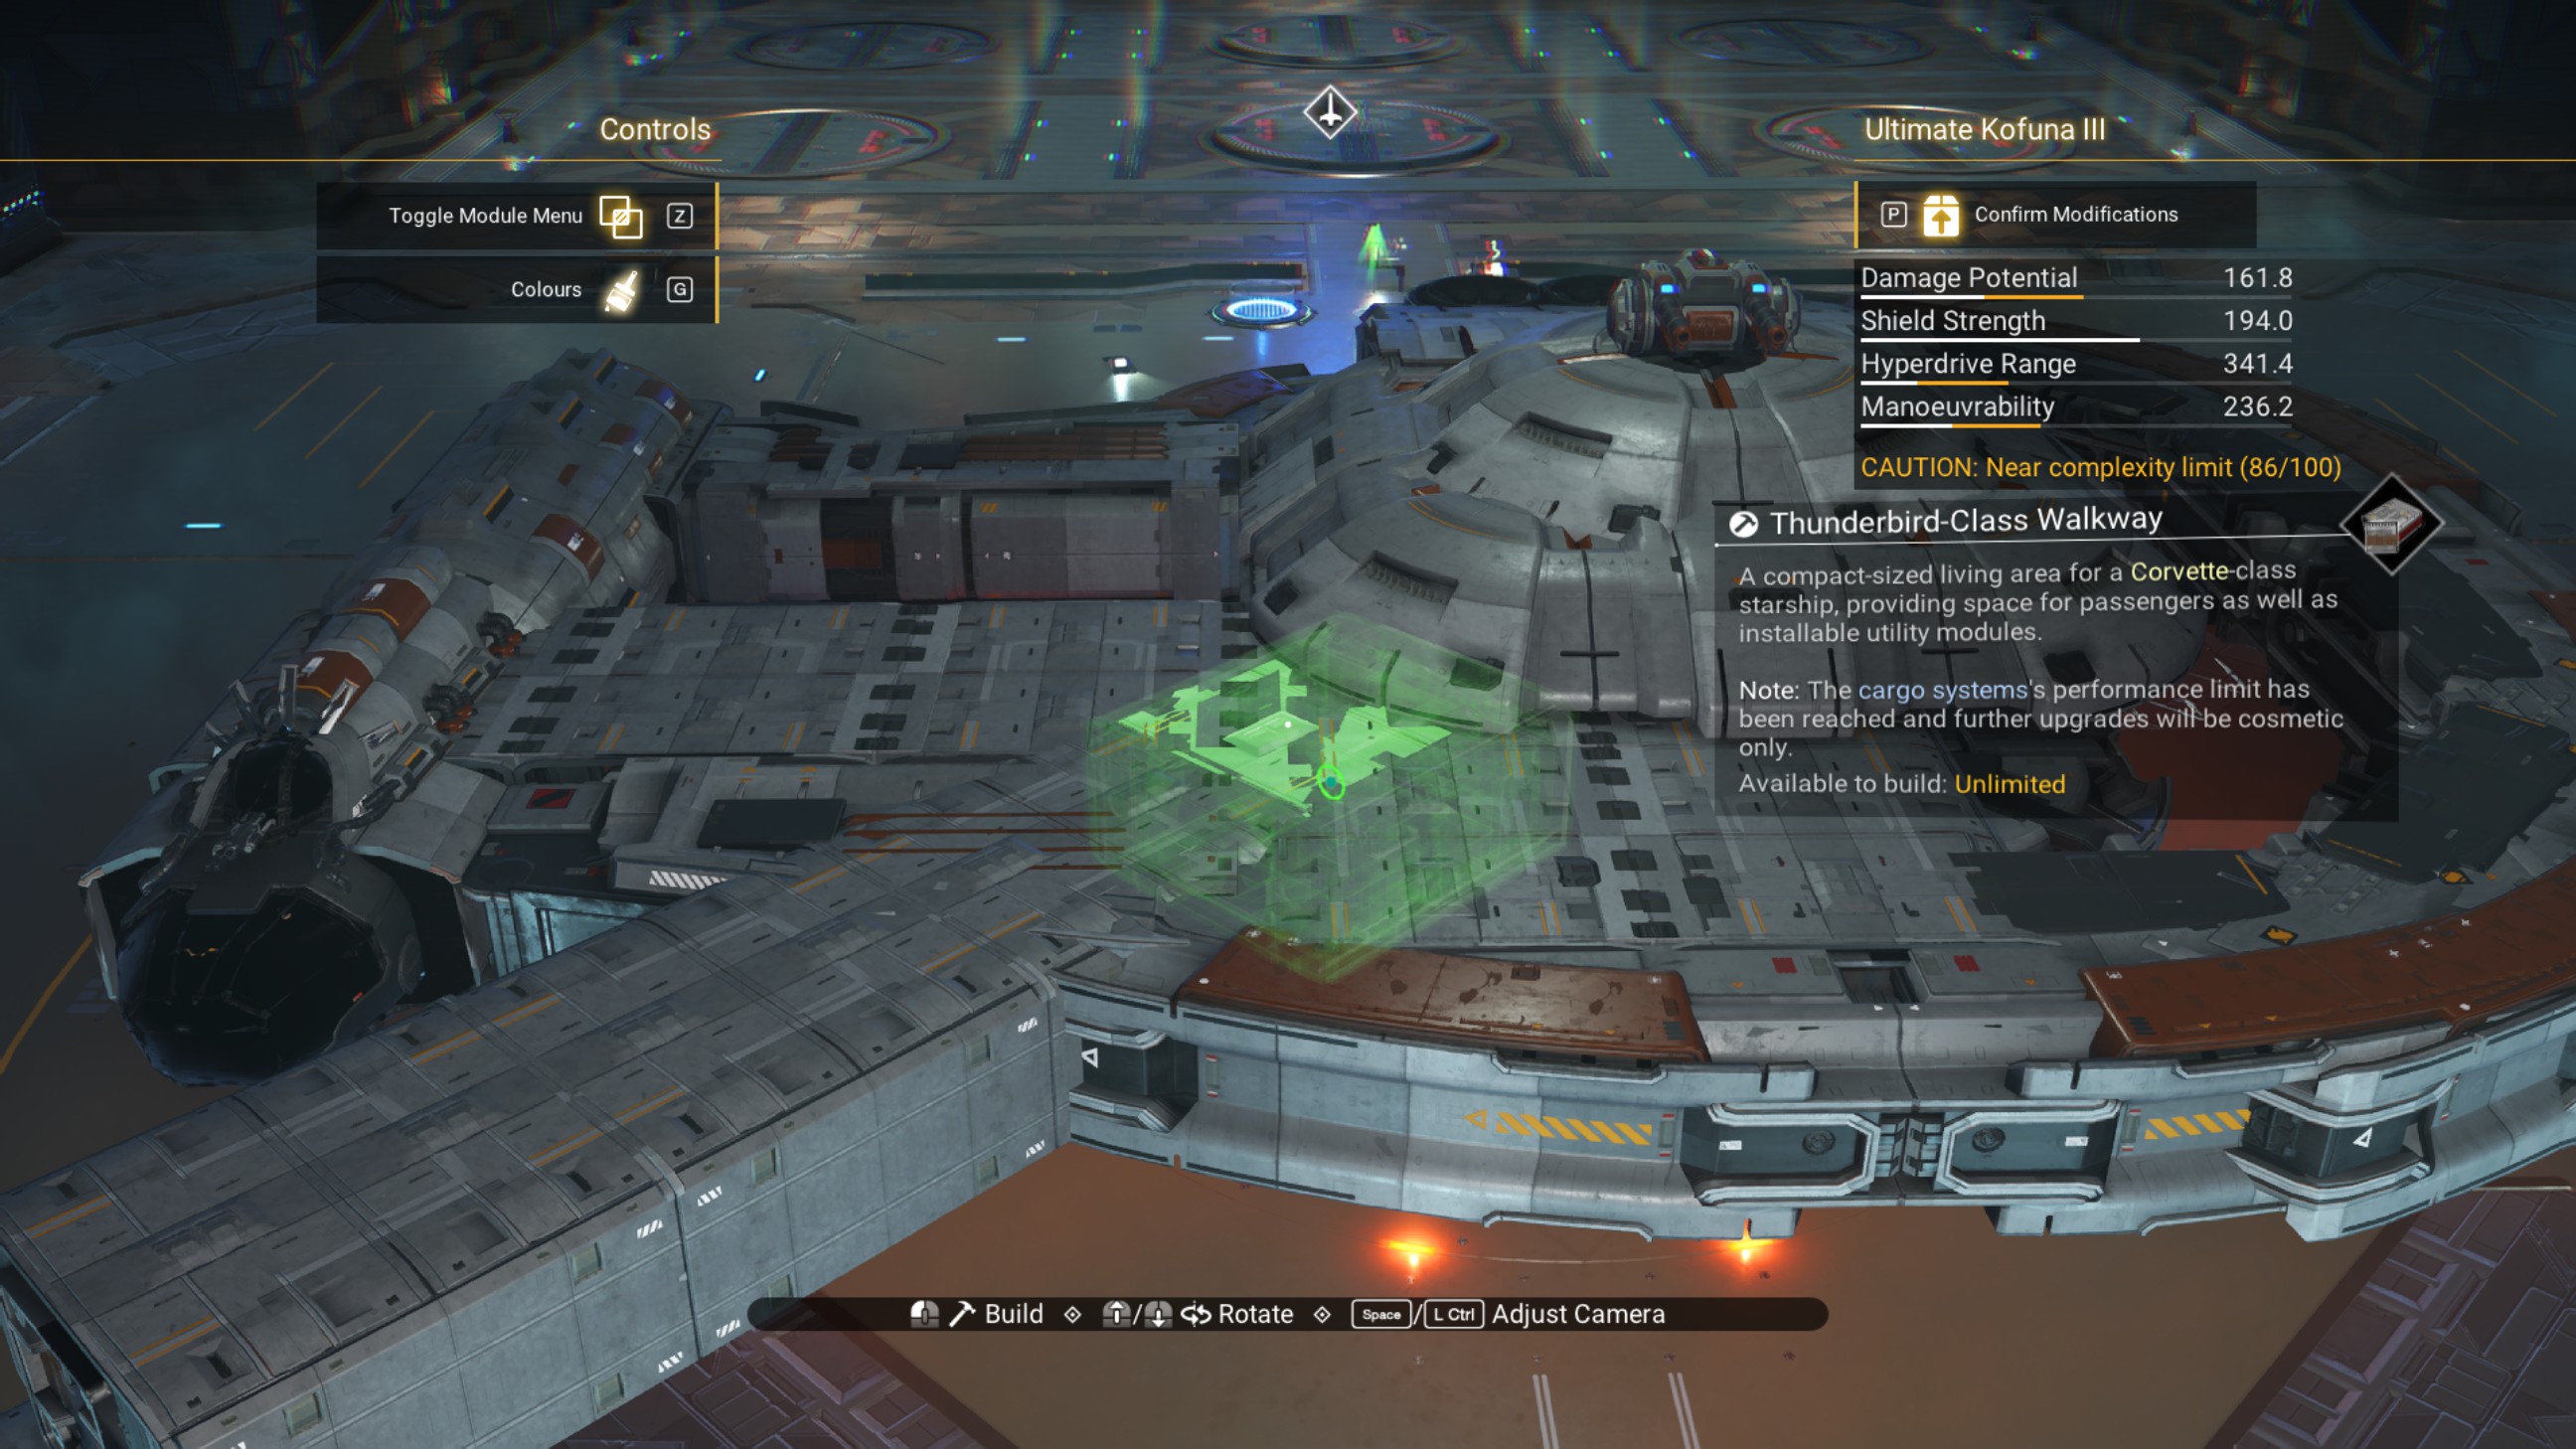
Delete the two middle walkways.
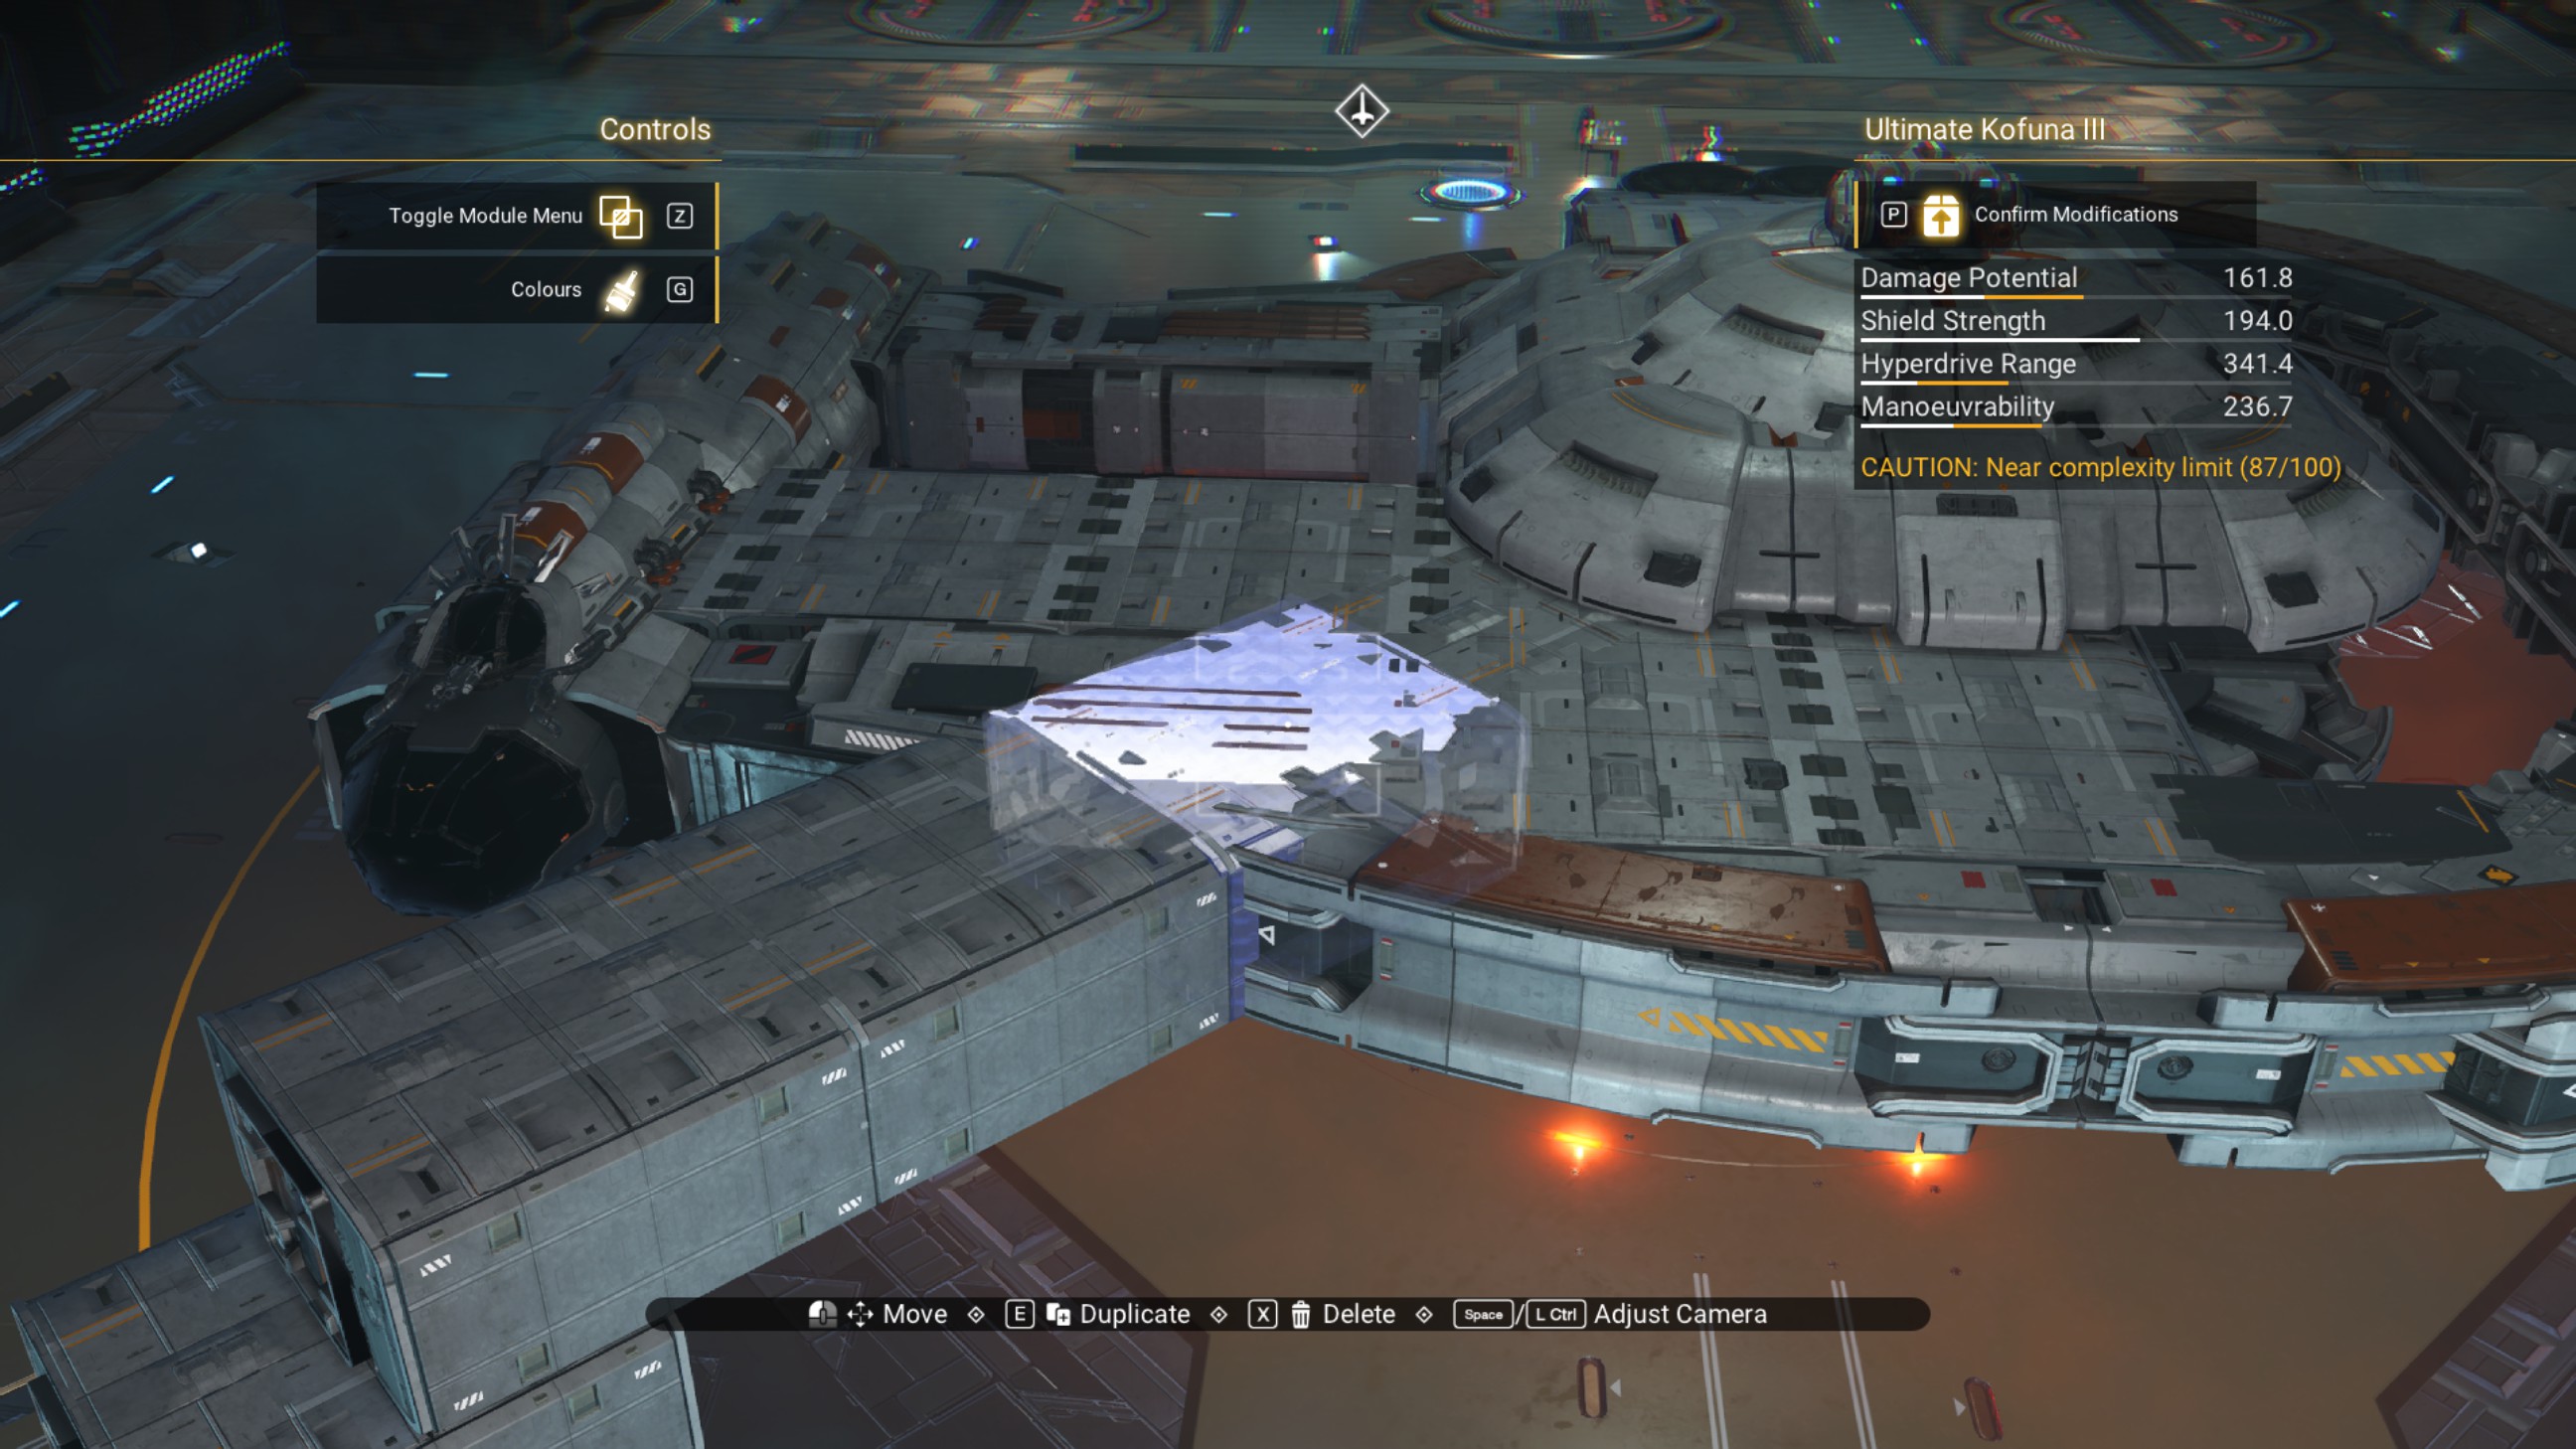
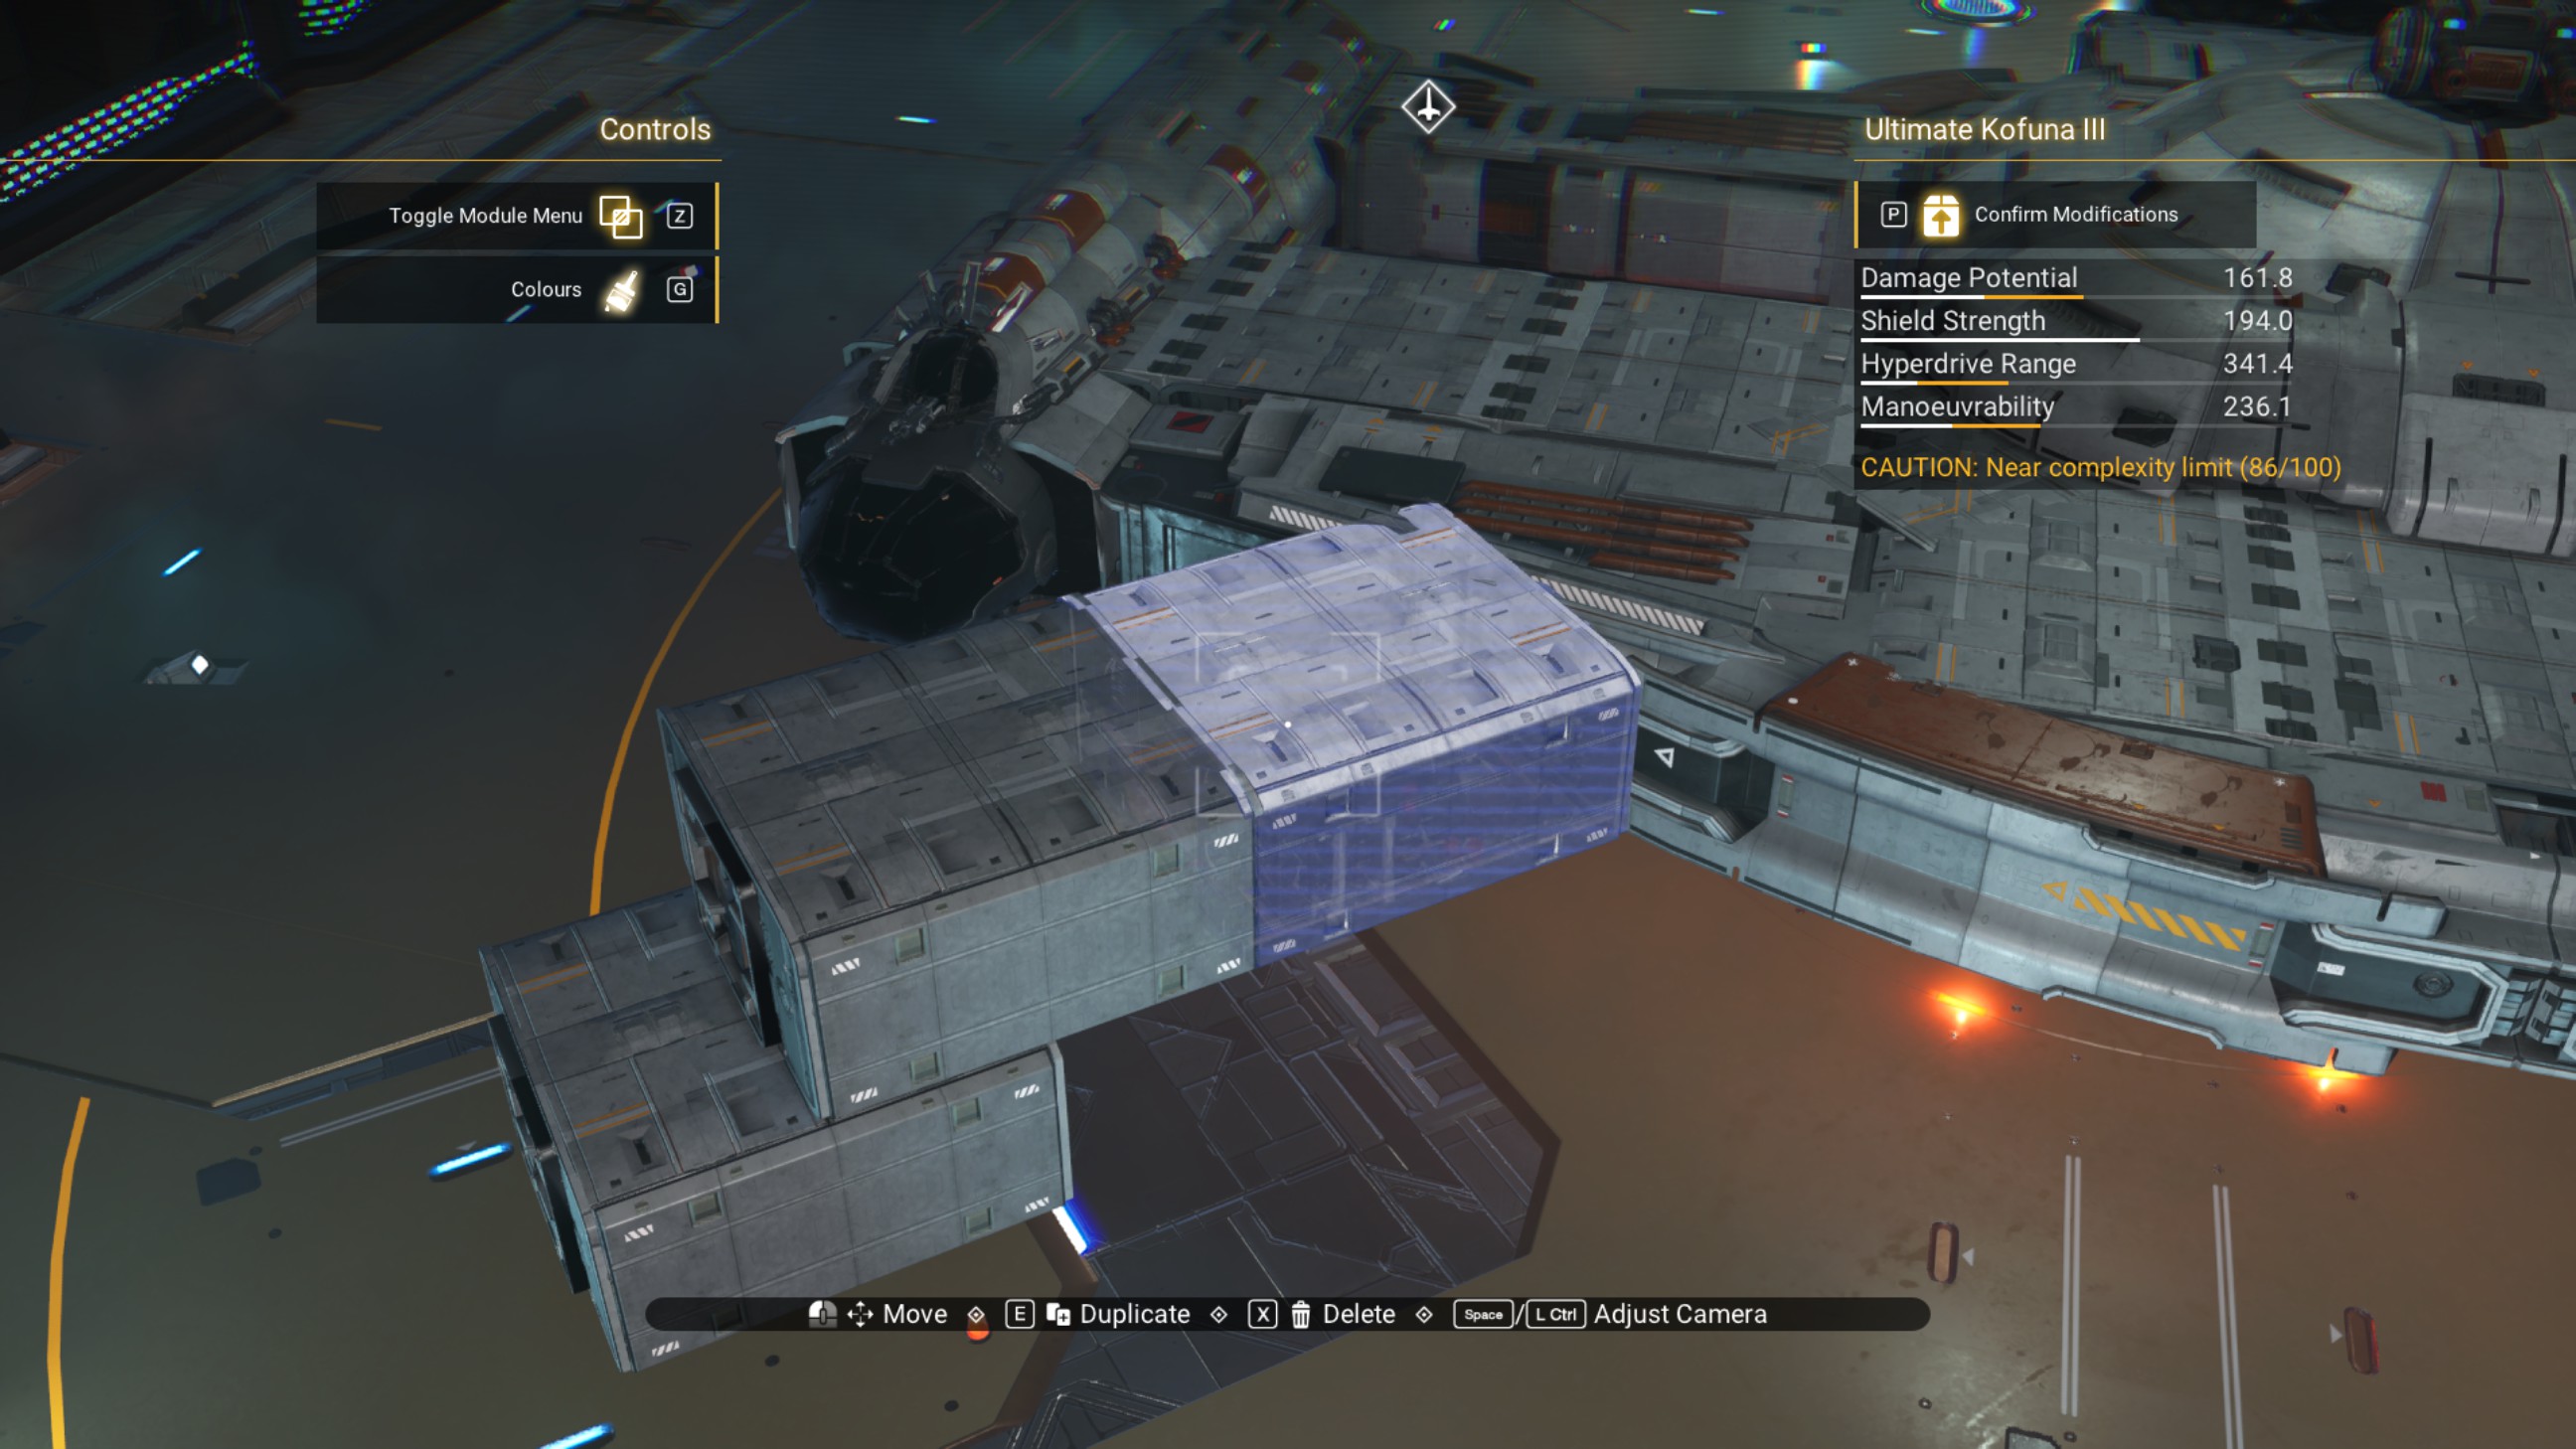
Place a speedbird nacelle rim, oriented to the front, on the 45 degree walkway within the ship.
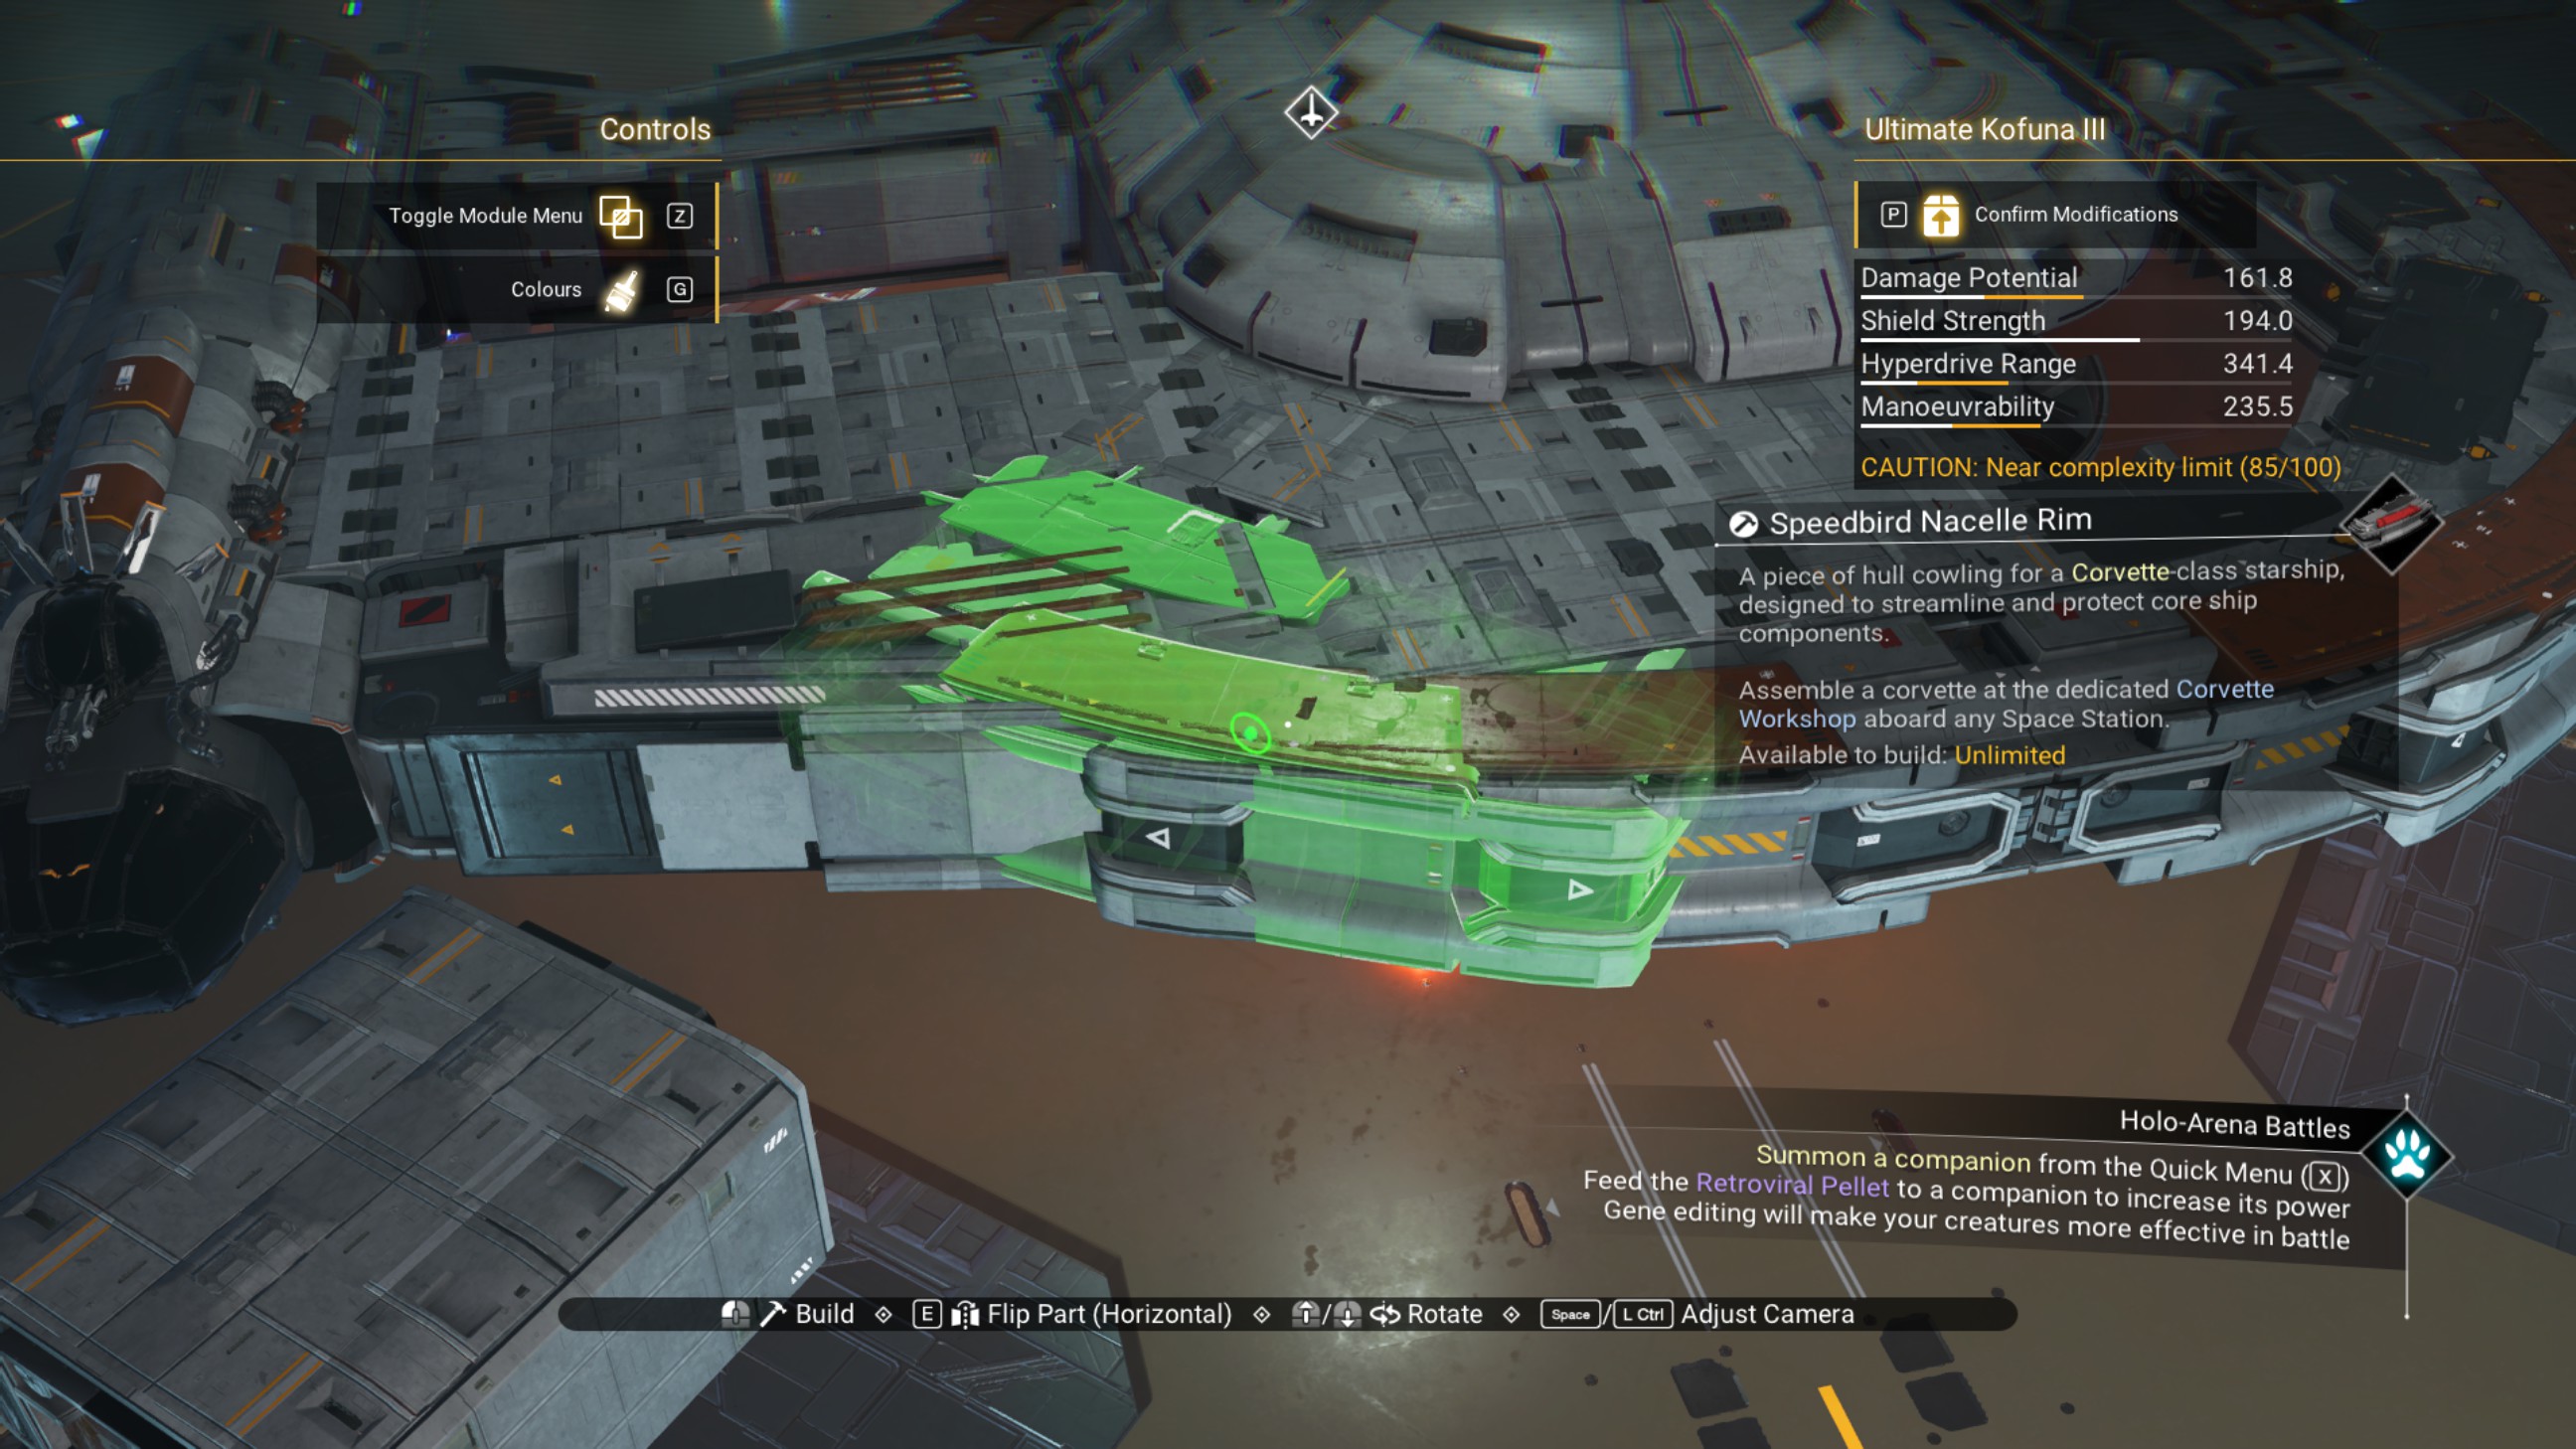
Delete the 45 degree walkway within the ship, and the other two remaining 45 degree walkways.
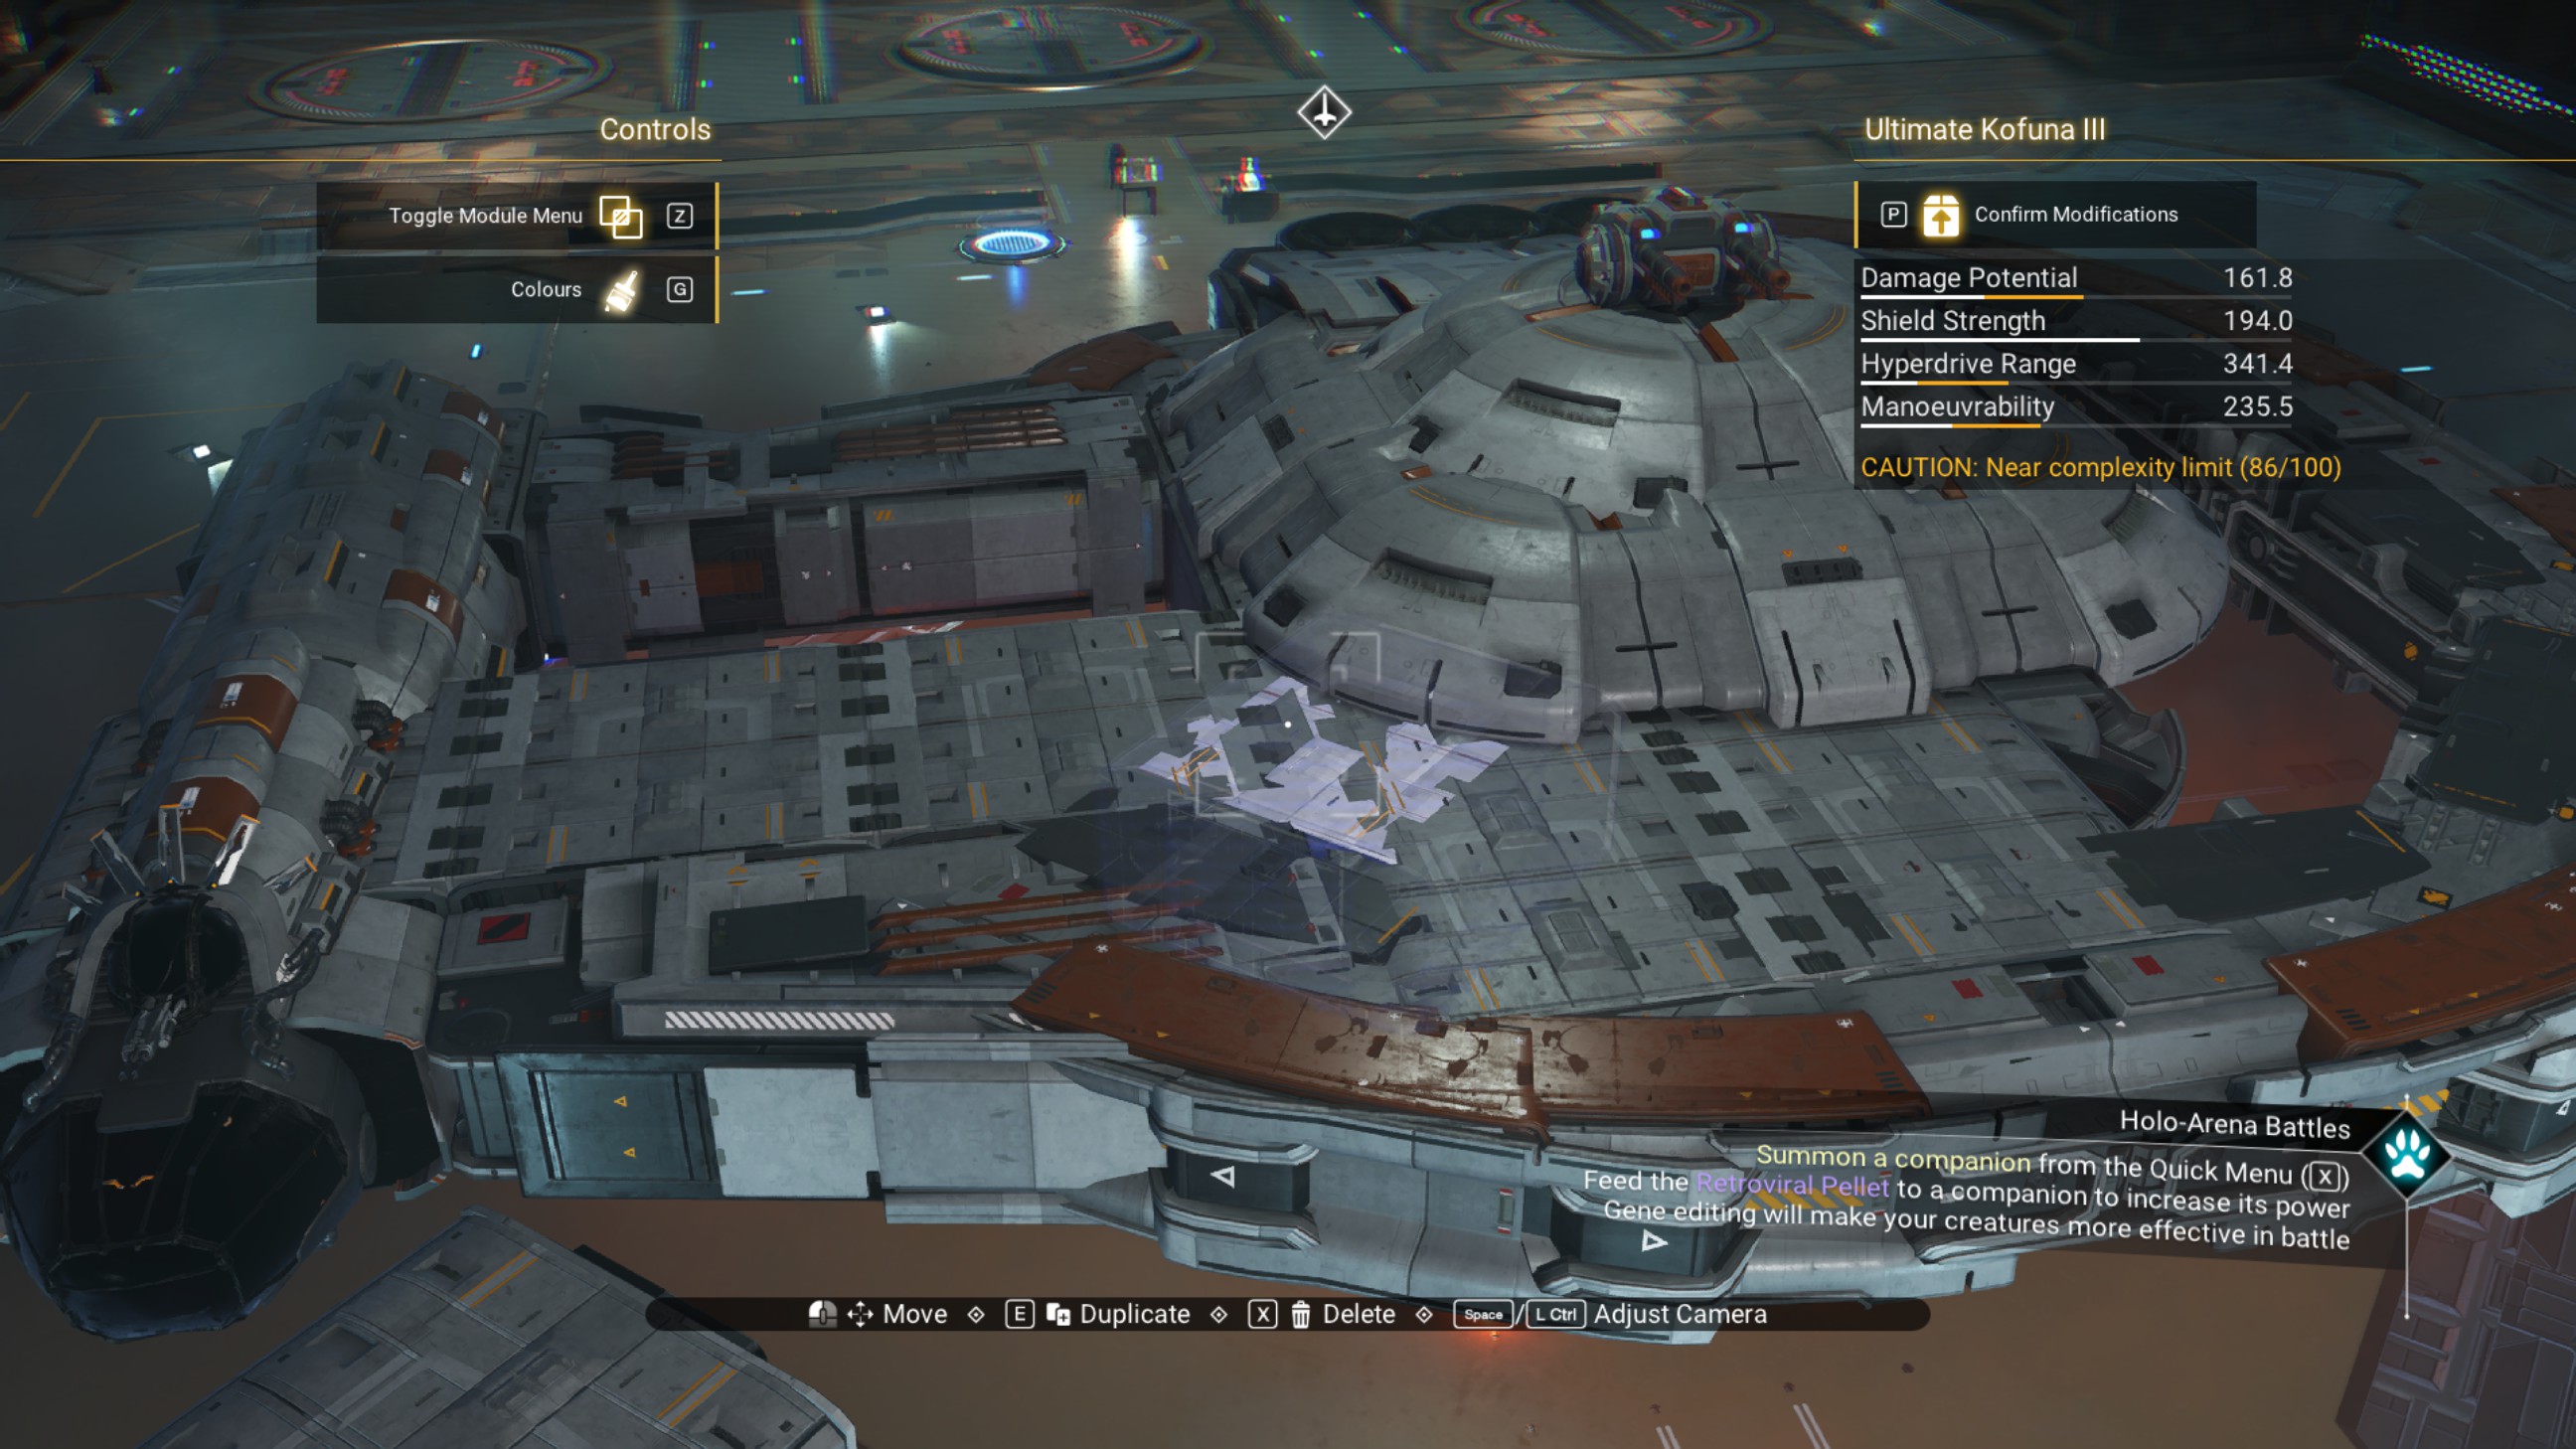
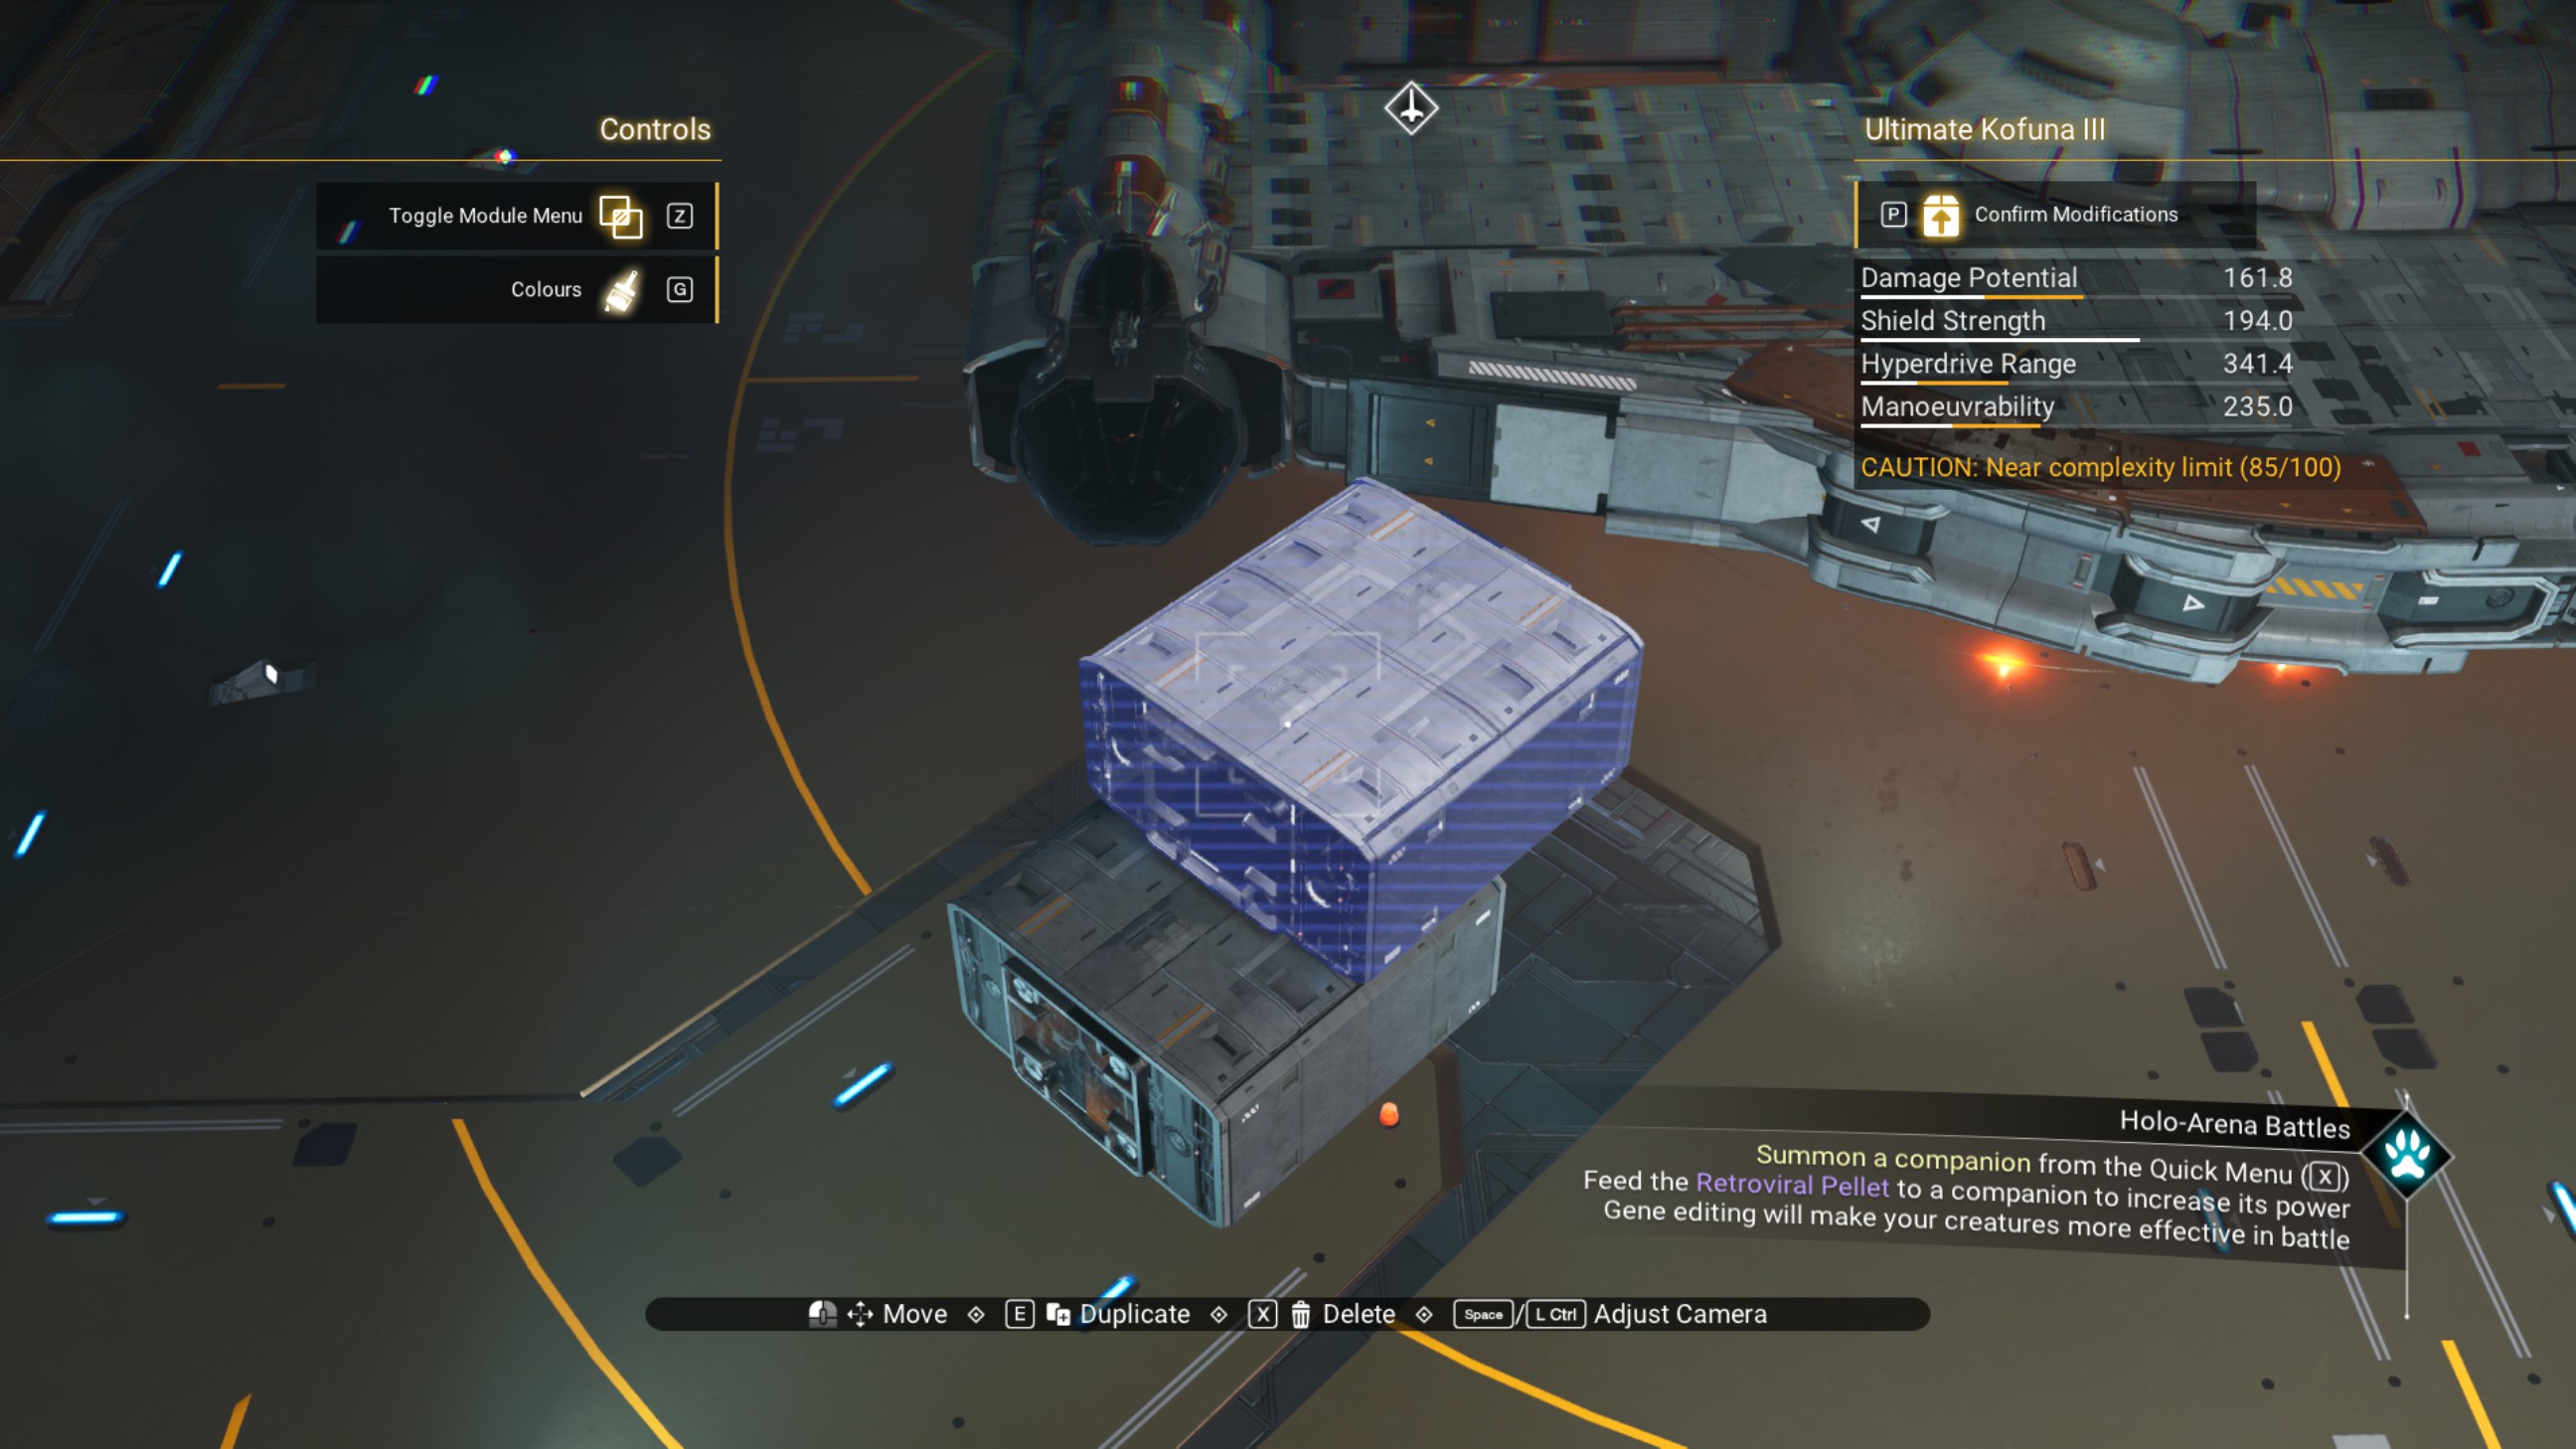
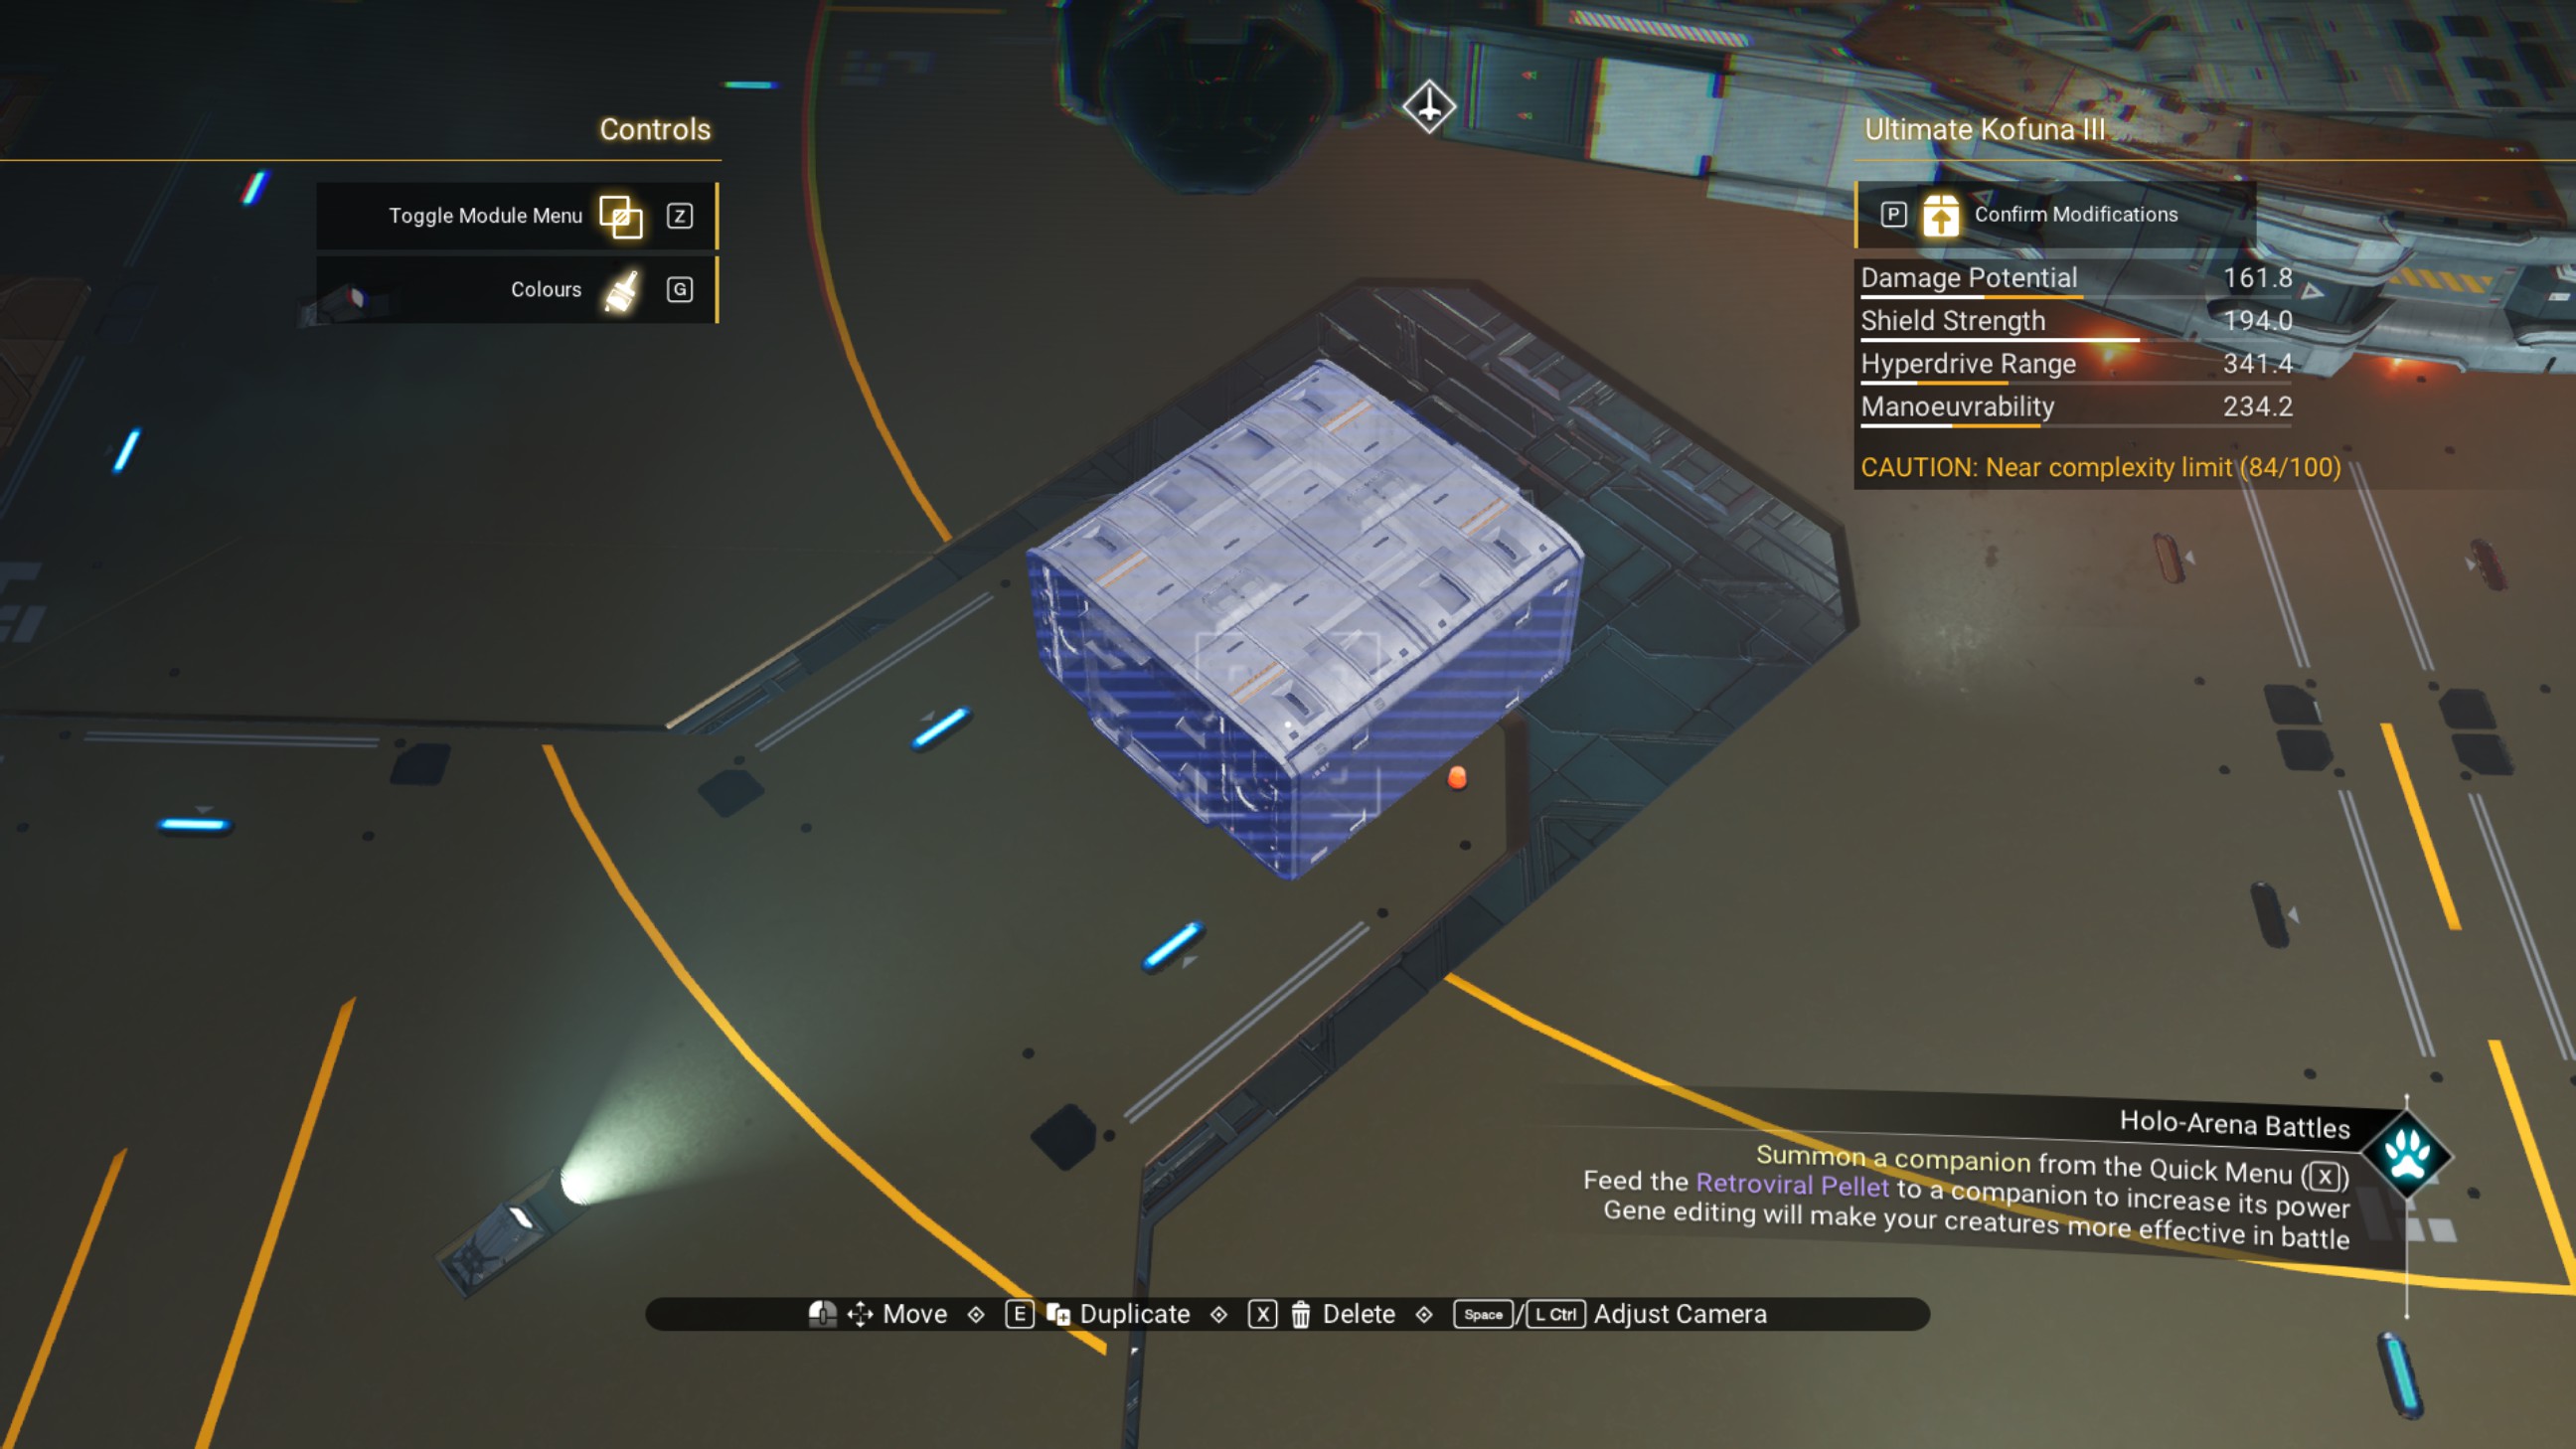
Fill in the hull with two habitation modules and six walkways, as shown.
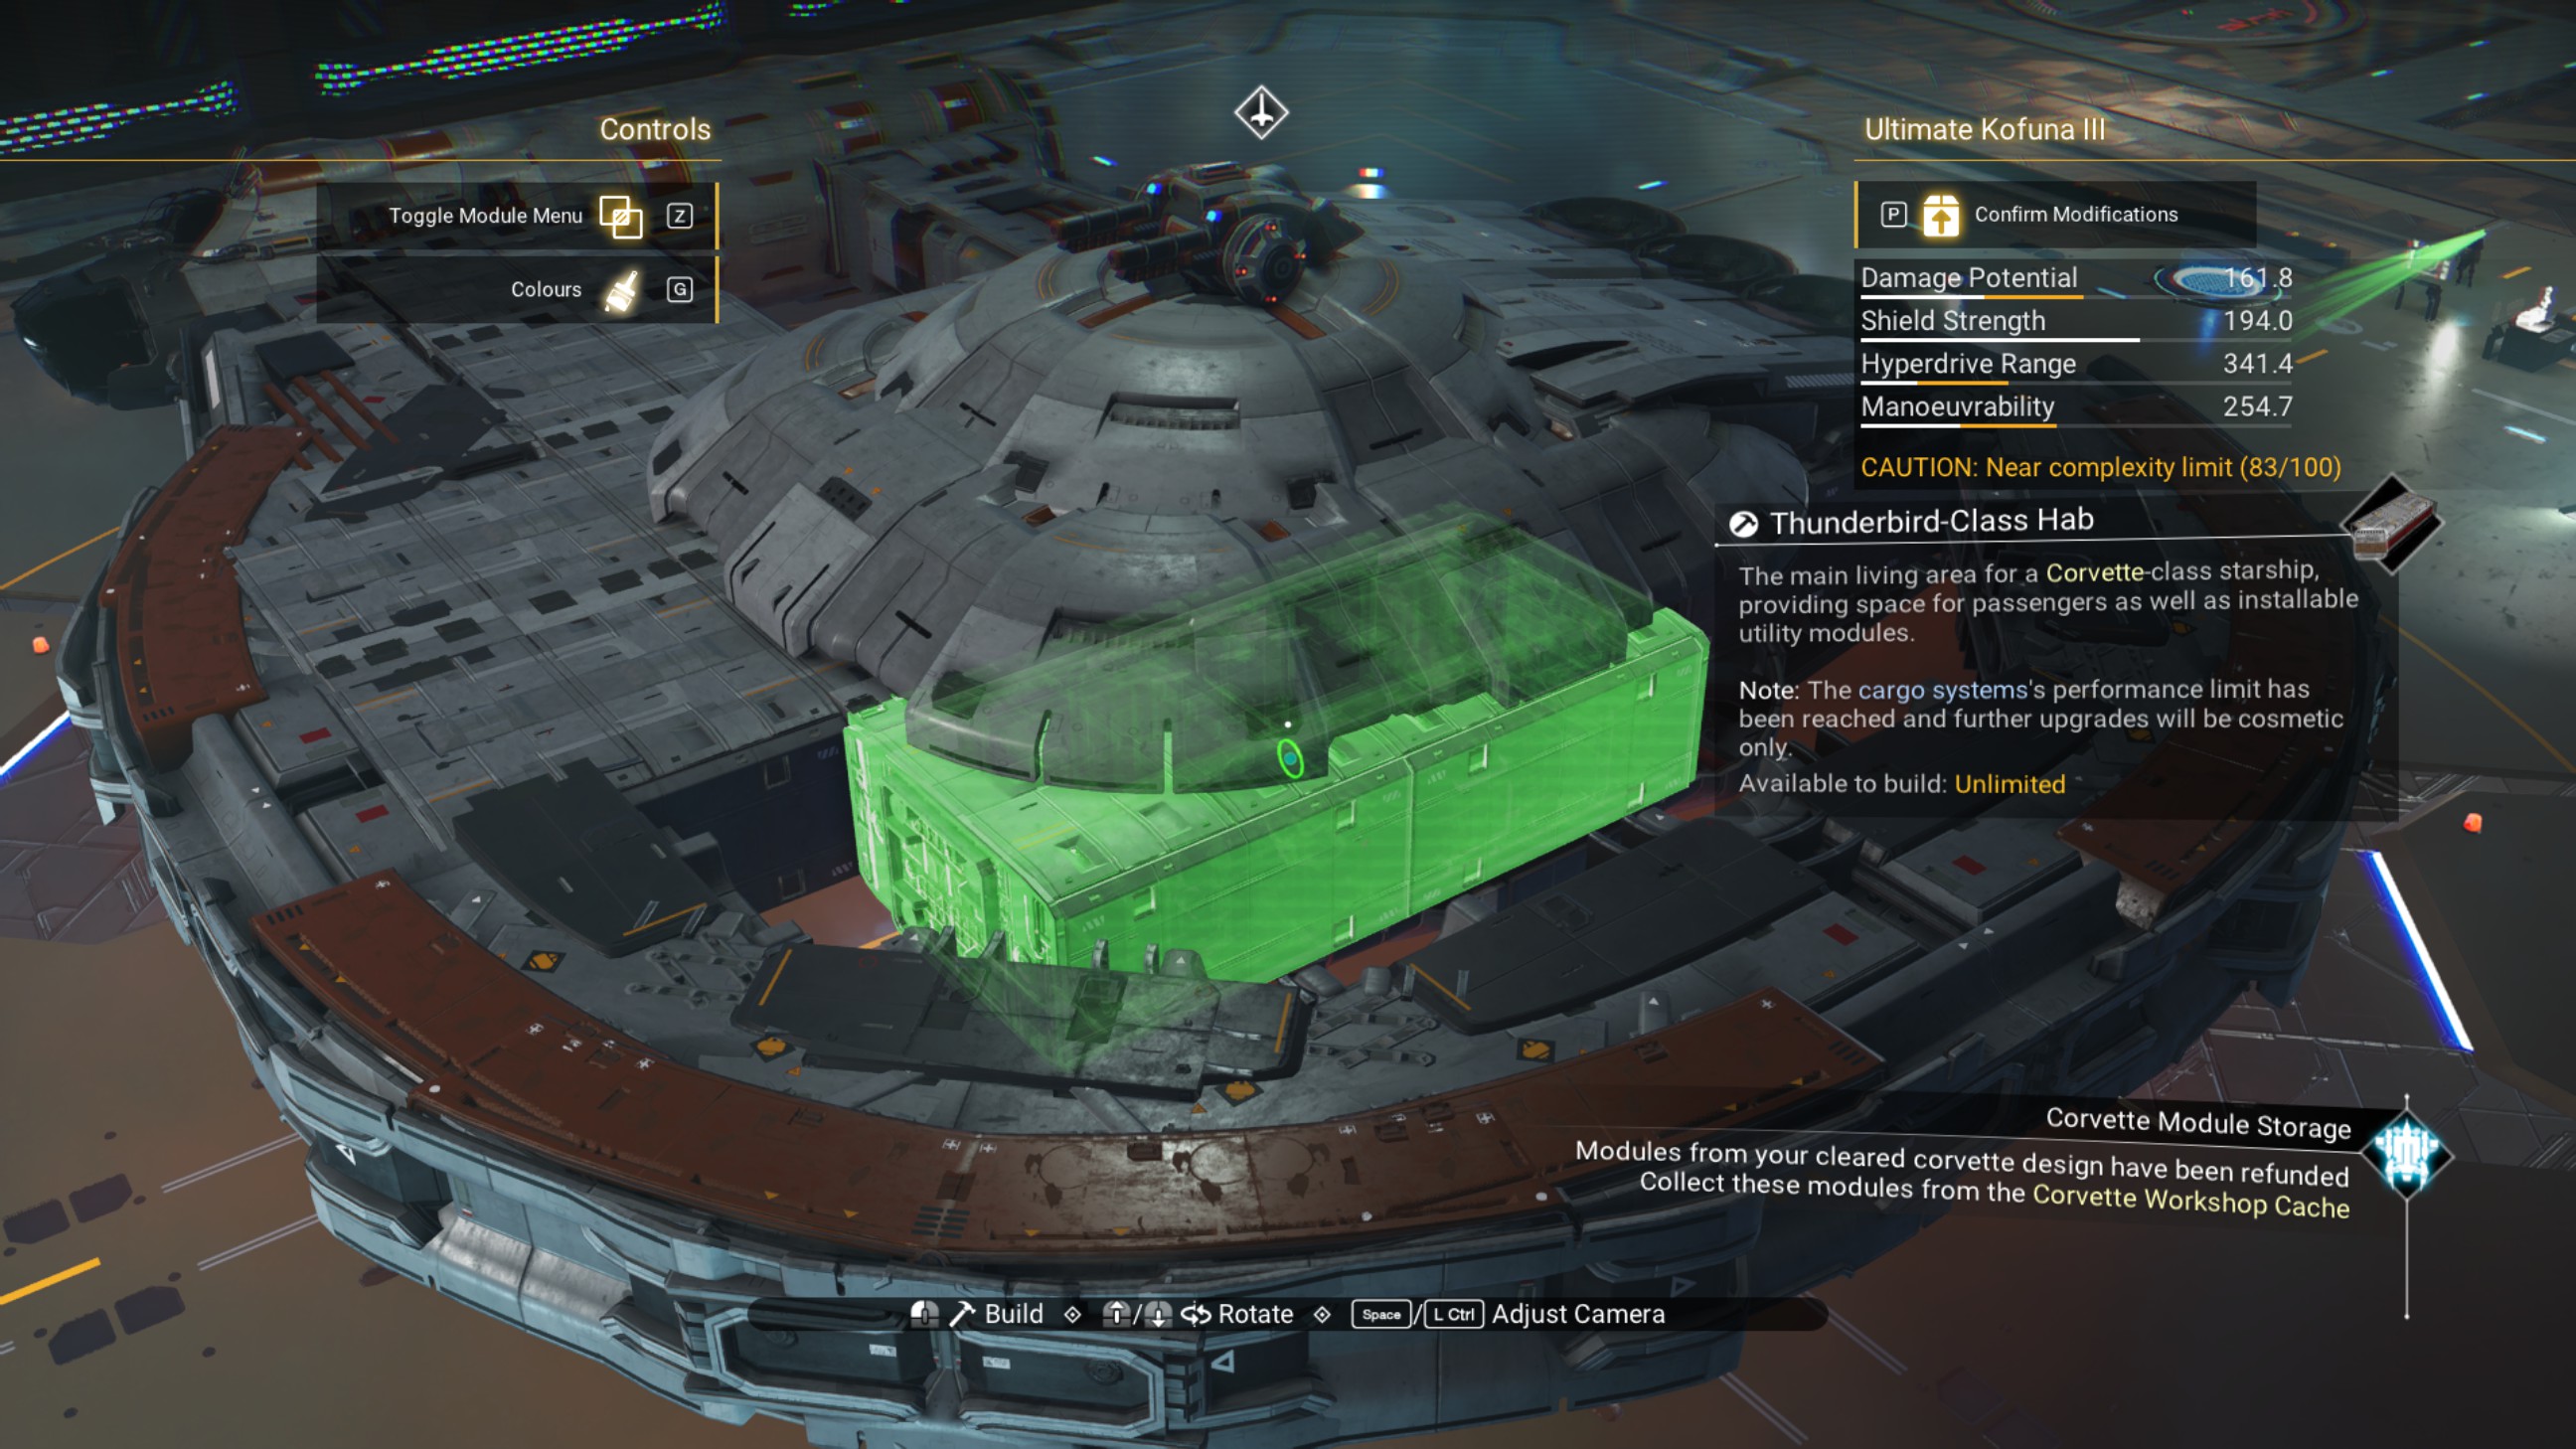
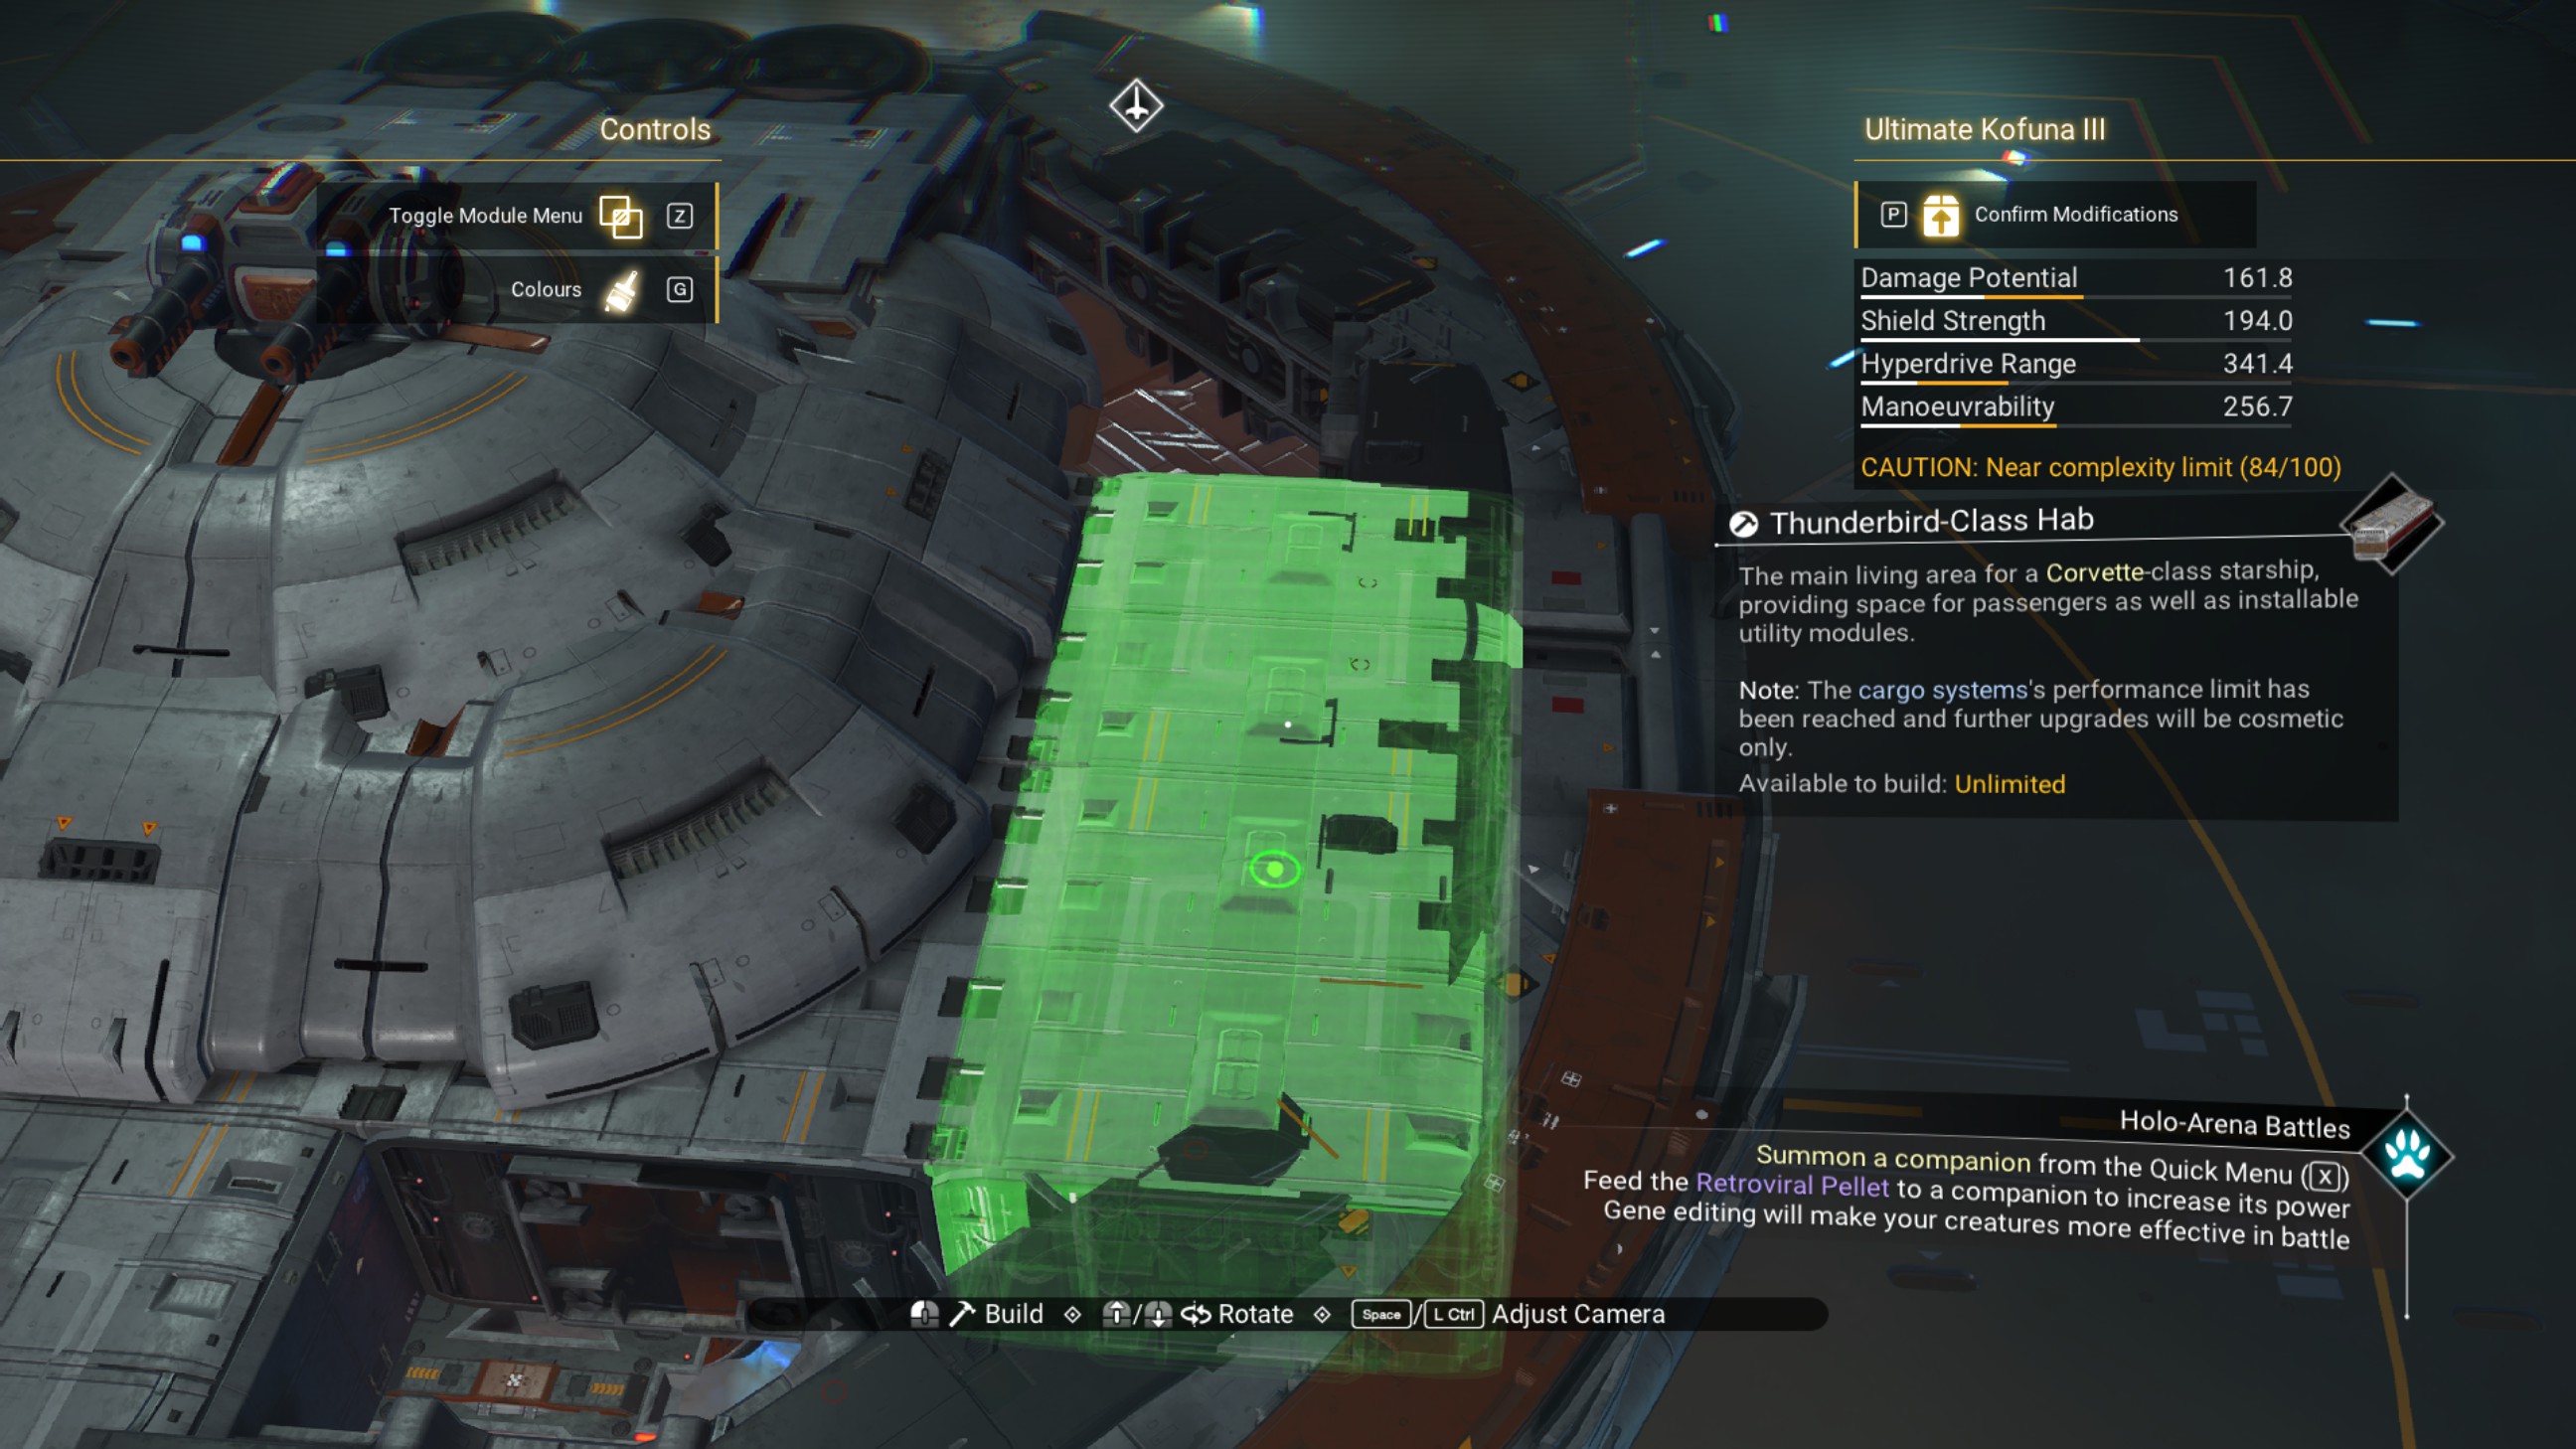
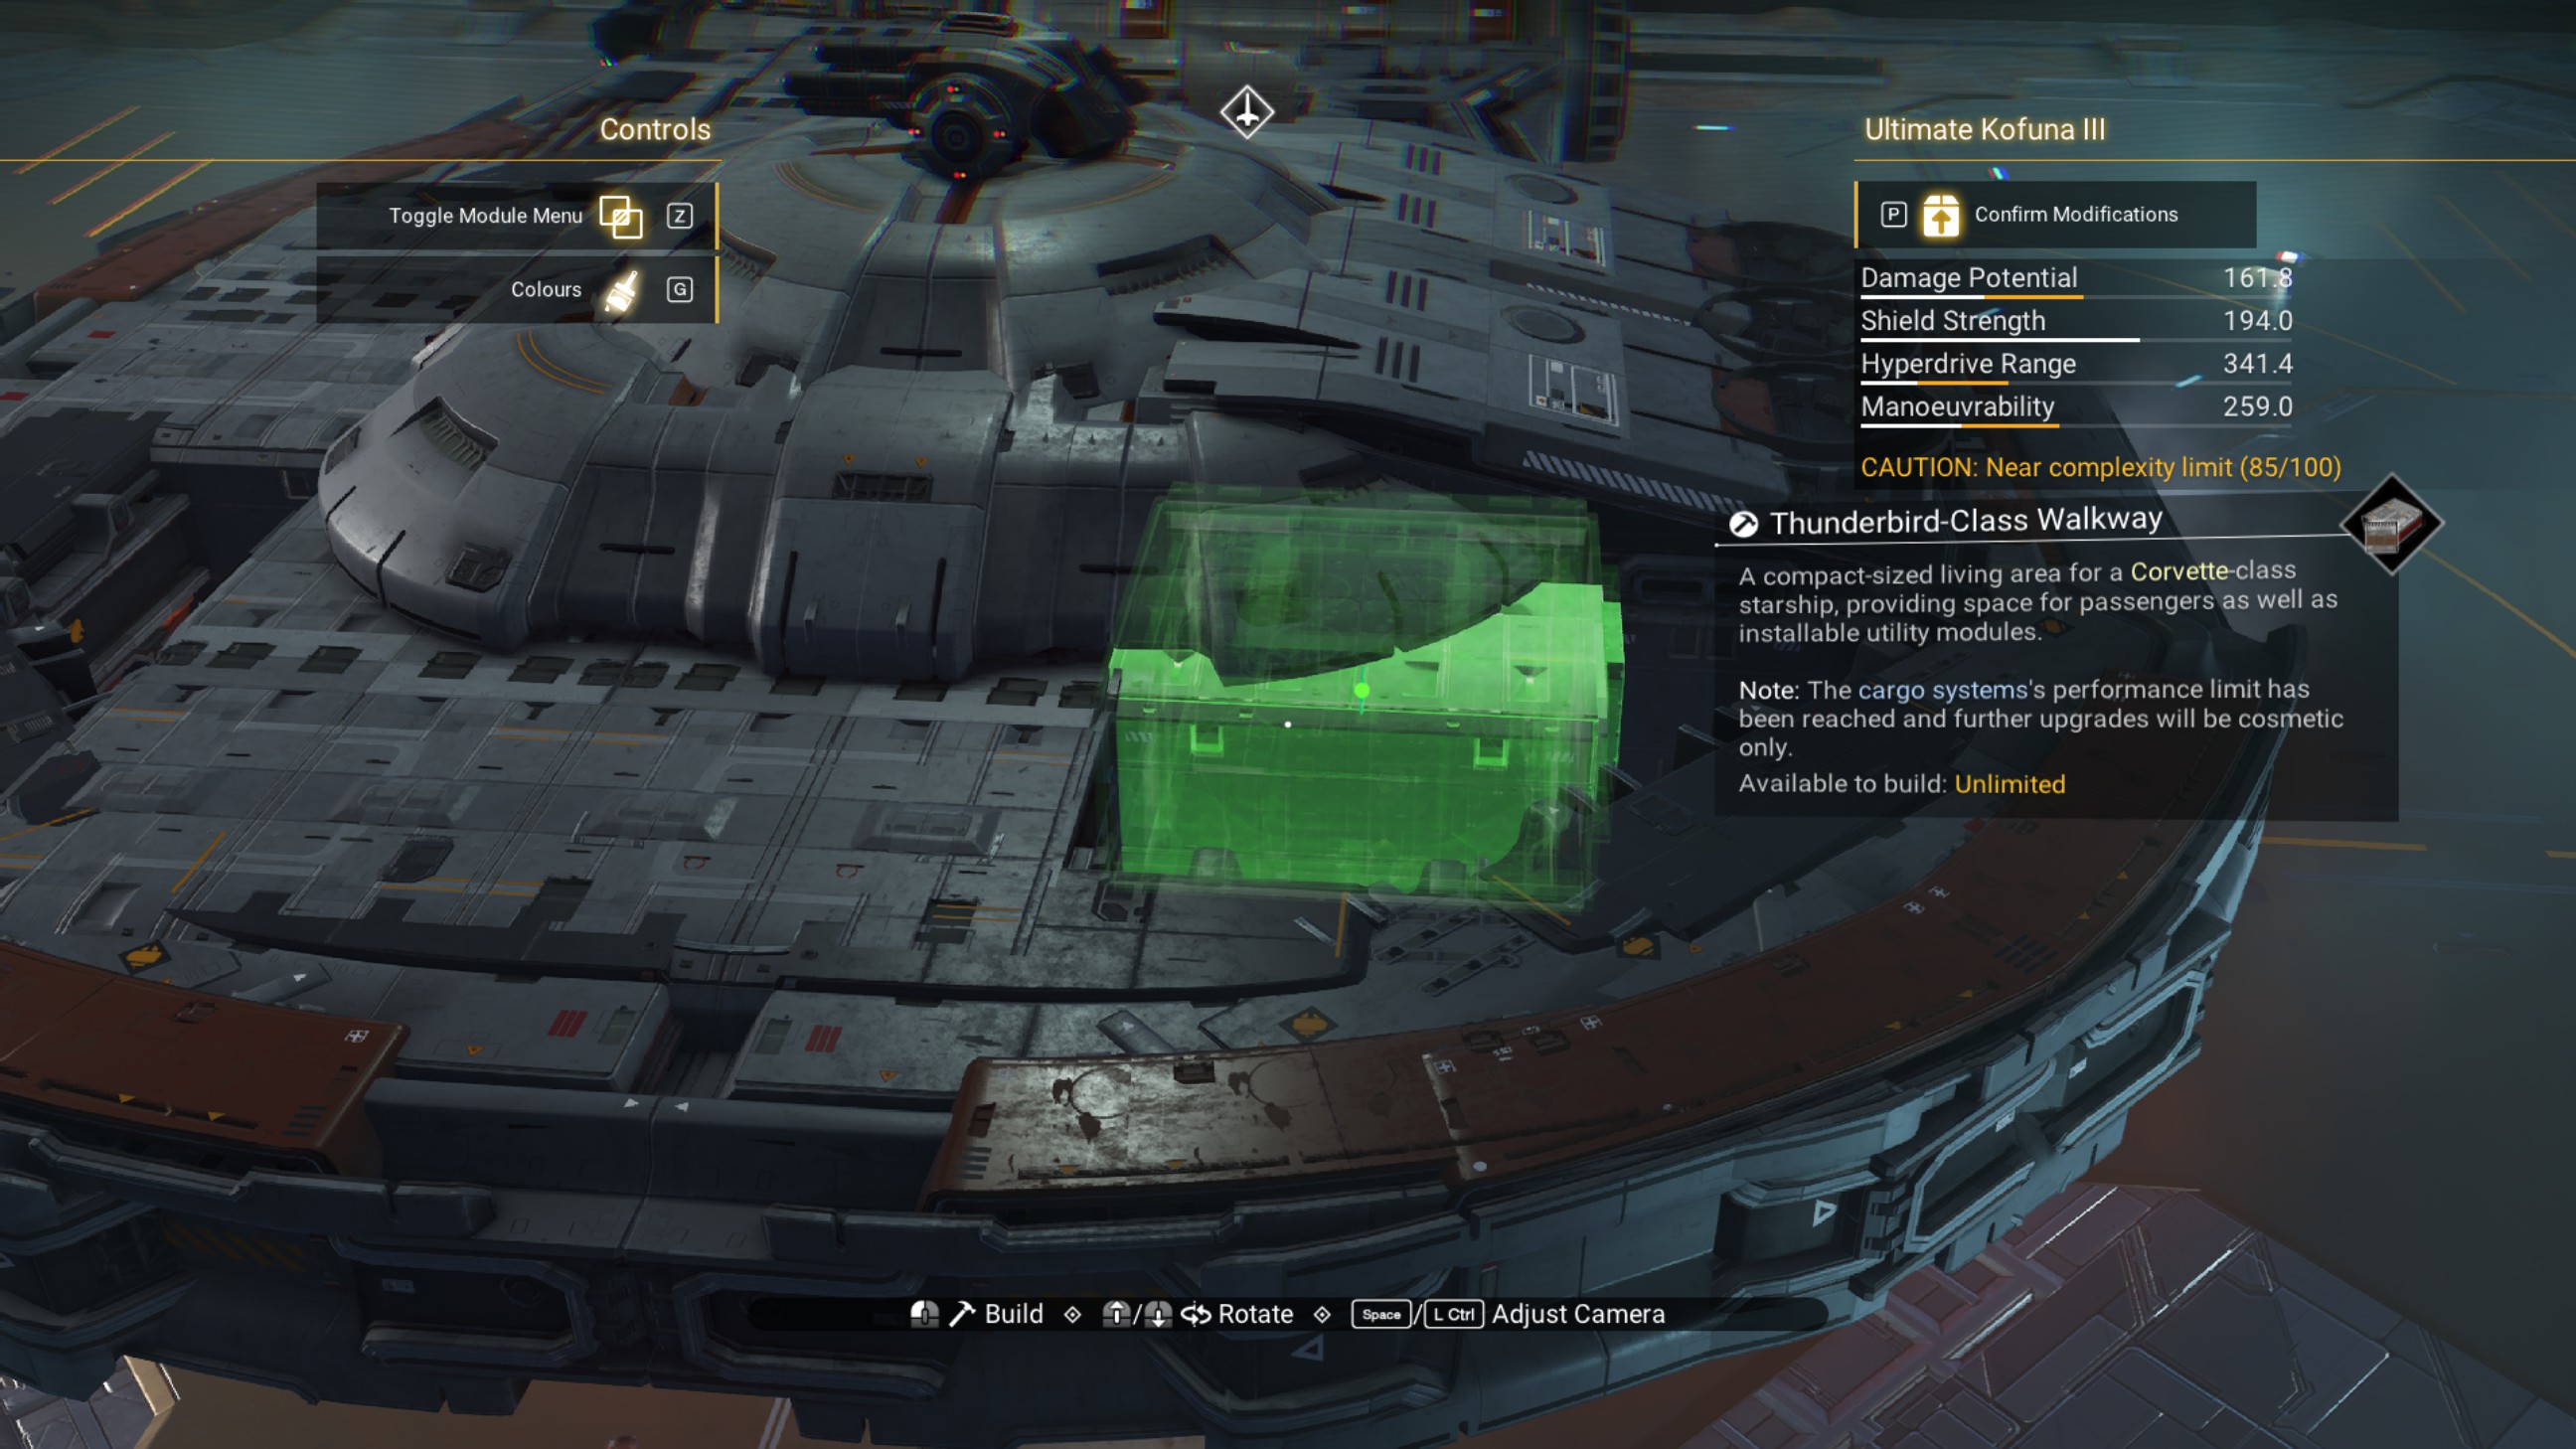
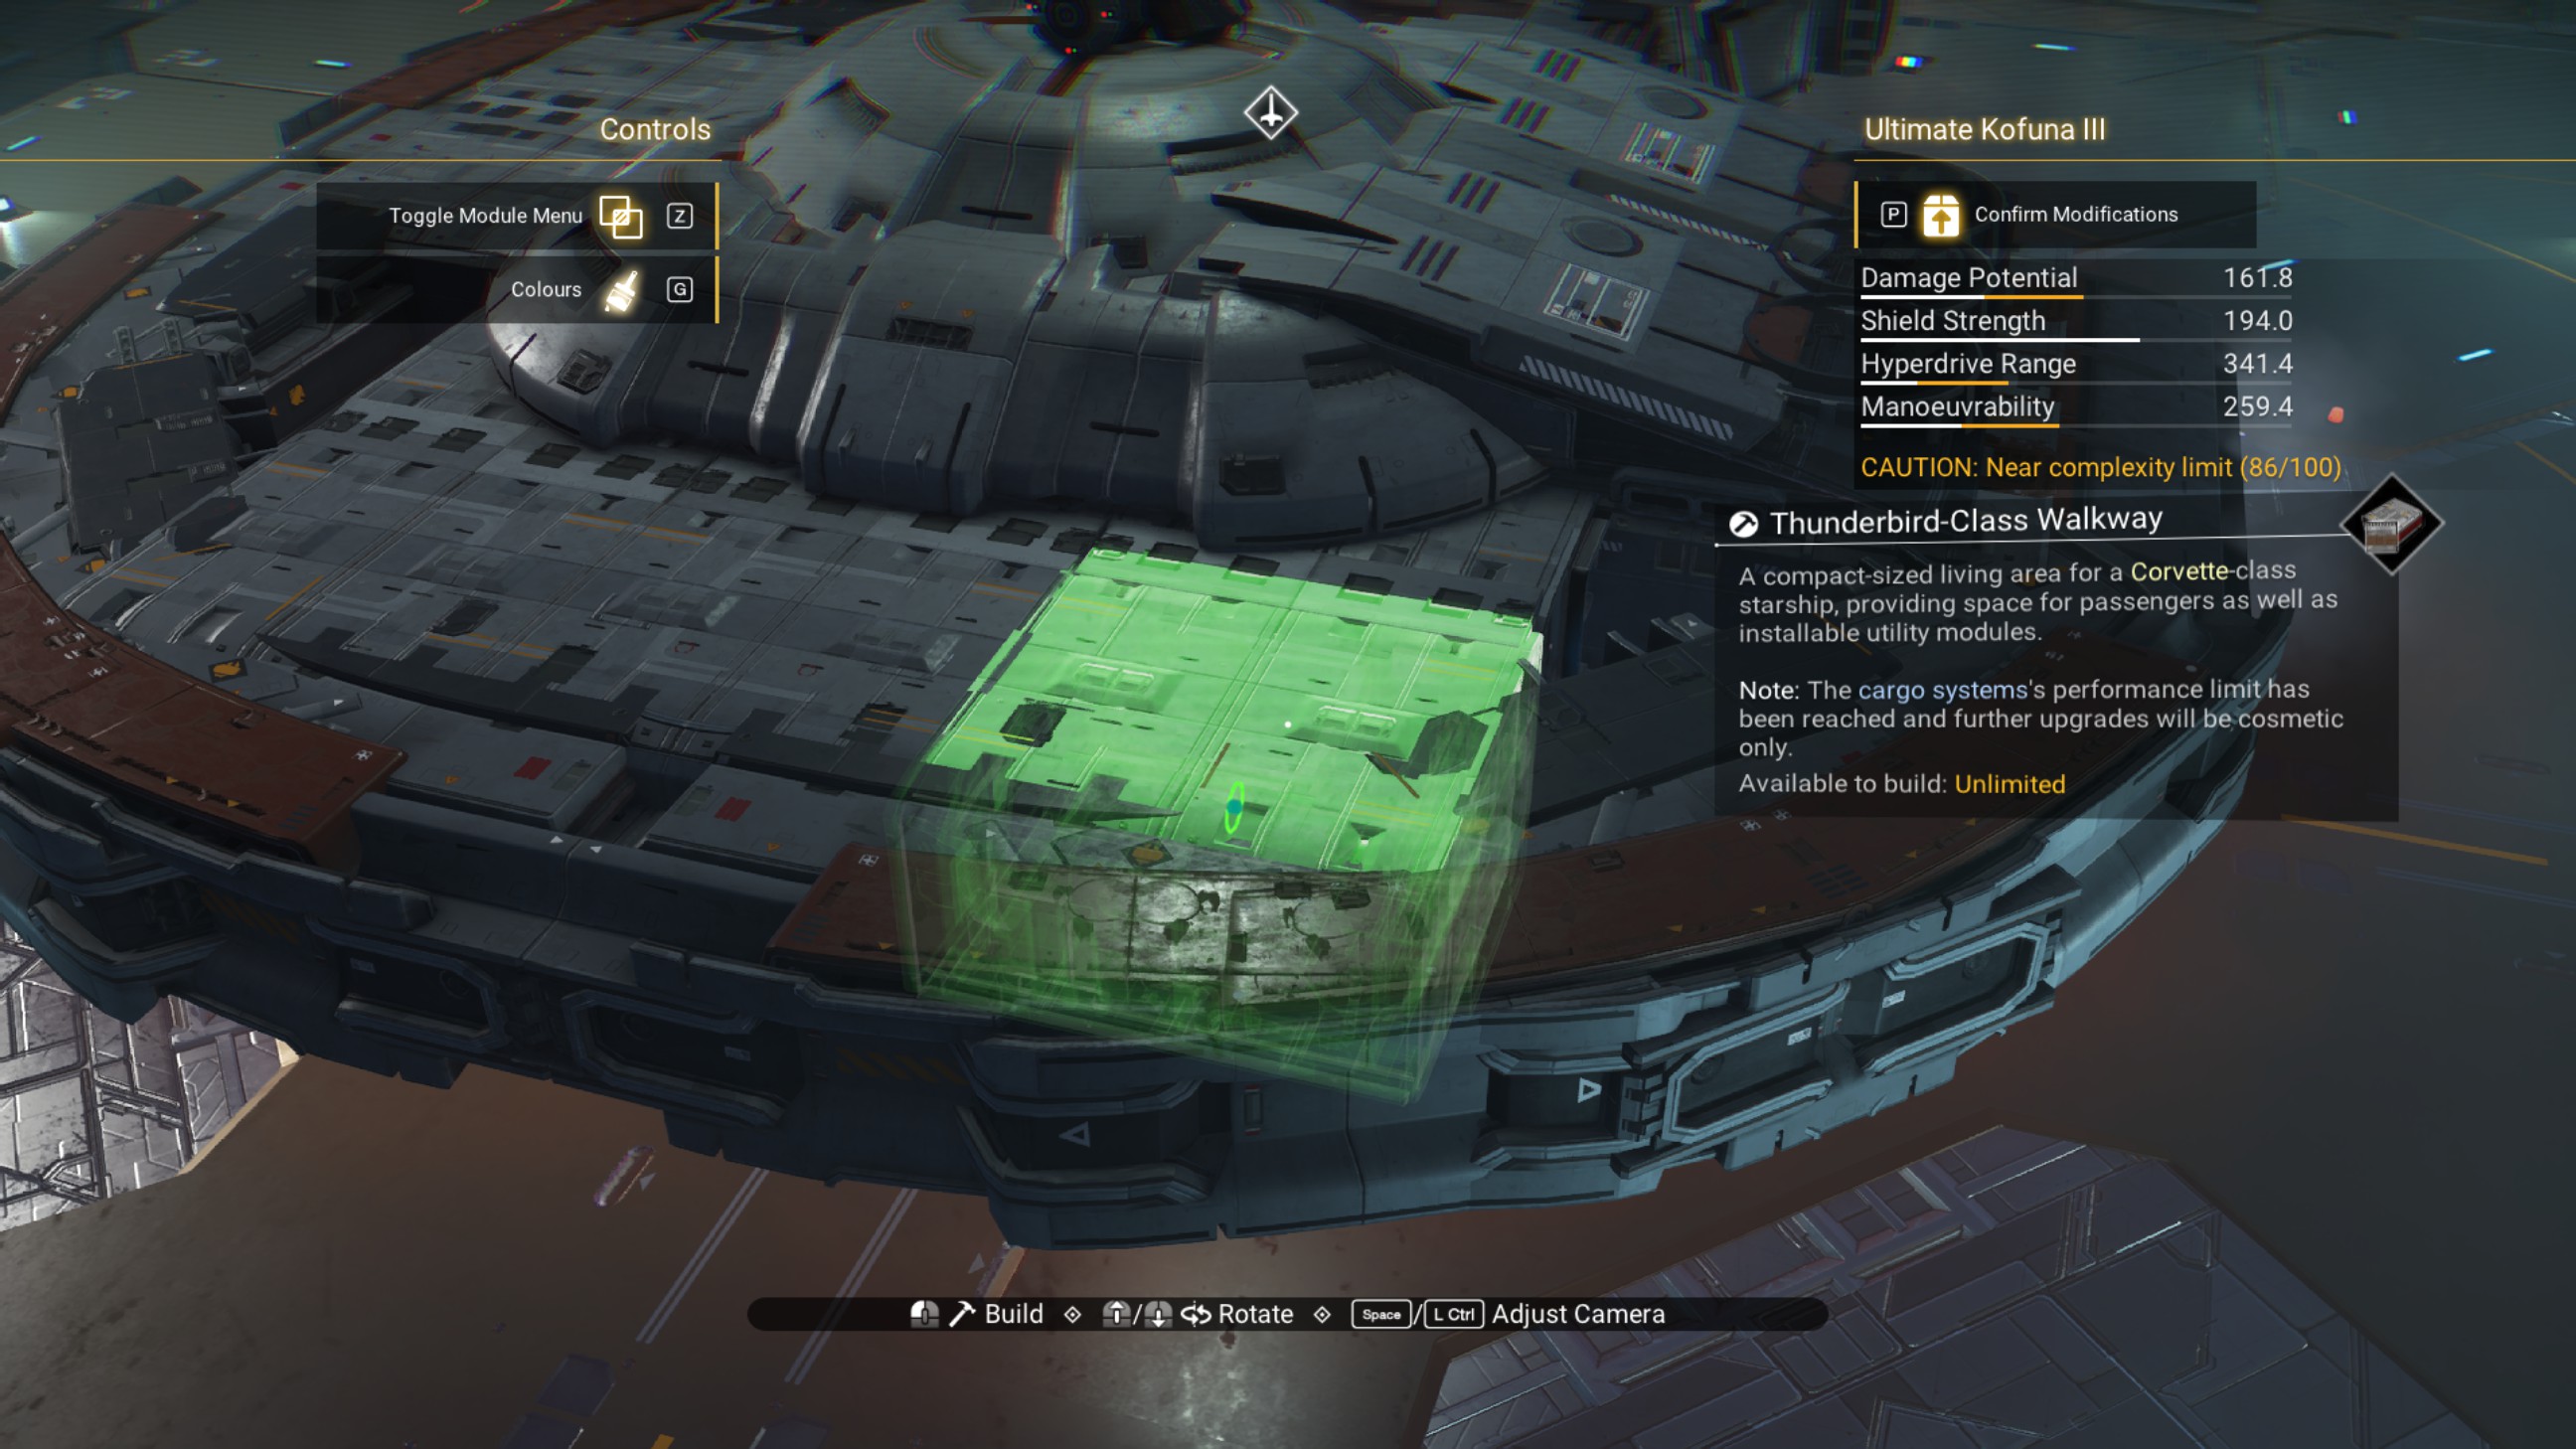
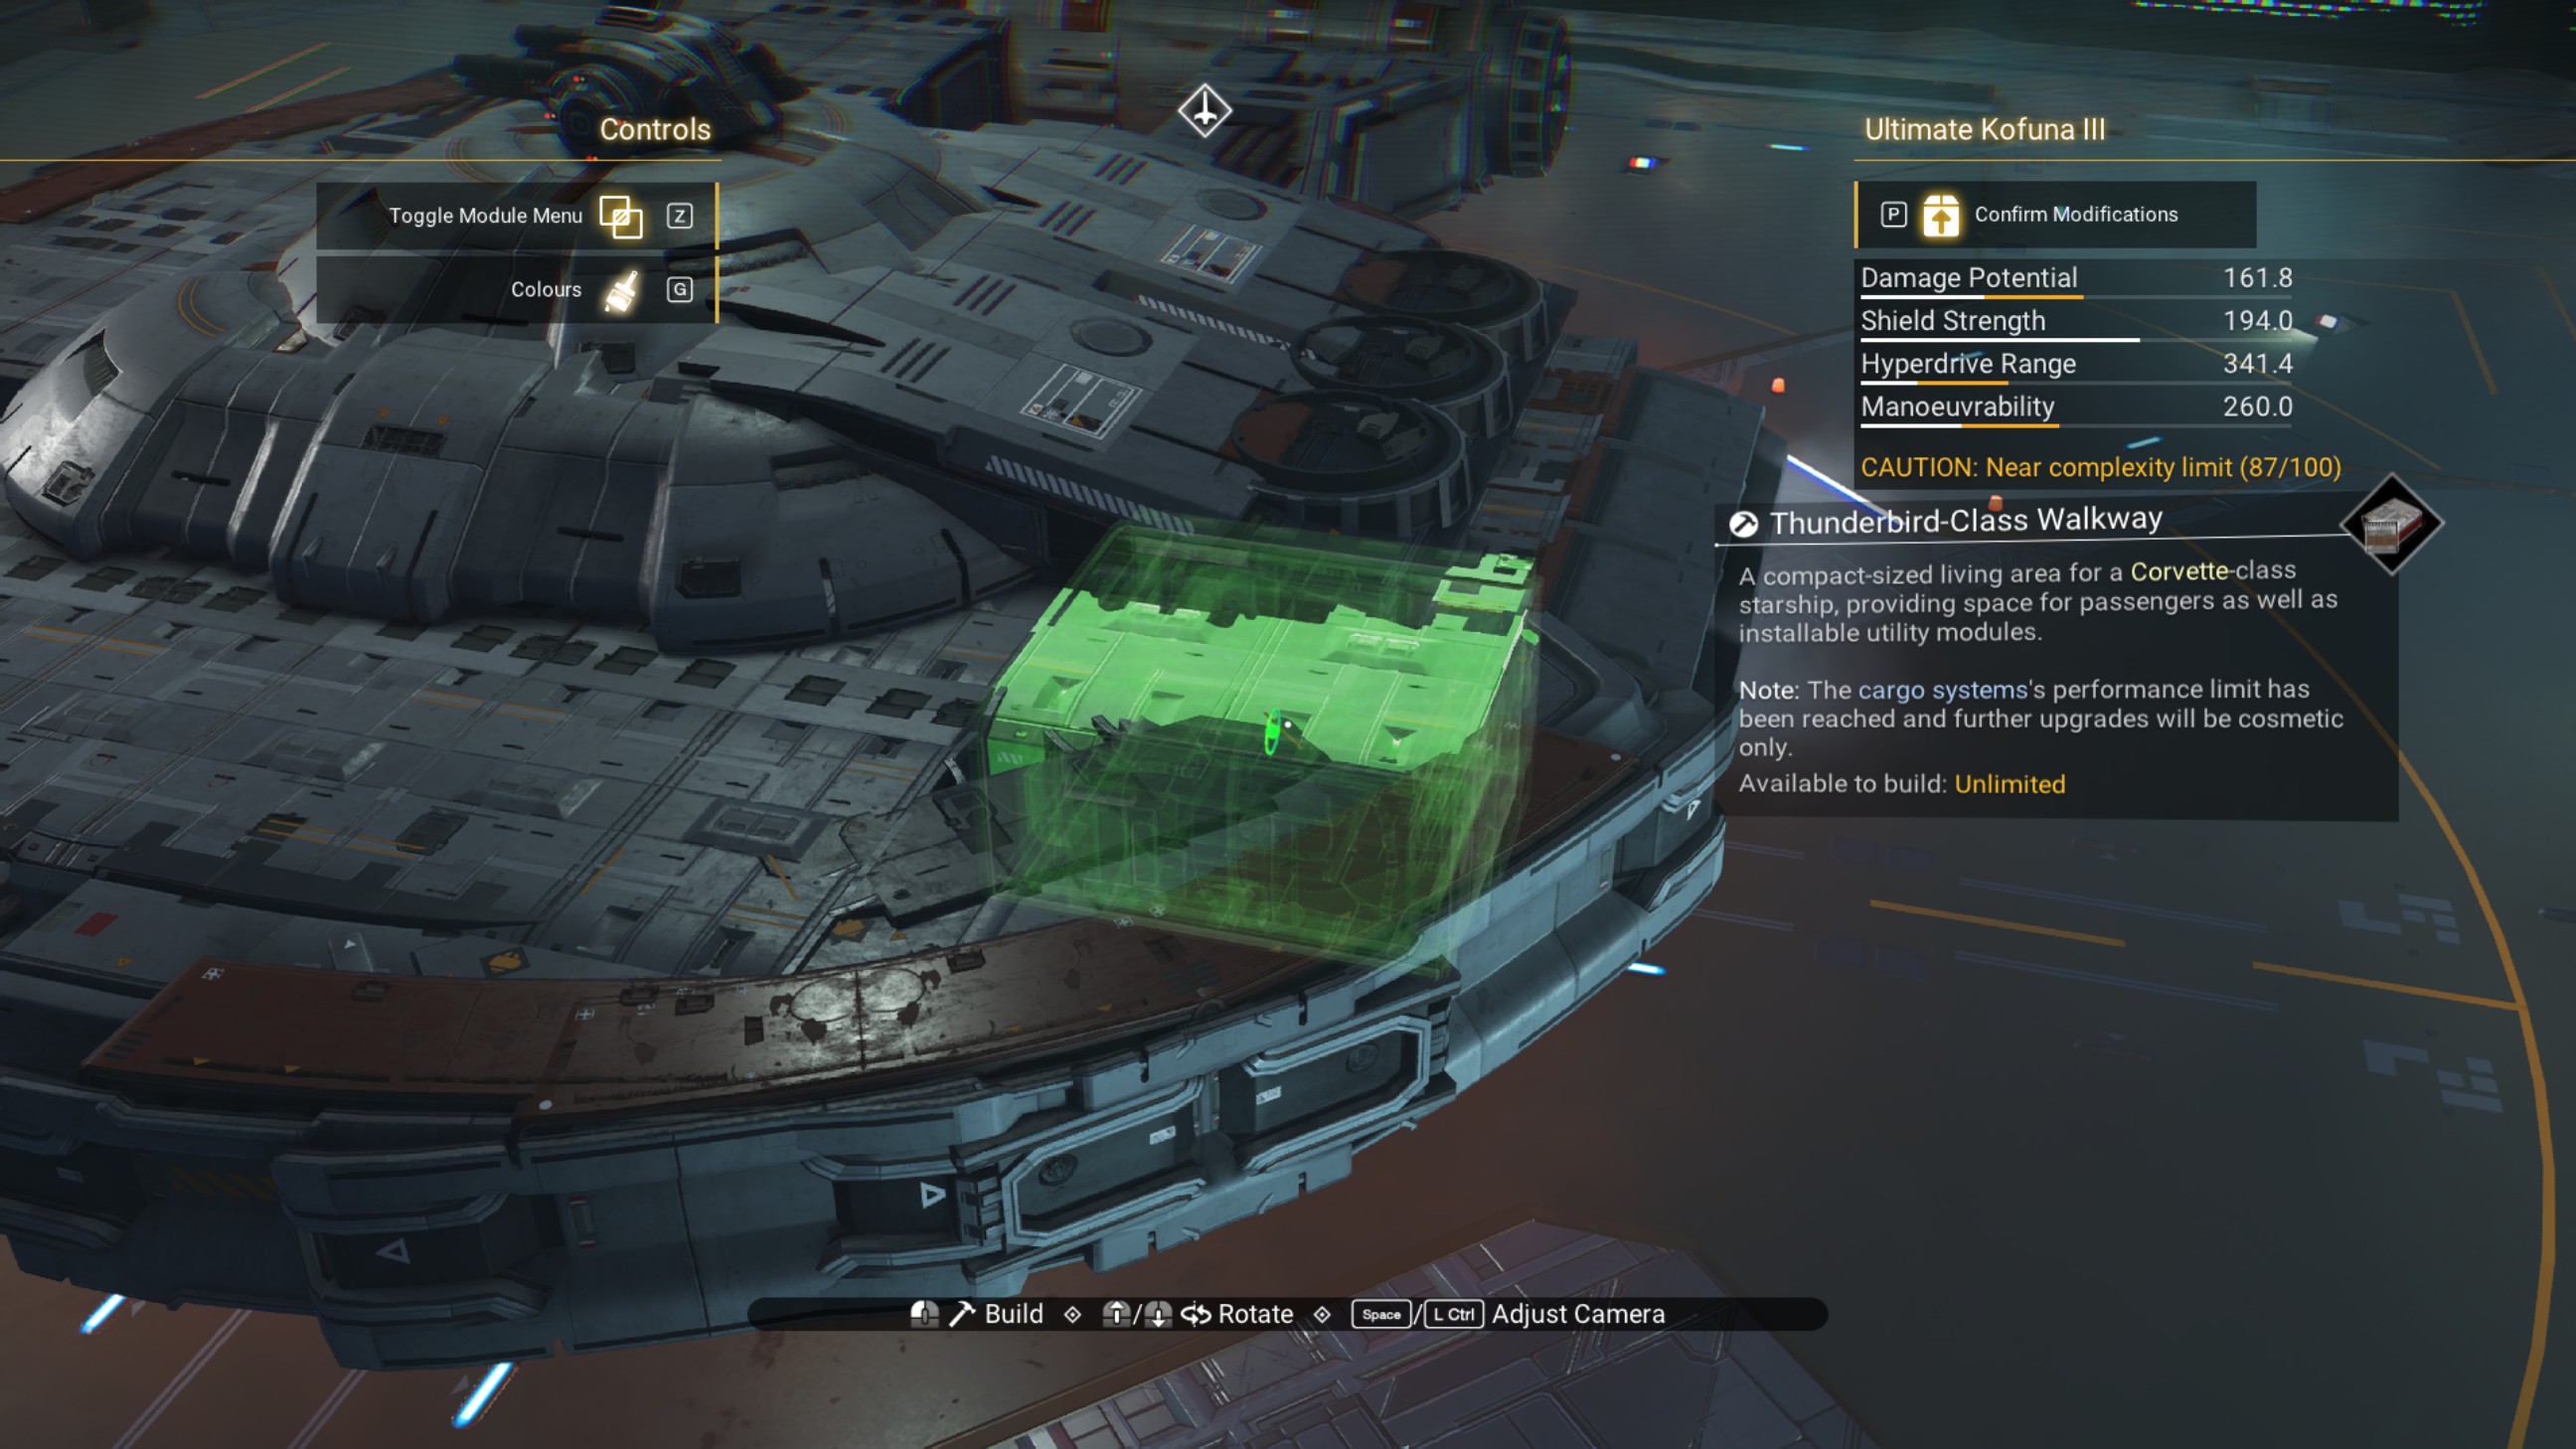
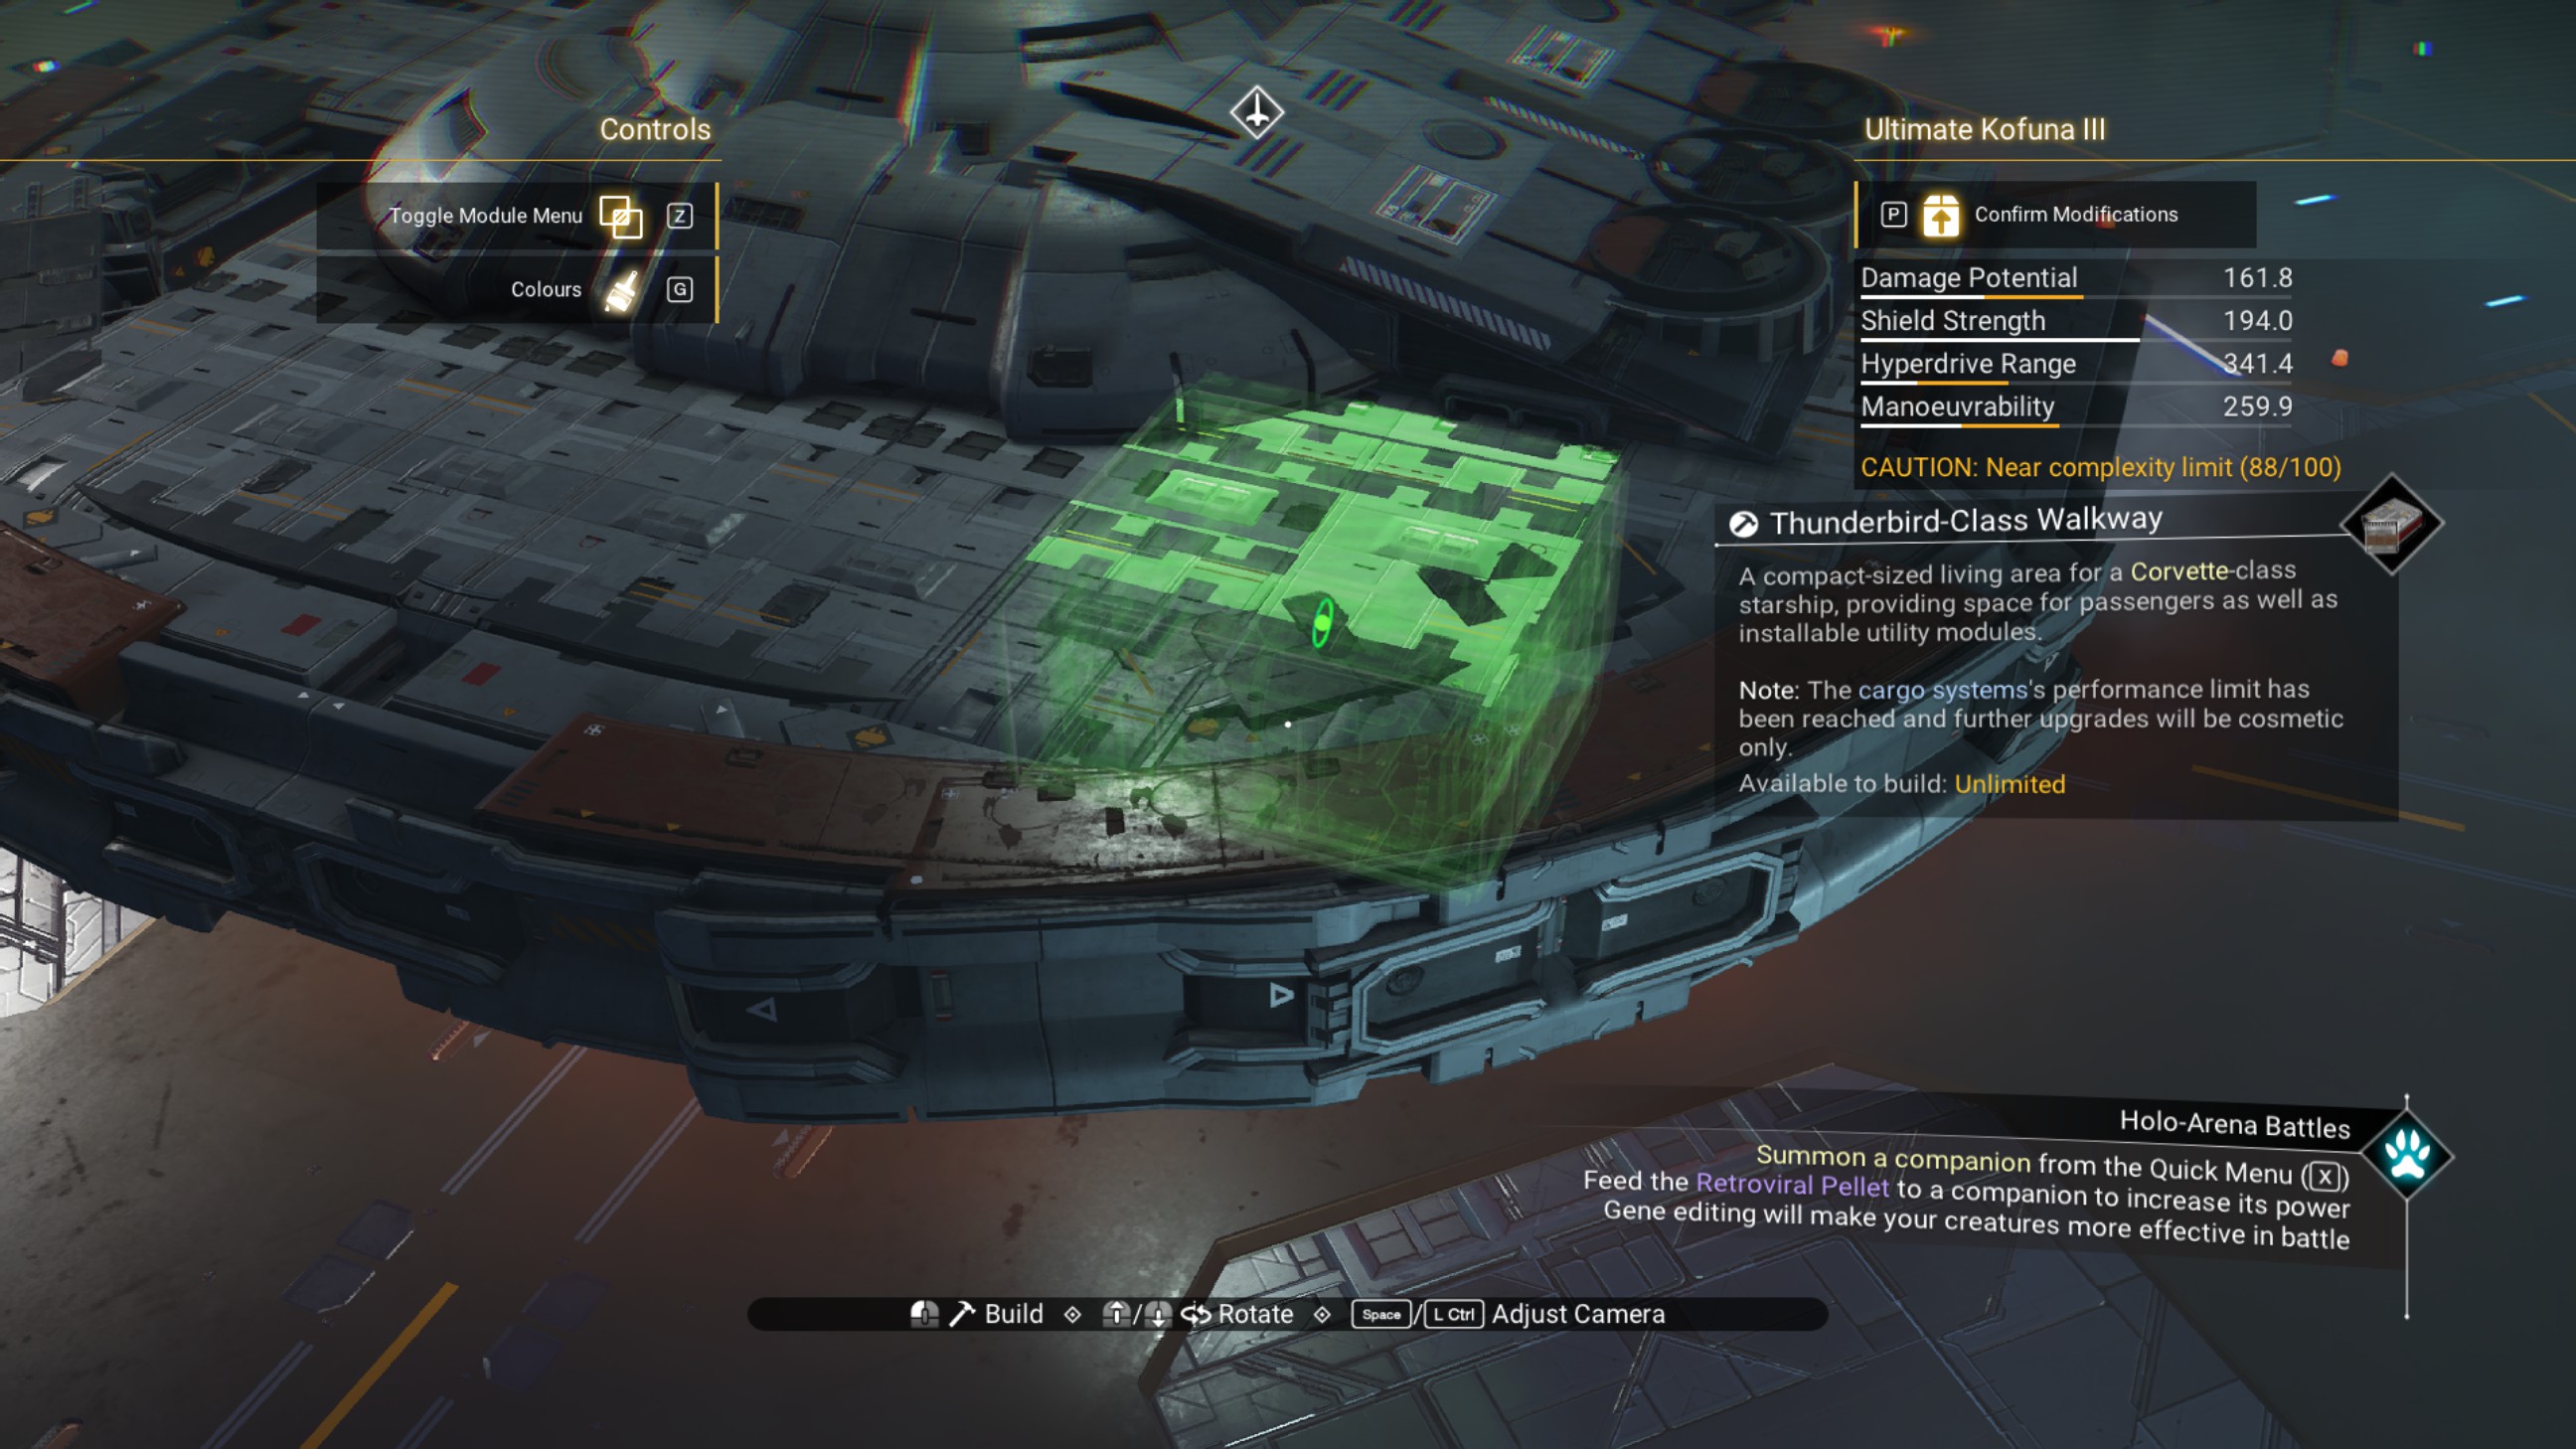
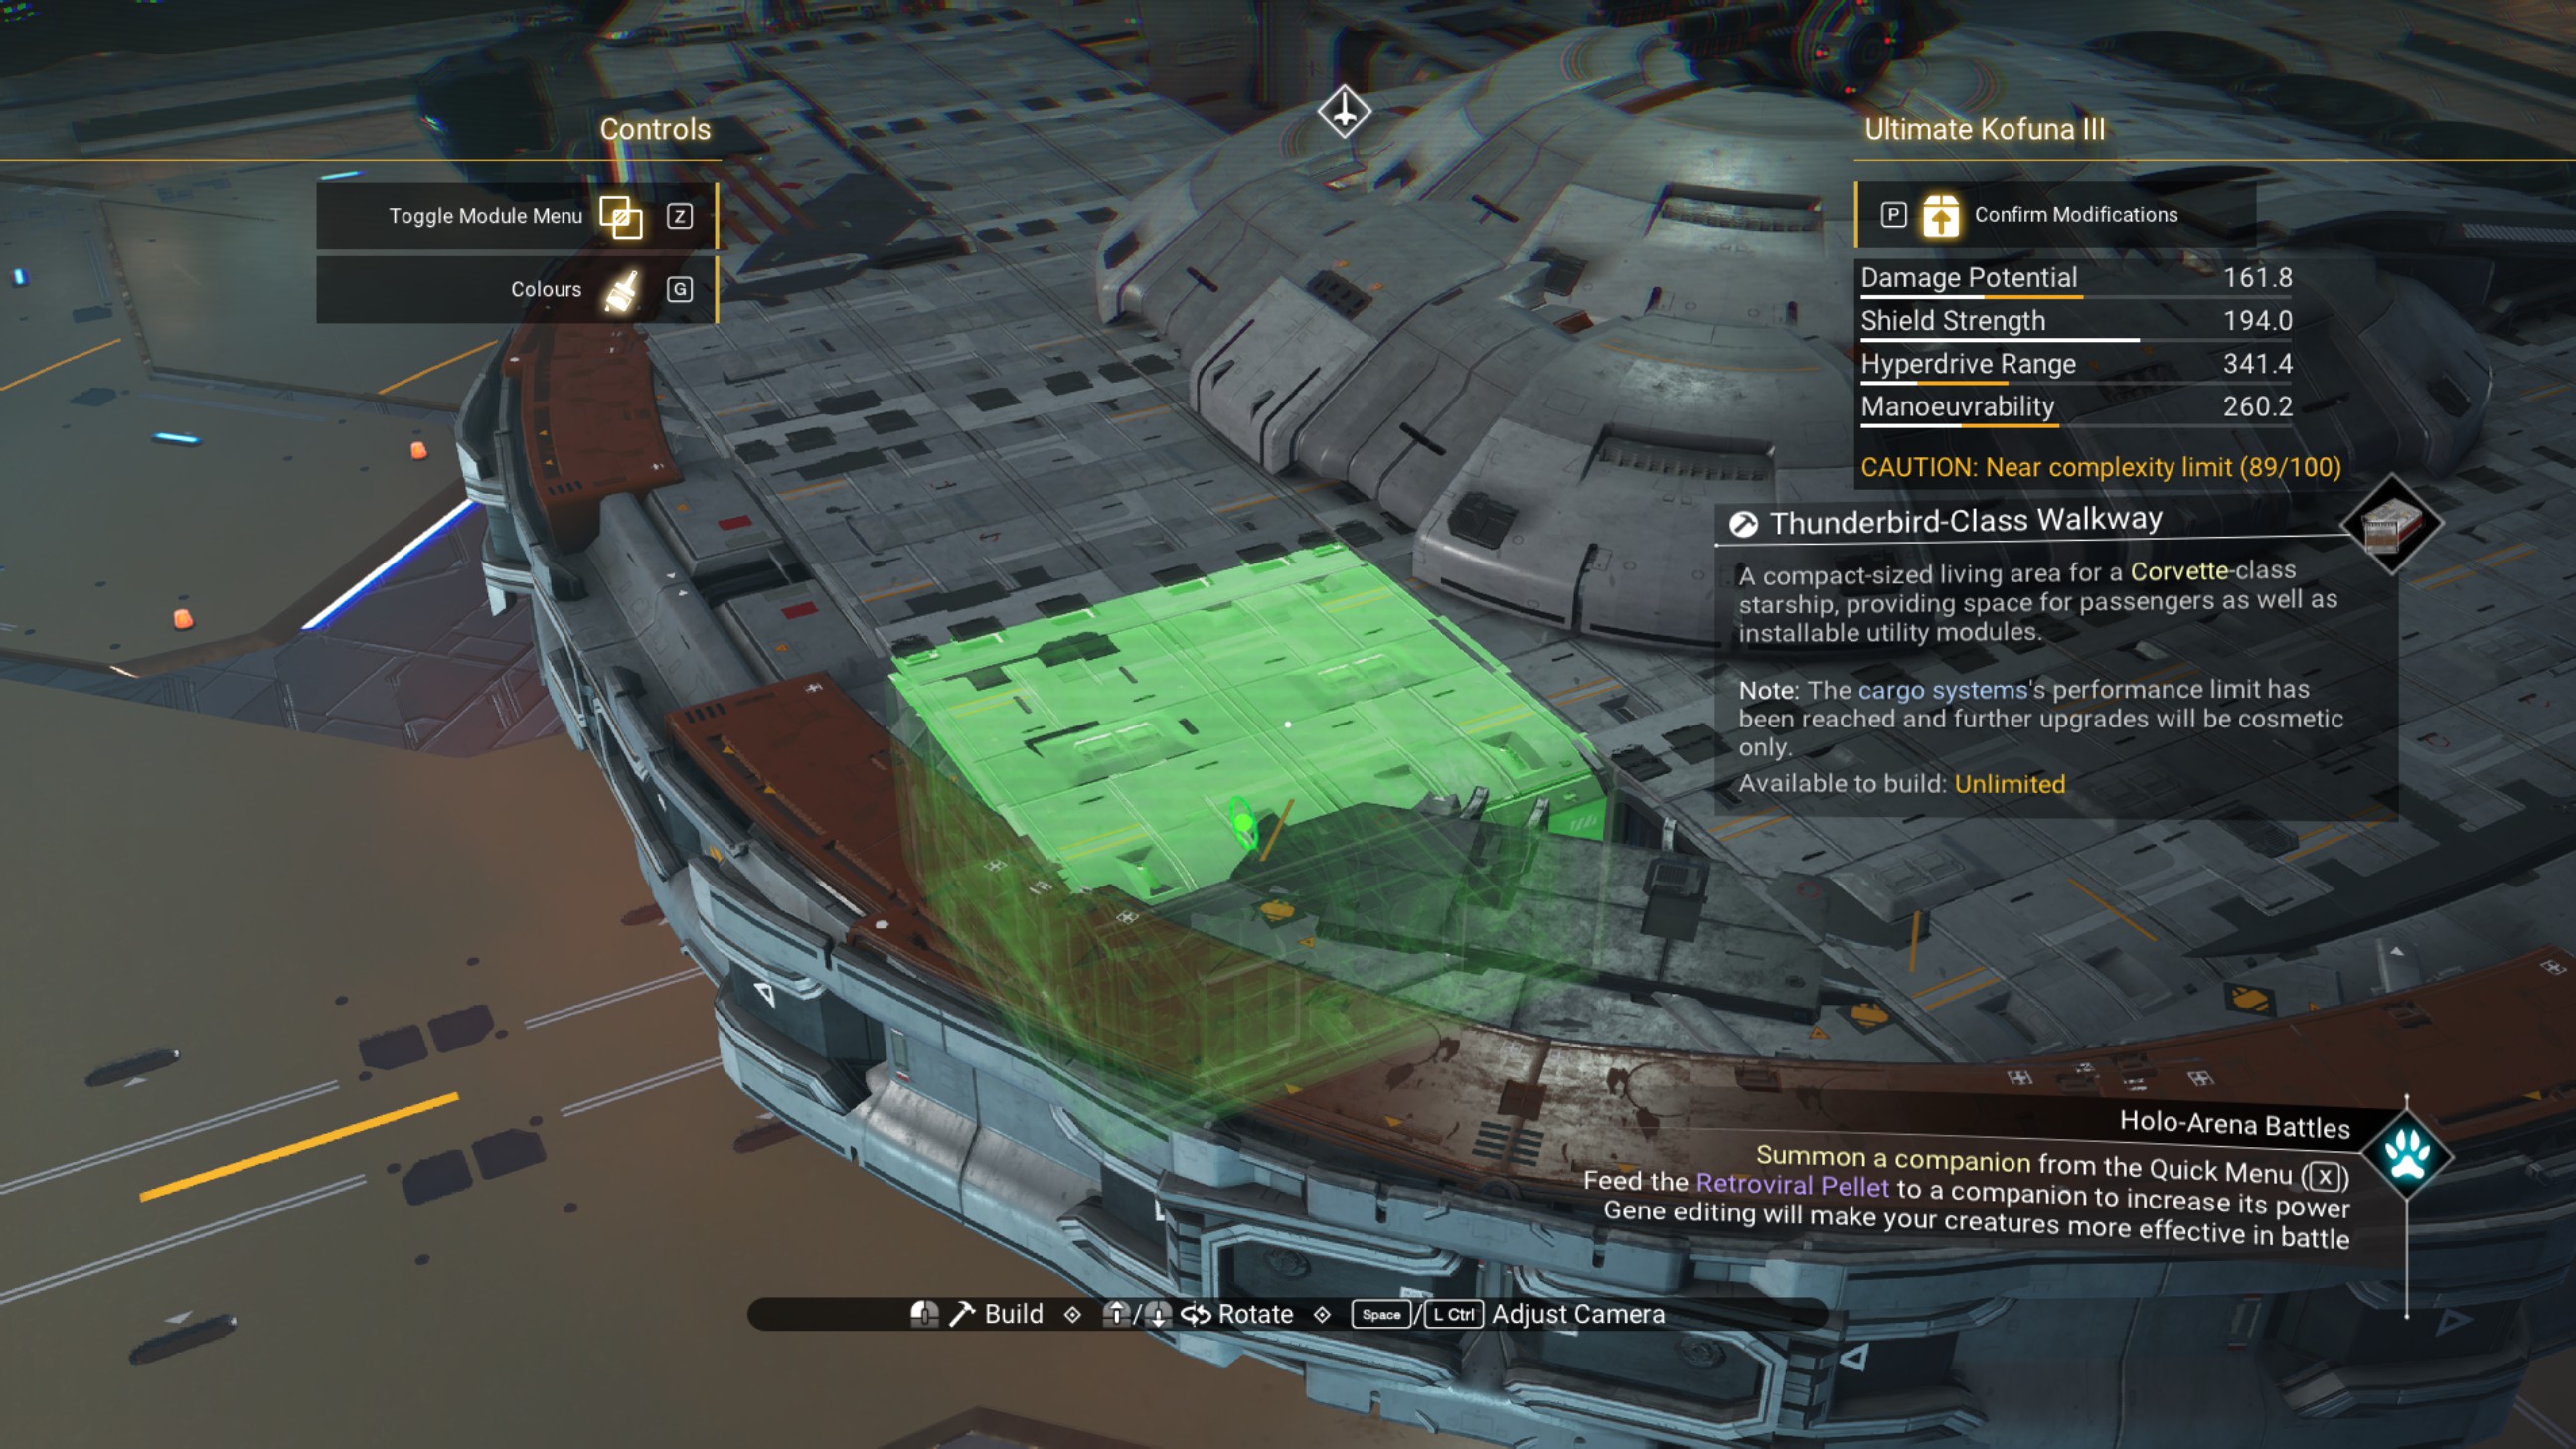
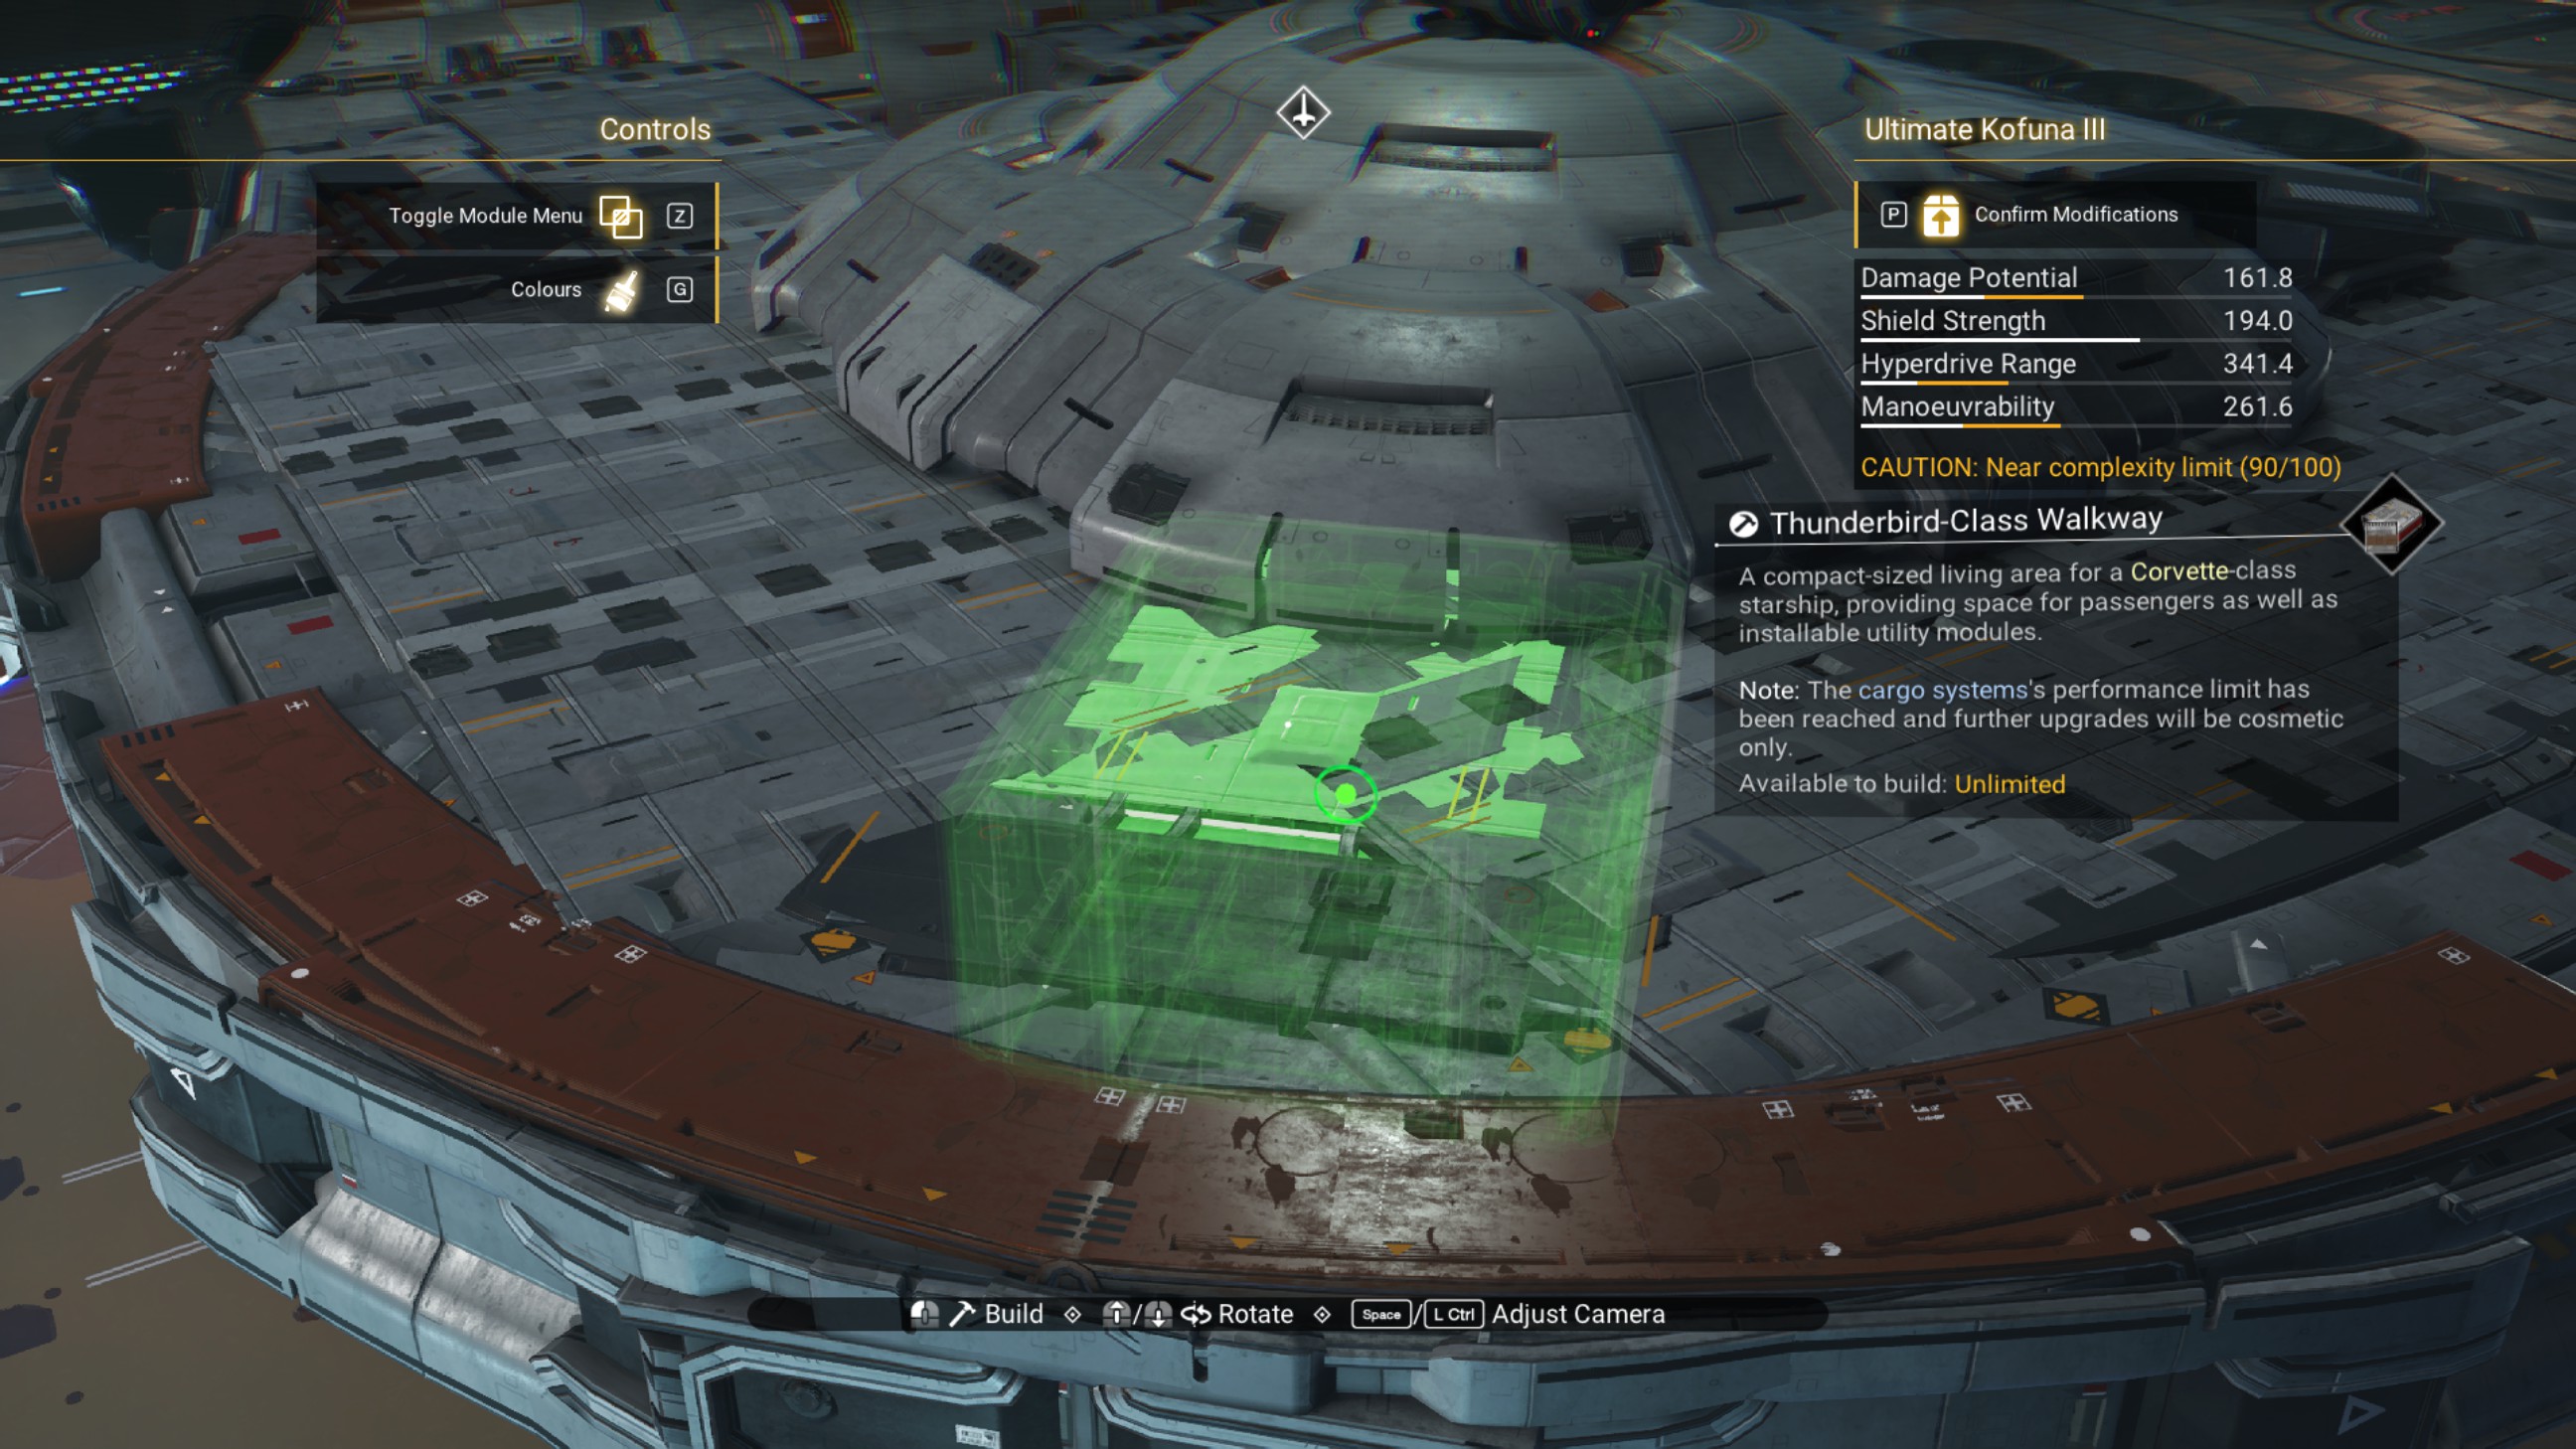
Now, for a free-placed angle. Start by placing a walkway under the saucer, on the port side of the ship, as shown.
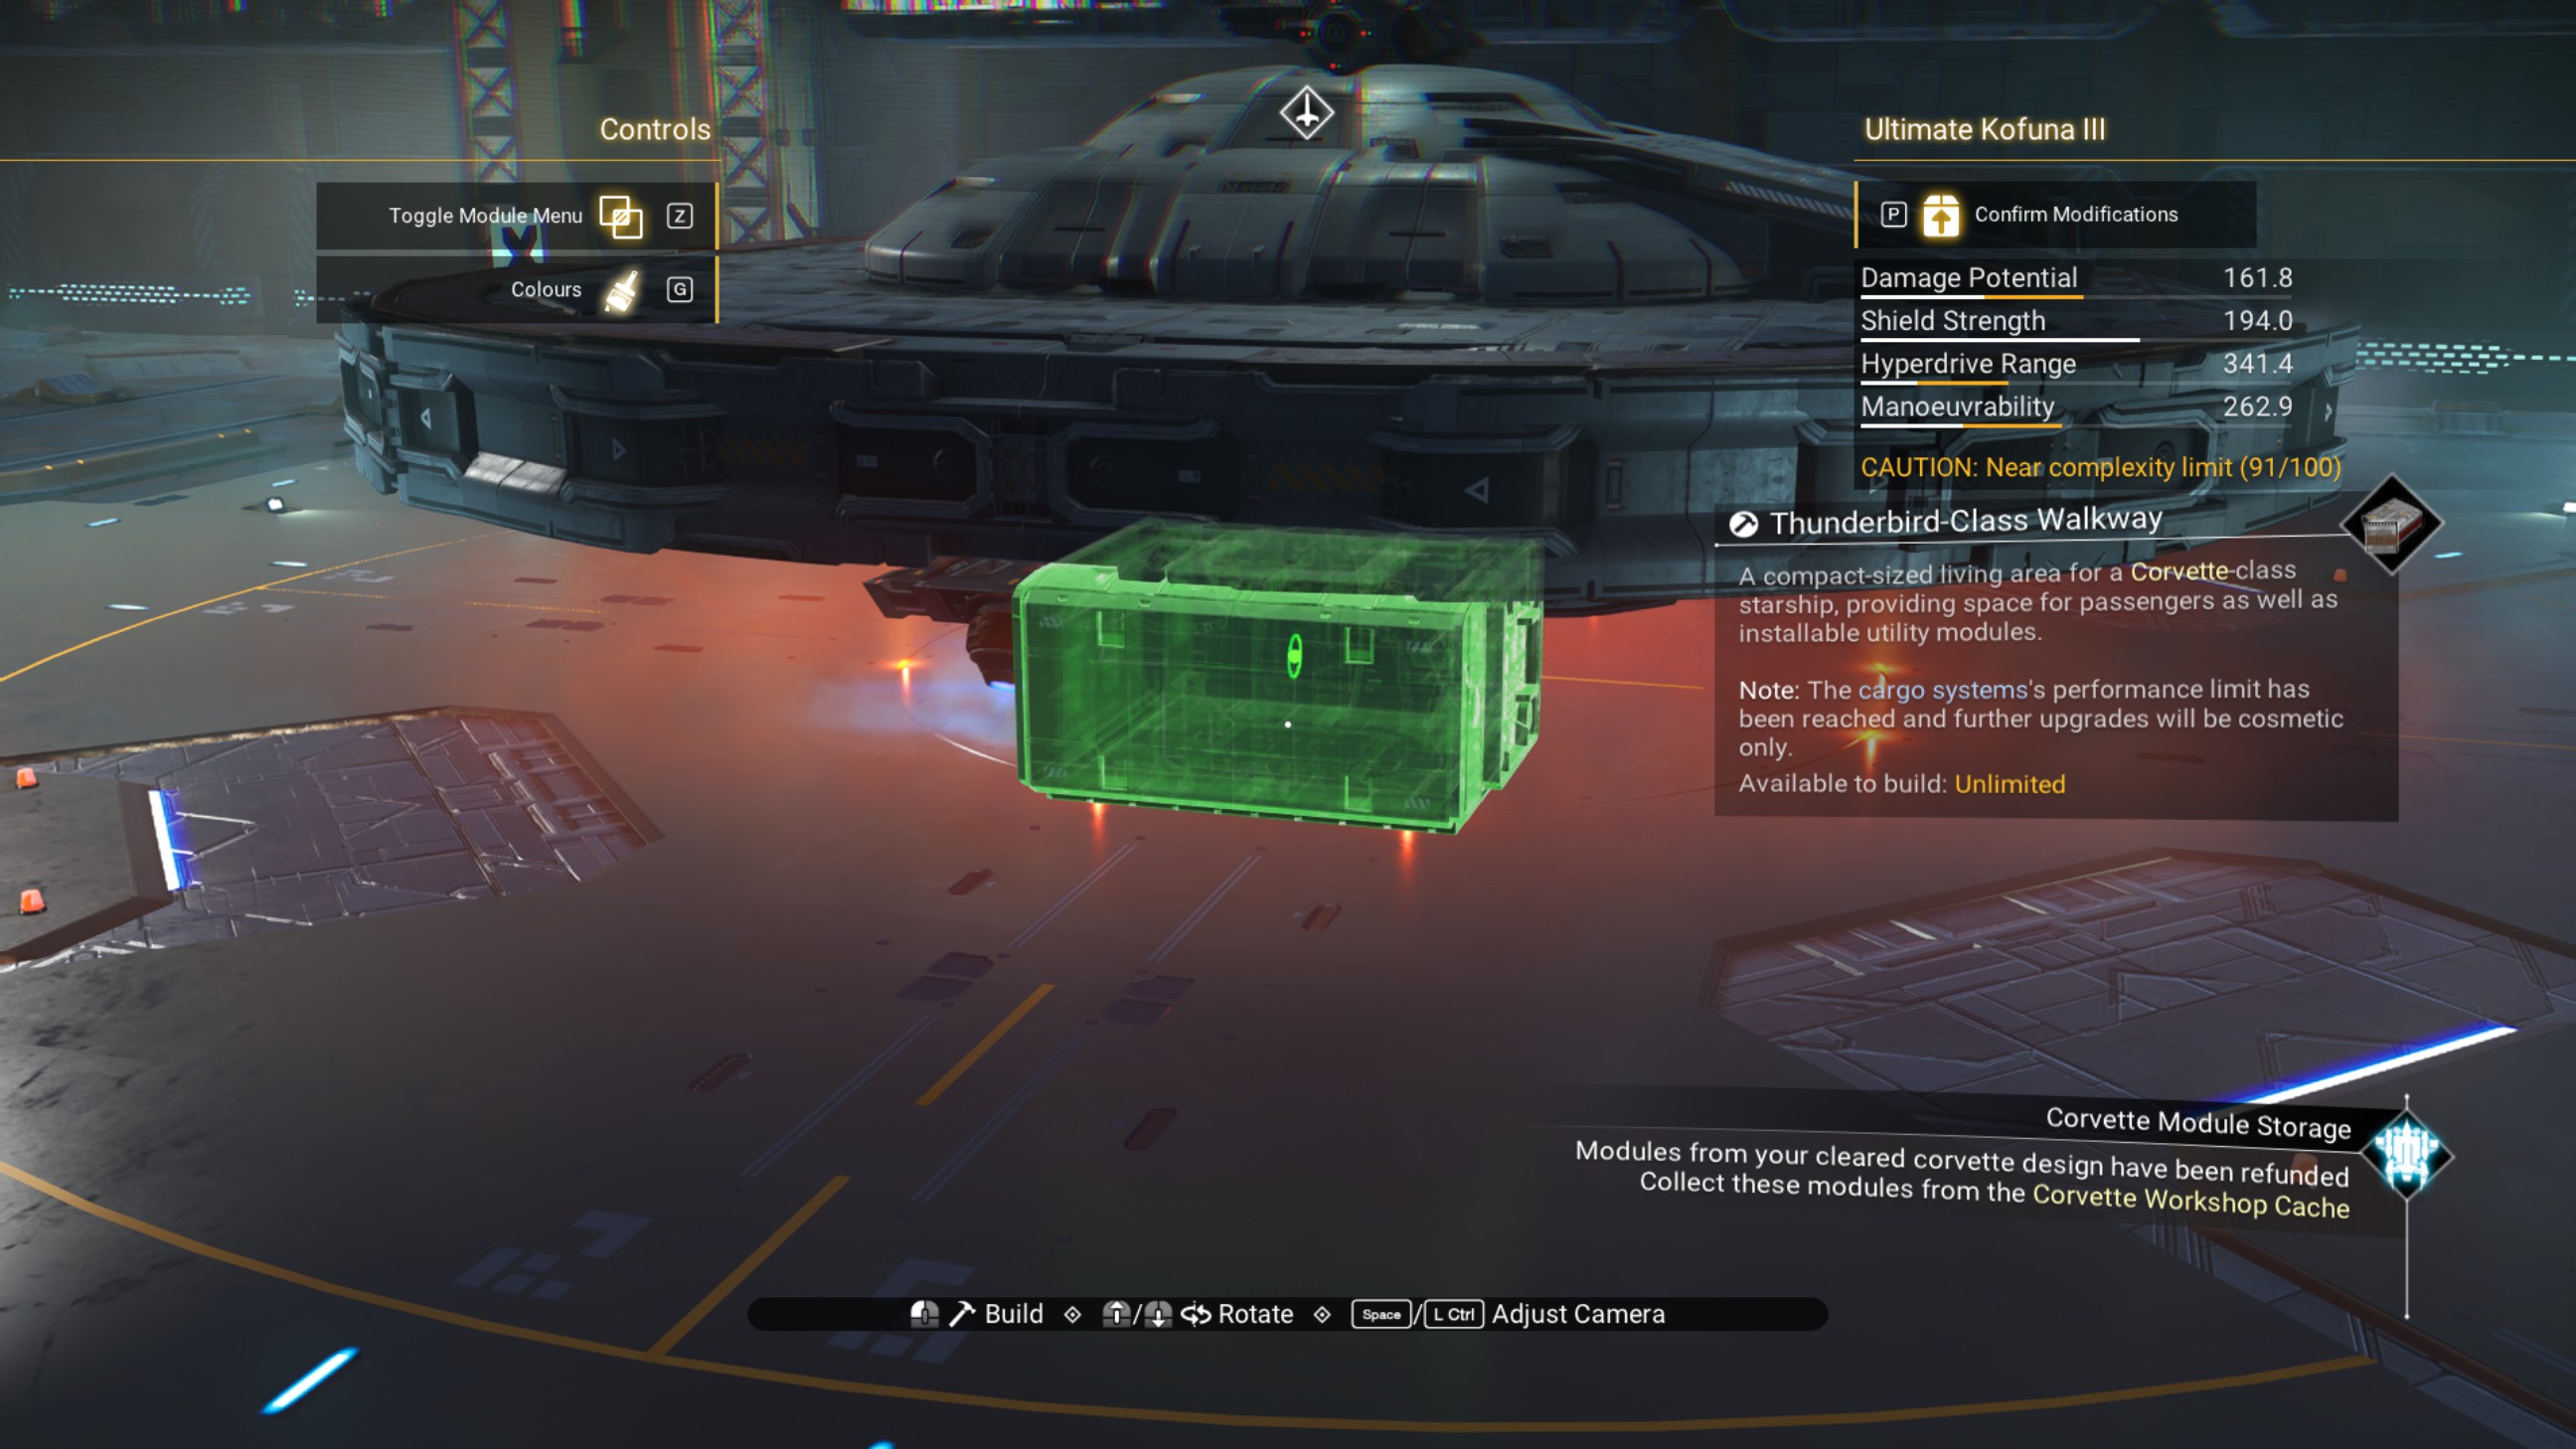
Place another walkway below that, then one out on the port side.
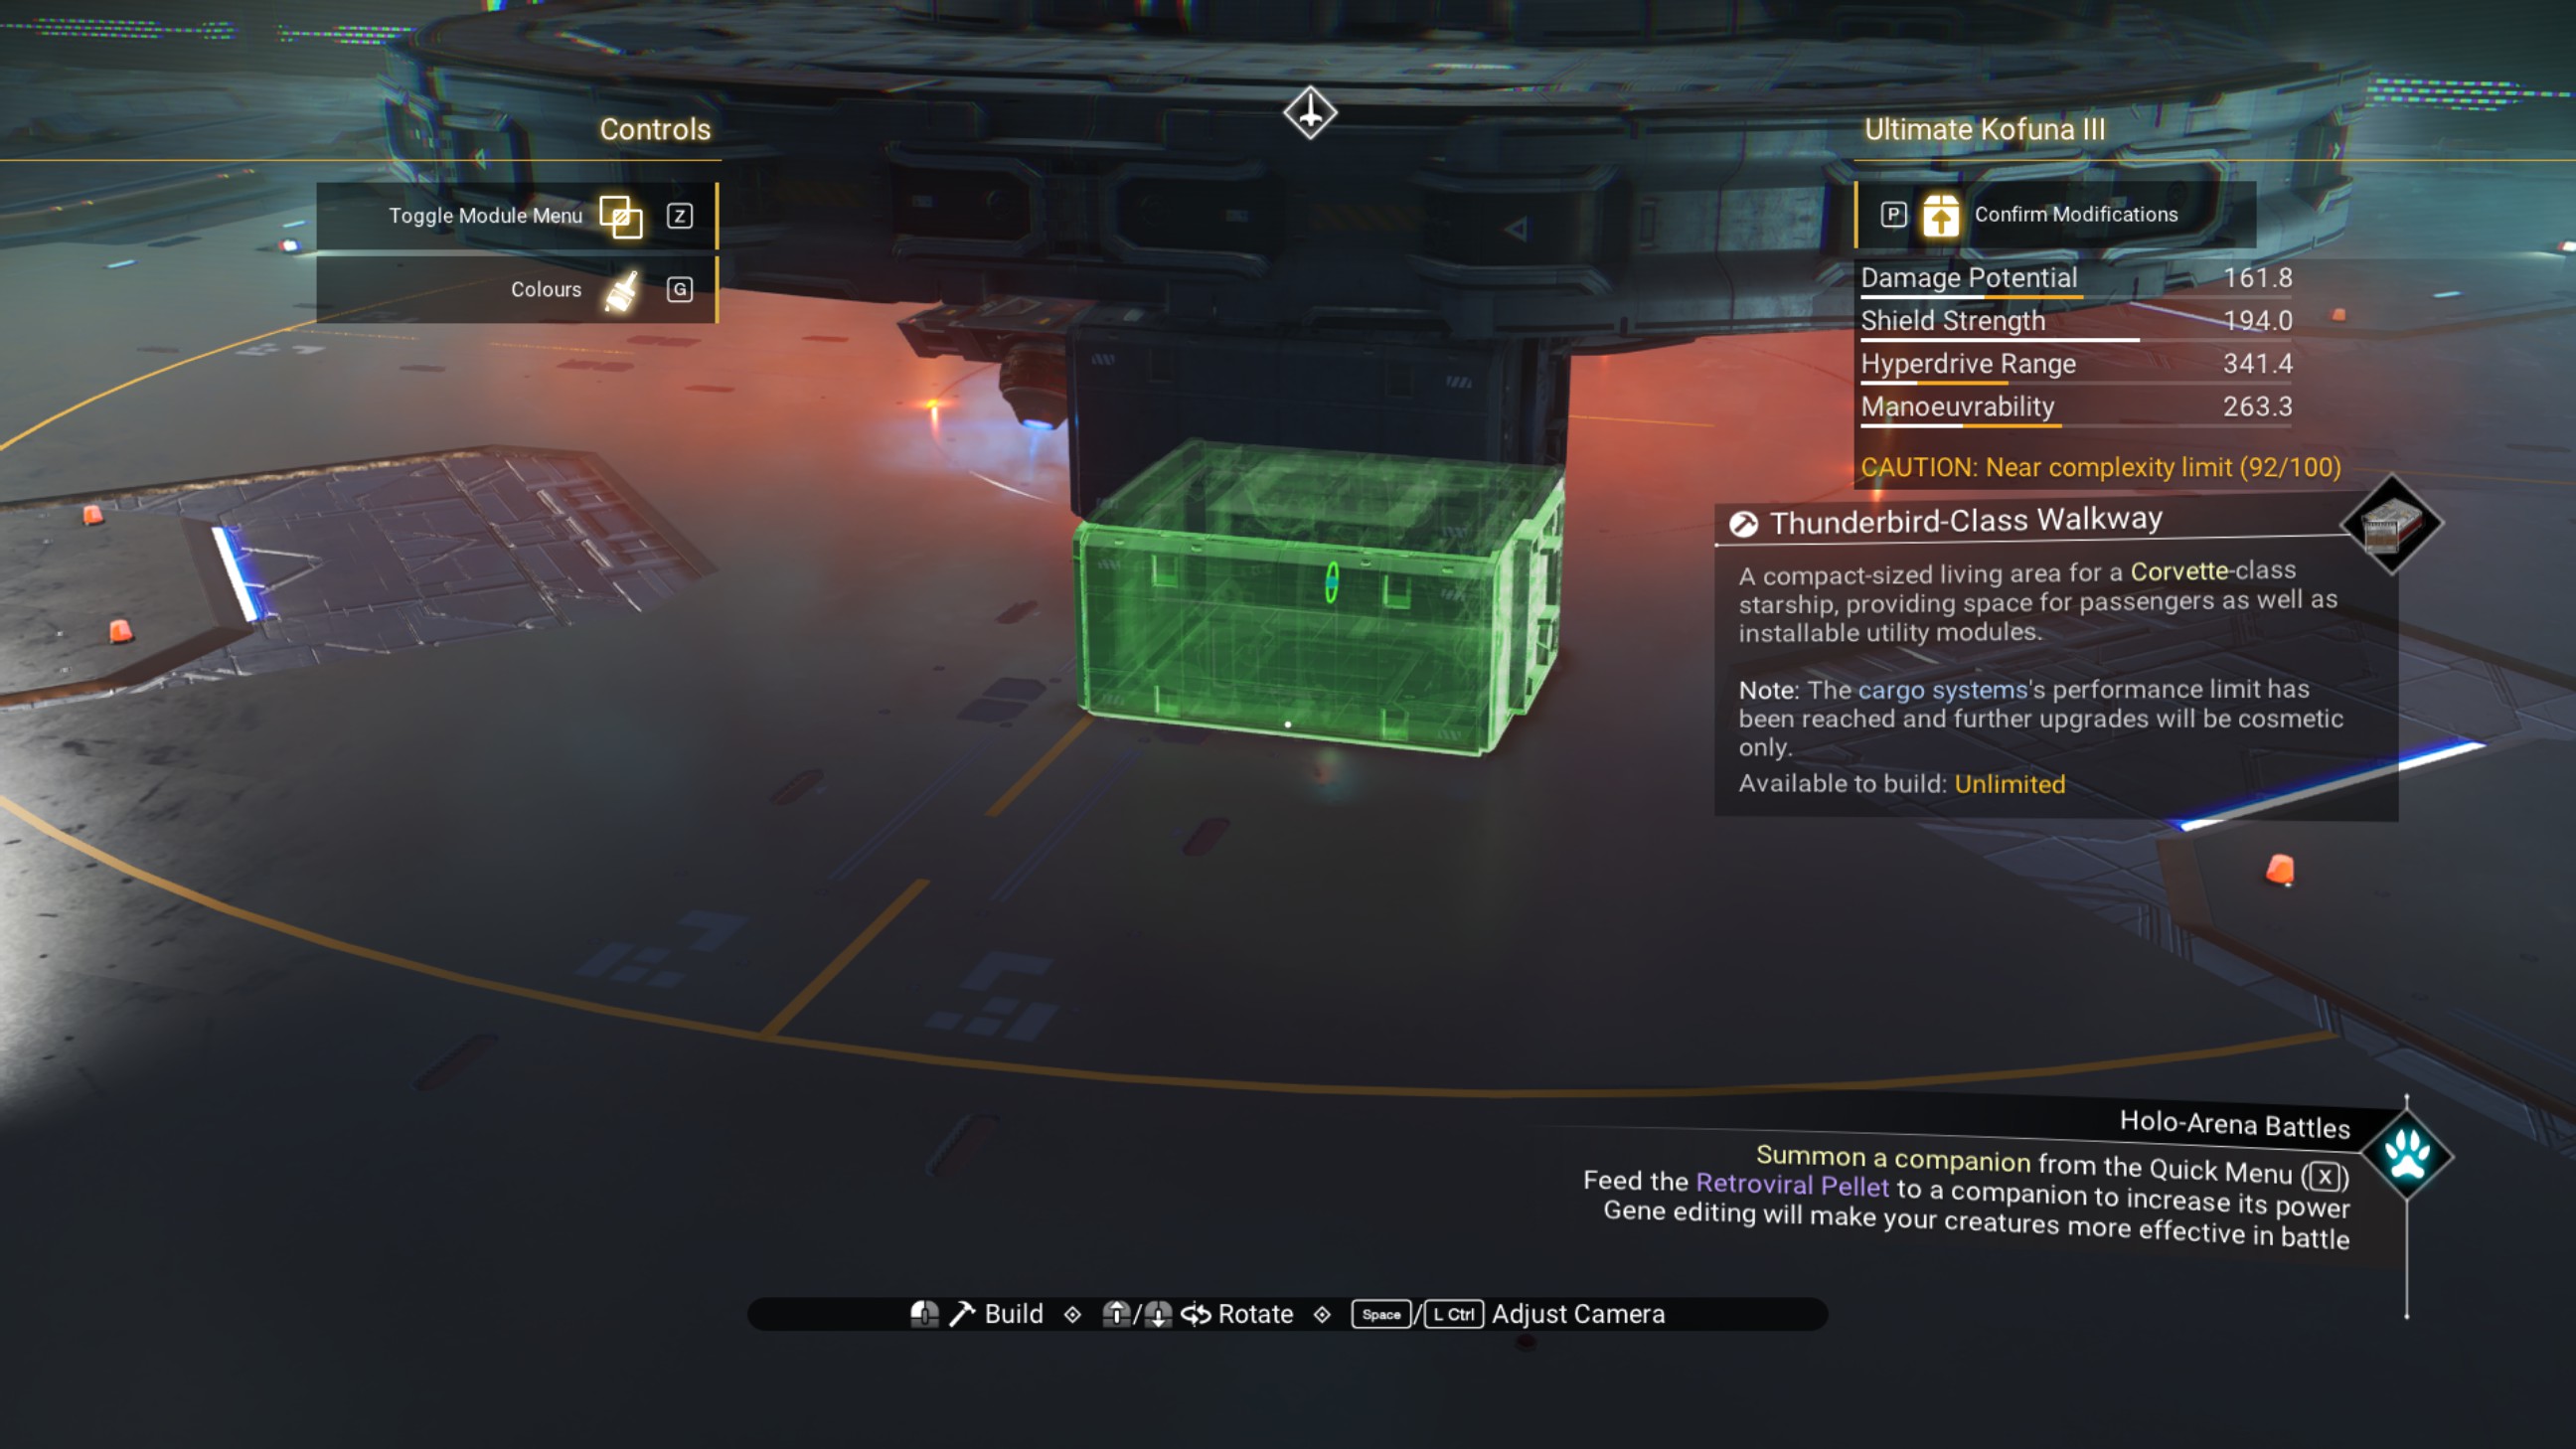
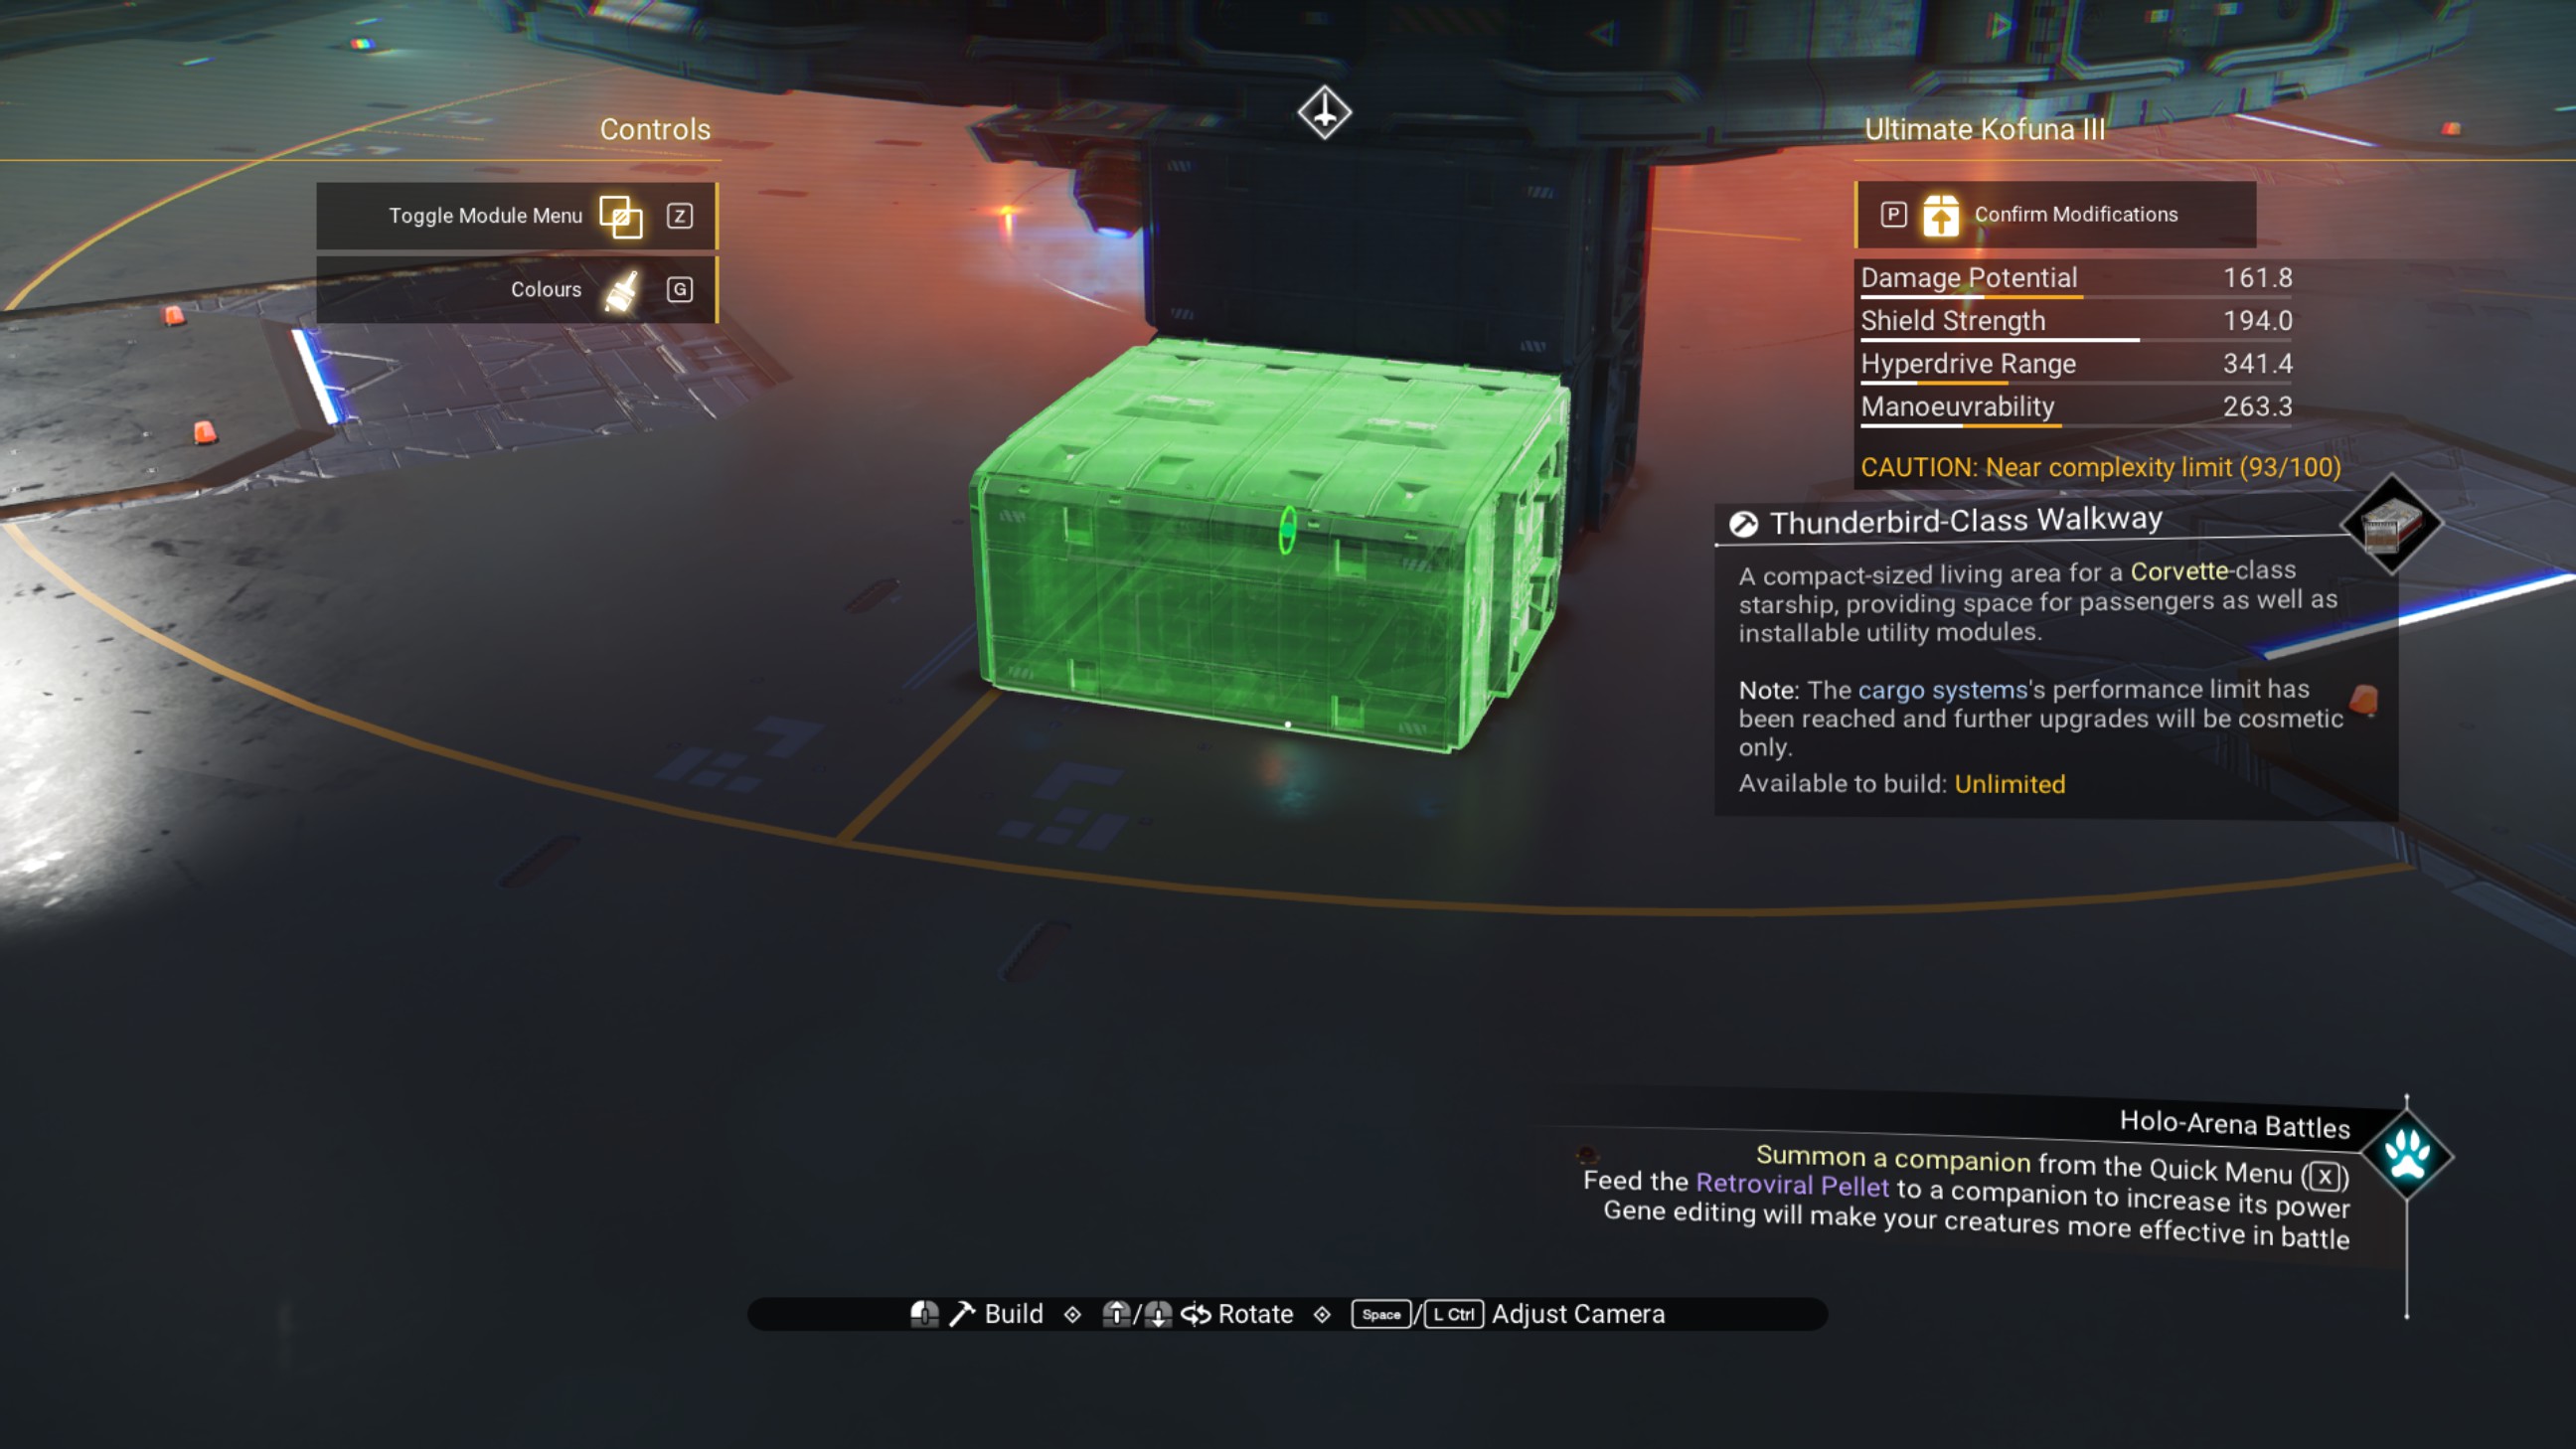
Place one walkway behind that, then another on that one's port side.
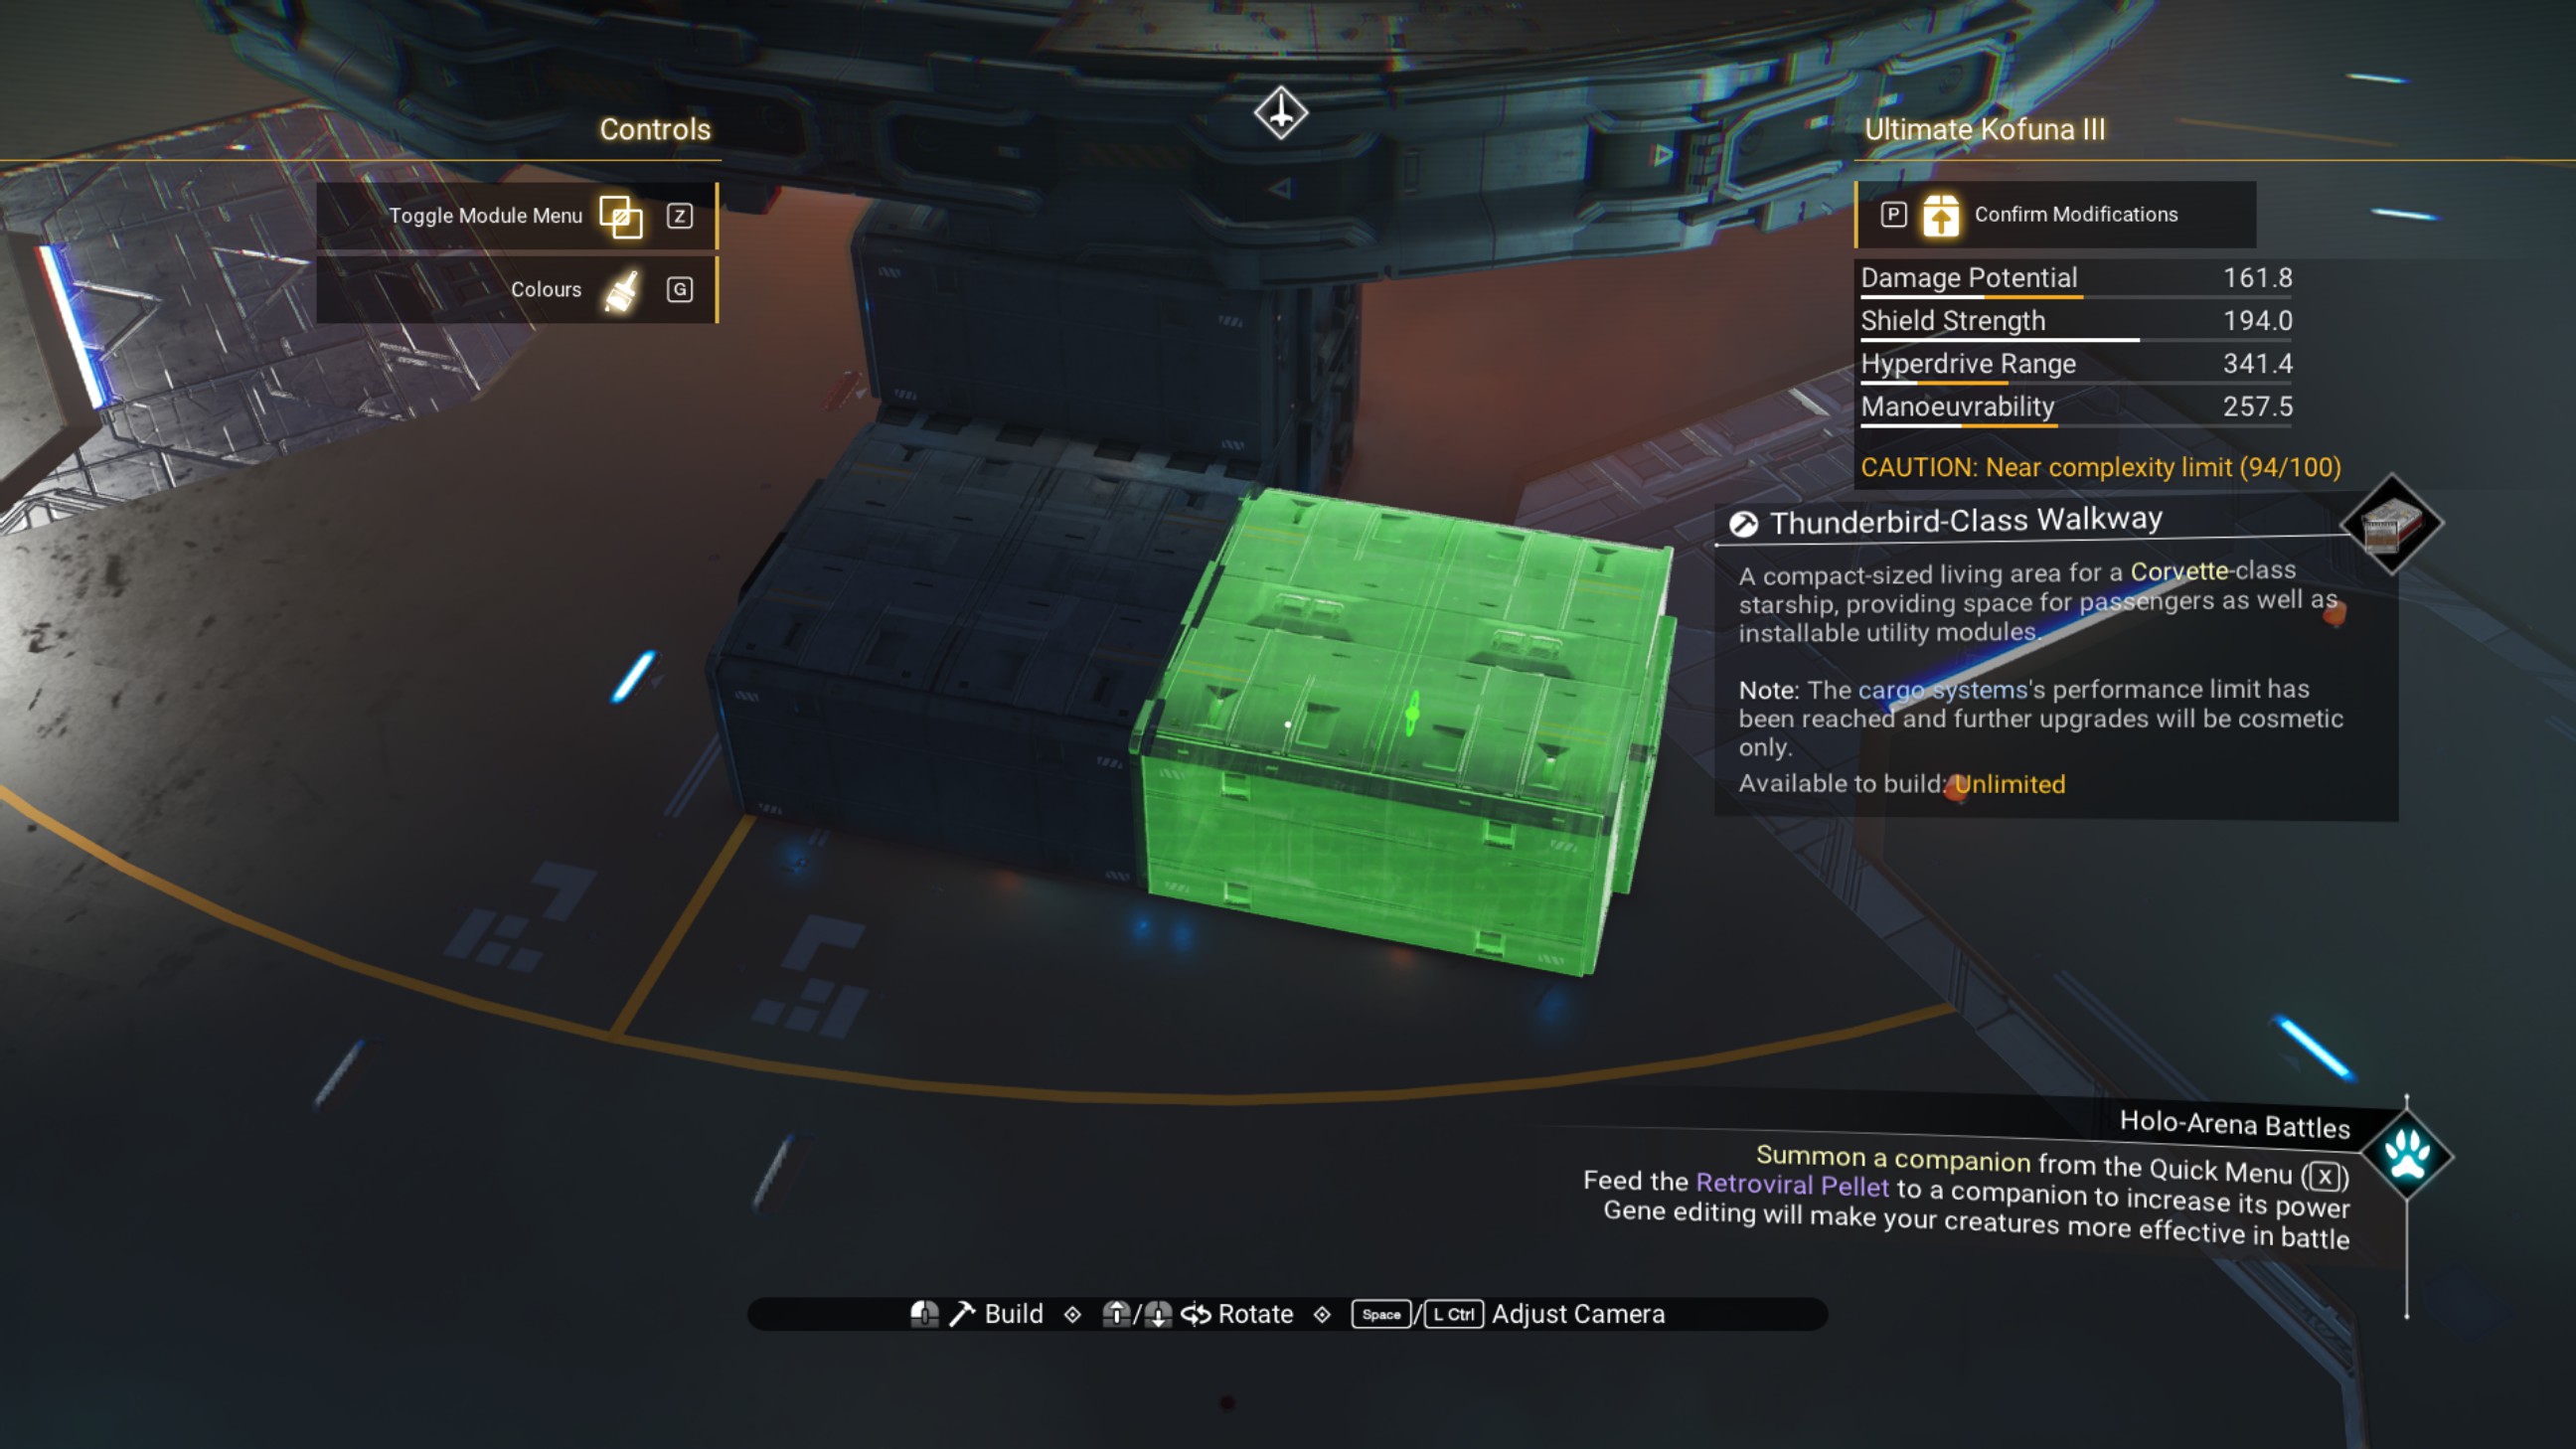
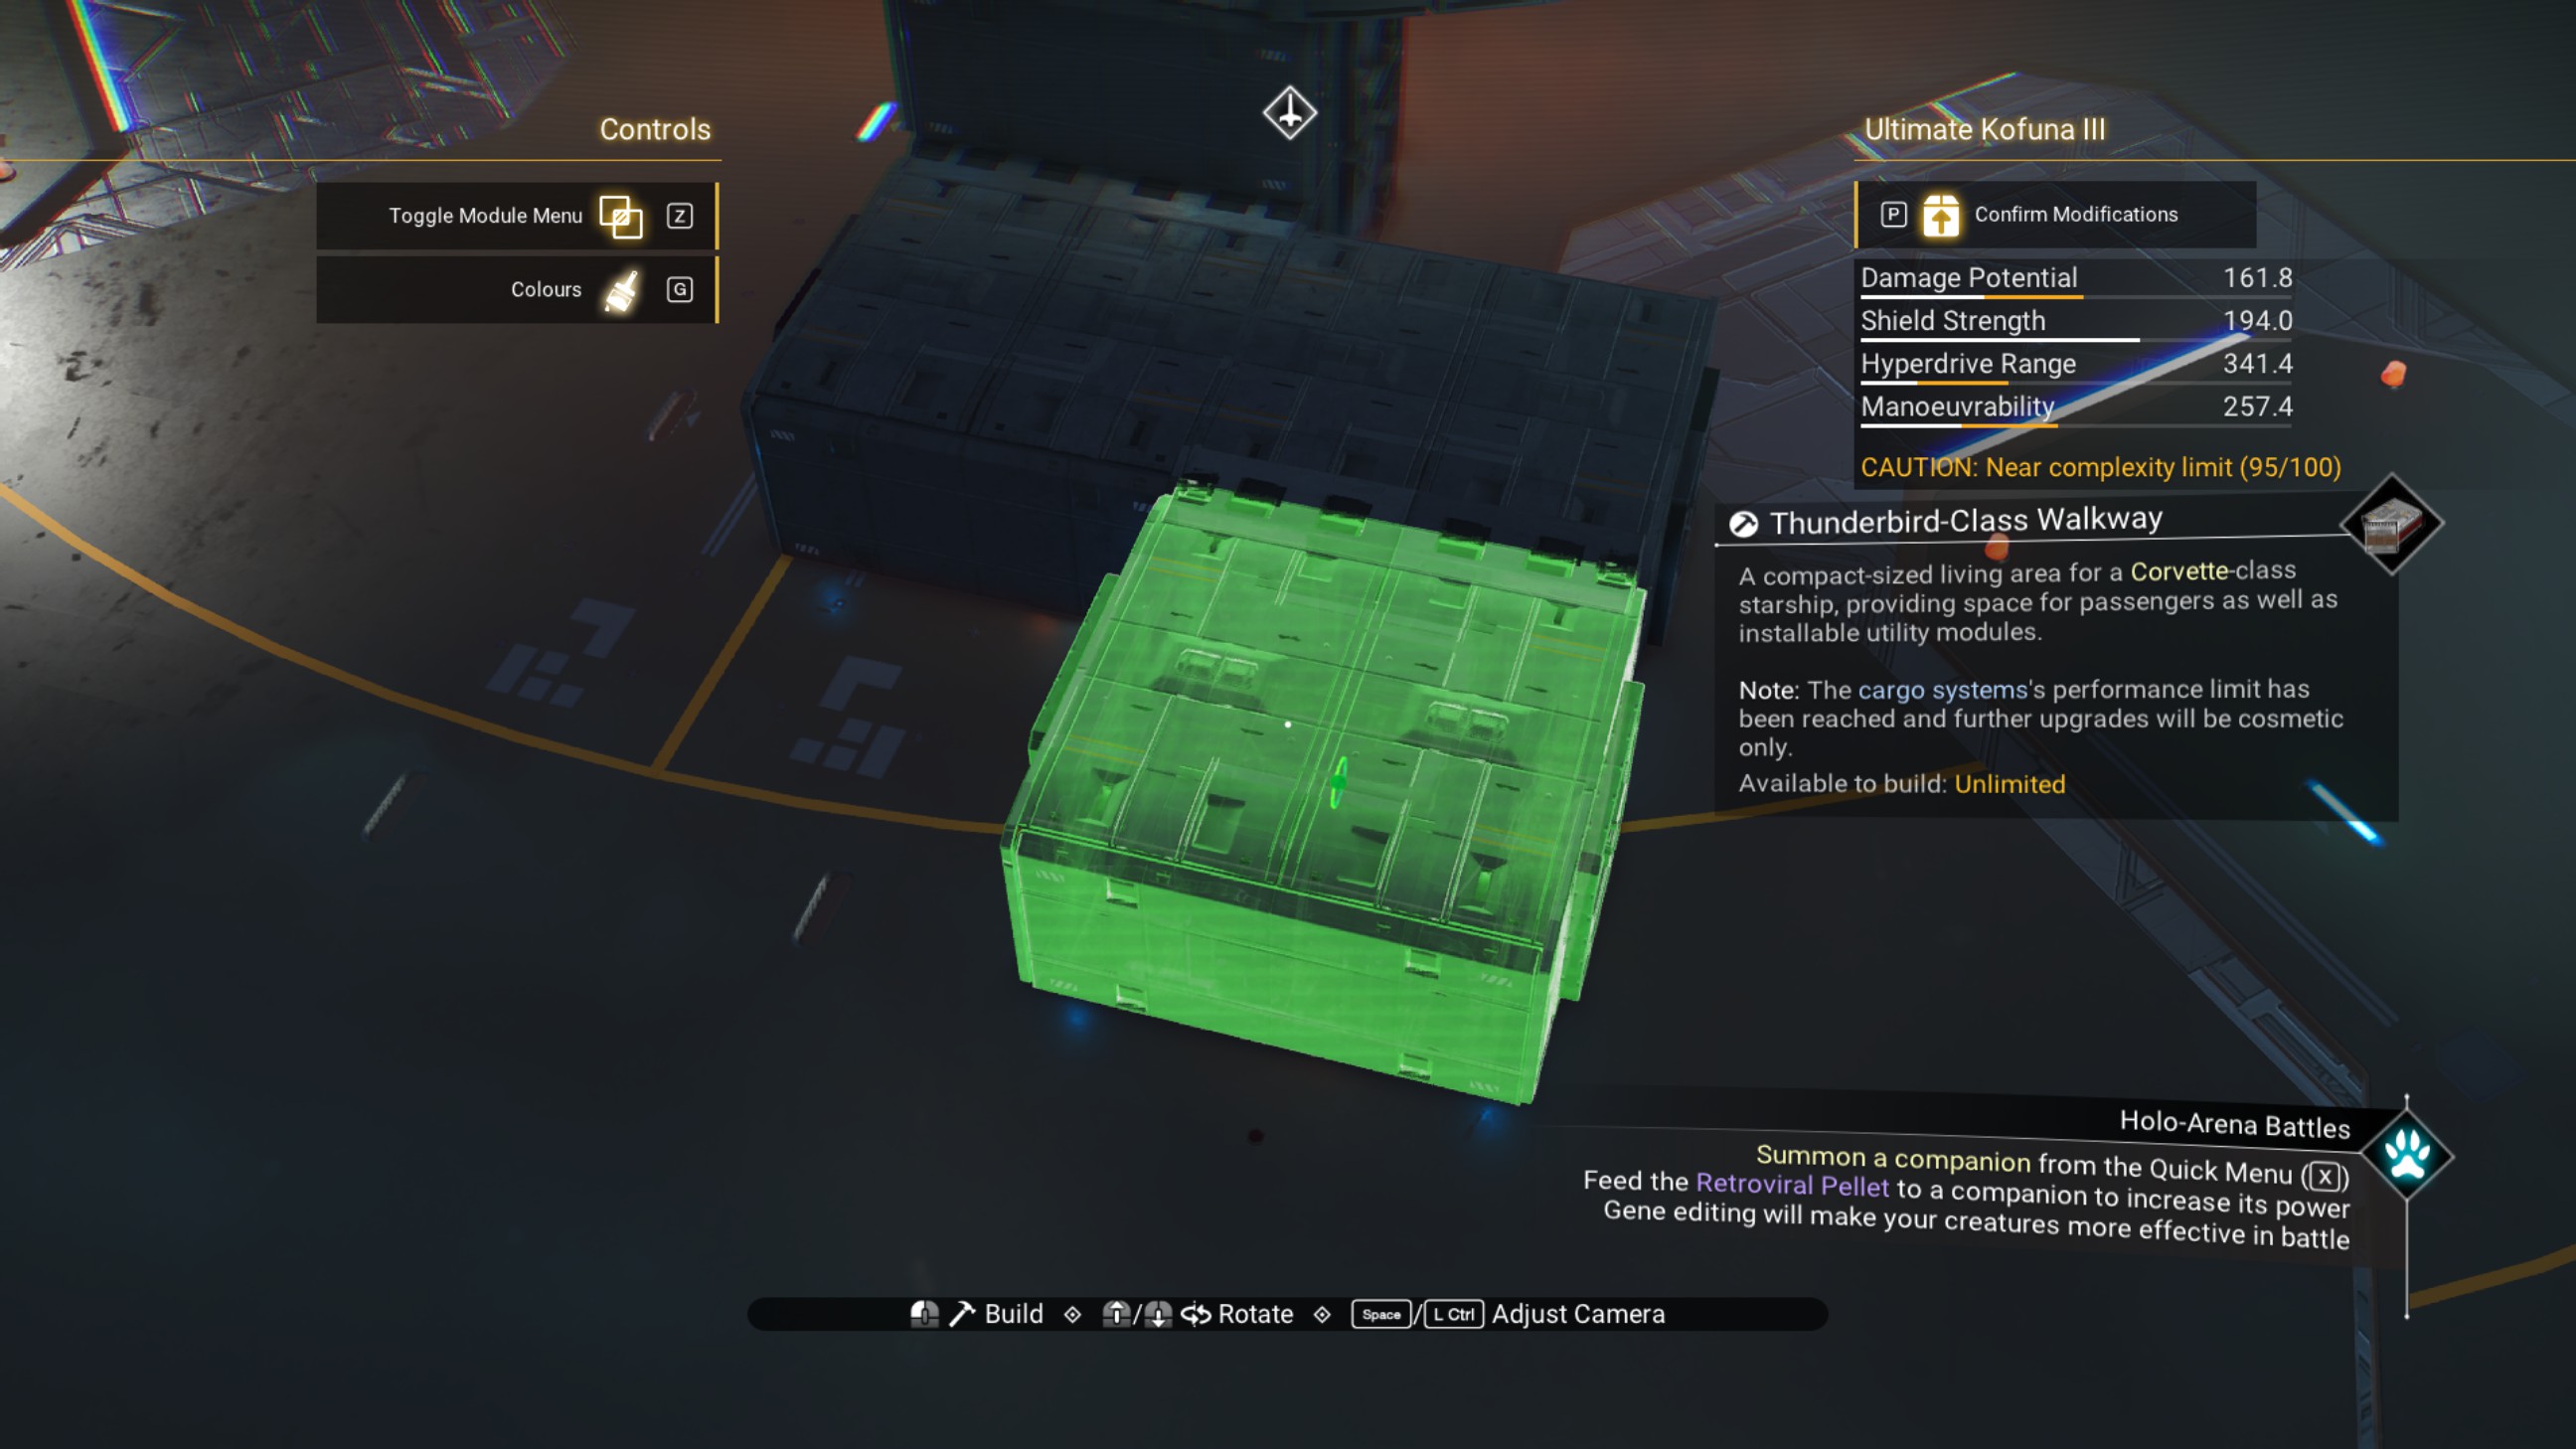
Place a zenith reactor behind that last walkway, then one on top of the walkway.
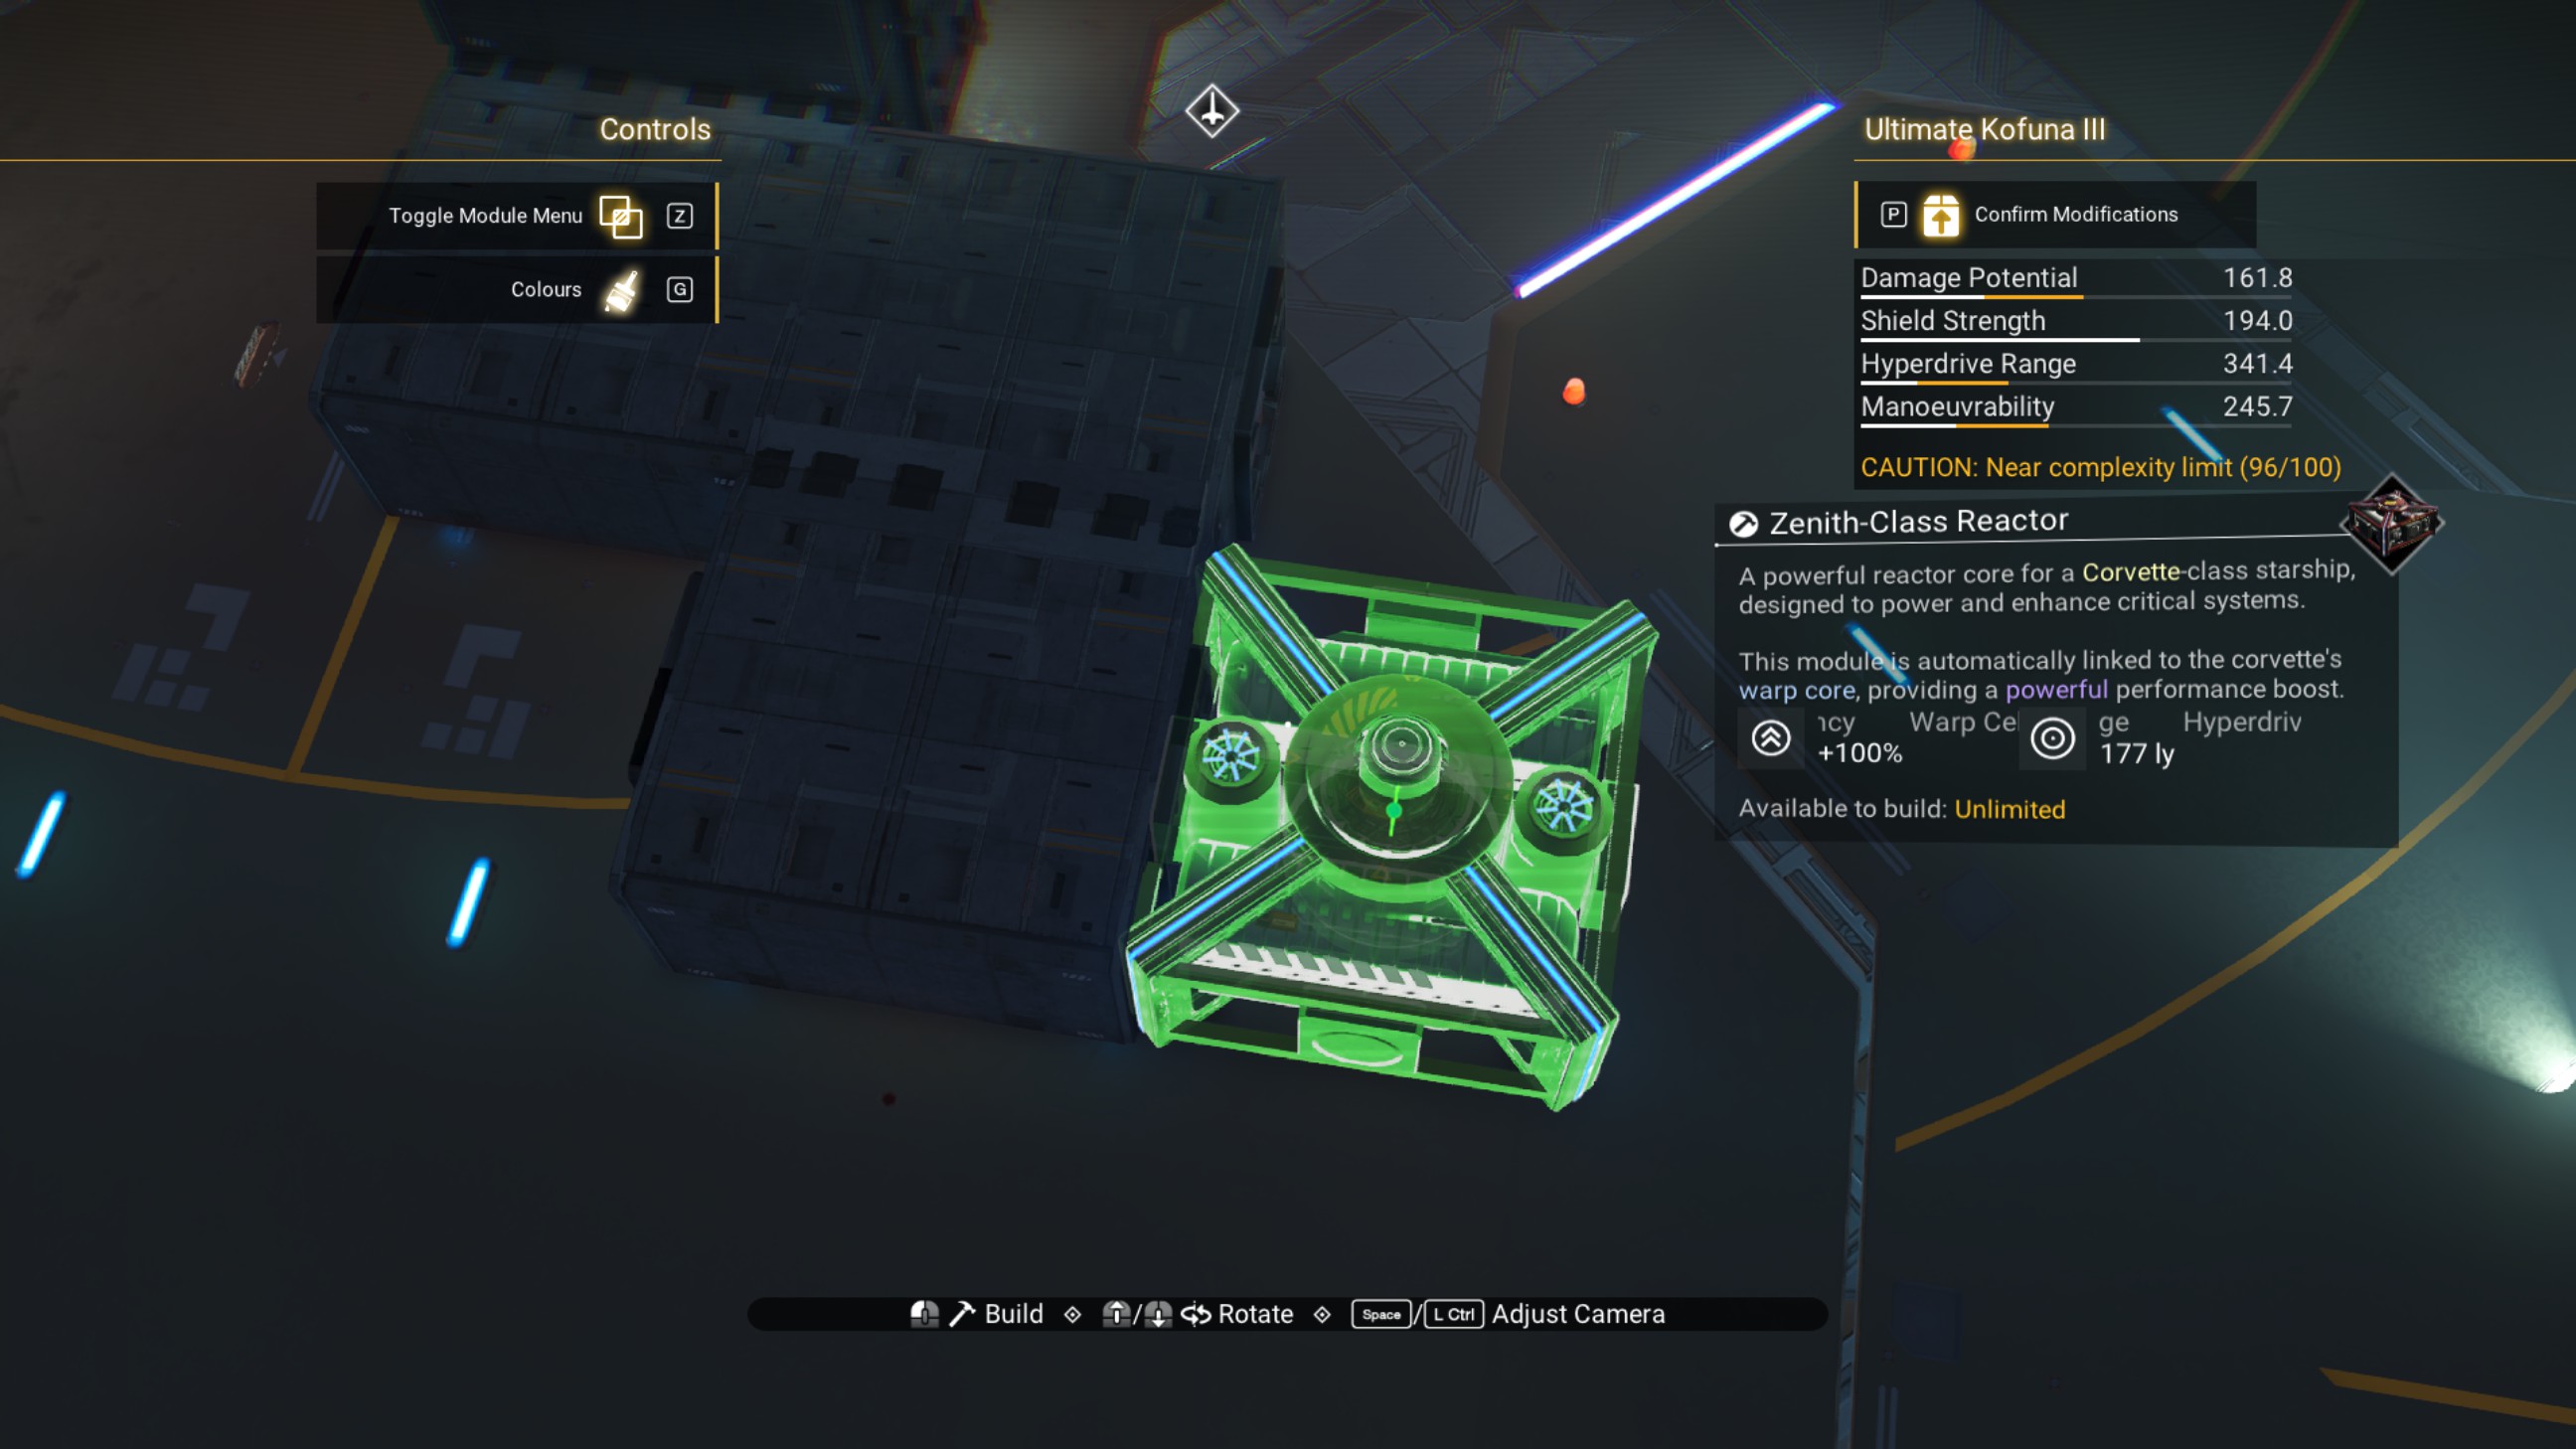
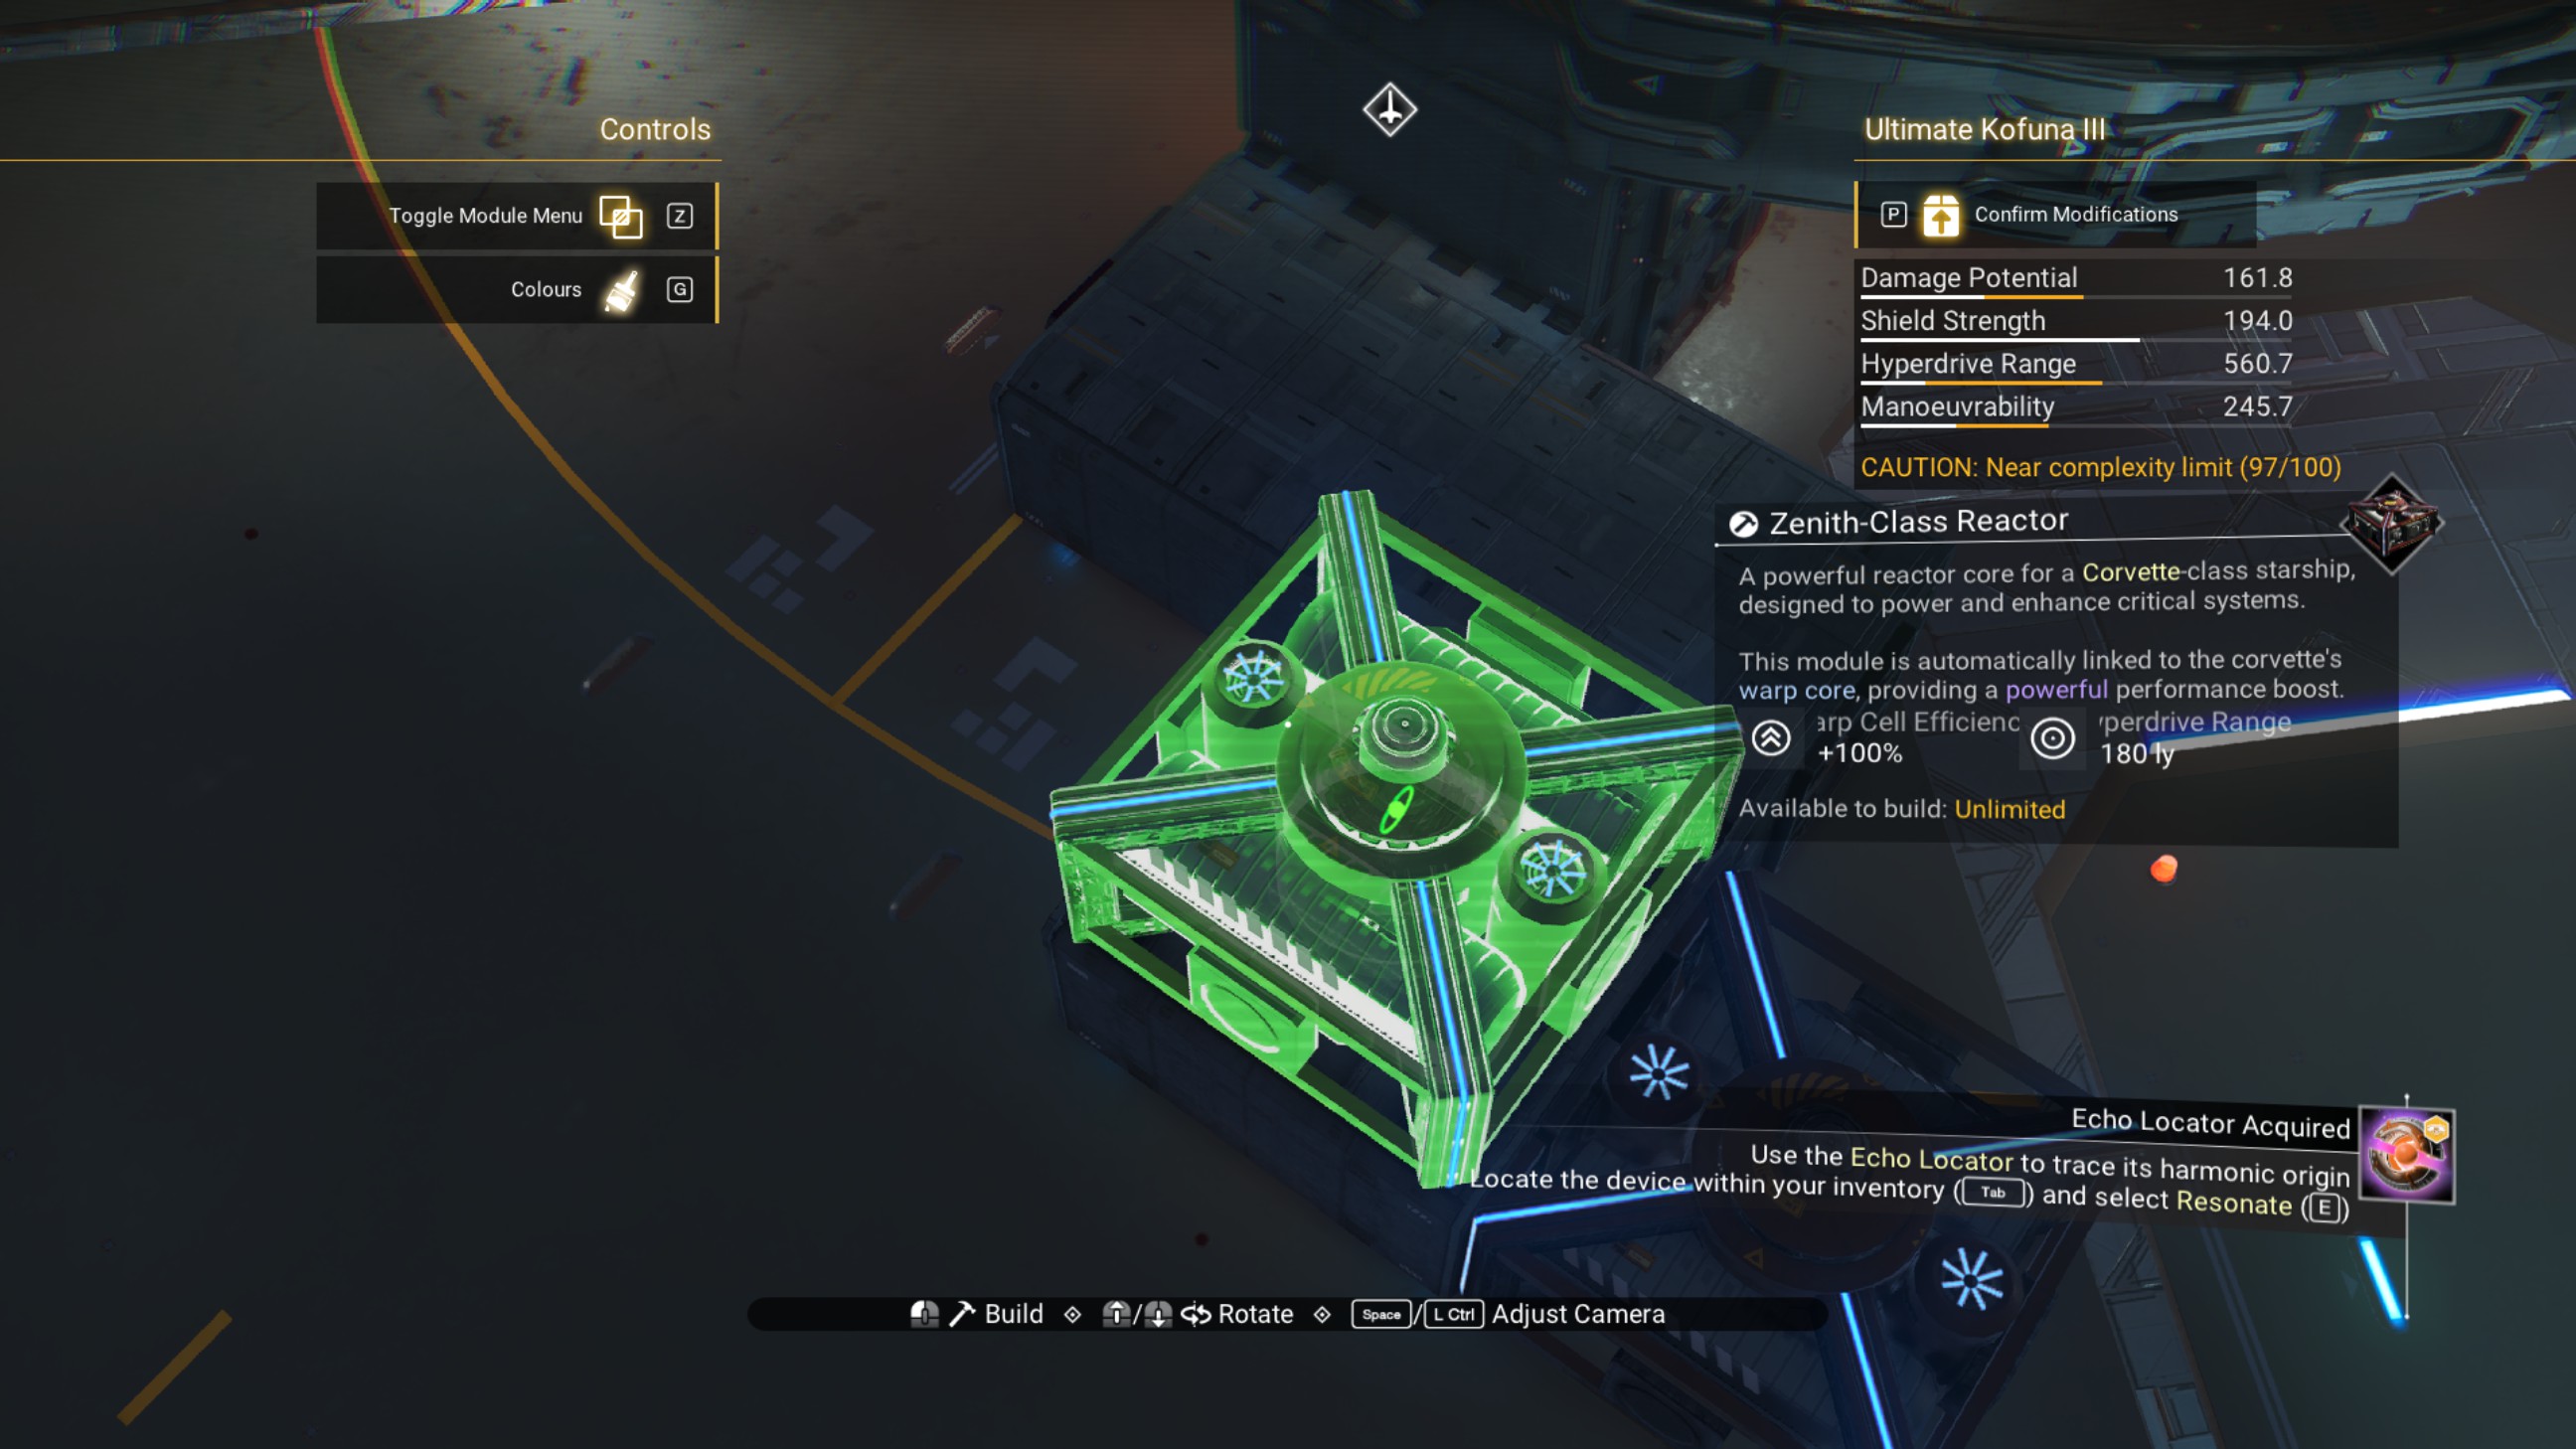
Place another zenith reactor on the front of the top reactor, then delete the walkway below them.
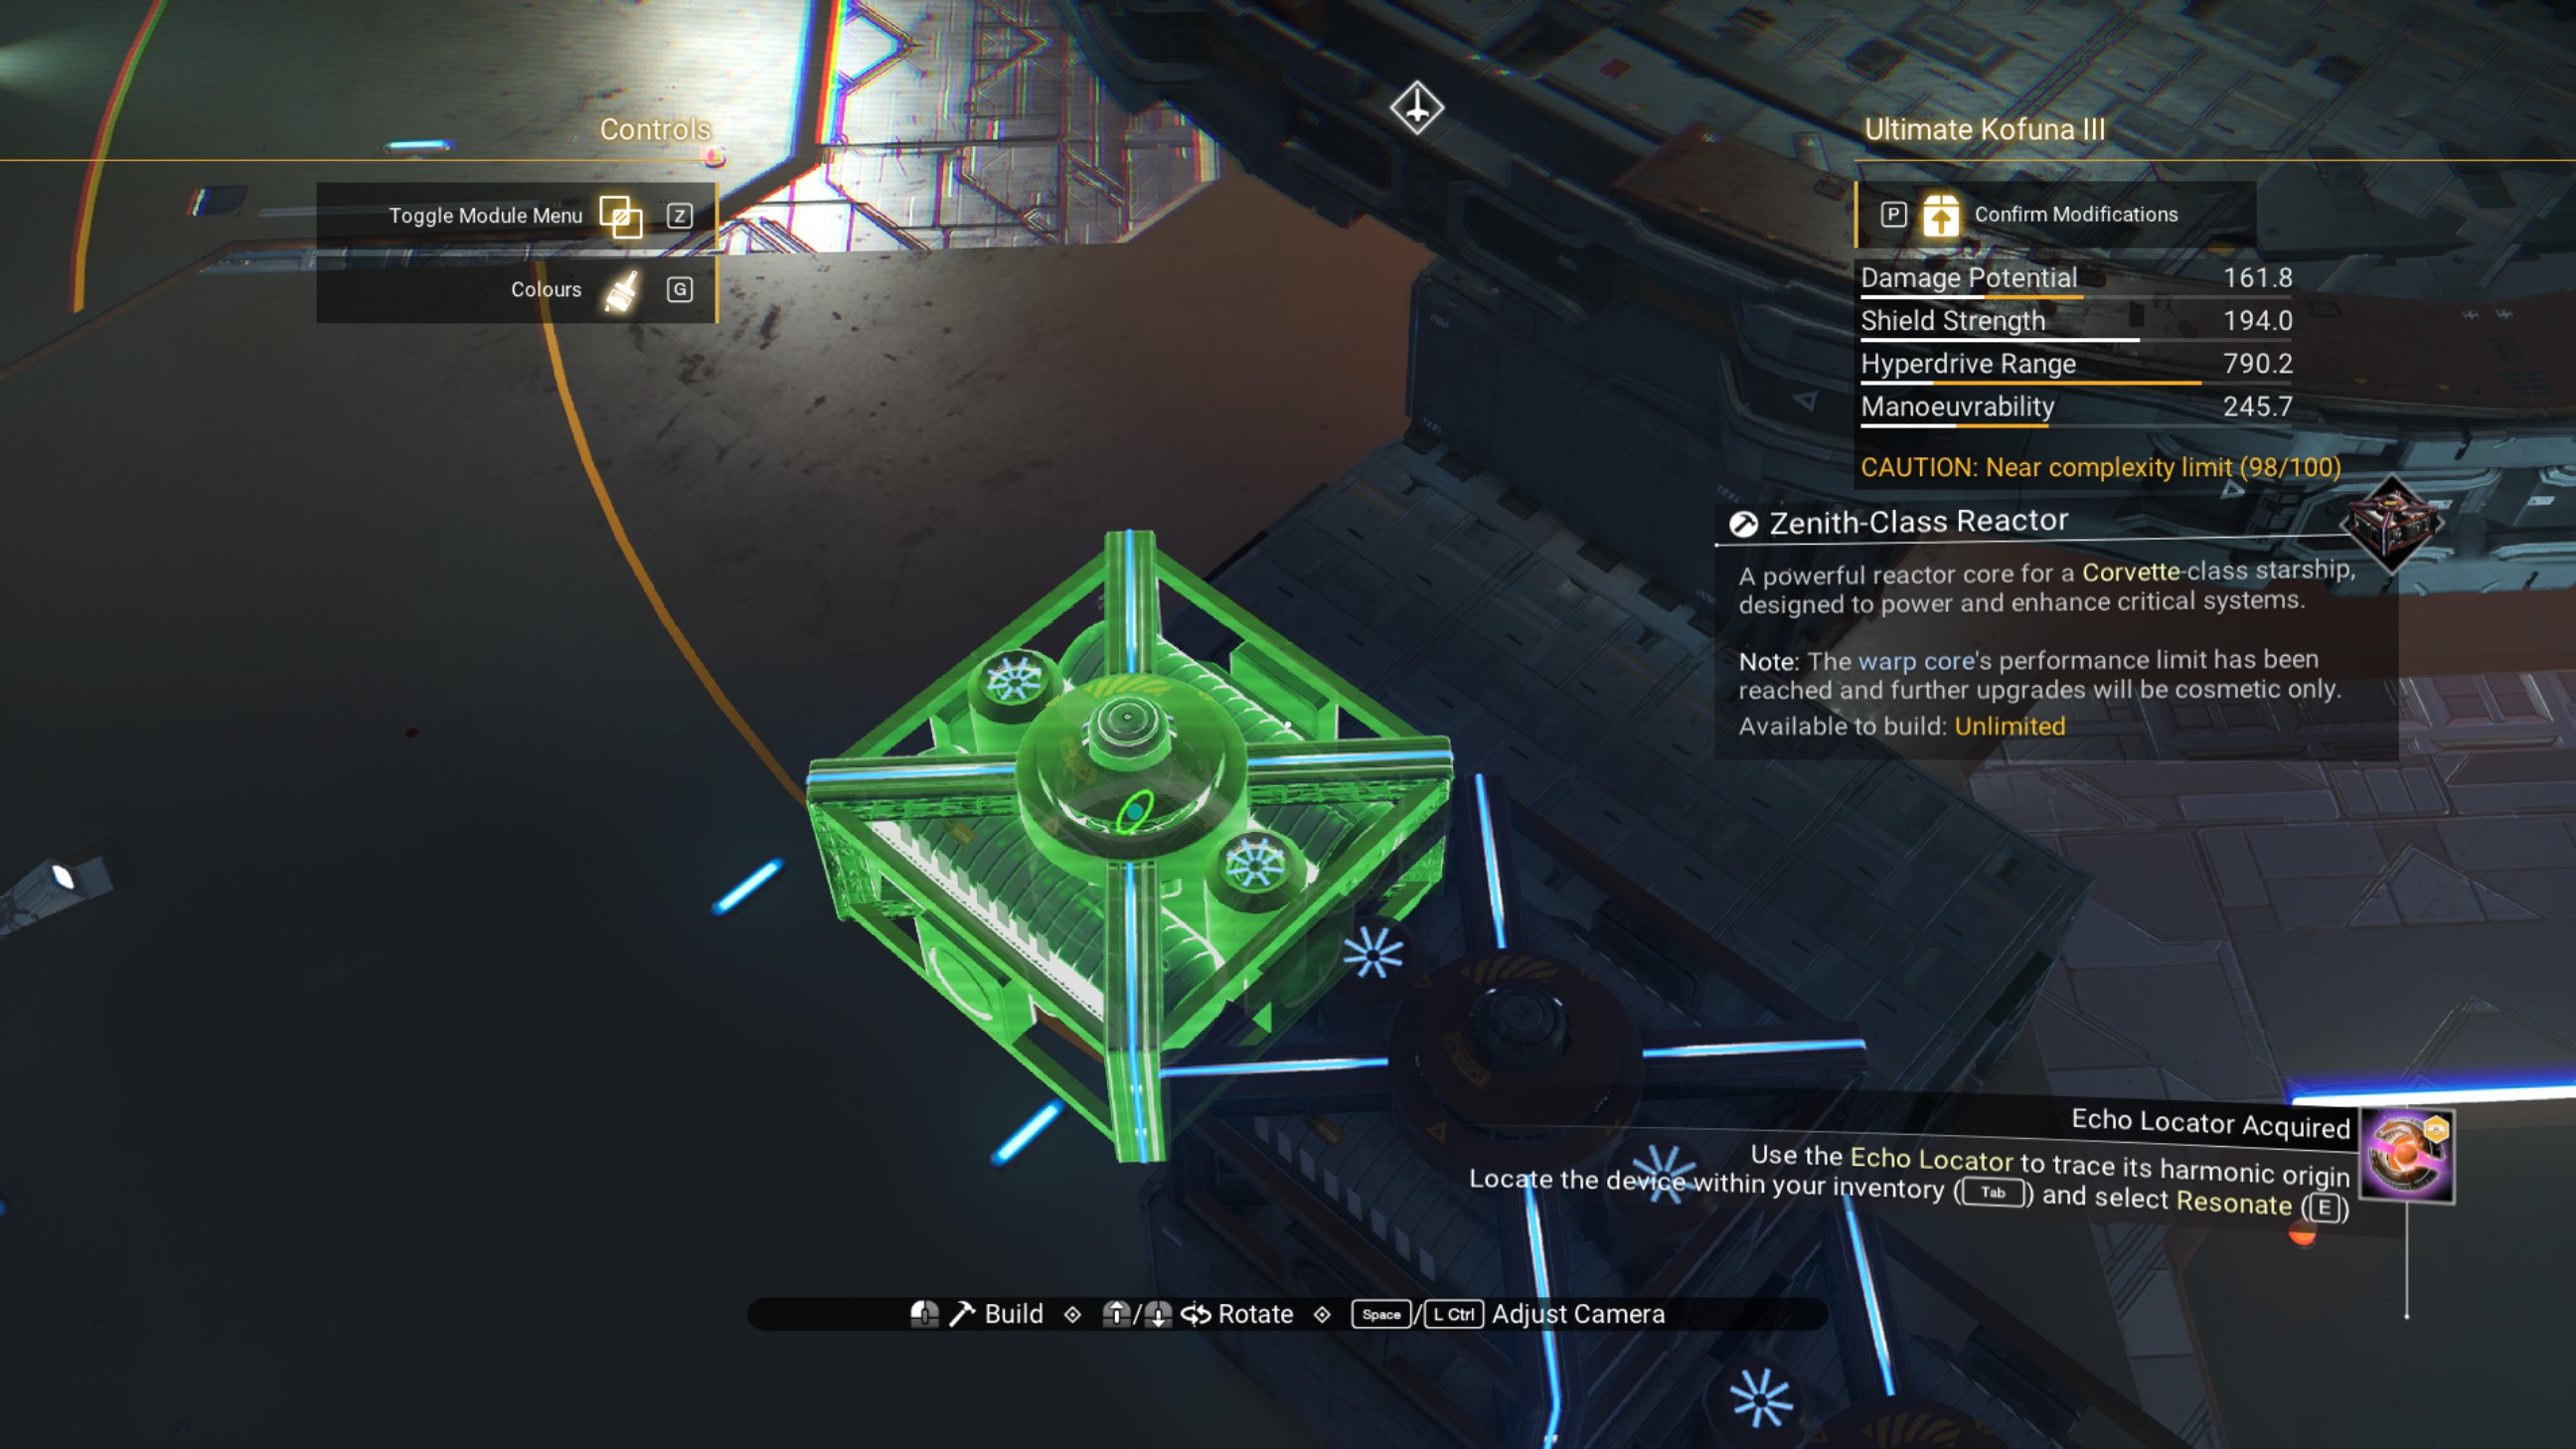
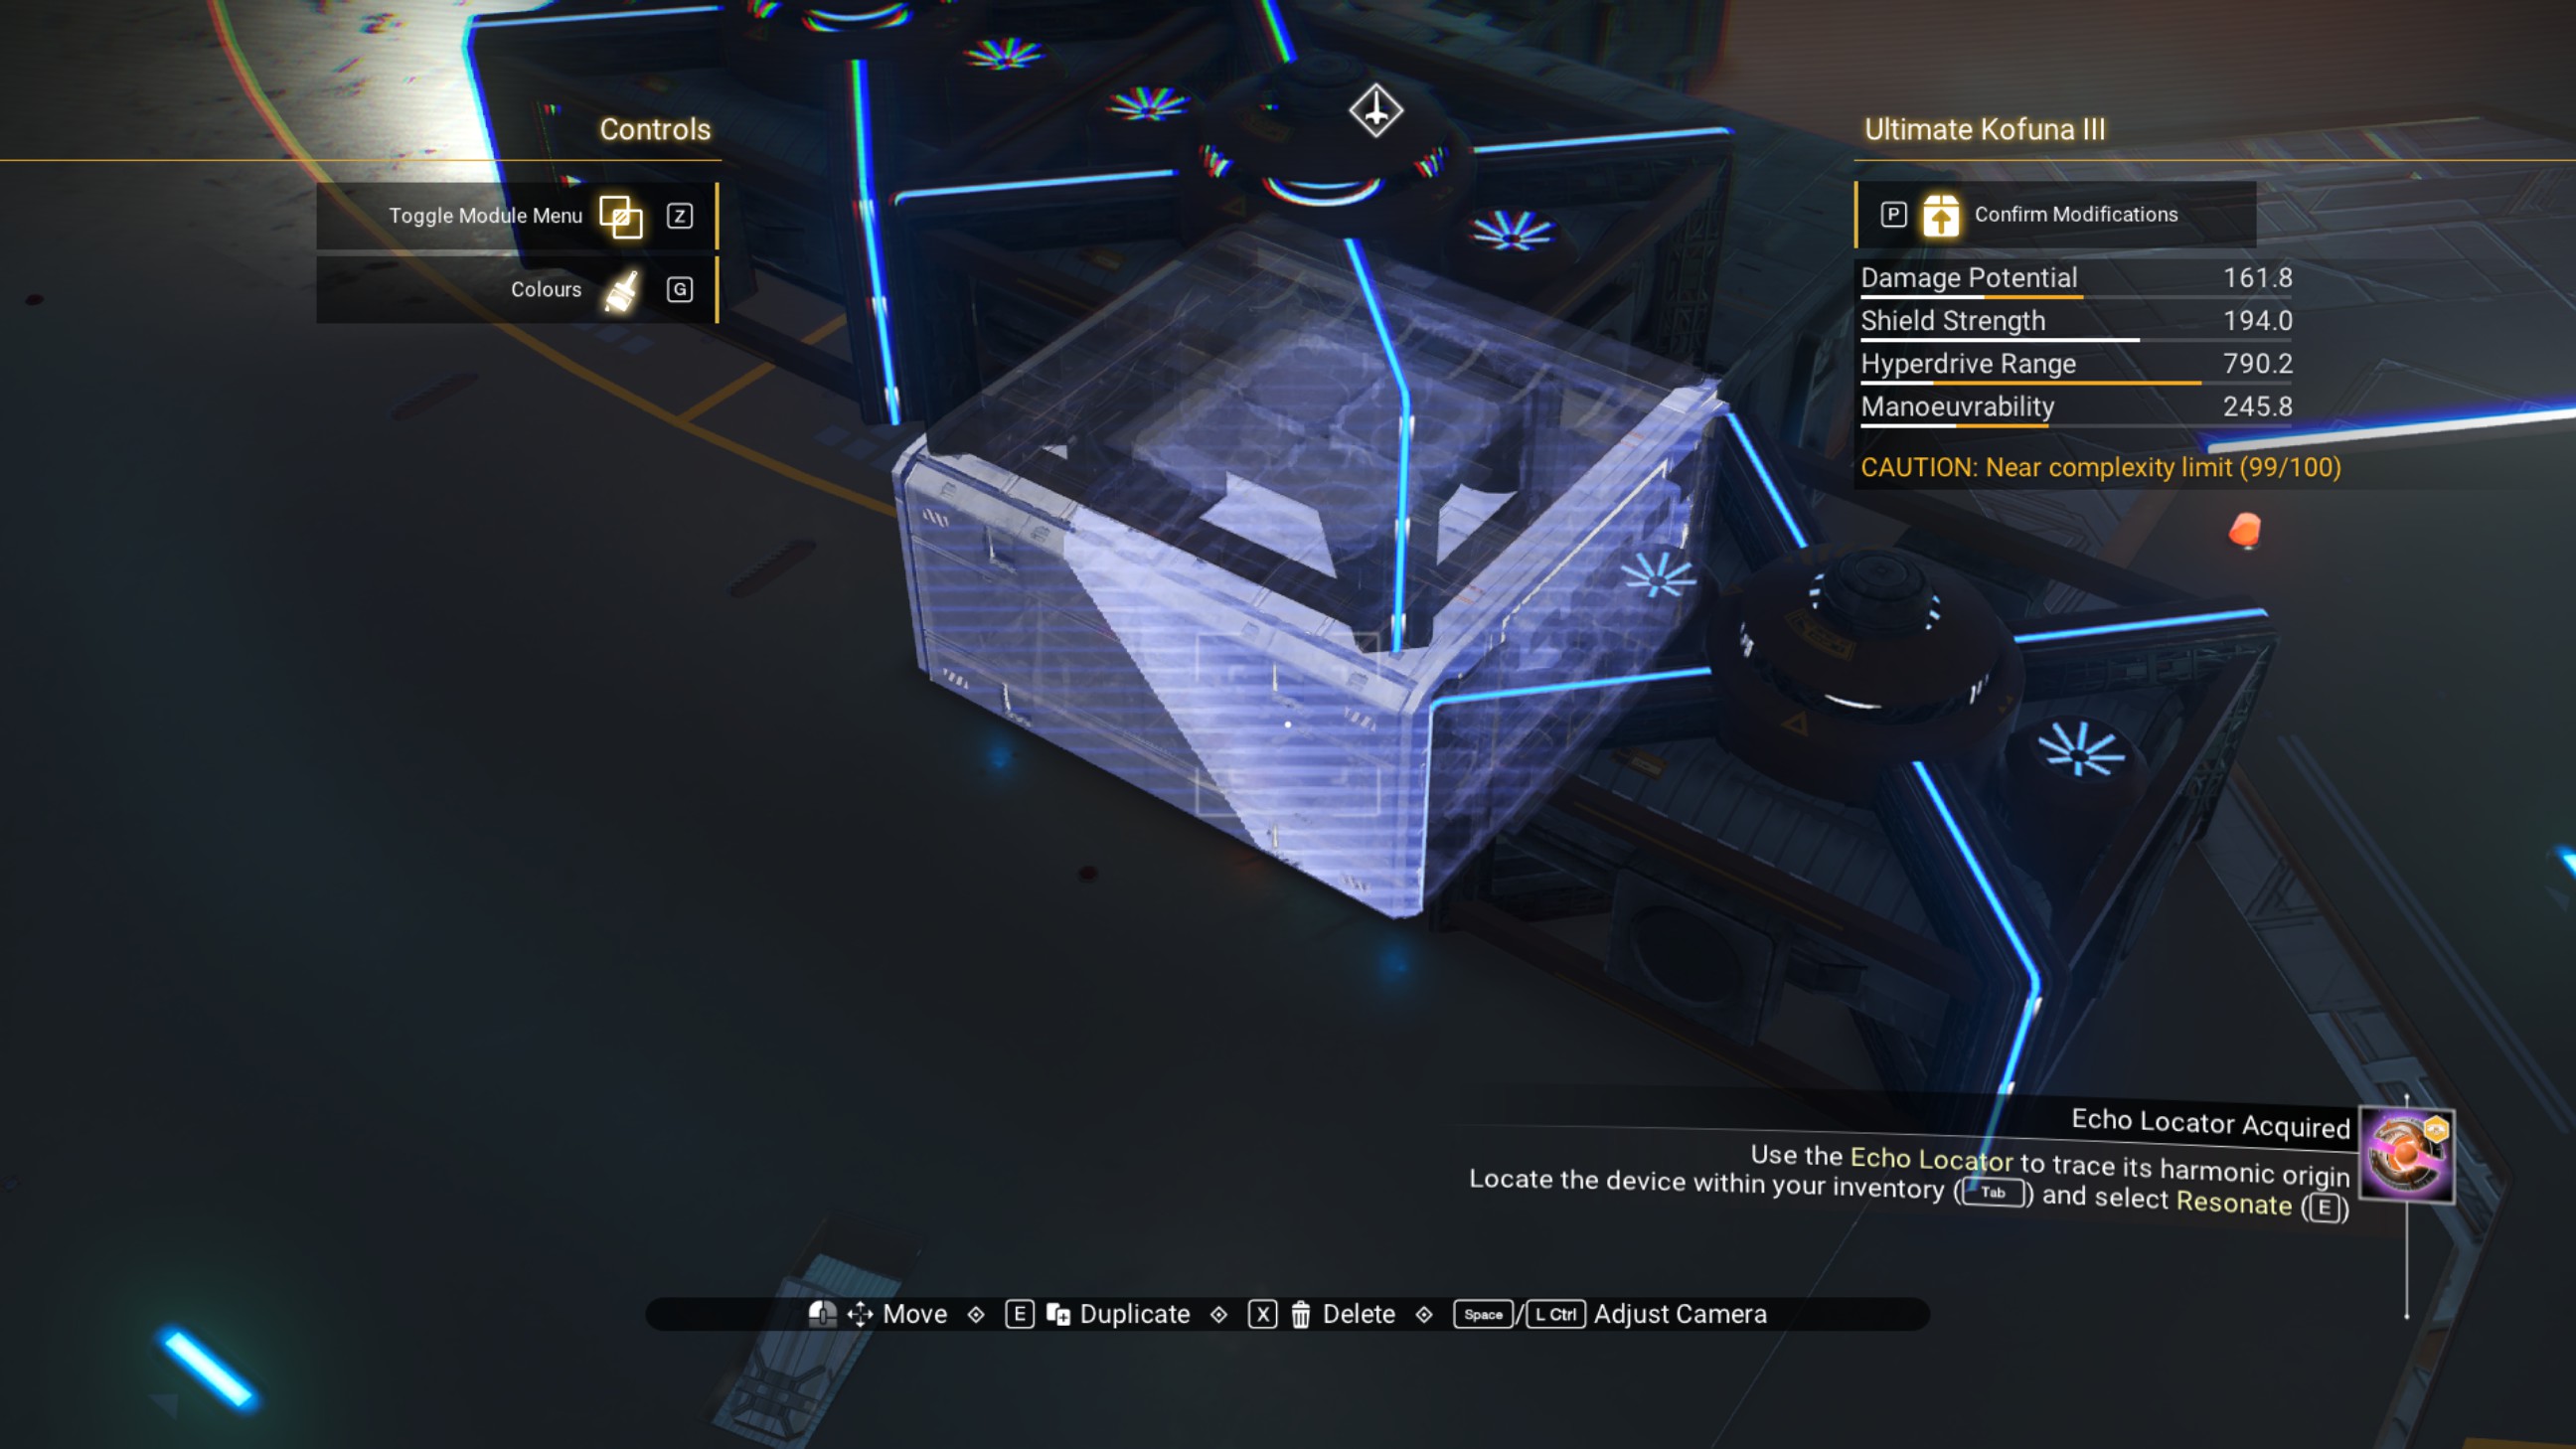
Let's make an adjustment so it'll be easier to see for the next part. Delete the three walkways shown, then place a walkway behind the top reactors to connect them to the ship.
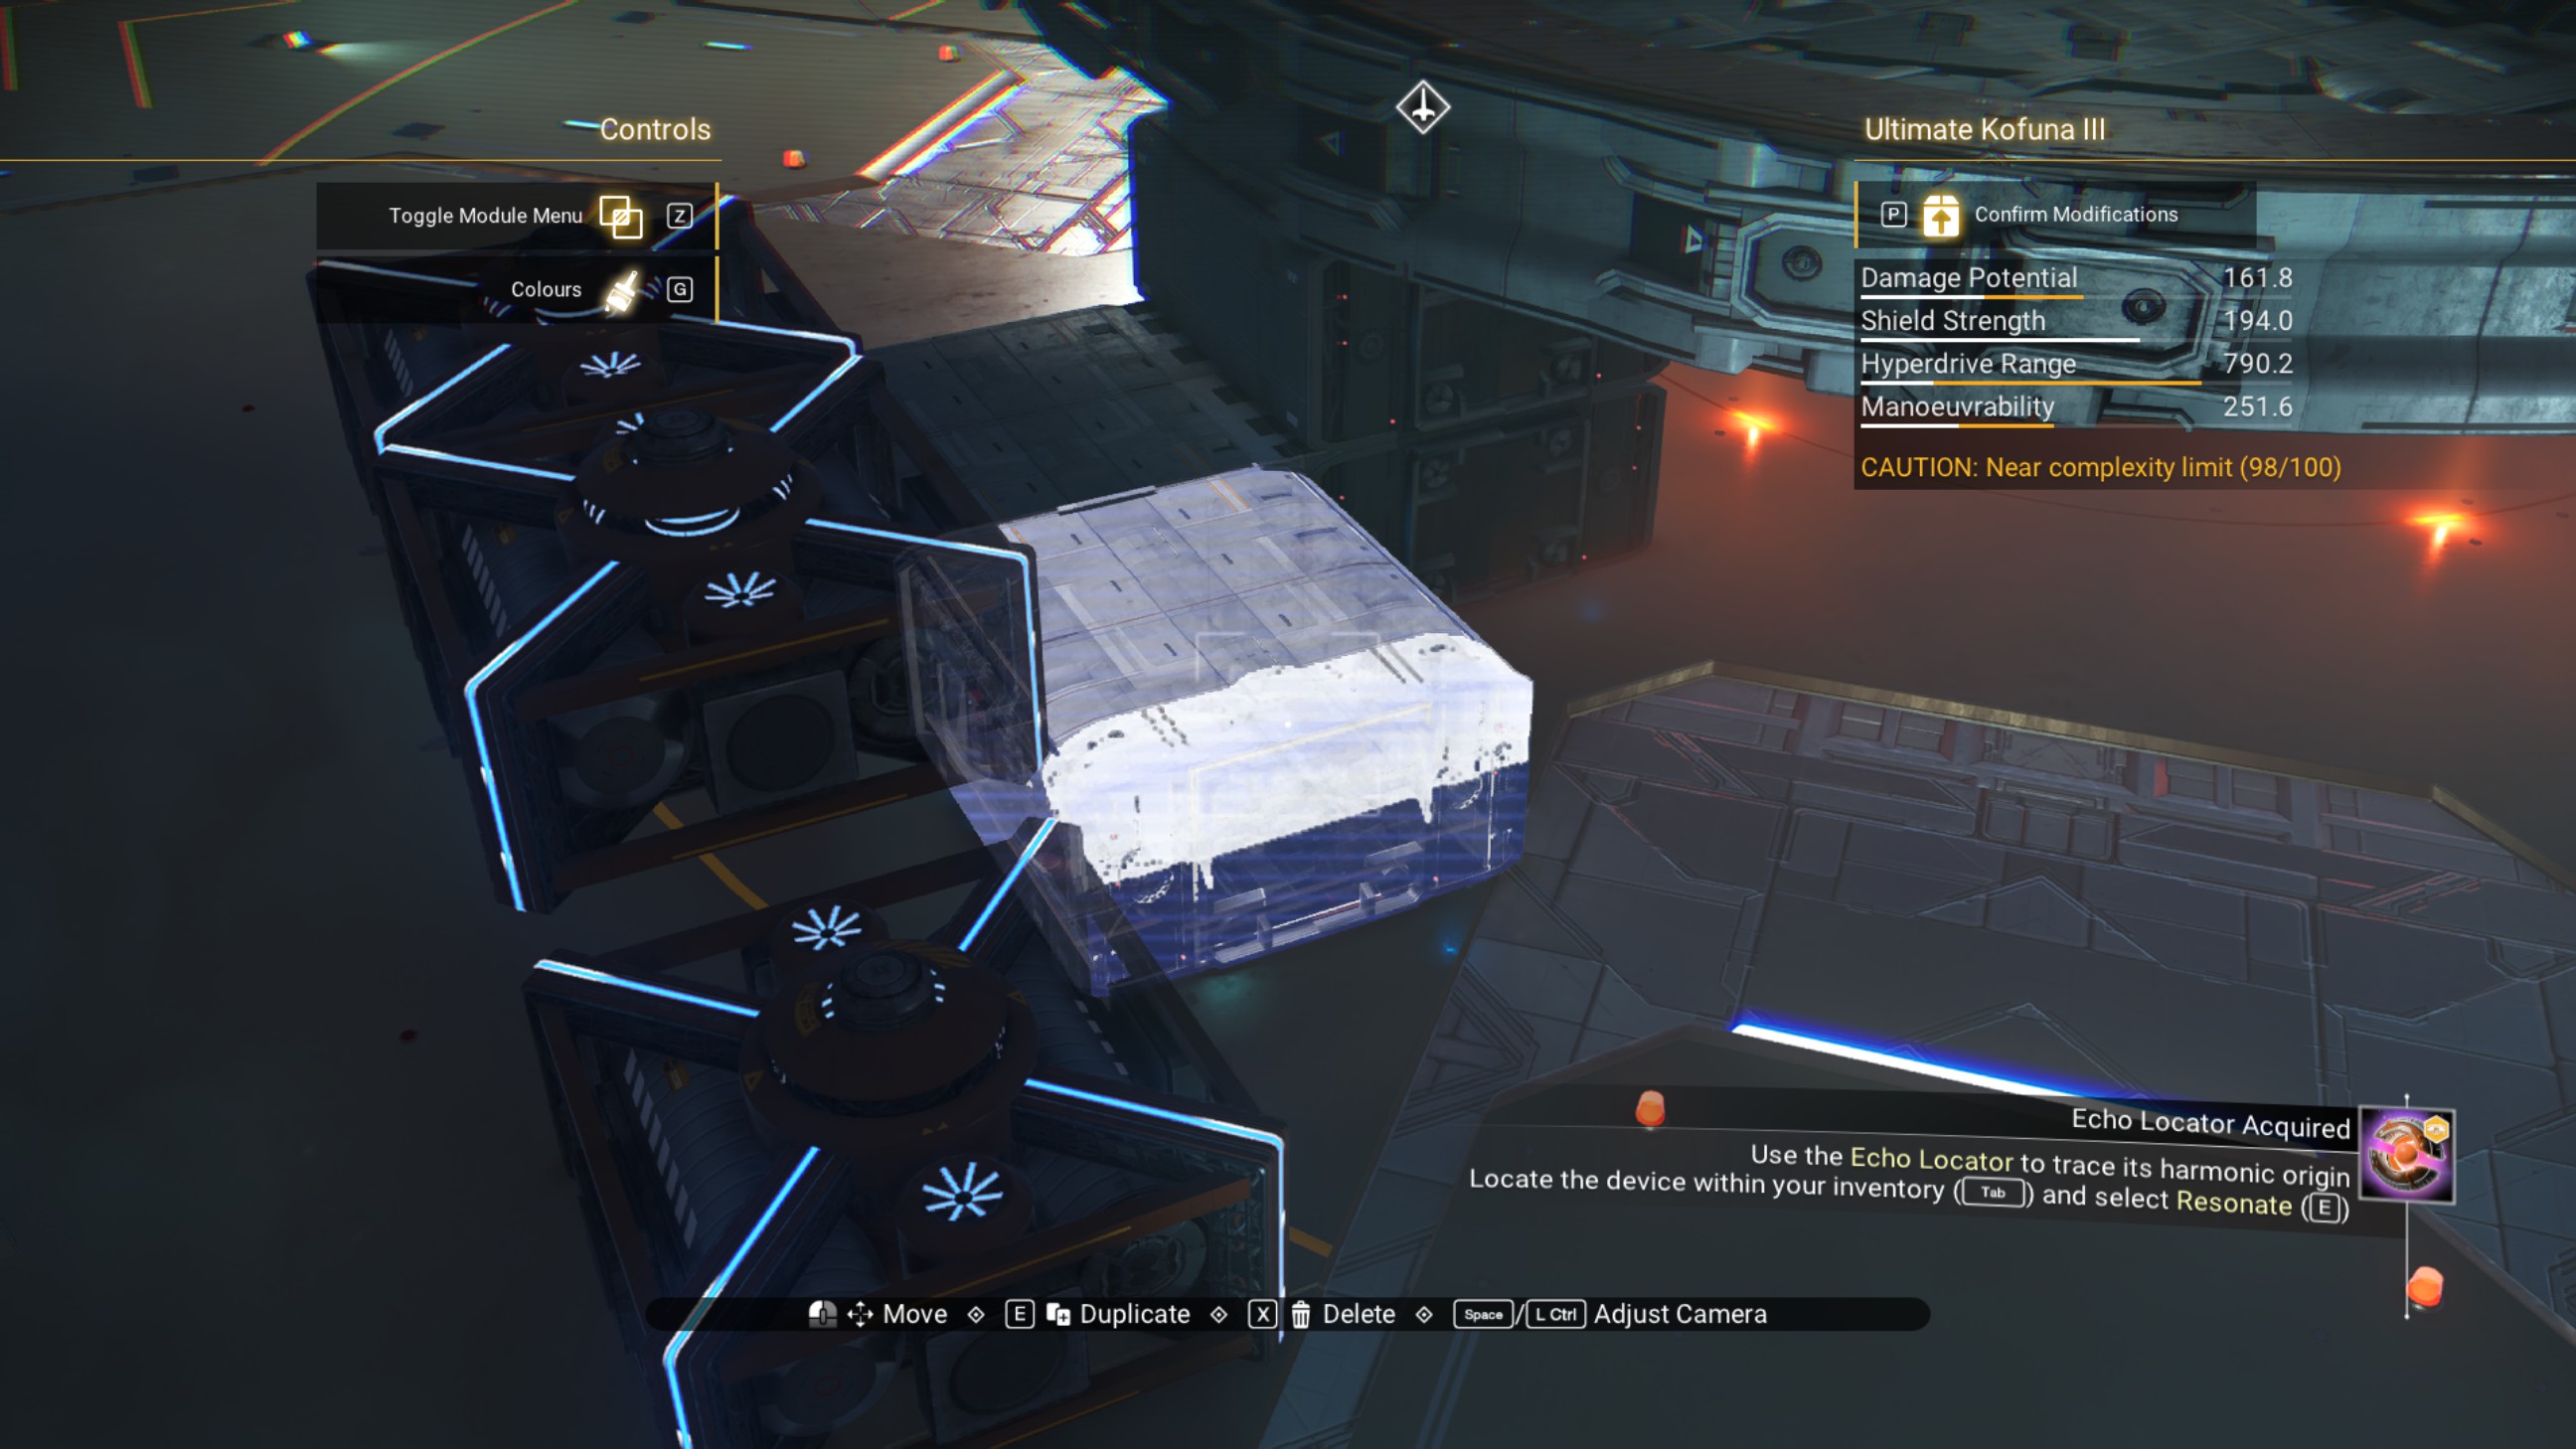
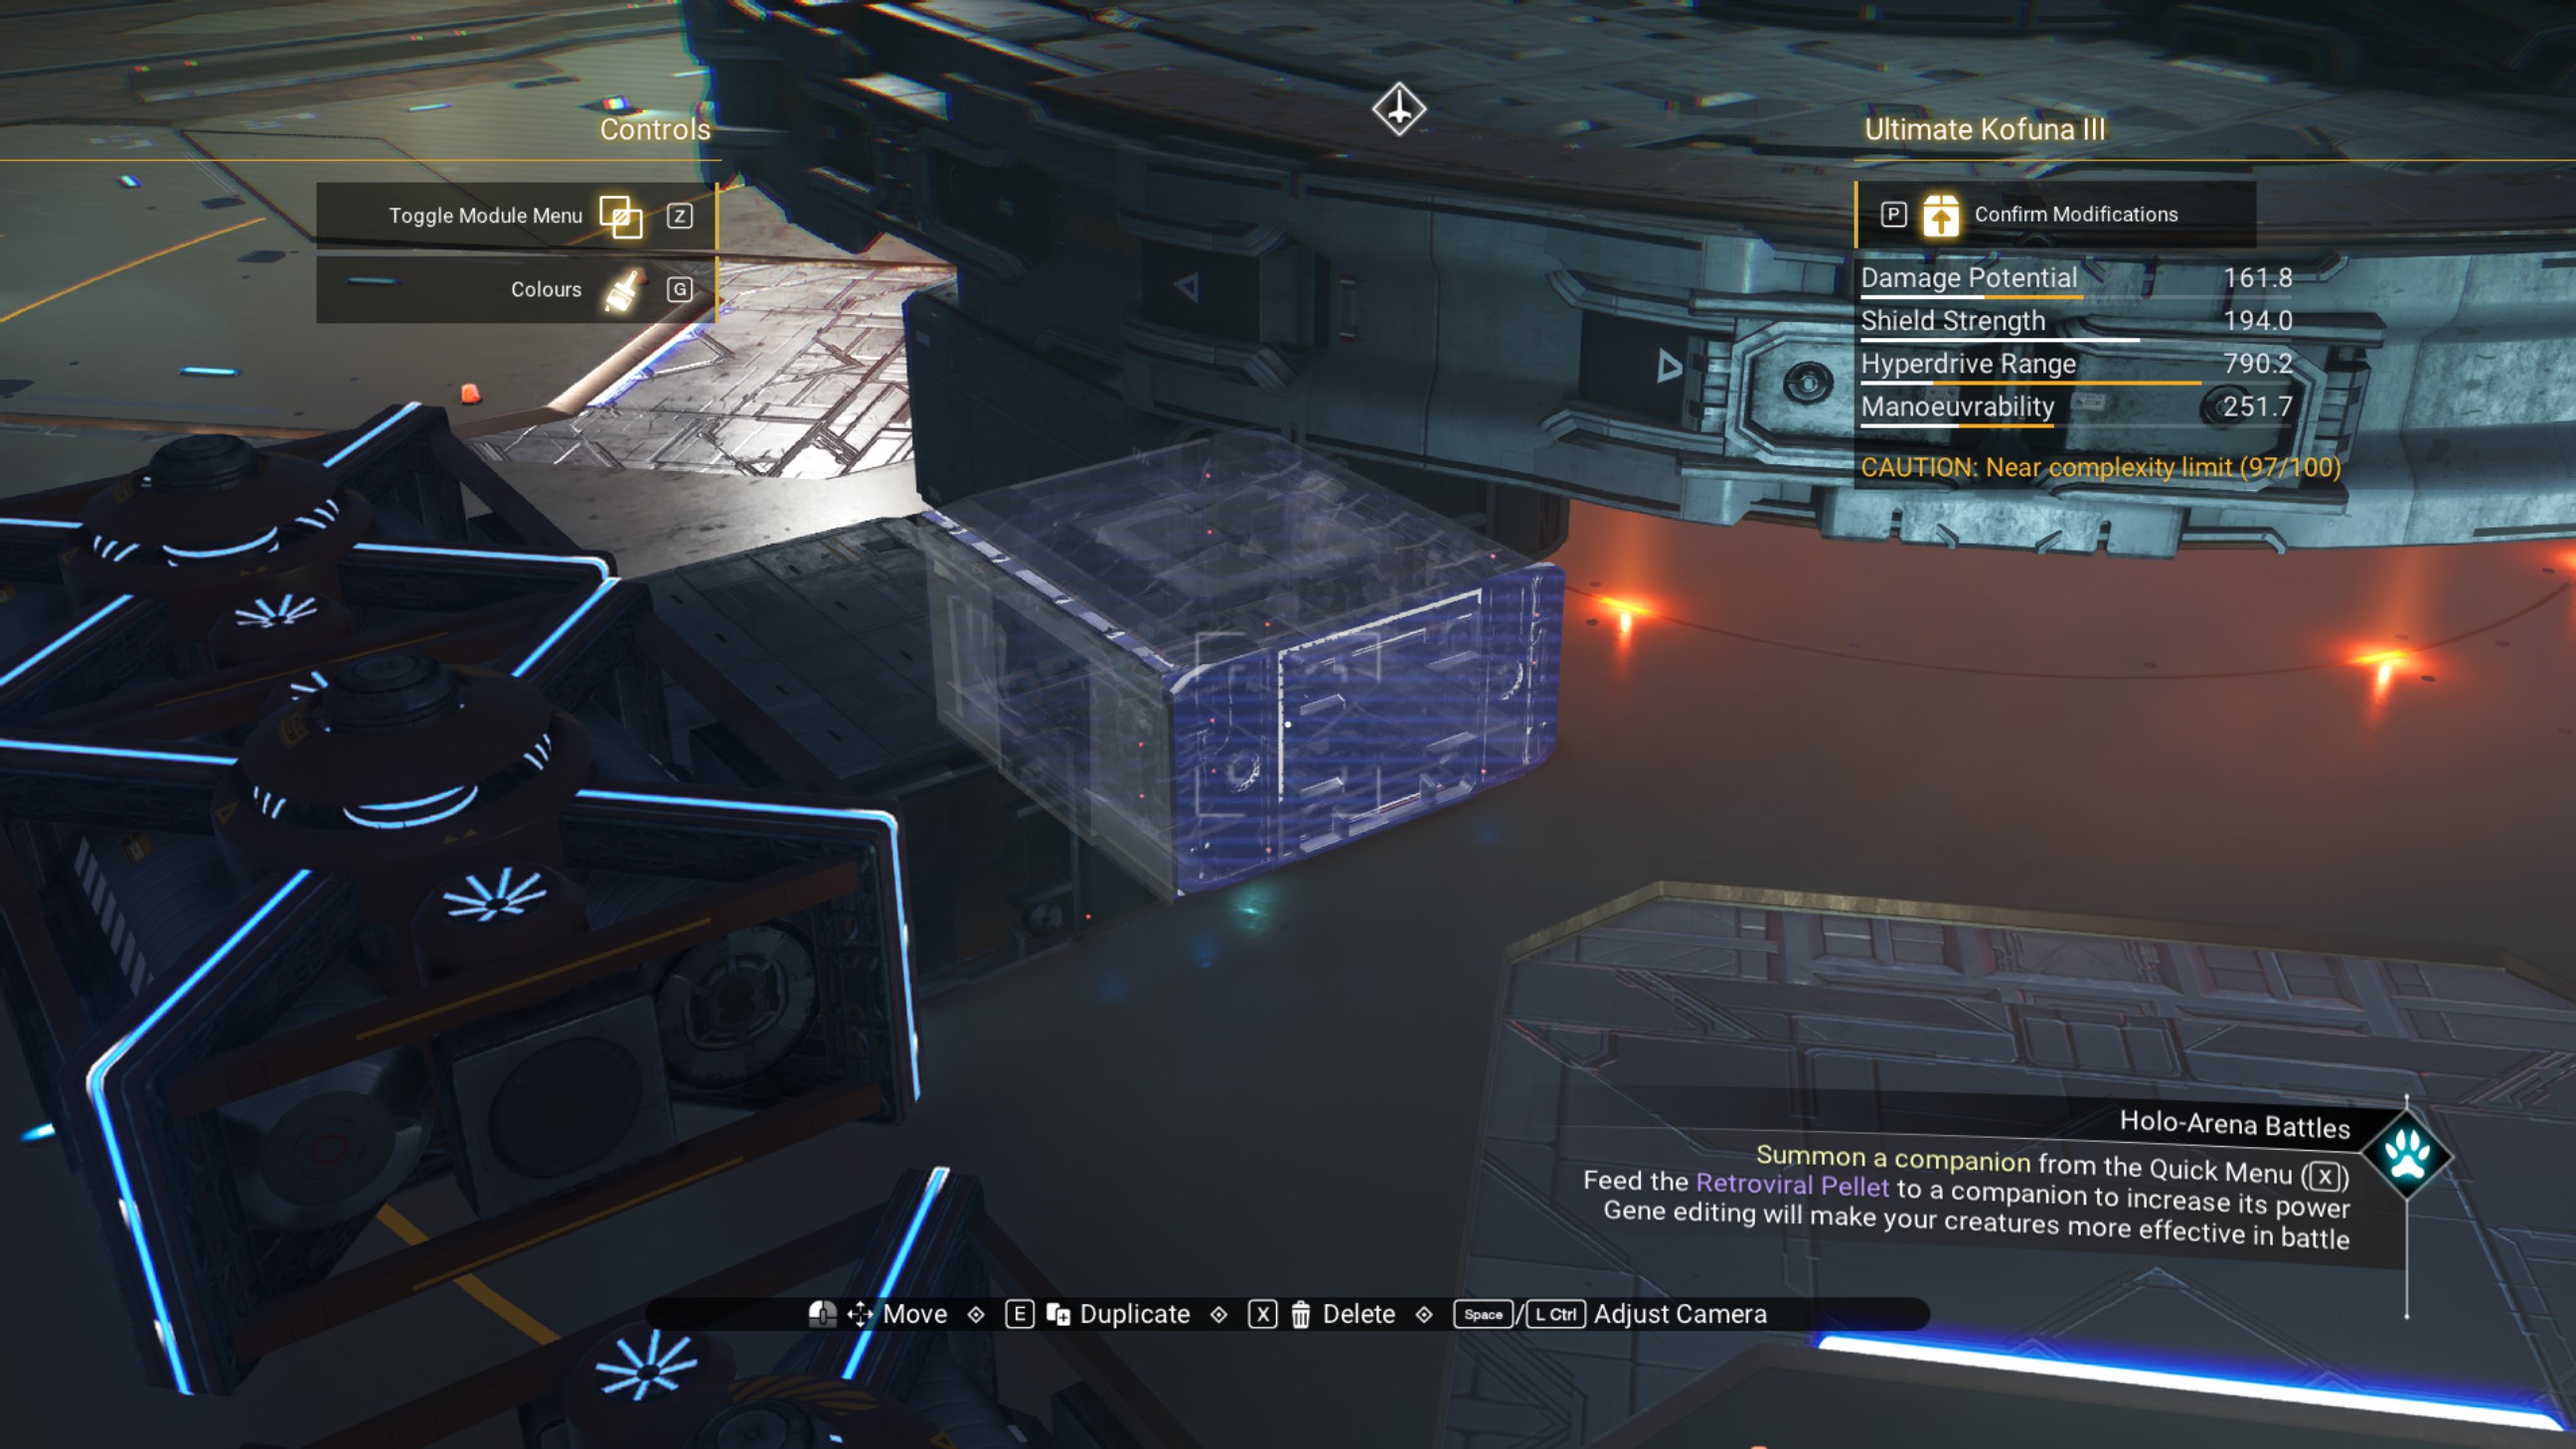
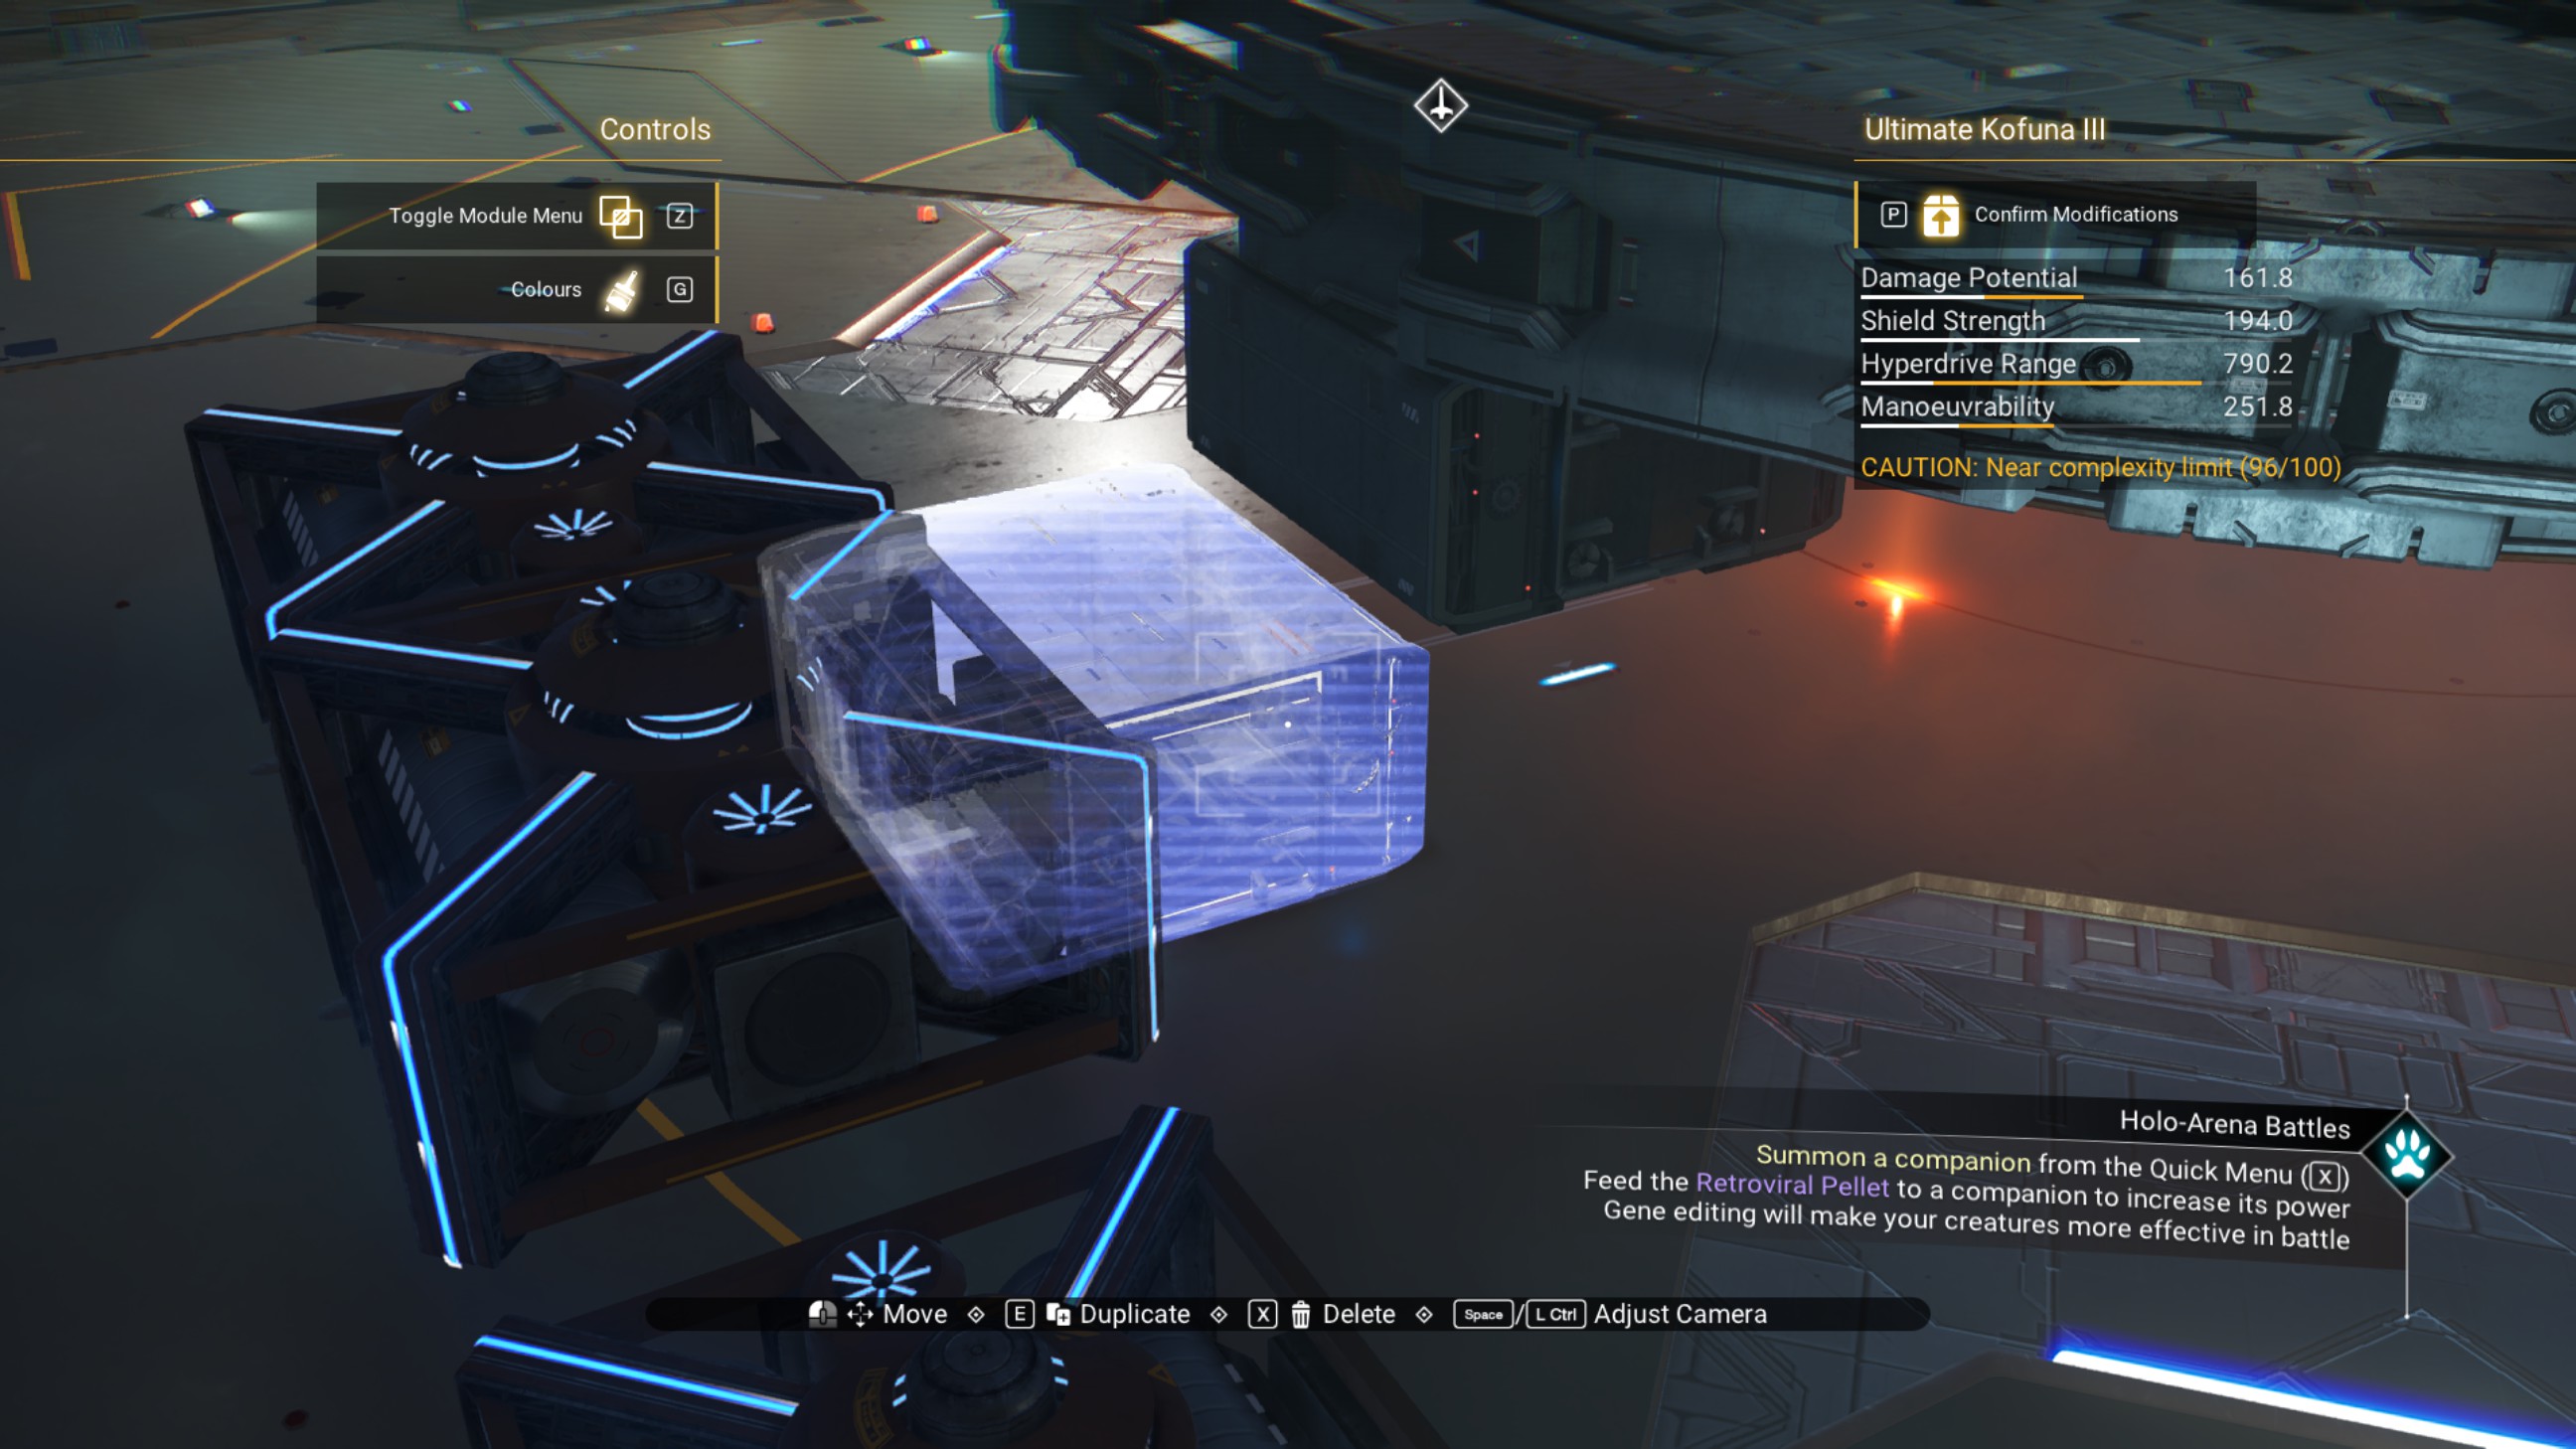
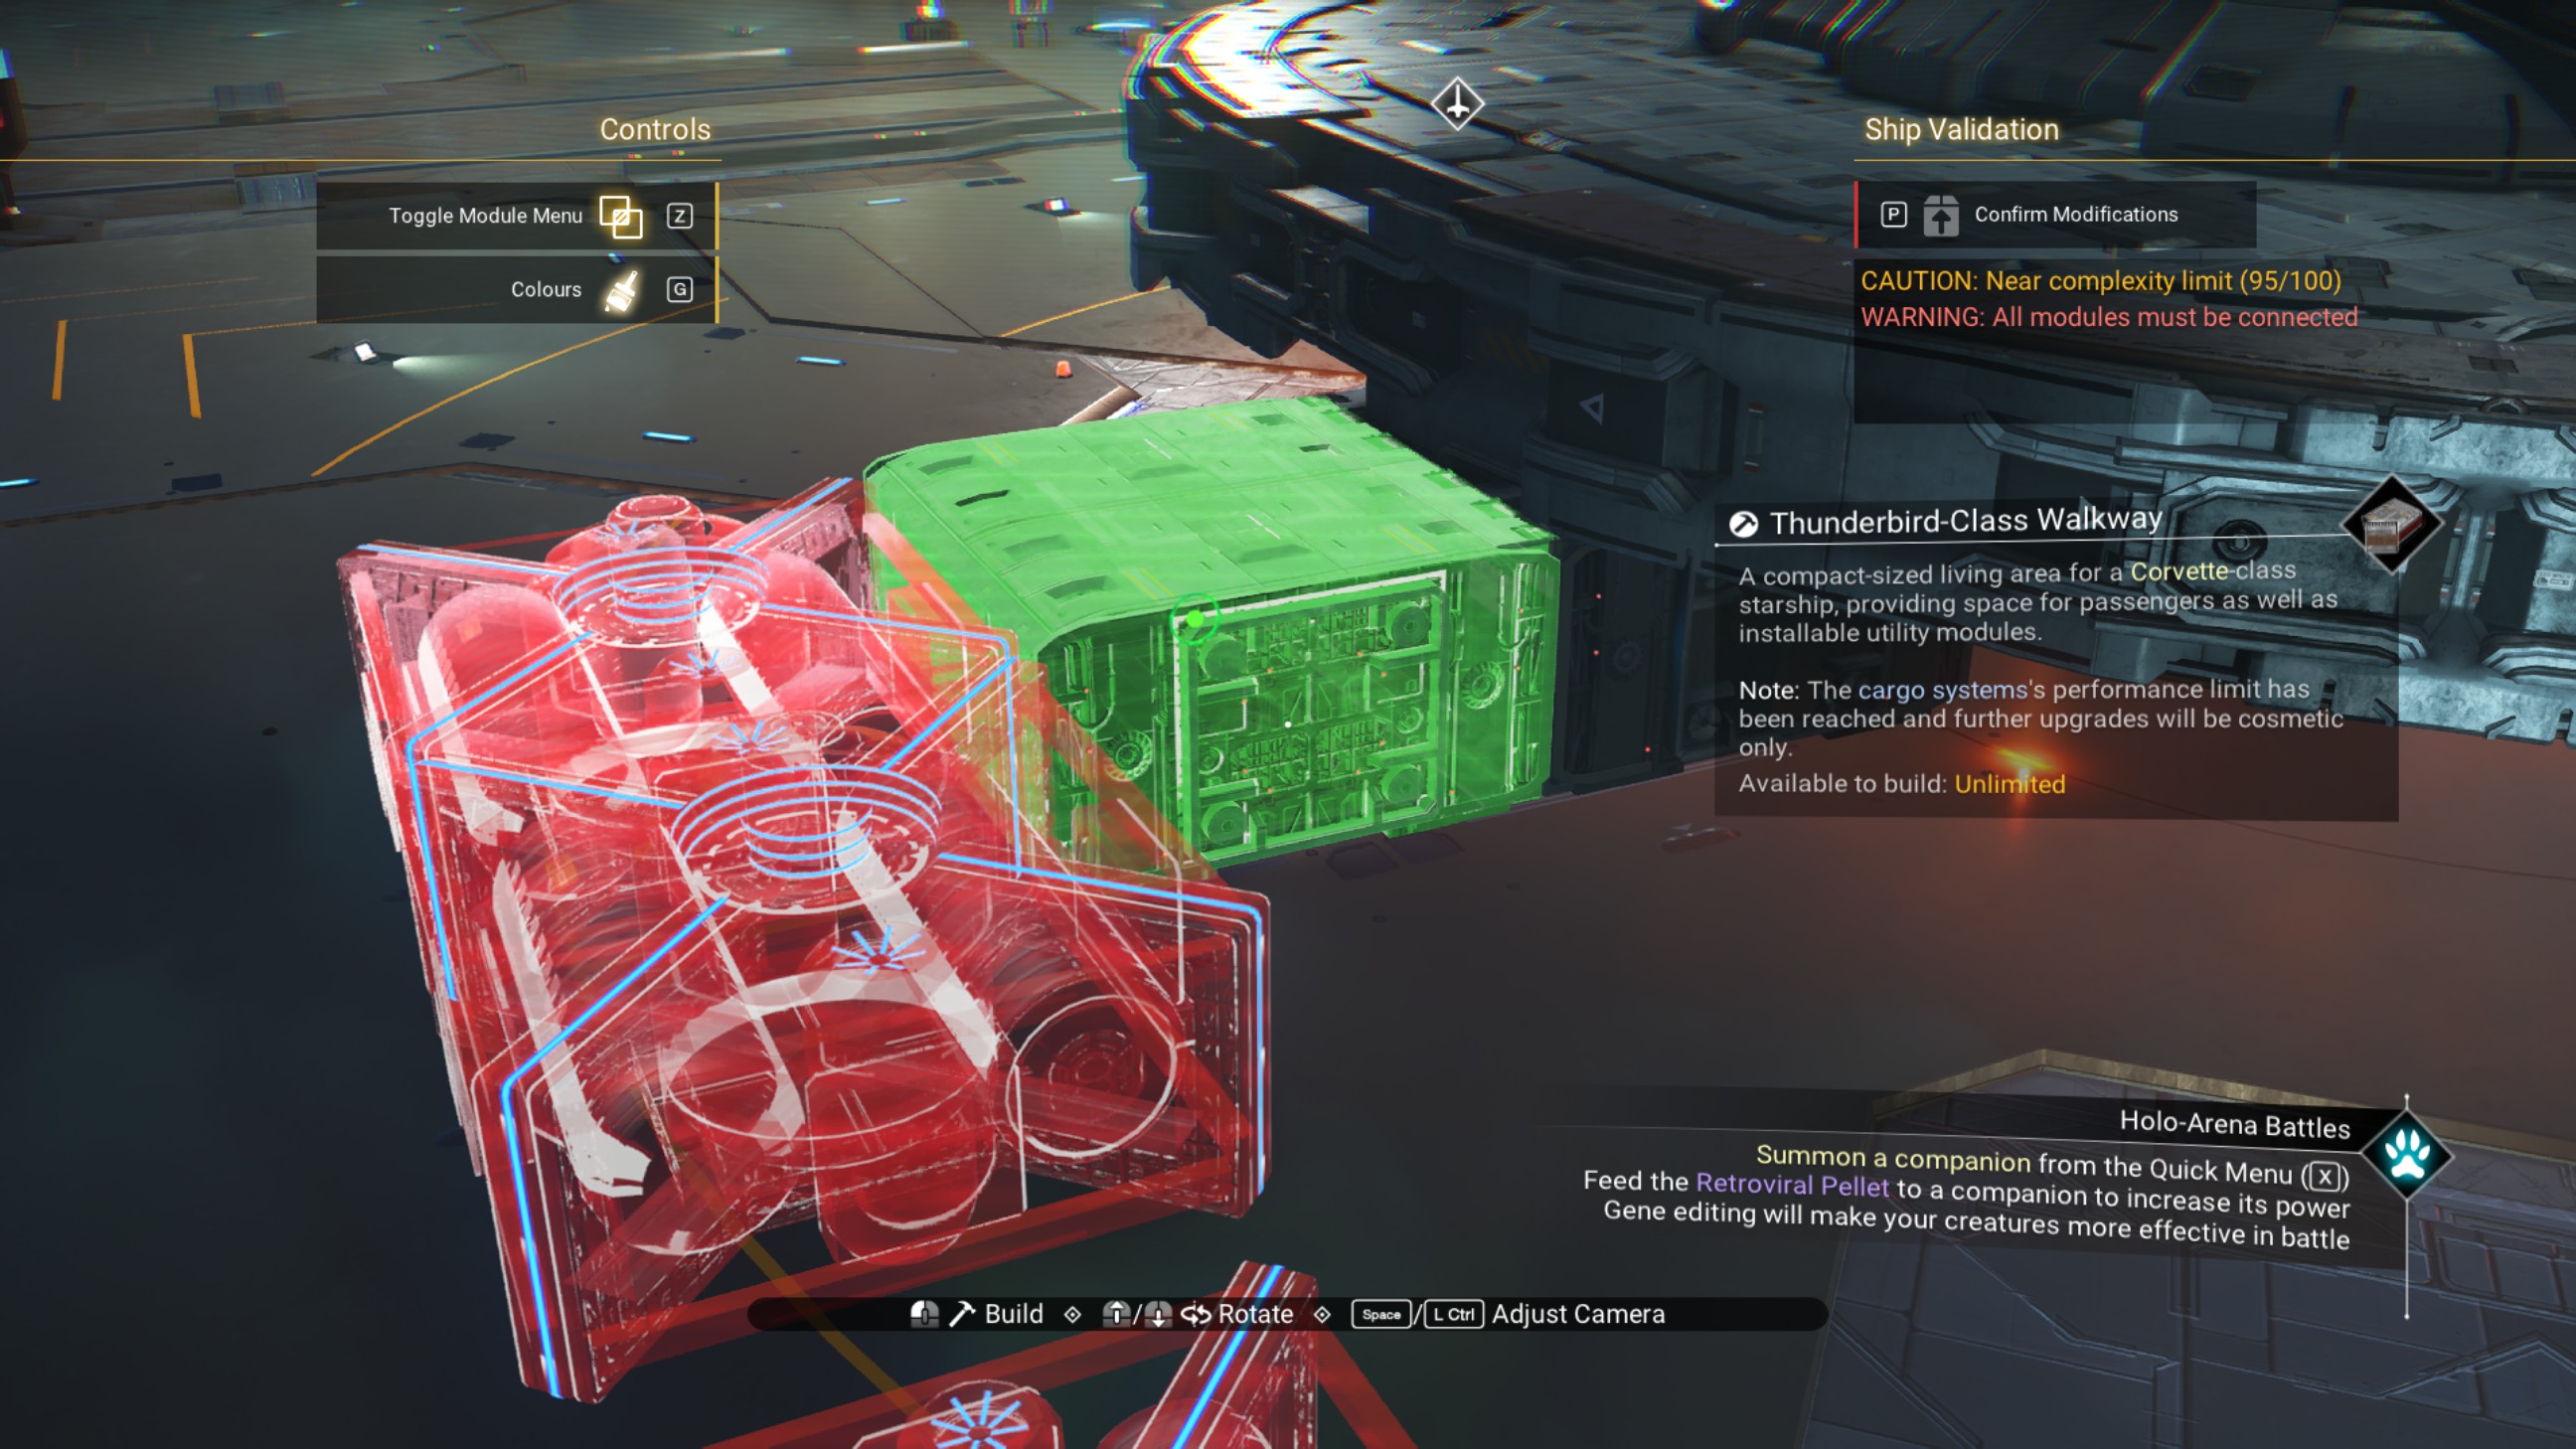
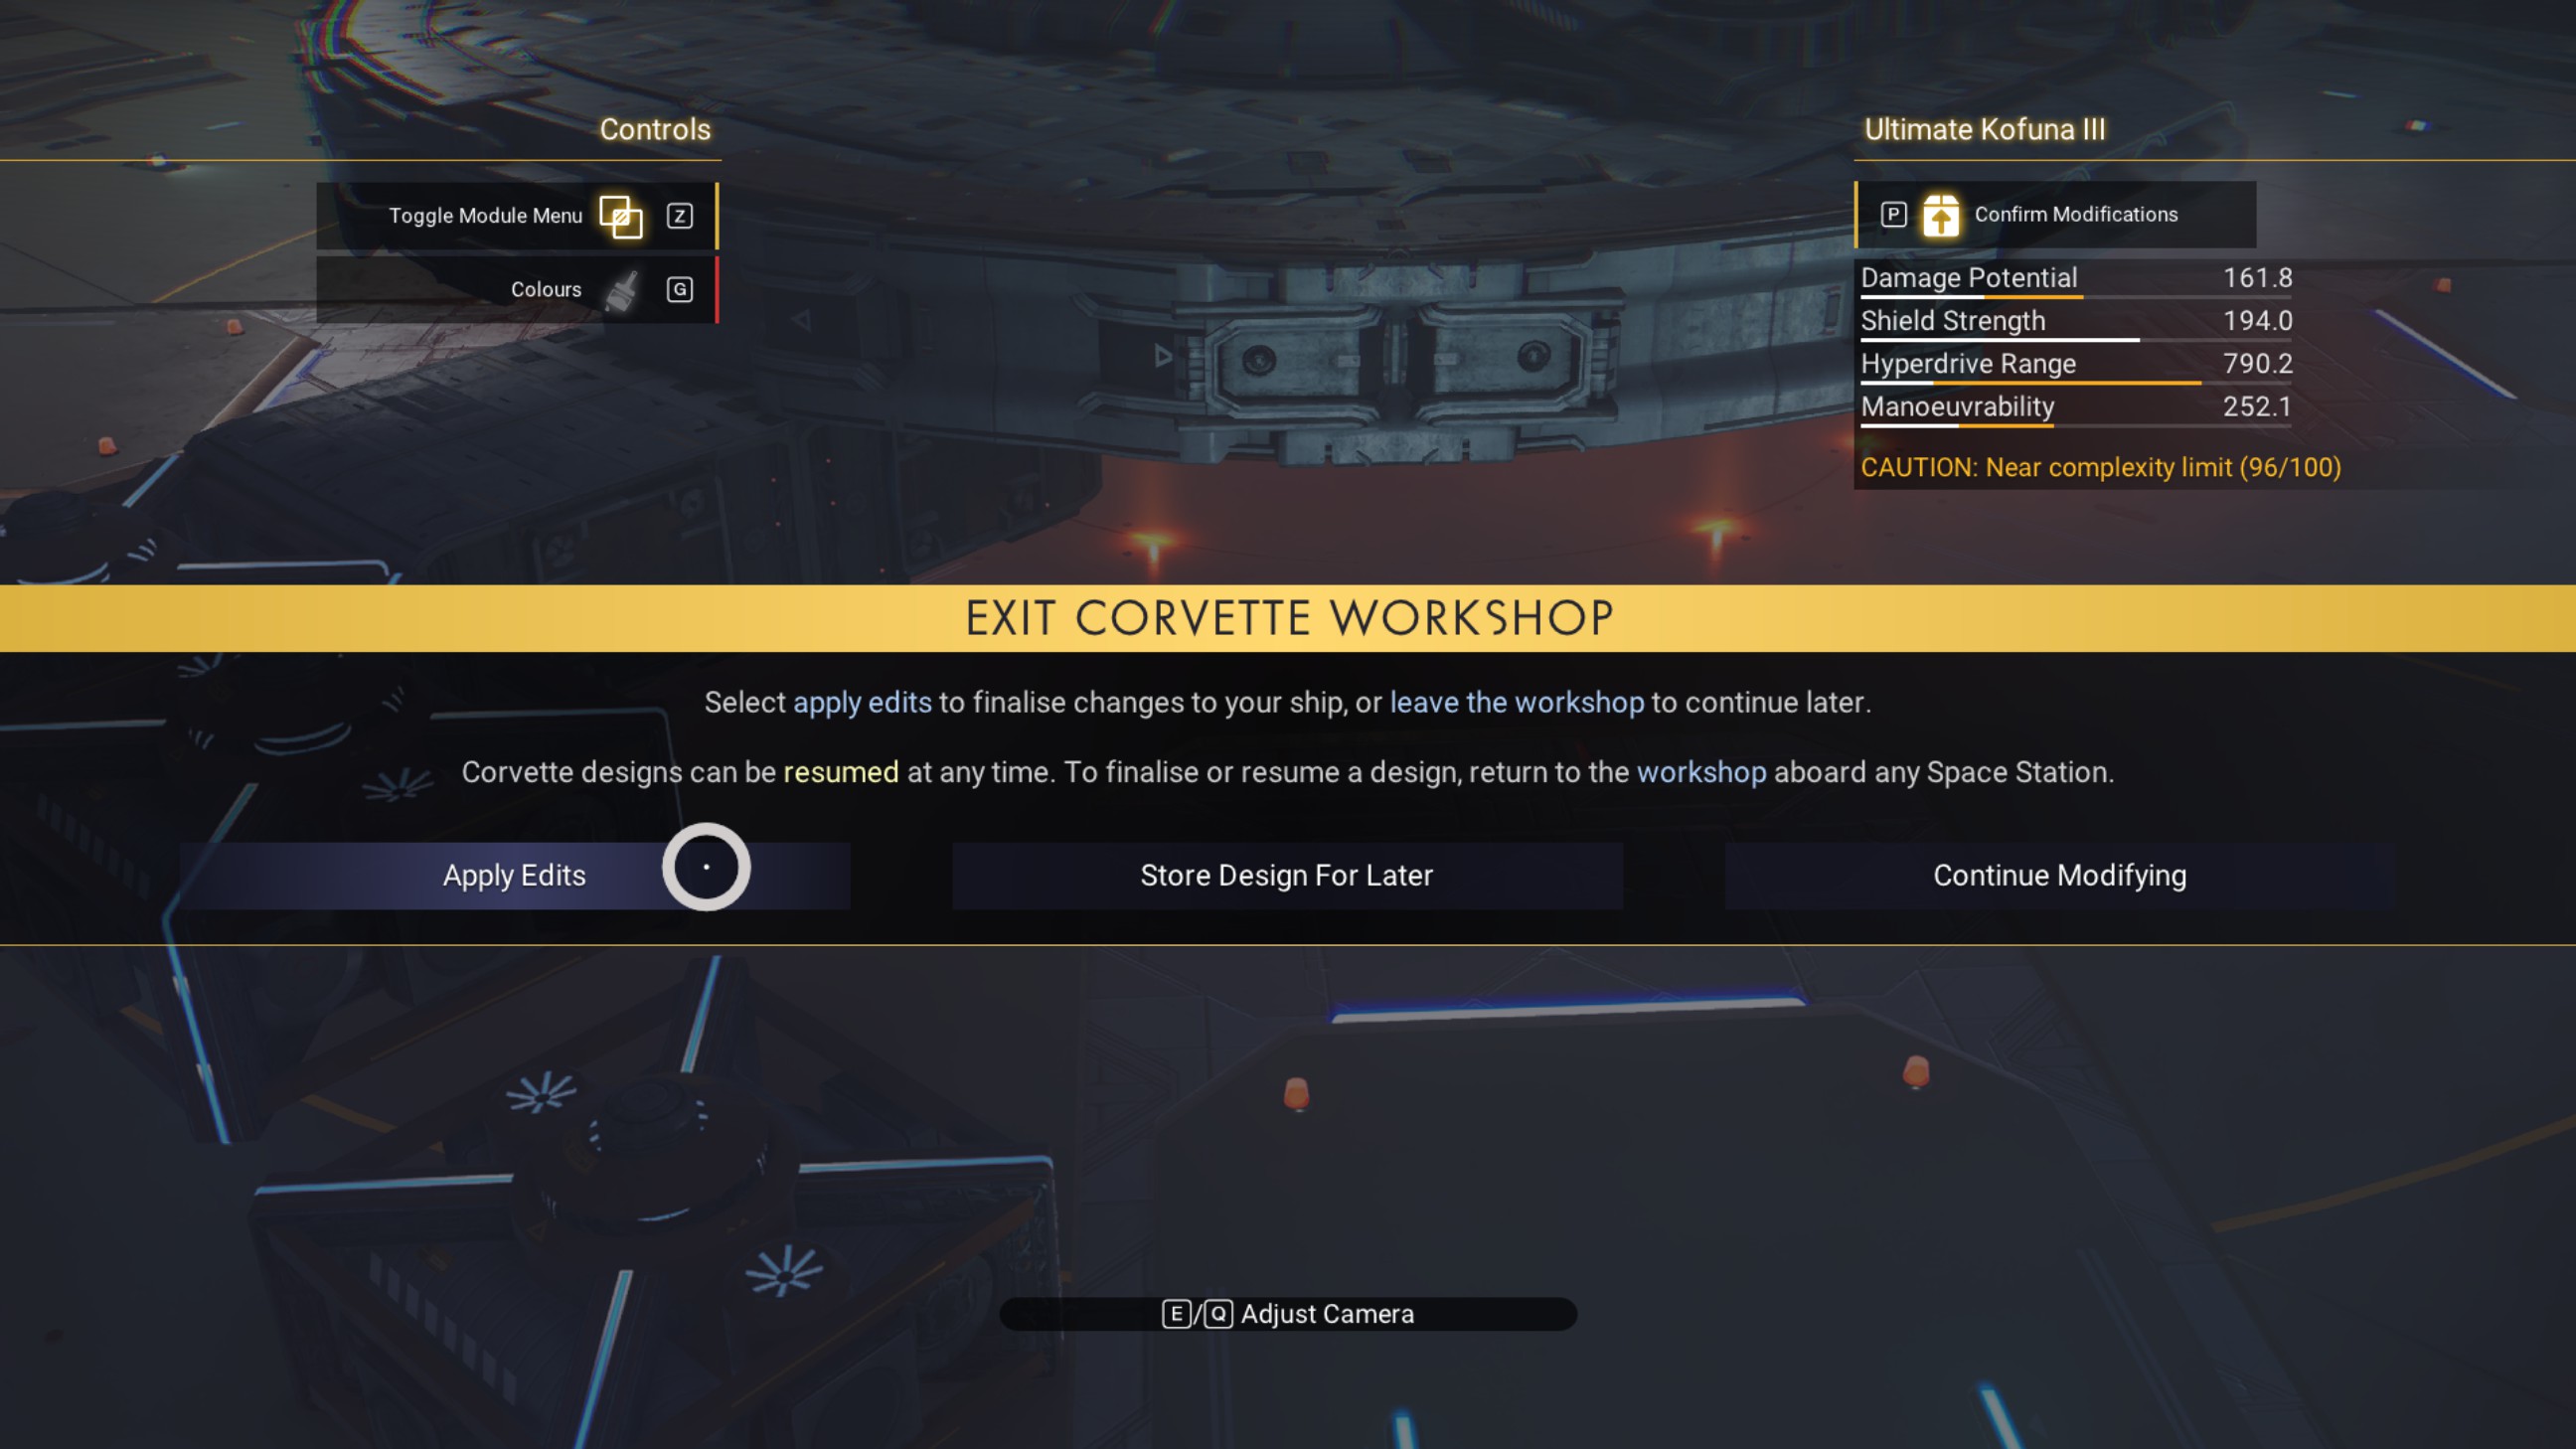
Finalize the ship, again.
Select the seamless window from the build menu and go into free placement mode.
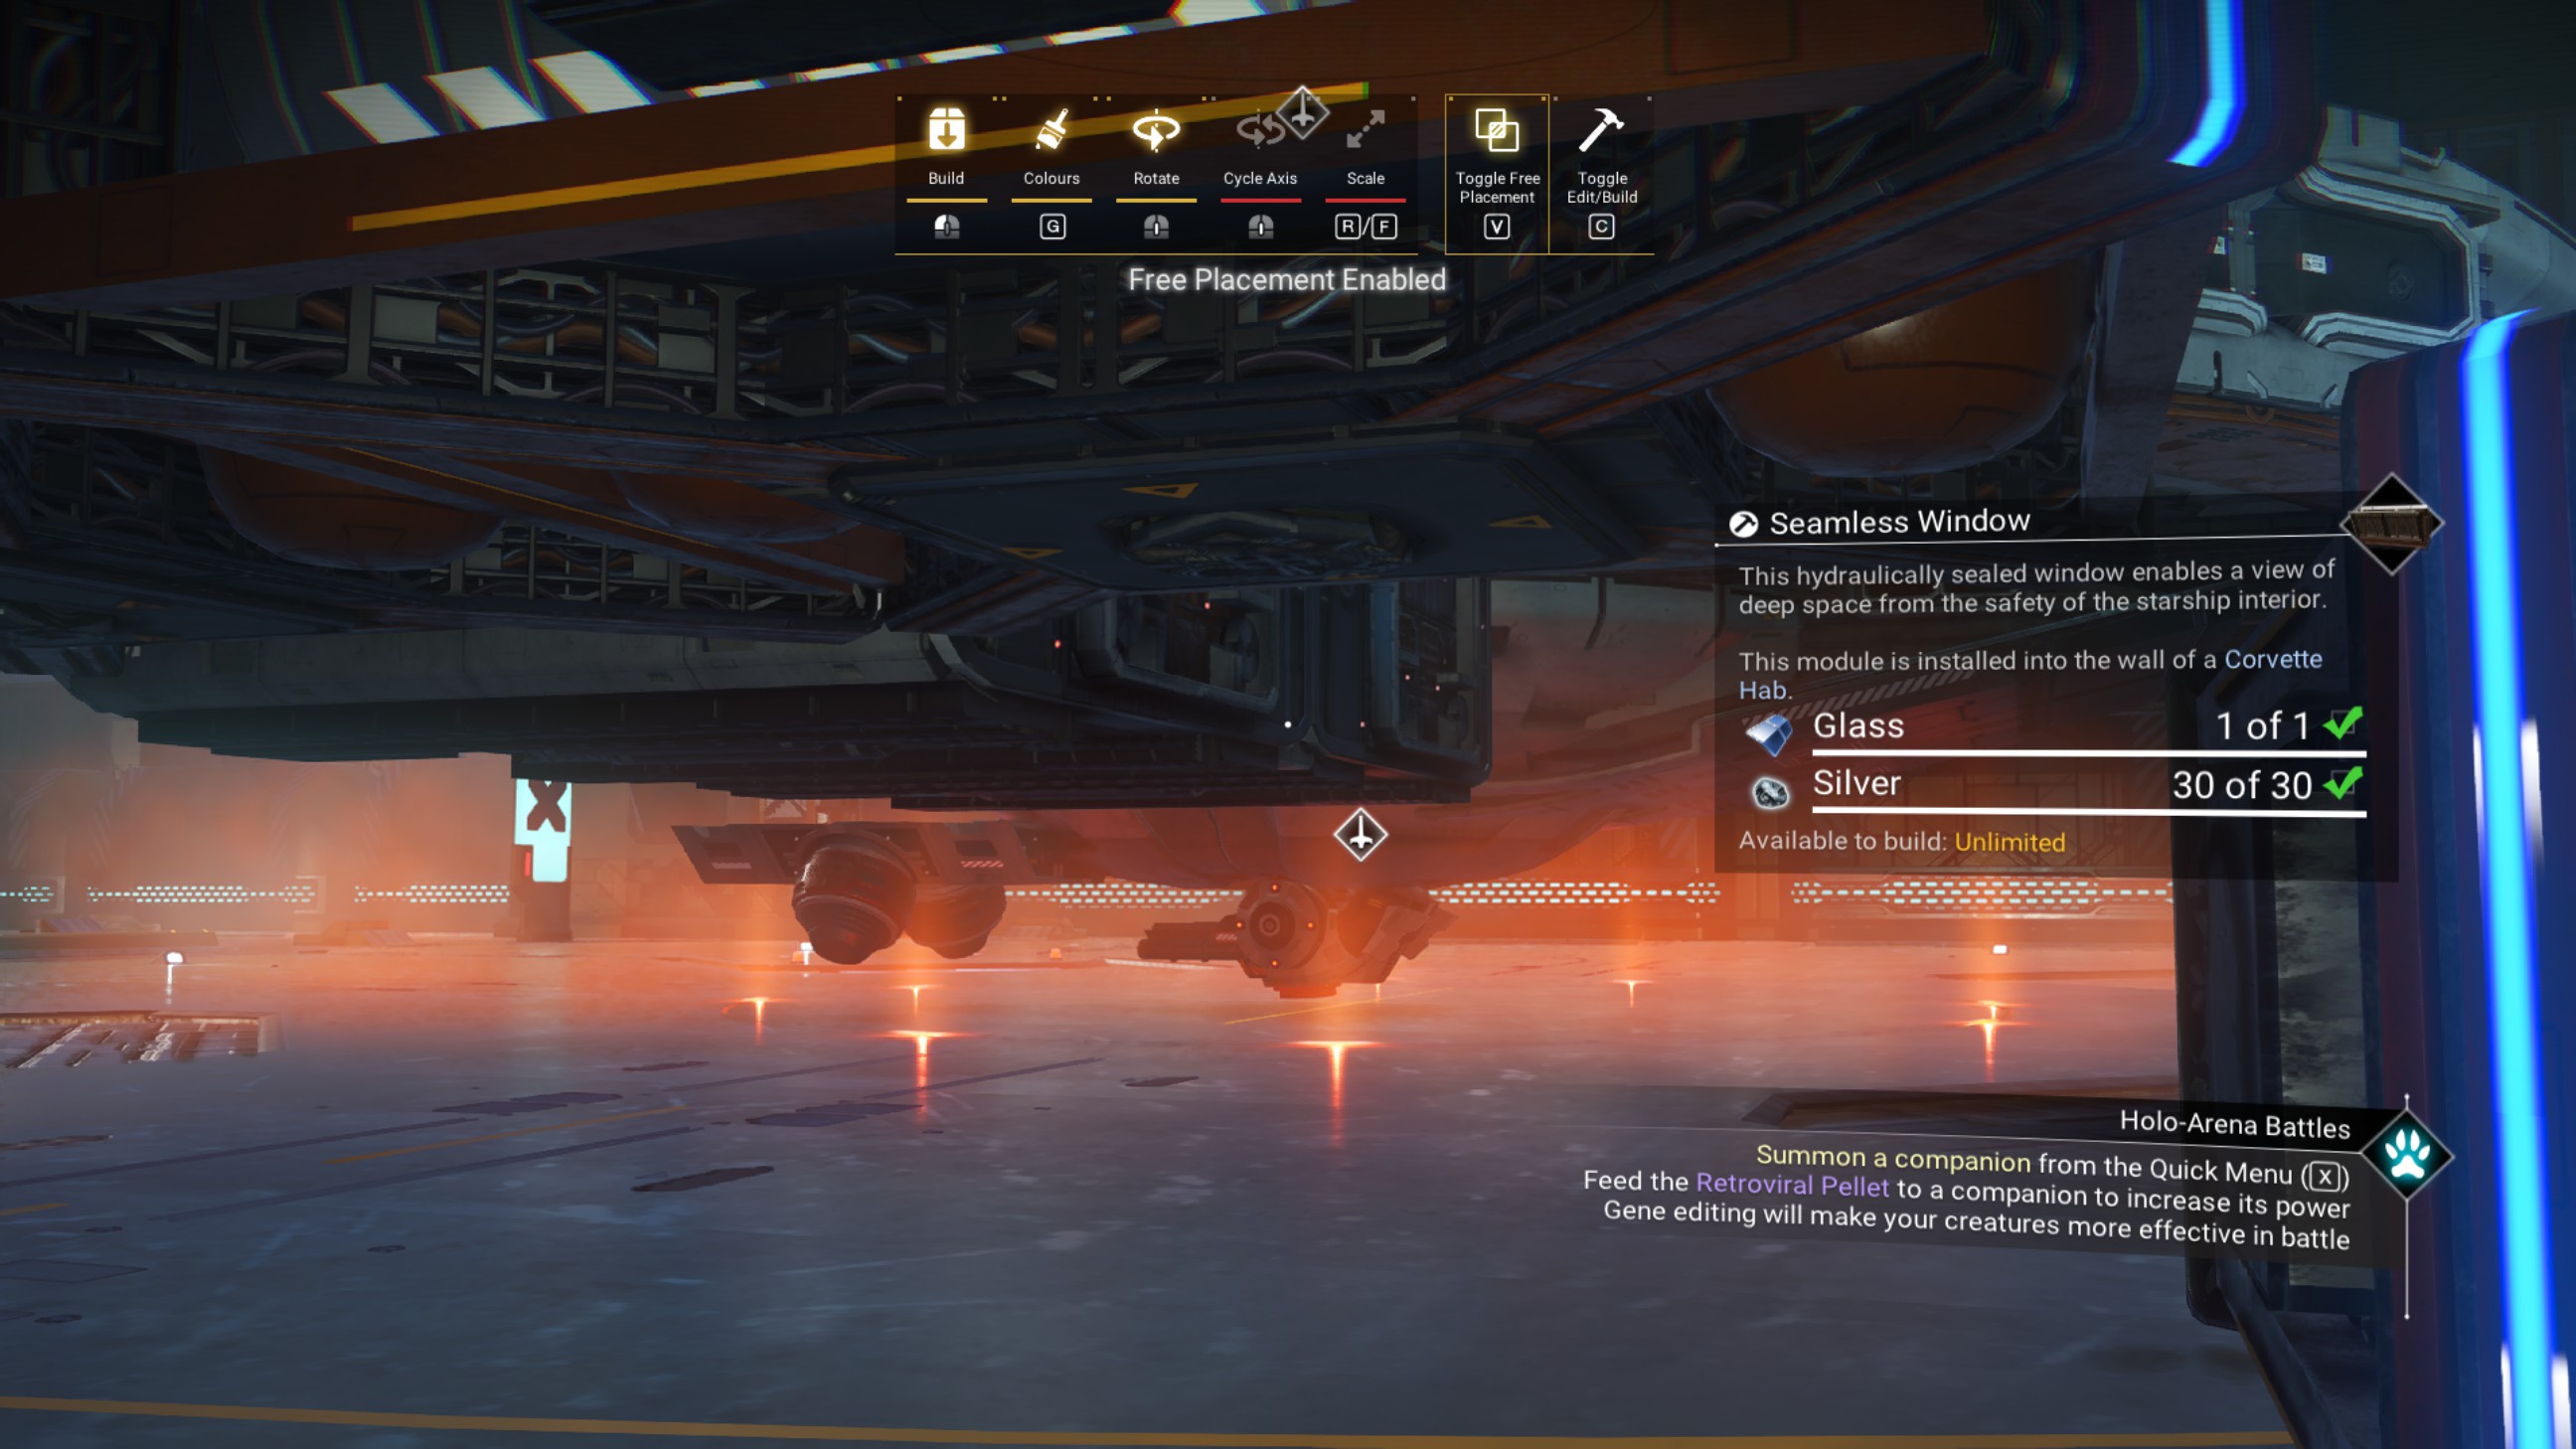
You want to be around 20 to 30 degrees off center. Line yourself up with the rear top zenith reactor, as shown, and place the window in line with the center of the ship (your cursor should line up with the turret). This part may take a couple tries to get right.
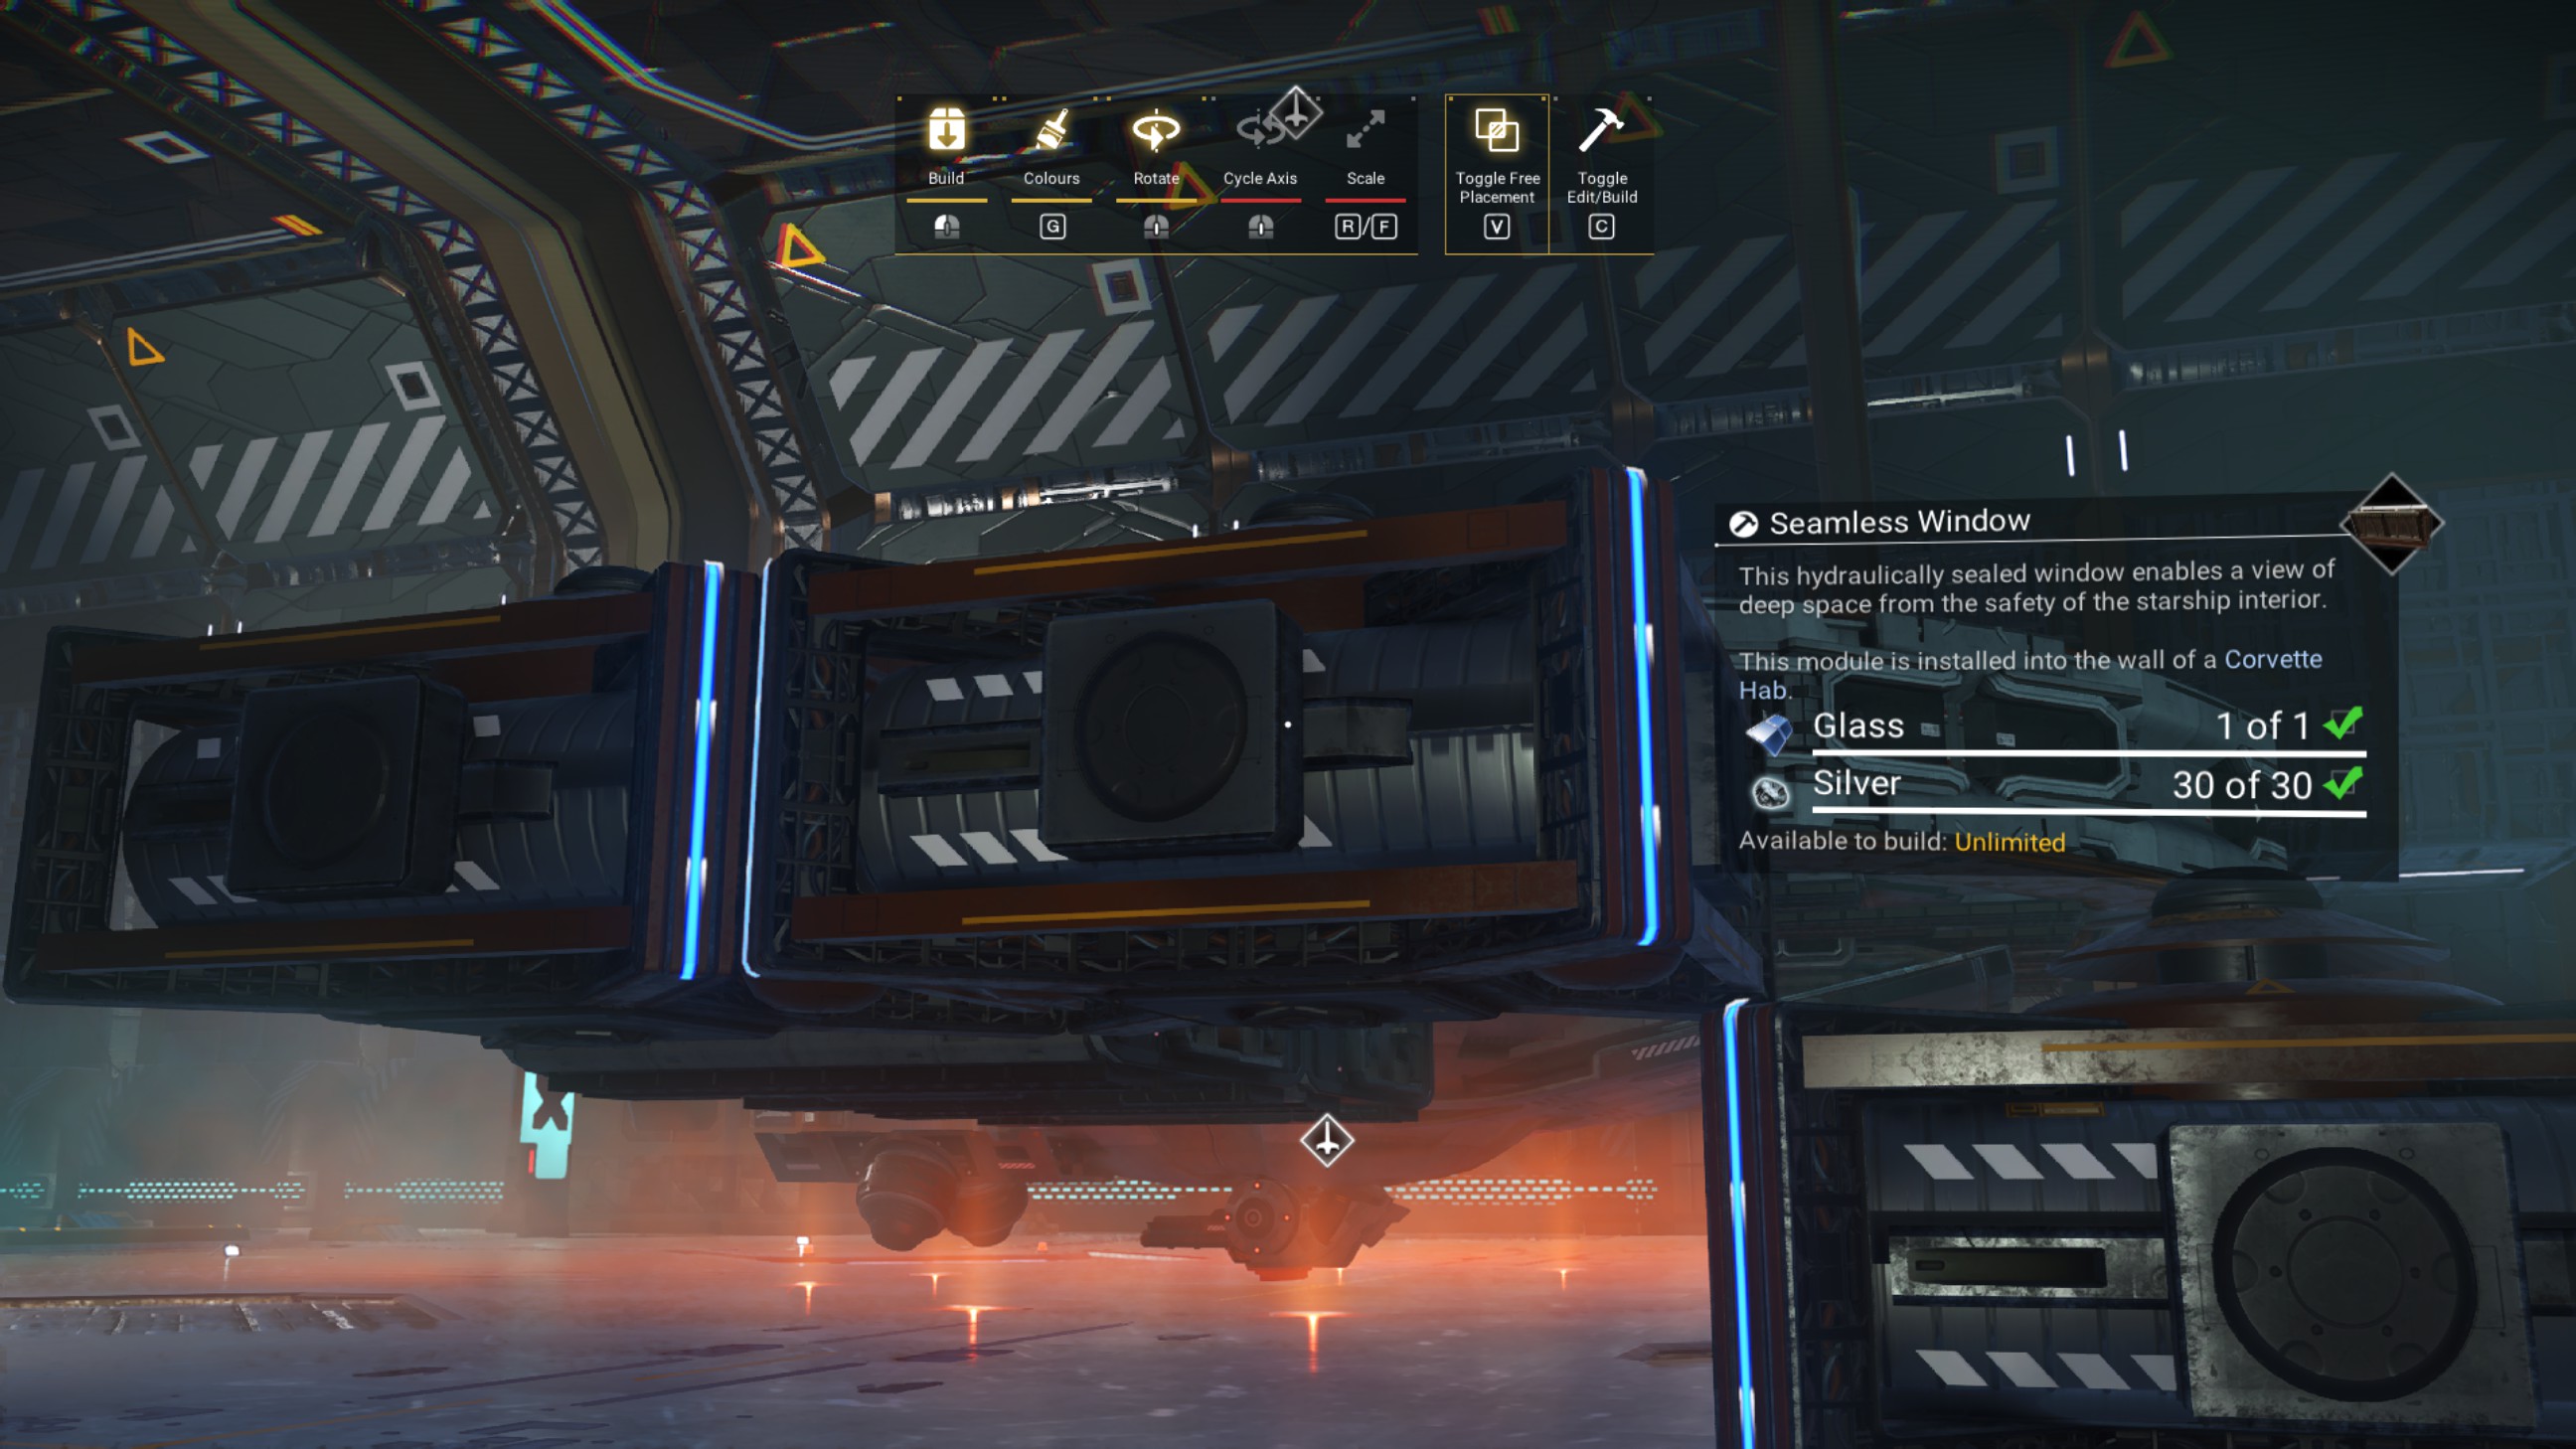
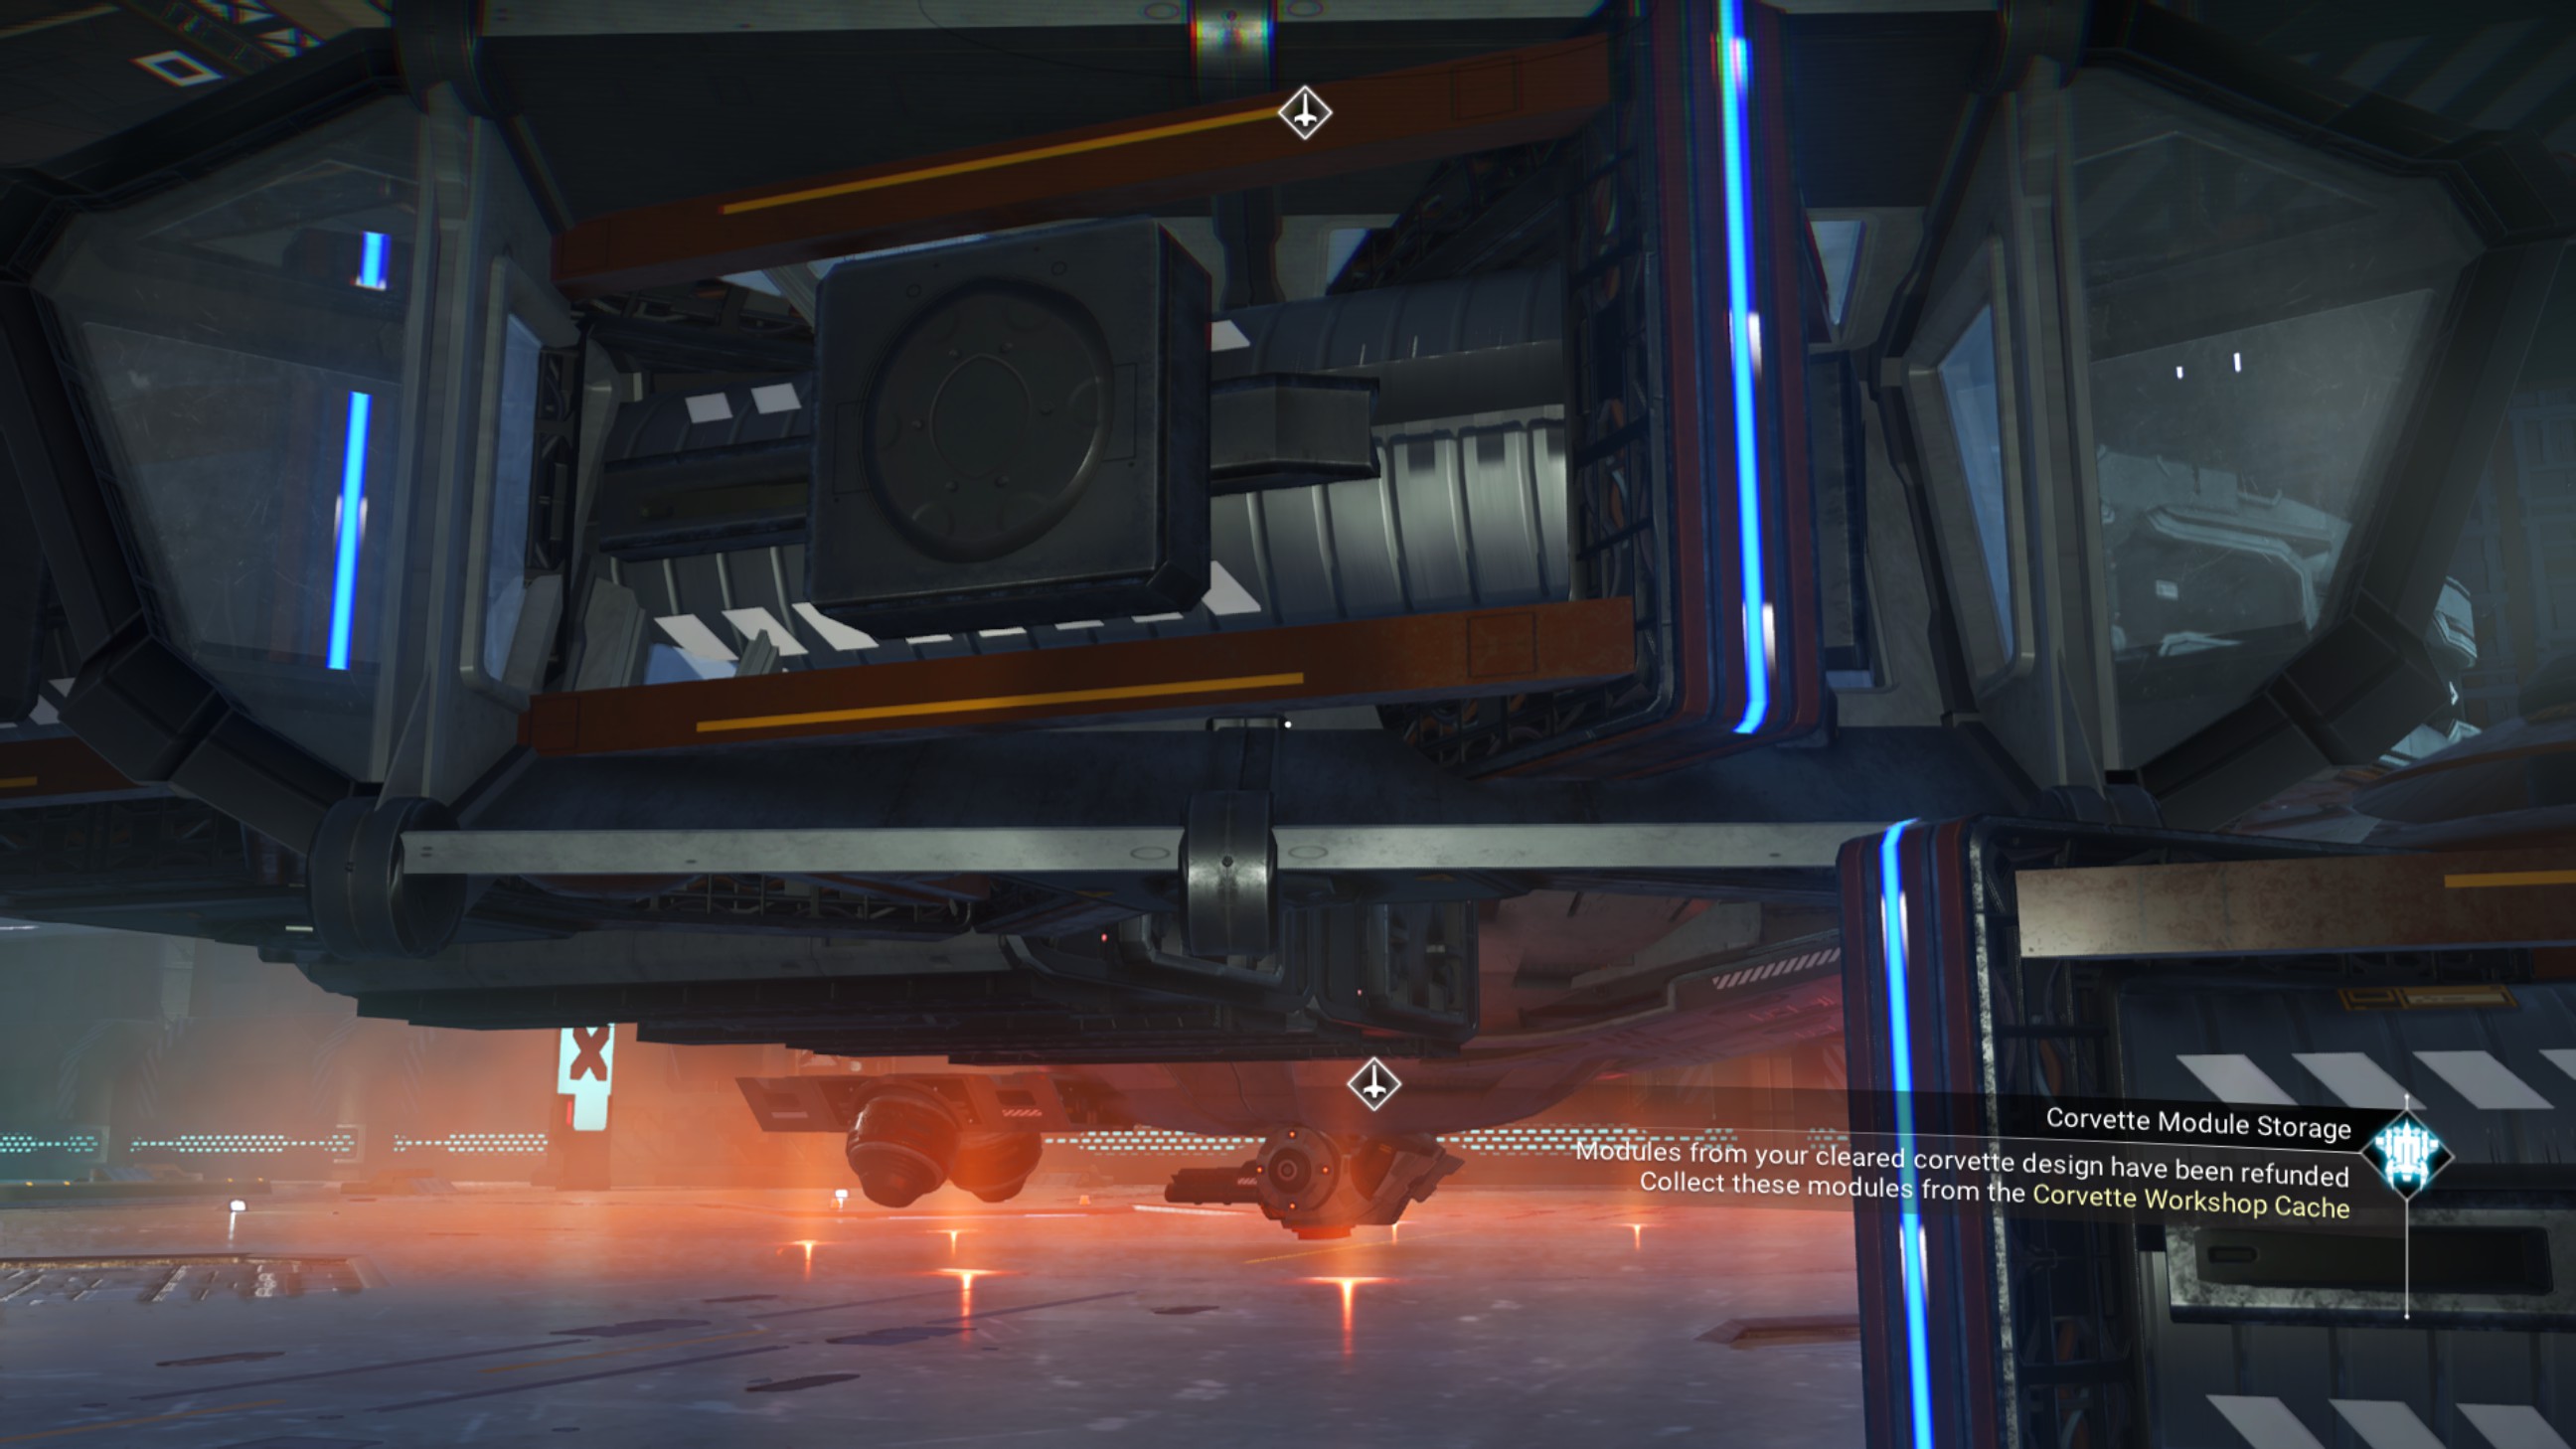
Back in the corvette workshop, place a walkway against the seamless window, then place another walkway on top of that.
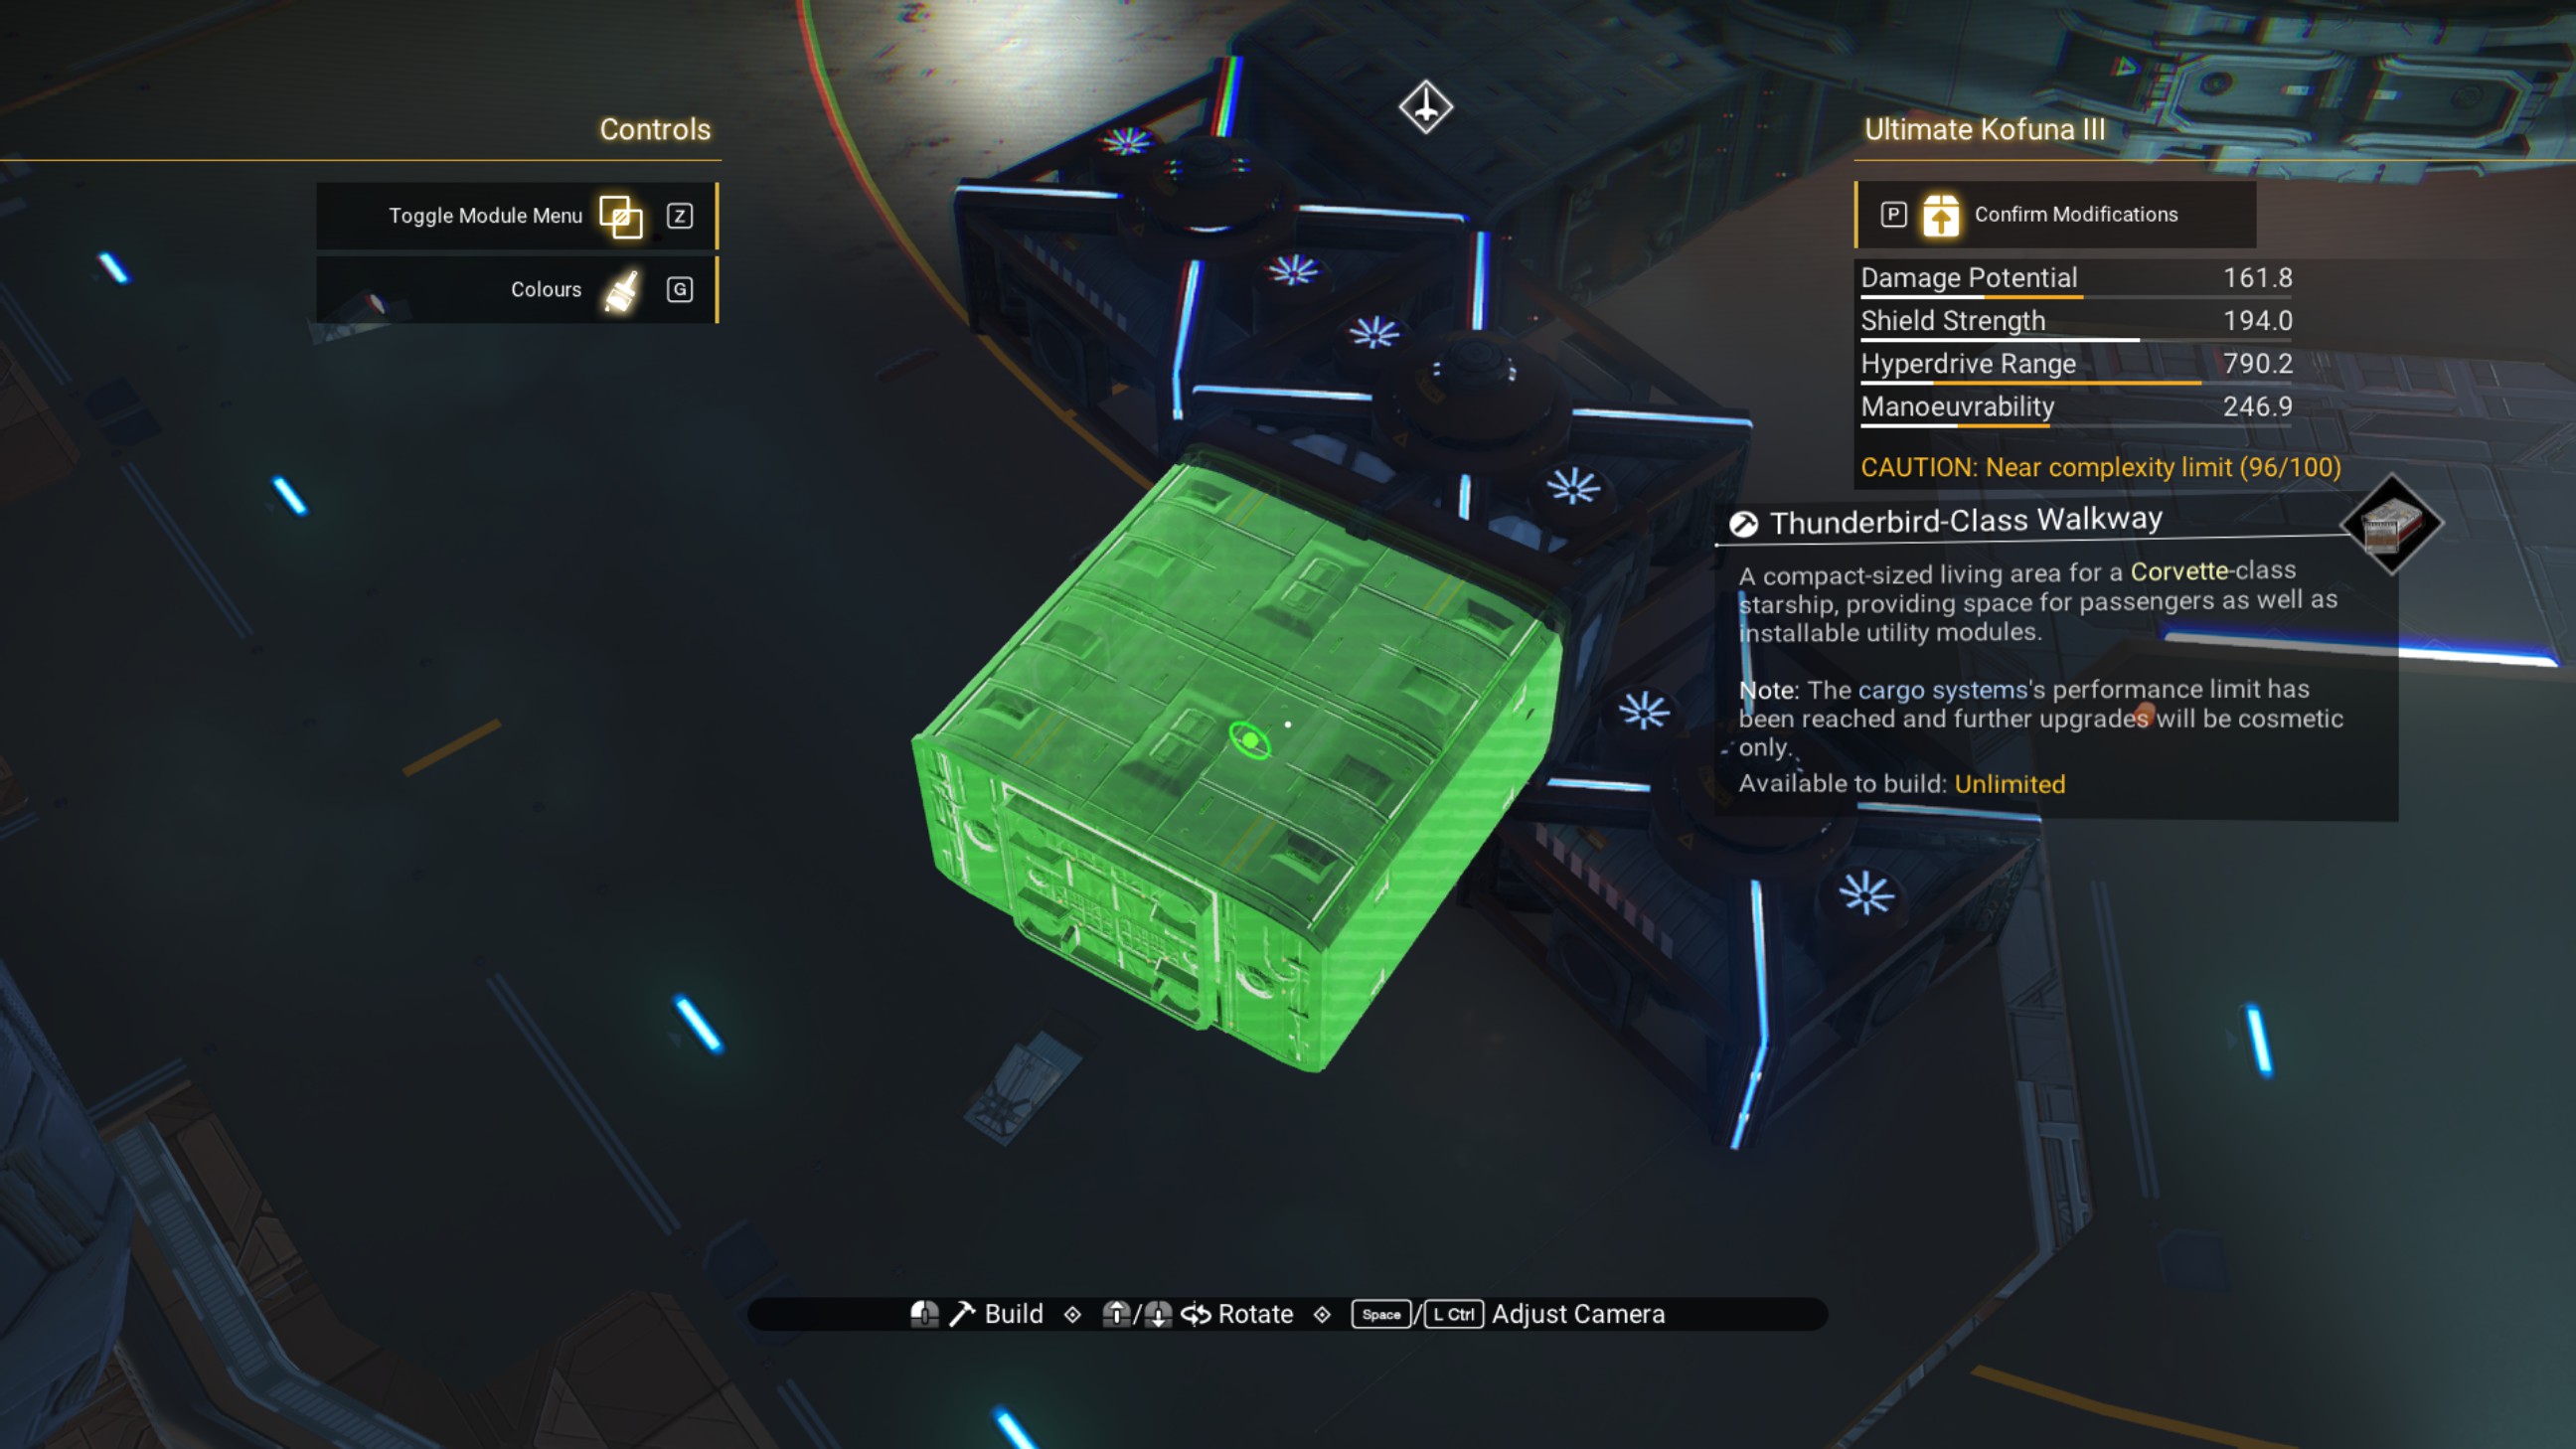
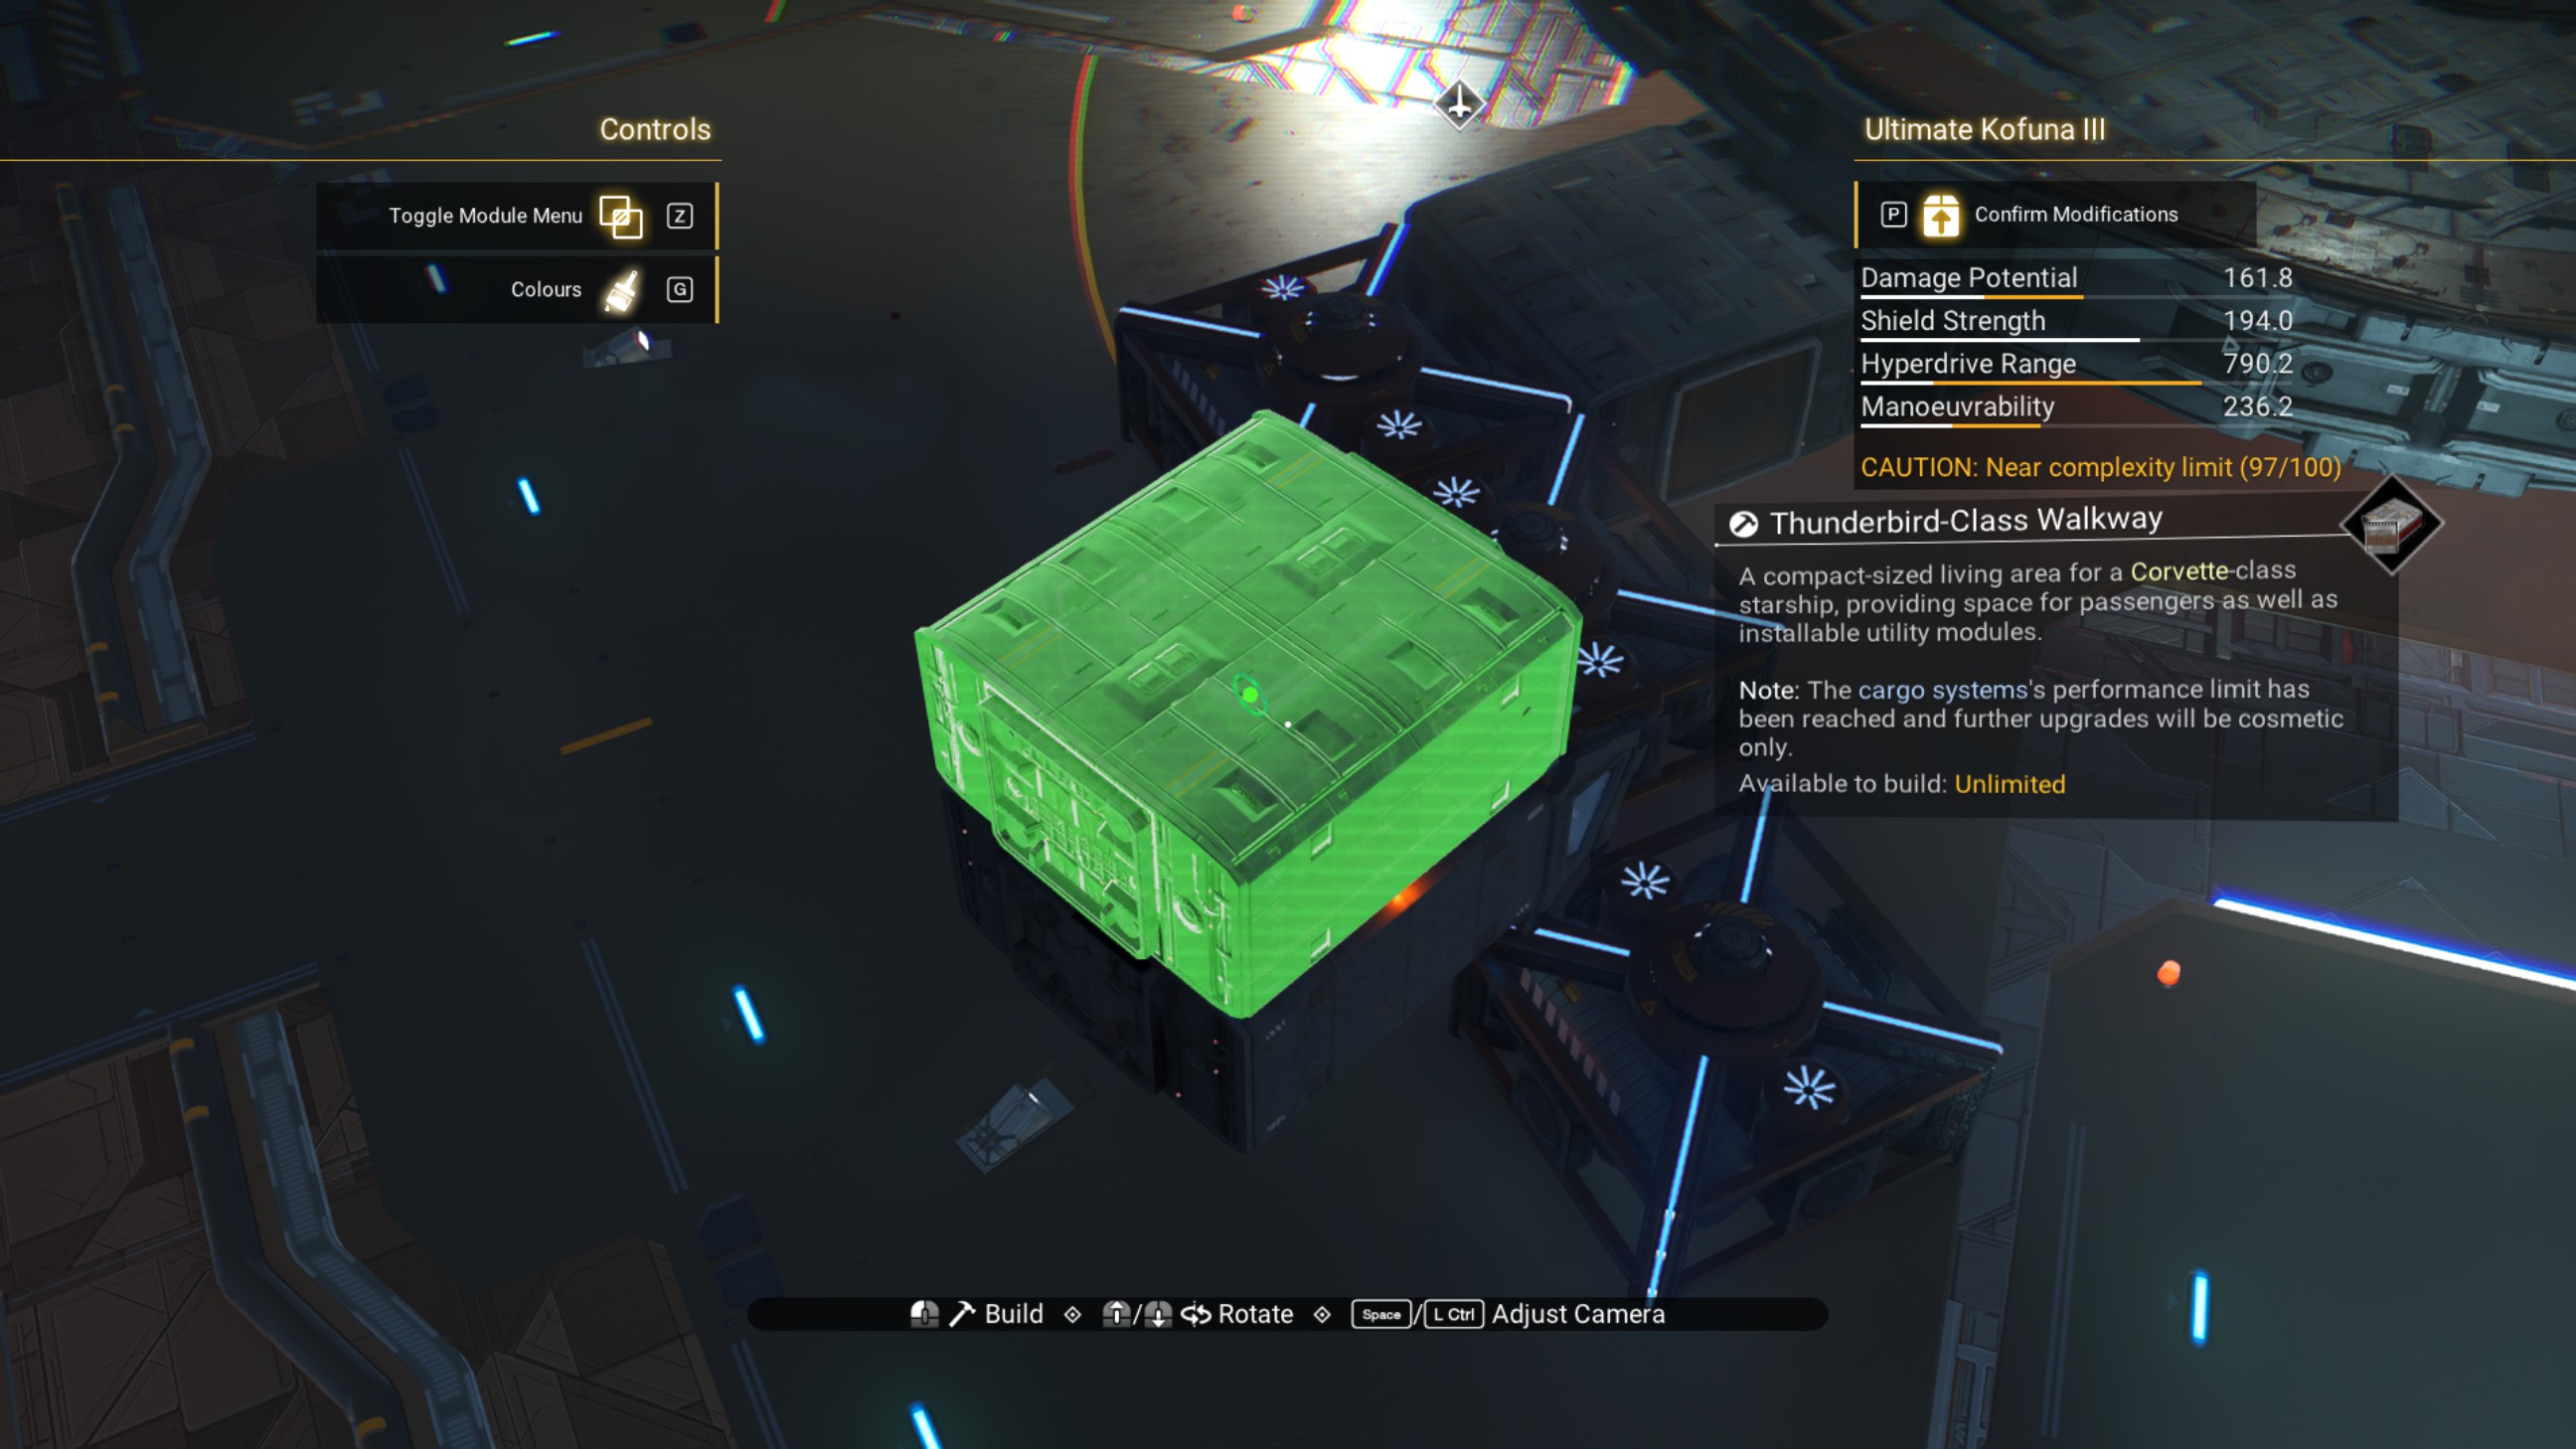
Go ahead and delete the connecting walkway, the walkway under the saucer, and the one we attached to the window.
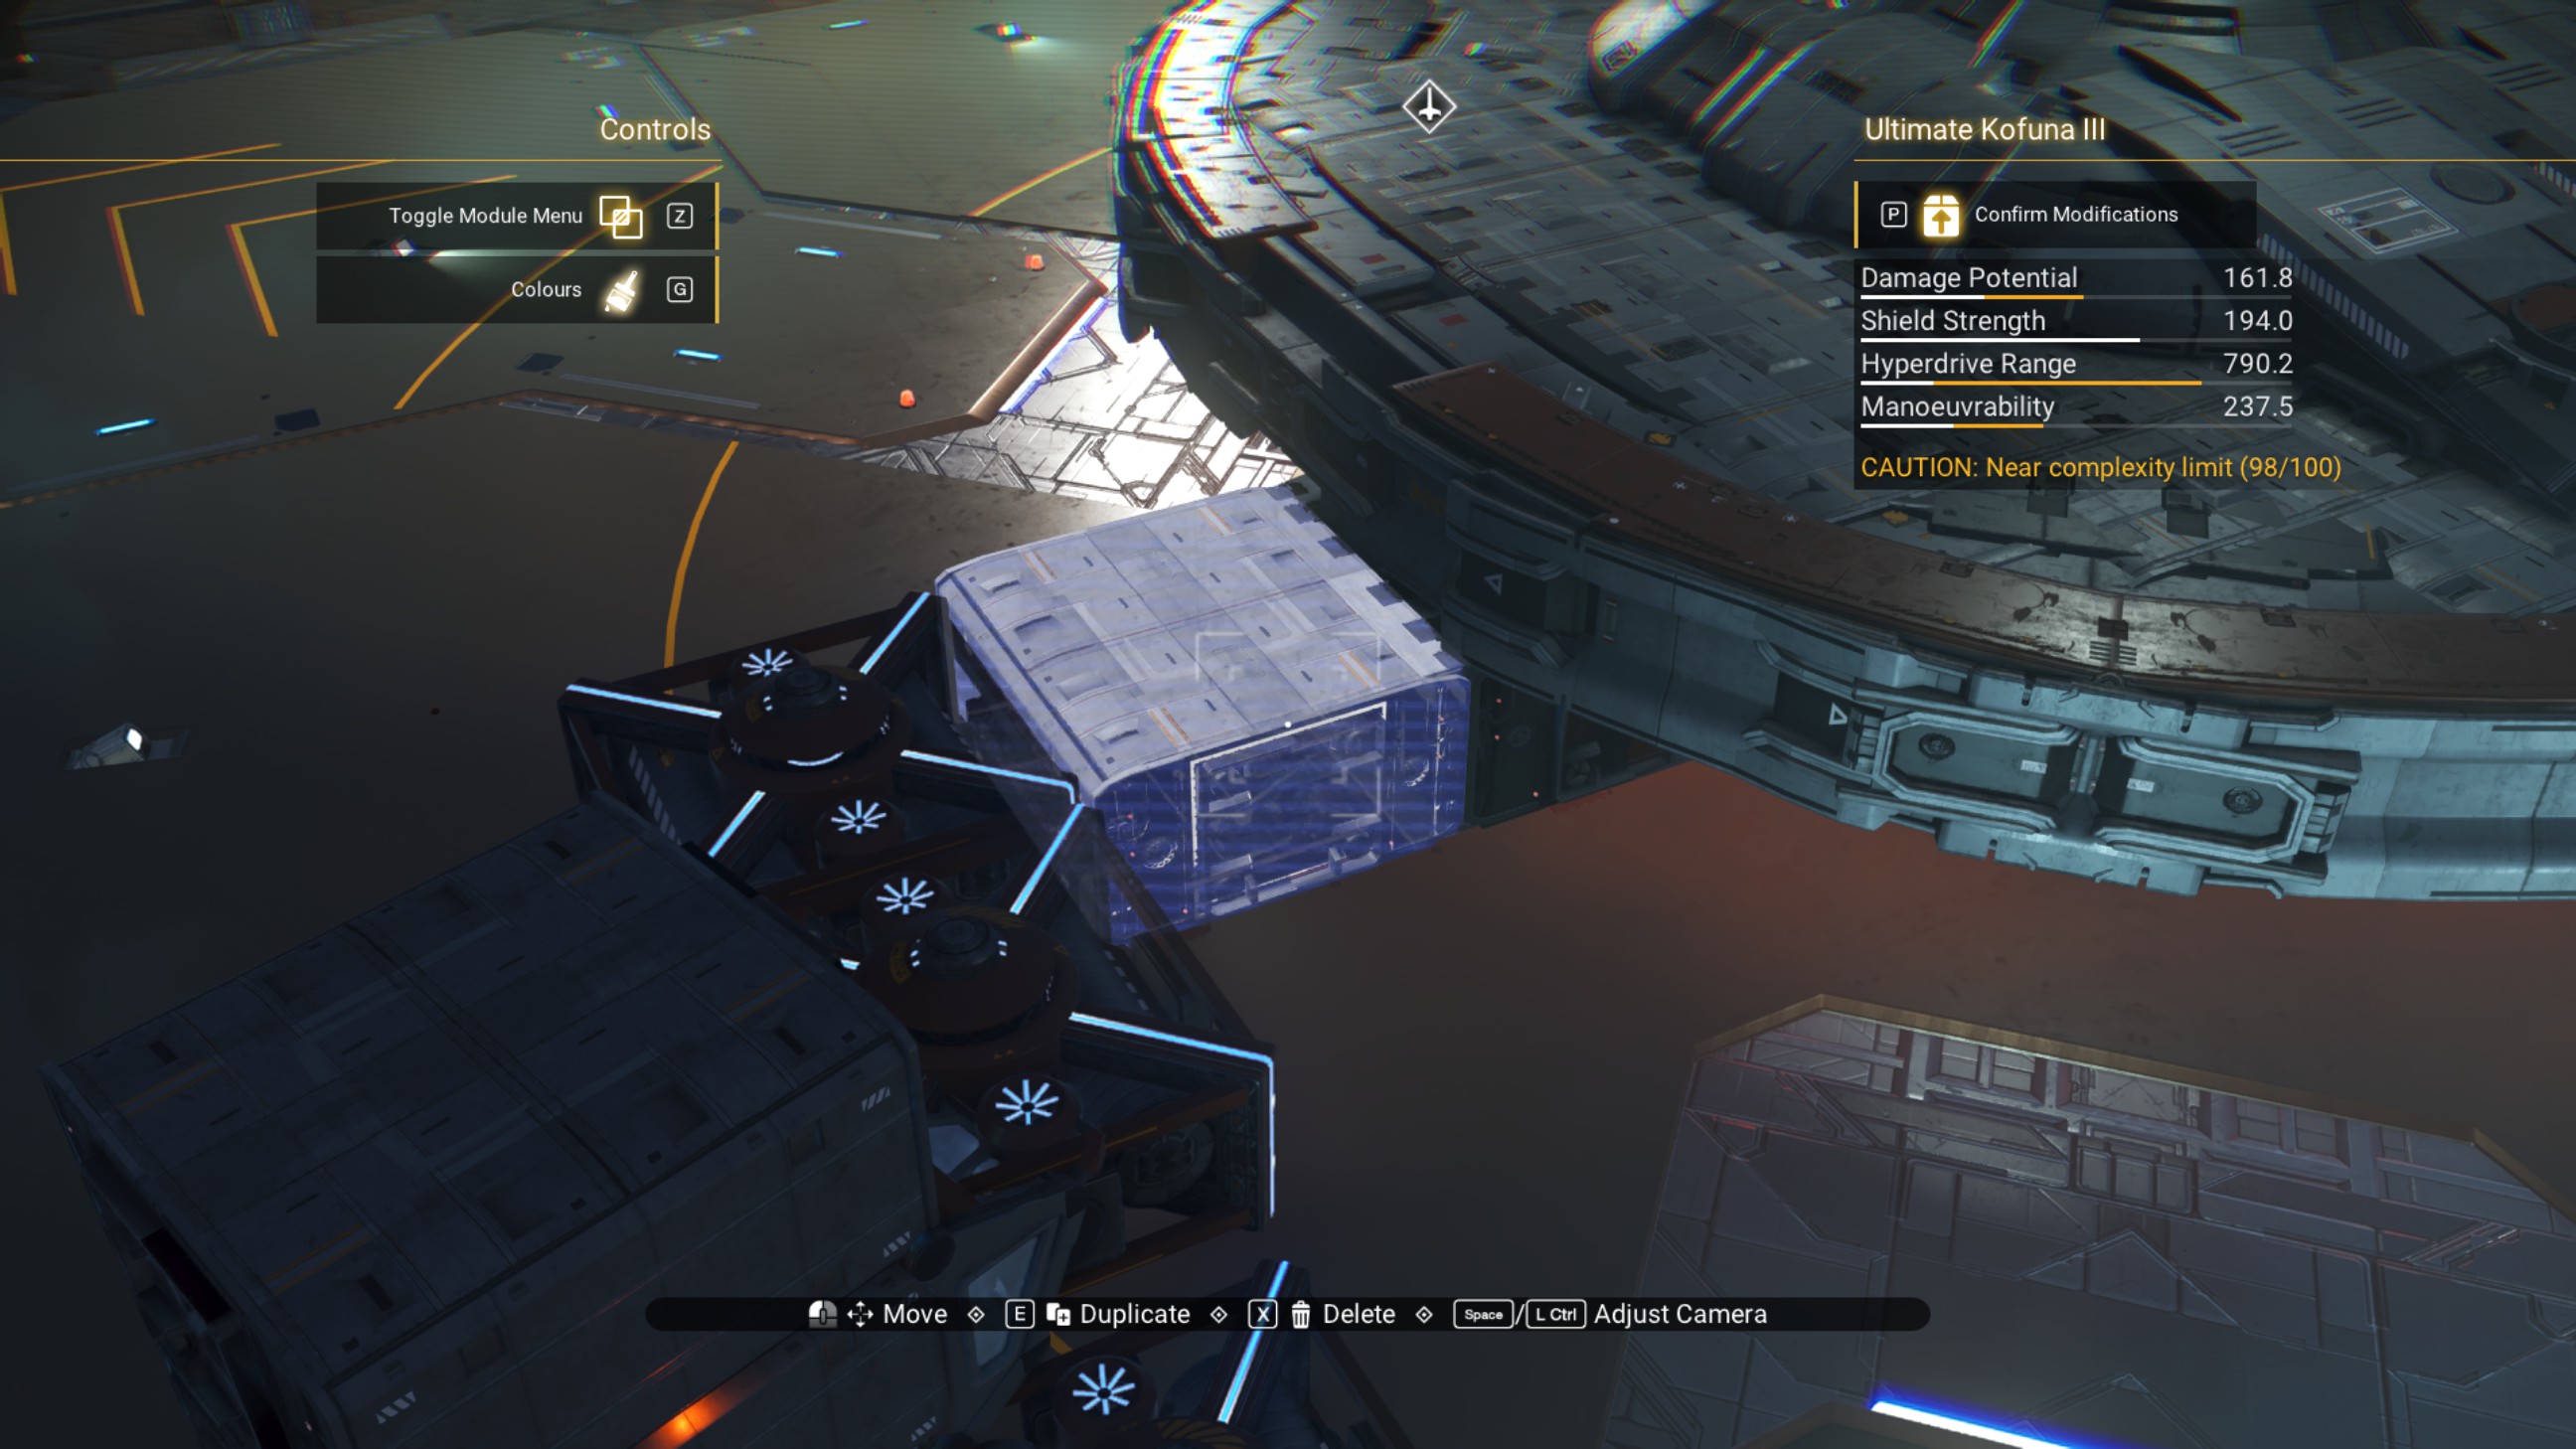
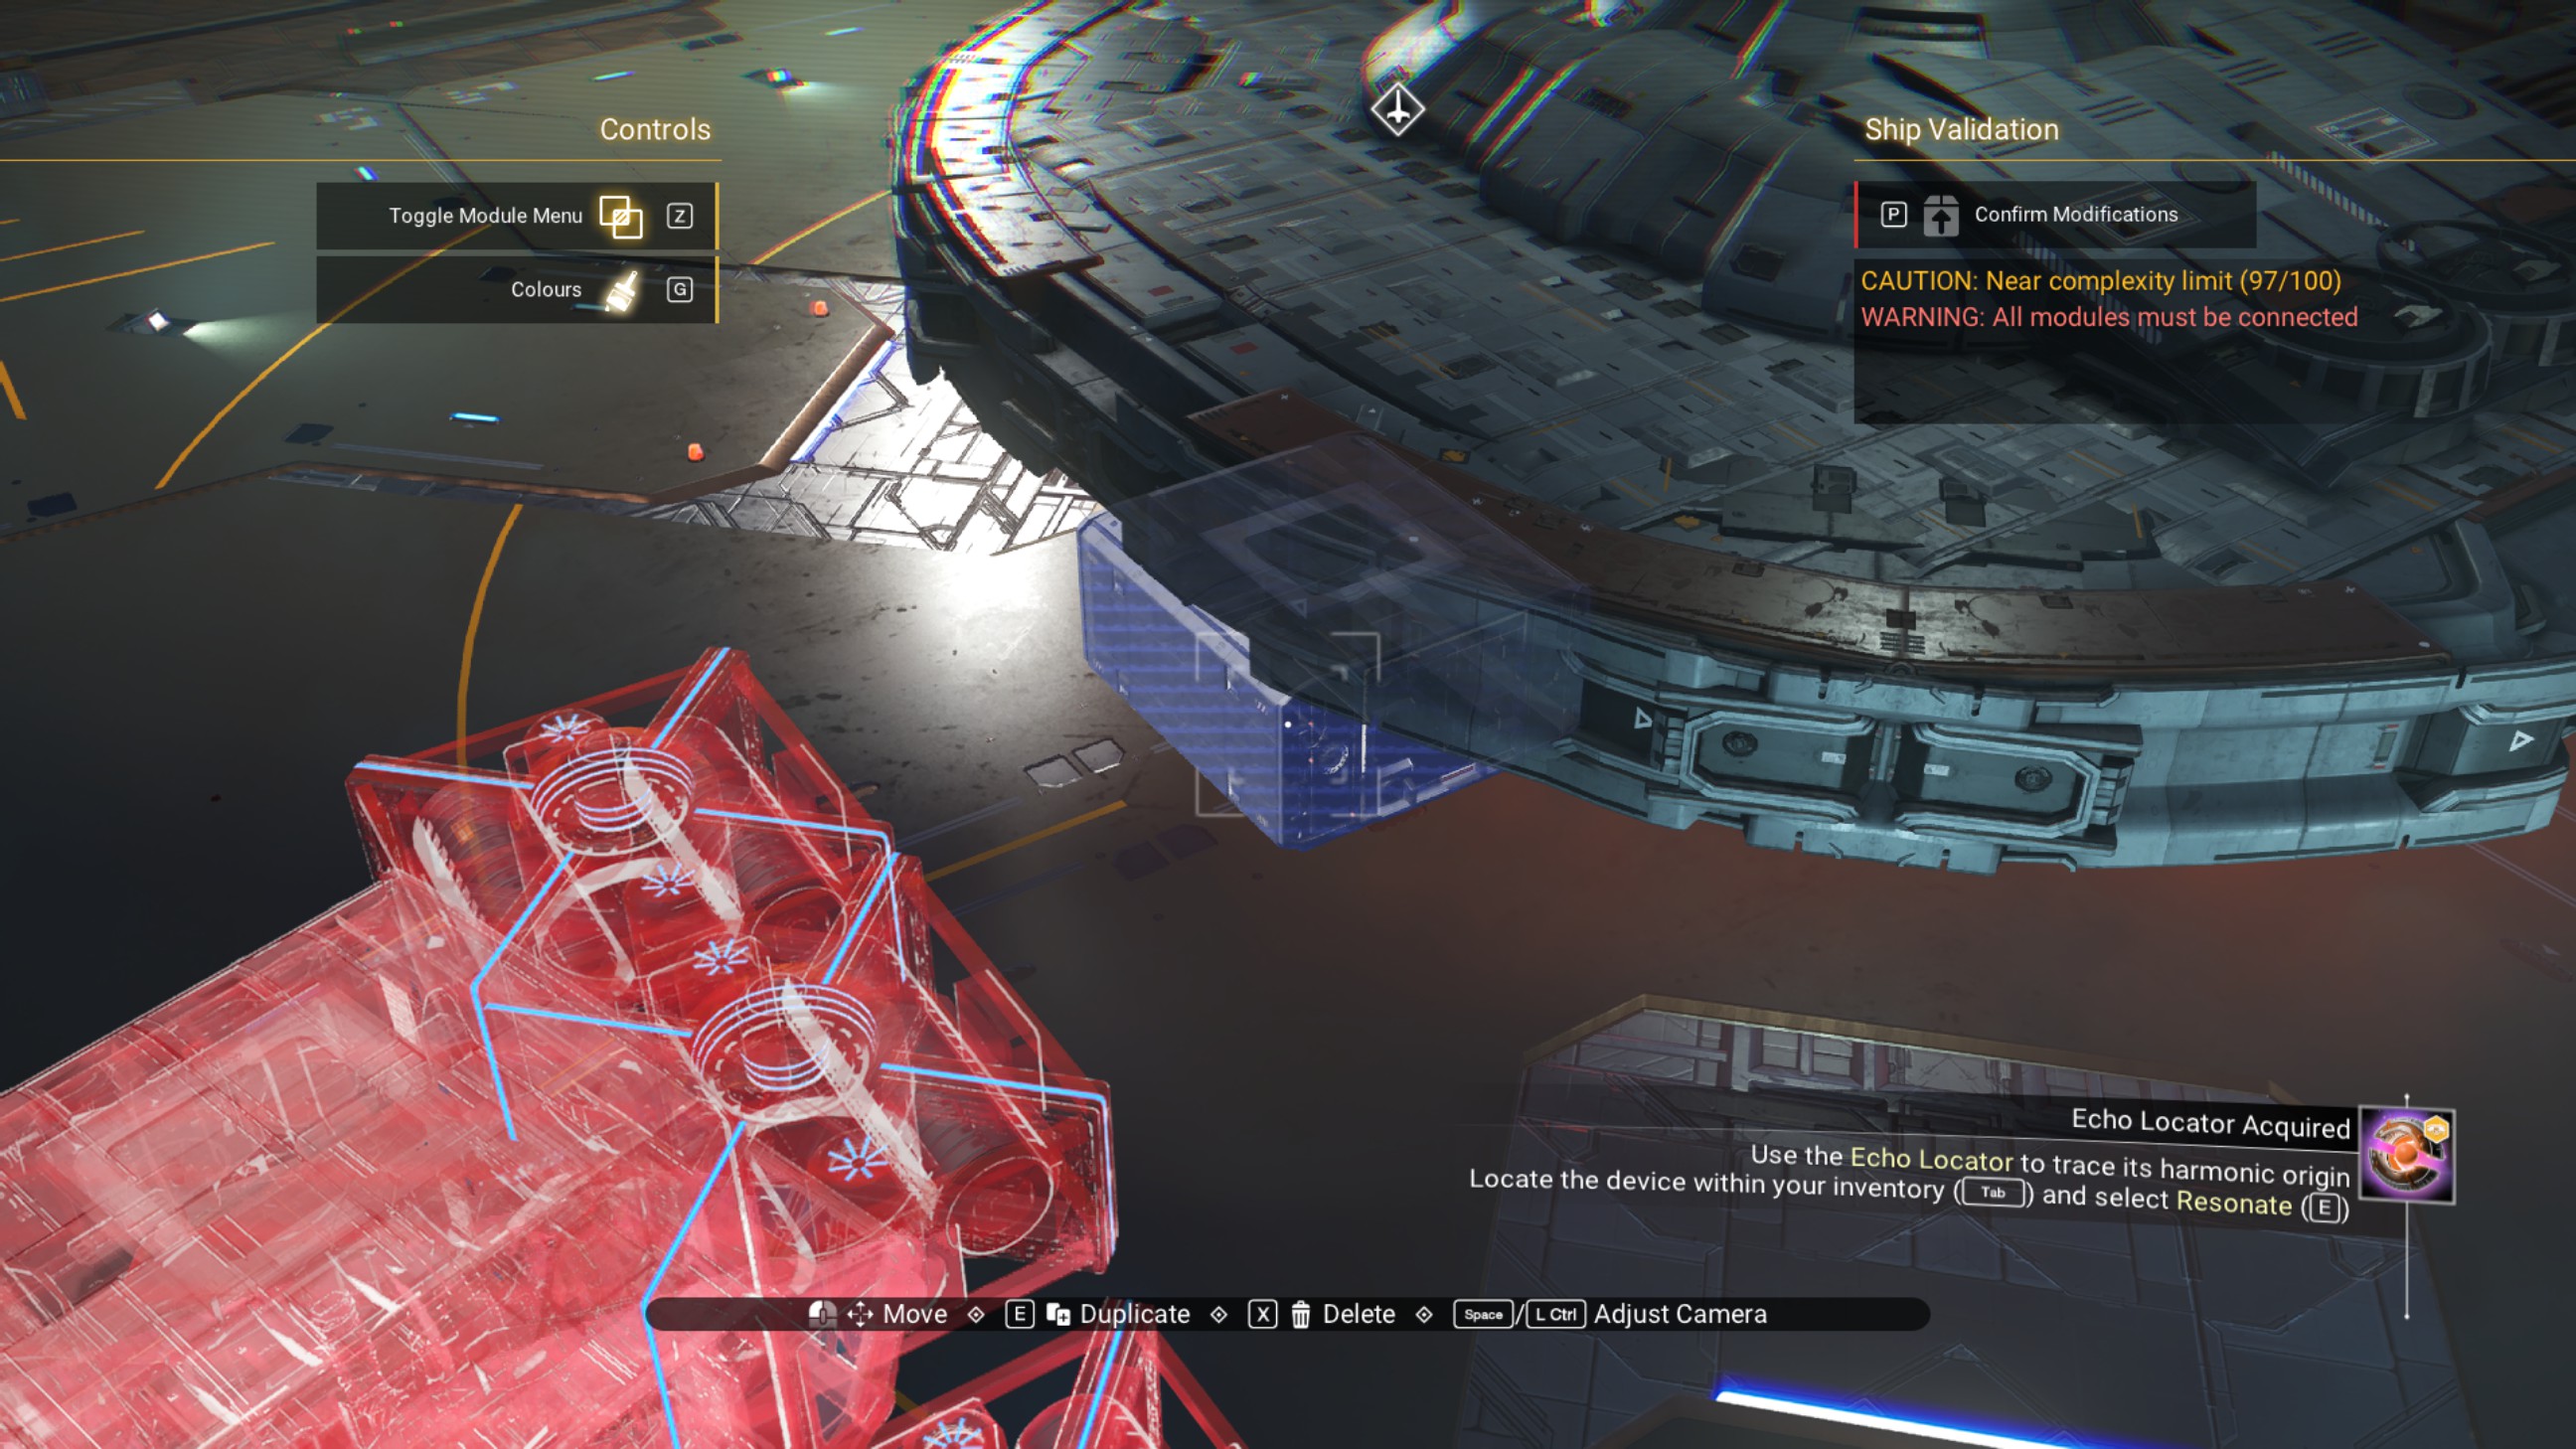
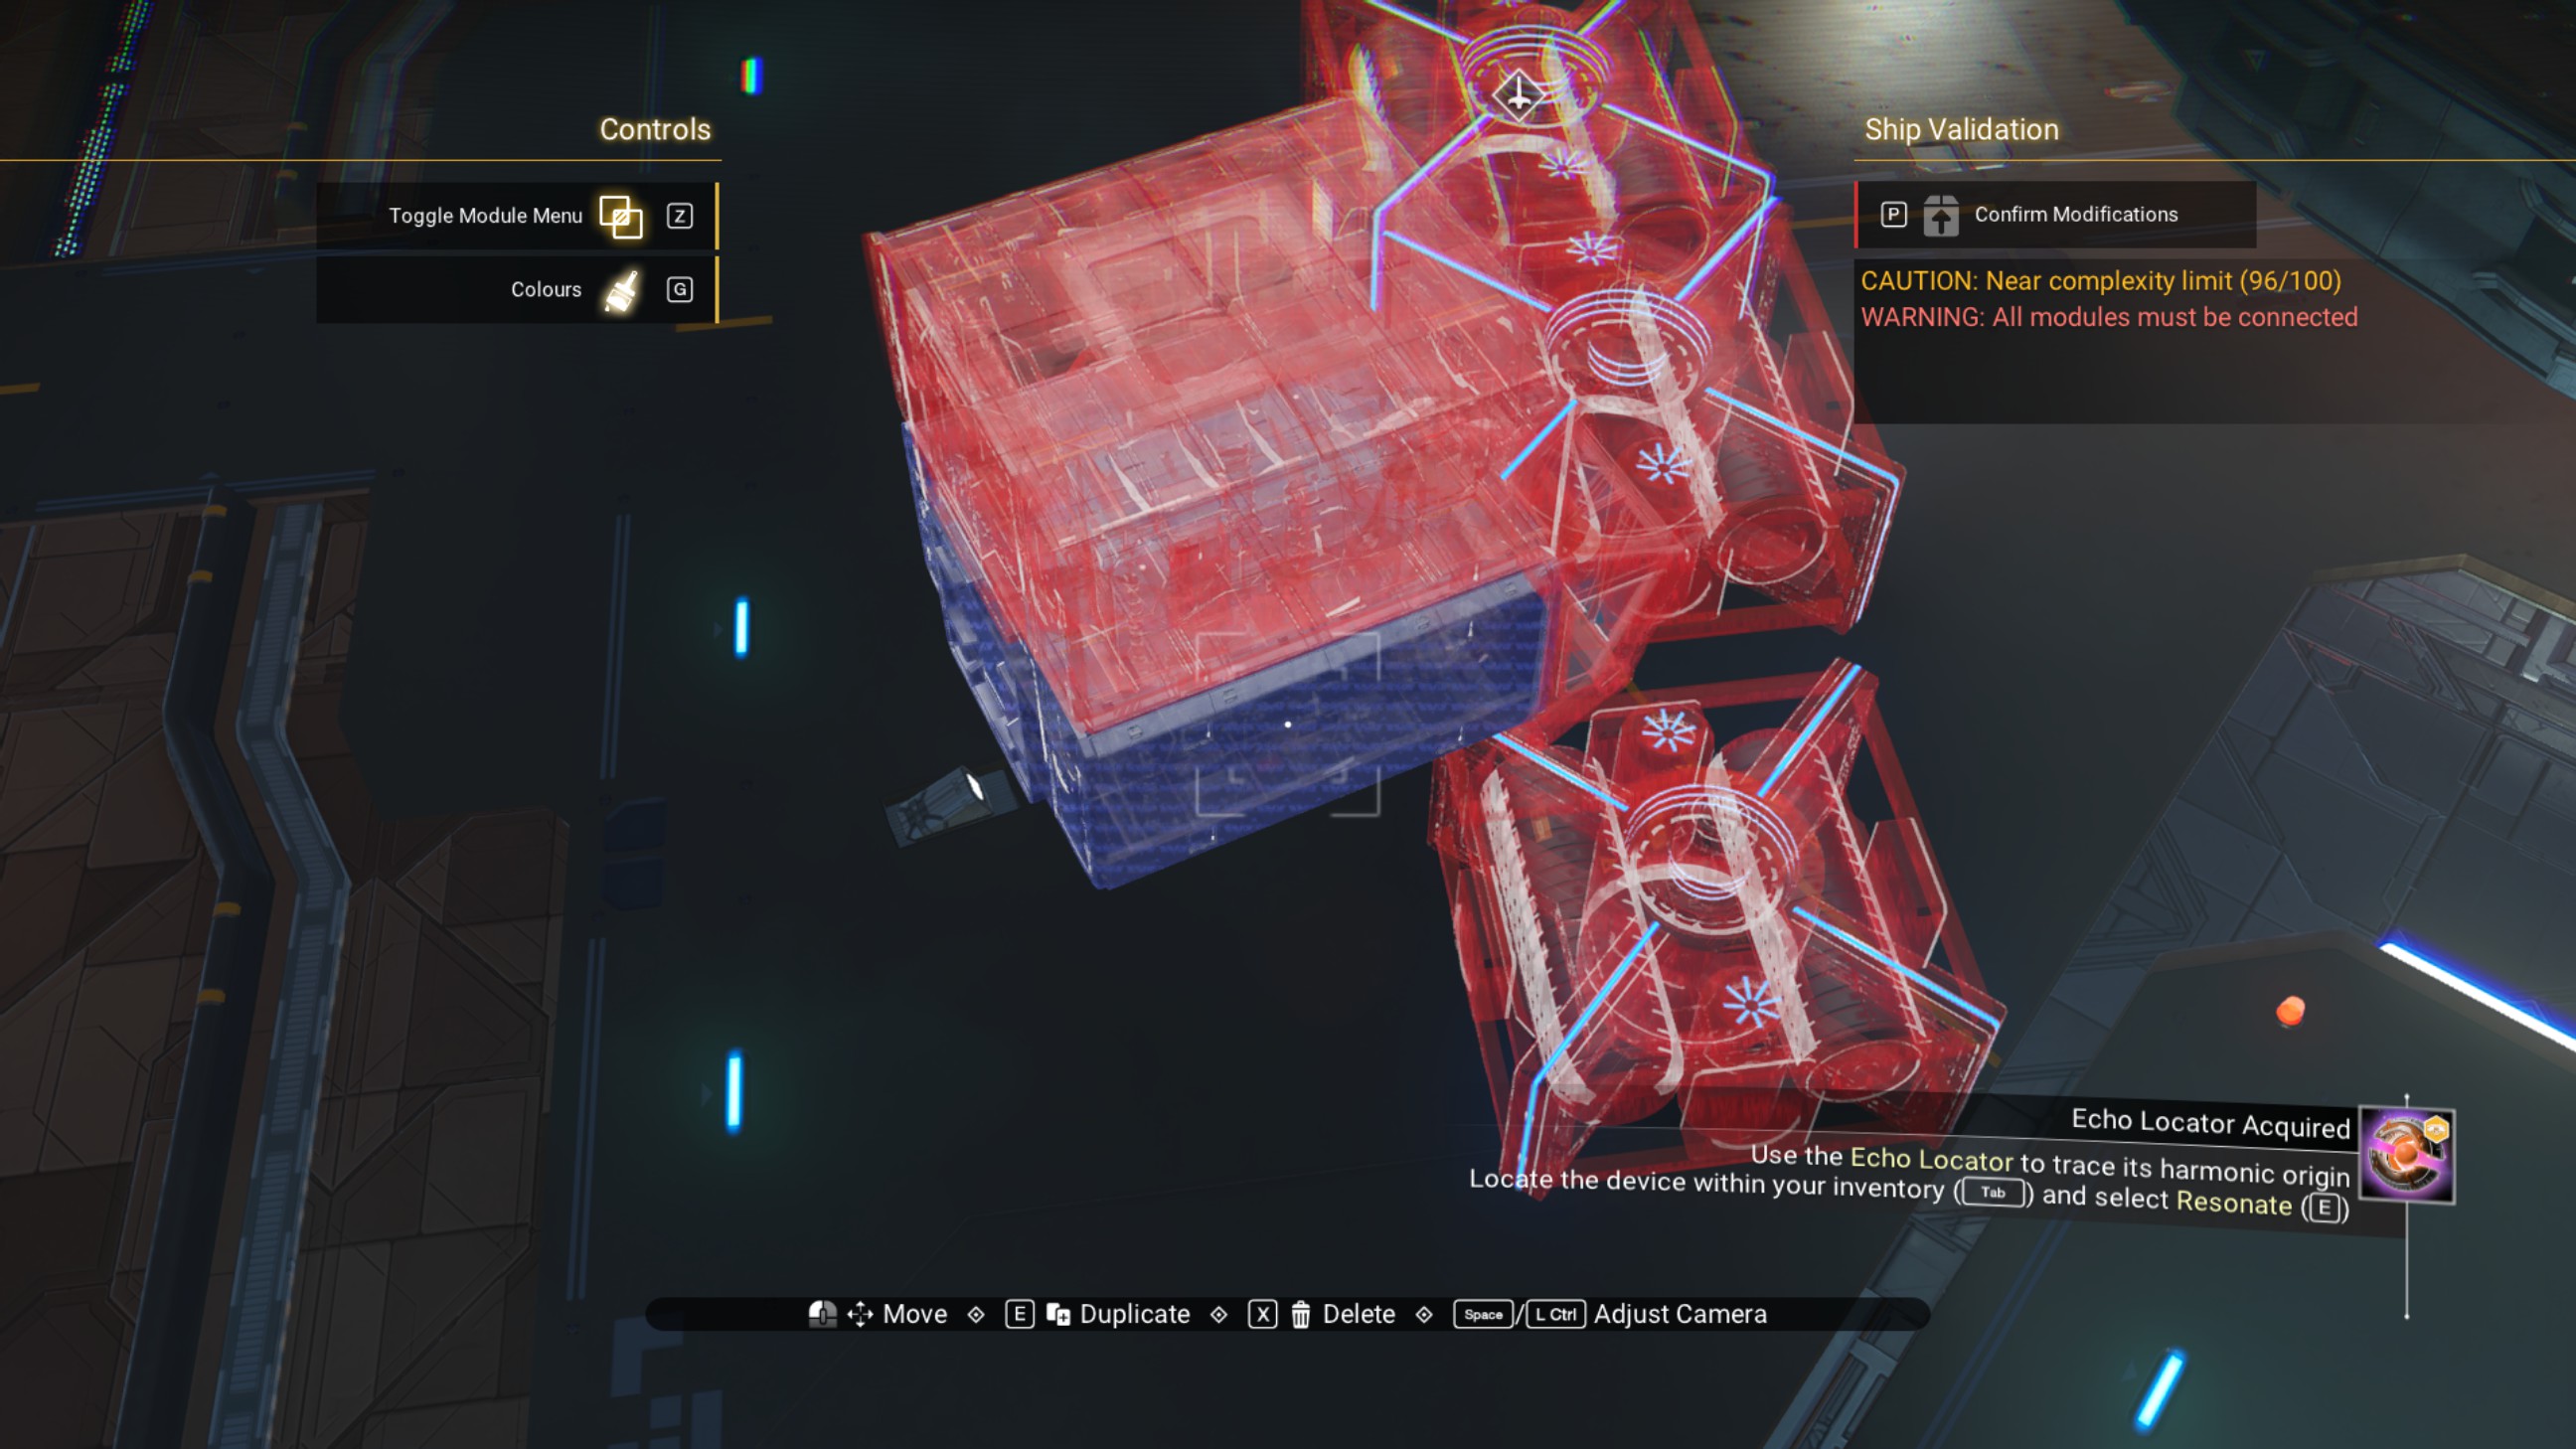
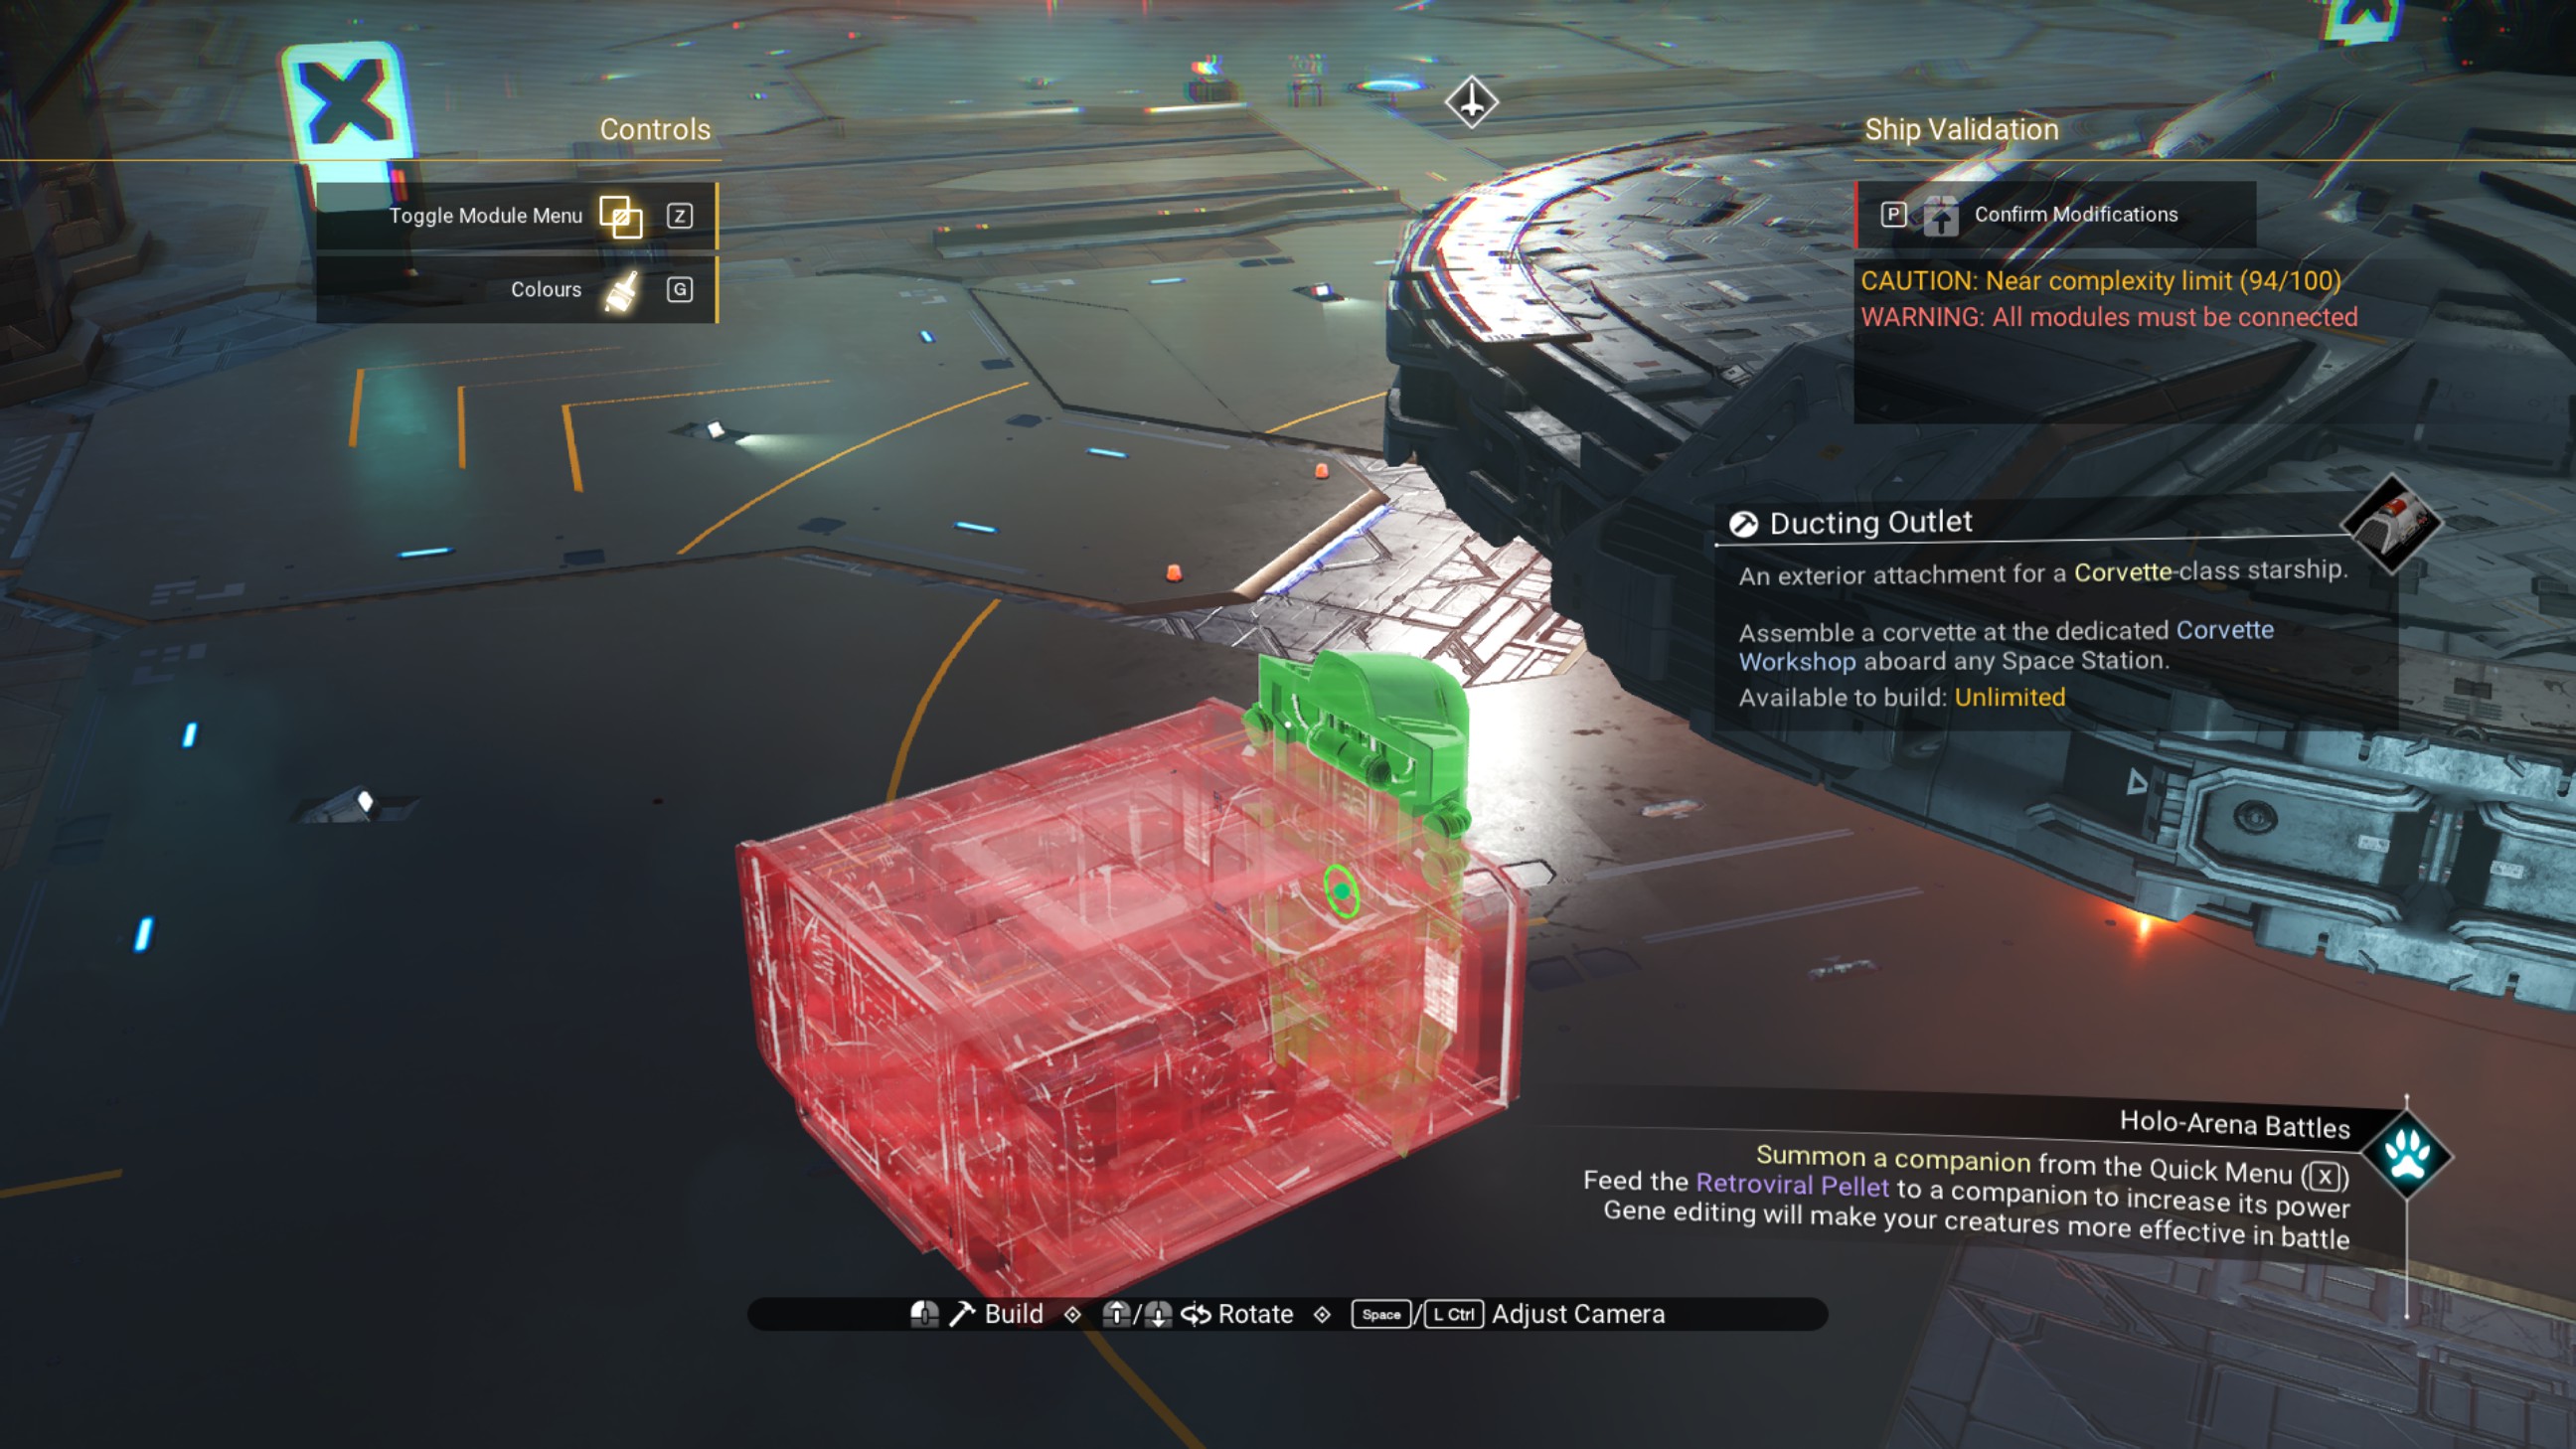
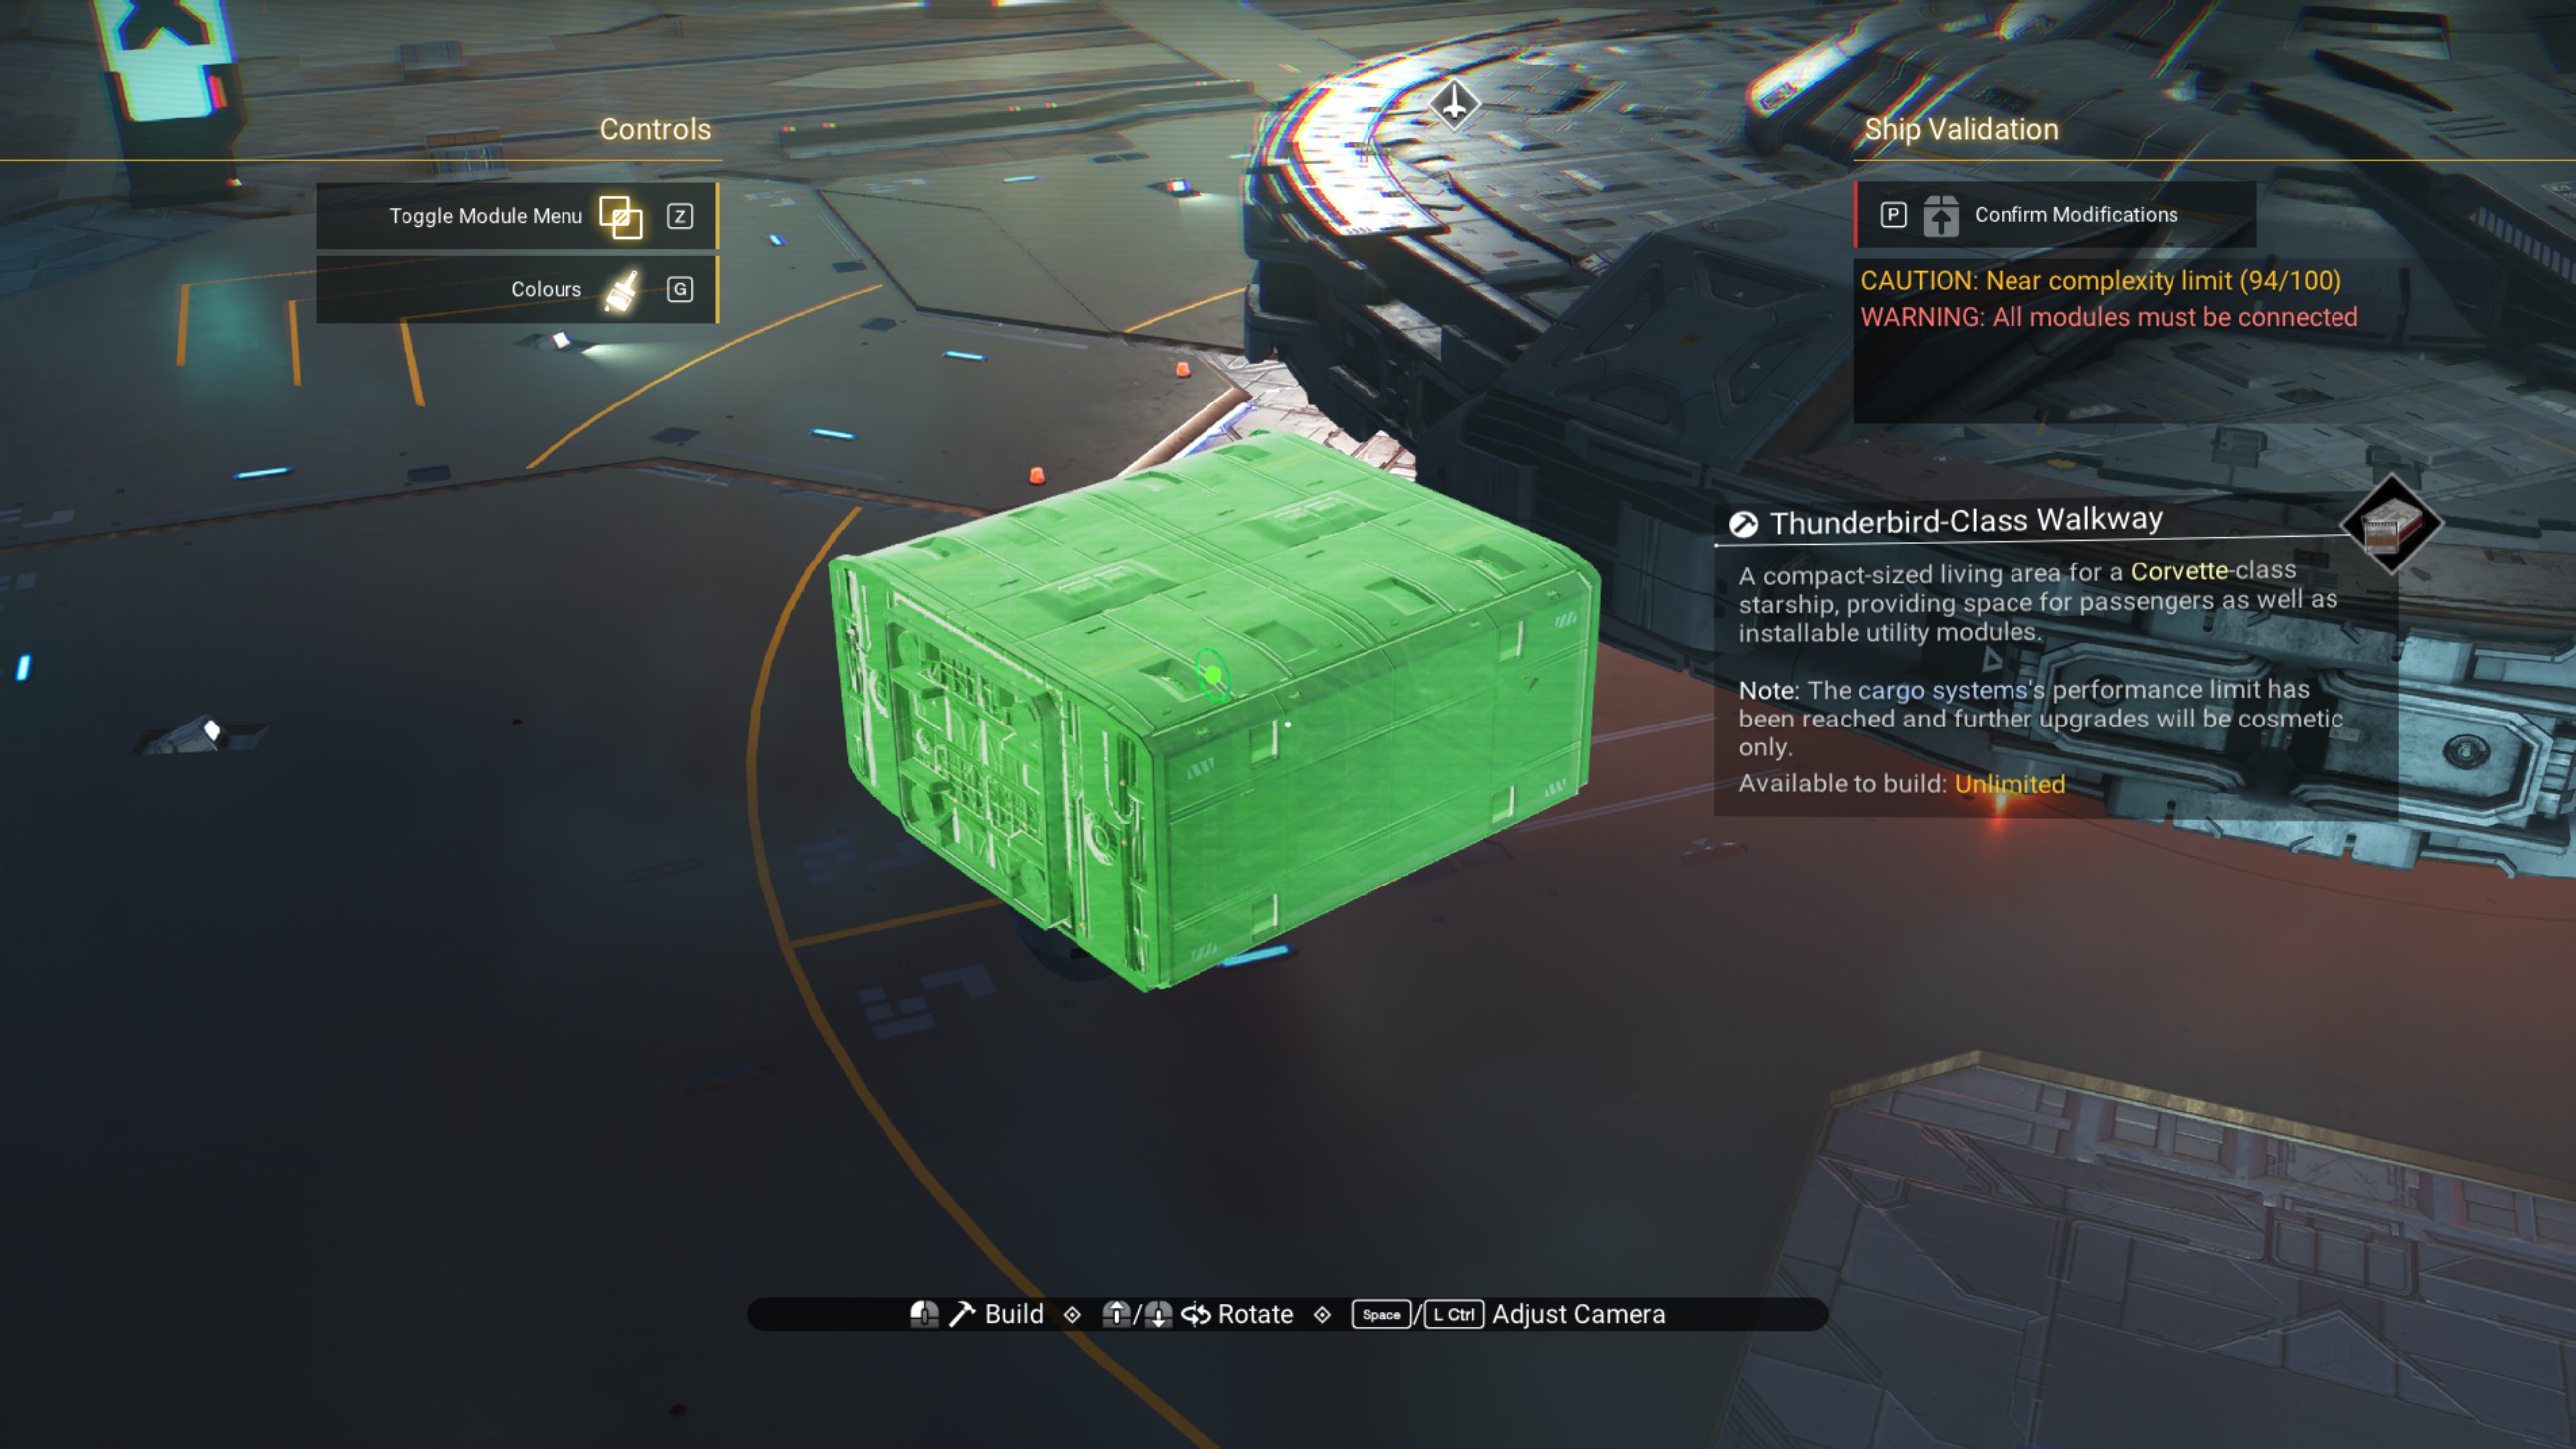
Place a ducting outlet on the side of the remaining walkway facing the ship, and offset the walkway so that the ducting outlet is on top.
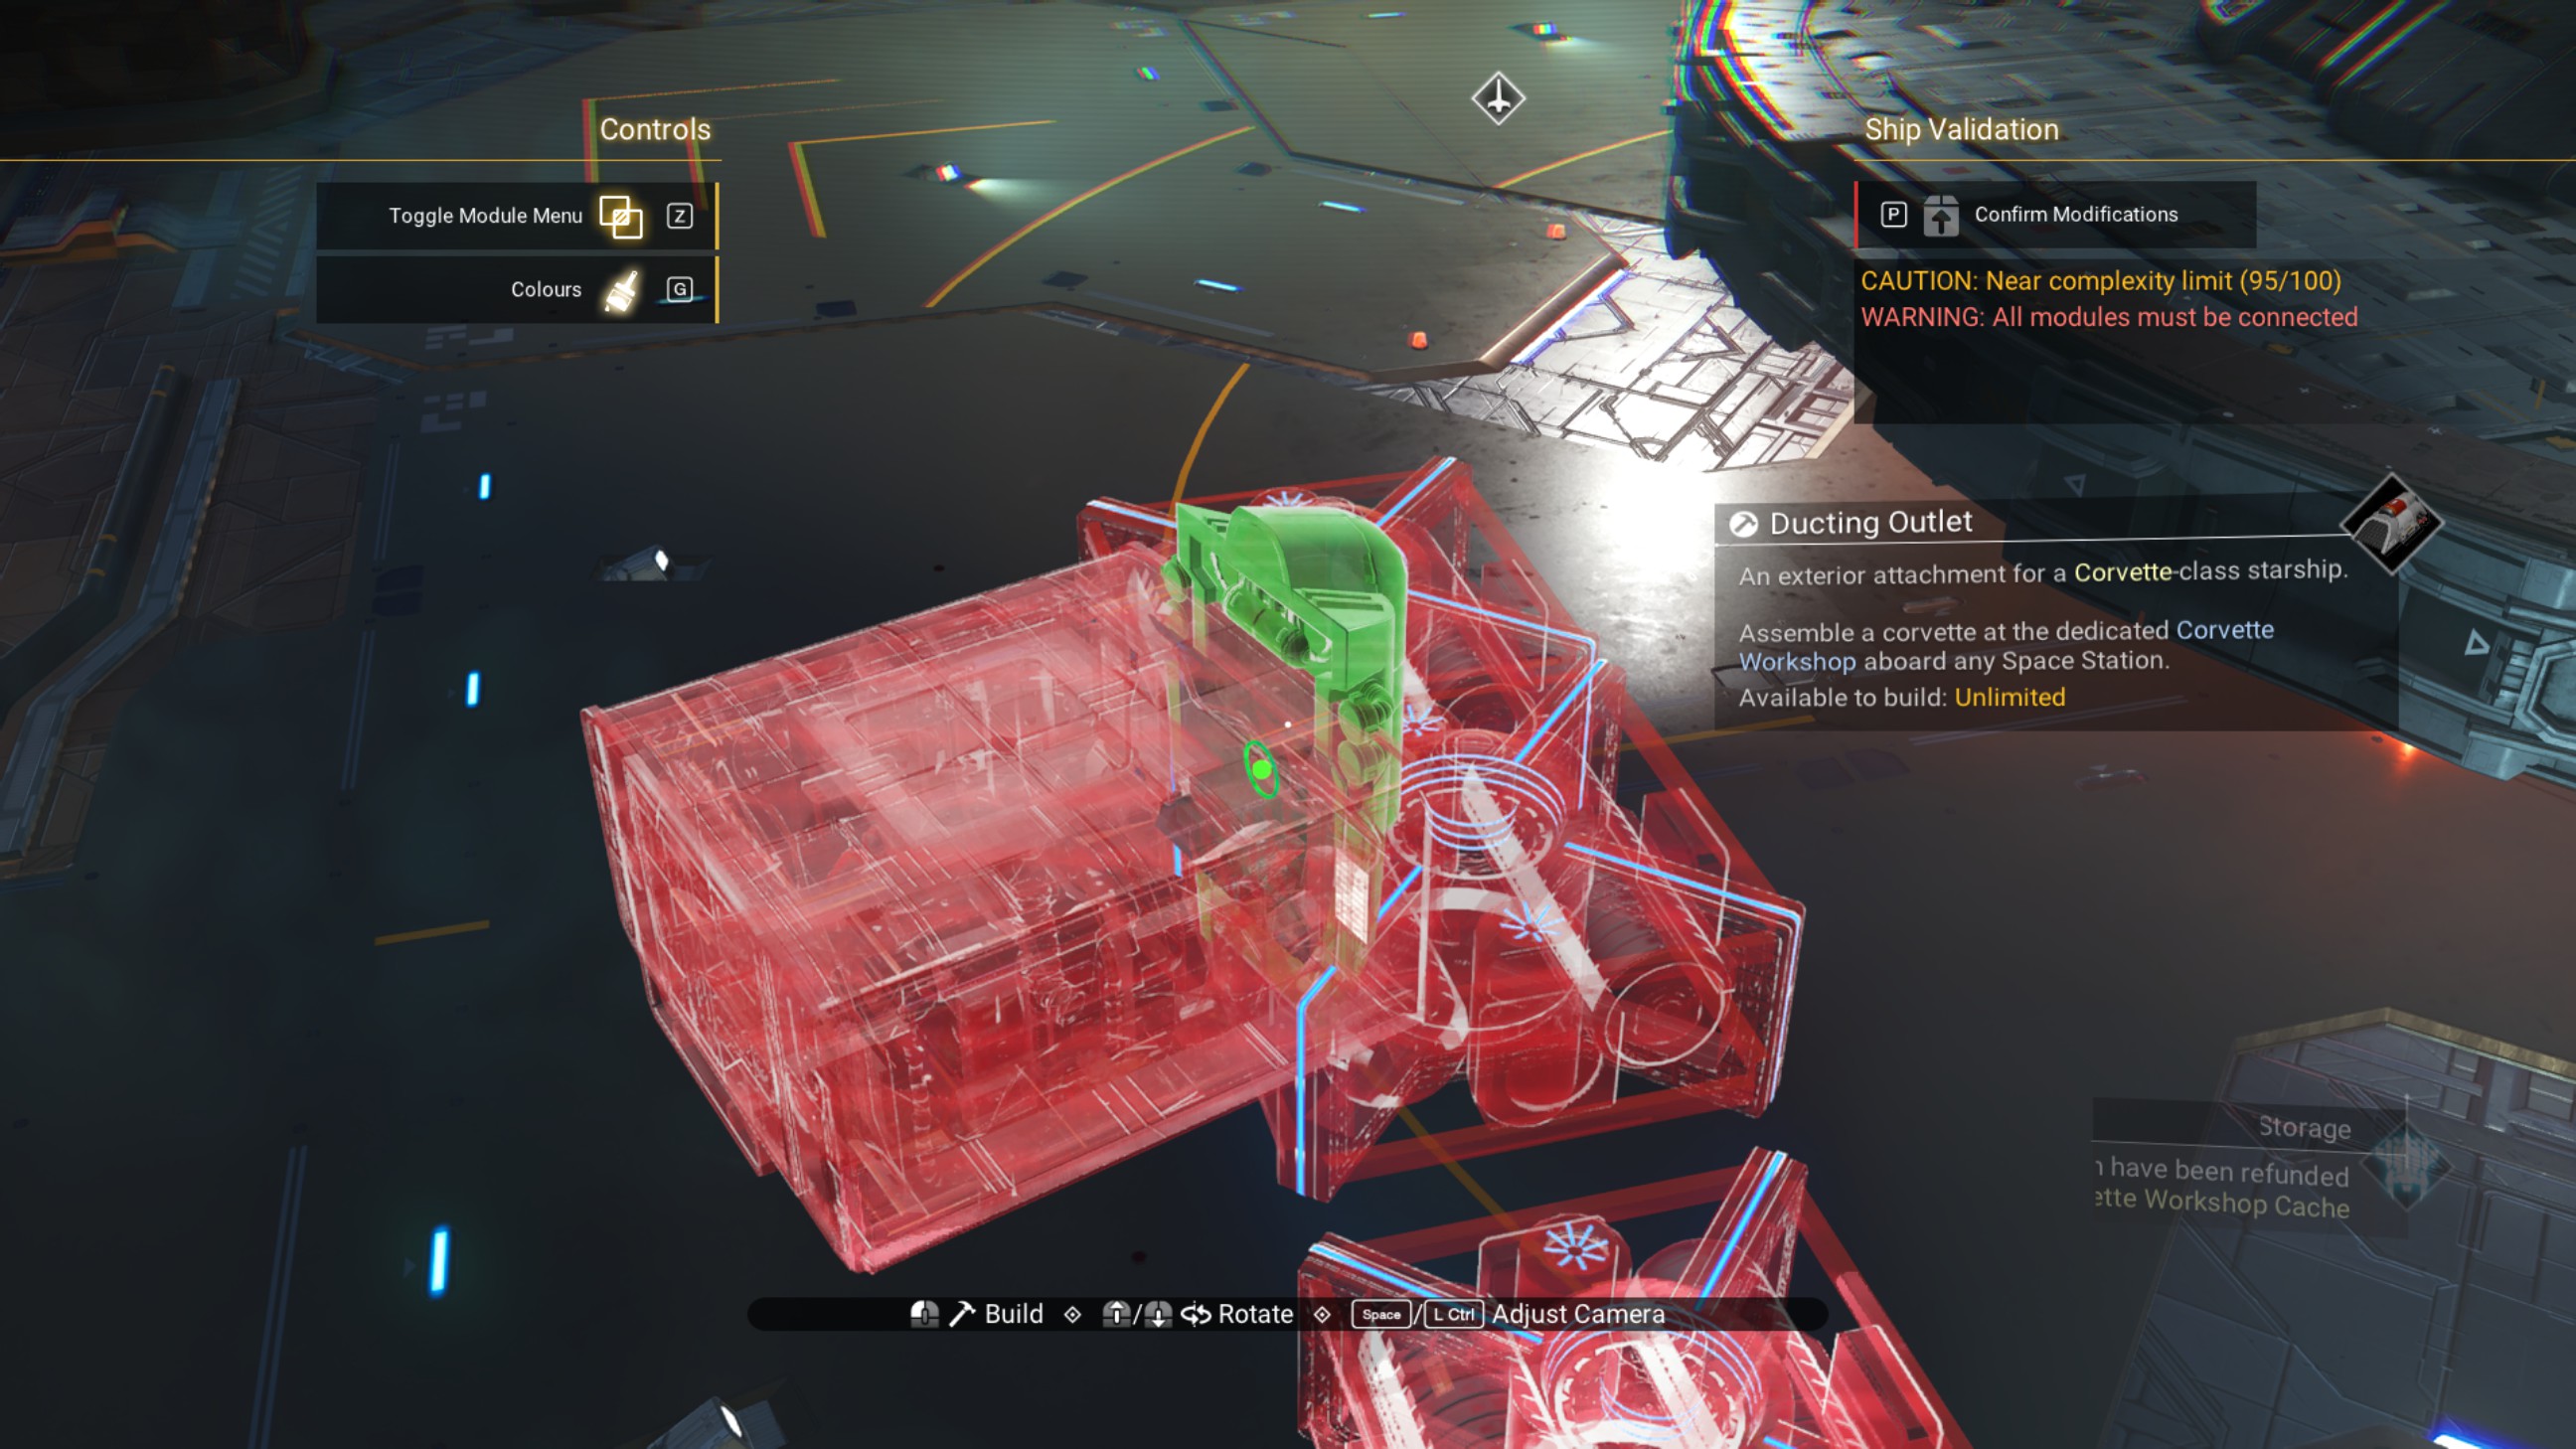
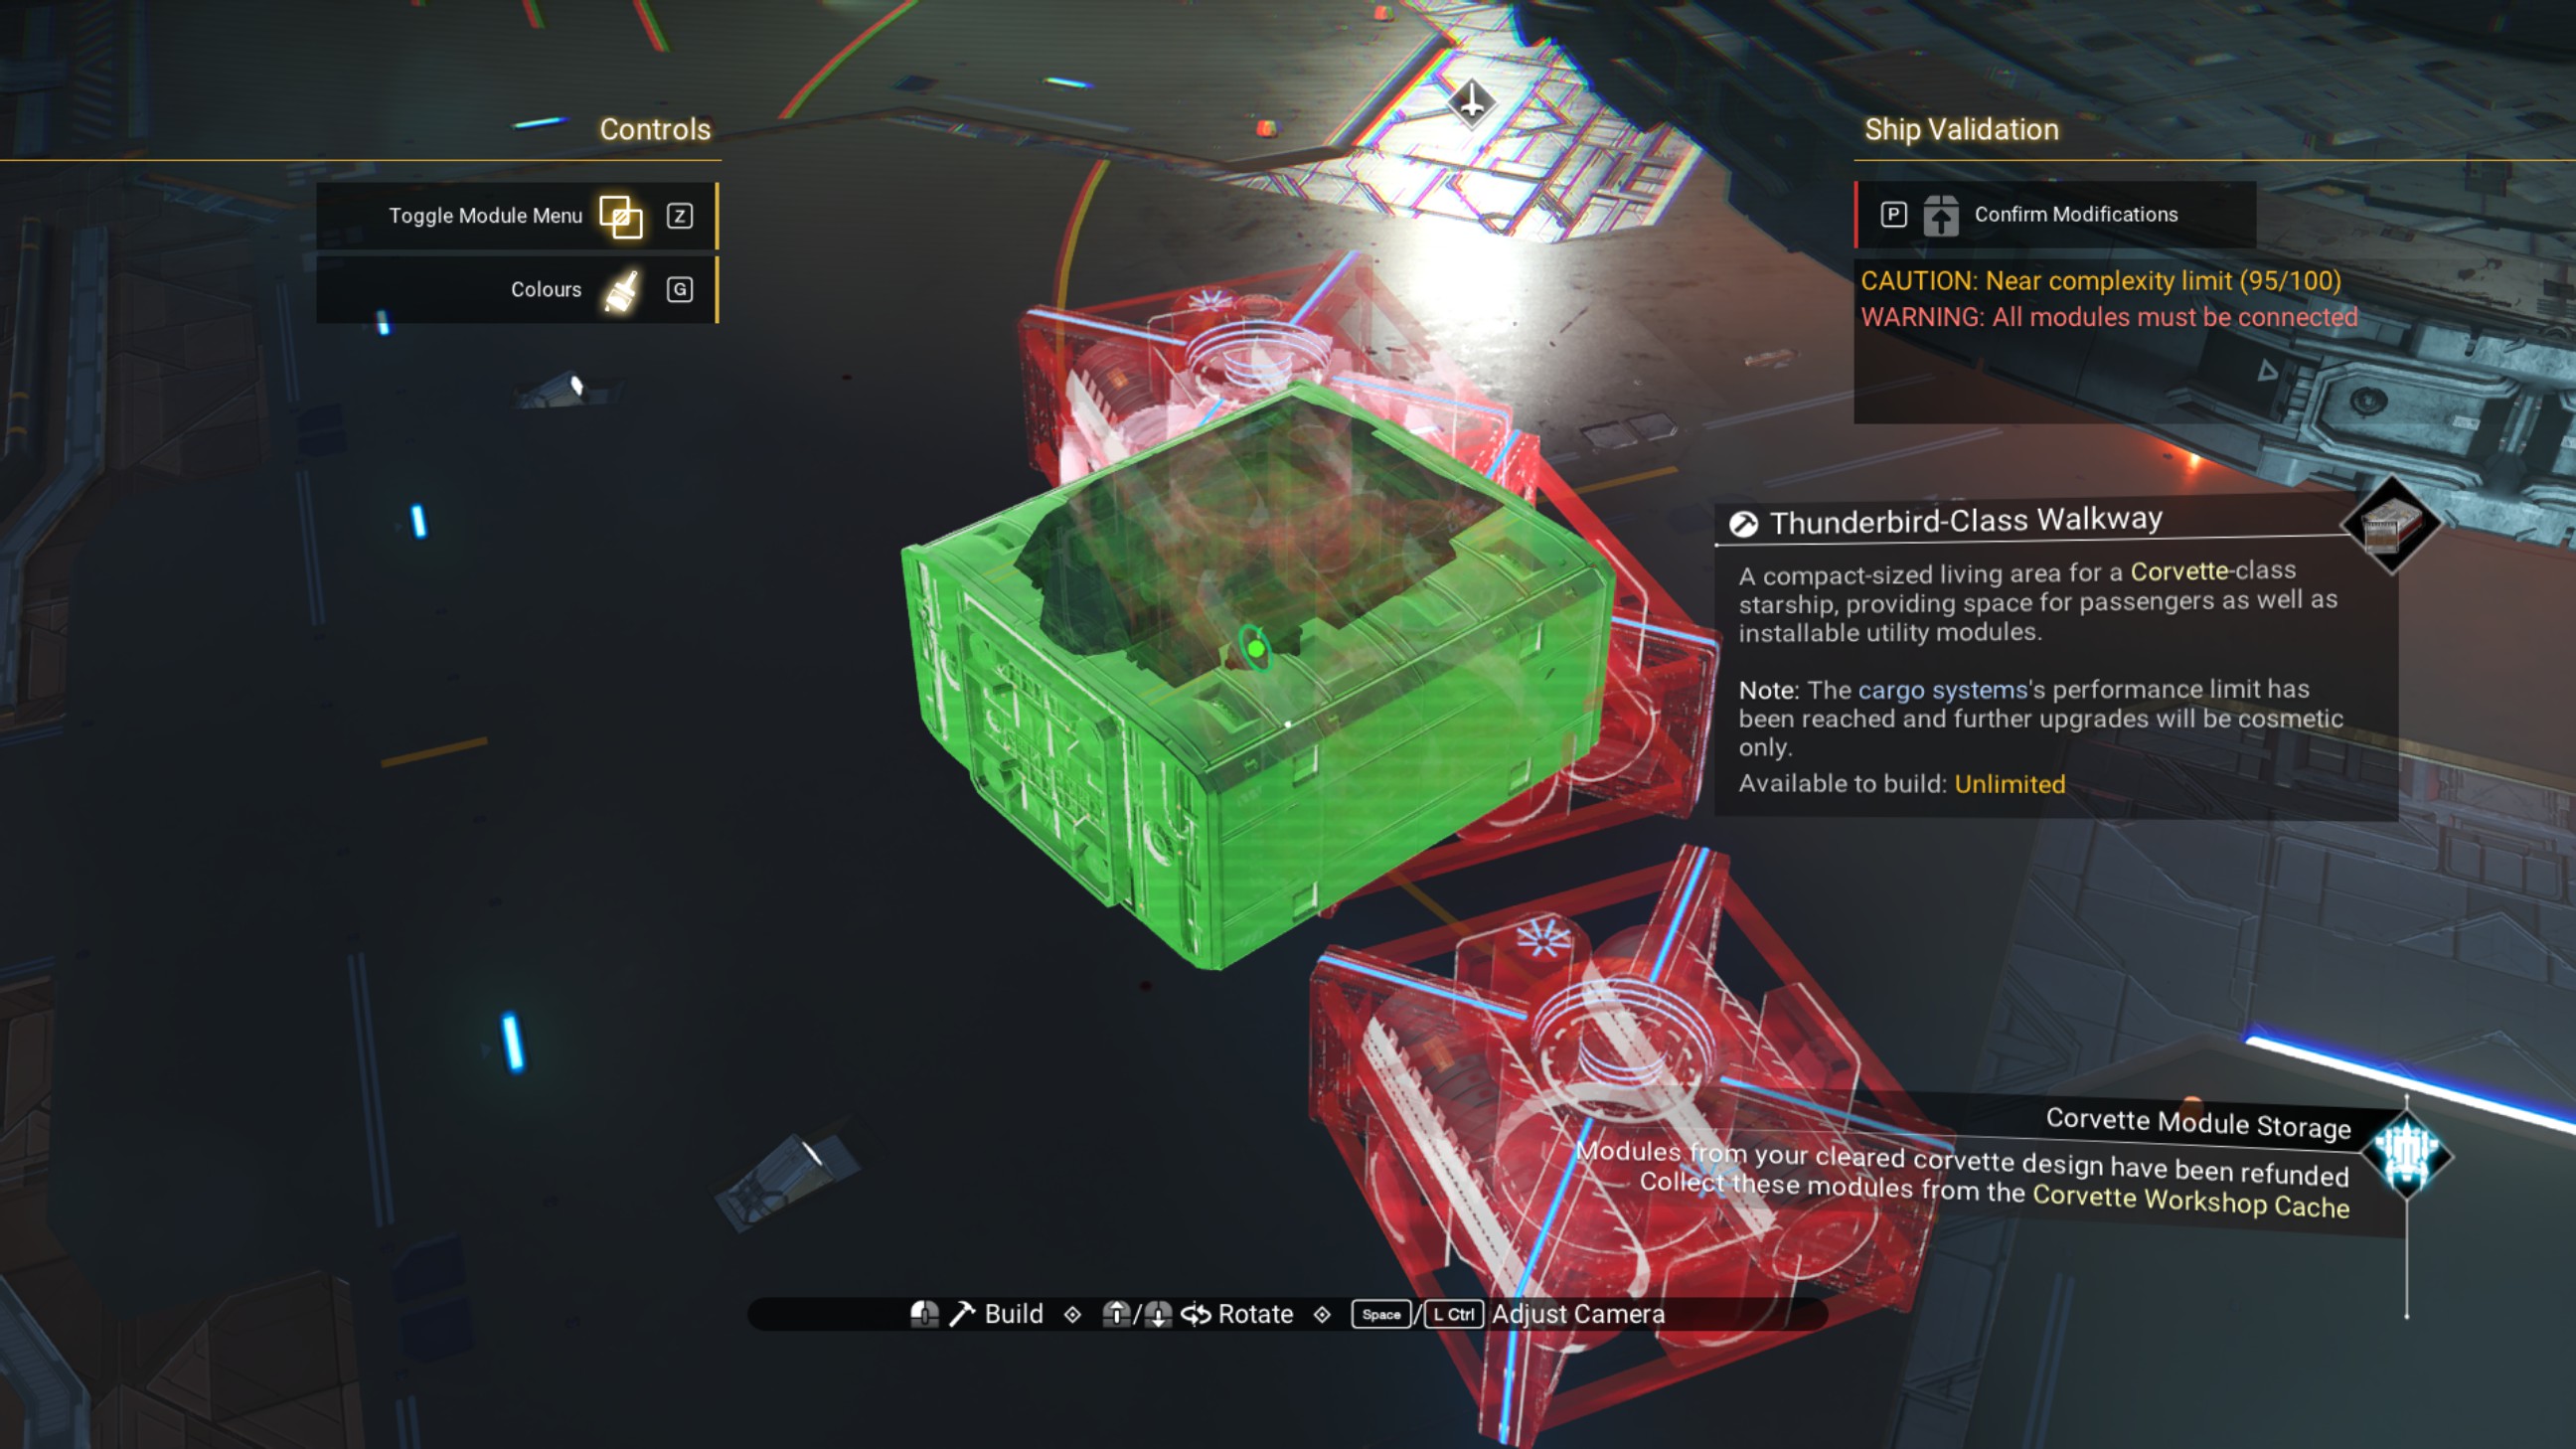
Delete the ducting outlet, and place a rotated rockhopper propeller module on the walkway.
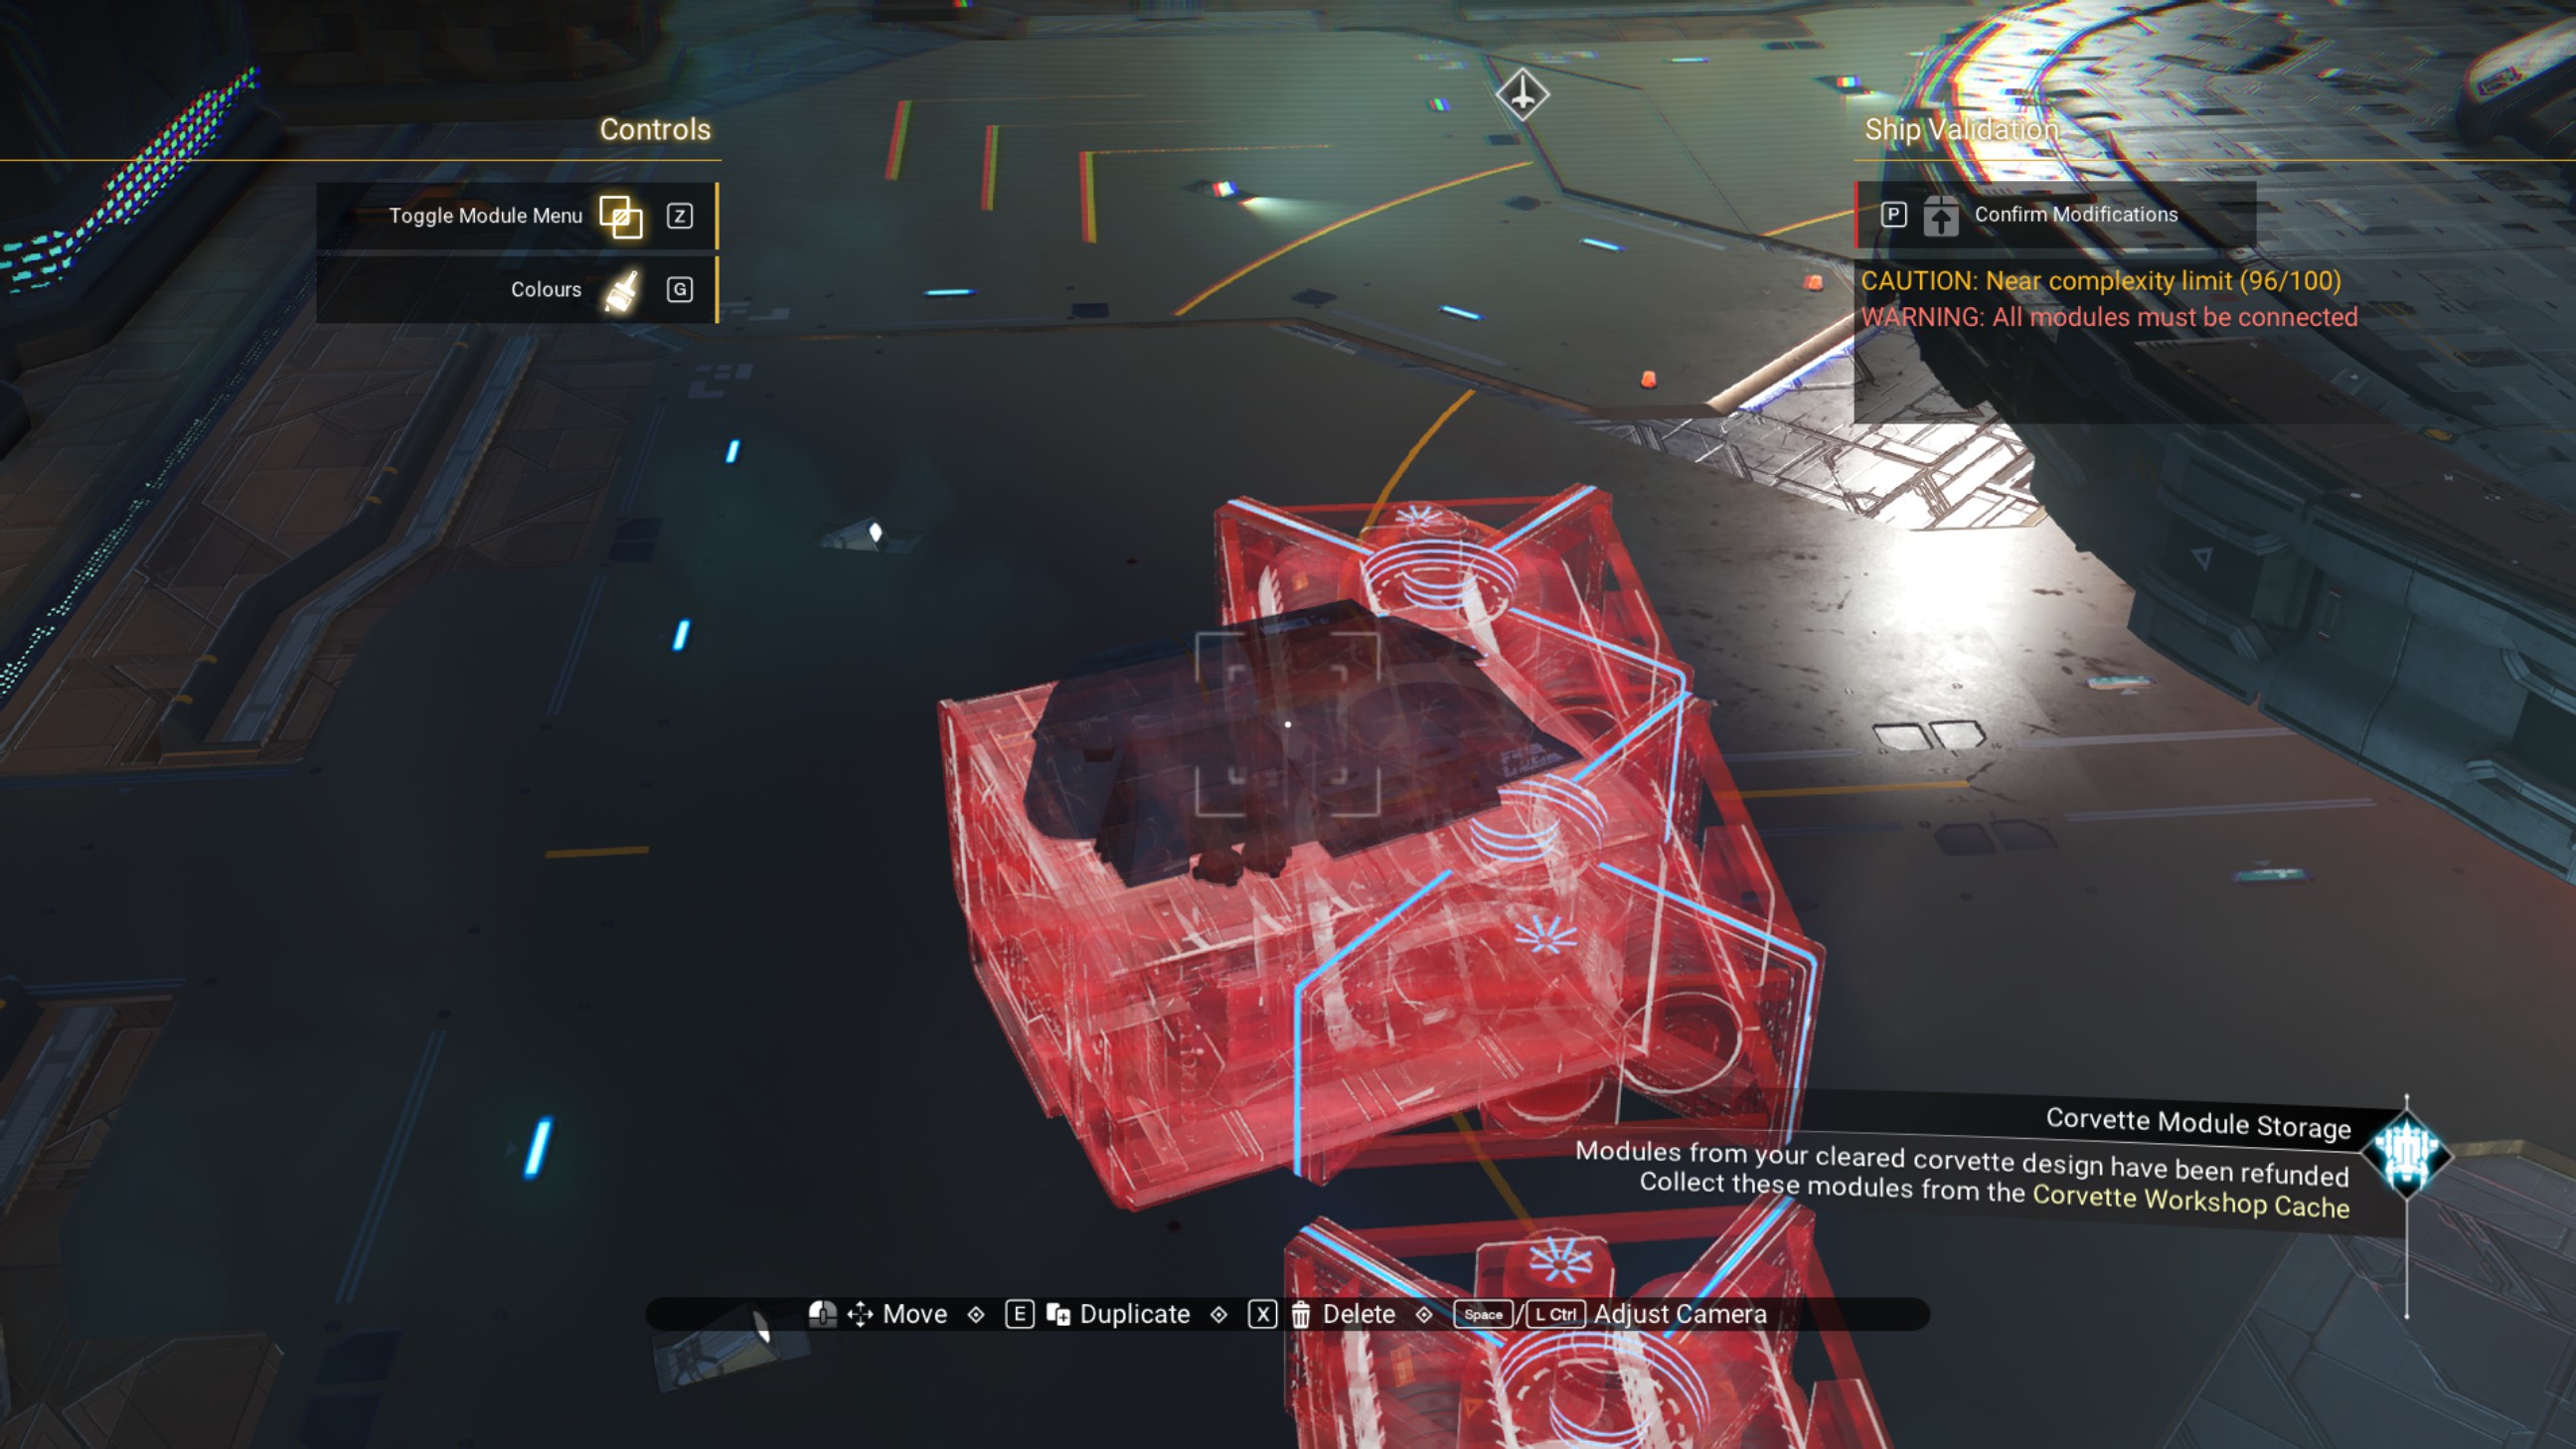
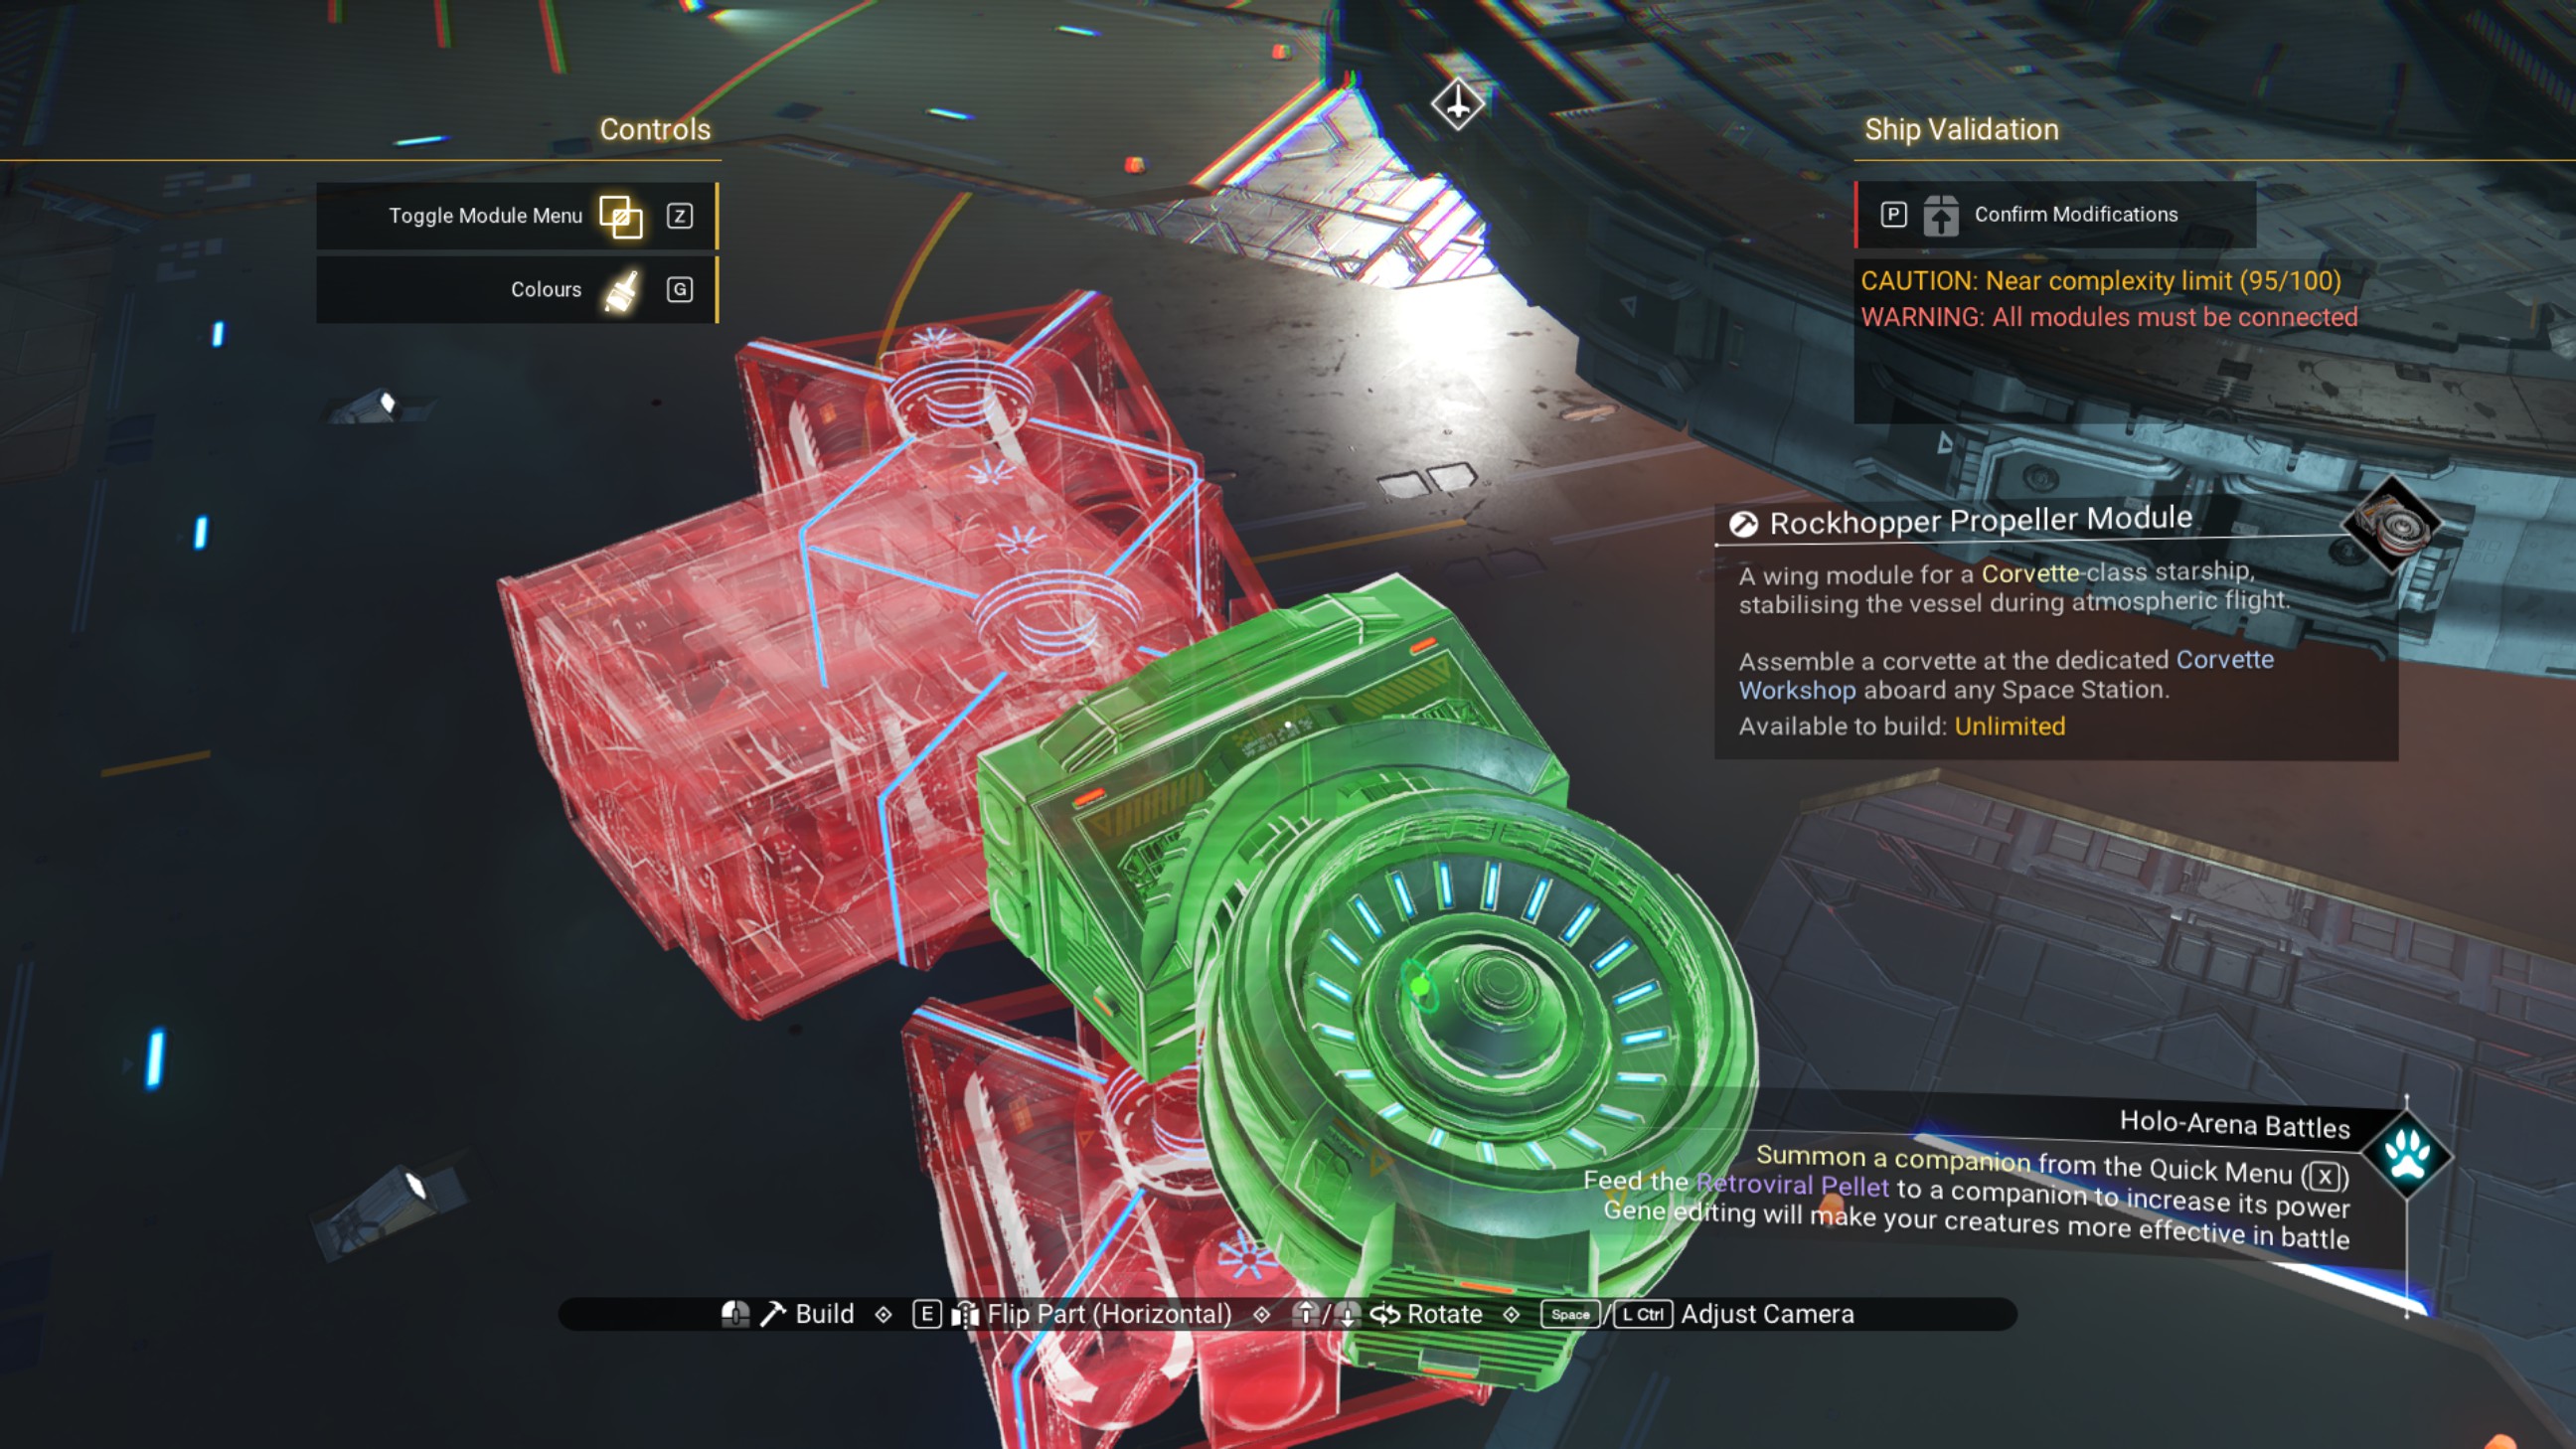
Shift the walkway along the propeller module half a step toward the ship, then delete the propeller module.
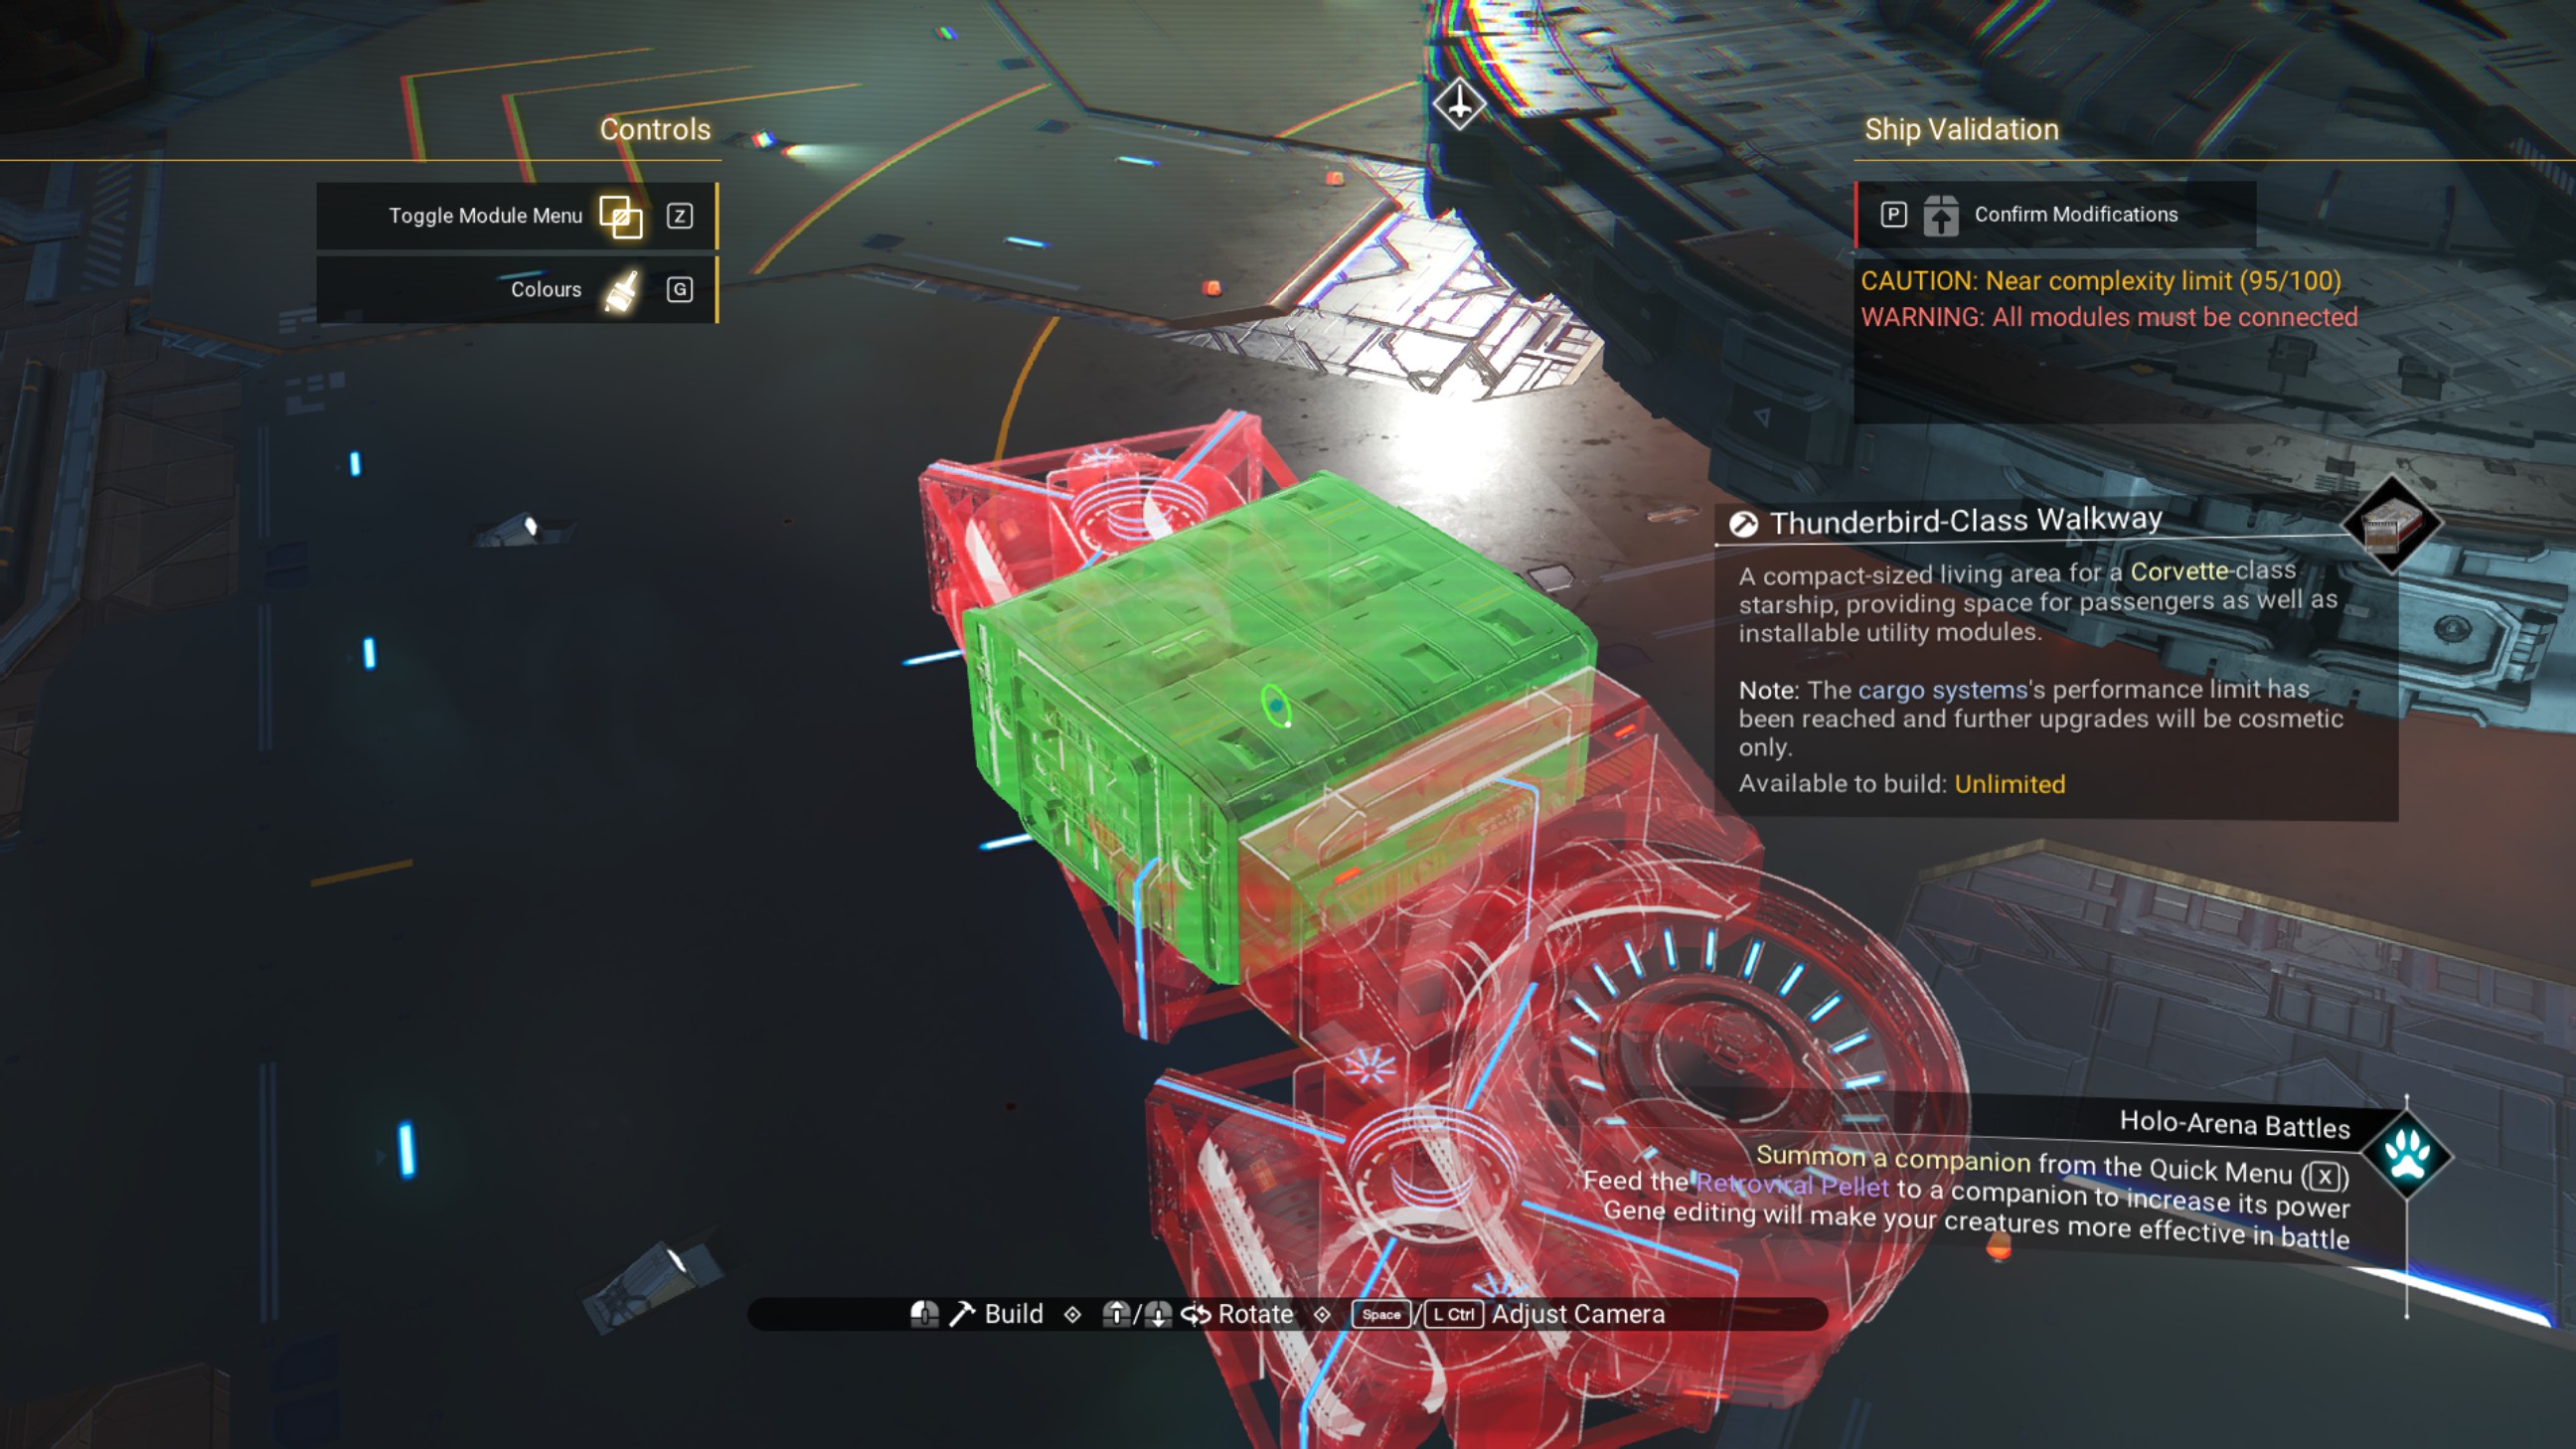
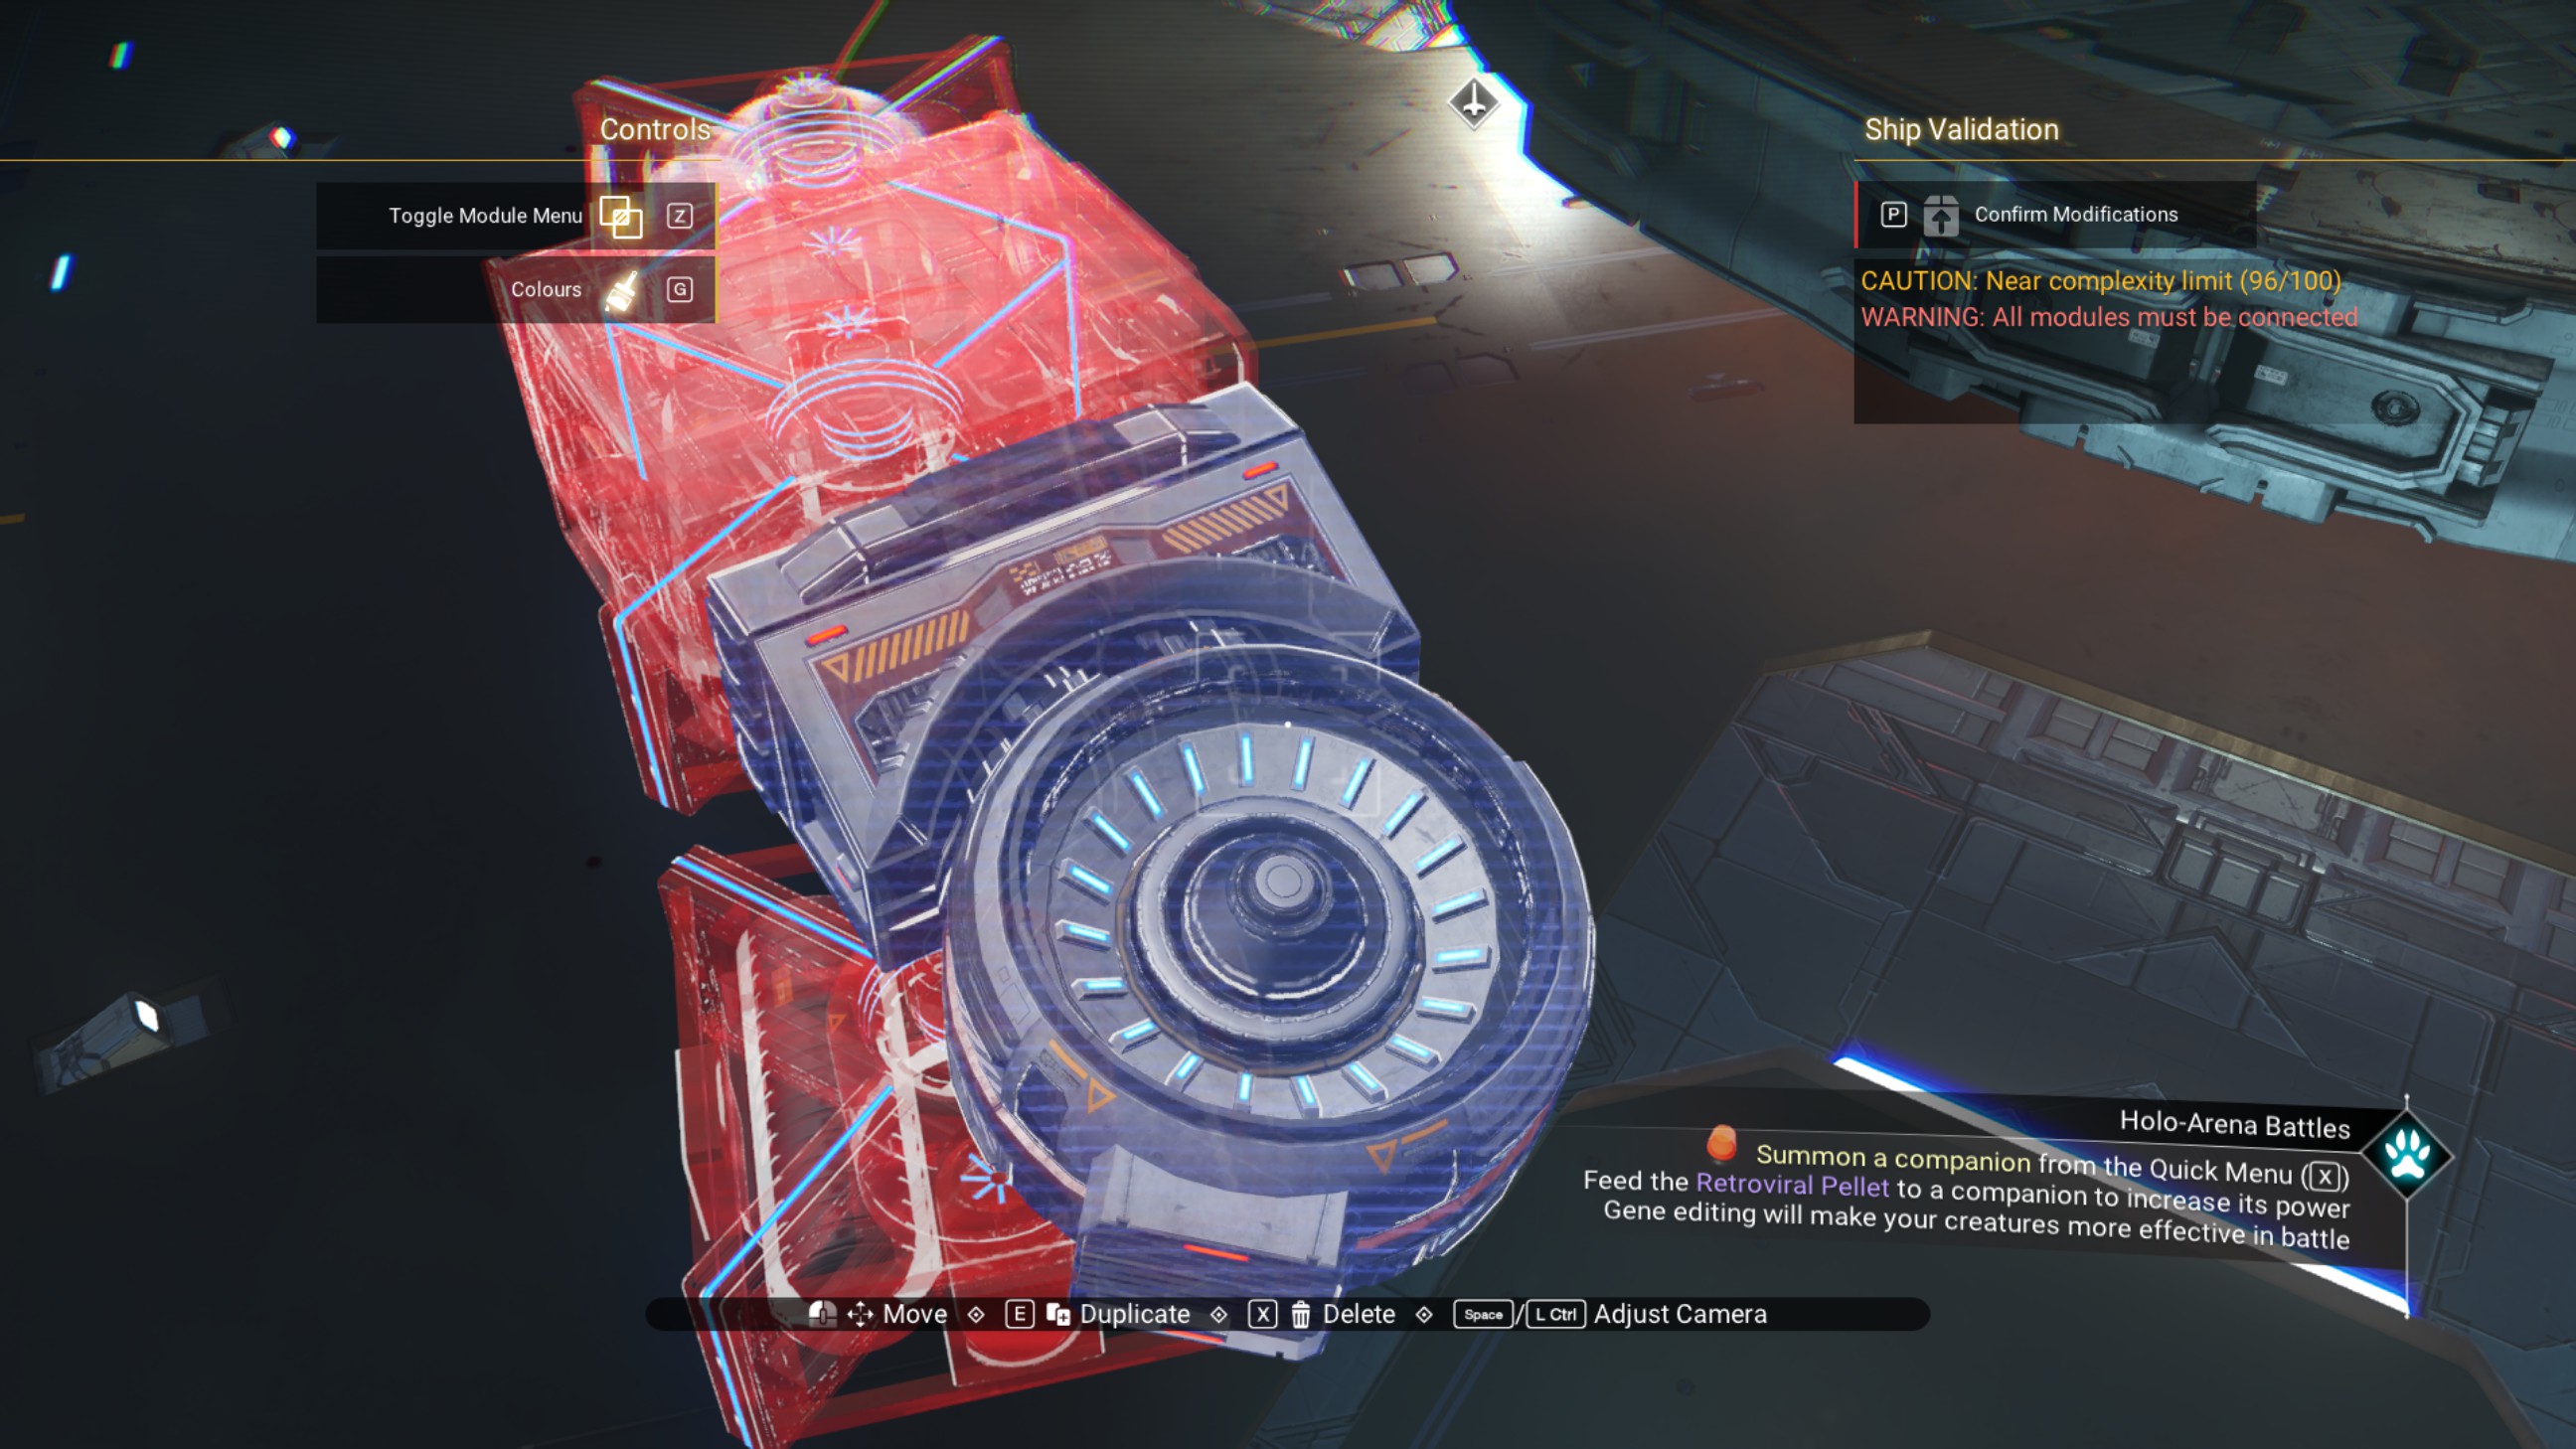
Place three walkways, one beside the other, as shown.
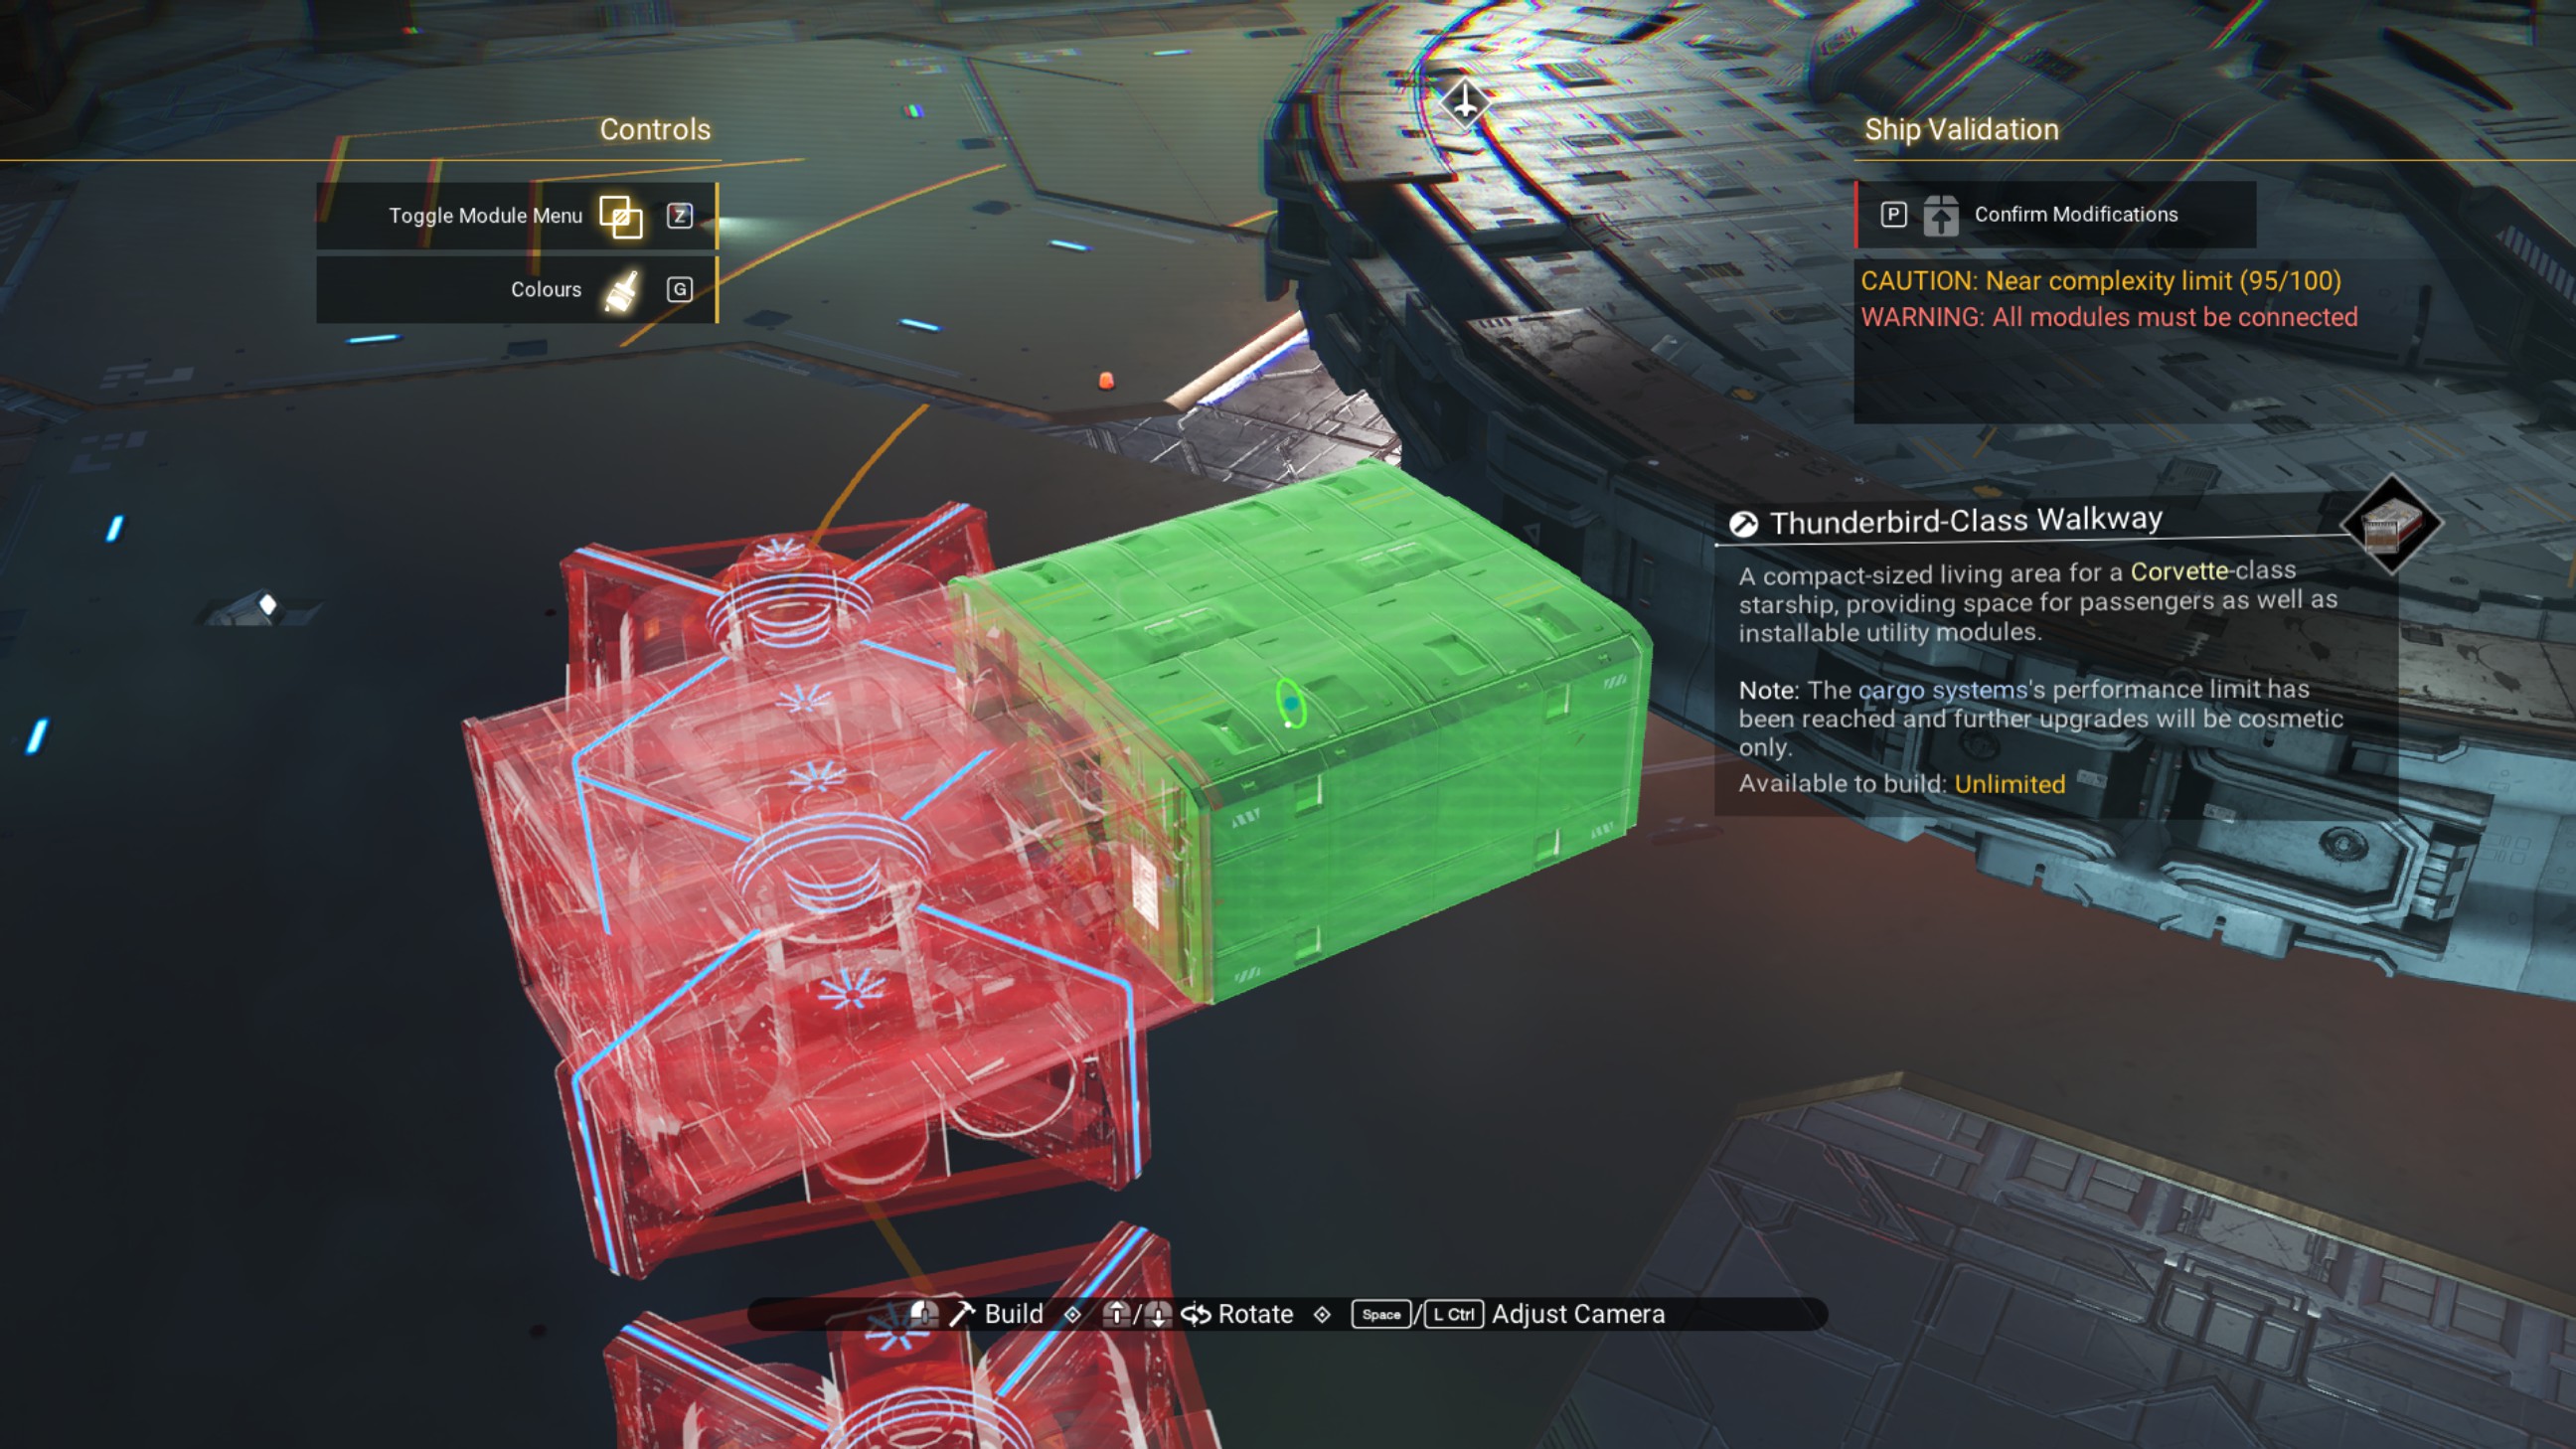
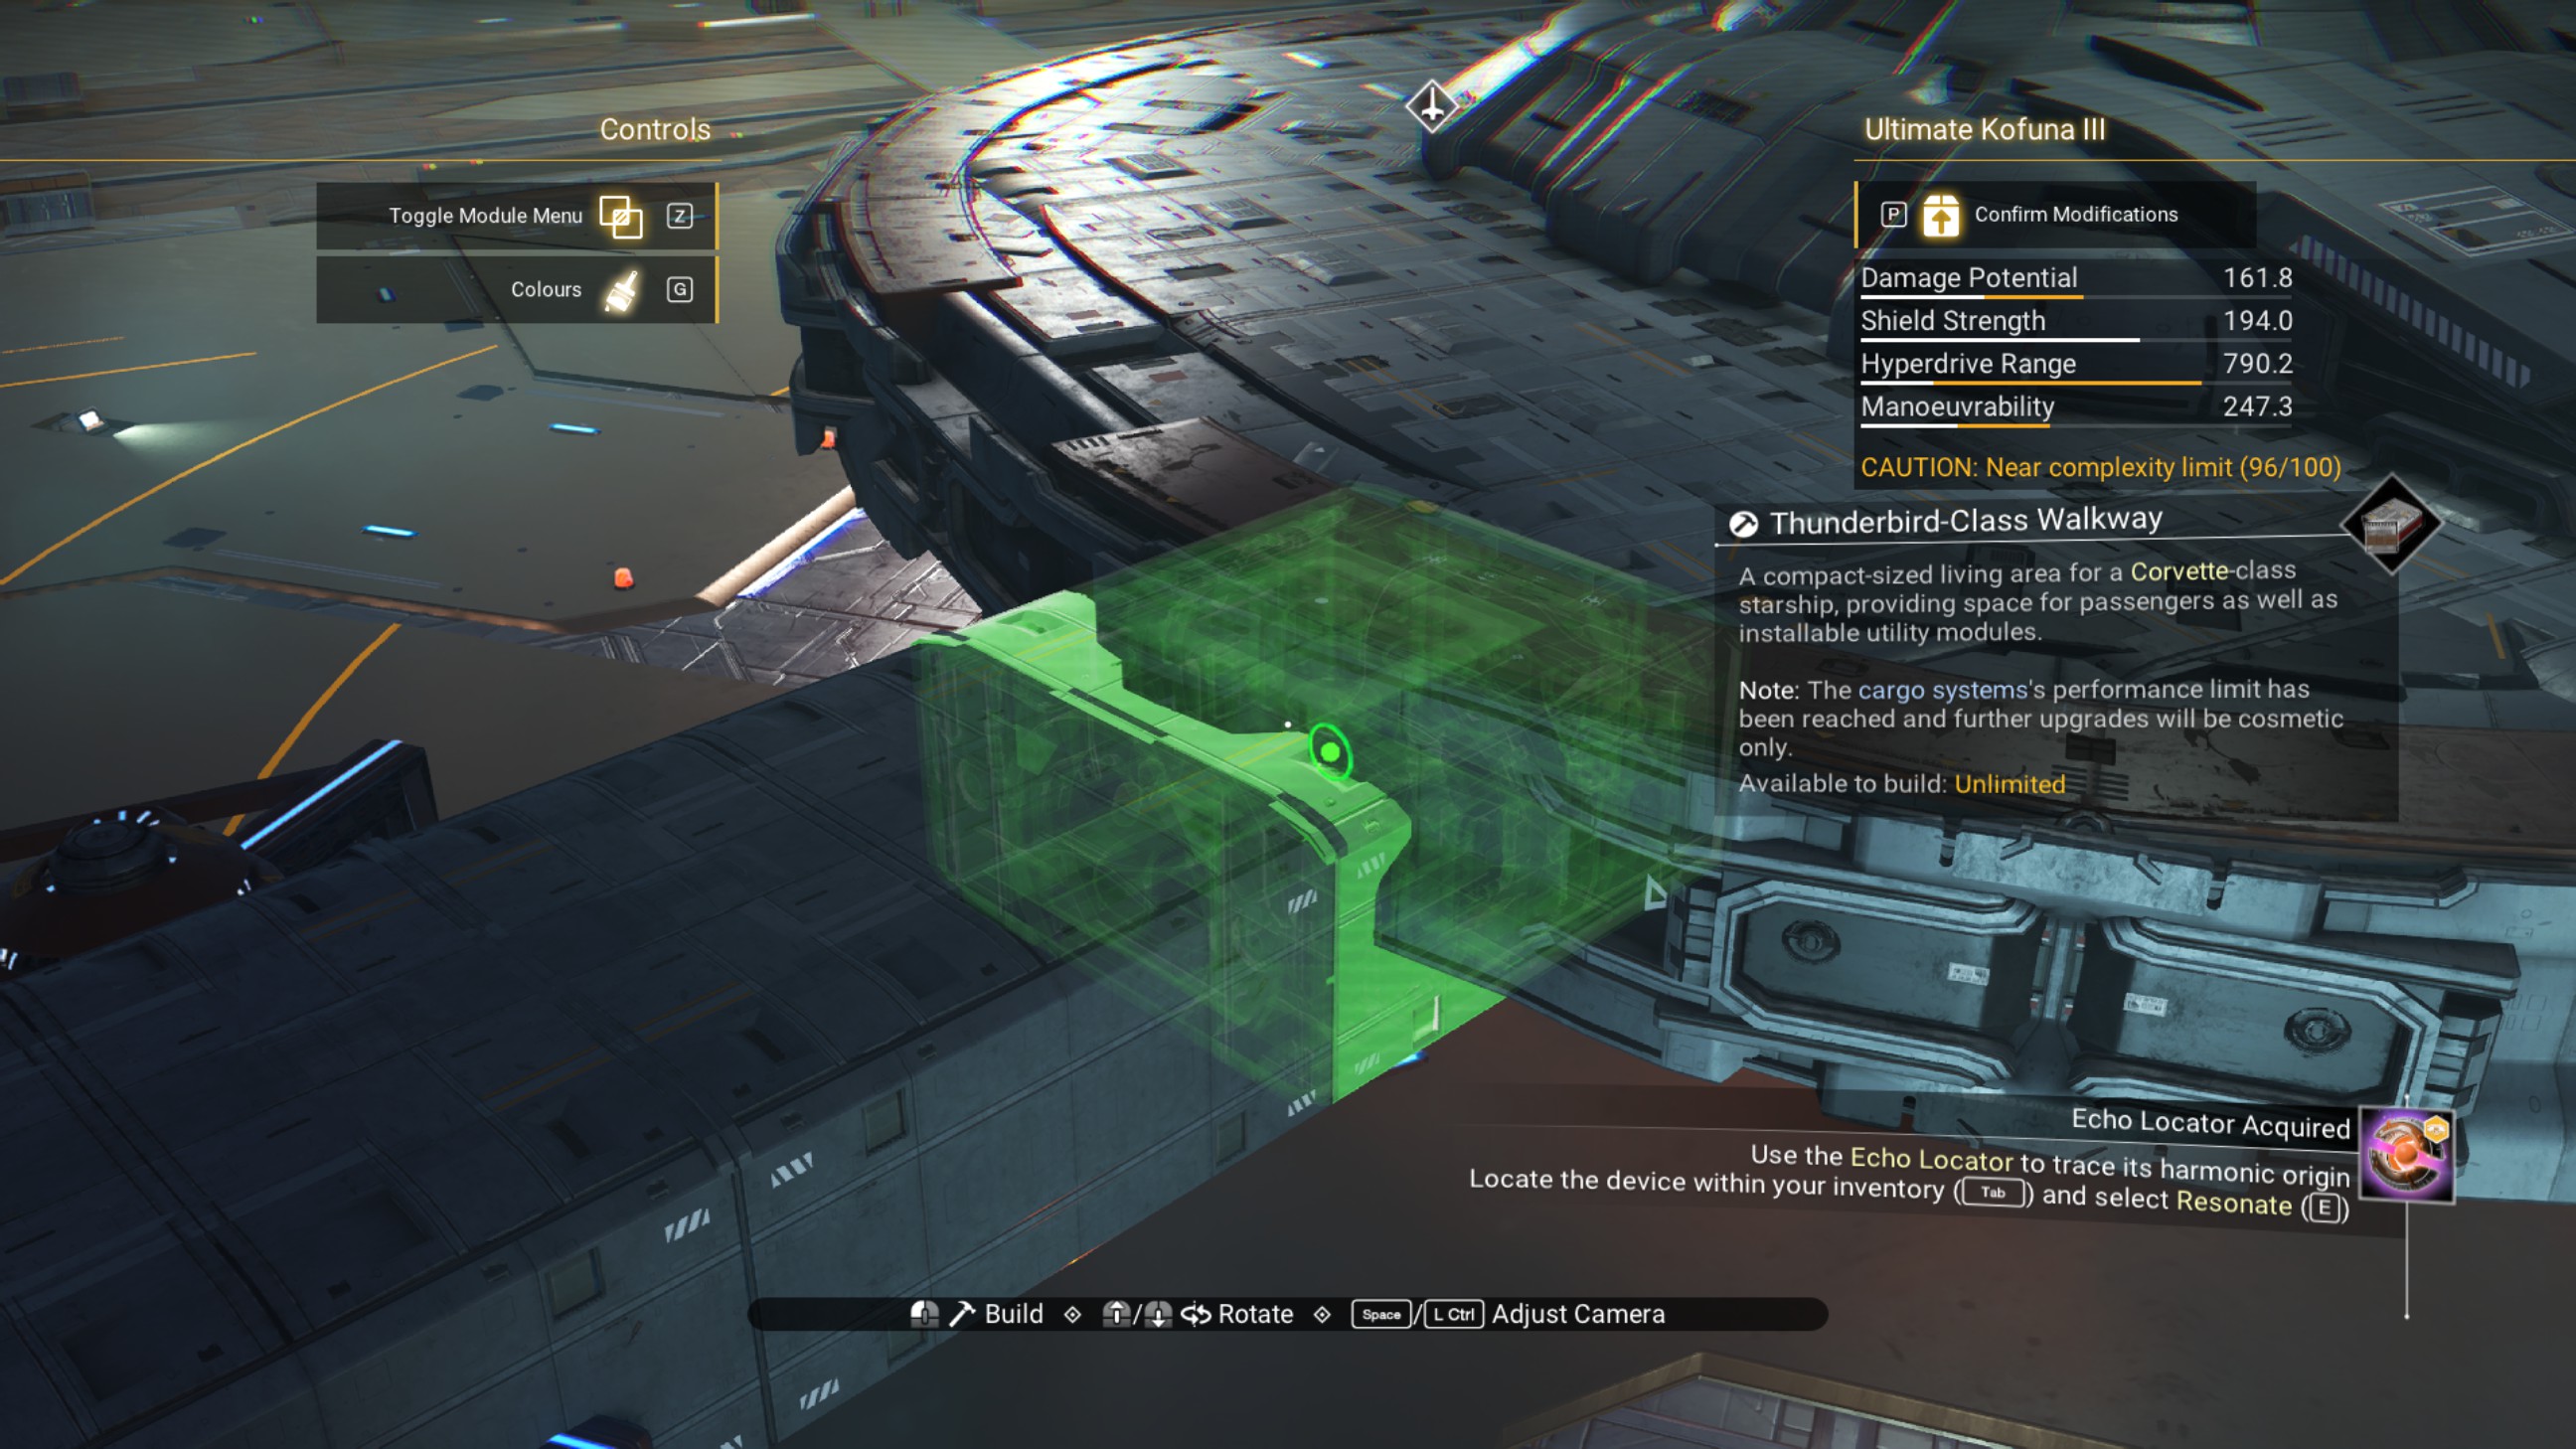
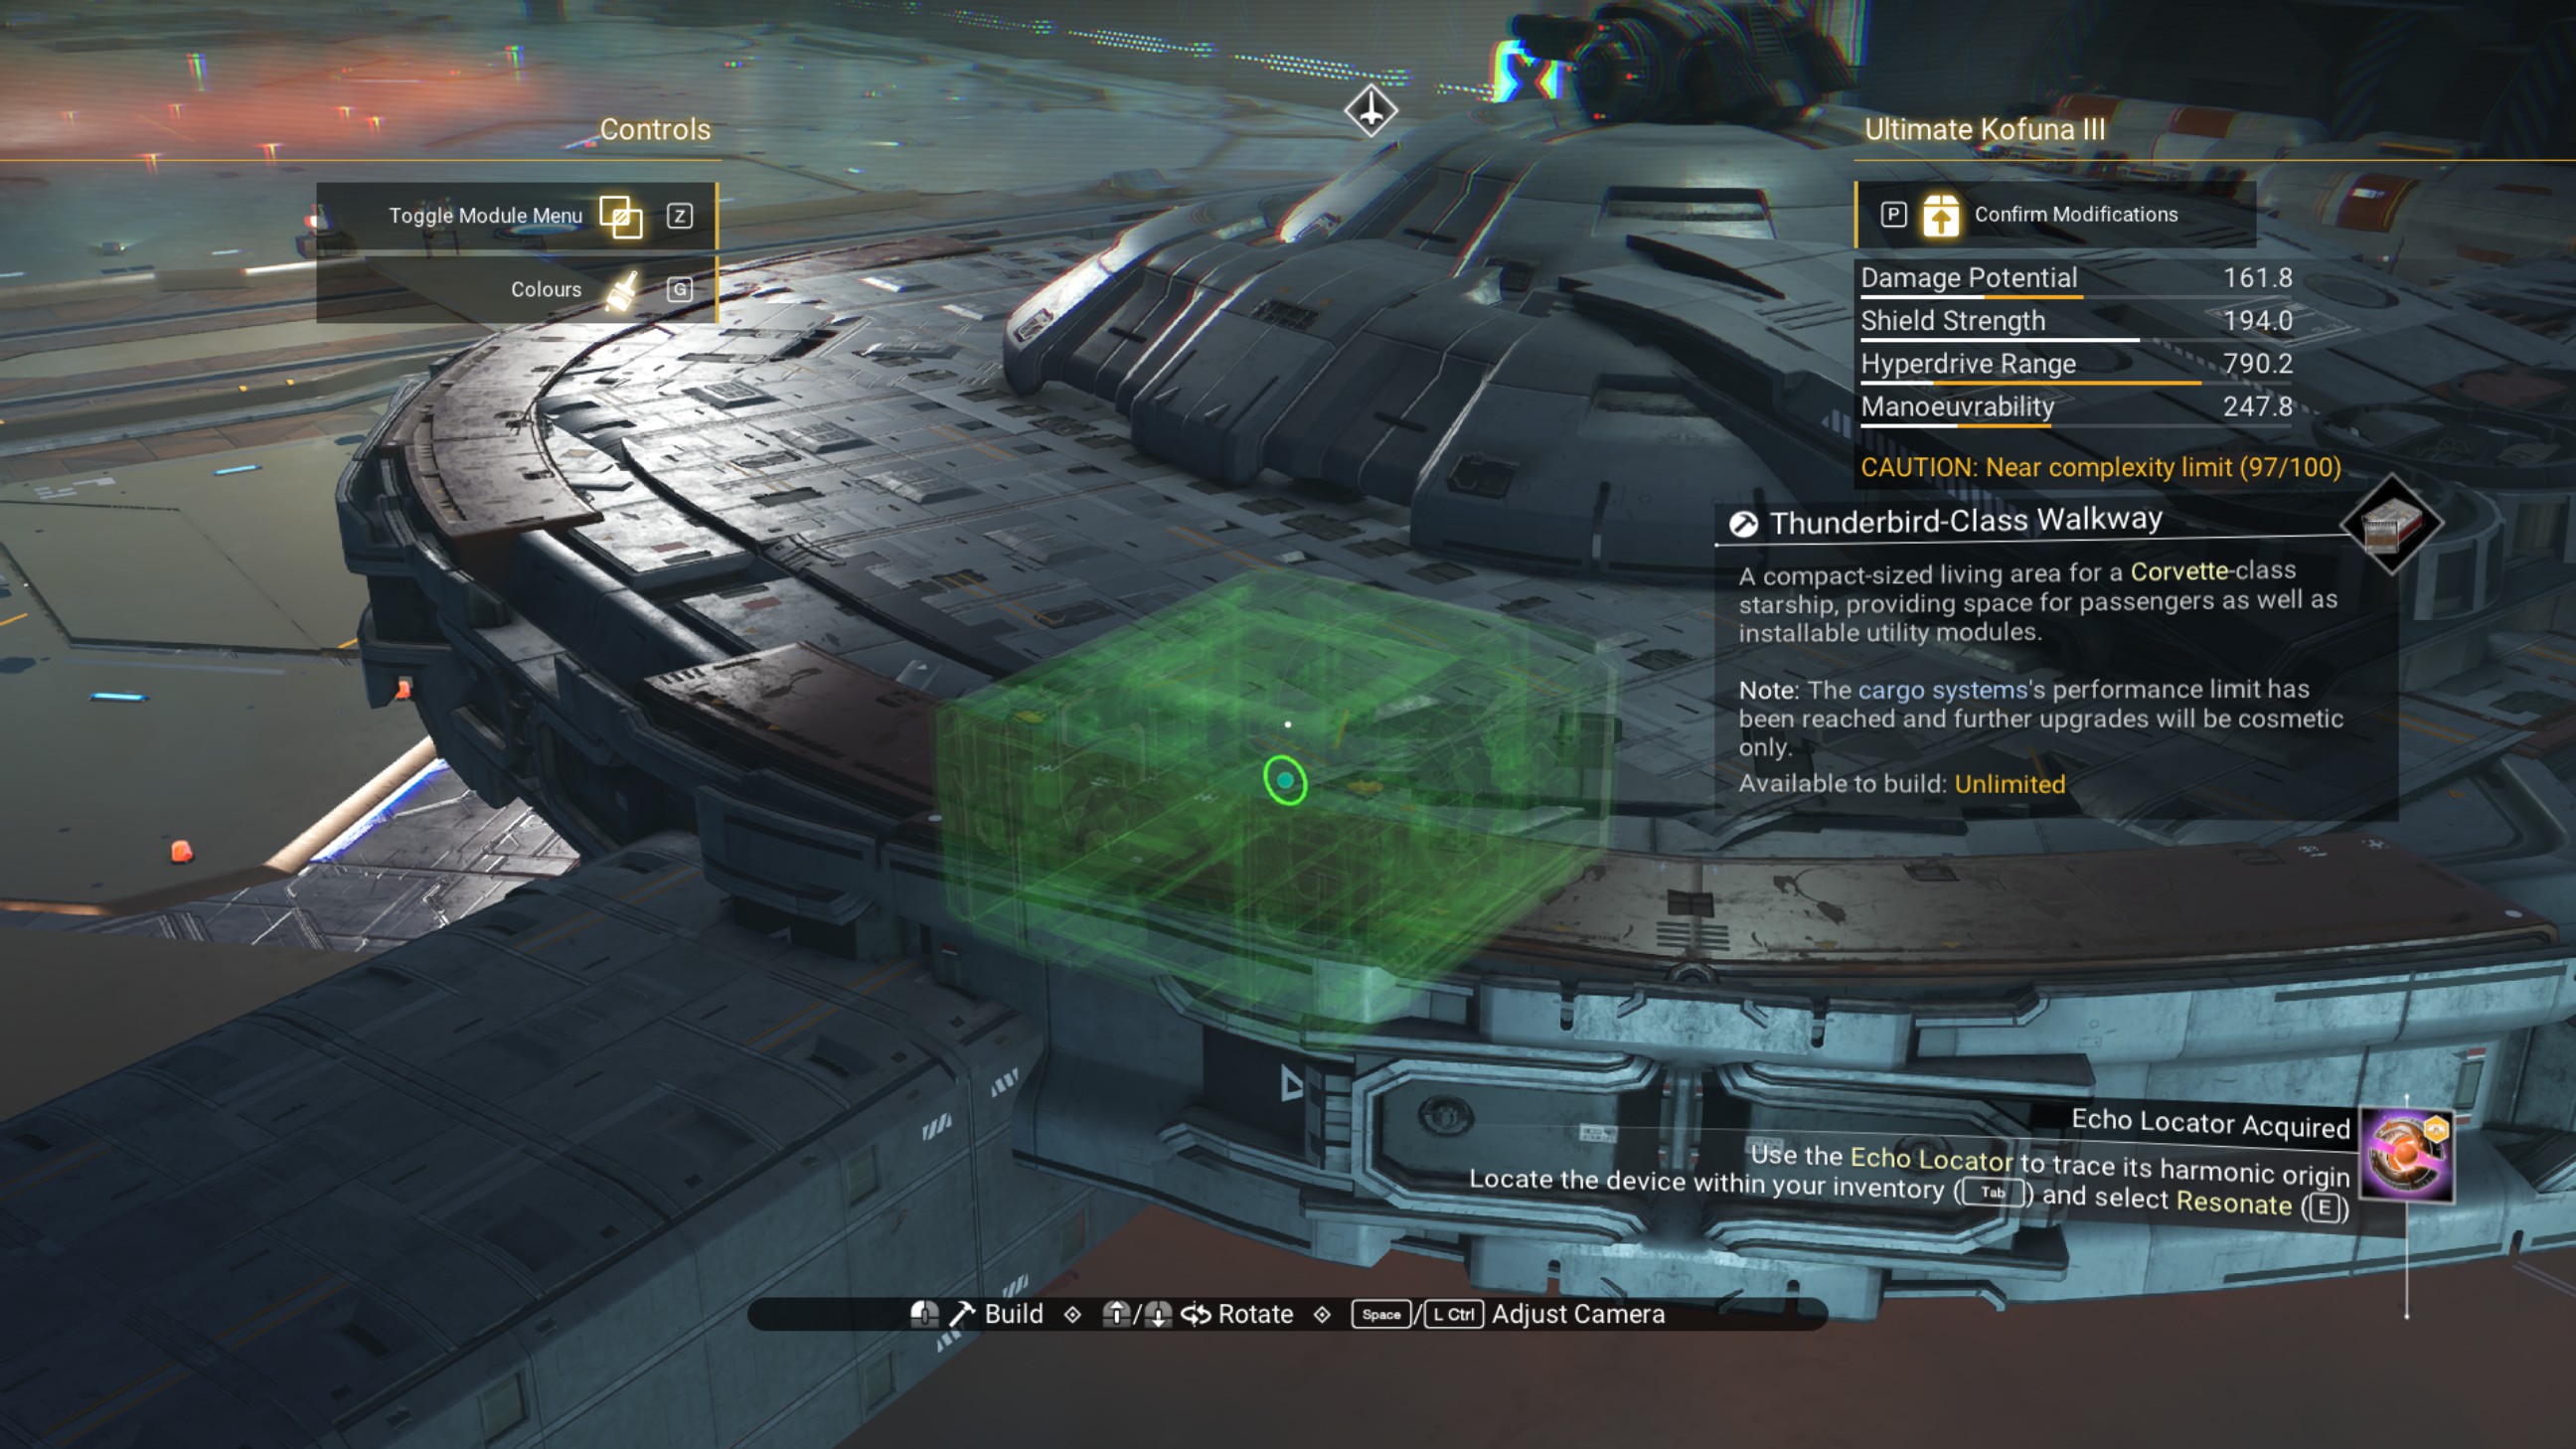
Place a longshore cowling so that the top is overlapped by the center structure, as shown.
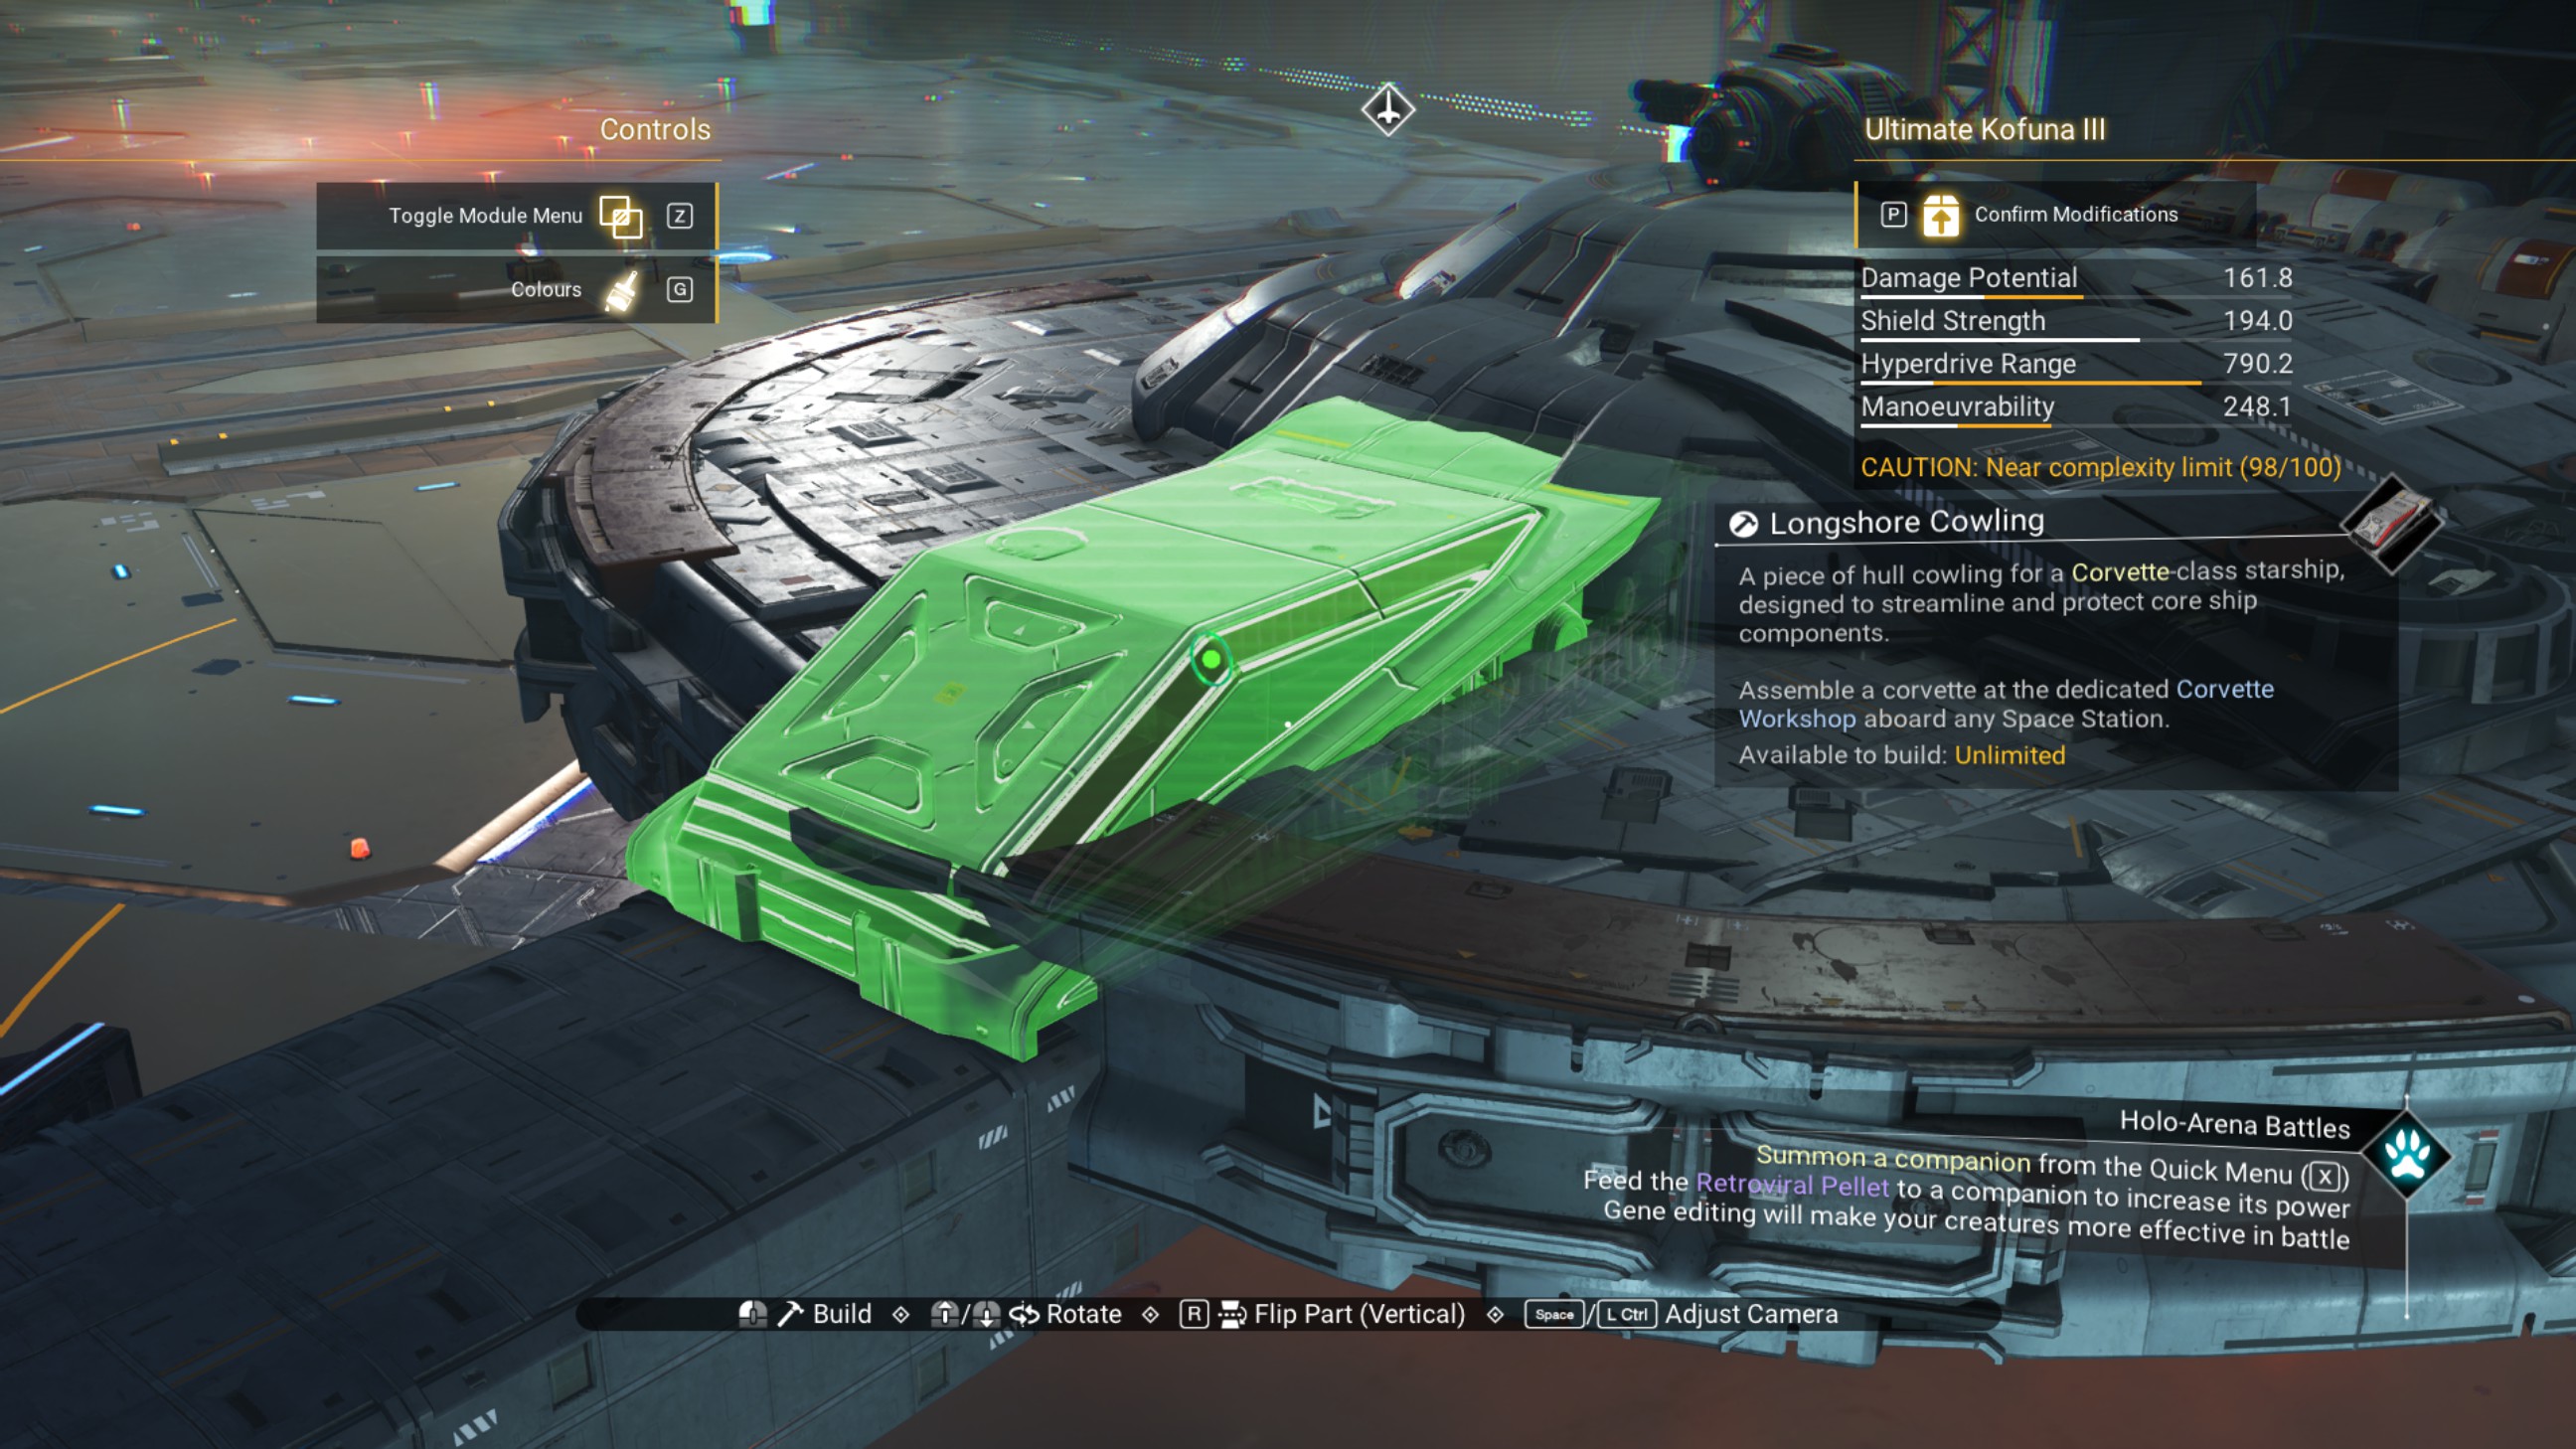
Delete the two angled walkways overlapping with the hull.
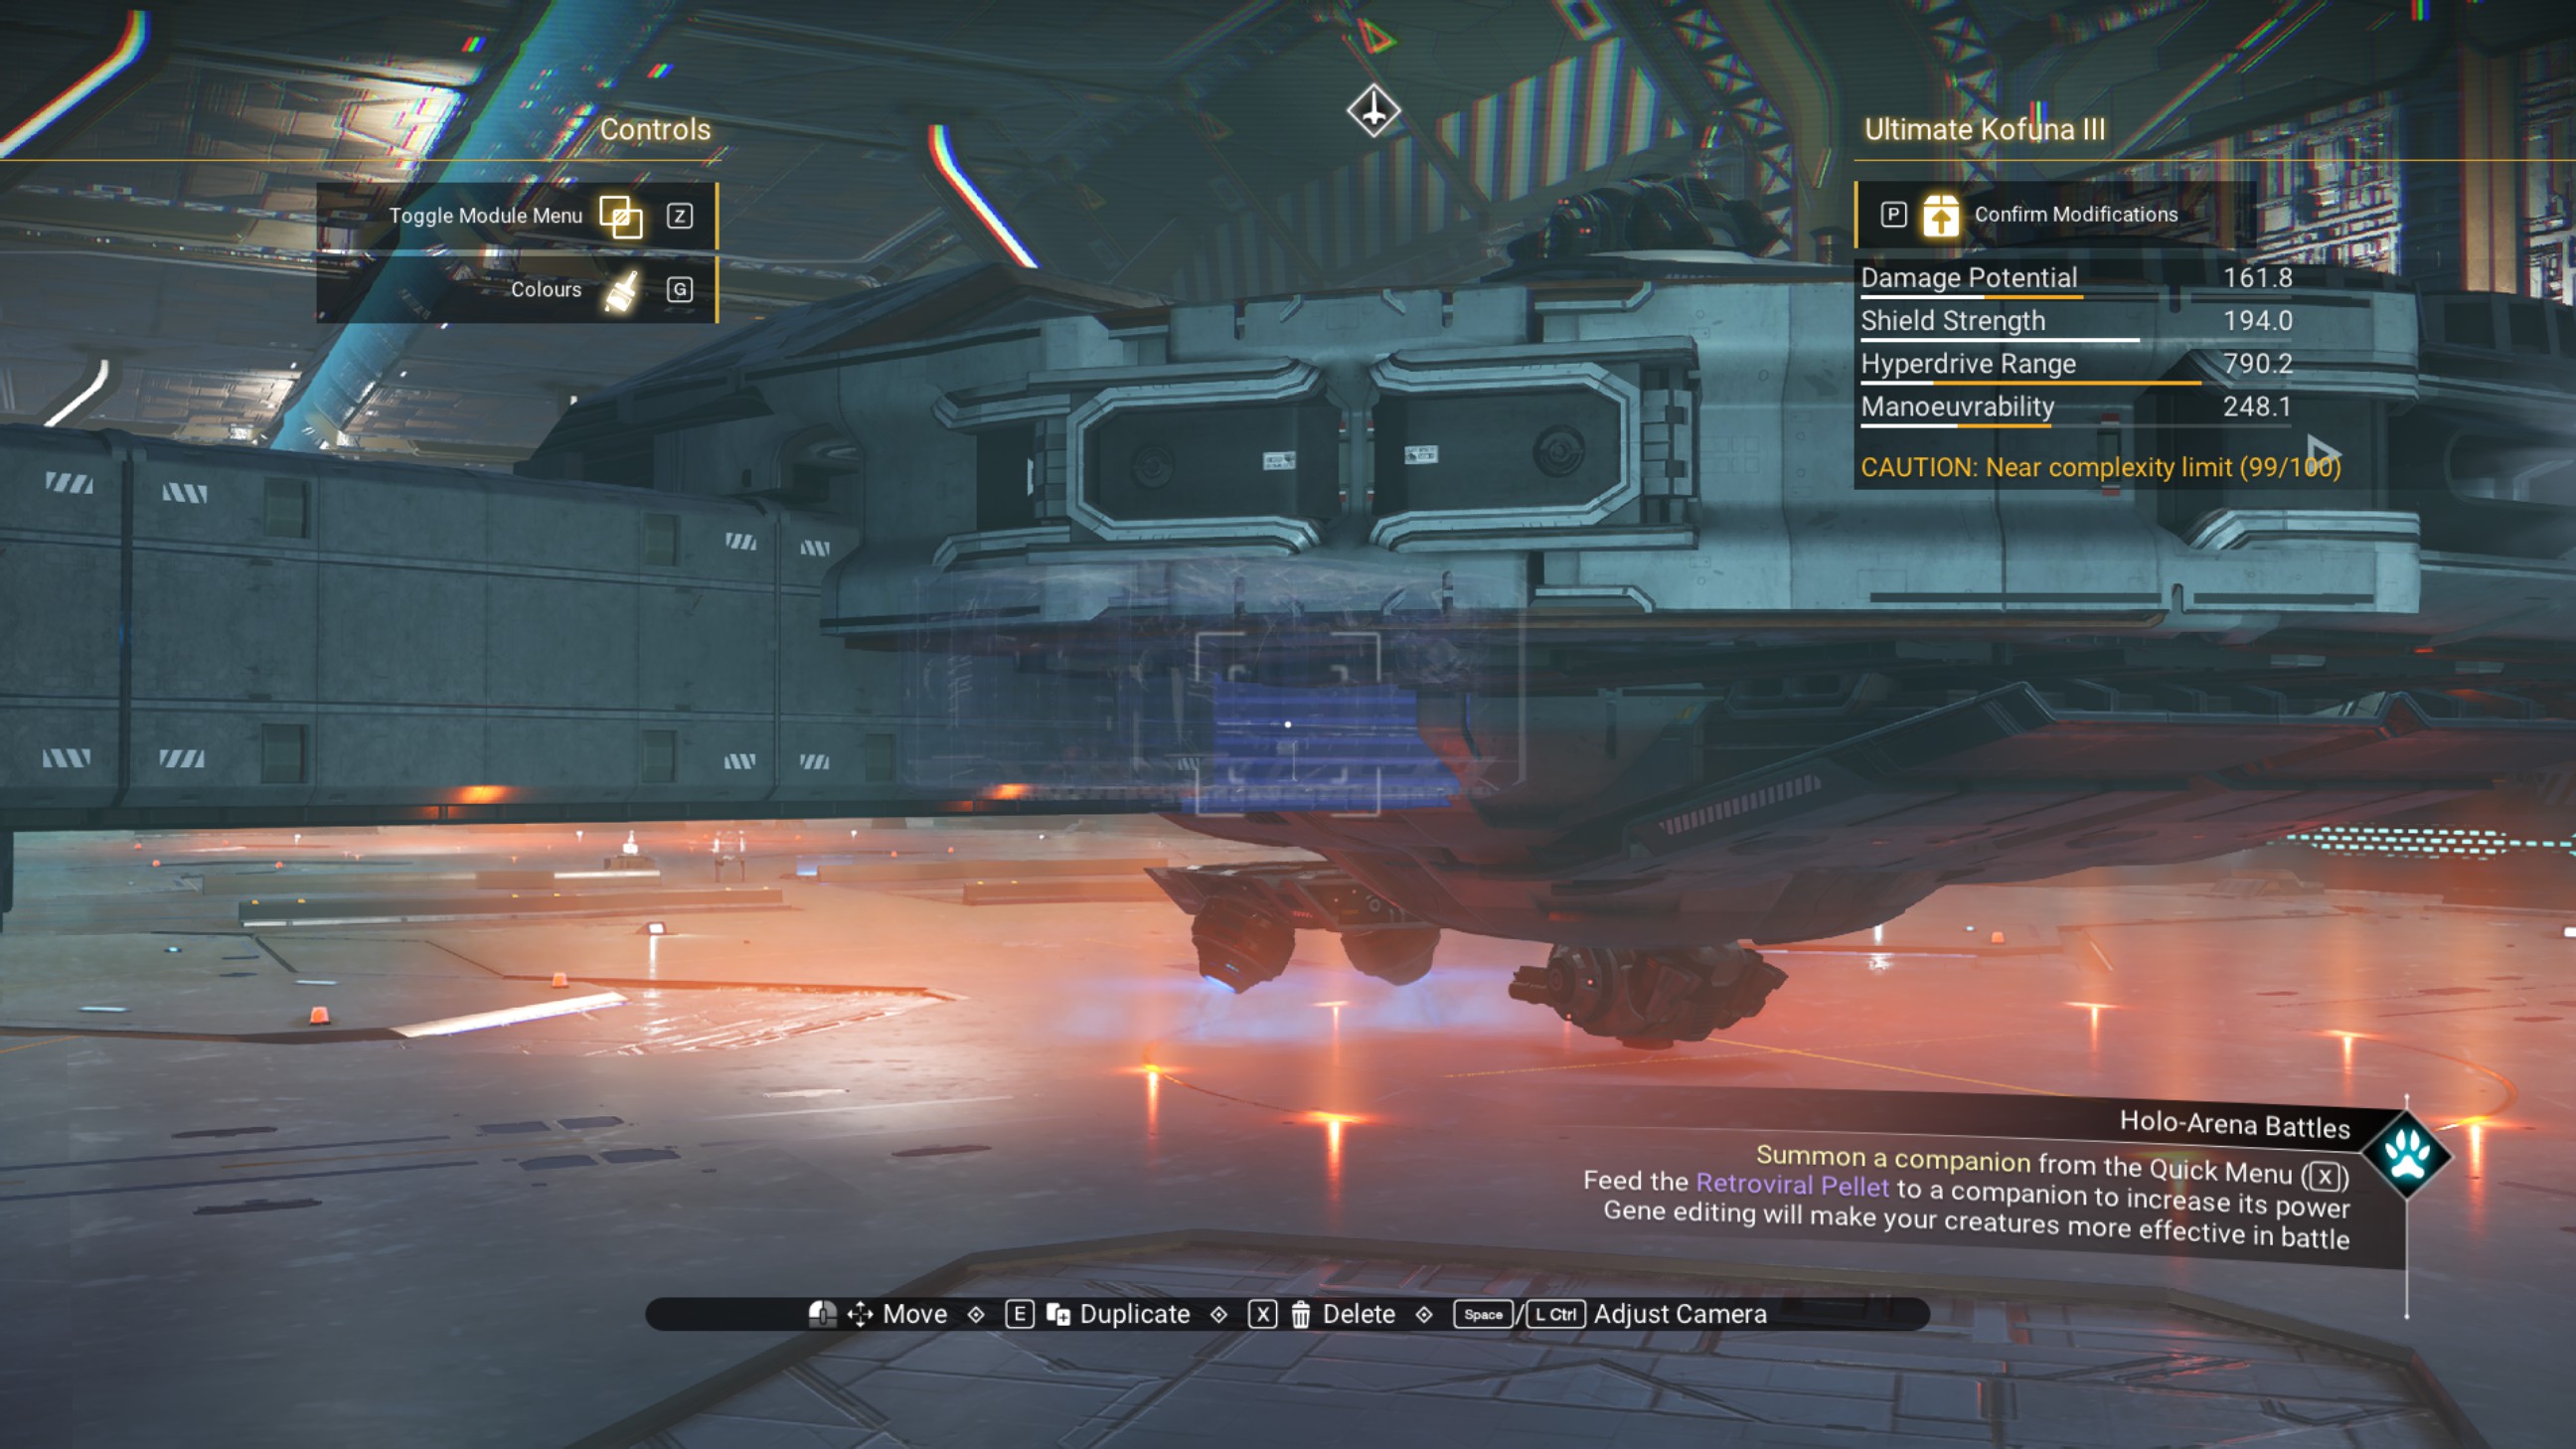
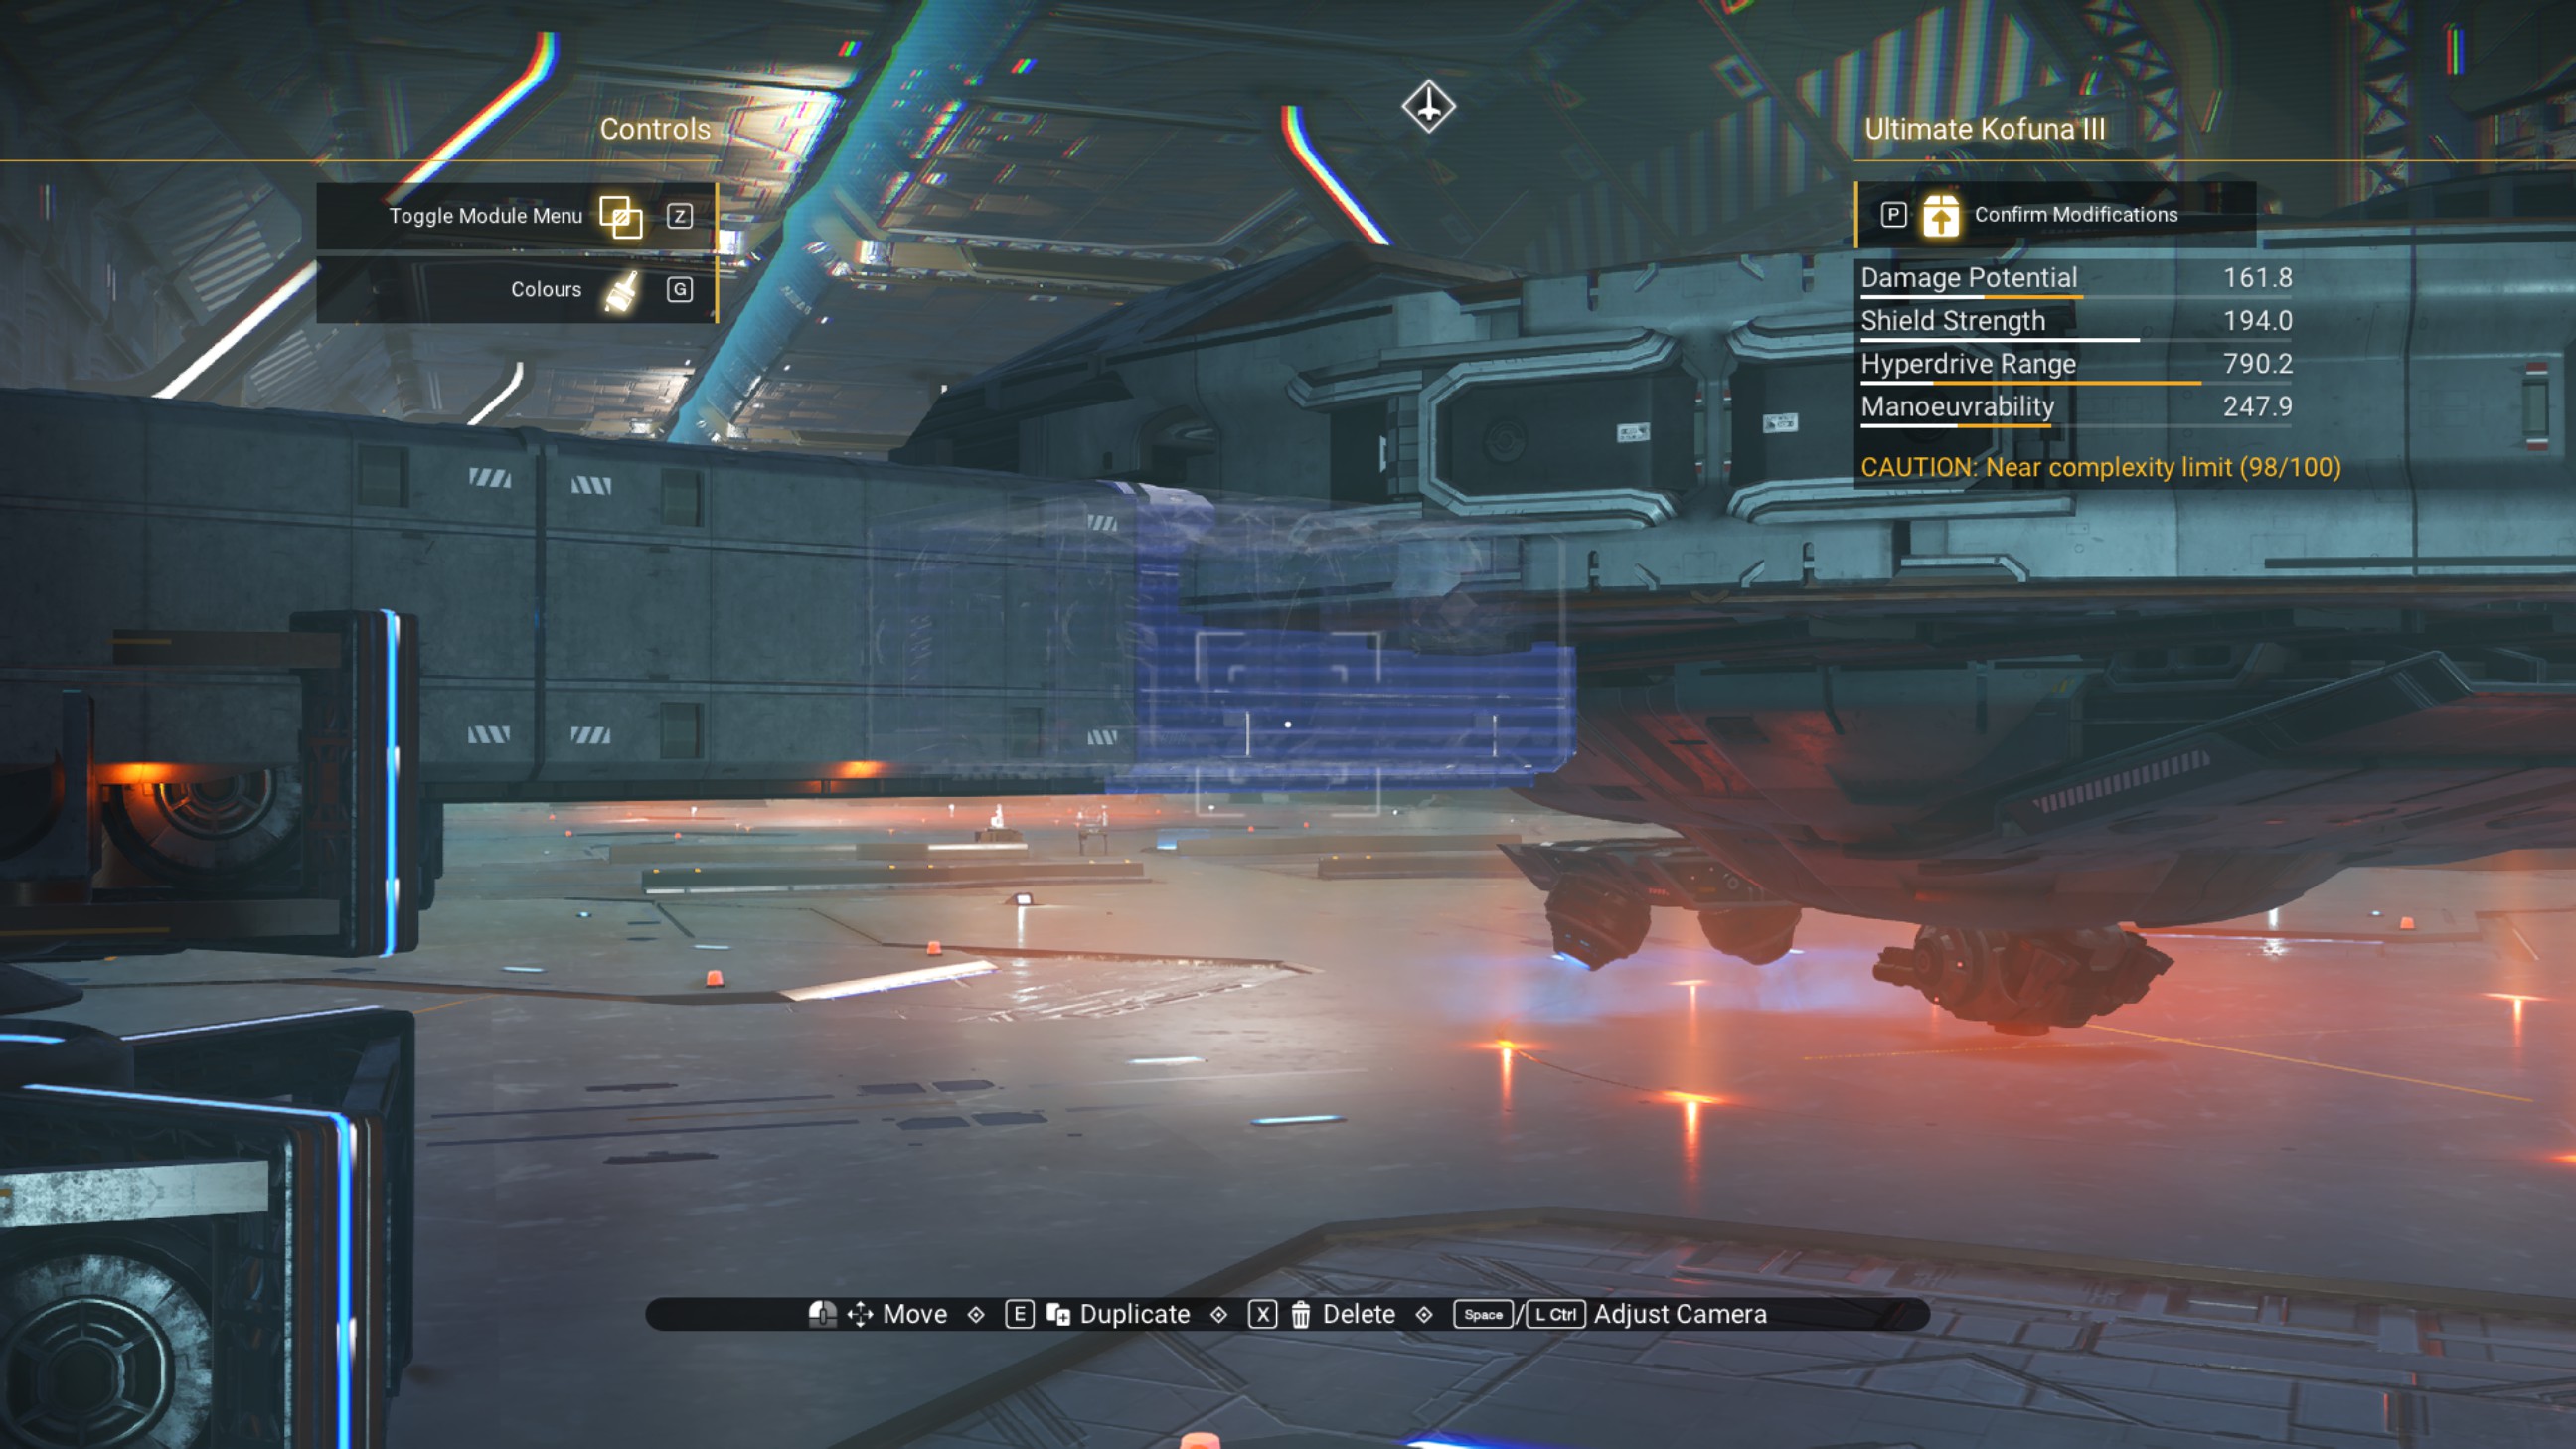
Place a walkway on top of the angled walkway closest to the ship, as shown, then another one beside that to overlap with the ship.
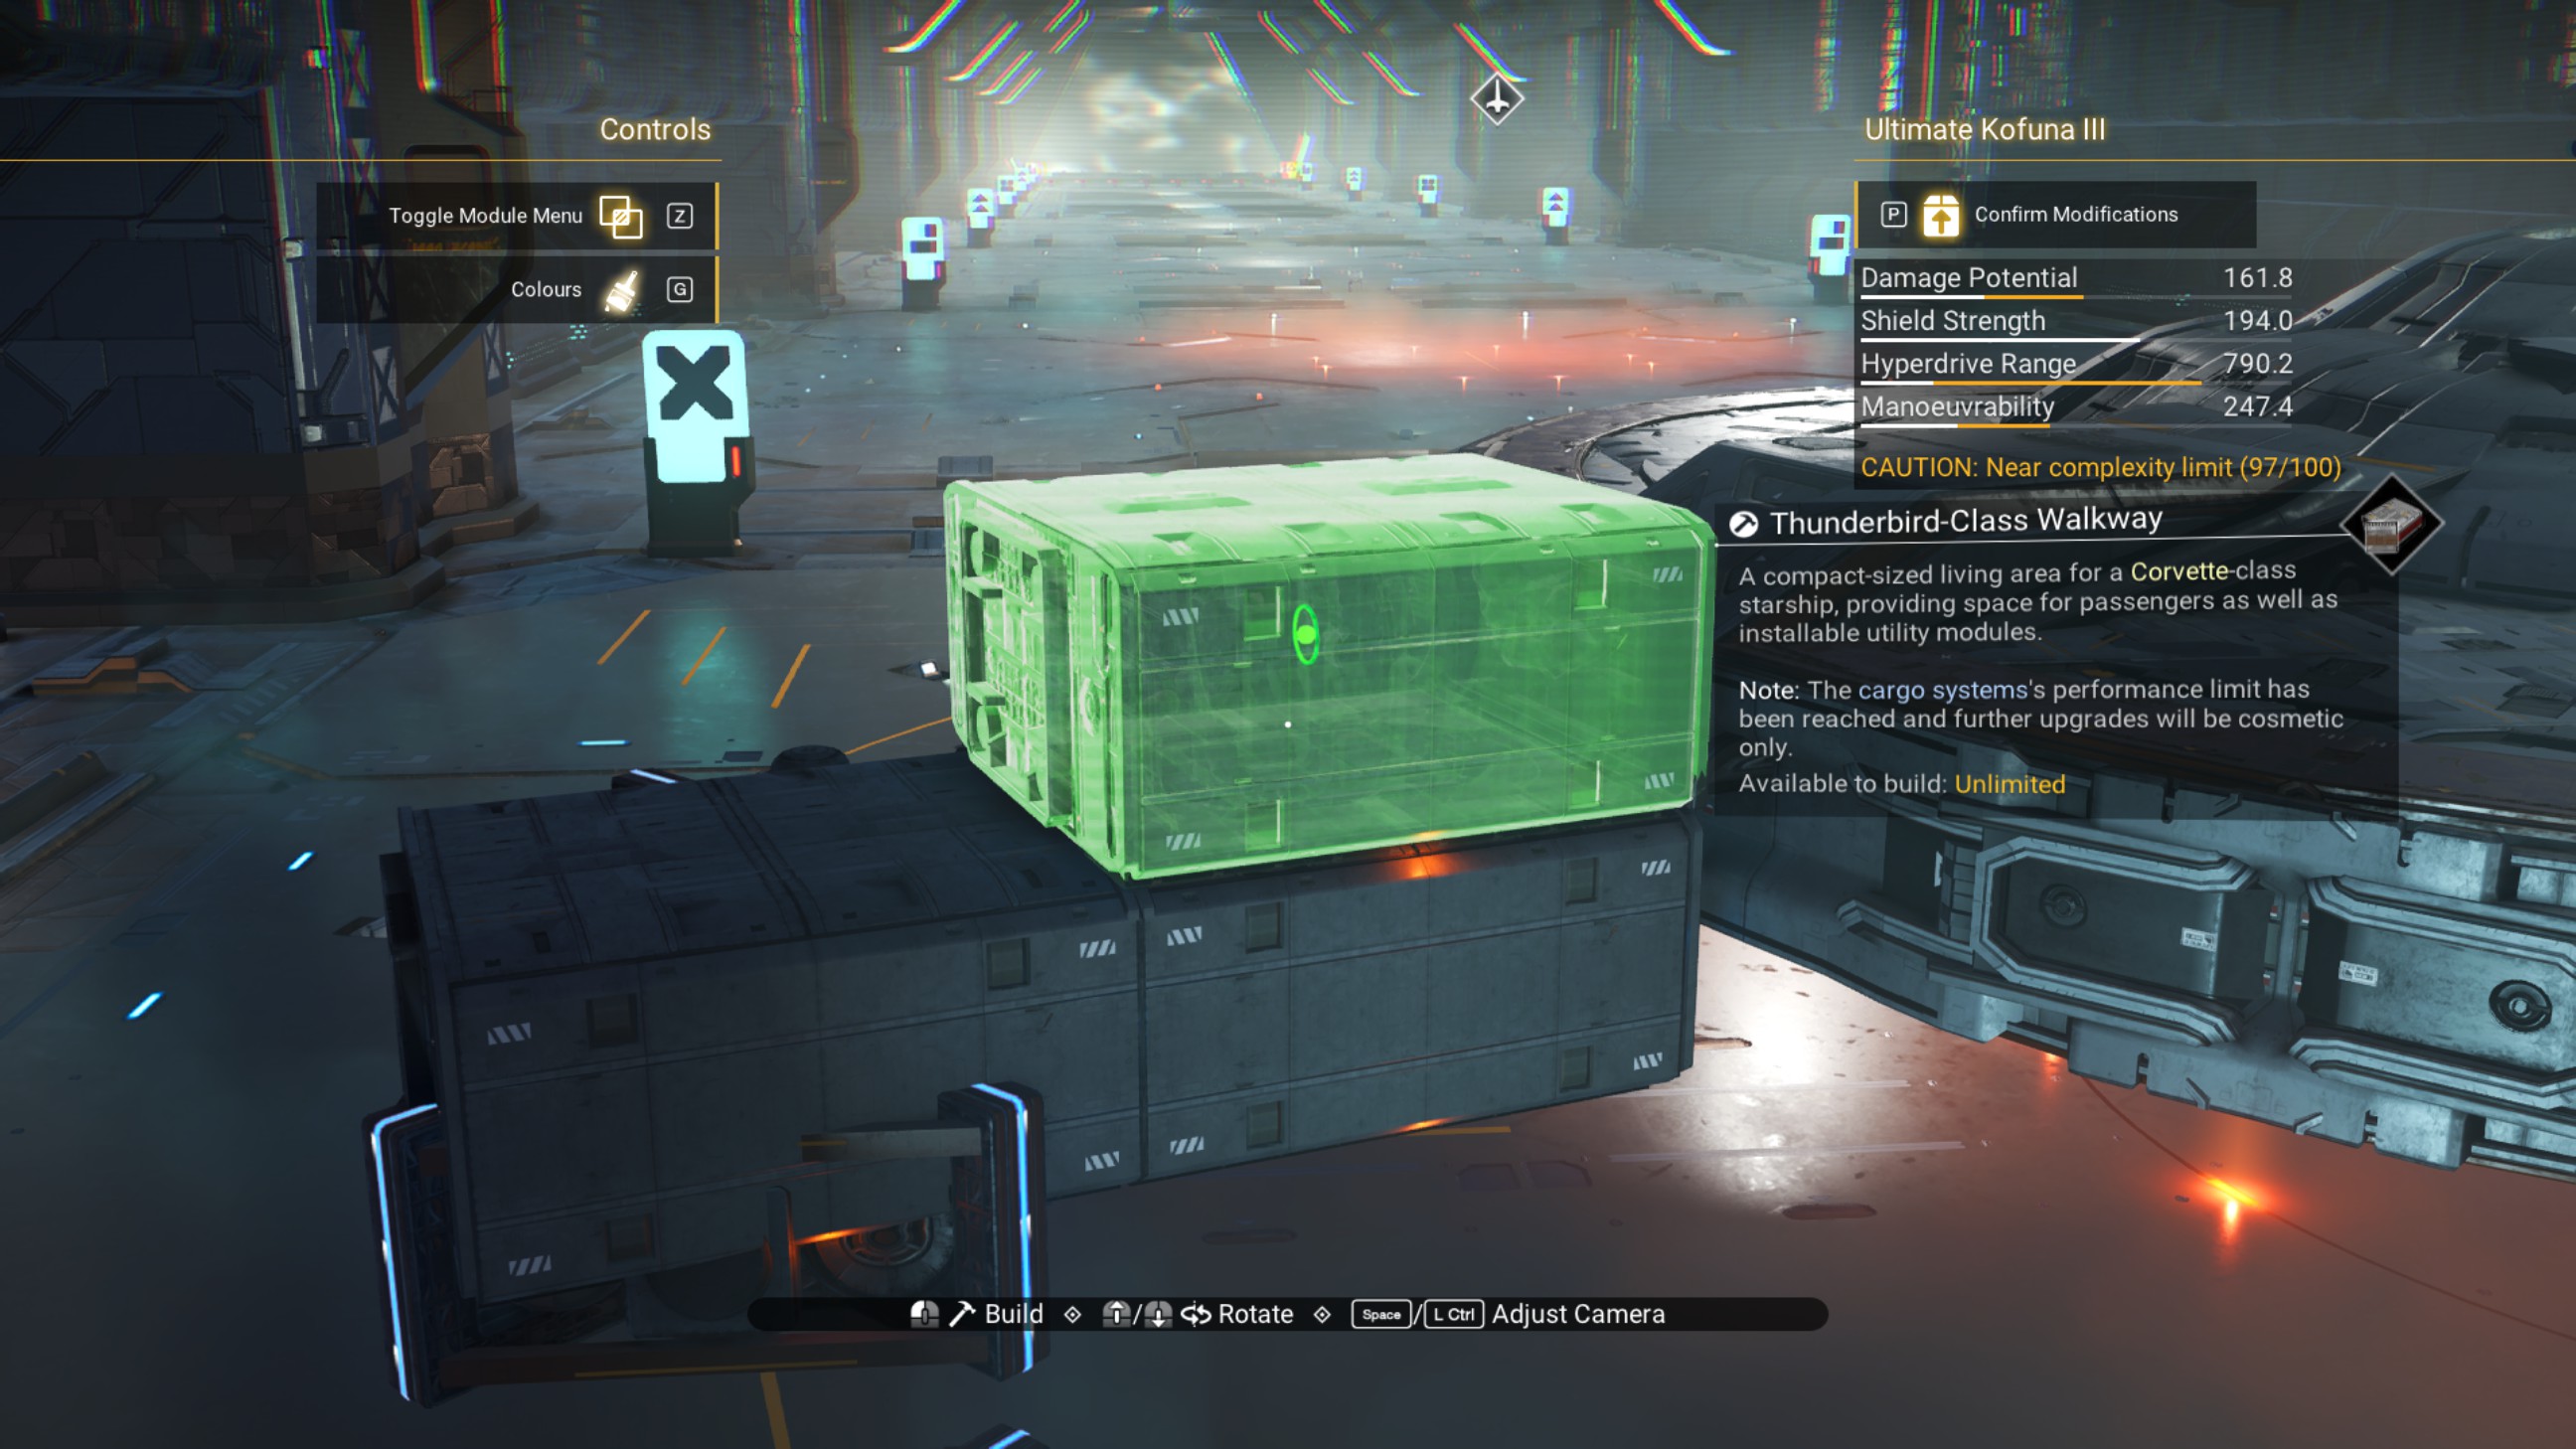
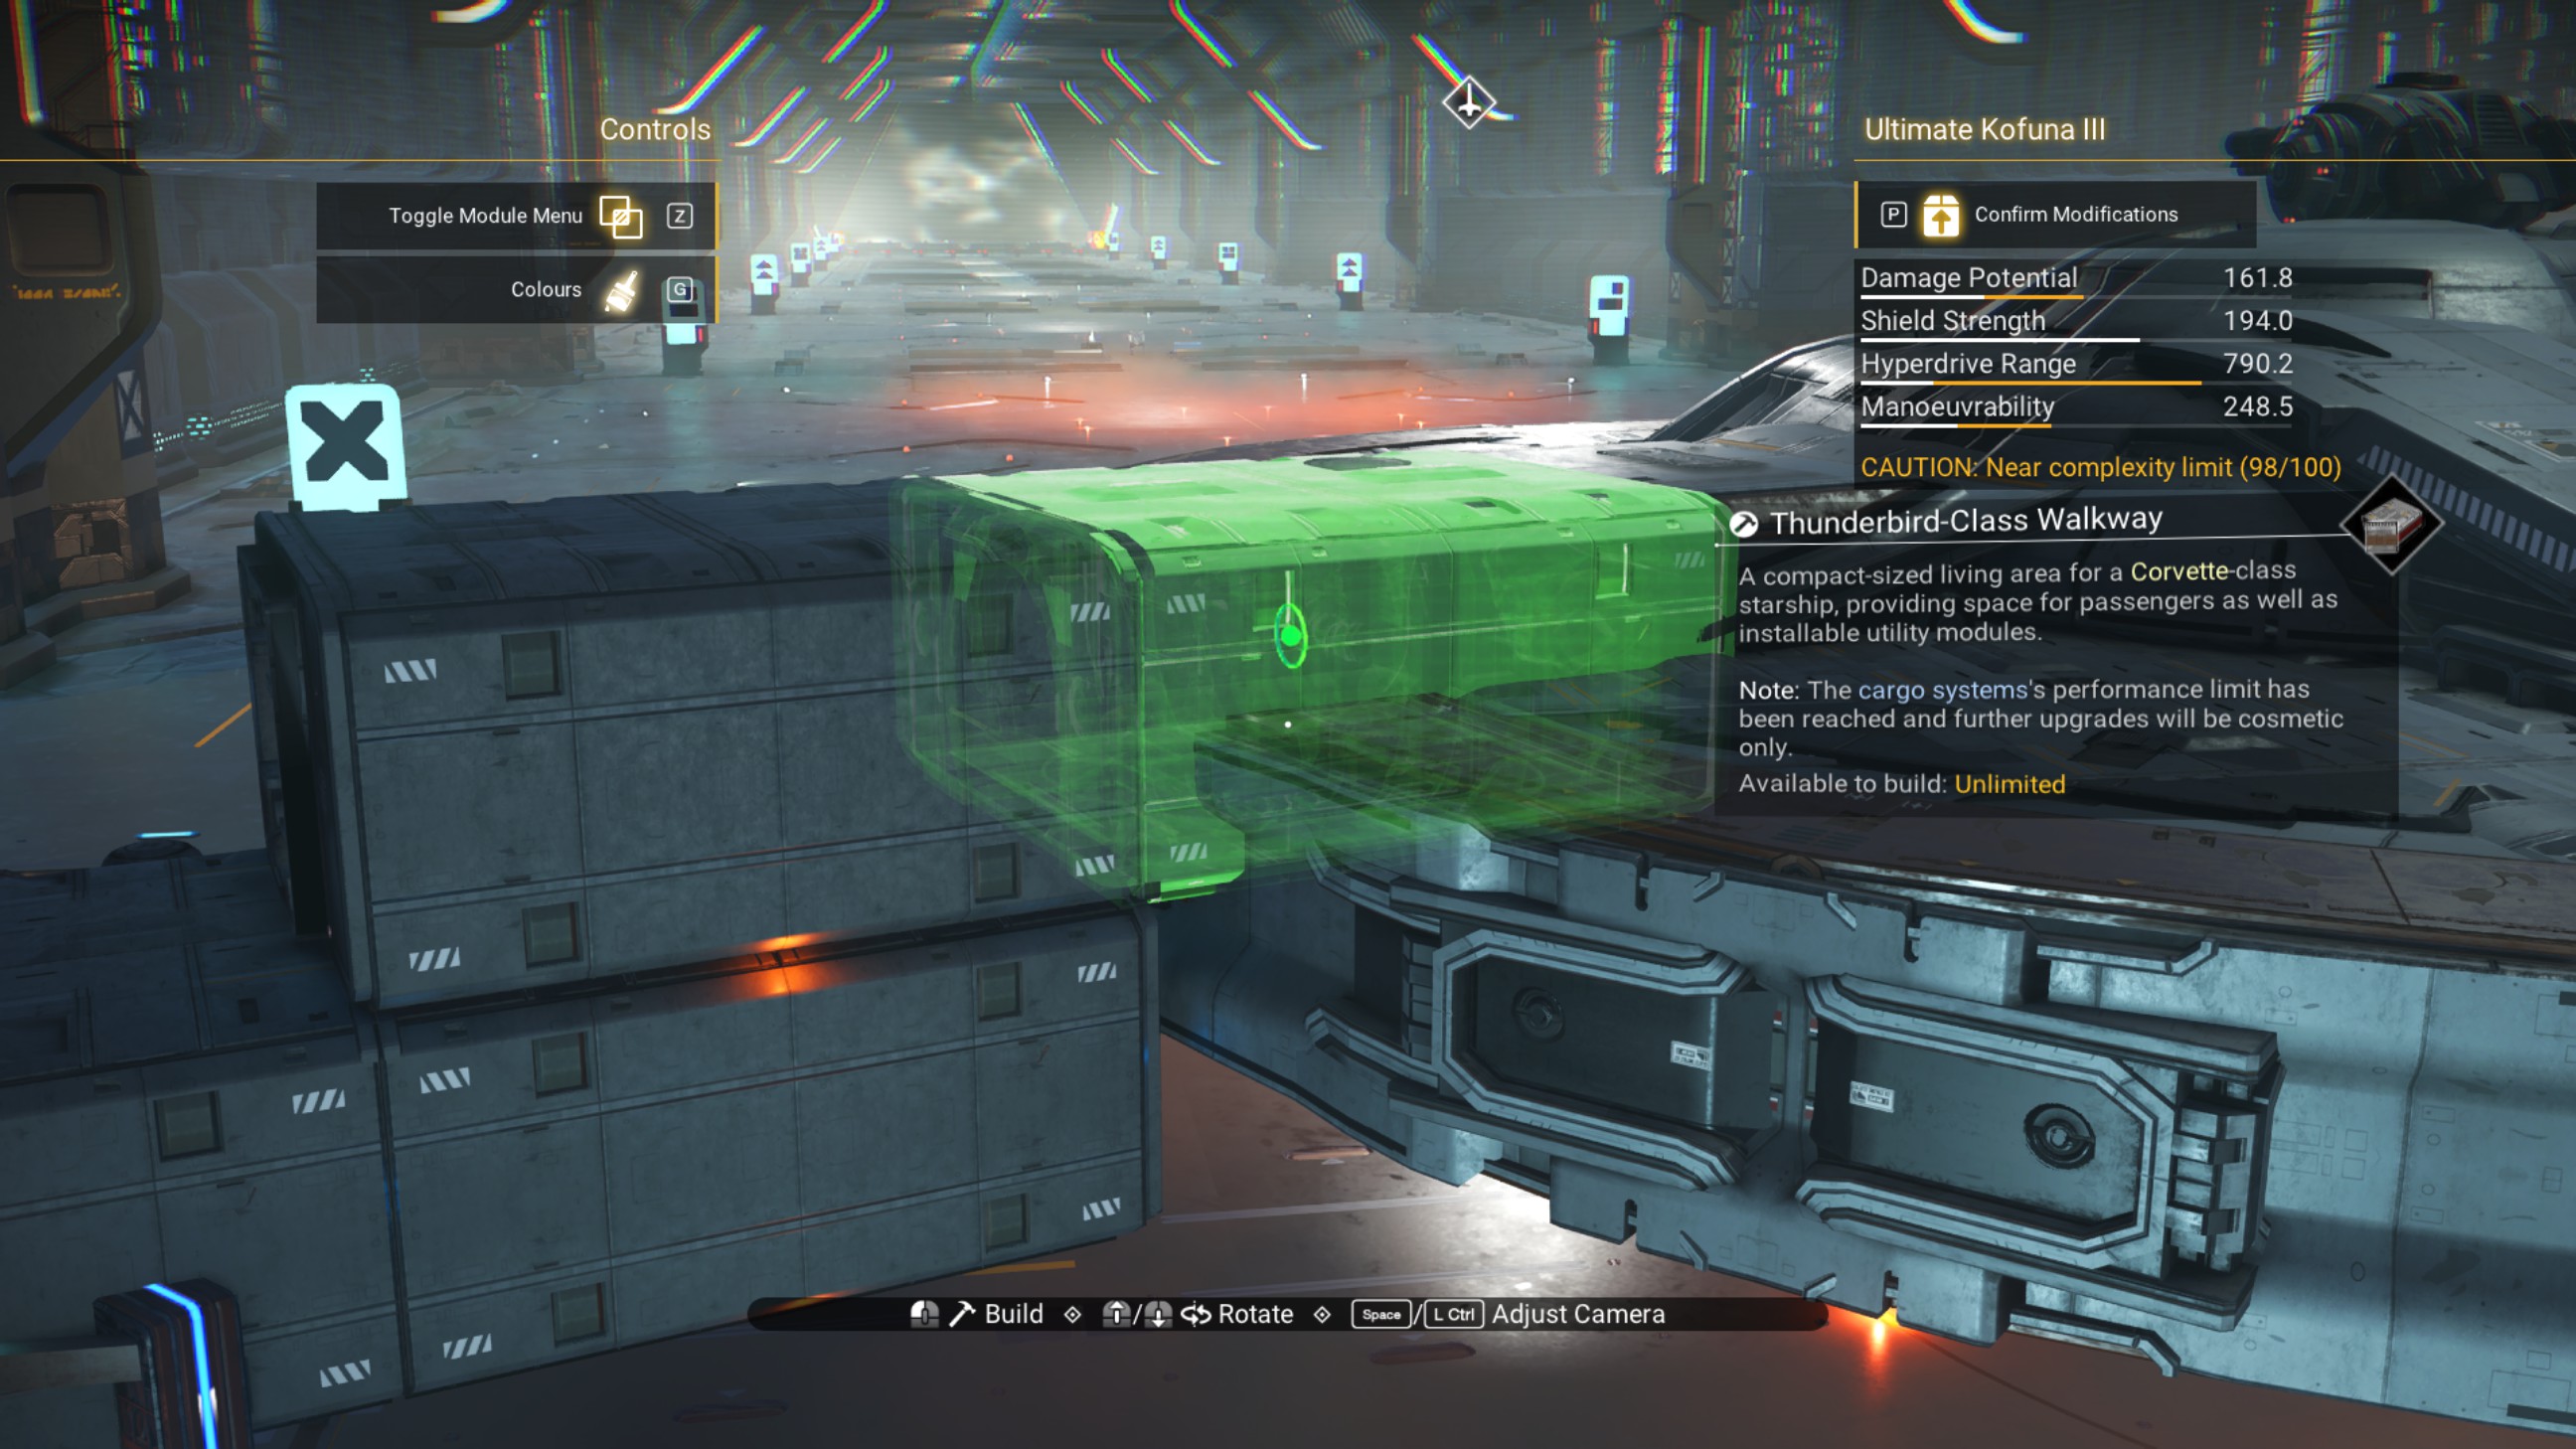
Delete the two angled walkways connected to the one overlapping with the ship.
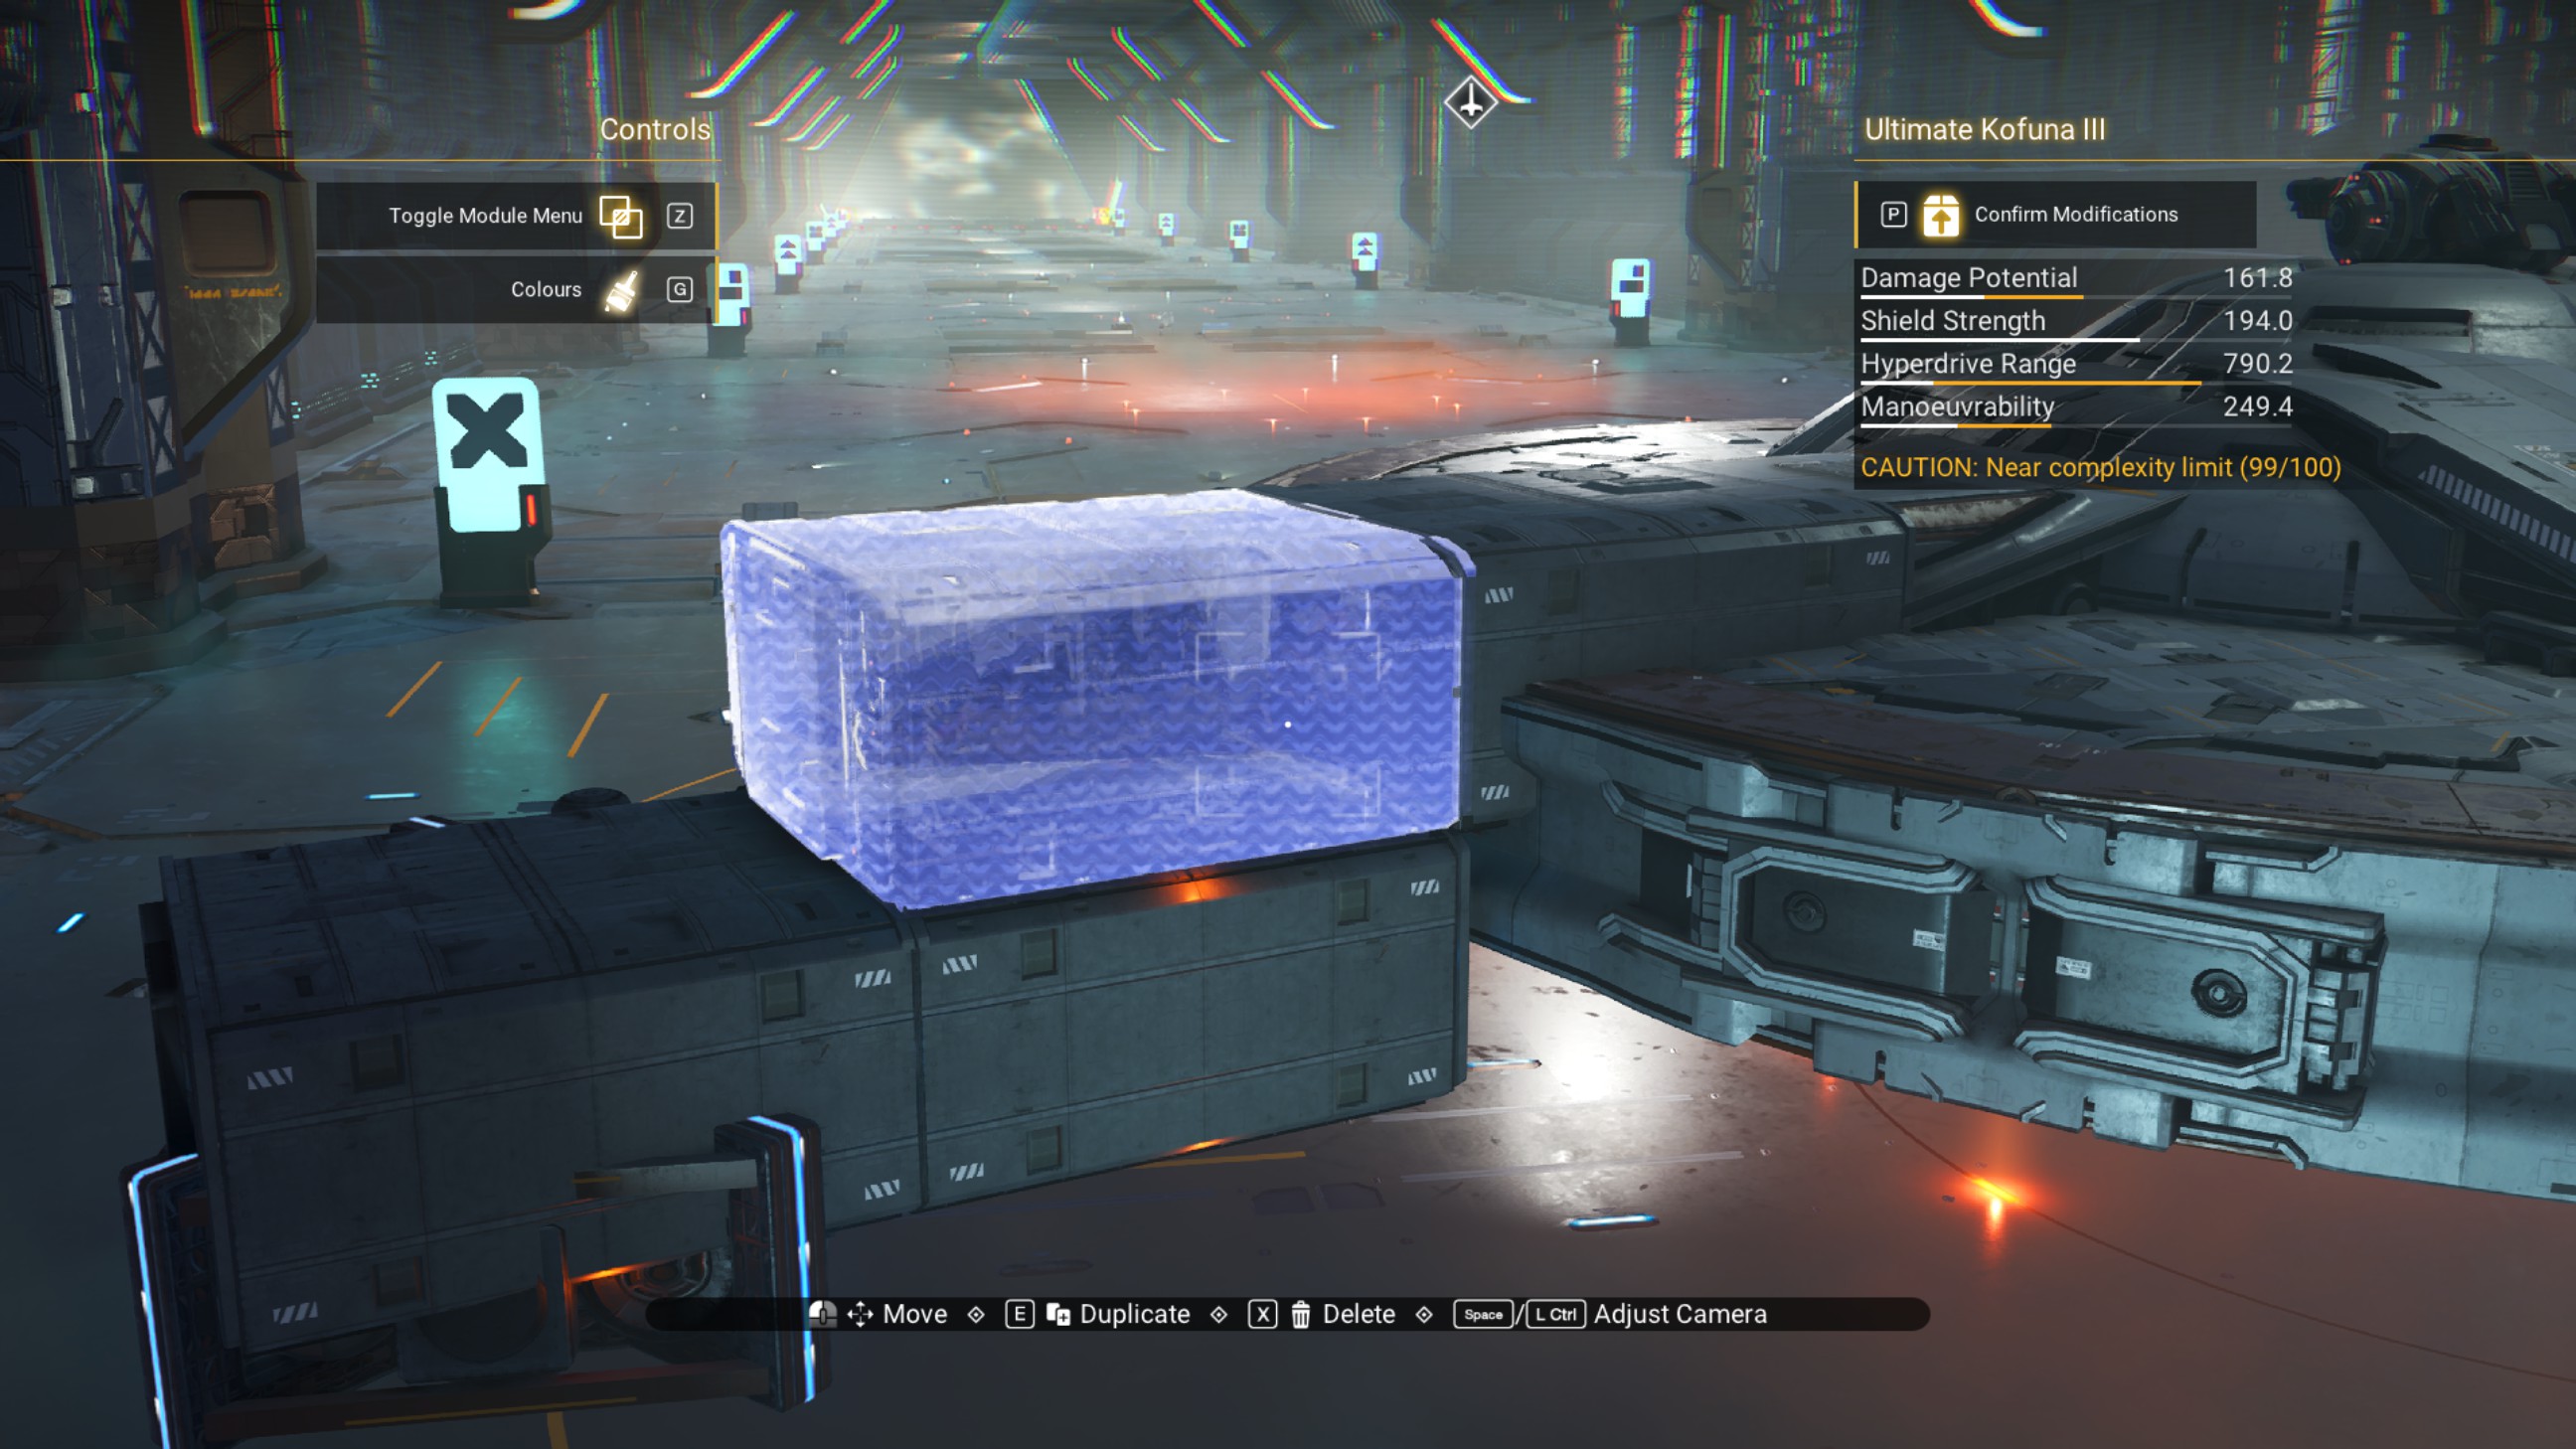
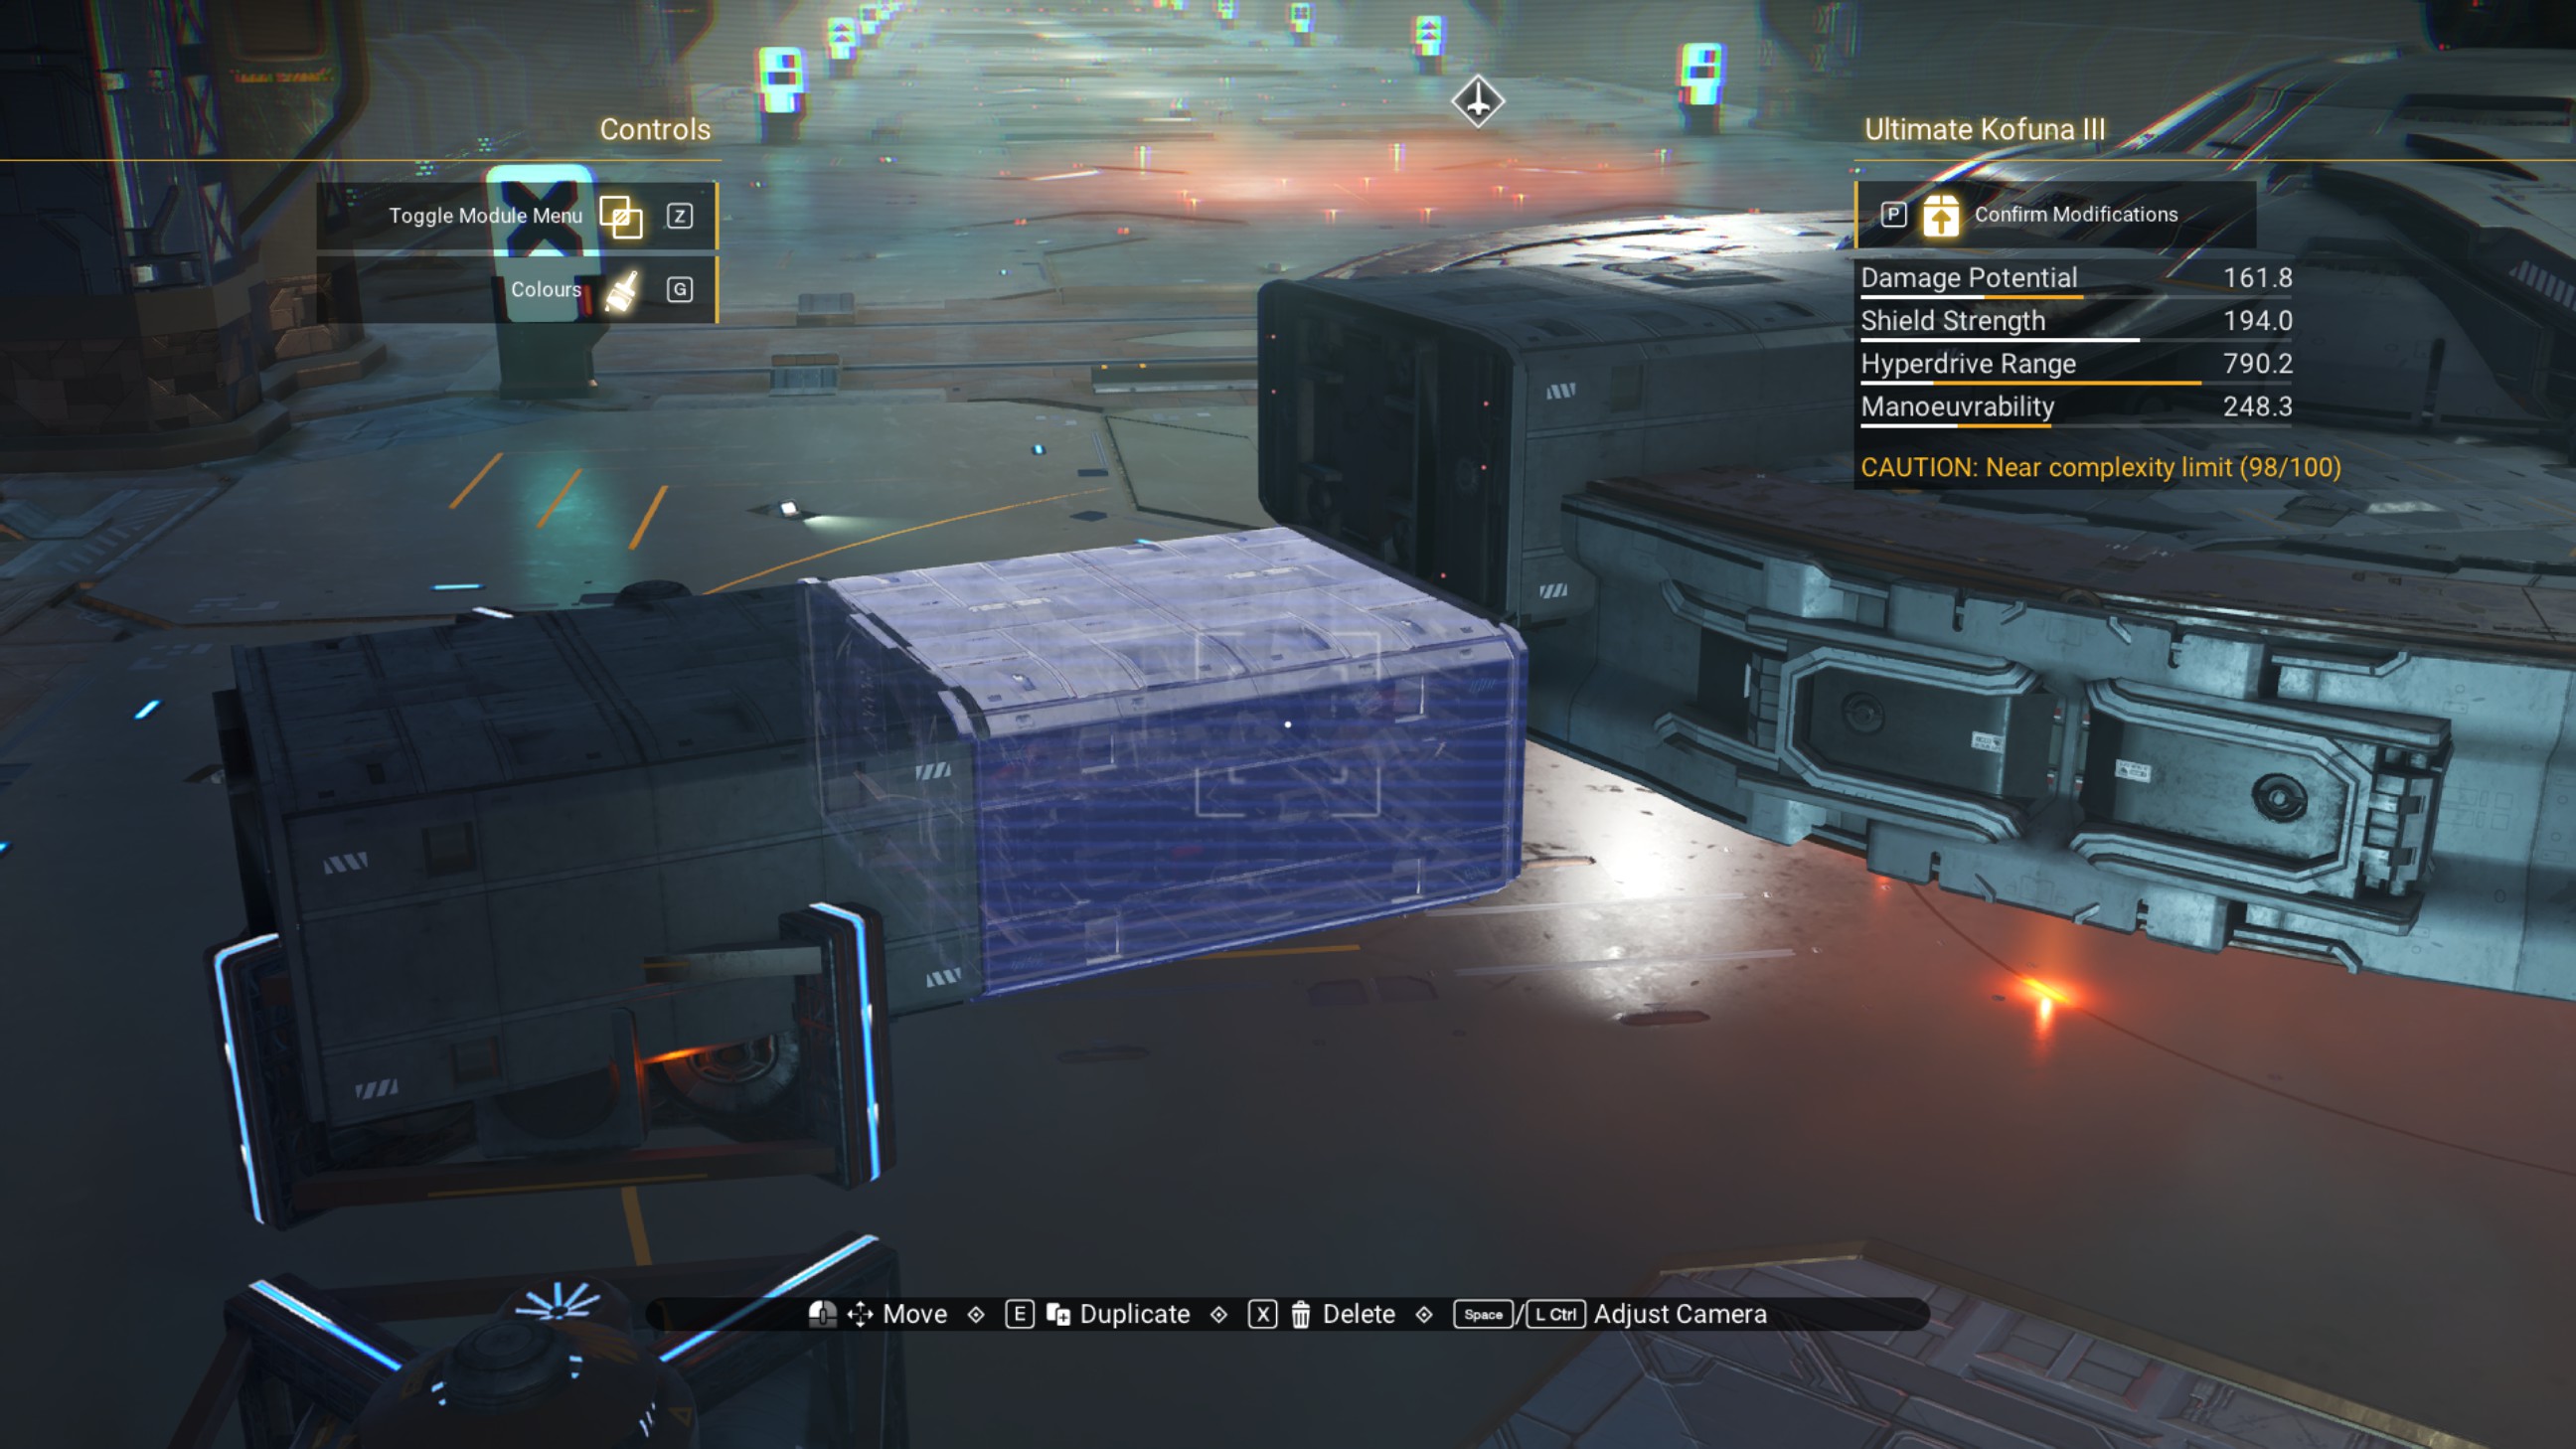
Place another longshore cowling on the underside, in line with the first.
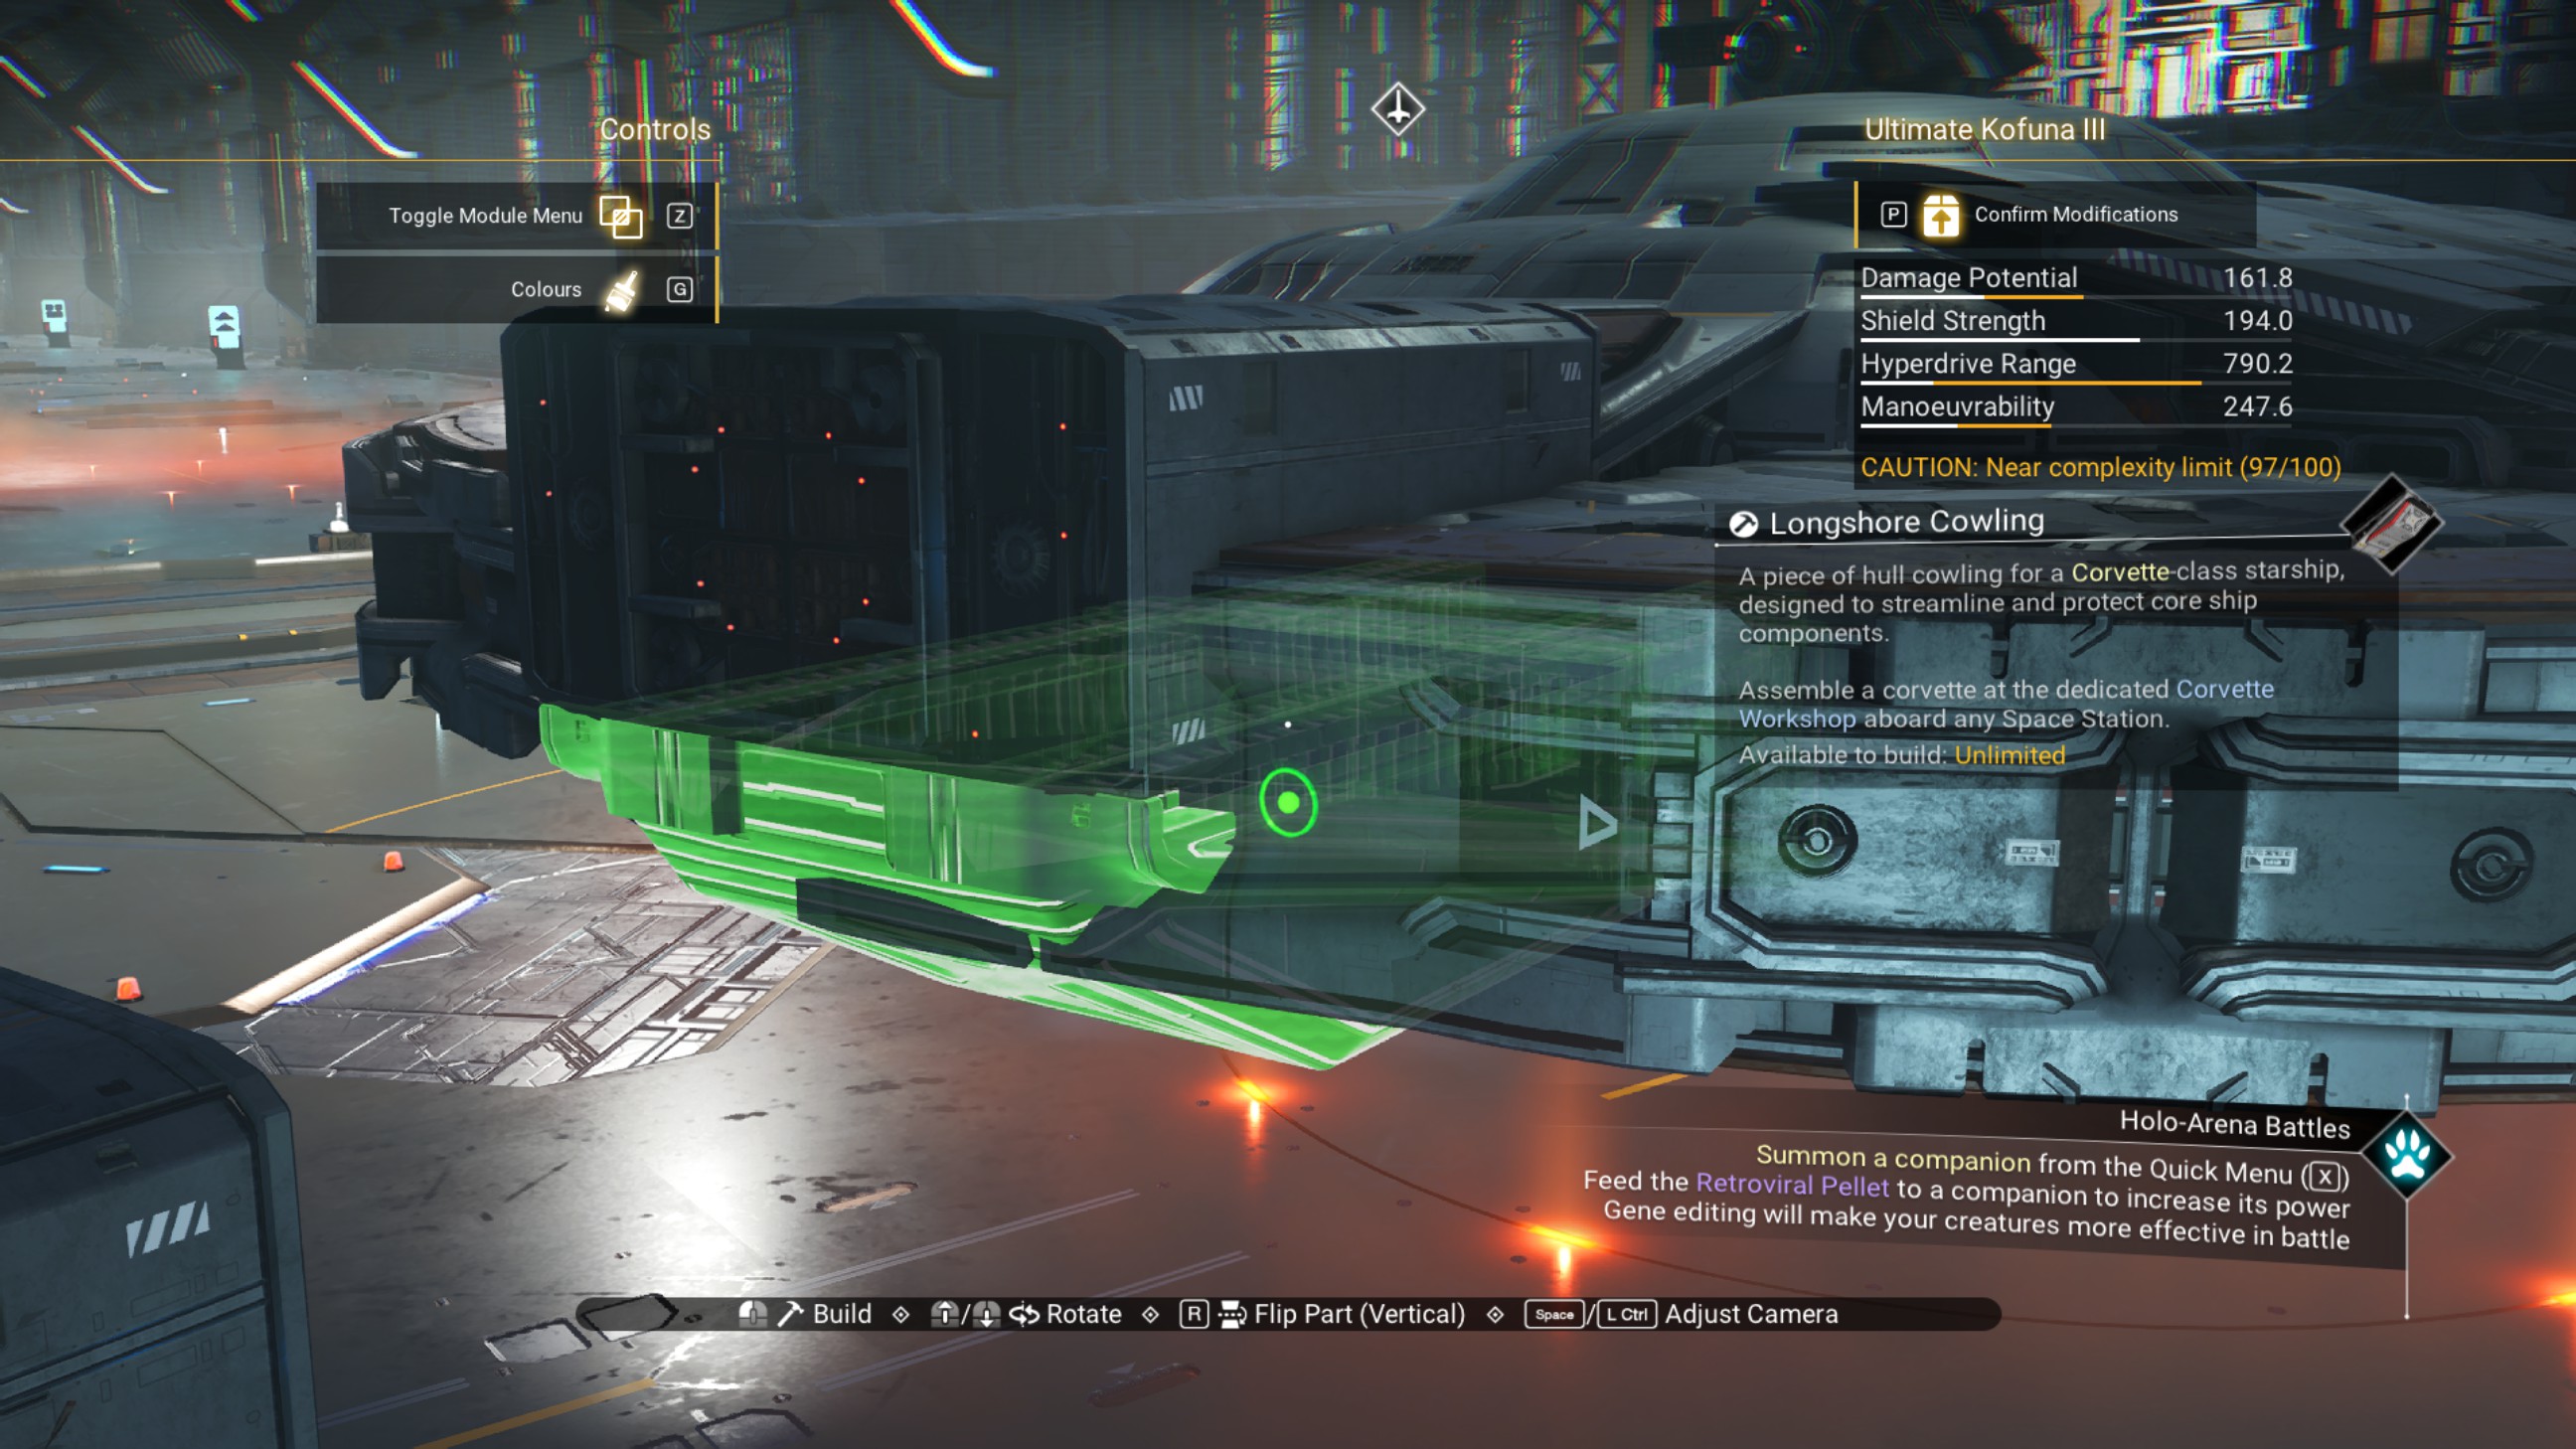
Delete the walkway overlapping with the ship, then delete the zenith reactors. Do not delete the angled walkway on top of the zenith reactors.
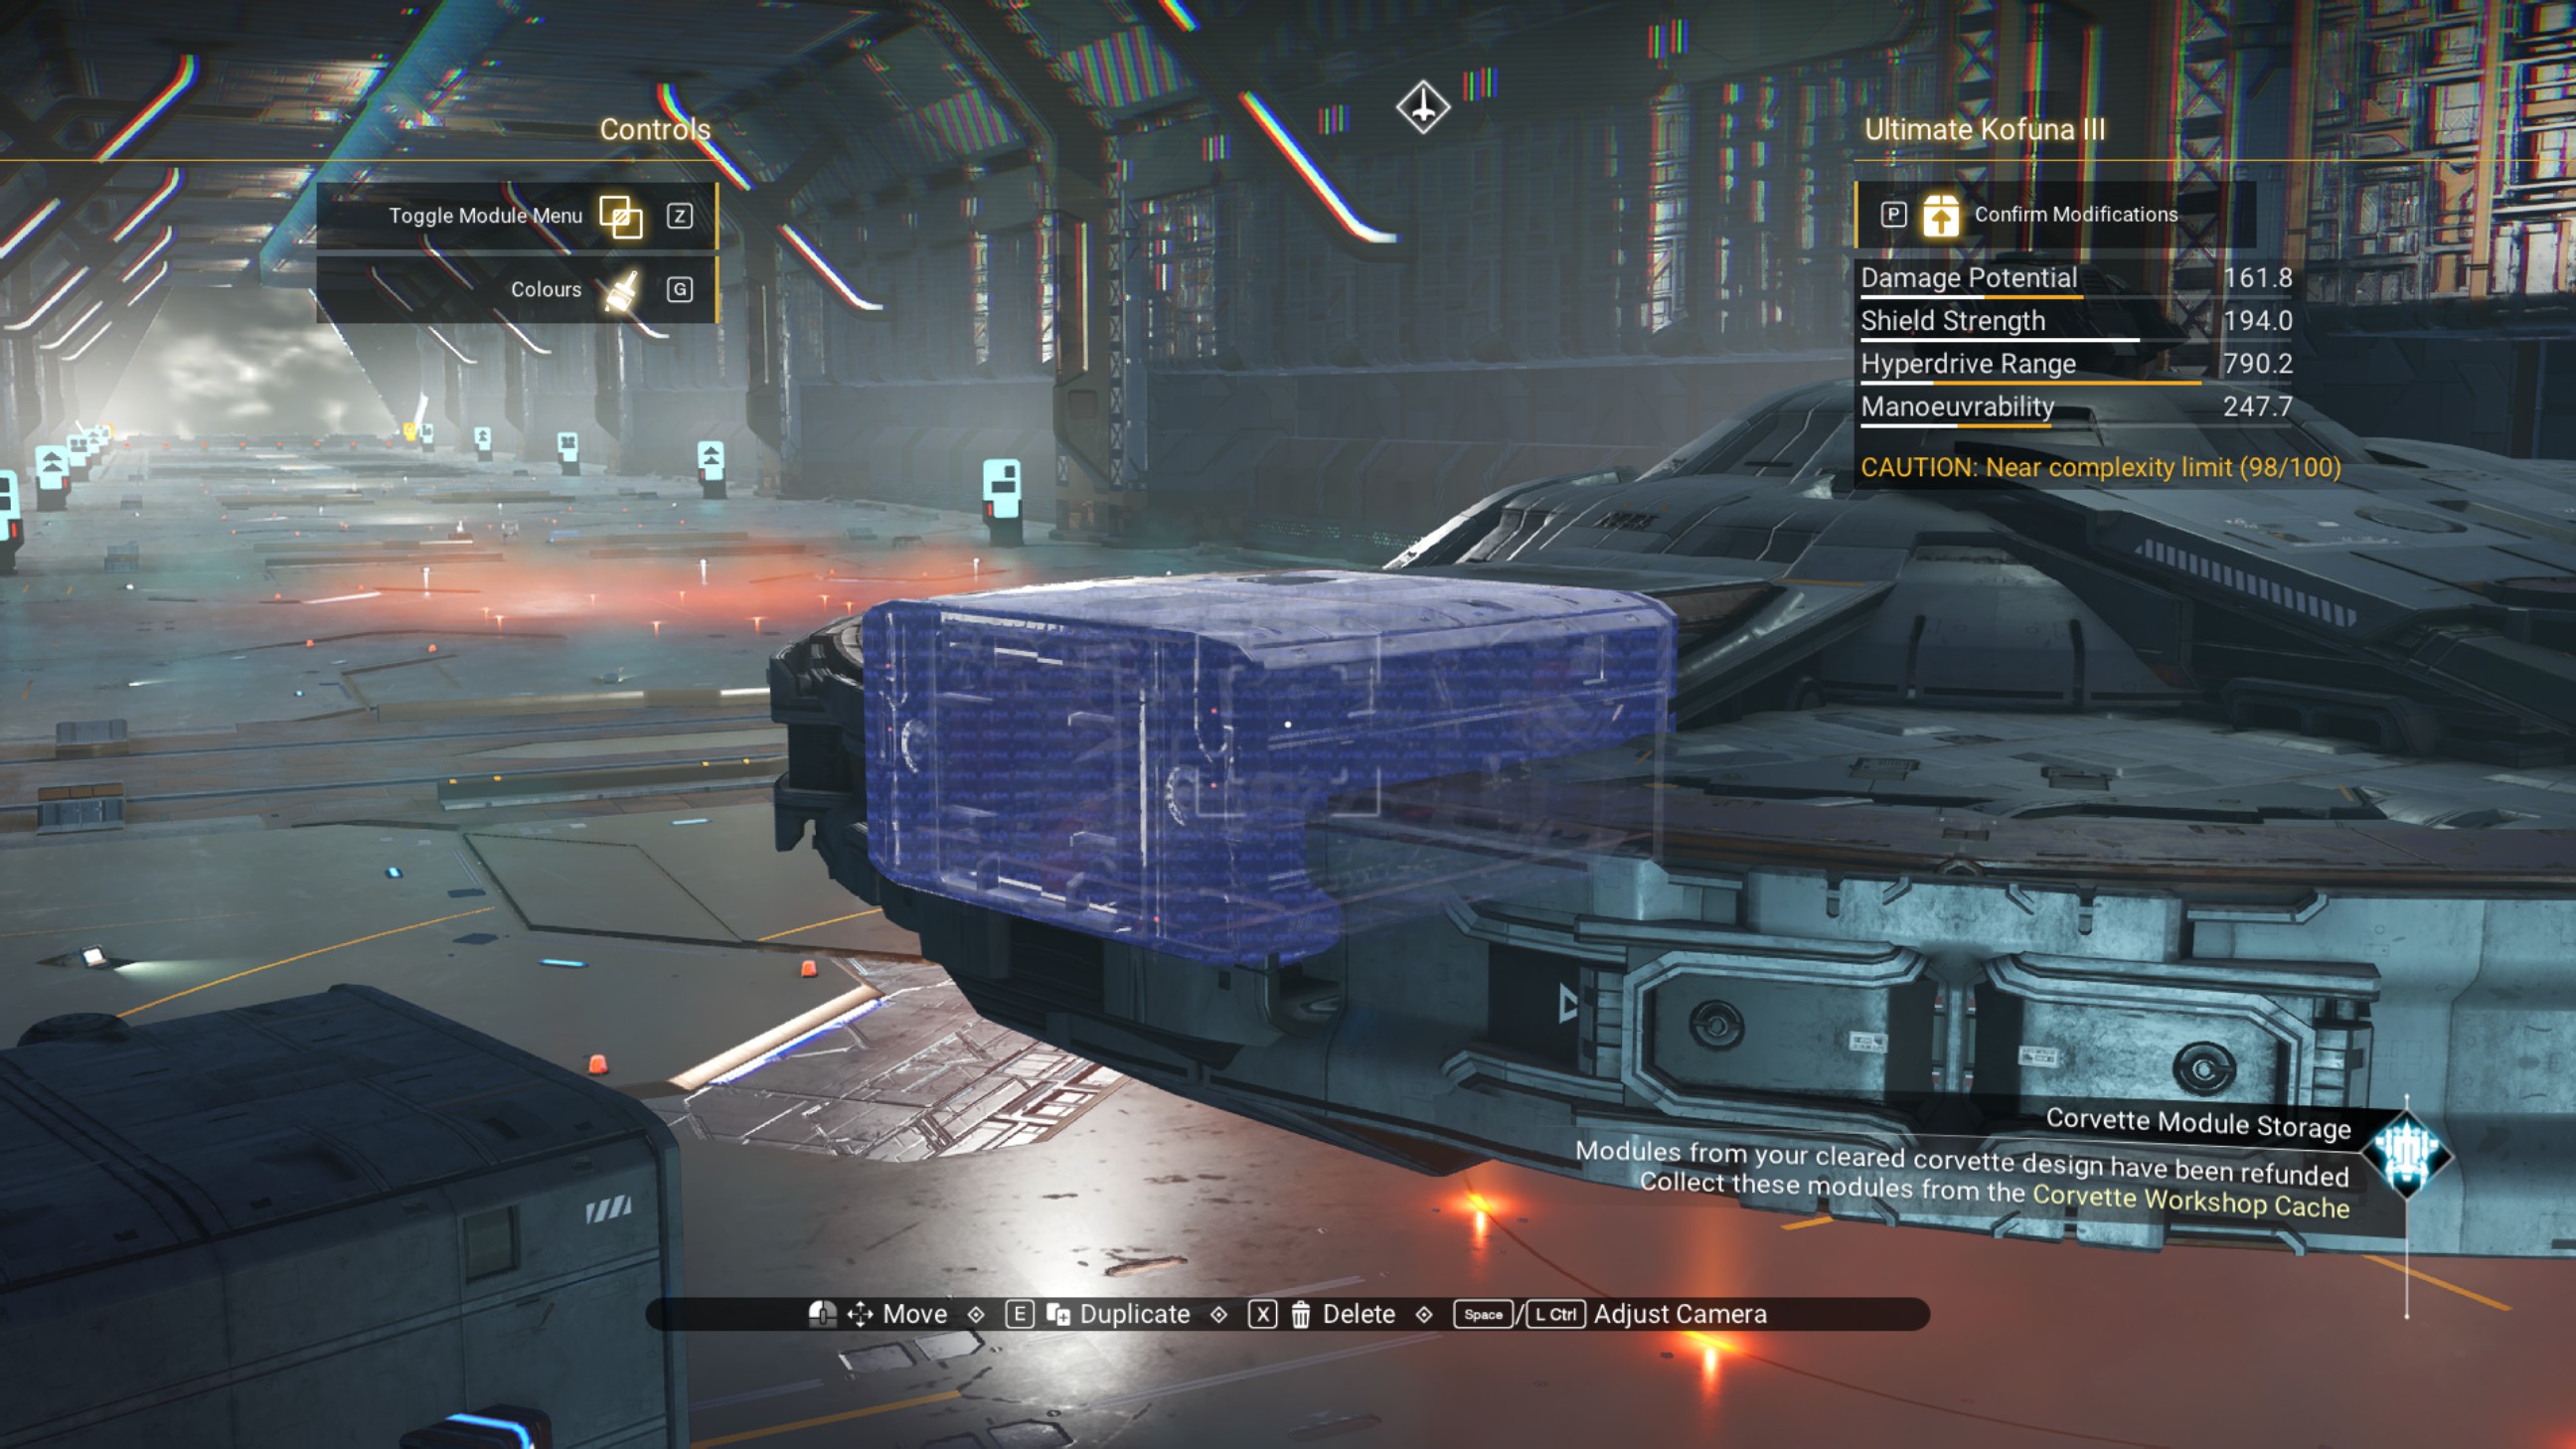
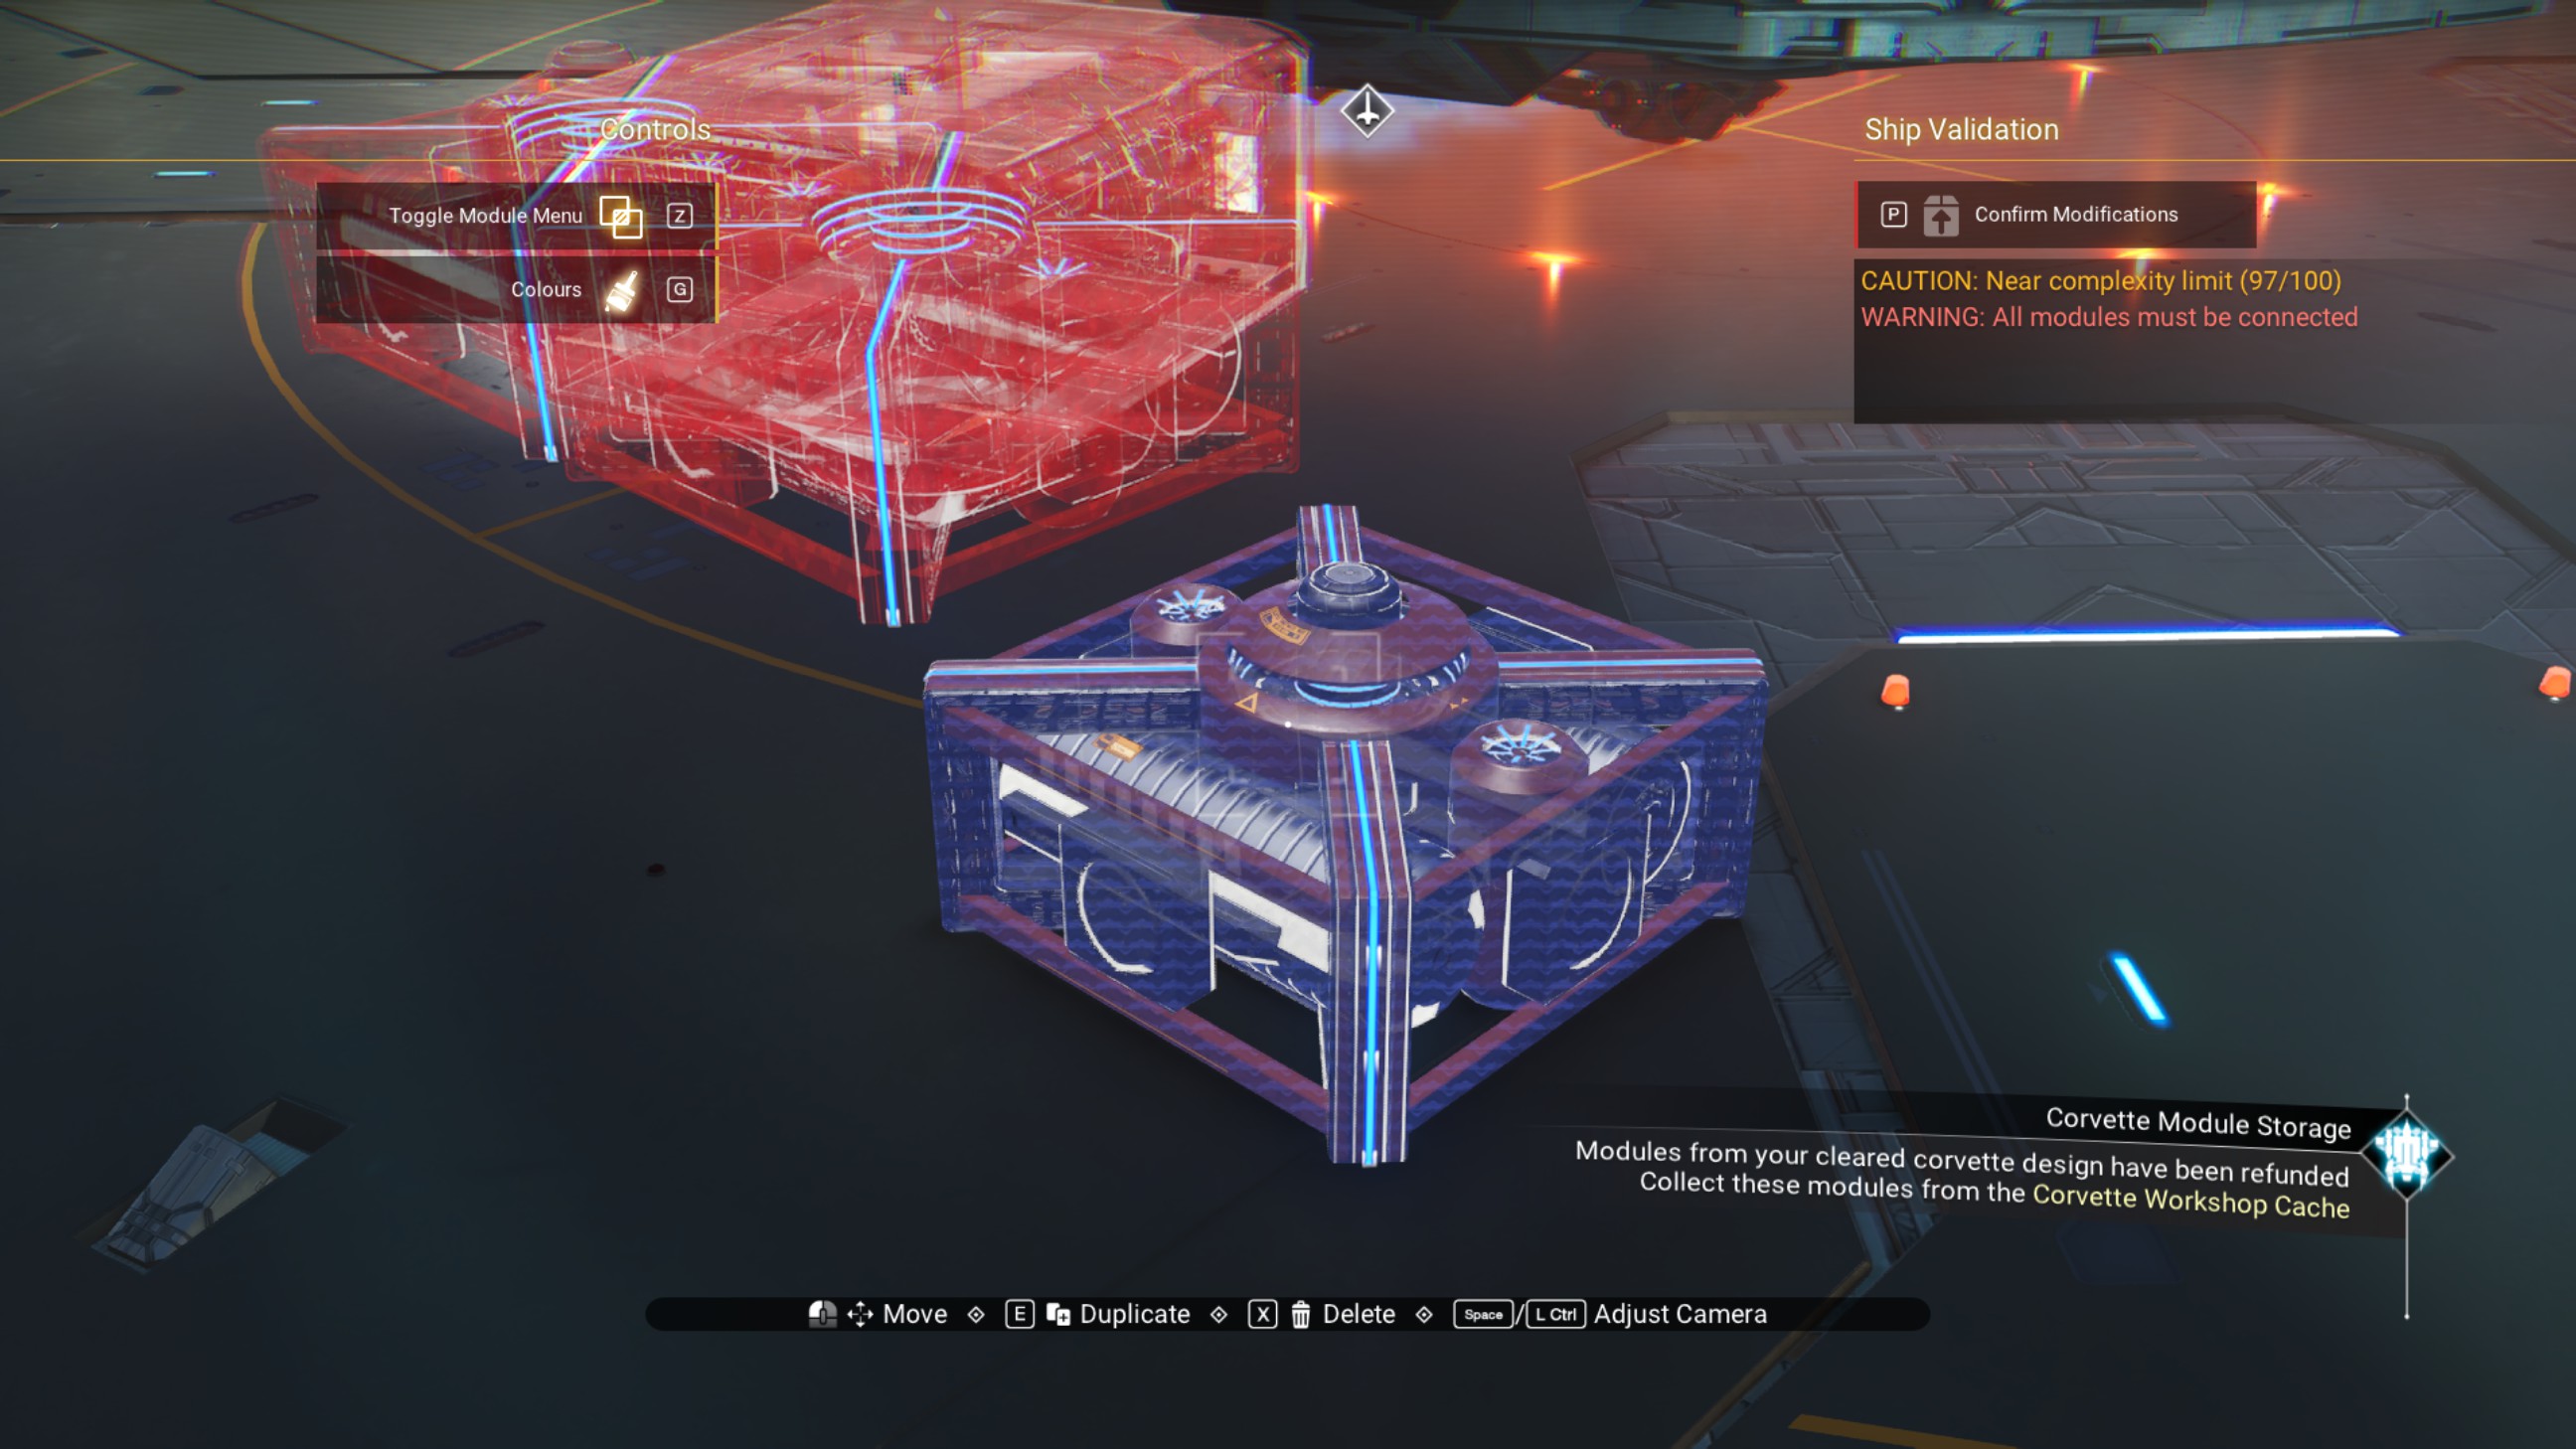
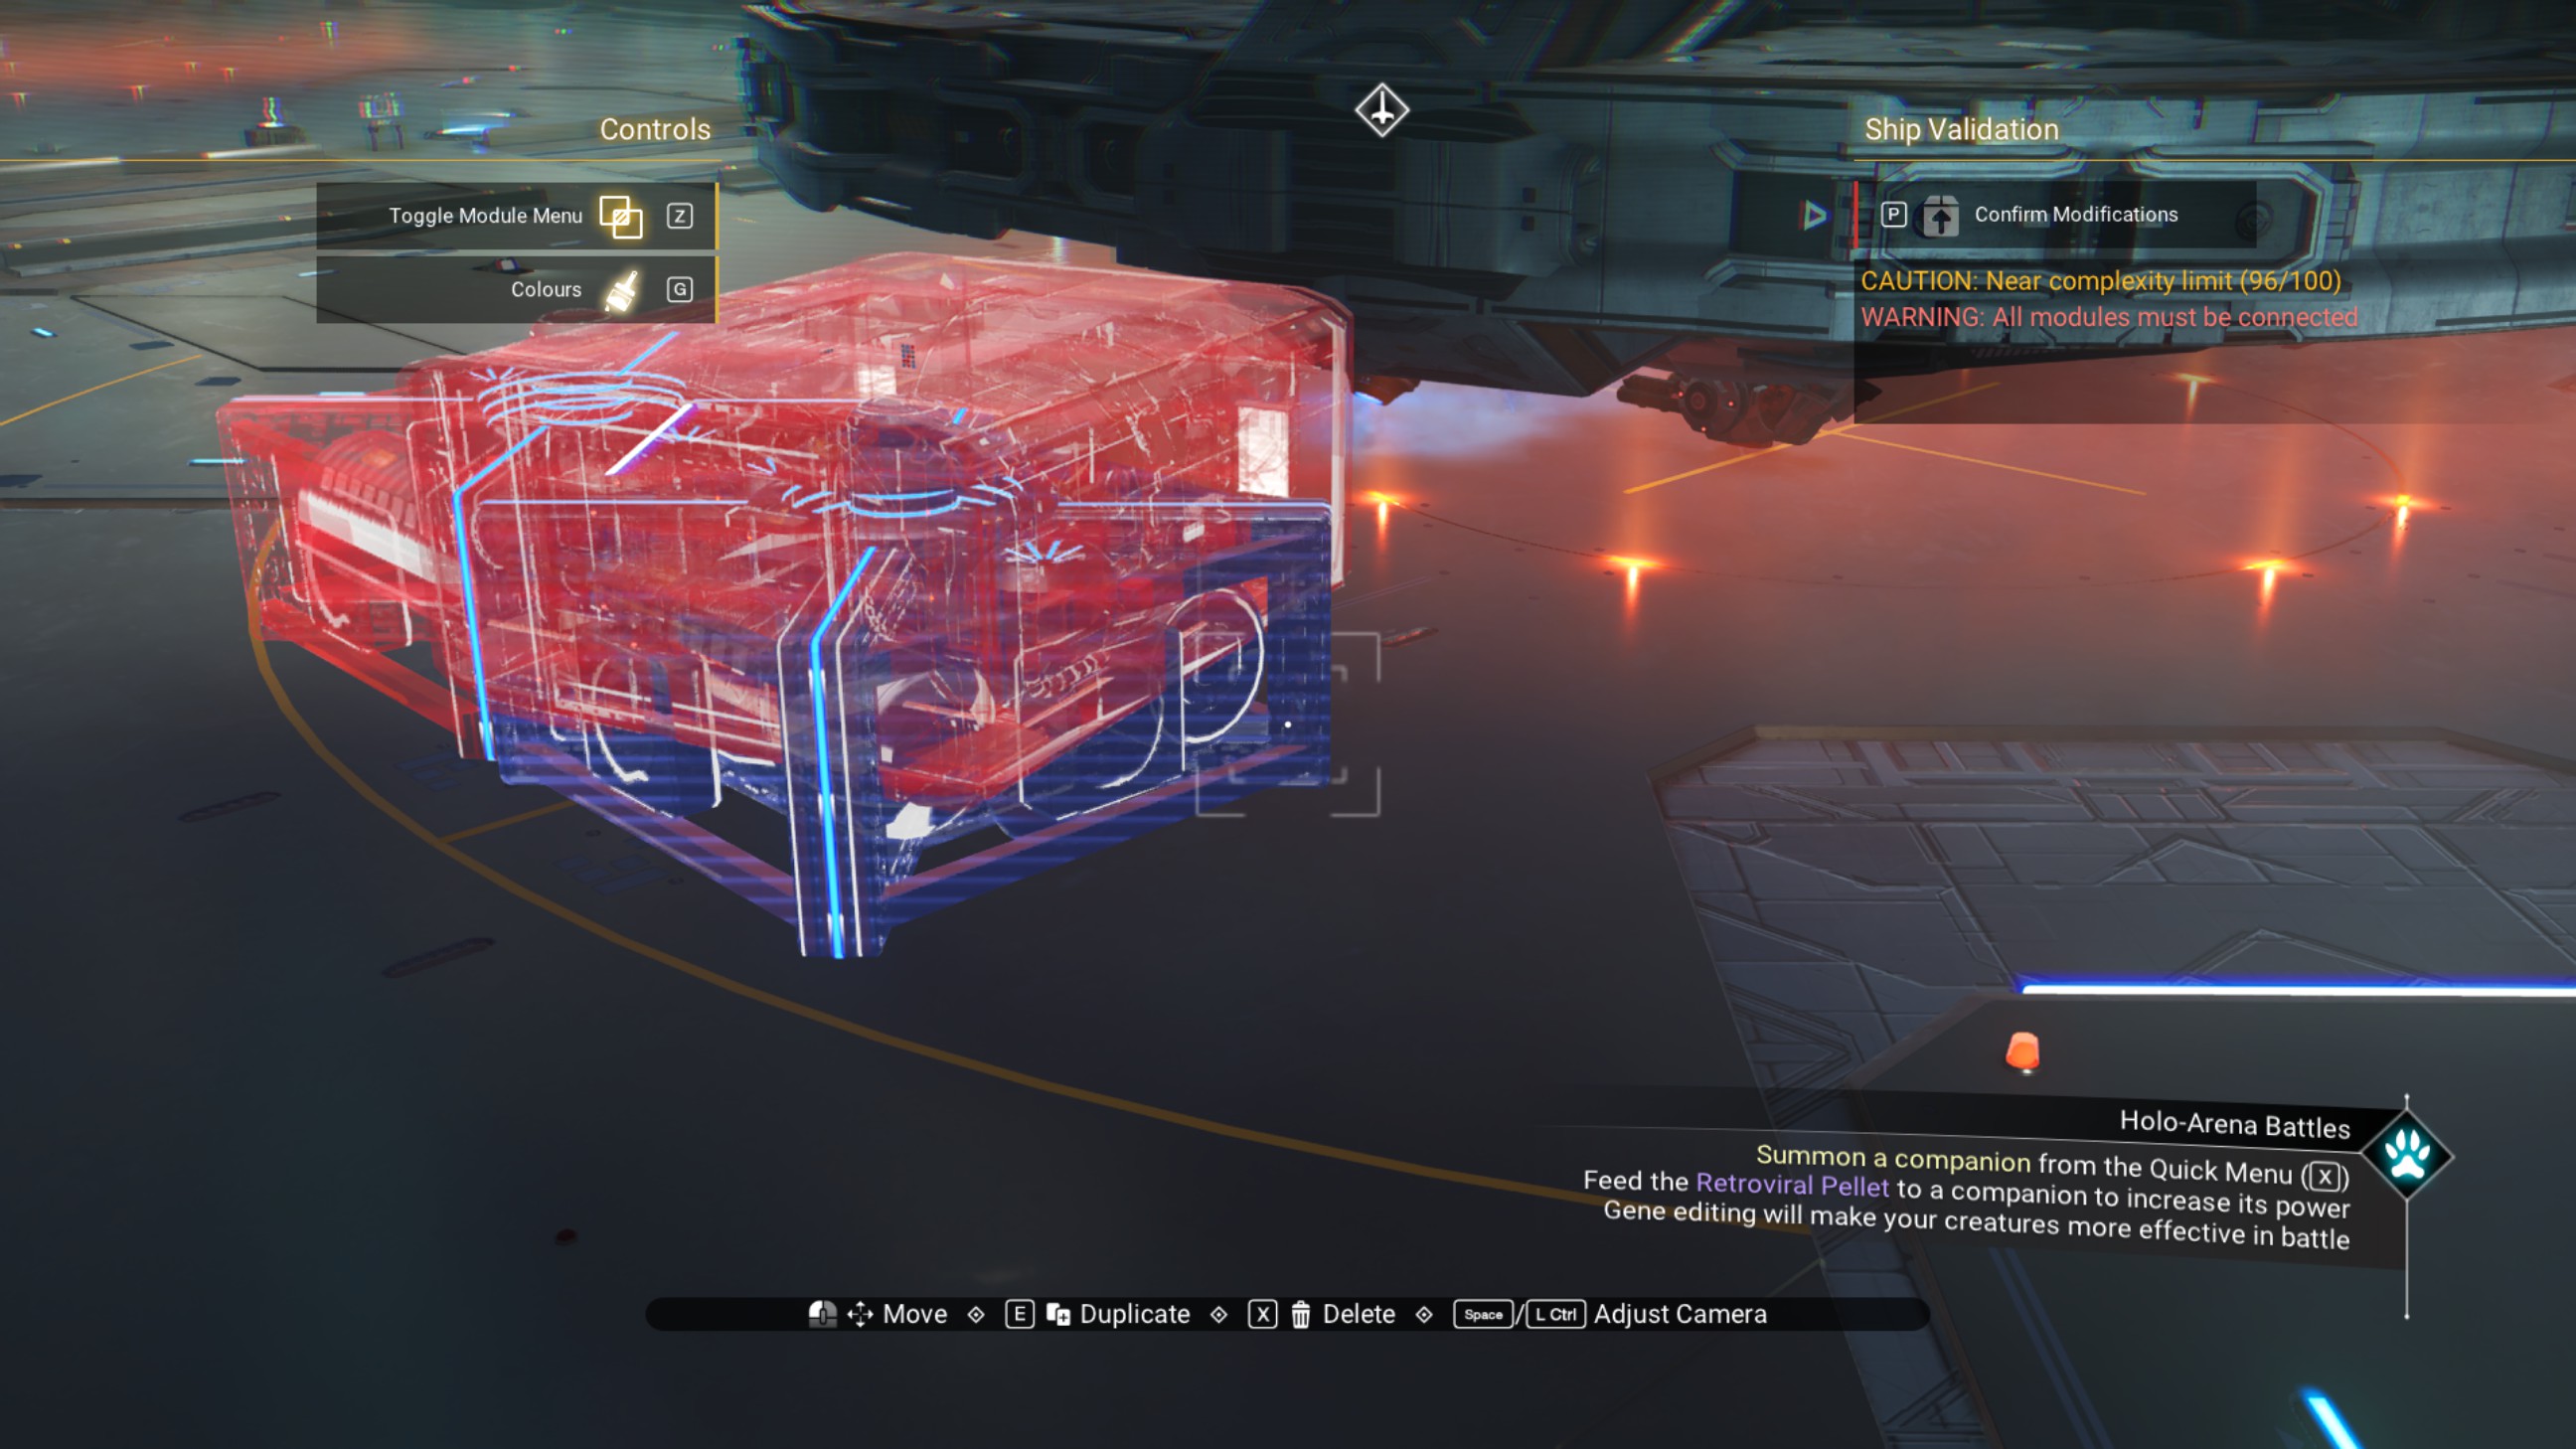
Place a ducting outlet on the remaining angled walkway, on the side facing the ship, and shift the walkway so the ducting outlet is on the underside of the walkway.
Finishing Touches
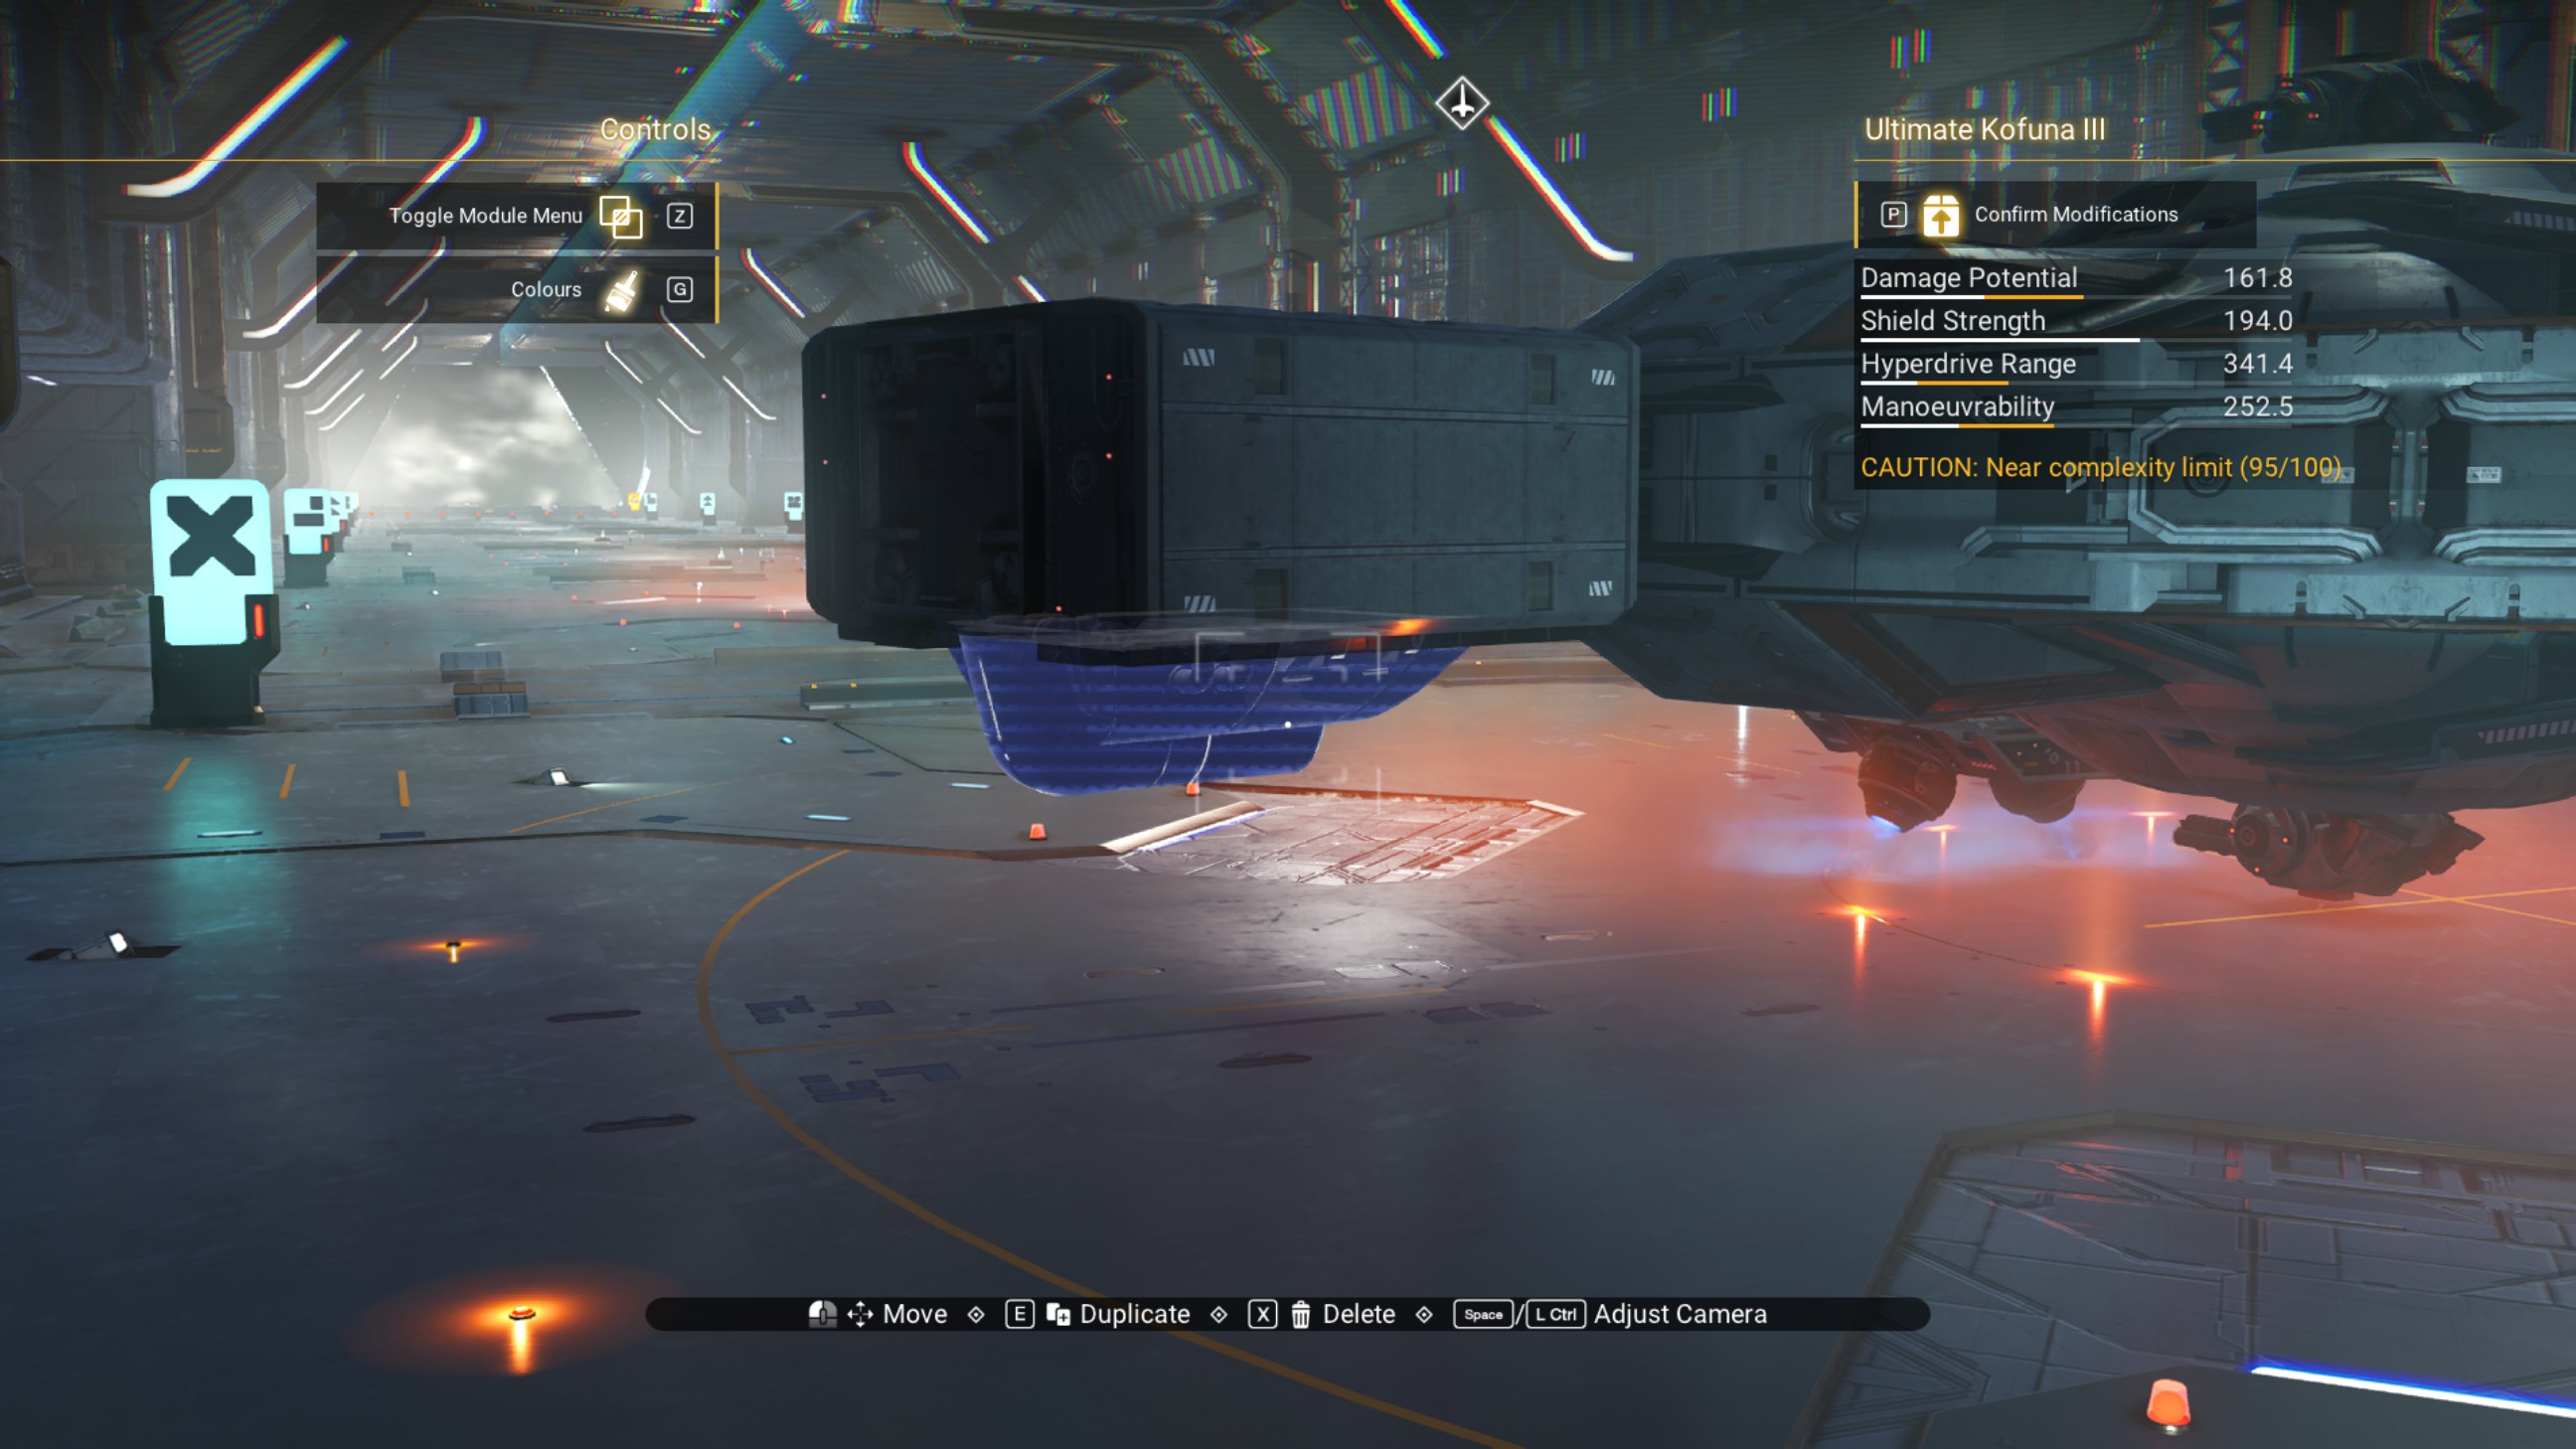
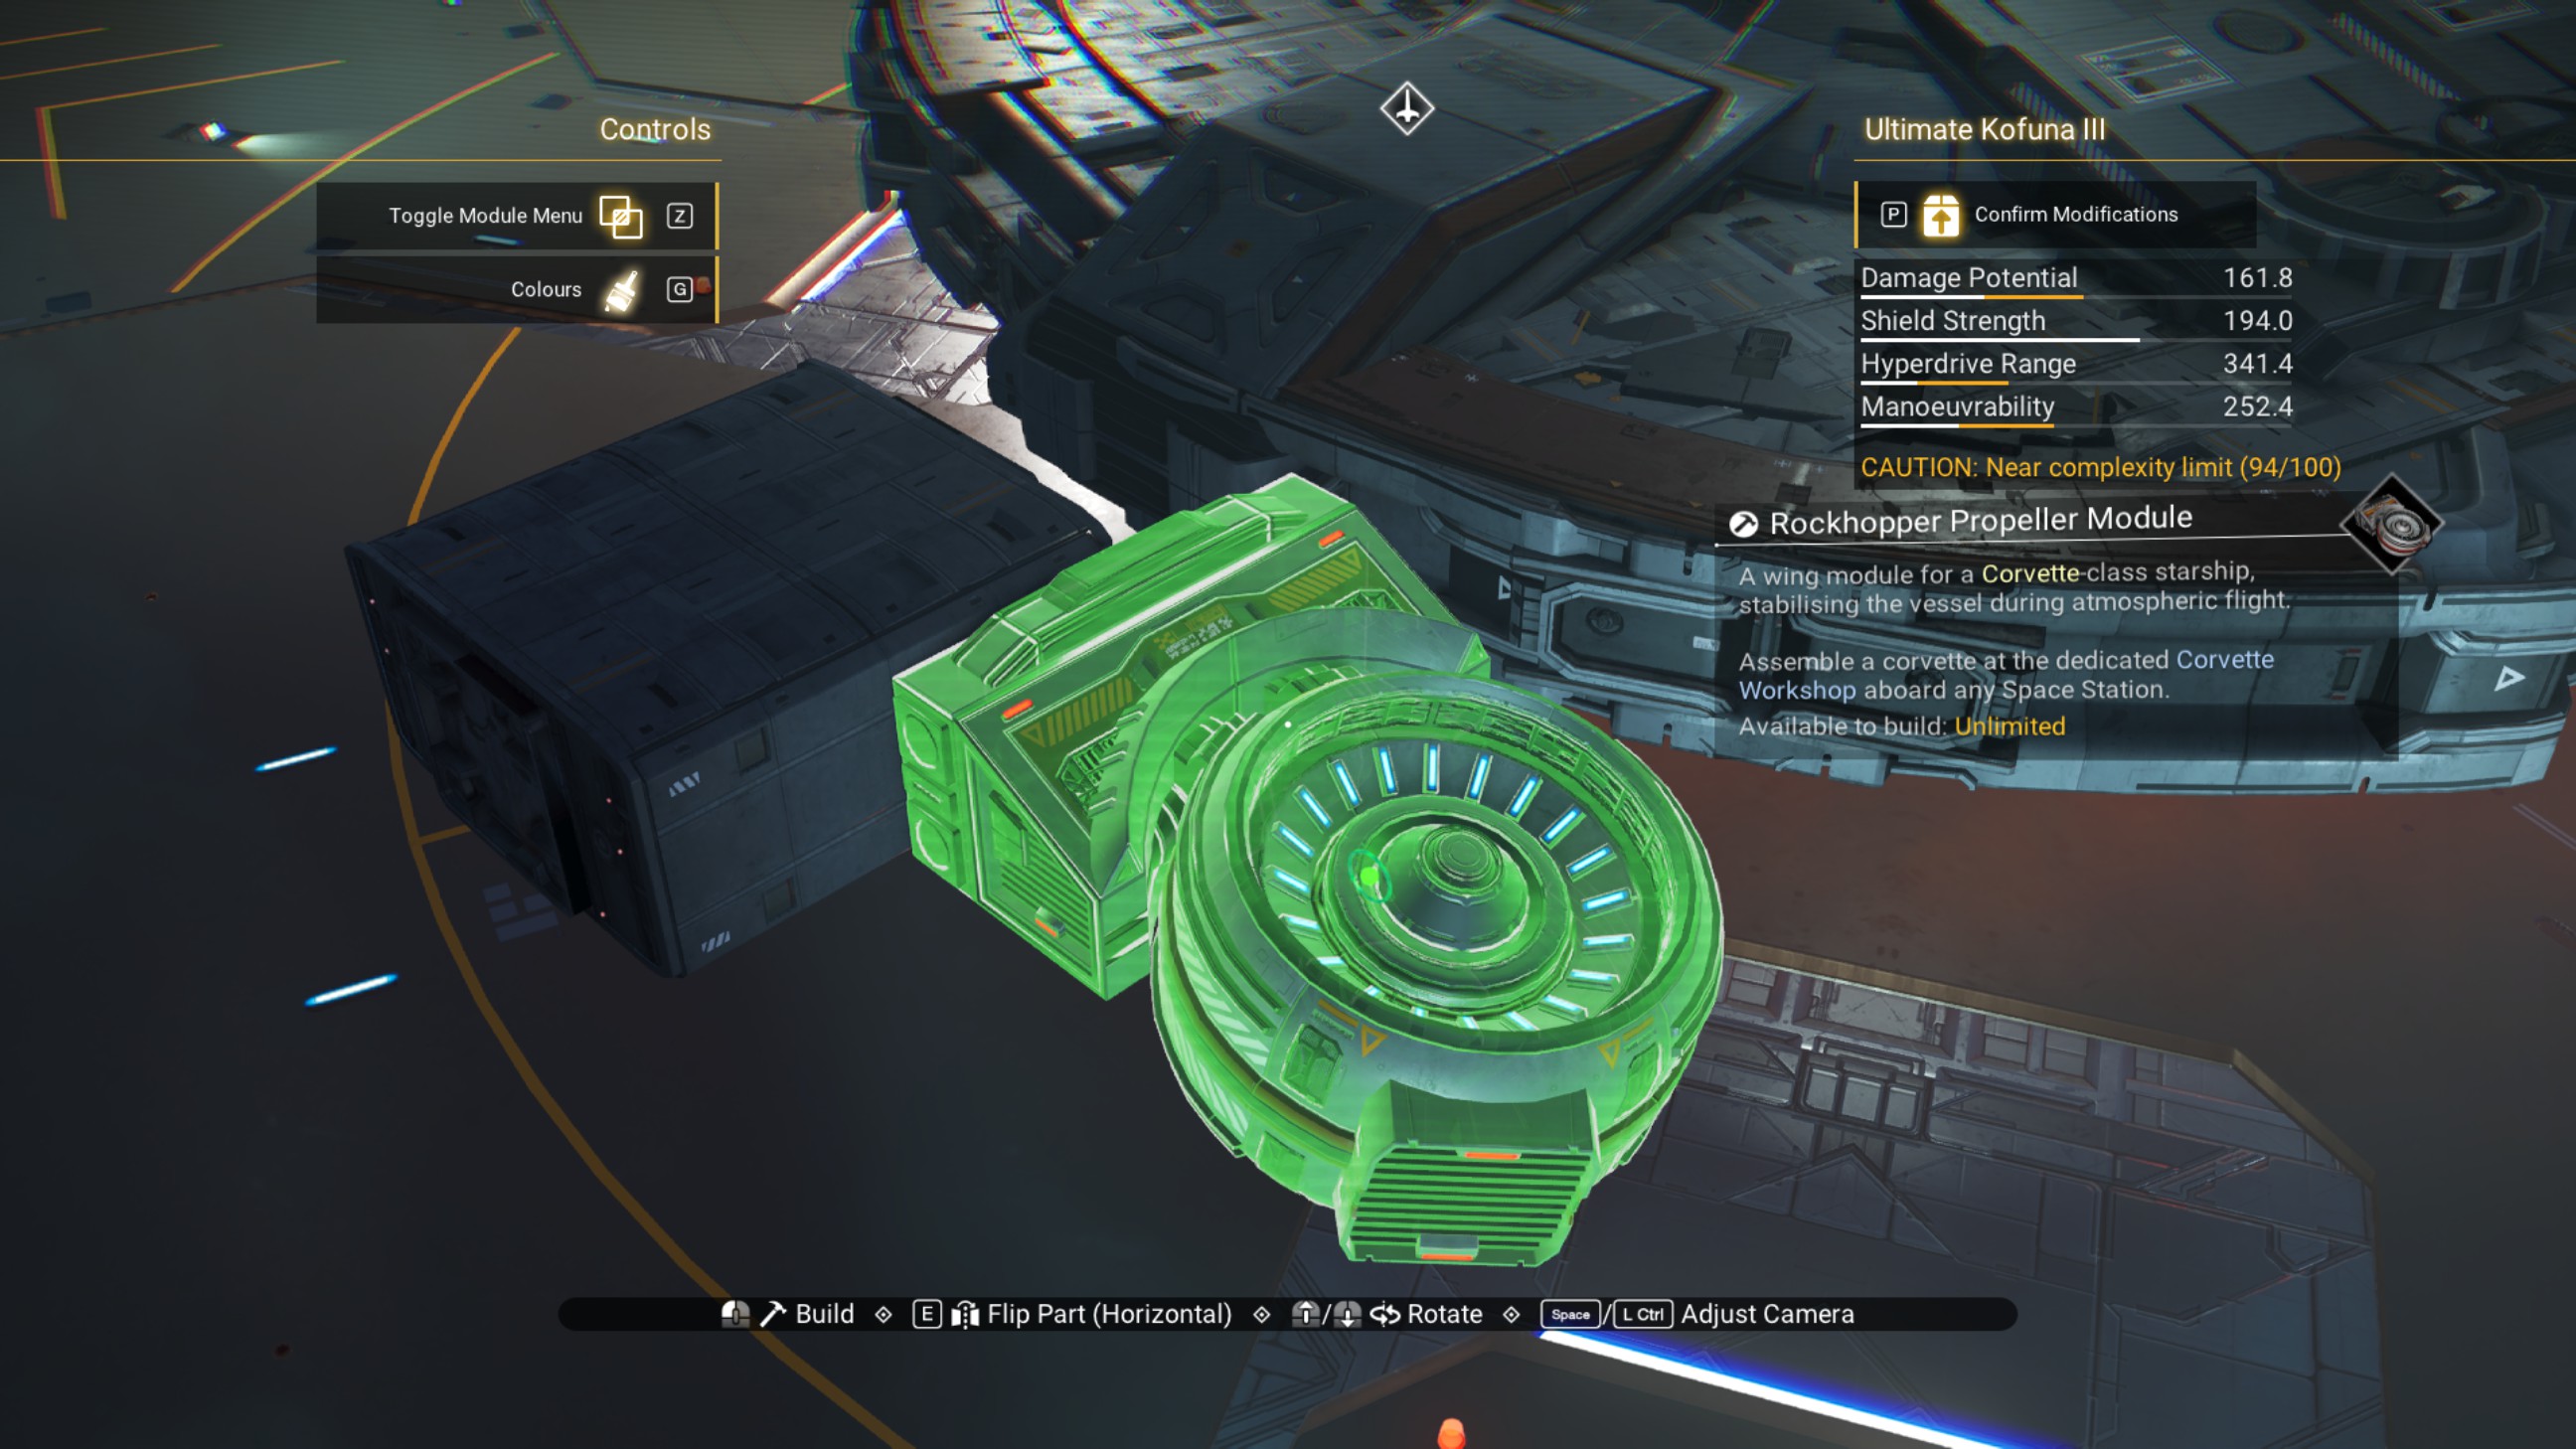
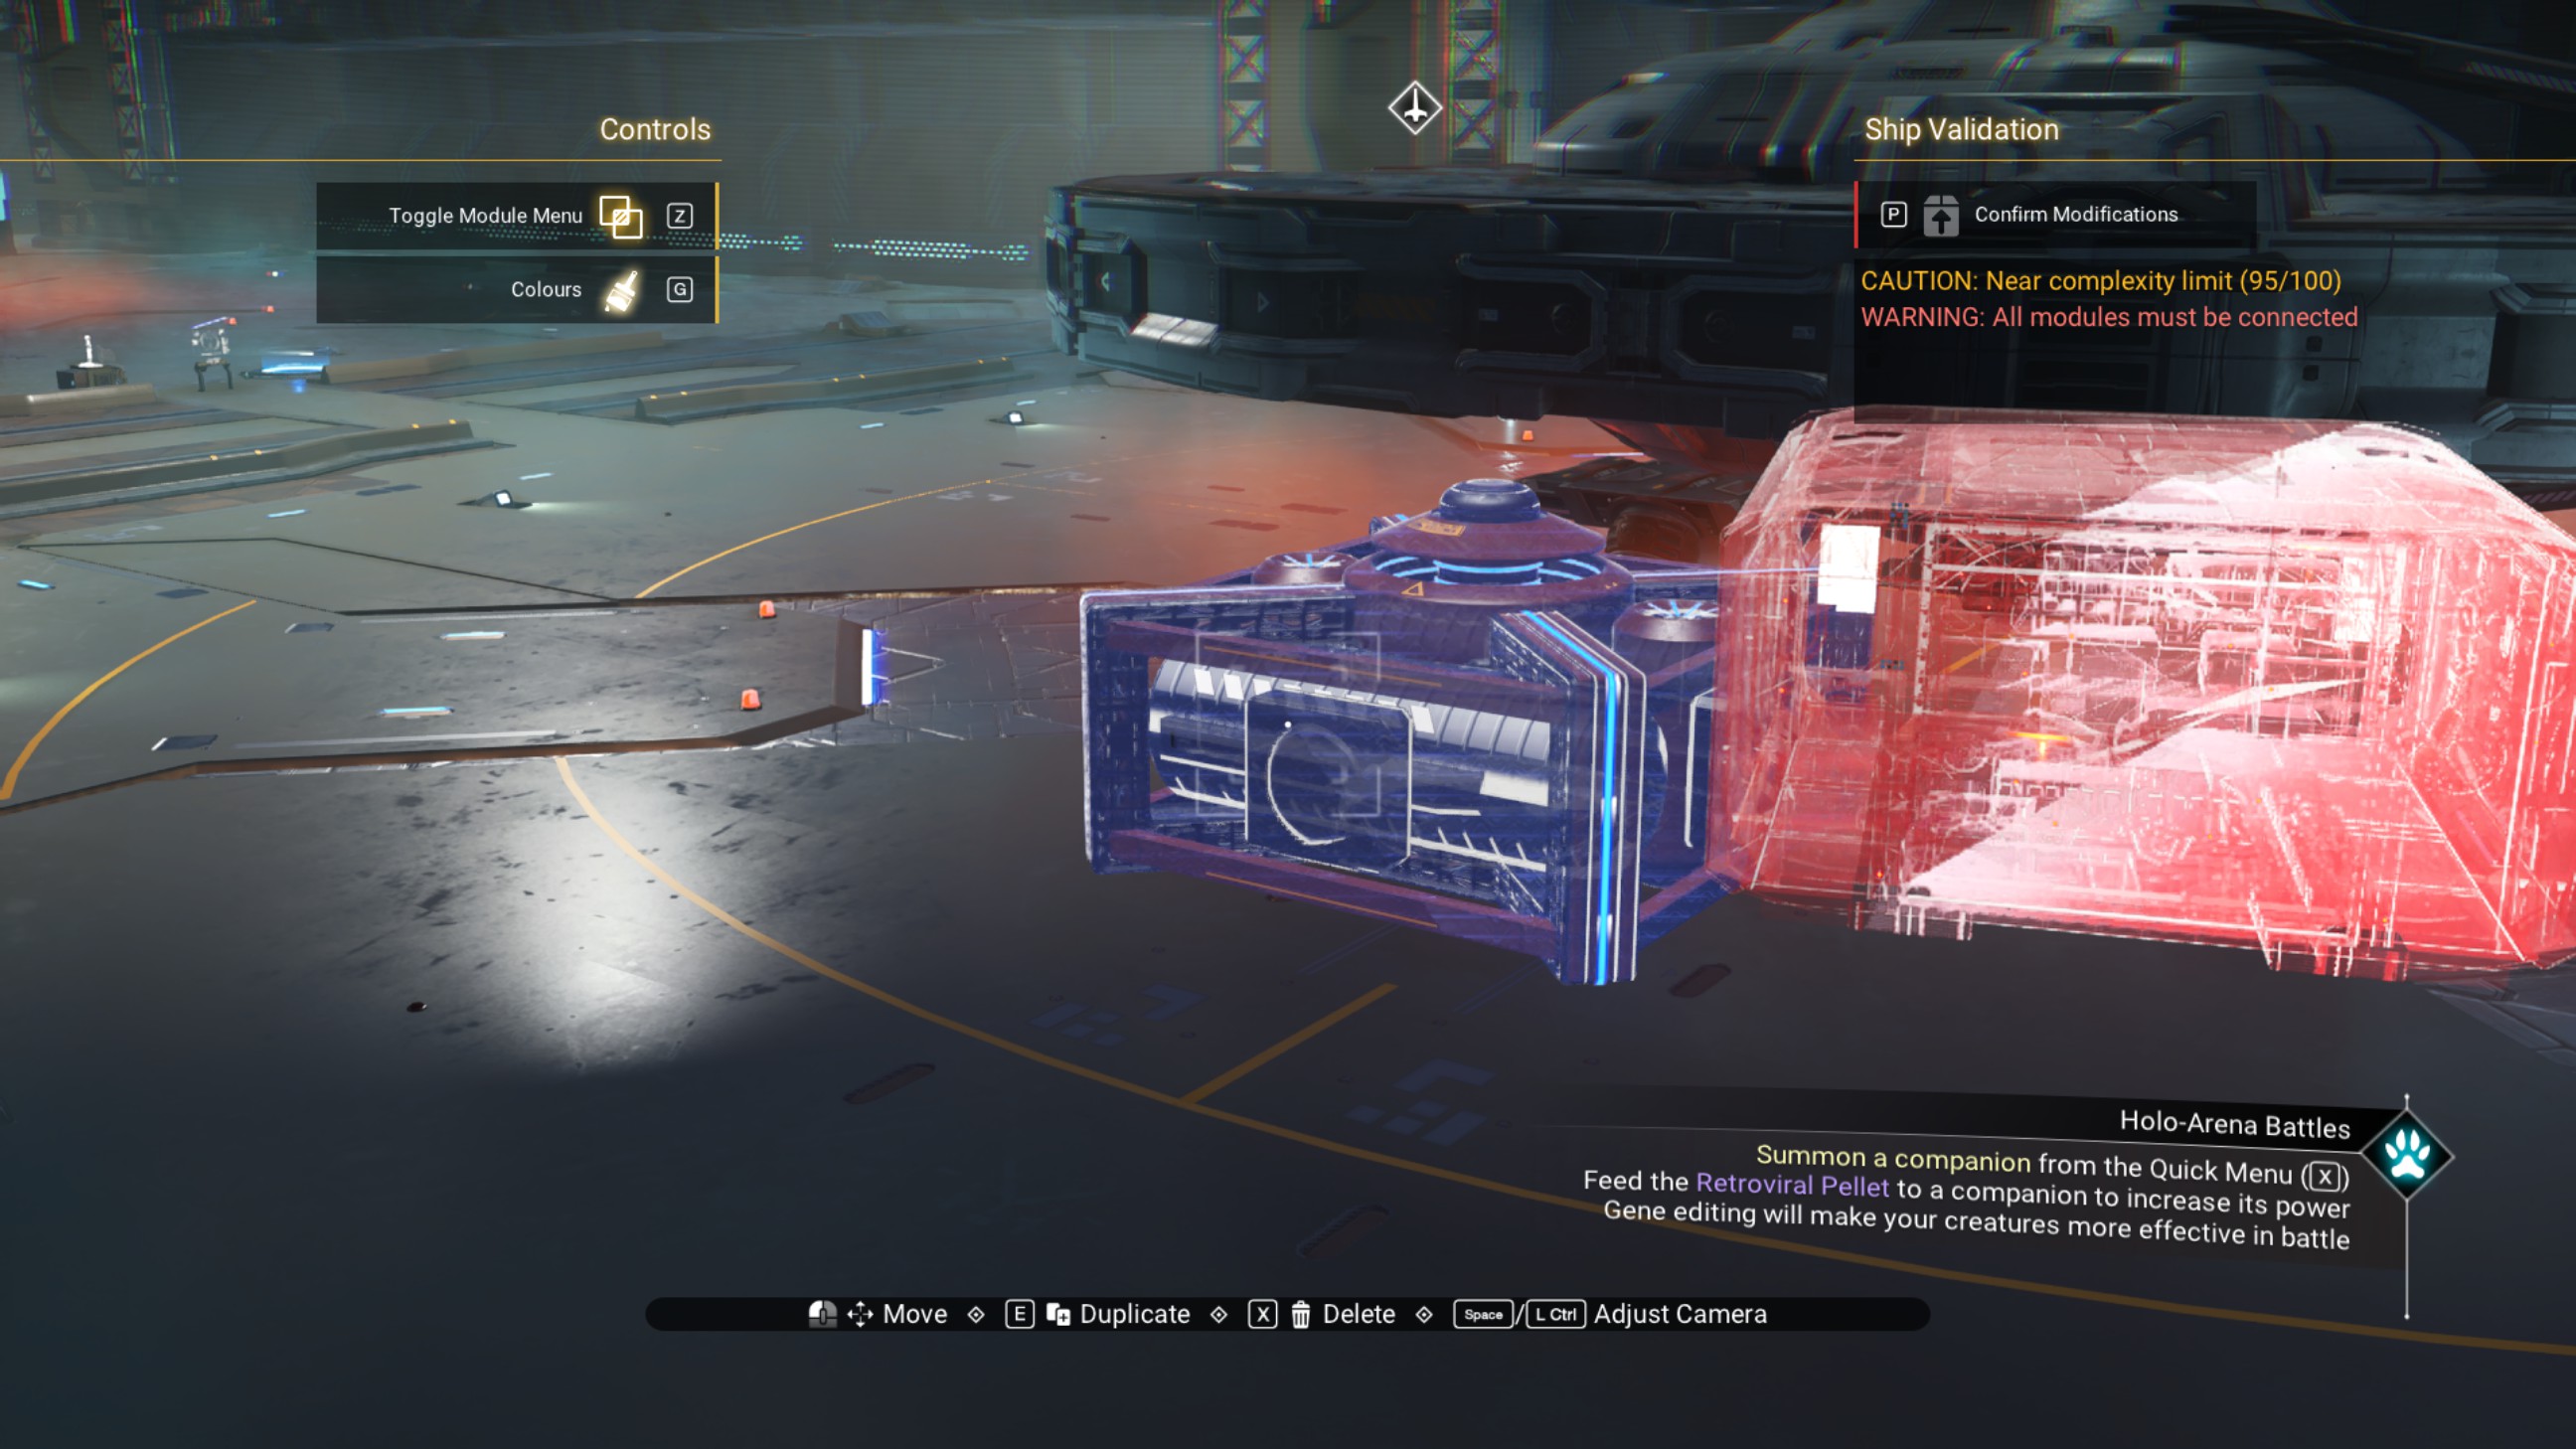
Shift the walkway toward the ship by half a step, then delete the propeller module.
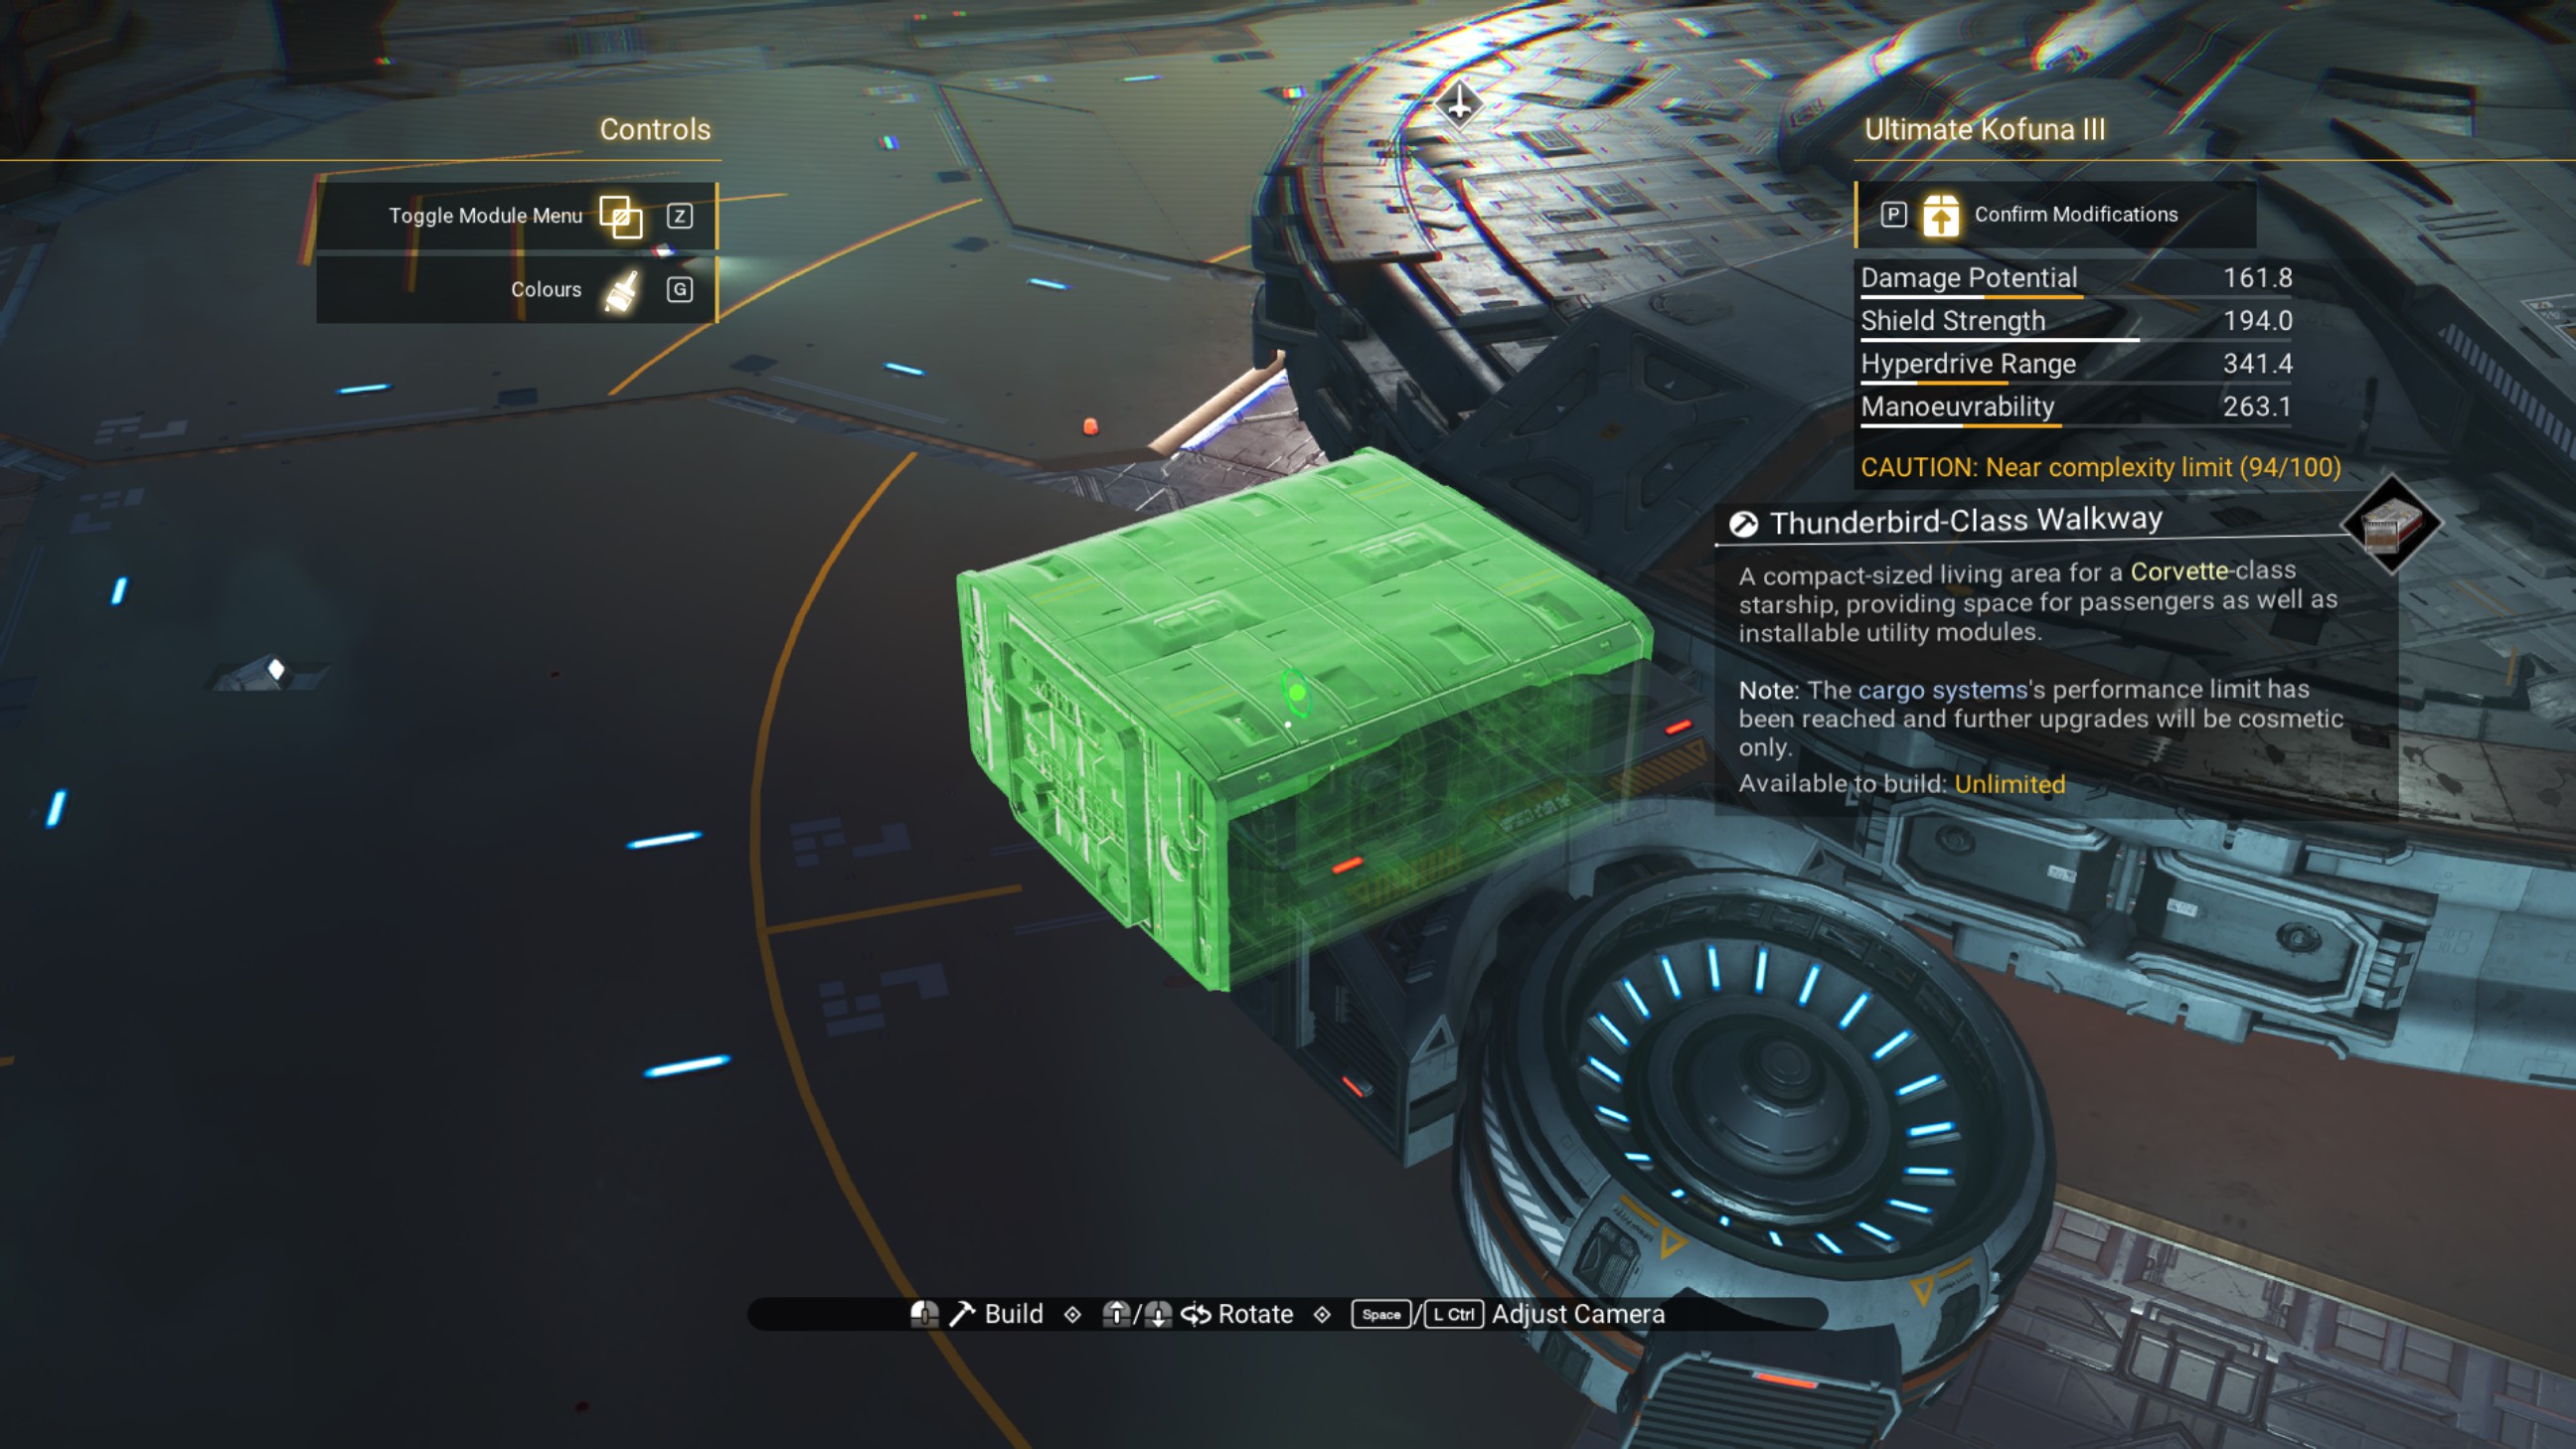
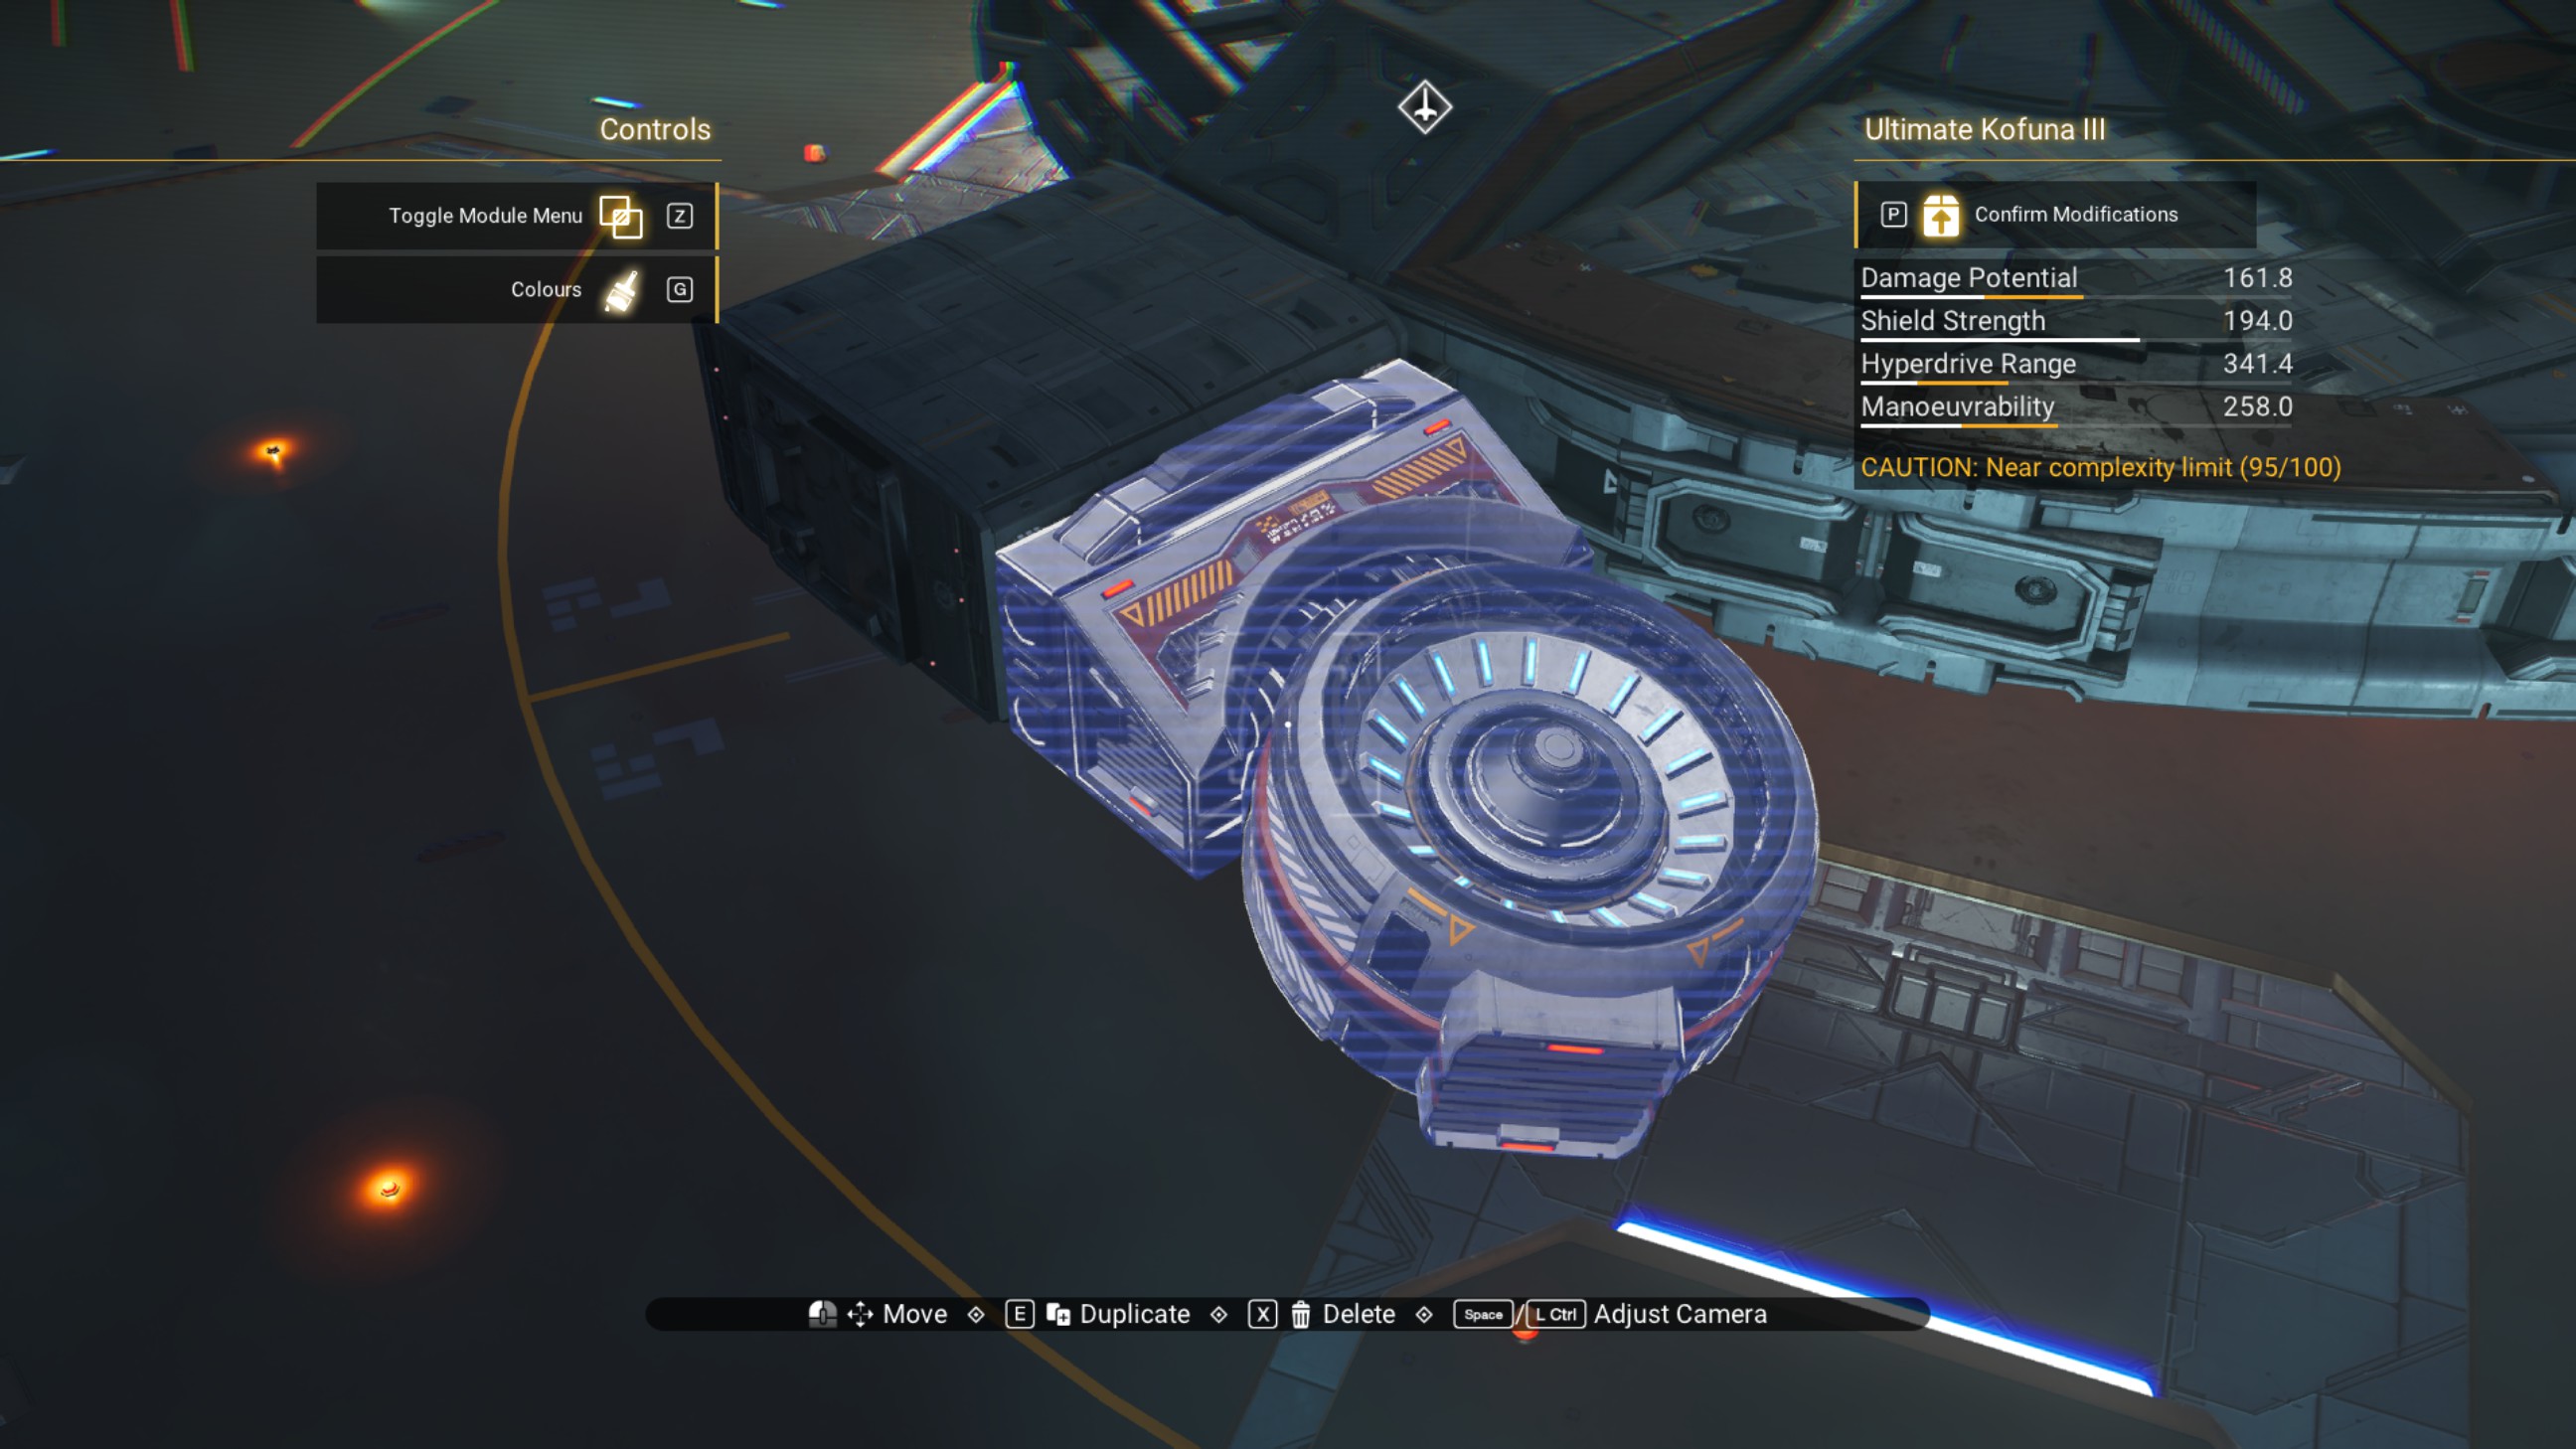
Place another walkway so that it overlaps the ship, as shown, then delete the walkway sticking out from the ship.
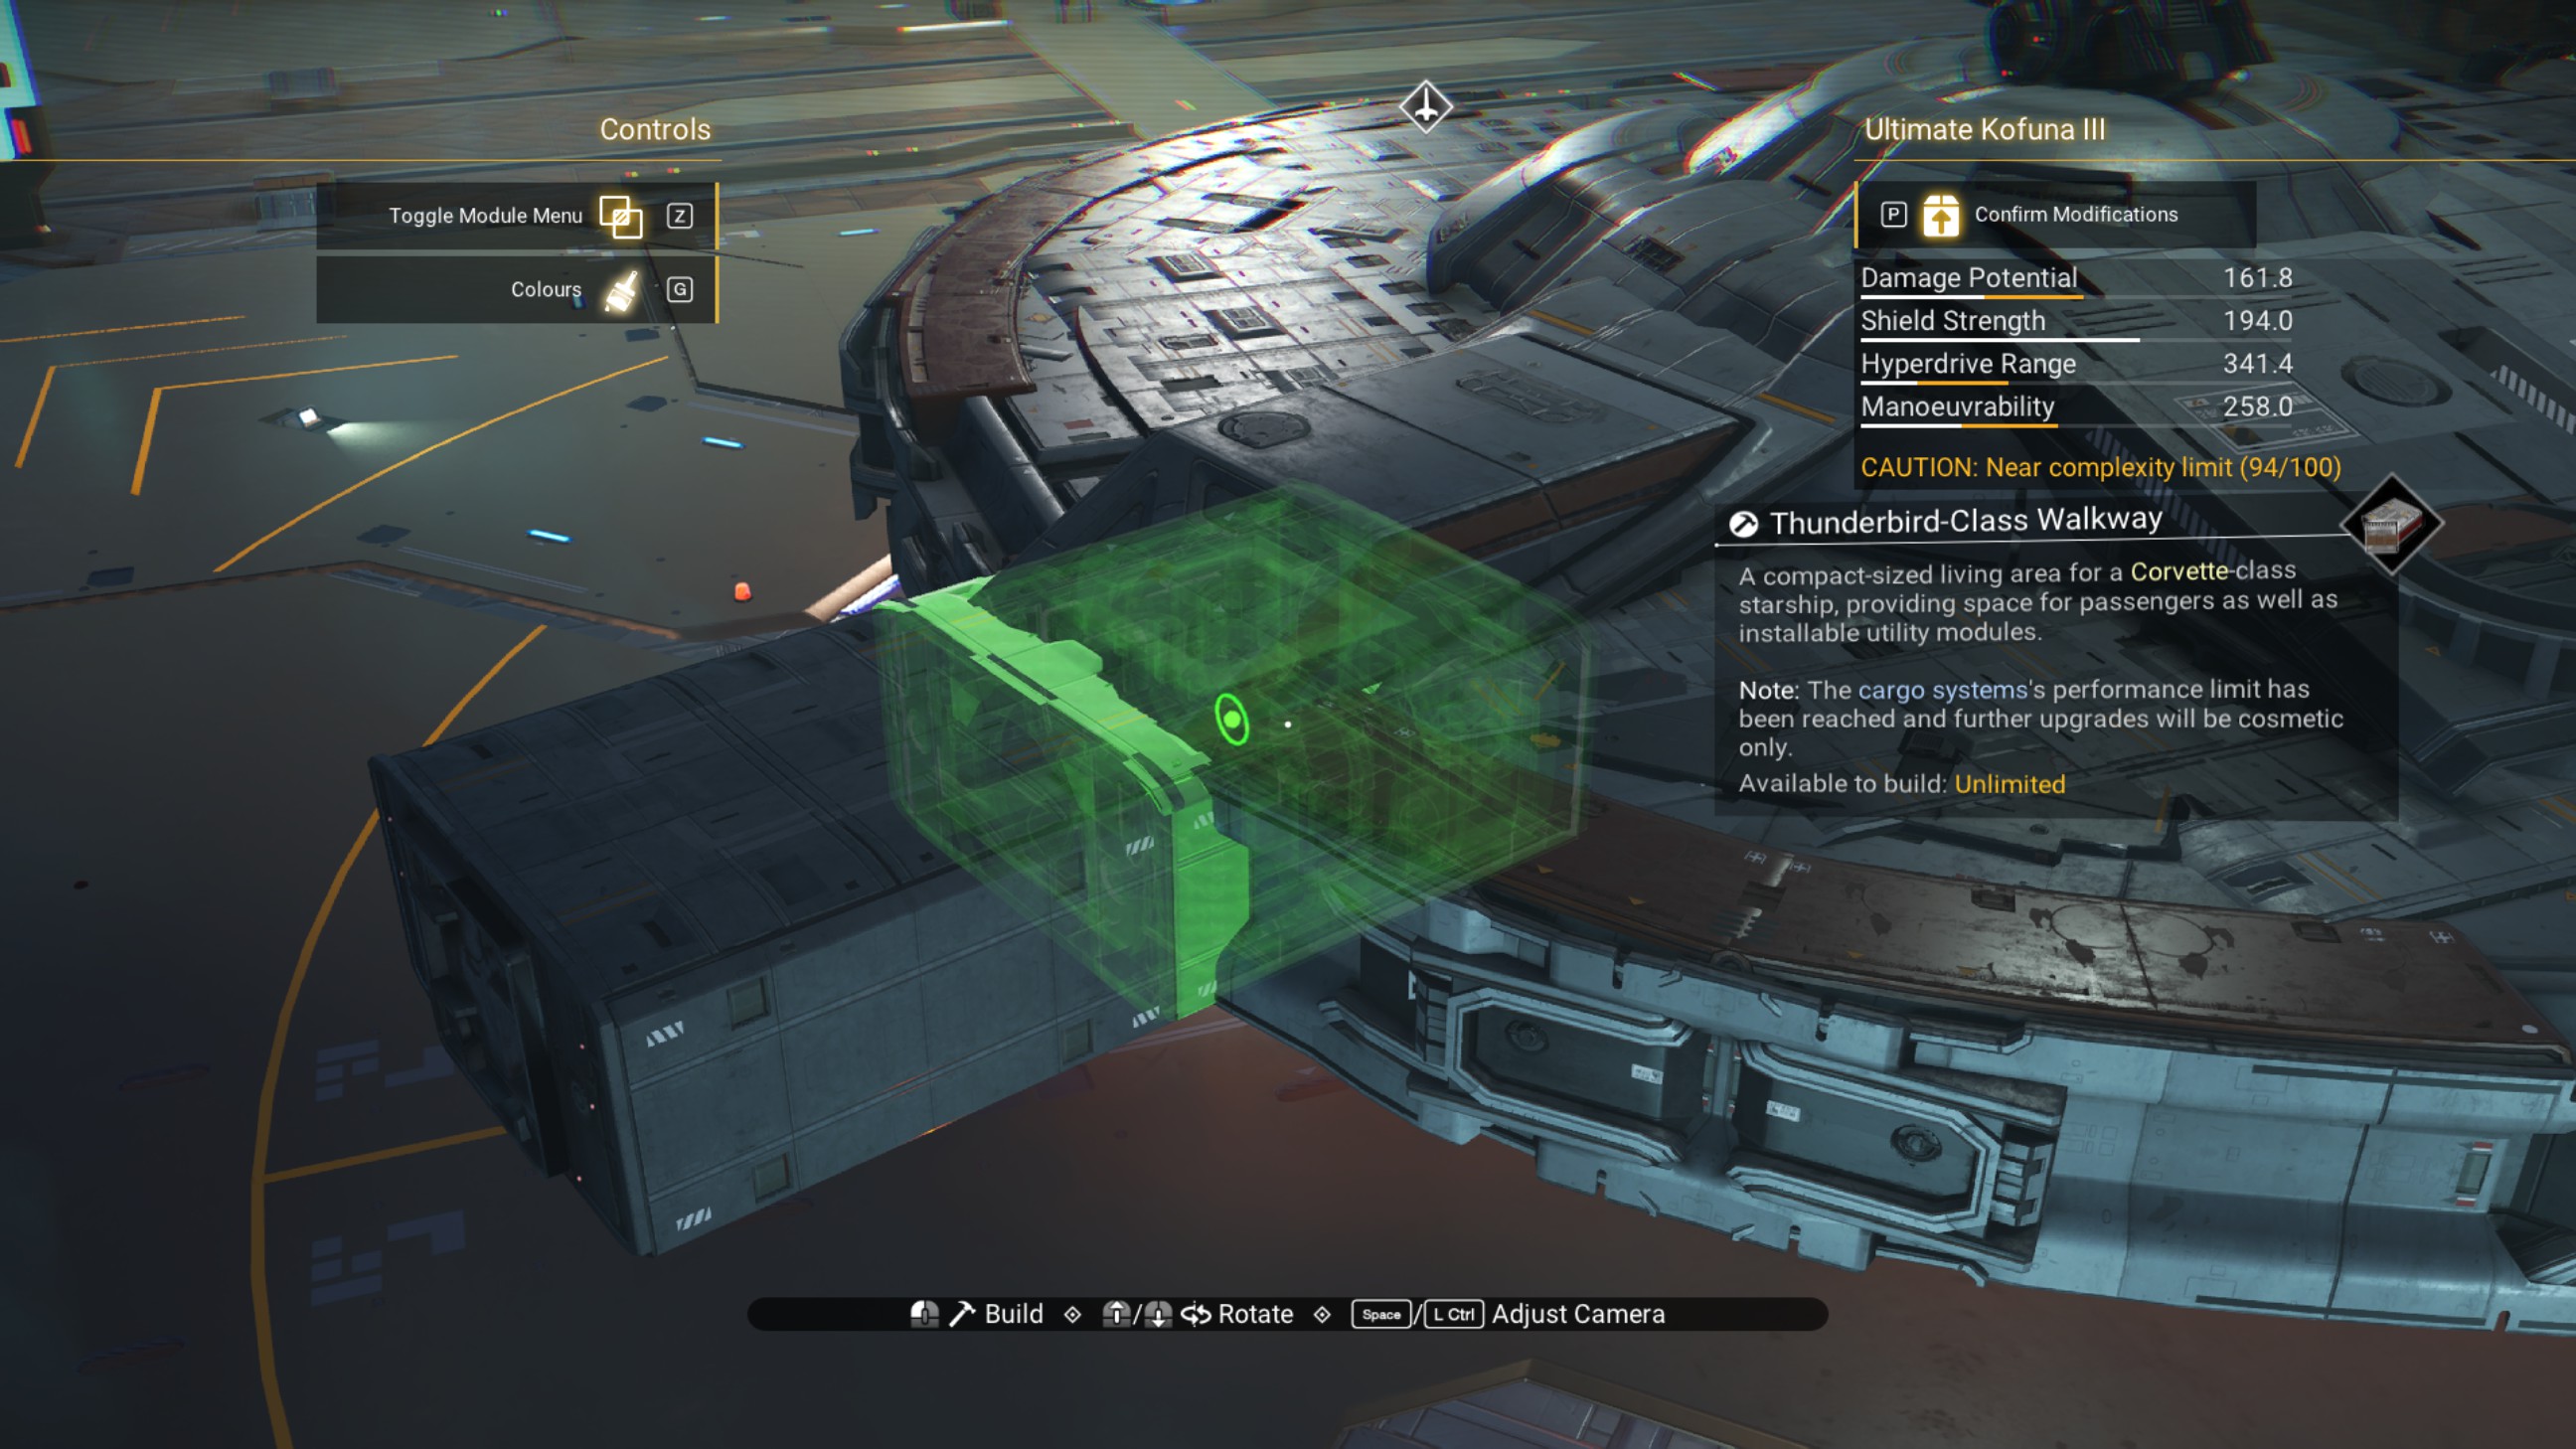
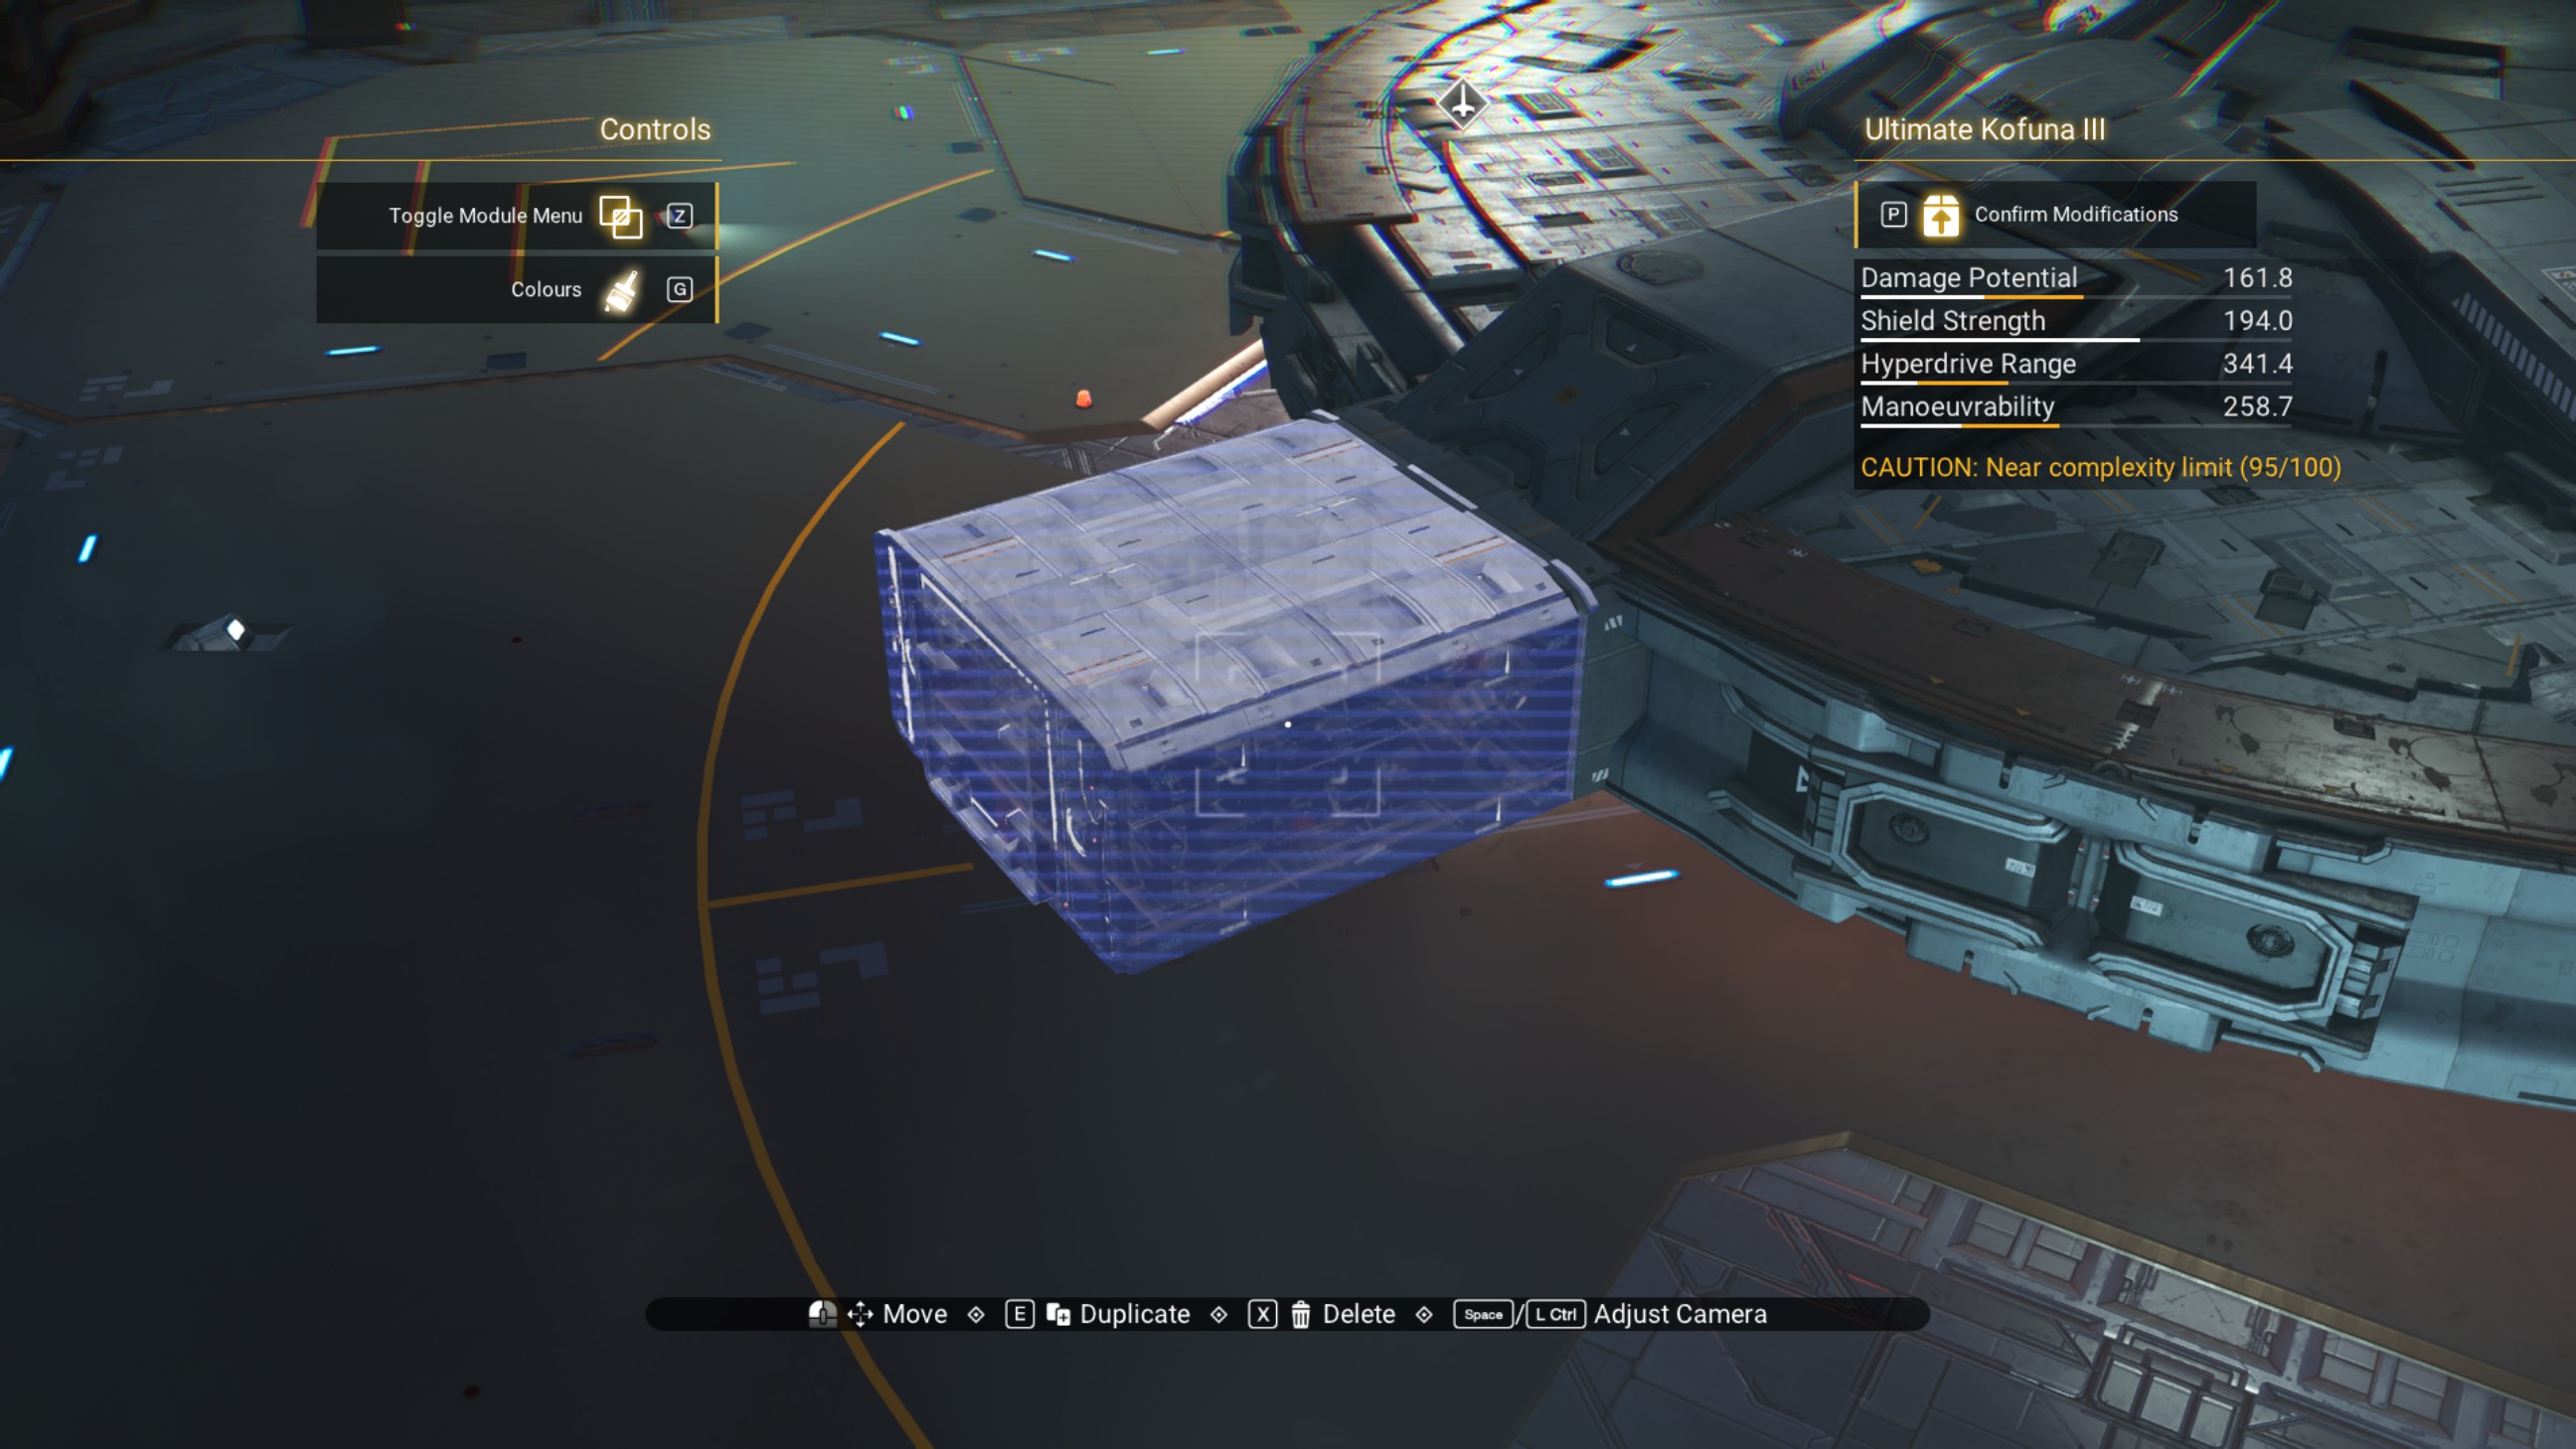
Place a cargo link on the walkway, as shown.
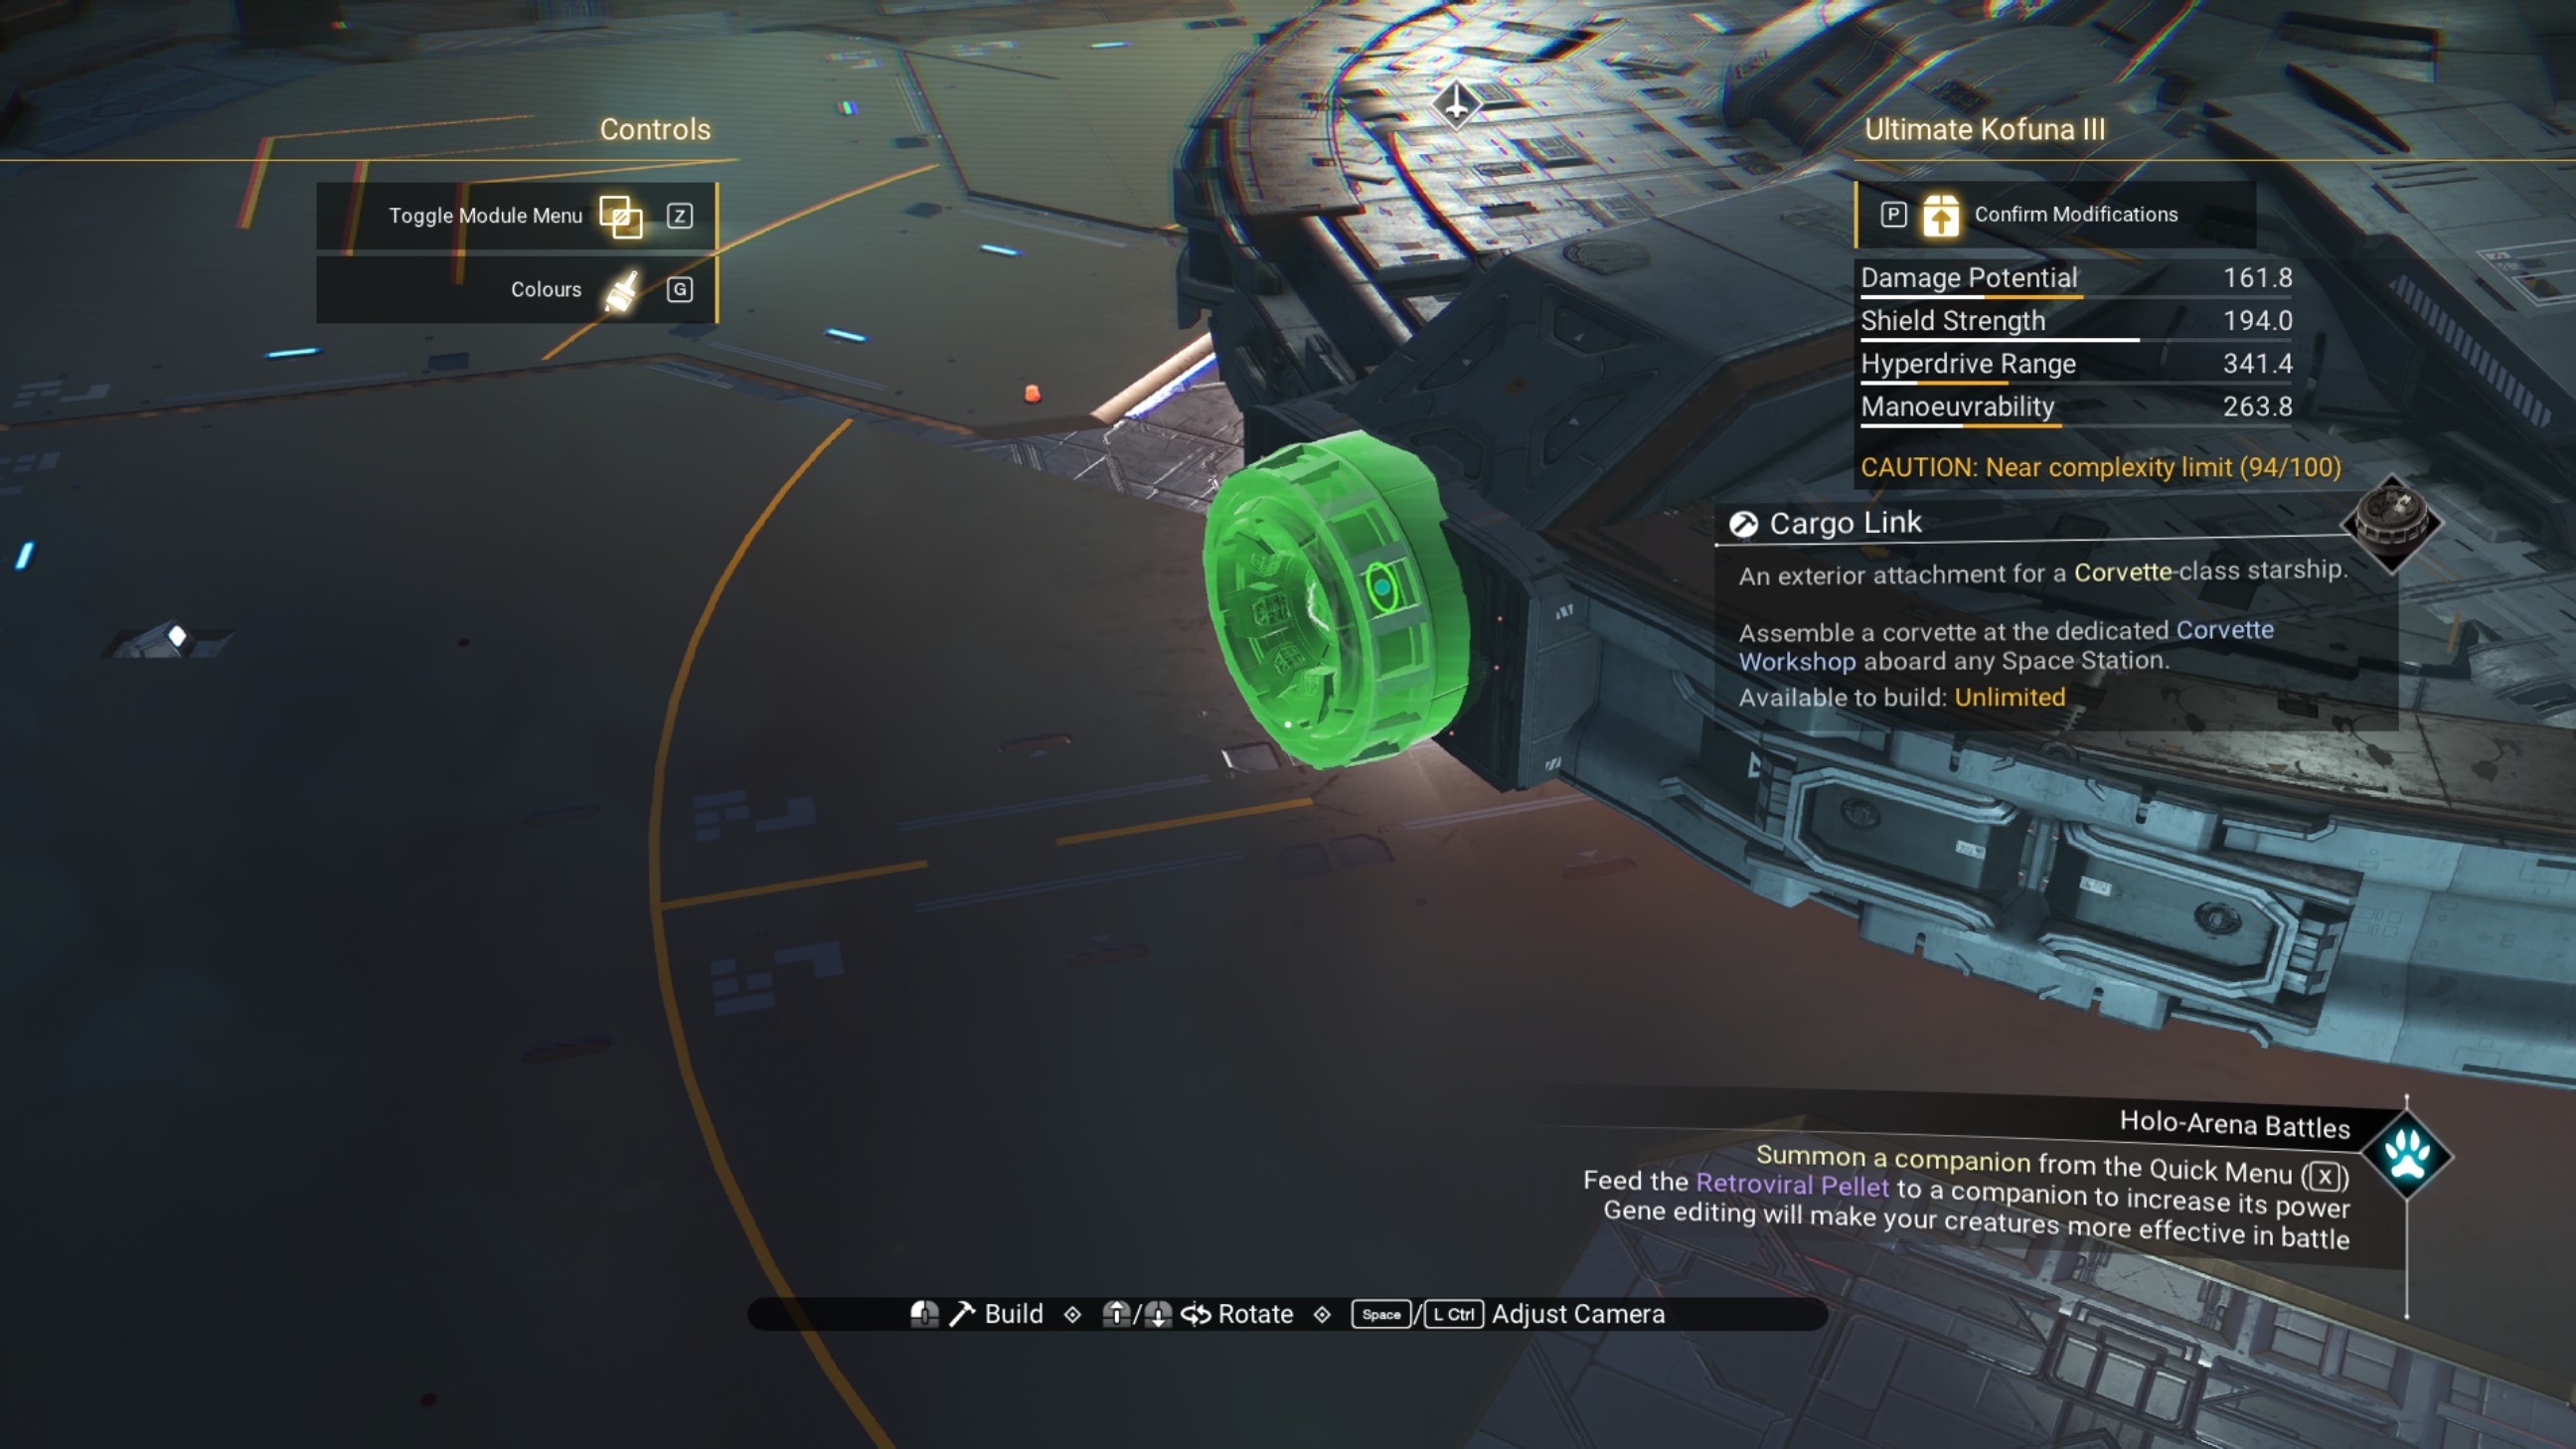
This next seven steps are optional. 1. If you would like another reactor, or would like to break up the silhouette on the cockpit structure, then place a walkway on the starboard side of the rear portion of the cockpit module.
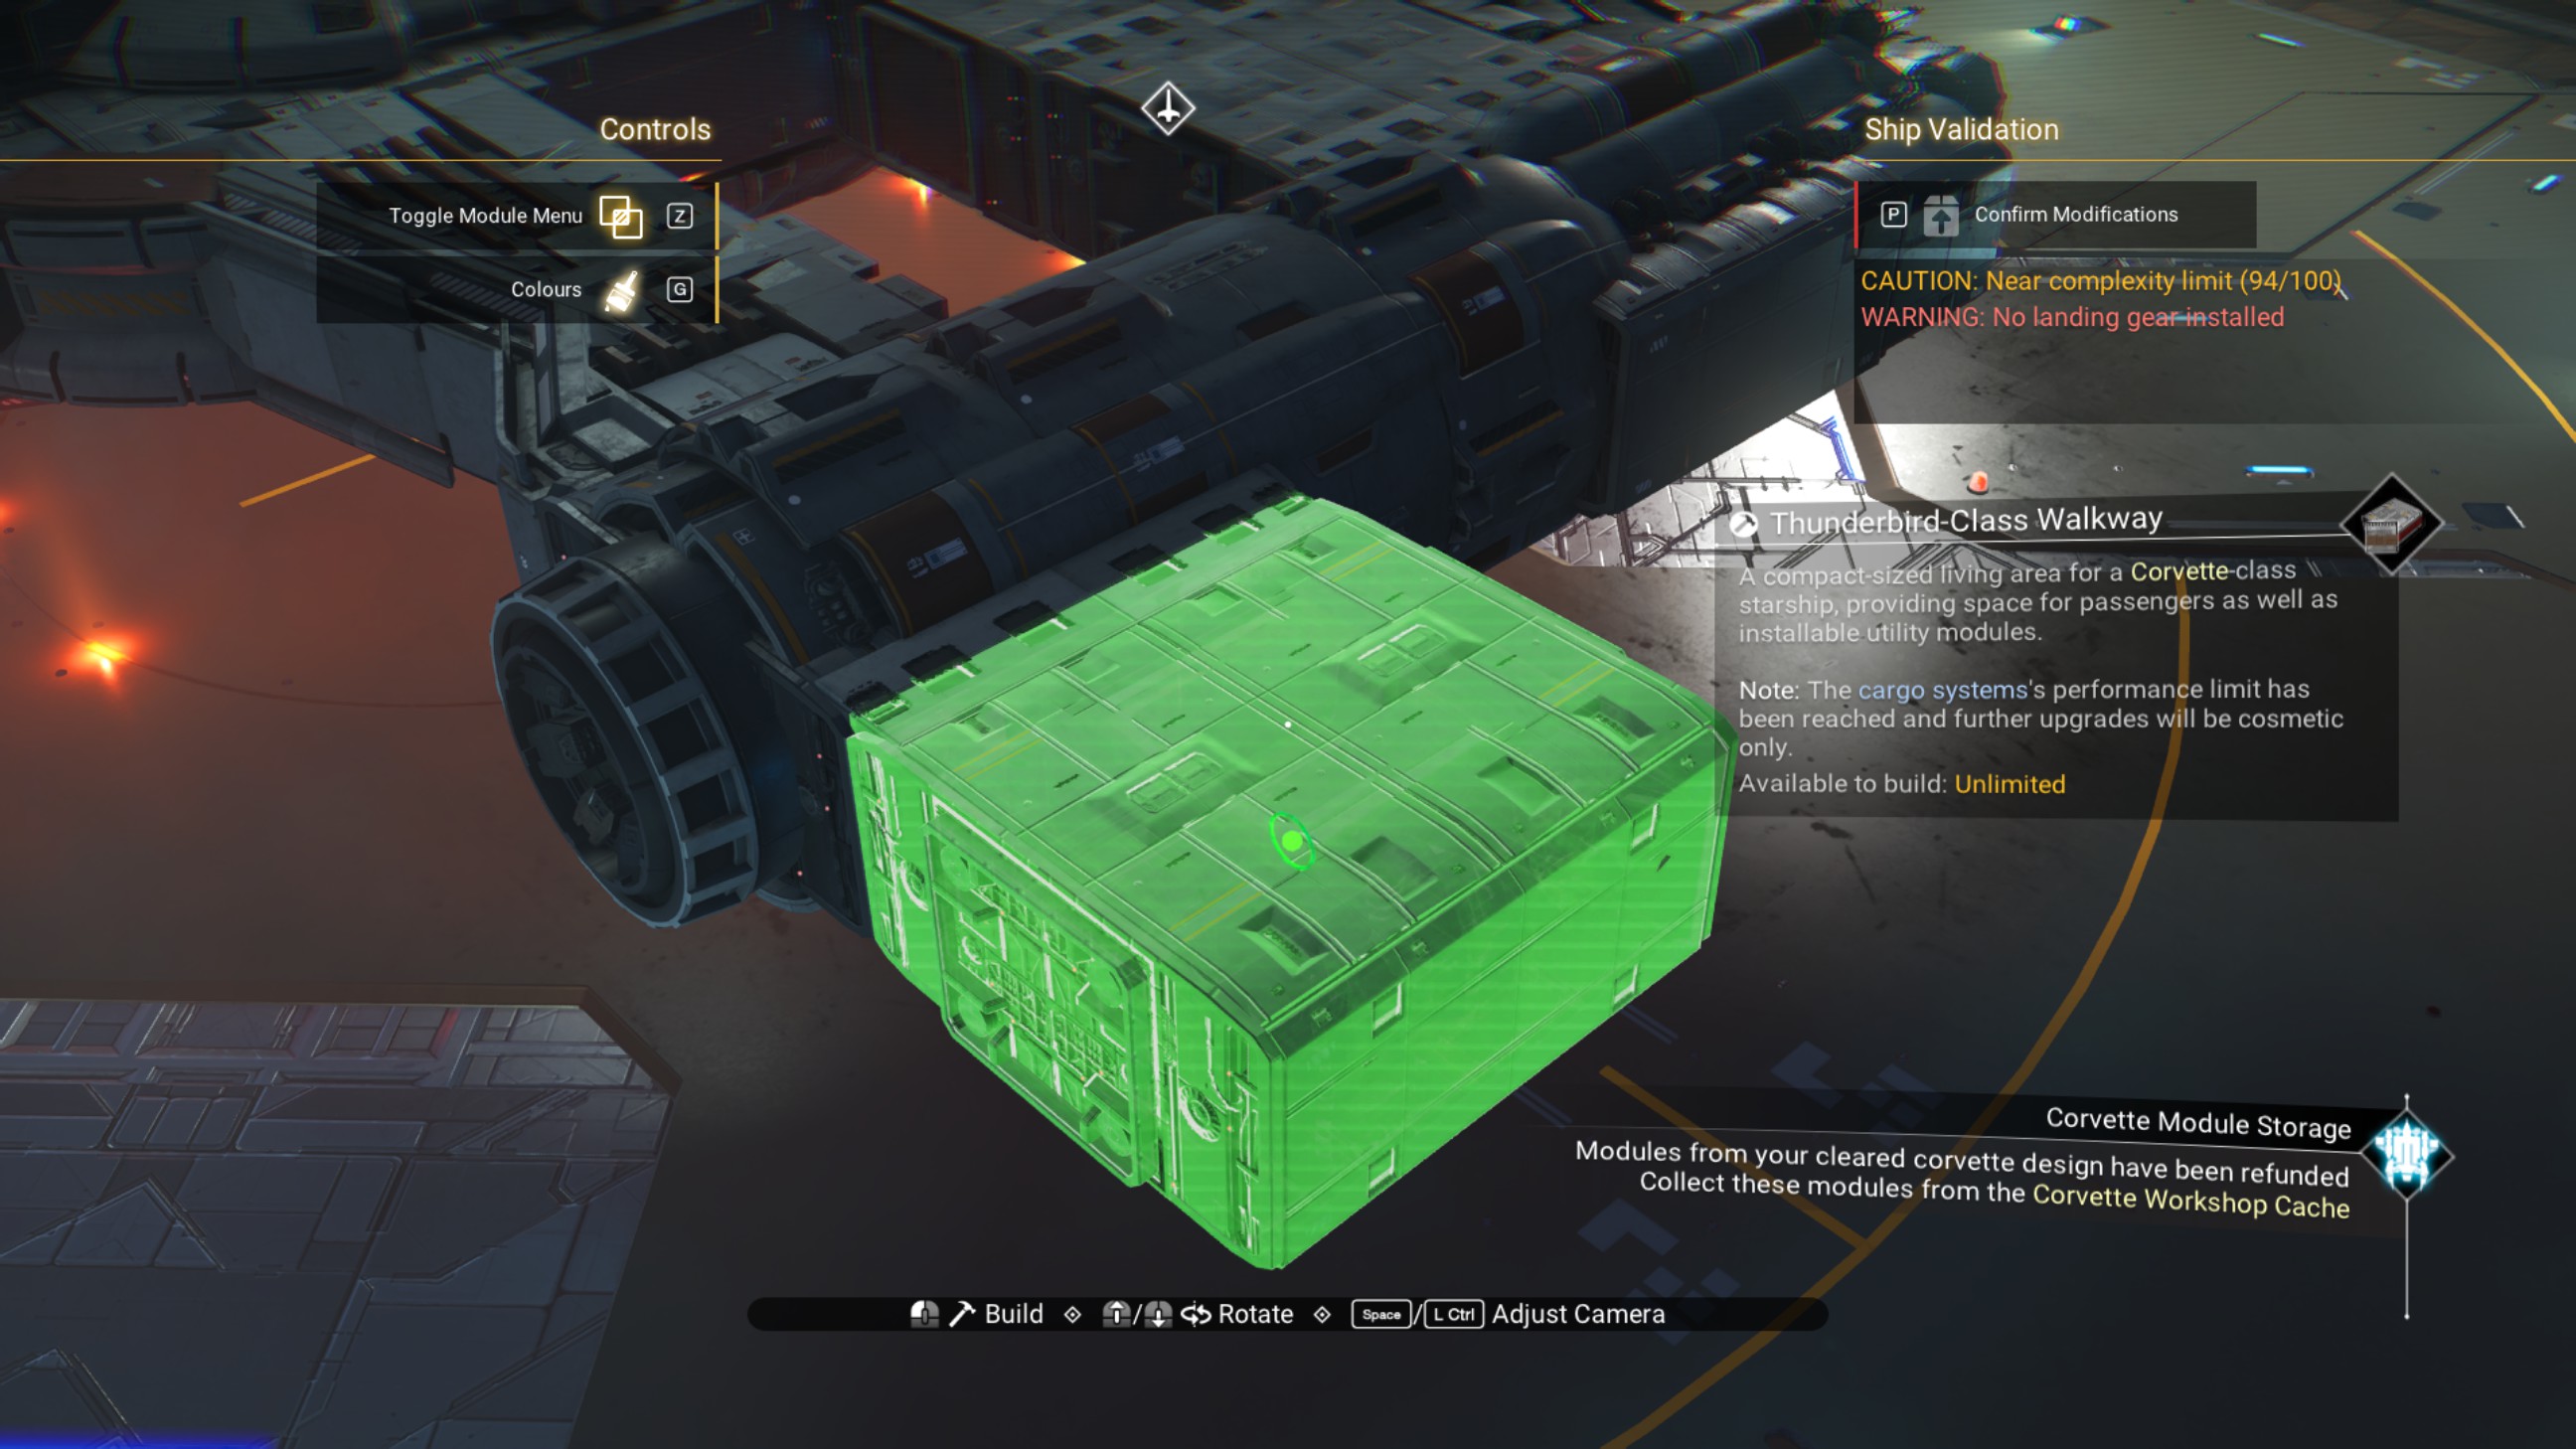 2. Place a ducting outlet on the front of that walkway, then offset the walkway so the ducting outlet is on top of it.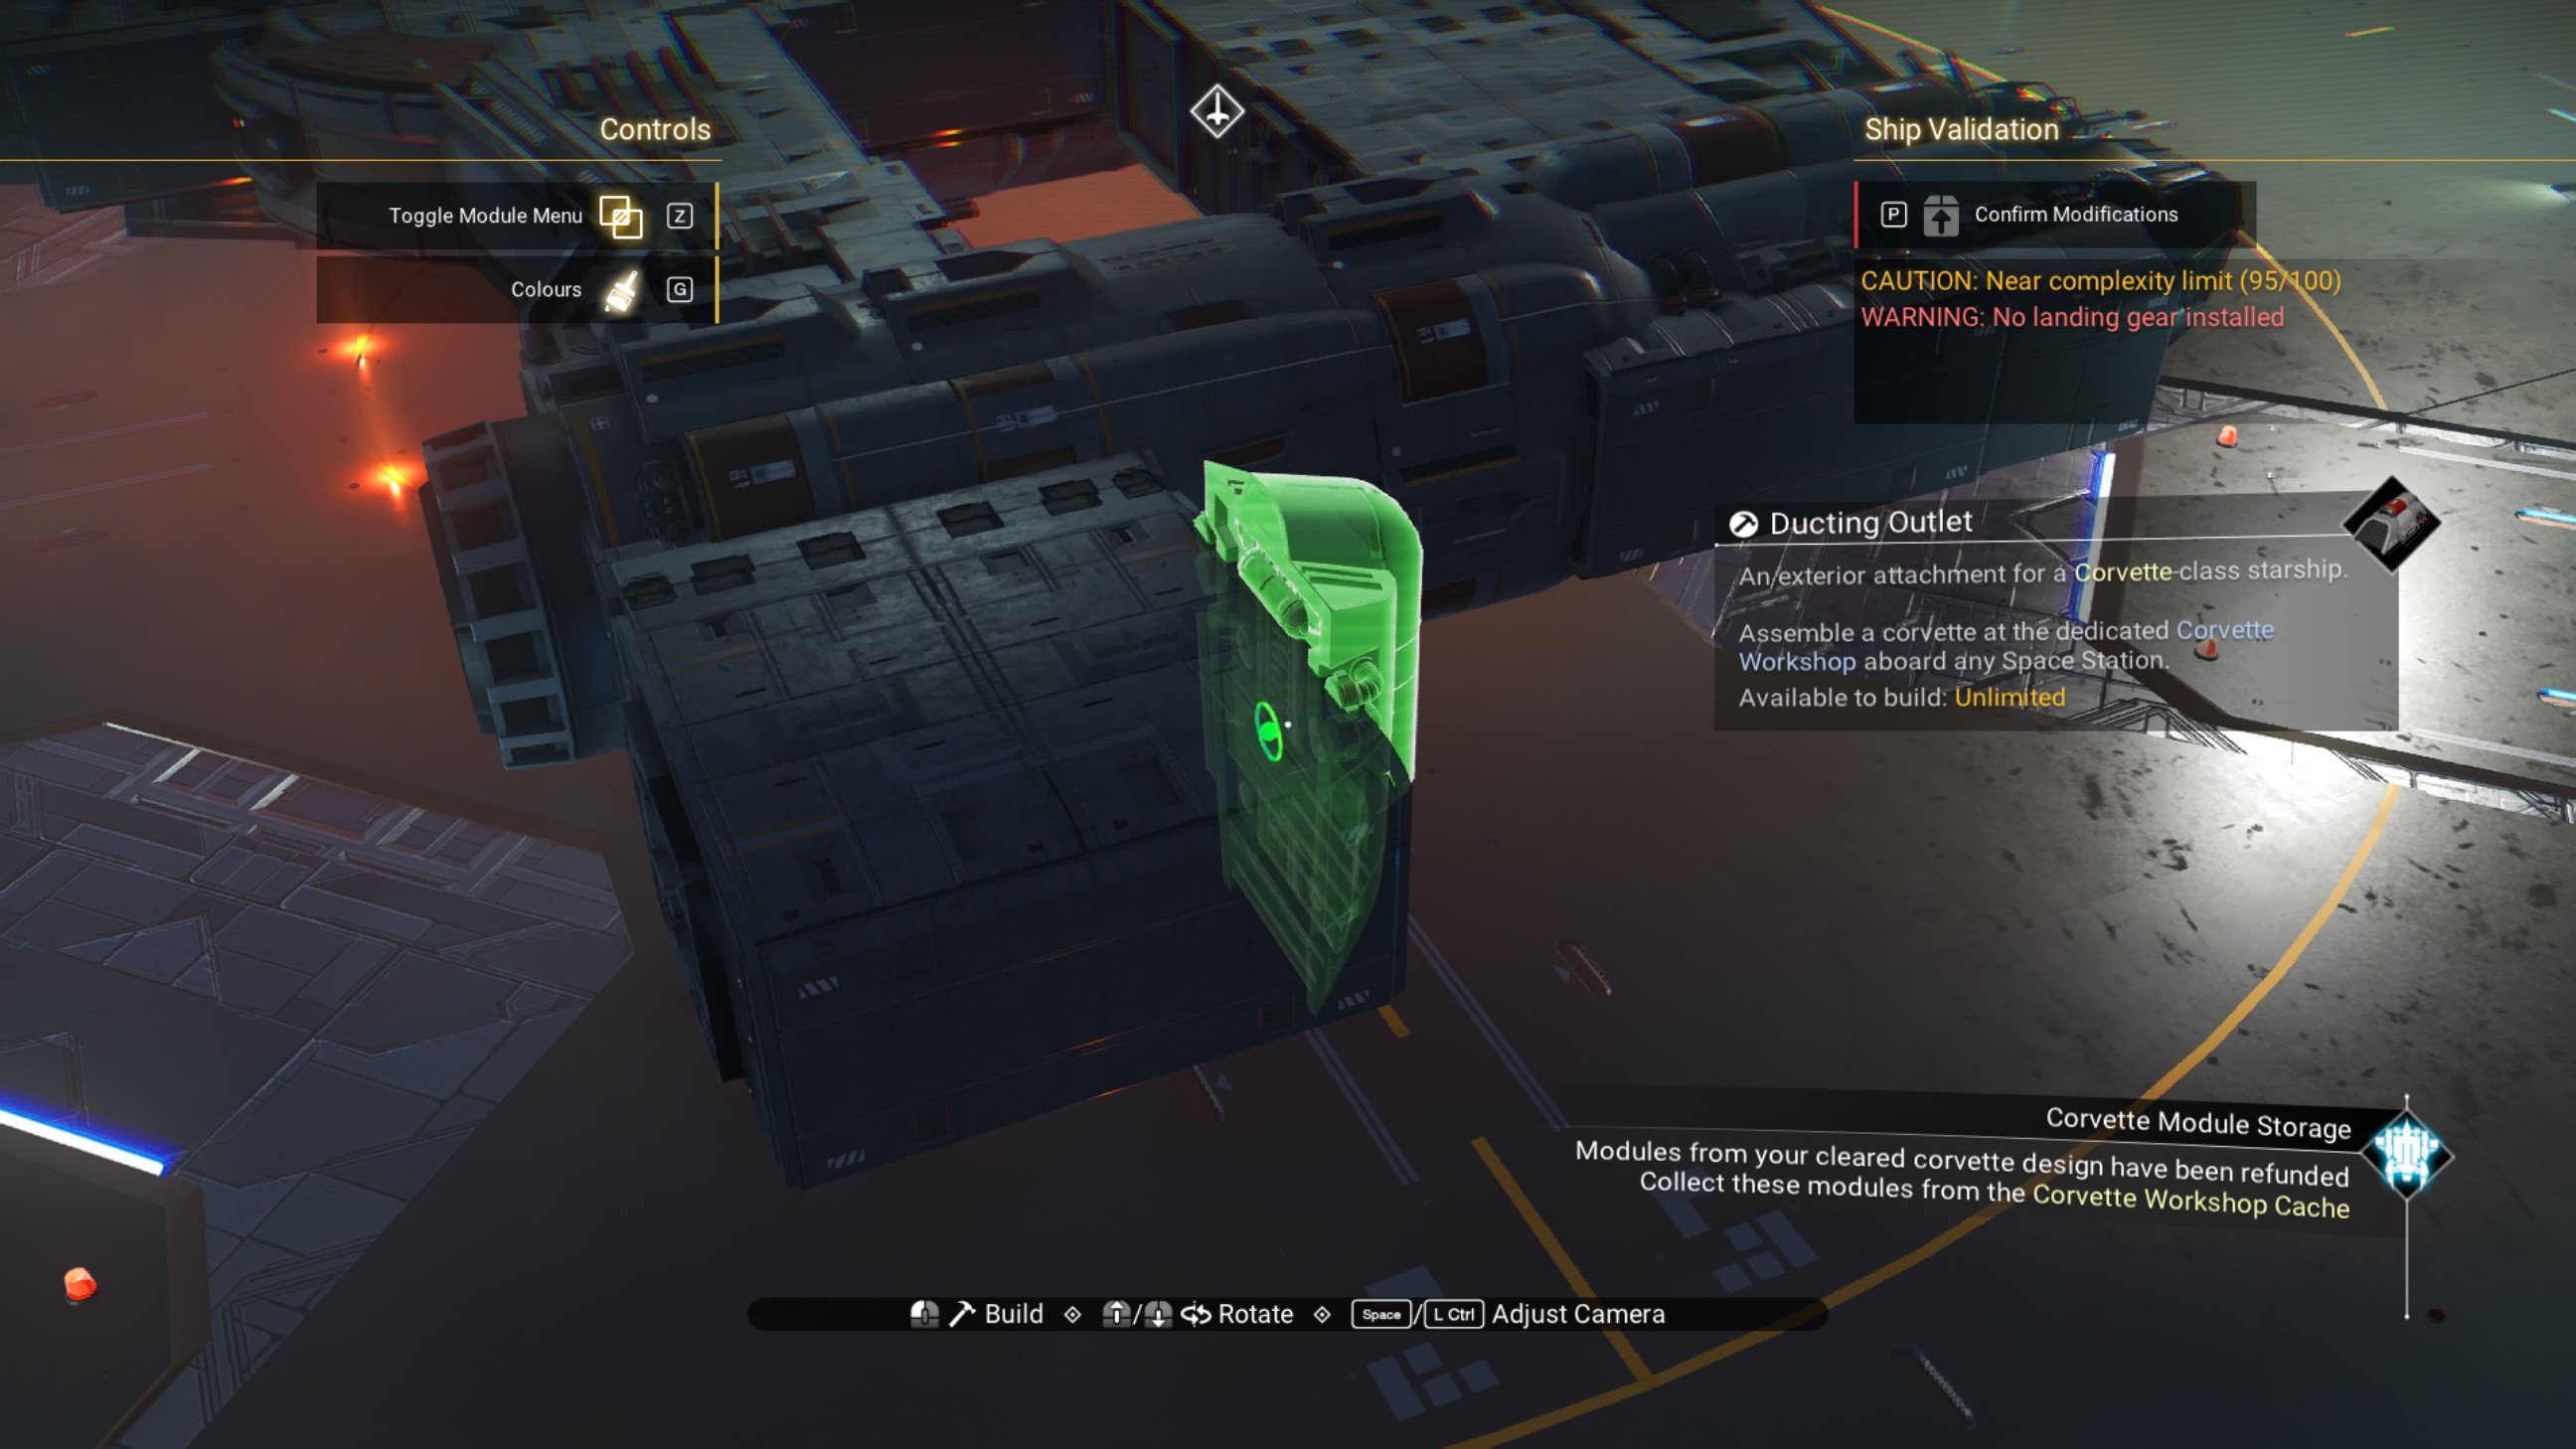
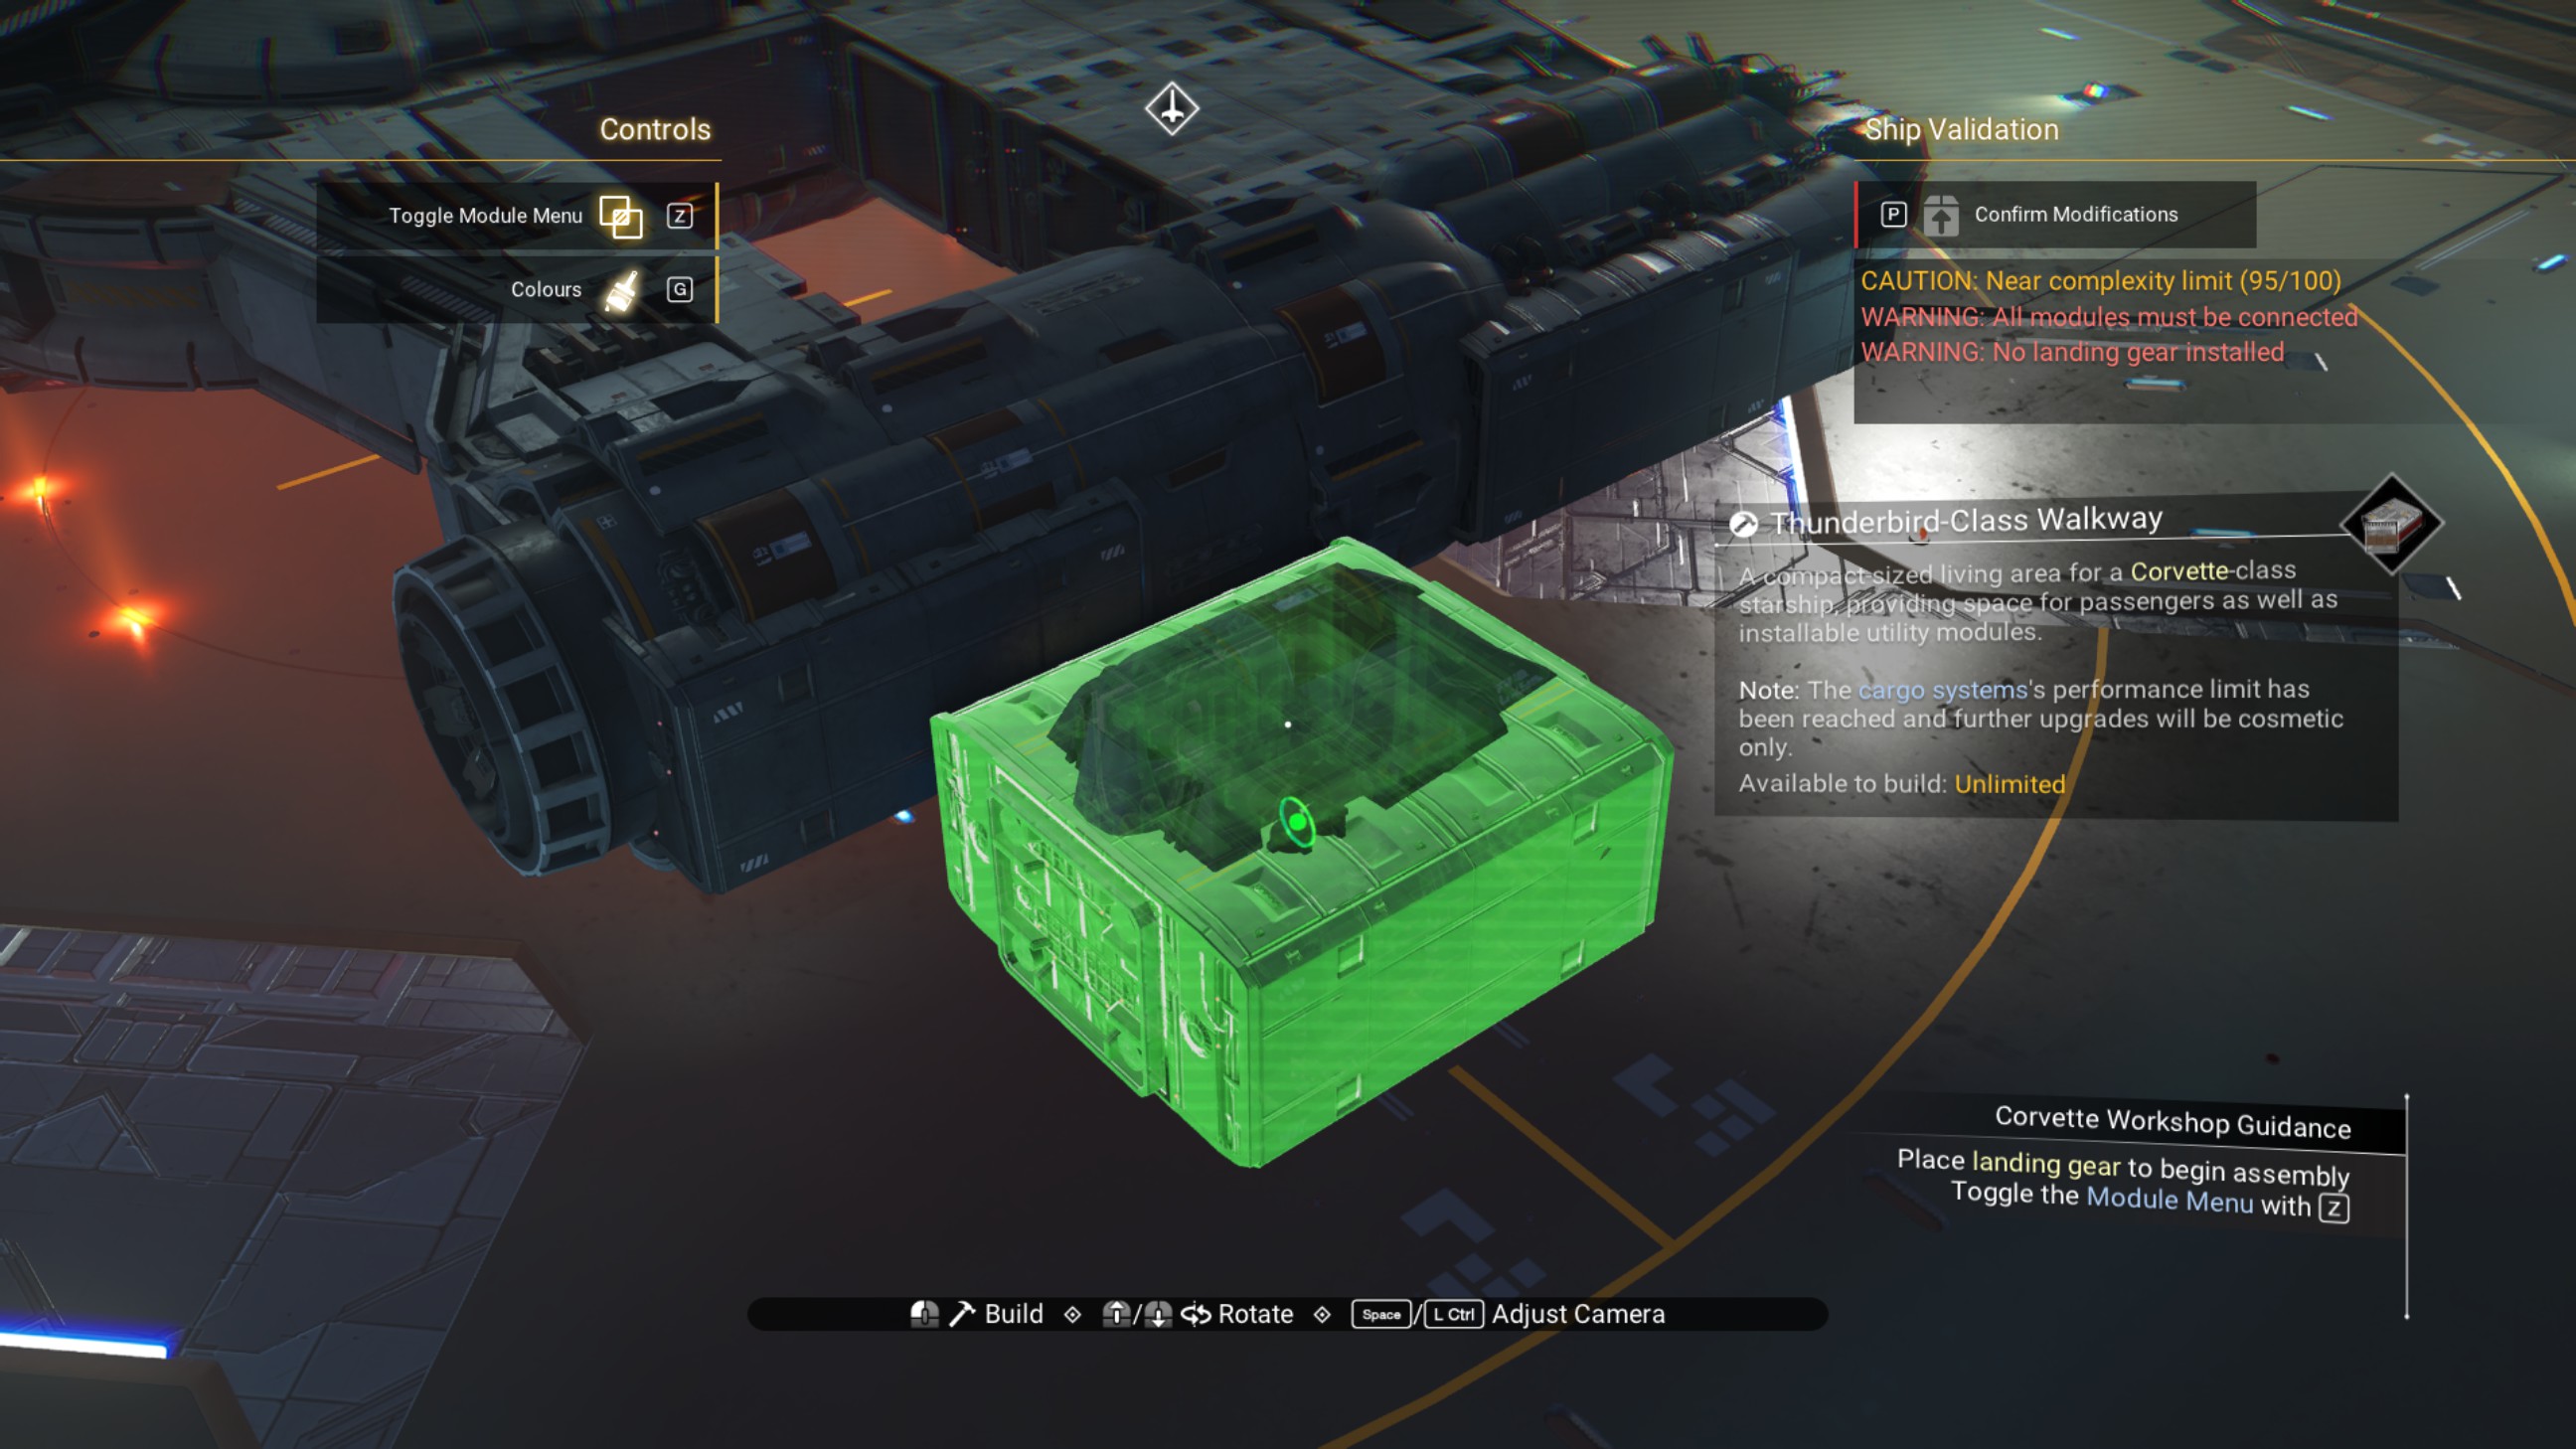 3. Delete the ducting outlet, then place a rotated rockhopper propeller module on the walkway, as shown.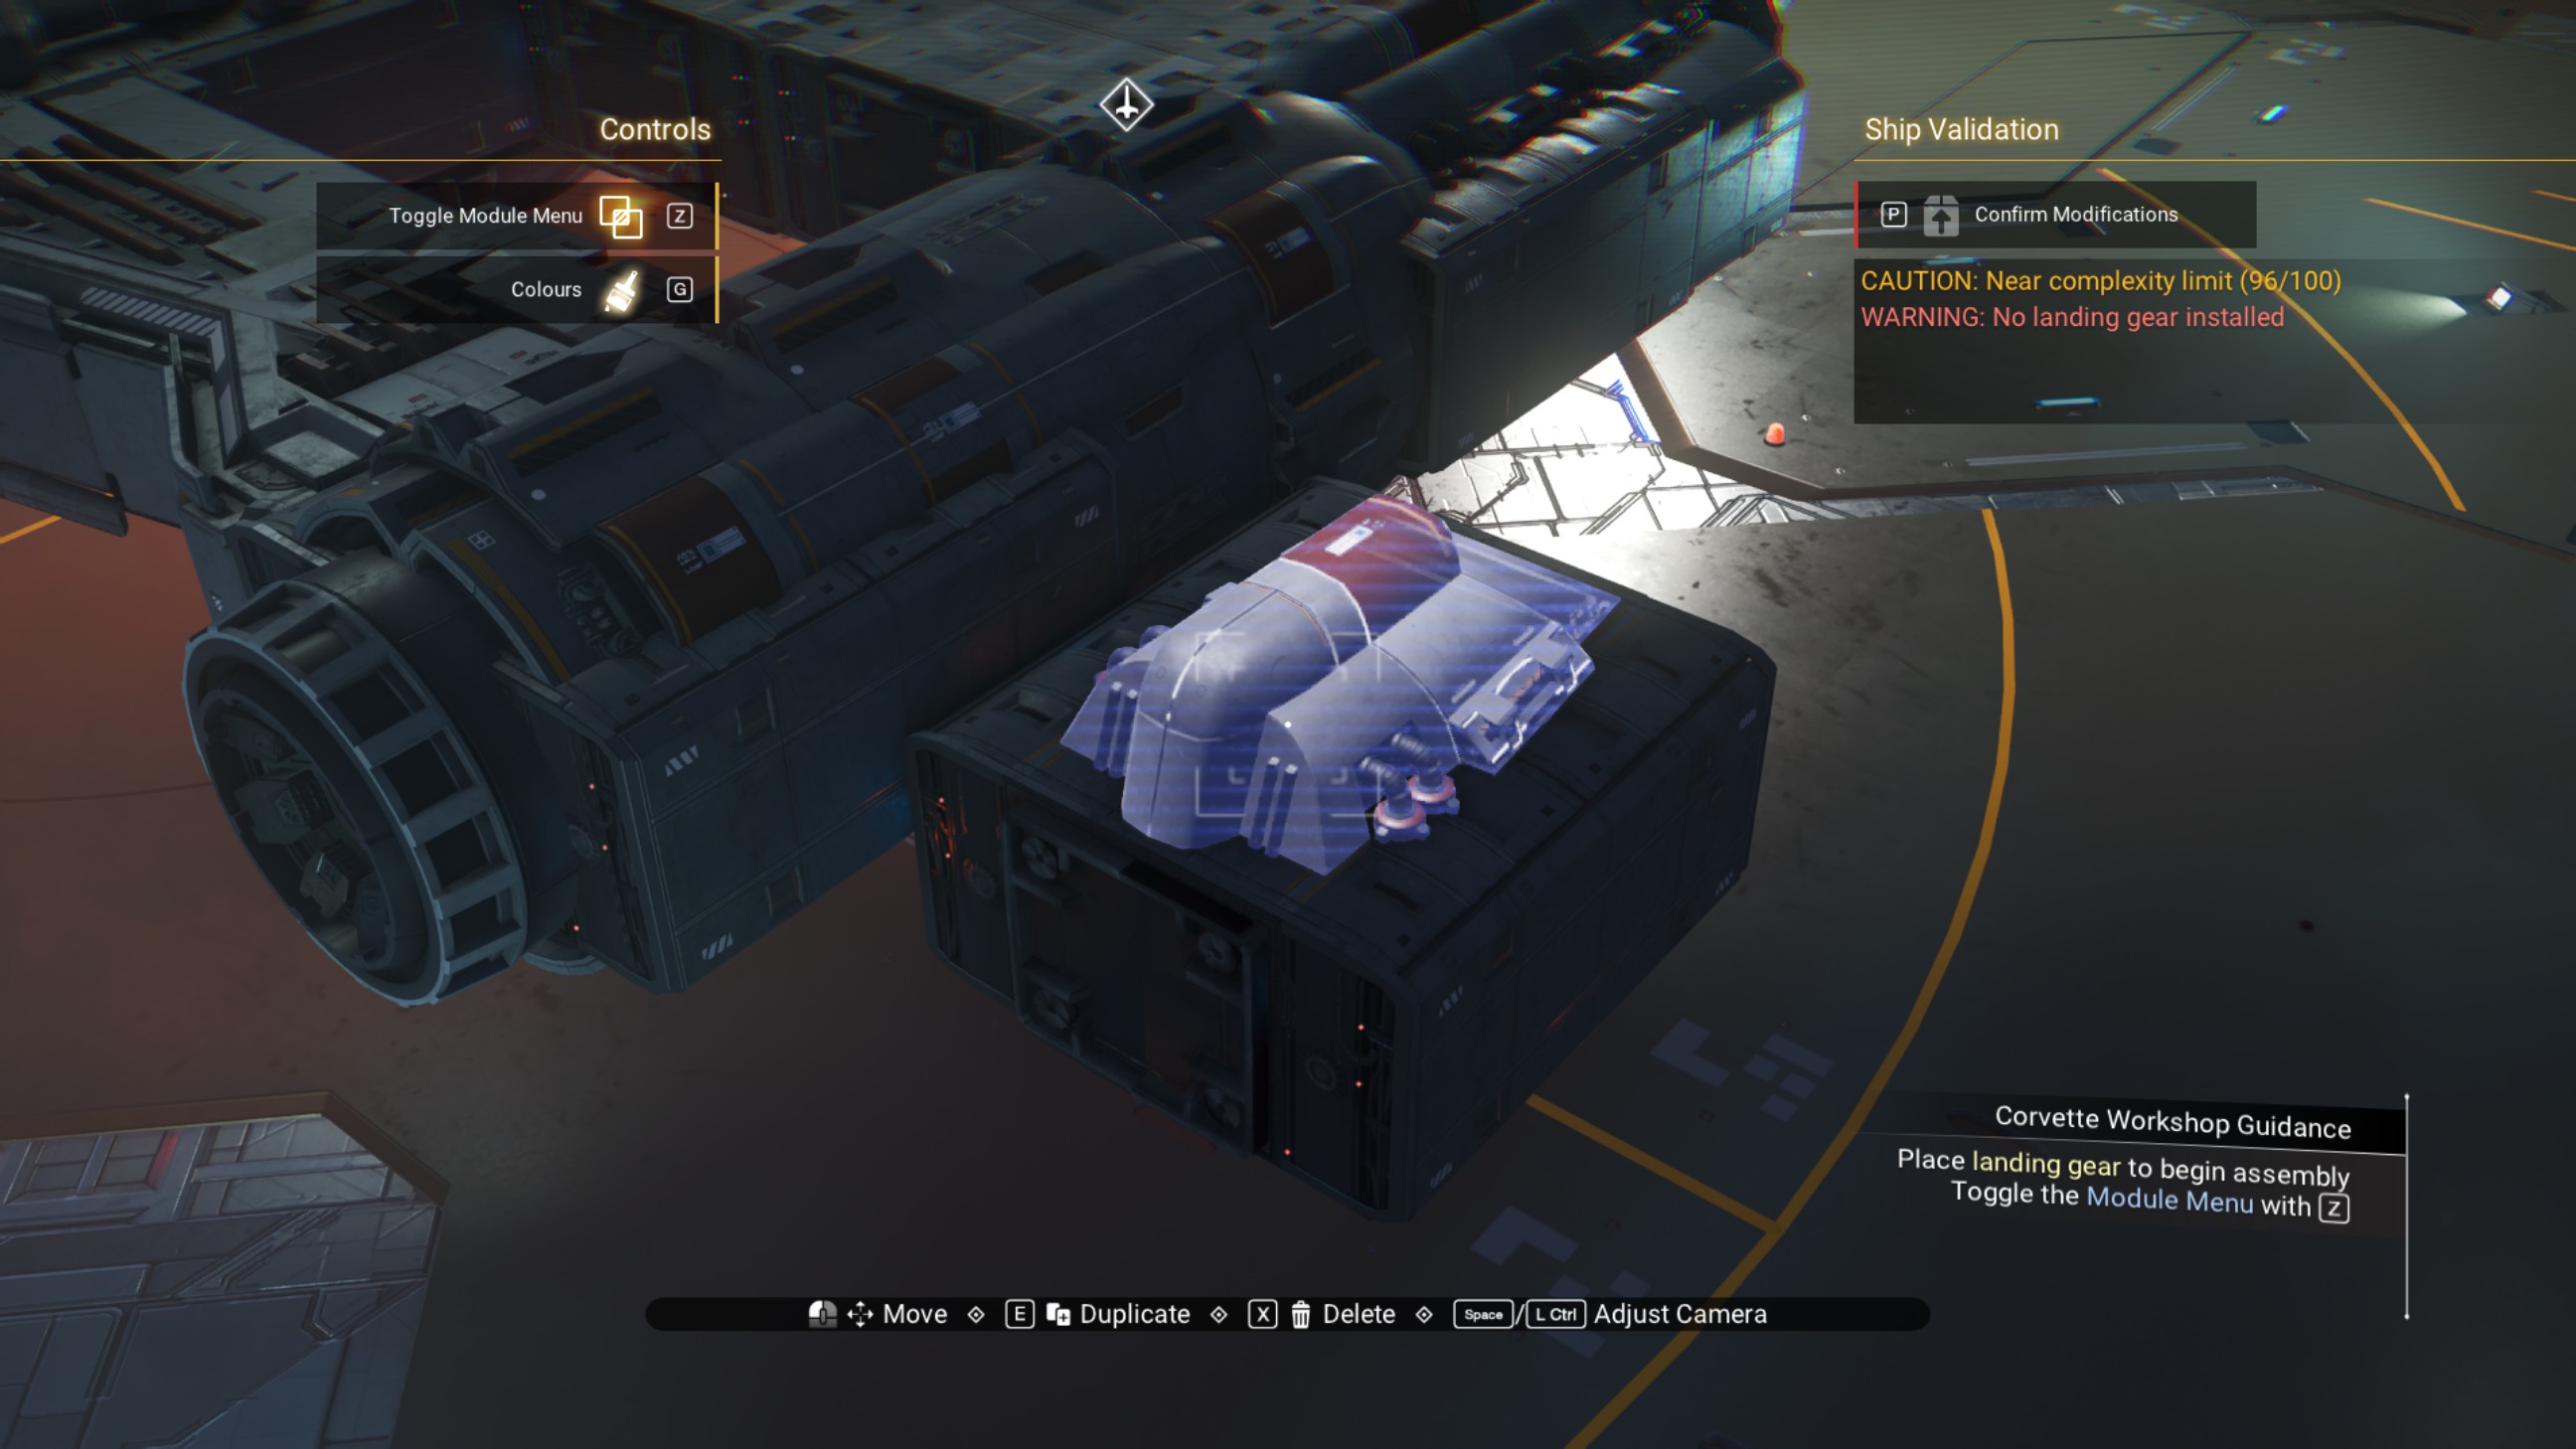
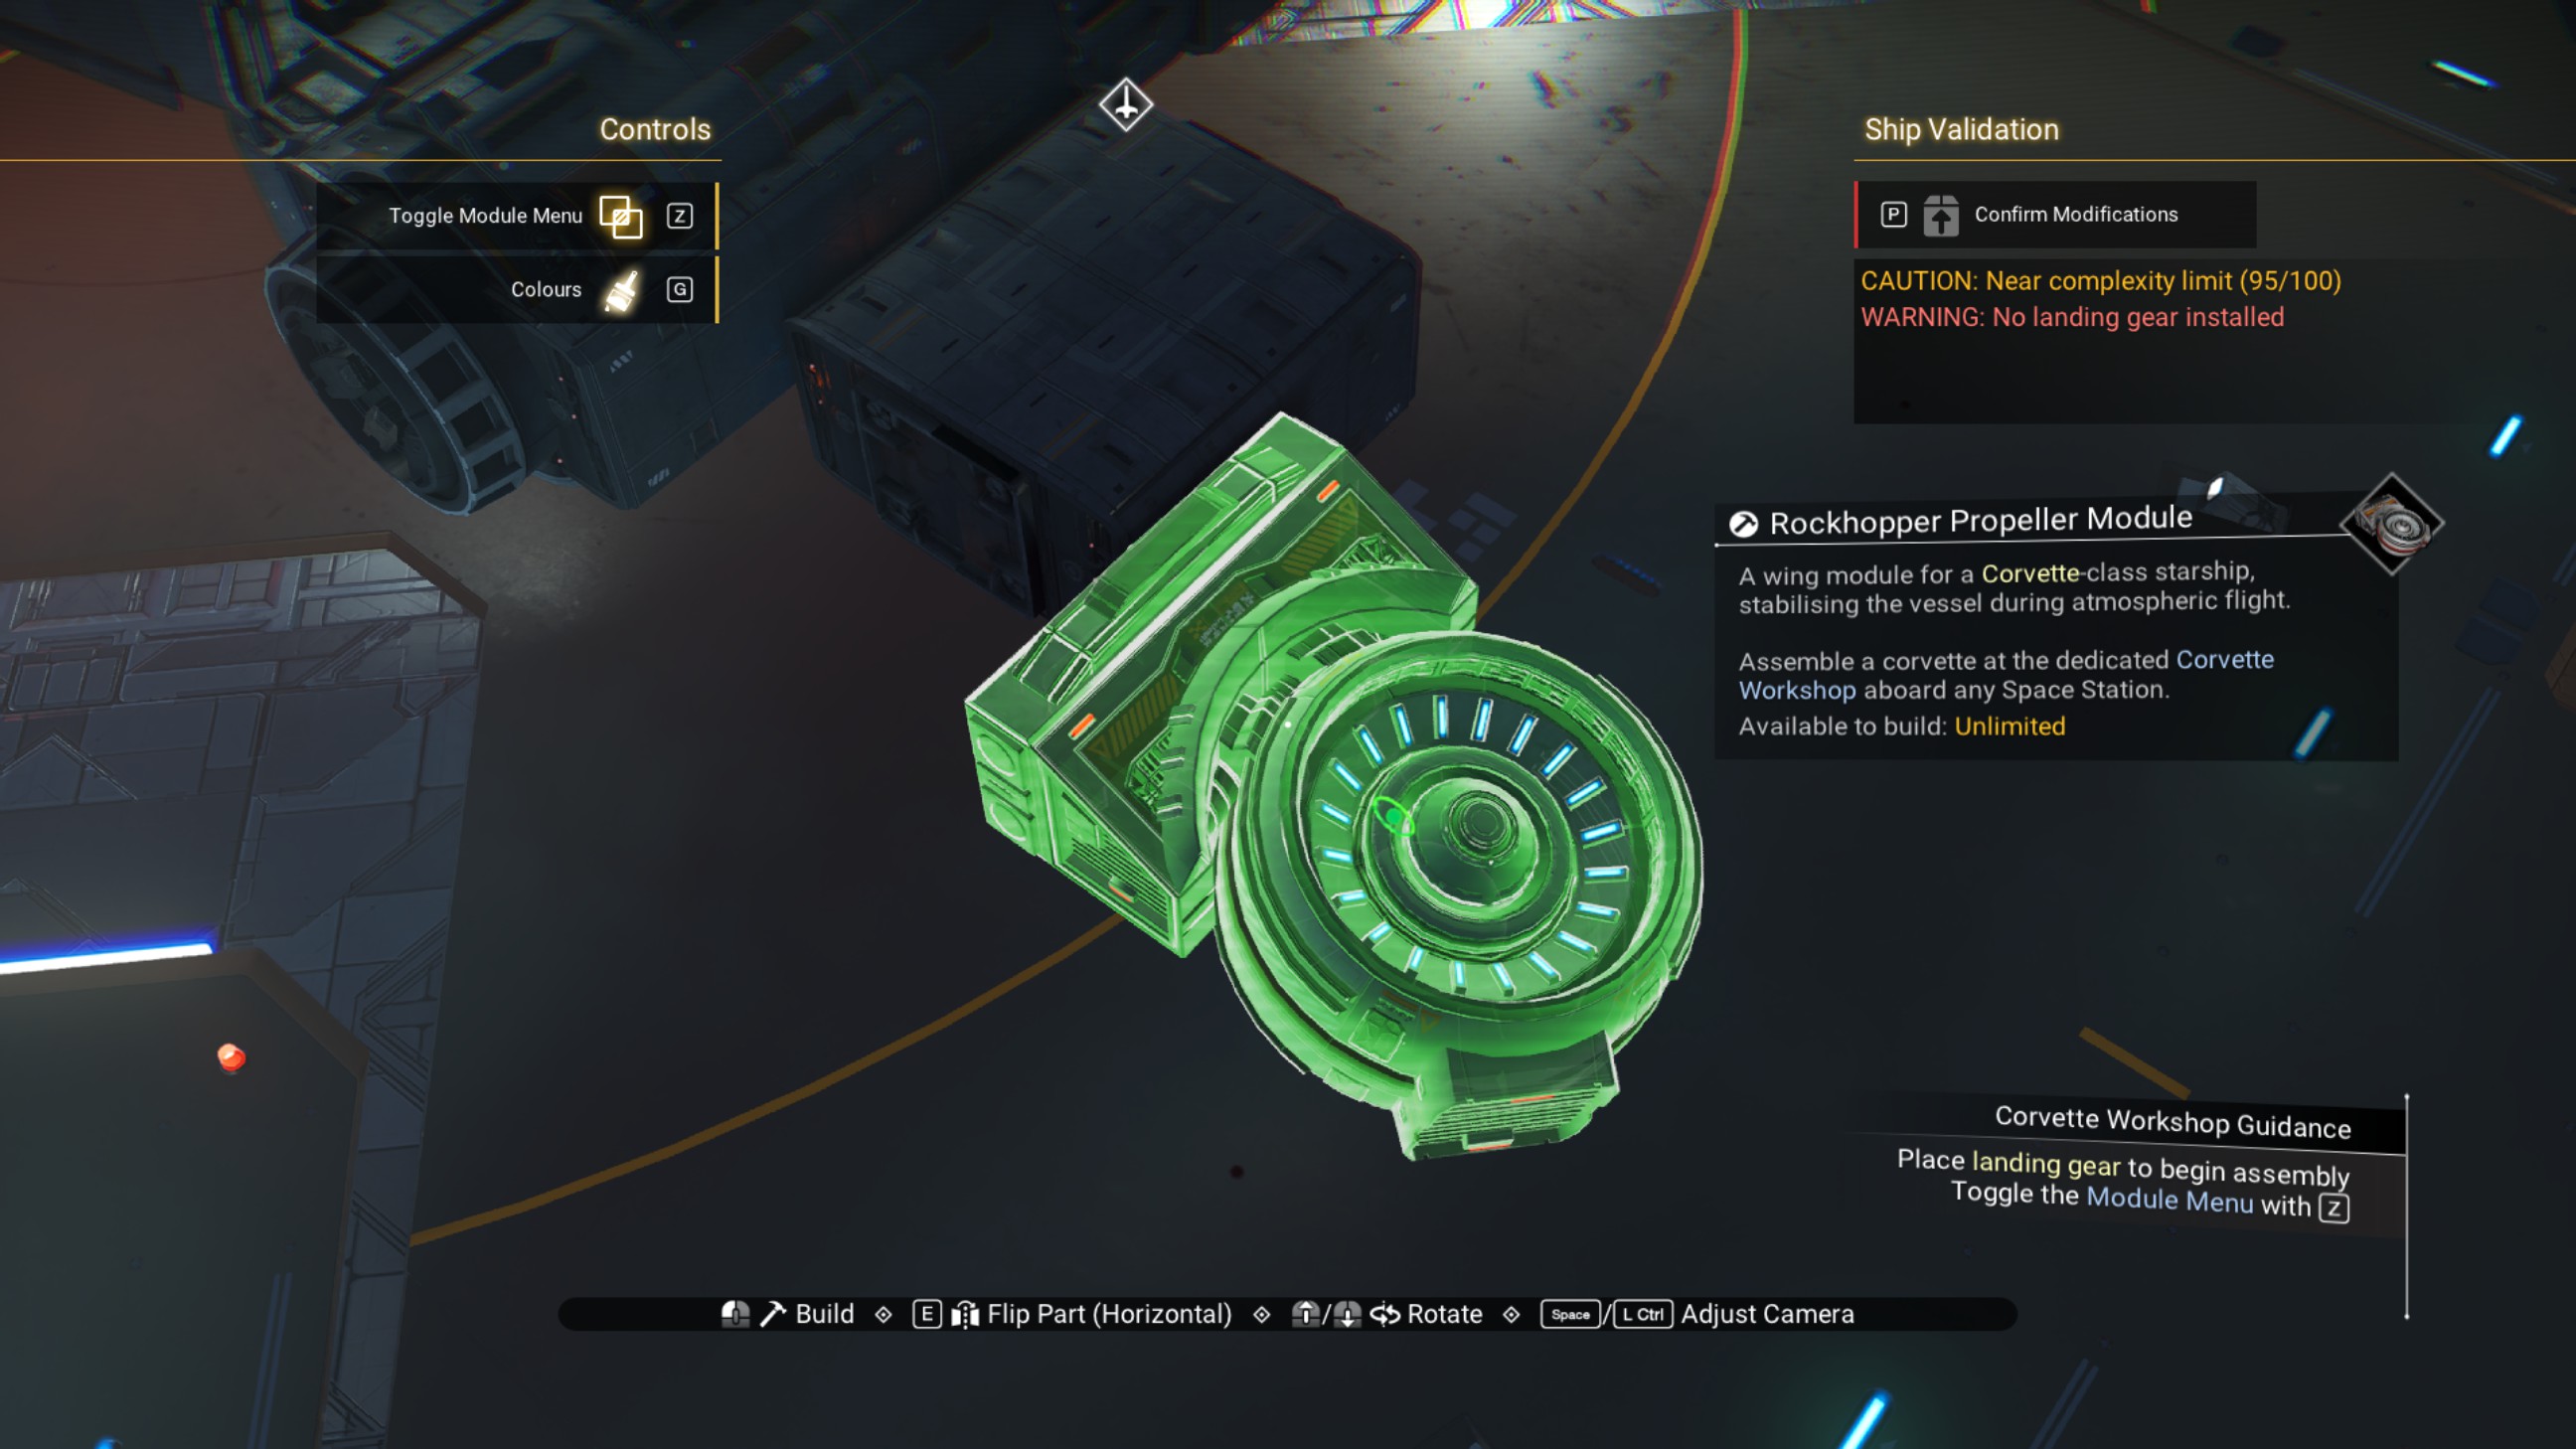 4. Shift the walkway backward half a step, then delete the propeller module.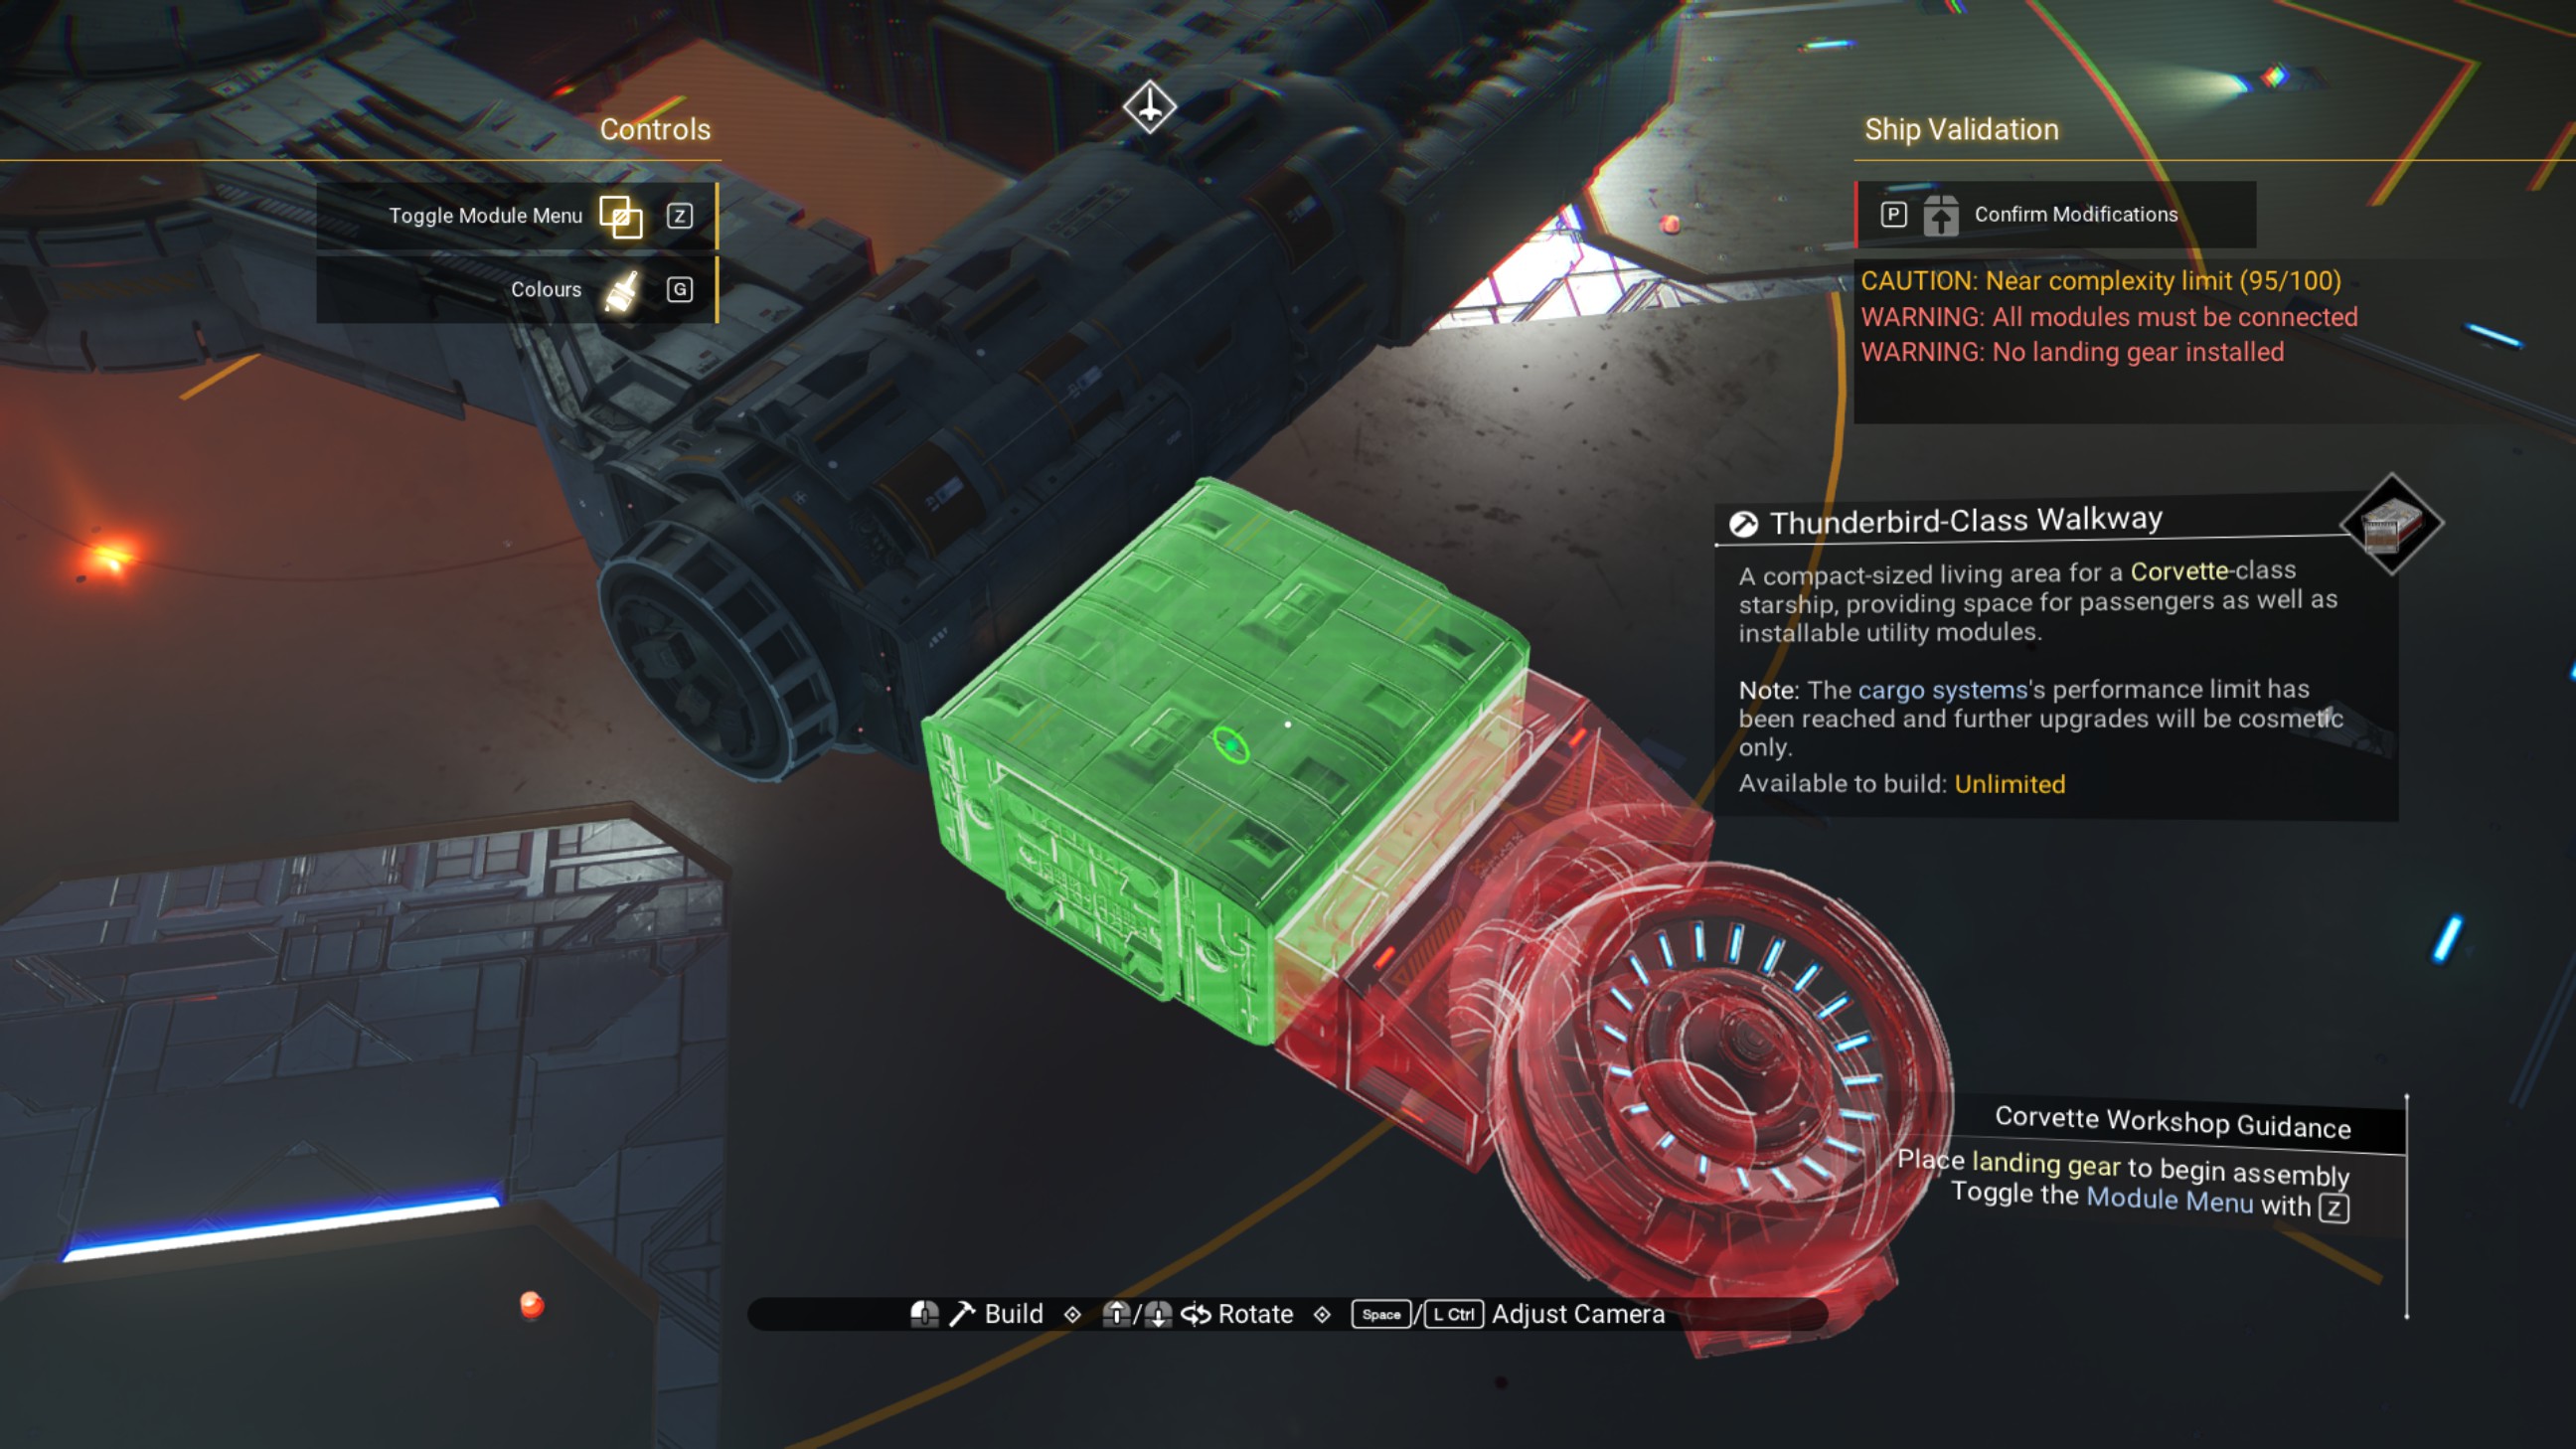
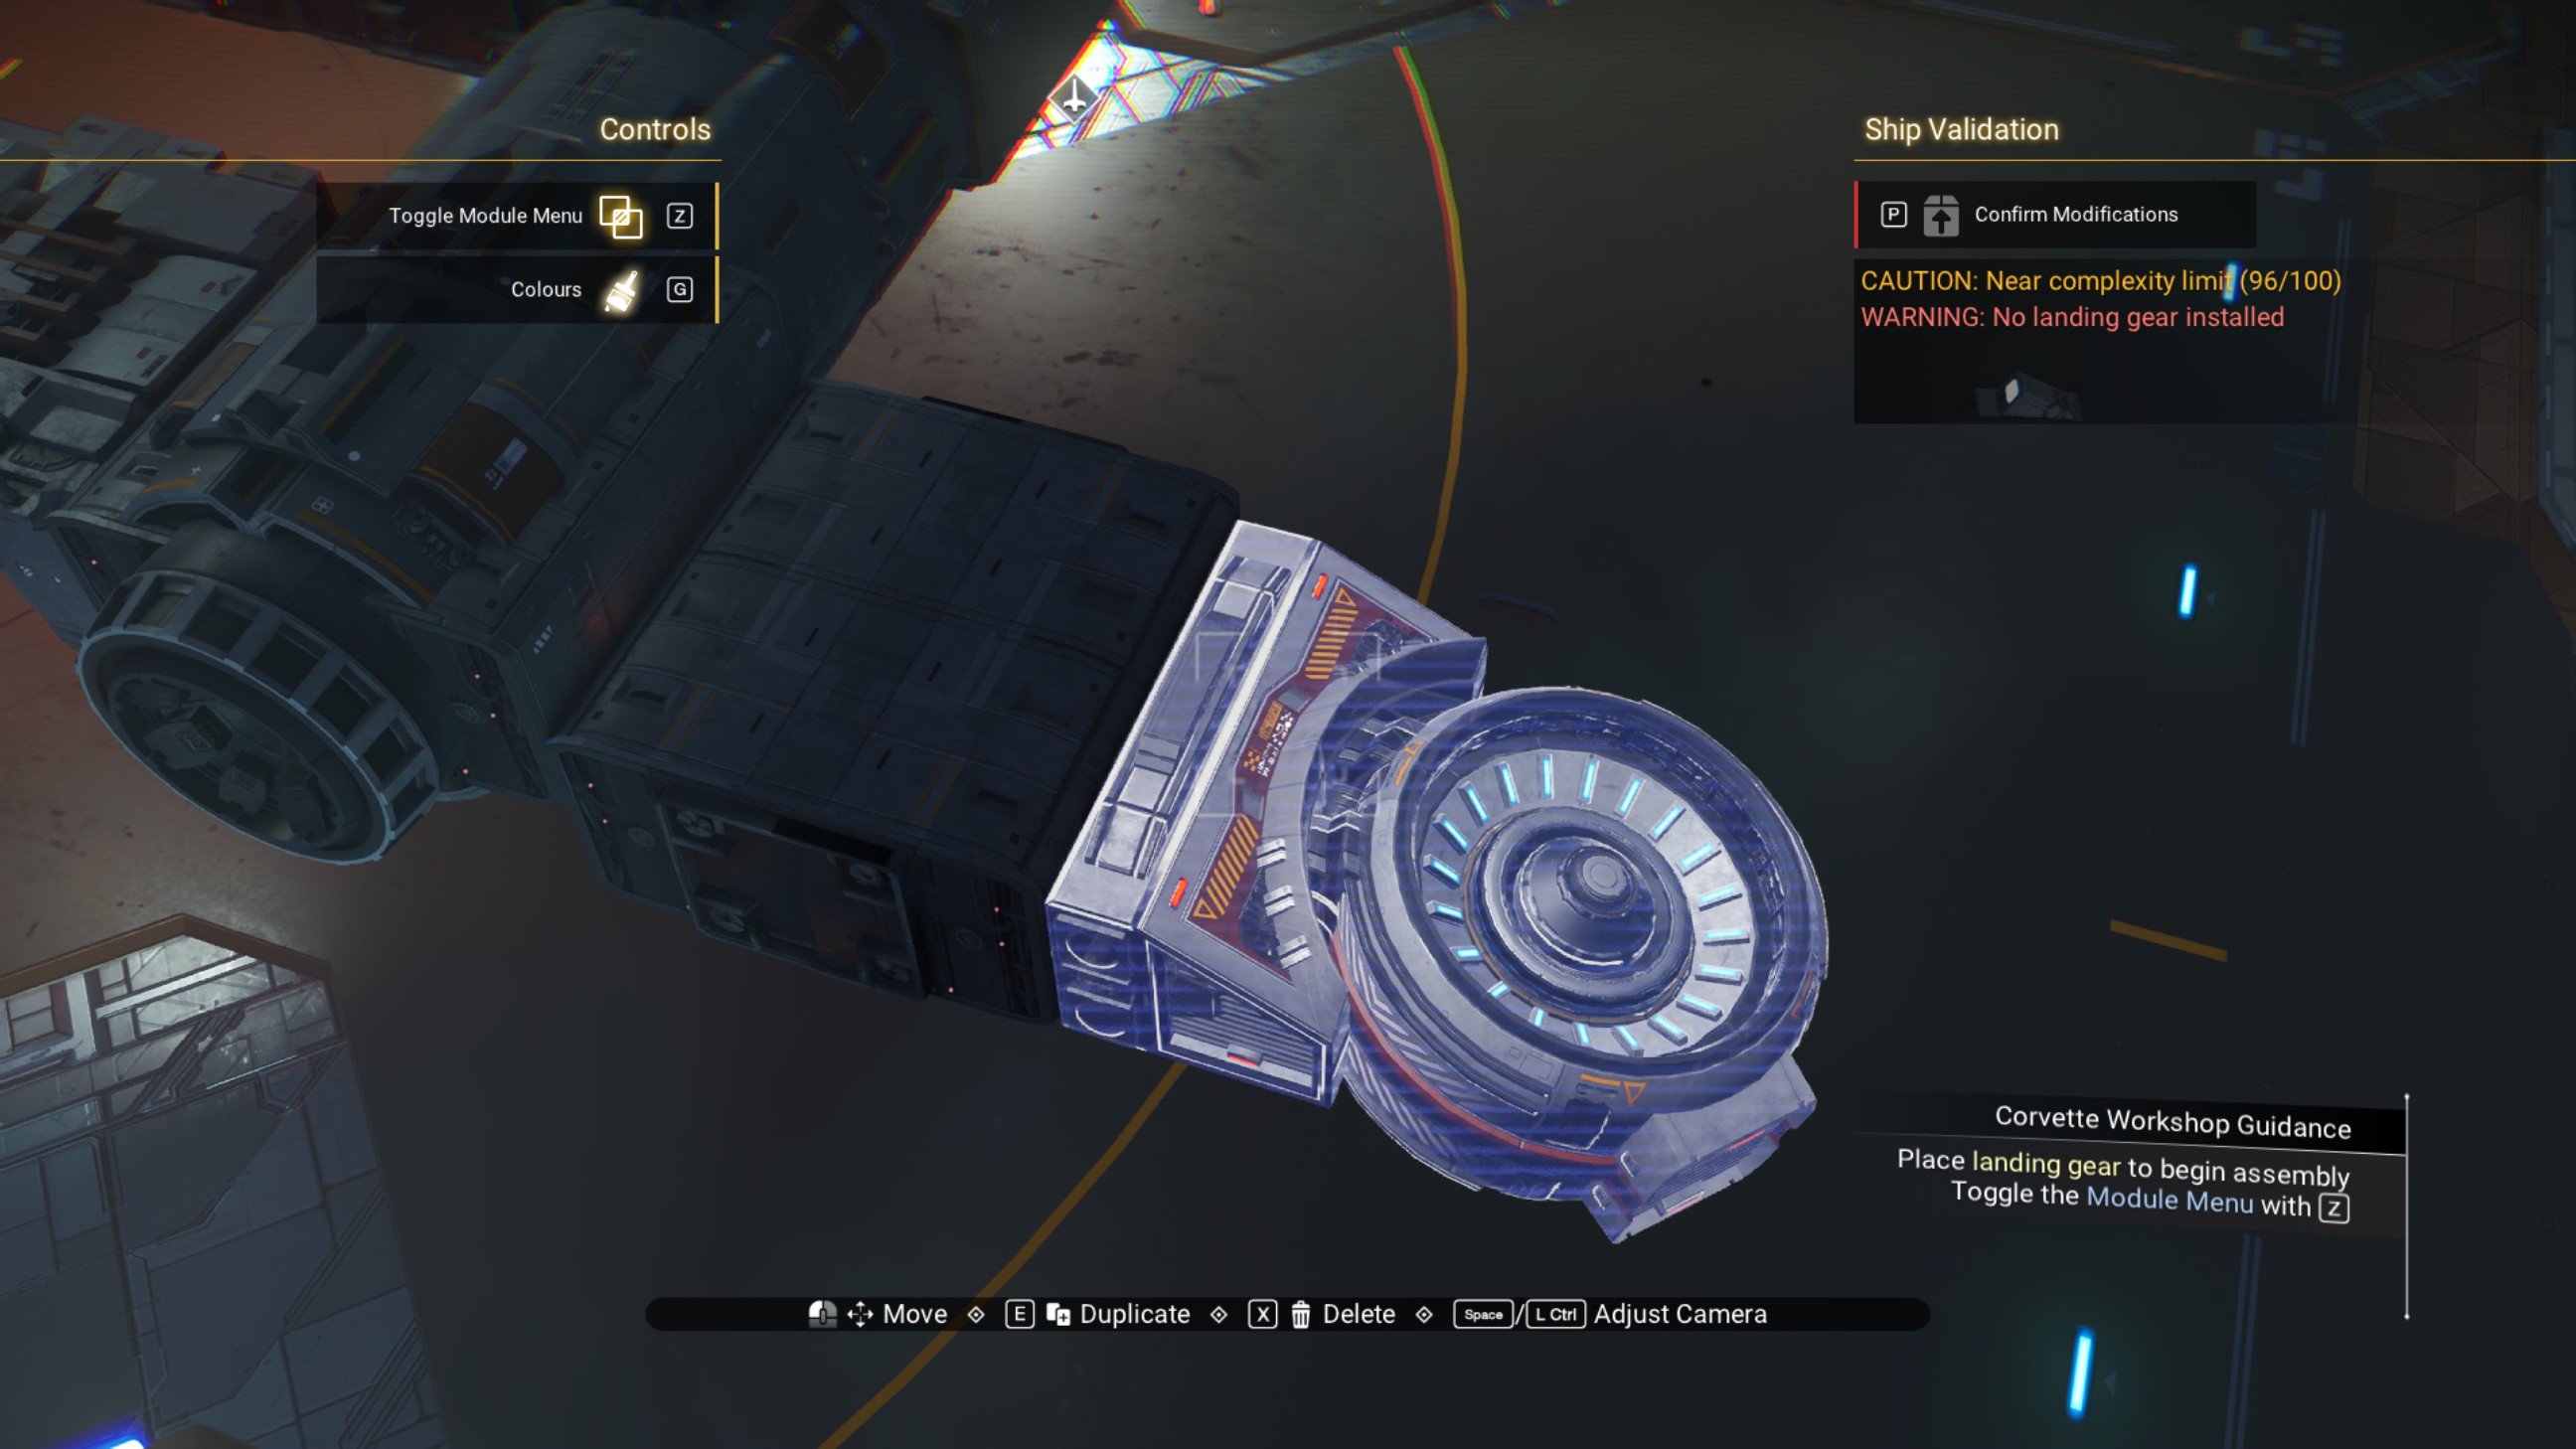 5. Place a walkway to the port of the offset walkway so it overlaps the cockpit module, then place a medusa reactor on top of that walkway.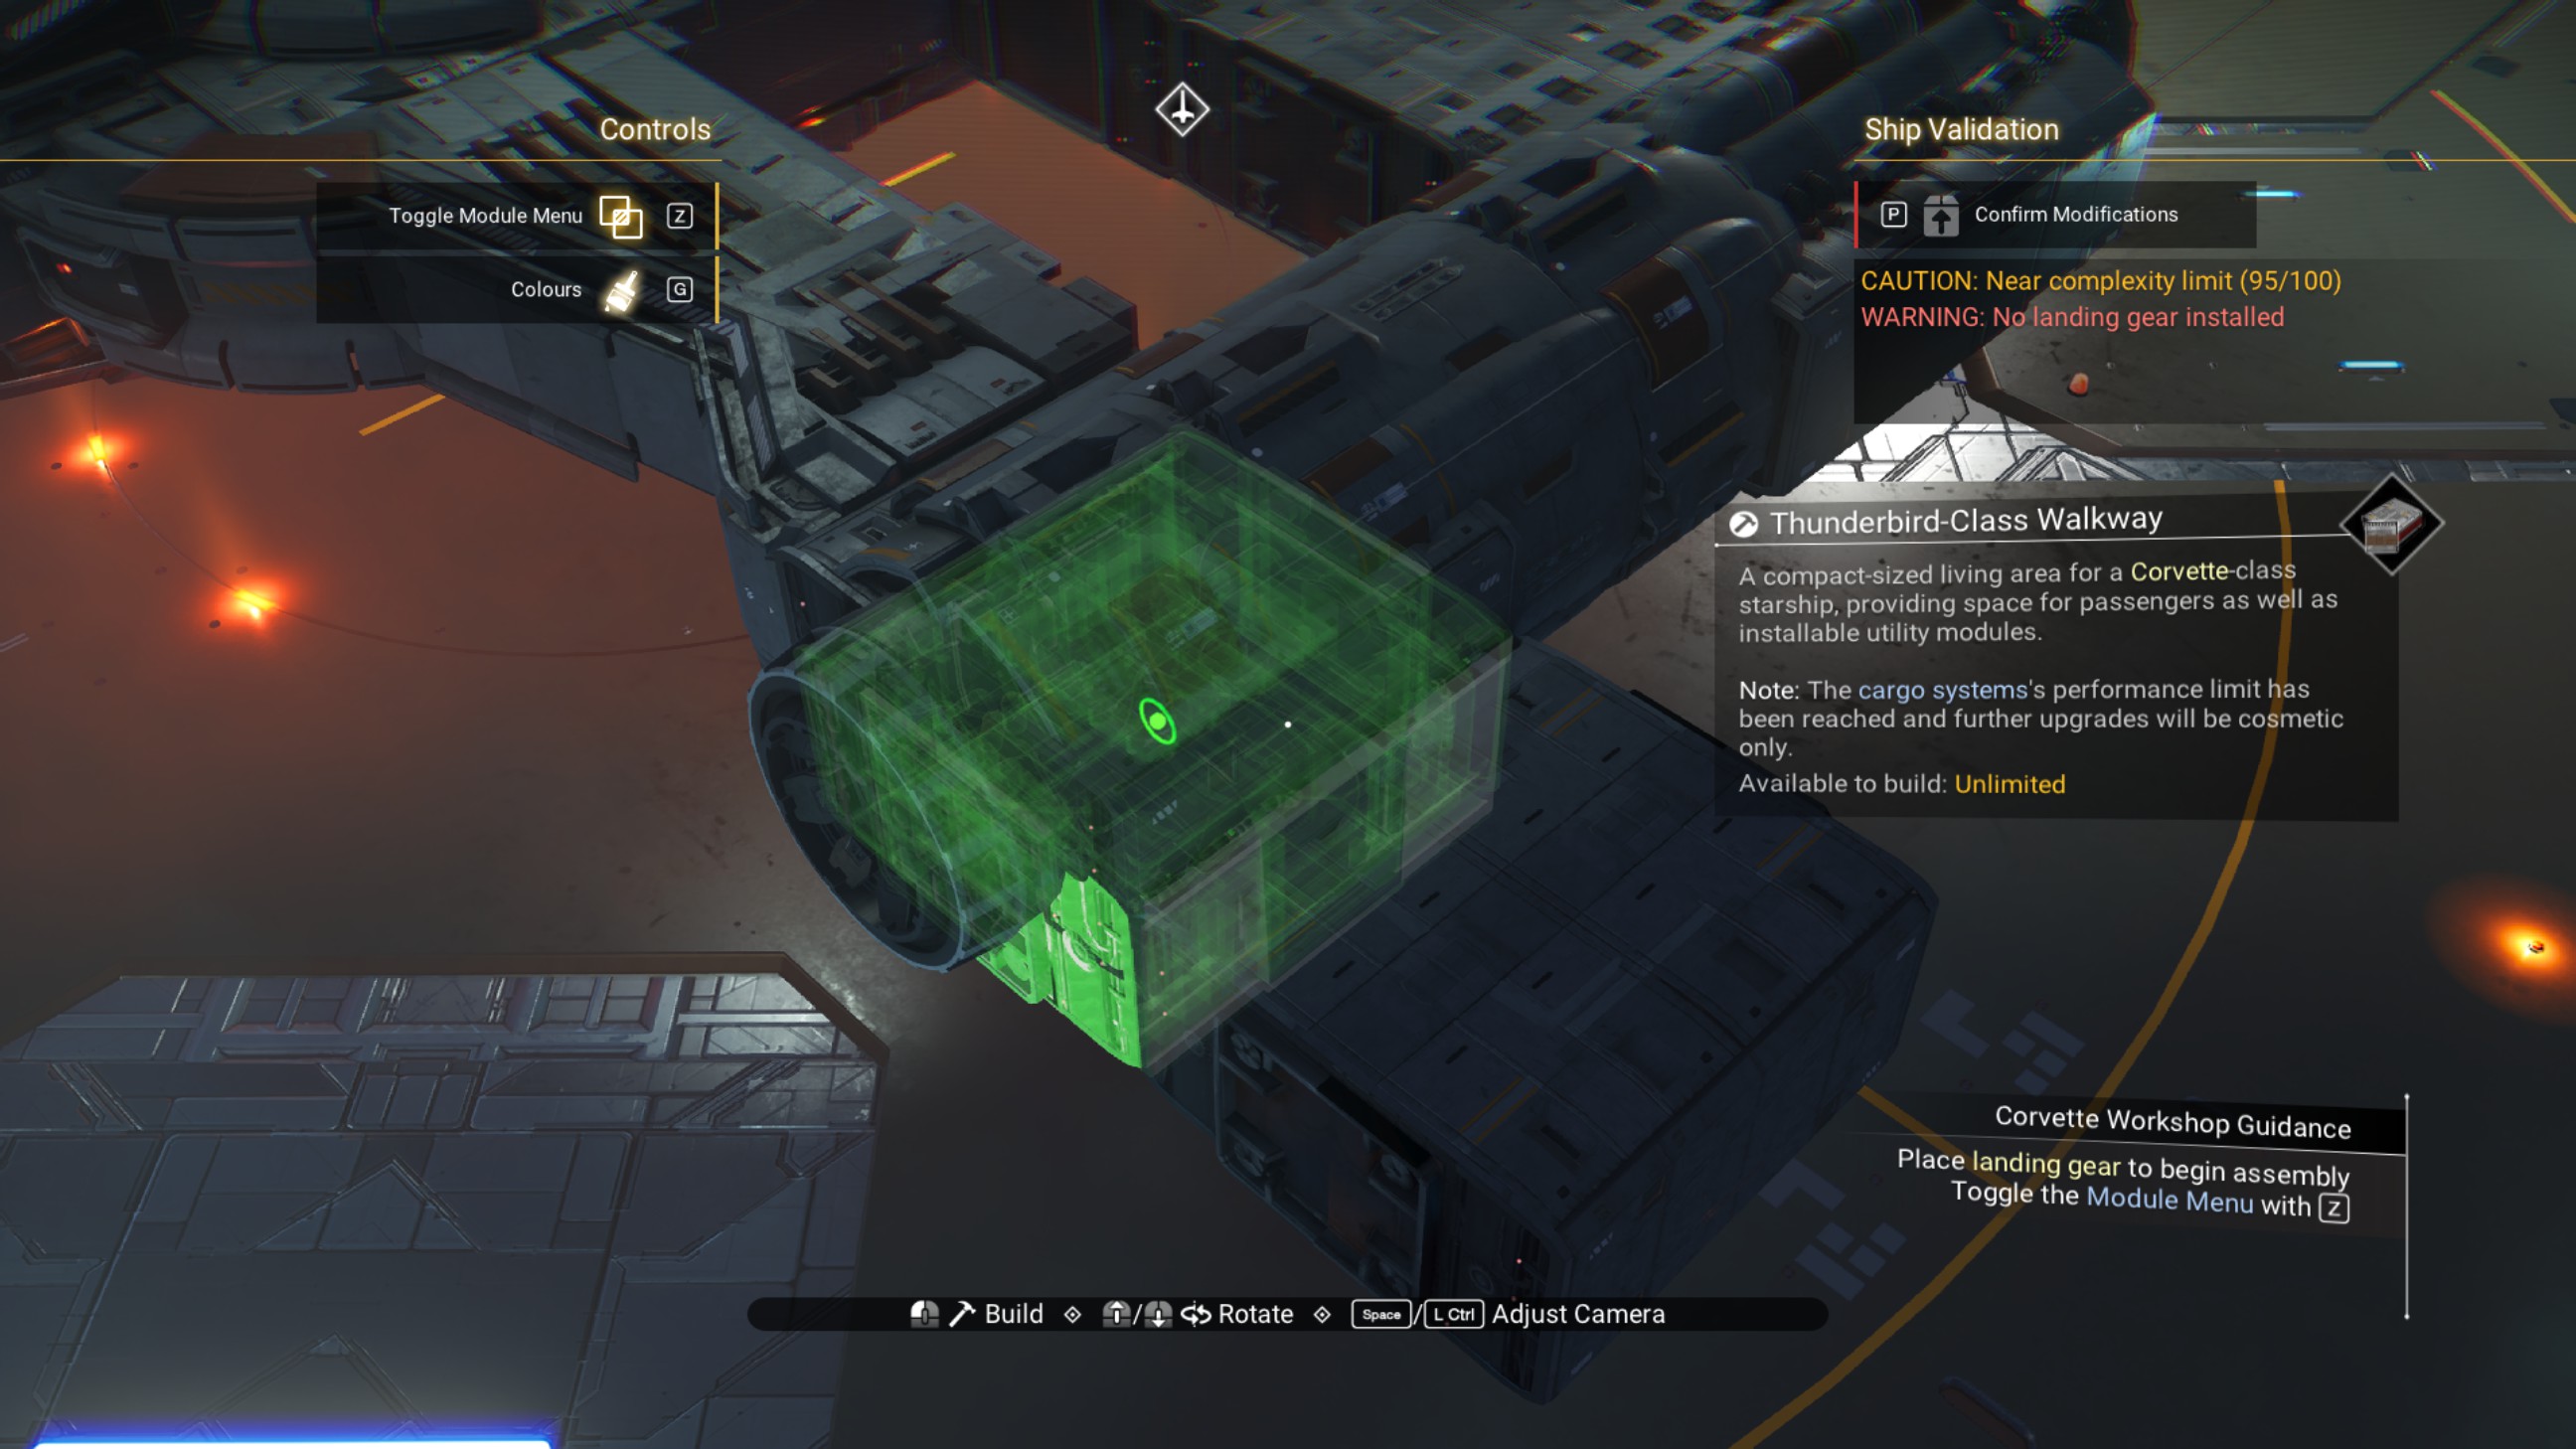
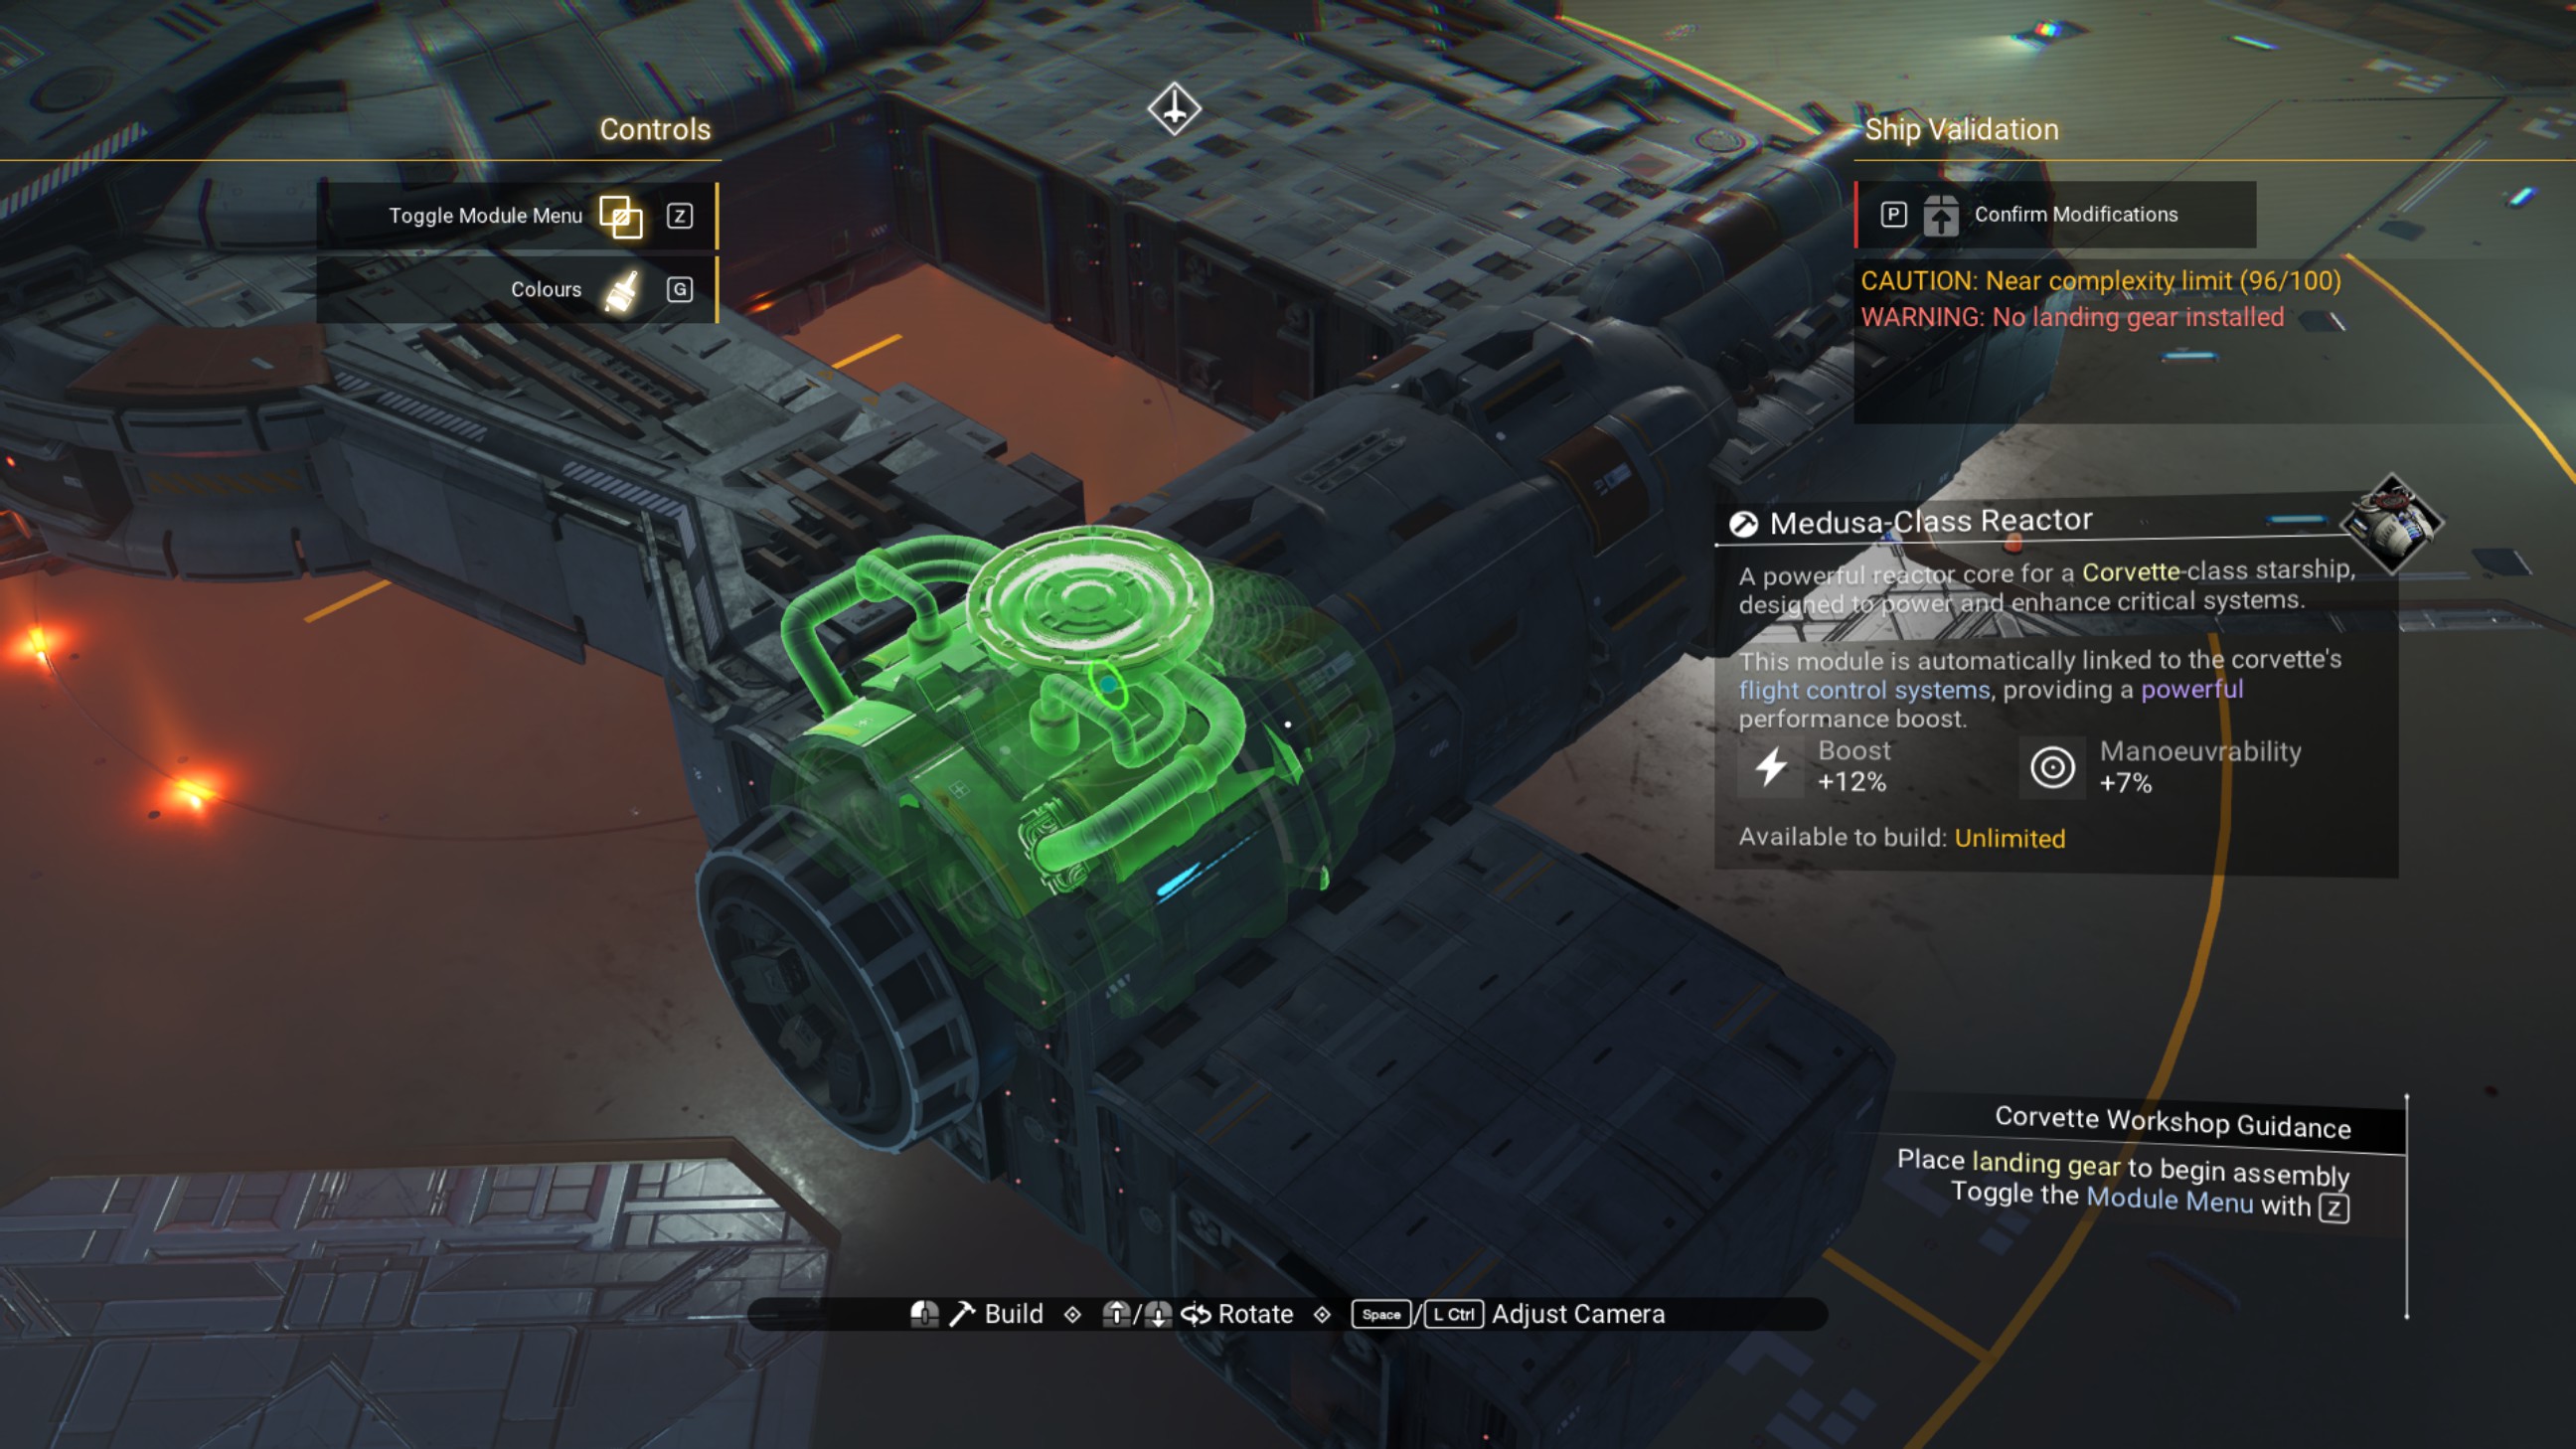 6. Delete the two offset walkways.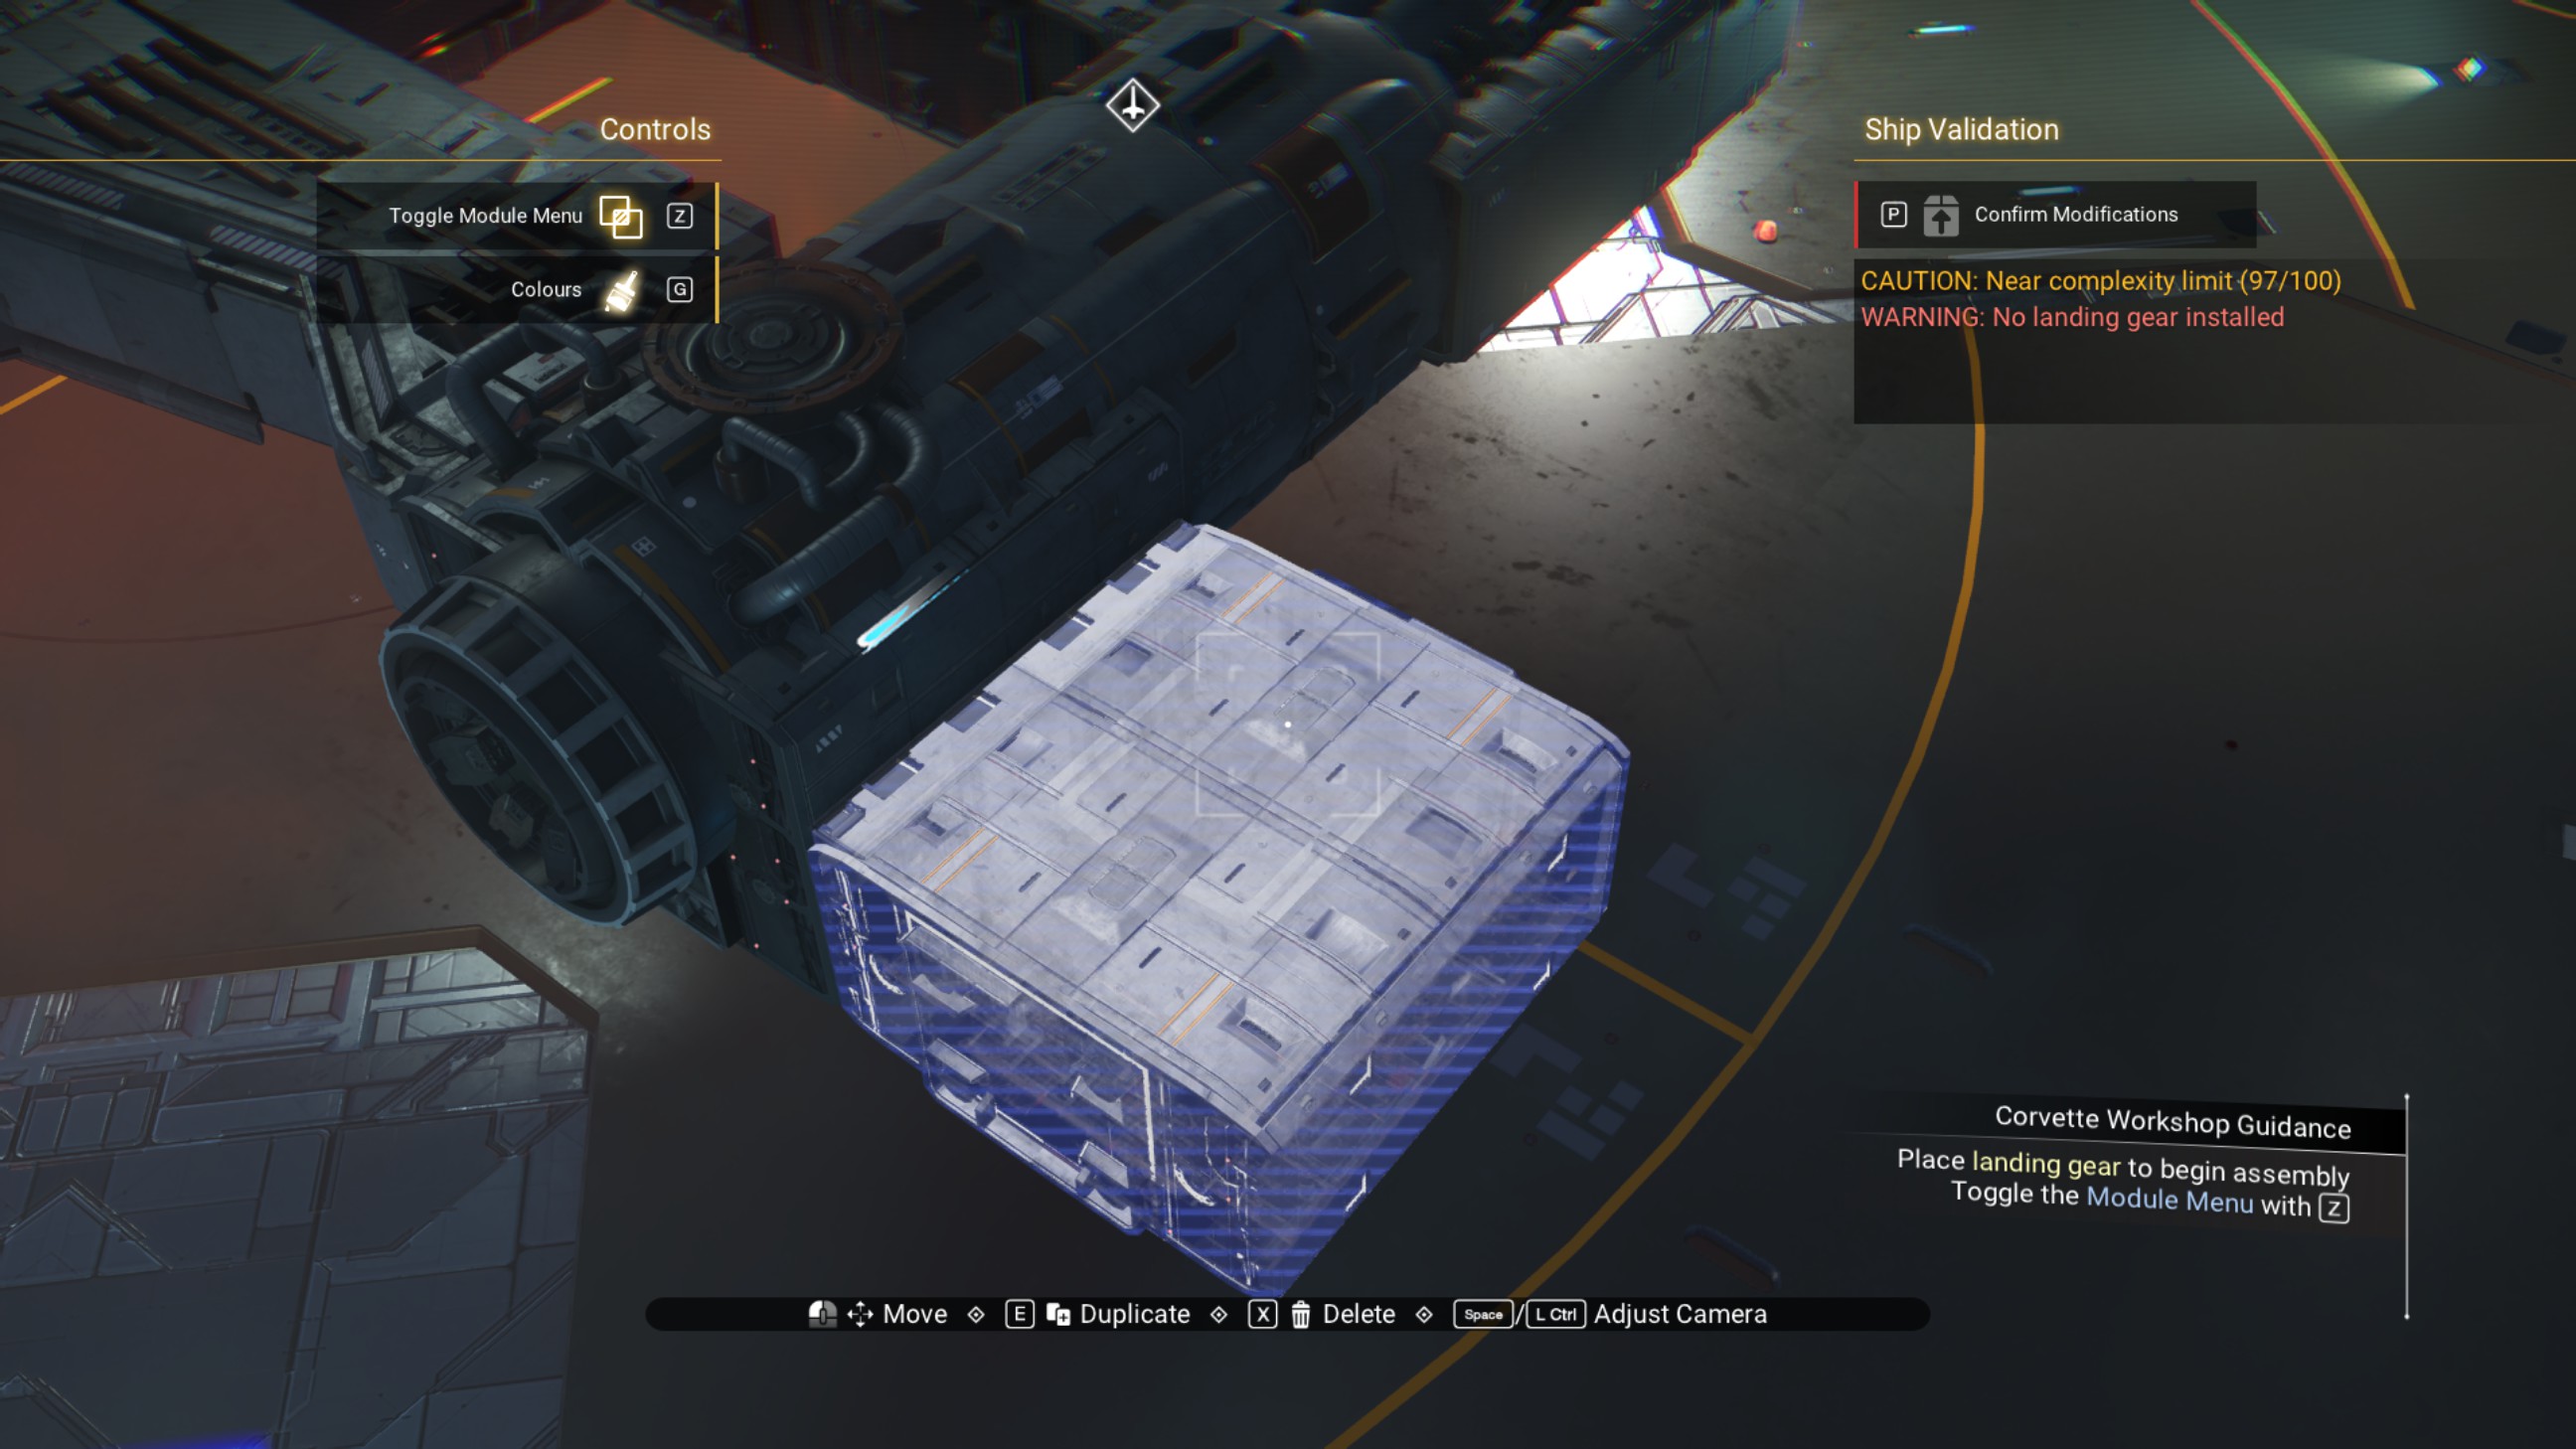
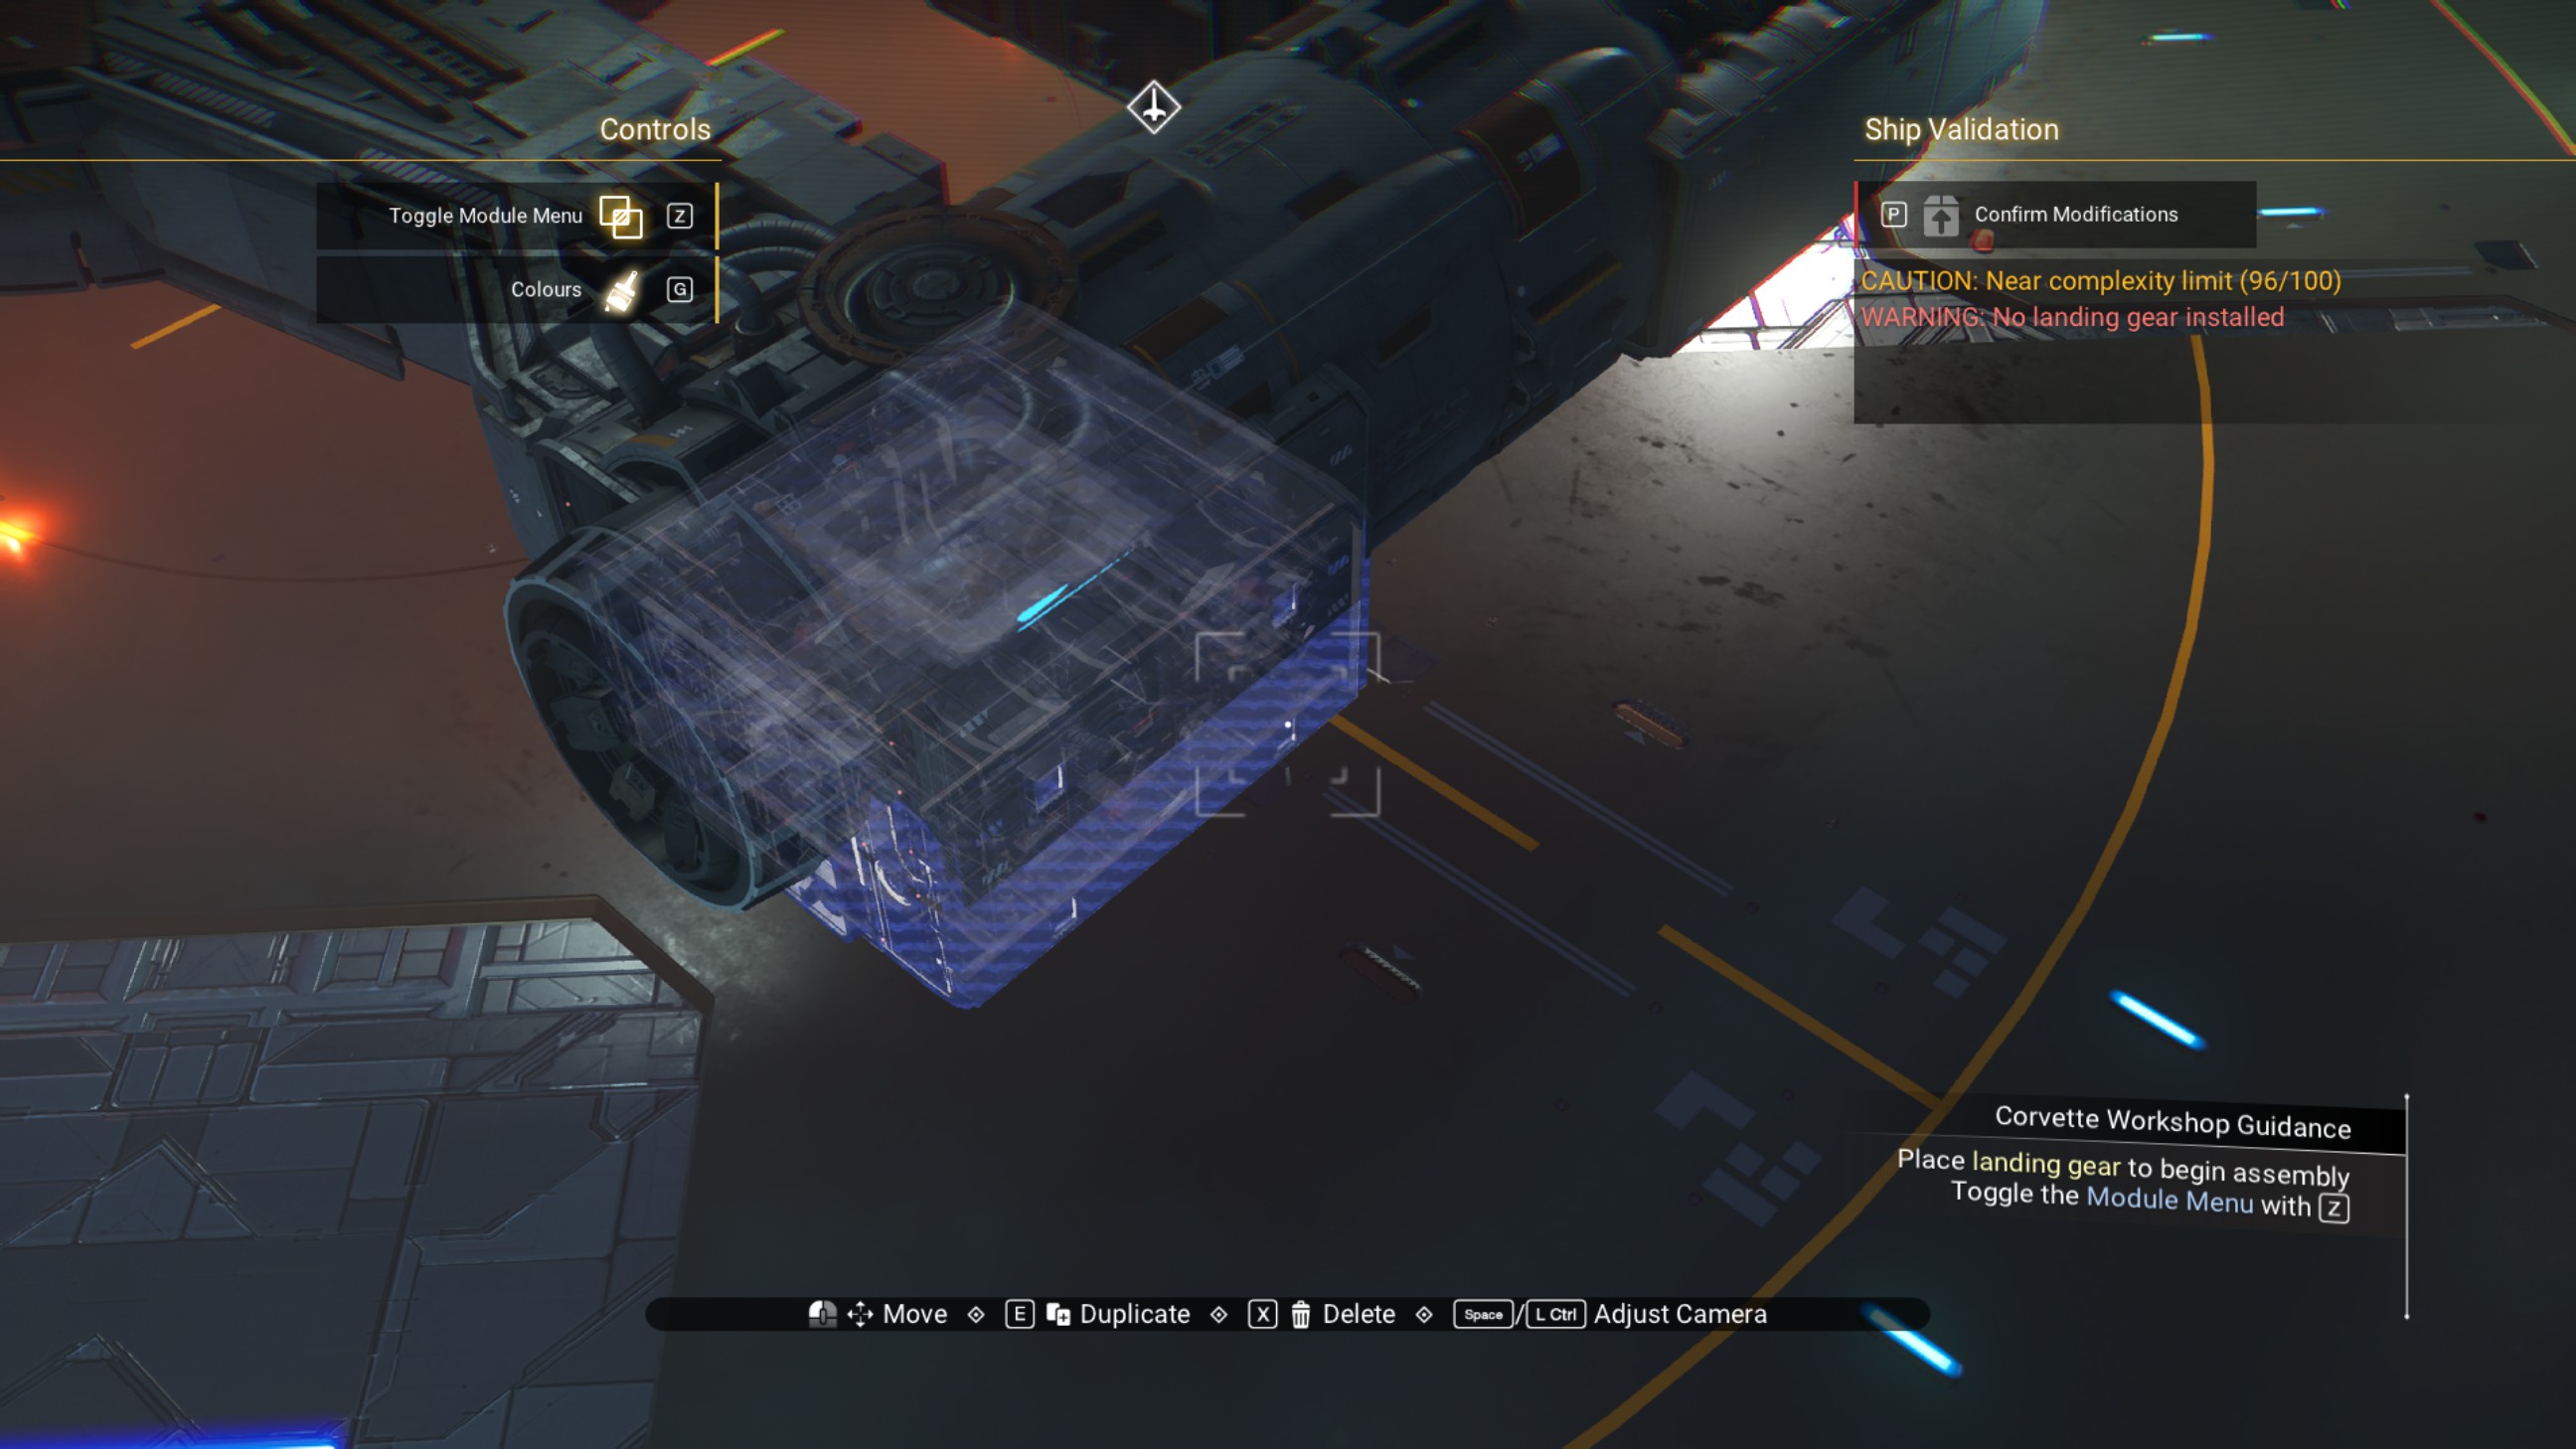 7. The finished product will look like this.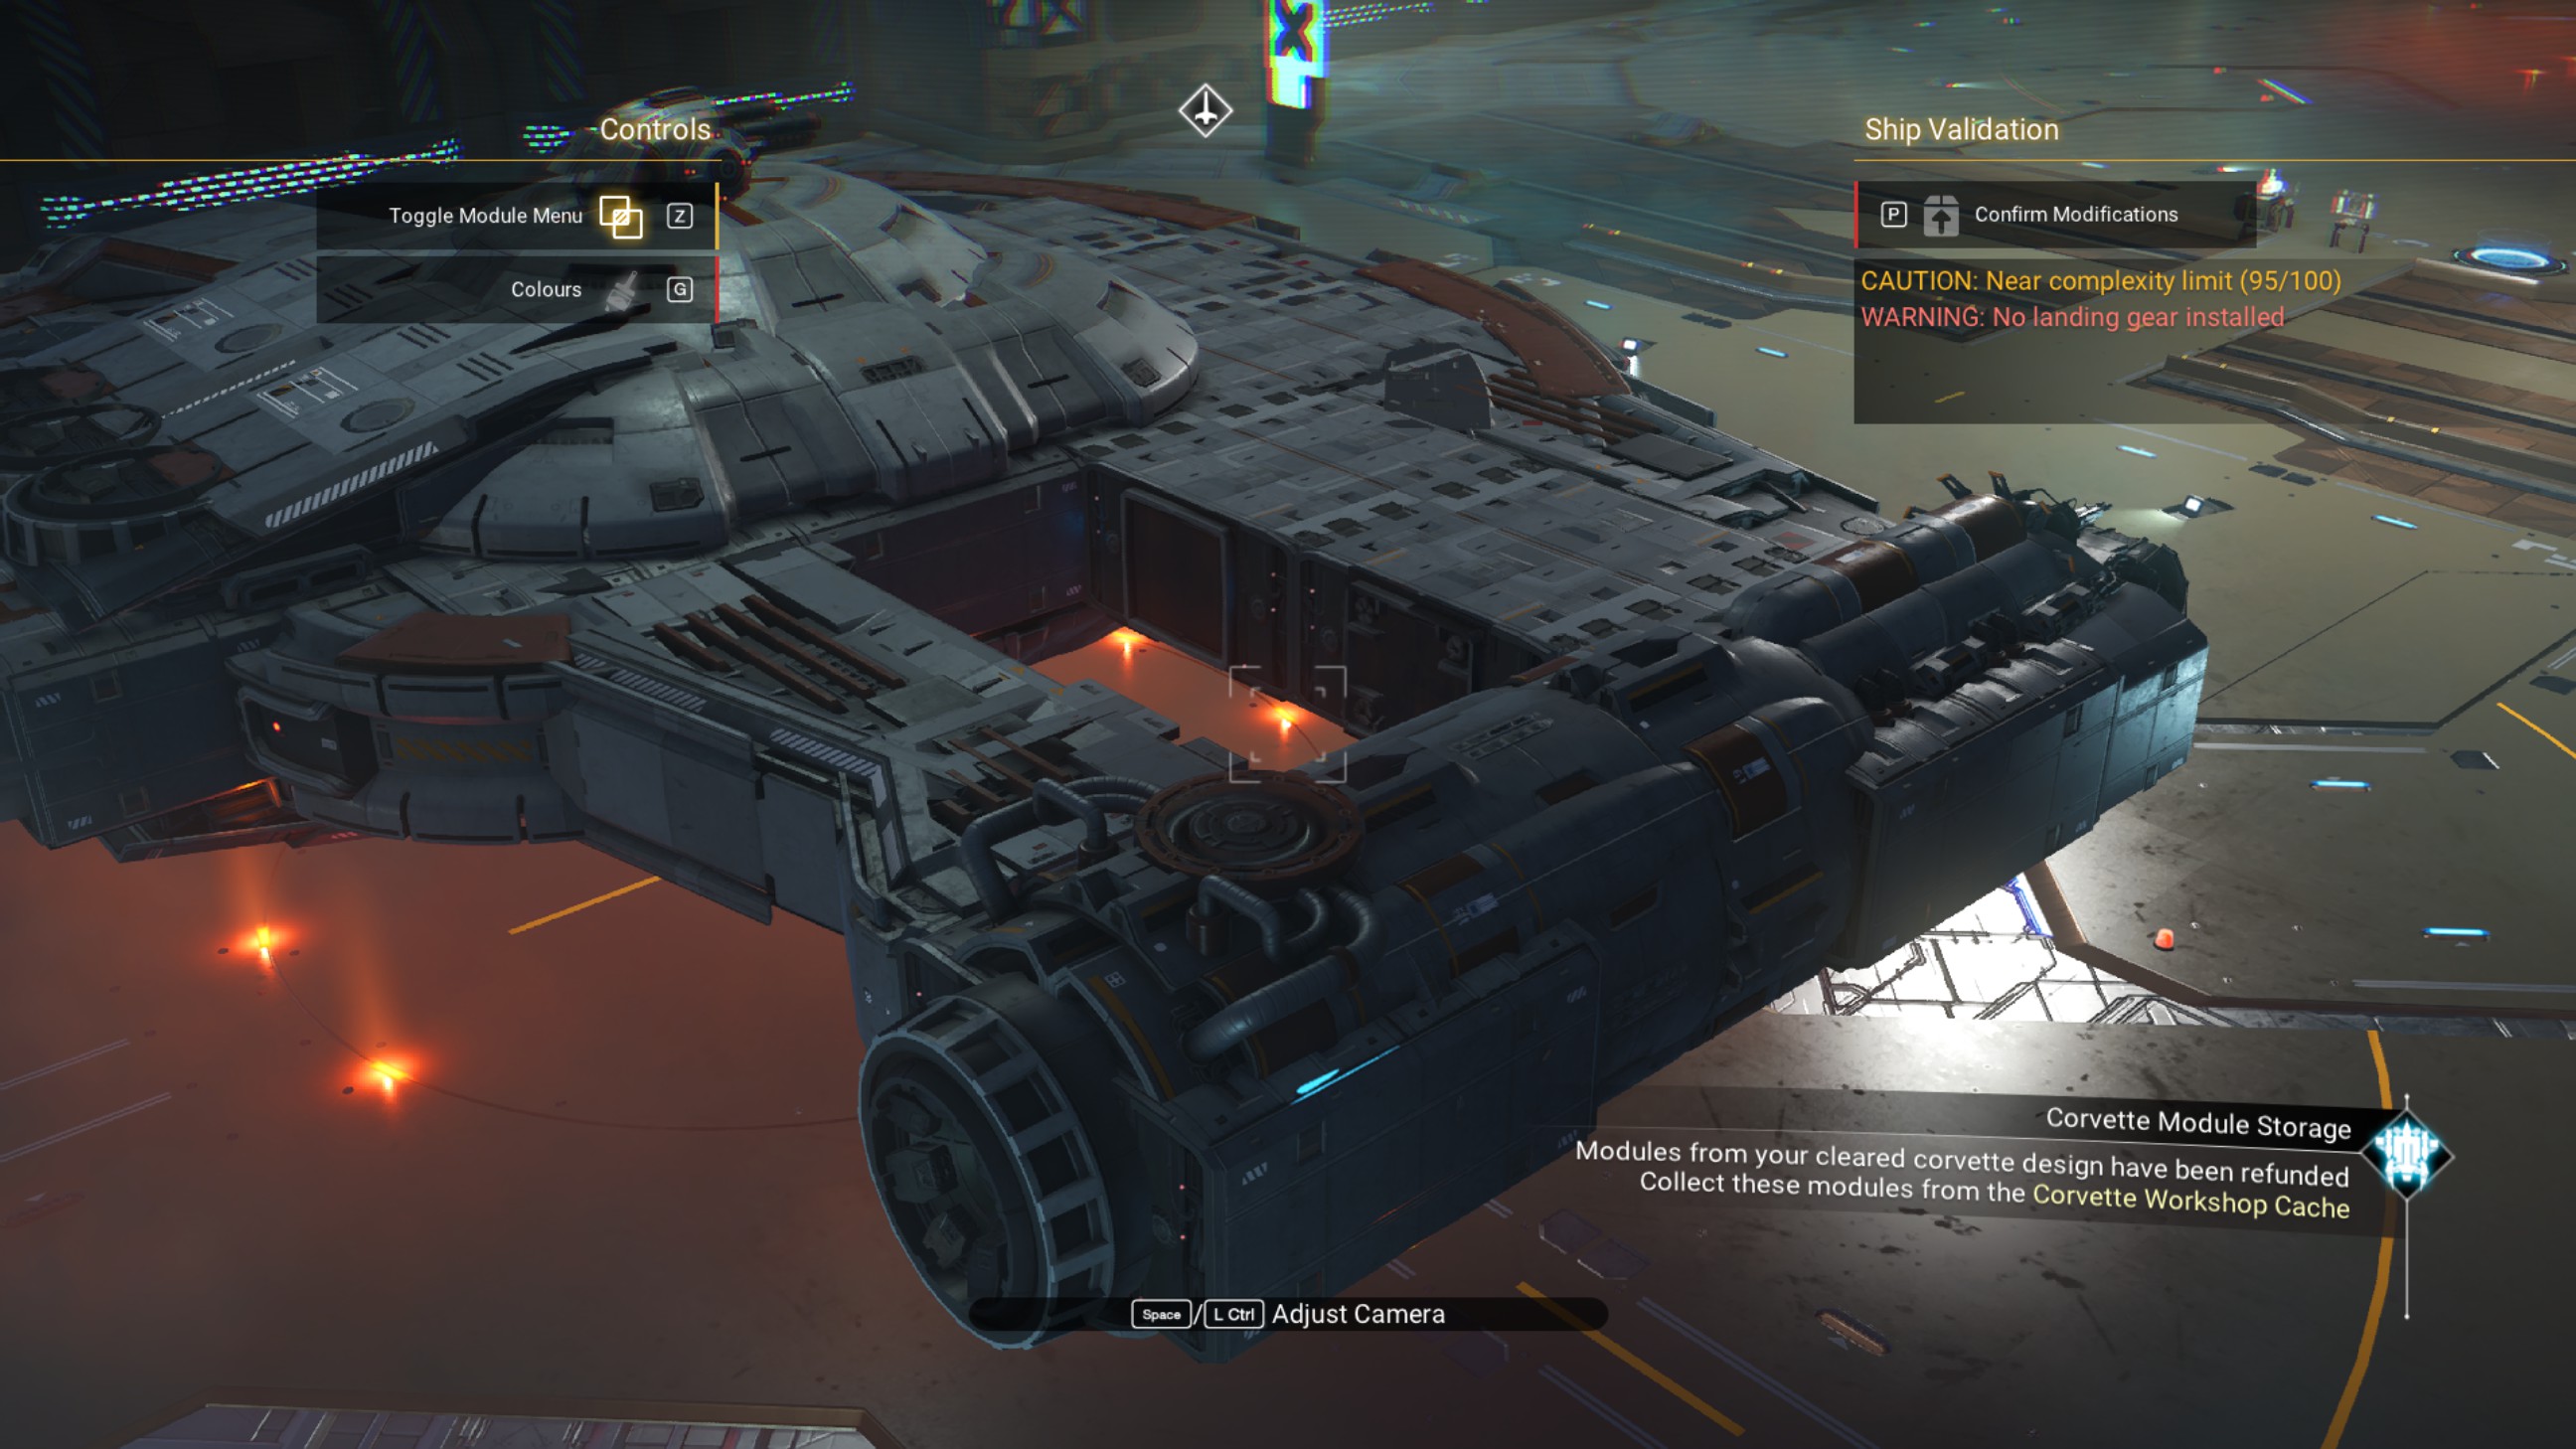
Finalize the ship, one last time. Then, we'll get rid of the landing gear.
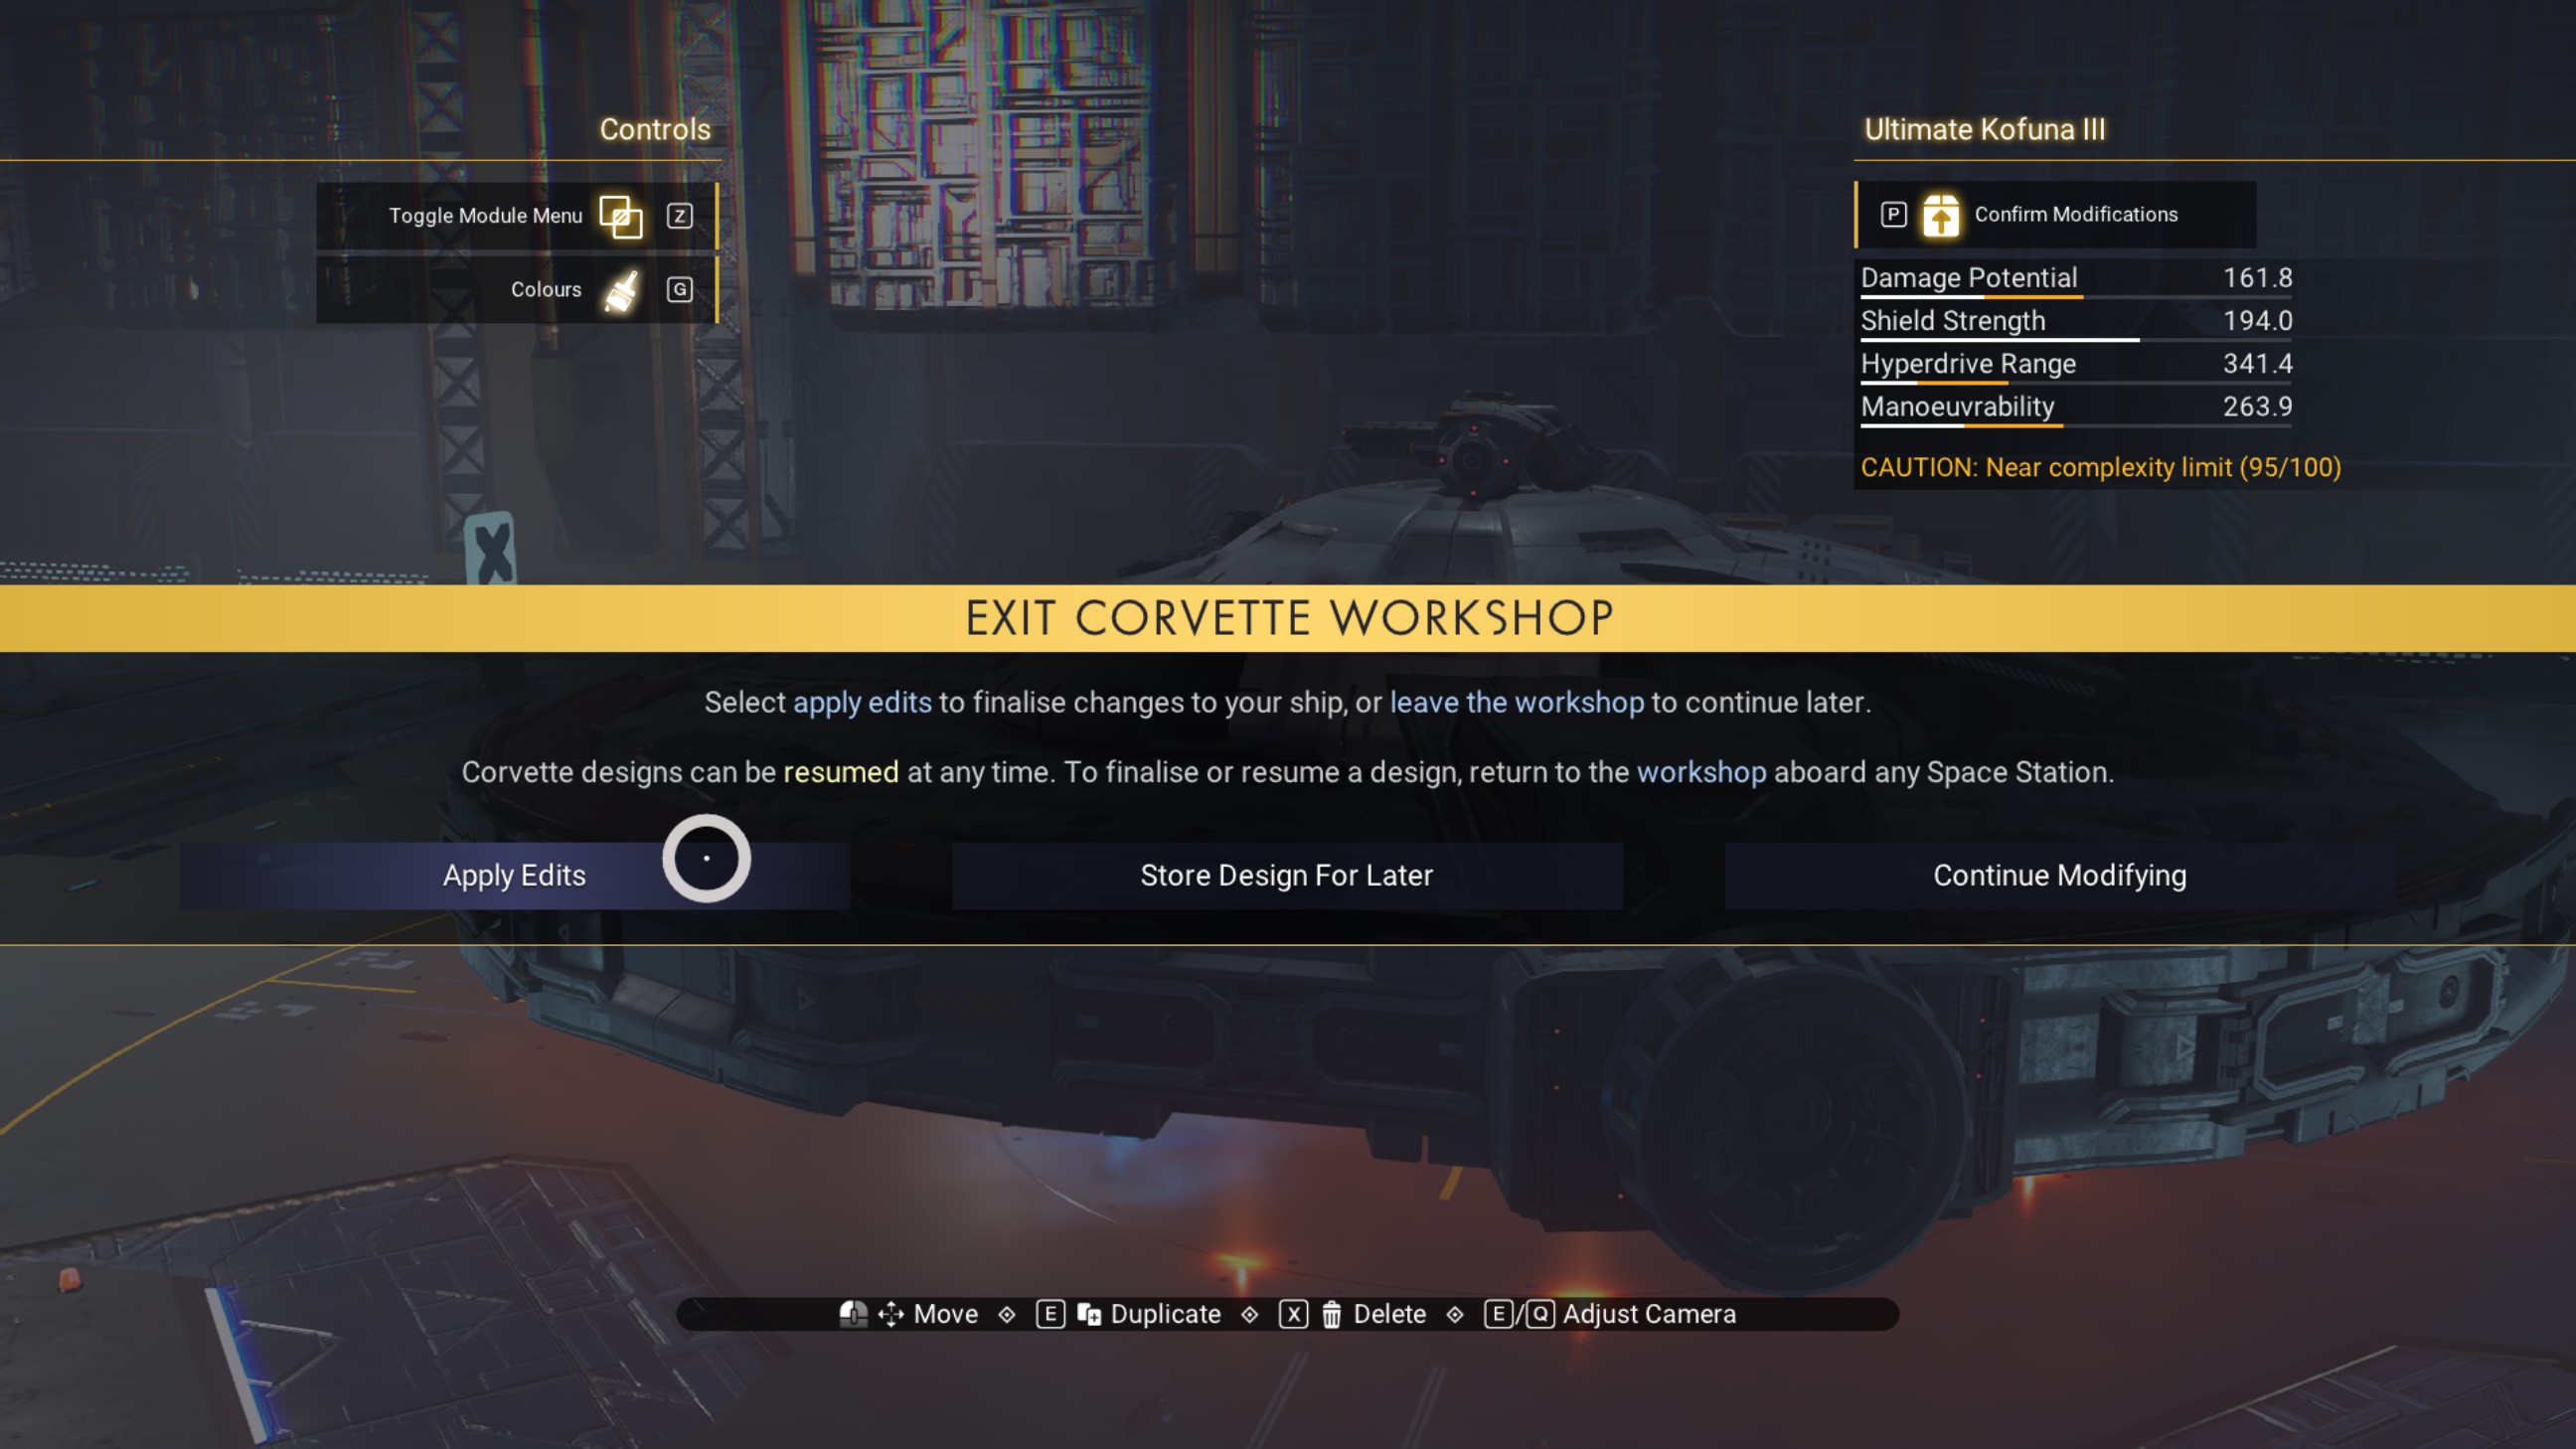
No Landing Gear
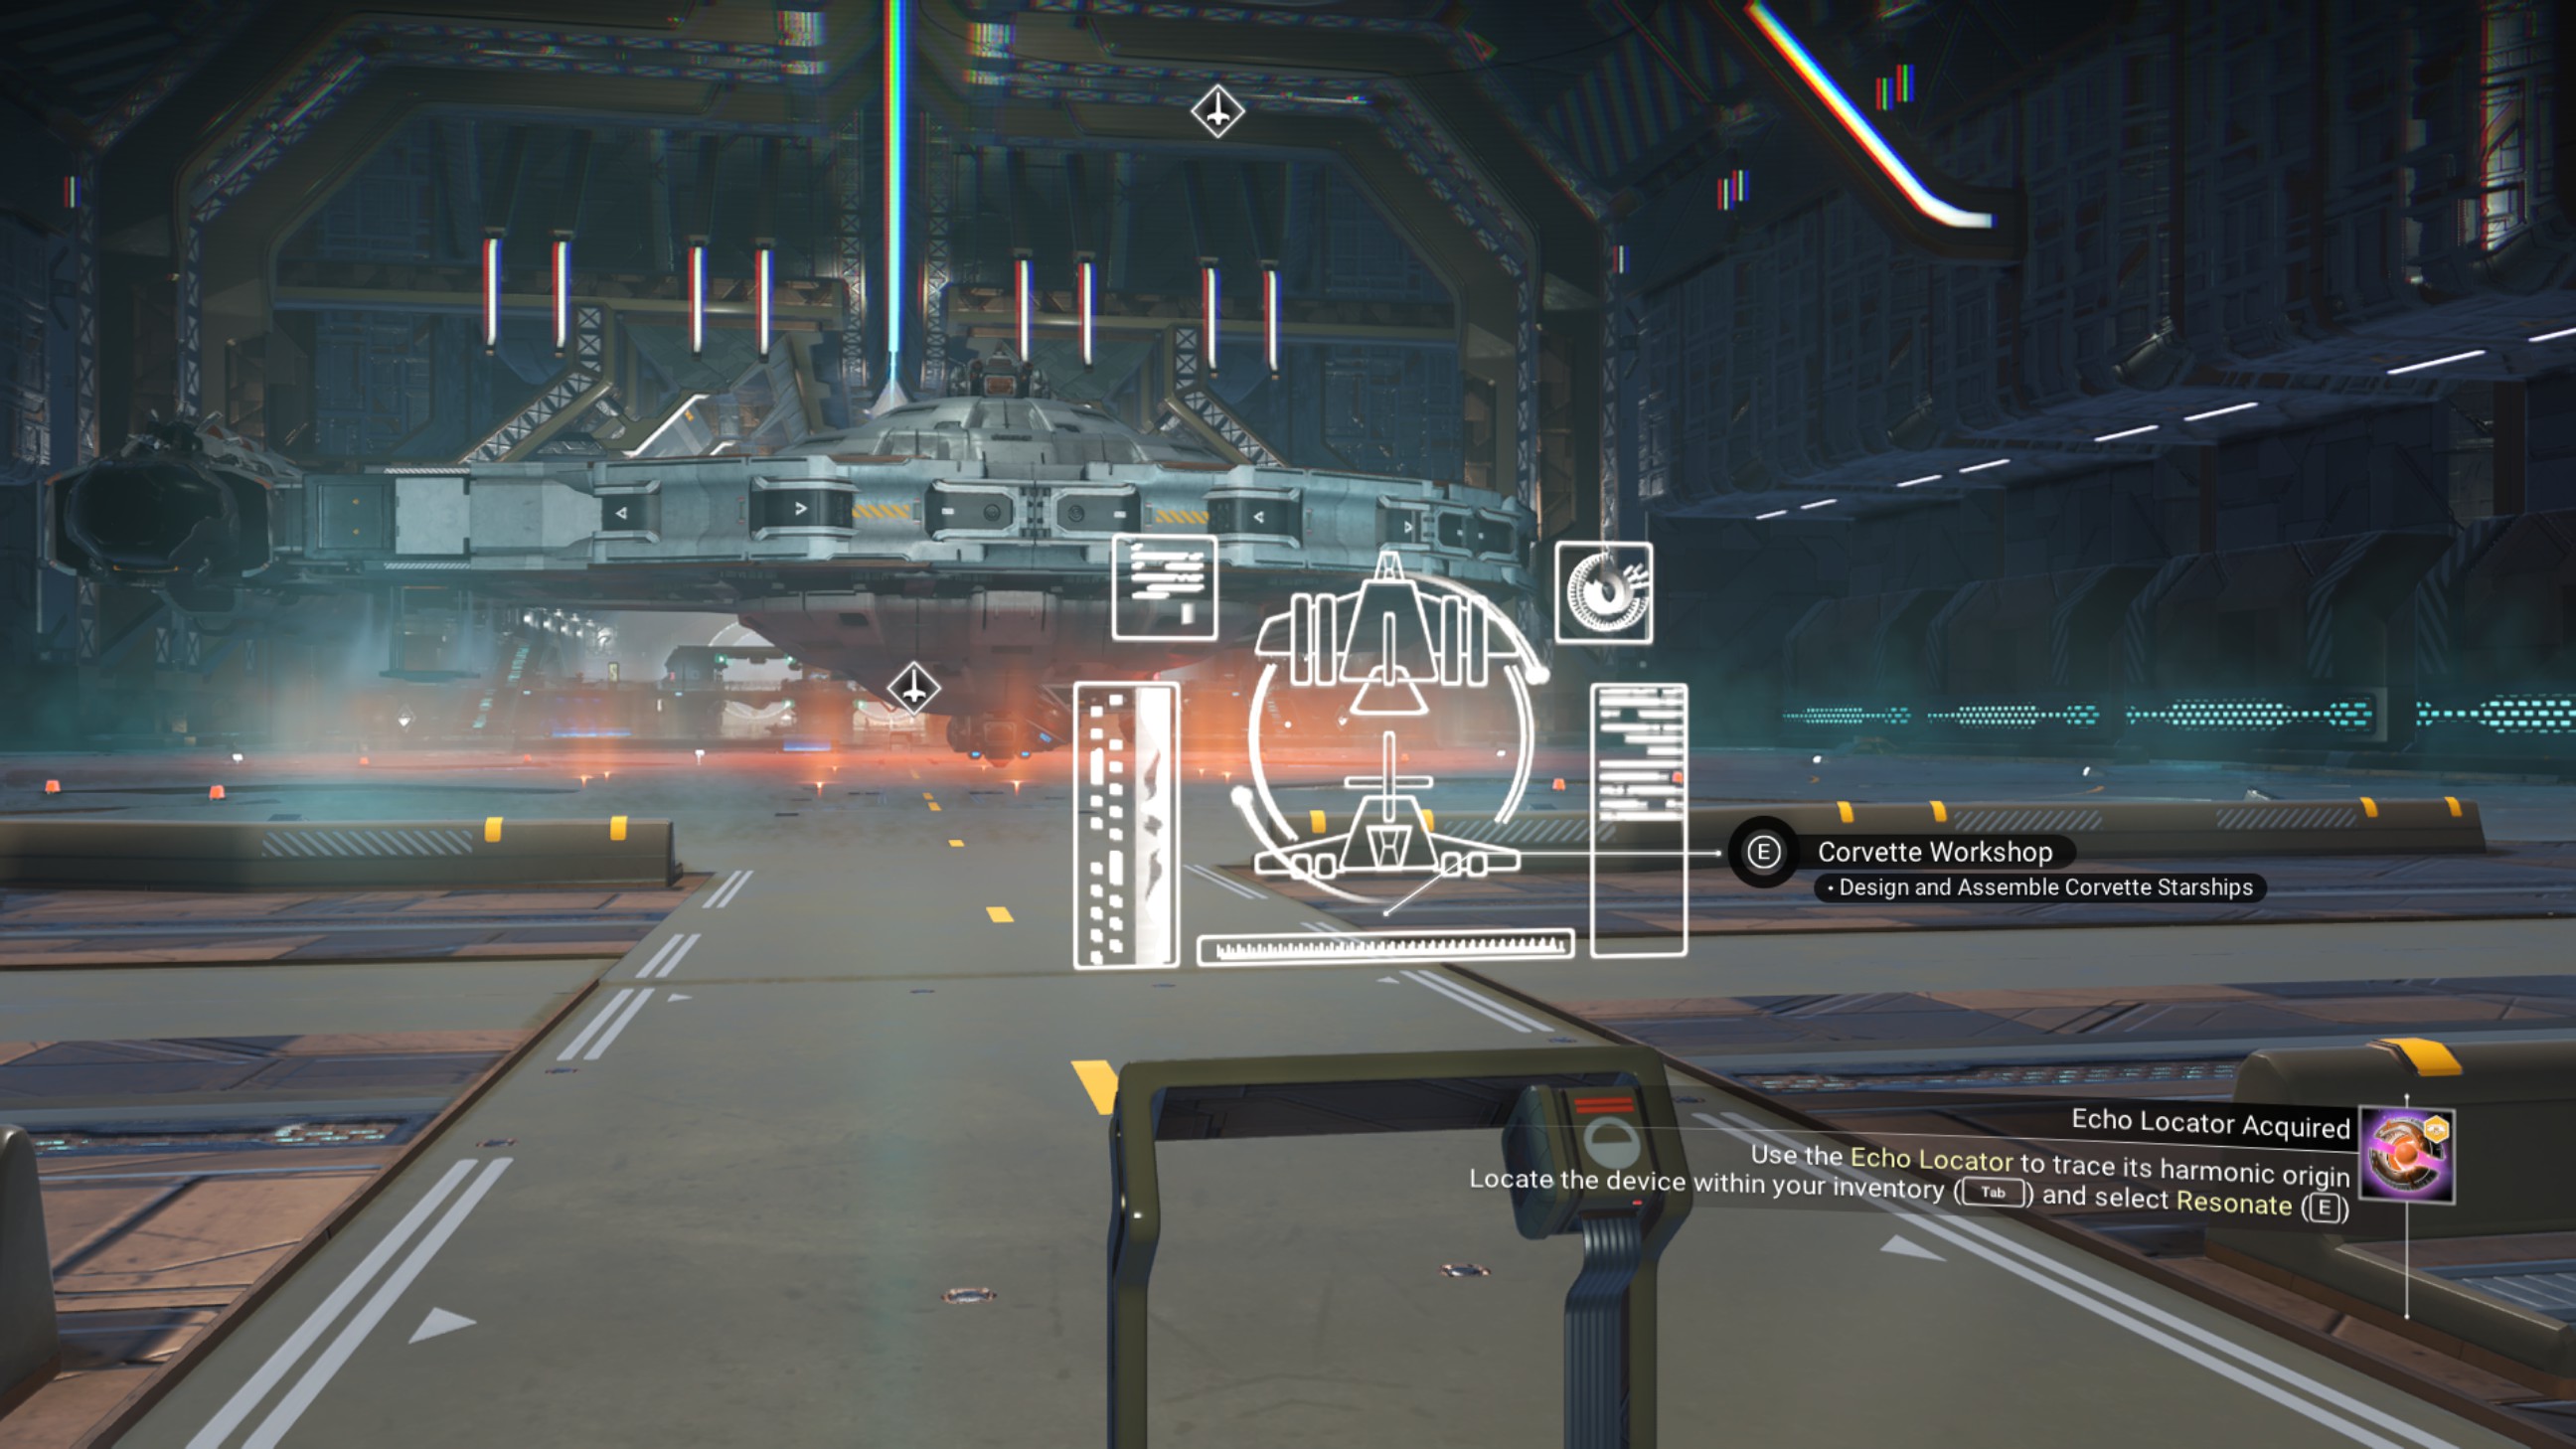
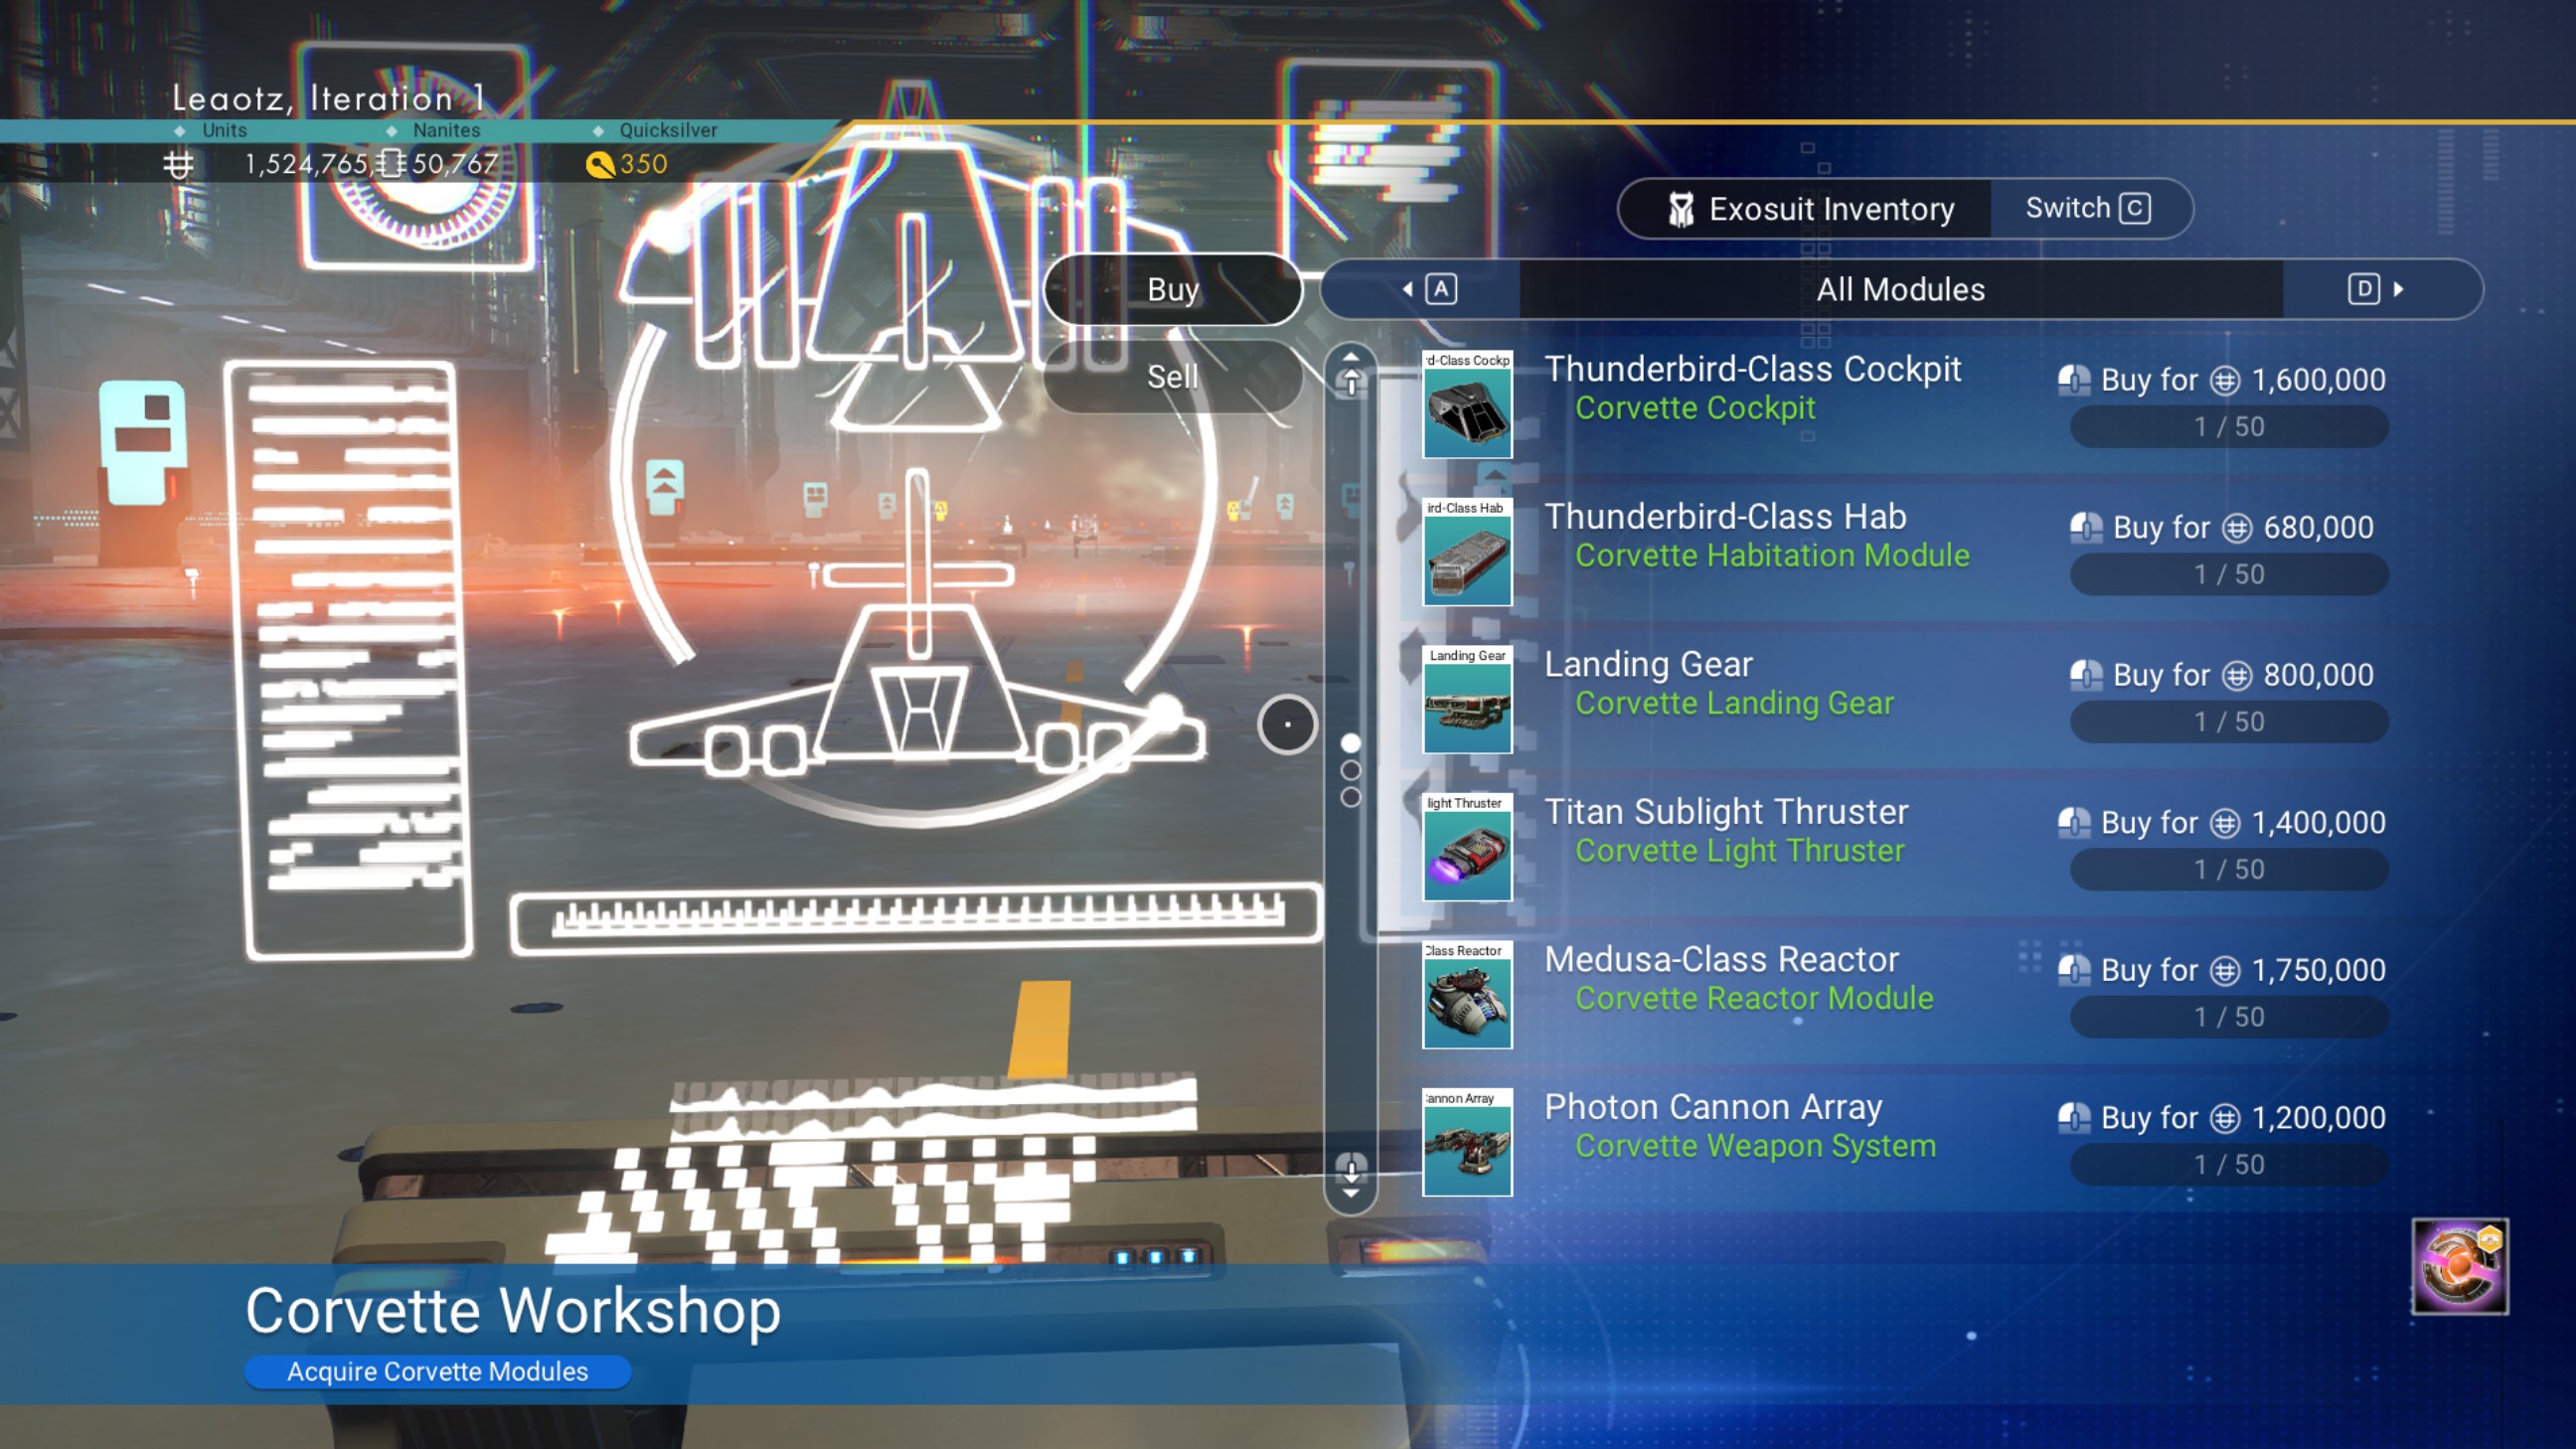
Go into the workshop and select "Purchase modules."
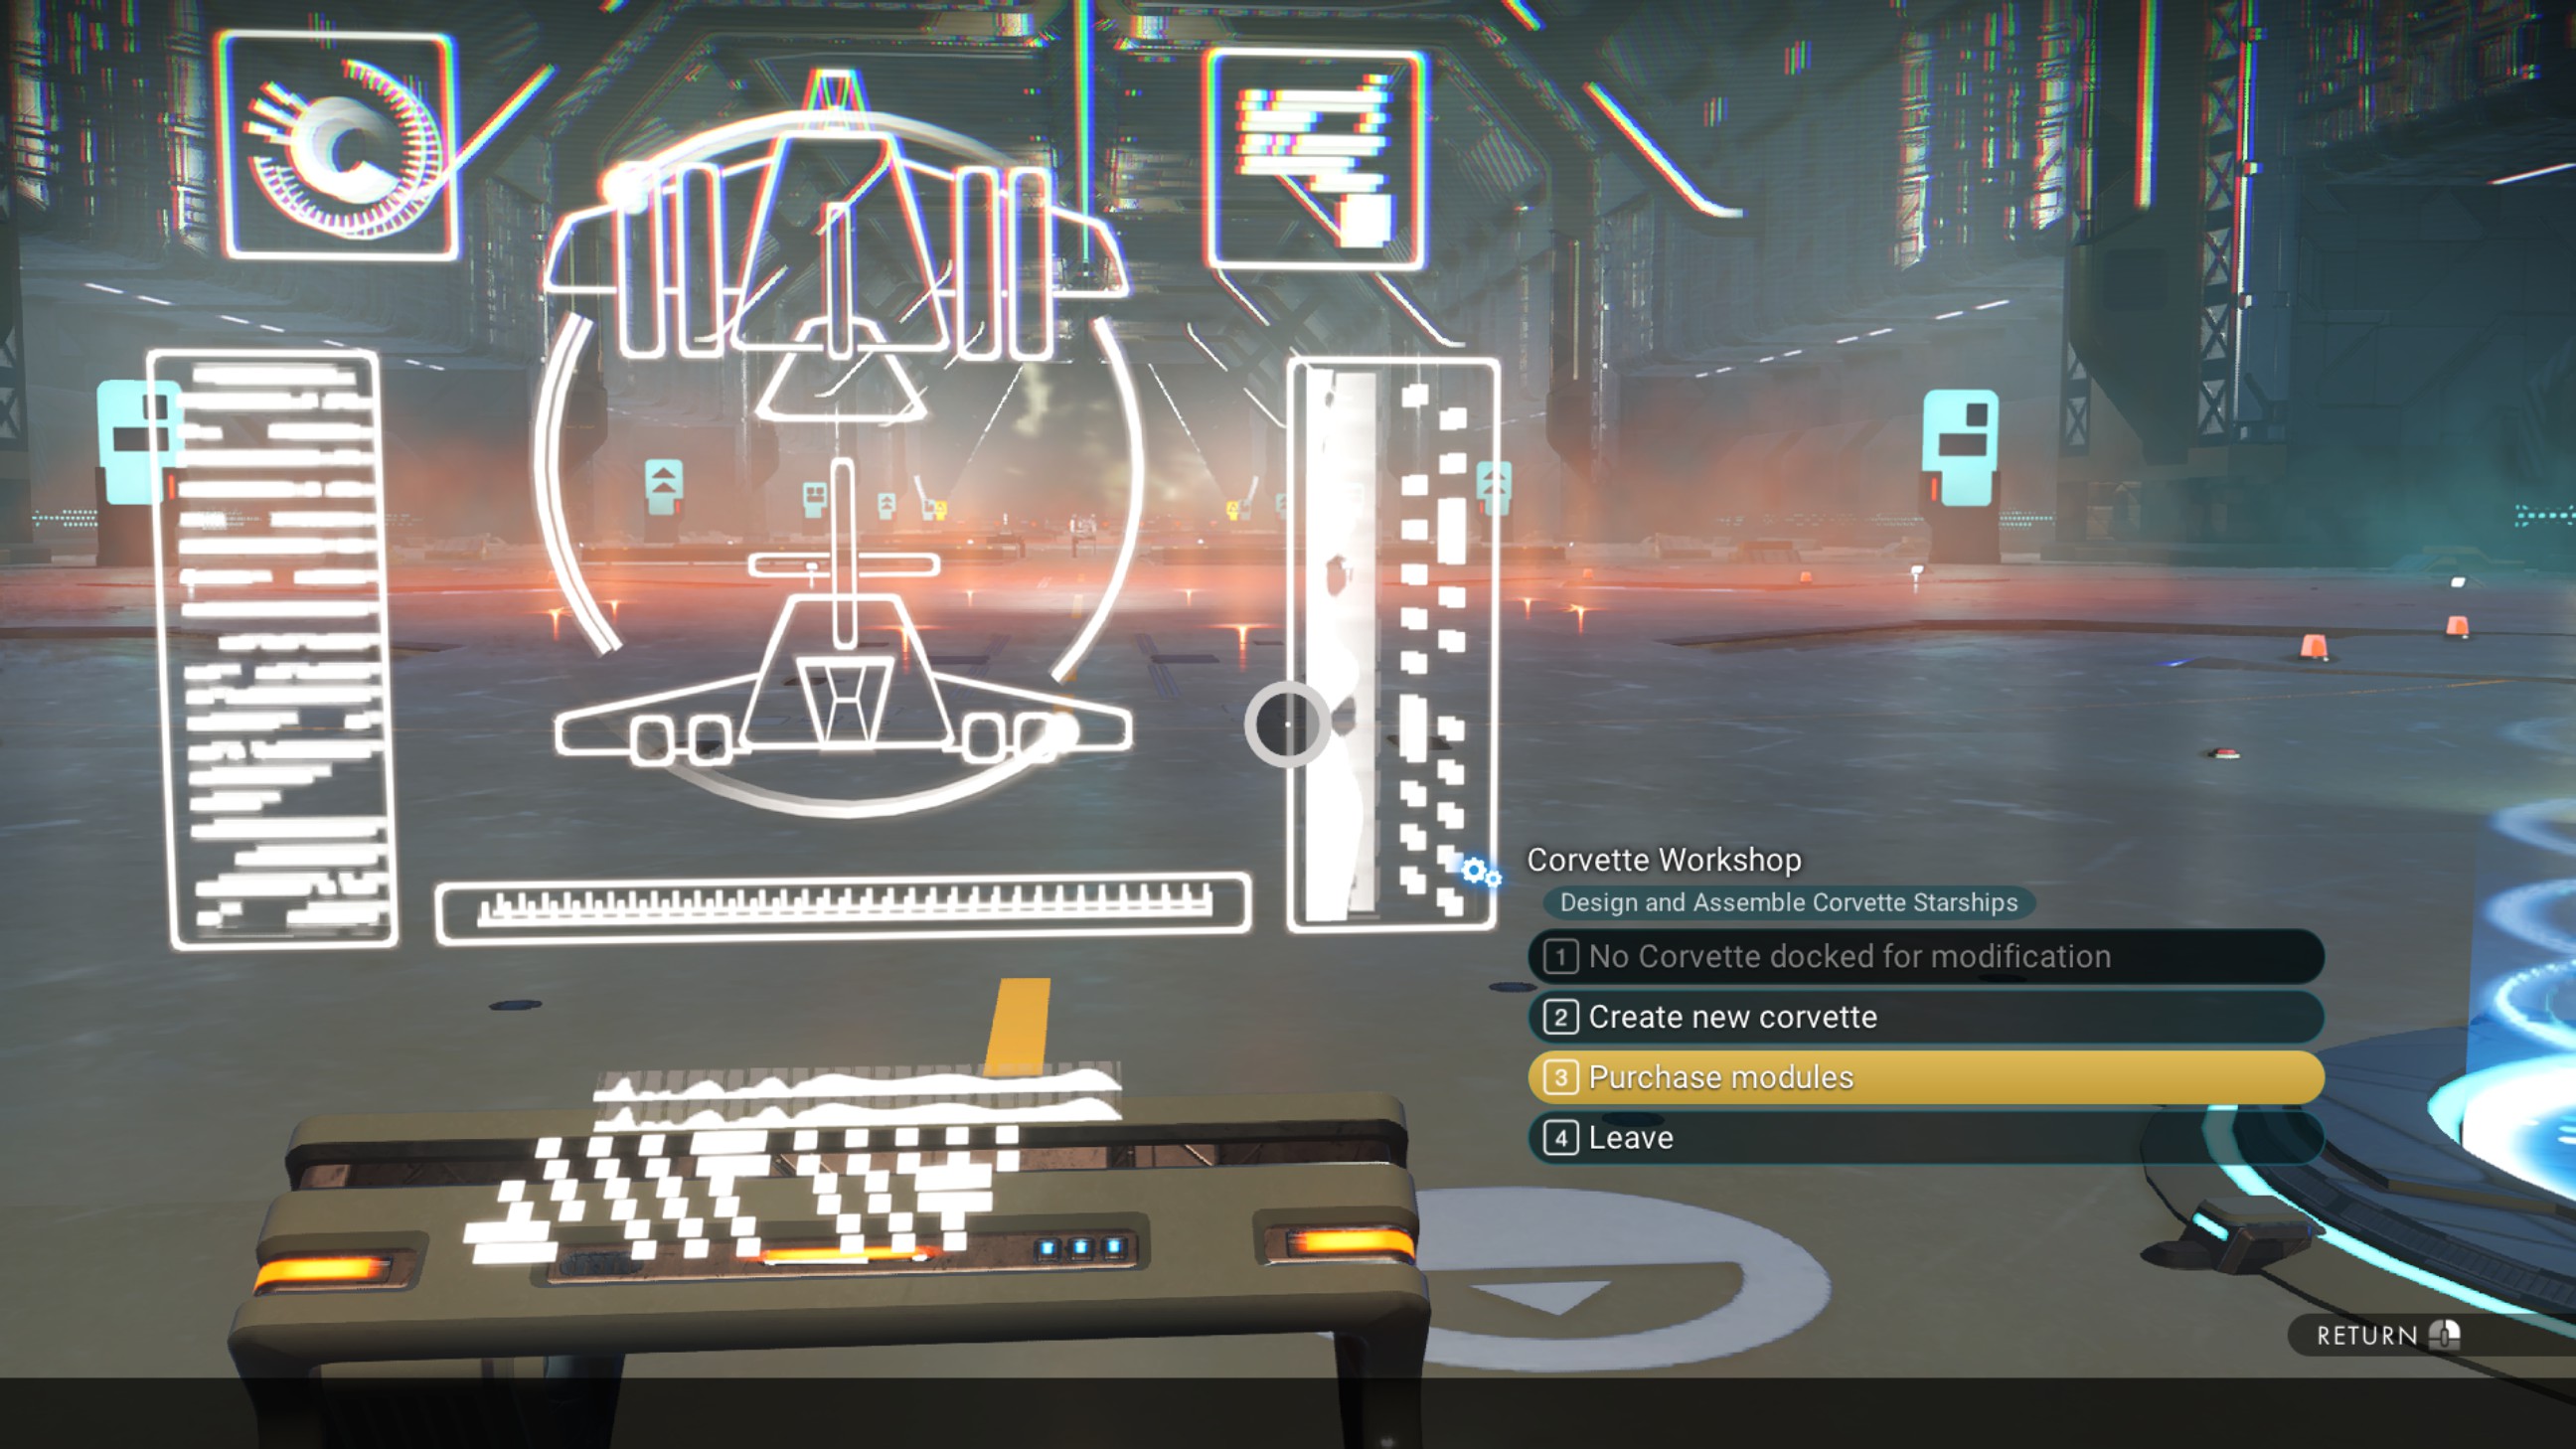
Select "Purchase base modules."
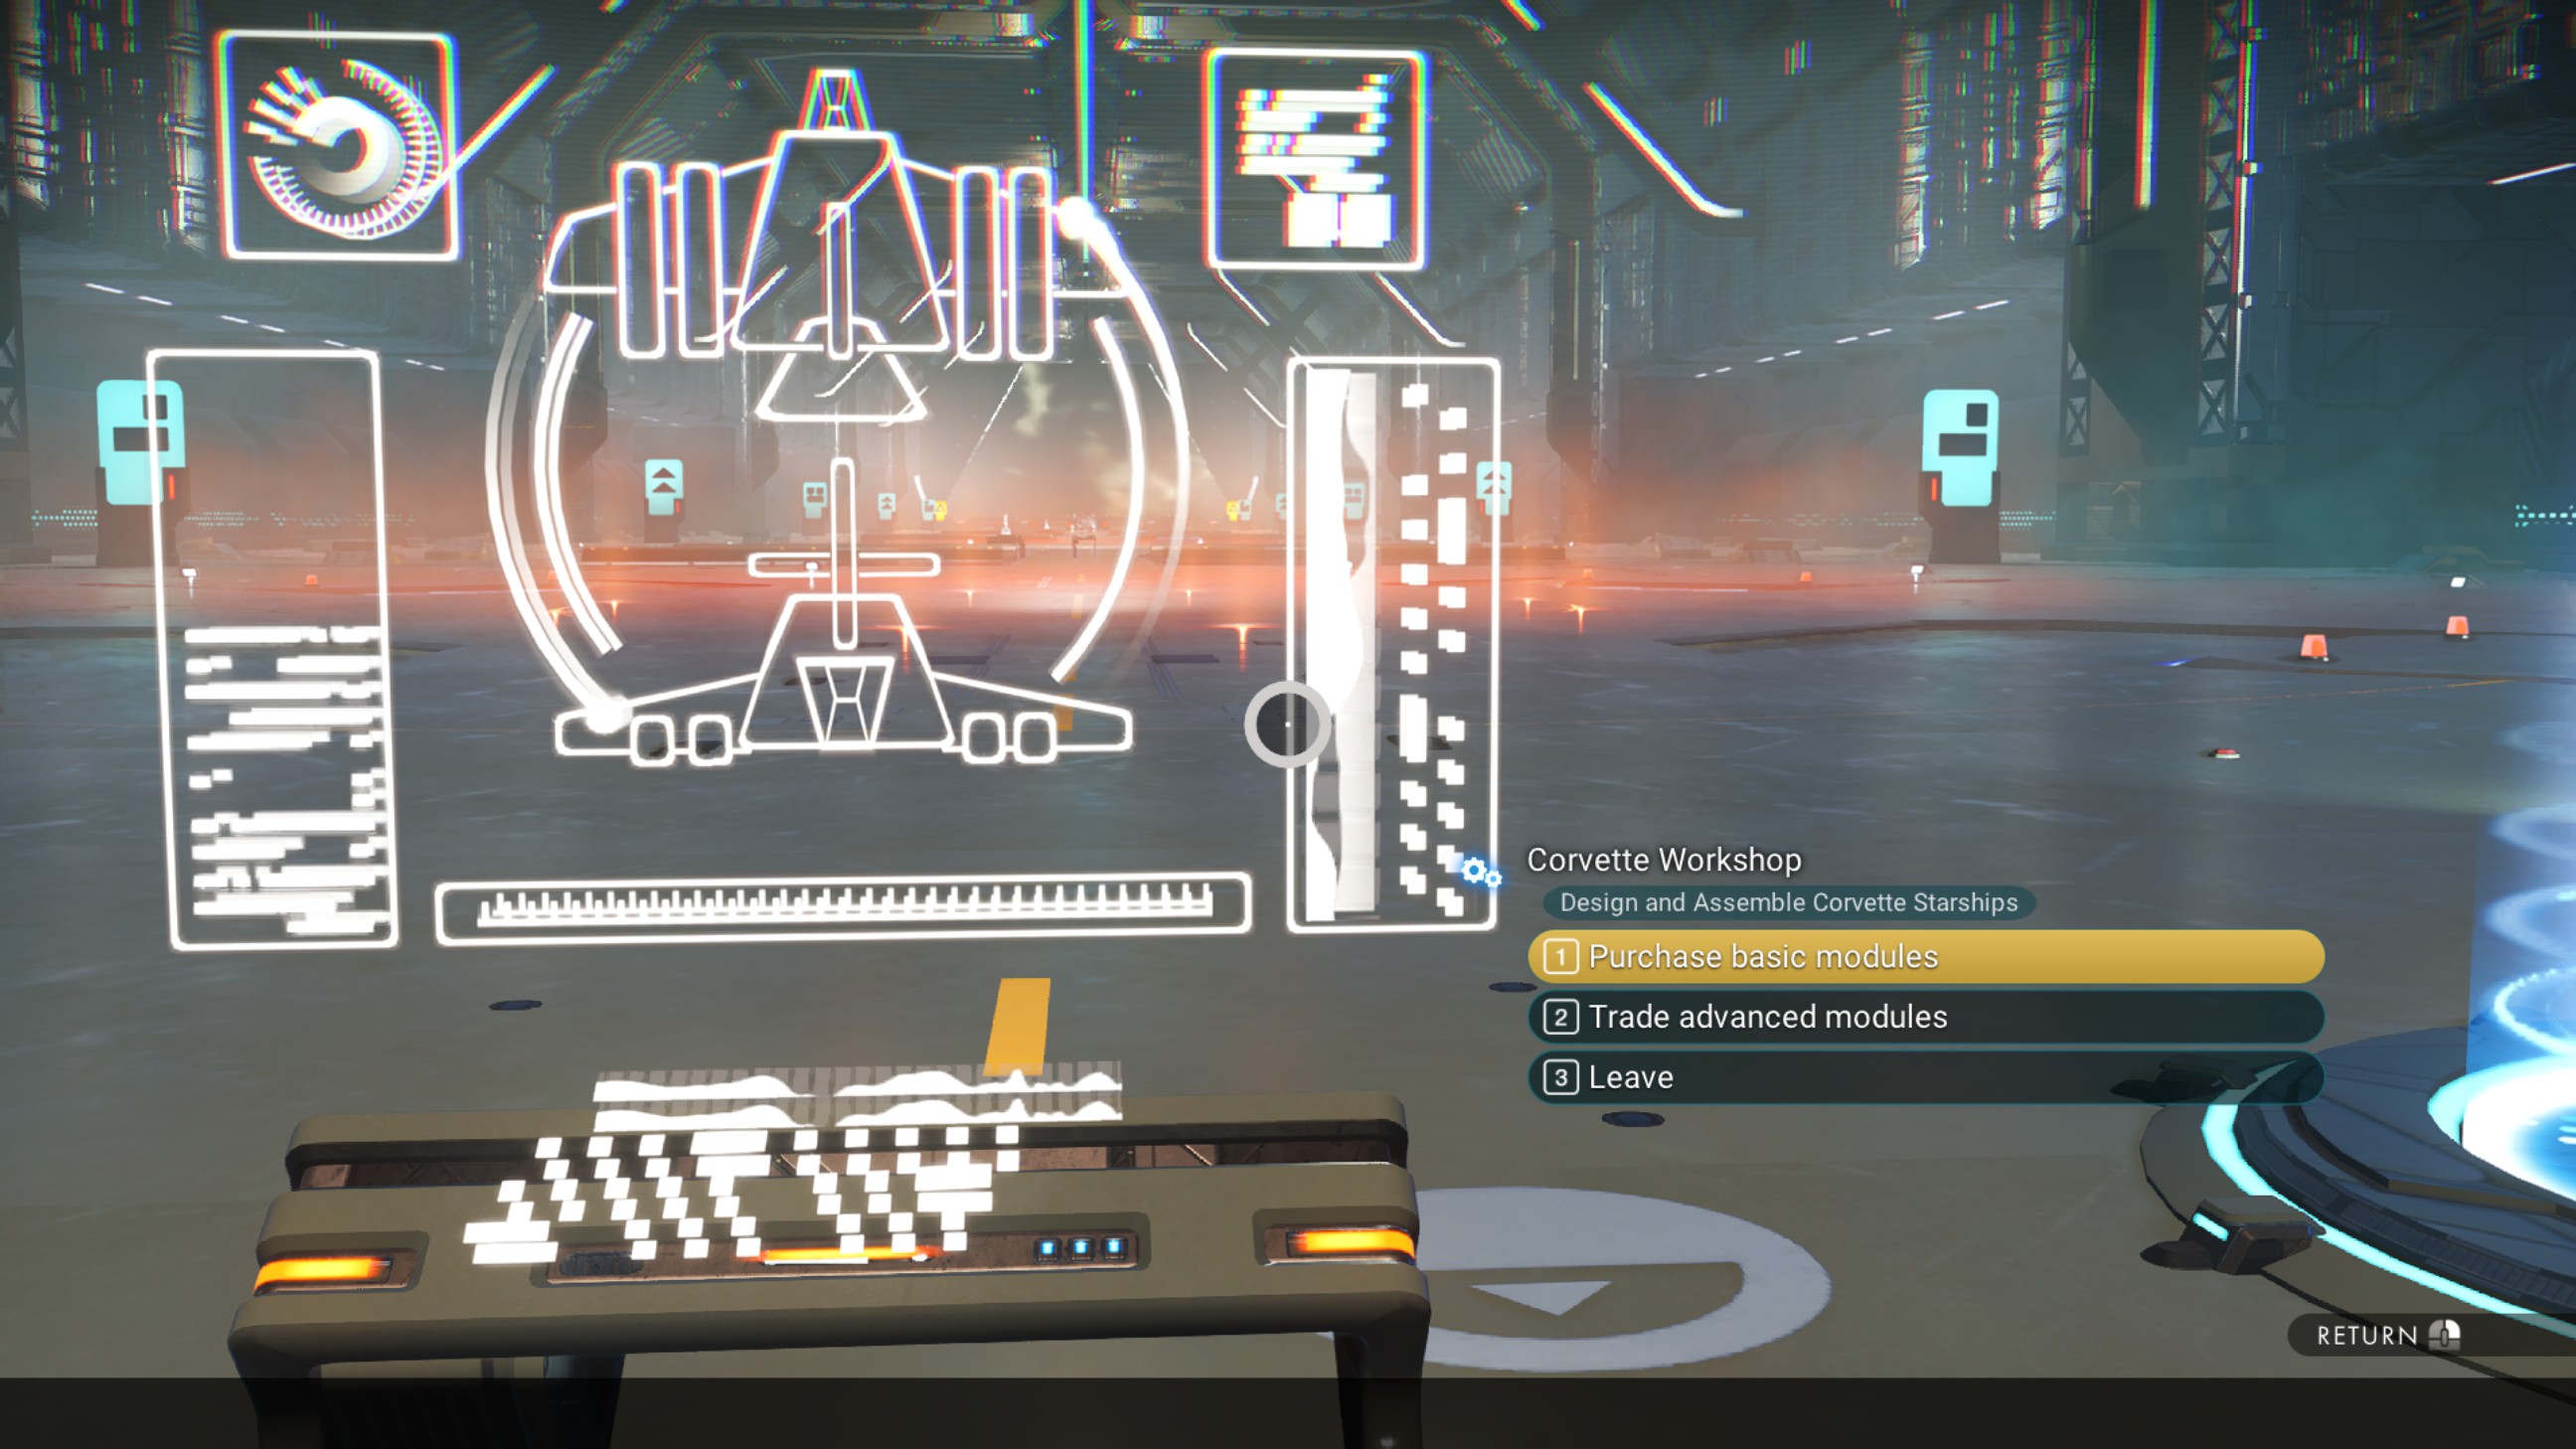
Once the shop is open, back out, and select "Create new corvette."
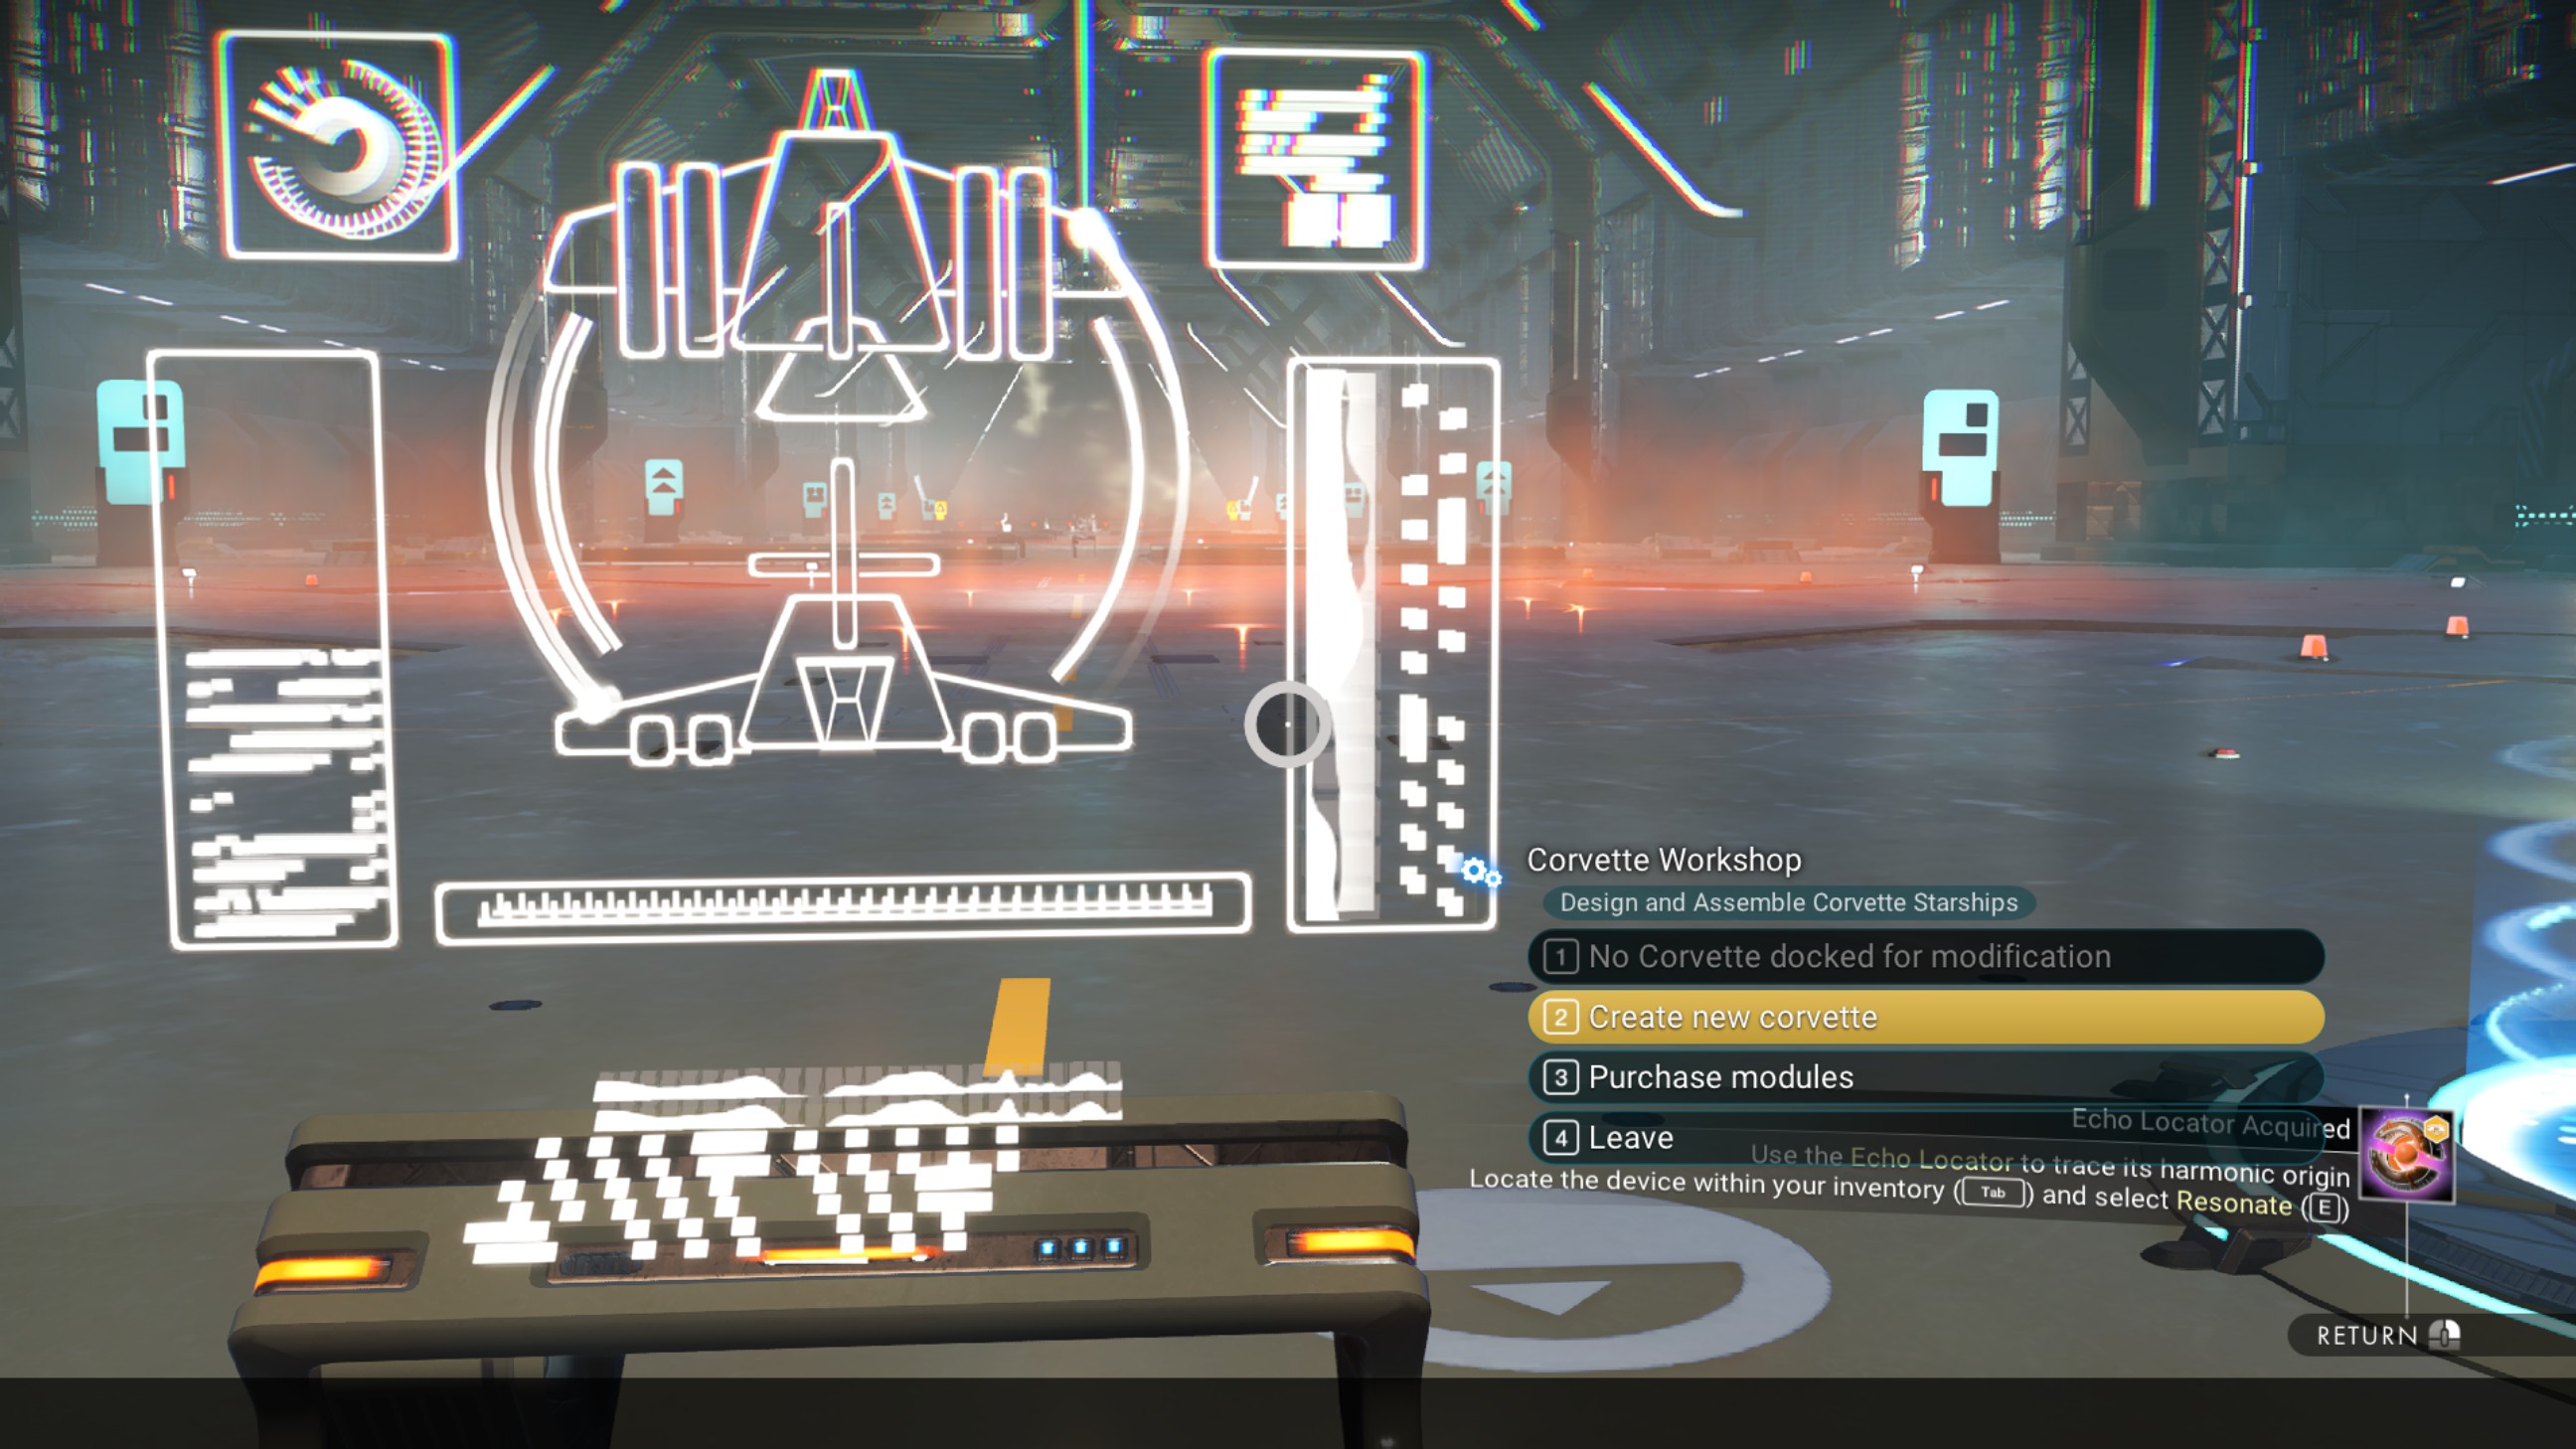
Turn around to face your ship. Go over to it and delete the landing gear.
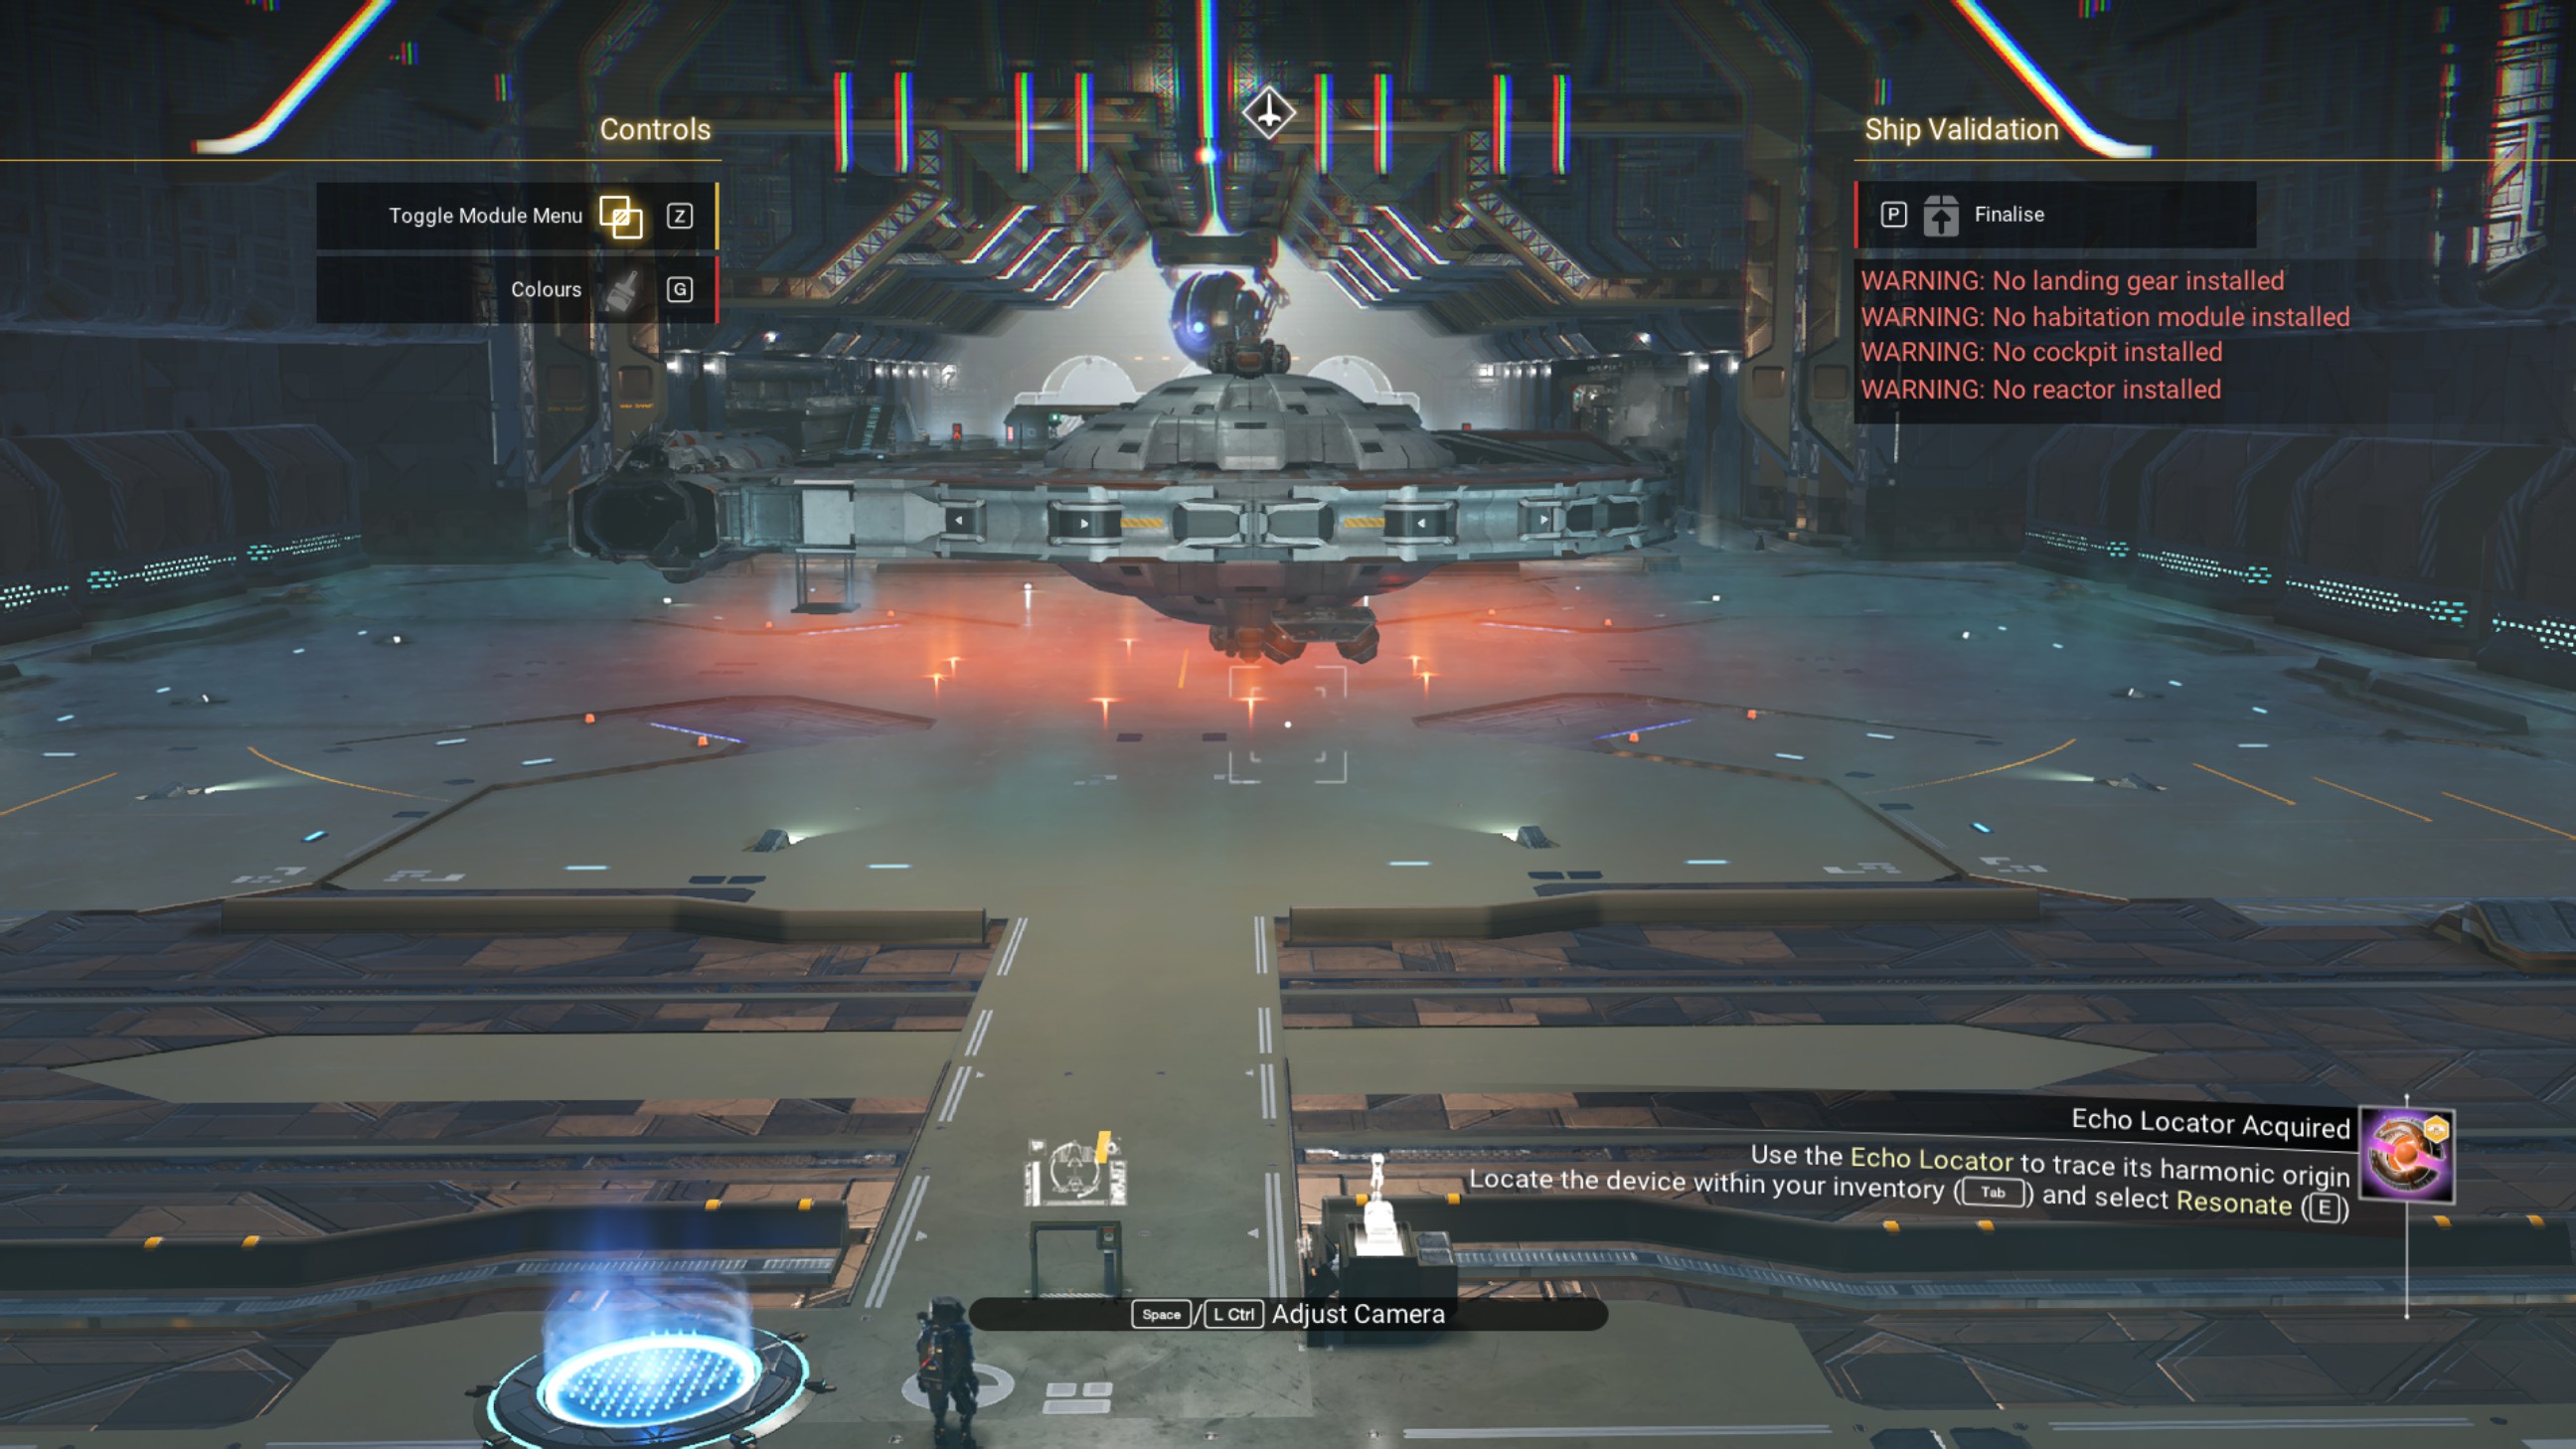
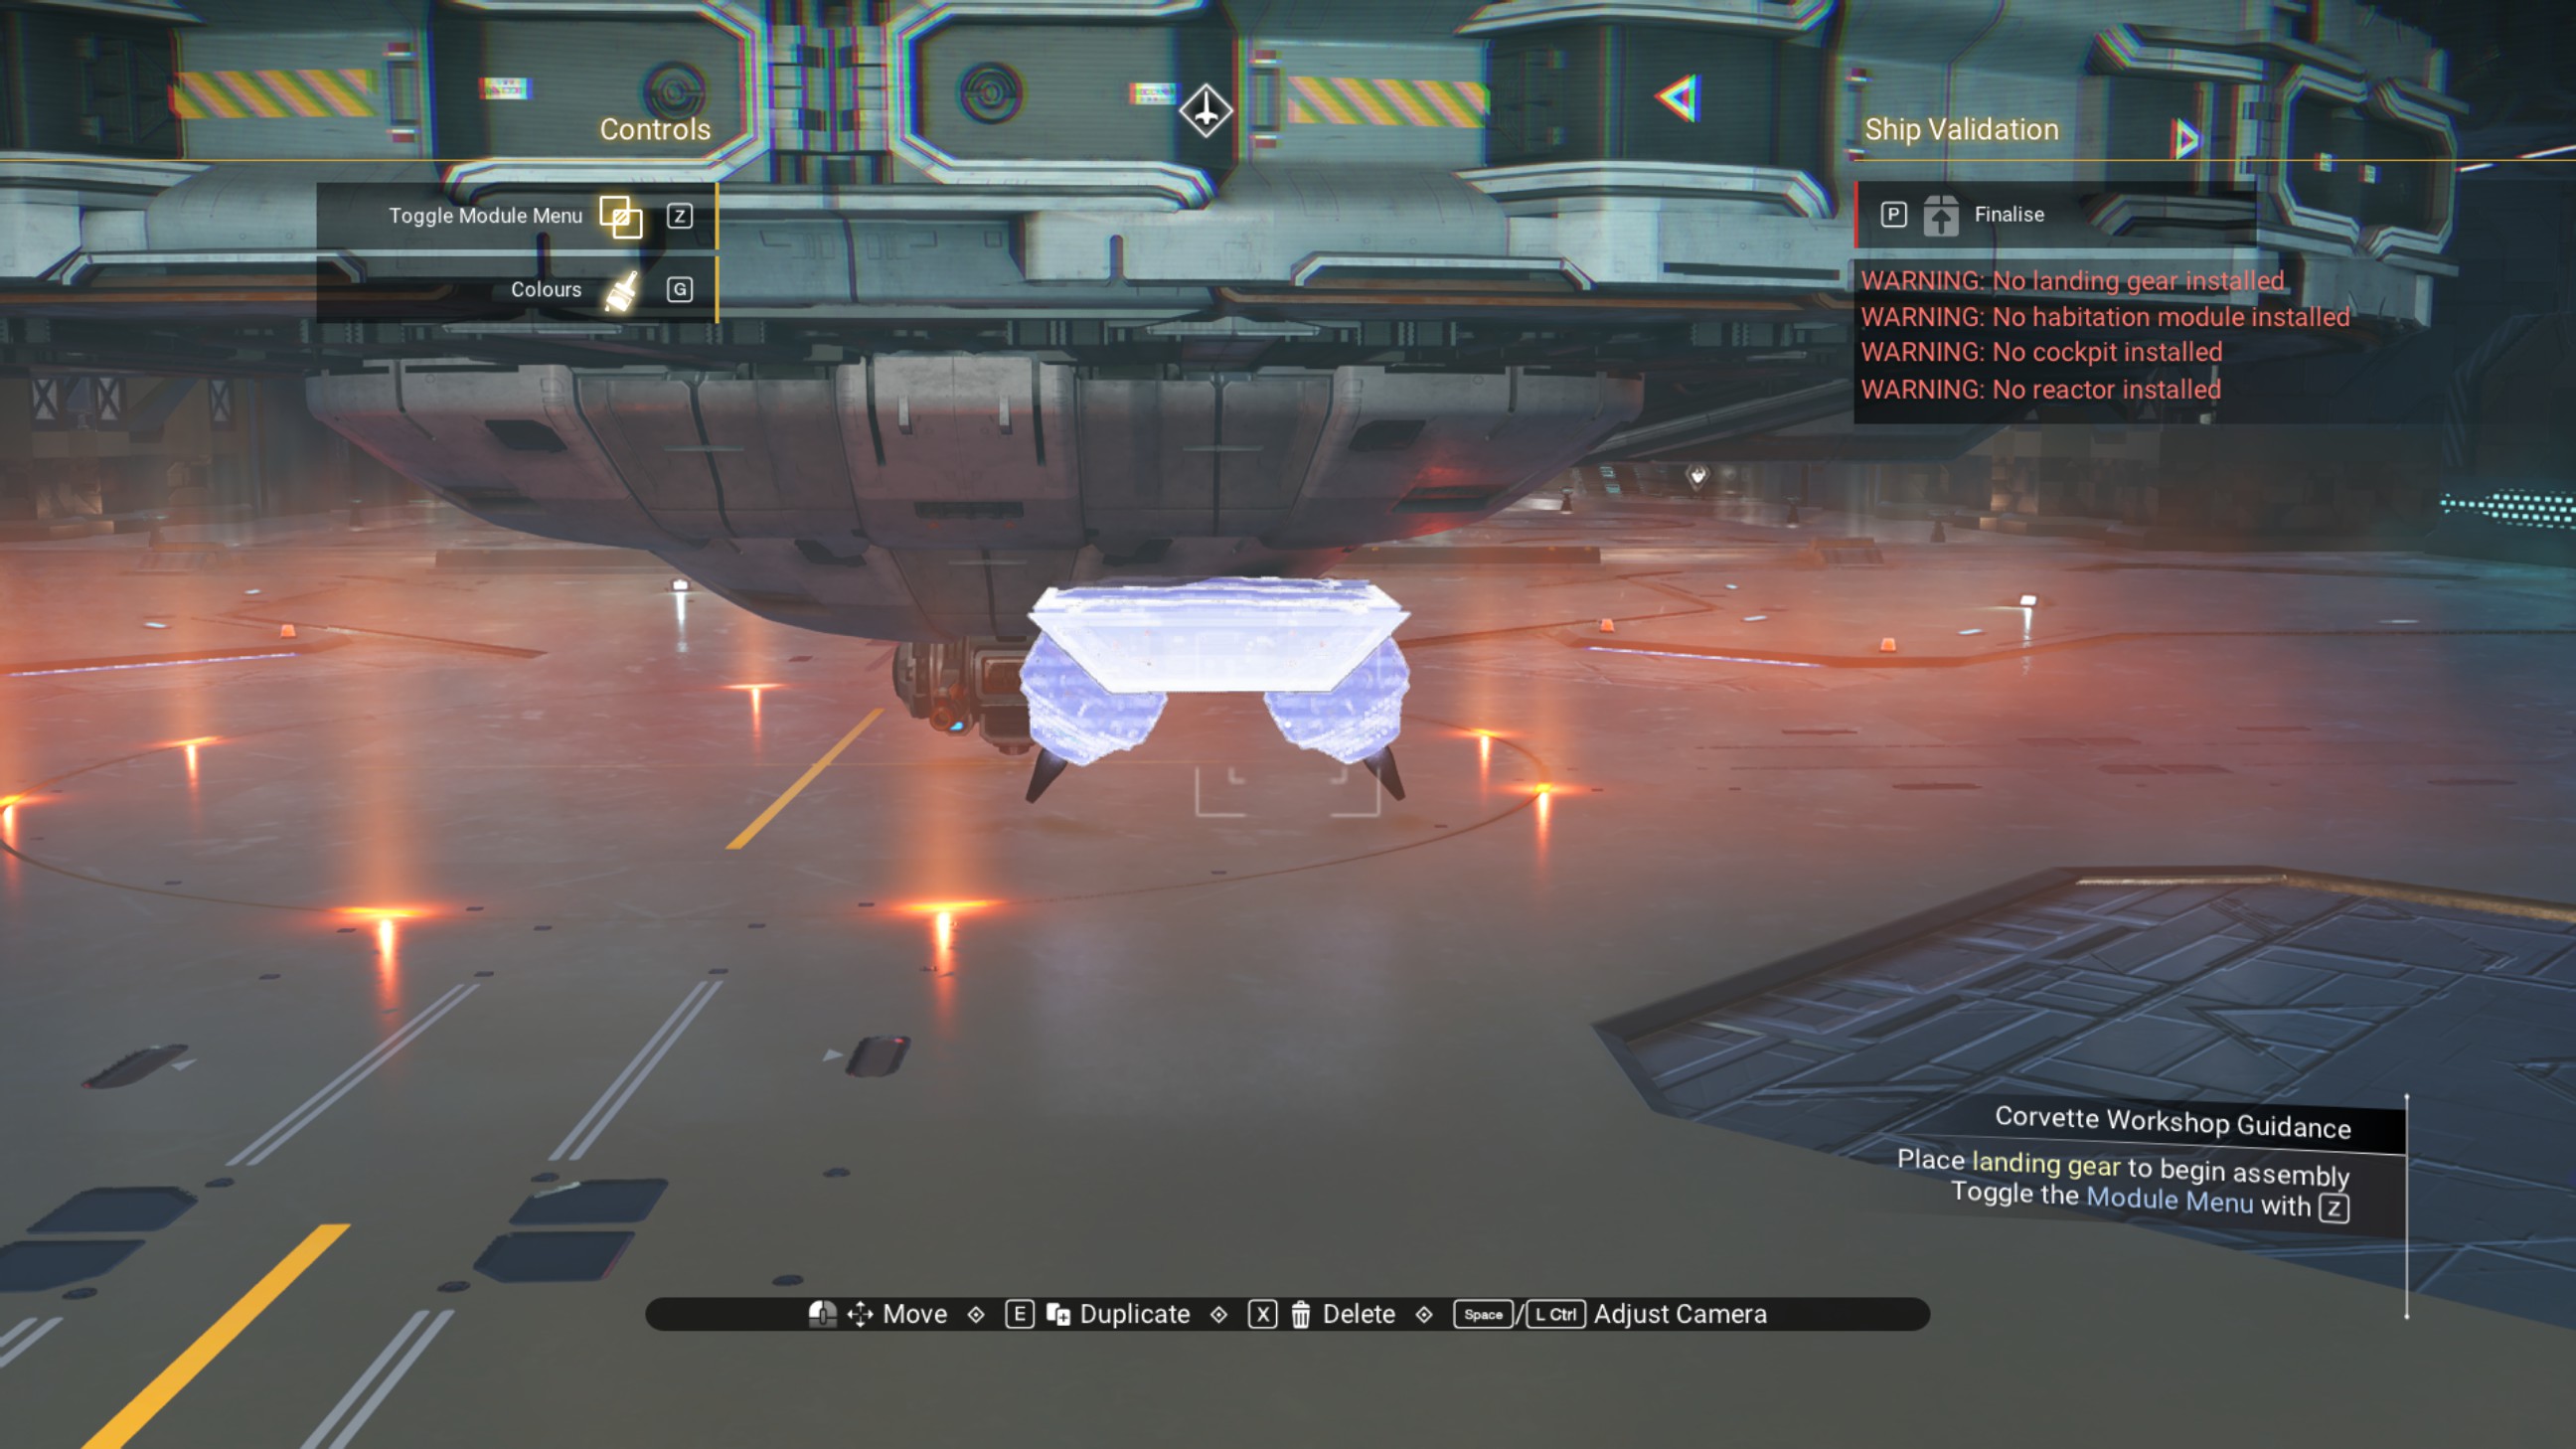
With the landing gear gone, leave the corvette workshop.
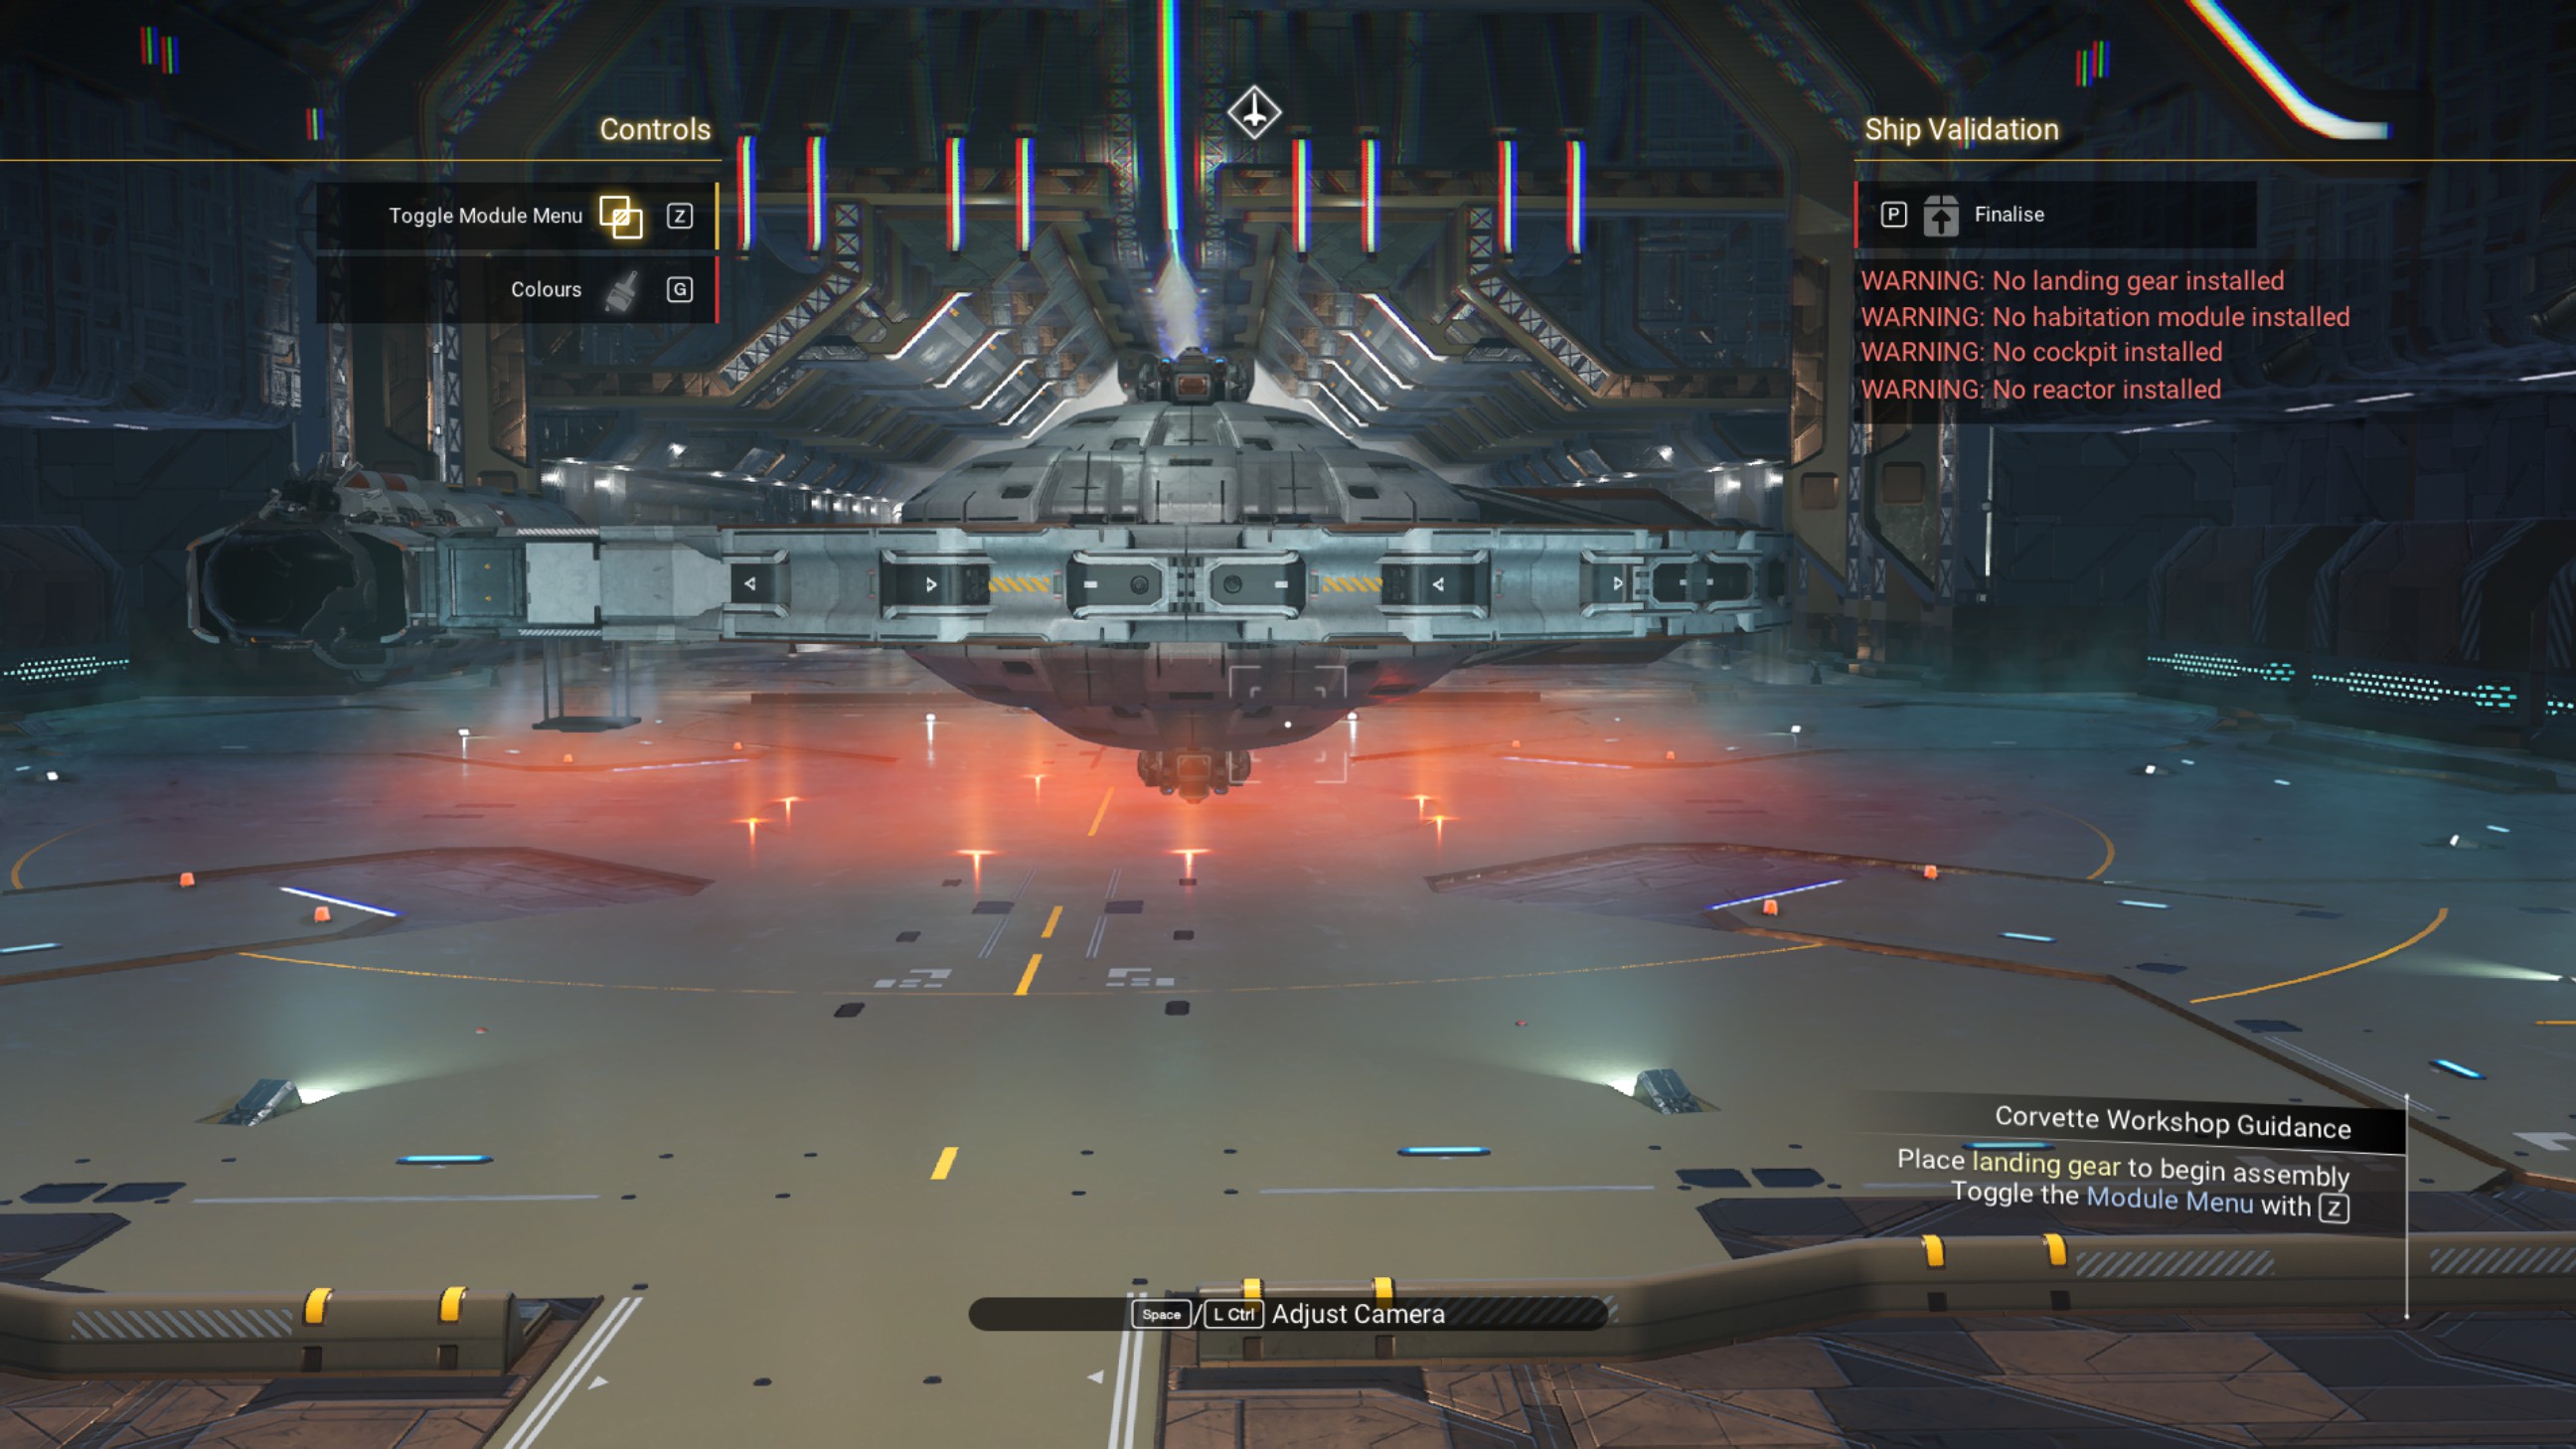
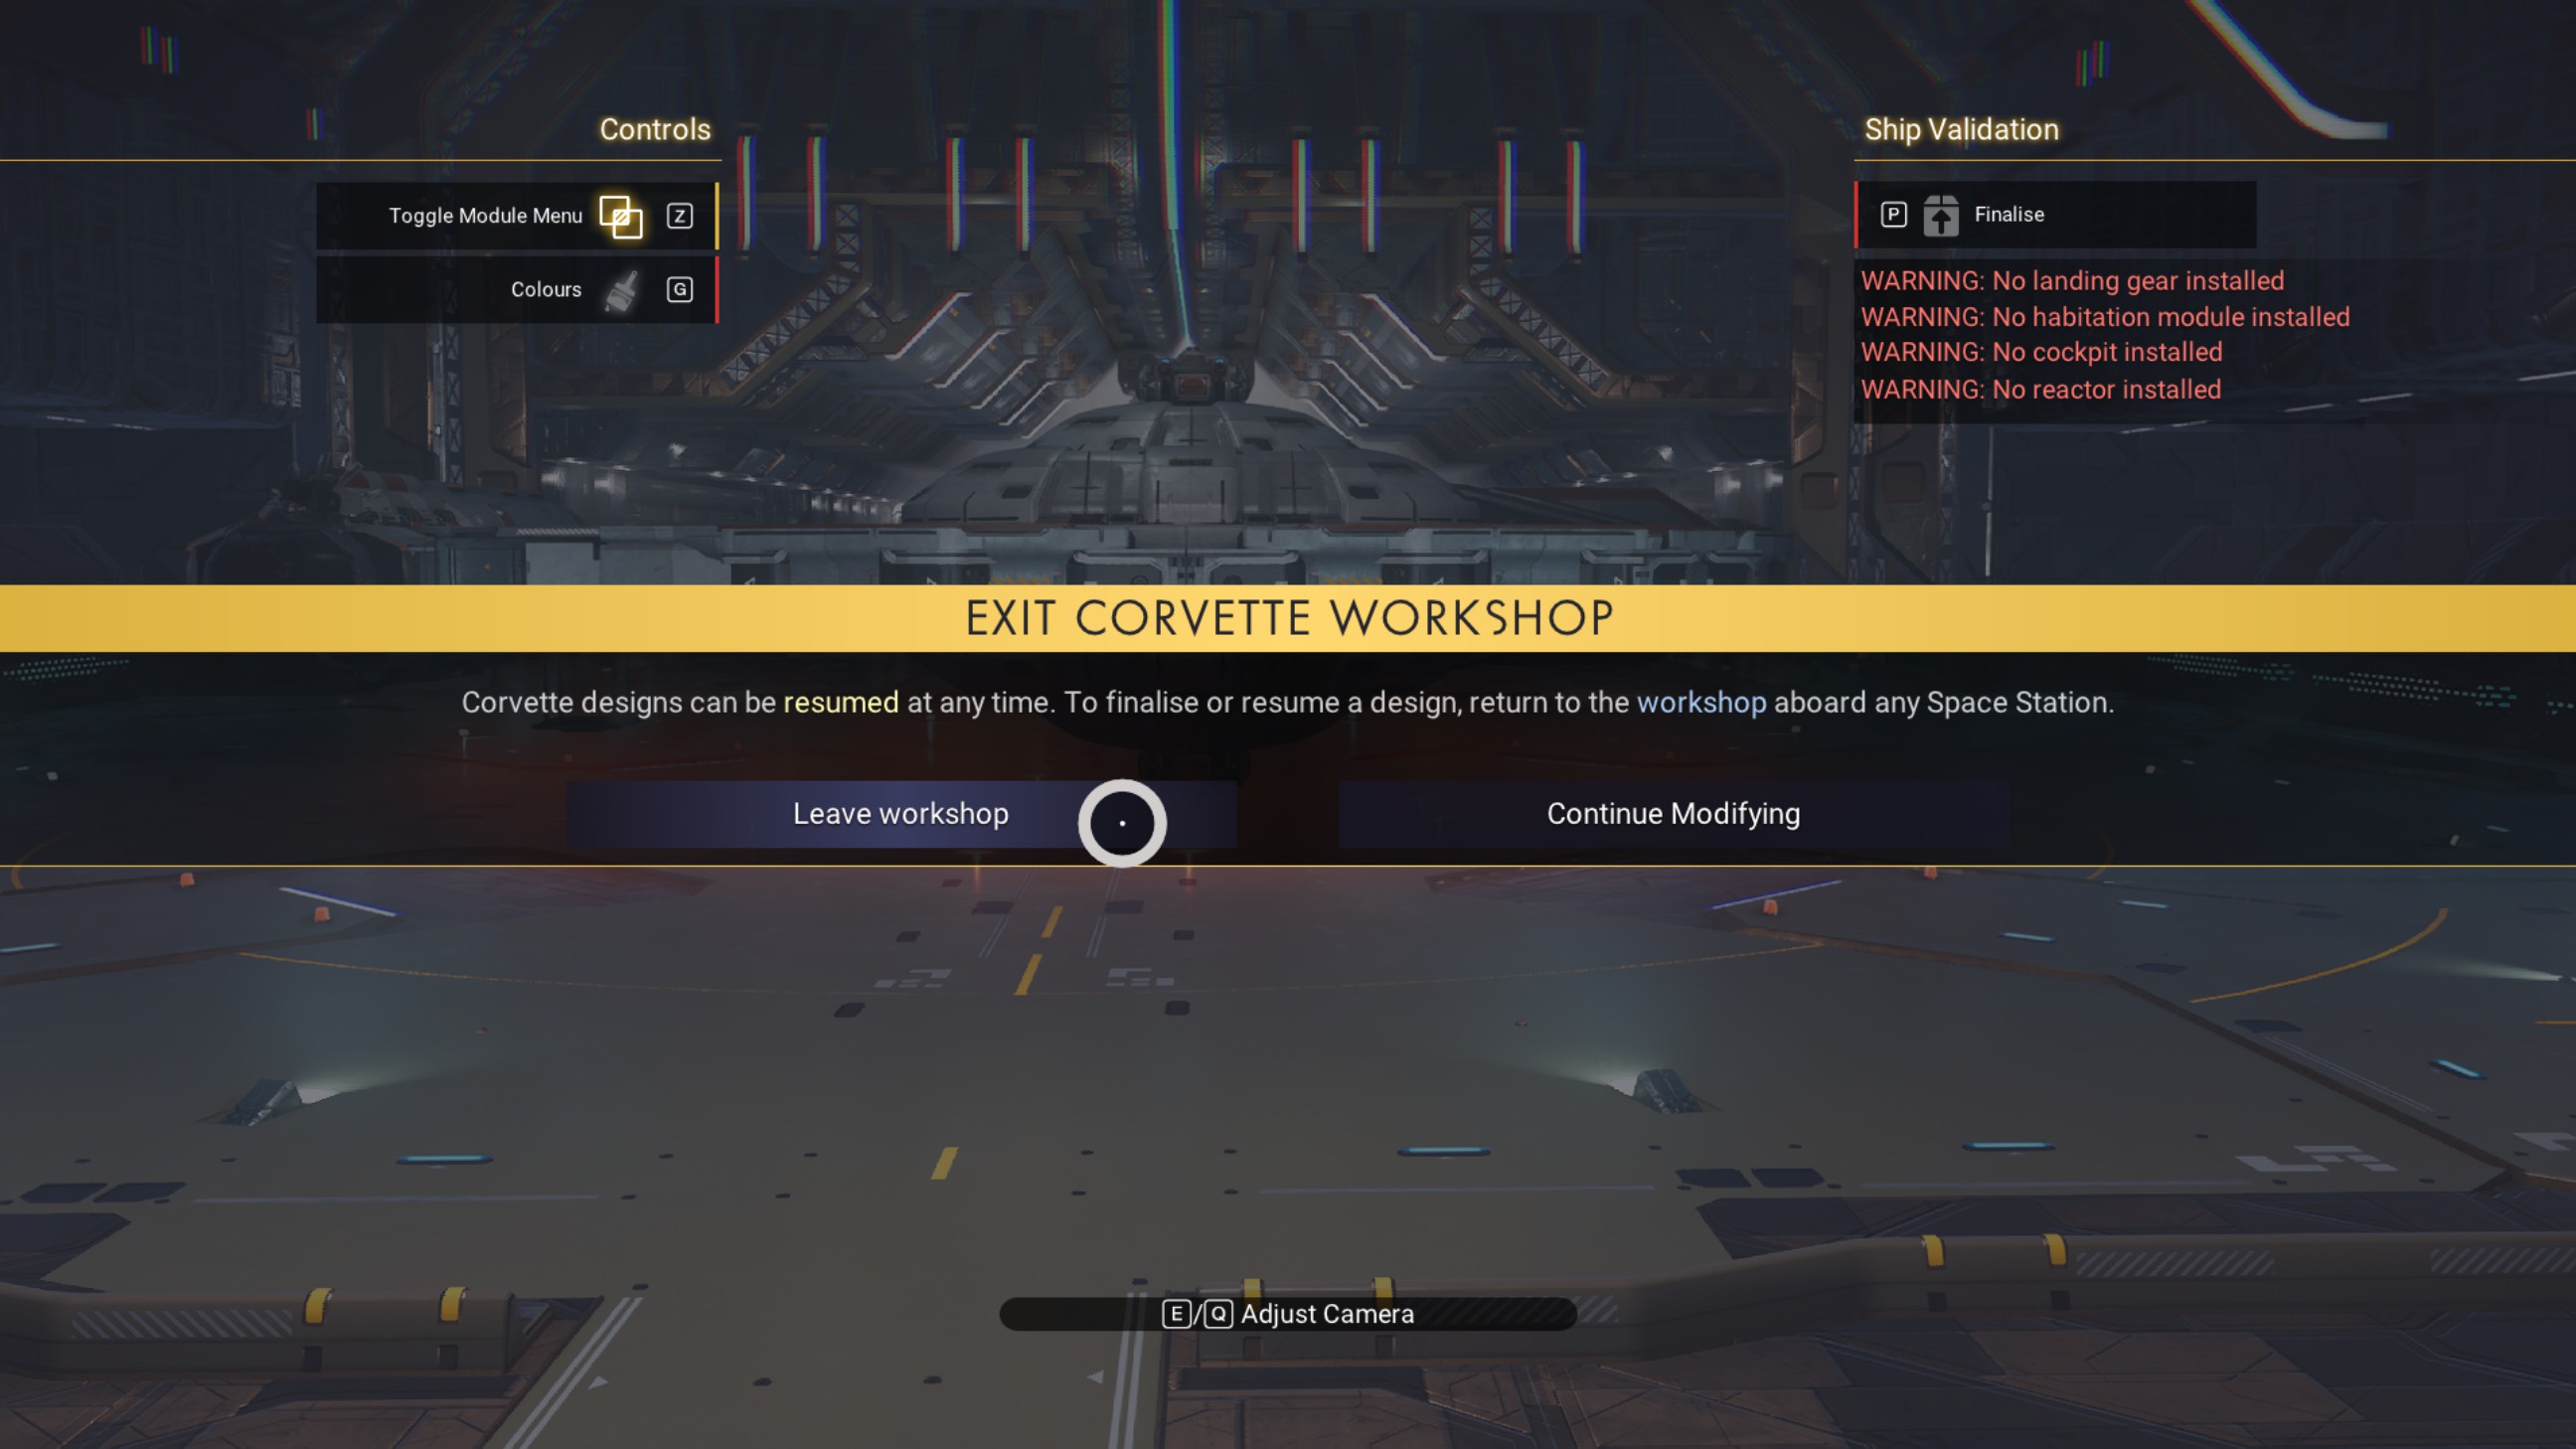
With that, the ship is finally finished!
Greebling
Gallery
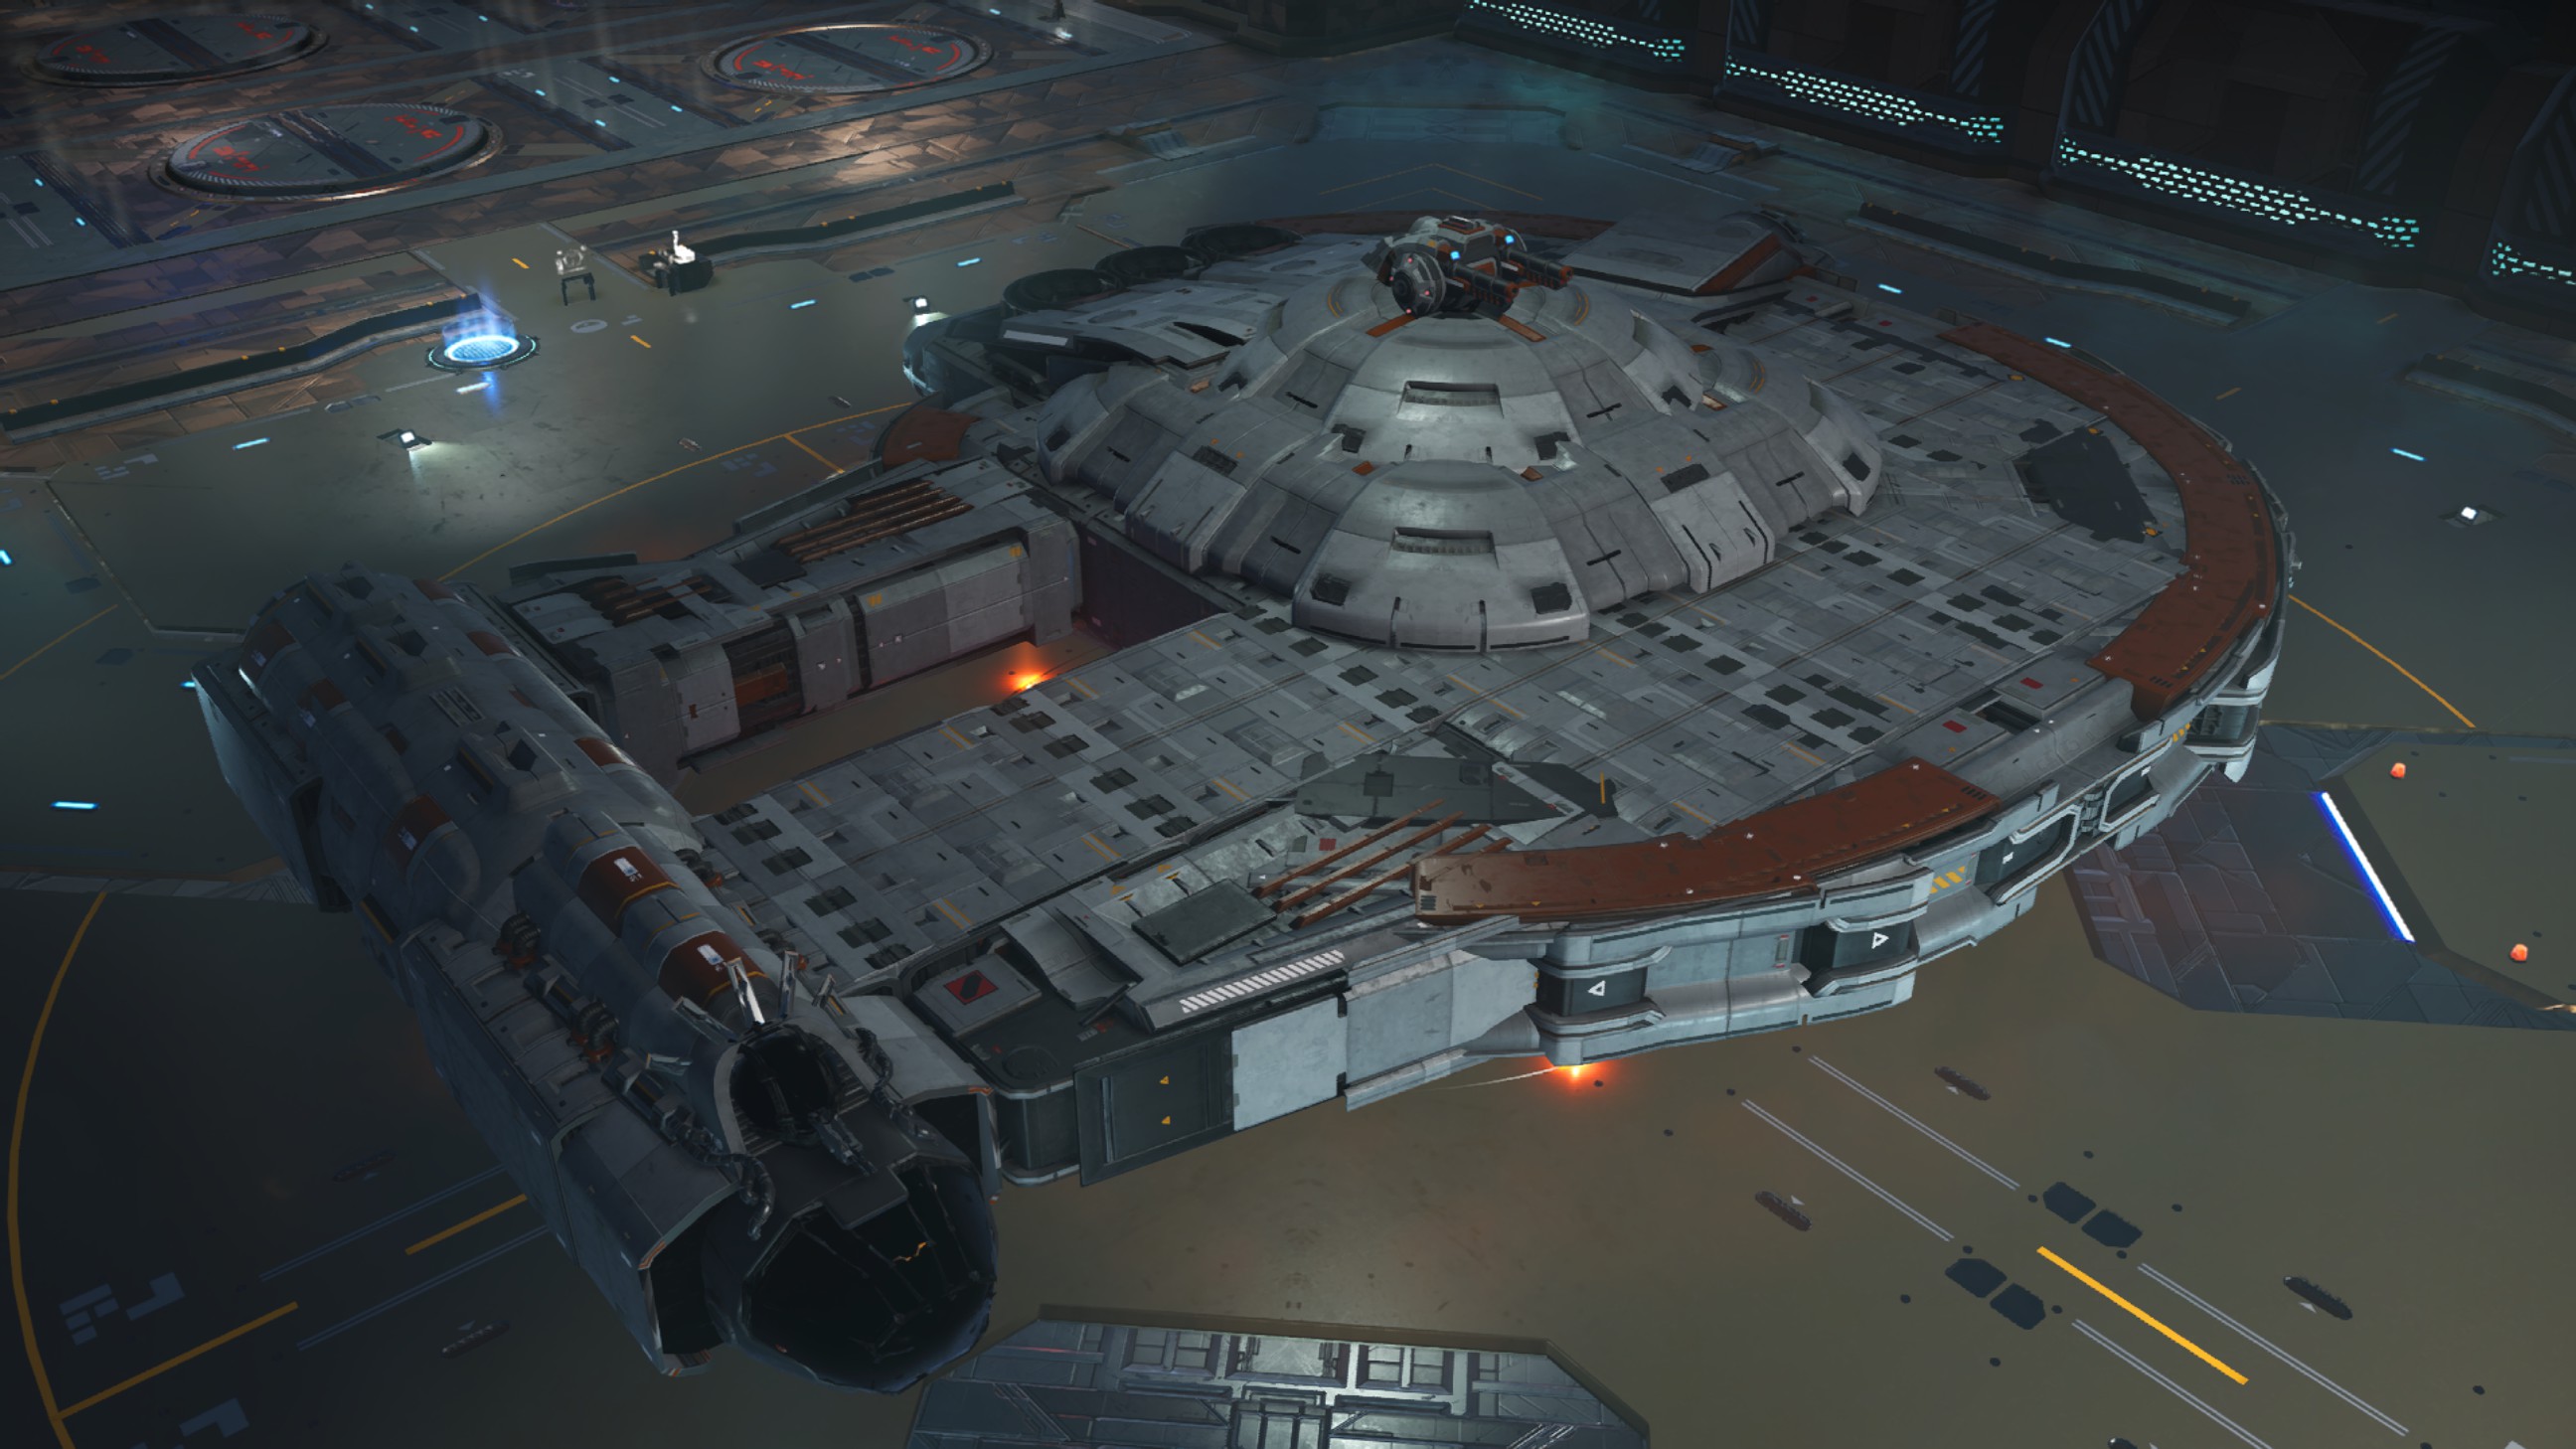
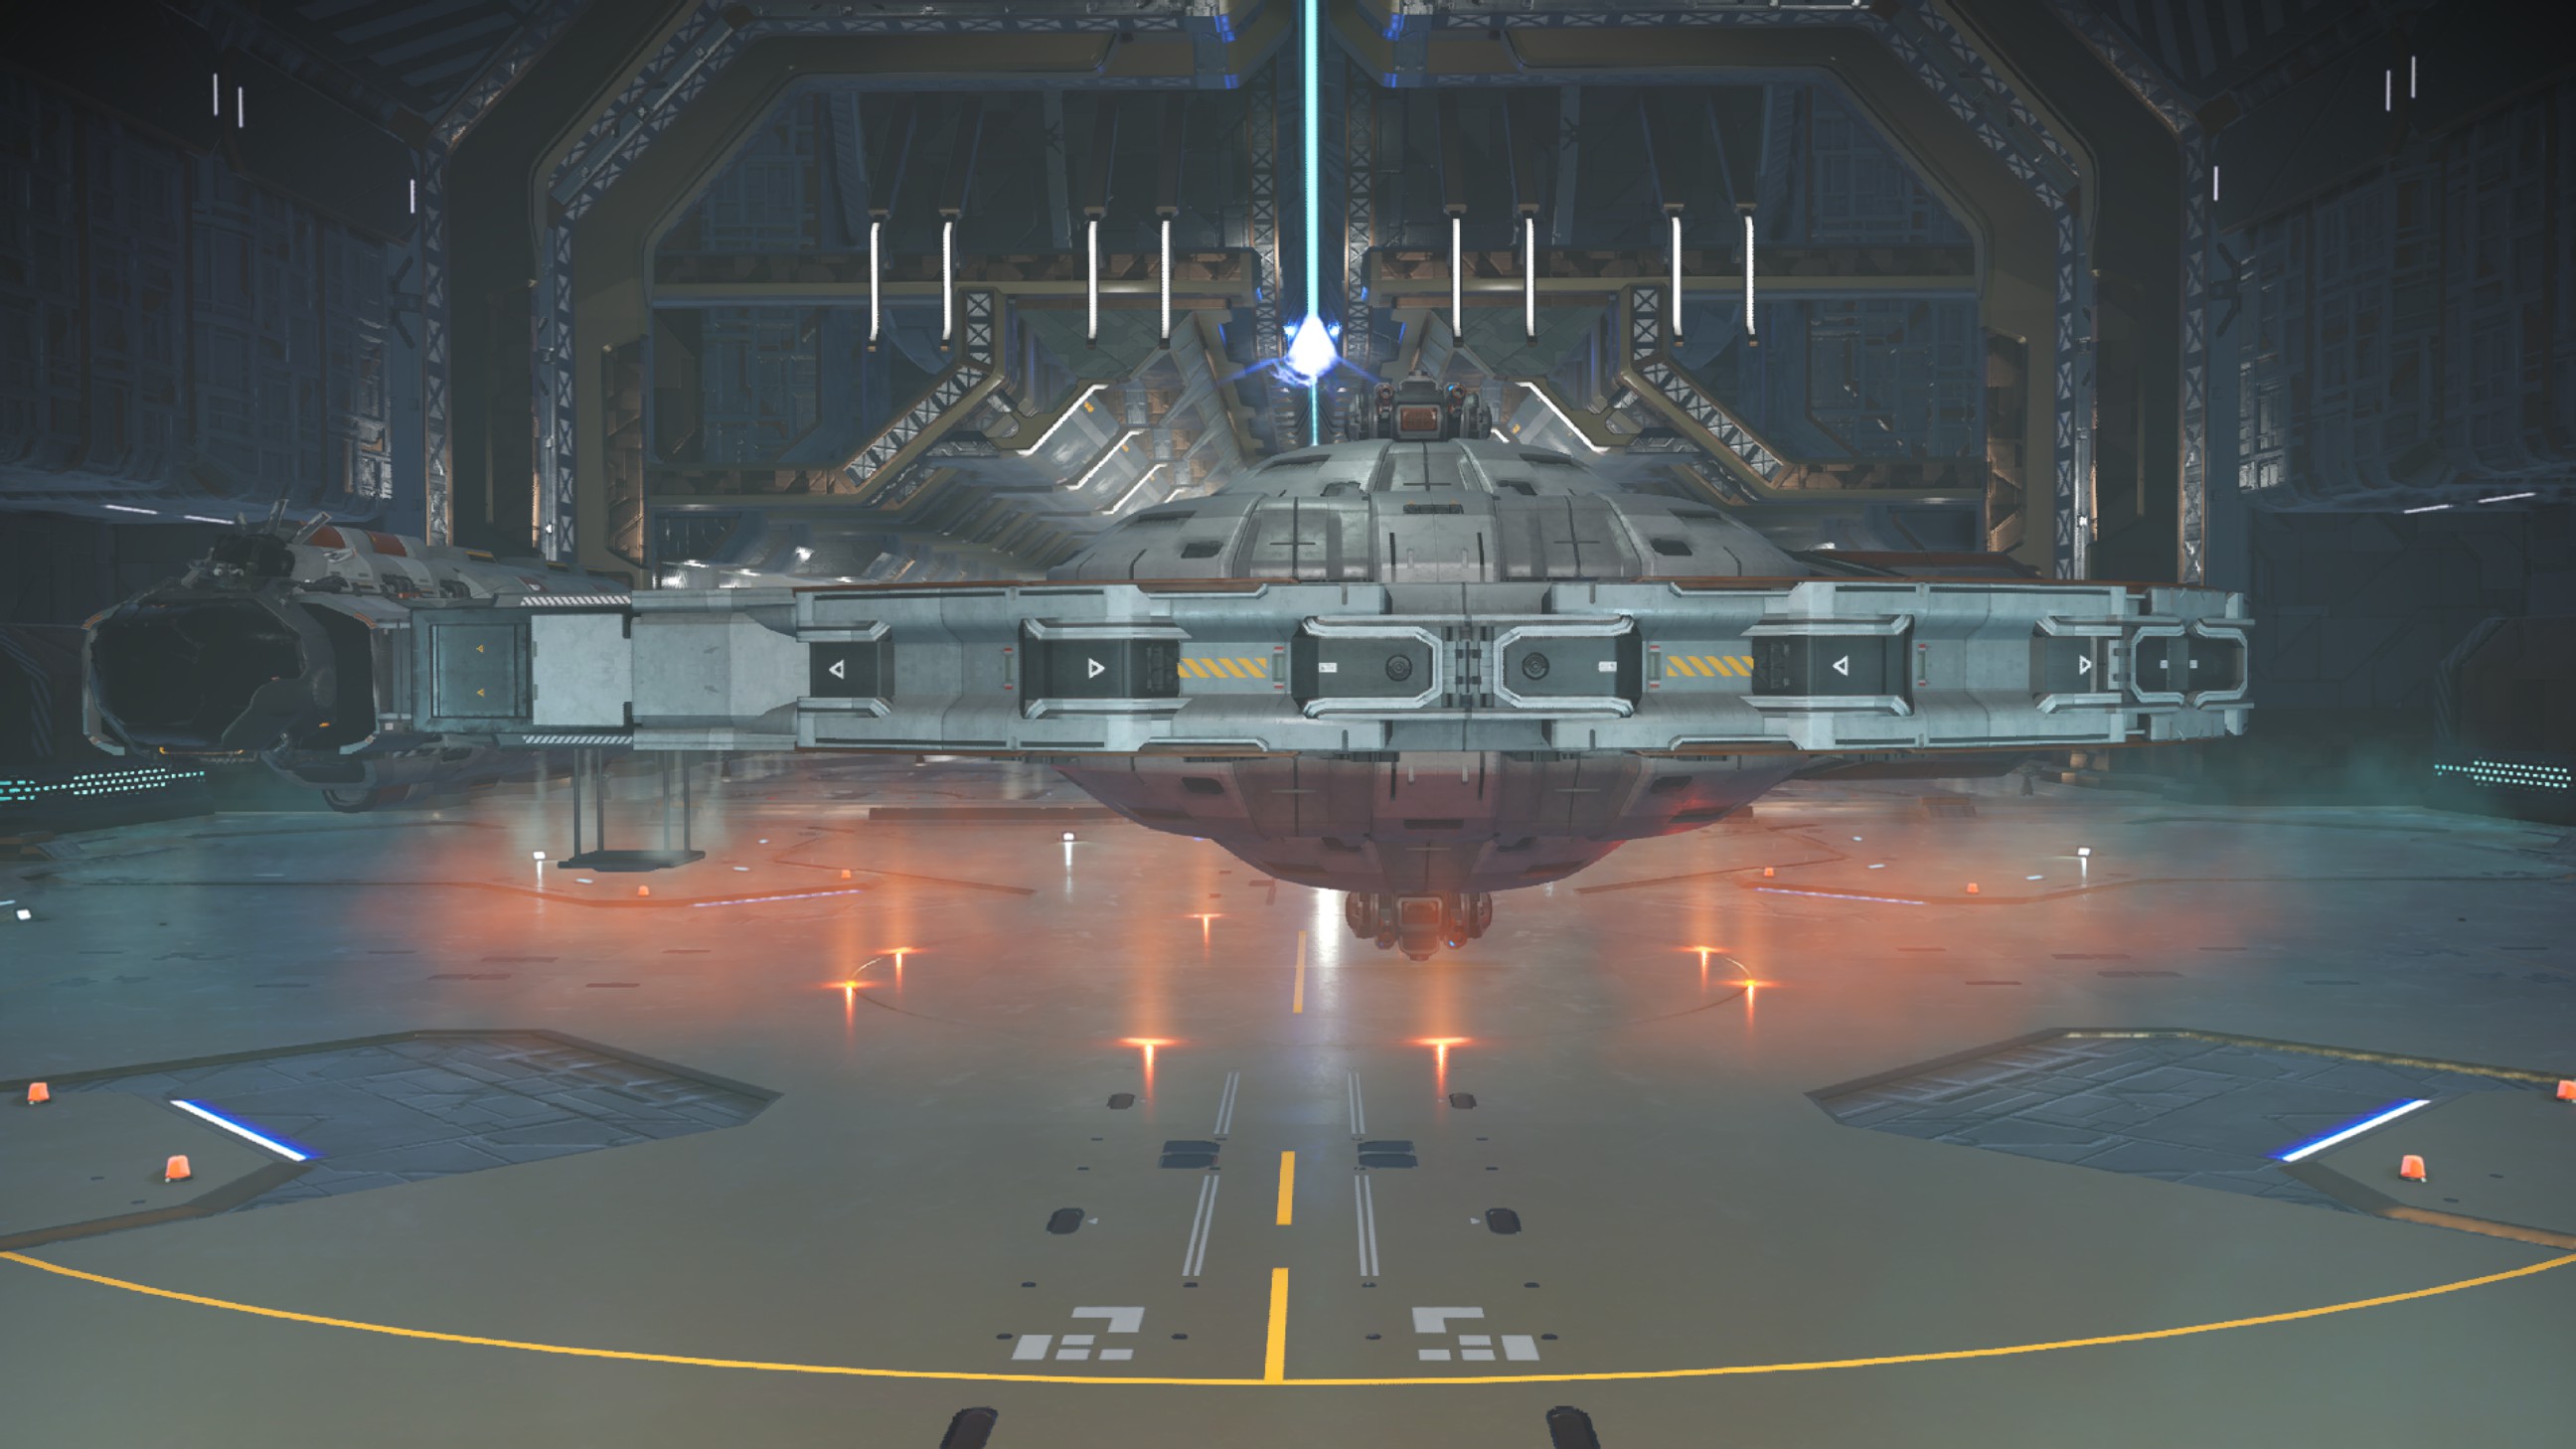
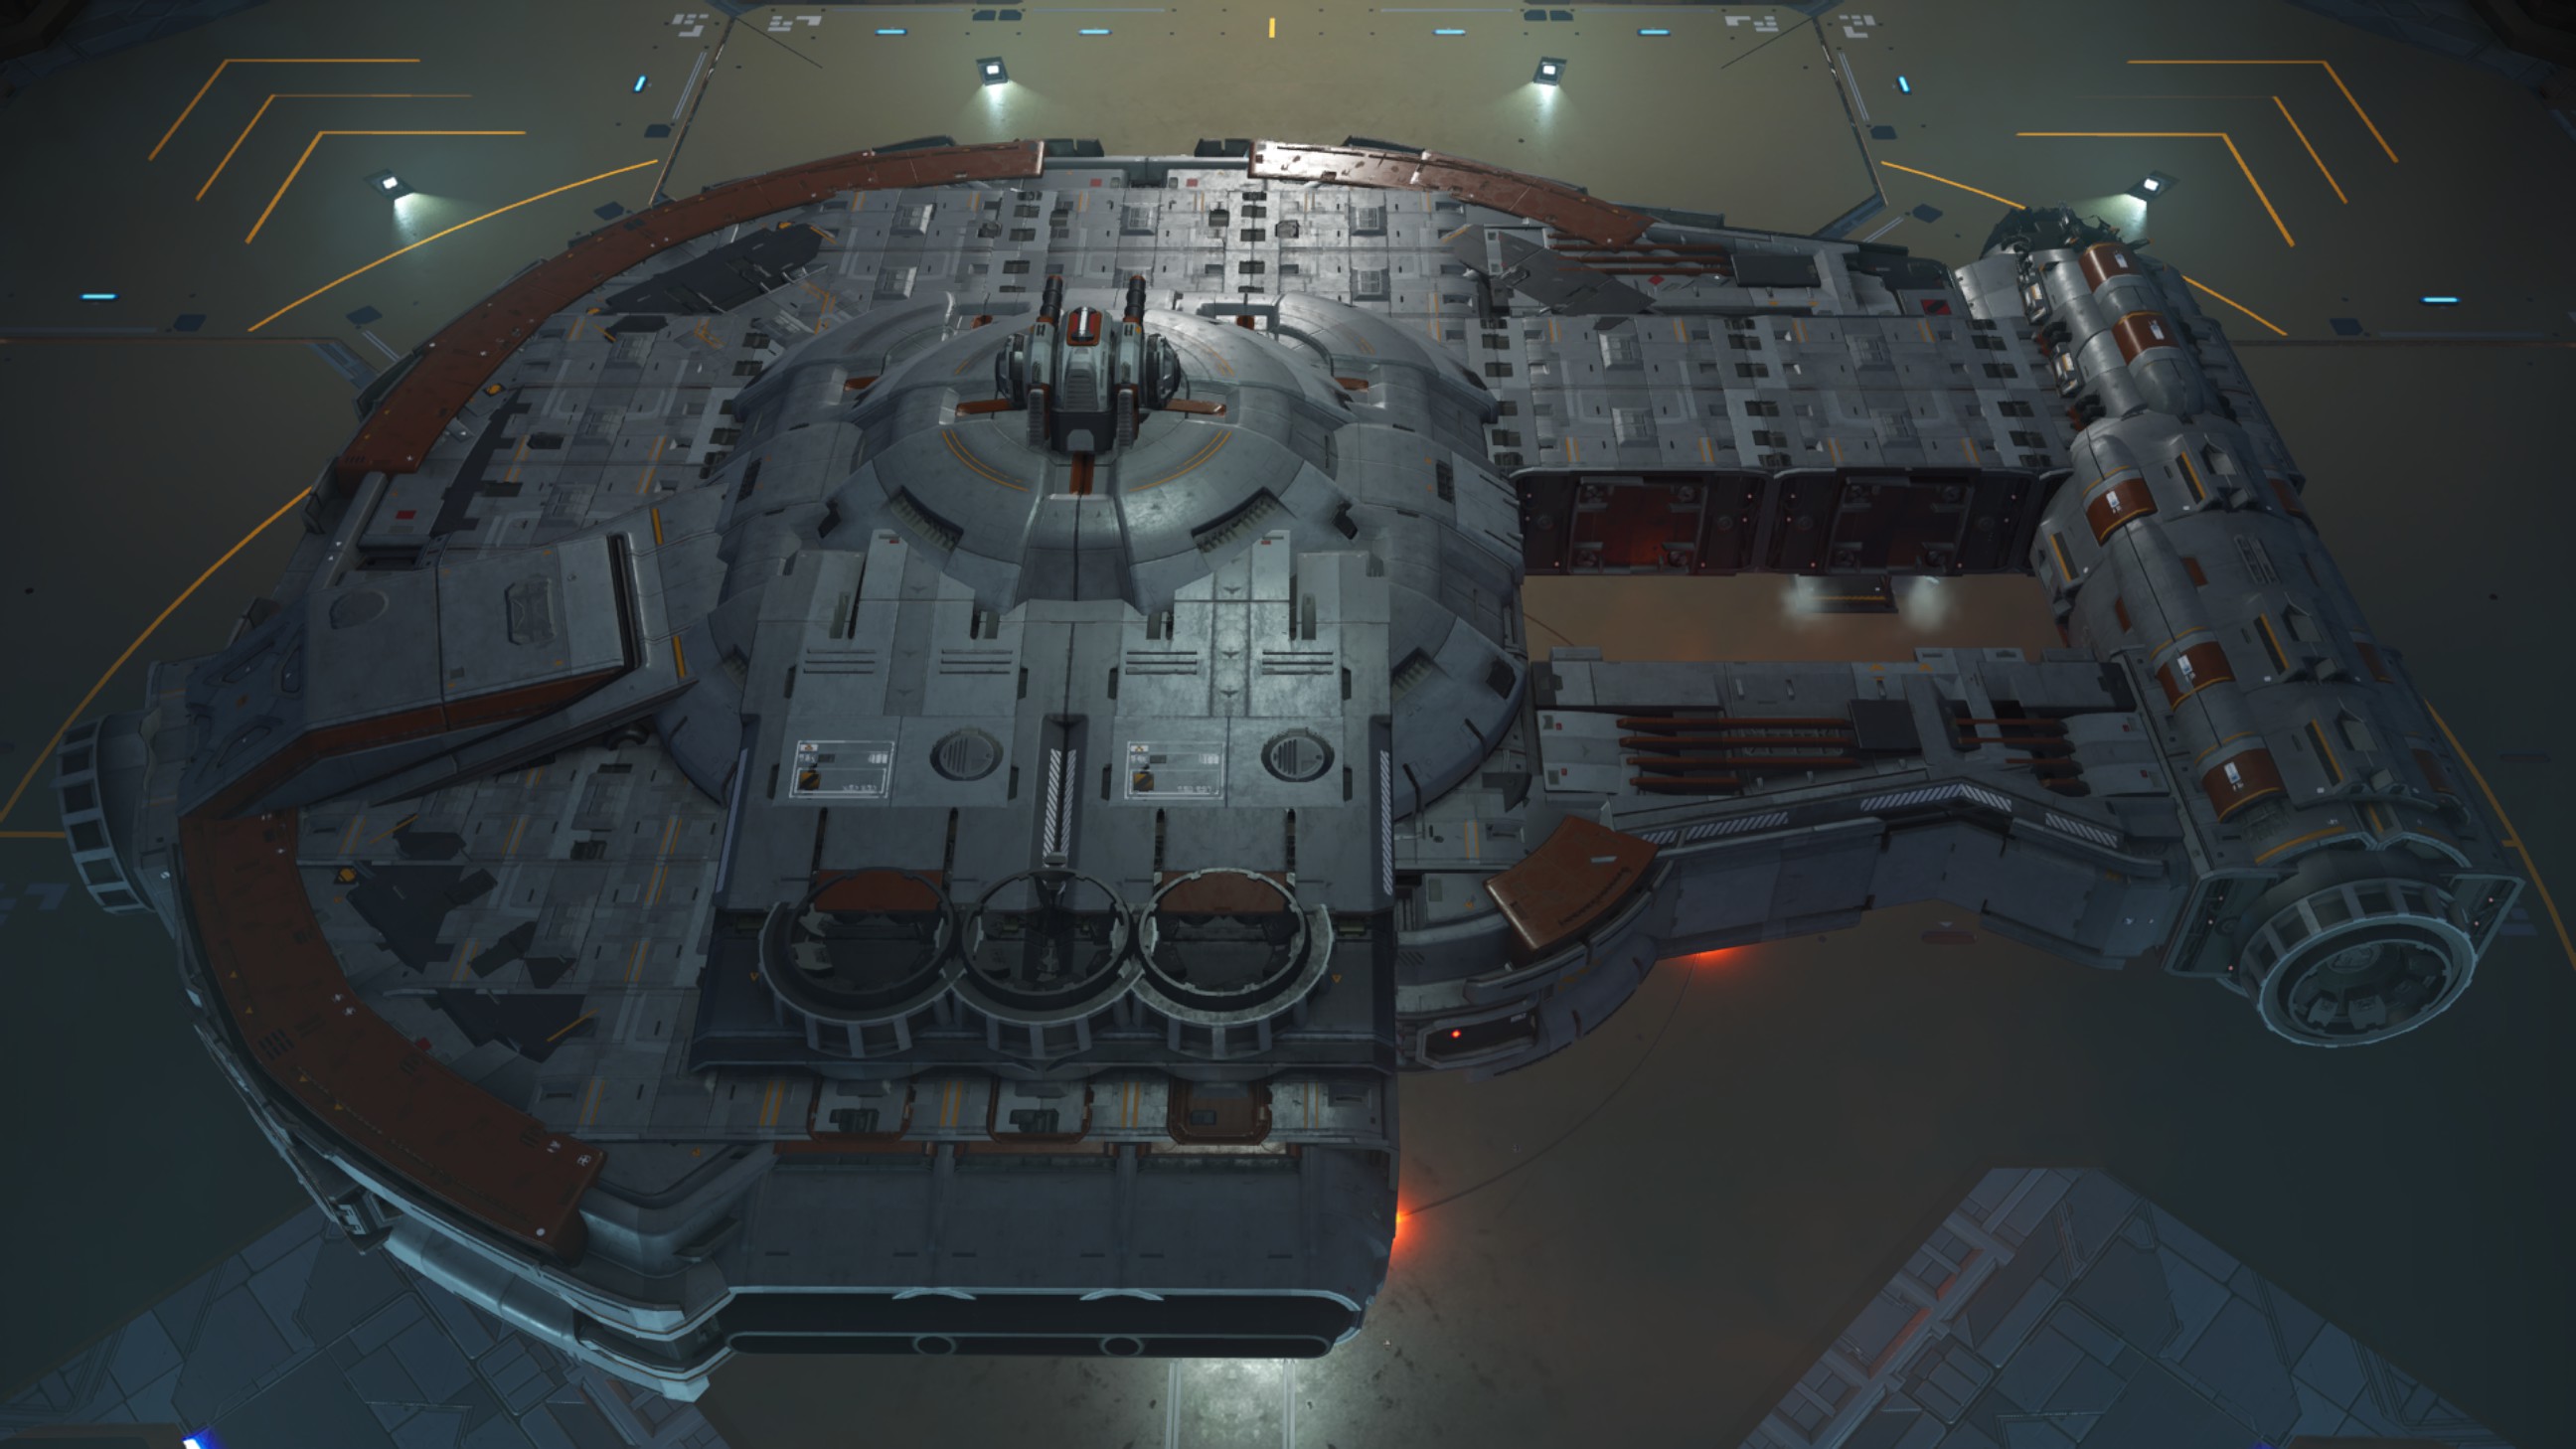
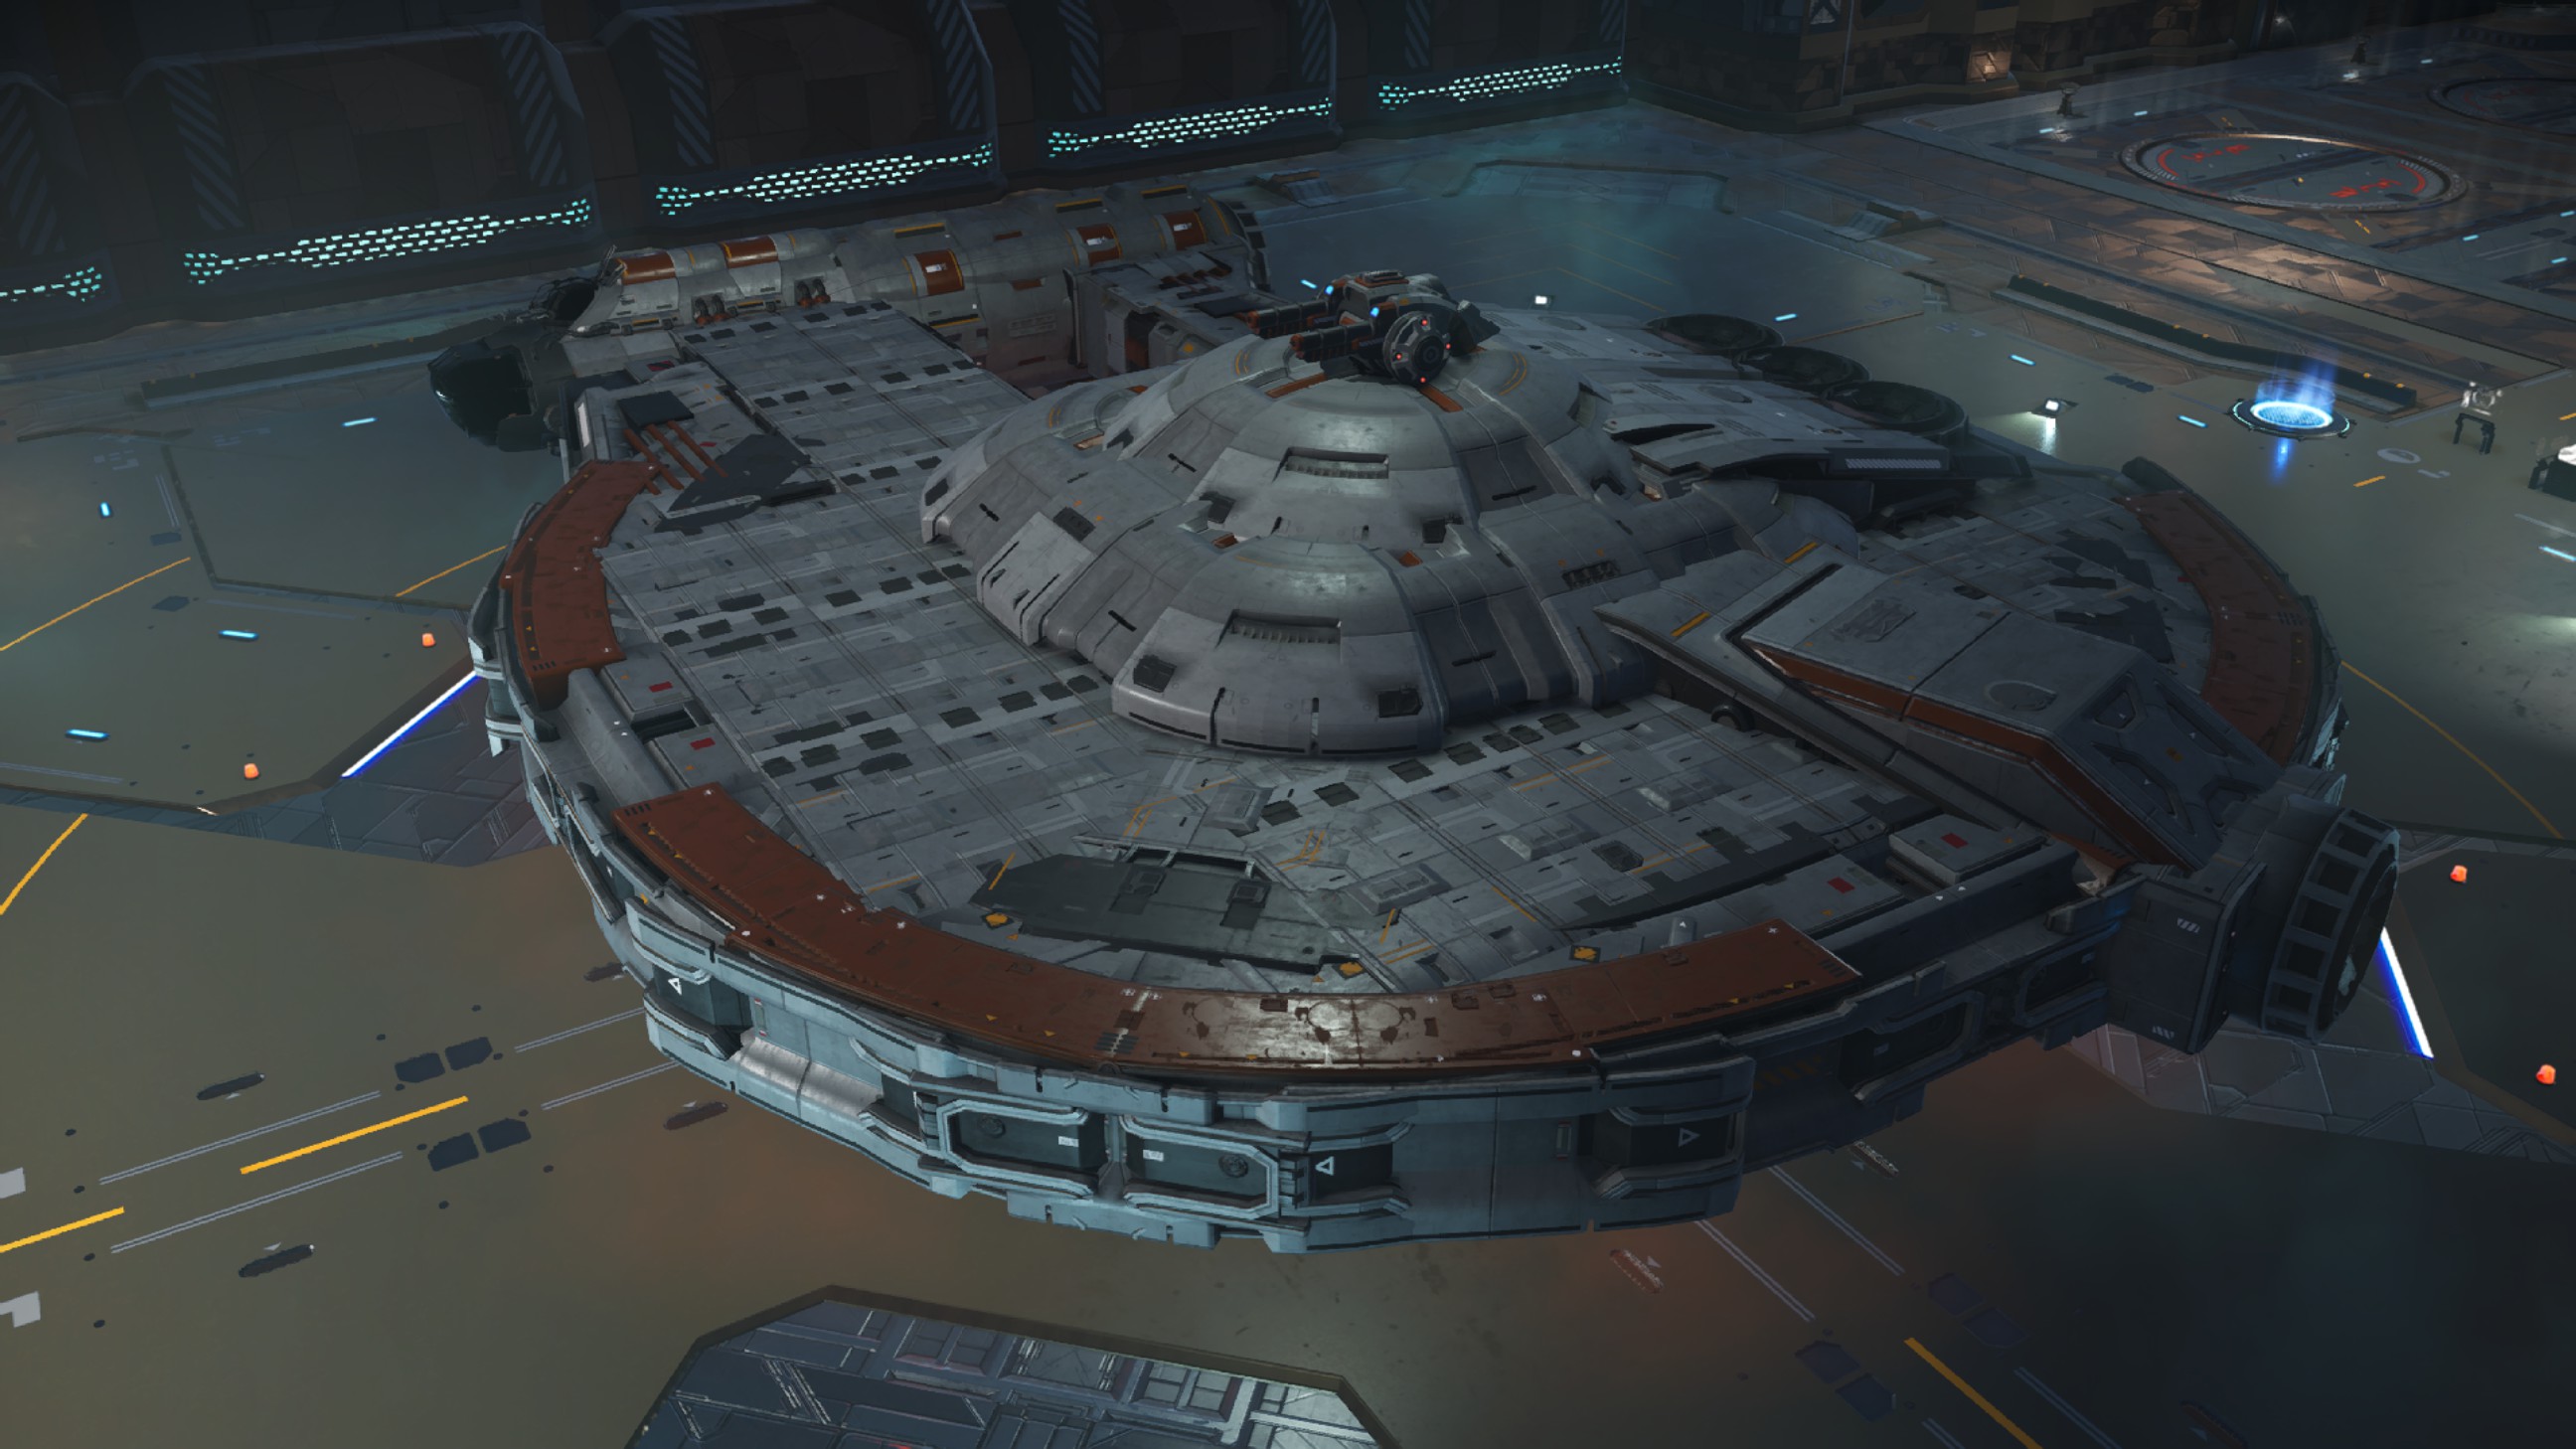
With painting and greebling:
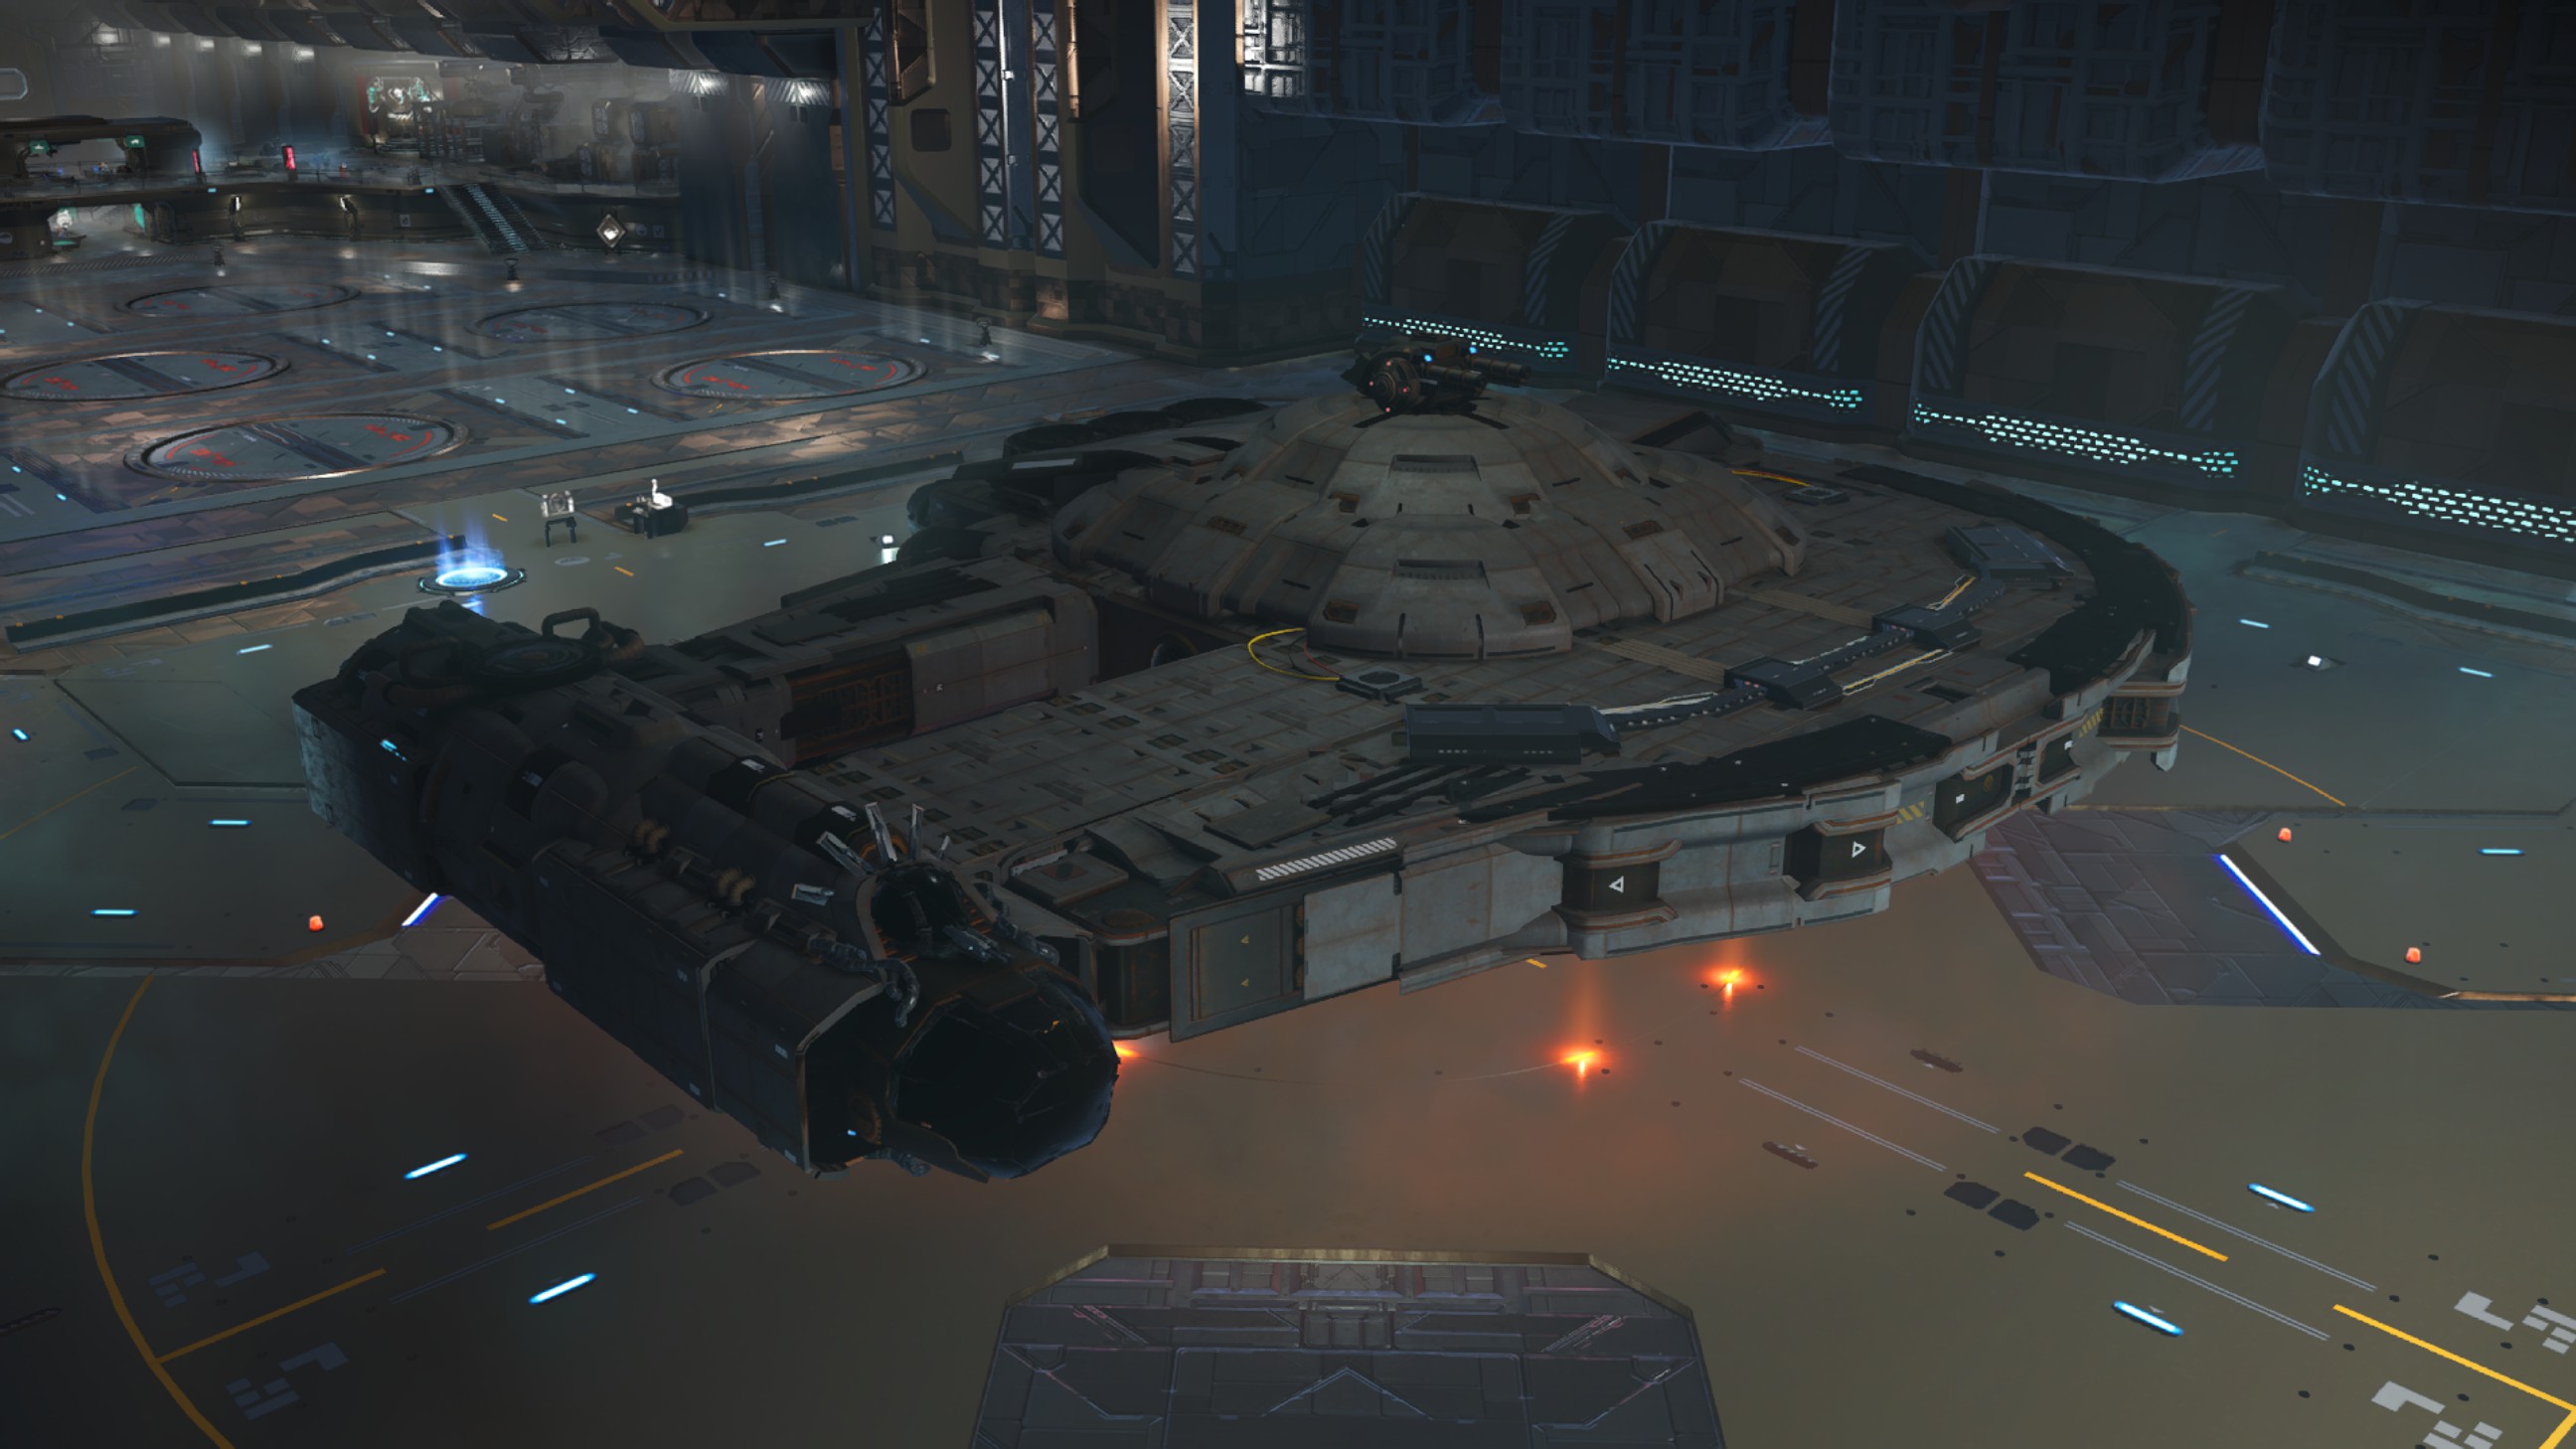
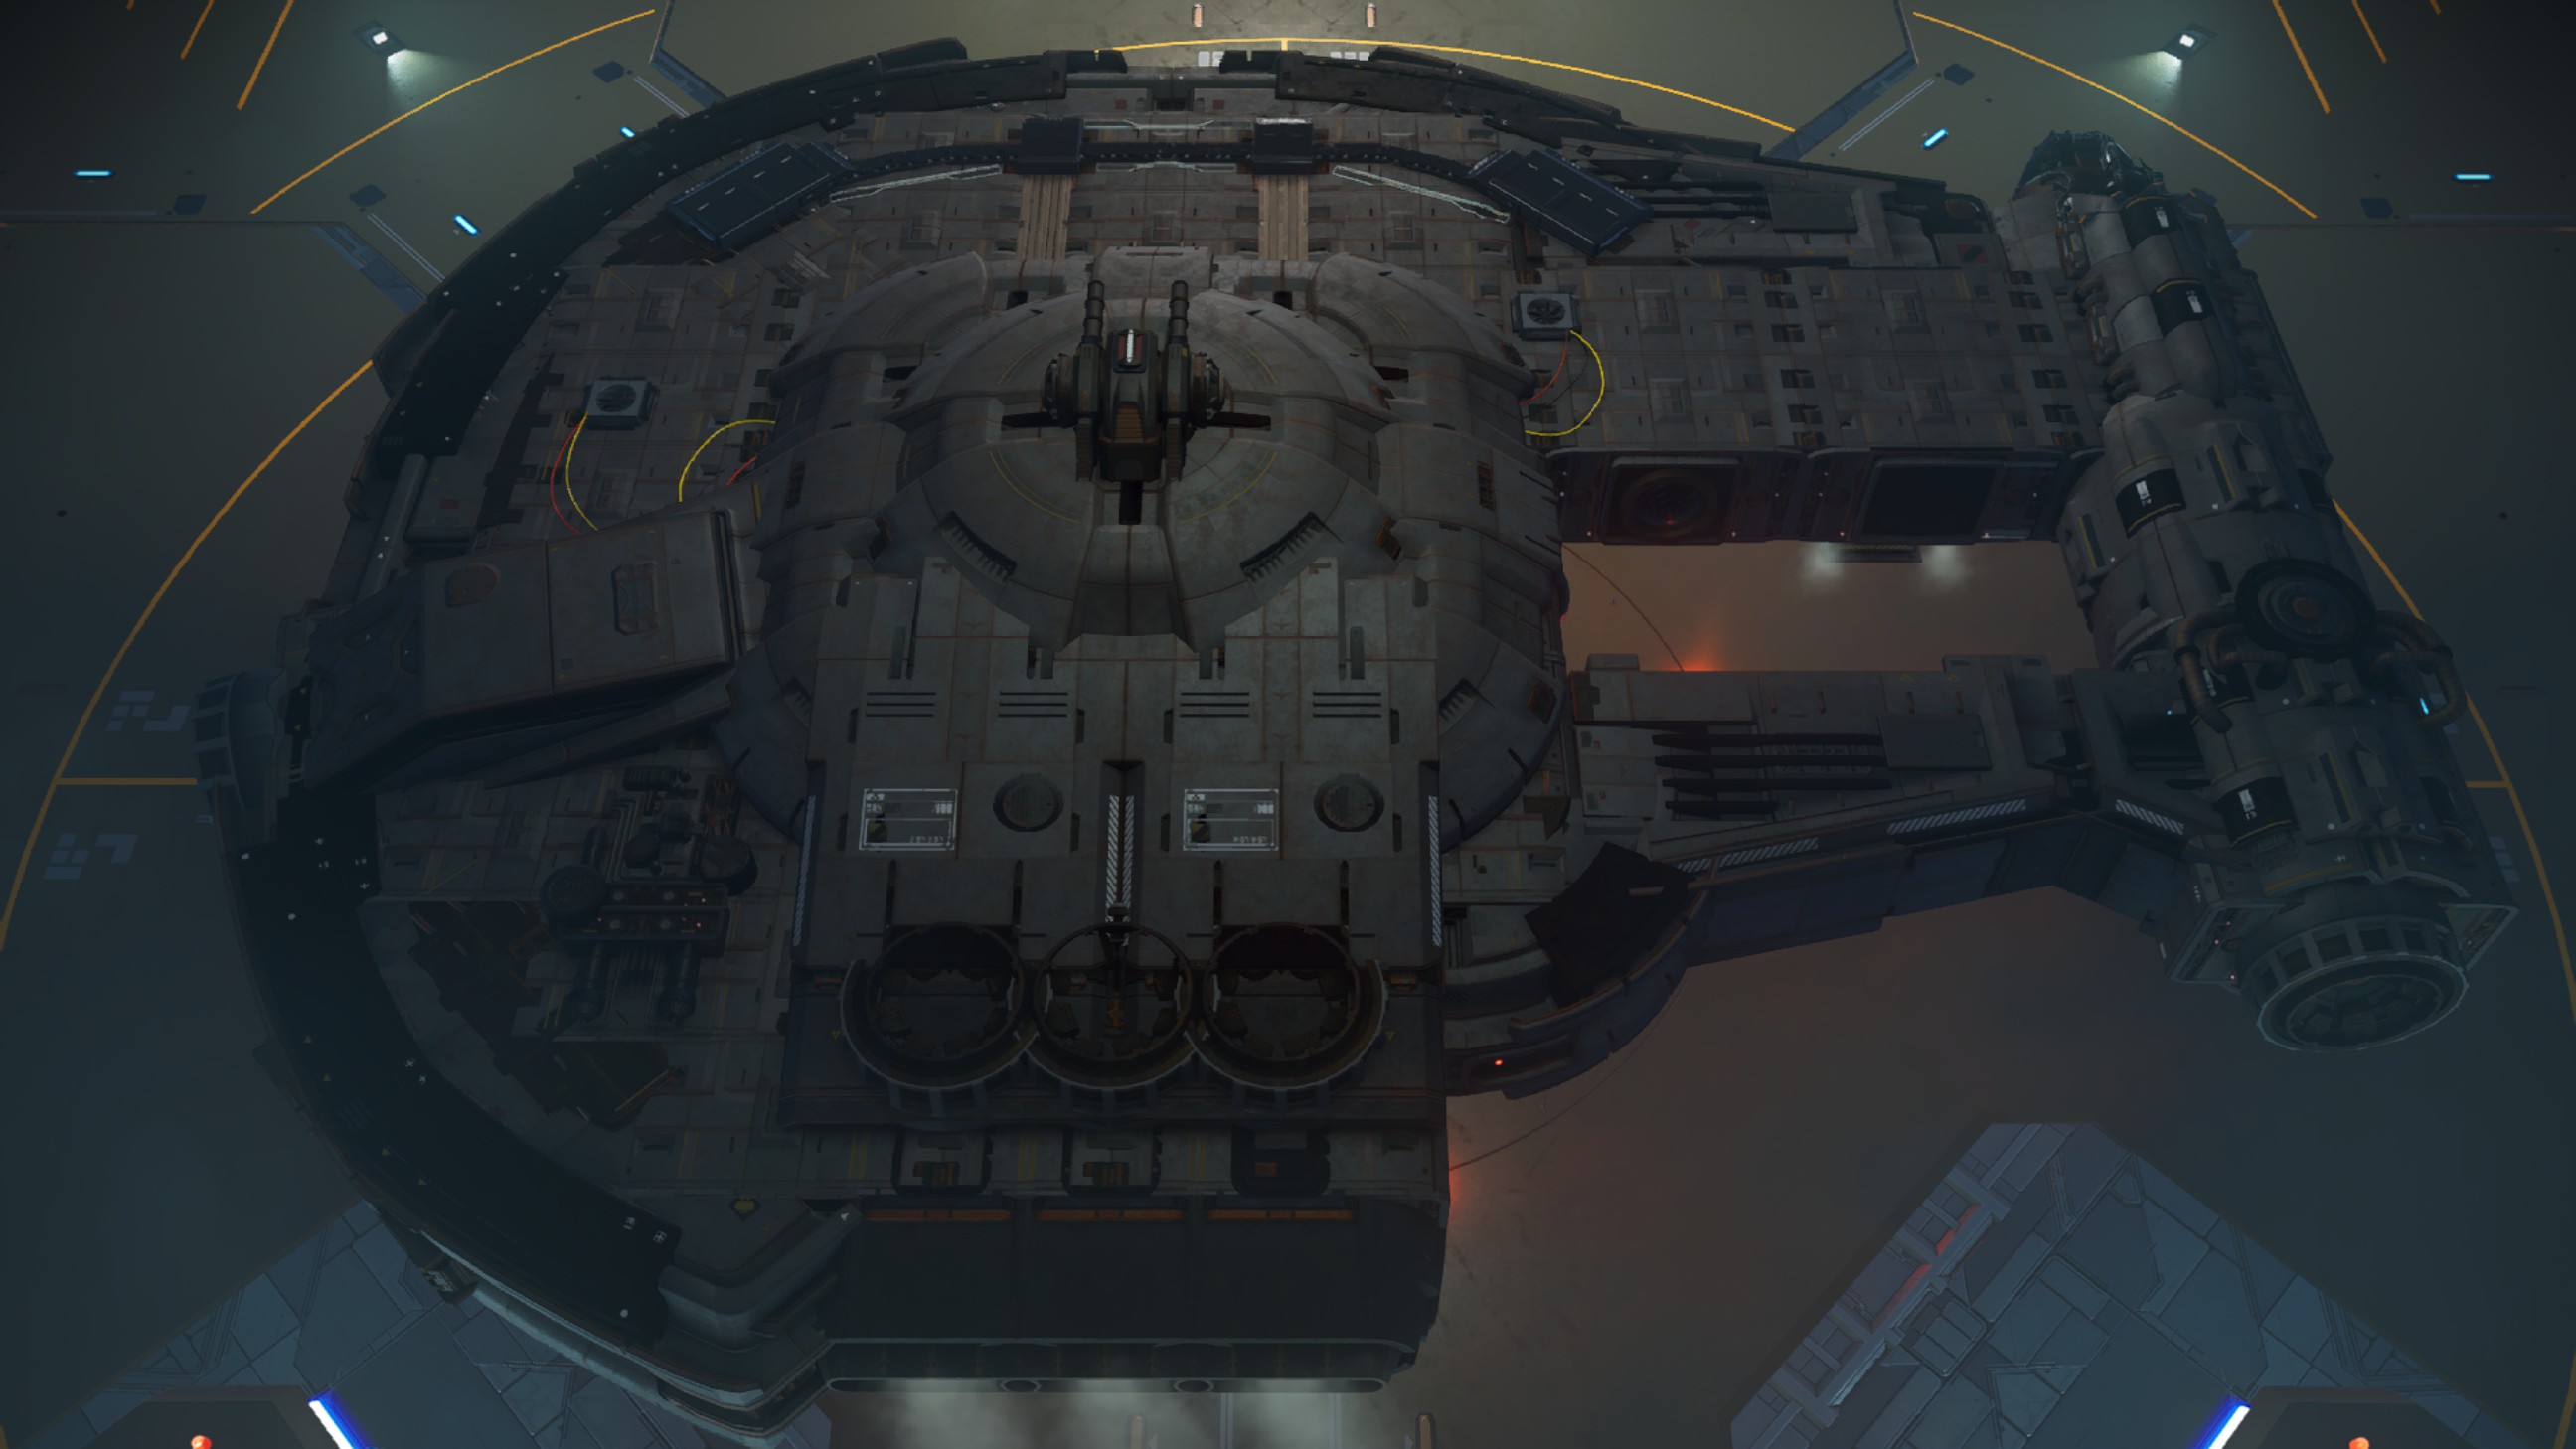
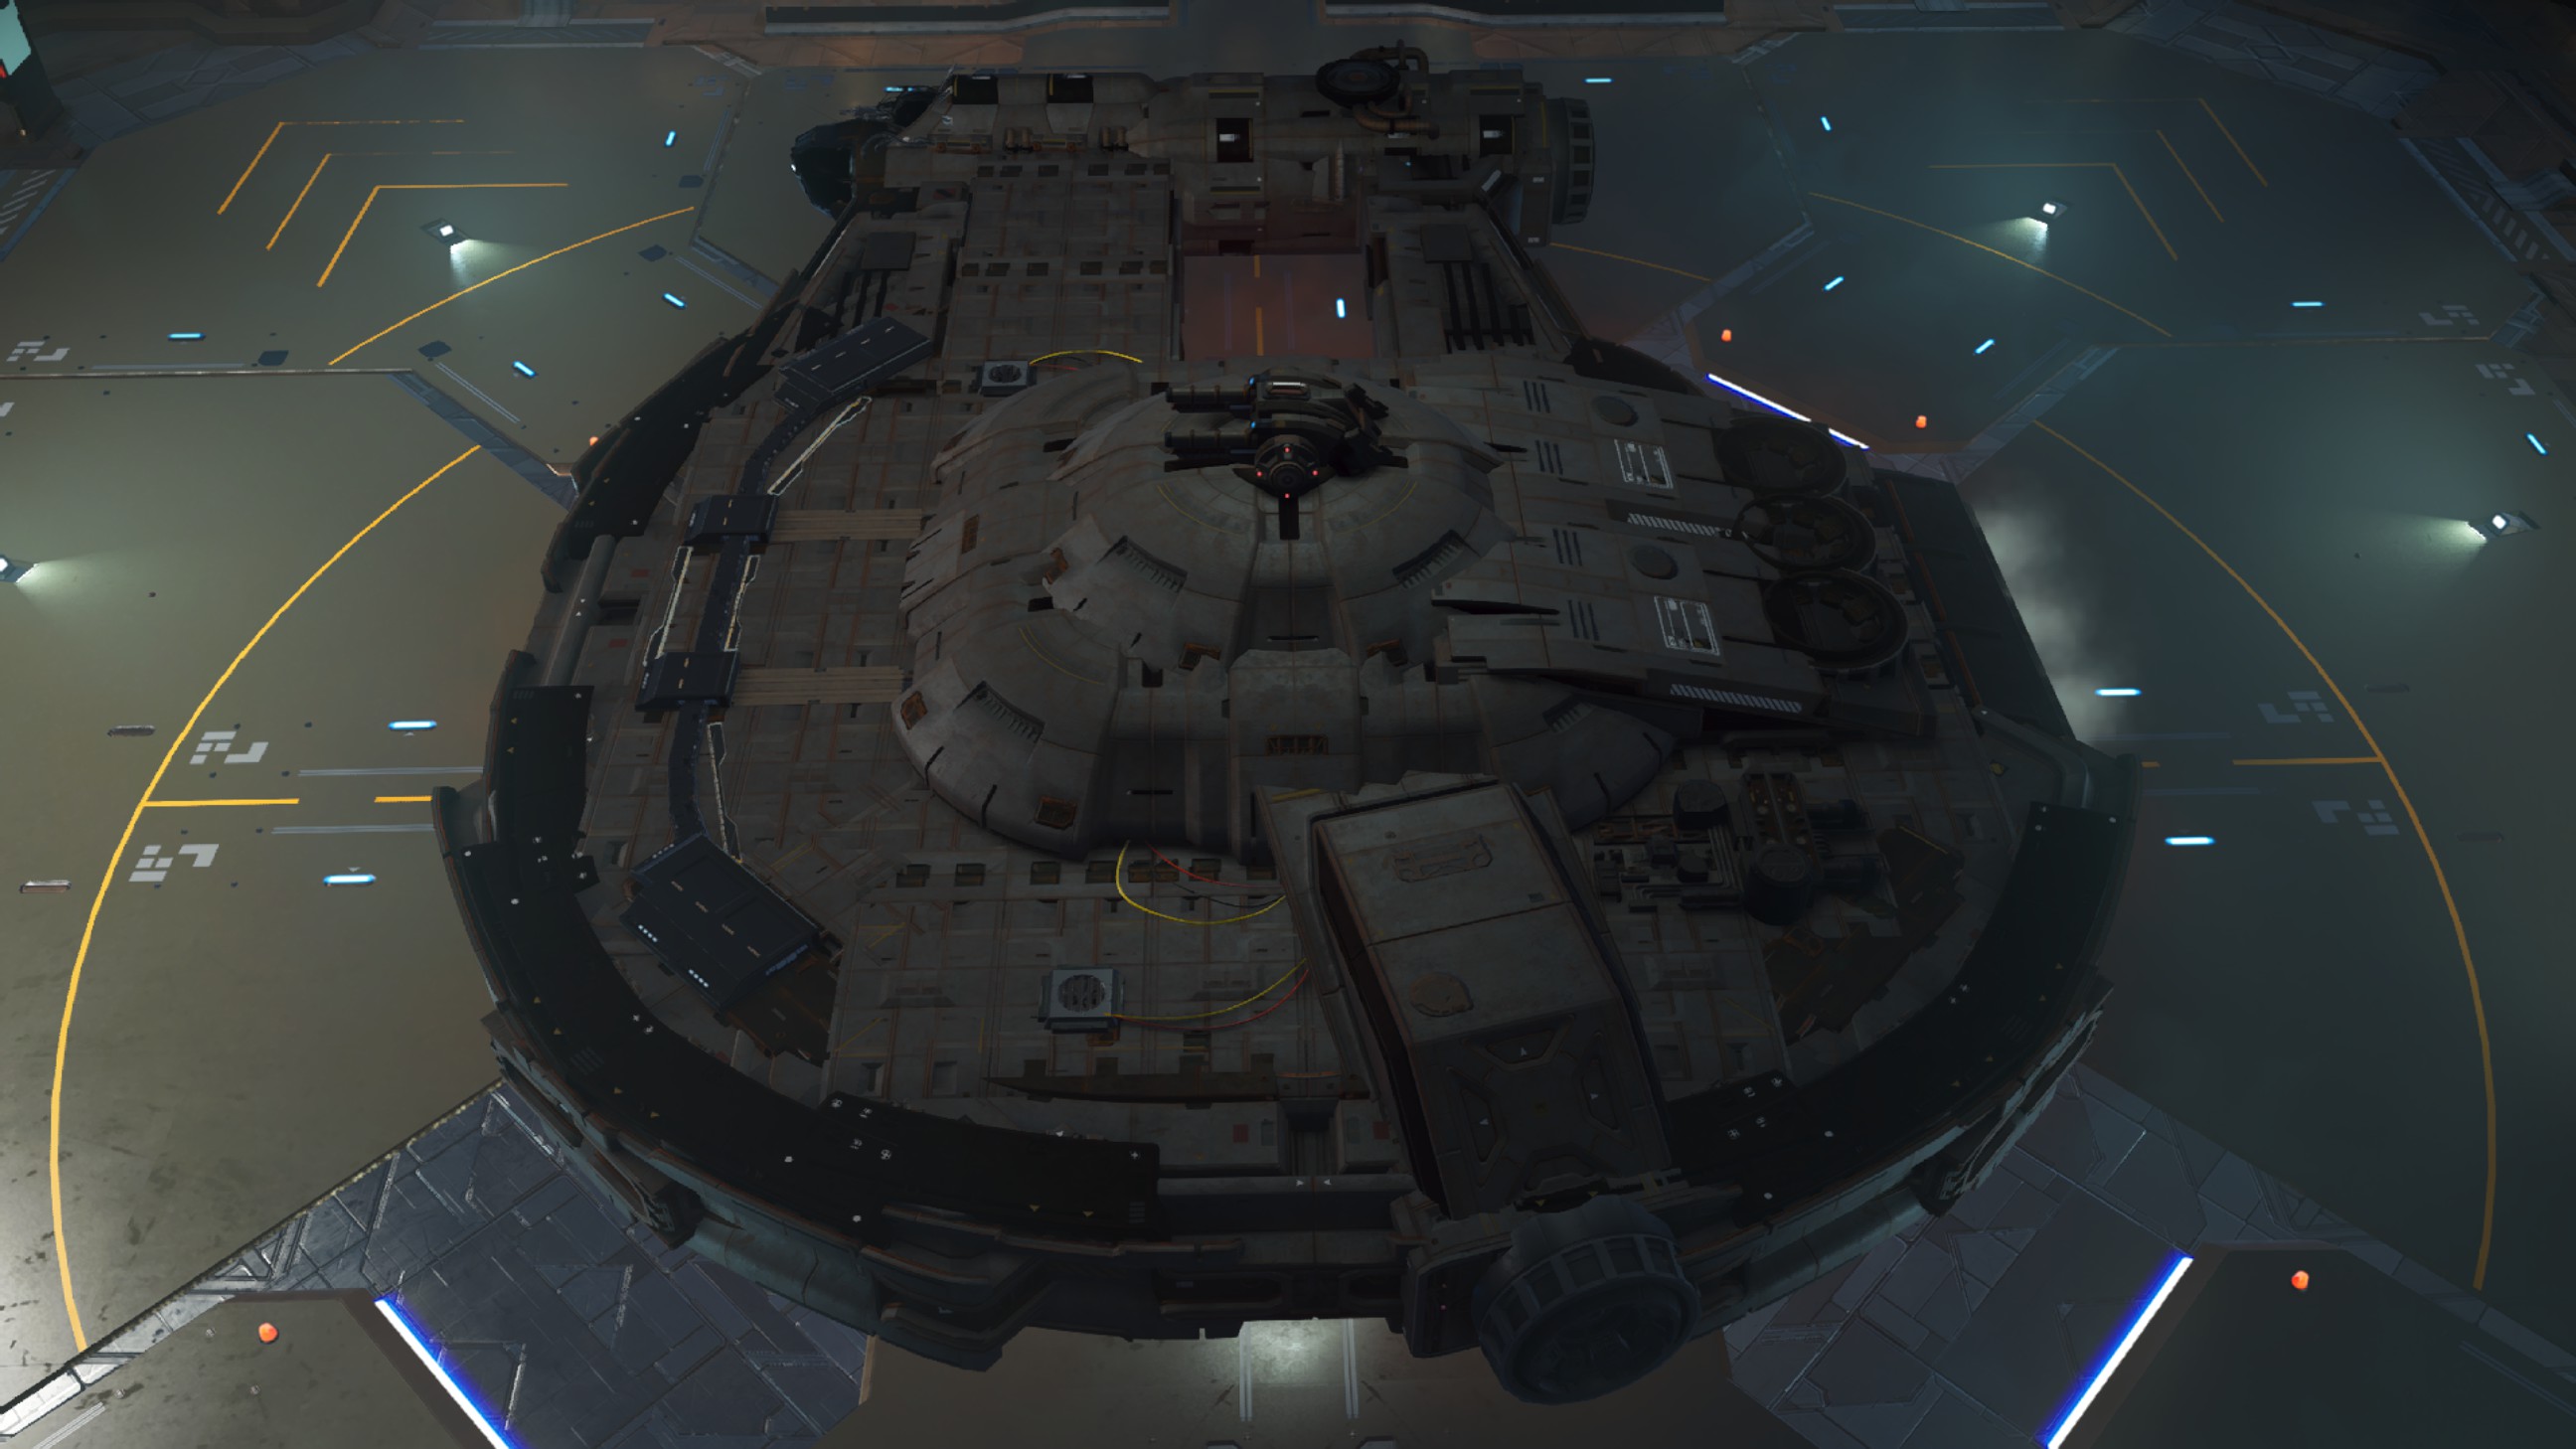
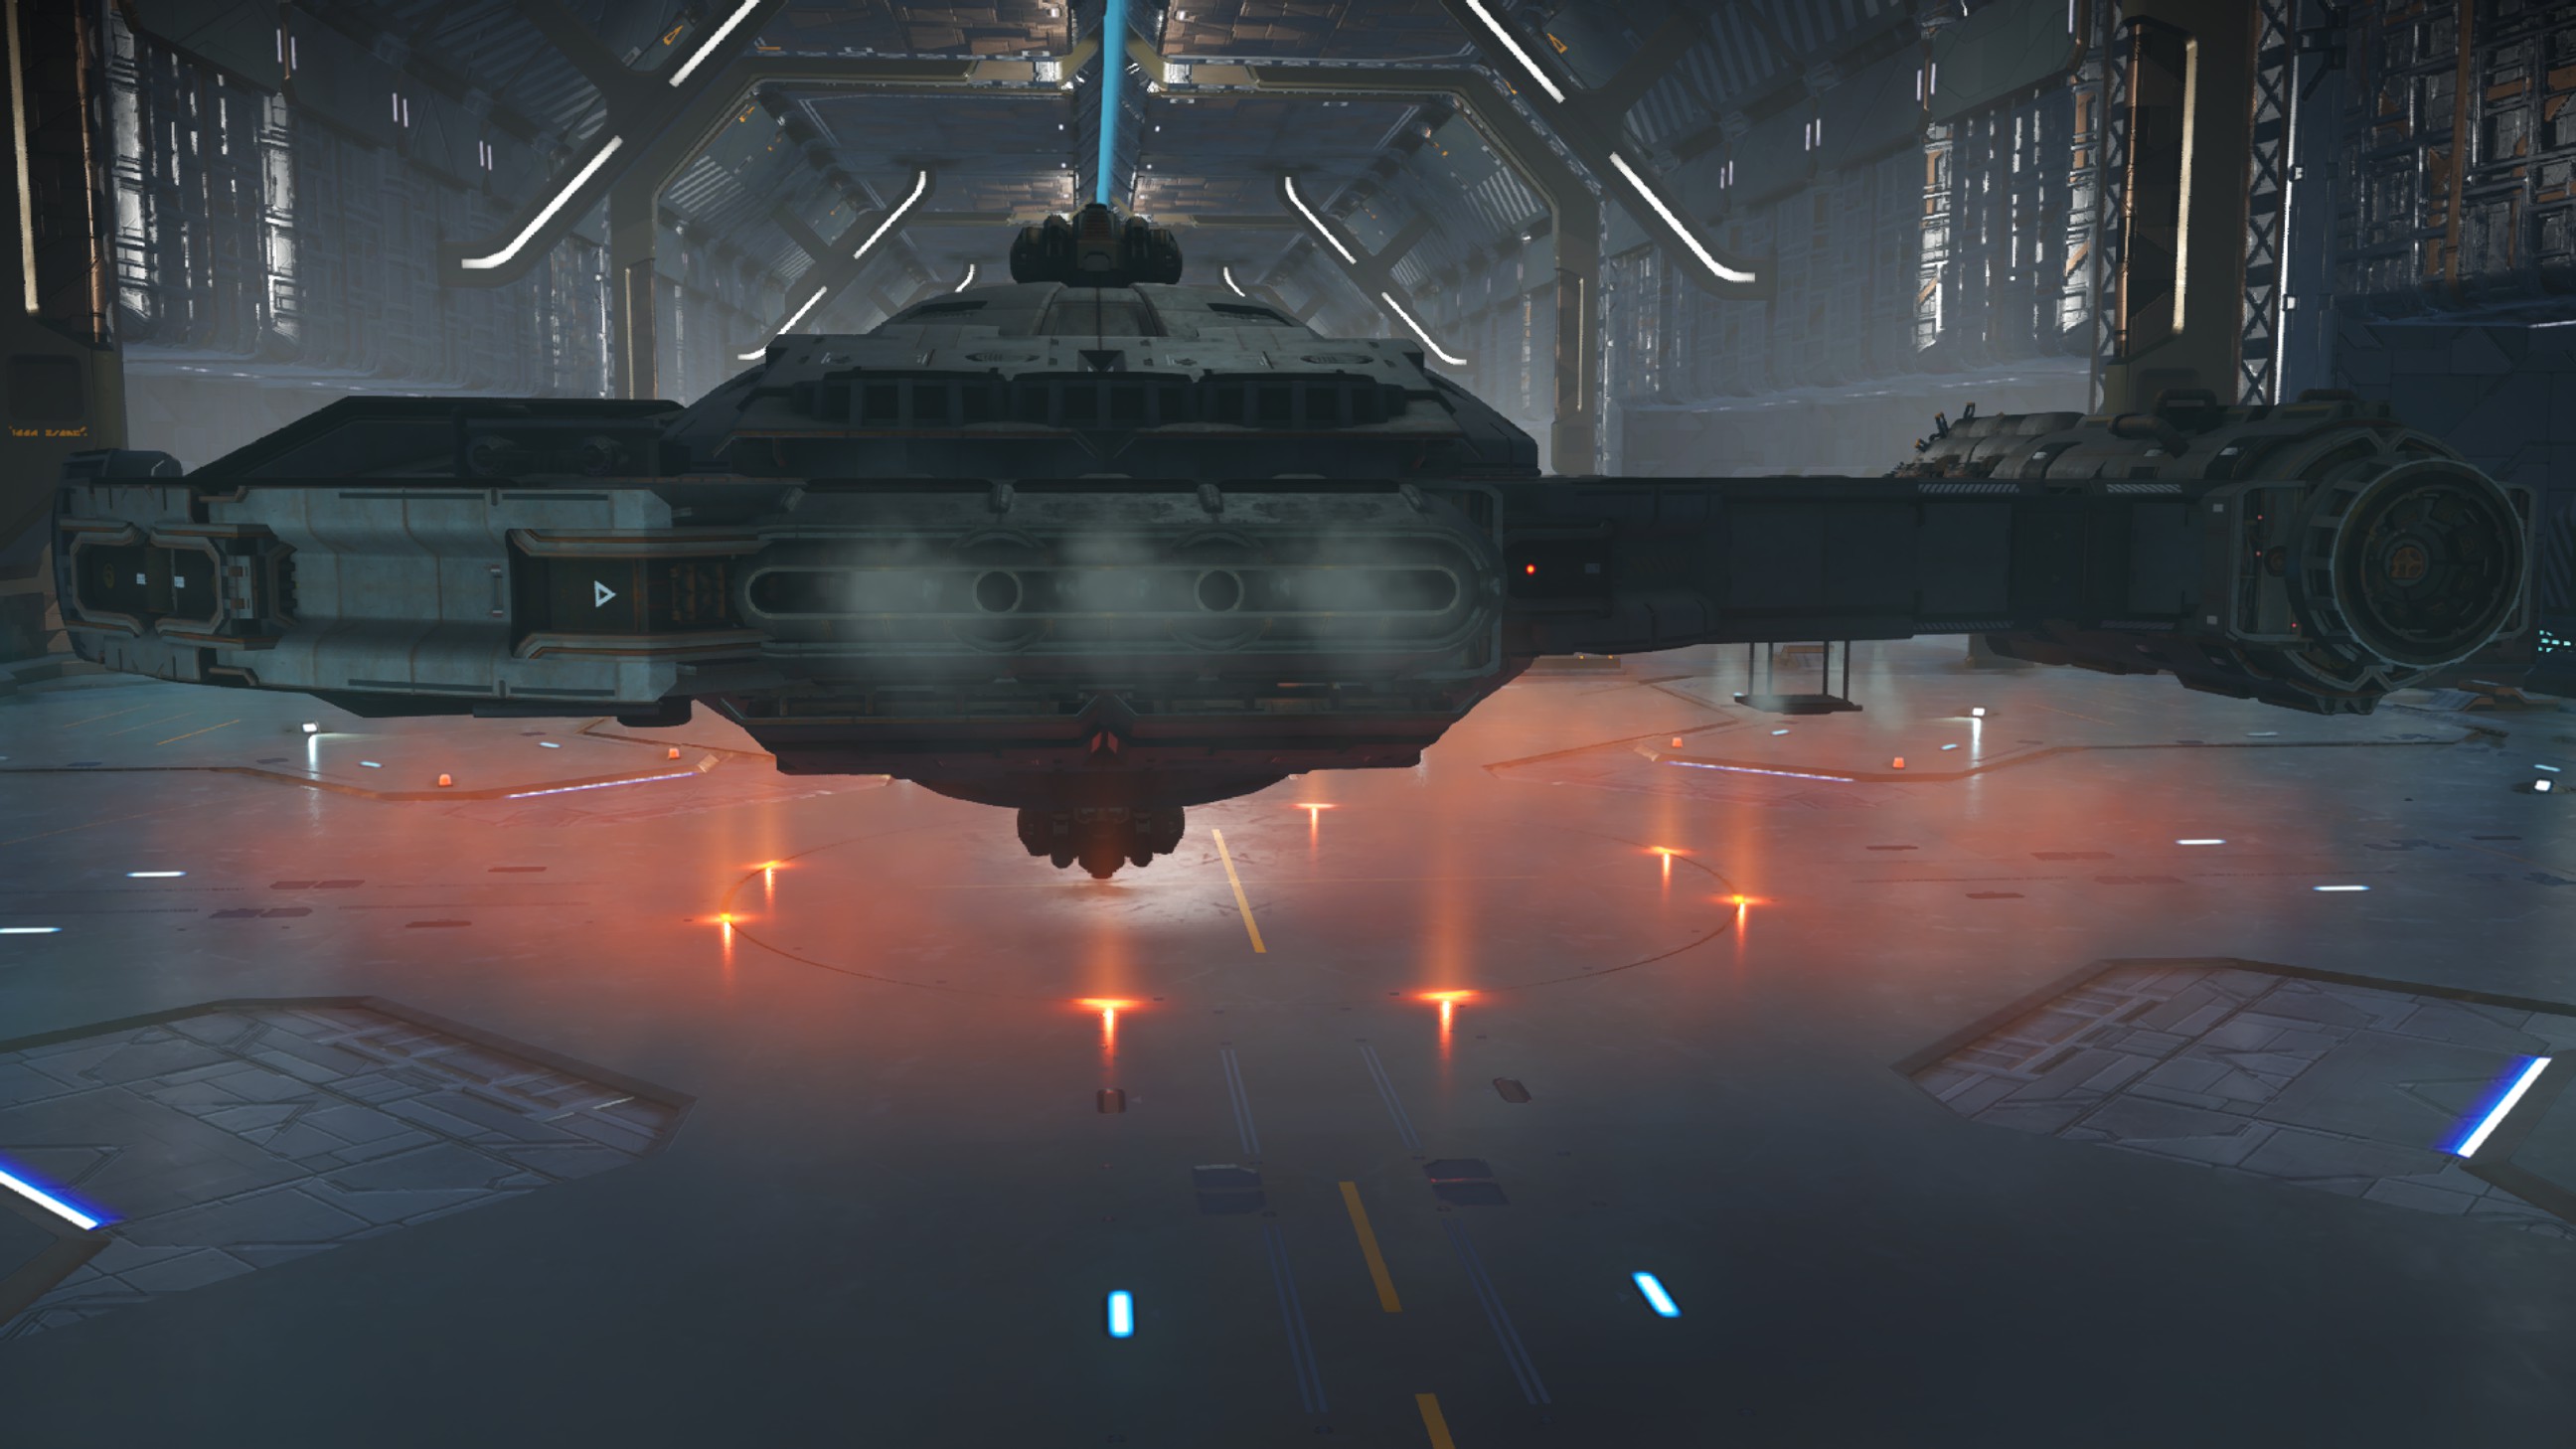
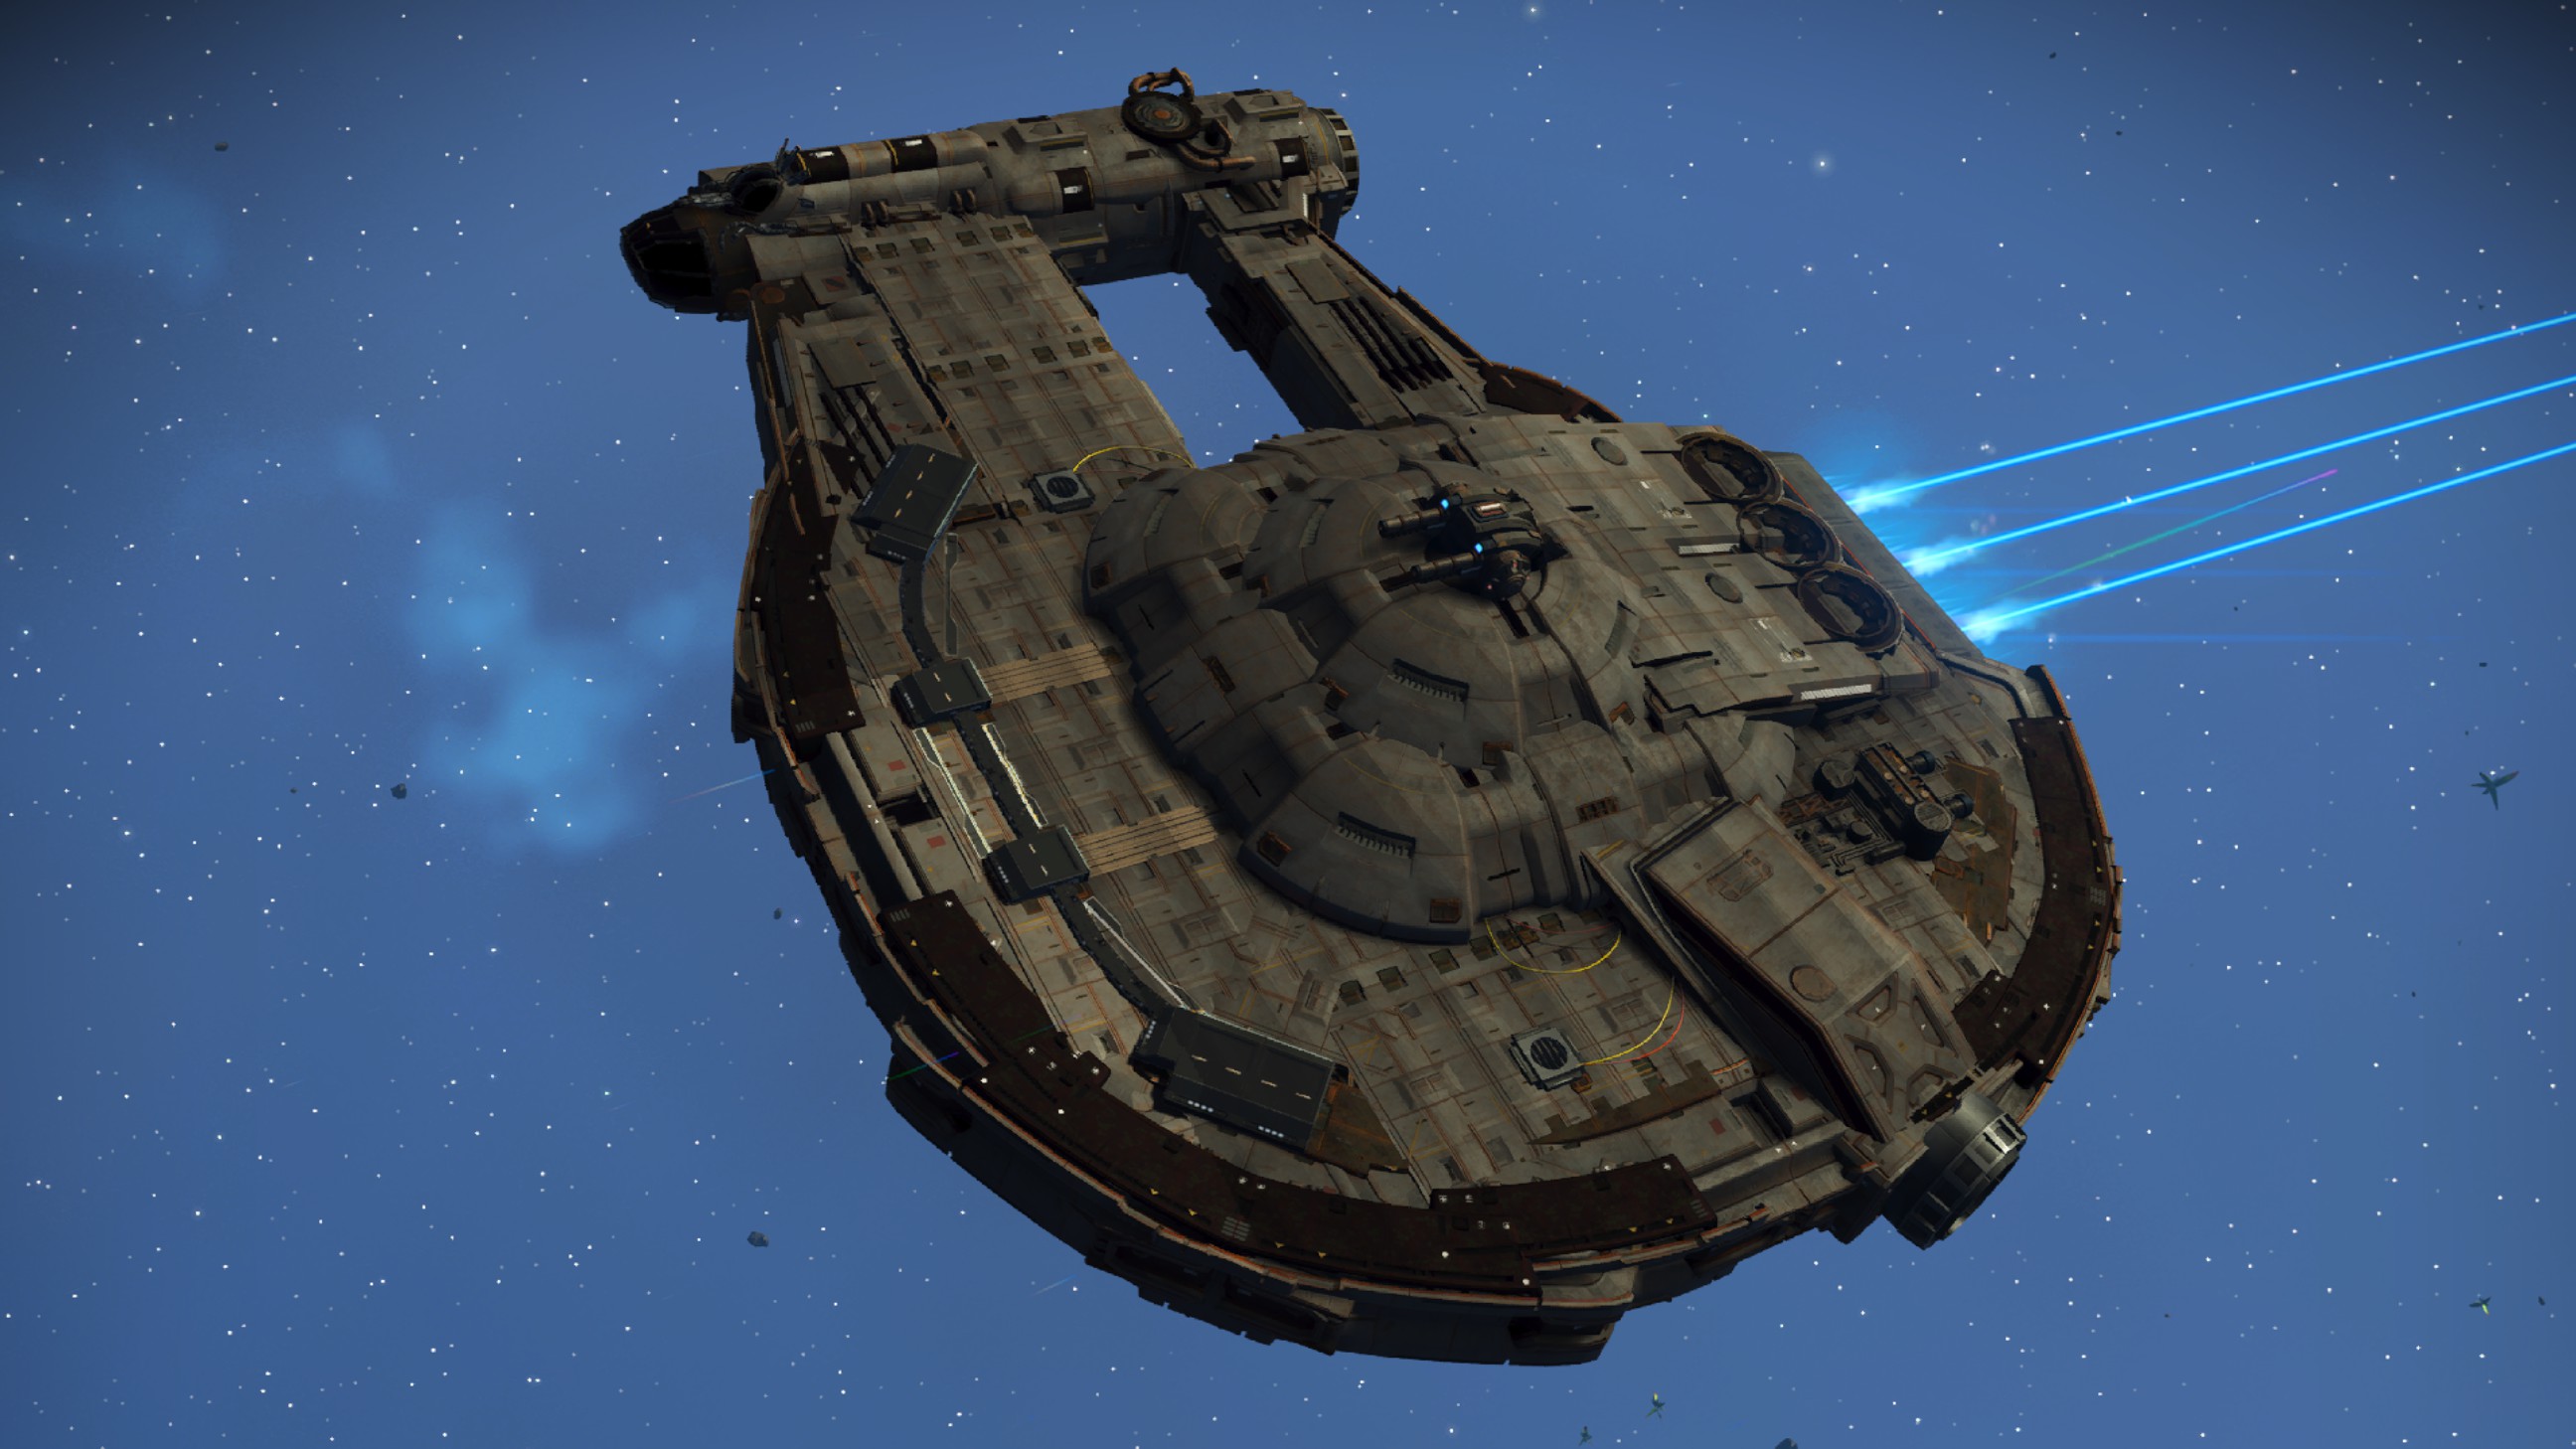
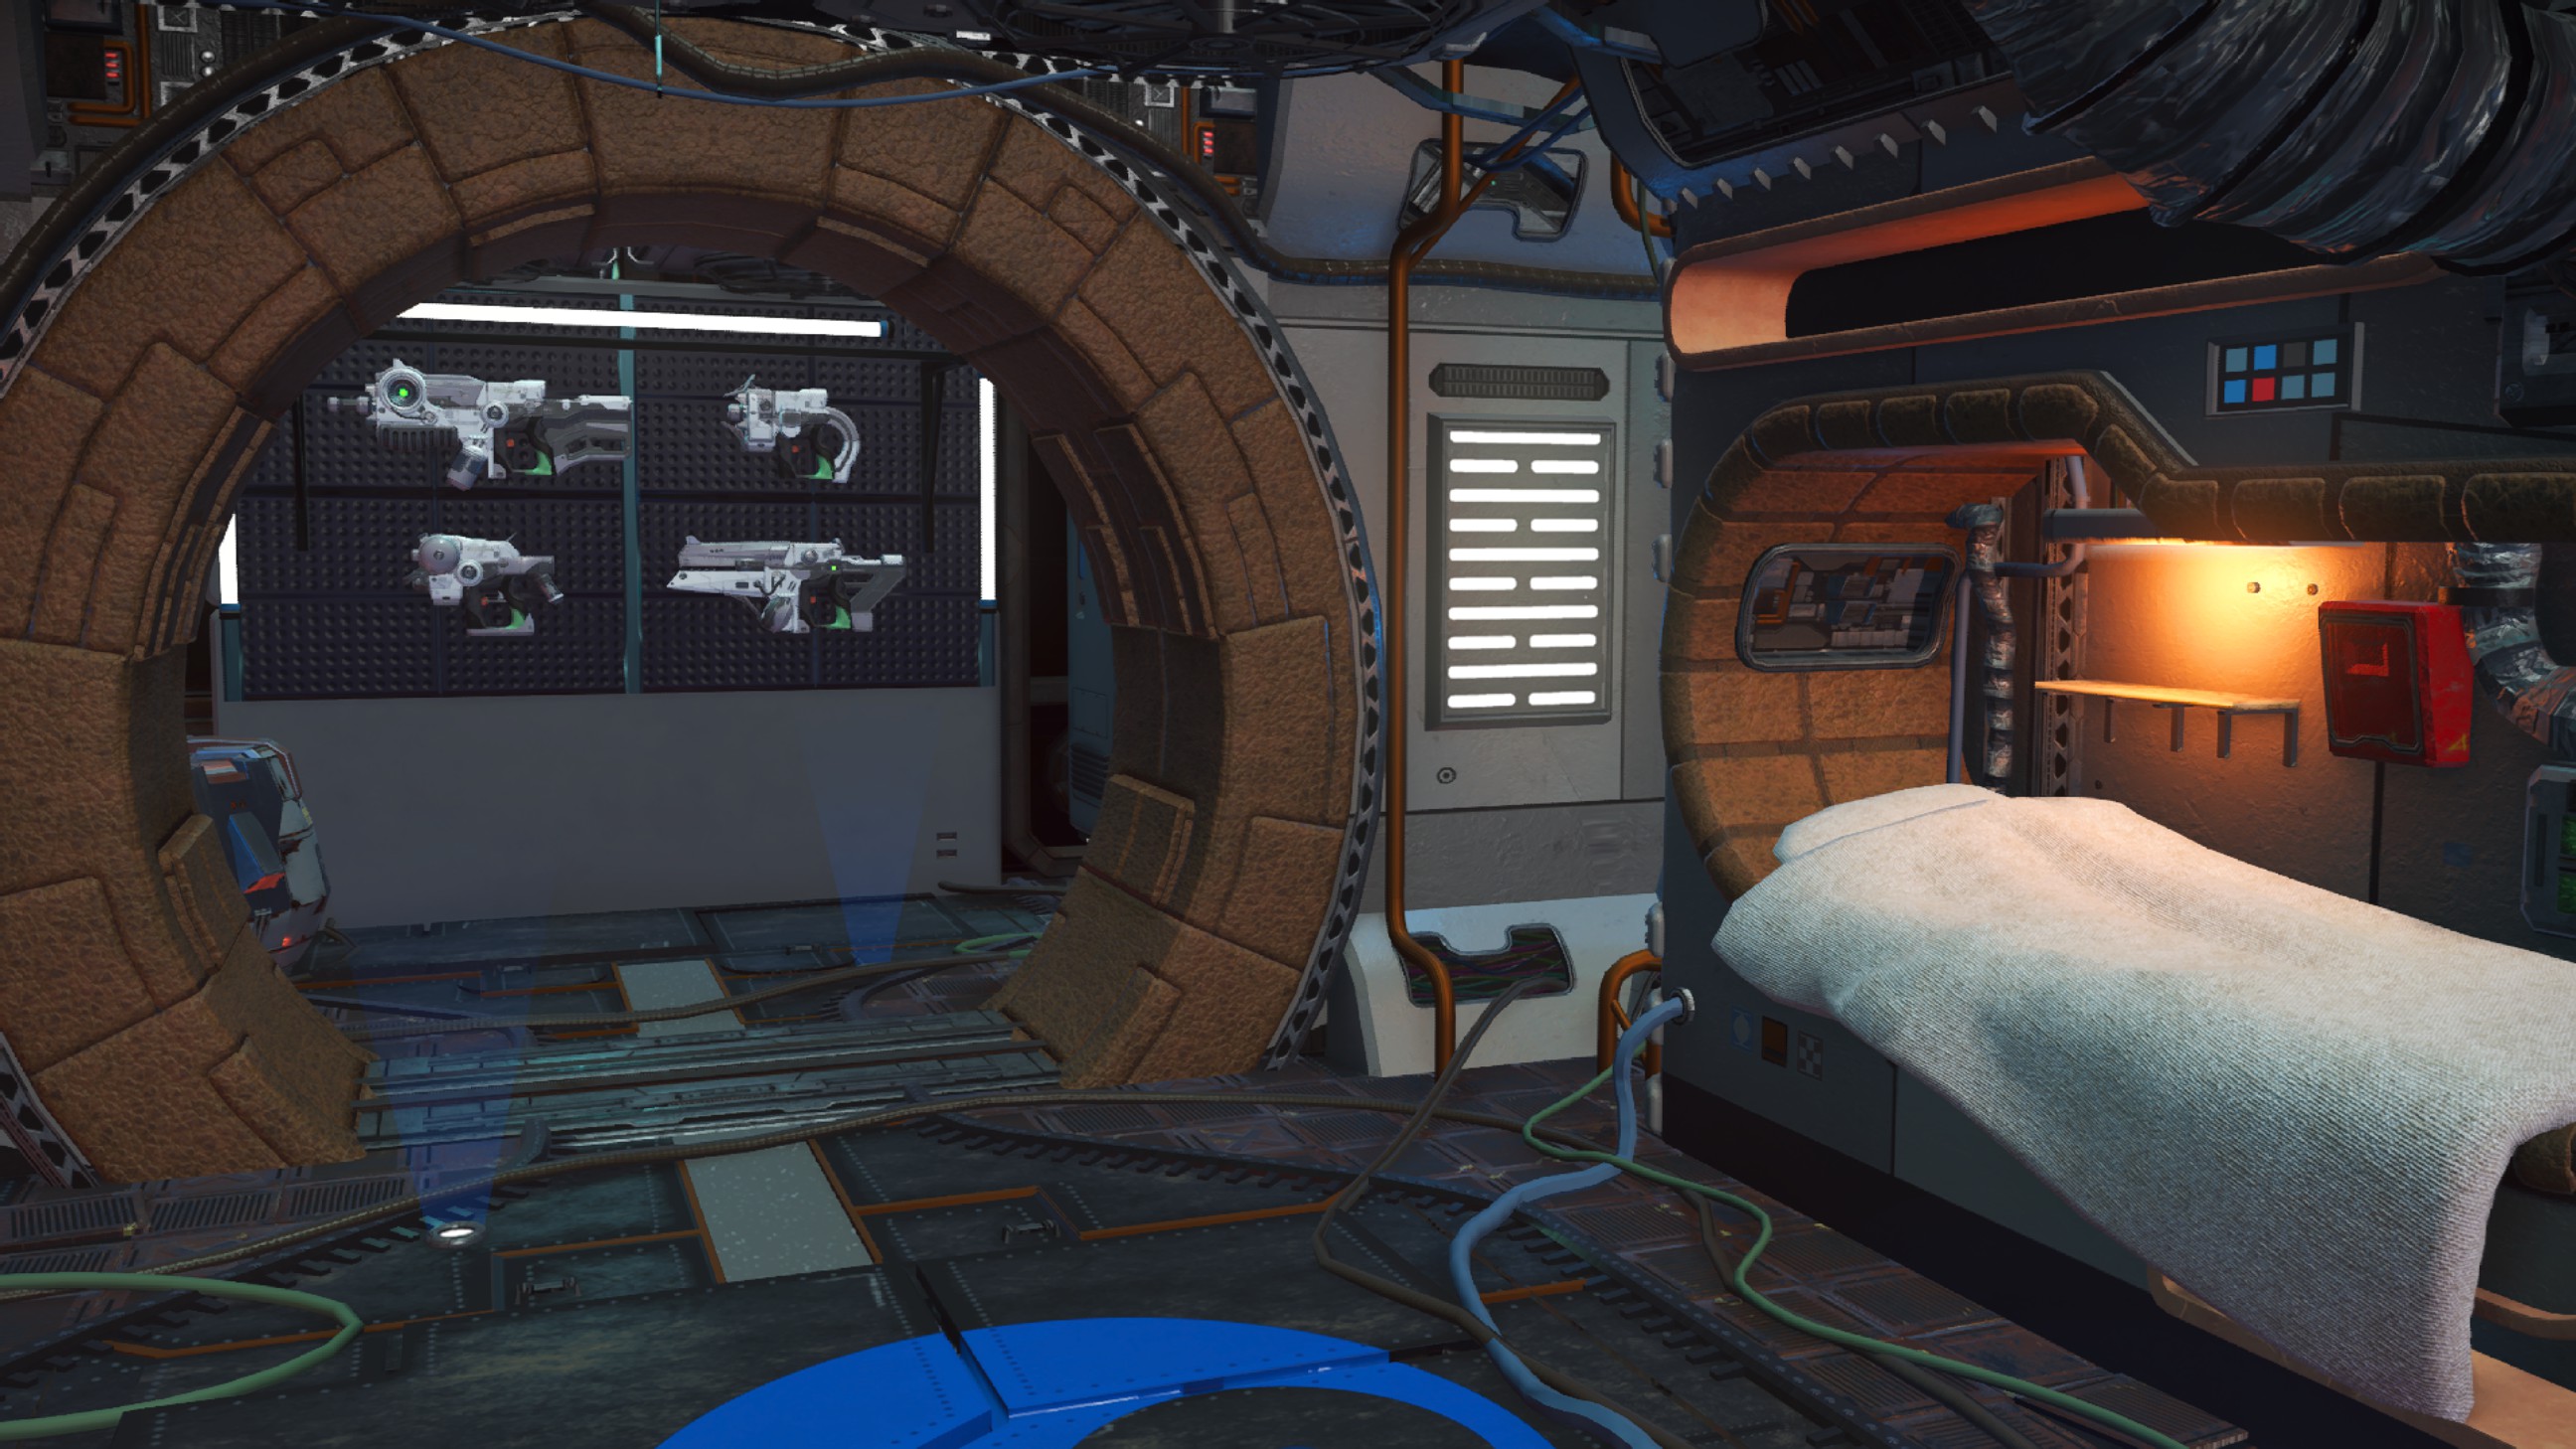
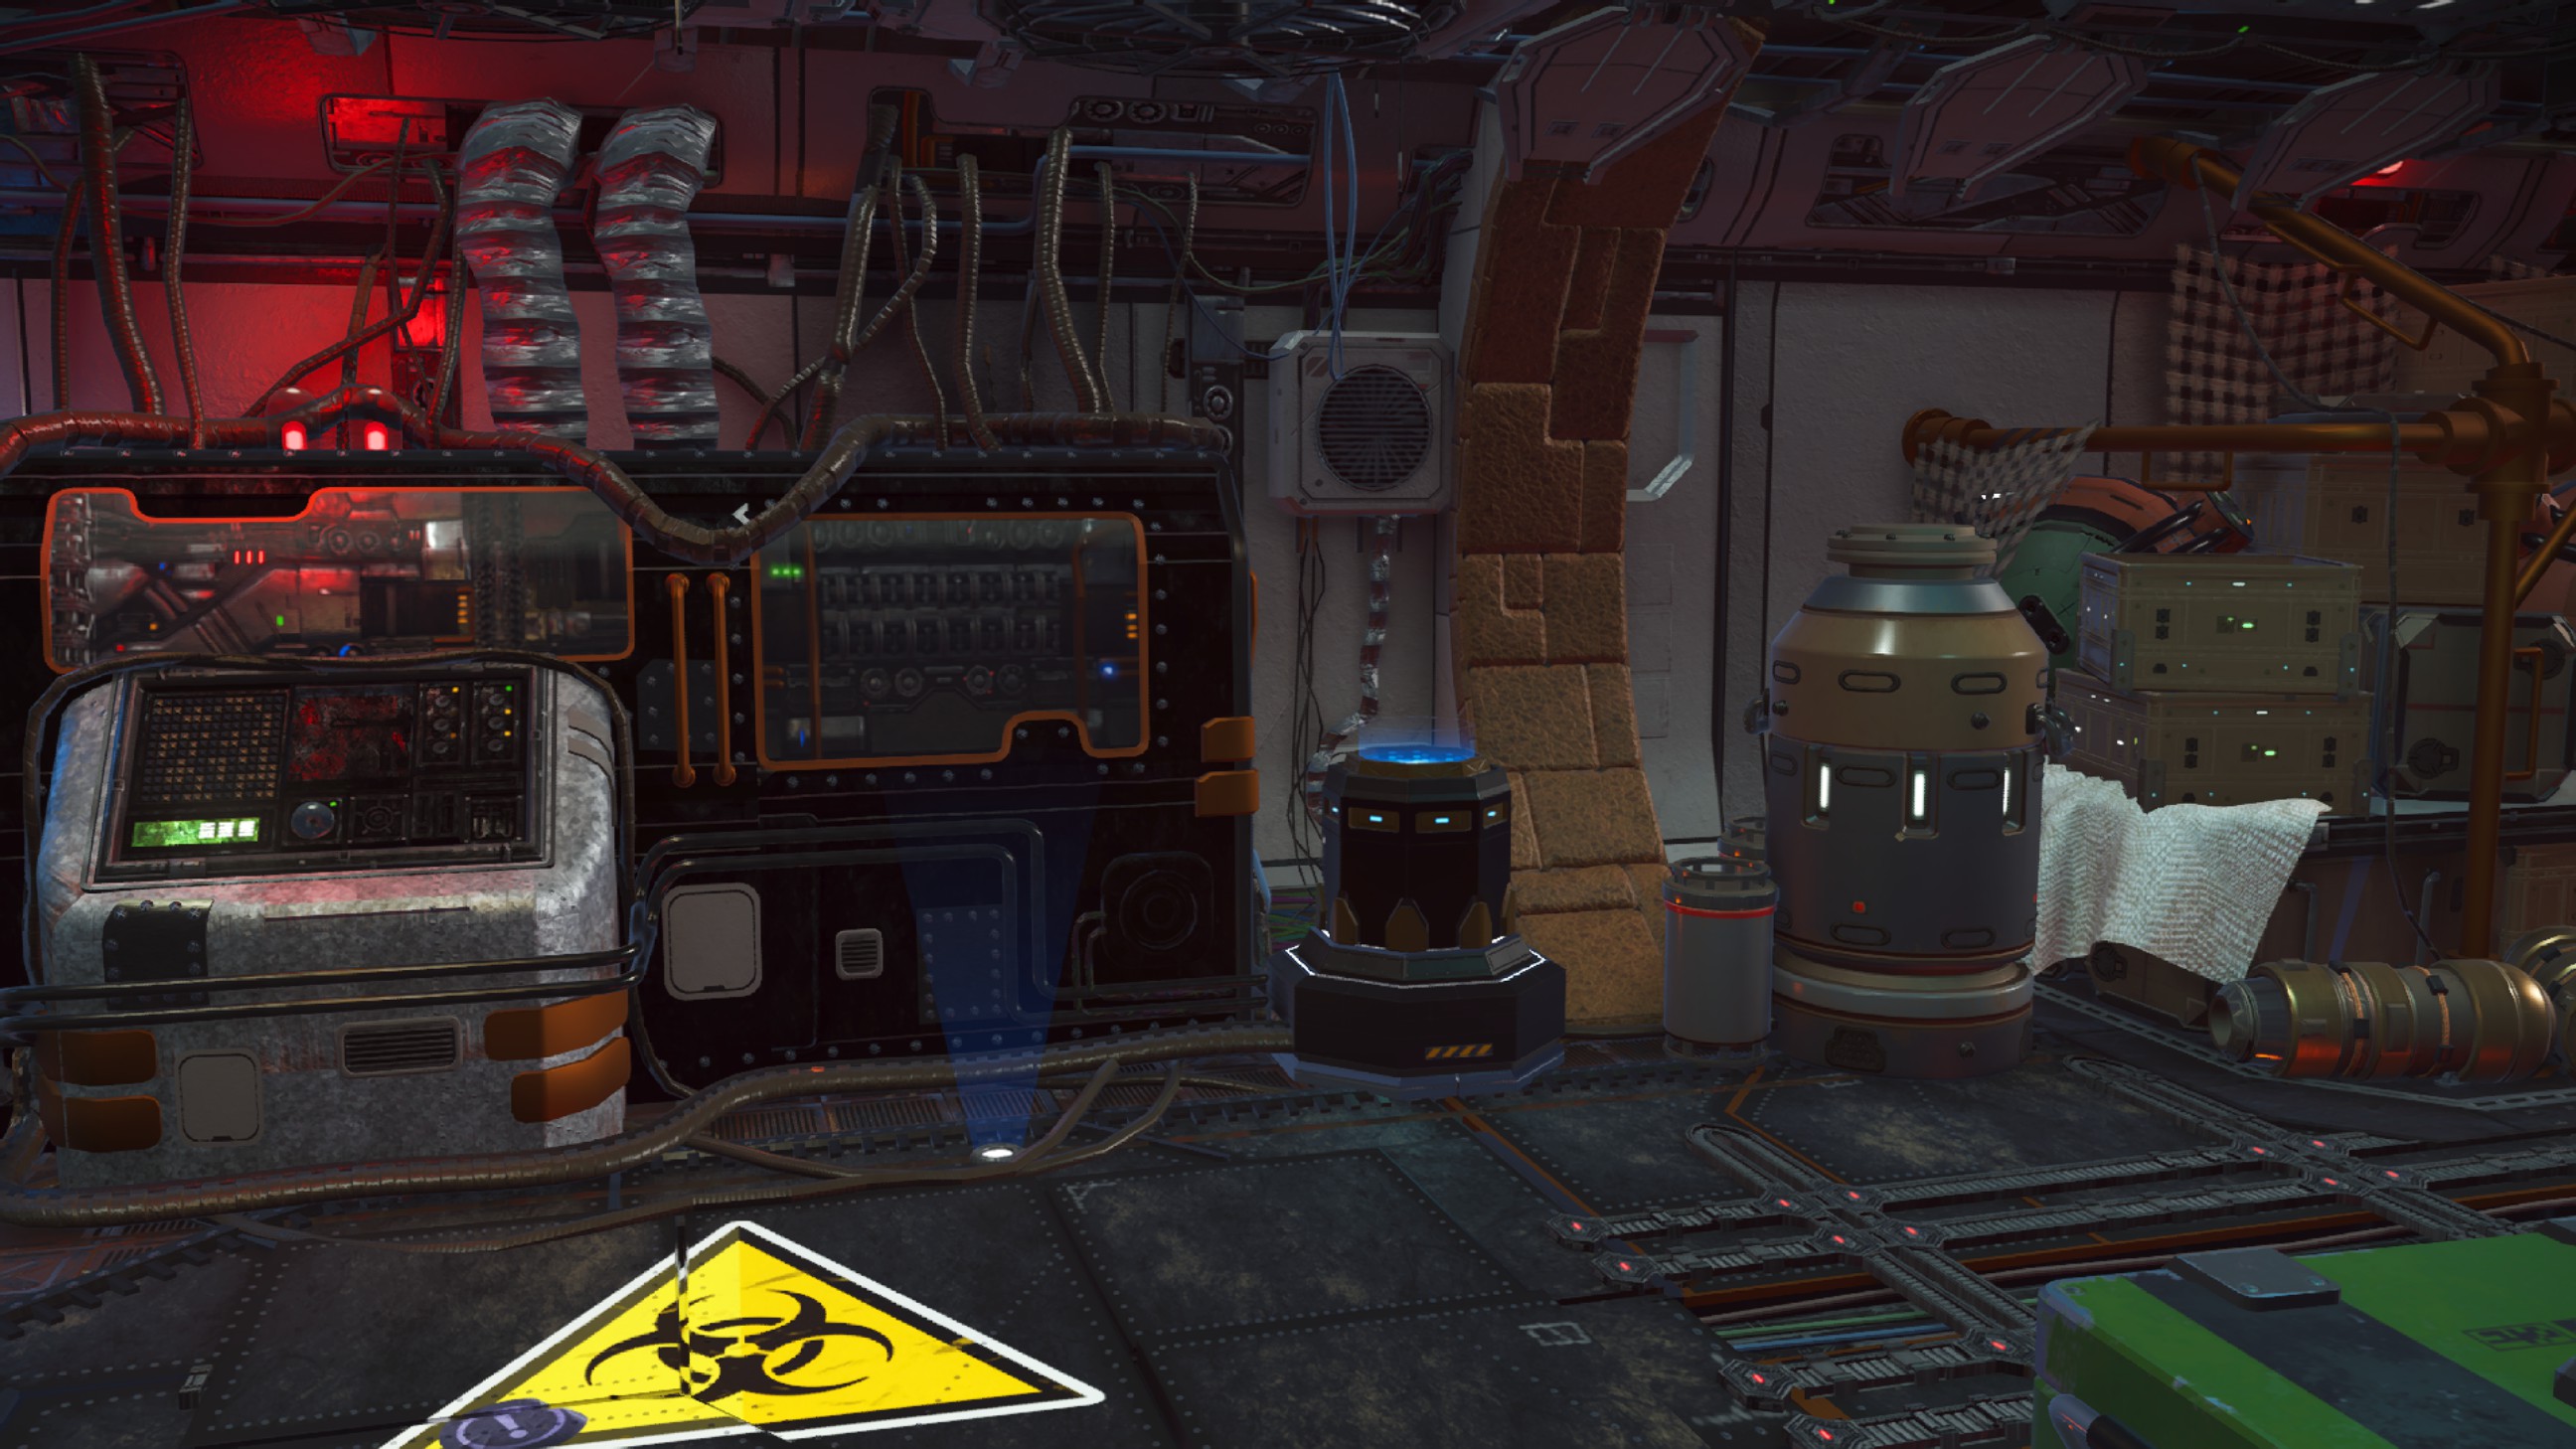
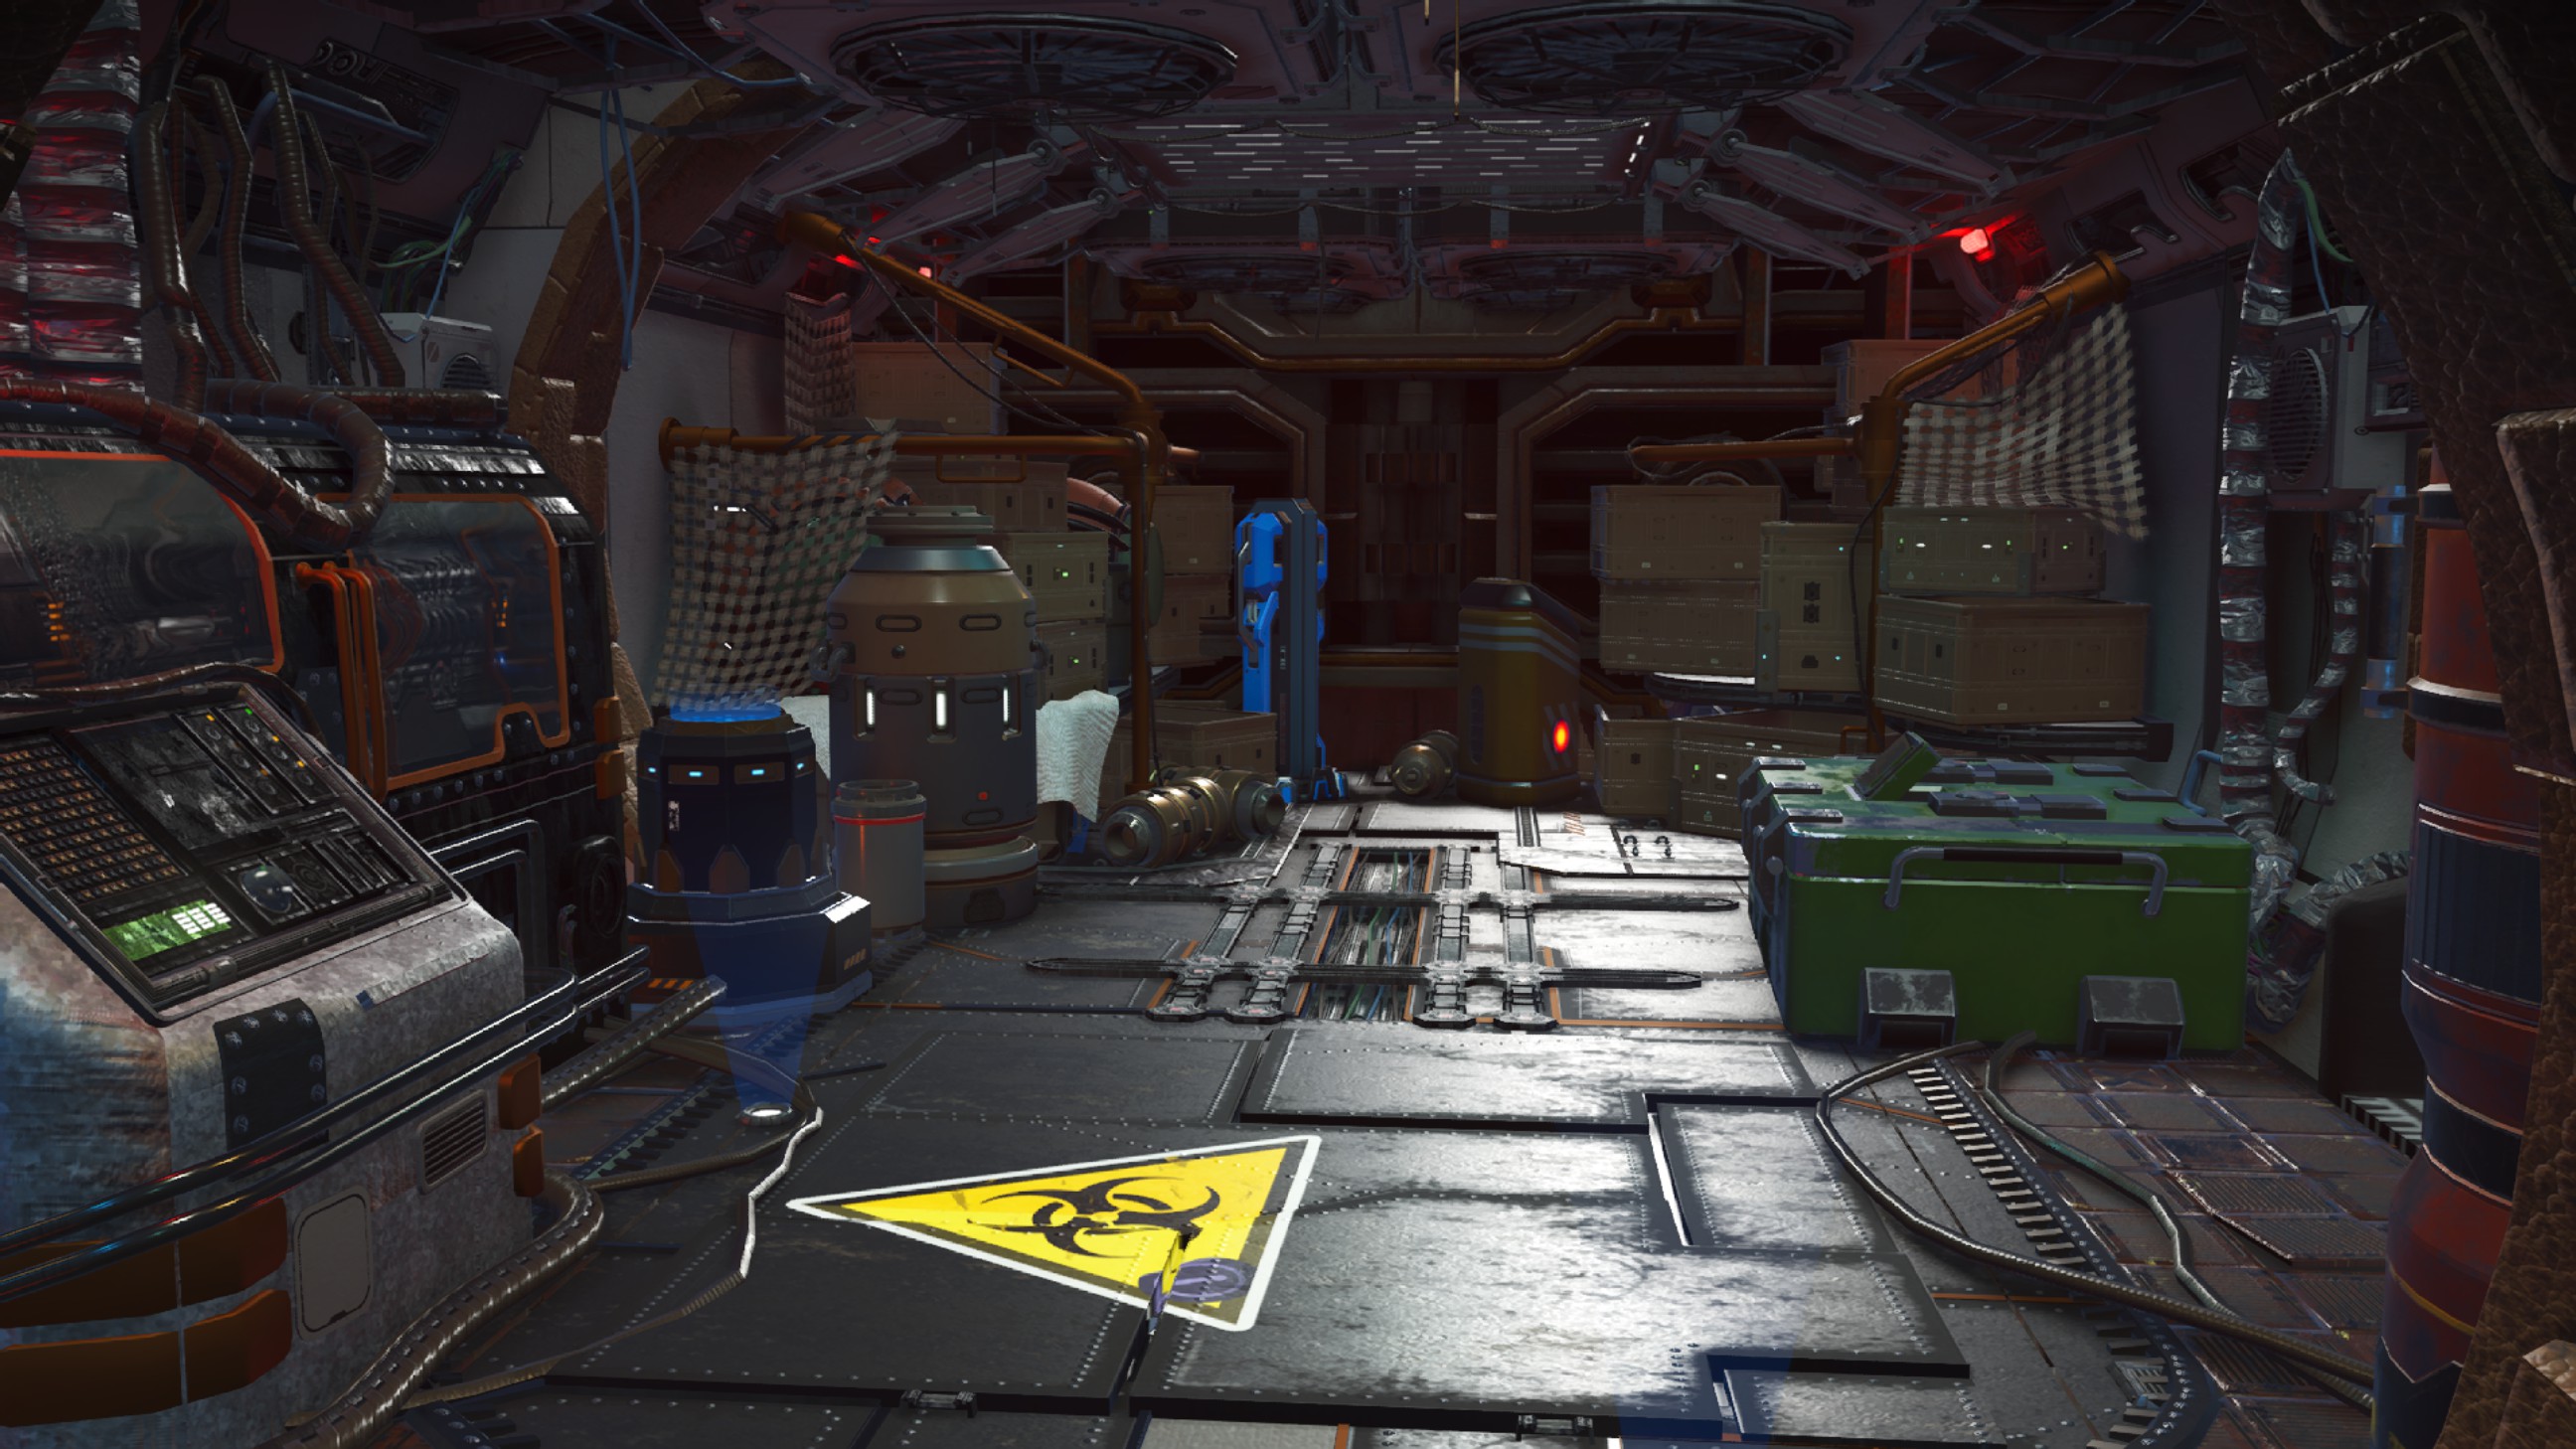
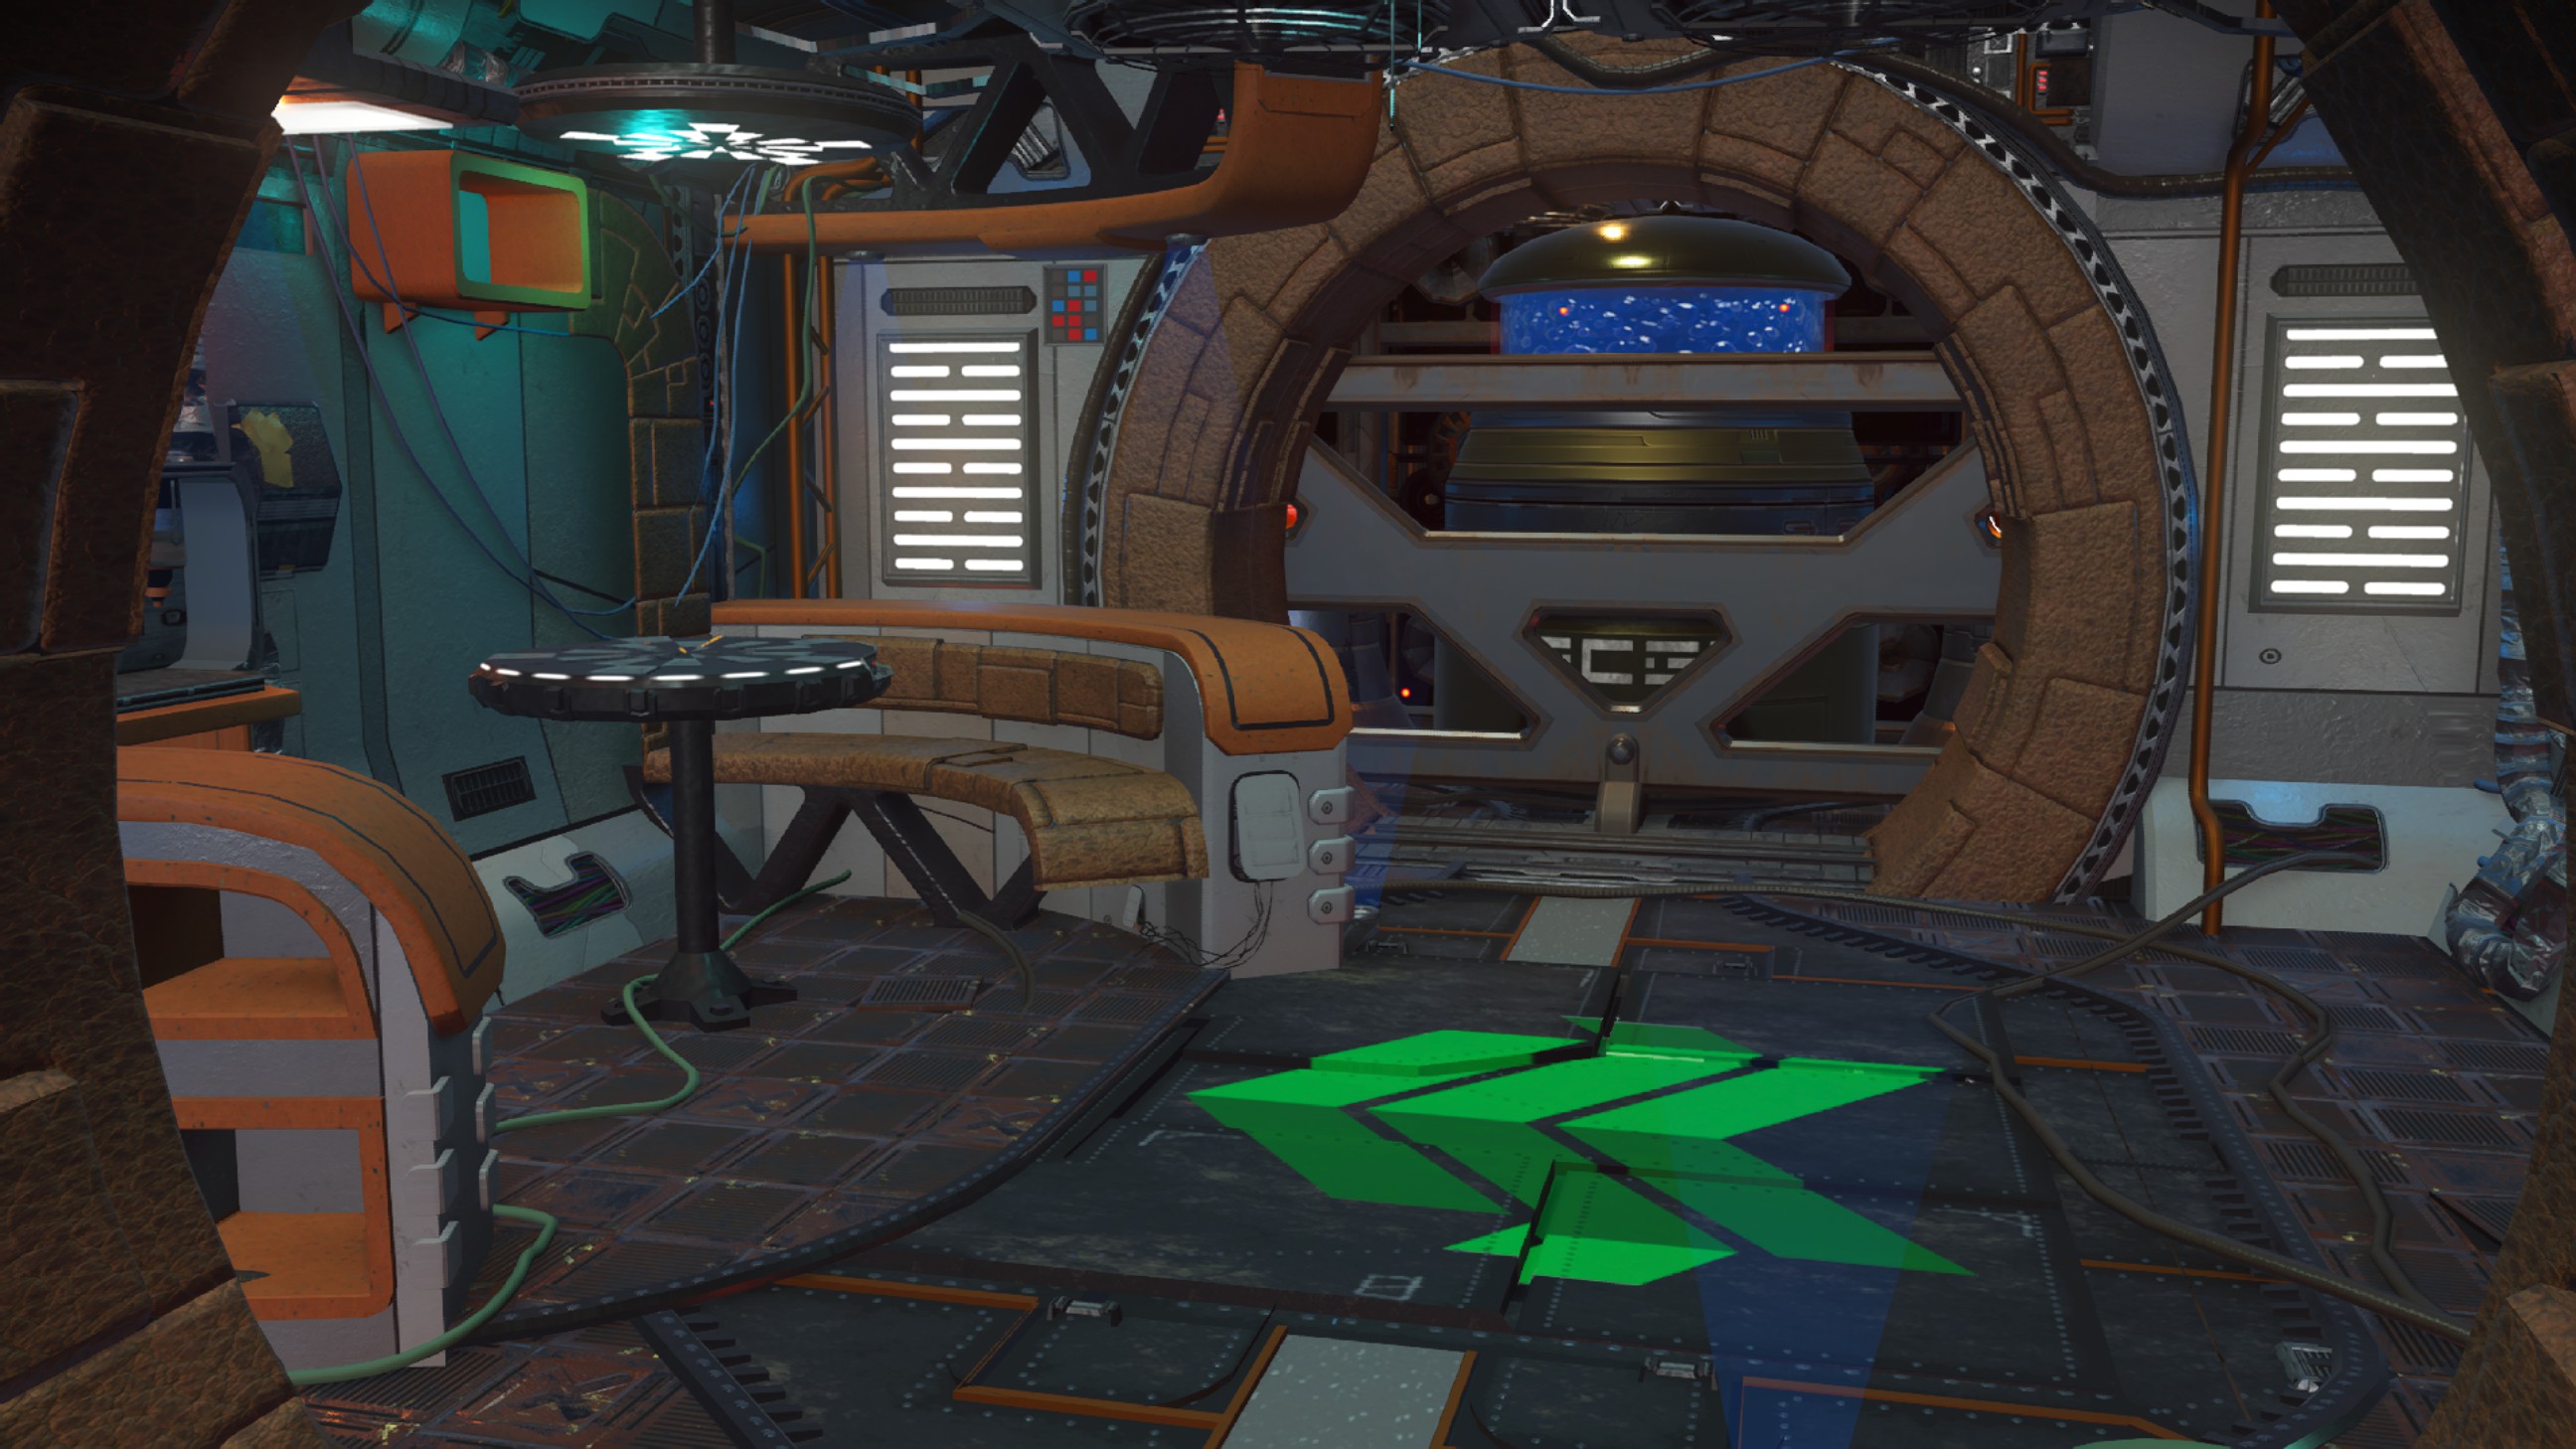
Don't forget to decorate the inside:
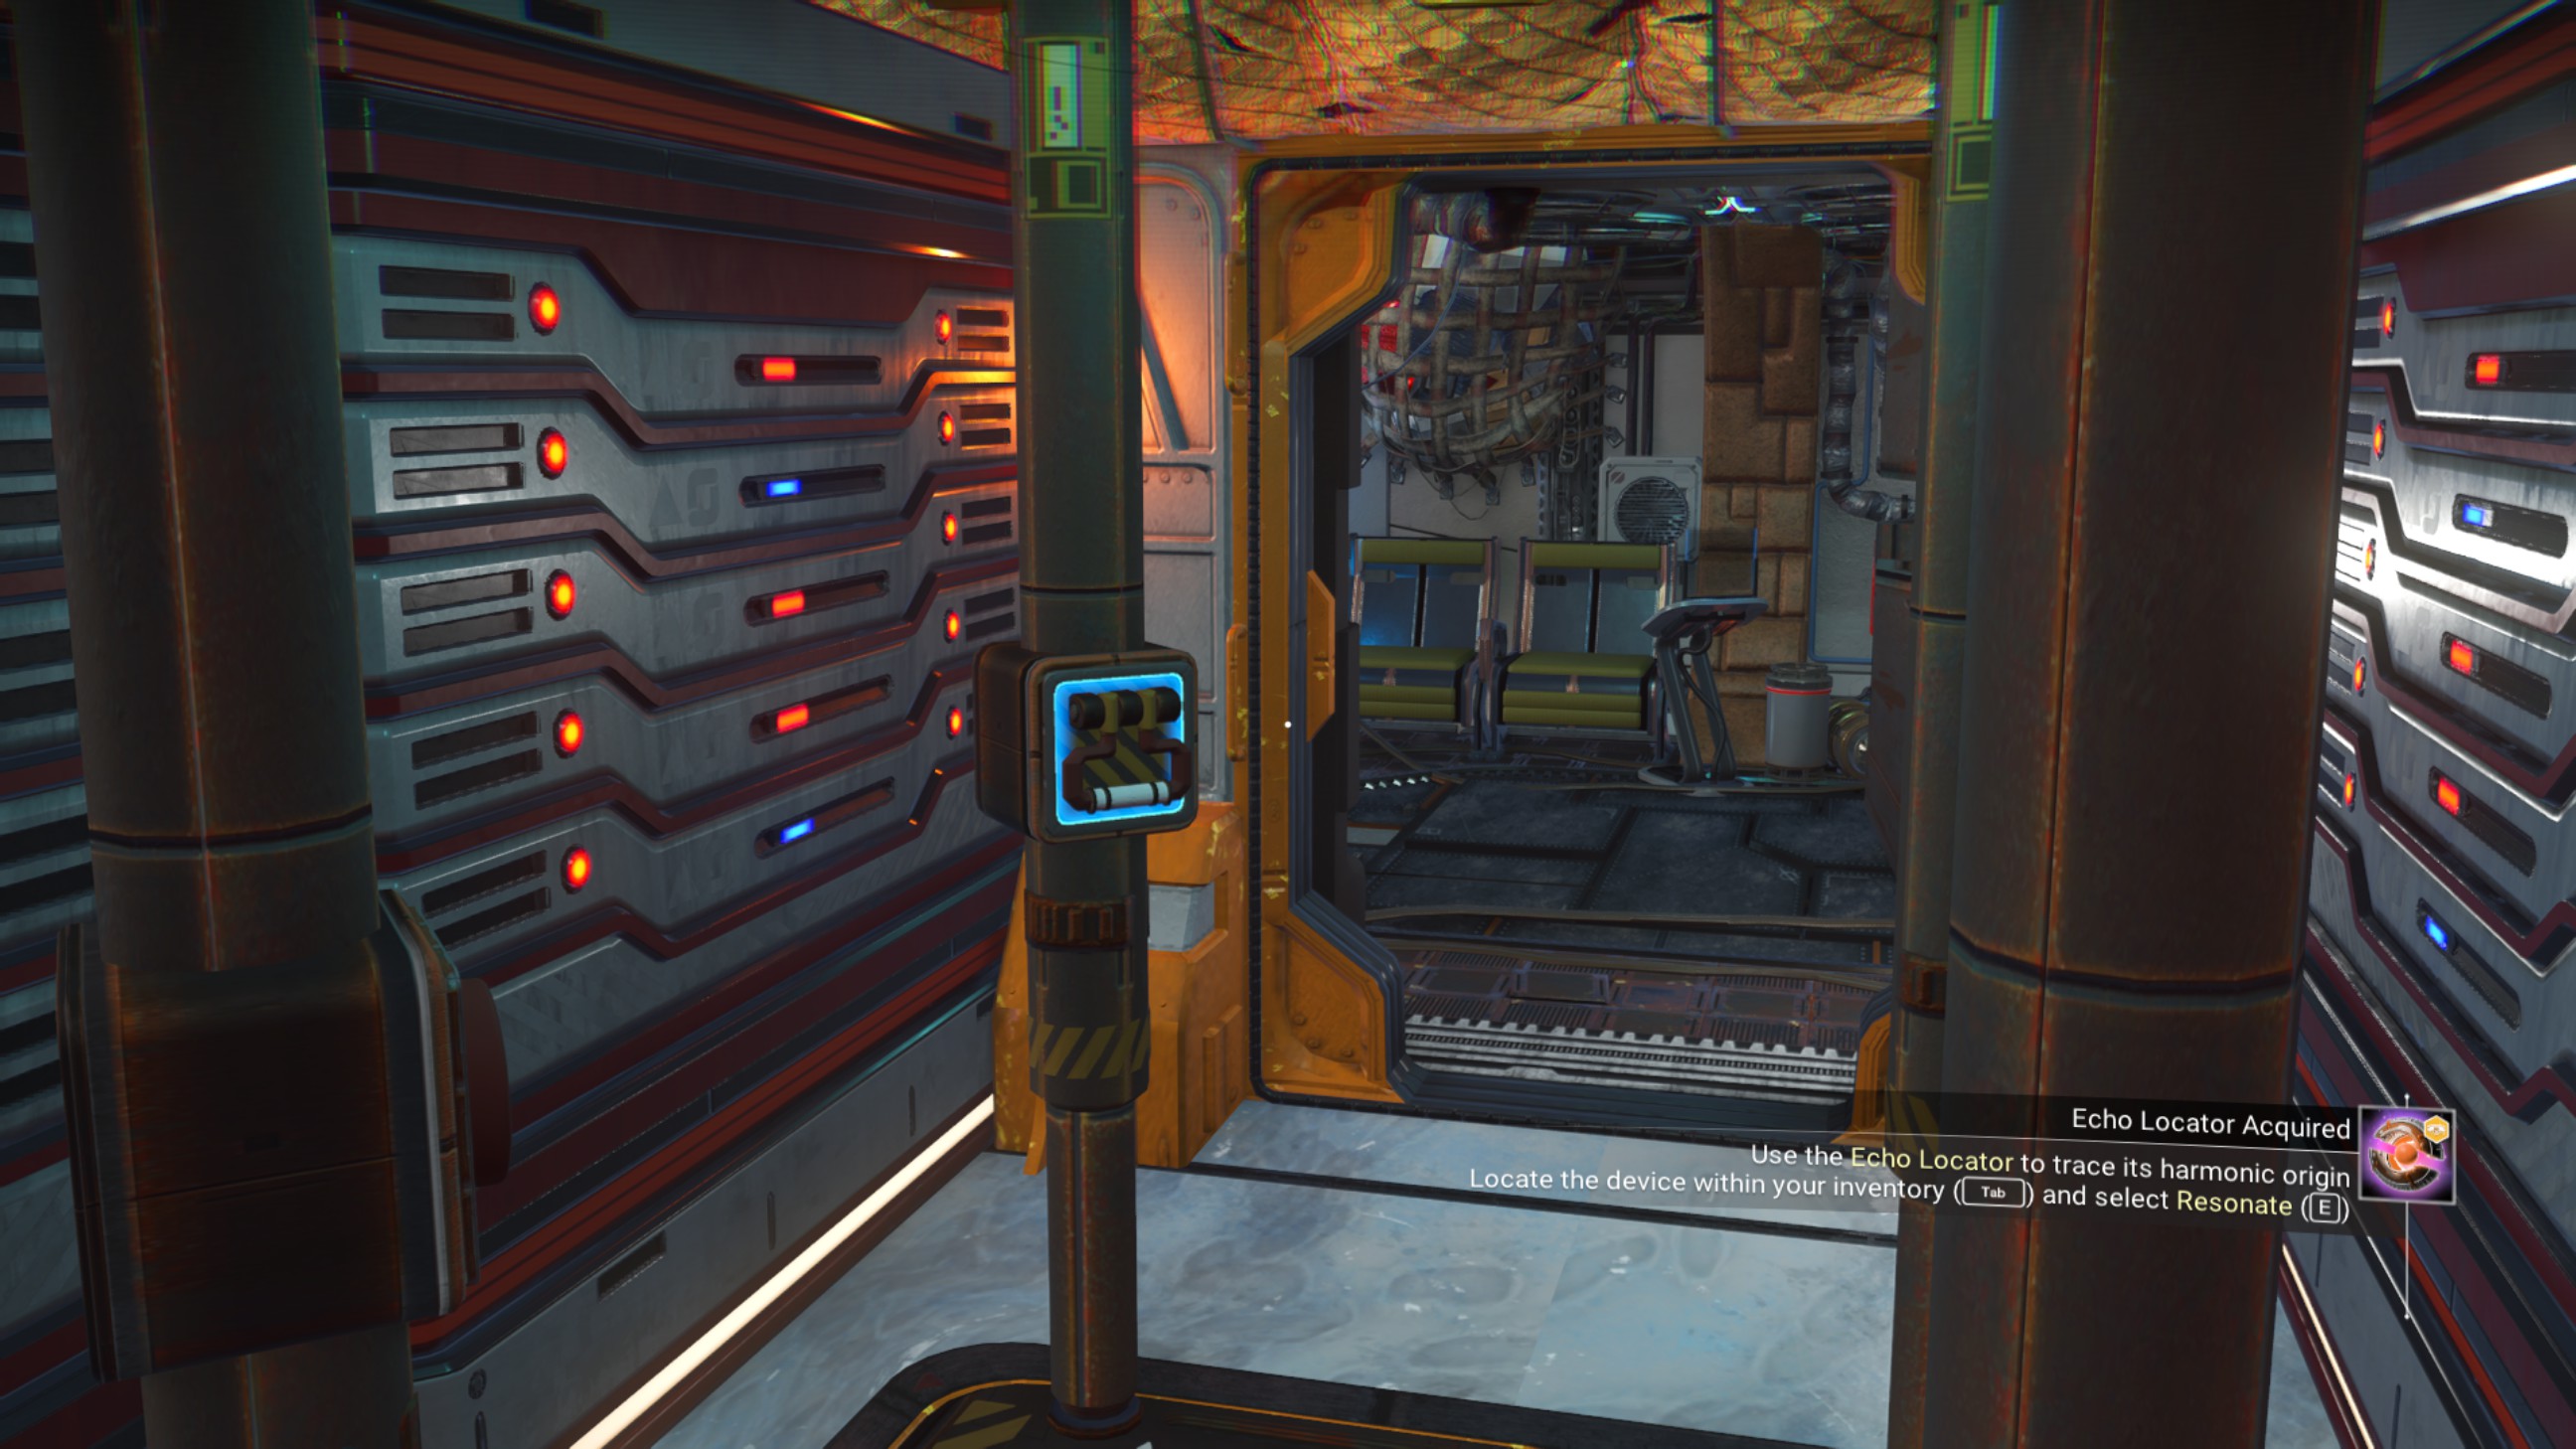
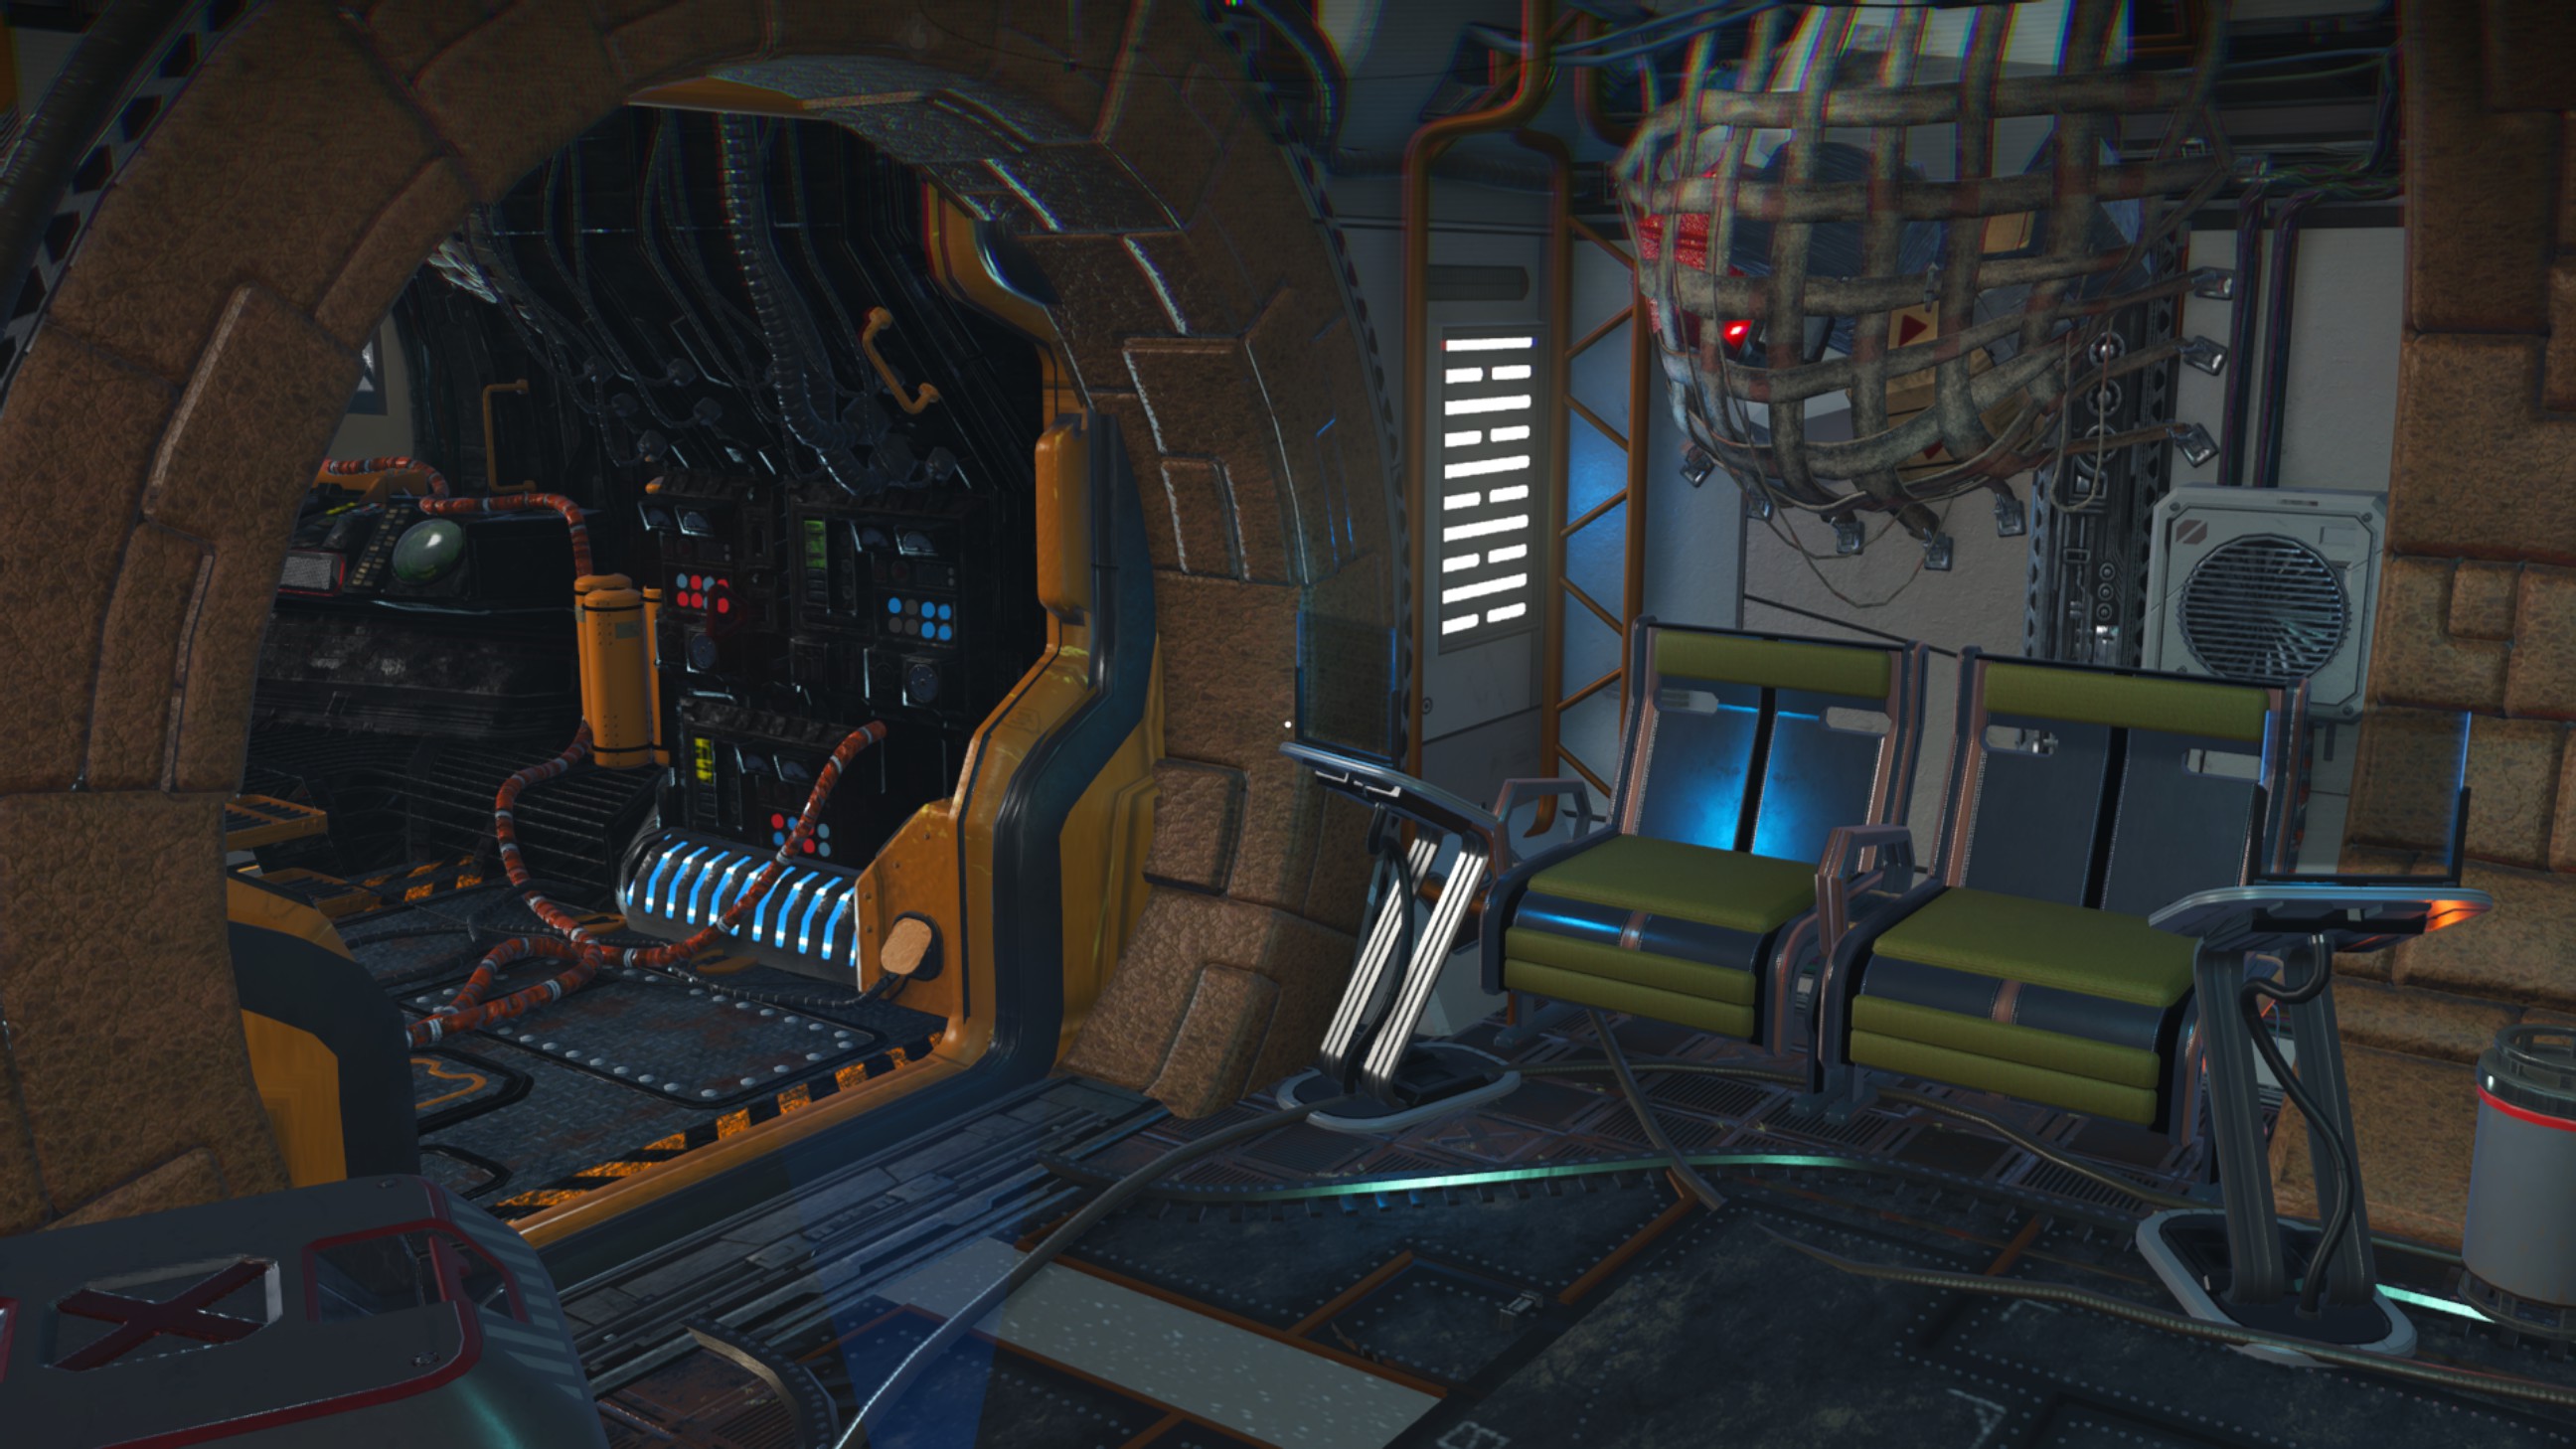
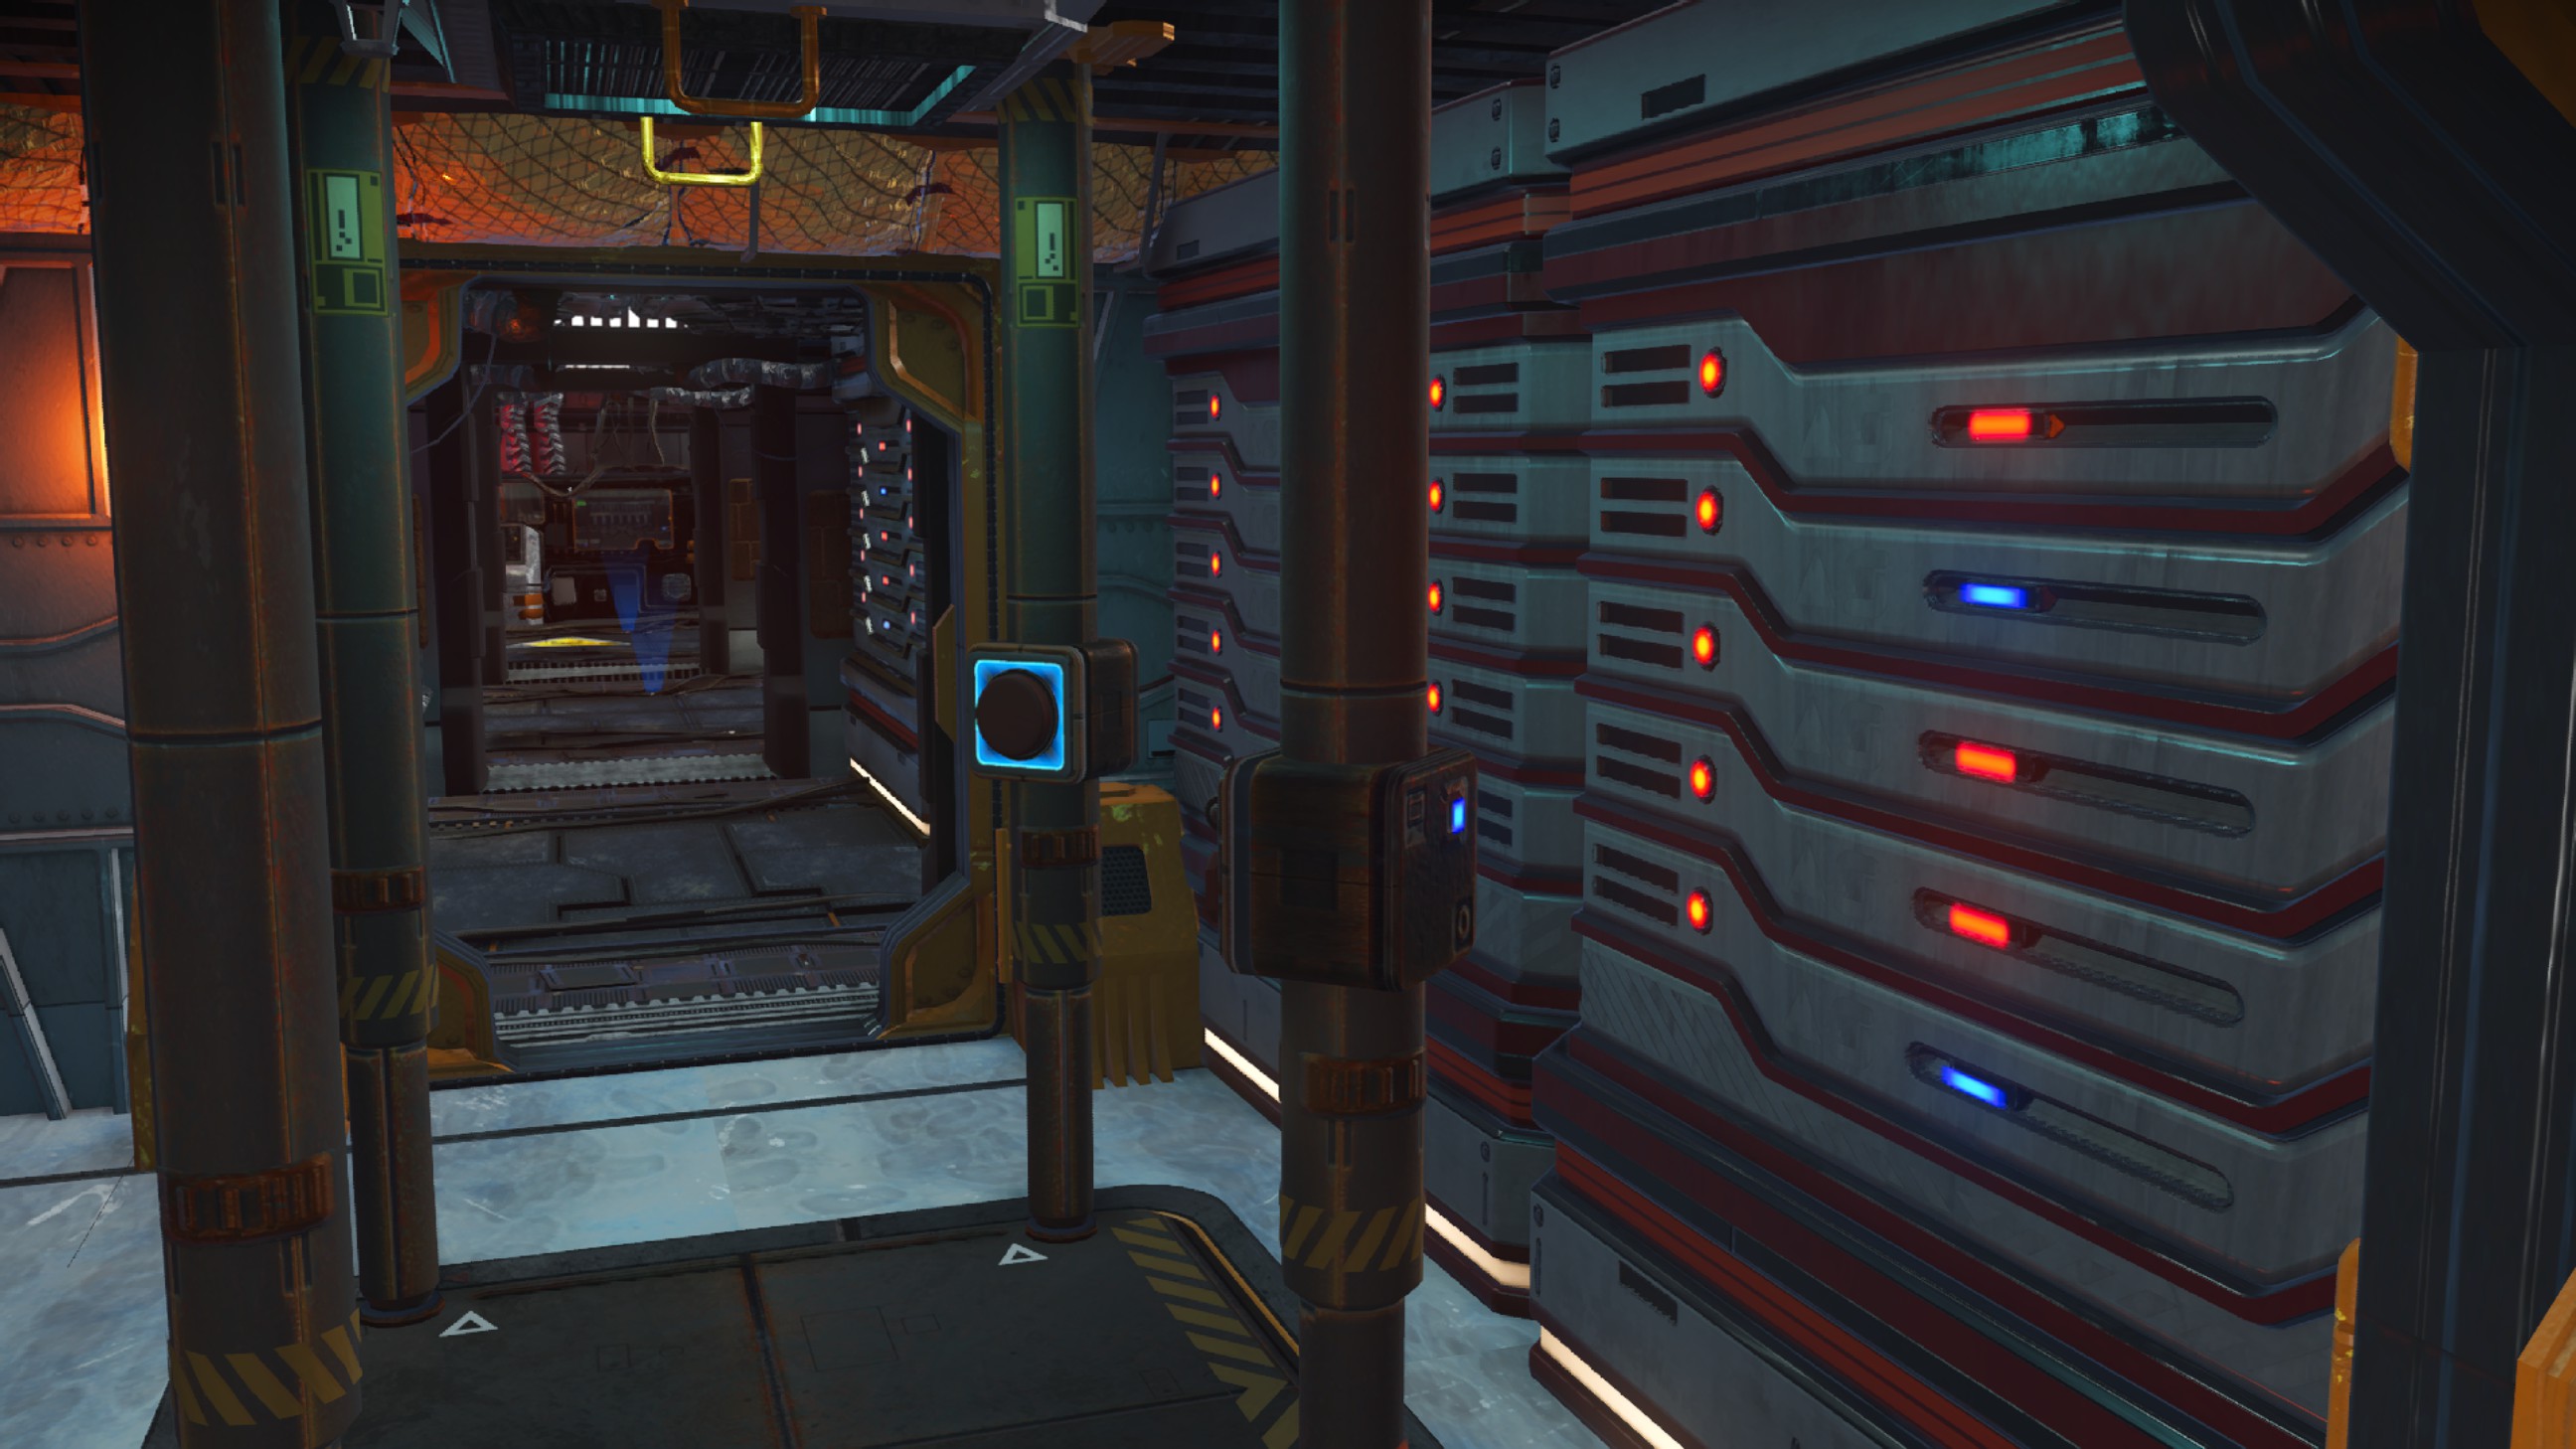
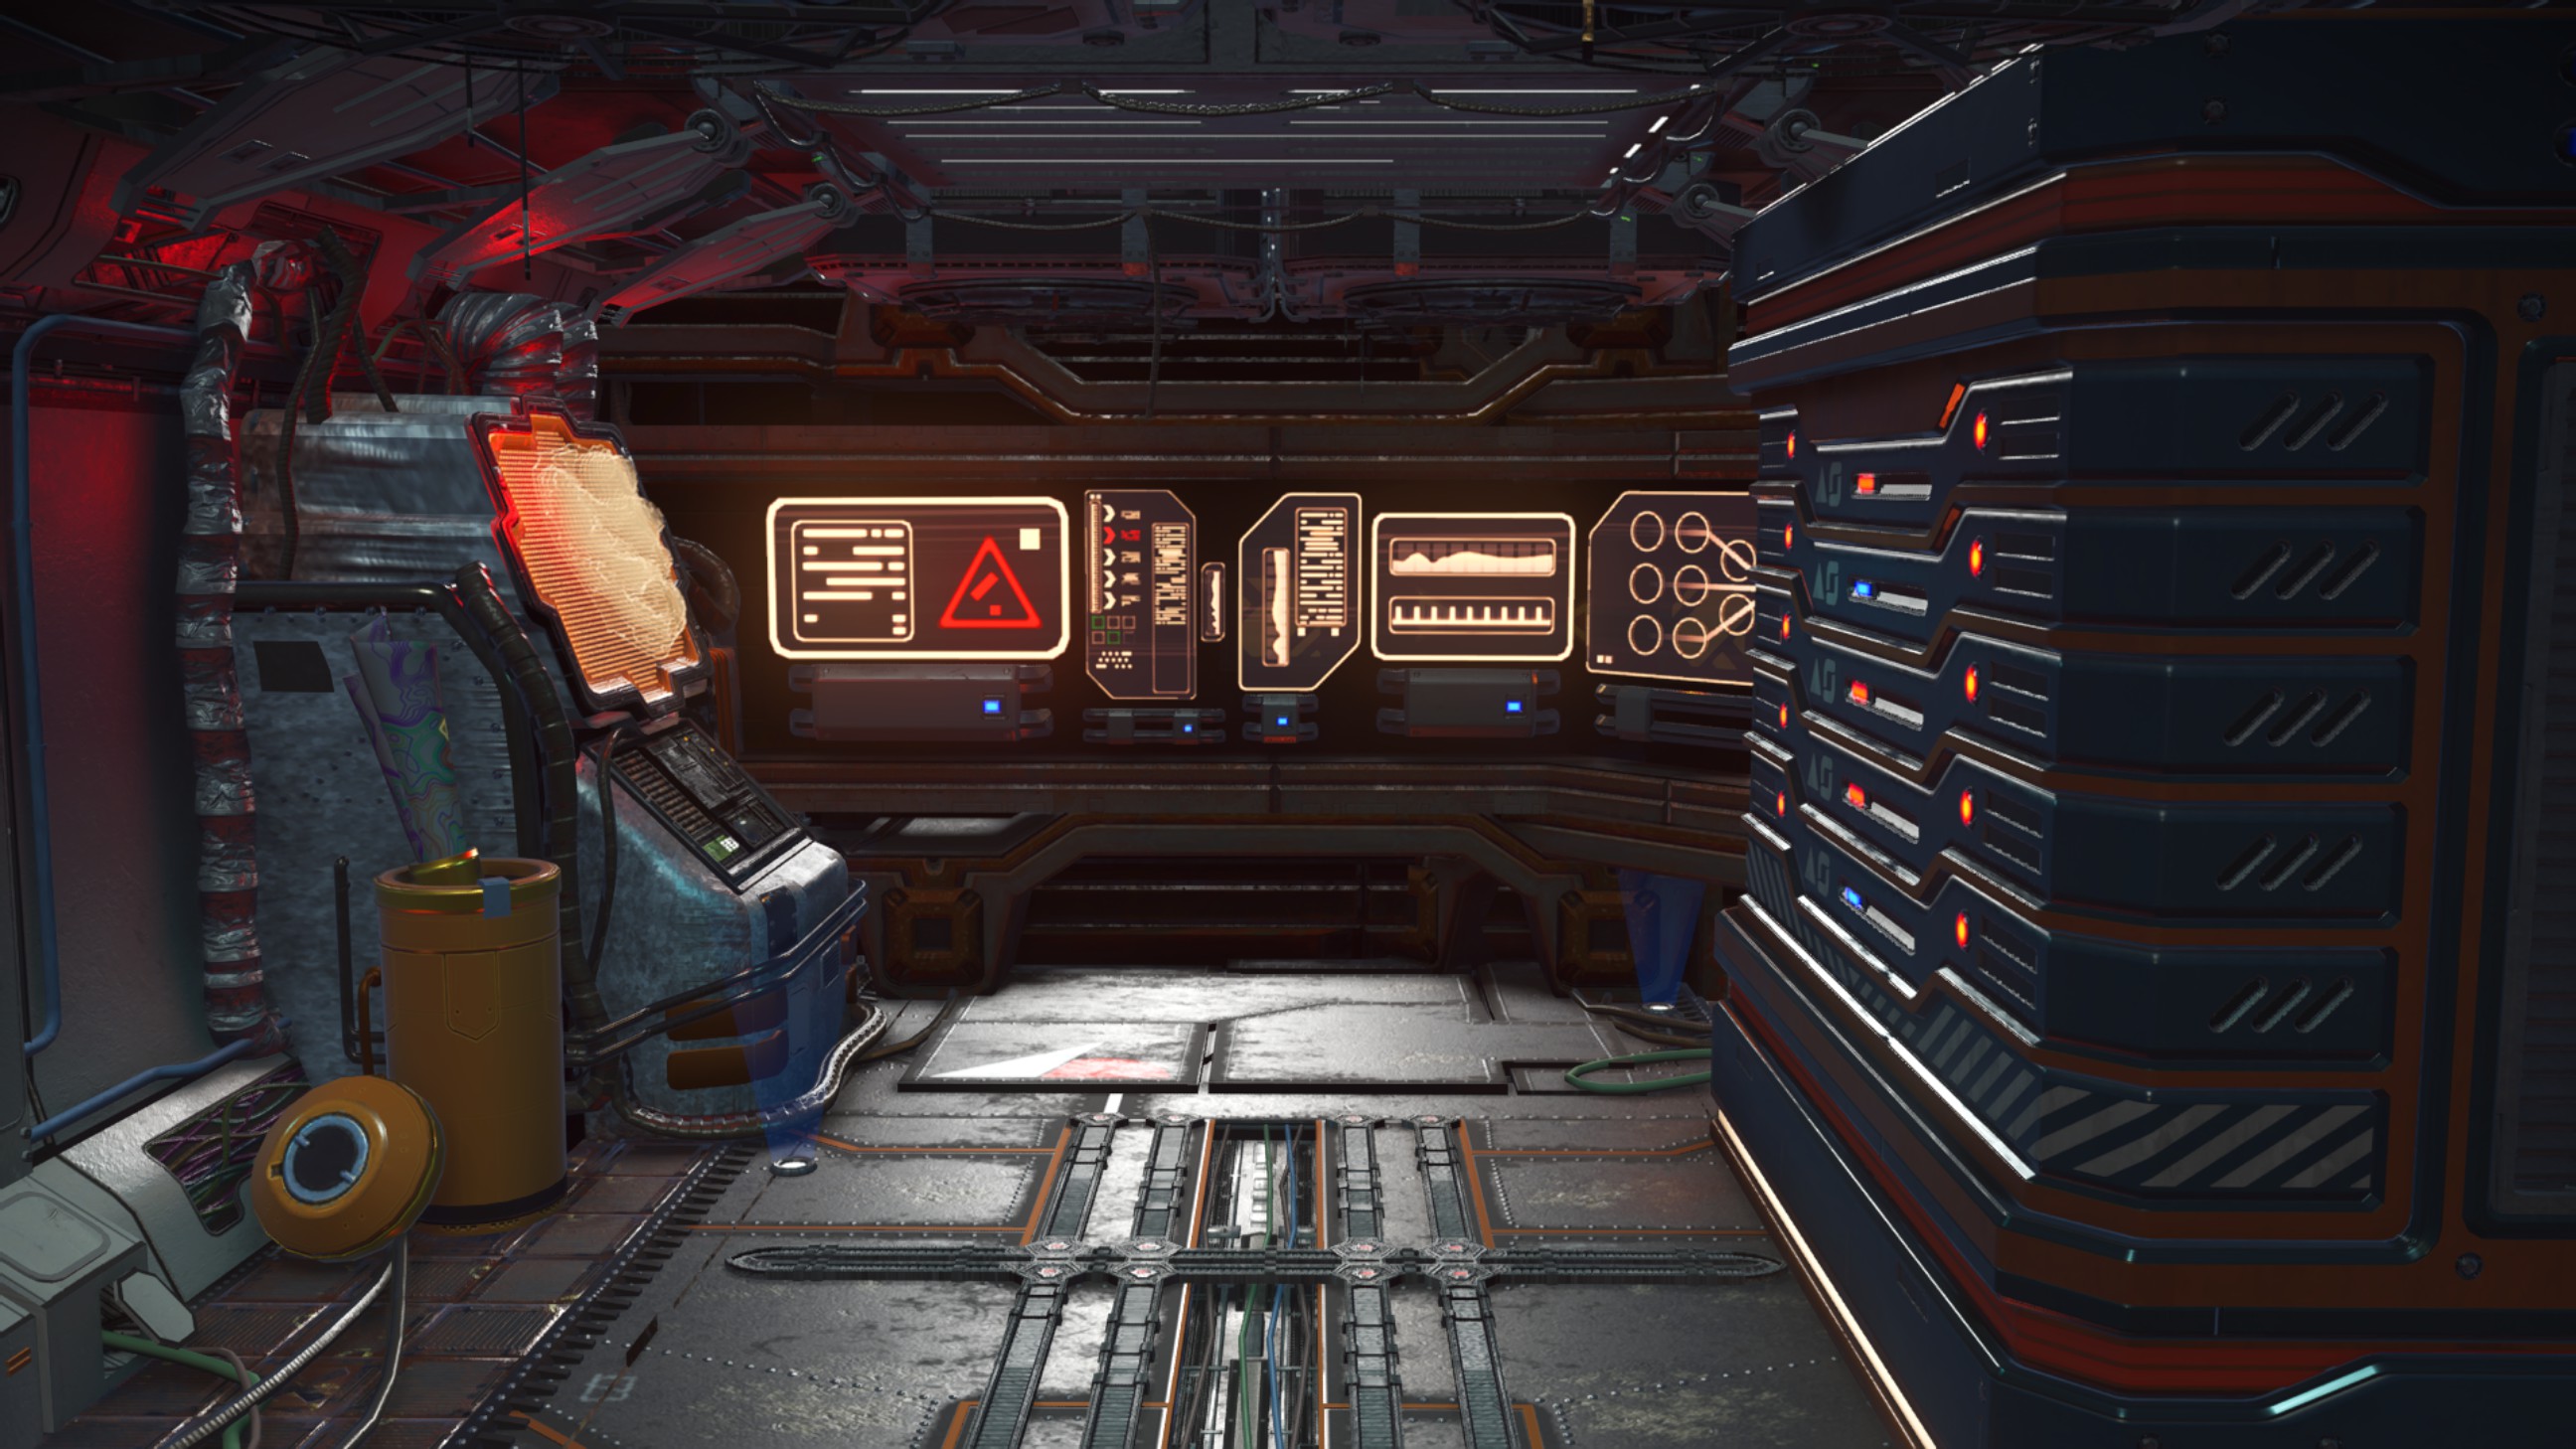
Change Log
- No Man's Sky Access Codes★ 5 (880)43k views2.1k ♥1 minUpdated 14 Apr
- Refining – The Magic Of Alchemy★ 5 (1.2k)41k views3.6k ♥5 minUpdated 24 Mar, 2022
- How to get RICH in NMS SUPER FAST★ 5 (501)32k views1k ♥2 minUpdated 7 Sep, 2022
- Multi-Tools: Types, Statistics, Weapons, Layouts★ 5 (550)27k views1.3k ♥7 minBulgarianUpdated 3 Jul, 2025
- Starship Guide: Types, Statistics & Roles★ 5 (461)25k views924 ♥8 minBulgarianUpdated 30 May
- Звездолеты СТРАЖЕЙ★ 5 (220)24k views519 ♥7 minRussianUpdated 9 Feb, 2025



- Upgrading to PremiumTeam Fortress 2★ 5 (20k)1441k views11k ♥6 minUpdated May 11, 2022
- No More Room in Hell Official ManualNo More Room in Hell★ 5 (2.8k)569k views2.1k ♥29 minUpdated Apr 22, 2019
- NMRiH Community Hosting GuidesNo More Room in Hell★ 5 (526)351k views653 ♥1 minUpdated Aug 10, 2022
- ULTIMATE GUIDE FOR GAME DEV TYCOONGame Dev Tycoon★ 5 (5.8k)326k views10k ♥4 minUpdated 23 Jan, 2014
- How to 'Git Gud' Soon™MORDHAU★ 5 (2k)318k views3k ♥68 minUpdated Nov 16, 2024
- Лучшие кооперативные игры SteamPAYDAY 2★ 5 (1.5k)315k views2.1k ♥56 minRussianUpdated Apr 27, 2025






This guide was created by its original author on the Steam Community. Are you the author and want it removed? Request removal.