Yet another Origins guide
Summary pictures
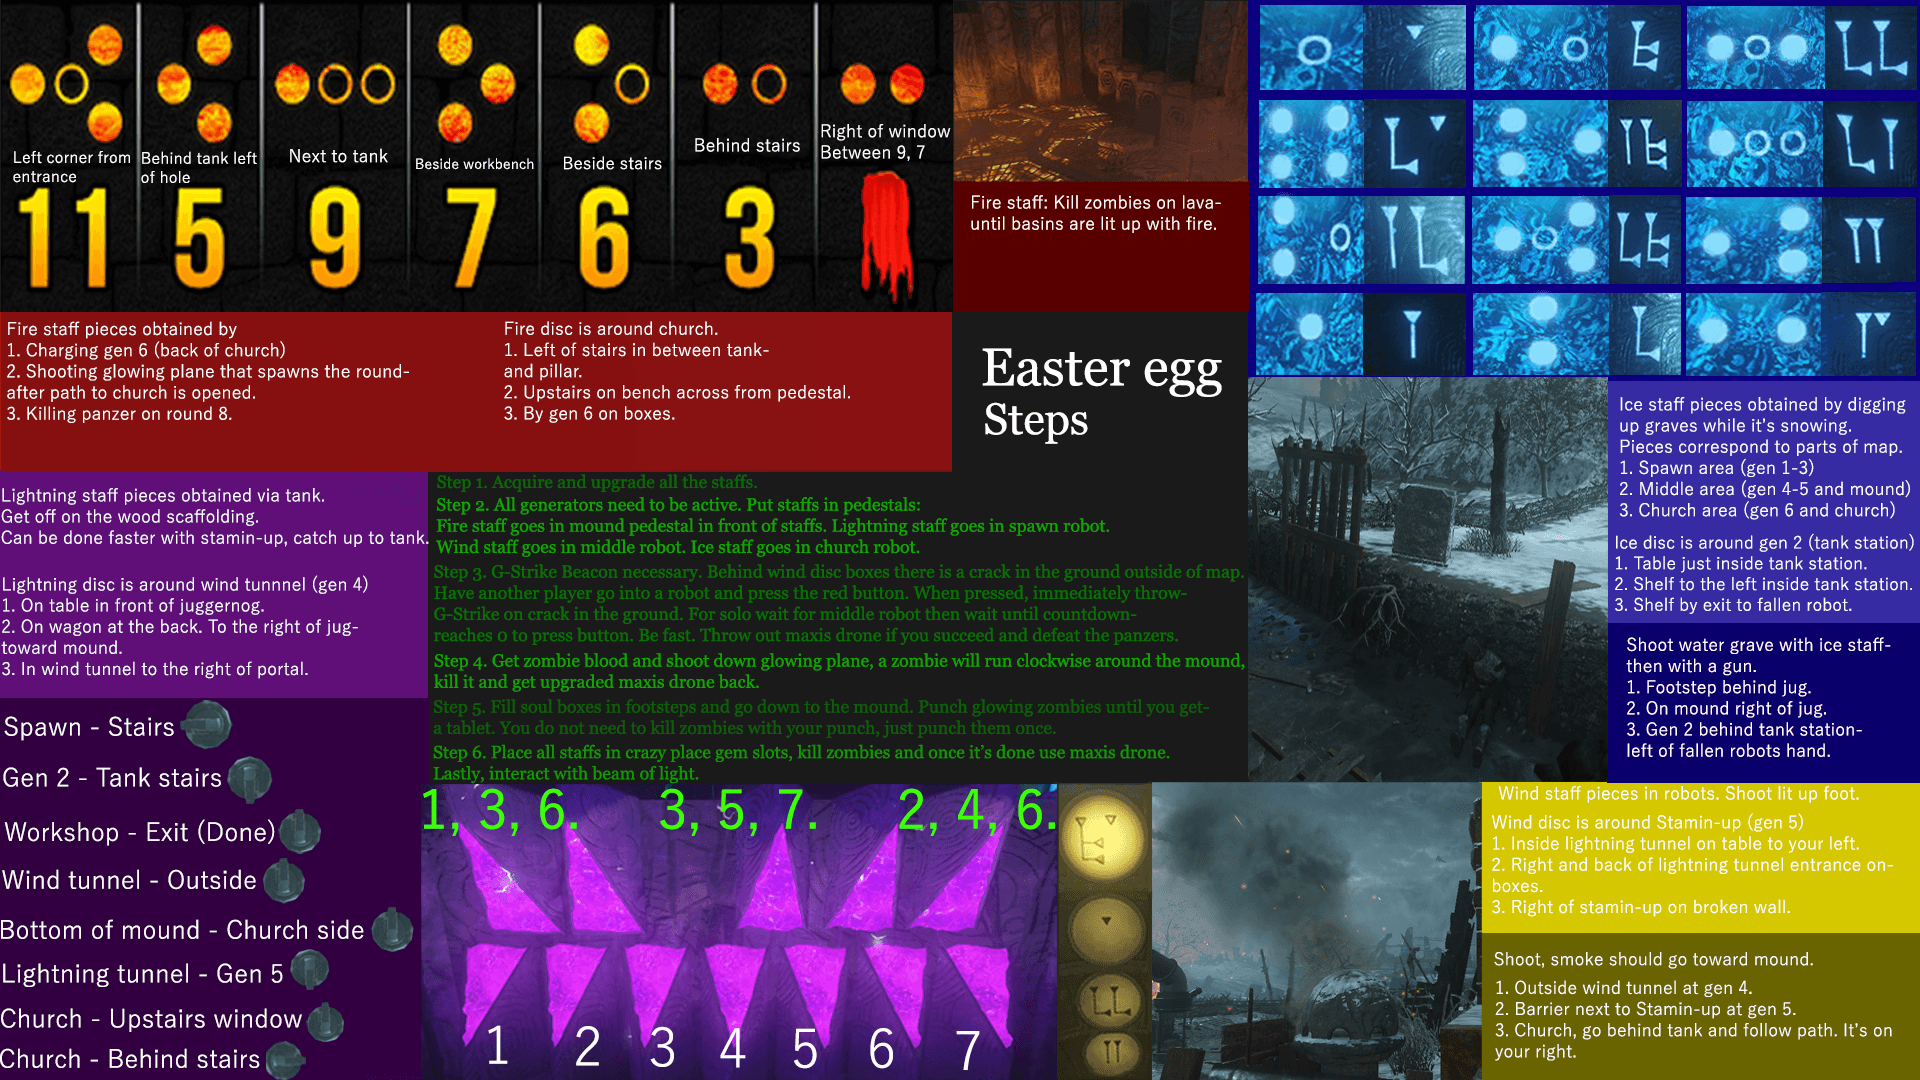
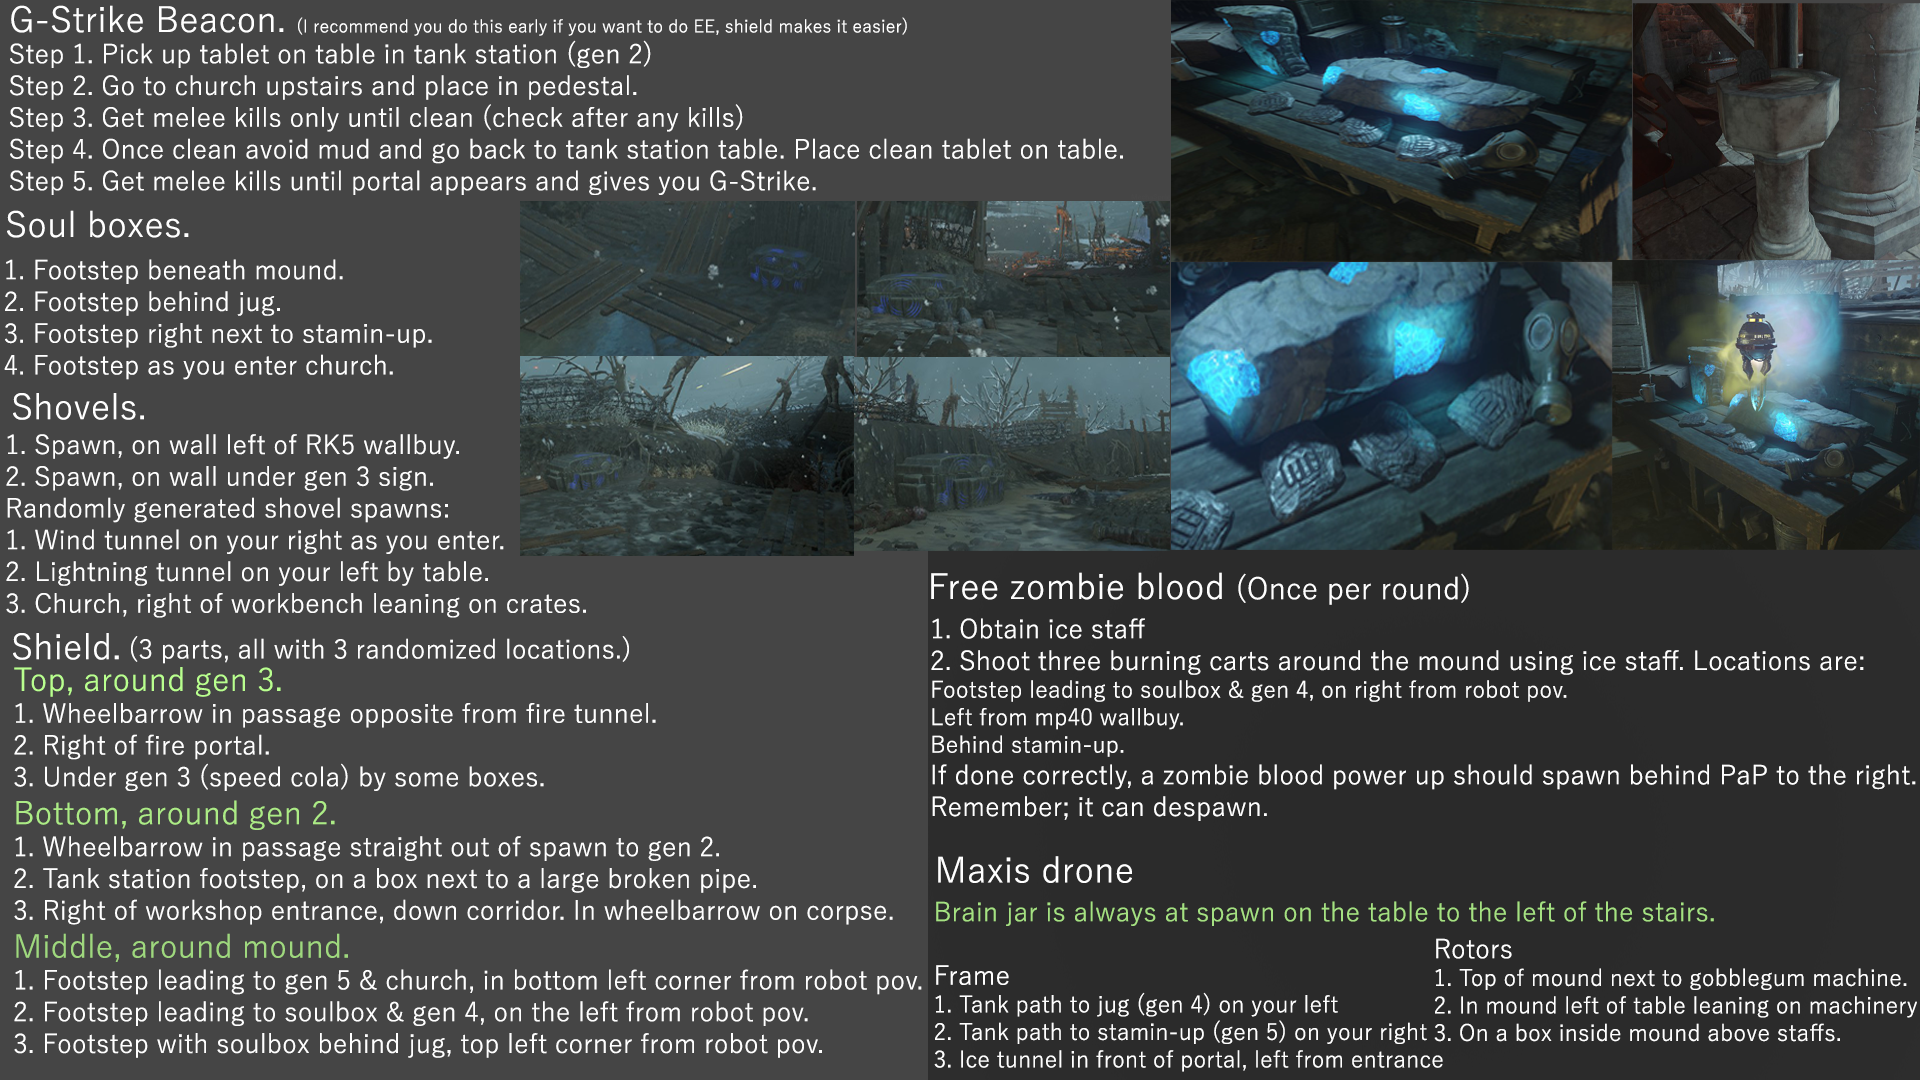
In case you came here for a summary of what to do or just want to quickly check the order of things, I've created two pictures that have all the information you need to complete the easter egg. Good luck, I'm sure you can do it.
YouTube video
The video will be temporarily unavailable while I sort out some issues. I apologize for the inconvenience, it will back here eventually.
Introduction
In this guide I will go over EVERYTHING in detail, I want to be as beginner friendly as possible while also appealing to more experienced players. I hope this helps you enjoy the map just as much as I do, have fun.
Notes for beginners / newcomers to the map
On round 8 a panzer will spawn. A panzer is a zombie with beefy armor and is much stronger than the average zombie. See "Tips and recommendations" for how to deal with them better.
Every now and again glowing zombies will attack the generators once you've completed all of them, if you kill them before they fully deactivate a generator you are guaranteed a max ammo drop and you do not have to stick around to activate the generator again. If they fully deactivate a generator you are not guaranteed any drops and you will have to manually reactivate it.
Sometimes the robots will all come at once, in unison. If they do this, only one of all of the robot's feet will be lit up. This is especially important to keep in mind for the easter egg step "Rain fire."
There are 6 generators around the map, once you've activated all of them you can use PaP at the top of the mound.
In order to interact with things, press "F."
- Just below the mound to your left as you exit the workshop.
- In the footprint behind juggernog (gen 4.)
- In the footprint just behind stamin-up (gen 5.)
- In the footprint just as you are about to enter the church, you can't miss it.
It may take a while to learn the map in its entirety but it will be worth it, good luck.
Tips and recommendations
This section will be all about tips and recommendations, from others (maybe) and me.
Build the shield in the wind tunnel as it's easily accessible and in the middle of the map which makes it faster to run to.
Build the Maxis drone in the church as there is more open space in the church than in the workshop. It's all about preference though.
The mystery box isn't really worth it on origins, if you're trying to do the easter egg I wouldn't recommend spinning the box unless absolutely necessary.
There is a faster way to destroy the water grave at the tank station when upgrading the ice staff. When you're on the upgrade step, instead of going all the way down to the tank station, stand just in front of the "Excavation" sign where the black vinyl can spawn and look toward the tank station. Once you spot the water grave, carefully align the middle of your crosshairs with the water grave and shoot it using your ice staff, if done correctly you should be able to shoot it with your pistol and be done with that step without needing to go down to the tank station.
(See the YouTube video for a demonstration of this strategy.)
Go for the G-Strike early as it's way easier to do during the earlier rounds.
Use the shield to get melee kills for the G-Strike.
Don't waste rounds before round 8, you're probably going to want a staff in your possession when the panzer arrives. If that's not possible, grab a shotgun or any other powerful bullet weapon and get ready for a long fight.
For the "Unleash the horde" part of the easter egg, I'd recommend you use the fire staff to defeat the panzers as it is quite powerful against panzers and has good spread. Especially when you use the charged attack.
For the "Skewer the winged beast" part of the easter egg I recommend that you try to fill all the soulboxes in preparation for the next step and in hopes of getting a zombie blood before you extinguish the ice carts. It can save time if you do happen to get a zombie blood drop while filling the soulboxes.
Don't be afraid to kill the last zombie if you're about to go down. It's a lot better to be alive on a later round than to go down at all. Just don't be too trigger happy and try not to get into those kinds of situations in the first place.
Even if you have a shield, you should watch your back. The zombies can slip on you or each other and accidentally flank you.
If the panzer grabs you, shoot the flashing red dot in its arm. Doing so will make it let you go.
When doing the "Rain fire" part of the easter egg solo, instead of having to train any zombies while you wait for the middle robot's foot to be lit up, simply go to the left of the stamin-up machine, jump in the corner of it, then crouch once you land. If done correctly the zombies will go to the area around you and stand still instead of attacking you.
When doing the "Raise hell" part of the easter egg, you can pick up any of the staves at any point and your kills progress will not be reset. Keep in mind that they do all have to be placed in their pedestals for any kills to count but for a brief moment you can pick any of them up, use their charge attack, and quickly place them in their pedestals again. This is especially useful if you use the ice staff.
Fun / useful secrets
The carts can be found:
- Footstep to the right of jug.
- To the left of / opposite of the mp40 wallbuy.
- Behind stamin-up.
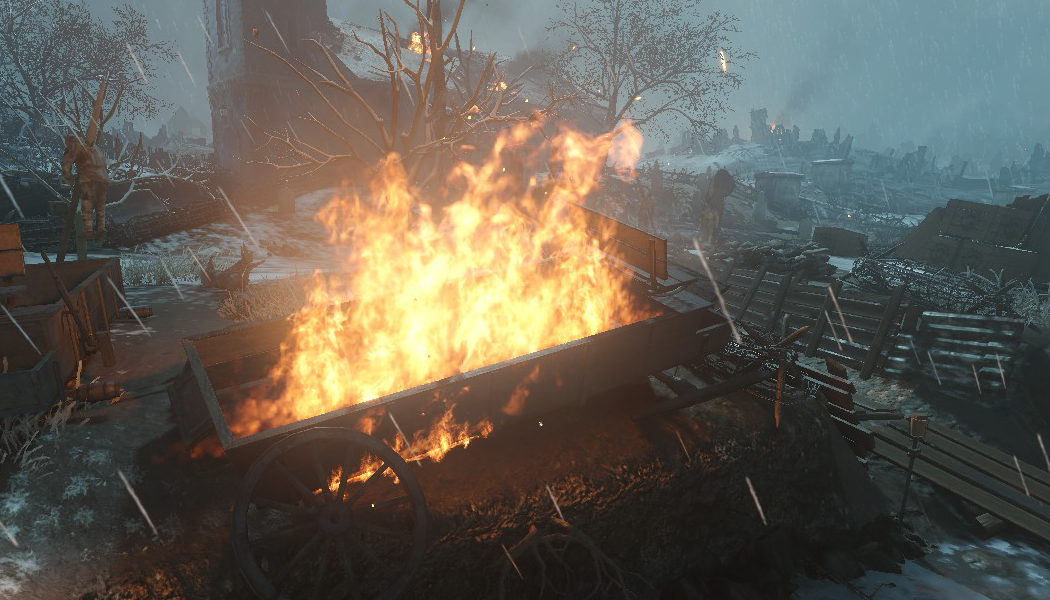
(One of the extinguishable carts)
- At the top of the mound on some scaffolding by the exit leading to the church.
- Right outside of spawn to the right of the path going to gen 2 (tankstation). It's outside the map on some debris.
- Right in front of the church's entrance through the tank's path going forward as you go down from the robots footprint. The stone is laying on a piece of the grating.
- Stamin-up (gen 5) on the broken house you're in. Stand around the bottom right corner from robot pov.
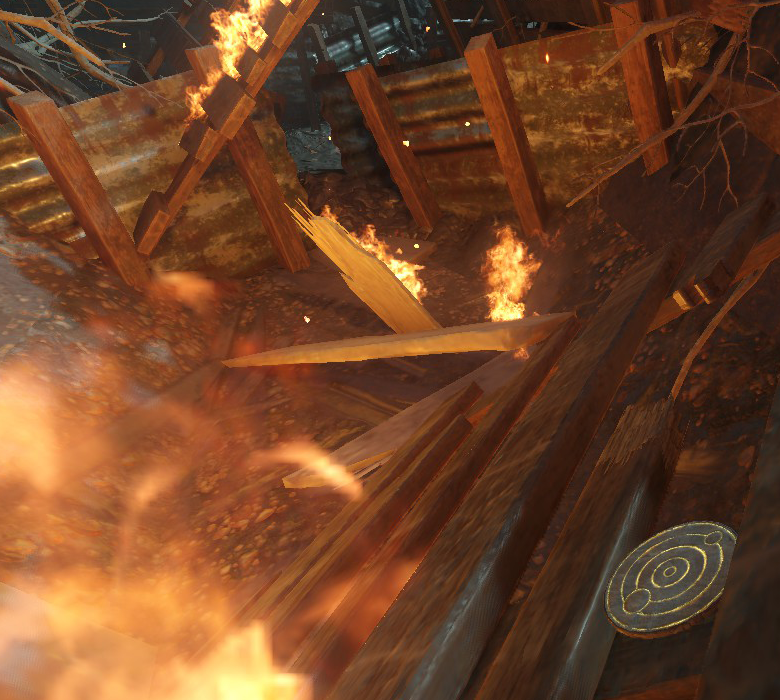
(One of the stone discs)
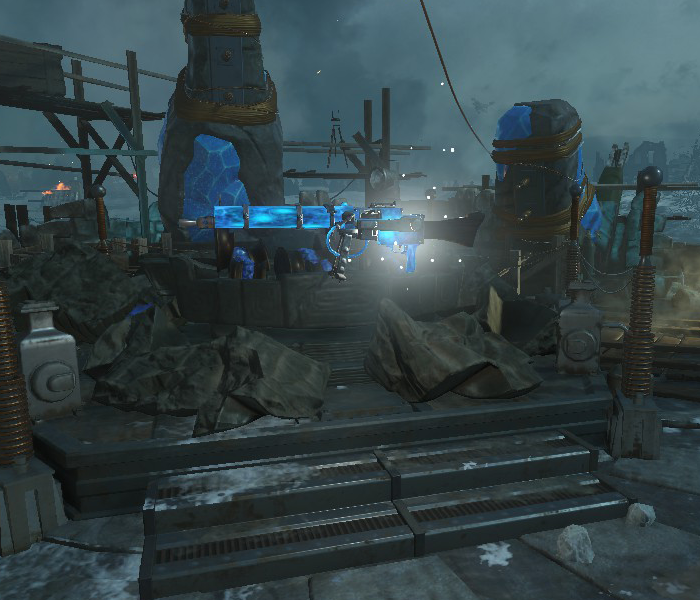
(The LMG)
There are way too many for me to list them all out (16 in total) so I made a map of them instead.
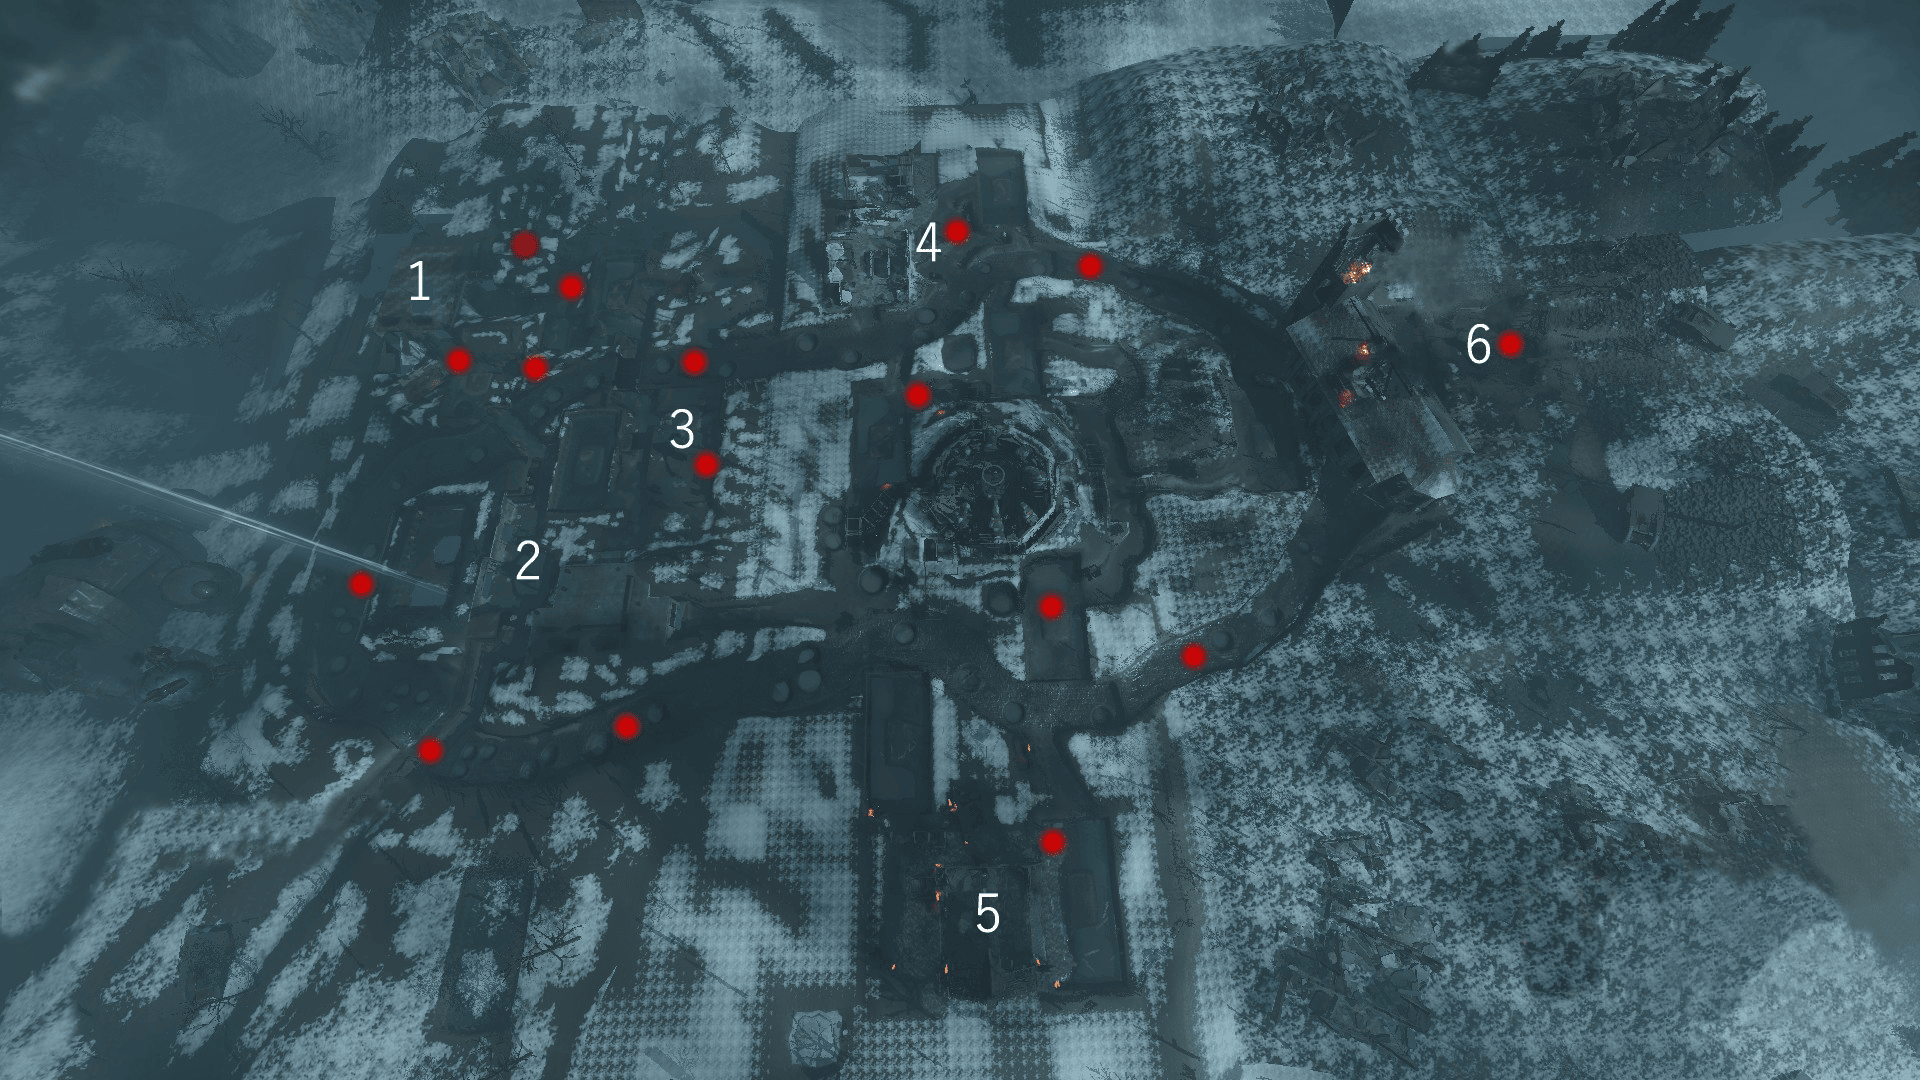 (Map I made with all spots and generators marked. Dark red spot is halfway down the fire tunnel)
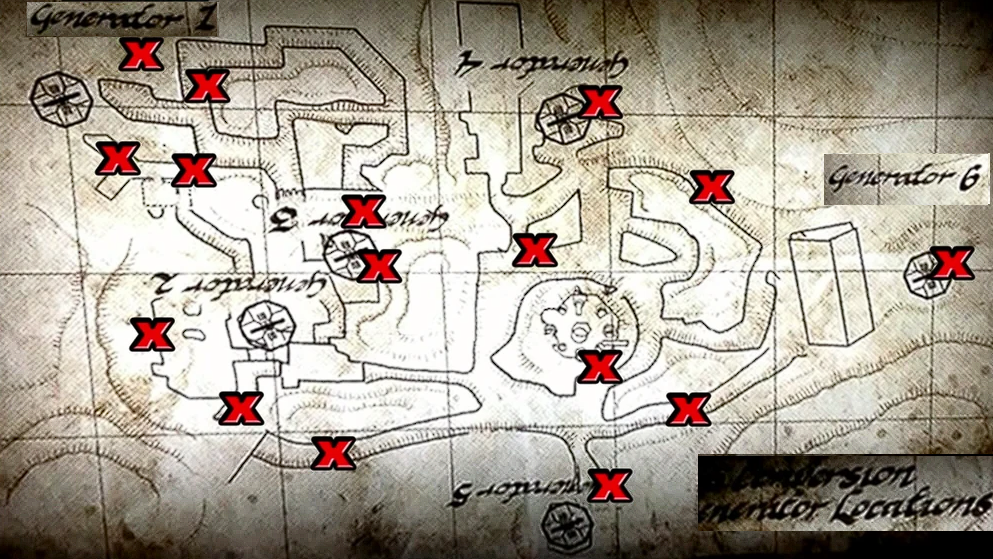 (Map I found online and flipped to match my map)
Credit: https://callofduty.fandom.com/wiki/Empty_Perk_Bottle
Only one grave can spawn at a time and will remain there until dug up. Once dug up it will spawn at one of the other 15 locations. The locations marked on my map are only estimates of where the graves will spawn.
If you find any red graves not shown on either map, comment an exact description of where it is and provide picture proof.

(Jumpscare)
Around the map there are 3 green rocks that when interacted with will play the song "Archangel."
These rocks can be found at:
- Spawn to the right of the reward box behind a bunk bed.
- The workshop upstairs under a bunkbed to the left from the exit to No Man's Land.
- On the mound past the entrance to the top of the mound.
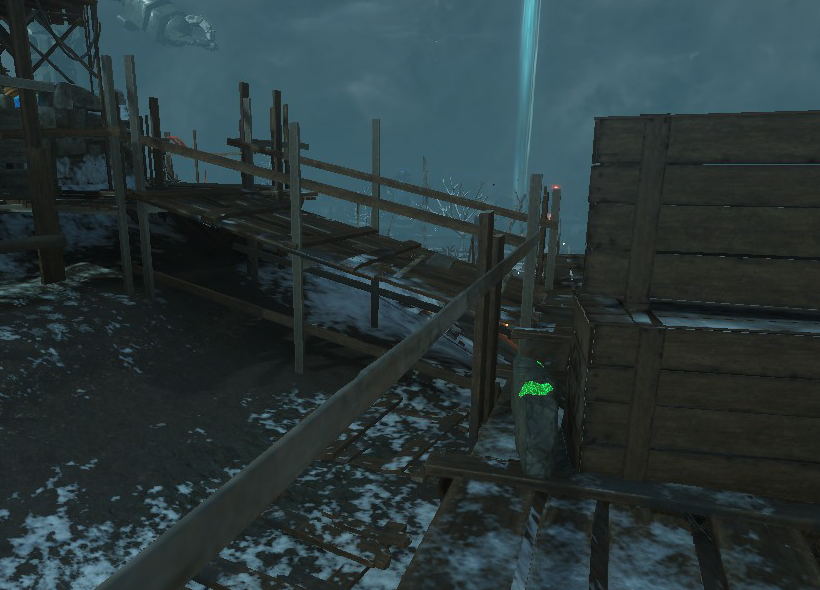
(The last green rock mentioned on the list)
Around the map there are 3 radios that when interacted with will the song "Sheped of Fire."
These radios can be found at:
- Just above the statues inside the mound.
- The crazy place, in a small corner in between the fire and lightning areas.
- The church robot's head, immediately to the left.
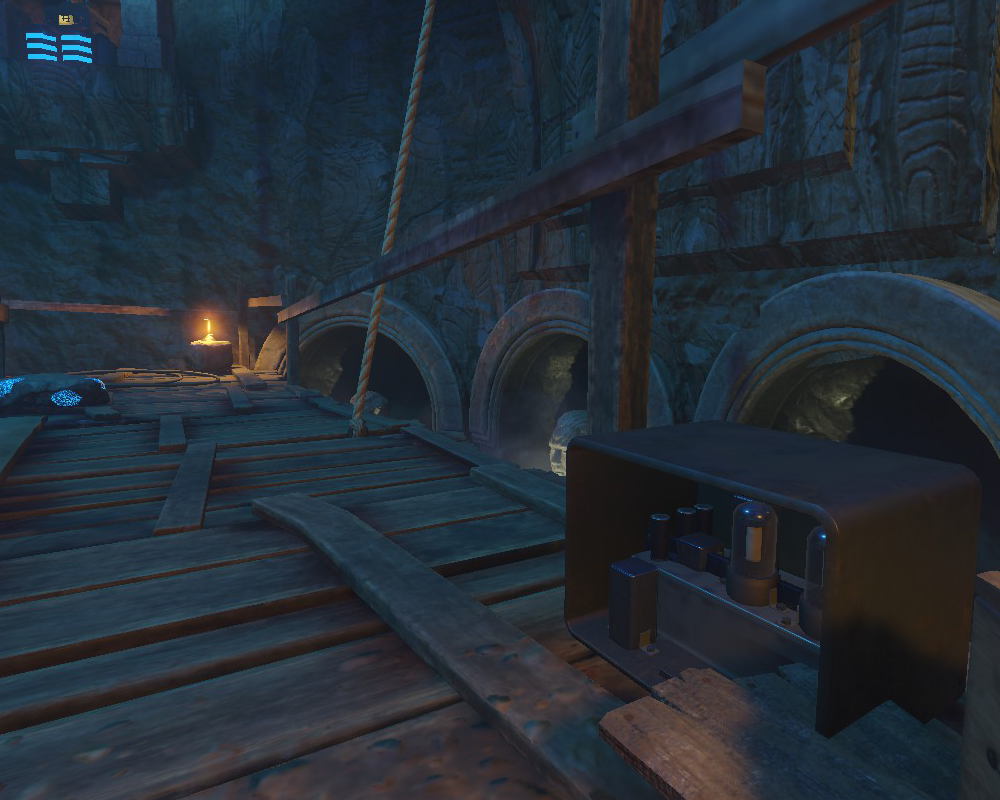
(One of the aforementioned "Radios")
If you only activate gen 1 and gen 5 then go back to gen 1 and interact with the painted 1's on the ground and then go back to gen 5 and interact with the painted 5's there, a song called "Aether" will play.
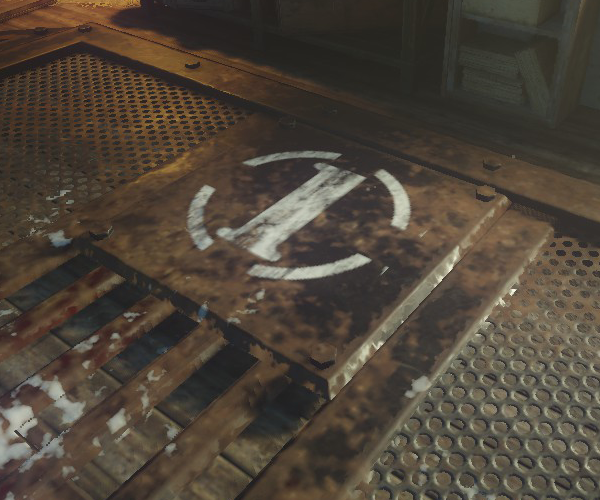
After completing the "Wield a fist of iron" (upgrading the punch) easter egg step, go into any of the robots heads and down yourself using a grenade. Once you spawn back in, your knife will be more powerful than usual.
Essential items
This section will help you obtain items that are necessary to do anything else in this map. Luckily there are only four, the gramophone, the black vinyl, the shovel, and the G-Strike.
The black vinyl can spawn in one of three locations.- Behind the "excavation" sign on a box. You pass this on your way up to the top of the mound.
- Behind the mound where the path to the church is. Facing the church, head right and stop as soon as you round the corner. Then look to your right.
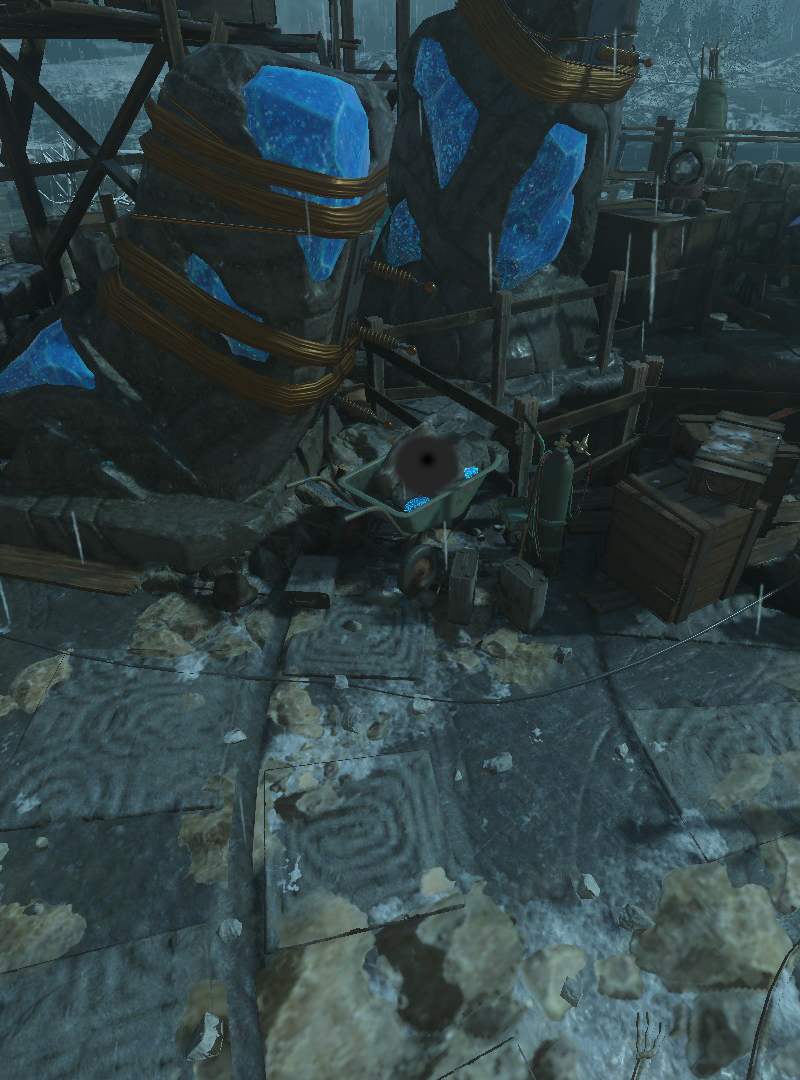
- At the top of the mound in a wheelbarrow to the left of PaP.
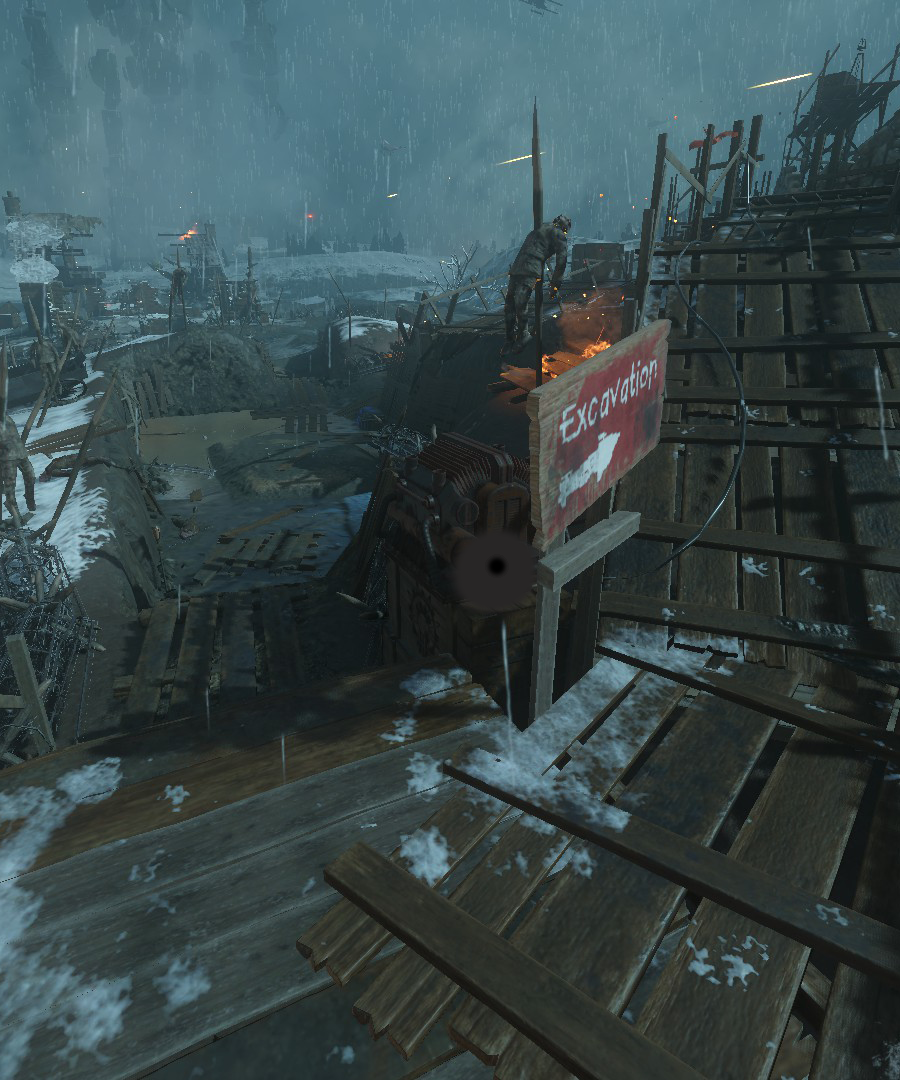
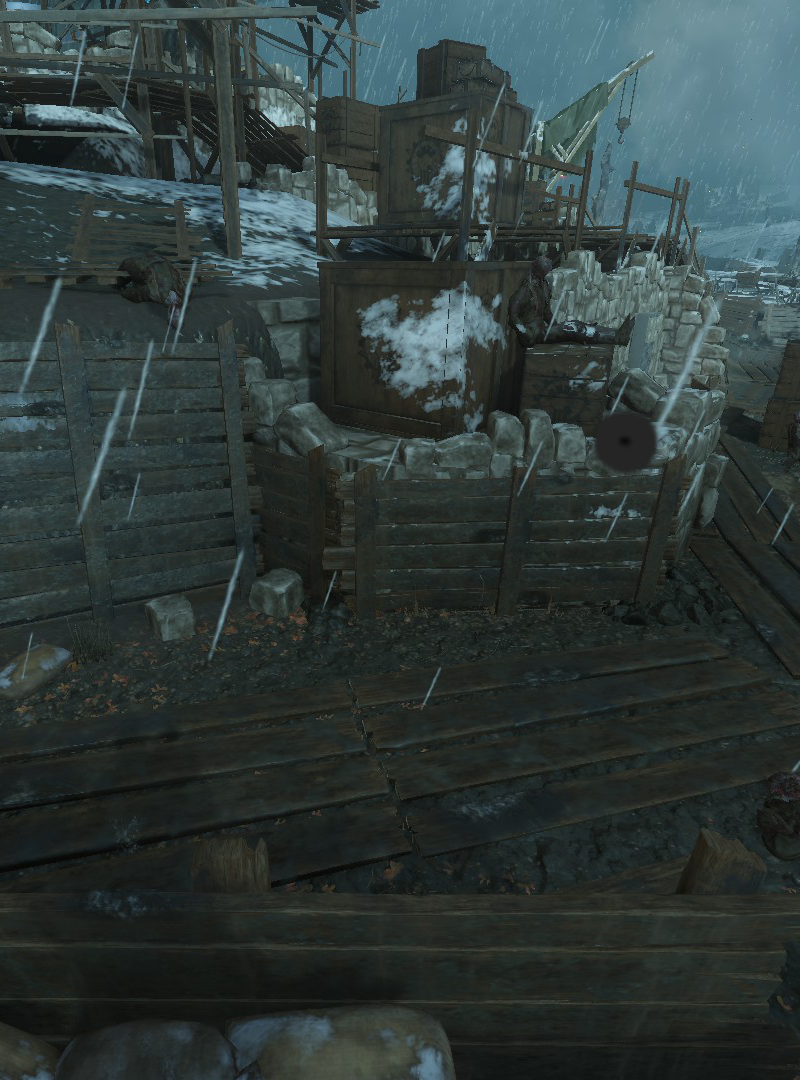
The gramophone can be obtained as soon as you enter the mound. One of the first things you'll notice is a table, at either side of the table you'll be able to find a gramophone. Pick it up.
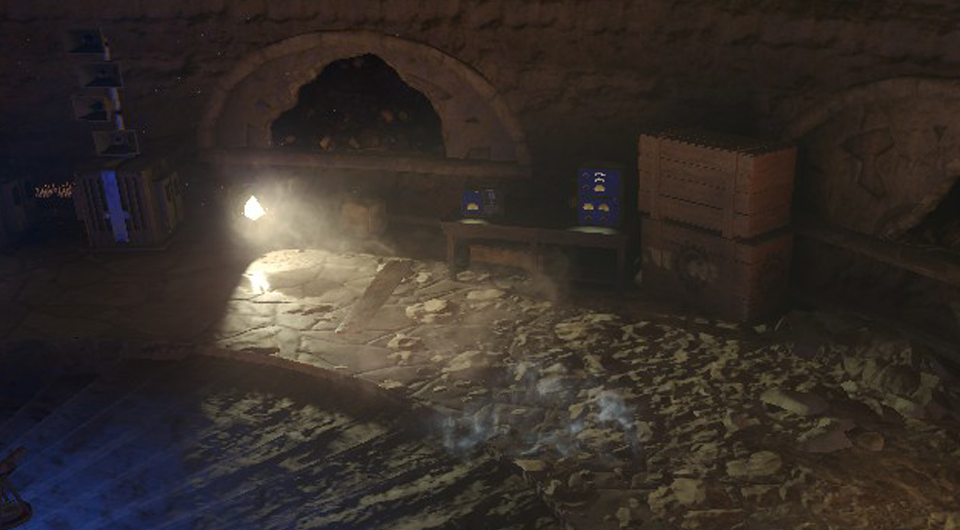
(The gramophone will spawn at either side of this table)
Using the black vinyl and the gramophone go to the table and place the gramophone on it, this will give you access to the staff crafting room. Don't forget to pick it back up again once it's done playing.
The two guaranteed ones are in spawn, one is to the left of the RK5 wallbuy and to the right of a radio. The second shovel is under the "generator 3" sign just up the stairs and straight forward. As for the other 2 shovels they can spawn in or around 4 locations.
- One can spawn in the lightning tunnel, just to the left of a table which can be seen immediately when entering.
- One can spawn in the wind tunnel immediately to the left, opposite of the workbench.
- One can spawn in the church downstairs to the right of the workbench in the far left corner. The shovel, should it spawn there, is leaning on some boxes.
- One can spawn in the church downstairs to the left of the rear end of the tank, leaning on a pillar.
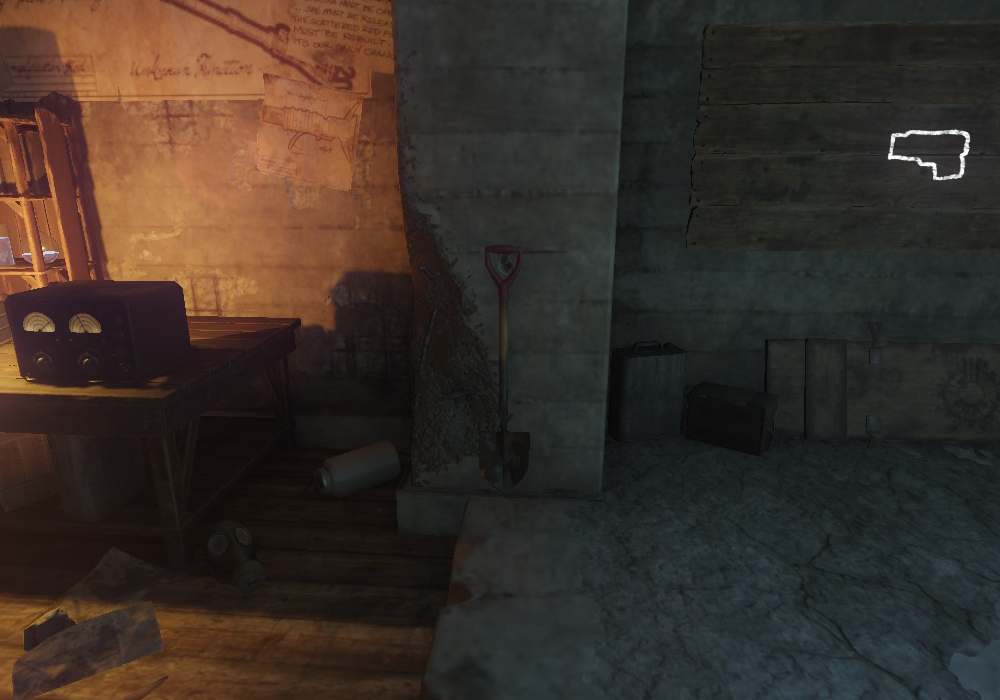
(Picture of a guaranteed spawn shovel)
If you cannot find a shovel in any of these locations, look around the general area and comment an exact description of where the shovel is.
Avoid mud and puddles by jumping over puddles and the mud while walking on the planks around the map and bring it all the way back to the tank station. If you get it dirty you have to go back and cleanse it. Once you've brought it back to the tank station place it down on the table. You once again have to get melee kills. Eventually a portal will open up and you will be awarded the G-Strike.
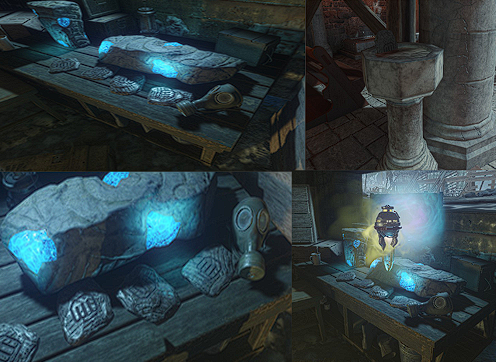
(Summary of the process in picture form)
Buildables
See "Tips and recommendations" for recommended build locations.
The top can spawn:
- In a wheelbarrow in a passage opposite of the fire tunnel.
- To the right of the fire tunnel portal on a table.
- Below gen 3 (speed cola) on the ground in front of a box.
- In a wheelbarrow in a passage outside of spawn on the way to gen 2 (tank station.)
- On top of the tankstation on a box next to a large broken pipe.
- On a corpse in a wheelbarrow at the end of a trench, going right instead of left to enter the workshop.
- In the footstep leading to stamin-up (gen 5) and church on the bottom left from robot pov.
- In the footstep leading to jug (gen 4) and a soulbox, right underneath the mound to the left from robot pov.
- In the footstep behind jug (gen 4) top left from robot pov.
Build it at either the workshop behind the stairs, the wind tunnel to your right as you enter, or in the back of the church downstairs behind the tank.
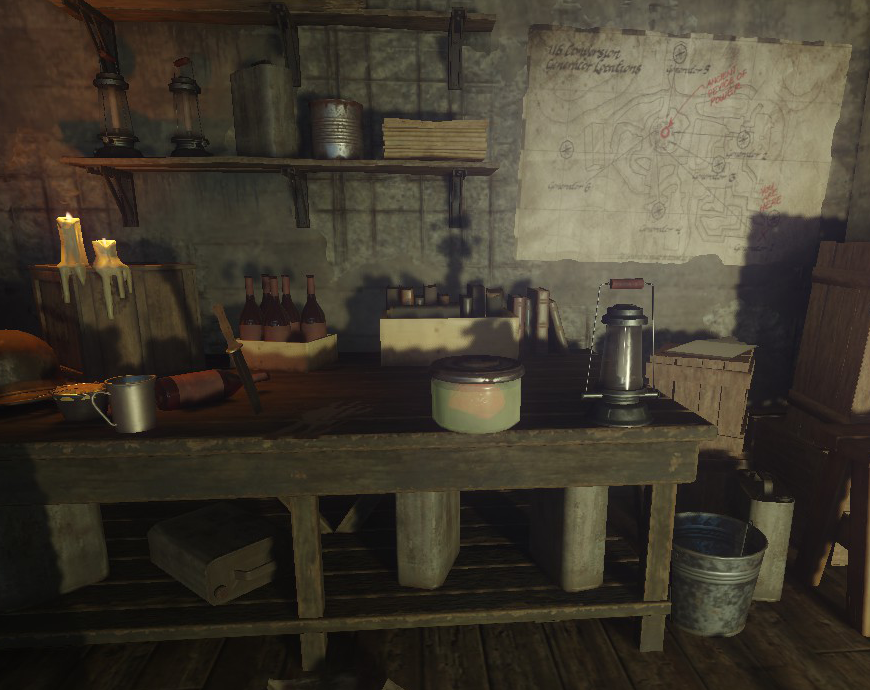
(The brain in a jar) The other two parts have three randomly chosen spawns.
The frame can spawn:
- Tank path forward on your left at a crossbone sign.
- Tank path backward on your right at a crossbone sign.
- Down the ice tunnel on your left at the bottom.
- Next to the gobblegum machine at the top of the mound.
- To the left of the gramophone table in the mound leaning on some machinery.
- At the bottom of the scaffolding above the staff crafting place on a box.
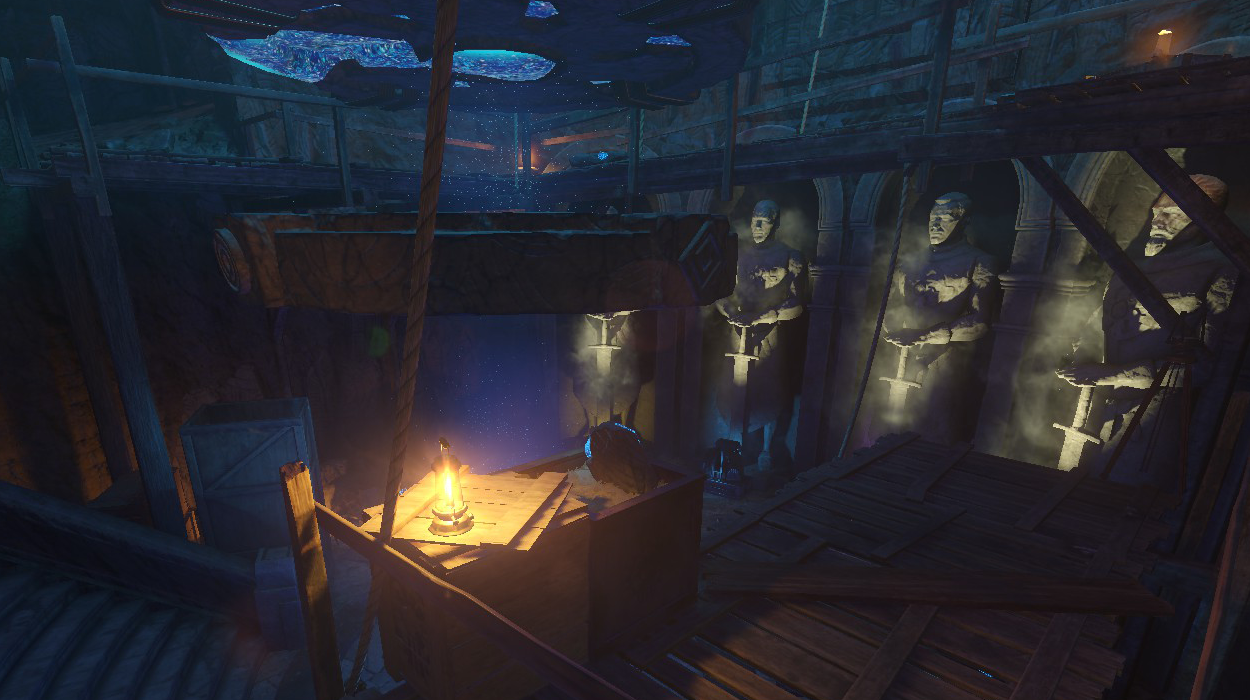
(The third possible spawn listed for the rotors)
Build it at either the workshop behind the stairs, the wind tunnel to your right as you enter, or in the back of the church downstairs behind the tank.
Constructing the ice staff
To get the vinyl you simply have to go to the tank station (gen 2) where you can find the vinyl in one of three locations.
- On a table in front of you as you enter the tank station.
- On a shelf to the left when you've entered the tank station.
- On a shelf around the corner, to the right when you come across a second table.
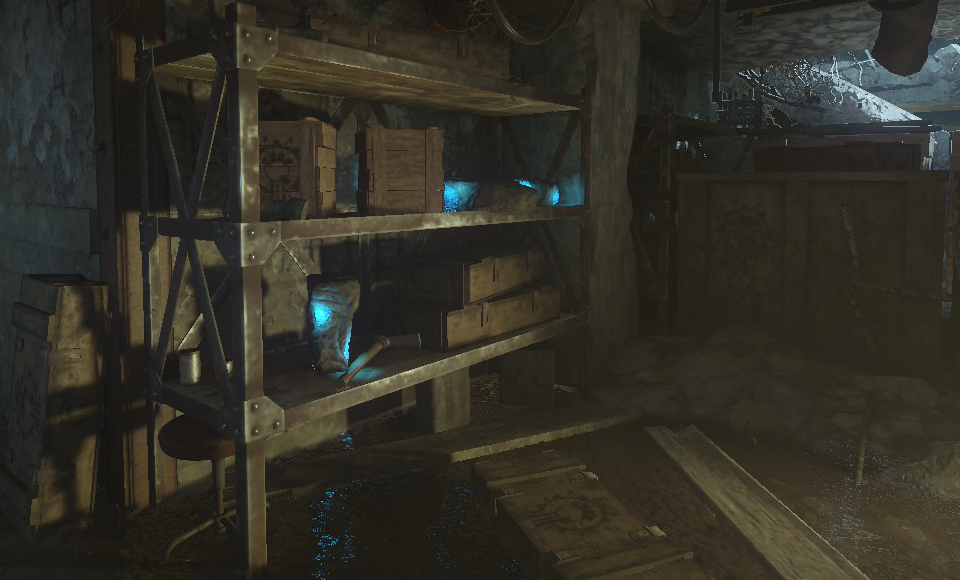
(A picture of the last mentioned location)
Once you have the vinyl head over to the church and go upstairs then go toward the generator. Once you reach generator 6, turn around and you should see a tunnel. Go down that tunnel, it's the ice tunnel. When you reach the bottom go up to the table and place the gramophone, a portal should start constructing itself. Once it's done building itself go inside. Once inside go up to the blue pedestal and grab the blue gem then go back to the place you appeared at, you should be able to rebuild the portal. When it's done go through it, and pick up the gramophone. You've just visited the crazy place.
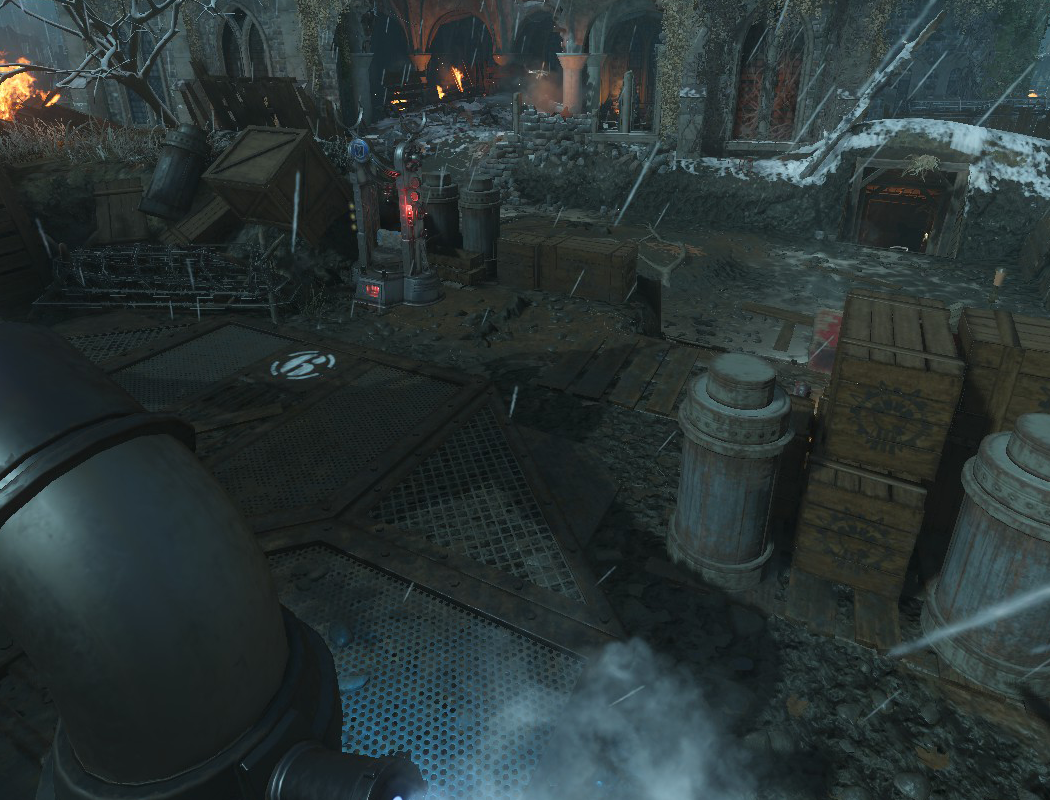
(Picture of the outside of the ice tunnel)
To get the parts of the ice staff you have to dig graves while it's snowing so hold off for a few rounds before you start digging. In order to get all the pieces you have to dig up a piece of the ice staff for each section of the map meaning you have to dig up a piece in the spawn area (gen 1-3), you have to dig up a piece in the middle area (gen 4-5) and you have to dig up a piece at the church area (gen 6).
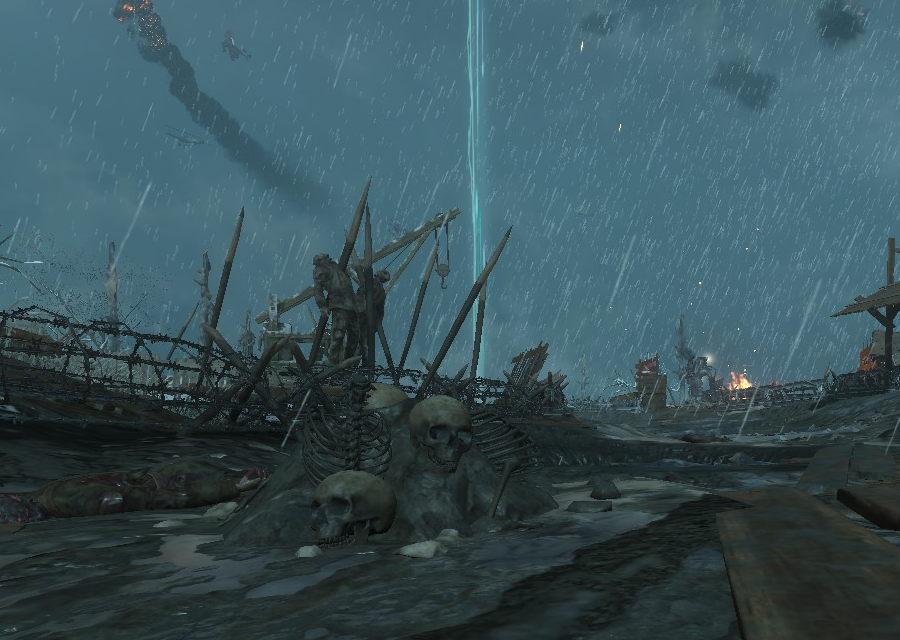
(Picture of a grave/digsite)
Once you've dug up every piece you can go to the very bottom of the mound and craft the ice staff using the gem and the pieces you've collected.
Constructing the wind staff
When a robot walks by either underside of its feet will glow. If you shoot the middle of the glowing foot and let the robot step on you, you will be transported to its head.
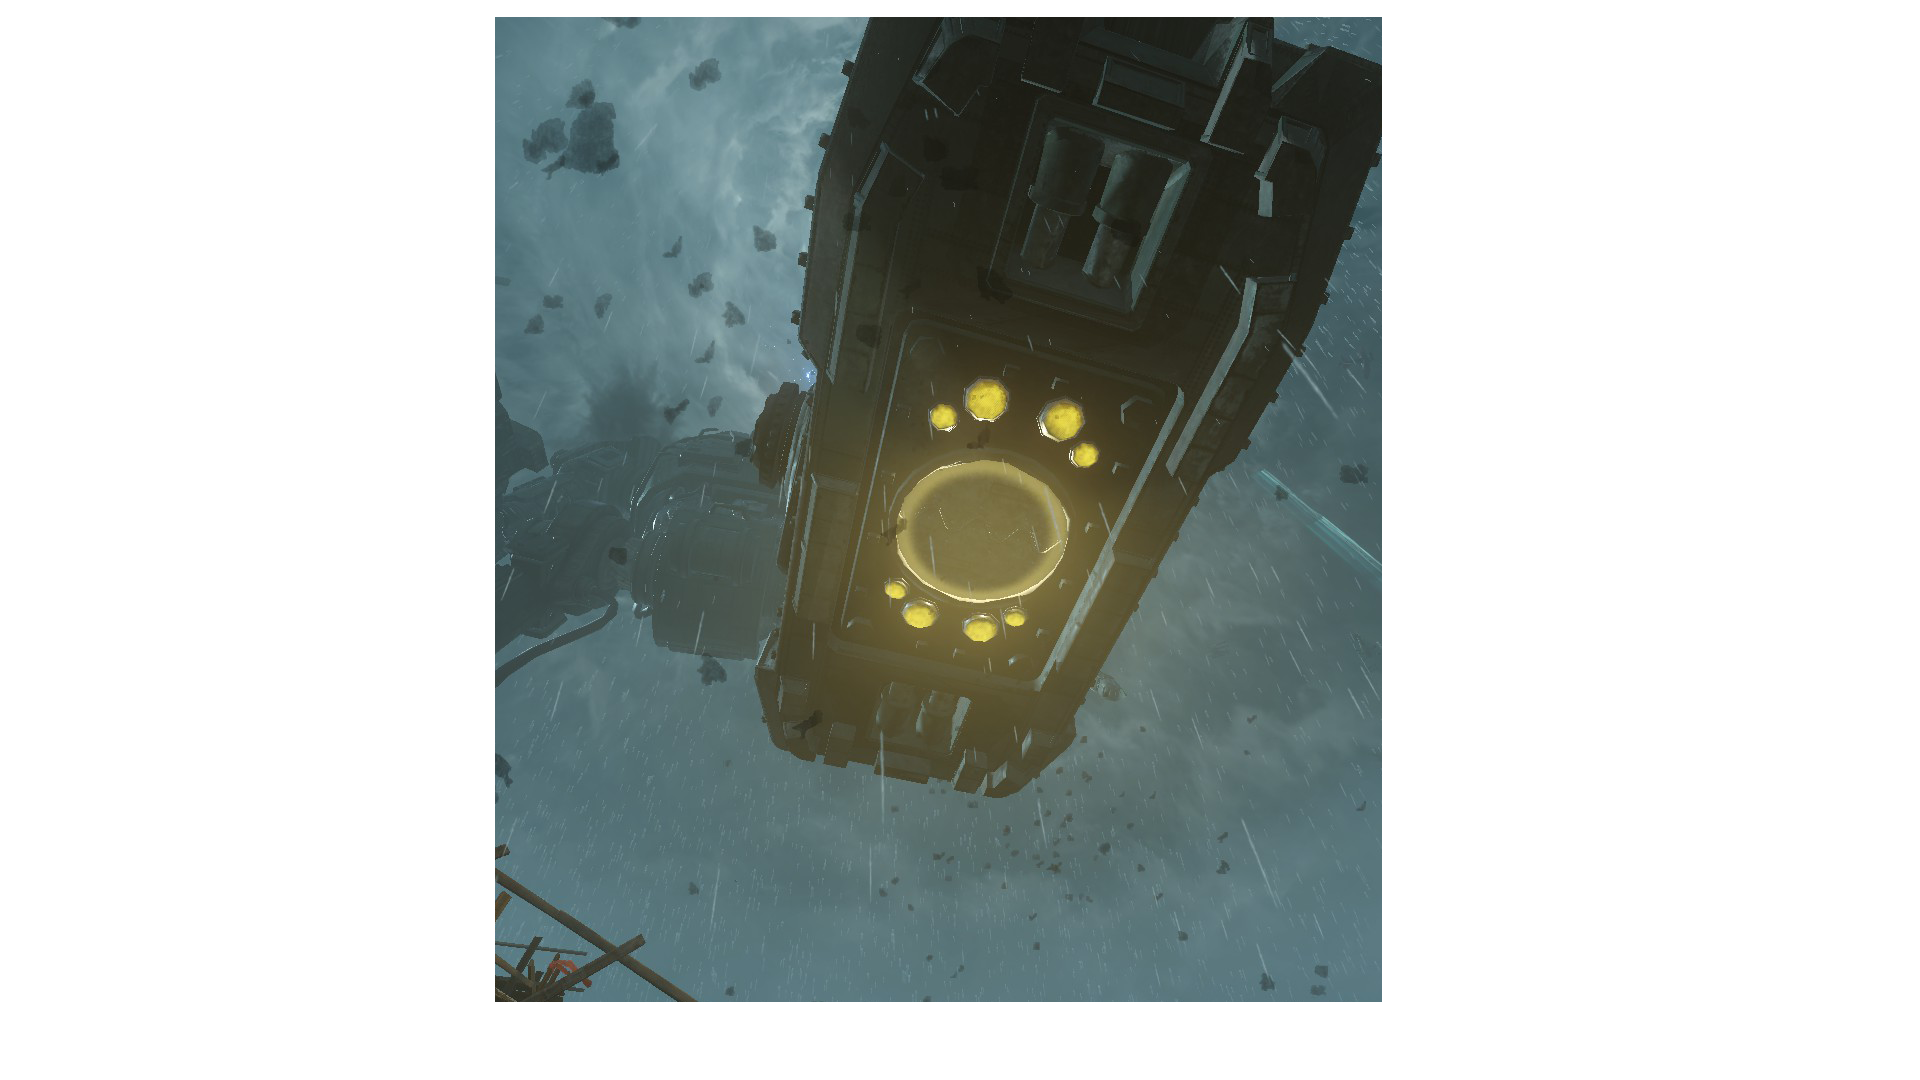
There are three different robots roaming around the map at all times, sometimes alone and sometimes all at once. All 3 robots have pieces of the wind staff in their heads so you'll need to do this step three times.
Once you've obtained all the pieces make your way over to stamin-up (gen 5) and look in these spots:
- Inside the lightning tunnel on a table on your left.
- To the right and back of the lightning tunnels entrance on some boxes.
- To the right of stamin-up on a broken wall.
You should find a vinyl / record disc, pick it up. Go to jug (gen 4) and head down the wind tunnel.
Place the gramophone on the table and wait for the portal to build itself. Once built head inside the portal and grab the yellow gem, then go back up the steps and create a portal back. Once you come back pick up the gramophone.
Now that you have all the parts needed to build the wind staff head over to the top of the mound and go inside. Once you're at the bottom simply build the wind staff and pick it up.
Constructing the lightning staff
- The table to the left of jug.
- A wagon to the right and front of jug.
- At the bottom of the wind tunnel to the right.
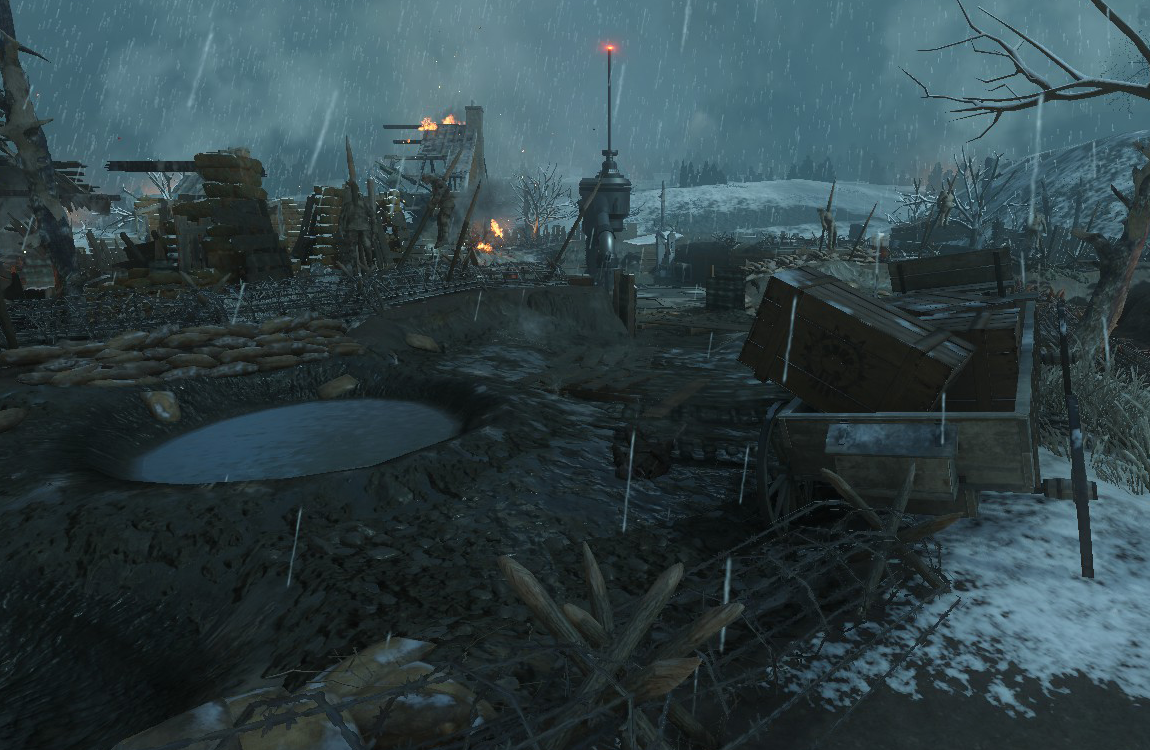
(Picture of the wagon in relation to gen 4 and jug)
The lightning tunnel is at stamin-up (gen 5), go to the bottom, build the portal, collect the gem and come back, don't forget to grab the gramophone.
In order to get the pieces for the lightning staff you'll have to ride the tank around and get off at certain locations. The first location is to your right, you'll see some wood scaffolding sticking out. Jump on to it and collect the lightning staff piece.
For the next part, stamin-up is recommended.
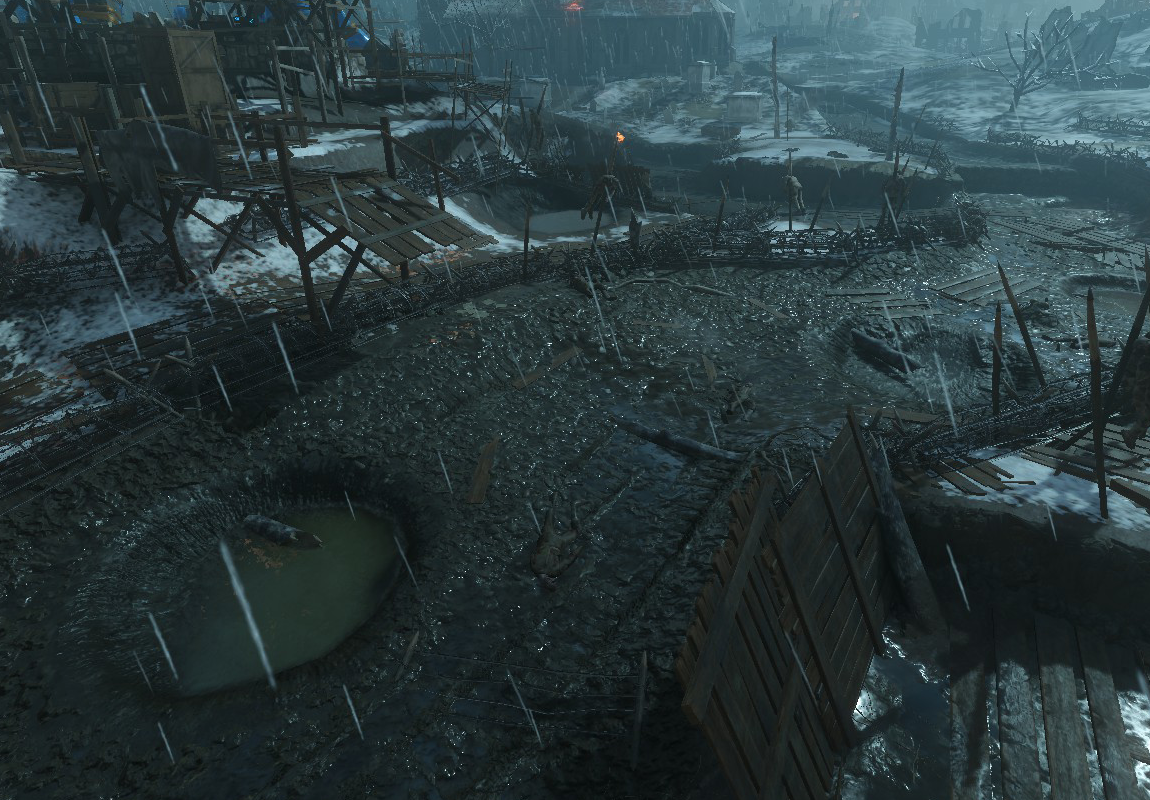
Once the tank has cooled down, ride it over here and jump off on the wood scaffolding on your left, if you have stamin-up run as fast as you can down and grab the piece, then try to run back to the tank and climb back up. If done successfully you'll be able to get the last piece in one round-trip. Jump off at the dirt path on your right. If you didn't succeed or you didn't have stamin-up, go to the tank station and call the tank over to save 500 points.
Once you have all the pieces and the gem, go down to the bottom of the mound and construct it.
Constructing the fire staff
- In between the tank and the pillar by the stairs on the ground.
- Upstairs on a bench opposite from the pedestal.
- Laying on boxes in front of gen 6.
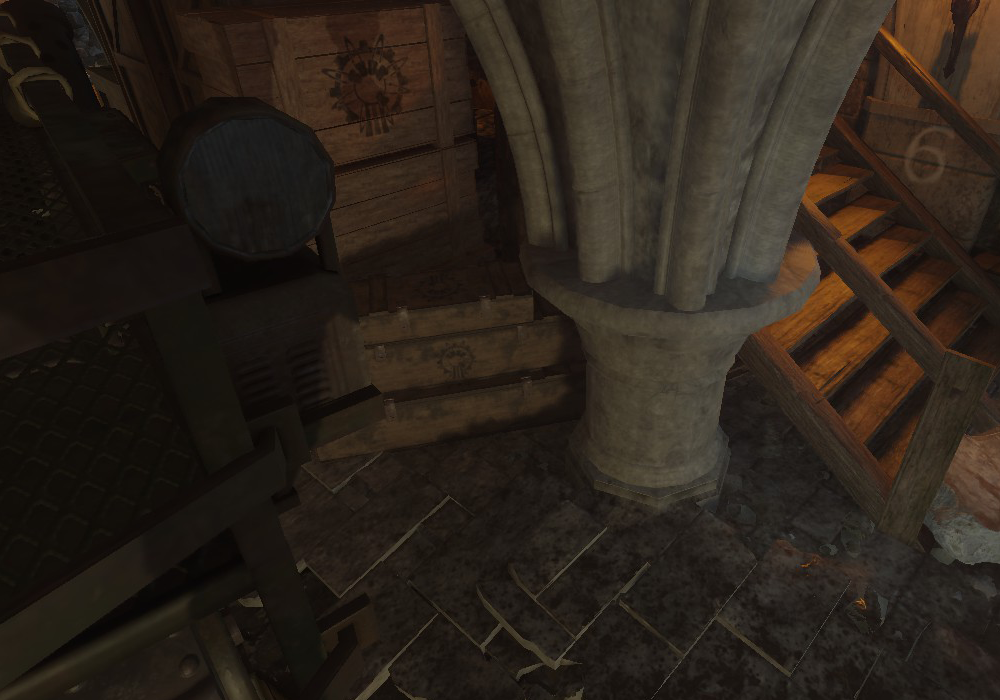
(One of the potential fire vinyl spawns)
Once you have it make your way back to spawn. Open up the door to gen 3 and look to the left. You should see the fire tunnel.
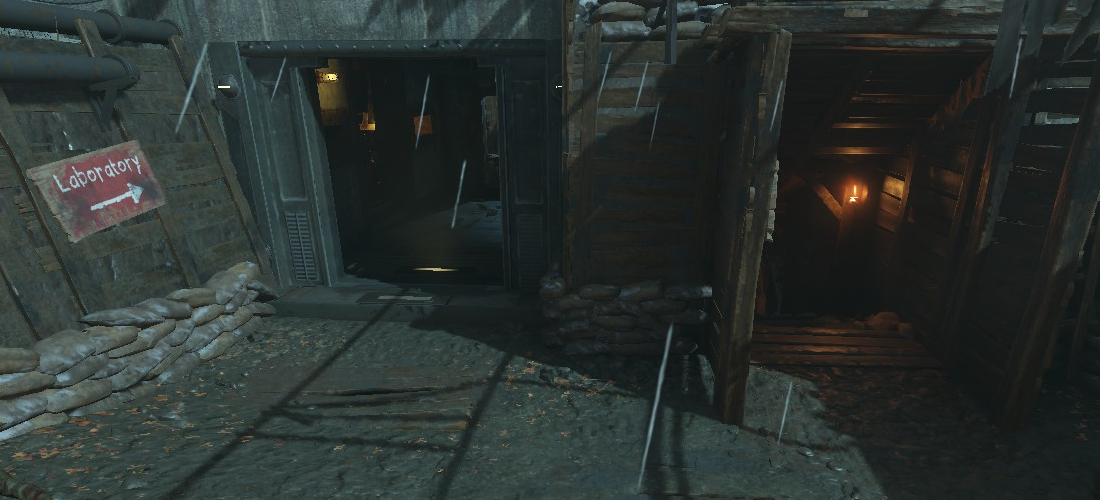
Enter the fire tunnel, place the gramophone, get the gem, go back, pick up the gramophone.
The fire staff is a bit weirder than the rest of the staffs when it comes to getting its pieces. To get the fire staff pieces you have to:- Open up the church. The next round a glowing plane should spawn, look out for it in the sky. Shoot it down using a weapon with normal bullets and collect the staff piece by the footprint with a soulbox in it below the mound.
- Activate generator 6, the staff piece will show up in the reward chest.
- Kill a panzer, a panzer spawns naturally at round 8.
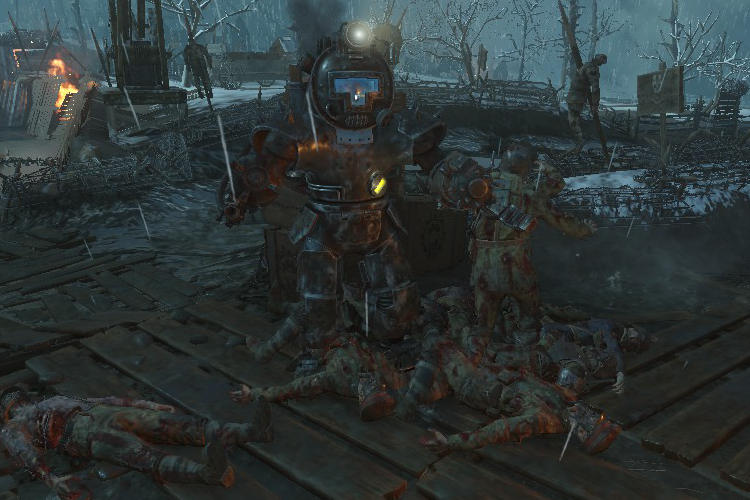
(A panzer and his zombie friends, he is not your friend though)

(The glowing plane)
Once you have the gem and all the pieces go down to the bottom of the mound and craft it.
Upgrading the ice staff
Once you have the ice staff head back to the crazy place. Go to the ice section of the crazy place and look around. You should see a strange symbol on the wall and some weird symbols in the ceiling. What you have to do is use this cheat sheet to translate the symbol on the wall into a symbol on the ceiling, then shoot the symbol in the ceiling using your ice staff.

(Cheat sheet for the ice puzzle)
Once you're done with all of them head back through a portal and go up to the mound. Go to the footstep right behind jug and look around. You might've noticed something strange. A tombstone made out of water.
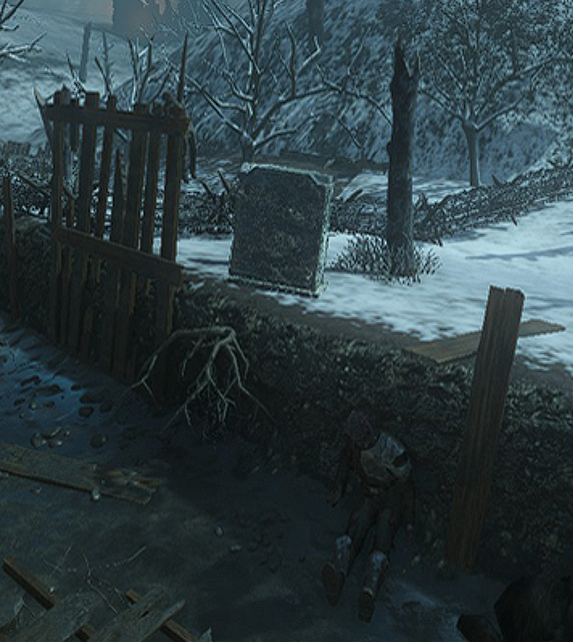
Shoot it with your ice staff and then shoot it using a gun that uses normal bullets.
There are three of these around the map, one is to your right on the mound straight ahead. The last one is at the tank station, when you exit through the other side into the mud you'll see a fallen robot outside the map. The water grave should be just underneath its right arm. That is the arm to your left. Once that's done go back to the mound.
(See "Tips and recommendations" for a faster way to do the last grave)
You might've noticed a couple of rings and levers earlier, pull the levers and make sure the rings all show blue.
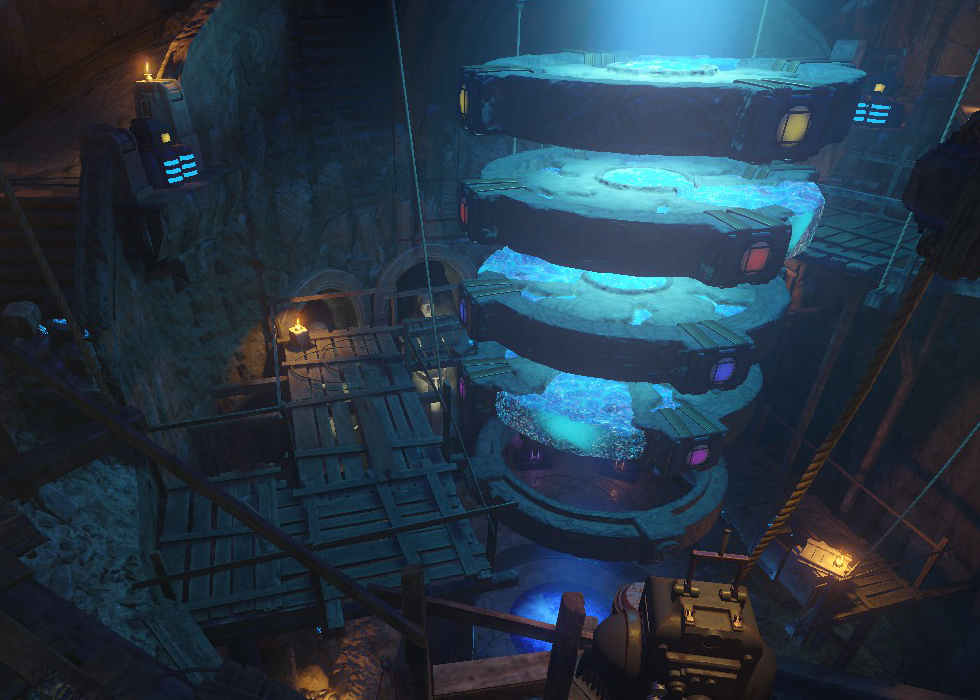
(Rings and levers)
When you've done that go down to the bottom and shoot the blue orb using your ice staff.
Lastly go back to the crazy place, place the ice staff in the pedestal where you took the gem from and kill zombies. Once you've killed enough zombies you'll get a confirmation sound.
Though lost for centuries, the power of the ice staff is now in your hands.
Upgrading the wind staff
To upgrade the wind staff you have to go back down to the crazy place where you, if you're at the wind section of the crazy place, will see a bunch of strange symbols if you look up at the ceiling.
All you have to do is shoot them with your wind staff until they've reached this configuration:
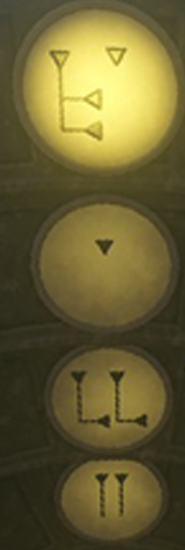
Then once you get the confirmation sound and they start spinning, rebuild the portal and head outside.
For the next step you're going to want to find these things:
and shoot at them using the wind staff so that the smoke emitting from them starts going toward the mound.
They can be found in these locations:- Just outside the wind tunnel by gen 4. (as seen in the picture)
- At stamin-up (gen 5), you have to stand next to stamin-up and shoot it through the barrier.
- From the church, go behind the tank and follow the path. You'll eventually see it on your right.
Now that you're done with those steps, head on over to the mound. You've probably noticed a couple of rings above the staff crafting place and levers surrounding it. You're going to have to interact with the levers and make sure all the rings show yellow. Once you've done that head on down and use the wind staff to shoot the yellow orb which should be floating in the first ring.
The last thing you have to do is go back to the crazy place. Place the wind staff where you found the gem and kill zombies until you get a confirmation sound.
The power of wind is yours.
Upgrading the lightning staff
To upgrade the lightning staff you'll have to go back to the crazy place. Go to the lightning area of the crazy place, you'll see purple triangles. They represent piano keys and there are chords on the walls which you have to play using the lightning staff. The keys you have to shoot are shown here.
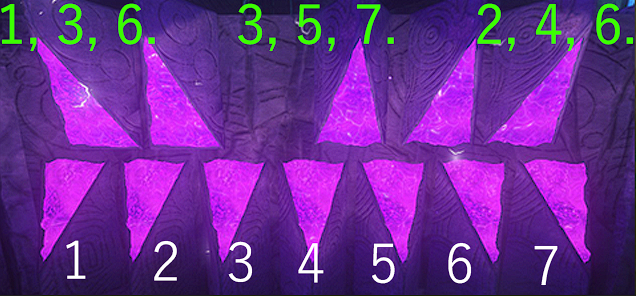
The bottom keys are numbered 1-7, you need not bother with the top keys as they are not used. Simply shoot the keys in the order that the green numbers show, from left to right.
First you shoot 1, then 3, then 6. Once it's done playing you shoot 3, 5, 7. Wait until it's done playing, then you shoot 2, 4, 6. You should hear a confirmation noise if you did it right. If you didn't, you'll have to try again next round.
Once you're done head back to the surface. Now you may have noticed these things around the map.
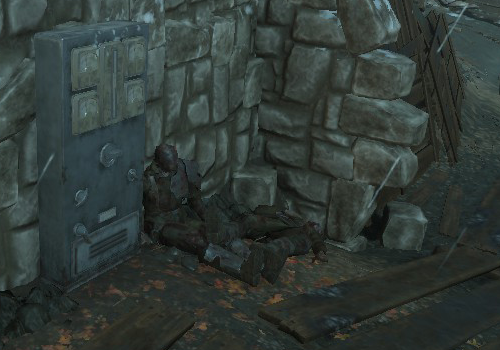
Well, this is where you have to use them. Simply turn all of them a certain way and you'll be done. Here's a cheat sheet to help you.
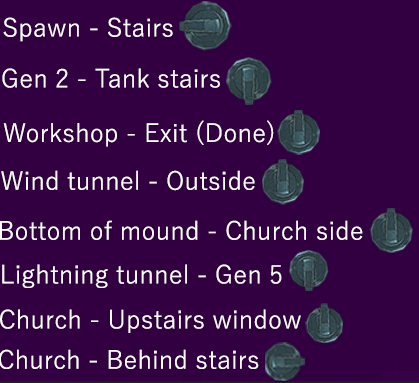
The "Workshop - Exit" one's default state is done so you don't need to turn it. From now on I recommend that you turn all of these in advance for every new game of origins you play as it saves you a lot of time of going back and forth.
"Lightning tunnel - Gen 5" is not inside the lightning tunnel but above the lightning tunnel.
Once you're done with all of that you'll hear a confirmation sound. Go back to the mound and pull the levers to turn all of the rings purple.
Once that's done, shoot the purple orb with your lightning staff, go to the crazy place and put the staff in the pedestal. Once you've killed enough zombies you should hear a confirmation sound.
With this staff complete, lightning is now yours to wield.
Upgrading the fire staff
Go to the crazy place and stand on the lava with grating over it. If you look around you'll notice four basins, which you'll have to light up using zombie souls, so get killing, but only on the lava. Once they're all lit up you'll hear a confirmation sound.
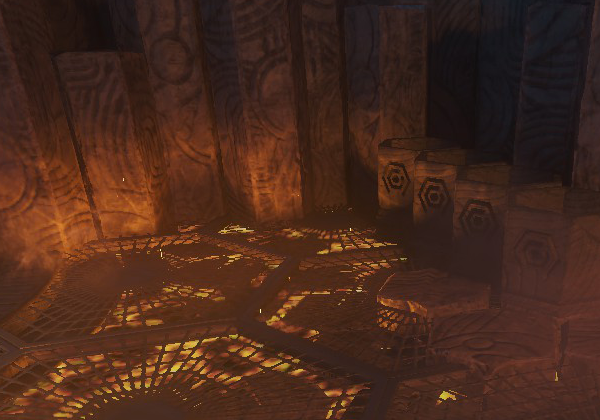
(The basins)
Once they're lit, go to the church and head upstairs. If you look toward the pedestal you'll see that the wall is glowing with strange symbols. What you have to do is translate these symbols into numbers, then shoot the torches downstairs labeled with those numbers in the exact order as they're shown.
Here's a cheat sheet:
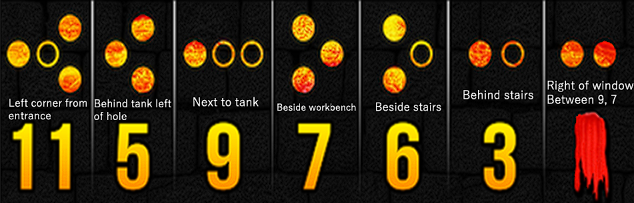
Picture credit: MrRoflWaffles at https://www.kronorium.com/origins/fire/
Once you've done that, go to the mound, pull the levers until the rings show red and shoot the red orb.
Lastly; go to the crazy place, place the fire staff in the pedestal, kill zombies and once you've killed enough you'll get a confirmation sound.
The elemental fire is yours to command.
The easter egg steps
- Acquire and upgrade all the staffs.
(Secure the keys) - All generators need to be active for this one; put all the staves in different pedestals. The fire staff goes in the pedestal at the bottom of the mound, the lightning staff goes in the spawn robots pedestal (yes you have to go up to their heads), the wind staff goes in the middle robots pedestal, and the ice staff goes in the church robots pedestal. Once this step is complete all the staves will respawn in their pedestals at the bottom of the mound.
(Ascend from darkness) - You need the G-Strike for this one. Behind the boxes where the wind vinyl can spawn, just outside the map, there is a big stone slab in the ground. During this step all the robots will come in unison and only one foot will be open at a time.
2+ Players:Have another player go up the robot while a player with the G-Strike waits by the stone slab. As soon as the player in the robot presses a red button where the wind staff piece used to be, throw the G-Strike onto the stone slab. If done correctly the stone will break and there will be a hole in the ground. If done incorrectly nothing will happen.Solo:Wait for either of the middle robots feet to be open, then go in at first opportunity.
Wait until the countdown reaches 0 and spam the red button where the wind staff piece used to be. Now run like a madman and throw the G-Strike onto the stone slab. It's better to be slightly slower and accurate than to miss entirely. If done correctly it will bust open, if done incorrectly nothing will happen. It is significantly harder and more time consuming solo but it's possible.See "Tips and recommendations" for an easy way to wait when doing this step solo.
(Rain fire) - Next you take out the maxis drone. He will go in the newly opened hole and after a second or two, panzers (plural) will come flying out. Kill all the panzers to move on to the next step.
See "Tips and recommendations" for an easy way to do this step.
(Unleash the horde) - For the next step you will have to use zombie blood to shoot down a glowing plane, then you will have to track down a zombie and kill it. While you are not in zombie blood, the zombie is invisible, and invincible. The zombie runs clockwise around the mound from just underneath where you shot down the plane so it shouldn't be too hard to find and kill, just keep in mind you do have to be in zombie blood mode.
See "Fun / useful facts" for a way to get free zombie blood once every round.
(Skewer the winged beast) - Once it's done you will have picked up the maxis drone again, except it's upgraded, and it will spawn back at the workbench where you built it. The next step is to finish all the soul boxes if you haven't done that and grab the special reward you get for doing so. Once you have the punch you have to go down to the bottom of the mound and punch glowing zombies. You don't have to kill them, just punch them. Eventually one will drop a tablet that upgrades your punch.
(Wield a fist of iron) - The last thing you need to do is go to the crazy place with all the staves and place all of them in the pedestals. Once you've done that you have to kill a lot of zombies. You will hear a confirmation sound and the screen will go white for a moment once you've killed enough.
See "Tips and recommendations" for an easier way to do this step.
(Raise hell) - At this point you've almost completed the easter egg, all you have to do is send out the Maxis drone and interact with the beam of light that appears.
(Freedom)Congratulations, enjoy your newly obtained achievement and cutscene.
- All Around Enhancement Mod Description And Info★ 5 (597)211k views1.2k ♥34 minUpdated Aug 10, 2023
- Black Ops 3: Console Commands★ 5 (1.1k)123k views2.4k ♥7 minUpdated Feb 13, 2020
- Origins Ultimate Guide★ 5 (562)72k views1.7k ♥17 minUpdated Jun 24, 2017
- Guide for Shadows of Evil [2020 updated]★ 5 (1.4k)67k views4.5k ♥24 minUpdated Mar 22, 2024
- Guide for Der Eisendrache [2020 updated]★ 5 (1.3k)65k views4.6k ♥30 minUpdated Feb 22, 2024
- How to download the community T7patch by Serious and play online zombies safely (also FPS Fix)★ 5 (491)62k views1.2k ♥4 minUpdated Apr 30





- Upgrading to PremiumTeam Fortress 2★ 5 (20k)1441k views11k ♥6 minUpdated May 11, 2022
- No More Room in Hell Official ManualNo More Room in Hell★ 5 (2.8k)569k views2.1k ♥29 minUpdated Apr 22, 2019
- NMRiH Community Hosting GuidesNo More Room in Hell★ 5 (526)351k views653 ♥1 minUpdated Aug 10, 2022
- Лучшие кооперативные игры SteamPAYDAY 2★ 5 (1.5k)315k views2.1k ♥56 minRussianUpdated Apr 27, 2025
- Desert Eagle Heat Treated | Blue GemCounter-Strike 2★ 5 (1.6k)292k views1.5k ♥2 minUpdated Jan 16
- Treasure Hunt Puzzle SolutionsTotal War: WARHAMMER II★ 5 (6.9k)281k views15k ♥3 minUpdated Aug 19, 2021






This guide was created by its original author on the Steam Community. Are you the author and want it removed? Request removal.