Blood Run: Power Station - Map Guide
Introduction
This guide covers the custom Call of Duty: Black Ops 3 Zombies map, Blood Run: Power Station. Specifically, this guide is provides a visual and text outline of special features on the map, including:
- all shield part locations,
- all teddy bear locations,
- the piano perk dispenser, and
- the buyable ending.
Shield
A shield is available on this map, with each part spawning in one of multiple possible locations each match.
Faceplate
Location 1
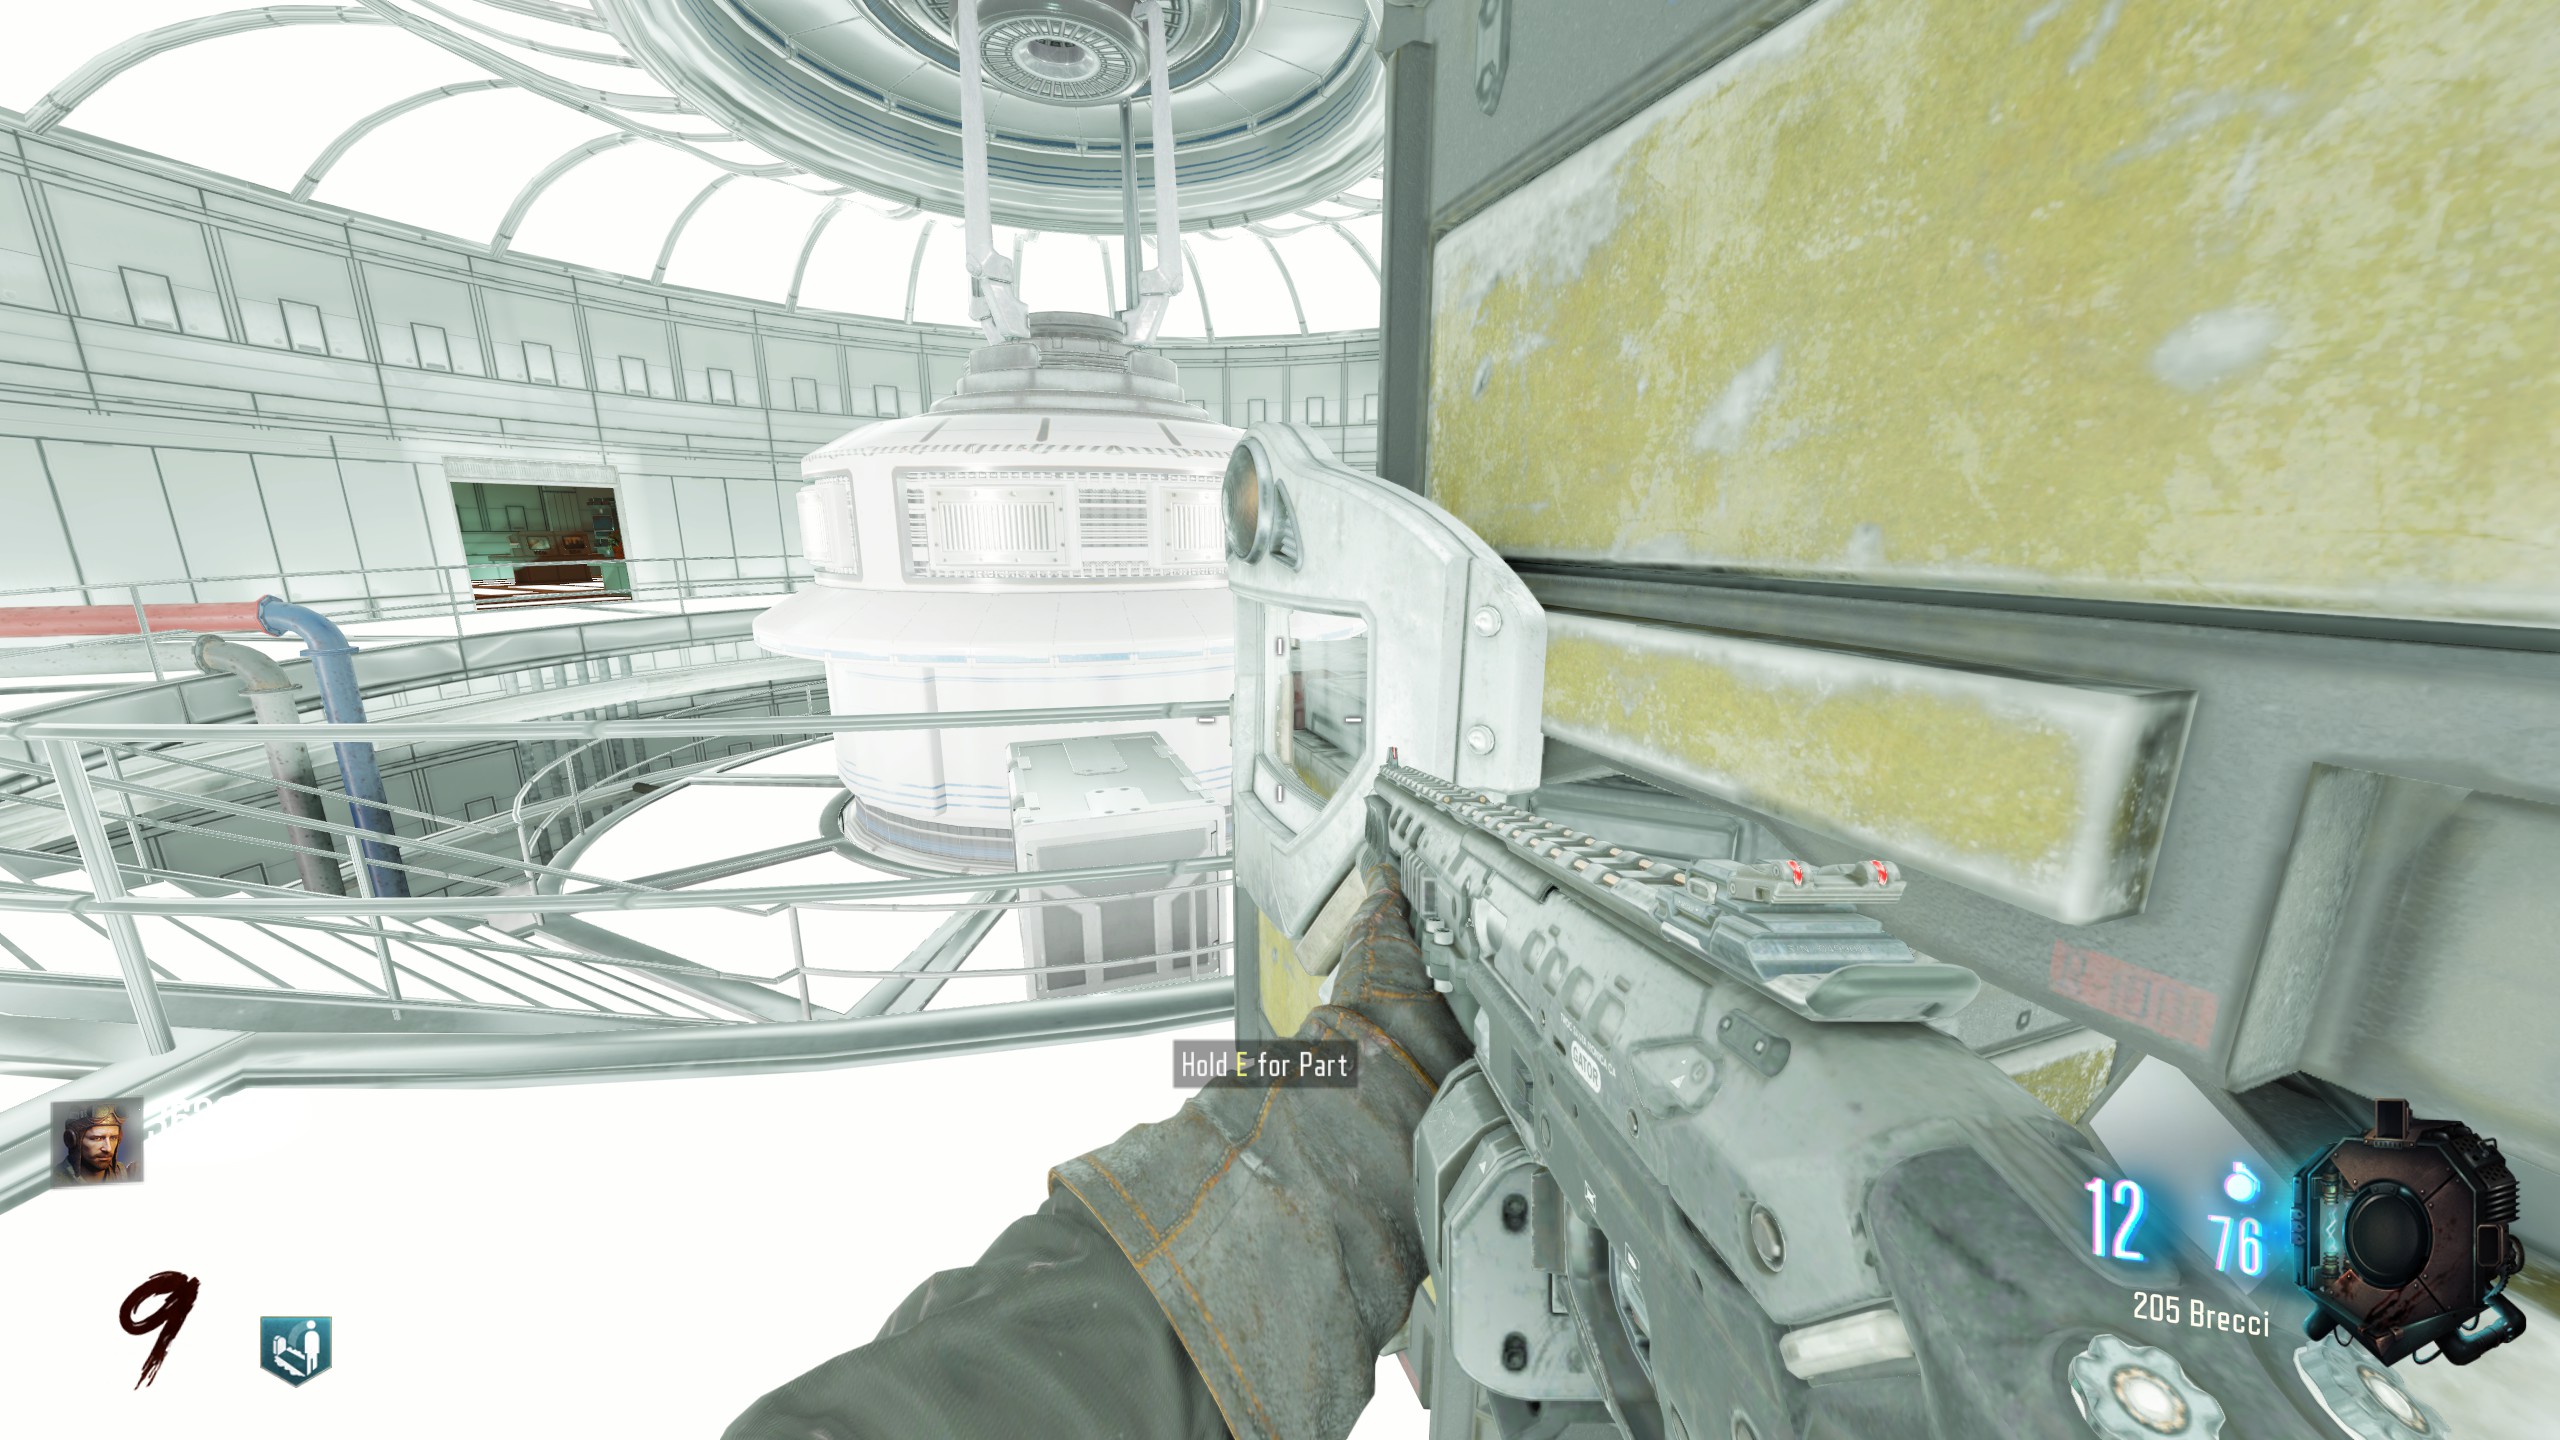
In the first circular room underground, on the upper level against boxes immediately to the right after entering the room from Deadshot Daiquiri.
Location 2
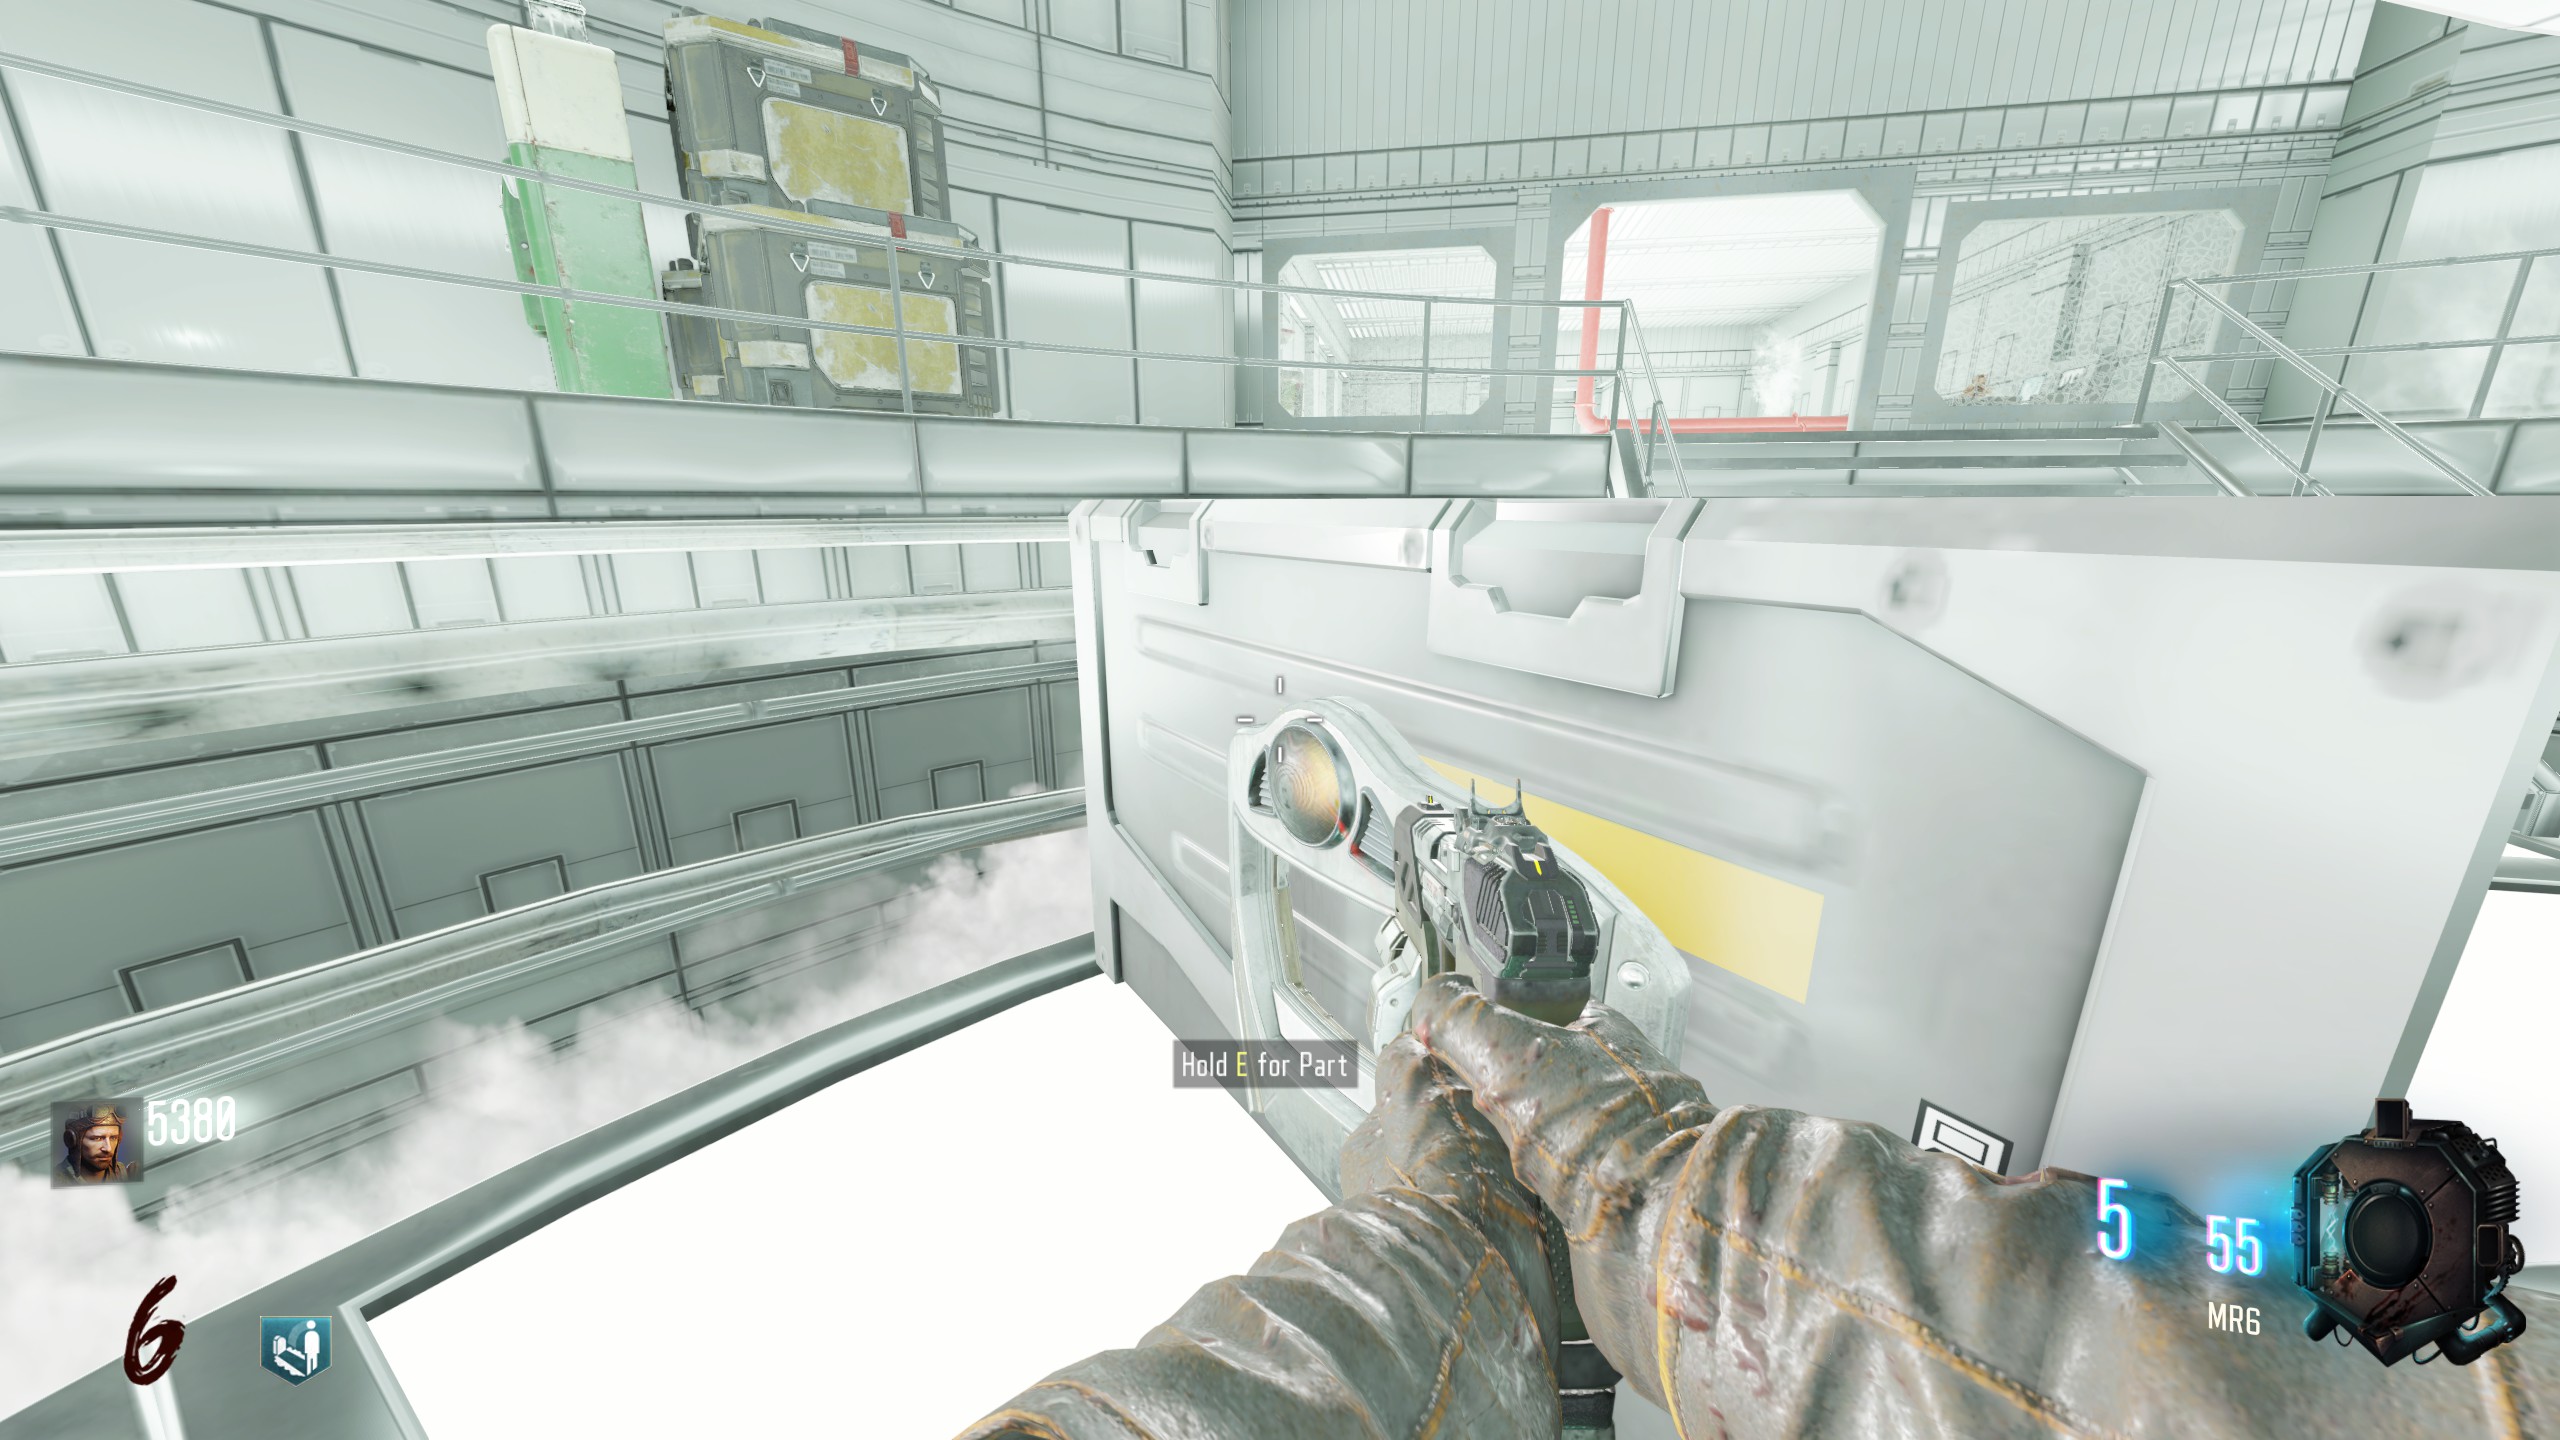
In the first circular room underground, on the lower level against boxes next to stairs leading up to Speed Cola.
Body (eagle)
Location 1
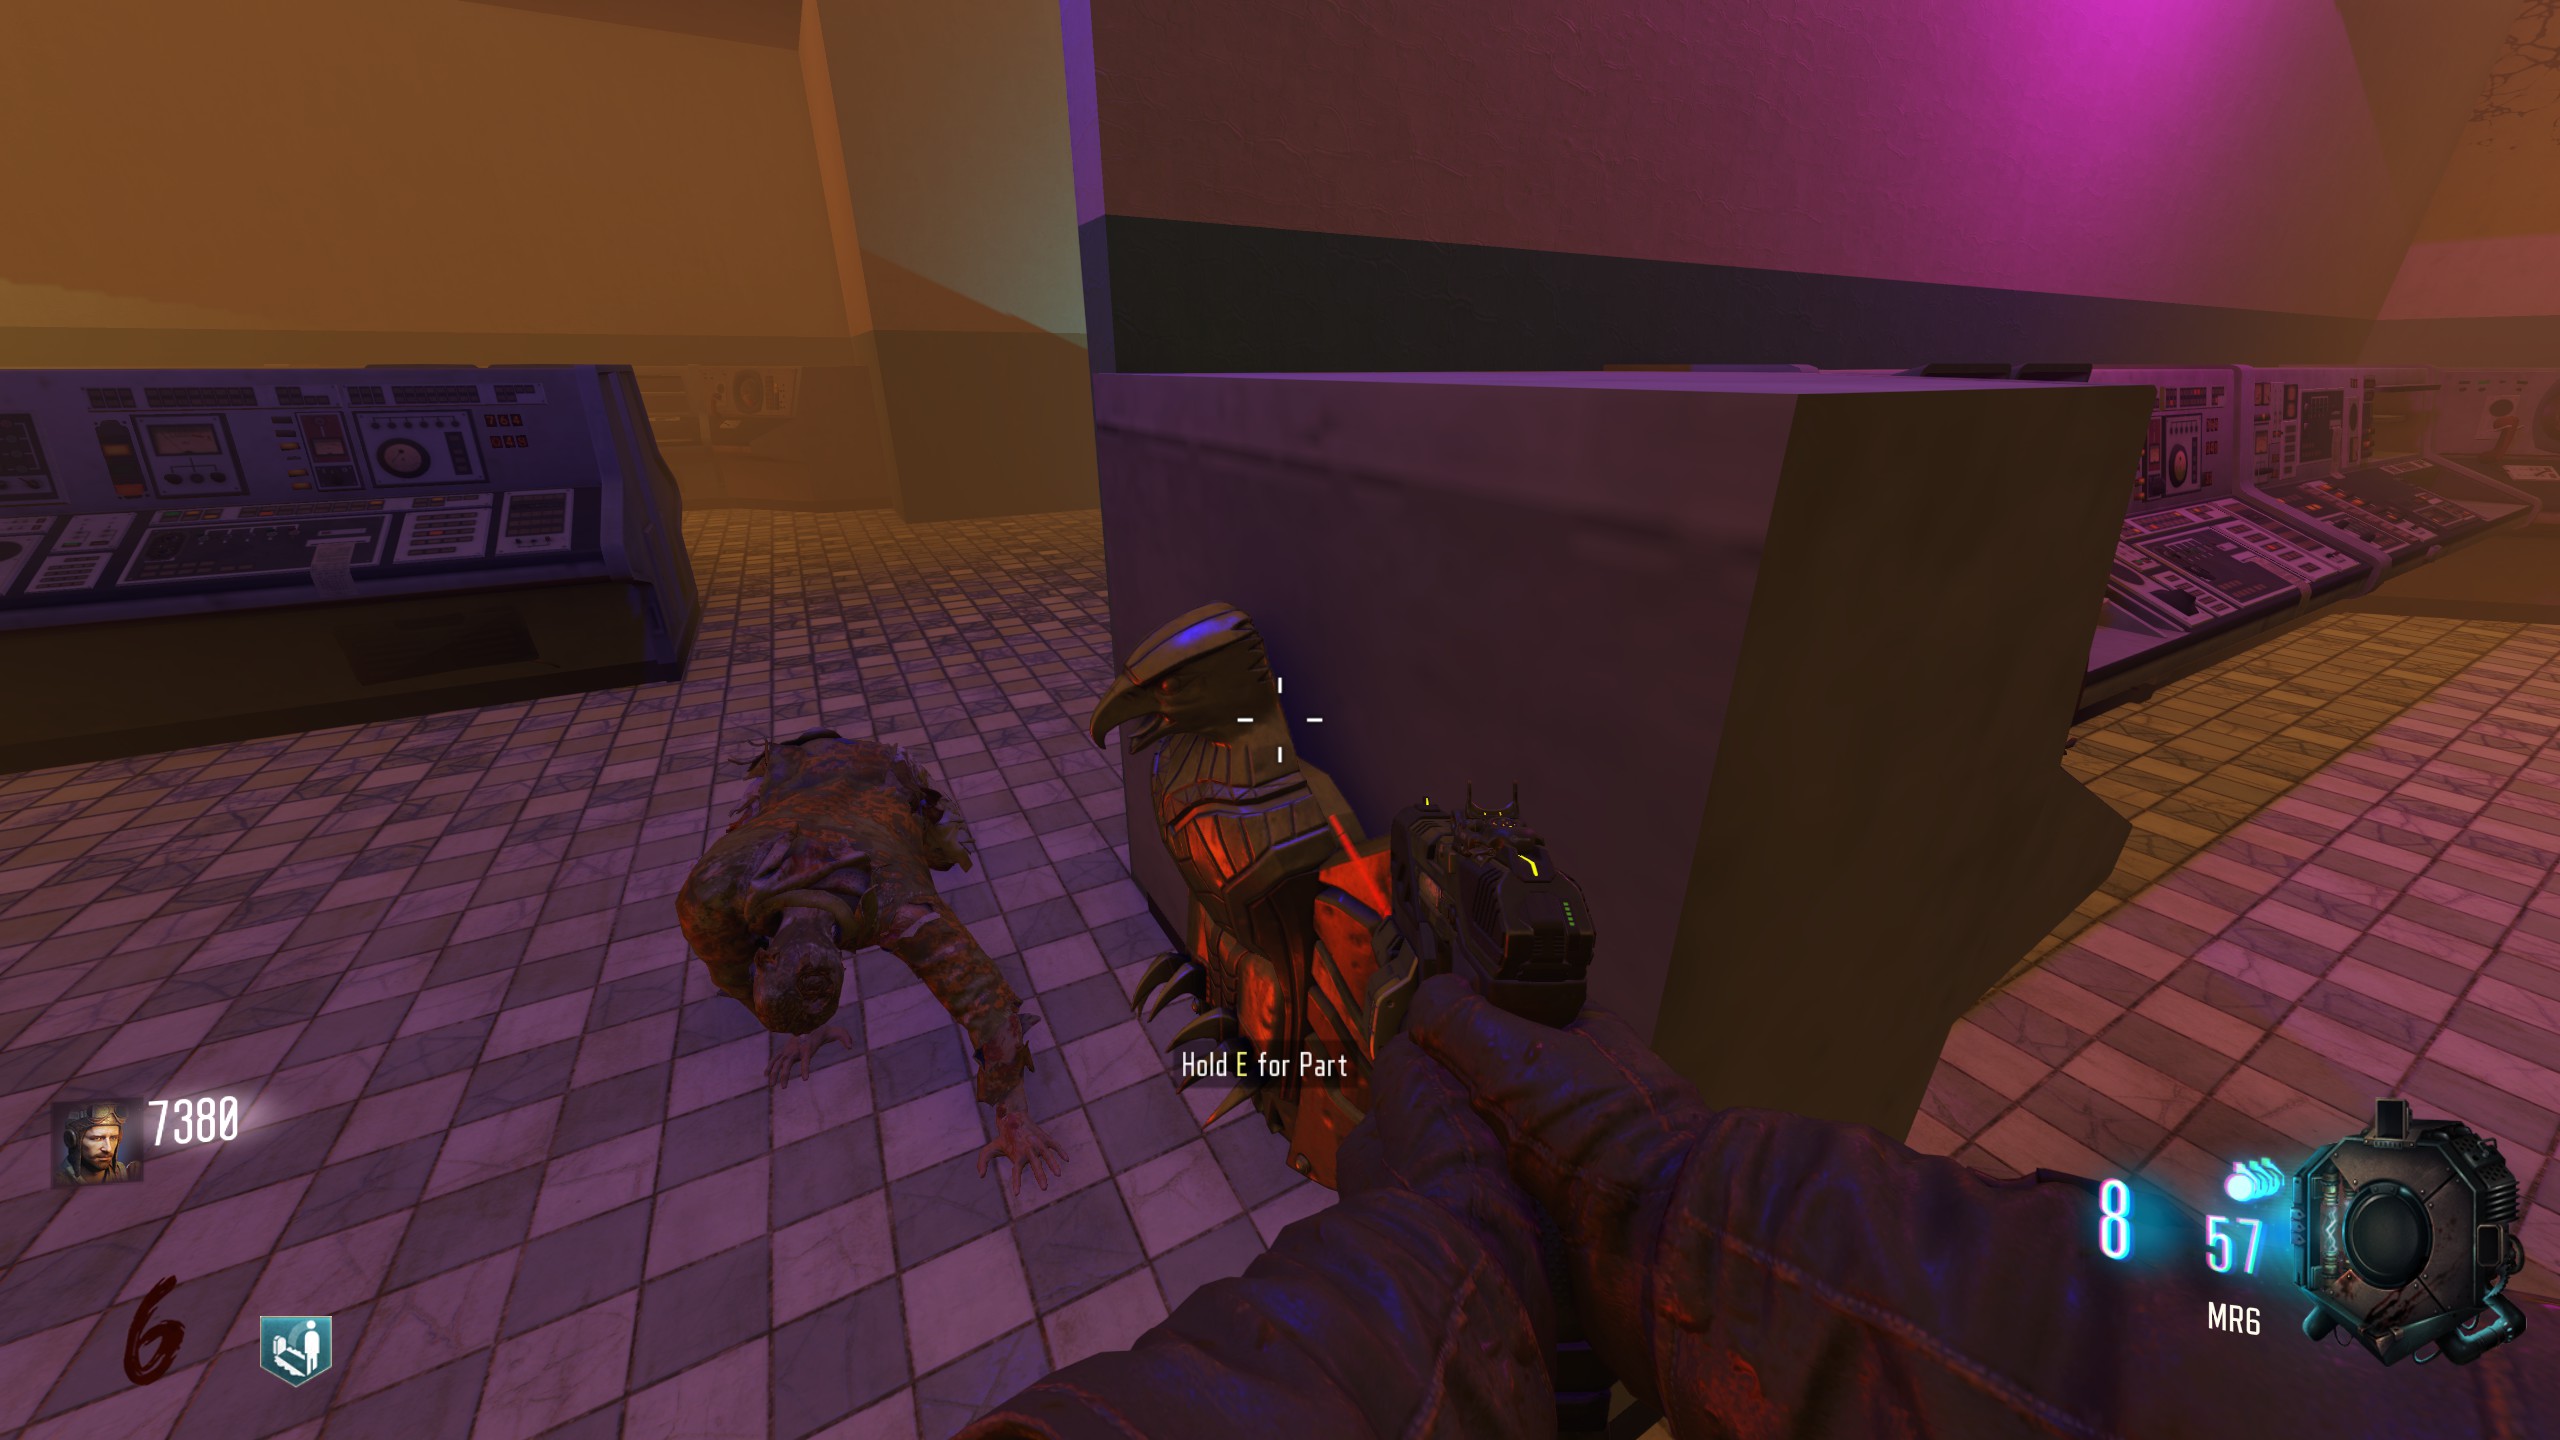
In 'Chernobyl' on the lower floor, against a bank of computers immediately after turning left.
Location 2
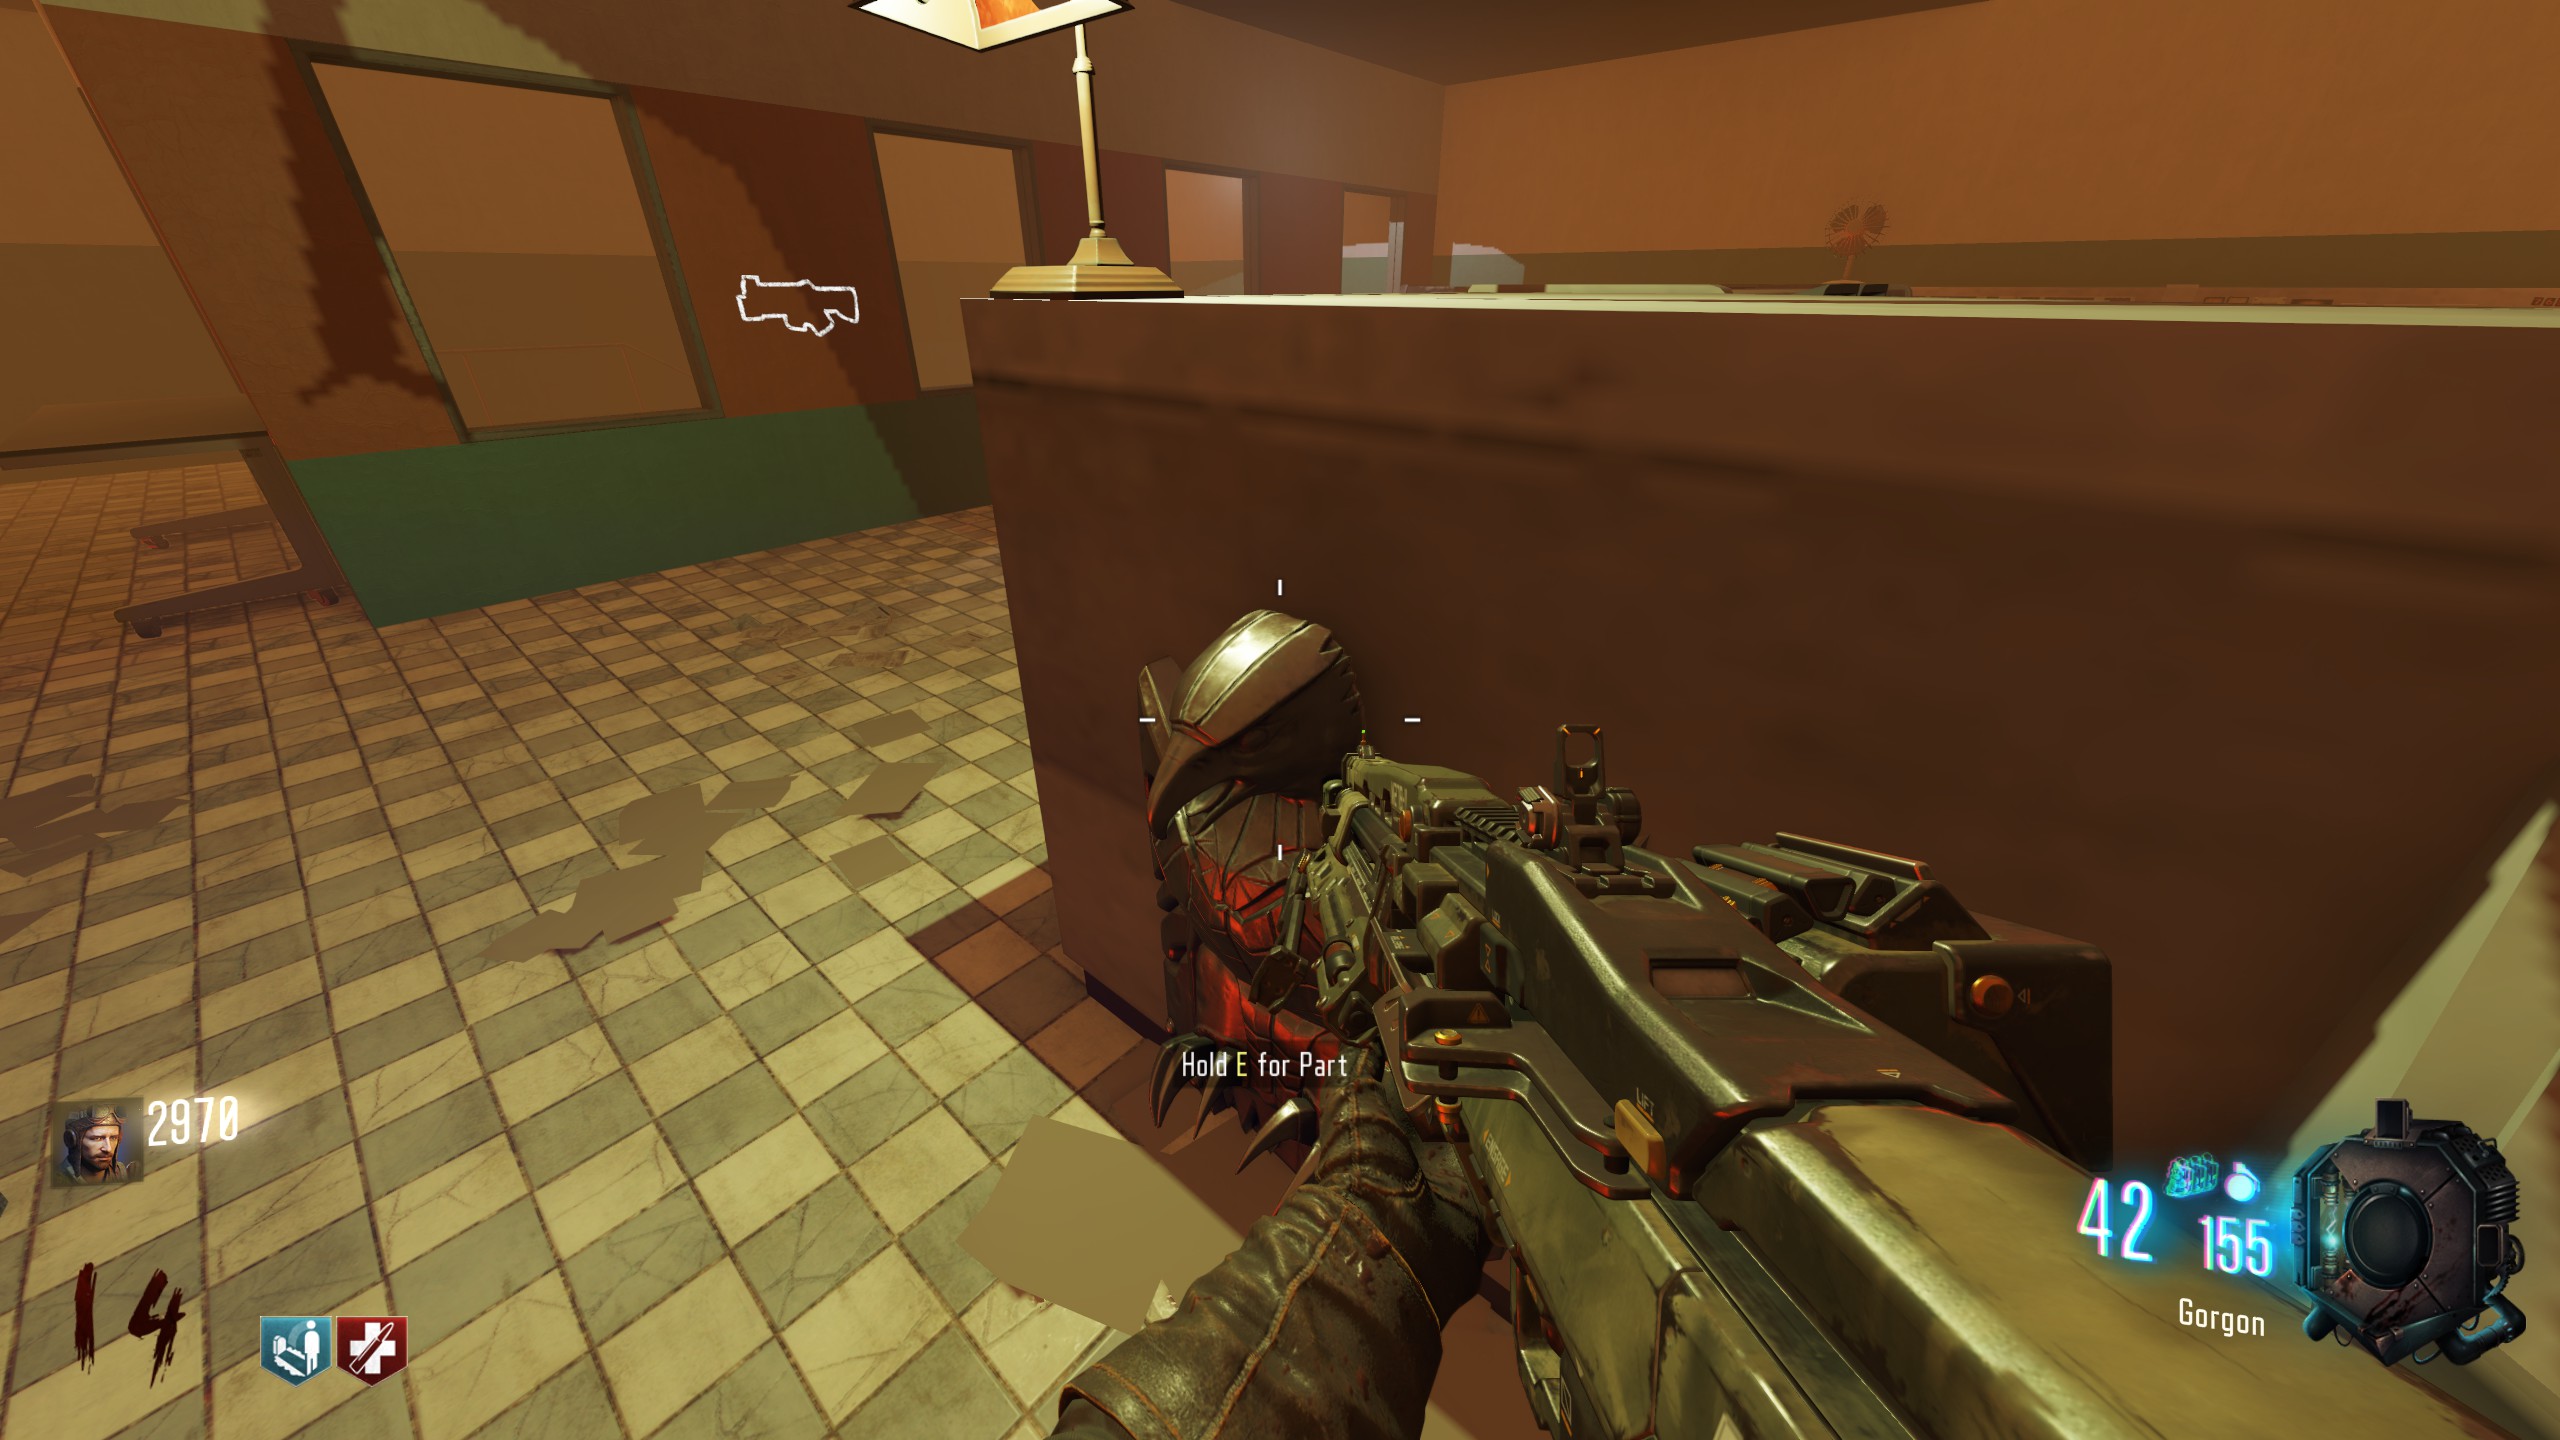
In 'Chernobyl' on the upper floor, against a bank of computers visible after turning left from the staircase.
Location 3
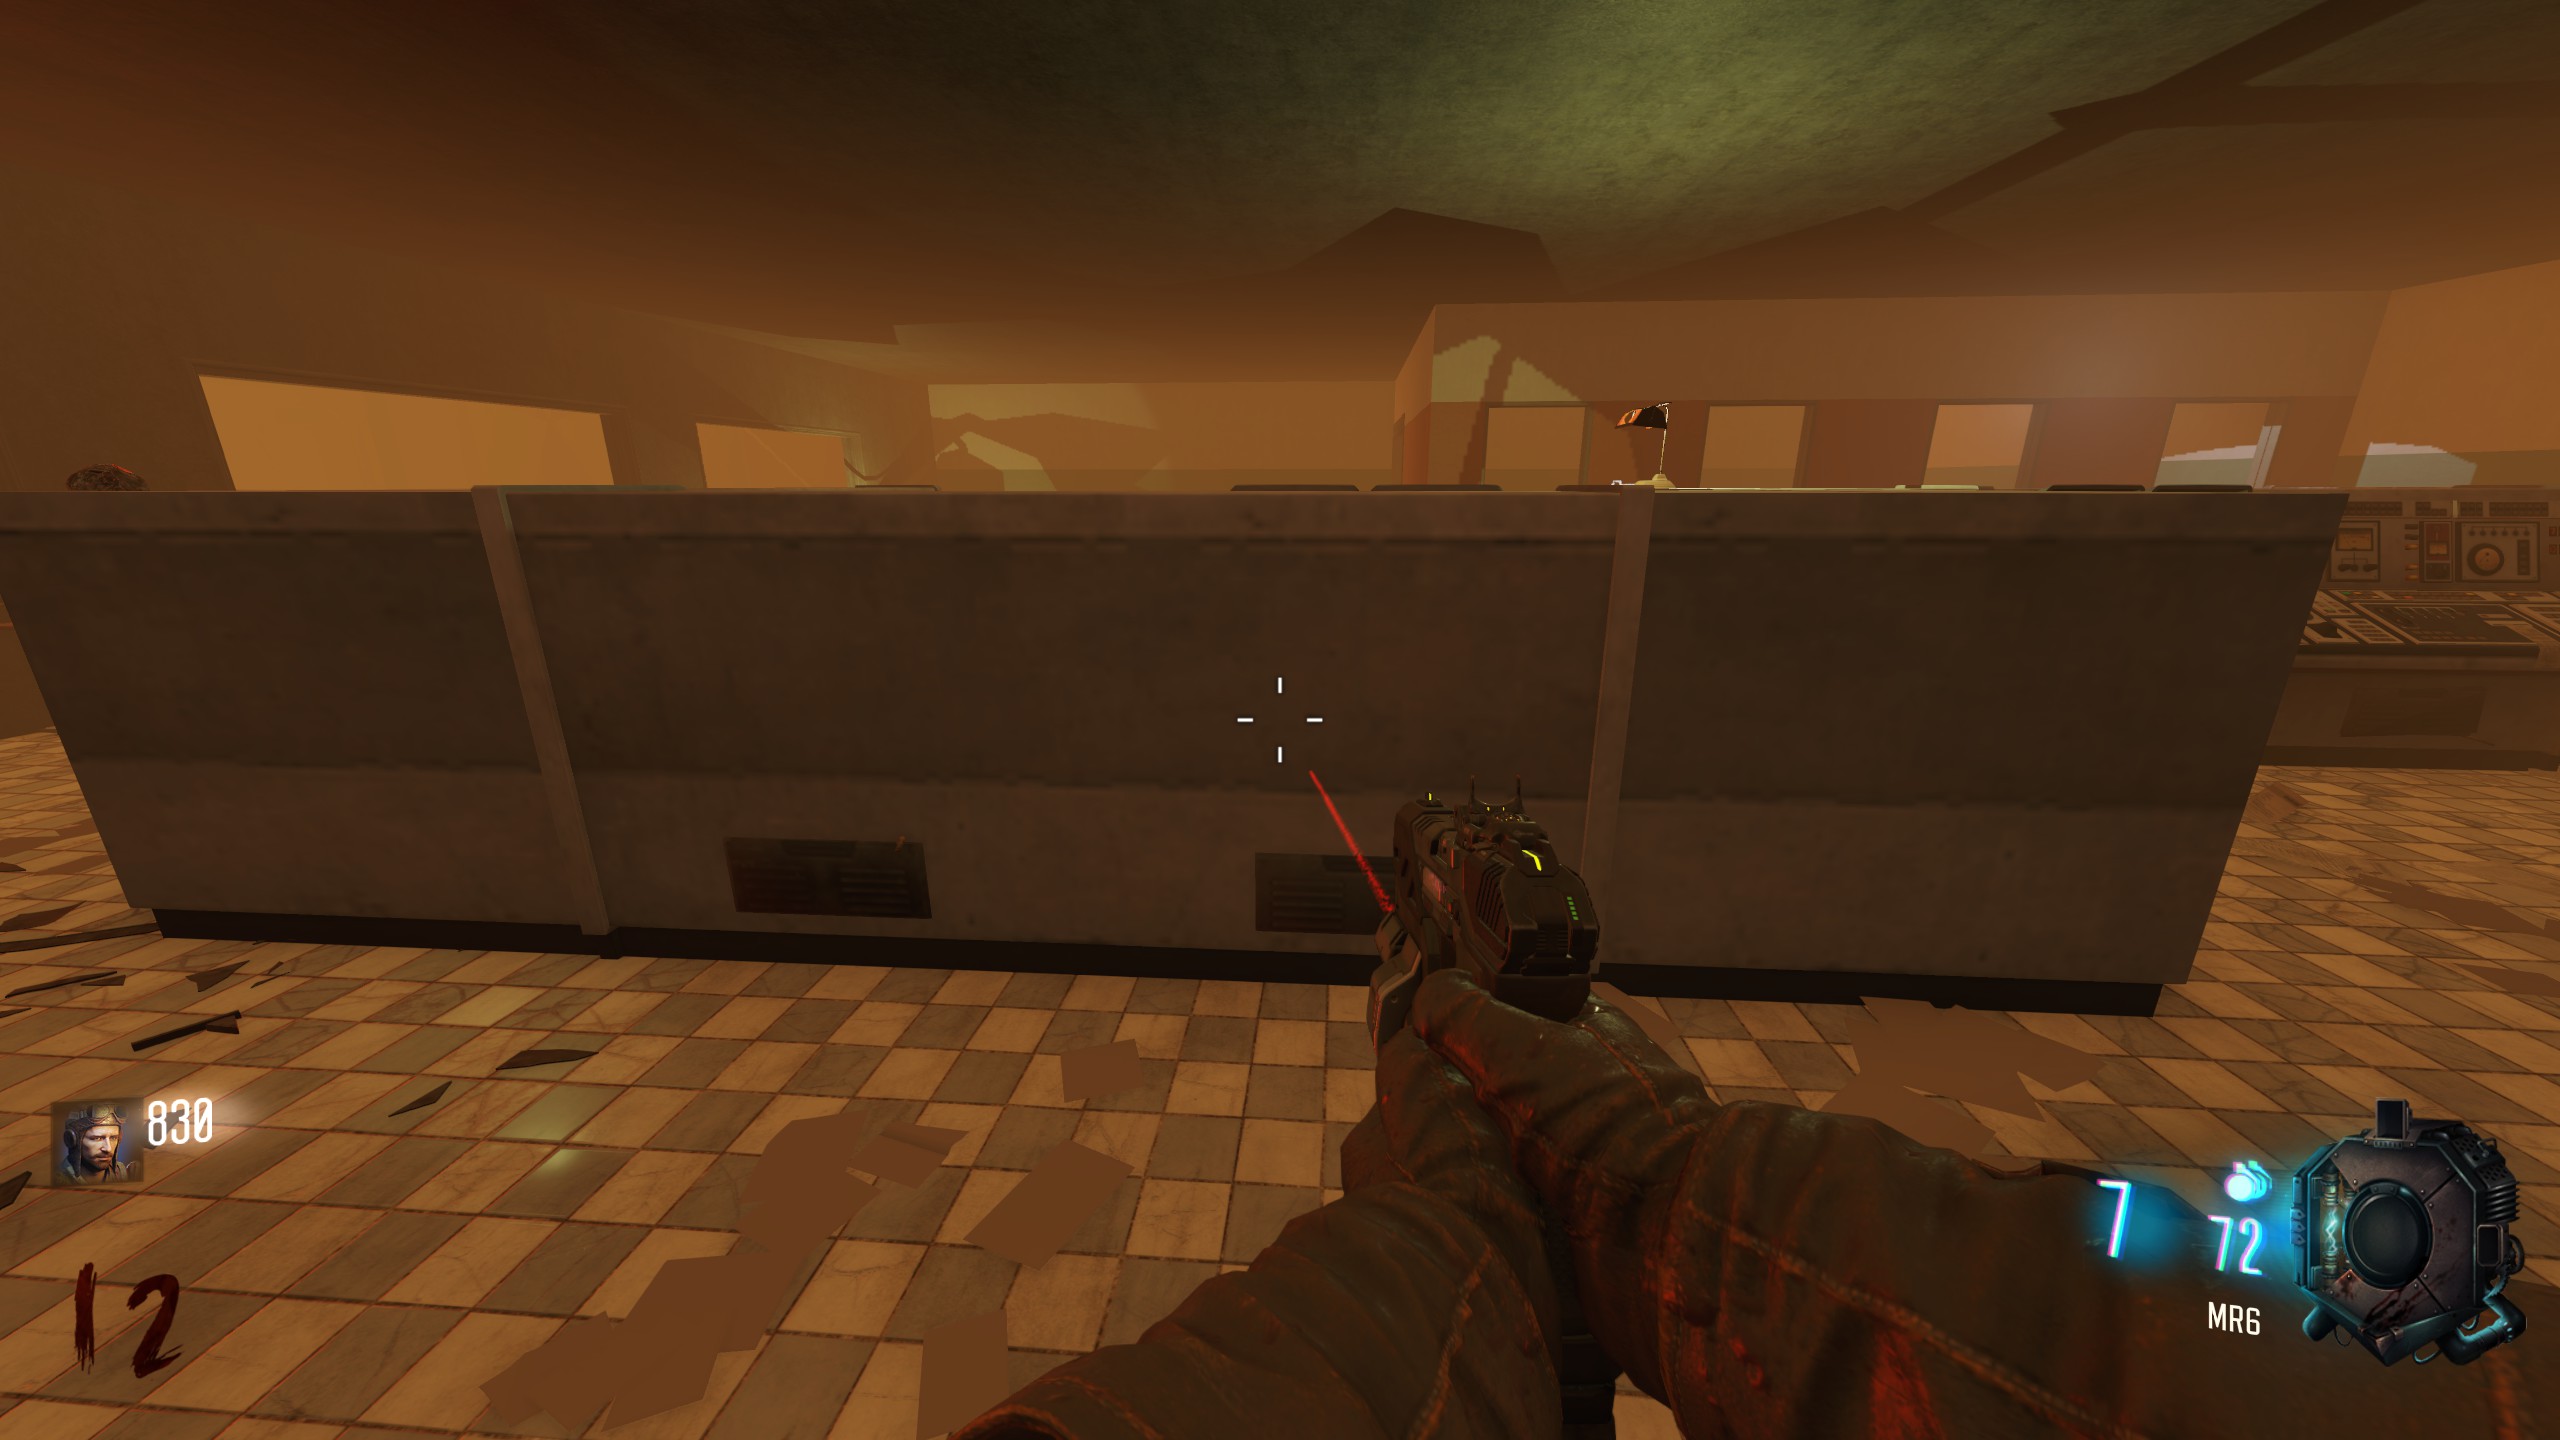
In 'Chernobyl' on the upper floor, behind a bank of computers after turning left from the staircase. Screenshot taken just after picking up the part.
Tanks
Location 1
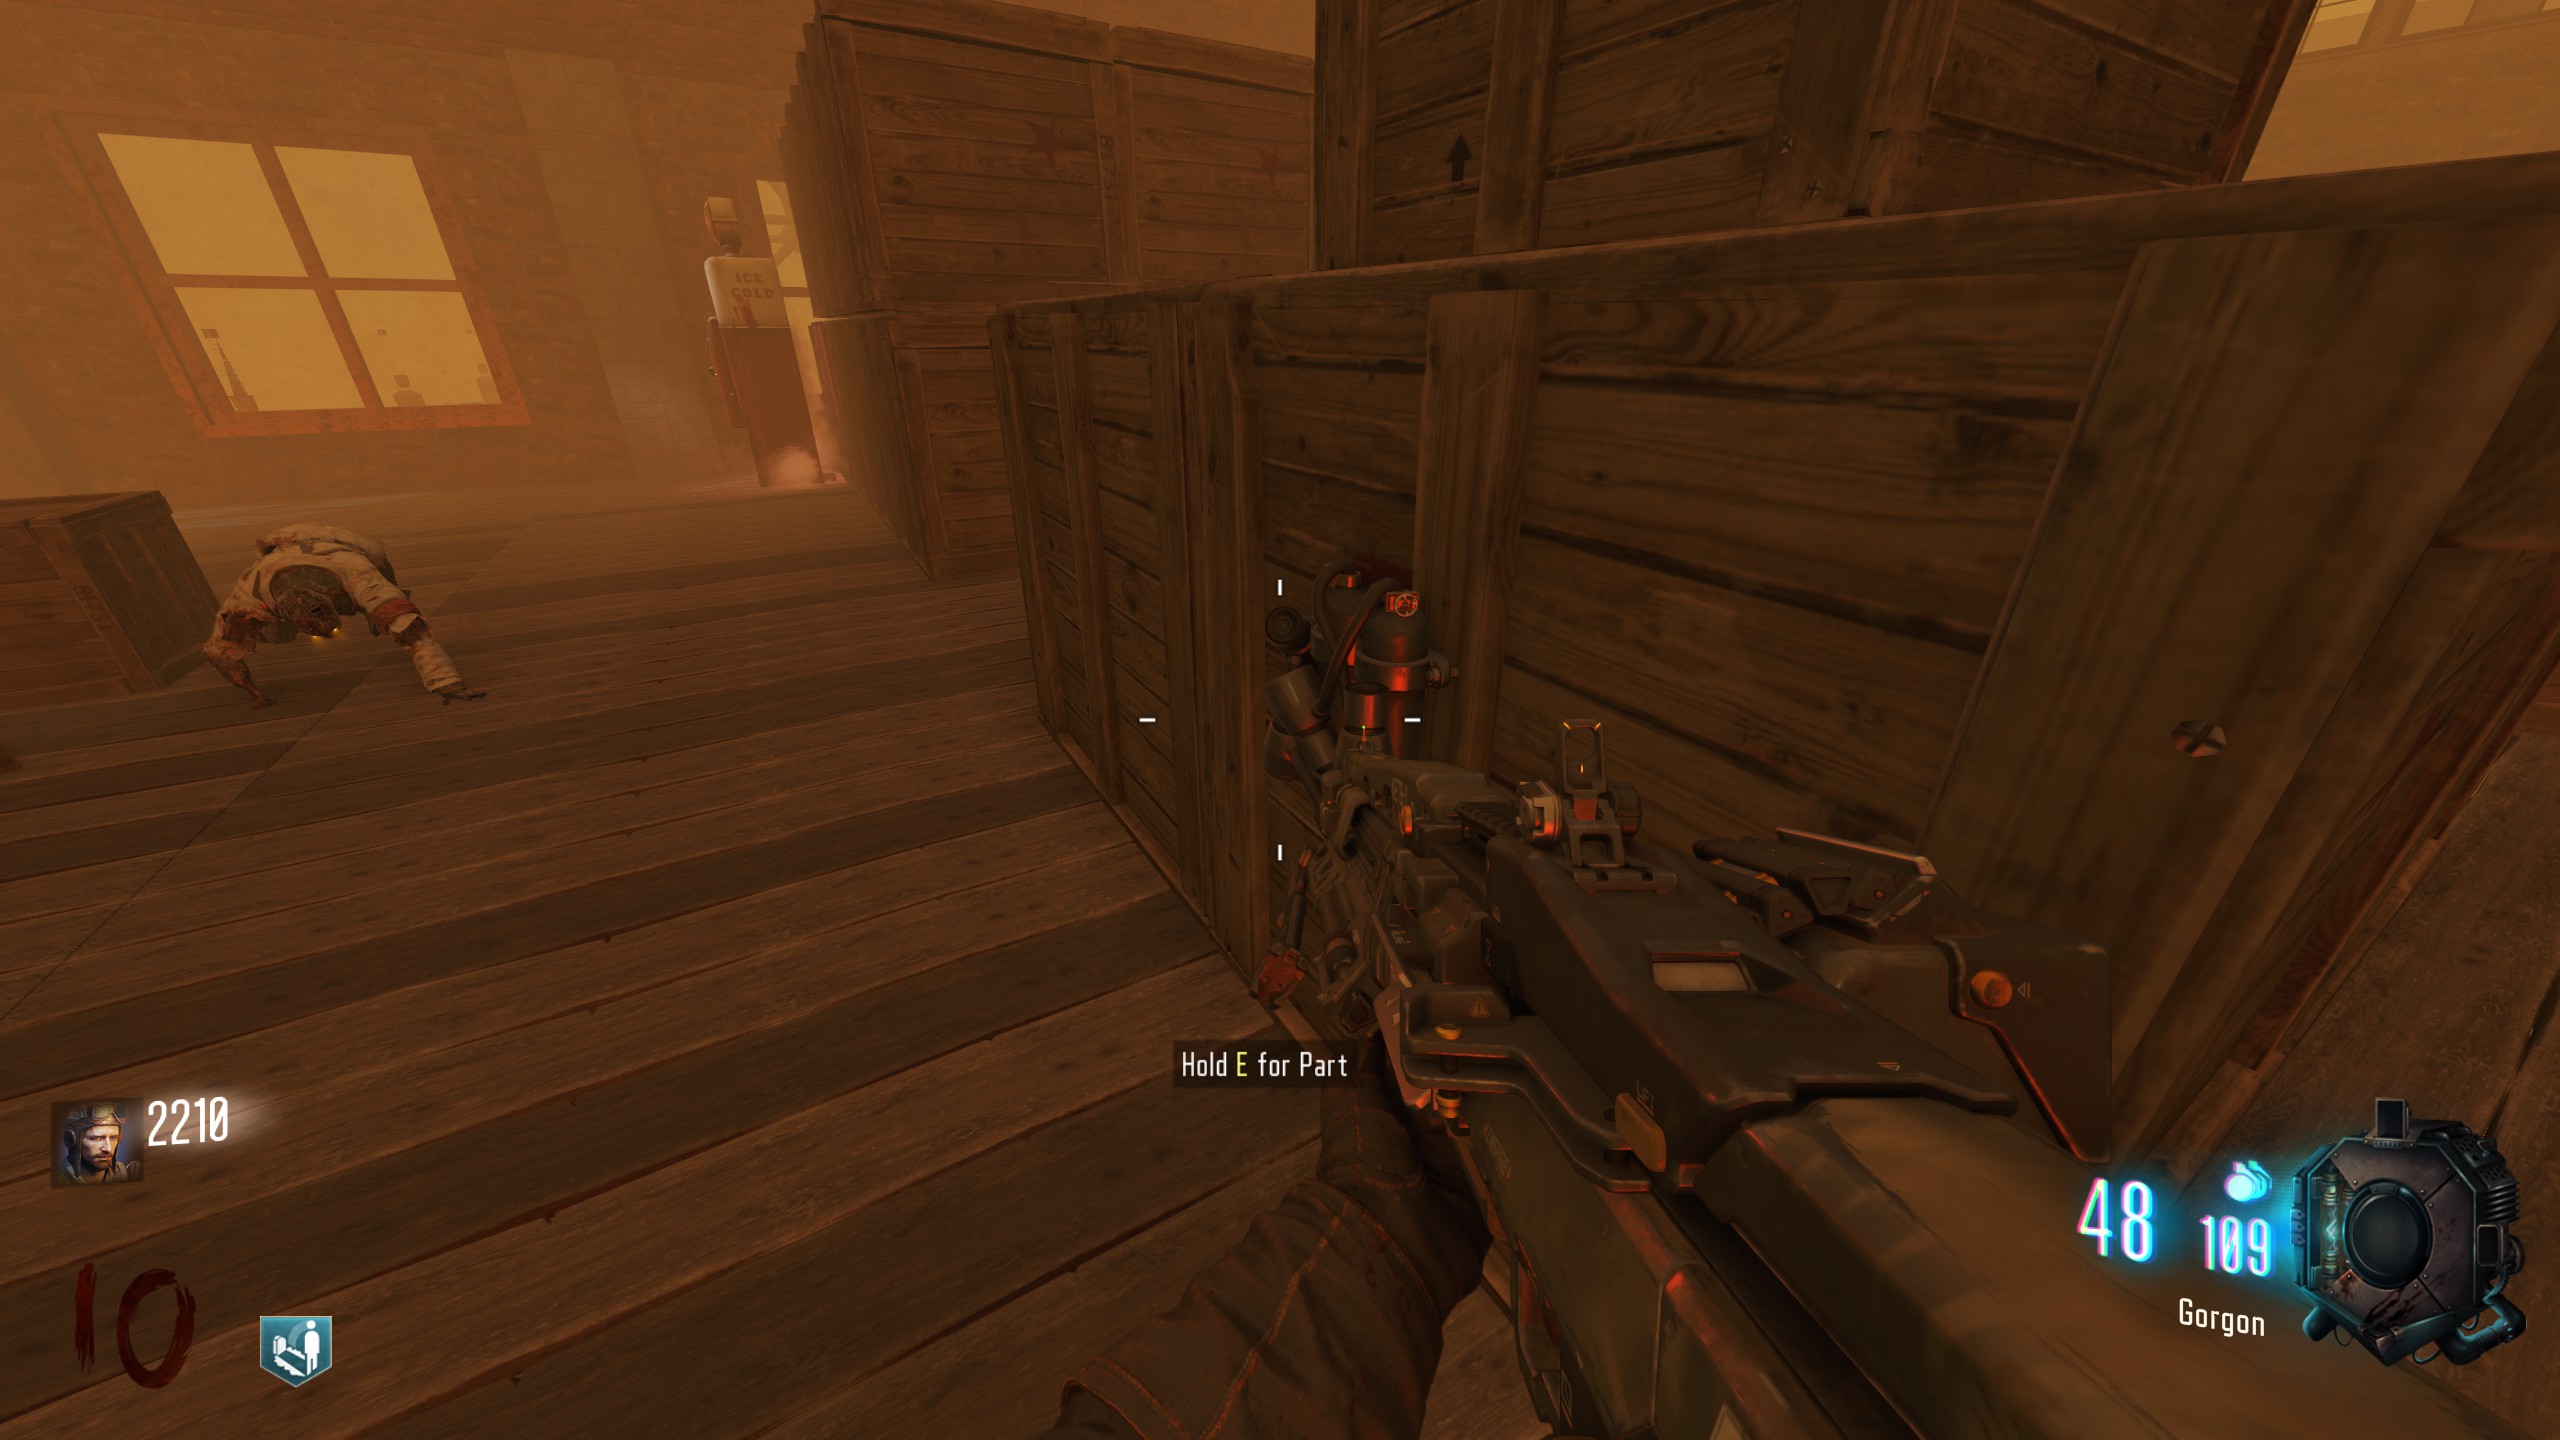
In the power building, on the upper floor against boxes near Jugger-Nog.
Location 2
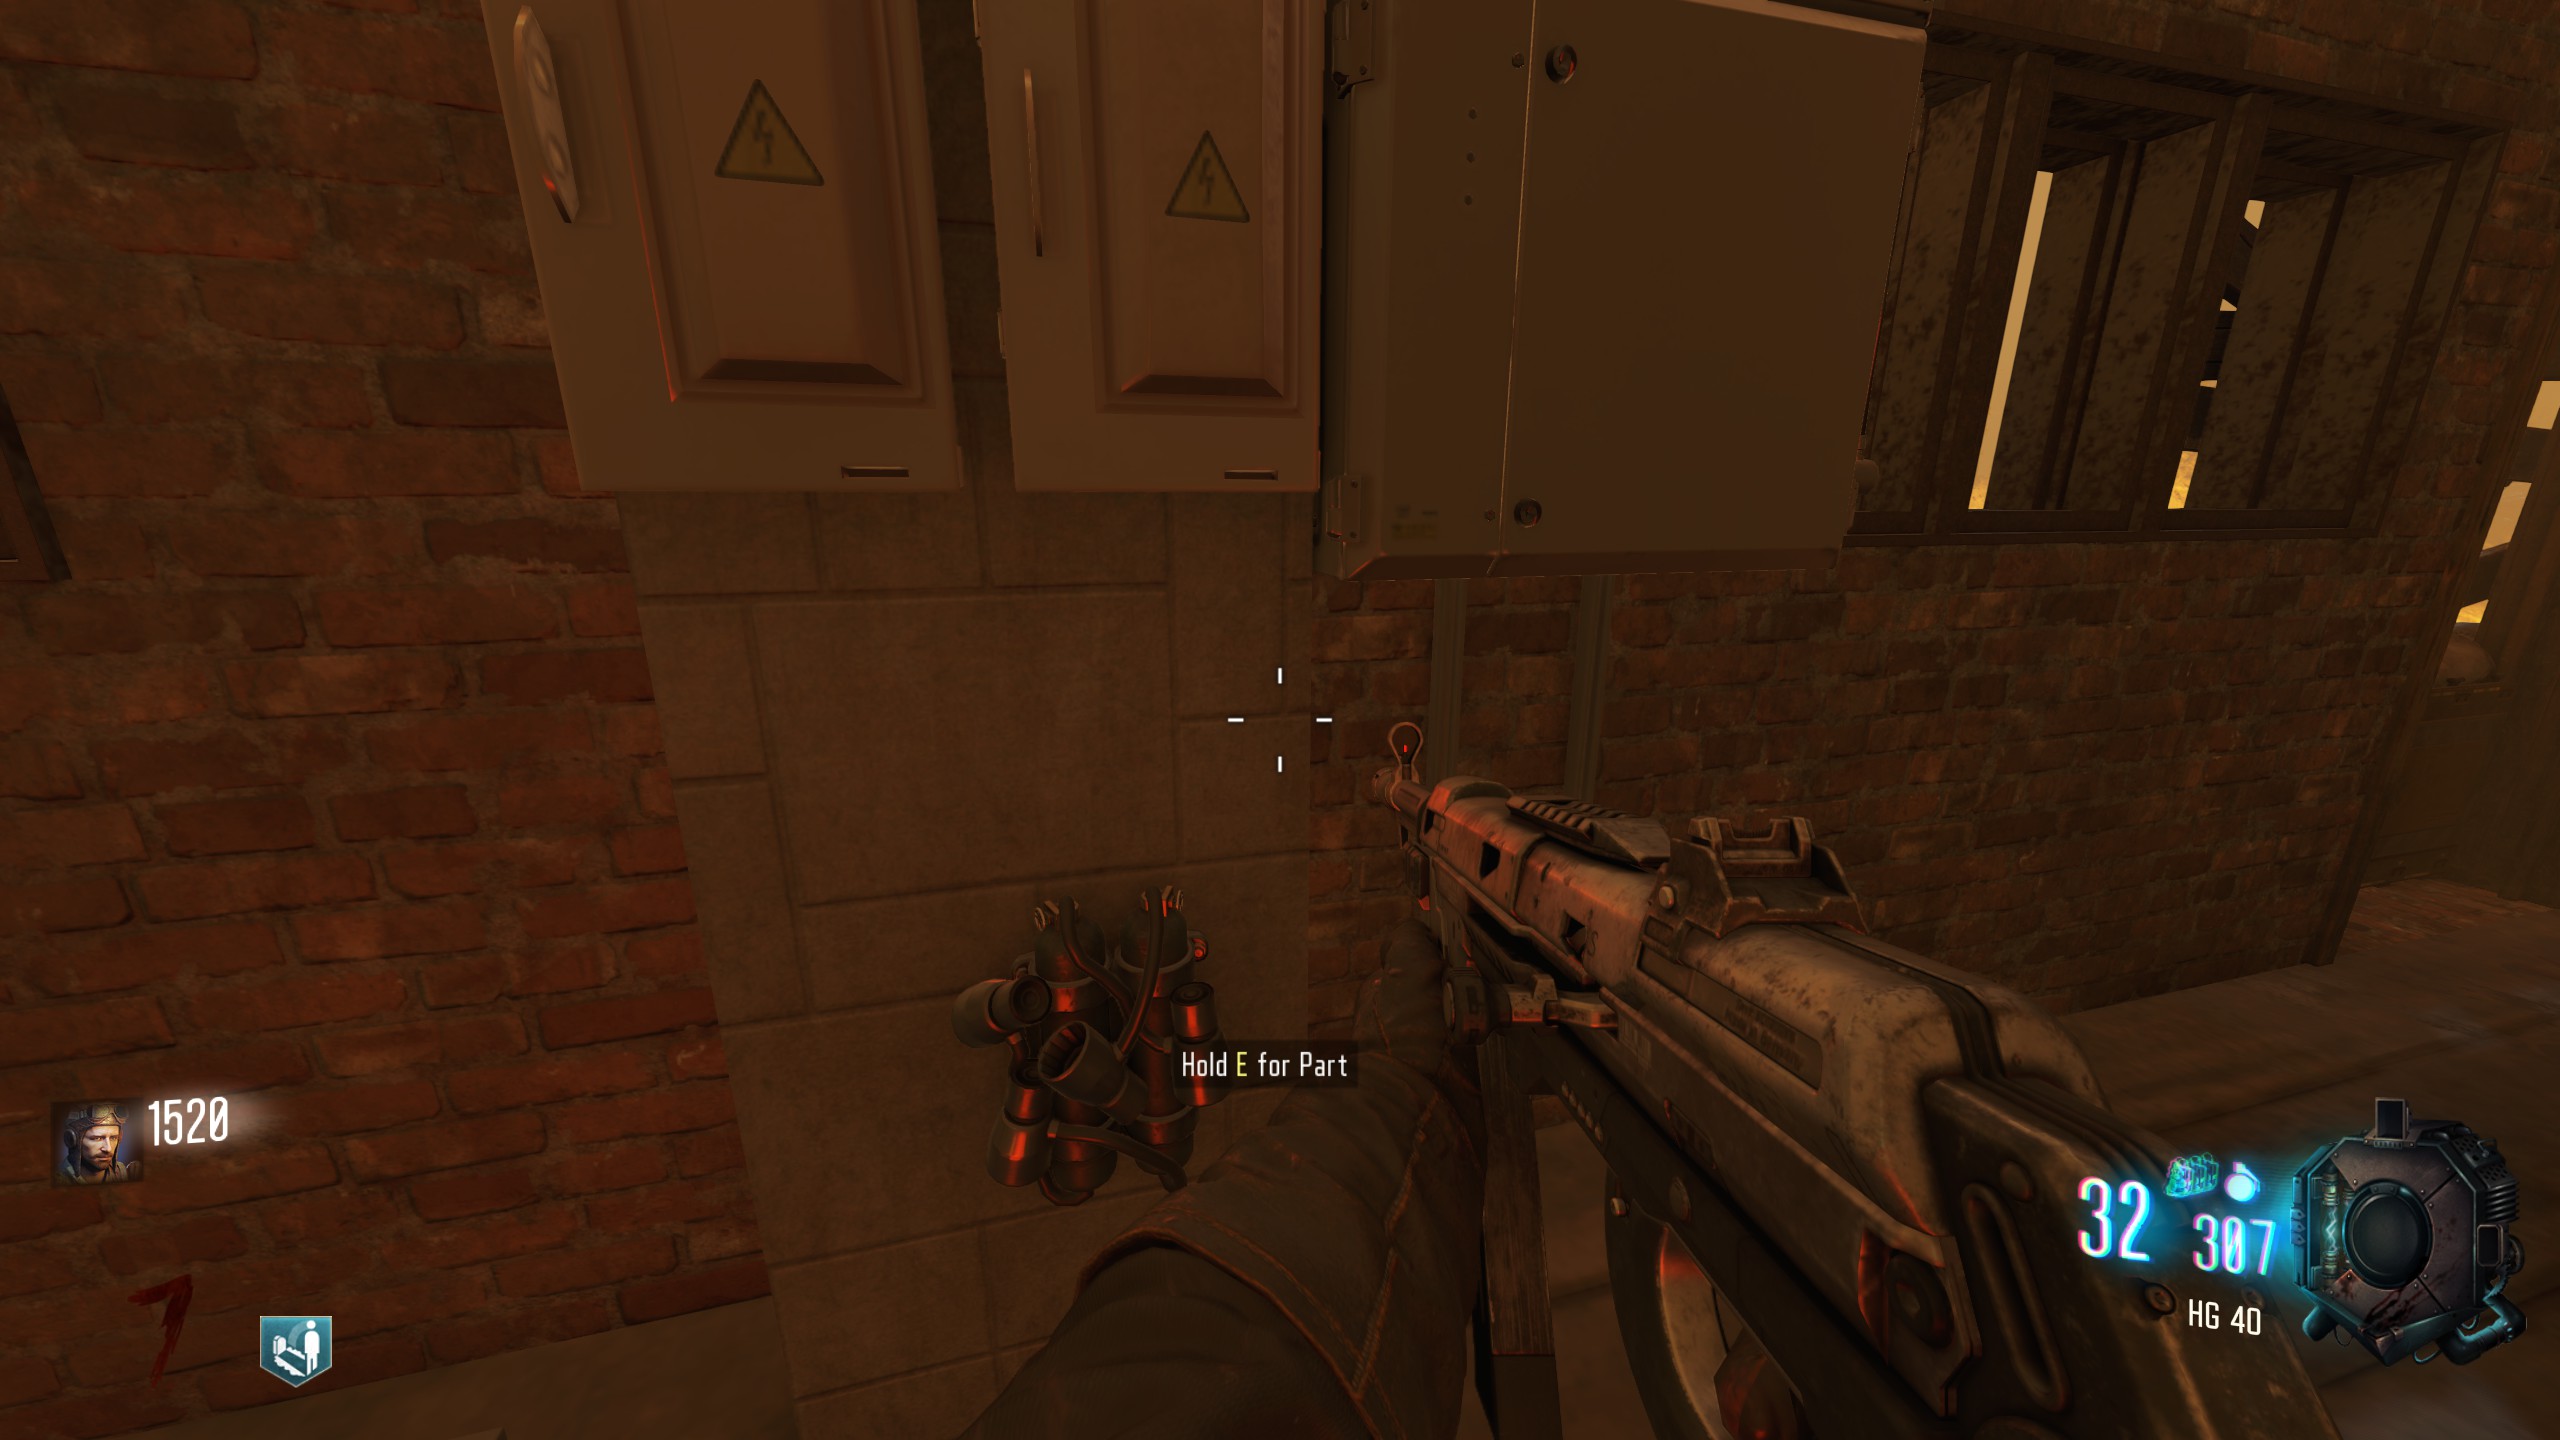
In the power building, against a wall to the left after ascending the staircase from the underground section.
Assembly Bench
Location
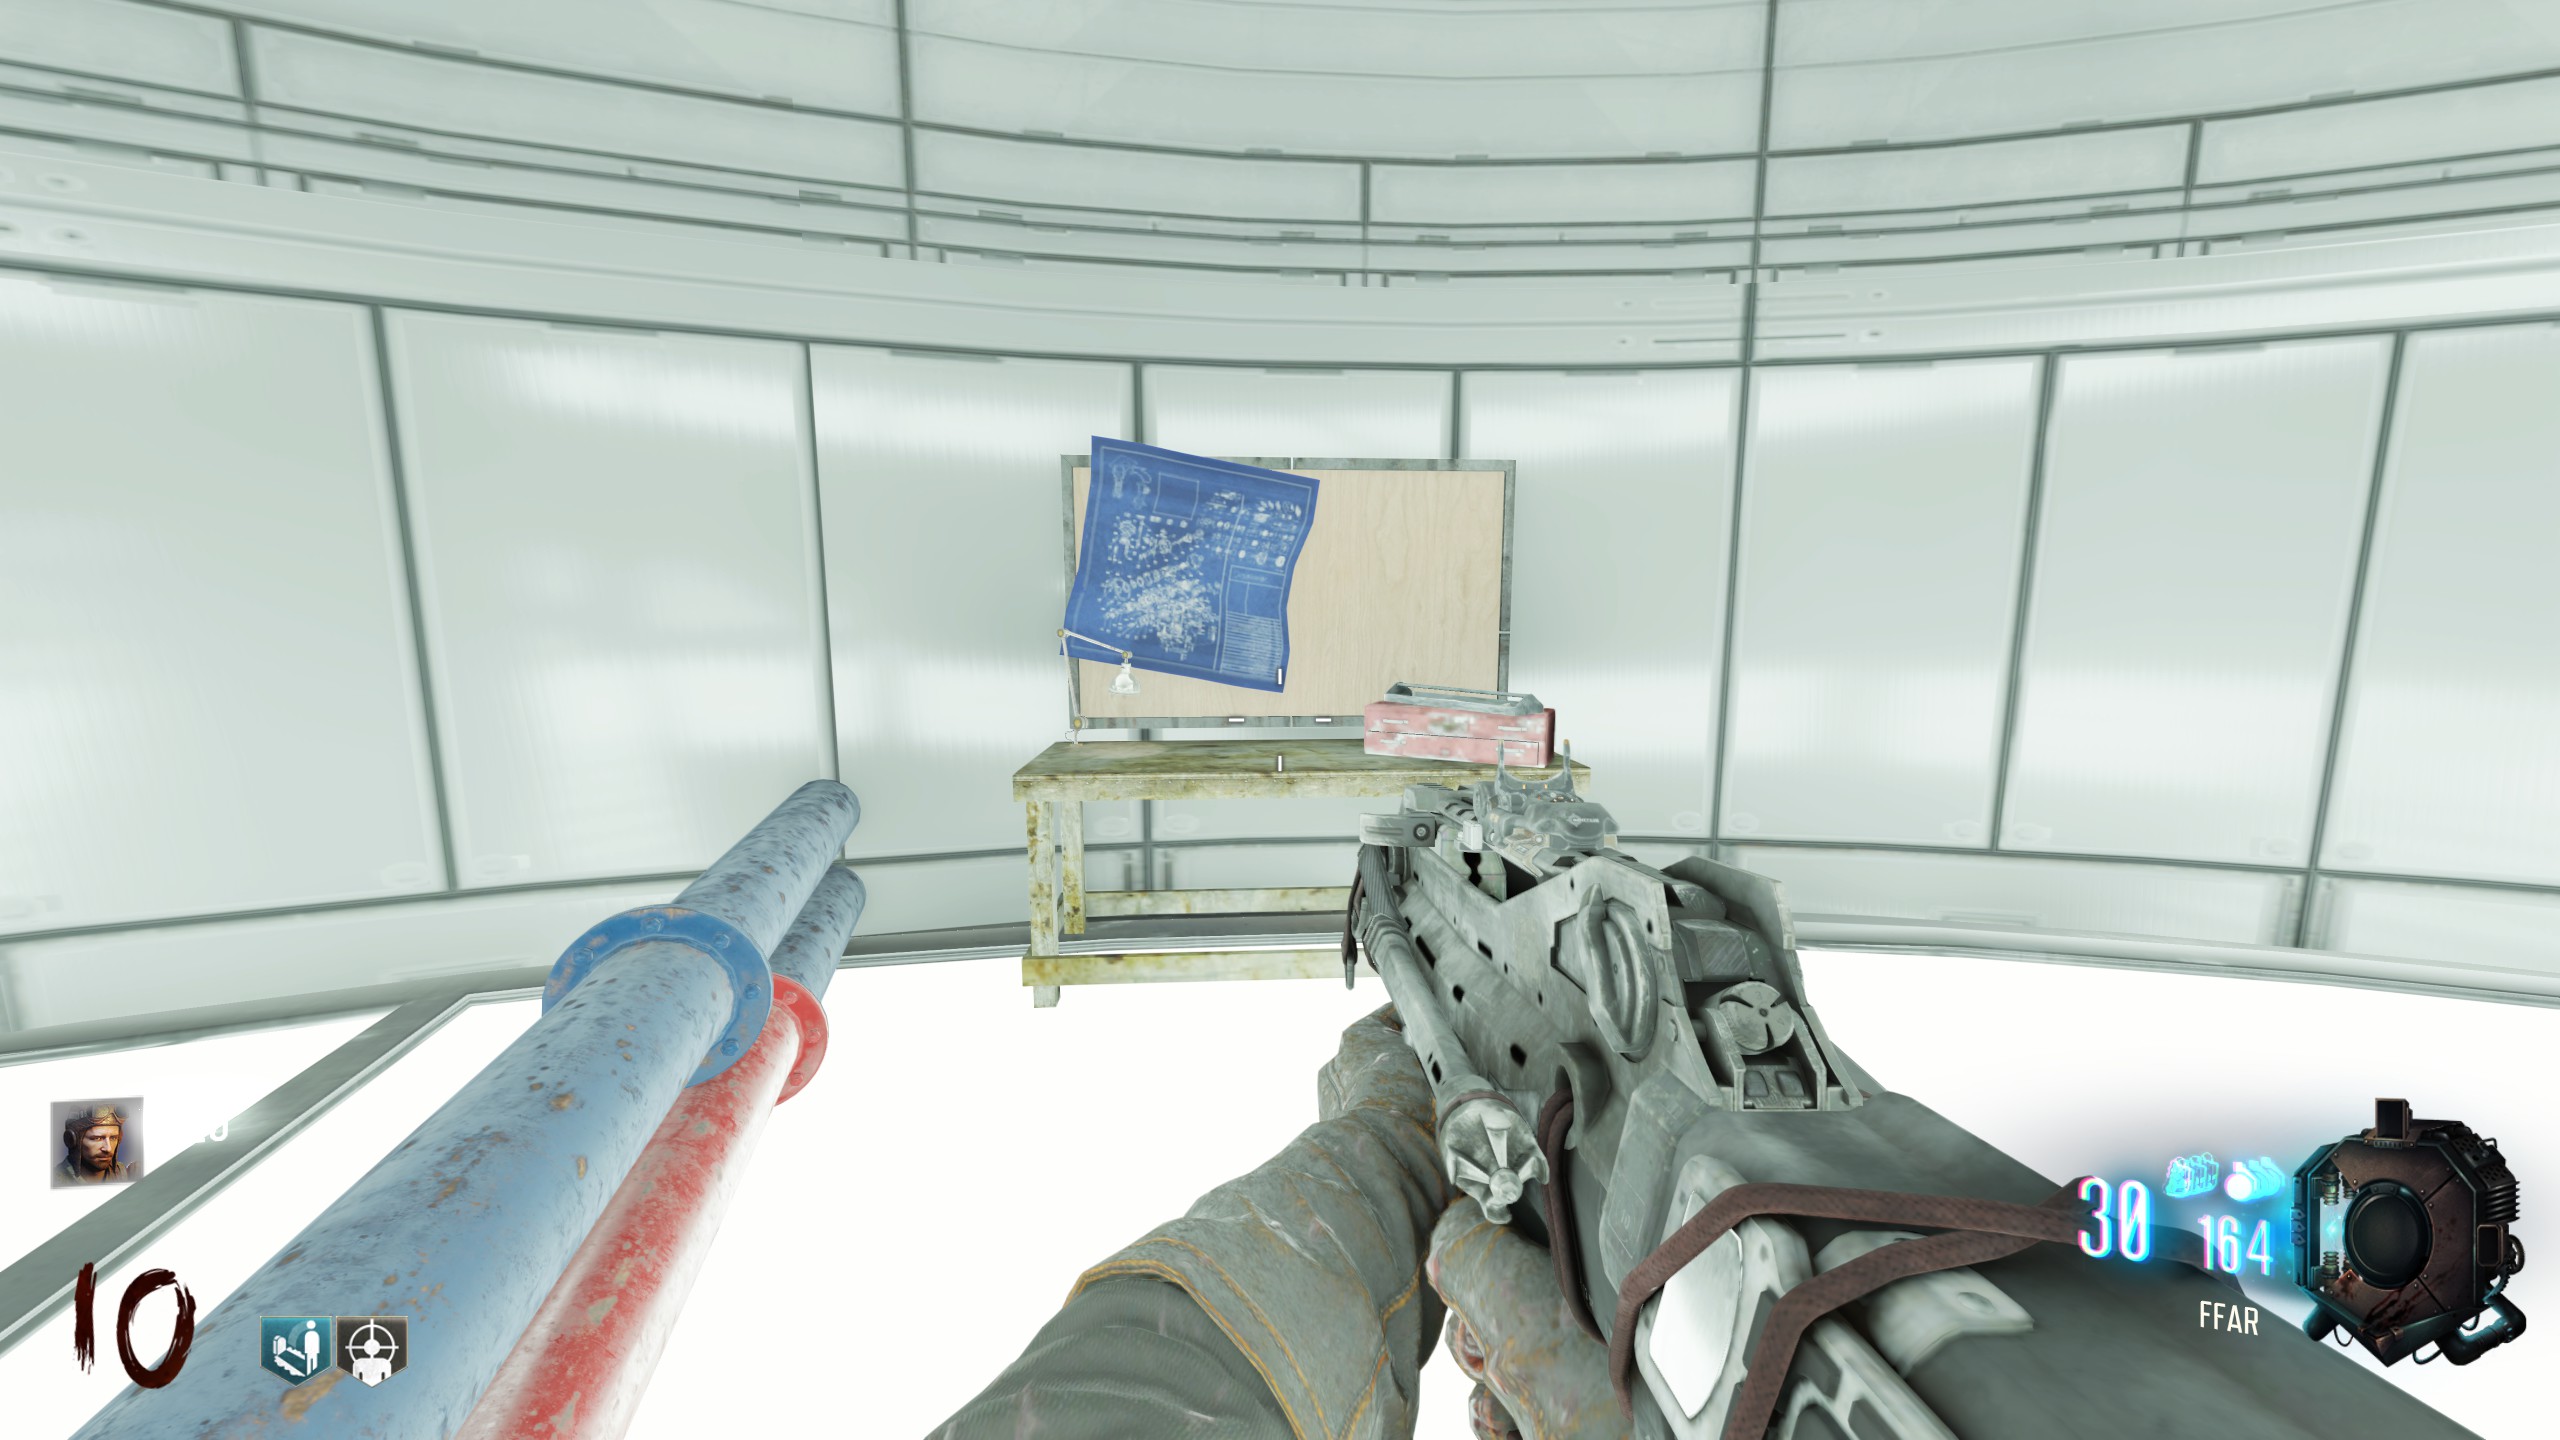
In the first circular room underground, on the upper level at the opposite end to Speed Cola.
Teddy Bears
There are 20 teddy bears located across the map. These are static, appearing in the same location every game. Visually, each resembles the traditional teddy bear from Call of Duty Zombies, however the head is replaced with a Cthulhu-inspired head.
To 'activate' the teddy bear, it must receive damage, i.e. from a knife, bullet or grenade. Teddy bears disappear when damaged, and a pop-up will advise how many players have found in this match. An additional message appears every 4 teddy bear activations (4, 8, 12, 16 & 20).
For every 4 teddy bears that are activated, an upgrade is applied to the match for all players. These are:
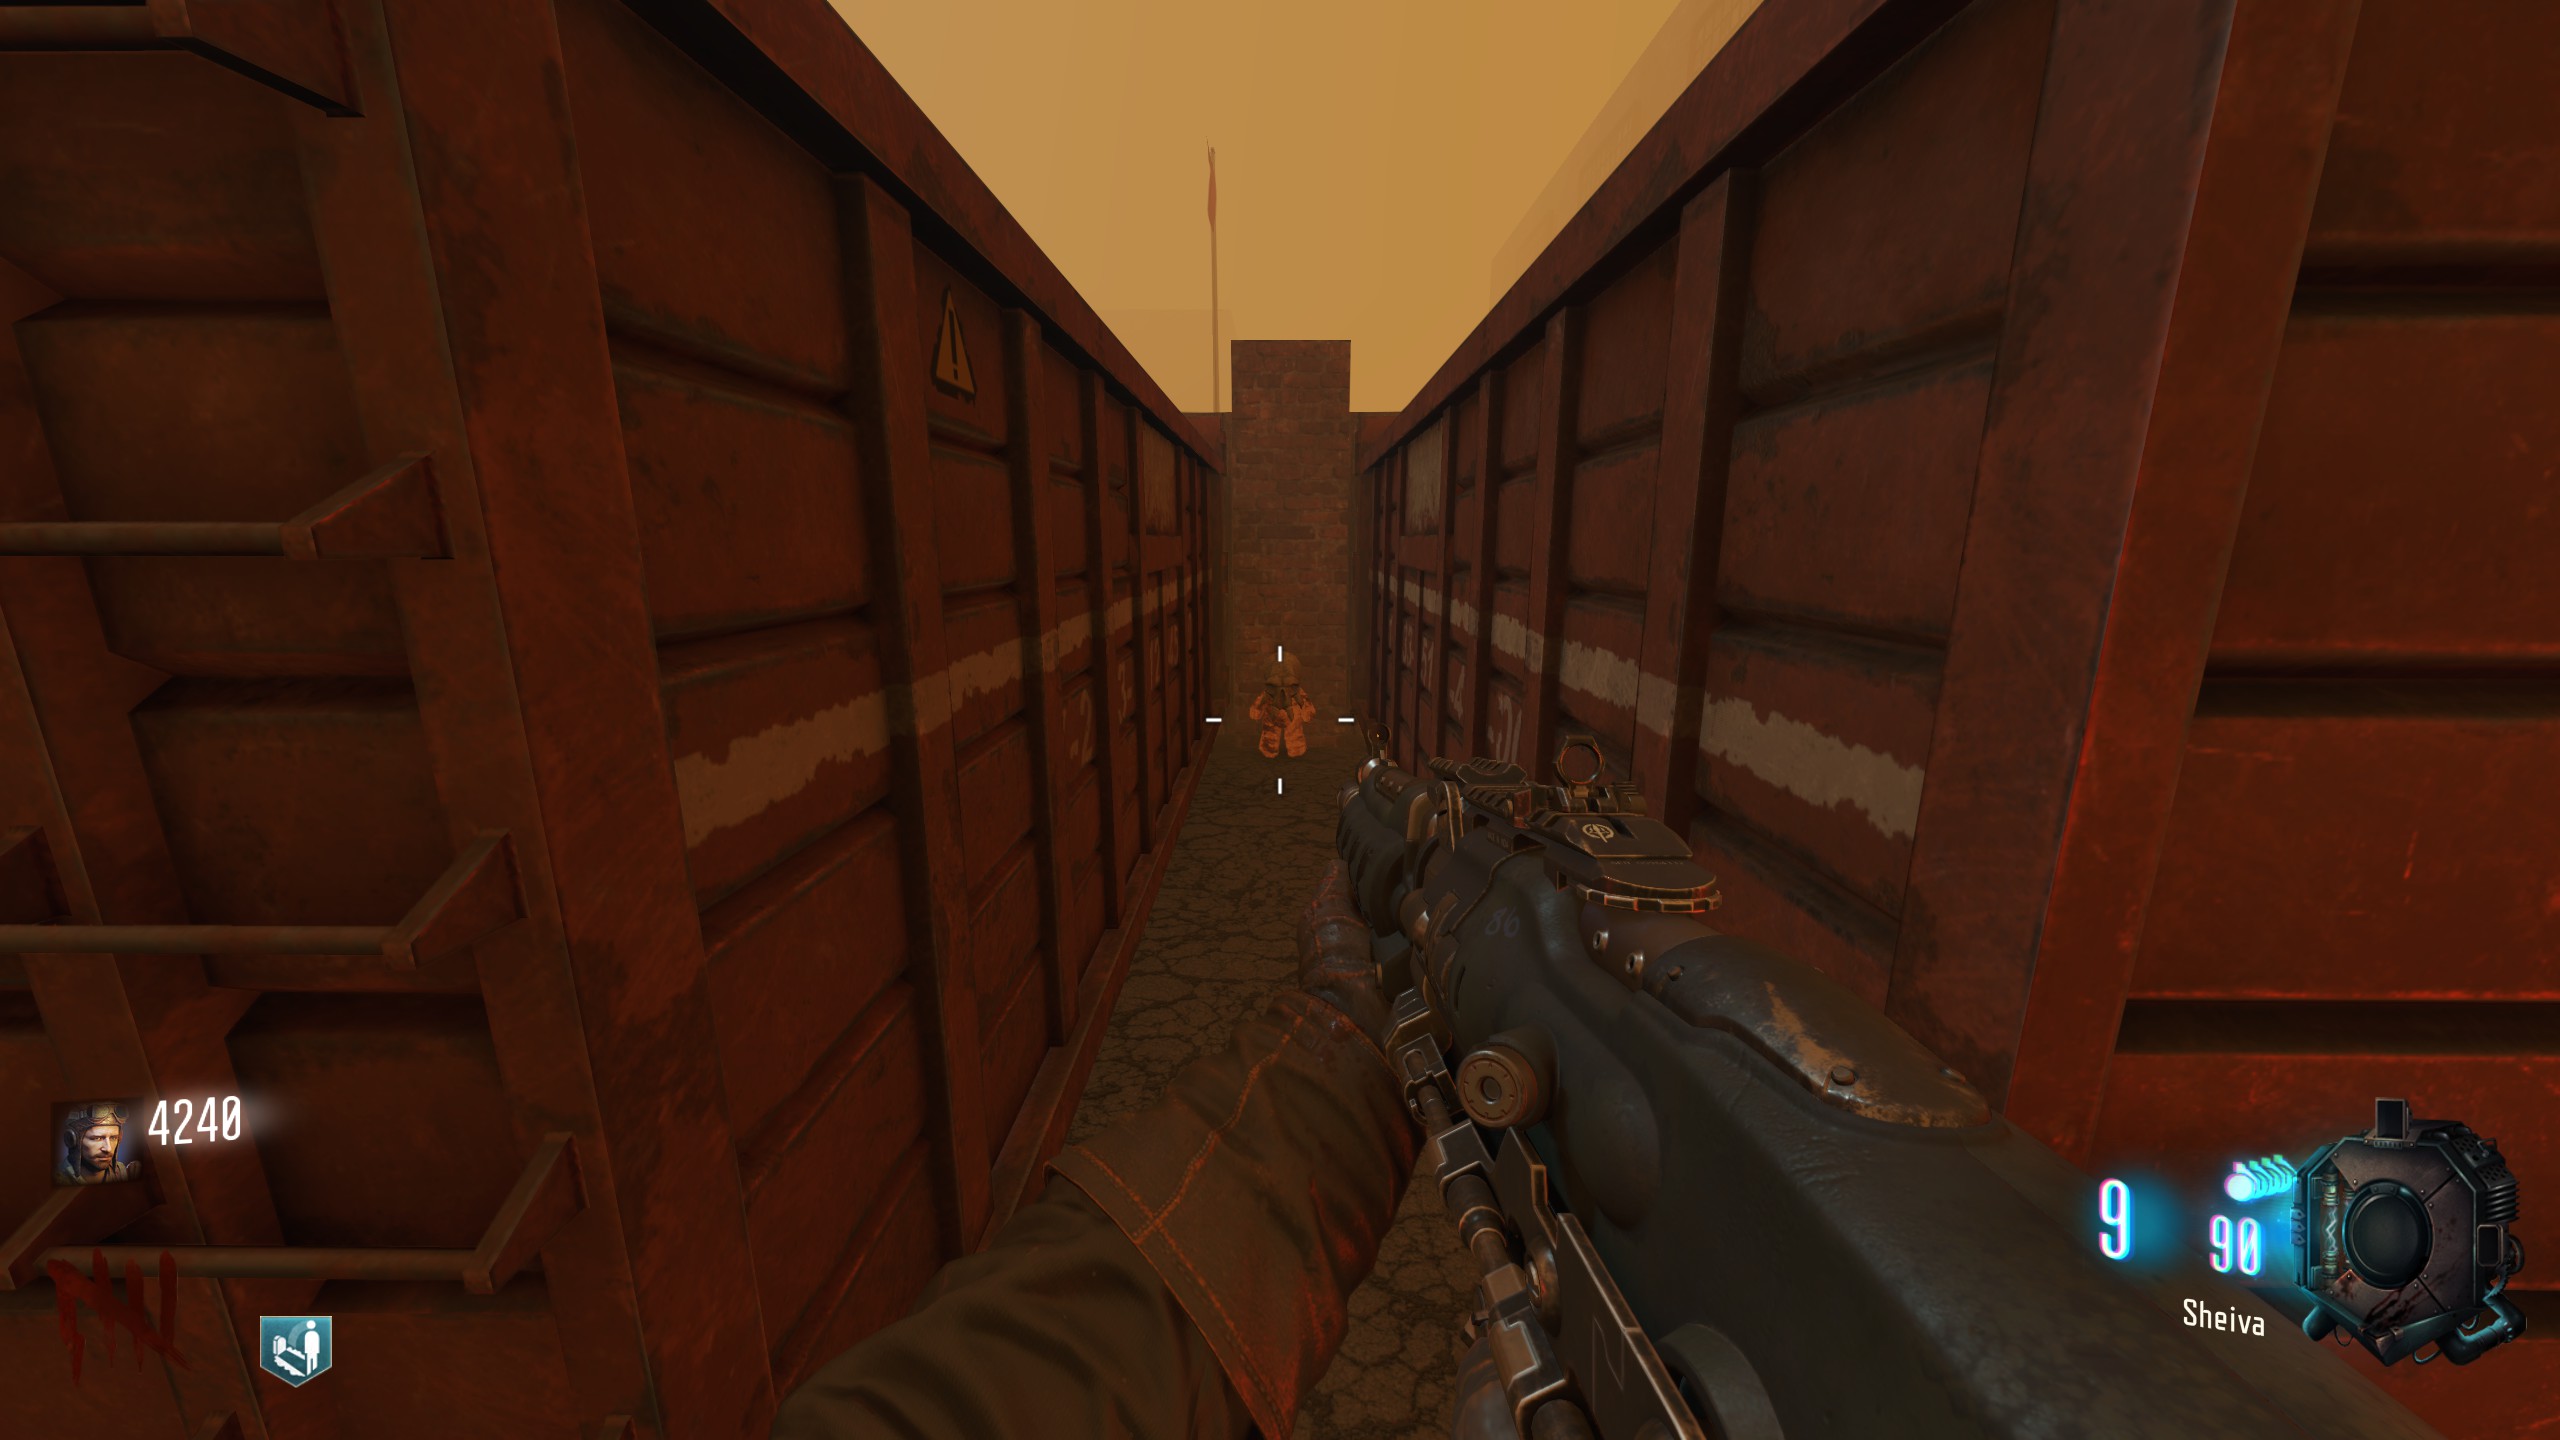
Past the first barrier, between two red skip bins.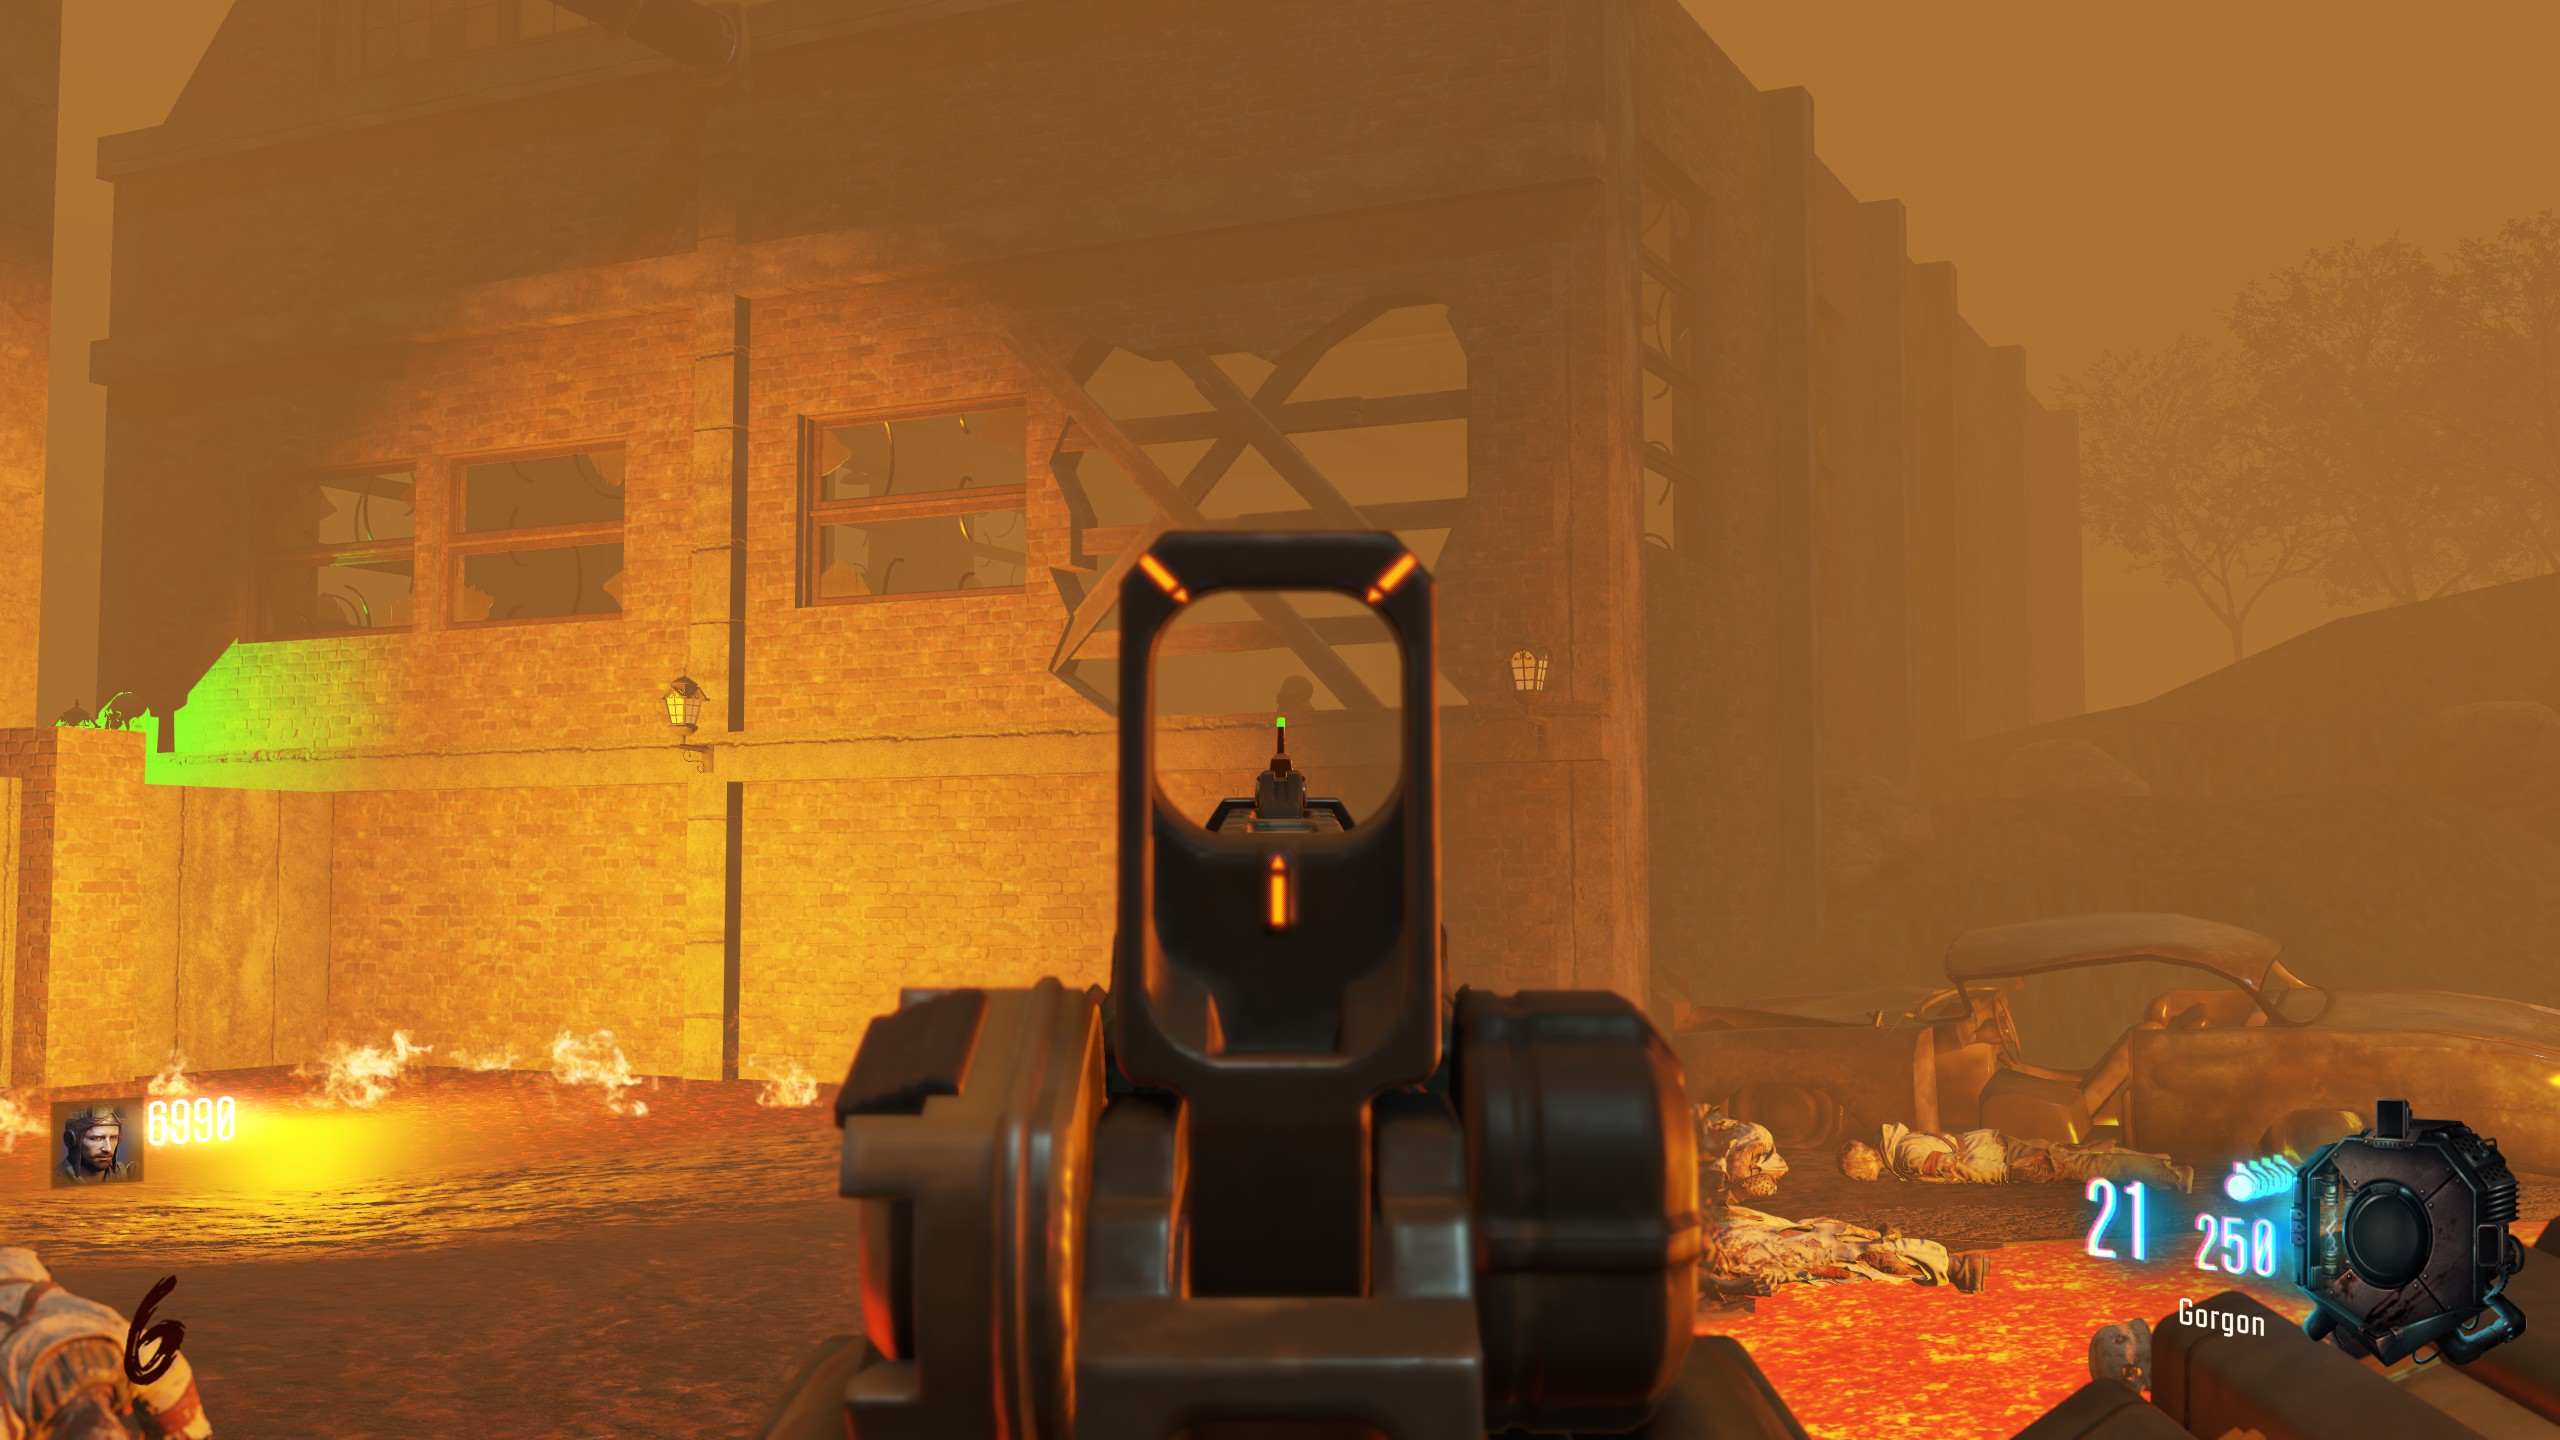
Past the first barrier, inside the second-storey window of the inaccessible building.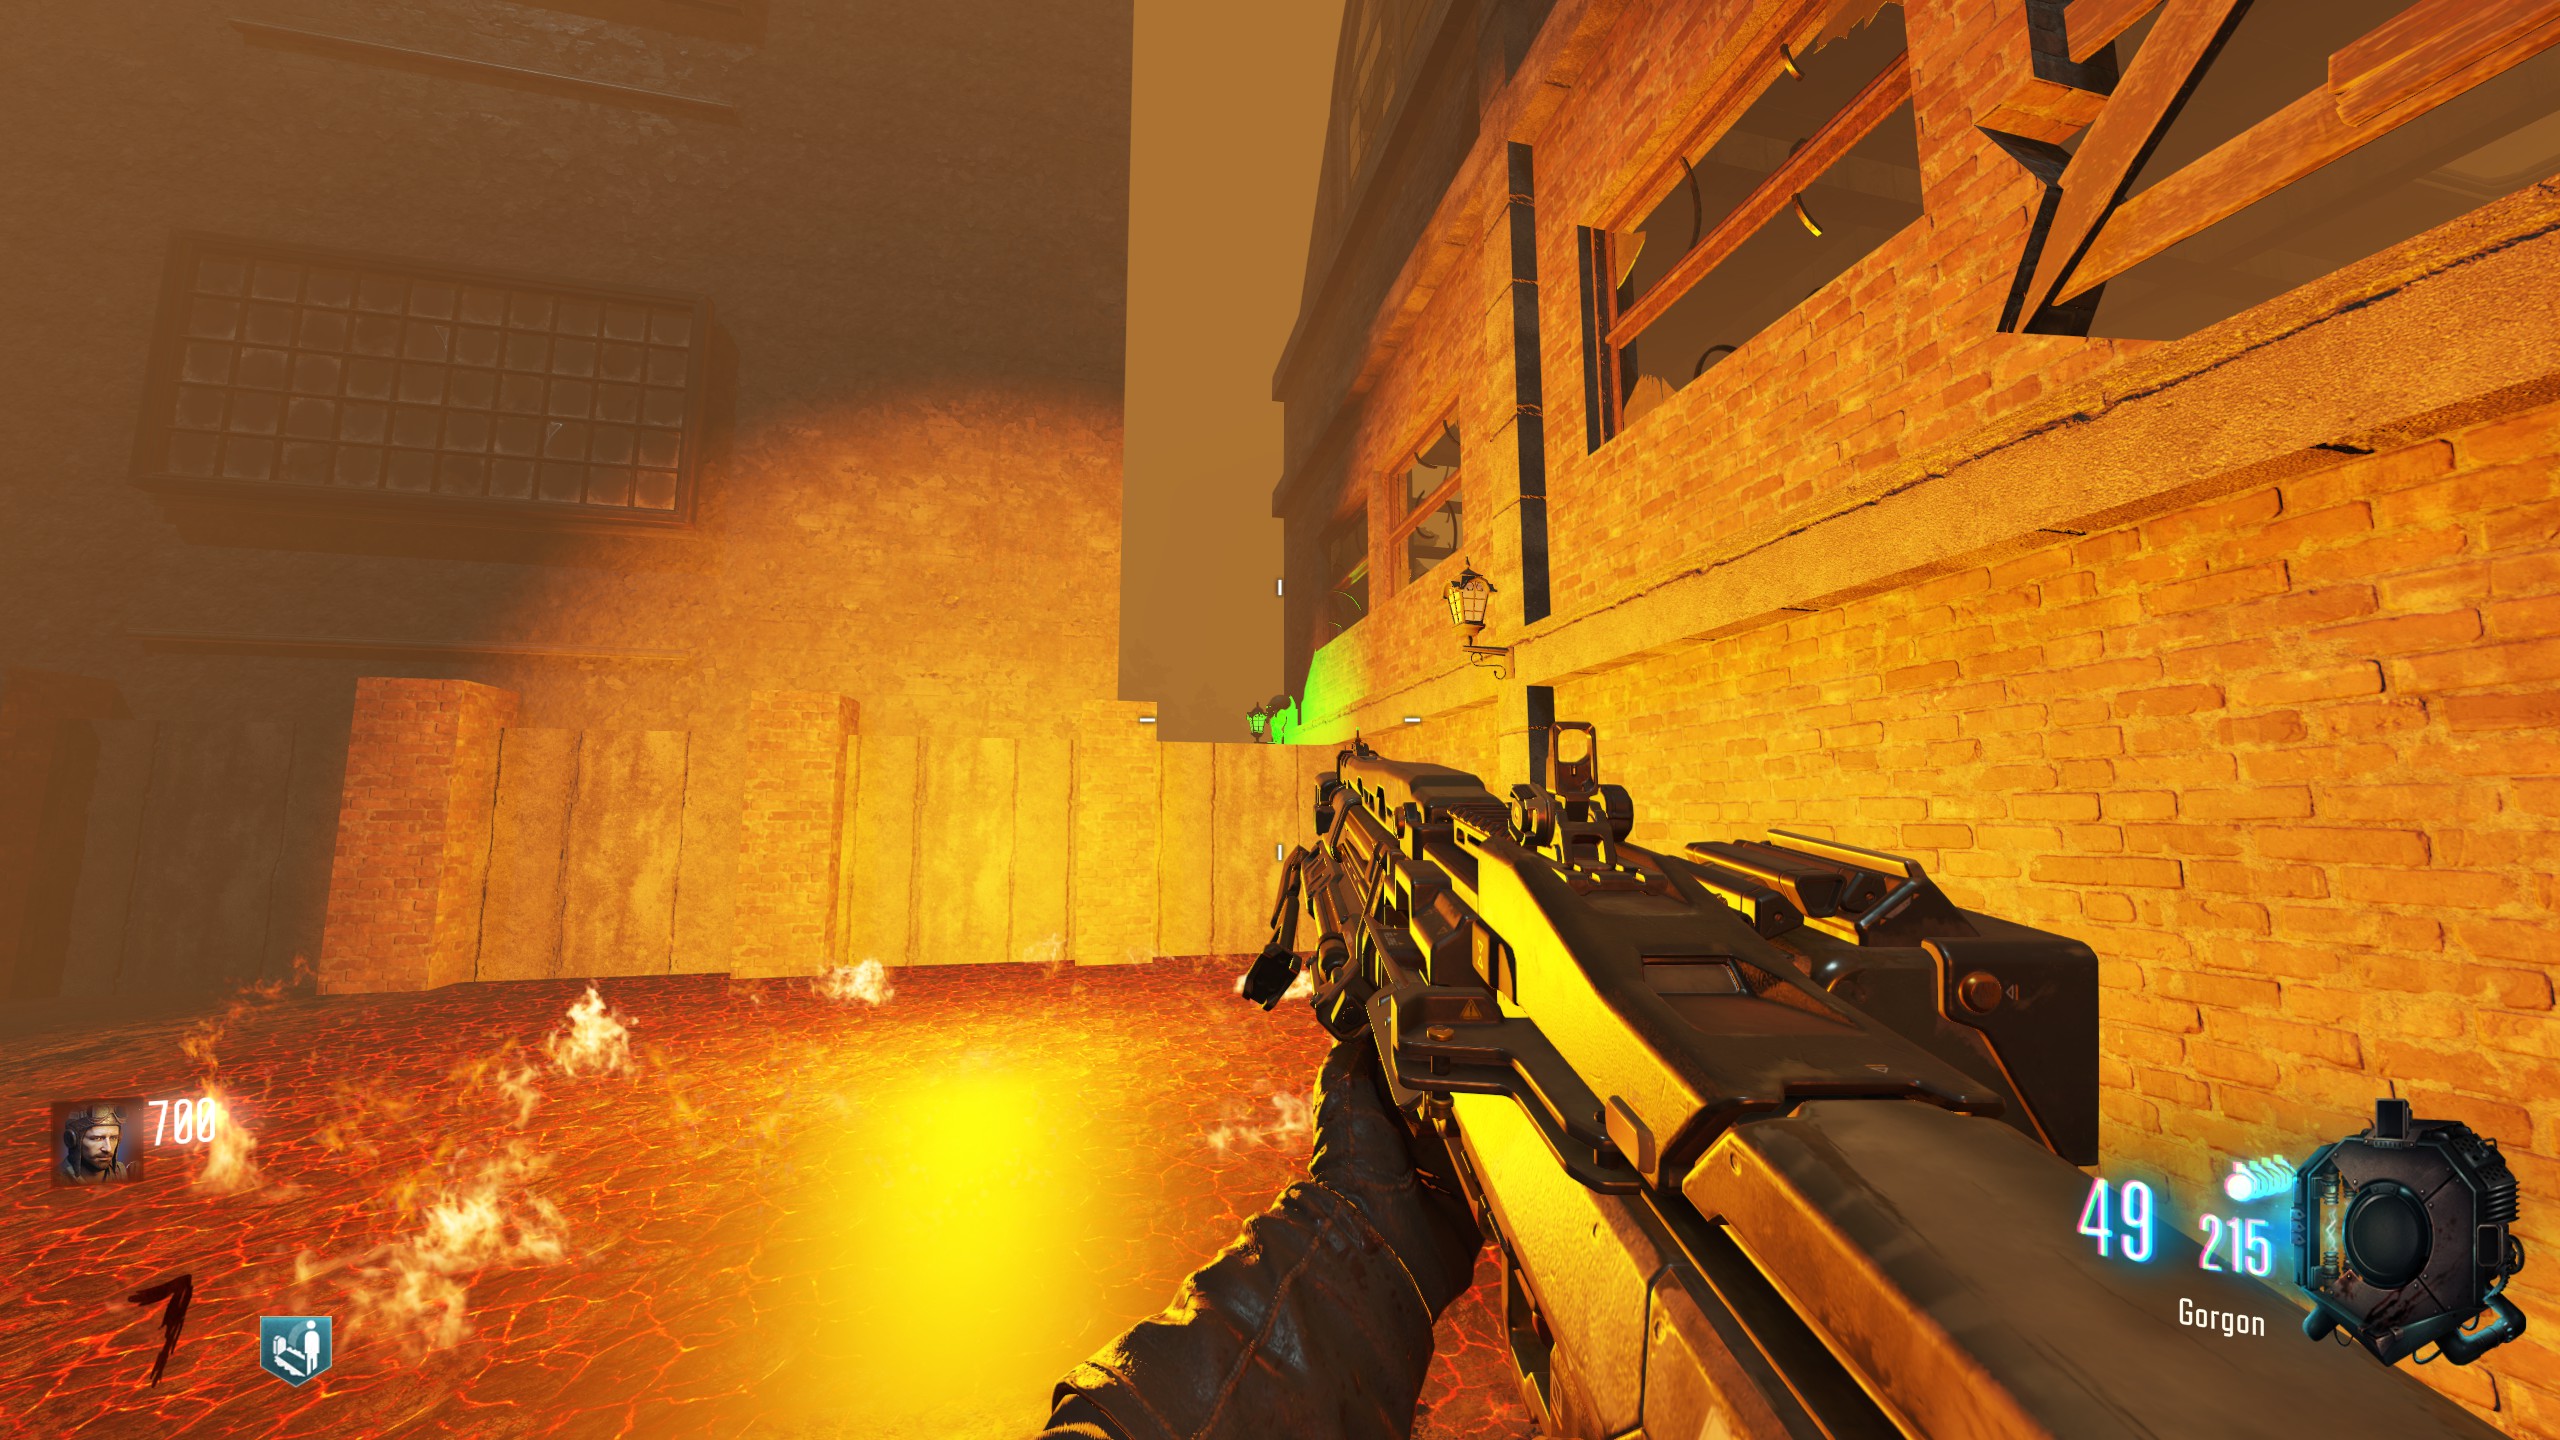
Past the first barrier, beside the green lamppost outside the inaccessible building.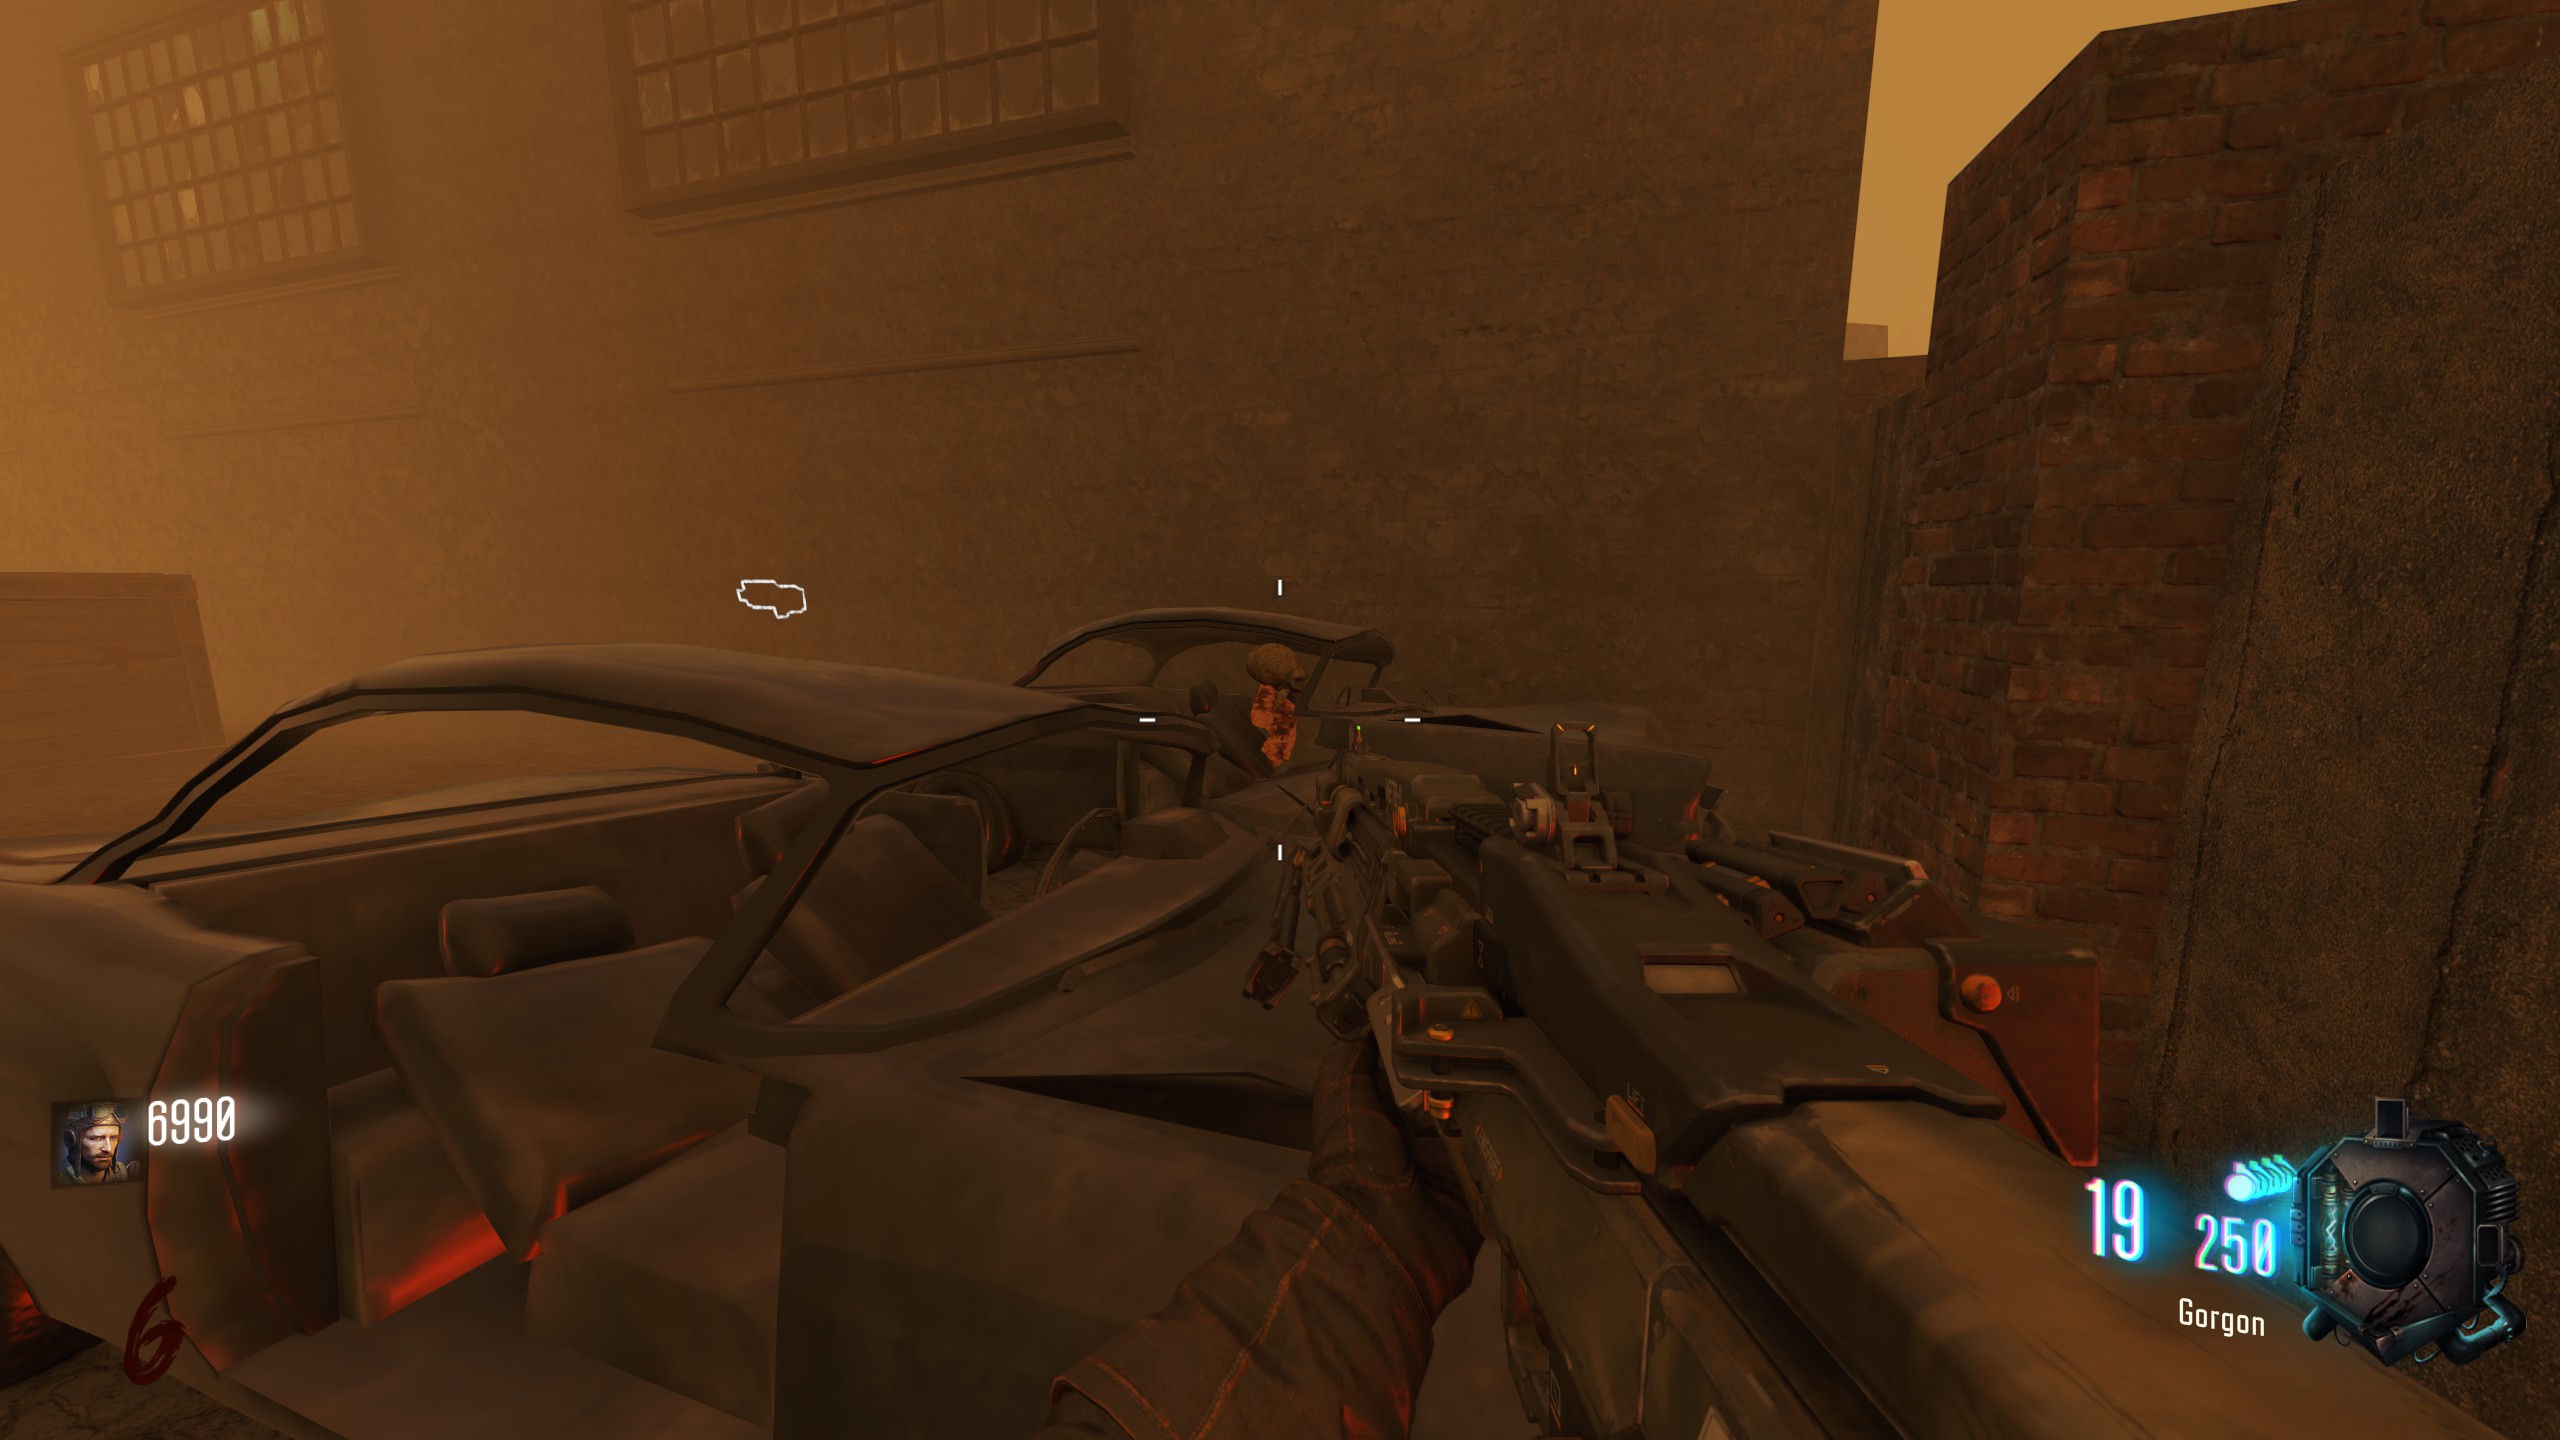
Past the first barrier, in a ruined car past the power building.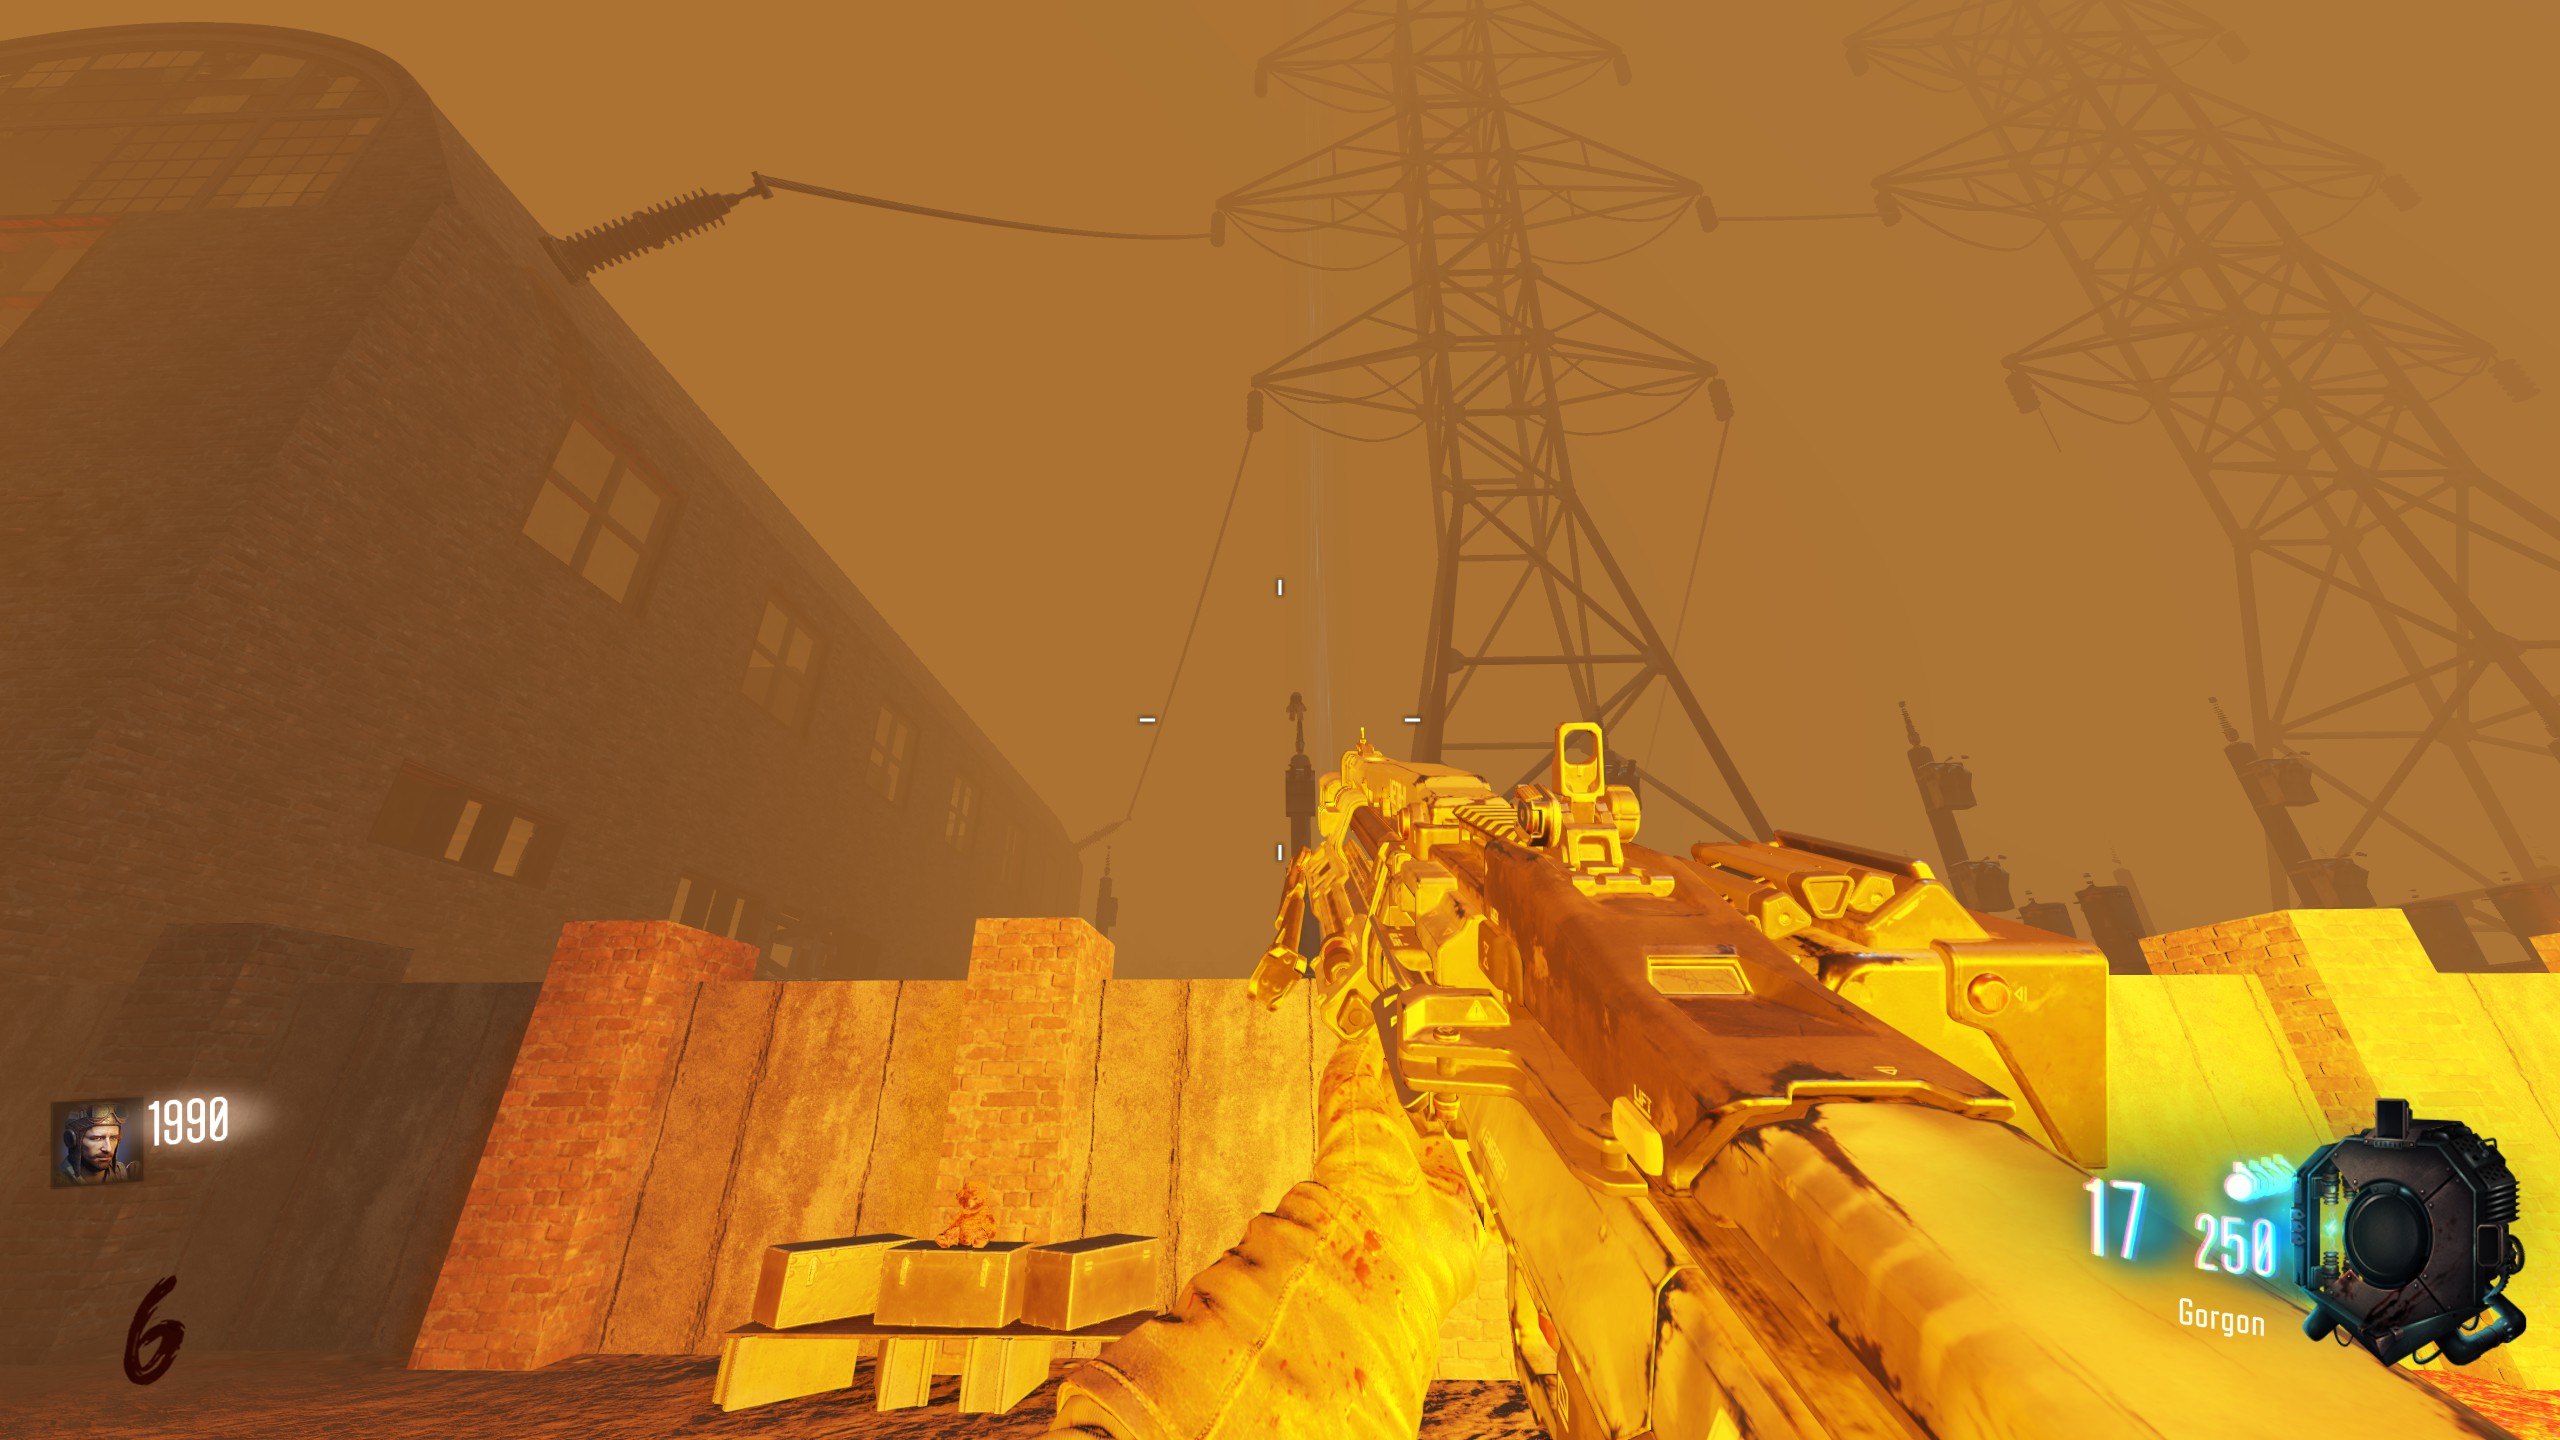
Past the second outdoor barrier, atop an electricity spire past the power building to the left. Can also be shot from the spawn area.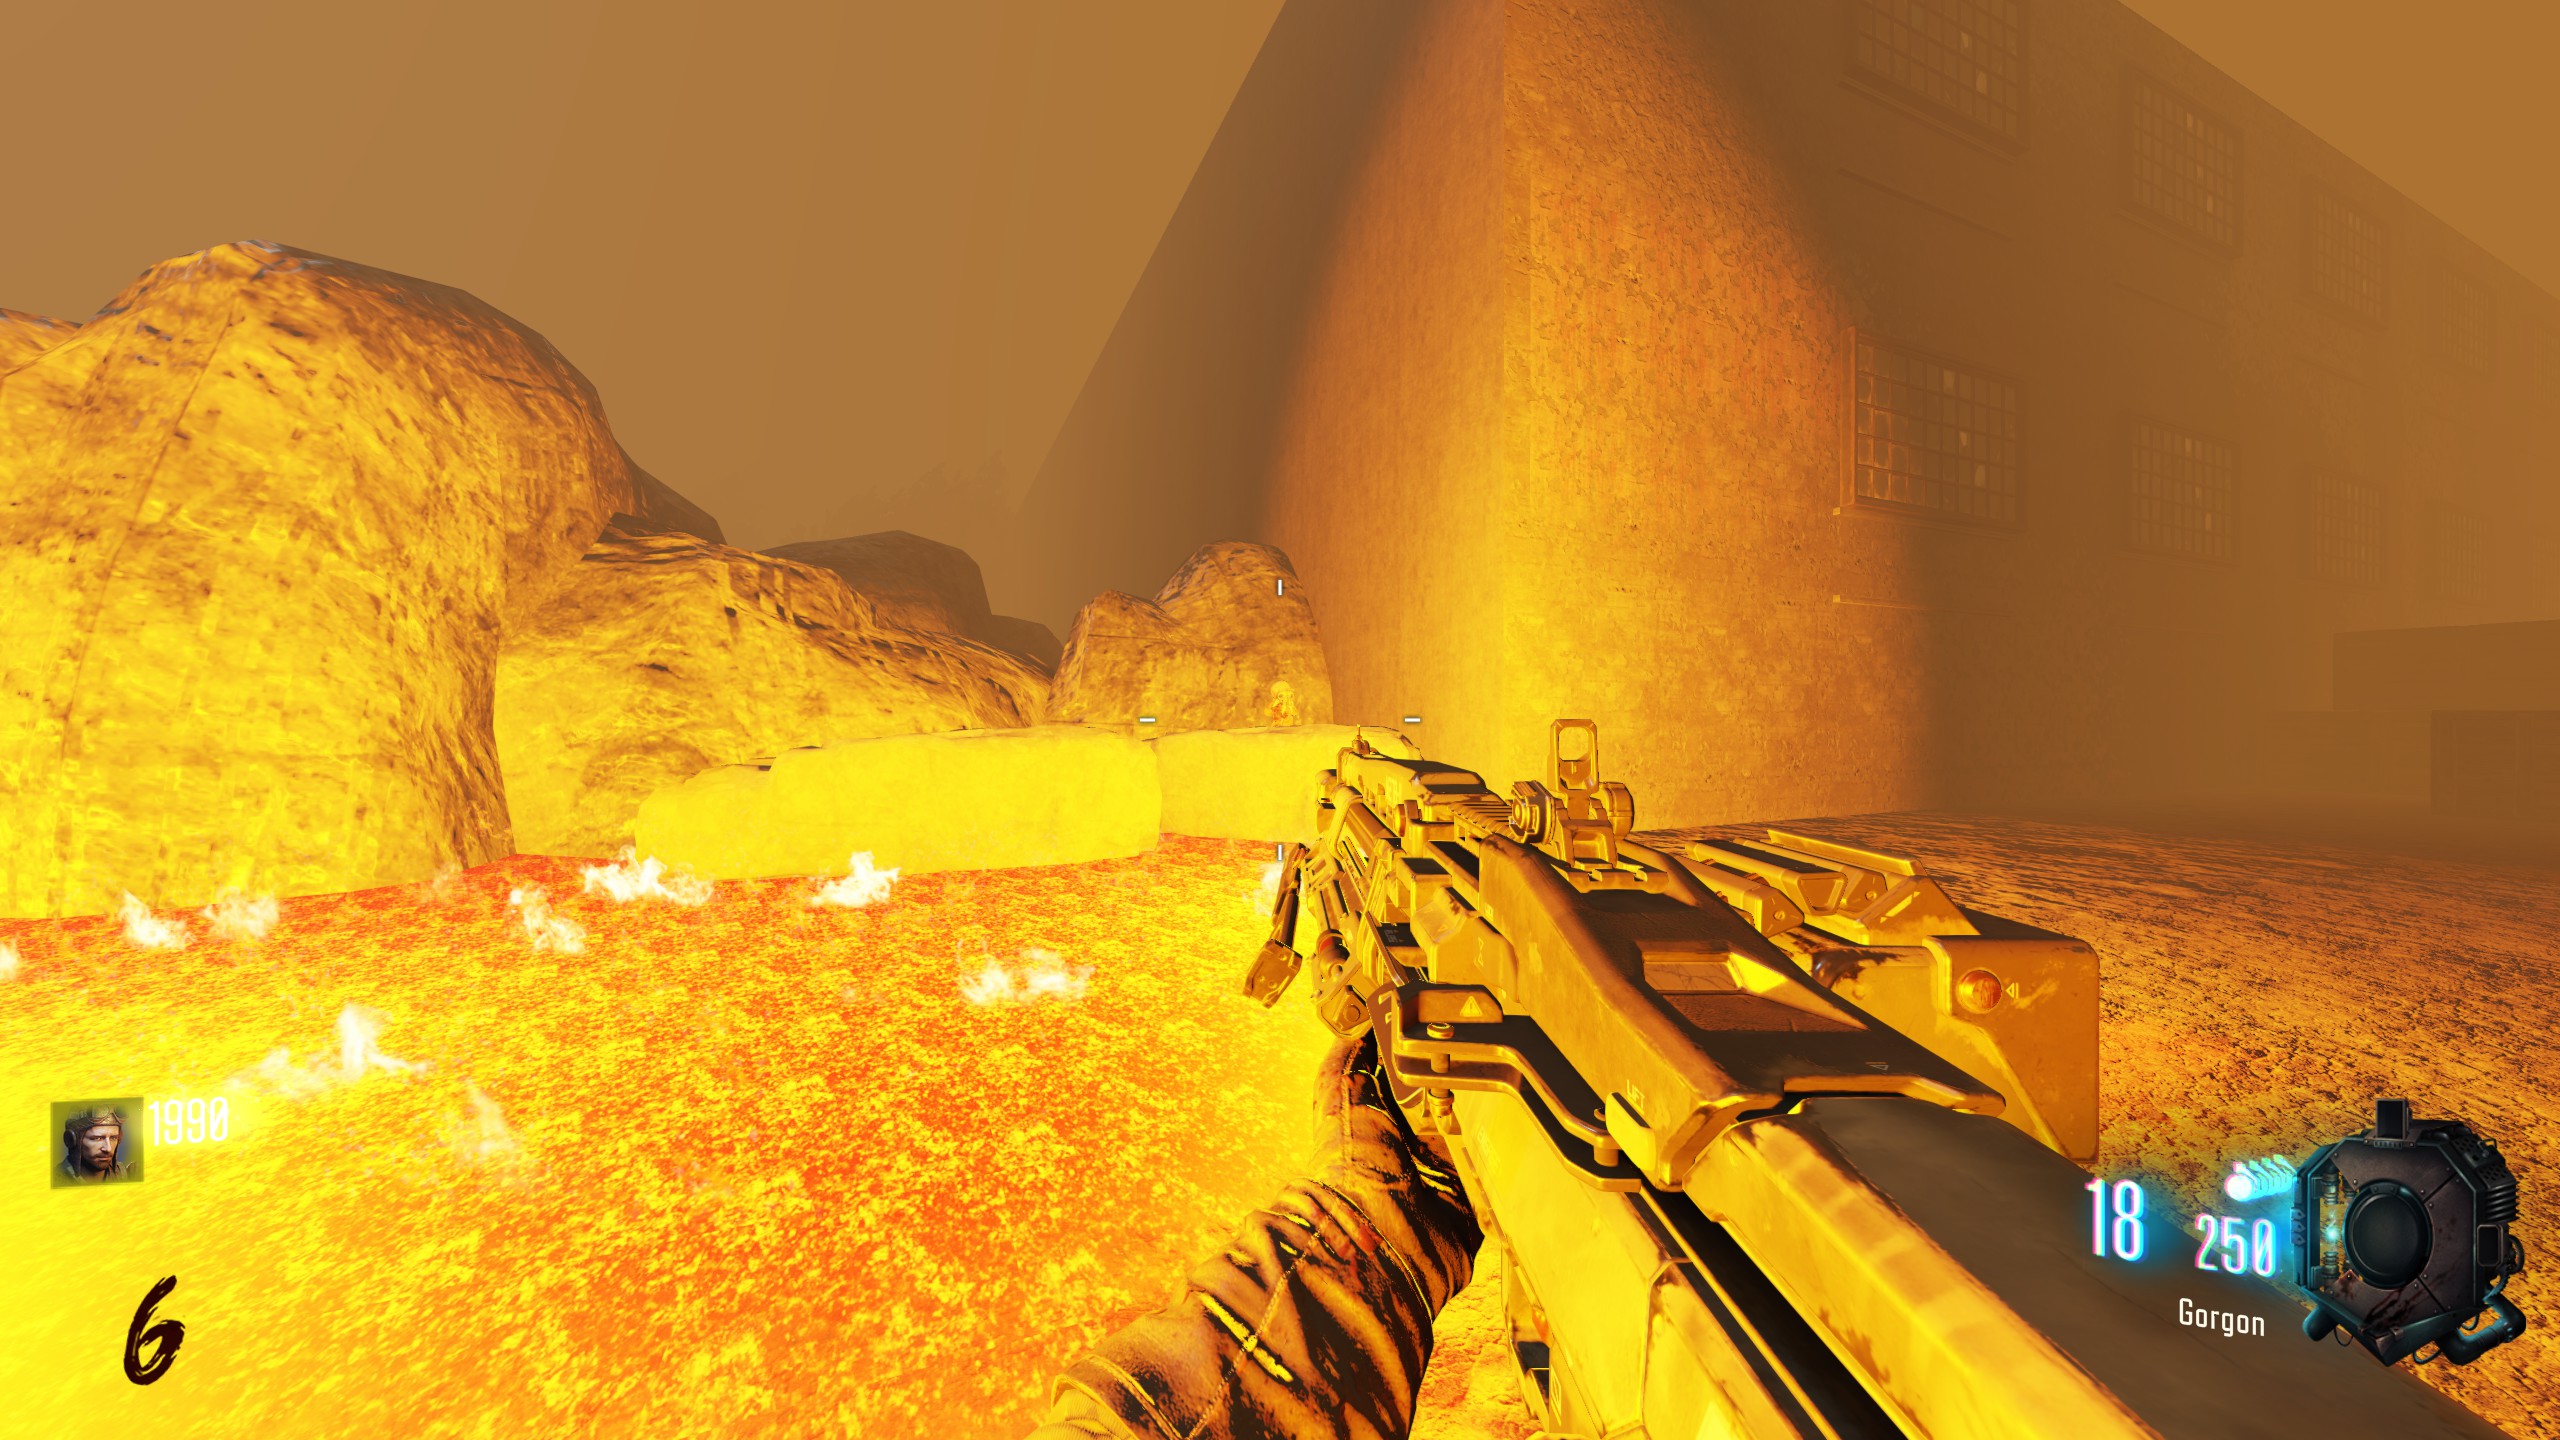
Past the second outdoor barrier, immediately past the inaccessible building on the right.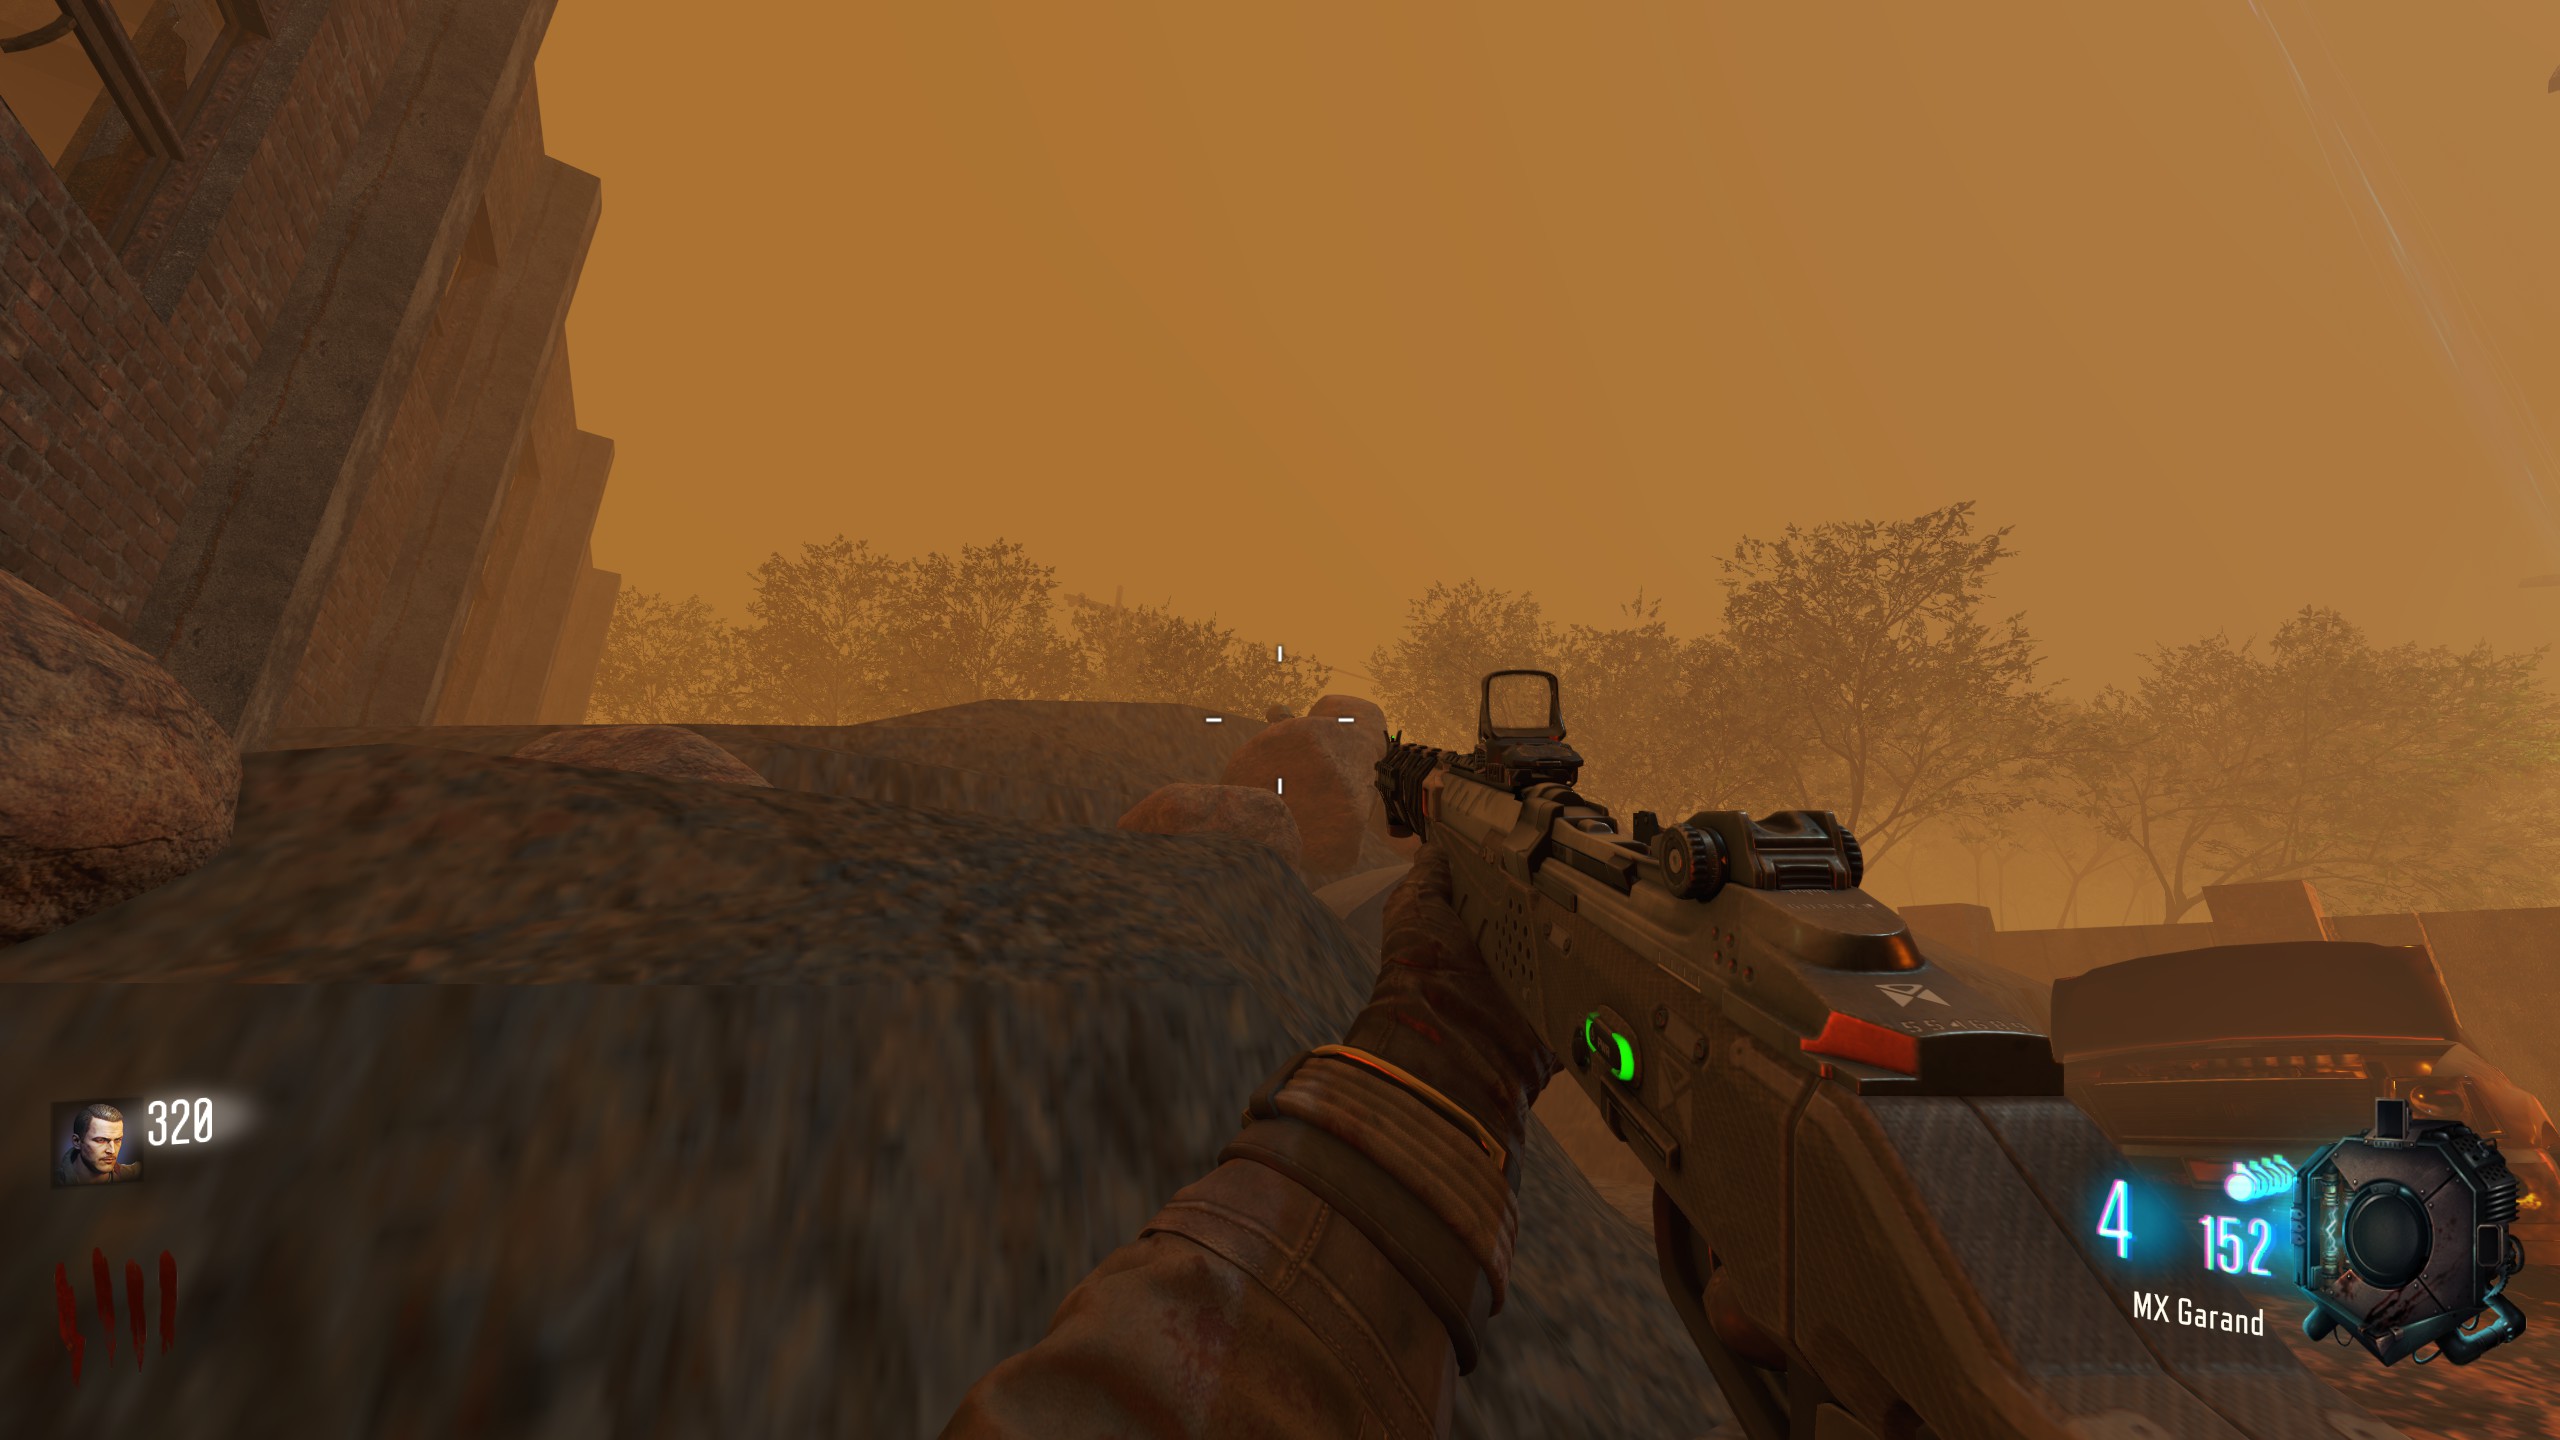
Past the first barrier, above the door to the underground section.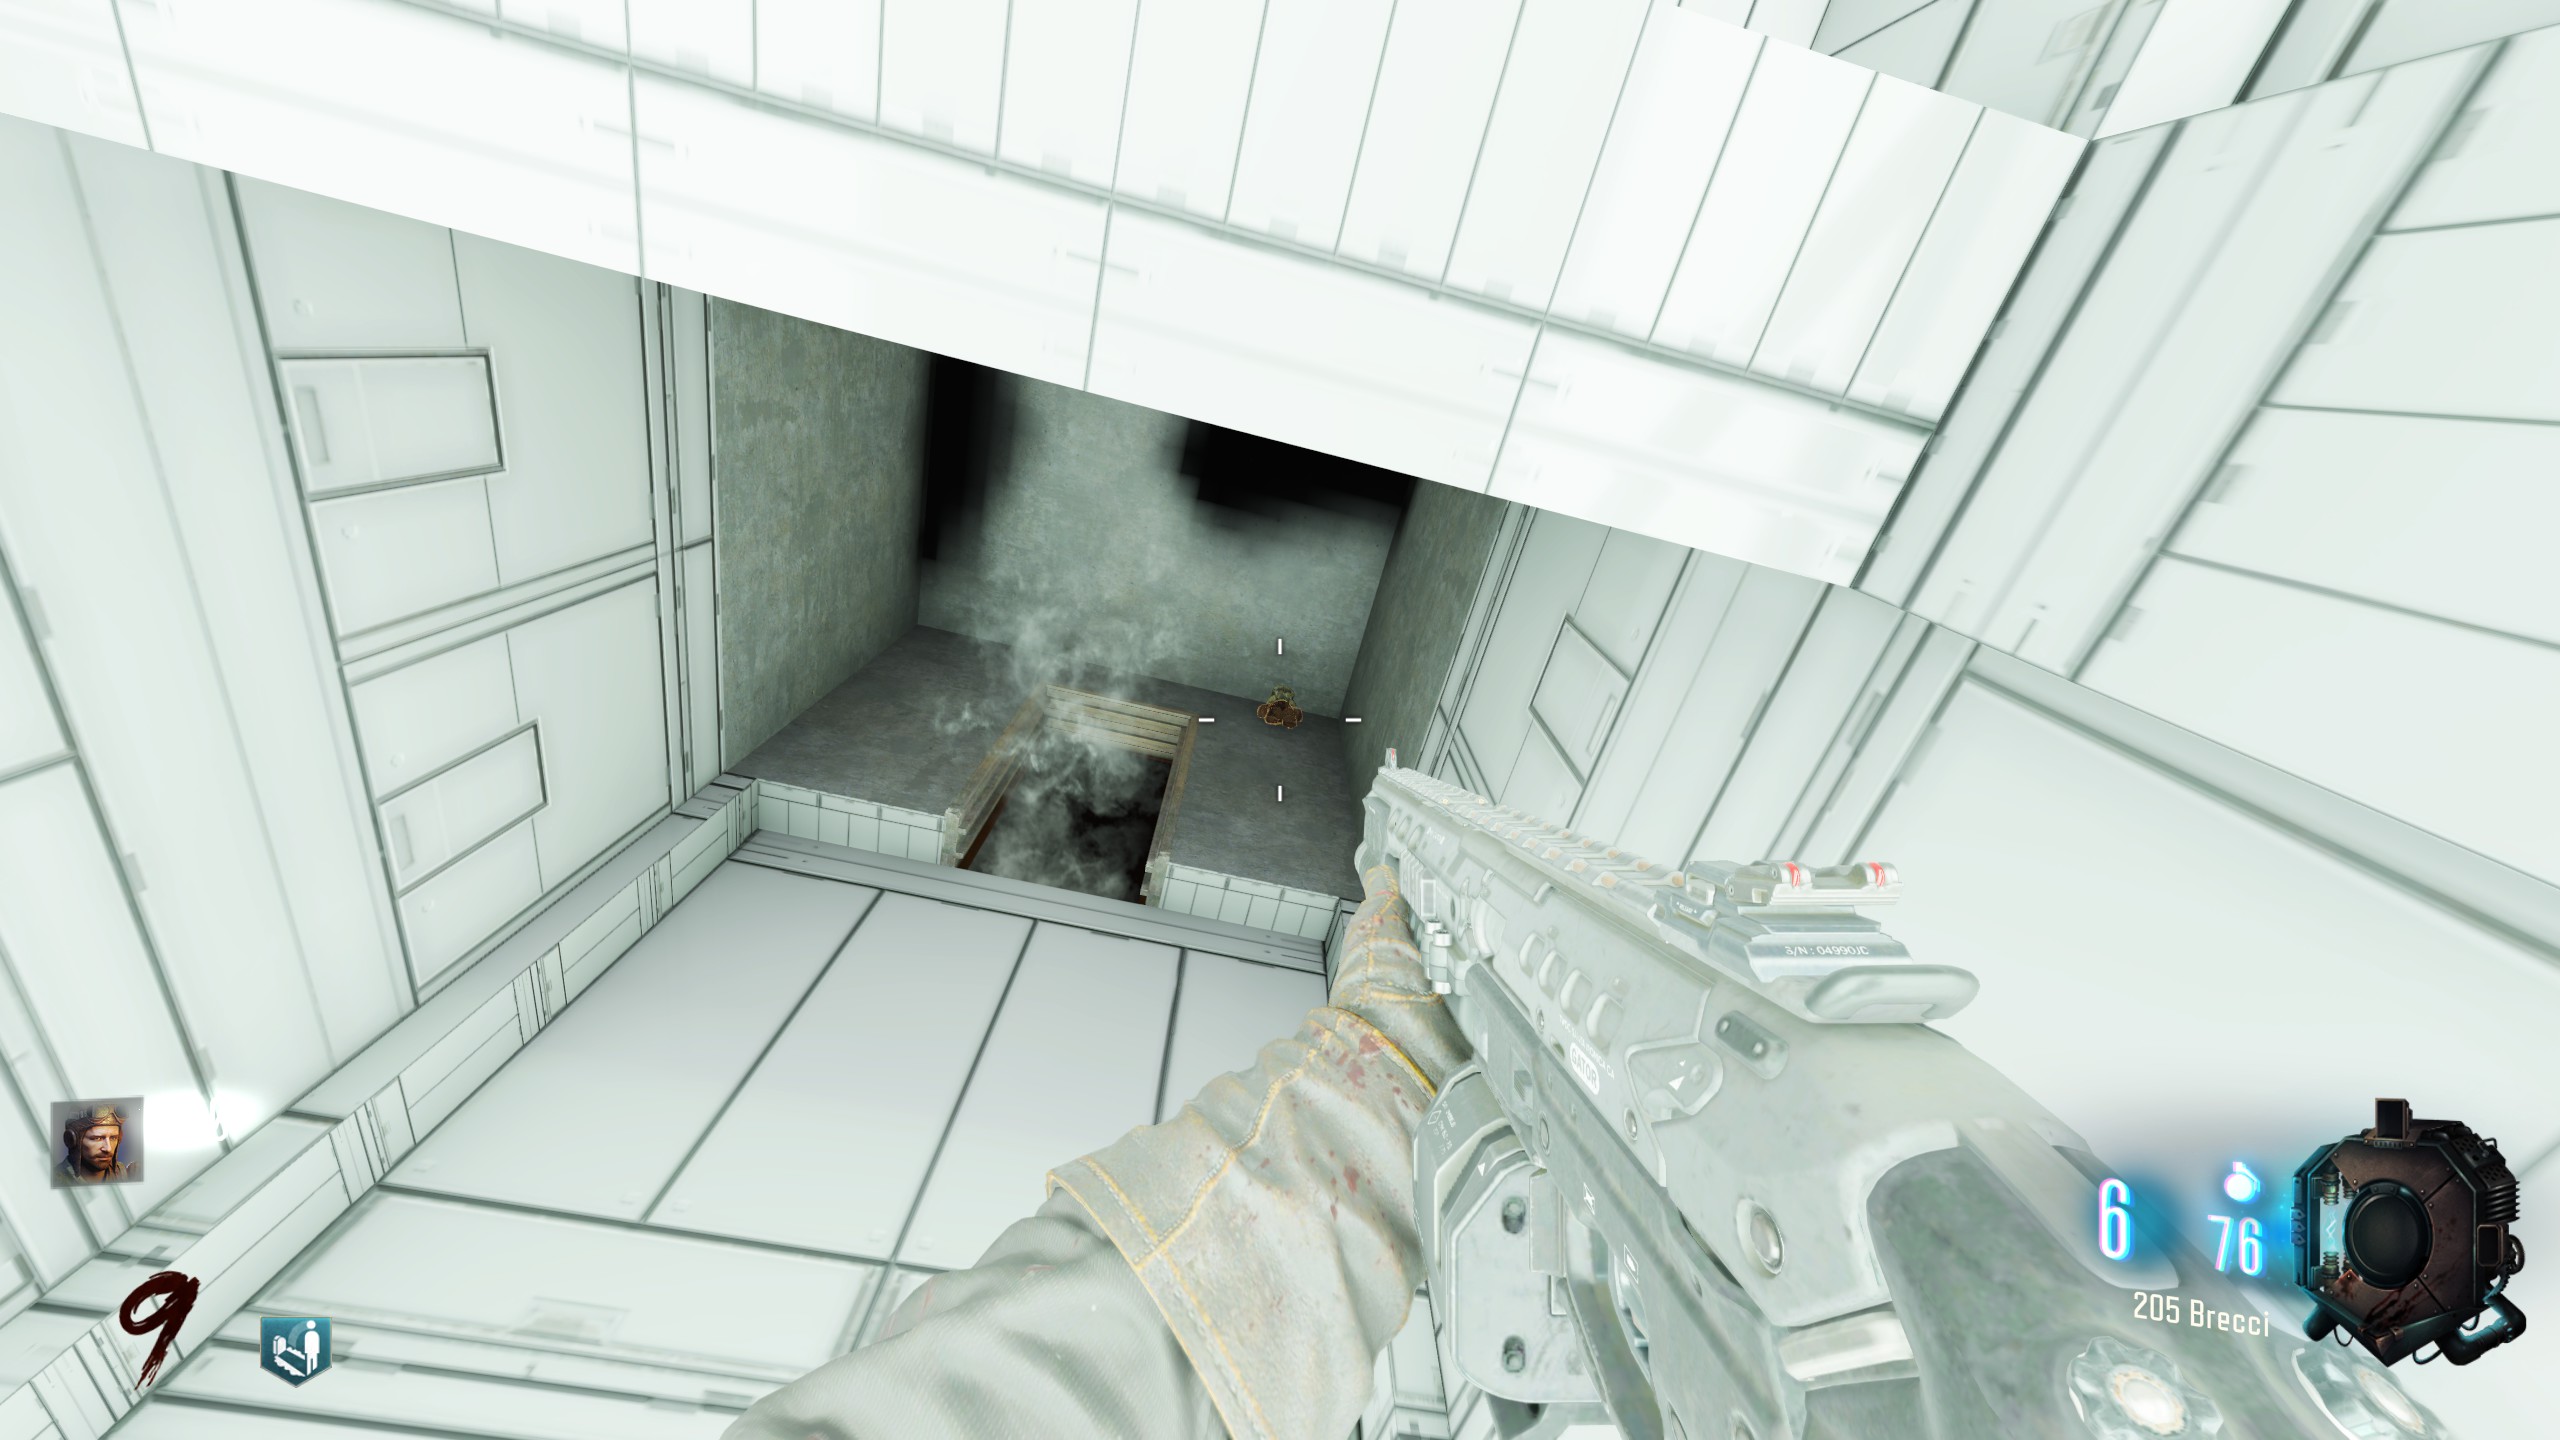
Immediately past the barrier leading into the underground section.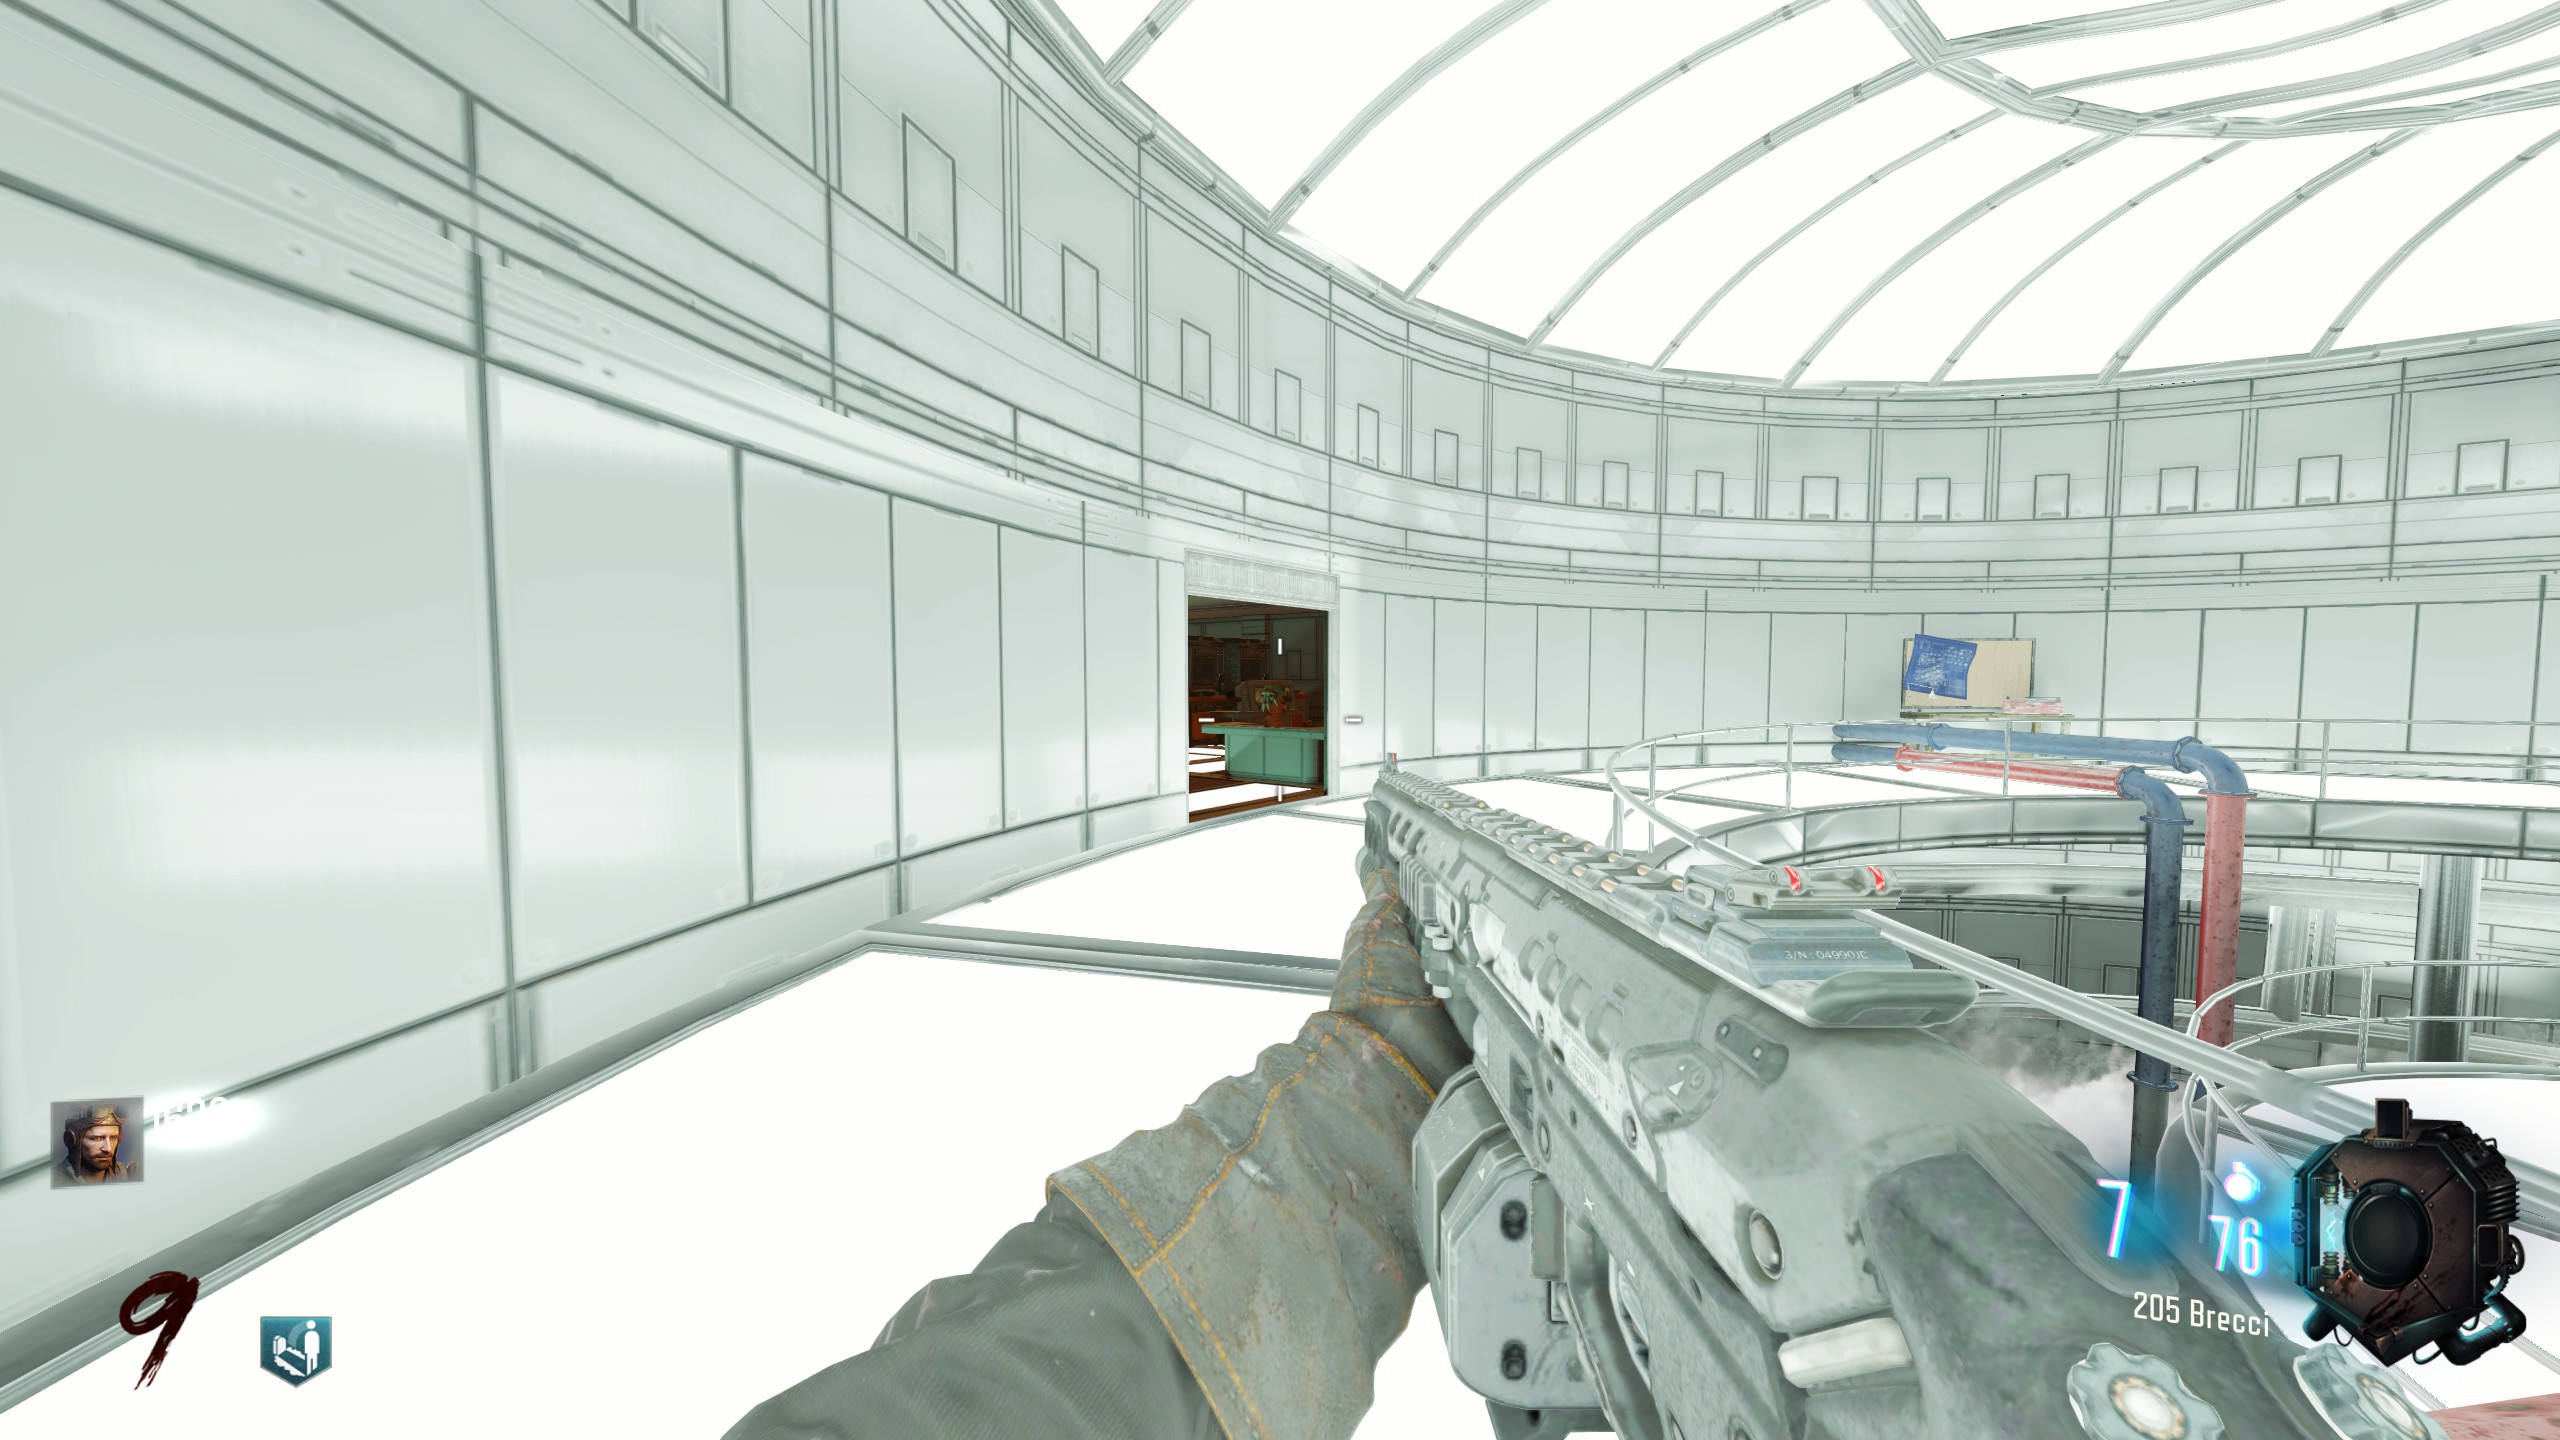
Just outside of the first circular room, on a desk. Visible after entering from the room with Deadshot Daiquiri.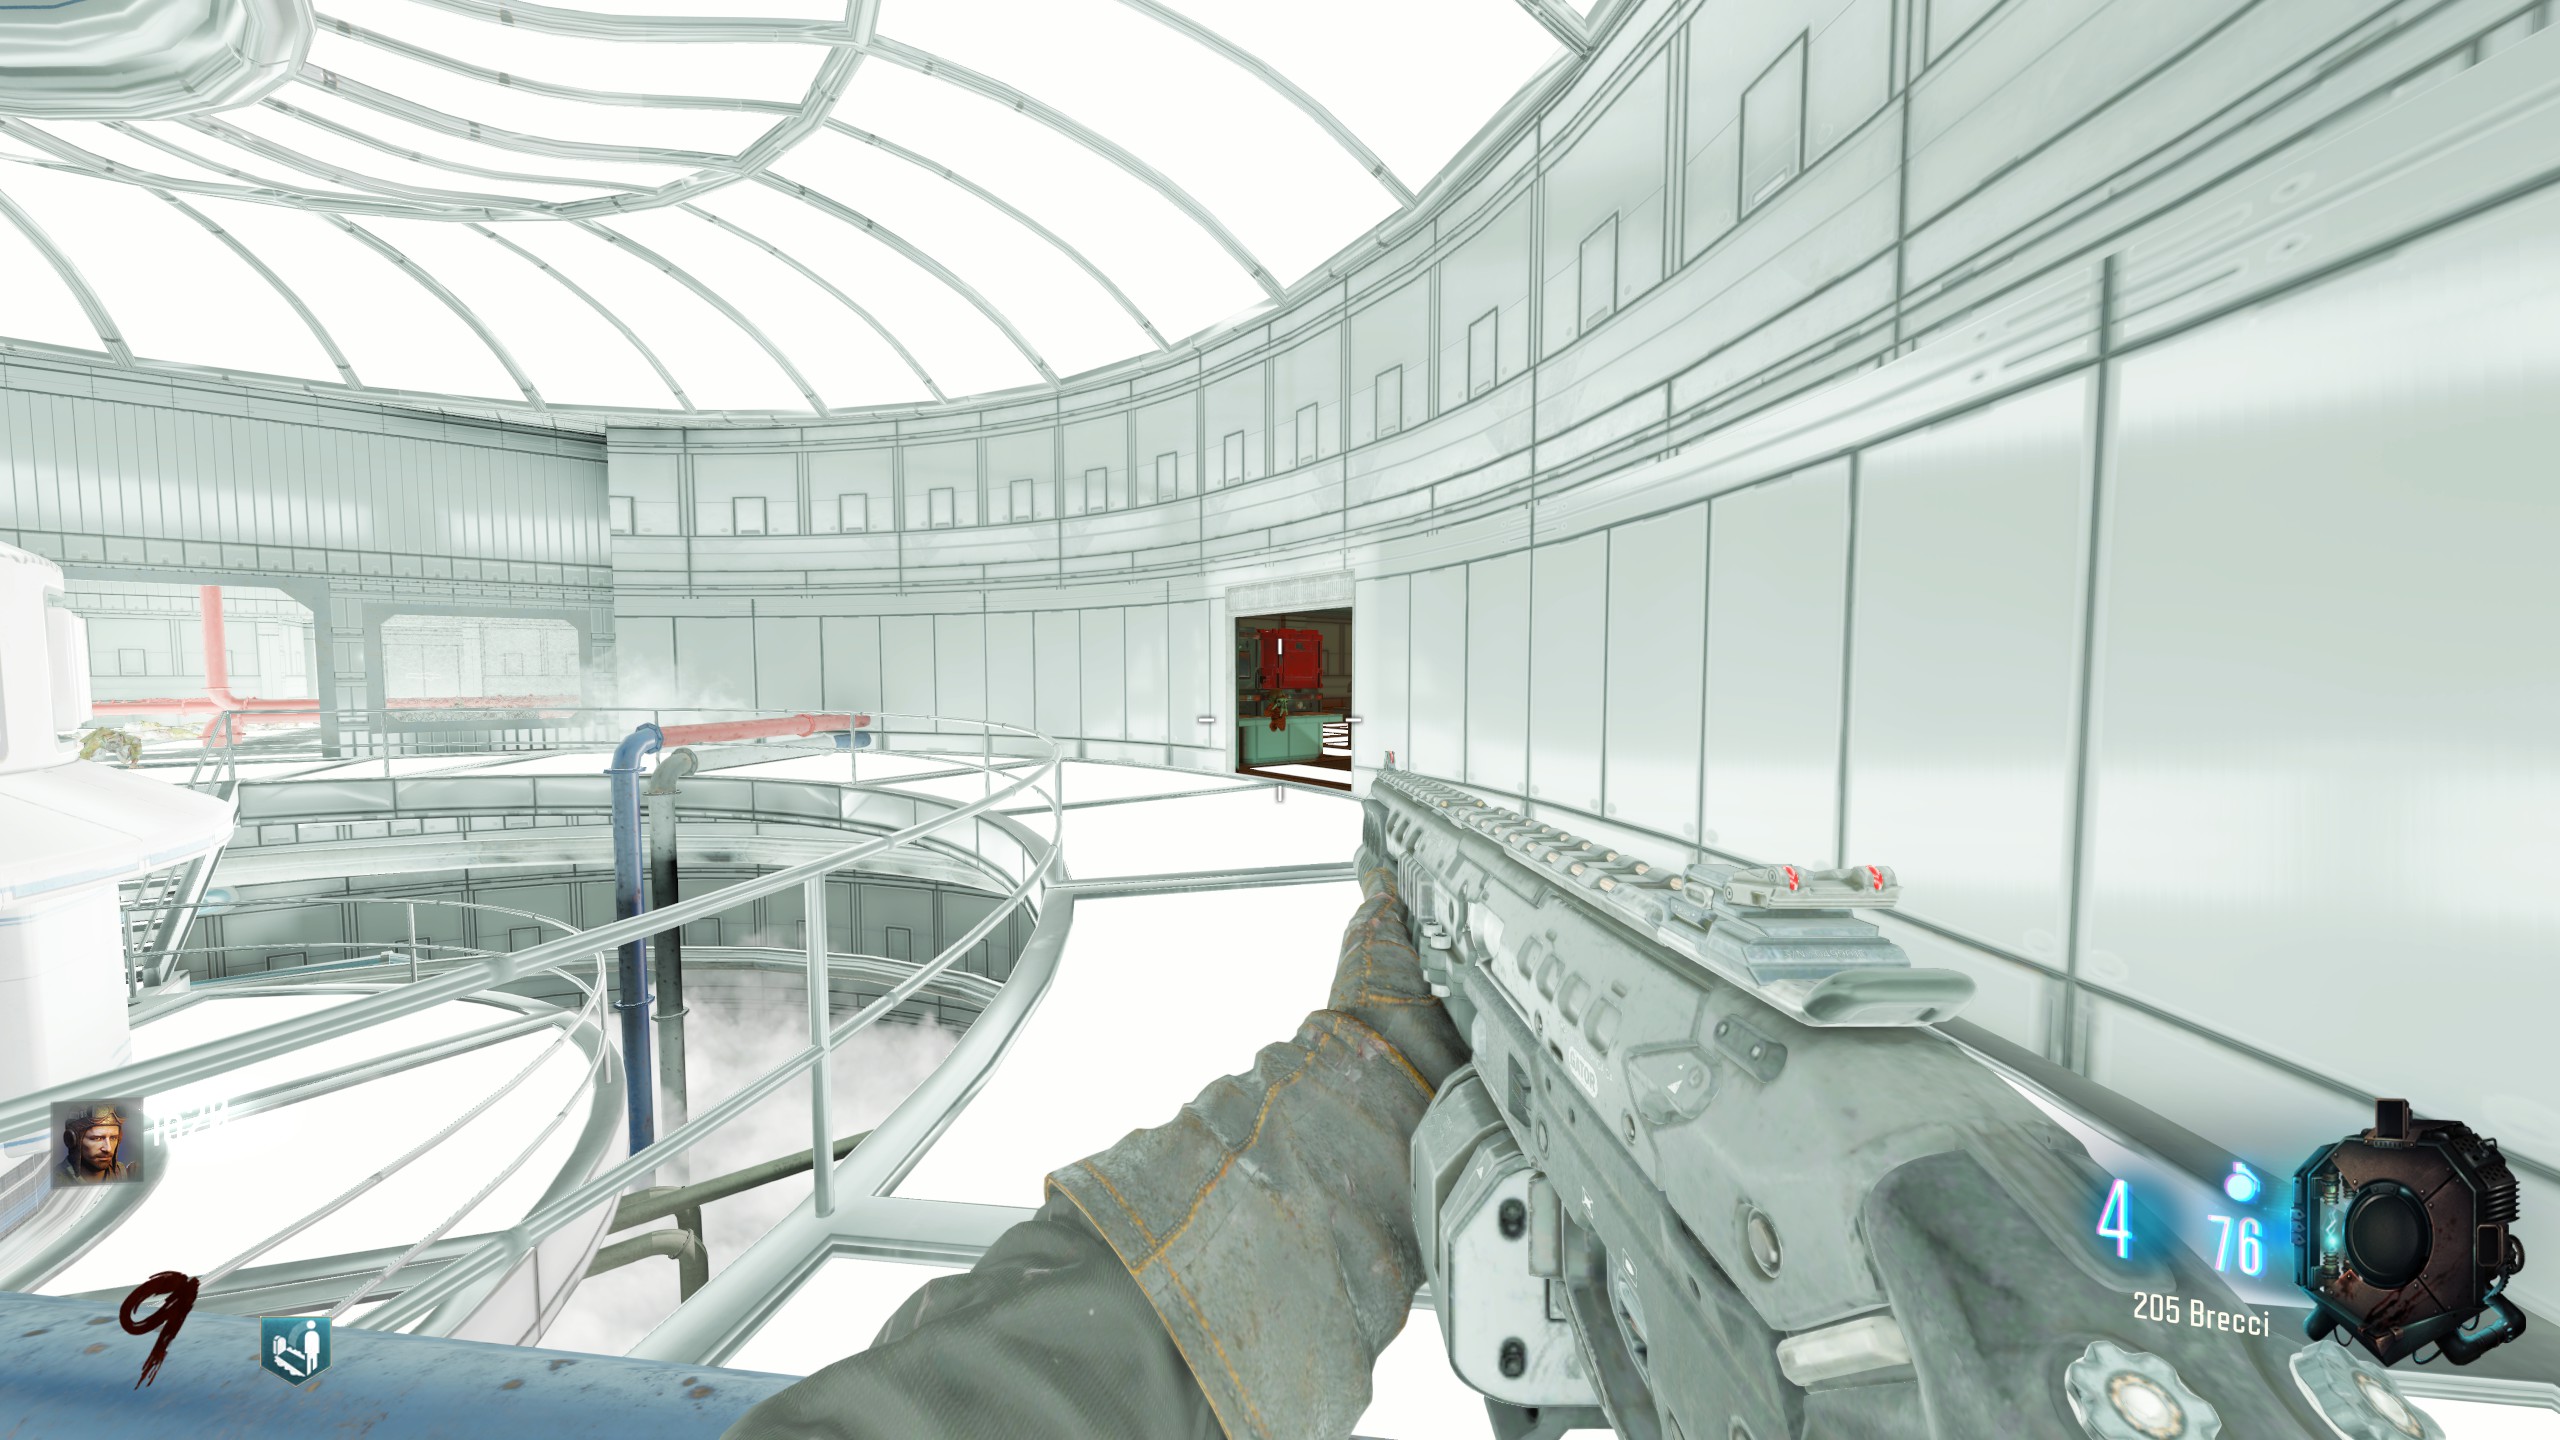
Just outside of the first circular room, on a desk. Visible from the side of the room leading to the second circular room.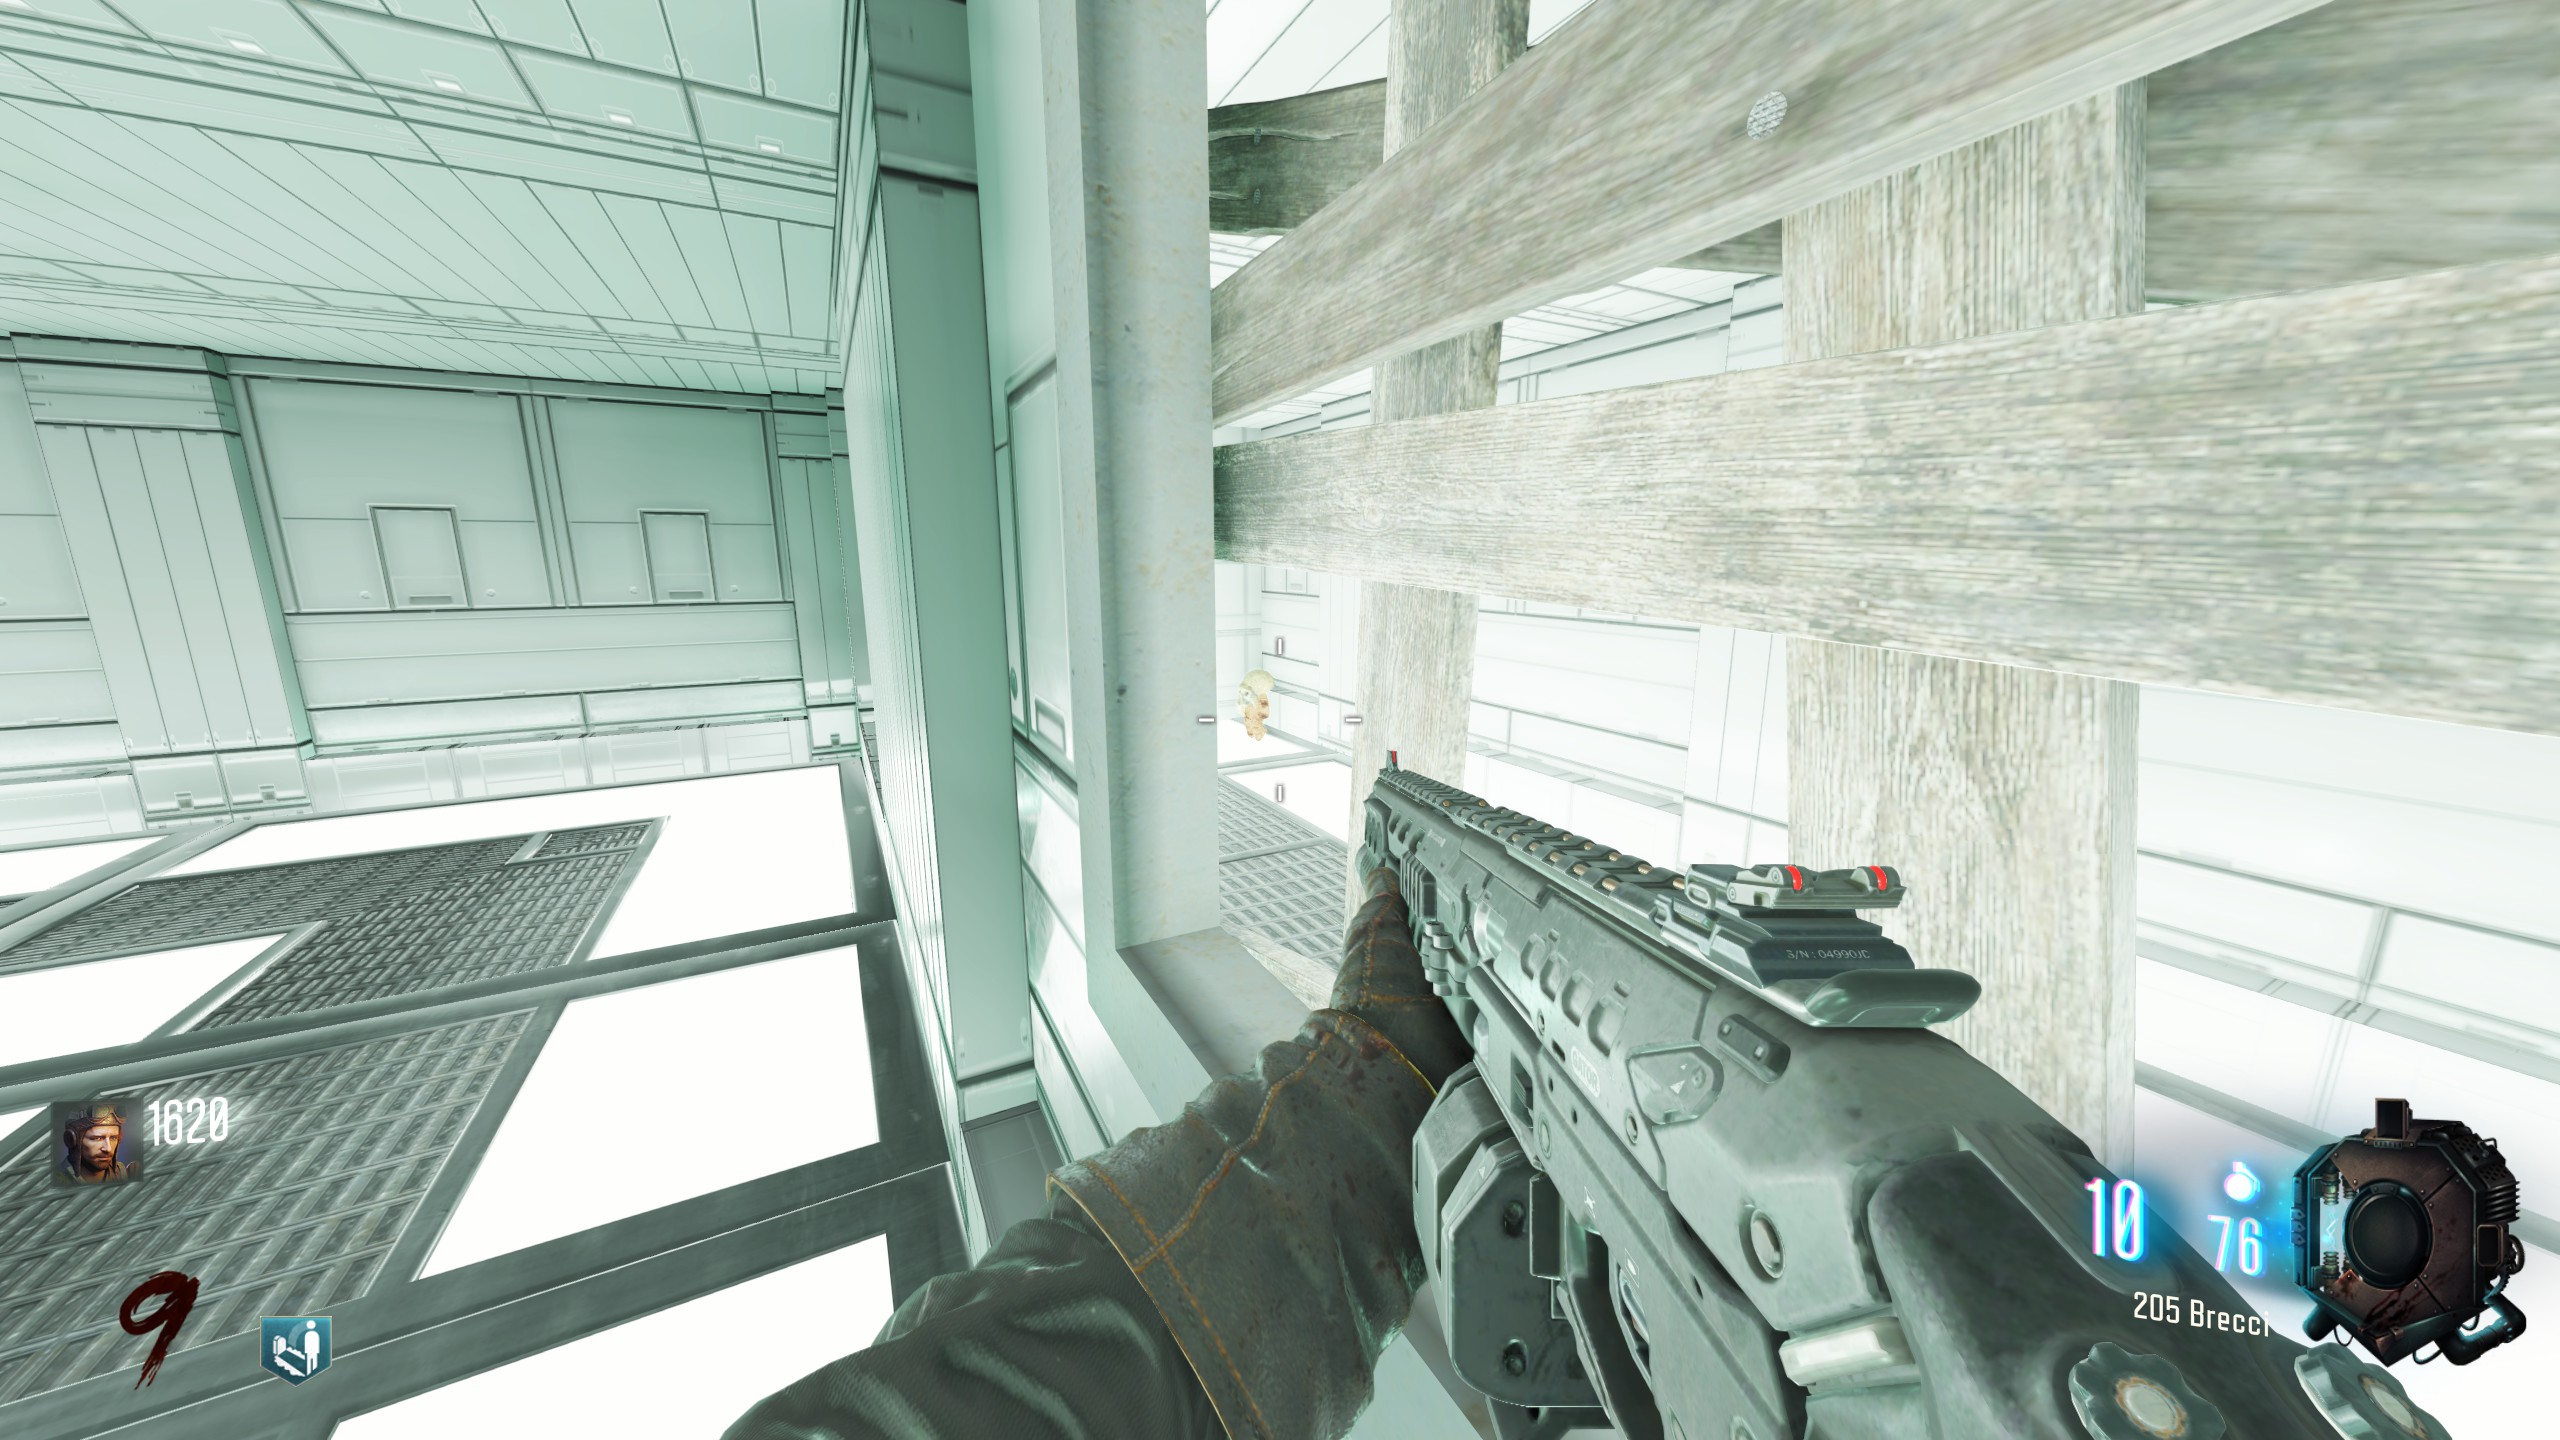
In the room connecting the circular rooms, behind a barricade.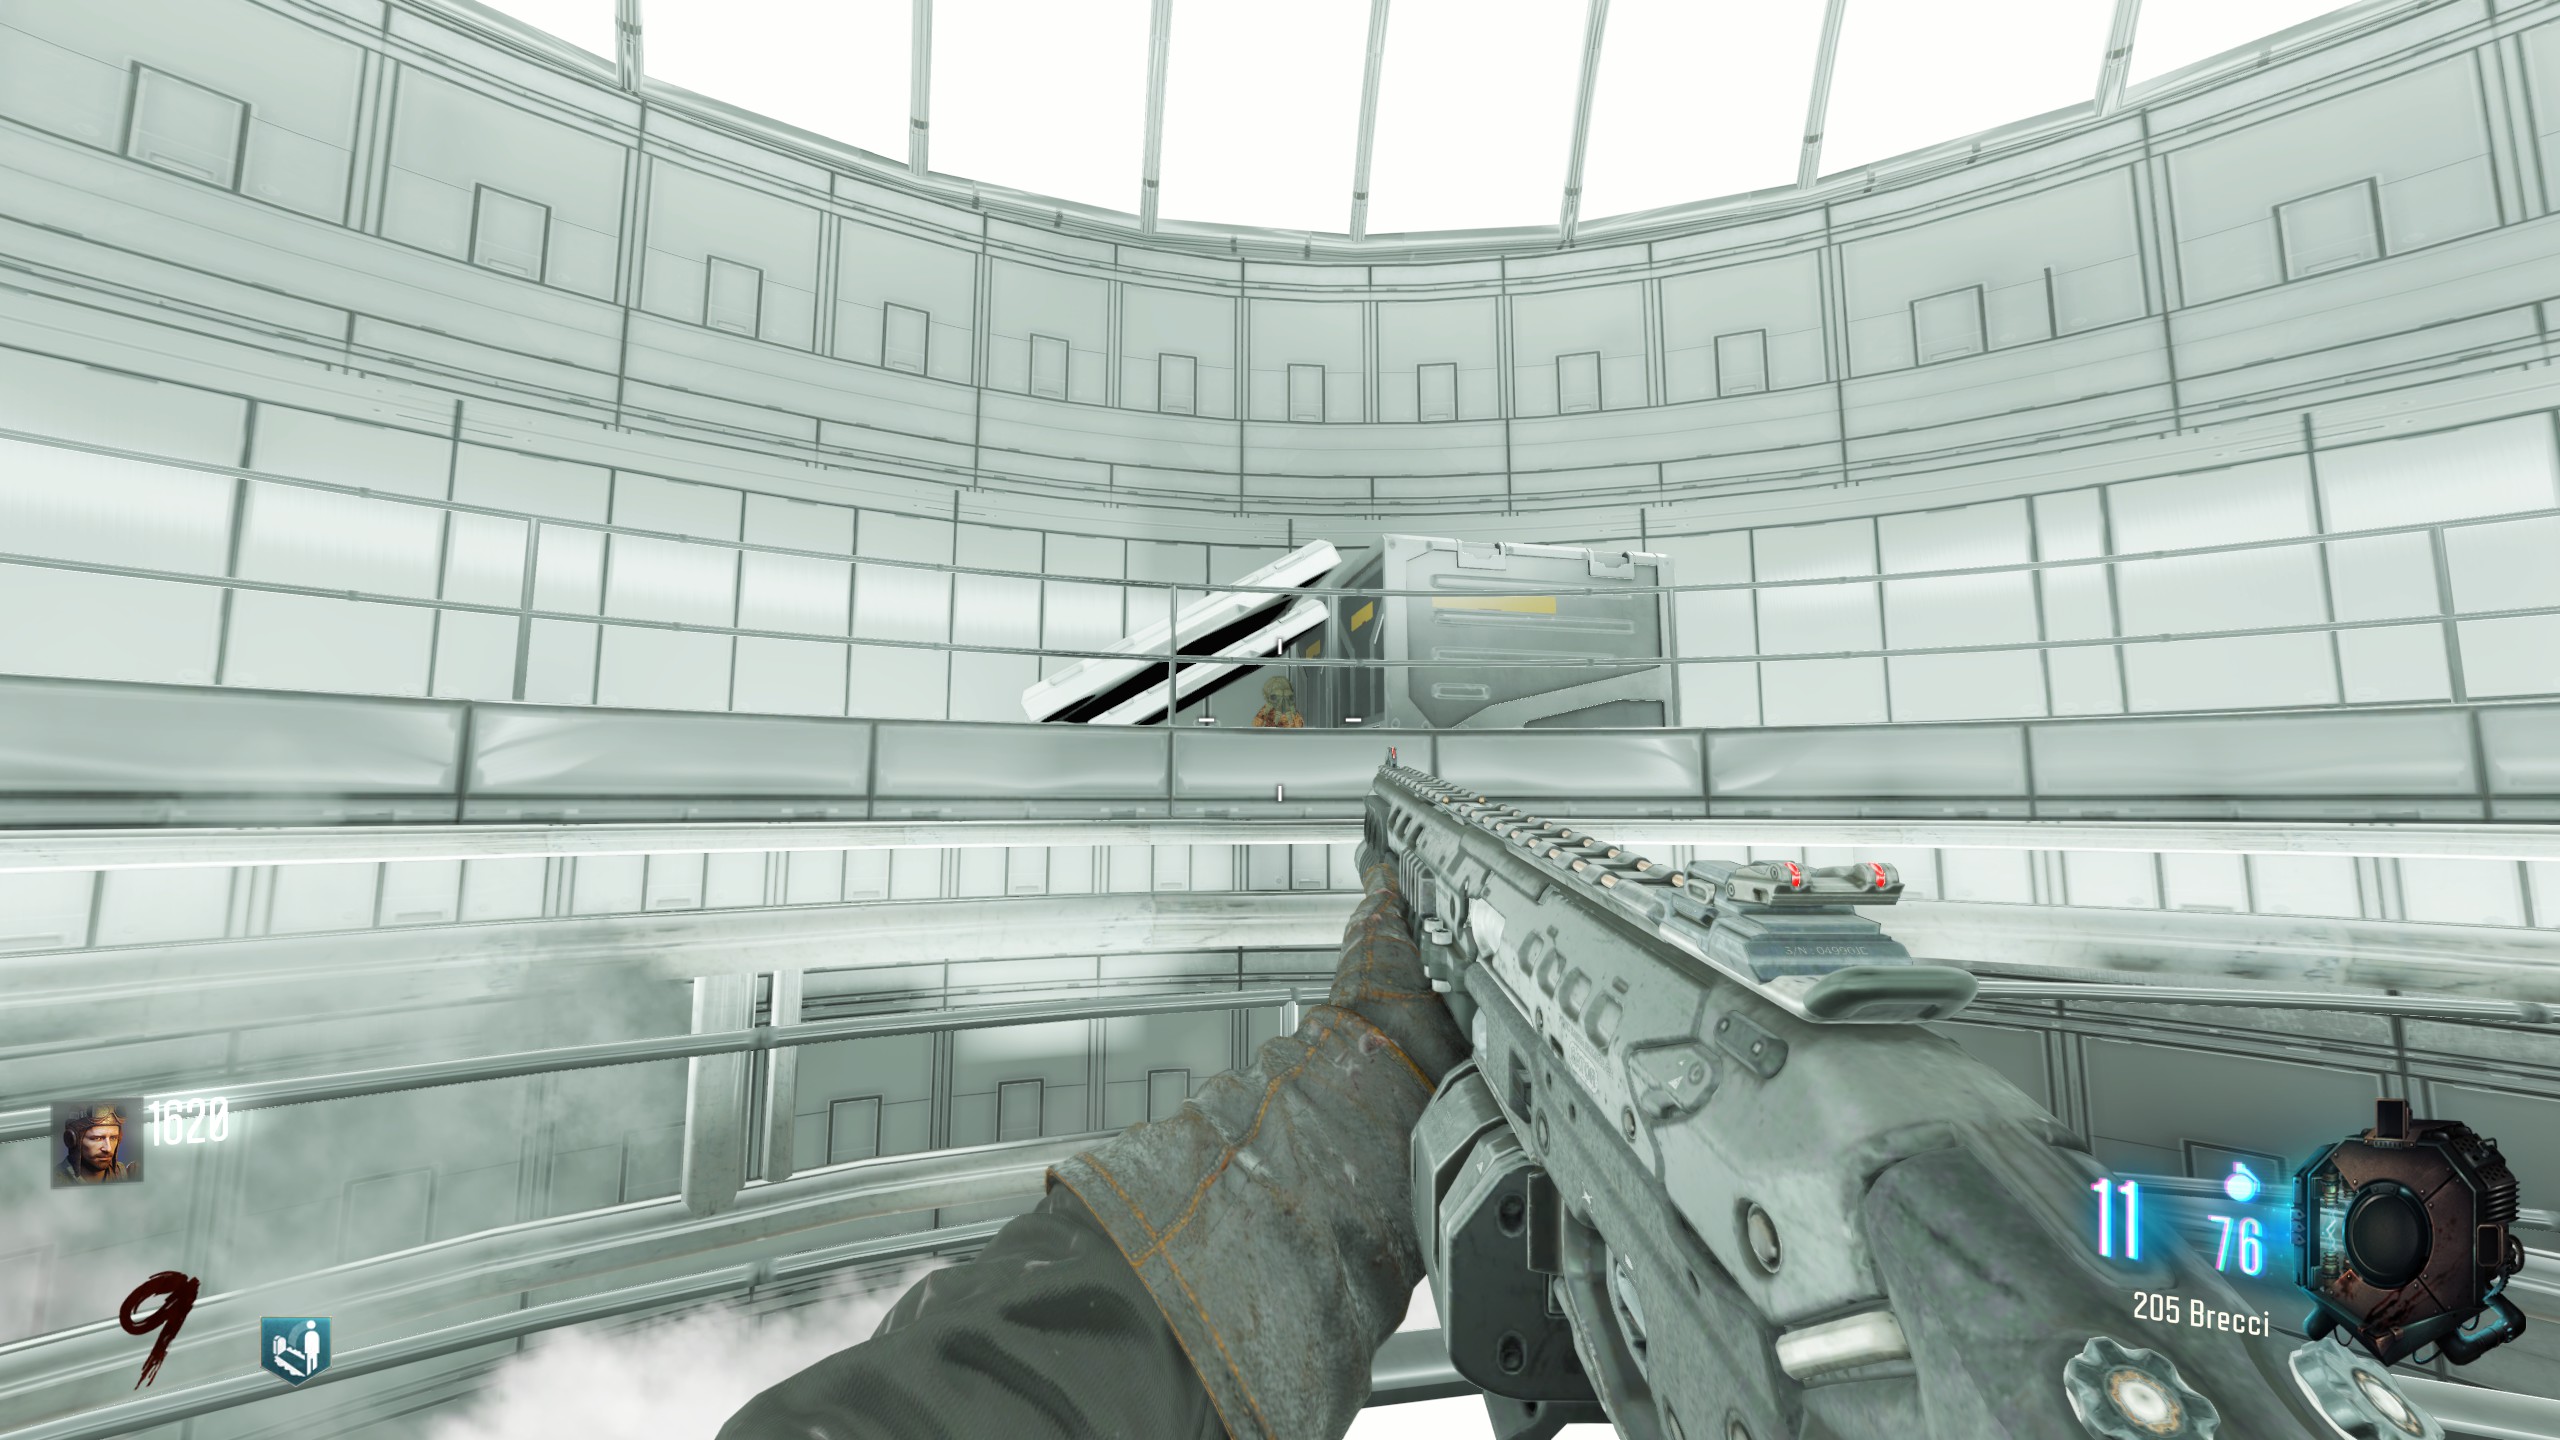
Inside the second circular room, beneath the one-way ramp.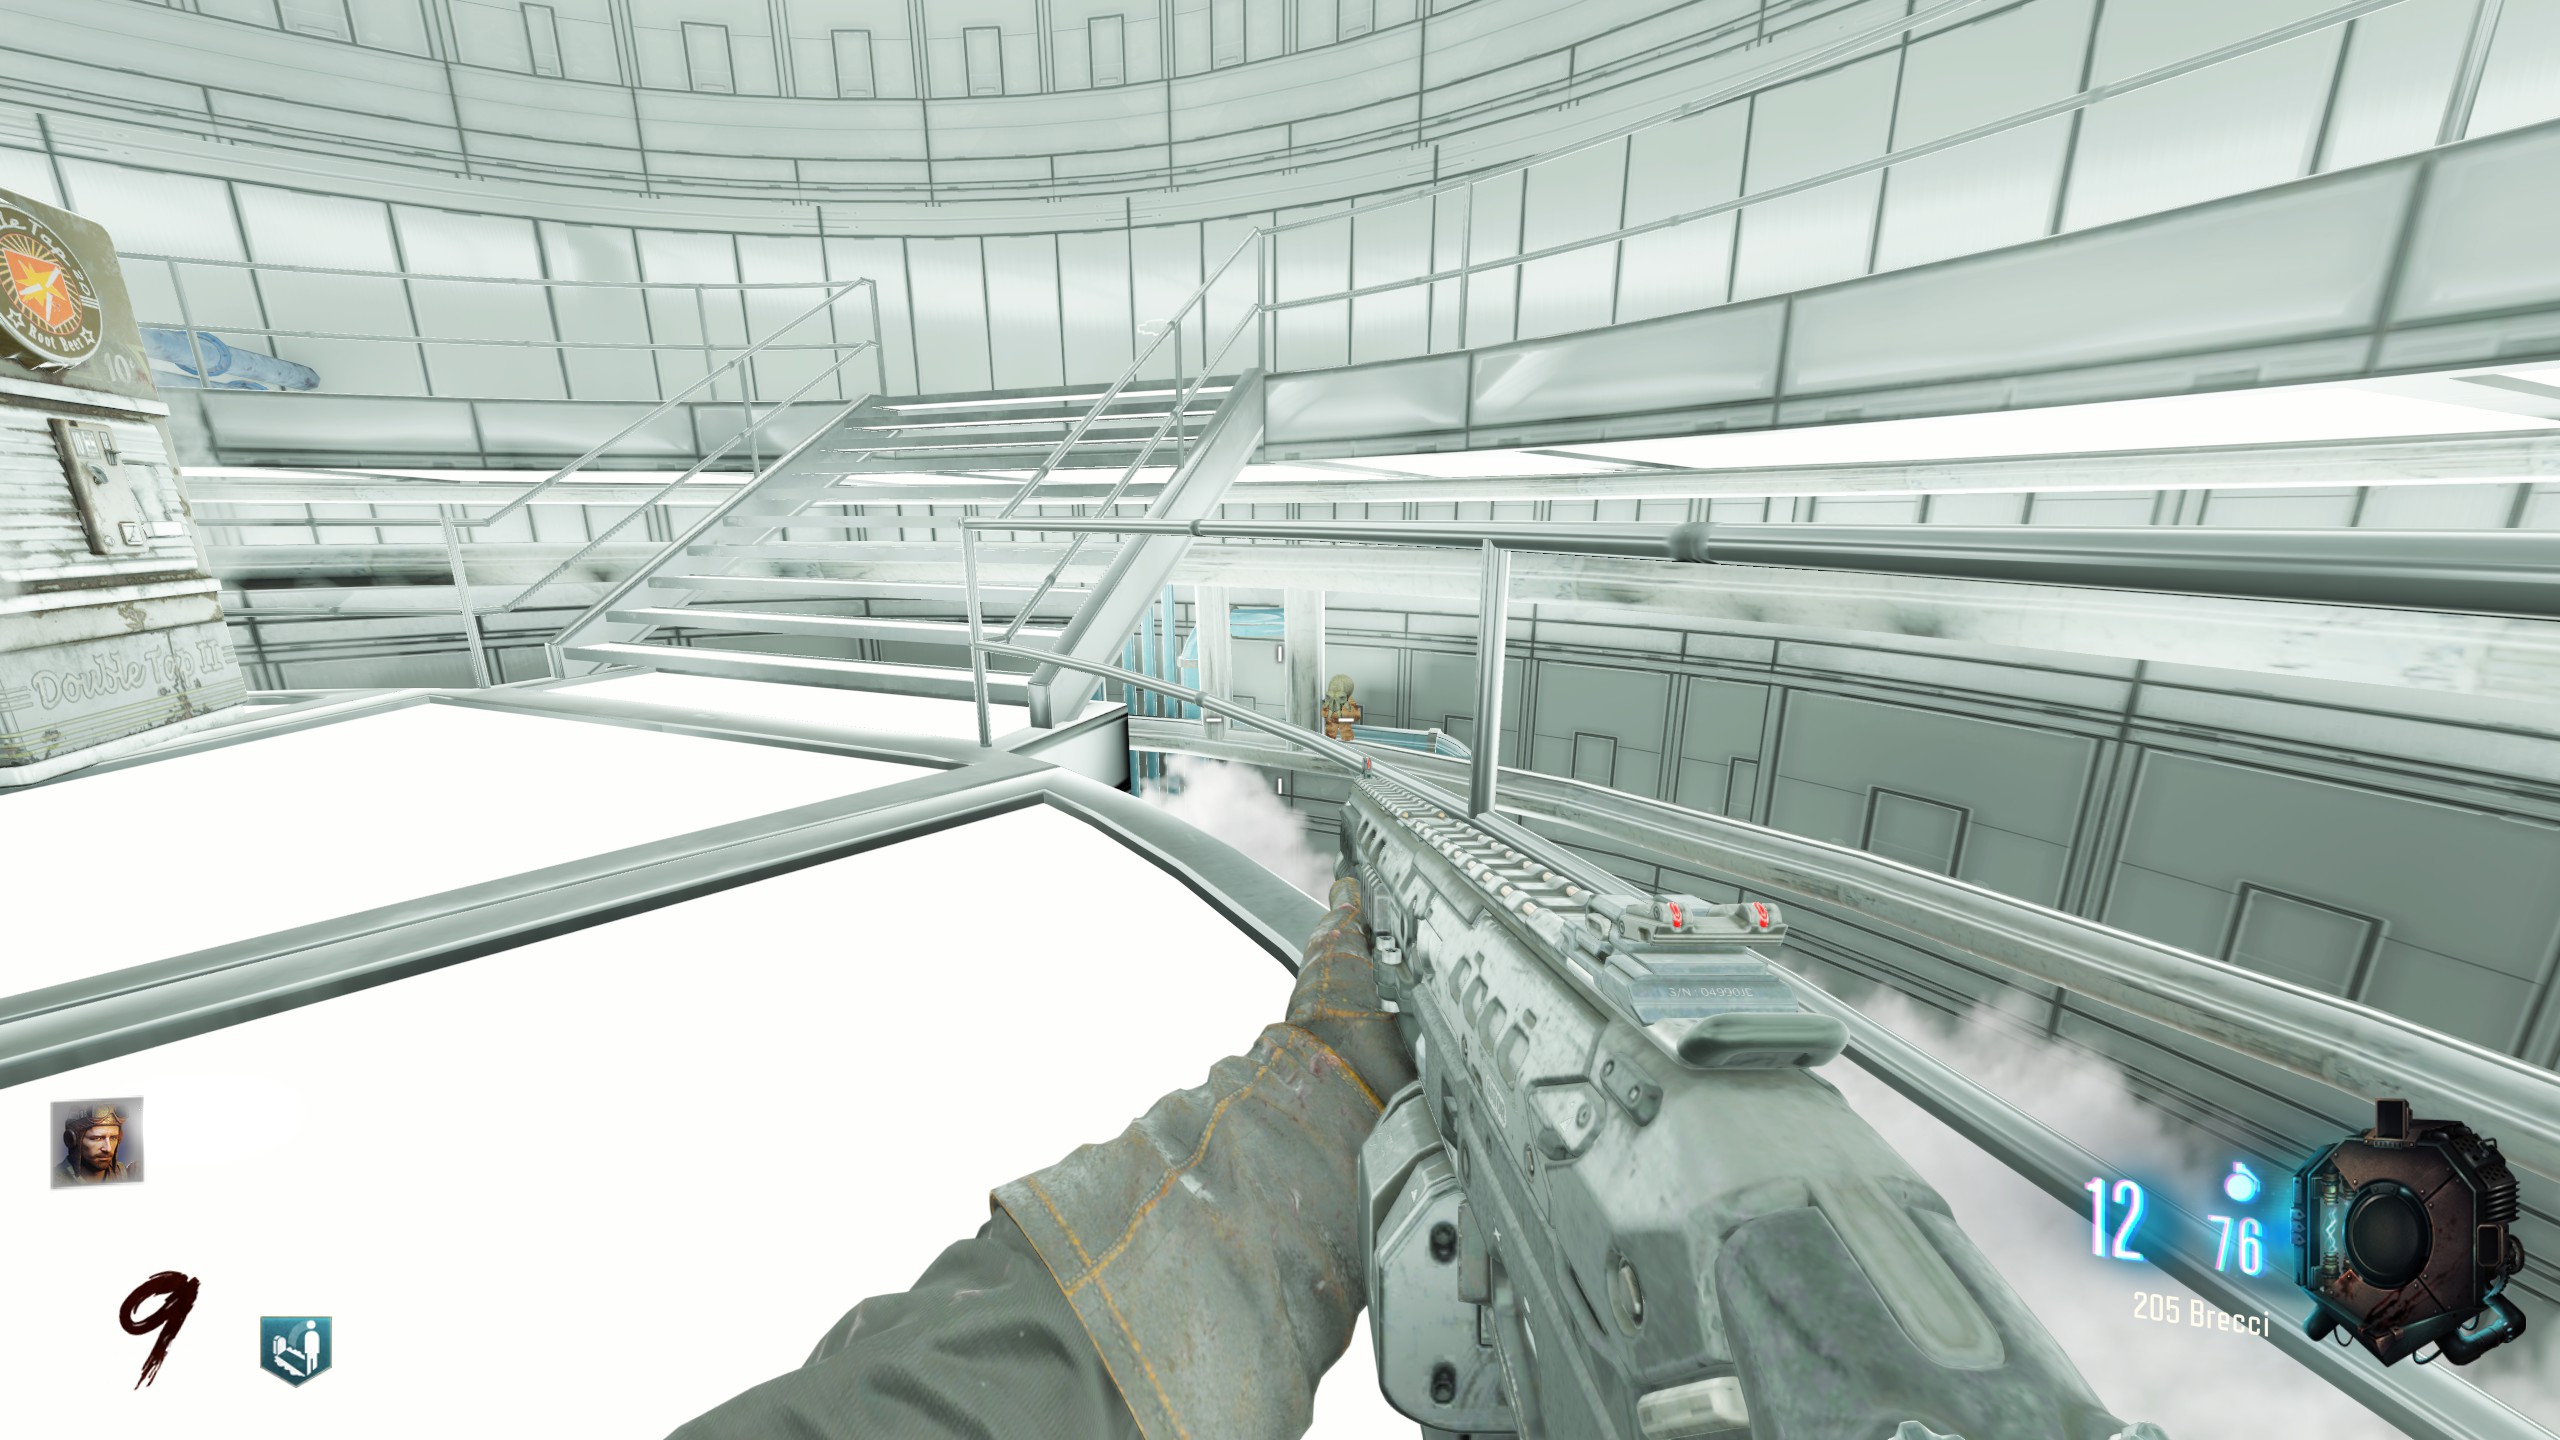
Inside the second circular room, beneath the upper floor and across from Double Tap.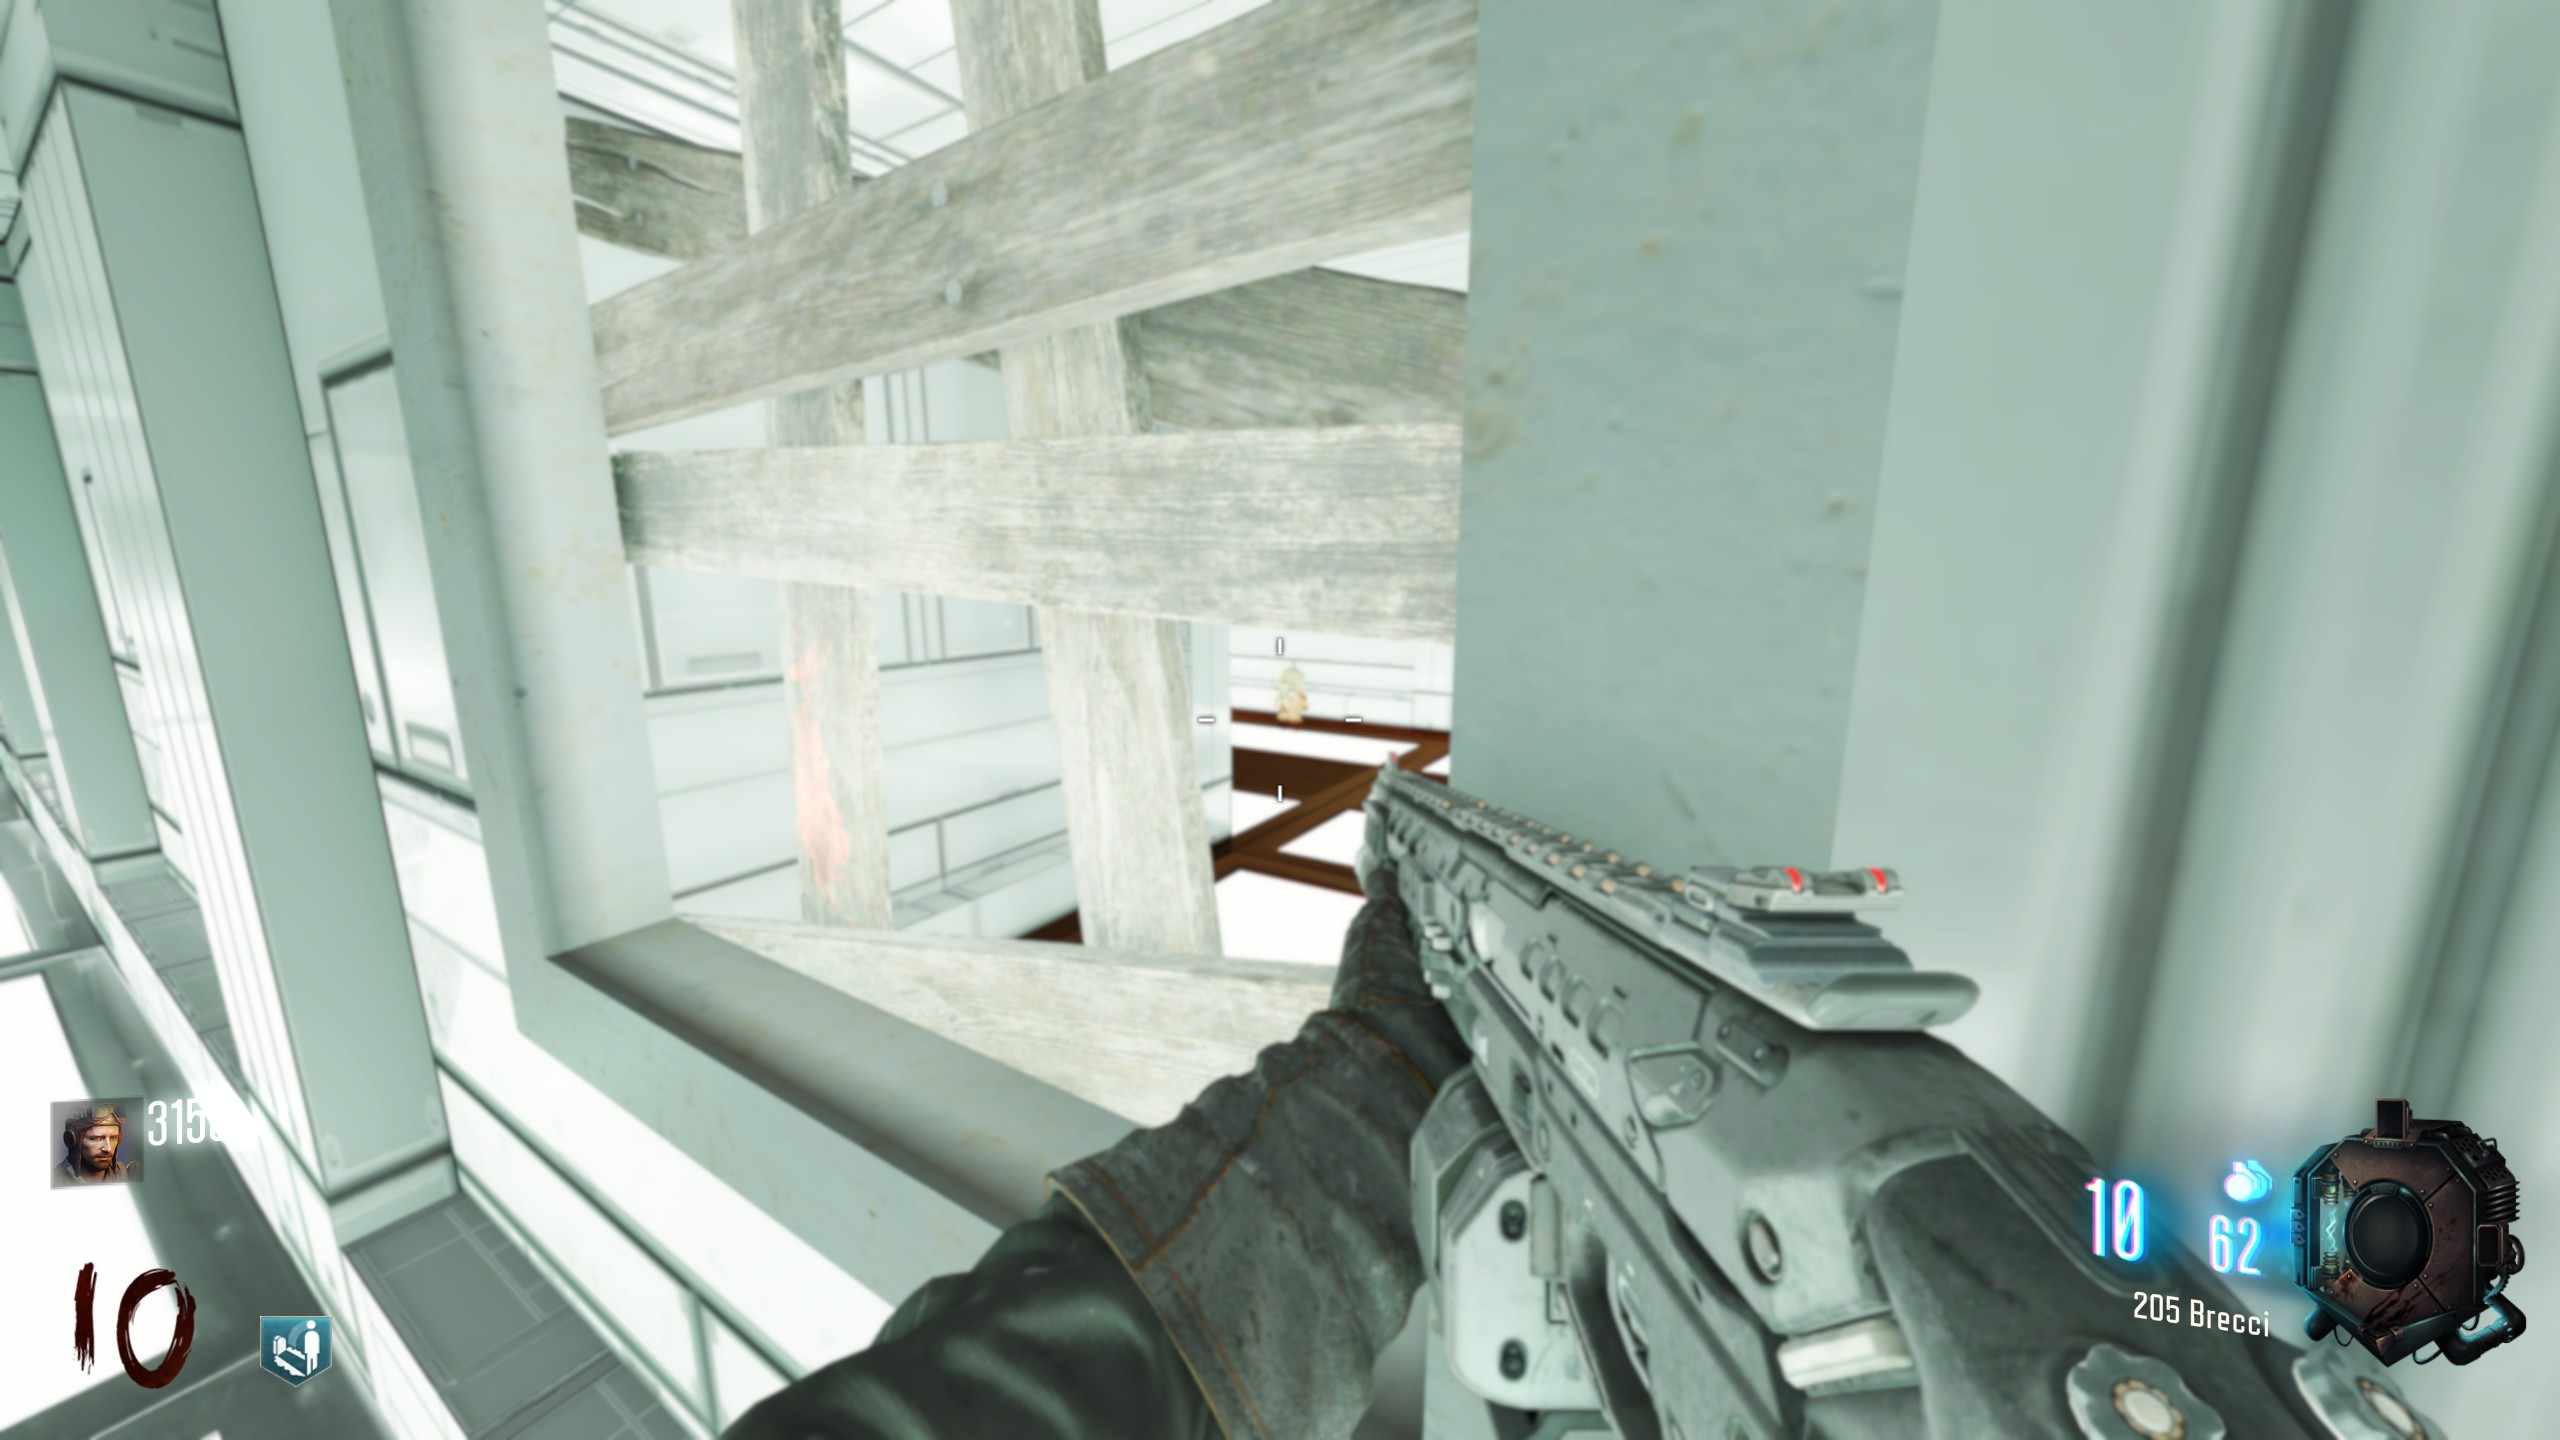
In the room linking the second circular room and the power building, behind a barricade.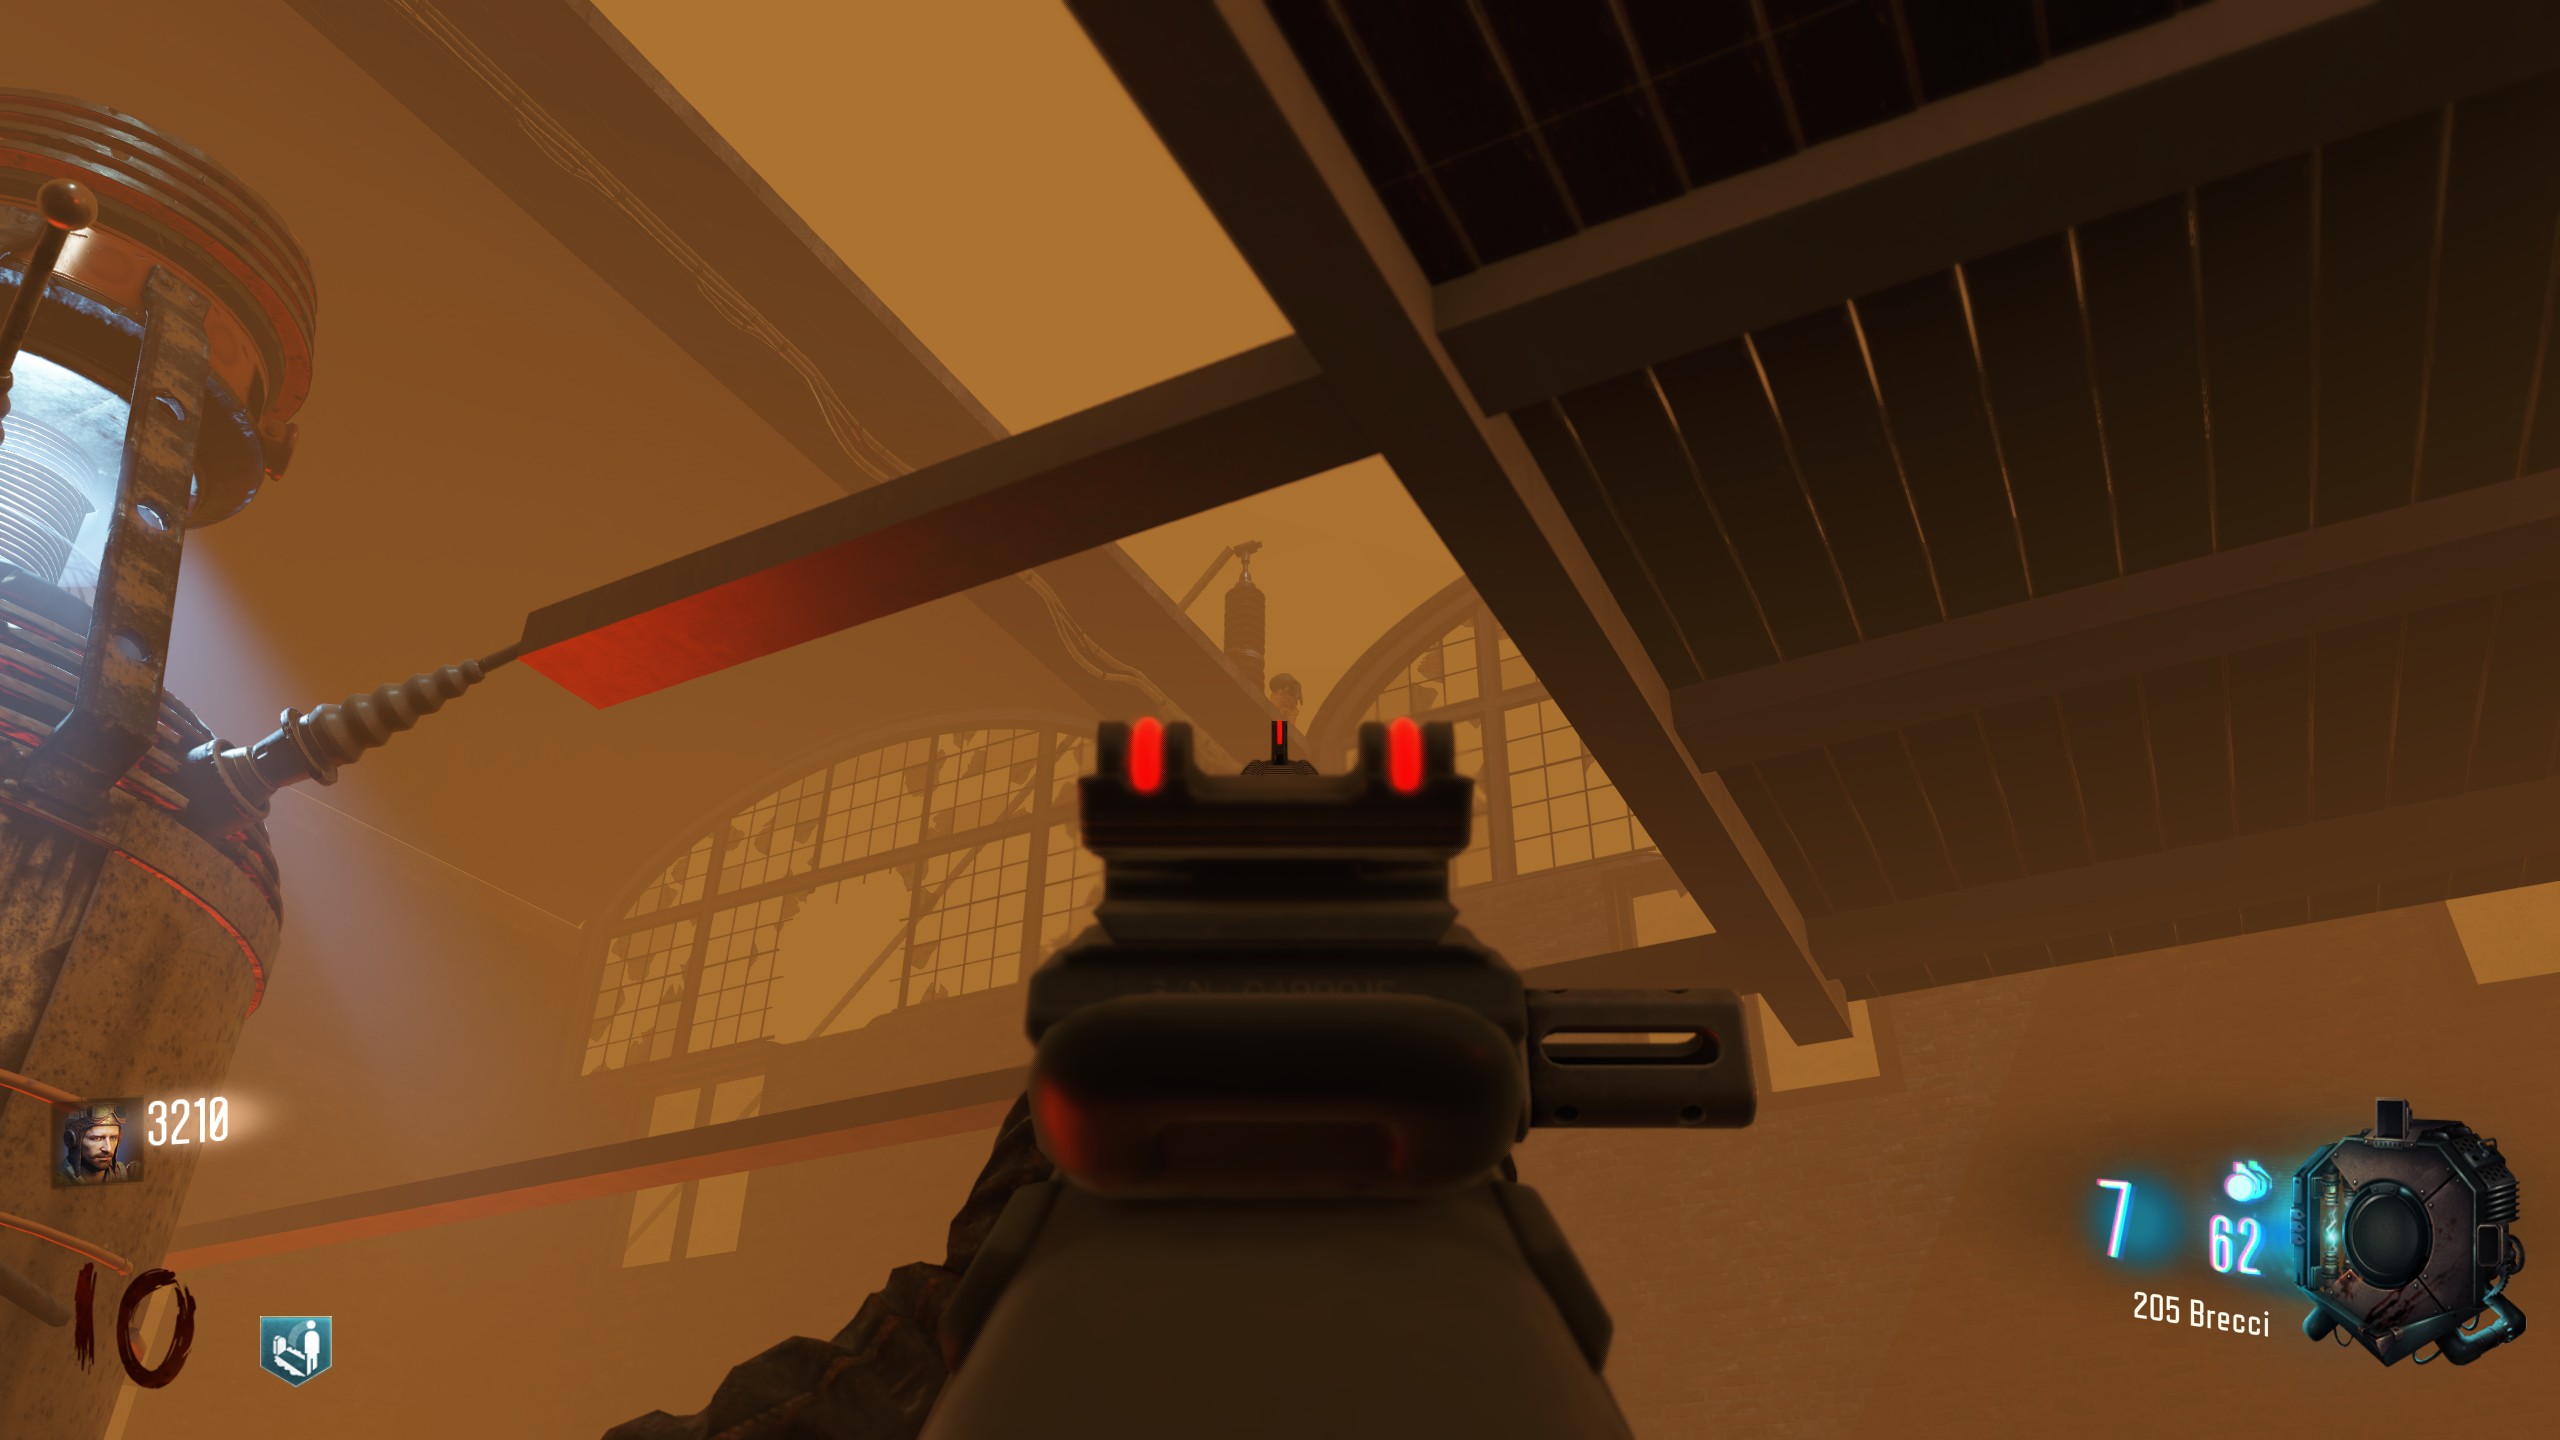
At the open roof of the building, beyond the teleporter housing Pack-a-Punch and above the stairwell leading into the power building. Can also be shot from the spawn area.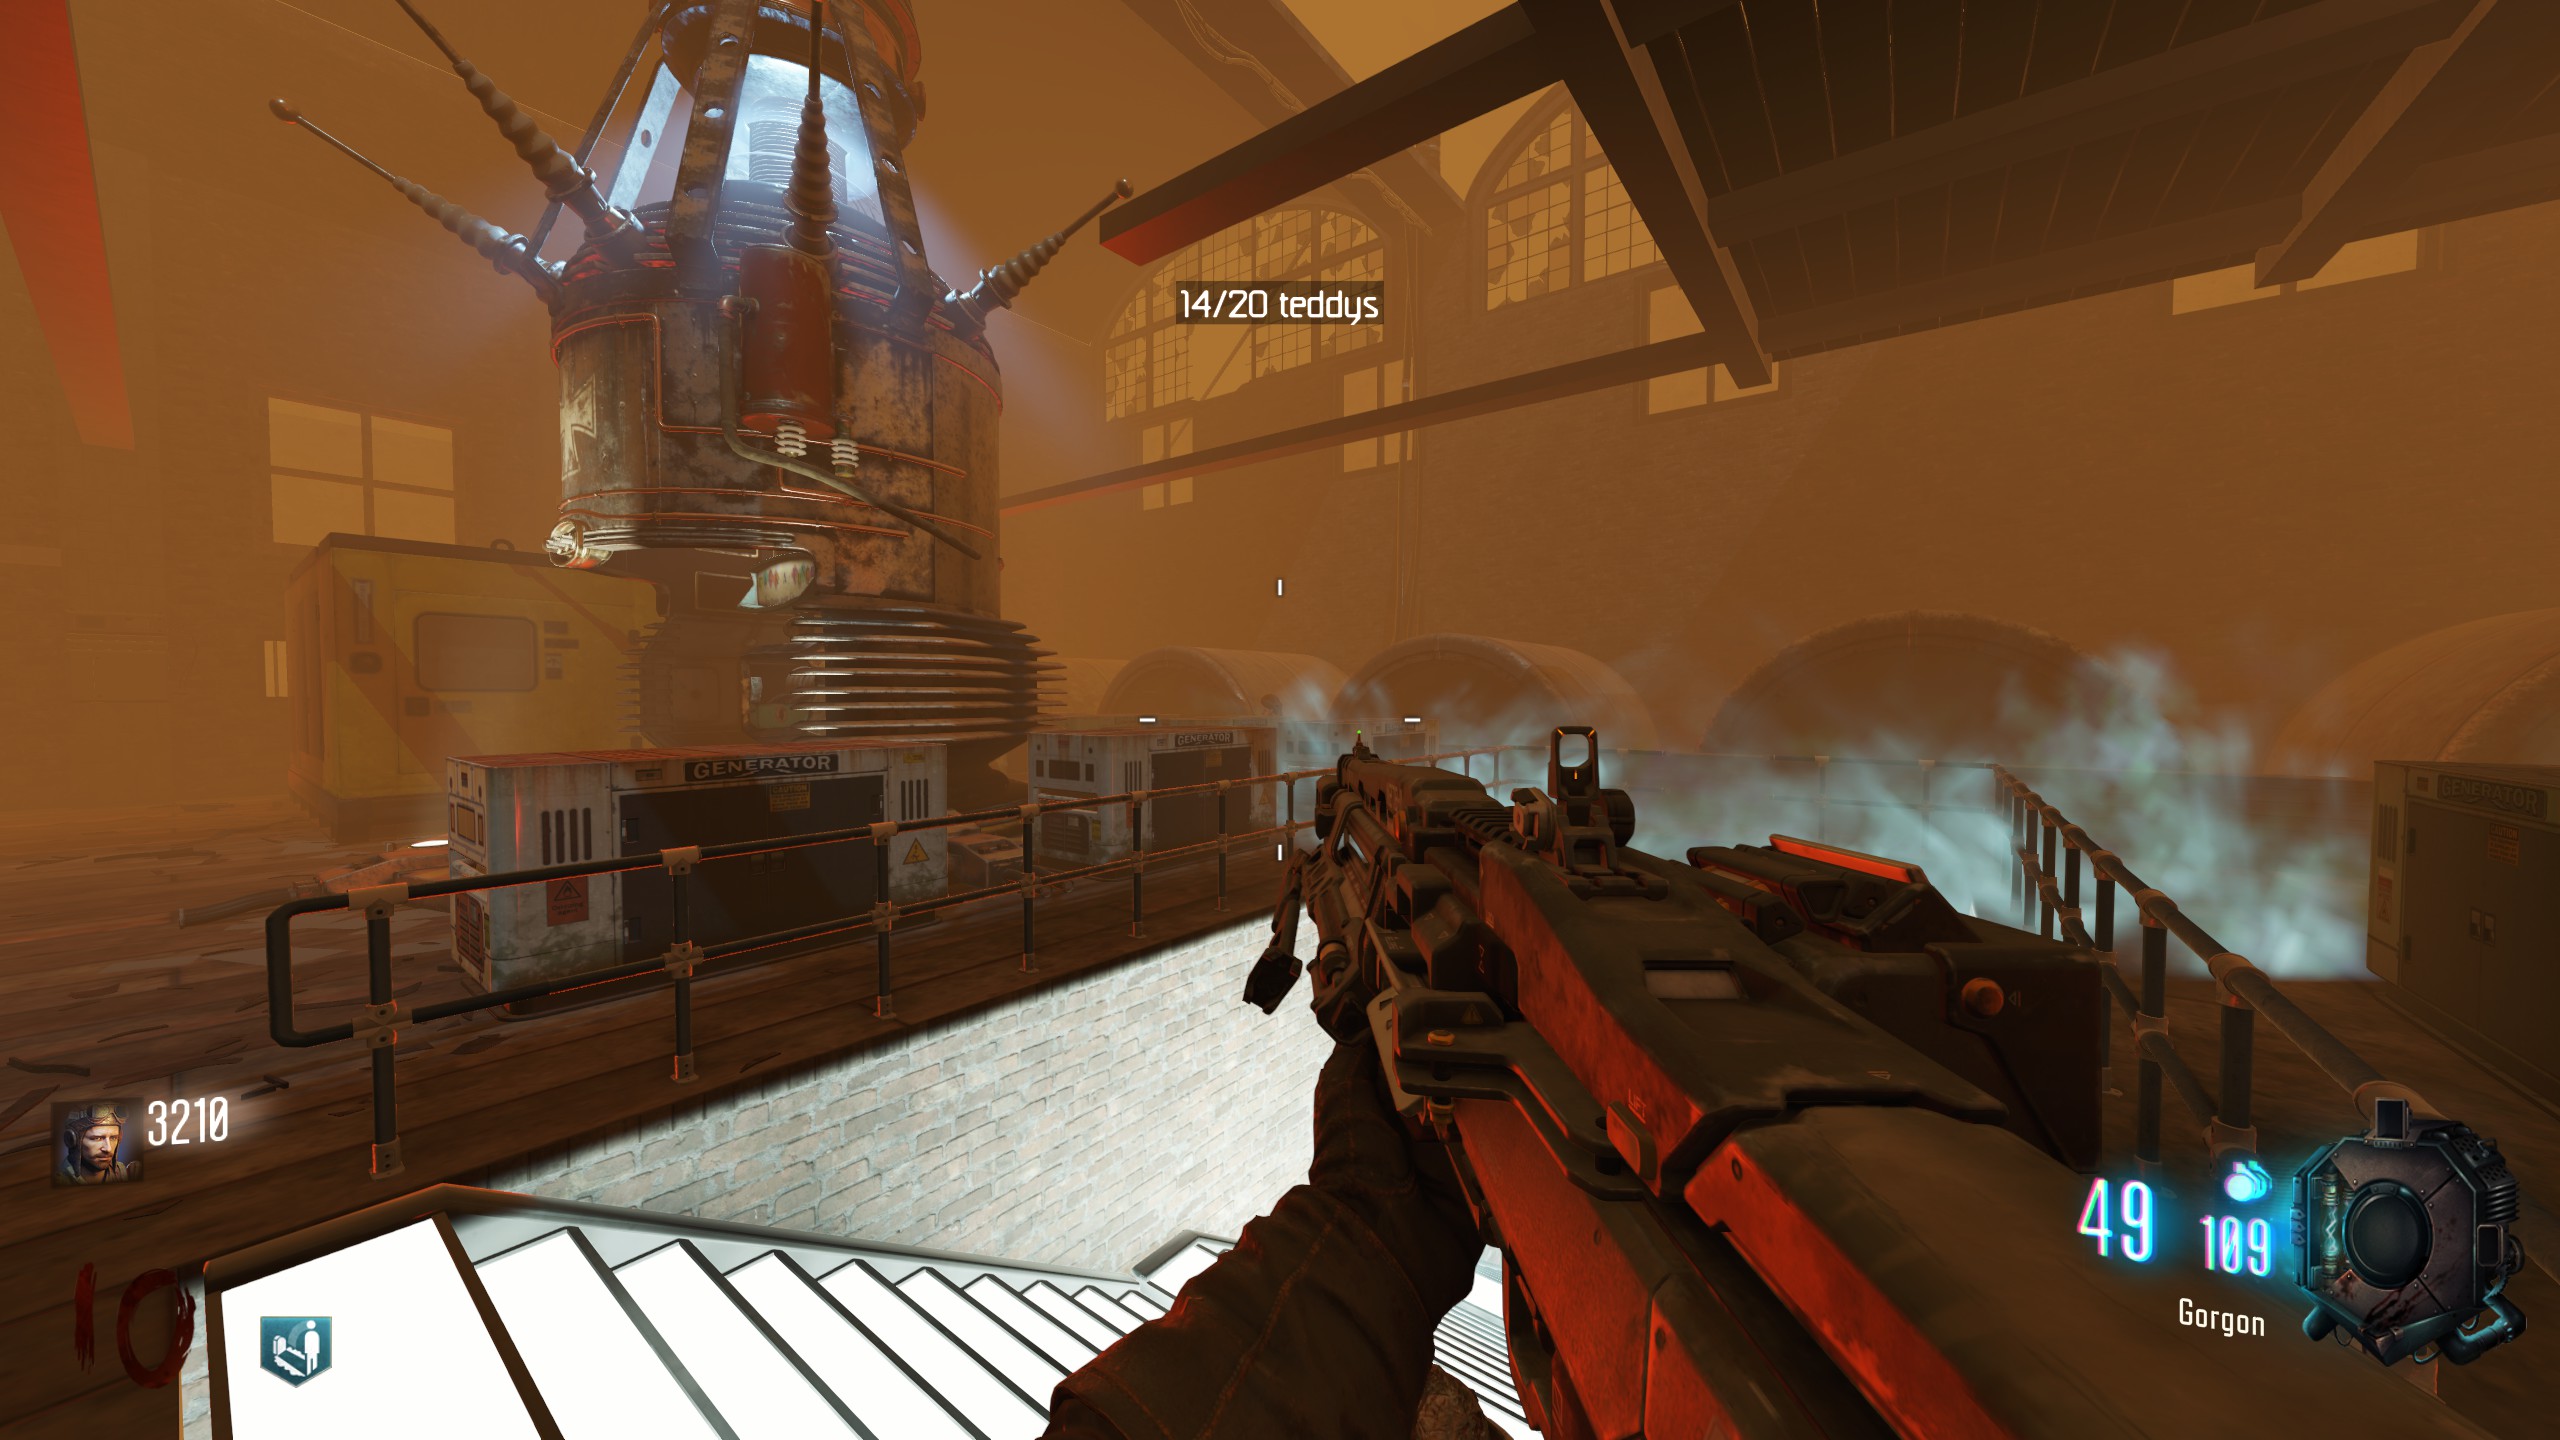
Beyond the teleporter housing Pack-a-Punch and above the stairwell leading into the power building.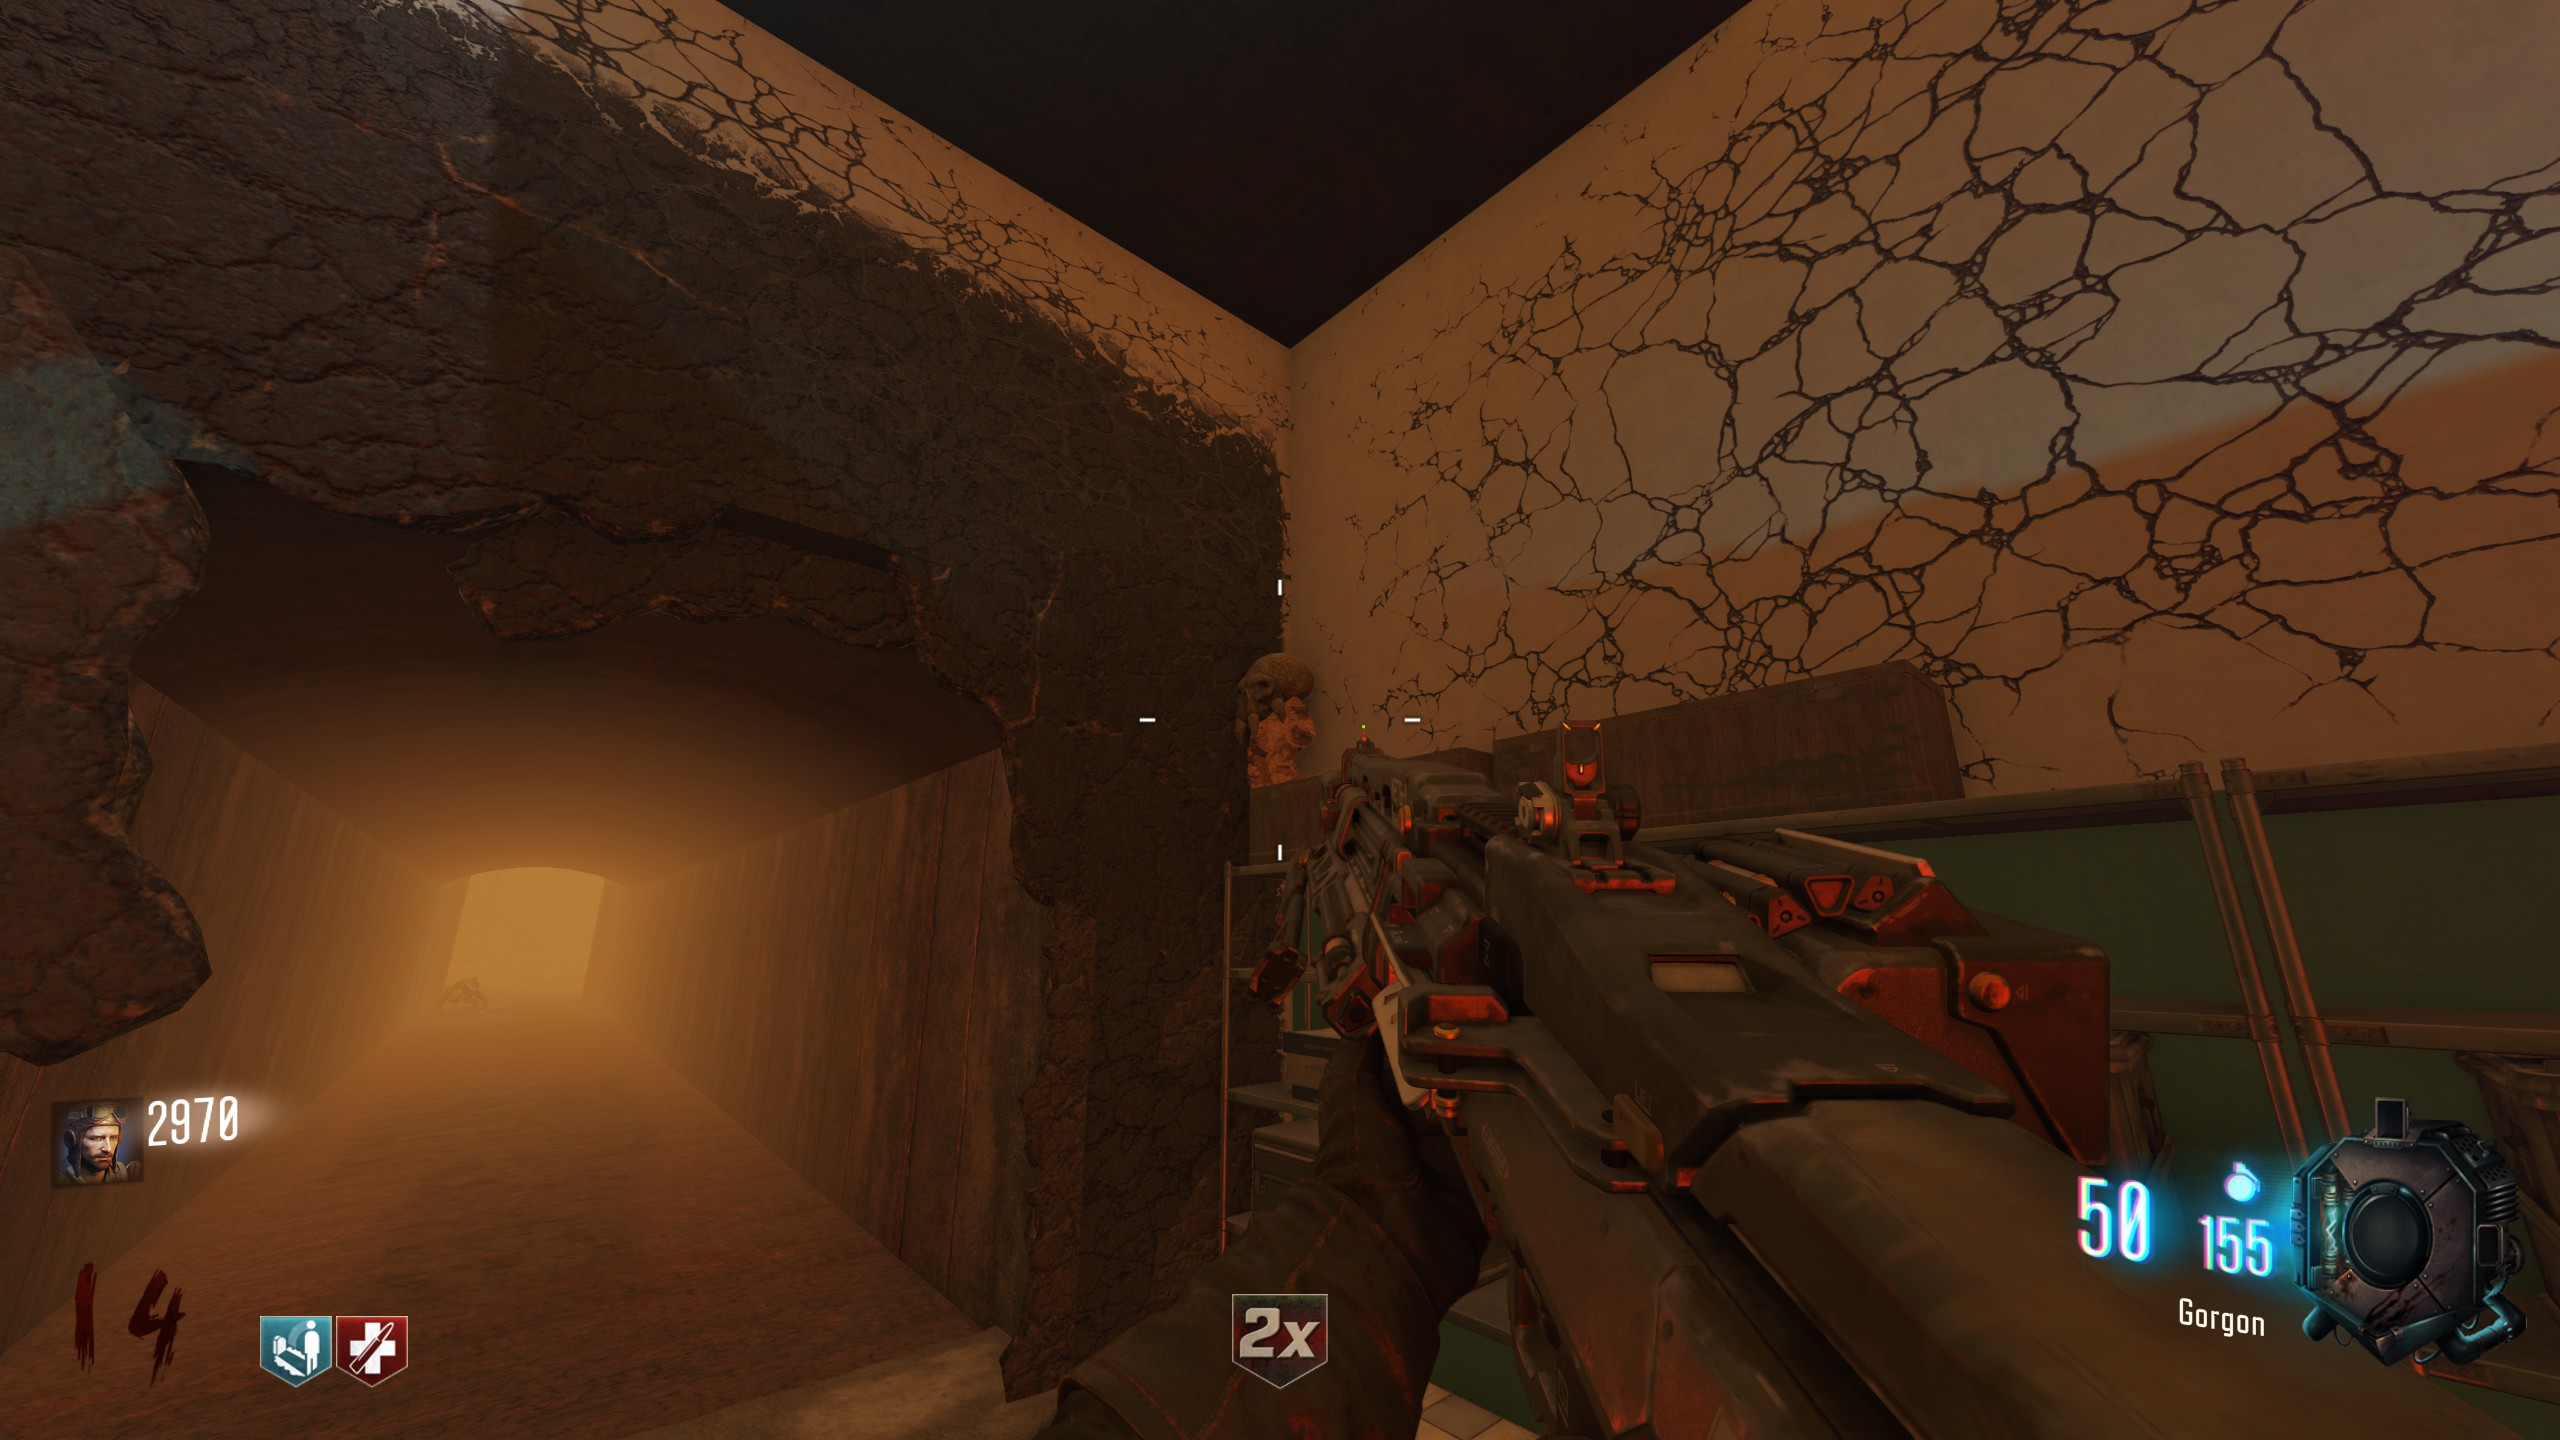
Immediately to the left when entering the room.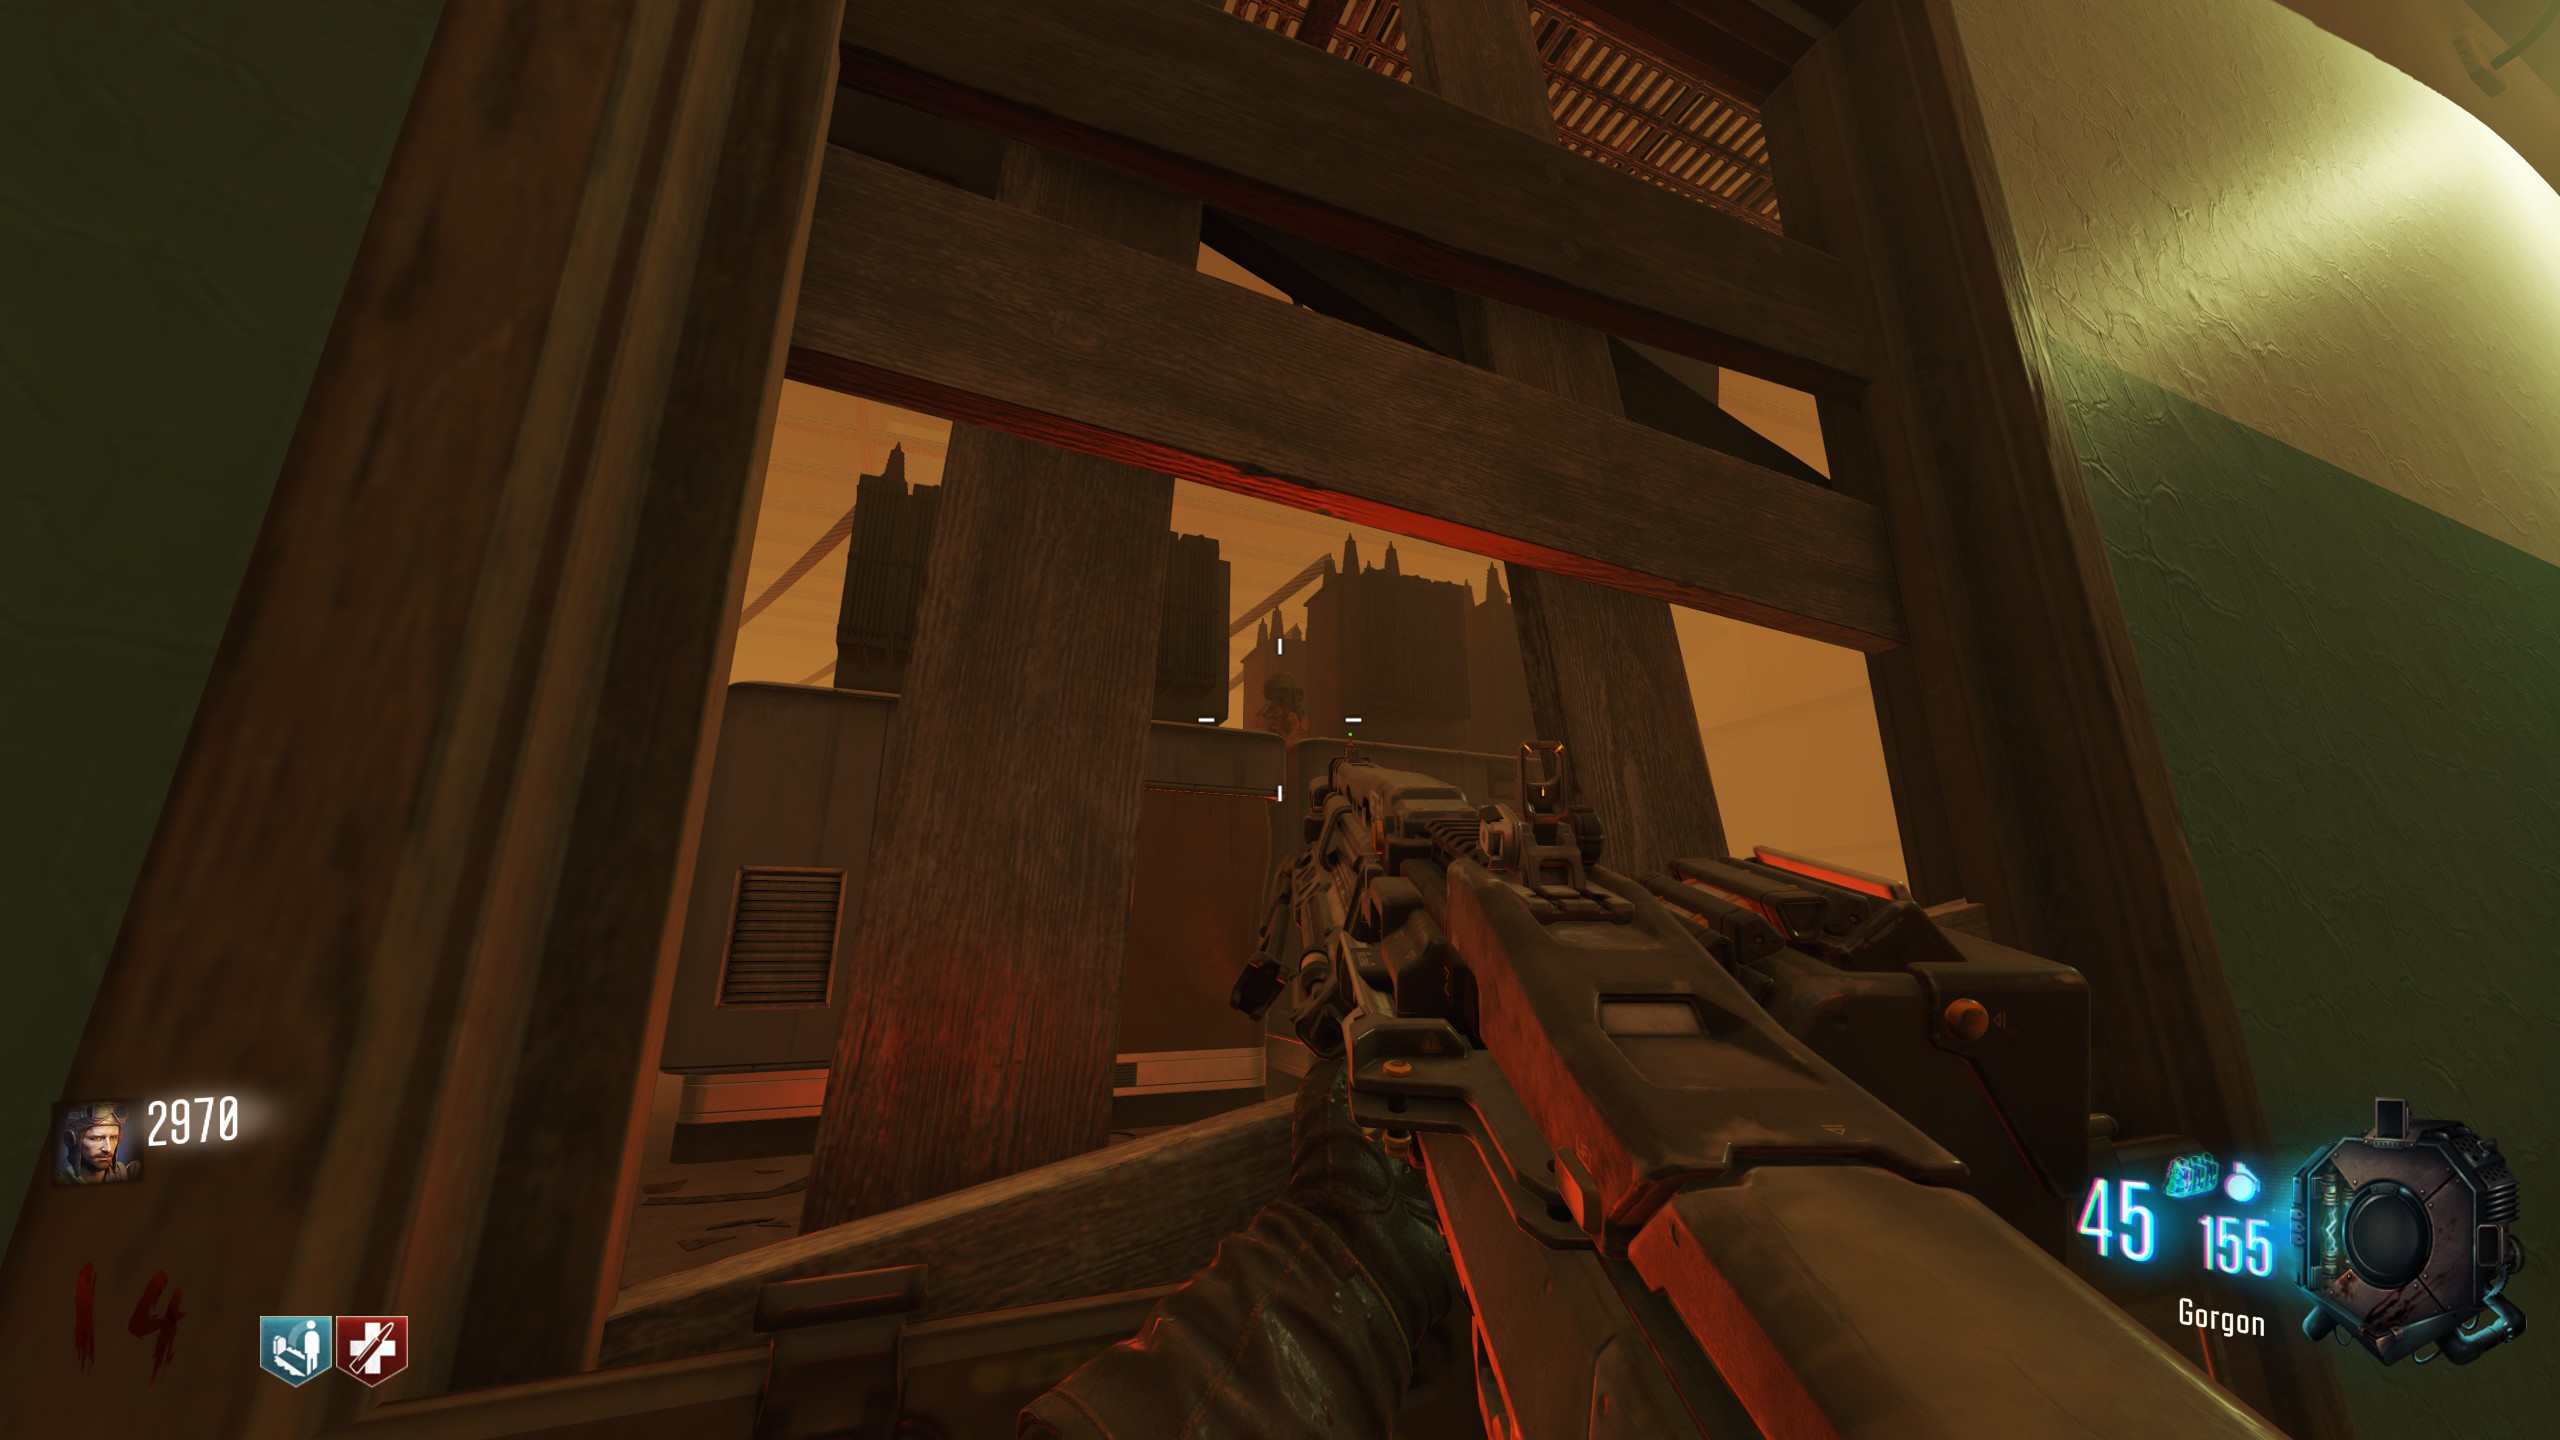
On a power unit immediately after a barricade.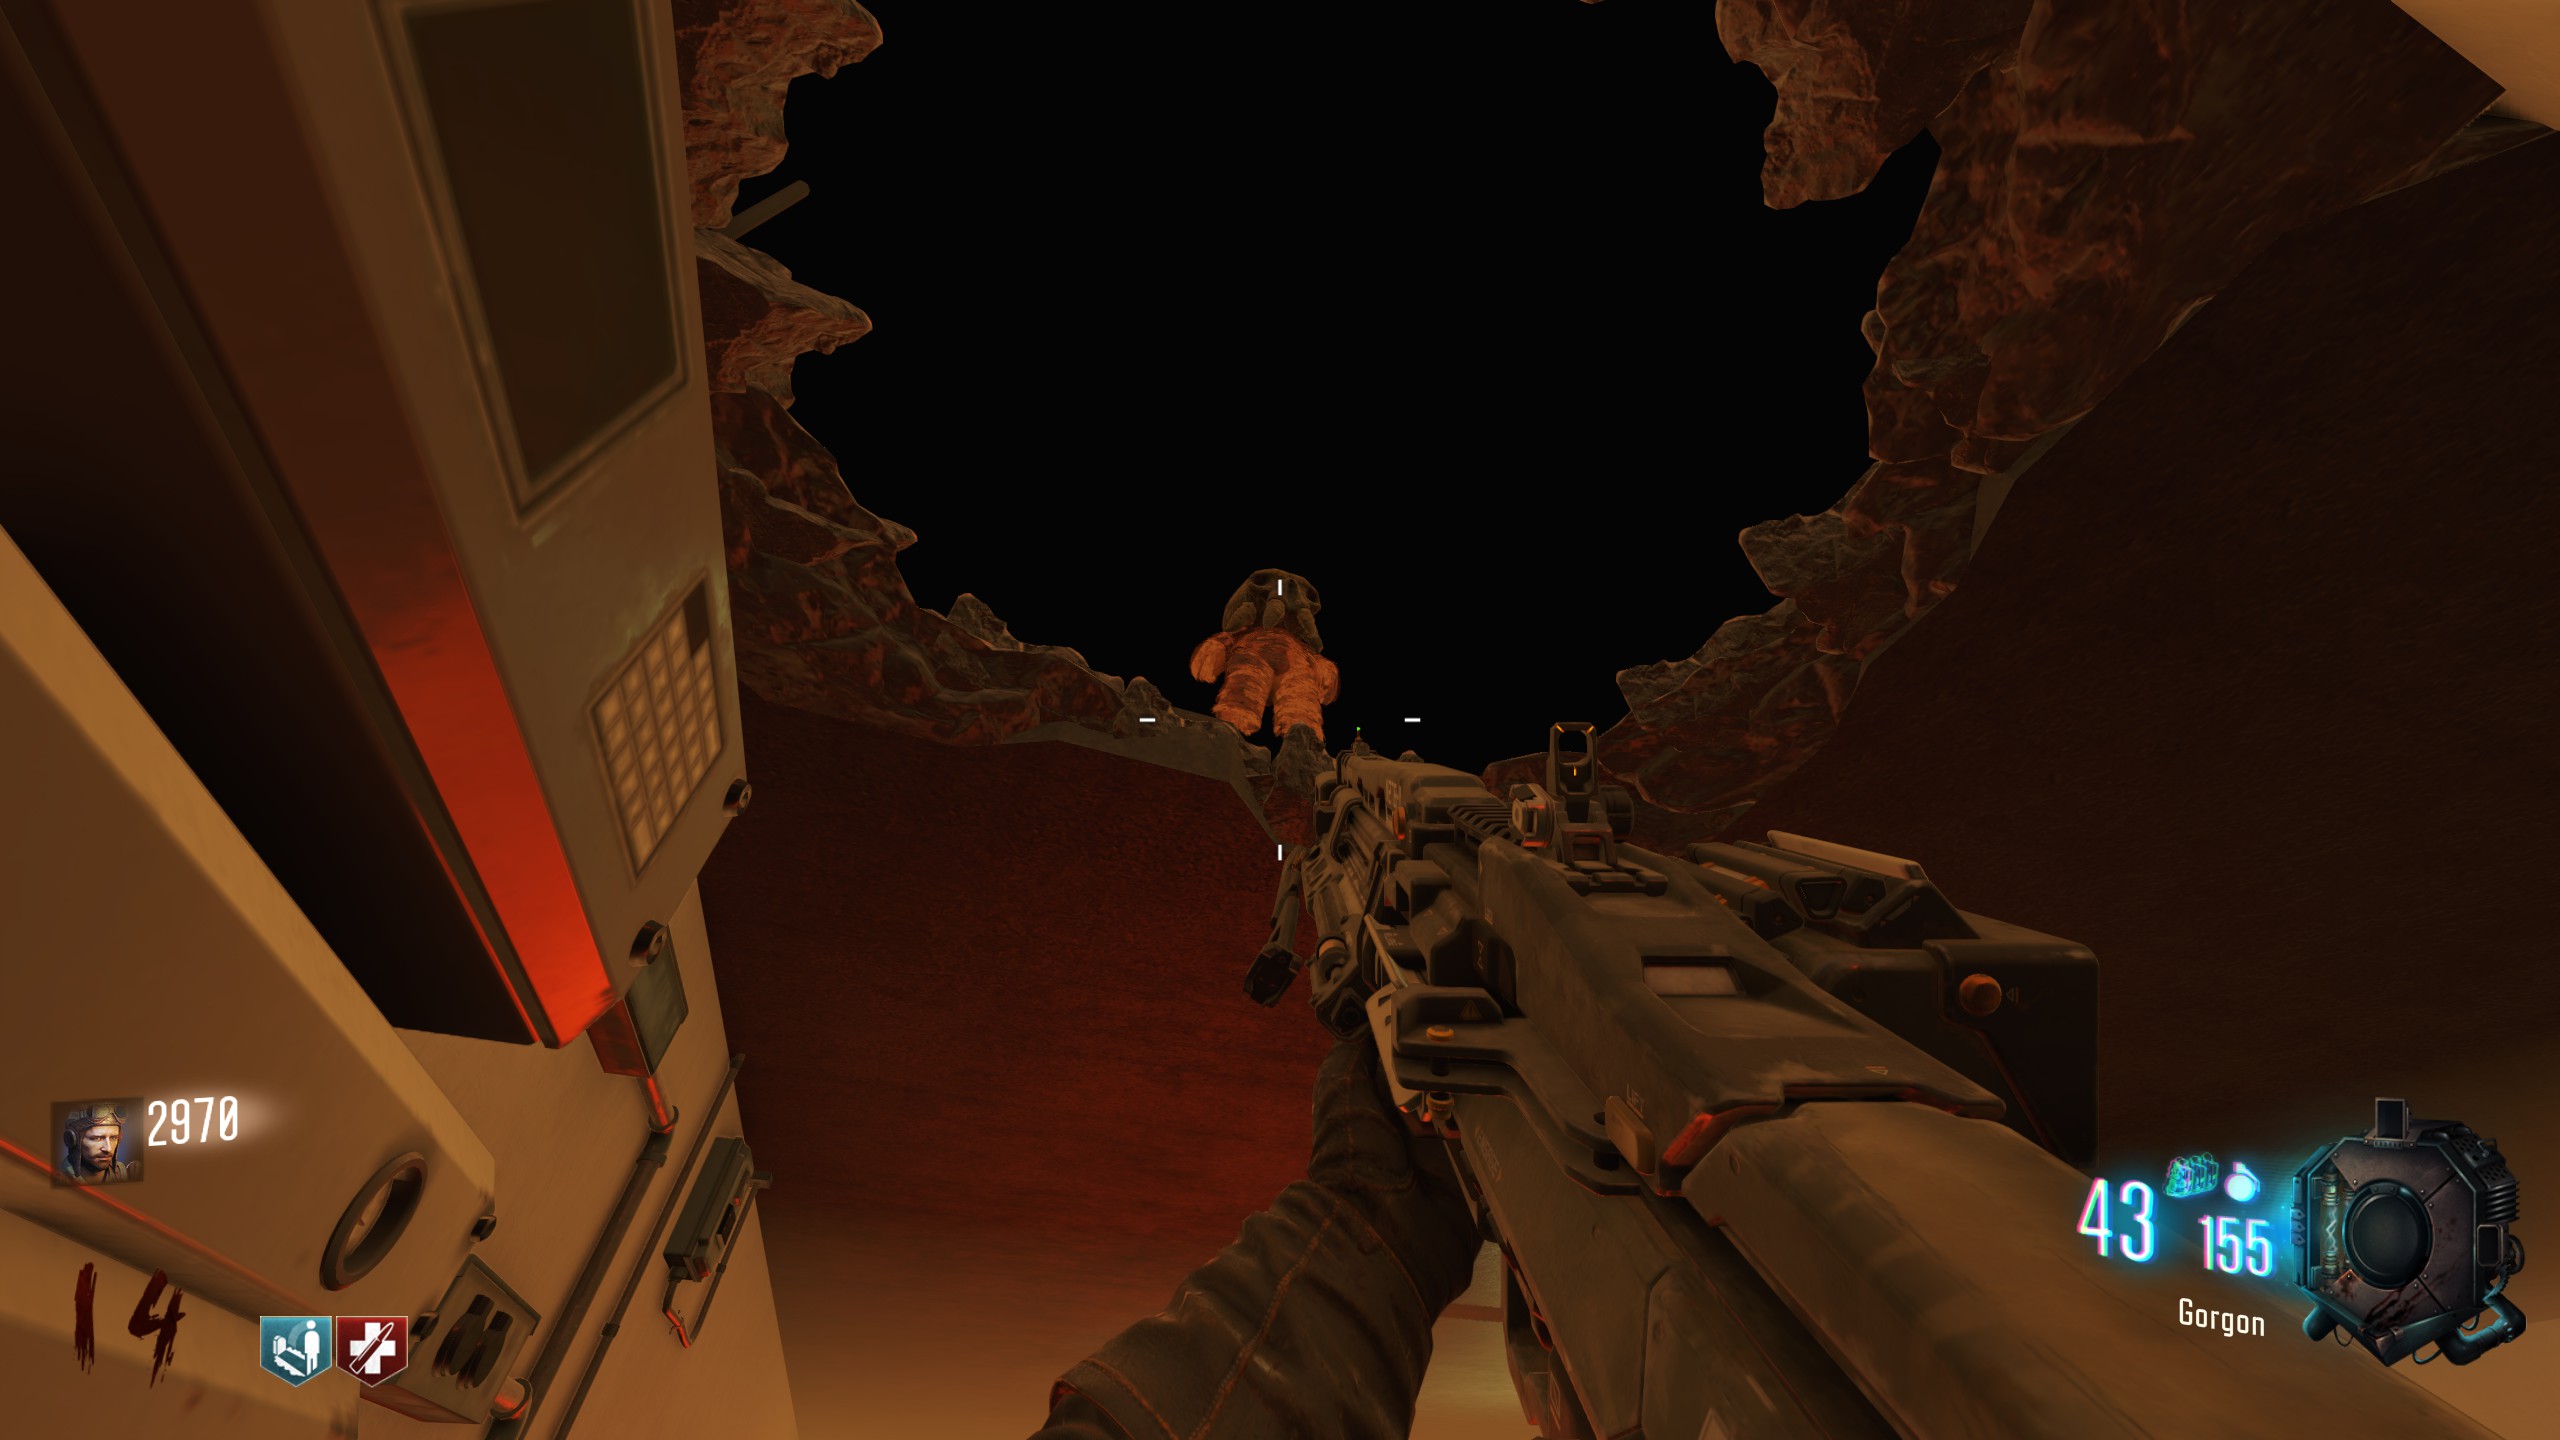
On the upper floor, in the black hole above the room.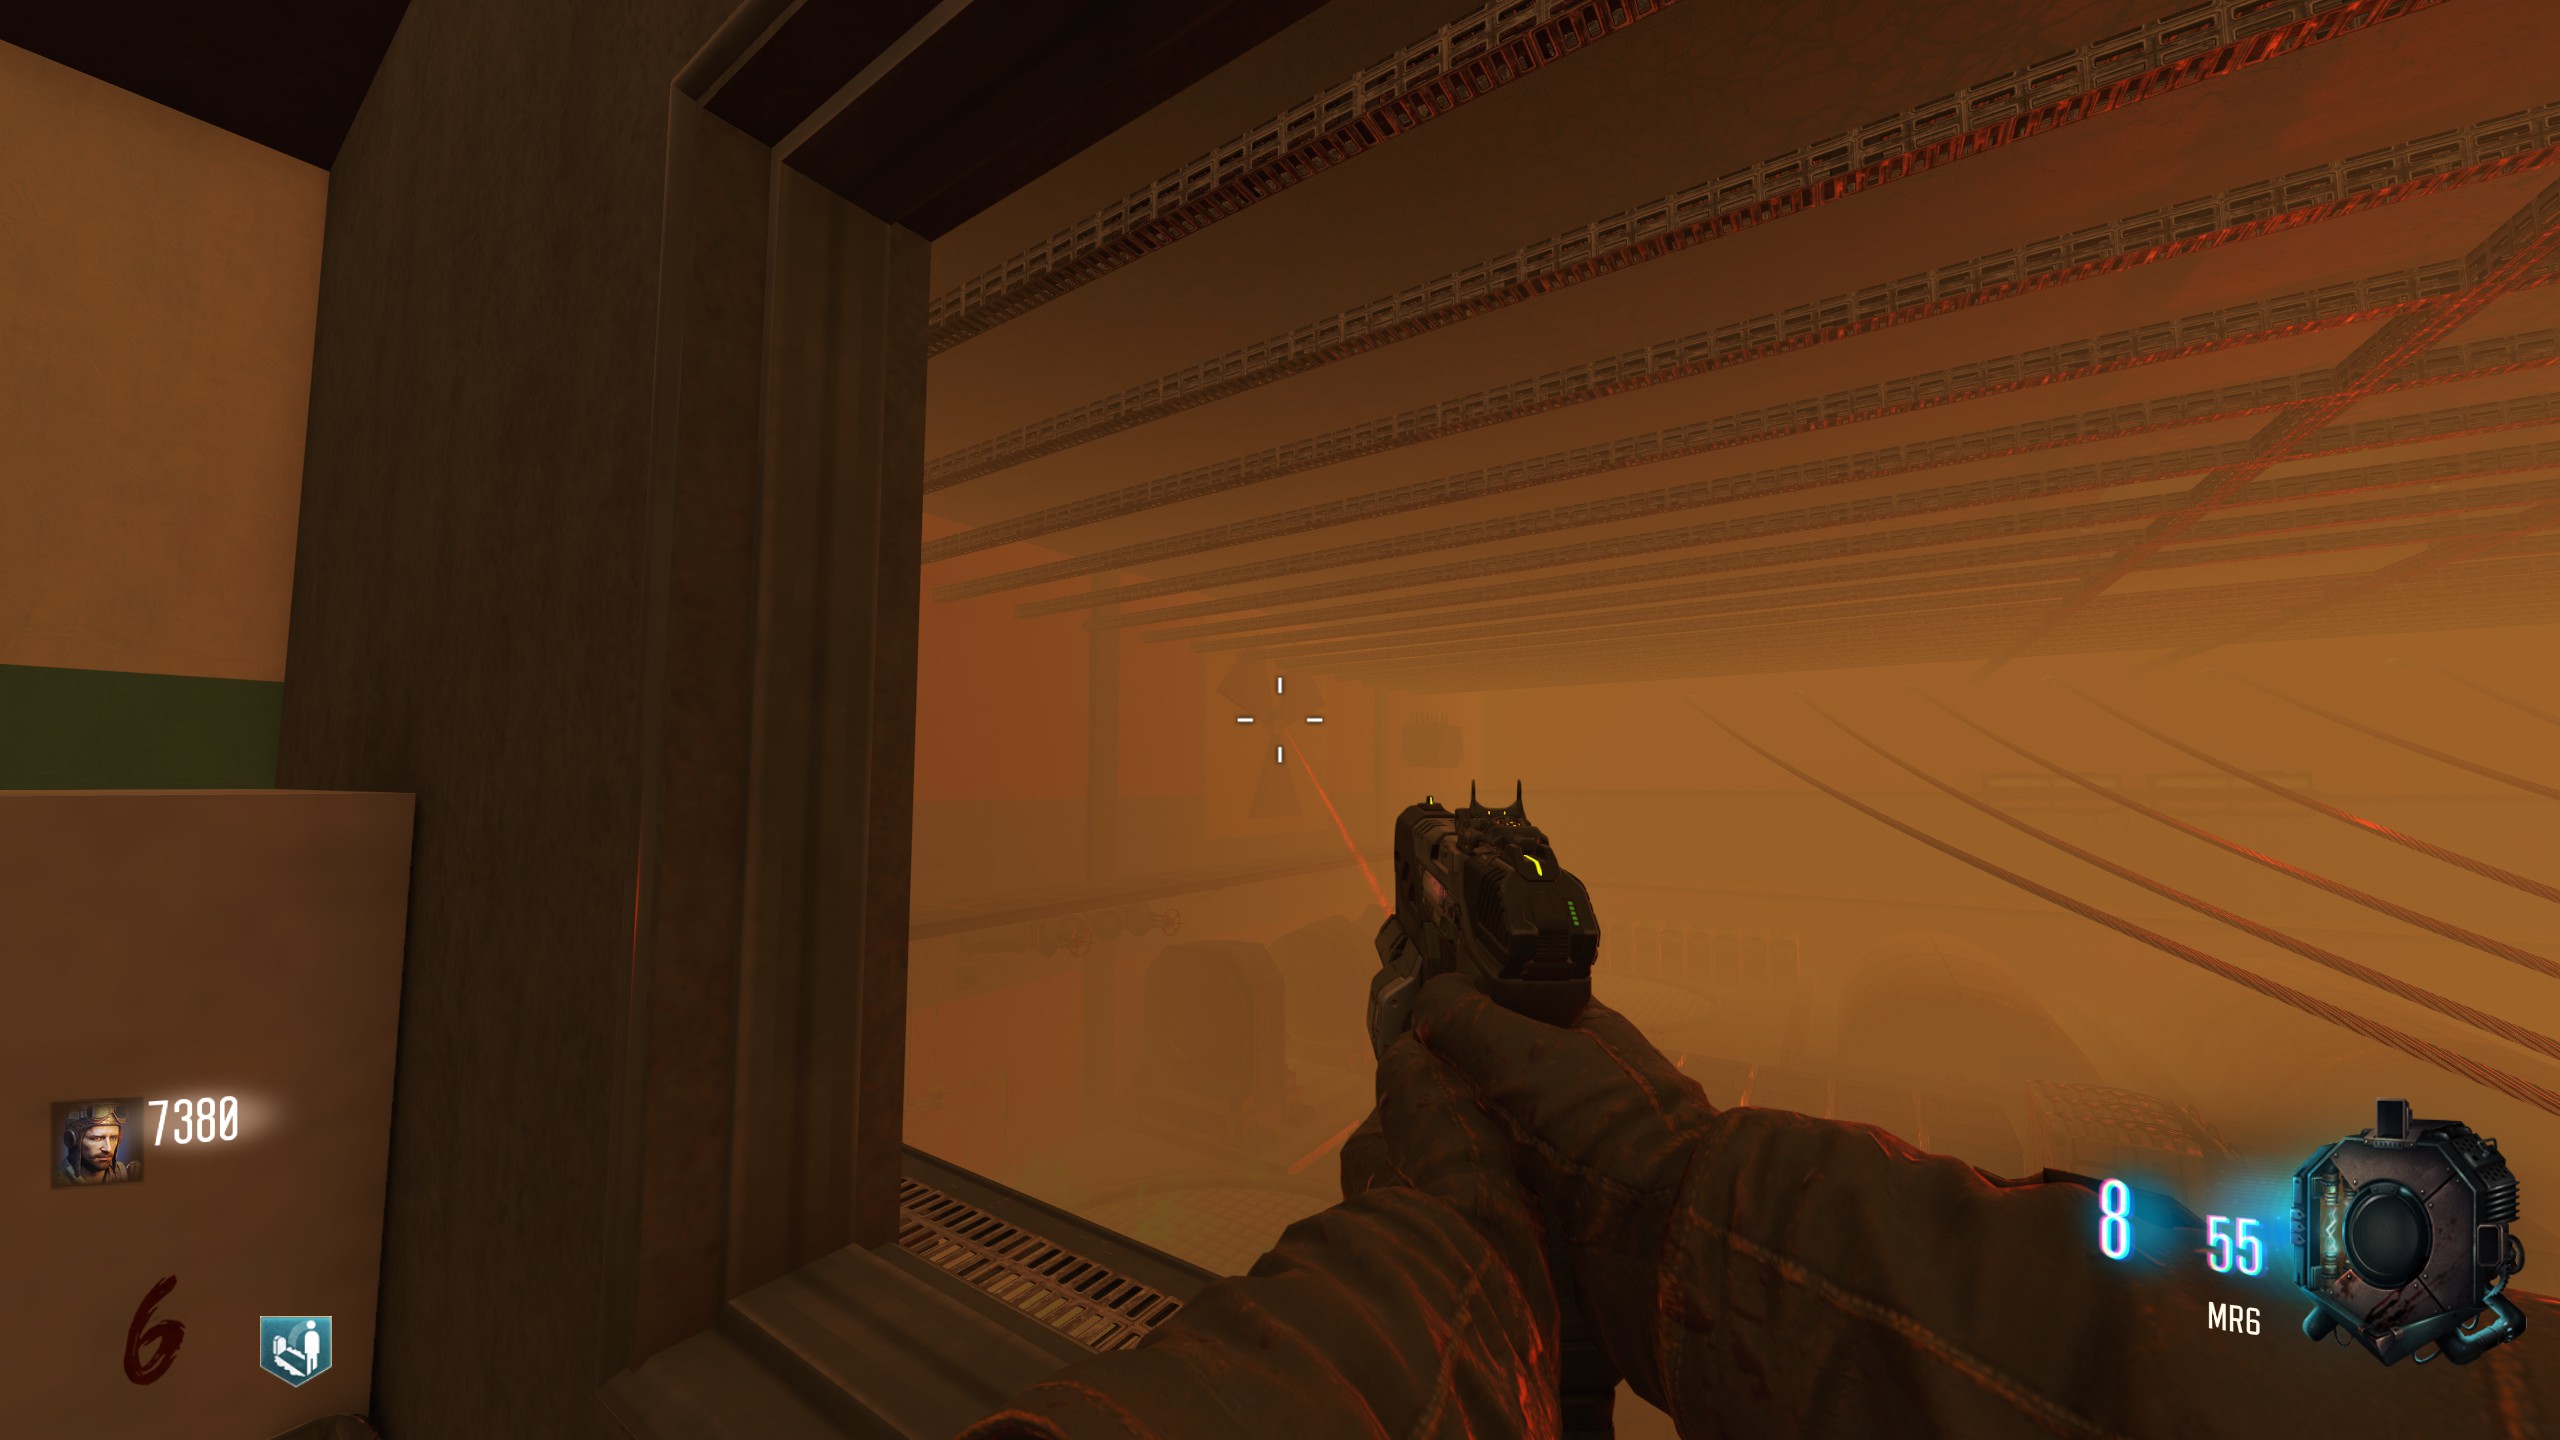
At the centre of the left-hand nuclear warning sign, outside the playable area.
To 'activate' the teddy bear, it must receive damage, i.e. from a knife, bullet or grenade. Teddy bears disappear when damaged, and a pop-up will advise how many players have found in this match. An additional message appears every 4 teddy bear activations (4, 8, 12, 16 & 20).
For every 4 teddy bears that are activated, an upgrade is applied to the match for all players. These are:
- 4: Max Ammo drops reload magazines in the weapons
- 8: the buyable ending is unlocked and available for purchase
- 12: the chance of receiving a perk from the piano increases from 10% to 33%
- 16: monkey bombs are added to the player inventory
- 20: grenades (including monkey bombs) generate an additional effect on explosion, forcing surviving zombies to remain in place temporarily and zapping them.
Outside
Location 1
Past the first barrier, between two red skip bins.
Location 2
Past the first barrier, inside the second-storey window of the inaccessible building.
Location 3
Past the first barrier, beside the green lamppost outside the inaccessible building.
Location 4
Past the first barrier, in a ruined car past the power building.
Location 5
Past the second outdoor barrier, atop an electricity spire past the power building to the left. Can also be shot from the spawn area.
Location 6
Past the second outdoor barrier, immediately past the inaccessible building on the right.
Location 7
Past the first barrier, above the door to the underground section.
Underground
Location 1
Immediately past the barrier leading into the underground section.
Location 2
Just outside of the first circular room, on a desk. Visible after entering from the room with Deadshot Daiquiri.
Location 3
Just outside of the first circular room, on a desk. Visible from the side of the room leading to the second circular room.
Location 4
In the room connecting the circular rooms, behind a barricade.
Location 5
Inside the second circular room, beneath the one-way ramp.
Location 6
Inside the second circular room, beneath the upper floor and across from Double Tap.
Location 7
In the room linking the second circular room and the power building, behind a barricade.
Power Building
Location 1
At the open roof of the building, beyond the teleporter housing Pack-a-Punch and above the stairwell leading into the power building. Can also be shot from the spawn area.
Location 2
Beyond the teleporter housing Pack-a-Punch and above the stairwell leading into the power building.
'Chernobyl'
Location 1
Immediately to the left when entering the room.
Location 2
On a power unit immediately after a barricade.
Location 3
On the upper floor, in the black hole above the room.
Location 4
At the centre of the left-hand nuclear warning sign, outside the playable area.
Piano Perk Dispenser
On the upper level of the power building, there is a piano that will play a random Perk-a-Cola jingle for 1,000 points. After the jingle ends, there is a 10% chance for the relevant perk to be granted to the player; this chance increases to 33% for the match's duration once 12 teddy bears have been hit.
Helpfully, this feature can be used when a player has 4 perks already, allowing them to bypass the limit.
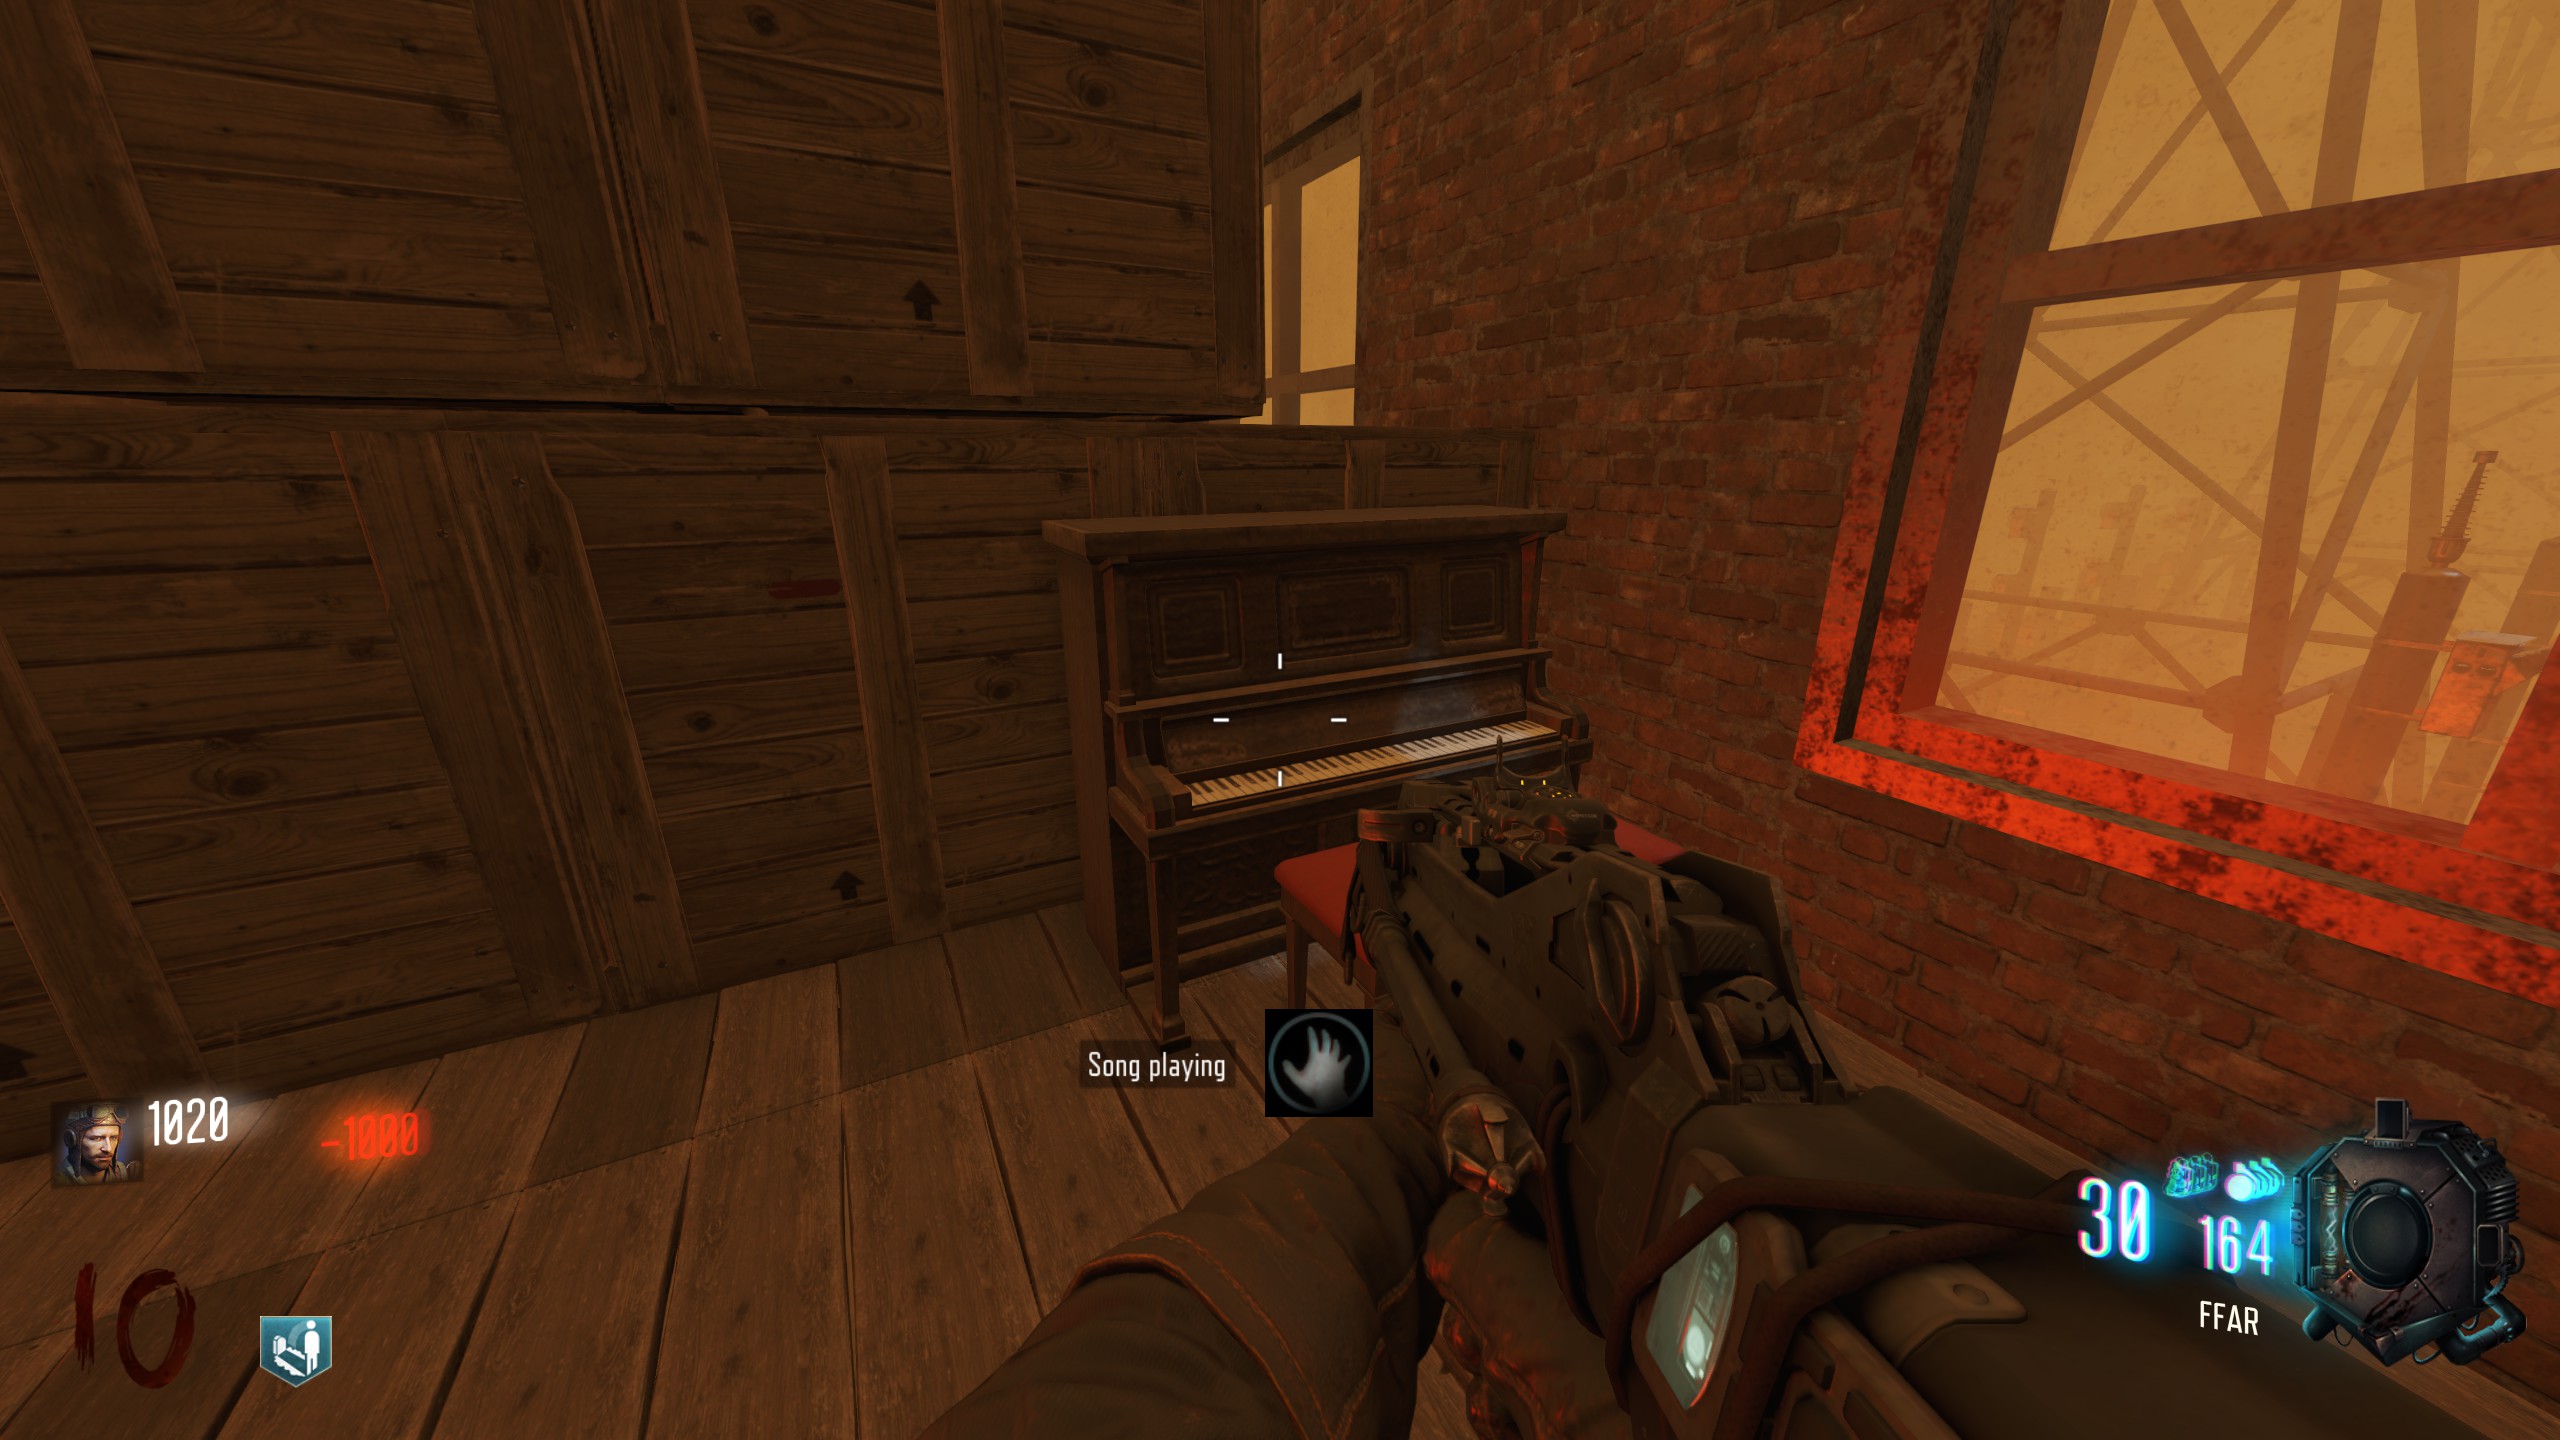
Helpfully, this feature can be used when a player has 4 perks already, allowing them to bypass the limit.
Piano location
Buyable Ending
The map contains a buyable ending, unlocked by hitting 8 of the teddy bears on the map. The cost of the buyable ending is exactly 50,000 points; a player with any amount of points other than 50,000 is unable to purchase it.
Location
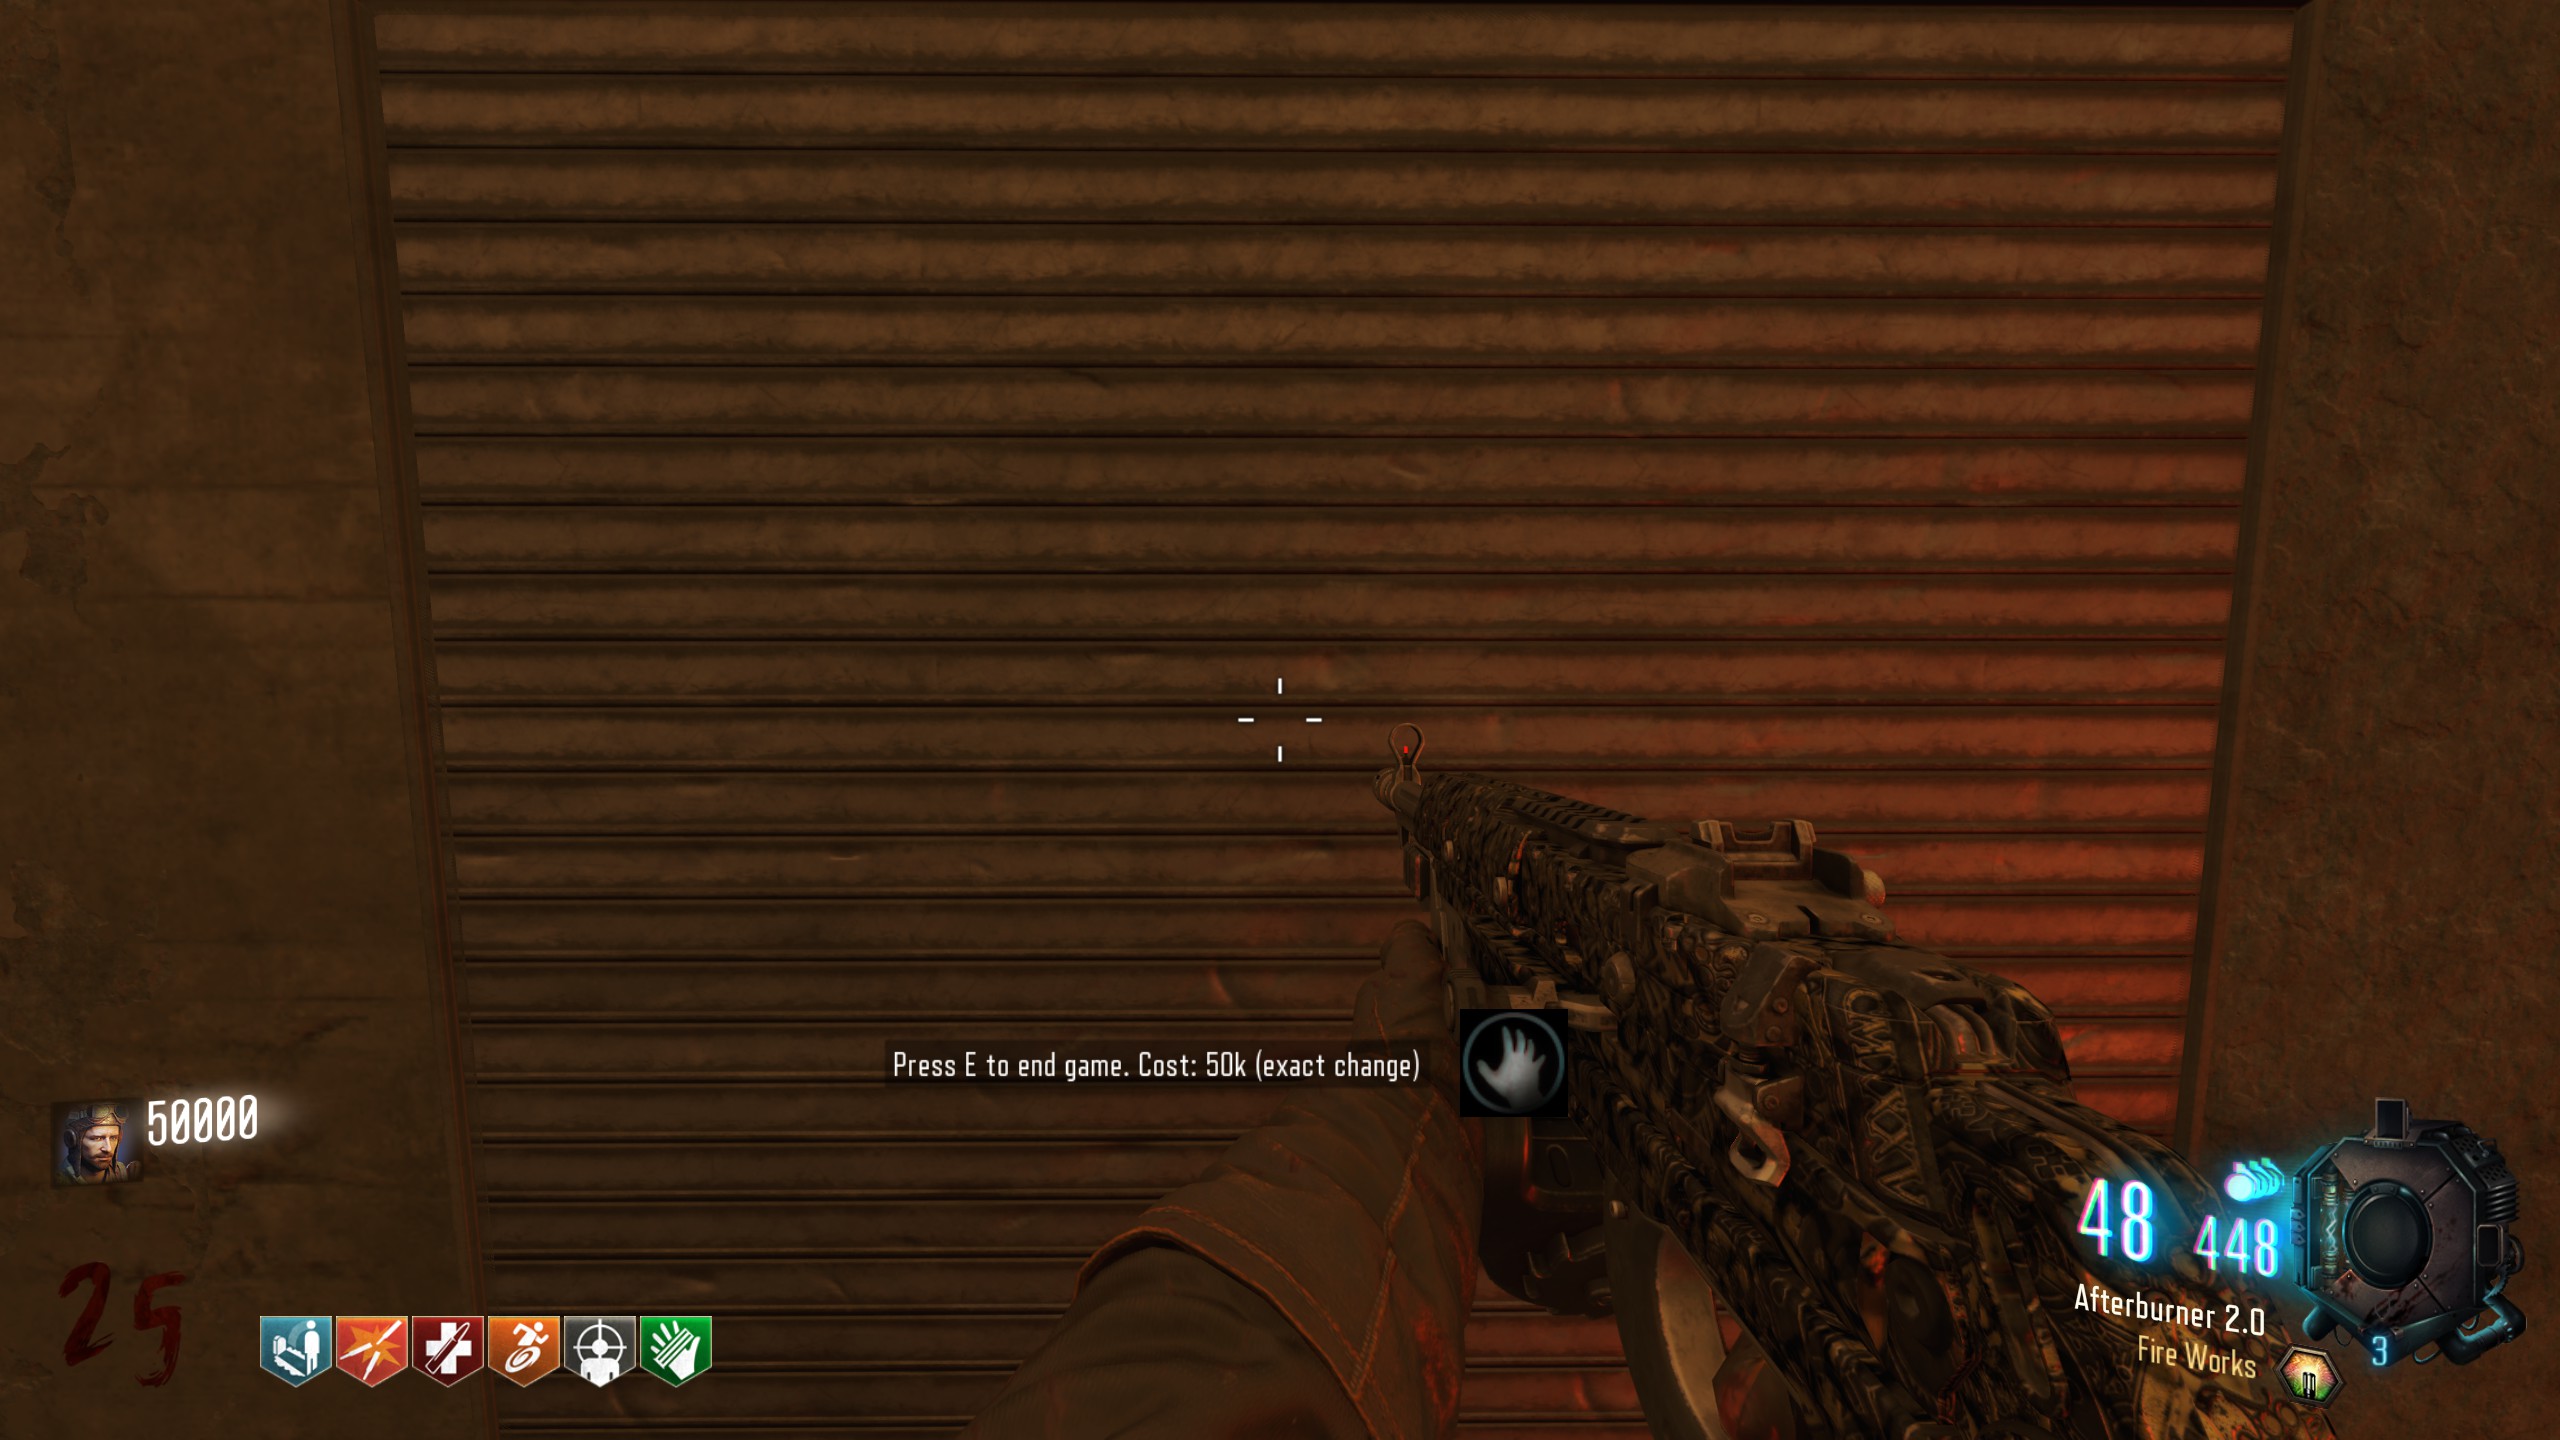
Past the second outdoor barrier, on the right-hand side.
Buyable ending screen
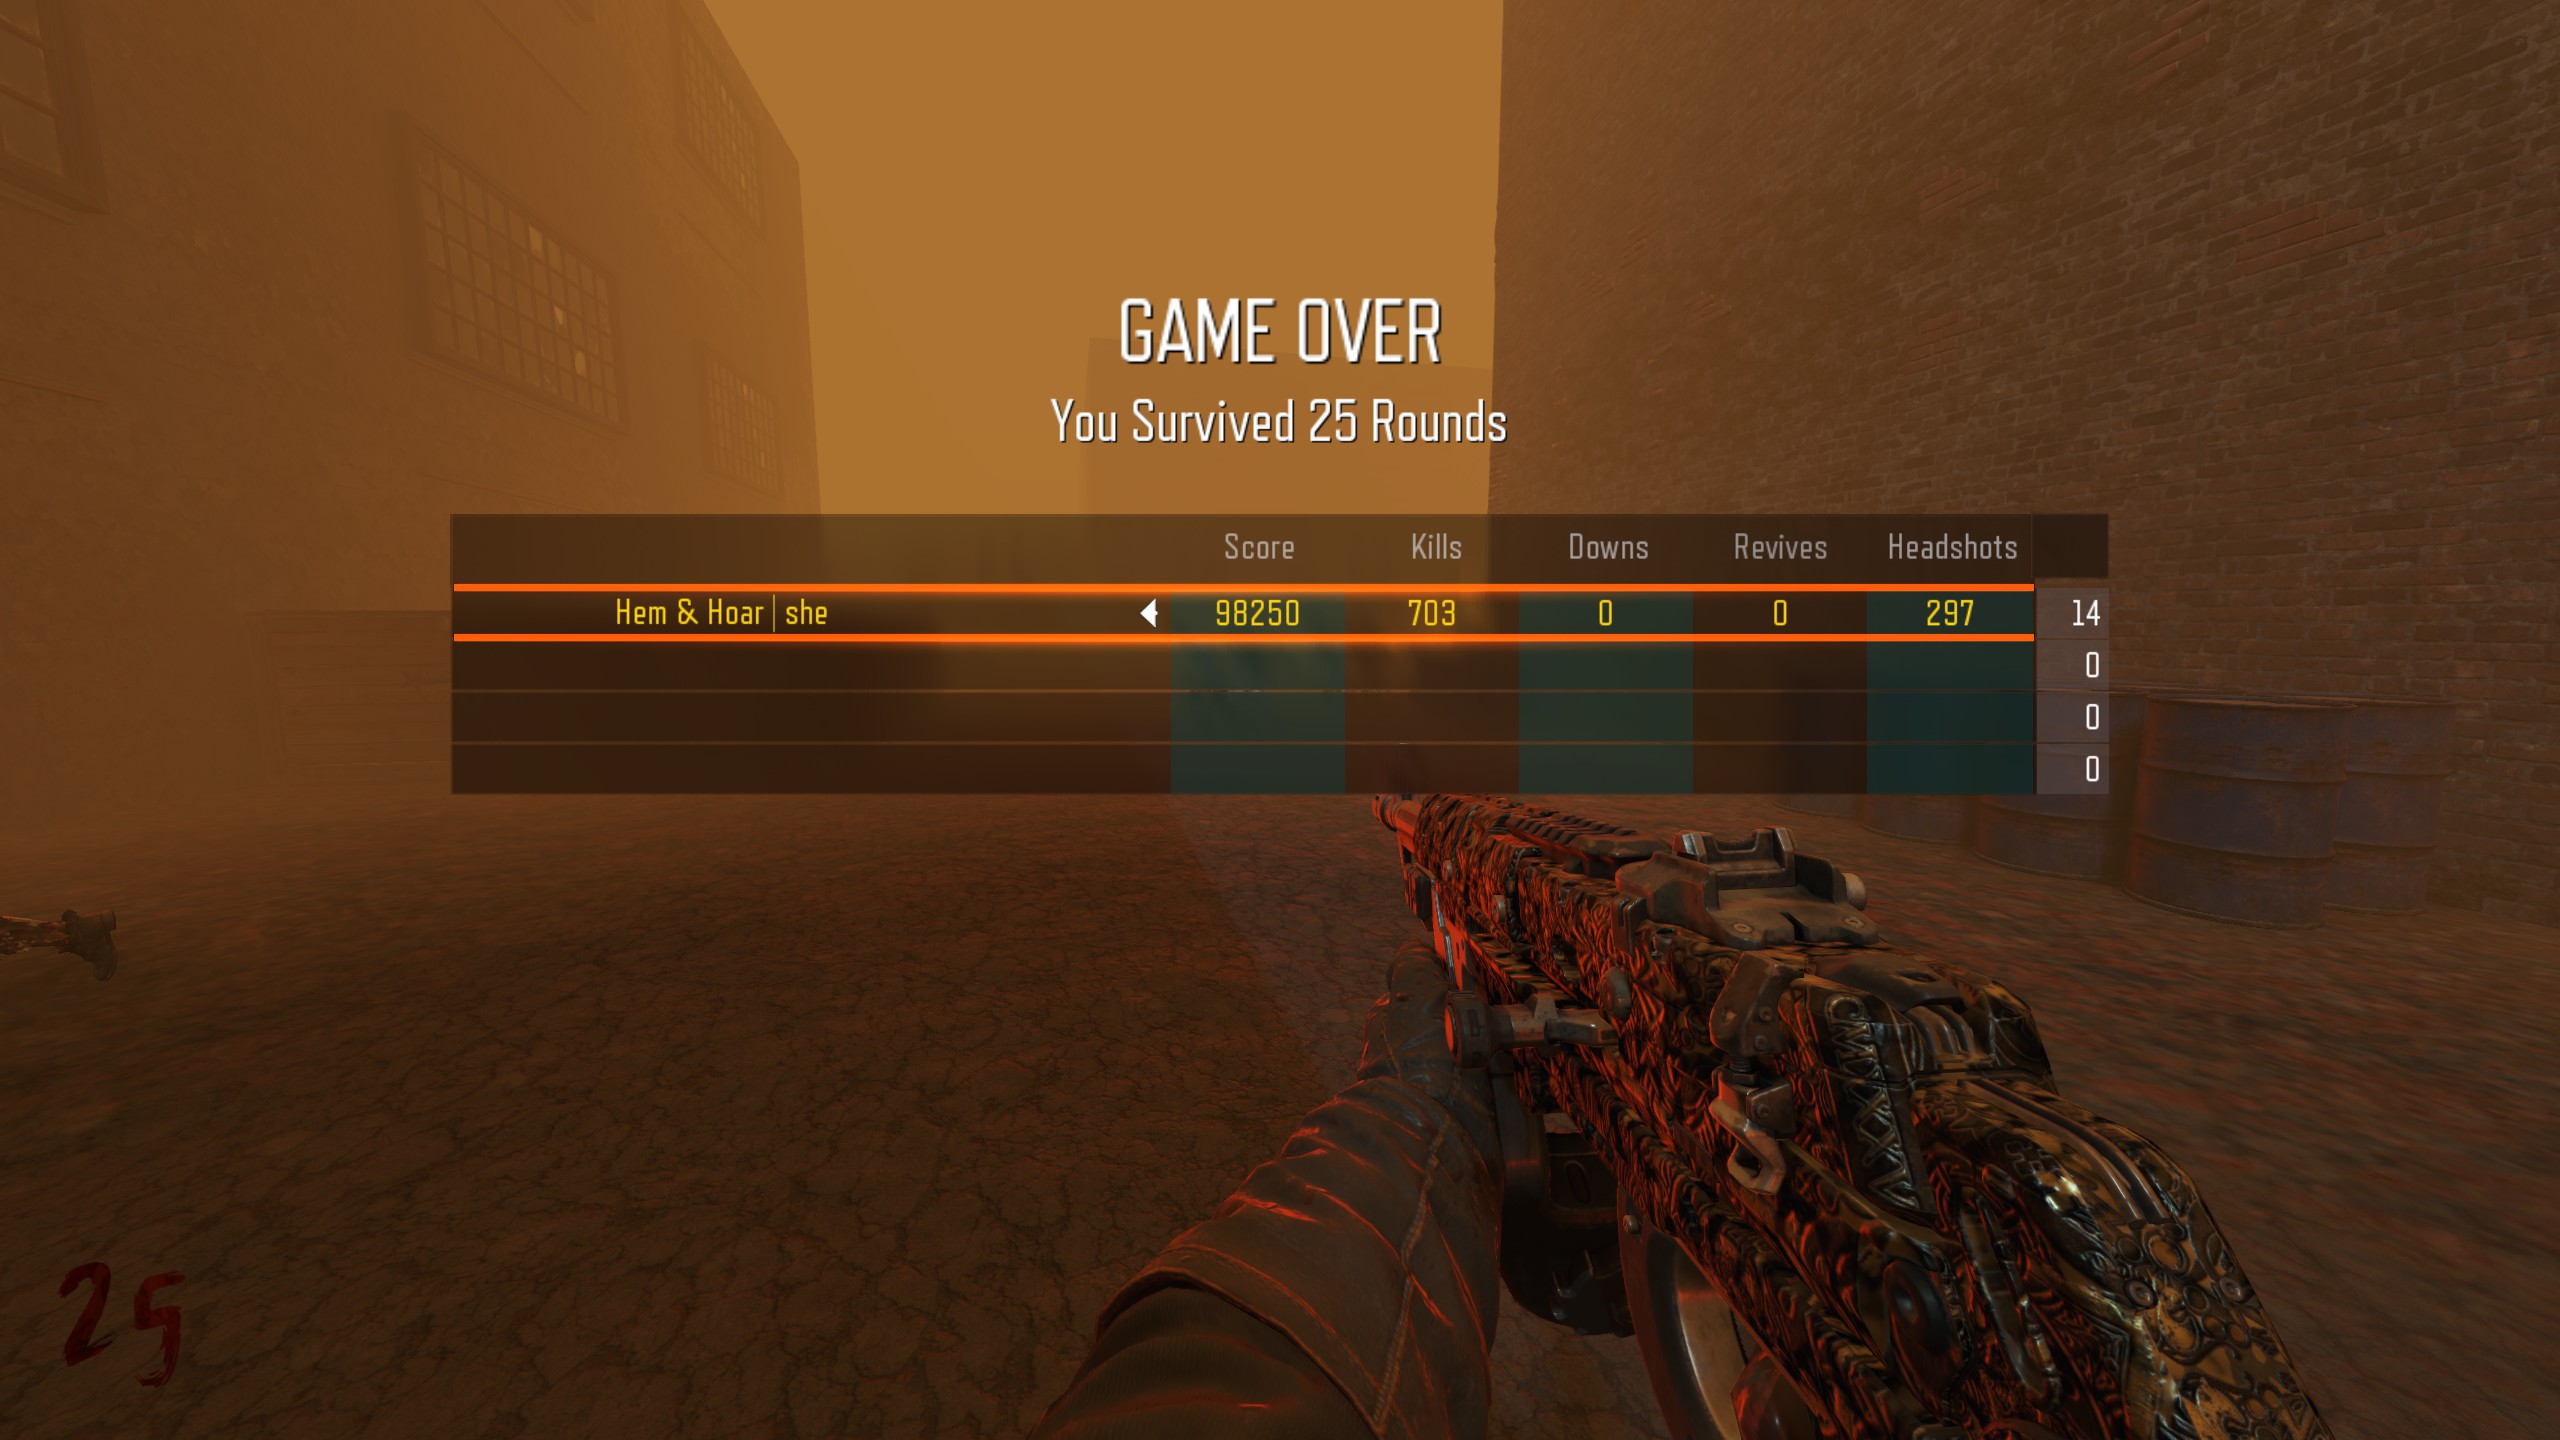
More Call of Duty: Black Ops III guides
- All Around Enhancement Mod Description And Info★ 5 (597)211k views1.2k ♥34 minUpdated Aug 10, 2023
- Black Ops 3: Console Commands★ 5 (1.1k)123k views2.4k ♥7 minUpdated Feb 13, 2020
- Origins Ultimate Guide★ 5 (562)72k views1.7k ♥17 minUpdated Jun 24, 2017
- Guide for Shadows of Evil [2020 updated]★ 5 (1.4k)67k views4.5k ♥24 minUpdated Mar 22, 2024
- Guide for Der Eisendrache [2020 updated]★ 5 (1.3k)65k views4.6k ♥30 minUpdated Feb 22, 2024
- How to download the community T7patch by Serious and play online zombies safely (also FPS Fix)★ 5 (491)62k views1.2k ♥4 minUpdated Apr 30





🔥 Popular guides
- Upgrading to PremiumTeam Fortress 2★ 5 (20k)1441k views11k ♥6 minUpdated May 11, 2022
- No More Room in Hell Official ManualNo More Room in Hell★ 5 (2.8k)569k views2.1k ♥29 minUpdated Apr 22, 2019
- NMRiH Community Hosting GuidesNo More Room in Hell★ 5 (526)351k views653 ♥1 minUpdated Aug 10, 2022
- Лучшие кооперативные игры SteamPAYDAY 2★ 5 (1.5k)315k views2.1k ♥56 minRussianUpdated Apr 27, 2025
- Desert Eagle Heat Treated | Blue GemCounter-Strike 2★ 5 (1.6k)292k views1.5k ♥2 minUpdated Jan 16
- Treasure Hunt Puzzle SolutionsTotal War: WARHAMMER II★ 5 (6.9k)281k views15k ♥3 minUpdated Aug 19, 2021






This guide was created by its original author on the Steam Community. Are you the author and want it removed? Request removal.