Die Rise EE Guide
Step 0: Set-Up
Before we do anything, we're gonna need the maps two Buildables. i.e: The Trample-Steam and the Sliquifier.
The Trample-Steam's parts are located around the Spawn Area. With the Chicken Wire either being against the wall, past the first door. Or under the stairs next to the first door.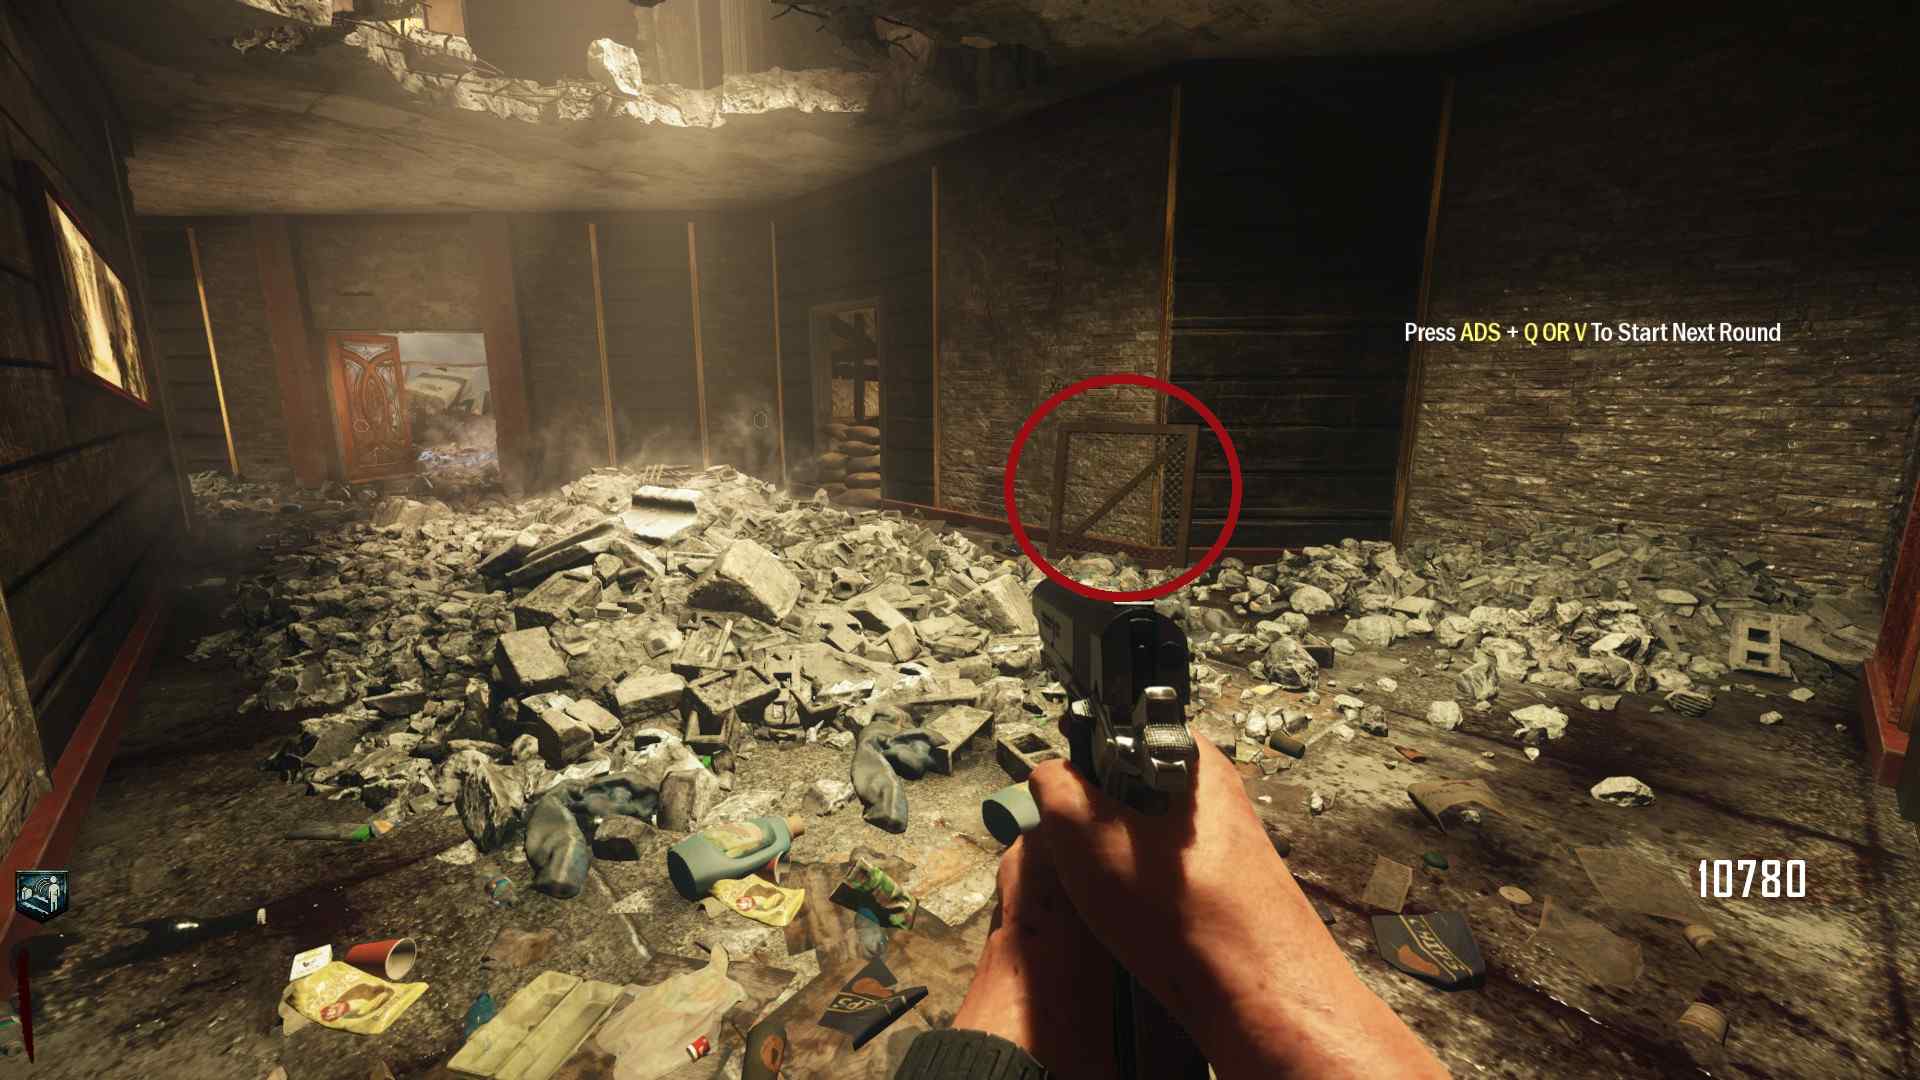
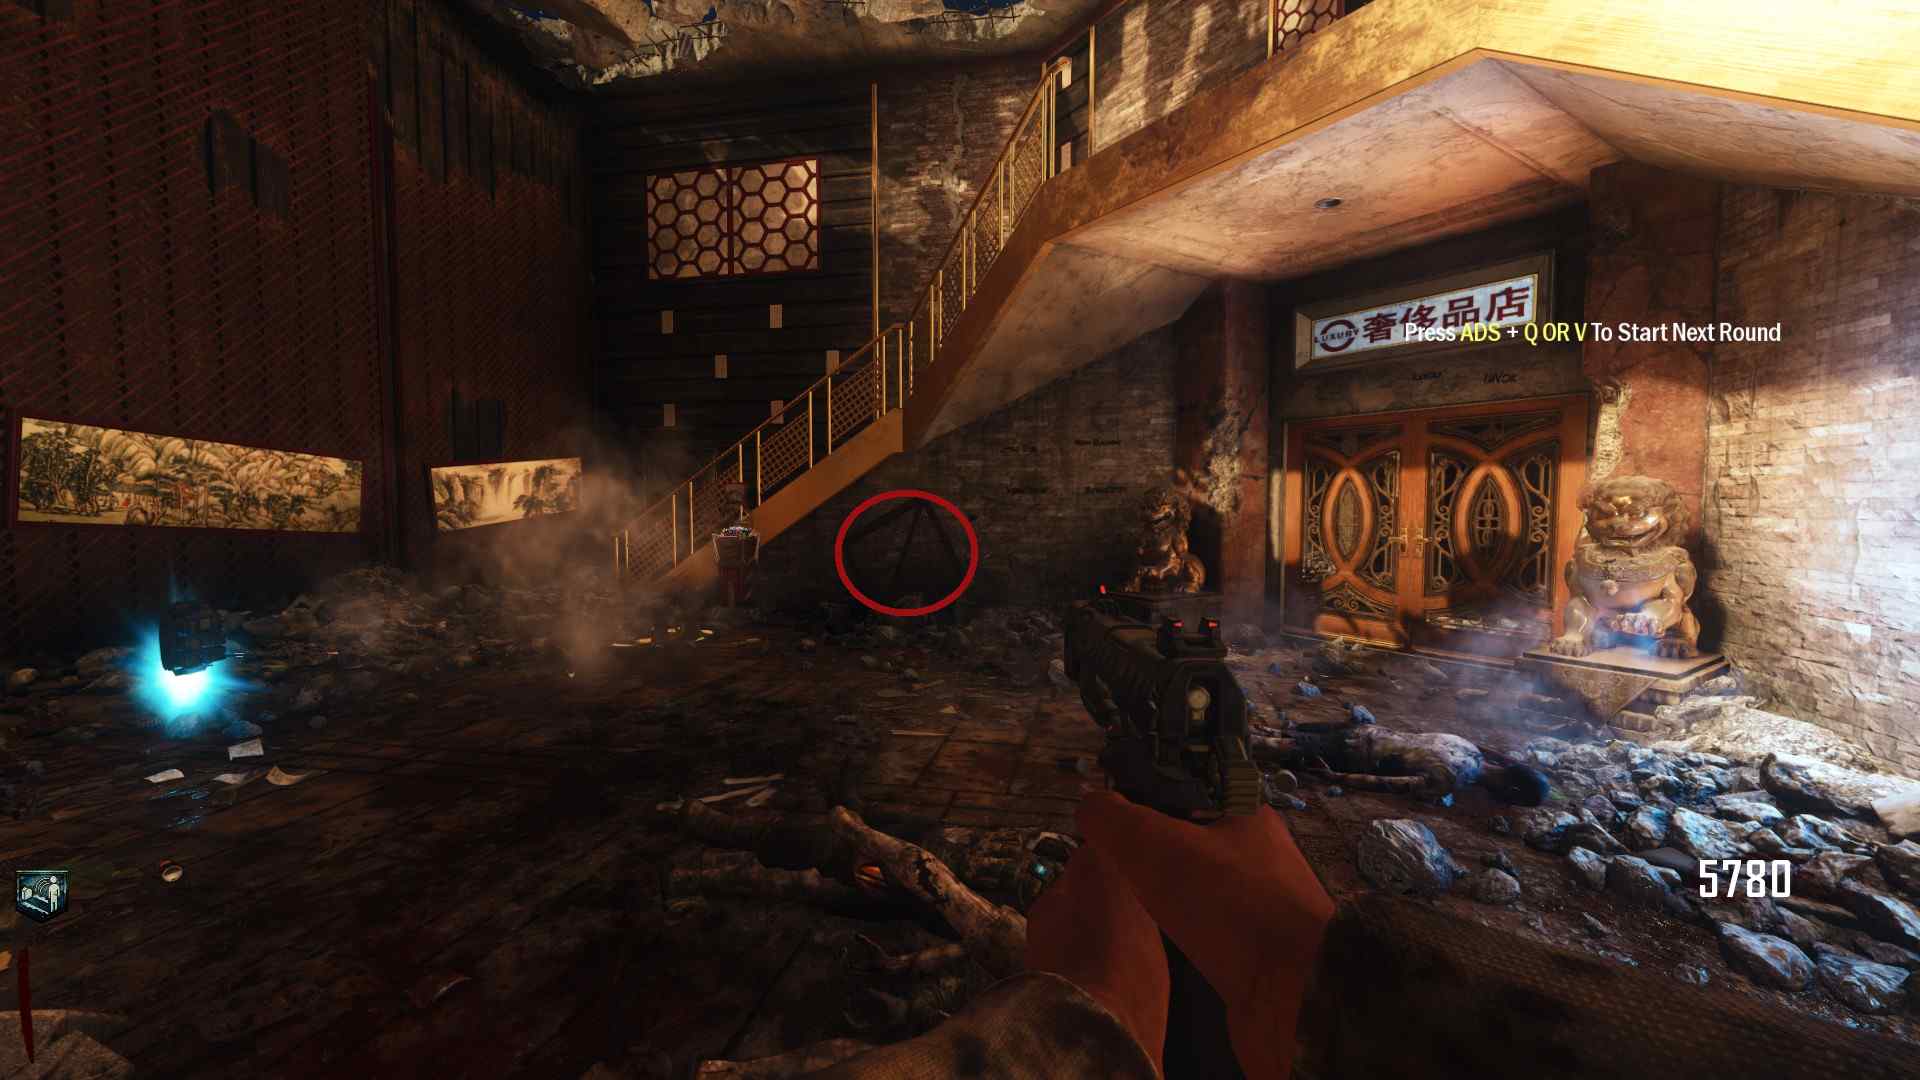 The Flag is either under the stairs in spawn or leaning on a railing past the first door.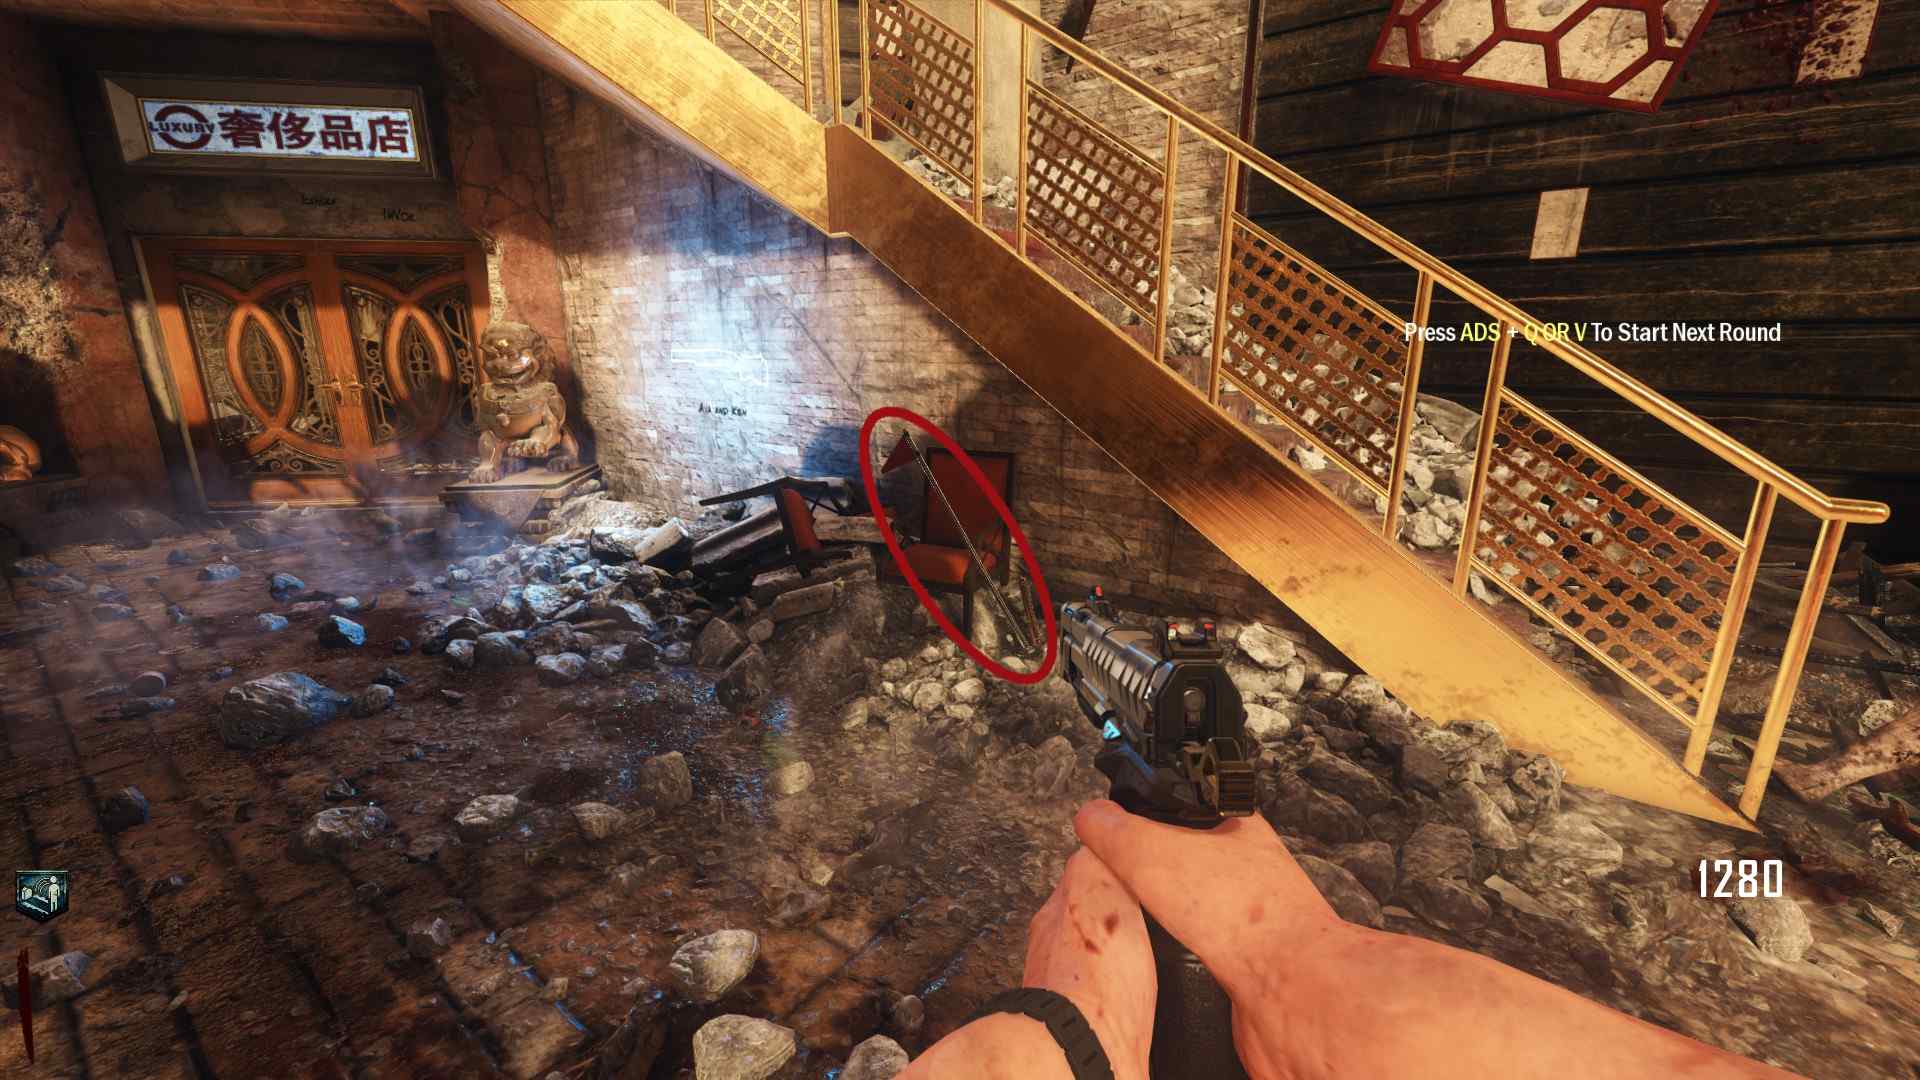
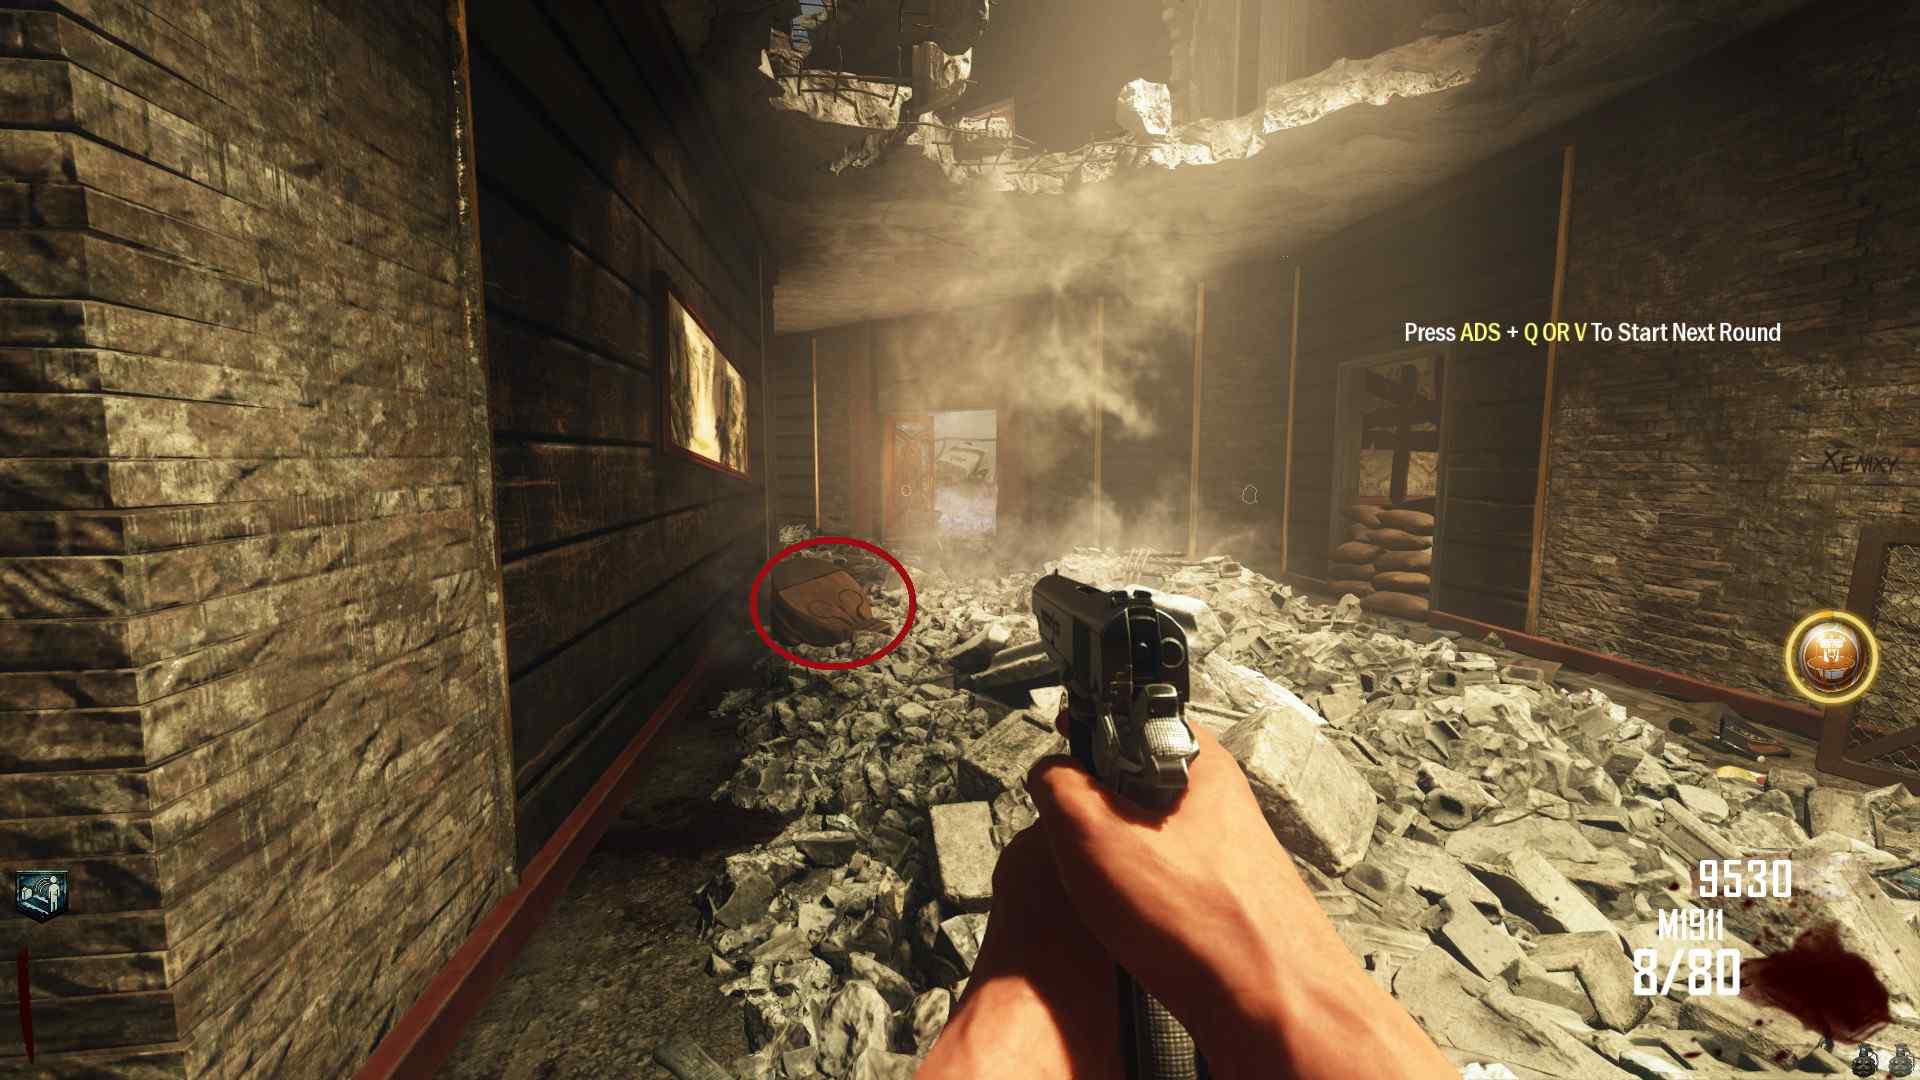
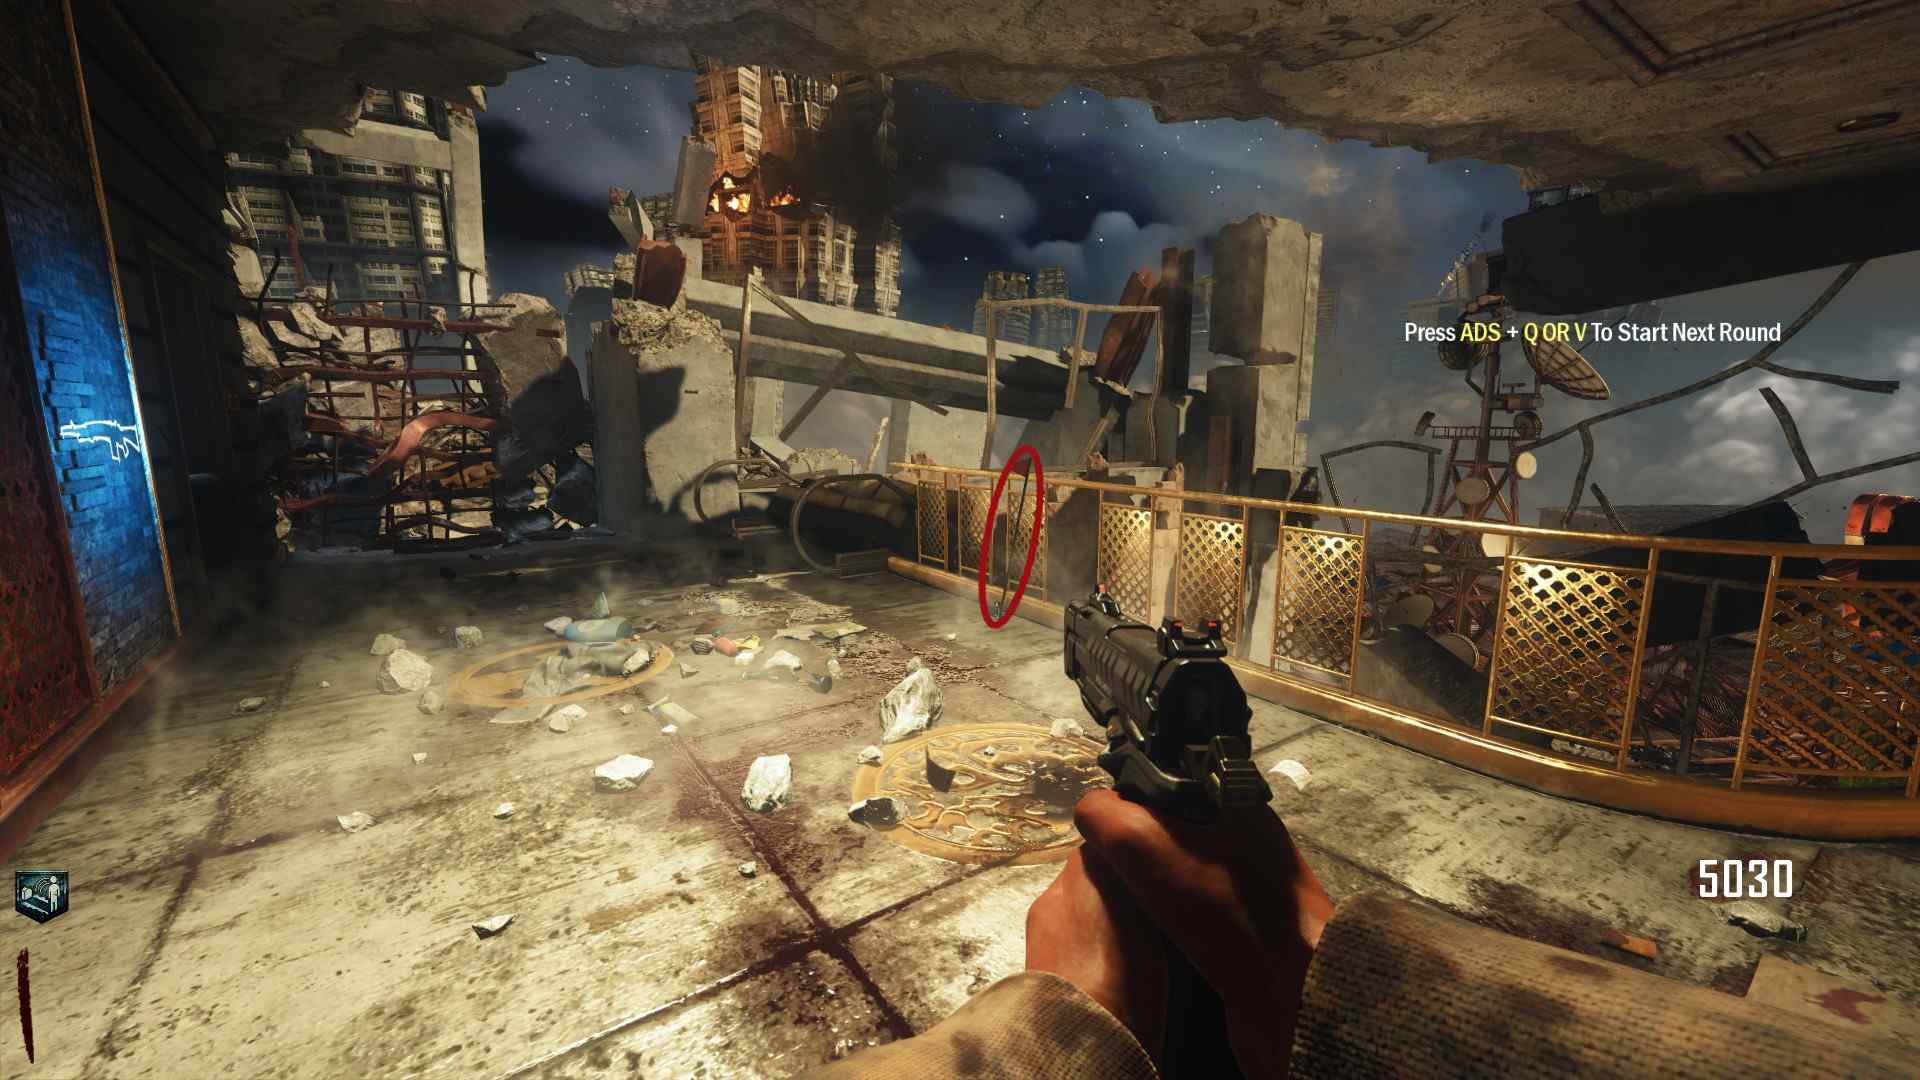 The Bellows are either on the stairs in spawn or in a hallway past the first door.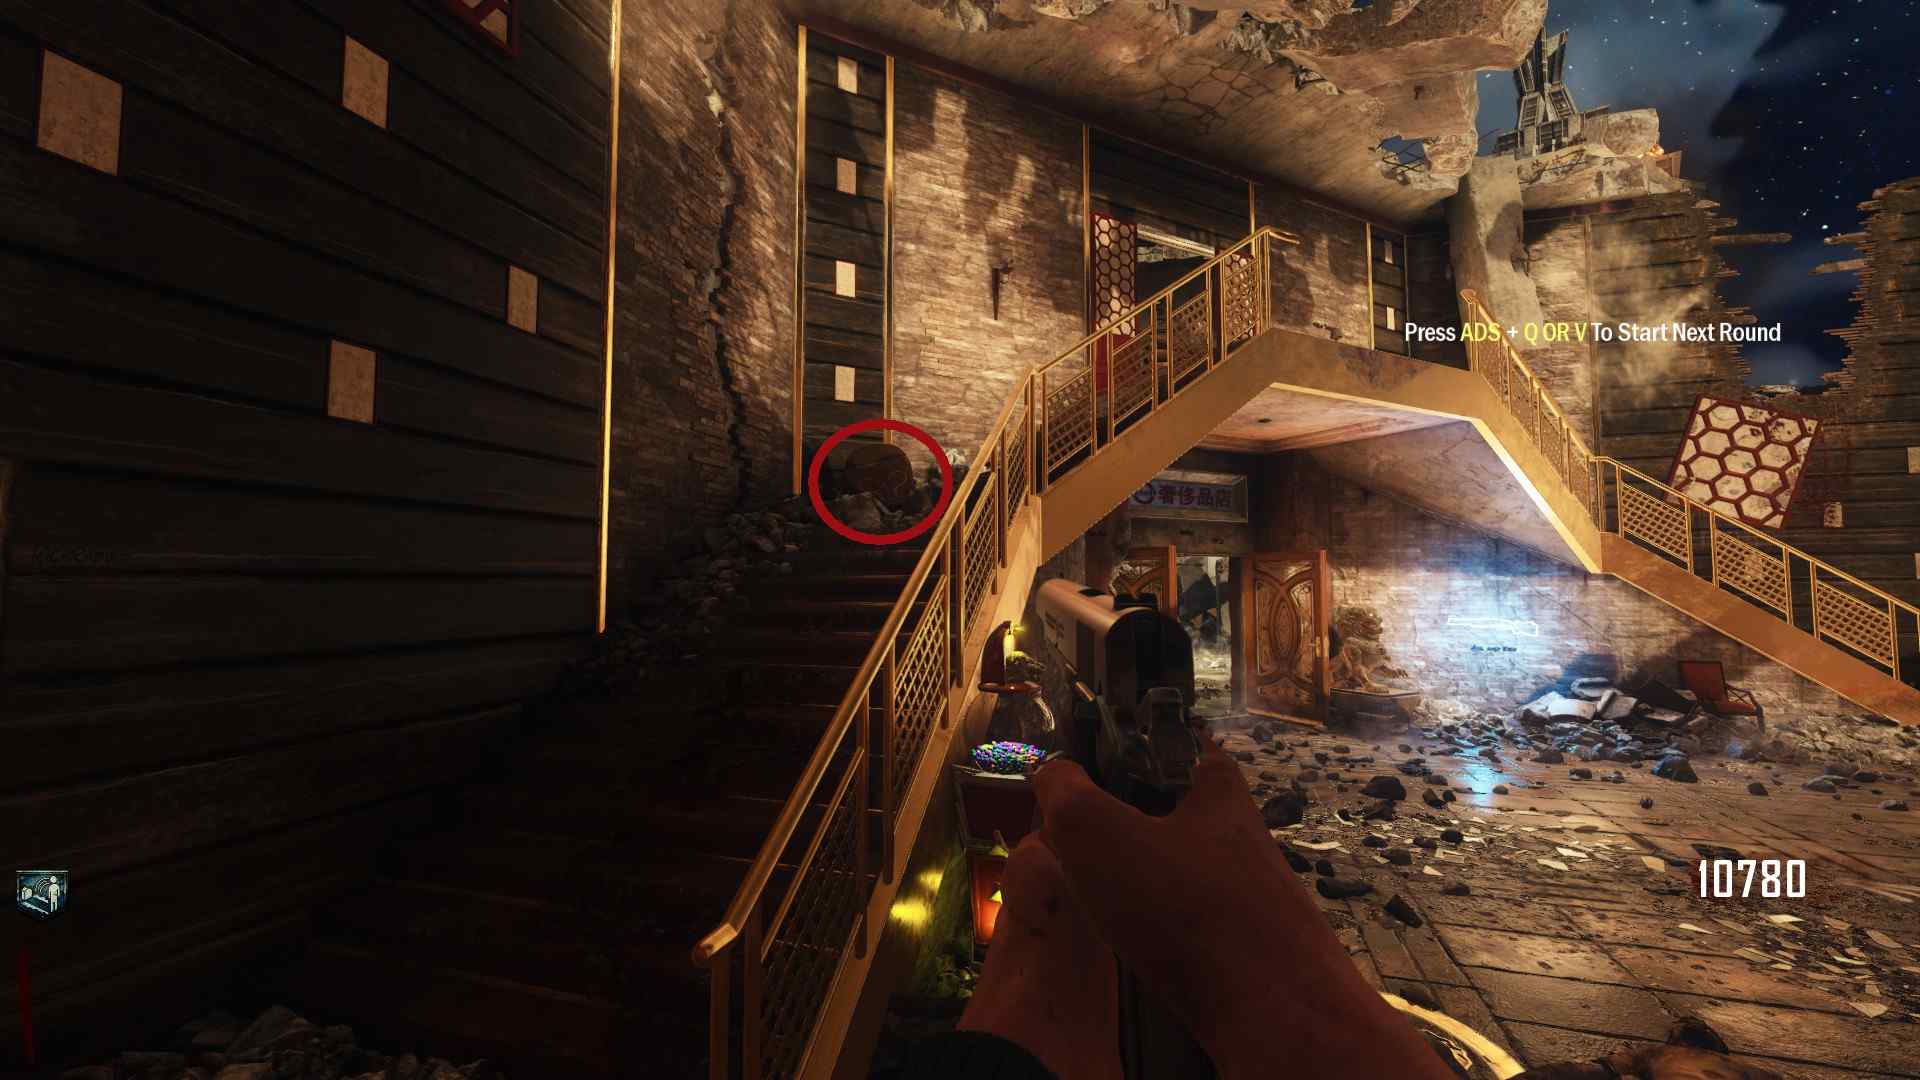
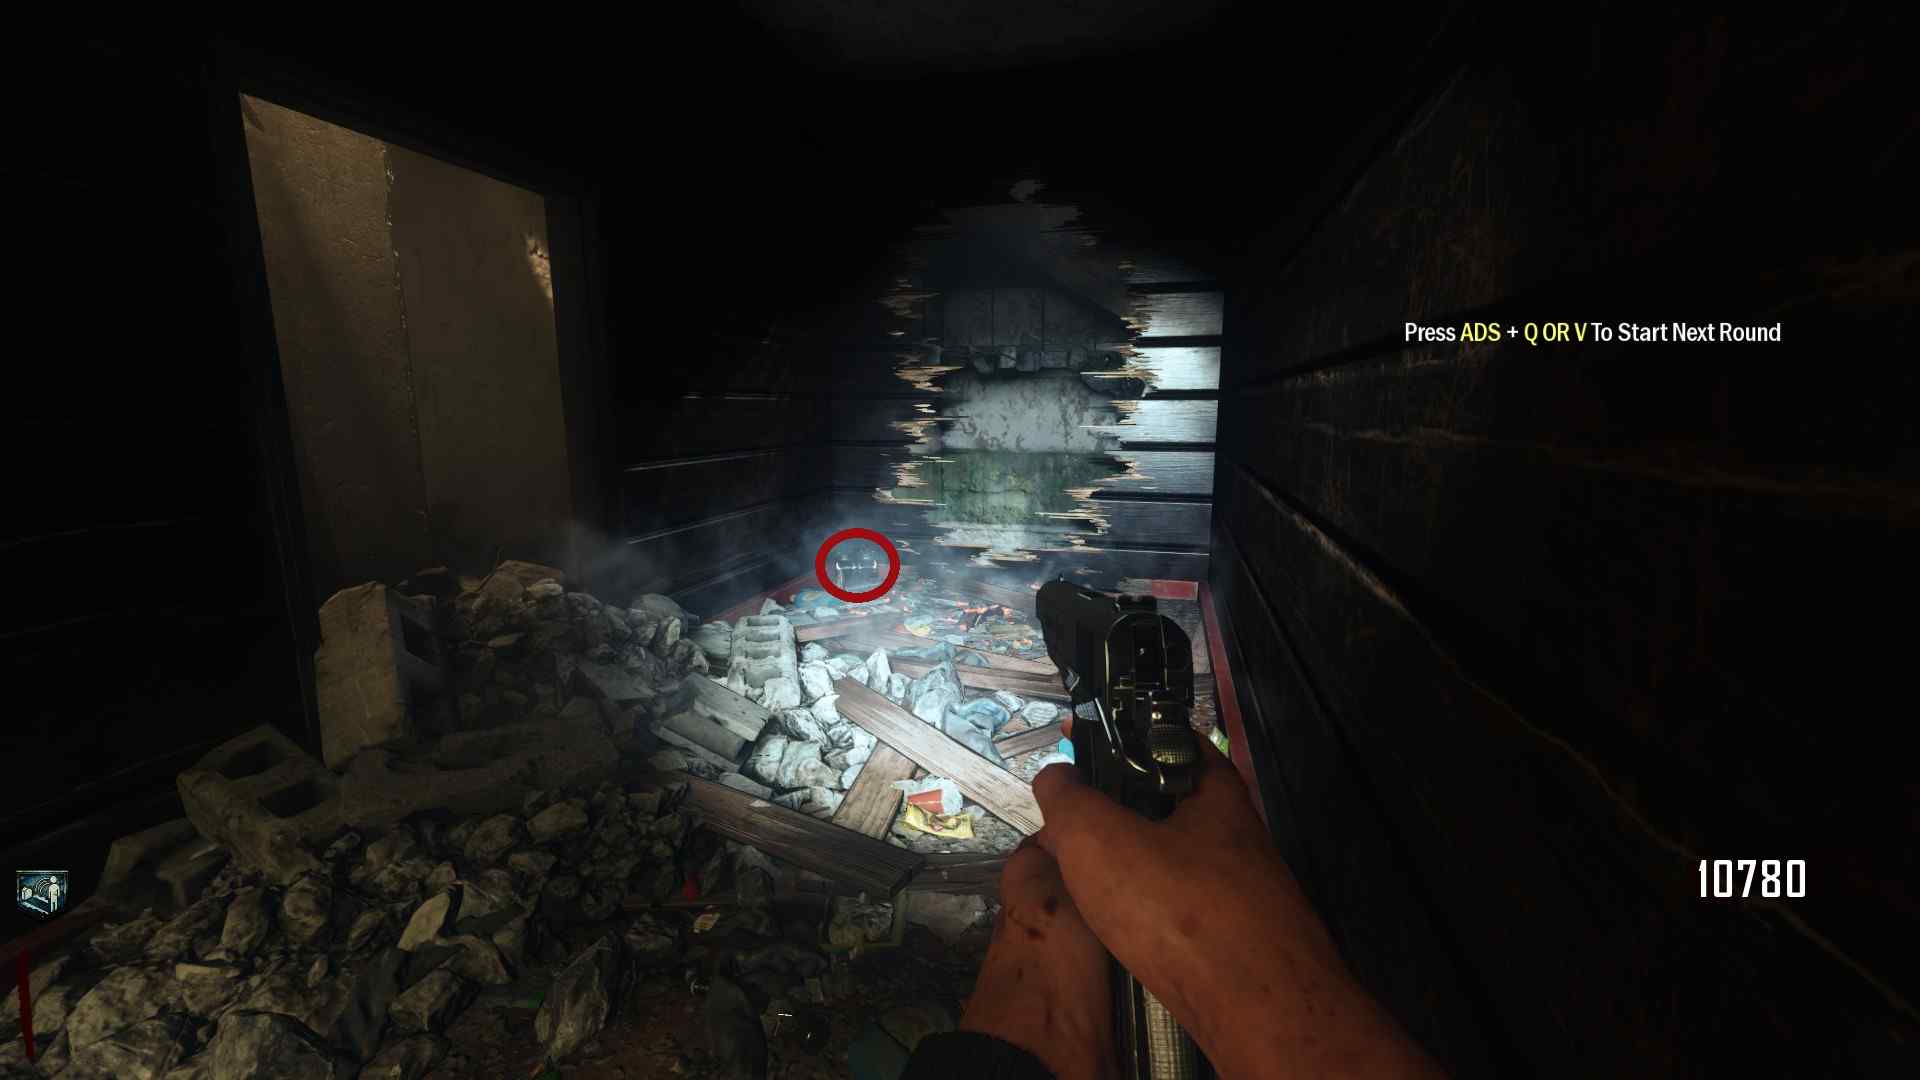
 And the Motor is either on the front desk in spawn, or in the corner next to a hole in the wall at the end of the hallway past the first door.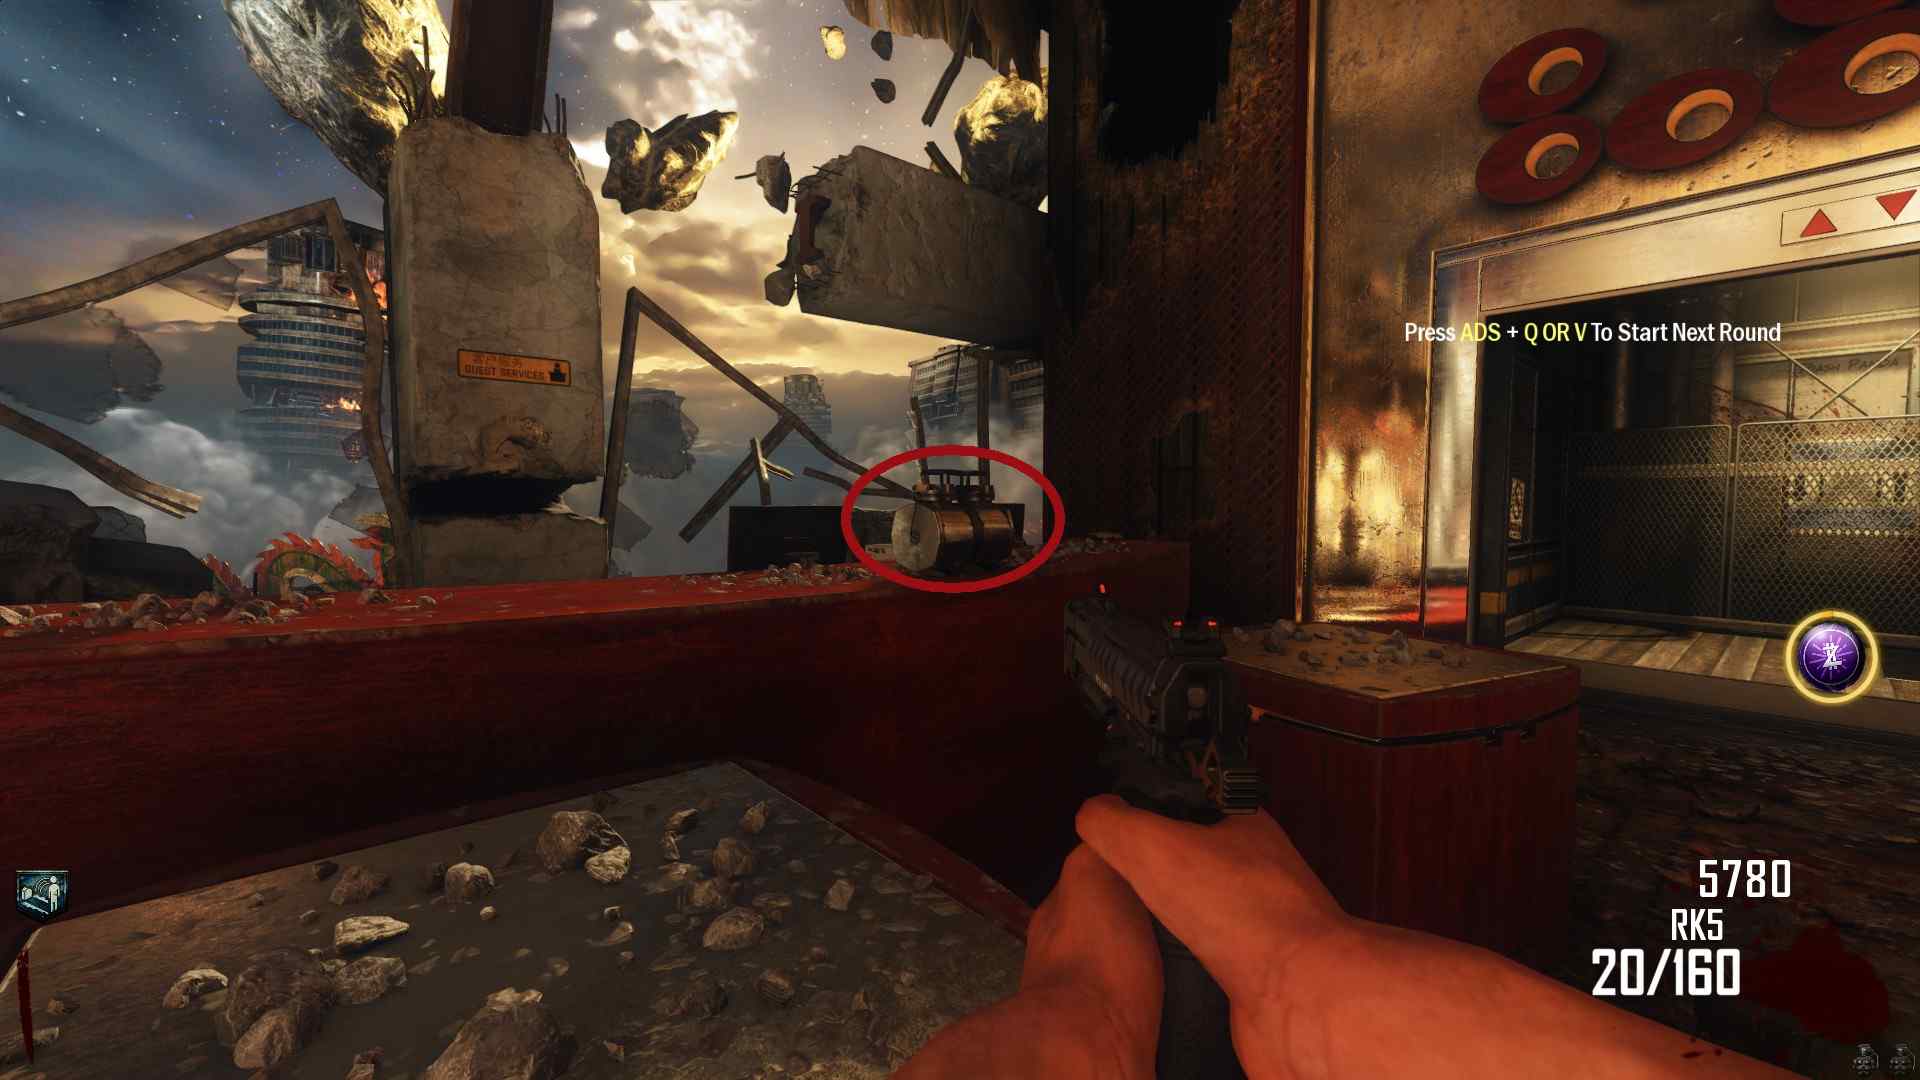
 Now you just need to find the Workbench with the Trample-Steam blue print to craft your very own, Launchie-Thingie-Deathtrap.
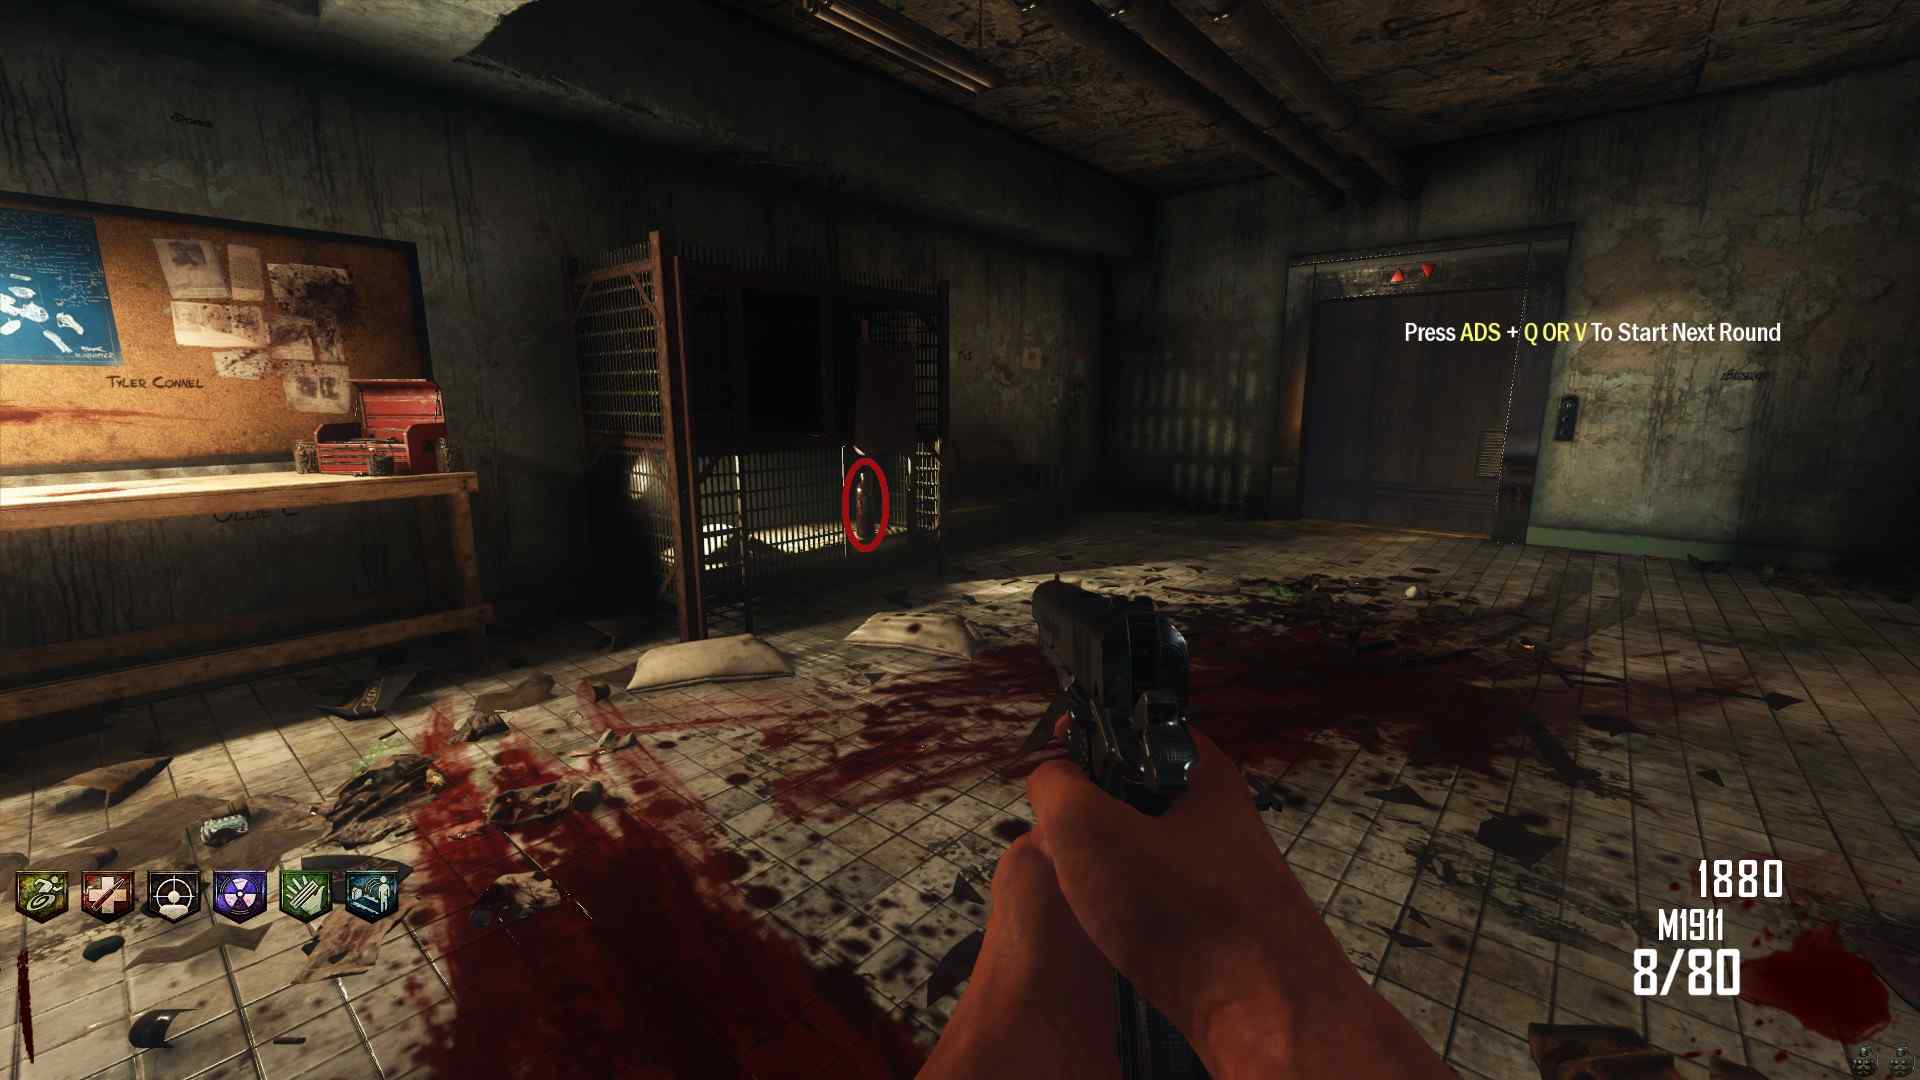
 But one side of the EE also requires the Sliquifier, (well that plus it's a powerful weapon), luckily all the parts are located around the Power Room. With the Gas Canister either being on a table in-front of the Power Switch, or in a kennel next to the Workbench.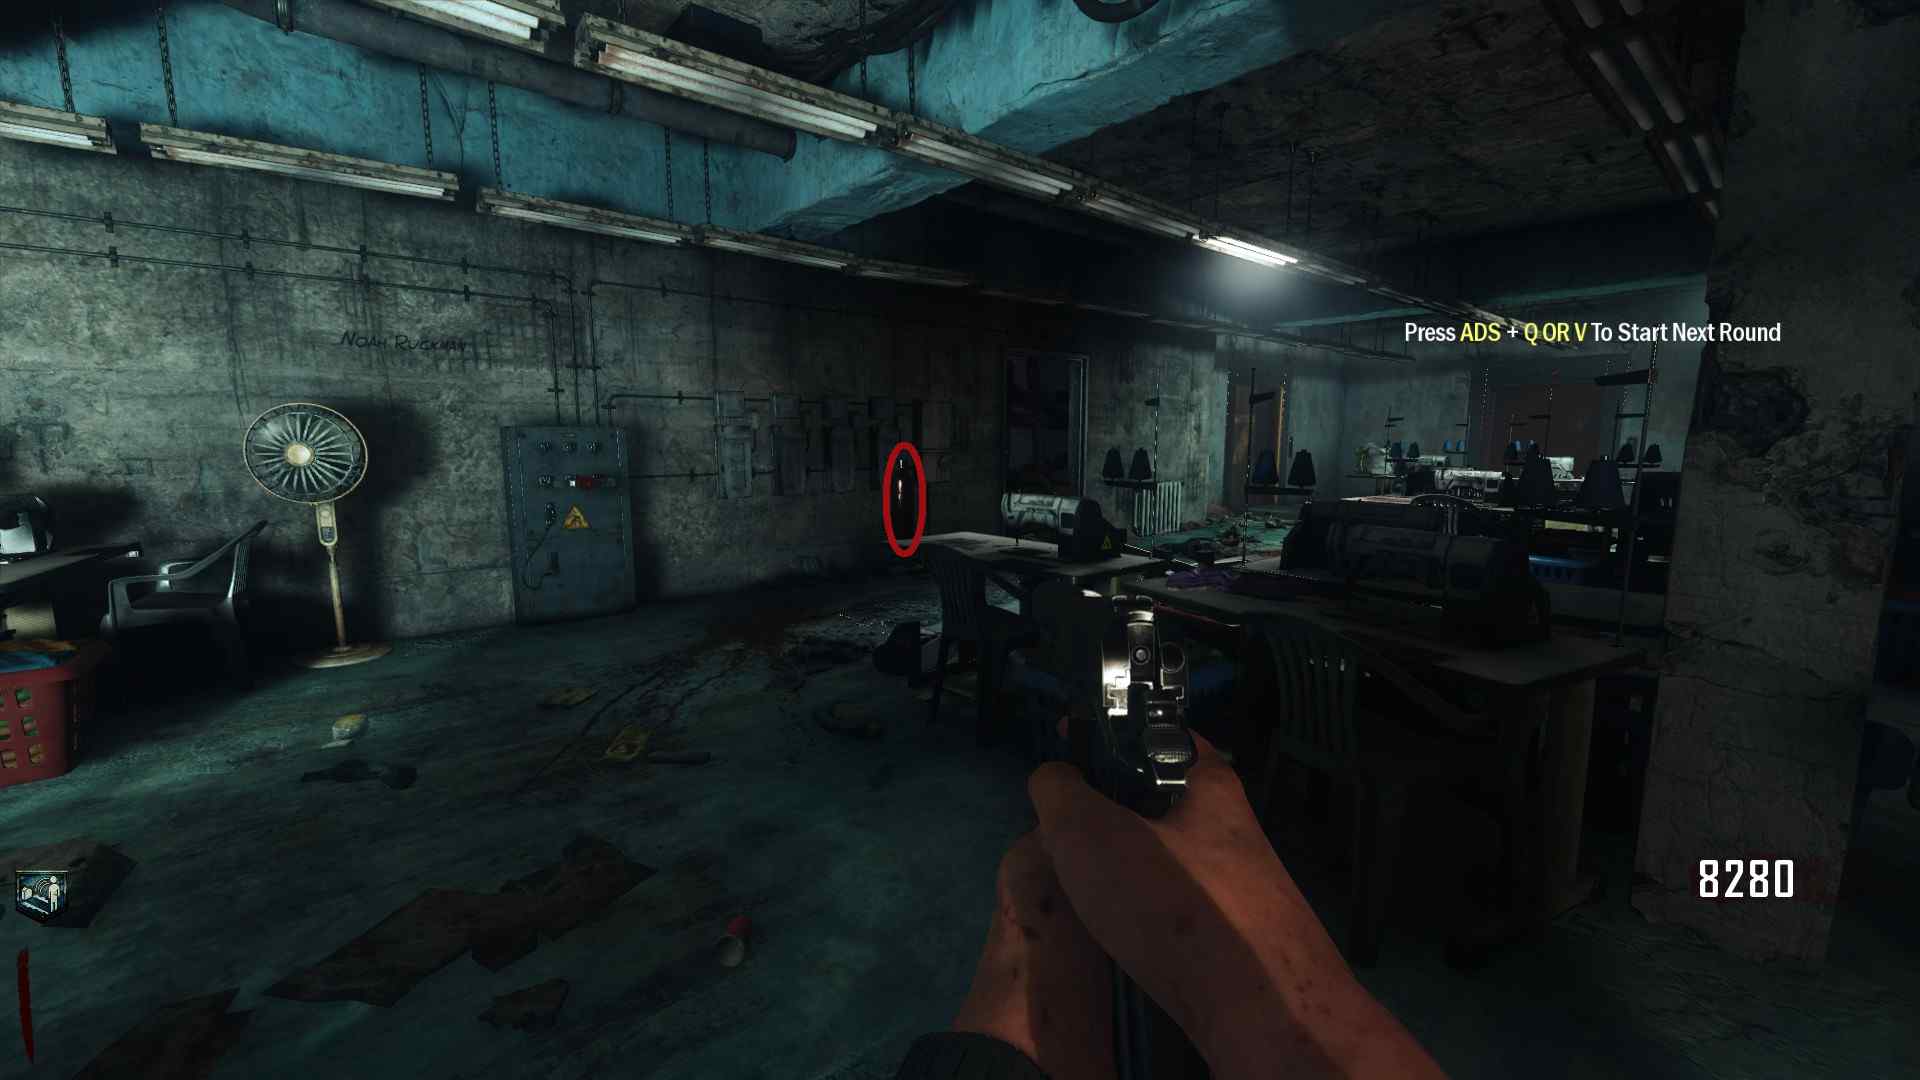
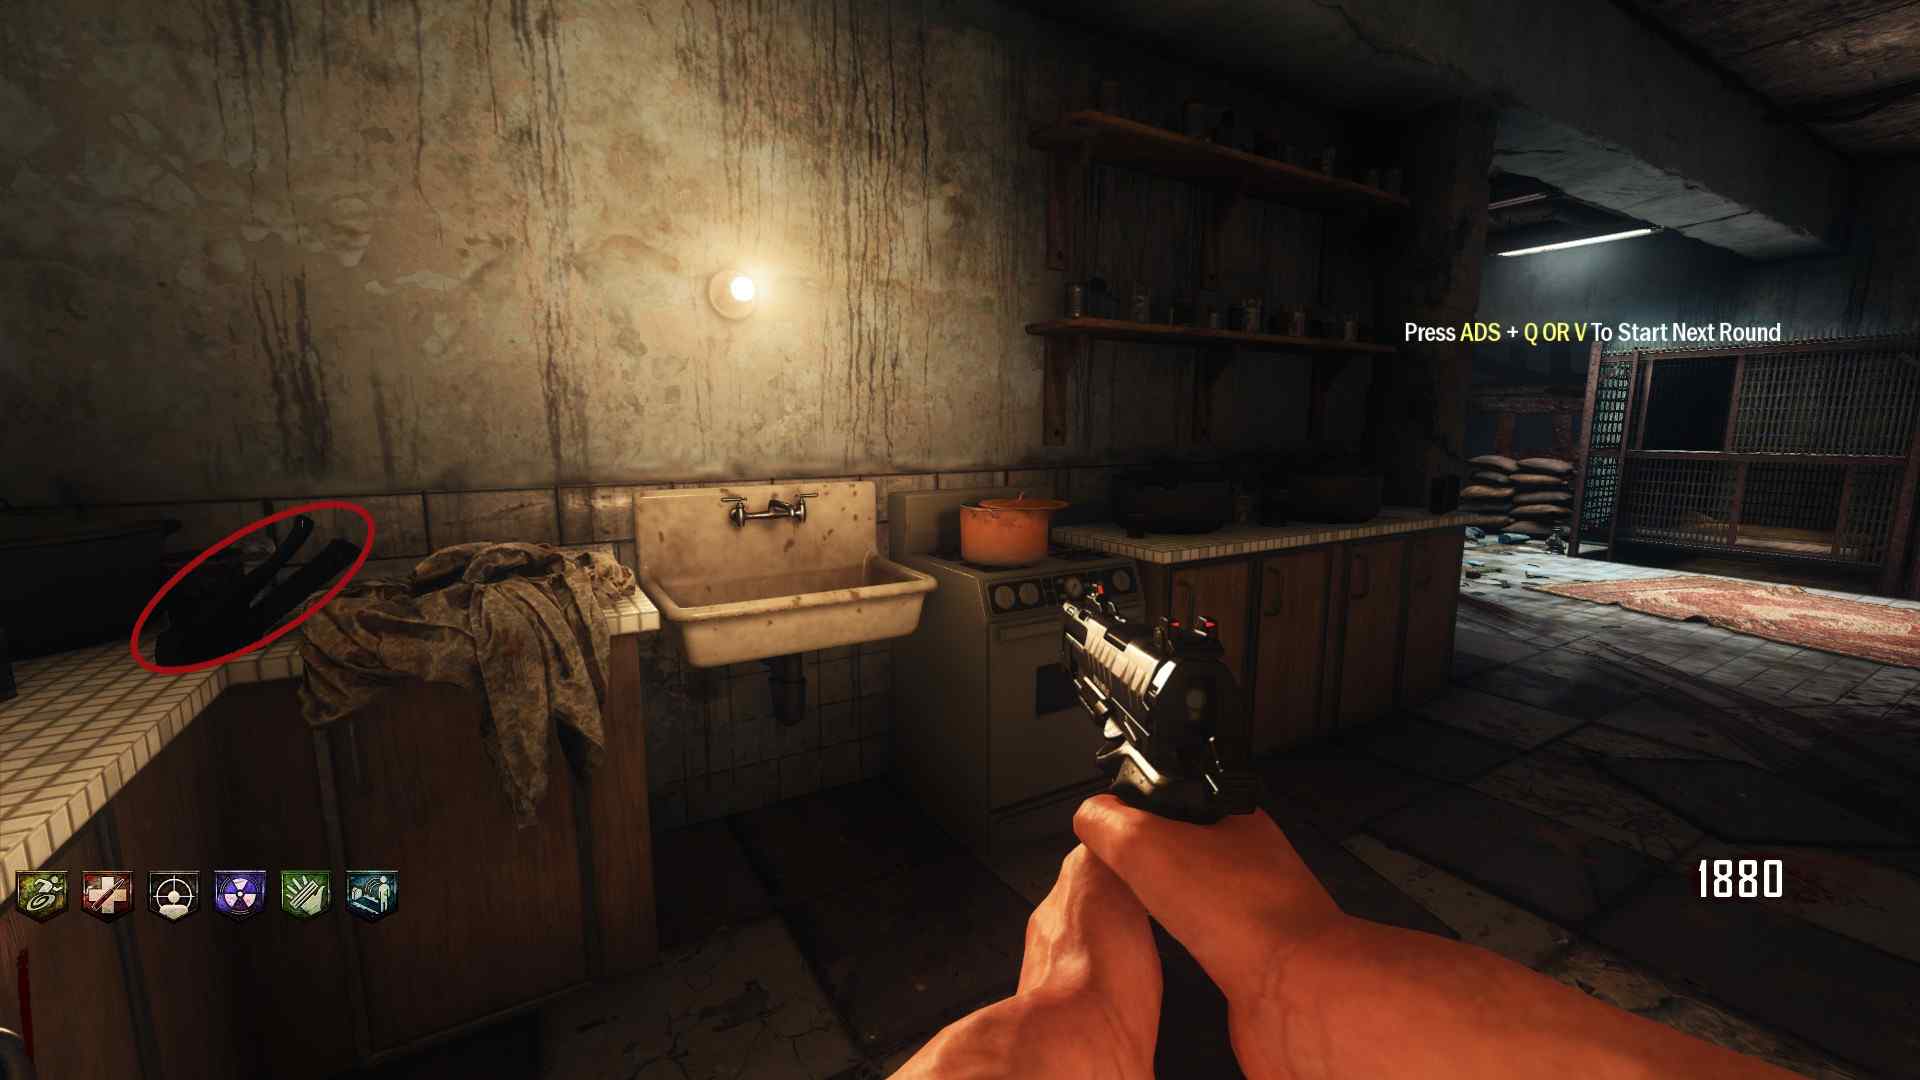
 The Handlebreak is either on a table in the Power Room next to the elevators, or on the counter in the little kitchen around the corner in the room with the Workbench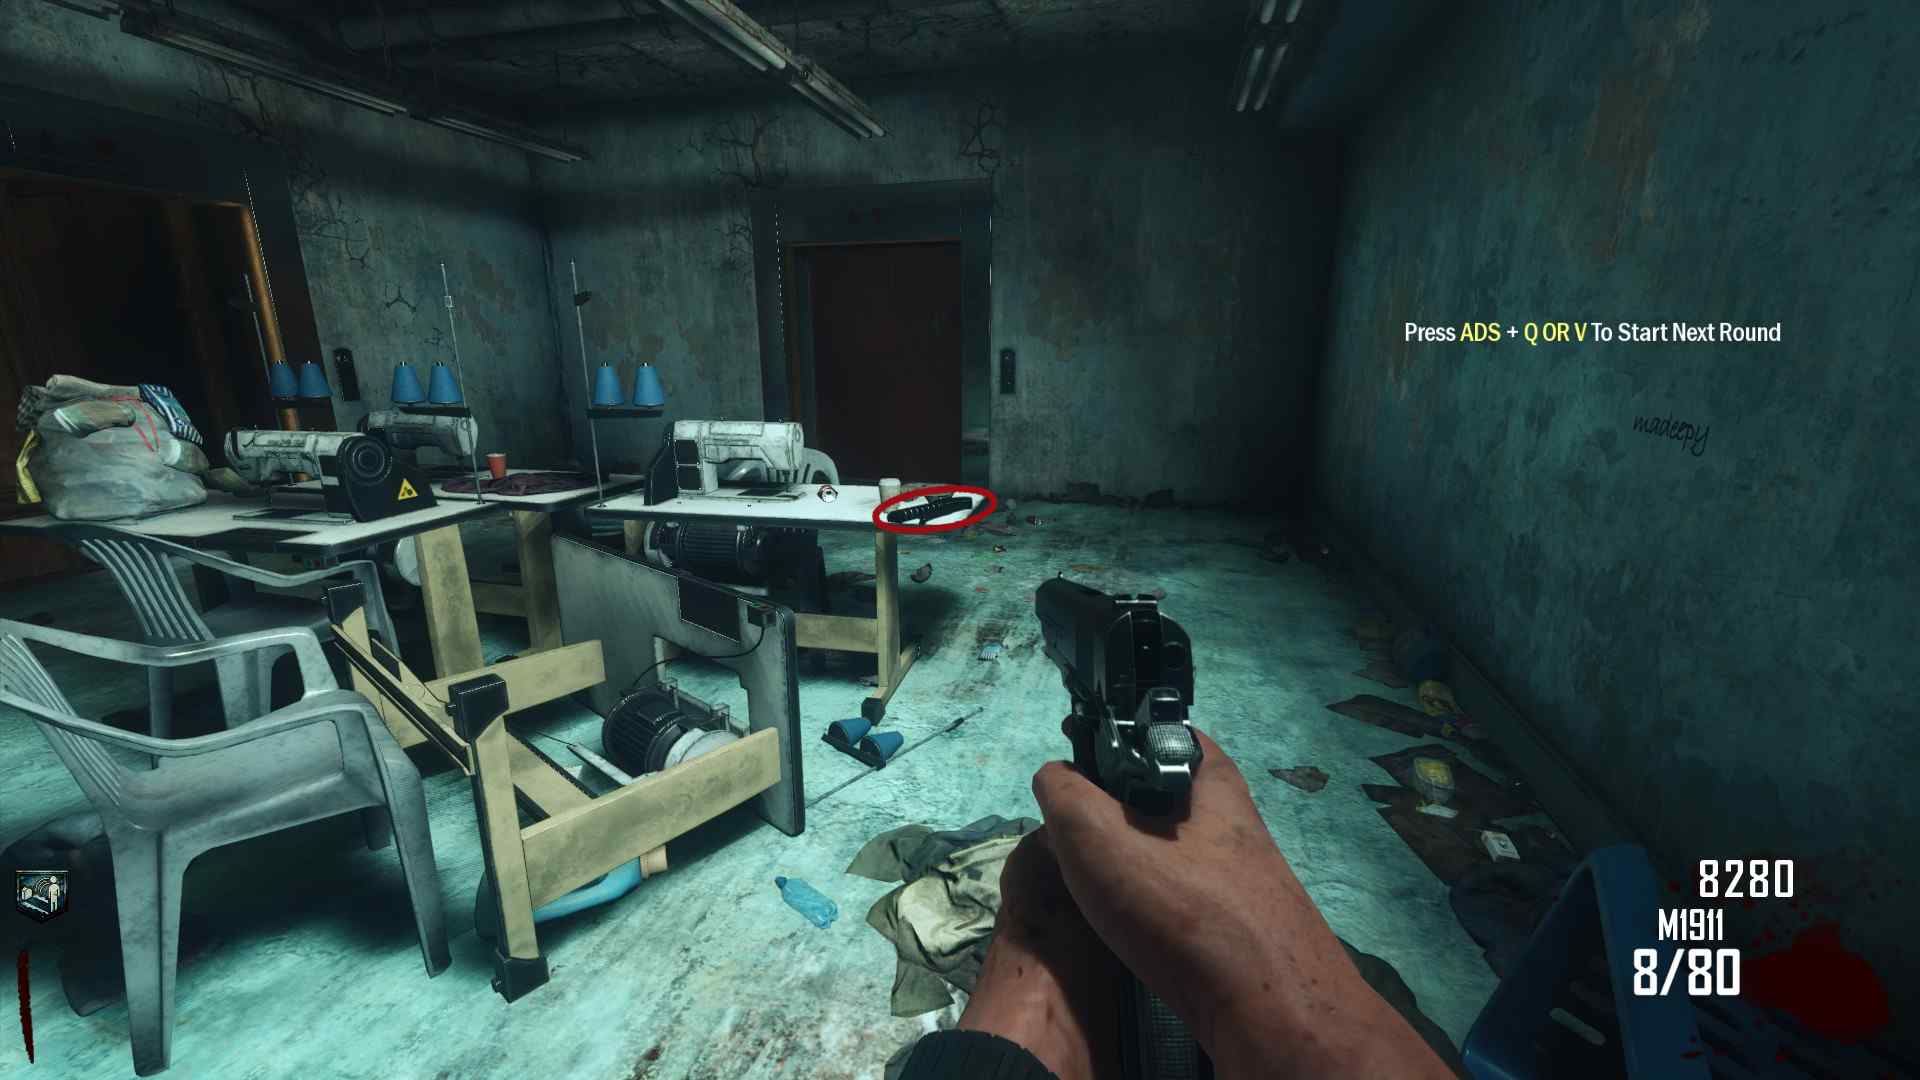
 The Mannequin Foot is always located between a broken tv and couch in-front of the stairs leading to the workbench.
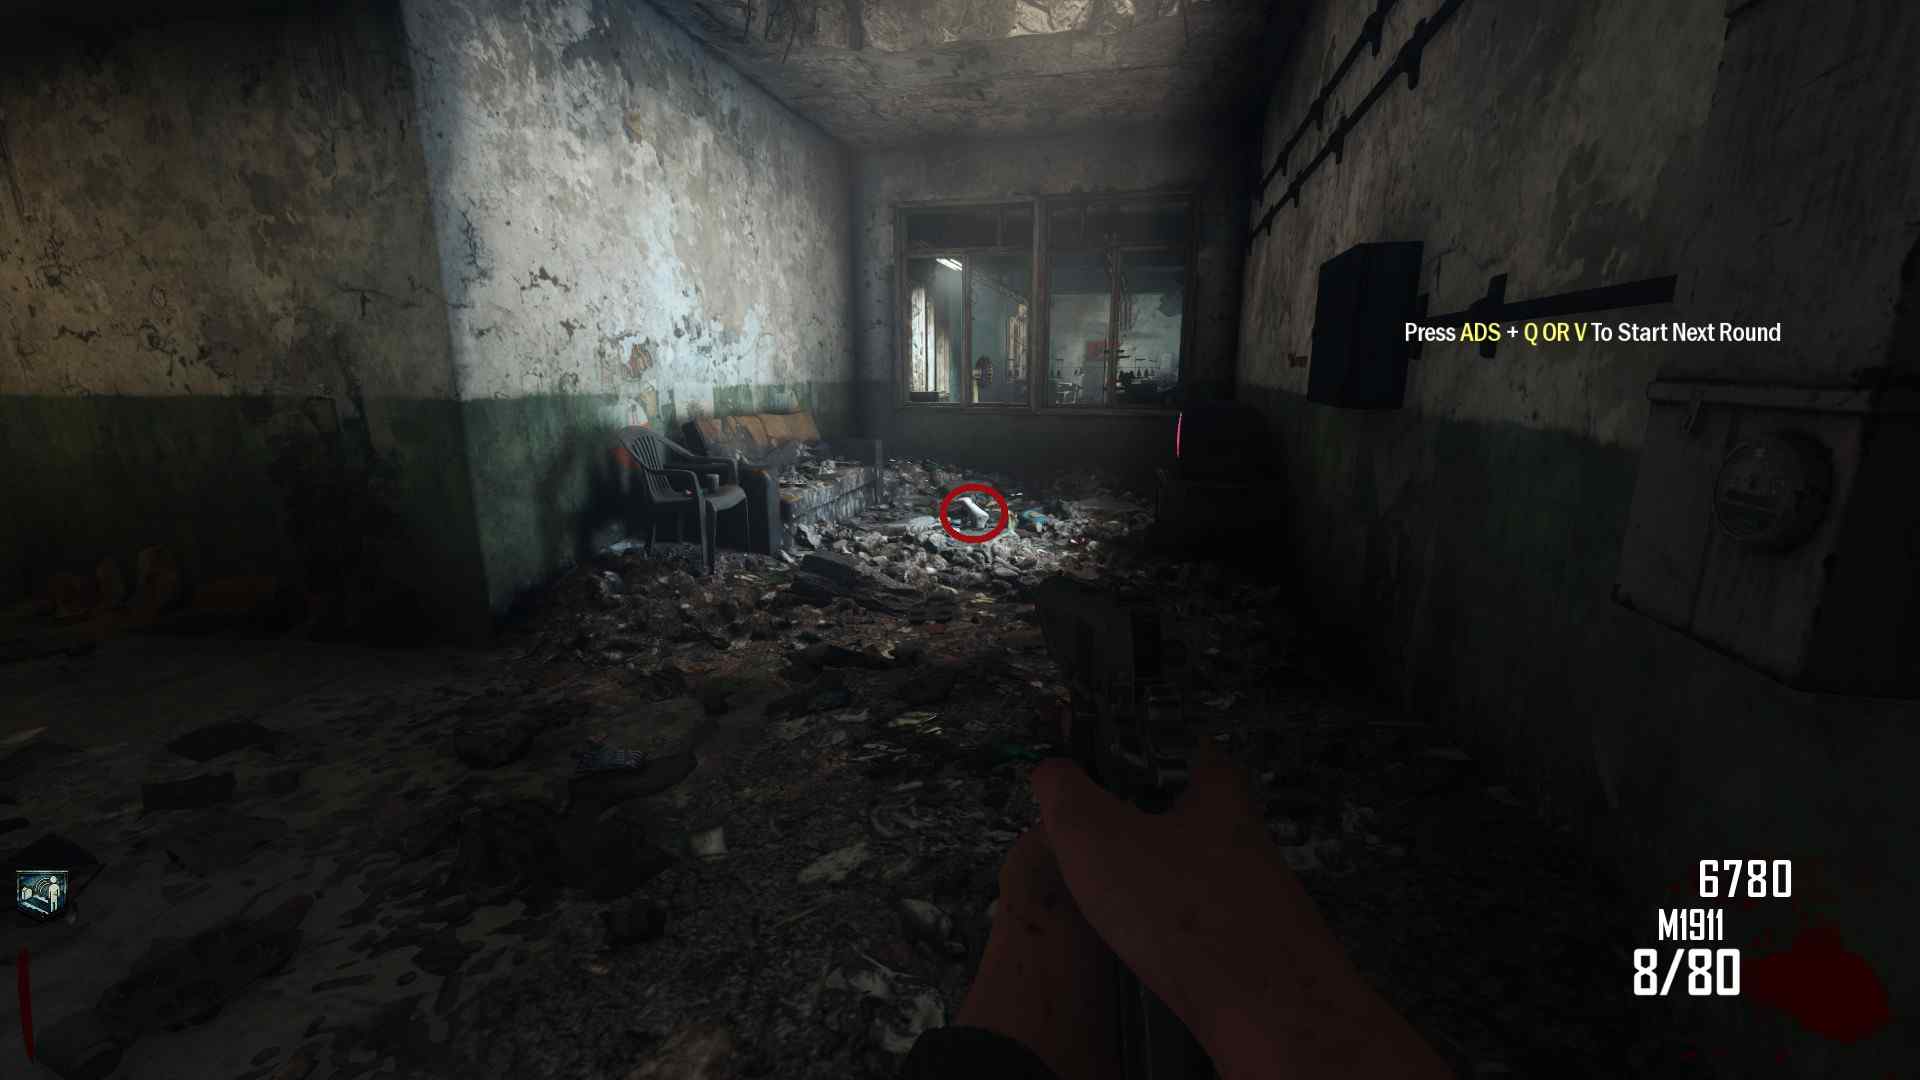 The Wires & Disk are either on a table next to a hot water tank, or on a barrel at the foot of the stairs leading to the Workbench.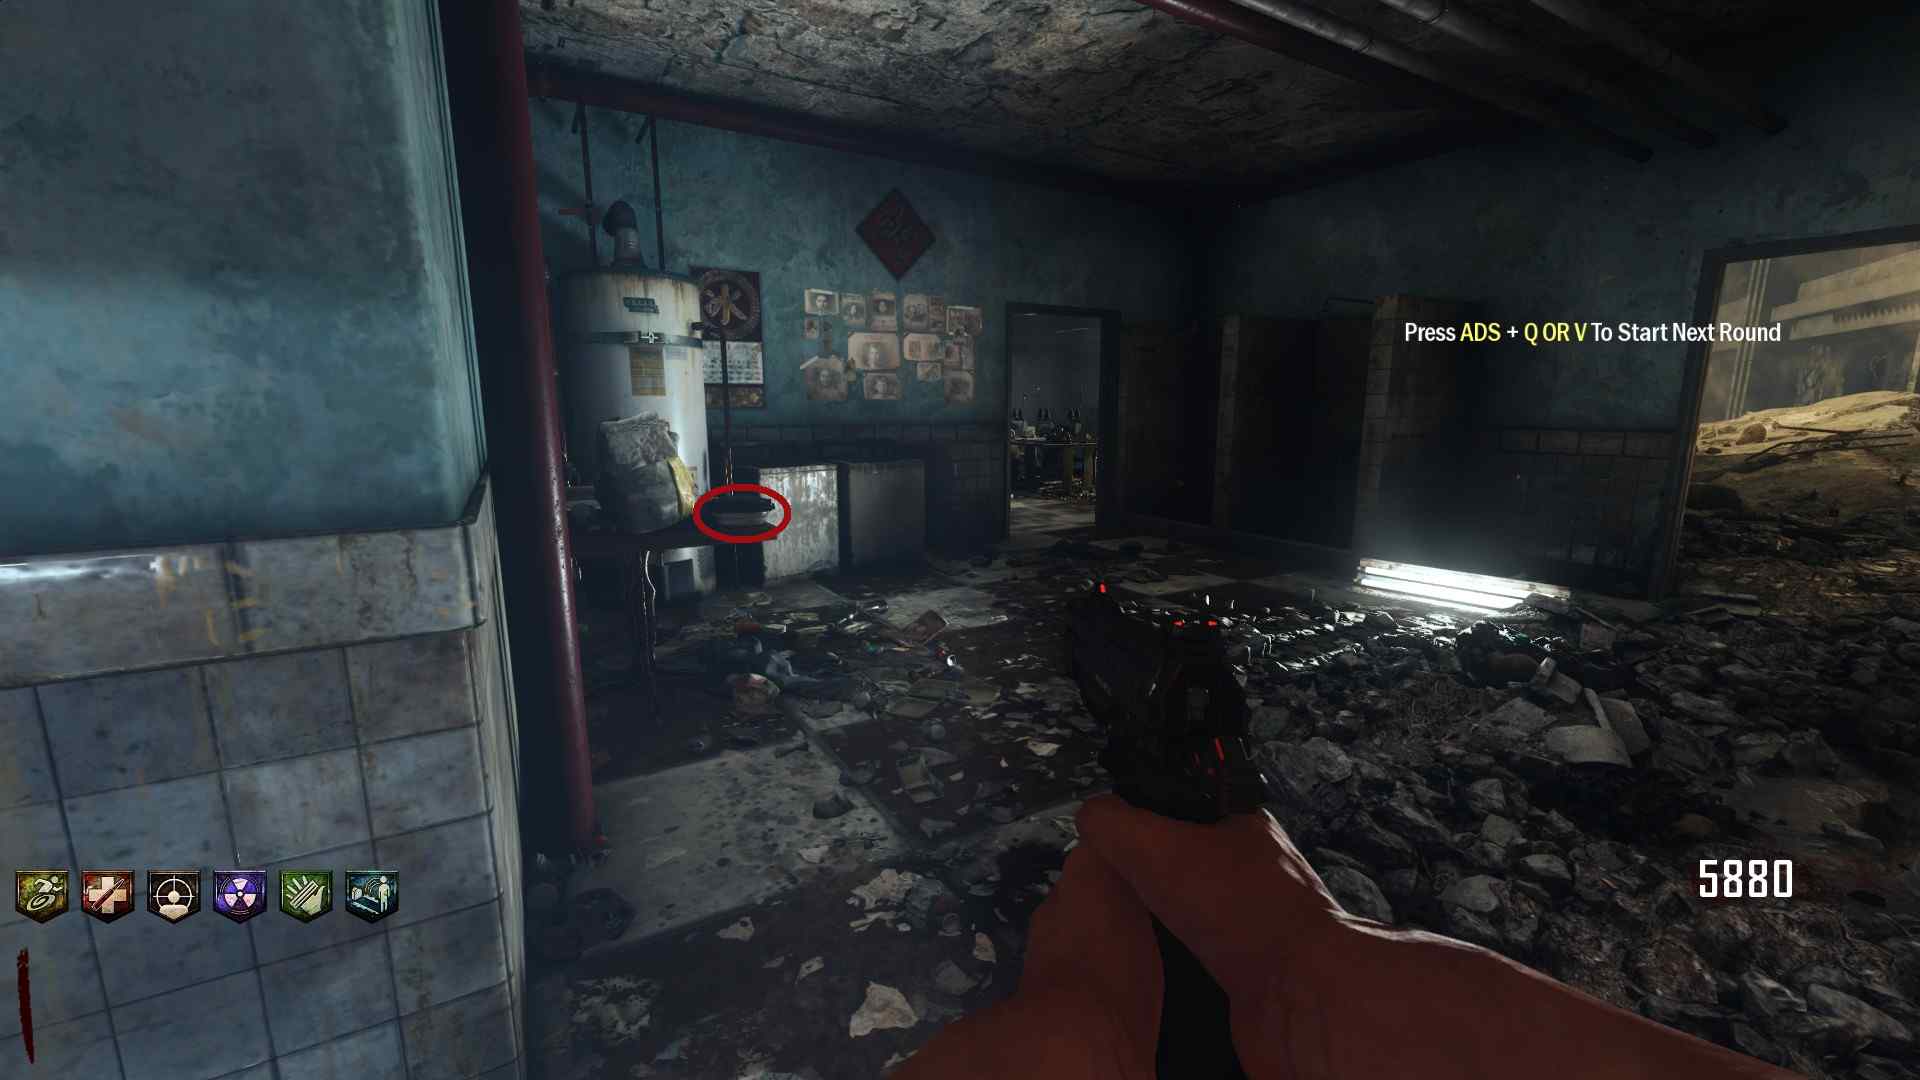
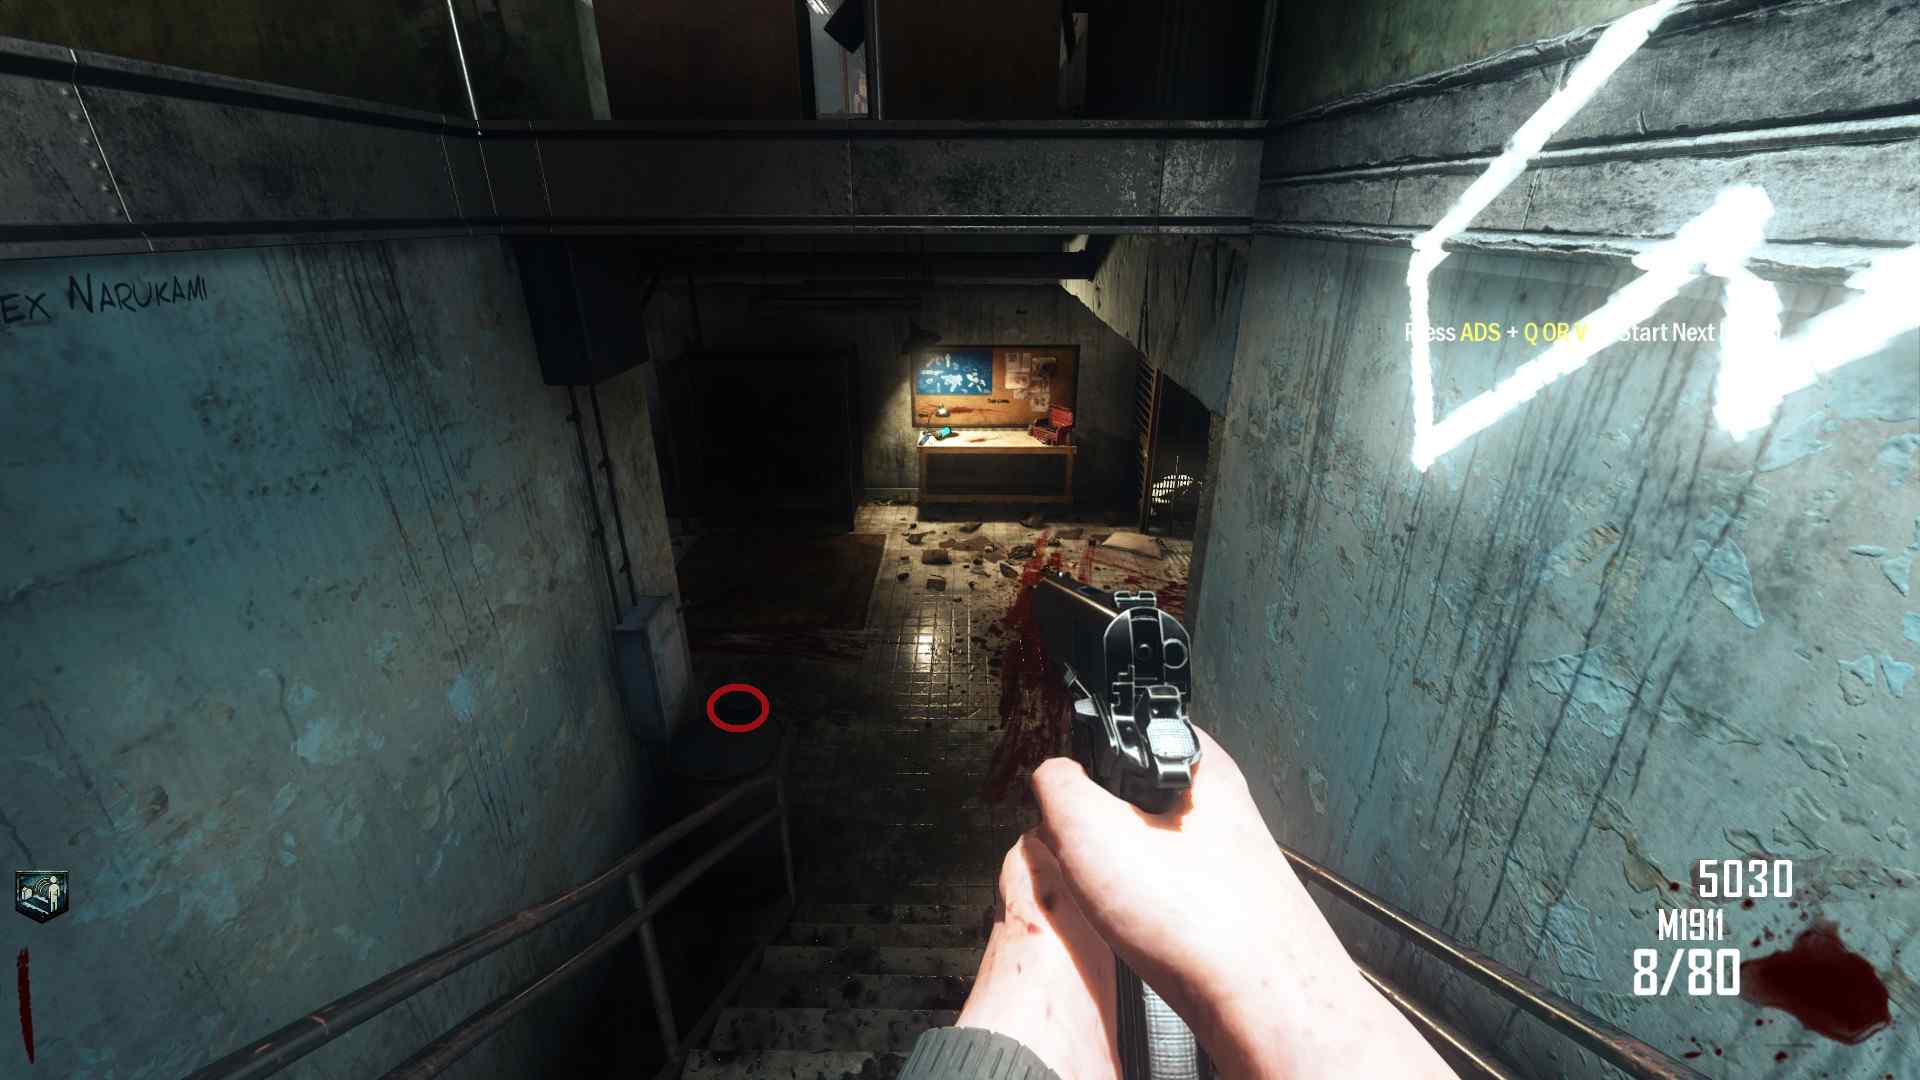 Now all that's left is to build it at the conveniently nearby Workbench. It even has the blue prints and everything!
 Also be sure to grab the Elevator Key, it can be used to call elevators and will be useful for navigating the map. It can be found in the hallway after the falling elevator in Spawn.
 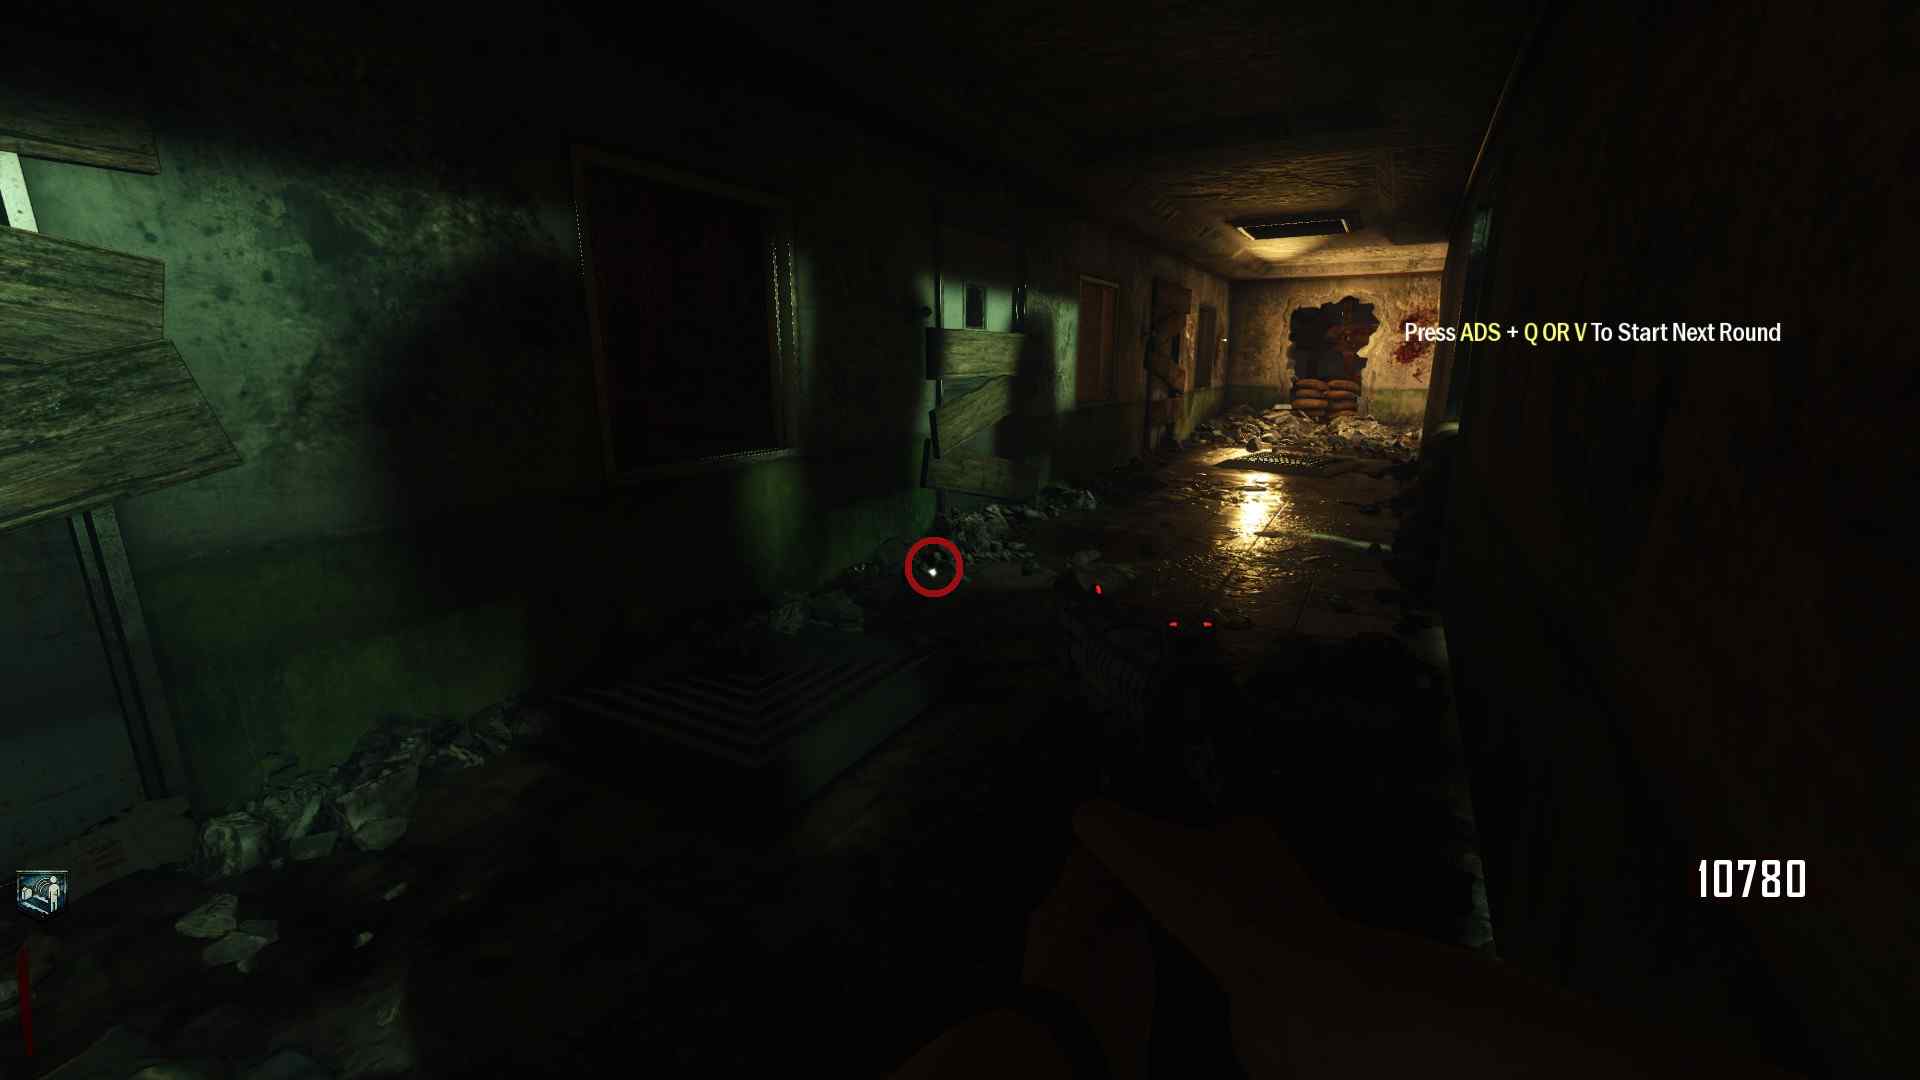 Note that in Co-op multiple keys spawn, one will always be in the hall after the elevator, but the rest will be scattered across the map. I have no idea where they are, I am only one person.
And last but not least you'll need the Galva-Knuckles, basically electro-punchy-things. They can be found in a small room within a Broken Elevator Shaft.
Note that in Co-op multiple keys spawn, one will always be in the hall after the elevator, but the rest will be scattered across the map. I have no idea where they are, I am only one person.
And last but not least you'll need the Galva-Knuckles, basically electro-punchy-things. They can be found in a small room within a Broken Elevator Shaft.

Keep in mind they're a bit pricey, coming in at a whooping 6,000 Points!
Step 1: Navigating The Crests
Alright so first things first, we need to build the Nav-Card Table. So we head to the roof and start looking for the parts required. The Wooden Plank is located...
The Radio can be found...
The Electric Box is....
And the Meteor is...
And combine the parts together at the base of The Tower.
(sorry, but after I completed the EE, the Nav-Card Table always spawned pre-built, so until I find a way to undo whatever it is I did, this part will be blank) Now that the Navigation Card Reading & Identifying Table is built we can finish this step. There are four Crests on top of some of the elevators

Each player has to be standing on a different Crest all at the same time, so if your playing solo then you just need to stand on any Crests until it glows.
Step 2: Crests & Dragons

However the Vital Energy is quite fickle, and requires the Crests to be activated in a certain order, a completely random order that can only be deduced by Trial & Error. Now the number of Crests that need to activated depends on how many players there are. i.e: one Crest per person. So if your in Solo you just need to activate one. Now the Vital Energy is primed and ready, it just needs to be channelled! Luckily the Channelling Orbs are close by. Unfortunately the Orbs are held in the jaws of two mighty Dragons.

 We'll need a weapon that can strike the Channelling Orbs with the exact frequency needed. i.e: any Sniper Rifle, luckily this map has a Sniper Rifle wallbuy. The SVU-AS to be specific.
 I like to use it due to it's PAPed name: Shadowy Veil Utilizer, I mean if that's not attuned to the frequency needed to retrieve Channelling Orbs then I don't think any gun will be.
Now just shoot the Orbs, it might take a few shots, it's kind of finicky.
I like to use it due to it's PAPed name: Shadowy Veil Utilizer, I mean if that's not attuned to the frequency needed to retrieve Channelling Orbs then I don't think any gun will be.
Now just shoot the Orbs, it might take a few shots, it's kind of finicky.

Now here is where the path splits, we can either help Maxis or Richtofen.
Step 3 (Maxis): Reincarnation
Welcome Maxis fans, first off, you have no taste. And second of all this is the more complex path to take and unfortunately the Canonical Path. So Maxis will say something about Reincarnation, at least I think he does? I don't know for sure because no matter what, I'm always out of ear shot of wherever his voice is coming from.
Anyways to do whatever Maxis said, we must report to the Buddha Room, it's the one with emblems of Siddhartha Gautama AKA The Buddha on the walls, as well as a golden statue but I don't think that's Siddhartha. (It's mostly the because of the bread and sword) So in the centre of the lower level of this room we must kill 15 Zombies, make sure not to kill any Zombies outside of this area otherwise it'll reset the kill count.
 Once your done with that Maxis will say something again about Reincarnation but once again I'm to faraway to hear anything he said. Thank Carmack AAE has subtitles for this map. Anyways now you need to get Ballistic Knifes and PAP them. Then shoot a knife into the floor at the centre of the Buddha Room.

Now back to Channelling Orbs.
Step 4 (Maxis): Steam, Crests & Orbs, Oh My!
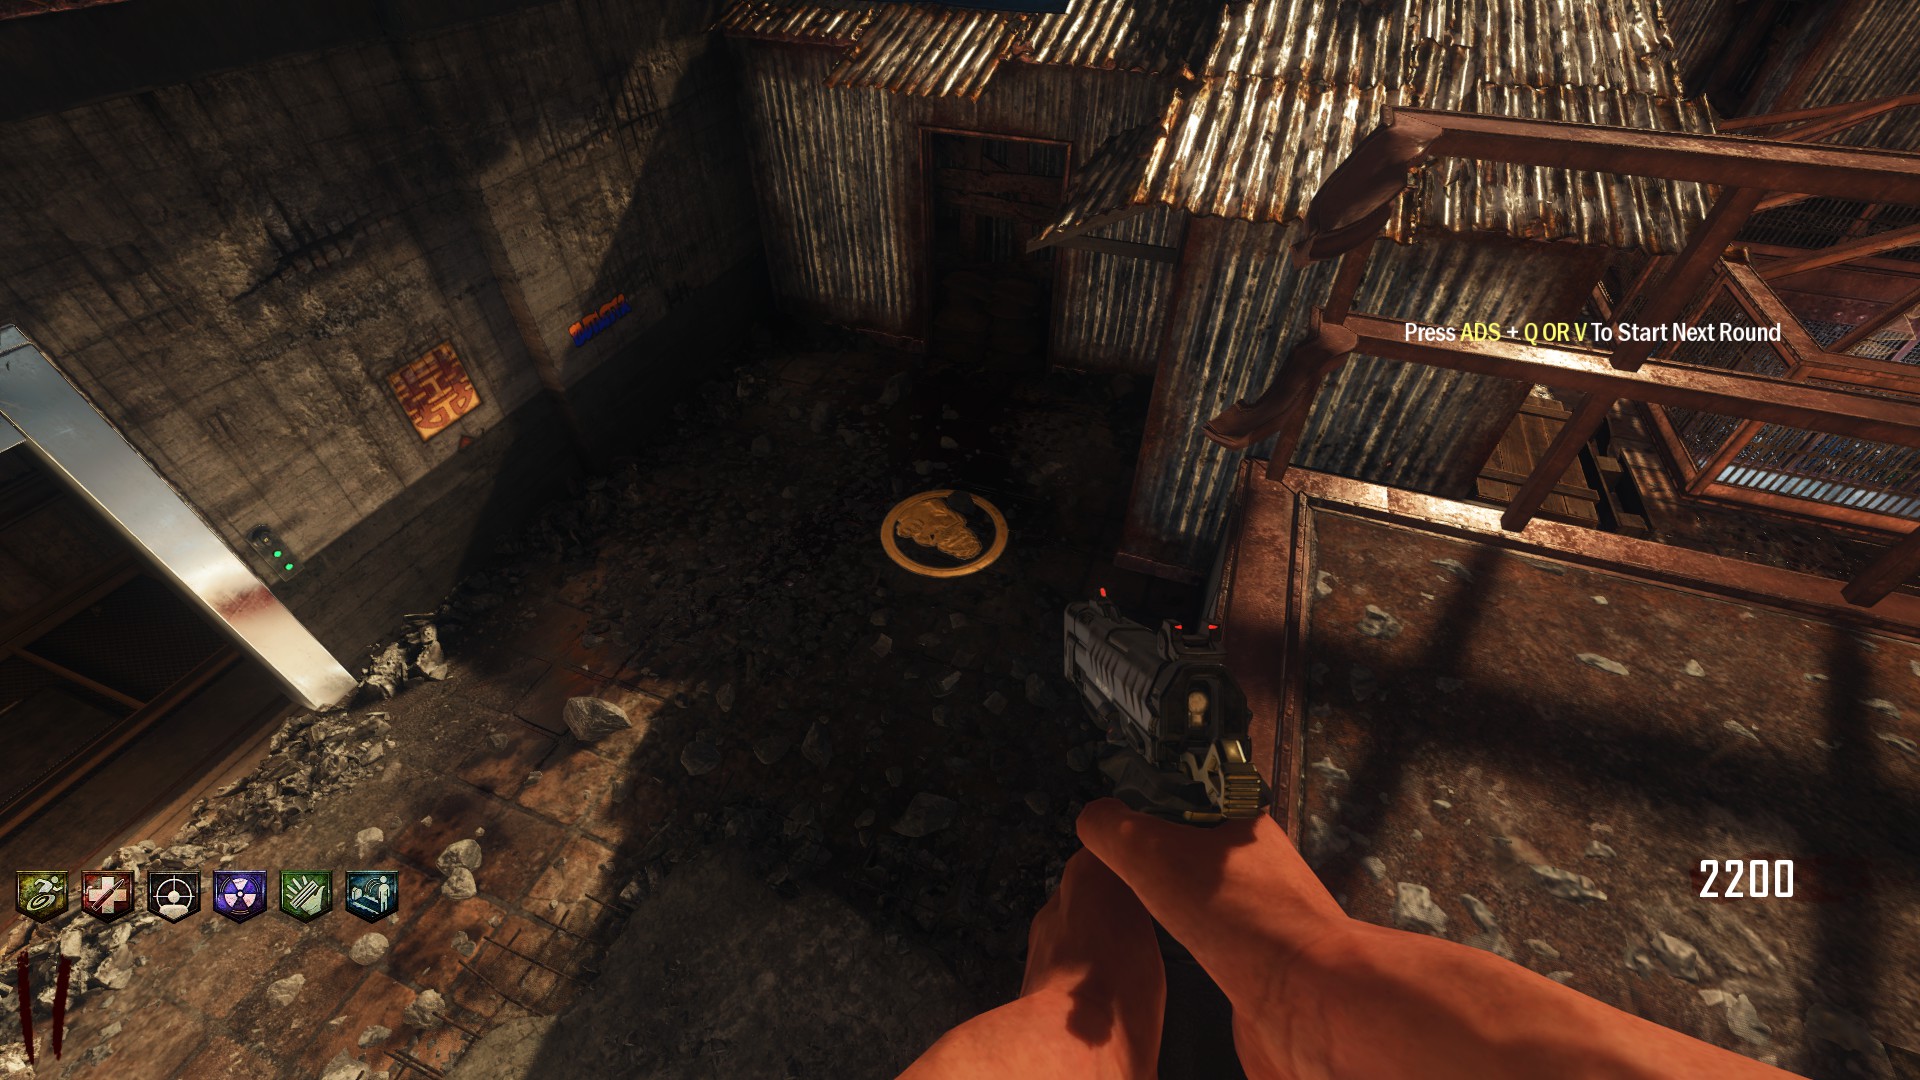
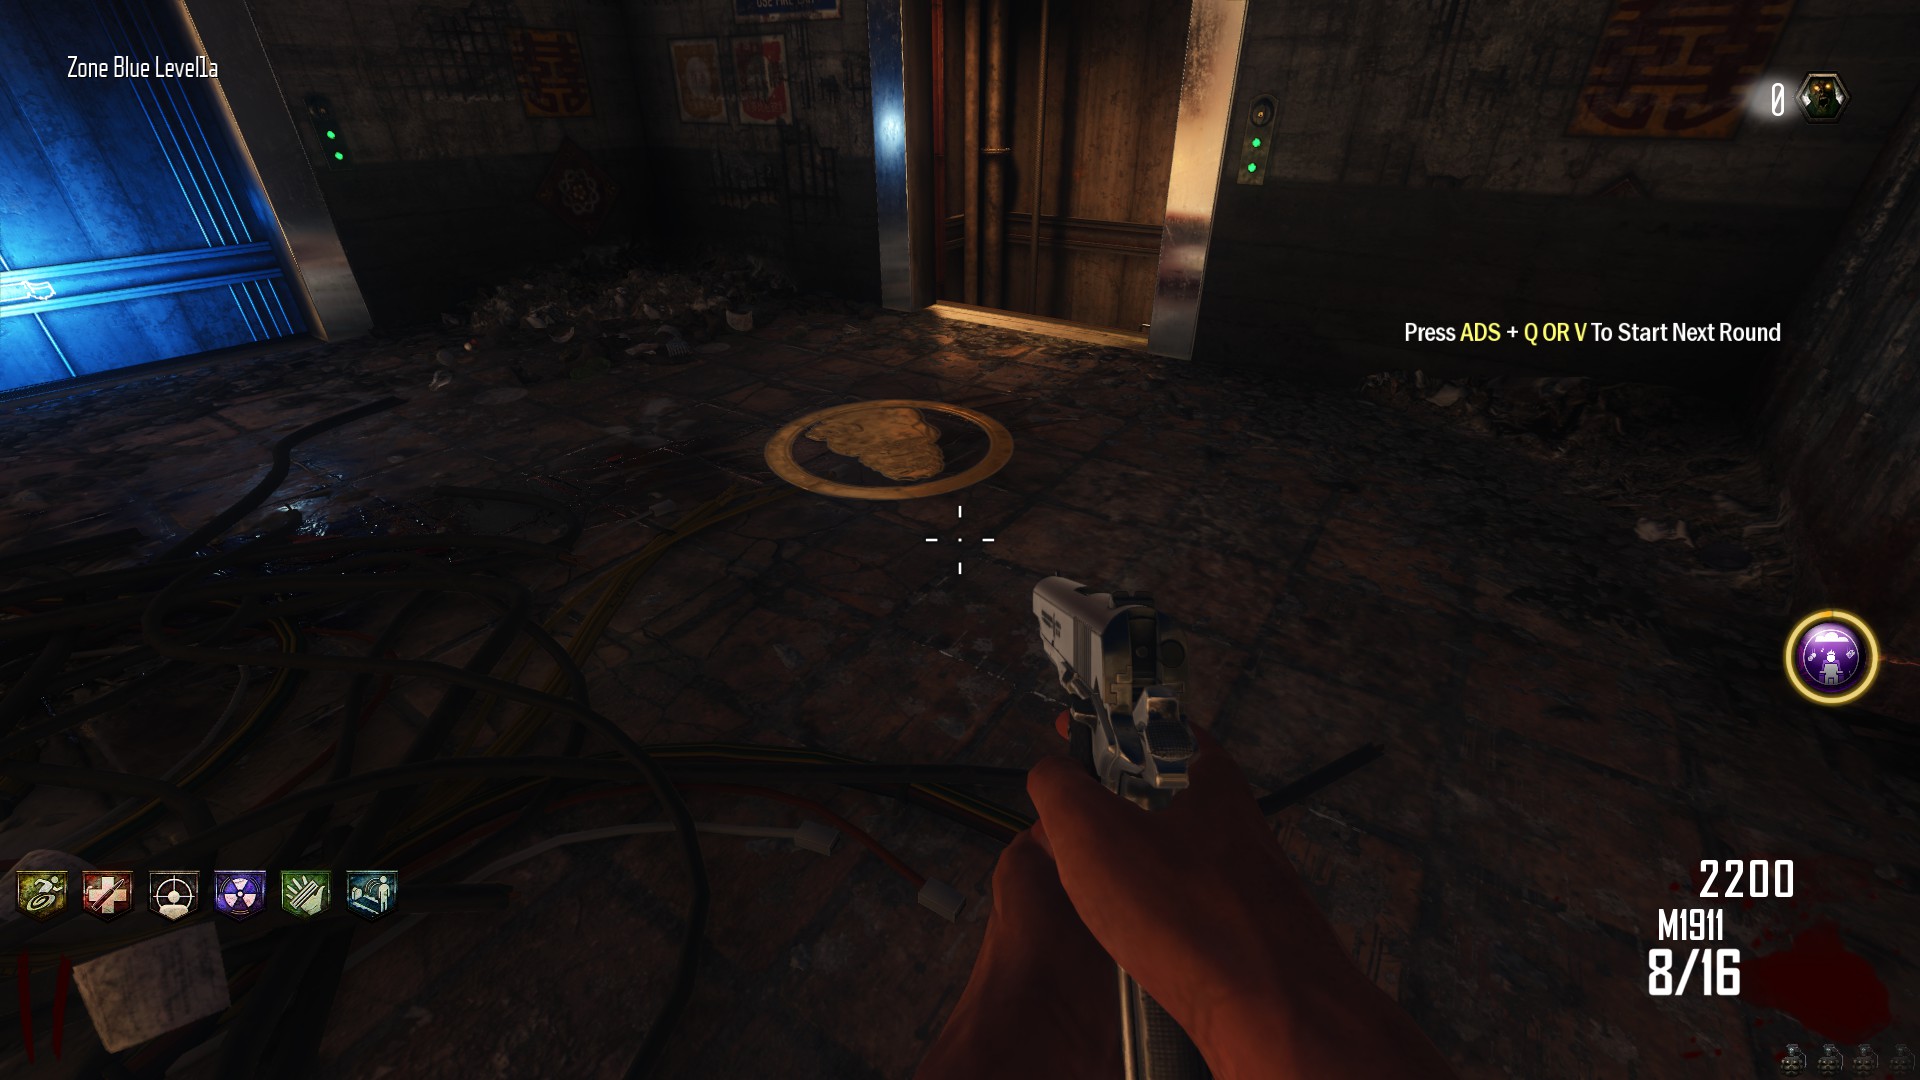 And the other two are at Spawn and down the stairs past the first door.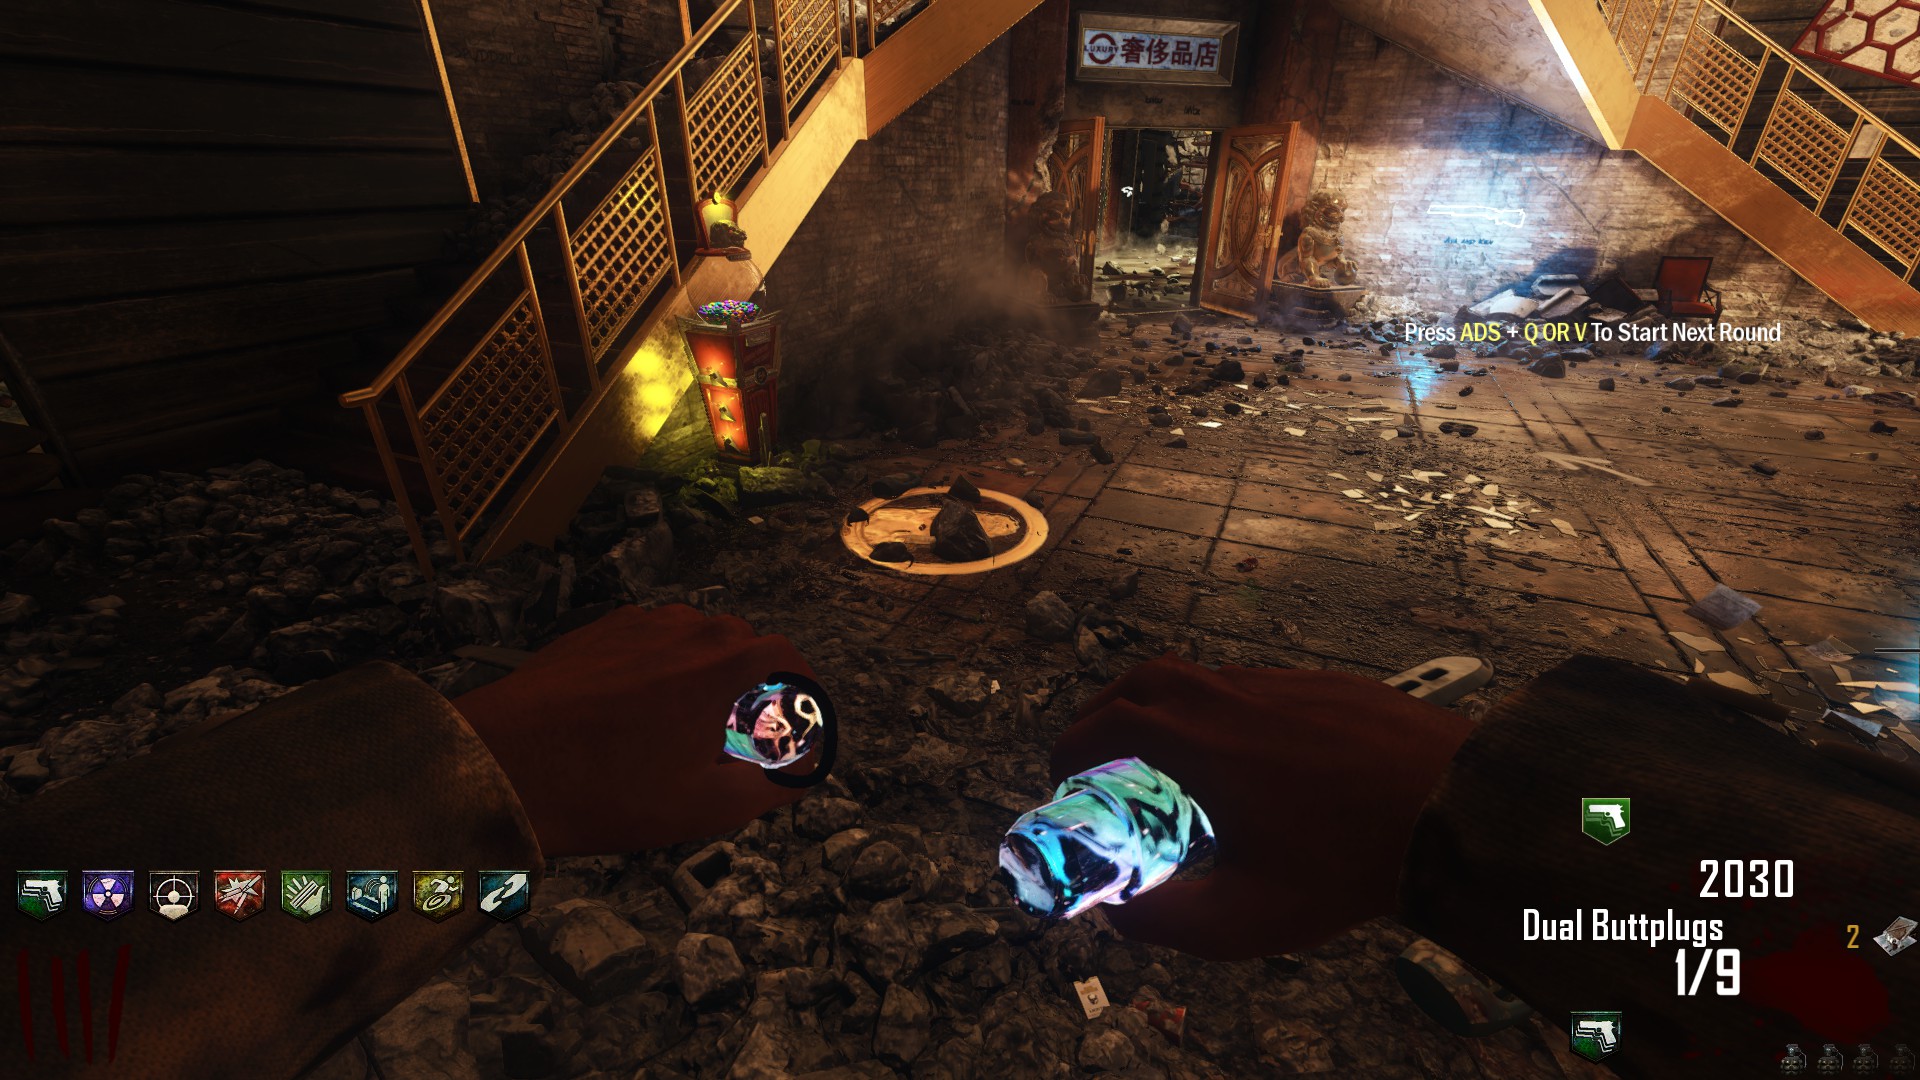
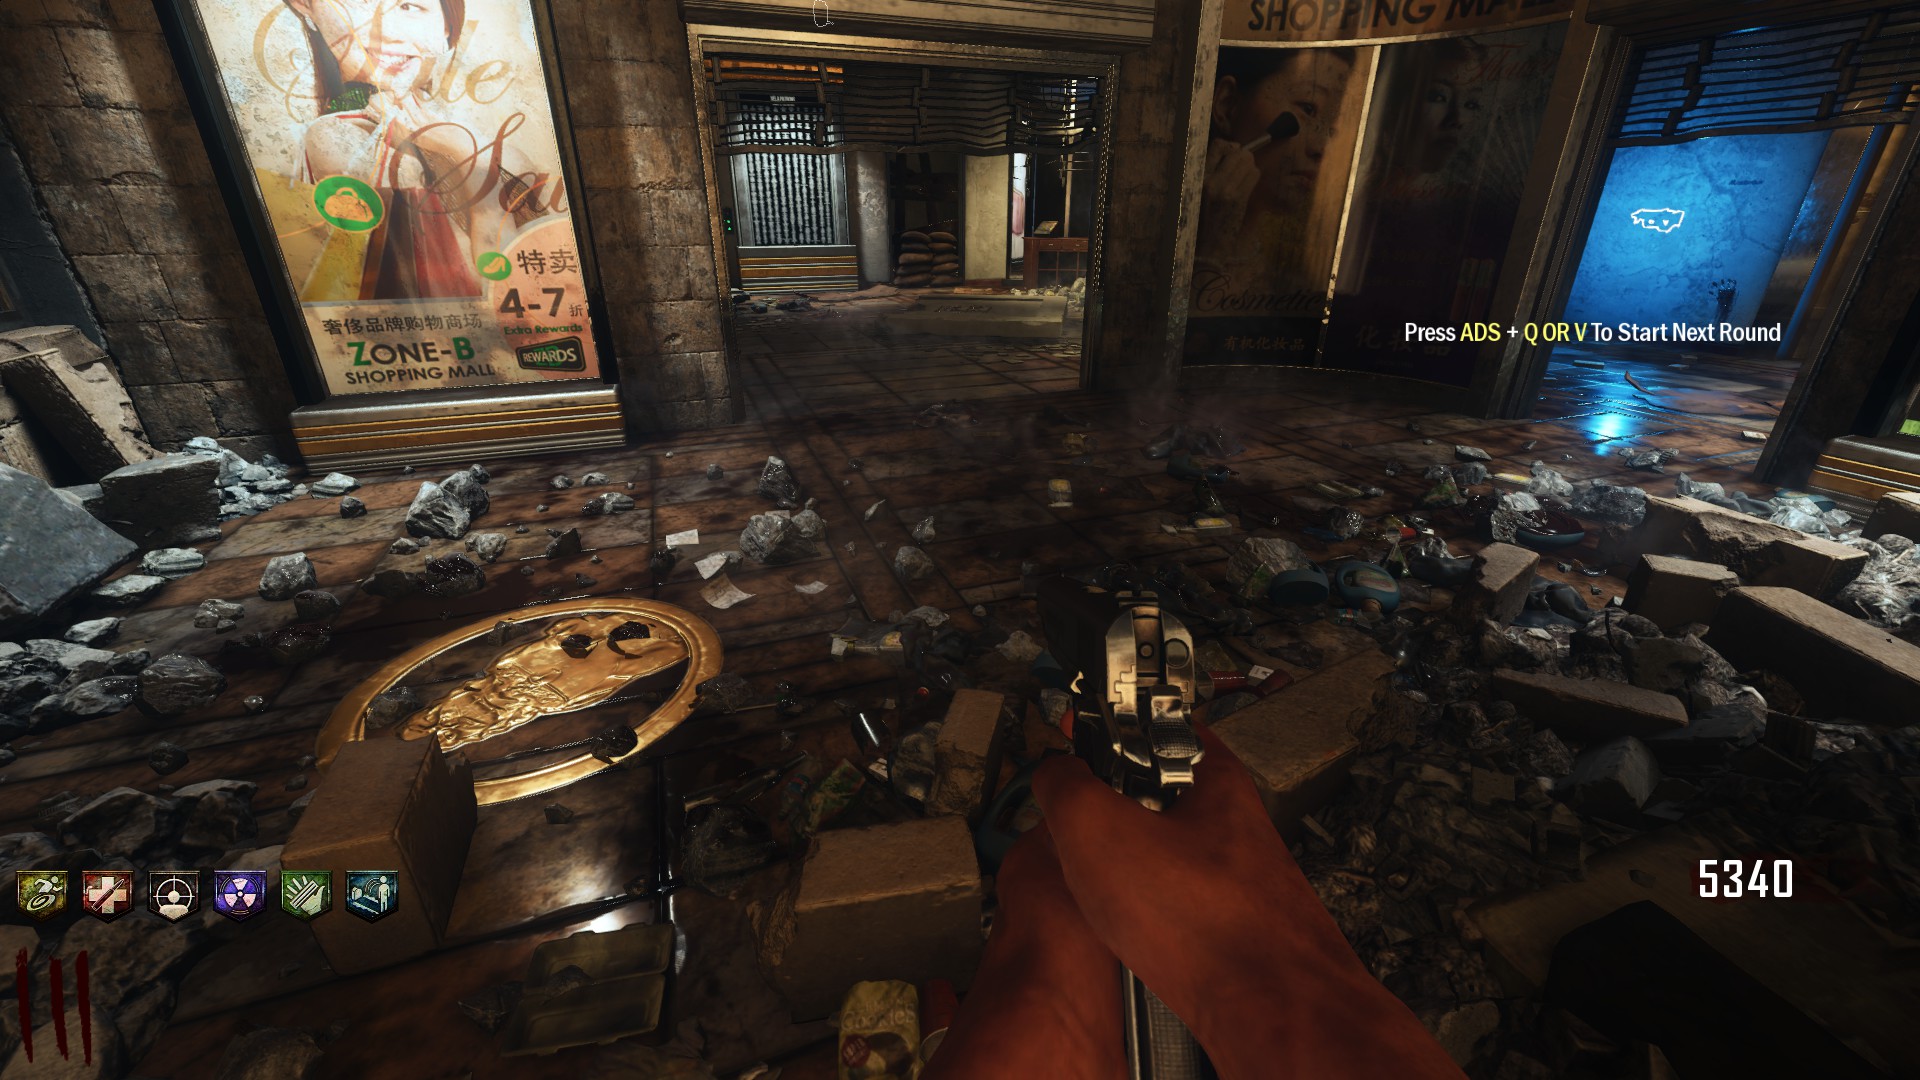 Now you need to place Trample-Steams on all four Dragon Crests and make sure that the Trample-Steams are facing the direction the Dragon Crests are pointing.

If you have less than four player or are playing Solo then don't worry after correctly placing a Trample-Steam on the Dragon Crest you'll be able to pick up another from the Workbench. Now grab the Channelling Orbs from the Lion Statues at Spawn.
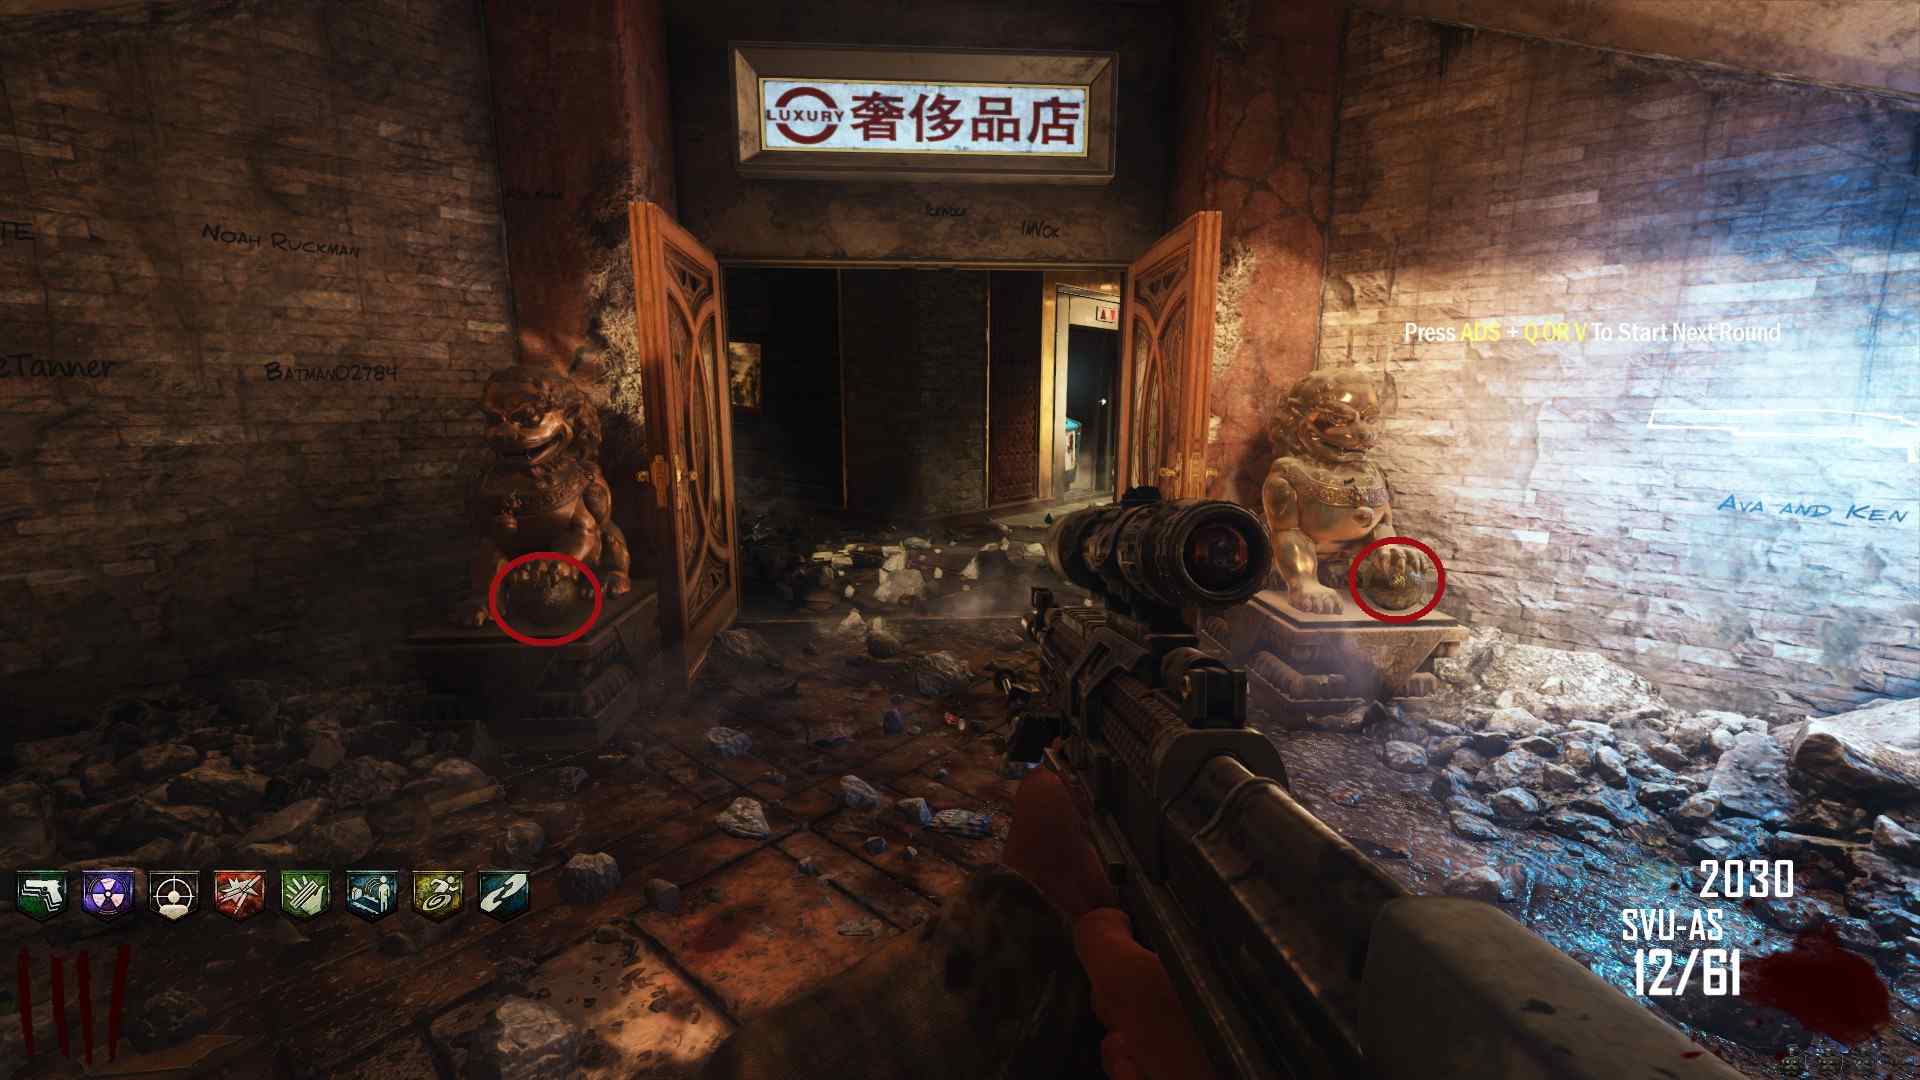 And place them on the Trample-Steams at Spawn and down the stairs.
 Now the Orbs will bounce back and forth between the Trample-Steams picking up Vital Energy and then after both have picked up enough, they'll explode, causing The Tower to channel the Vital Energy.
The Tower's Legs will start to glow orange, indicating that the step is complete.
Step 3 (Richtofen): Make Those Balls Wet!
Welcome fellow Richtofen fans! If your reading this that means you've chosen the correct, but sadly non-canonical path. Oh well time for the wettening! Our first order of business is to sabotage Maxis' plans by rendering the Channelling Orbs unusable.
How we do this is by going up to the Lion Statues at Spawn that are holding the Orbs.
And shooting the Orbs with ten shoots from the Sliquifier, each.

Which will cause Richtofen to say "Jaa! Make Those Balls Wet, You ♥♥♥♥♥!"
Anyways you'll know when your done because the Orbs will be spinning.
Step 4 (Richtofen): Bloody Steam
 Everyone just has to place a Trample-Steam on one of those Crests with the Trample-Steam facing the direction the Crest is pointing. Then you have to lead zombies into it.
You don't need it to kill a specific number of Zombies, you only need the Trample-Steam to activate sixteen times, you can even activate it yourself. Keep in mind that every player has to do this on a different Crest meaning in Solo you only have to do this once on any Zombie Crest. Once done The Tower will be charged, and The Tower's Legs will start to glow blue.

Now we can move on to the final step!
Step 5: Mahjong Shuffle
Oh boy, it's time for the worst part of the EE, now I don't say that because it's a bad puzzle or anything, no in fact I really like this puzzle, however the clues you have to find are on small Mahjong Tiles that are hard to see, unless you already know where they are. So be glad I saved you the suffering.
But first, I need to explain this puzzle. Each Mahjong Tile is either a 風/Wind or 索子/Sō tile. The 風/Wind are "北" meaning "North", "南" meaning "South", "东" meaning "East" and "西" meaning "West".
With the 索子/Sō being a basic, one object means one, two means two, three means three, and four means four. With both being either Red, Blue, Green, or Black.
The 風/Wind tiles tells you which Tower Legs to hit and the 索子/Sō tiles tells you in which order, with color being used to connect the 風/Wind and 索子/Sō tiles together.
So if East and One are both Blue, then that means East is the first one you have to hit, and if West and Four are Black then that means West is the last one you have to hit.
Here's a little cheat sheet I made to help you: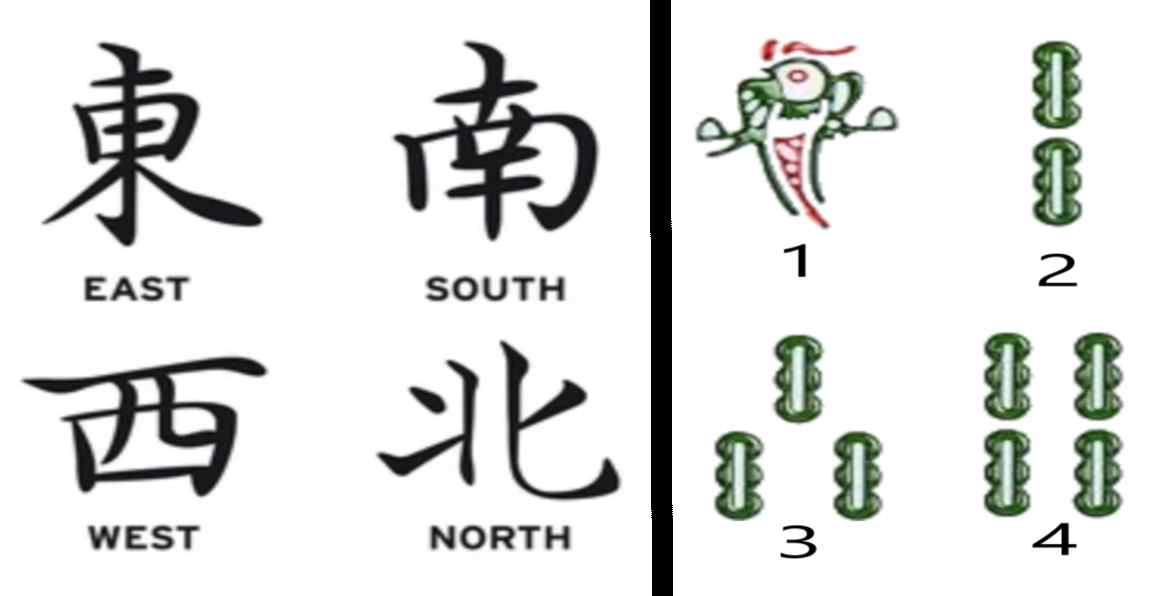 I hope it's somewhat helpful.
So all around the map are these little Mahjong that have either a direction or a number in certain color, these will tell you which order to strike the Tower Legs in with the Galva-Knuckles.
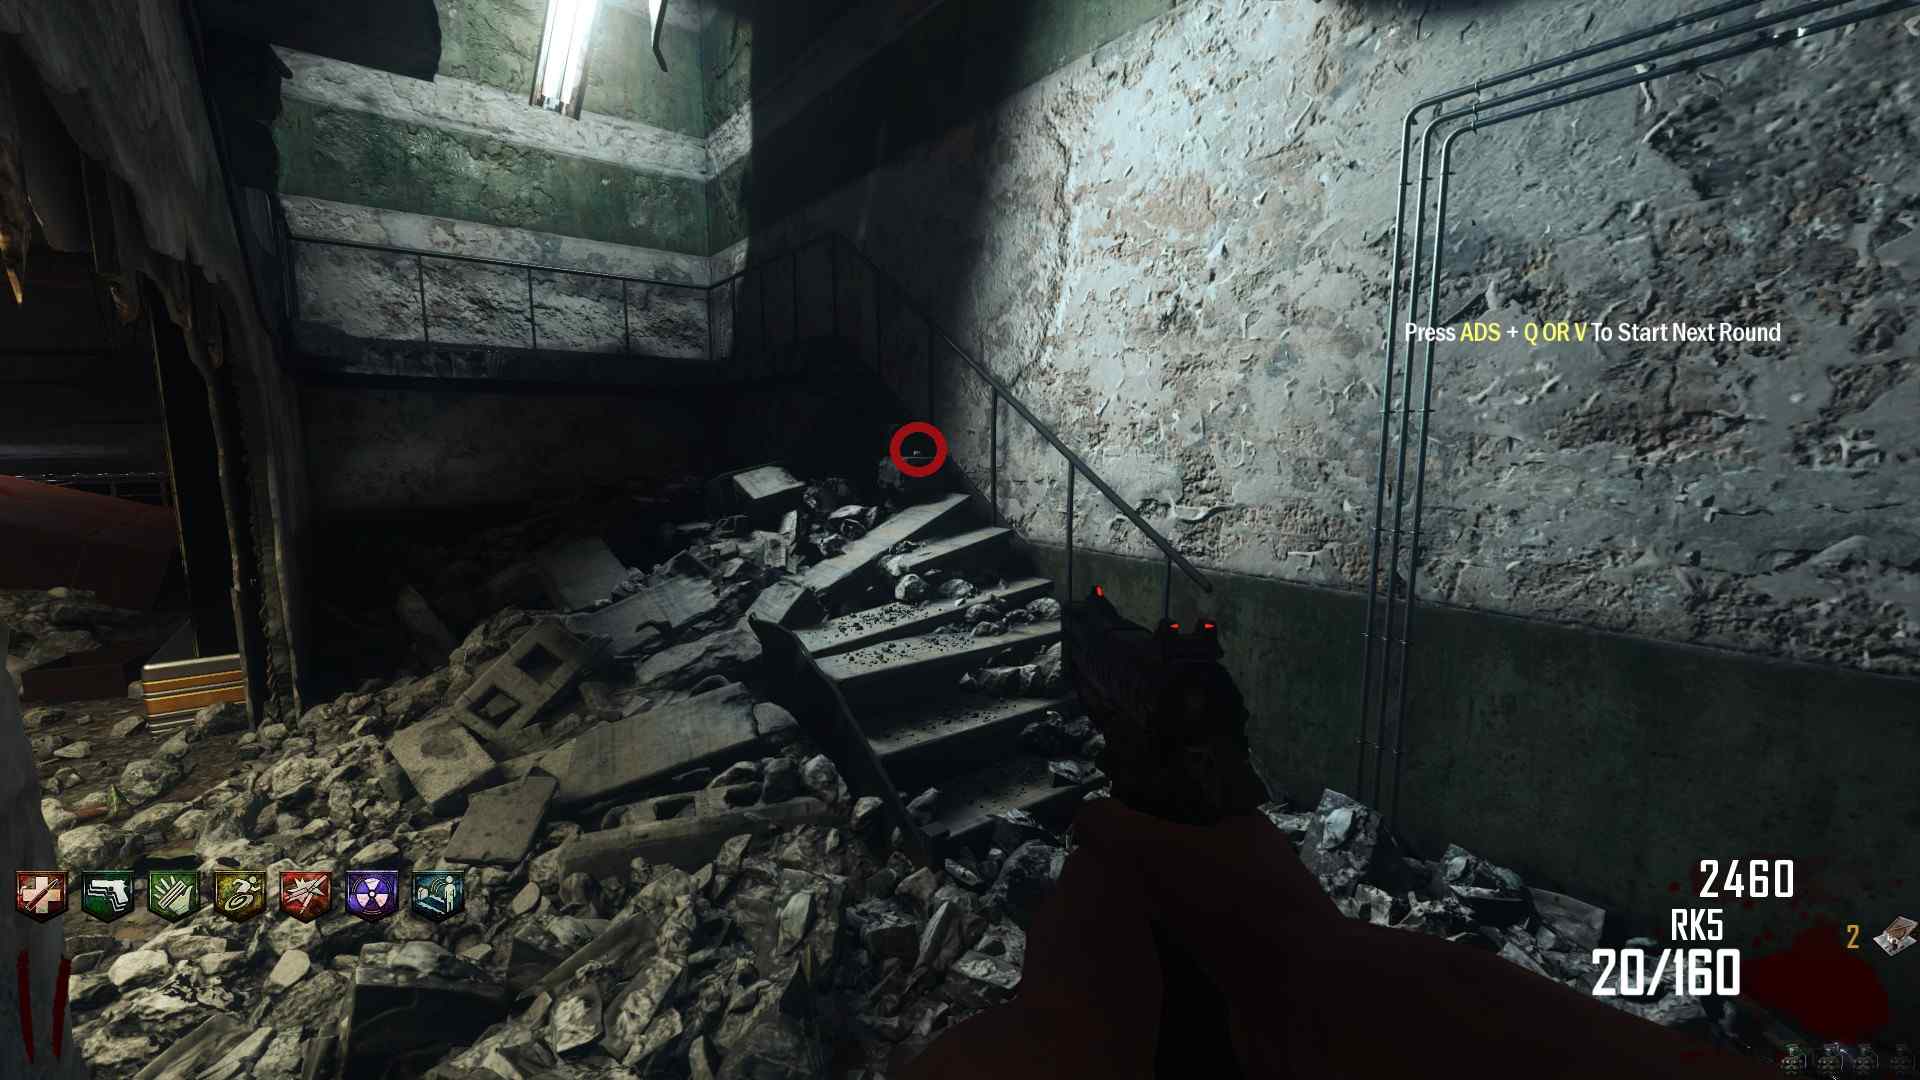
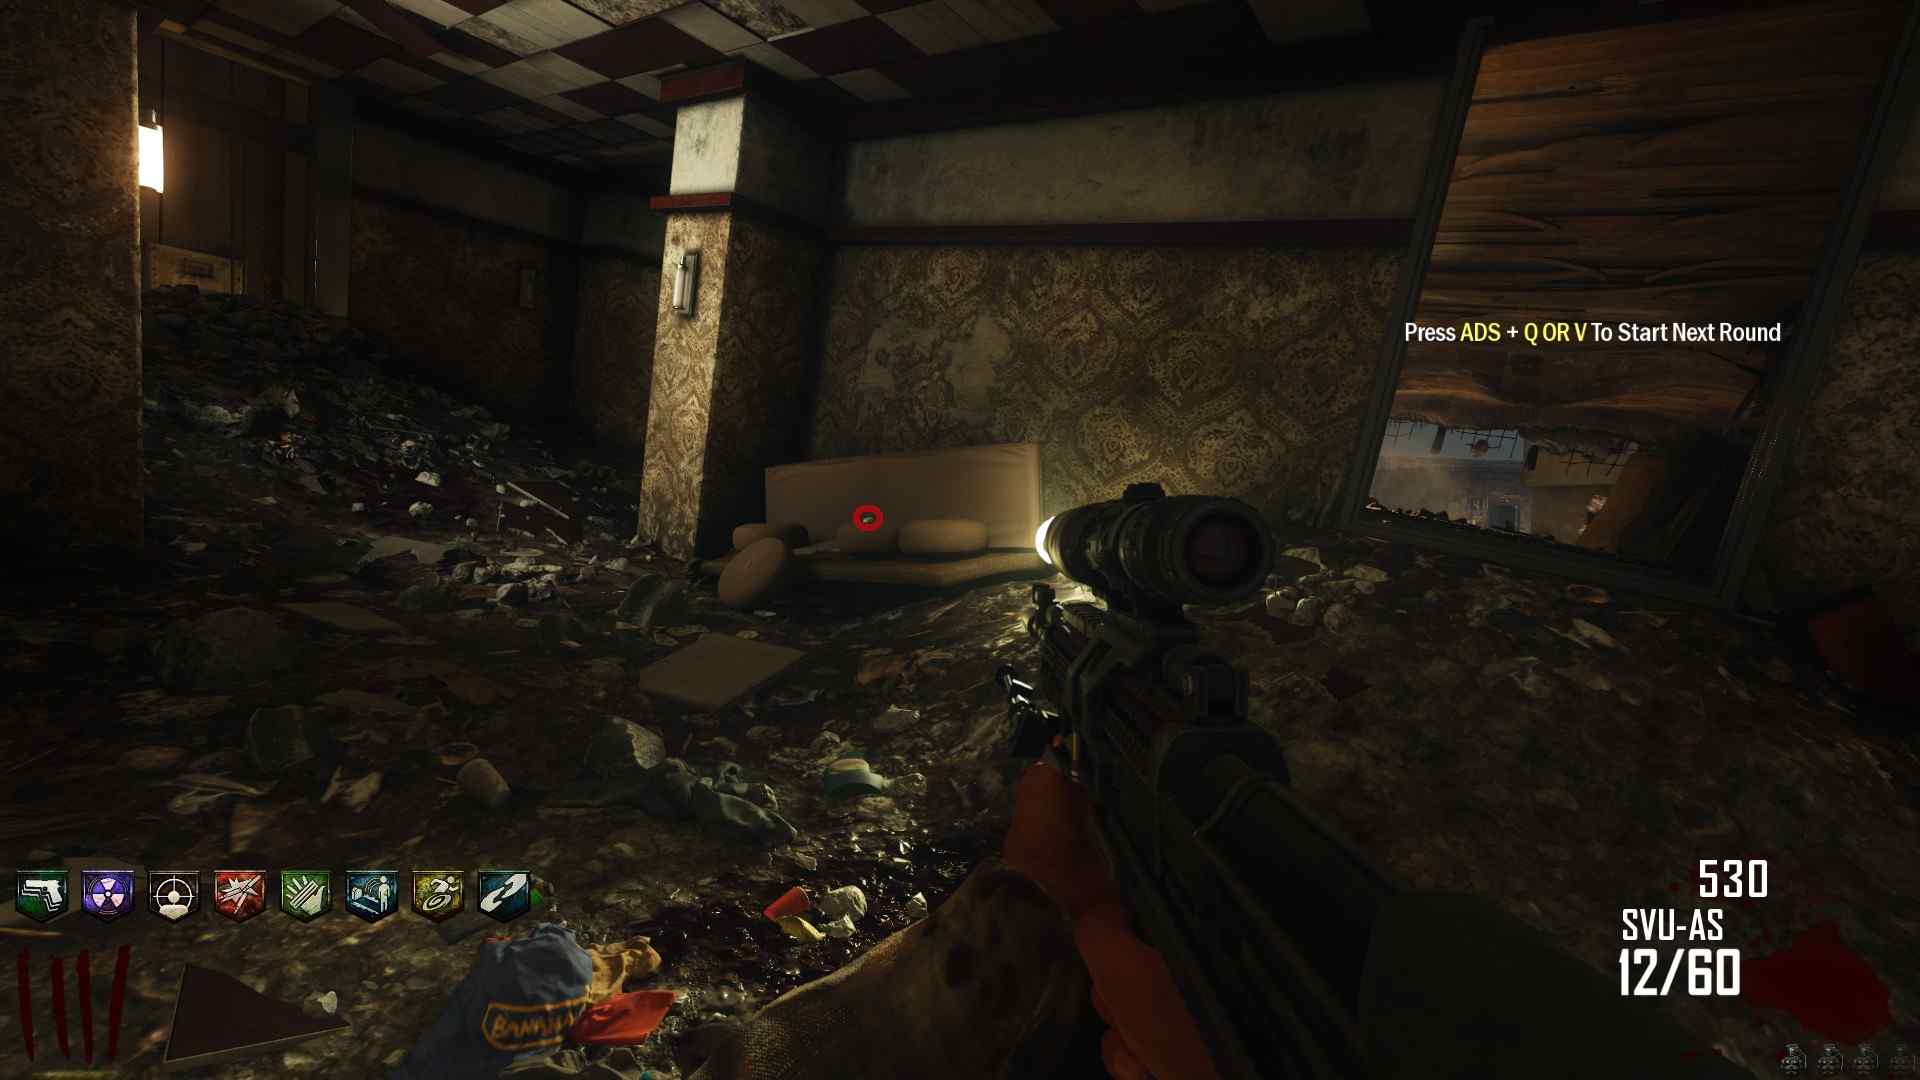
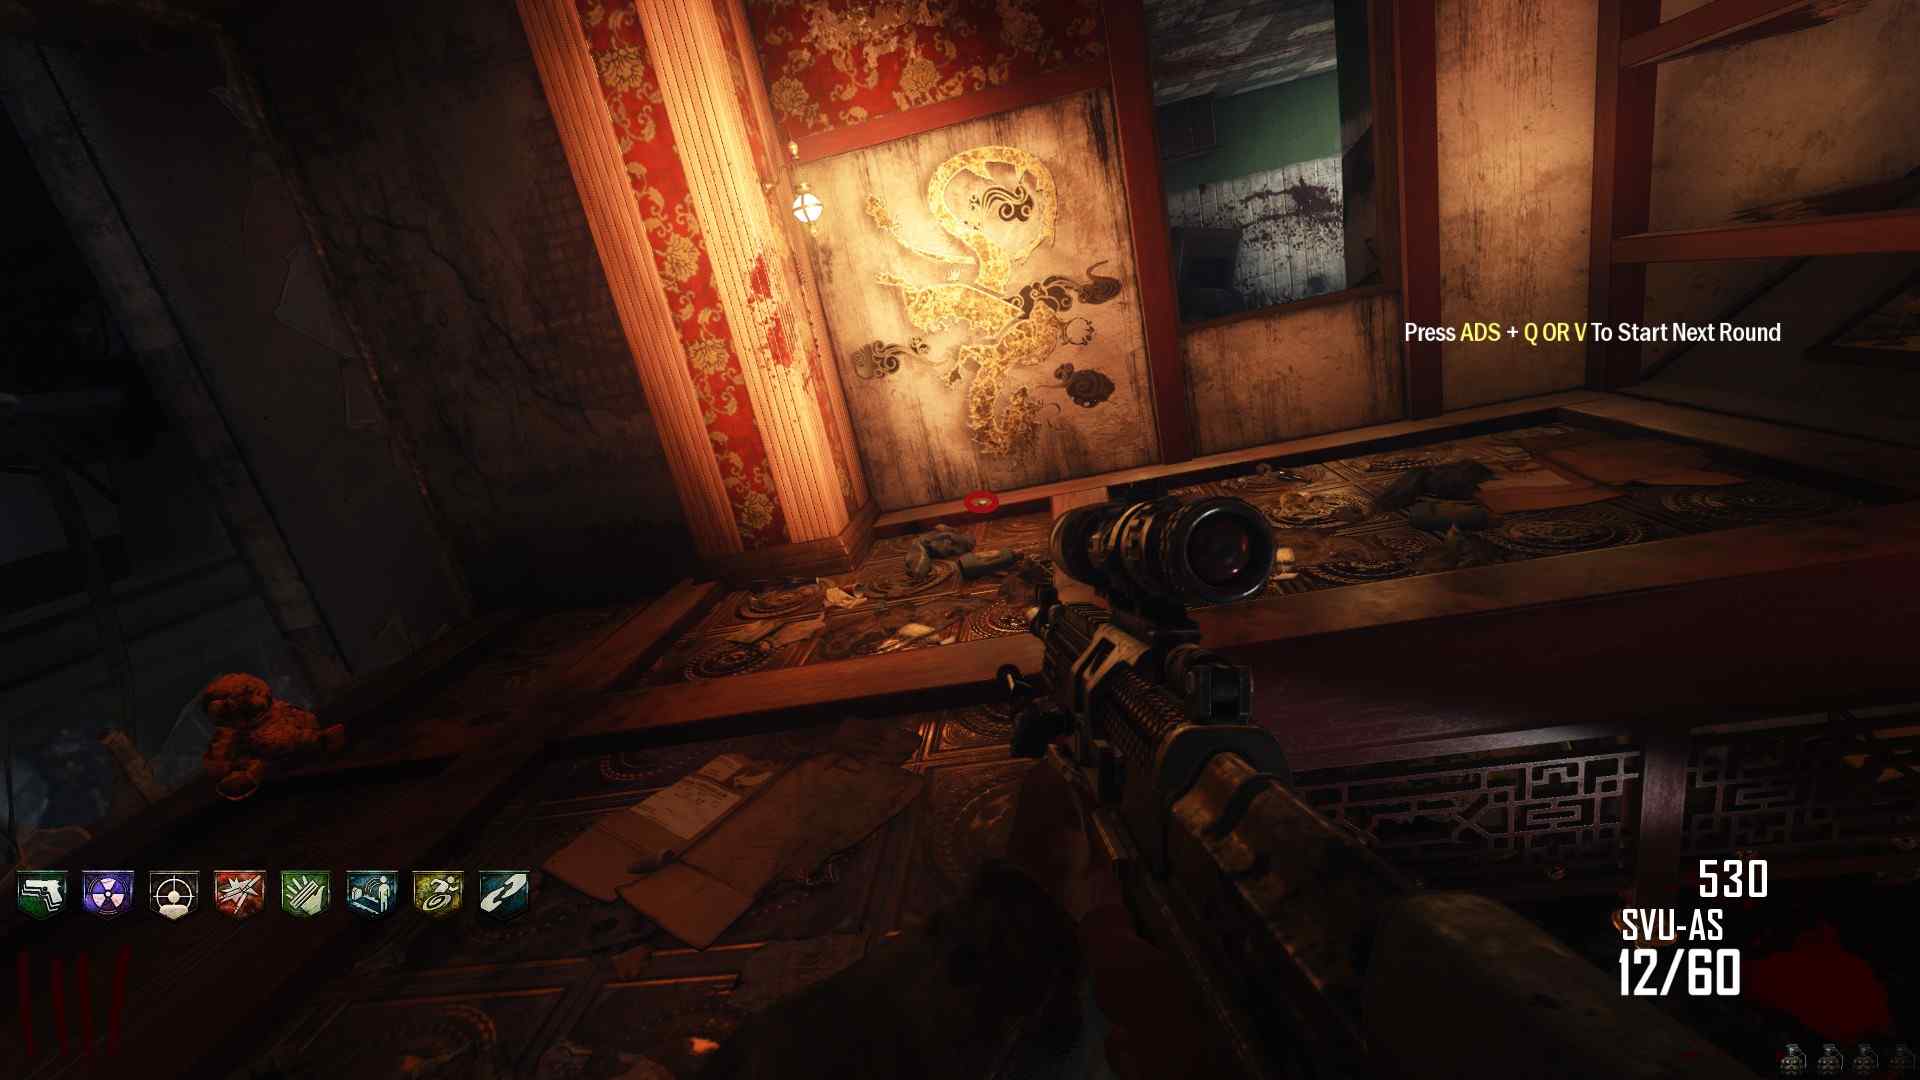
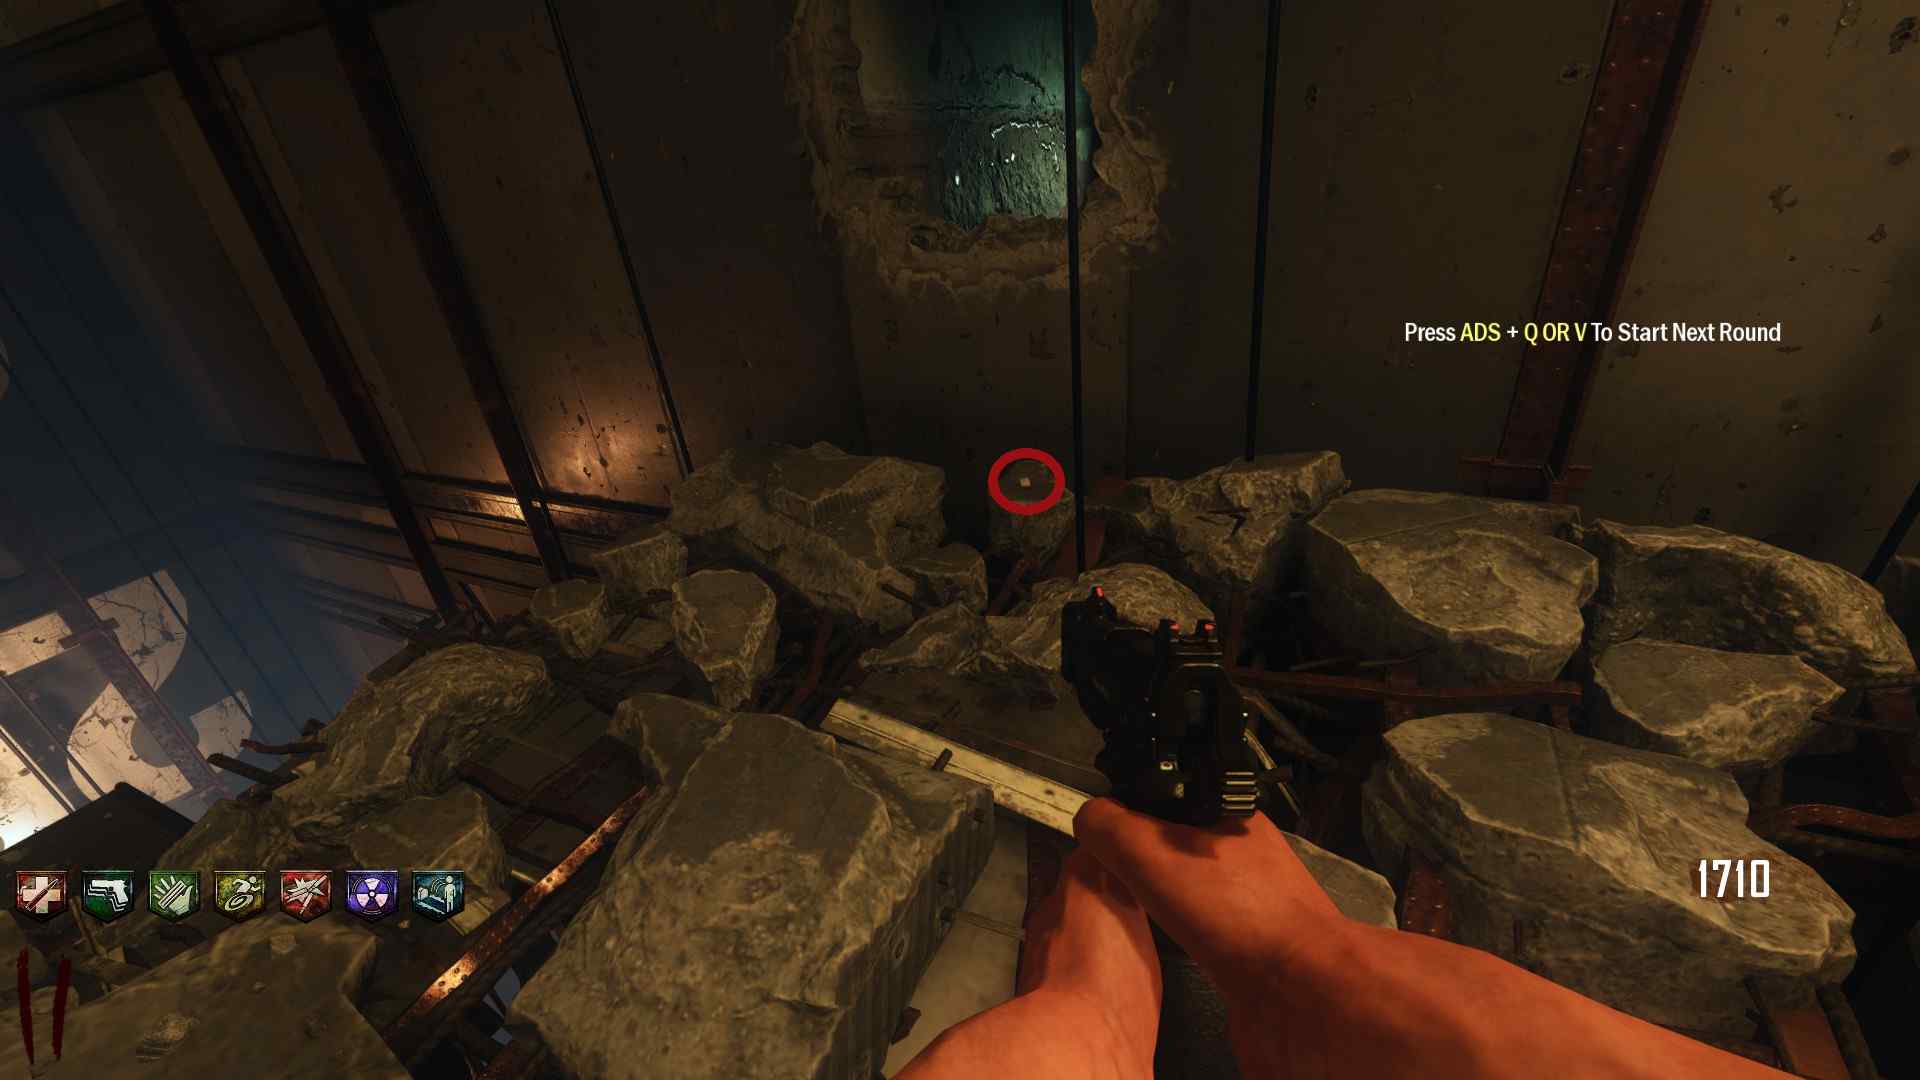
There are eleven different locations the Mahjong Tiles can spawn, but only eight tiles will spawn, so don't freak out if you check a location and the tile isn't there.
The first location is behind the front desk at spawn.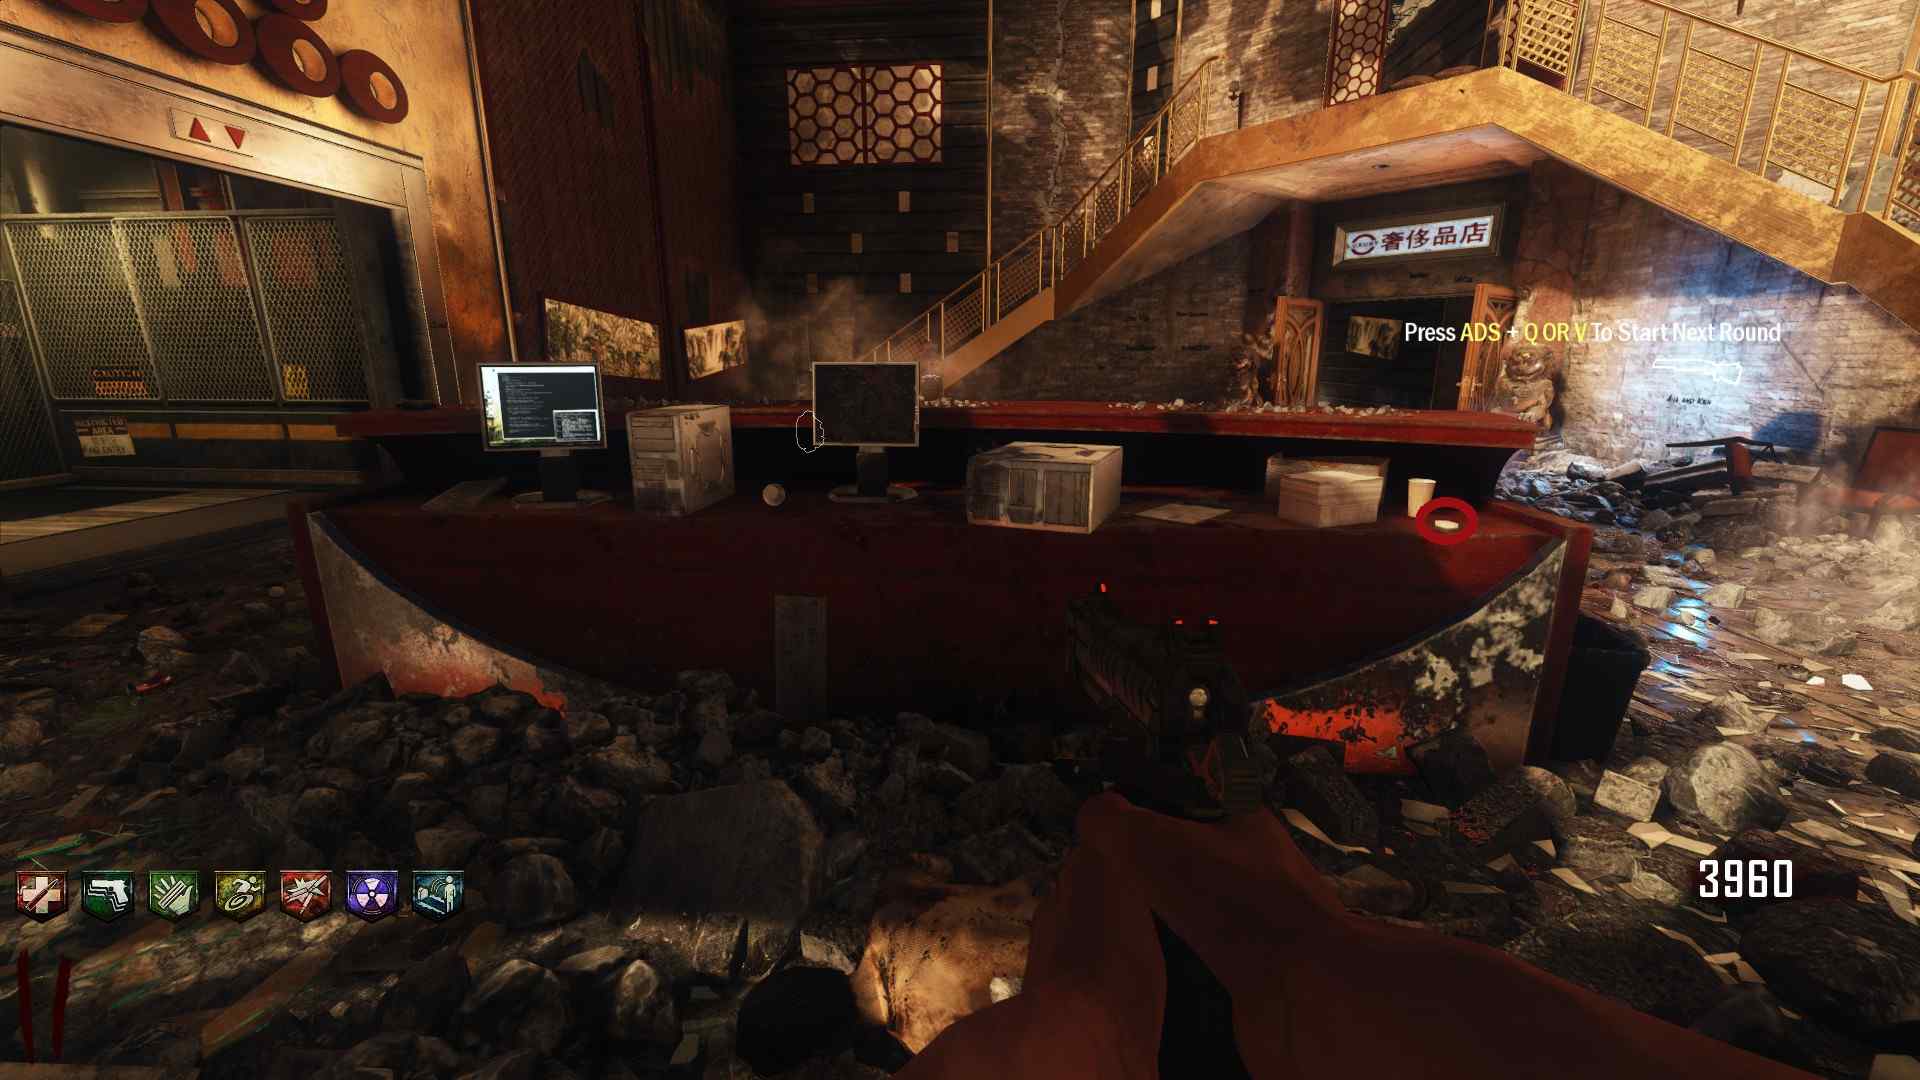 The second location is at the foot of the stairs past the first door.
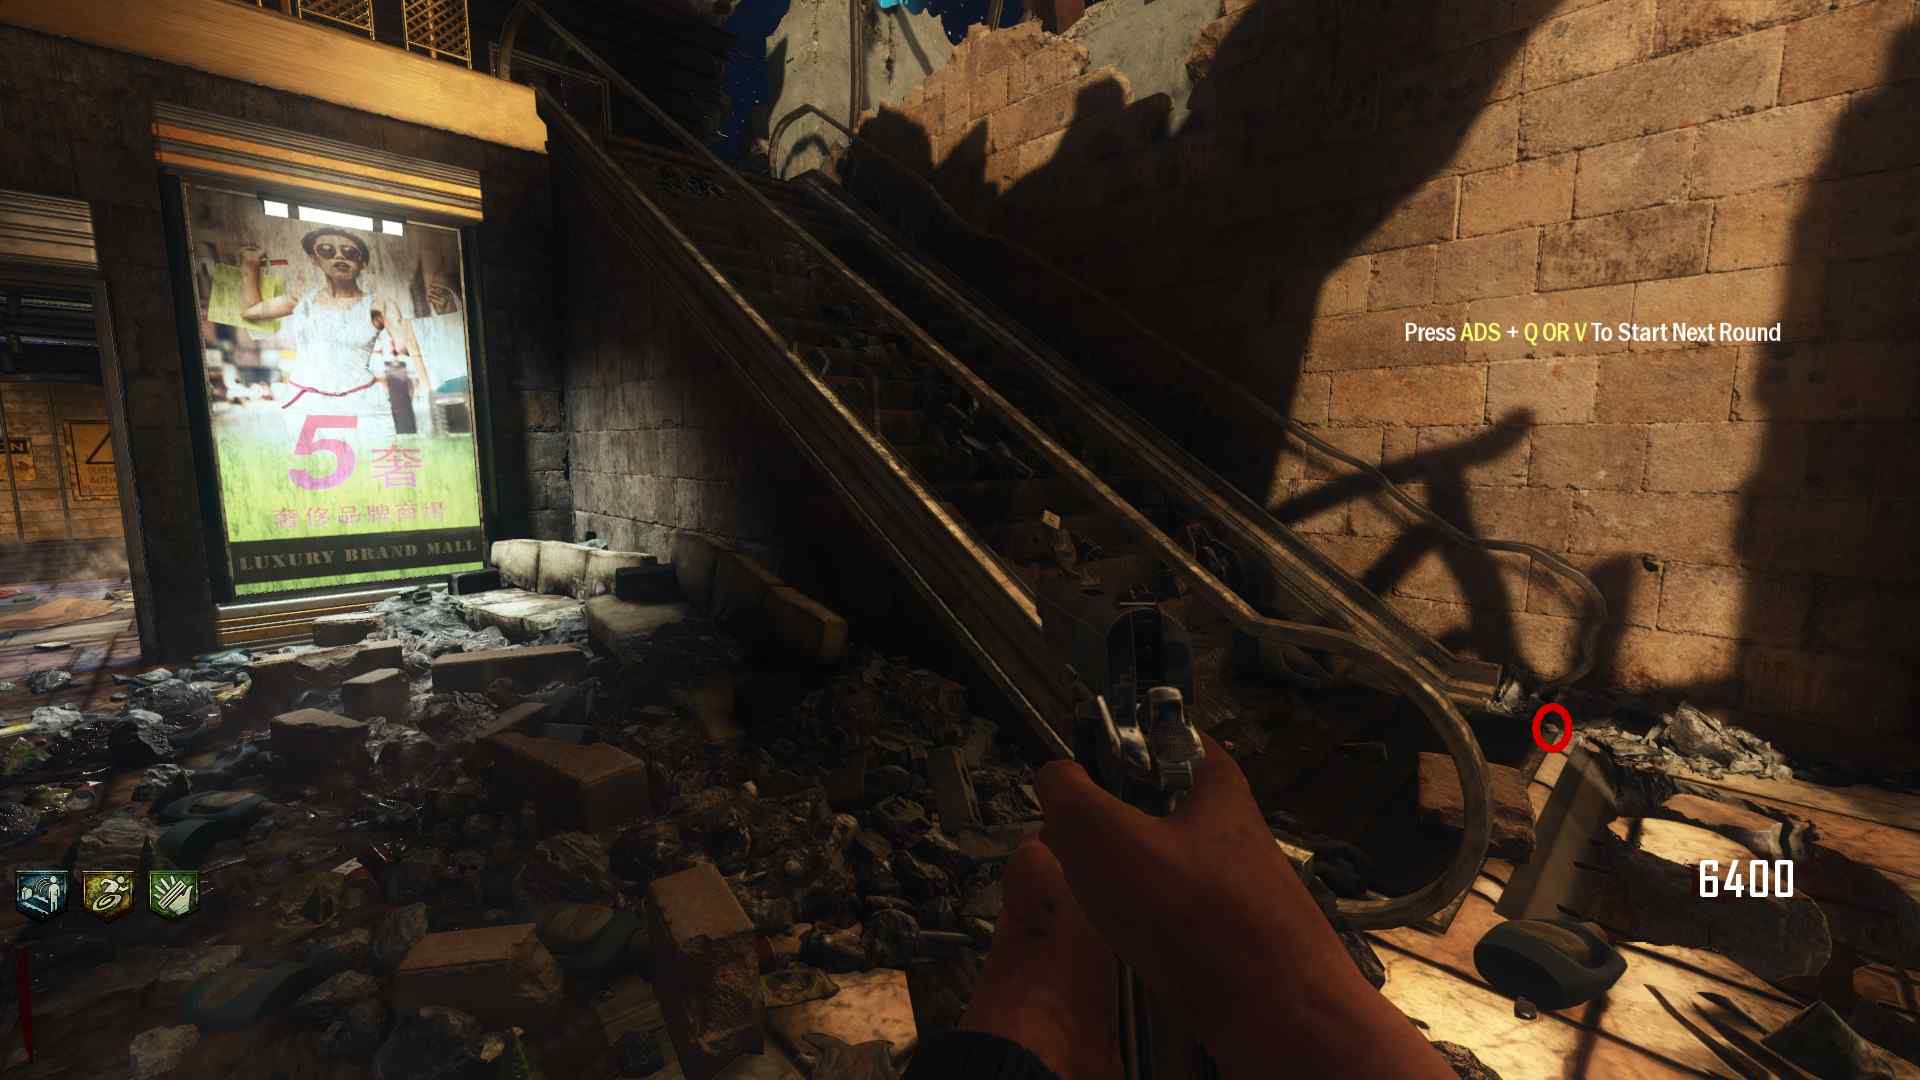 Another location is on top of some destroyed stairs.
 Another location is on a couch in the upside down building.
 Another location is on the upper level of the Buddha Room.
 Another location is in the Broken Elevator Shaft, on floor 25 to be exact.
 Another location is on a table in the Power Room.
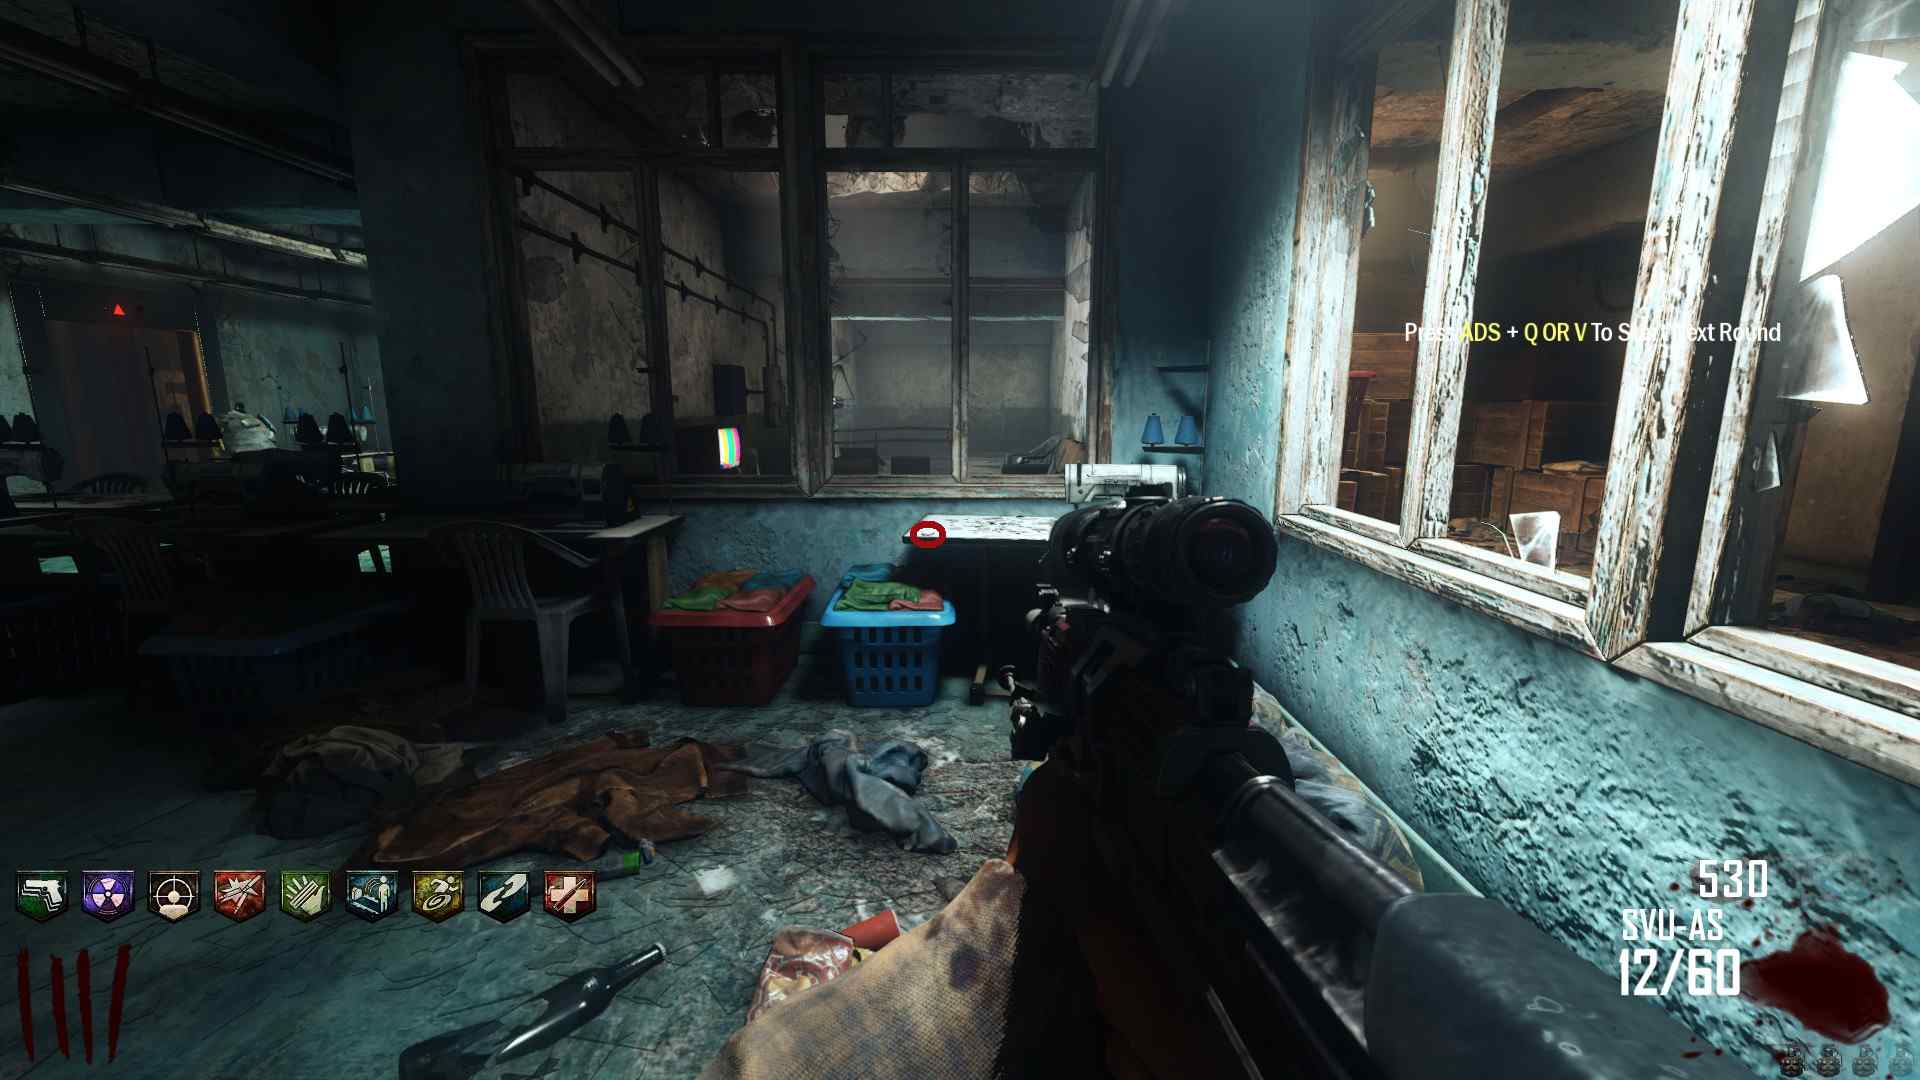 Another location is on a table next to a hot water tank on the floor under the Rooftop.
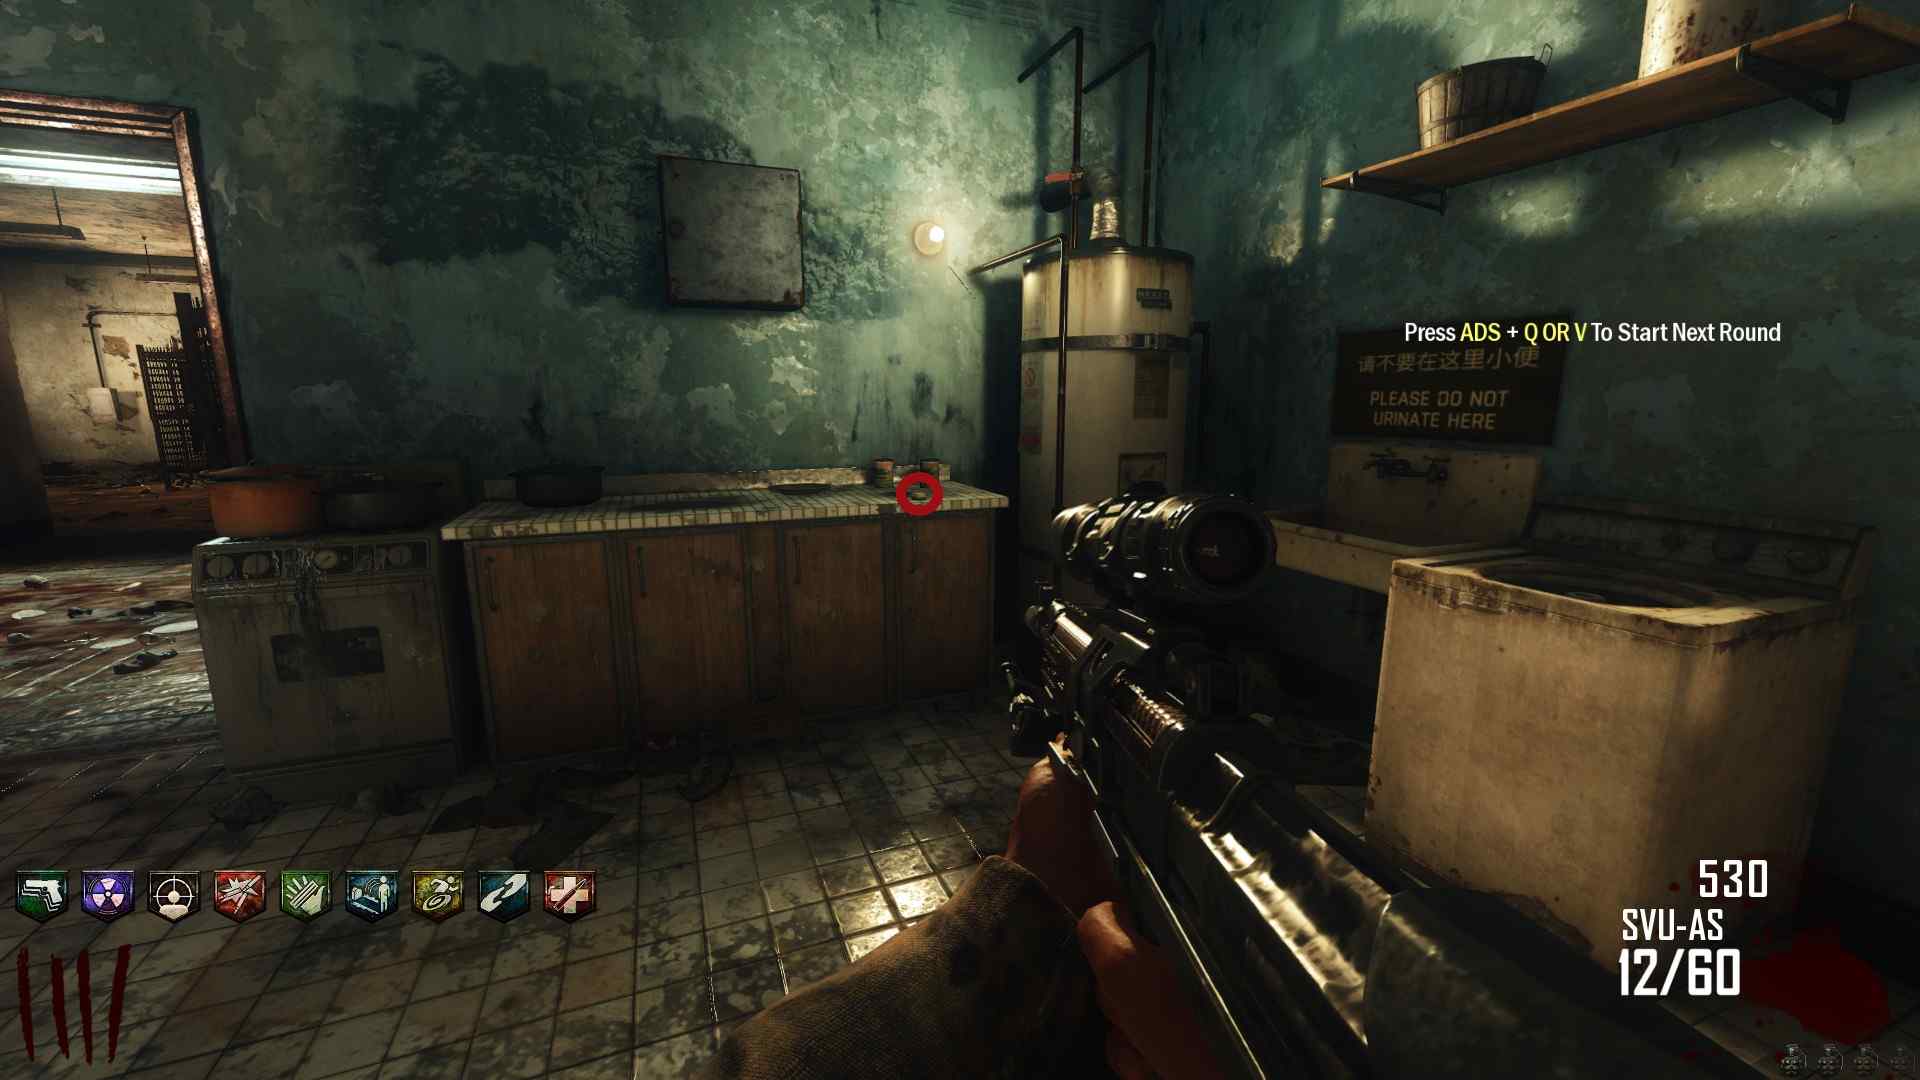 Another location is on a shelf in the same area as the Sliquifier Workbench.
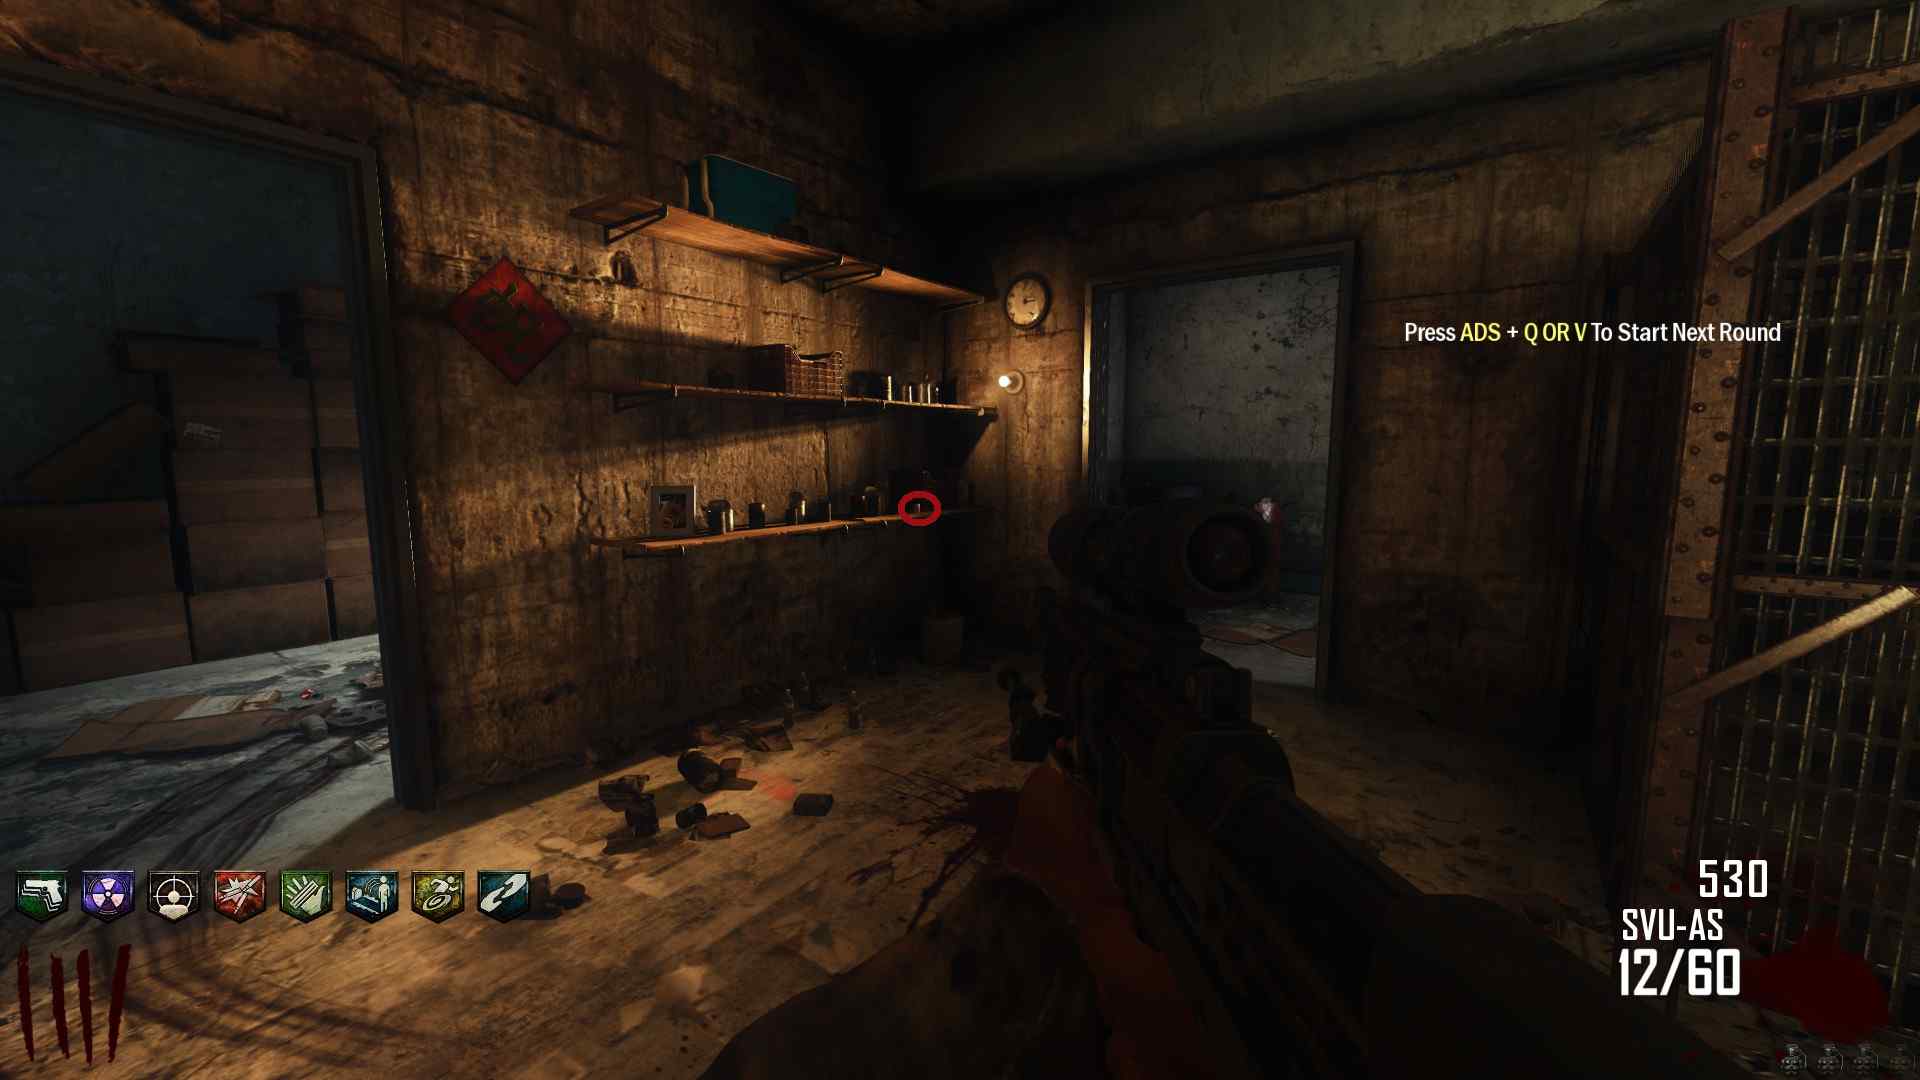 Another location is on a chair in a shack next to one of the Dragon Crests.
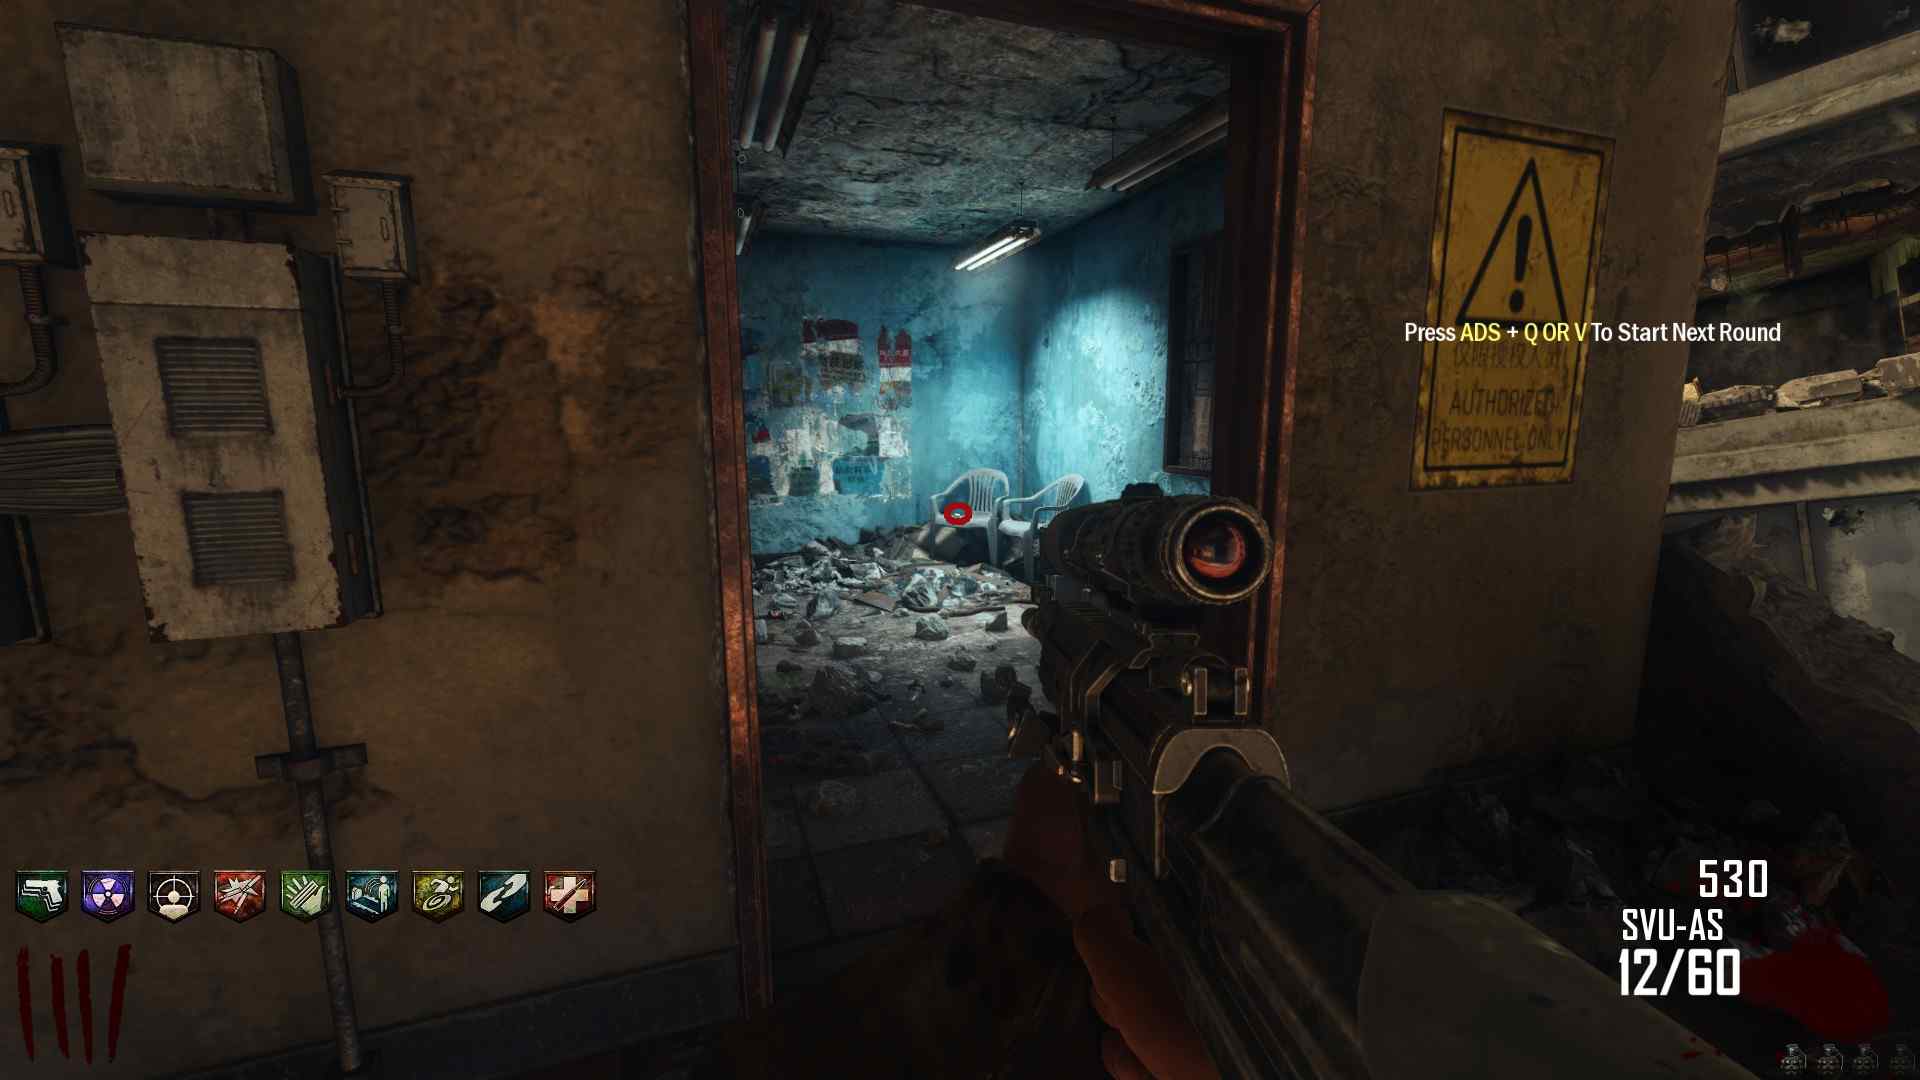 And the last location is next to the Tower Legs.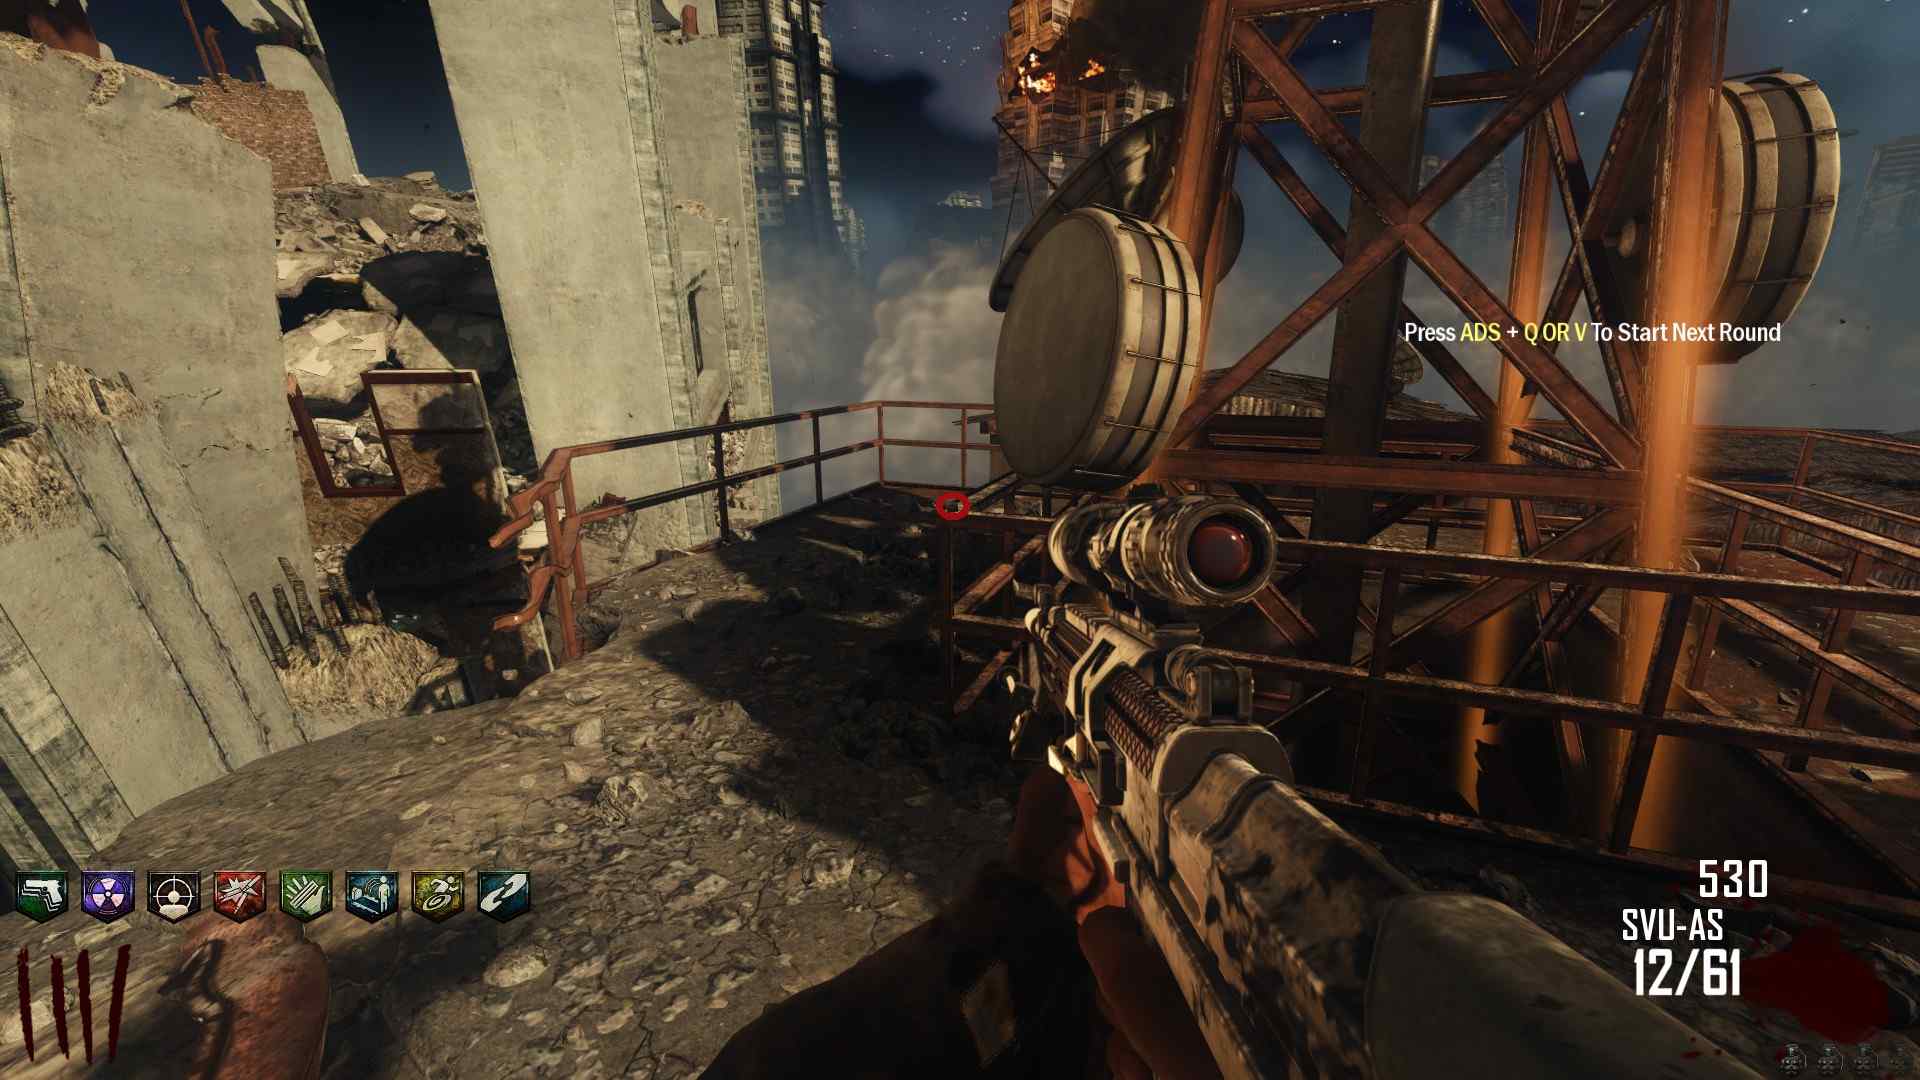
And that's all the locations that I'm aware of. So after you write those down, or memorise them if you have a photographic memory. Use the colors to connect the directions to the numbers. Now there is the issue that North, South, East and West don't really help us without a compass.
Now I have no Idea how people figured this out, outside of just using Trial & Error. But the Dragon next to the tower is West meaning across from that is East, and the Trample-Steam Workbench is to the North meaning across from that is South.
So we now know which Tower Legs to strike, in which order, and which direction each Tower Leg is facing. So hit them with the Galva-Knuckles which will charge up The Tower making it glow either Orange or Blue.

Sorry if this last step turned into a mess, it's hard to explain the Mahjong puzzle. But hey if you did it, enjoy having All Perks Permanently. Yep you get to keep then after you die, well unless your playing Solo then you don't keep your Quick Revive.
It also unlocks the Gobble Gum Machines for future playthroughs and the Nav Card Reader spawns pre-built.
There is the small issue that like the original, you can't do the same side of the EE twice in a row, if you do the Maxis side then you can only do the Richtofen side afterwards, and vice-versa.
Side EE?: Free Perk
 There are multiple ways to do this, using a Bowie Knife, Galva-Knuckles, Trample-Steam, of just pure raw sharpshooting SKILL.
Does this even count as an EE anymore, this is pretty much common knowledge at this point?
Side EE: Golden Key
So you have your Elevator Key but it isn't enough, you want some elevators to just stop moving, or to be able to buy certain perks that you just can't seem to find, or you're just annoyed by the cool-down on the Elevator Key. Well don't worry the Golden Elevator Key has you covered.
Now getting it is simple, just use the regular Elevator Key on every Elevator Panel you can find, including the unique panel in the hallway you find the regular Elevator Key in.

There's eight panels in total, and you'll hear a sound effect when you get the Golden Elevator Key This upgrade removes the cool-down and lets you lock elevators in place, as well as giving you the option to swap-out some perks with others that are normally unobtainable.


So go ham, I guess.
Side EE: Phd Slider
This will cause the elevator to rise back up to Spawn. Ride the elevator back up and then repair the Internal Elevator Panel,
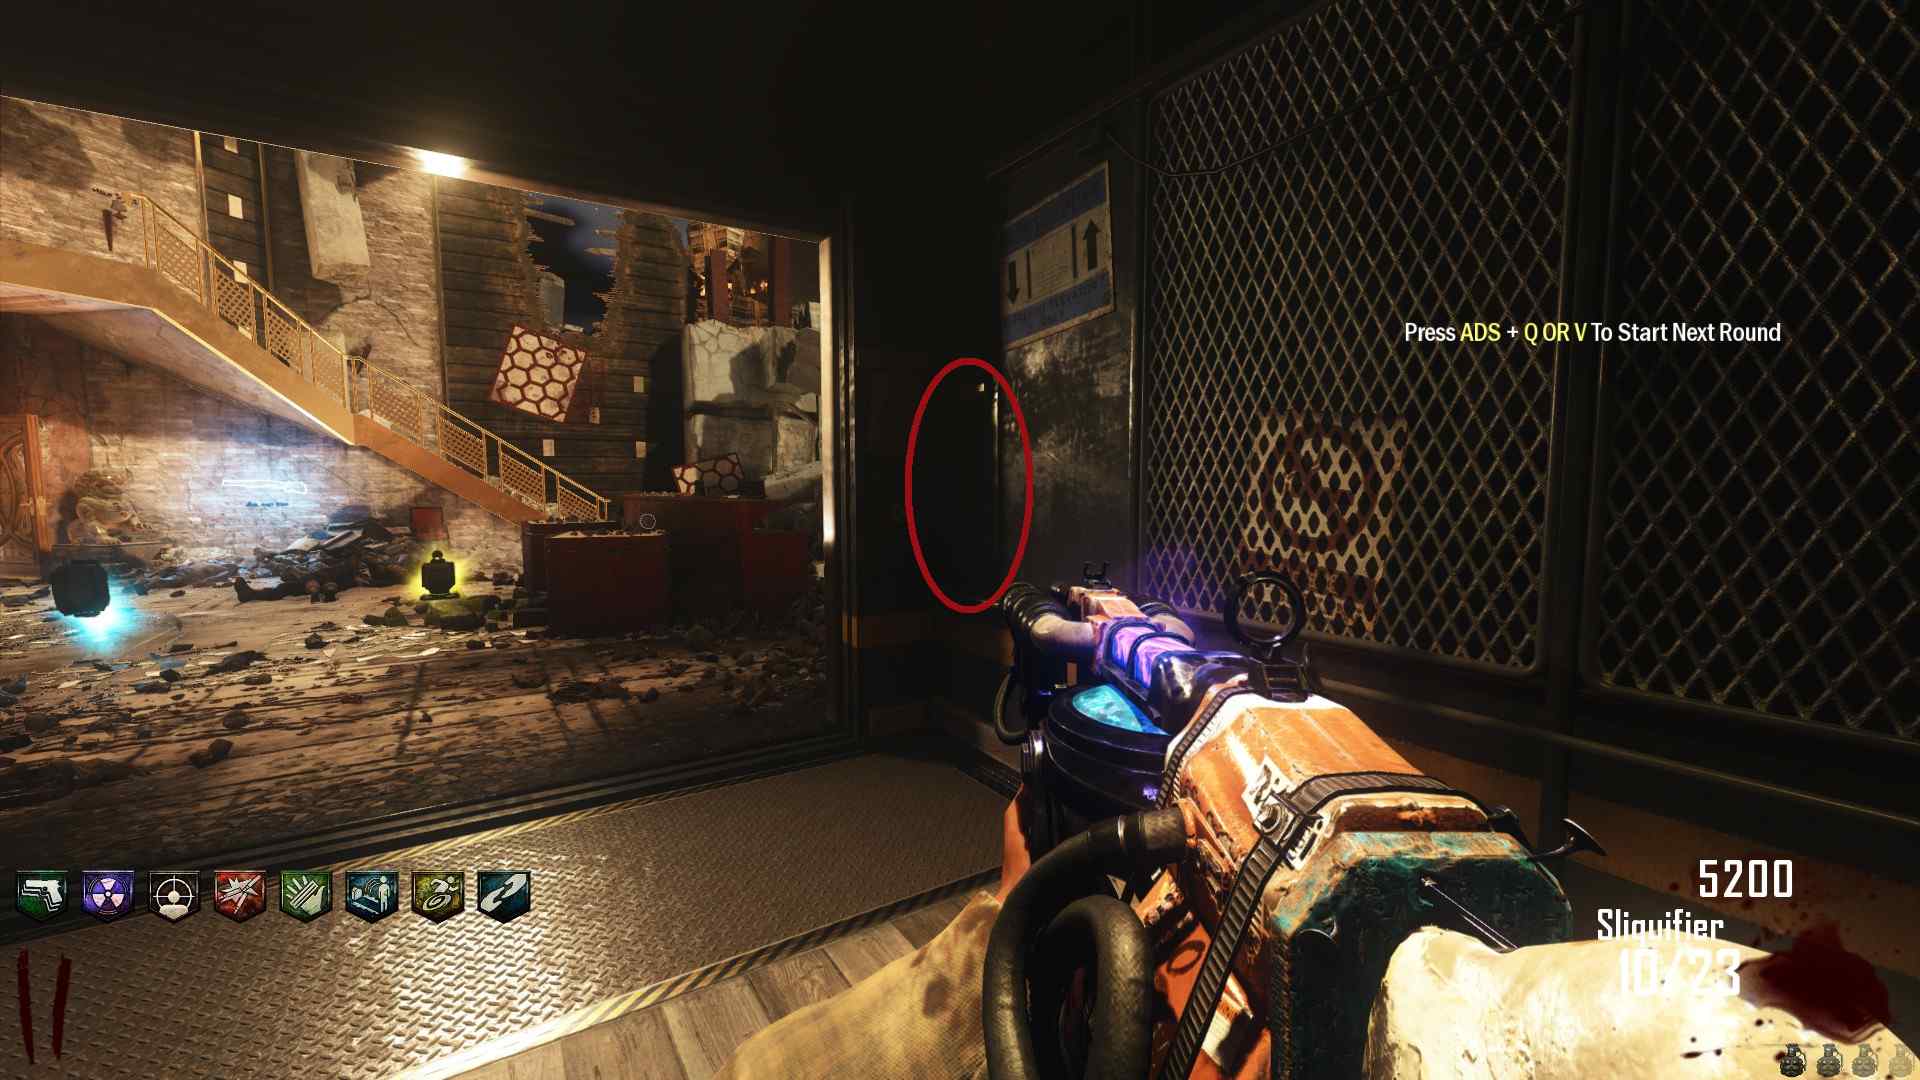 Once repaired the elevator will still fall down, but it will stop halfway, at a hallway leading to Phd.
Finally after years of waiting, year of this perk machine taunting me, I can finally have Phd on Die Rise! And better yet it's been upgraded, because now with Phd if you fall off the map, it'll save you.
Side EE: PAPed Sliquifier
Unfortunately the Pack-A-Punch doesn't like the taste of the Sliquifier so we have to jump through a few hoops.
First we need to head to the restaurant, look for the Neon Sign hanging off the side of the building, and shoot the 国 Character ten times with the Sliquifier. Make sure you empty an entire clip into it! (Is clip the right word in this case? I guess vial would be more accurate.)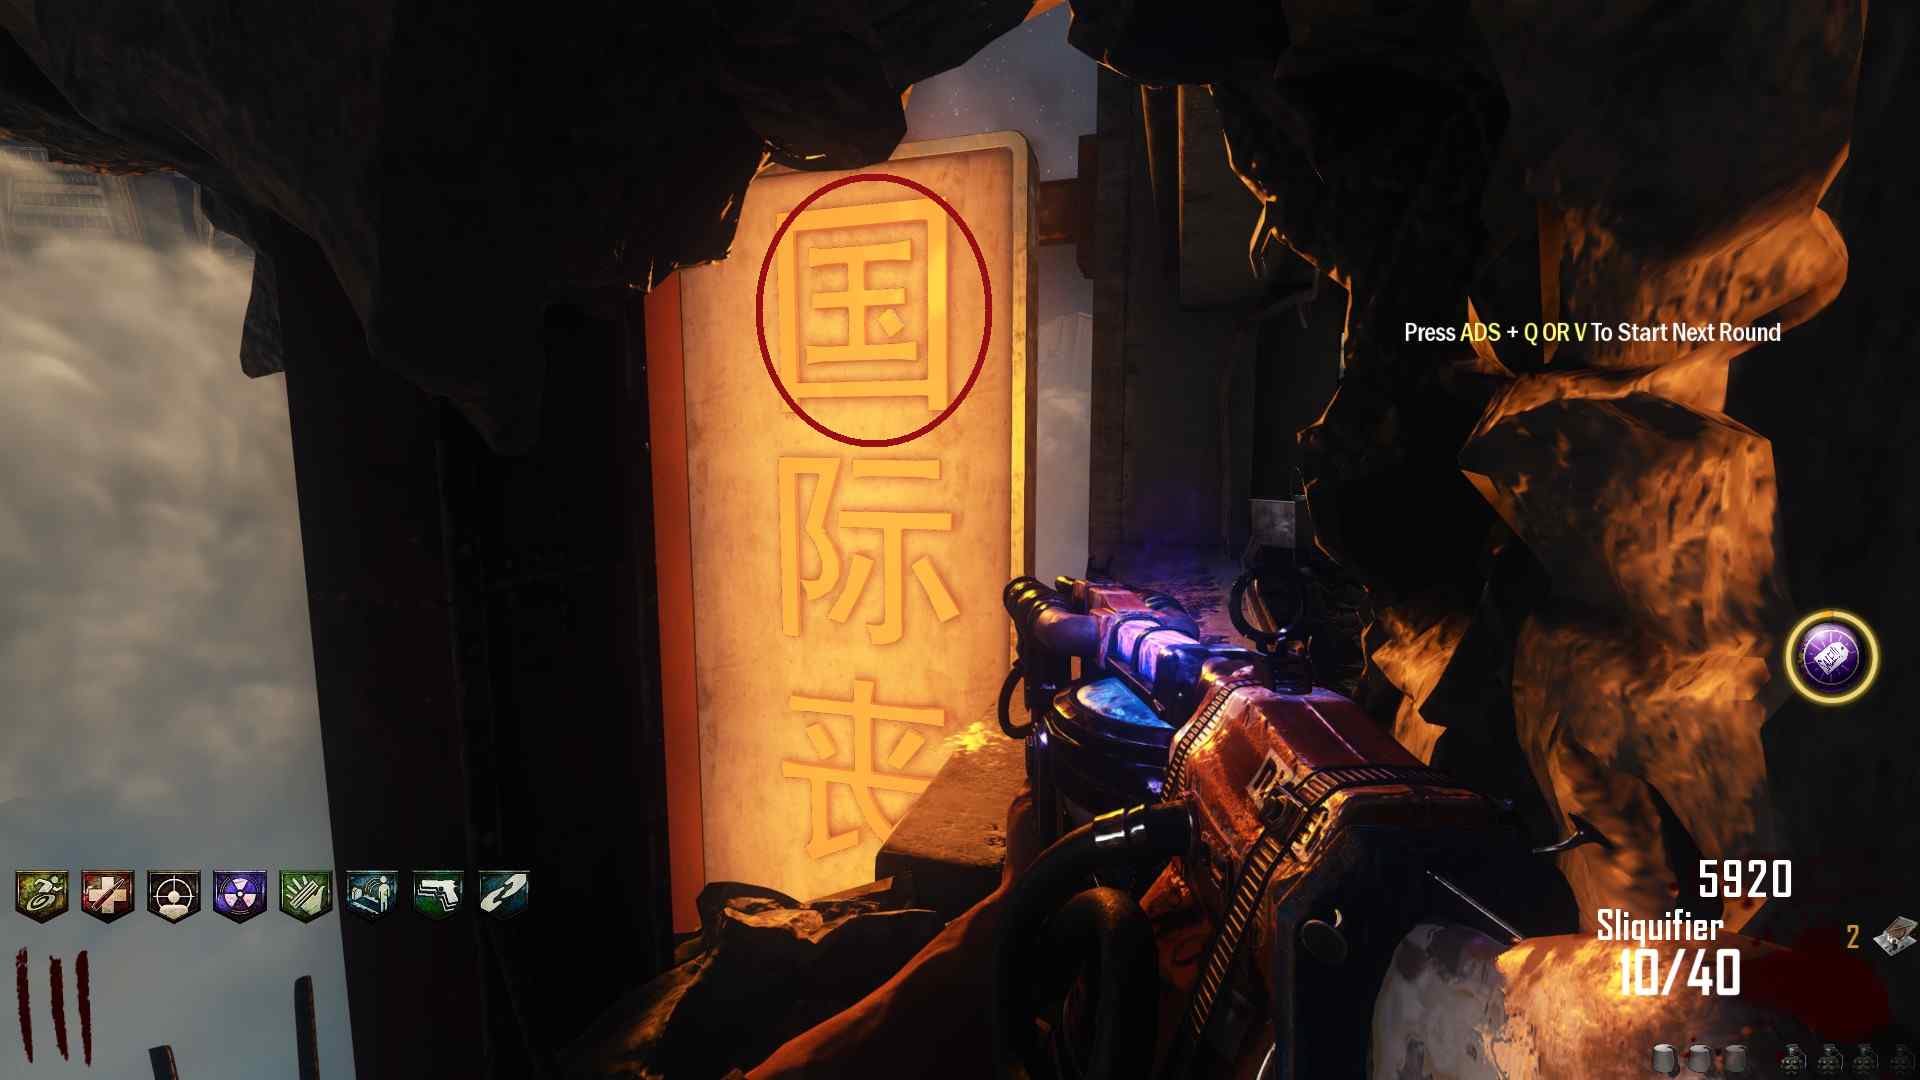 Now you might have noticed these glowing vials around the map, now you can shoot them with the Sliquifier to collect them. There's five in total, one is behind a Barrier on the floor below The Rooftop.
 One is on the Workbench the Sliquifier is crafted on.
  One is hidden under a platform in the Broken Elevator Shaft, right in-front of the Galva-Knuckle room.
 One is on top of the Fridge you can store weapons in, near the Power Room.
 And the last one is on a self in the room with the SVU-AS Wallbuy.
  Now your probably wondering what's in those vials? It's alcohol, and now the Pack-A-Punch is drunk enough that it lost it's sense of taste and will no longer spit out the Sliquifier, so now we can upgrade it!

Enjoy your old and improved, Sl1qu1f13r! So graceful, so beautiful, so Deadly!
Side EE: Electro-Knife
Now this next part is Time Sensitive so read through all the steps before attempting this.
If you head to the Power Room and strike the Power Switch with the Galva-Knuckles it'll start surging with electricity. This will only last for 90 Seconds.
Although you can strike it again to restart the timer. Now you have to ride the nearby elevator up because the Bowie Knife Wallbuy is in that elevator shaft. Buy a Bowie Knife.
 Once you get a Bowie Knife you have to head back to the Power Room and strike the Power Switch while it's still surging.
And enjoy your new Electro-Knife, it does similar damage to the The Golden Spork from Mob Of The Dead.
I recommend using the Golden Elevator Key to lock the second Elevator under the Power Room and then using Phd so you can drop down that Elevator shaft after you get the Bowie Knife to quickly reach the Power Switch.
Side EE: Hidden Songs
This map has two EE Songs, We All Fall Down from the original and Demon Speeding by Rob Zombie.
We All Fall Down plays when you interact with three Teddy Bears around the map. One is on a table in the corner of the Power Room.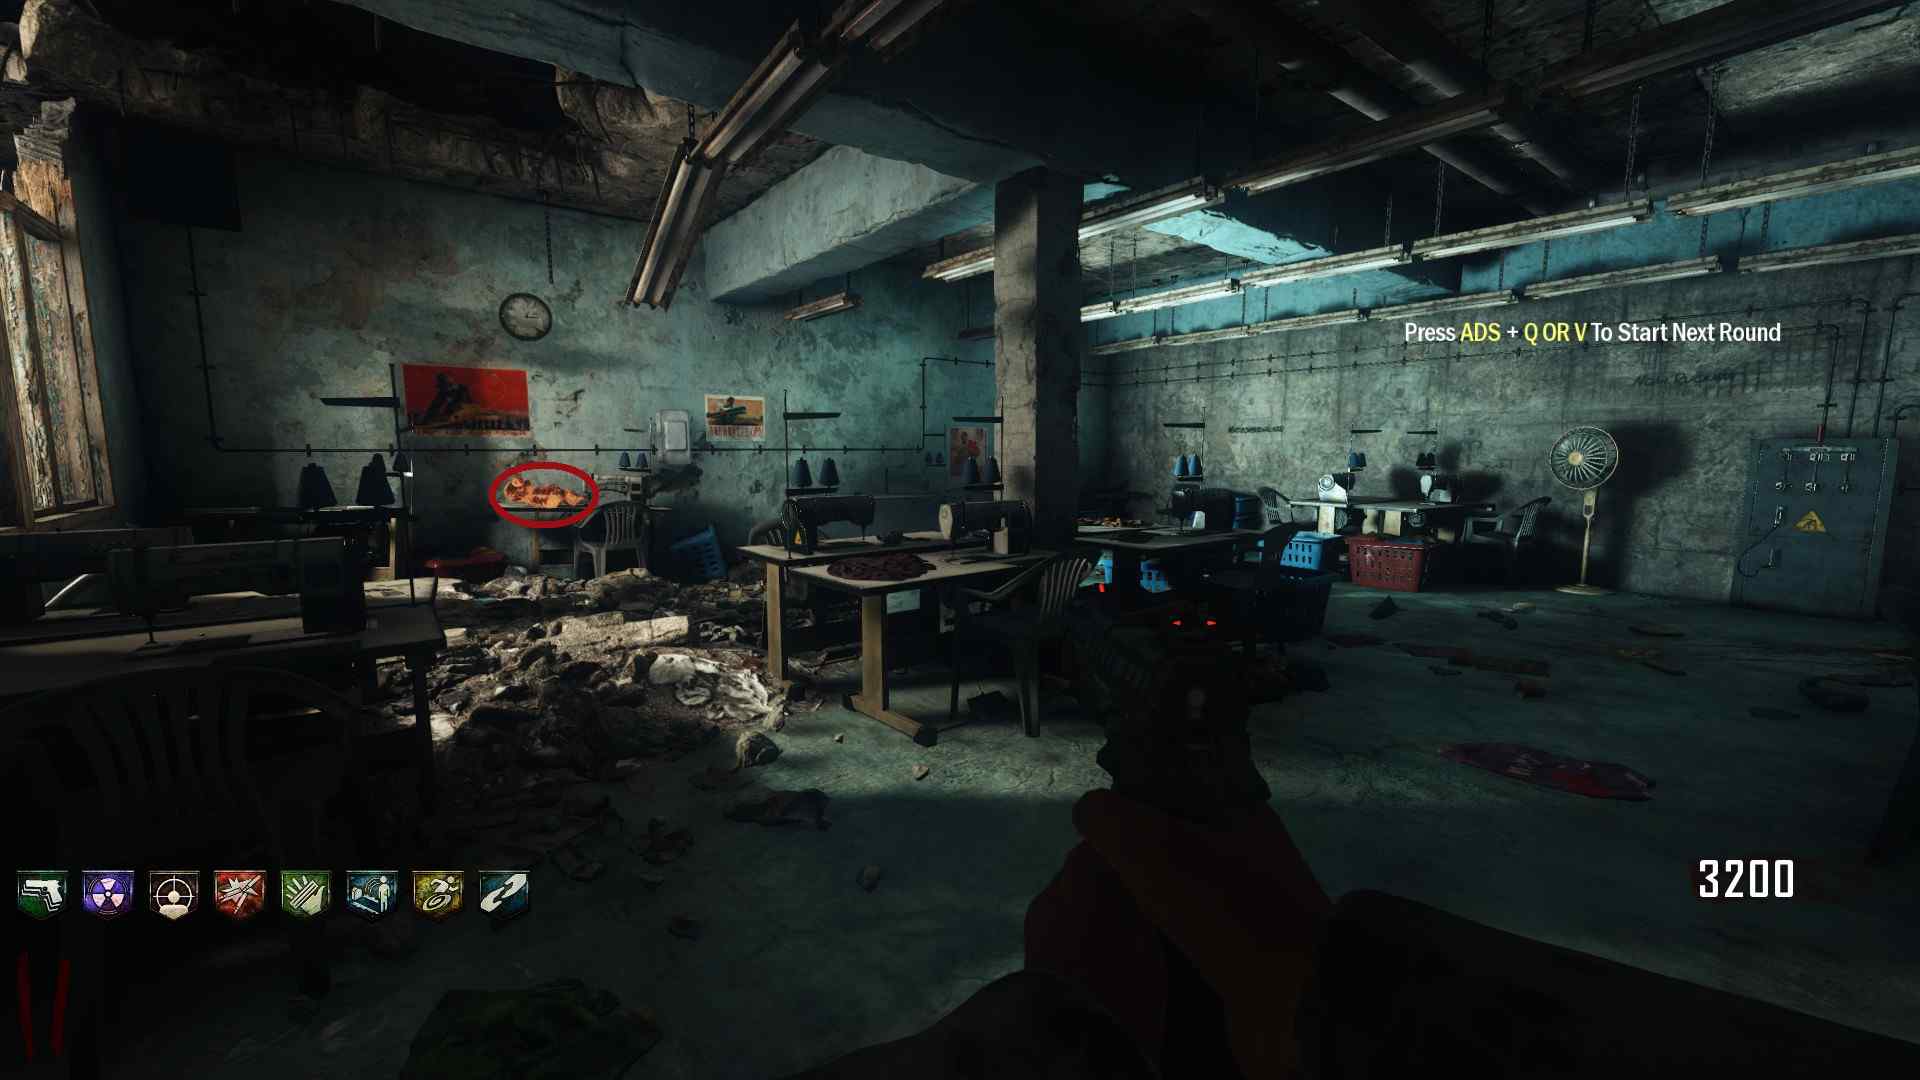 Another is in the upper level of the Buddha Room.
 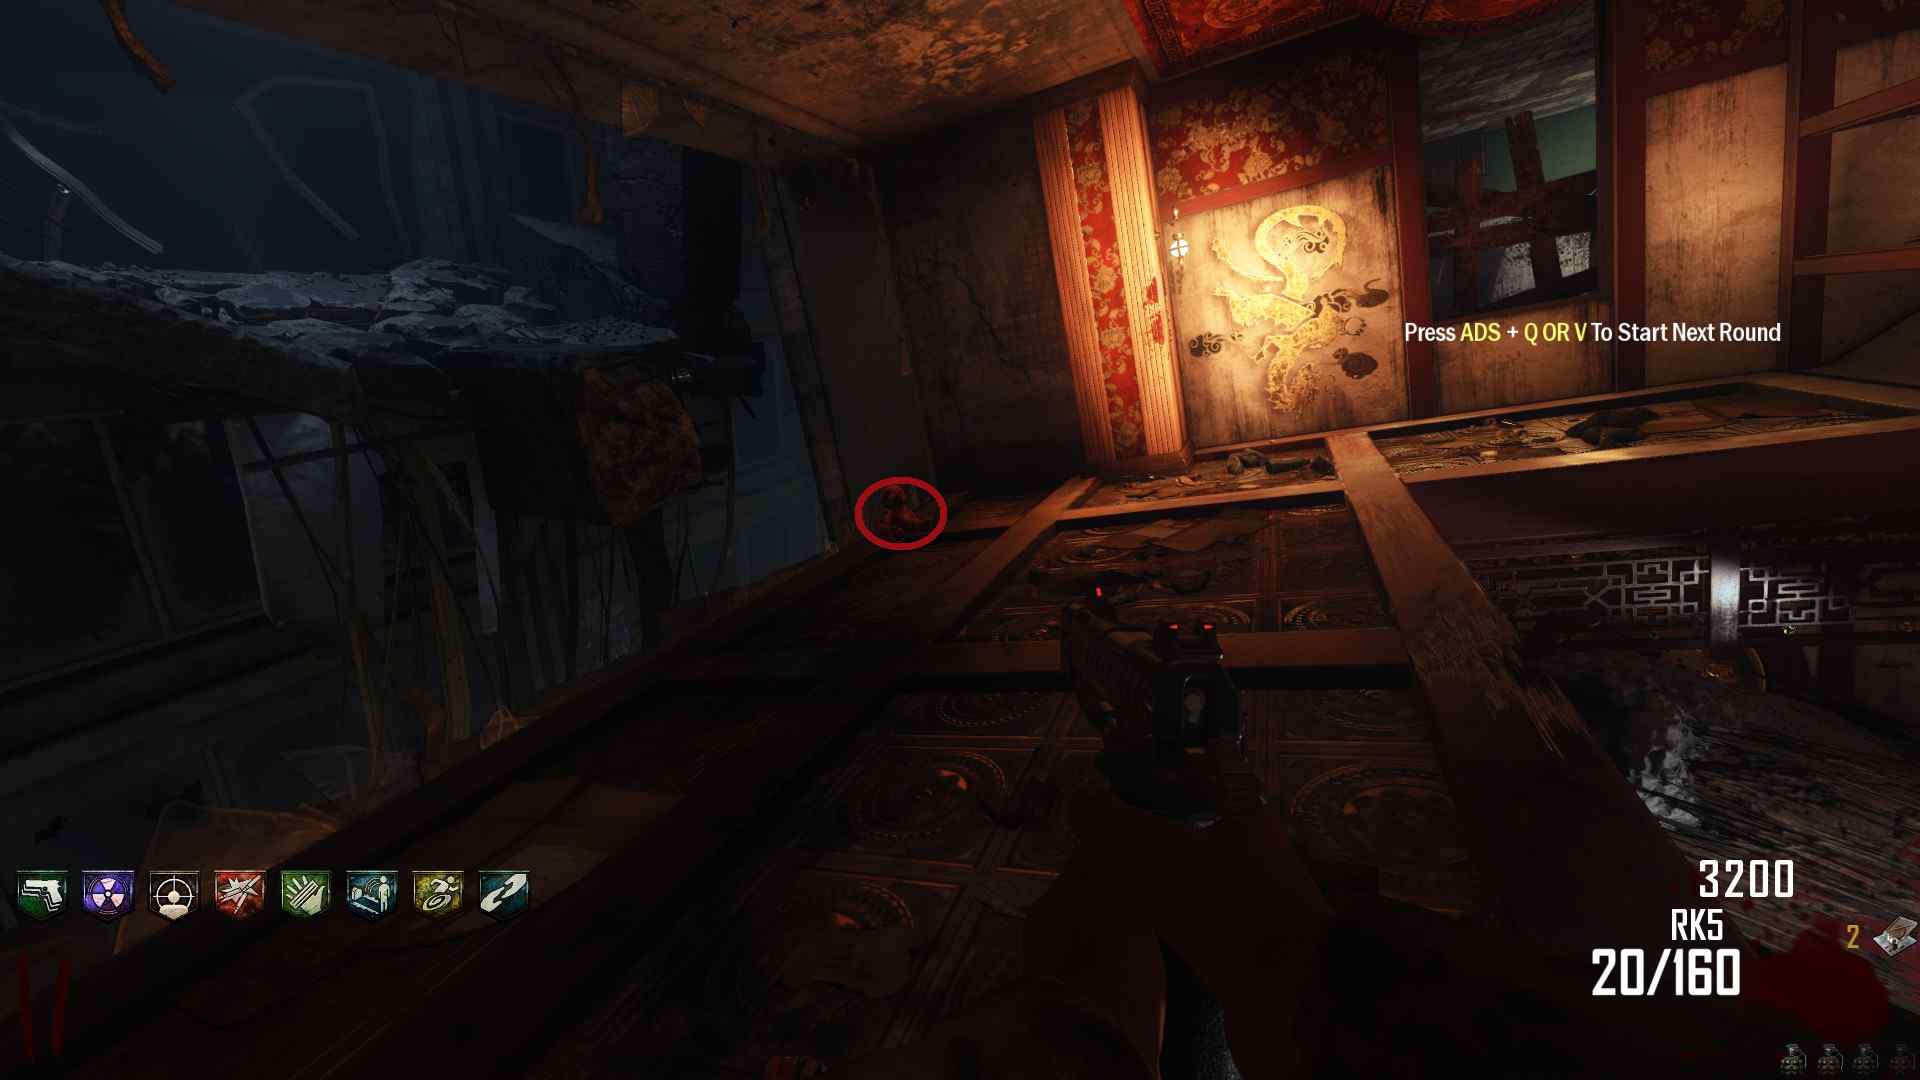 And the last one is on a shelf next to the SVU-AS Wallbuy.
 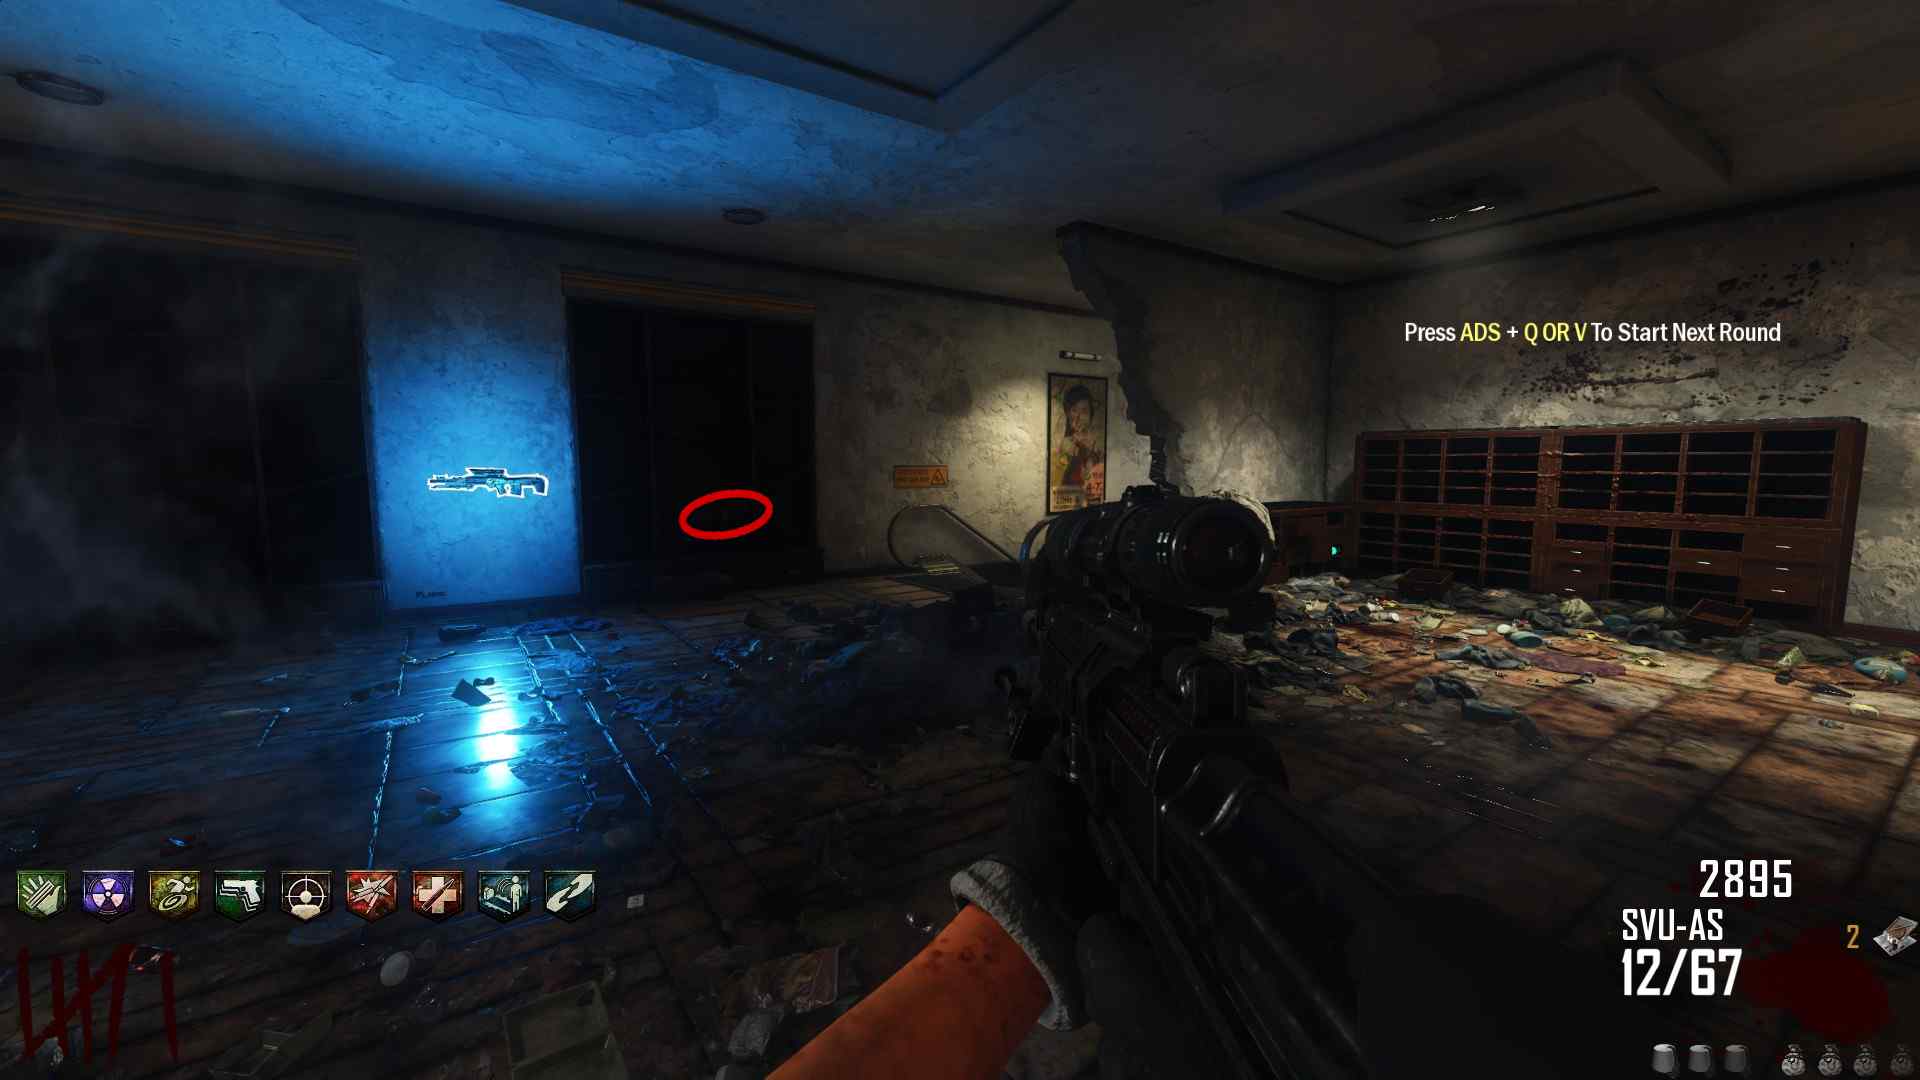 Demon Speeding plays when you interact with four Broken TVs around the map. One is located passed some kennels in the area under the Power Room.
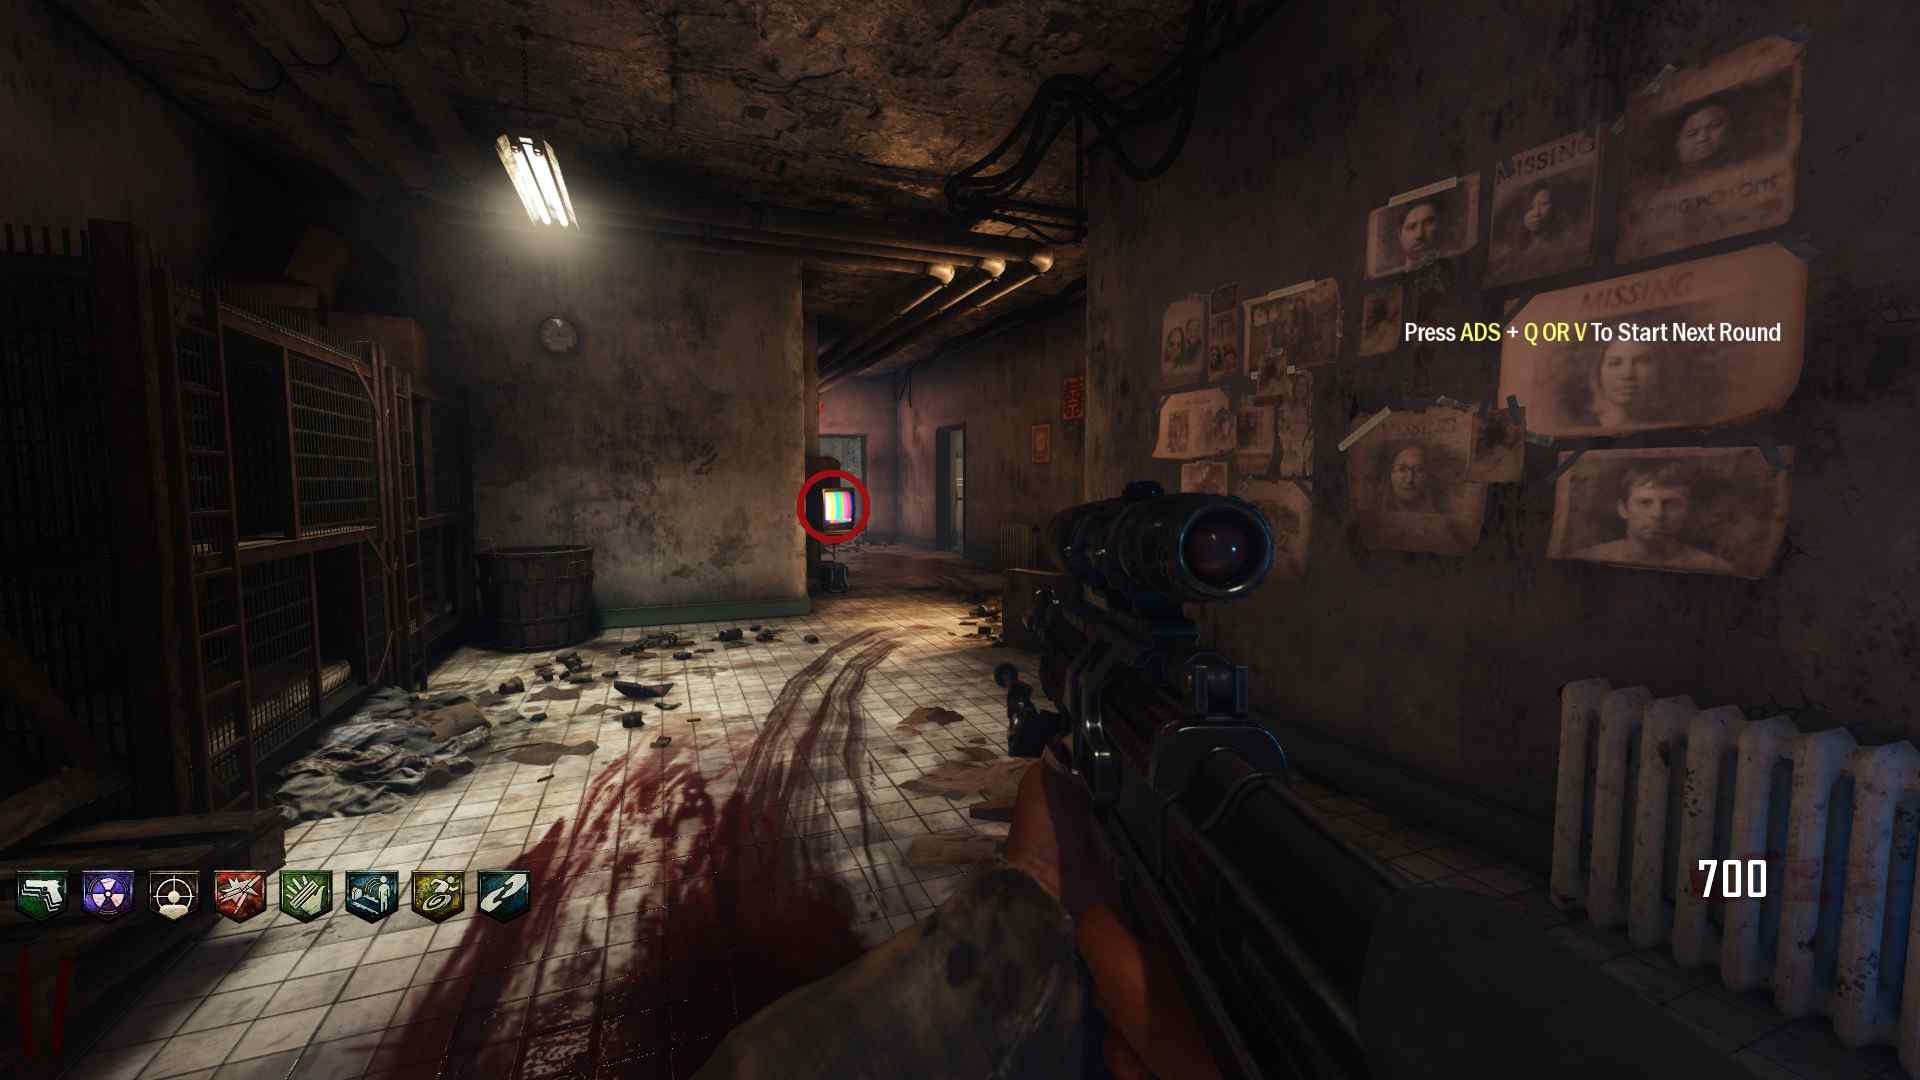 The second one is located above the Workbench where you build the Sliquifier, it's where you find the Mannequin Foot used to make the Sliquifier.
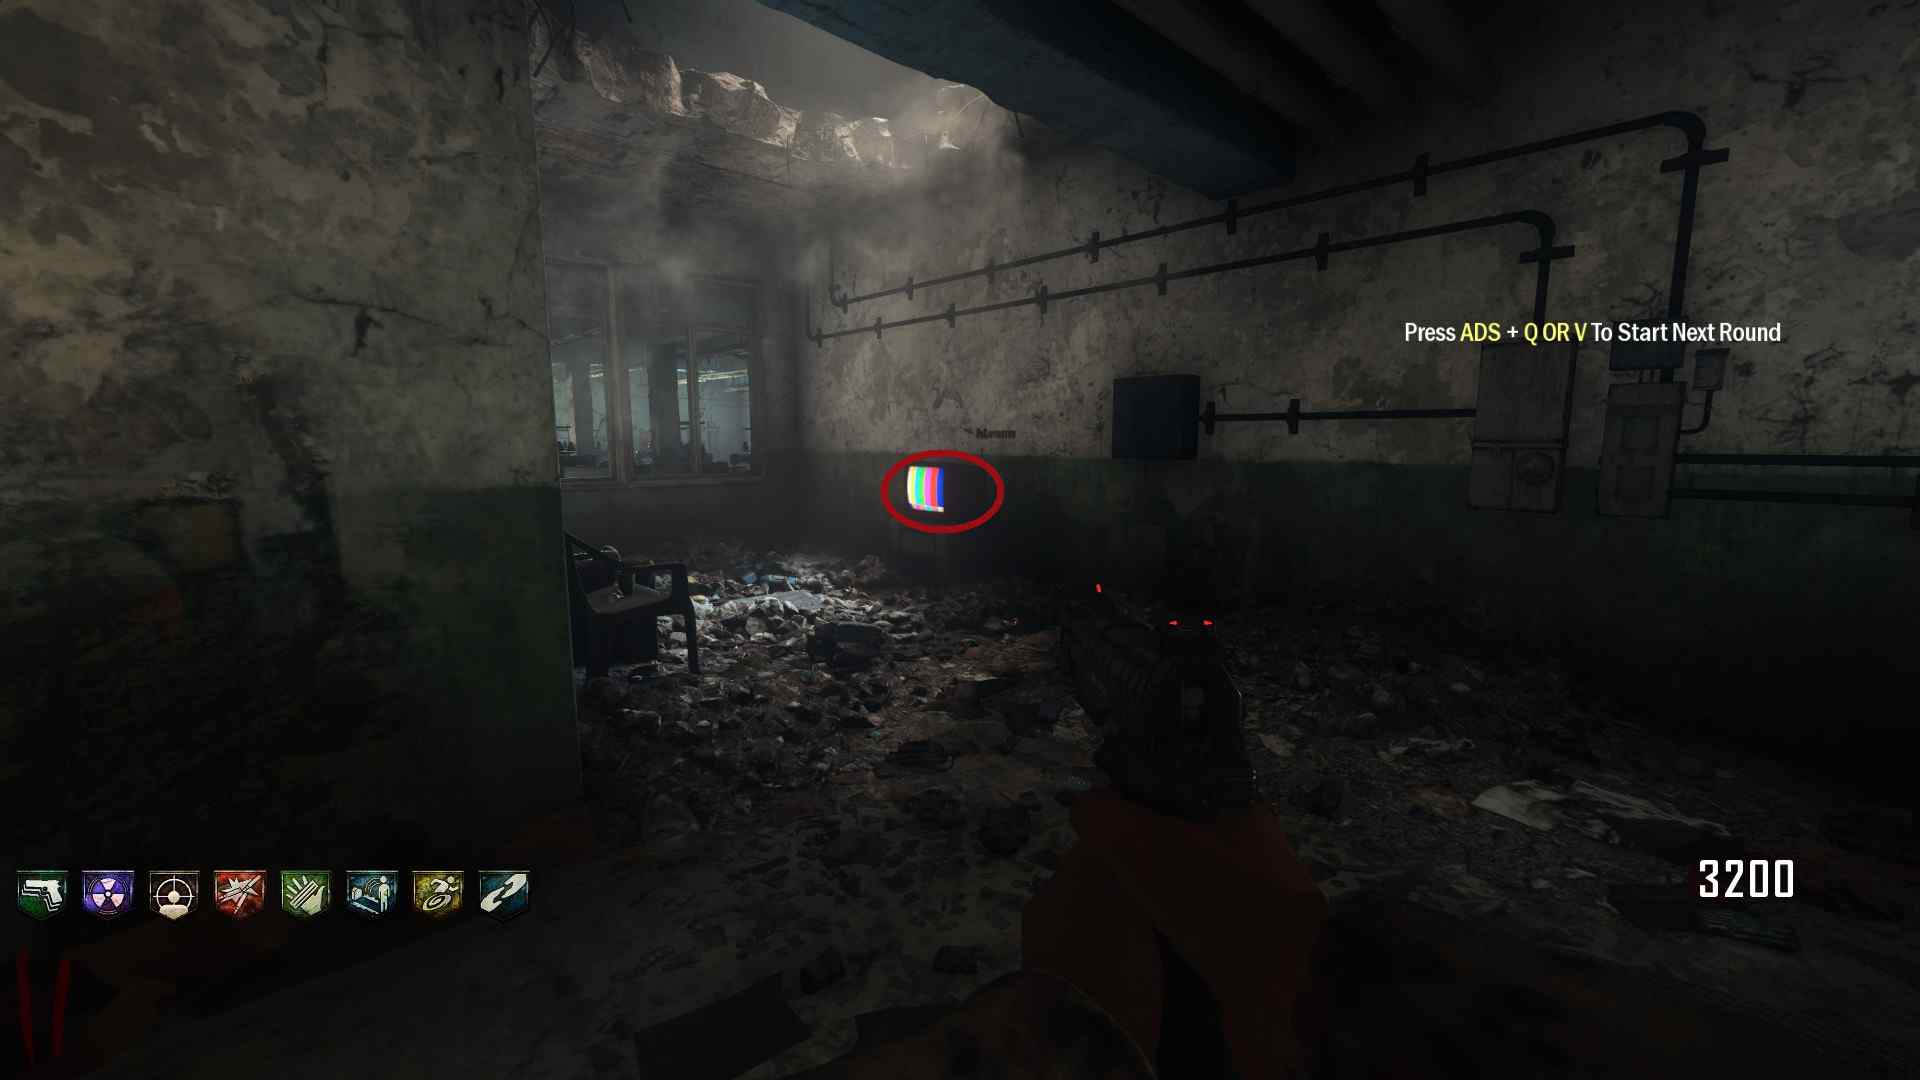 Another is throw a hole in the floor in the destroyed part of the building, the area leading to the Broken Elevator Shaft.
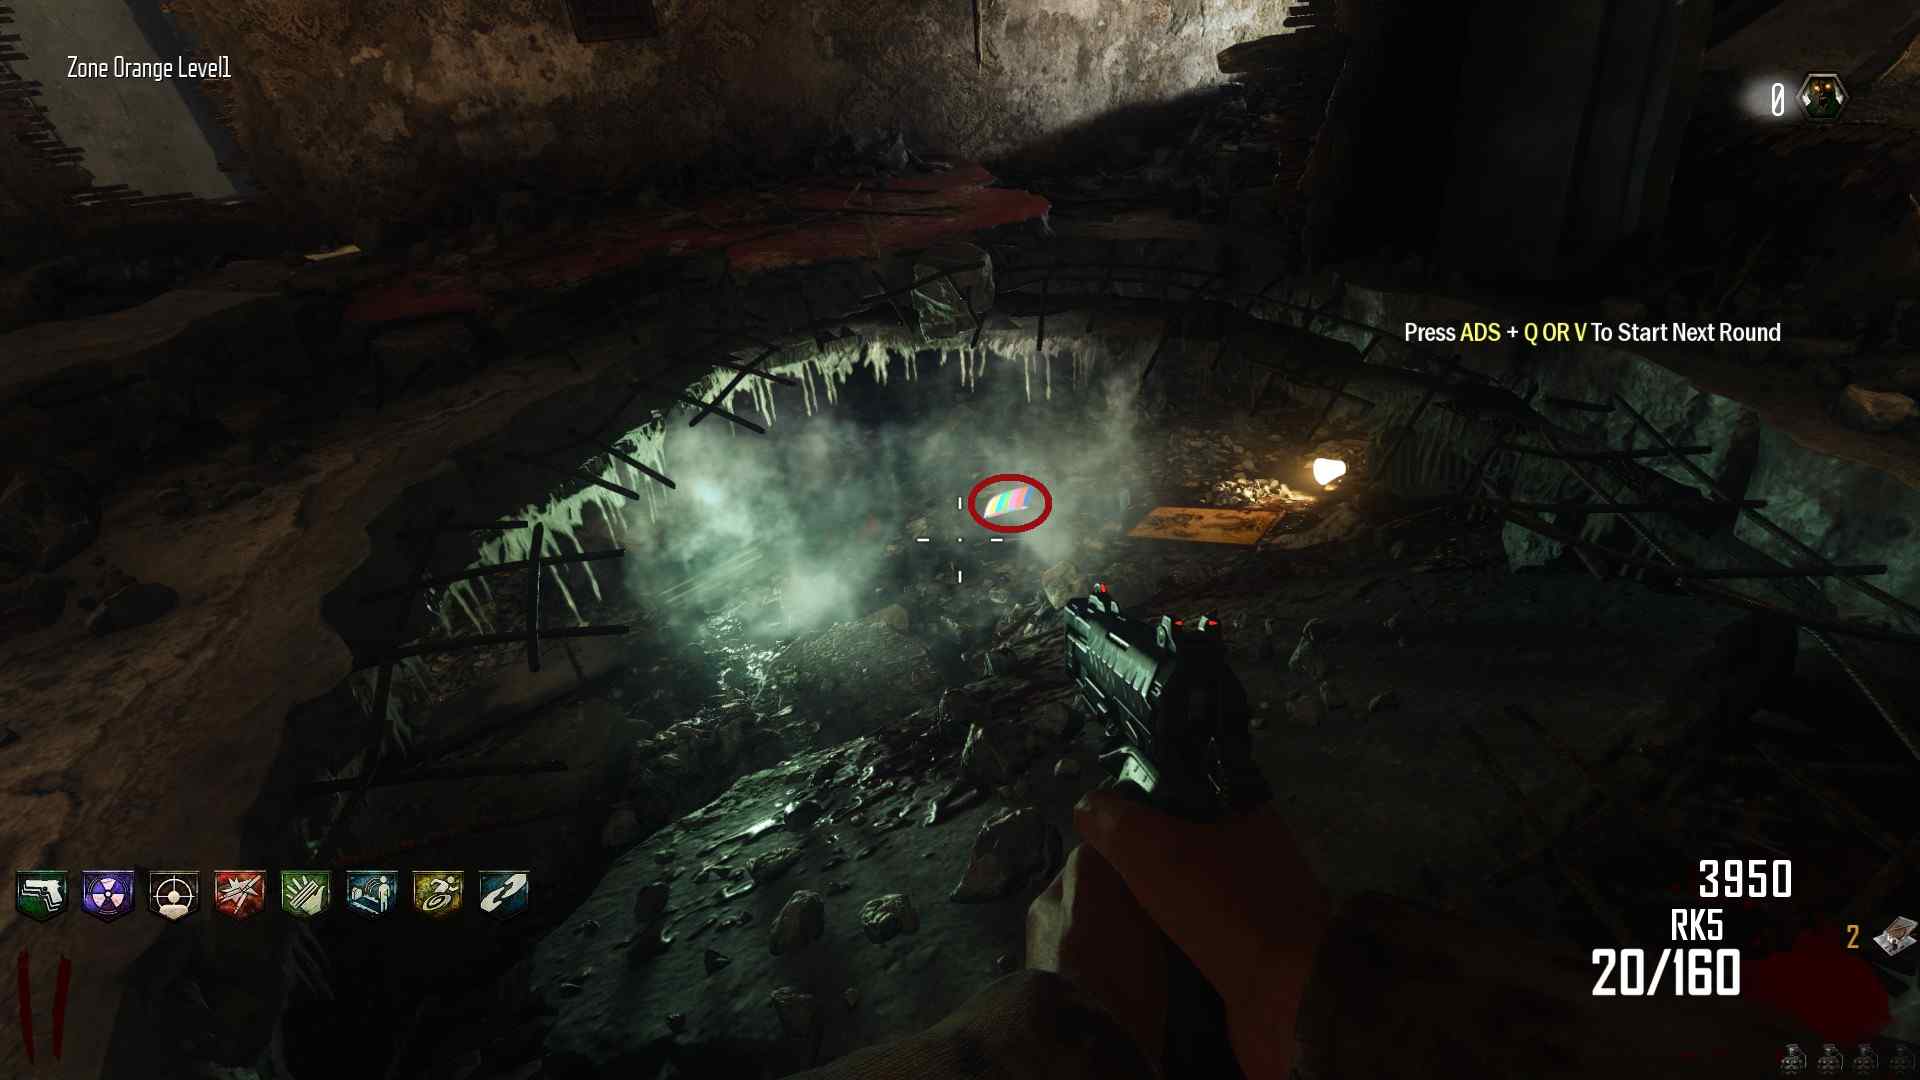 And the last one is across from the Box Spawn Point on the Rooftop.
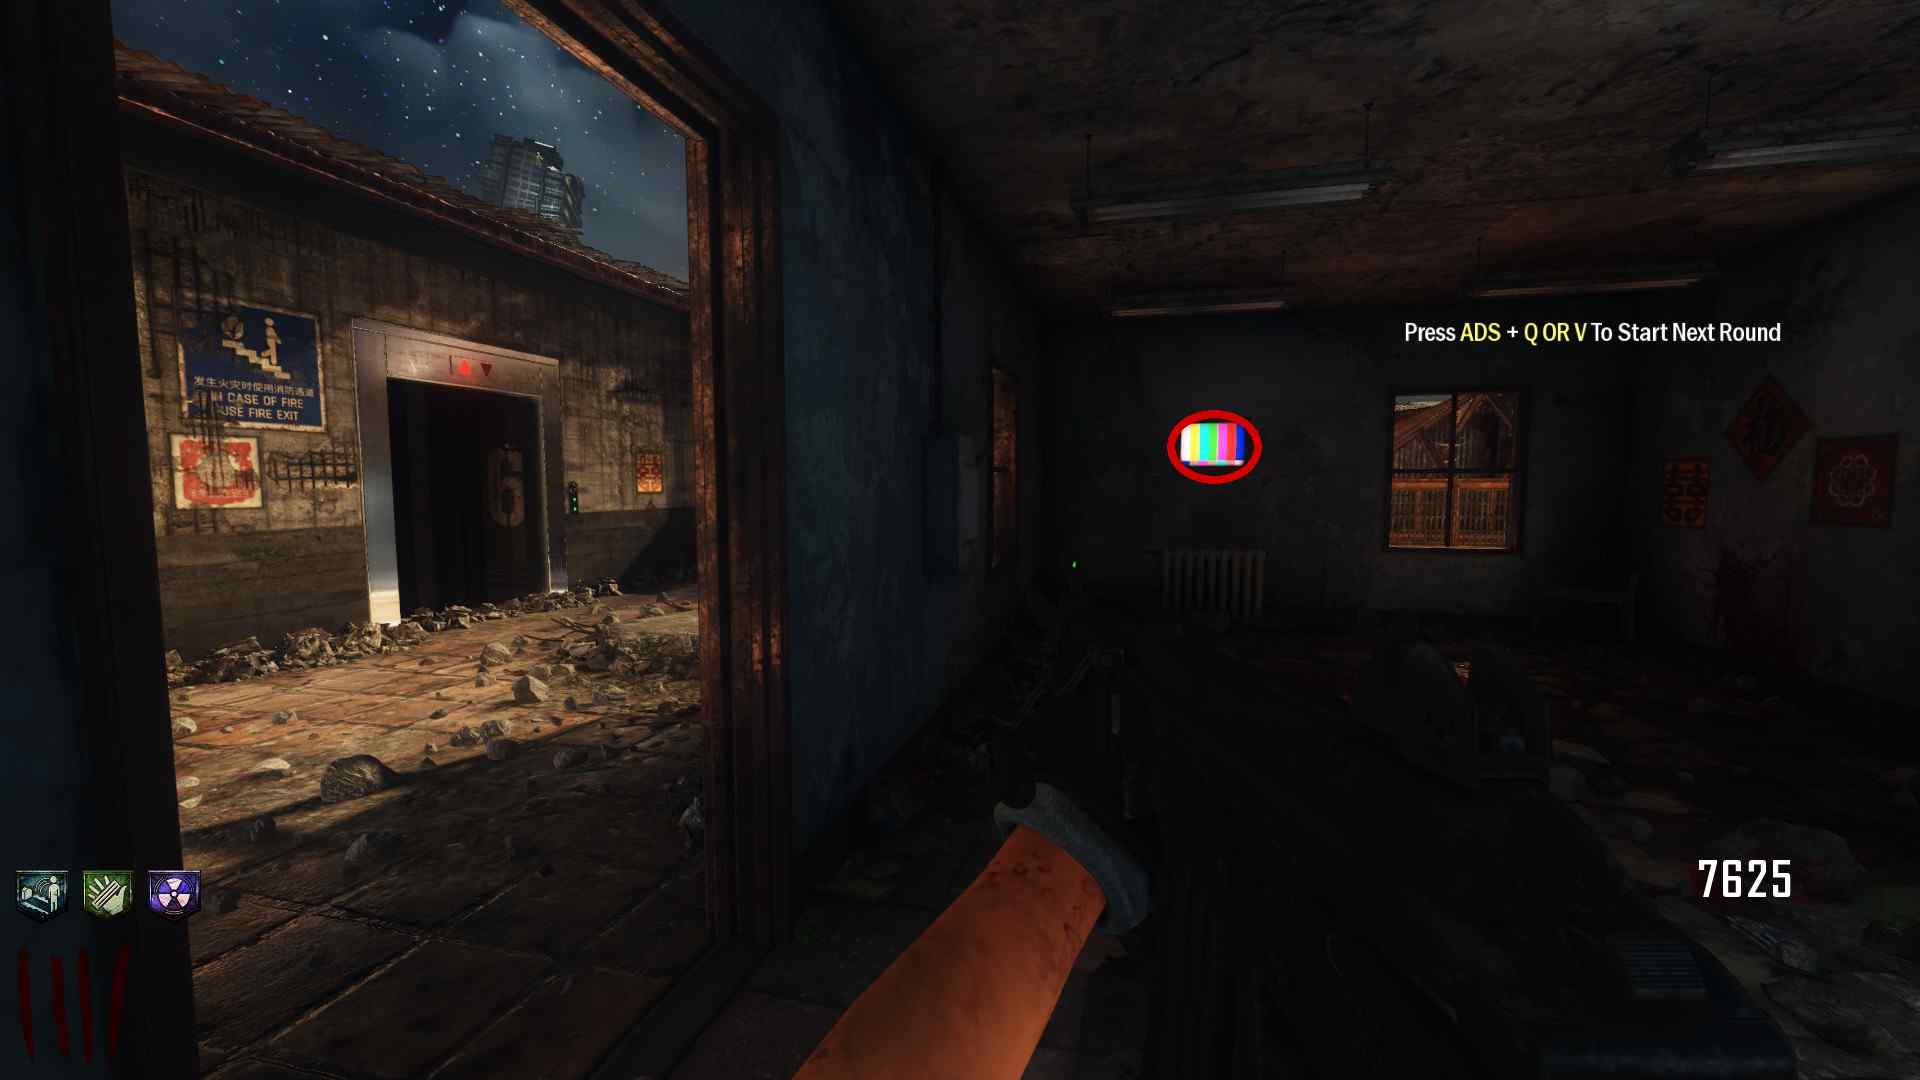 Keep in mind that this song is Copy Righted.
Side EE: Dual-Wield Five-Seven Wallbuy
I love the Five-Sevens they were my introduction to dual pistols. They were always a decent damage dealer for those early rounds, if only there was a way to get them without wasting points on the Box. Well now there is, you just have to jump through a few hoops.
First we must collect Black Ops 1, 2, 3, & 4. Black Ops 1 for the Xbox 360 is next to the Broken TV on the Rooftop.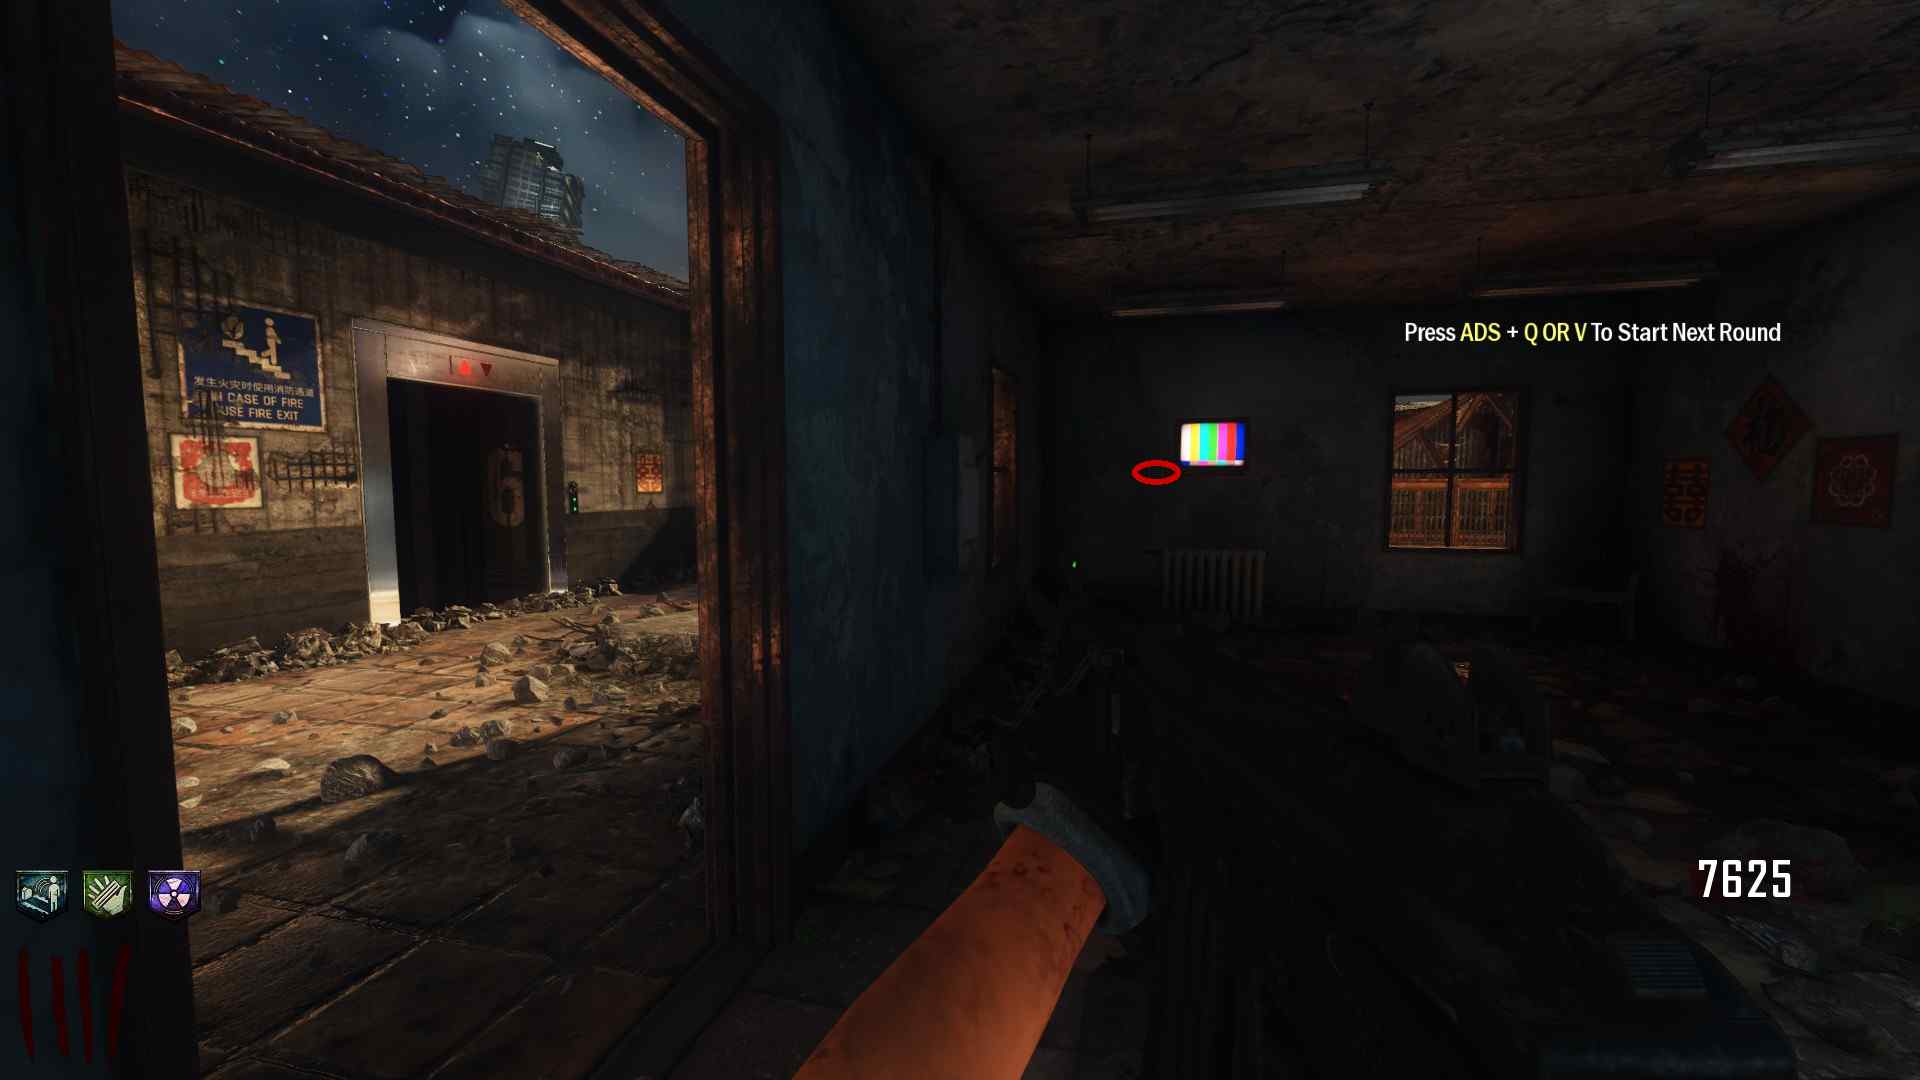 Huge disappointment that it wasn't the Wii version, I mean come on!
Black Ops 2 for the Xbox 360 is on a chair next to a Broken TV, close to the Sliquifier Workbench.
Huge disappointment that it wasn't the Wii version, I mean come on!
Black Ops 2 for the Xbox 360 is on a chair next to a Broken TV, close to the Sliquifier Workbench. 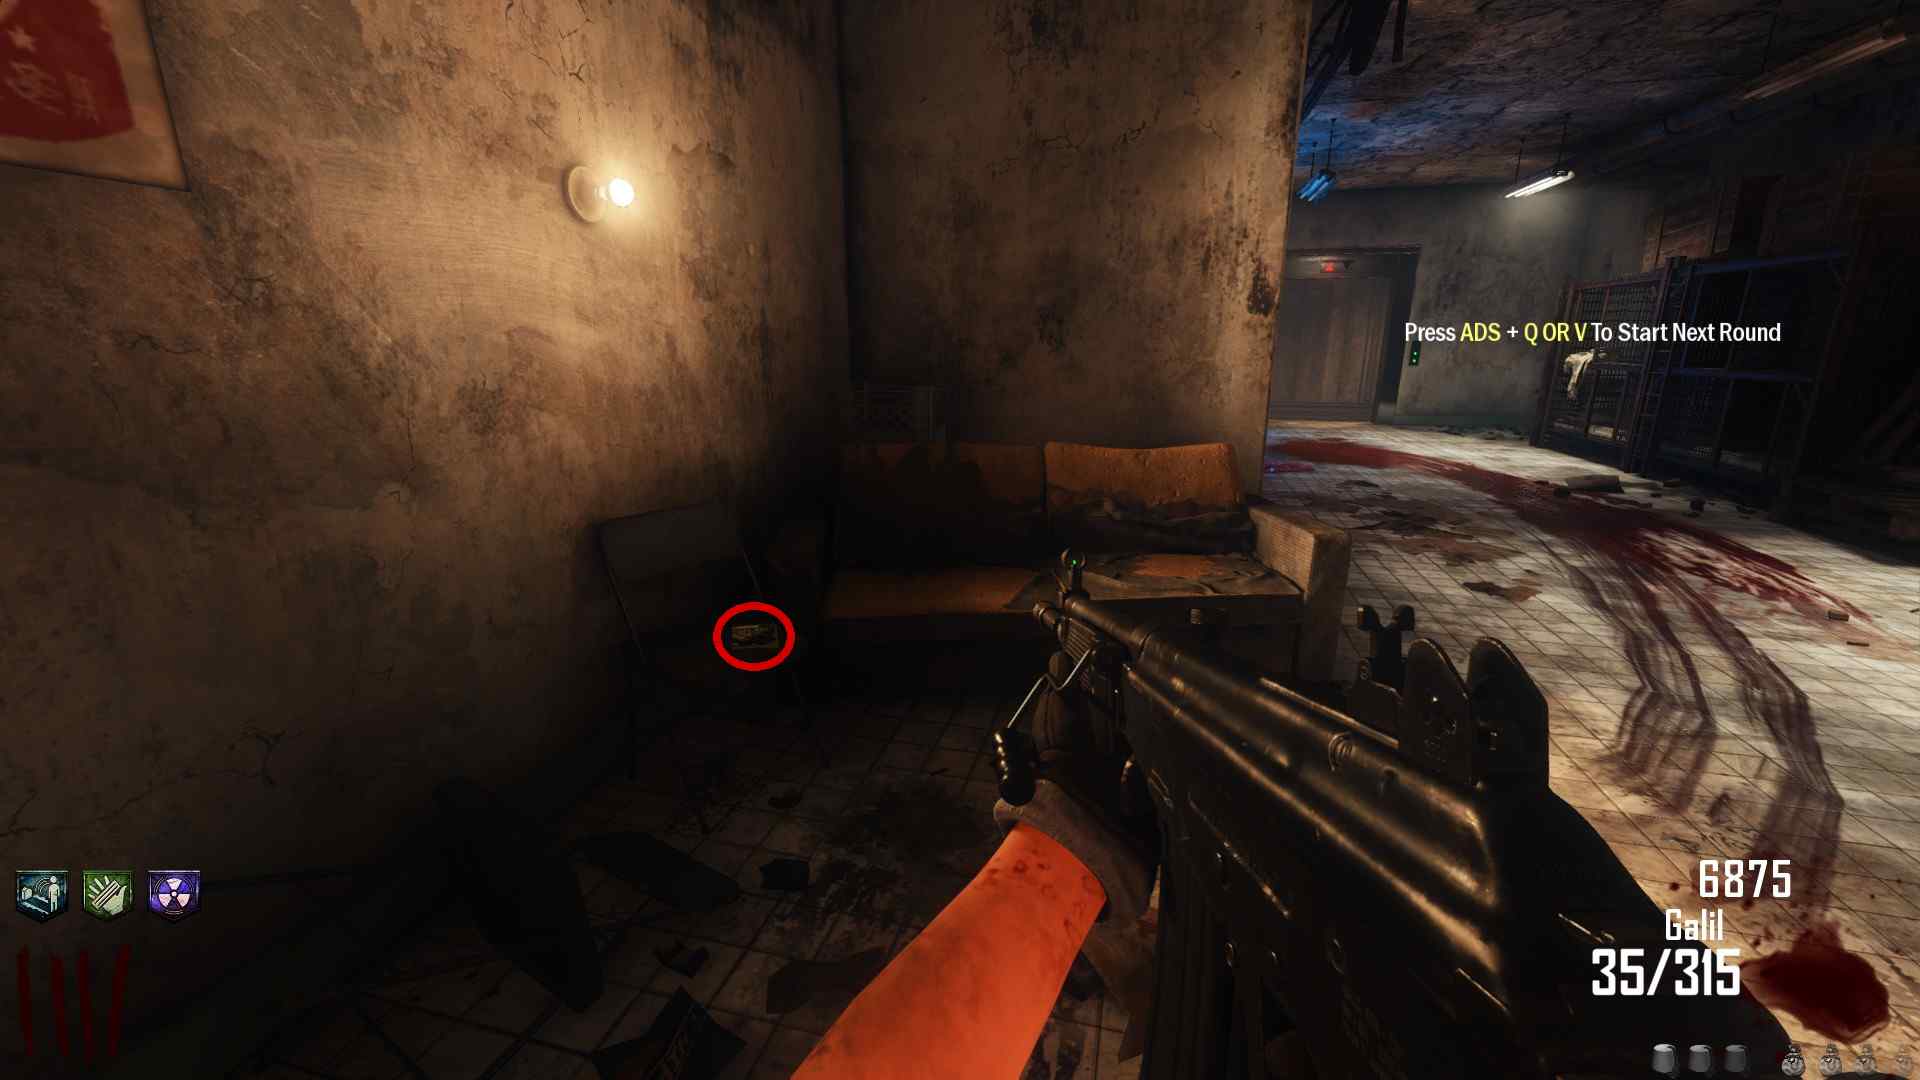 Black Ops 3 for the PS4 is on a self in the same room as the SVU-AS Wallbuy.
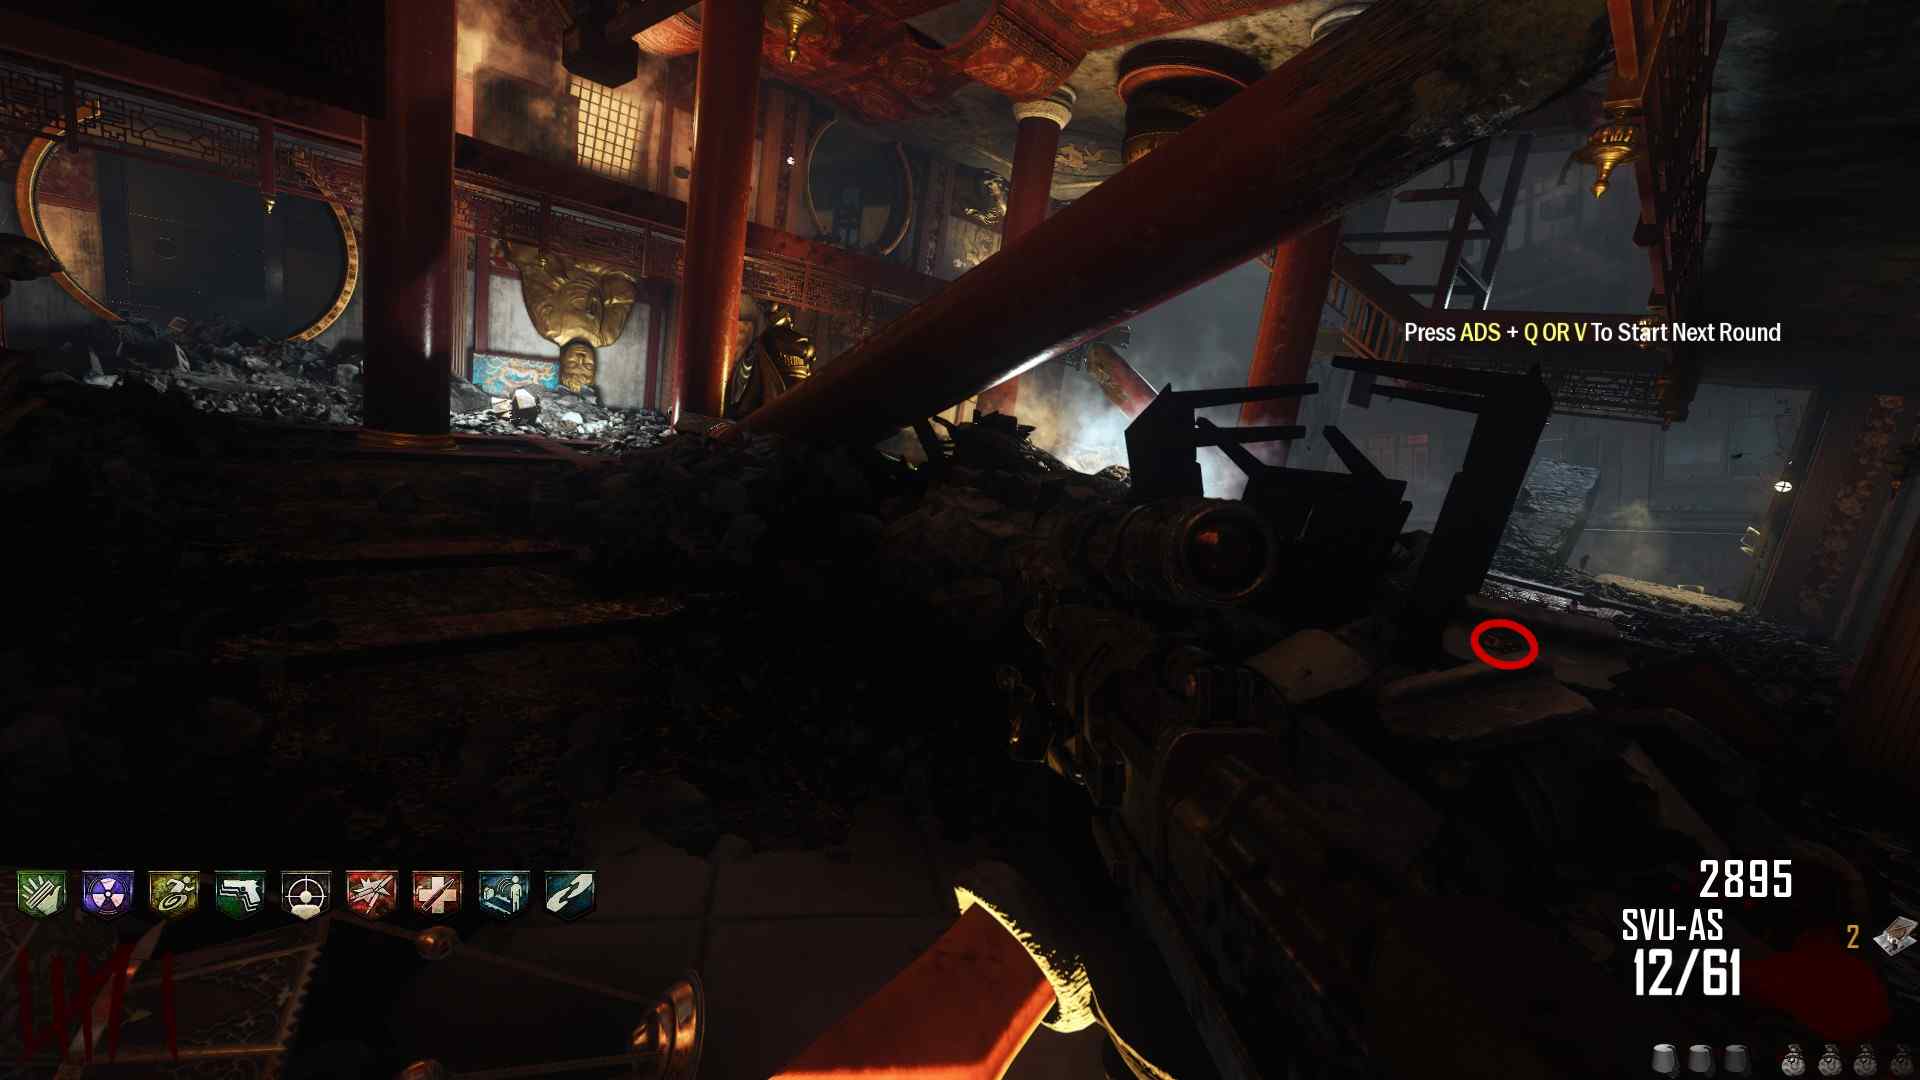
 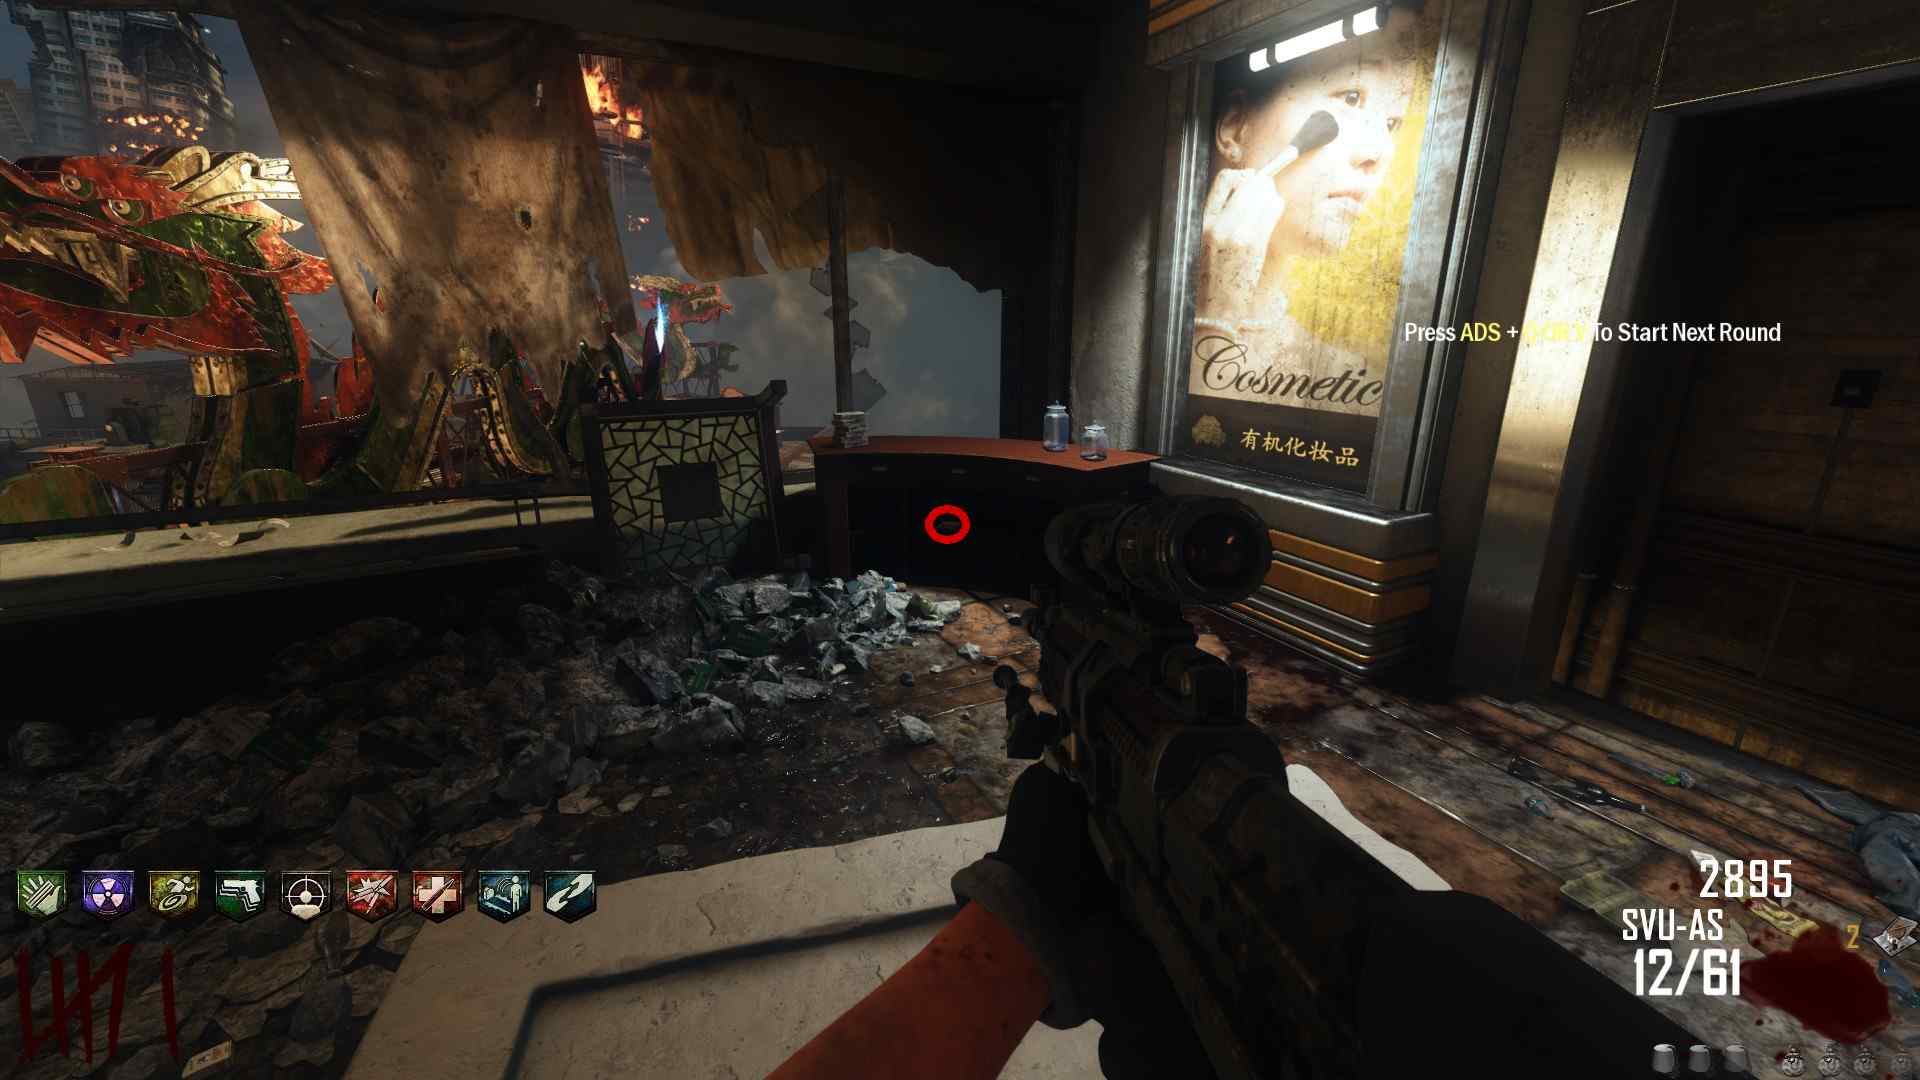 Black Ops 4 for the PS4 is lying on some rubble under a fallen pillar, in the Buddha Room.
  Now head to the Rooftop, you might be hearing some strange noises, these are coming from this boarded up window. Interact with it and glowing Red Orb will emerge from it. Feed it souls!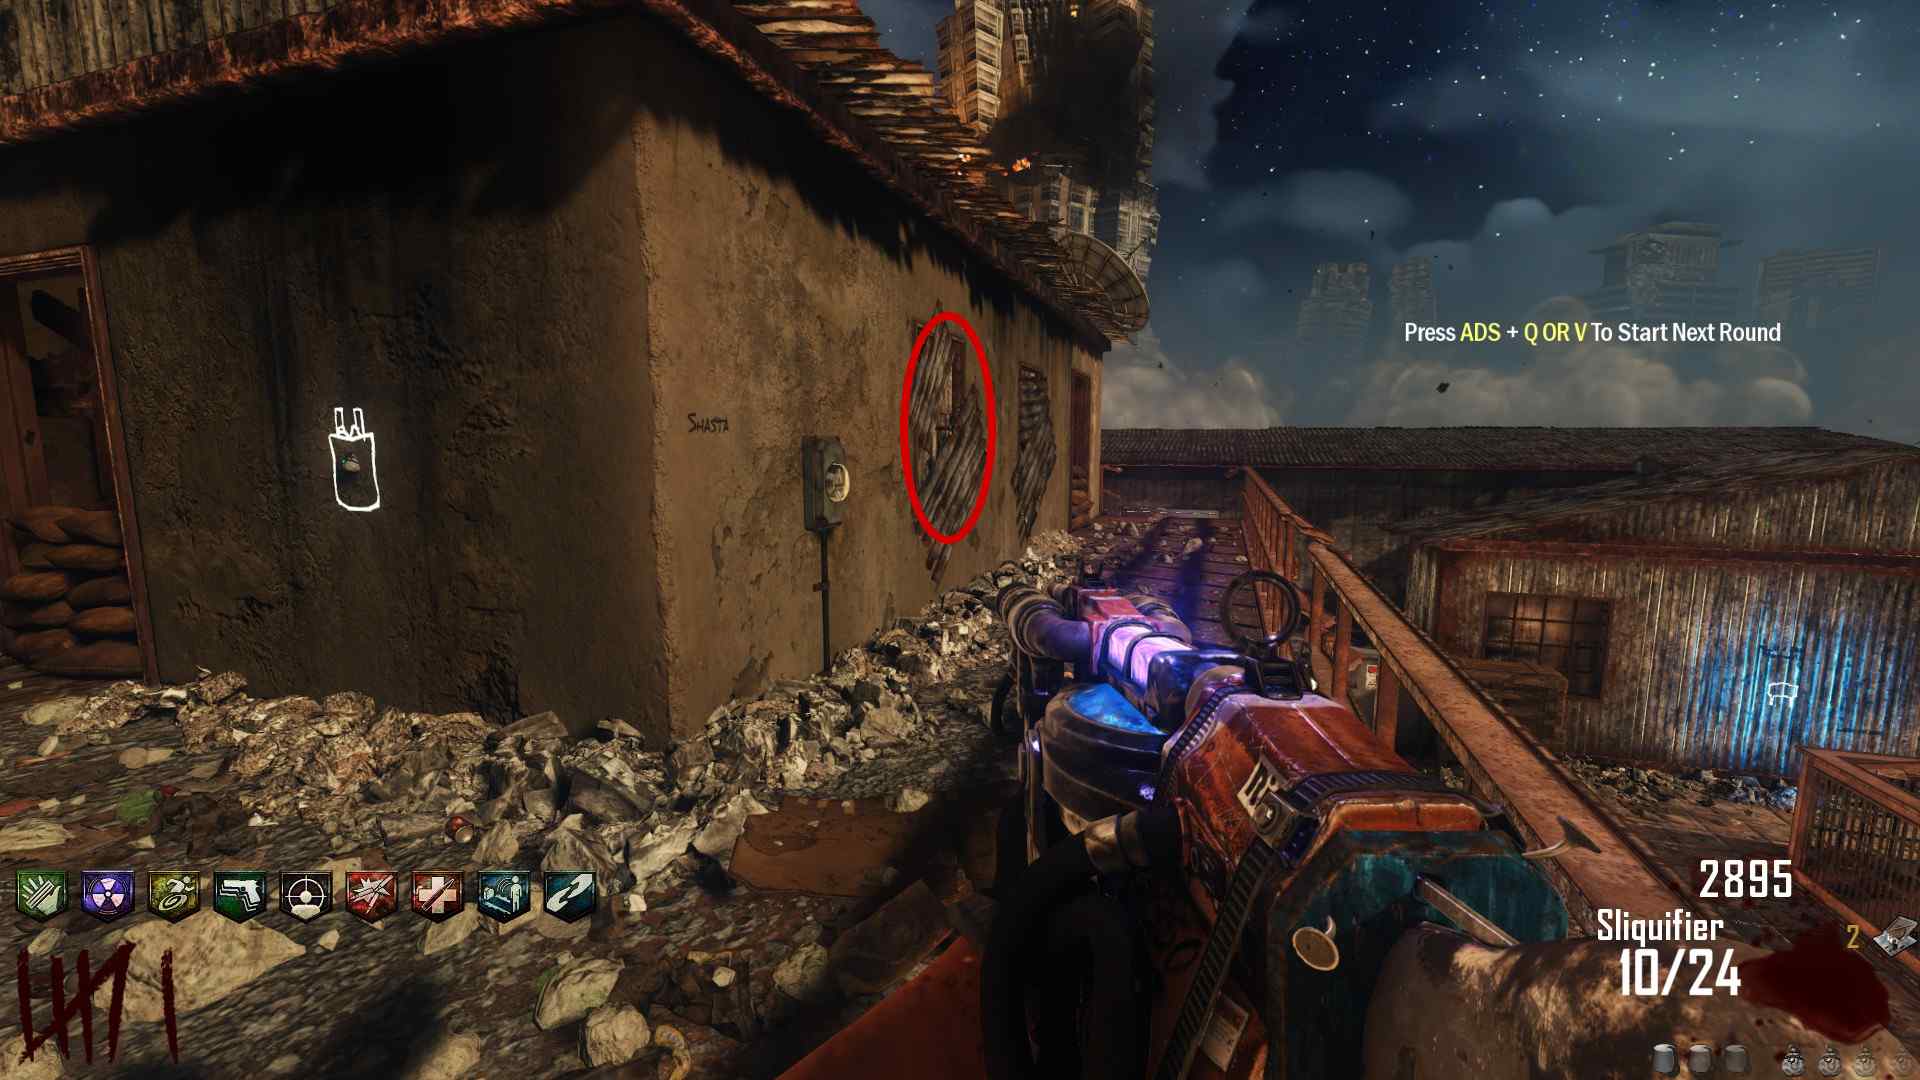

Then you'll be able to buy Dual-Wield Five Sevens from the boarded up window.
Side EE: Free PAPed Galil
You can get a free PAPed Galil, and it's easy to. Which is good because I love the BO2 Galil. First you need to have a Gun, pretty much any gun will do, single fire is preferable but semi/full-auto is fine.
Now you need to head to the room with the Trample-Steam Workbench and shoot the lanterns there in a specific order. 1 4 3 5 2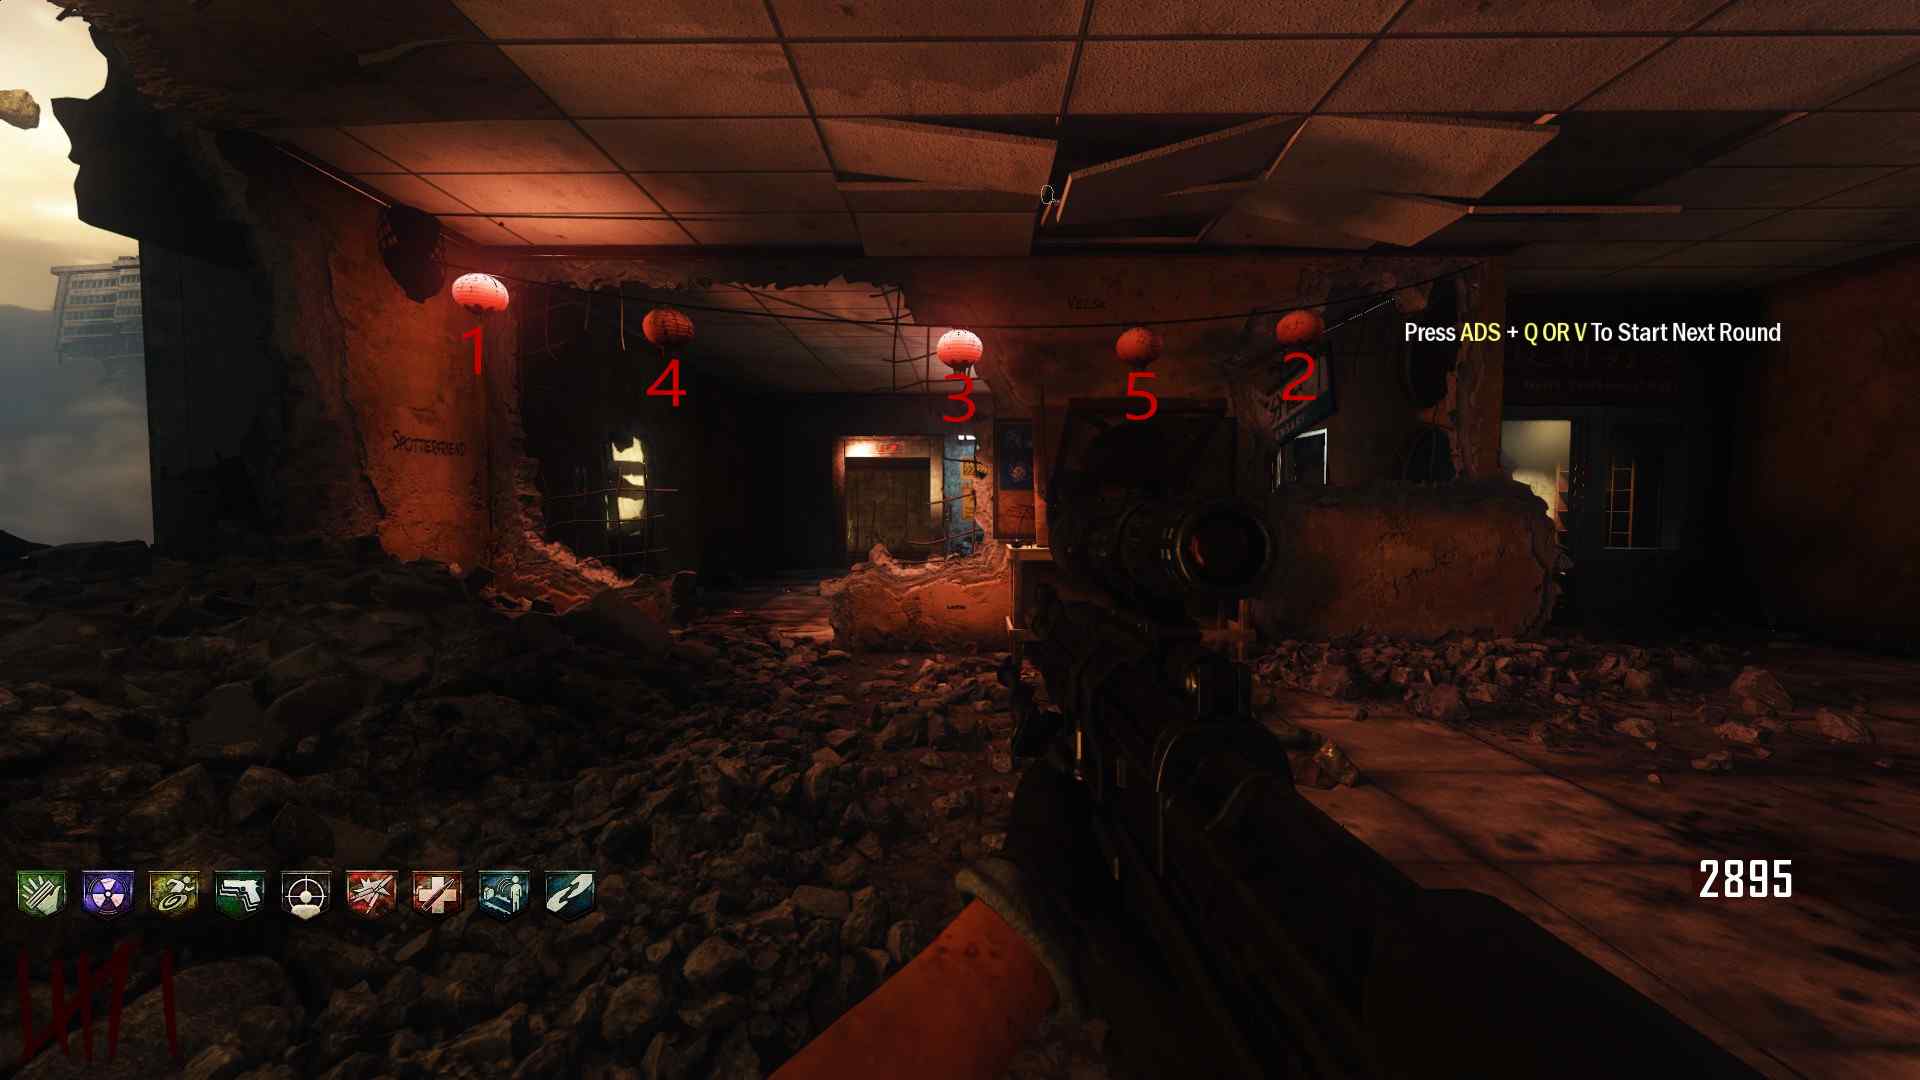 Then you need to find the name "Colter" written on the wall, luckily it's right next to the elevator shaft in the same room. All you have to do is melee it.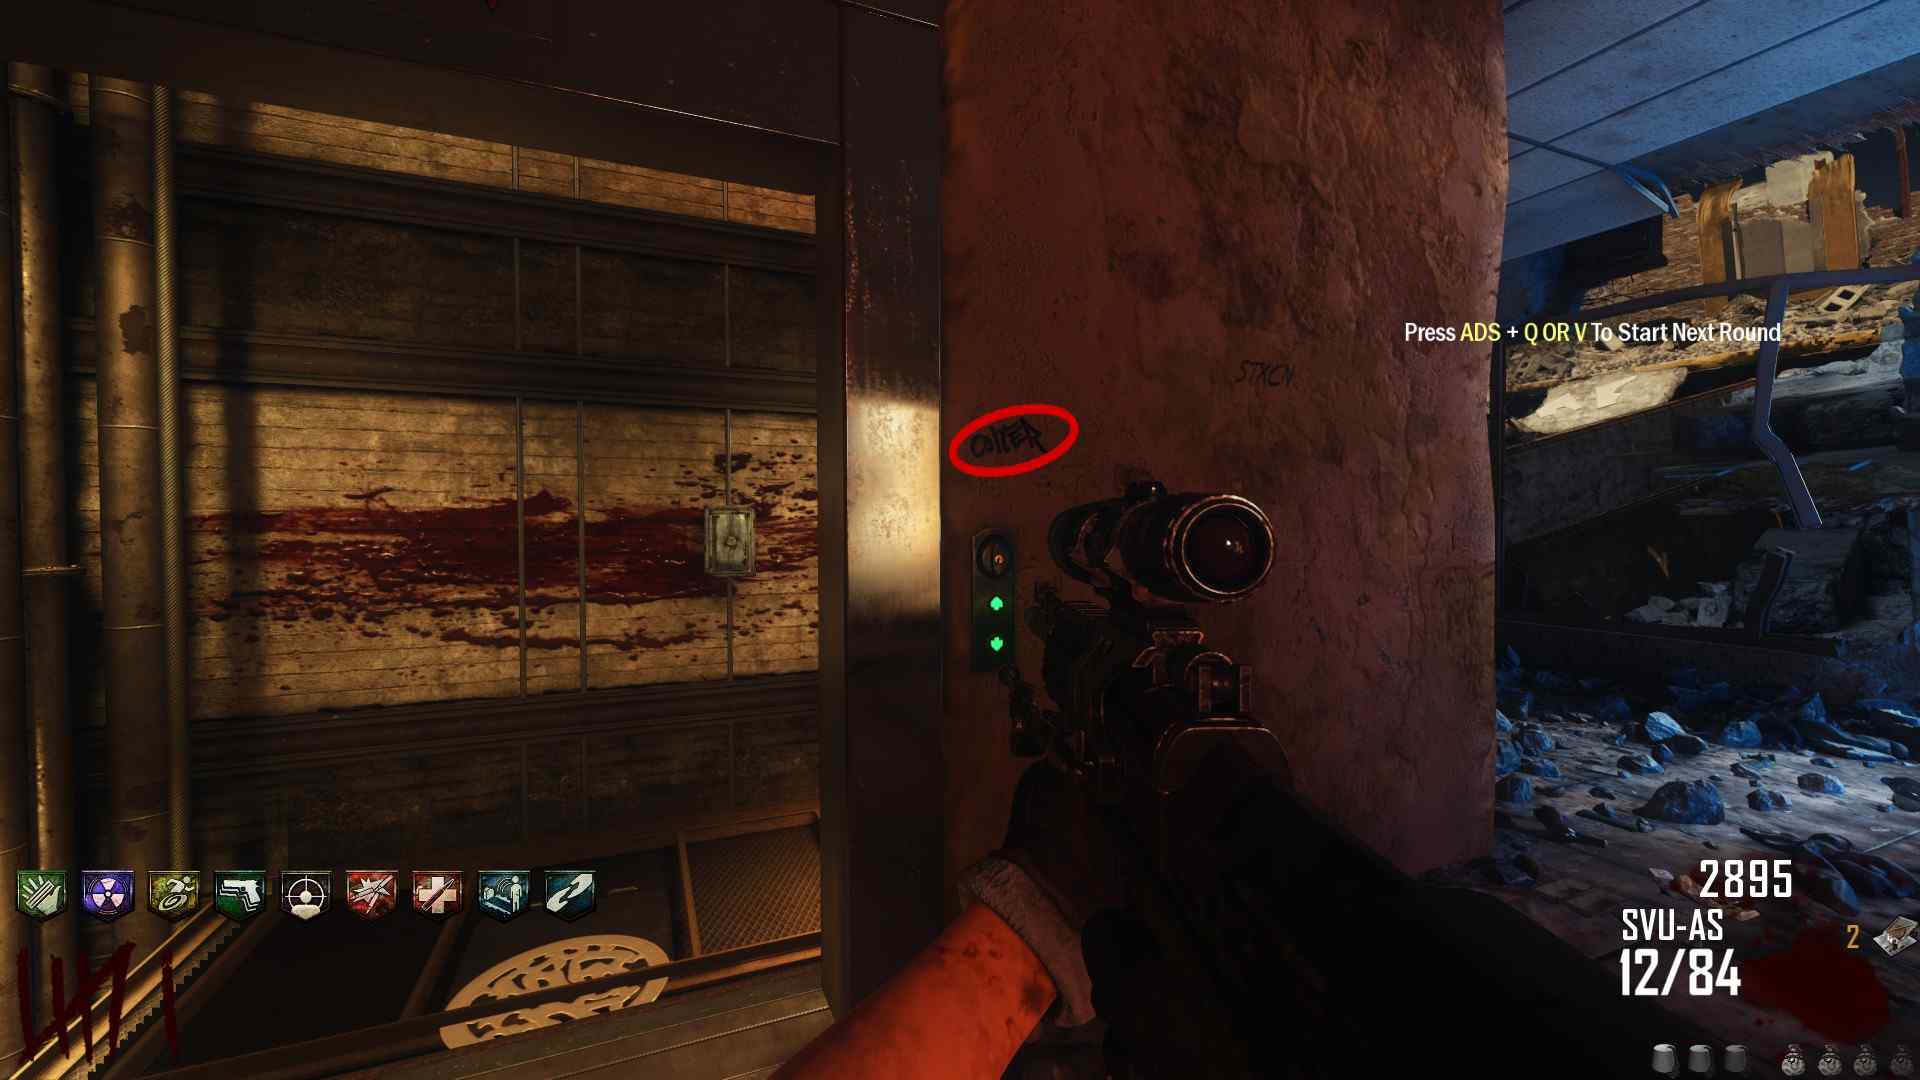
Side EE: Free Icy Tempest AAT
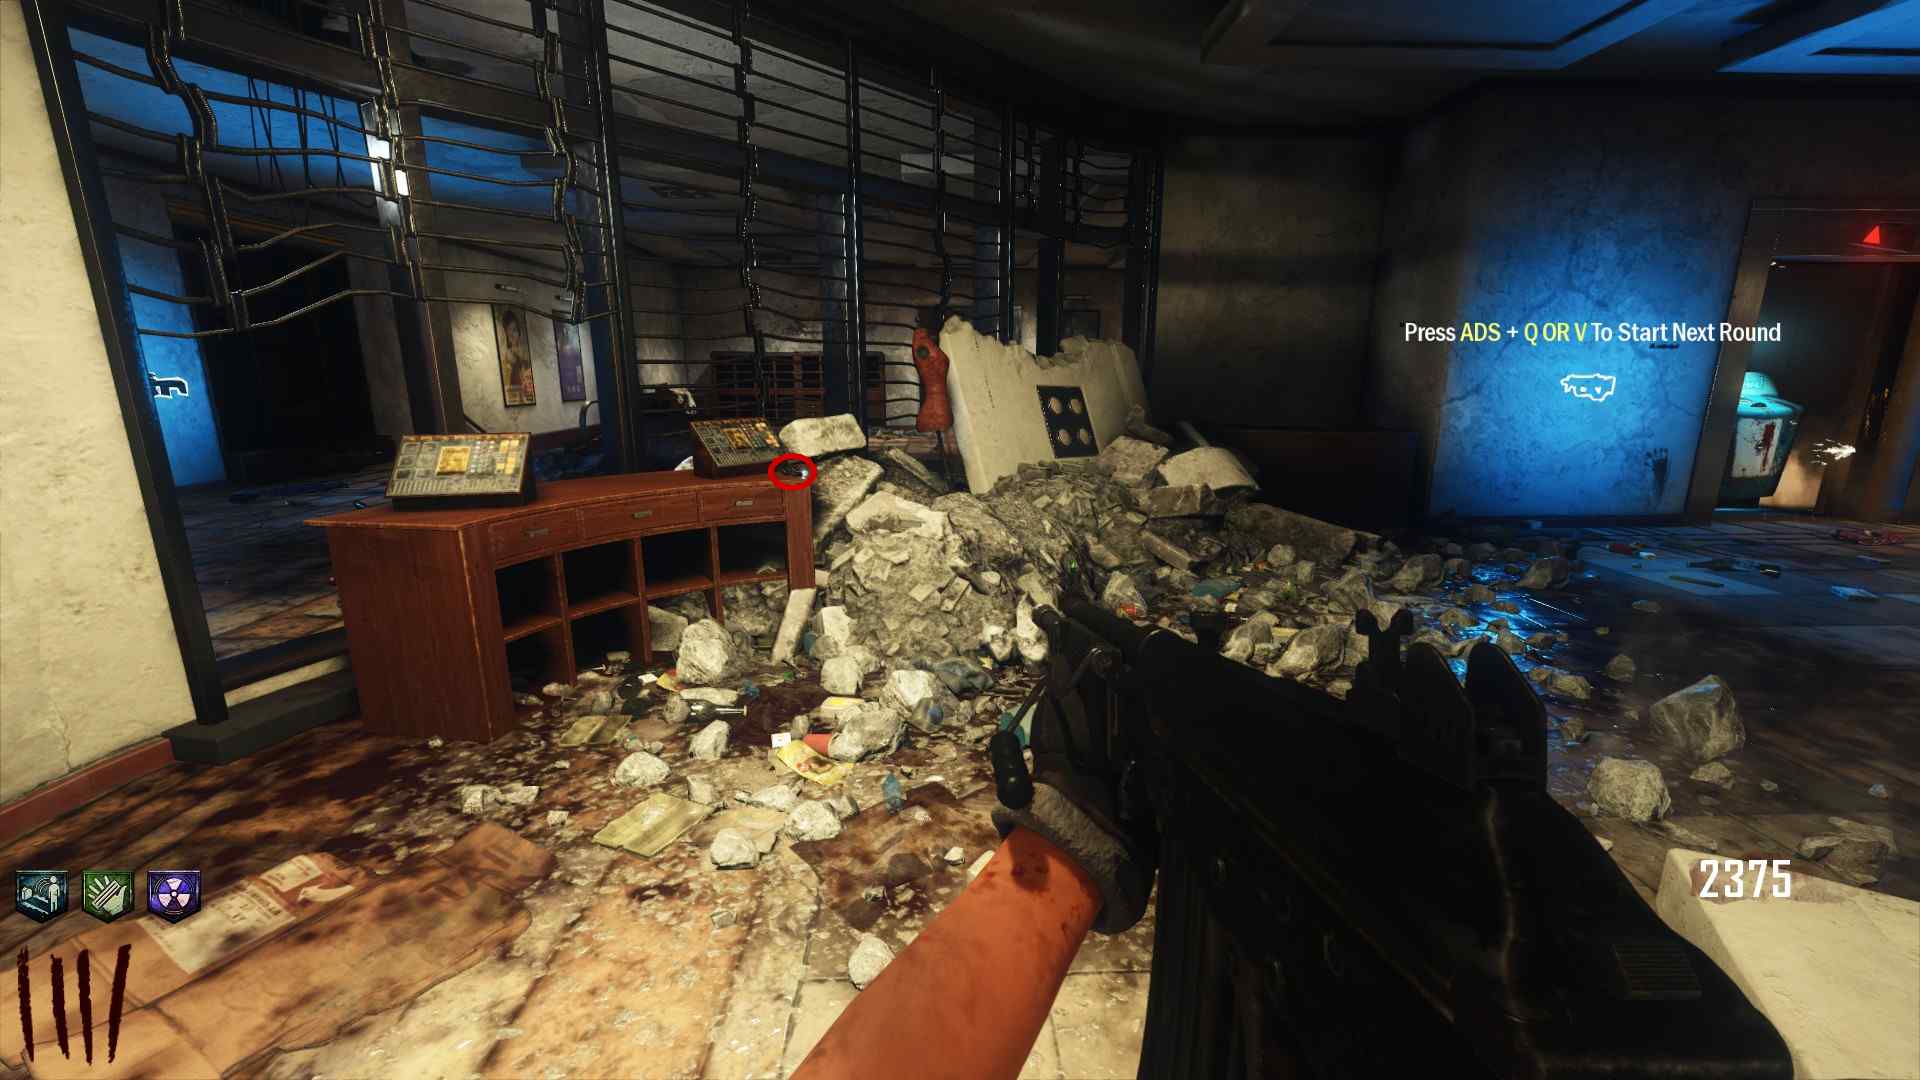
Interact with it to get your free Icy Tempest AAT.
- All Around Enhancement Mod Description And Info★ 5 (597)211k views1.2k ♥34 minUpdated Aug 10, 2023
- Black Ops 3: Console Commands★ 5 (1.1k)123k views2.4k ♥7 minUpdated Feb 13, 2020
- Origins Ultimate Guide★ 5 (562)72k views1.7k ♥17 minUpdated Jun 24, 2017
- [2.0]All Around Enhancement Mod Description And Info★ 5 (186)71k views600 ♥38 minUpdated 16 May
- Guide for Shadows of Evil [2020 updated]★ 5 (1.4k)67k views4.5k ♥24 minUpdated Mar 22, 2024
- Guide for Der Eisendrache [2020 updated]★ 5 (1.3k)65k views4.6k ♥30 minUpdated Feb 22, 2024






- Upgrading to PremiumTeam Fortress 2★ 5 (20k)1441k views11k ♥6 minUpdated May 11, 2022
- No More Room in Hell Official ManualNo More Room in Hell★ 5 (2.8k)569k views2.1k ♥29 minUpdated Apr 22, 2019
- NMRiH Community Hosting GuidesNo More Room in Hell★ 5 (526)351k views653 ♥1 minUpdated Aug 10, 2022
- ULTIMATE GUIDE FOR GAME DEV TYCOONGame Dev Tycoon★ 5 (5.8k)326k views10k ♥4 minUpdated 23 Jan, 2014
- How to 'Git Gud' Soon™MORDHAU★ 5 (2k)318k views3k ♥68 minUpdated Nov 16, 2024
- Лучшие кооперативные игры SteamPAYDAY 2★ 5 (1.5k)315k views2.1k ♥56 minRussianUpdated Apr 27, 2025






This guide was created by its original author on the Steam Community. Are you the author and want it removed? Request removal.