zm_mc_jungl Full EE Guide + Secrets Walkthrough (All Collectables++)
>>
 Thanks for giving my map a chance! The EE is straight forward and easy to speedrun but can quickly become frustrating. Point hoarders will probably finish the fastest.
TIP: This is the kind of map you want to save the last zombie on for convenience.
(TLDR? You can view the images and skim a reasonable portion of the guide)
EE: Part 1
P1: Initiation
Firstly, see Section "All Possible Banana Locations". It's just something to be aware of.
As soon as the map starts, you will find 1 of 3 cobbles glowing a warm honey orange.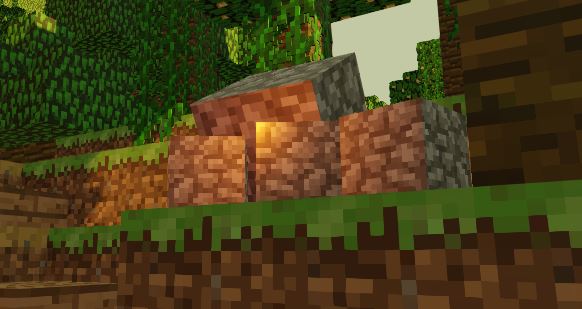 Still remember how to complete Moon? This image look familiar?
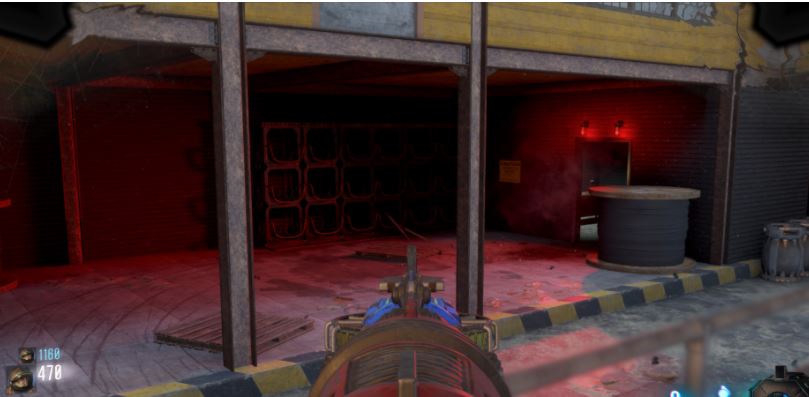 Fear not; In the case that this image tells you even less info than a 1992 DMV Driver's Ed Leaflet, the glowing abnormally sized cobble will represent the Slots to Land 'nades into in North Tunnels like so:
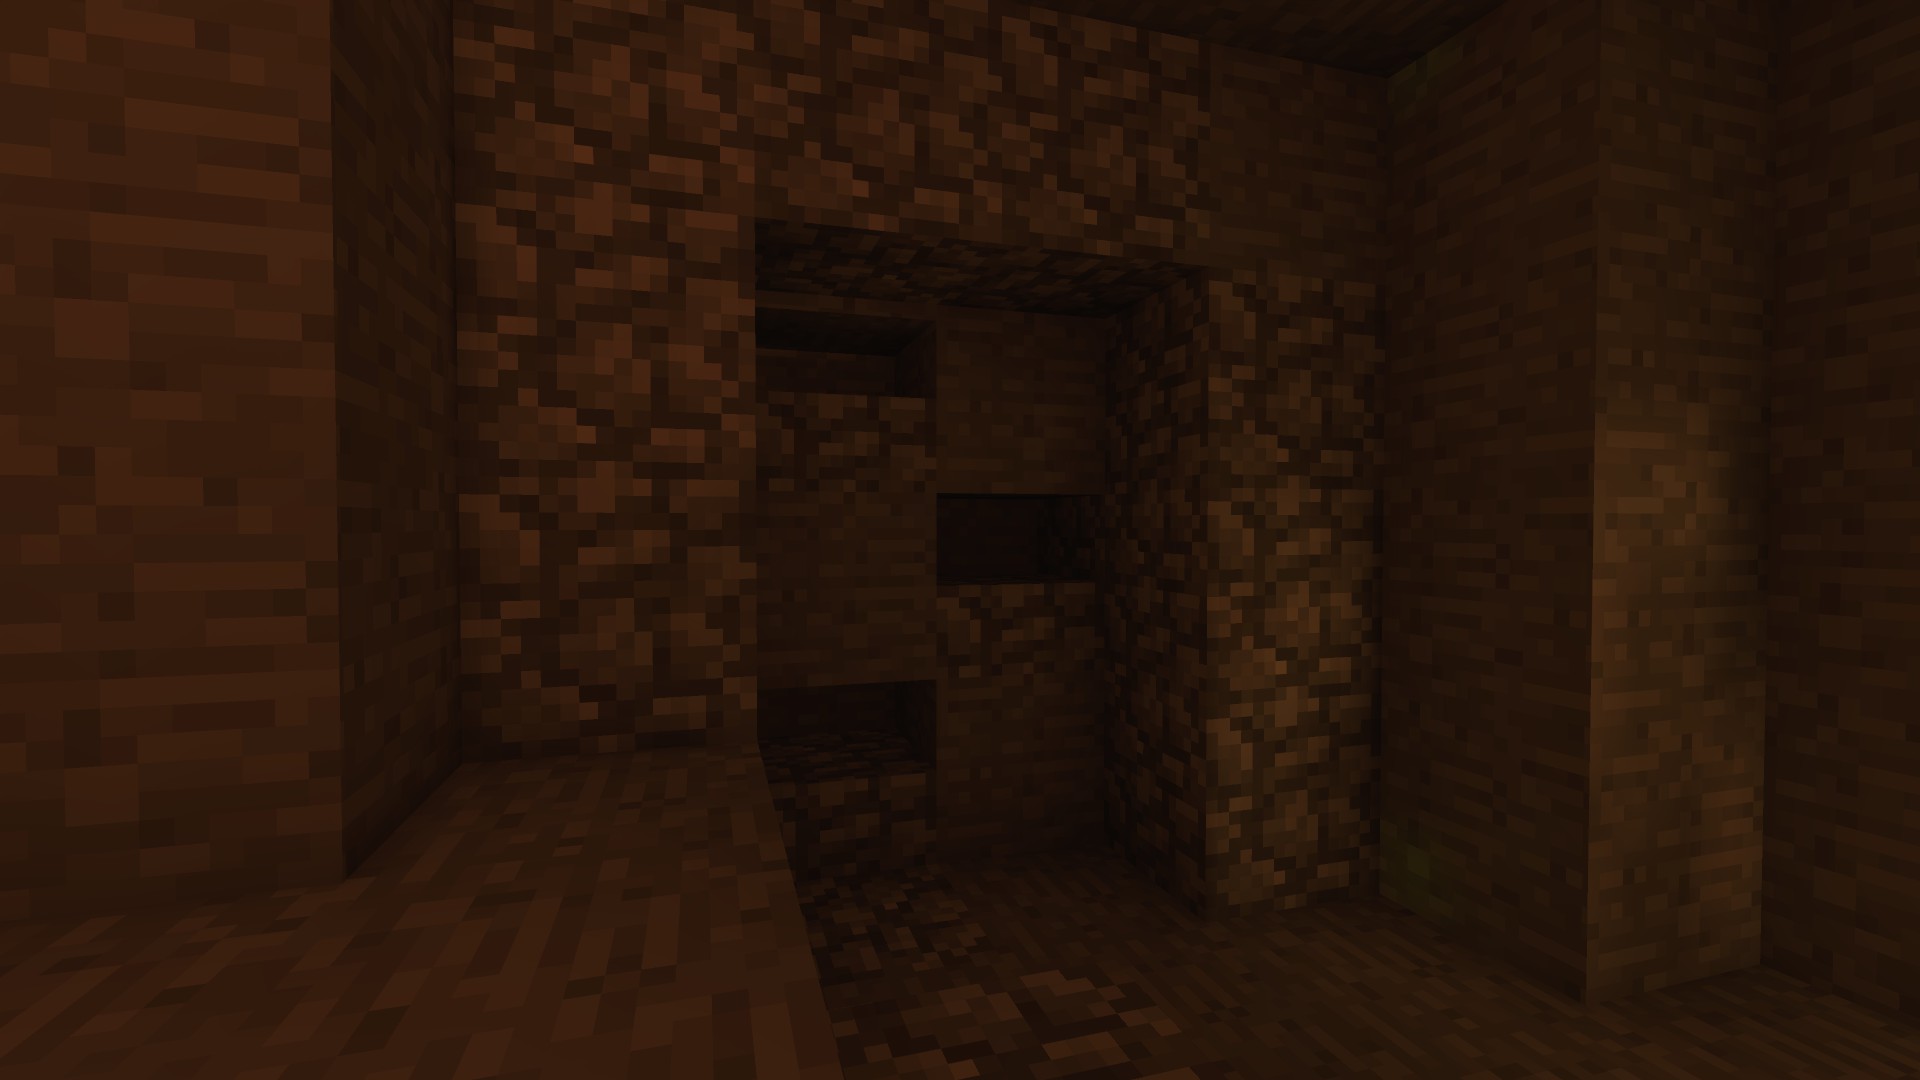 The slots can be rather difficult to hit. ESPECIALLY the TOP LEFT ONE as shown above. There is a hint of stone that bars you from sticking the landing and you could die; be careful.
The trick I recommend is to get the grenade stuck in that top left one. You could also try cooking it and sticking the landing; slightly riskier. The other 2 are much easier to land.
EE: Part 2+3
P2: Finding The Artifacts
Now once you manage to piece your 2 and -2 together which is still 0, (you will have to check the cobblestones again after this), there will be an Earthquake to knock artifacts which resemble Locks out of the trees and walls of the whole map. In order to find them, A cobble by Spawn area will glow Baby Blue.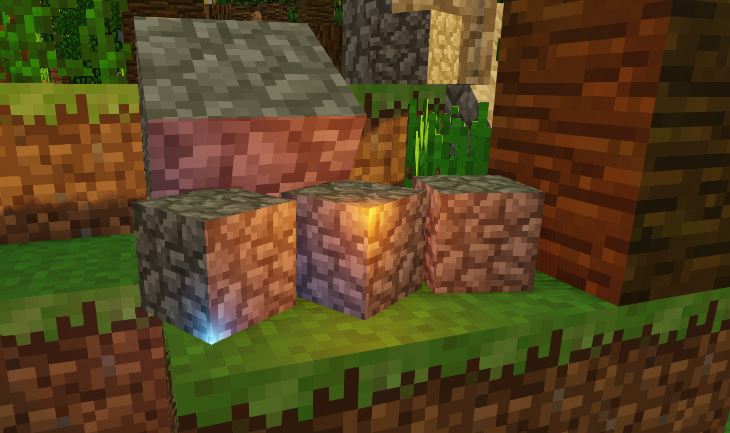
(See Section "Artifact Locations" for these 3)
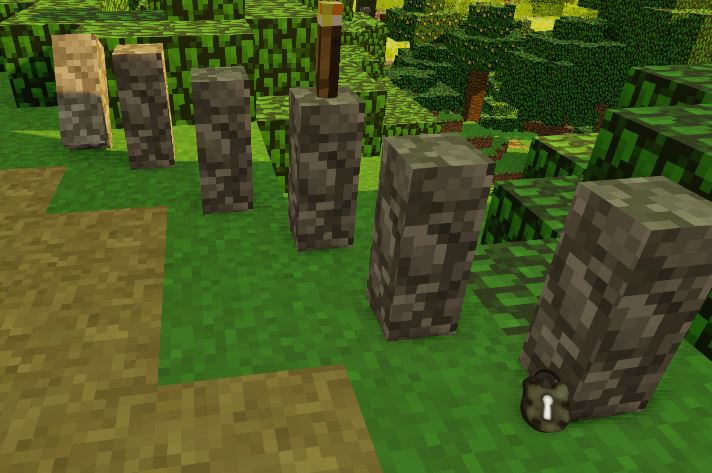
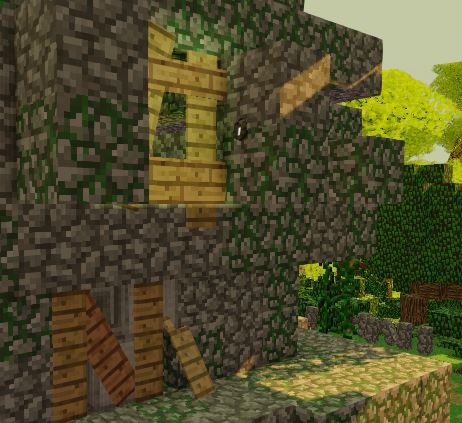
LEFT BLOCK = TEMPLE
MIDDLE BLOCK = VILLAGE
RIGHT BLOCK = TREE / ROUNDABOUT
With all Locks collected, you are 1 step away from setting the curse. Begin the curse by first interacting with this large face of the Cobble emitting ungodly beautiful godrays.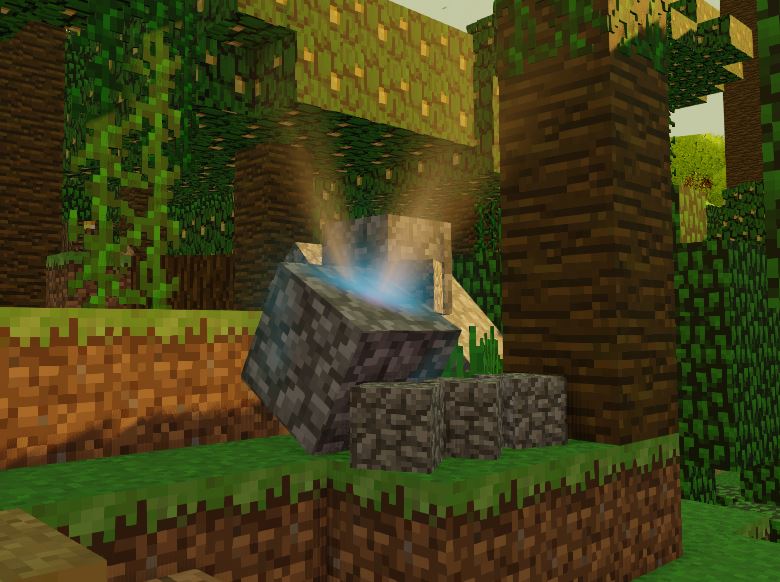
P3: Group with Team
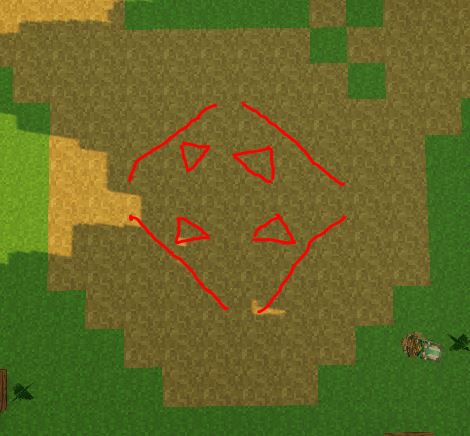
ALL PLAYERS IN THE MAP, must then huddle up in the center of spawn. Here's a suggestion / diagram of how you can safely wait for them.
EE: Part 4 + 4.5
P4: Preparing The Sacrifice //Pics shown in Daytime for convenience*
There will be Three Pressure Plates in risky locations. (See "Tips N Tricks: Shortcut")- Chasm Overhang (AKA by Gobblegum Machine by the Path Junction)
--Do not fall.
- The very ledge of the Tunnel by the Waterfall.
--Do Not Fall there either.
- Underneath a torch inside the Flower Tunnel's two paths. (almost in front of Double Tap)
?!?! --I don't even know how you could fall here. While that would be impressive, Don't die.
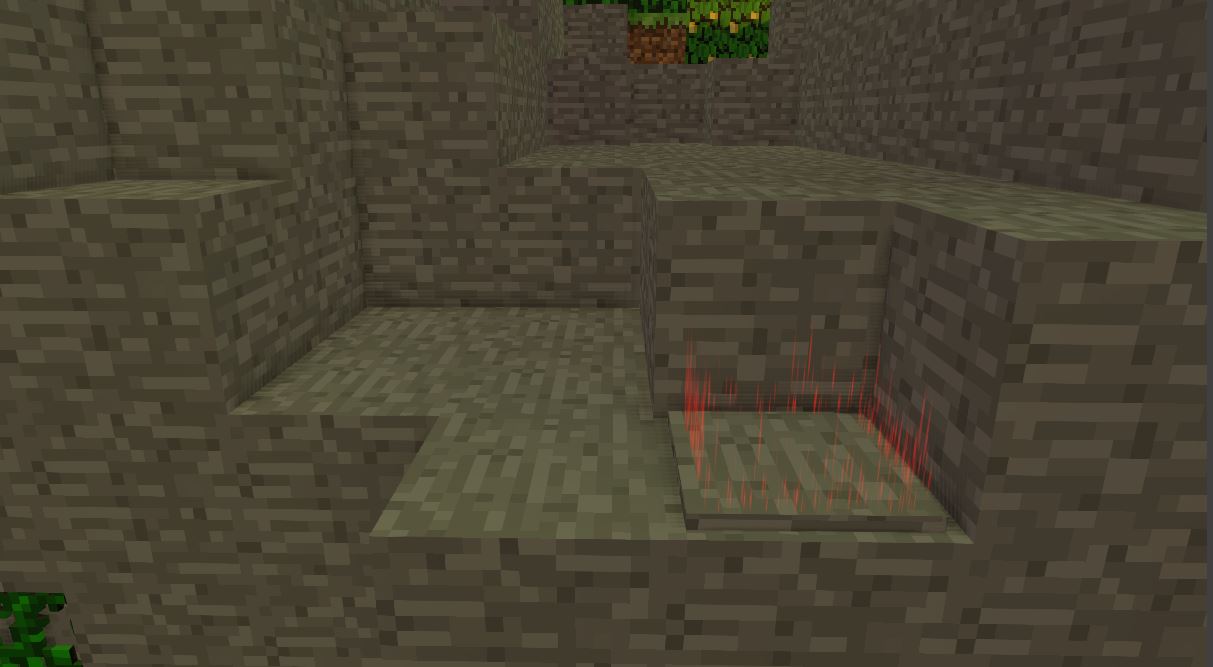 You will have a hard time trying to see the skulls in the night, and the skulls demand precision shots to the face as well- Aim between the eyes. Yet conveniently, an ICR is immediately in front of one plate. A splash damage weapon from the box will do the job just as nicely.
(Skulls shown in day for you to know where they are):
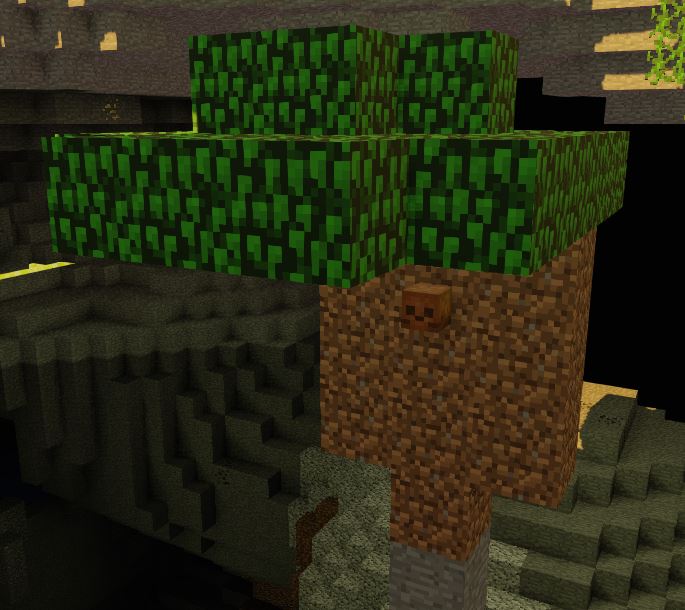
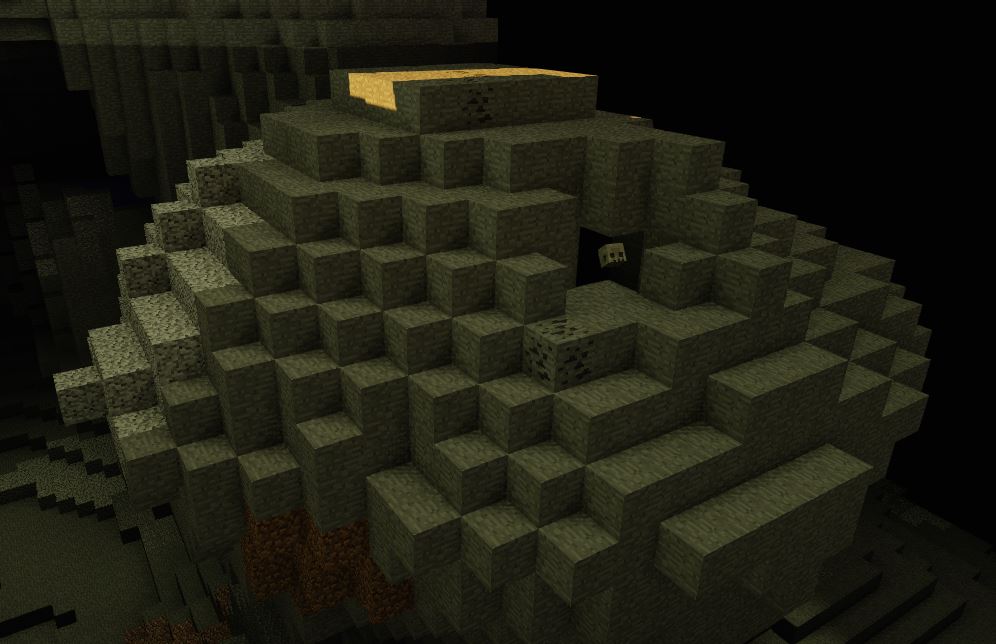
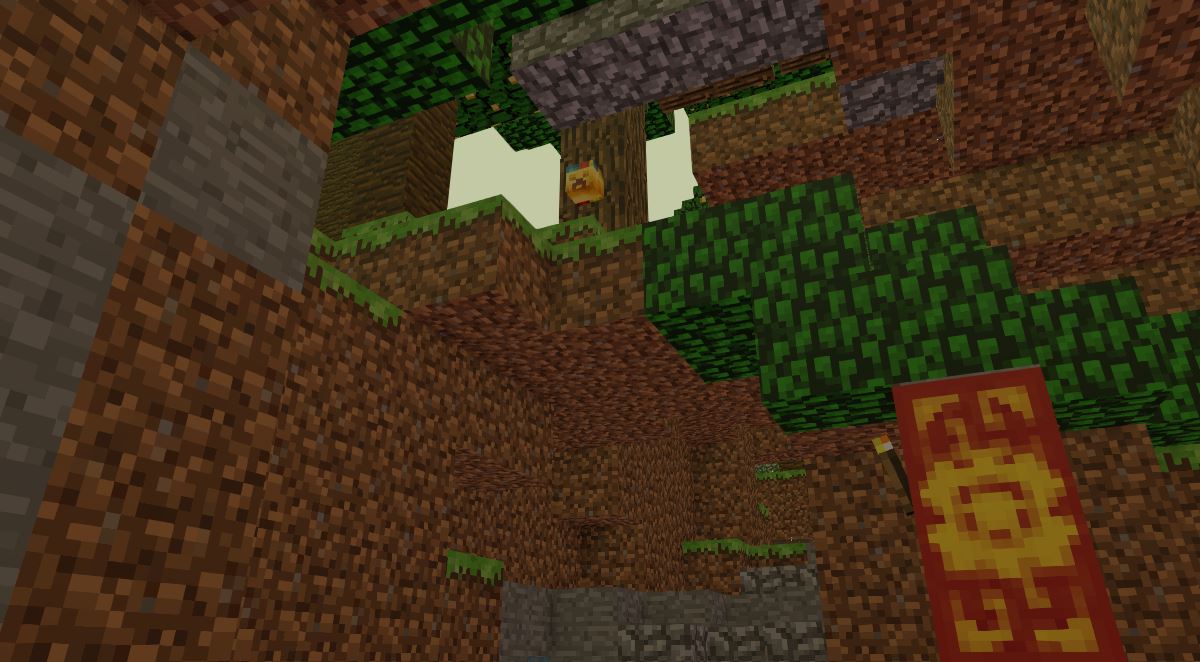
(Pro tip: The pressure plates are a bit more relaxed than Shang; Step on them for 3 seconds total rather than all at once if you caught yourself between zombies.)
P4.5: I swear I've played this before!
The pressure plates' SKULLS are for you to activate the Spinning Totems. One plate equals one set of spinning heads; This is to let you know if you've forgotten a to destroy a skull or finish a plate. Again, Totems don't fire until the skulls are gone.
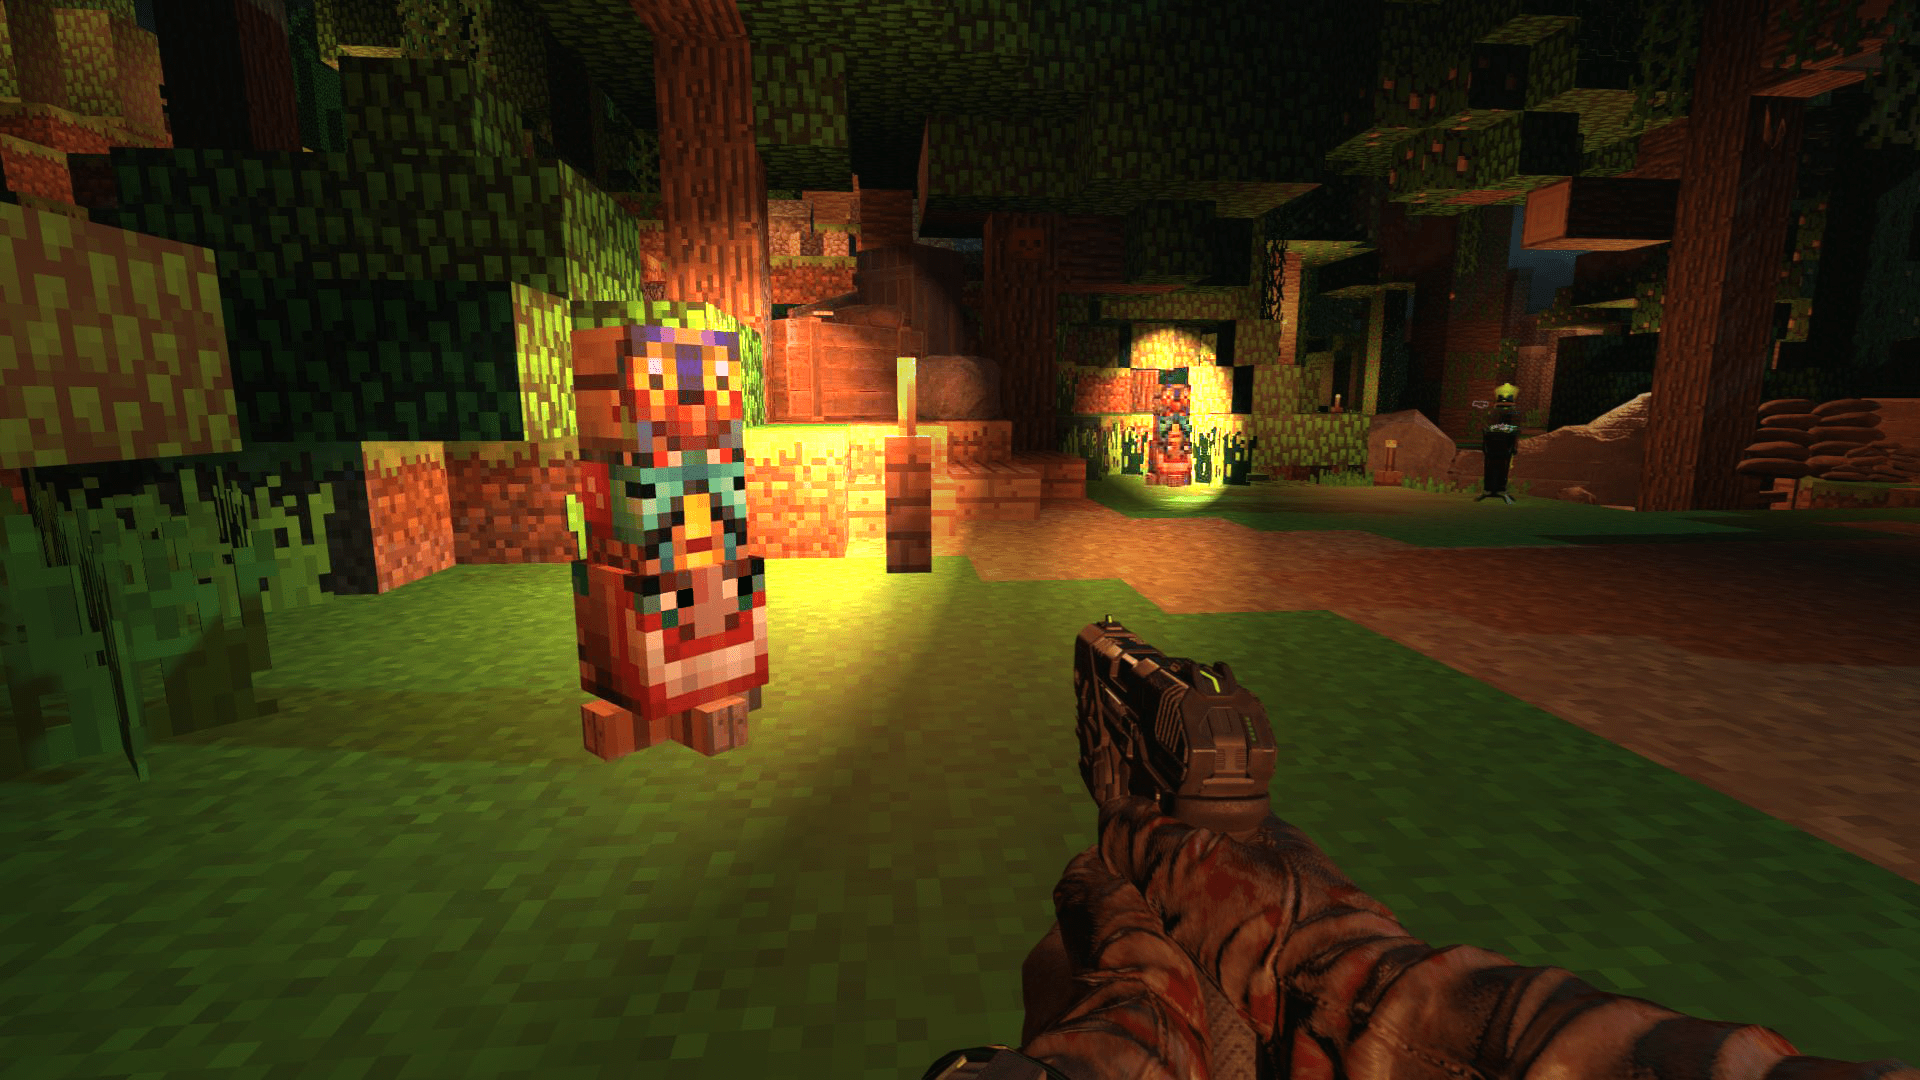 When these two are fully spinning, there will be a [Use] prompt on both of them.
EE: Part 5 + ??
P5: EE End, Completing The Sacrifice!
Once both Totems were interacted with, you must sacrifice the Banana blade to unleash an earthquake.
(You're going to want to PAP the banana blade for a surprise that you are certain to miss out on if you do NOT Pap it. So... always Pap I guess. Or not- up to you. Maybe you enjoy the map on nighttime better.)
Interact with the Banner in the Temple Altar with one of two special weapons to conquer the map. If you lost it in the process, you have to roll the box for it.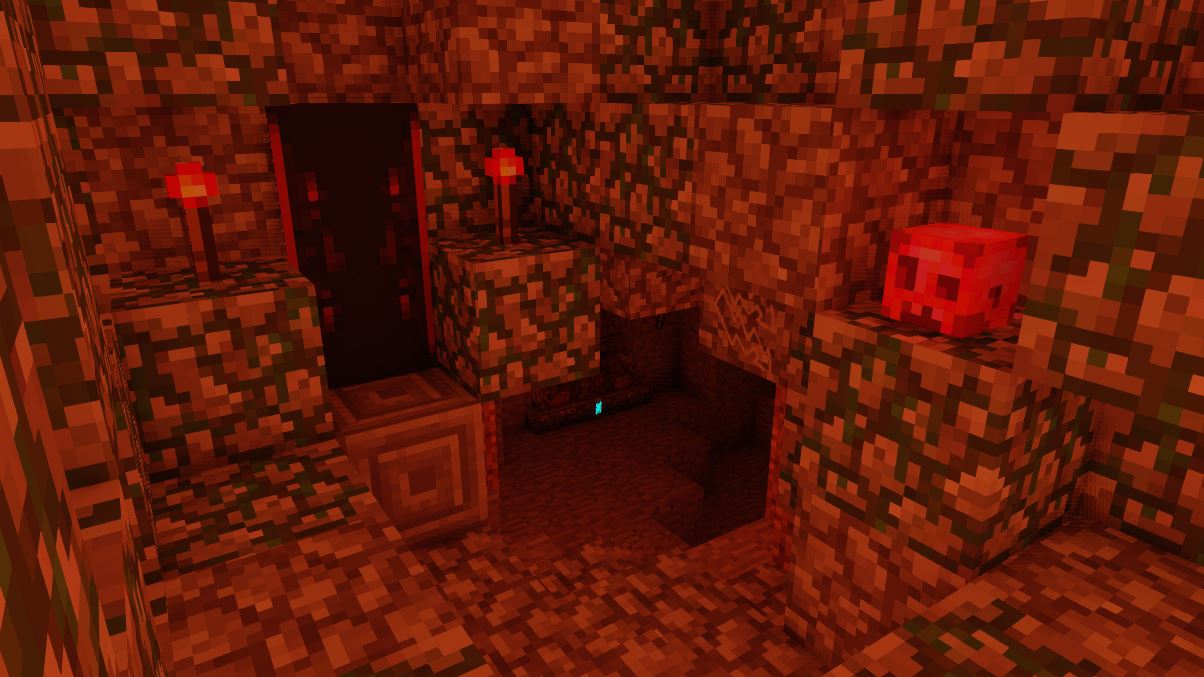
Banana Blade Ritual == Congrats, another EE conquered.
Blade Of Bananagement Ritual == [CLASSIFIED]CLASSIFIED_DOC.JPEG
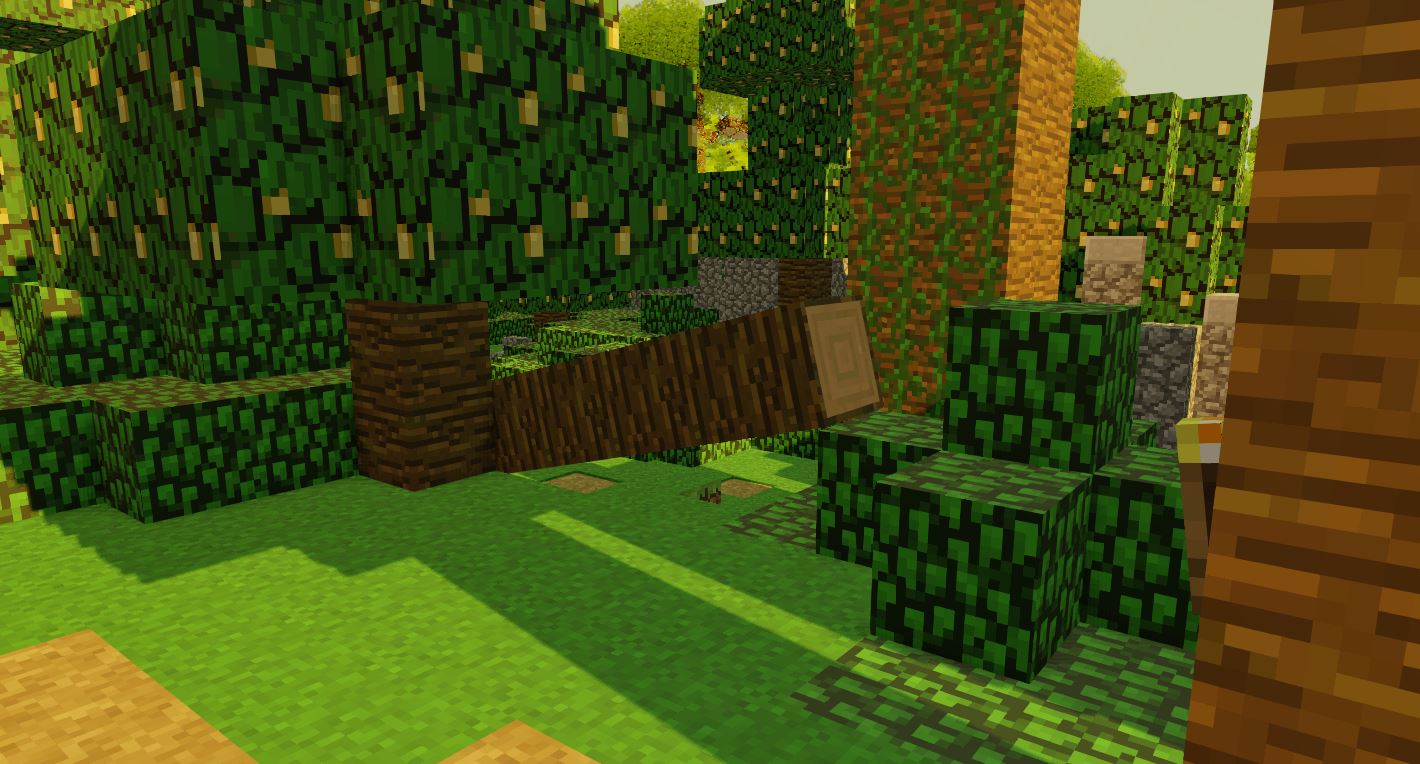 ??: The Final Post-EE Unlock
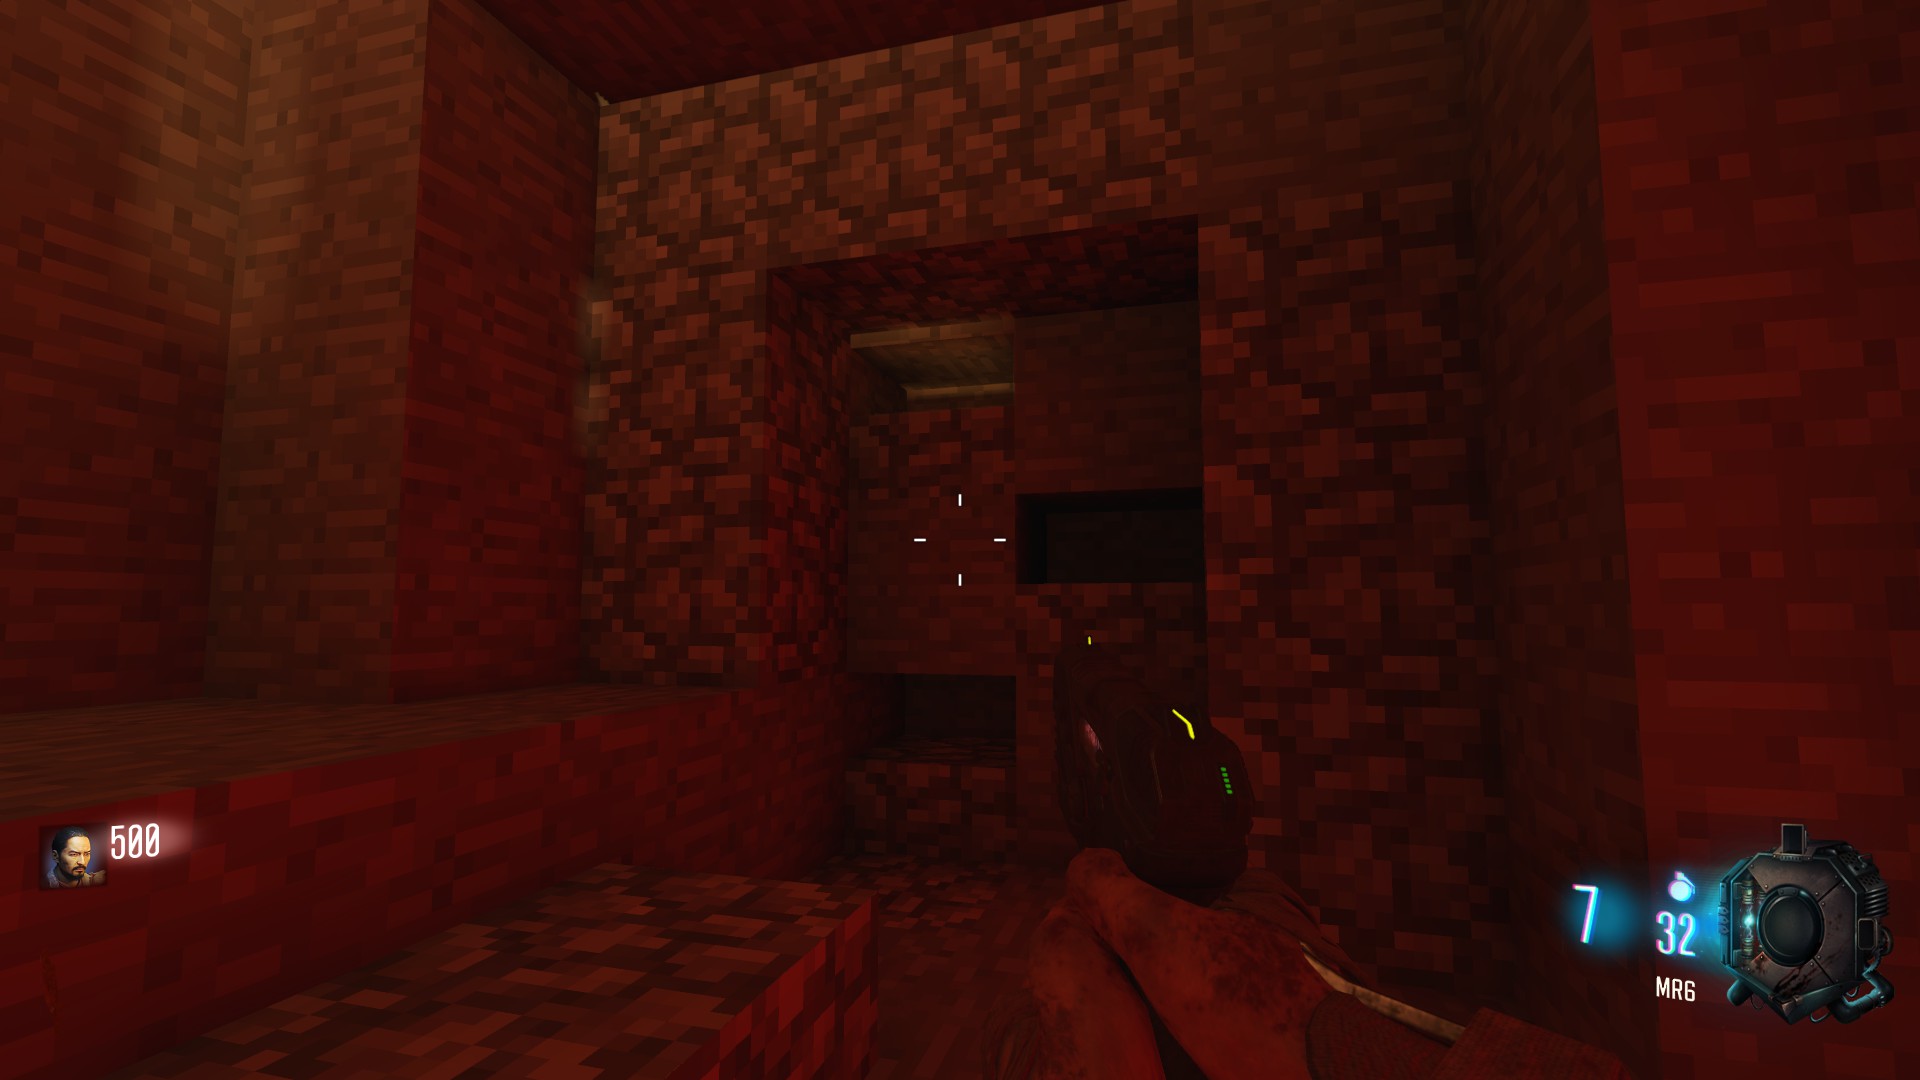 Remember that awful troll grenade slot at the very beginning of the EE? It was illuminated for you at night time! Even though you do this part after the ritual, Throw one more grenade in and then walk up to this very post right here...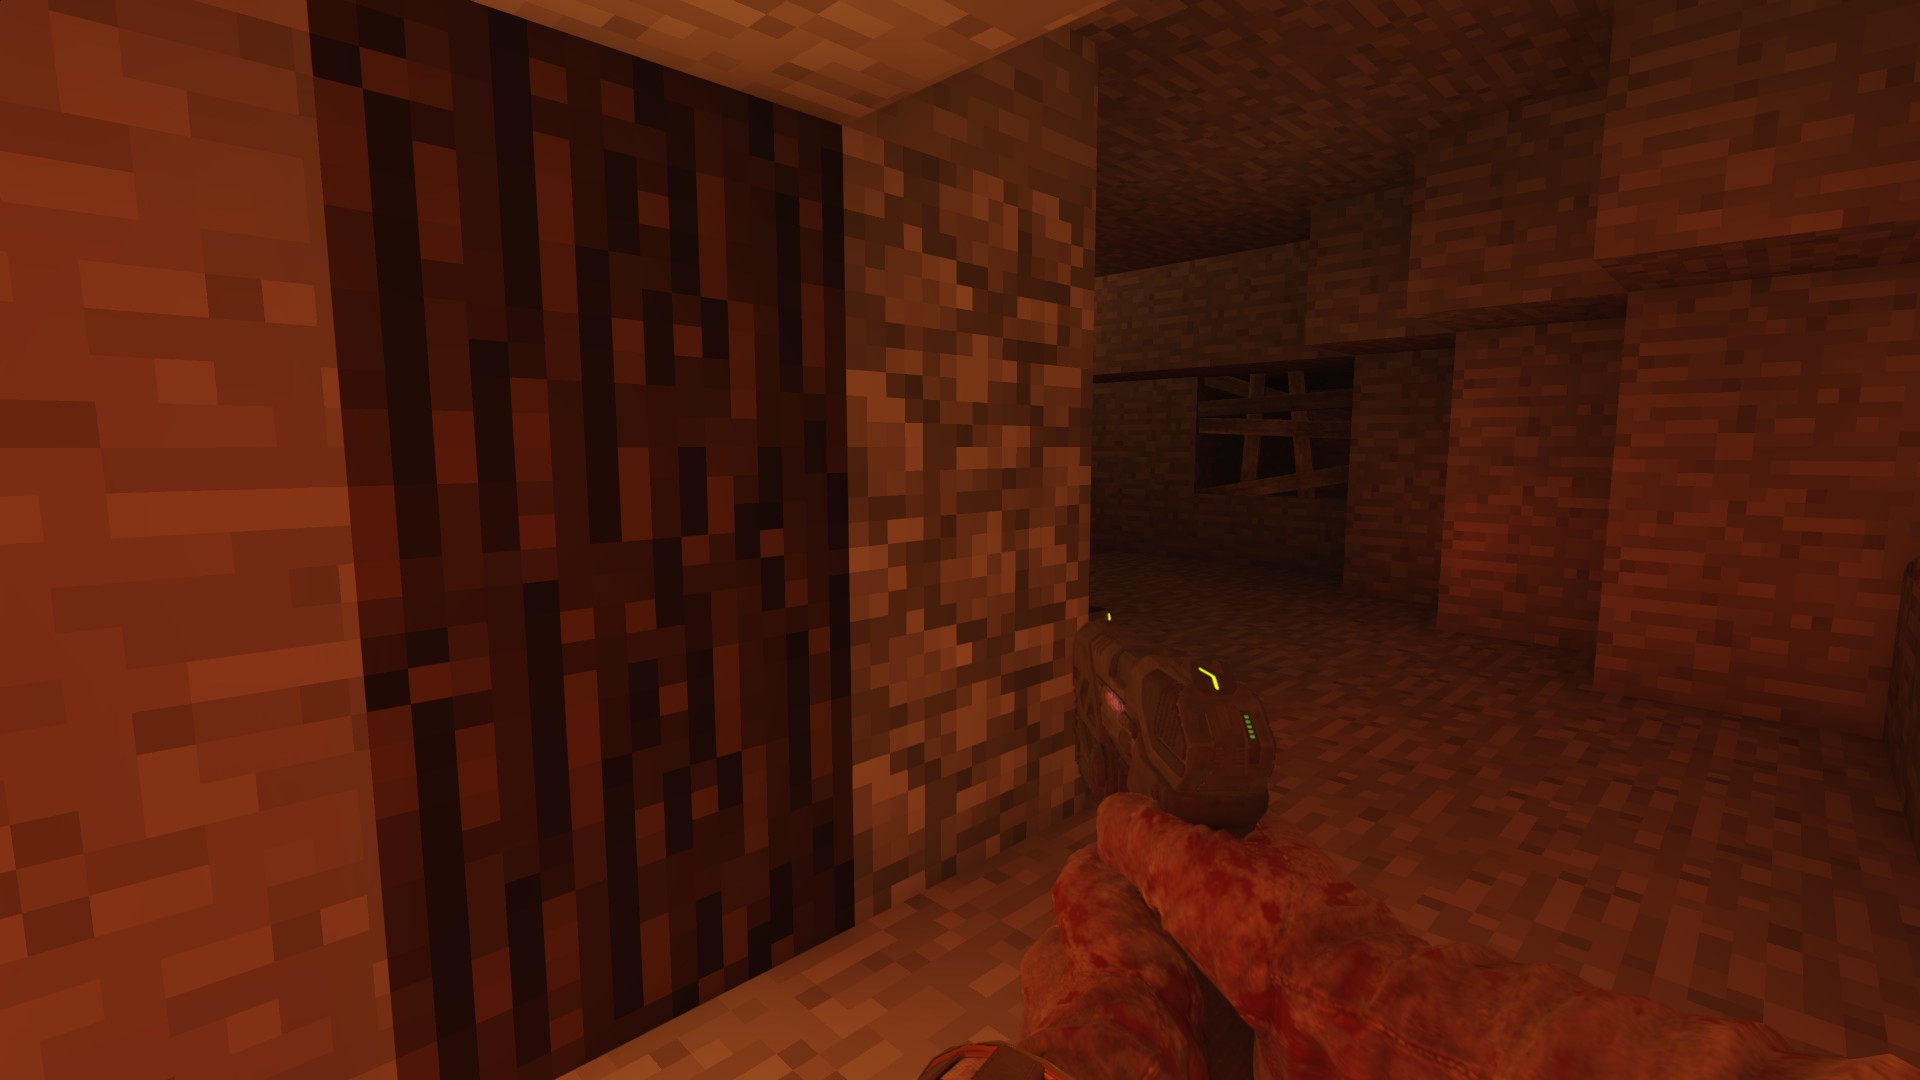
And you'll be thanked for 100%'ing my EE with everything promised in the guide description *and* more to keep the high rounds going, in a secret room.
>>

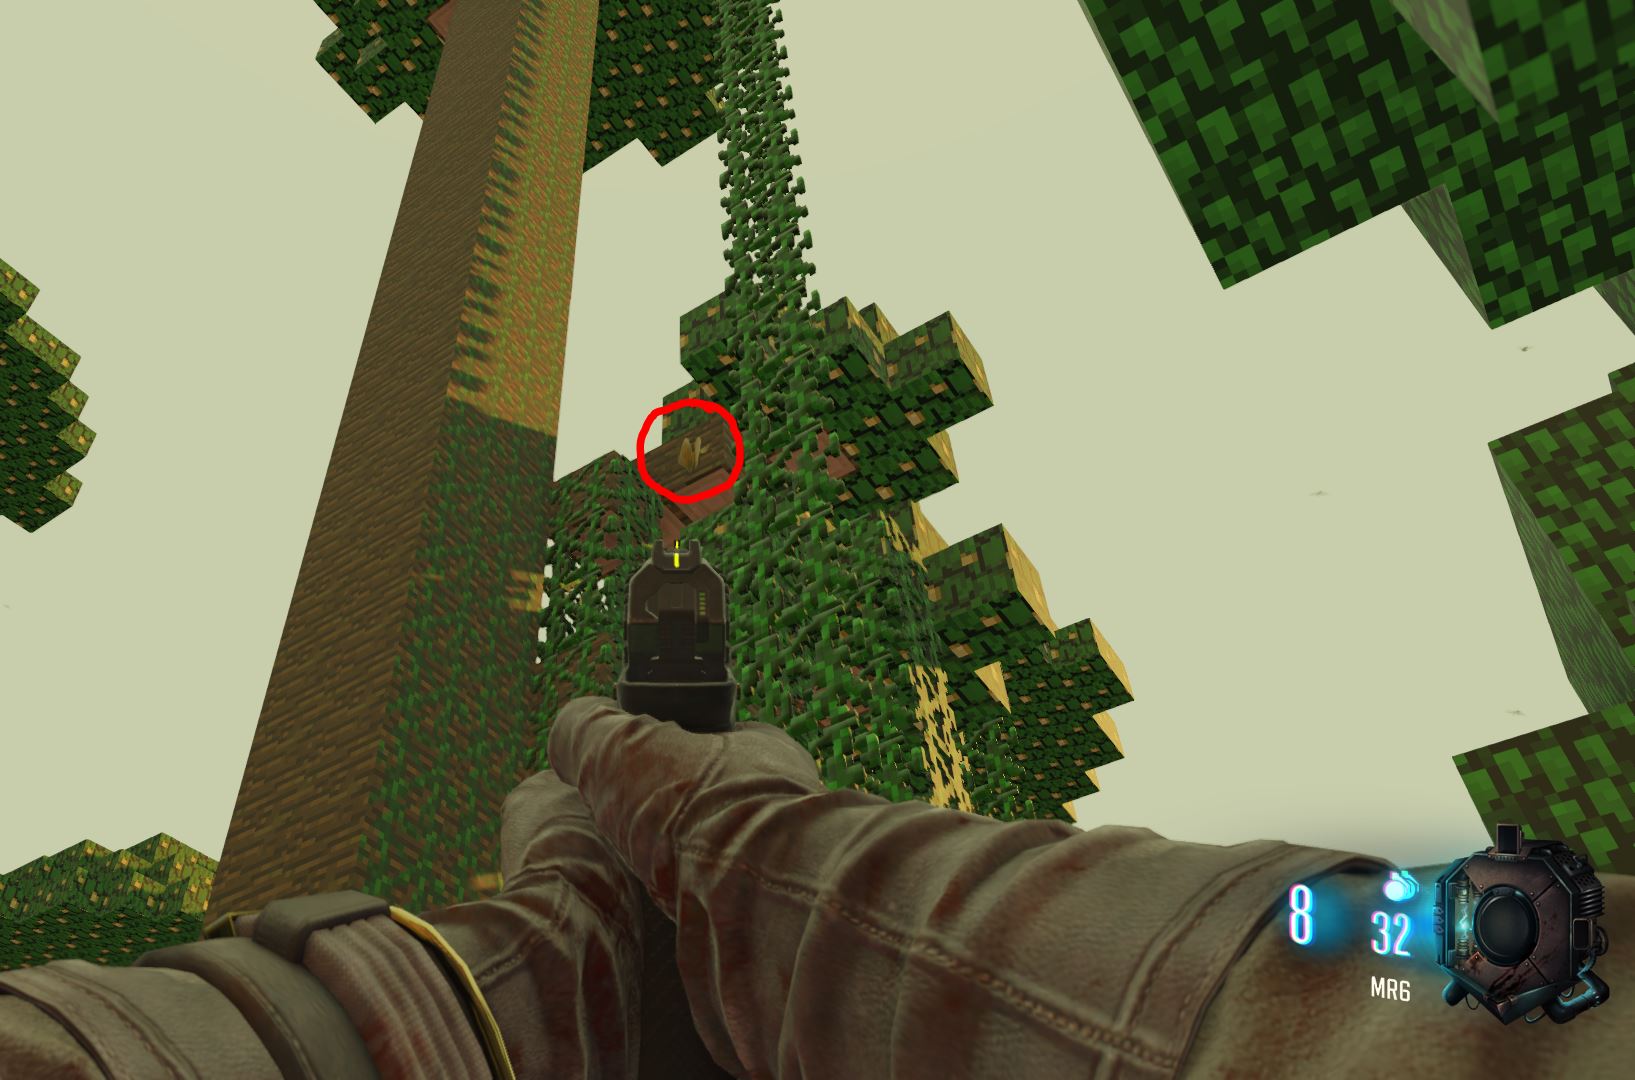
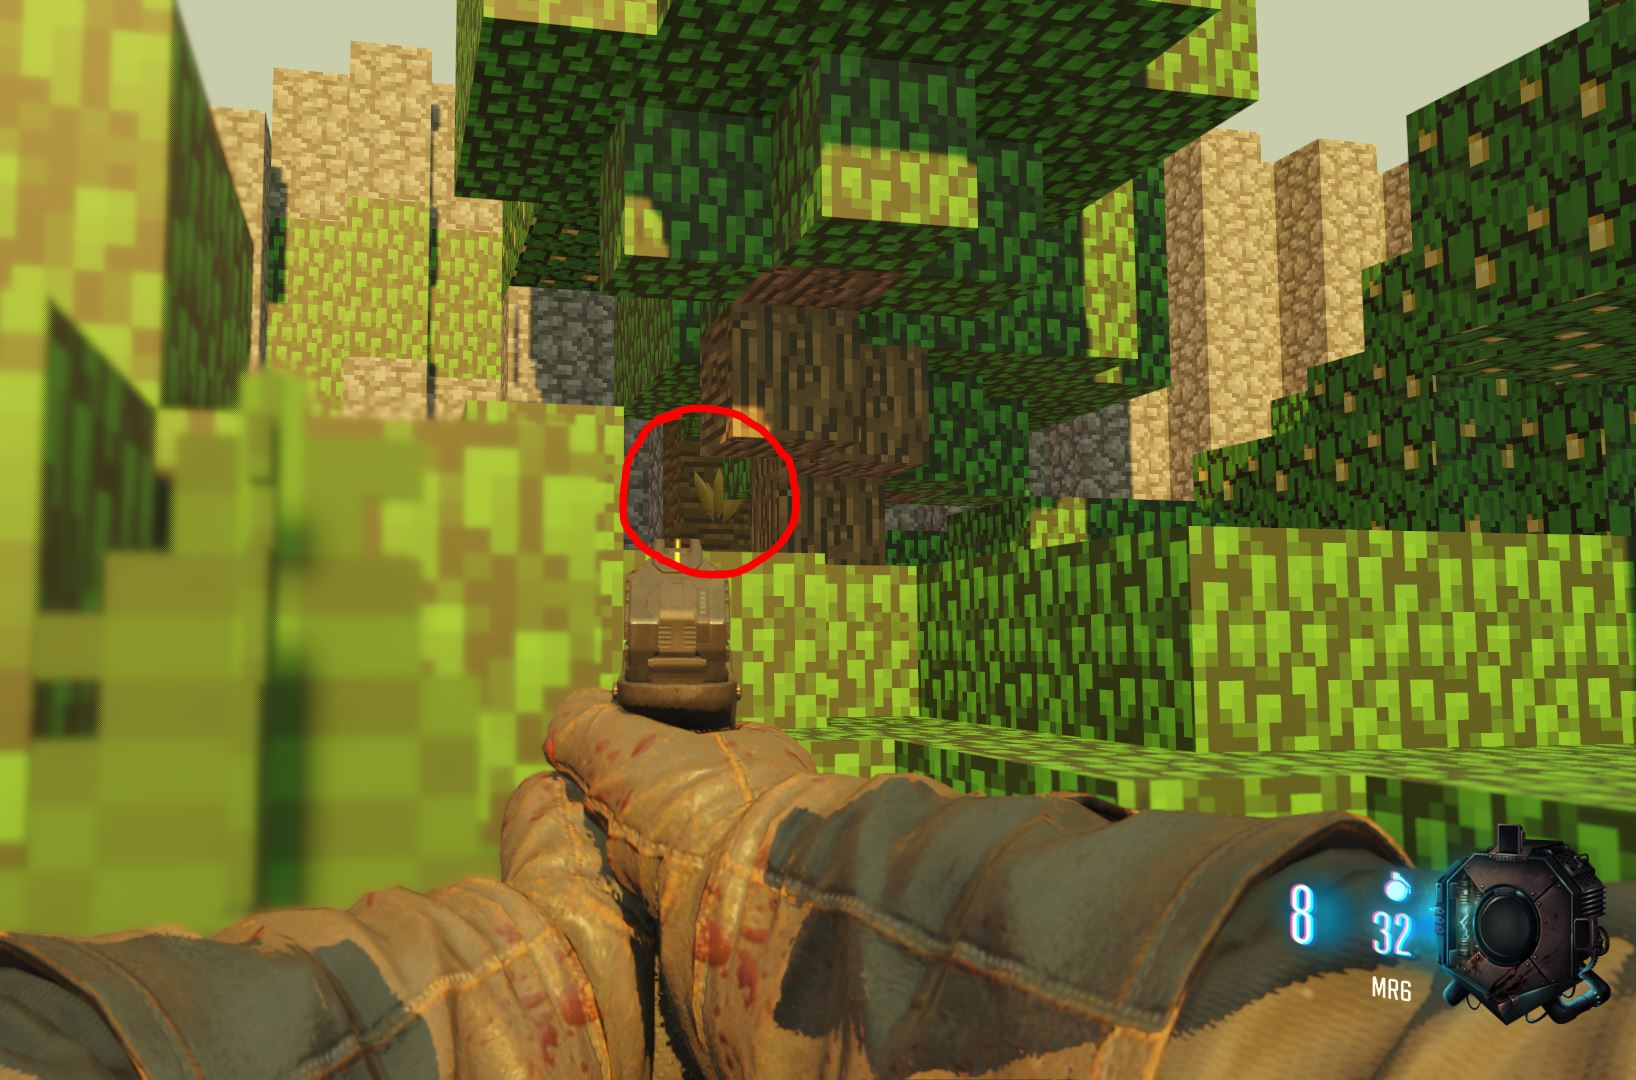
All Possible Banana Locations
You may have noticed the shootable bananas. They are indeed, quite the cool bananas. Quite tricky to even see them though, in some cases borderline impossible.
By shooting all bananas in the map, you will obtain an absolute potassium-punishing-piercer-melee that is strong enough to eliminate all early rounds. Not quite a bowie knife but still pretty strong.
The "Banana Blade", will PAP into The Blade of Bananagement. Need I say more? Either of them can be used to finish the EE. I recommend the Bananagement if you enjoy green lasers.
Bananas 1, 2, and 3 (I find it convenient to number them like that):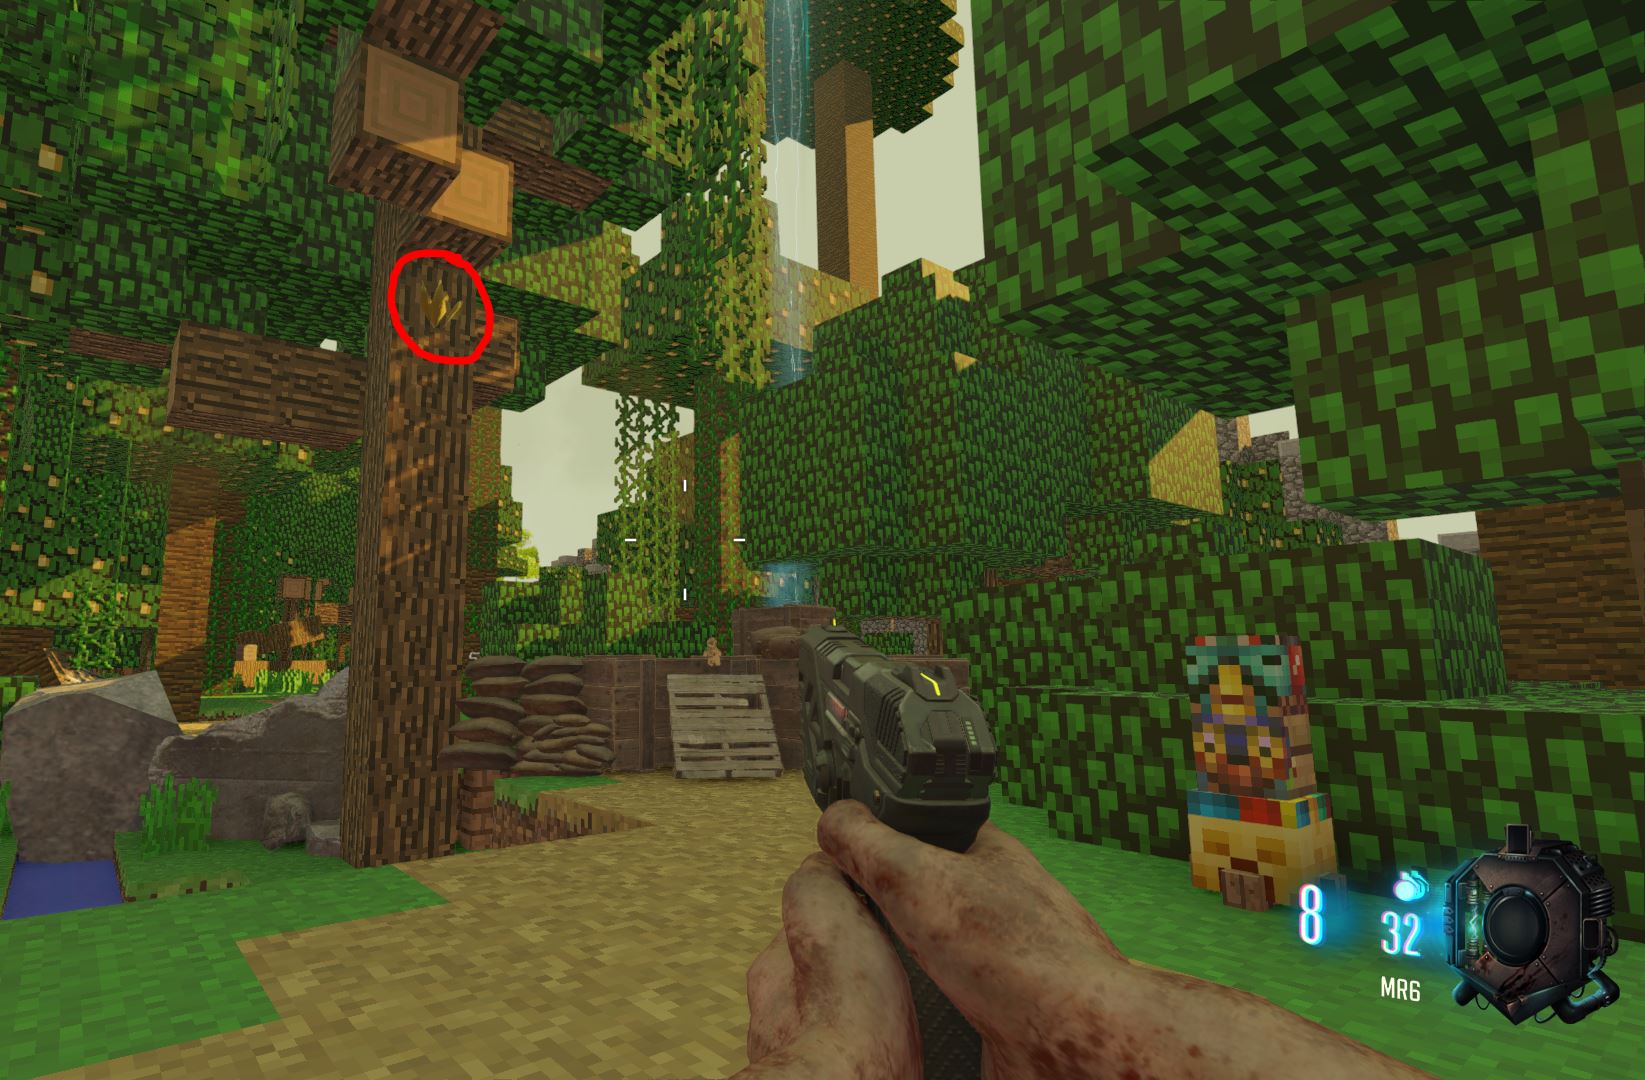
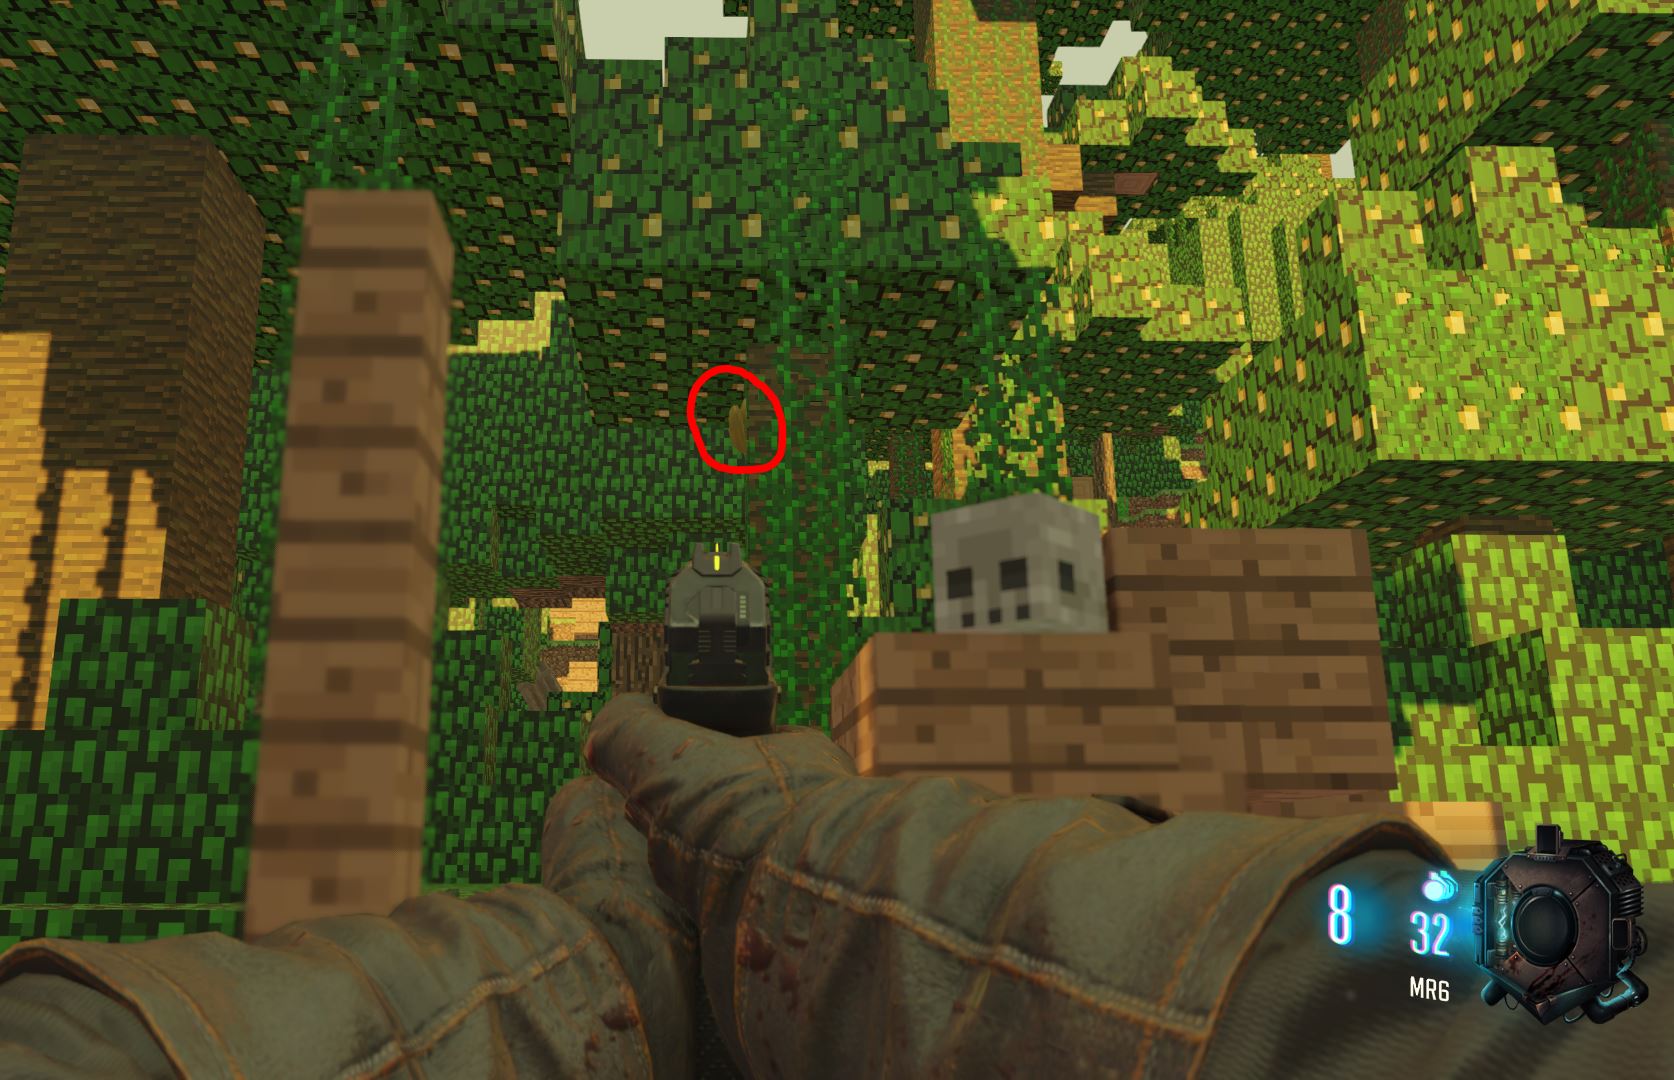
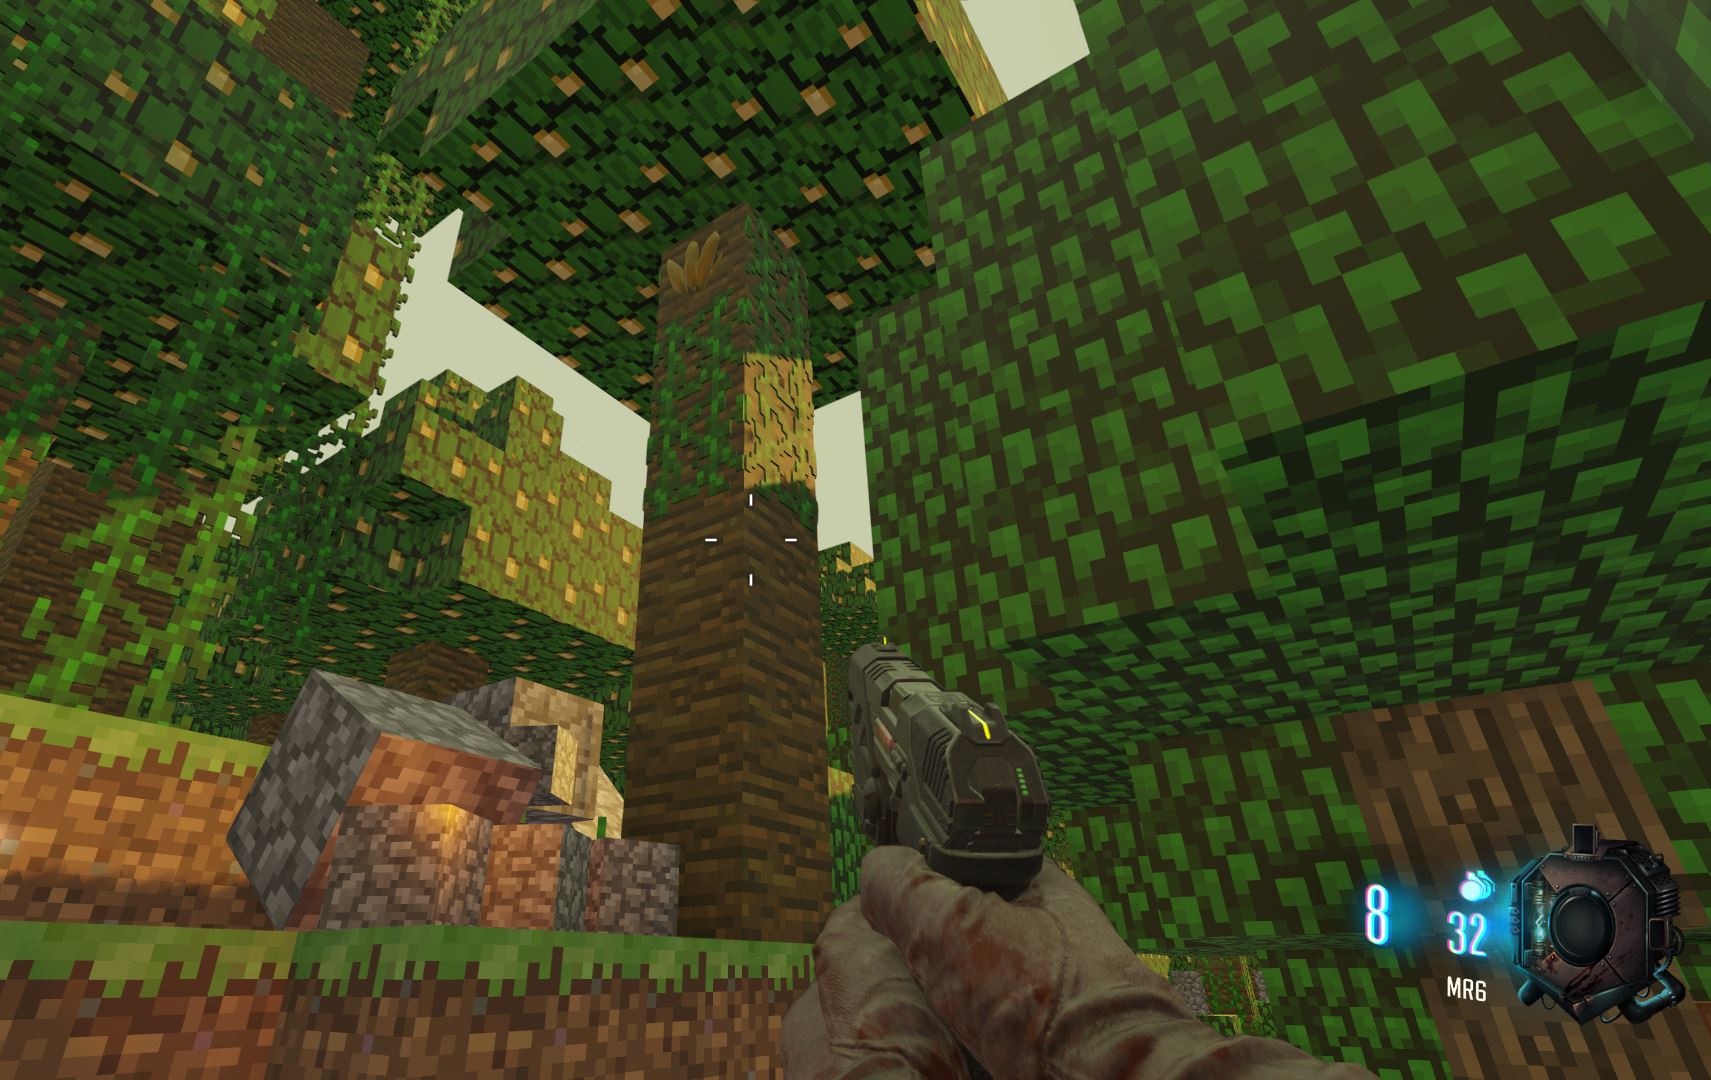 Bananas 4, 5, and 6: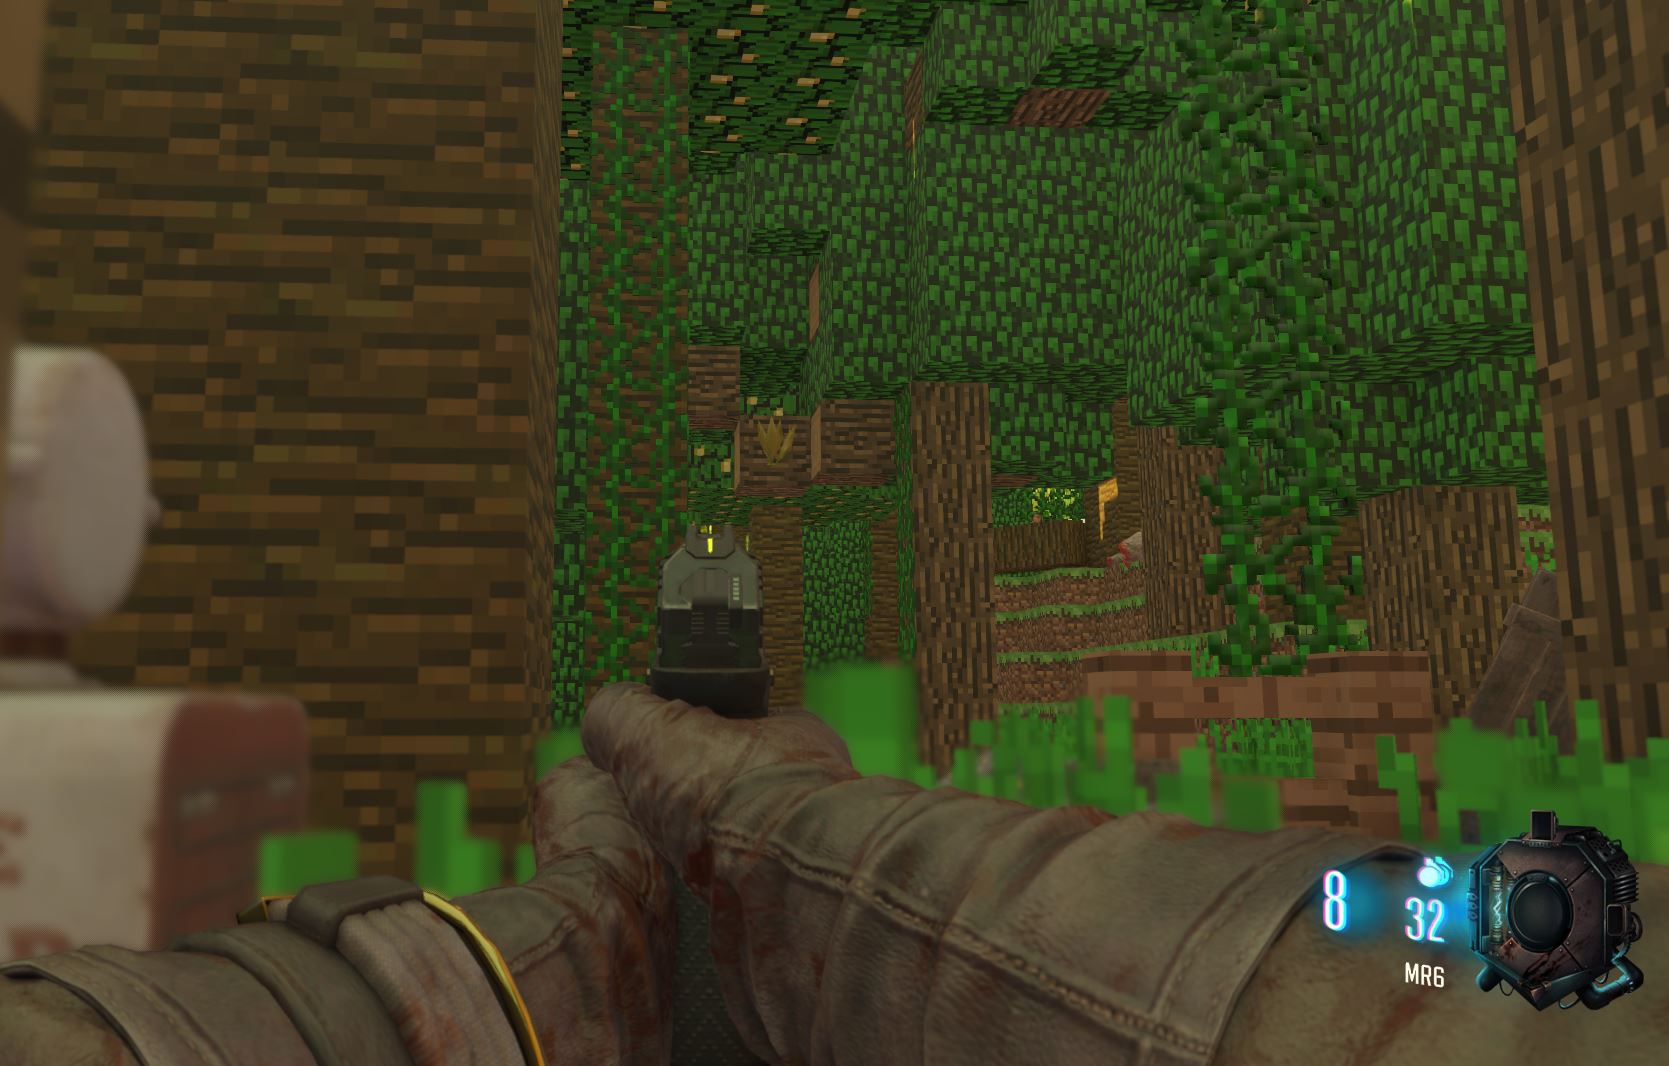
All Artifact Locations
Along Cobble Posts.
Outside Temple Wall-Debris. (Unreachable from ground)
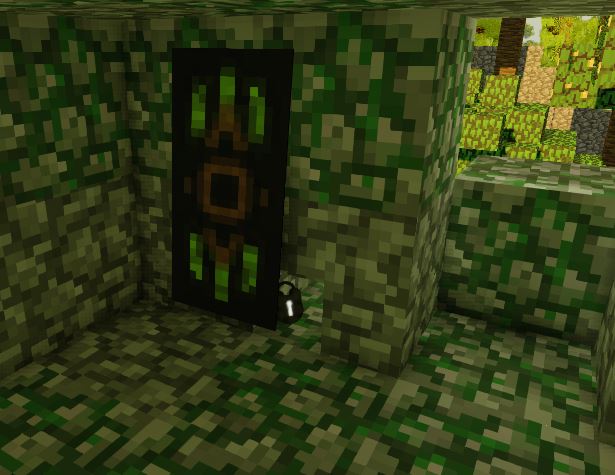
Hidden Behind Banner.
 VILLAGE:
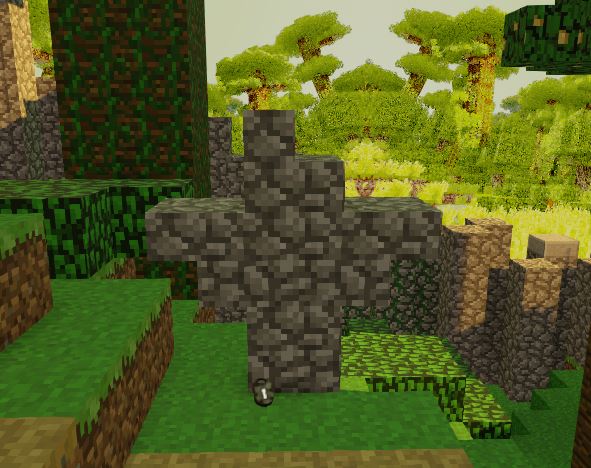
By Odd Cobble Cross.
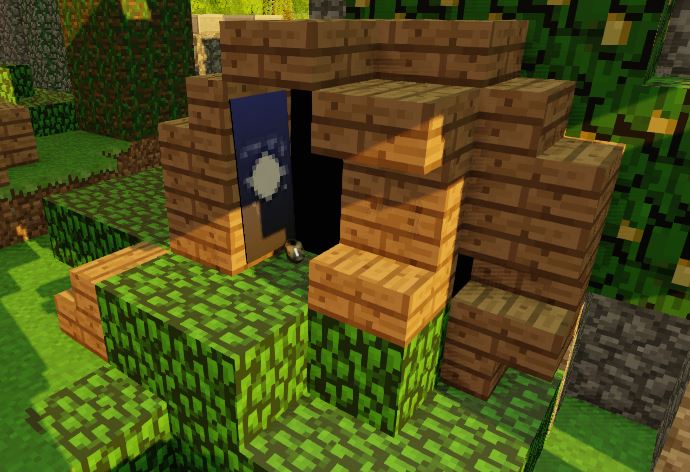
Inside Moon Banner Hut.
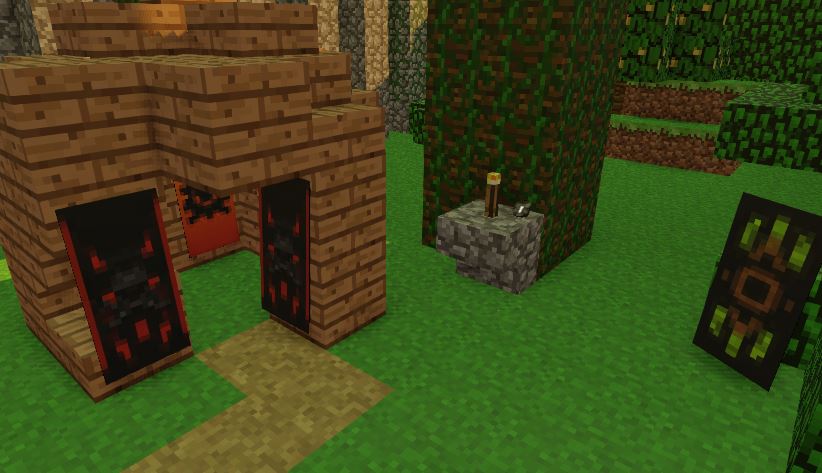
By Chief's Hut.
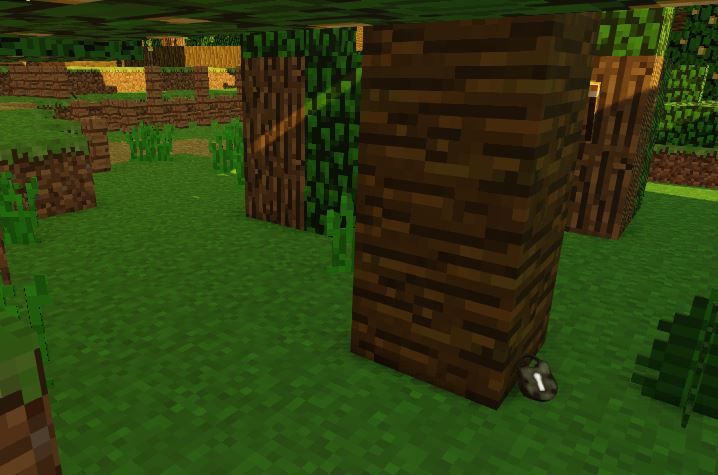
 TREE:
TREE:Next to Mule Kick // By a diagonal log; Hidden against a tree.
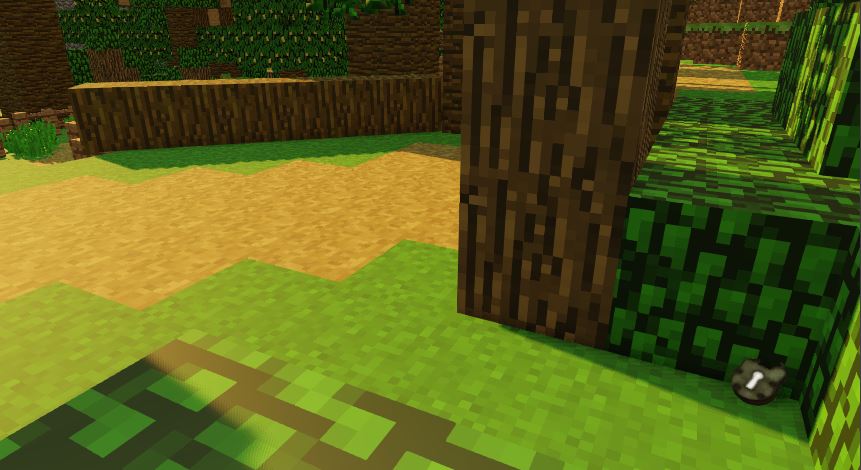
By the broken fence.
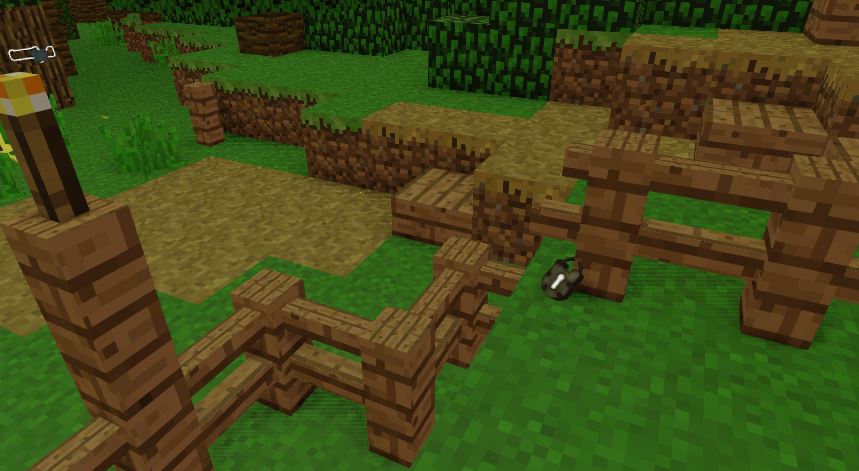
Inside obscured grass path /// behind tree.
How Do I 'PAP' without dying?!?
The Pack A Punch has a puzzle of its own. Thankfully, the puzzle is easy as you only have to do it once.
So firstly, PAP is at the bottom of the cave, here's how you get there:
#1. Turn power on, probably ASAP as it's kind of a 1-way death tunnel challenge.
#2. If you want to enter PAP at this point
AWalk up to the very edge of the cliff. Its helpful to take a step back too;
AWait for 2 banners to appear just outside the cave portal.
b. You must memorize them.
#3. The portal opens the moment you see it. Take a leap of faith and yeet your body into an
obscure purple demonic light, as one does on Thursdays of course.
AIM FOR THE TREE when you jump or you will miss and your friends will probably
laugh at the result.
(I must admit; it's funny to watch.)
#4. Shoot ONLY the 2 banners that appeared. They are your exit tickets. Doesn't matter who shoots them either, just shoot the right ones.
ALL banners there remain dangerous for the whole game. While technically the safest area by far, its not the brightest idea to train down there if you aim like you work an office job at the Death Star.
All Flags are named.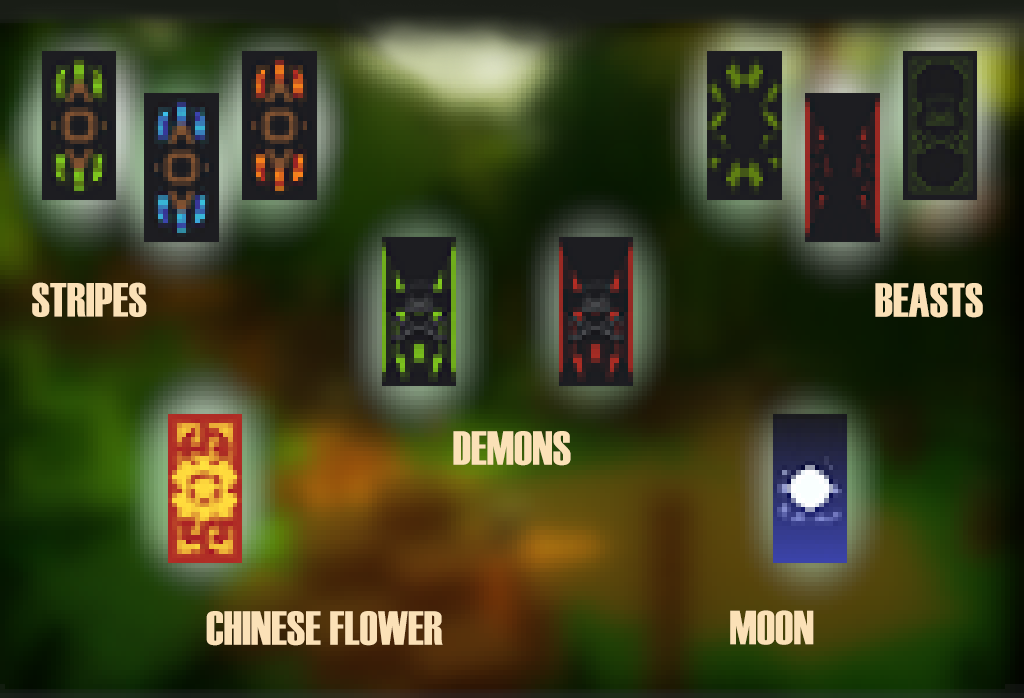
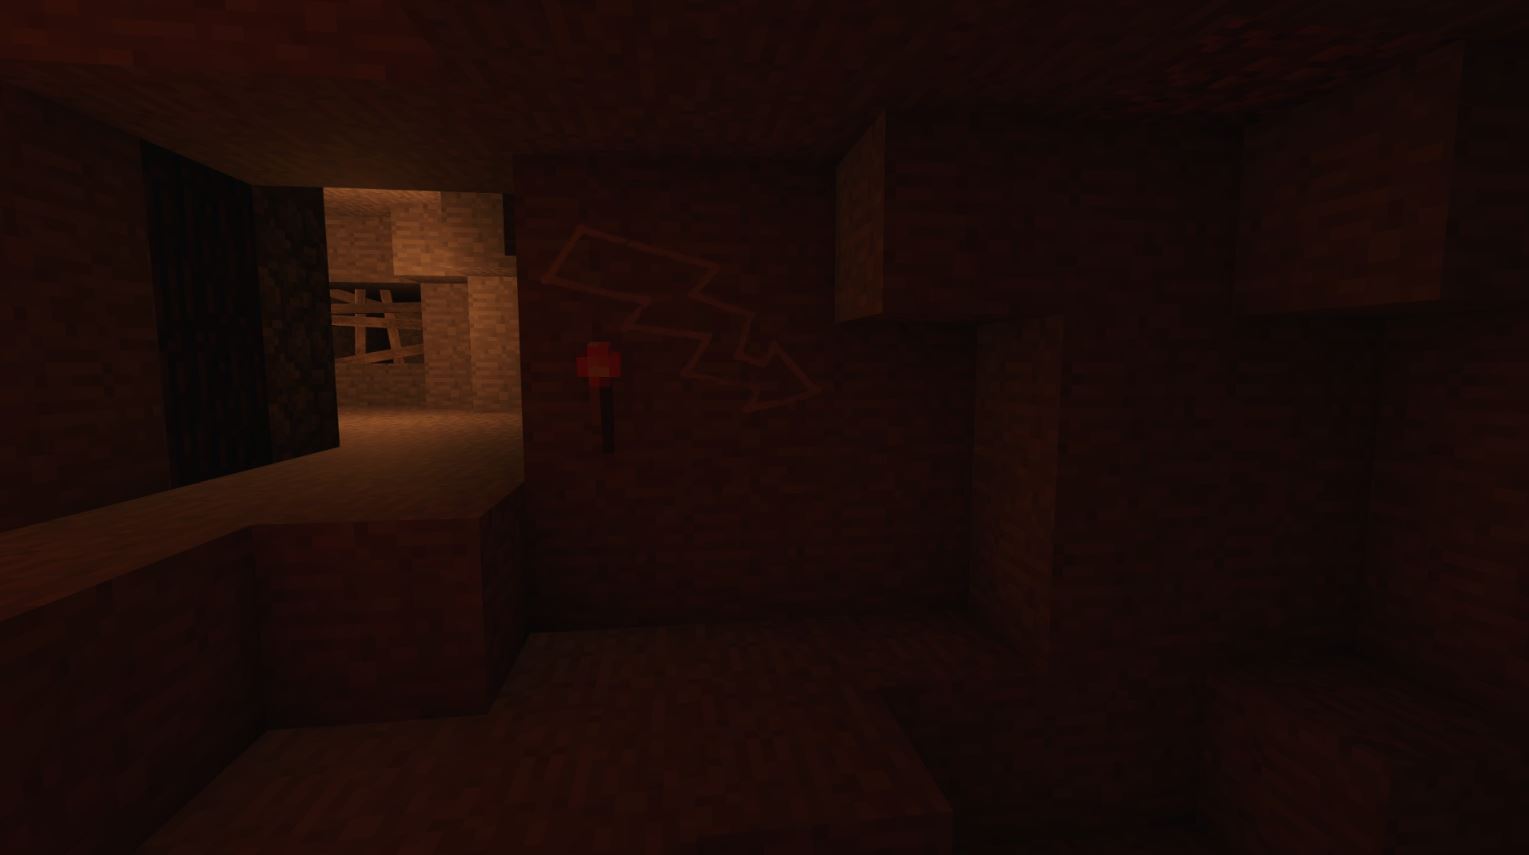
Secret Wallbuy
>>

*Tips N Tricks* Surviving The Roundabout
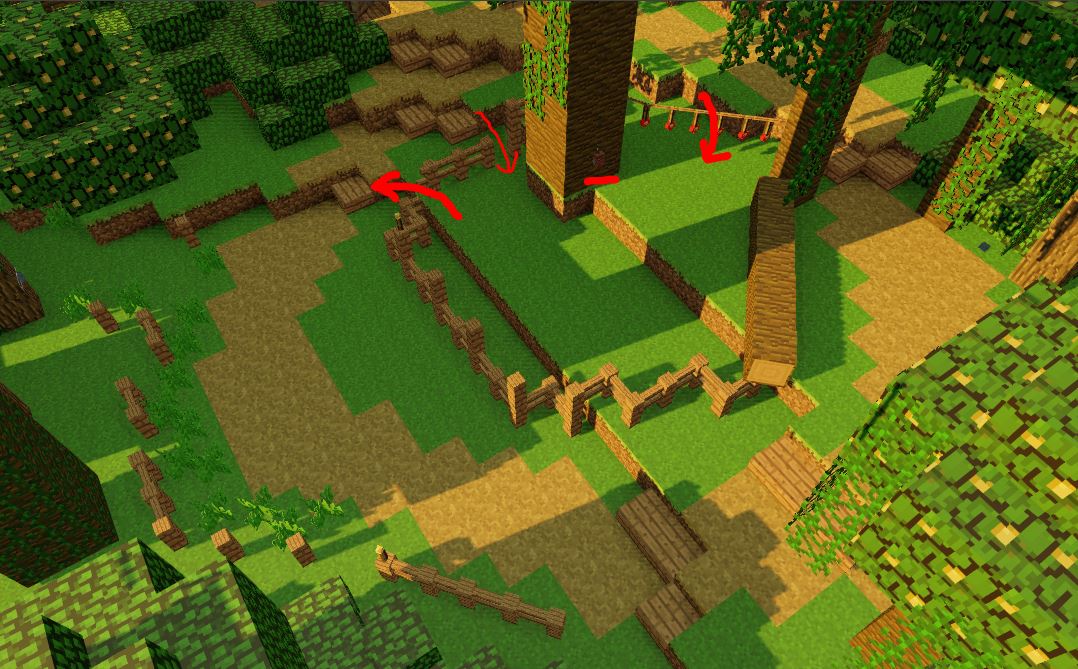
- When activating the trap, zombies that do not get blasted with the power grid of Texas will simply flank around the tree INTO that "Small Arrow" through the fences as shown above. (See "Enhanced AI")
--Follow up, Left arrow is a difficult entrance/exit because the fences are broken. Middle Arrow is probably more dangerous but also nice and straight, not difficult to move around. - It is (probably?) safer to traverse both the jugg and obscured paths when the circle is way too tight
- The trap works just the same as what it's inspired by; you will not survive it
- Is tolerable with the Raygun (In my opinion)
*Tips N Tricks* Enhanced-AI Difficulty
This map, in all its imagery, should be an homage to my favorite map Shang, which is a difficult map. Zombies will literally ZIG-ZAG to juke you, especially near the Tree Roundabout.
They will sometimes not go straight for you.
They will sometimes look funny.
They will 115% give you stress migraines.
Embrace the challenge. Did you want... another One-window Minecraft map?
- The Tree Roundabout is a super tasking area to train in even with the trap powered on, I don't advise proning or crouching there.
- The village is just straight up not a good area to train in. You will be flooded like BO1 Vietnam. If you have to, the EE would make things easier for you. (See "CLASSIFIED.JPEG" in EE Part 5)
- Less likely to die when moving in one direction at a time
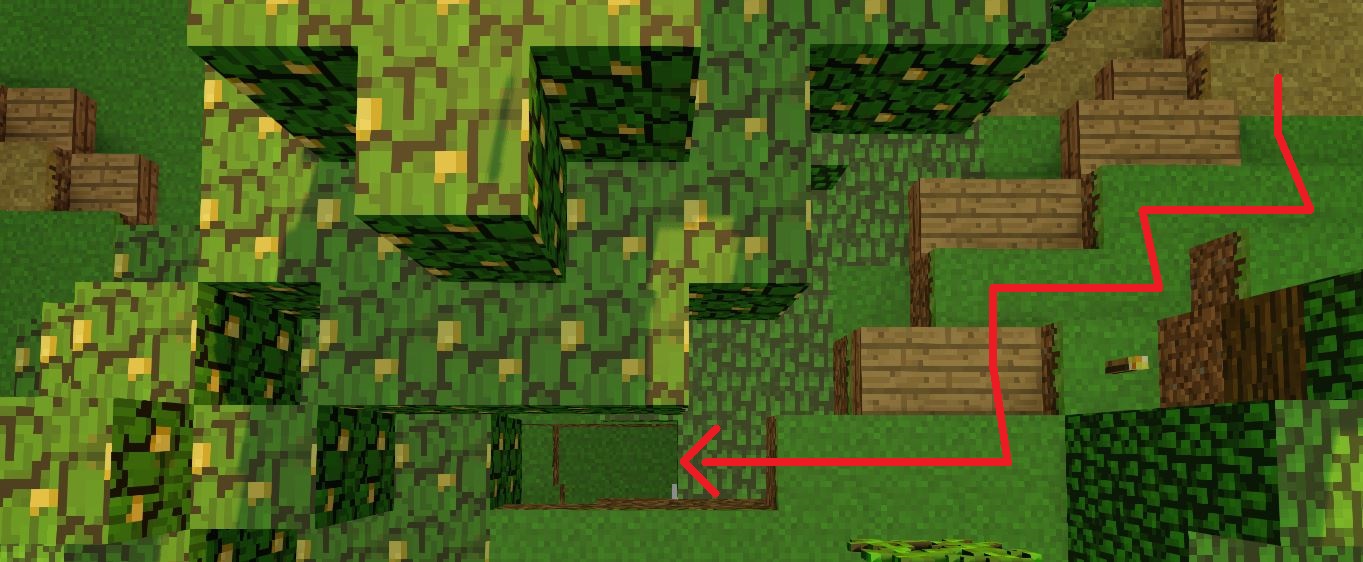
*Tips N Tricks* Plate 1 shortcut
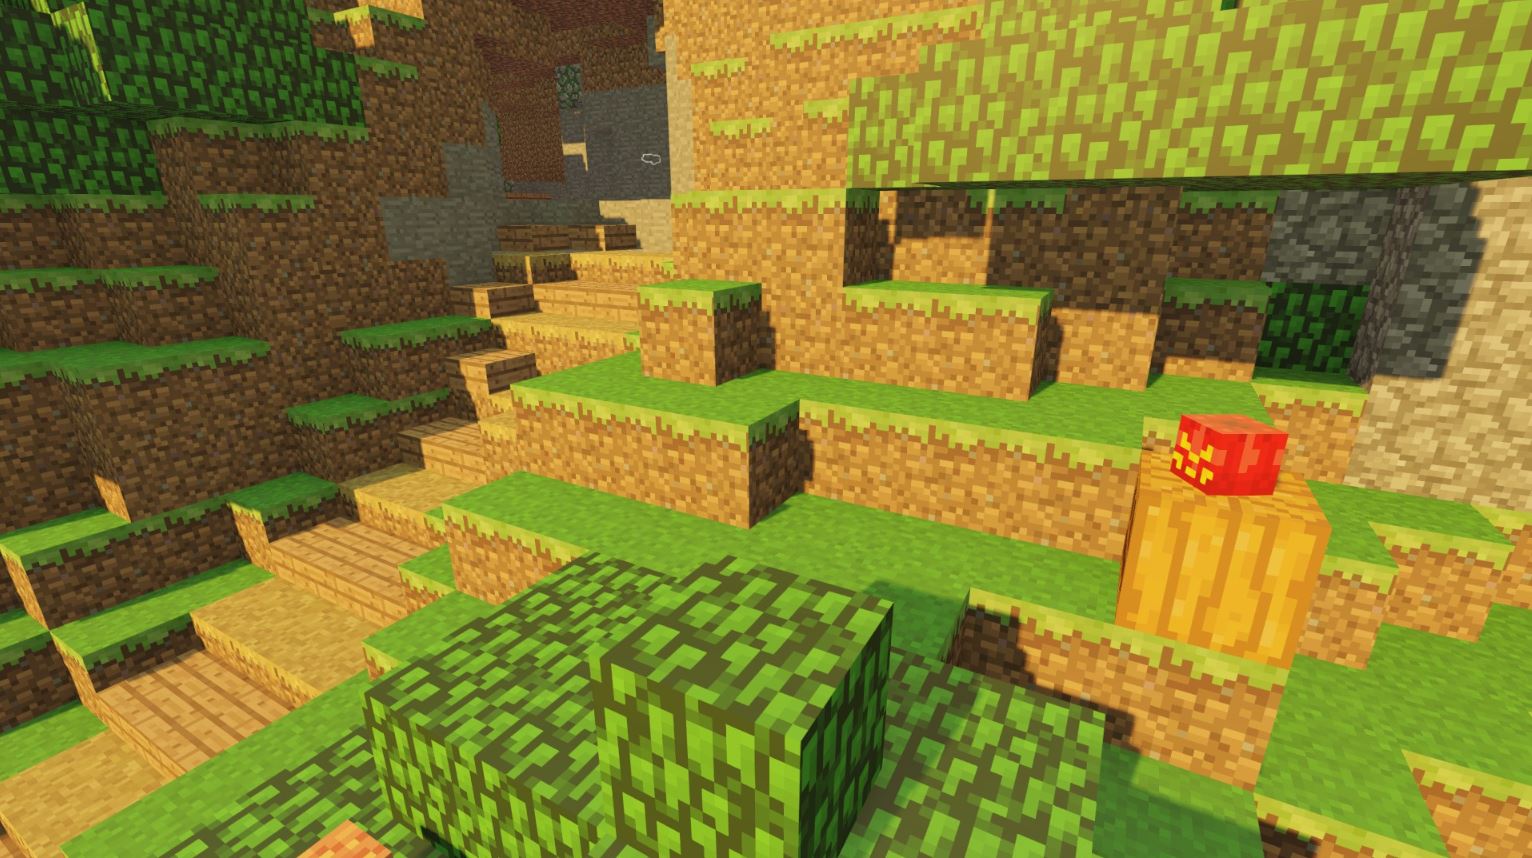
*Tips N Tricks* Secret Perk Icon?!?
*Tips N Tricks* How to Die to the Floor And Not Break Your Device.
Beware, you may run into the awkward slopes meant to challenge you in this map, and here's how you handle them.
Tip #1: The village sucks, stay away. There's no sugarcoating it, it's an A-to-B area. Do not try and train the zombies there, you will not receive an HD Flat Screen TV. You will only die and feel like you're playing Verruckt all over again. Completing the EE will grant you an exit which makes this area slightly more viable, however.
Tip #2: In some spots, Grass and Ferns tend to act as the walls where it's less obvious. Don't worry, you'd notice if you bumped into them. You can actually spot a banana by following a fern barrier by the Temple.
Tip #3: Read Tip #1 until satisfied with results.
If not satisfied with product, please contact 1-800-MAPMAKING-IS-HARD .
Minecraft How-To: Build the Tiki Totem Designs! (w/ Armor-Stand Command)
- Three Main Heads Used:
https://minecraft-heads.com/custom-heads/humanoid/14579-smiling-tiki
https://minecraft-heads.com/custom-heads/animals/606-masked-eagle
Instructions:
- Place a block at your location of choice
- Place top head on that block
- Remove the block
- Place bottom head below the other
- Use F3 to find the coordinates of the block below the bottom head
- Run the command /summon armor_stand x y z (replace x y z with the coordinates from step 5)
- Place middle head on the armor stand
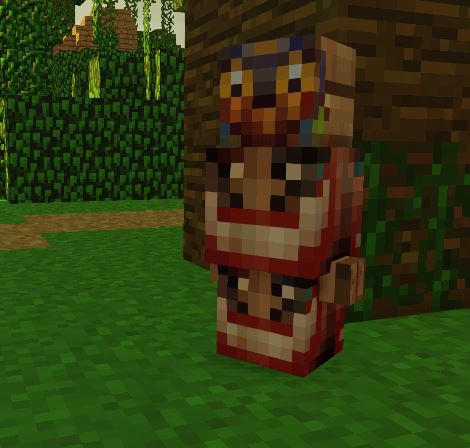
Experiment with Stands and commands to build some of my other variations seen in the map.
(Pro tip: combine this with invisible armor stand NBT data if you know how)
My last words on this map.
My goal for this was to drastically improve the reputation of Minecraft maps. If you like it, great, I appreciate it- I practically slaved away at it. If you don't, then don't worry my friend- I will definitely not be making another map. However I will keep an eye in the comments for the next few months to check for major bugs. I'd just like to put that out there since I worked day and night until Upload, only to have it suck quite a few sleepless months out of my life. So, although making this and learning the BO3 Engine language was honestly quite a fun trip, please don't request new maps from me in the comments. It's not happening.
btw...did you find the alien?
- All Around Enhancement Mod Description And Info★ 5 (597)211k views1.2k ♥34 minUpdated Aug 10, 2023
- Black Ops 3: Console Commands★ 5 (1.1k)123k views2.4k ♥7 minUpdated Feb 13, 2020
- Origins Ultimate Guide★ 5 (562)72k views1.7k ♥17 minUpdated Jun 24, 2017
- Guide for Shadows of Evil [2020 updated]★ 5 (1.4k)67k views4.5k ♥24 minUpdated Mar 22, 2024
- Guide for Der Eisendrache [2020 updated]★ 5 (1.3k)65k views4.6k ♥30 minUpdated Feb 22, 2024
- How to download the community T7patch by Serious and play online zombies safely (also FPS Fix)★ 5 (491)62k views1.2k ♥4 minUpdated Apr 30





- Upgrading to PremiumTeam Fortress 2★ 5 (20k)1441k views11k ♥6 minUpdated May 11, 2022
- No More Room in Hell Official ManualNo More Room in Hell★ 5 (2.8k)569k views2.1k ♥29 minUpdated Apr 22, 2019
- NMRiH Community Hosting GuidesNo More Room in Hell★ 5 (526)351k views653 ♥1 minUpdated Aug 10, 2022
- Лучшие кооперативные игры SteamPAYDAY 2★ 5 (1.5k)315k views2.1k ♥56 minRussianUpdated Apr 27, 2025
- Desert Eagle Heat Treated | Blue GemCounter-Strike 2★ 5 (1.6k)292k views1.5k ♥2 minUpdated Jan 16
- Treasure Hunt Puzzle SolutionsTotal War: WARHAMMER II★ 5 (6.9k)281k views15k ♥3 minUpdated Aug 19, 2021






This guide was created by its original author on the Steam Community. Are you the author and want it removed? Request removal.