Comprehensive Guide: Torchless Bloodmoon All-Boss All-DLC Challenge
Why choose this self-imposed challenge?
If you are reading this guide it is likely that you did not abandon Darkest Dungeons after winning on your first playthrough. Like myself, perhaps you started on Radiant difficulty and then graduated to playing in Stygian or Bloodmoon. Every playthrough grants you additional knowledge and skills that make each subsequent playthrough less challenging, therefore you ramp up the difficulty in order to keep things interesting and keep the adrenaline racing!
In my own personal journey, I took on Stygian mode after winning my first run in Radiant difficulty. After purchasing all the DLC on sale, my next goal was to win in Bloodmoon with no torches (ironically I succeeded only by ignoring the crimson court and farmstead areas entirely). Next was to take on all all bosses with zero torches (still utilizing light from skills and camping). While this allowed for reduced stress and avoiding Shambler fights, it was also a little unsatisfying to not fully utilize torchless trinkets. What's more, I took weeks to finally make it to the final boss with Dismas and Reynauld with the intention of having them be the last two survivors, only to lose with one hit away from killing the Heart of Darkness! You can't imagine the pain of having weeks of stress-inducing triumphs and failures invalidated a single inch away from victory. Luckily I decided to use my accumulated knowledge to take on a new challenge: completing all bosses in zero light (meaning no light from camping or skills).
This time I was triumphant and hardly lost any champions along the way, allowing for a relatively stress-free journey. Throughout my campaigns I utilized a huge amount of resources including videos from other torchless runs (ShuffleFM, Adam Vs Everything) along with good dose of the Wiki and Reddit. This serves as the comprehensive guide I wish I had myself, and will hopefully reduce the amount of research you need to conduct for your own run. In any case, a large degree of skill and decision-making on the fly will be needed in every scenario you find yourself in so don't consider this guide to be a form of cheating or the answer to an easy run!
Mods to Set Up Your Run
In my final run I utilized two mods which I would highly recommend:
(Essential) Torchless Run
https://steamcommunity.com/sharedfiles/filedetails/?id=3440606712
This mod will automatically snuff out your torch after leaving the first room, and prevent skills/camping from increasing torchlight so you don't have to do this manually and possibly forget. Other similar mods may remove high torchlight quirks or other things that remove some of the difficulty, which is not the point of the challenge
Edit: It's since come to my attention that torchless mods WILL change the actual gameplay of Shieldbreaker nightmares due to setting the camplight to zero. This means that instead of being treated as full-light, nightmares will also now be torchless. You can either play with this added difficulty as I decided to do, or you would have to exit to the main menu and uncheck this mod whenever you are about to camp with Shieldbreaker. Either way you will need to consider your quirks and trinkets appropriately with the light level in mind.
(Optional) Perfect Faster Dungeon
https://steamcommunity.com/sharedfiles/filedetails/?id=2430886866
Speeds up walking, combat, scouting, and raid results. You will really notice a quality of life difference when you are playing for long sessions.
Key Differences Playing in Zero Light
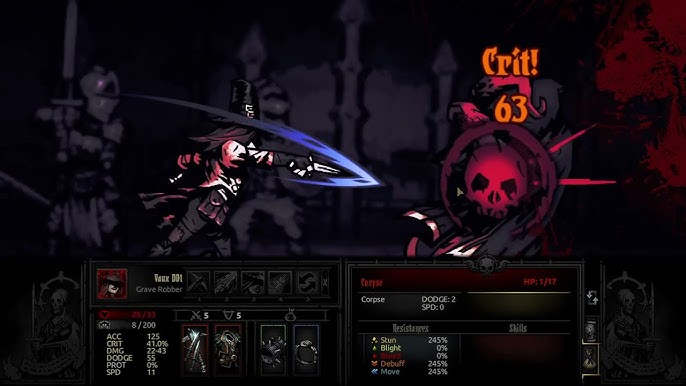 You may be aware that with less light comes increased stress, monster damage, monster crits, monster accuracy, and hero surprised chance. The small upside is increased loot and player crits. The full data can be seen below as copied from the wiki:
++++ Stress (+40% on Radiant, +40% on Darkest, +50% on Stygian, +50% on Bloodmoon)
+++ Monster ACC and DMG (+12.5/+25% on Radiant, +12.5/+25% on Darkest, +12.5/+30% on Stygian, +12.5/+30% on Bloodmoon)
+++ Heroes Surprised (+40%)
+++ Loot (Gold/Items +30%/+12 draws)
+++ Player Crits (+3%)
Not shown on UI: +++ Monster Crit (+5% on Radiant, +5% on Darkest, +6% on Stygian, +6% on Bloodmoon)
Another benefit of playing in low torch is the elimination of some decision making, such as inventory management and trinkets. Bringing no torches means you have 1-4 additional inventory slots to make use of and accumulate more treasure throughout the run. The existence of low-torch items means that they will mostly take priority over other trinkets. Scouting trinkets are also top-tier in zero light due to their ability to prevent surprise chance and scout out paths to avoid fights and acquire quest items. Stuns and prioritizing killing stress casters are more important than ever due to the increased 50% stress, as a single crit from a stress caster (such as drummer pigs or bandit gunners) can EASILY add over 100 stress across the entire team.
Things to Keep in Mind when completing All Bosses
The goal of defeating 100% of bosses before the 100 day limit in Bloodmoon will require you to adjust your gameplay in a few different ways. If you weren't already aware, bosses are unlocked by completing dungeons which will progress the meter bar in each area. Longer dungeons will progress the meter more than short ones, the full details which are are copied from the wiki here:
For Apprentice bosses, successful short expeditions will increase the unlocking progress by 50%, medium by 75%, long by 100%.
For Veteran bosses, successful short expeditions will increase the unlocking progress by 33%, medium by 50%, long by 67%.
For Champion bosses, successful short expeditions will increase the unlocking progress by 25%, medium by 30%, long by *40%. *(source: ingame observation from July 8th, 2018, Bloodmoon difficulty).
Excess unlock progression from expeditions which unlock the boss DO appear to carry over to the next boss. (egs. at 50% progression to unlock apprentice Hag, a medium mission will unlock the boss AND progress to unlocking the apprentice Brigand Pounder by 25%)
This means that short dungeons should be avoided while longer dungeons should be prioritized in order to maximize the amount of leeway you have when it comes to completing the challenge. This is a very tight challenge and you will only be able to retreat from 4-6 dungeons while still being able to complete every boss in time. The race against the clock isn't about getting enough champions to level 6 (unless your high level heros are constantly dying), but more so unlocking all the bosses without staying under 14 deaths.
You will also need to have a good set of champions available to take on the bosses at each level, so it would be advised to clear all the level 1 and level 3 bosses around the same time so you won't be left with a full roster that is too high leveled to take on the lower level bosses/dungeons.
The Early Game
The old road should not provide any notable difficulty, but you want to make sure that Dismas and Reynauld do not have much stress after completing the Dungeon or else you will want to start over. Hopefully you get at least one deed so that you can upgrade the stagecoach twice upon arriving in the hamlet, as the increased selection will make things MUCH easier for you.
During the first dungeon you will want to complete all room battles to maximize early resources, but still keep two heroes at low enough stress to take them into the next dungeon. You never want to take more than two level zero heroes into a level 1 dungeon due to the increased stress penalties. The first 2-3 dungeons will definitely provide the most challenge due to not having ideal skills unlocked. I would advise prioritizing dungeons that offer good trinket rewards (especially scouting and accuracy trinkets), and then ones that provide portraits in order to begin preparing to build the bank by around week 15 (refer to districts section for elaboration). You should still prioritize unlocking both parts of the guild to level 1 beforehand as the portrait cost is minimal for the initial benefits.
Saving up a decent gold reserve will also necessitate putting off locking/removing quirks until later on. Be on the lookout for quirks that are either good or bad in zero light, as high light level quirks are still relevant when it comes to heroes that will be used in the farmstead or Crimson Court.
When it comes to stress treatment facilities early on, you can either start upgrading the Abbey early in order to minimize costs and maximize stress heals or avoid upgrading the Abbey at all beyond beyond the first levels. More experienced players will want to go with the latter option as the busts can be used for more useful upgrades. Avoid upgrading the tavern or using it if at all possible, especially as the game goes on due to the possibility of losing valuable trinkets.
Ideal torchless trinkets to prioritize if they are available as quest rewards: Moon Ring, Dark Bracer, Moon Cloak, Dark Crown, Dark Tambourine, Hell's Hairpin, Scouting Whistle, Seer Stone, Survival Guide
Dungeons should also be prioritized by their length. Long apprentice missions should be taken advantage of as often as possible due to their lower difficulty and advancement of boss meters. Keep in mind that long Veteran missions are quite difficult, and long Champion missions are almost impossible with torchless debuffs and pretty much never worth risking for any trinket.
Tips for Heroes and an ideal Roster
This serves as a general guide for all heroes, from their ideal trinkets to how many you should aim to keep on your roster.
Abomination (0)
Can be useful in some niche scenarios but I have tended to skip him altogether for more versatile options
Antiquarian (2-3)
Try to get some as soon as possible in the early game to start racking up gold. Room exploration and quest item dungeons will be easier due to the ability to avoid battles. You can start dismissing them once you rack up a ton of gold (close to 300k), but keep one on the roster for battles against the Siren (see Boss guide for more details)
Ideal trinkets: Bag of Marbles, Candle of Life, Ancestor's Map, Feather Crystal
Arbalest (1)
A little underwhelming except in a few niche cases like the Swine Prince and Shrieker, can honestly be dismissed after the final Swine Prince fight if you're low on roster space.
Ideal trinkets: Medic's Greaves, Dark Bracer, VVulf's tassel, Ancestor's Musket Ball, Matchstick
Bounty Hunter (0)
Have never required a Bounty Hunter on my torchless roster (except with no other options in early game) as other heroes simply offer more utility
Crusader (1-2)
Utility champ that works great with dance comps and will destroy backline stress casters after getting some accuracy trinkets. Having a highwayman behind a rank 2 crusader provides a lot of damage and utility as crusader will have the option to spam holy lance every turn if needed. Can serve as the main stress healer in your party and secondary healer.
Ideal Trinkets: Paralyzer's Crest, Ancestor's Scroll, Moon Ring, Focus Ring, Quickdraw Charm
Grave Robber (0-1)
If you find one early on you can definitely make use out of her incredible scouting and strong lunge damage to one-shot stress-casters. She's just outclassed by more reliable heroes in later dungeons and doesn't provide much utility for bosses (except Thing from the Stars)
Ideal trinkets: Sharpened Letter Opener, Moon Ring, Focus Ring, damage/crit items
Hellion (2-3)
One of the best damage dealer options in the front line due to the existence of Hell's hairpin. Opening move will almost always be Iron Swan to take out mosquitos and other squishy stress casters.
Ideal trinkets: Hell's hairpin, Moon Ring, Thirsting Blade, Ancestor's Pen, Dark Bracer
Highwayman (3-4)
I've heard some criticize highwayman as a character that takes too much damage in torchless, but I find him to be essential against many boss fights with cleave attacks. His riposte makes him one of the best options in taking down the Shambler, which is something you will need to be prepared to deal with at any time especially in later dungeons. Great in a team with Houndmaster as well as you can advance forward later in the fight to shift Houndmaster from a stunner into a stress-healer.
Ideal trinkets: Moon Ring, Dark Bracer, Ancestor's Signet ring, Ancestor's Pen, Crimson Court set
Houndmaster (3)
Very solid choice for many comps due to his reliable stun, party stress heal, beast damage bonus, and scouting trinkets. Hound's Harry is great against the Shambler for applying damage to all enemies and setting up deaths to DOT.
Ideal trinkets: Evidence of Corruption, Scouting Whistle, Moon Ring, Dark Bracer, Cudgel Weight, Ancestor's Pistol, Spiked Collar, Fuseman's Matchstick
Jester (2)
Great for maintaining low stress on teams which can allow you to take them on new missions immediately, and is especially useful in epic quests in the Courtyard where monsters are susceptible to bleed.
Ideal trinkets: Dark Bracer, Moon Cloak, Dark Tambourine, Ancestor's Coat, Wilbur's flag
Leper (0-1)
Seems counterintuitive to use a position-reliant hero like Leper in torchless where surprise is much more common, but he still has a place to shine once you have enough scouting from trinkets. The massive damage can be worth it if he is able to get a few good quirks, and is even an option in the final dungeon levels
Ideal trinkets: Moon Ring, Focus Ring, Ancestor's Signet Ring, Surgical Gloves, Fortunate Armlet
Man-at-Arms (2)
Essential for many boss fights, especially Prophet, VVulf, Countess, The Flesh, and the second Darkest Dungeon level due to his guard ability. Need to be careful with items that add stress because that is usually how he will die.
Ideal trinkets: Moon ring Rampart Shield, Guardian Shield, Surgical Gloves, Crimson Court set
Musketeer (Don't enable this DLC as it makes no sense from a gameplay standpoint)
Occultist (2)
High utility support with the strongest stun in the game, great to take against Shambler as with the right damage dealers you can finish the fight without taking any stress with a well-timed stun. Great to take with mark comps too, for example Arbalest and Houndmaster vs the Swing Prince
Ideal Trinkets: Demon's cauldron, Vial of Sand, Feather crystal, Moon Cloak
Plague Doctor (2-3)
The double stun makes her one of the best backliners in torchless due to the amount of stress that can be prevented, especially good in the ruins and cove where blight is more effective.
Ideal Trinkets: Blasphemous vial, Feather Crystal, speed trinkets
Vestal (5)
I find vestal to be indispensable in torchless as a primary healer in most dungeons given the increased amount of damage all around. You will probably want to keep five on rotation that can eventually be used in each of the final levels, with a backup in case one dies.
Ideal trinkets: Salacious Diary, Ancestor's scroll, Ancestor's Map
Flagellant (1)
Very useful front liner when it comes to the Warrens and Weald, where he can tank marked hits from Fungal Clawers and treebranch smackdowns from giants.
Ideal trinkets: Martyr's seal, Fortifying Garlic, Heartburst Hood
Shieldbreaker (2)
Essential for a number of fights including Prophet, the Miller, Vvulf, and the Guardian.
Nightmares are much more difficult in torchless due to the likelihood of accumulating stress on SB before camping. Traditionally, torchless items have no effect during nightmares so they may be worth unequipping before camping or taking different trinkets altogether for the dungeon (this is not the case when using torchless mods, which set the camp light to zero during nightmares). Scales are also a huge boon to take during certain boss fights which apply ridiculous damage to single targets (Prophet/Vvulf), as well as Champion dungeons in general for safety. Don't take the trinket rewards from nightmares as they will show up in your trinkets later regardless and don't need to take up inventory space during the run.
Ideal trinkets: Crimson court set, moon ring, surgical gloves, Spectral Speartip, stress reduction trinkets for nightmares
Buildings
The Guild:
Spend your first few portraits to upgrade both portions of the guild to level 1 as it will provide great benefits for the low cost. After building the bank, you can spend remaining portraits here to maximize your skills as soon as possible. I would never advise taking a team to a veteran dungeon without level 3 skills, or a champion dungeon without lvl 5 skills.
Stagecoach:
This should be where you are spending most of your deeds at the start in order to select and build the roster you will be using in the endgame. You can alternate between the stagecoach and the blacksmith depending on the costs of each upgrade. I also find it worth upgrading experienced recruits in case your heroes die, or when you start dismissing antiquarians and get to save time leveling up new heroes
Blacksmith:
Upgrade whenever you can, make sure that your weapons/armor are suitable for the level of dungeon you are taking on. It would generally be advised to wait until you have at least level 3 armor/weapons on all your heroes before taking on a veteran dungeon (or max weapons/armor when taking on Champion dungeons) as you will be making these unnecessarily difficult for yourself
Abbey:
You have the option of investing at least some initial busts in the abbey for stress relief, otherwise you will be taking heroes with unneeded added stress into the dungeons. Investing a few busts can mean the difference between a hero starting at zero stress or 15 stress. The cloister is a fine option to prioritize if you want cheaper stress heals, but the penance hall and transept can offer better potential bonuses like stress/damage buffs. Experienced players may not need to make any upgrades beyond the first level, especially if you aim to build the puppet theater.
Sanitarium:
You should generally prioritize upgrading the treatment library to reduce the cost of removing/locking in quirks. The patient cells are also crucial in taking advantage of events which cause the sanitarium to be free which can save you tens of thousands in gold.
Tavern:
Unlock only the first levels as needed in order to treat heroes with negative quirks that force them to be there
Survivalist:
Upgrade whenever reasonable to save money on camp skills, ideally wait until you will be unlocking many camp skills at once.
Nomad Wagon:
No upgrades to this are necessary at all, although you can upgrade the number trinkets offered to increase odds of seeing a good scouting trinket, torchless trinket, or endgame class trinket
Districts
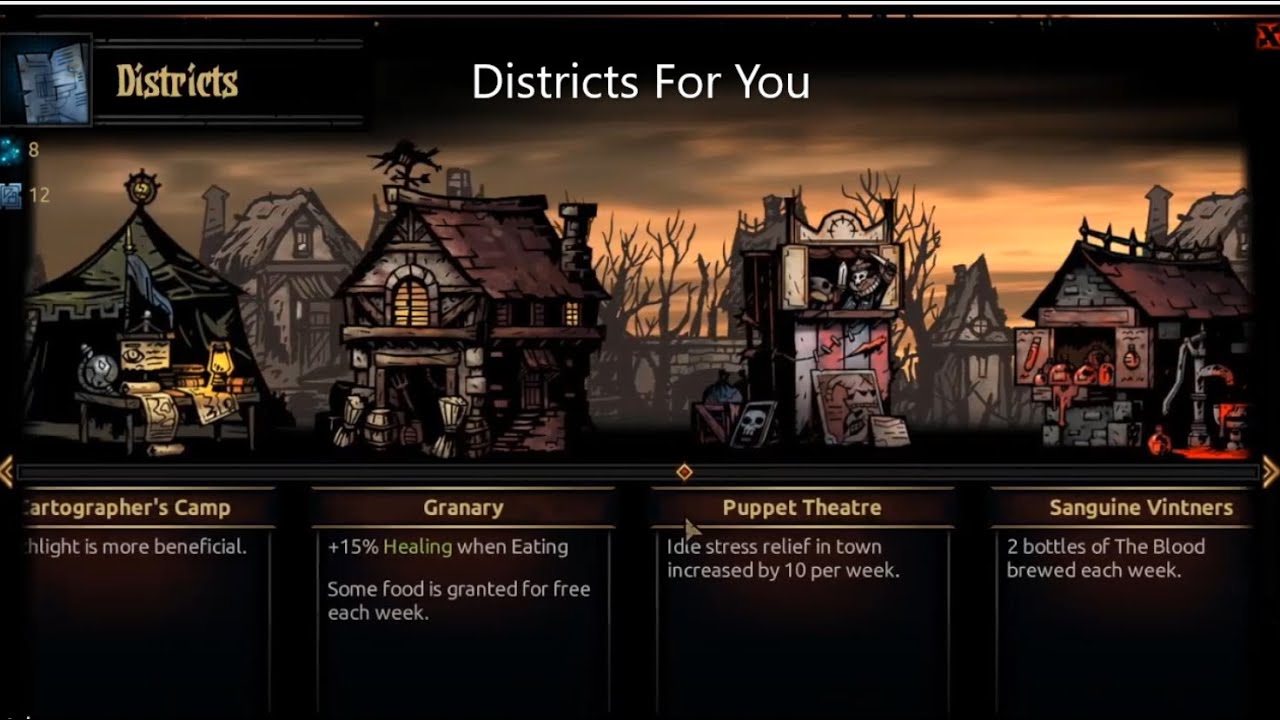 Here are the three districts I would prioritize in order of their importance for this challenge.
The Bank:
The bank is a hotly contested district among discussions online, with many pointing out that the benefits are minimal in early game when gold is low. I will argue that even if the bank is not netting you 5k gold a week, it will still allow you to get to that point MUCH faster. Some may tell you that once you get to 100k gold, you are pretty much set with proper budgeting. I would argue to actually aim for at LEAST 250k, as the compound interest will make a HUGE difference that would greatly affect your wealth in the mid game and late game. Even after getting to 300k I have often found myself dipping close to 100k again later in the game. This simply means that you must spend more time in level 1 dungeons before moving onto level 3, which is not a big deal. From personal experience, after trying to rush this district as early as possible I never looked back. Try to keep at least two antiquarians in your roster and take them out as often as possible to get a large amount of gold saved up early so the bank can permanently eliminate money problems.
Puppet Theater:
Hugely underrated district, especially when you have a large roster (as you should). Having benched heroes heal 15 stress a week means you don't have to utilize the abbey nearly as often. After trying this district once, I would now prioritize it after building the Bank
Granary:
Very useful district for the relatively low cost. I would actually not recommend starting any champion dungeons until you have this district built, as it puts you at an unnecessary disadvantage with how good this district is with the extra healing.
Other essential districts to get before the final levels in no particular order based on your available resources:
-Training Ring
-Altar of light
-Outsider's bonfire
-House of the yellow hand
Lower priority districts that you have the option of going for:
-Sanguine Vintners: ideally you are able to quickly end fights with courtyard monsters to keep curses at a minimum level so you don't need to build this district, I have never needed it on my runs personally
-Cartographer's camp: by the time you can get this district usually you already have Ancestor's map or other scouting options which make the bonuses in zero torch negligible
Some Boss Tips
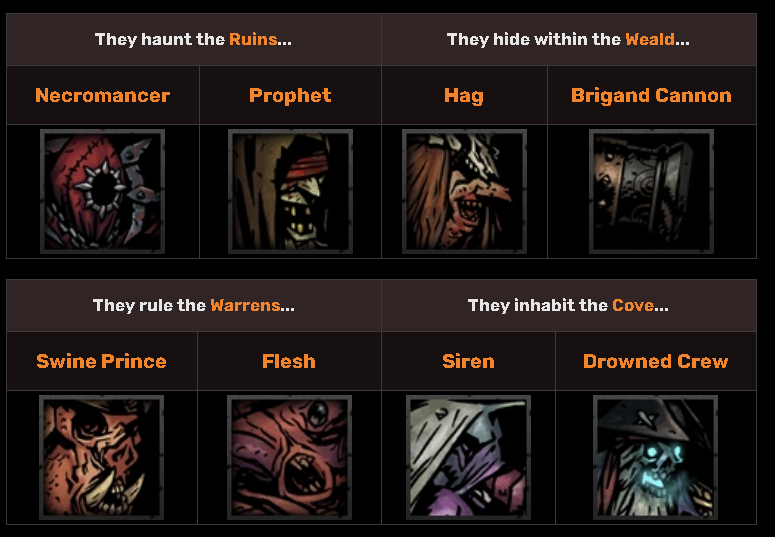 Flesh
FleshVestal-Plague Doctor-Houndmaster-Man at Arms/Flagellant
PD can alternate between stunning and blighting the backrow to reduce a huge amount of damage, while Houndmaster hits Hound's Harry every turn. Maa camp skills make a huge difference for this fight, along with guard/bolster/stuns. Flagellant can make do in a pinch with his nice bleeds to the backline, and the ability to tank hits from the maws.
Hag
Highwayman really shines in this fight due to the Hag's cleave attacks. It's usually better to focus the hag instead of the pot as you can usually take her down before trapped hero hits death's door.
Brigand Cannon
Highwayman-Vestal-Houndmaster-Hellion
Besides prioritizing killing matchstick Dan every turn, I would advise trying to clear all enemies initially to reduce incoming pressure as the Cannon only summon 1-2 enemies to replace them. Frequently it will only spawn a single matchstick man which will free up three heroes to attack the cannon directly. You can also simply try to stun the matchstick man every turn other turn and focus the cannon for much faster damage, just be prepared to tank a lot of damage from the other spawns.
Prophet
Plague Doctor-Maa-Vestal-Hellion/Shieldbreaker
PD will be very useful in getting to the boss with relative ease, and can apply constant damage with blight every turn or heal teammates off death's door if needed. I find guarding with Maa to be more reliable than trying to reduce the prophet's damage, as Rubble of Ruin will miss half the time after using bolster and camp skills. It would be advised to take stun resistance trinkets such as Stun Amulet to make sure the guard holds up. Shieldbreaker's blocking ability can give Maa a chance to activate bolster if she's targeted. This is an extremely difficult fight at Champion level, use aegis scales generously here of all places
Necromancer
Not much to say except highwayman is great against the cleave attacks and dancing with a position 2 crusader.
Swine Prince
Arbalest-Houndmaster-Occultist-Flagellant
Arbalest-Vestal-Maa-Shieldbreaker
Occultist can alternate between marking, debuffing damage, and stunning. Arbalest will generally be using flare to clear stuns/marks every turn but can land a marked hit in now and again. I have found this team to struggle more against the Champion Swine God and may consider the secondary team comp to be a much safer option, with Maa able to tank marked targets and Shieldbreaker able to block hits (as well as prevent marks on Arbalest with camp skill)
Siren
Best way to cheese this fight is to take an antiquarian as Siren will generally try to take the hero with the least debuff resistance. Keep in mind that holy waters do not actually work in boosting resistances on heroes you don't want to targeted. Again highwayman really shines in this fight due to the amount of cleave attacks.
Drowned Crew
Highwayman is recommended again for the cleave attacks, along with point blank shot being great against the anchorman. One of my new favorite strategies is taking a Jester with a huge amount of dodge (Ancestor's coat, crimson court trinket) and using Solo or dirk stab to get him in front of the Anchorman who will usually miss in between getting stunned every other round.
Thing from the Stars
Shieldbreaker is great in this fight due to the high armor piercing attacks in the beginning, and then the blight effects towards the end. Unfortunately in torchless it is almost impossible to avoid getting a large amount of stress from the fight, so farming him for shards is not as viable. Again I would advise starting the farmstead quest as late as possible in order to avoid this encounter ruining important dungeon runs or having to plan around it. Do start it before your Shieldbreaker hits level 5 however, or else you won't be able to take her on the first quest against the miller
Brigand Vvulf
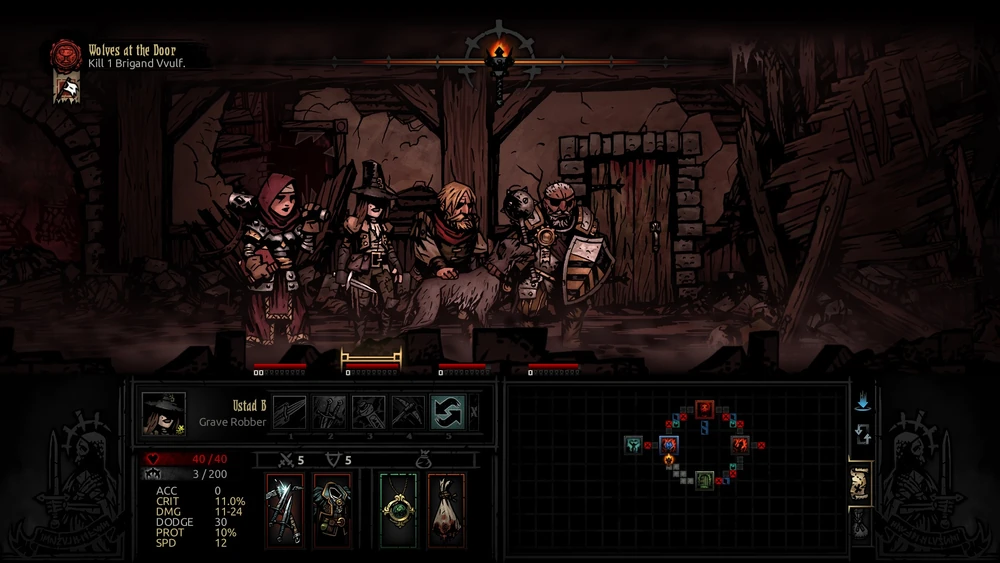 As your heroes begin to approach level 5, you need to start preparing for Brigand Vvulf who has a chance to spawn once you have 4 level 5 heroes. This means getting at least one Man at Arms to level 5, or ideally level 6 since he will not take the stress penalty of the level 6 dungeon. Until the Vvulf event spawns you should keep Man at Arms and a decent level six team at zero stress so they will be ready to go at any time.
My ideal comp is: Vestal-Maa-Houndmaster-Shieldbreaker/Hellion
I find Houndmaster to be crucial due to his ability to relieve team stress while stalling in the fights leading up to Vvulf, who is just as likely to kill you with stress as damage. I would advise taking Guardian Shield on Man at Arms and moving him to position 4 before reaching the boss, along with anti-stun trinkets to ensure his guard does not lapse. Ideally Vvulf will target Shieldbreaker early on so that you can use her block skill and free up Man at arms to use bolster.
Shambler
 The Shambler can really be a run killer in torchless due to his random spawn chance in zero light, and you may frequently encounter him right before the room you need to clear to end the dungeon or right before a boss fight that renders you unable to continue.
From level 3 dungeons and onward, you should always consider whether the team you are bringing can survive an encounter with the Shambler and still continue the dungeon. Some of the heroes that shine most in this fight are Highwayman, Houndmaster, Occultist, and Shieldbreaker. Highwayman's riposte can frequently one shot tentacles on their own, freeing other heroes to damage the Shambler. Houndmaster's cleave and other DOT attacks are very effective for killing tentacles as it will prevent them from attacking while also preventing new ones from being spawned. Occultist with some of his stun trinkets can stun the Shambler on turn 1, which has sometimes allowed me to finish the entire fight without taking any stress. Antiquarian can also be surprisingly useful in this fight by spamming dodge vapors, and cleaning up tentacles with blight as needed. If you have a Jester who is shuffled to the backline, do not underestimate the power of spamming battle ballad many rounds in a row. This may seem counter-intuitive due to the importance of actions in this fight, but getting enough speed to take actions BEFORE the tentacles makes an entire world of difference killing them before they can buff themselves.
At some point you WILL kill enough shamblers to get all of his trinket drops. After collecting them all, I will HIGHLY recommend selling the Tentacle Idol. This means that whenever you beat him later on, he will ALWAYS drop the tentacle idol after you finish a fight with him. You can then equip this trinket on heroes with high stress to potentially roll virtues and save your dungeon runs, as your team will likely accumulate a huge amount of stress after the battle.
The Fanatic
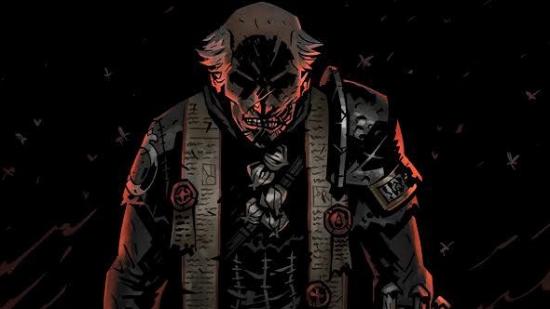
An extremely challenging boss that should be carefully hunted with ample preparation. The fanatic has a chance of spawning during medium and high-level infestation when at least two cursed heroes enter the dungeon, with a higher chance of spawning the more cursed heroes you have. I would only recommend seeking him out in an apprentice dungeon with a dedicated team. Note that he will not be present if you do not see his special load screen, otherwise he will spawn as a pre-set room battle.
Recommended heroes: Hellion, Shieldbreaker, Highwayman, Maa, Vestal, Flagellant, Graverobber, Bounty Hunter
There are many different heroes that offer advantages during this fight. You should be taking AT LEAST one riposte character to get passive damage in every round. Bleeds are more effective than blights, and armor piercing abilities are good as well. You are probably better off focusing the Fanatic rather than the stake and trying to heal the staked hero coming off at death's door. Bring a stack of Laudanum to deal with the ability that applies horror, and aegis scales for the hero at death's door.
You might want to try taking him on early in your run so you can start over in case things go south.
The Crimson Court
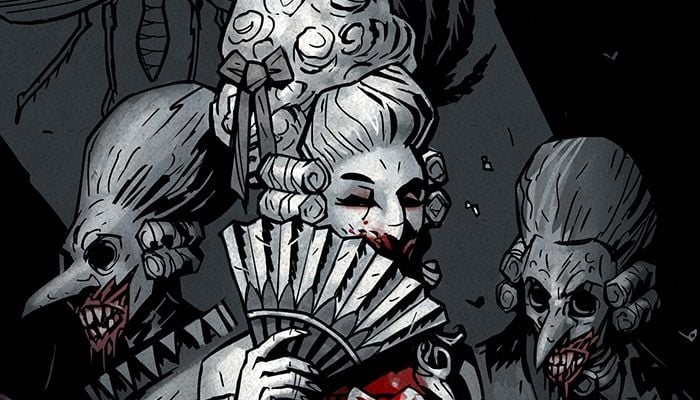 While the court can offer some great trinkets that are still relevant in torchless, I would honestly advise putting the first quest off for as long as possible. This will allow you to save up a decent reserve of blood, and also put off the growing infestation that will soon make your life miserable with the crimson curse. It would be advised to wait until you have a good team of level 2 heroes with all their upgrades, and when the quest is offering one of the two trinkets that you will be able to use every run for the remainder of the game: Salacious Diary and Vial of Sand. All other trinkets are eventually outclassed by other torchless trinkets, class trinkets, or ancestral trinkets.
Plan on completing each courtyard quest in a single attempt, simply because it is entirely reasonable to do so. Before entering the dungeon, start prepping your chosen team but removing negative quirks that will force curio interactions to make your life a living hell: dipsomania, plutomania, curious, dark arts, egomania, etc. Keep in mind your torchless trinkets will not work as the light will always be at 100, so hold onto good trinkets even if they only work in full light.
Baron Quest:
I have had a lot of success with the following team compositions:
Vestal-Jester-Houndmaster-Hellion
This has always been my favorite comp to take into Crimson Court dungeons due to the great damage, stress heal, and utility. Jester can sit in rank 3 and spam battle ballad, bleed skills, and stress healing. Vestal and Houndmaster can take turns stunning high priority targets like Chevaliers.
Vestal-Highwayman-Jester-Hellion
Highwayman replaces Houndmaster in this comp due to the advantage he gives against the Baron's frequent cleave attacks. In normal fights ideally highwayman goes before Jester with duelist's advance so that Jester can then be in position to use battle ballad, otherwise Jester can simply use one of his bleed skills. Take dirk stab to jump back in front of Highwayman so that Hellion can stay in position 1, and use inspiring tune to stall for stress heals when there's one enemy left.
Viscount Quest:
I would recommend the Vestal-Jester-Houndmaster-Hellion comp as outlined above. Not much else to say except for the boss fight, where I would recommend taking out bodies 2, 1, and 3 in that order before trying to land any attacks on the Viscount who will likely start outhealing your damage at some point.
Countess:
The main problem with countess the ability Sway with Me which moves your heroes out of position, and the eggs that pop when your hero attacks her. I would advise a very specific strategy to get around this, which is having one main damage dealer such as Hellion and having a Man-at-arms guard her at all times to prevent an egg from landing on her. Here's a recommended comp I've always had success with leading up to the boss and fighting her:
Vestal-Jester-Maa-Hellion
I would recommend taking Guardian Shield and stun amulet on Maa, and then place him in position 4 before starting the boss fight so he can just alternate between spamming guard on hellion and command. Jester sits in the back row to spam battle ballad and heals until it's time to use Finale. This way only Hellion is putting strong attacks/bleeds on Countess and the eggs never have a chance to pop.
The Farmstead
After unlocking endless mode, you should start looking in the stage coach every week for Jesters, Vestals, and Shieldbreakers with good quirks to use for the fight against the sleeper. A strong composition is two shieldbreakers in the front row spamming impale, with the 1st shieldbreaker having higher speed than the 2nd. I would advise waiting until you get a +100% shards collected event to maximize the value you get from this mode. Keep in mind that endless mode technically does not use up your weeks, as the next dungeon you take afterwards will not advance the week count.
Final Darkest Dungeon Levels
We are the Flame
I have had success completing this dungeon with two different comps in torchless:
Highwayman-Jester-Vestal-Hellion
Crusader-Jester-Occultist-Hellion
I would advise going with the first team unless you only have three Vestals available, in which case she is better off used in the next 3 dungeons so you can replace her heals with Occultist and Crusader.
The key to success in this dungeon (and the second) is leaving Rapturous Cultists alive until the end of the fight to stall and stress heal. This means that when they guard an enemy, you will want to stun them instead of killing them like your first instinct may be. In this way I have been able to keep both example parties at full health and no stress even leading up to the boss fight.
Although highwayman is not great for stall tactics, note that you can keep grapeshot blast at lvl 0 and use this with vestal stun or Maa riposte to get two low damage abilities in every turn to prevent stall mechanics or killing the rapturous cultist.
Lighting the Way
Highwayman-Vestal-Houndmaster-Man at Arms
Again with this team I have been able to keep the team at full health and zero stress at the end of each fight using stall tactics and Houndmaster's stress heal. Depending on who goes first, Man at Arms or Houndmaster should use their first action to guard Vestal during boss fights to prevent her from being targeted with Revelation.
Note that once you loot the Ancestral trinket in this dungeon, you can replace the torch on one of your characters so they have another useful trinket. Just remember to swap it back out before any of the boss fights.
Belly of the Beast
Vestal-Plague Doctor-Houndmaster-Hellion
Not once in any of my playthroughs have I been ever been relocated by the white cell stalk. Take accuracy trinkets on Houndmaster/Hellion and use Vestal's camp skill to further boost their accuracy. Plague doctor can buff up Hellion and then alternate between stunning/blighting the Mammoth Cyst.
Hell is in the Heart
Highwayman-Plague Doctor-Vestal-Crusader
This is my preferred lineup only because I enjoy allowing Dismas and Reynauld to be the final survivors of the dungeon. Just don't make the mistake of taking Bulwark of Faith on Cruasder as I did, given that he will be taking increased damage/stress due the self-mark. Plague doctor should definitely bring Battlefield Medicine as you will likely run out of bandages/antivenoms very quickly otherwise. This is also the only fight I like to take shard dust, in order to allow PD to buff the final two heroes twice each (although I would advise popping it during the first phase due to the increased stress taken)
Conclusion
- Curio Guide★ 5 (5.1k)96k views13k ♥10 minUpdated Feb 2, 2022
- Party Building/Composition★ 5 (2.2k)60k views5.8k ♥27 minUpdated Jun 28, 2018
- Know Your Dungeon: 15 Adventuring Tips★ 5 (2.6k)58k views4.3k ♥52 minUpdated May 31, 2020
- The Darkest Dungeon 101 - All You Need to Know★ 5 (2.1k)56k views6.1k ♥21 minUpdated Jun 20, 2022
- The Complete Guide to Provisions★ 5 (2.2k)50k views6.1k ♥20 minUpdated Jun 24, 2020
- Darkest Dungeon без боли: 100 страниц боевого опыта★ 5 (2.6k)48k views4.7k ♥179 minRussianUpdated Aug 30, 2020





- Upgrading to PremiumTeam Fortress 2★ 5 (20k)1441k views11k ♥6 minUpdated May 11, 2022
- No More Room in Hell Official ManualNo More Room in Hell★ 5 (2.8k)569k views2.1k ♥29 minUpdated Apr 22, 2019
- NMRiH Community Hosting GuidesNo More Room in Hell★ 5 (526)351k views653 ♥1 minUpdated Aug 10, 2022
- ULTIMATE GUIDE FOR GAME DEV TYCOONGame Dev Tycoon★ 5 (5.8k)326k views10k ♥4 minUpdated 23 Jan, 2014
- How to 'Git Gud' Soon™MORDHAU★ 5 (2k)318k views3k ♥68 minUpdated Nov 16, 2024
- Лучшие кооперативные игры SteamPAYDAY 2★ 5 (1.5k)315k views2.1k ♥56 minRussianUpdated Apr 27, 2025






This guide was created by its original author on the Steam Community. Are you the author and want it removed? Request removal.