A Basic Source 2 Porting Guide
Introduction
DISCLAIMER as of 07/10/2025, due to recent updates, the cs2 s2fm branch has some lighting issues inside s2fm which includes severe flickering, I would highly recommend using the HLA branch of s2fm. The sbox branch of s2fm was completely removed due to the dev team disliking the software and are attempting to make a Unity style movie maker, that I personnaly am not a fan of in its current state. There is a community version of s2fm and the workshop tools for Deadlock with the CSDK 12 but I cannot comment on how good it is due to me not having access to Deadlock.
I will be attempting to either fully revamp this guide or make another, more in depth guide since I have become more knowledgeable with the workshop tools.
Welcome To The Basic Source 2 Porting Guide
In this guide you will learn how to port models from Source Filmmaker, Garry’s Mod, and most other Source games, as well as most 3d models you can find on the internet.
Requirements:
Blender : https://www.blender.org/download/
Source IO : https://github.com/REDxEYE/SourceIO/releases/tag/5.2.0
Blender Source Tools : https://github.com/kaa992/BlenderSourceTools
VTFEdit : https://valvedev.info/tools/vtfedit/
Crowbar : https://github.com/ZeqMacaw/Crowbar/releases
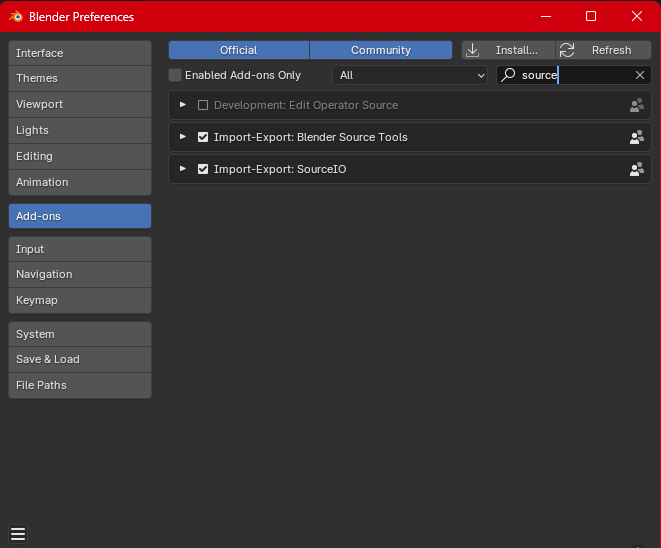
Note : SourceIO and Blender Source Tools are addons for blender and do not need extracting from their ZIP files.
Preperations
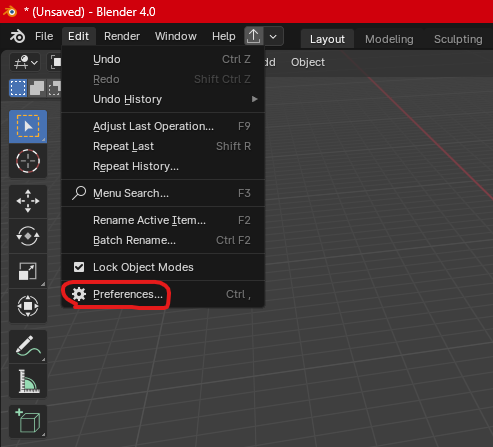
At the top left of the Blender window go to edit then at the bottom of the list preferences.
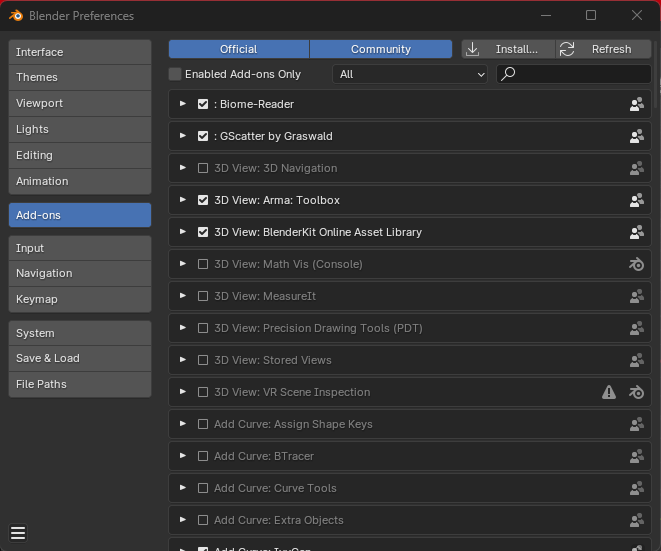
A new menu will pop up, select addons. Then at the top right select install, locate the downloaded ZIP files, you must select one at a time. When they have been installed there is no need to restart Blender.
Porting Models From Source 1 To Blender
There are multiple ways of installing a model from the SFM workshop, either by subscribing or a direct download link, either to google drive, mega, dropbox etc
Take this addons for example https://steamcommunity.com/sharedfiles/filedetails/?id=2936331939
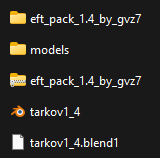
By having a direct download, you just need to download the files and extract the model and material files. Once those are extracted place them into a folder. Keep the folders named as models and materials, no need to take any files out.
If the only way to download the model is by subscribing *not in this case*, then subscribe to the addon, wait for it to download, when it's finished, go find it in the workshop folder, usually the file is specified at the bottom of the addons description.
In this case there is only one model located in steamapps\common\SourceFilmmaker\game\workshop\eft\facecover\hueta\zryachii_balaklava_closed.mdl
Now to bring the models into Blender.
Go to file -> import -> source engine assets -> source model (.mdl)
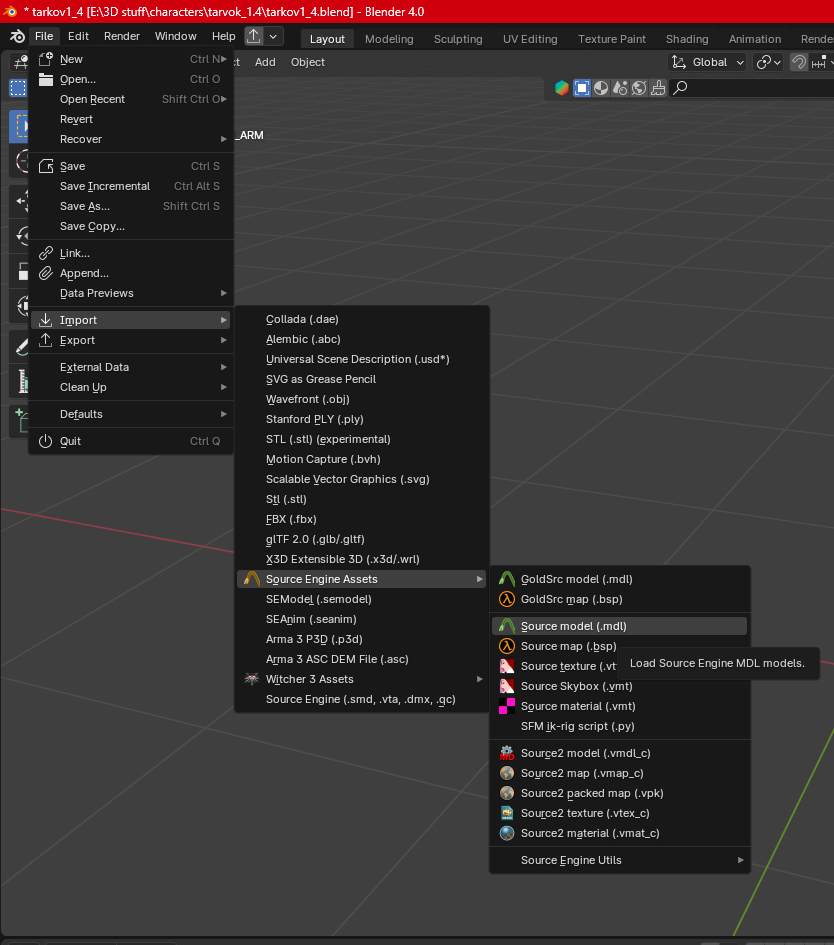
Go to the models folder, and select the model/models you want to import.
When it's imported,you will see the model in the viewport.
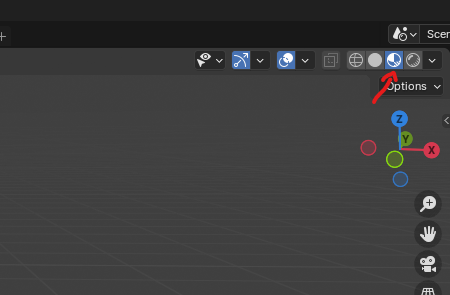
If you want to see the textures before exporting to source 2 you can go to the viewport shading and select Material preview mode
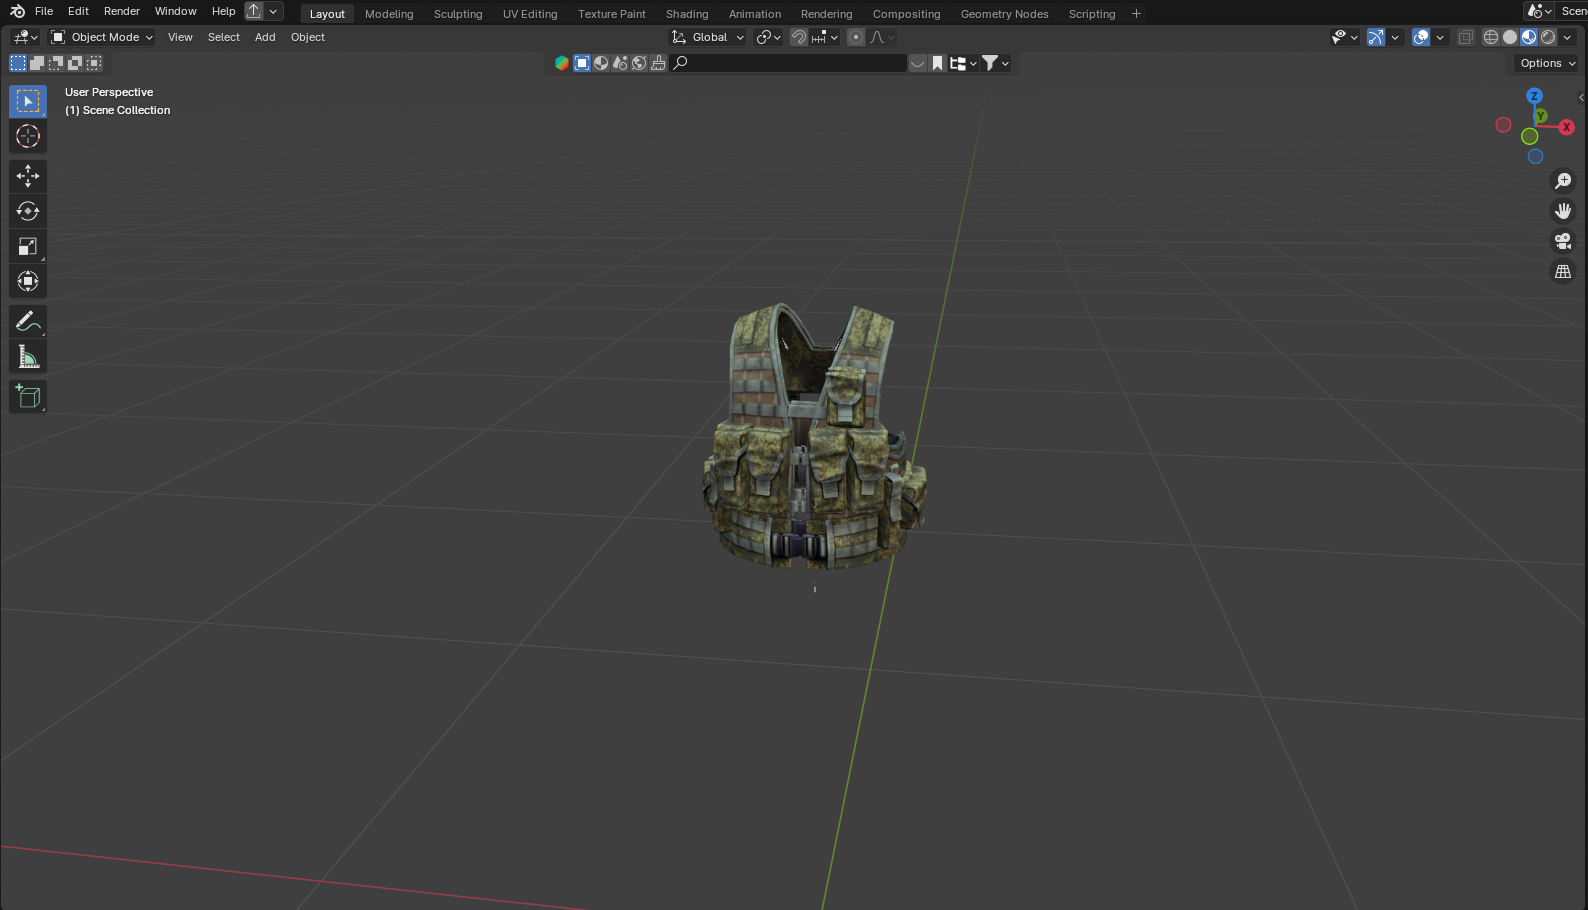
 In my case with the tarkov pack, it looks like this.
 Next, select the models in the viewport so they have an orange glow.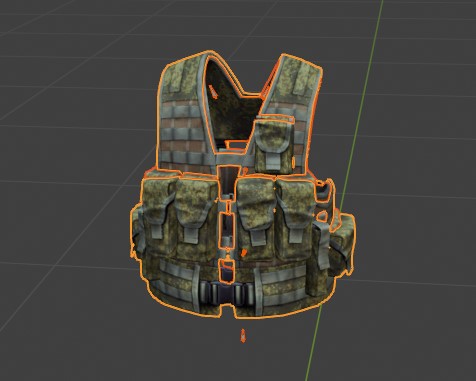
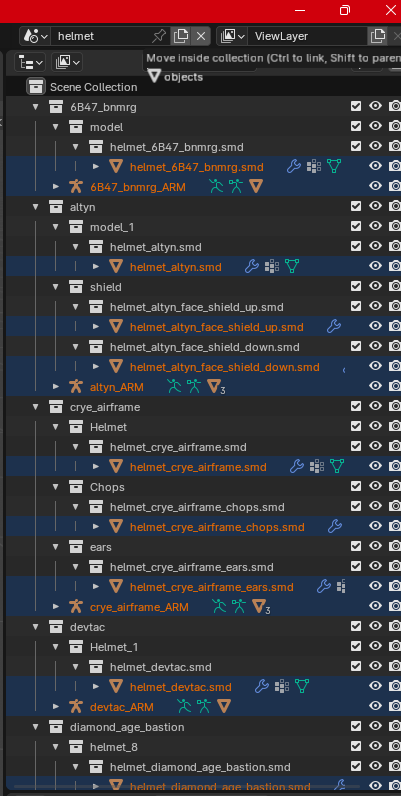
If you have multiple models, go to the collections tab, with all the models still selected move them all to the main Scene Collection, you can then delete the collections.
To delete collections inside of other one right click and select delete hierarchy.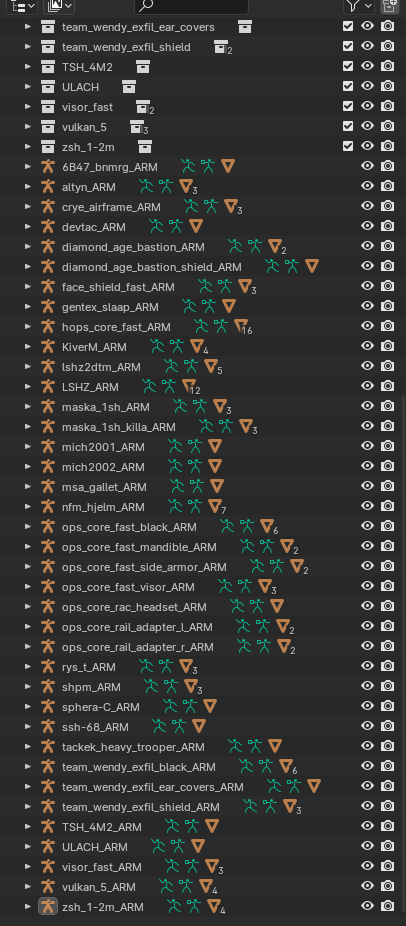
Getting Models From GMod
First things first, locate your addon, it can either be in GarrysMod\garrysmod\addons folder or steamapps\workshop\content\4000 folder.
Once you have located your addon, copy the addon to a new folder. Open a new file explorer tab, go to steamapps\common\GarrysMod\bin and find the file called gmad, once you have found it, go to the other file manager tab and drag the .gma file onto gmad, it should do its thing, once its done, you should now have a models and a materials folder.
The next step is the Same as for Source Filmmaker.
Porting From Blender To Source 2
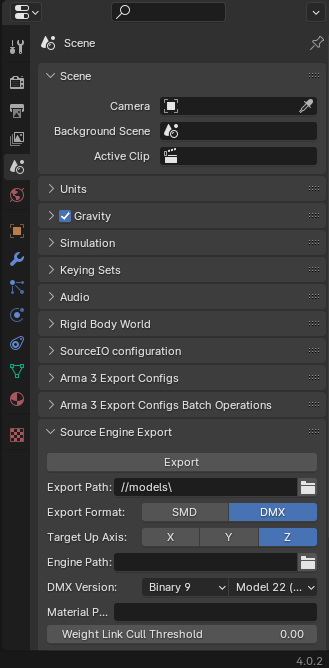 Select Source Engine Export, and choose an export path.
For Half Life Alyx and Counter Strike 2 the export path should be in the content\<game name>_addons\models. For S&Box it should go into addons\<addon name>\models.
Make sure the export format is DMX, and make the DMX Version Binary 9 Model 22 (ModelDoc)
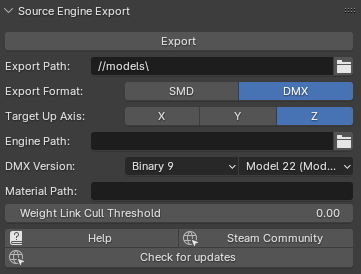 Now with the model(s) still selected press export, and choose selected objects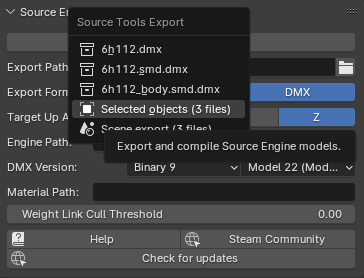
*One thing to note, if your model has shape keys, exporting the model as a DMX file will enable you to use the shapekeys in Source 2, just make sure in the Material settings in the Material editor to select Morphing enabled.*
Importing Models To Source 2
I do not own Half Life Alyx but the process is almost identical to Counter Strike and S&Box.
For this example I will be using Counter Strike 2.
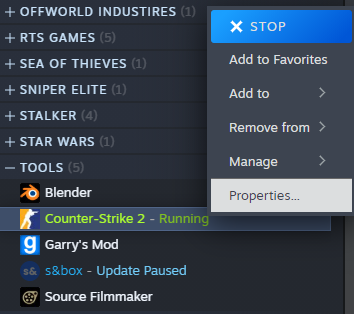
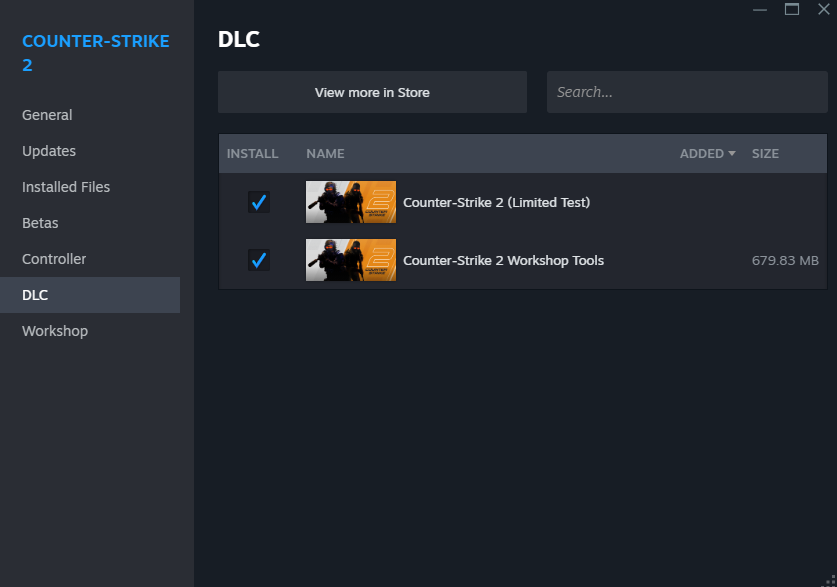
For S&Box its already integrated.
When its done installing, click play and select the workshop tools.
When it opens, create a new addon, name it something similar to what model you are exporting, in this case tarkov_pack. When a new addon has been created, select it and press launch tools, or you can simply double click on the addon.
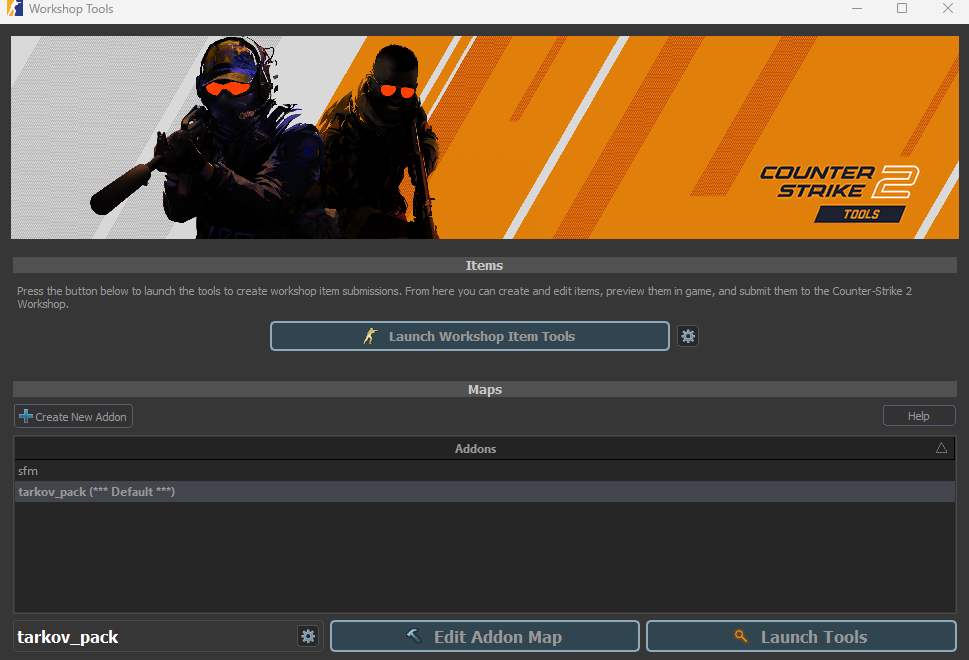 It should open the asset browser as well as an instance of the game.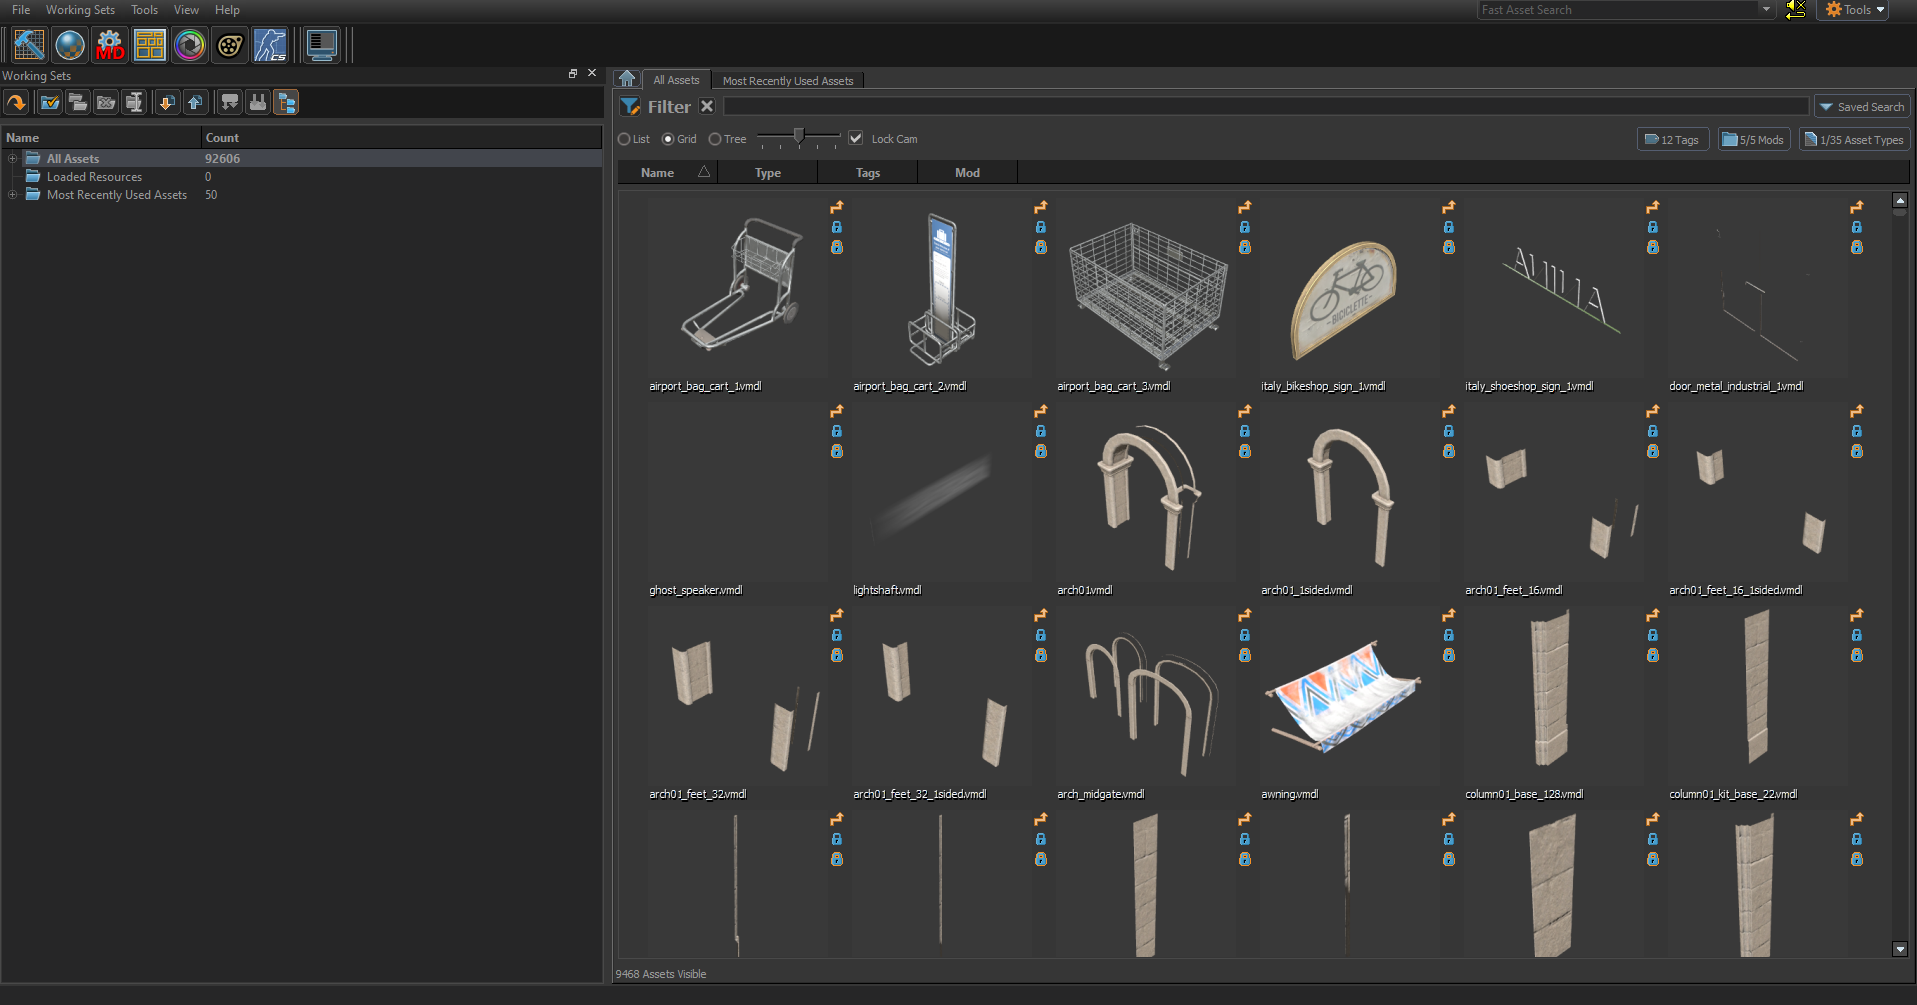
Importing Textures into Source 2
In this next part you will learn how to use VTFEdit
Download and open VTFEdit.
It should look like this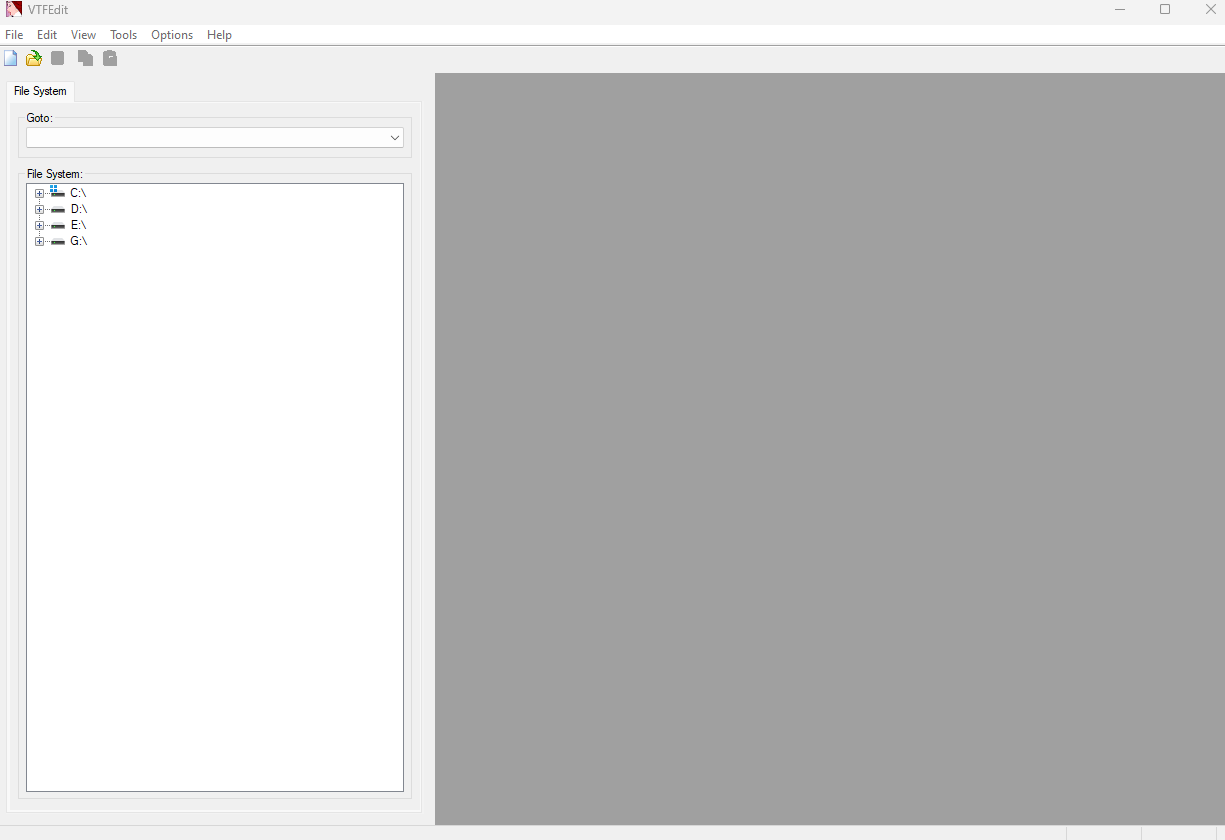
If you only have one vtf file to port over then drag and drop the image into the grey area. Do not try and port a vmt file, it will not work.
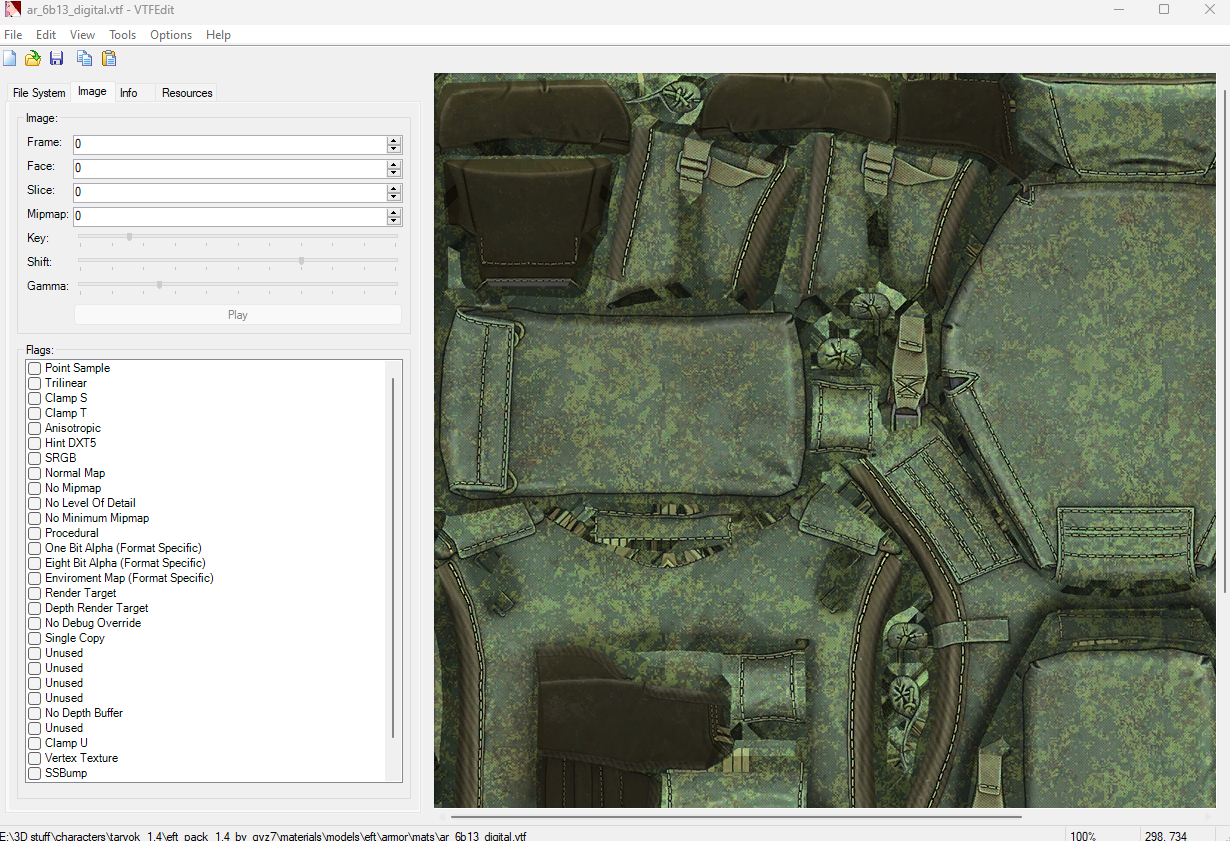 With an imported vtf file it should look like this, i usually don't touch the bottom left, to convert it to either a png, jpg or tga, go to file -> export,
save it to your materials folder, save the file to your prefered type, usually png.
When porting a model, you are most likely going to have more than one texture, instead of doing it manually, that would take far to long, trust me.
Instead go to tools -> convert folder
This window will pop up.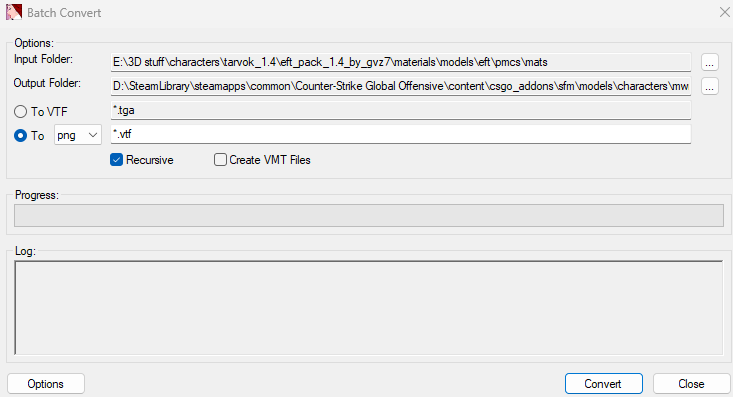
Choose the materials folder we used for importing to blender.
For the output file, choose the materials folder in the content folder. (hlvr_addons\content for hla, csgo_addons\content for cs2)
Make sure in the export option you select to png, you can change it to jpg, tga or bmp, make sure recursive is selected, and finally you can press convert.
Using ModelDoc
ModelDoc is pretty straight forward, import model, add material, add Ambient Occlusion box, maybe change the scale depending on what file format it is.
How to do all of that
Importing Model :
Click on the yellow star and click add new meshes to the left of the screen, not the + add button, that's for later.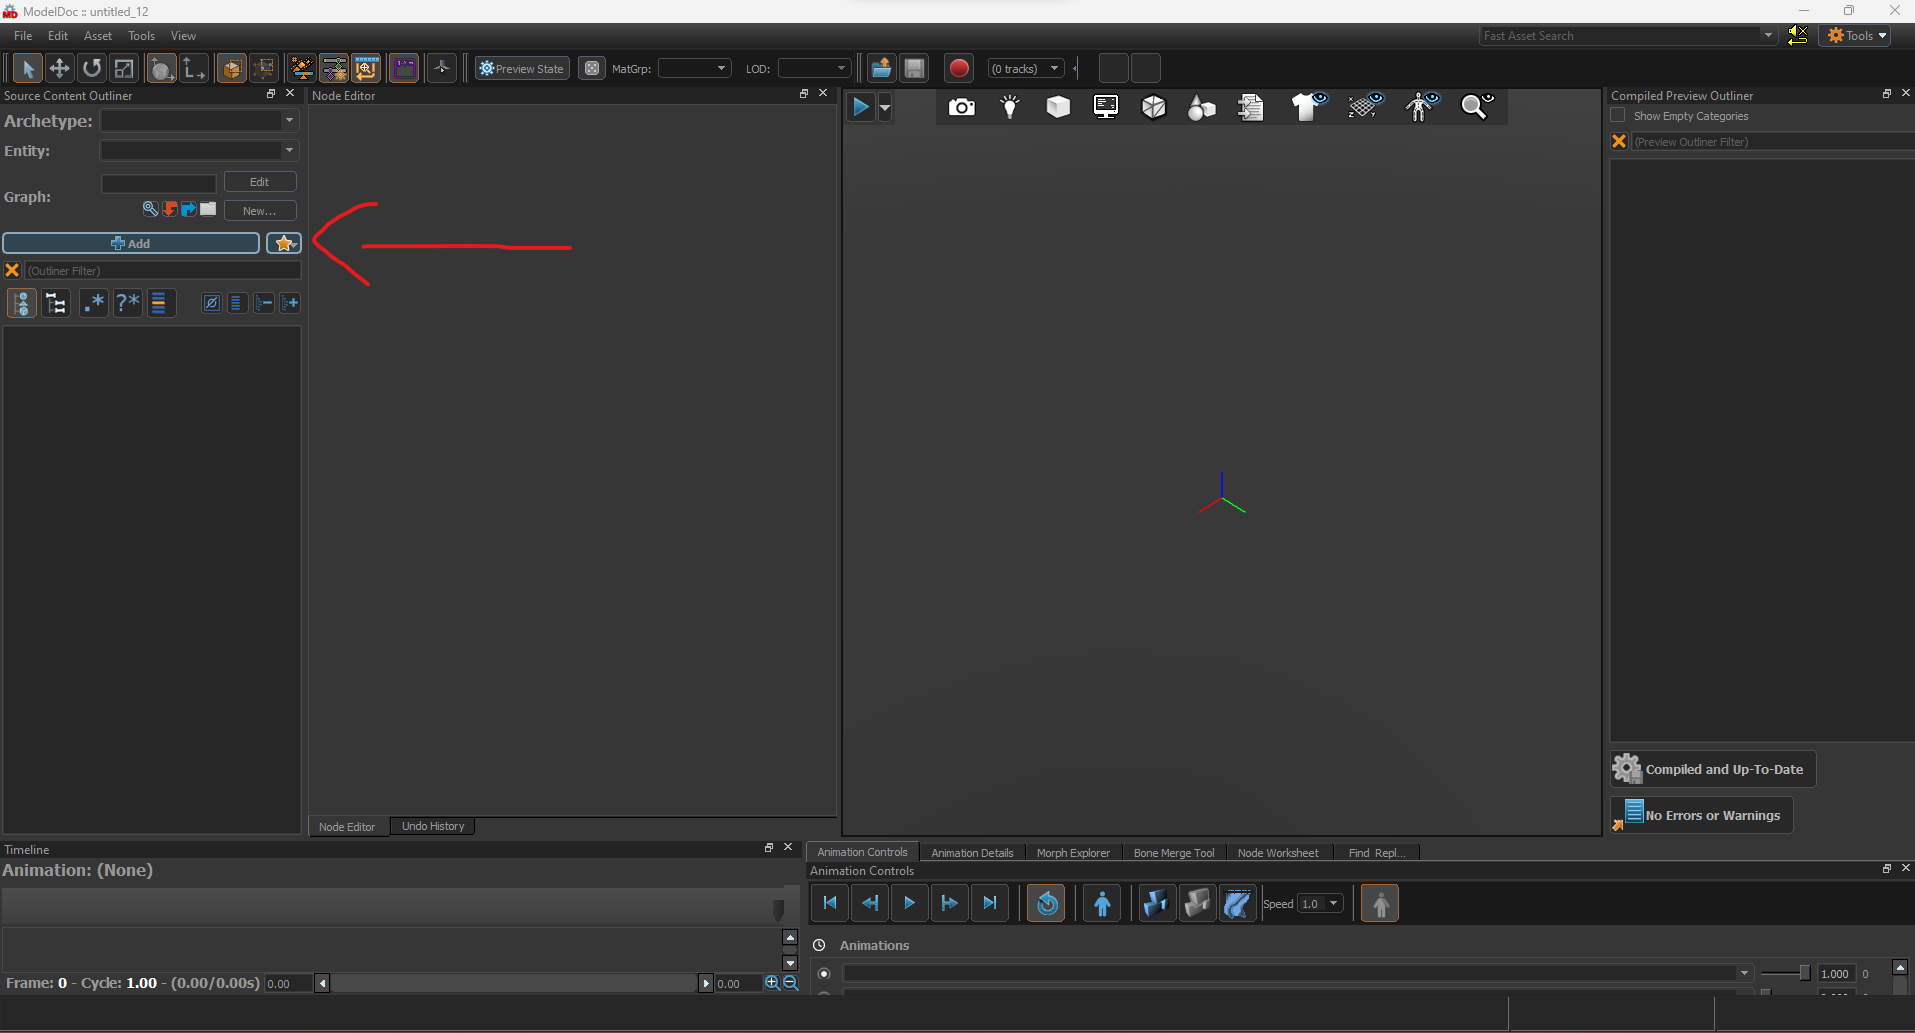 Locate you model, and press open/double click.
Oh no where is my model ?
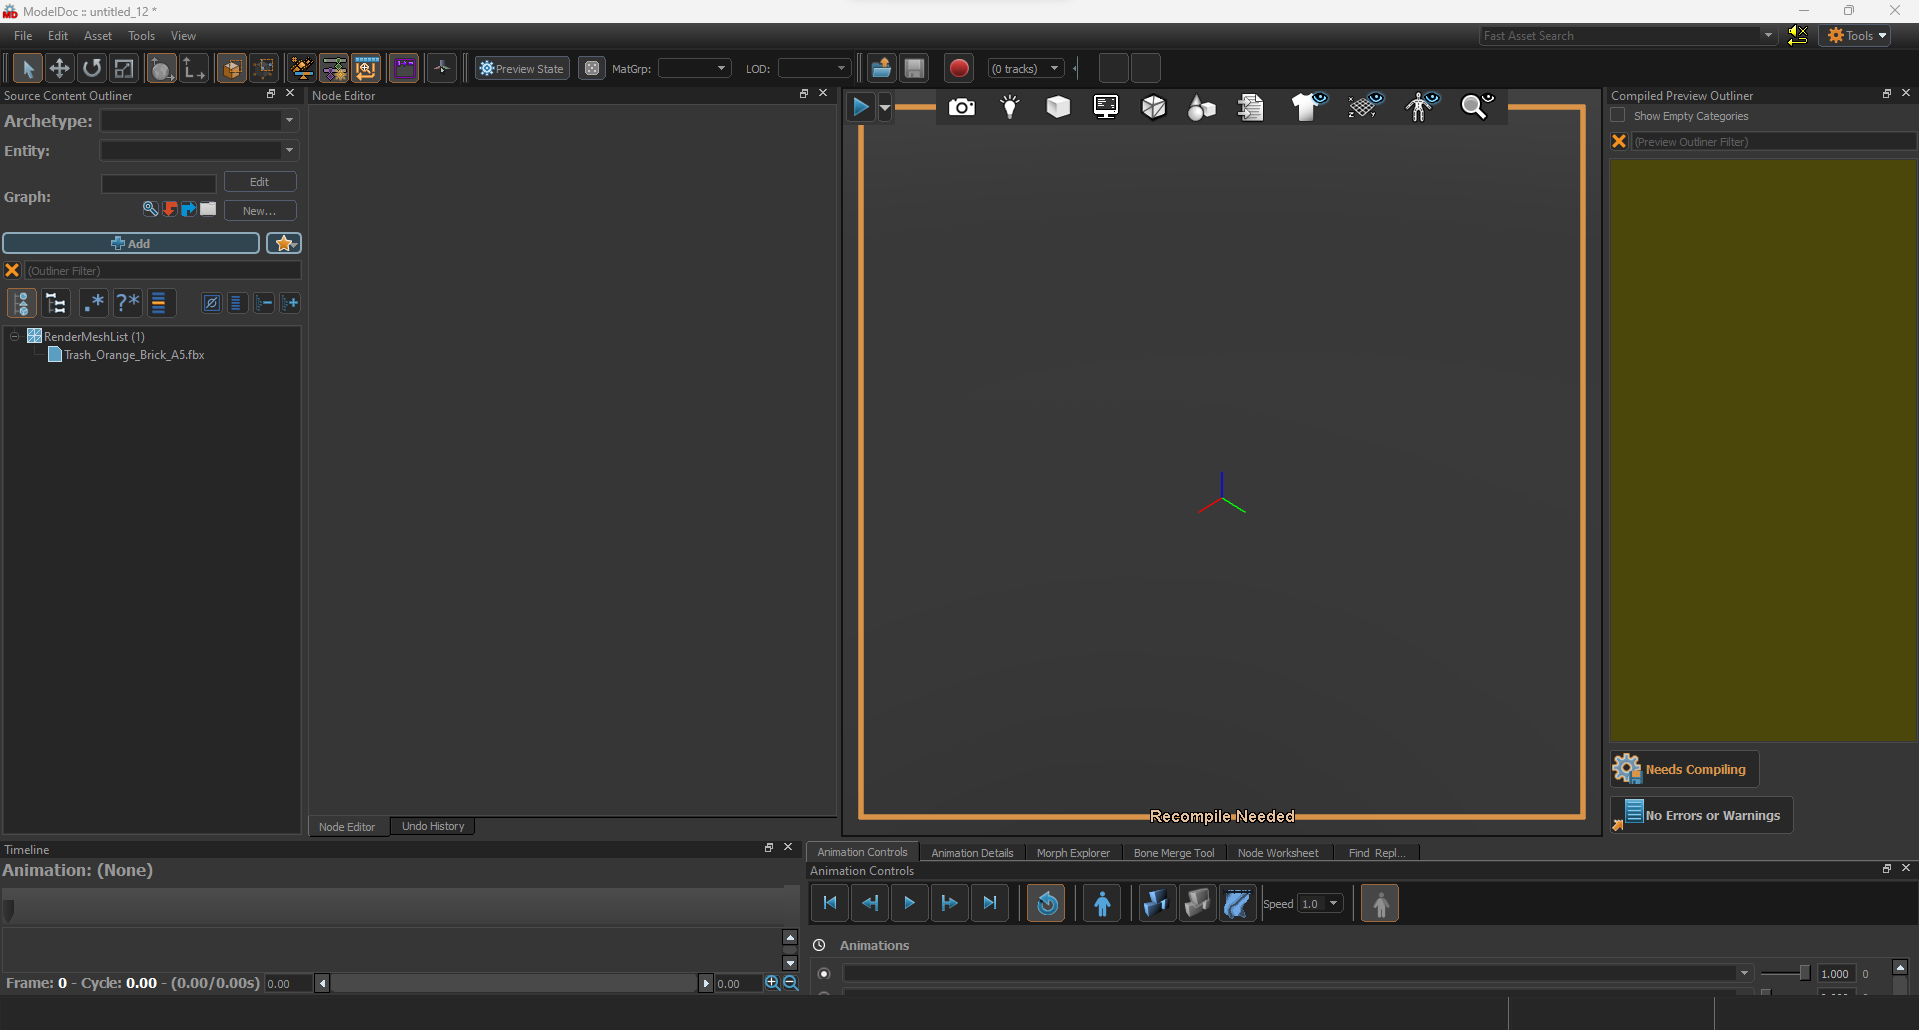
Don't worry, press compile at the bottom right of the window, save the file to the same location where you model is located to keep it organised.
Depending on the model type, it may appear either to large or to small, if you are importing a DMX file you usually need to scale it by between 50 and 60, use base game models for scale, if you are importing an smd, it is usually the right size, and FBX is usually to big so you need to scale that by .4.
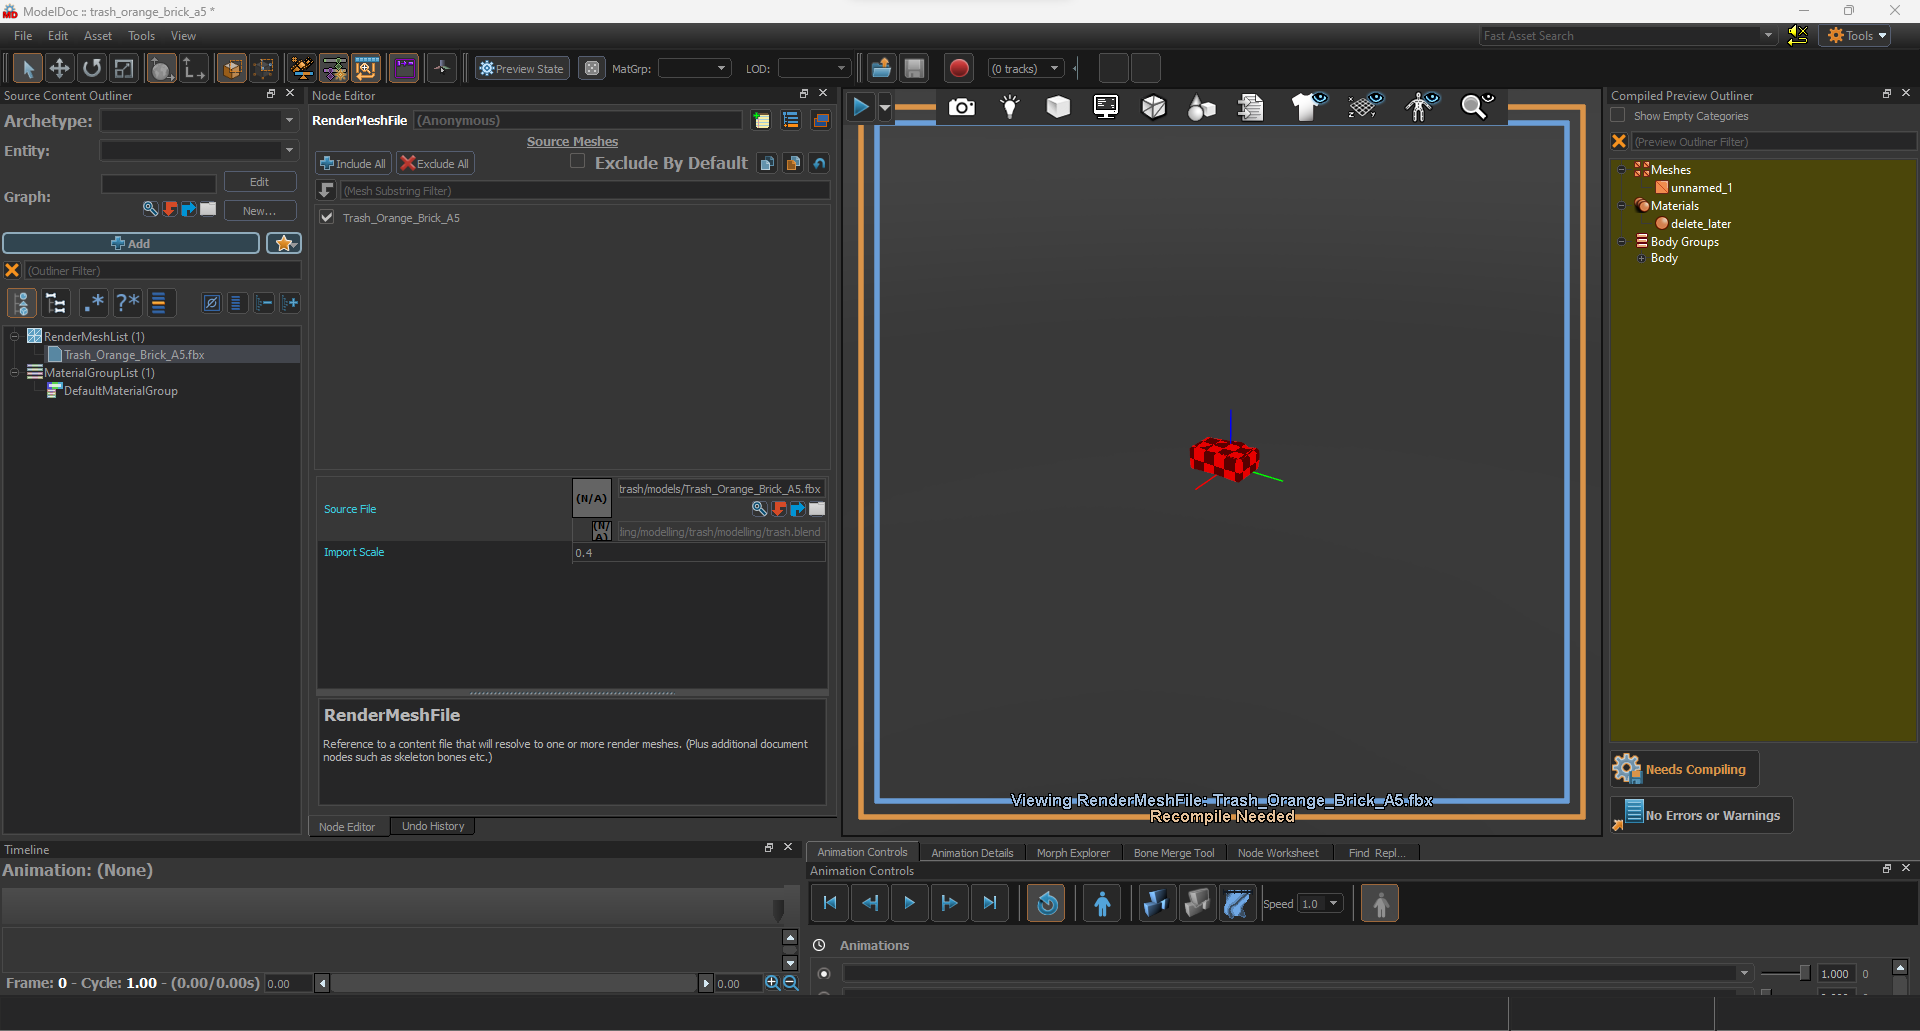
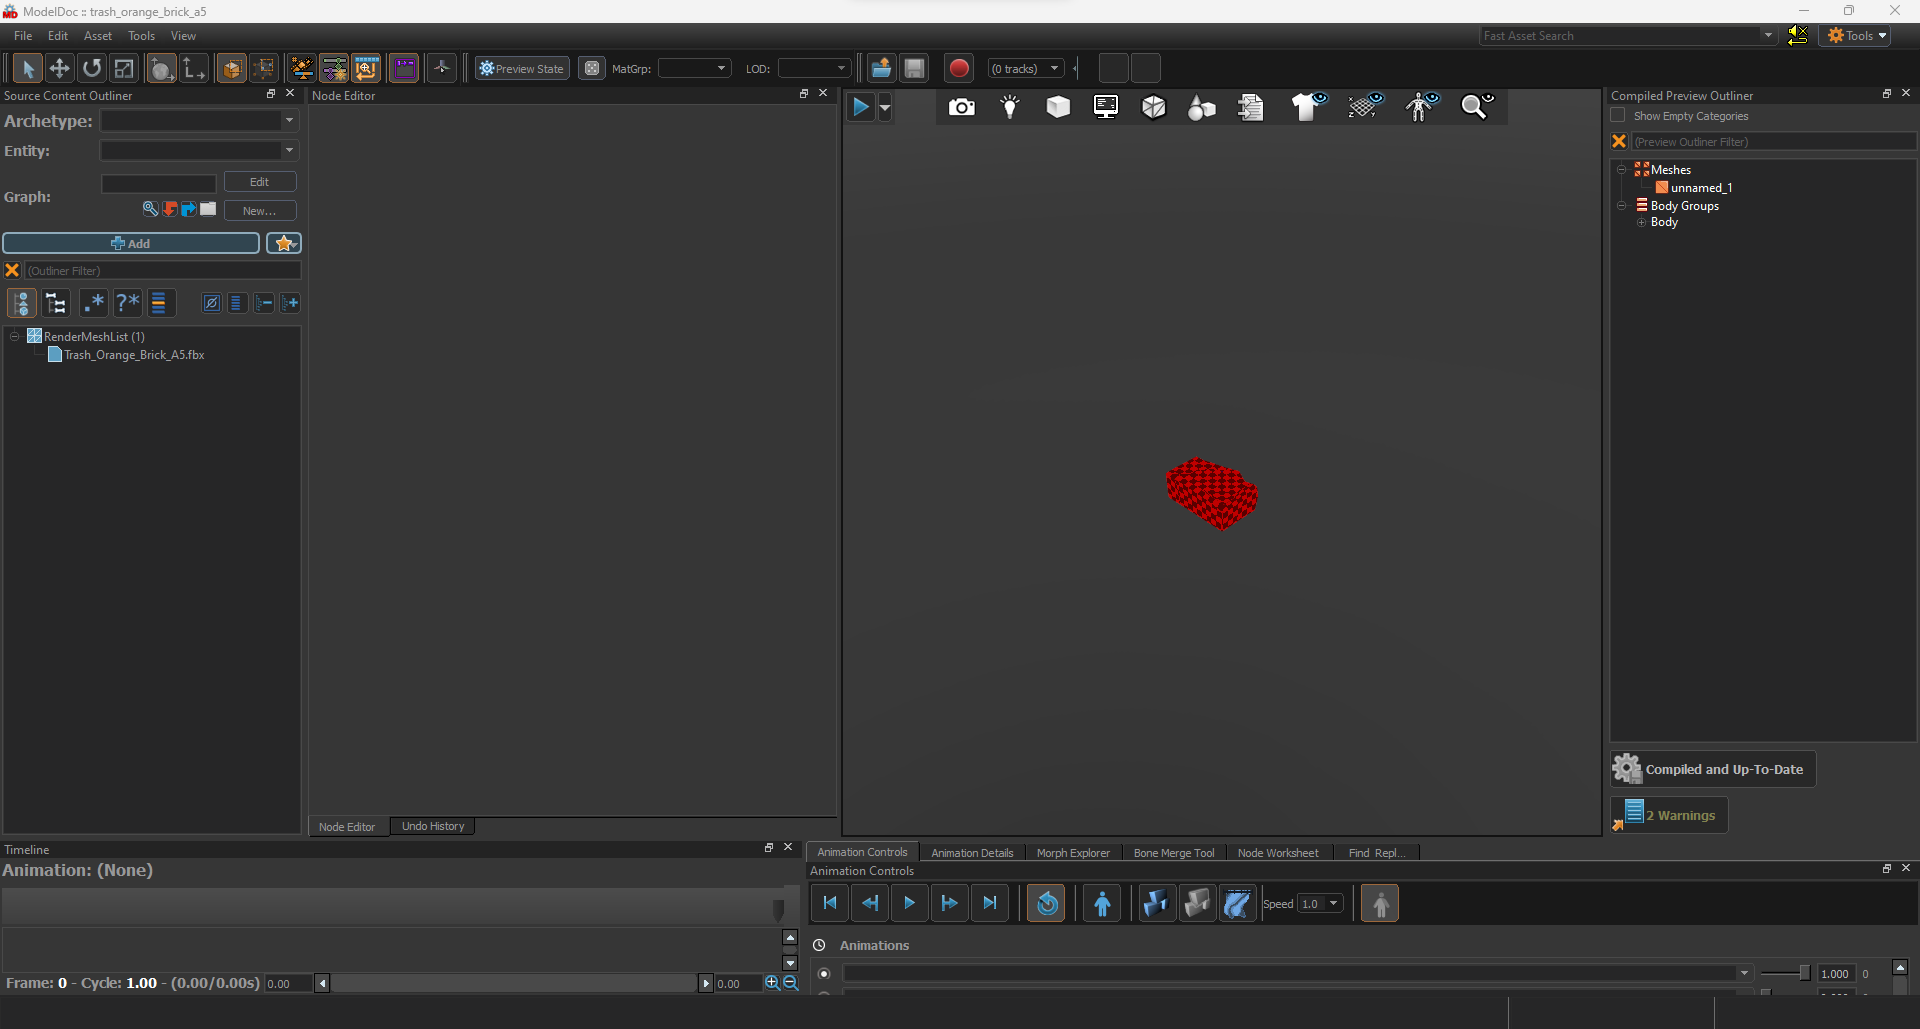 Now you have a model, with no texture, time to fix that.
Click on the blue +Add next to the yellow star from earlier
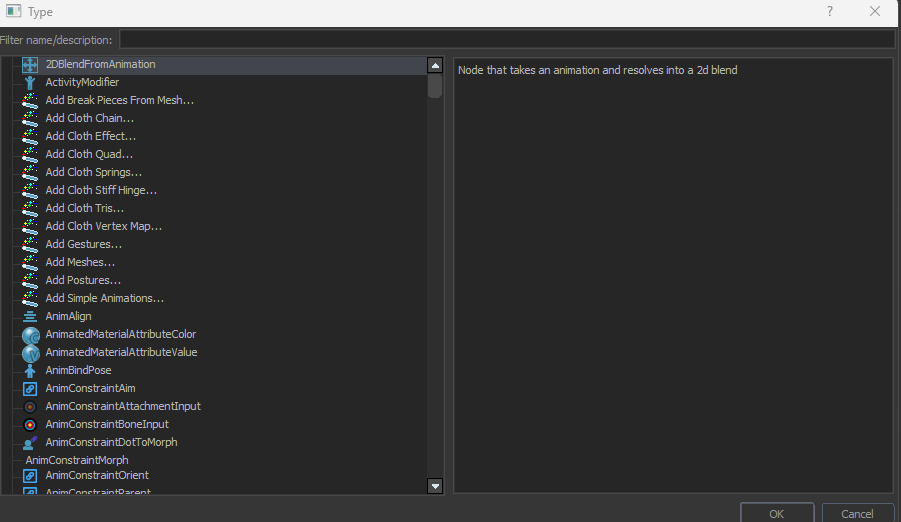 this window should pop up
In the searchbar type material, select DefaultMaterialGroup, click ok, or double click DefaultMaterialGroup
this window should pop up
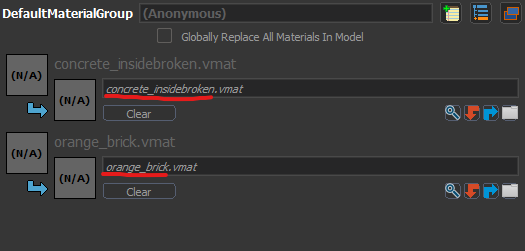
In the searchbar type material, select DefaultMaterialGroup, click ok, or double click DefaultMaterialGroup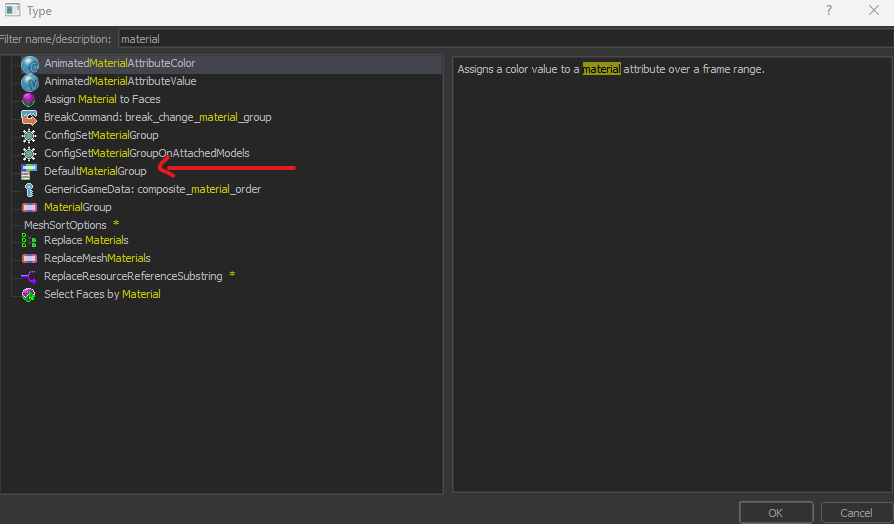 Now in the left menu you can see the DefaultMaterialGroup, left click on it, in the node editor you will see the names of the required materials.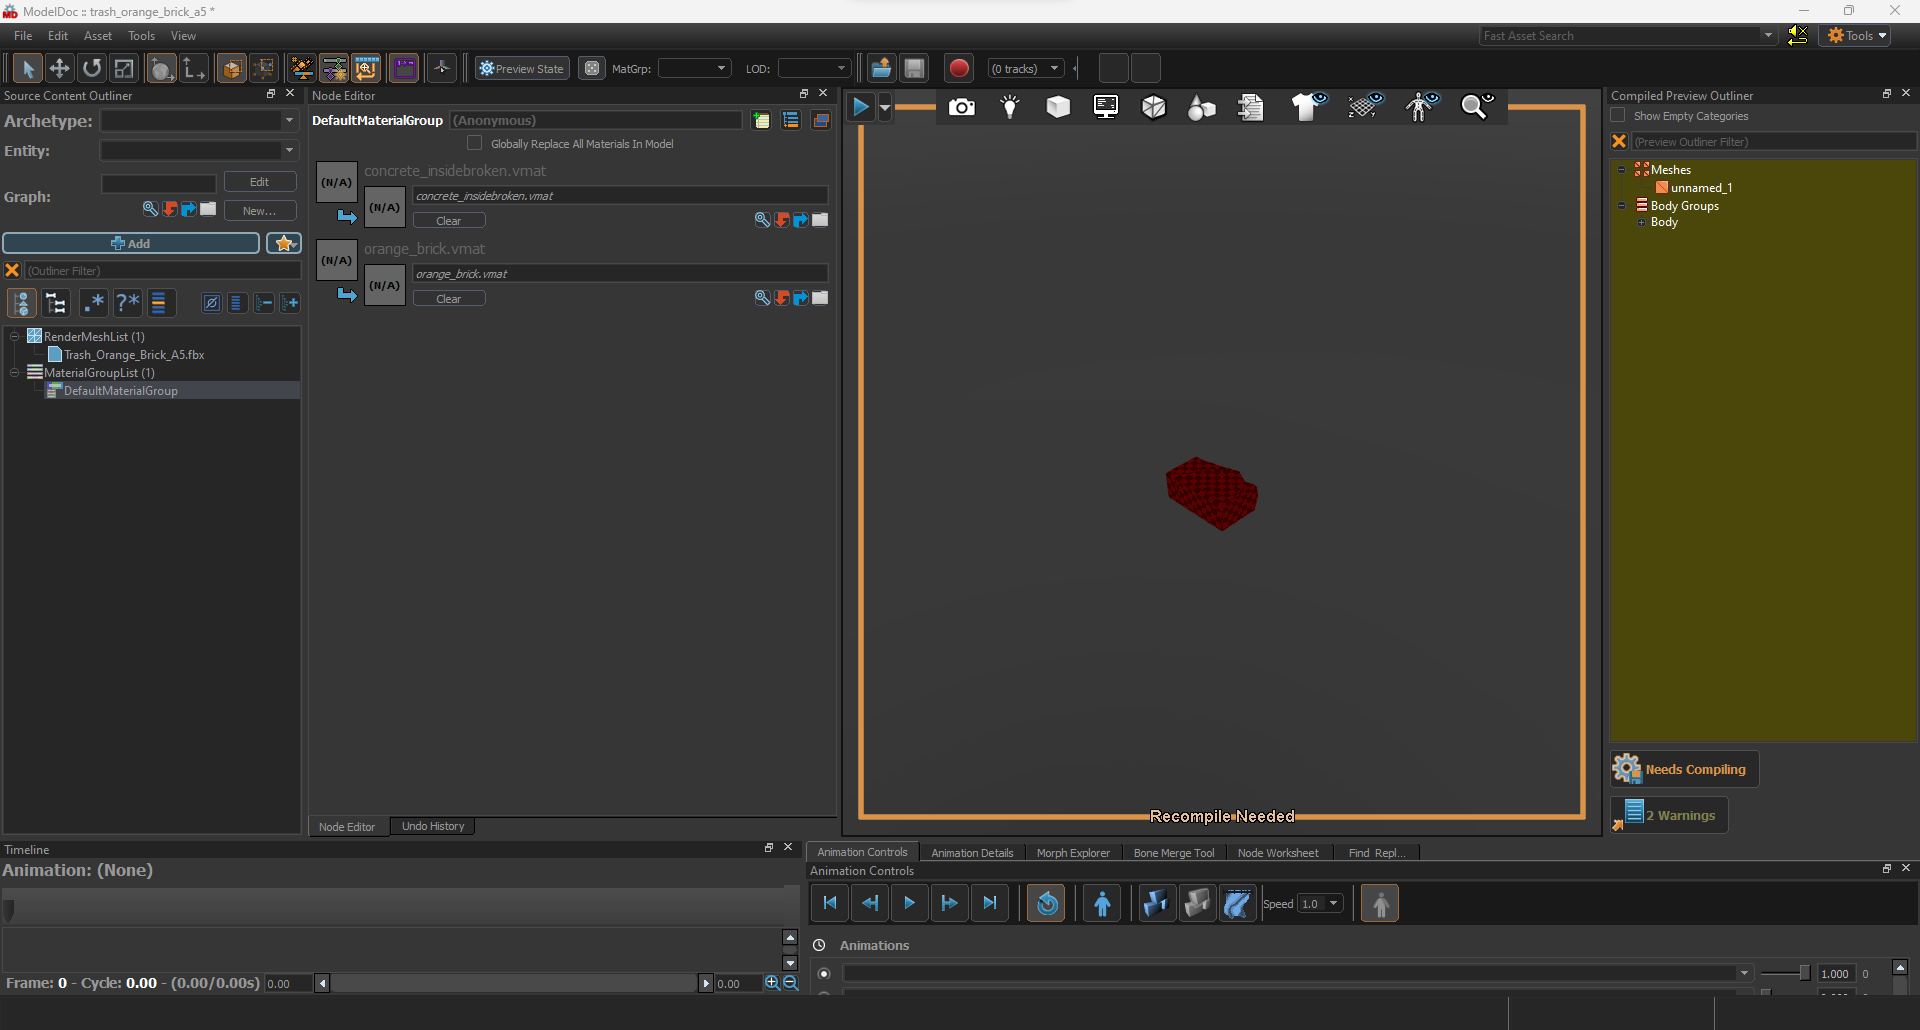
Its now time for the material editor.
Using The Material Editor
To open the material editor, go back to the Asset browser, to the same place you opened ModelDoc, to the left of it should be the Material Editor Icon, click on it.
This is the material editor window.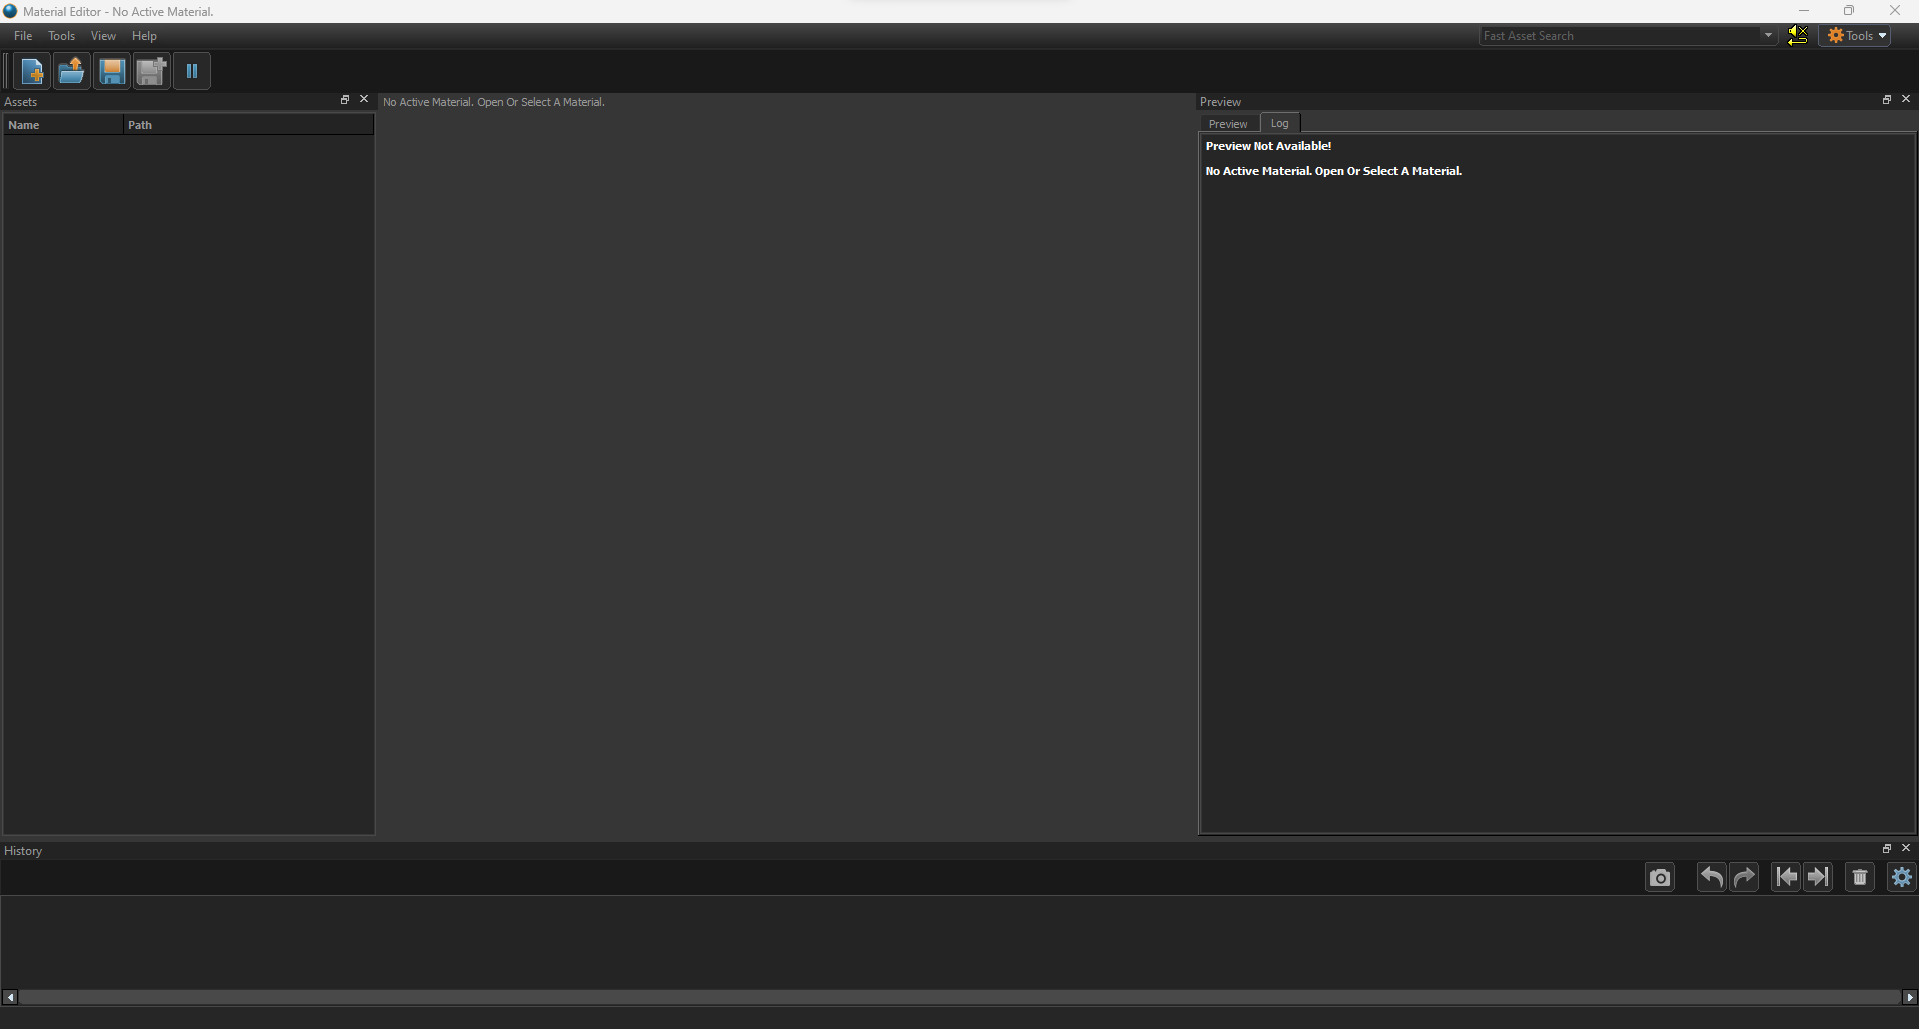
Create a new material either by clicking new at the top left, or by pressing Ctrl + N on the keyboard.
A list of different Shaders will appear, for props you should use the complex shader, vr_complex for HLA, csgo_complex for cs2 and just complex i believe for S&box.
For CS2 users, you must select Show Core Shaders at the bottom of the window to be able to see csgo_complex
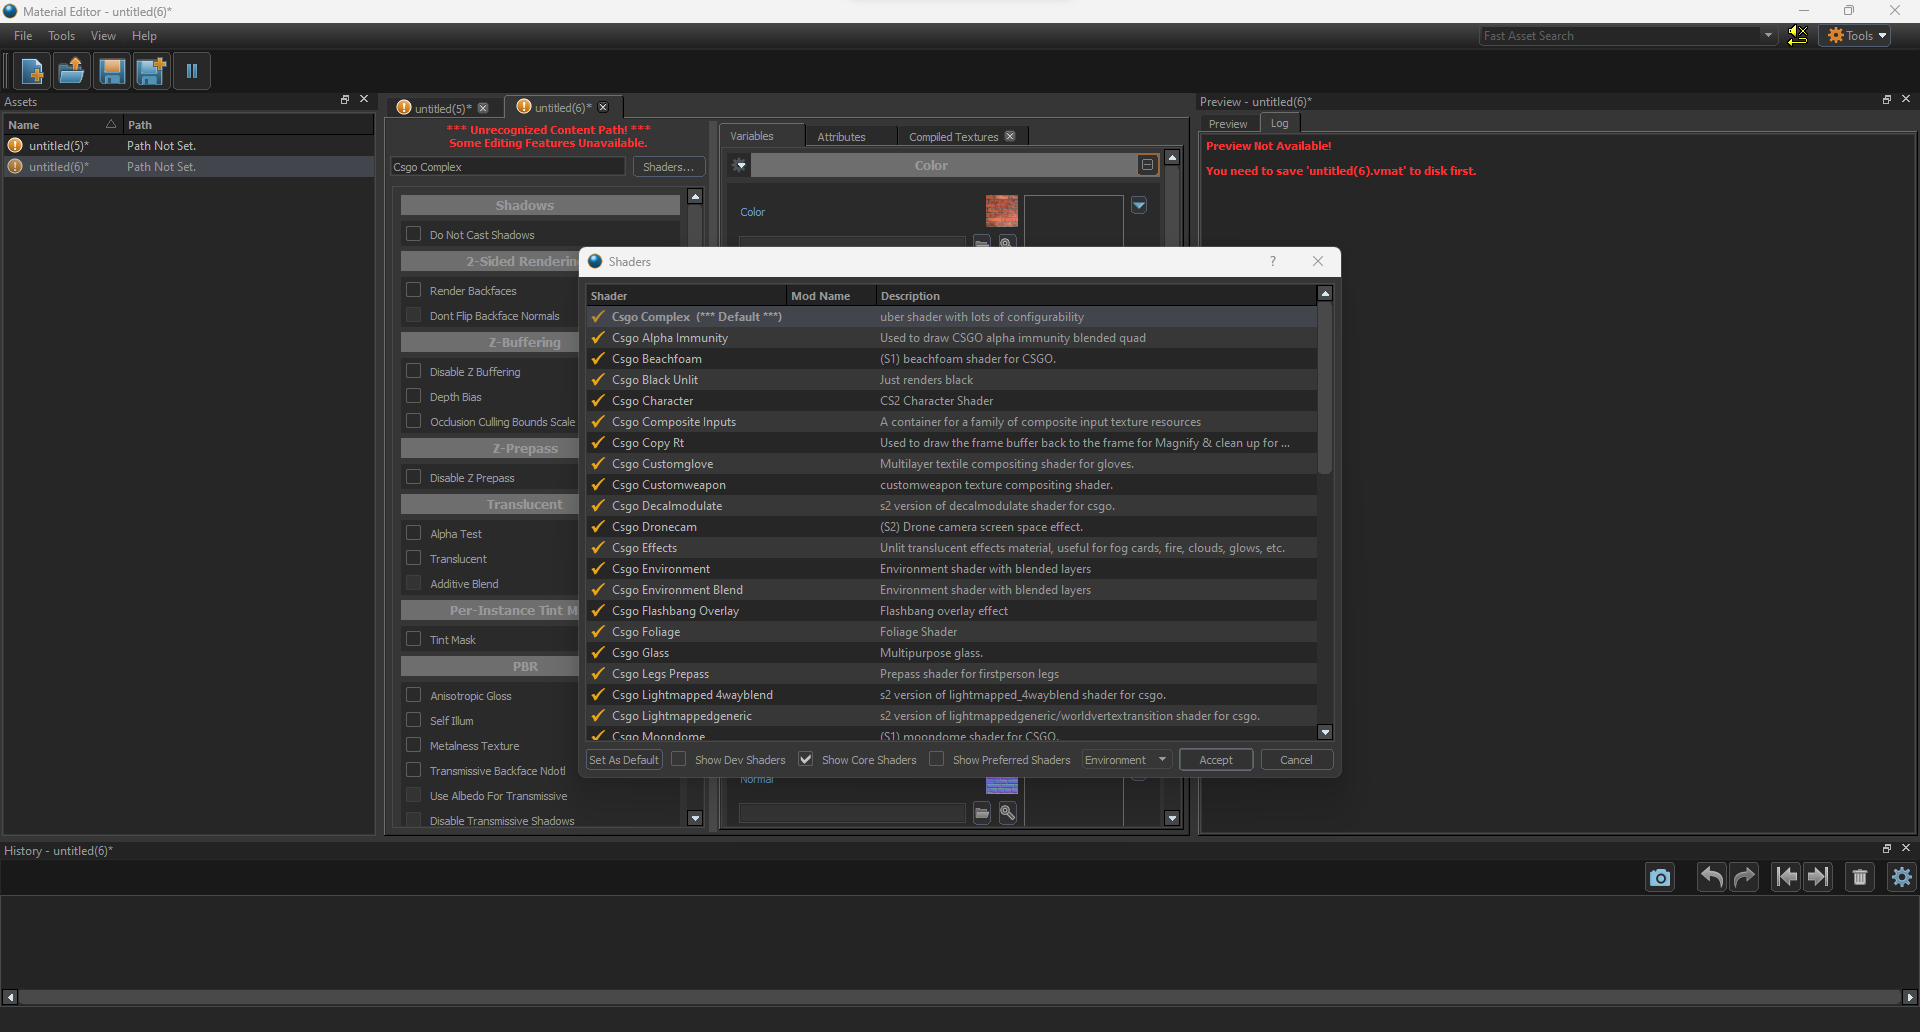 Select the complex shader, and save the file in the materials folder. You should now have a white sphere.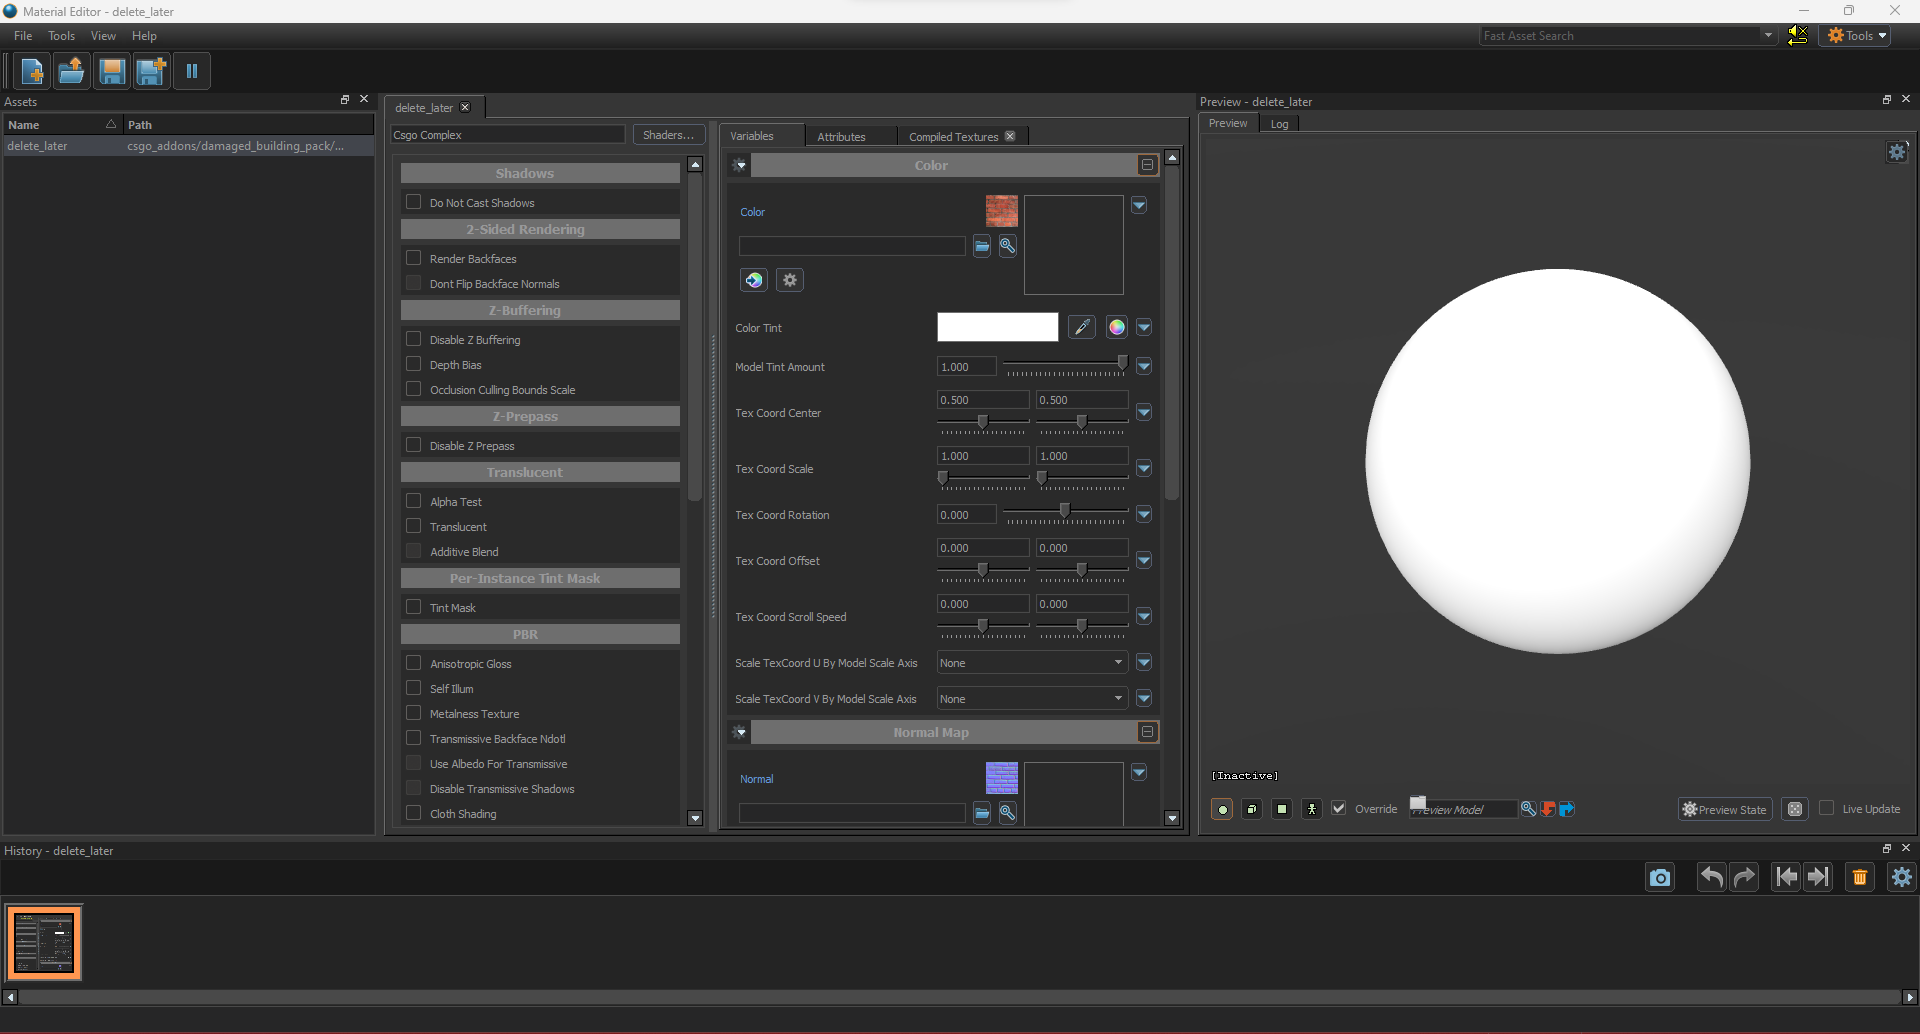
A material is composed of multiple textures, usually :
- Color
- Normal
- Displacement
- Roughness
- Ambient Occlusion
- Metalness
A model exported from source 1 will usually have around 2 of these, color and normal.
Those are the ones we will be doing first.
 Back in the Material Editor, in the color section, click on the magnifying glass, paste the texture name in the search bar.
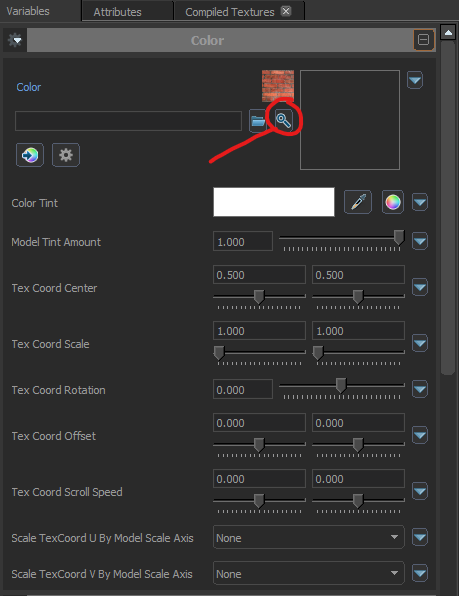 Select the color texture and click accept/double click.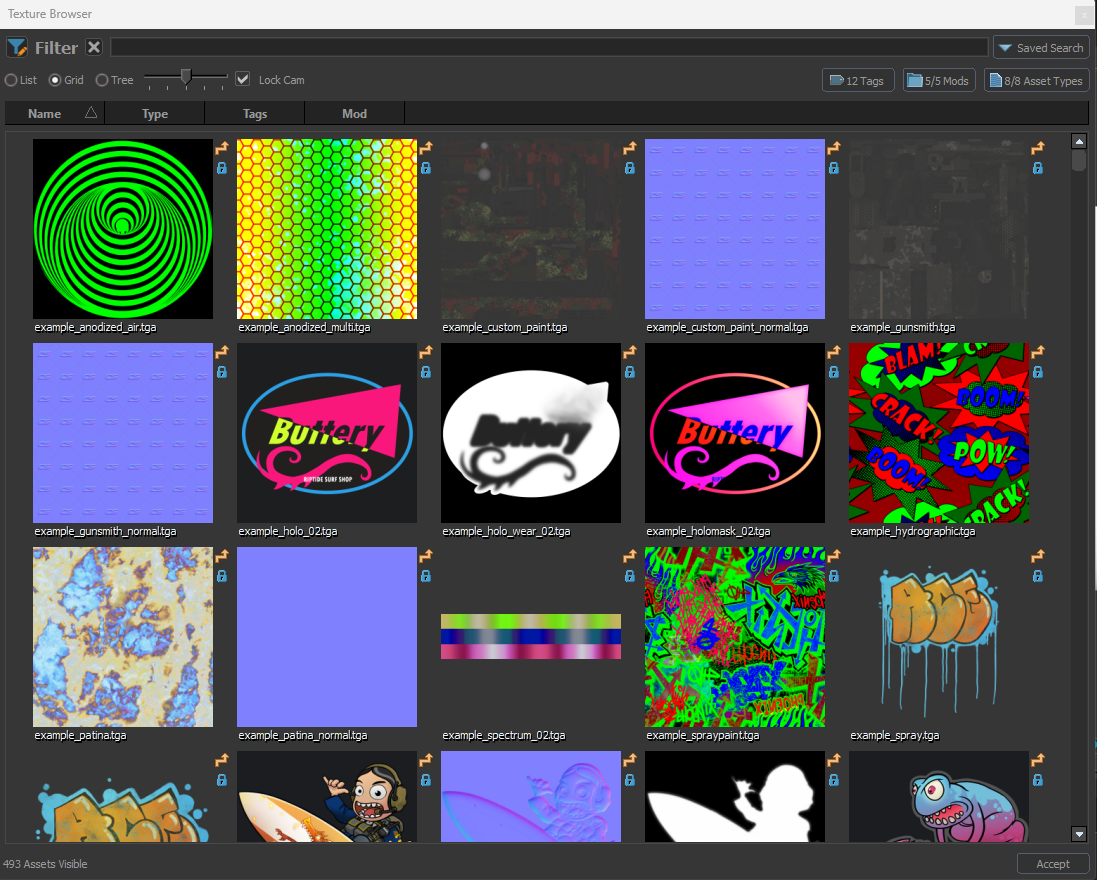
Now you have a base color, it's time for the normal texture, as you can see the default texture is purple, click on the magnifying glass in the normal section, paste the name of the texture, and select the normal texture, it looks like the color texture but its purple and usually ends with _normal, _nrml or _n.
As you can probably see, the sphere looks wet, like its not rough, depending on the material, you may want to make it rougher.
Go down to the lighting section, and then roughness, since you probably don't have a roughness, texture you can either make one, or select a color.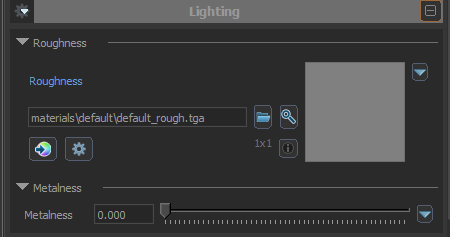 Roughness works like this, if the texture is black, its wet, if it white is rough, grey is intermediate.
What i usually do is Change to color and choose a lighter grey.
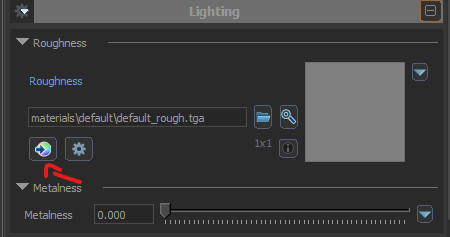
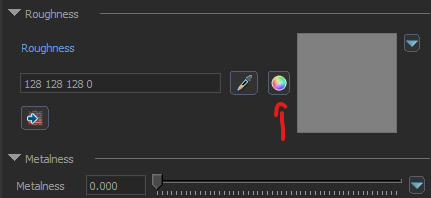
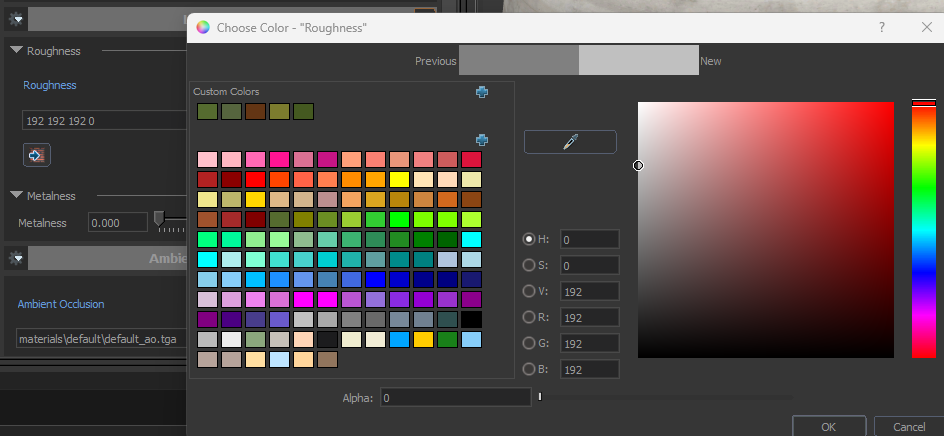
Press ok, you now have a basic material.
Based on what kind of material you need, glass, mud, concrete, you need to change the values accordingly, darker rougness for reflective/wet materials.
You can add a metalness texture, same principal as the roughness texture but it look metallic rather than wet.
Applying Materials
Going back to ModelDoc,
In the node editor, select the magnifying glass and paste the material name in the search bar, click accept/double click the material to apply it.
Now you just need to Compile the model again to see the result.
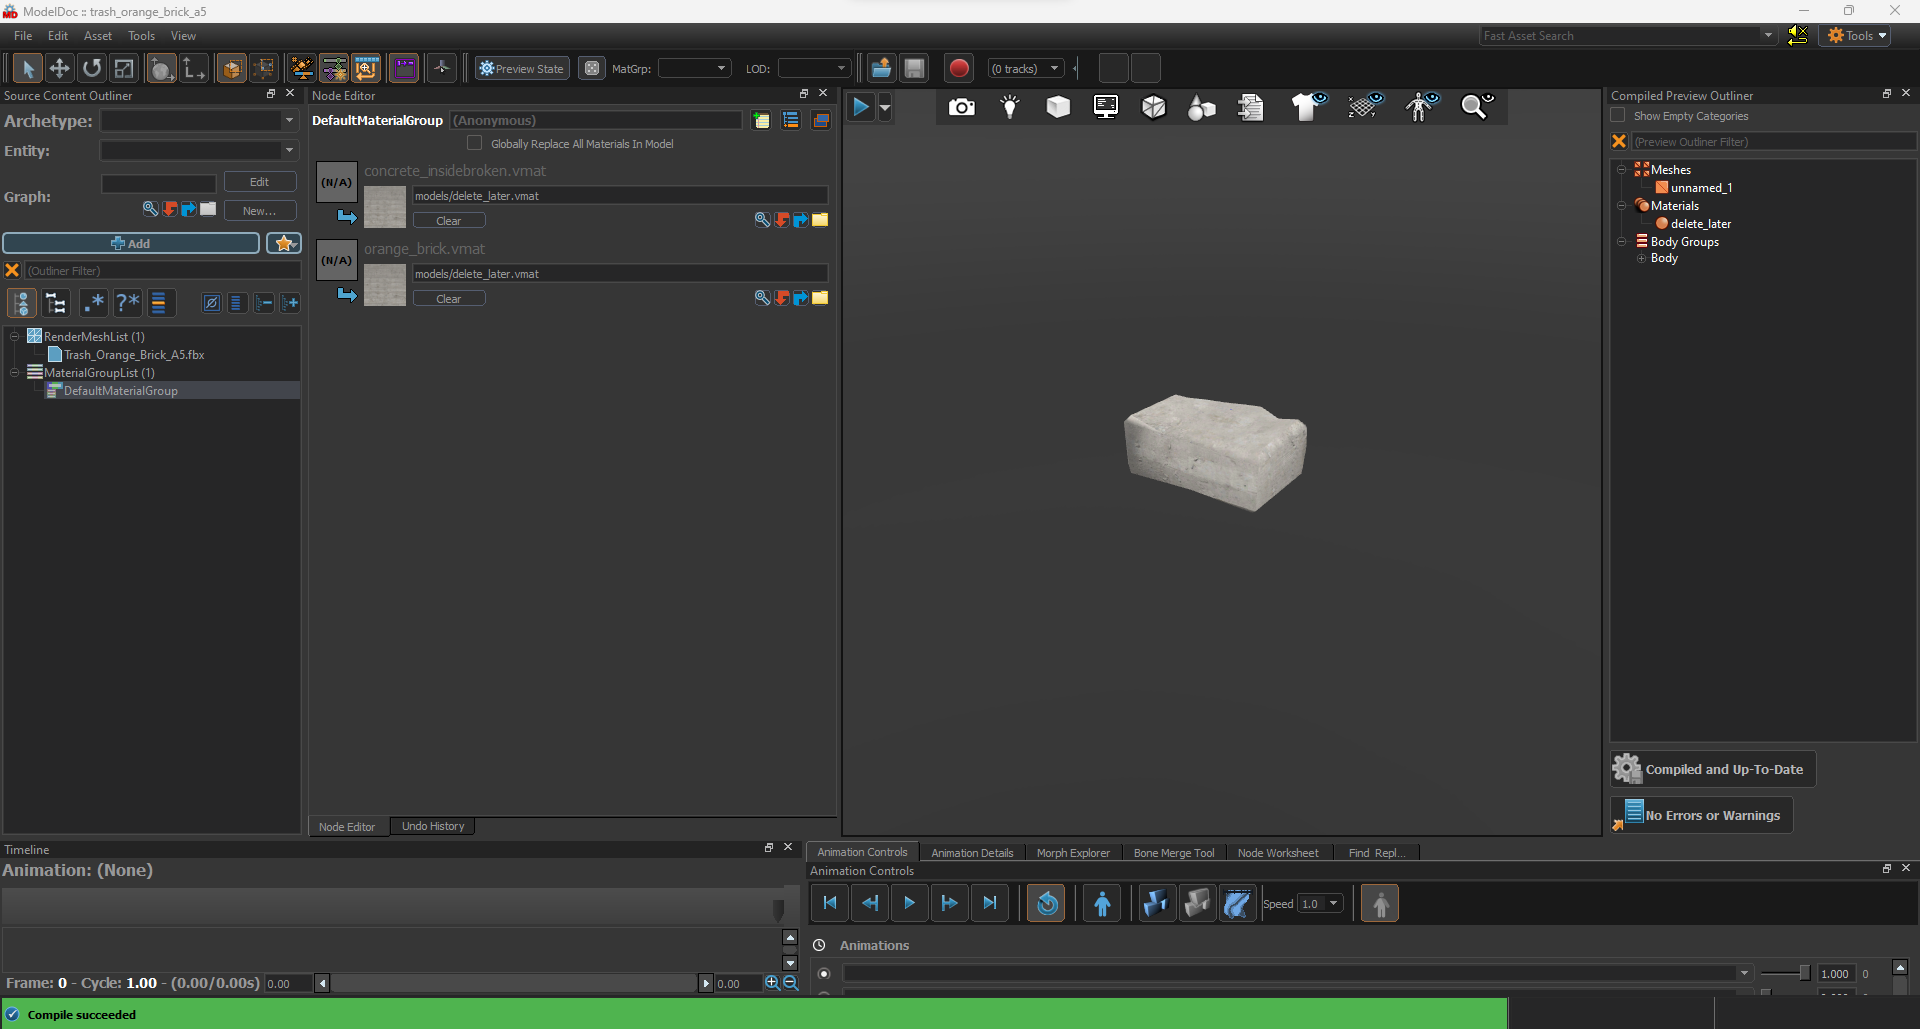
If there are multiple materials, you need to repeat the process as many times as there are materials, this is usually the most time consuming part of the process.
Adding Ambient Occlusion Proxies
Ambient Occlusion Proxies or AO proxies, represent the Ambient Occlusion on the model,
"It measures the extent to which a location on the surface is obscured from surrounding light sources". sciencedirect.com
They either come in the form of a box or a capsule.
To add one click on the +Add button to the left of the yellow star, type ao
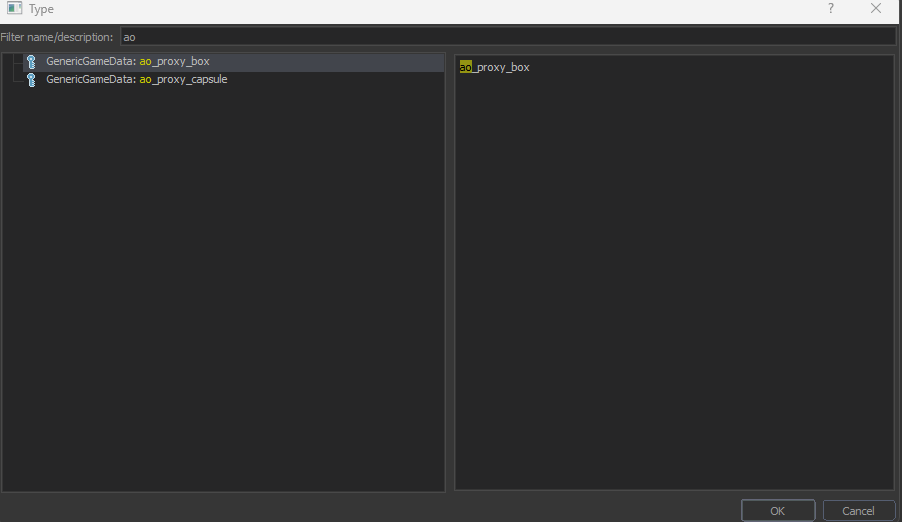
Depending on the type of model you have select a type of proxy, a box i usually used for crates, furniture, etc. Capsules are usually used for characters, but both can be used for any type of model.
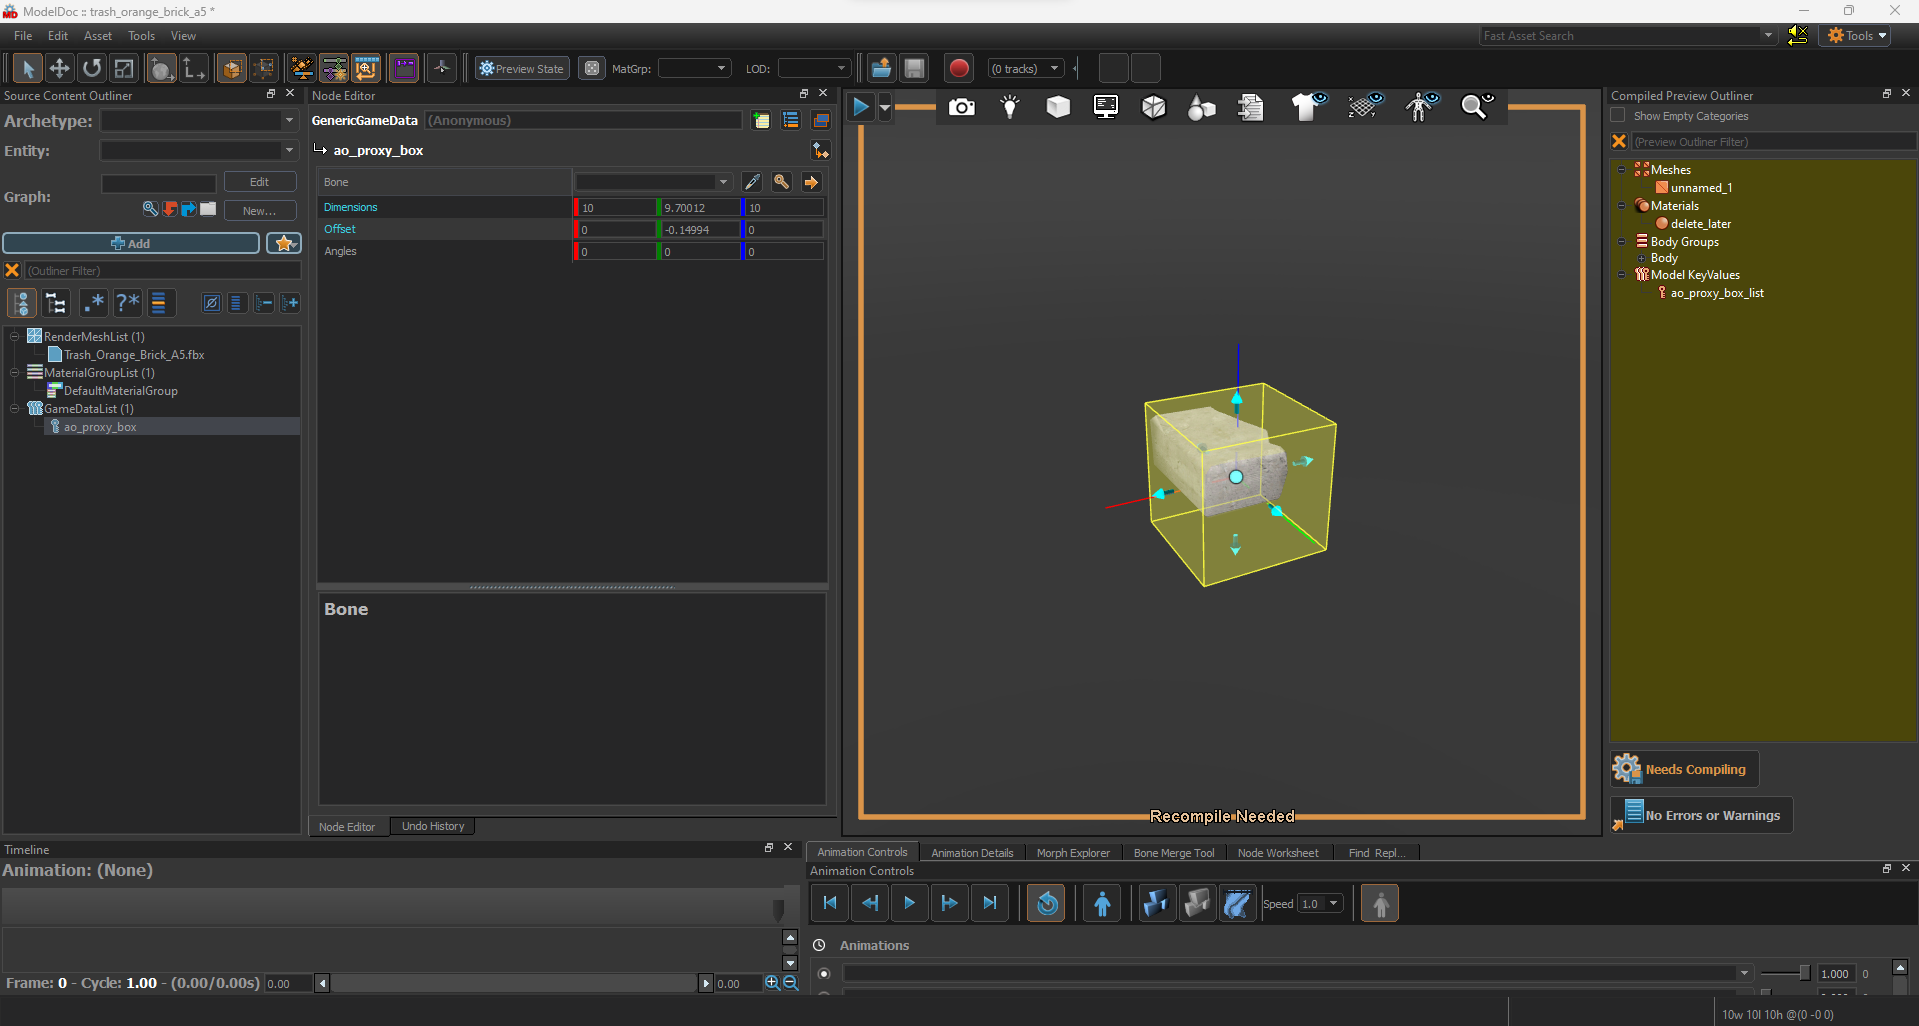
If you are adding it to a simple prop select the root bone if available in the node editor. And scale the proxy to the approximate size, don't go to big or to small, if you are making a proxy for say, a chair you are going to need multiple proxies, for each leg, the seat, etc
There isn't a limit to how many proxies can bee used but there is no need to go overboard on them.
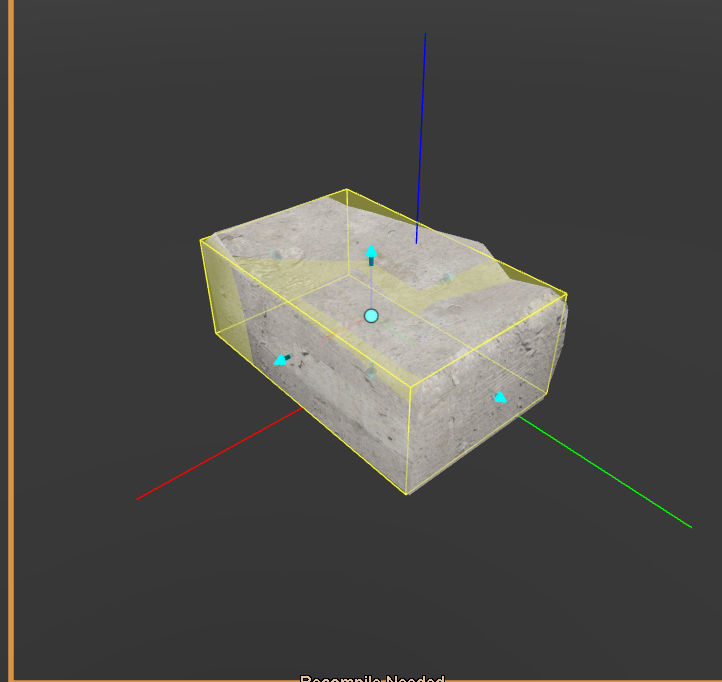
Once you have finished placing the Proxies you can Compile the model.
Your model now has Ambient Occlusion
To enable it in S2FM, on the model you want the AO to be received on for example a floor/wall model right click on it in the Animation set editor, go to utilities and select Set Receive Ambient Occlusion Proxy Shadows.
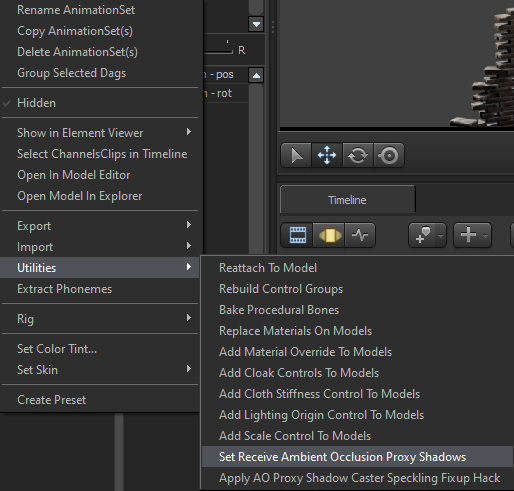
Face Flexes
After importing the DMX file into ModelDoc, compile it and head to the material editor, select the character shader for CS2, the skin shader for Sbox and the vr_skin shader for HLA.
When you have selected the materials you want, go down and select morph supported, now face flexes should be enabled. Save the material and apply it to your model.
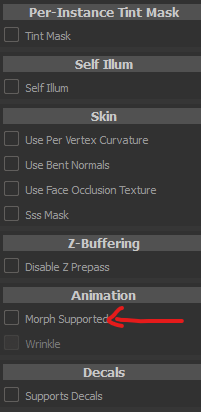
https://steamcommunity.com/sharedfiles/filedetails/?id=2824280020 Here is a more in depth tutorial for face flexes
THIS WILL NOT WORK WITH EYES YOU NEED SEPARATE EYE BONES TO BE ABLE TO MOVE THEM
Bodygroups
Creating bodygroups is simple.
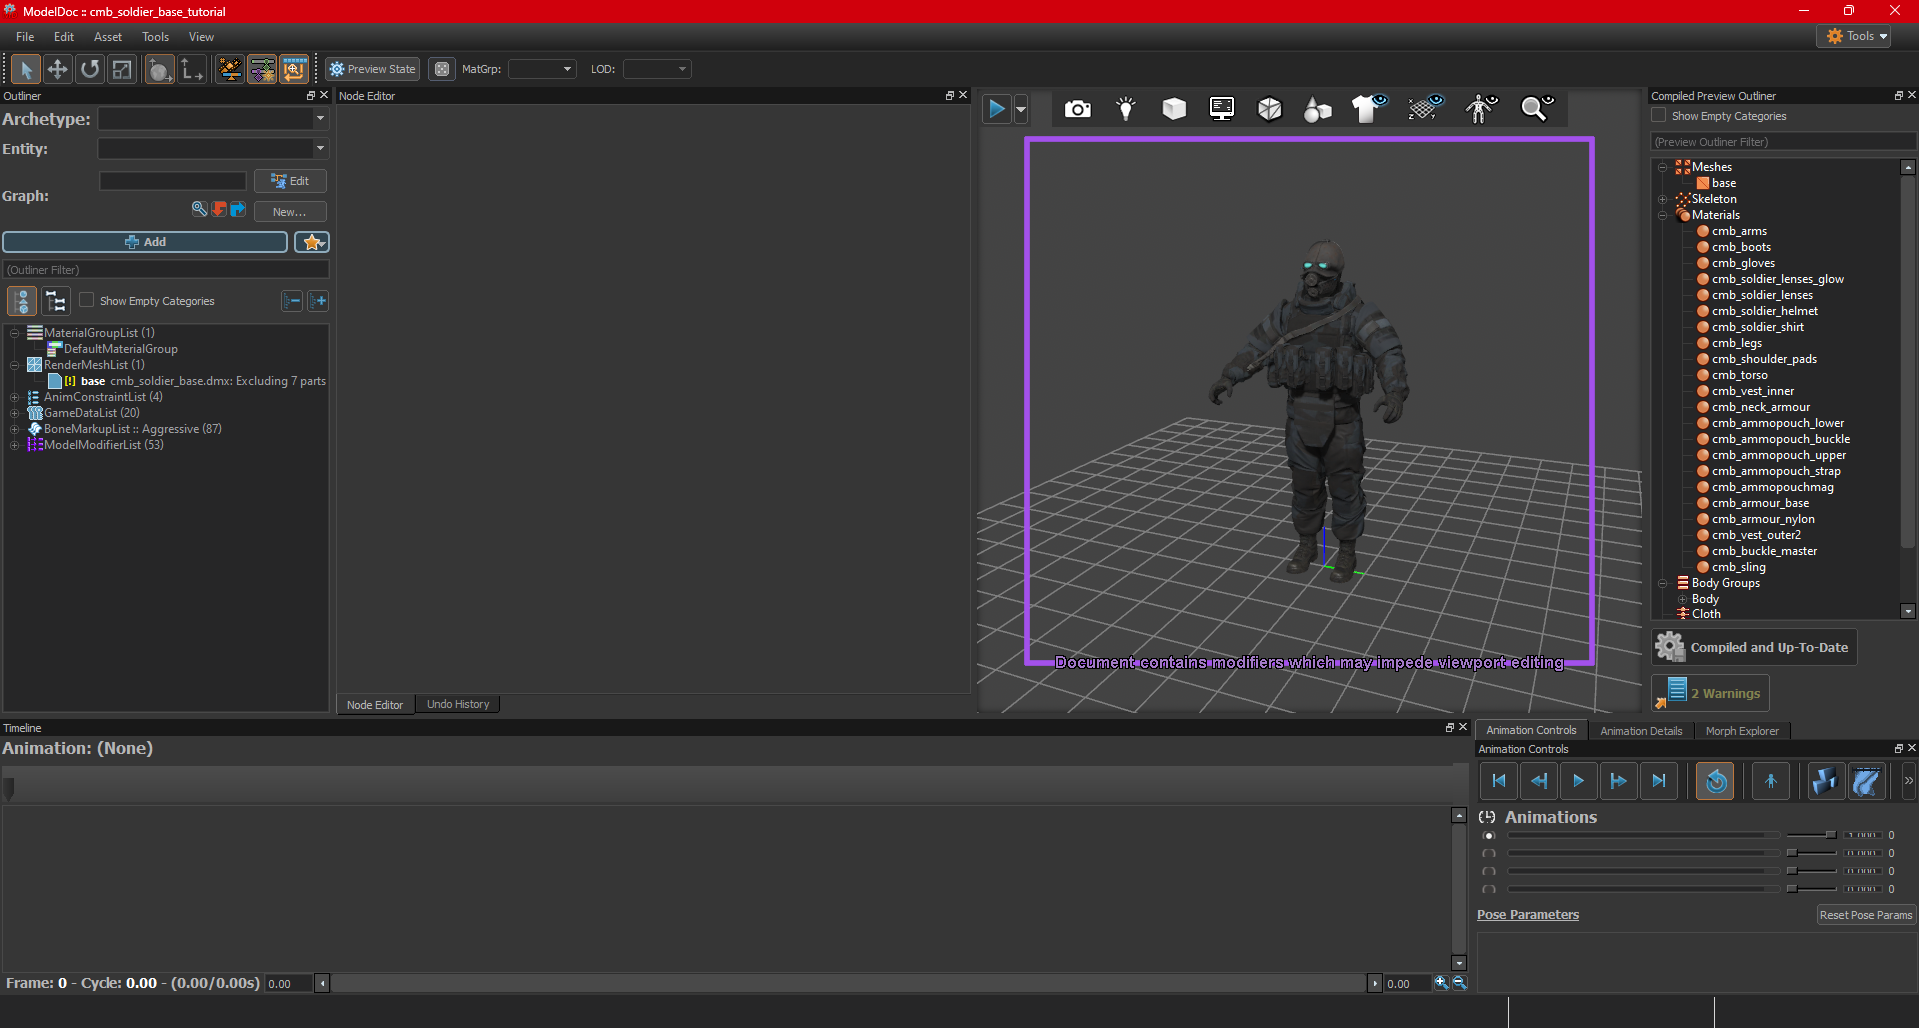
First add a bodygroup node
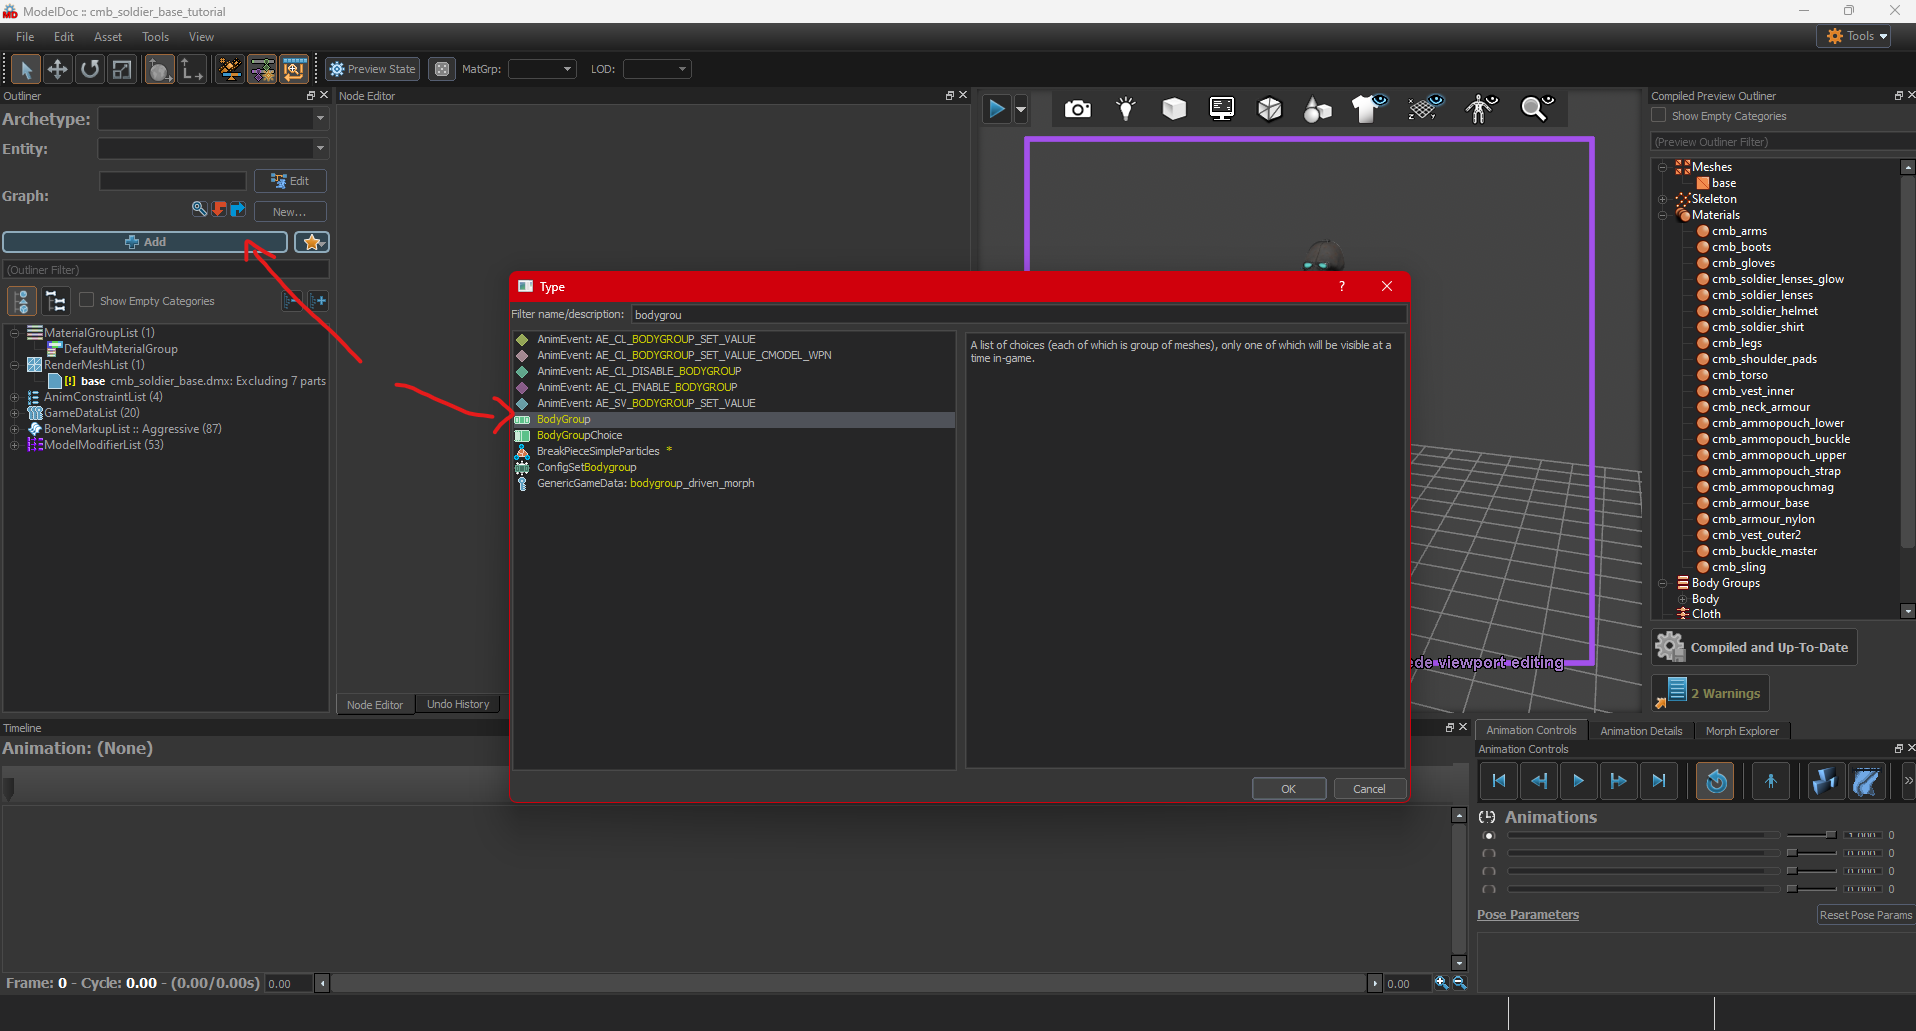
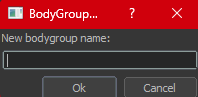
Name it
Once that is done, click on the main mesh in the RenderMeshList
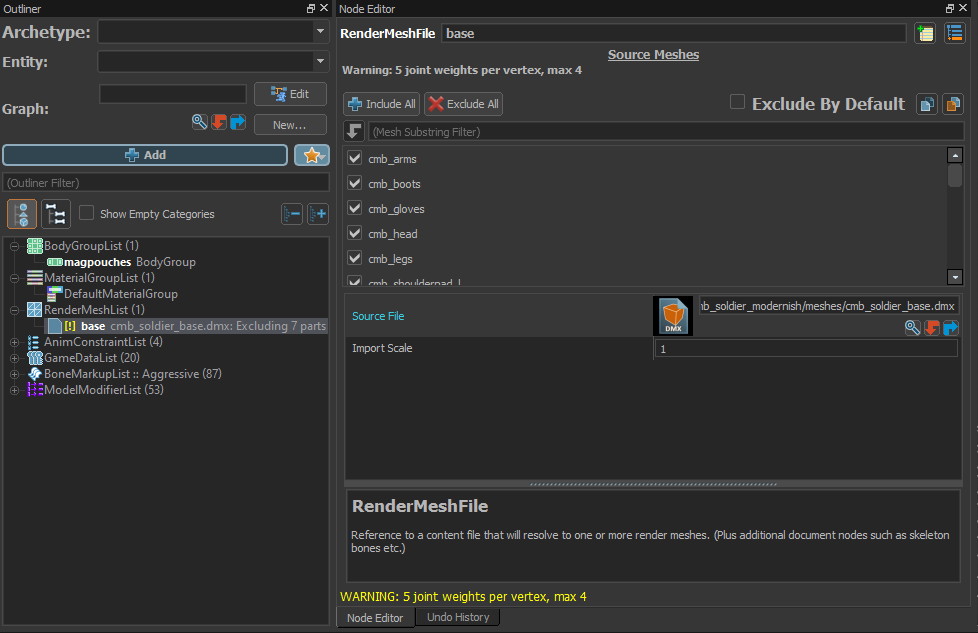
You will notice to the right in the node editor the list of meshes inside the main mesh.
Duplicate the base mesh and in the node editor click on extrude all, then find the mesh you want for the specific bodygroup and enable it
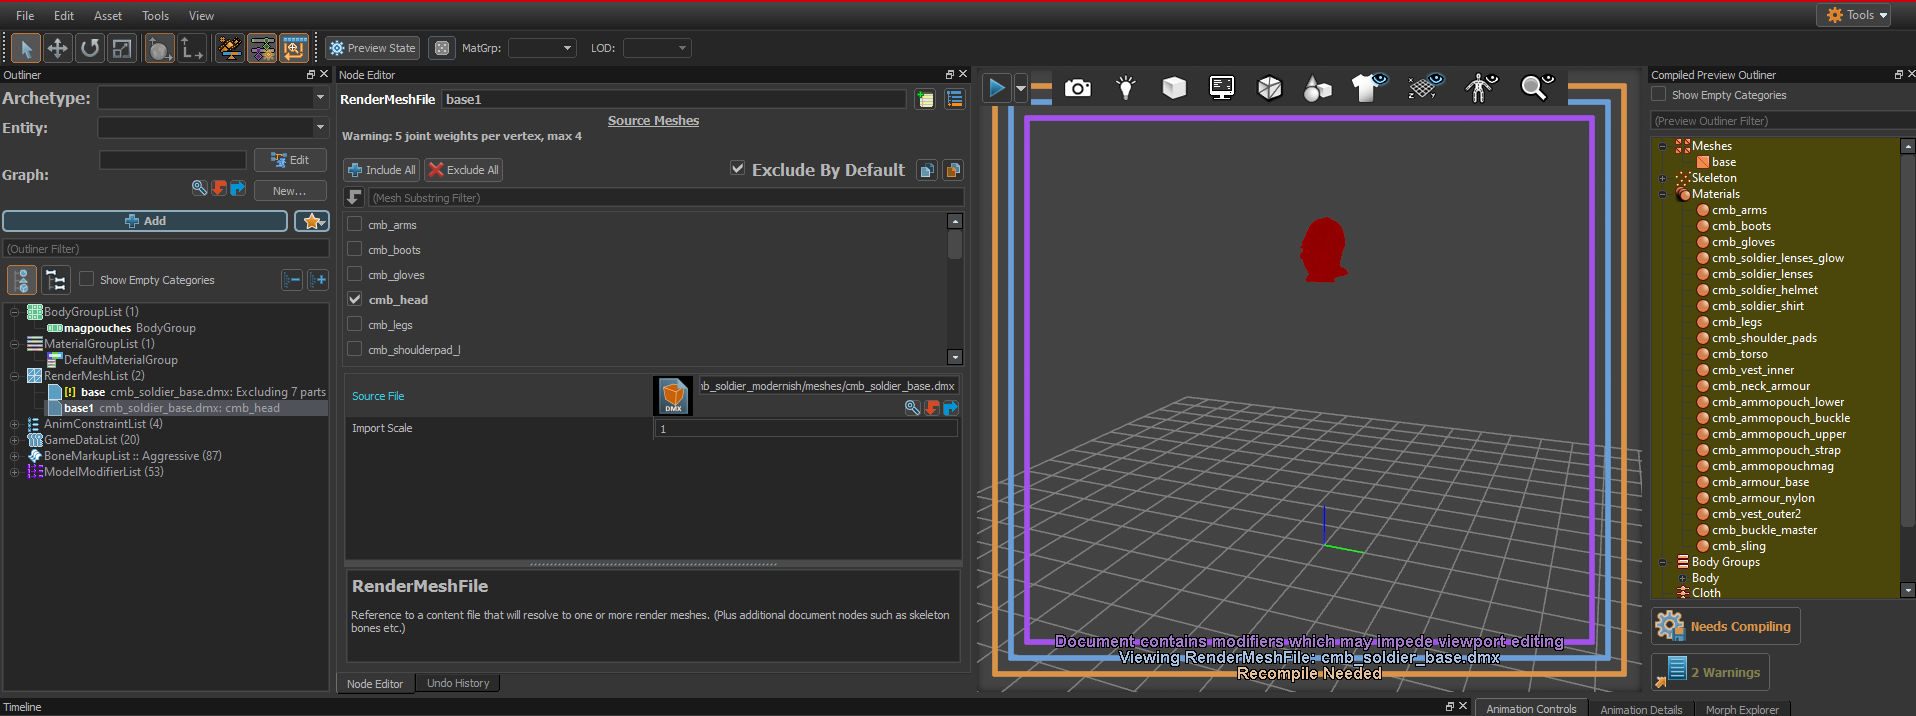
Back to the base mesh, disable the mesh that you enabled in the new mesh
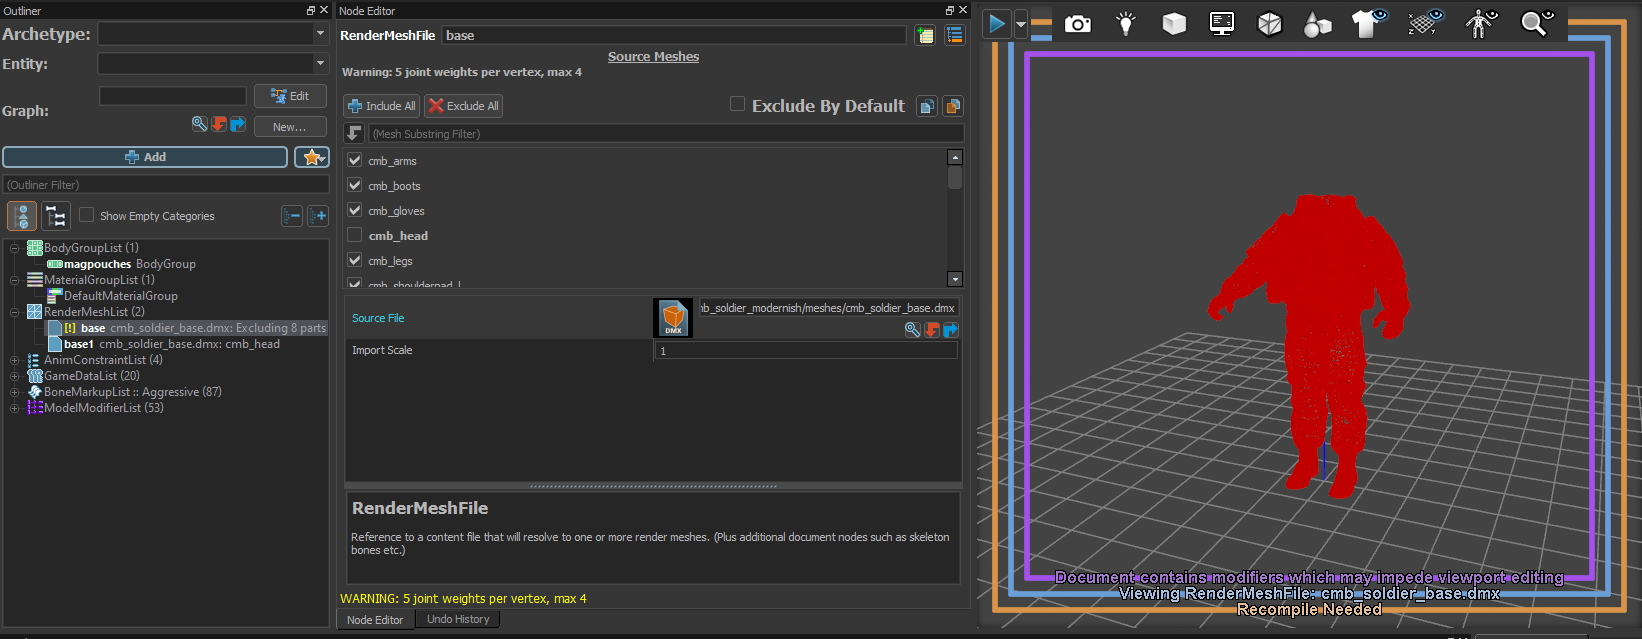
Now back to the bodygroup node, right click and add a bodygroup choice.
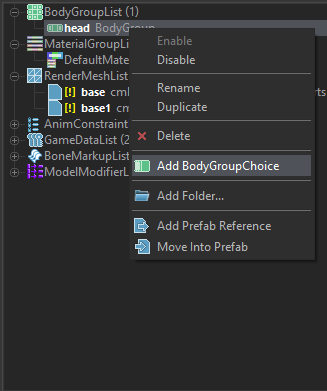
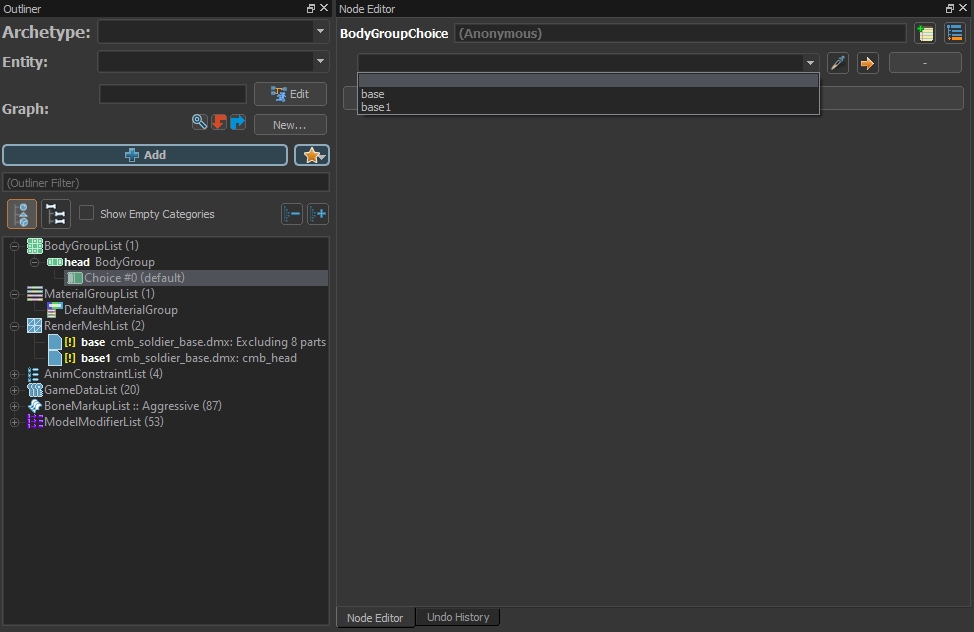
In the node editor click on the + icon, then in the dropdown find the mesh you want inside the bodygroup.
Compile the model, now in sfm you will see that you can change the bodygroups, with the autodefault bodygroup being everything that isn't in a bodygroup.
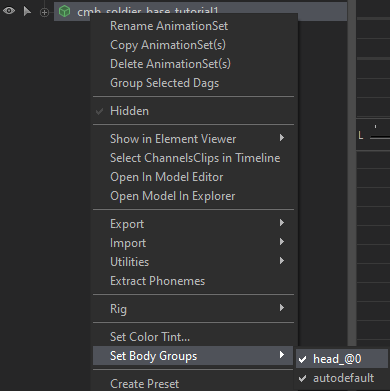
Things to note:
- You can add multiple meshes per bodygroup, but you cannot have the same mesh in two different bodygroups
- A rather annoying feature is that every bodygroup choice in a bodygroup will have the same name + @number, so its best to properly organise bodygroups.
Finishing Touches
You are nearing the end of this guide, what is in the is part may not apply to everyone, but it is still useful to know.
If you have imported a model that has bones and the bones are either partially of completely missing, click on the +Add button in ModelDoc search for bonemarkup
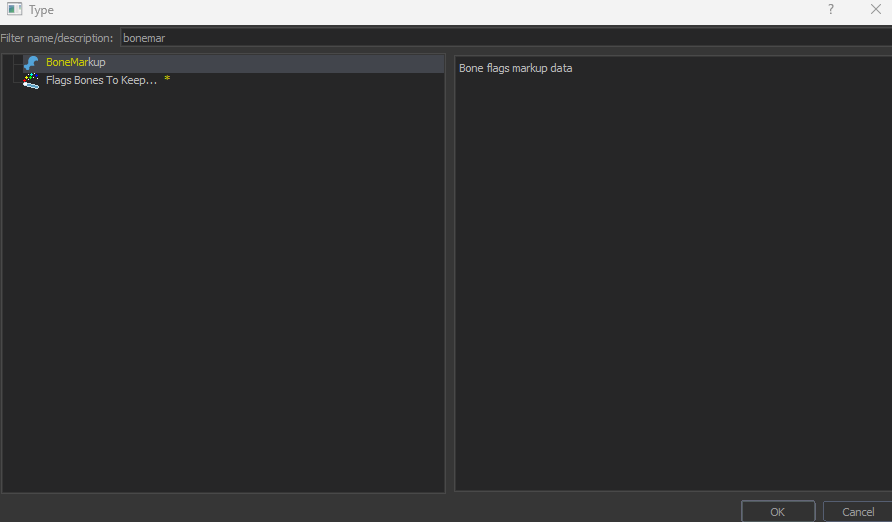
Click ok, and pick the target bone, if its a skeleton, pick one of the root bones.
Next click on Do Not Discard, then recompile the model. If you are missing multiple bones, duplicate the BoneMarkup and change the target bone, after you have finished with all the bones, you have the possibility to save the markup group to a prefab to be able to use on other models. To do that right click he BoneMarkupList and select Move Into Prefab, select what folder you want to keep it in.
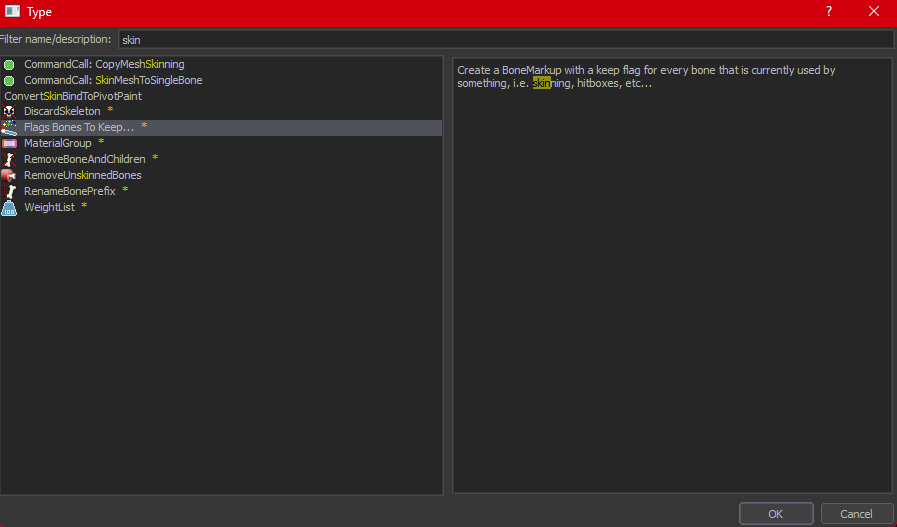
Update : I have found a new way to speed up this process although results may vary, search "flag bones to keep and select it, it may or may not work but it is always good to try.
Porting Other file types
For FBX files you can skip entirely the Blender section, FBX files are supported by Source 2 but only for static meshes. So you can put them directly into the Content folder.
For characters, it is best to use DMX files, since they can use Face shapes, other file types cannot.
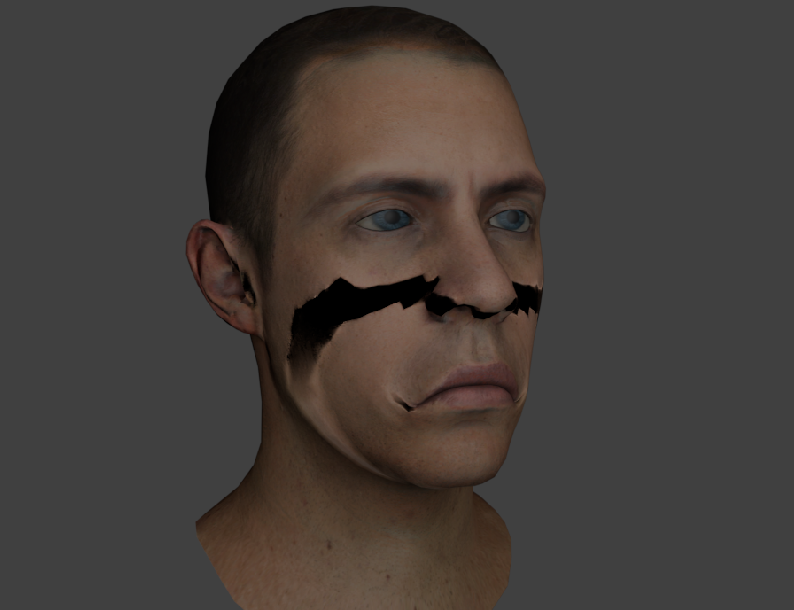
Example of face flexes with FBX file :
Closing Remarks
Thank you for sticking until the end, I hope this guide has proven useful to you, this is my first guide so please excuse any errors, if you find some inaccuracies please tell me in the comments, if you have any questions please ask, if i cannot answer your question then I invite you to join the Source Filmmaker Discord where you can ask all sorts of questions, SFM or S2FM related.
I will update this guide, with adding animations to models making different materials and other things in the future.
Again thank you for reading and enjoy !
File Types Annexe
Small explanations of the different file types you will encounter when porting.
VTF : valve texture format, file type used by older source engine games as textures. Can be transformed into jpg, png, tga or bump files using VTFEdit.
DMX : file type used by valve games can be used both for source 1 and source 2, supports facial flexes. Used for any model usefull for character models with facial flexes.
SMD: file type used by valve game simpler than DMX, can be both used for source 1 and source 2, does not support facial flexes. Best used for simple props.
FBX: universal 3d file type, unsupported by source 1, supported by source 2, cannot be used for facial flexes.
PNG: universal image file type, unsupported by source 1, fully supported by source 2. Has ability to be transparent. Less compression, larger file size.
JPG: universal image file type, unsupported by source 1, fully supported by source 2. Cannot be transparent. Compressed, smaller file size.
TGA: image file type, unsupported by source 1, fully supported by source 2. Highest quality, size, least compression. *Allows better reflections*
MDL: file type used by source 1 games to store model data, such as smd or dmx files. Can be unpacked using crowbar or SourceIO.
VMDL: file type used by source 2 games to store model data. Can be unpack using SourceIO.
VMAT: file type used by source 2 games to store material data. Can be opened using the material editor in the source 2 tools.
VMDL_C: VMDL that has been compiled
VMT: file type used by source 1 games to store material data.
.blend: file type used by Blender.
- Changing Textures Using Material Overrides★ 5 (1.4k)41k views2.7k ♥5 minUpdated Jul 26, 2014
- Manually Updating TF2 Content★ 5 (1.3k)35k views1.9k ♥2 minUpdated Nov 26, 2025
- The Fundamentals of SFM: For Beginners★ 5 (1.3k)25k views3.3k ♥55 minUpdated Apr 29
- Ваш первый постер★ 5 (1.1k)22k views2k ♥5 minRussianUpdated Oct 22, 2024
- Getting Gmod Workshop stuff too SFM★ 5 (510)15k views1.3k ♥1 minBulgarianUpdated Aug 4, 2015
- Animation Guide★ 5 (704)14k views1.9k ♥6 minUpdated Apr 9, 2023



- Upgrading to PremiumTeam Fortress 2★ 5 (20k)1441k views11k ♥6 minUpdated May 11, 2022
- No More Room in Hell Official ManualNo More Room in Hell★ 5 (2.8k)569k views2.1k ♥29 minUpdated Apr 22, 2019
- NMRiH Community Hosting GuidesNo More Room in Hell★ 5 (526)351k views653 ♥1 minUpdated Aug 10, 2022
- ULTIMATE GUIDE FOR GAME DEV TYCOONGame Dev Tycoon★ 5 (5.8k)326k views10k ♥4 minUpdated 23 Jan, 2014
- How to 'Git Gud' Soon™MORDHAU★ 5 (2k)318k views3k ♥68 minUpdated Nov 16, 2024
- Лучшие кооперативные игры SteamPAYDAY 2★ 5 (1.5k)315k views2.1k ♥56 minRussianUpdated Apr 27, 2025






This guide was created by its original author on the Steam Community. Are you the author and want it removed? Request removal.