SFM for noobz!
The Begining
This section is about how you start and simple controls and stuff like that. The first thing you'll see when you start sfm is the session menu. Name the session however you like and lets continue. Then you'l see no map loaded. Right click on the screen and click load map. Pick a map of your liking.
After the (definitely not 3 min loading screen) you will see the map you loaded. To move around just click and hold the screen and use W A S and D to move around.
After the (definitely not 3 min loading screen) you will see the map you loaded. To move around just click and hold the screen and use W A S and D to move around.
Posing, Camera, and Lighting.
The first thing you wanna do is add a camera. To do that, click the plus button in the top left. Then click add animation set for  camera. Then under work camera click camera 1. Now we need to add a model. To do that, go back to the plus button and click create animation set for new model. Now we are in the model viewer. Make sure you are in all mods for the models to show up
  Then in the search bar, type in hwm. After that type in the class you wanna use. IM going to use heavy. Great! Now you should see a heavy infront of your screen. Now we are going to pose him. to pose go into the graph editor.
 To pose him, press and hold control to view his rig. voila! after that lets start posing.
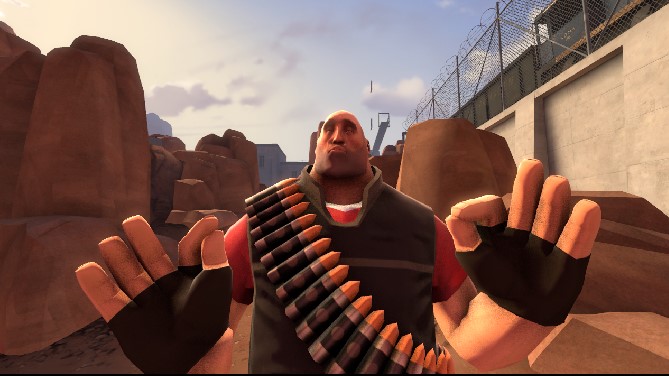 This is the Finished product. Now the last part, lighting. This is where i see alot of people struggle, but you have to remember that lighting is the most important part of a scene. Since it can even make tho most boring of all things look good.
 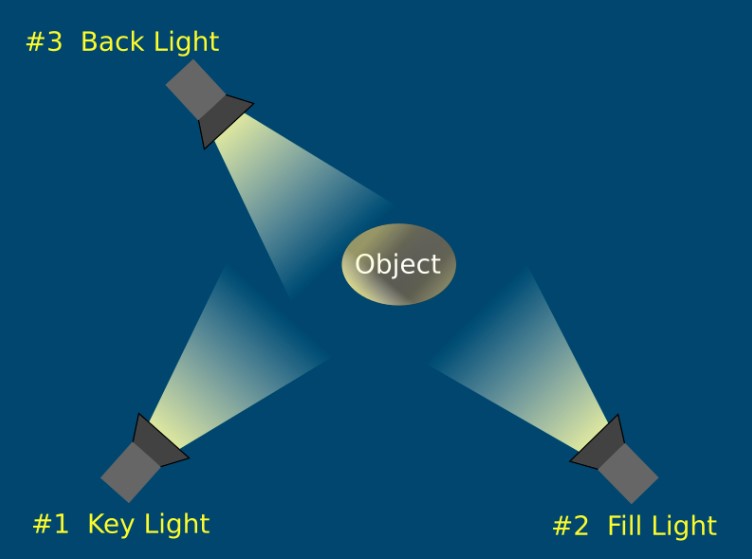 Take a look at this, this is standard 3 point lighting. You have the key, the fill and the back. Lets have a look at how to do this in sfm. Go back to the plus button and click create animation set for new light. After that, you should see a light appear on the animation set editor. drag and drop it into the primary viewport (your camera) and move it around.
 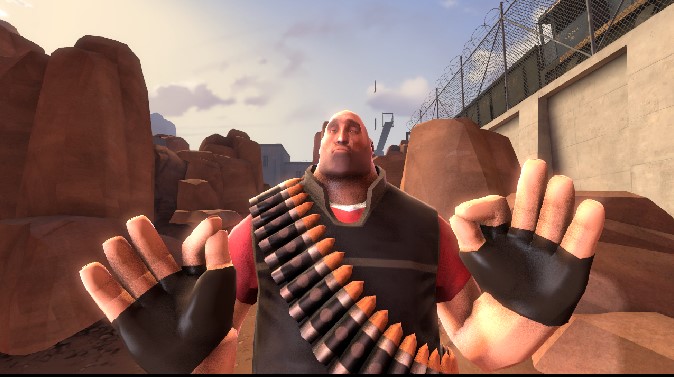 Finished Result.
Congrats! You have made it to the end of this section! Hope you have a better understanding of how to move, light, and camera now. But, this tutorial isnt over yet.
camera. Then under work camera click camera 1. Now we need to add a model. To do that, go back to the plus button and click create animation set for new model. Now we are in the model viewer. Make sure you are in all mods for the models to show up Then in the search bar, type in hwm. After that type in the class you wanna use. IM going to use heavy. Great! Now you should see a heavy infront of your screen. Now we are going to pose him. to pose go into the graph editor. To pose him, press and hold control to view his rig. voila! after that lets start posing. This is the Finished product. Now the last part, lighting. This is where i see alot of people struggle, but you have to remember that lighting is the most important part of a scene. Since it can even make tho most boring of all things look good. Take a look at this, this is standard 3 point lighting. You have the key, the fill and the back. Lets have a look at how to do this in sfm. Go back to the plus button and click create animation set for new light. After that, you should see a light appear on the animation set editor. drag and drop it into the primary viewport (your camera) and move it around. Finished Result.Congrats! You have made it to the end of this section! Hope you have a better understanding of how to move, light, and camera now. But, this tutorial isnt over yet.
Windows
Windows are essential! To add windows go to the top top left and click windows, then add whatever window you like.
Skins
This will show you about skins in sfm. First, what are skins? Skins in sfm are the diferent types of teams or uber, Like skin1 for tf2 models is blu team, and skin 3 or 4 is uber. When you go into the model viewer you can see a tab called skins.  Under that you can see this
These are all the skins in the model, other models may have more skins, some may have less. (note, the skins you select here will not spawn with the model, you have to select that atfter you spawn it in)
So, lets select skin 1.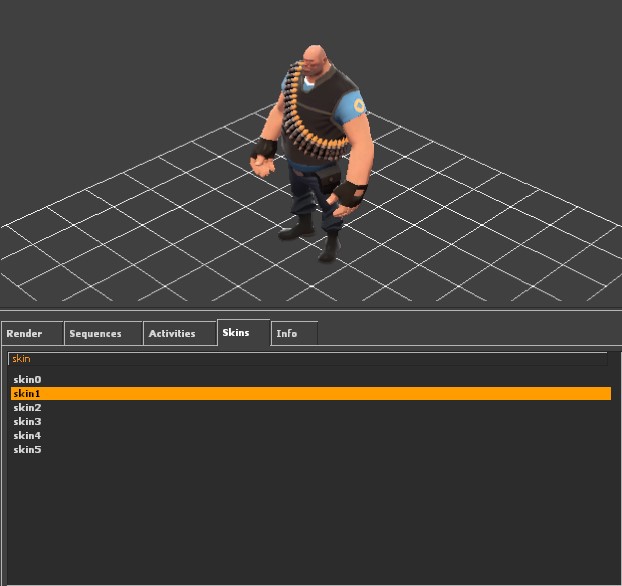
You can see that the heavy has turned to blue color, as if he were on the BLU team. Lets do skin 3 and 4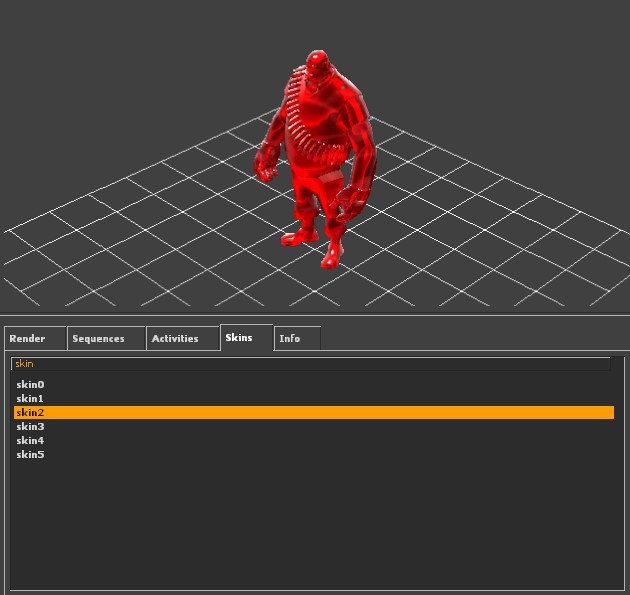
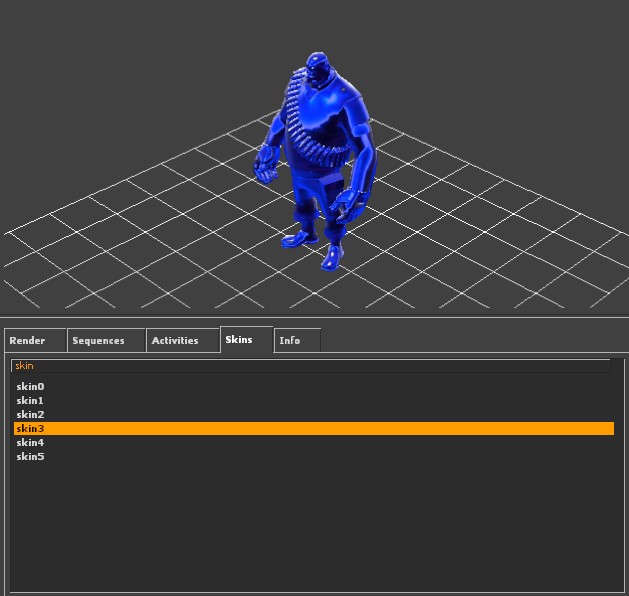 (IMPORTANT NOTE! My uber is fixed in sfm, the default uber is always flashing like its about to end. Heres a link to the fix and how to install. https://sfmlab.com/project/1bf2dc9d-434e-4615-b681-3a2b0297dfa3/ https://www.youtube.com/watch?v=G9tgbIyV-MI
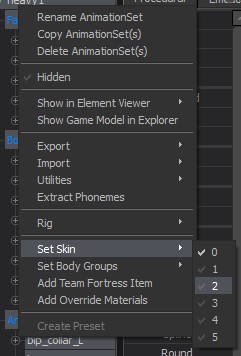
Now lets talk about how to change skins. Right click on the model and select the skin.
Under that you can see this These are all the skins in the model, other models may have more skins, some may have less. (note, the skins you select here will not spawn with the model, you have to select that atfter you spawn it in)
So, lets select skin 1.
You can see that the heavy has turned to blue color, as if he were on the BLU team. Lets do skin 3 and 4
(IMPORTANT NOTE! My uber is fixed in sfm, the default uber is always flashing like its about to end. Heres a link to the fix and how to install. https://sfmlab.com/project/1bf2dc9d-434e-4615-b681-3a2b0297dfa3/ https://www.youtube.com/watch?v=G9tgbIyV-MI Now lets talk about how to change skins. Right click on the model and select the skin.
Animation
Great! You made it to the last section of this guide, now we're talking about animation. To do animation, go to the graph editor and move the playhead (aka the blue stick) forward. (please not that you must make a keyframe in order for all the controls to work, to make a keyframe, go to the start by pressing the arrow keys and select the heavy ALL if it and press m) Now we can move the playhead forward, and move his body or head. You should see him moving. Congrats! This is the end of the noob tutorial, hope this guide helps and see you later.
More Source Filmmaker guides
- Changing Textures Using Material Overrides★ 5 (1.4k)41k views2.7k ♥5 minUpdated Jul 26, 2014
- Manually Updating TF2 Content★ 5 (1.3k)35k views1.9k ♥2 minUpdated Nov 26, 2025
- The Fundamentals of SFM: For Beginners★ 5 (1.3k)25k views3.3k ♥55 minUpdated Apr 29
- Ваш первый постер★ 5 (1.1k)22k views2k ♥5 minRussianUpdated Oct 22, 2024
- Getting Gmod Workshop stuff too SFM★ 5 (510)15k views1.3k ♥1 minBulgarianUpdated Aug 4, 2015
- Animation Guide★ 5 (704)14k views1.9k ♥6 minUpdated Apr 9, 2023




🔥 Popular guides
- Upgrading to PremiumTeam Fortress 2★ 5 (20k)1441k views11k ♥6 minUpdated May 11, 2022
- No More Room in Hell Official ManualNo More Room in Hell★ 5 (2.8k)569k views2.1k ♥29 minUpdated Apr 22, 2019
- NMRiH Community Hosting GuidesNo More Room in Hell★ 5 (526)351k views653 ♥1 minUpdated Aug 10, 2022
- ULTIMATE GUIDE FOR GAME DEV TYCOONGame Dev Tycoon★ 5 (5.8k)326k views10k ♥4 minUpdated 23 Jan, 2014
- How to 'Git Gud' Soon™MORDHAU★ 5 (2k)318k views3k ♥68 minUpdated Nov 16, 2024
- Лучшие кооперативные игры SteamPAYDAY 2★ 5 (1.5k)315k views2.1k ♥56 minRussianUpdated Apr 27, 2025






This guide was created by its original author on the Steam Community. Are you the author and want it removed? Request removal.