How to EASILY port stuff into sfm (for idiots like me)
Requirements
Porting from source games
VTFEDIT
GcfScape
Crowbar (make sure its configured for sfm in the set up games tab)
For porting from blender
Blender
Blender Source tools
Gmod
For addons simply find their file in steamapps>workshop>4000
then use gmad (Found in gmods bin folder) to open your gma file, it should generate a folder with your models material and mesh
after that you should be able to simply copy and past the models and materials folder into wherever you want them to be, if not you may need to decompile and recompile it in crowbar for sfm
some models come in strangely posed in sfm from gmod, just add the ragdoll/proportions sequence to them to fix it
L4D2
L4d2 is a little harder for workshop items, but still relatively easy
Start by going to your l4d2 addons folder (Left 4 Dead 2\left4dead2\addons\workshop) and find your items vpk
After you have found it open it with gcfscape and extract the root to an easy to access location
after that find your models mdl file and decompile it with crowbar
Find the models qc file and then open it with notepad and change $modelname to something that isn't already existing in your sfm file and then save
After that recompile it with crowbar, if it is unable to compile there are a few common reasons why
1: to many vertices on 1 smd file, solved by splitting any smd files above around 10,000
2: duplicate animations/sequences, simply find any duplicates and delete them
3: other, usually crowbar will give you a good idea as to what to do
If your able to recompile it, simply take the new models, and take the old materials, and put them wherever you want them in sfm
If your model has materials that match another models materials, you will need to edit the materials folder name, and then update $cdmaterials to match that name, as well as each vmt
eg: many item models use the same material names as base l4d2, so if you wanted to port multiple you would need to change the subfolder they are in
Finally if your model comes in weirdly posed, just run the proportions sequence on it
Hl2
Very similar process to l4d2
go to \Steam\steamapps\workshop\content\220 and find your file and open the dir vpk file with gcfscape
After that simply extract the root, decompile it in crowbar, open the qc and change the models $modelname, and then recompile it. Once again it may have the same issues as other compiles Ie high vert counts so solve those as well Once you've recompiled add the materials to the new folder and put it into sfm
Blender
First thing you will want to do is triangulate your models entire mesh by selecting your mesh, pressing f3 and typing triangulate mesh
(Optional) if you are making a prop add a simple bone and parent your object to it so you have more than the root transform to work with
second, you want to make sure all your materials have an actual image texture behind them, as well as an easy name, as each material will have to have a matching vmt with the same name. Sfm will not accept blender materials like unity unless you bake them as image textures
thirdly you want to go to Scene tab in the bottom right
(Its got a cone and a circle on it, right above the globe icon)
and then scroll down and find "source engine export", after that set export format to smd, and select a folder to export your mesh into and then export it
Now you will write a qc file for your mesh make a text document and change the .txt to .qc, here is a basic barebones one
$modelname "MyMesh.Mdl"
$bodygroup Mesh //<---You can name this part anything but it has to have some name
{
studio "Mesh.smd"
blank
}
$surfaceprop combine_metal
$cdmaterials "models/mesh" //Your models materials path, everything after materials is the path
$sequence idle "Mesh.smd" //Name it the same as your meshes smd
Your model name can be anything, as long as it ends with the mdl, you can have multiple bodygroups, the blank allows it to be toggled off, and you can add another studio smd to be able to switch between the two. and adding another bodygroup makes a seperate bodygroup
You will need a $bodygroup for each mesh to be in the final compile
Now with allat dealt with you should be able to compile your models qc with the smd in the same folder, if not double check your qc file, and read why crowbar wont compile it
Once you're able to compile it, make a materials folder under the same name as referenced in qc file (Materials>models>mesh in this case) now you will convert your textures
We're in the final strech, you will want to take your models texture files into vtf edit by using file>import and then exporting it as a vtf, in this case our texture will be called meshtex
Now you will generate a vmt file, there are many types, but for this example we will use VertexlitGeneric as our model is an object, here is a very basic one
"VertexLitGeneric"
{
"$basetexture" "models/mesh/meshtex"
}
Make sure both the vmt and vtf are in the material path of the qc, once you do all of that you should be able to import your model you should end with your model in sfm with textures like this
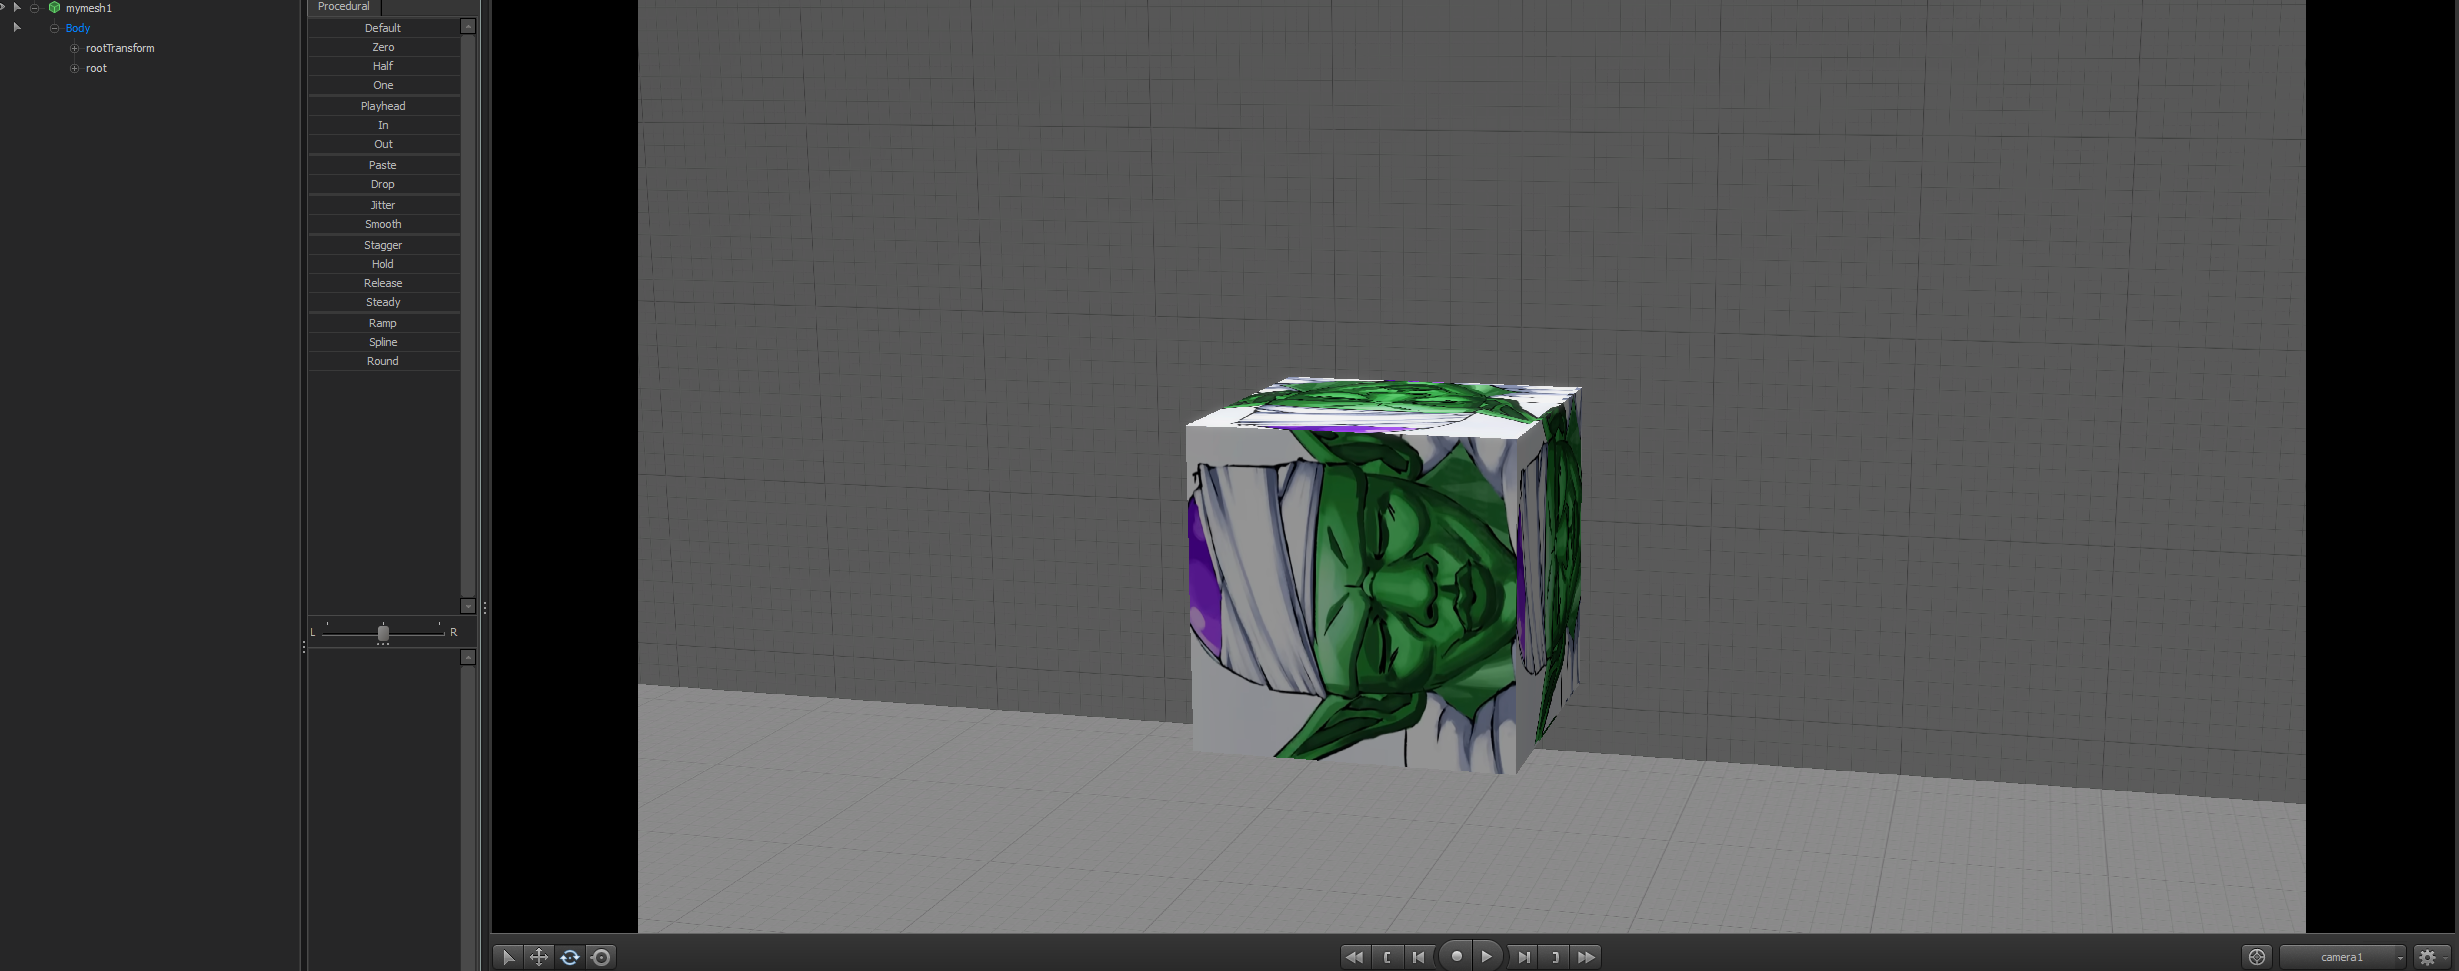
If not open sfms console and check for errors
Here is a google drive link to the model so you can compare yours, contains the compiled version and qc,vtf, and smd
https://drive.google.com/drive/folders/1-9QTGHME1EzfpNlwjnnqtPnRjYs3qNK3?usp=drive_link
End

- Changing Textures Using Material Overrides★ 5 (1.4k)41k views2.7k ♥5 minUpdated Jul 26, 2014
- Manually Updating TF2 Content★ 5 (1.3k)35k views1.9k ♥2 minUpdated Nov 26, 2025
- The Fundamentals of SFM: For Beginners★ 5 (1.3k)25k views3.3k ♥55 minUpdated Apr 29
- Ваш первый постер★ 5 (1.1k)22k views2k ♥5 minRussianUpdated Oct 22, 2024
- Getting Gmod Workshop stuff too SFM★ 5 (510)15k views1.3k ♥1 minBulgarianUpdated Aug 4, 2015
- Animation Guide★ 5 (704)14k views1.9k ♥6 minUpdated Apr 9, 2023





- Upgrading to PremiumTeam Fortress 2★ 5 (20k)1441k views11k ♥6 minUpdated May 11, 2022
- No More Room in Hell Official ManualNo More Room in Hell★ 5 (2.8k)569k views2.1k ♥29 minUpdated Apr 22, 2019
- NMRiH Community Hosting GuidesNo More Room in Hell★ 5 (526)351k views653 ♥1 minUpdated Aug 10, 2022
- ULTIMATE GUIDE FOR GAME DEV TYCOONGame Dev Tycoon★ 5 (5.8k)326k views10k ♥4 minUpdated 23 Jan, 2014
- How to 'Git Gud' Soon™MORDHAU★ 5 (2k)318k views3k ♥68 minUpdated Nov 16, 2024
- Лучшие кооперативные игры SteamPAYDAY 2★ 5 (1.5k)315k views2.1k ♥56 minRussianUpdated Apr 27, 2025






This guide was created by its original author on the Steam Community. Are you the author and want it removed? Request removal.