Fixing TF2 Cosmetics' Paint Textures
6/24/26 Update ( Guide is OBSOLETE )
https://steamcommunity.com/sharedfiles/filedetails/?id=3749980470
Introduction
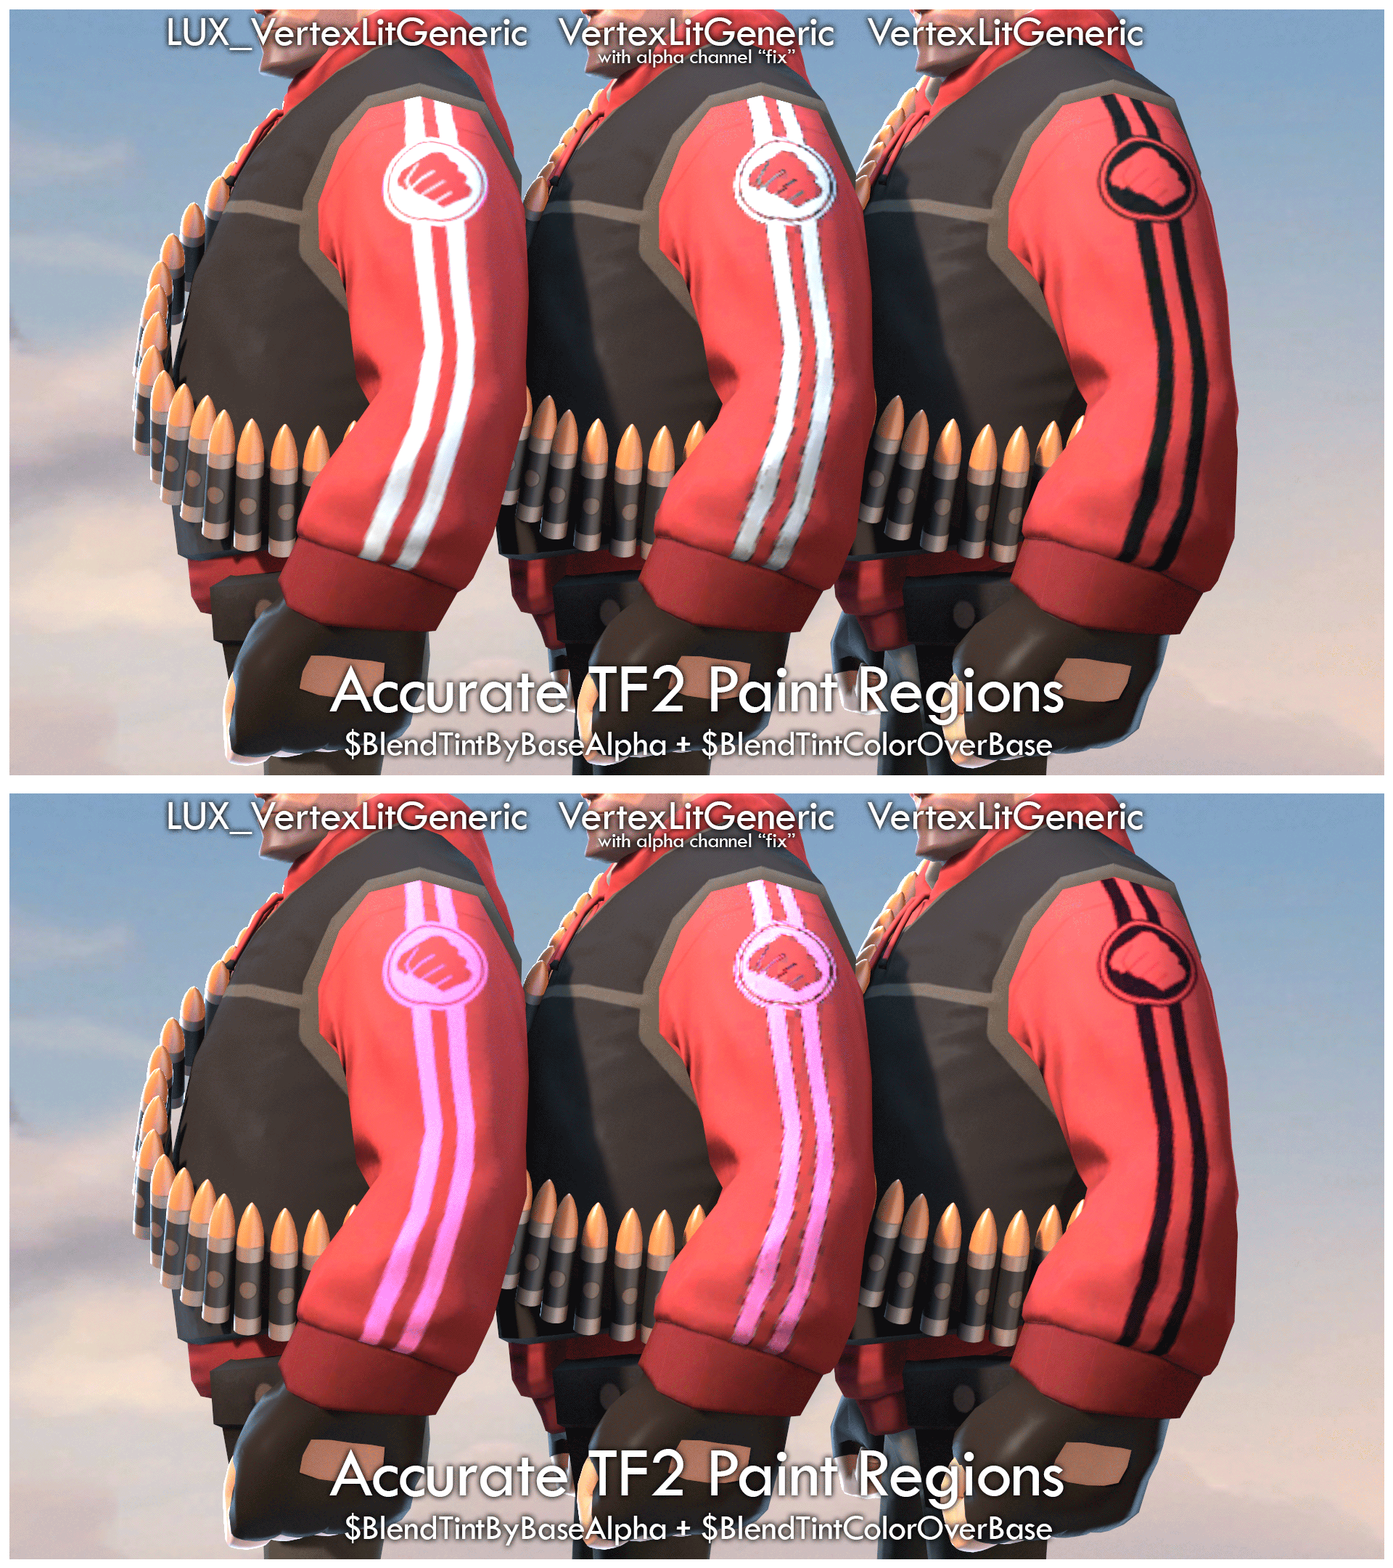
Something like 90% of TF2 cosmetics have broken textures, making their paint regions appear black. This is because SFM is running on an older version of TF2.
This guide will be a comprehensive, more up to date guide on how to fix those paint regions. I will be teaching a slightly different method I've discovered that leads to better results than the commonly known method.
In this guide I will also go over setting up a new game folder for SFM, that way you can put all your material fixes there and they wont be overwritten when you update your TF2 assets.
While there are plenty of fixes uploaded to the workshop, I recommend learning how to make them yourself. This allows you to become more knowledgeable on the technical side of SFM, as well as allowing you to easily place fixes in a separate game folder, and as to not rely on others for fixes as there will not always be a fix uploaded. Plus it avoids any issues that can arise from having Workshop above TF in your search paths.
Follow this guide and you will understand all the steps I applied here.
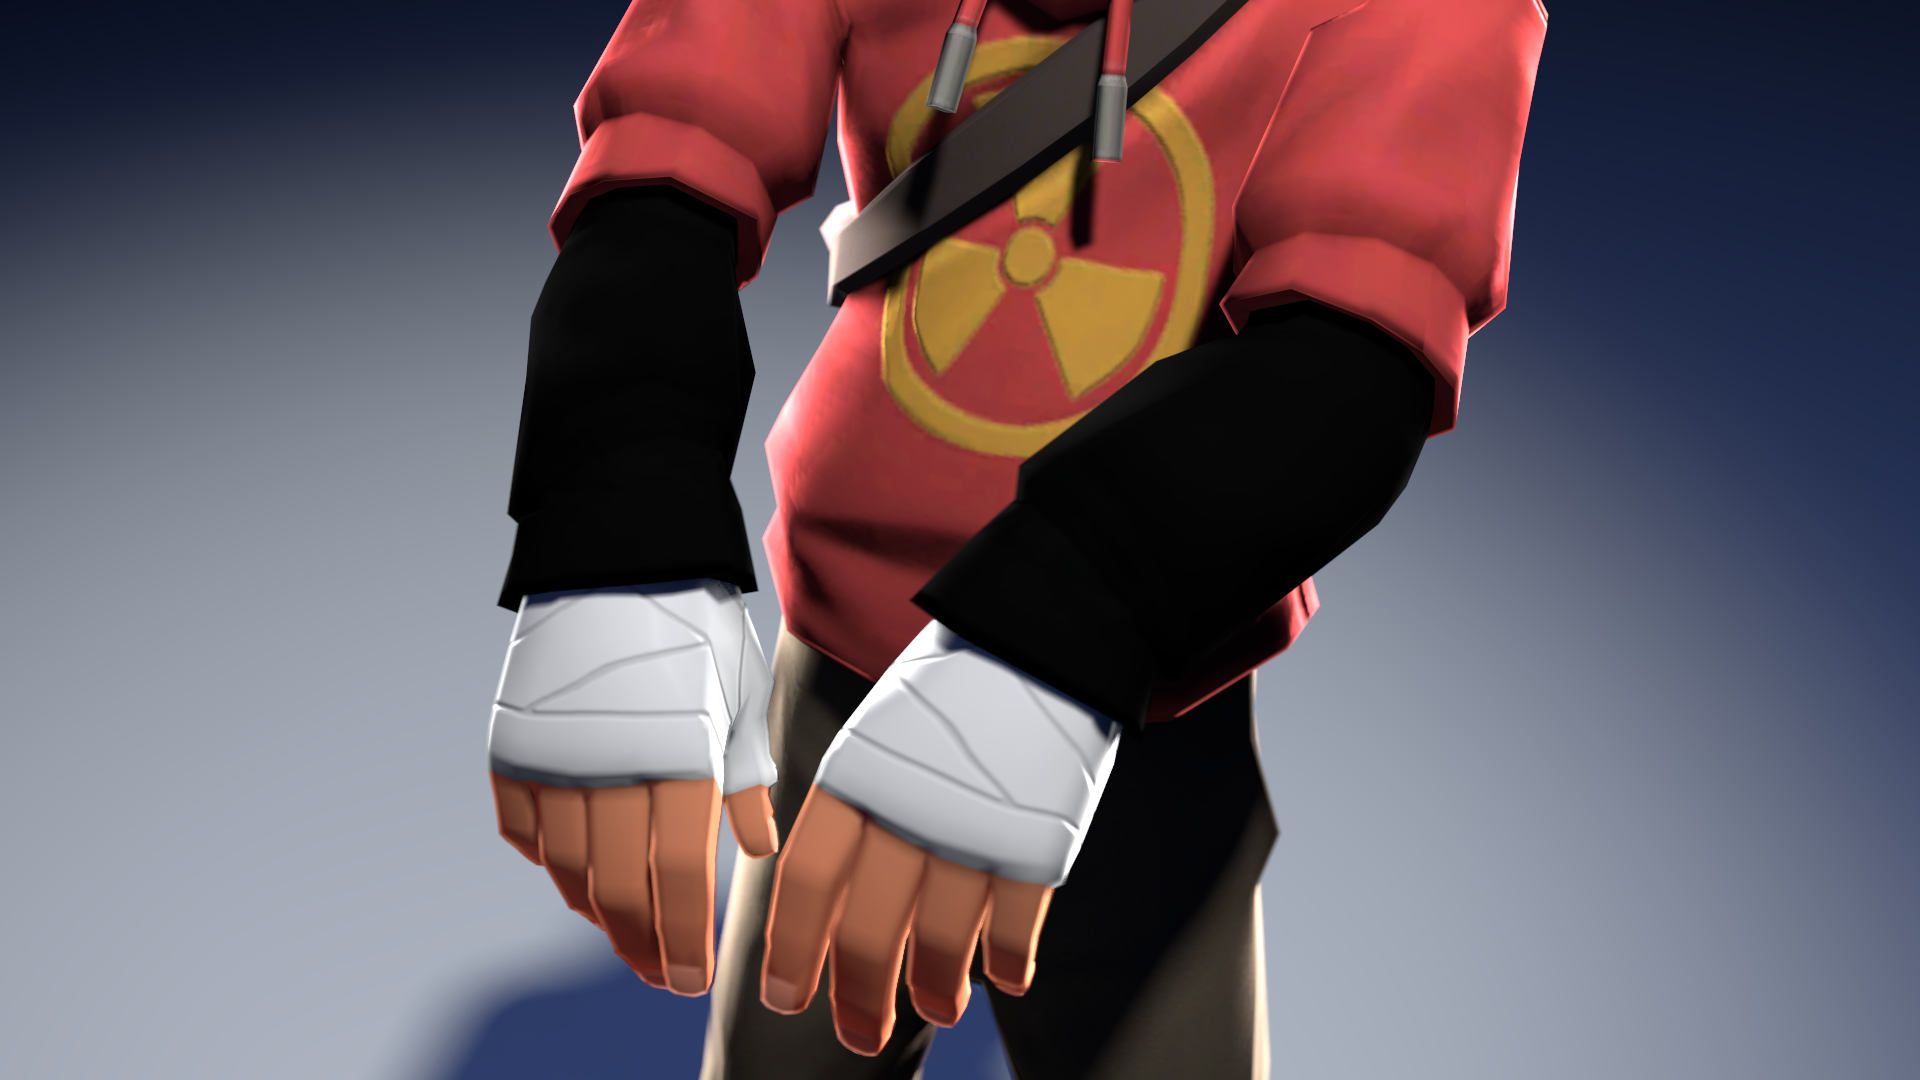
Step 0: Black/Dark Unpaintable Cosmetic Texture
Time to learn how to fix this issue.
Software
There's two ways to go about fixing the texture, I will be explaining both:
- GIMP 2.10[download.gimp.org], an older version of GIMP (an image editor) that's compatible with the following plugin.
- GIMP VTF Plugin[github.com], allows GIMP to open and export VTFs, but needs fixing.
- Everything[www.voidtools.com] (Optional), the fastest and easiest way of locating files.
This first method really only saves you a couple steps, you can still fix textures without needing to use an old version of GIMP and a plugin that needs manual fixing.
Though it's what I personally use.
- GIMP[www.gimp.org], an image editor.
- VTF Edit[nemstools.github.io], a program that allows you to view VTFs, export them as PNGs, and import PNGs in order to convert them to VTF, among other things.
- Everything[www.voidtools.com] (Optional), the fastest and easiest way of locating files.
I recommend downloading VTF Edit either way, it's a good tool to have.
Terminology
- Alpha Chanel
- Alpha Mask
- Alpha Layer
- Layer Mask
- Alpha Mask
- Alpha Mask Image
- Alpha Texture
- Alpha Image
- Alpha Channel Image
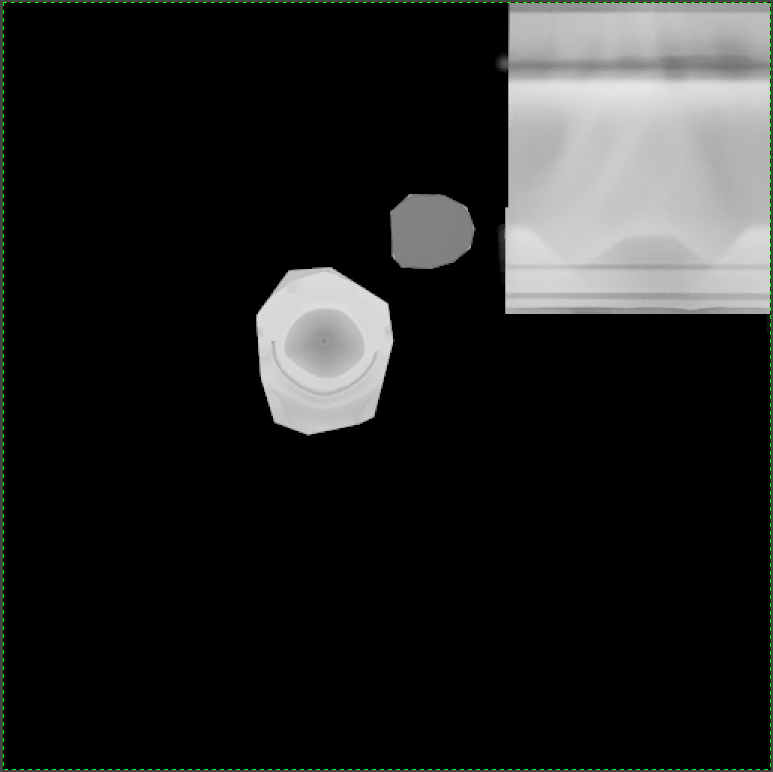
TF2 uses 2 methods that use the alpha channel in order to paint cosmetics, while SFM only supports 1. Most model makers tend to use the method that SFM does not support, and that leads to all the broken paint regions.
- Base Image
- Base Texture
- RGB Channels
- VTF
- VMT
- Material
Step 1: Importing the VTF to GIMP
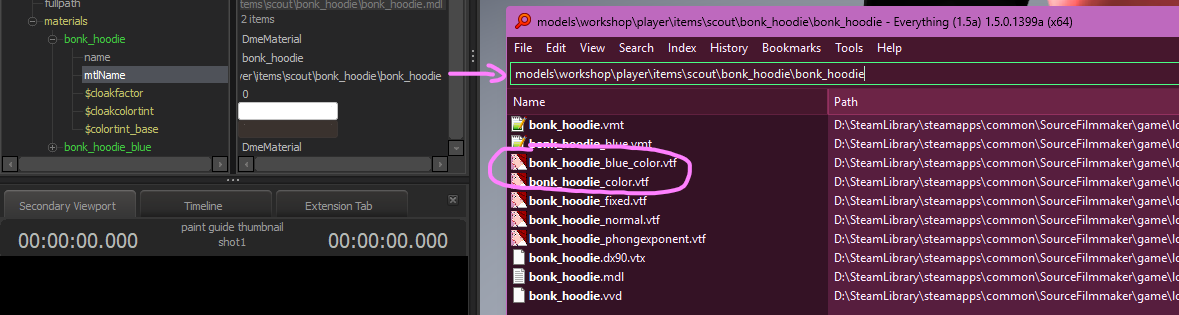 Then right click the _color VTF and click Open Path. This will open the folder they're in with File Explorer.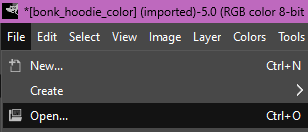
Or you can drag the VTF into GIMP. When opening a VTF using the plugin, the alpha channel will come already separated. No extra step needed here.
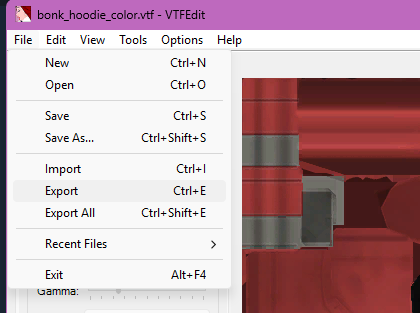
And then in GIMP you can simply go to File>Open and locate the PNG you saved.
Or you can drag the PNG into GIMP. When opening a VTF thats been converted to a PNG, the alpha channel will come applied.
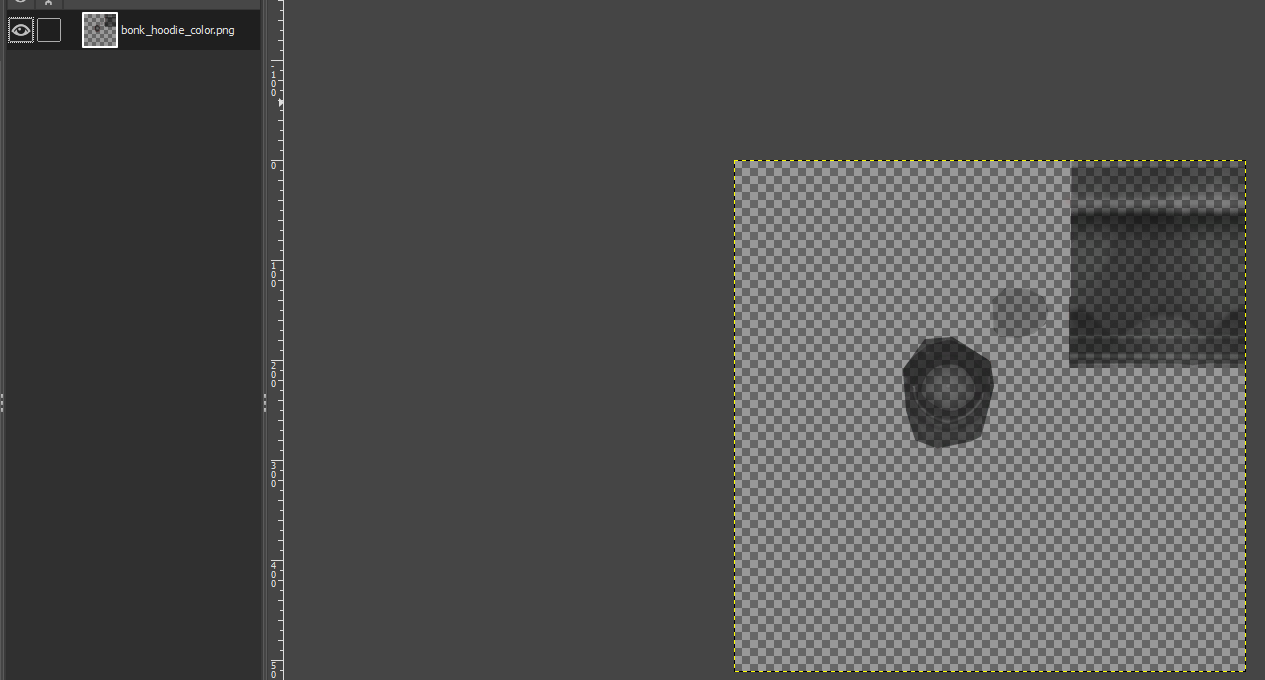
You will need to separate the channel from the base RGB channel by doing the following.
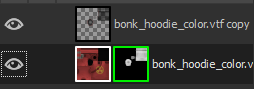
Right click the layer, and click on "Add Layer Mask..."
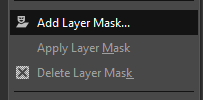
And make sure to select "Transfer Layer's Alpha Channel". This will make the textures workable.
Step 2:Copy-Pasting the Alpha Texture
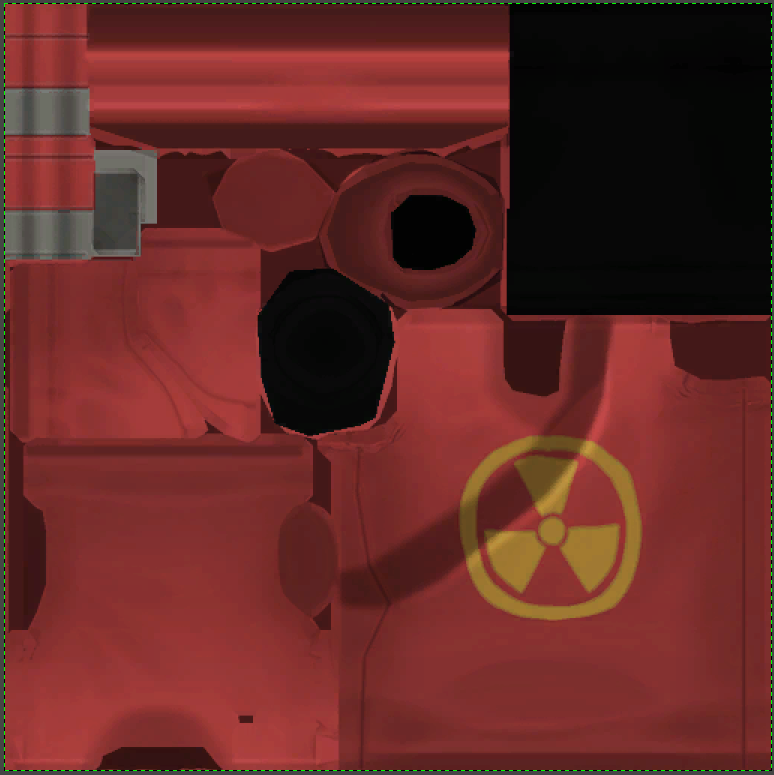
And the alpha channel will have the paint regions white with gray detailing. This alpha image needs to be transferred to the base image, and that's what you will learn to do in this step.
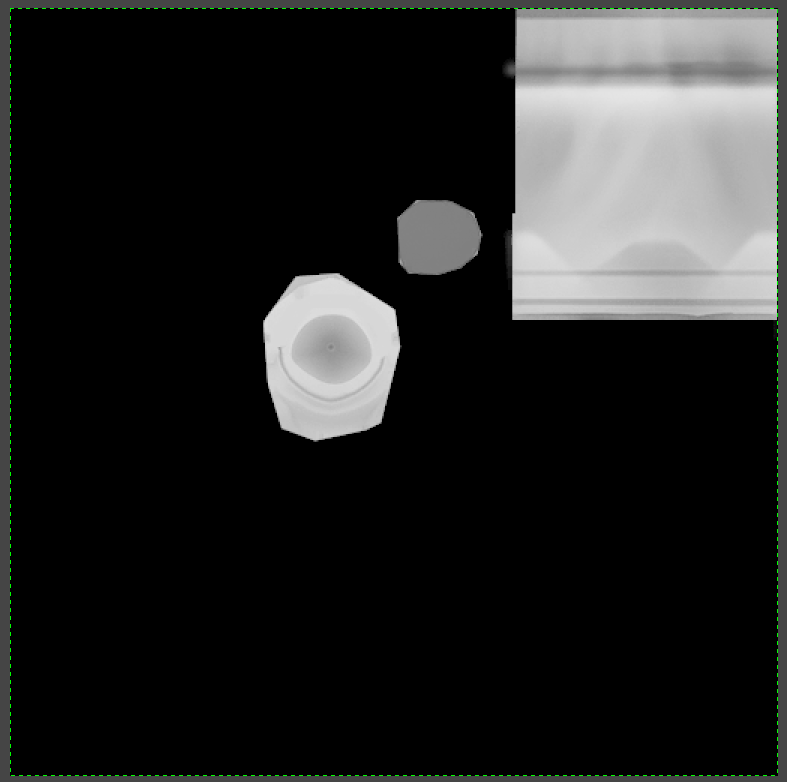 If your broken cosmetic's textures don't look like this, then it has other issues that are not within the scope of this guide. Cosmetics that have tinting $selfillum will still look like this, but the $selfillum will make the coloring washed out, this is also outside the scope of this guide
 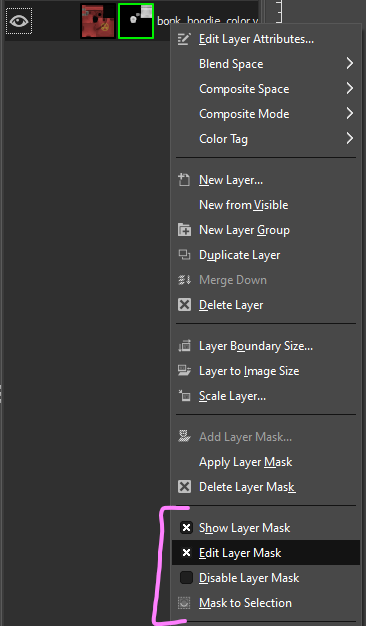 Once you're editing the Alpha Channel, use Ctrl+A to select all of the pixels, and Ctrl+C to copy the selection.
Then, switch to editing the base texture image, either by using the toggles or clicking the thumbnail like I explained above. And then Ctrl+V to paste the alpha image you just copied. This will create a "Floating Selection". Right click it, and click on "To New Layer", this will put the alpha image on its own layer.
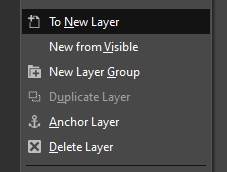 You should now have this, two layers. One of the original VTF and its alpha channel, and one of the alpha image isolated.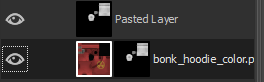
Step 3: Merging the two layers
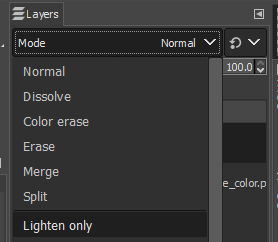
And then Right Click the pasted layer, and click on "Merge Down".
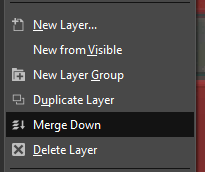
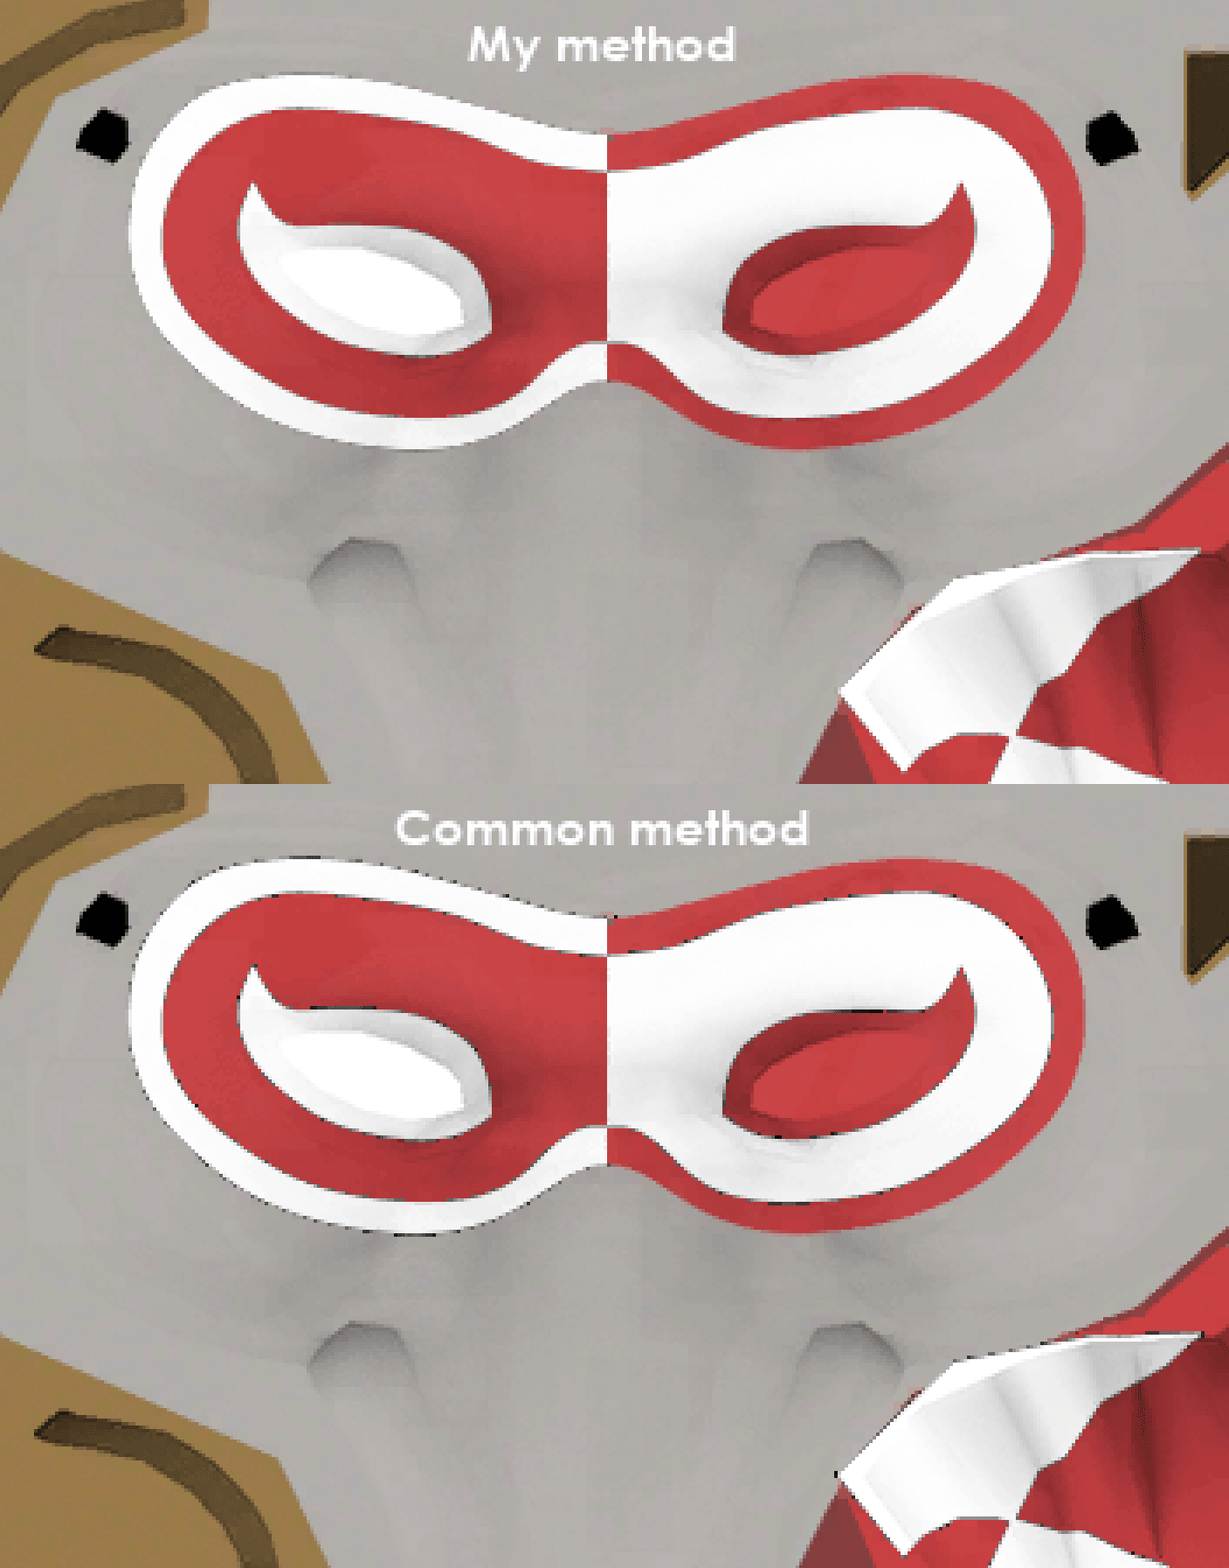
On most textures, this method guarantees a much cleaner edge, with very little extra work.
Here's an example:
IF you merged down while the alpha channel on the original VTF layer was enabled, the alpha channel will be applied. In which case, simply Right Click the alyer, and click on "Add Layer Mask", and then select "Transfer Layers Alpha channel".
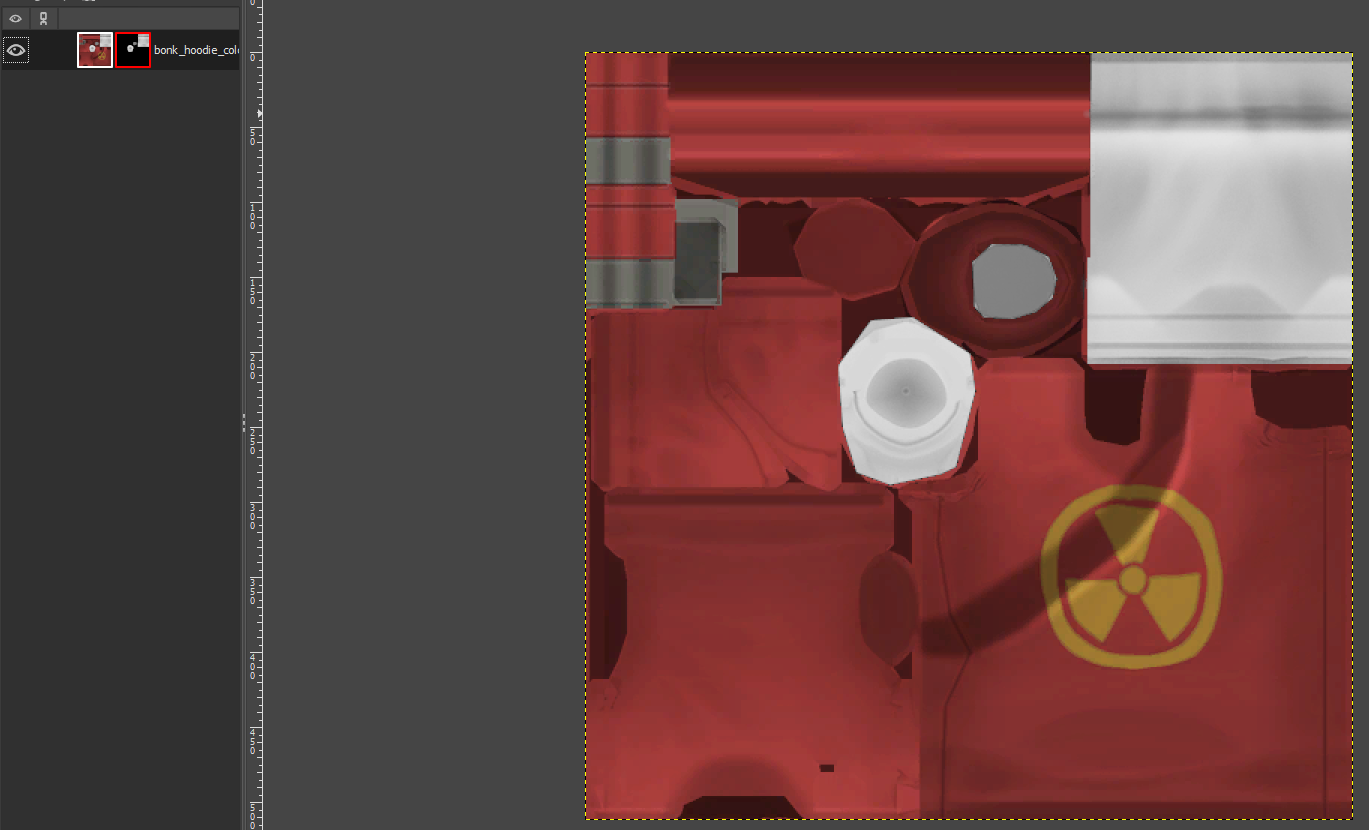 The segments that were black will now be white, as well as still having the original alpha channel.
Step 4: Fixing the Alpha Channel
Now its time to fix the alpha channel.
I haven't found a better method of doing this than the commonly known one. If i ever do find something better, I will update this guide.
Equip the "Select By Color Tool", either by clicking on it in the toolbox, or using Shift+O. Then, in the "Tool Options" window, set the threshold to 15. Depending on your texture, this may need to be fine tuned more, but 15 is a goo starting point.
Then, click on a pure black section of the alpha channel. This will select everything except the parts we want. Thus, use Ctrl+I to invert the selection.
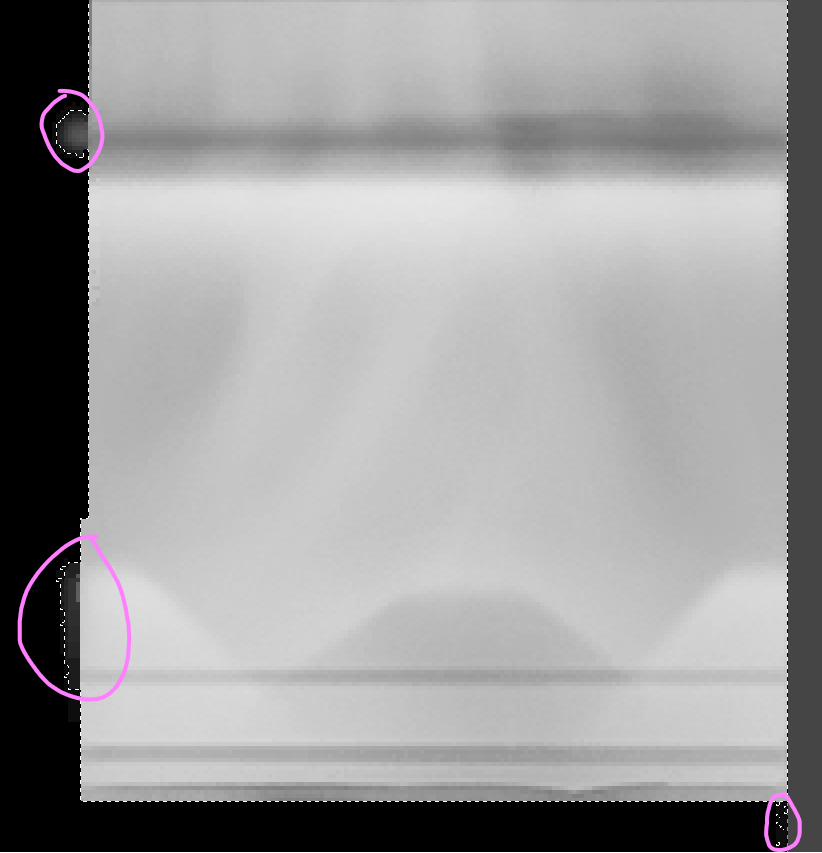
But also sometimes, these tiny selections are actually necessary for the paint region. You'll just need to play it by ear, experiment, and see what looks the most correct.

Then, Right Click the image, go to Edit, and click on either "Fill With FG Color" or "Fill With BG Color", whichever is PURE white.
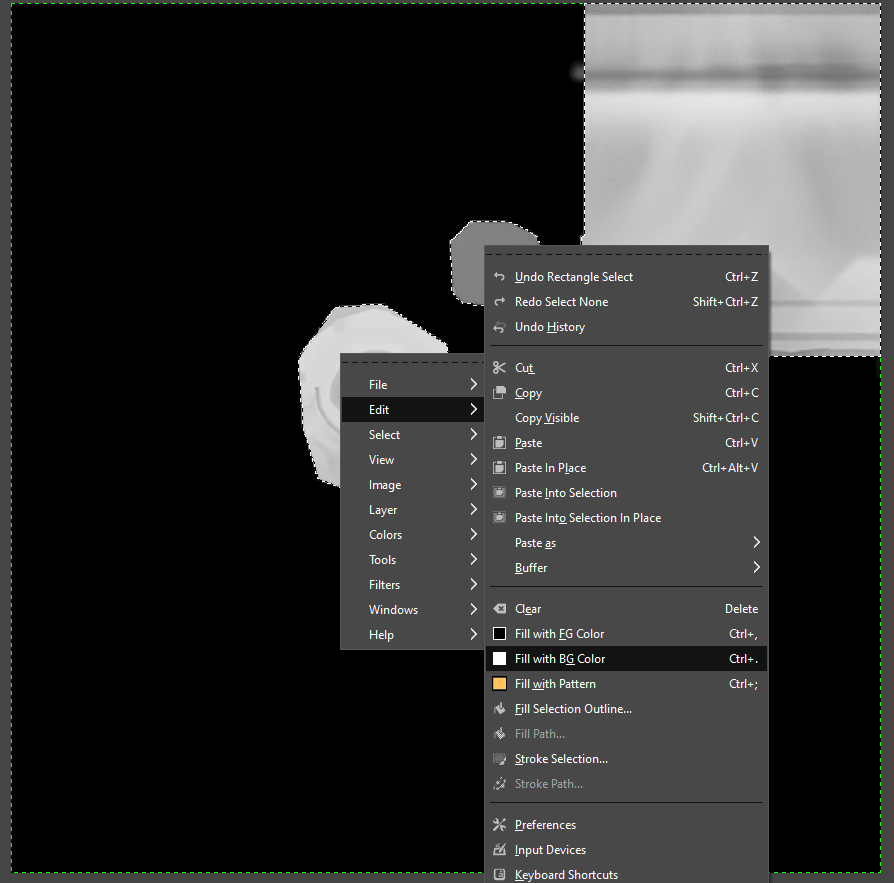 Finally, you should have an alpha channel that looks like this:
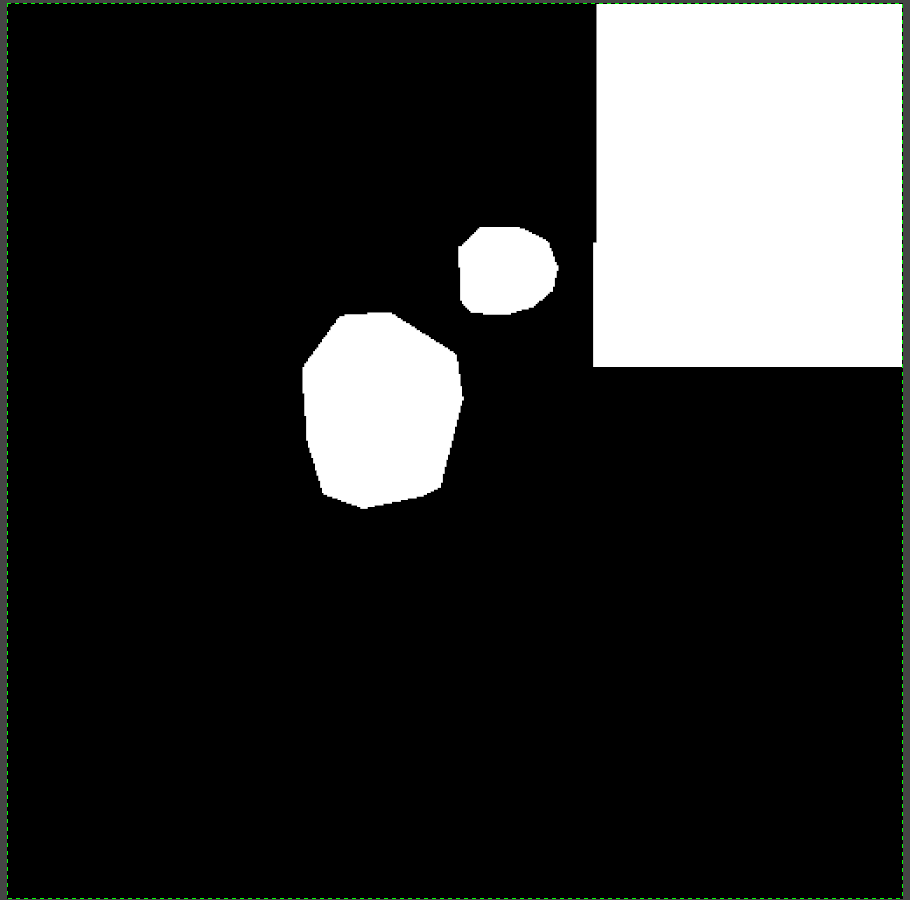 Then, Right Click the layer and click on "Apply Layer Mask".
You'll have this:
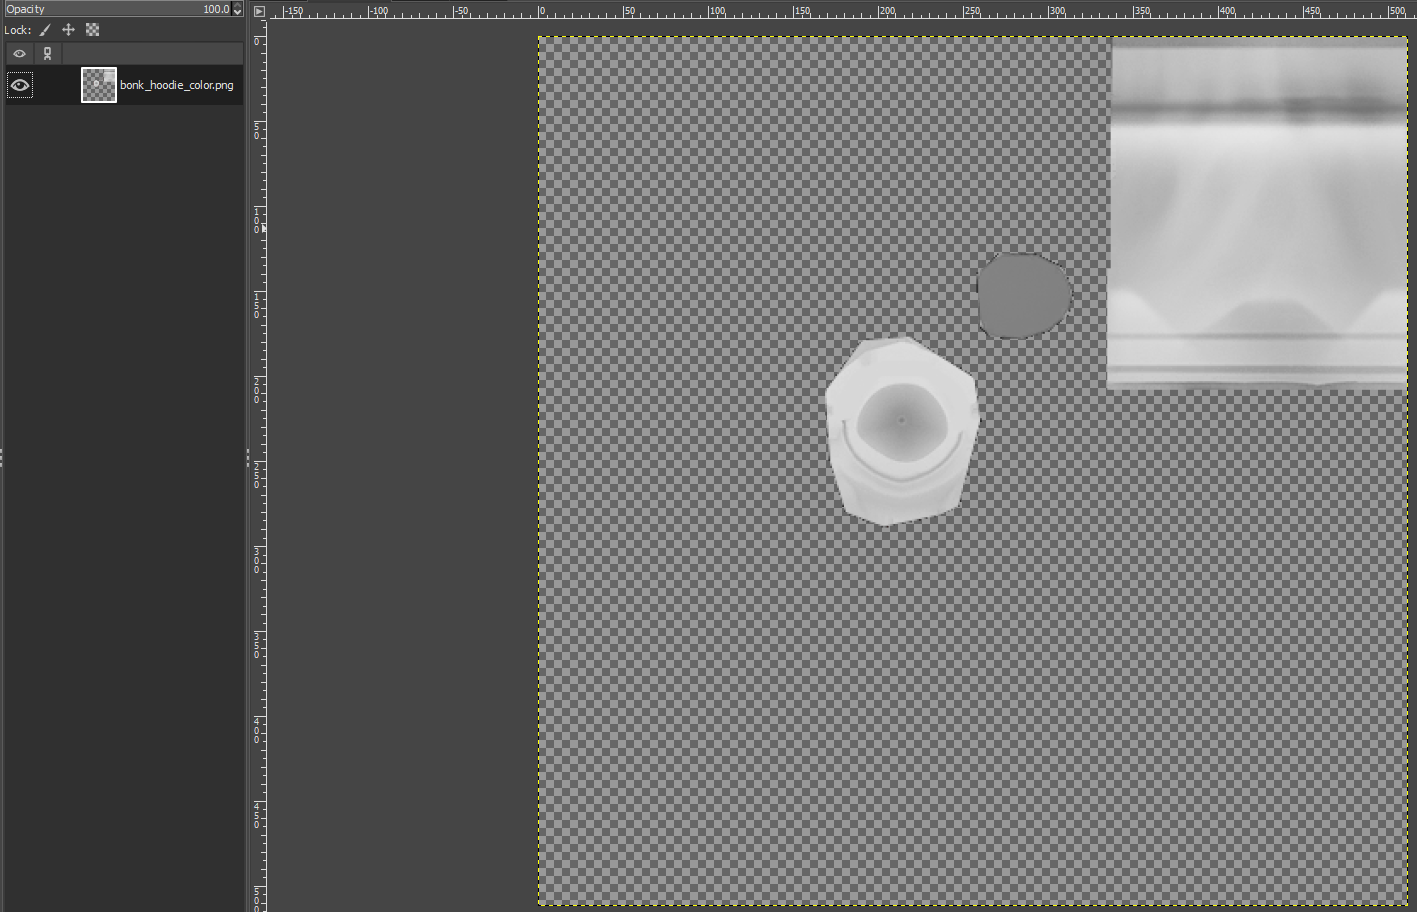
Make sure there's only 1 layer to make things easier.
This is your finished texture, but before you save it, I highly recommend following the following step.
Step 5: Setting Up a New Game Folder
Technically this step is optional, though I highly recommend following it, unless you've already got a fixes game folder set up, in which case you can skip to next segment of this step.
Setting up a new game folder allows you to save your material fixes there, instead of saving them to the "tf" game folder. This way, when you update your TF2 assets,your fixes will not be overwritten. Which you should be doing manually, I advise against relying on the workshop for TF2 update assets as well.
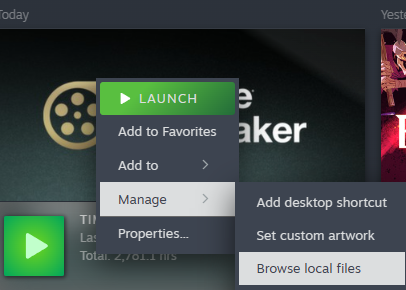
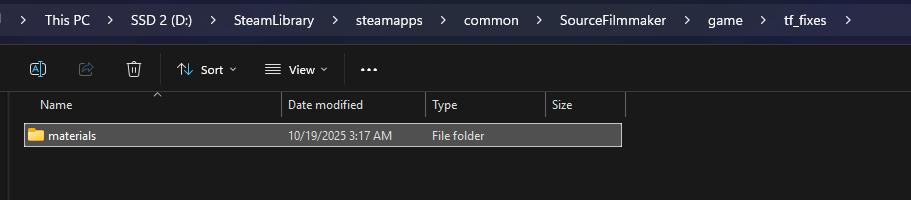
This will open a new File Explorer window at your SFM directory. Then open the folder named "game", and create a new folder in there. Name it something that makes sense, but avoid spaces and special characters. And then create another folder inside it named "materials" For the purposes of this guide, I will create one and name it "tf_fixes".
 Then, launch the SFM SDK, if you disabled it before, you can enable it again in the SFM Steam properties.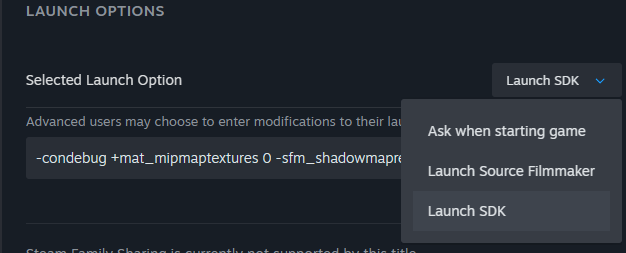
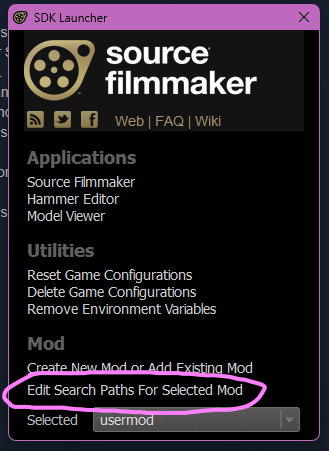
In the SDK, click on "Edit Search Paths For Selected Mod".
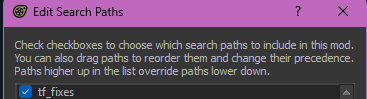
Find your newly created game folder, enable it, and make sure it's above "tf". For simplicity, you can simply drag it to the very top.
But if you're willing to use Command Prompt, it can be much less tedious.
I will explain both methods.
Simply Right Click in the current folder and create a new folder, name it the same according to the original VTFs path. Though once you have some commonly shared folders created, you wont need to be making as many folders. Make sure there are ZERO typos, otherwise you'll be left wondering why your fixed material didn't apply.
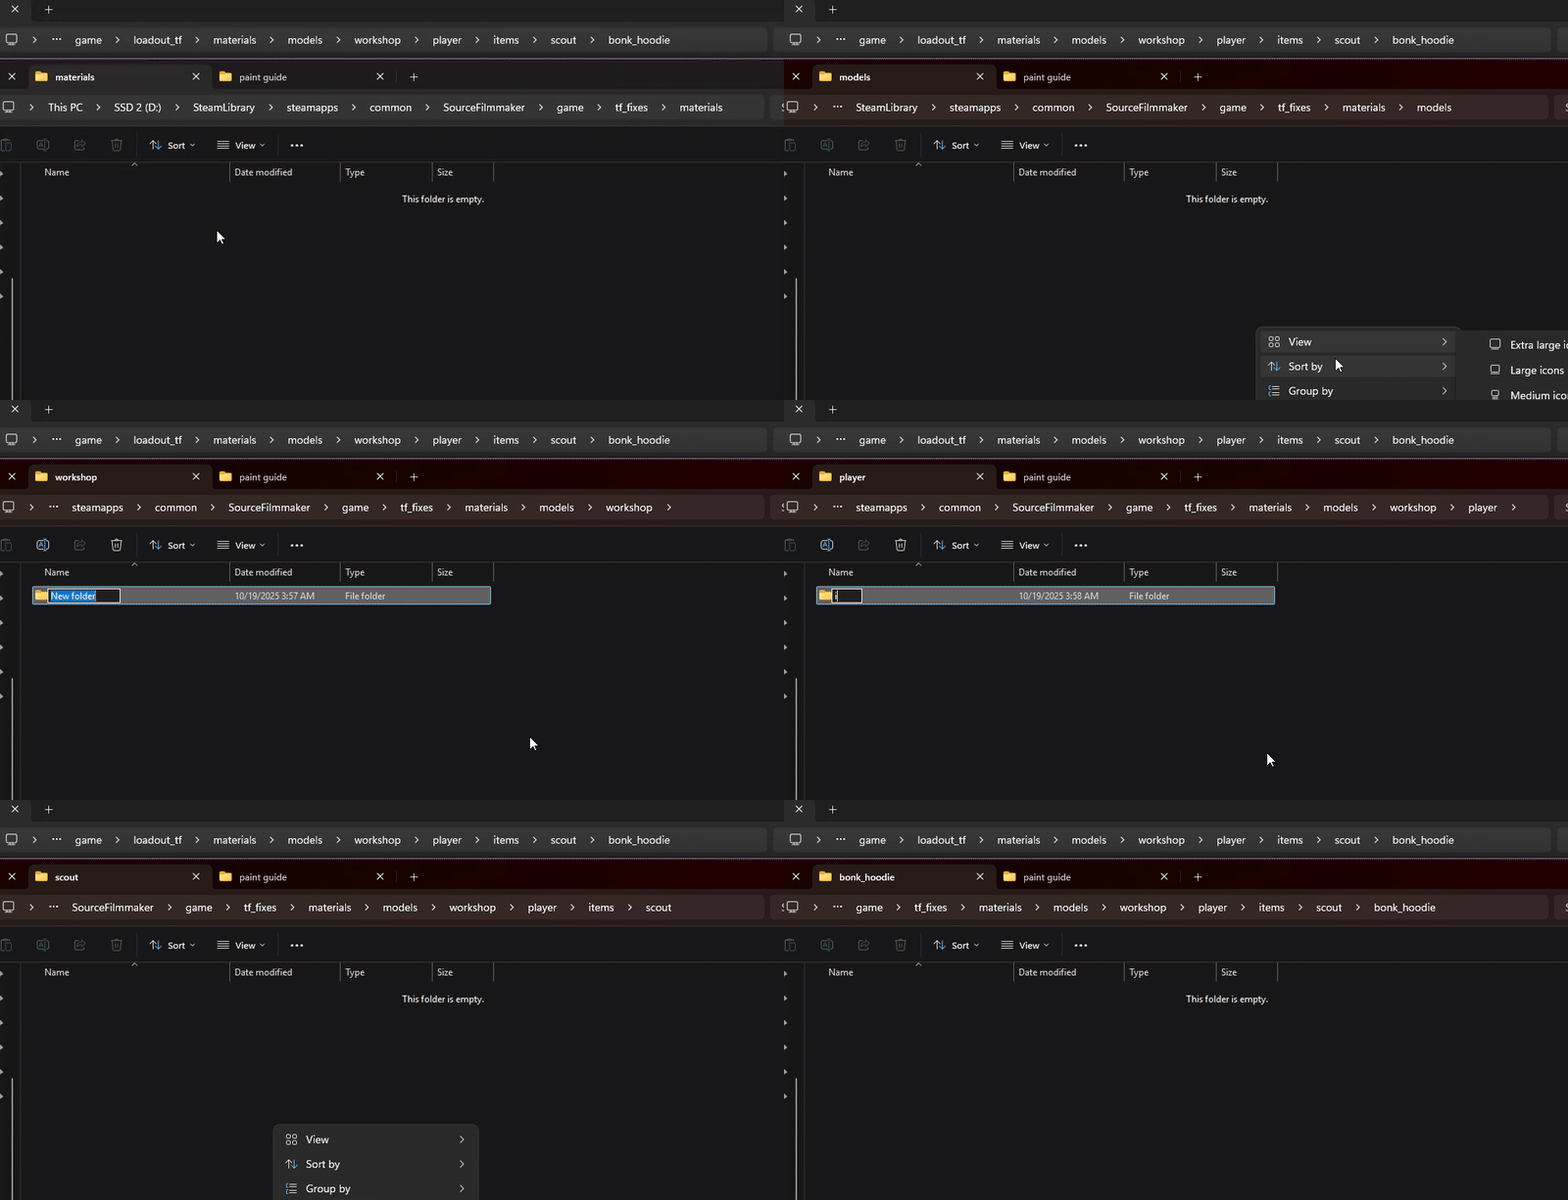
You can use Command Prompt to create the folders for you, being much quicker, less tedious, and negates the possibility of typos, so long as you do it correctly. While in your materials folder of your fixes game folder, click on your directory bar, type "cmd" (without the quotes) and press Enter.
This will open a Command Prompt window at your materials folder.
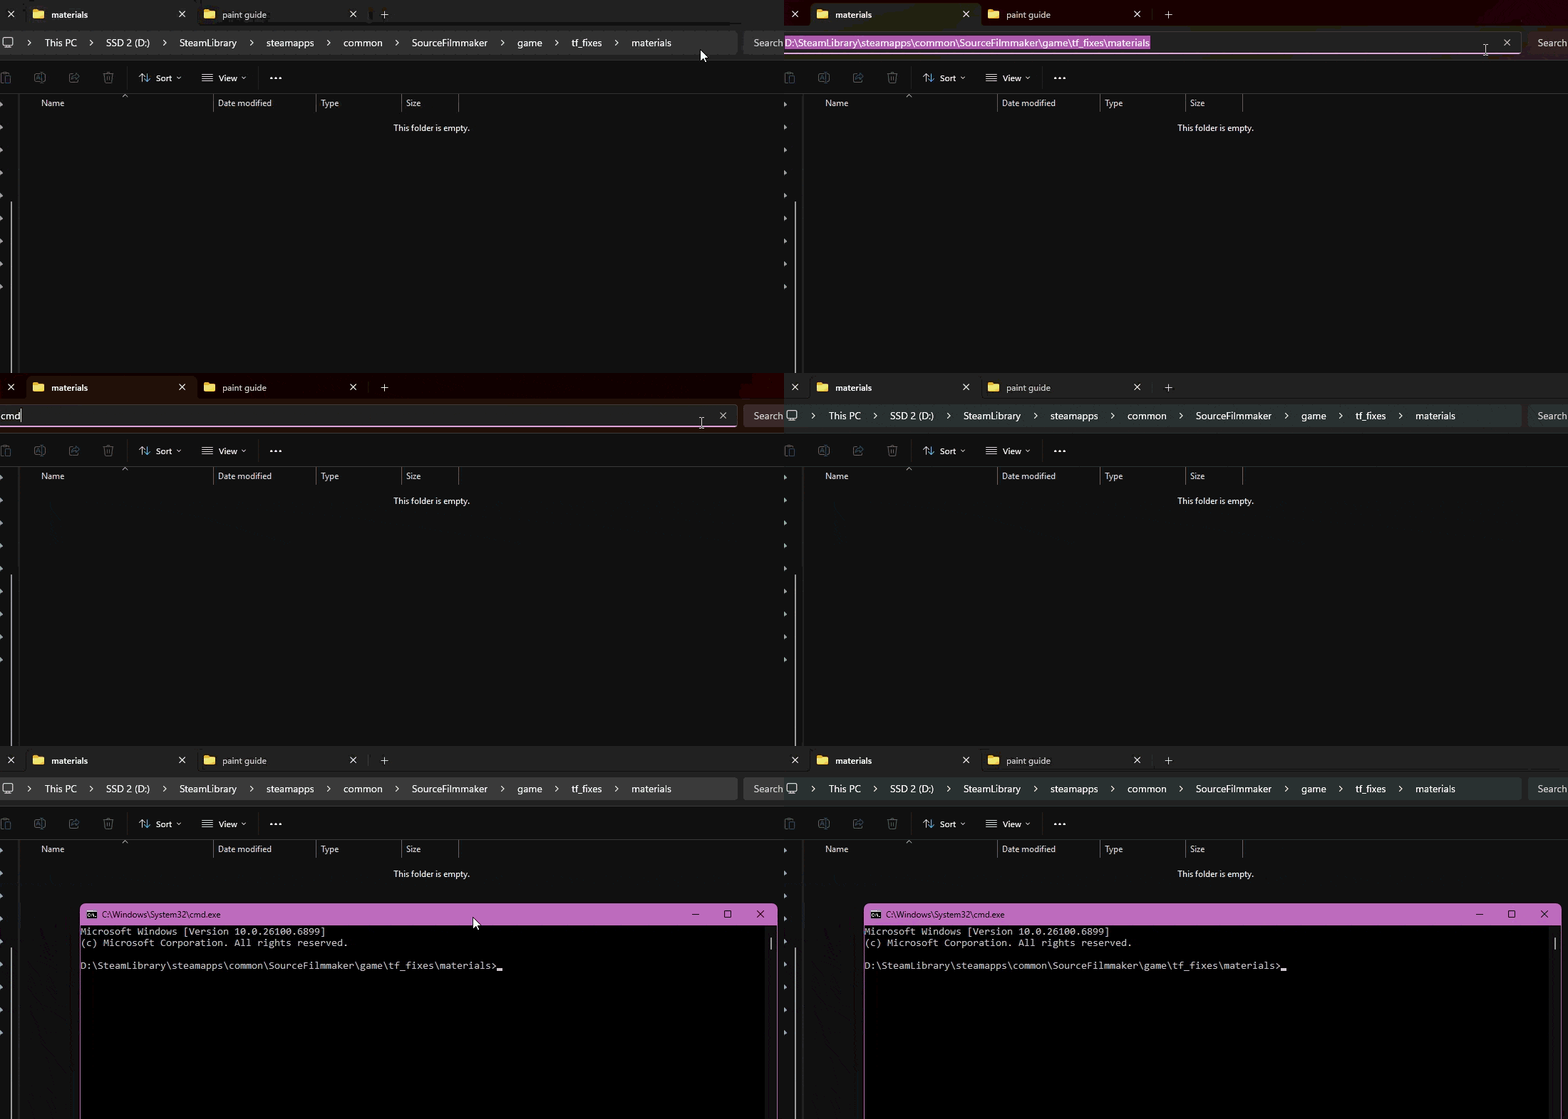 In the folder of the original broken VTF, select the file path up to "models", like so, and copy it with Ctrl+C.
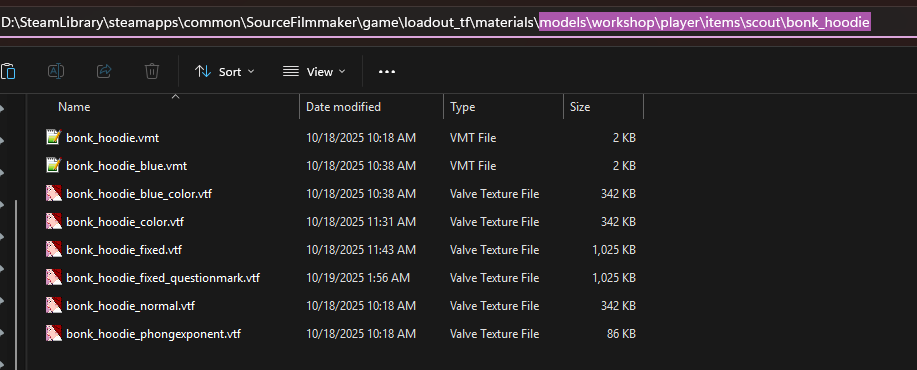 Then, go to your Command Prompt window and type the following, quotes included(paste with Ctrl+V):
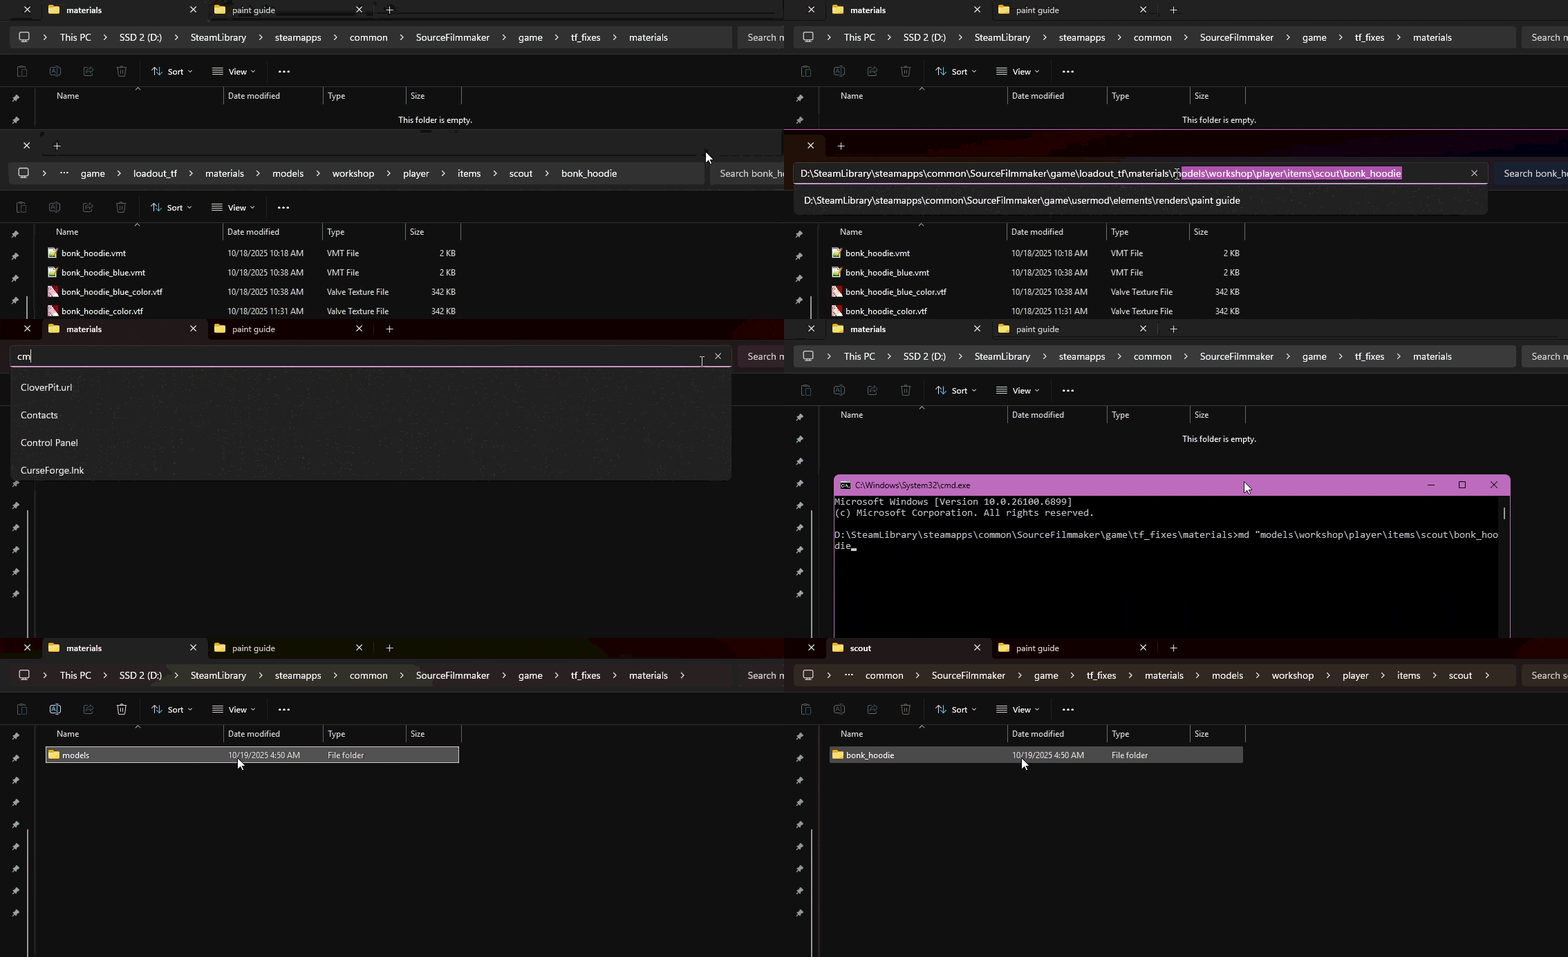 Using Command Prompt to create directories while there's already existing folders will not cause any issues. It only creates folders as needed.
Step 6: Saving Your Fixed Texture
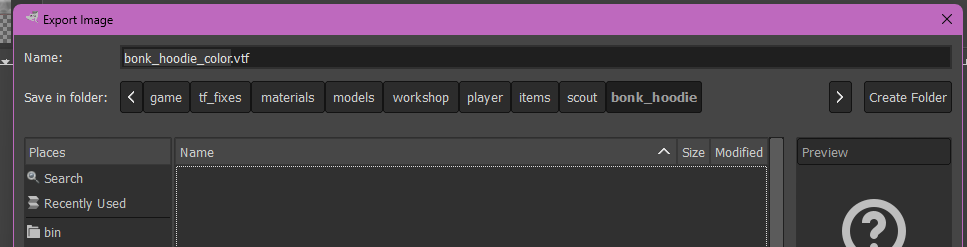
In the VTF settings window that pops up, disable Mipmaps, doing so saves space and increases texture quality. Compression On/Off is up to you. Just make sure that Alpha is enabled.
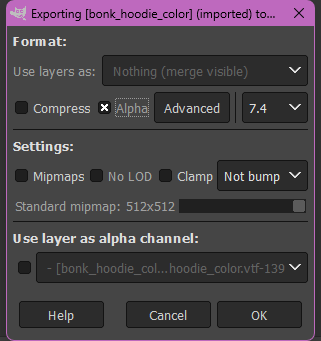
Press OK to export the VTF.
Then open VTF Edit, and in the top left go to File>Import, and import your newly saved PNG.
The default VTF Options should be fine, just press OK.
Then go to File>Save As in the top left, and navigate to the folder for the material. If you followed the previous step, you'd navigate to the folder you just created in that new fixes game folder.
Make sure the name of the VTF you're saving is exactly the same as the broken original.
Step 7: Finished
If you did all this with SFM open, use
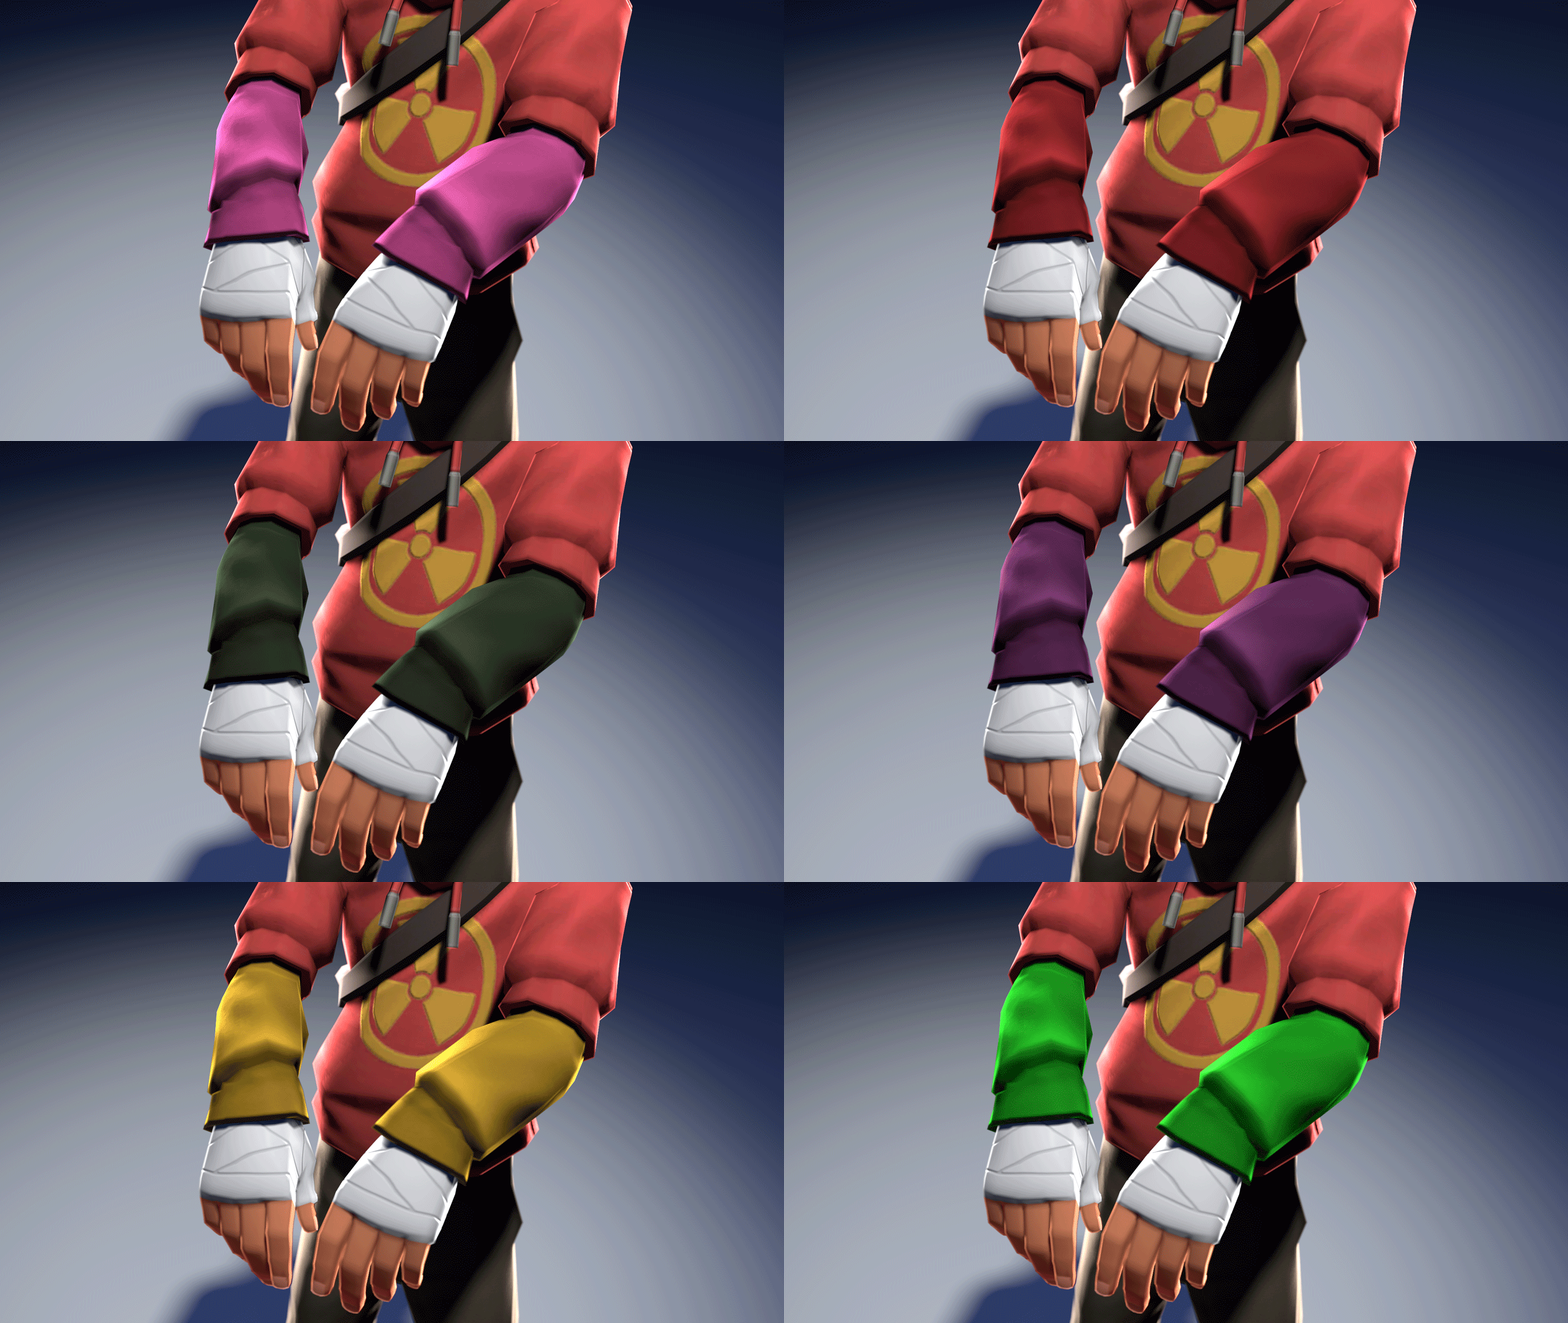
Conclusion
I'm pretty sure I covered everything. If you think I somehow missed something, leave a comment. I'll make sure to update with any new information.
Practice fixing cosmetics and you'll get faster at it and you won't need this long winded guide.
Here's the video from the start of the guide, see if you can follow along:
- Changing Textures Using Material Overrides★ 5 (1.4k)41k views2.7k ♥5 minUpdated Jul 26, 2014
- Manually Updating TF2 Content★ 5 (1.3k)35k views1.9k ♥2 minUpdated Nov 26, 2025
- The Fundamentals of SFM: For Beginners★ 5 (1.3k)25k views3.3k ♥55 minUpdated Apr 29
- Ваш первый постер★ 5 (1.1k)22k views2k ♥5 minRussianUpdated Oct 22, 2024
- Getting Gmod Workshop stuff too SFM★ 5 (510)15k views1.3k ♥1 minBulgarianUpdated Aug 4, 2015
- Animation Guide★ 5 (704)14k views1.9k ♥6 minUpdated Apr 9, 2023




- Upgrading to PremiumTeam Fortress 2★ 5 (20k)1441k views11k ♥6 minUpdated May 11, 2022
- No More Room in Hell Official ManualNo More Room in Hell★ 5 (2.8k)569k views2.1k ♥29 minUpdated Apr 22, 2019
- NMRiH Community Hosting GuidesNo More Room in Hell★ 5 (526)351k views653 ♥1 minUpdated Aug 10, 2022
- ULTIMATE GUIDE FOR GAME DEV TYCOONGame Dev Tycoon★ 5 (5.8k)326k views10k ♥4 minUpdated 23 Jan, 2014
- How to 'Git Gud' Soon™MORDHAU★ 5 (2k)318k views3k ♥68 minUpdated Nov 16, 2024
- Лучшие кооперативные игры SteamPAYDAY 2★ 5 (1.5k)315k views2.1k ♥56 minRussianUpdated Apr 27, 2025






This guide was created by its original author on the Steam Community. Are you the author and want it removed? Request removal.