How-to Cel shade Guide
1. Setting up
Requires no Post-processing or multiple renders to achieve this effect.
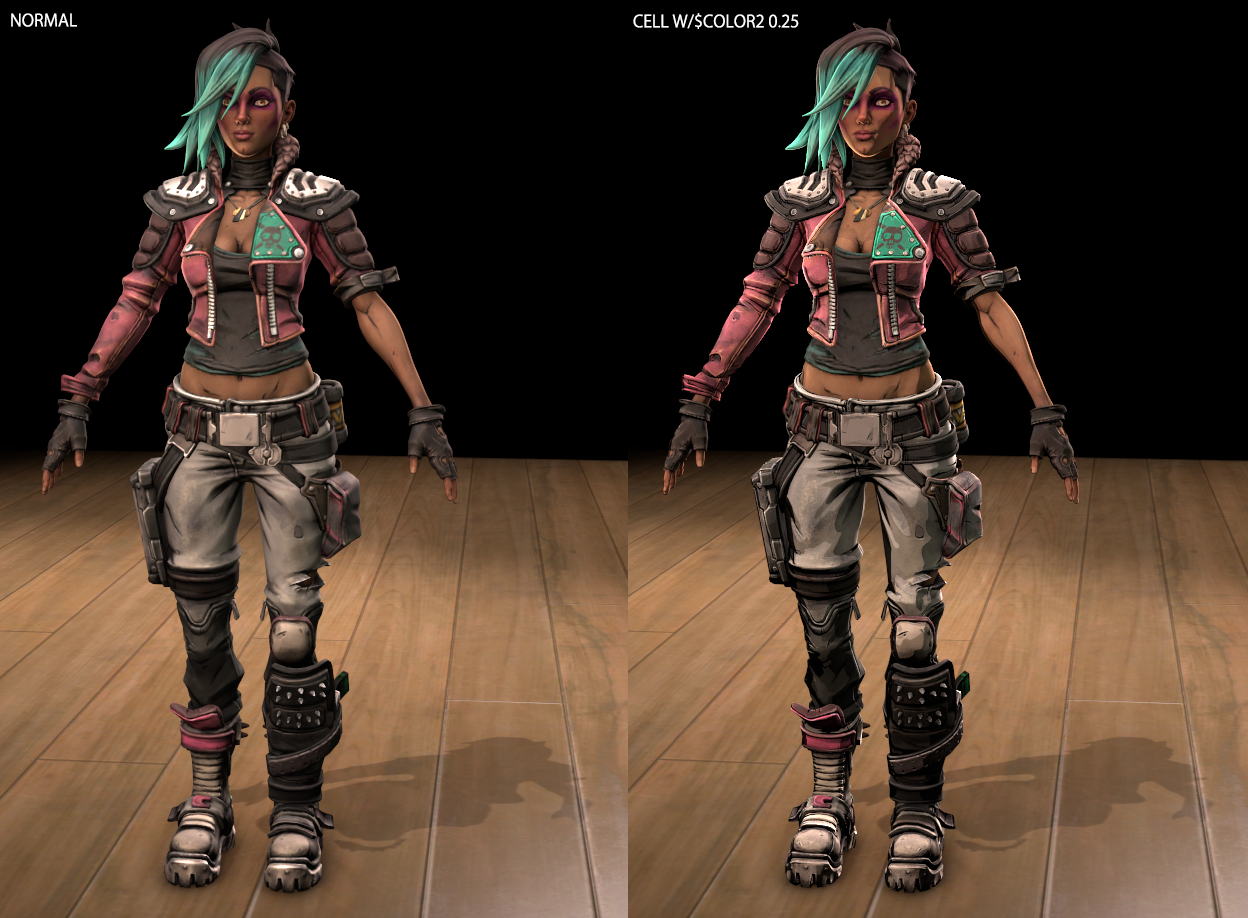
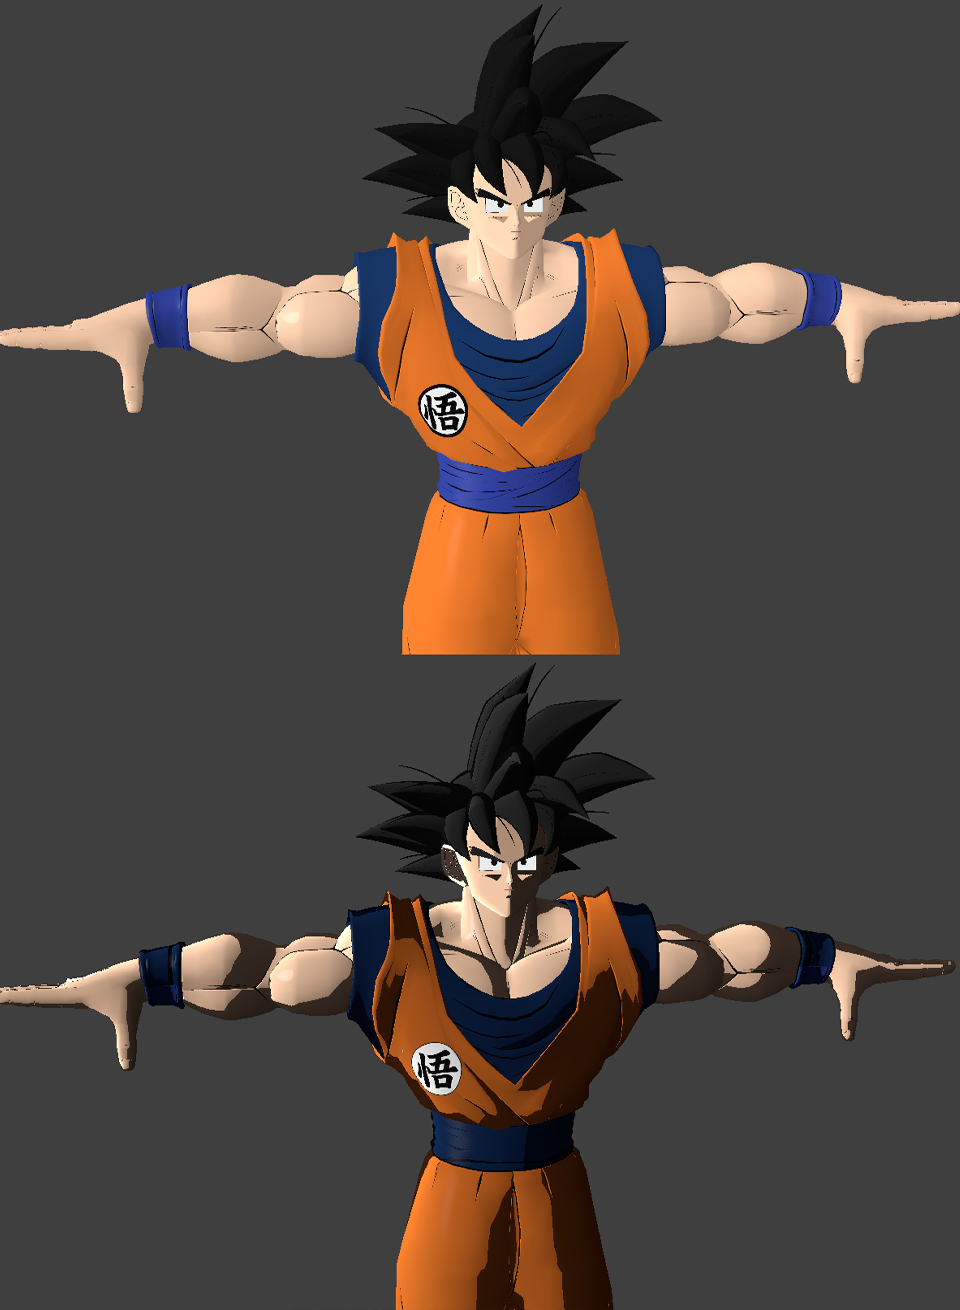
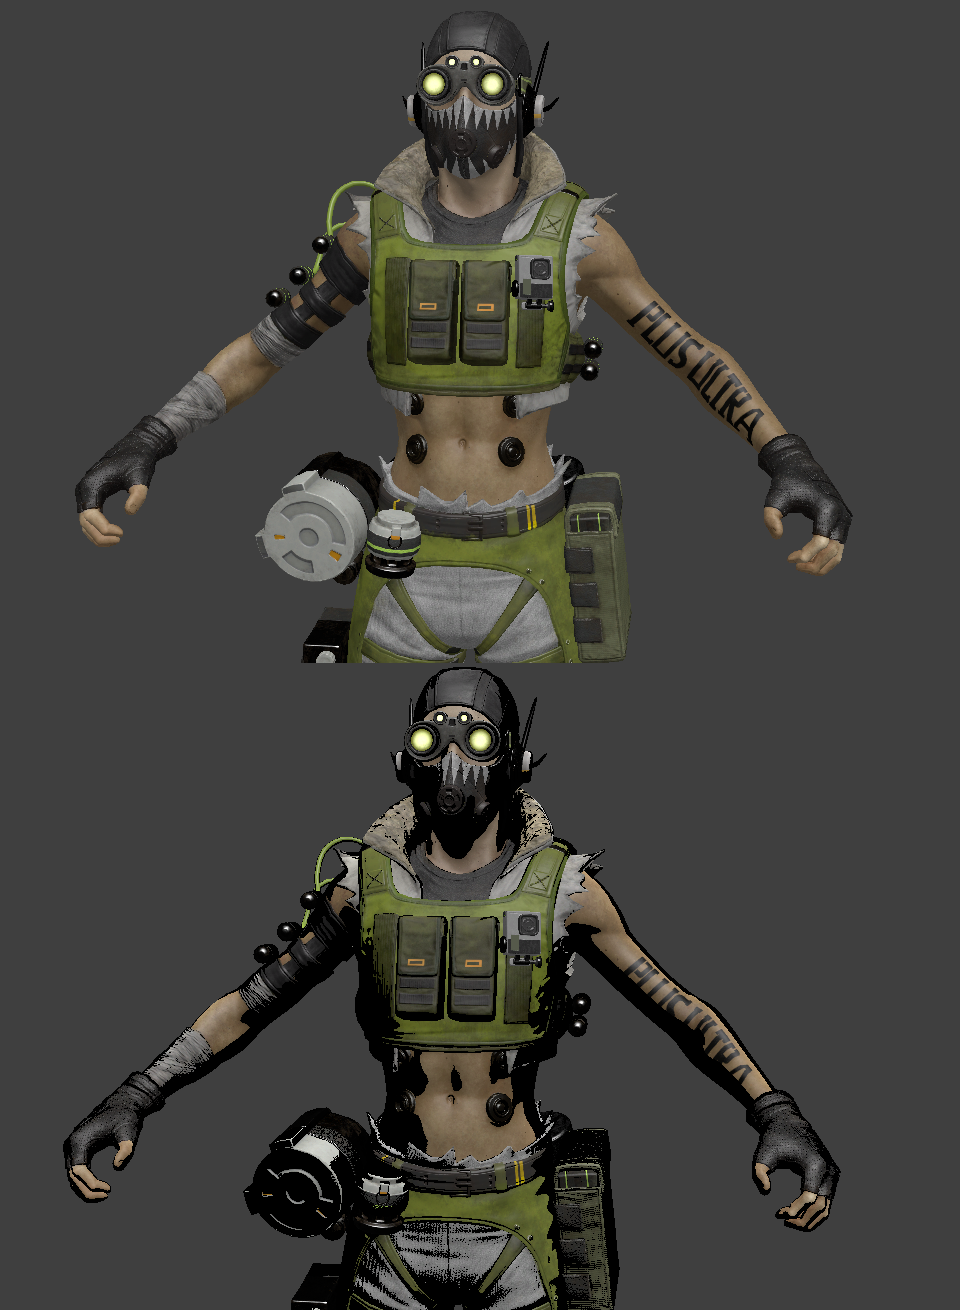
This was something i saw Anonymousgamer testing out awhile back.
Since then I wanted to get a fully working result that allowed Pesudo Pbr to work.
This requires A $PhongExponentTexture and $BumpMap to work
If you have Neither then we'll try to get around that.
( I HIGHLY RECOMMEND YOU MAKE AN ORIGINAL AND CEL FOLDER BEFORE PROCEEDING )
For this tutorial I'll be Using Mark2580 BL3 Lorelei Model
https://steamcommunity.com/sharedfiles/filedetails/?id=1867822718
(Edited Version of Lorelei textures to compare with as you follow this tutorial)
https://drive.google.com/file/d/19i9diAs9Rk4hSOHofJZPPyxP8Ug3MtOu/edit
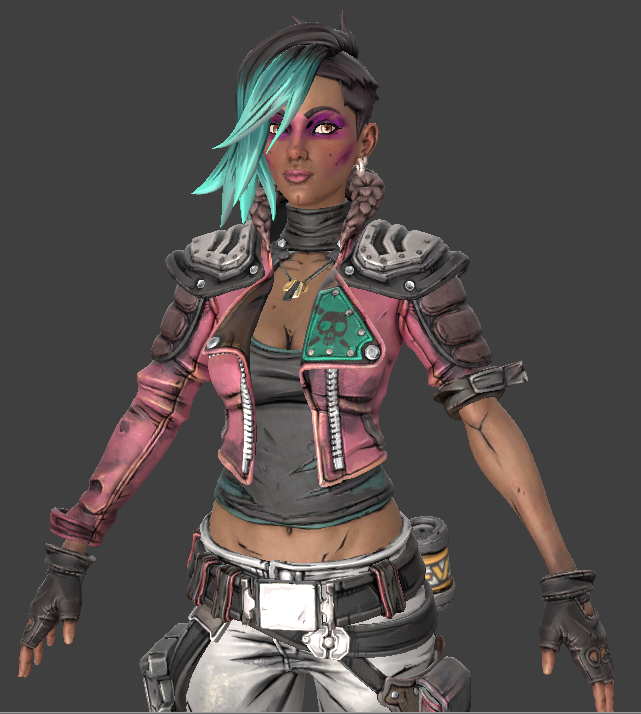
First step we'll first need to add this to our model's base VMT's
----------------------------------------
// Paste into VMT
$basemapalphaphongmask 1 // ( If you have something in BaseTextures Alpha, then disable this)
$COLOR2 0.25 0.25 0.25 // Change this for shadow tint Color adjustment
$phongalbedotint 1
$phongexponent 0.001
$phong 1
$phongboost 23.076
$phongfresnelranges 0.05 .225 1
----------------------------------------
Now your model will either Invert colours or become very dark.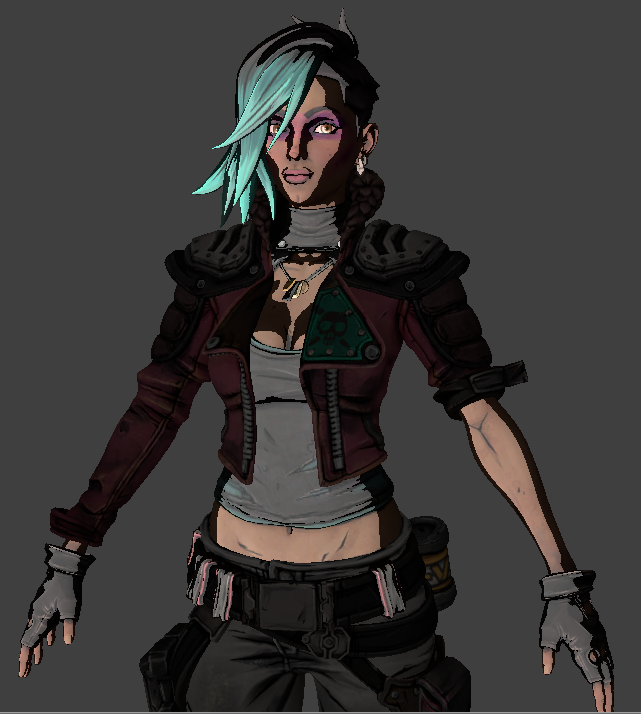
We'll next need to edit some textures to get this working correctly.
2. Editing Textures
We'll need a photo editing program next to check RGBA channels.
First texture will be Basetexture, VTFedit and Export as PNG or TGA
Now check If there's is an Alpha layer: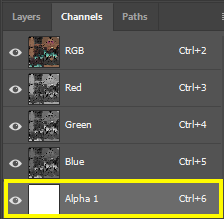 +If nothing is occupying Alpha, Create Alpha channel and apply White
+( We can move onto Exponent section )
-If something is there ( etc Alpha for Hair/clothing) then leave BaseTexture as is.
-( Move onto Normal map section )
----------------------------------------------------------
Normal Map Section:
Export and open your Normal map texture:
*Check if there is a gloss Map in Normal Alpha channel , Invert it
-(We can also clear White but the model may glow more )
----------------------------------------------------------
Exponent Section:
+If the model has one , Wipe Green channel to White.
(This allows the models colours to come through)
We'll Cheese this and copy the green Channel from the BaseTexture into a new file.
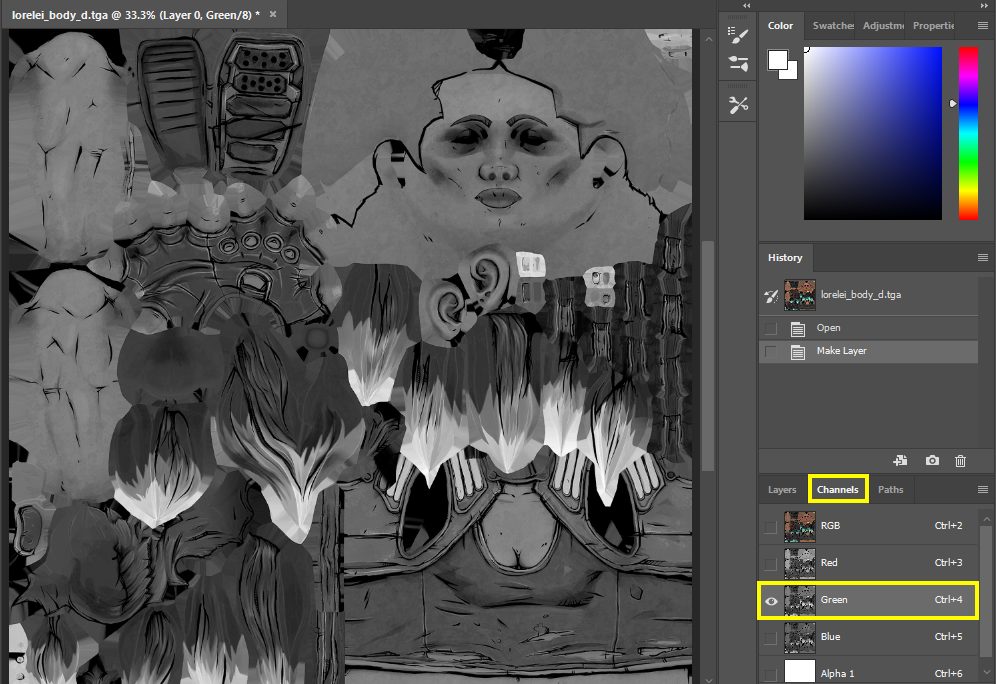
Next is to duplicate layer. (This will be following Blueflytrap's PBR method for Exponent)
1st layer>Ajustments> Level > Move input middle to 0.28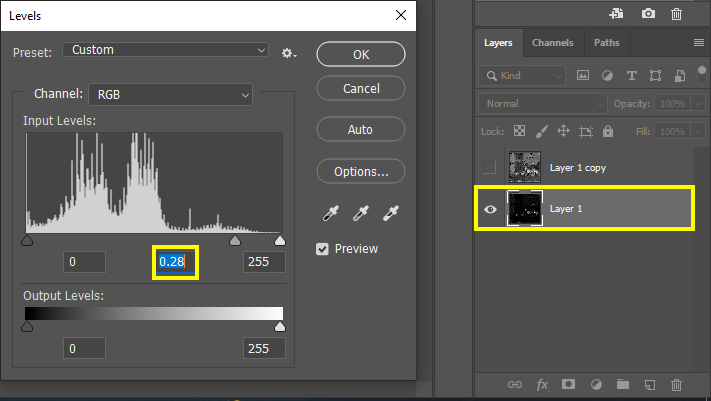
2nd layer>Change Blend Mode to lighten.
Ajustments> Level > Move Output Right to 0.2 and Merge layers
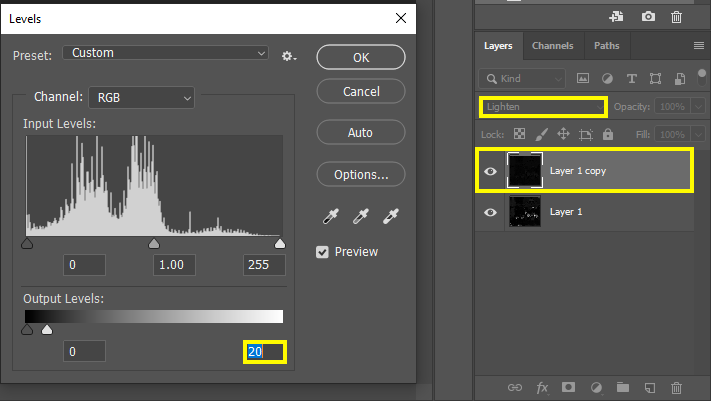
Now go to Channel and wipe Green/Blue.
After that we should be left with a Cyan colour > Save as Exponent
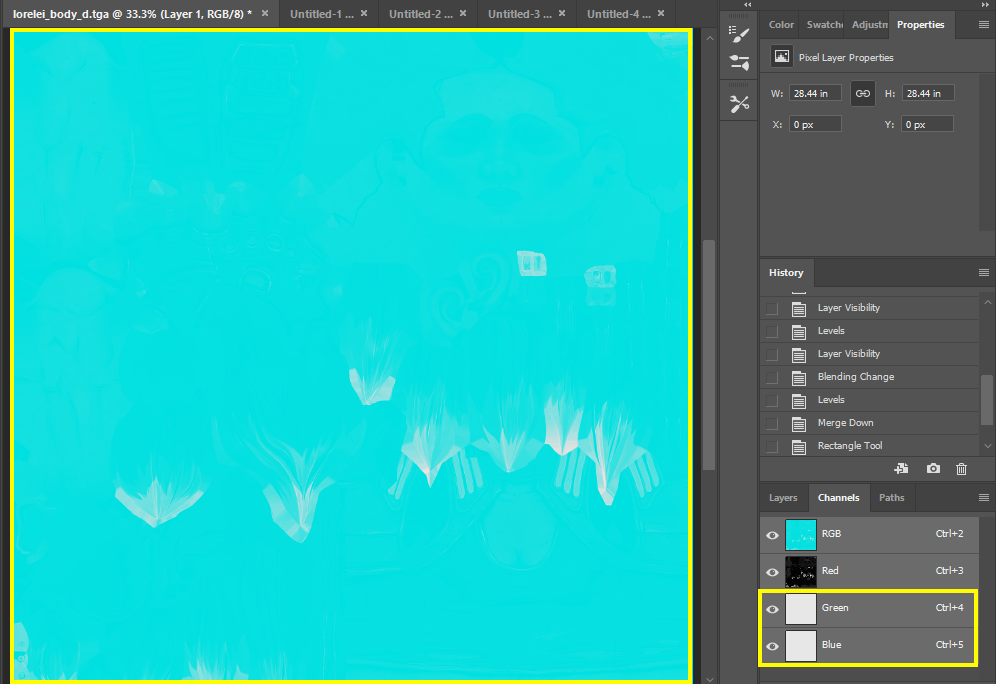 + (We could also use this for Normal map by Inverting>Pasting into Alpha)
! (Will require tweaking since we don't have the original Rough/Gloss map) With All that completed, Export back to VTF format and test model.
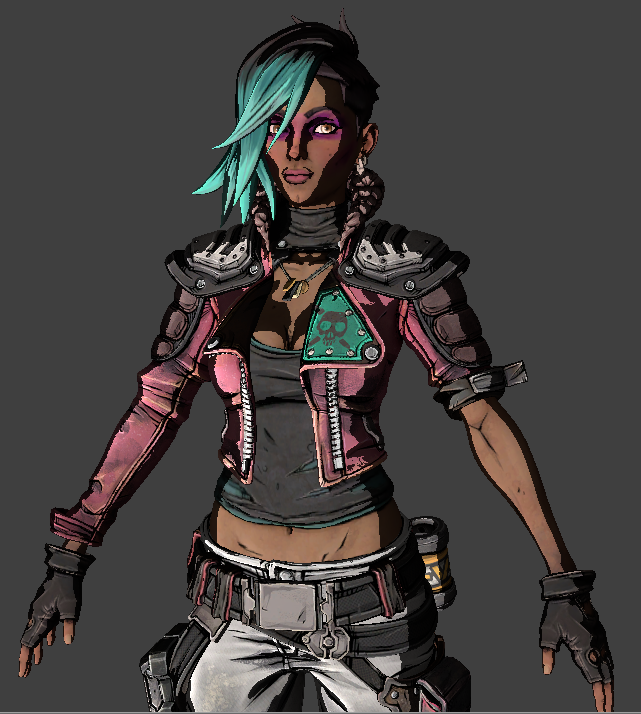
Now we should have the model looking like this for comparison.
3. Finish
This is still experimental overall , Some values and parameters may conflict.
What each parameter does:
Control shadow/ colour:
$COLOR2 0.5 0.5 0.5 // Softer colour/contrast , Any higher will reduce The cell shade effect
$COLOR2 0.25 0.25 0.25 // very dark but seems to balance well
$COLOR2 0 0 0 // Completely back unless Radius is high
-----------------------------------------------------
$phongalbedotint 1 // Allow colour Tints on phong reflection
$phongexponent 0.001 // Tightens Shadow factor
$phongboost 23.076 // multiply's tint
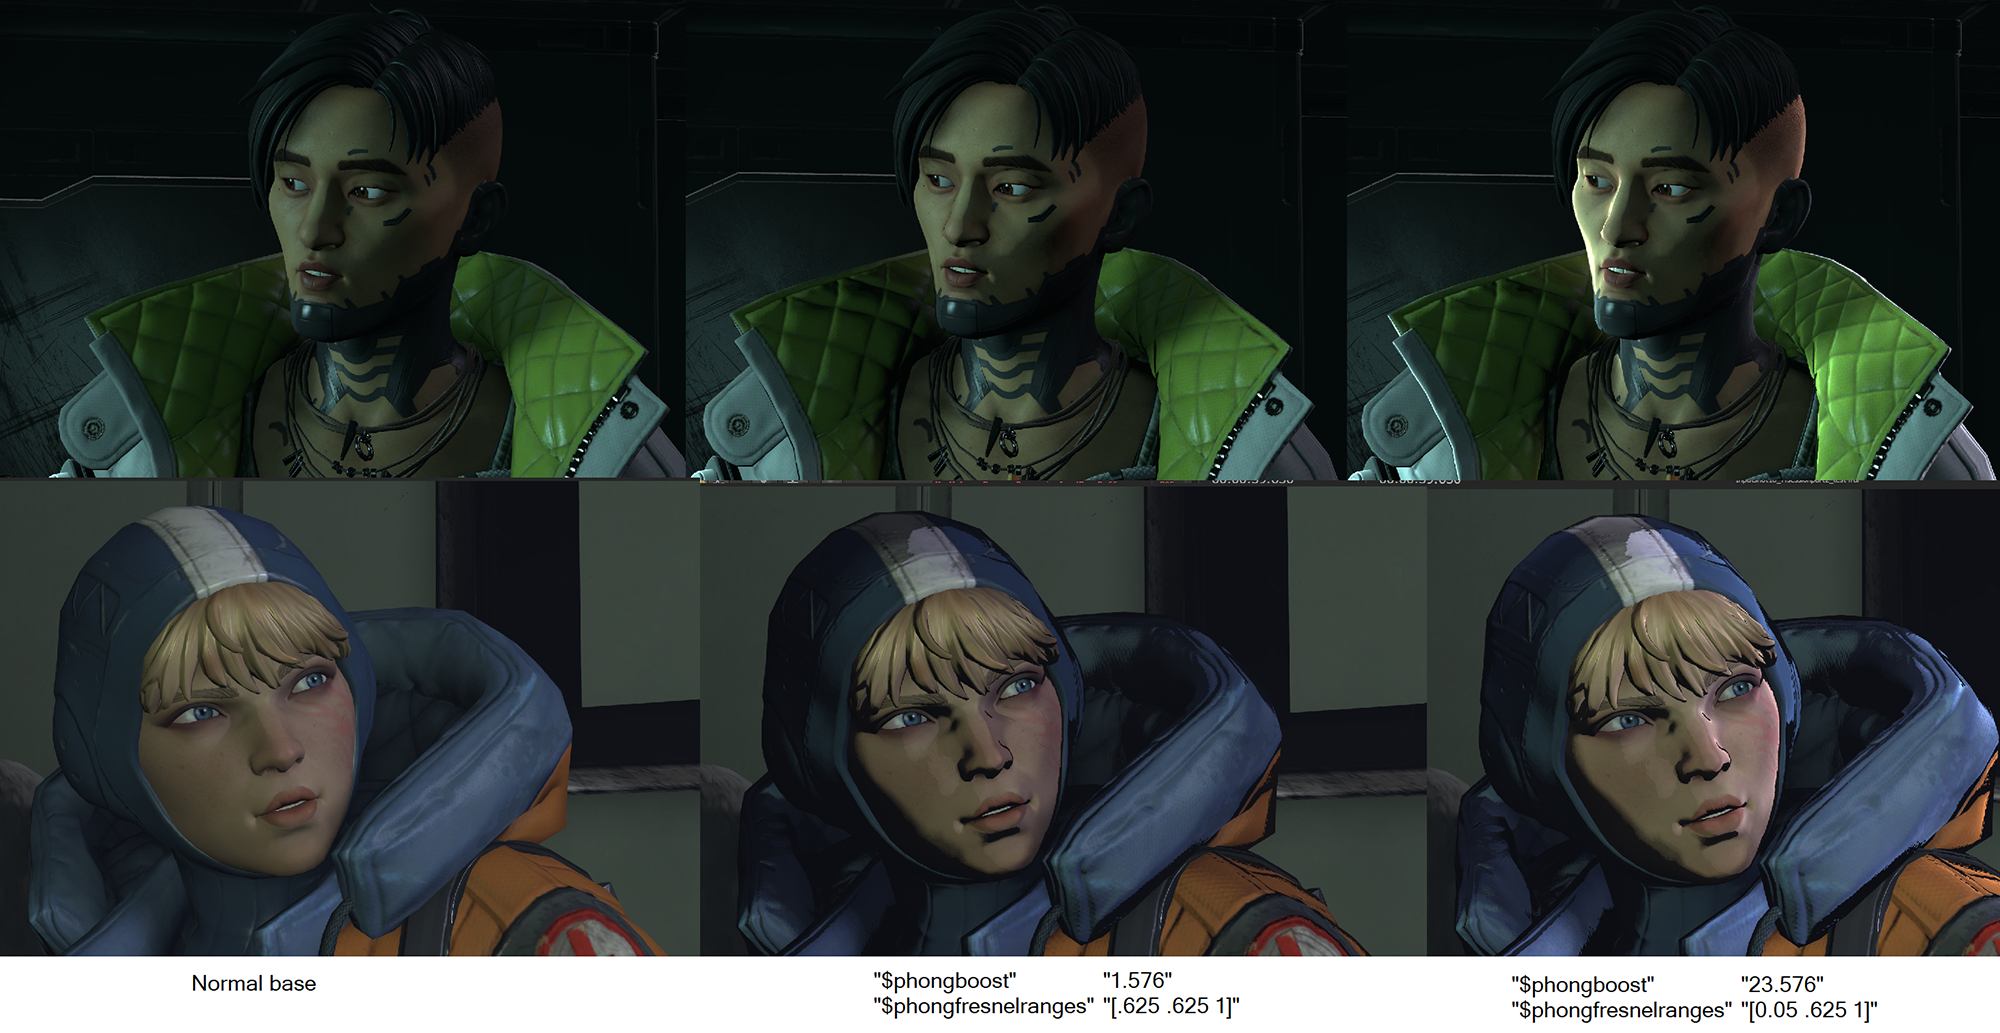
$phongfresnelranges 0.05 .225 1 //The 1st value is very important , at 0 the Colours will not show
// Can start from 0.01 to adjust if end results are too bright.
-----------------------------------------------------
Extra info:
The values used for this tutorial adds a Rimlight as shown on right
If you wish to remove it, use the middle values
-----------------------------------------------------
Hopefully i've covered enough in this Tutorial to get you the desired results.
I'll try to respond to best of my knowledge if you get stuck.
Here's more examples of models I've tested with this method
- Changing Textures Using Material Overrides★ 5 (1.4k)41k views2.7k ♥5 minUpdated Jul 26, 2014
- Manually Updating TF2 Content★ 5 (1.3k)35k views1.9k ♥2 minUpdated Nov 26, 2025
- The Fundamentals of SFM: For Beginners★ 5 (1.3k)25k views3.3k ♥55 minUpdated Apr 29
- Ваш первый постер★ 5 (1.1k)22k views2k ♥5 minRussianUpdated Oct 22, 2024
- Getting Gmod Workshop stuff too SFM★ 5 (510)15k views1.3k ♥1 minBulgarianUpdated Aug 4, 2015
- Animation Guide★ 5 (704)14k views1.9k ♥6 minUpdated Apr 9, 2023




- Upgrading to PremiumTeam Fortress 2★ 5 (20k)1441k views11k ♥6 minUpdated May 11, 2022
- No More Room in Hell Official ManualNo More Room in Hell★ 5 (2.8k)569k views2.1k ♥29 minUpdated Apr 22, 2019
- NMRiH Community Hosting GuidesNo More Room in Hell★ 5 (526)351k views653 ♥1 minUpdated Aug 10, 2022
- ULTIMATE GUIDE FOR GAME DEV TYCOONGame Dev Tycoon★ 5 (5.8k)326k views10k ♥4 minUpdated 23 Jan, 2014
- How to 'Git Gud' Soon™MORDHAU★ 5 (2k)318k views3k ♥68 minUpdated Nov 16, 2024
- Лучшие кооперативные игры SteamPAYDAY 2★ 5 (1.5k)315k views2.1k ♥56 minRussianUpdated Apr 27, 2025






This guide was created by its original author on the Steam Community. Are you the author and want it removed? Request removal.